Leaderboard


Popular Content
Showing content with the highest reputation on 10/29/19 in all areas
-
K&D have been out of business for over 25 years, and stopped producing that particular tool a good few decades before that. I think you will either have to remake them (not easy, they are complex), or find another.2 points
-
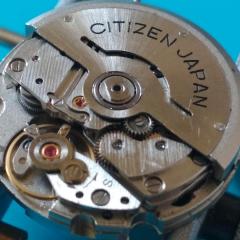
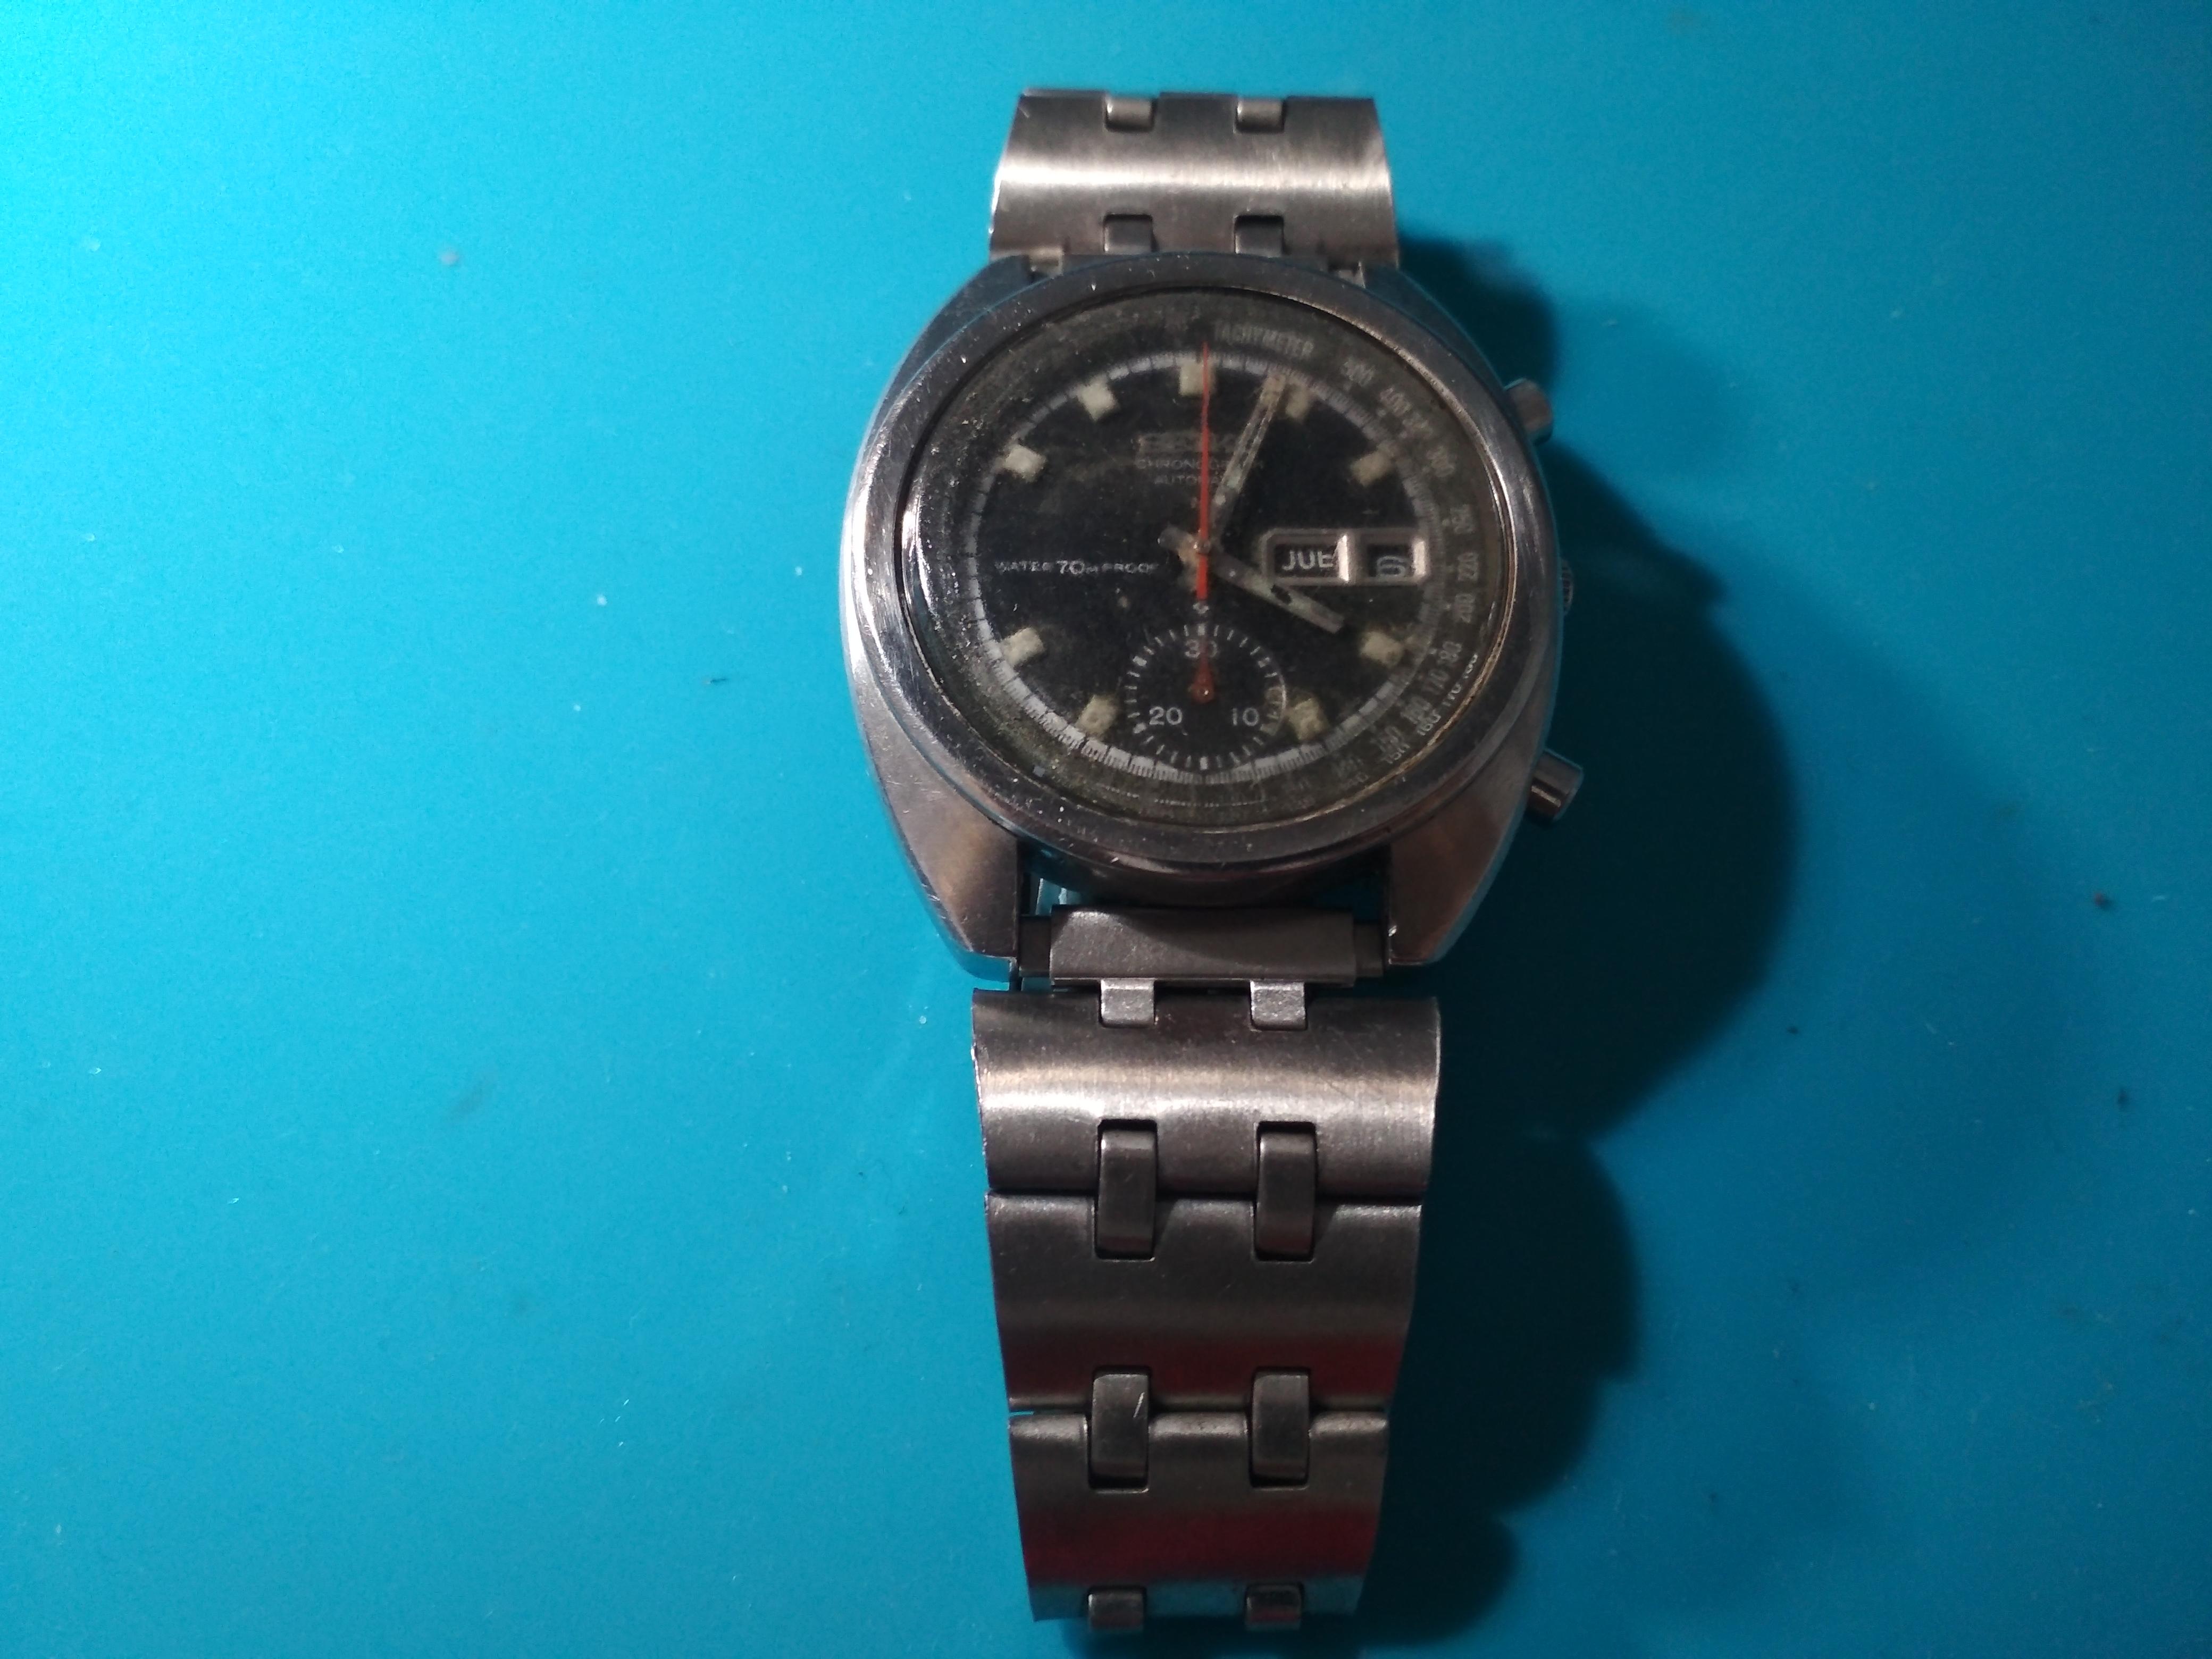
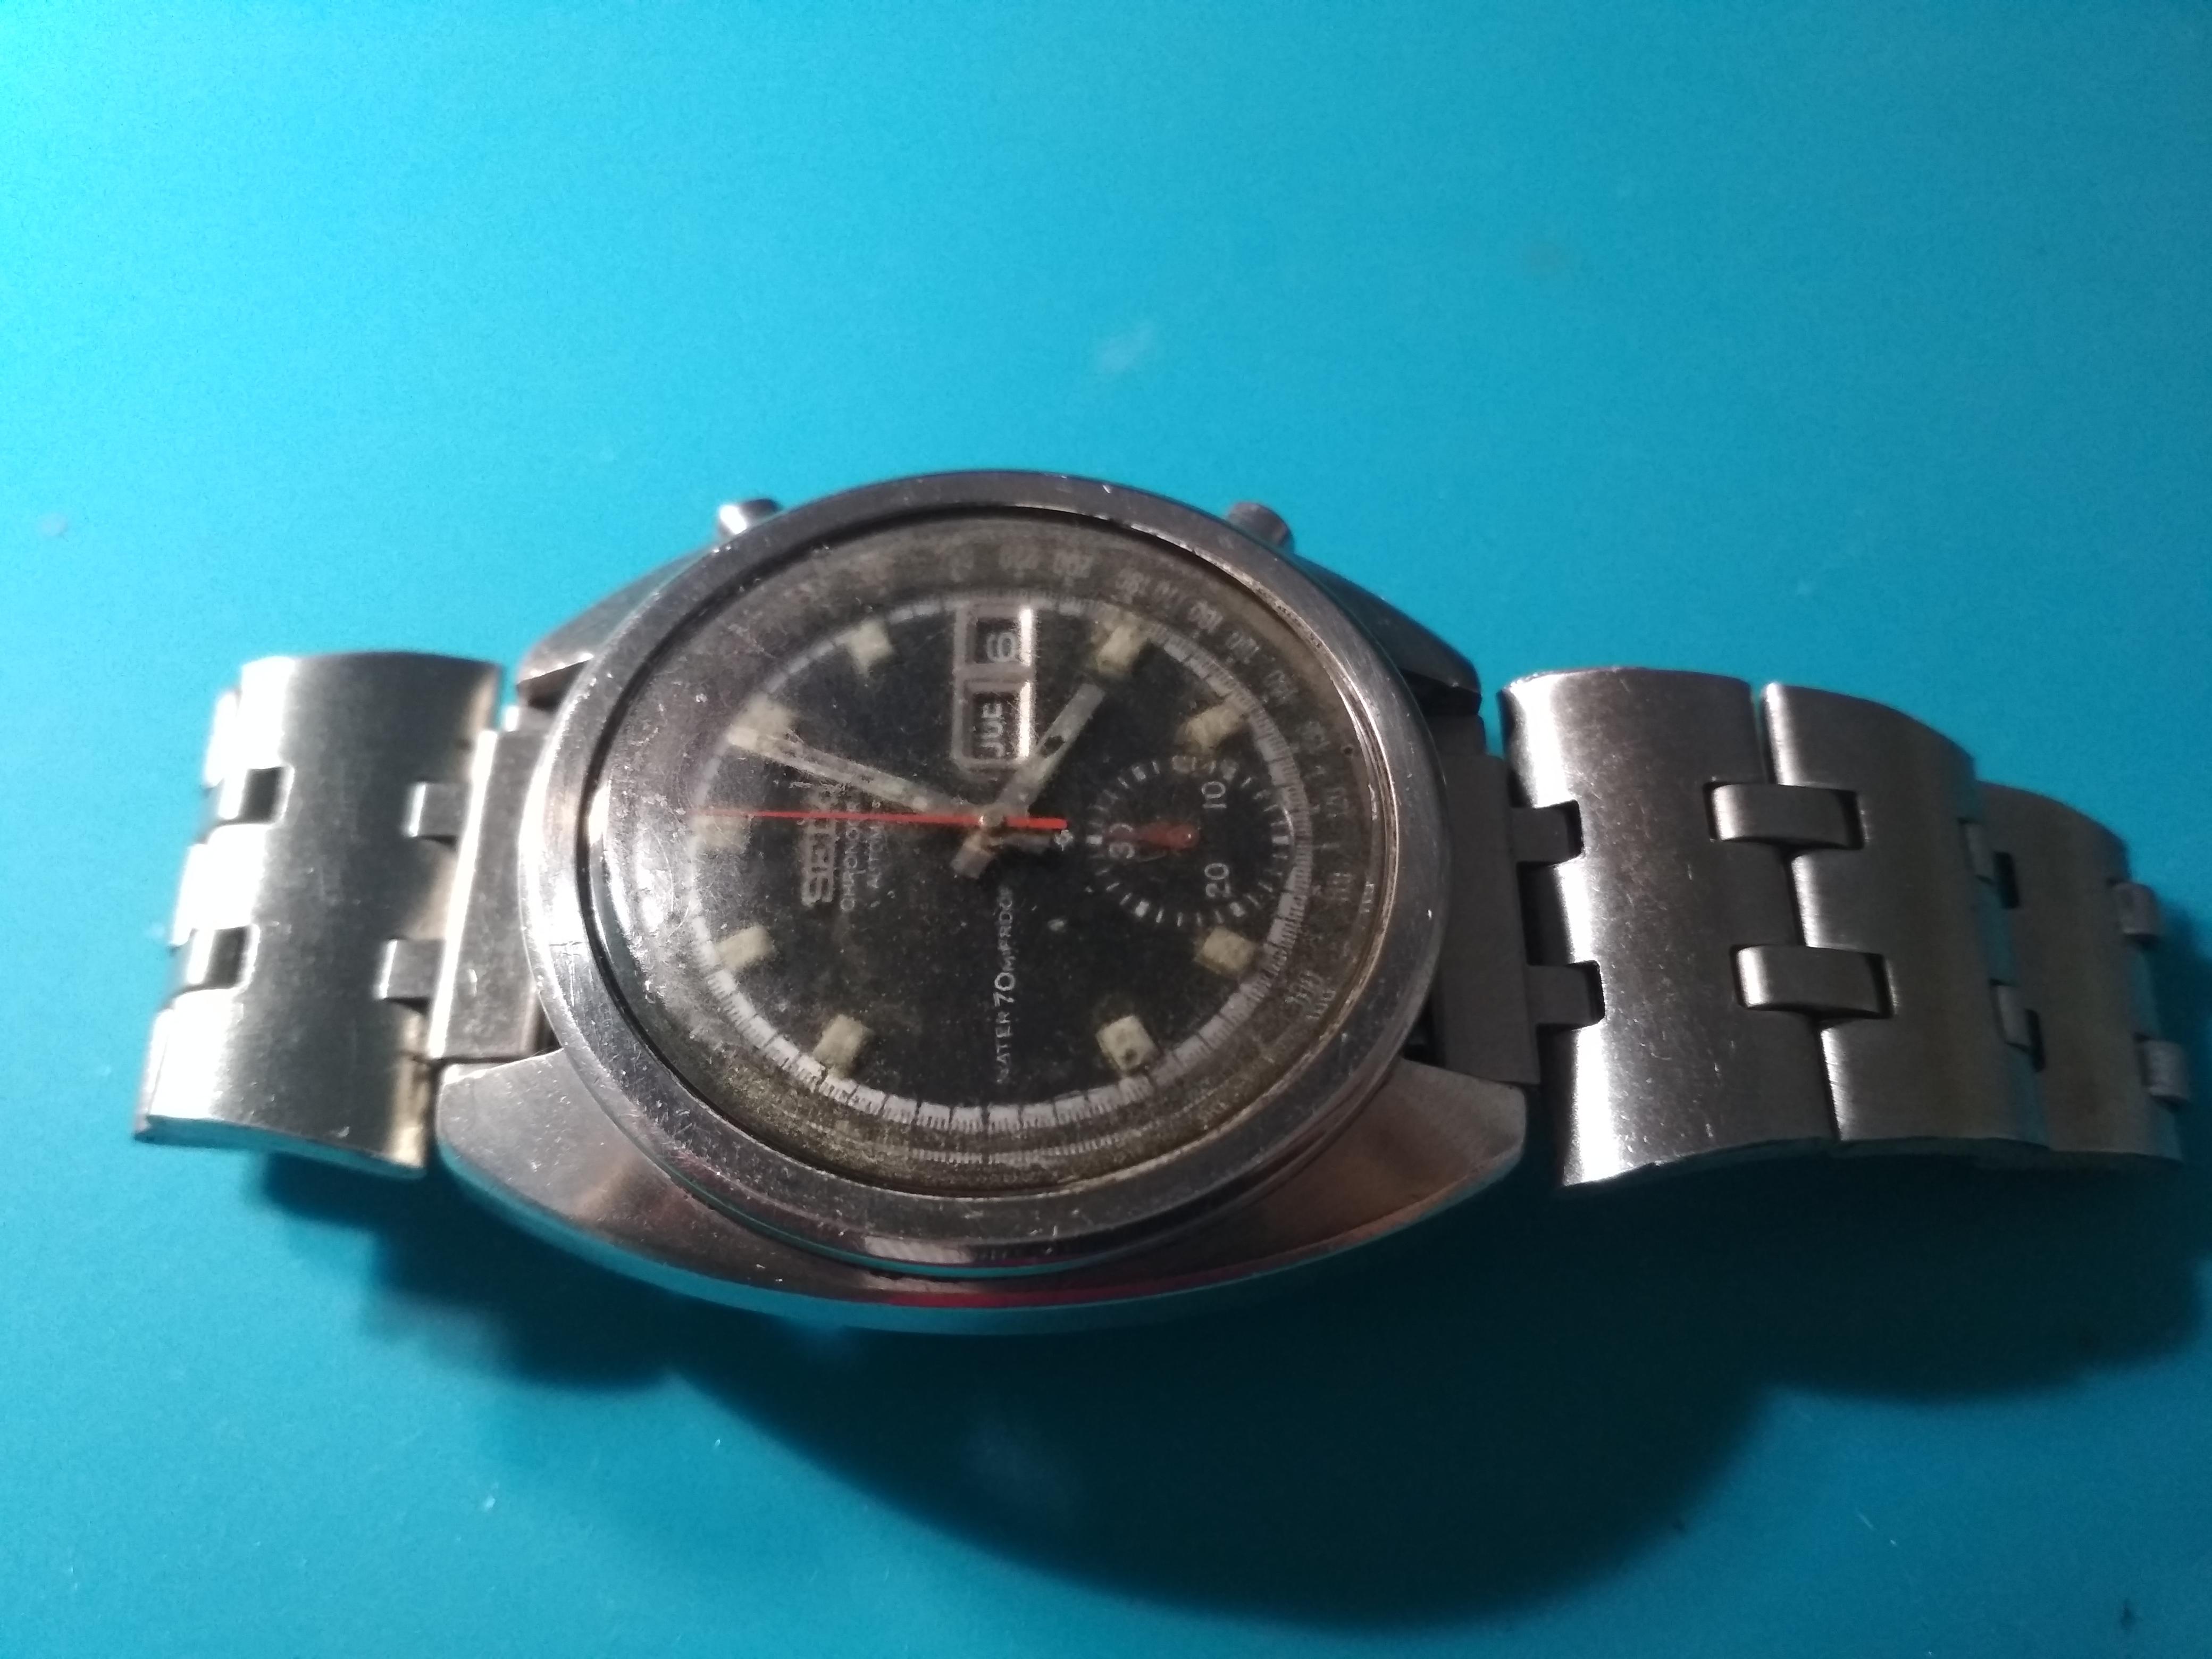
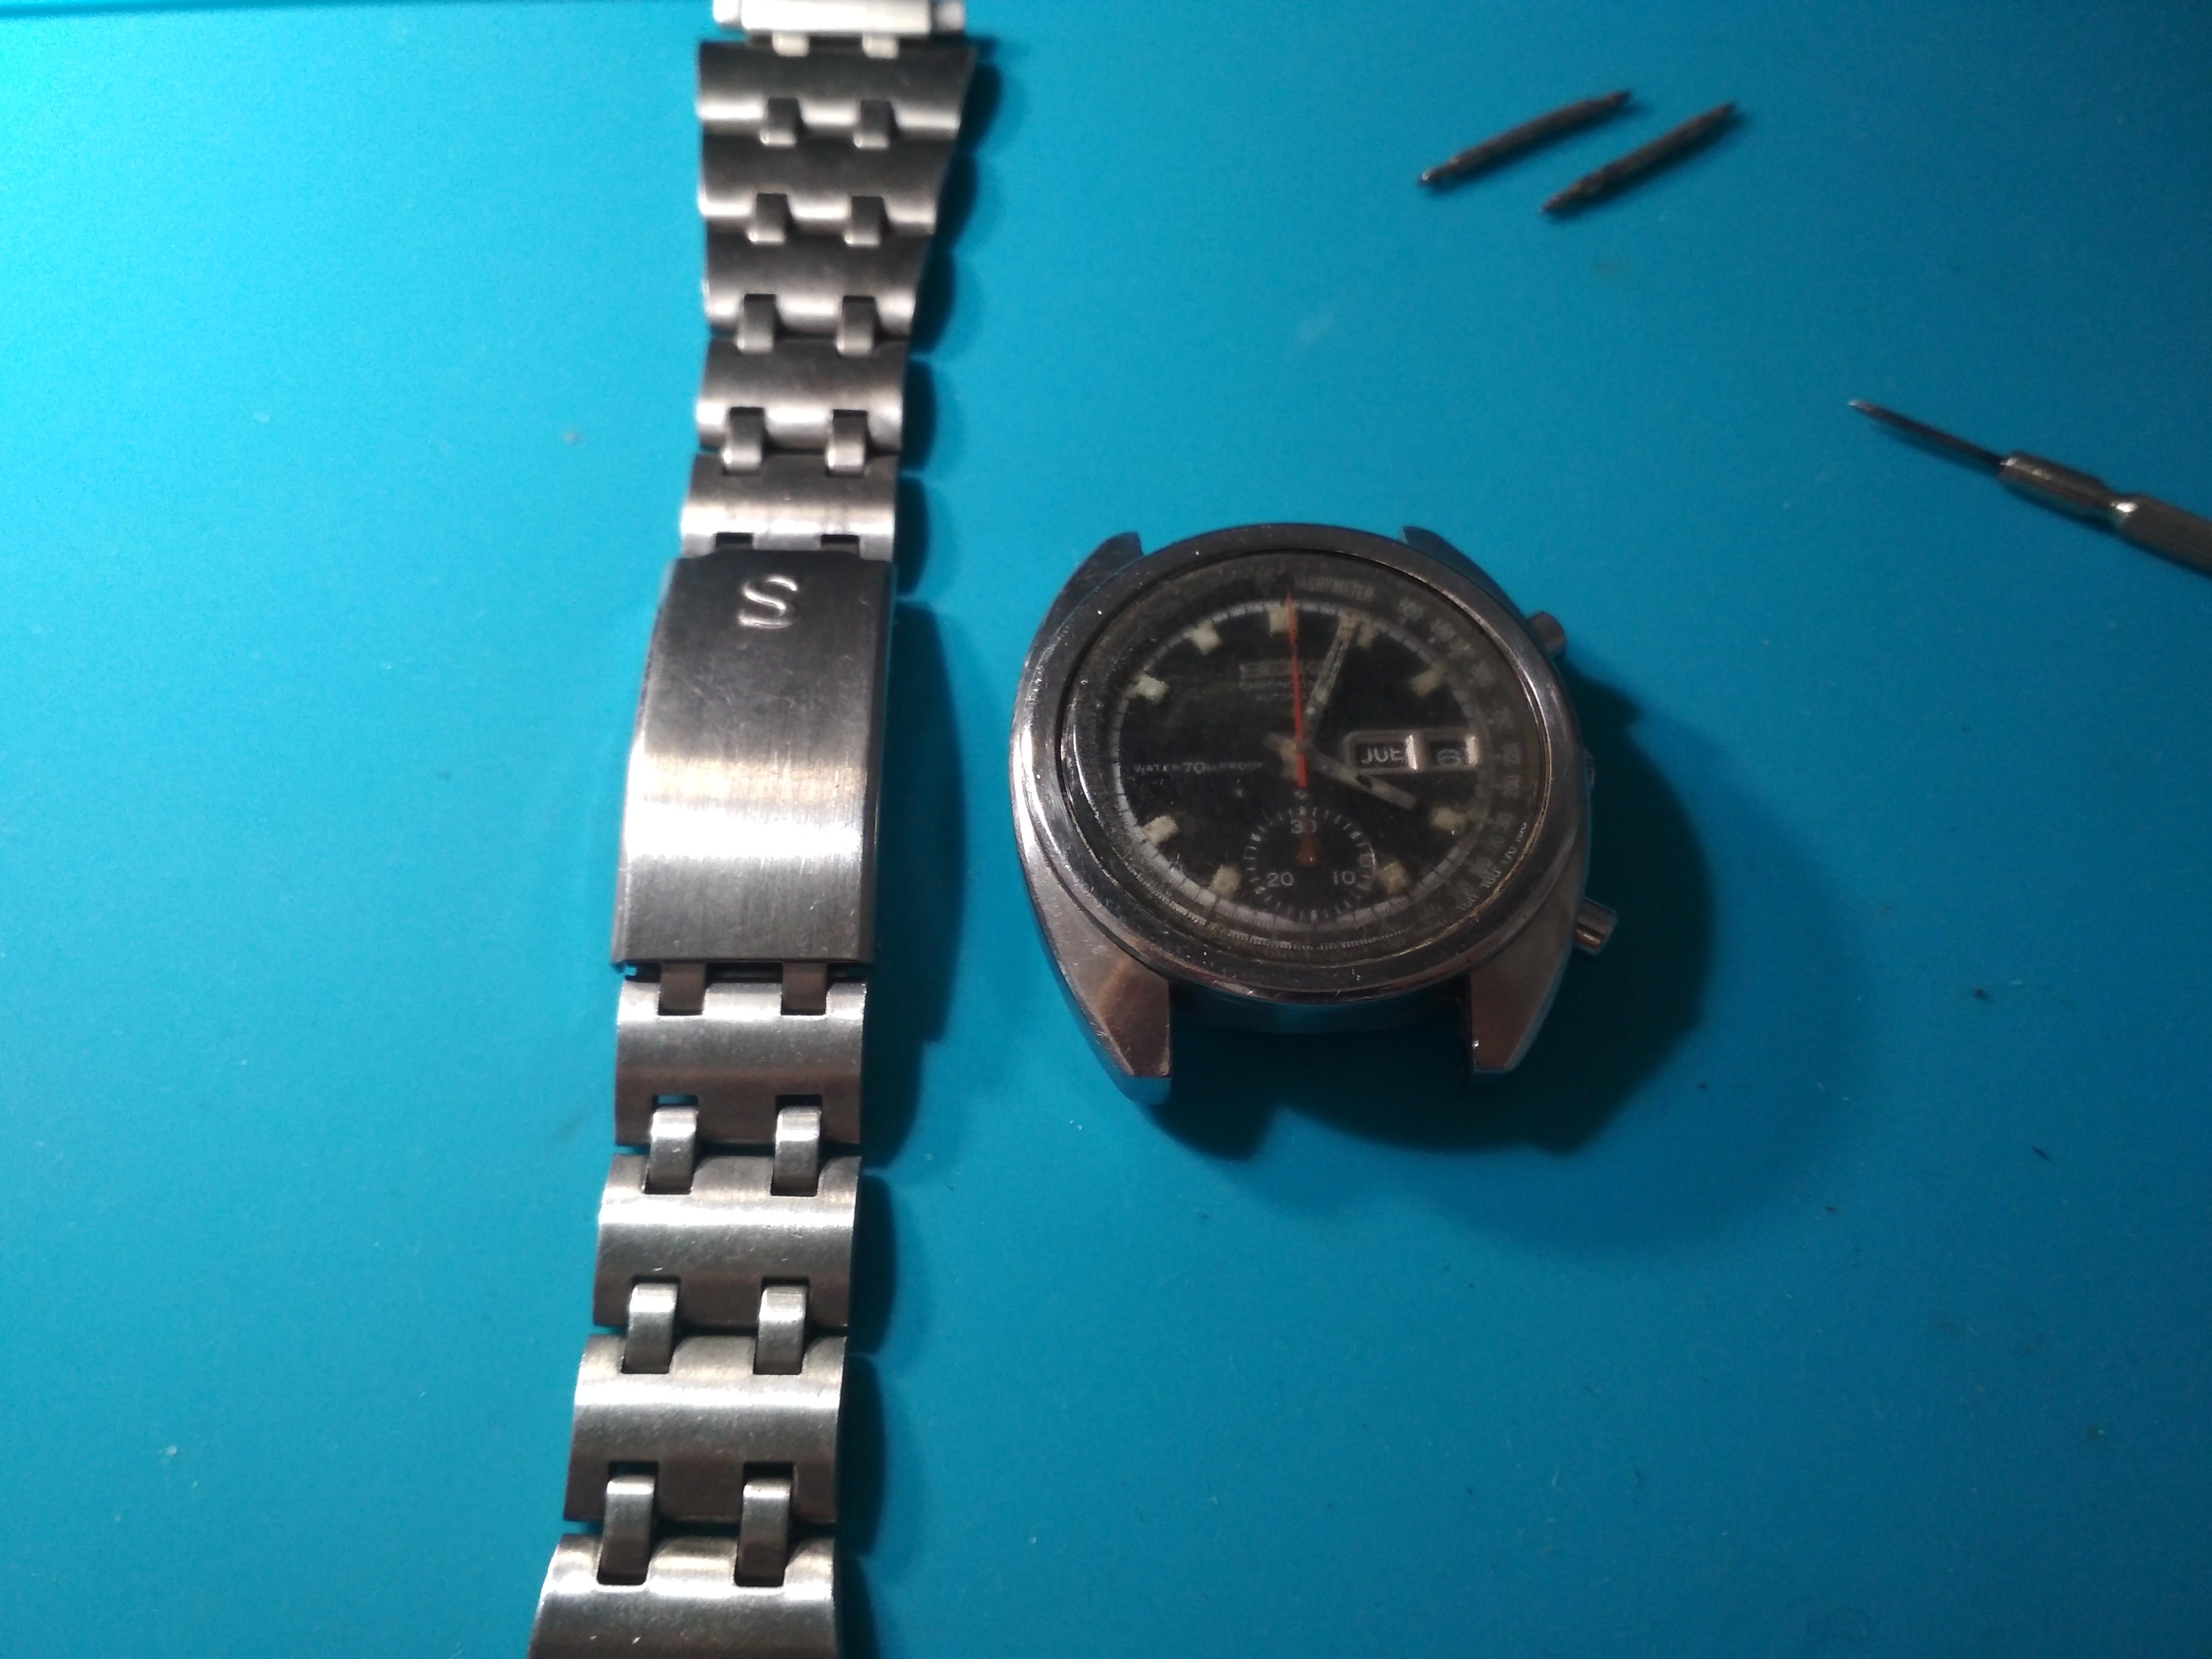
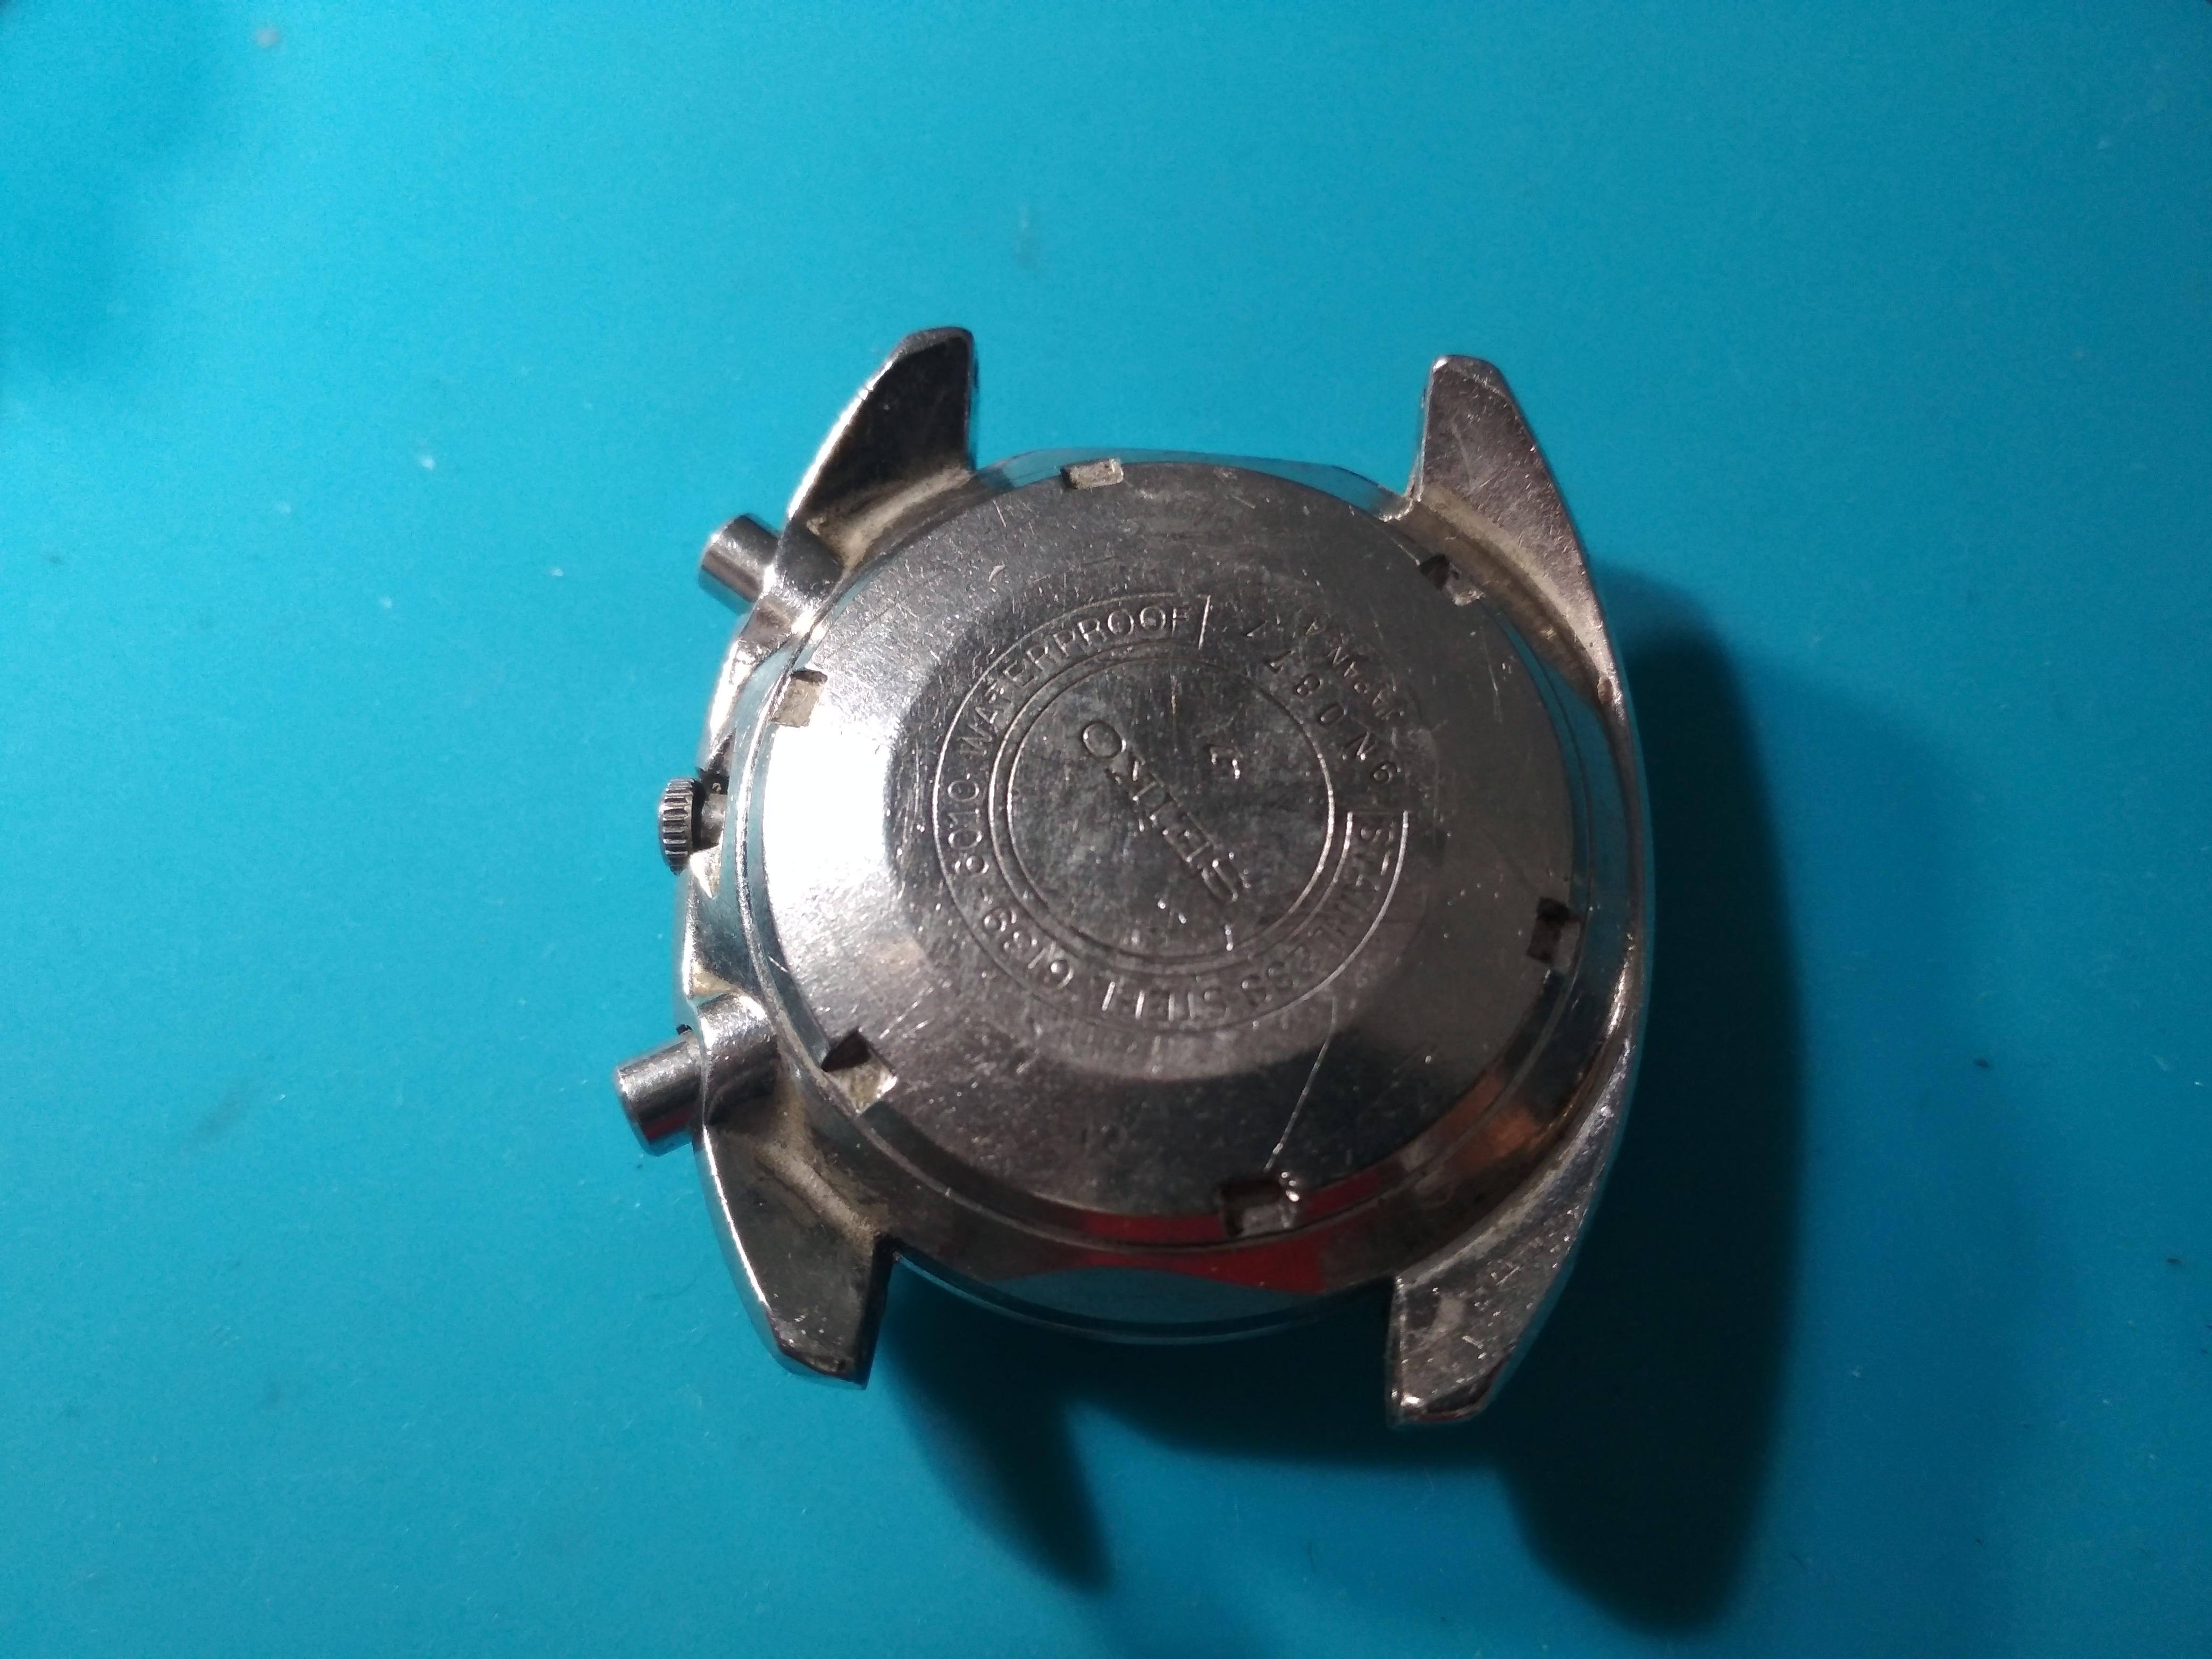
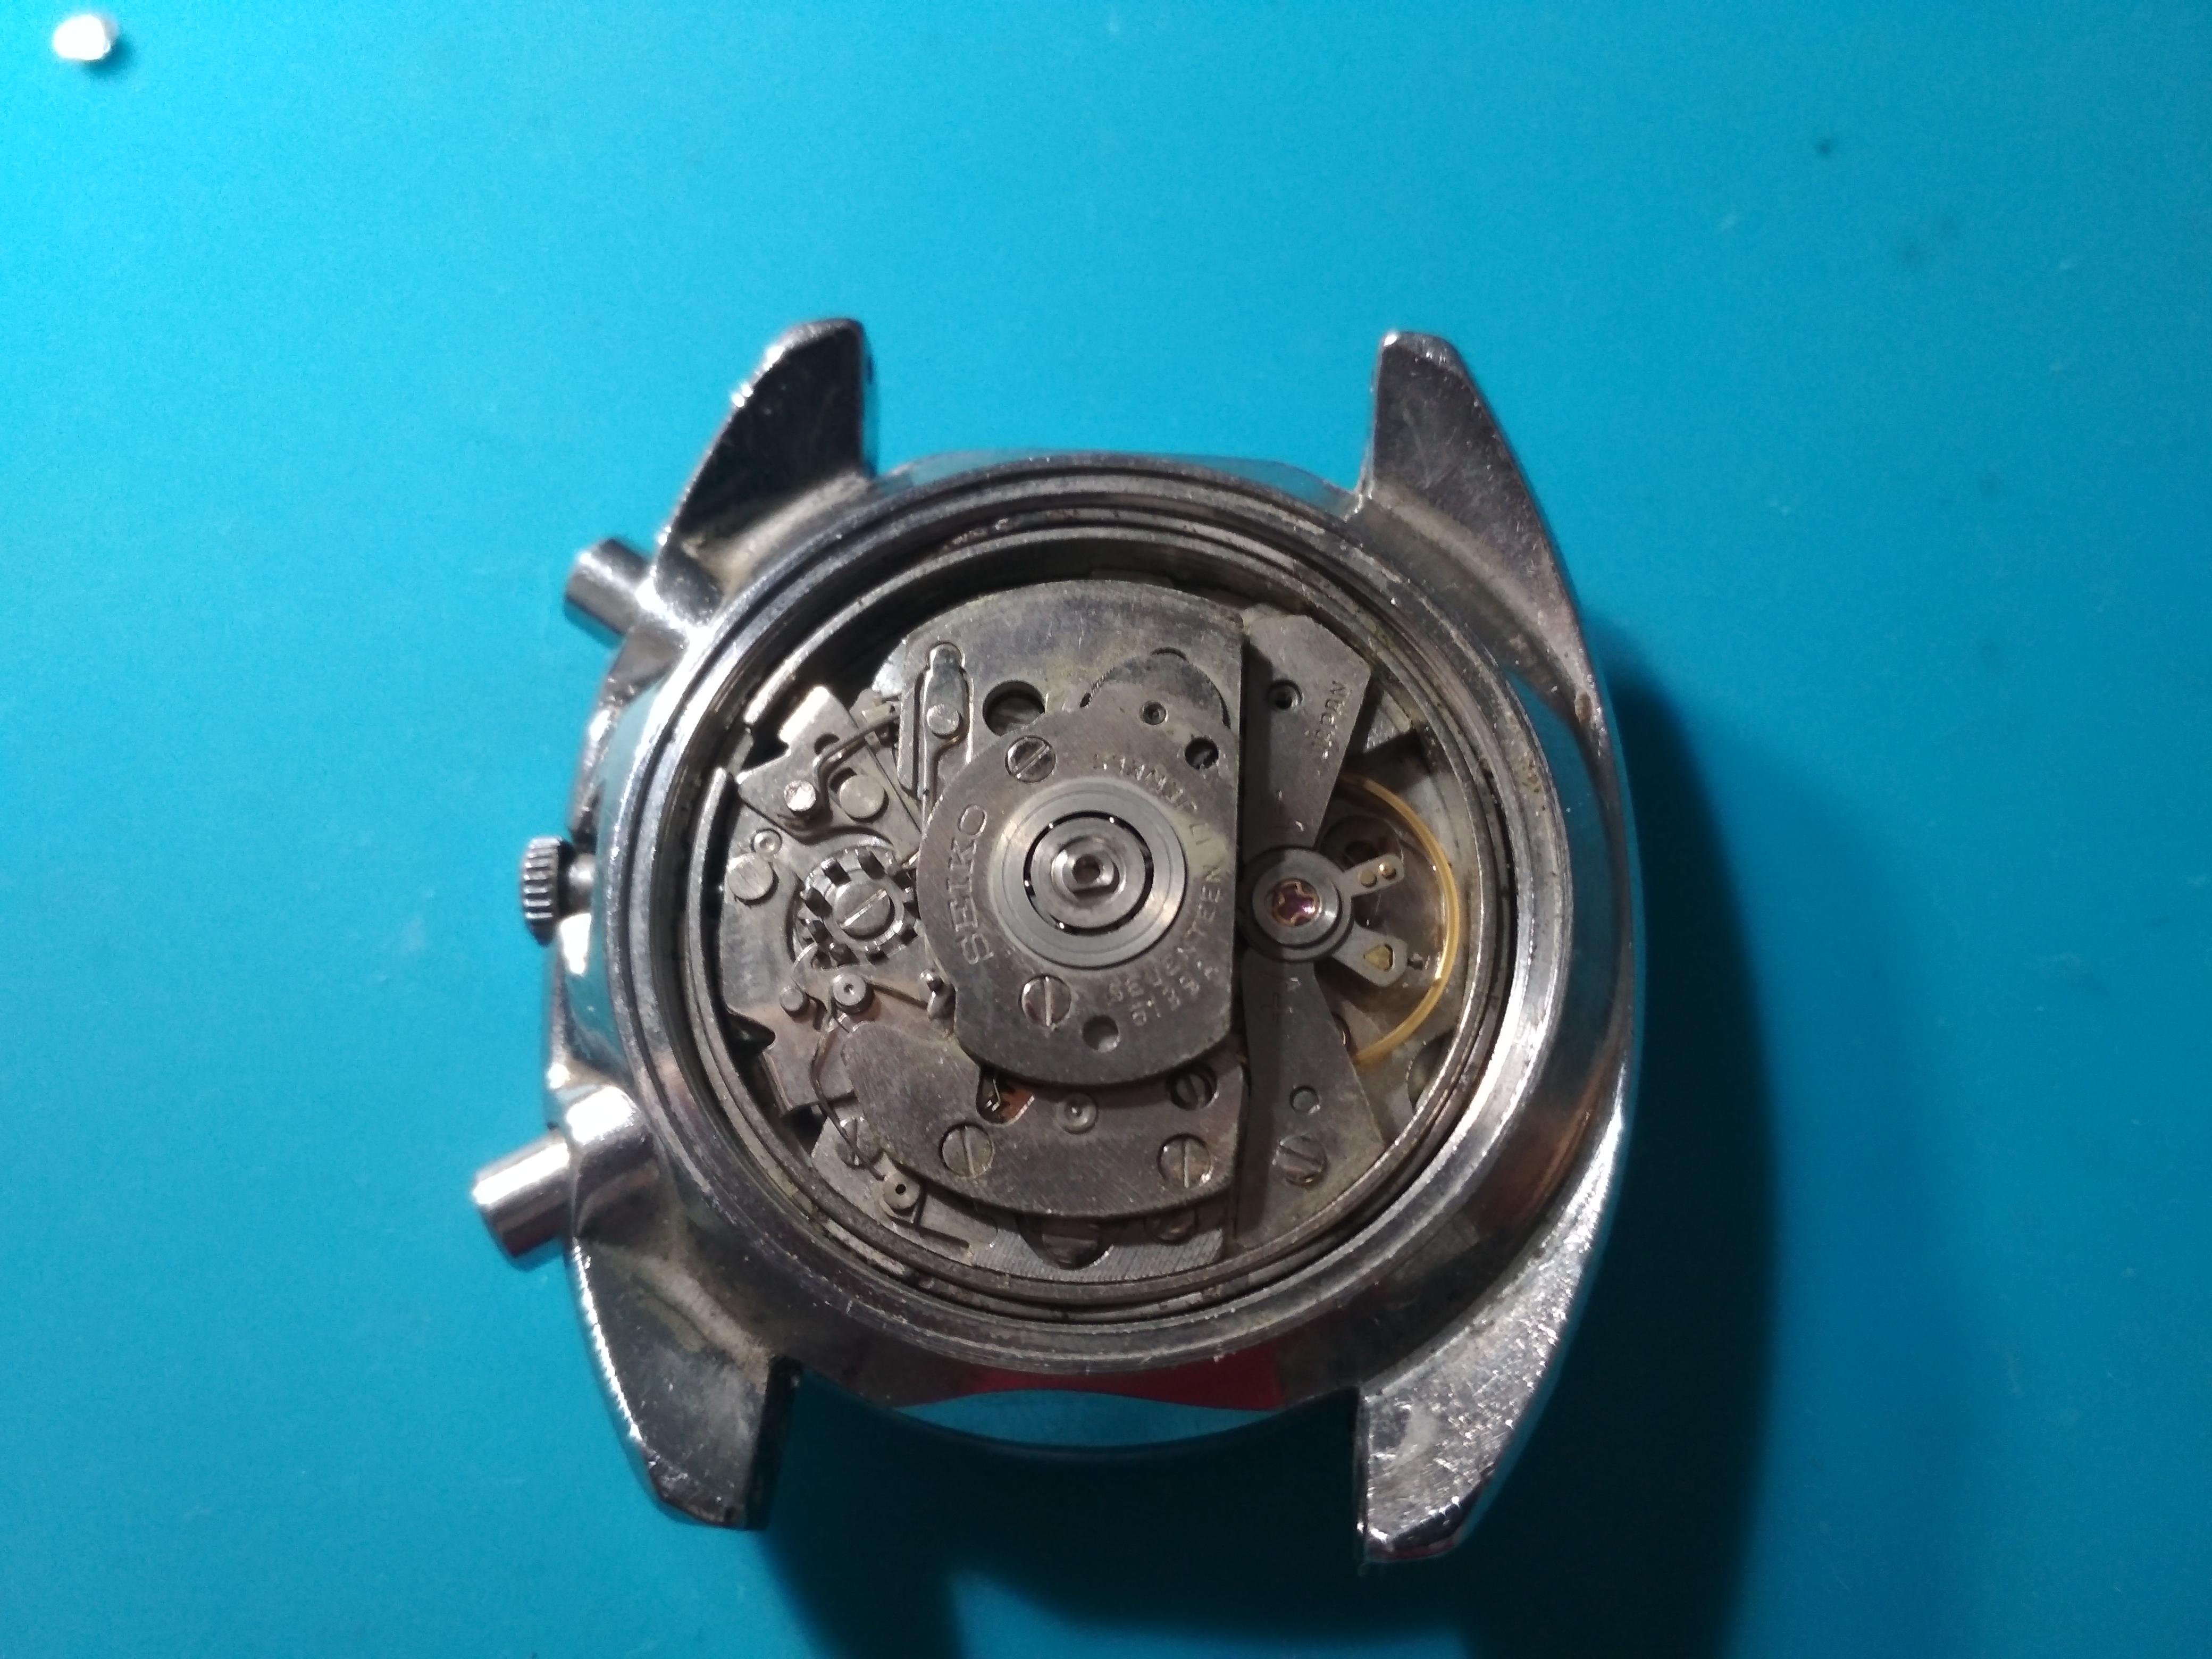
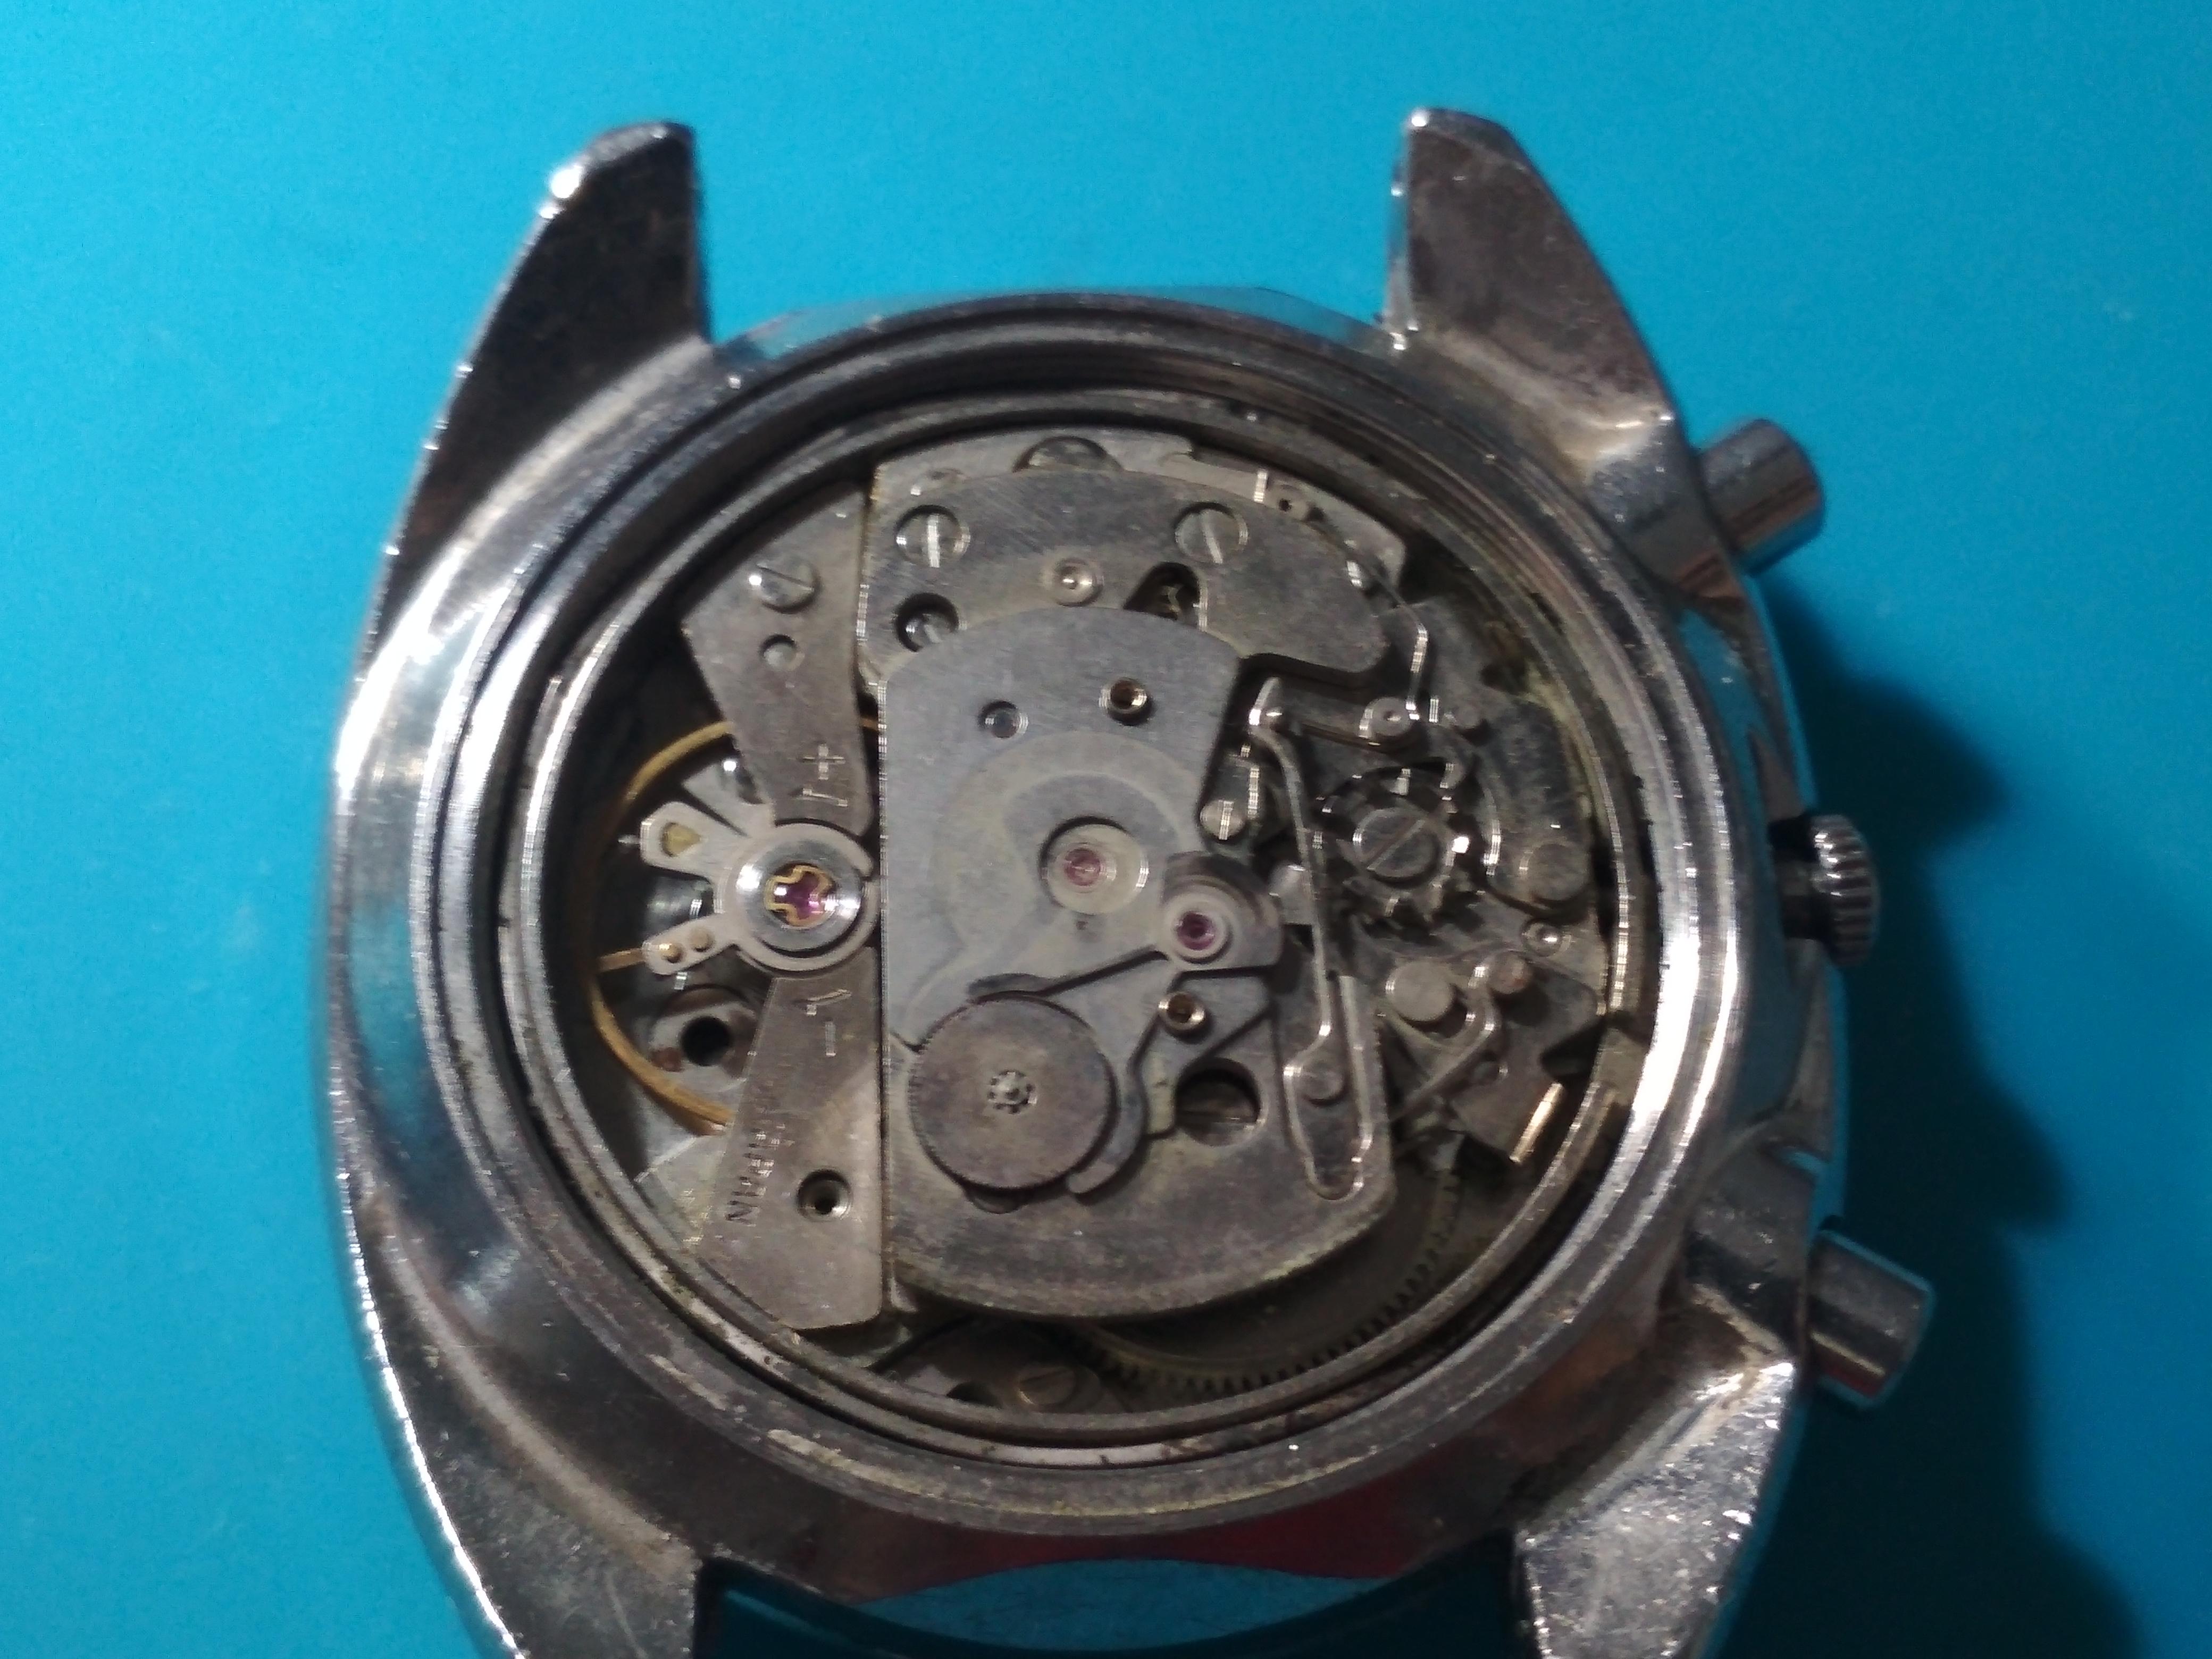
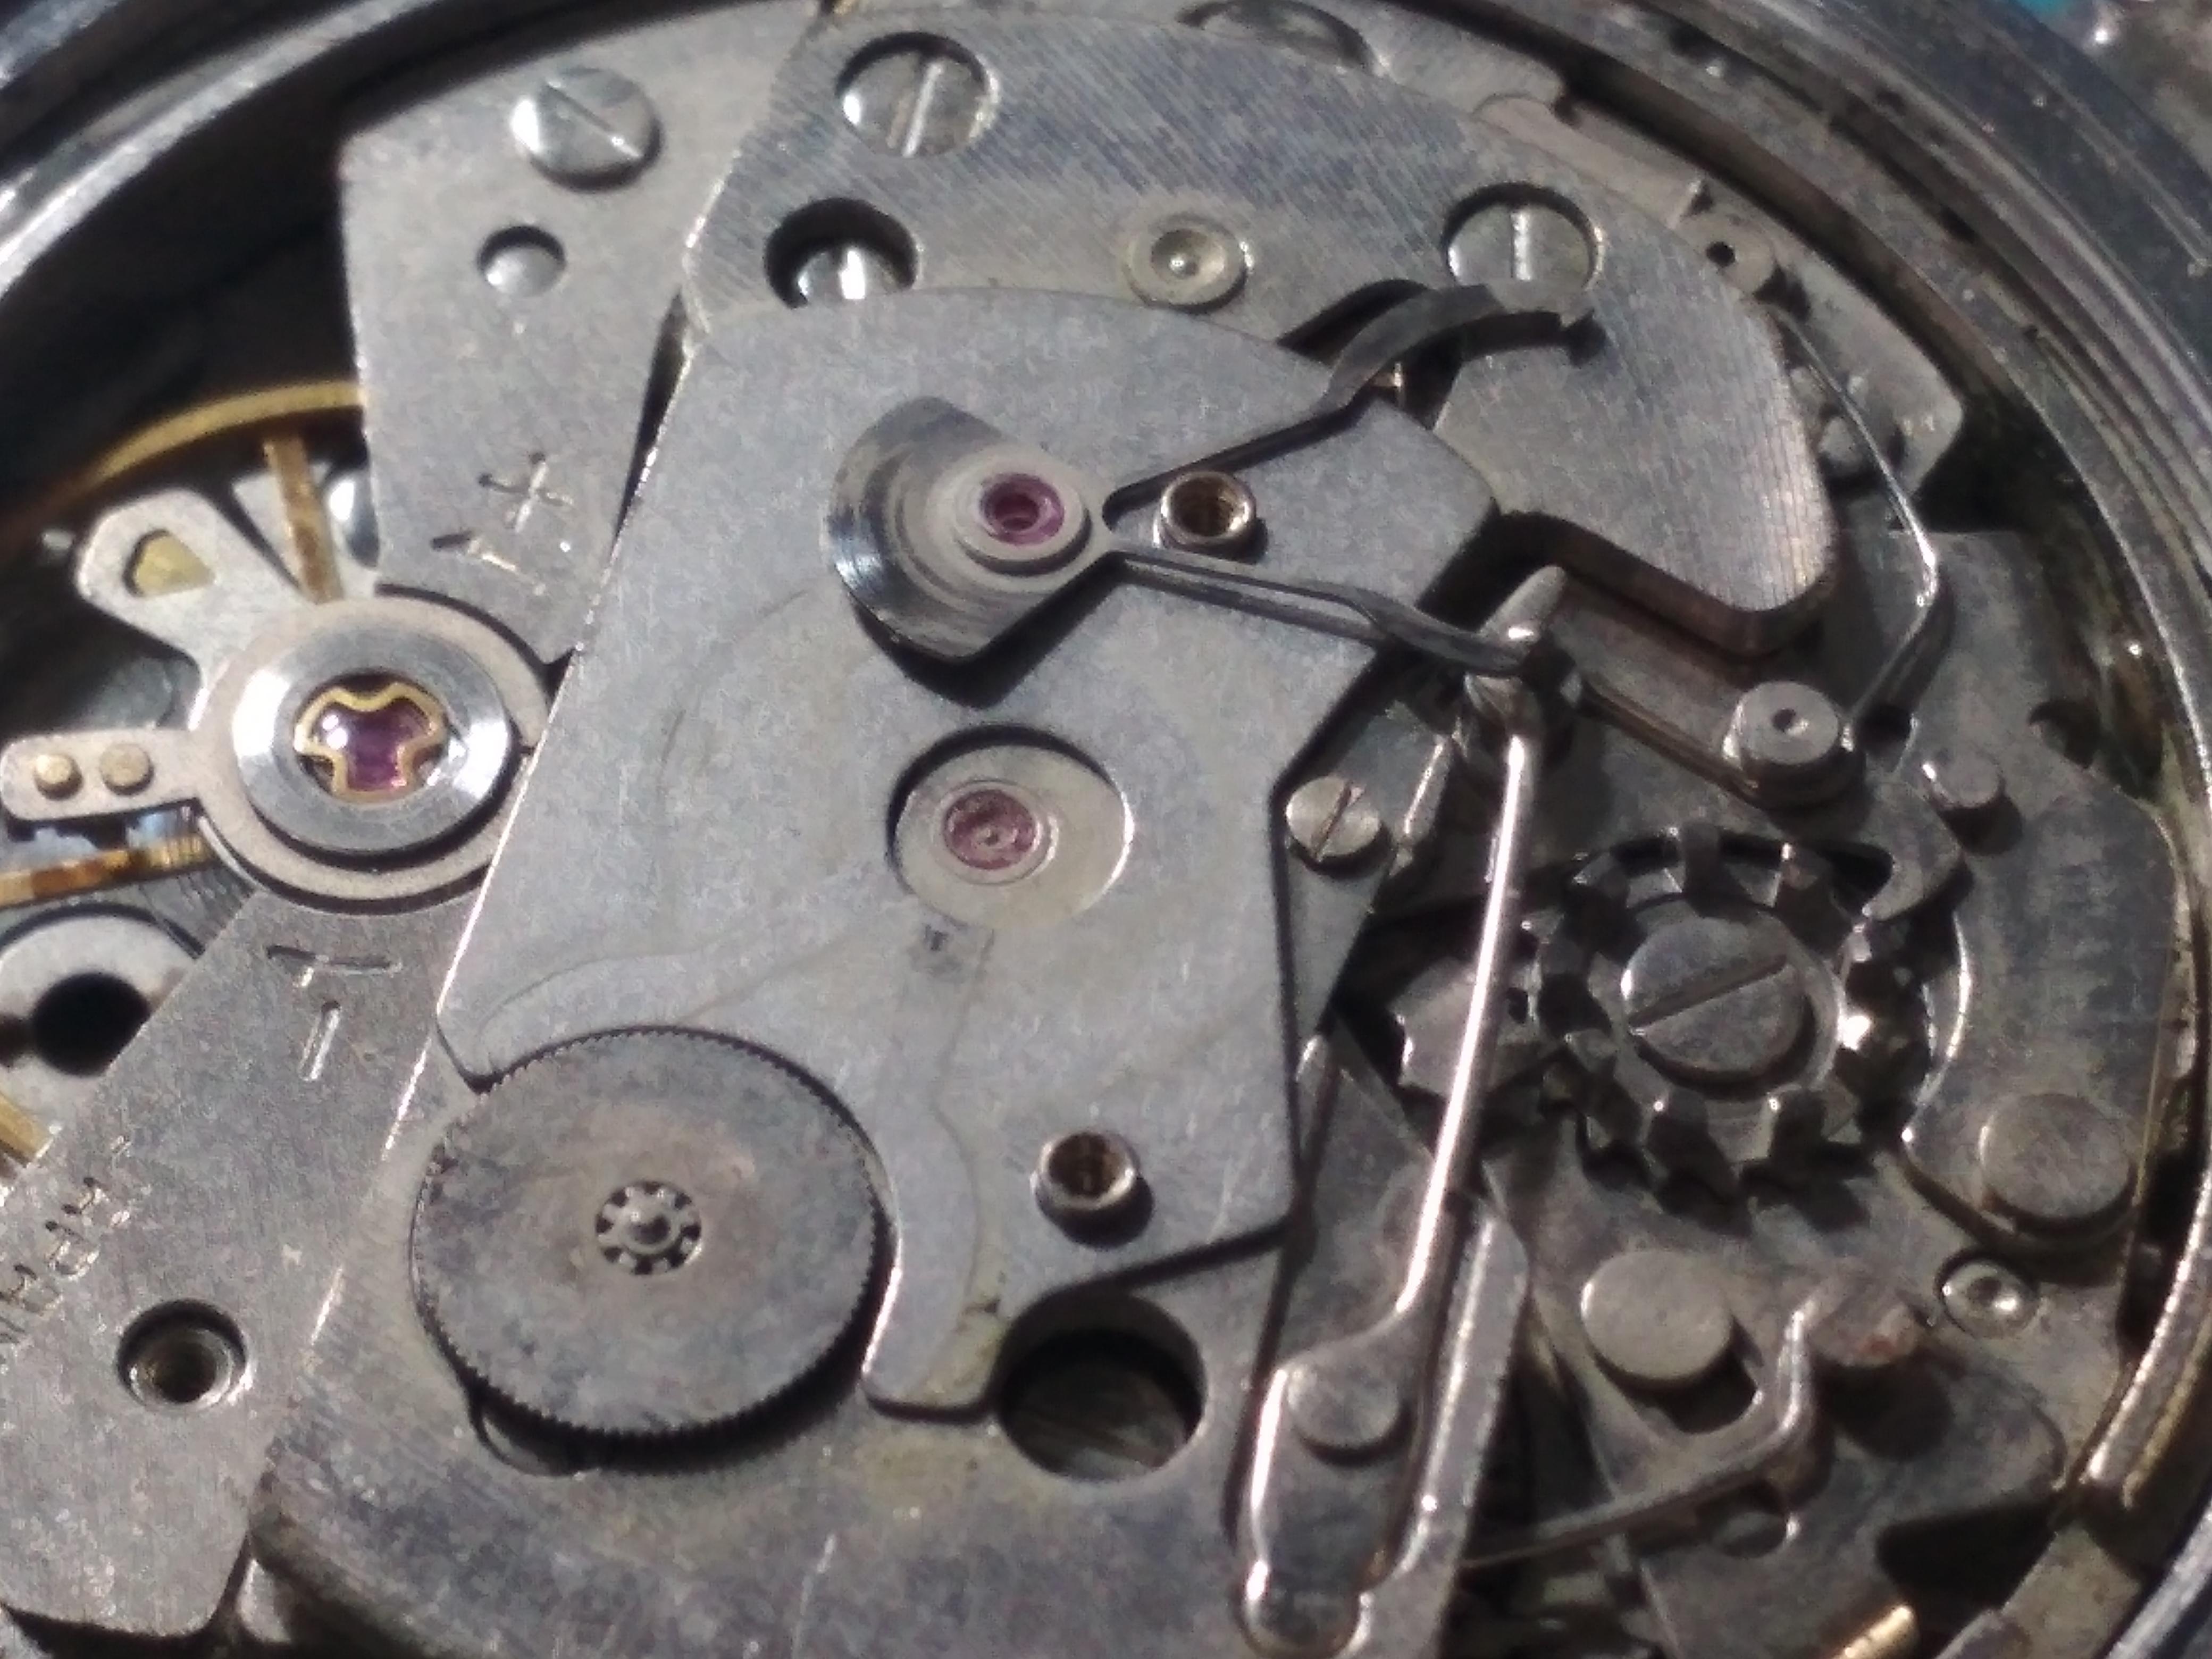
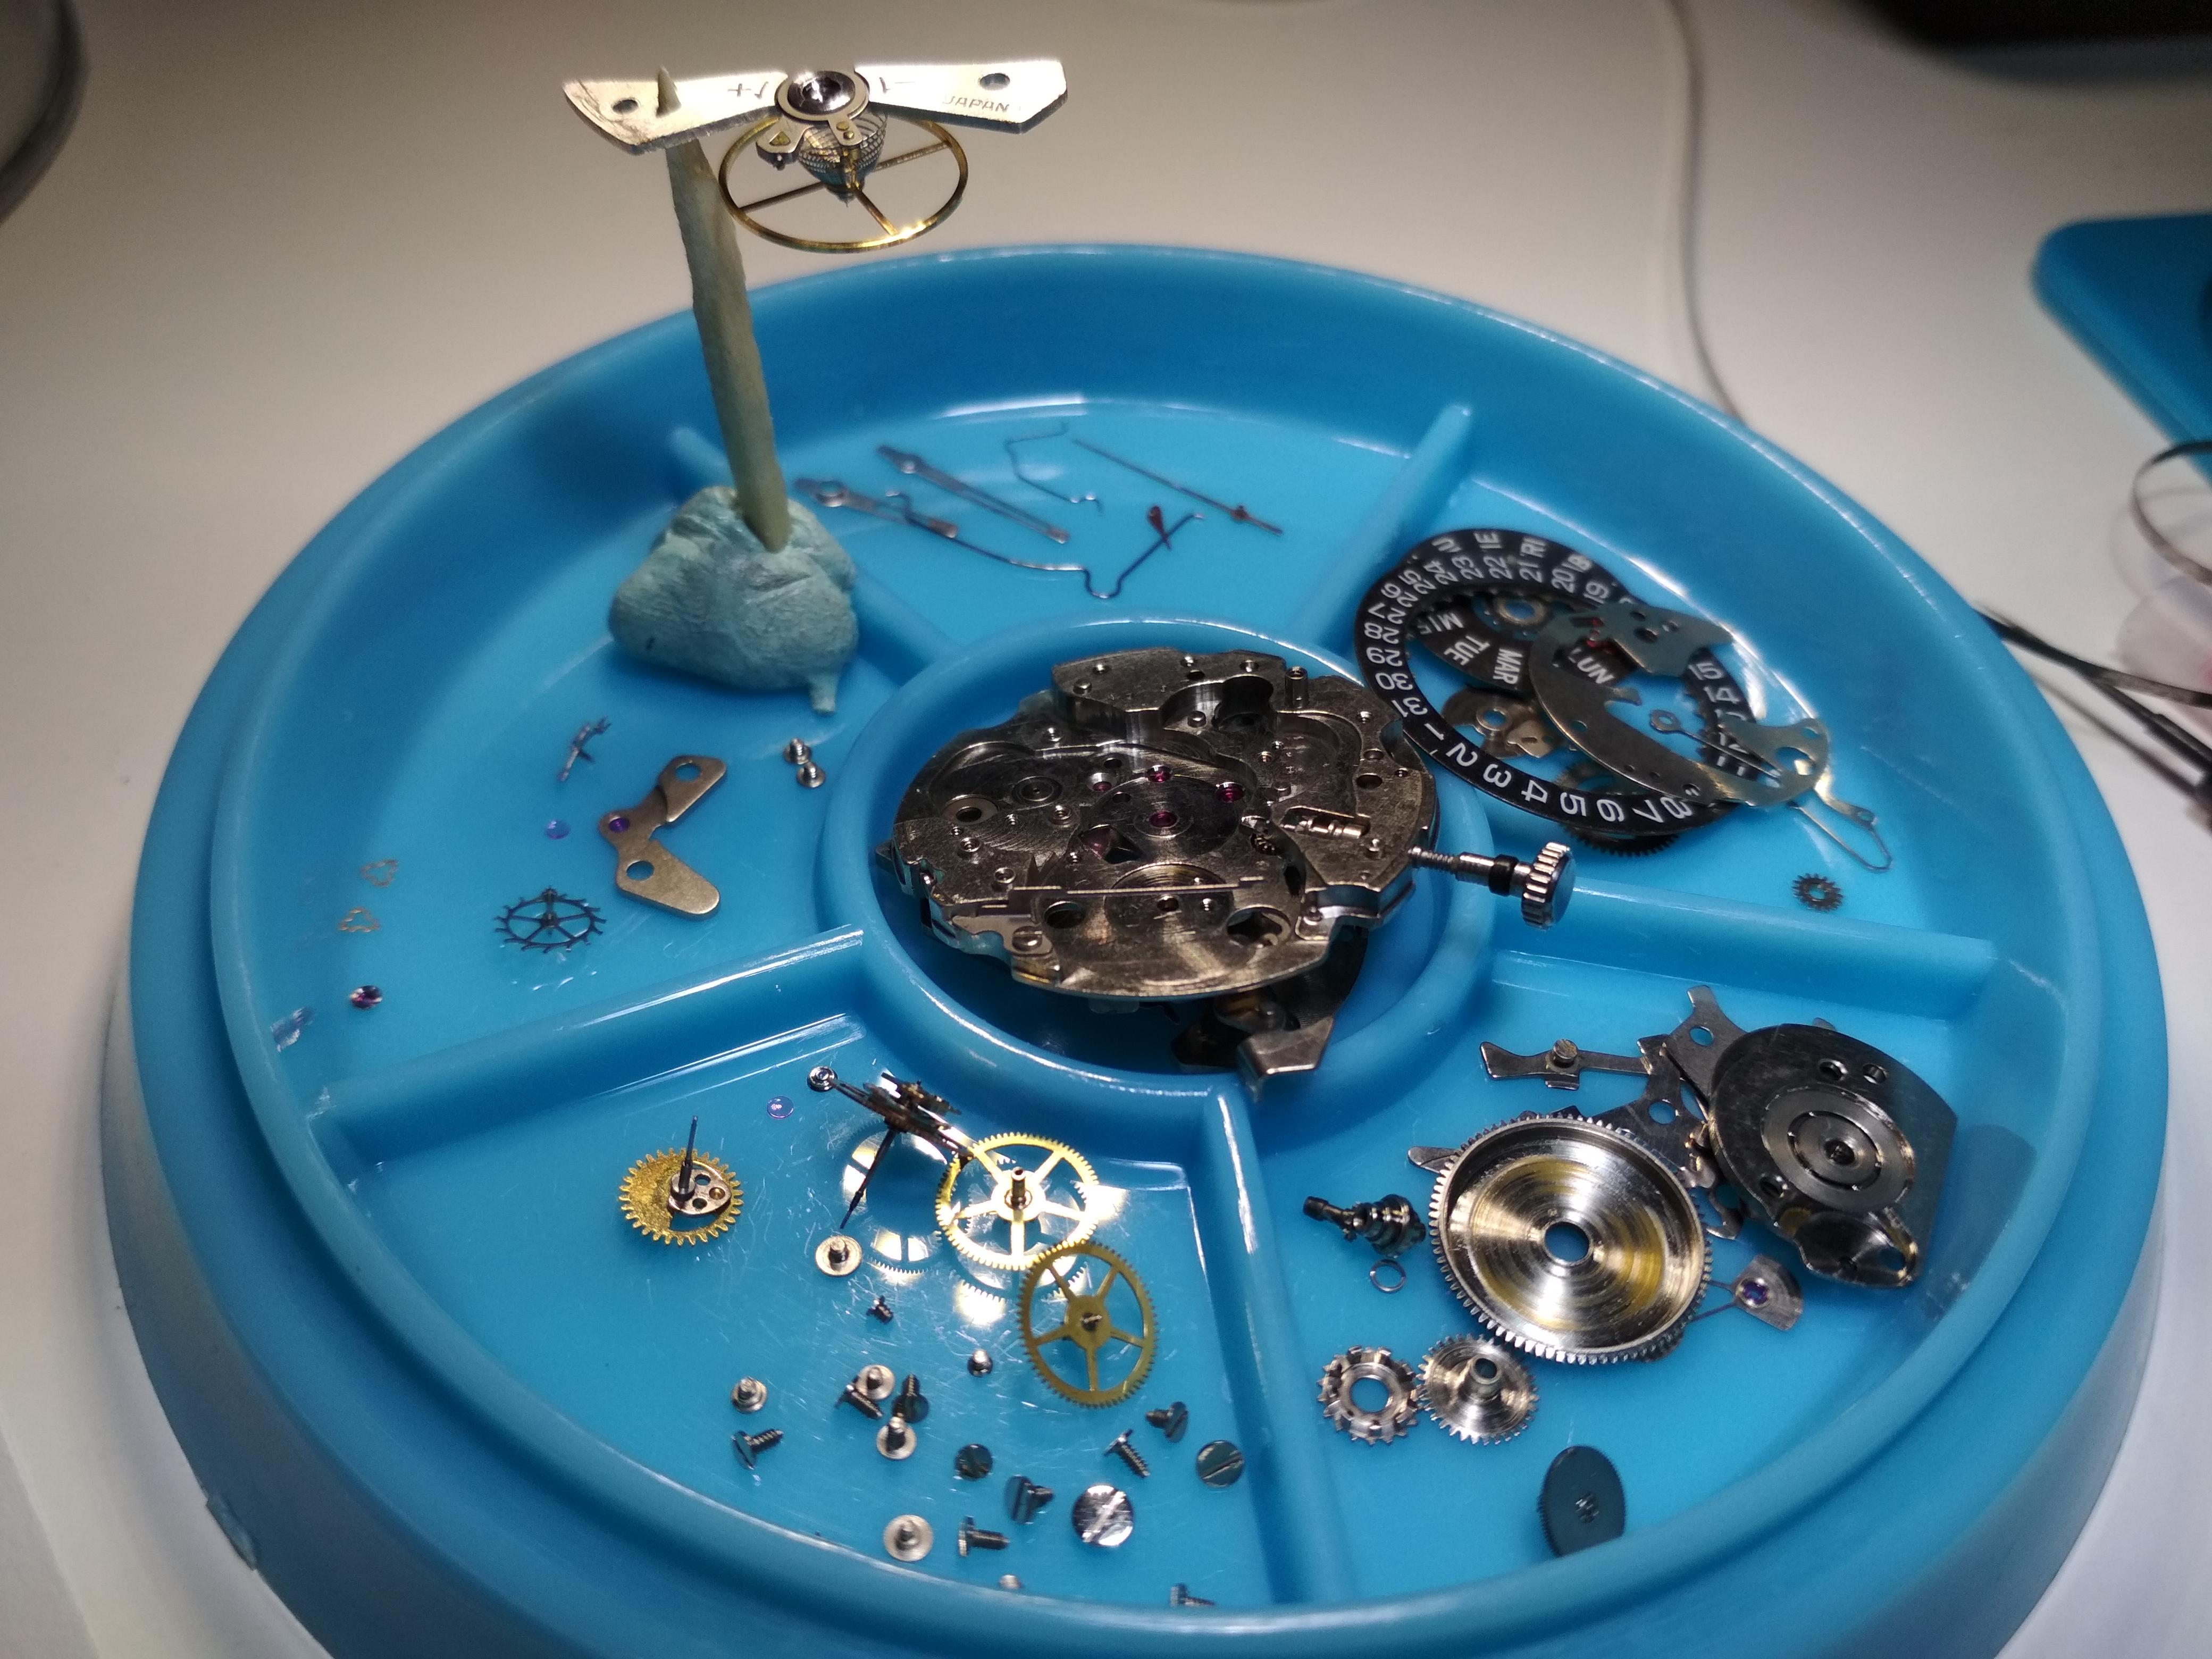
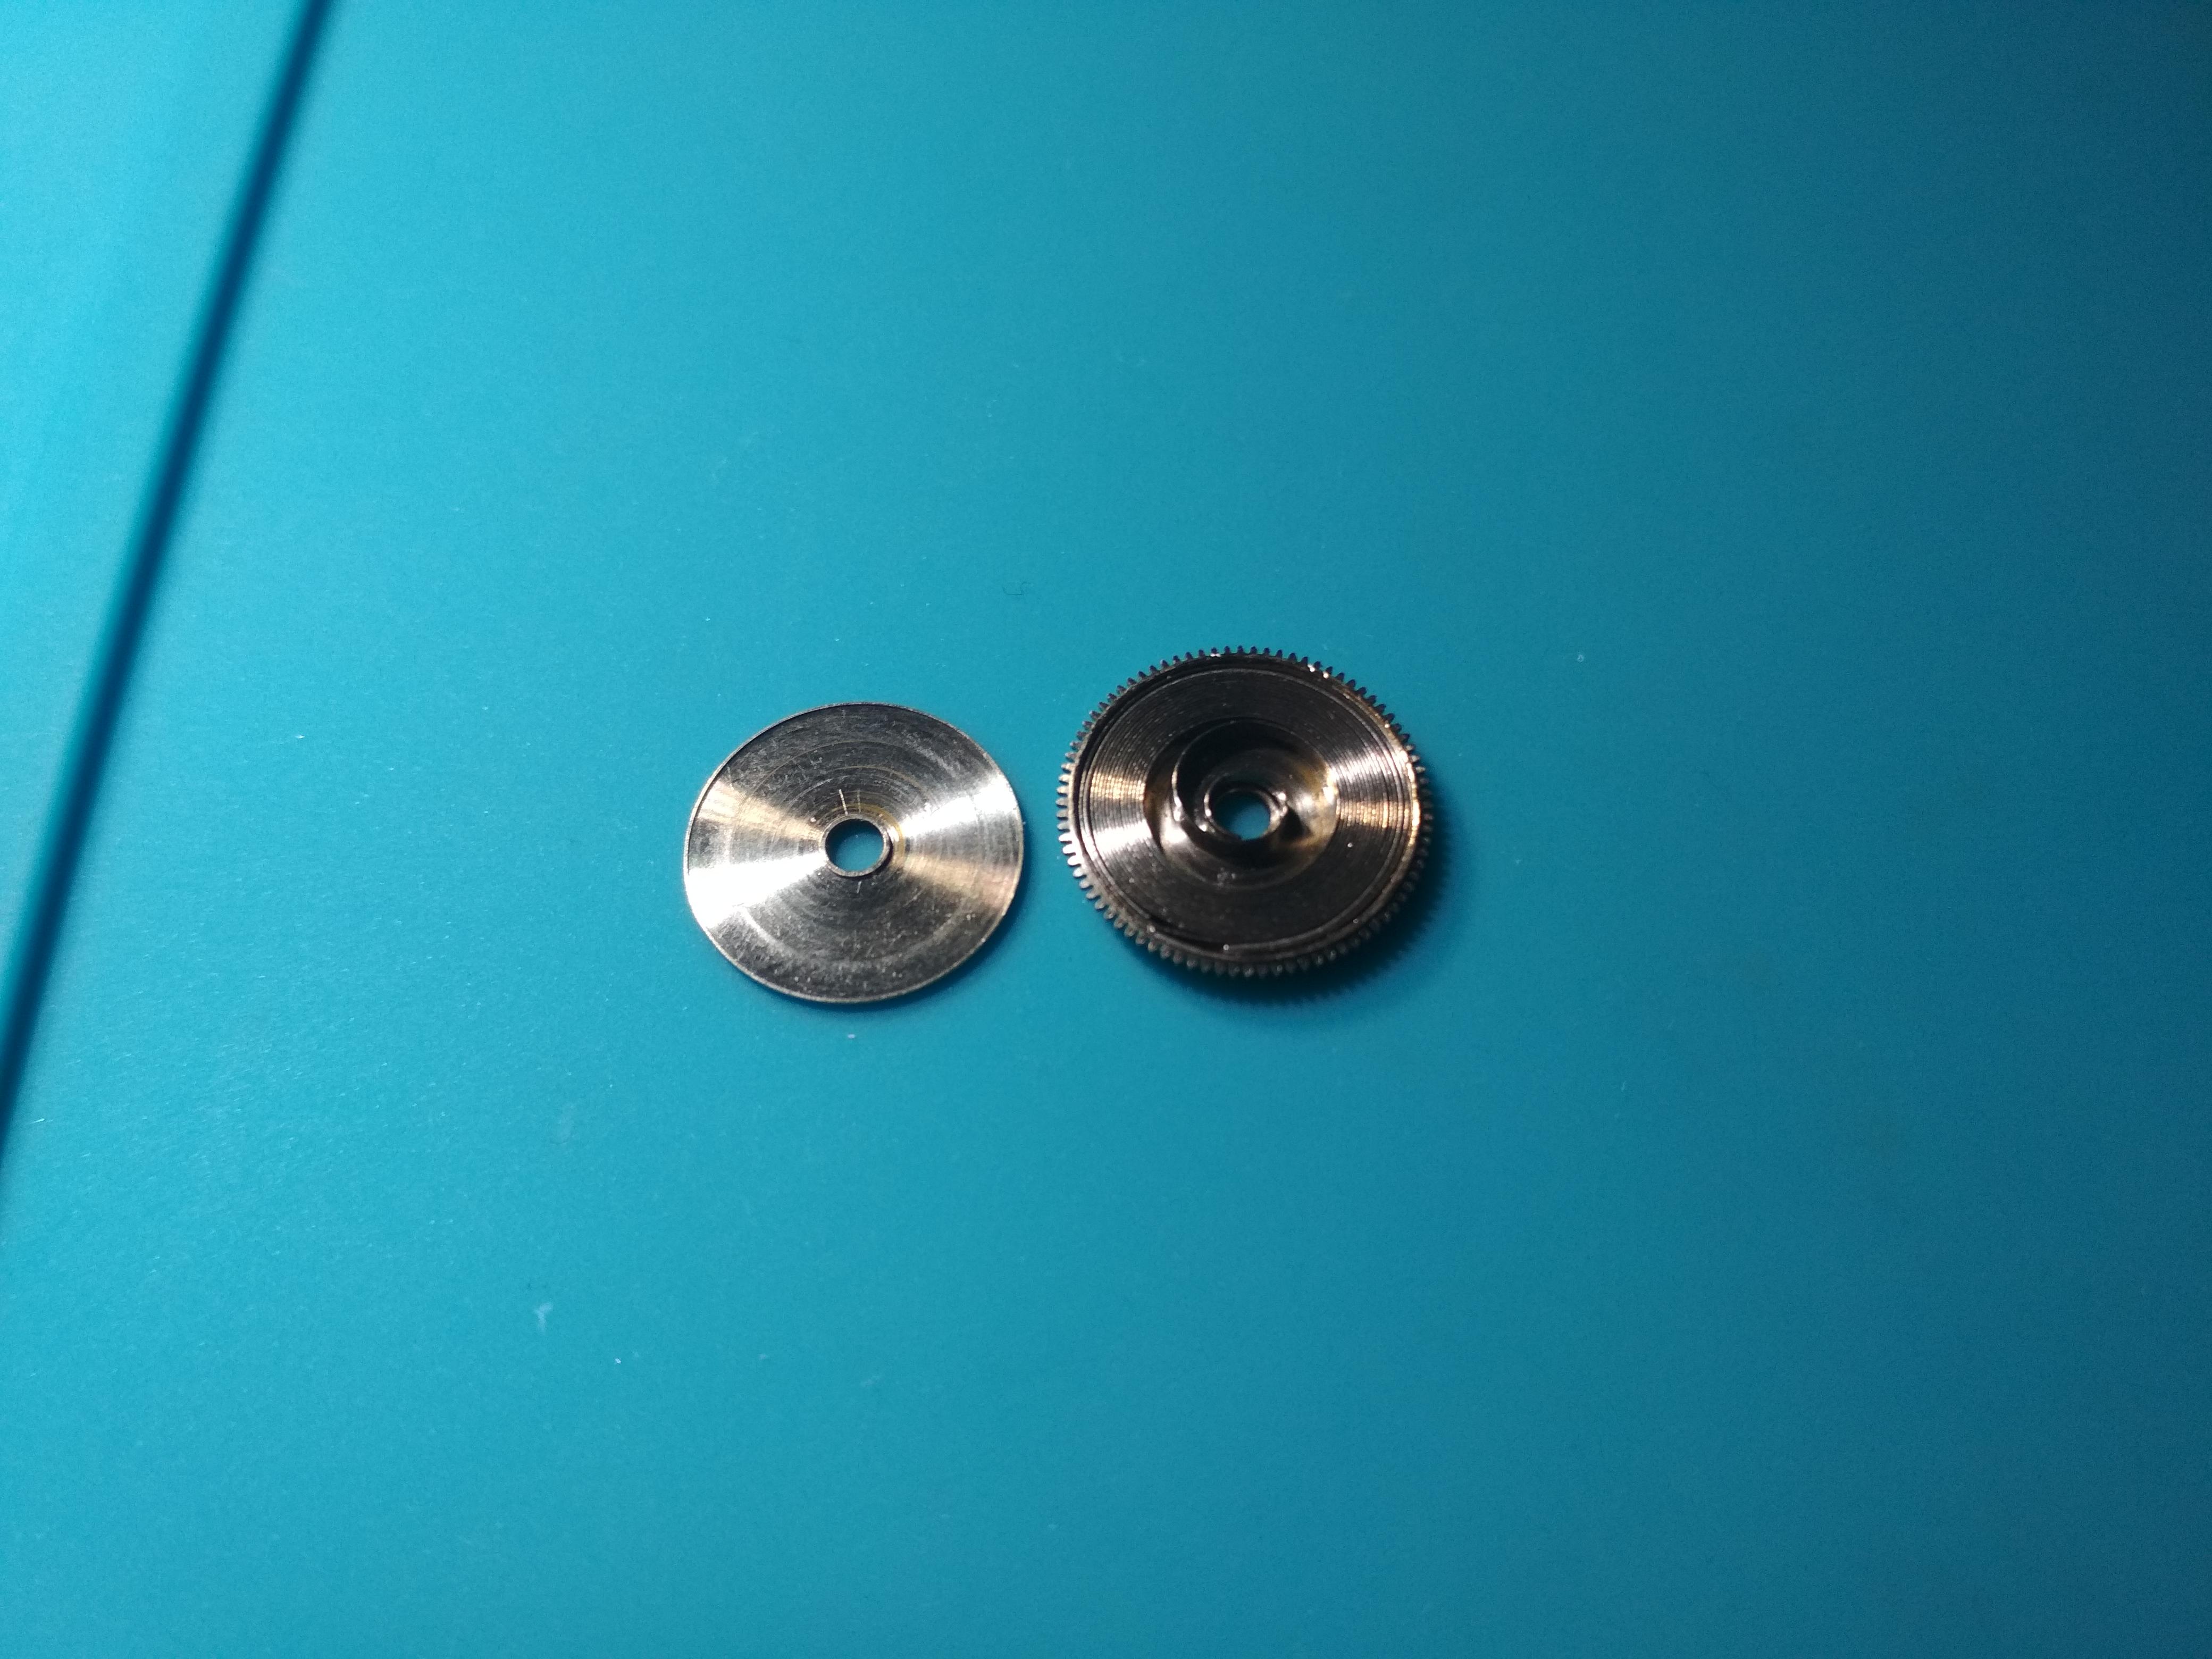
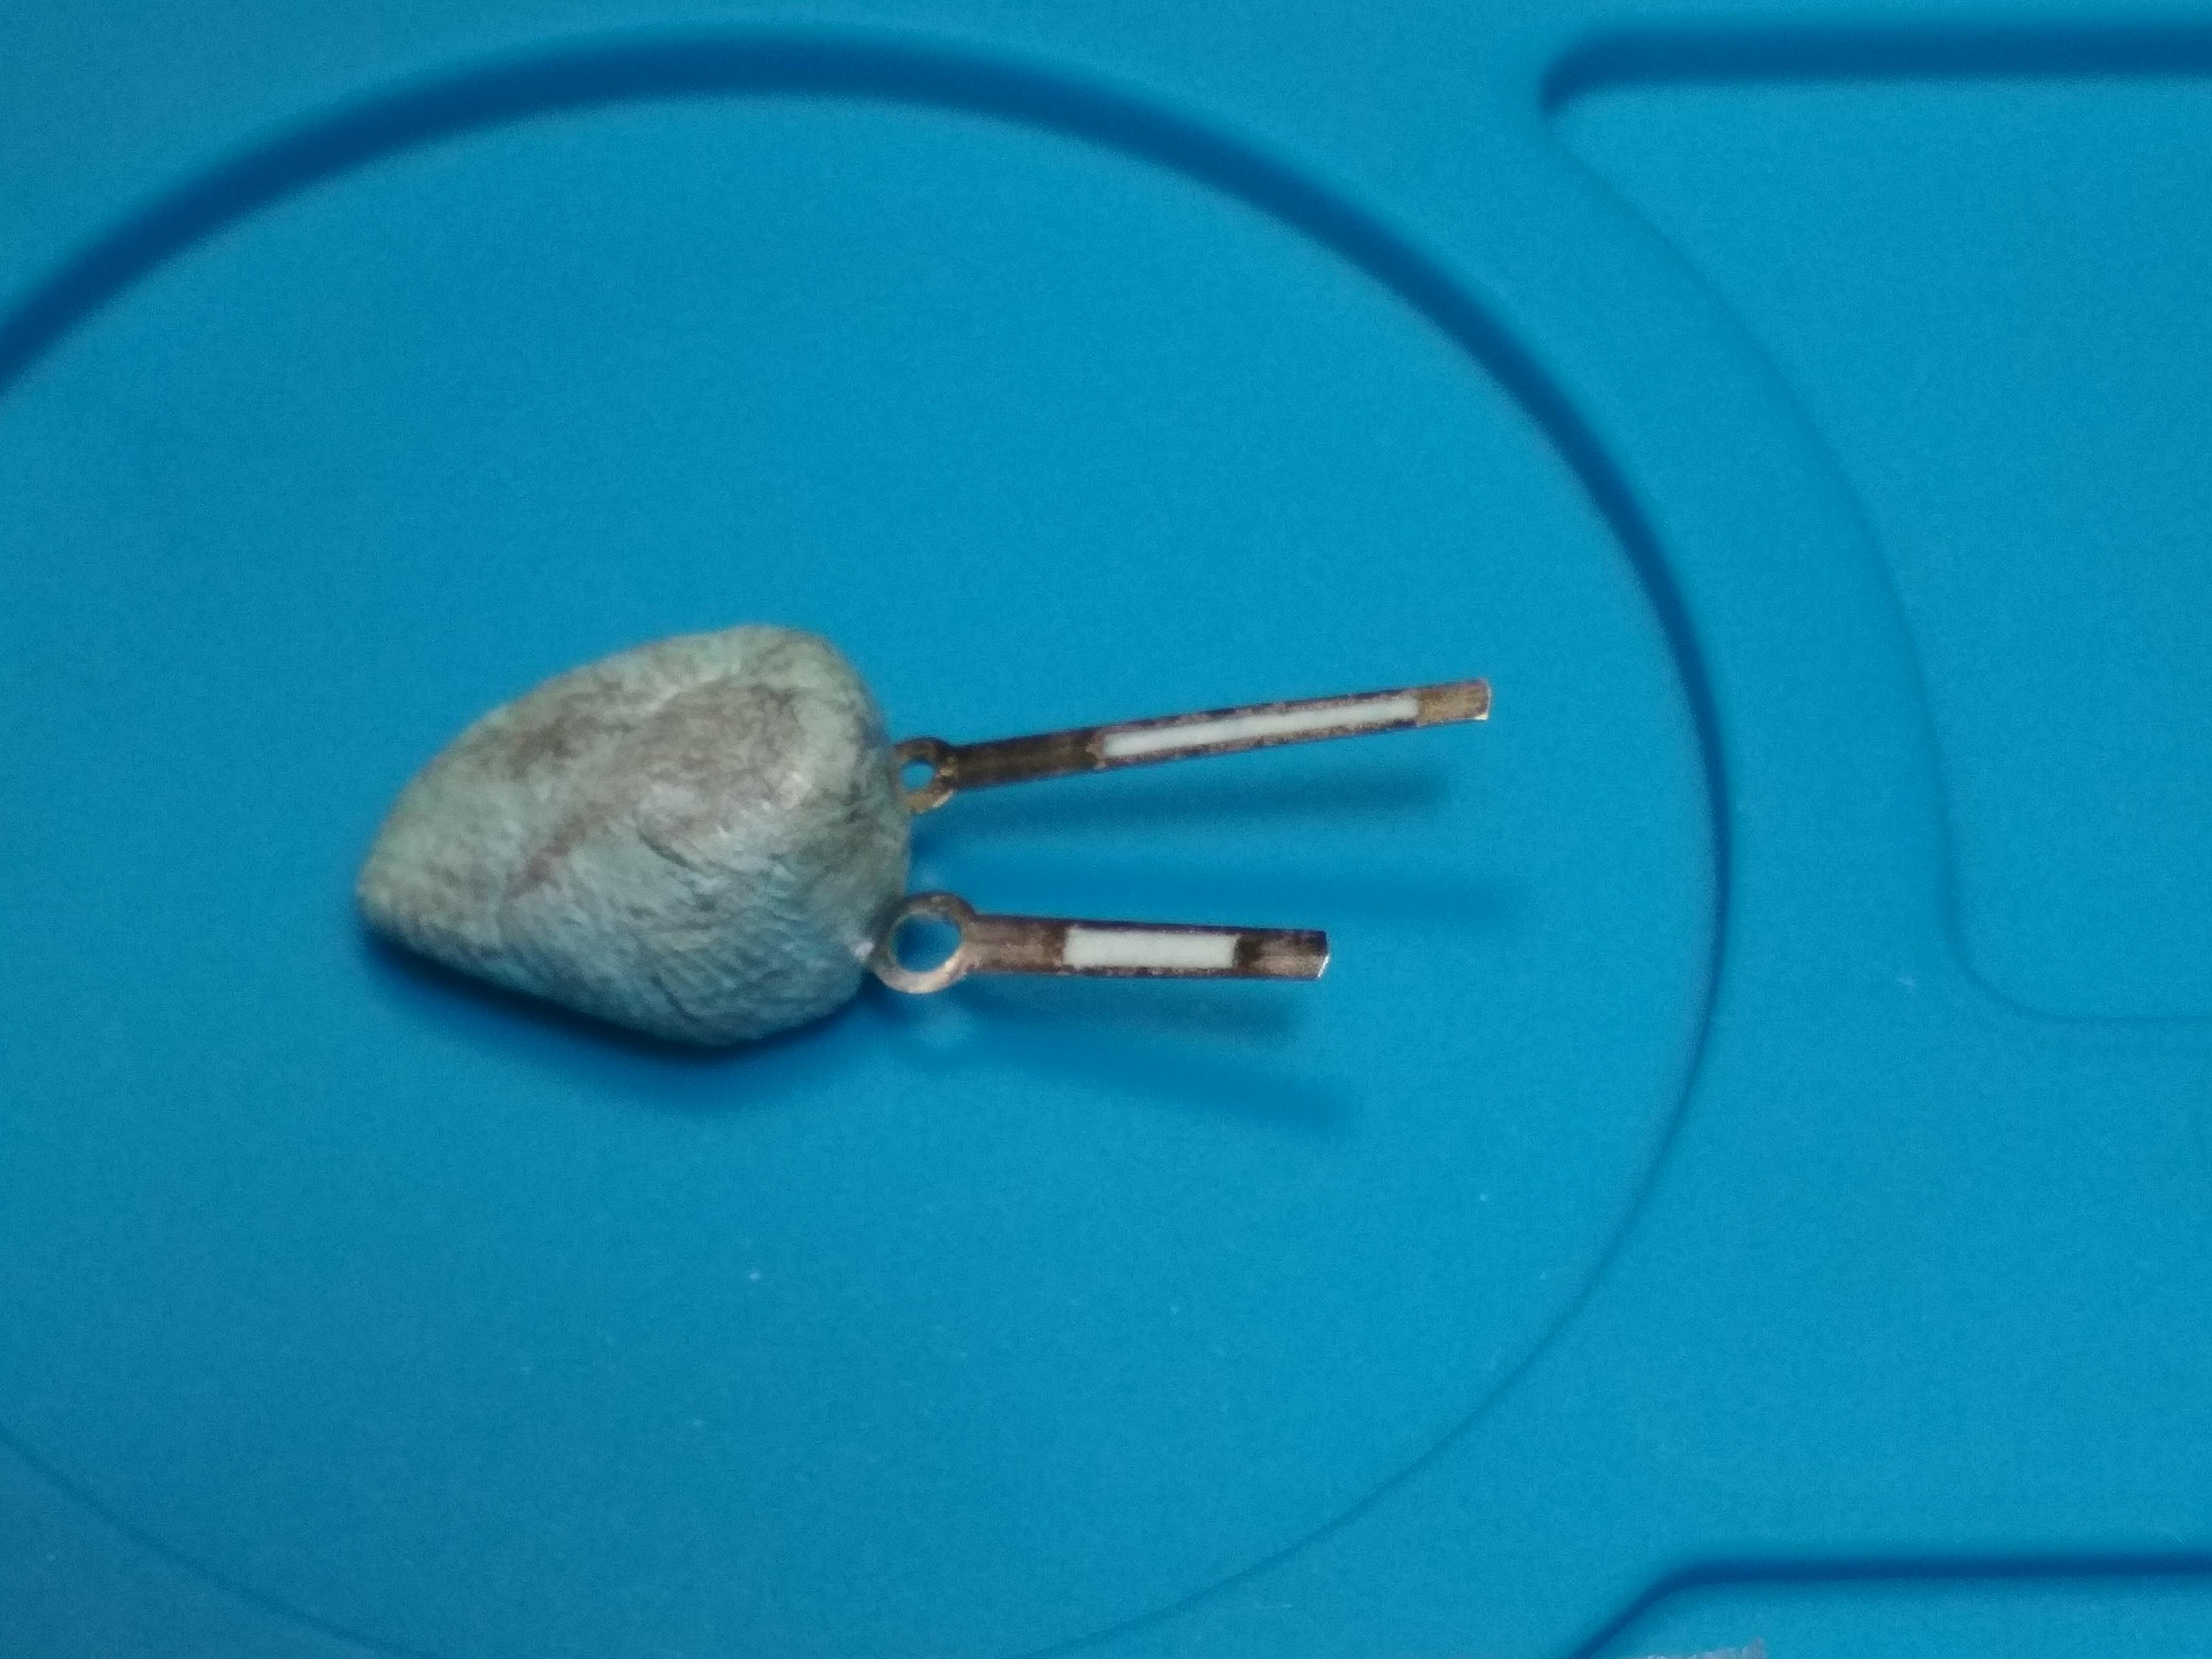
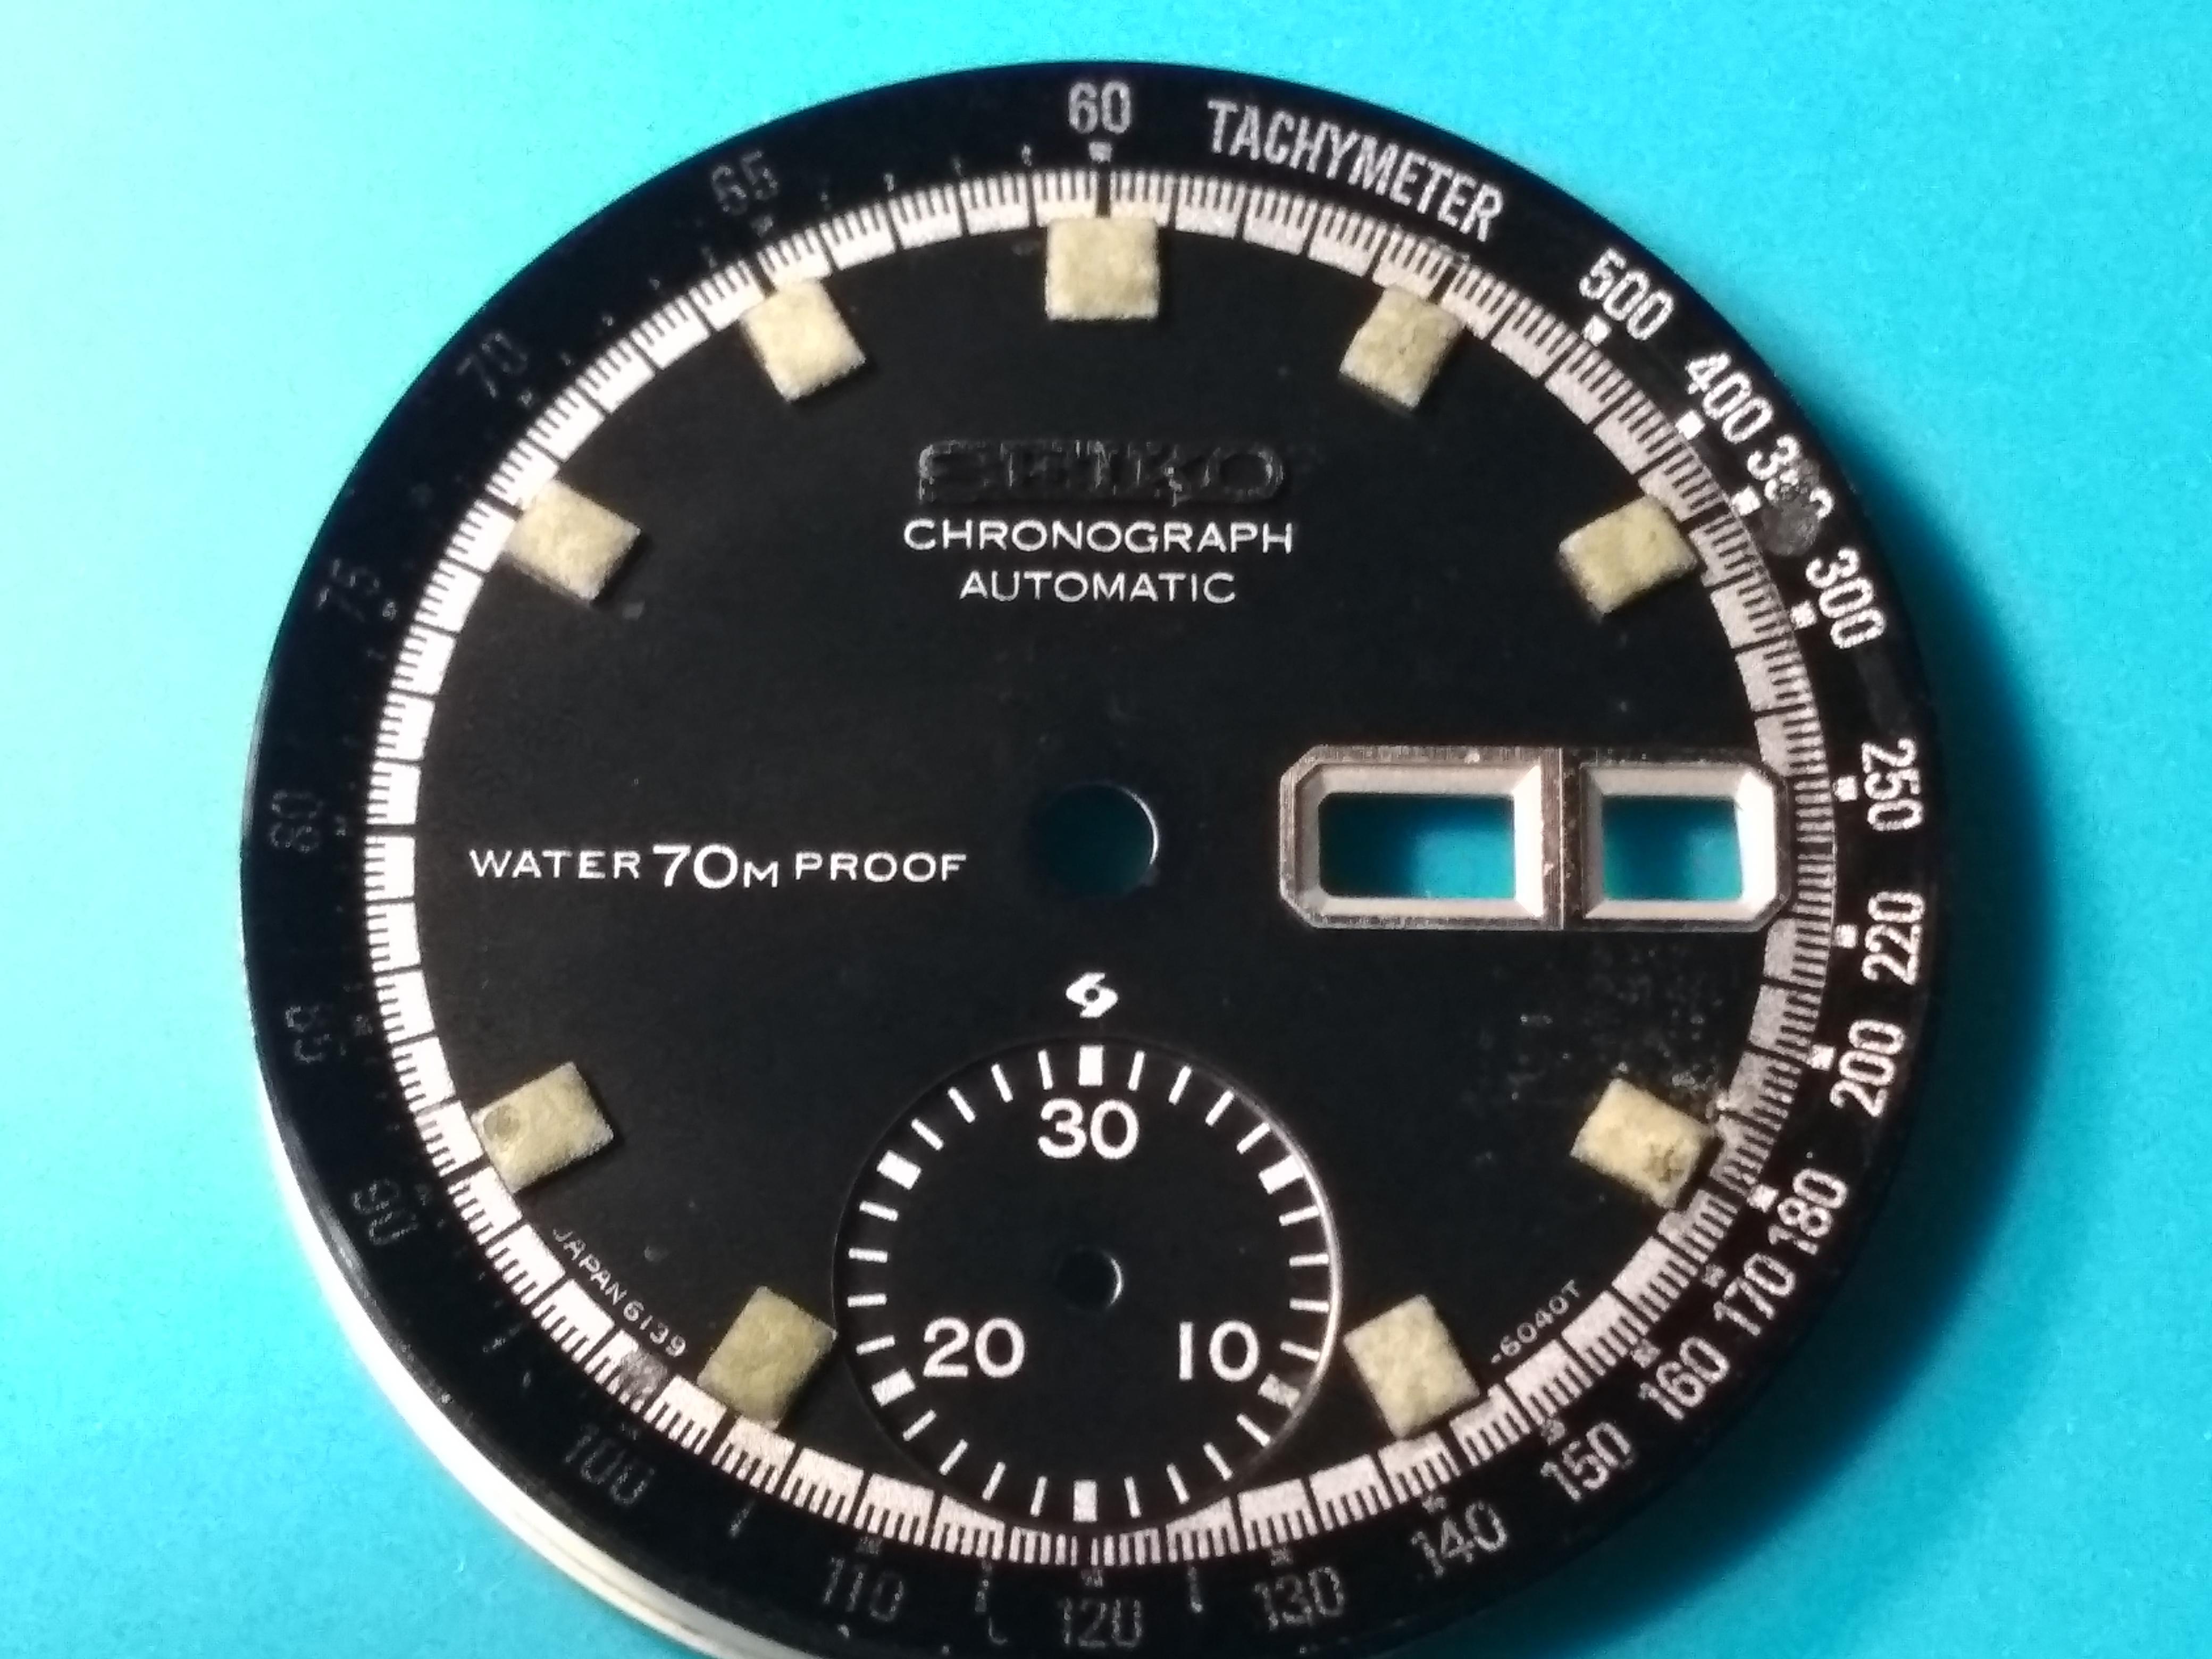
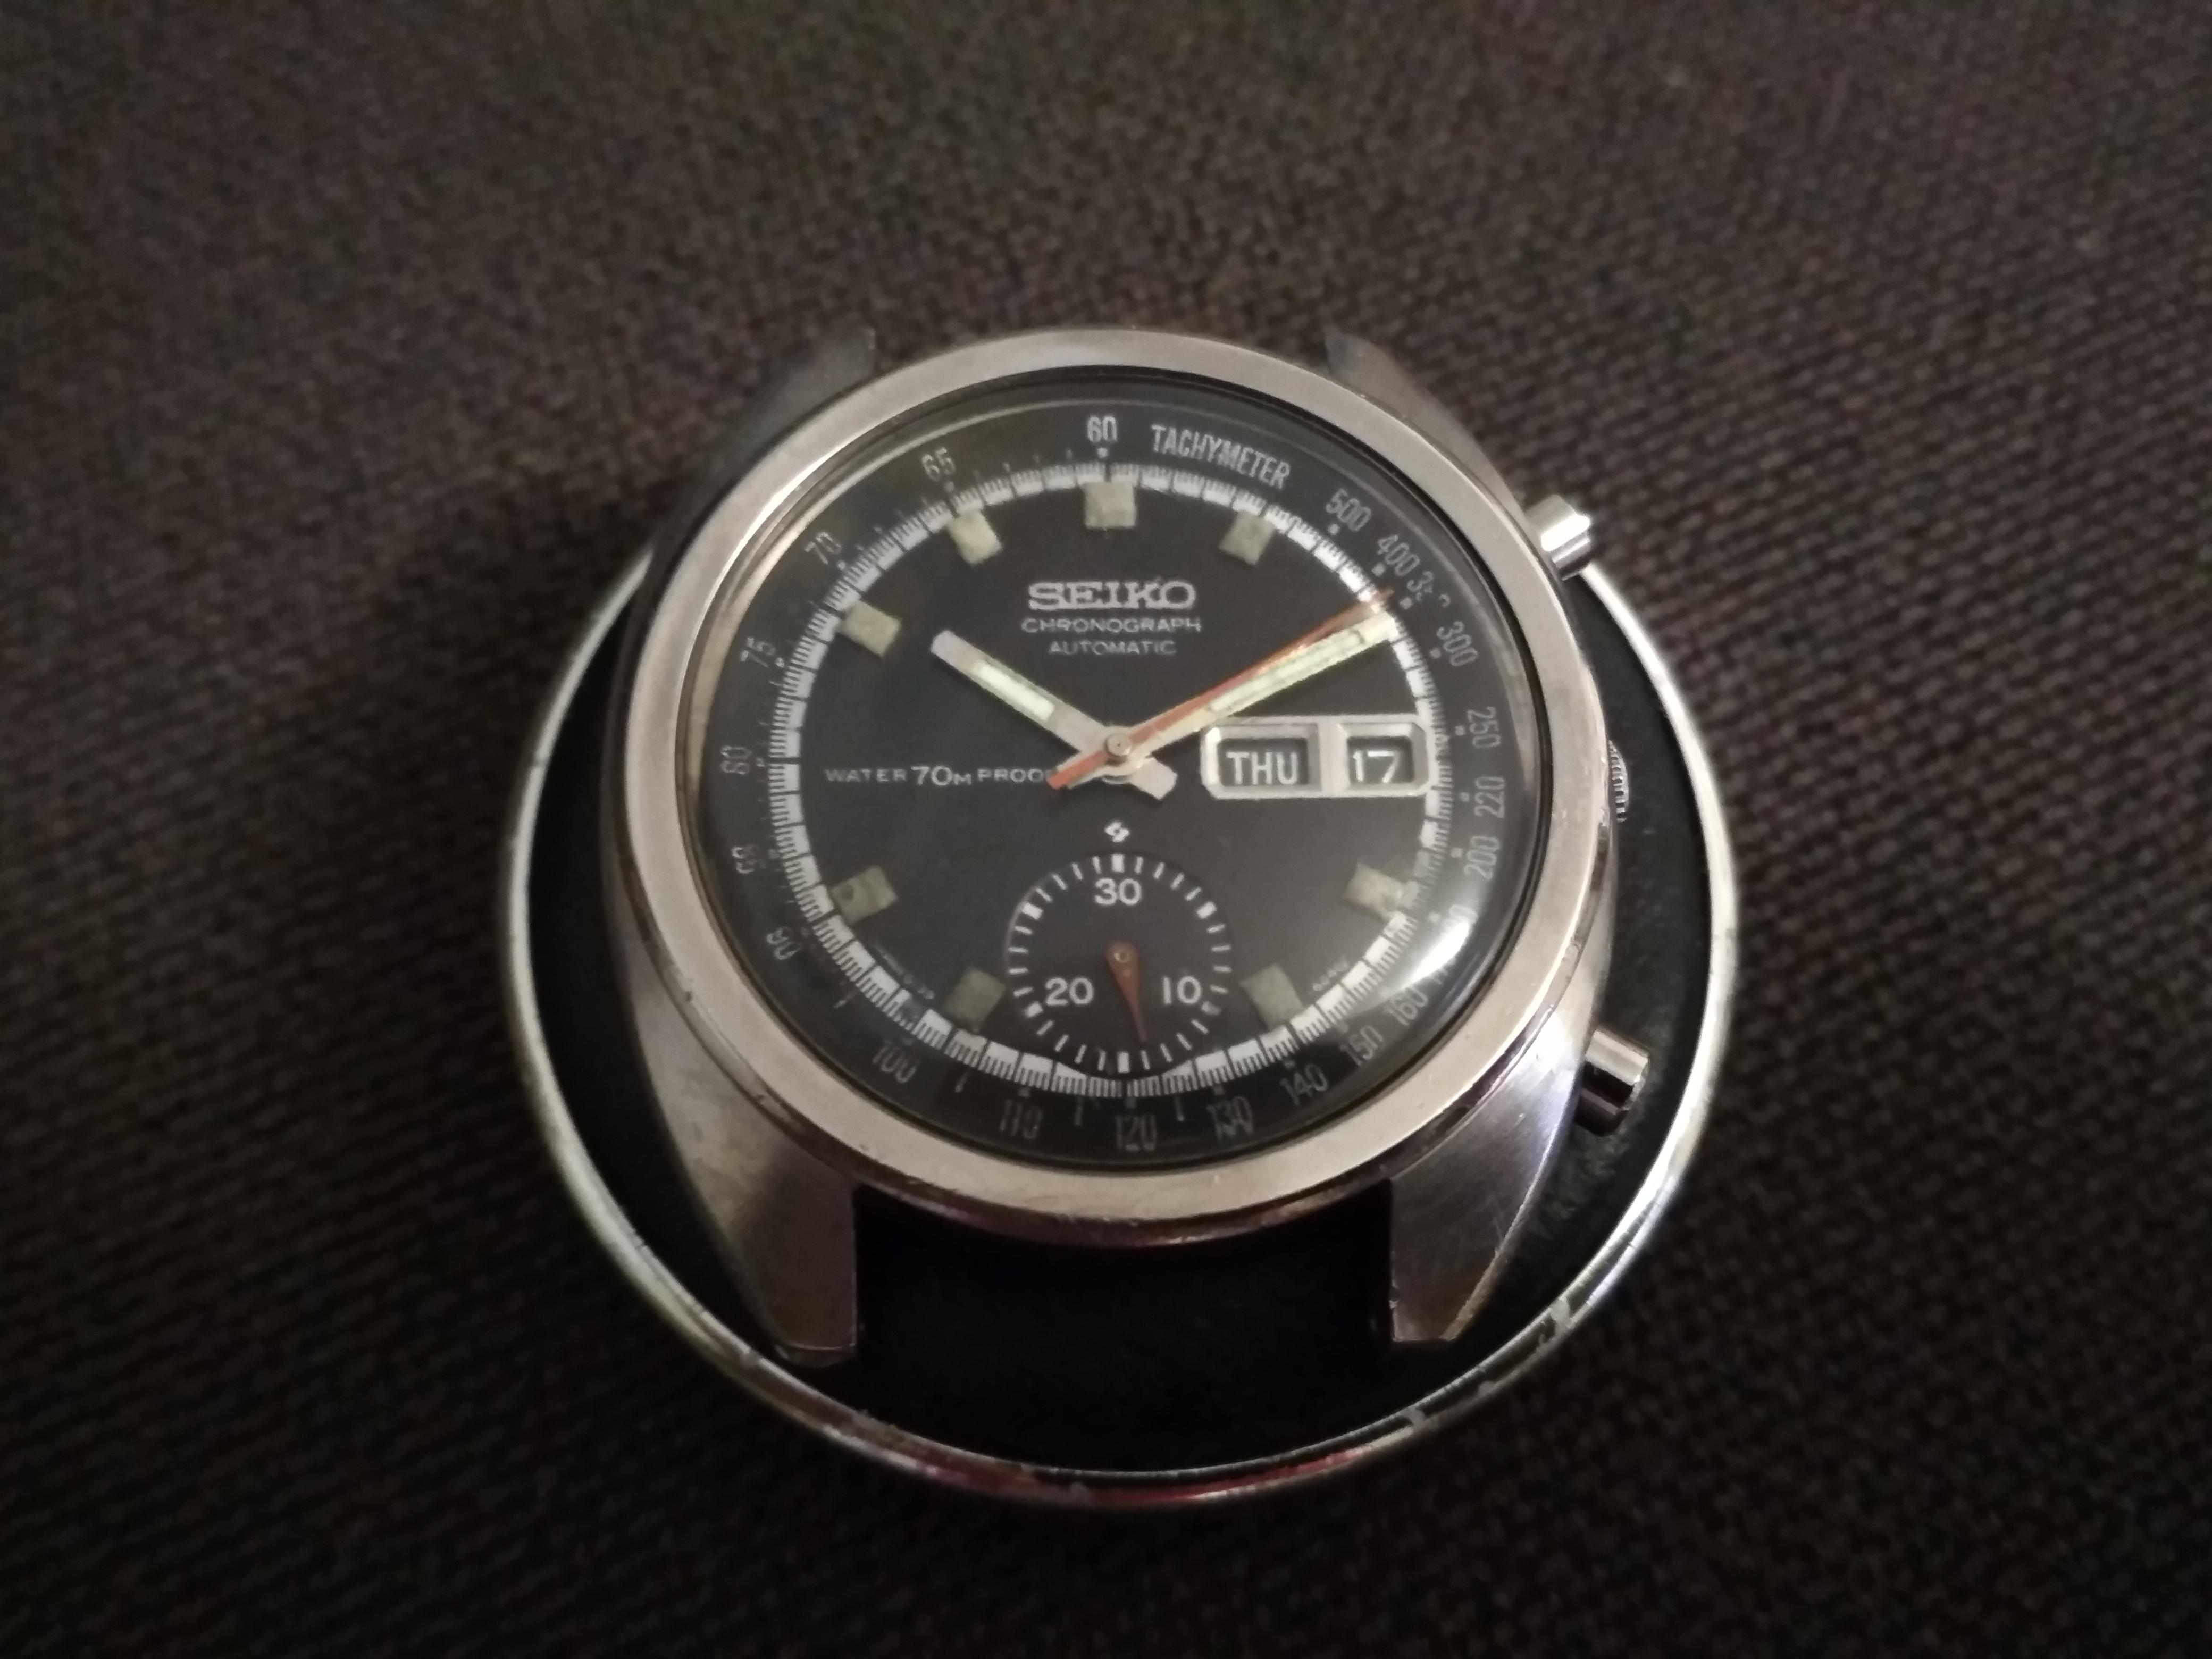
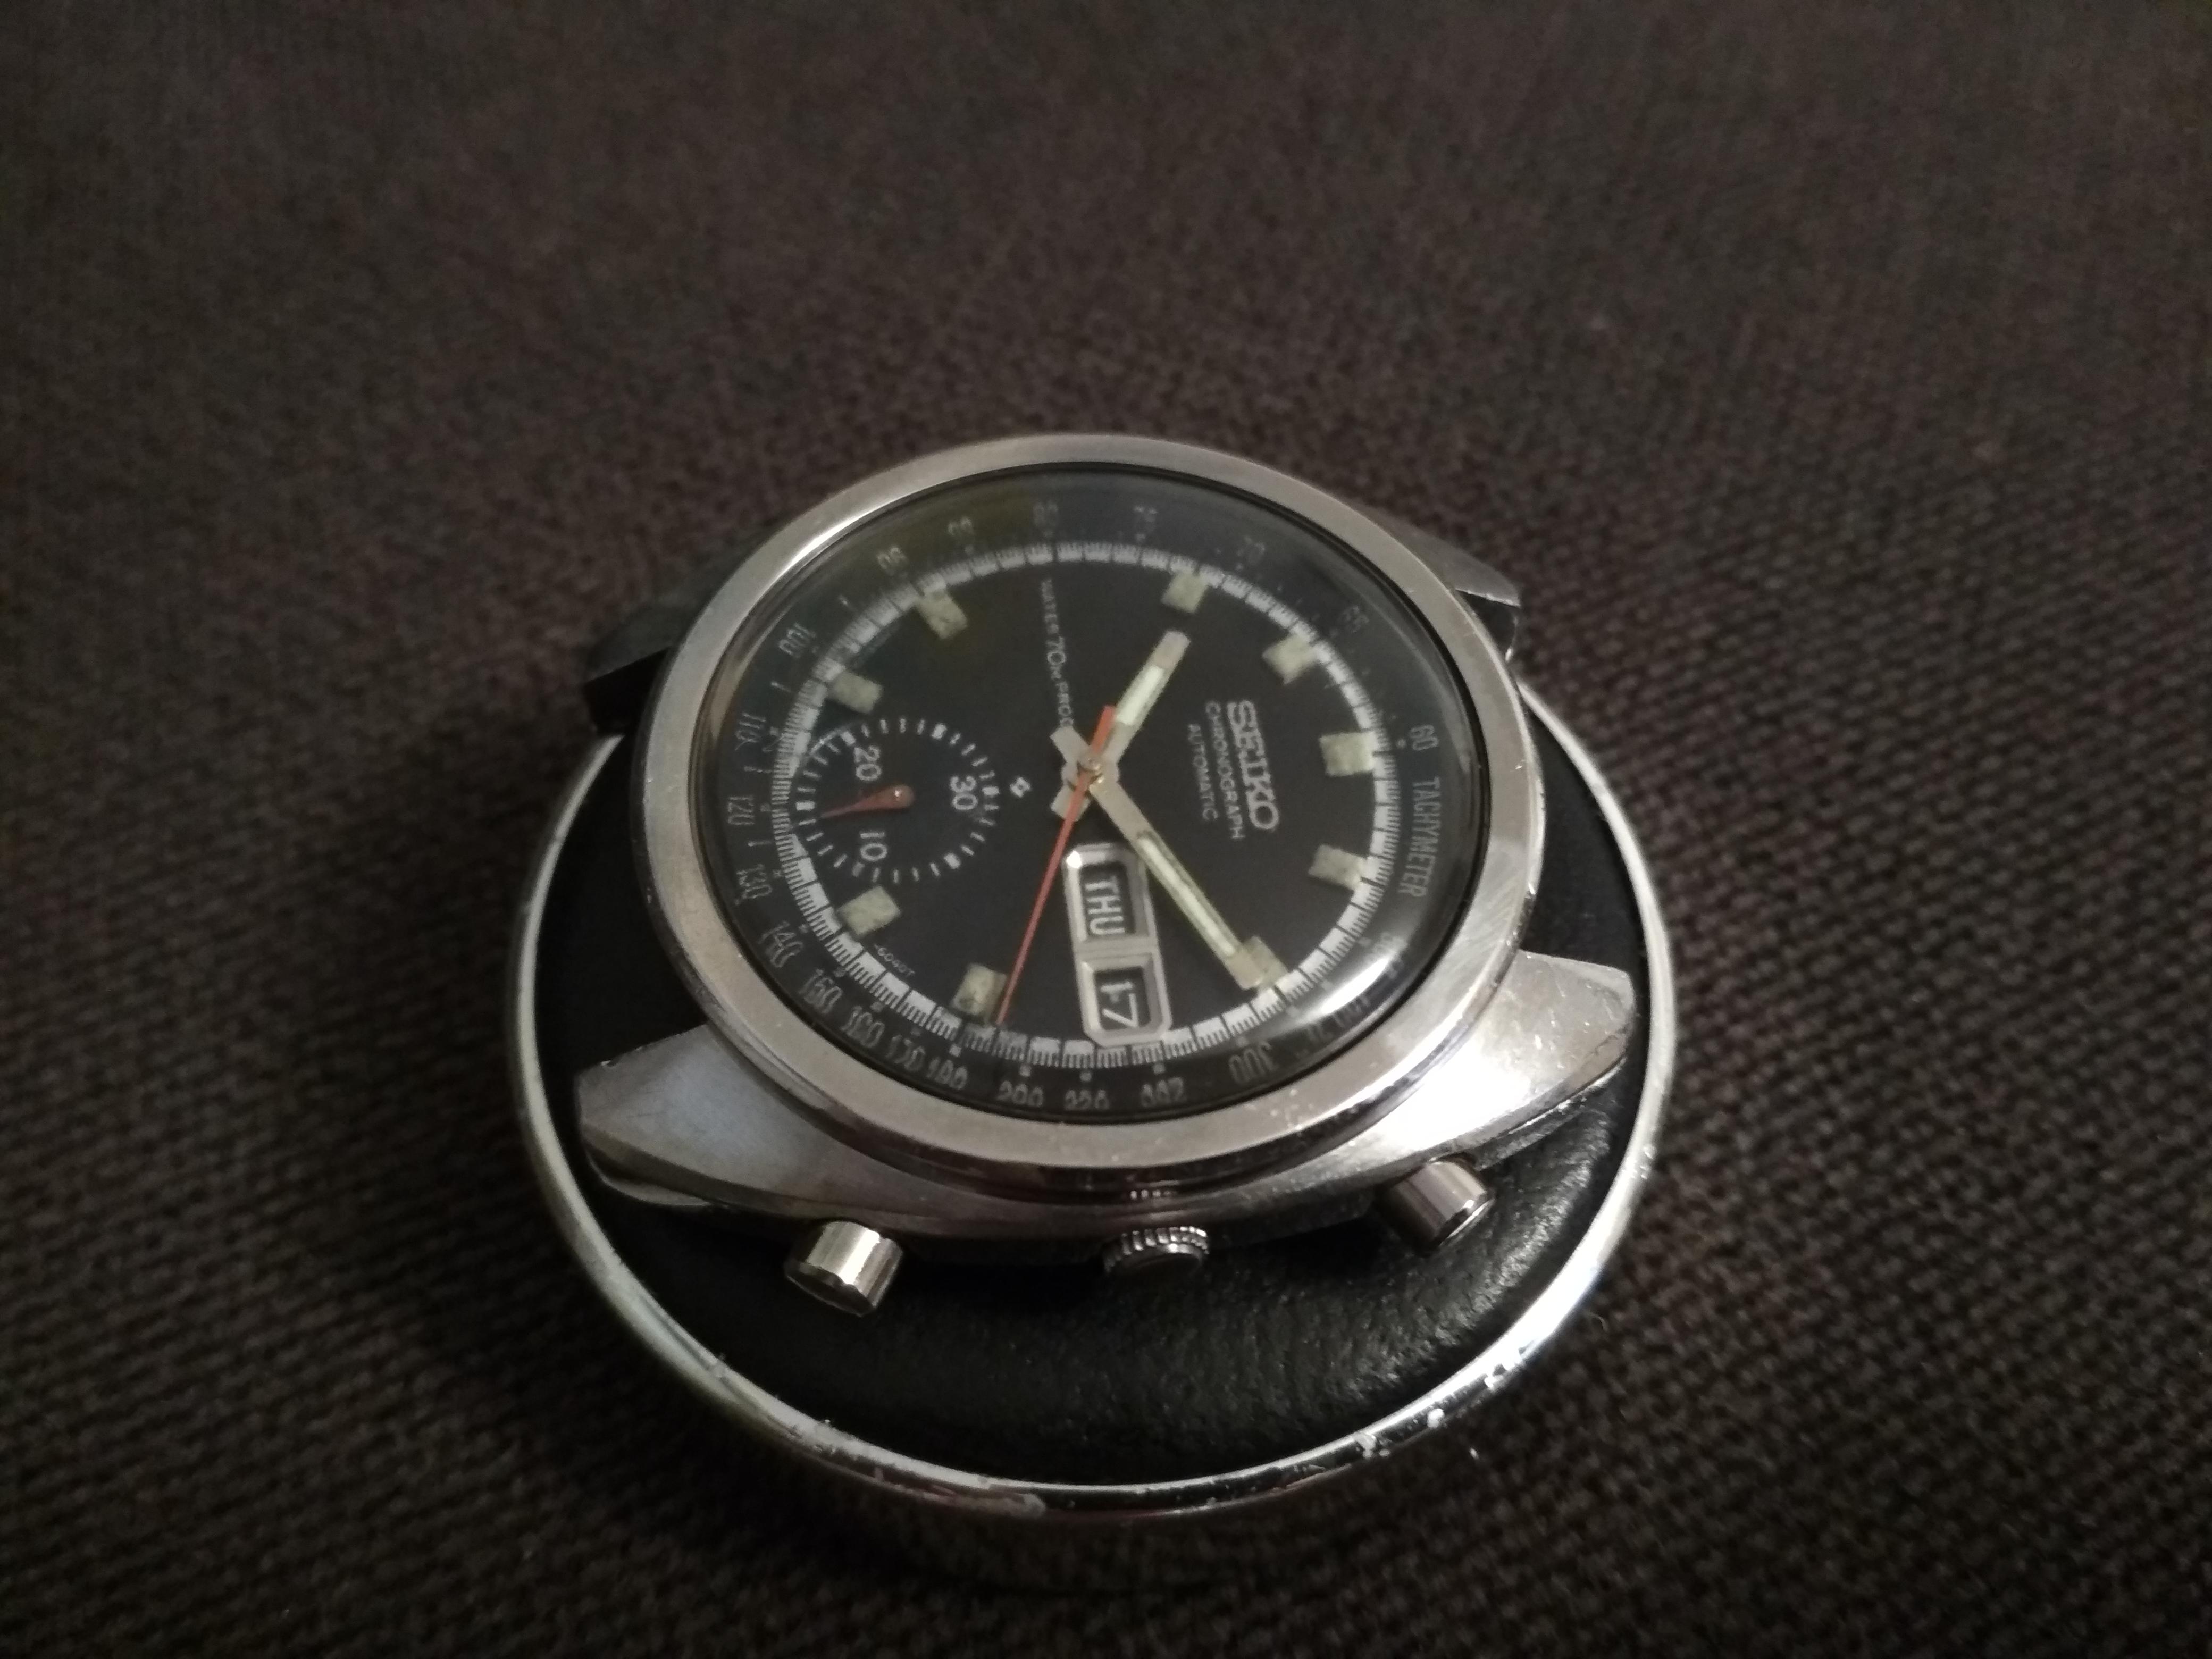
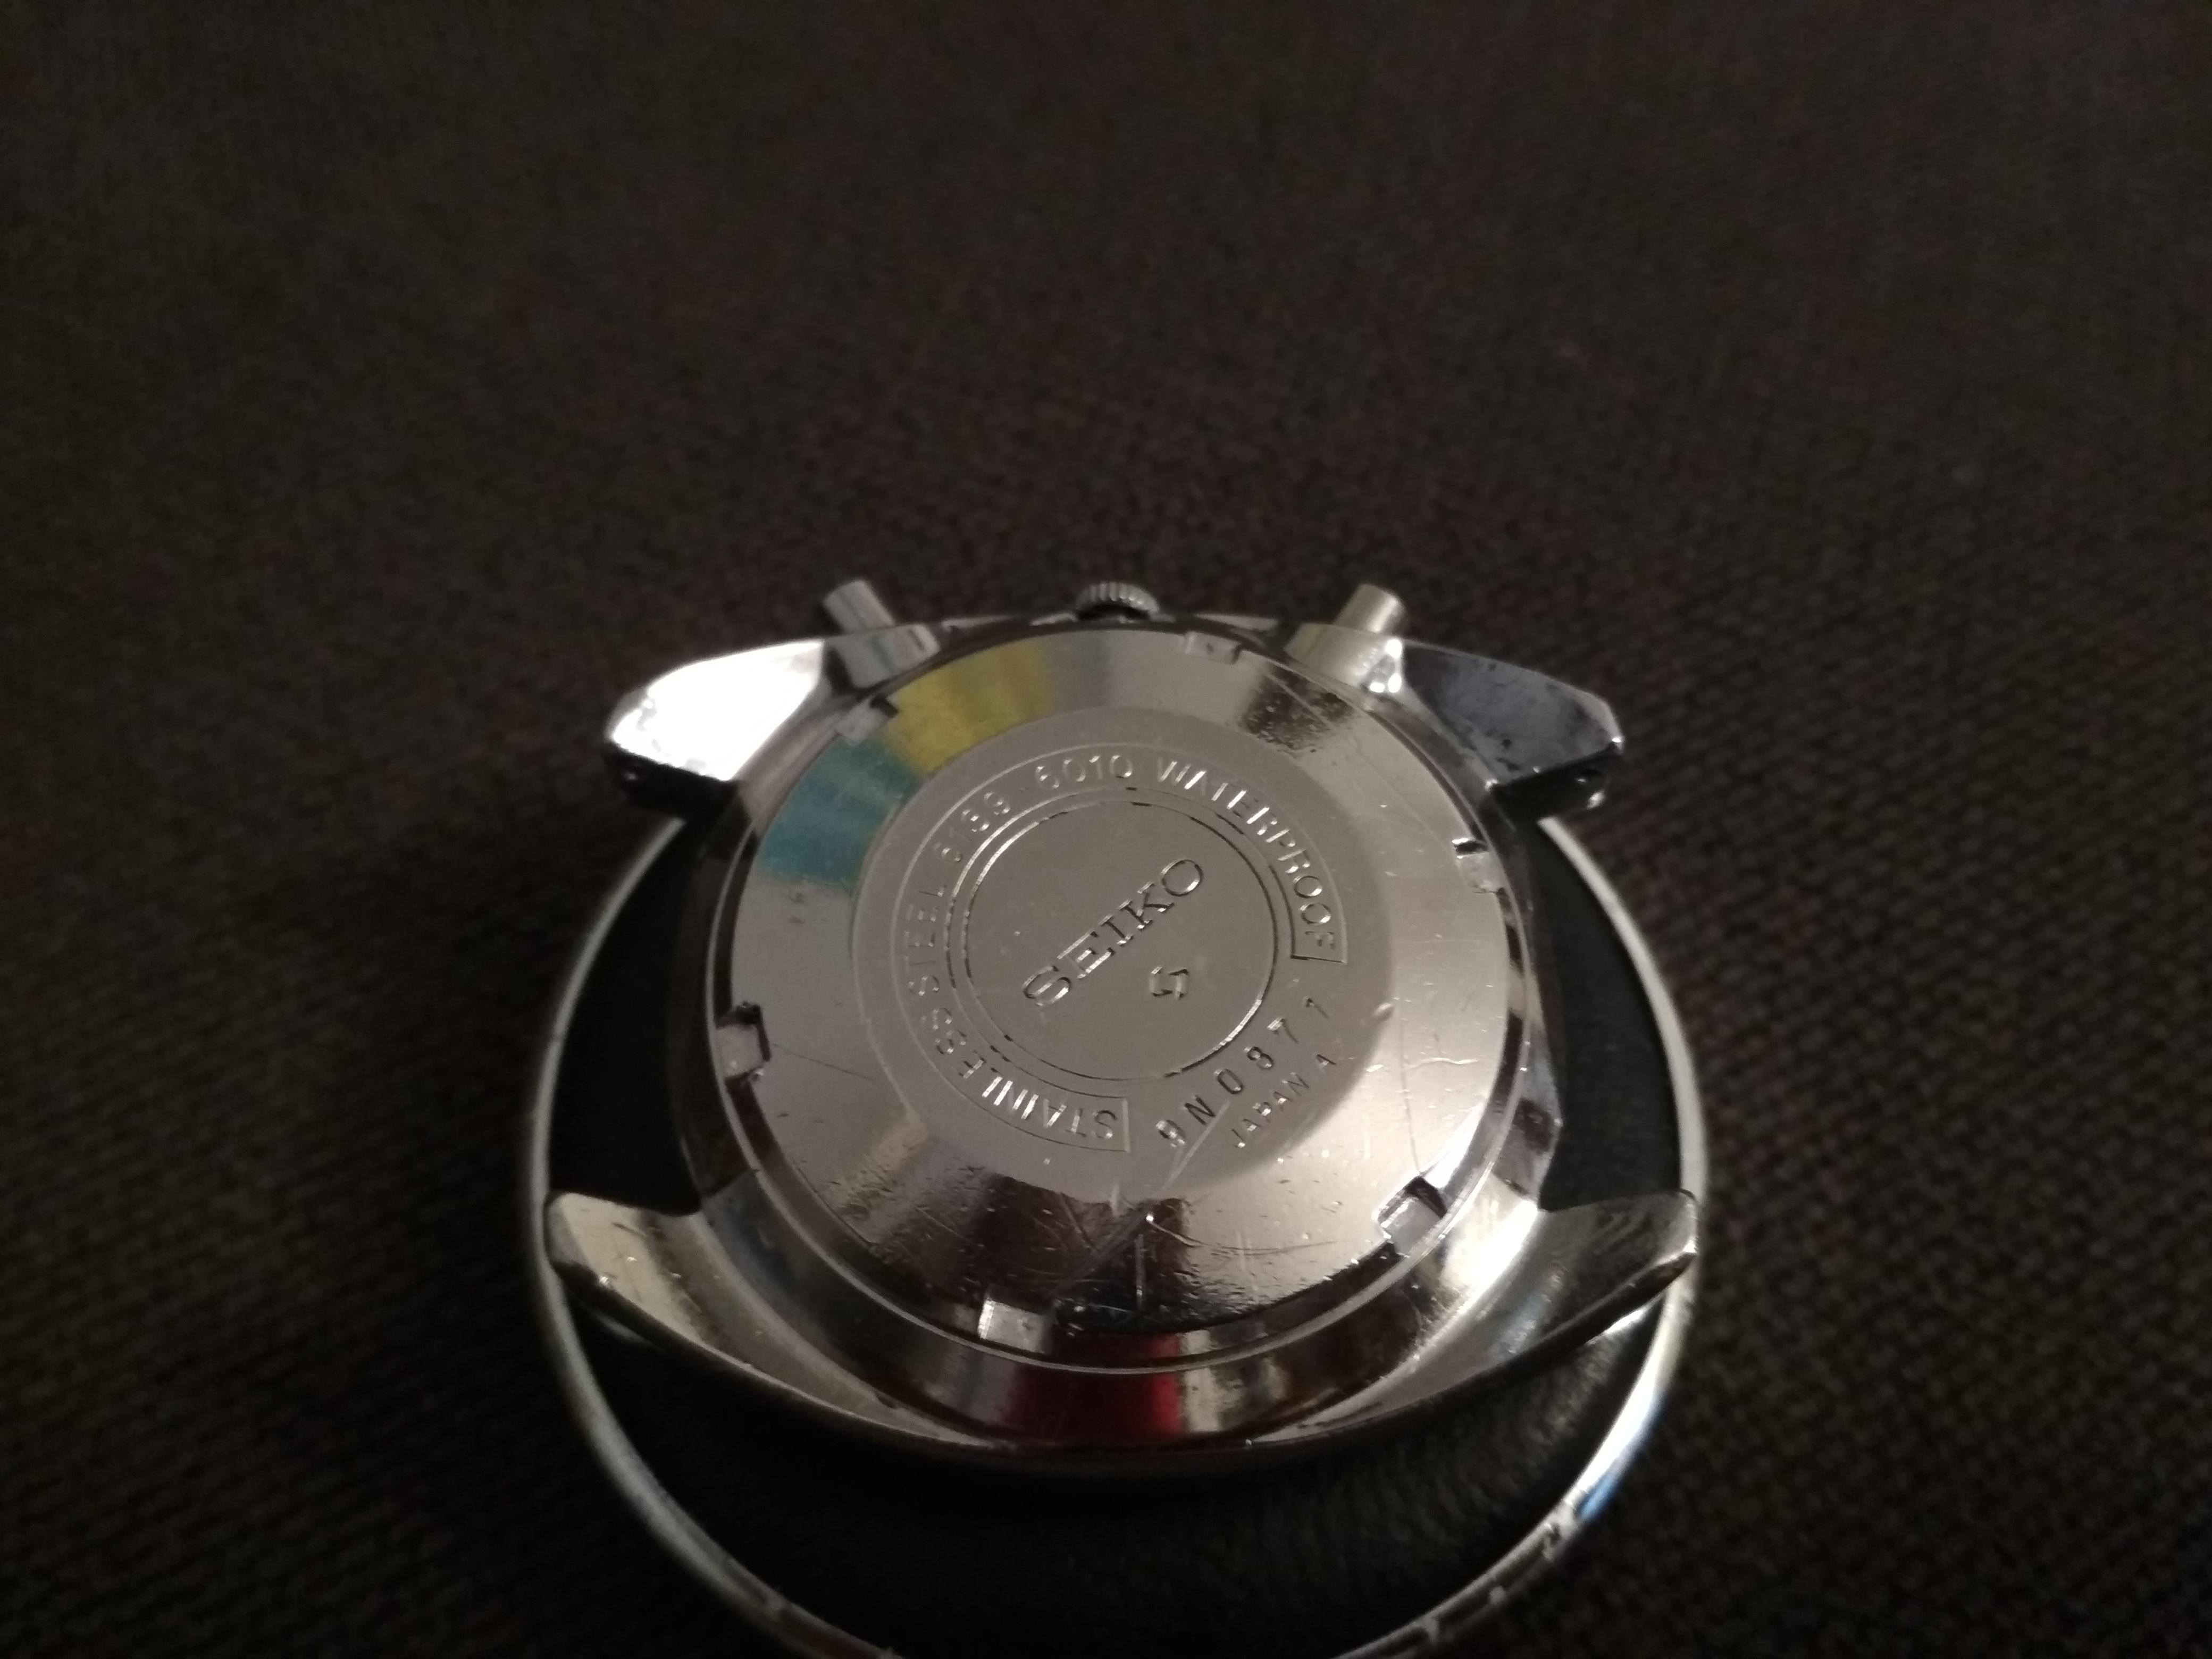
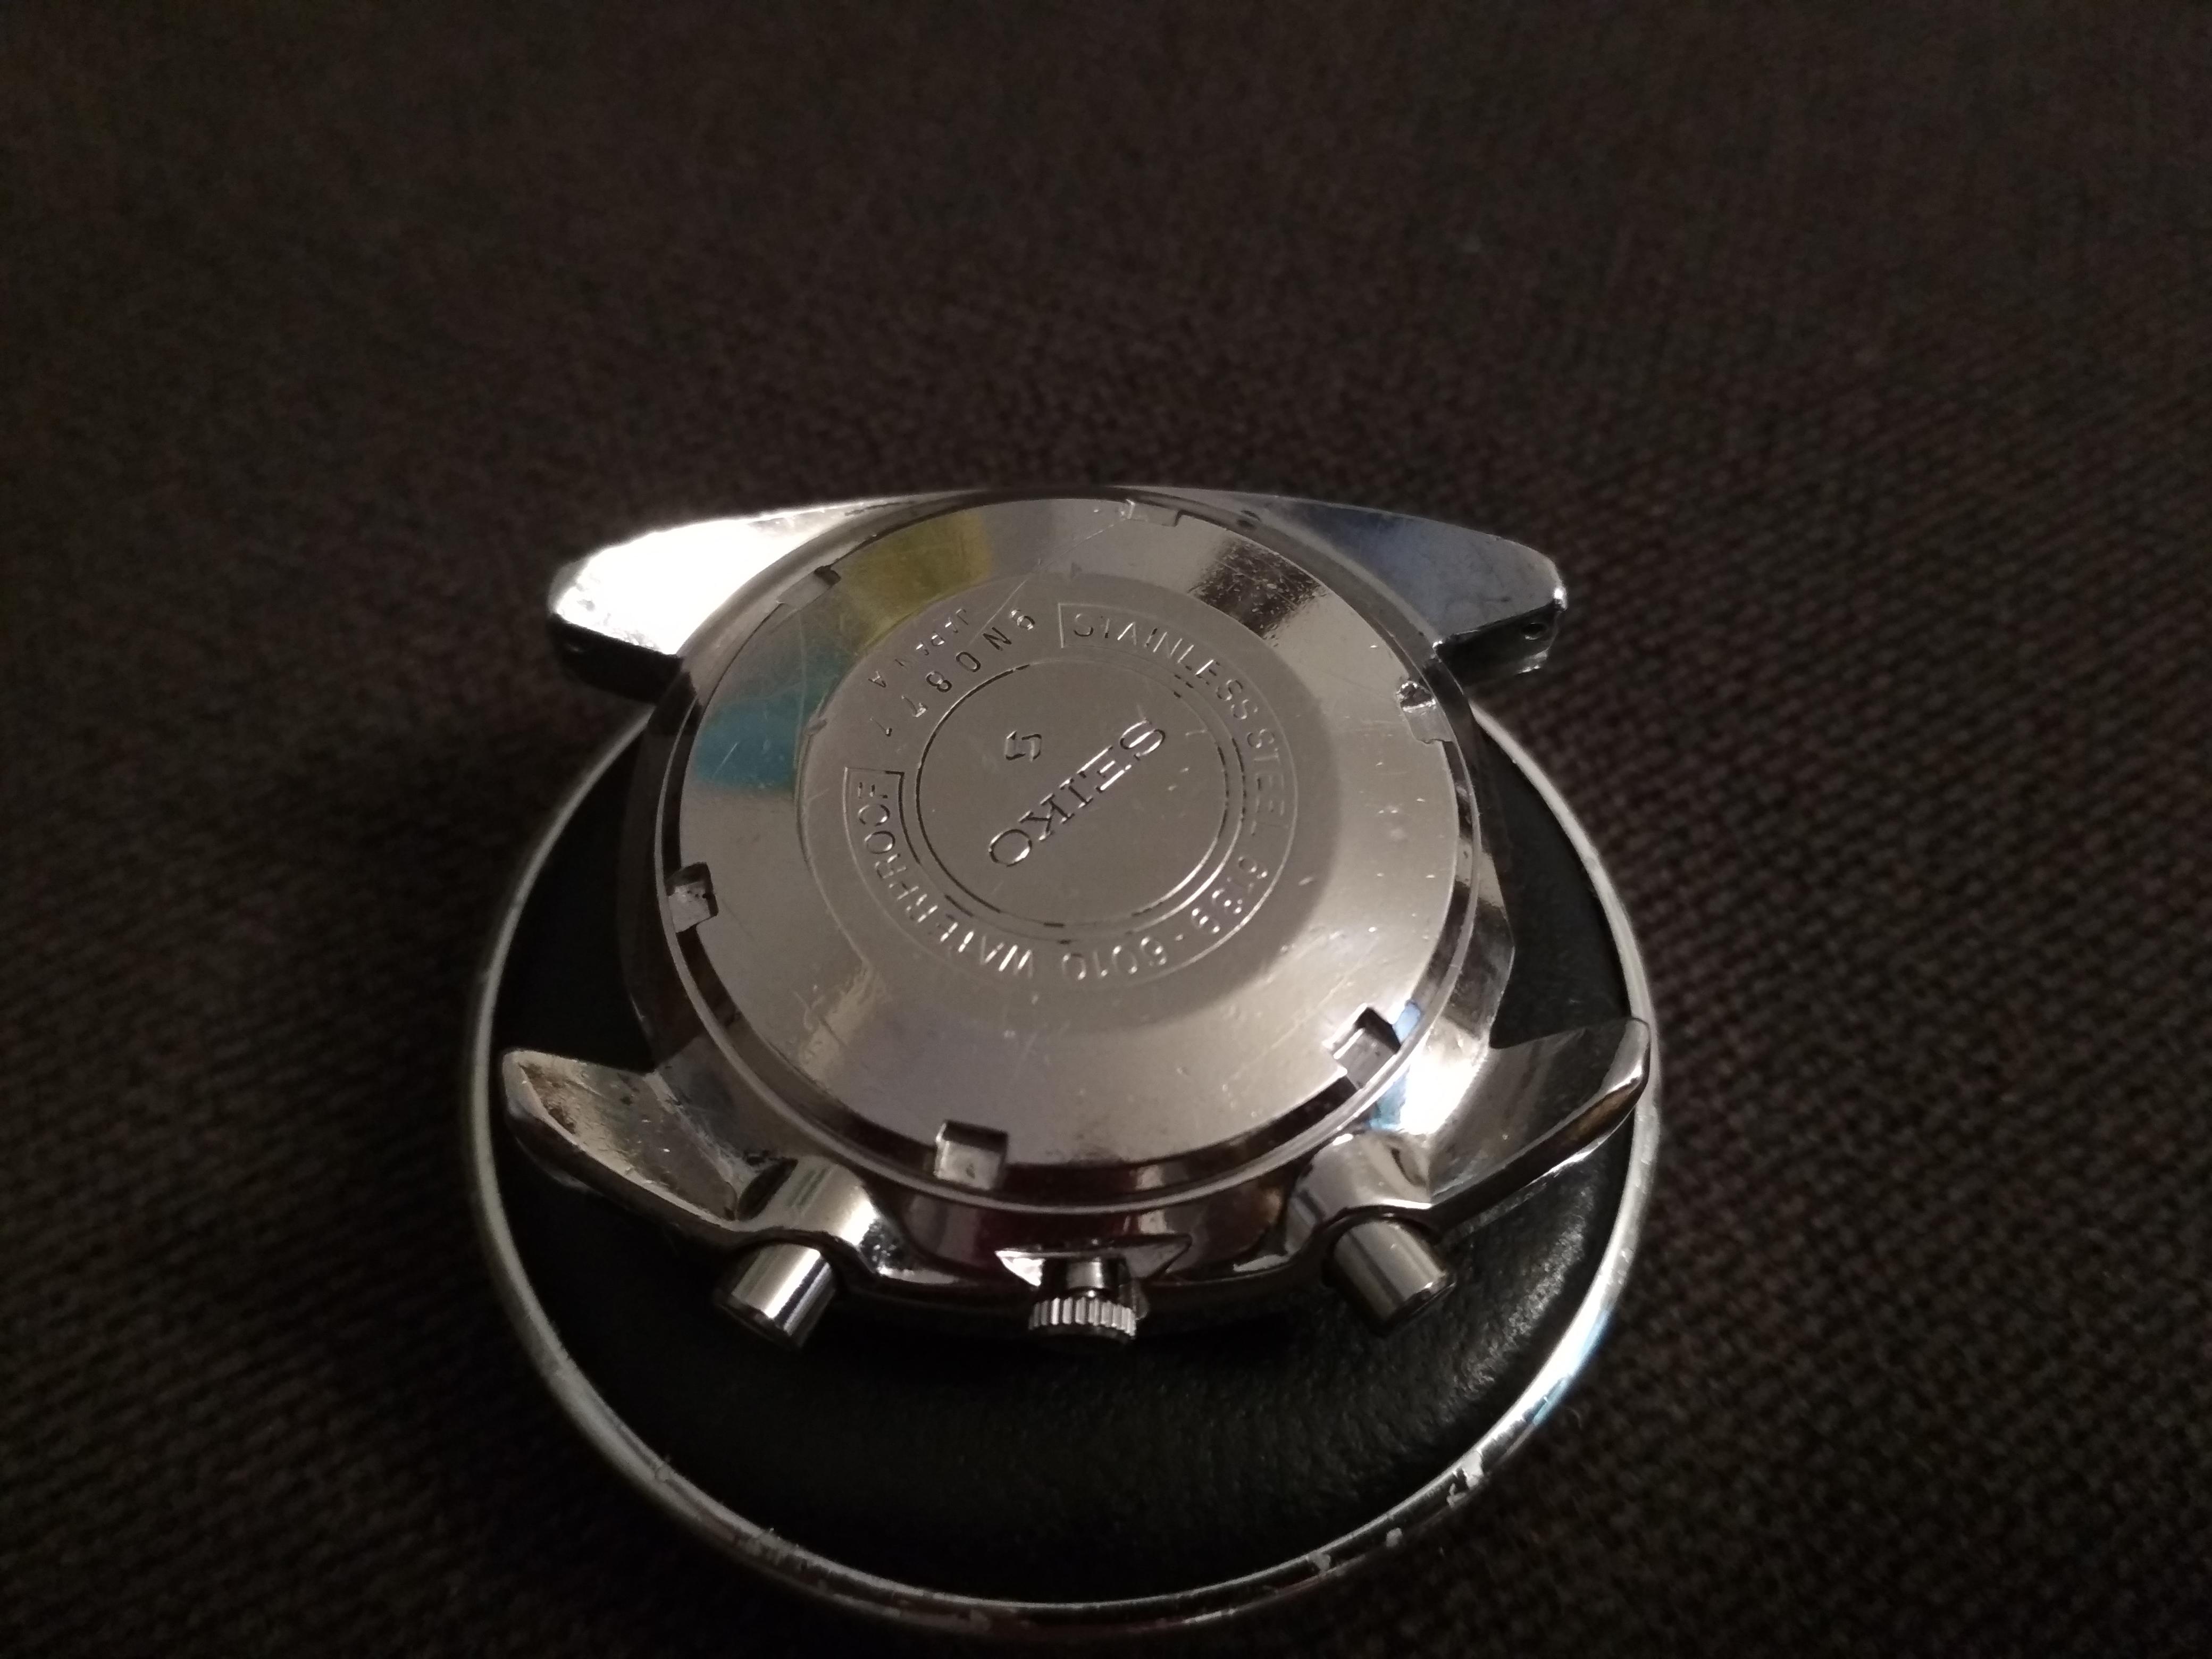
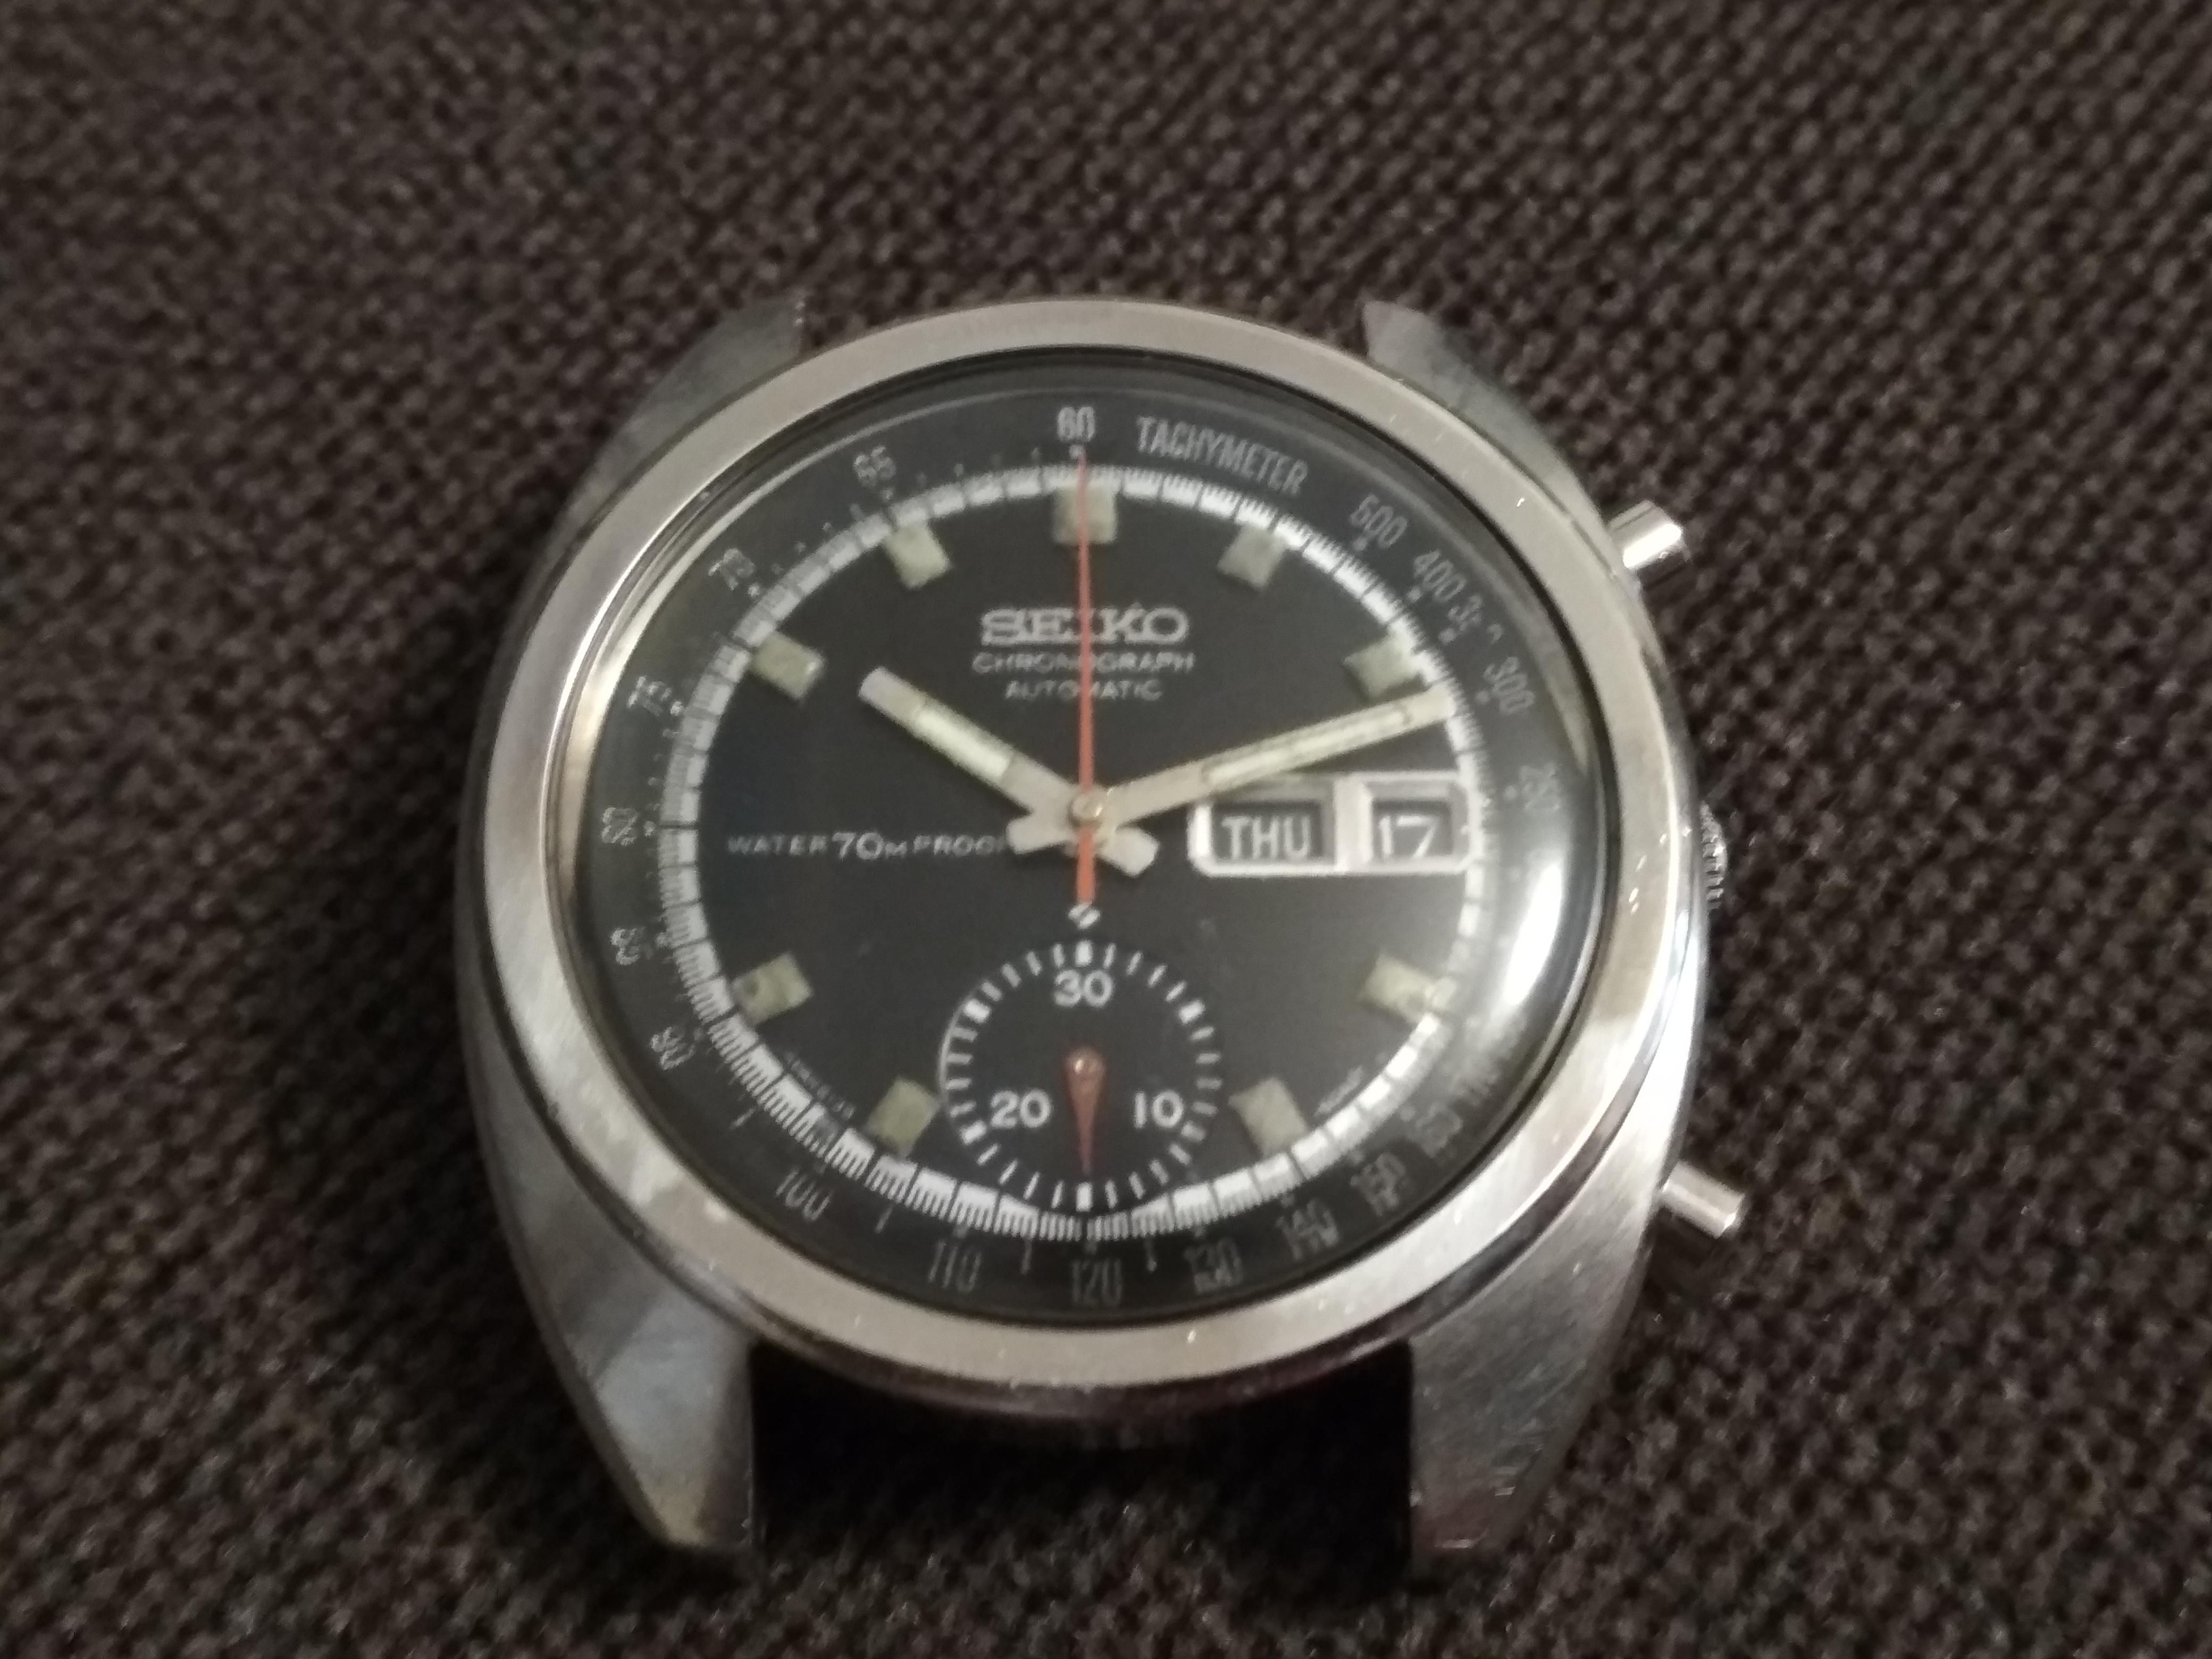
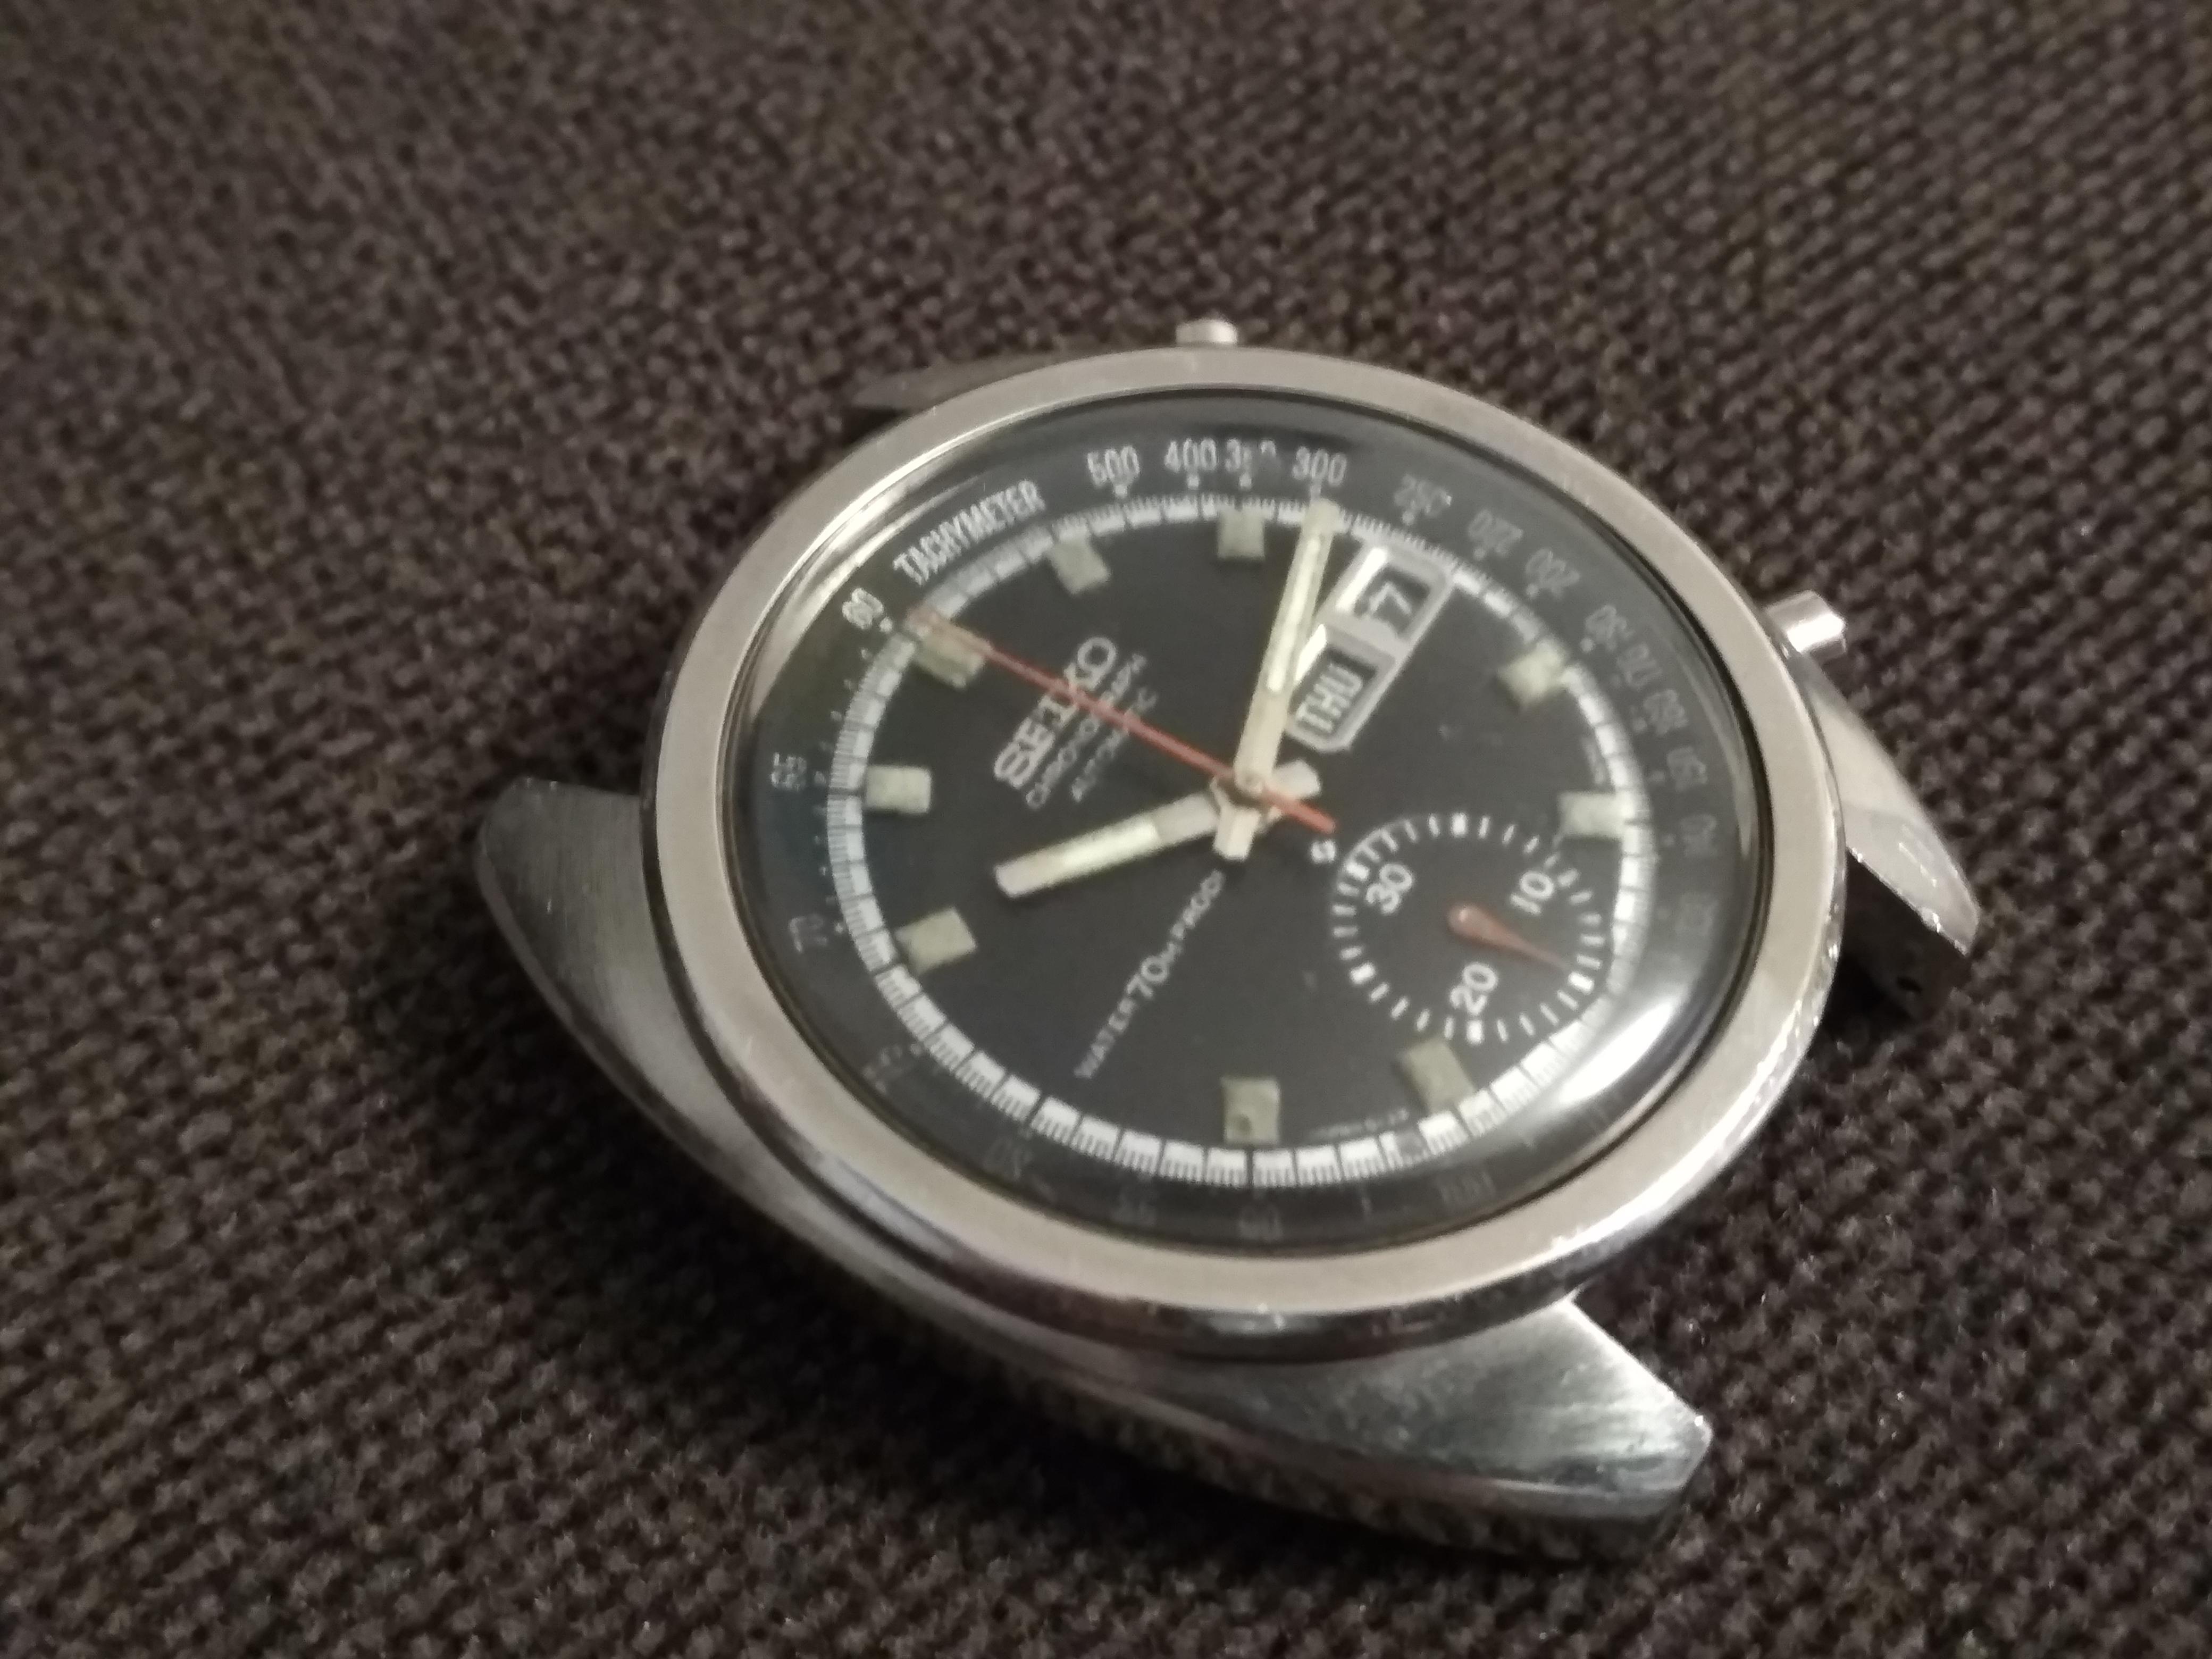
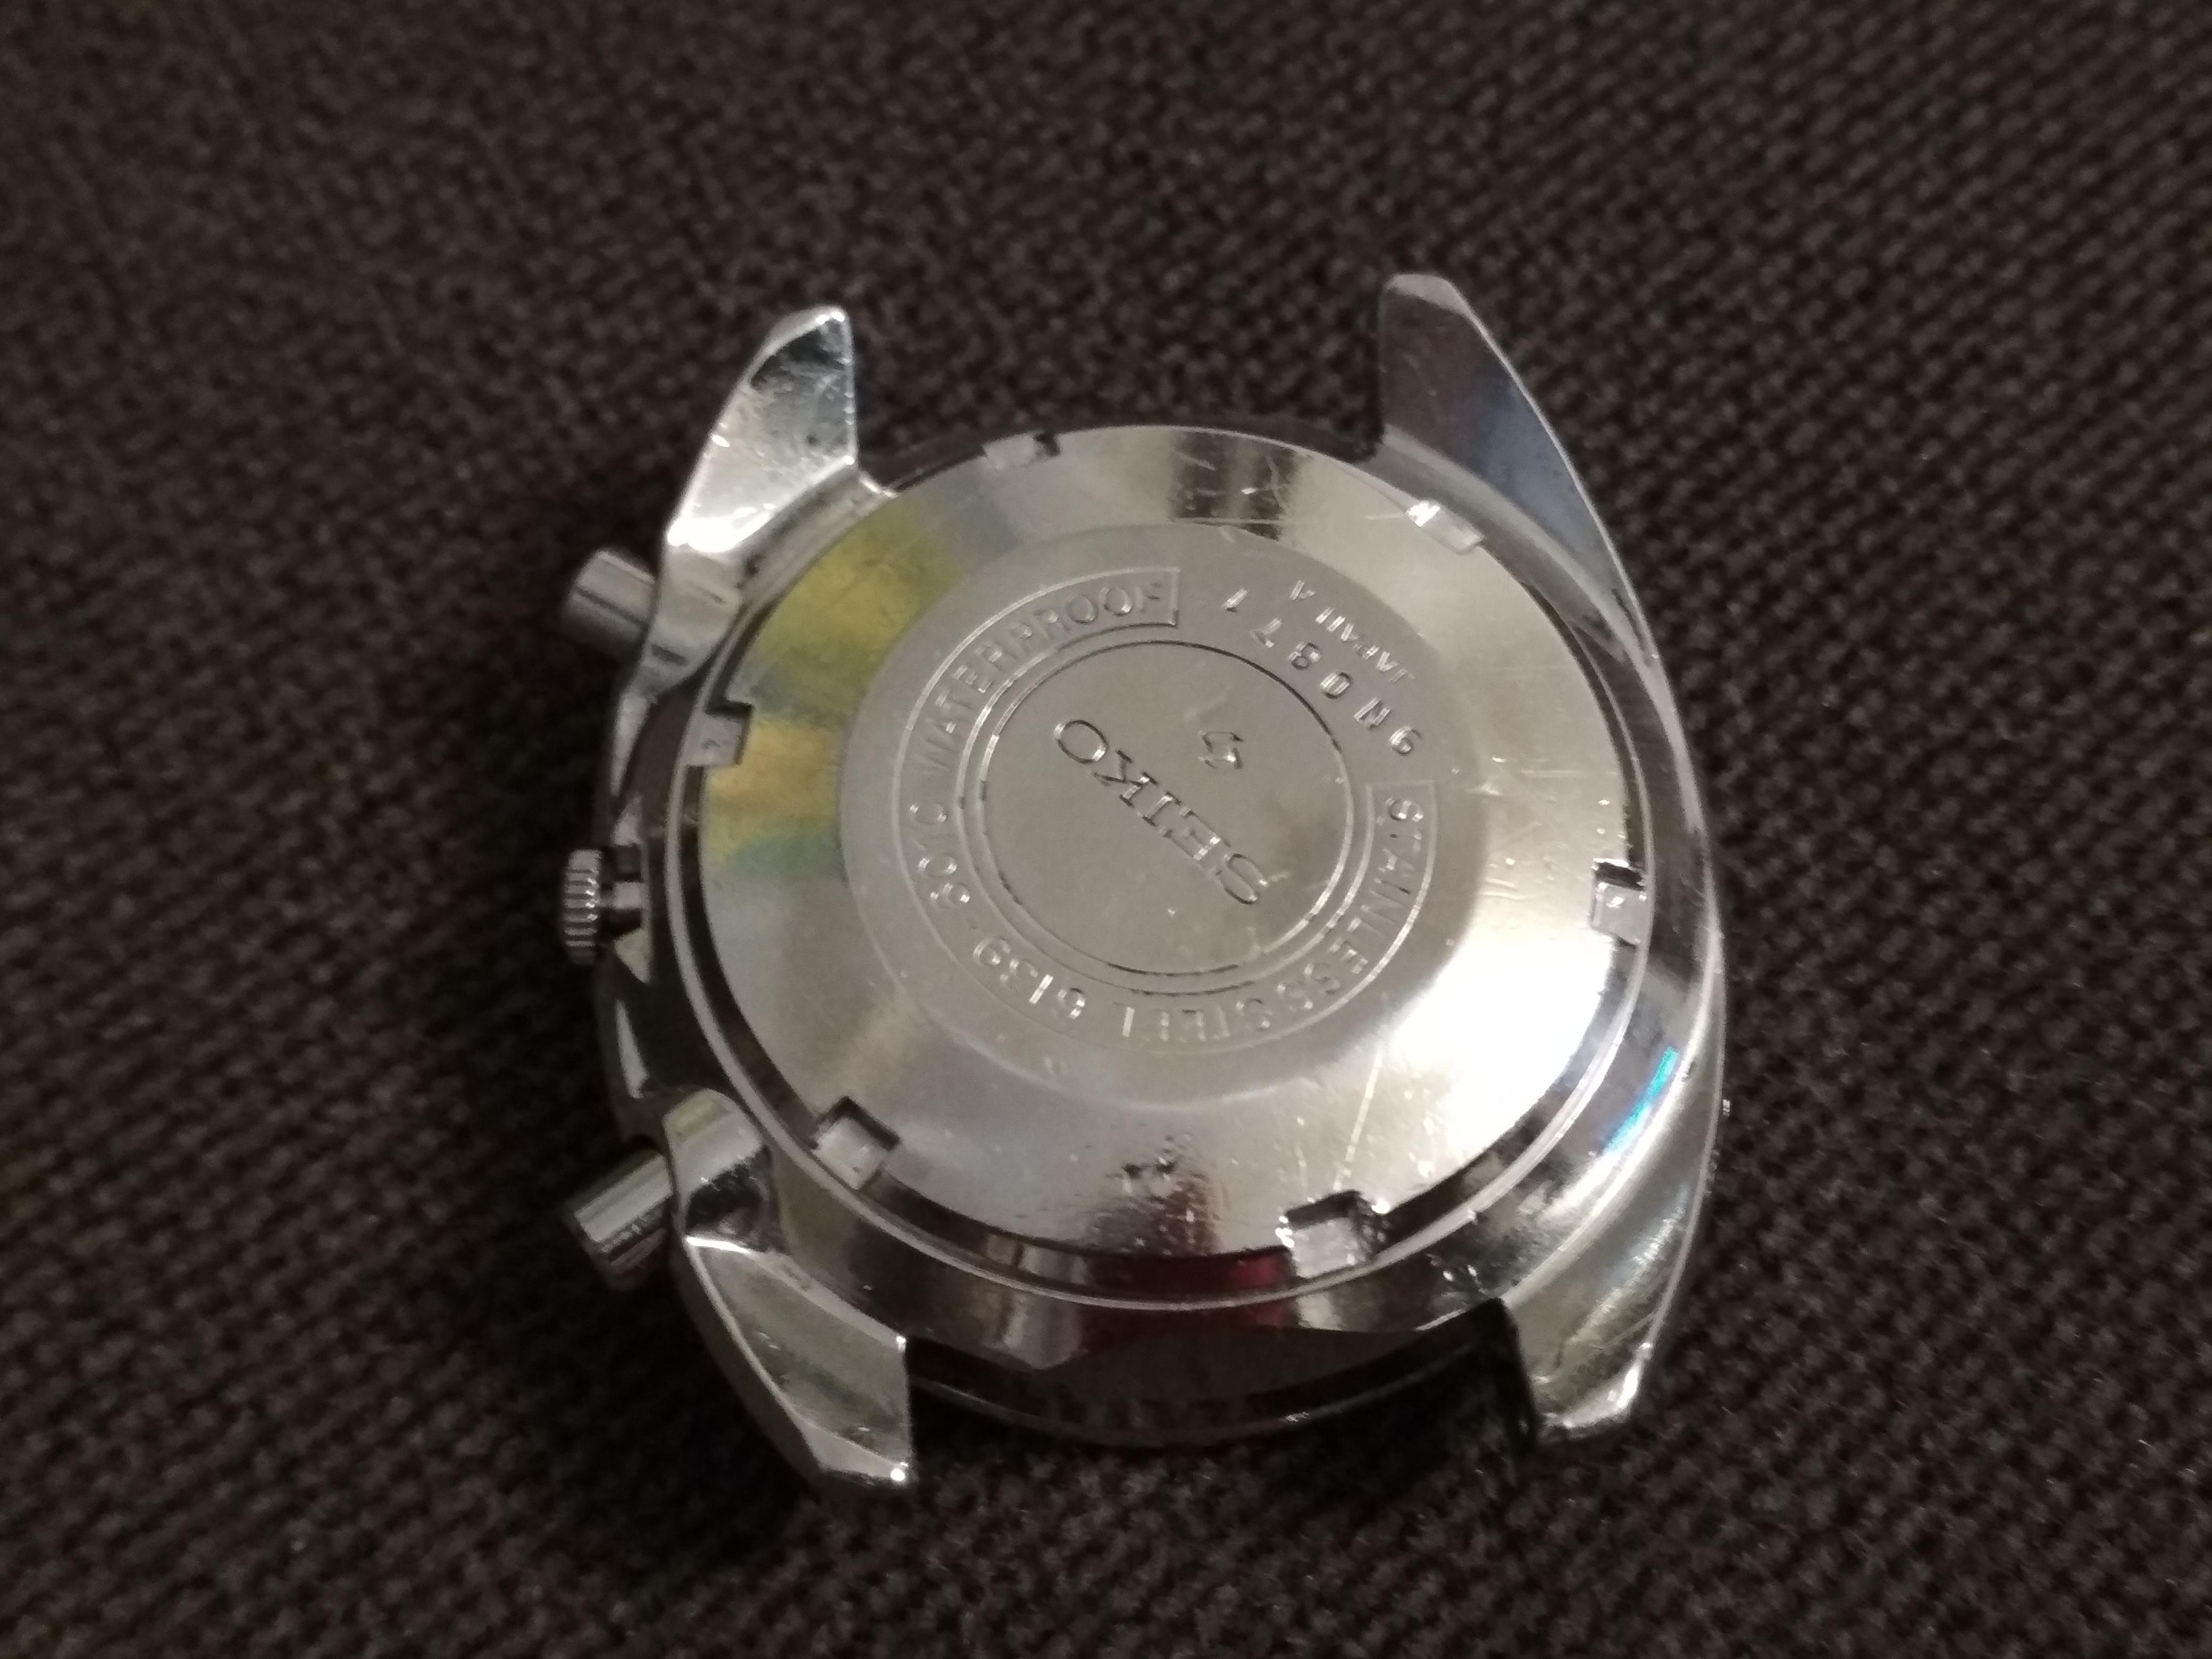
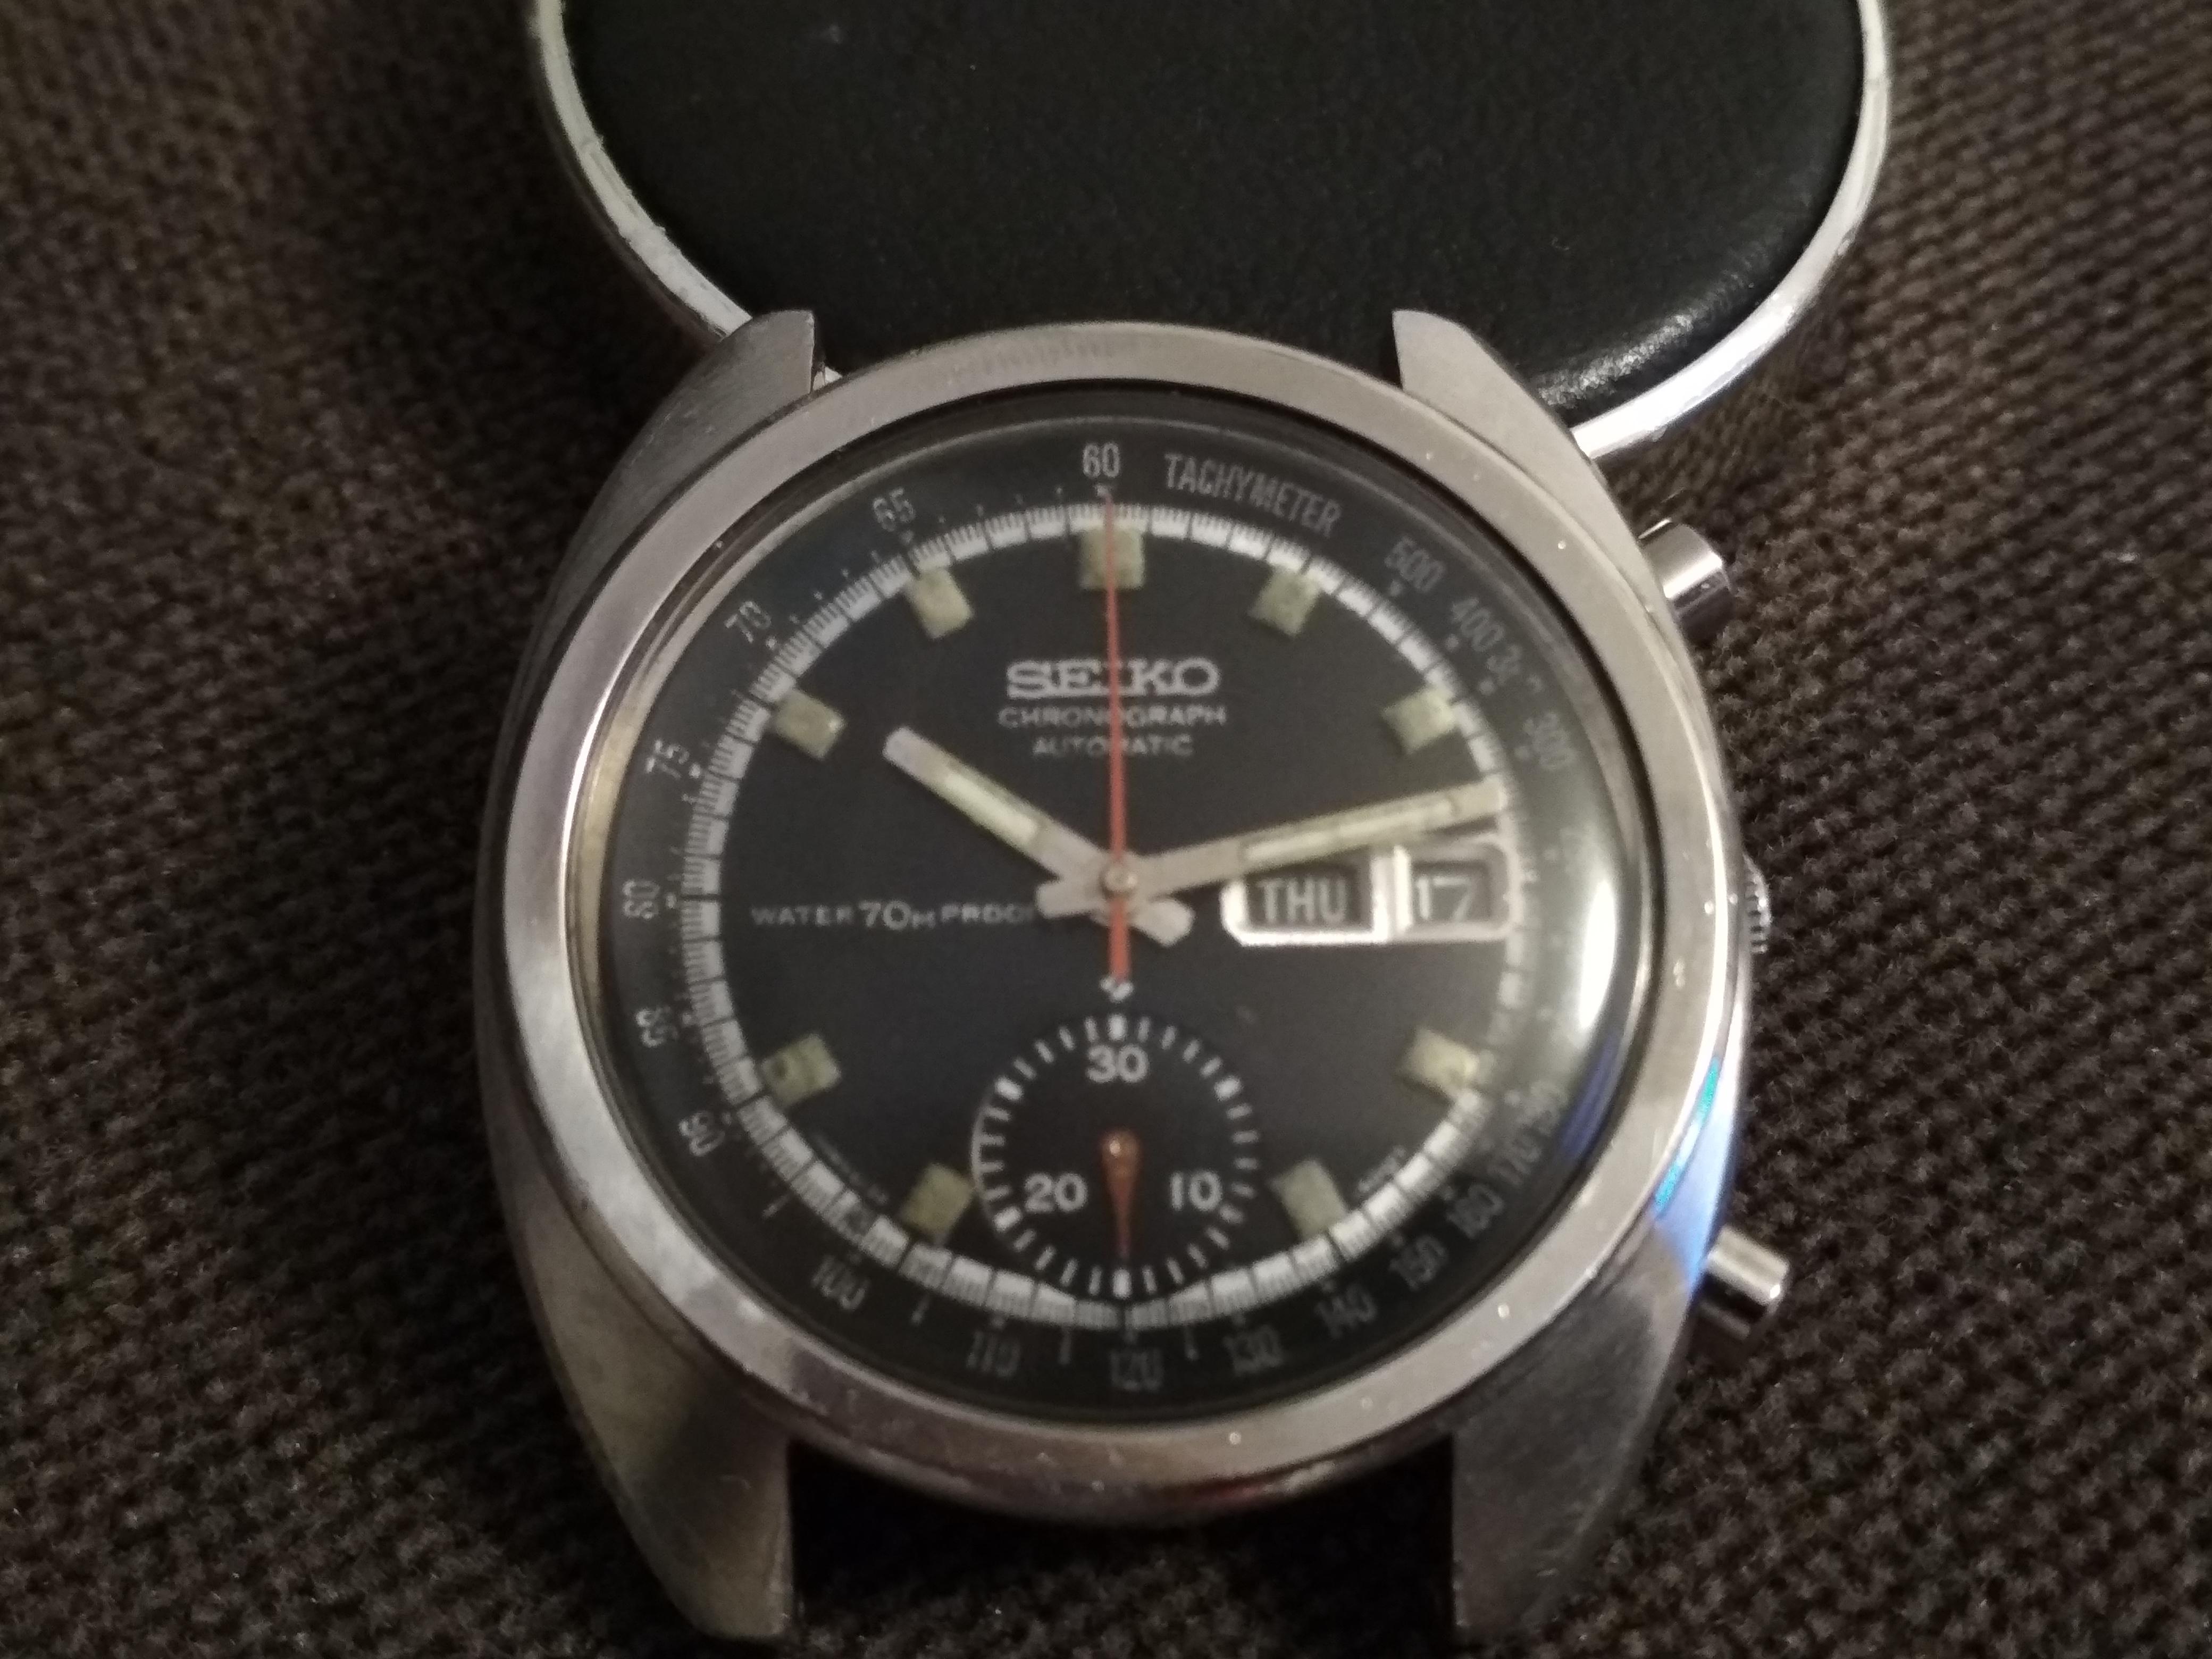
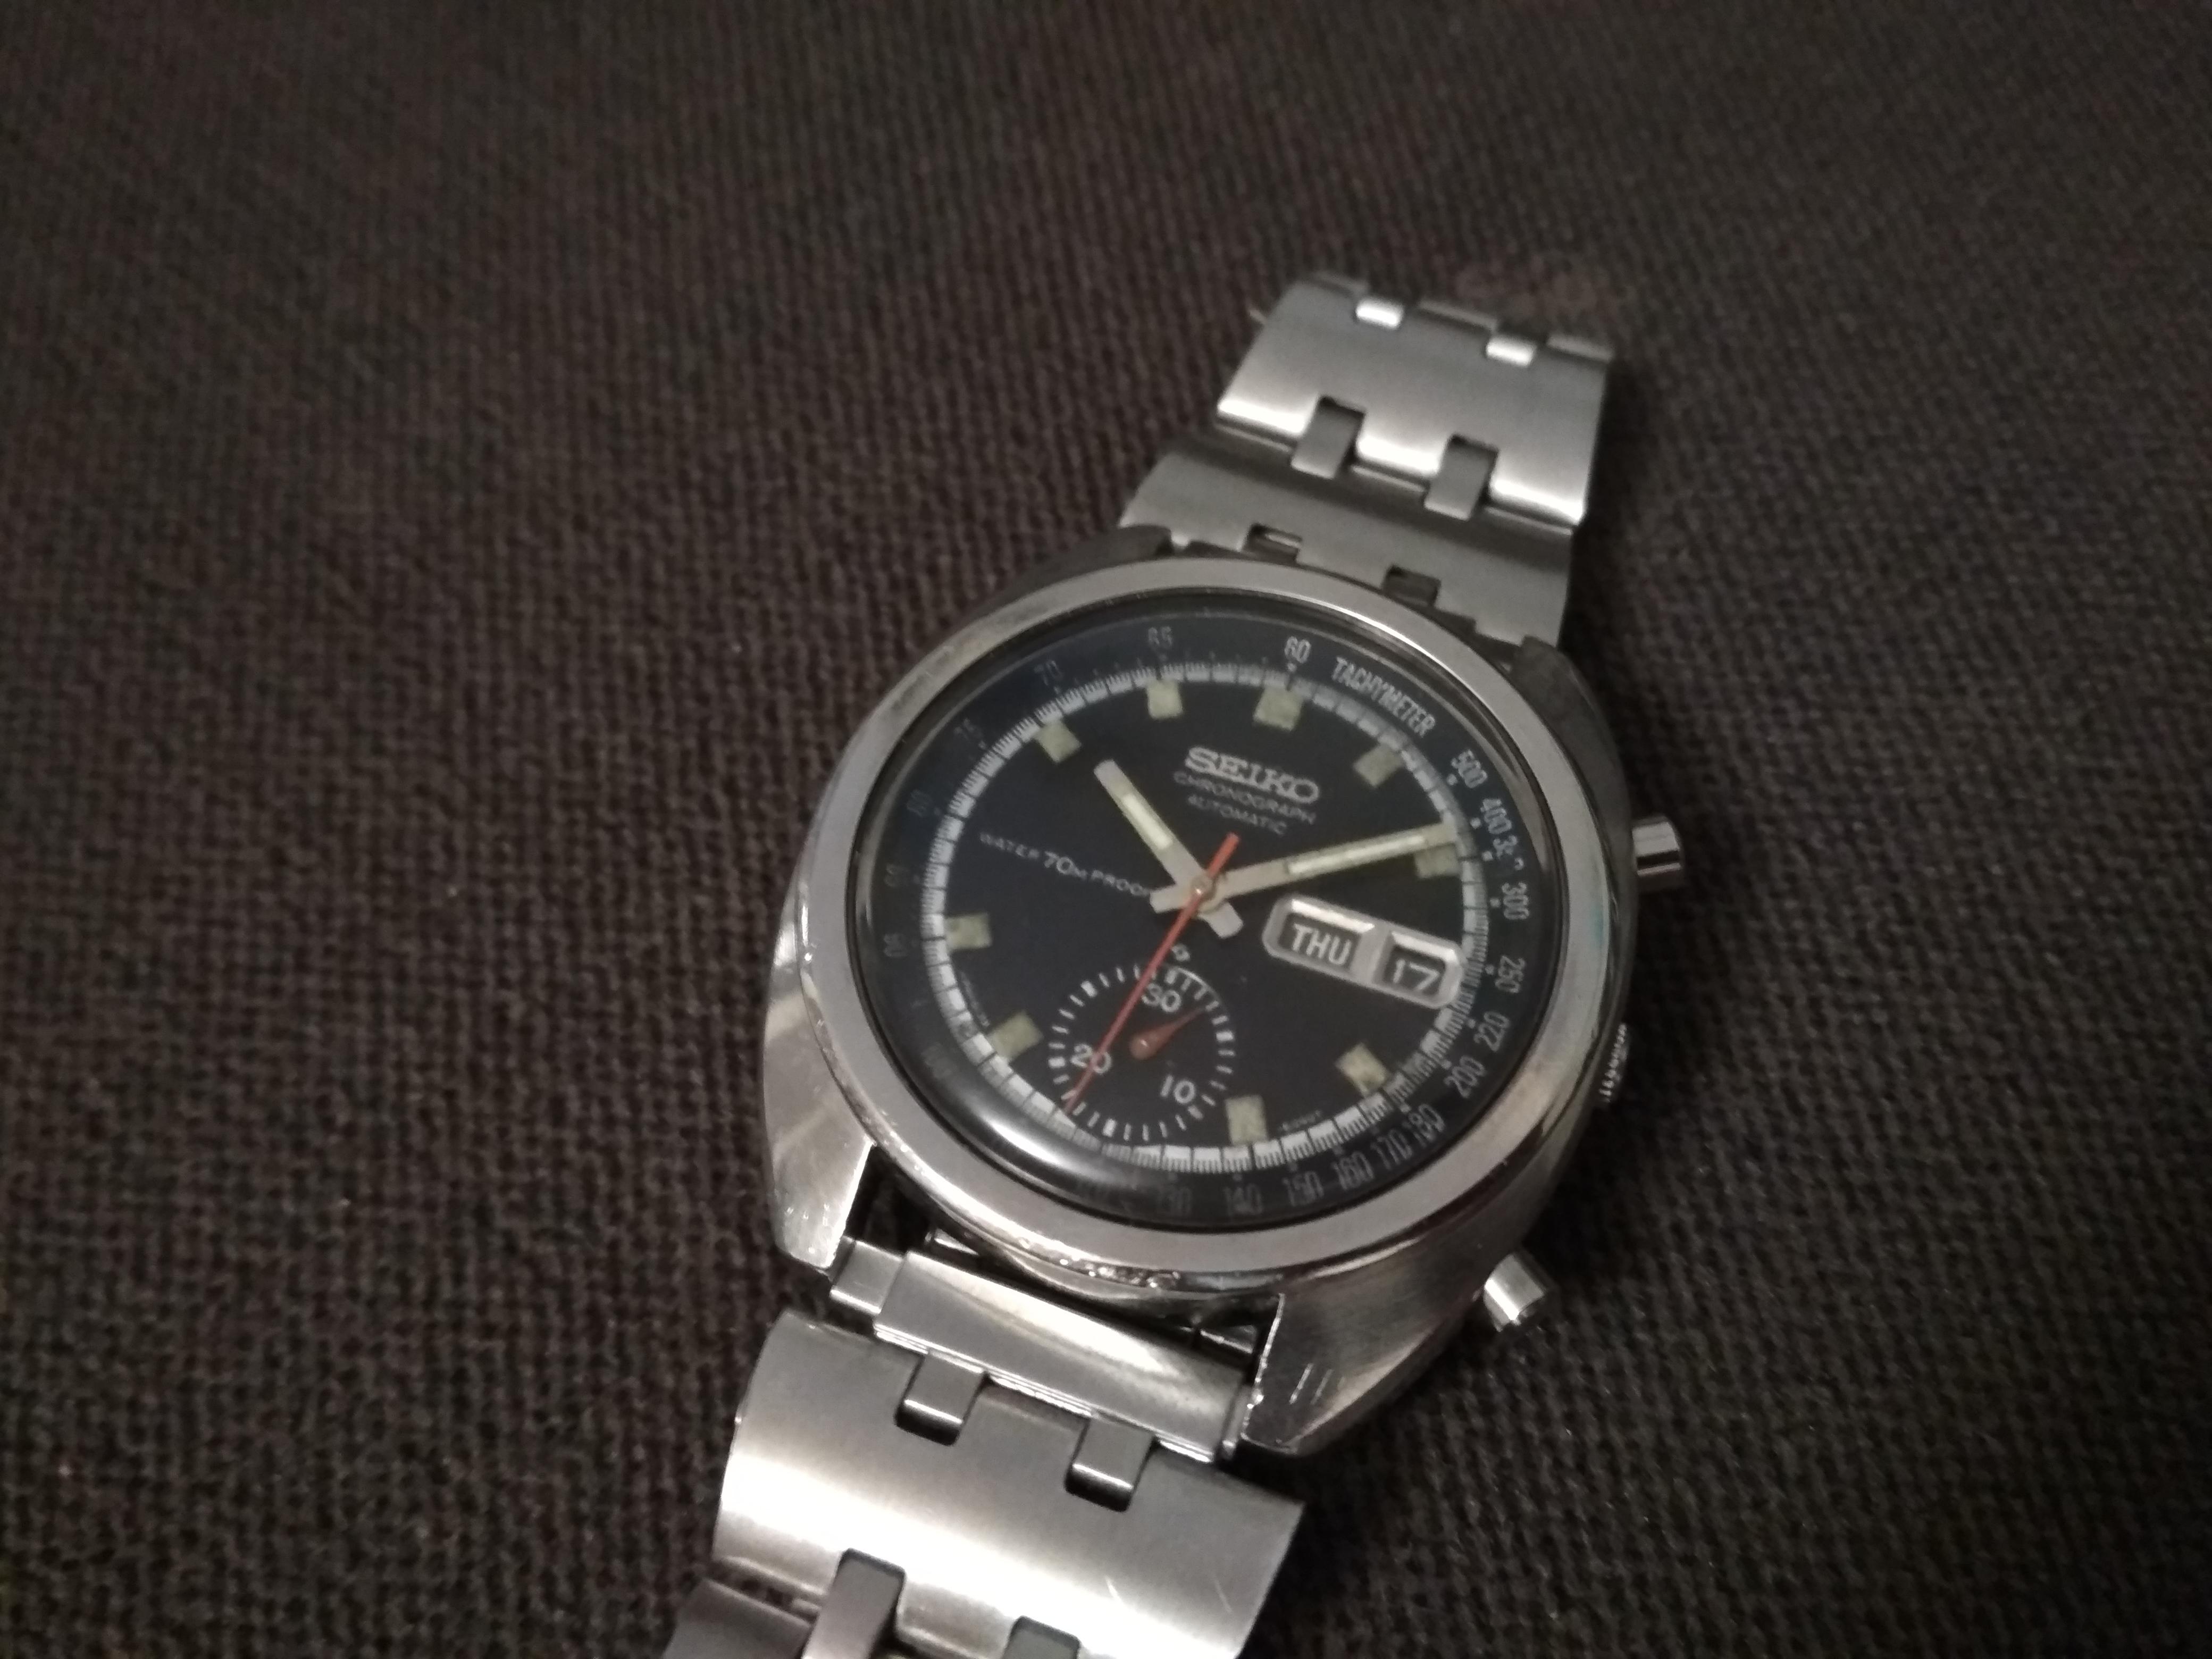
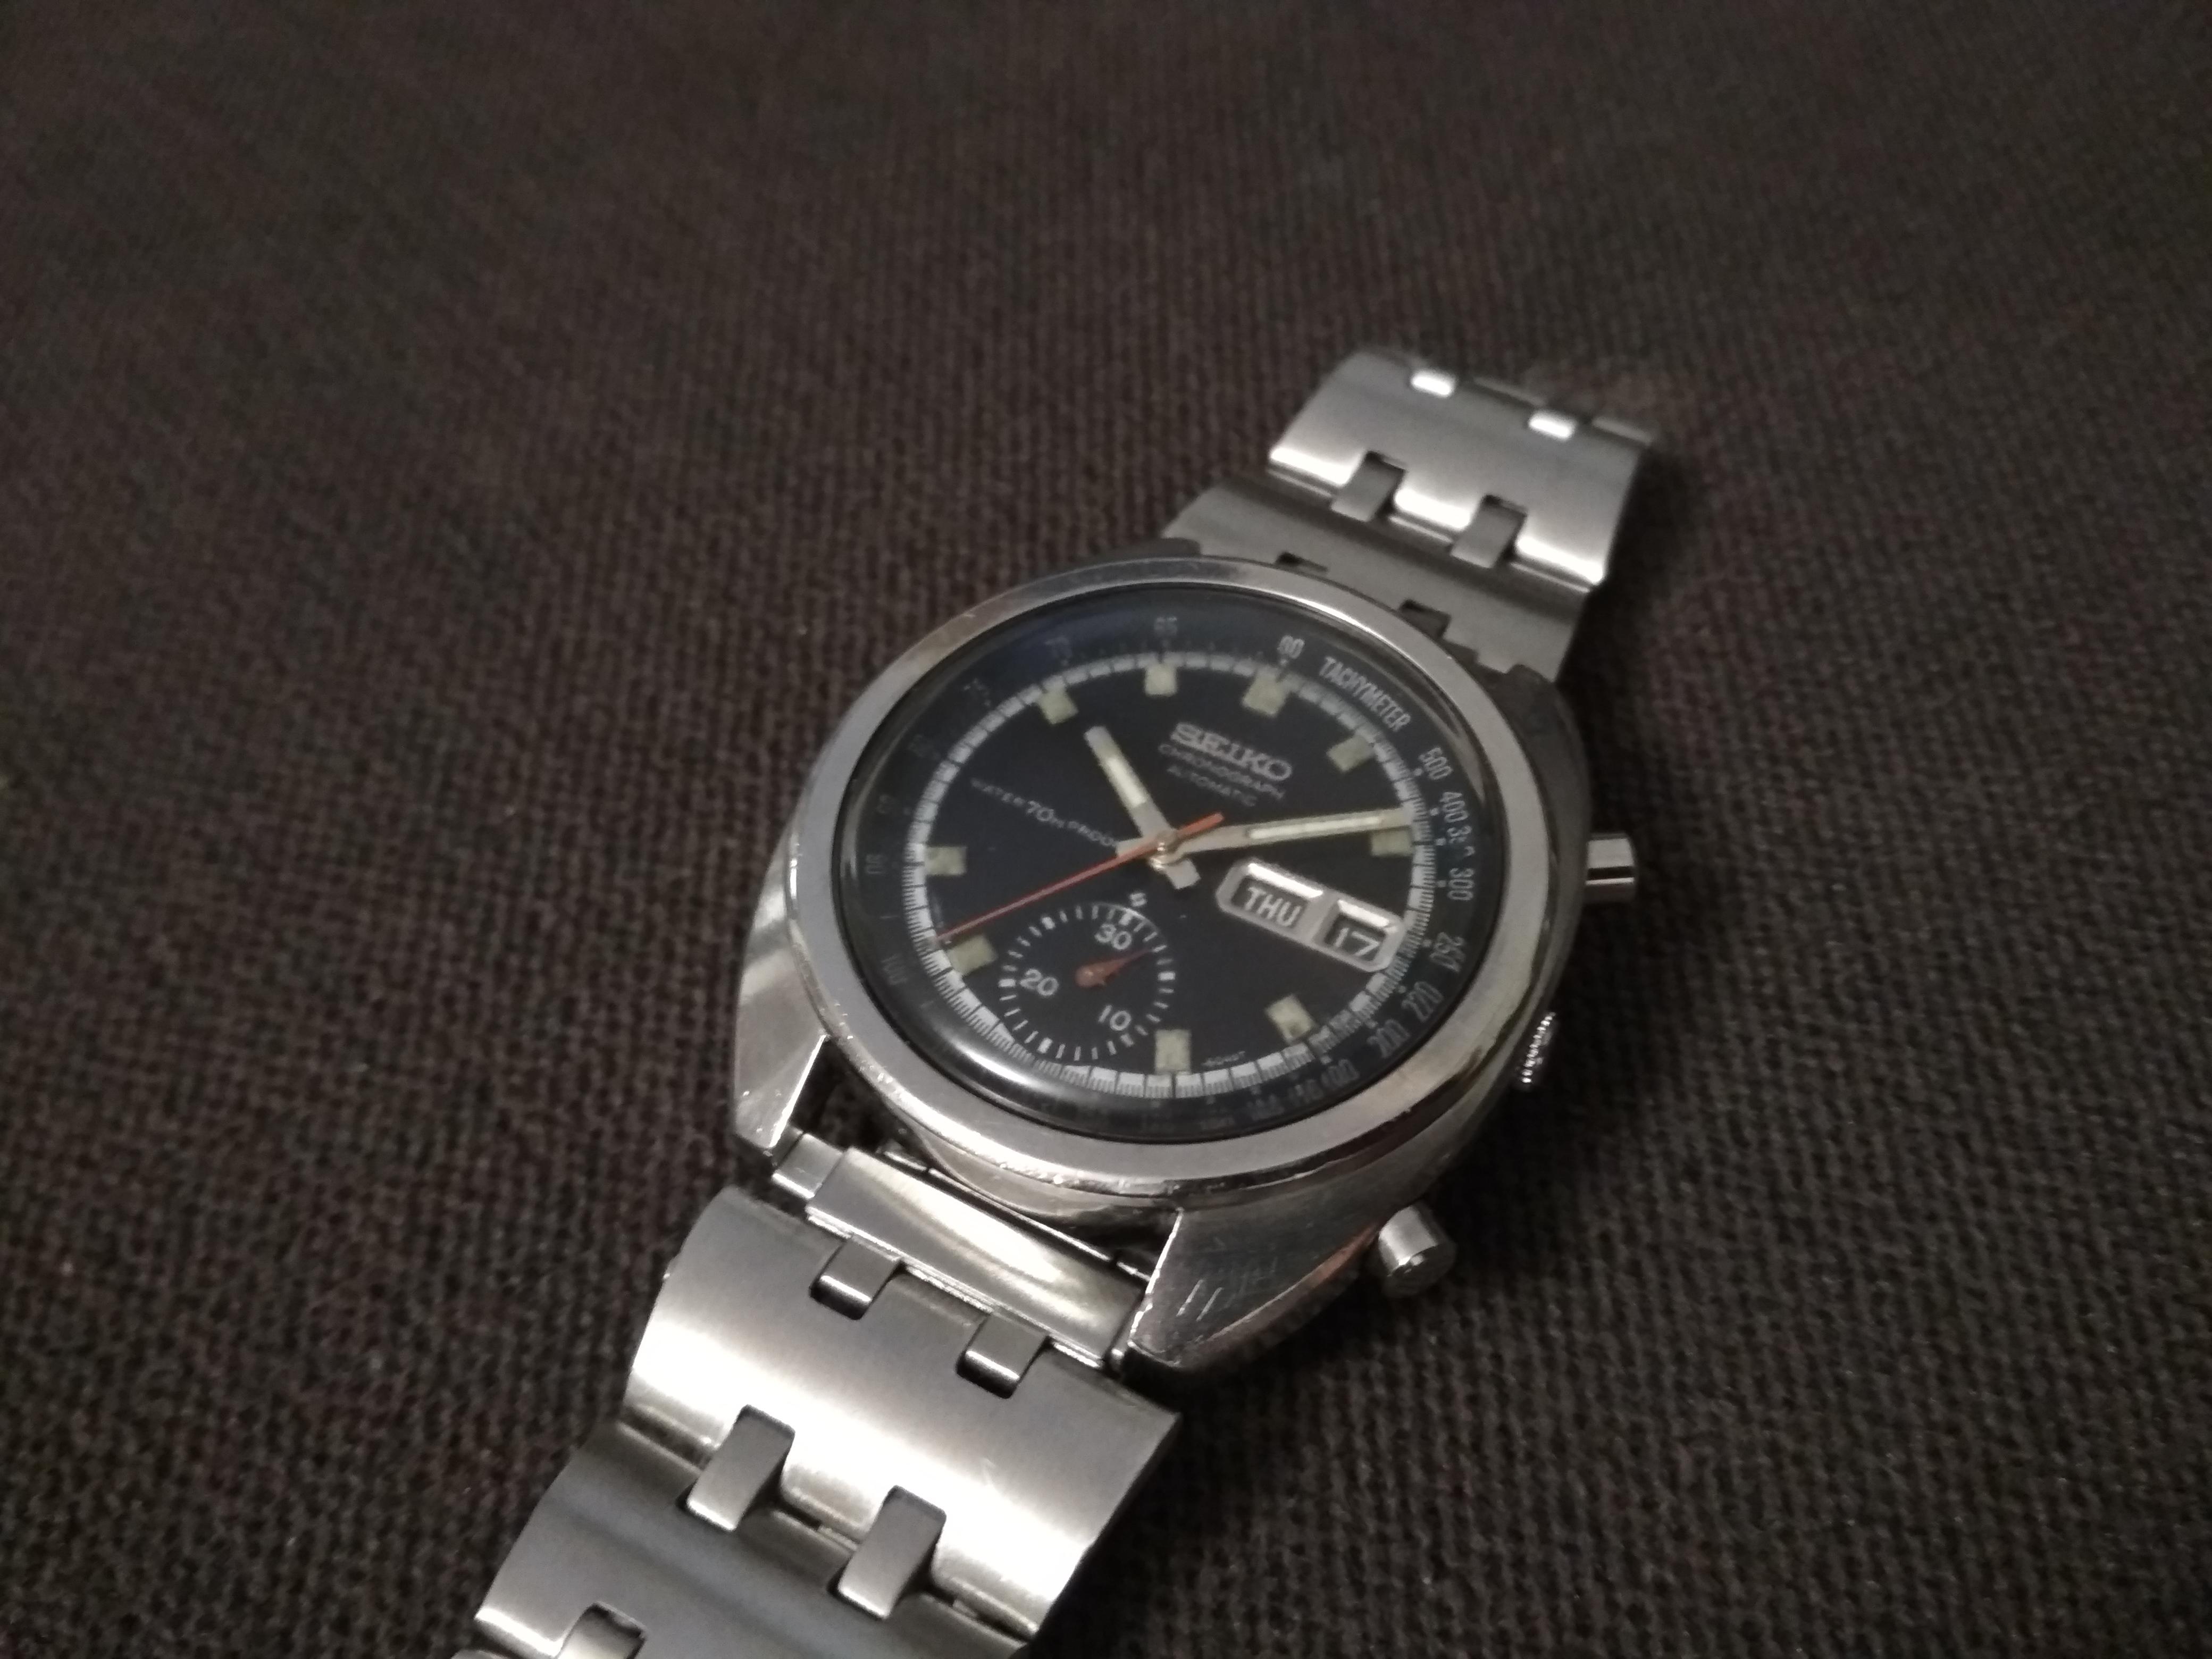
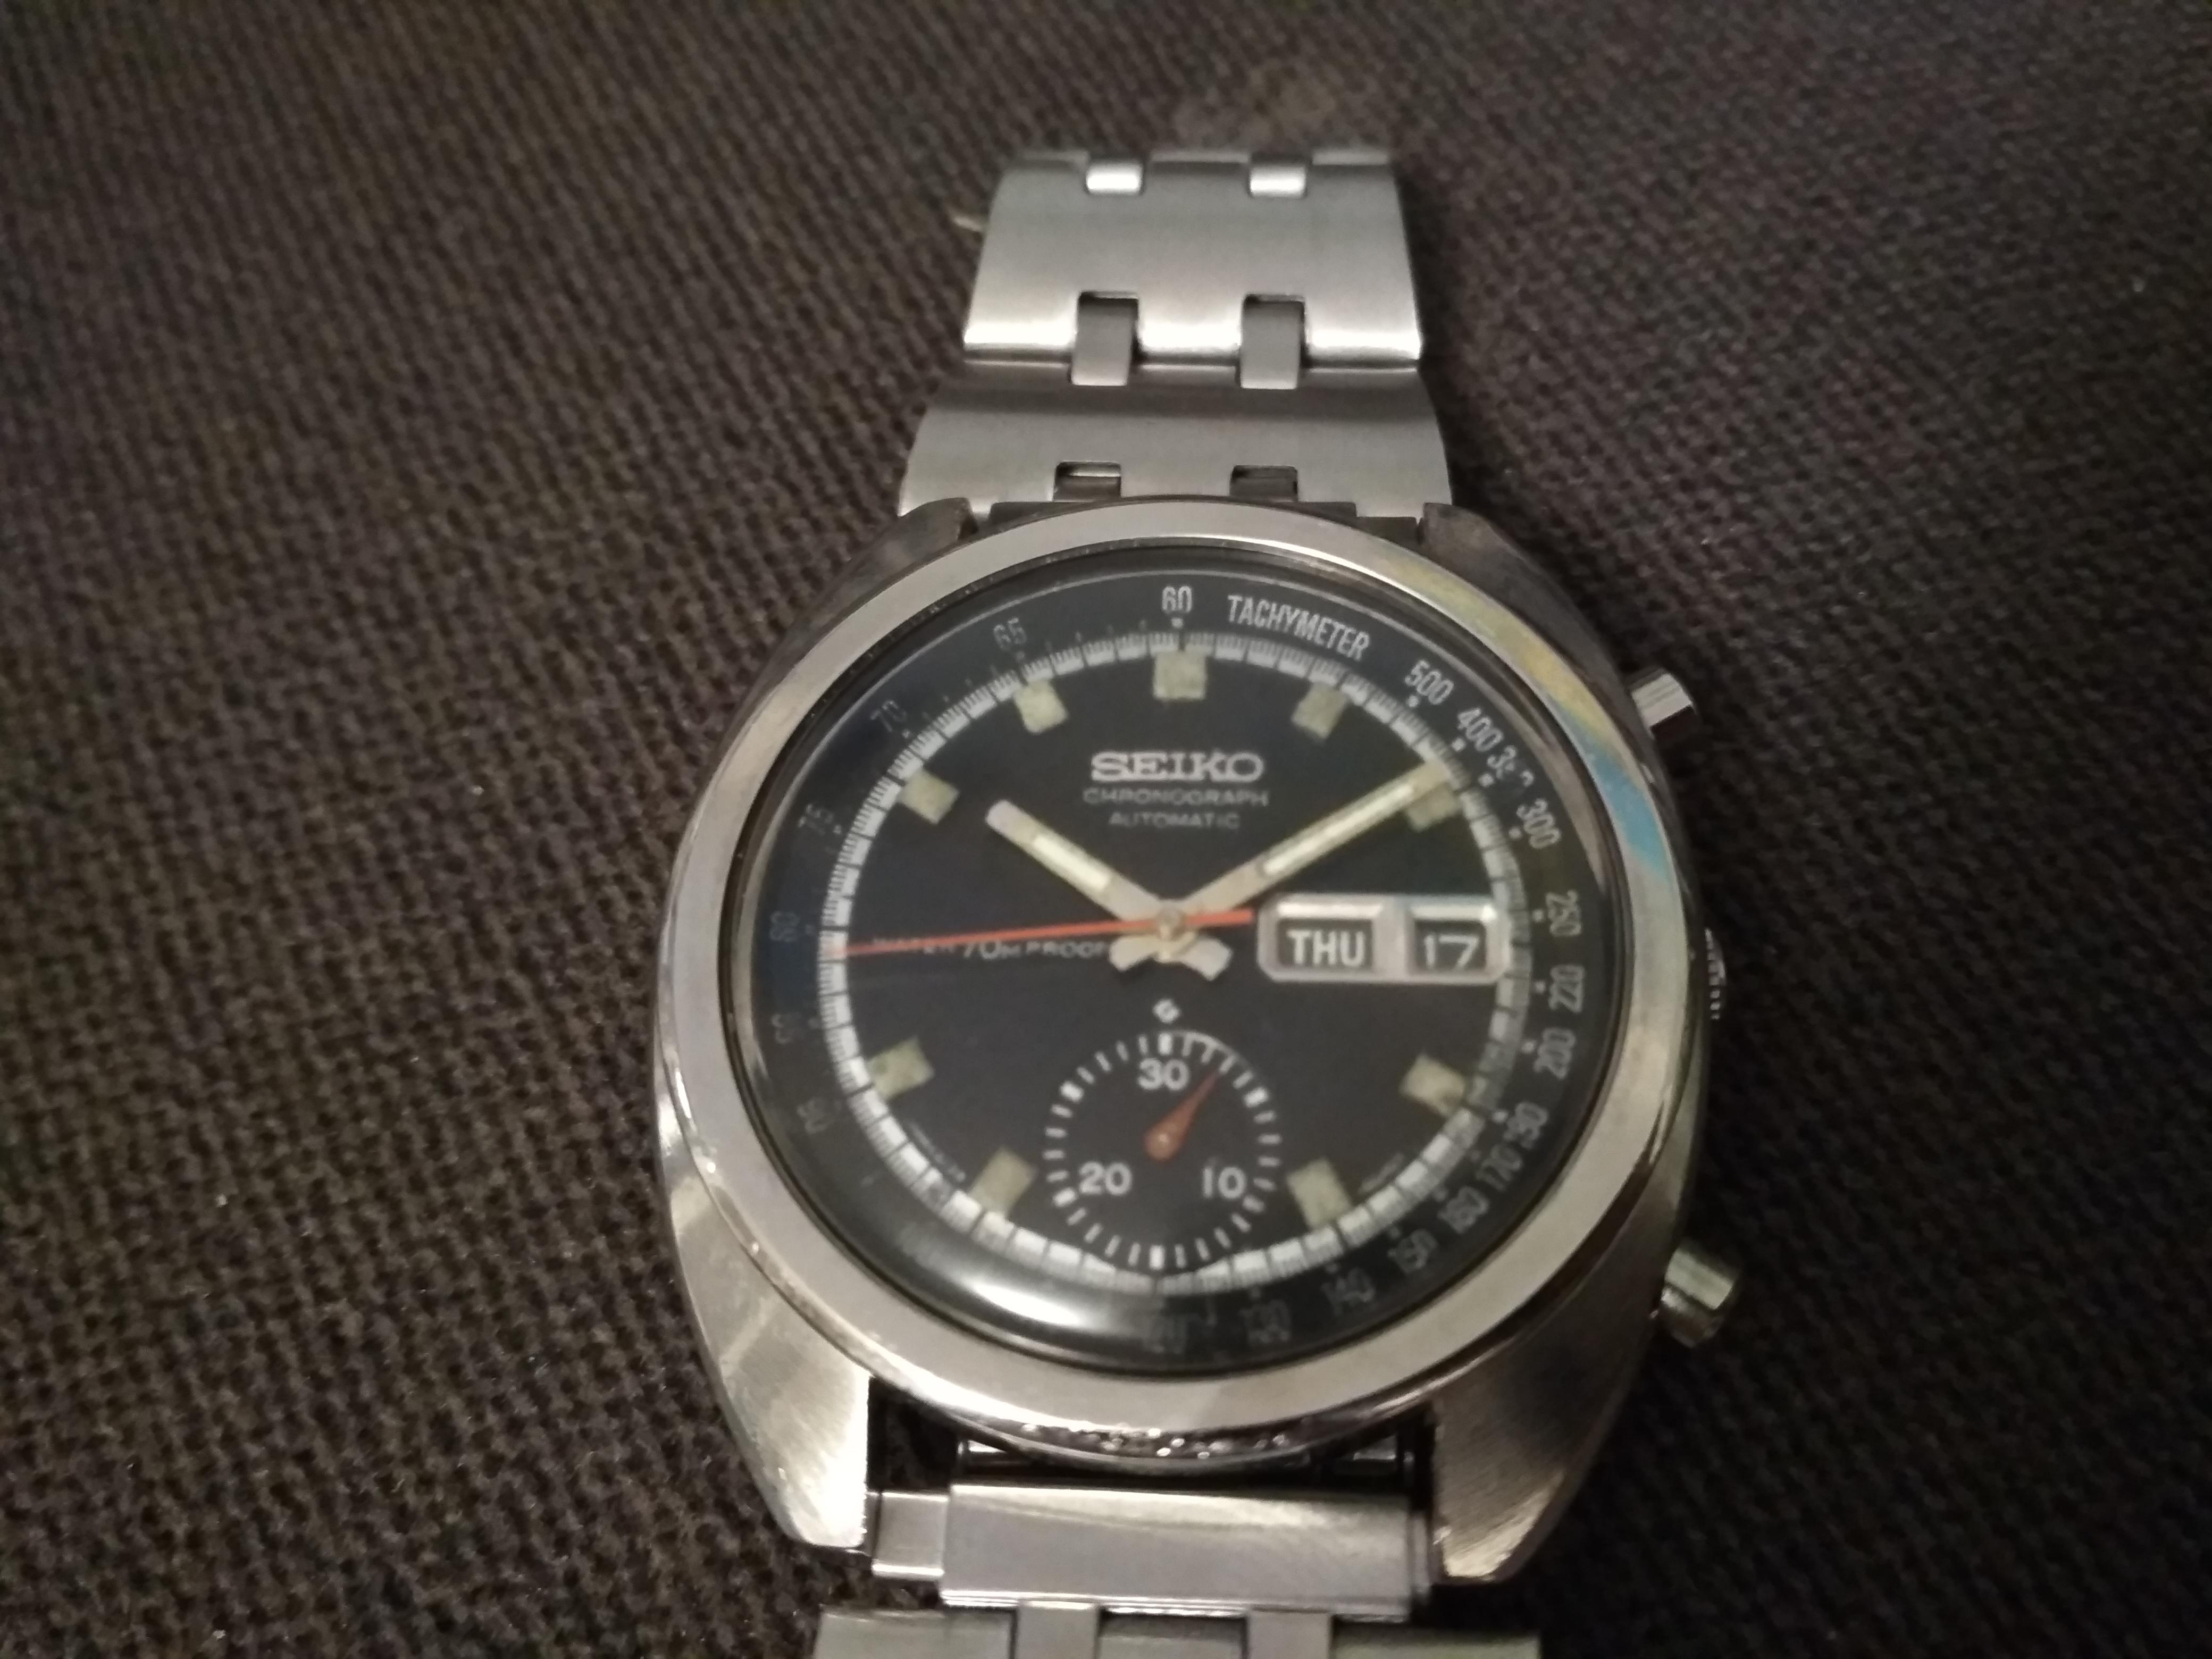
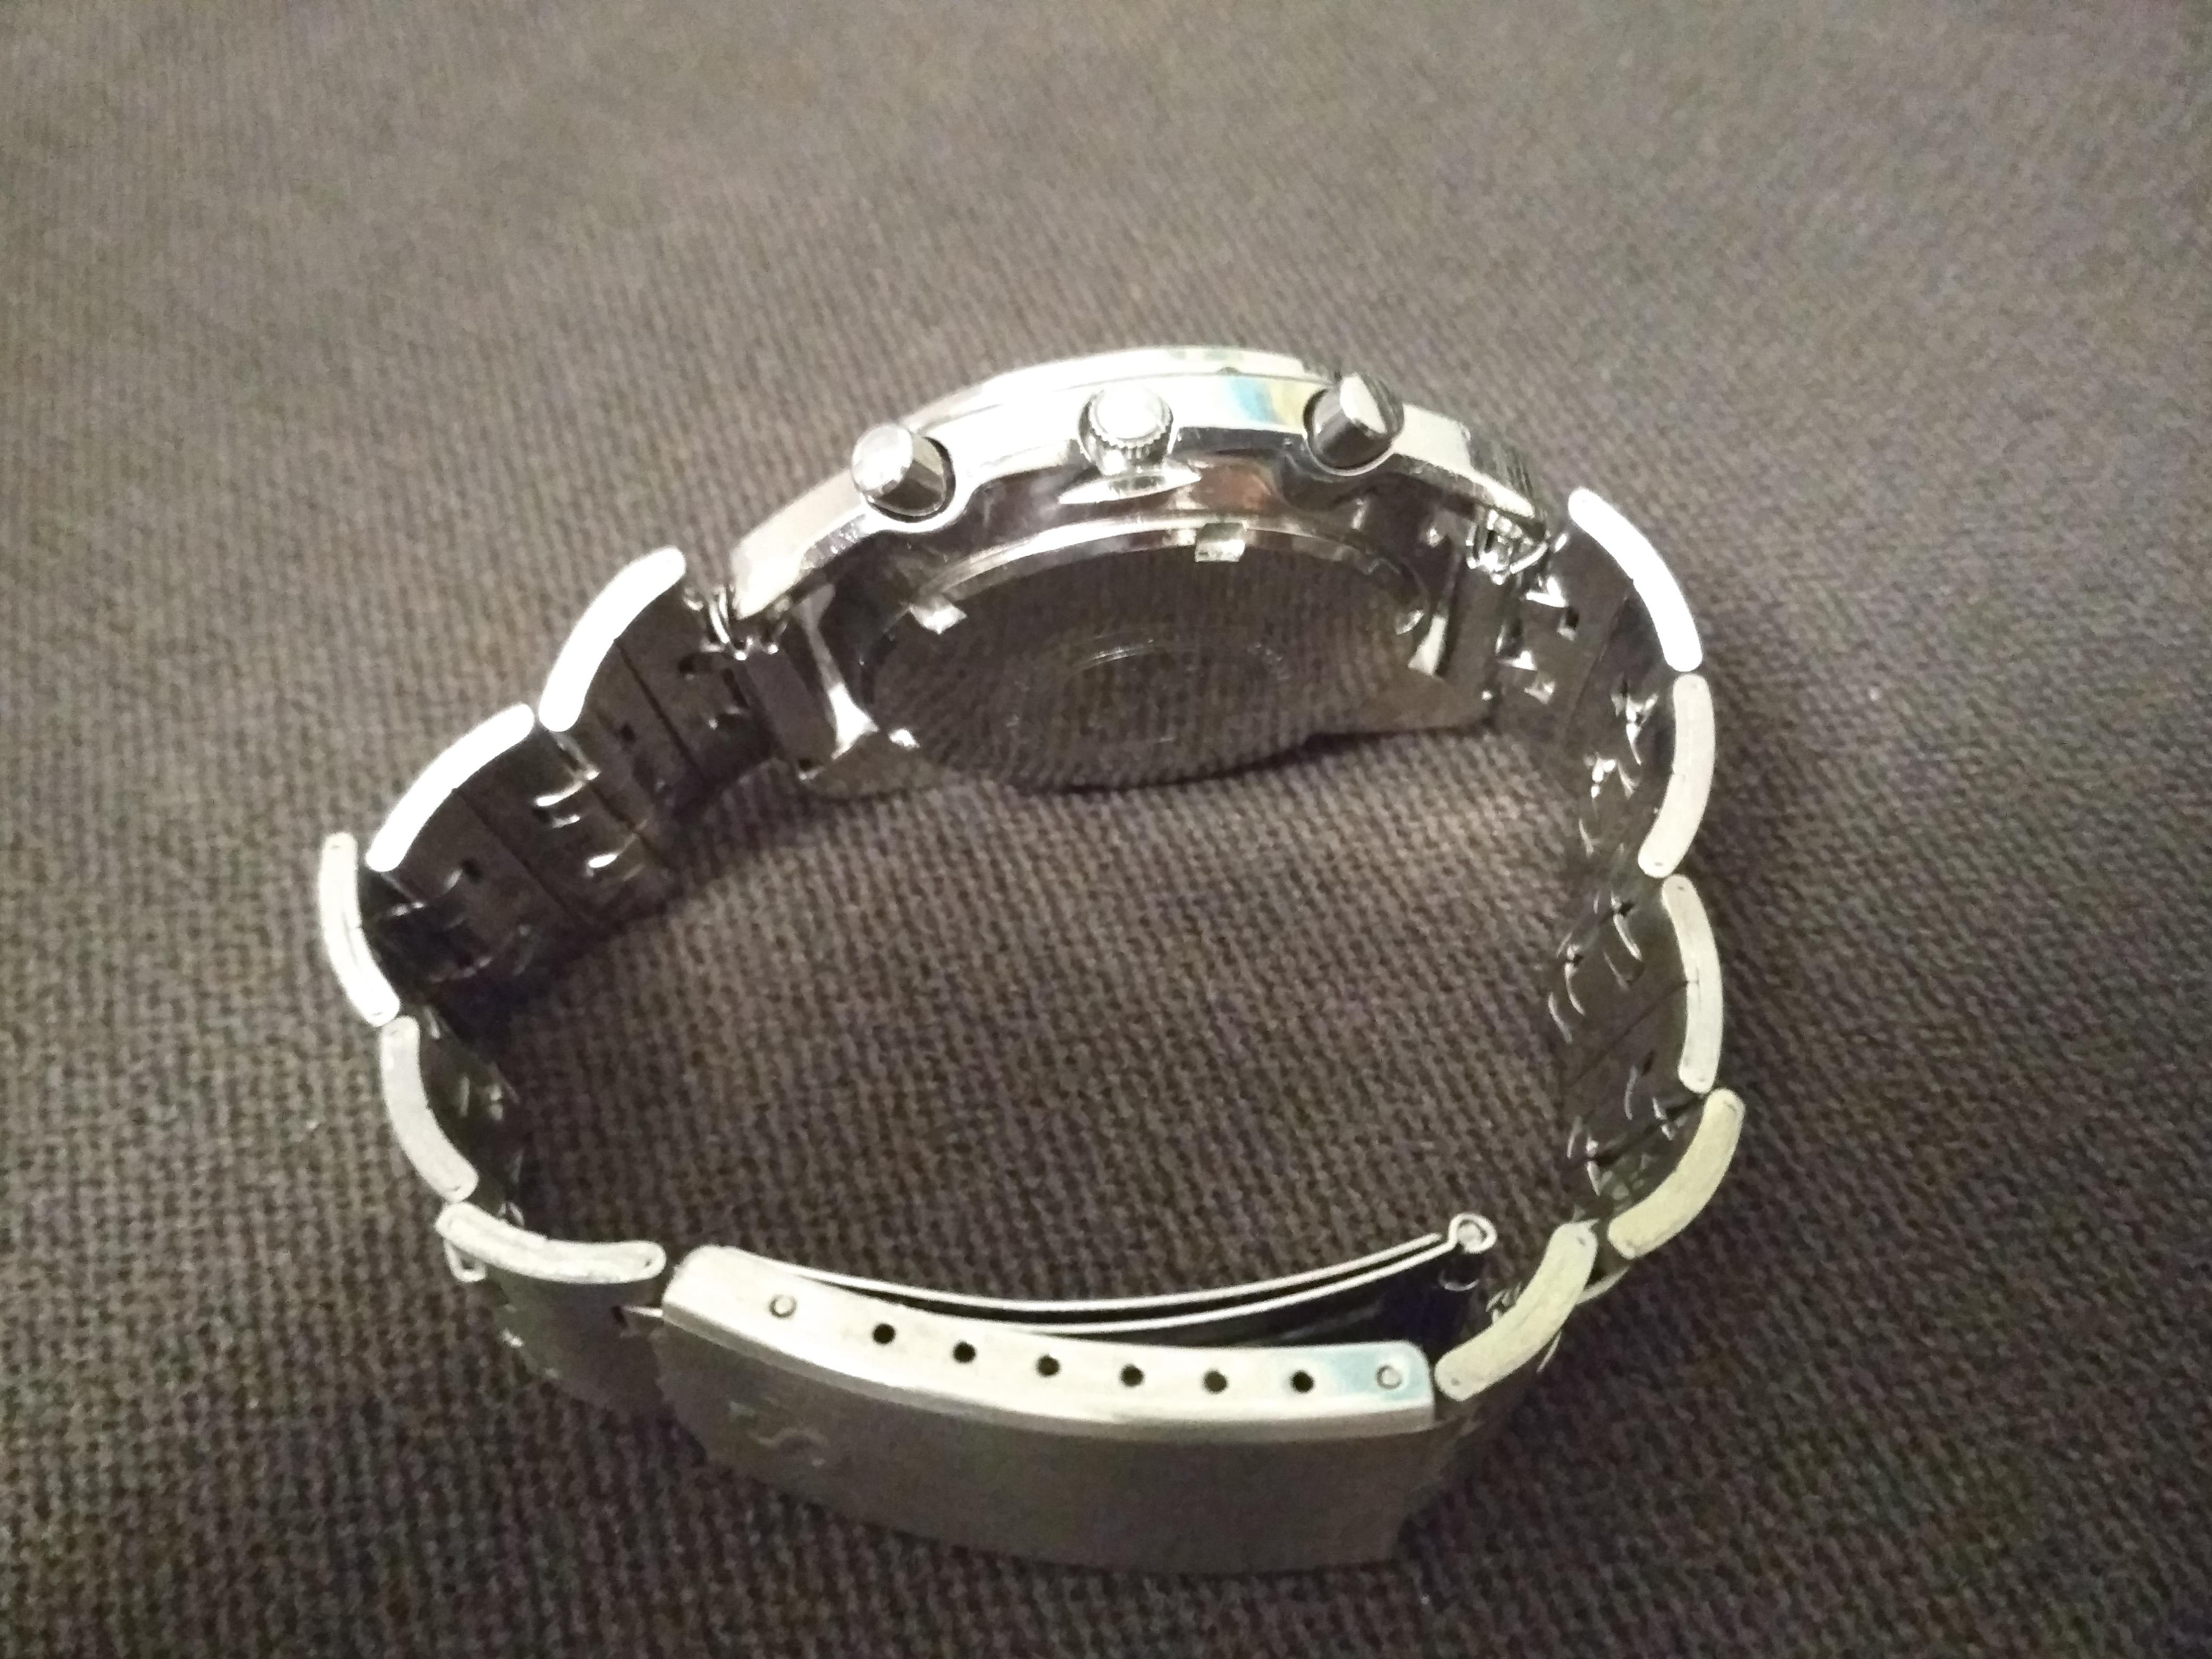
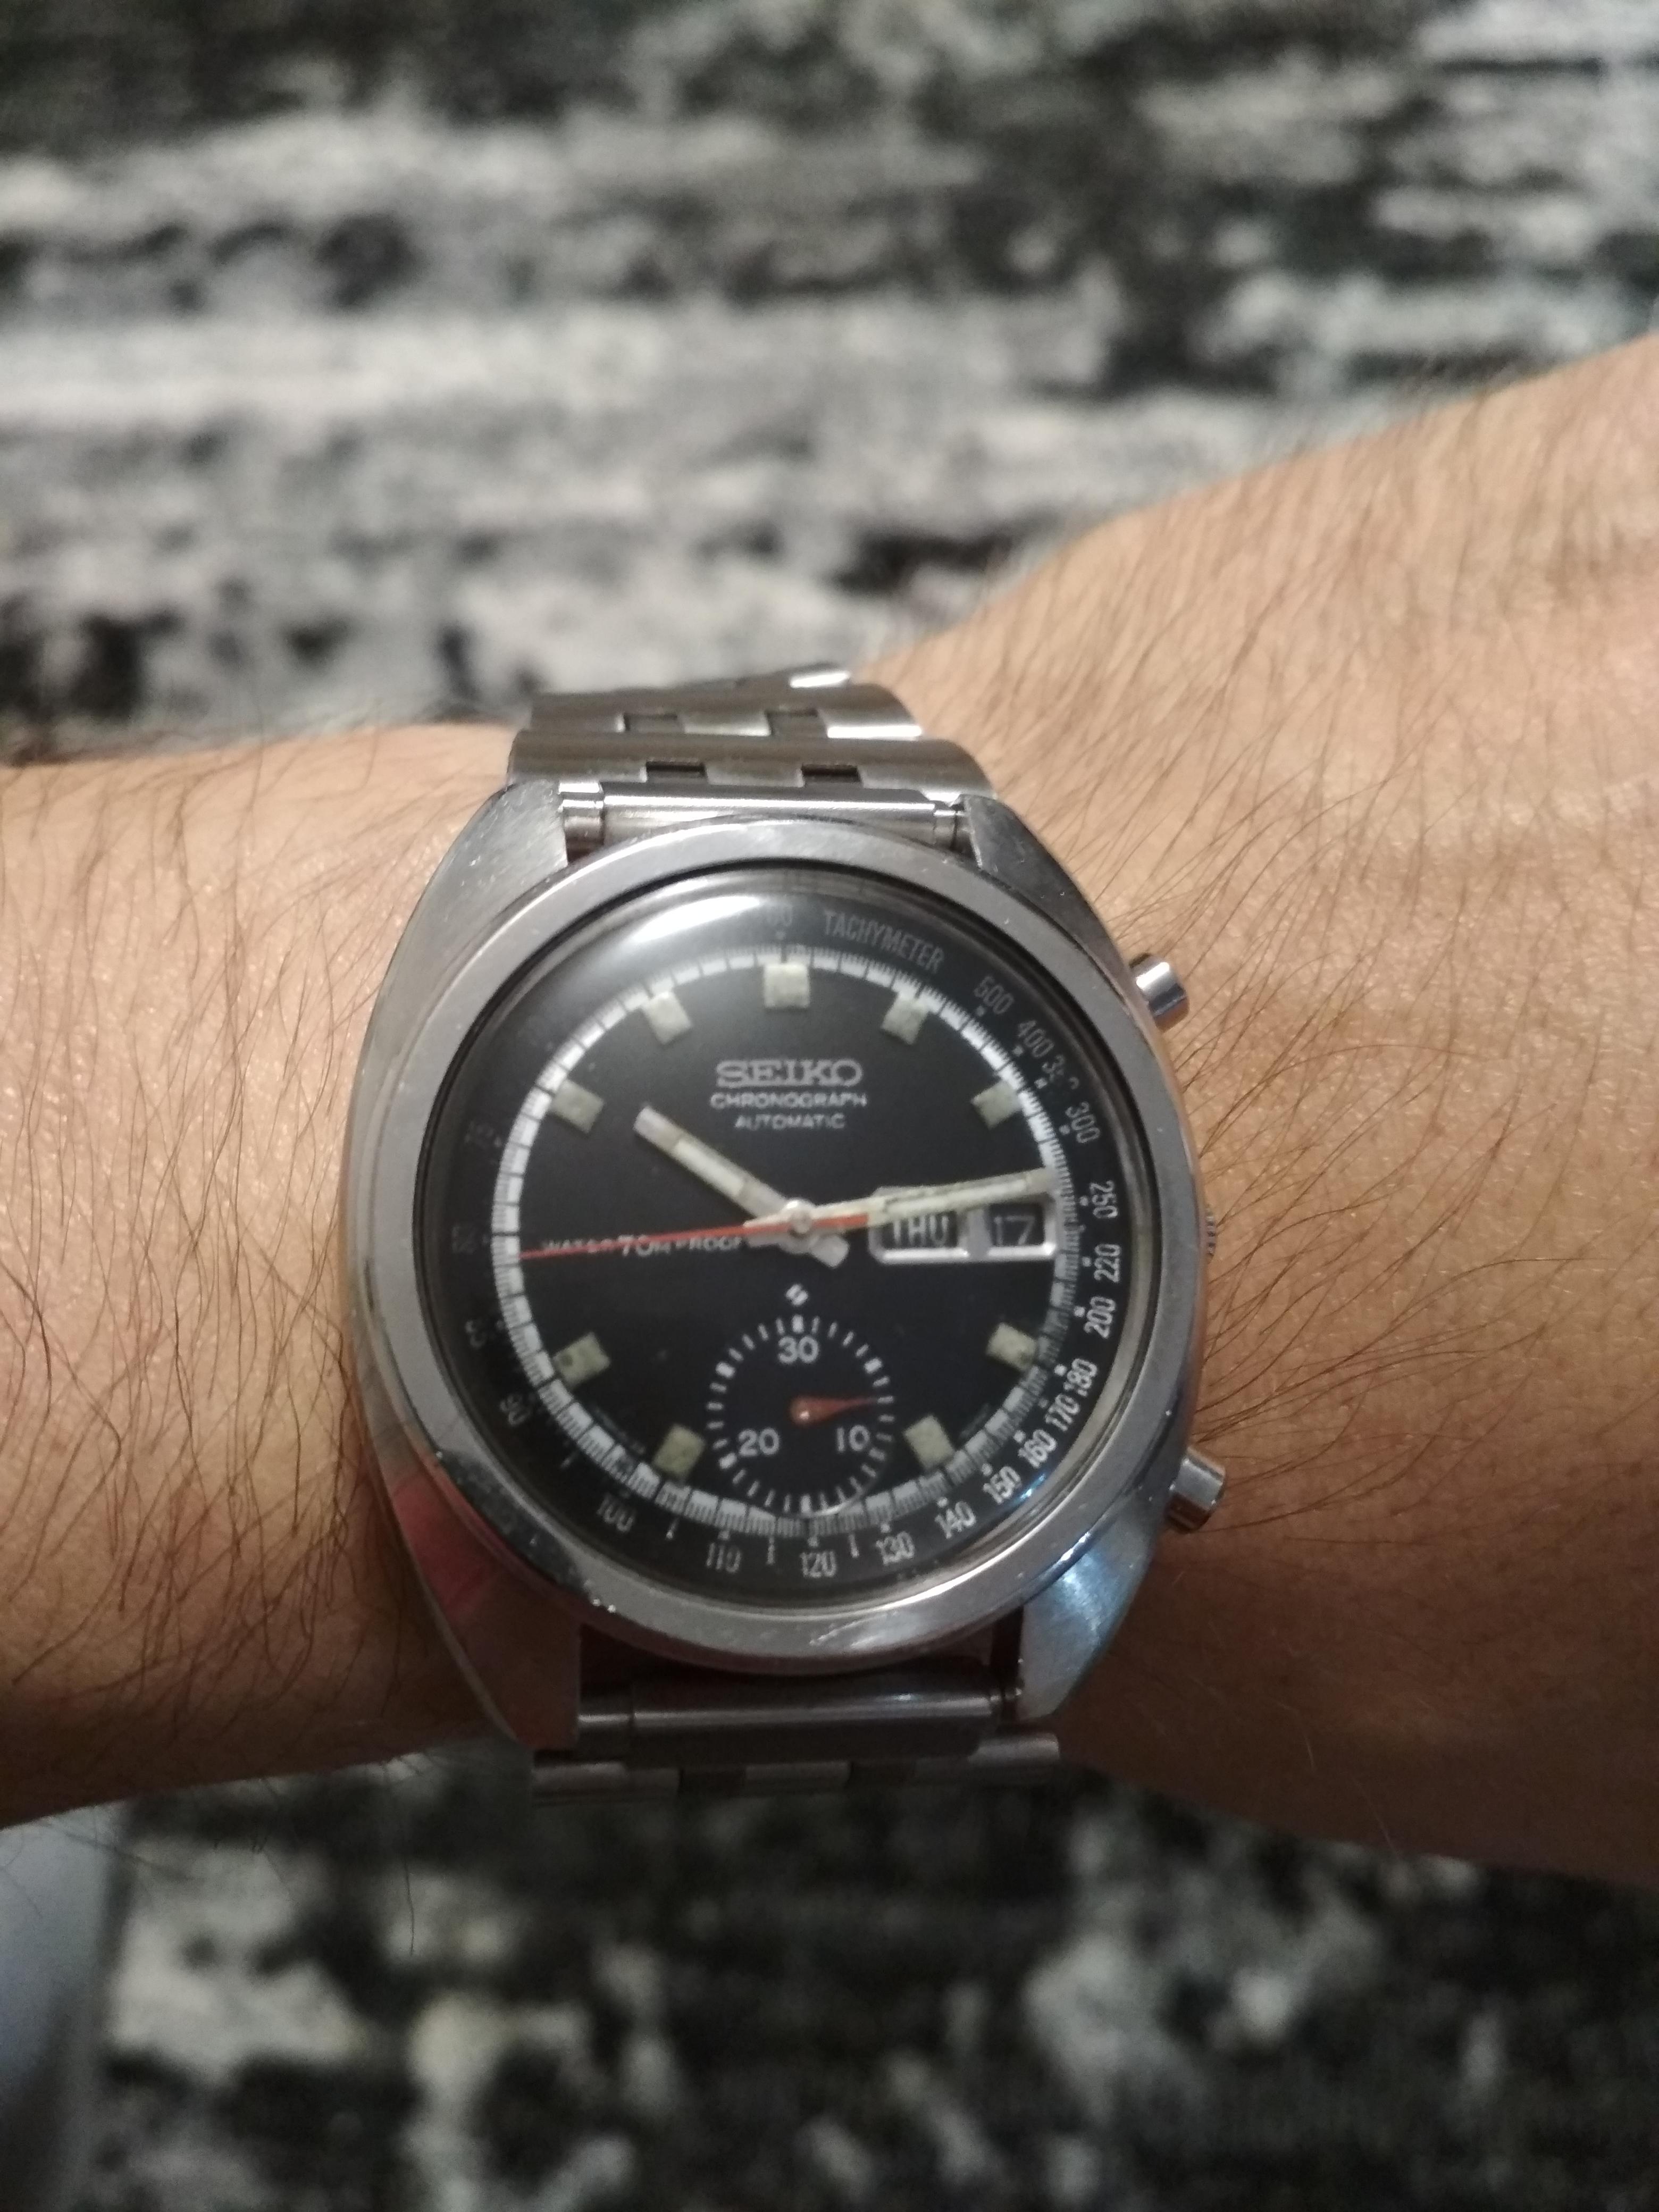
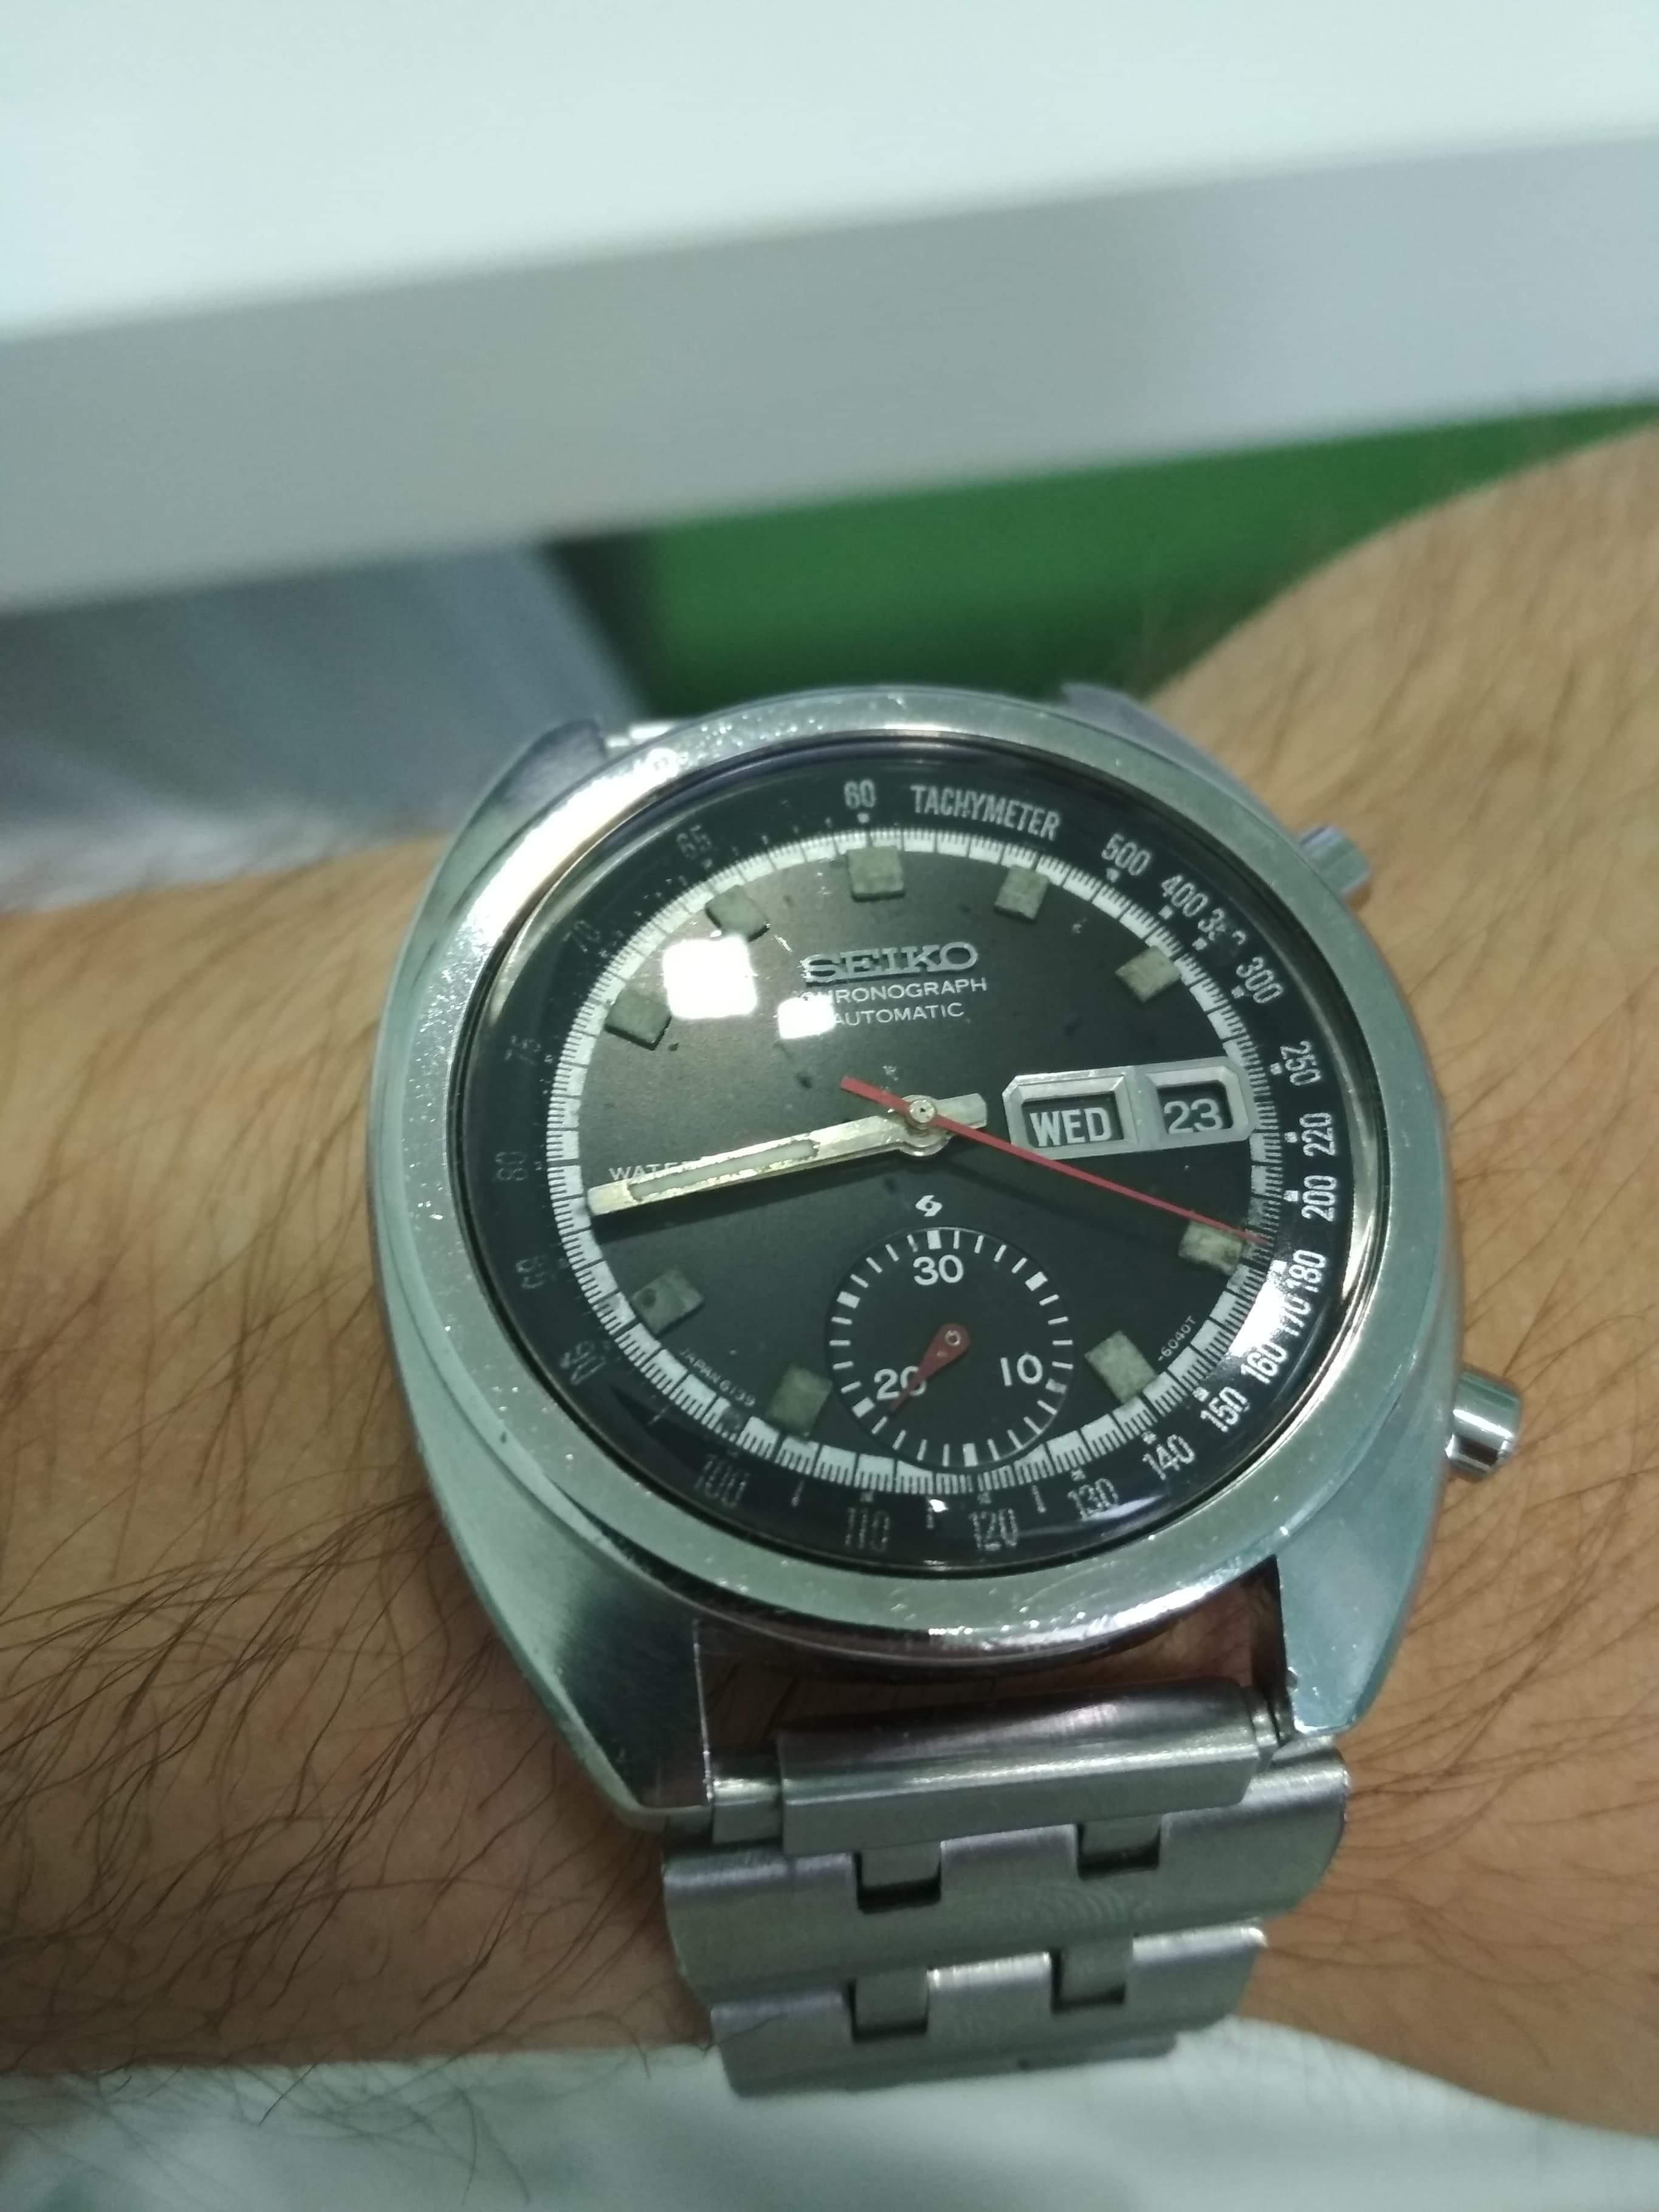
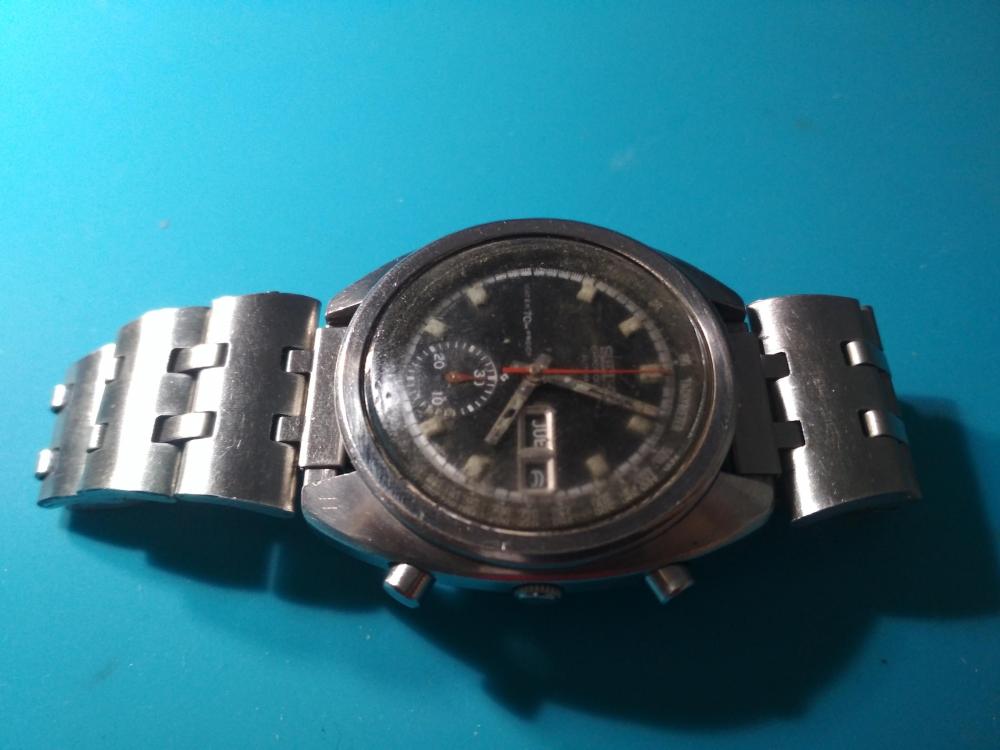
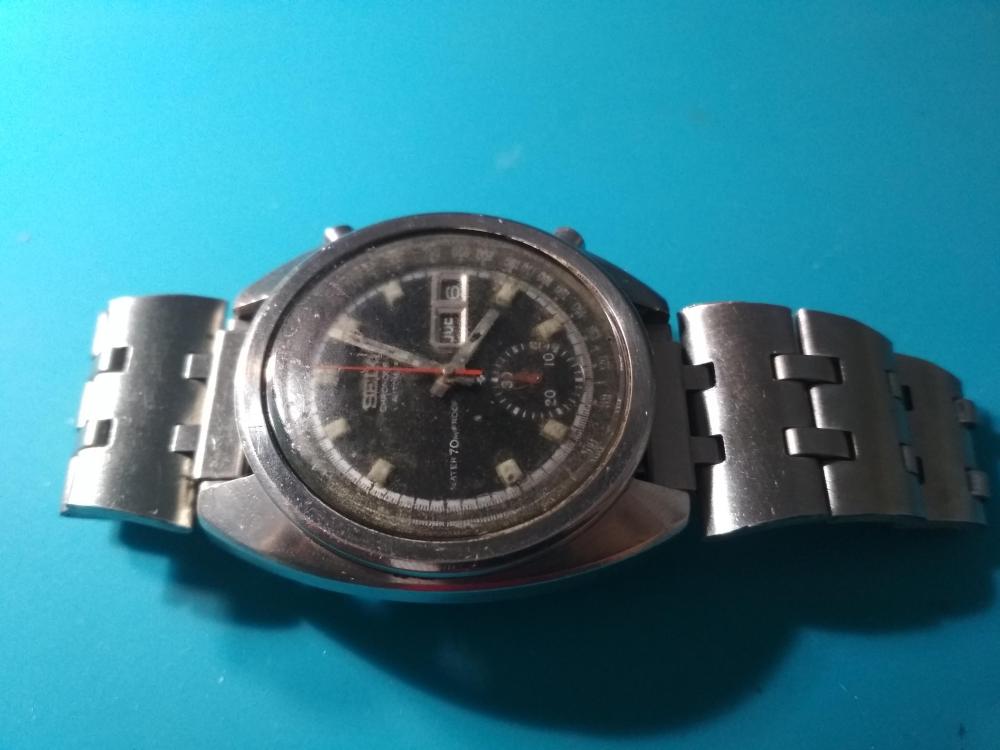
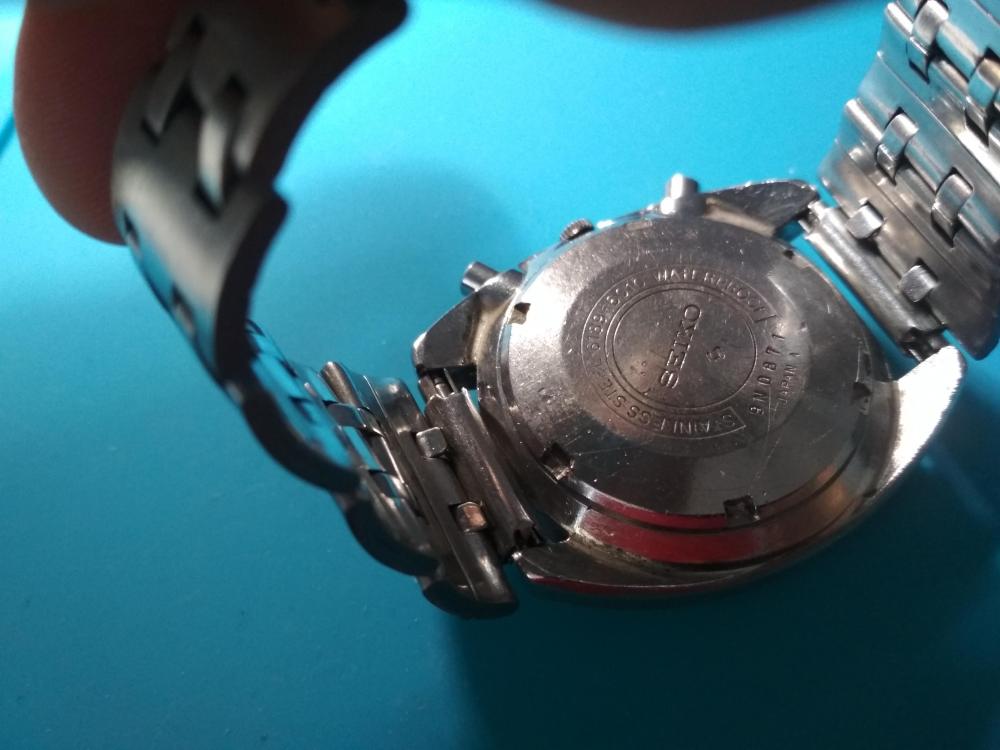
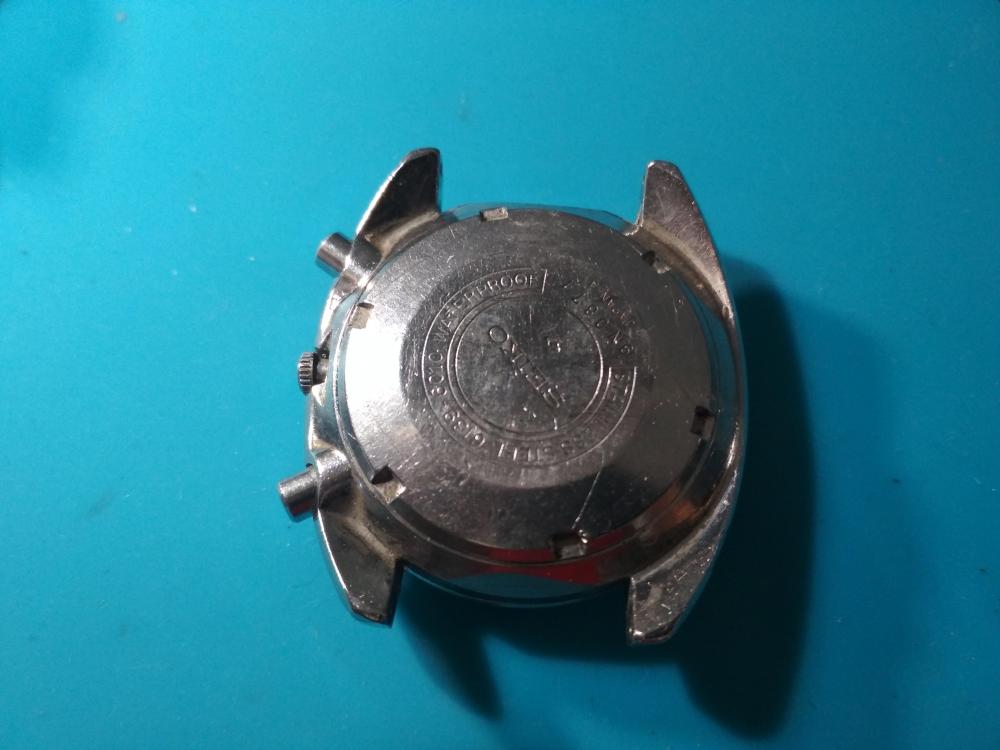
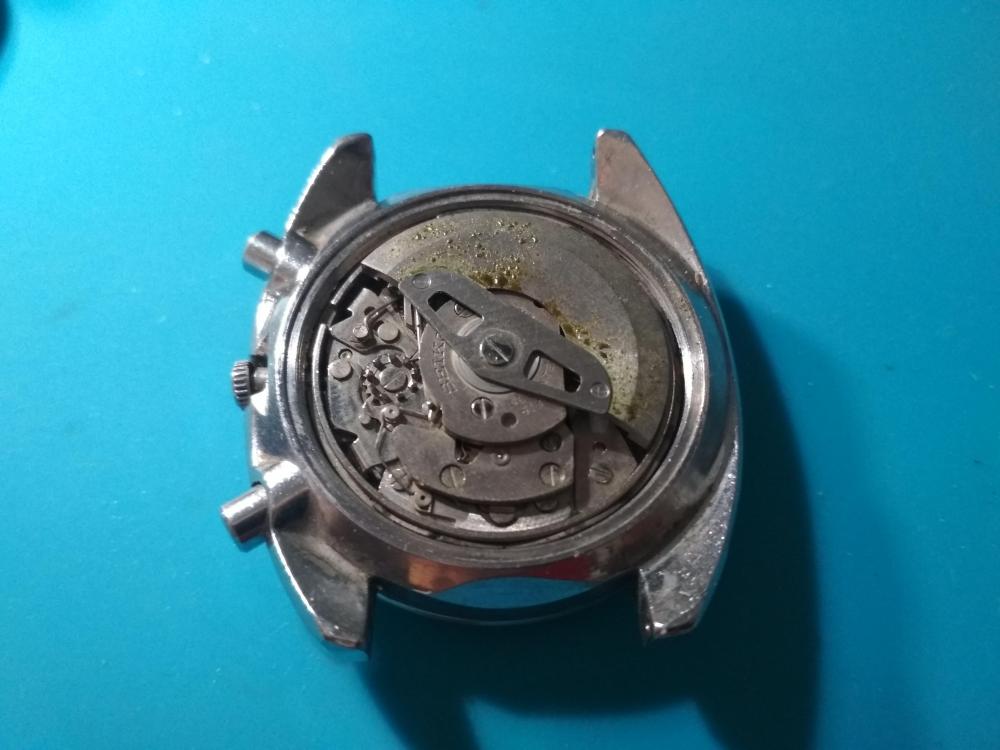
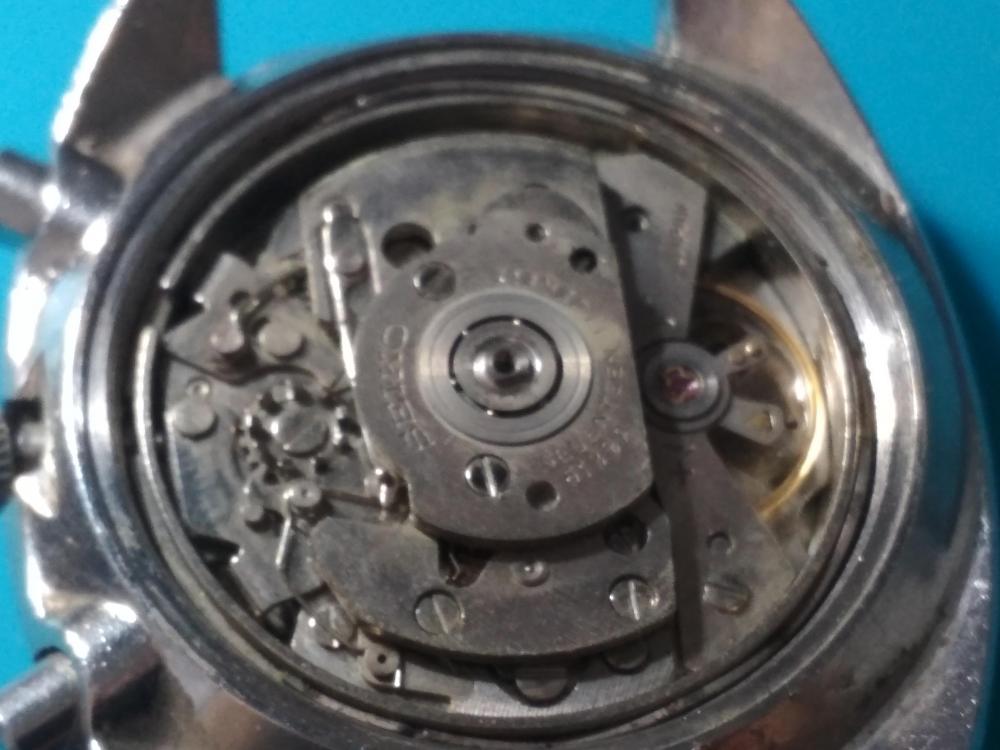
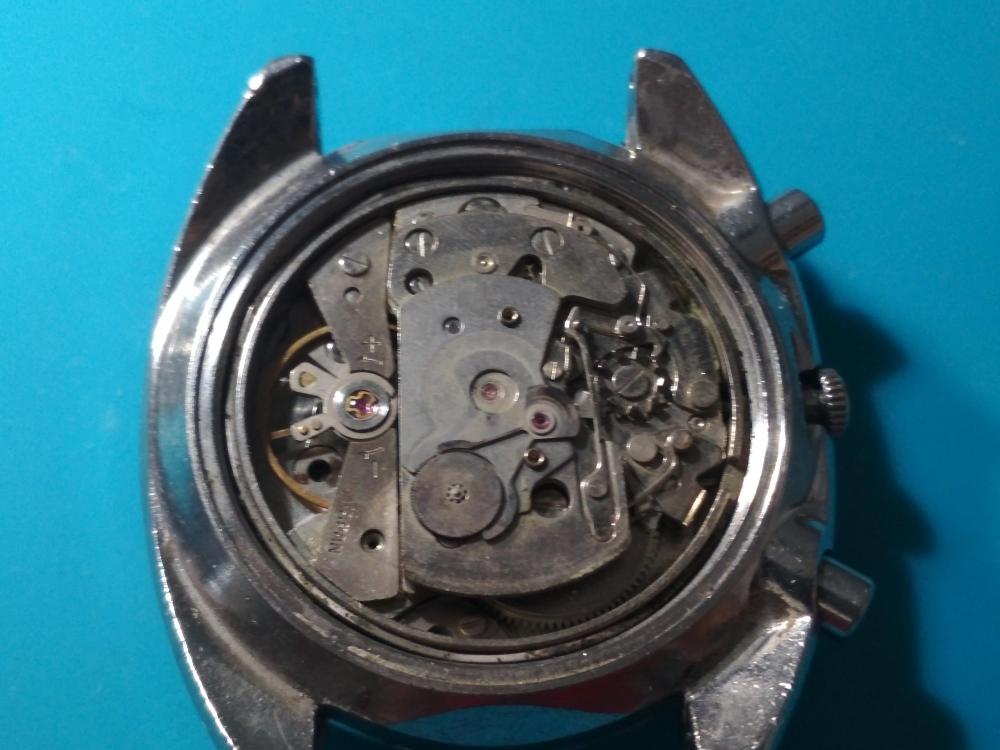
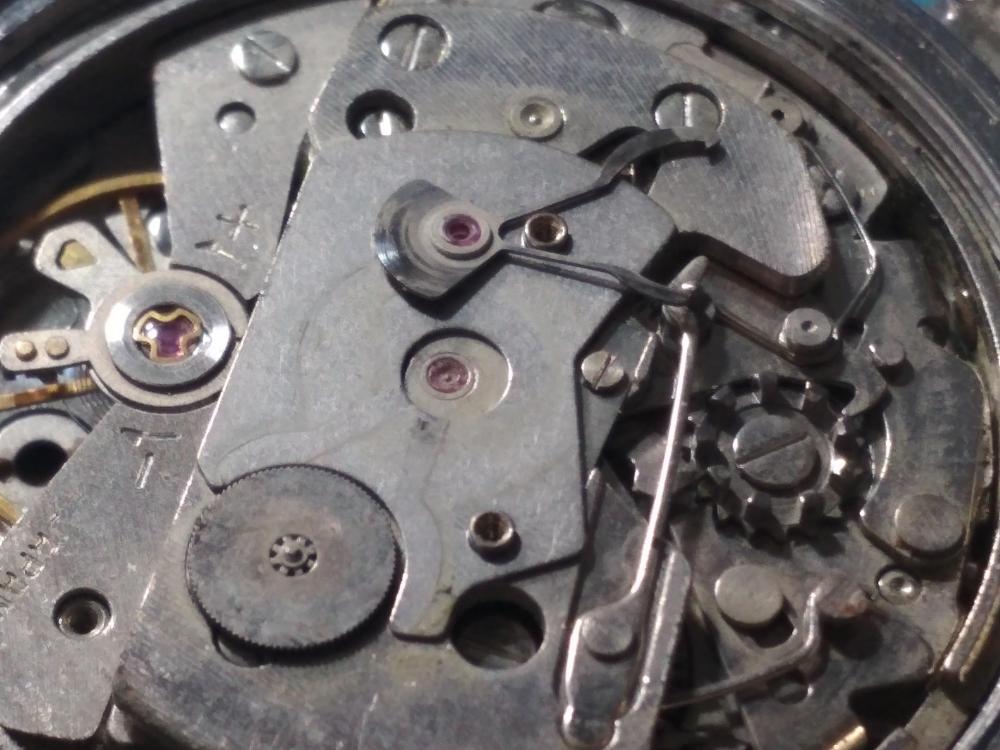
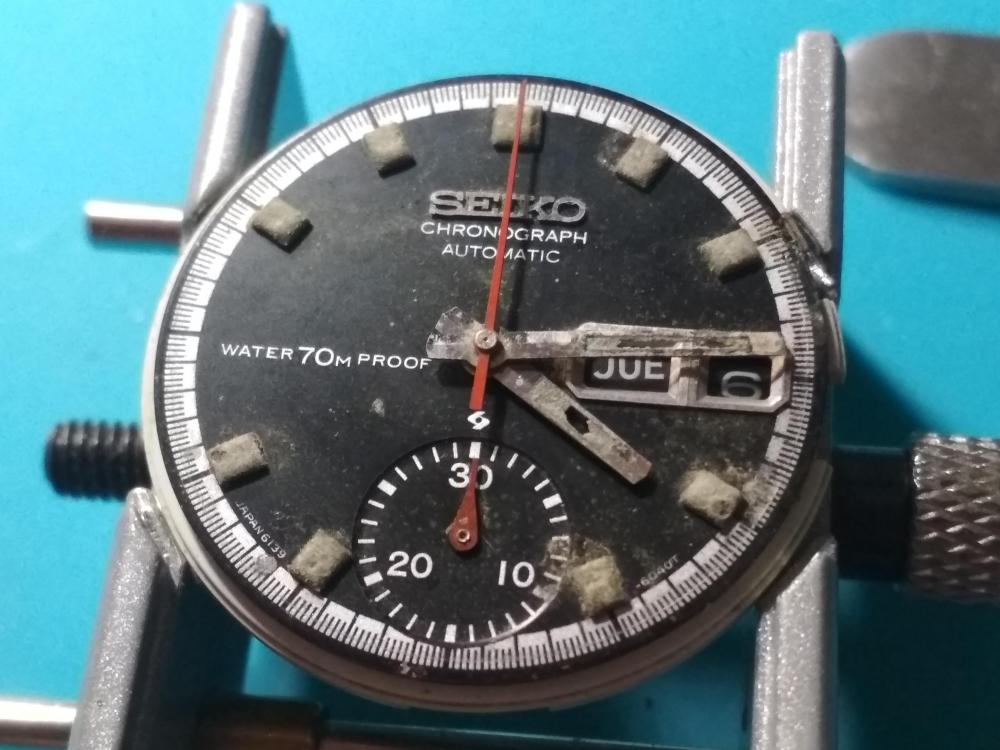
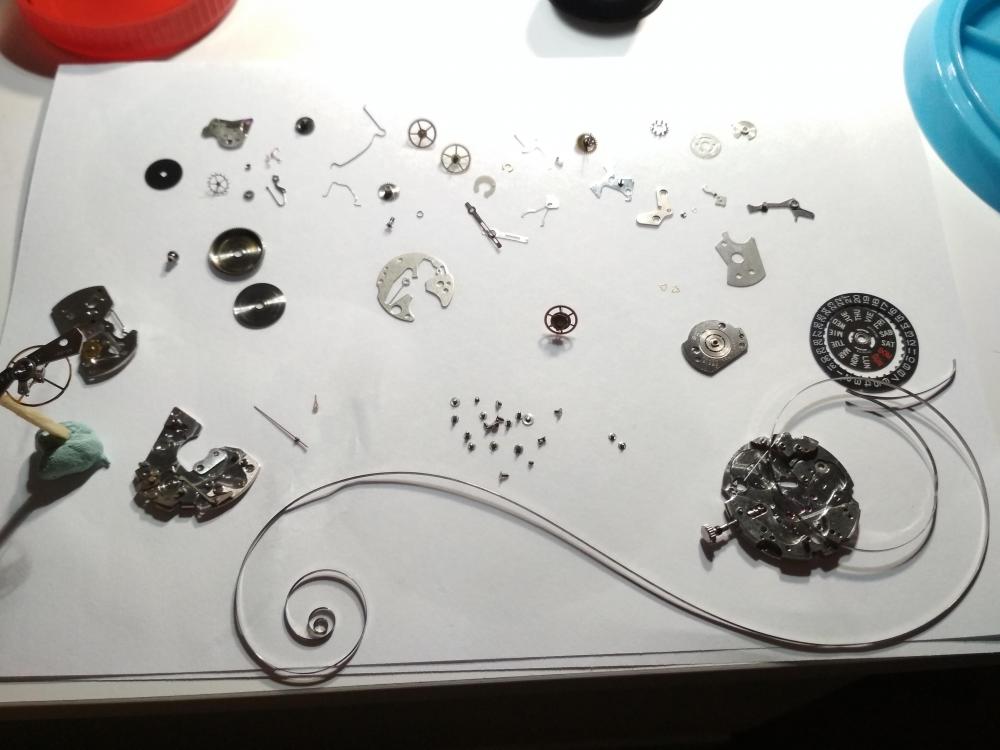
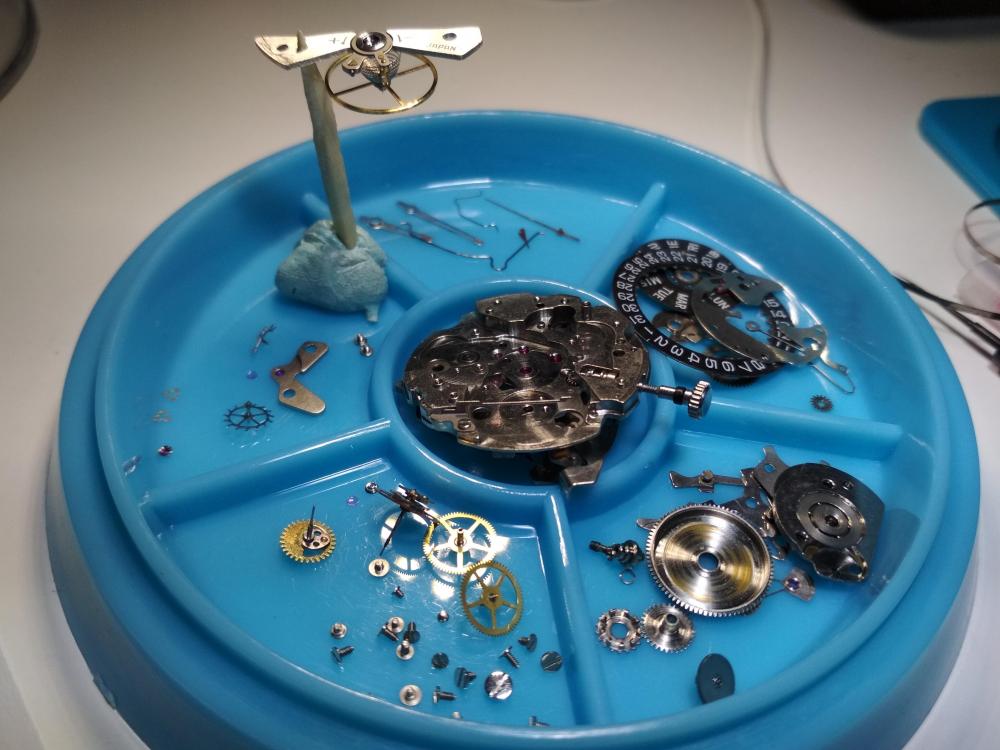
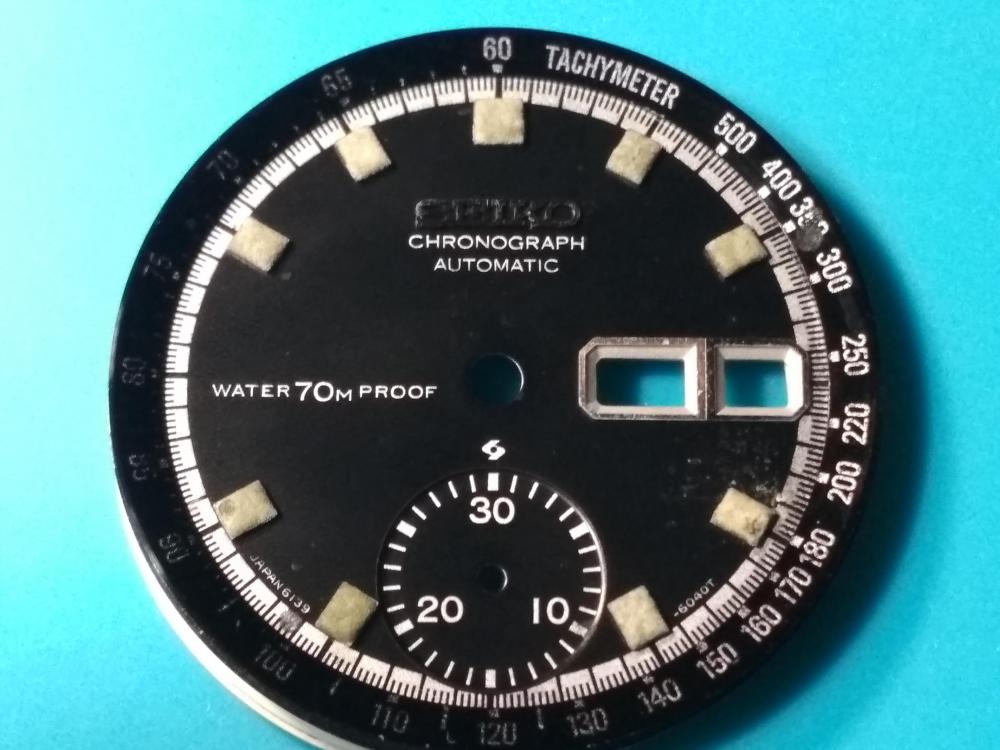
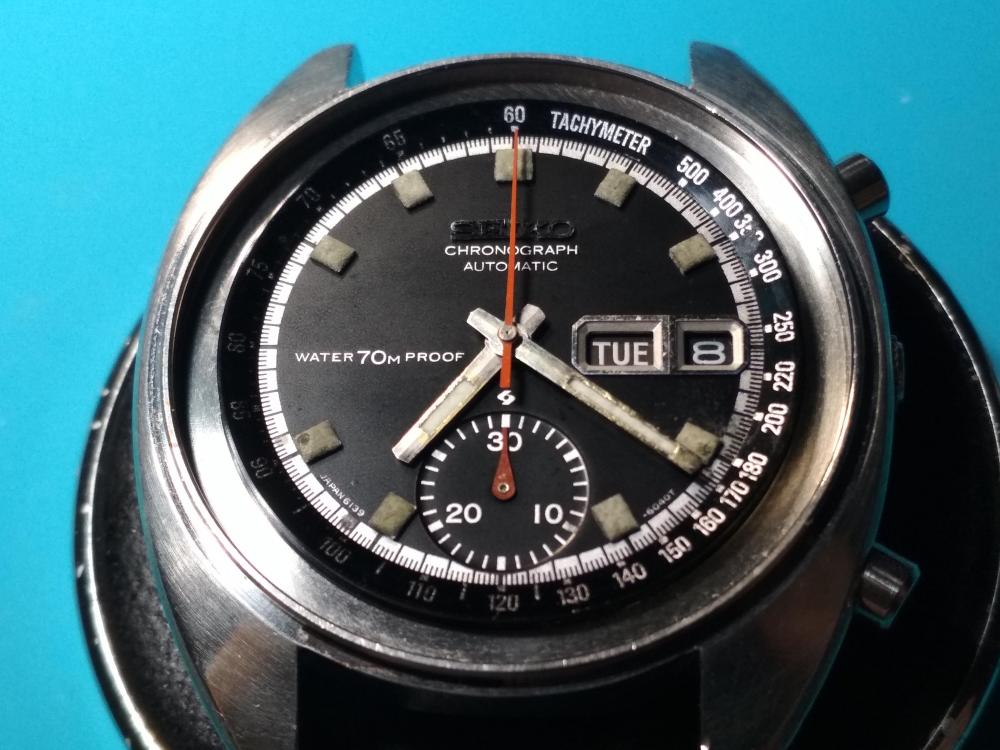
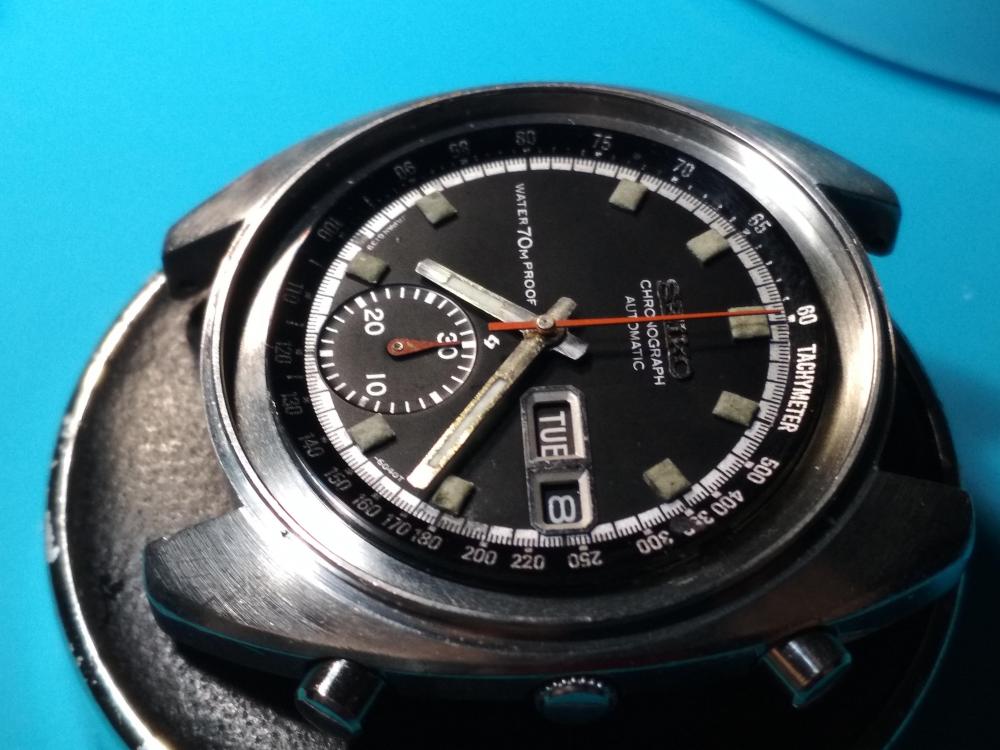
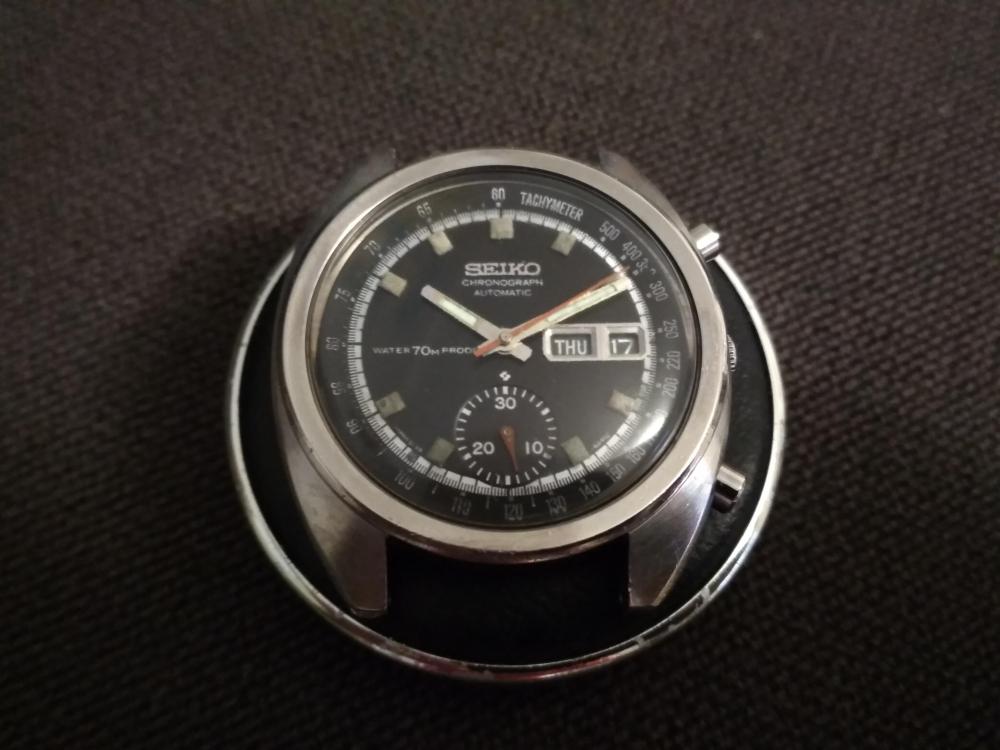
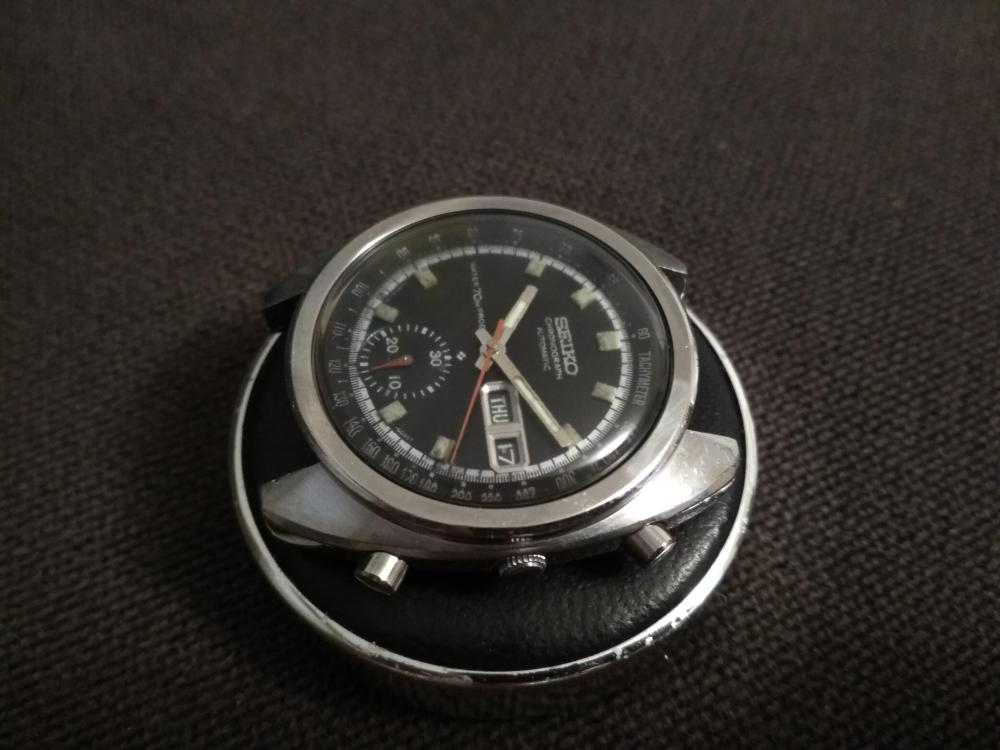
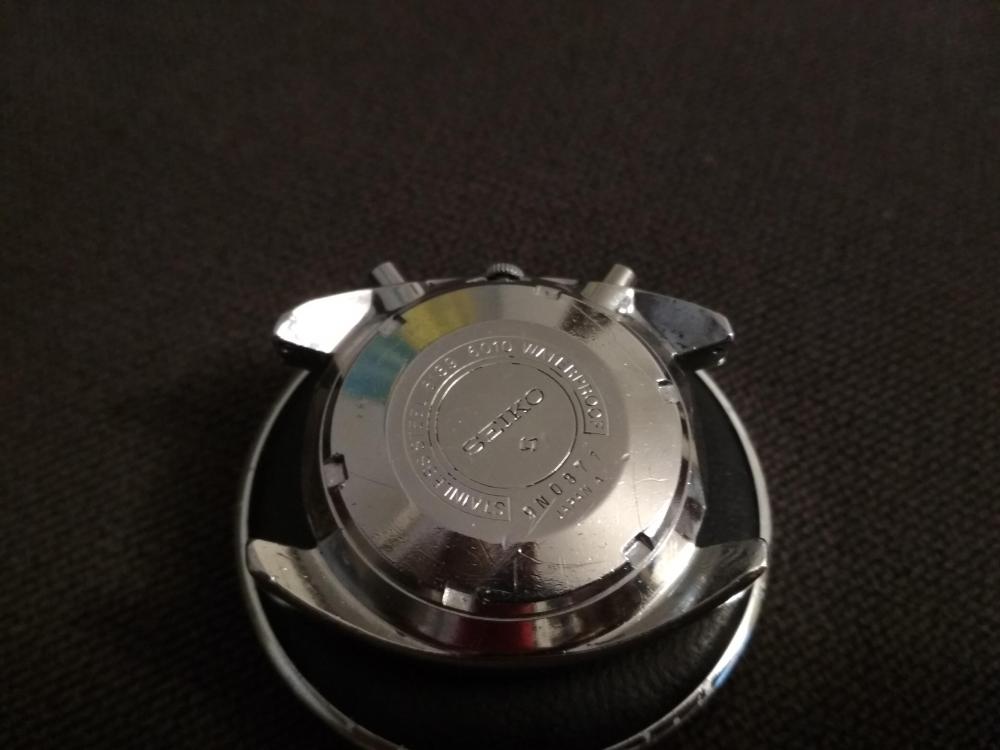
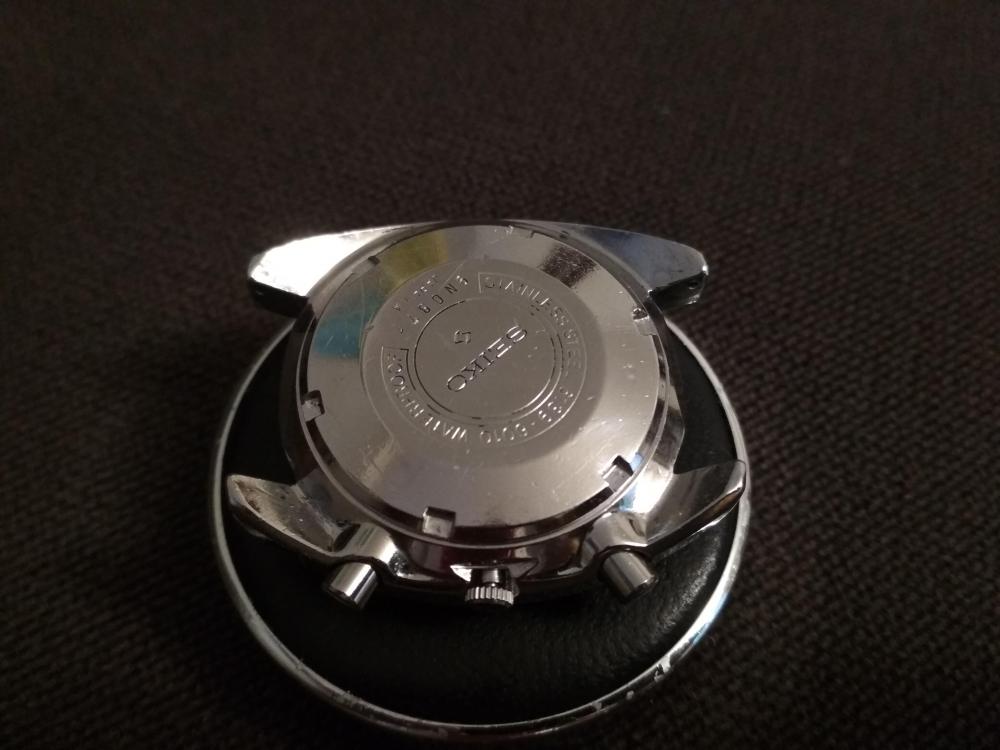
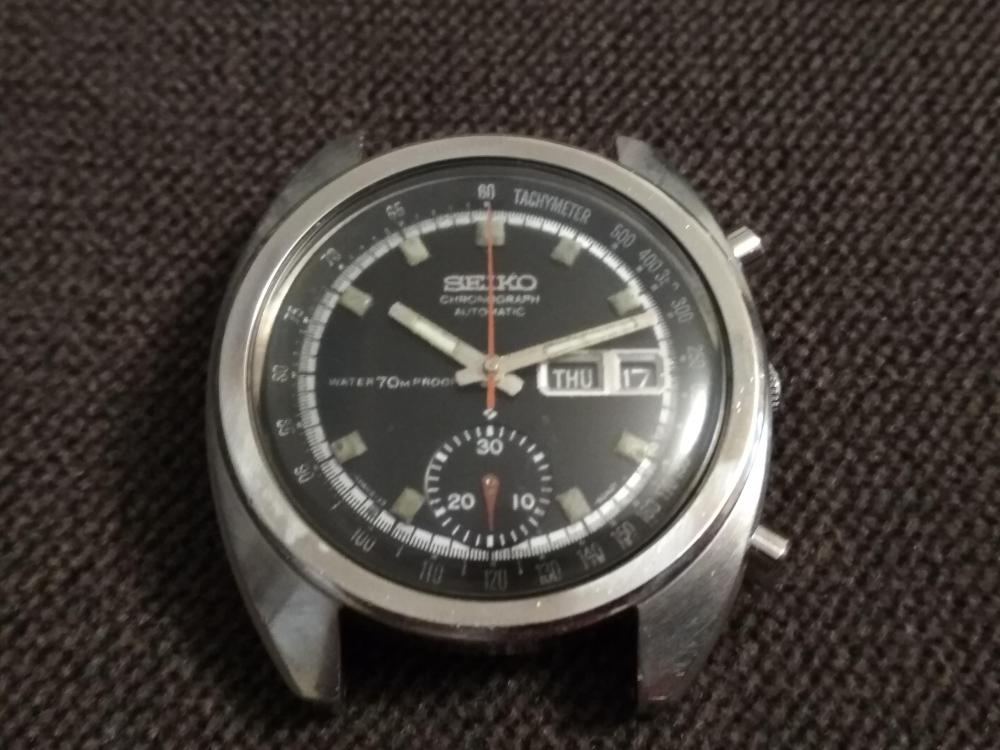
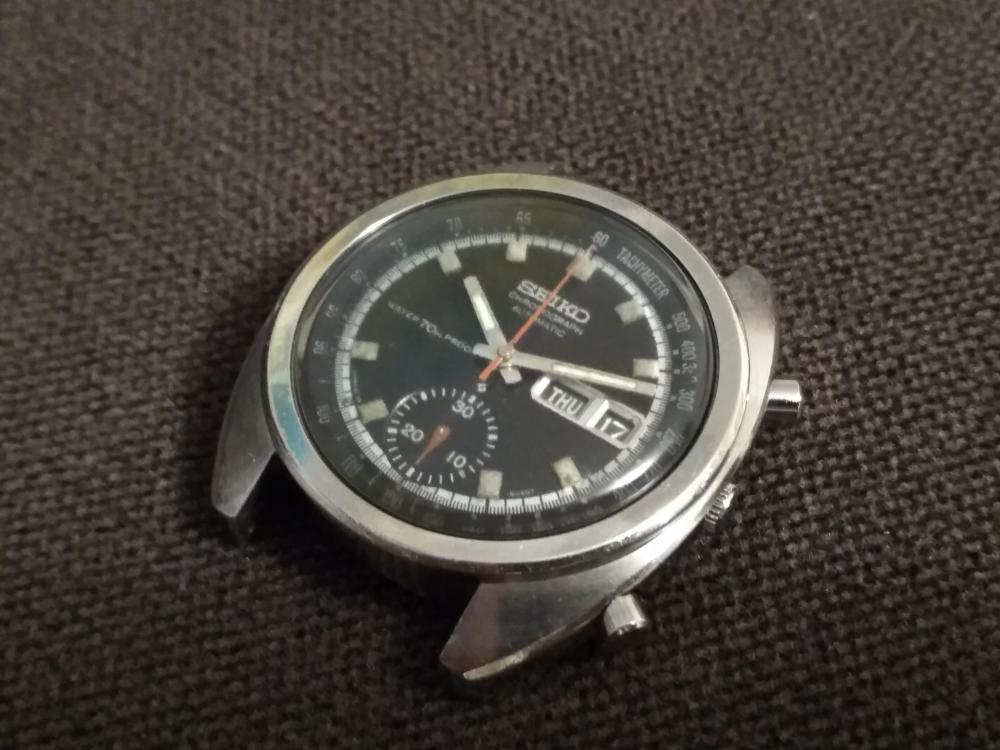
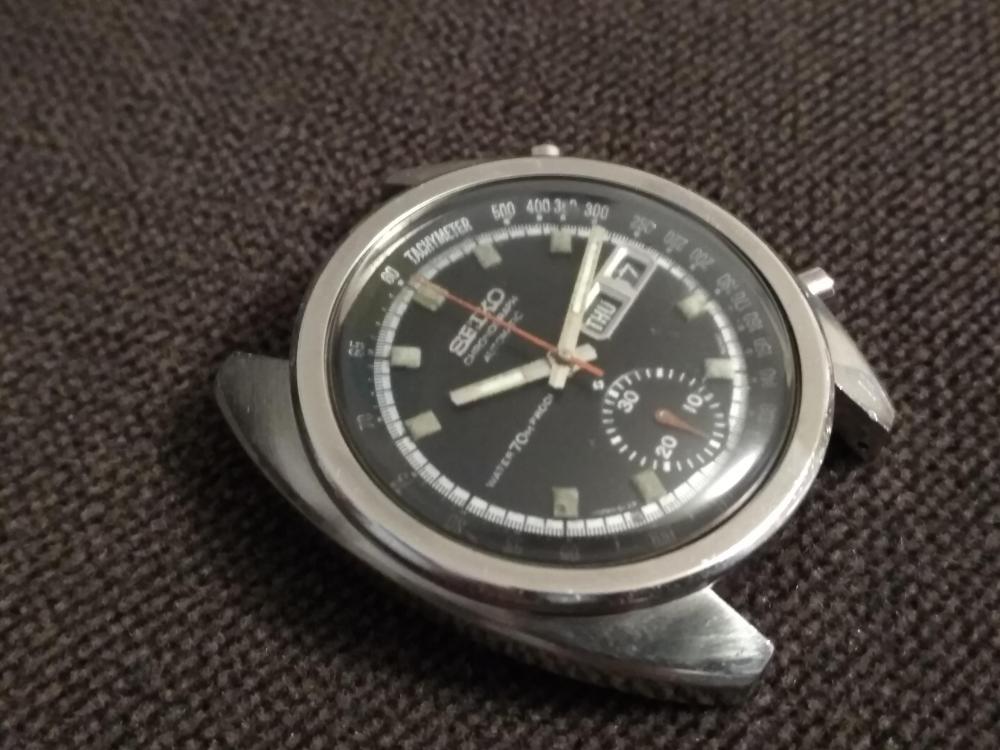
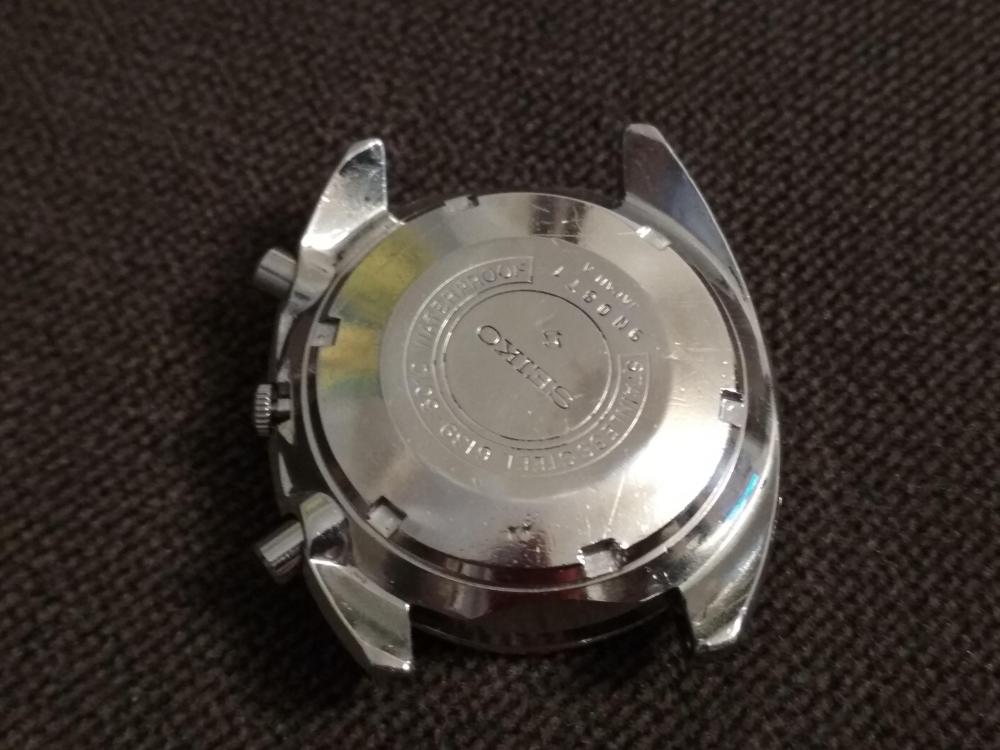
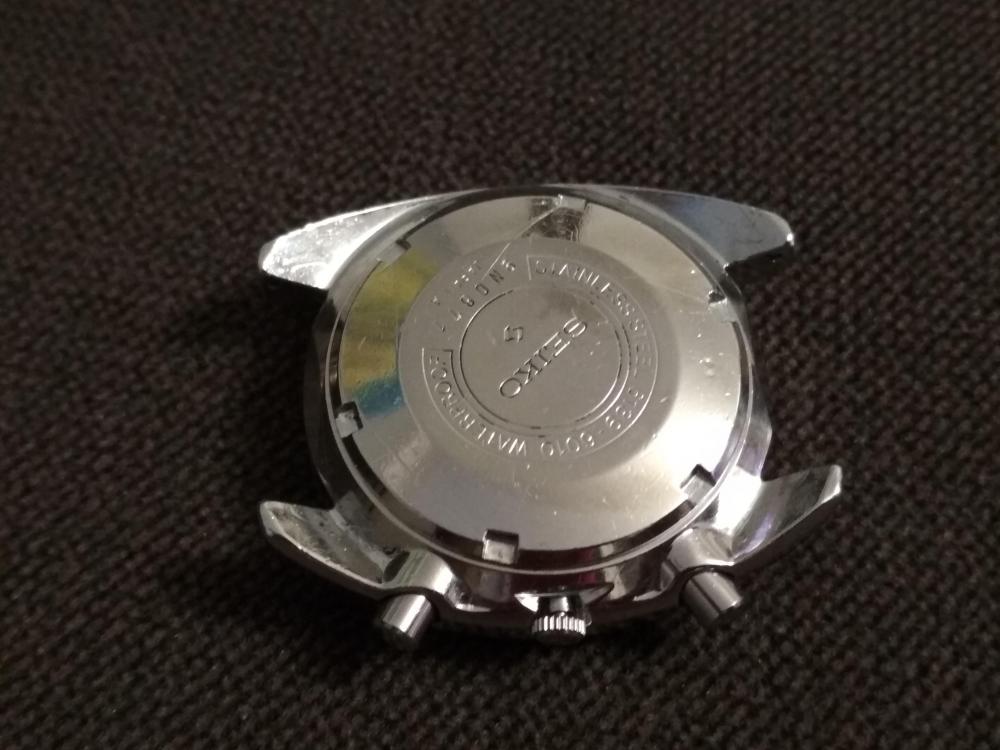
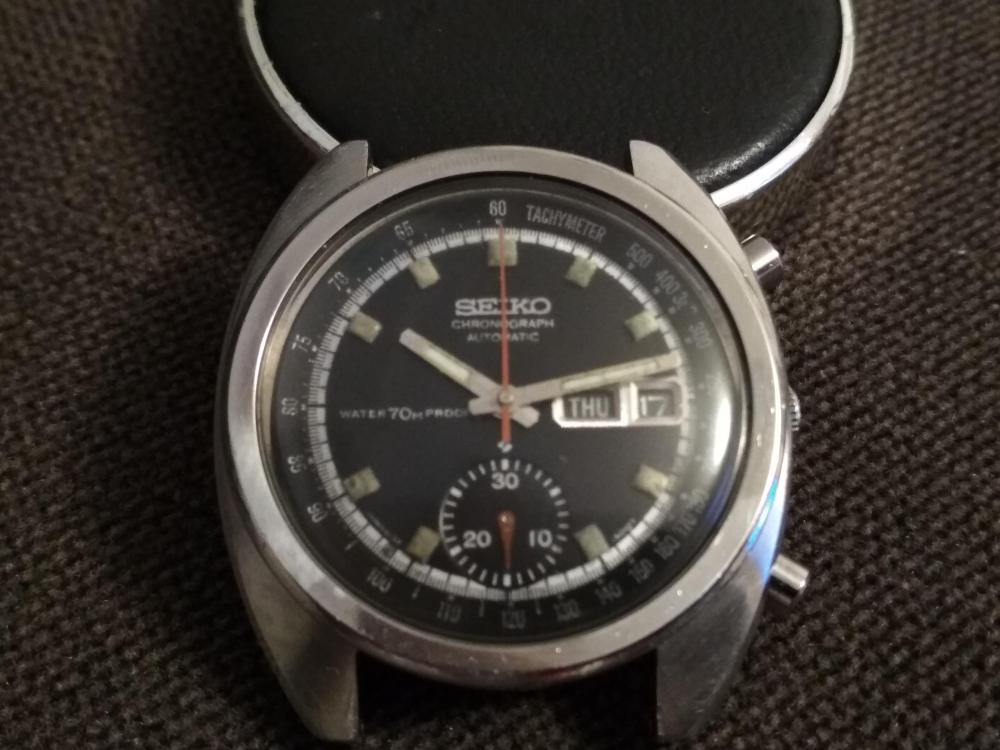
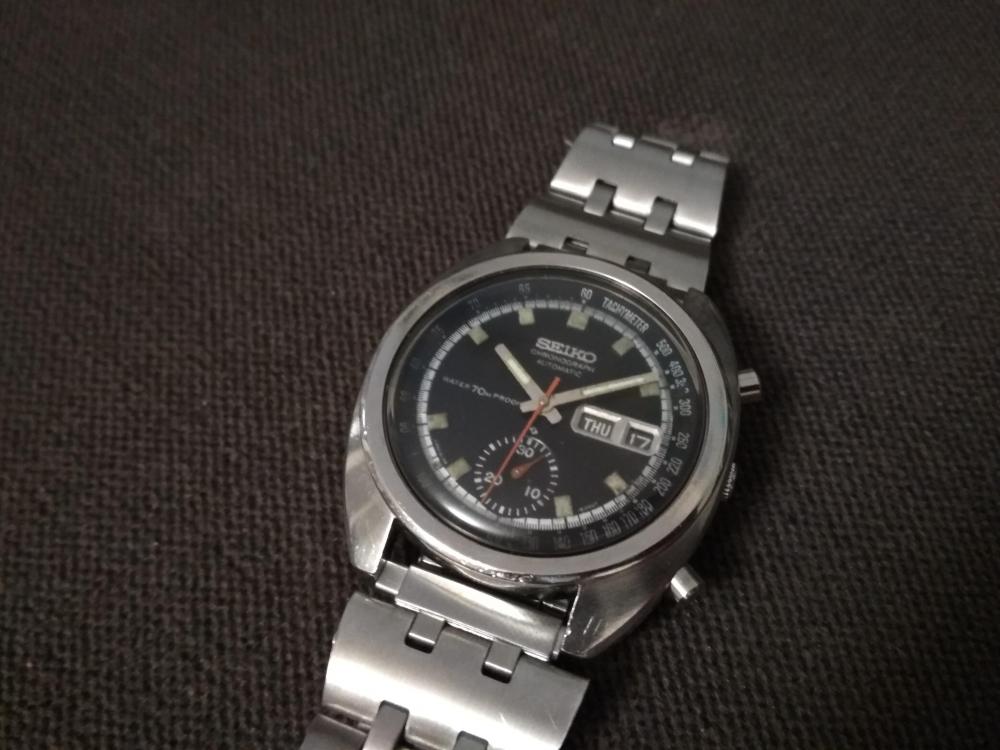
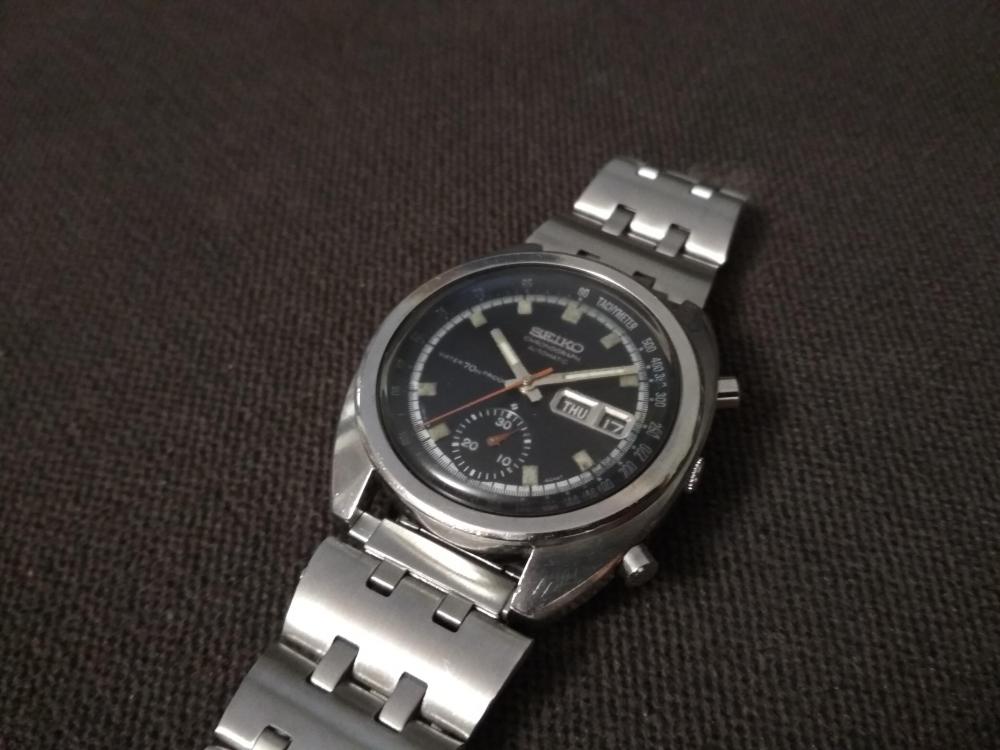
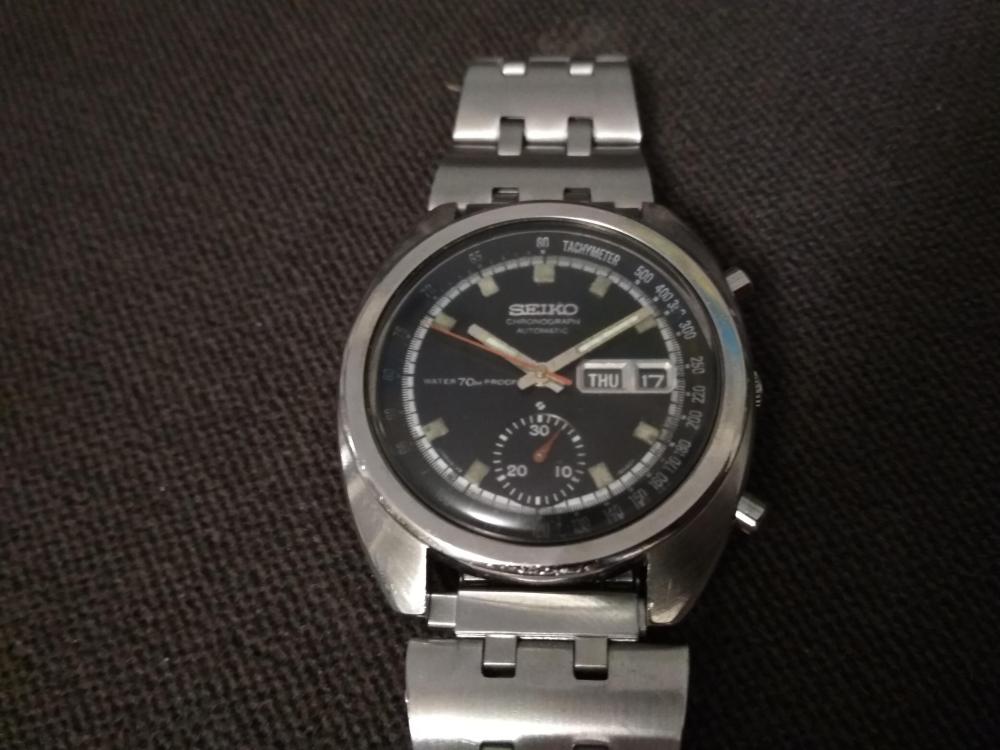
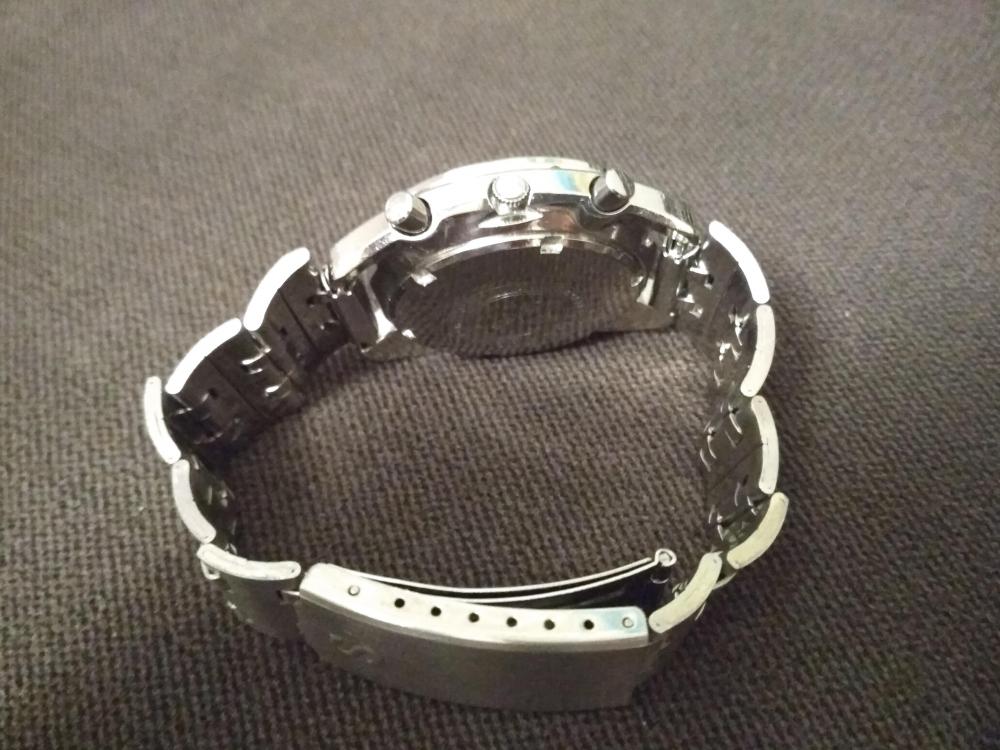
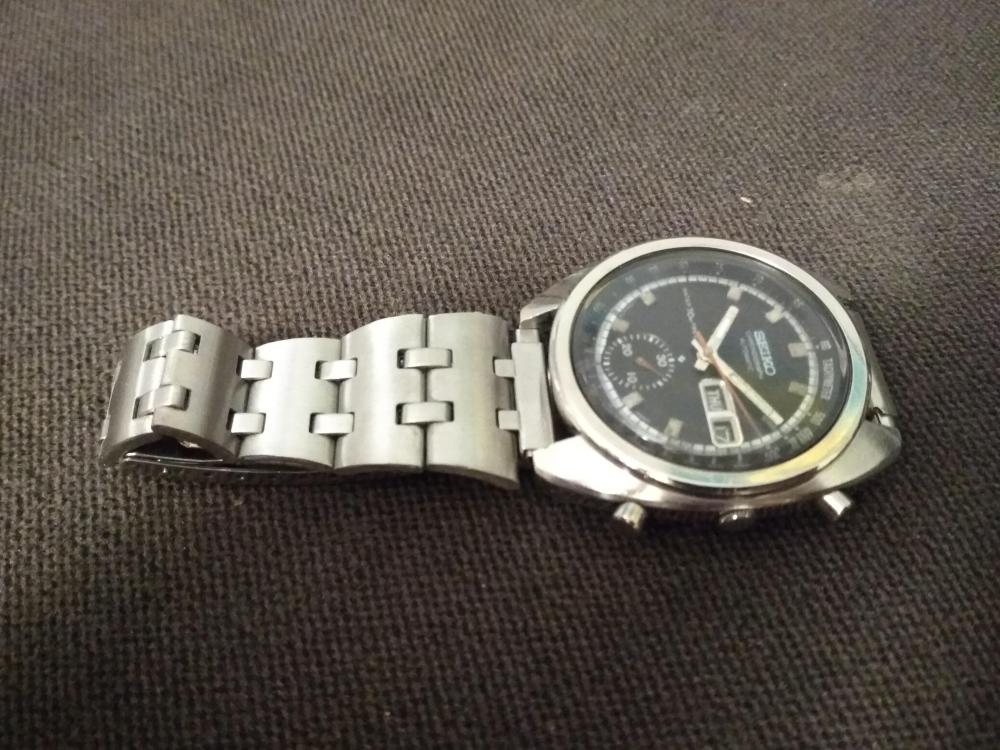
Hello guys. This is my last project – Seiko 6139-6010 aka Bruce Lee. Watch is from ‘69and it is based on the 6139A movement. Nice shot for the 50th Seiko anniversary of first automatic chronograph development. So please see the pictures below from all restoration proces. It took me 3-4 evenings. The watch came to me as non runner. Crystal was scratchy with many chips. Dial was dirty and dusty with signs of water damages. Hands lost their lume. Day calendar was loosen and didn’t work properly. Movement was complete but very dirty and dry – there weren’t any residues of old oil in the jewels. Somewhere were signs of water flood. I dissasembled movement and I gave it a bath in ultrasonic cleaner then i’ve assembled and oiled movement. Star disk od date wheel was repaird with small amouth of resin glue. Movement had tend to stop sometimes. Inspection showed that the tiny chip on the bottom pivot of the escape wheel. It was hard to see it. After replacment movement ran as a champ. I polished the hands cause there was rust and gave them new lume. Dial was cleaned. I didn’t touch the lume on the hours indexes. I was affraid to screw up it. I think now it is quite good despite the fact that the lume does not glow. Orginal crystal was polished but I decide that in the future I will replace it. Case and caseback got some polish works only with polishing paste, not too much cause I didn’t want to loose the sharpnes of orginal edges – as usual I did it. Bracelet was matted with abrasive wool. Everything was mix up and combined and there is the result. After measurments on timegrapher and adjustment it is a nice timekeeper. An amplitude satisfy me as well. Now I am enjoy to wear it. Please let me know what do you think of this restoration project and about my works on it. I appreciate your comment and your spend time. Cheers folks VID_20191016_170551.mp4 VID_20191017_195141.mp4


 1 point
 -
Only a vintage Sector Altimeter Sellers Pic. Hopefully in as good condition as I think it is. I have a soft spot for this case shape [emoji4]1 point
-
Hi A quick look on Ebay under canteen crowns for elgin watches revealed a seller in Greece has both Gold and S/steel ones available £17-73, Have a look and see if its what you are after.1 point
-
Thanks for your detailed response, I will certainly give this a go! Sent from my iPhone using Tapatalk1 point
-
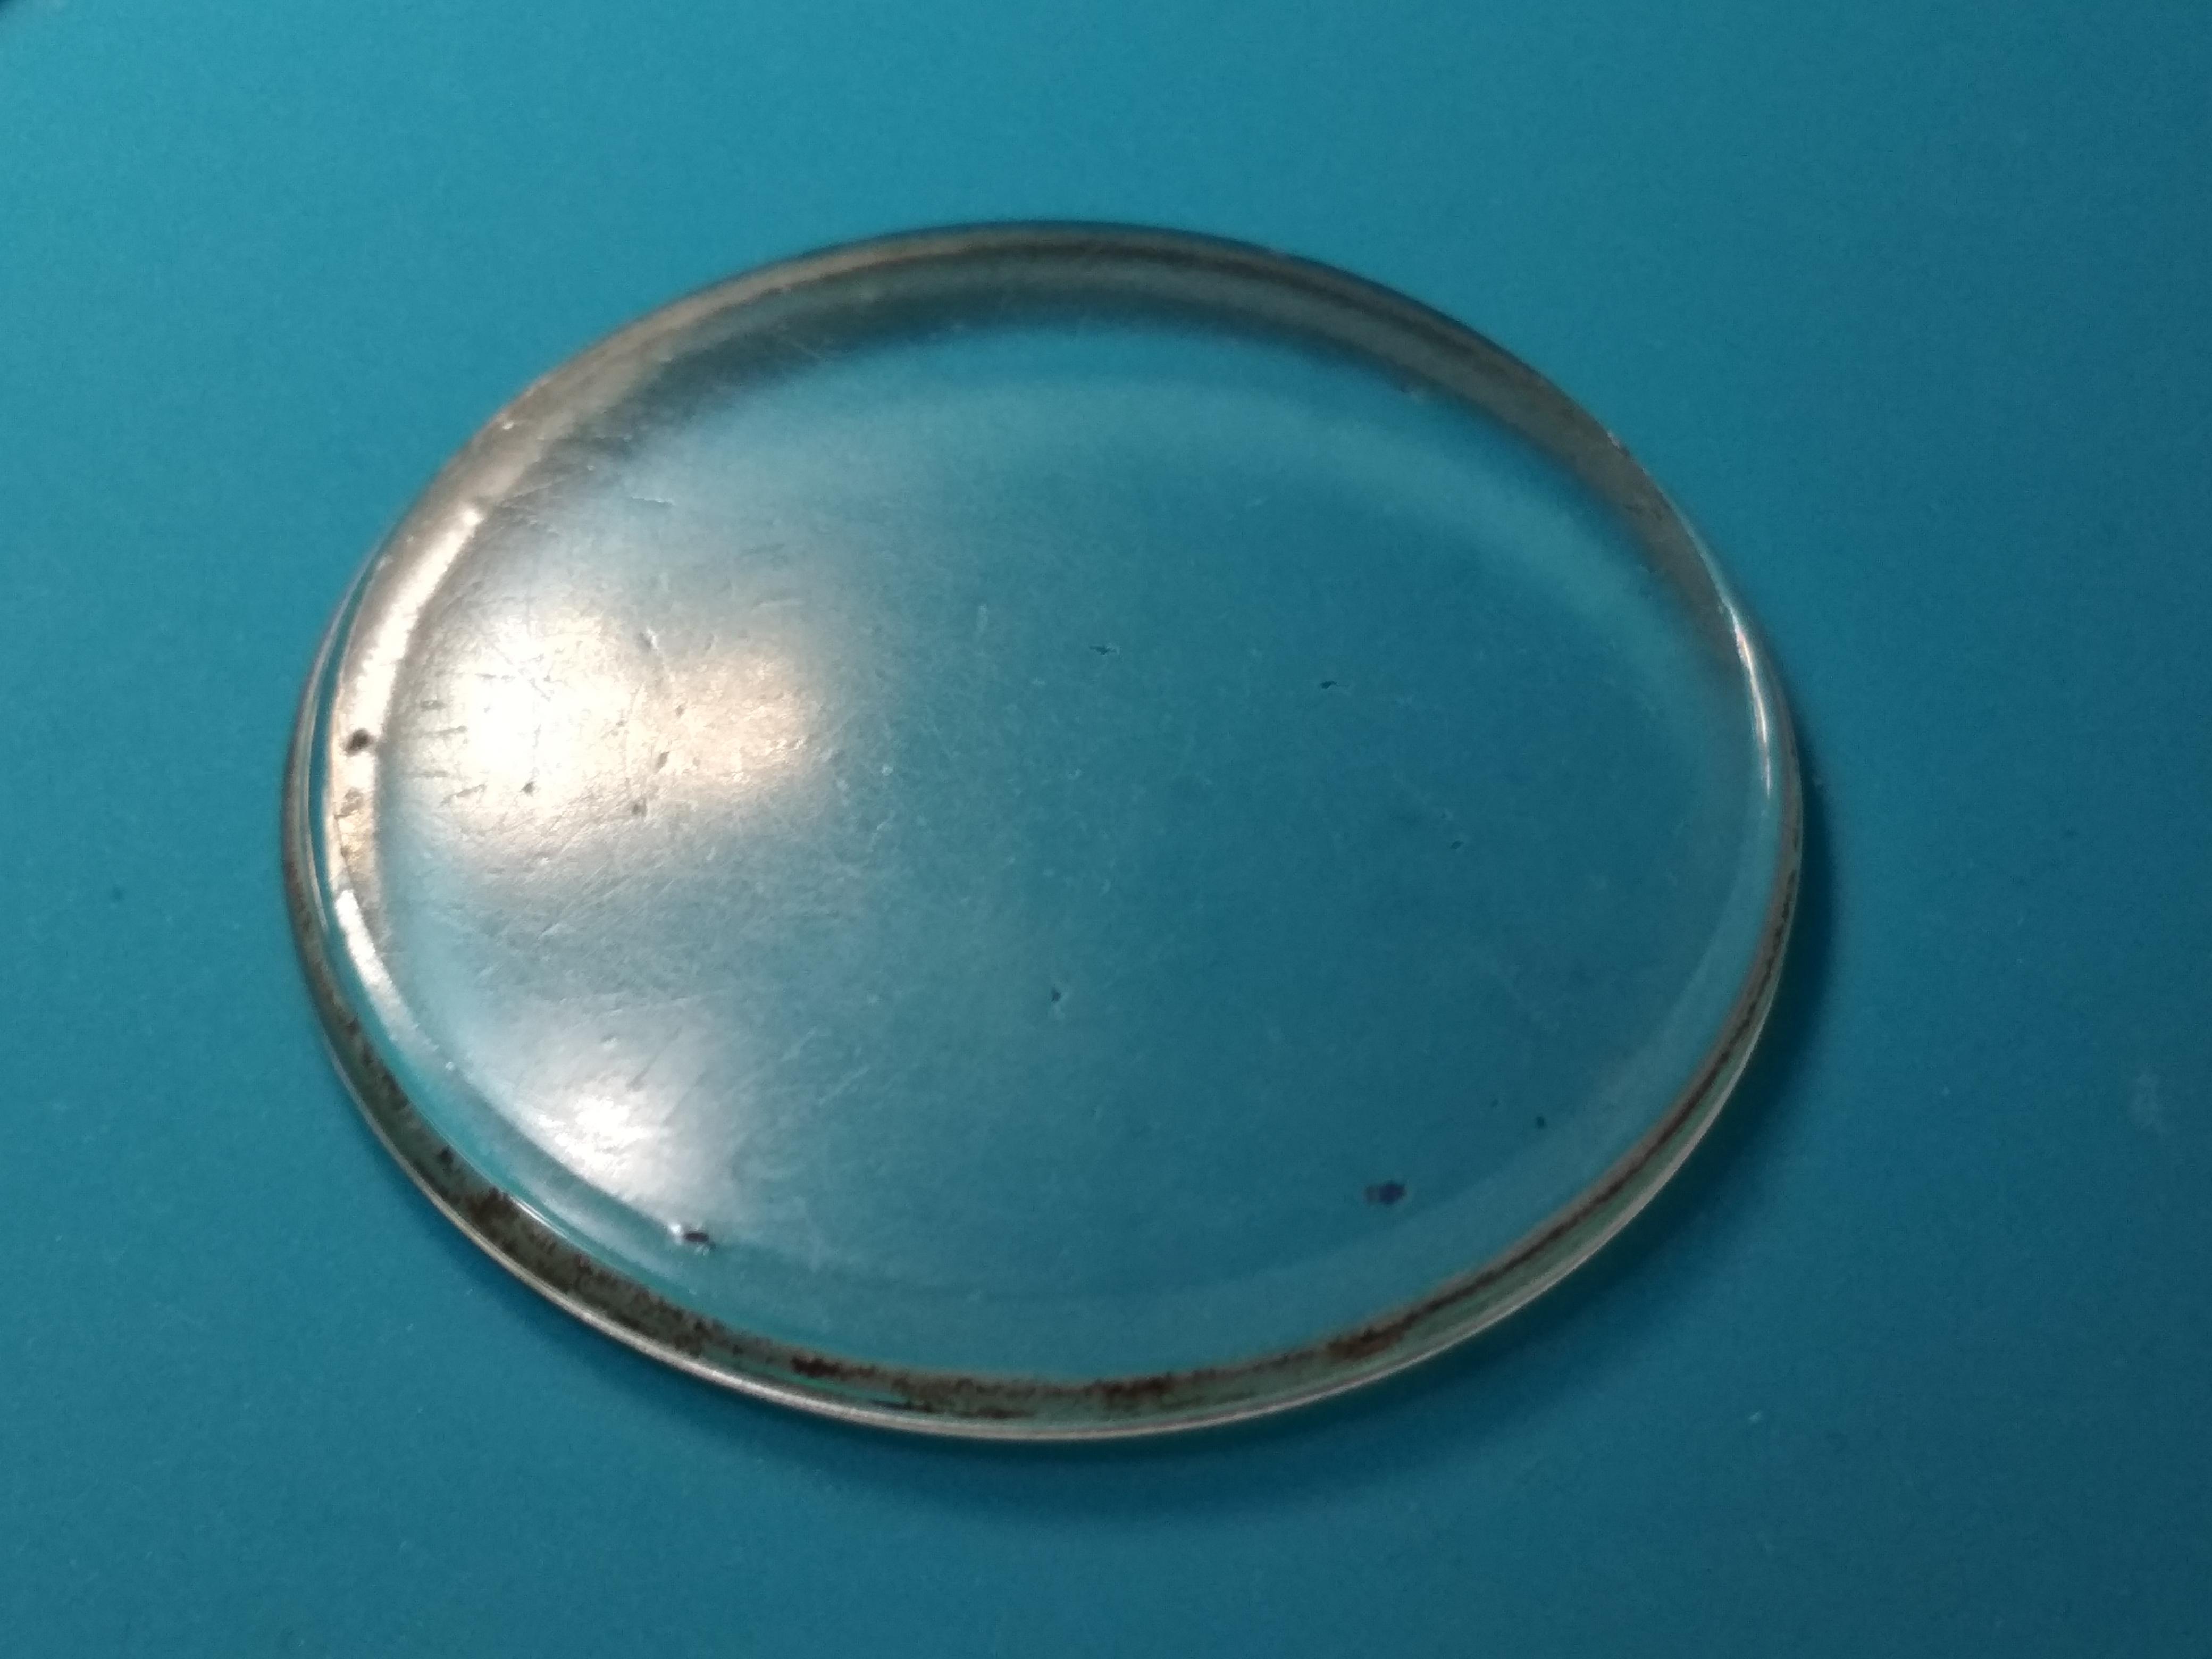
Cut a 5-6cm round from a credit card. On top of it place a round of 280 grip wet paper if there are deep scratches or dings. This is held on a mandrel in the rotary tool. which is much better if is hold horizontal by some support. Place a cup of water under the work and dip often. Set low speed. Better to keep the glass in the watch otherwise you risk it to fly away and chip it. Keep the watch as much as vertical as possible, Look well where the wheel is grinding. You want it to go where the scratch is, by including the watch just a little but, not just anywhere around. As you practice, you will be able to recognize when grinding in the right spot , as the white streaks (that is glass) shape differently on a scratch. Replace papers as needed, like once or twice, it will be difficult to tell because the glass will be very hazed, but try your best. When sure all is gone switch to 600 grid and polish where you worked before, again no need to go all around. Glass will be still hazed, but less. Next, do not waste time with finer paper, use an hard felt wheel, 50 x 15mm, and cheap oil diamond paste. This time you will be working with the outer wall, not the face of the wheel like before. For quick work you can use a single grade like 20, finer than that does not make much of a difference. The way you do it is to place a little paste toward you, and draw from that gradually with the wheel. Clean well with dish detergent. Very likely you will see more defects, in which case you will have to go back to wet paper. It takes practice to do all the above right but in my experience the paper/paste combo is the faster and most effective method. but after you mastered all the steps you can bring a terrible glass to perfection in 45-60 minutes.1 point
-
I'm now envisioning a bored little guy in a factory giggling away to himself as he pops one of these bits from a bucket nearby into each movement that goes to shipping.1 point
-
You can use a thread gage. If you have inch (tpi, threads per inch, for 8mm collets generally 40tpi) and metric (distance from one thread to the next, as above for standard 8mm collets 0.625mm) gages, you will see that they are for all intents and purposes the same. You might not be able to differentiate, and almost all drawbars will be happy with either.1 point
-
This subject has been covered many times in this forum. Just put it in the search bar and you will find lots. Personally I find it too long a winded a process and I have had mixed results. If it is a deep scratch removing the scratch and still keeping the optics OK I have found difficult. Far easier, quicker and in real terms cheaper to just change the crystal.1 point
-
Beware; their are mm threads ( UK ) AND S.A.E. ( US ) thread forms. AND " nare the twain will meet" vin1 point
-
The original standard was developed by Webster Whitcomb. If you look at many of the above sizes they are either the same or very very close. The thread pitch of 40tpi comes out to 0.635mm, and in the real world that's close enough to interchange almost all the time. What gets sticky is the thread diameter; if you look at Lorch they have a 0.625mm pitch but the thread diameter is 0.275", which is big enough to bind in many drawbars intended for the 0.268 WW thread. You can see there are several including Bergeon and Wolf Jahn with a 0.270" thread diameter, and from experience these work well across many makes. Differences in length B of a couple of millimeters doesn't generally pose a problem, it's sort of a silly dimension callout there, as there are varying head total diameters (Bergeon, Wolf Jahn, Schaublin and others are a full millimeter larger than WW) which will throw off that length without changing the function. The keyway may vary a bit over different makes, and some lathes may have a slightly larger key which interferes. It is OK to very carefully reduce the key size with a sharp file. If the lathe spindle is well made the file won't touch it anyway, but the key is soft enough to cut. What's really important in buying collets is that they are truly 8mm, or more specifically 7.99mm plus a few microns. The original WW spec is 0.3147" which comes to 7.993mm. This is because the bore in the lathe is very precisely 8mm in diameter, and they wouldn't fit in if they were also 8mm. The bore is where 90% of the accuracy comes from, the angled face of the spindle and corresponding angle on the collet are to close it- they must also be extremely accurately made of course, but the bore and collet fit are where the real business takes place. From experience older American made collets from Derbyshire, Levin, Hardinge (often marked Dale), are all good. European makes of Wolf Jahn, Bergeon, Schaublin, G.Boley, Boley Leinen, and certainly some others are all good. I have used all of the above in several makes of lathe including Webster Whitcomb, Levin, Leinen, Boley. Likewise from experience Starrett (nothing to do with the measuring tool manufacturer) and Peerless are some of the worst. They are soft, and undersized. You can see above Marshall/Peerless, the body size is 0.312" or 7.93mm. That's enough undersize to seriously affect accuracy and repeatability. Any collet however good it may look may be useless due to abuse in the past. Some ugly collets run perfectly. When buying used you just have to accumulate and sort through, make a set of really good ones, keep another set for rough work.1 point
-
I polish mineral glass with good result only using water paper and cerium oxide powder. You can see result below.


 1 point
 -
There is a Polywatch diamond paste polishing kit available for glass. I bought it locally for $17.90CDN. I usually just replace crystals if I can get the size because they are relatively cheap, but I came across a Fossil with a very thick single-dome crystal and thought I would try this and it worked very well for even deep scratches. Sent from my BBF100-2 using Tapatalk1 point
-
It took me months...After making the base, in dark stained pinewood I got stressed by that much woodworking. Then got tired of working uncomfortable again and added the hinged armrests. It's so good to work with the arms fully supported and at the correct angle.
 1 point
 -
An excellent answer about french chalk and lacquer from wls 1971. Just to add the sawdust must be fine and clean. I used to keep mine in a big deep box.1 point
-
It is the play between gravity and the length of the pendulum which determines the rate. As written, the longer the pendulum, the slower the rate, the shorter the faster. Funny enough, the weight of the bob, in theoretical therms and under ideal conditions, is irrelevant; not in reality though ... Gravity here on earth is not everywhere the same either, never mind dragging the clock into space The length of the pendulum can be changed to any desired length and therefor to any desired rate. Remember, it is not the clock which runs on time and the rest has to follow. It's a mechanism which does its thing regardless "the time" and it is up to the clock-maker to make the mechanism to run such that it follows / indicates the time. He can change the gears such that the clock follows the time, but it's the length of the pendulum and the amount of gravity which are dictating the rate. The length of the pendulum (and therefore the rate) can change due to outside influences, but that's another topic and than we are talking about complete different clocks (think of Vienna clocks ) Same as with mechanical watches, it's the rate / frequency of the balance-wheel which dictates the rest.1 point
-
The company that makes TimeTrax timing machines has a clock train tables publication. So going through the book casually I'm guessing That maybe 50% do not have an even count. Not only do they not have even counts for the most part they're all totally different numbers. Which as already pointed out is totally irrelevant as long as the pendulum matches the gear train and the hands revolve the proper rate it doesn't matter.1 point
-
First, I'm not heavy into clock, I've done a few but never thought about the beat rate from the mechanism side. My logic goes from the other end of the stick. In my world it's the length of the pendulum which determines the number of beats. The longer the pendulum, the slower the beat, the shorter the pendulum, the higher the beat. The pendulum steers the anchor escapement and therefor the speed with which the power is released and the mechanism tuns. The hands for the time-indication are connected to the mechanism. Change the length of the pendulum and the clock will beat faster or slower. That's how you regulate the time keeping. So, which end of the stick is it ? BTW, looks like a nice fusee mechanism and with (original?) chain ! I wouldn't mind a picture of the (pub?) clock1 point
-
Just in case you want all the numbers I have them below. But it looks like The assortment FB-INCA-ROA466 Is a better way to go because you get spare parts. 400/1650 SHOCK SPRING, UPP/LOW 270.03 1344/OME 440 http://www.incabloc.ch/images/cat/omega.gif http://cgi.julesborel.com/cgi-bin/matcgi2?ref=OME_620 Omega 620.pdf1 point
-
I have done this fiddly repair recently on a 620, so it is possible. First you'll remove the hairspring/balance from the balance cock. Flip over the balance cock and you'll see the u-shaped clip that is holding in the incabloc setting. I would recommend installing the new shock-spring and cap jewel into the setting before installing back into the balance cock. You can scavenge a new shock-spring for a reasonable price from www.ofrei.com , part:FB-INCA-ROA4661 point
-
French chalk: https://www.cousinsuk.com/product/french-chalk Use a very soft brush such as the very soft Glasgow brush : https://www.cousinsuk.com/product/natural-bristle-brushes-handheld The brush is passed over the chalk to coat it , you then brush the plates using the brush in a very fast motion applying no pressure just skim the surface very fast any excess chalk must be blown from the pivot holes and surface when finished, the plates must be absolutely bone dry before chalking other wise the chalk may sit in the pivot holes and not be removed when blowing clear. Lacquering is a skill in it's self applying the lacquer with a very fine natural bristle brush such as a Camel brush natural bristles let the lacquer flow better from the brush than nylon or synthetic bristle brushes, traditional lacquers are shellac based and dry very quickly almost on contact applying to parts that have been slightly warmed before hand gives a more even result, I have Lacquered by hand and have had some good results, but it is a frustrating process at times you have to work quickly and methodically, clear lacquers are easier to get good result with, warm tone Lacquers can be very unforgiving so in the end I gave up and now use a compressor and airbrush to apply. https://www.cousinsuk.com/product/lacquers-rapid-drying1 point
-
But you did adjust the mainspring and it could be slightly obstructed. You could use a toothpick and press lightly against the inner arm/spoke of the center wheel and see if it significantly improves the amplitude of the balance. I do this with pocket watches usually then iPhone record it in slo mo to see the resulting amplitude. Sent from my iPhone using Tapatalk Pro1 point
-
It does look like quite deep locking, but I wouldn't assume that it isn't normal without a comparison. Don't compare it to any Chinese copies as I tend to find that these have a very shallow lock. I would doubt your mainspring is the culprit, from what you have described.1 point
-
Hi The sawdust is used for drying off the parts after cleaning then puffed off with a blower. The french chalk was supplied in a block, you used a watchmakers brush and loaded the brush then polished the plates with the chalk, old methods now as most cleaners now brighten the brass and most plates are warm air dried.1 point
-
The idea is they would center the screw and then use the lever to get it within a few seconds of +/- 0 and then sort out the rest of those seconds with the fine adjustment screw. It's really difficult to regulate with precision of down to the second with just the lever so the fine adjustment is there to help with that.1 point
-
Welcome back and good luck the second time around.1 point
-
The fine adjust screw will move only so far. The "screw" is an eccentric, so you are correct, once it gets to a certain point it will reverse the adjustment if you keep turning it 360°. Put the screw in the center position (the slot inline with the balance pivot) then CAREFULLY move the lever a fraction of a mm clockwise to make it slower or counter-clockwise to make it run faster. Once you are with 15 seconds +/- then you can use the fine adjustment screw to get it closer. It's going to be rather a long process without a timegrapher, and we are all assuming that the beat error is within spec's.1 point
-
Nice to see you back. So get those tools out and off you go.1 point
-
According to convension what ever the measurement is add 0.01, I believe that's what is quoted by Esslinger and others. The criteria is that when fitting the crystal it must be pressed in square to avoid a pinched gasket. So great care must be taken on fitting. A screw press is best as it is more controllable. I have done it using the hand press I lubricates the crystal edges a little water, just a wipe, lay the crystal on to the gasket ensure its square and press gently so it eases it in with little or no real force, also choose the correct dies for the job.1 point
-
Welcome back Dave, never fear there is plenty of good advise given freely on the forum.1 point
-
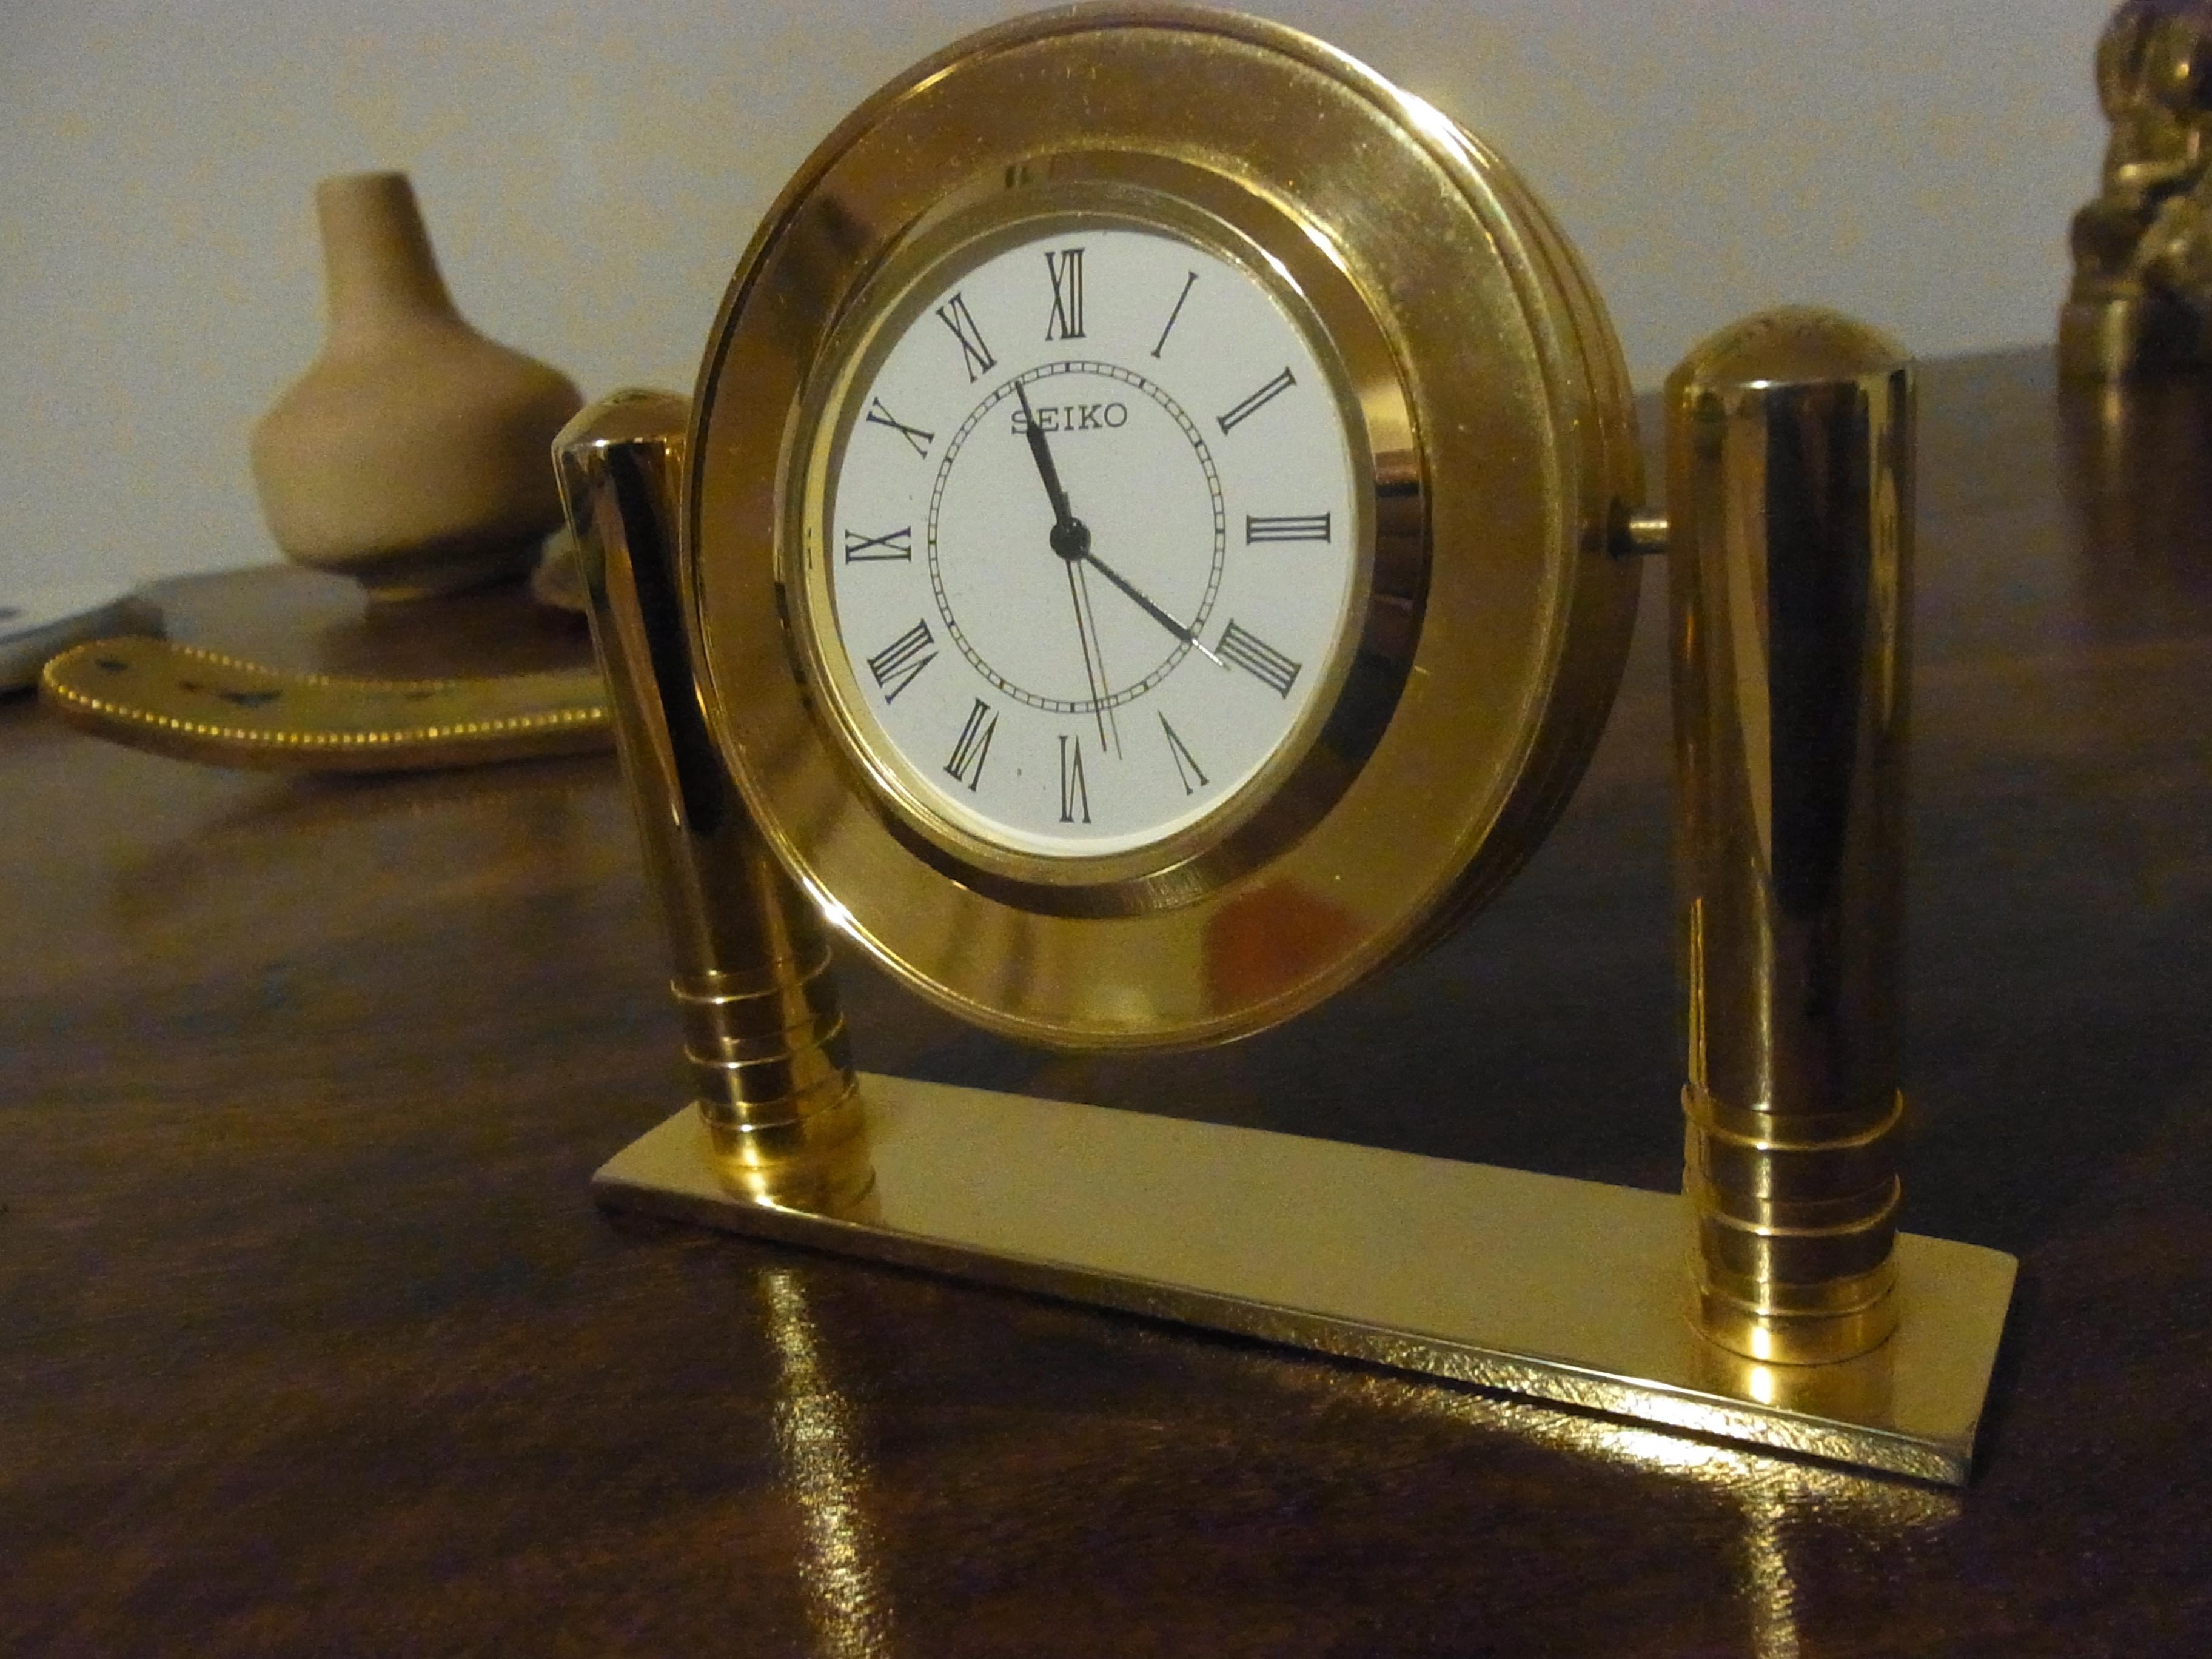
Does a brass desk clock count as Watch of Today? Well this one kind of does, since it is actually a Seiko quartz watch movement, complete with stem and crown. The "watch" part is held in to the body with a silicone band which allows it to press fit into a recess on the very heavy brass body. The whole thing is about 4" high and surprisingly heavy, and no doubt cost a pretty penny when new. Needless to say, it is yet another member of the 404 club. Don't forget to put the clocks/watches back tonight if you live in the UK.
 1 point
 -
Had the head of screw strip off the mainspring barrel arbour. Tried to use a bergeon screw extractor and failed. So I set the arbour up in a lathe and graved a small cone center. Then I used circuit board drills and progressively drilled out the center. And after two broken bits, I finally got the insides loose. Then I went on my Stereo Microscope and picked out loose parts using rodico and a small pink screwdriver. All worked well. Now to find a new screw. The main mission was to replace a broken mainspring. And here is the broken mainspring. Sent from my iPhone using Tapatalk Pro1 point
-
IMG_4345.m4v I was given this clock this week being told it had not run for 10 years. I expected issues and then found it is run via quartz, changed the battery tightened the loose hands and away it went. The counter weights and chains are just for display. I could make a fortune with these repairs !!!1 point
-
Thanks returned the clock today customer very happy.1 point
-
@Sberry I've done a lot of Vostoks and I hope you'll find this post useful where you'll find a picture (among the assembly pictures) and a video (link) demonstrating how to get the anti-shock spring in place.1 point
-
You have an 8-day French carriage clock with a cylinder platform escapement. They must have been produced in there millions, this type is very common, the numbers are just case part numbers. It has an Arabic style dial with original hands. Cleaning Brass. All movement parts should be polished by hand. Brasso is what I used; some on here say Brasso is an abrasive and should not be used. Total rubbish, you will need old soft cloth and a soft brush to apply it. I would then clean in petrol and dry in soft sawdust. You will need a block of French chalk and a chalk soft brush (clean) you can buy this from any good supplier. Never use the chalk brush for any other work. You chalk brush every brass piece of the movement, this will prevent it from tarnishing, you will need a bench blower to blow away the excess chalk. Cleaning Steel Parts. All screws should be cleaned and polished, removing the burr, general tidying up of the screw heads. Best to use a lathe if you have one. You can do it by hand but you will not have such good results. You will need various emery sticks, start with a file, nothing too drastic and using various emery work down until you reach a nice shine. The same goes for all the platform screws. Clean off the arbor of any burr and use the emery sticks to finish, don’t forget the key end, the same goes for the handset. Polish the ratchet and the spring with emery. Cleaning the platform. Re-move the collet/hairspring from the balance; don’t forget to mark it so you know where to put it back in the same place. Put the hairspring in Ronsonol lighter fluid with the escape wheel; remove the regulator and its parts and leave. Clean all the brass parts in the same way as I have described above. Clean the regulator parts with emery and wash out in Ronsonol. You can clean the escape wheel with a glass fibre scratch brush. Cleaning the case. Polish in the same way, don’t French chalk it. You must make sure you have completely removed all access polish. You should lacquer the every part of the case with a clear lacquer, you will need a very soft artist brush for this so it doesn’t show brush strokes and brush in one way only, This dries very quick, so be careful. I have included a link for the lacquer. https://www.cousinsuk.com/product/lacquers-rapid-drying1 point
-
This is the paperwork that came with it. Turns out it cost £21 in 1952 which is a bit more that the £300 I paid. I hope these are of some interest. Pultra Information.pdf Pultra Price List.pdf Pultra Receipt.pdf1 point