Leaderboard


Popular Content
Showing content with the highest reputation on 02/06/20 in all areas
-
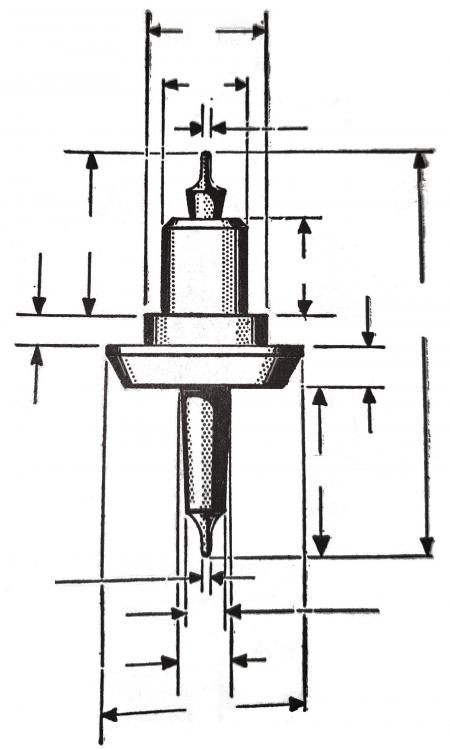
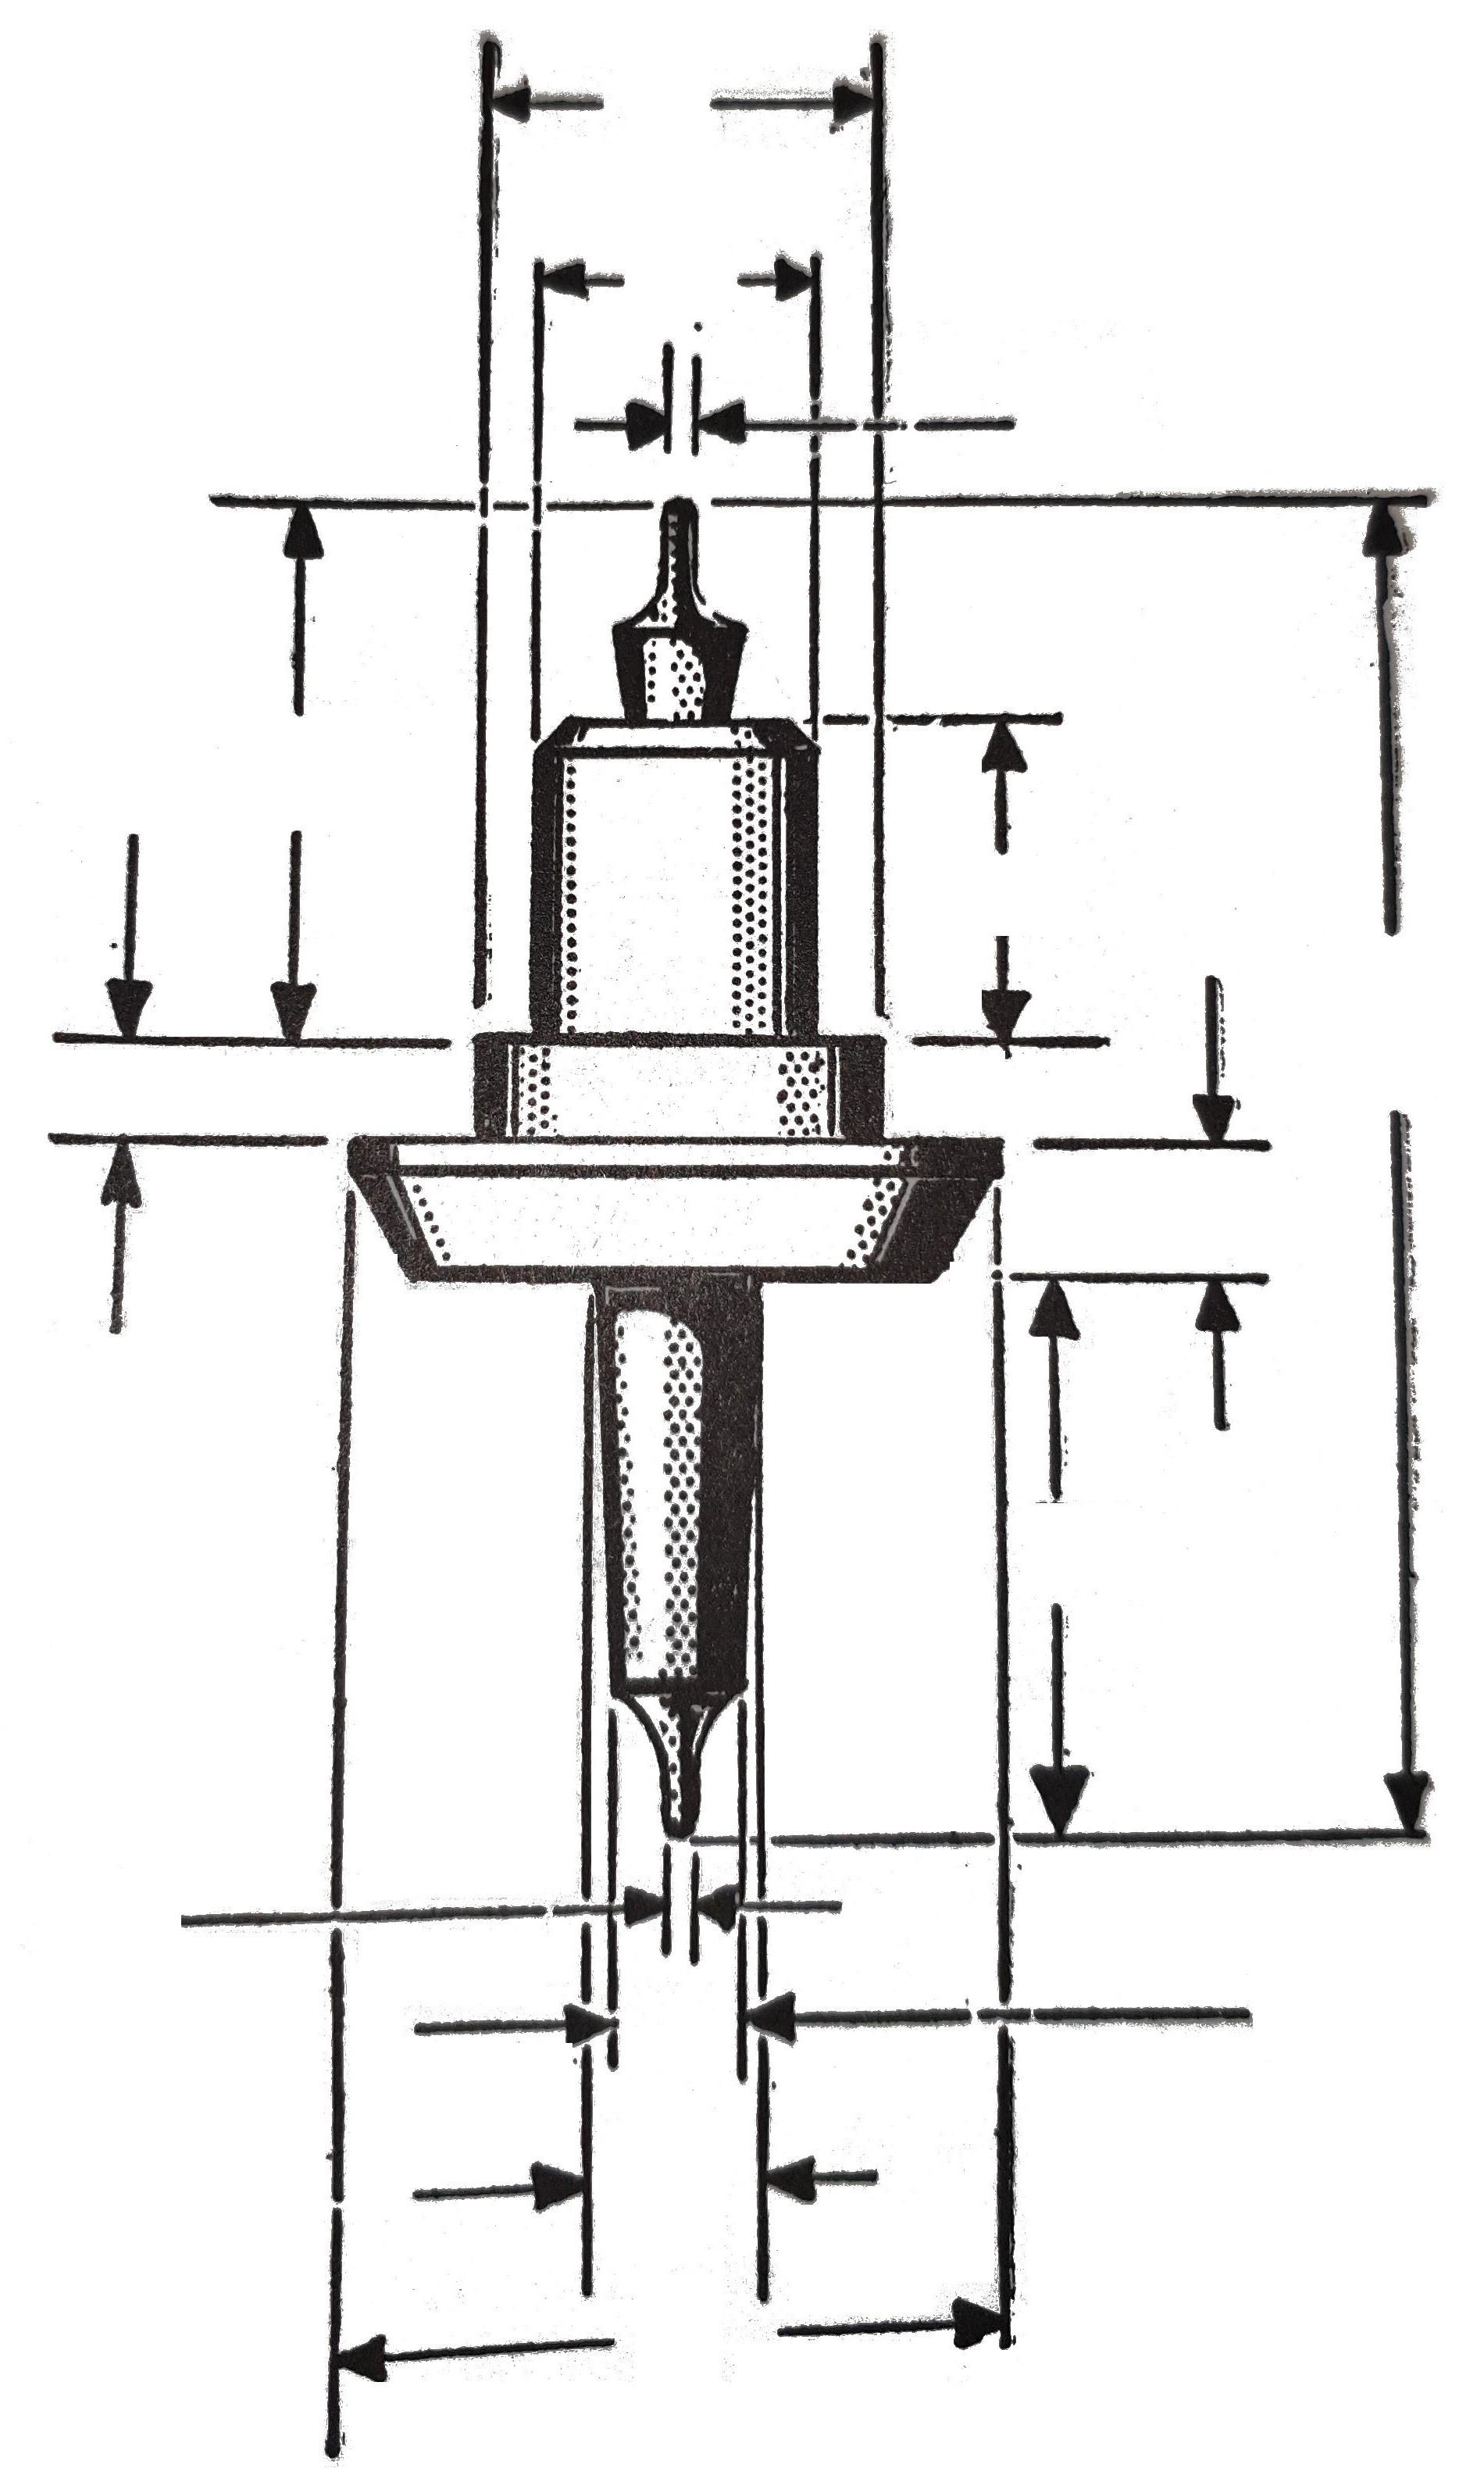
I've got a 1920s Jaeger car clock with platform escapement that I need to make a new balance staff for and tonight I will measure the broken balance staff to get all the critical measurements. Previously I have just made a rough hand drawn sketch of a balance staff but decided it would be nicer if I had a good diagram I could use to write the measurements on and then keep it filed away should I ever have to make another ABEC balance staff. I was thinking of making one up in CAD from scratch but in flicking through Henry Fried's book 'The Watch Makers Manual' I found a perfect diagram. Took a photo of it, did some clean up of it in GIMP and then turned it into a PDF file for easy printing. I have set the PDF to be A4 size. I have attached the PDF and a JPG of the image too as I thought this may be of use to other people. If you haven't already got a copy of Henry's book I do recommend it, as in my opinion it gives the best walk though on making a balance staff using only the equipment an average watchmaker would have in their workshop. Balance Staff.pdf
 6 points
 -
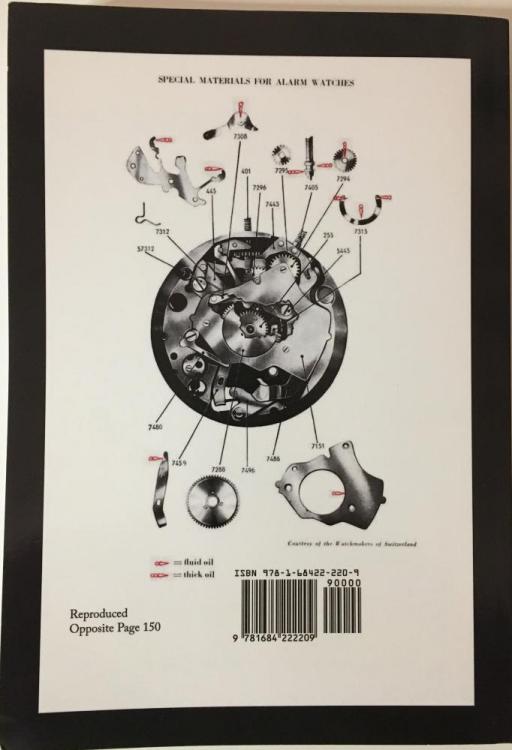
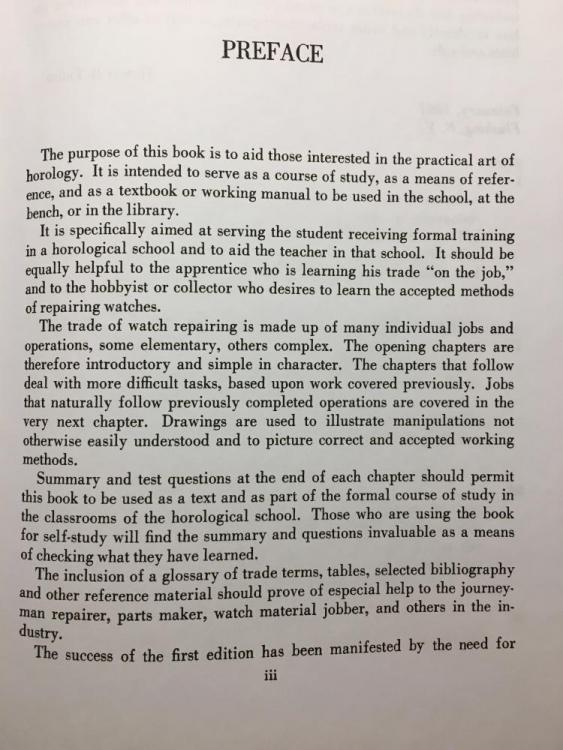
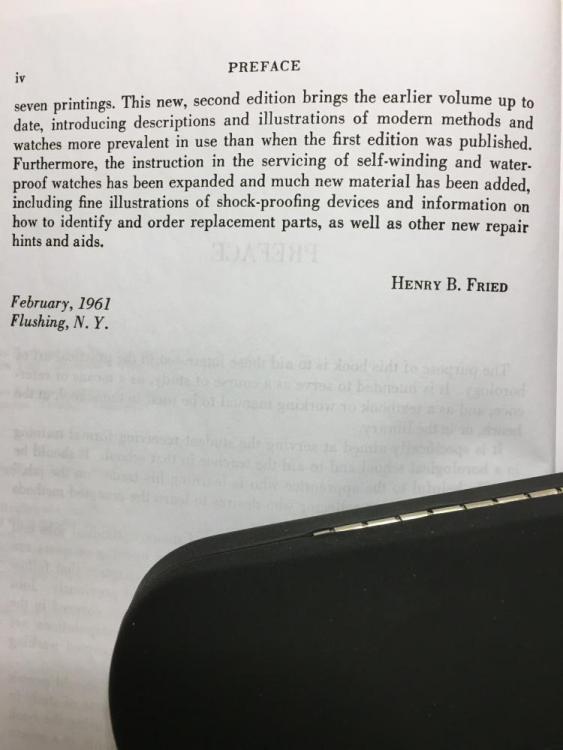
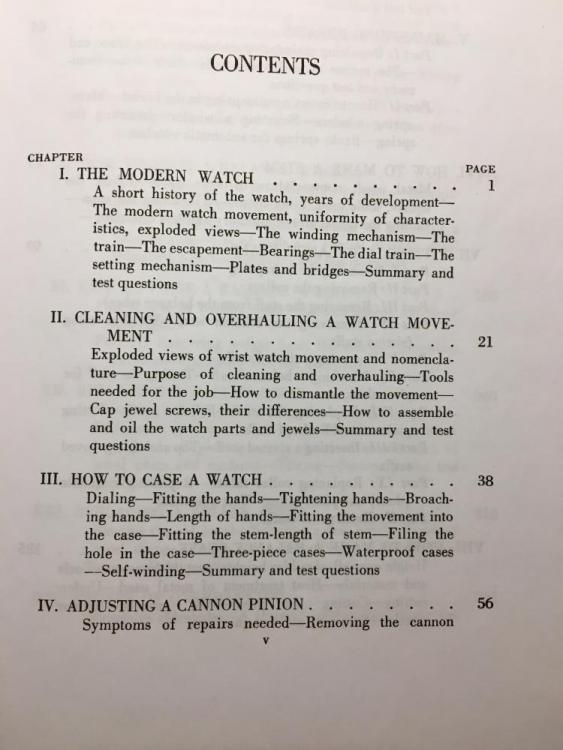
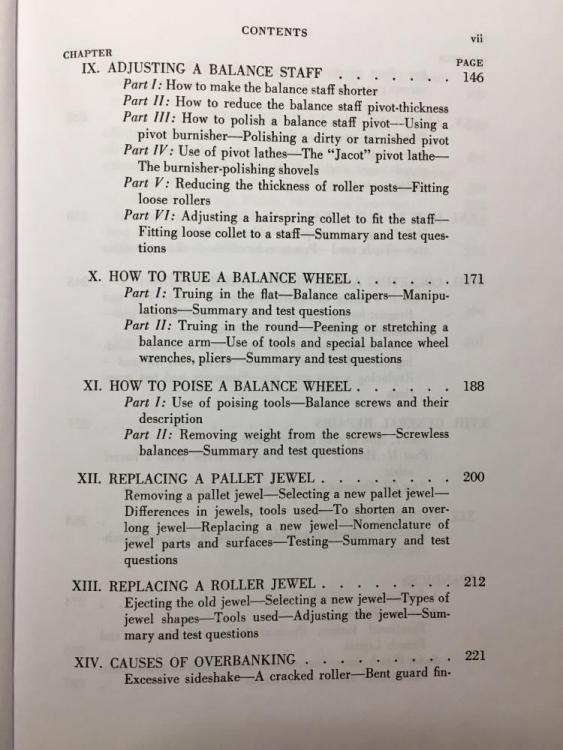
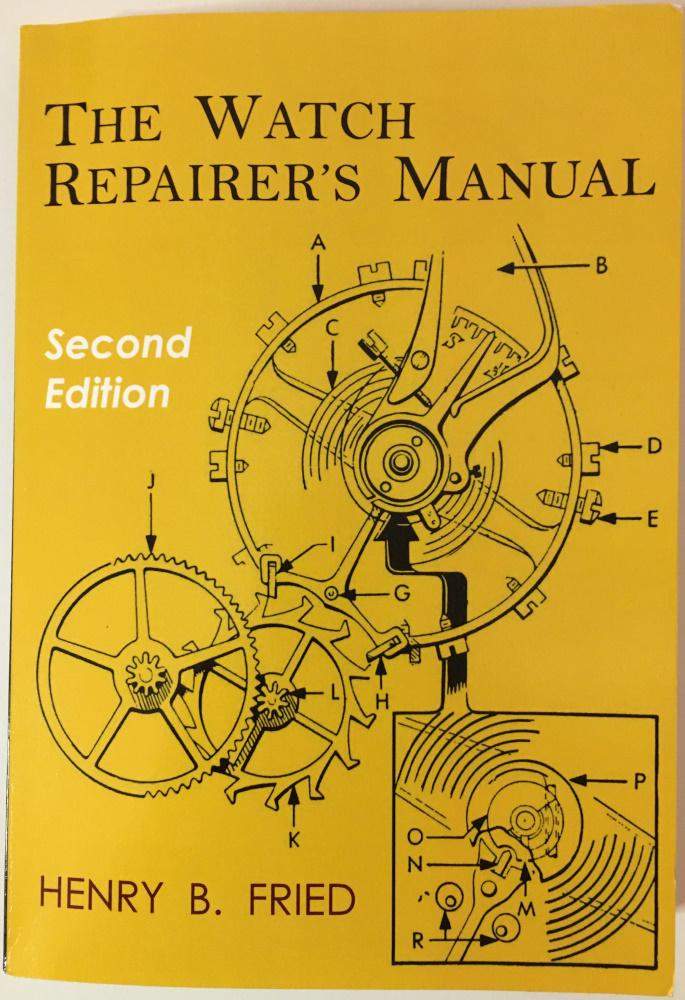
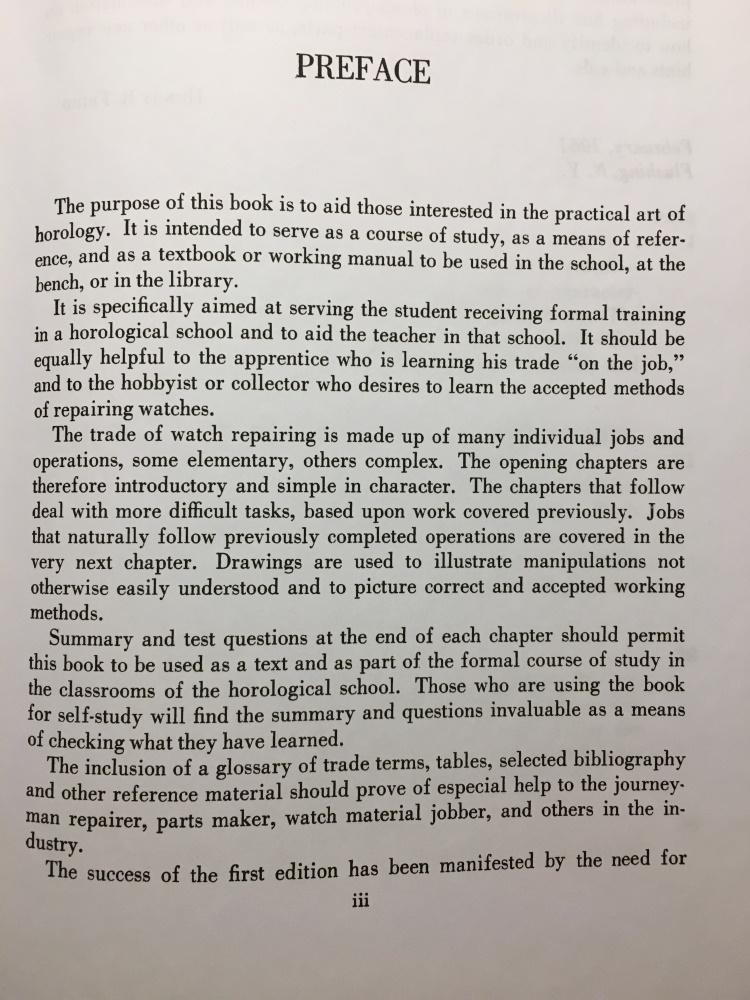
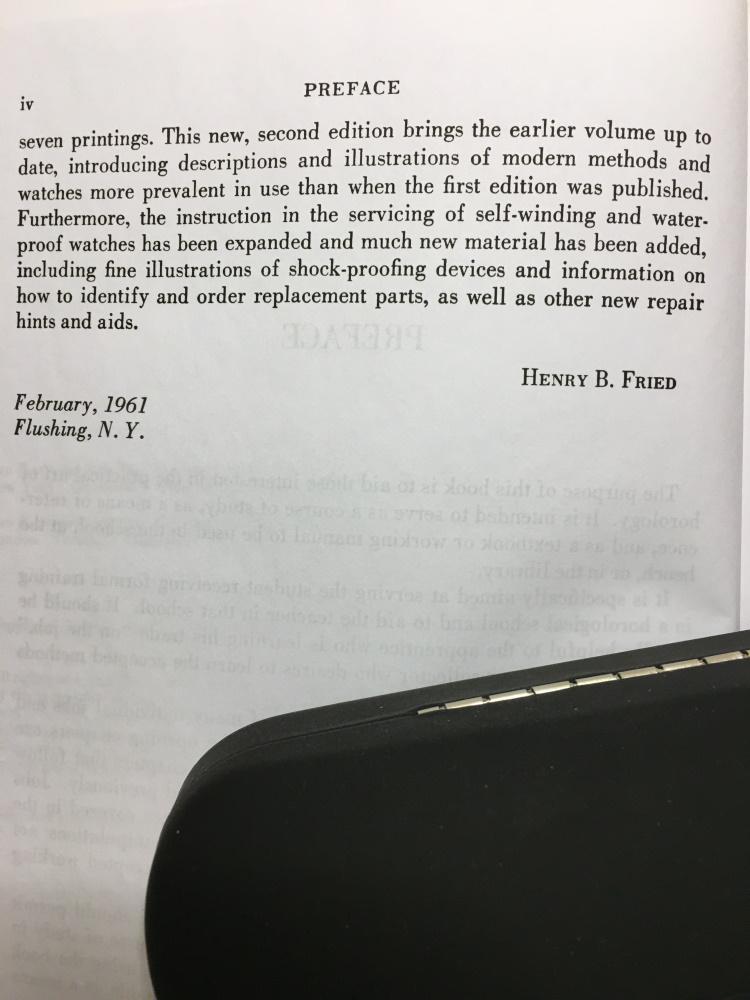
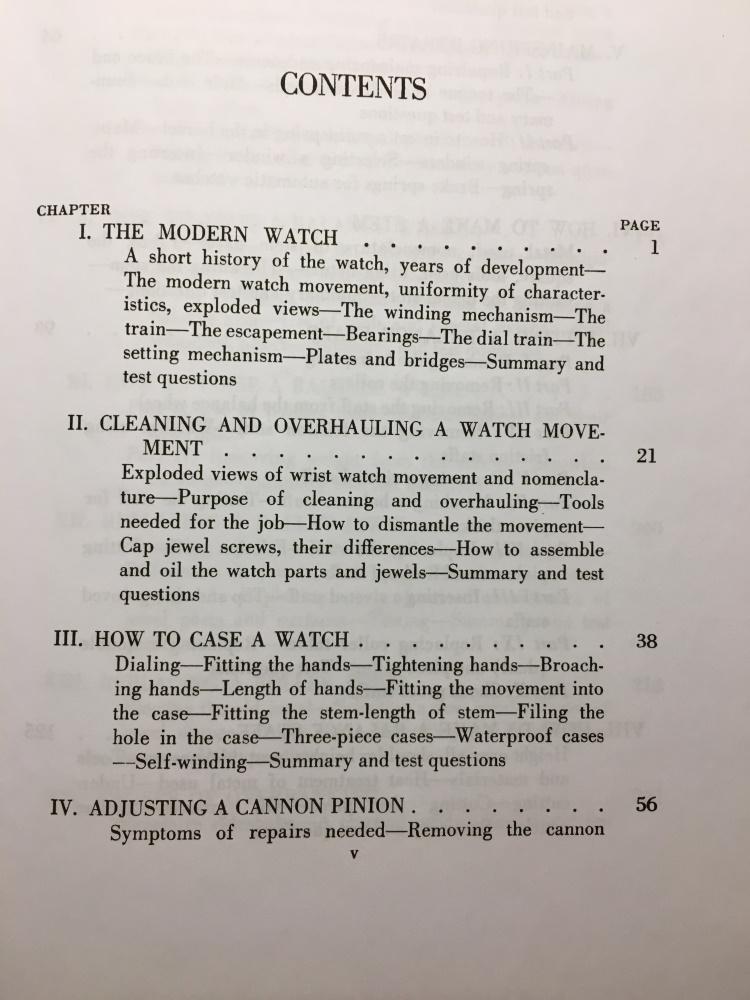
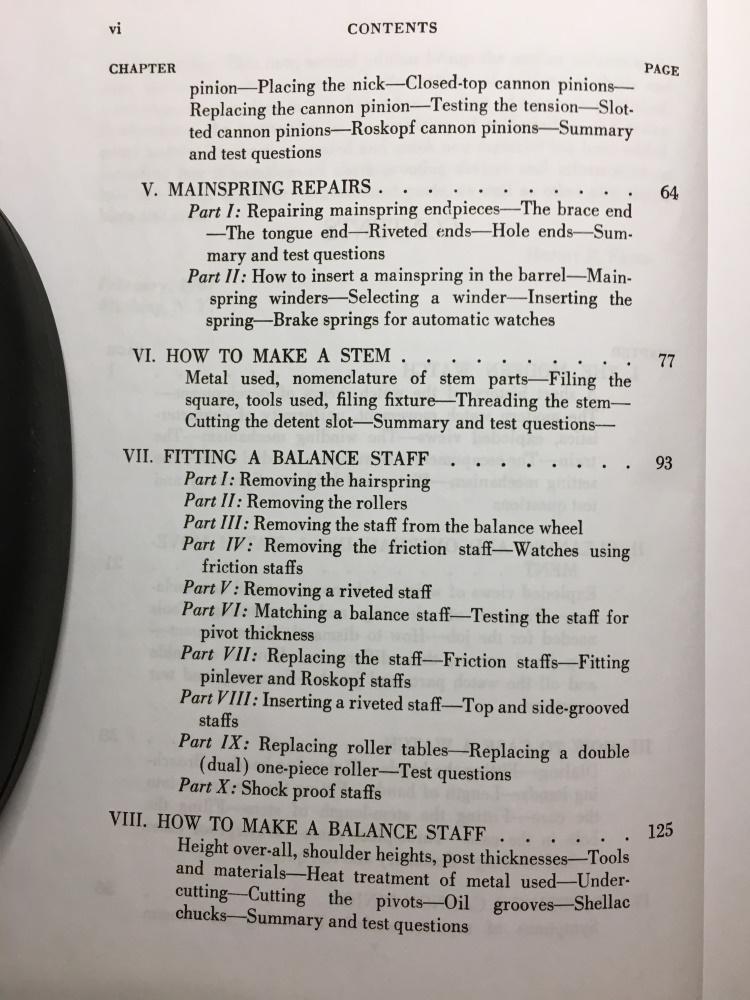
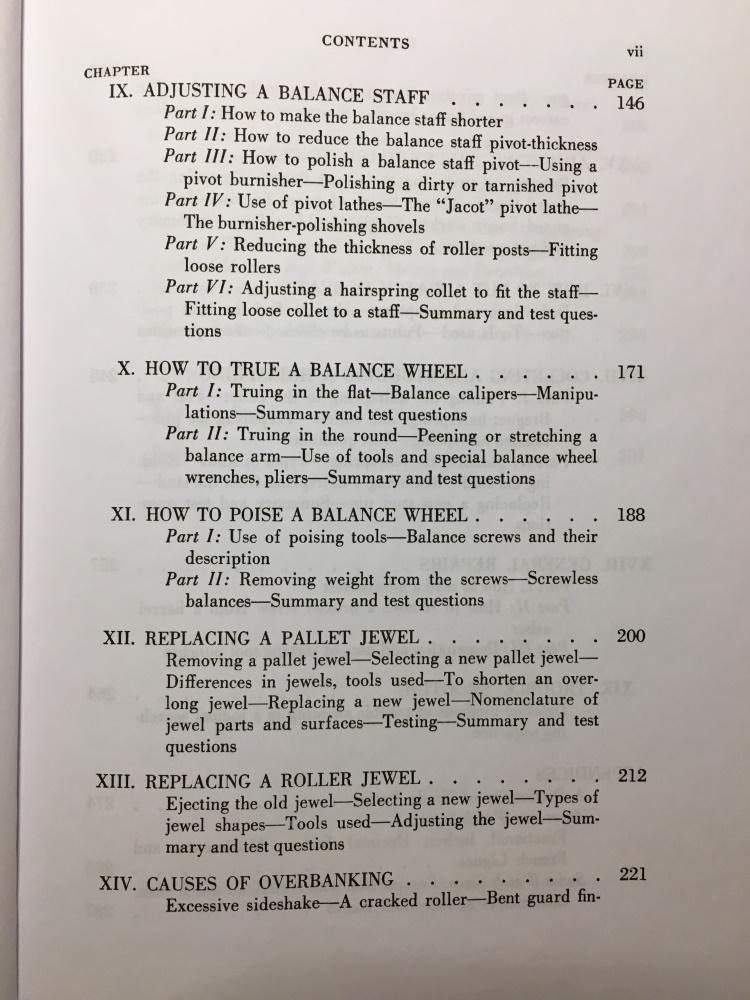
Just before Christmas a WRT member recommended me the book ”Bench Practices for Watch Repairers” by Henry B. Fried. The book is widely praised and mainly covers advanced repair topics about hairsprings and jewelling but also some other stuff. So far, I’ve only read a small part of it, but it is very well written and illustrated. Anyway, this got me interested in the book “The Watch Repairer’s Manual” by the same author. However, I couldn’t find much info about it, so I decided to take a chance and buy it on eBay for approx. $21 including shipping, and I’m glad I did. It is equally well written and illustrated and covers both fundamentals and some pretty advanced stuff. Characteristic of the author is that he is extremely precise in his language and explanations which I both enjoy and find very enlightening. For example, you can expect sentences like: “The escape wheel pinion is the last part in the train, but its wheel belongs to the escapement”. For those of you interested in this book and want to know a bit more about it I have taken pictures of its cover, preface, and contents which follow next. I realise my post may constitute a copyright infringement, but I’m thinking that as I’m not copying any actual content, not doing it to make any profit and as I’m in fact promoting the book, my post may hopefully pass. If not, please feel free to delete it.


 3 points
 -
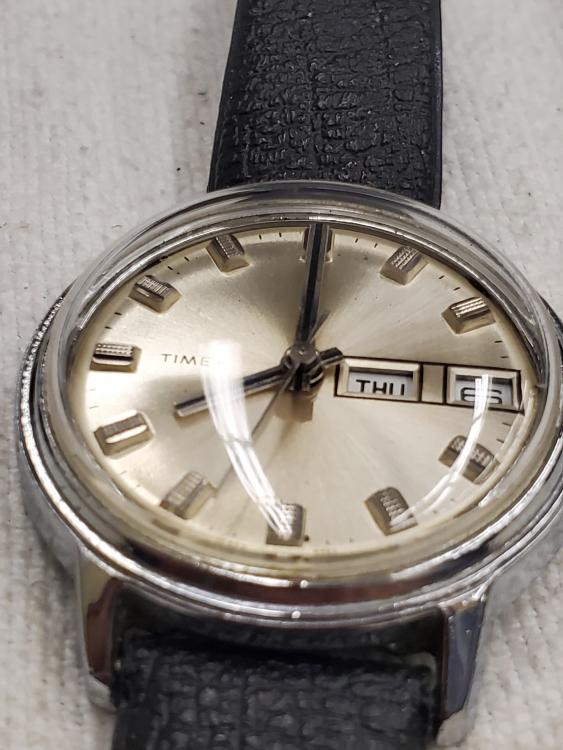
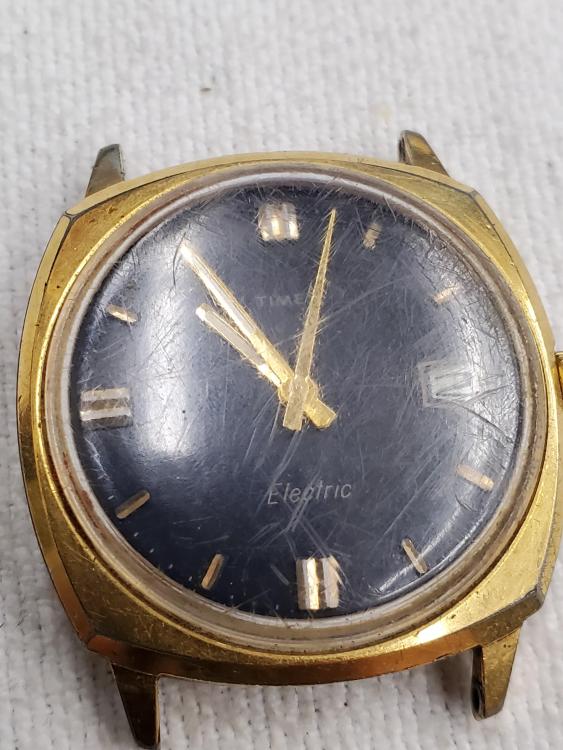
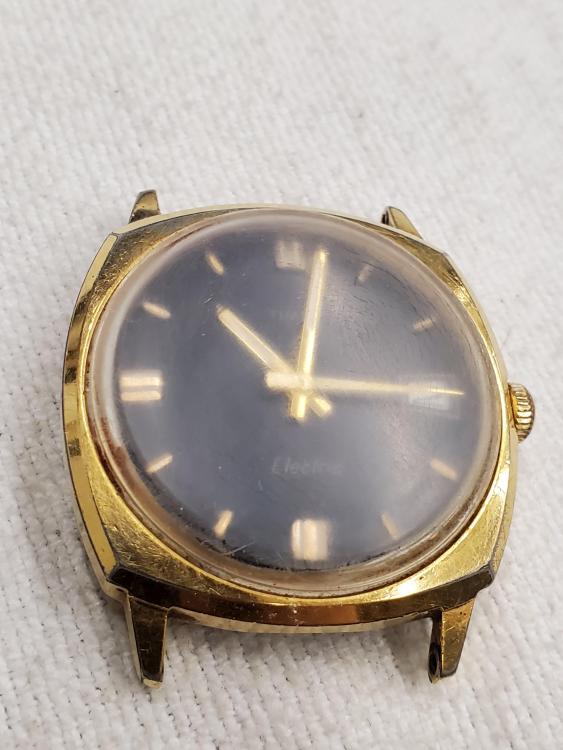
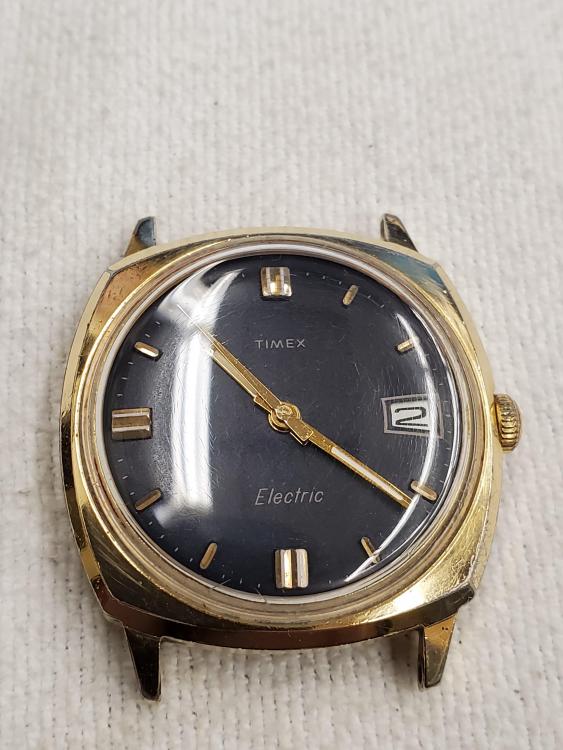
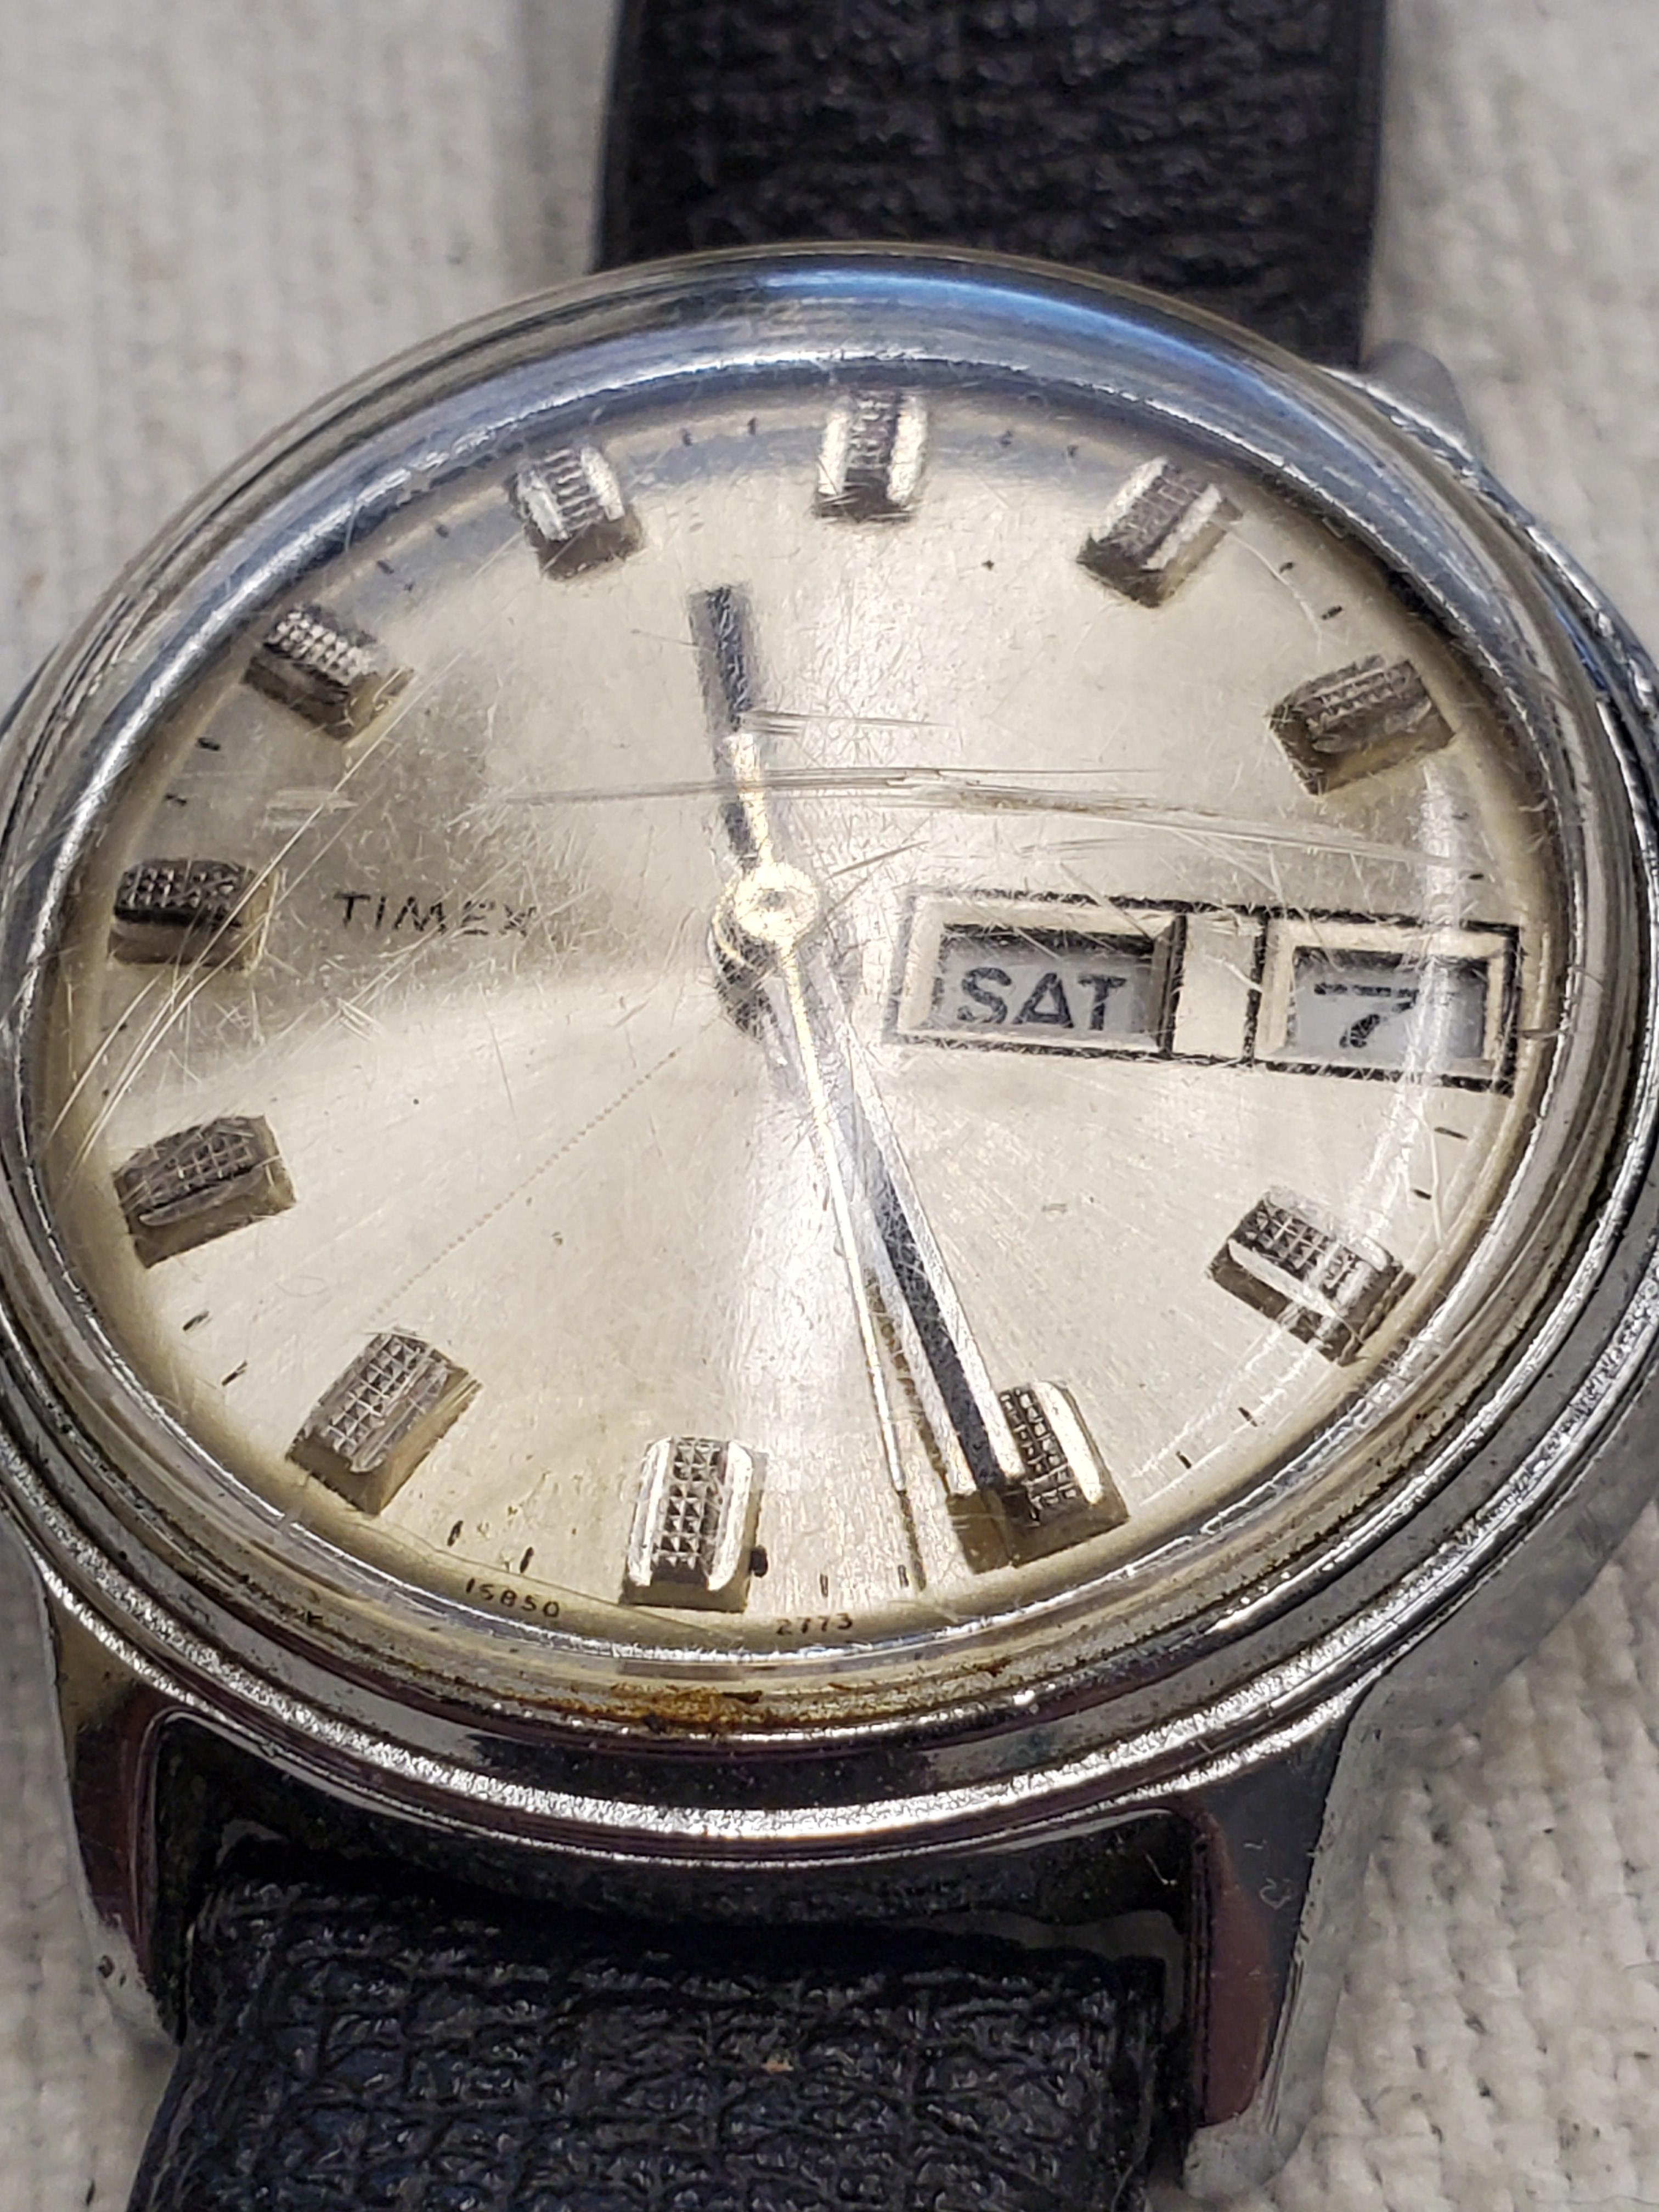
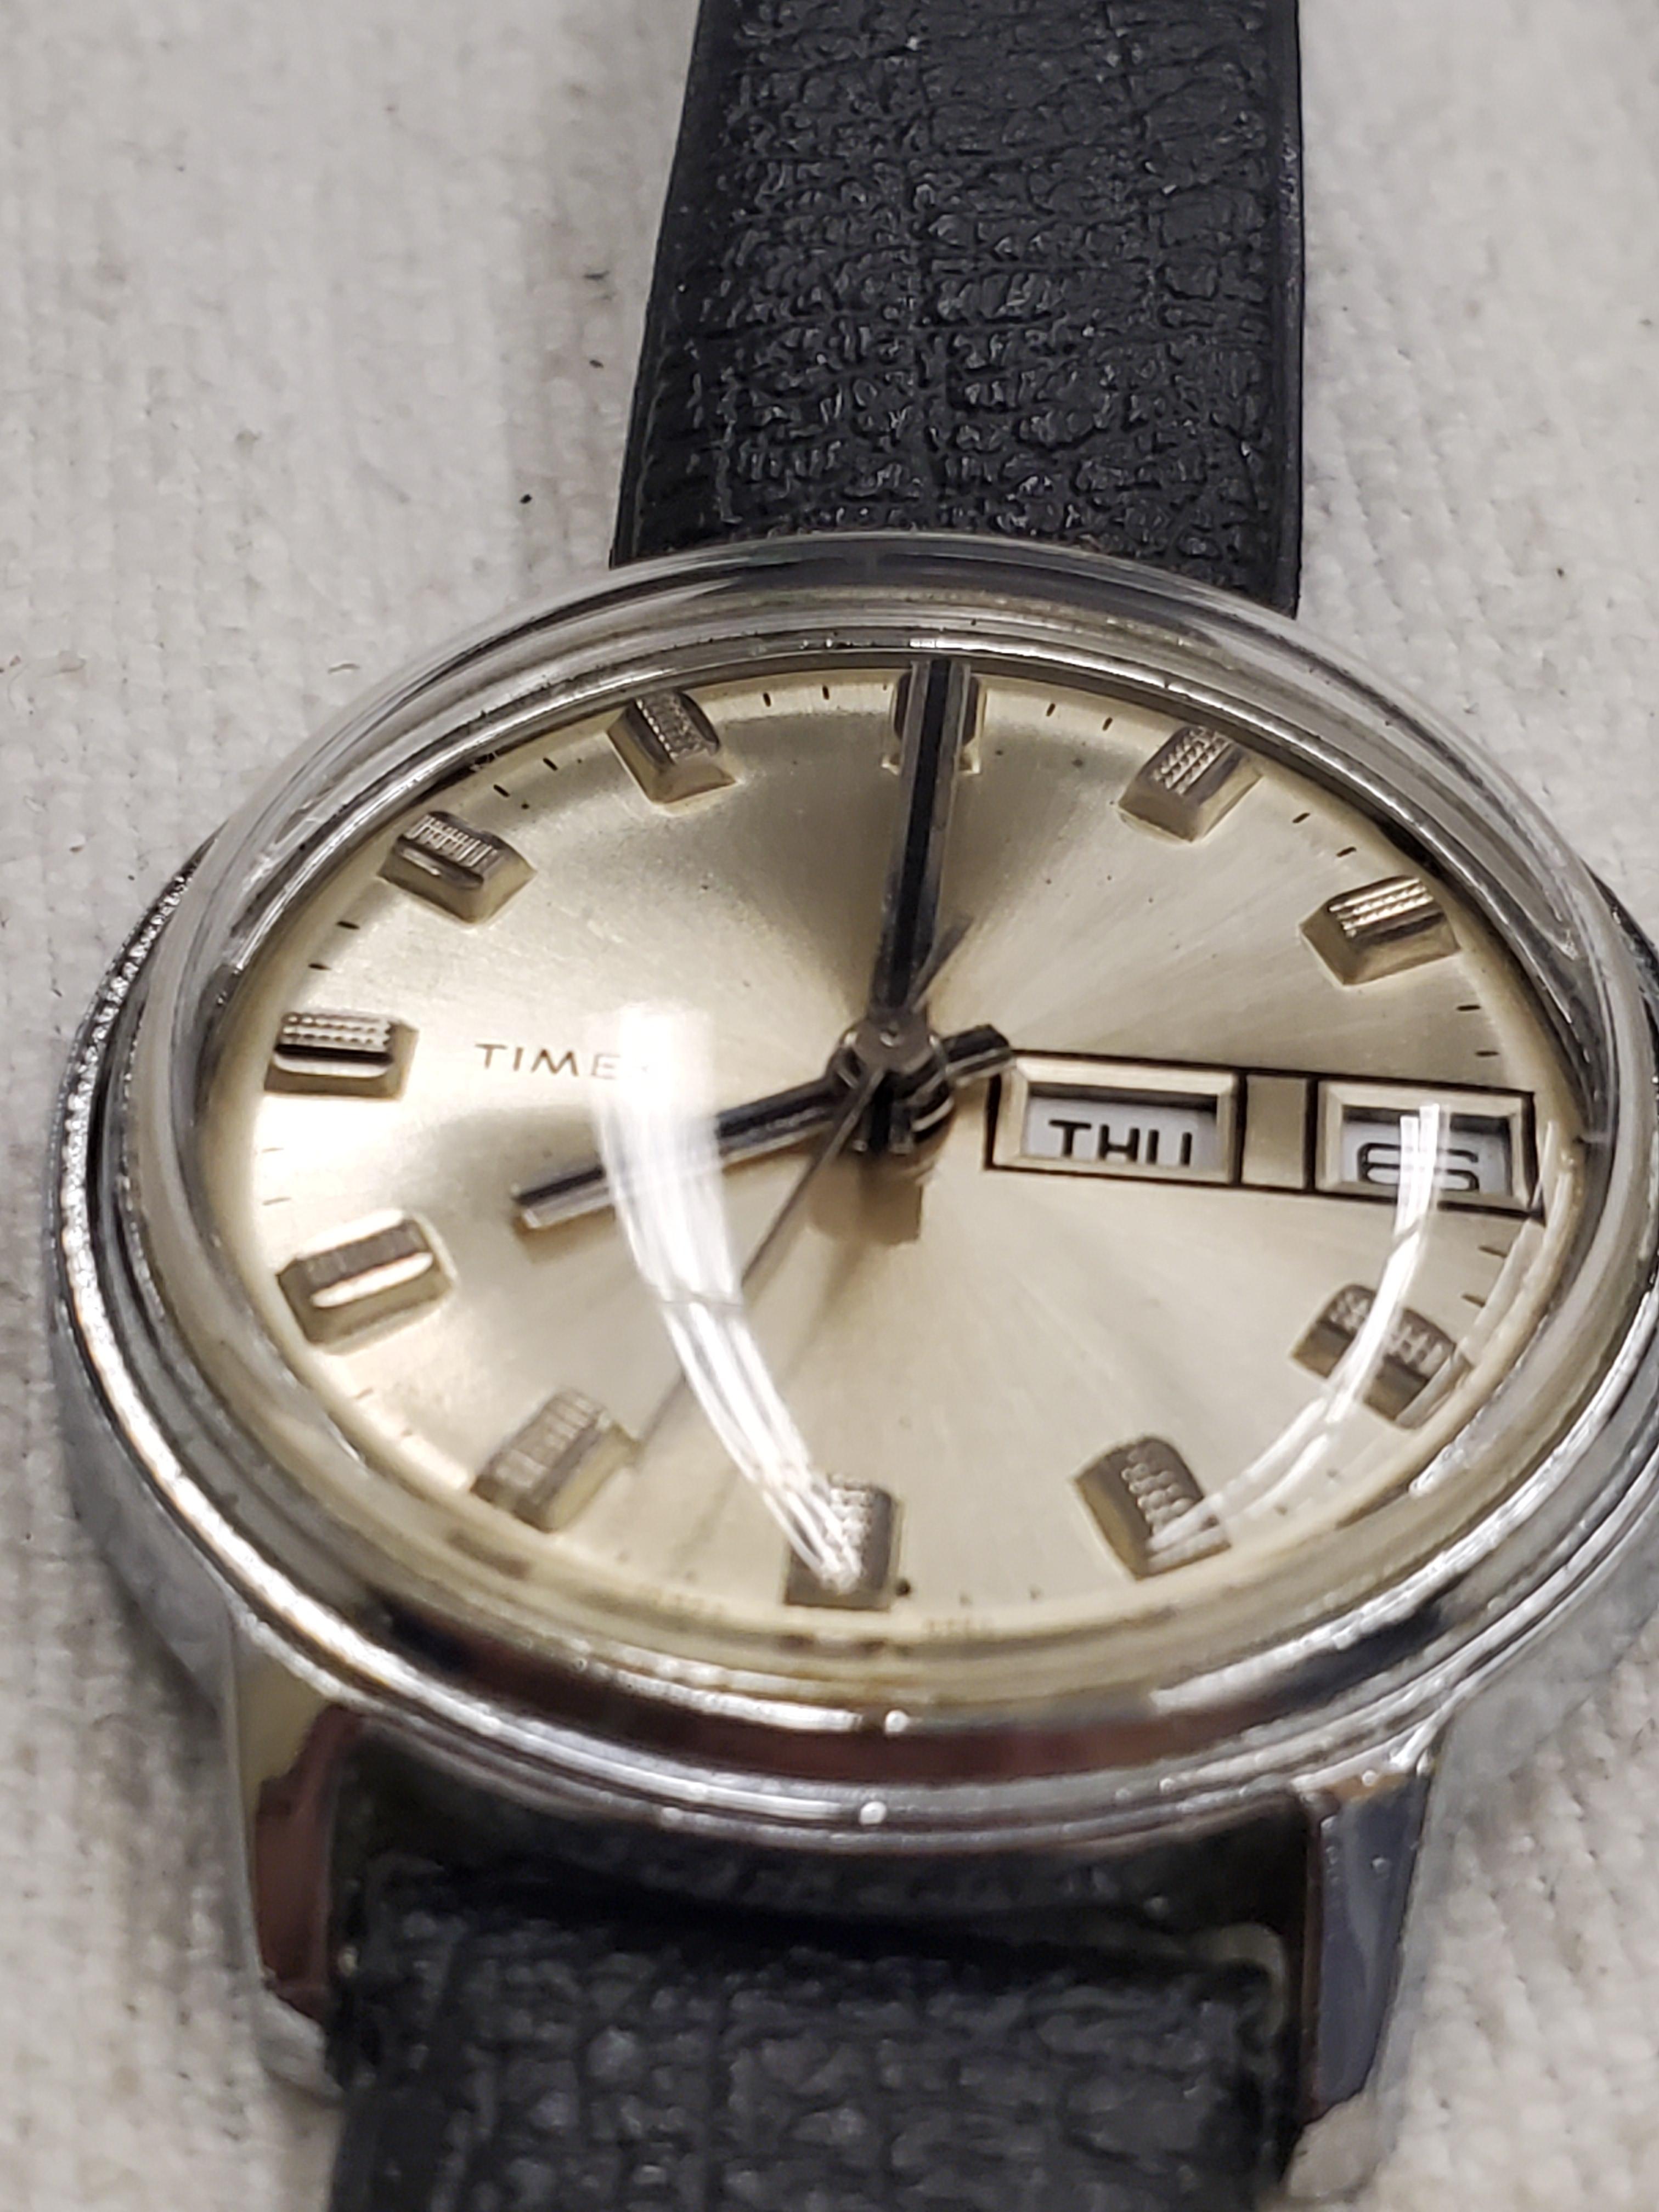
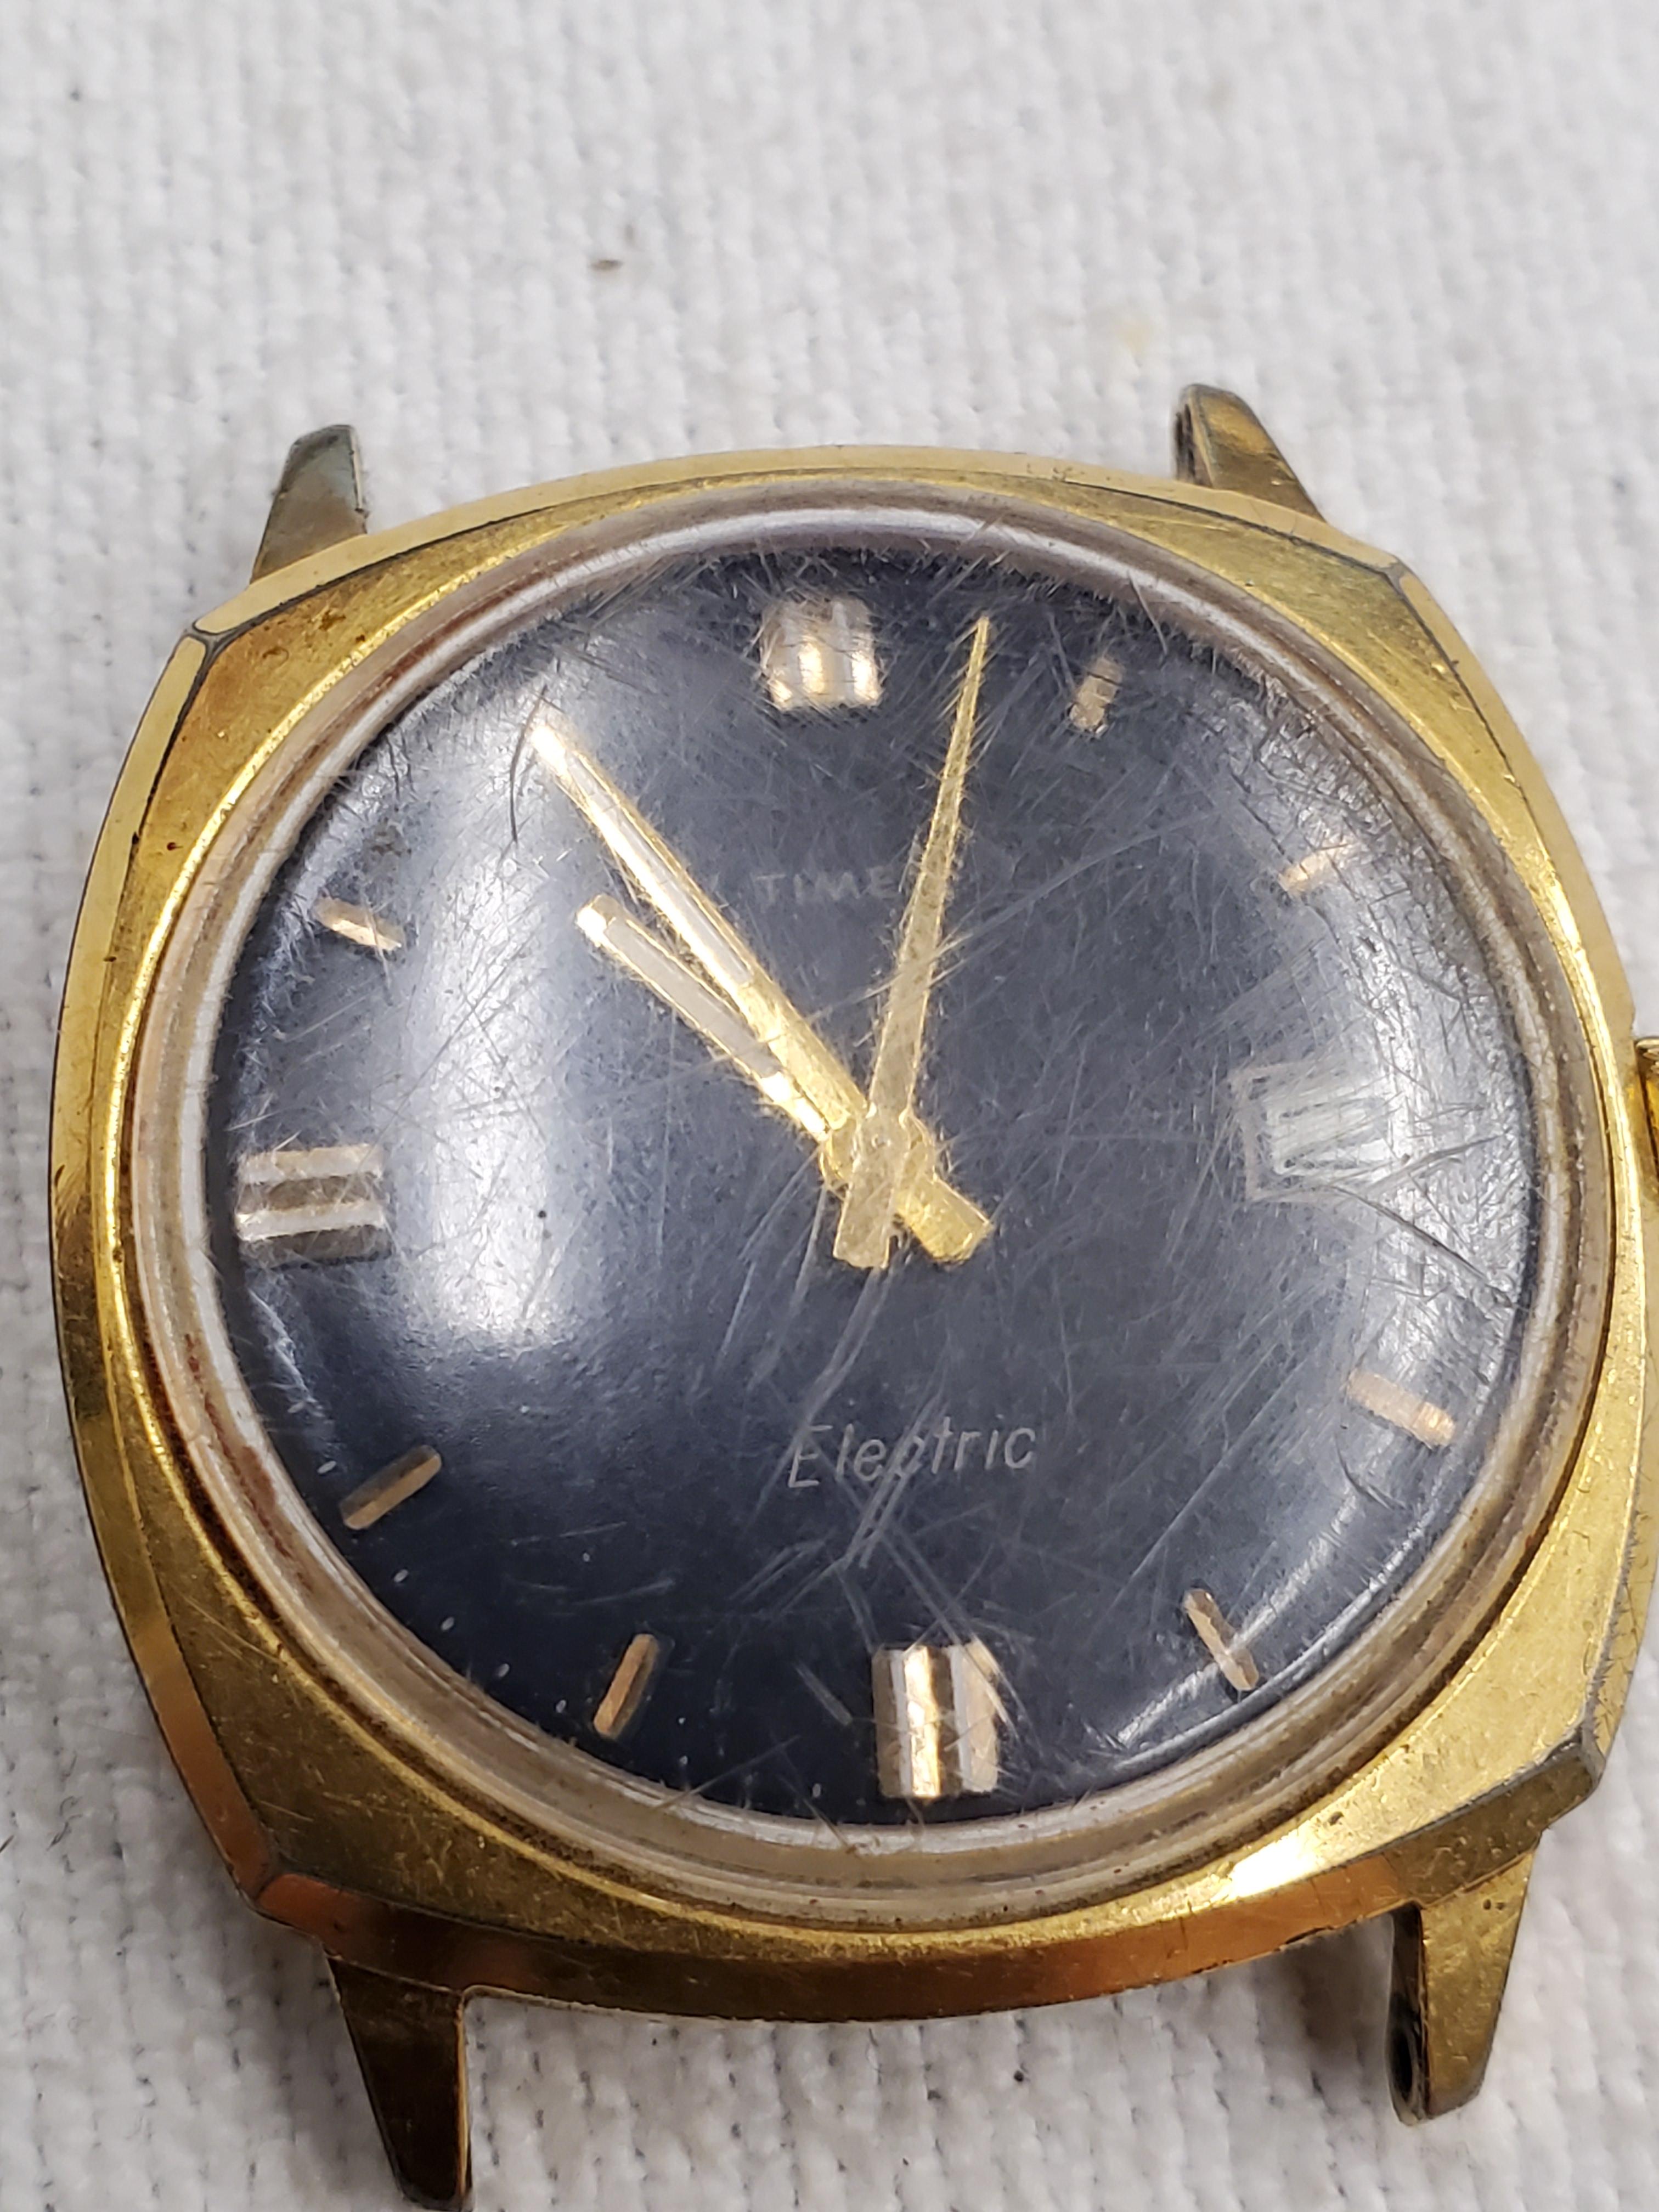
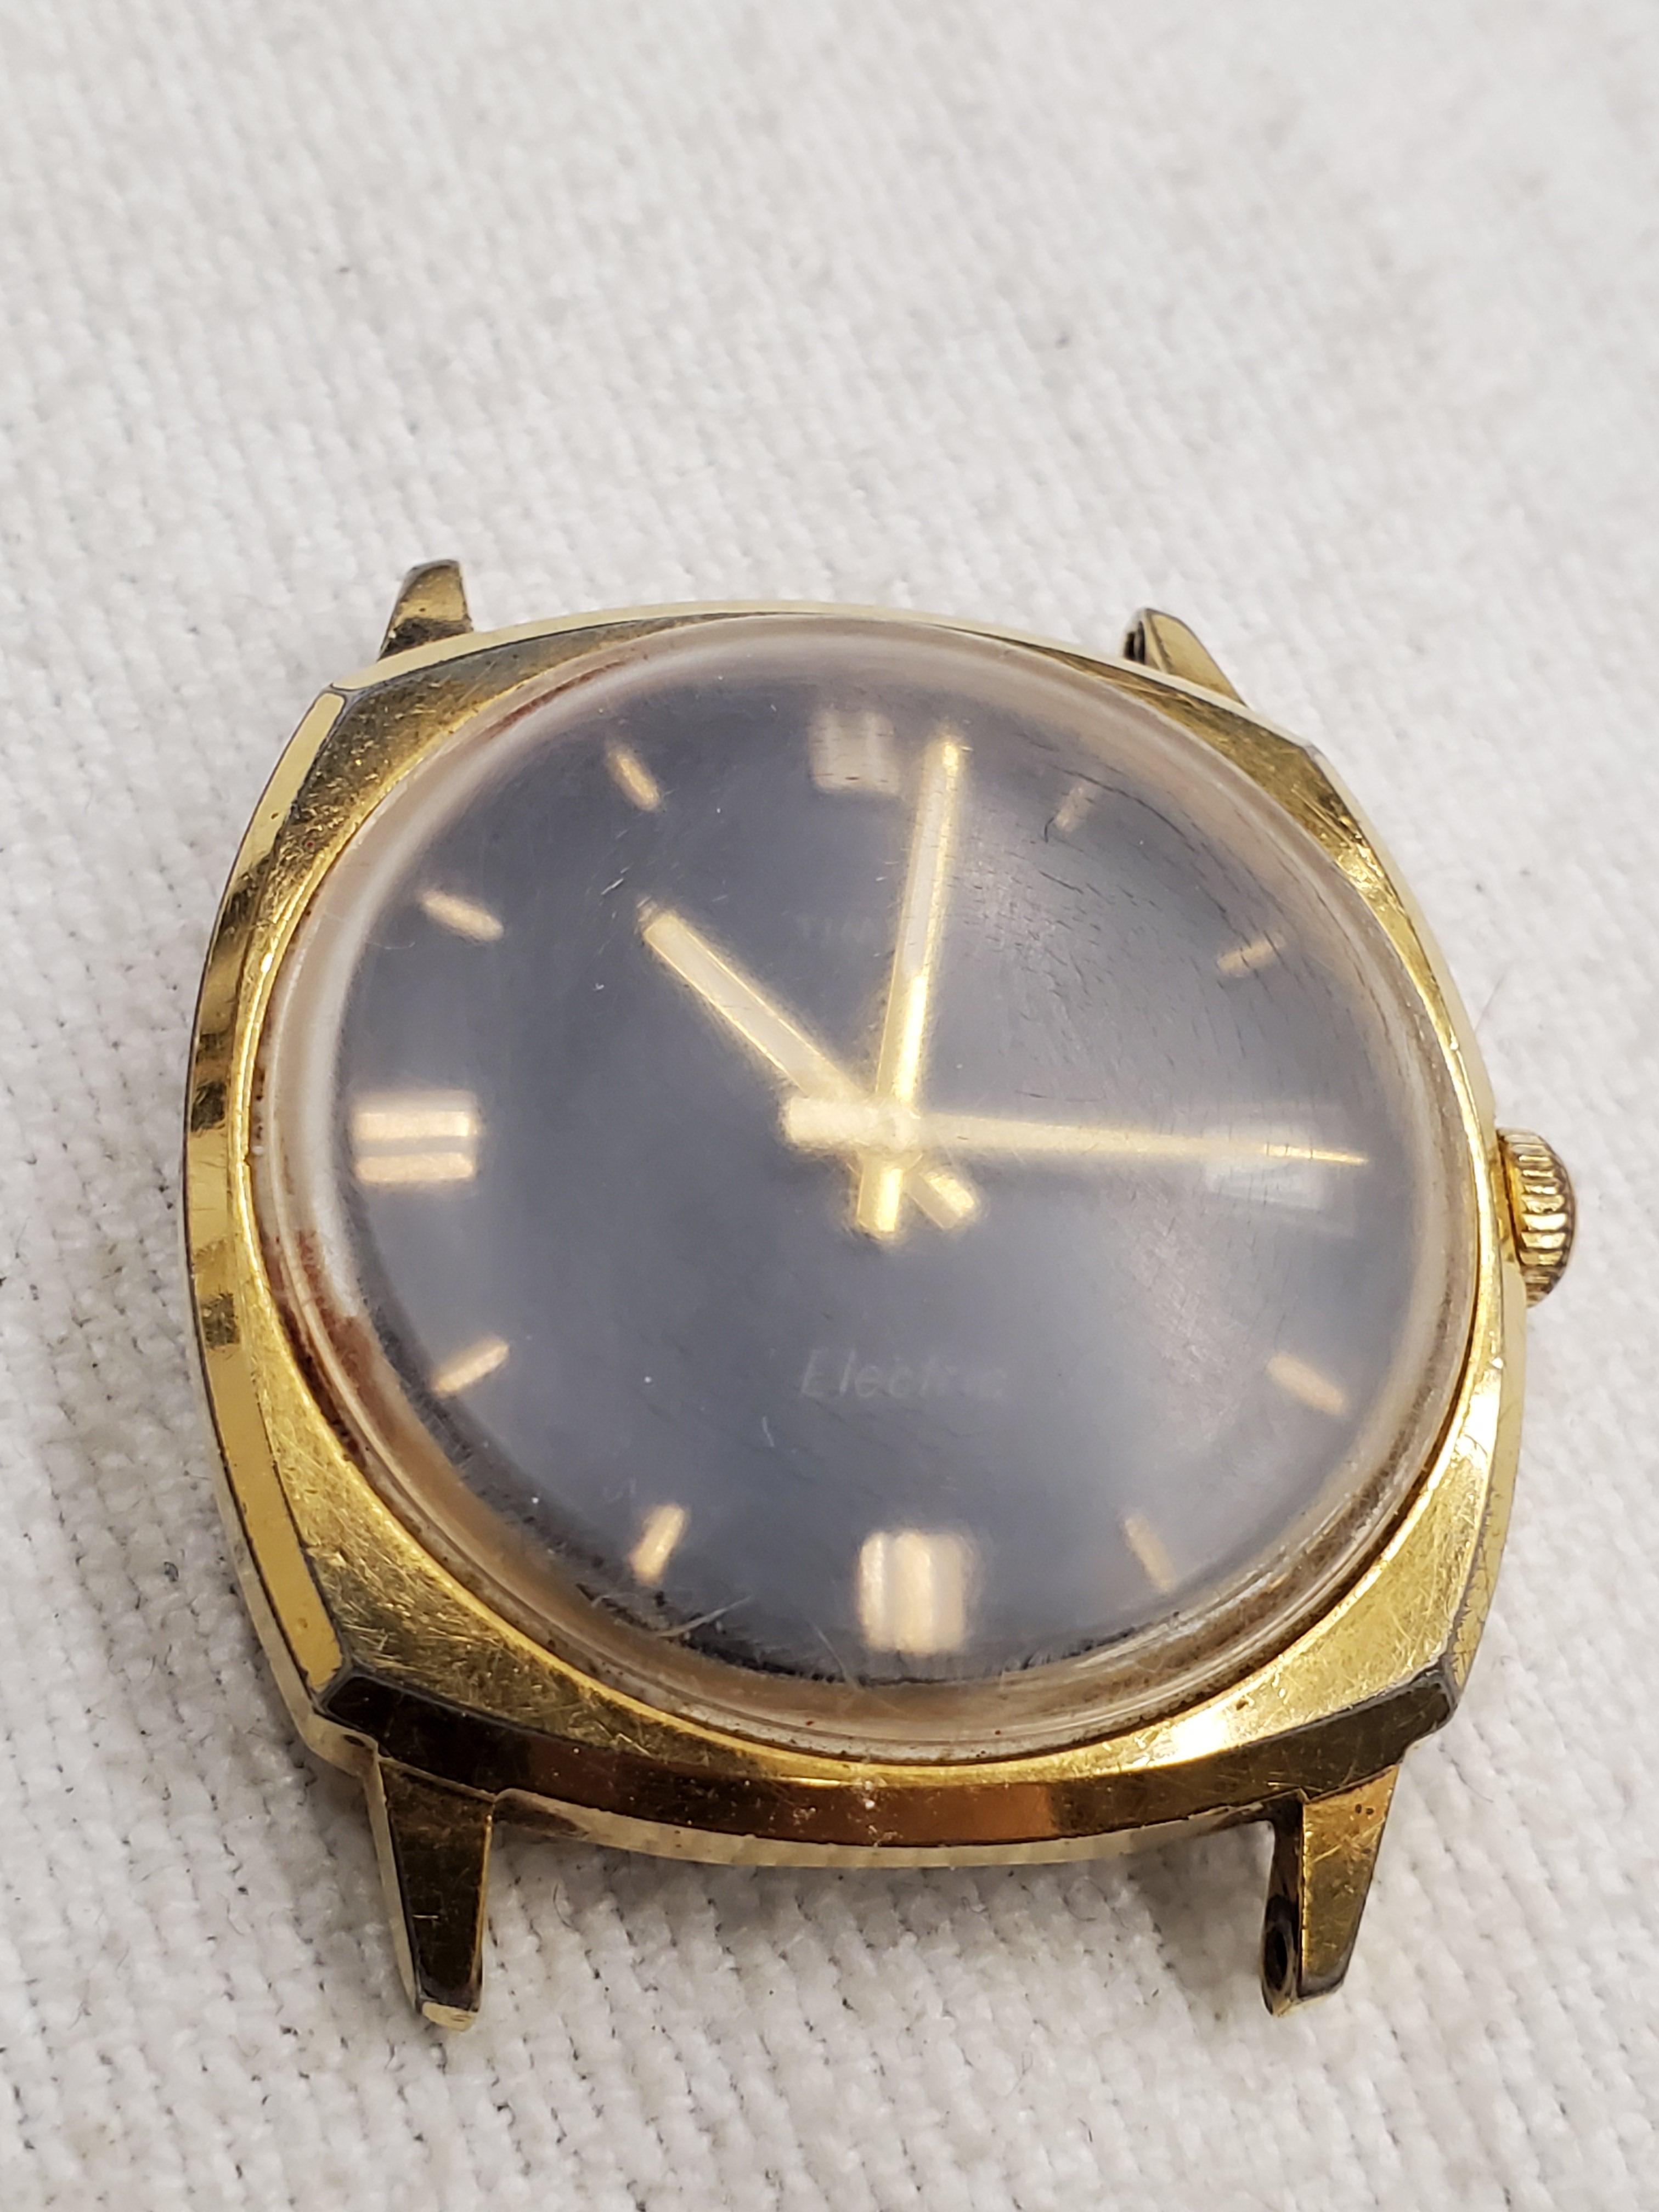
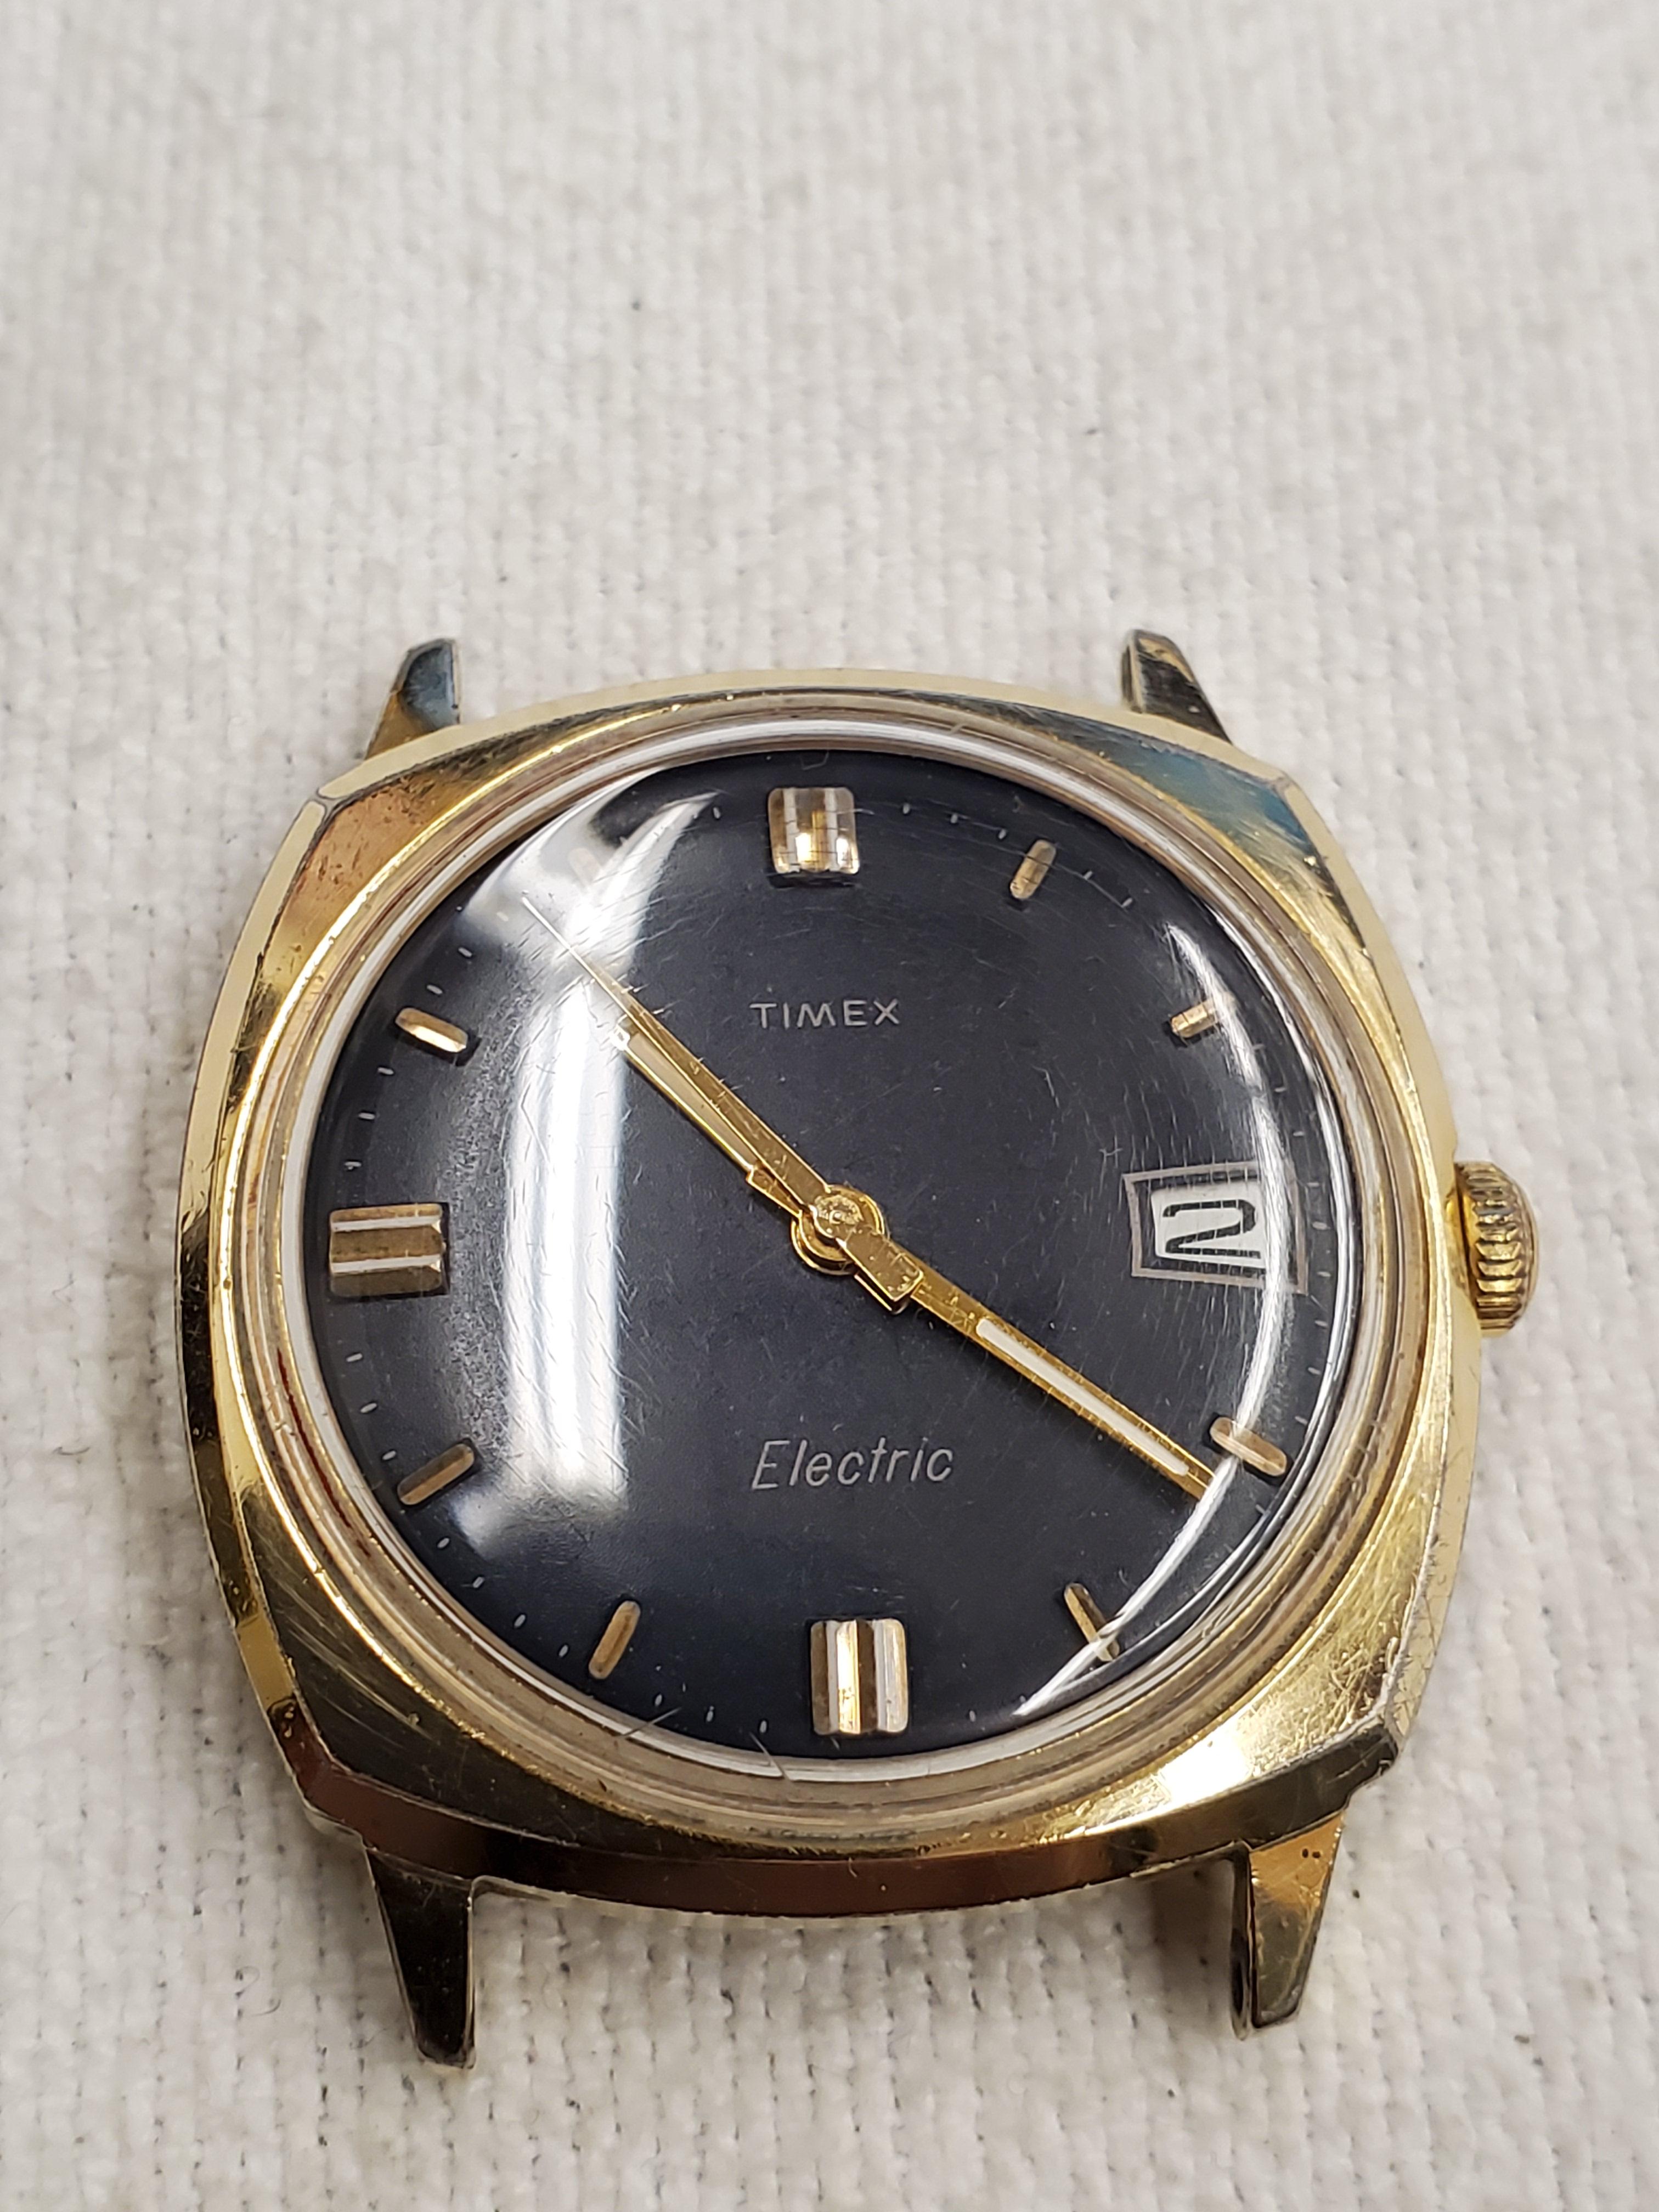
Of my antique show haul, I have 2 watches left to overhaul. This watch is third from last. As you can see, the crystal was in awful condition. This is yet another Birth year watch. I'm still amazed how great these Timex's look after some positive attention is given to them. Before After

 3 points
 -
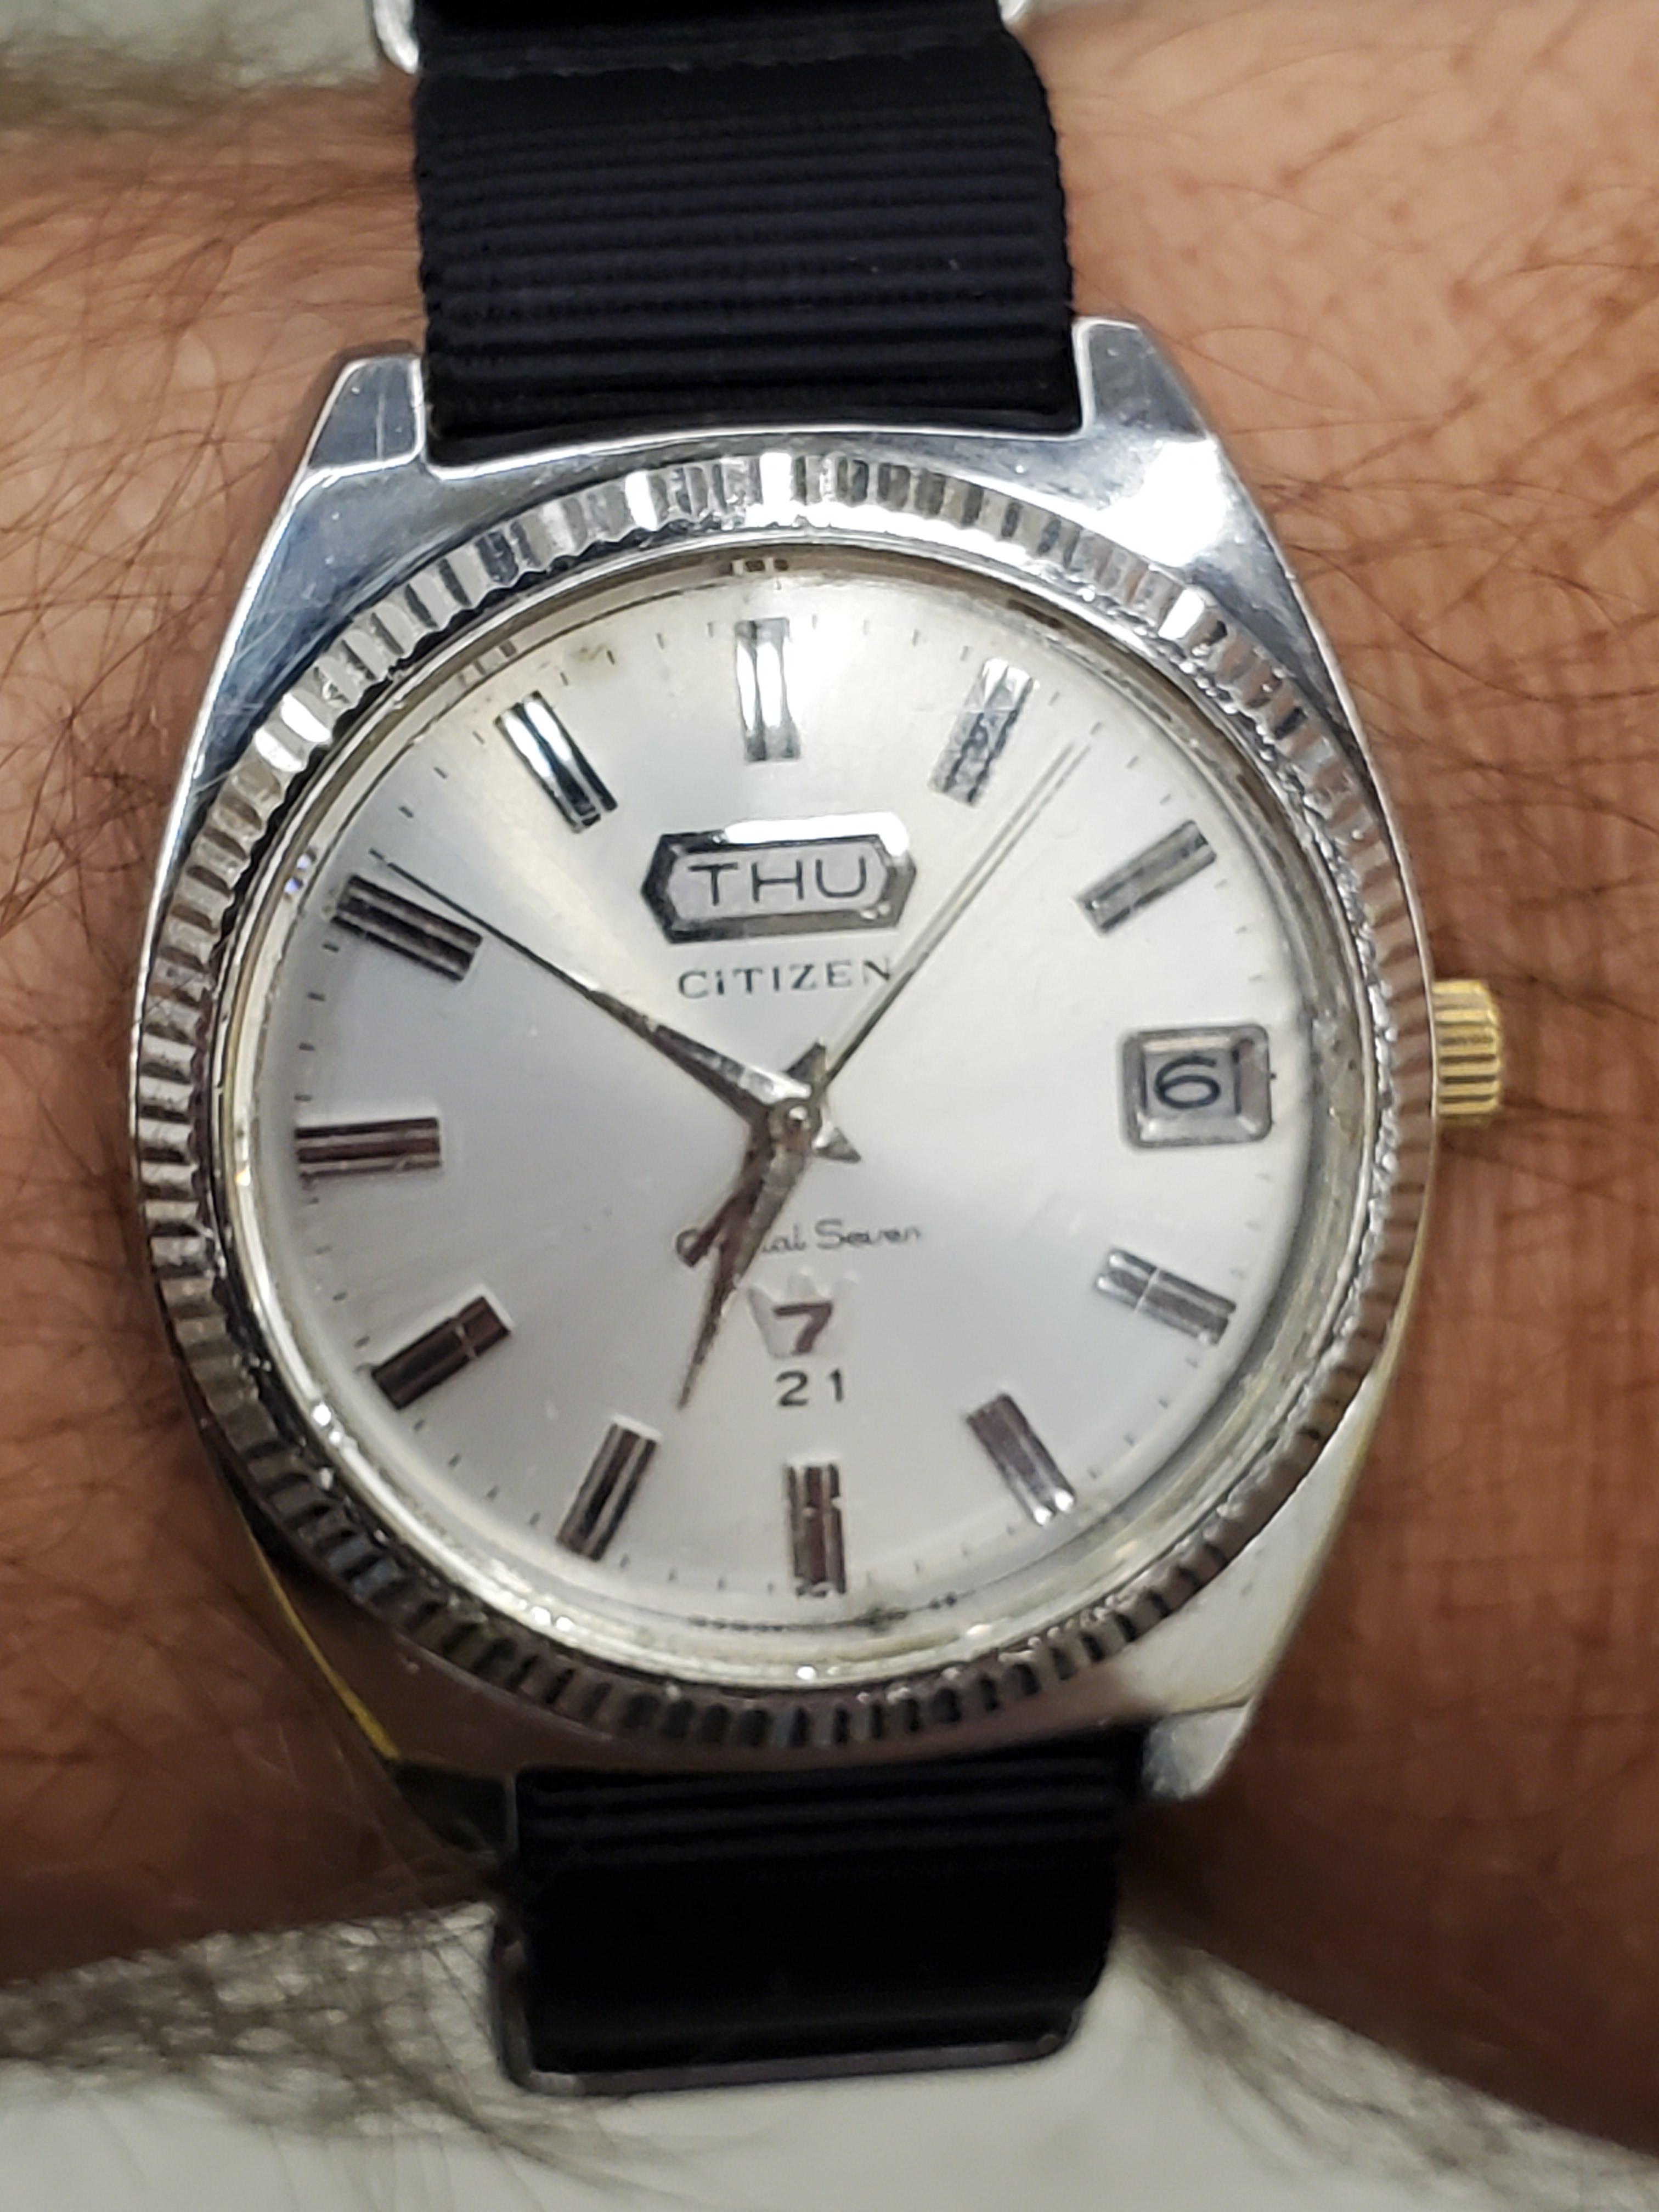
I recently acquired a Citizen "box-o-parts" from the Bay. I got it because it had parts for a Citizen Jet which I need a proper case for mine. There was included several cases, dials hands, misc gears and 2 movements. When it arrived I found that one movement was a 27 jewel Jet with the automatic rotor assembly in pieces and missing the rotor weight. The other movement turned out to be a complete mid 60's 21 Jewel, Crystal seven. The balance was good and the mainspring was intact. I gave it a wind and it attempted to run. So I thoroughly cleaned it, assembled and lubed it and it took off running like a champ. I matched up a dial, hands and a complete case in the parts provided, and now, here it is on my wrist adding miles to the odometer. Yes, the crown is mismatched, but only I, and you, will know, lol.
 3 points
 -
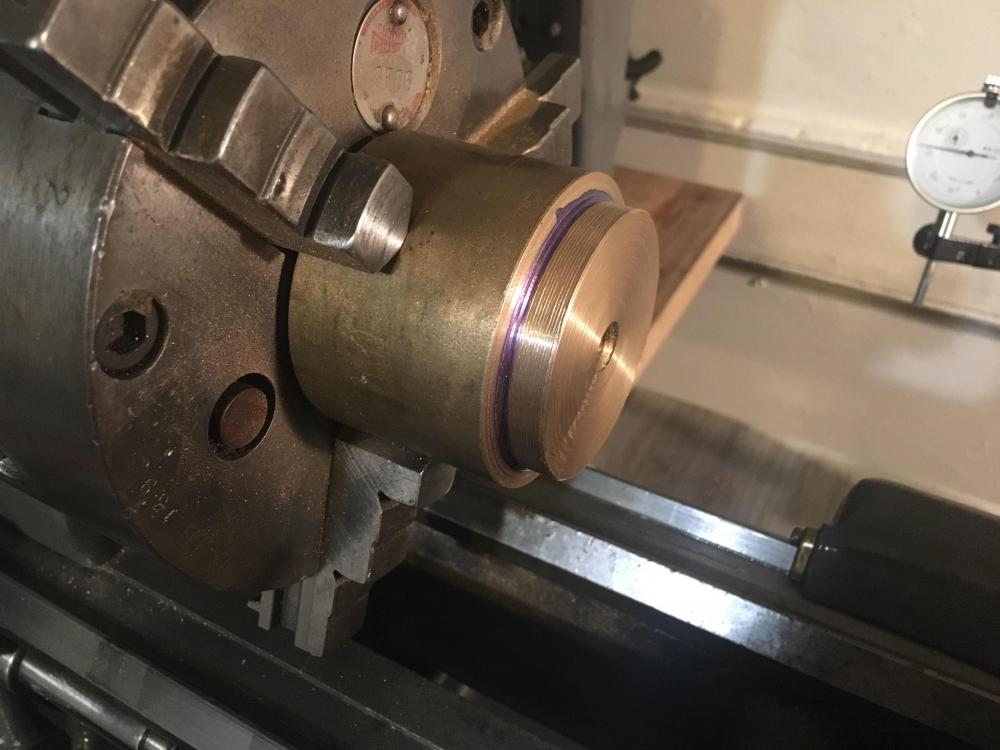
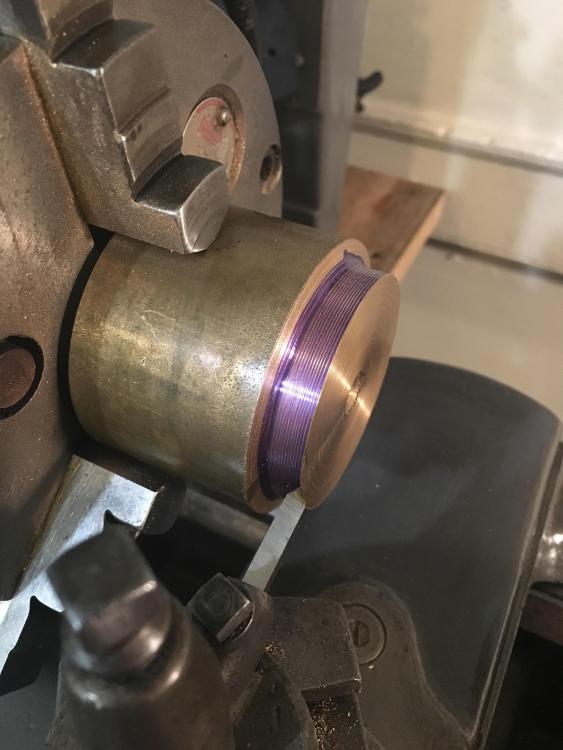
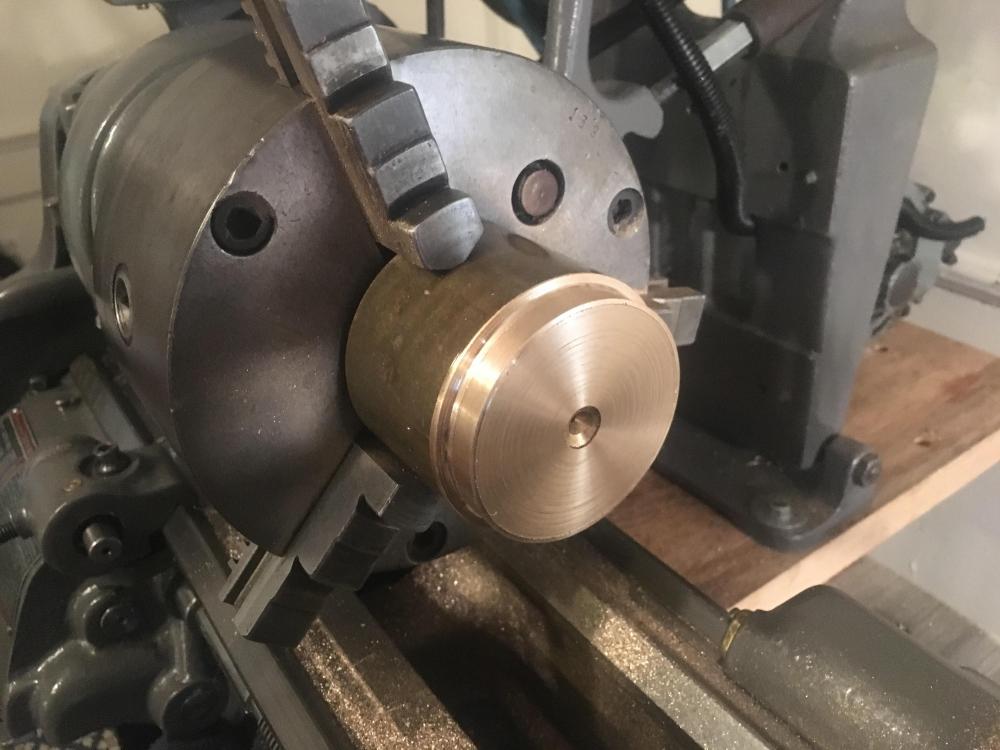
I thought some of you might want to watch me make this watch! You can follow on instagram but I will try to keep up here. It's a "unique" watch I would say so bear with me (New Bern pun!). Right now it involves making two brass rings that will seat in two hemispheres. I couldn't make the hemispheres yet so I cheated a bit and bought some until I can find a way to spin them myself (spinning metal is really hard on a lathe and I worry about my ancient (WW2 era) South Bend. I started with 2 3/4 brass (360 I think) and brought it down to size and threaded the outside and plan to cut the two rings from this but first I still need to open up the inside and create a groove along the interior rim. Center drill, 5/16 bit and will be moving to boring bars. Okay you are all caught up!
 2 points
 -
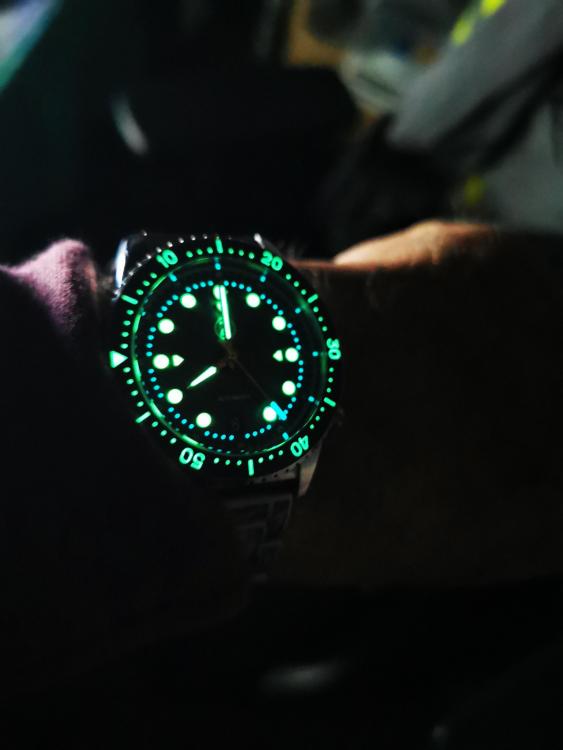
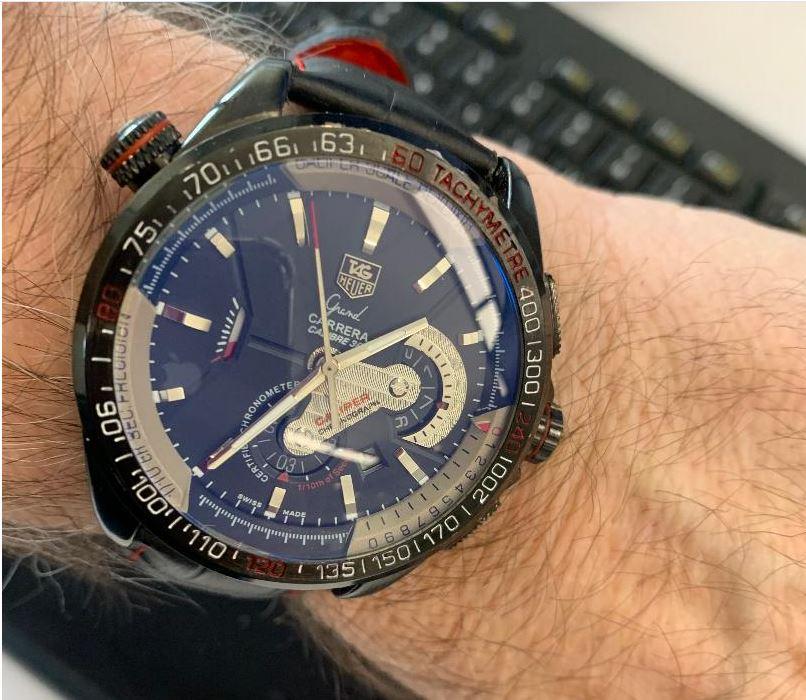
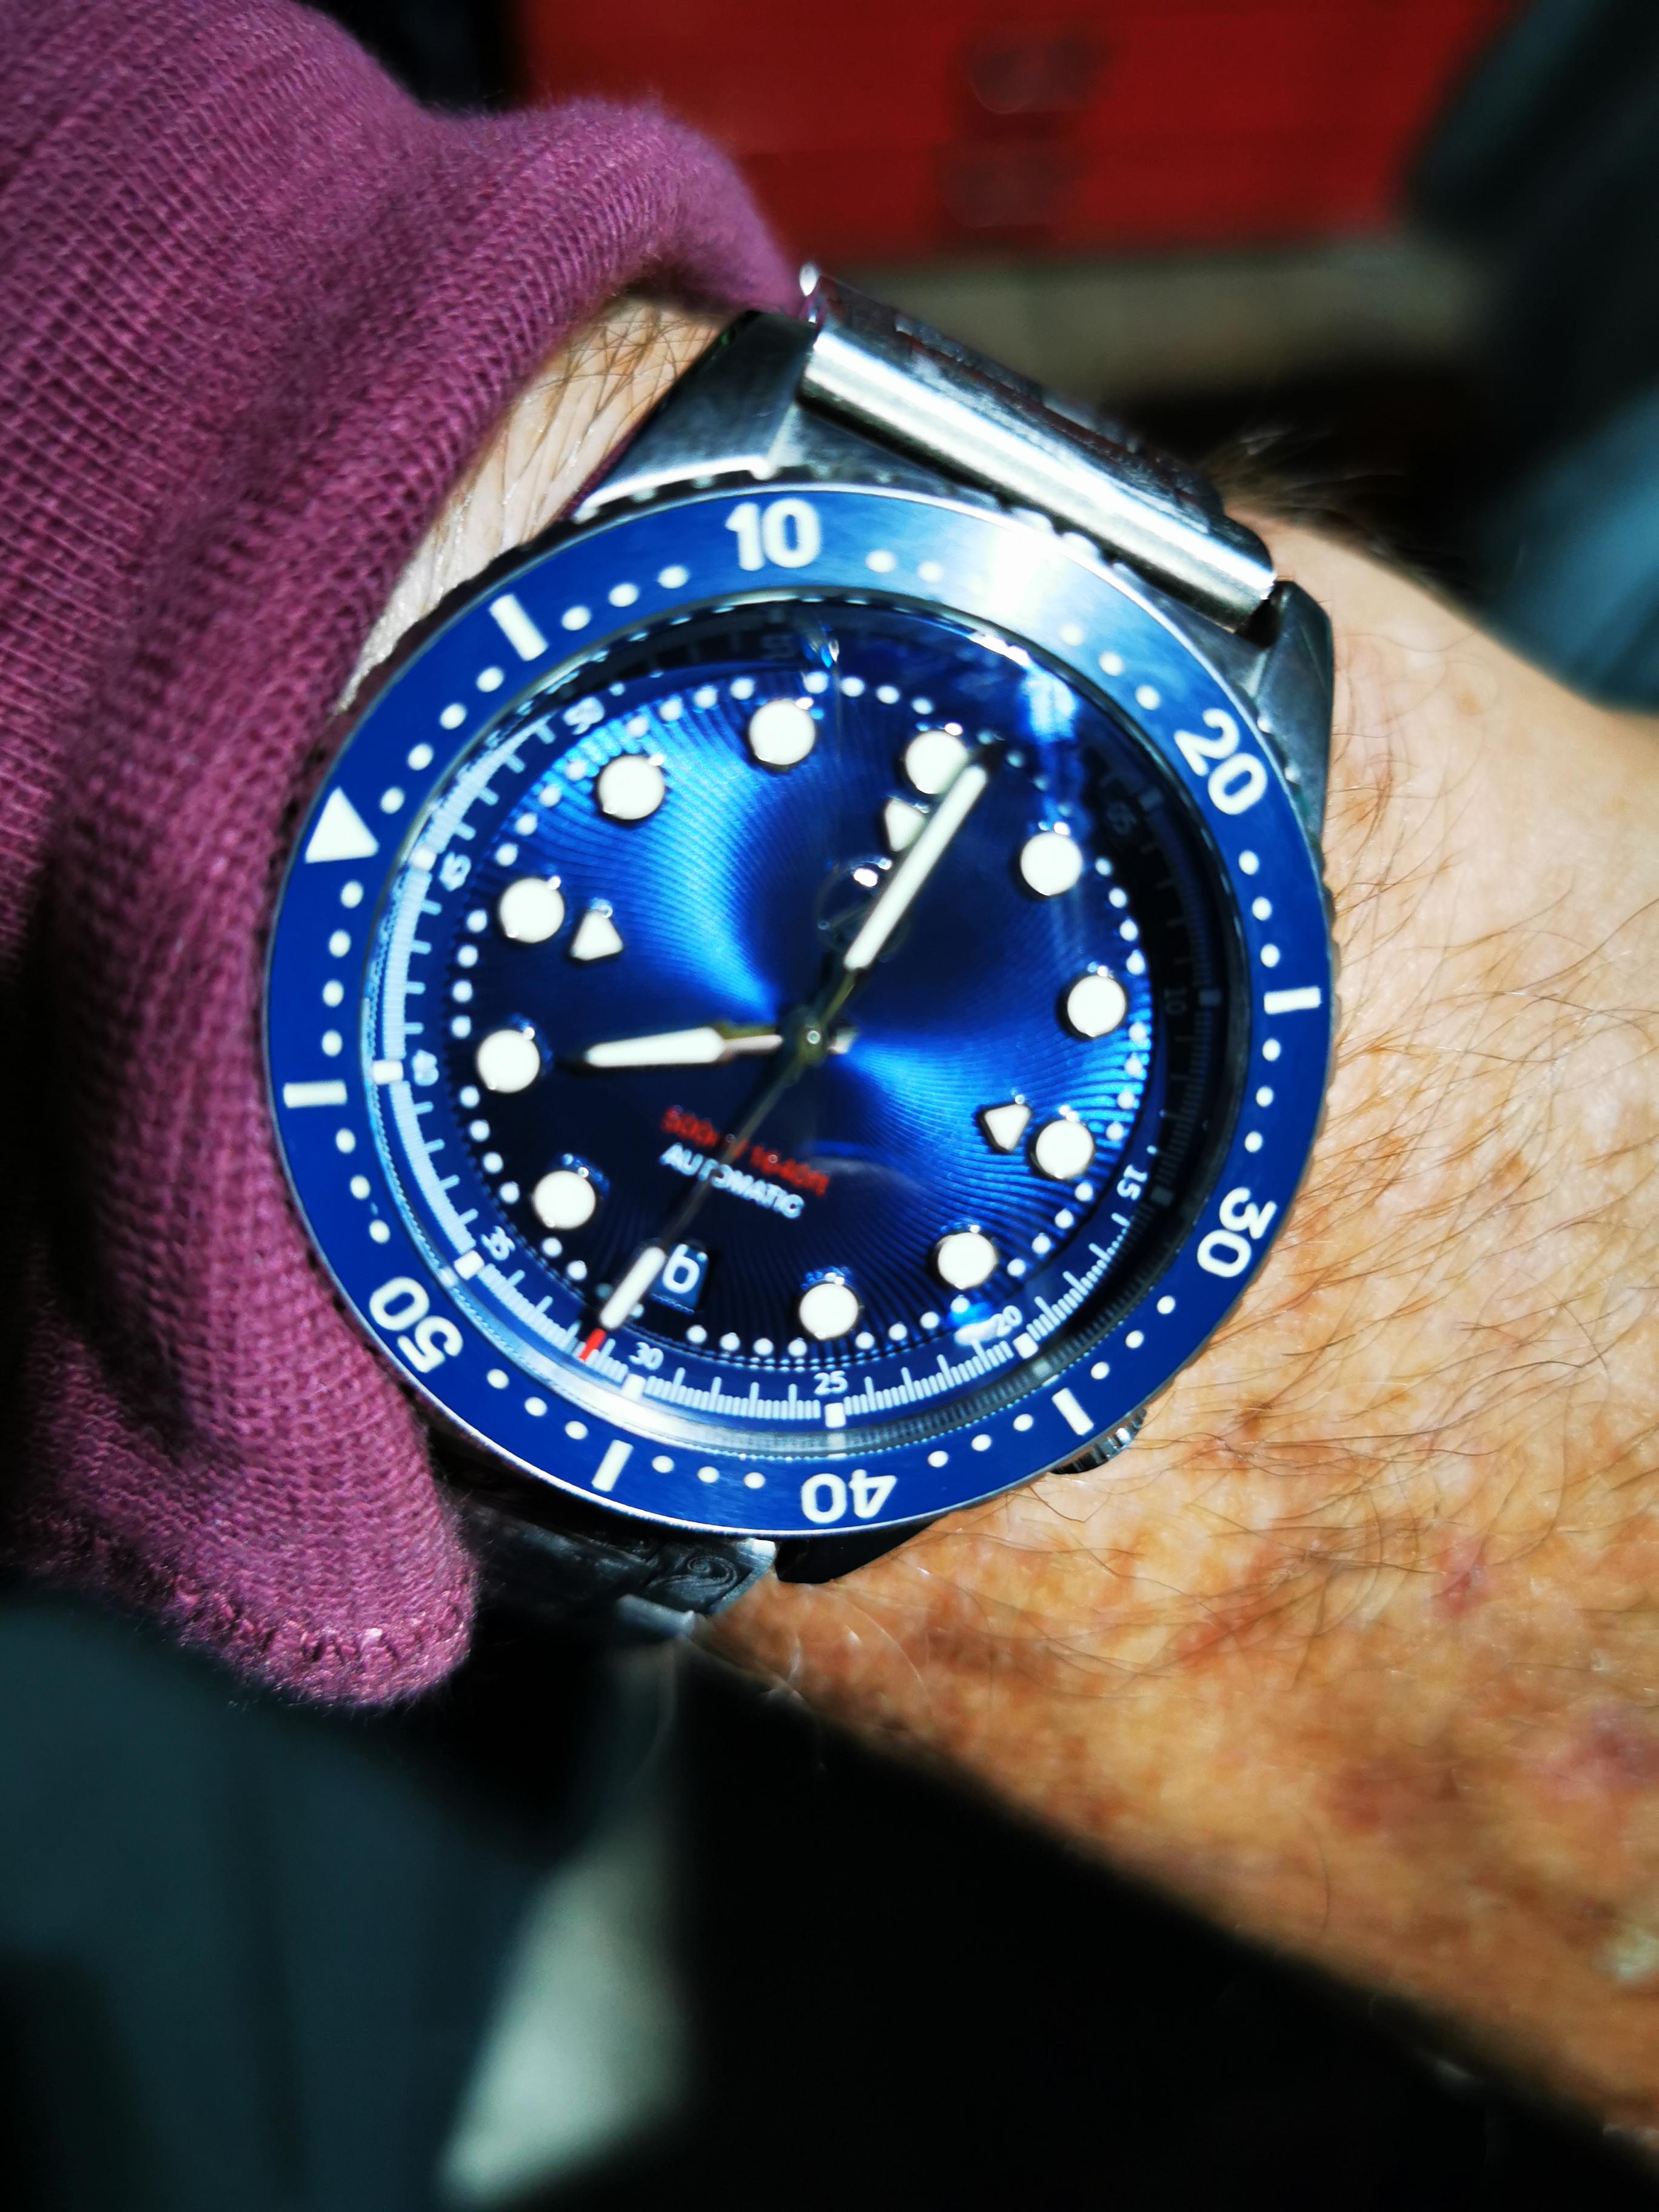
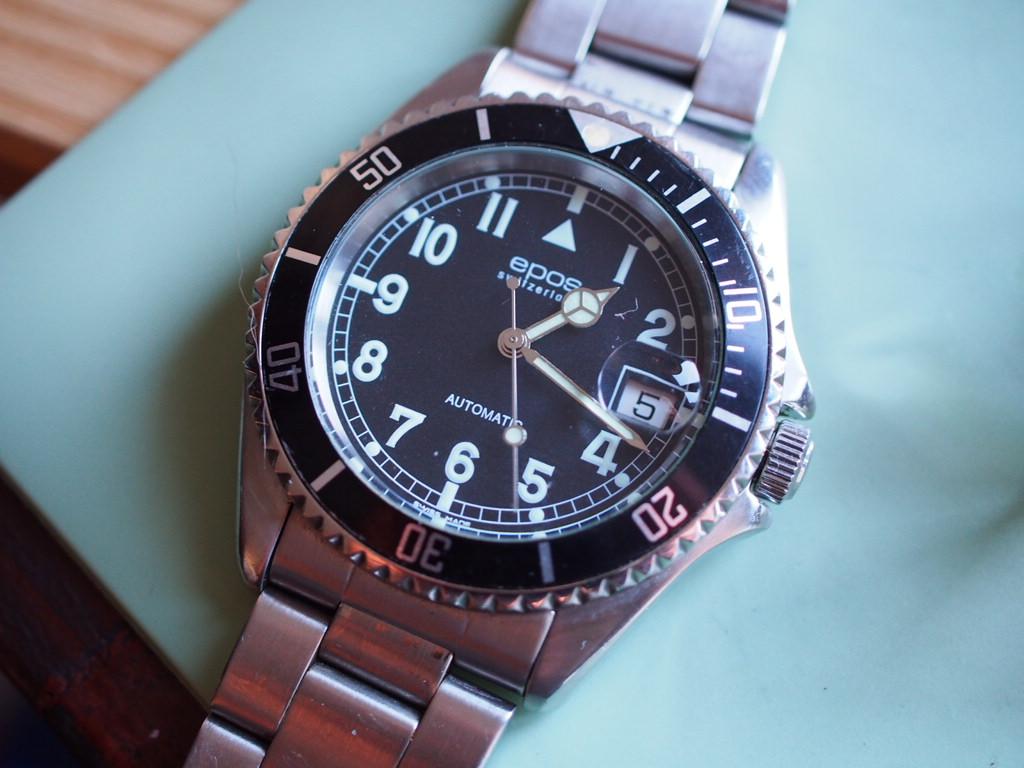
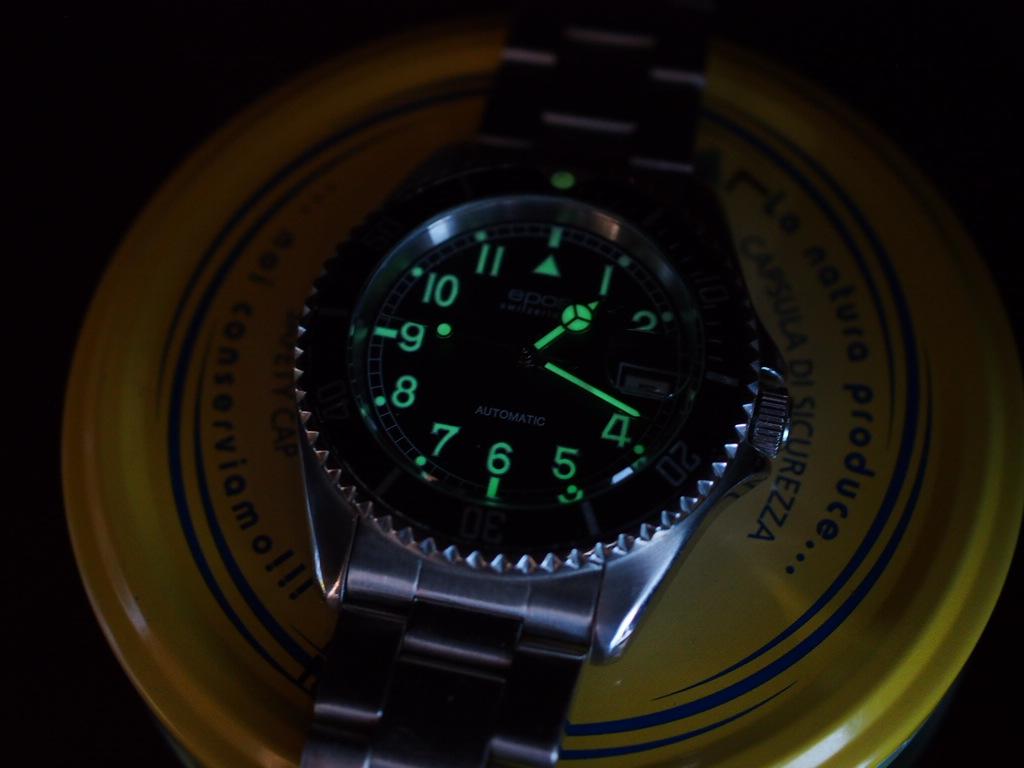
While I am sitting at the computer I thought I would do a wrist check for you. A Zelos Mako v2 sunburst blue dial, ceramic bezel loads of superluminova
 2 points
 -
Wait, you're making a minute repeater with calendar... making? And starting with the case? I admire your drive!2 points
-
The technical sheets for 6119 A, B and C can be found HERE2 points
-
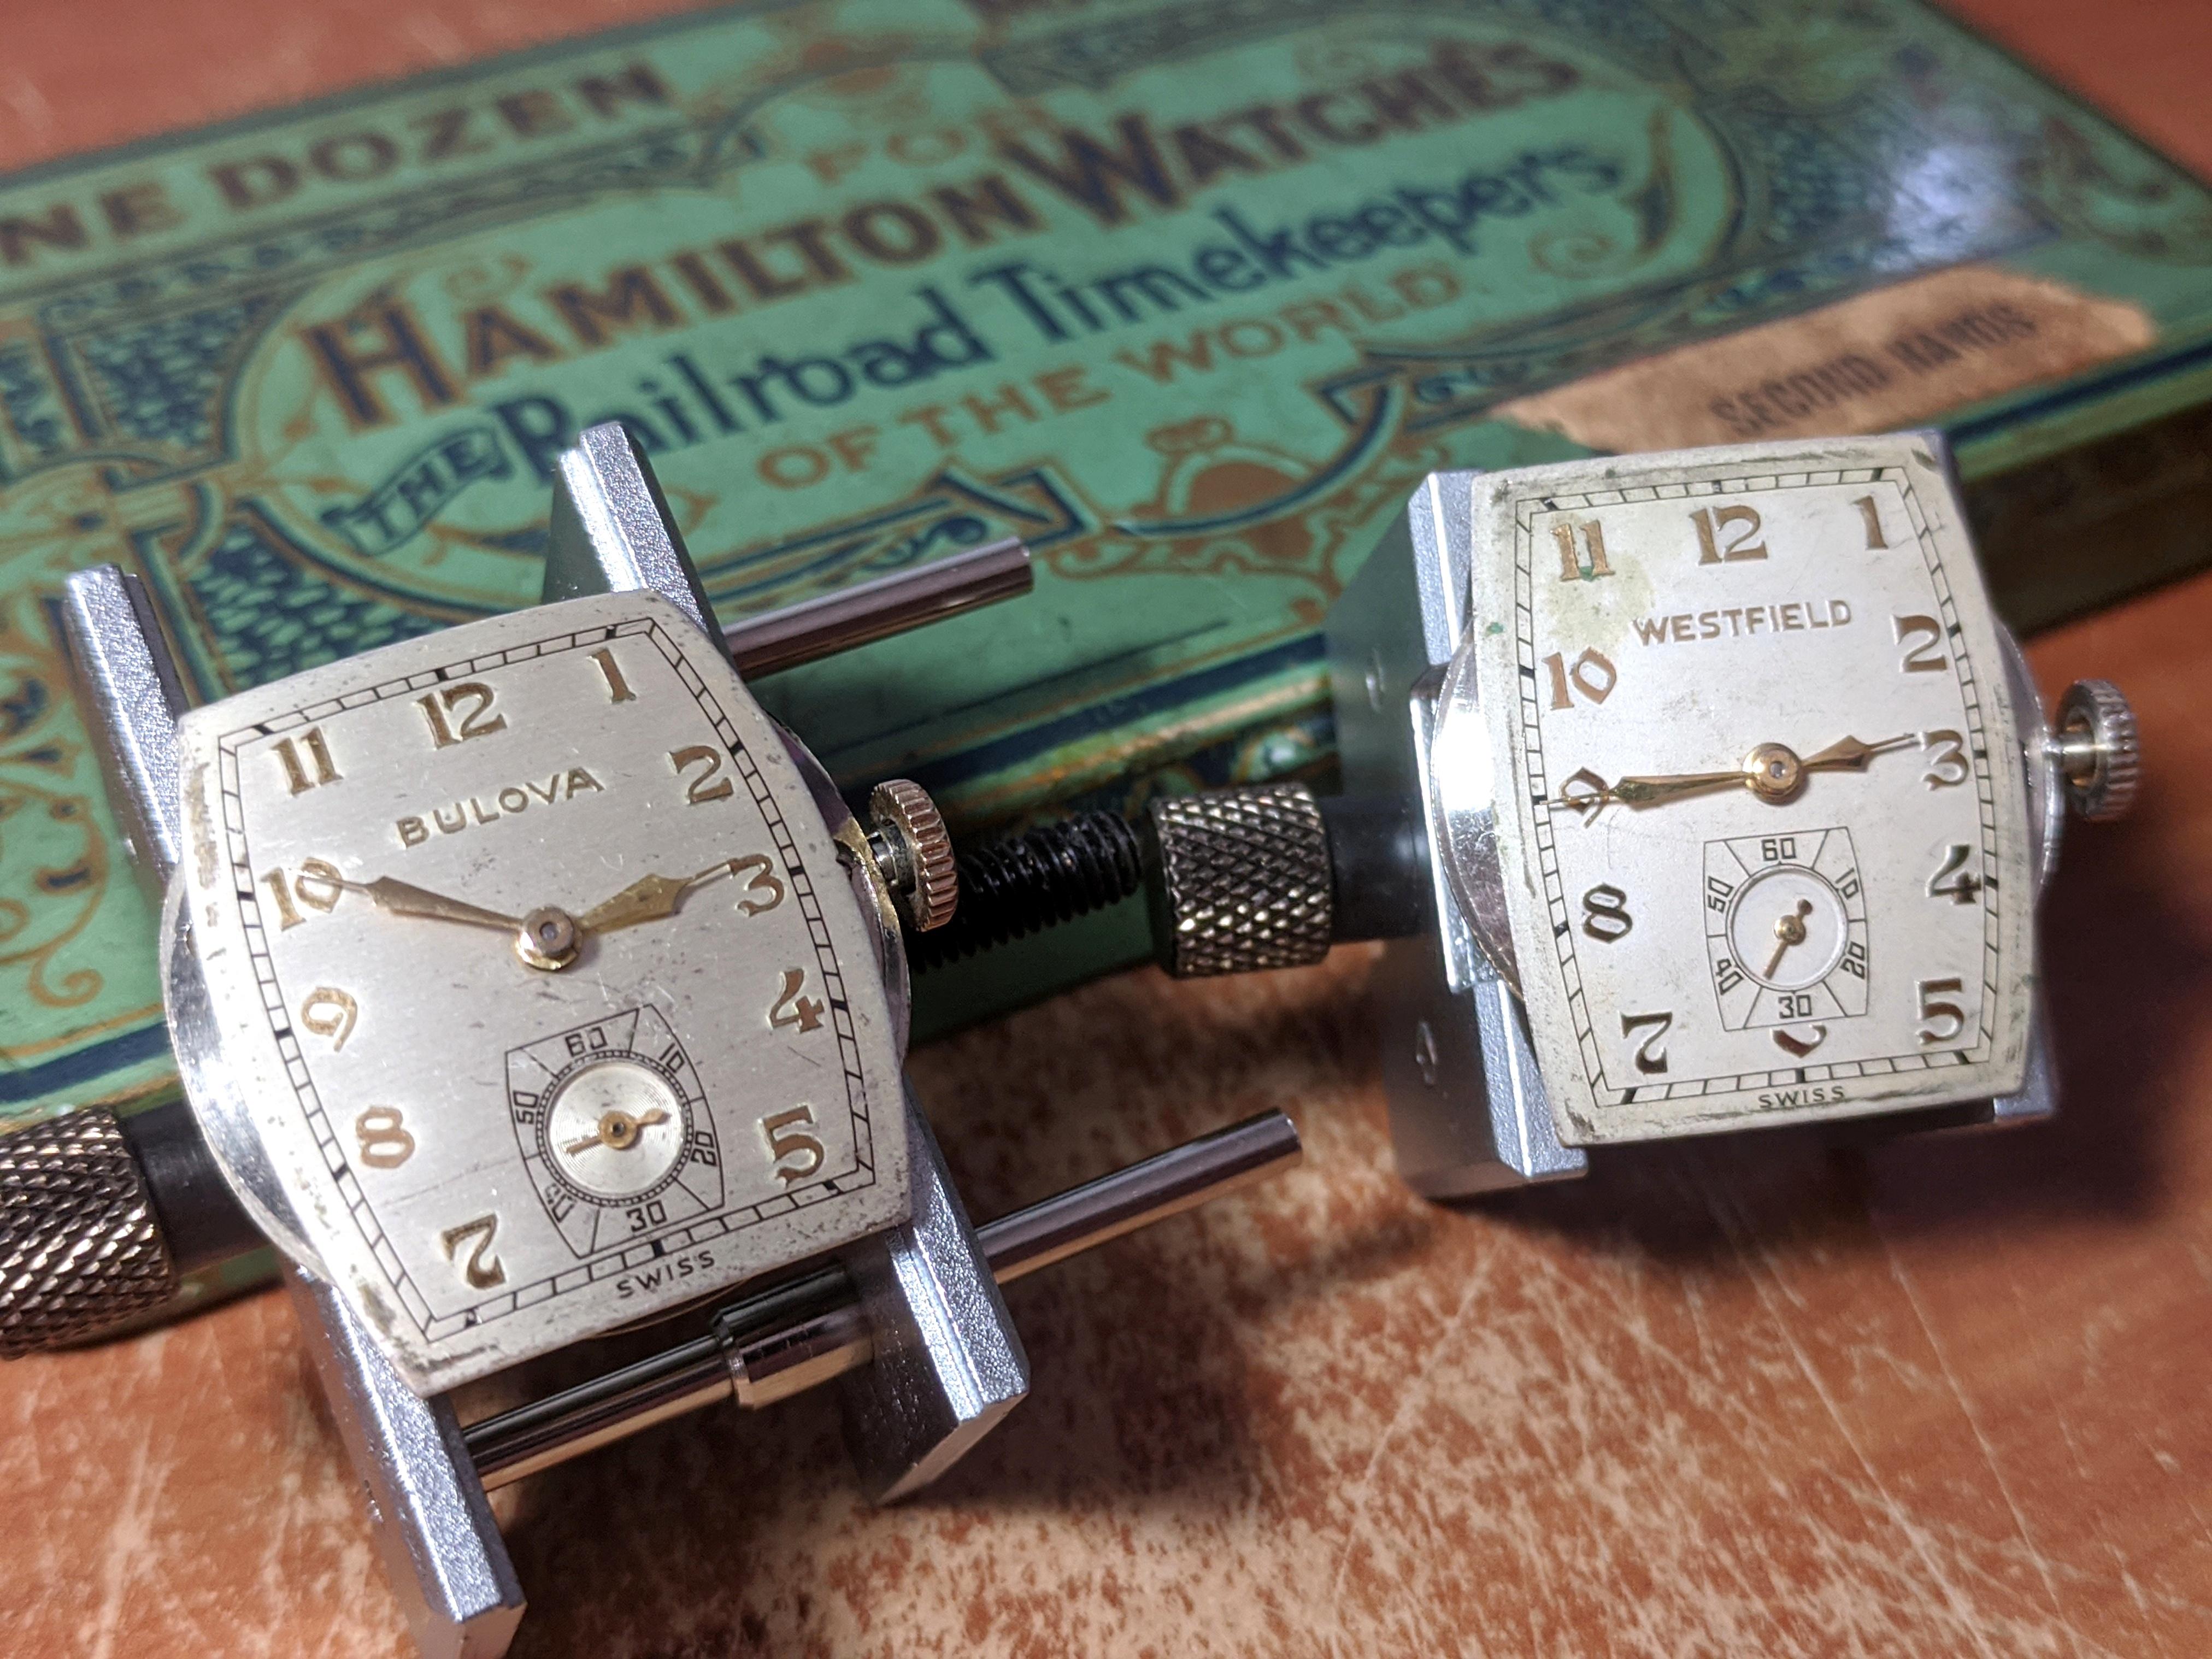
I picked the up the 1945 Bulova Cadet as a non-worker on eBay, then I received a parts lot that had a Westfield case and dial. Of course, I had to get a 1940 Westfield Trojan cousin movement for it. Unfortunately, I didn't notice til this morning that the replacement Westfield had a curved dial whereas my case had a flat dial and it doesn't fit. Oh well, guess I'll have to buy more watches.
 1 point
 -
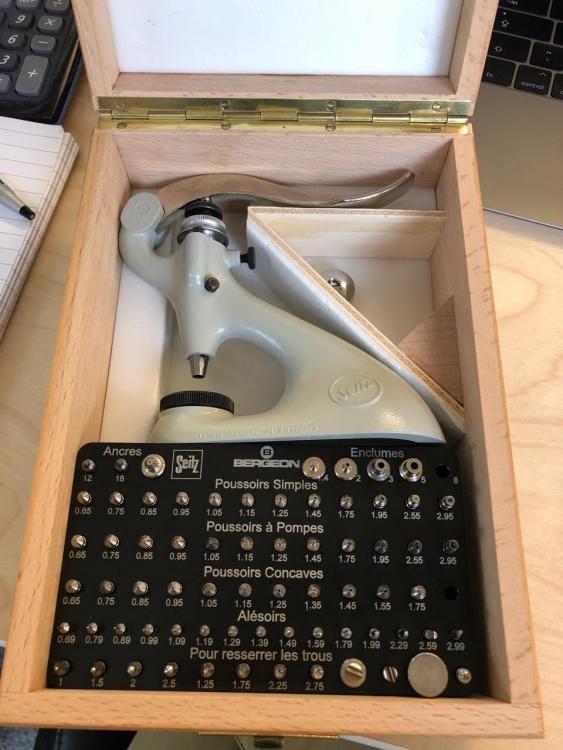
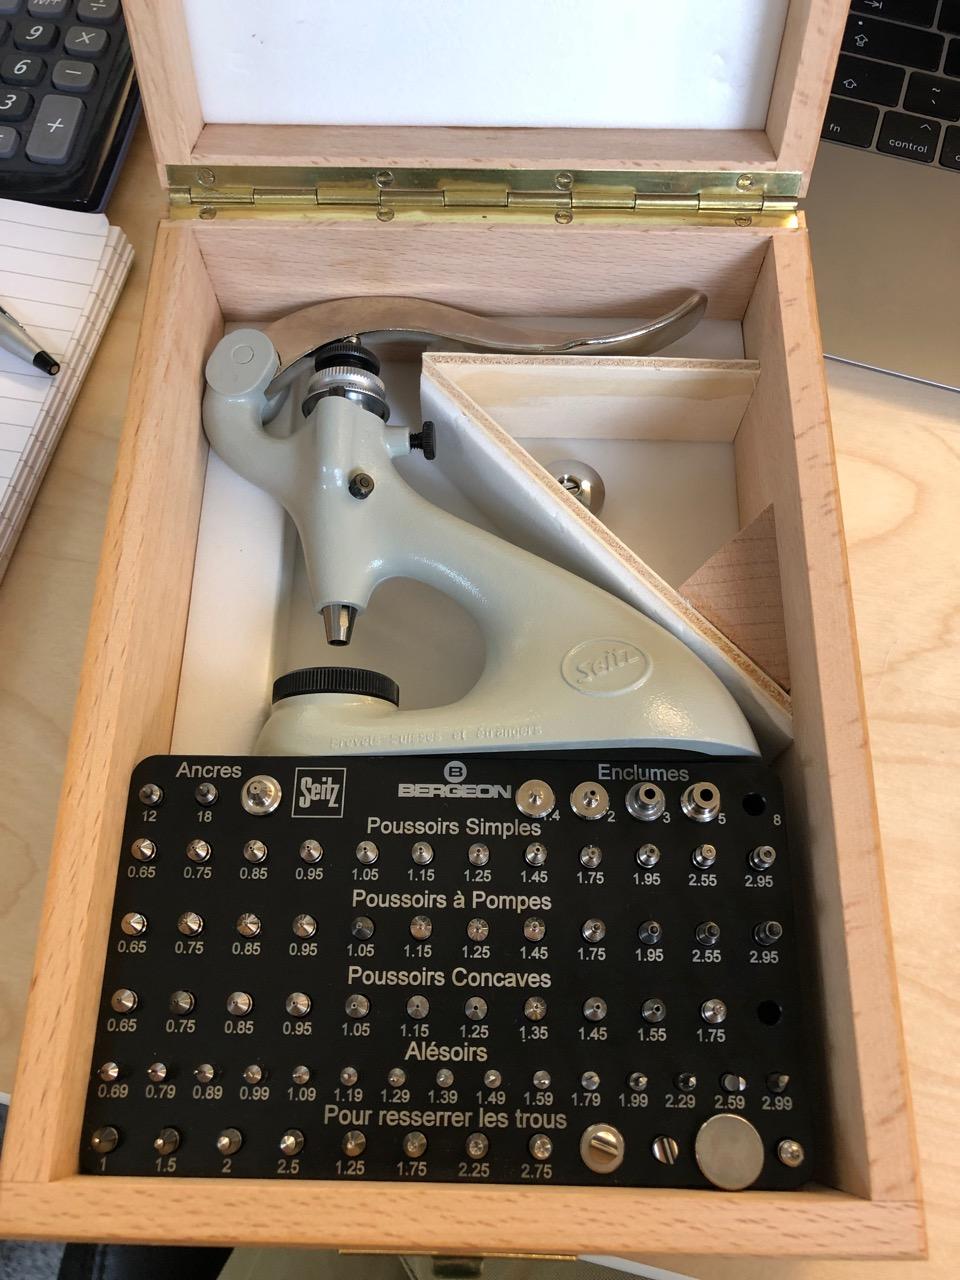
This beauty arrived today. My first jeweling tool. So excited
 1 point
 -
Hi Jeff, Welcome . Yes this is where to greet and welcome our new friends. Looking forward to making friends with you, that should'nt take much of your time since I can tell you all I know in twenty five words or less.1 point
-
Welcome...very familiar with your neck of the woods; used to work in Edenton, NC, retired now on Scottsdale AZ1 point
-
Didn't get it as cheap as $21, but £24 including shipping from the UK. Having read Mr.Fried ”Bench Practices for Watch Repairers”, I'm sure this one is worth it too. Thanks1 point
-
It could be the hairspring is touching due to gravity. I think that if you were to place it on a timegrapher or equivalent application (a mandatory tool when working on mechanical watches) you would see an irregular pattern. Also you would be able to hear a rough sound in the troubled positions.1 point
-
Since I recently acquired 21 watches in various states of function and condition, I thought I'd share my technique for restoring acrylic crystals. As a warning, there are items used in this procedure which can be harmful if used improperly, so please always read the manufacturer's warnings and heed them, thank you, and enjoy. I prefer to begin with a dual sided Emory board similar to what is used in nail salons. They're flexible and conform to the curve of the crystal. The one I use comes with 2 different grits, one coarse and one fine, 400 and 600 grit respectively. I dip the Emory board in water and ensure a small puddle forms on the crystal. I begin with the coarse grit and start with a circular motion, applying steady pressure. As I sand, I rotate the watch in small increments being careful to not stay in one place too long and to maintain a circular sanding motion. I follow the natural curve of the crystal as well, unless it's a flat crystal. After a few minutes, I stop and check my progress. I wipe off the water and acrylic residue and look for any obvious, deep scratches that remain. If not, I proceed to the next step, if so, I repeat the previous steps. When I'm satisfied that the deepest scratches are gone, I thoroughly clean the crystal and wipe it dry. I now flip the Emory board to the fine side and repeat the previous procedure of circular motions. Knowing when you have done it enough is honestly an issue of feel. When you first change grits, the surface feels rough and there is resistance as you sand, but that lessens as the deeper sanding marks are made shallow by the finer grit. This process should take less time than the first step. Again I clean off the residue and thoroughly dry the crystal. If im happy the the smoothness of the crystal, I can now move on to the final polish. I use a polishing compound from my employer that works amazingly, however any glass polishing/scratch remover that contains Cerium oxide will work fine. For this step I take a cotton cloth and fold it over twice giving me 4 layers of fabric. I then dab a penny size drop of the Cerium Oxide cream onto it and then press the crystal firmly onto the cloth. I then swirl the crystal around and around in a steady, circular motion, maintaining a firm pressure as I work. I rotate the crystal every few moments and I rock and tilt the crystal following the contour of the crystal. After a couple minutes of this action, I stop and wipe away the residual cream and inspect my progress. Most times, one cycle of the Cerium oxide cream is adequate, however, if you miss a spot, repeat the process. The initial penny size drop of the cream is almost always enough. If you're happy with the results you can wipe away all the residue and enjoy your work. BTW, cerium oxide will lightly polish metals as well, similar to Brasso. This can help to remove scuffs, light scratches, Oxidation and other residues on older watches. Lastly, this entire procedure can be perform without ever removing the crystal from the case, as long as you are mindful of the case. Thank you for your time in reading this, hopefully I've enlightened you and added a new tool to your watchmaking toolbox. (The crystal used in the photos of this procedure has microscopic crazing cracks from age and heat which are deeper into the crystal and this procedure does not remove those, however, for me it looks great.)
 1 point
 -
This Swissie was in the same batch with the Seiko Bullehead that I've presented recently. Very wearable at 39.5mm and well equipped with a SW200 mov't. Seller classified it as a junk just because the balance had over banked, as I eventually found, definitely a deal for €144 inc agency fees and shipping. Runs as a charm and will be in two minds about keeping it or not.

 1 point
 -
Hi I do it this way because all the files are located on the computer as PDFs having been gathered over many years and stored . I also have access to a collection on printed material and a lot of books collected over a long time. I have been repairing clocks and watches for almost 60 years as a hobby. I joined this forum ( the friendly forum) to help others when required, Look for no street cred or anything else just to help those not so clued up whenever I can ,.1 point
-
He has plenty of light.1 point
-
Very nice, do you like working in the dark?1 point
-
Really! this is going to be one interesting watch.I cant do anything like it. cleaning ,lubricating and parts swapping are the extent of my skills. I am going to enjoy watching a ground up build.1 point
-
One nice feature of this forum software is that we can re-use attachments we had included before, saving us more uploads. From the "insert other media" chose "existing attachment". Type in few letters that identify it, and you will be presented with the relevant matches. Select one or more, then the green insert button.1 point
-
That is true worldwide, not just Australia. Most Swiss makers, not just Swatch, do not make parts available - period. Since there is no secret or magic place to get these parts beside trying Ebay, either you manage to get an official service center to order for you (unlikely), or give the watch to them (costly).1 point
-
I'm sure many members will be interested in this. Thank you for your post.1 point
-
Hi, Well, the most obvious wheel is the hour wheel which carries the hour hand. If it's both morning and night, then it seems less likely to be calendar-related.1 point
-
I have actually improved the process by using a 600 grit sanding barrel. No lines. Then finish off with this stuff....works great on glass. Sent from my iPhone using Tapatalk Pro1 point
-
I am making the movement (it's a bit of a surprise, just something I have been thinking of making for a long time.) It's going to get really complicated with a new calendar function and a minute repeater all on three mainplates. Should be fun! New Bern is an interesting place for sure; always seems to be on the verge of becoming something you can't identify.1 point
-
I really like this book too, it covers a lot of ground and is very well written. I visited the horological society of New York last year and they have Henry's old bench and some of his tools in their office! They also gave me this book while I was there.1 point
-
Loose canon pinion. This is a really bad idea. Even if all of the pivots are properly lubricated you are spinning everything up to way beyond its design speed, and if the pivots are dry or are contaminated with micro dust particles then you're just going to grind down the bearing surfaces and cause unnecessary damage. Further more you will cause the hands to spin very fast, accelerating and decelerating them via the slipping interface of the canon pinion, and this could well have caused the canon pinion to loosen up to the point where it now no longer does its job. Winding just a small amount of power into the m/s with the pallet fork out so that you can see that the train is free is fine, but spinning the movement up fast enough to "clear out any crap" is kind of asking for trouble. There should be some resistance felt at the crown when you set the hands.1 point
-
Hi, it was mainly filing and a bit grinding. Origin was a steel tweezers of this type, which I had a lot of: Some pictures of the curve tweezers: Frank
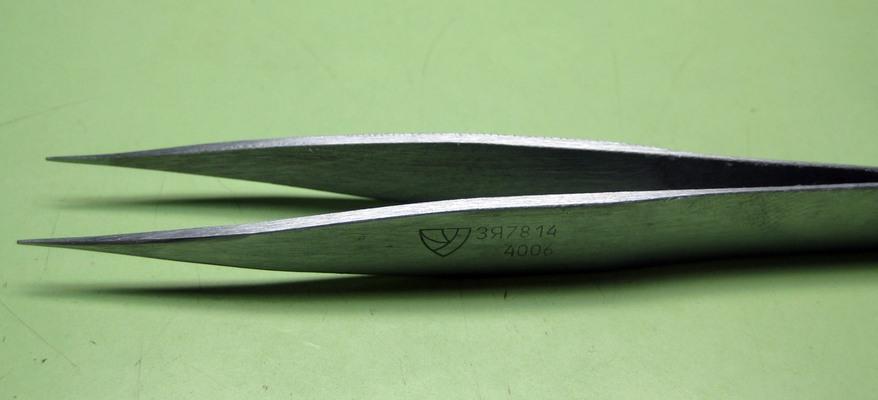
 1 point
 -
You can still access it through the history books... https://web.archive.org/web/20130806005336/http://raulhorology.com/2012/08/eta-6498-escapement-fitting-the-pallet-staff-and-jewels-setting-depth-of-lock-and-run-to-banking/1 point
-
I paid $50 for the one I am wearing today at this past weekend antique fair. Maybe I scored a home run?
 1 point
 -
That's the Internet, stop caring or paying and your site will go phooff. Maybe this recent video by our Host Mark will help you1 point
-
Hiascanio I have come across super friendly watch repairers who would go out of their way to help as they realise it is a profession they love and are all to happy to see it being carried on by younger guys. I have also come across one where I got chatting and as soon as I mentioned I was a hobbiest it was like a Jeckyl and Hyde moment where I was told that unless I was apprenticed in the 50s I would never be any good or a mount to anything. This forum is full of very knowledgeable craftspeople who I have found to be very helpful as I have asked some woeful questions but have been answered and helped. Guess in the real world only getting to know a watch maker will allow you to determine their approachability. Hope this helps. Andy1 point
-
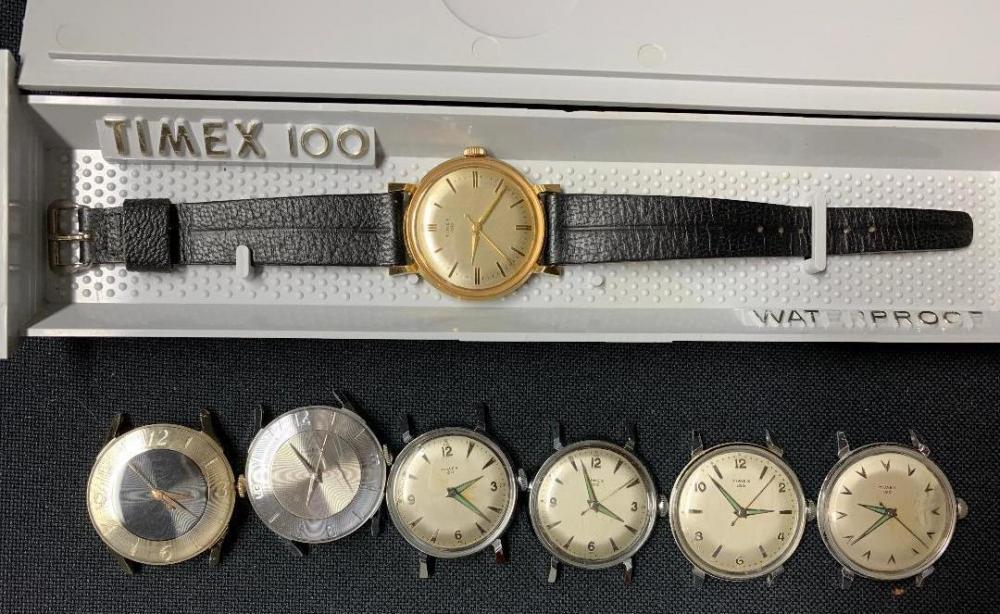
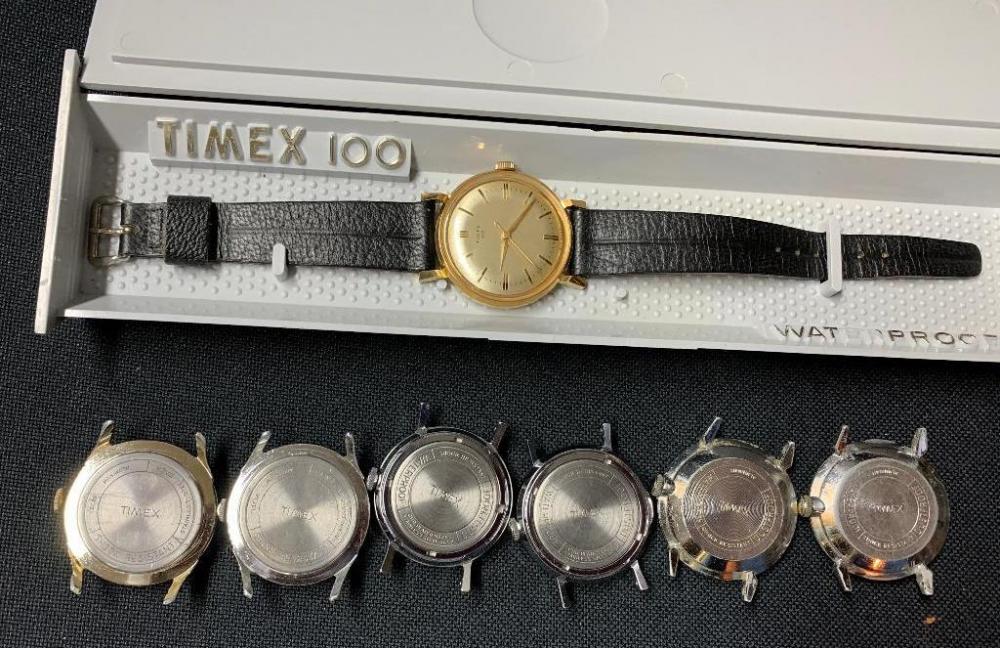
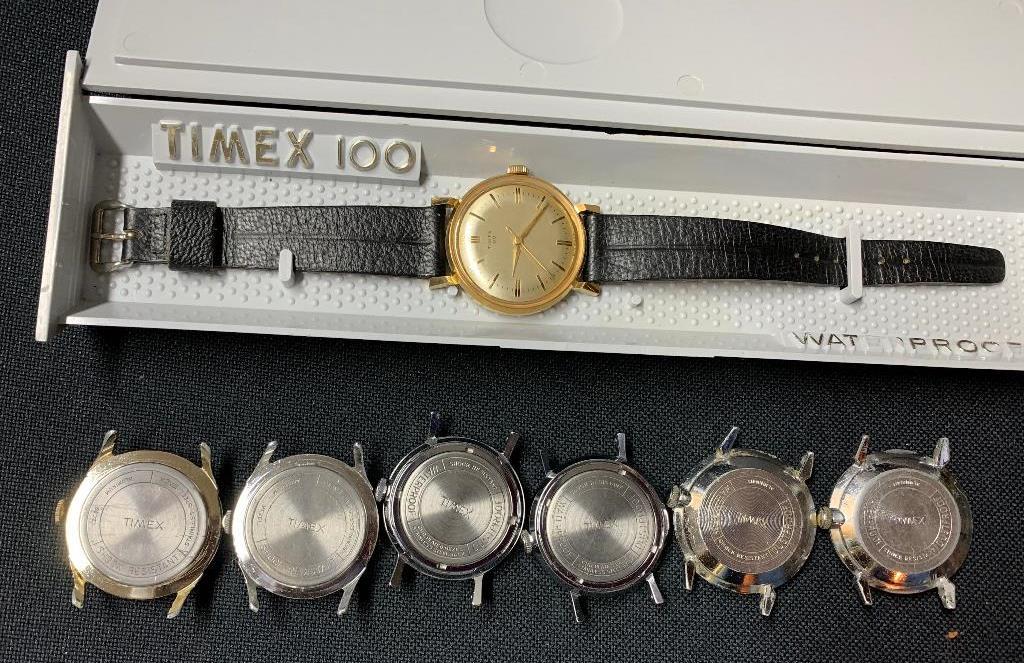
A collection of Timex 100's -
 1 point
 -
Reporting back. Here's what worked: Hand sanitizer. Decided to give it a try since none of the other conventional cleaners were touching it. Best thing ever - it dissolved the black goop immediately and it wiped away easily with bud swabs and Scott tissue. It works really well removing Sharpie marker and tape goo, guess gasket removal goes on the list, too.1 point
-
Personally I would just remove the most of the goo with an 1mm driver while keeping the watch face up. Then remove the module and bezel and drop the entire case in your favorite cleaner.1 point
-
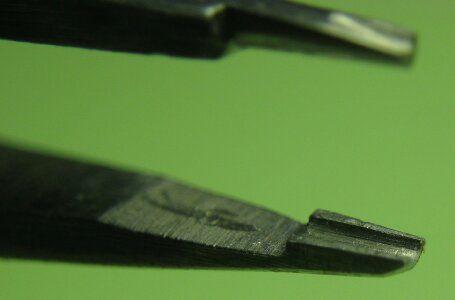
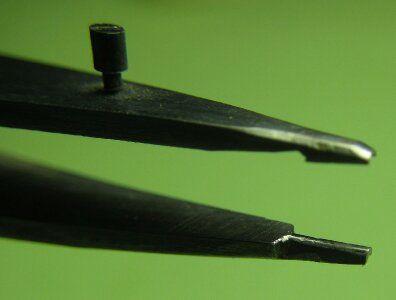
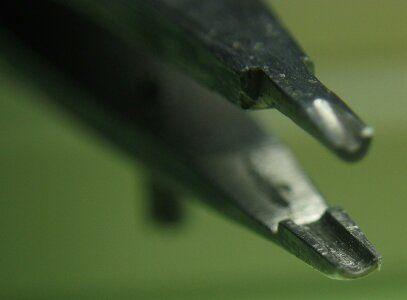
OK, here are the bad boys. The curving ones I have go from 00 to 5, the lifting ones from 00 to 4. The example hairspring would be about right for a deck watch- very big, and the largest of both sets worked well. You can see in the 4th pic that the end of the lifting tweezers can be adjusted for the thickness of the spring (red circle) and how far it pushes (screw in blue circle). I just did a simple overcoil, there are many shapes, here the goal was to get the curve to follow one of the spirals more or less imagining in our imaginary watch that would be where the regulator lies.
.thumb.JPG.ed9edaa457f2ae65fd68b5c8979f71ff.JPG)
.thumb.JPG.14232216bb5c72b75c99d989c4cc4925.JPG)
.thumb.JPG.e5dba0c9c2d2944ffee08e5d60914d6e.JPG)
.thumb.JPG.7d3a1cc14d1a5a731110ed5c85cacdaa.JPG)
.thumb.JPG.dafd458d74365be46c35e6540e193777.JPG)
.thumb.JPG.01847c089c95a5605111d398a112fef1.JPG)
.thumb.JPG.67970e70d3e7beadf7ff9f9678cf1c51.JPG)
.thumb.JPG.75e15b9b7acf1c81fe047e75f0b2b424.JPG)
.thumb.JPG.94f57557953150a9c612c9b2a59880d8.JPG)
.thumb.JPG.3b9305968e9fd431f57c73a92022009b.JPG) 1 point
1 point -
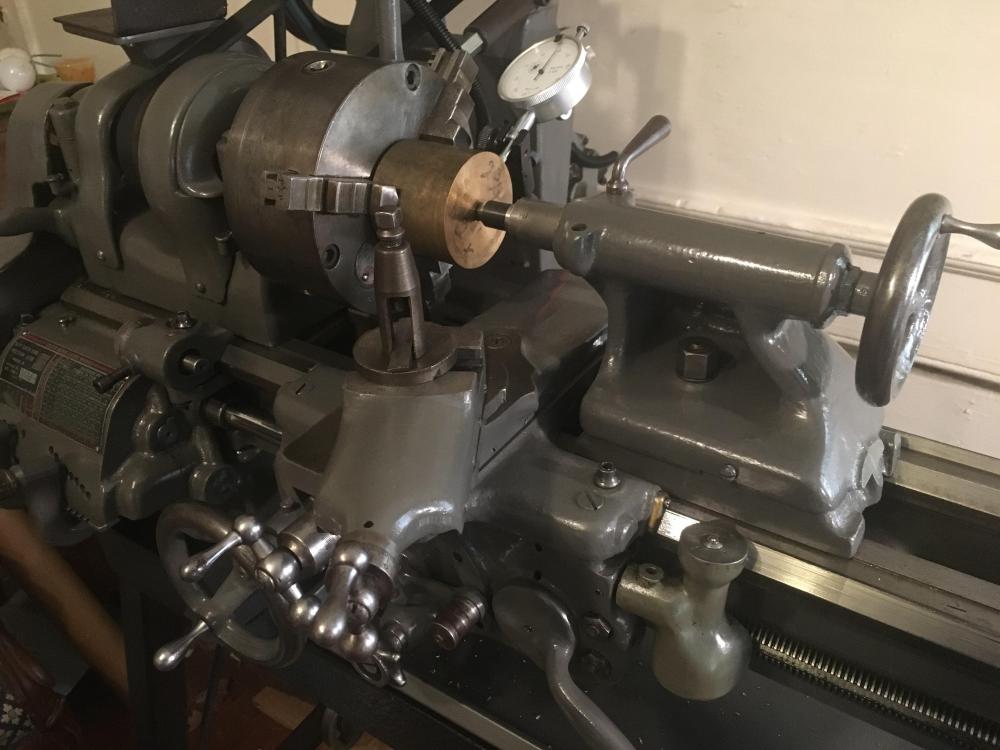
Here are my lathes that aren’t mounded on a Borel Base with countershafts (of which I have 3) with one mor in the mail, that’s 10 lathes. I have a small collection I guess. All cleaned and running. Sent from my iPhone using Tapatalk Pro1 point
-
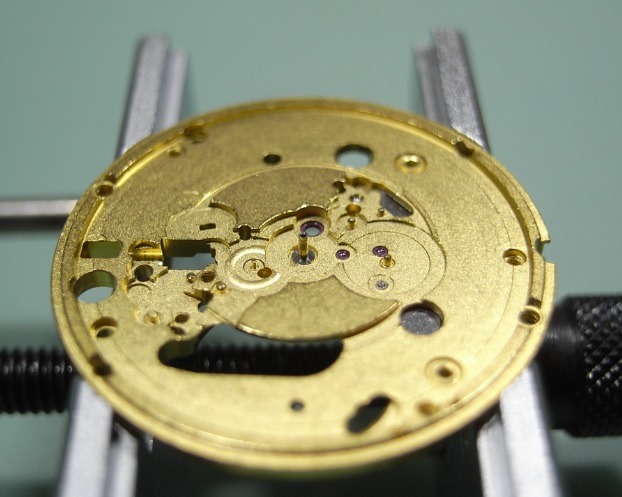
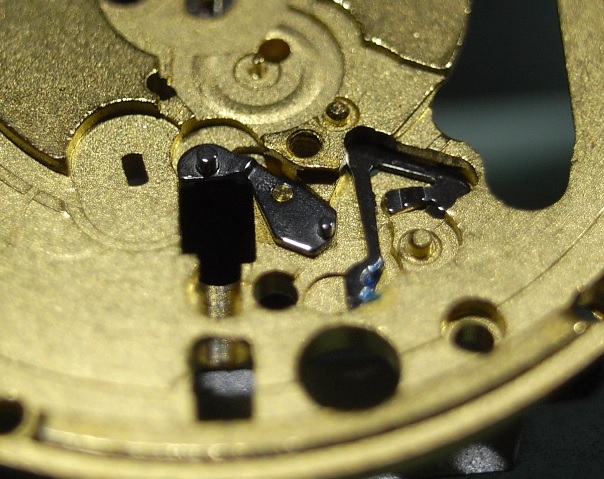
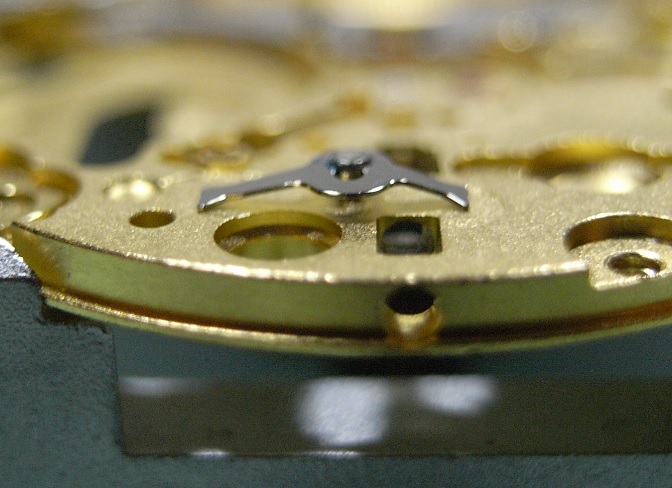
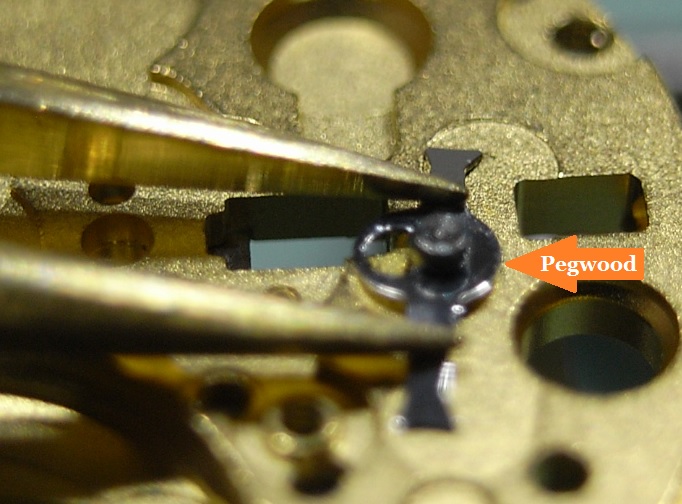
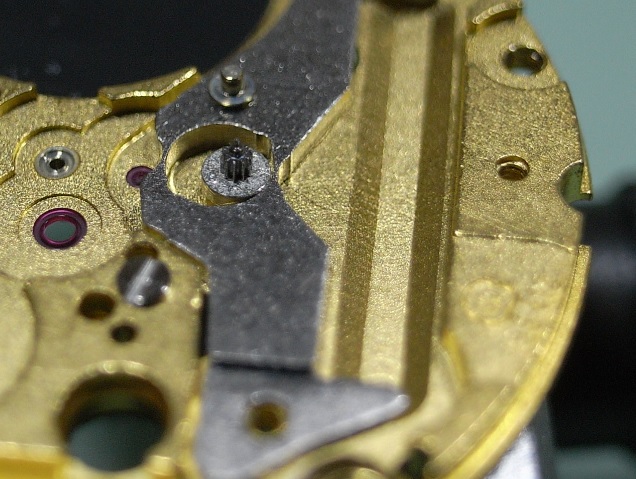
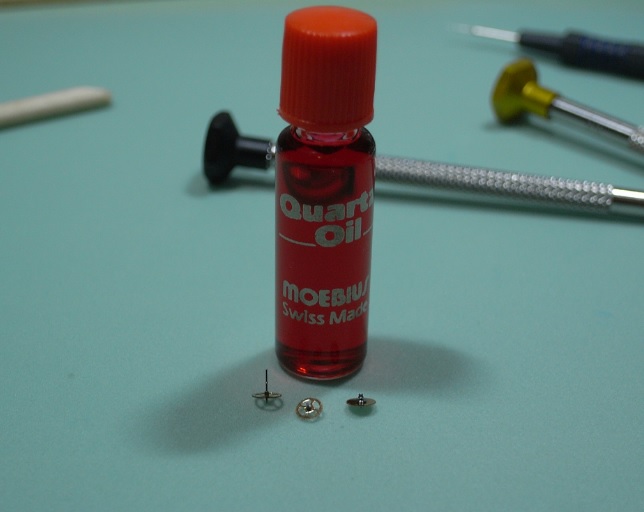
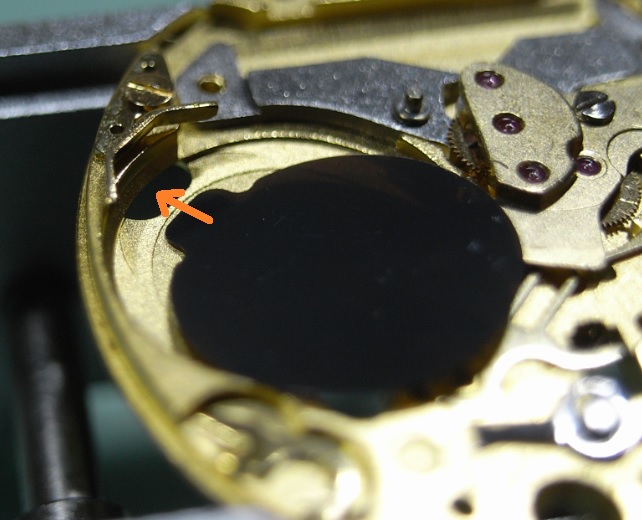
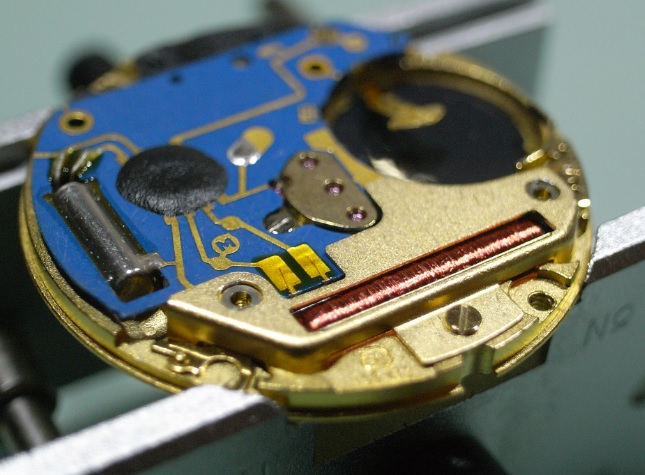
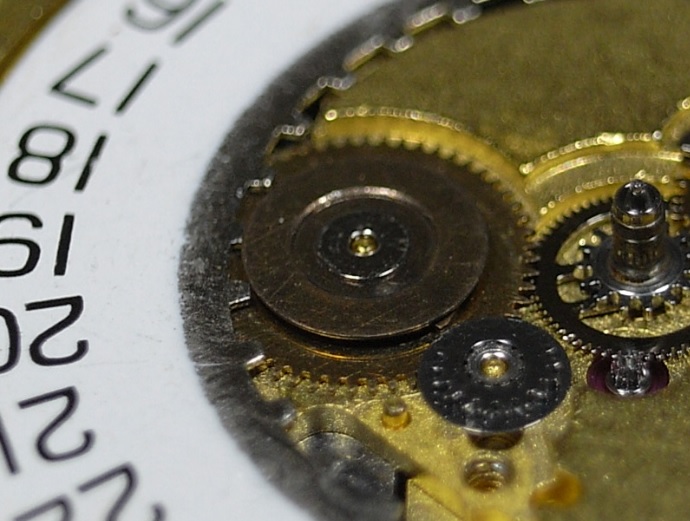
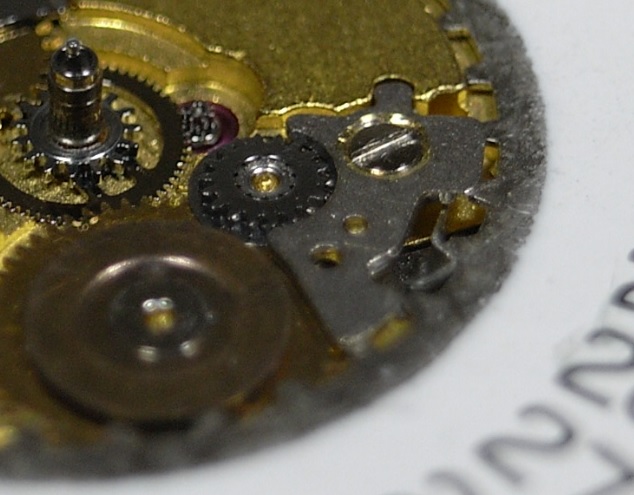
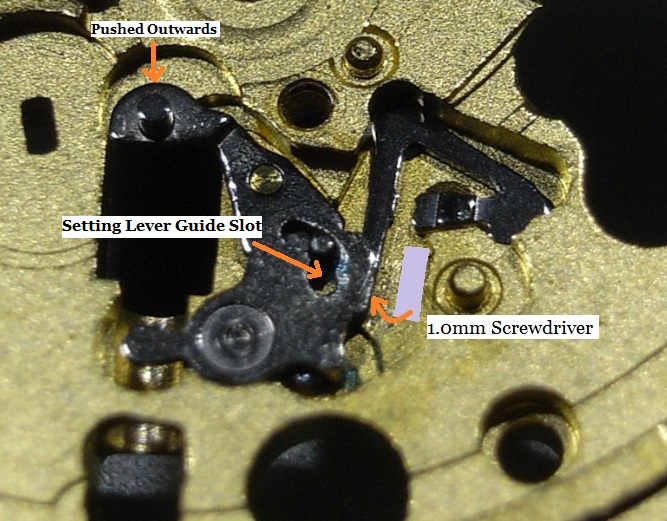
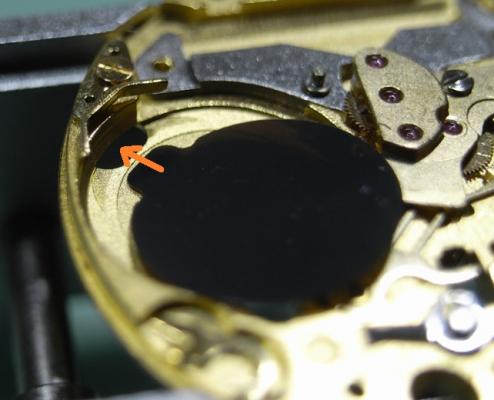
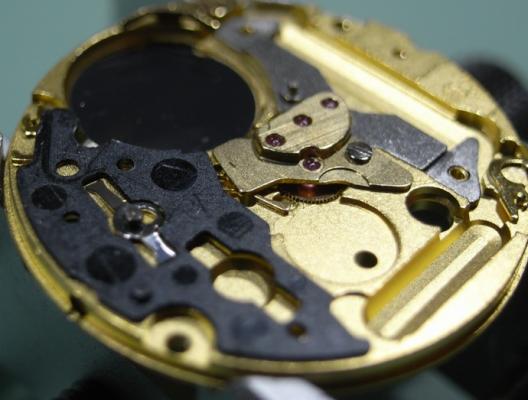
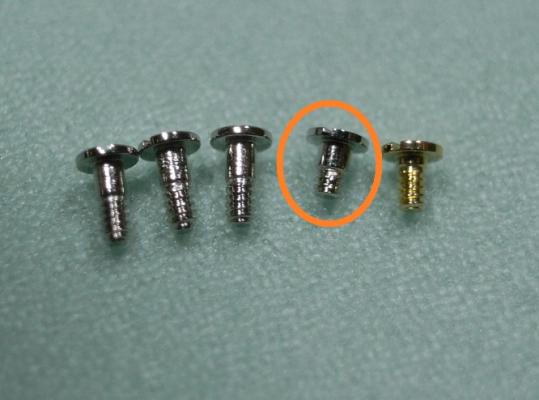
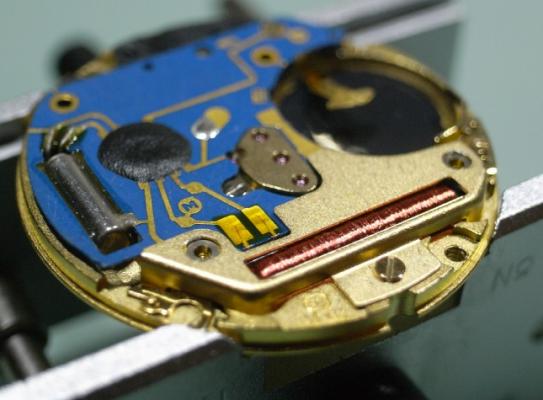
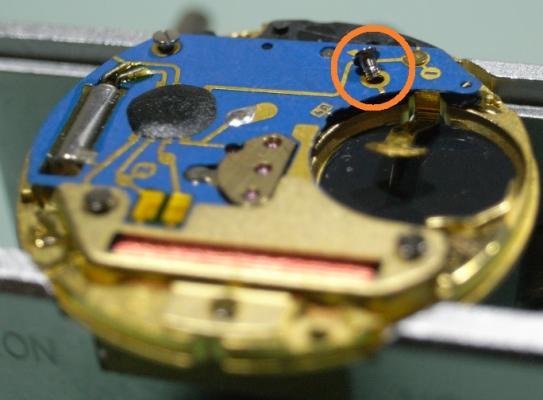
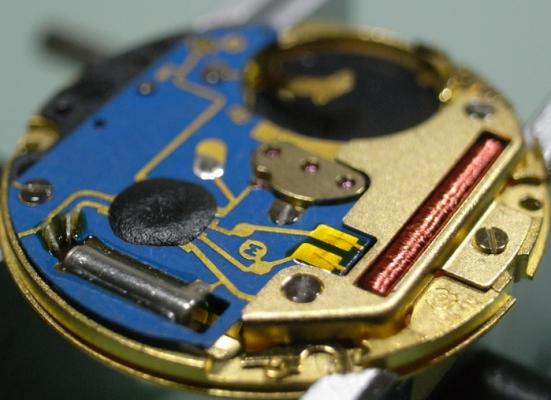
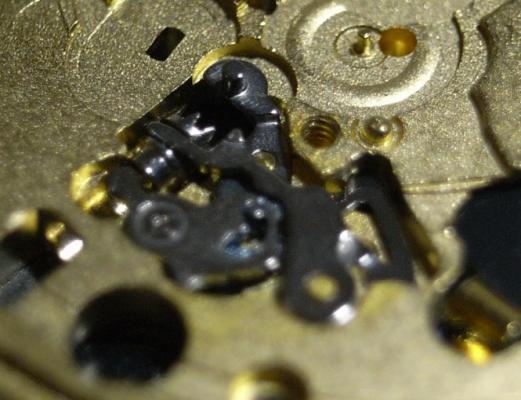
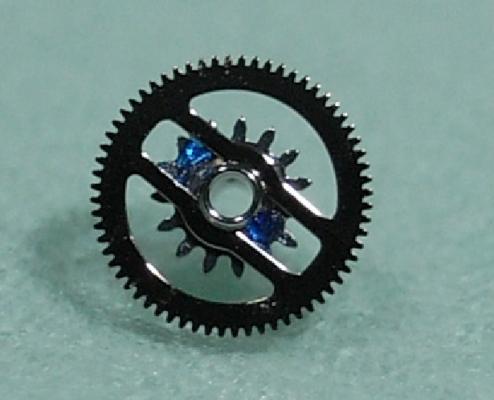
Assembly I have made the assembly walkthrough much more detailed, as putting things back together is always more tricky than pulling them apart :) Firstly install the Setting Lever Jumper and the Double Corrector Operating Lever. D5 on the Corrector Lever Pivot 9501 on the Setting Jumper To install the Setting Lever, first move the Double Corrector Operating Lever to it's most outward position, then push the Setting Lever 1/3 of the way down it's pivot, next place a 1.00mm screwdriver as shown below, and turn it clockwise. This will push the Setting Lever Jumper over to the other side of the pin on the underneath of the Setting Lever. Then push the Setting Lever home, making sure that the pin on the Double Corrector Operating Lever locates inside it's guide slot on the Setting Lever. I know this sounds a little complicated; but once you study the Keyless Work, you will understand the procedure I've explained here. Just take your time, and read through this procedure whilst looking at your work a couple of times until you are sure you've got it. Please Note: If you use a larger size of screwdriver be careful you don't push it too far over and bend the jumper ... using a 1.00mm driver is the correct size and will avoid this possibility. 9501 on the Setting Lever pivot 9501 in the guide for the Corrector Lever pin Flip the movement over and place the Setting Lever Spring Clip as shown below Then with a pair of tweezers push down on both sides of the clip and with a piece of Pegwood push it inwards so it locks in. Next install the Rotor, and you'll find due to it being magnetized, it will stick to the Stator. DO NOT try and locate it in it's jewel, as it will just pop out and stick to the Stator again, and this can be very frustrating ... but I have a little trick that will cure this :) Place one of the screws on the opposite side of the Main Plate, behind where the Rotor is located, and you'll see it will be attracted to the Rotor (as seen below). This little screw will pull the Rotor downwards and stop it being pulled over by the Stator, so you now can locate it in it's jewel. Don't forget to remove and demagnetize the screw once you've completed installing the gear train. There is a LOT of discussion on oiling quartz gear trains. The ETA Service Manual says to use Moebius 9014 on this particular movement; but I prefer Moebius Quartz Oil, as it can be used on both metal and plastic gears without concern ... why have 2 oils when 1 will suffice for both applications. Others say, don't oil the gear train at all, as it just adds load to the movement and makes it draw more current. Personally, I'd rather change a battery a little earlier than change out a worn out movement ... you choose which is cheaper. When oiling any quartz gear train, we only apply about half of what you'd use on a mechanical movement ... it's called Ghost Oiling. That being said, ghost oil the jewel for the Third Wheel with Quartz Oil as shown below. Ghost Oil the upper part of the Second Wheel with Quartz Oil as shown below Fit the Gear Train into the Main Plate. Place the Gear Train Bridge over the wheels, locate the pivots carefully until all are freely spinning, and tighten down the bridge. Remember once the screw makes contact with the bridge, STOP, and recheck the free spinning of the train before completely tightening the screw. Once the Bridge is secure, place the Stop Lever and Switch back onto it's pivot. D5 for Stop Lever and Switch pivot Quartz Oil for all Gear Train pivots (remember to oil both sides) Next install the Battery Isolator, making sure to push the tab into it's slot as shown below. Then install the Isolator Block Next we need to short out the screws for the IC Board. You'll see there is a Gold Screw, this is for the Coil Protector, and then there are three screws of the same length, and one shorter one. The shorter screw must be place into it's correct hole. Locate the IC Board onto the movement. Before I screw the IC Board down, I always fit the Coil Protector first. This helps avoid any damage if you accidently slip off a screw head. Remember to use the Gold Screw. Next place all the rest of the screws into their holes, noting the position where the short screw is to be located. This side of the movement is now complete. Time to flip it over and complete the Keyless Work, Motion Work and Calendar Work. Place the Sliding Pinion into it's position. Please Note this is a spare movement I'm using here, and I don't have a stem. If you have a stem, now is the time to install it. 9501 in the grove for the yoke on the Sliding Pinion 9501 on the stem Place the Yoke into position D5 on Yoke Pivot Install the Setting Wheel and Date Corrector D5 on Setting Wheel pivot D5 on Date Corrector slot Next is lubricating the Cannon Pinion. This is one step that MUST be done correctly, otherwise too much friction will occur and you'll damage the Setting Wheel in short order. 9501 Canon Pinion fiction points Place the Canon Pinion and then the Minute Wheel D5 Minute Wheel pivot D5 Ghost Oil the Canon Pinion Tube Attach the Motion Work Bridge and secure it down. Place the Date Ring onto the movement, and then slide the Date Indicator Driving Wheel into place, so the teeth of the Date Wheel are inside the Driving Wheel. Then install the Intermediate Date Wheel. D5 Date Indicator Driving Wheel pivot D5 Intermediate Date Wheel pivot Lubricate the foot of the Date Jumper Spring as shown below 9501 Date Jumper Spring foot Place the Date Jumper Spring into position on the movement Place the Date Jumper Maintaining Plate and secure it. Check the date and time setting, making sure the quick date works smoothly. Check the feel of the Motion Work, making sure there is not too much or too little friction from the Canon Pinion. Your movement is now completely serviced, all that's left to do is fit Hour Wheel, Dial and Hands :woohoo-jumping-smiley-emoticon: It's good for another 100,000 miles or 5 years ... whichever comes first ^_^ I hope this walkthrough both helps and encourages you with servicing your 955/6 ETA Movement


 1 point


.JPG.2757bb0ac8358d992d746ca1031af32d.JPG)
.JPG.fa1dc36d7626aa1366bb81f1b8ee7a77.JPG)
.JPG.7141428c73cc9814d42103b45cadccd0.JPG)
.JPG.2f2ce9225432ce0d86c3659f14352b0b.JPG)
.JPG.84c58cdba75e7e326e9793cb1d83f3d0.JPG)
.JPG.a9fed7c426e00e98eee4c6a406cce6b6.JPG)
.JPG.6cff07ba38d3cc7df9681f99a979701e.JPG)
.JPG.9c679c9be668be442c0d8cdb50ffea1e.JPG)
.JPG.25ddea8b3e253301a05baba3bf4c91c0.JPG)
.JPG.b1e980e7eb7f1b322ccb340810a312af.JPG)