Leaderboard


Popular Content
Showing content with the highest reputation on 10/03/21 in all areas
-
I designed the synthesizer and VCO for the DSP on an integrated circuits used in disk drives (circa 1995). These designs went into WD, Seagate, and Quantum disk drives. The VCO was slaved to the synthesizer (which was slaved to a crystal oscillator) and was designed to be adjusted according to where the read head was on the rotating disk (inside radius slower than when at the outside edge of the disk). What we discovered was that as you dial the VCO near the frequency of the synthesizer, it just locked in and would not budge until you pushed it well past the reference frequency given by the synthesizer. Wow...we were scratching our heads. Somebody on the team discovered that we were not the first do notice this issue. Christiaan Huygens also discovered that when clocks mounted on the same beam while closely regulated, will synchronize themselves. In modern times, we call this "injection locking." This bit of insight was exciting for me...being the son of a watchmaker.3 points
-
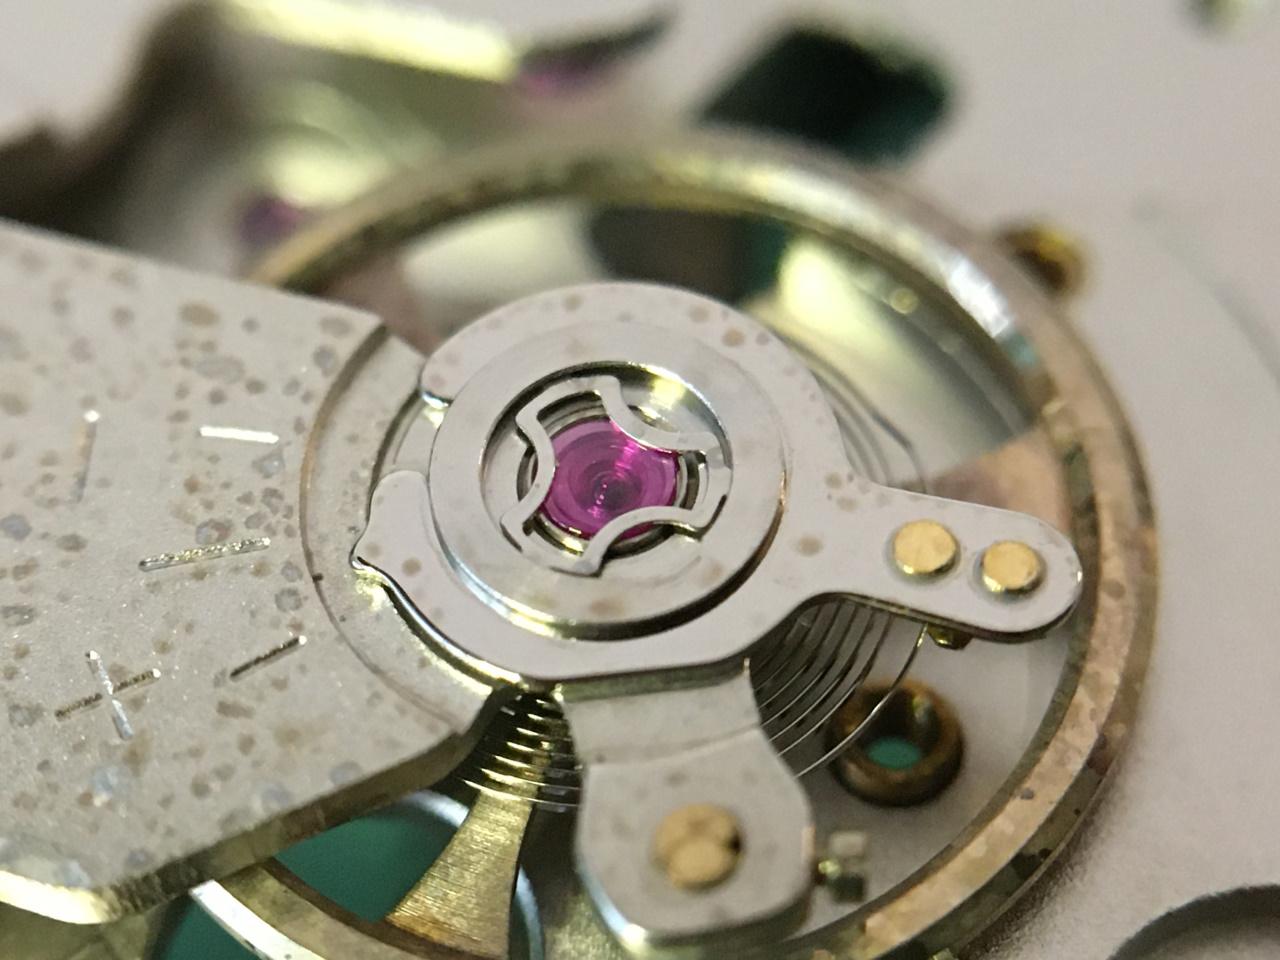
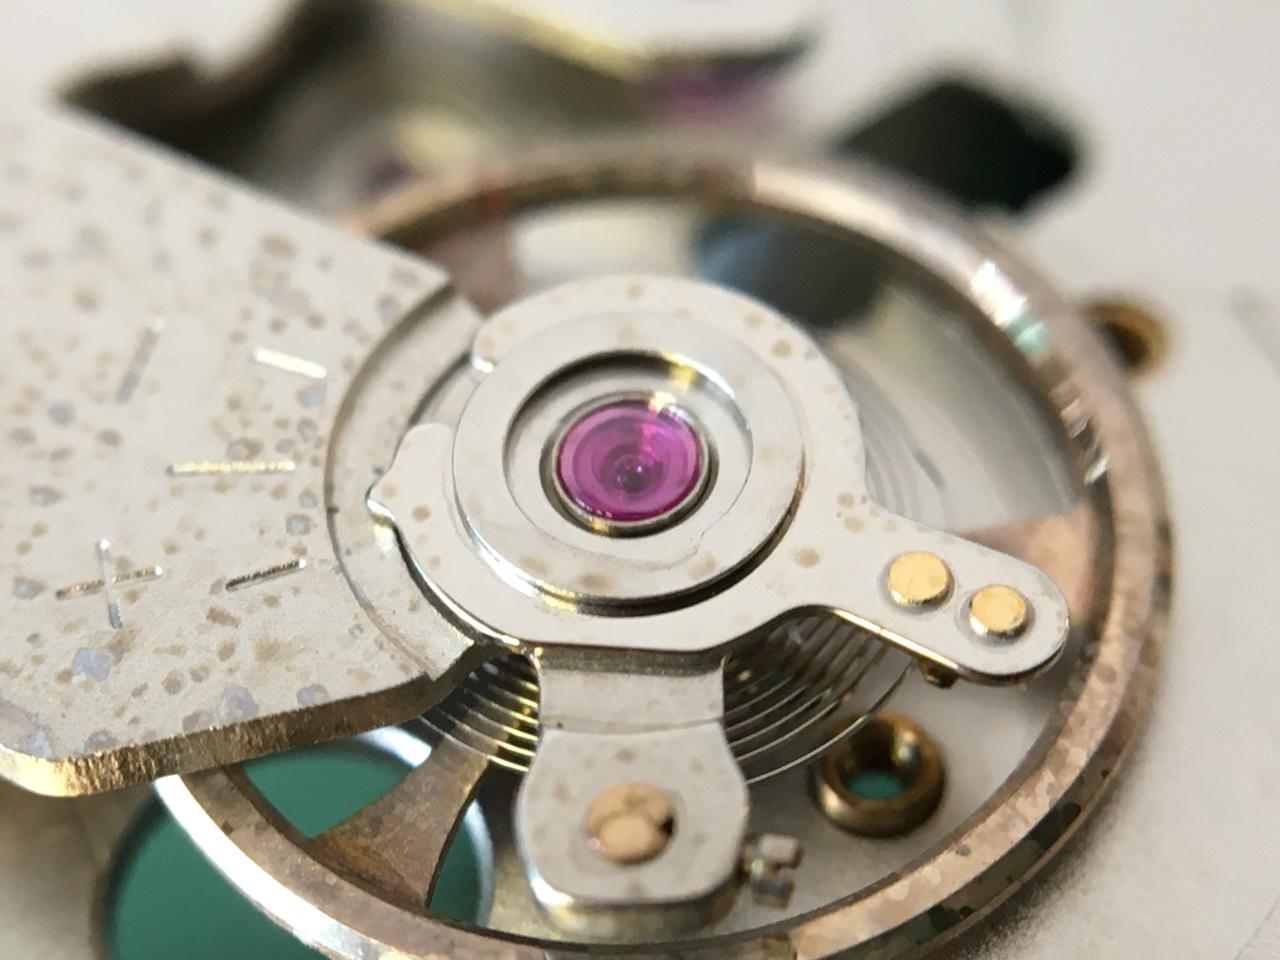
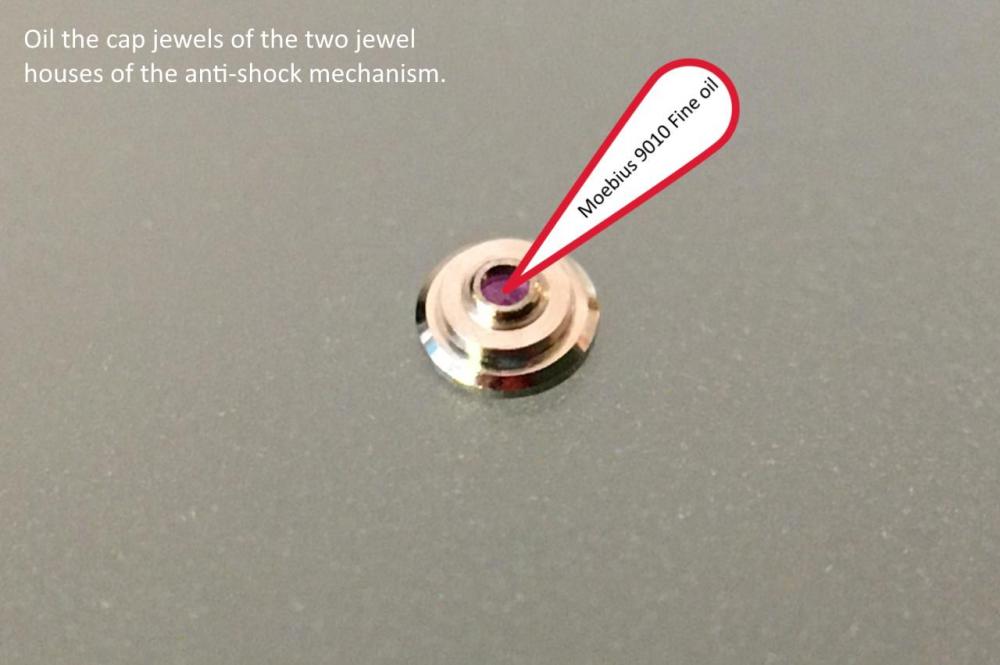
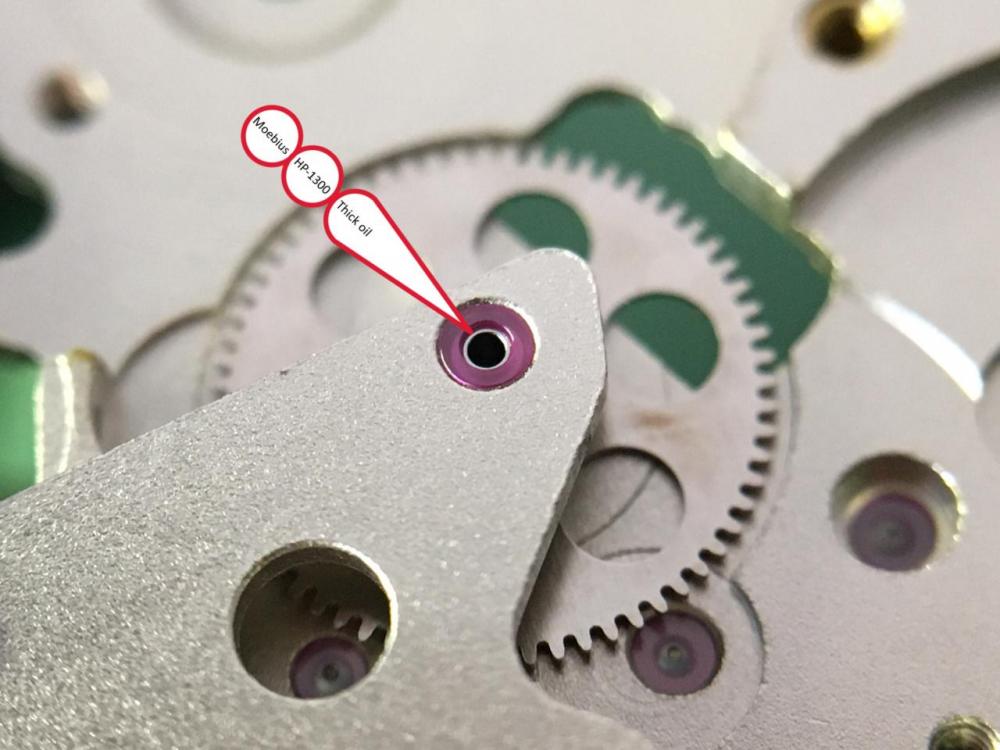
There is also an argument that the oil takes longer to dry out when the jewel hole is capped. I don’t have anything to prove this though.2 points
-
actually if you watch his video carefully makes a much more bold statement.. At about 15 minutes 45 seconds in he shows a standard test for ultrasonic machines which is punching holes in aluminum foil very very thin aluminum foil.. Based on that test he's concluded that all ultrasonic machines are evil and bad for cleaning delicate watch parts.. But then we have this snipped out an amusing image from the company that makes the machine that destroys watch parts. notice they have a really amusing sense a humor on their website a machine that's capable of ripping apart watch parts is supposed to not cause damage how the heck can that be? what becomes interesting with this is I've seen the foil test before it is a standard test so it's not like he discovered something new here. As far as ultrasonic and watch cleaning machines I bet you're right now at this second somebody is cleaning a watch with ultrasonic energy all day long as people all across the planet cleaning watches and if it was as destructive as he said don't you think we would've known about it? Although on this group one person claim that ultrasonic machines will destroy balance pivots but I've only heard of that here? So for having a wholesale slaughter of watches and ultrasonic machines why don't we know about it? Wire the watch companies still recommending ultrasonic cleaning wire companies still making ultrasonic watch cleaning machines? somewhere in the group we've had this discussion before. I remember as a student in school the cleaning machine ultrasonic of course had a timer 10 minutes. I'm not sure if we were actually told how long the set the timer but I discovered the solution turns a really pretty blue-collar if you go the maximum time with brass plates and I had beautiful frosted pocket watch plates. If you start reading the instructions for the cleaning solutions especially those with ammonia. Ammonia is really good for cleaning and really good for taking tarnish off but it's also really good for taking the copper out and turning the solution a beautiful blue color or sometimes blue-green. So typically if you clean and definitely clean without heat heat is not recommended for about four to? I remember being in school in Switzerland the cleaning machine was taped at four minutes all day long students were cleaning watches and ultrasonic machine none of the pivots ever fell off and the watches looked fine other than the students abusing them. So I usually try to go for 4 to 5 minutes. Because the longer it stays in their once it goes beyond taking the tarnish off it starts dissolving the cleaning fluid as far as I'm concerned is more destructive than the ultrasonic machine. But it does bring up an interesting problem that a standard test of using aluminum foil that's been around forever one watchmaker somewhere in the planet concludes based on this test it all ultrasonic machines are bad for cleaning watch parts. Or maybe ultrasonic machines are fine for solid things like watch parts just bad for aluminum foil thin aluminum foil. Then as far as cleaning balance wheels delicate hairsprings in the ultrasonic machining I've never had a problem with that. iit's possible that companies mass-producing watches may actually glue their ruler jewels in.. They easily have the machinery to do that and have it very precise and everyone exactly the same. It is no guarantee and modern watchmaking that they're going to use shall. I've even seen some watch companies that I'm pretty sure the roller jewel is held in my friction only because I've never seen shellac.
 2 points
 -
Hi guys … I had promised that I would make a « custom decal dial tutorial » on another thread there So here we are … There are many variations of decal dials, the best IMHO being the « negative gilt » dials which gives the best results. The process I’m showing today is aabout how to make a dial with black printings on a one color background. I had a cheap quartz diver waiting in my drawers so I’ll make a Heuer diver hommage based on the 980.016 model (quartz one too). DAY 01 : It’s 4:30 AM (I’m an early bird) and I have 2 hours to kill before a business trip to Paris (I’m French) so I decide I have time enough to begin. The first part of the process is to prepare the dial plate : - stripped it, removing all the lumes bars and dots - soaked the dial for some minutes in acetone to remove the paint - filled the tiny holes where the bars and dots go with cyanolite glue - sand everything flat I sand with 800 and don’t try to get a smooth surface as I want the paint to adhere perfectly to thedial plate. Here is the result … Then I want to spray paint. I make a tube with some painter’s tape, from a « curve » with it and place it on a plastic bottle cap. I want it curved so that I can stick the dial on it without any risk of bstructing the center hole or the date window of the dial plate. So I stick the sanded dial plate on the tape tube. As you can guess from the pic below … that’s not the first time a make an orange dial. Then I place the bottle cap and dial plate on a paper sheet and spray paint in orange. I use street art spray paint as it is « water resistant ». As you can see on the next pic, I don’t try to get a smooth surface, or even to perfectly cover the dial plate at first. I will let this coat dry, sand it with 2000 grade, then spray 1 or 2 coats until I get a perfectly smooth orange dial plate, ready for receiving a decal. So I place the bottle cap and dial under a shooter glass and will let it dry for about 24 hours before sanding and spraying the second paint coat. The 24 hours drying time is really important (though it could depend on the paint you use). The paint I use looks perfectly dry after about 5 hours but if you spray the second coat without waiting enough, that coat won’t perfectly adhere to the first and you could get a granular surface like an orange peel. And here is the dial waiting under the shooter glass. On the right is a « negative gilt » dial (third and last matte varnish coat) On the background there are two Raketa 2609 movements from the 70ies, quietly (really loudly to be honest) ticking for test after I‘ve recently serviced them. Now it’s 5:45 AM so I will have a and go to the train station. I’ll sand the dial plate this evening and spray the second paint coat tomorrow morning. Then sand it in the evening and spray the third coat (if needed) the day after. DAY 02 - DAY 03 : So here's what you get after the first paint coat … doesn't look really good but no matter as there's still some work to do to get a better result. And here's what you get after 3 coats of paint, each one sanded with 2000 grade, to get a perfect finish, flat and smooth. Now the dial plate is eady to receive the decal. DAY 03 : I won’t explain anything about Photoshop and Illustrator here … I’ll only explain how I print my decals. One thing really important, from my own experience, is the definition of the design. I’ve tried several, from 1200ppp to 6000pp and the best results I’ve got on printing decal sheets were with a 4000ppp definition. So all my dial designs are done in 4000ppp. The result is really BIG files … for example an A6 template with 12 dial desings ready to print is about 800Mo. As that dial is black printing only I open it with Photoshop and let the softwre (so ont the printer) deal with the printing quality. My printer is an old Epson Picturemate with a 1200 maximum definition. As the good quality decal sheets are not cheap and as I’m a « skinflint» I often print on A7 sheets … 6 dial designs on one sheet. When printed you should let it dry for about 4 hours then spray 2 really thin coats of matte varnish, letting each coat dry for at least 12 hours (24 hours is better). DAY 04 - DAY 05 : 2 days of speed-hiking with my wife so I didn’t worked on that tuto. You can check on the net what speed-hiking is, but to summarize it’s hiking as fast as you can with really light backpacks, trying not to run (or only short runs). On a good day you can walk 5 to 6 miles/hour … when trained you can walk up to 6,5 miles/hour … and while I trained for my first 62 miles ultra I achieved to walk (no running) up to 6,85 miles/hour (11 km/heure). DAY 06 : Today is Monday 6:00 AM. It’s been 5 days since I begun that tutorial and … my legs ache and all my body is painful (see Day 04 - Day 05) The dial plate is ready and the decal sheet too. You can see that the decal sheet looks matte now. That is because I have sprayed 2 coats of matte varnish on it, to protect the inkjet ink while I’ll soak the decal in water. Of course if you print with a laser you won’t have to spray varnish as the laser inks are (almost) water resistant. First thing to do is to chose the best item on the decal sheet and cut it round. Then you are ready to go. On the next pic you can see all you need now : - dial plate … fixed on a foam board using the dial feets - decal dial … nicely cut round - tweezers - thin and smooth brush (mine’s a watercolor brush) - some « micro set » … or just vhite wine vinegar (it helps the decal to set on the dial plate) - cold water Now you put the decal in cold water and while it soaks you brush some micro-set (or white vinegar) on the dial plate. Then you put the decal on the dial plate. Here you can see why I prefer using clear decal sheets on coloured dial plates … because it’s much easier to « perfectly » positionate the decal, using the central hole and the date-window. When you’re happy with the position of your decal you use a paper tissue to absorb the excess of water. Do that carefully as you don’t want to move the decal on the plate. And here we are … everything worked fine while absorbing the water and the decal position is OK. I’ll let it dry for about 12 hours before I cut the central hole and the date window, before I proceed to the varnish finish. Still Day 06 but 7:00 PM The decal has dried for about 13 hours so now I can proceed on cutting the decal sheet That's what I do then I : - fix it back on the foam board - apply some « micro set » around the center hole, the date-window and the outer diameter - gently press with a paper tissue so that the decal is perfectly applied (no more «air bubbles) And I let dry for 3 hours more Evening … 10:00 PM Now the decal is « perfectly » applied and dried and ready for the finish Last pic for today is after spraying the first coat of glossy varnish I will let it dry for 12 hours, sand it with 2000 grade paper and apply the 2nd coat. DAY 07 : 20:00 AM … only 1 pic today just after finely sanding with 2000 grade the 2nd varnish coat I applied yesterday DAY 08 : Yesterday evening I applied the 3rd and final varnish coat after finelt sanding and cleaning And today I can show you the final result … and say I'm pretty happy That dial is so glossy it’not easy to get a good pic, even on close-up. May I say that me hpone is nit the best at shooting pics (just like me) and the actual dial is much much better that it looks on the pictures below. I hope that you liked that tutorial and that it could be helpfull to members who want to try to build their own watch dials. I’ll try to make better pics with a real camera and a better lens … next week of the week after, after luming the dial together with the hands. Then I will still have to get a case and rework it so that it could be a 980,016 lookalike. Some of you may wonder how much time did I spend to make that dial. It took 8 days to achieve the all process but I spent only 1 hour the first day then only from 15mnm to 5mn the days after. So, apart from the design work on Illustrator and Photoshop (which took me hours), I would say that the whole process is about 2 to 3 hours. I must say that it's not my first try at dial making and I've trained for 2 years now. So if you want to try you should consider spending a few more hours but it's really worth the time spent as at the end you get your unique DIY dial.1 point
-
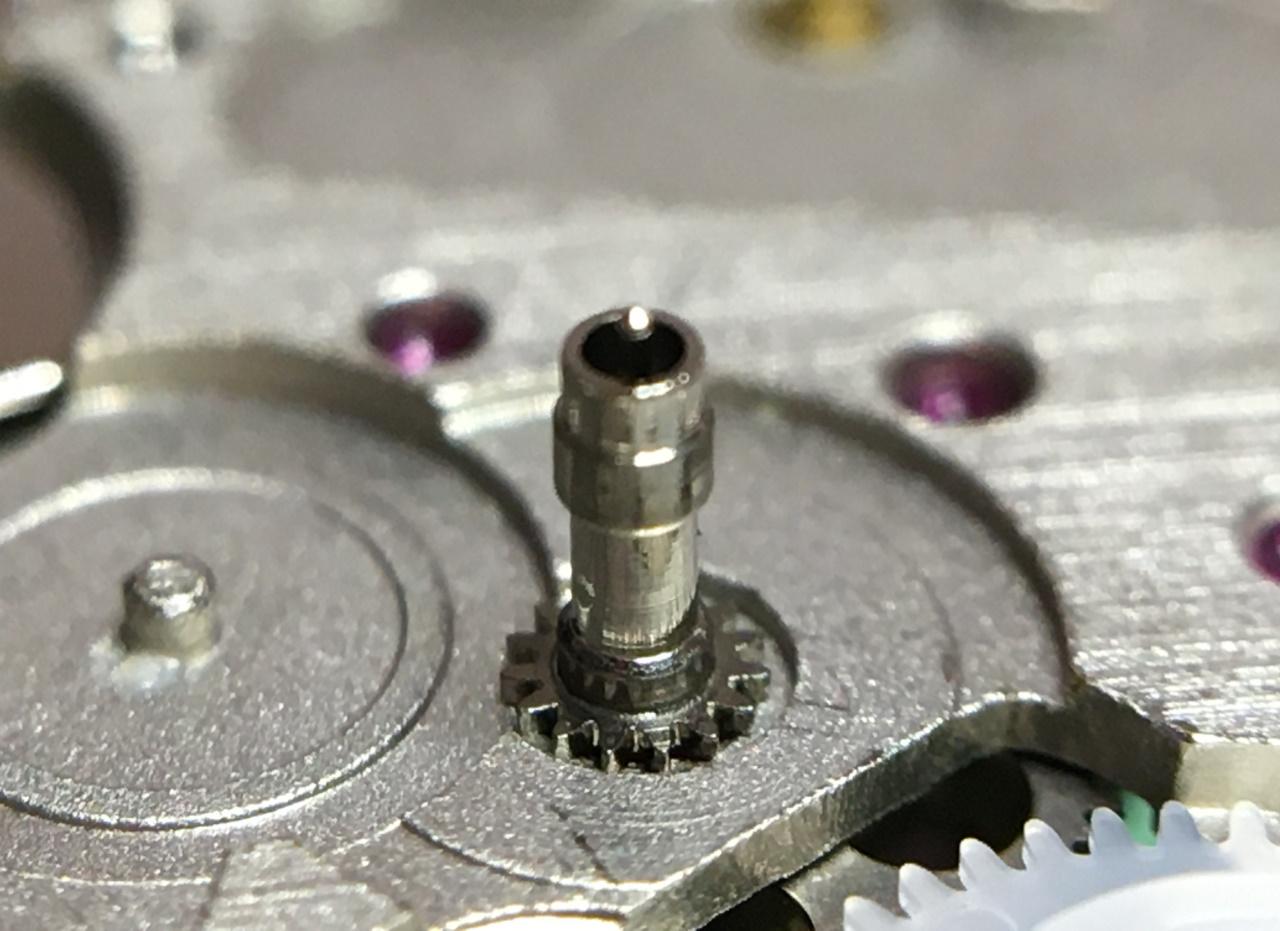
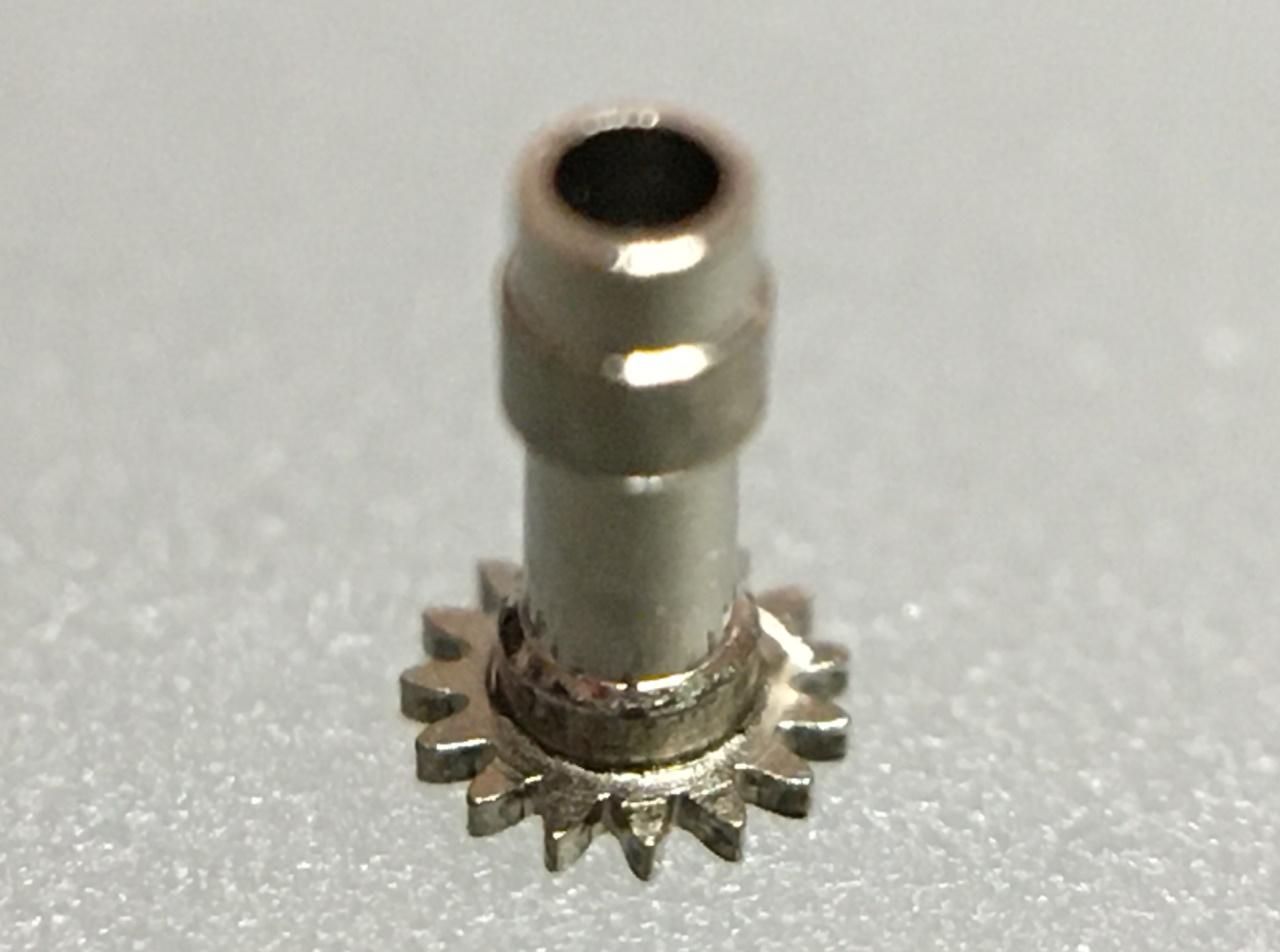
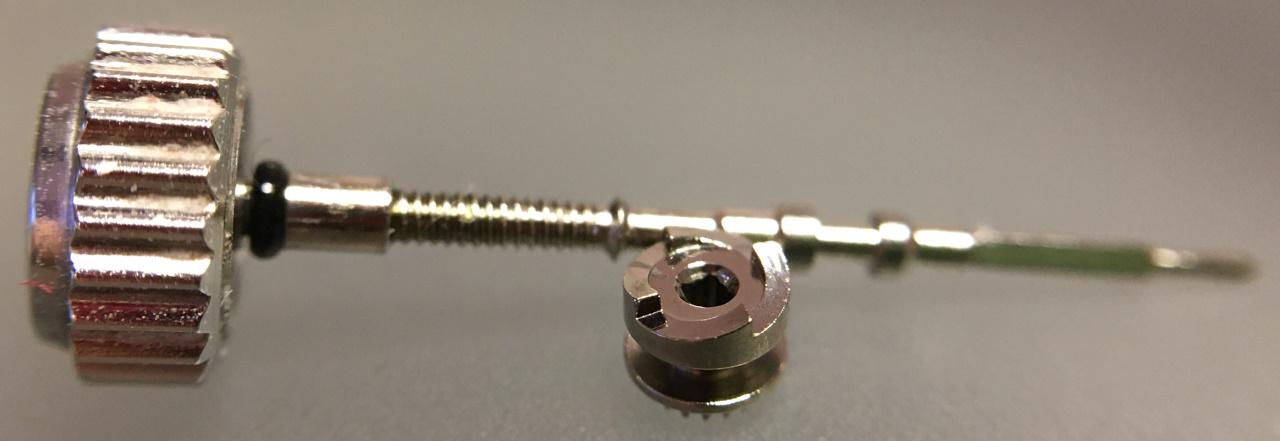
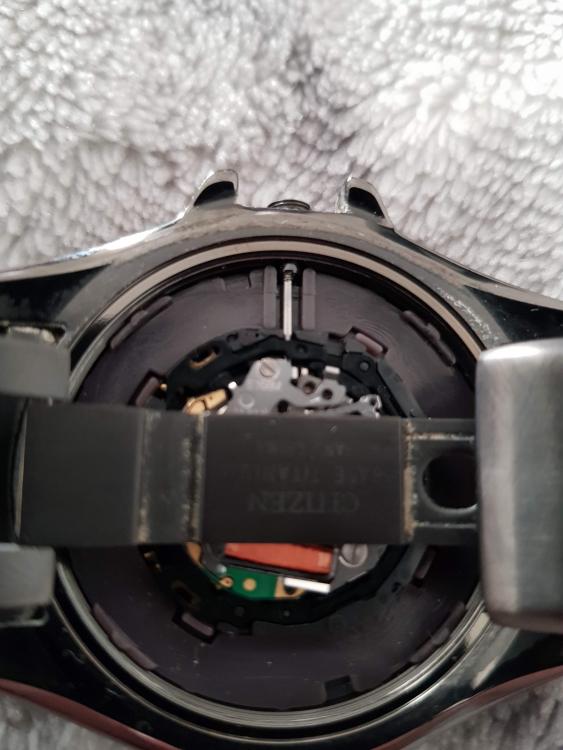
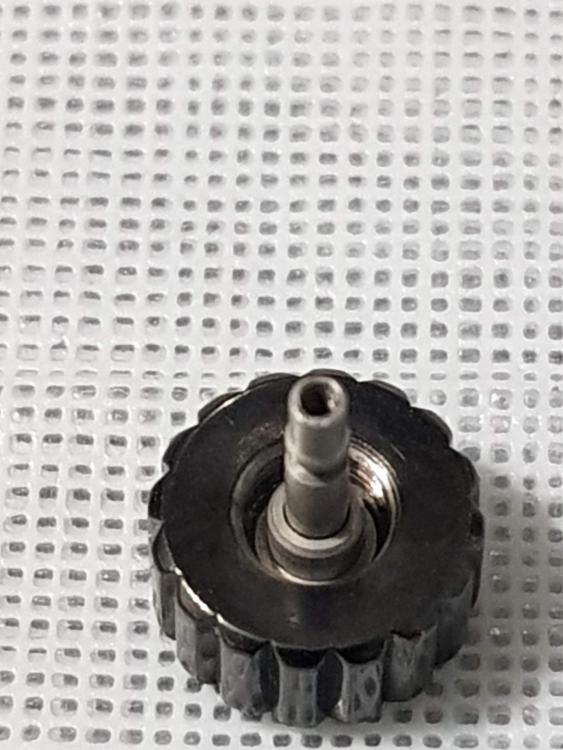
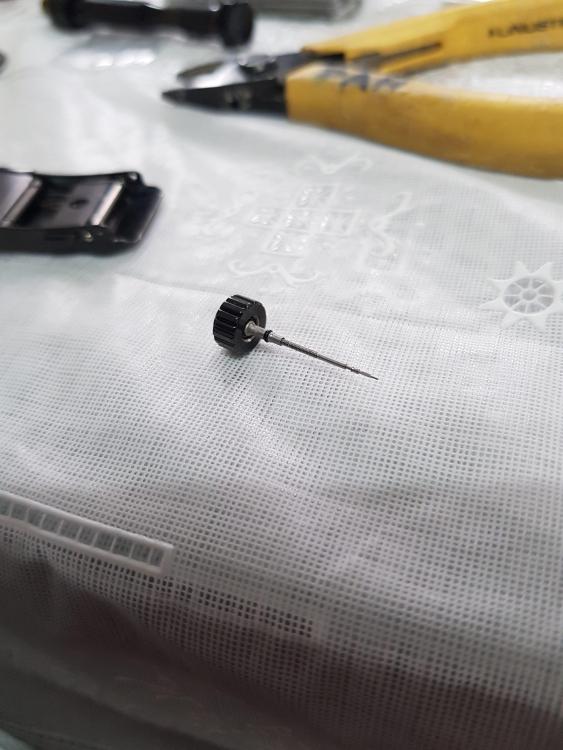
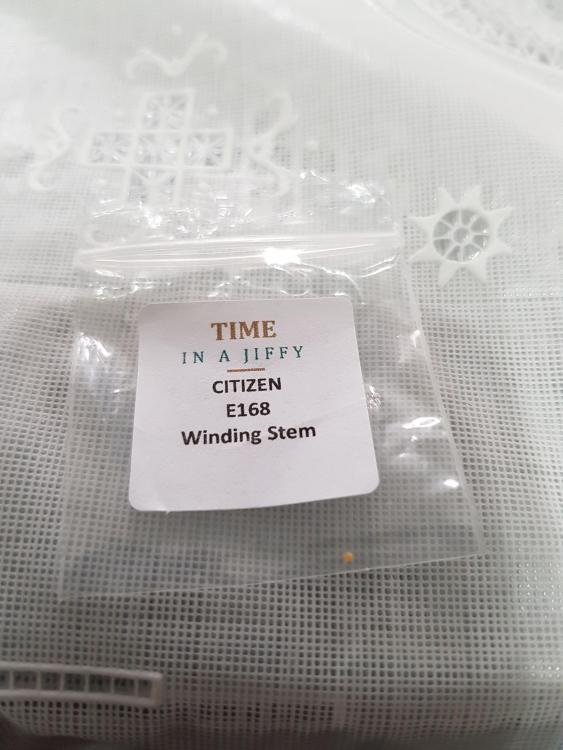
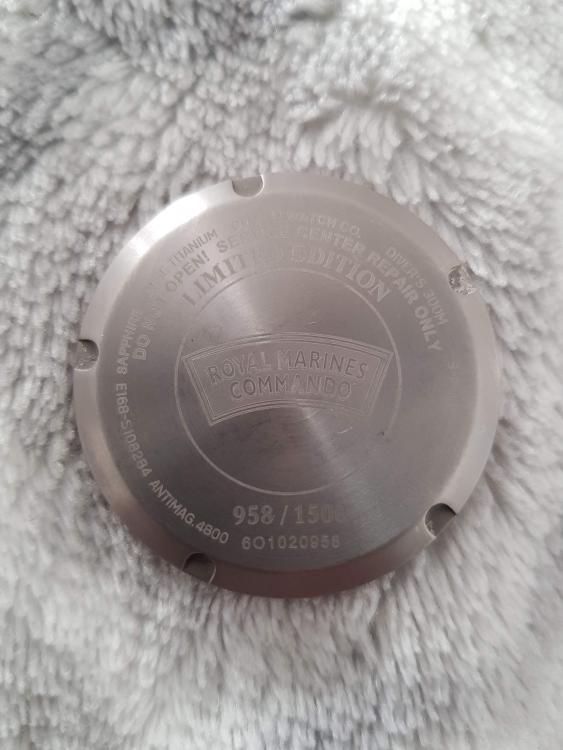
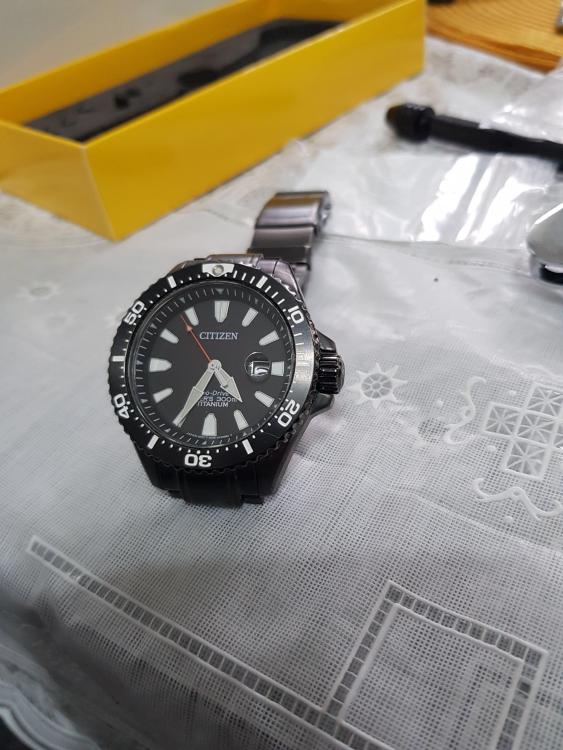
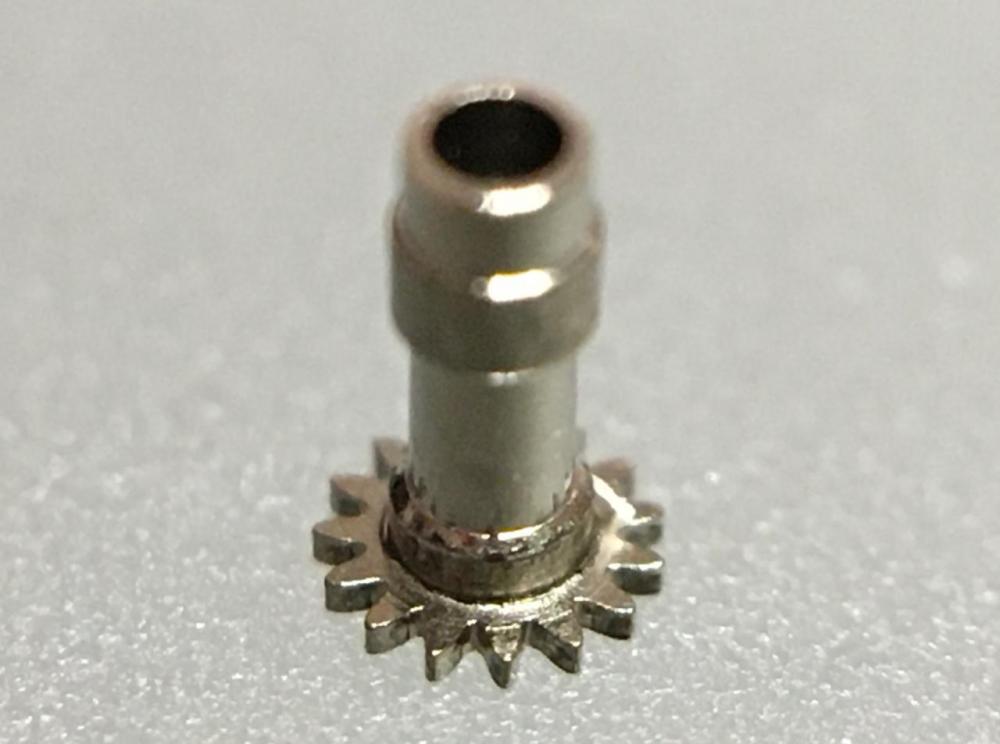
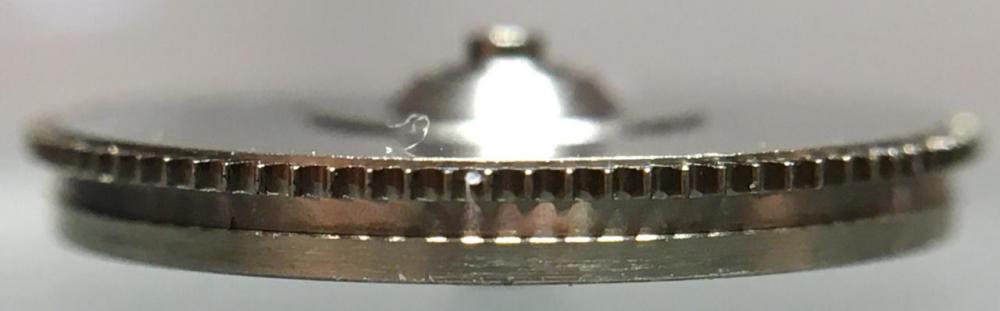
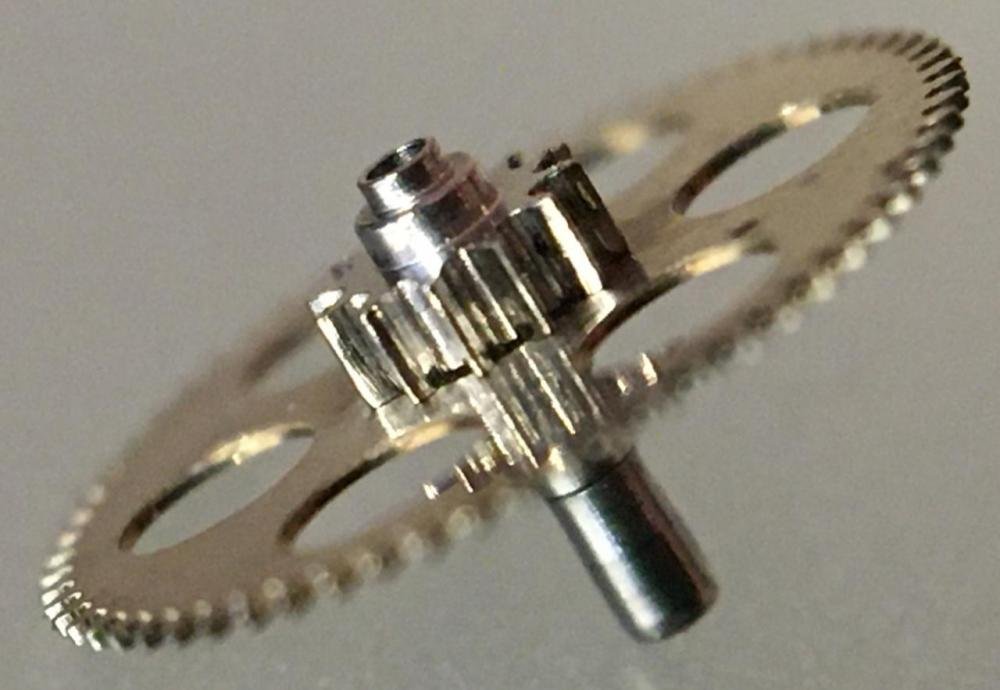
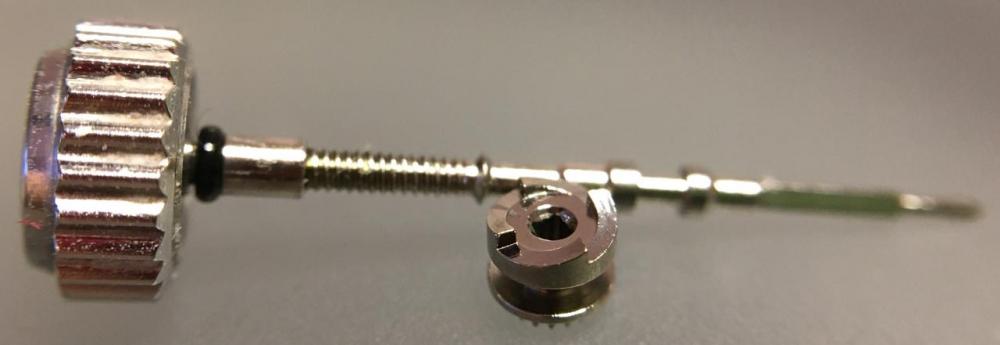
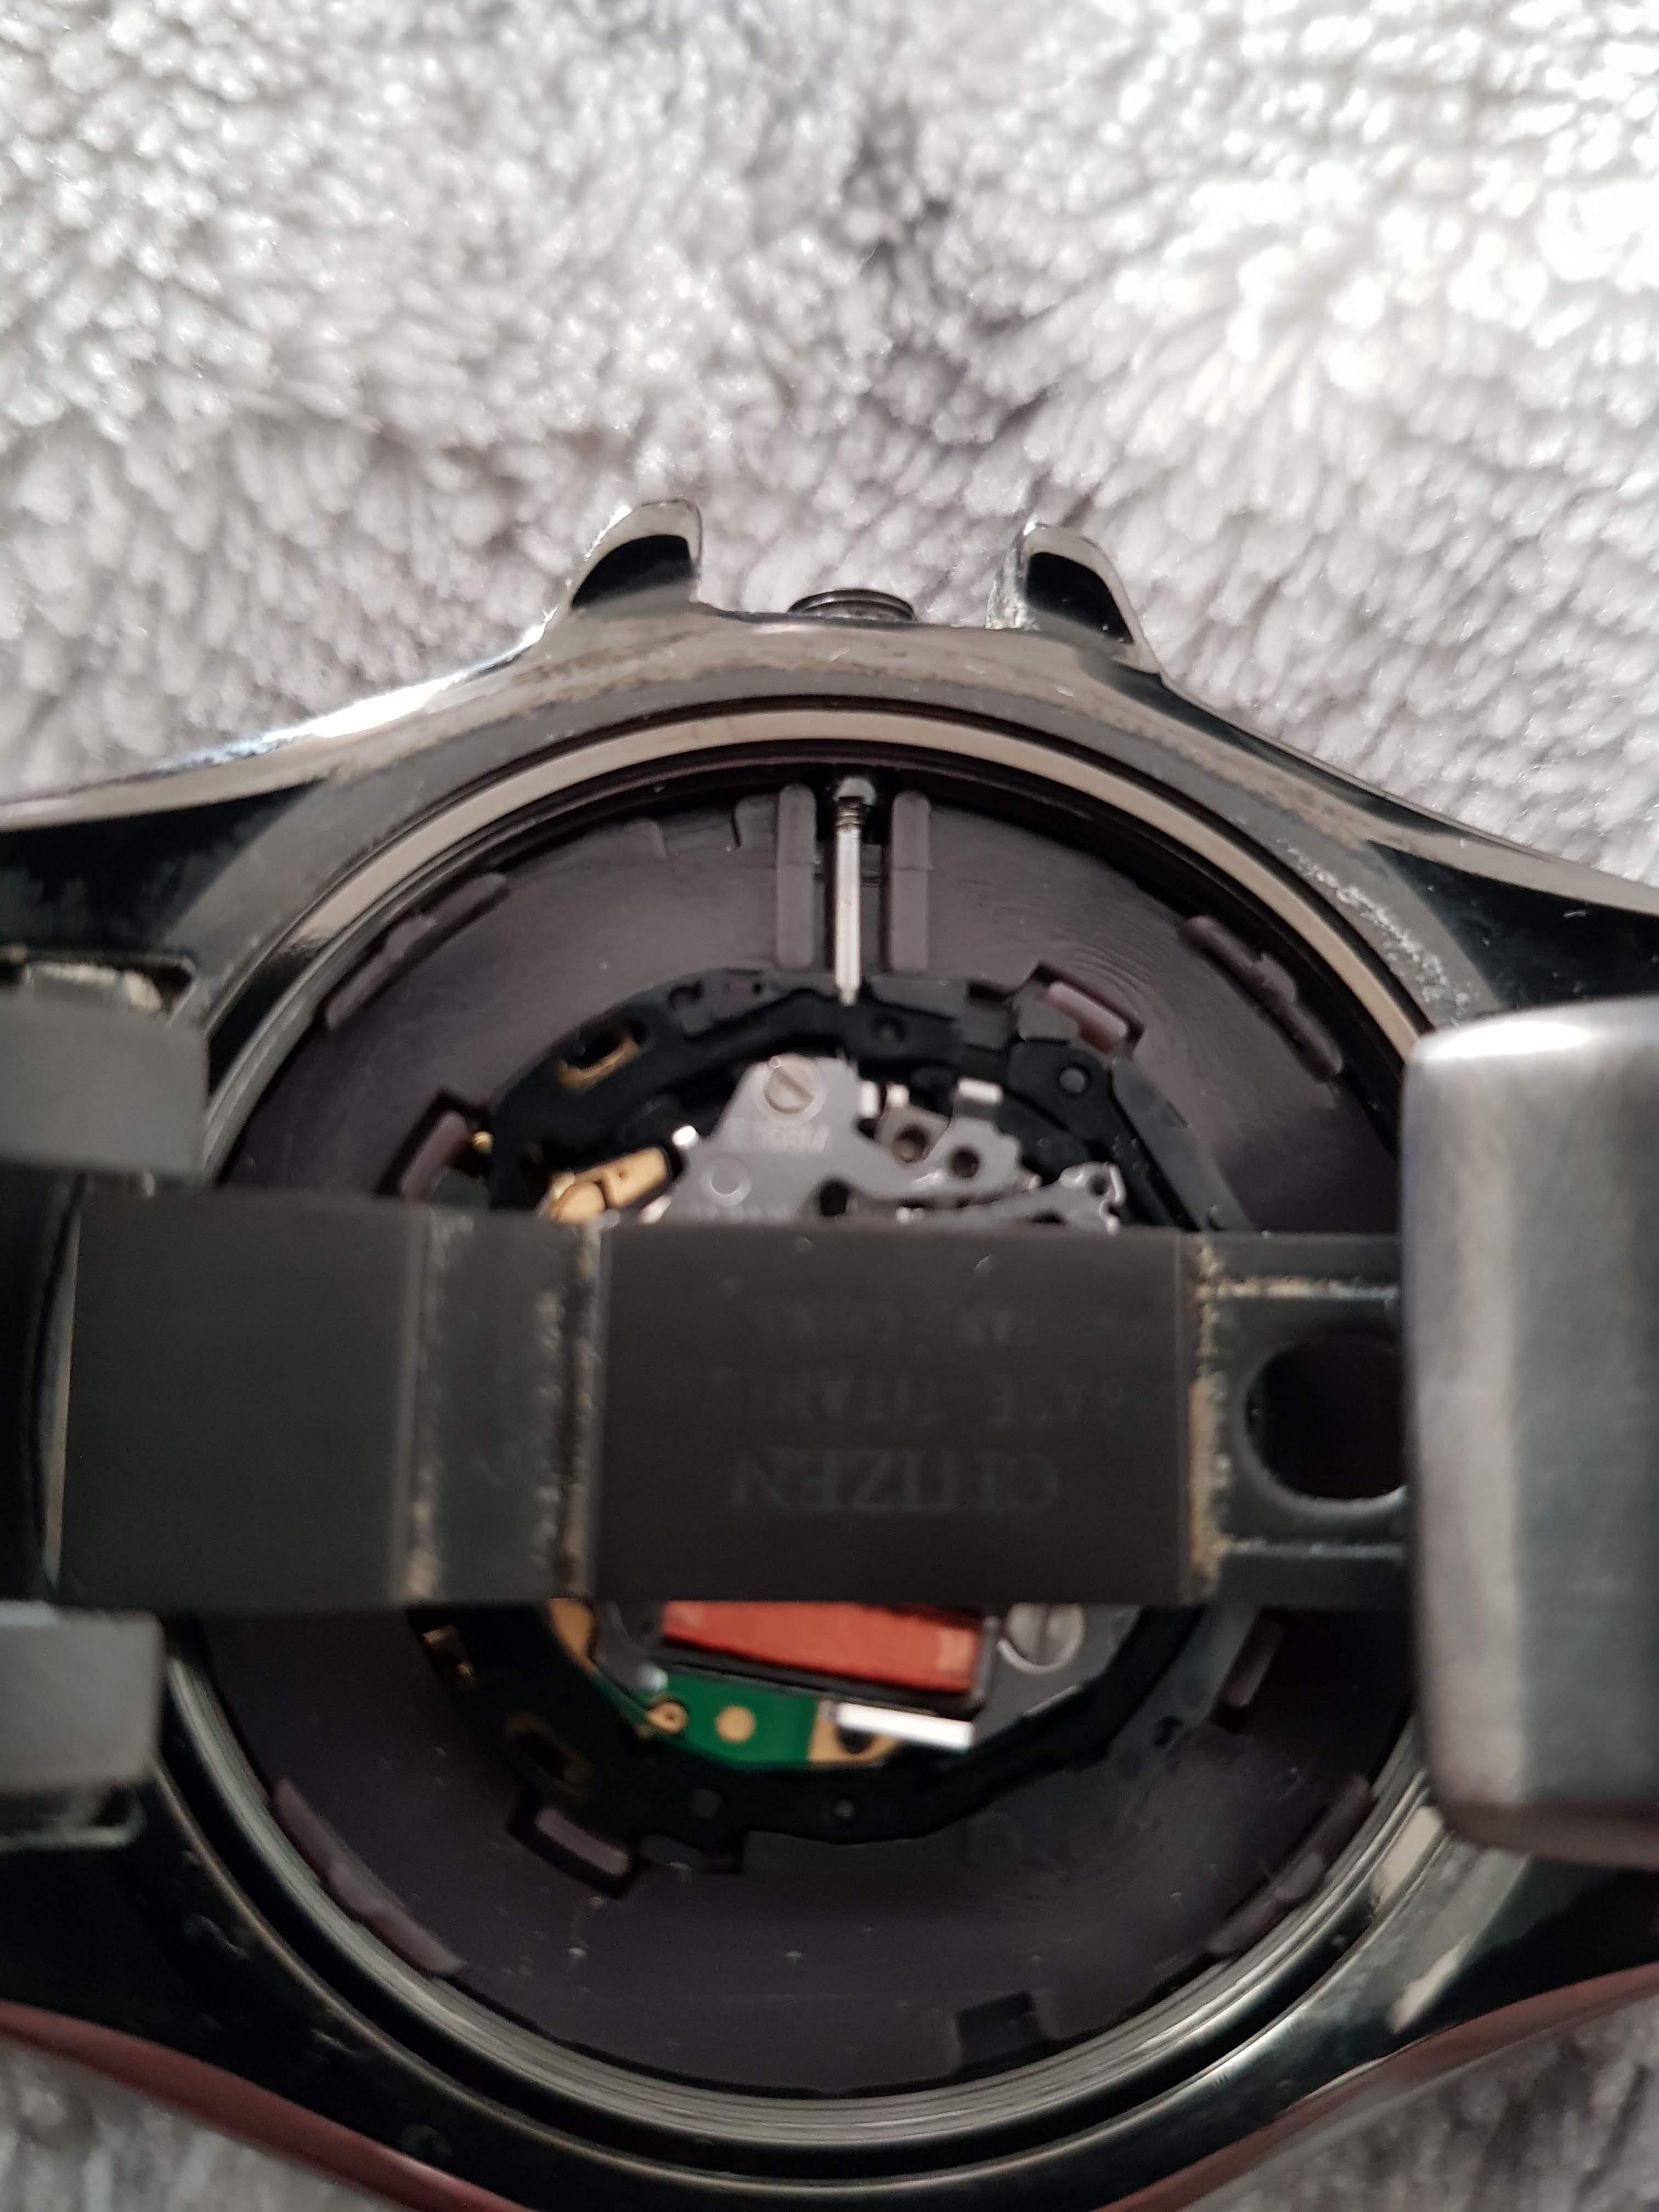
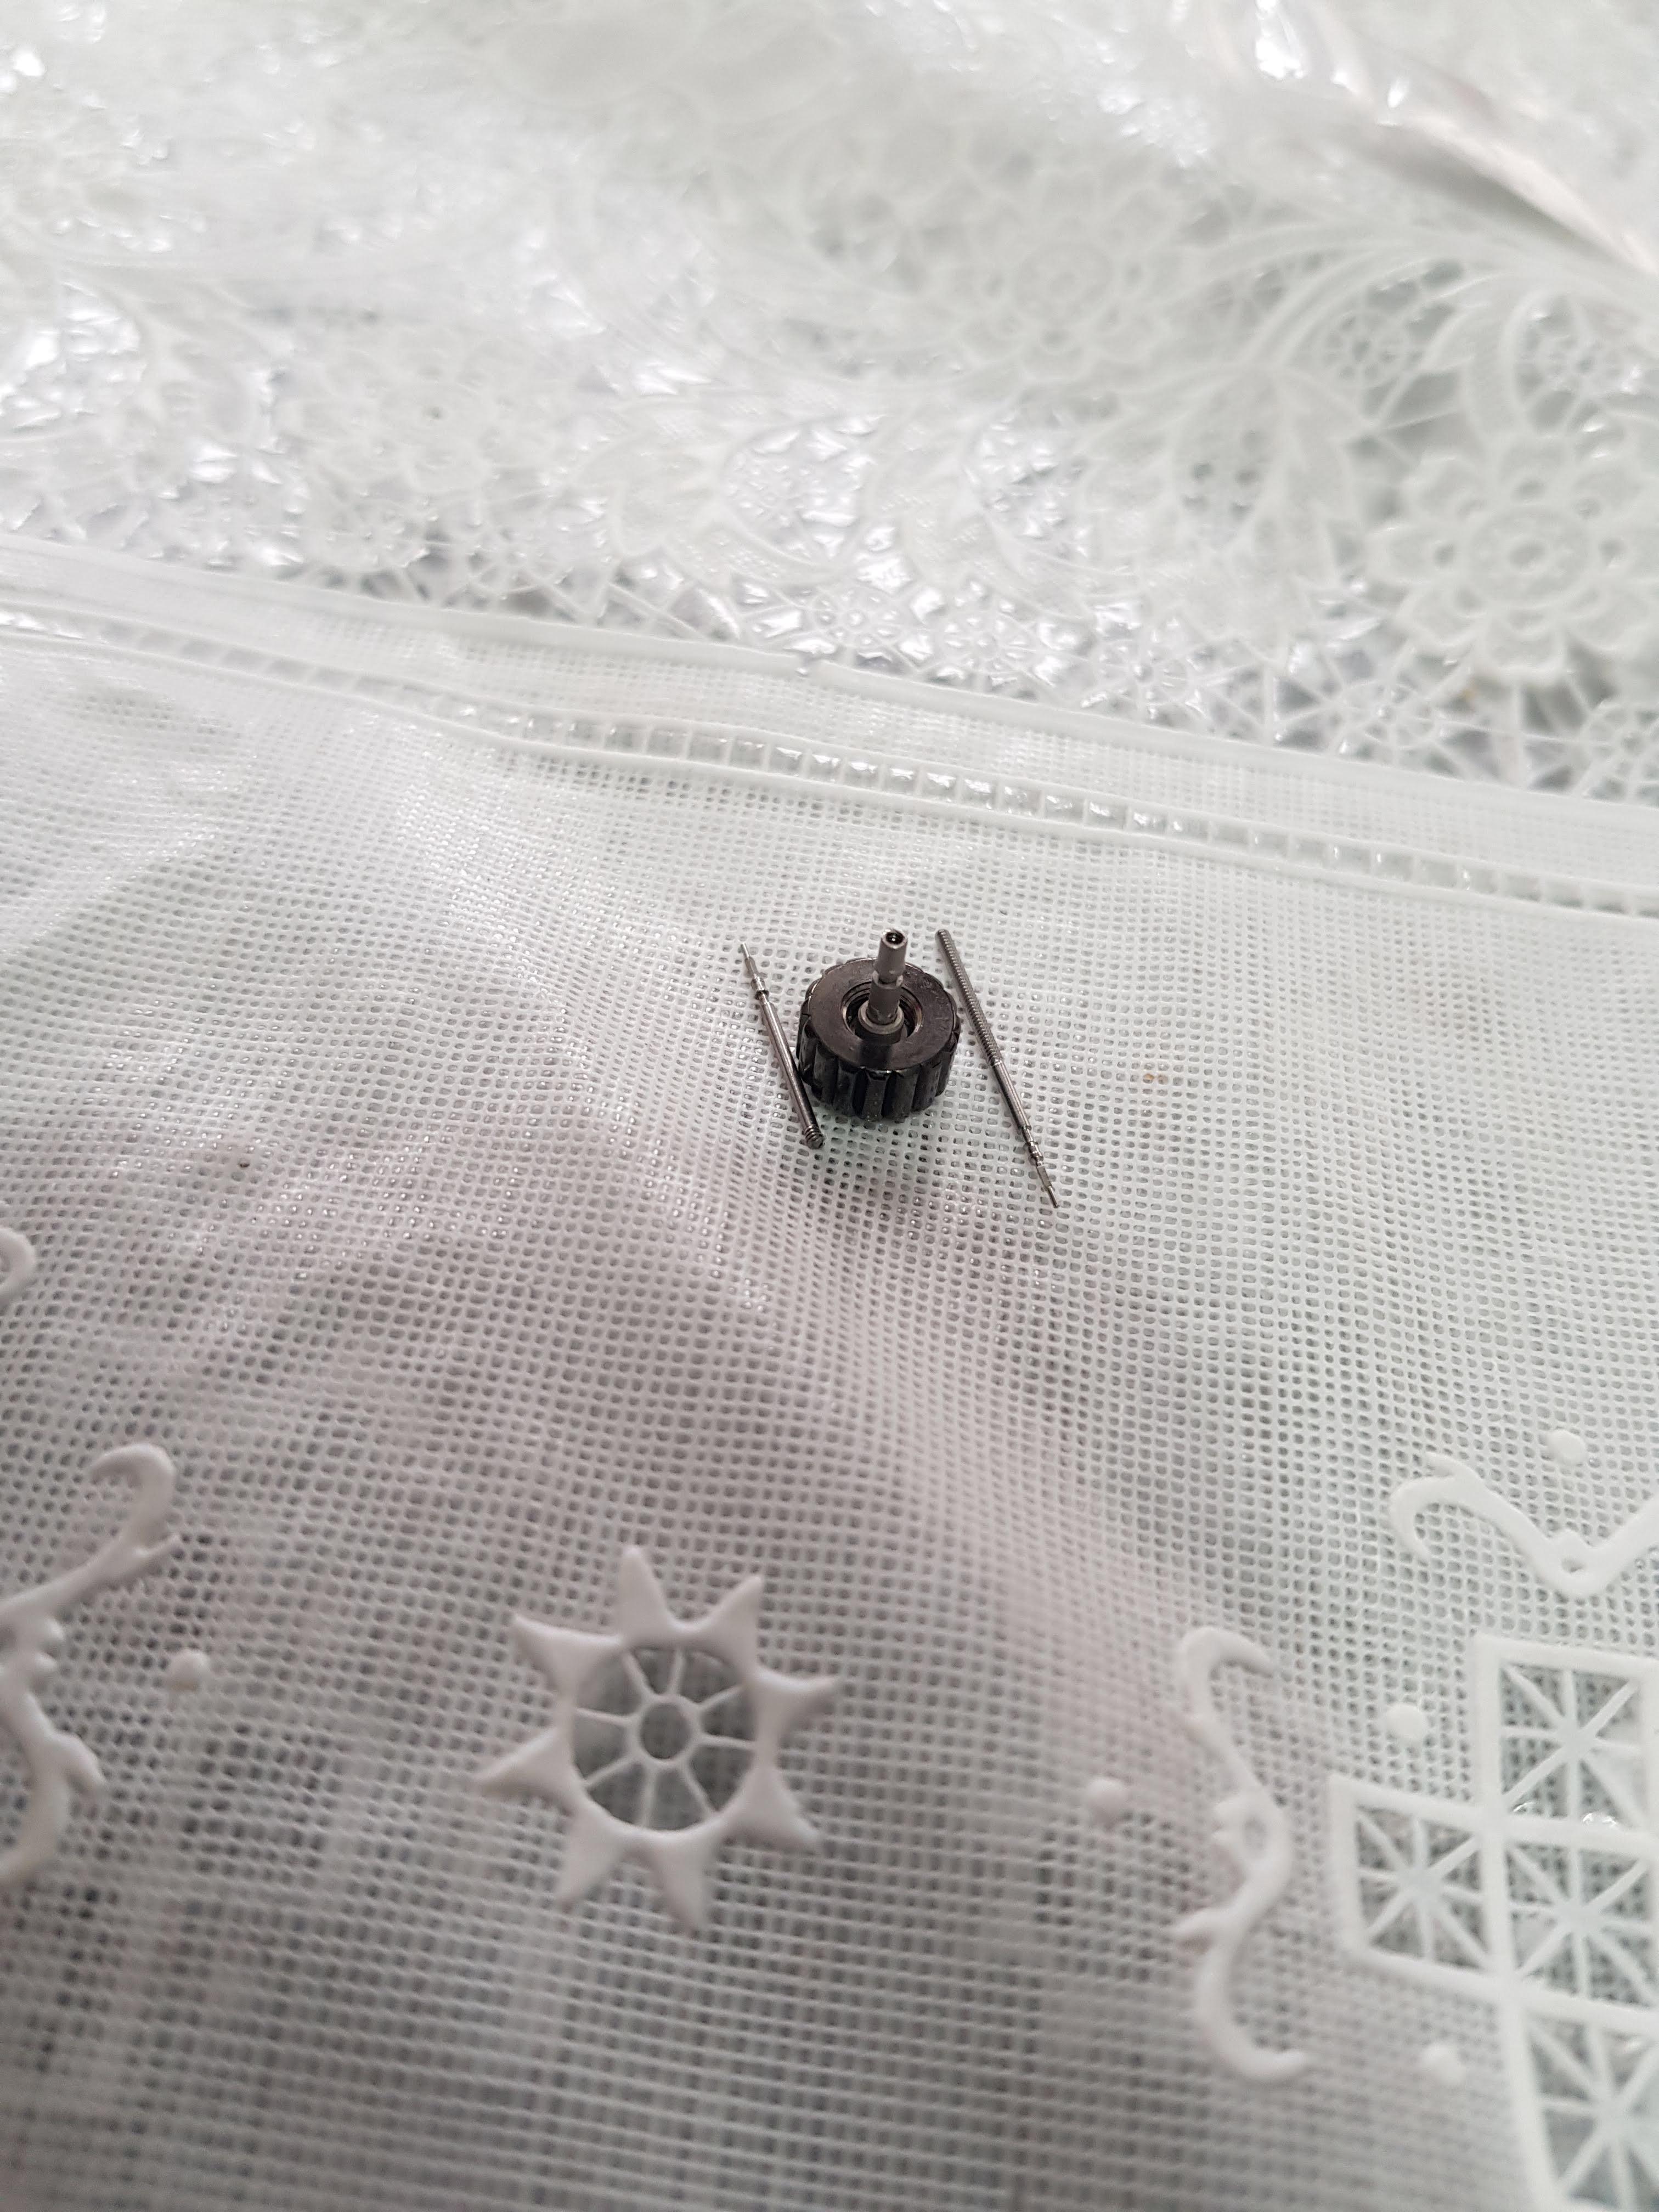
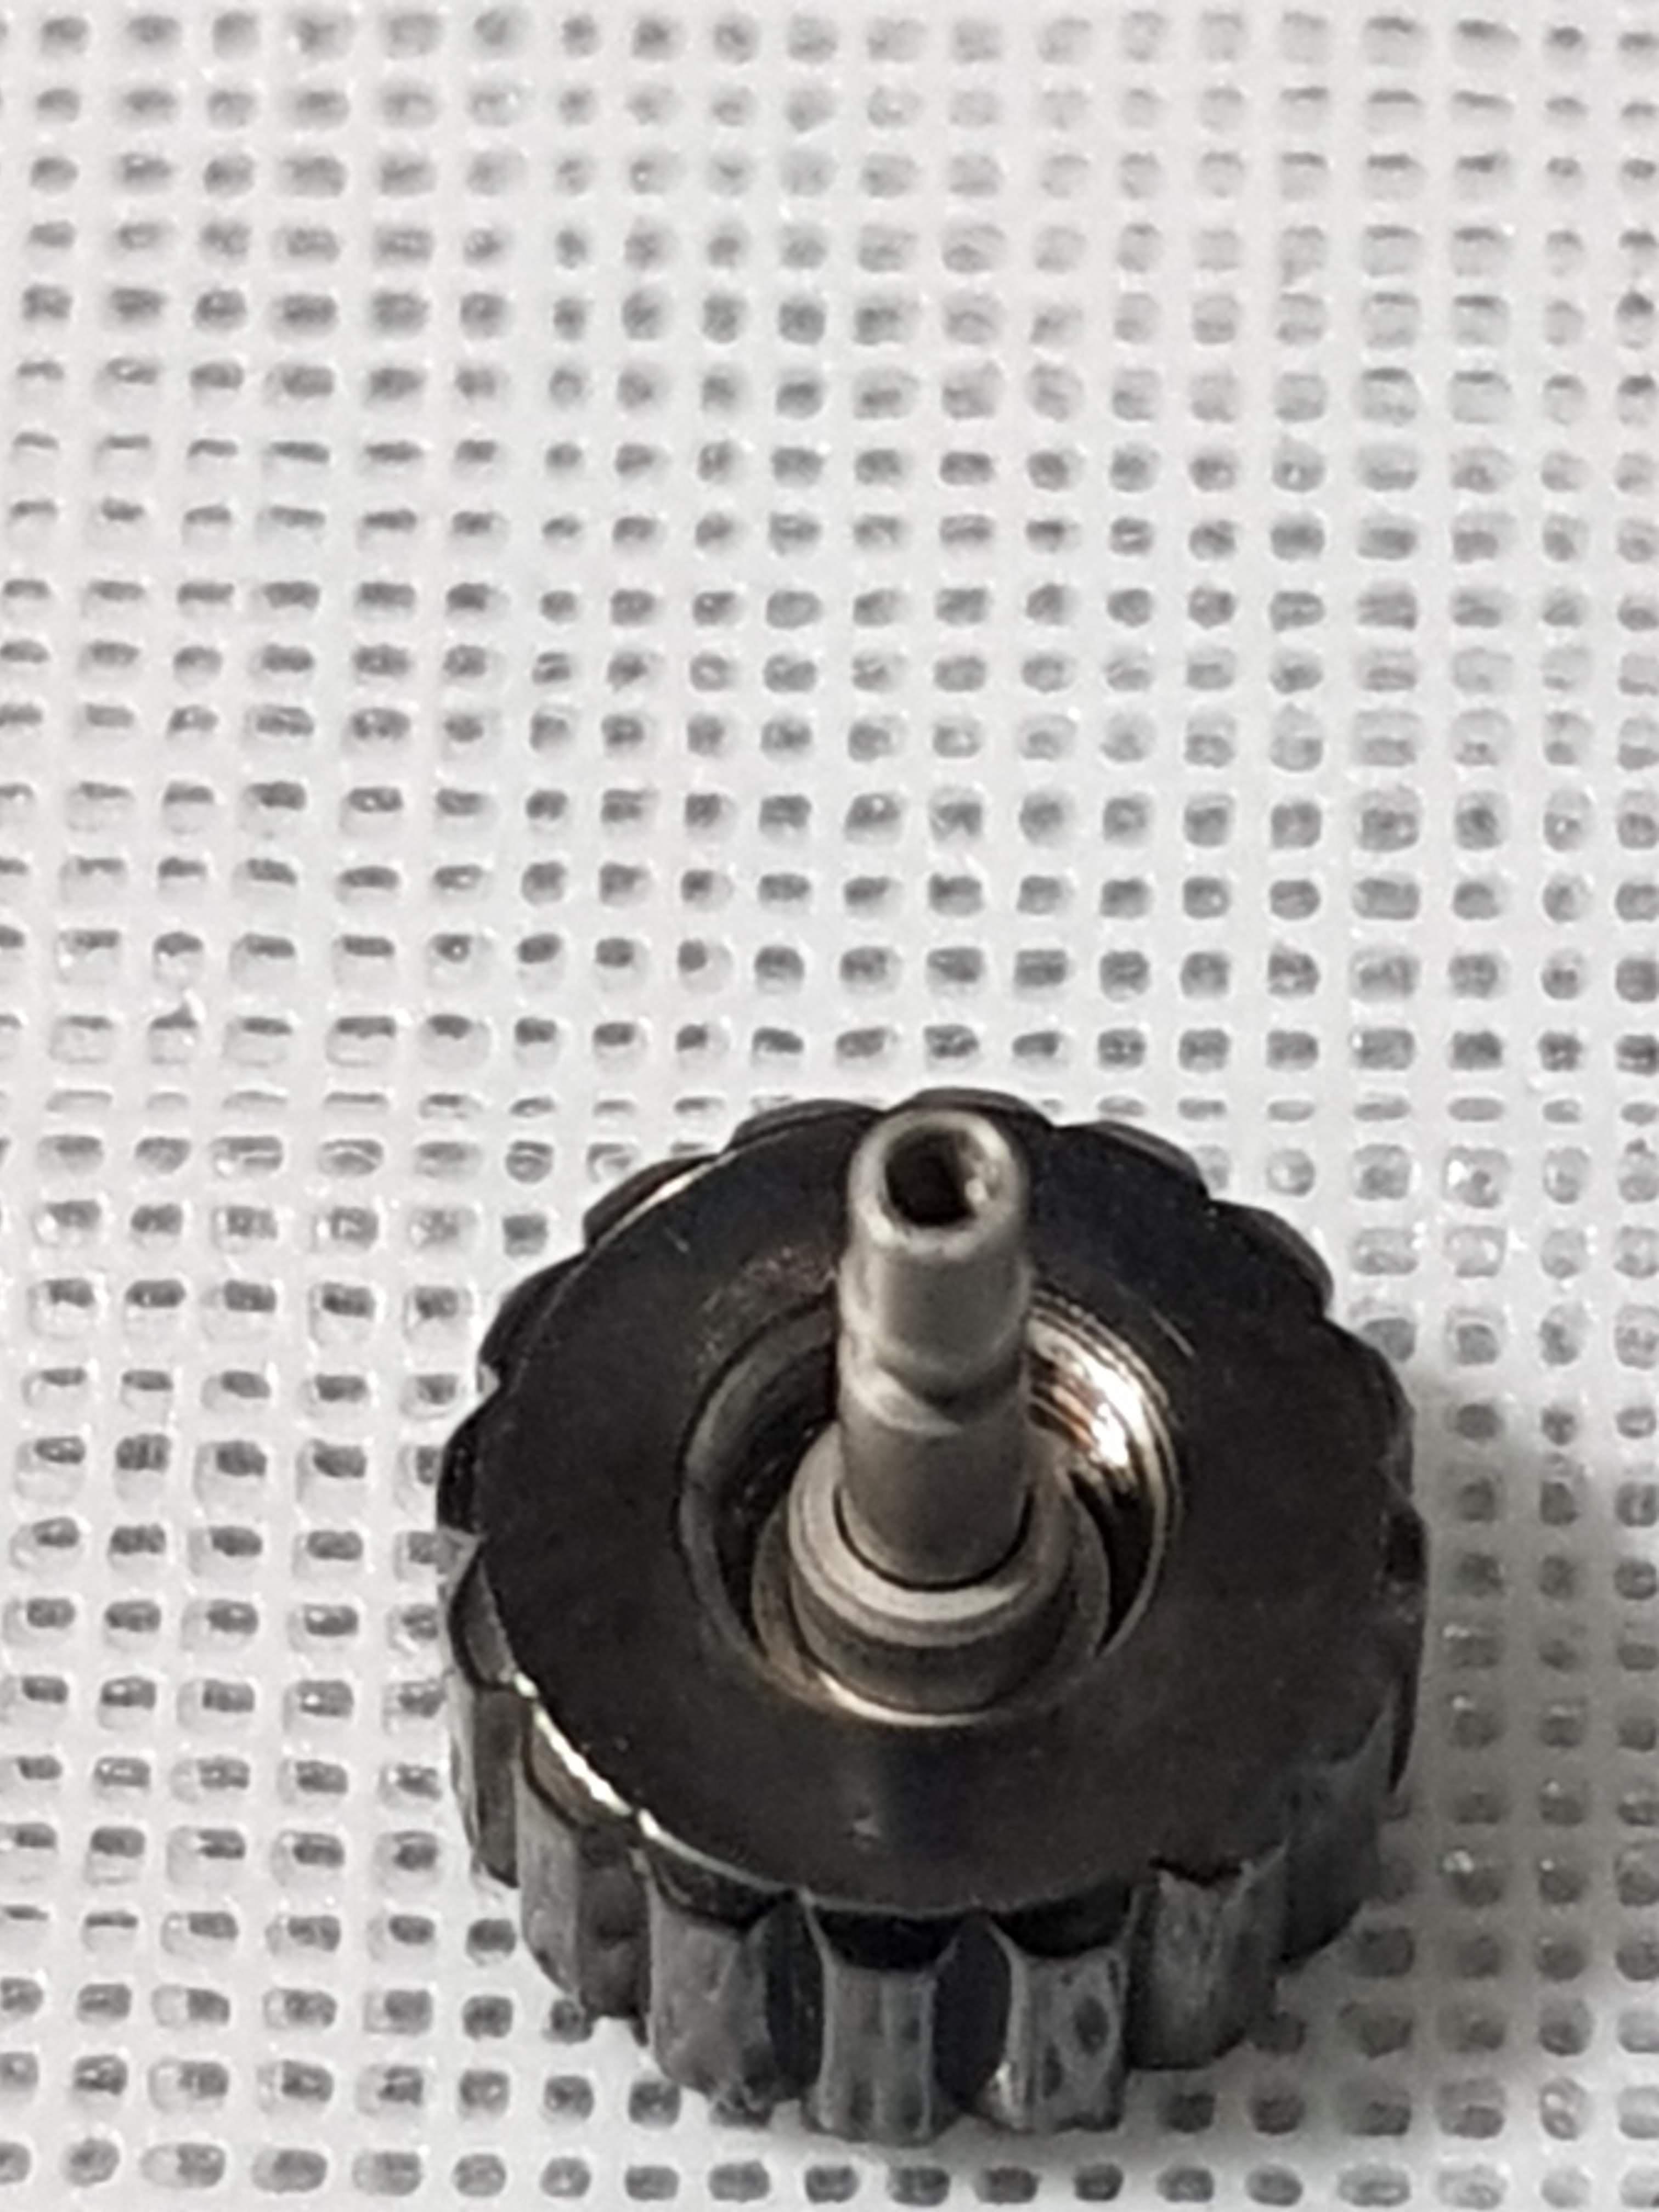
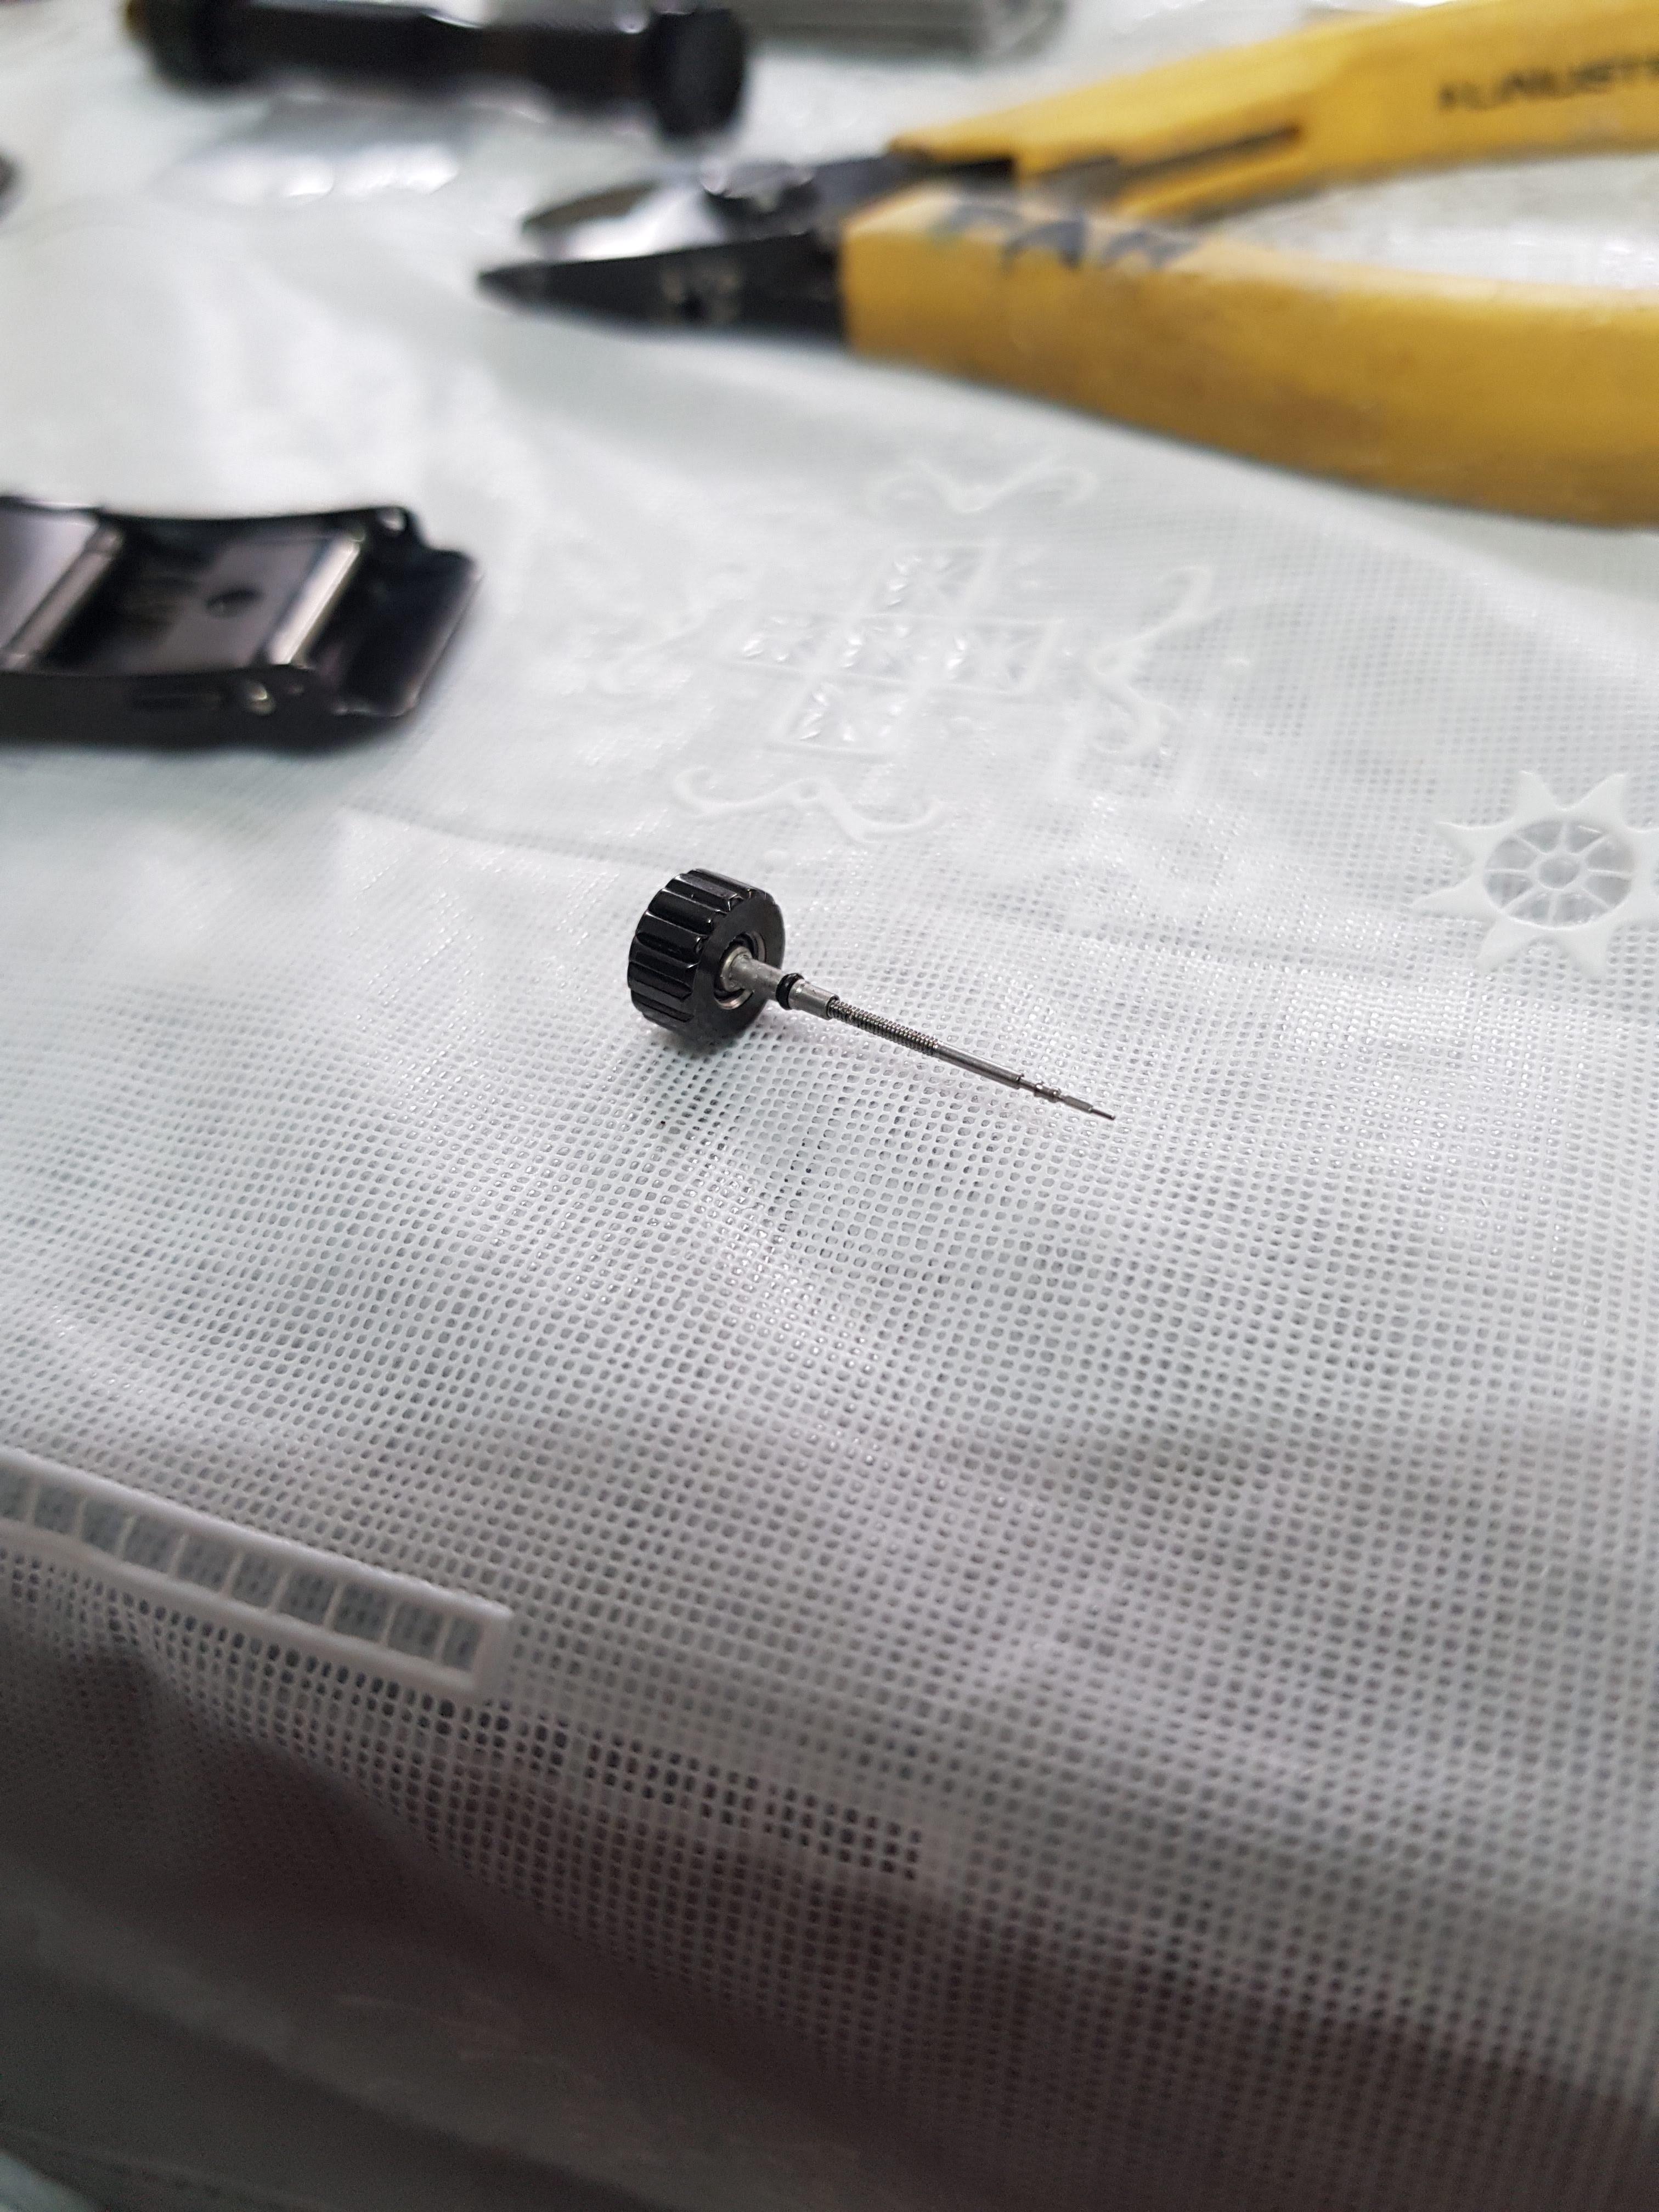
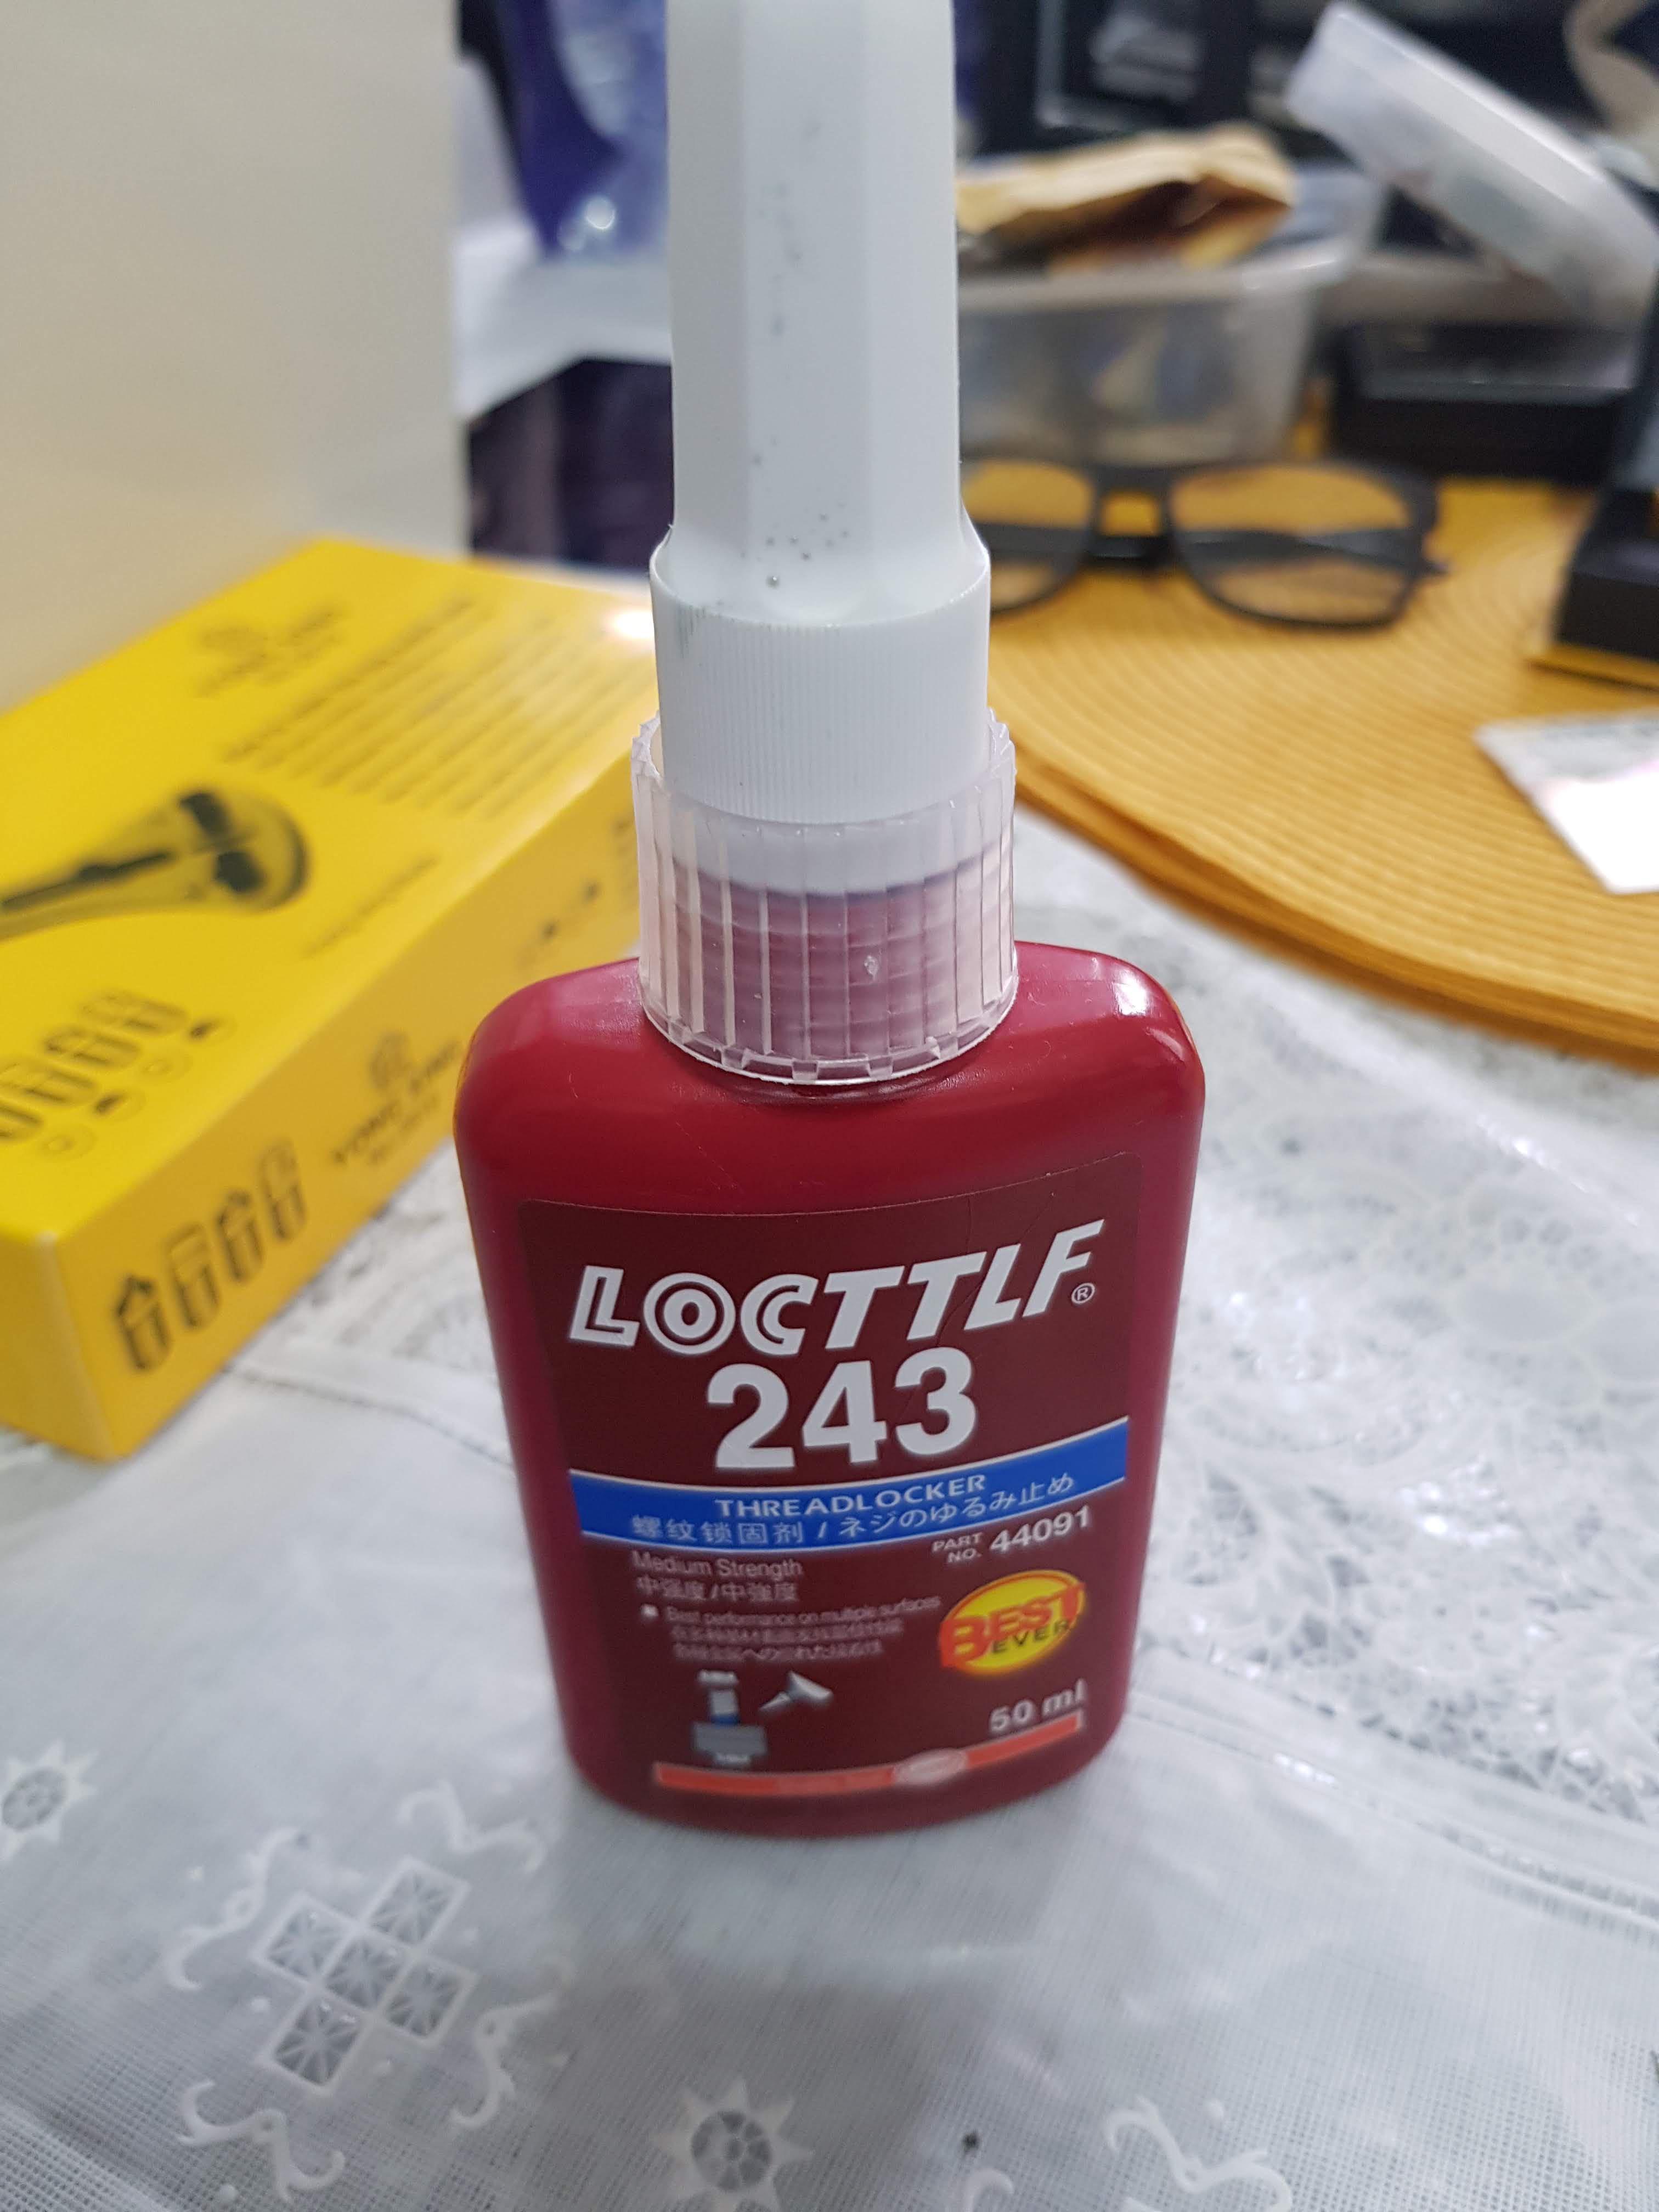
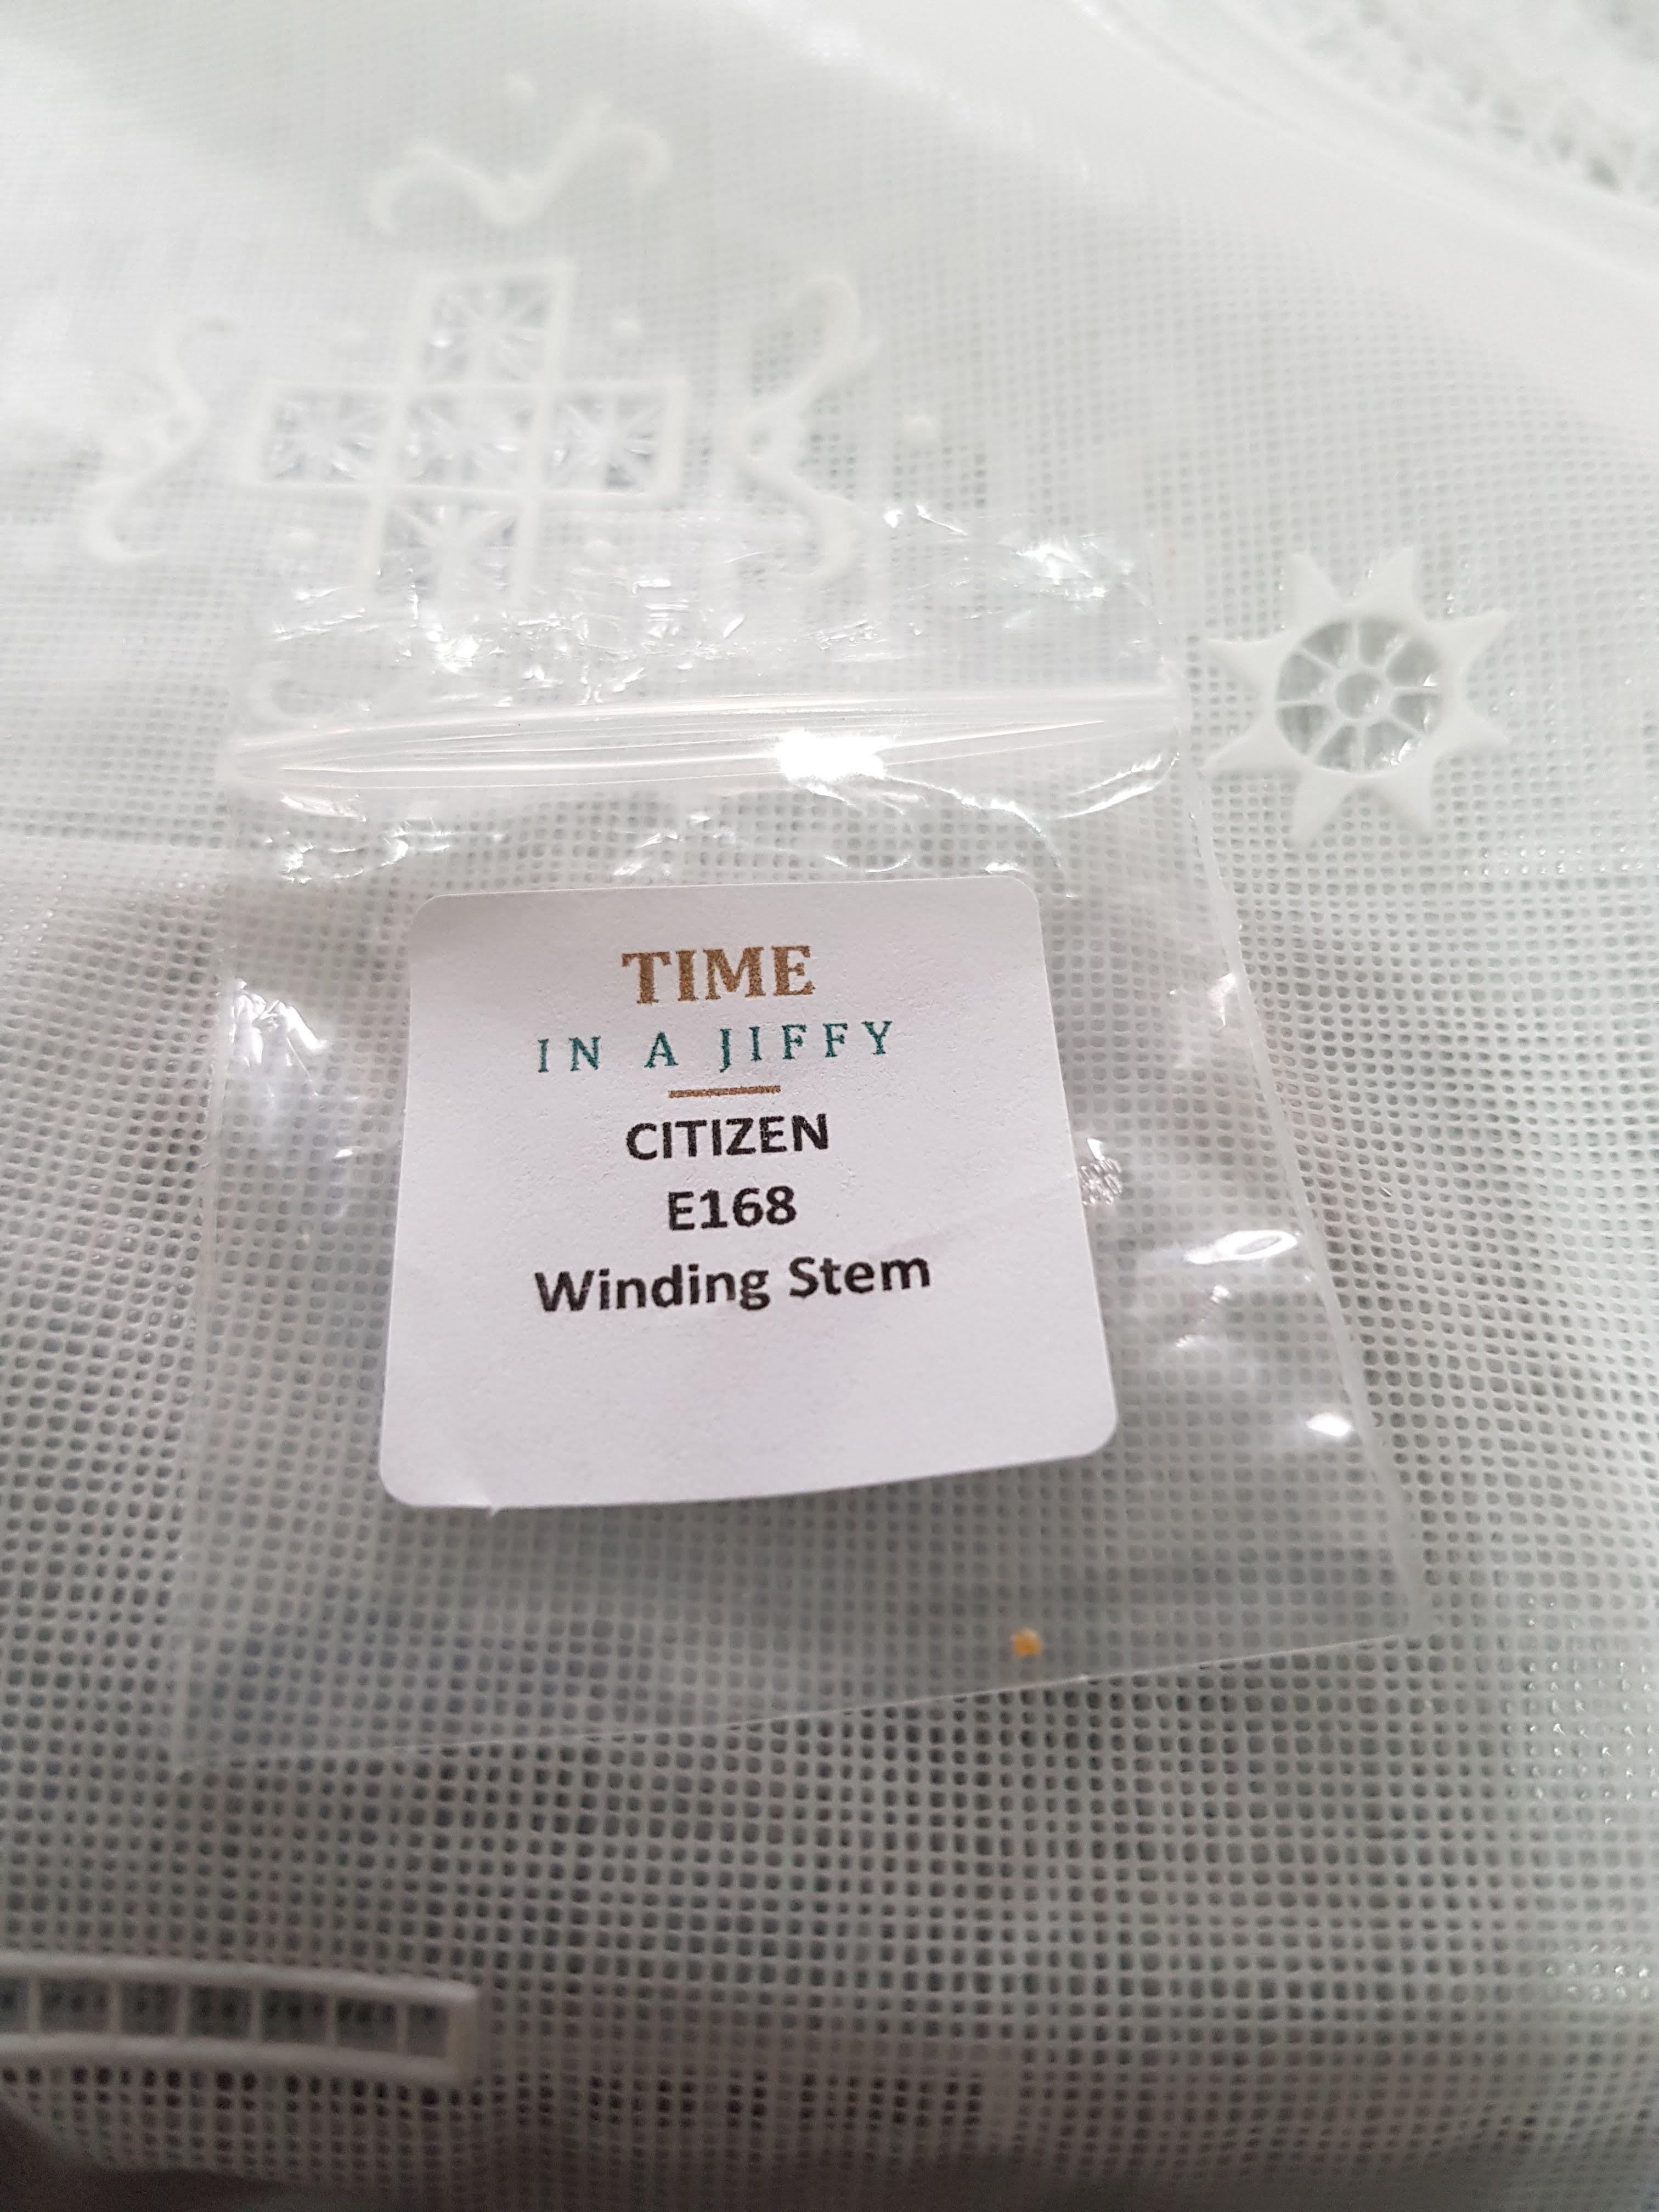
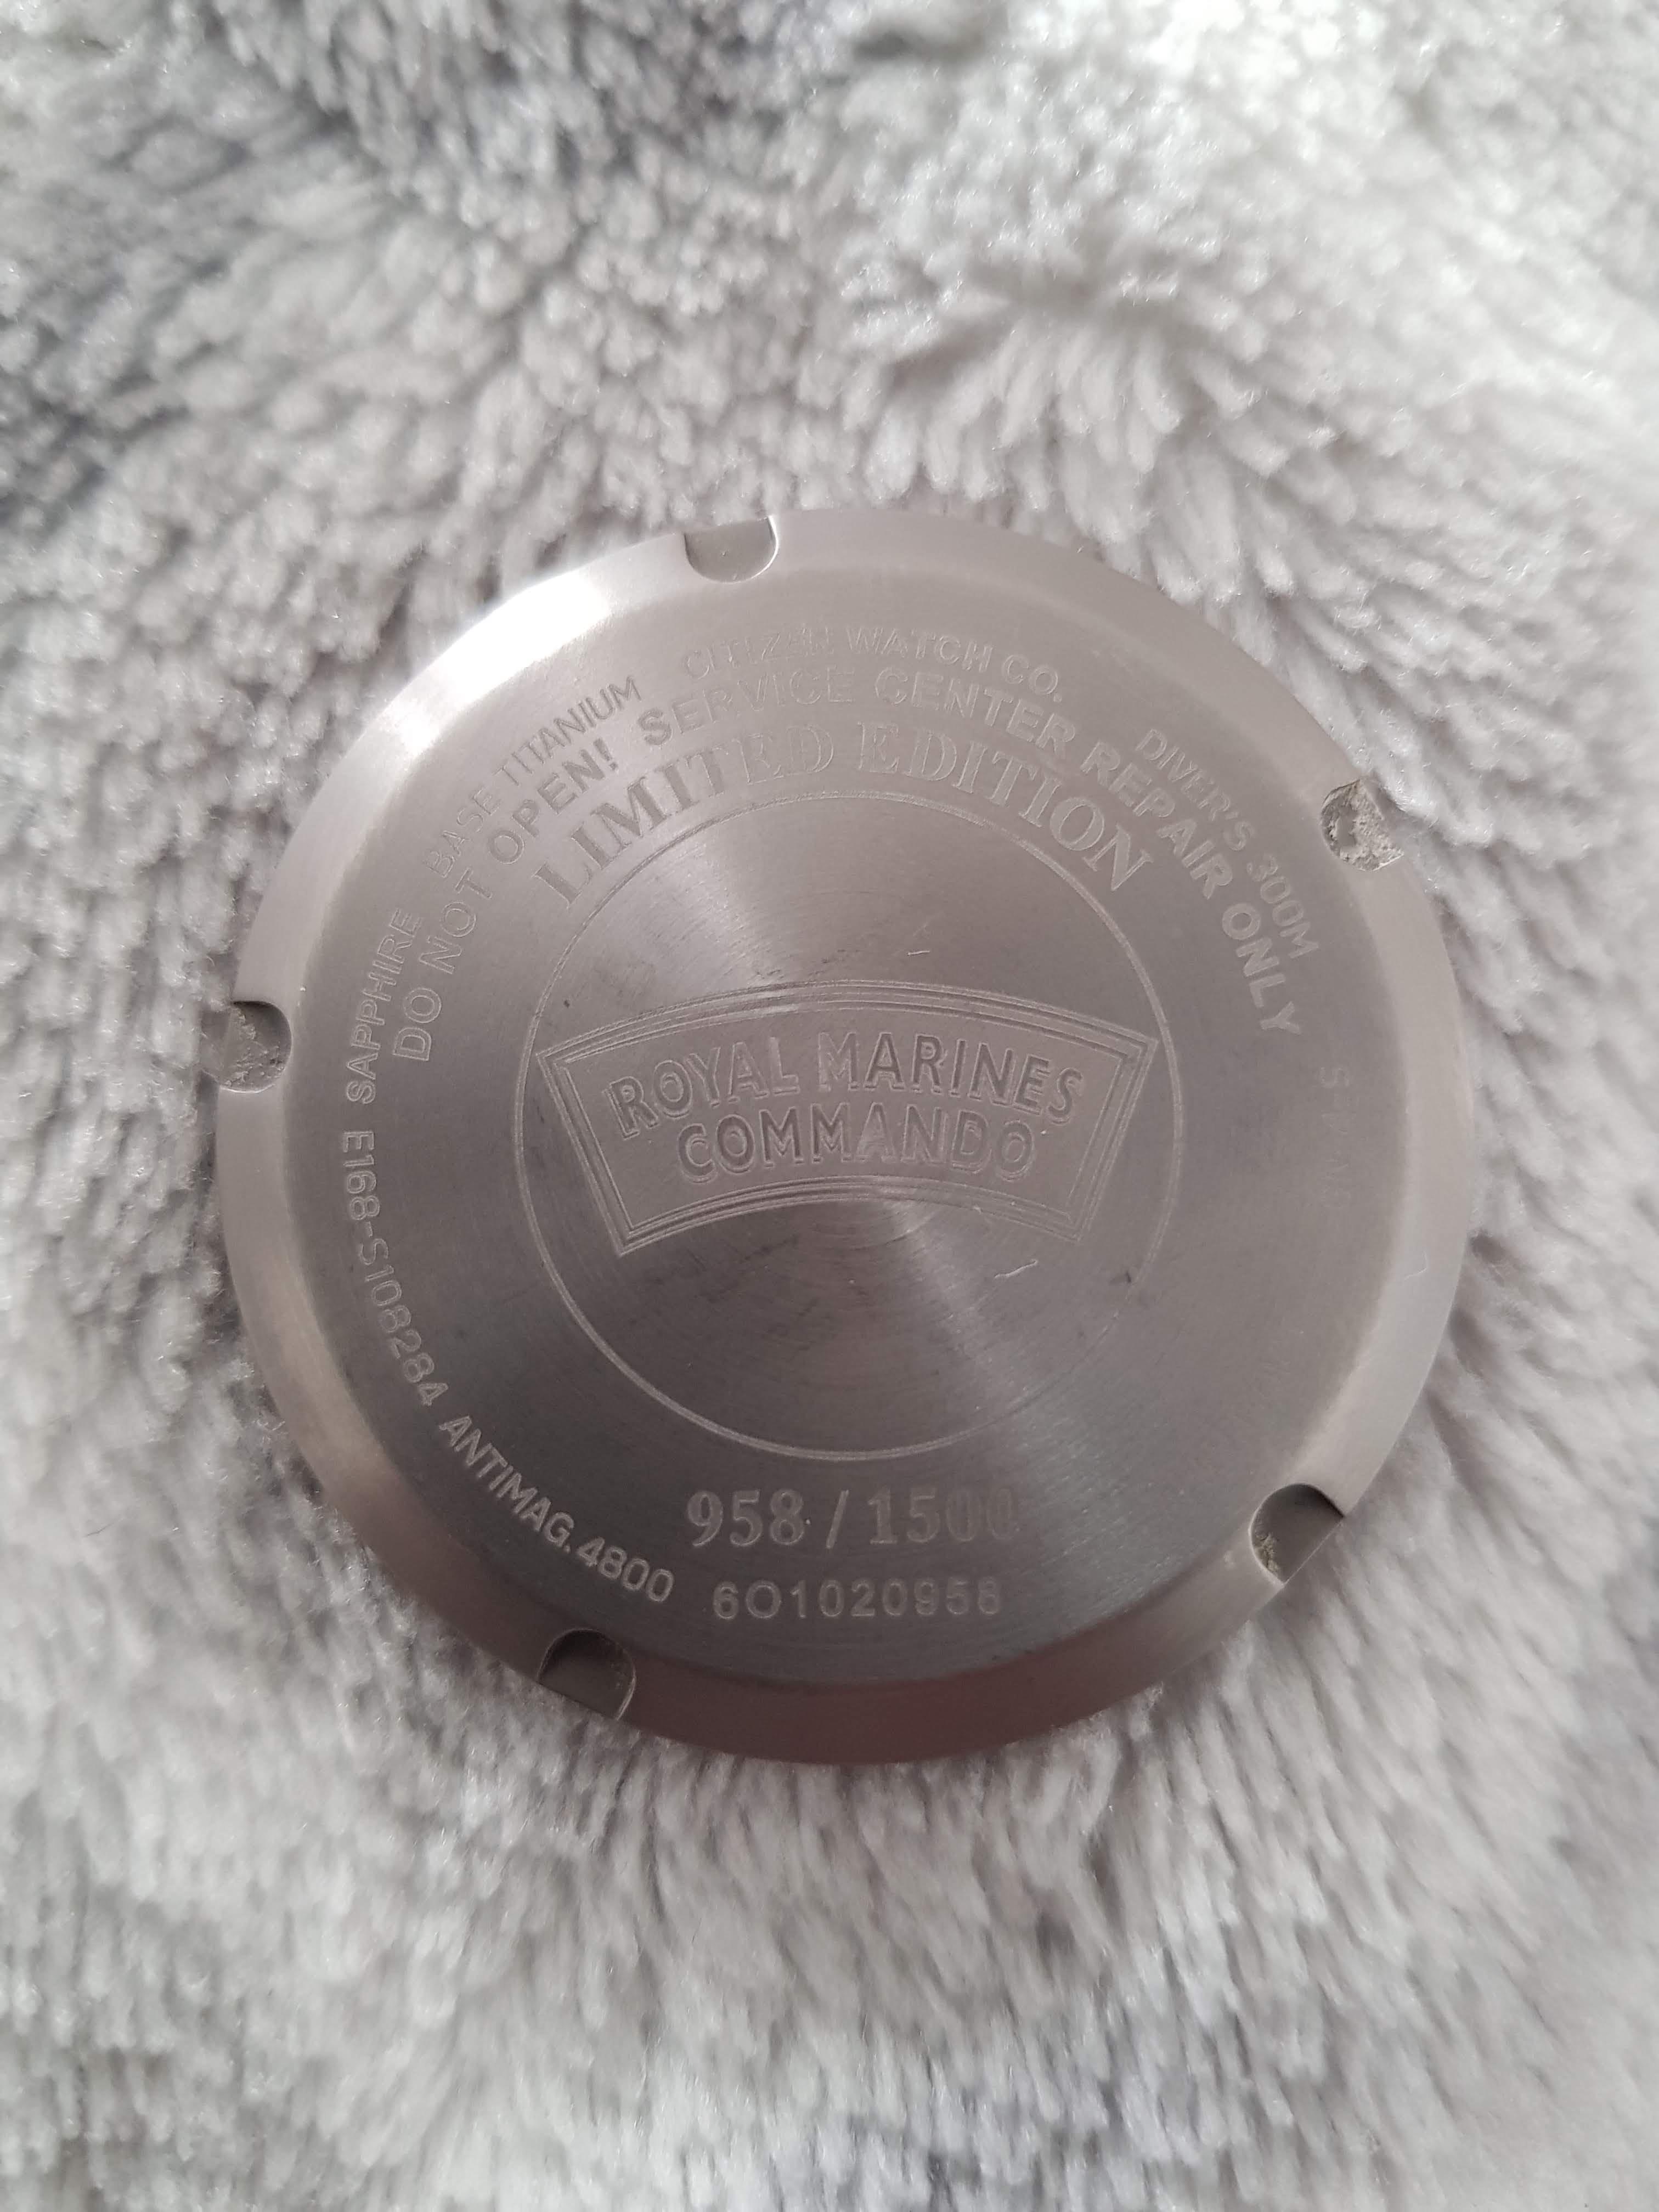
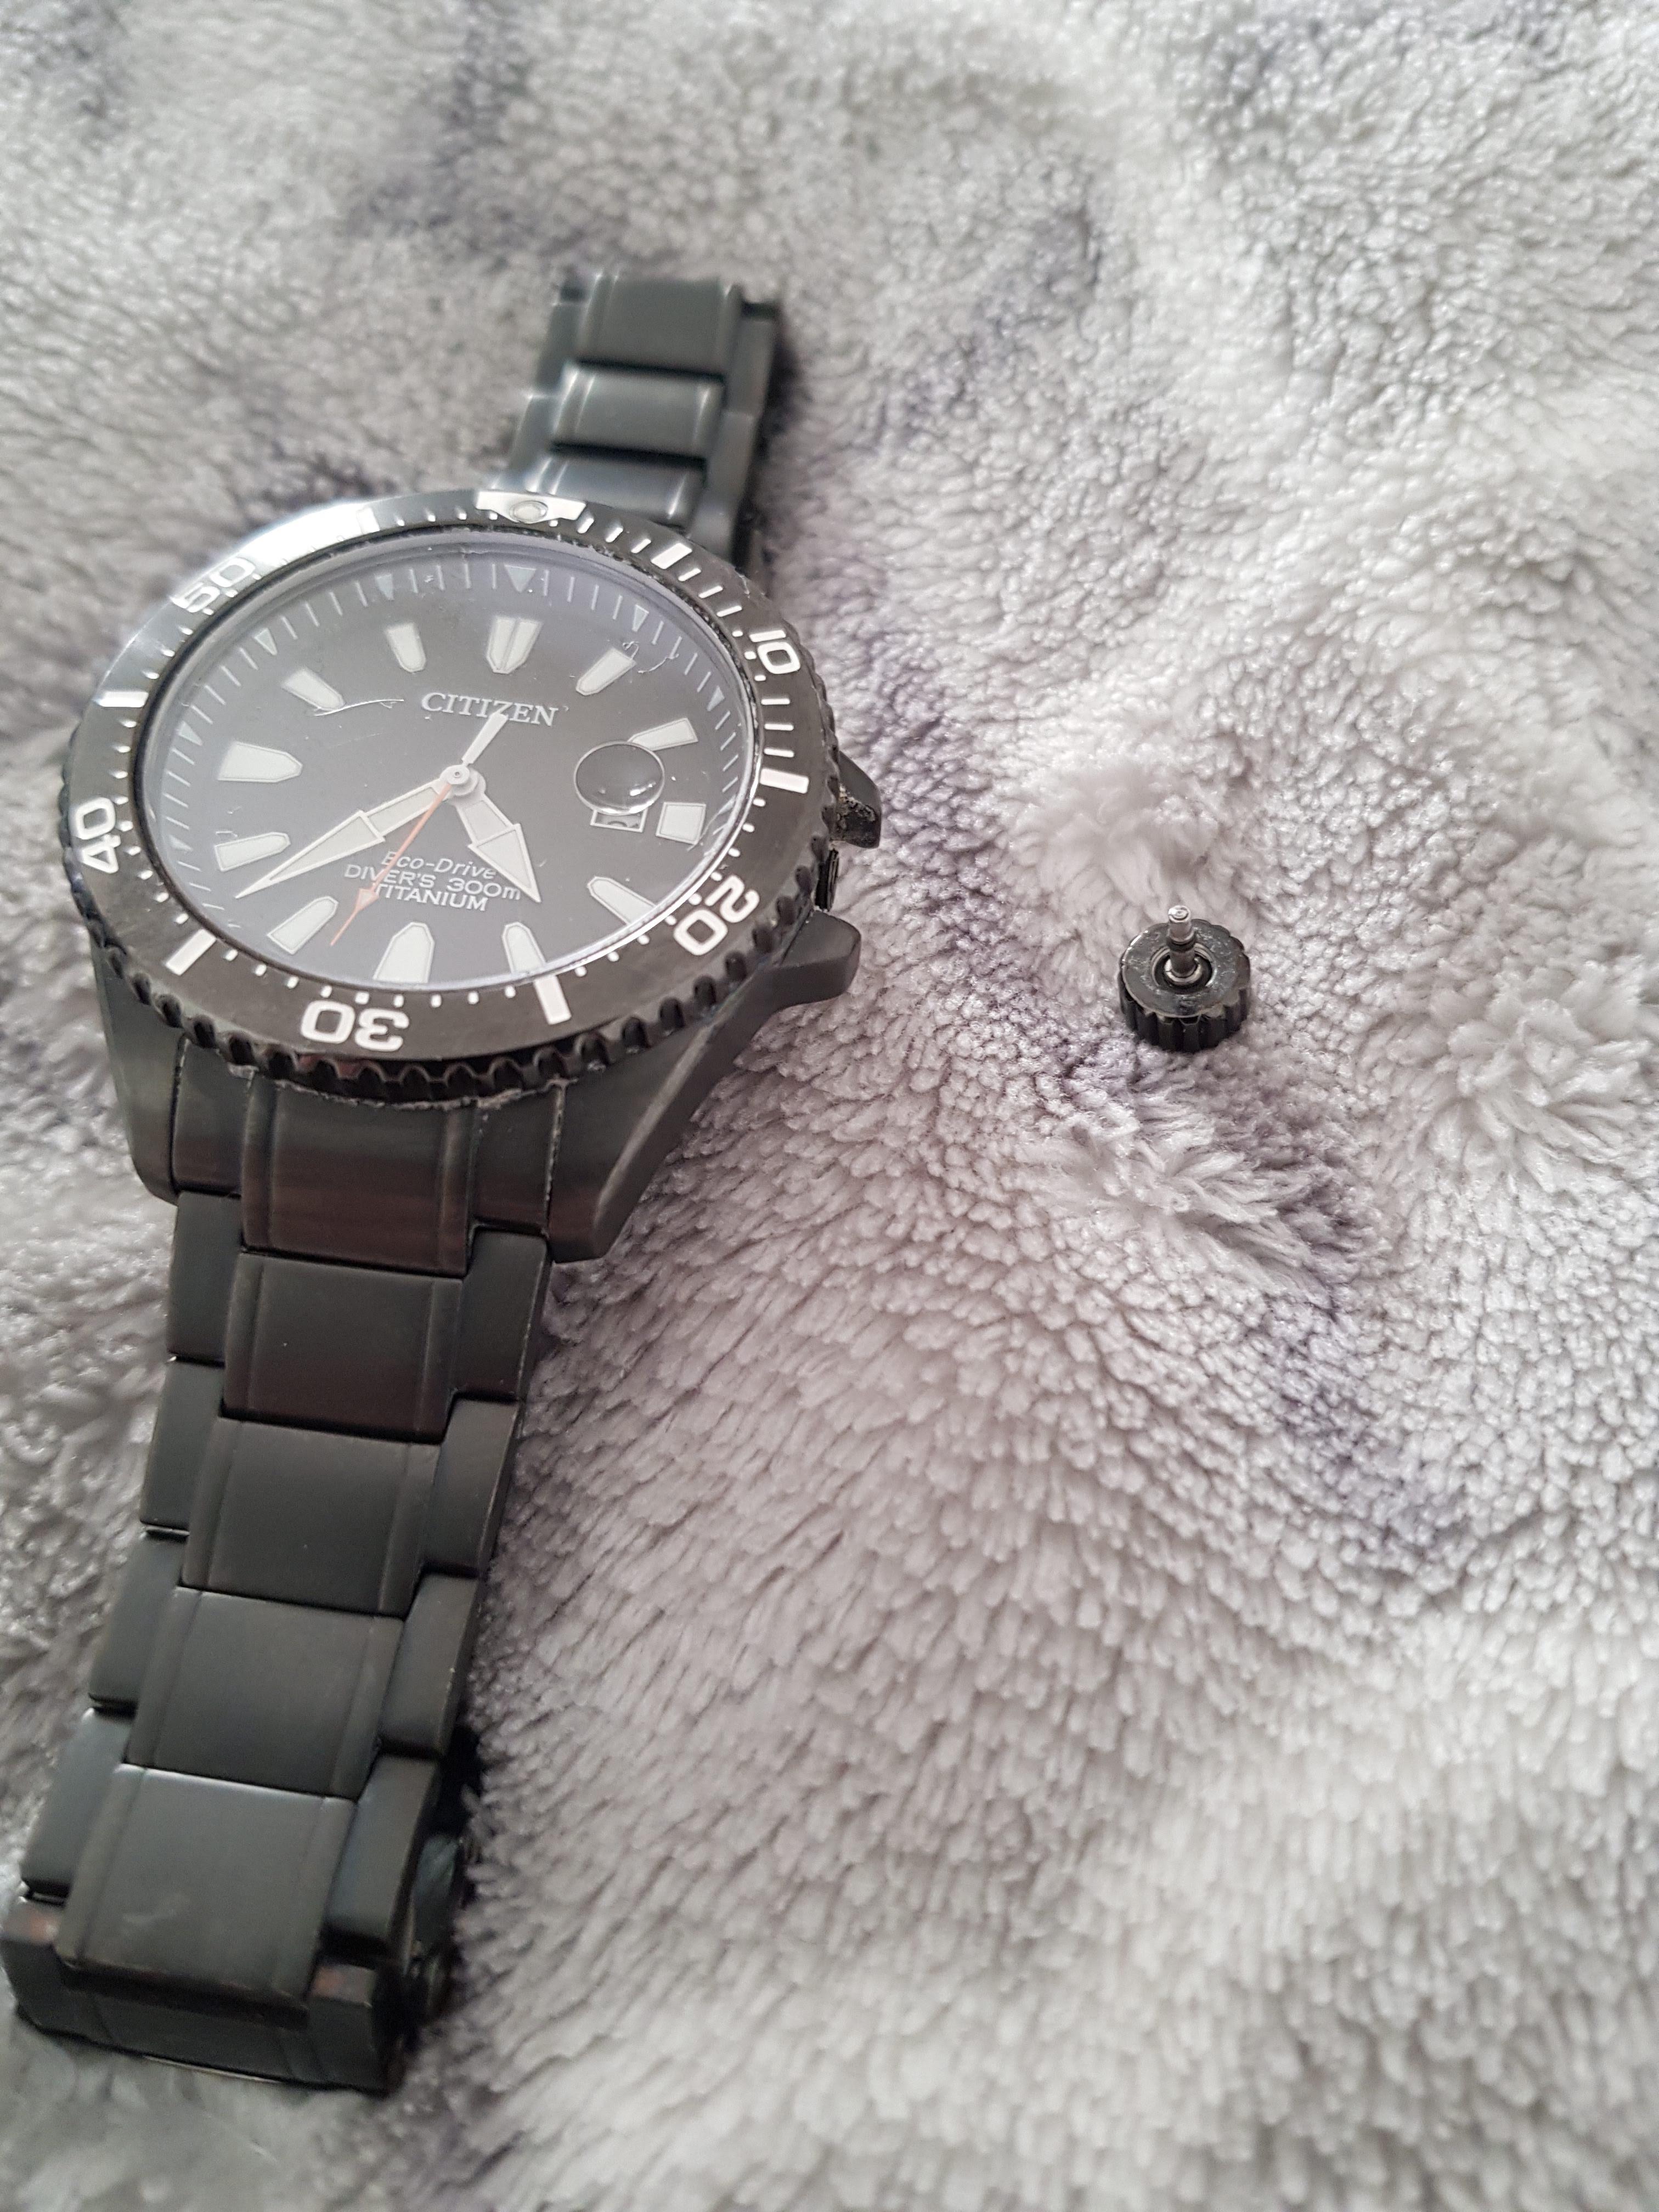
I recently purchased a watch off eBay with broken stem I have cleaned and then dissolved stem in alum powder and replaced with new stem movement is e168 so stem not to hard to find hope you enjoy the pics Watch back with broken stem dissolving stem in alum powder mixed with water put this jam jar in pan of boiling water on cooker ring and 10 hours later over 2 days you get a crown minus stem if crown is stainless steel. Old stem and new stem next to nice clean crown and clean crown crown with new stem cut to length and tested the loctite thread seal used and seals put back . case back cleaned and seal lubed. The watch was cleaned in ultrasonic bath before reassembly. watch all back together happy happy hope you enjoyed


 1 point
 -
That is certainly an Omega.1 point
-
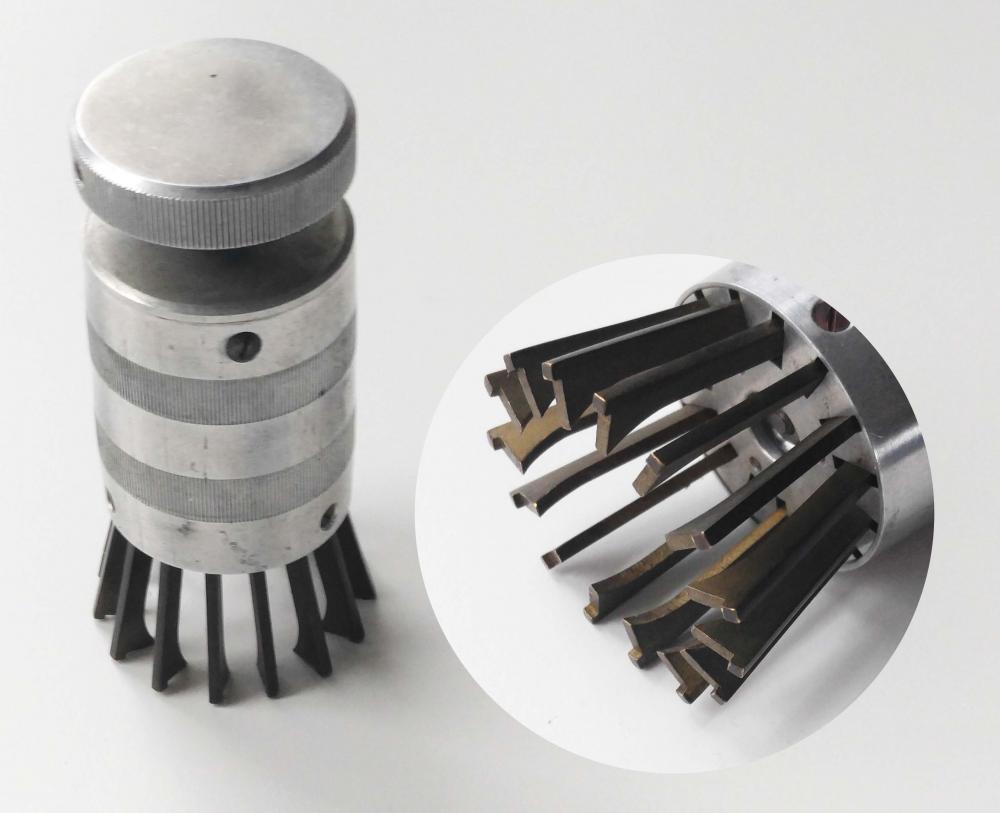
Those one off tools are a curse! They always seem to fall under two categories: Use it once and never use it again, or use it once, need it later and forget you already have it, and order it a second time, use it, then discover you already had one when you go to put it away to never be used again.1 point
-
Looks real and the crystal is original. See the little Omega symbol stamped on the underside?1 point
-
Probably you have looked the reference from the caseback, not the serial which may be stamped on the mov.t. Anyway it is indeed a authentic Seamaster De Ville.1 point
-
Looks genuine to me. Caliber 1010 is inscribed on your watch, Gg to Dr ranfft database to see picture of the movement and some additional info. Google, Omega 1010 ranfft Regs1 point
-
Thanks JDM it’s still difficult to decide the hairspring to purchase, for me anyway. Measuring the strength of an existing spring is also difficult to determine. Unless the ligne of a watch is always the determining factor. The drop test is a guide ie attach the new spring to the balance and it should dangle by approx 1/2” I have used this method and it is close ish. When time I must practice pinning up a H/S to a collet which will open up so much more opportunities when looking for a replacement.1 point
-
I think that Praezis mistyped the definition of force in the CGS system, which is the following: dyn = g * cm/s^2 Again, the reference article: https://en.wikipedia.org/wiki/Centimetre–gram–second_system_of_units In all systems, when there are seconds cubed, it's about power, not force, nor torque.1 point
-
Brilliant some times thinking out of the box works. I am a great believer in diy sououtions in stead of slavishly buying expensive tools for a "one off"1 point
-
Ok, I've found some other definitions - "What is the C.G.S. number of a hairspring? This is a number indicating the "strength" of a given diameter. To be more exact, it indicates the "elastic moment" of a hairspring at a diameter of one centimeter when the spring is deflected by a one-half centimeter long arc of a circle. (The "elastic moment," incidentally, equals the force the spring exerts, expressed in grams, multiplied by the radius, which is one-half of a centimeter. ) Horological Times January/1989 Article printed by special permission of the Associated Spring Corp. and F.N. Manross and Sons" Since a one-half centimeter arc of a one centimeter diameter circle is one radian, we are close to your definition, but not the same. Another one - "The spring number indicates the restoring couple of the spring when its diameter is one centimetre" And I found this to define restoring couple - "The moment (or torque) of a couple is calculated by multiplying the size of one of the force (F) by the perpendicular distance between the two forces (s)." Aargh!1 point
-
I'm still trying to understand this. I think I've got the general concept, but I am confused by the unit. Force times centimeter cubed? It sounds like the torsion spring constant, but that is newton-meters/radian. Do you have a reference for this definition? It sometimes helps me to read more than one explanation. Thanks!1 point
-
Bravo! Good for you. Medical experts now blame oral bacteria for a plethora of diseases, like heart disease, kidney diseases, diabetes, stroke, pancreatic cancer, etc. Every bit of effort to reduce the amount of bad bacteria in the mouth adds years to your lifespan. But don't go crazy thinking you can kill all the bactera with mouthwash, because mouthwash kills the good bacteria along with the bad.1 point
-
Or more popularly, spontaneous synchronization1 point
-
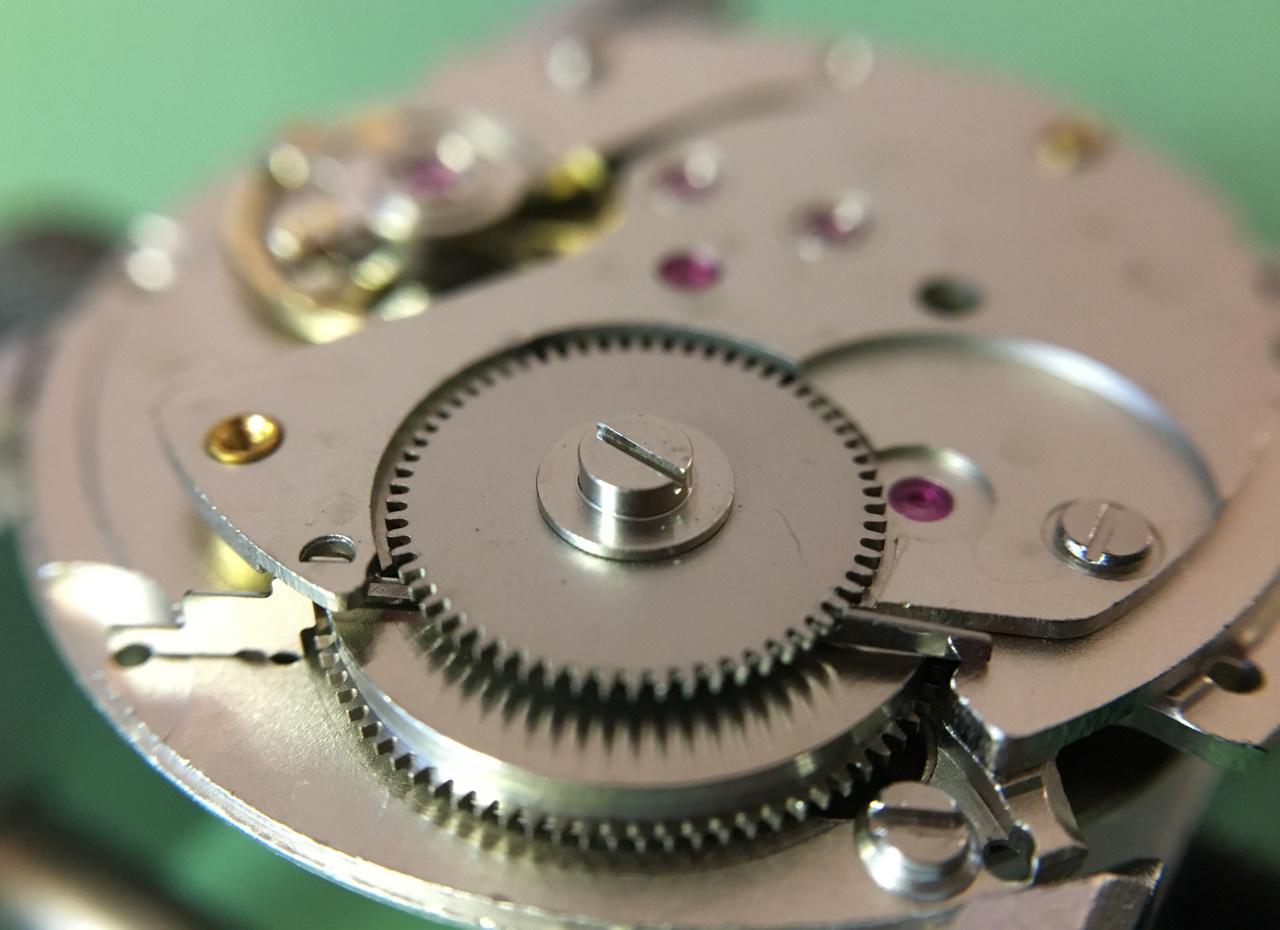
I had a look in the workshop this afternoon amongst my pile of watches and bit and I found an ingersoll watch which works. Its on the bench at the moment and I will check it out tomorrow and will post a picture. It looks similar to yours except I dont think it has the separate bridge for the escapement wheel but the pics will confirm.1 point
-
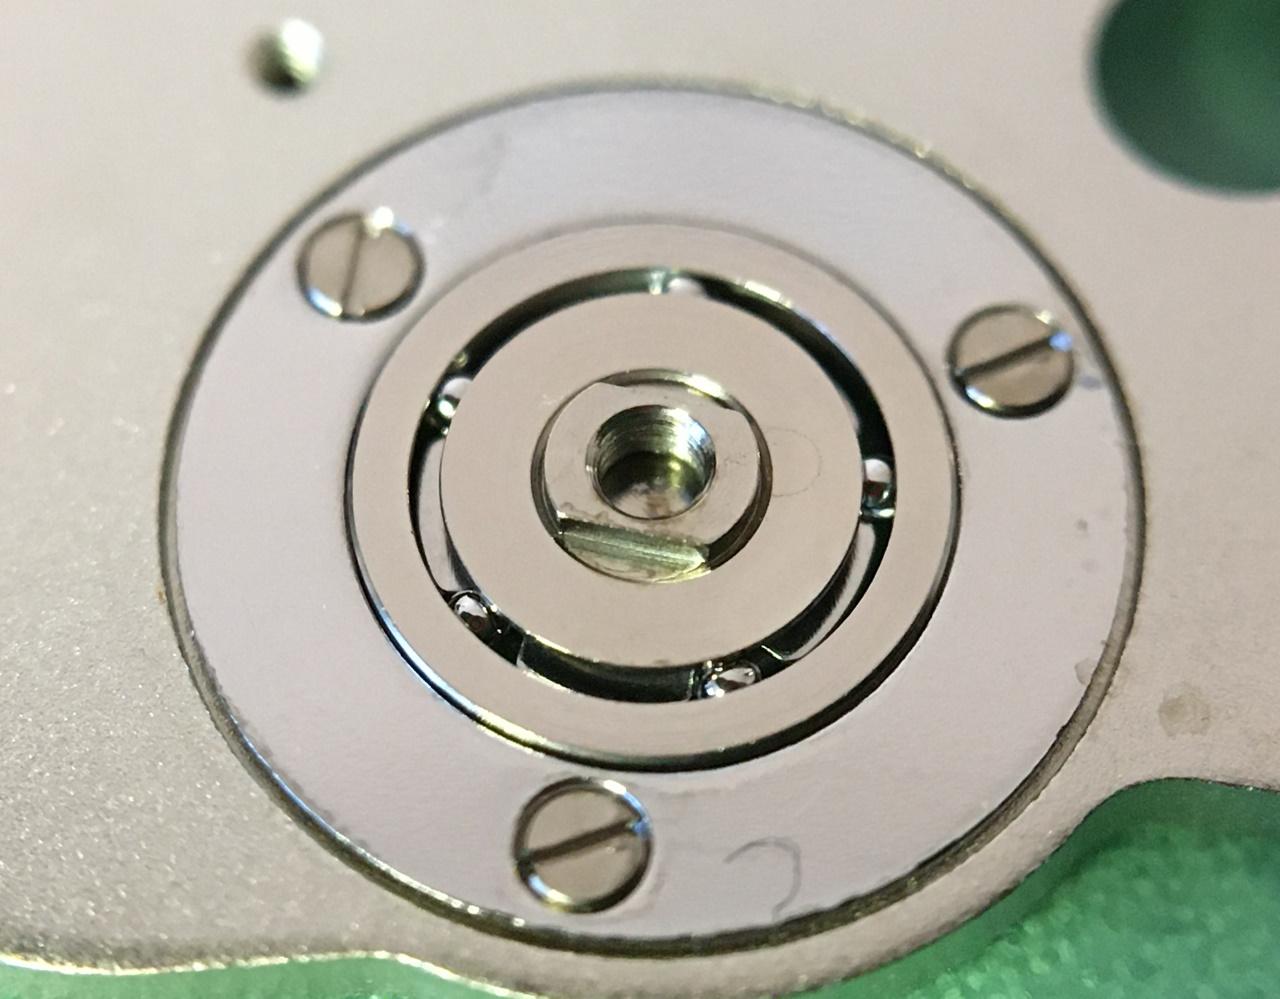
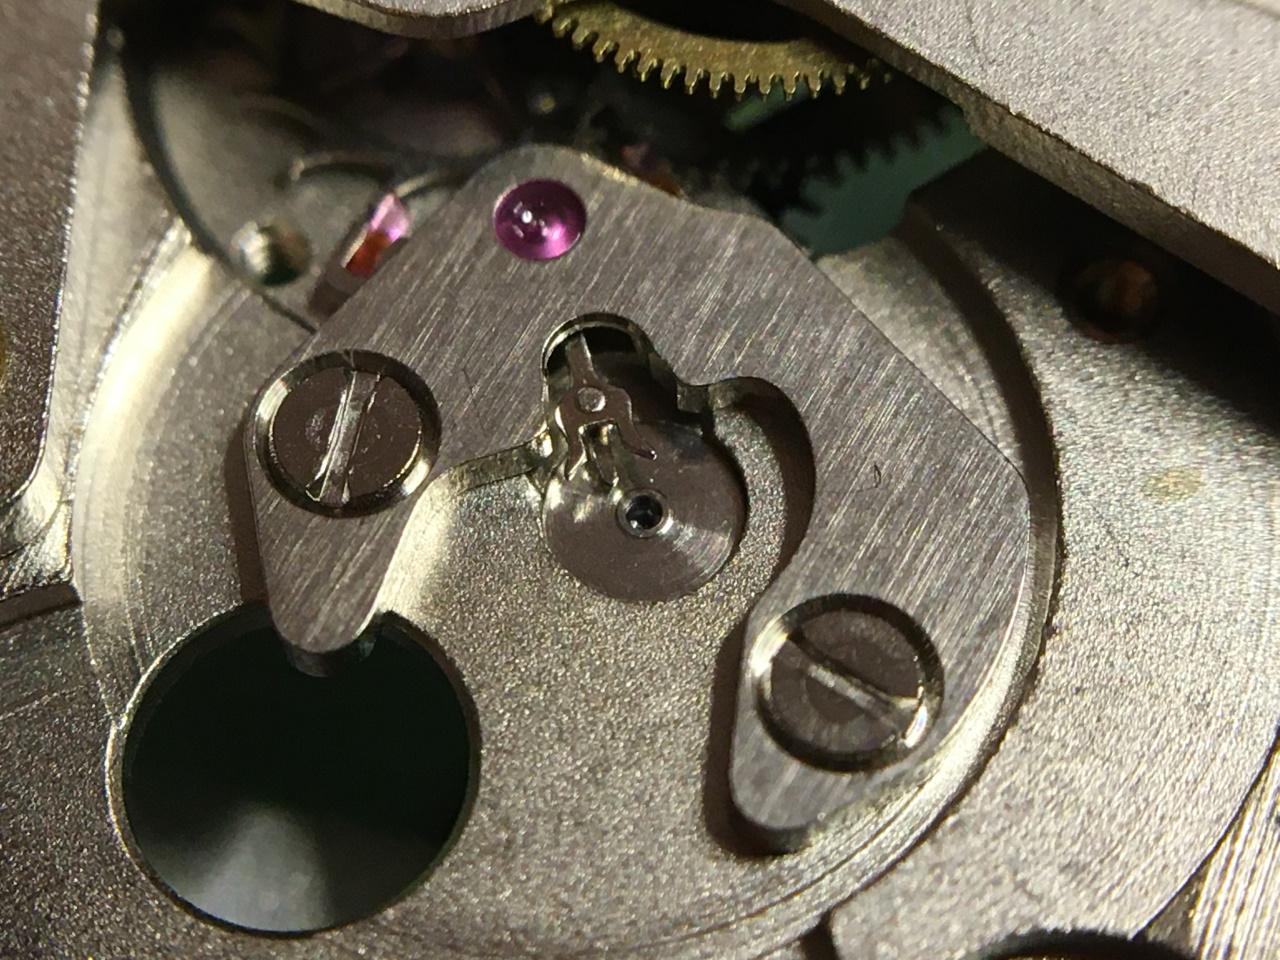
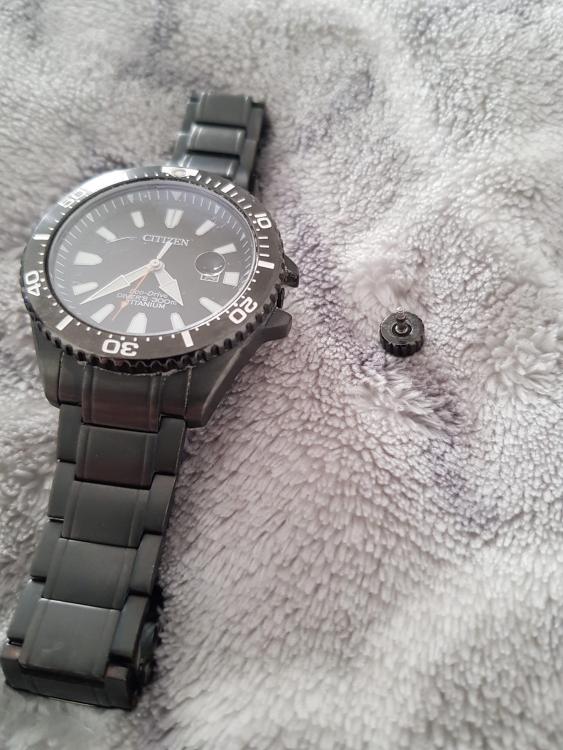
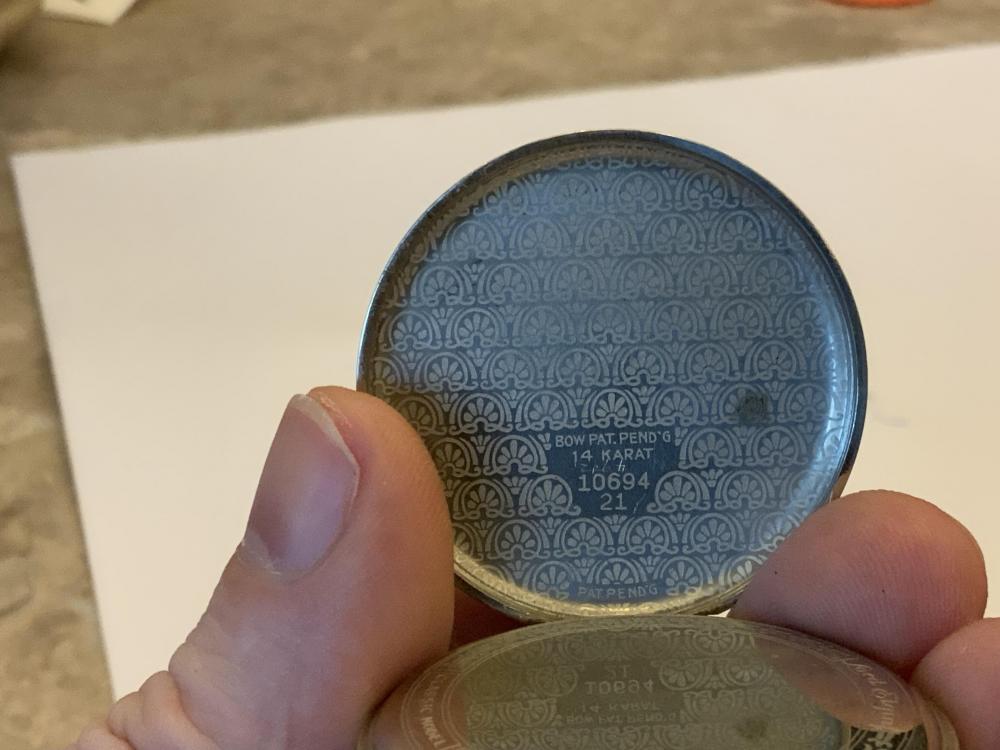
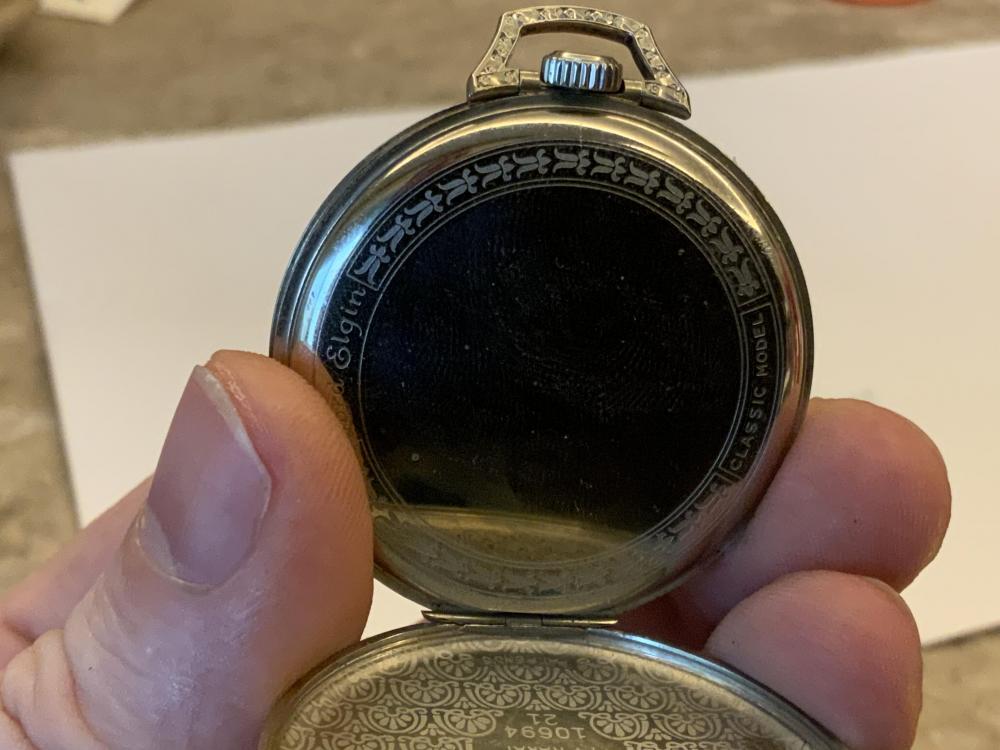
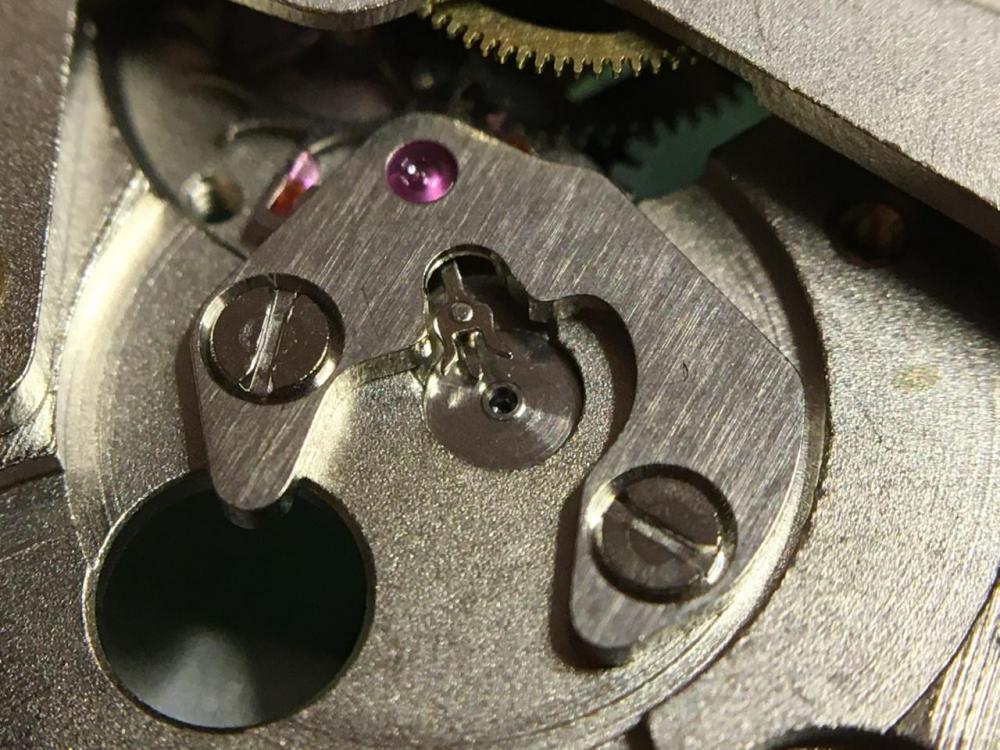
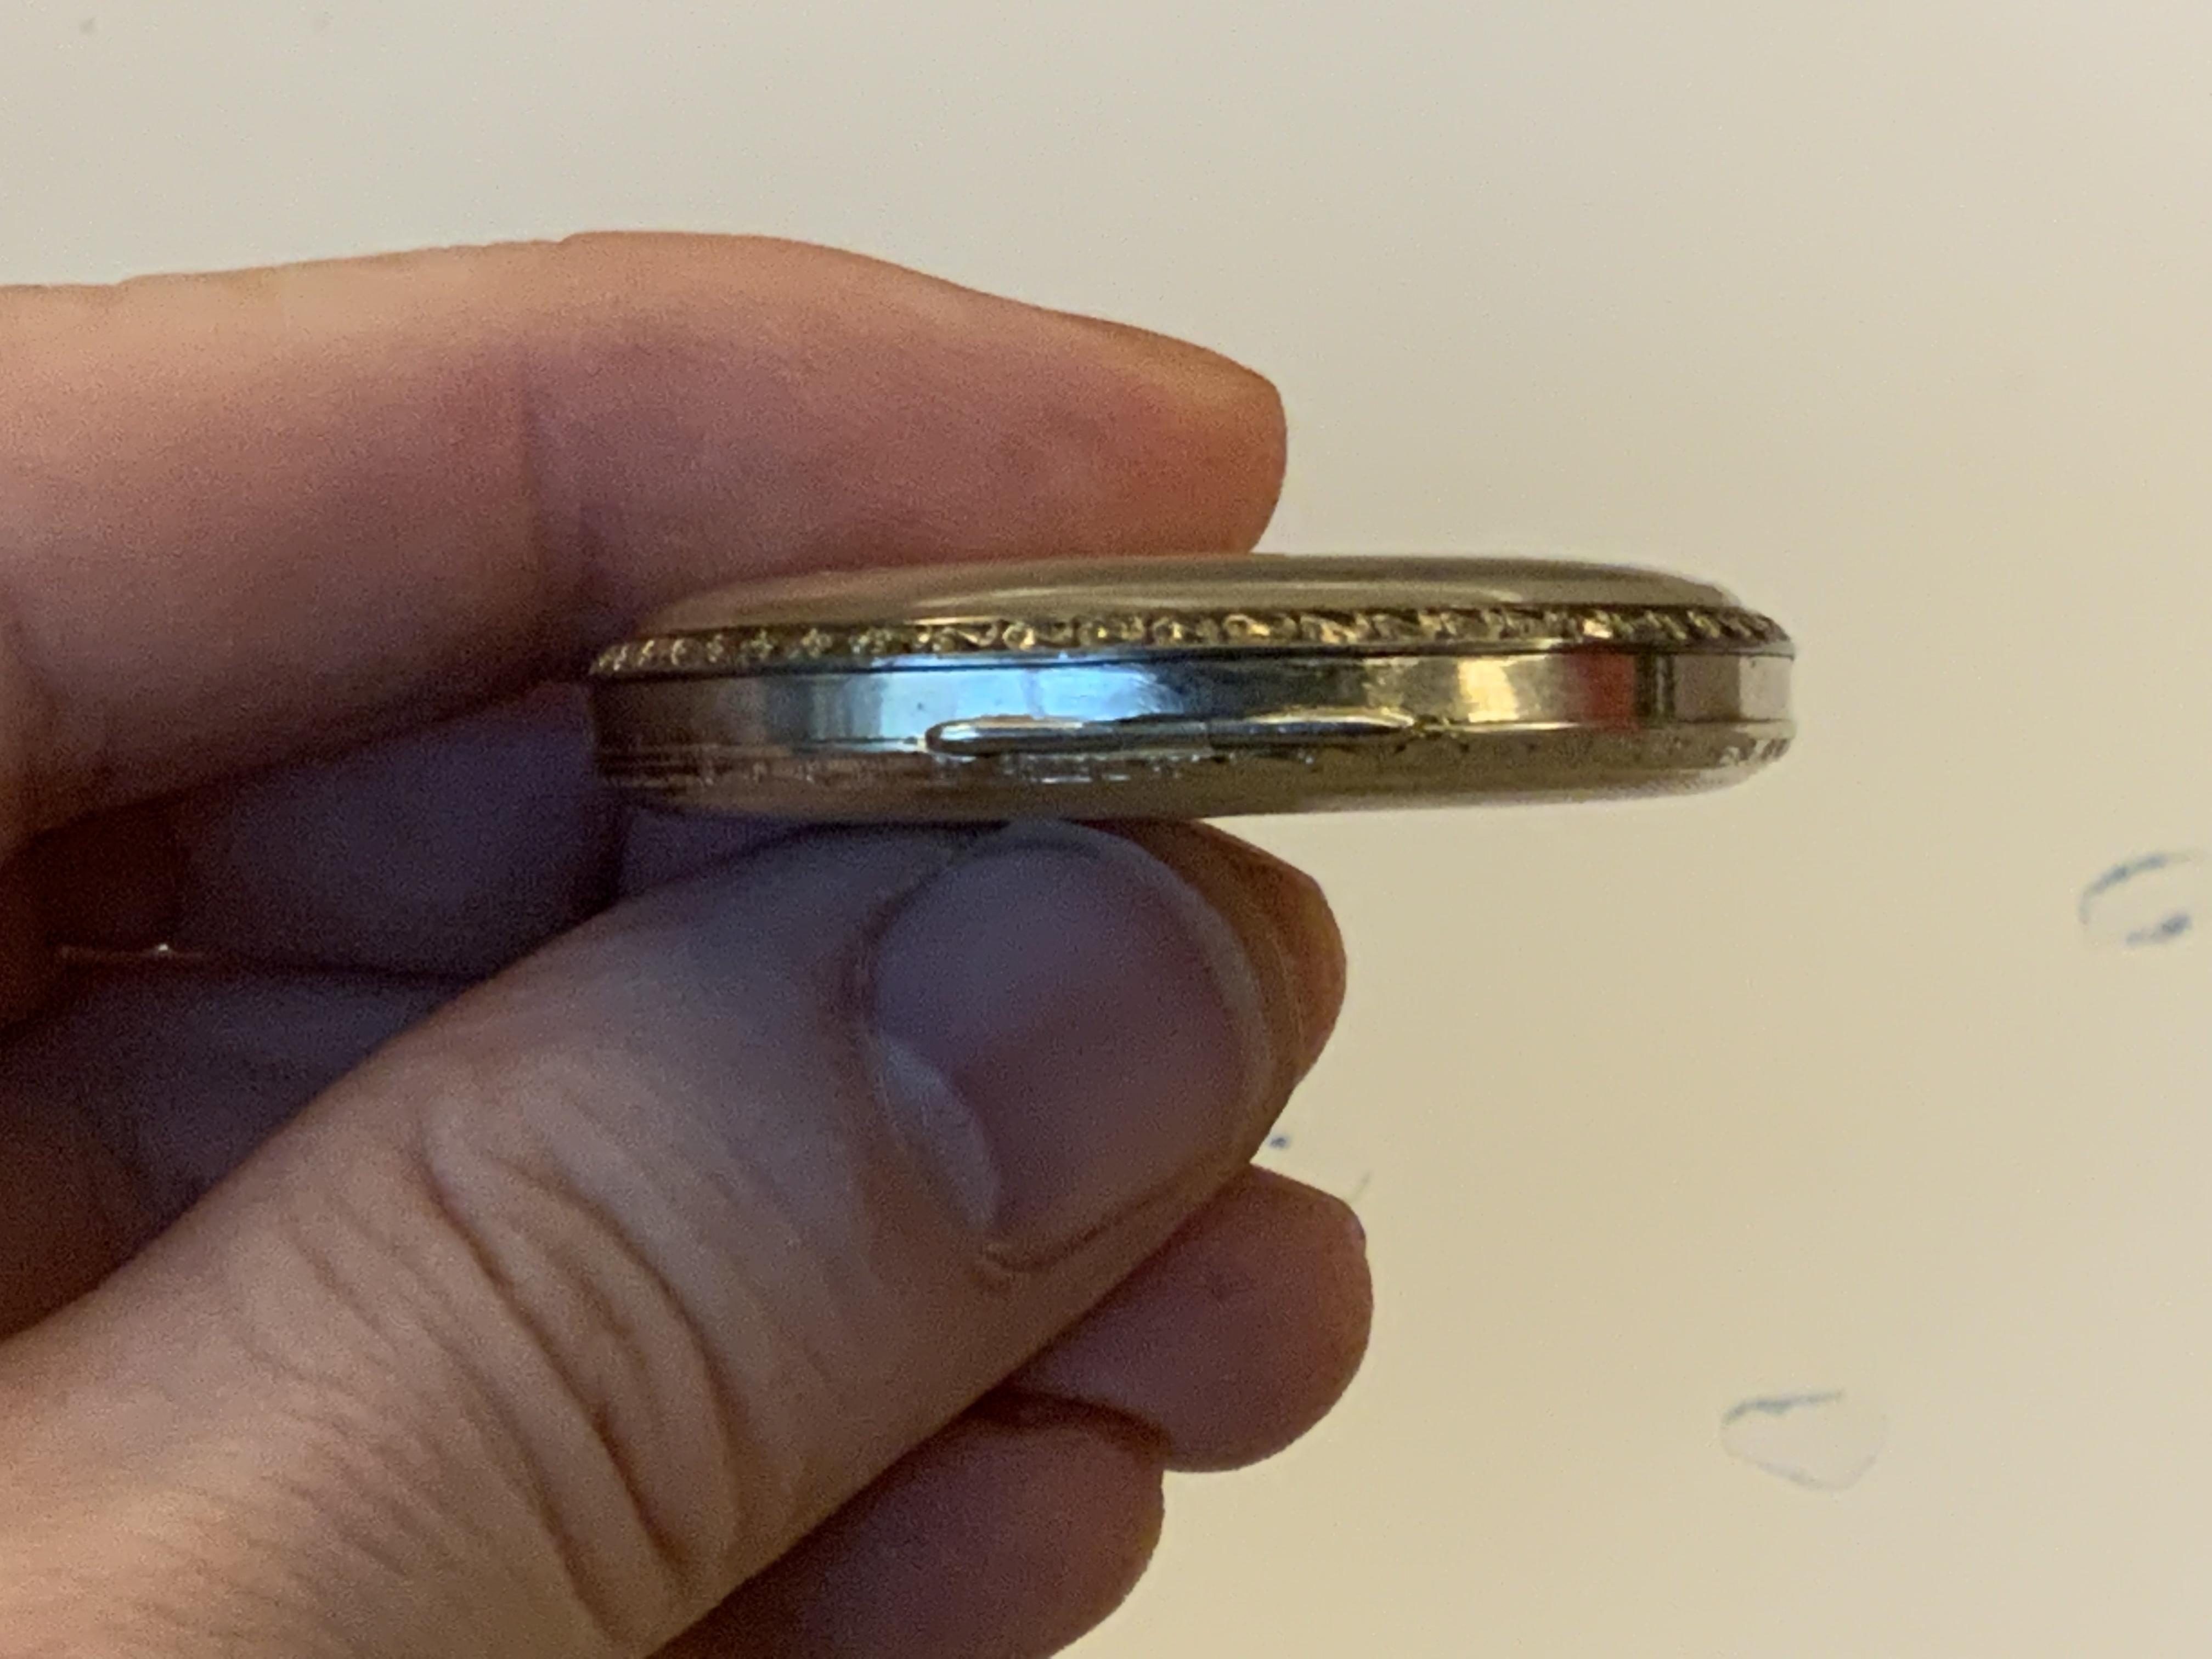
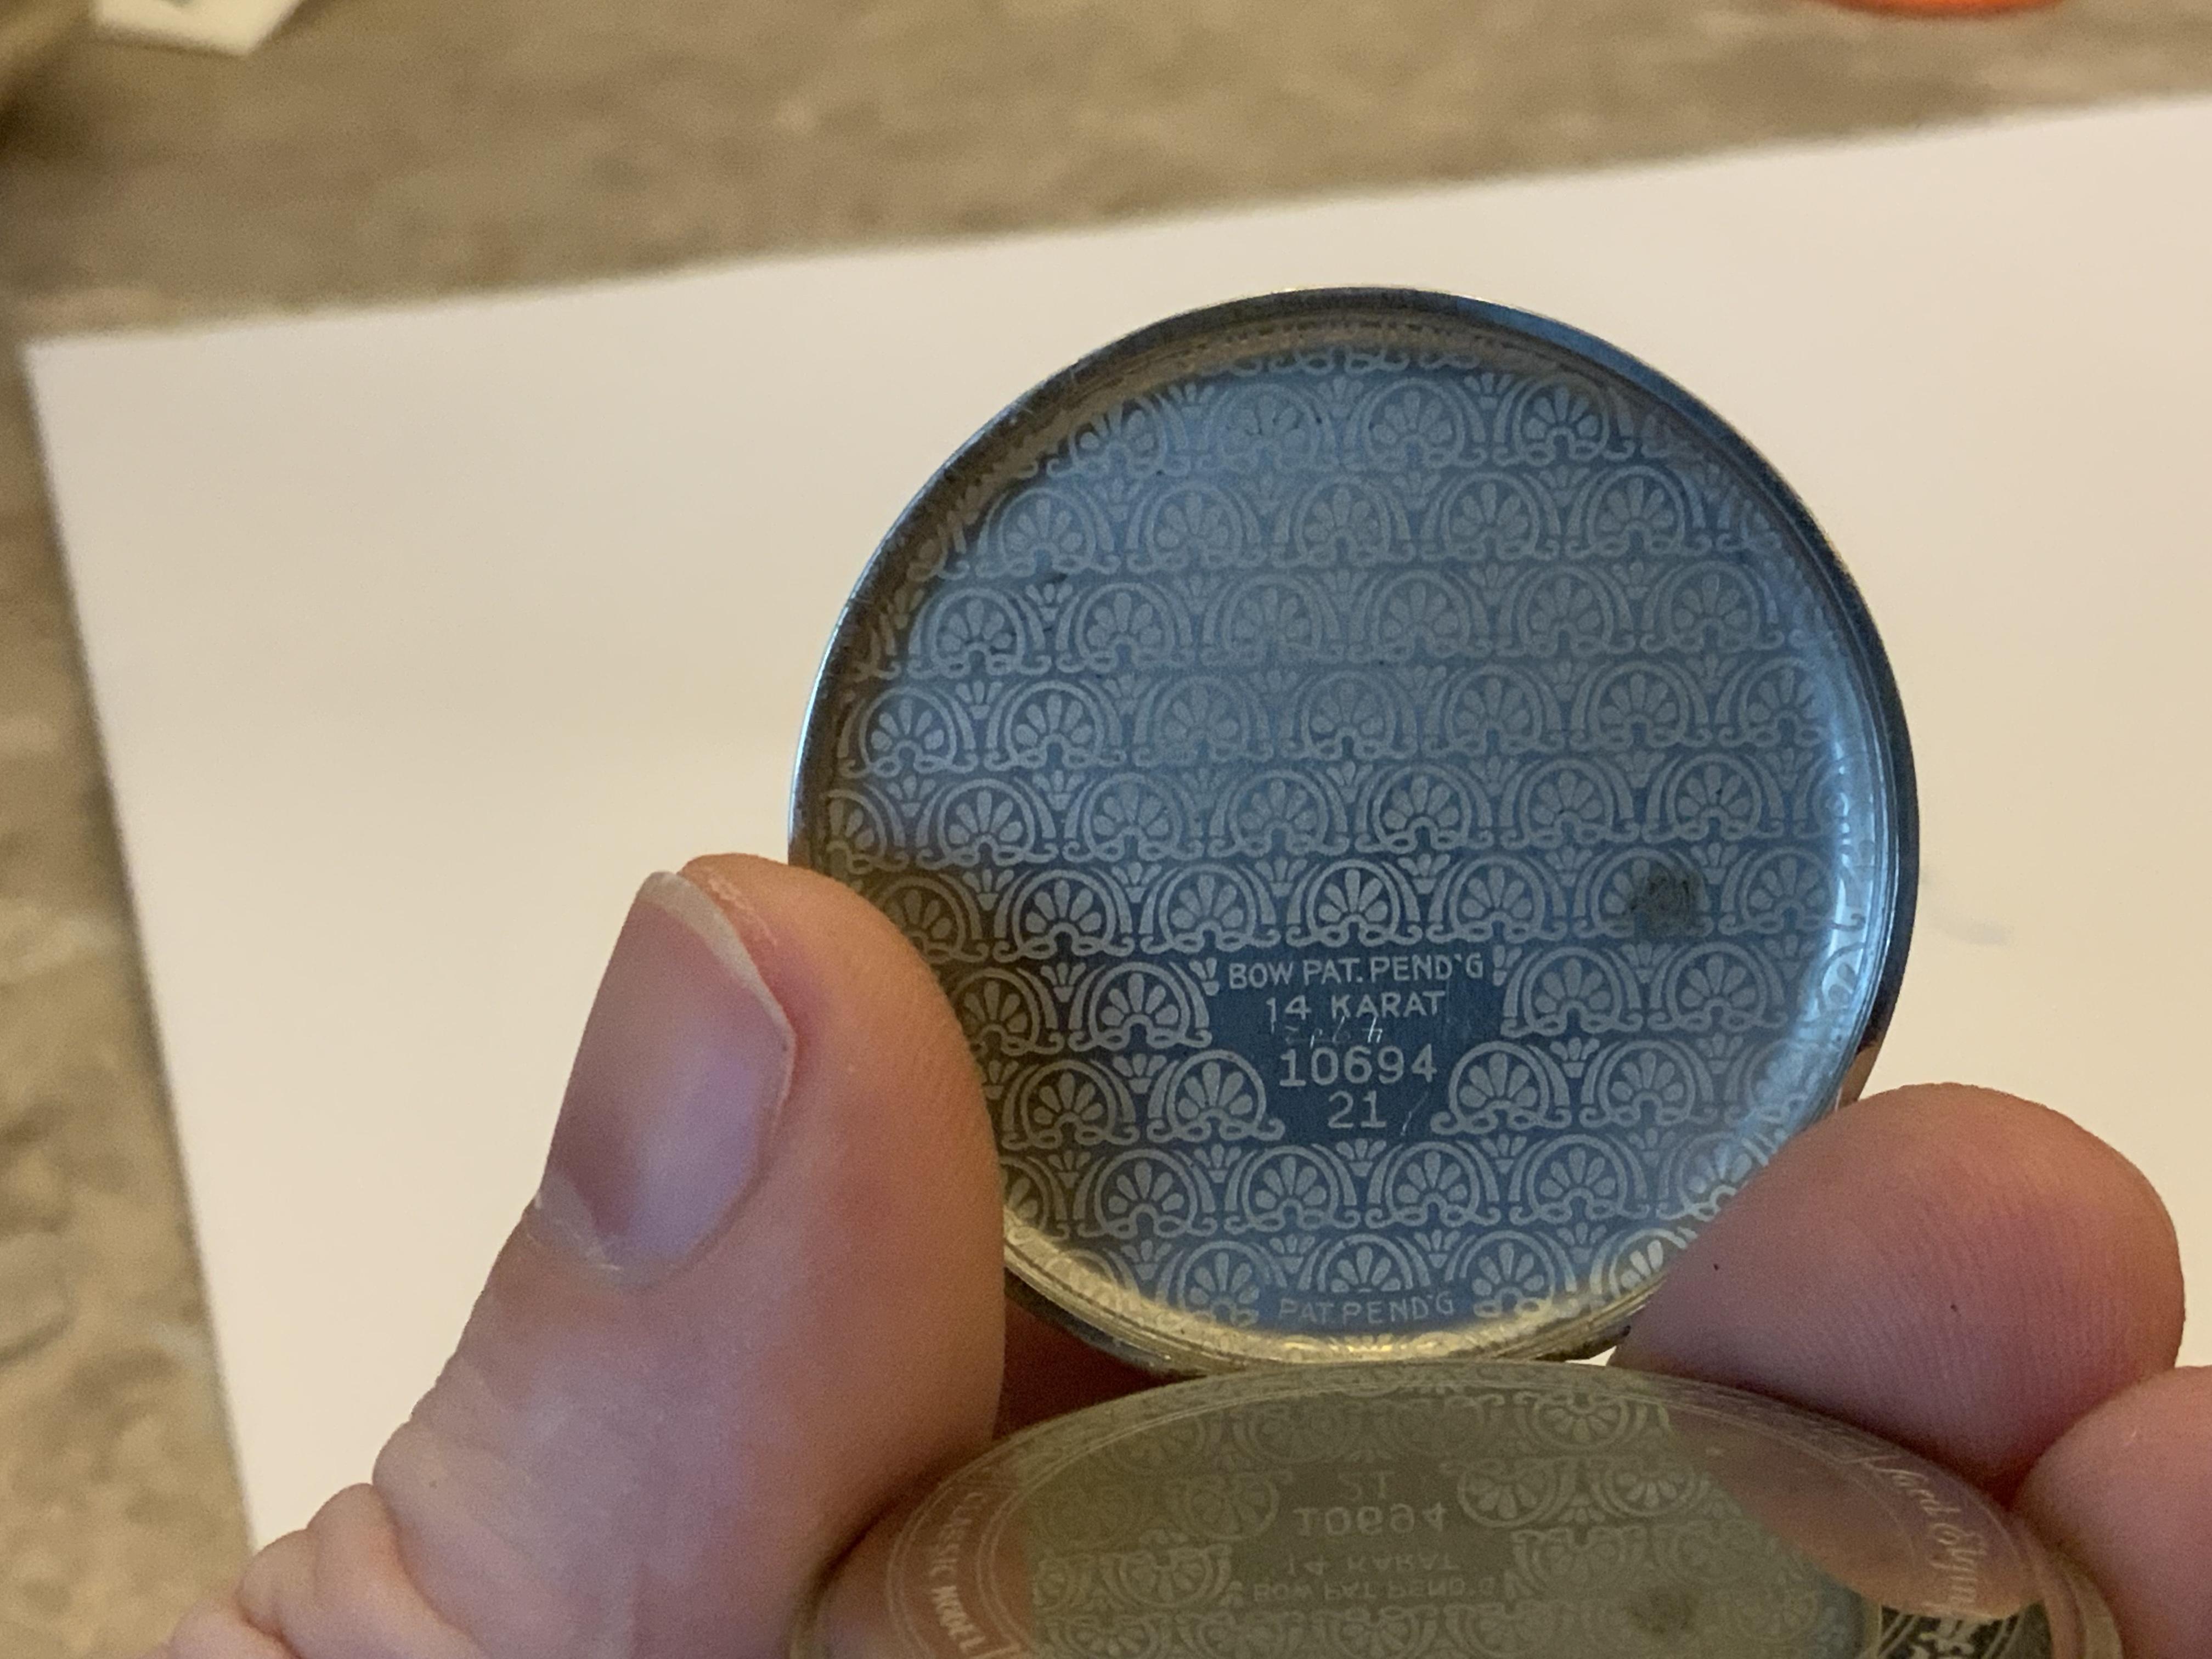
Thank you all for the responses. What mad me question if it was a screw fit was the absence of almost any case markings from previous attempts to open it. I’ve attached a couple more pictures for the case, just in case this helps a little.

 1 point
 -
I think you will find that Jersymo is right watch repairers have to make a living, the ingersoll/smiths is a cheap watch abd spending time would be un economic for what he could charge for a clean/repair. If his normal rate is £30 ph and spends 4hrs on the job £120 its not worth it. and I guess £30ph is cheap for some. A battry change, re seal and pressure test for some dealers is £320 or £40 just for a pressure test so it all comes back to economics. When you go back to the shop find out what it needs what caliber it is and any thing relavant you can think of which may help us define the problem. cheers1 point
-
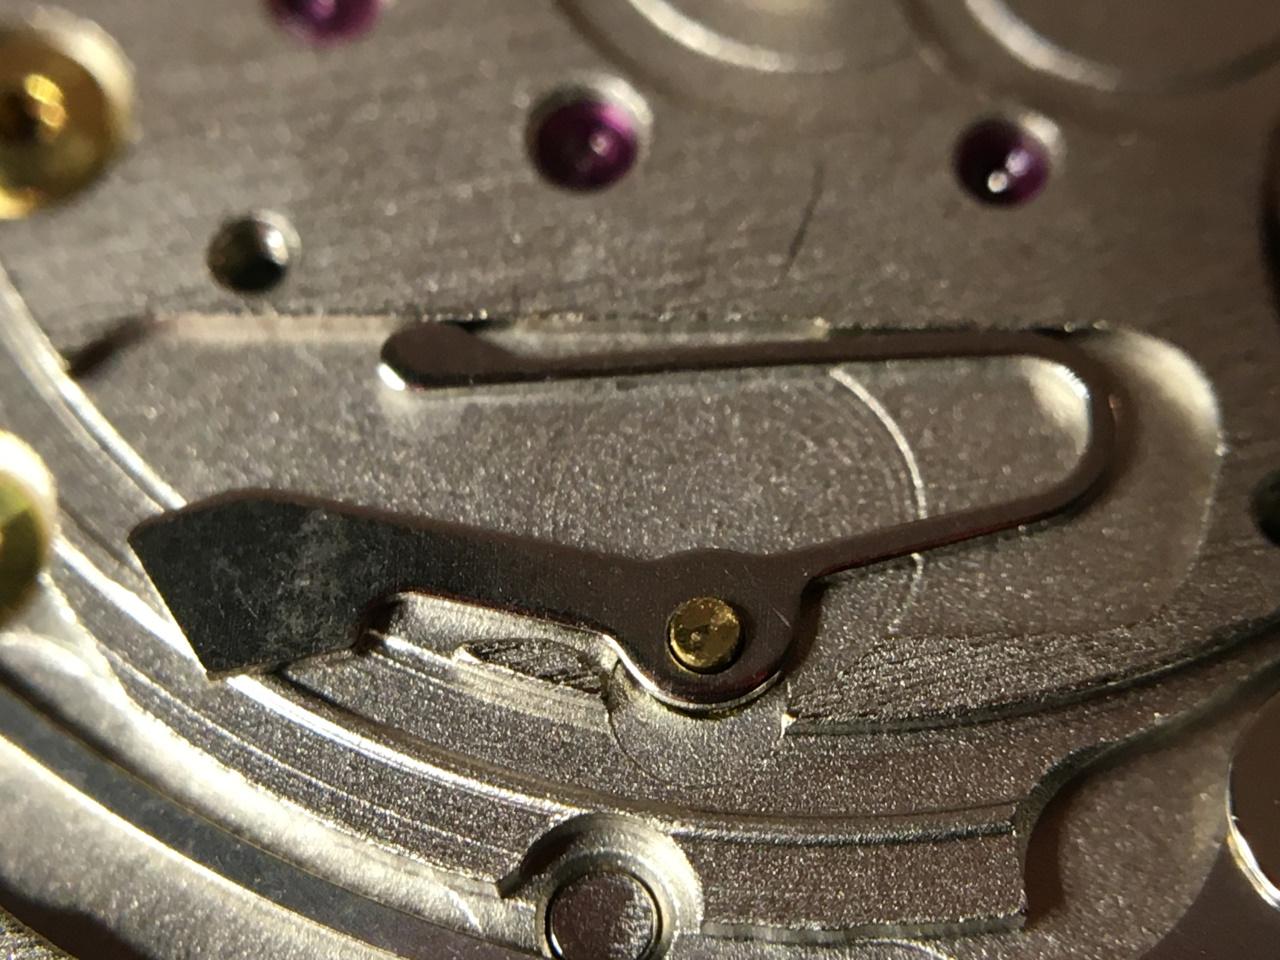
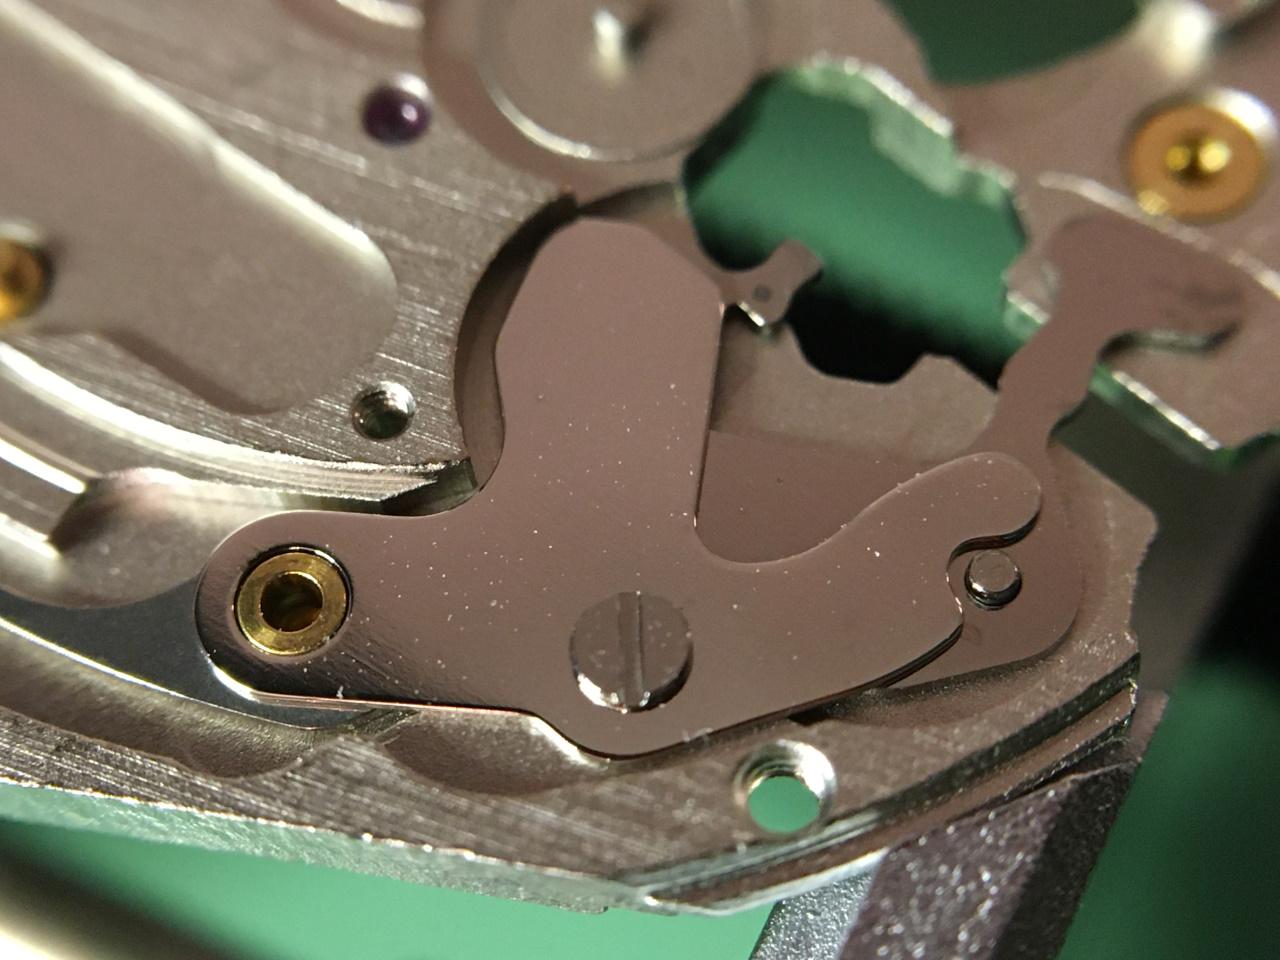
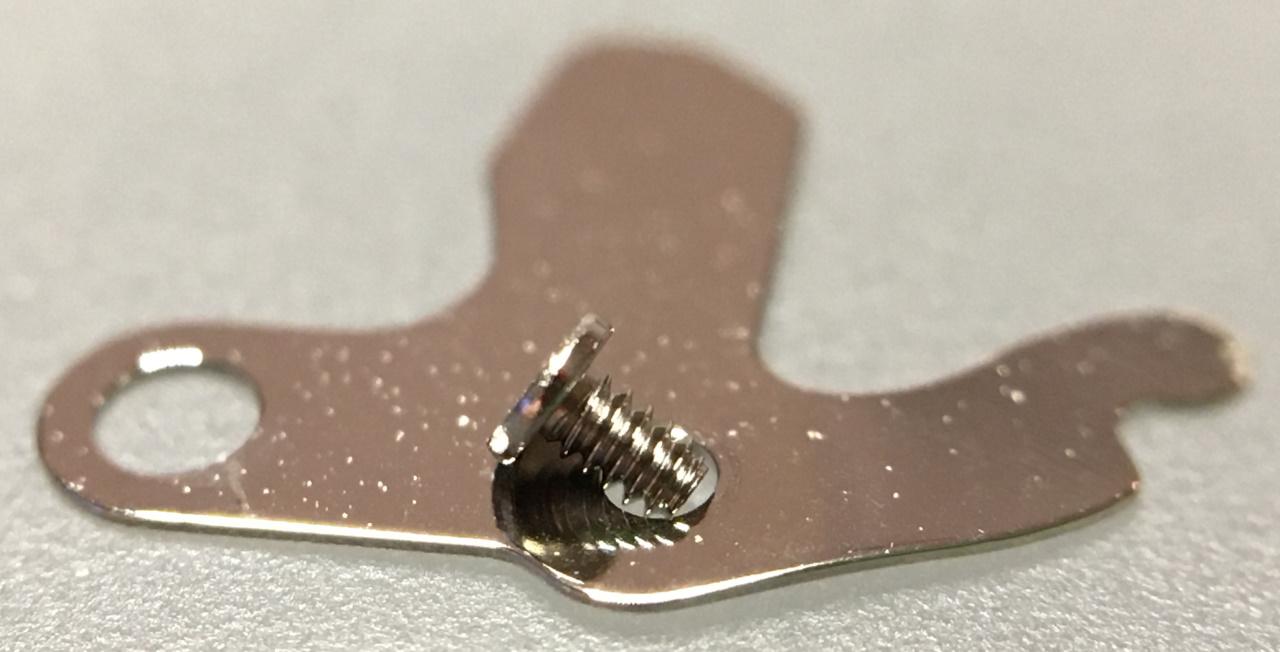
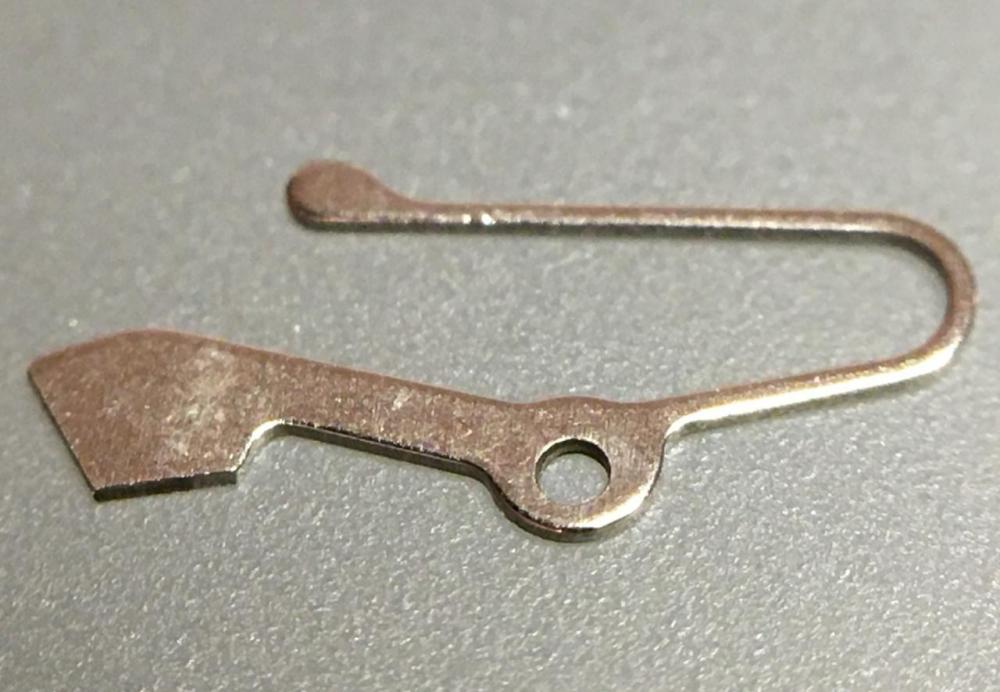
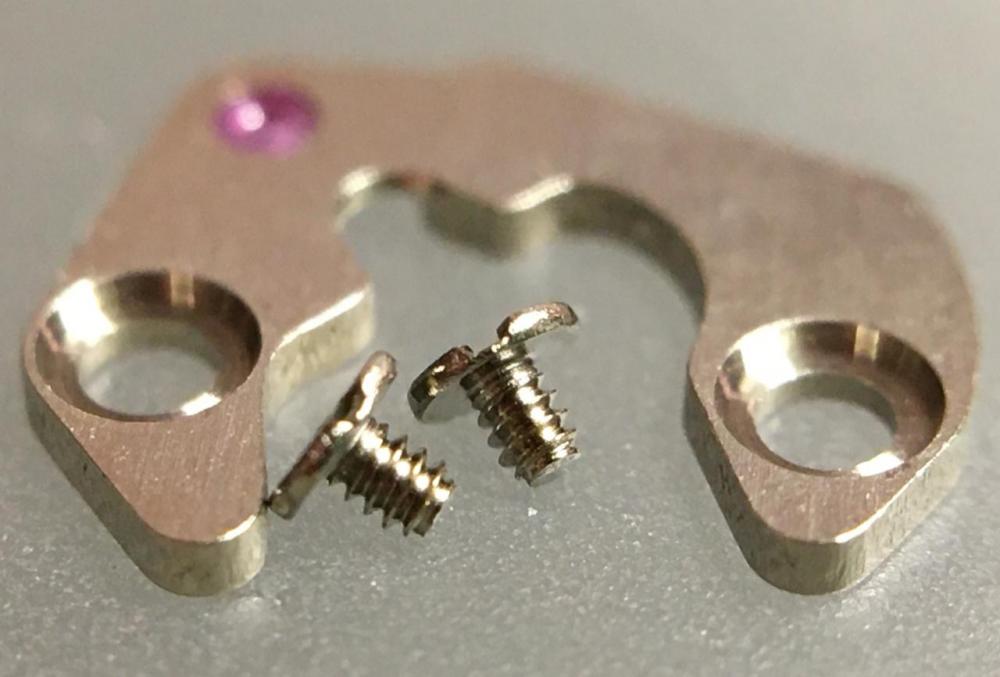
OK, I more or less did as instructed. The tap that I had that was close to the right diameter was questionable, so I was afraid to use it. Instead, I found a slightly bigger screw and self-tapped it in. I was very careful...just turning a quarter turn then backing off...then a quarter turn plus a little...then back off. I continued this until the screw was seated. The screw was a little long, so before doing the above...I put it in a vice to work it down on a diamond sharpening plate. Had some difficulty with the pin vise, so moved to just holding with tweezers. The whole process including tapping probably took a half hour or more.1 point
-
Tap to the next size up and use the next size up screw. Sometimes a rap with a domed punch will close it enough that the original screw will grab, these only have to be snug not "tight".1 point
-
You misunderstood my post. Your method works fine as long as you search using Google. You never mentioned Google so I first thought you meant using the search feature on julesborel.com. Anyway, just got word from them. See below: "We are planning on having the watch part data base up and running very soon. Our computer tech person is working on it as fast as he possible can. Since our move he has had a very extensive computer issue list to work on but the data base is part of the list. Because if this I cannot give you an approximate date. Please keep checking back. Jane Burch @ Jules Borel & Co"1 point
-
May I ask you what paint and what airbrush tool was used?1 point
-
Those airbrush results look great! what kind of paint are you using? @Tudor, when you are tinting lume with coffee, is that with water-based PVA binder? What lume tints work well with solvent-based mediums?1 point
-
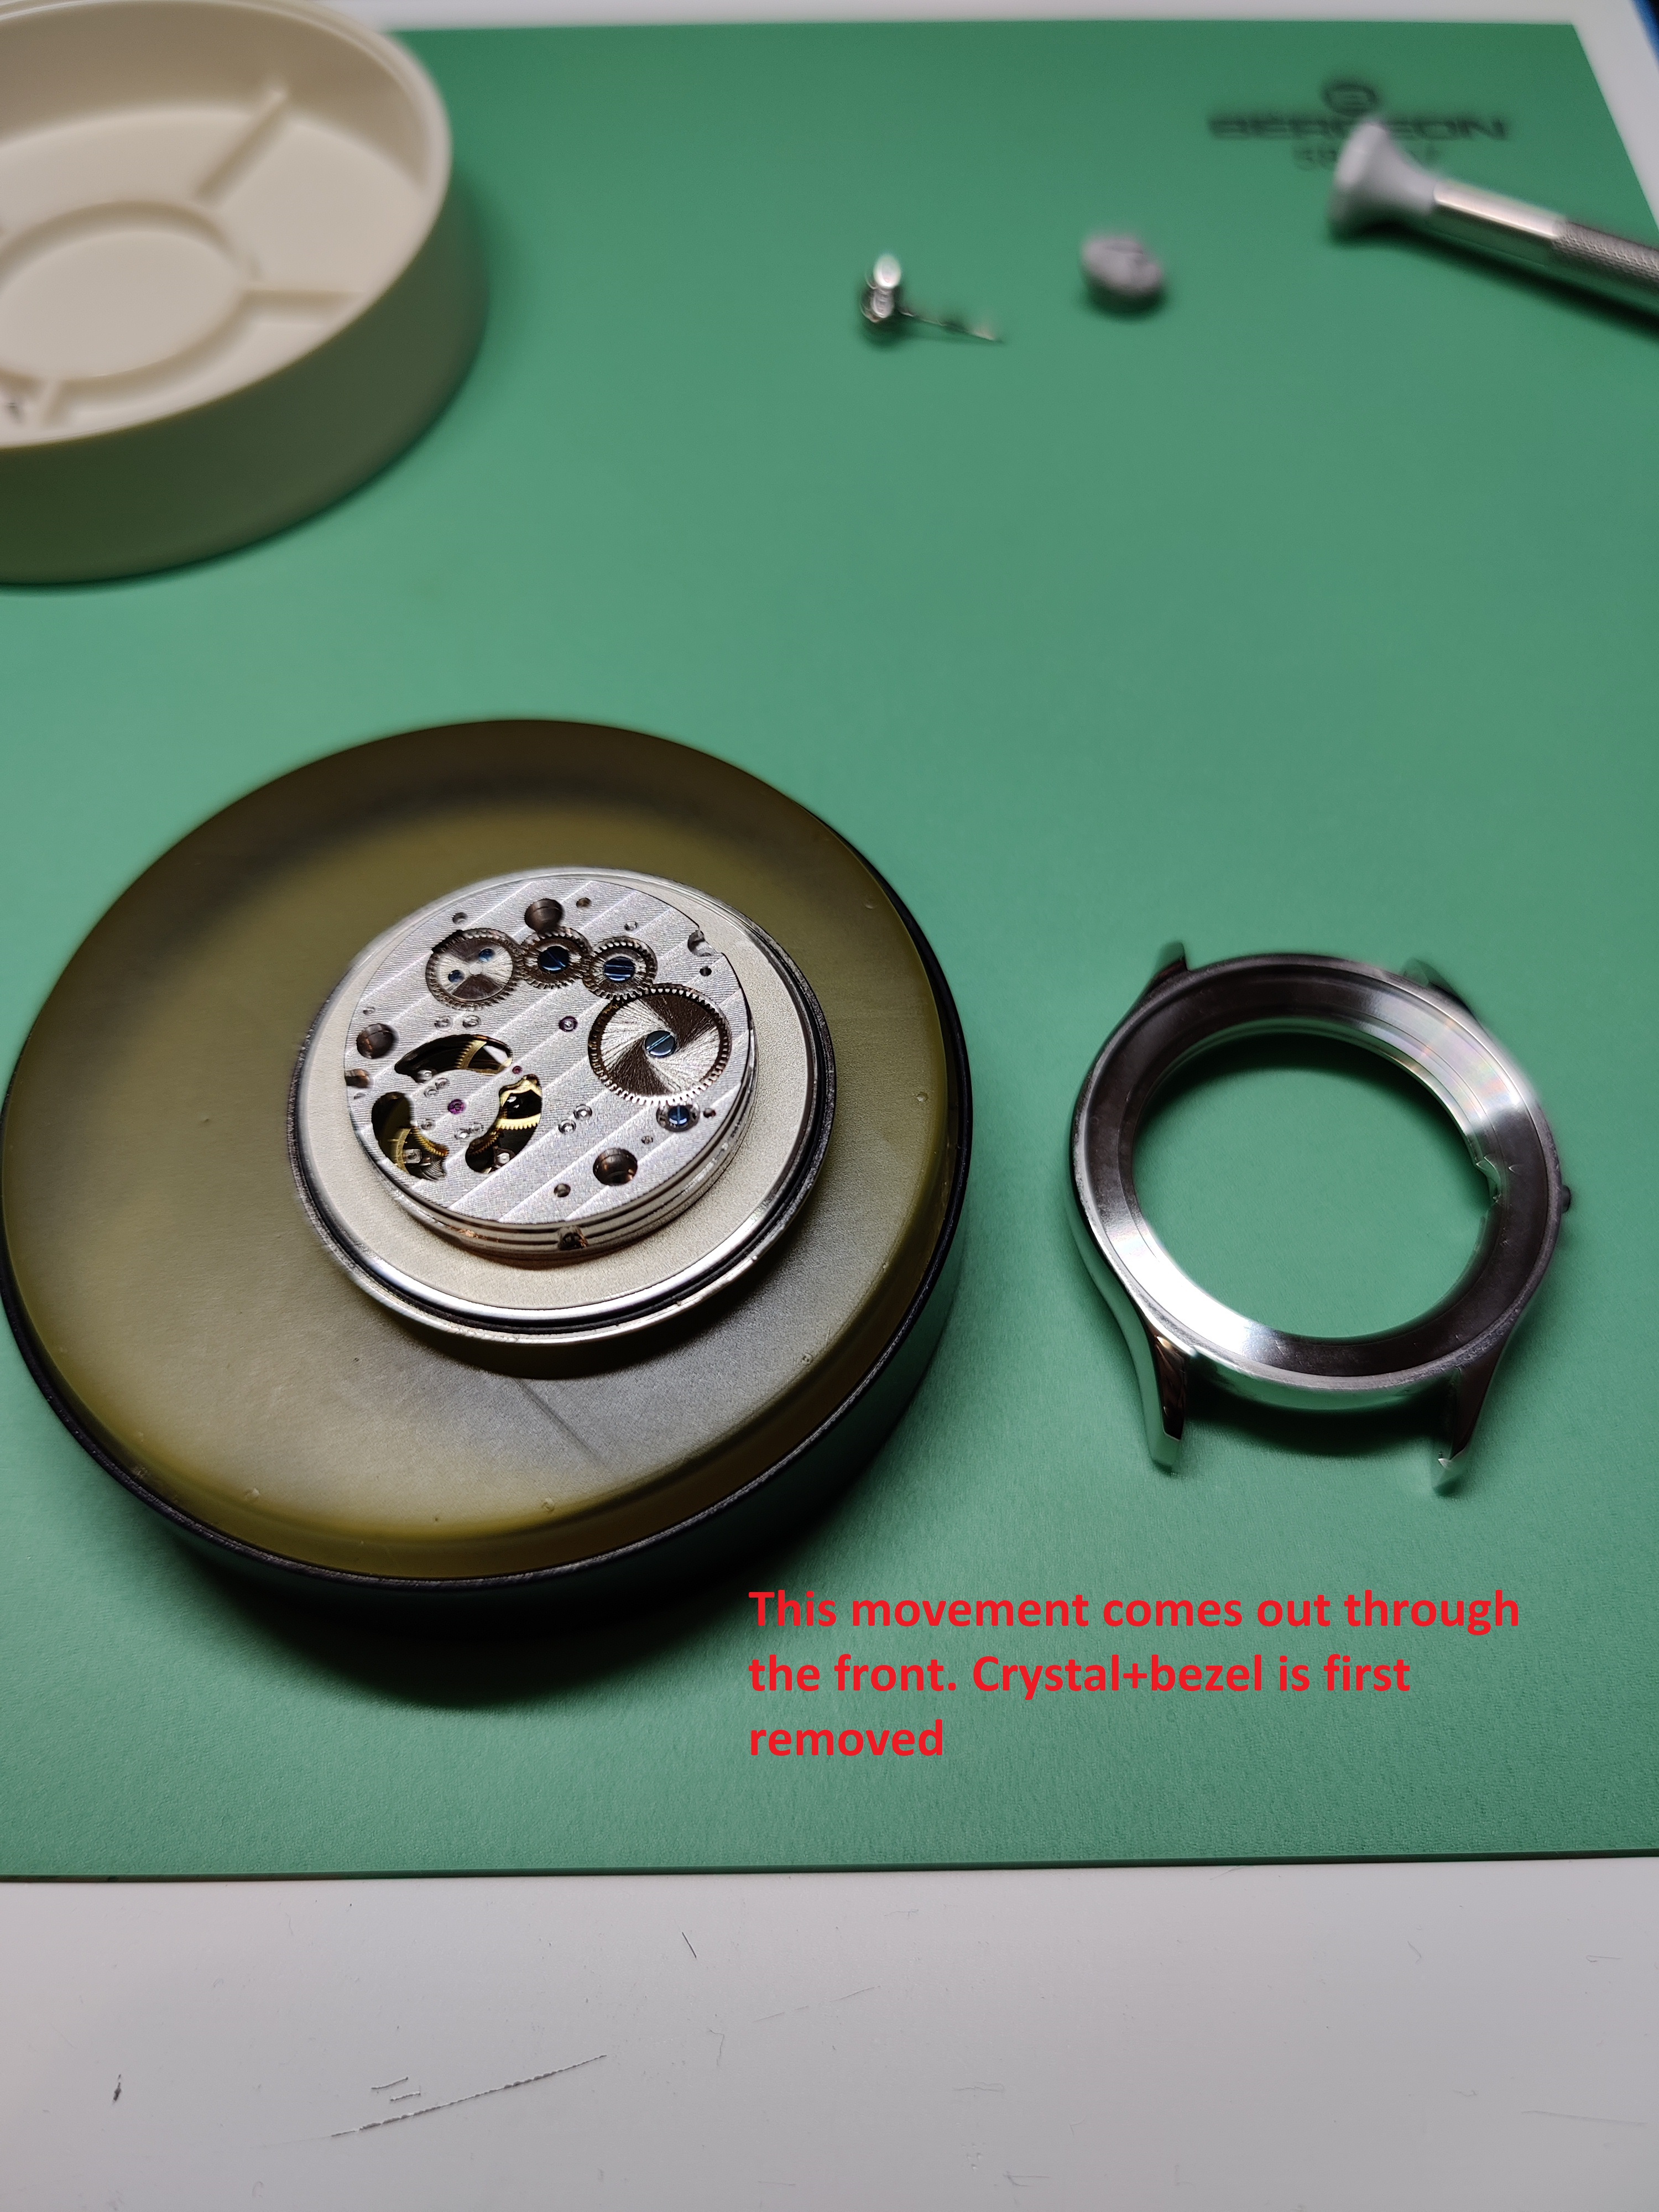
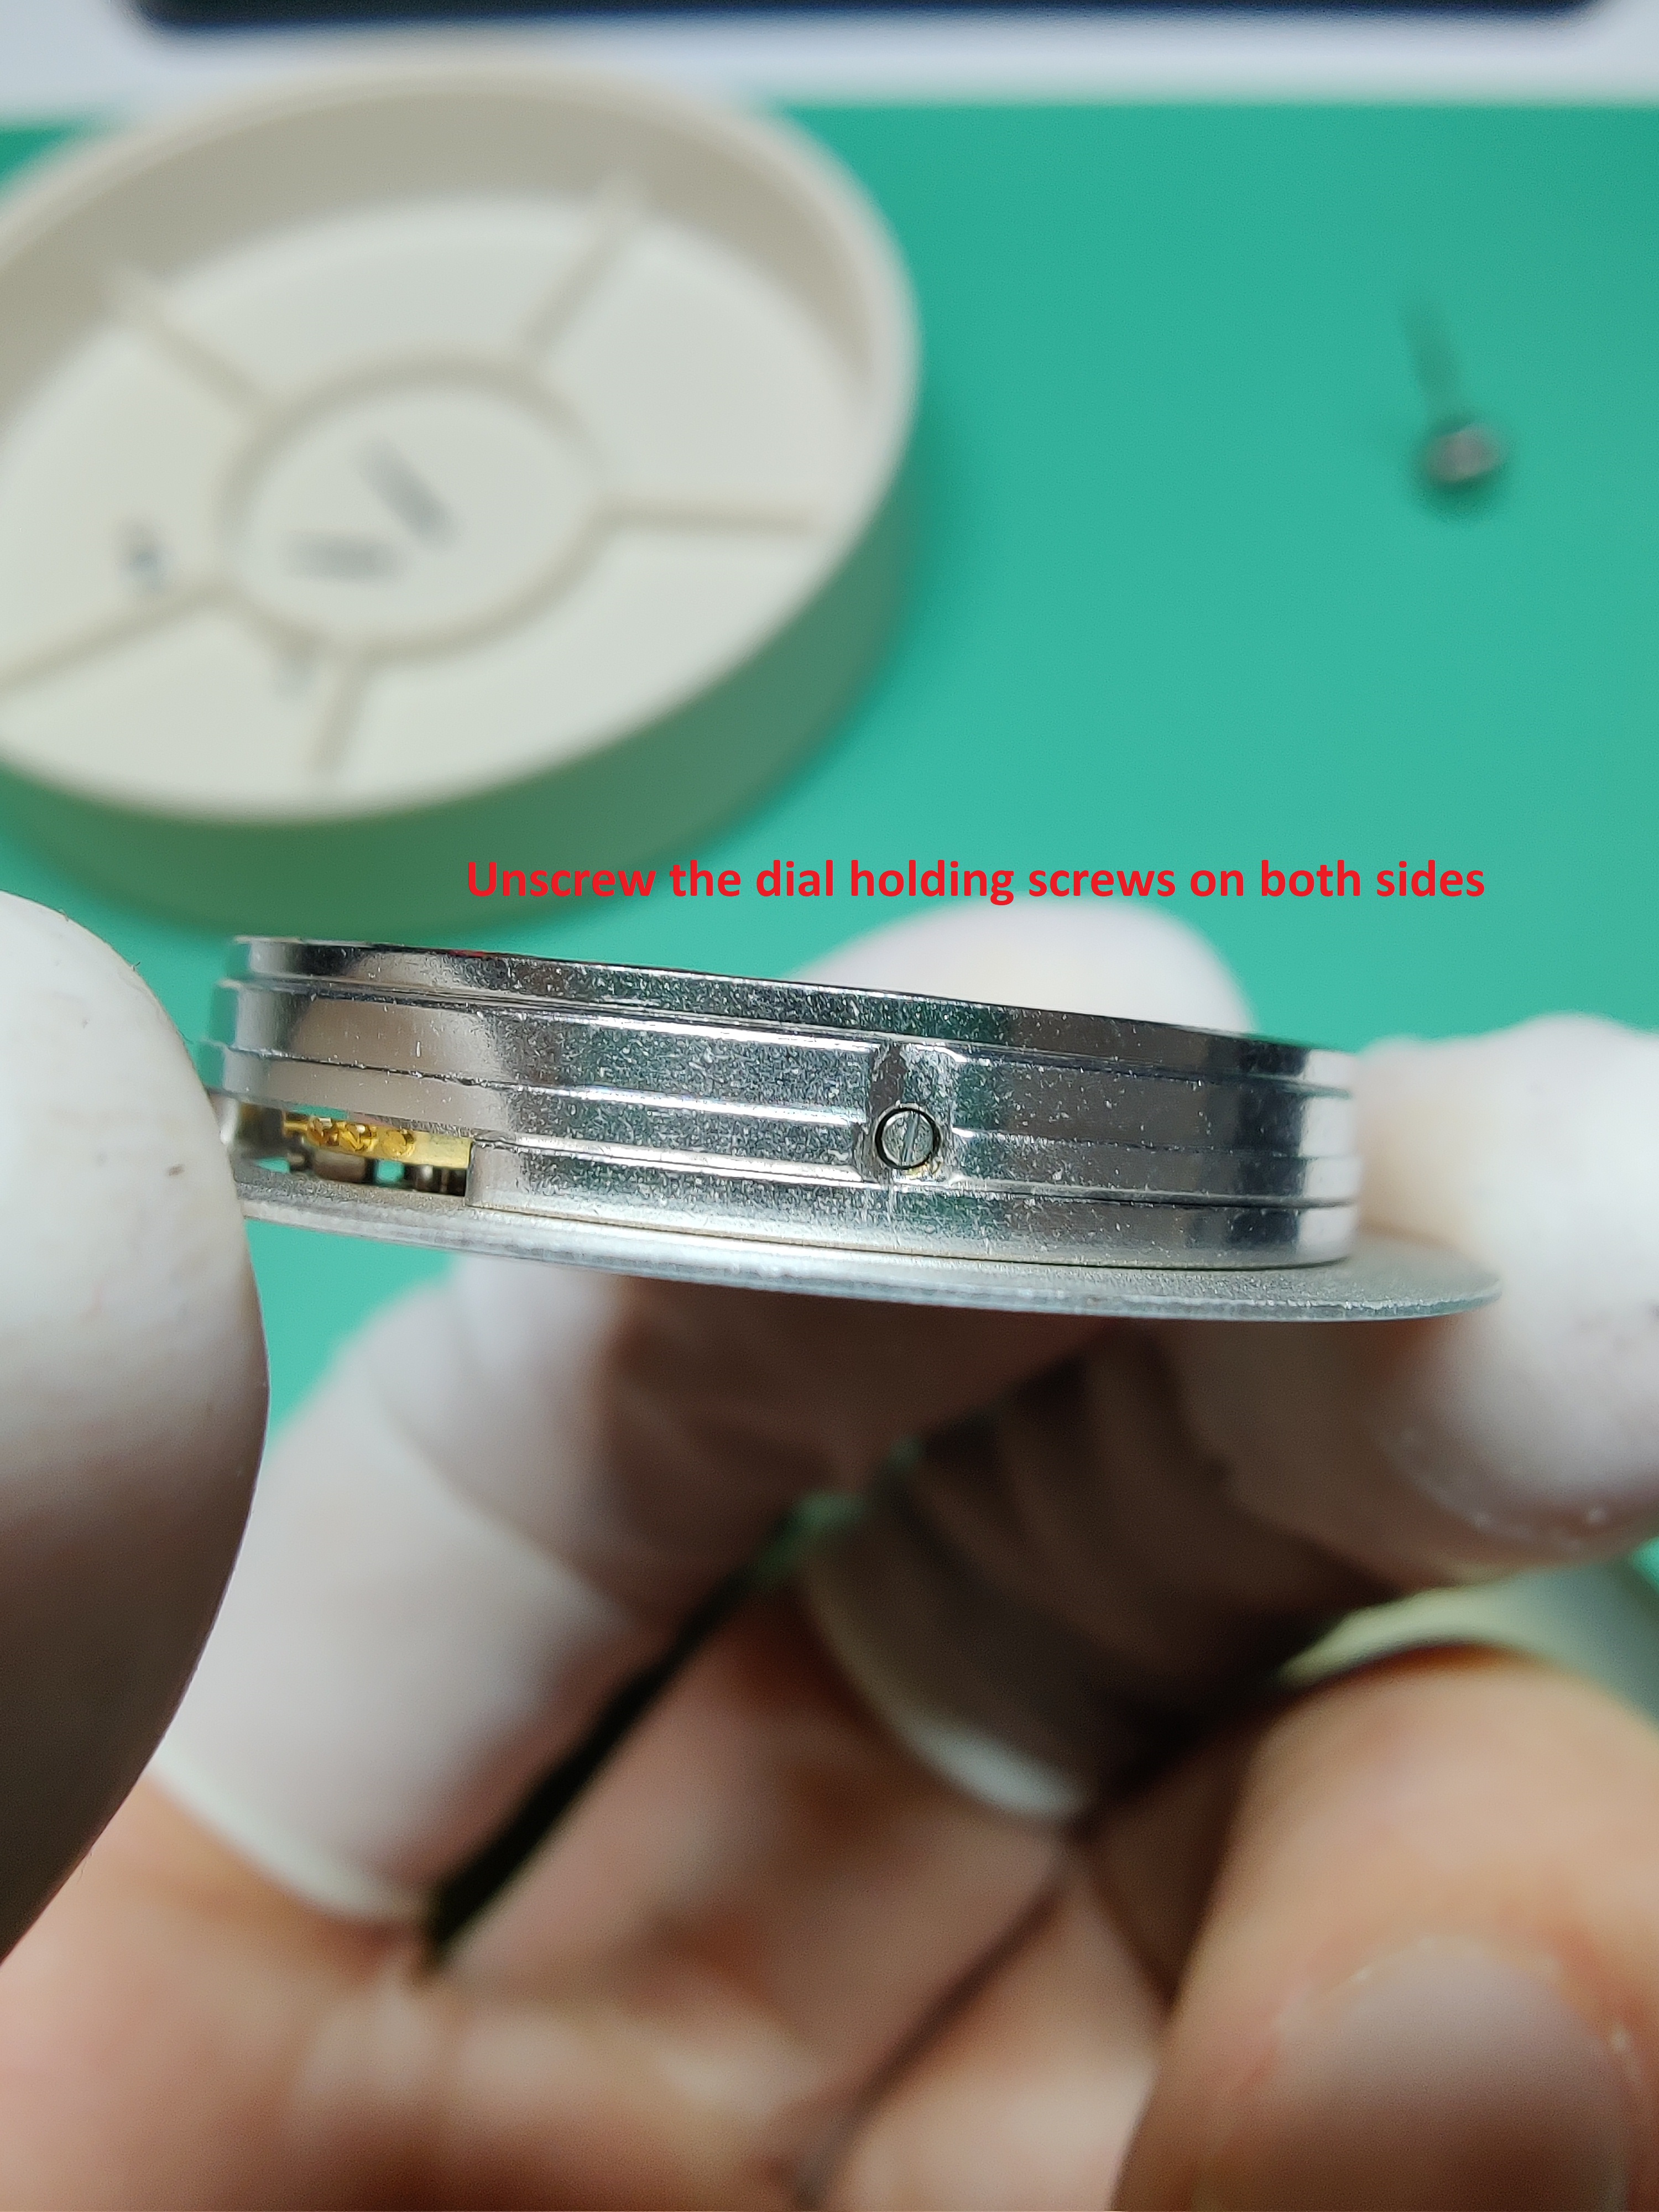
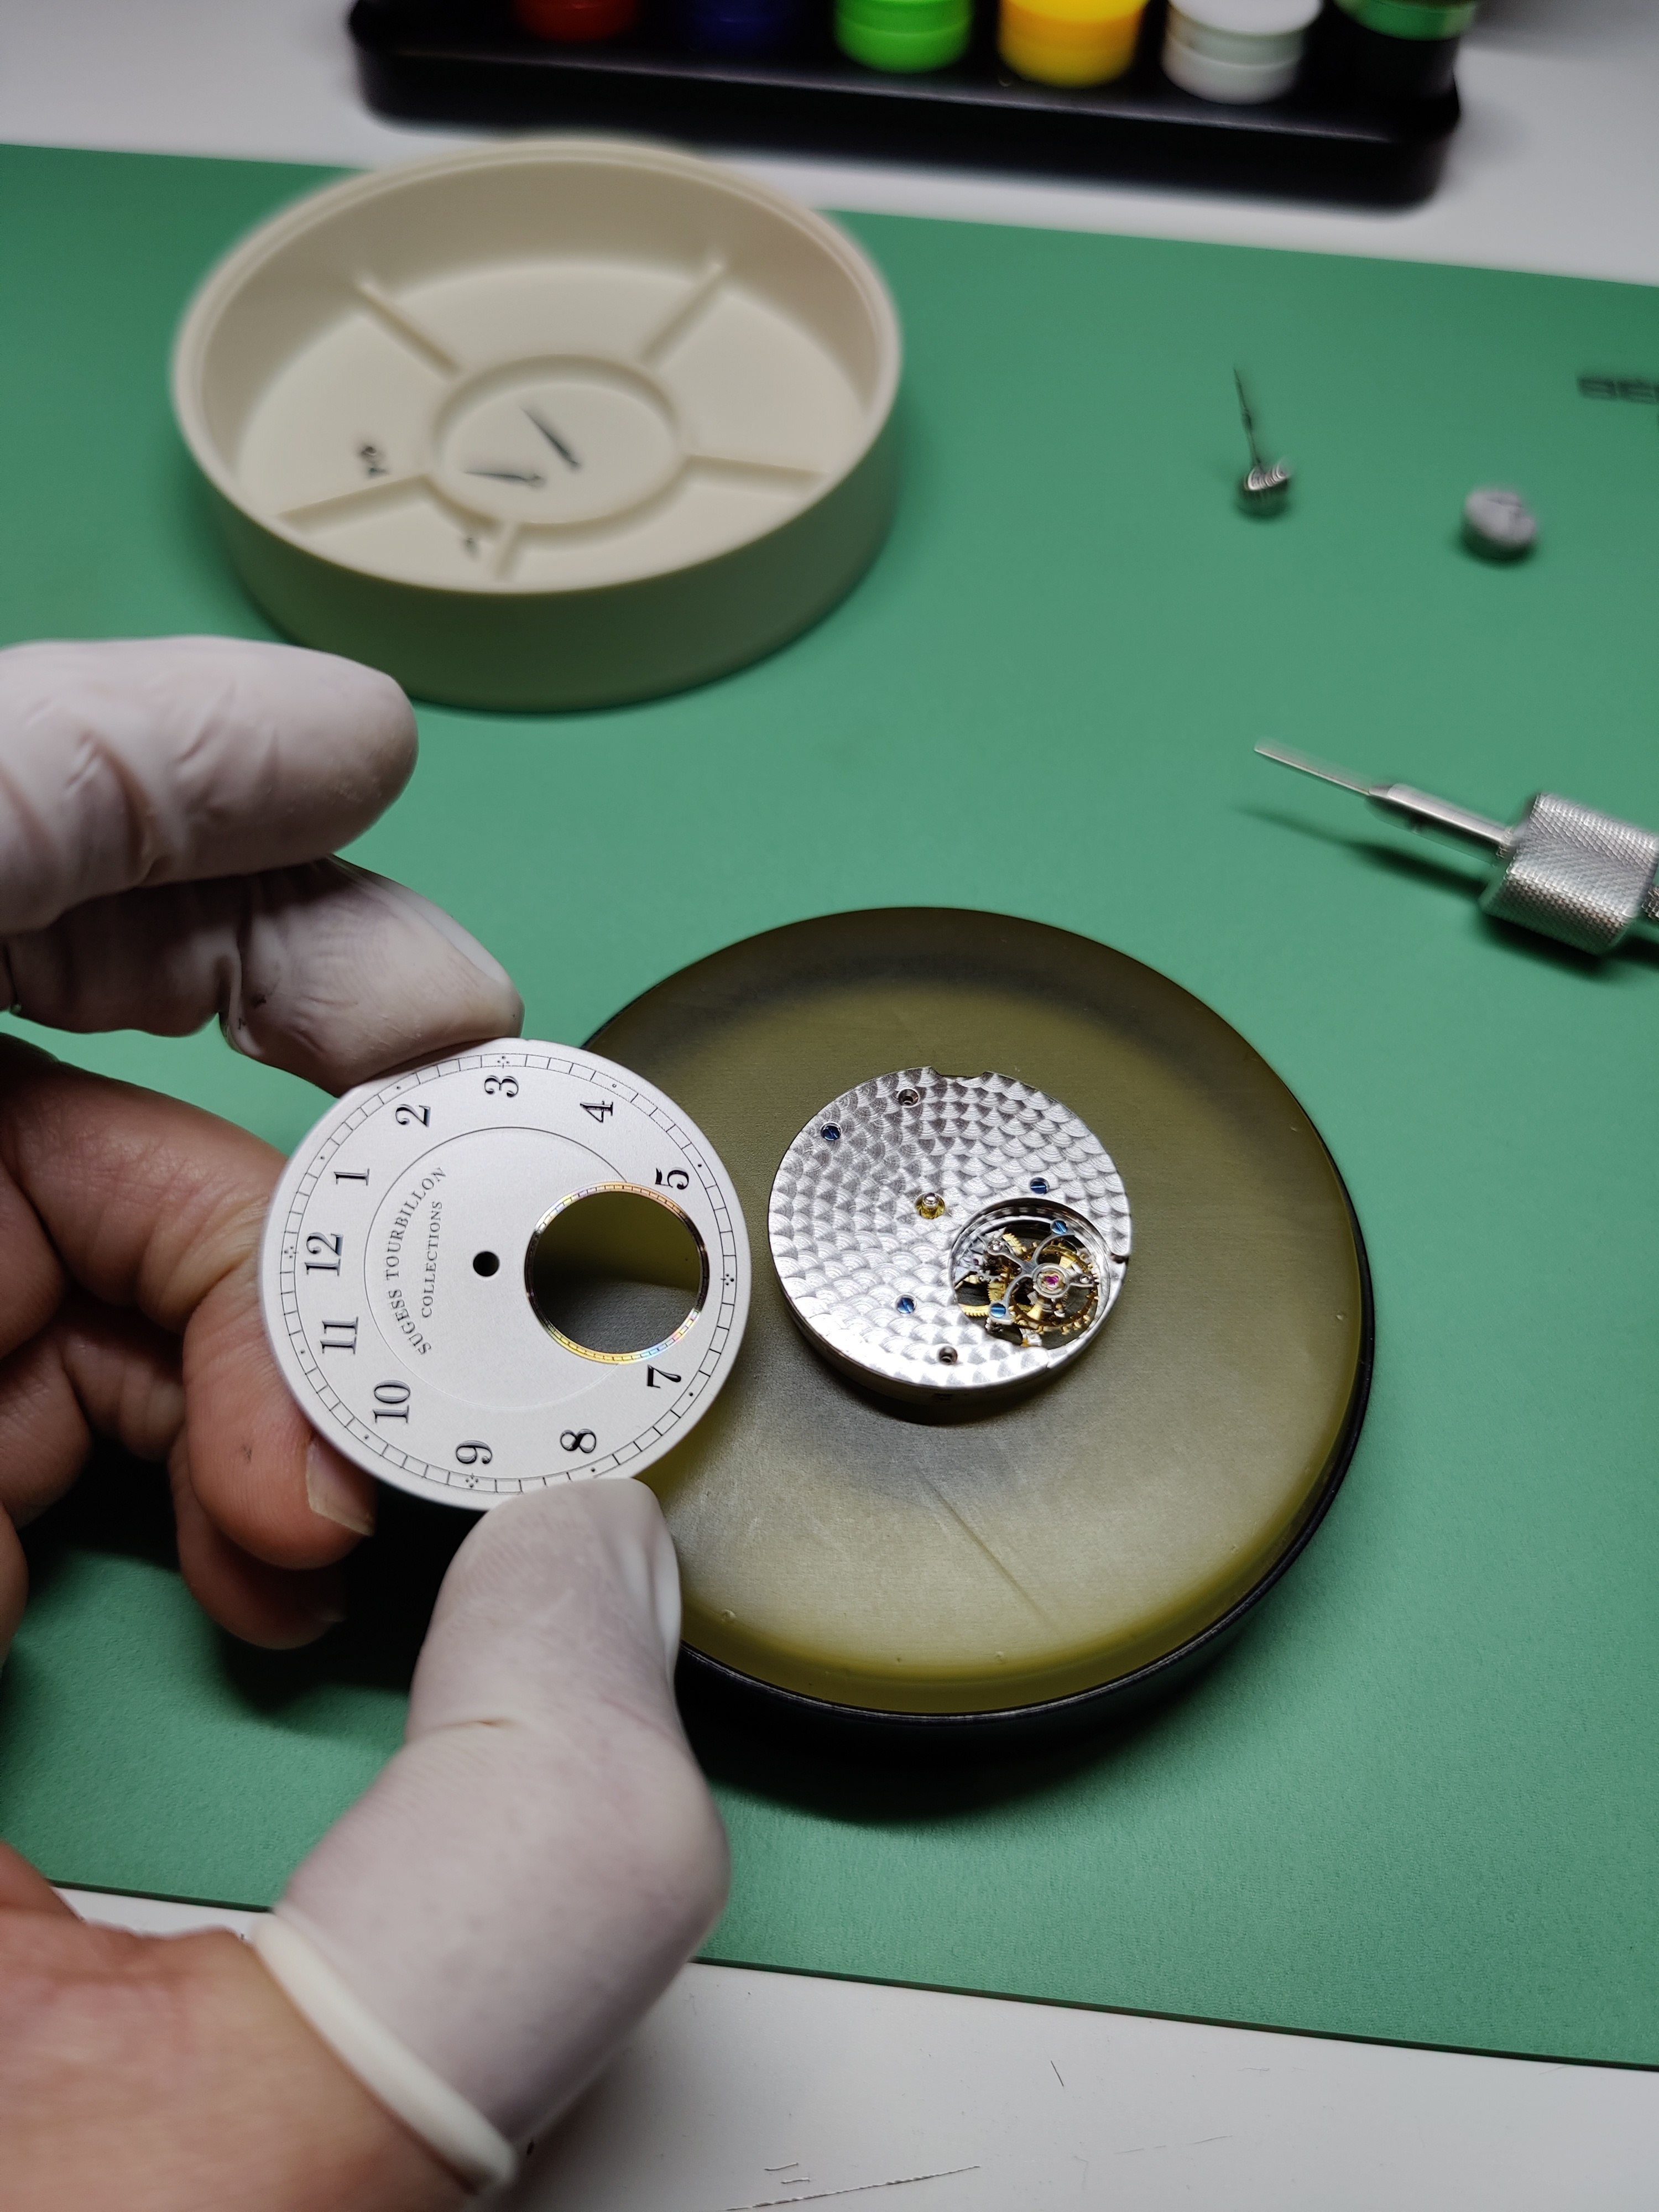
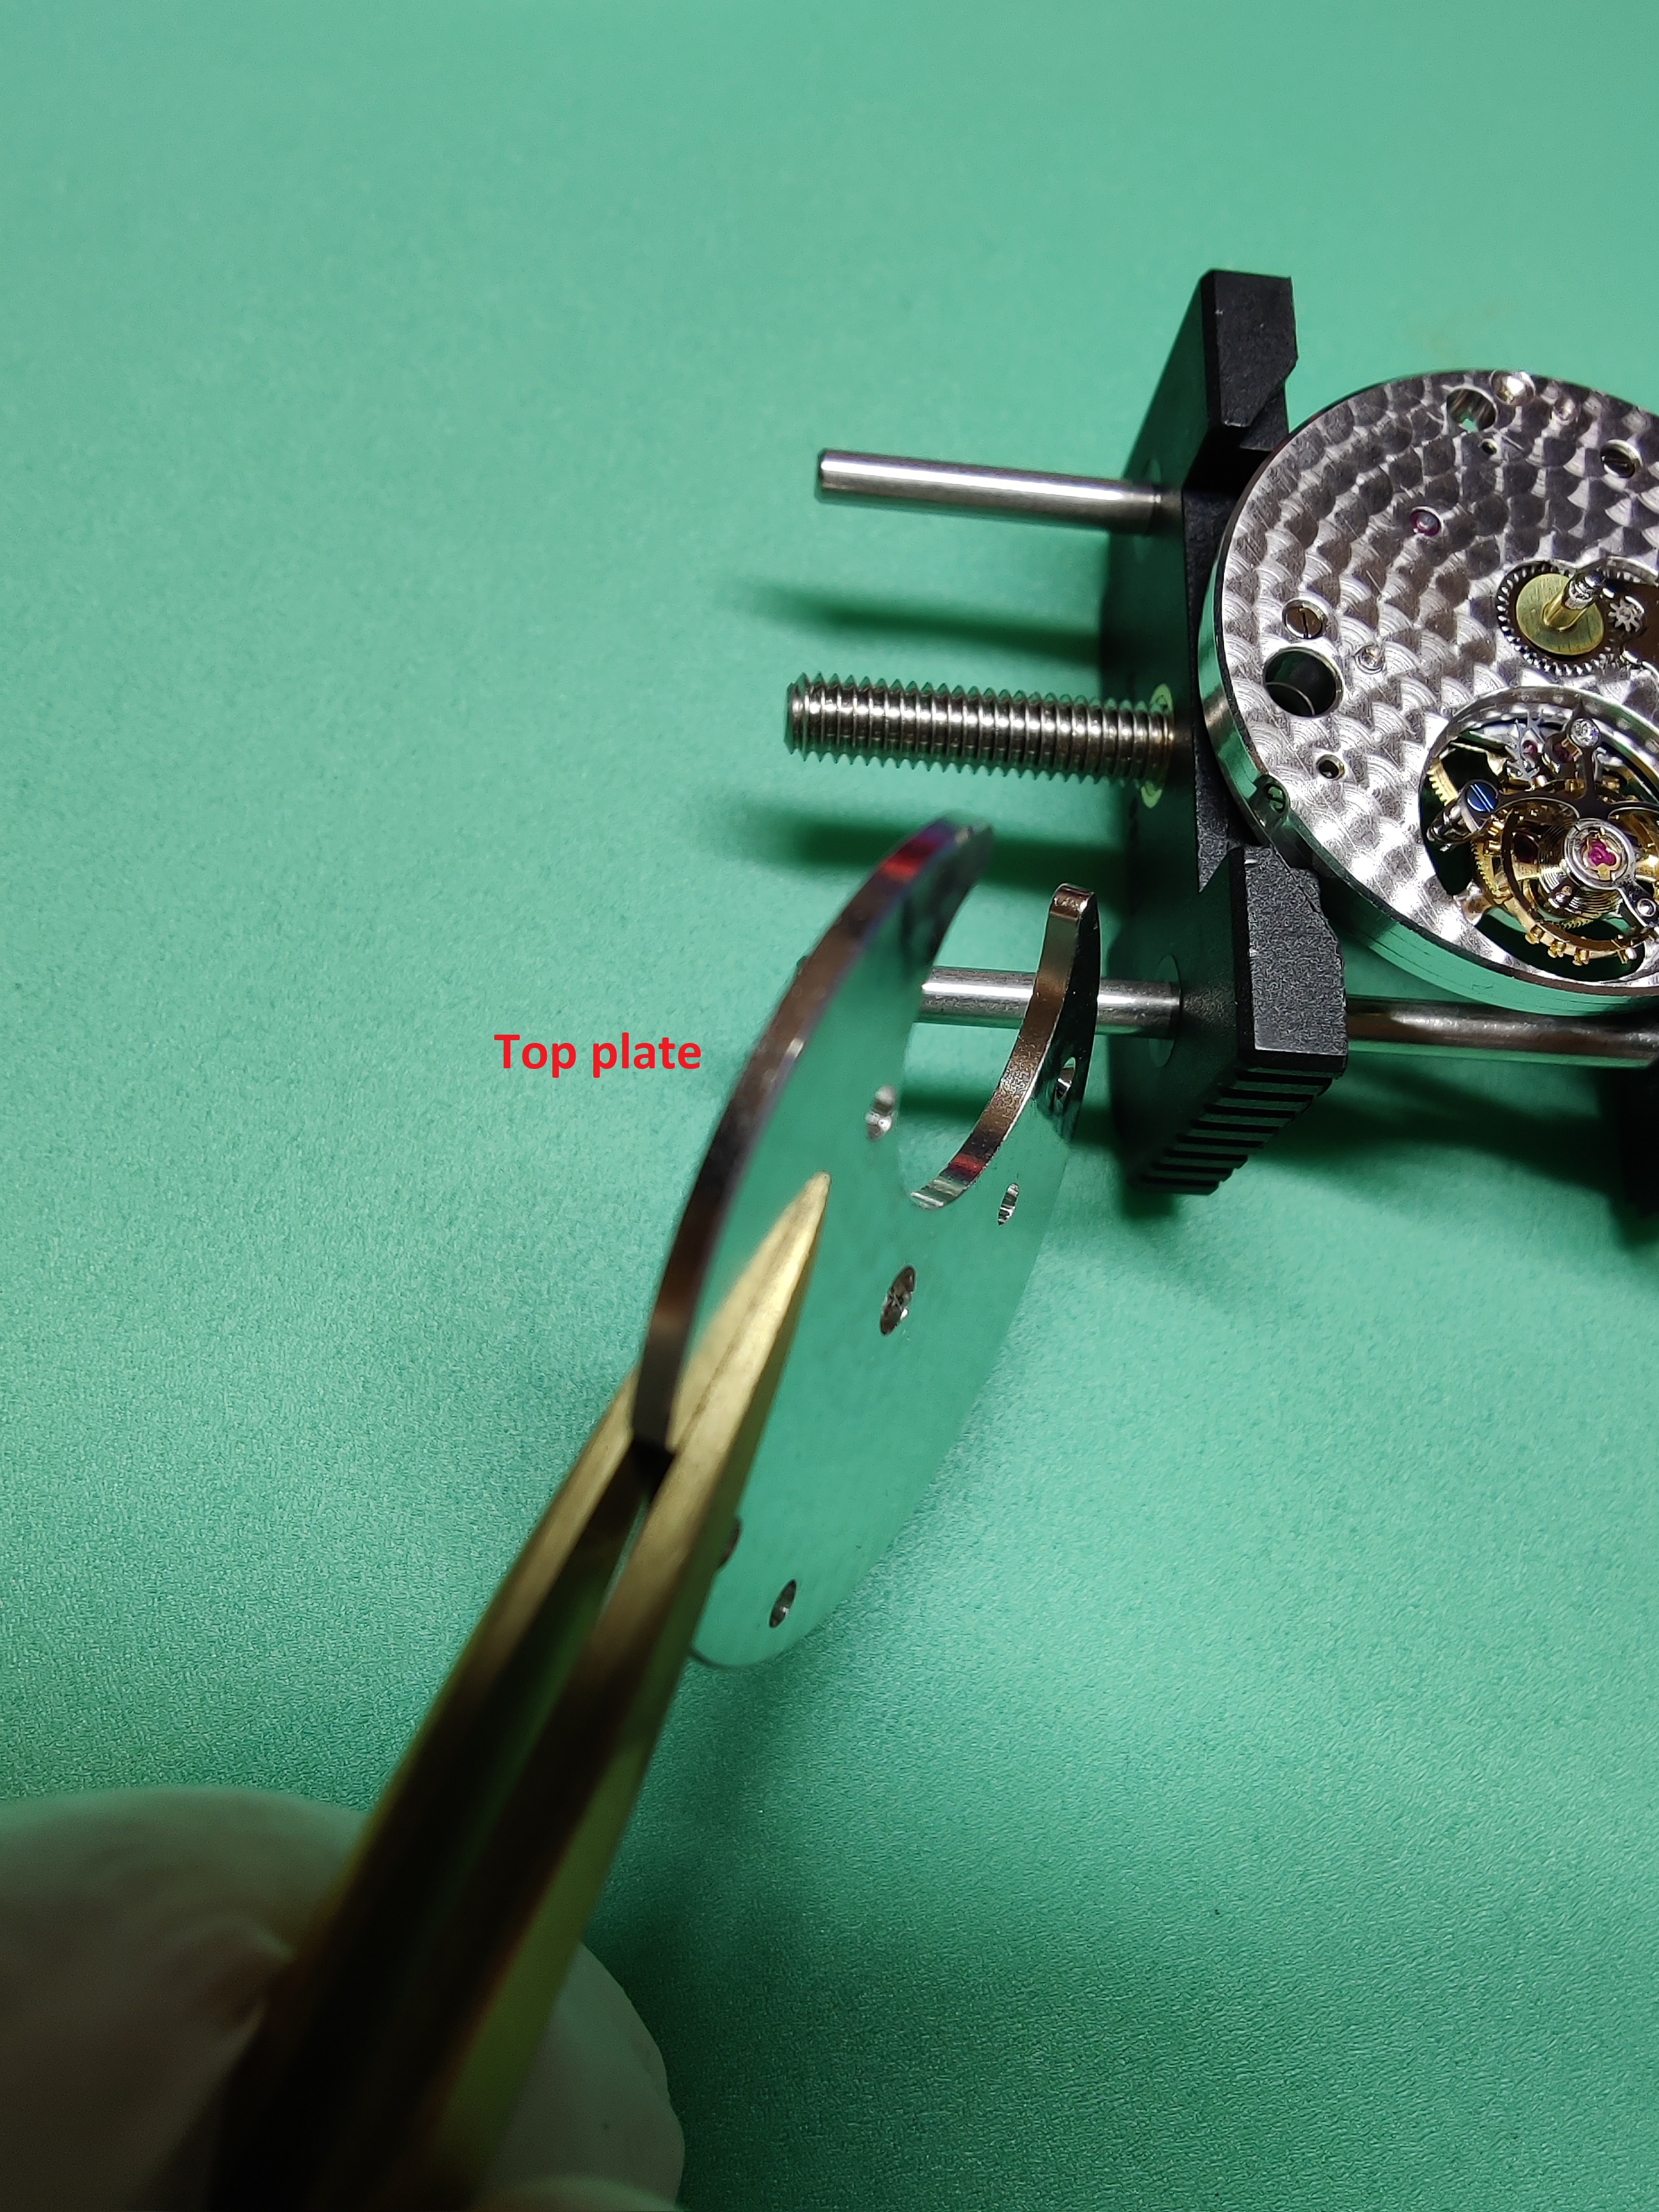
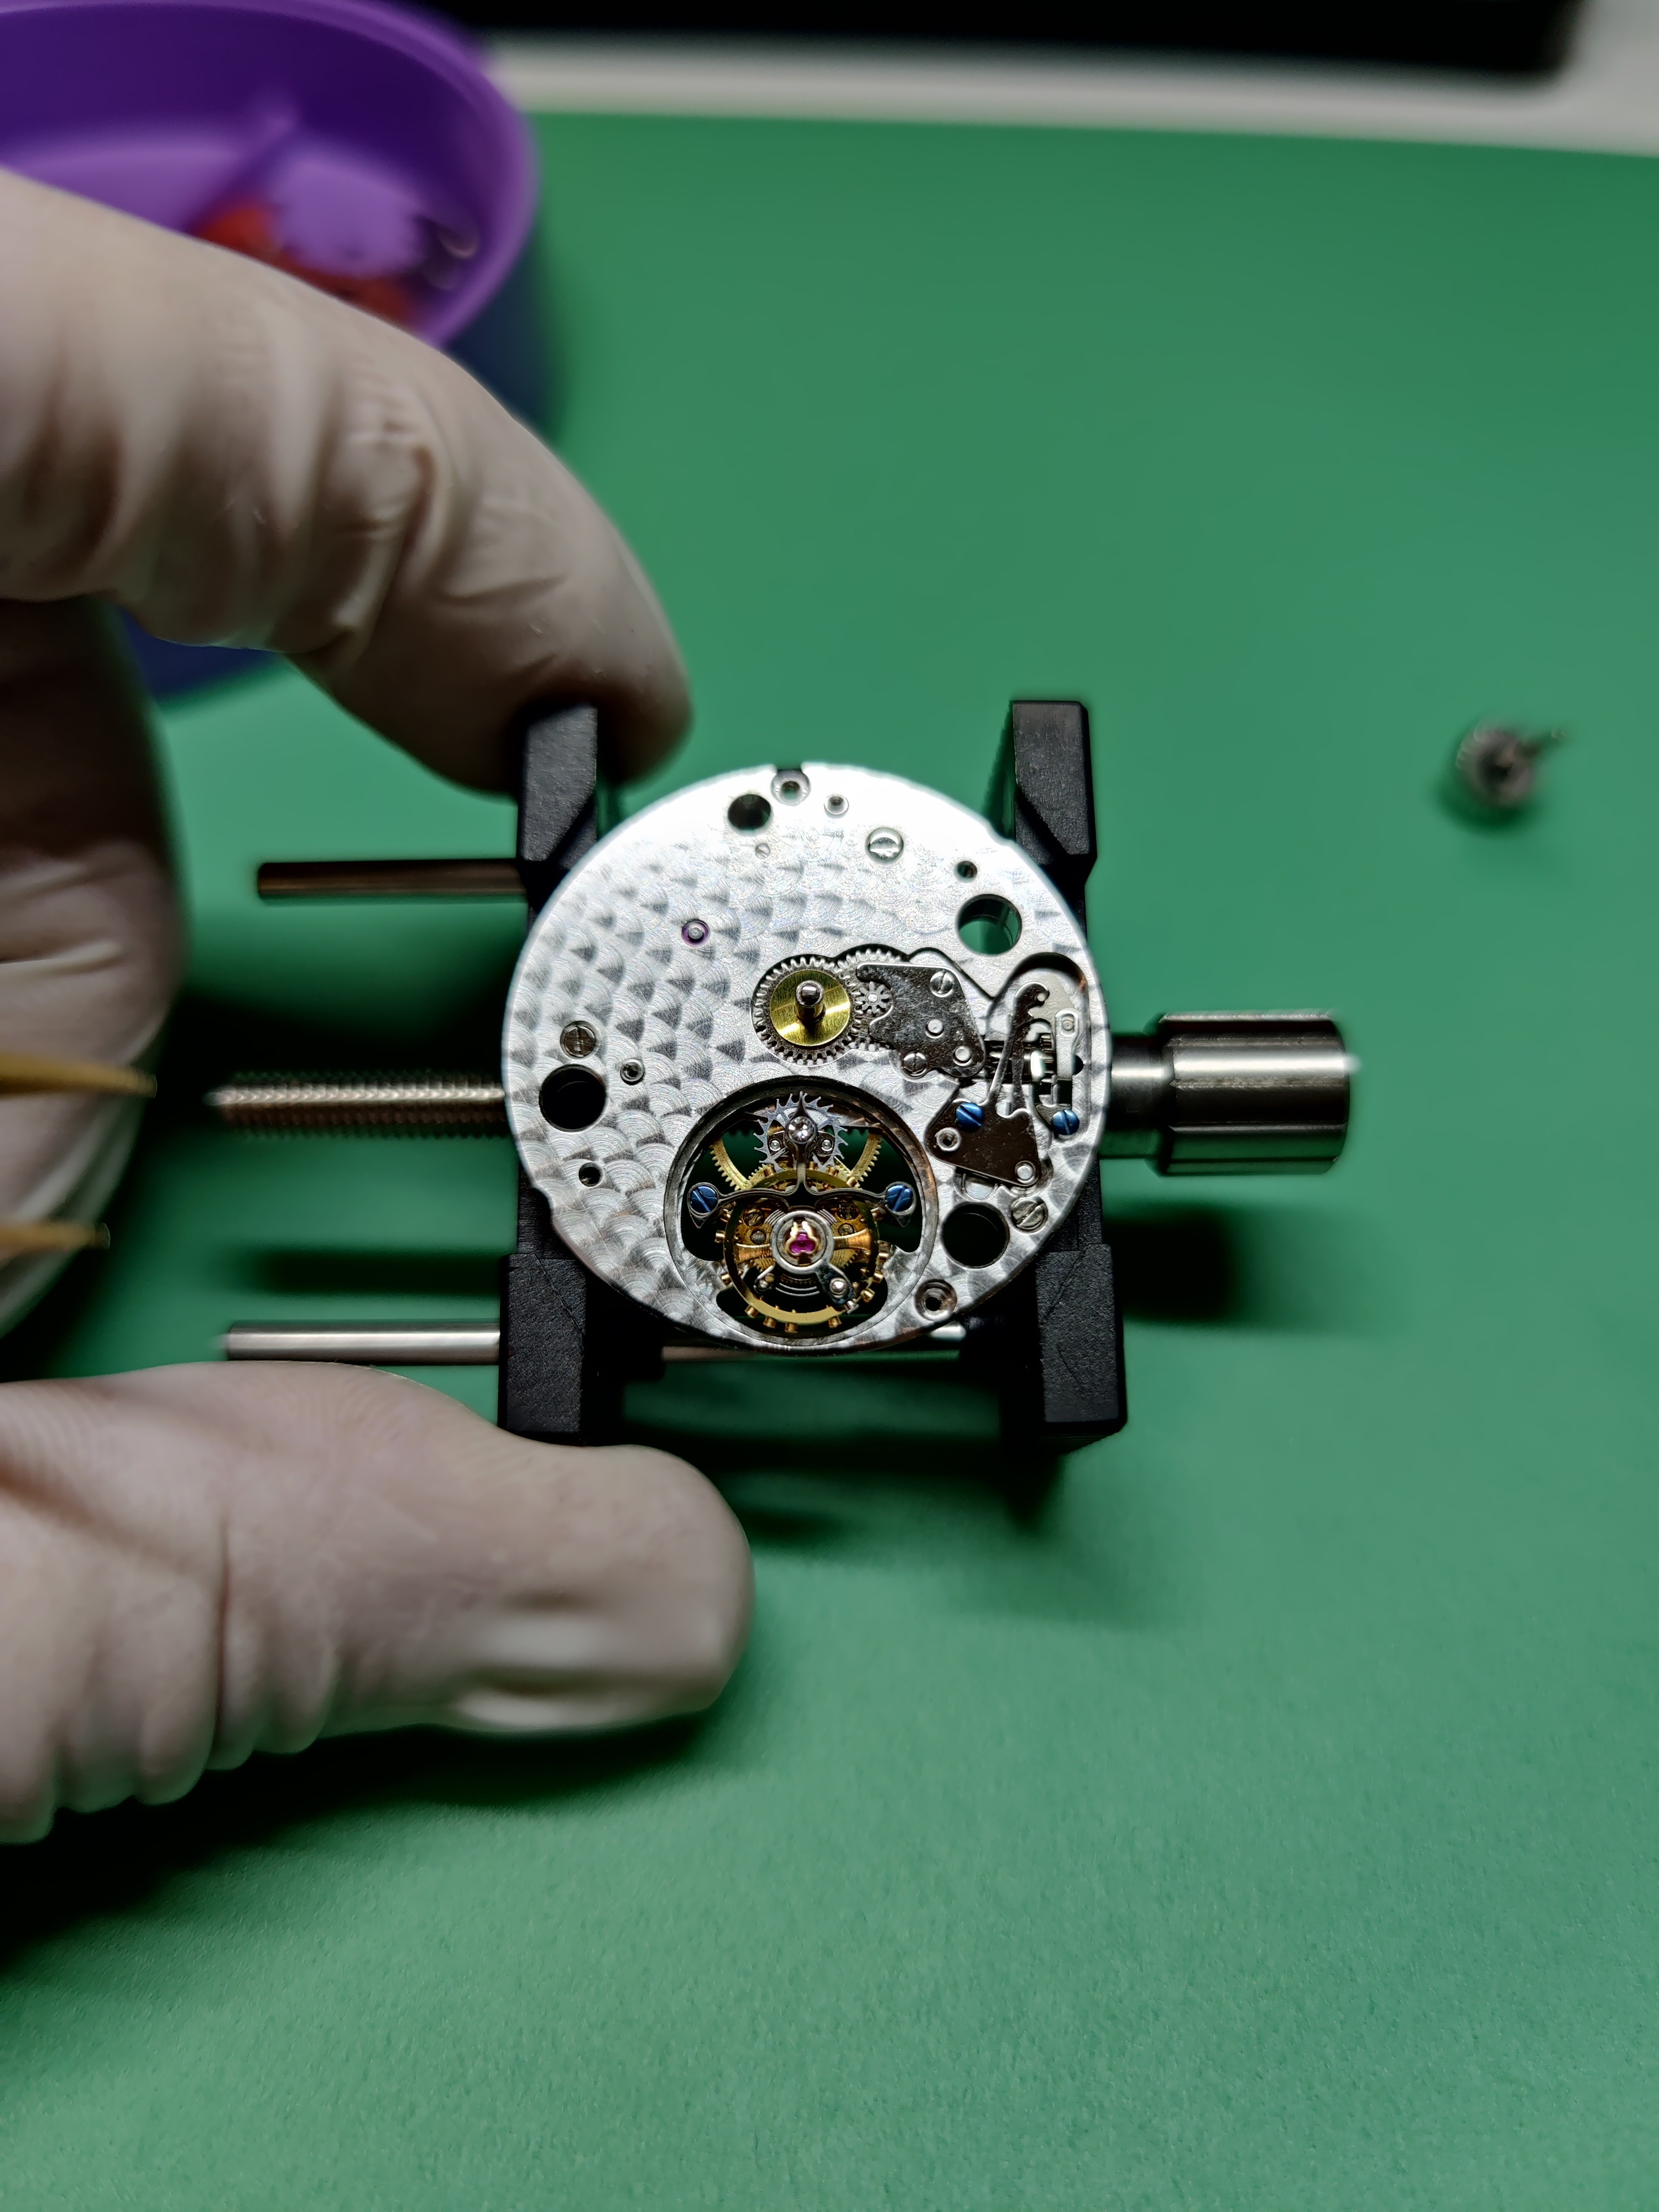
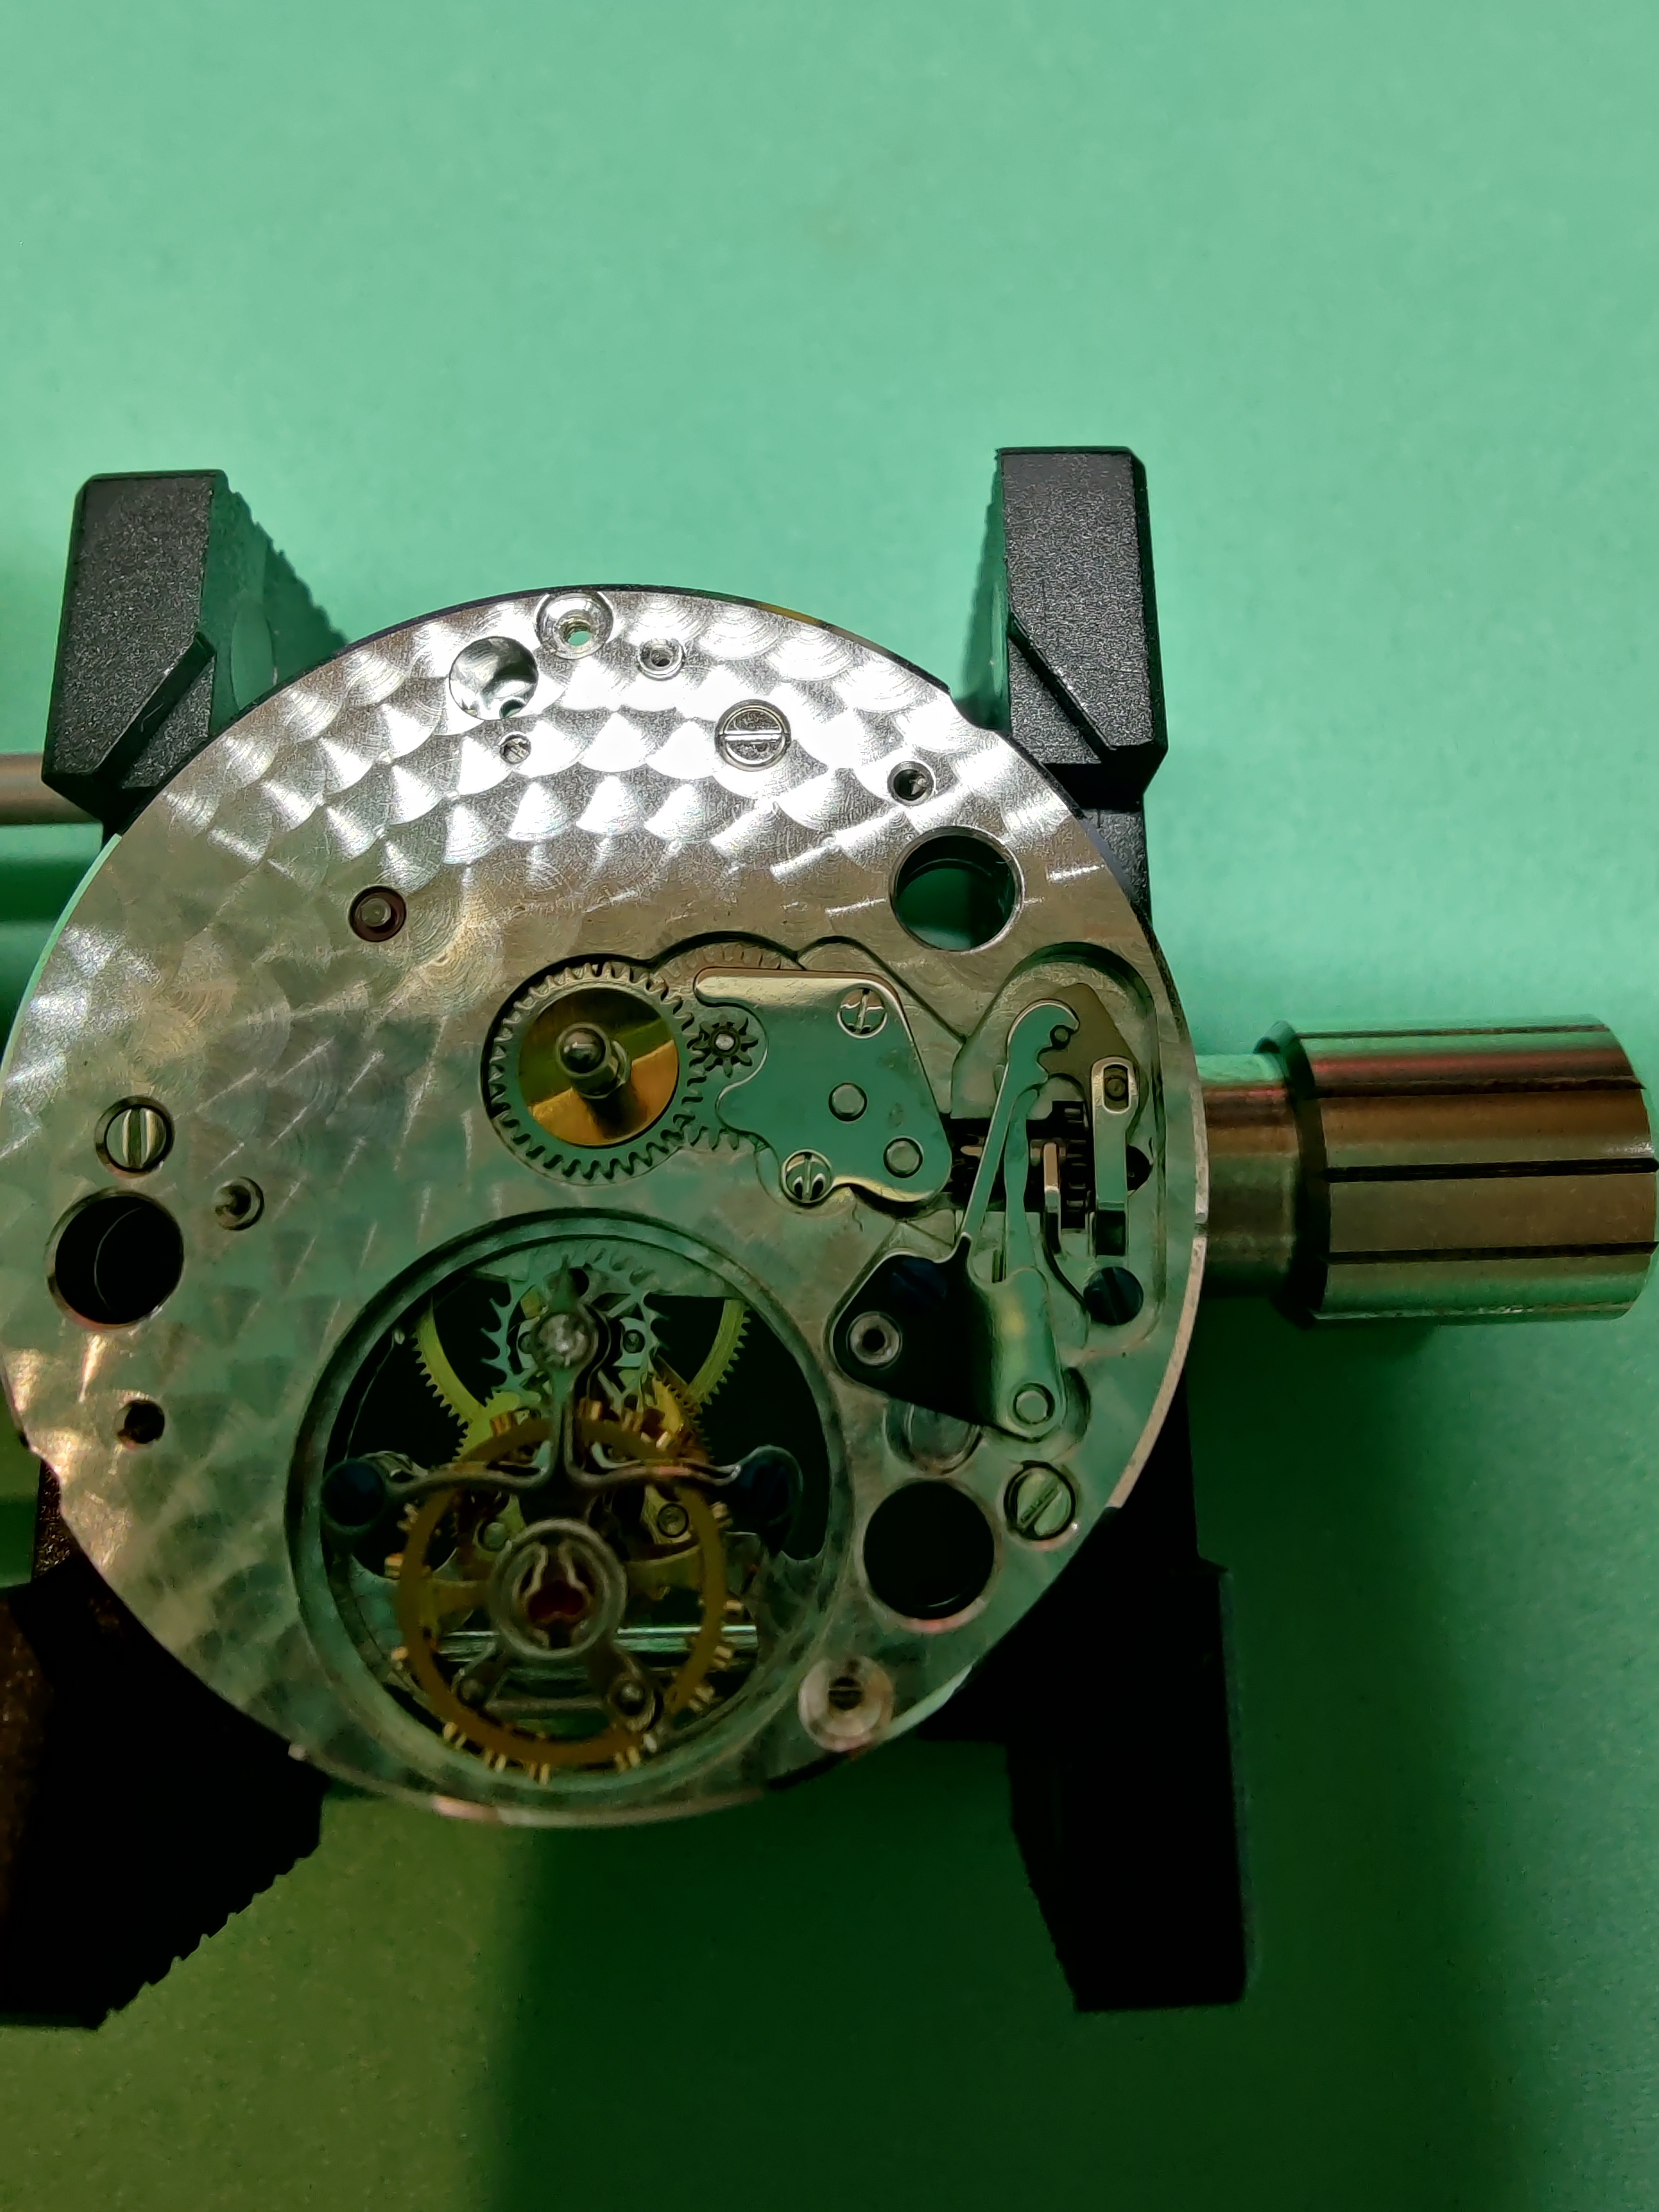
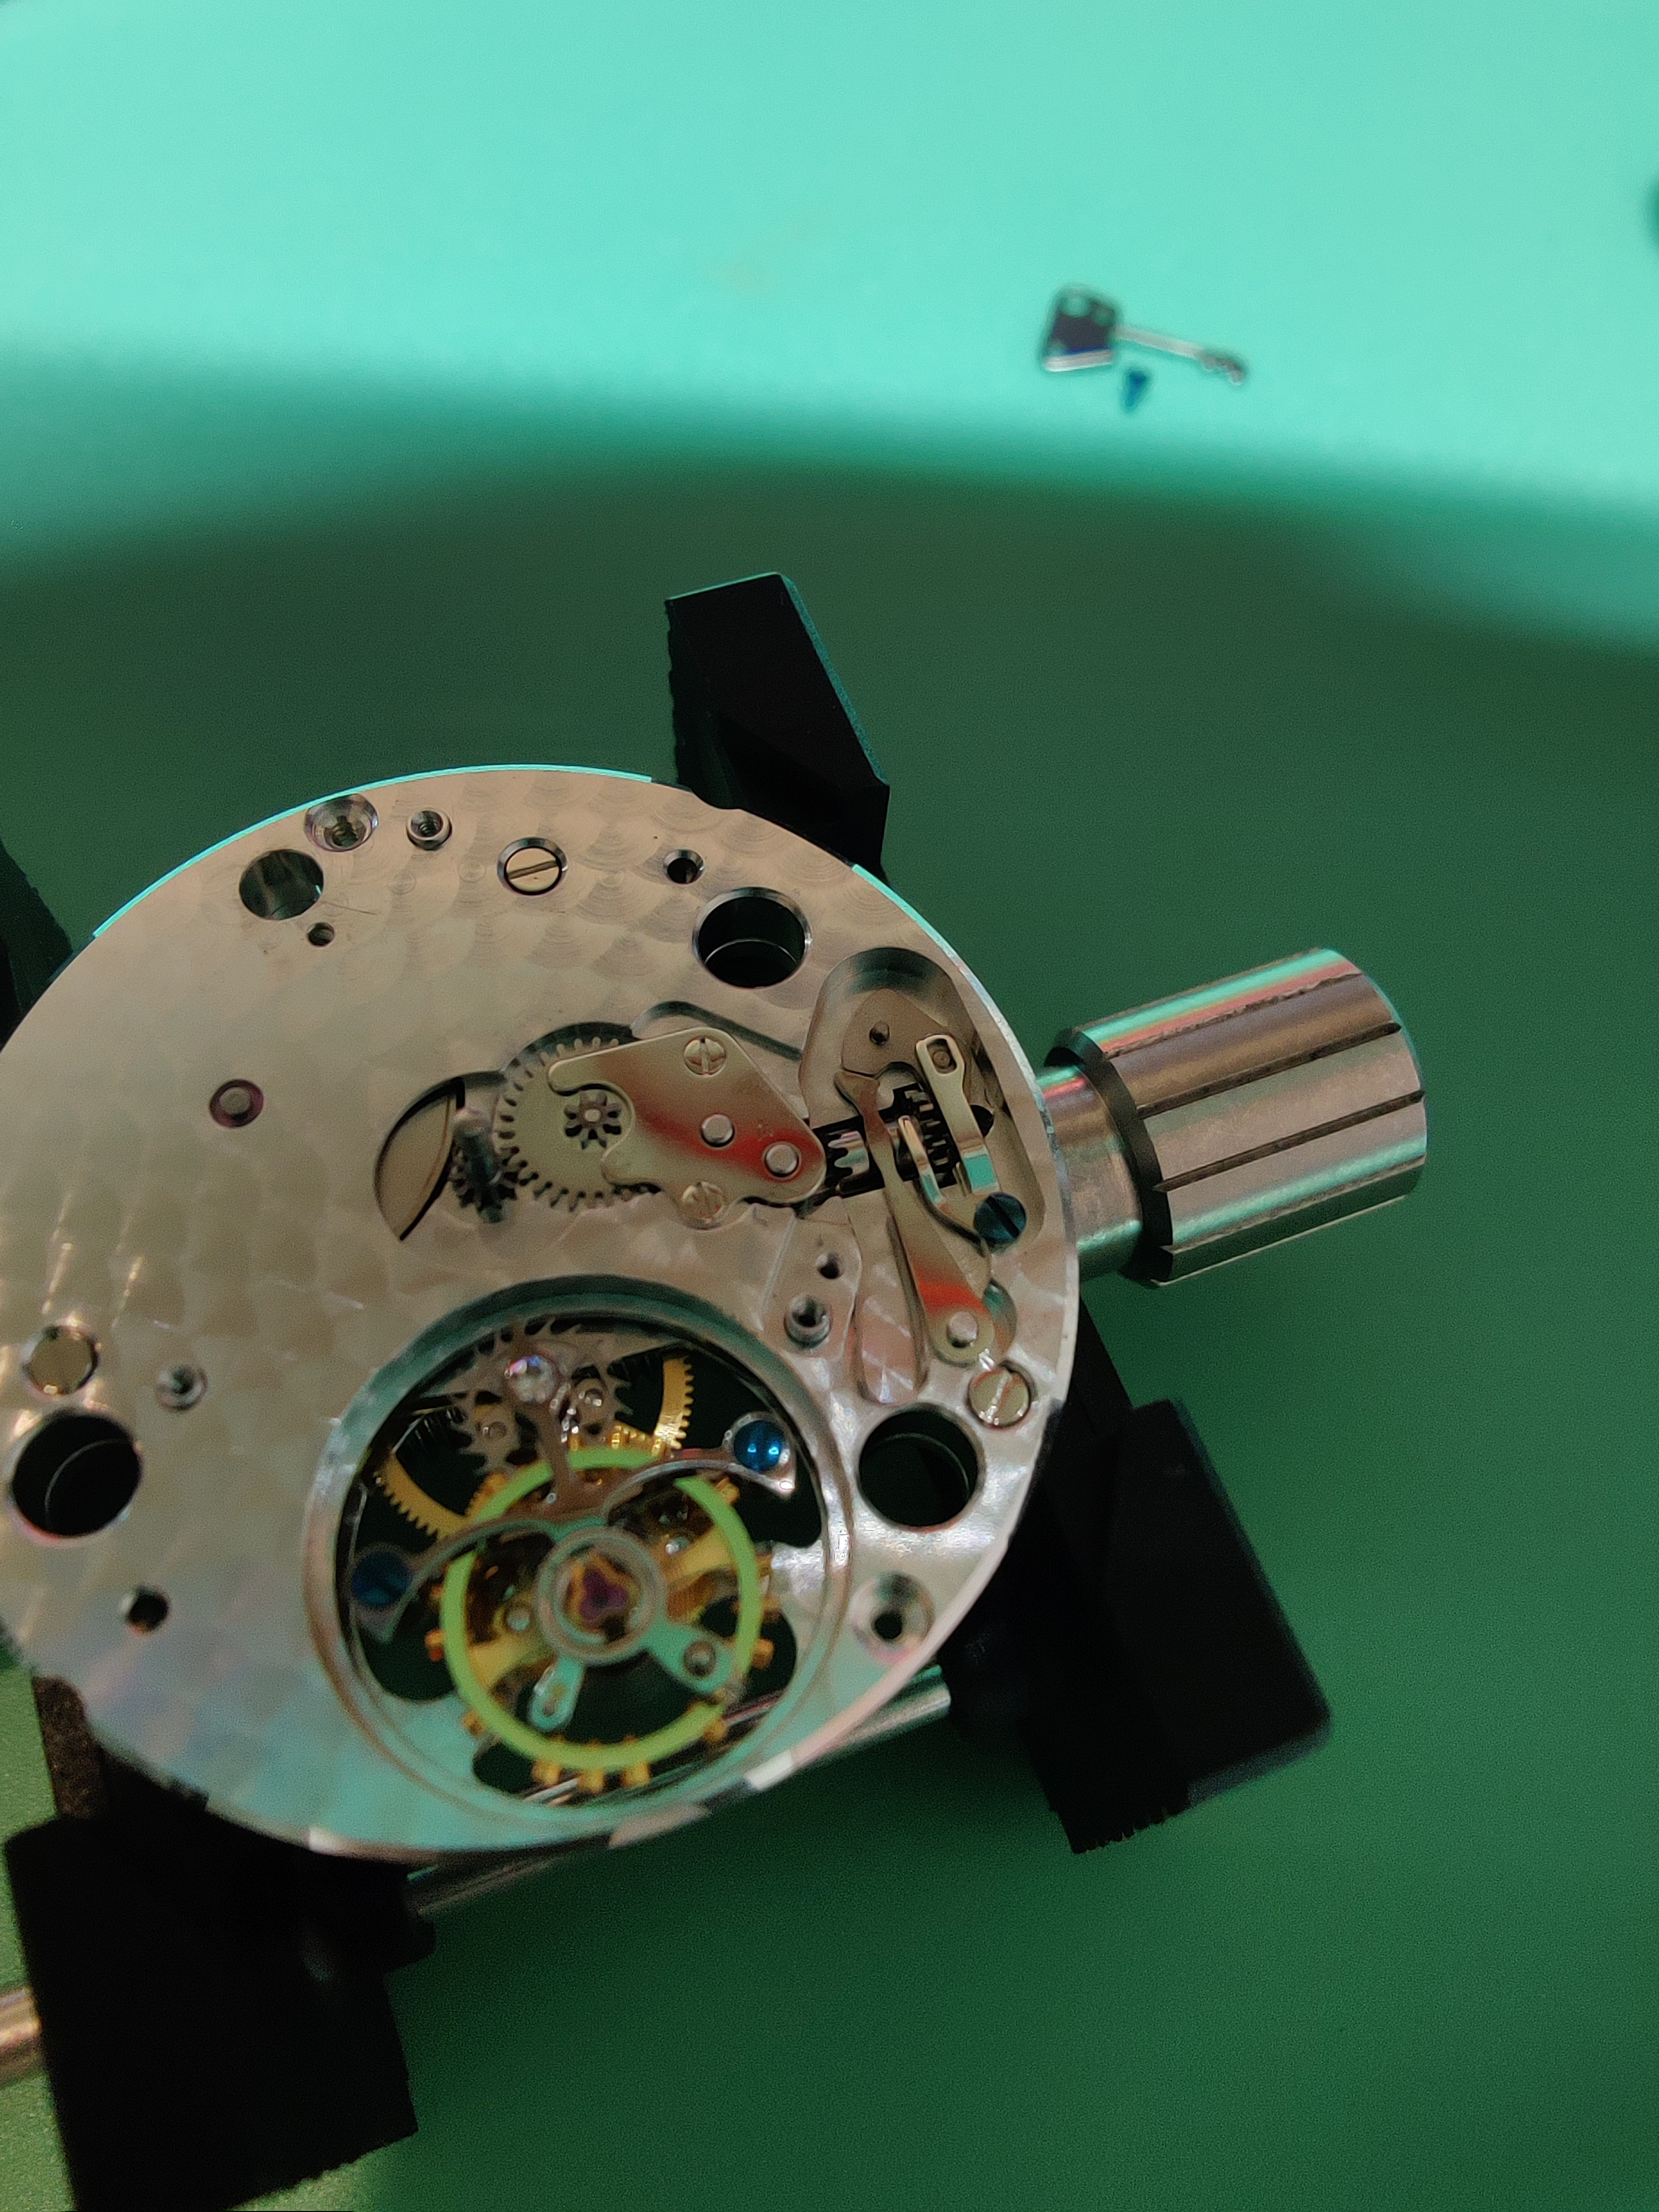
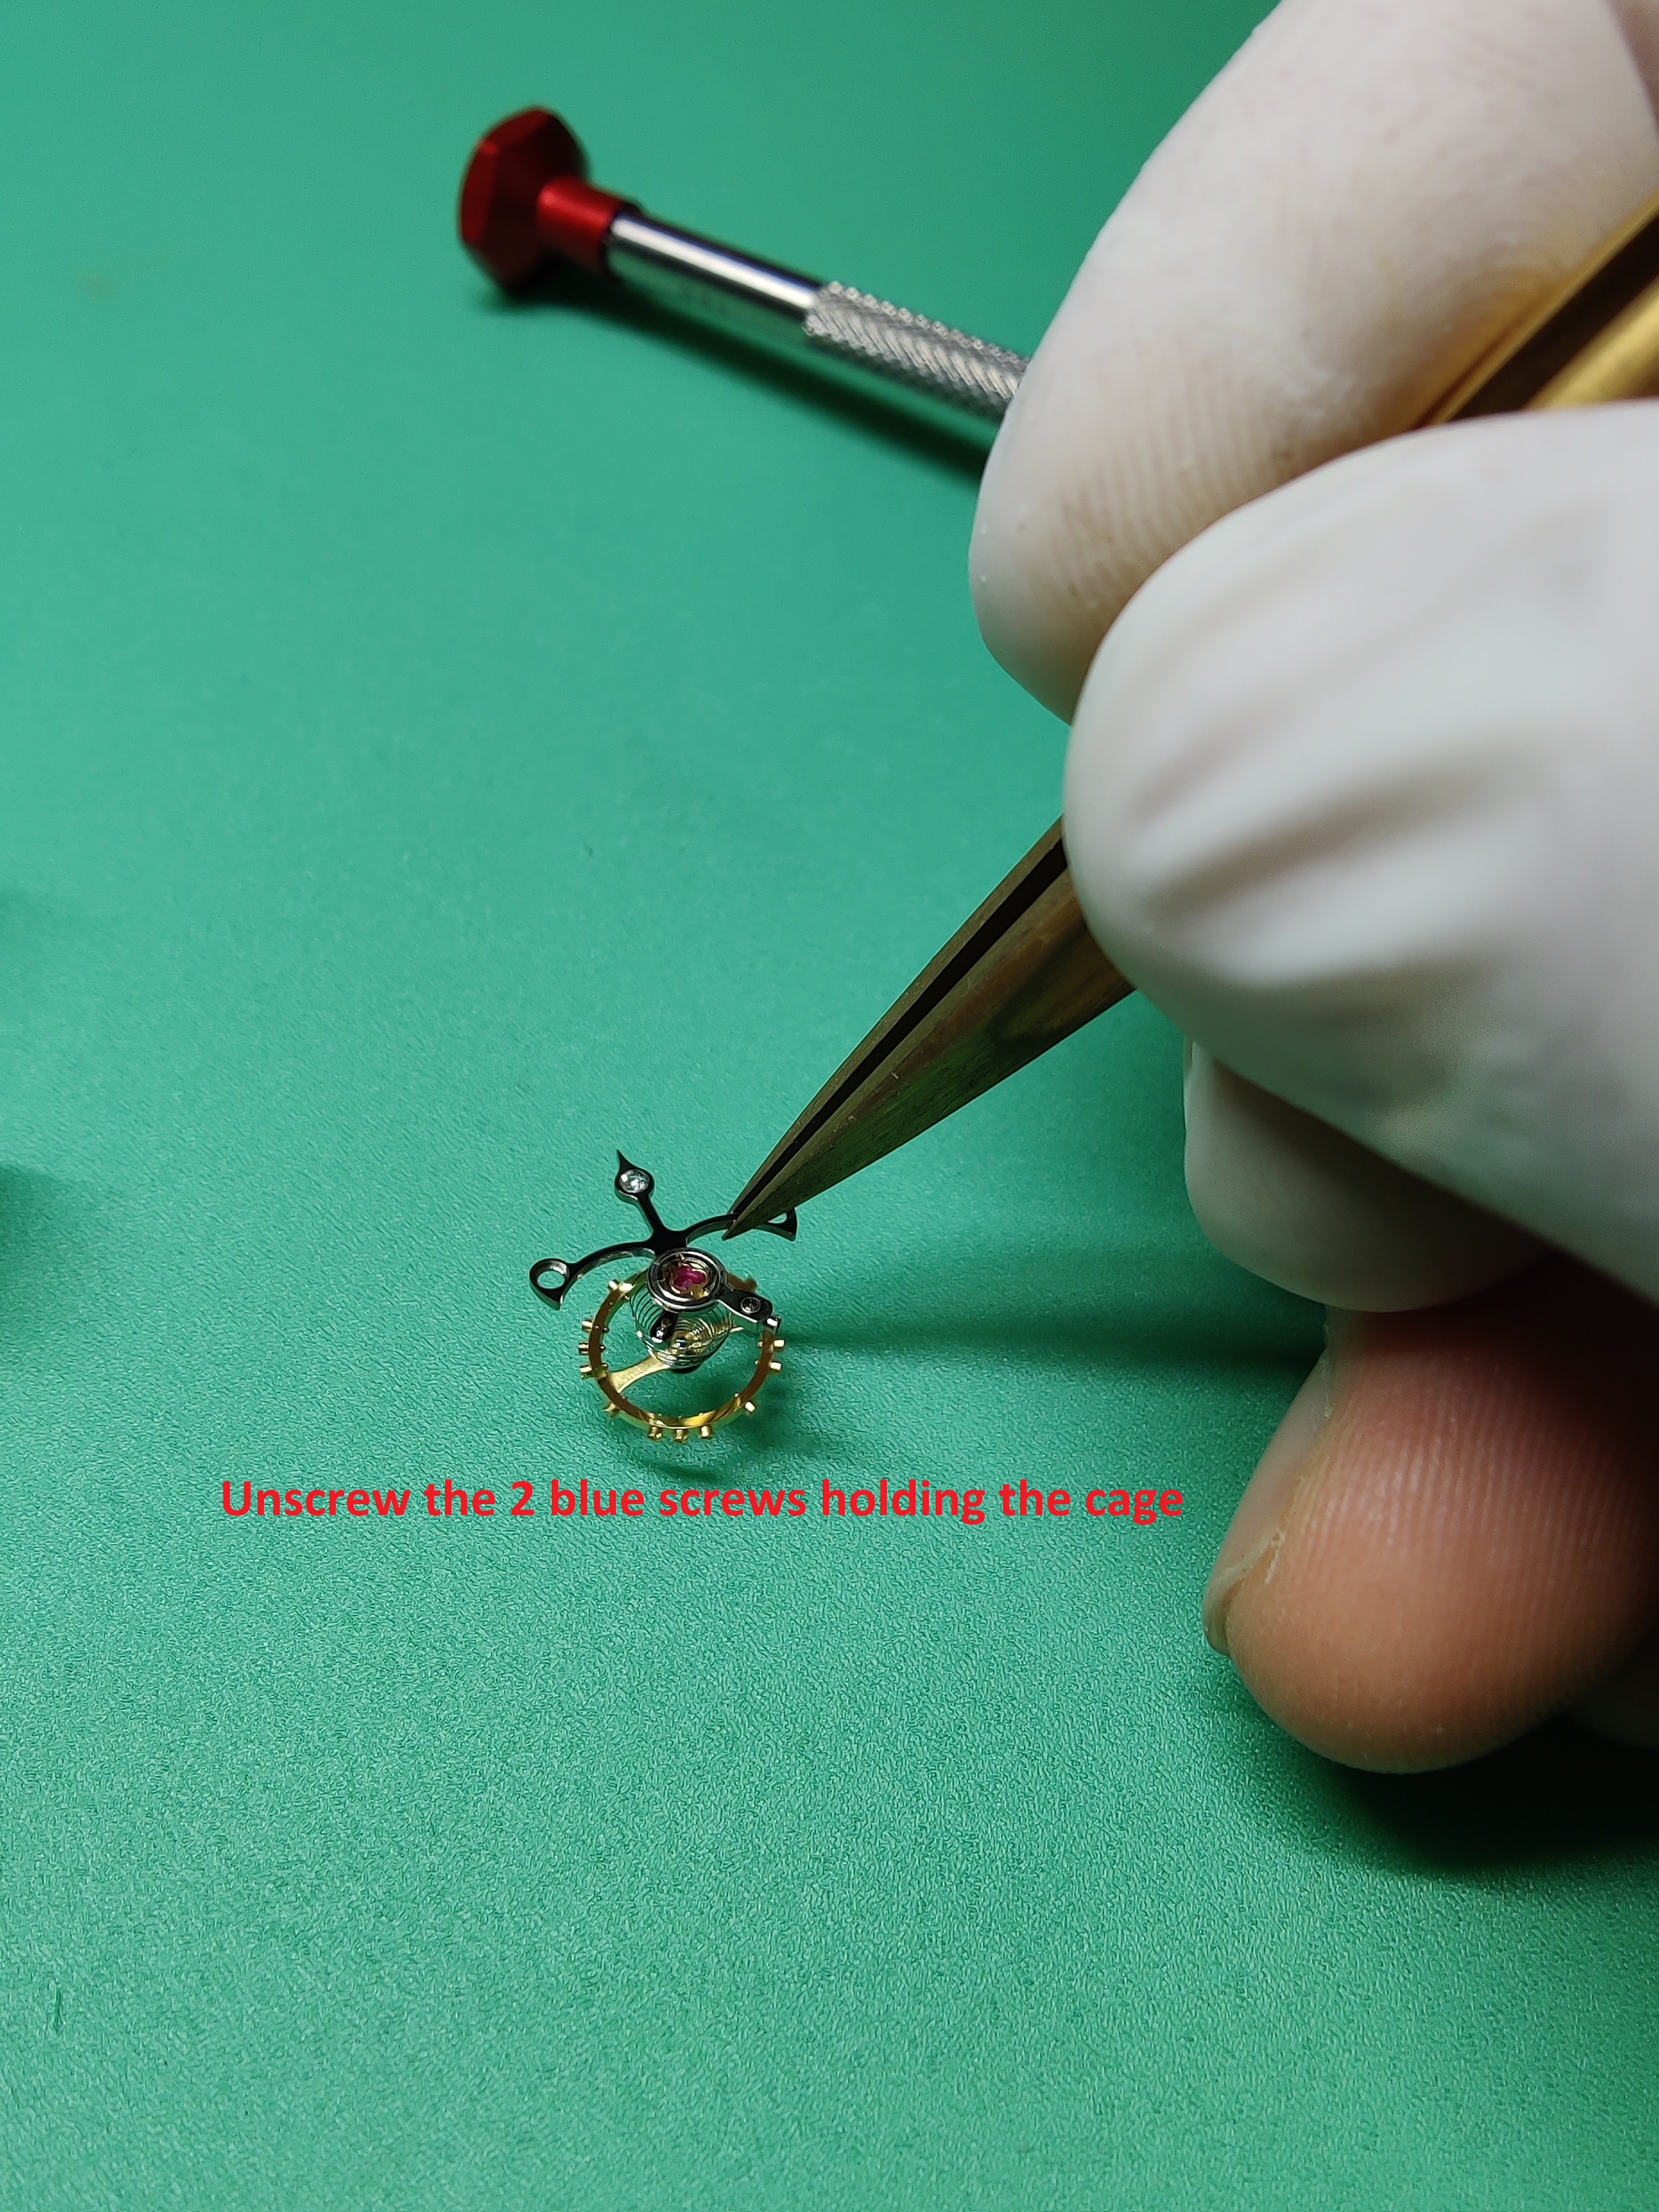
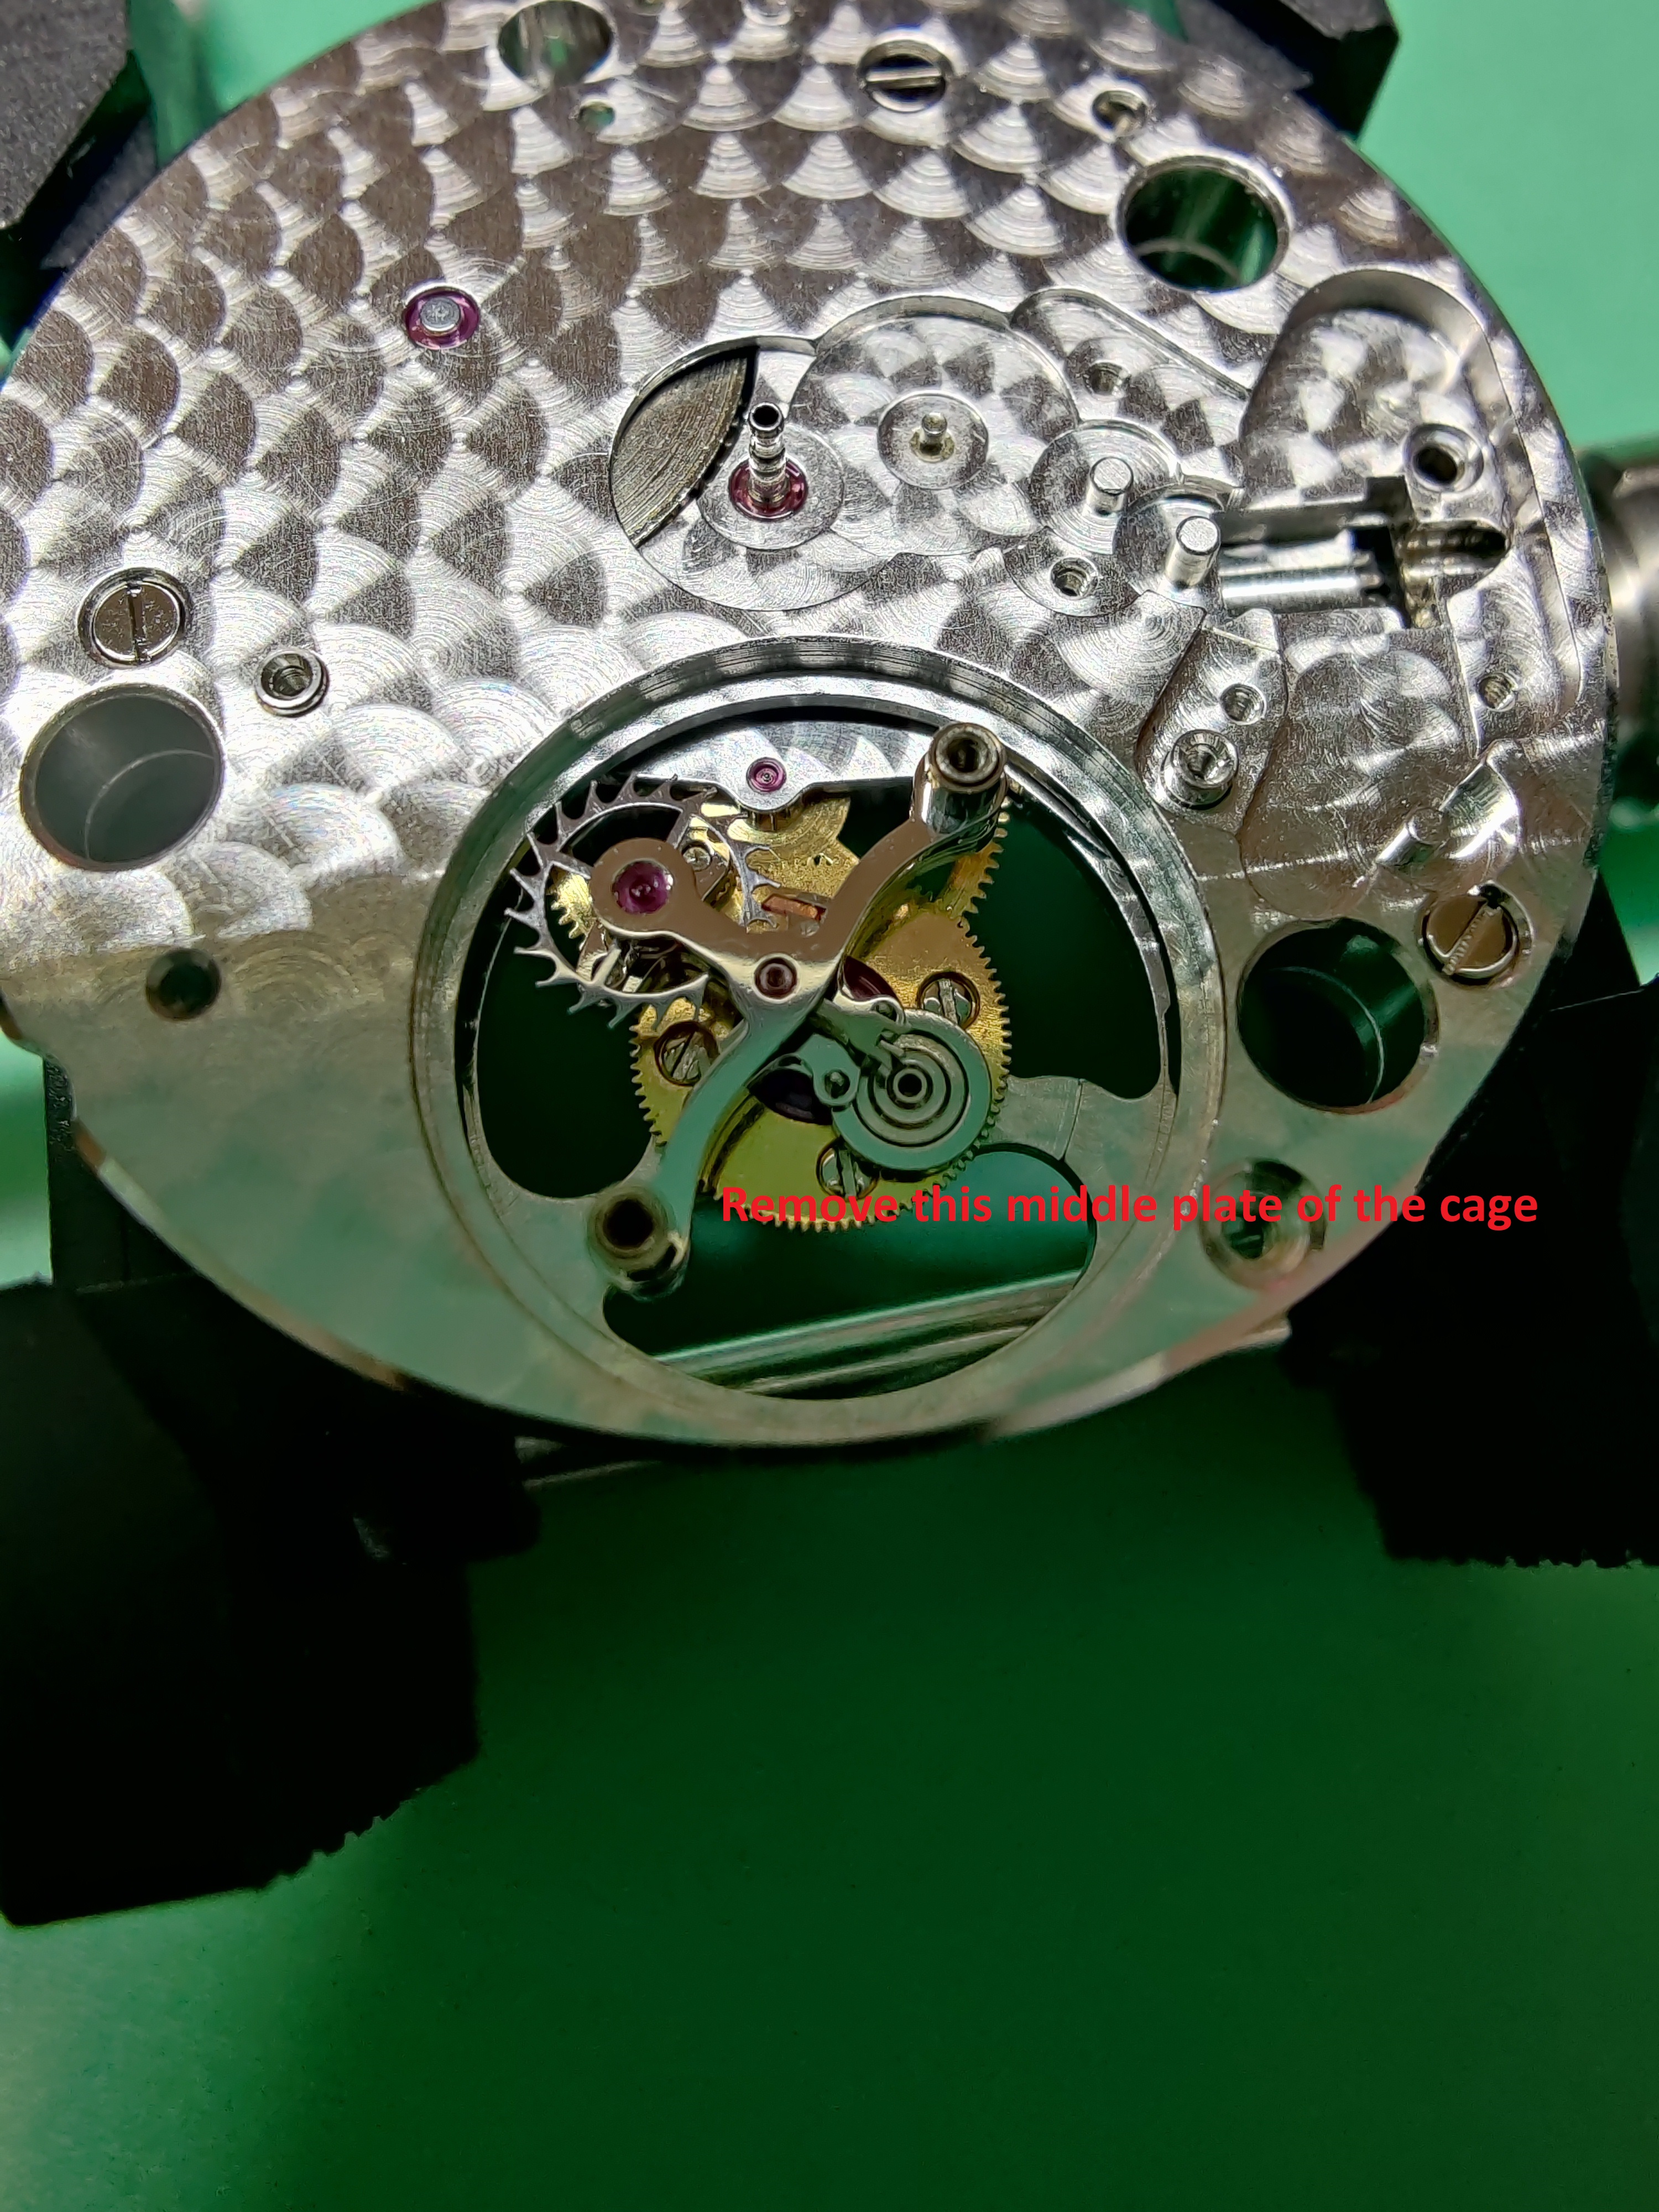
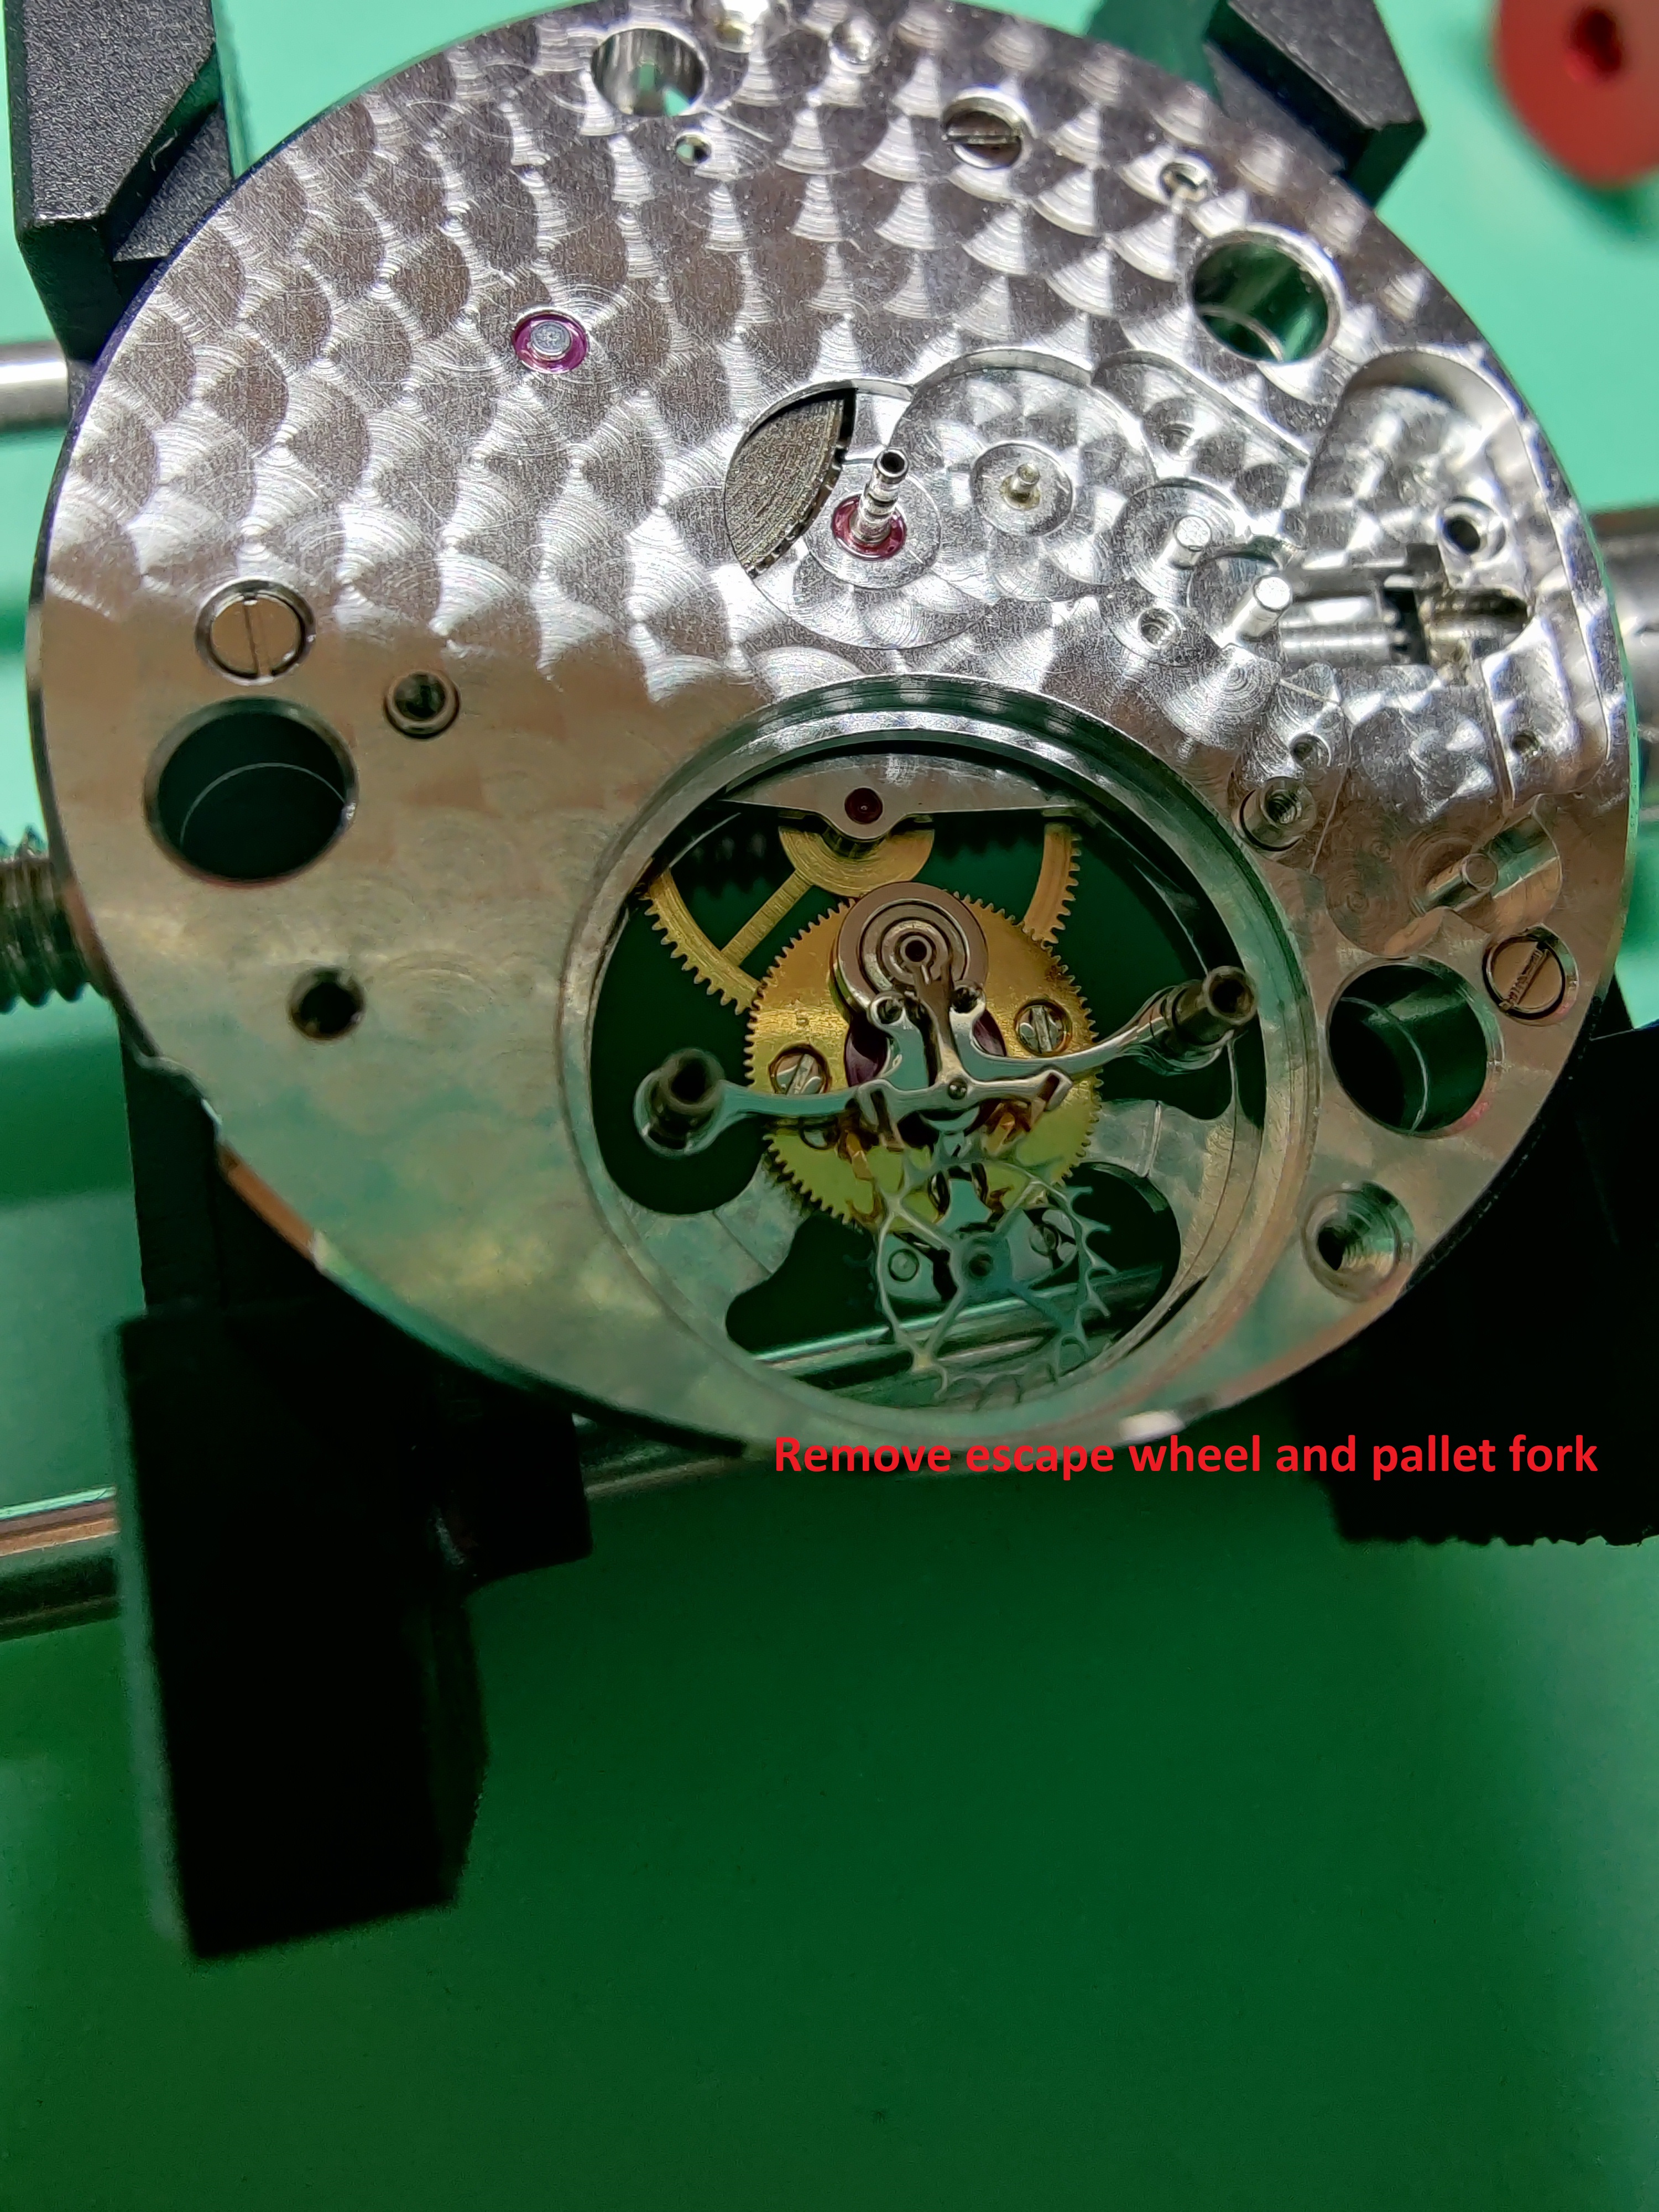
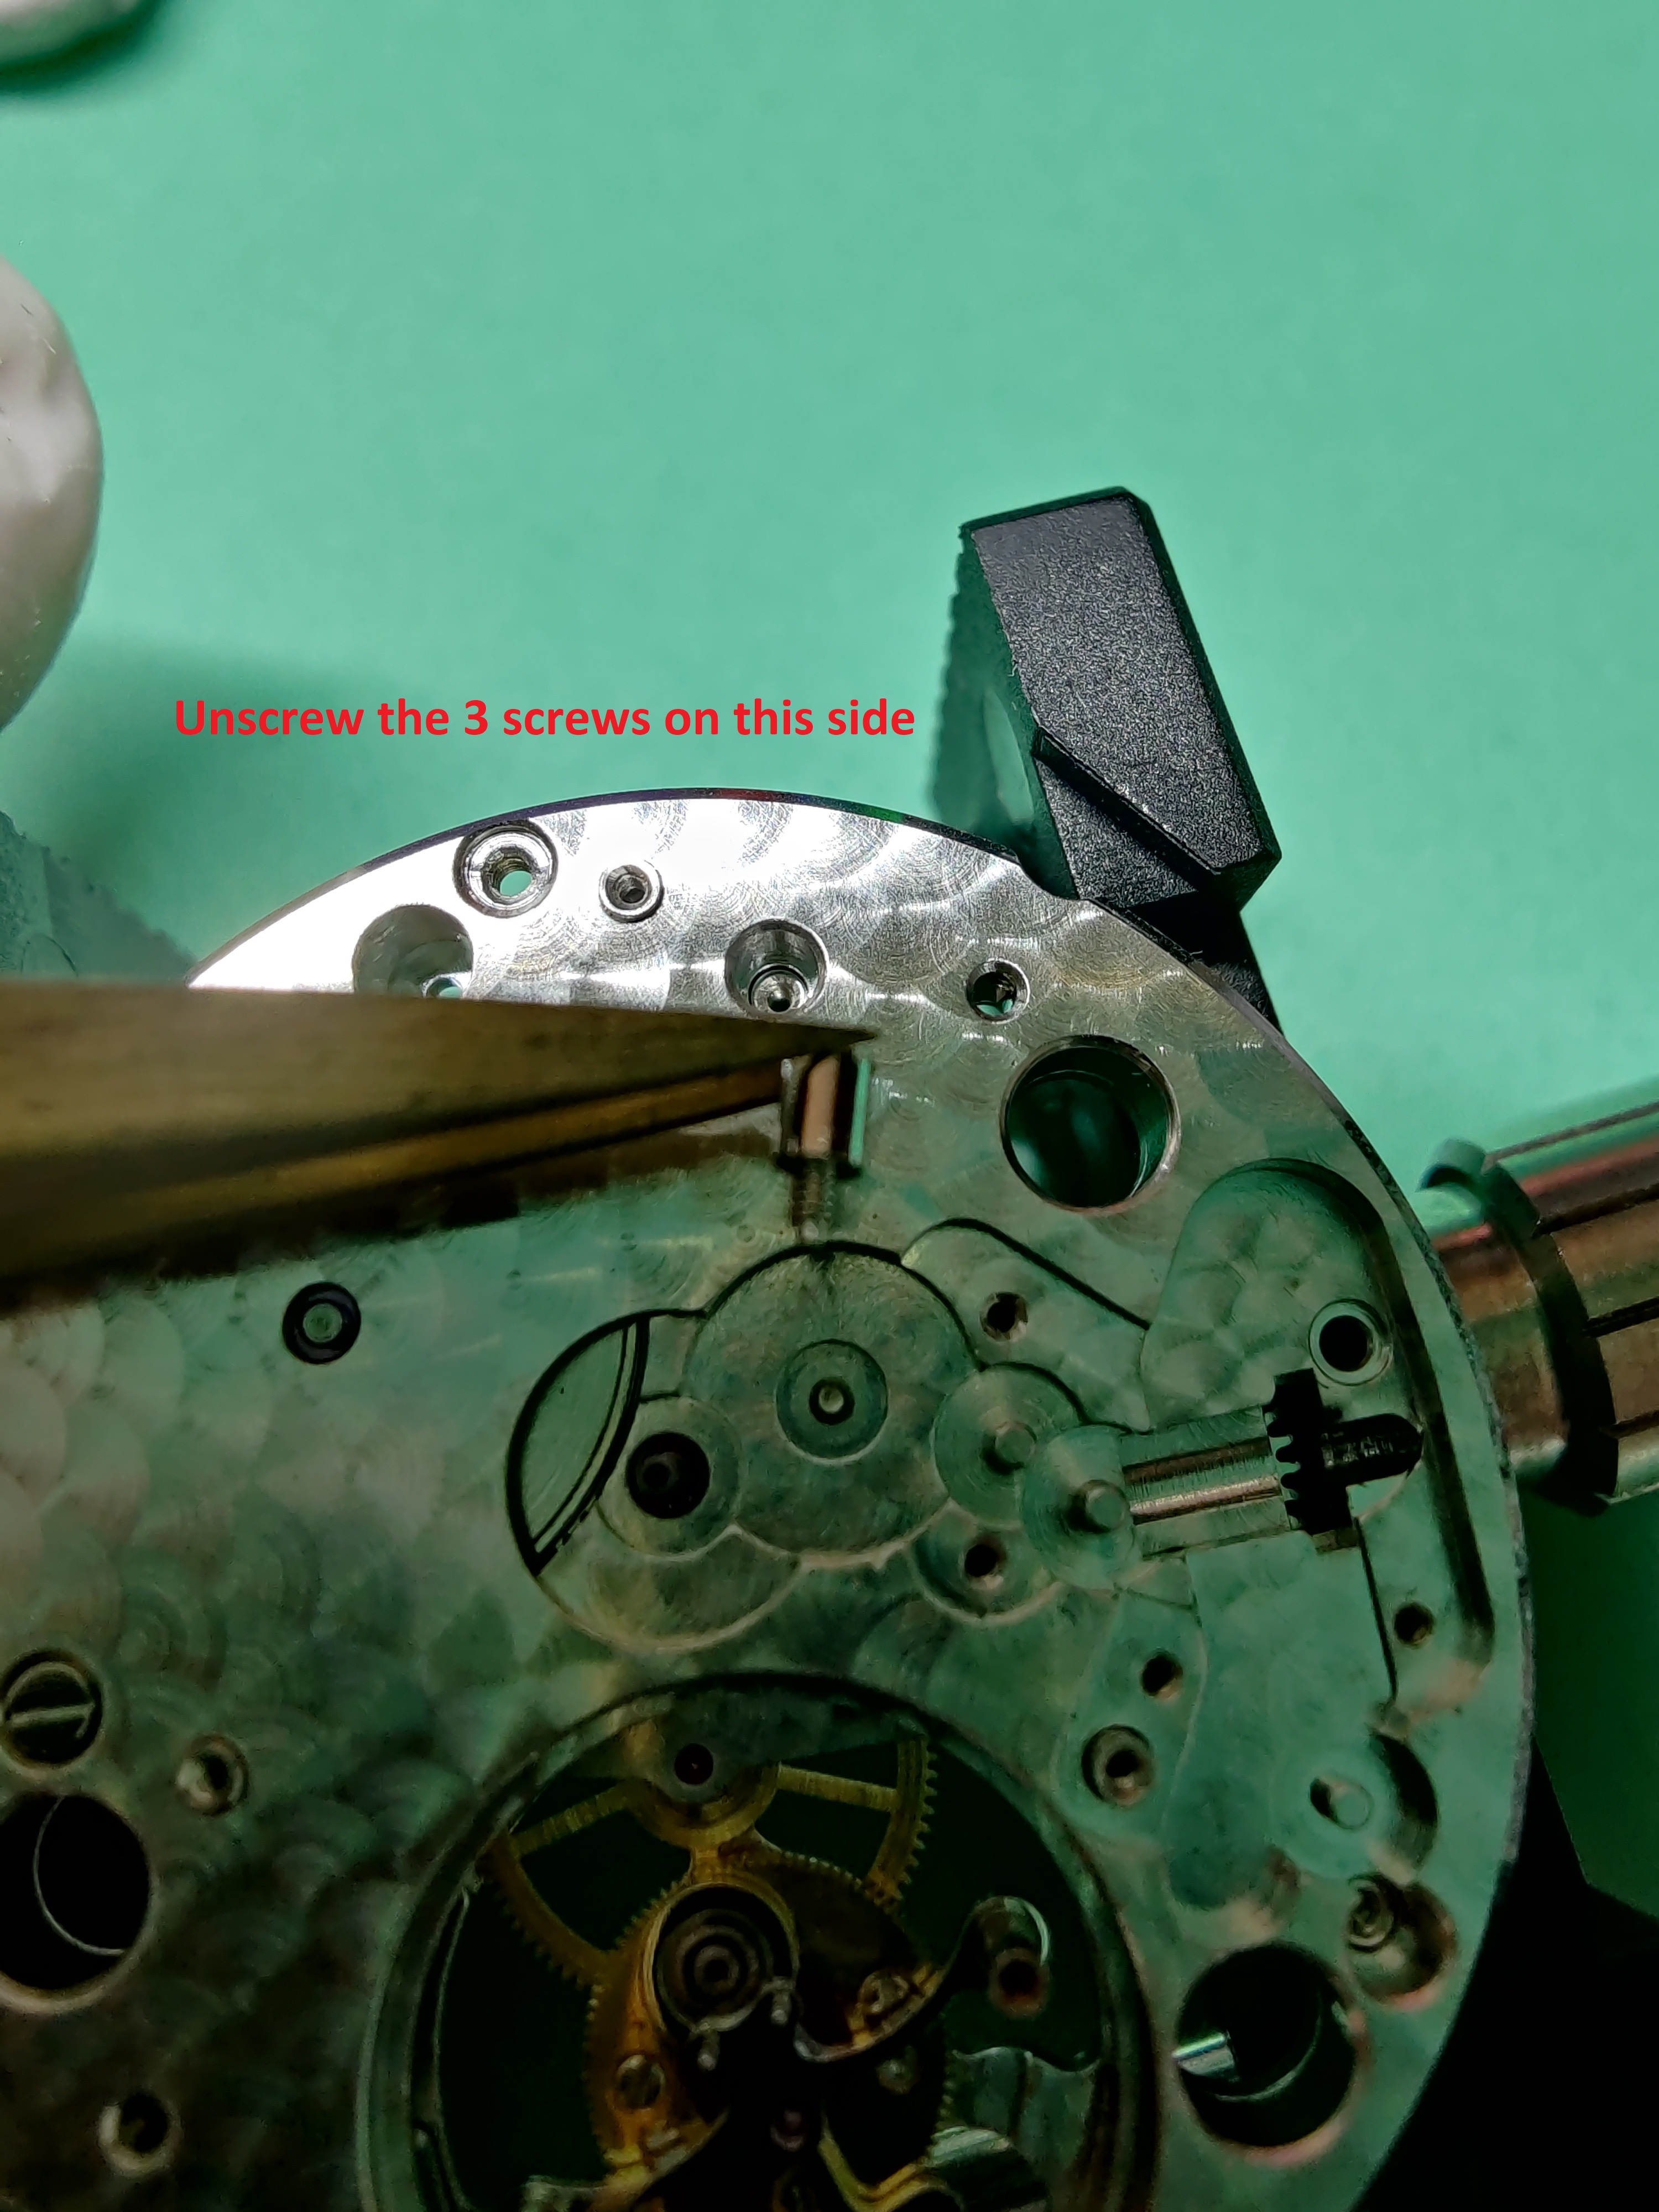
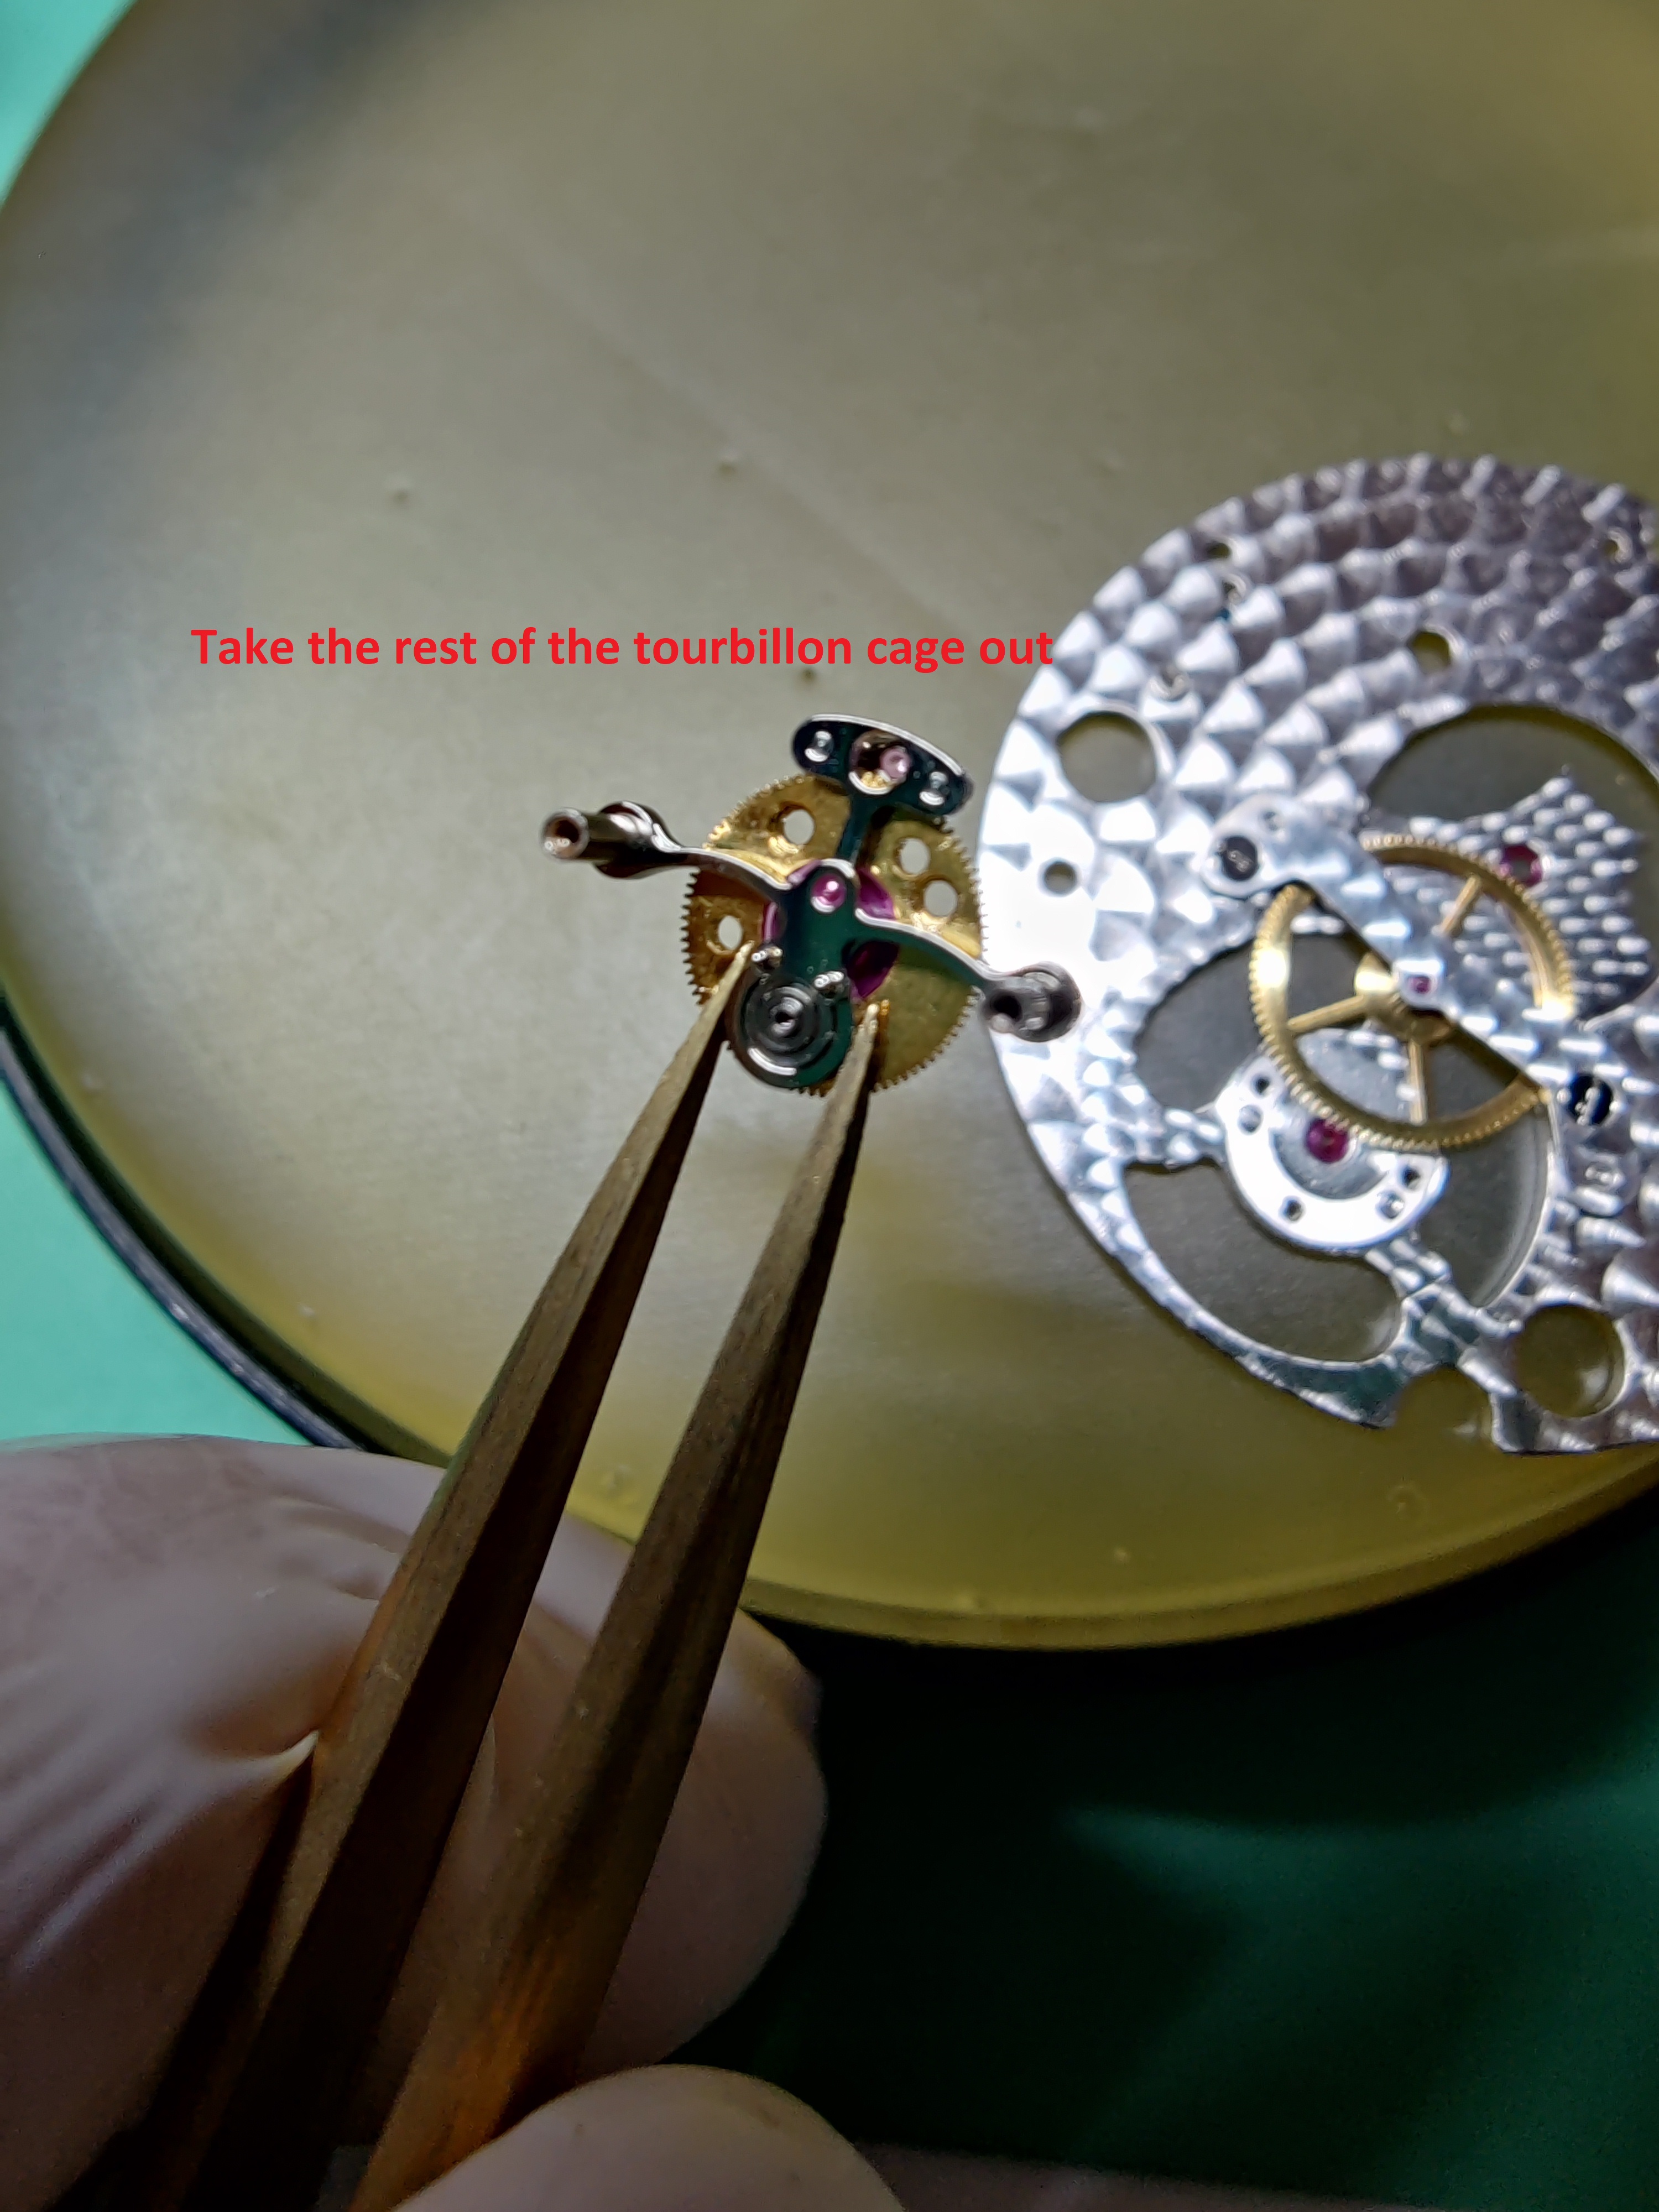
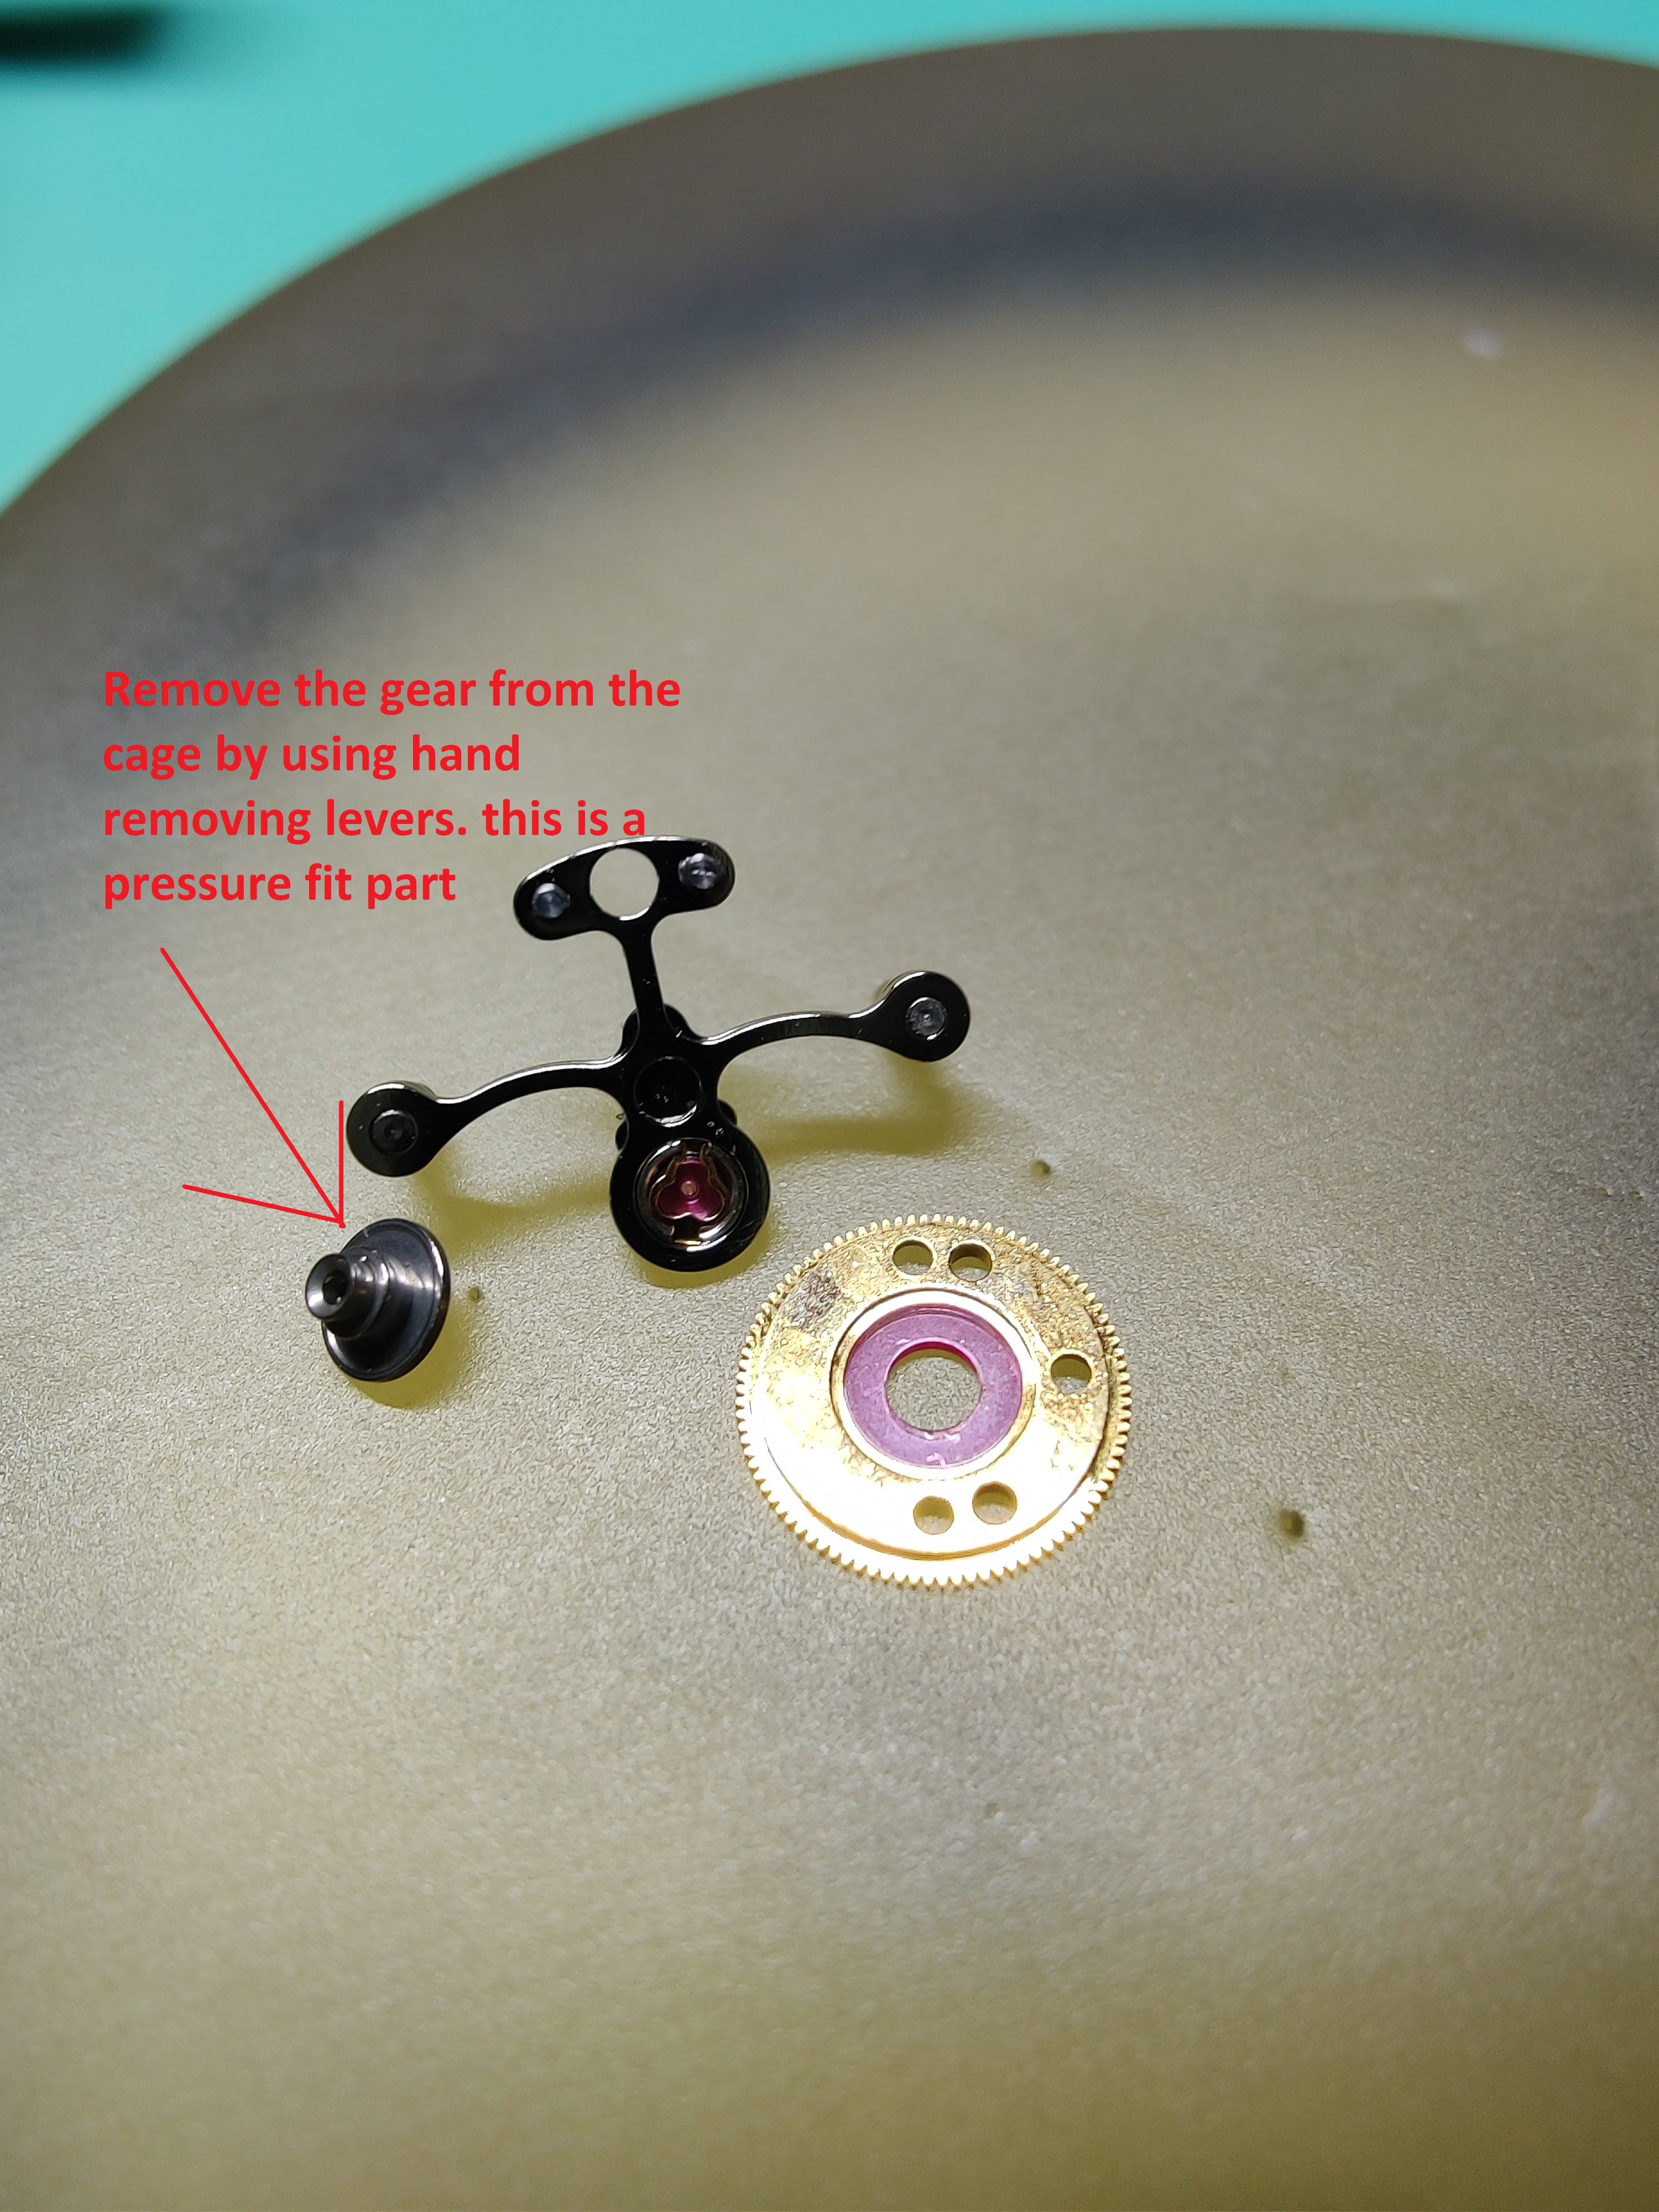
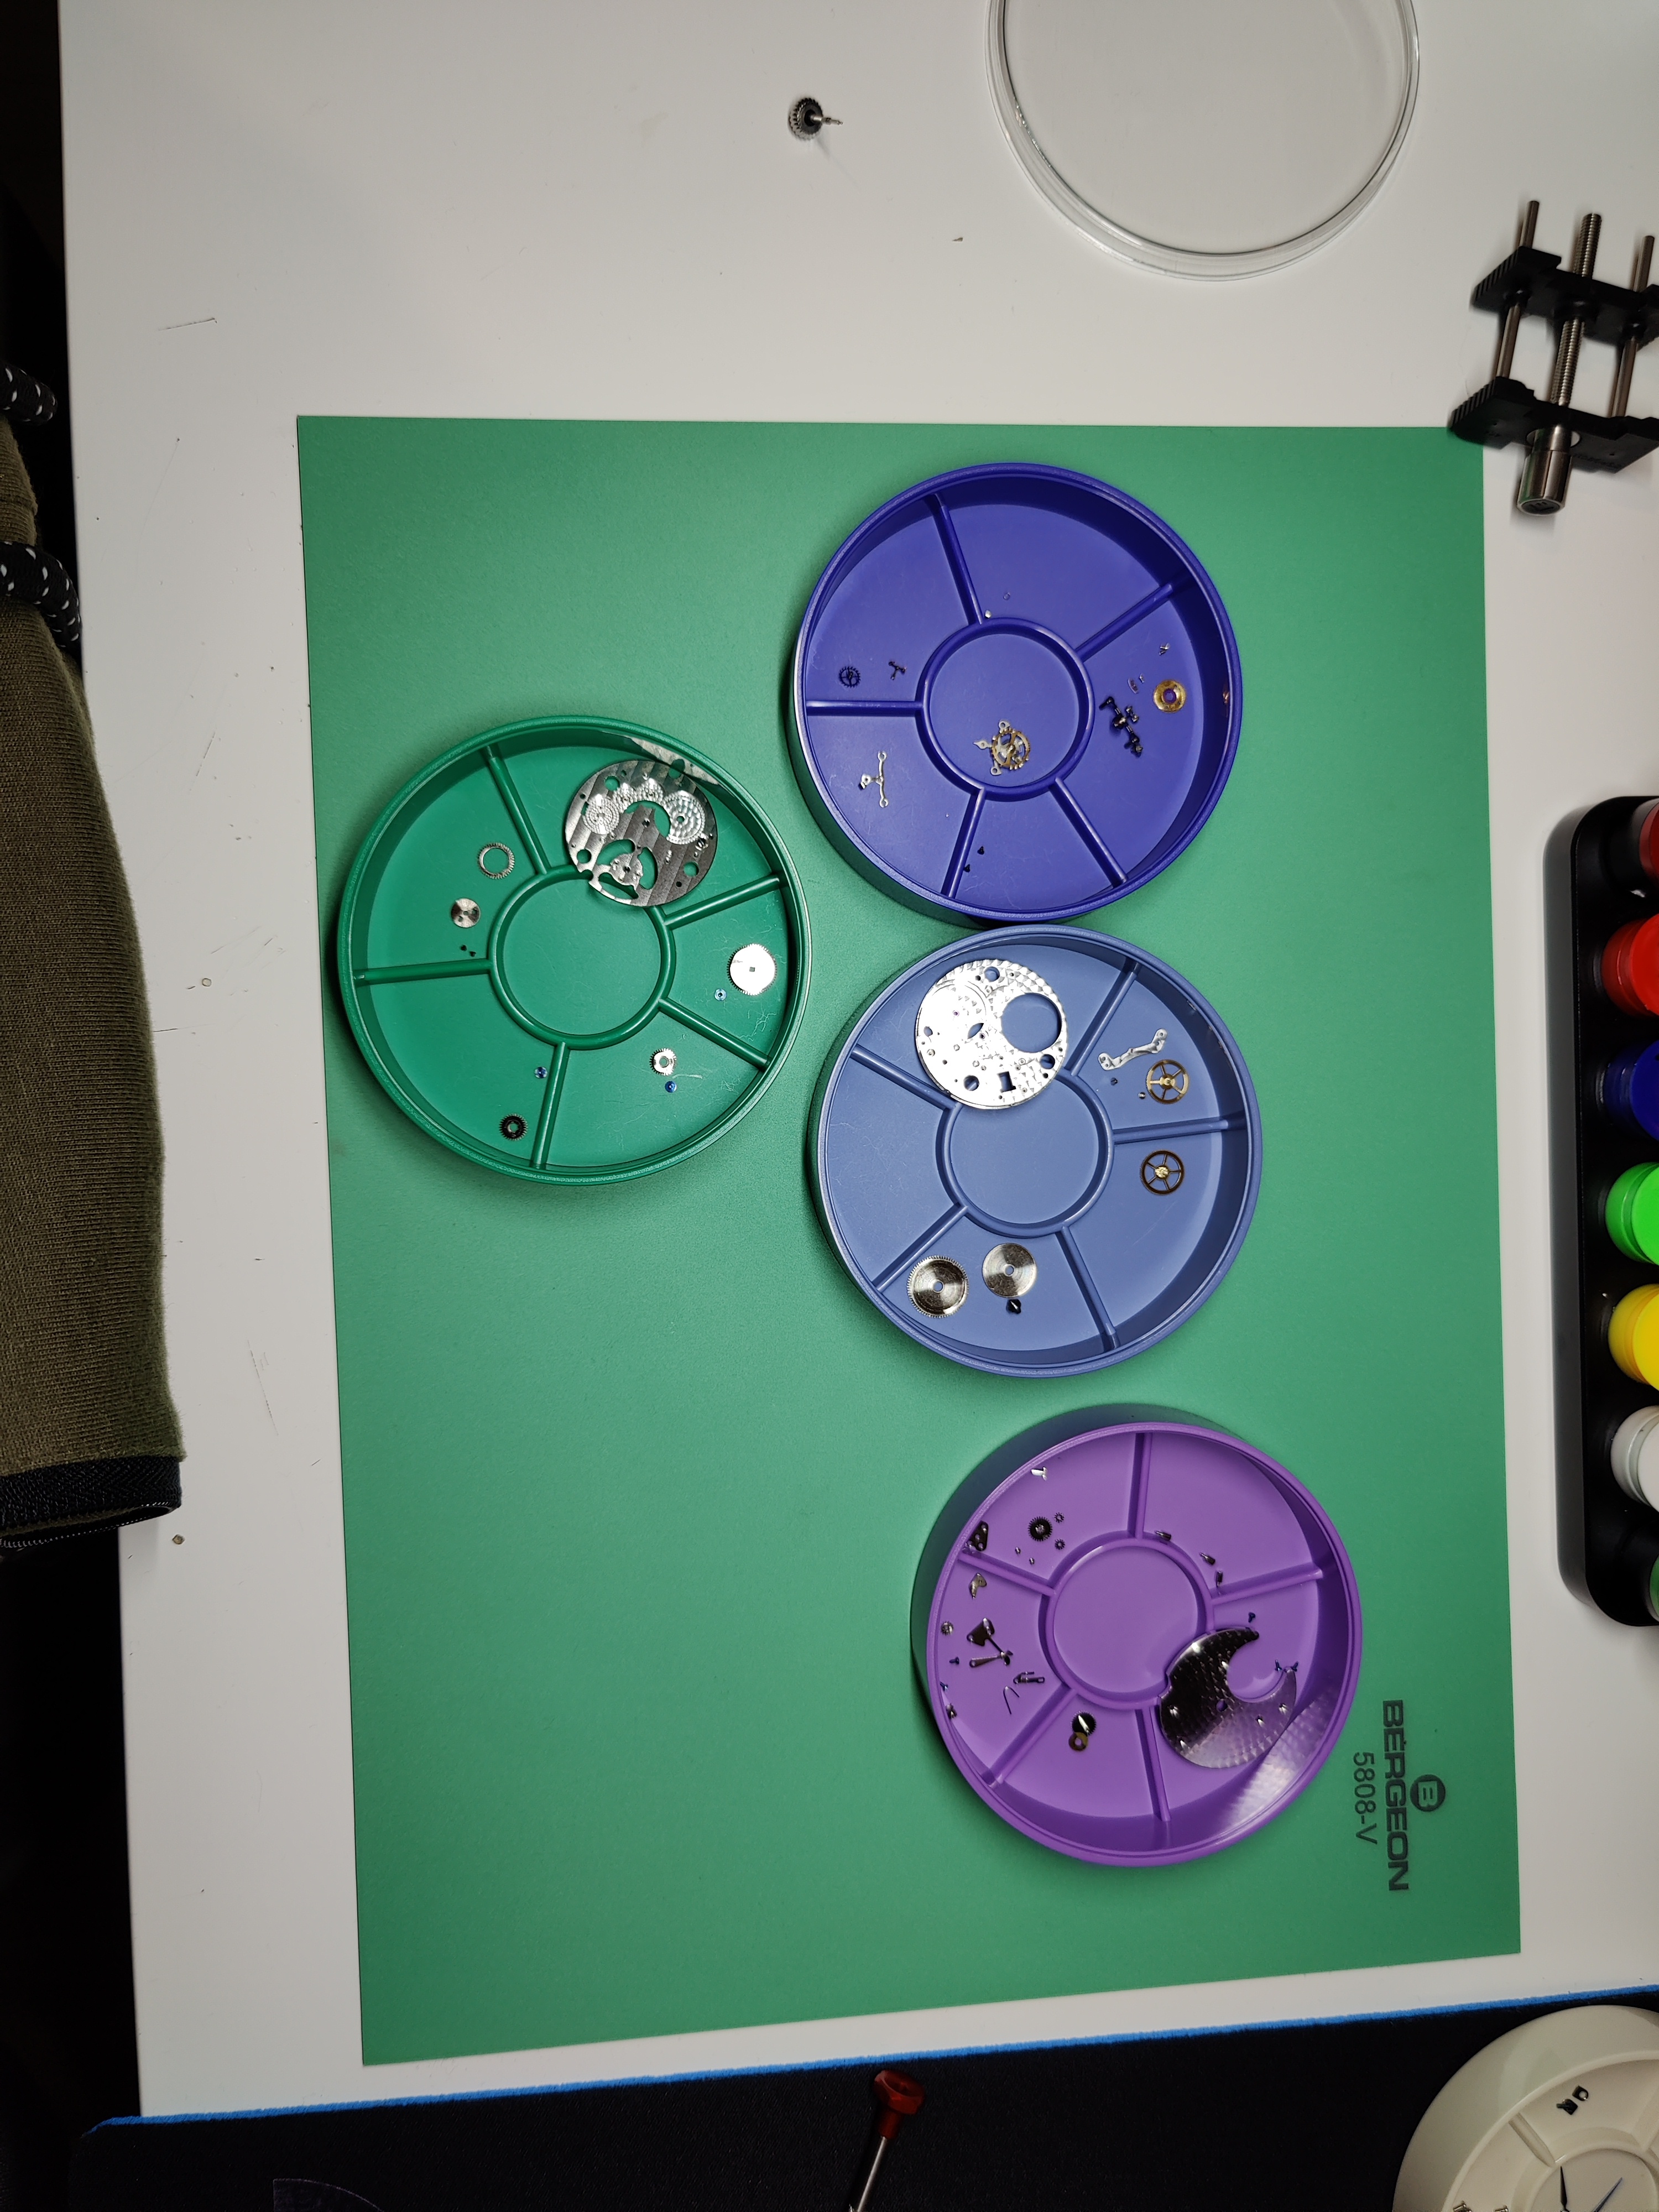
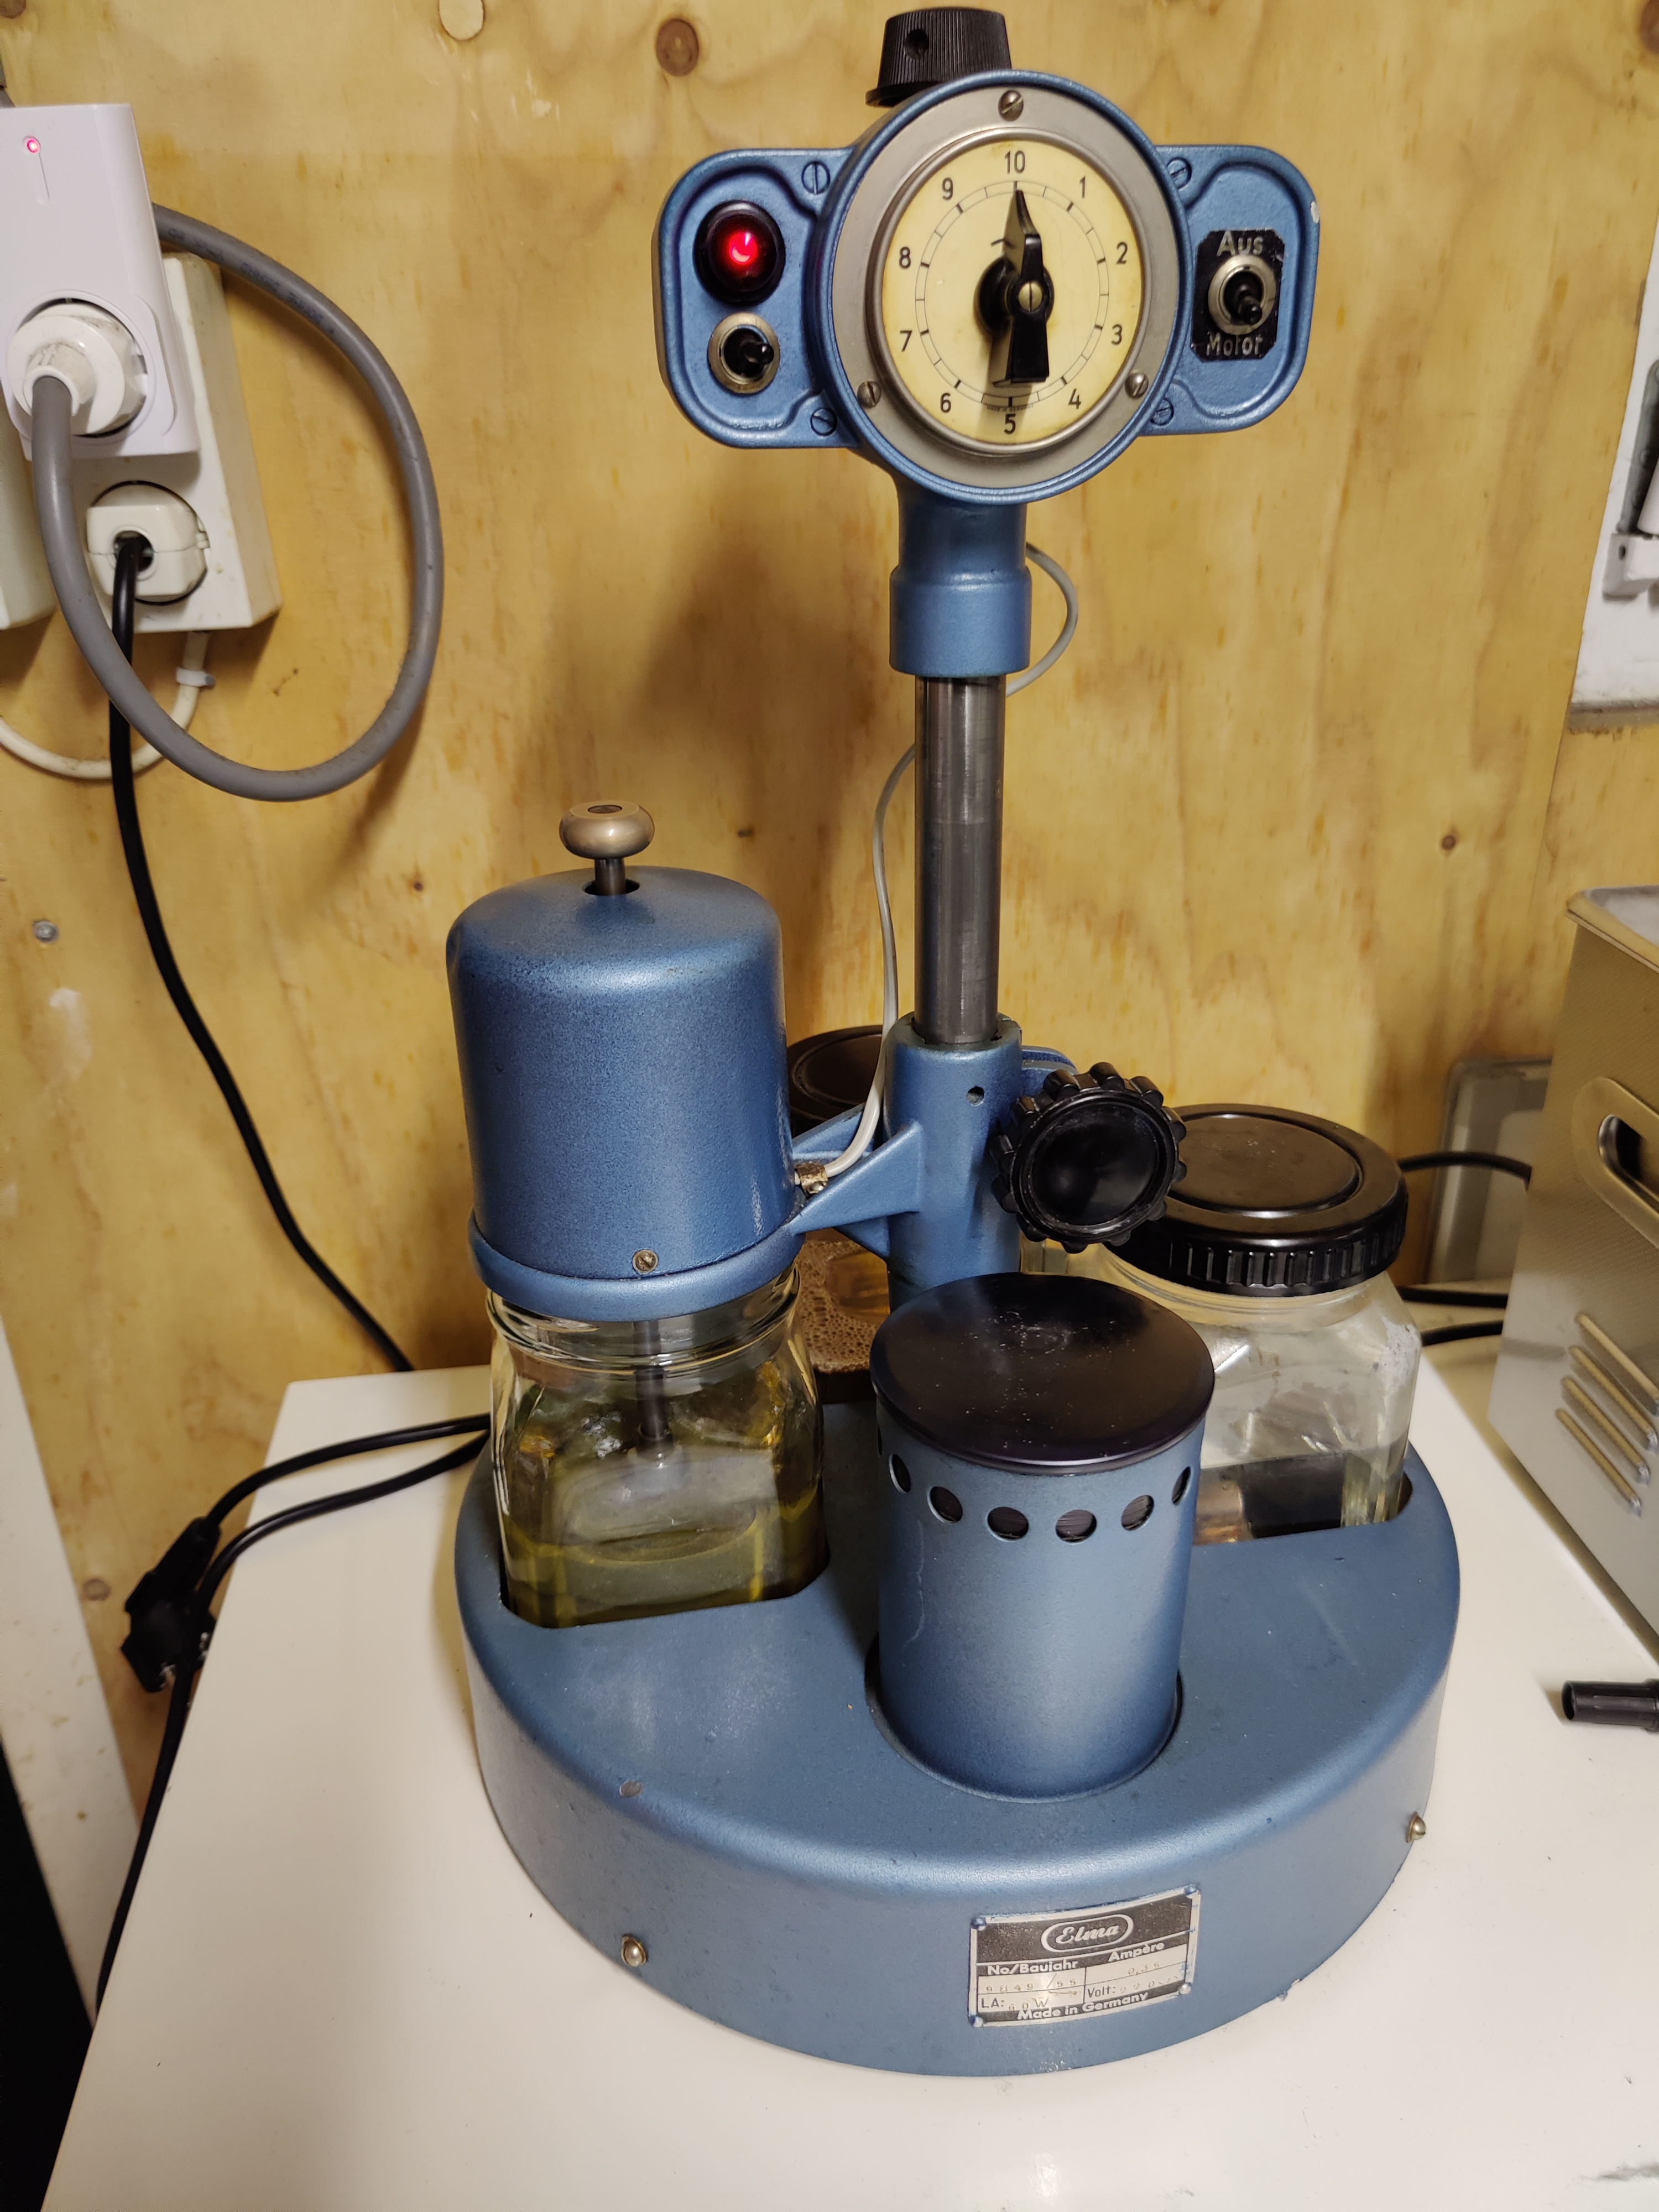
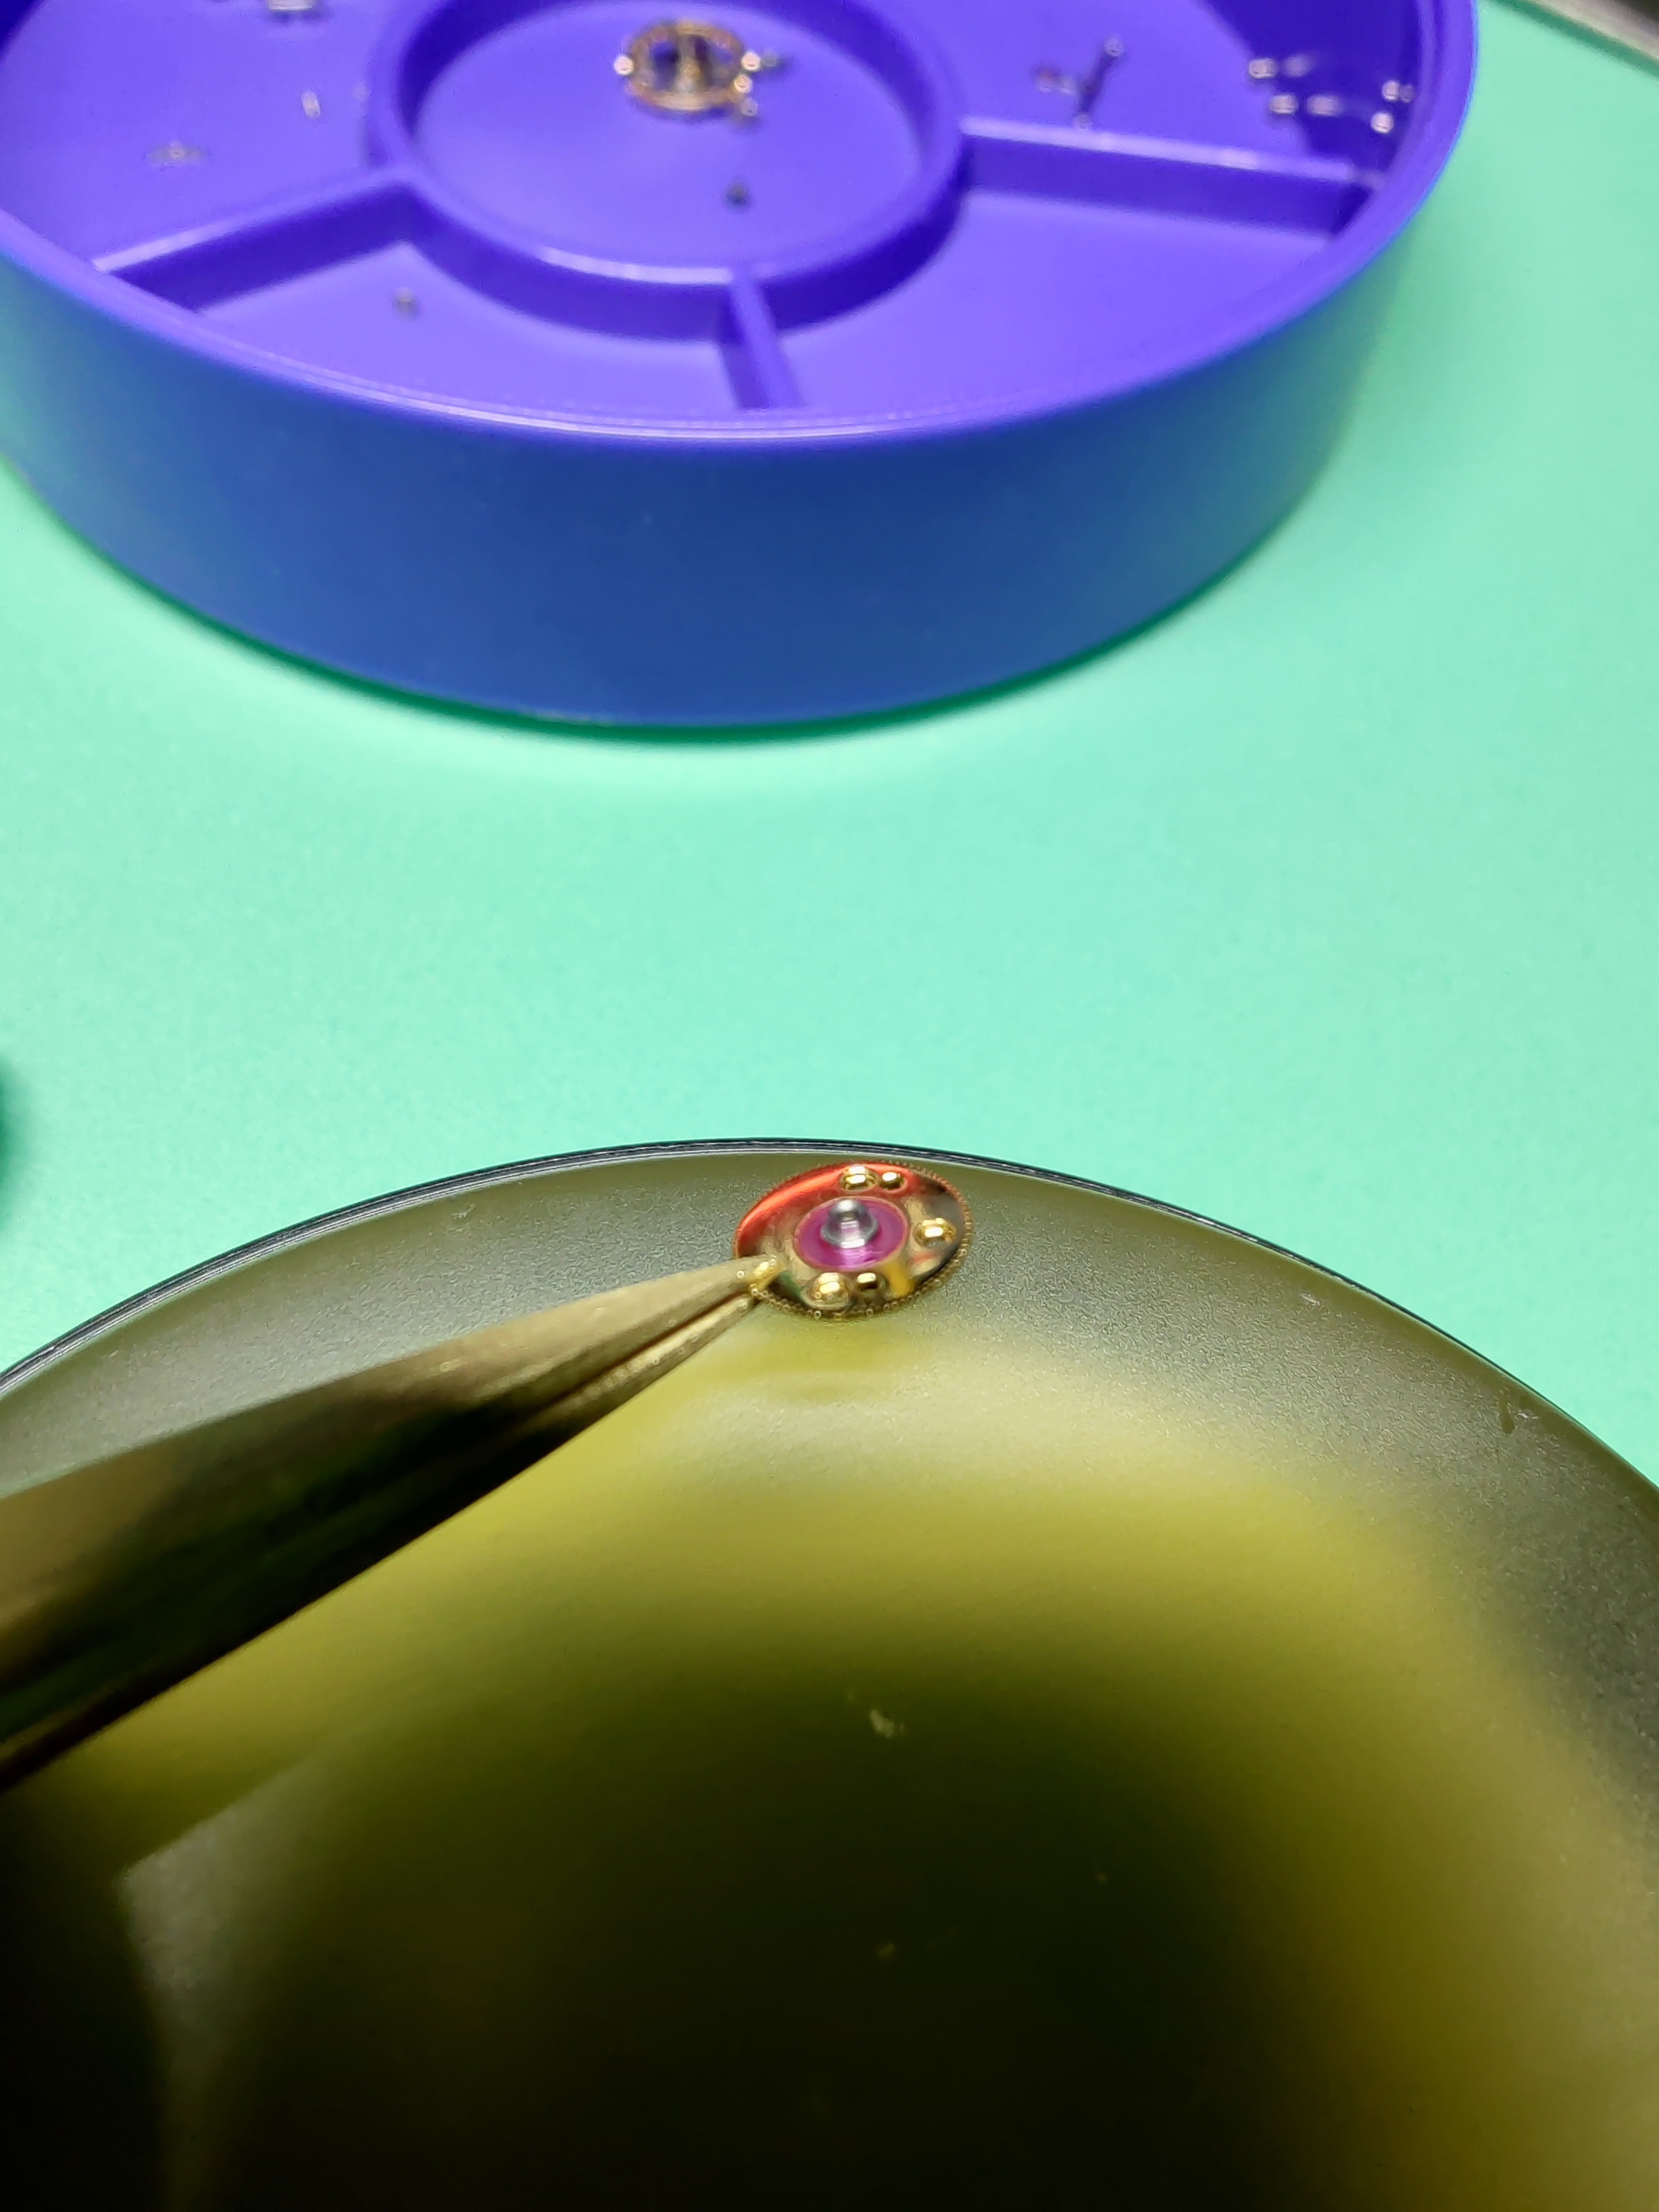
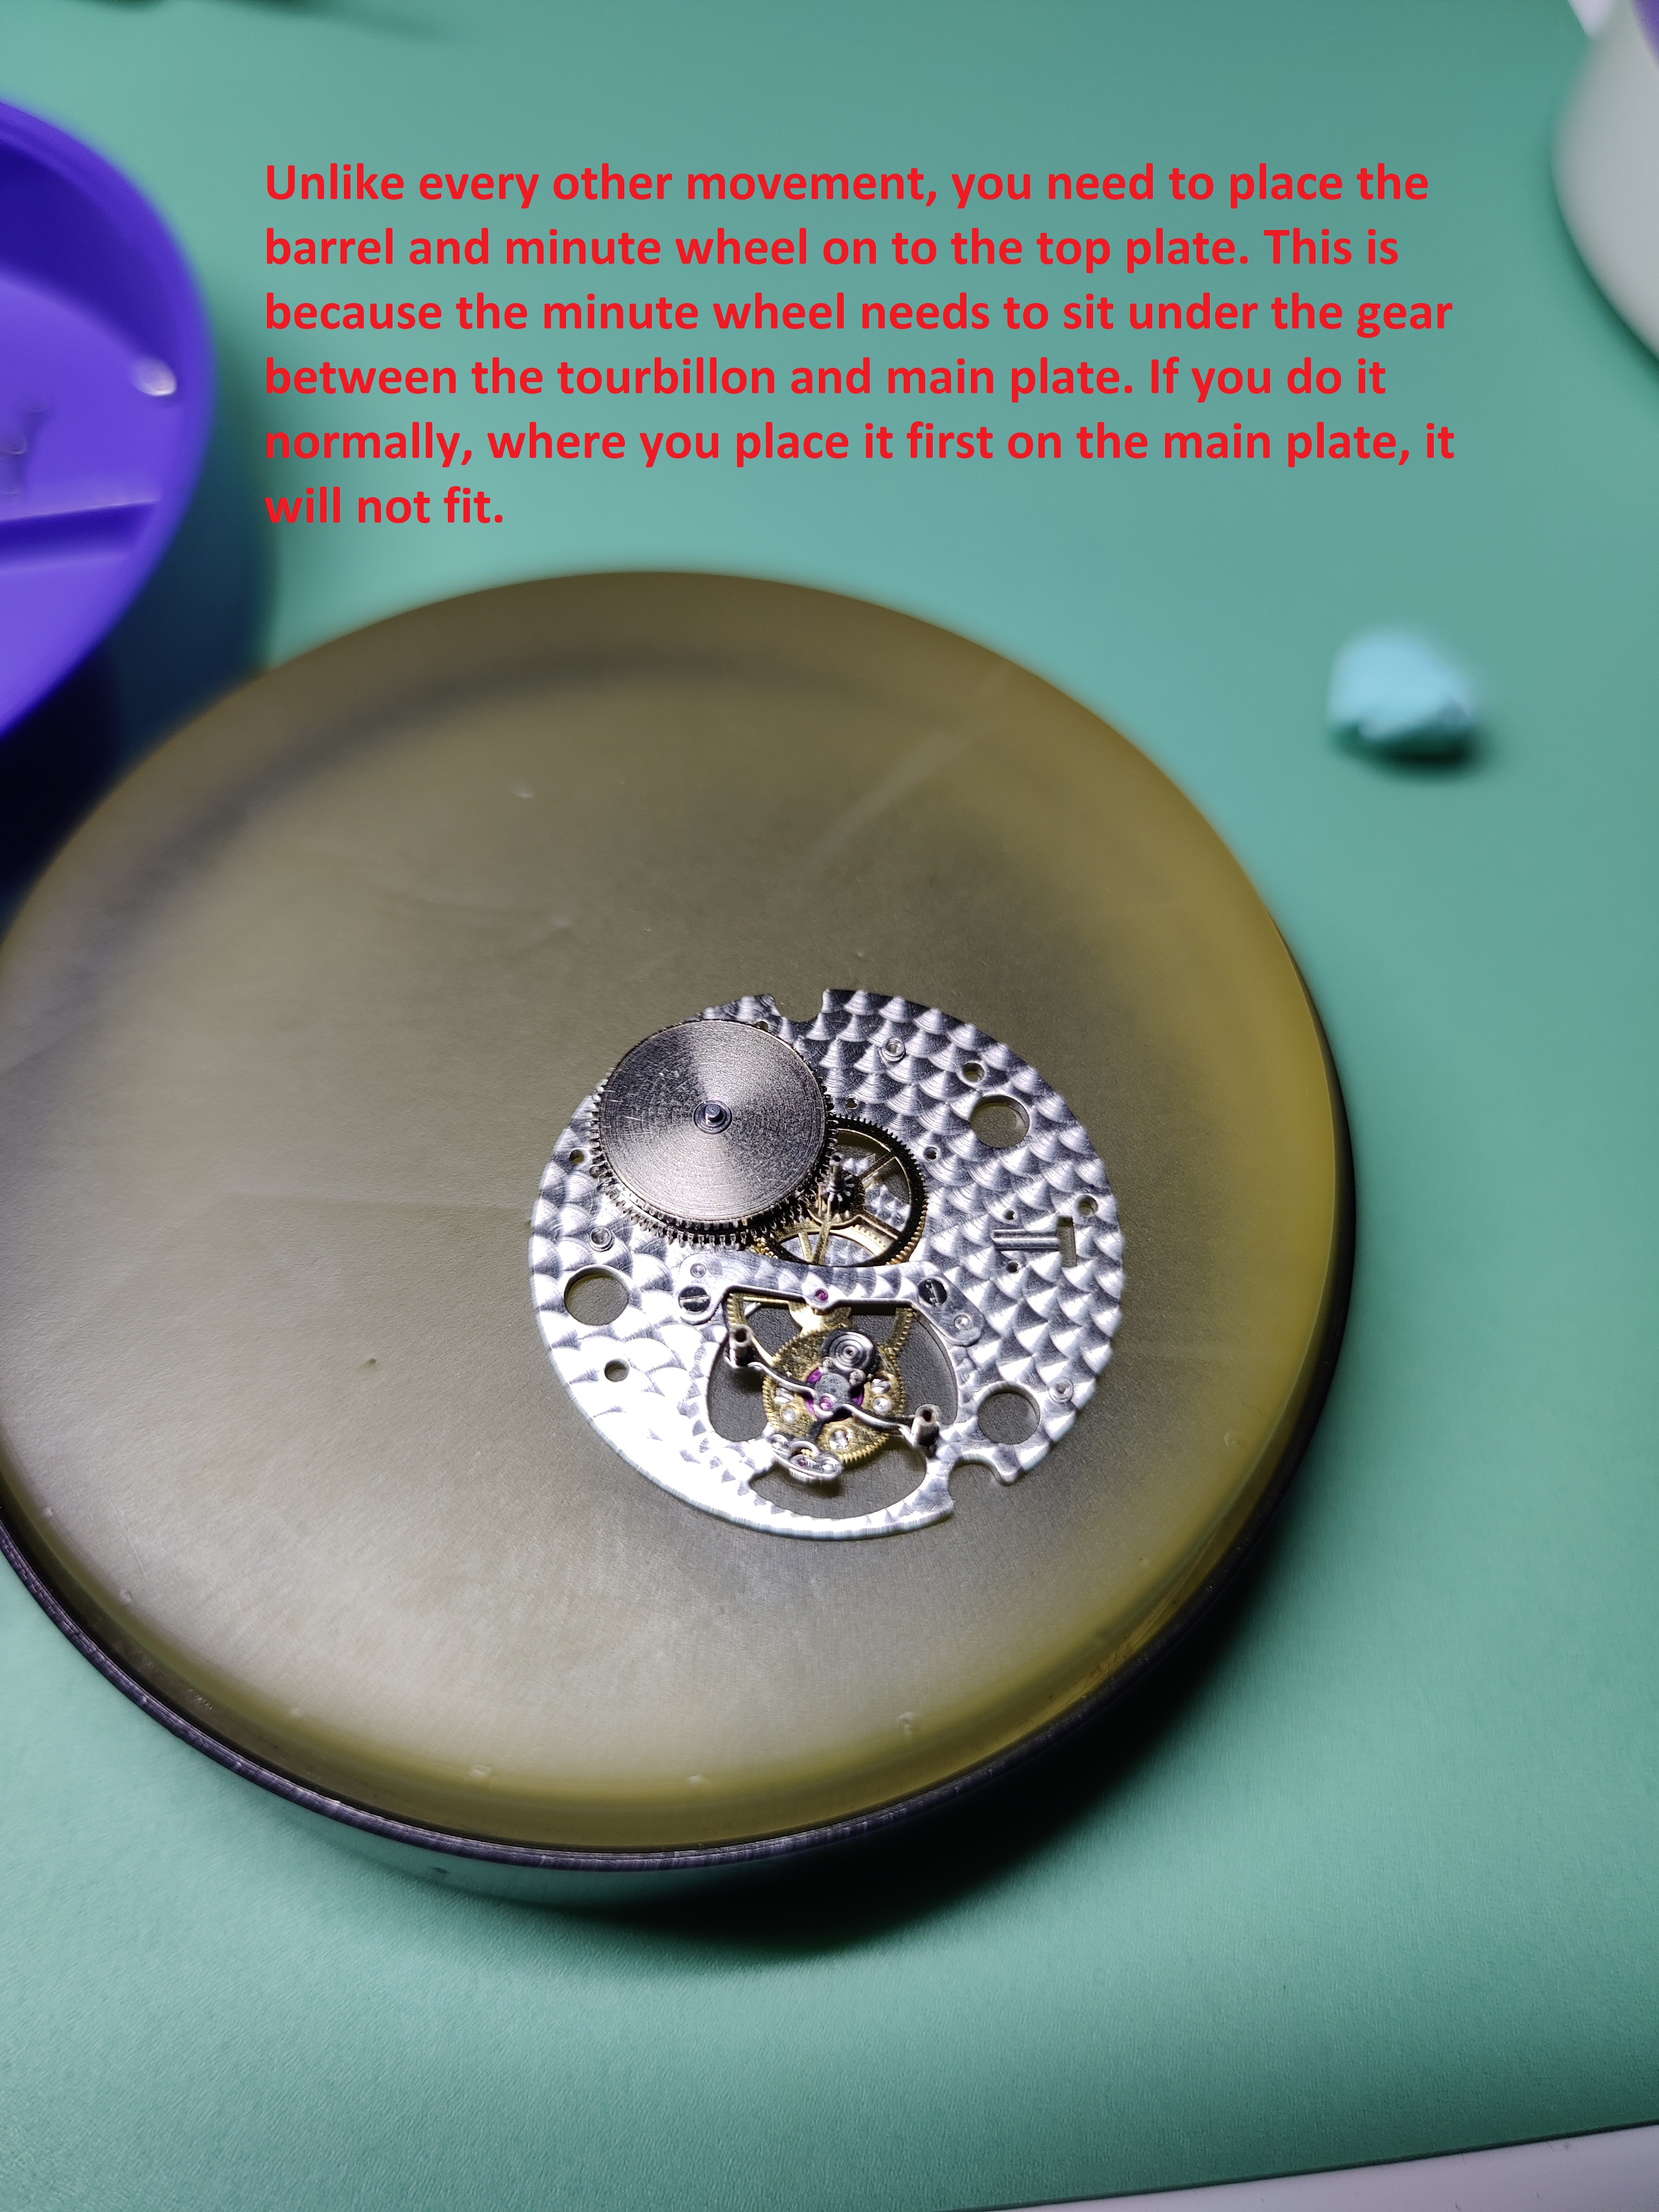
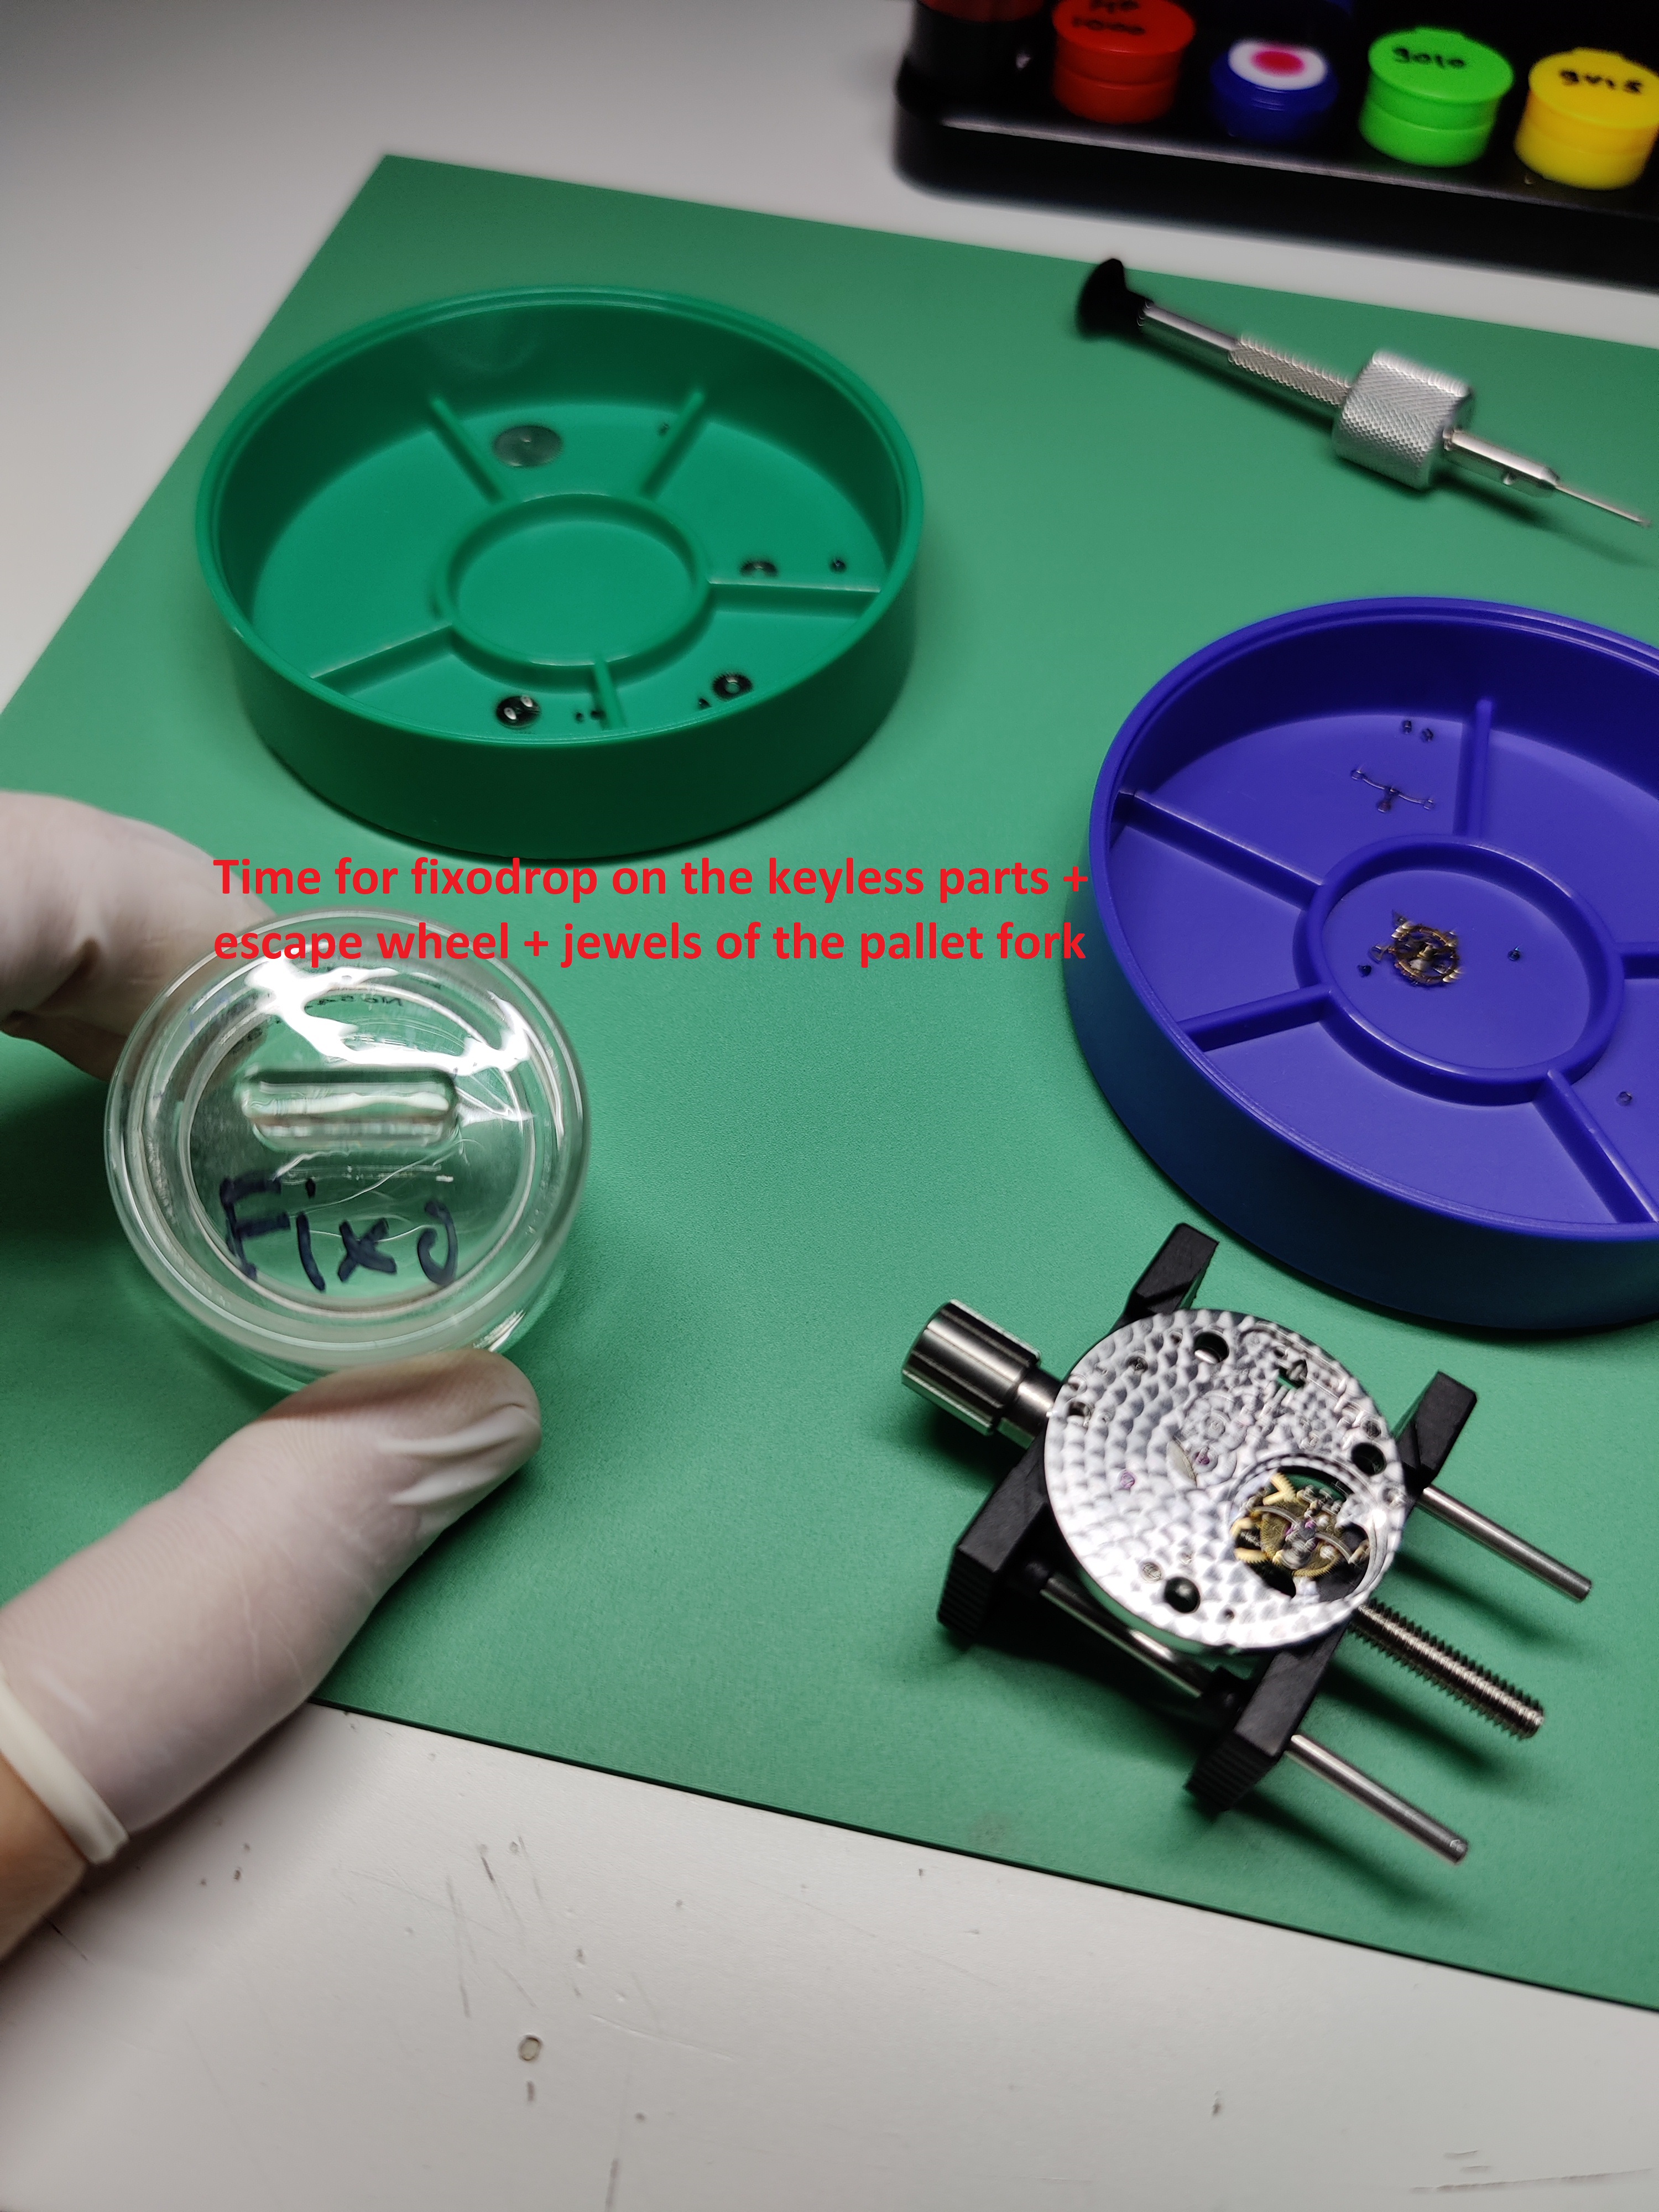
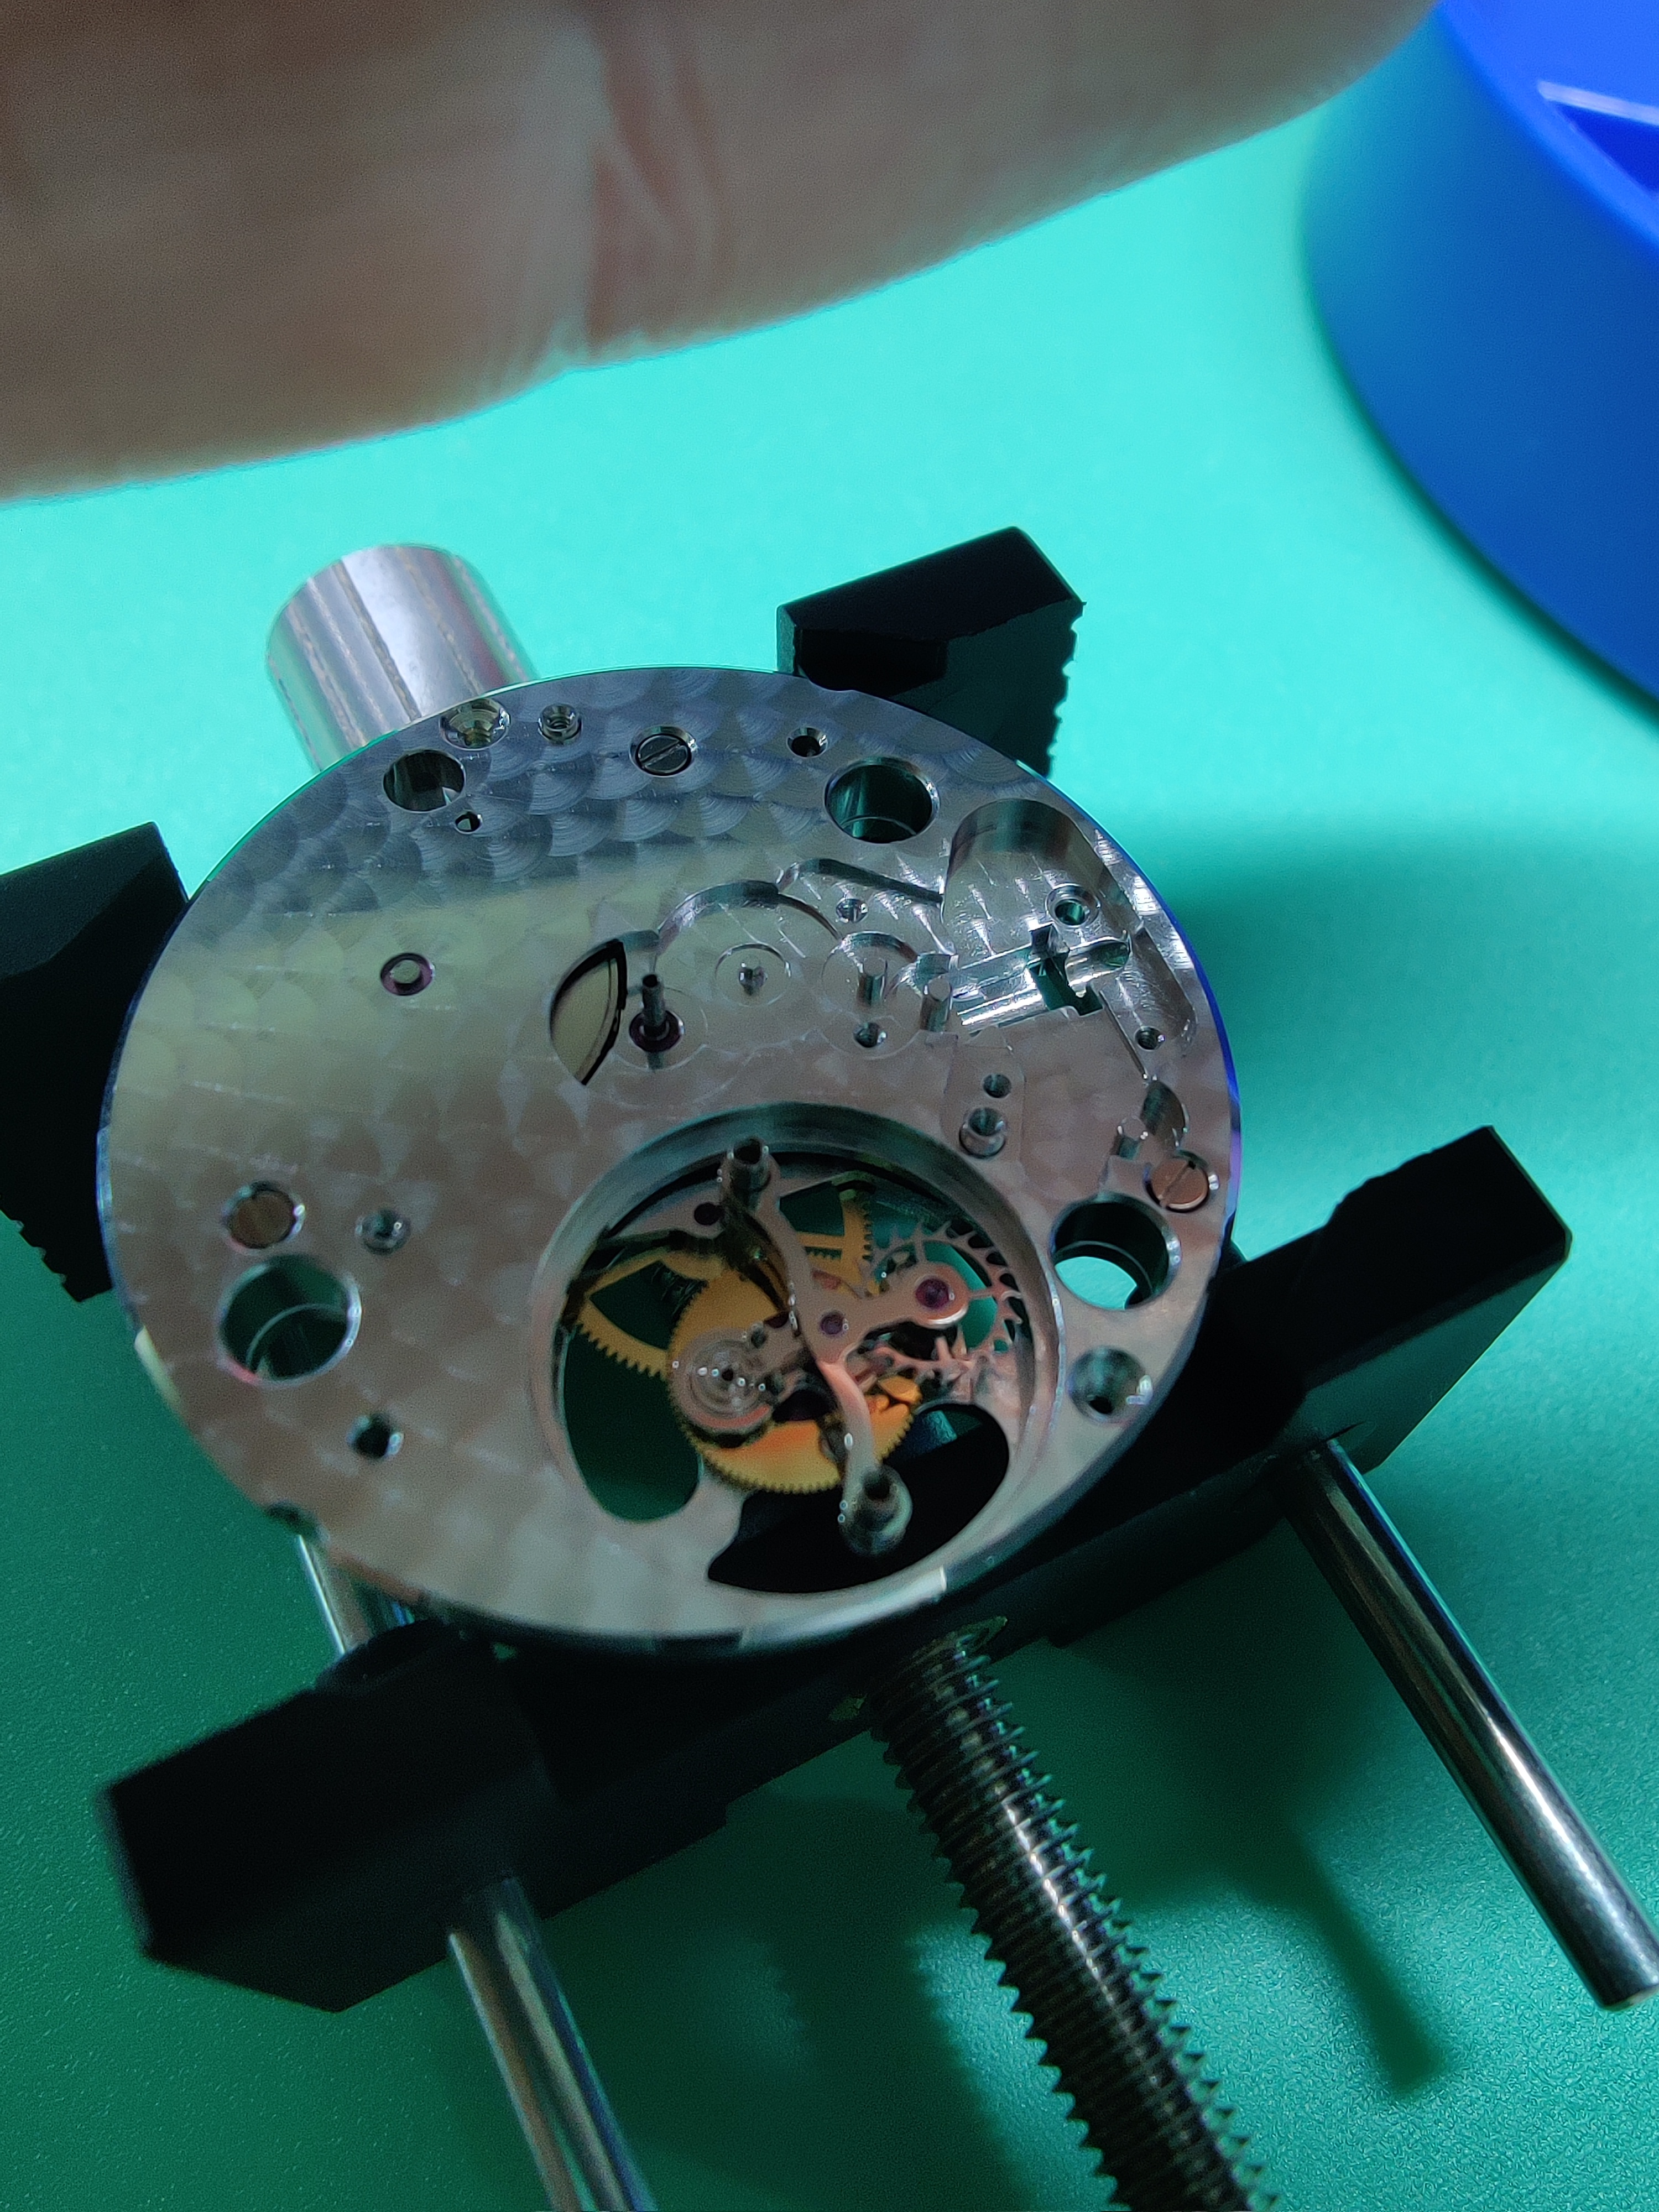
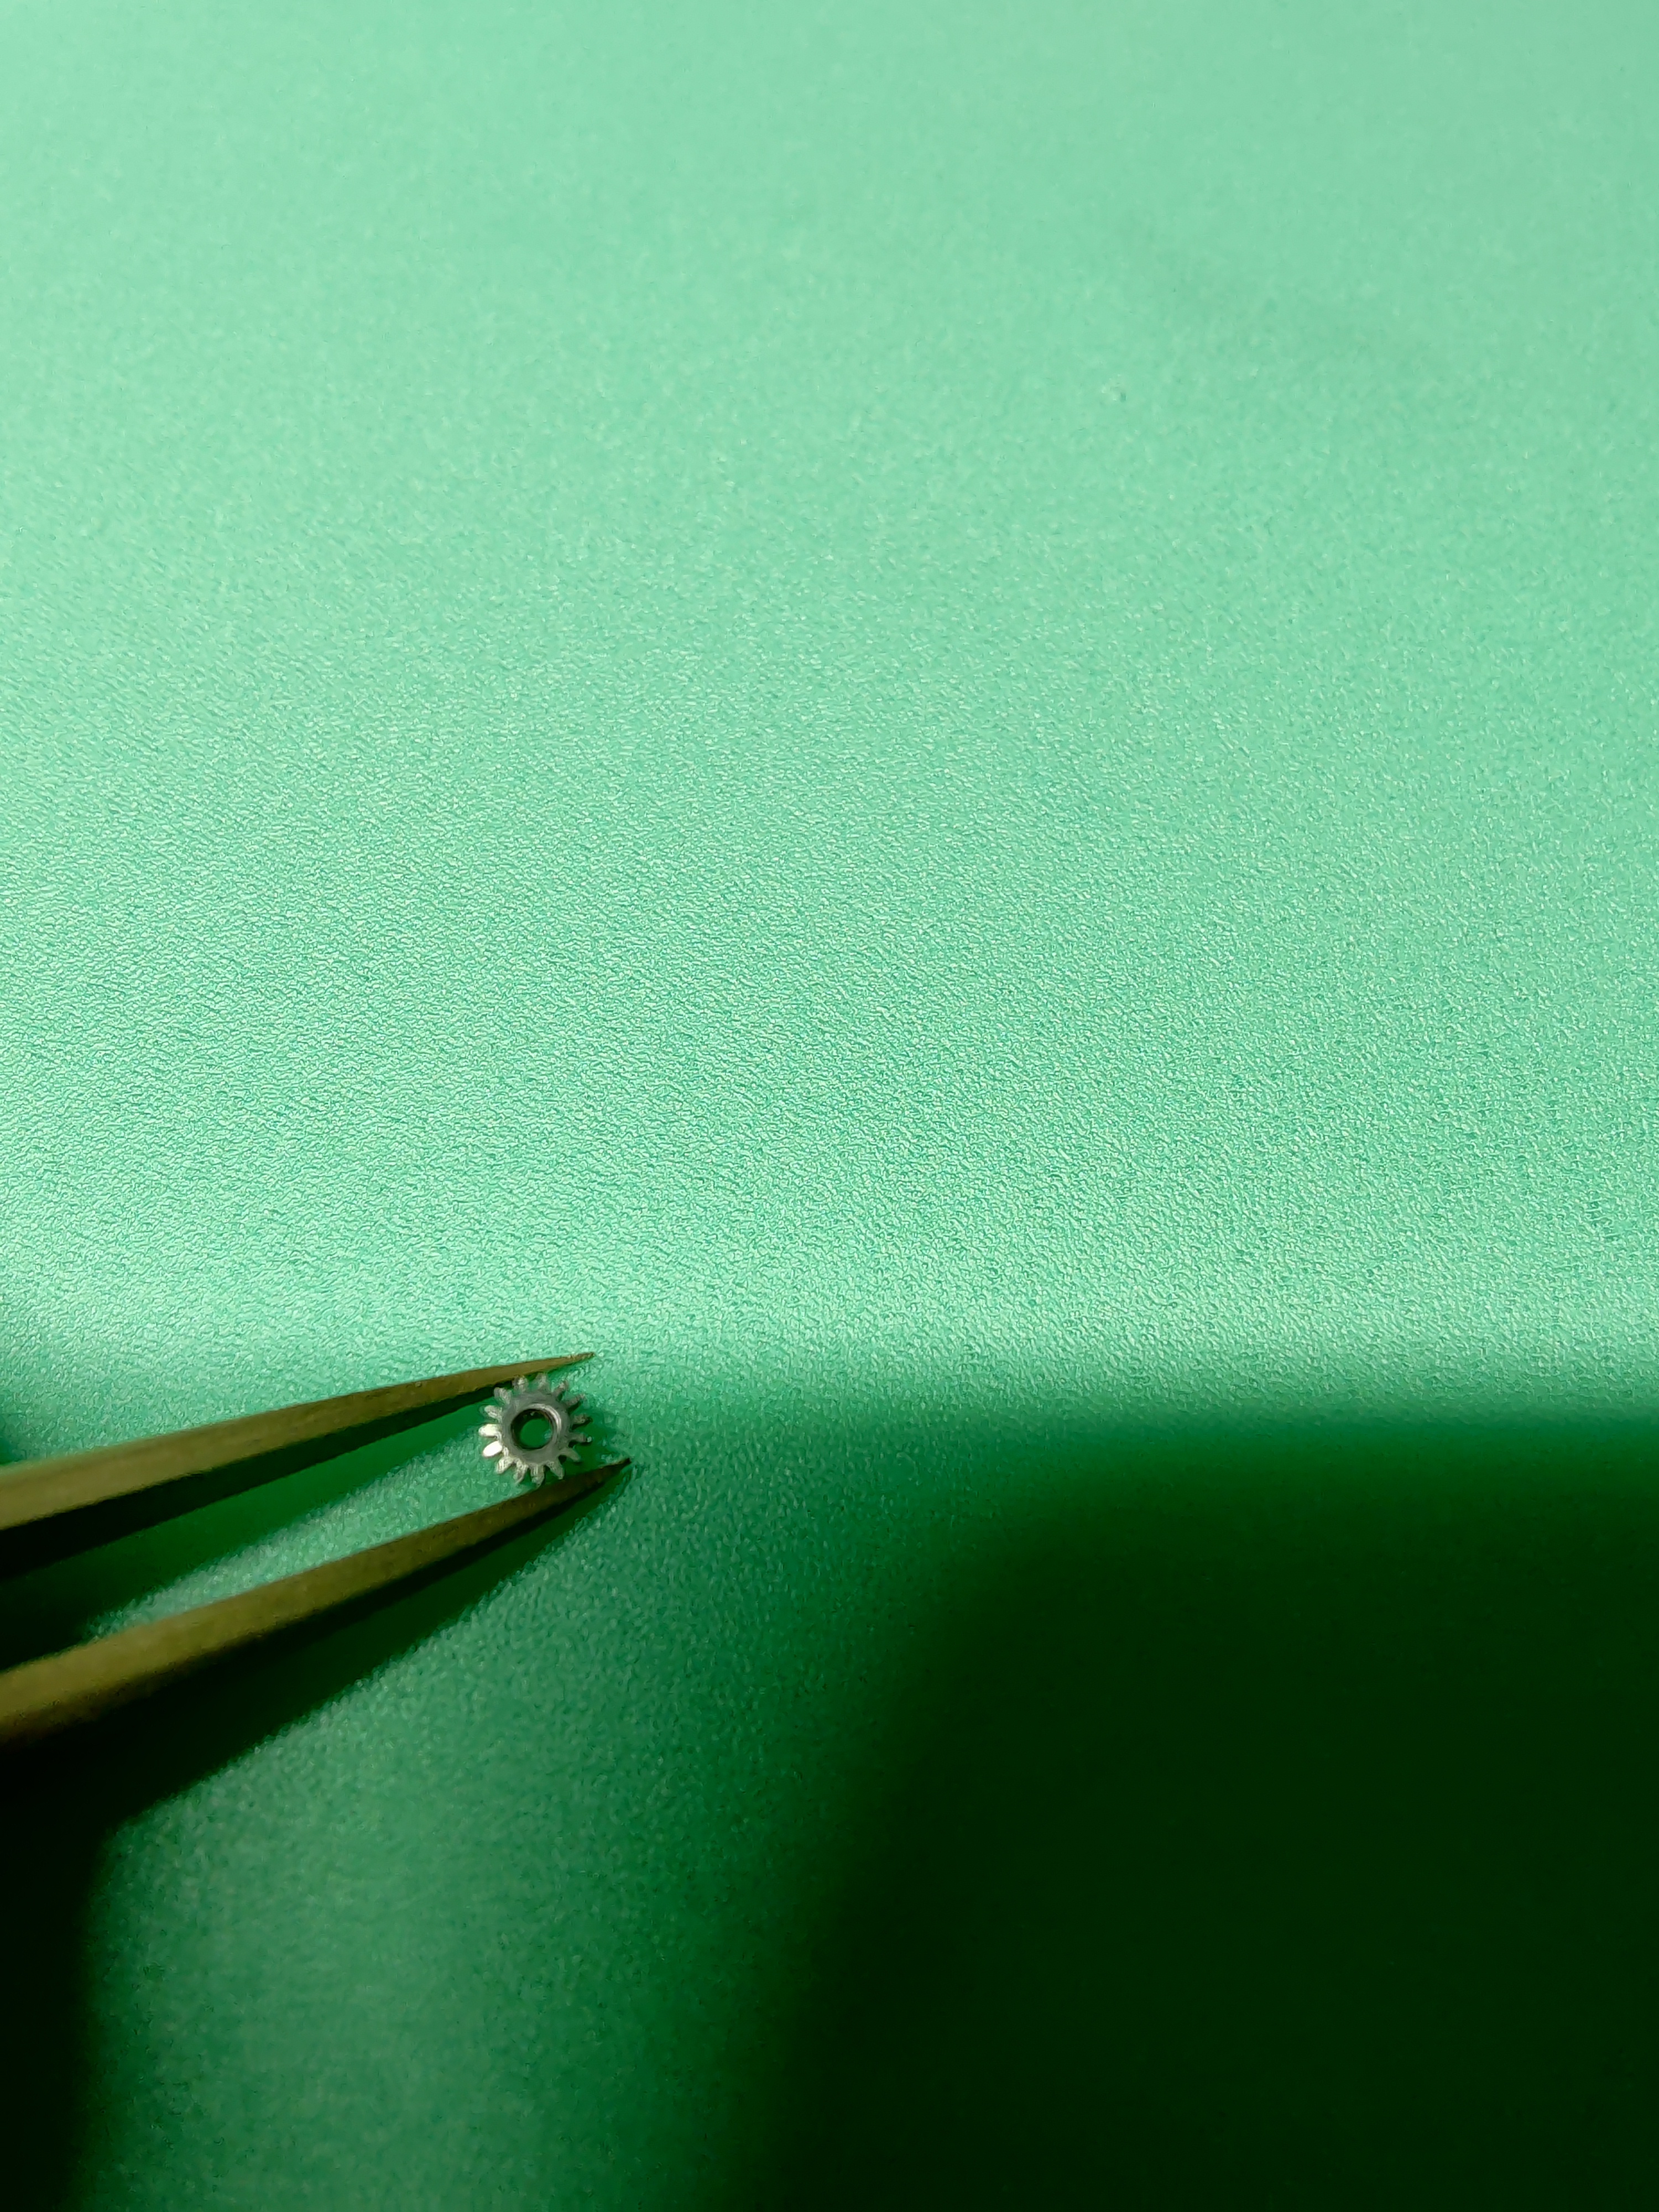
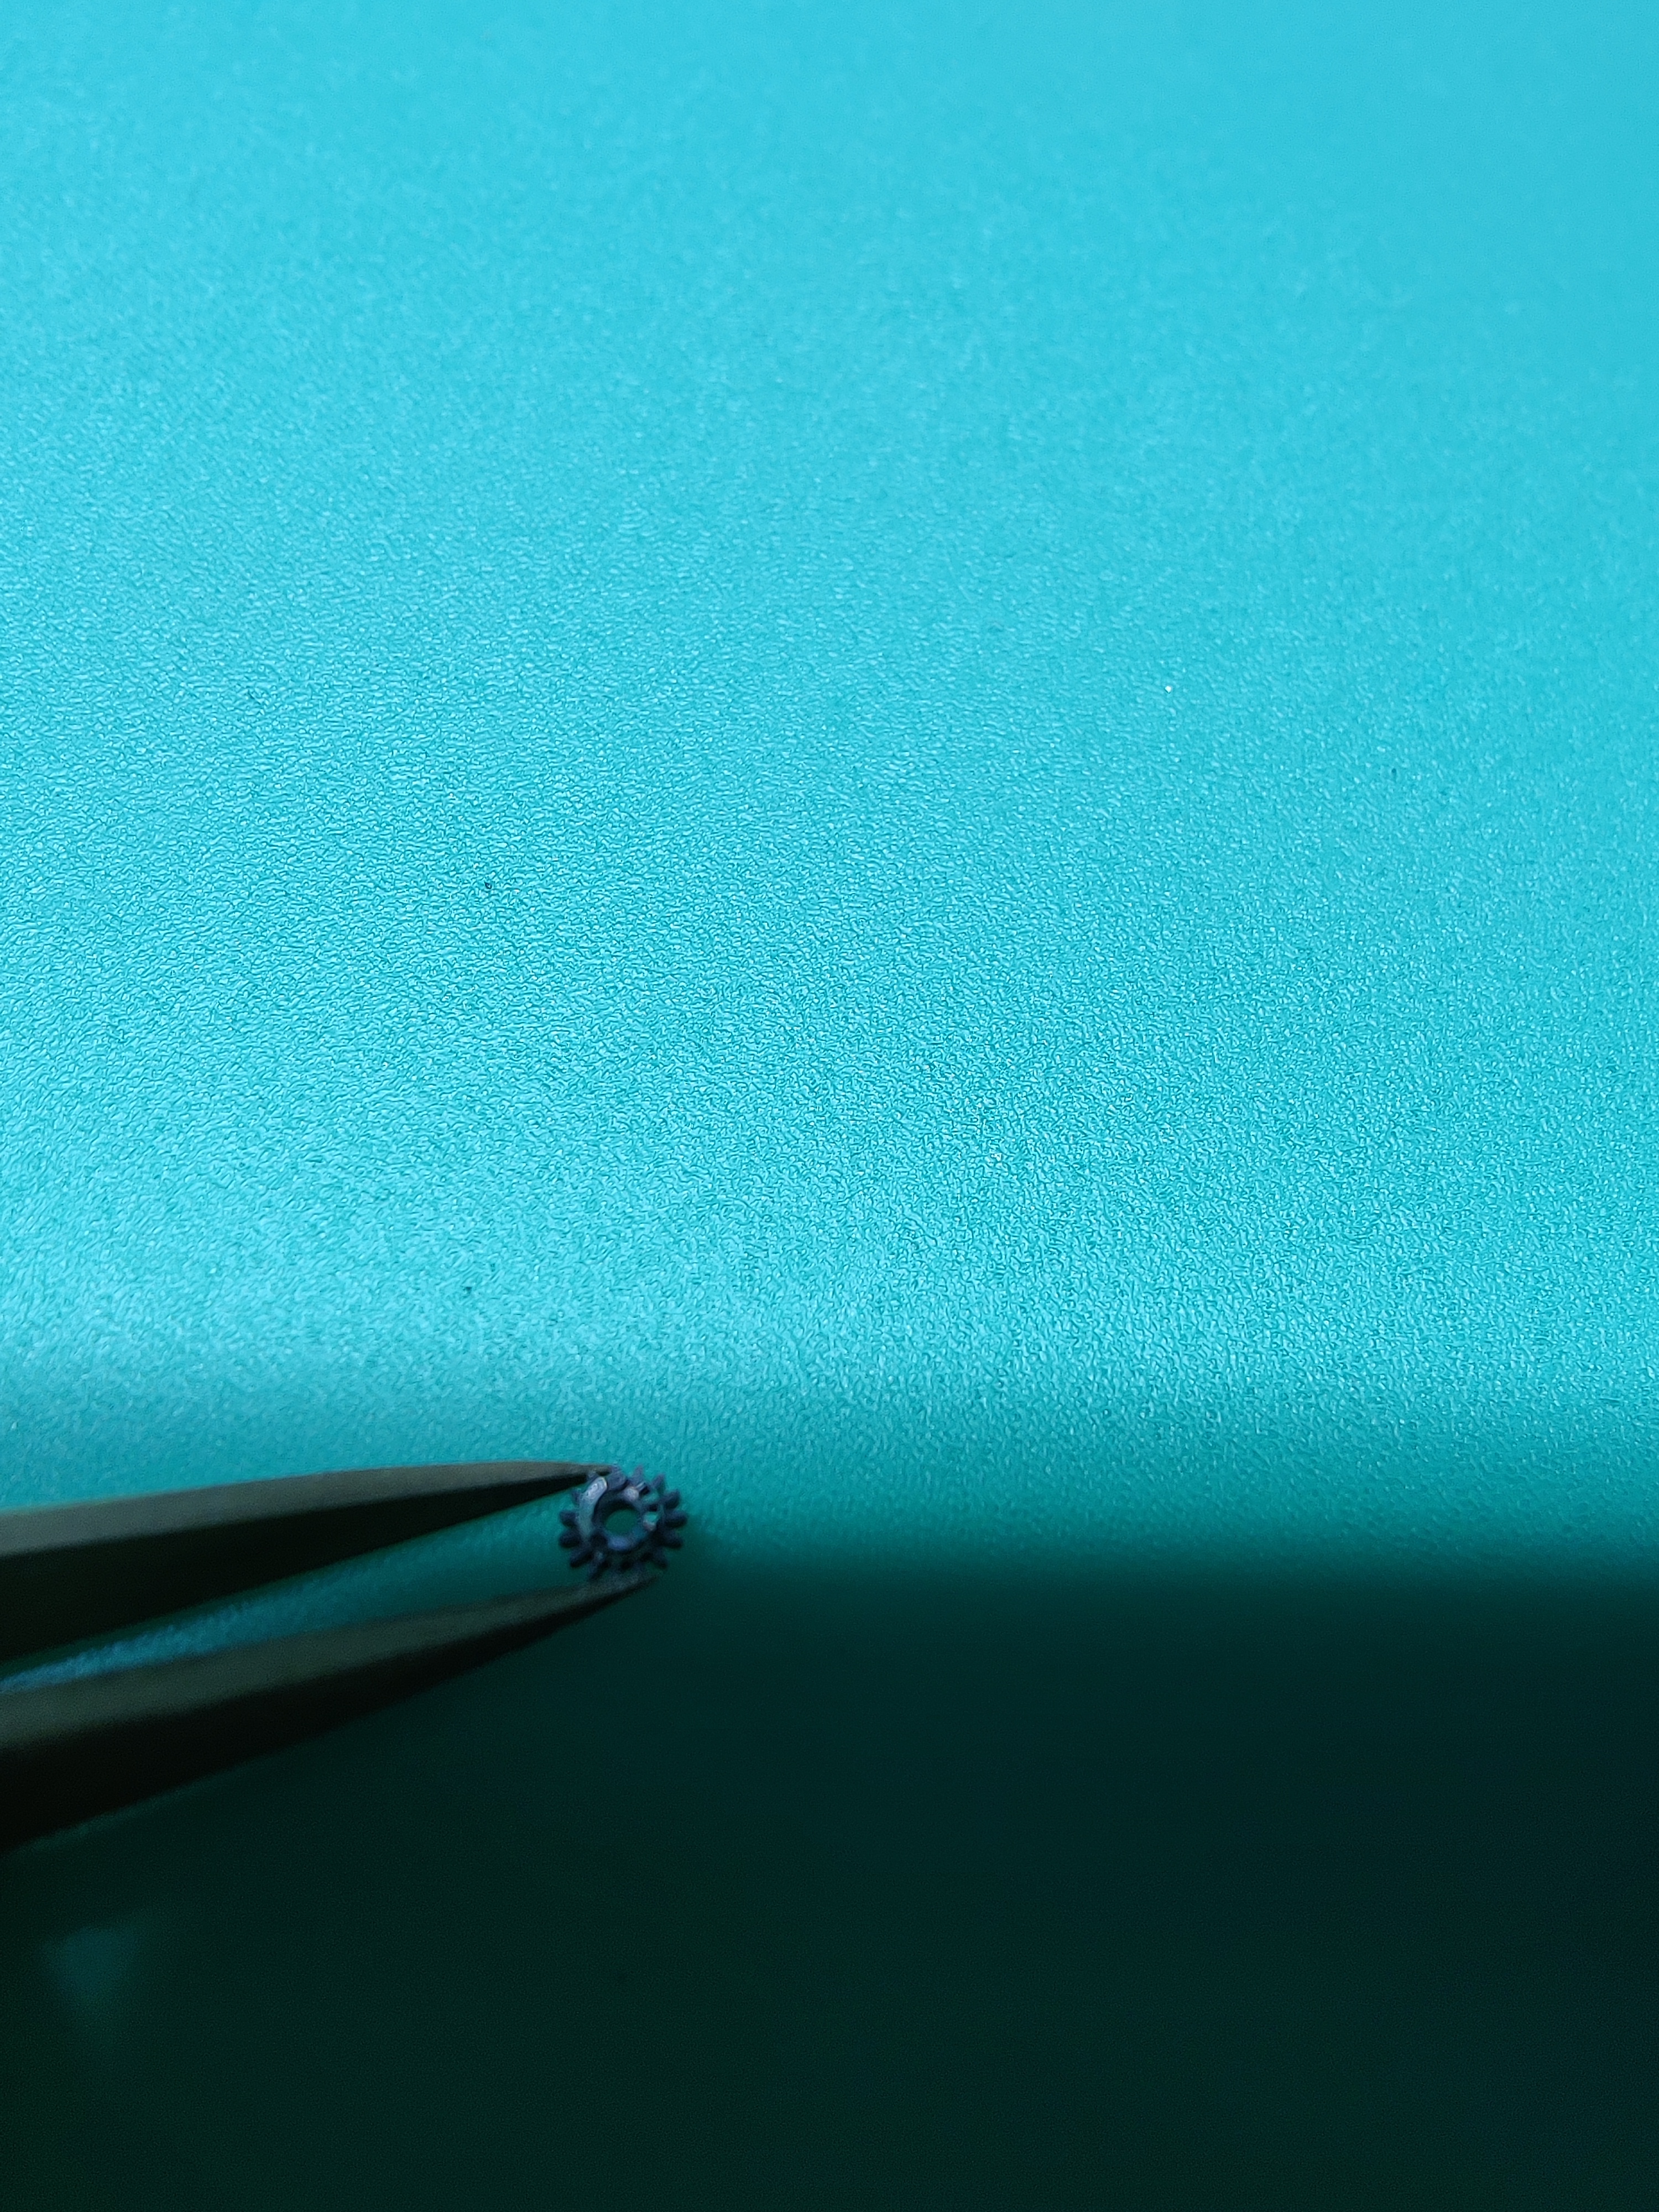
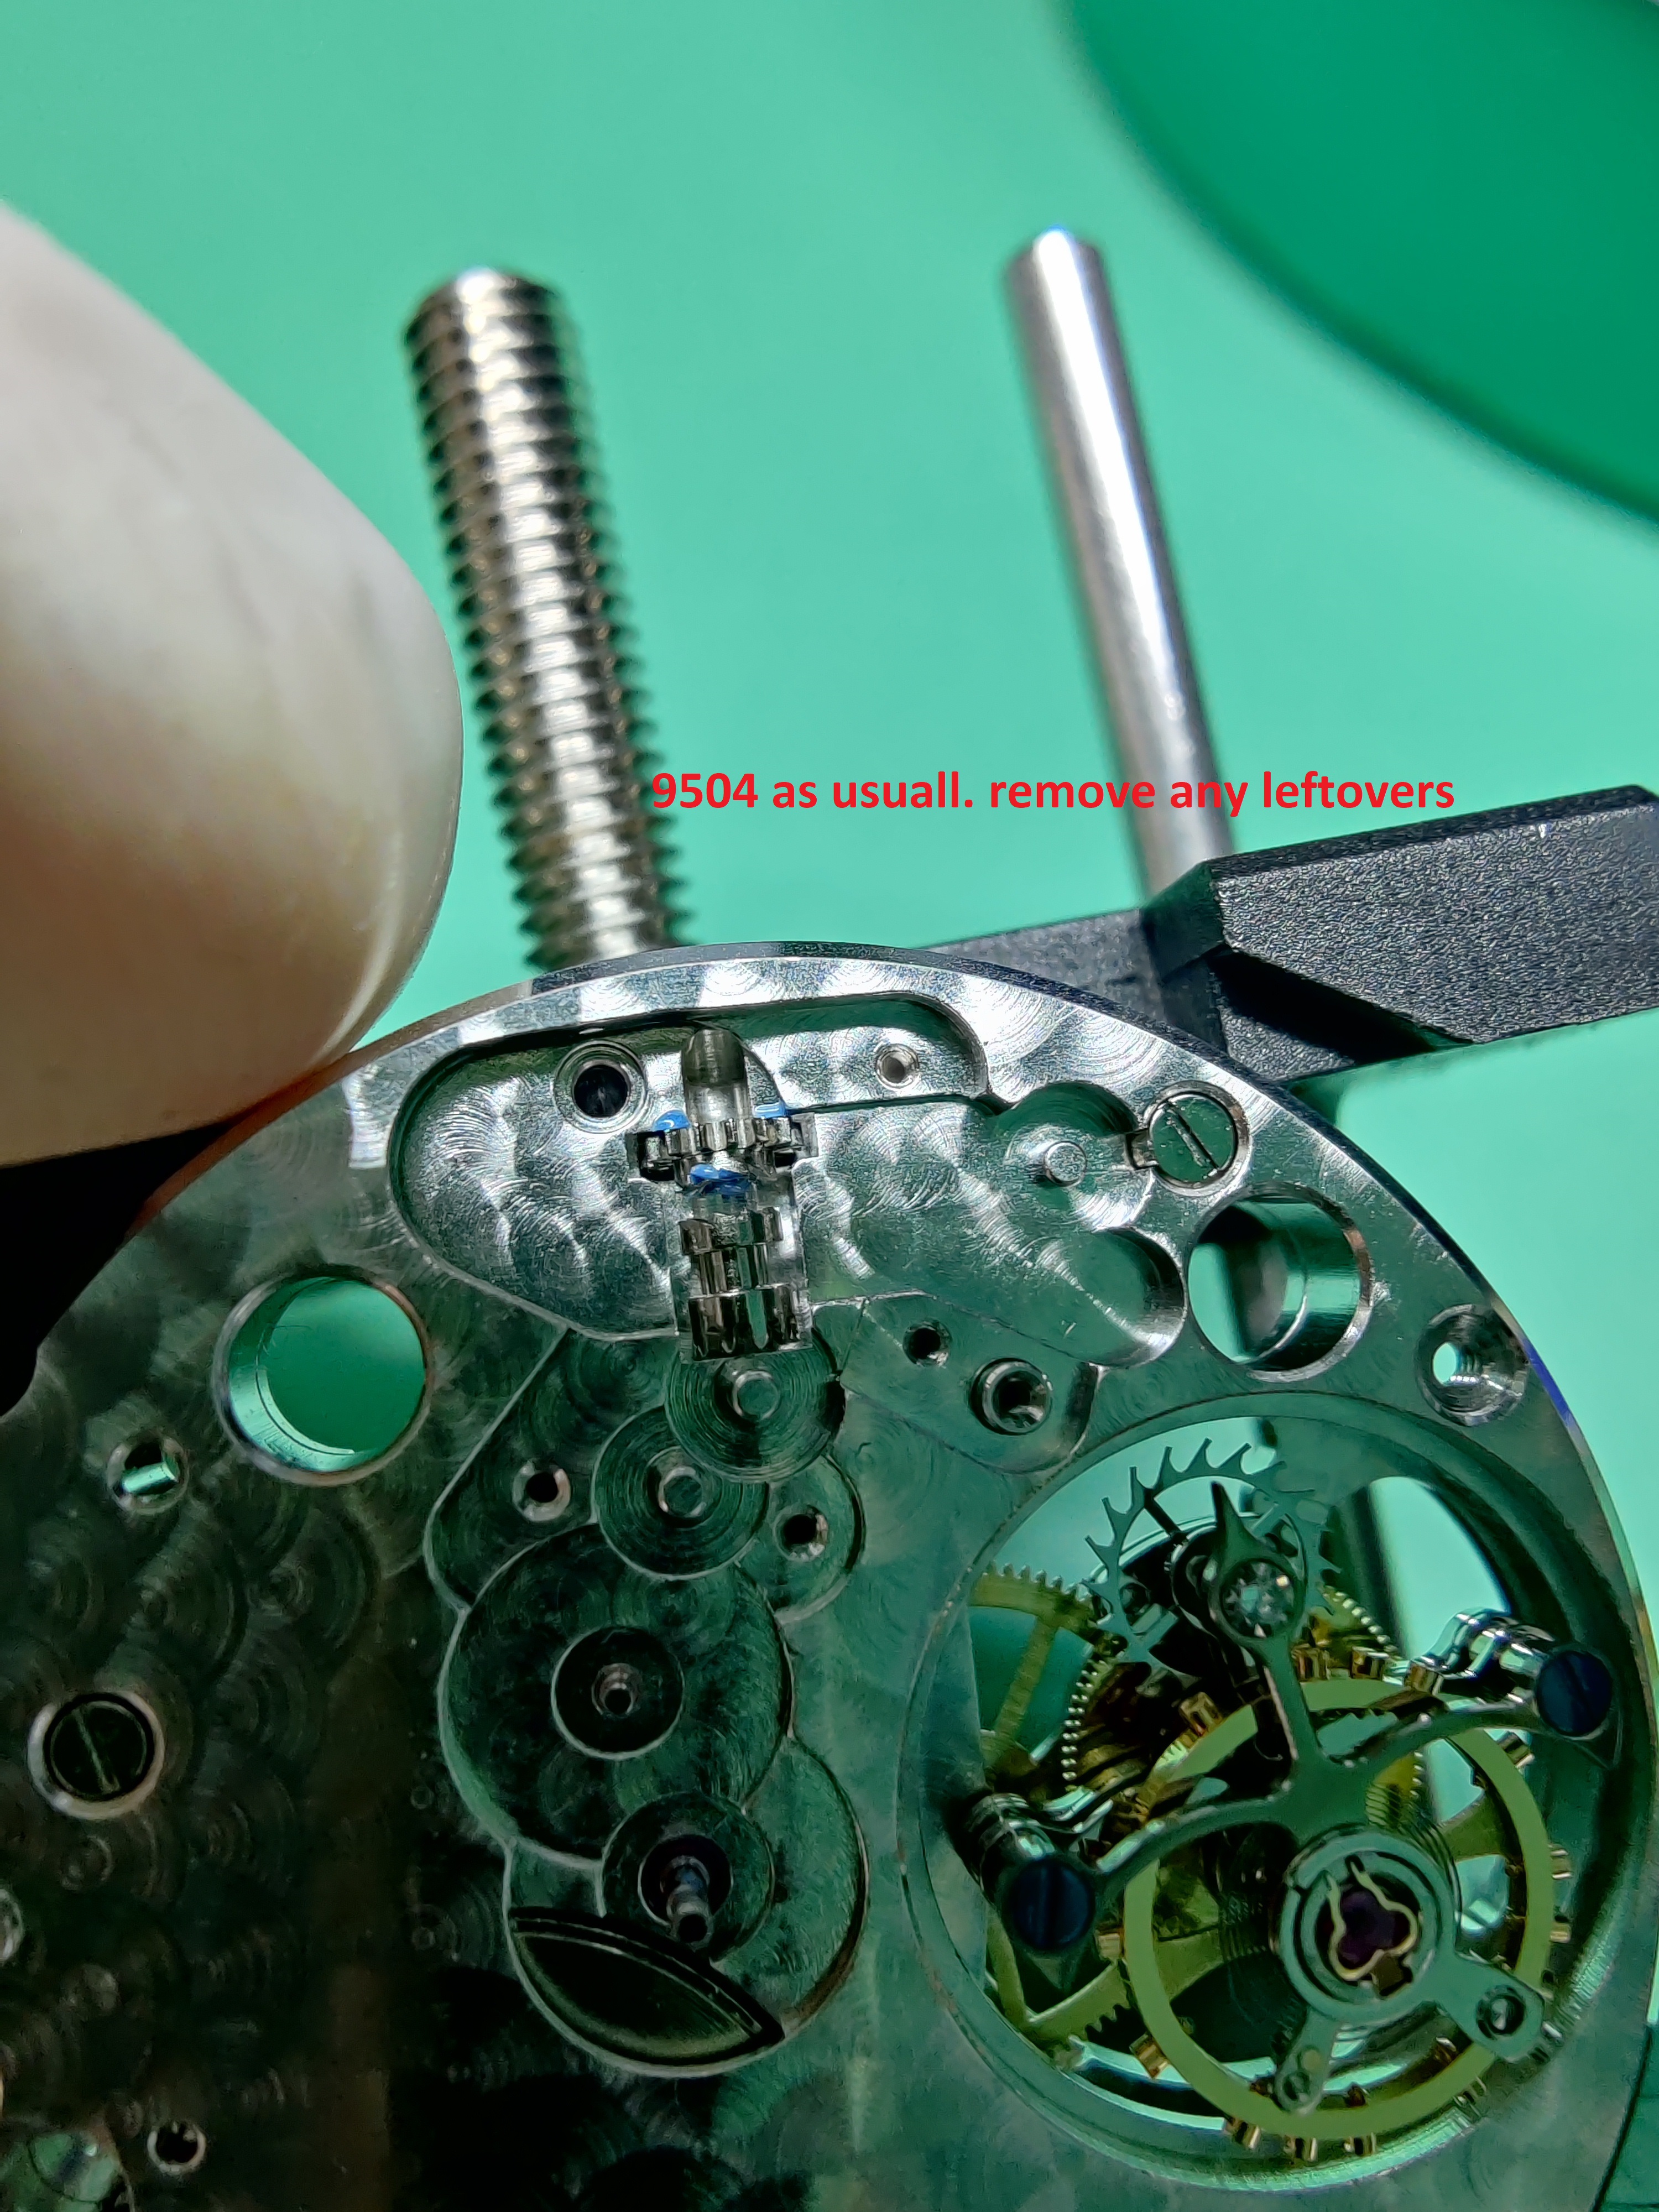
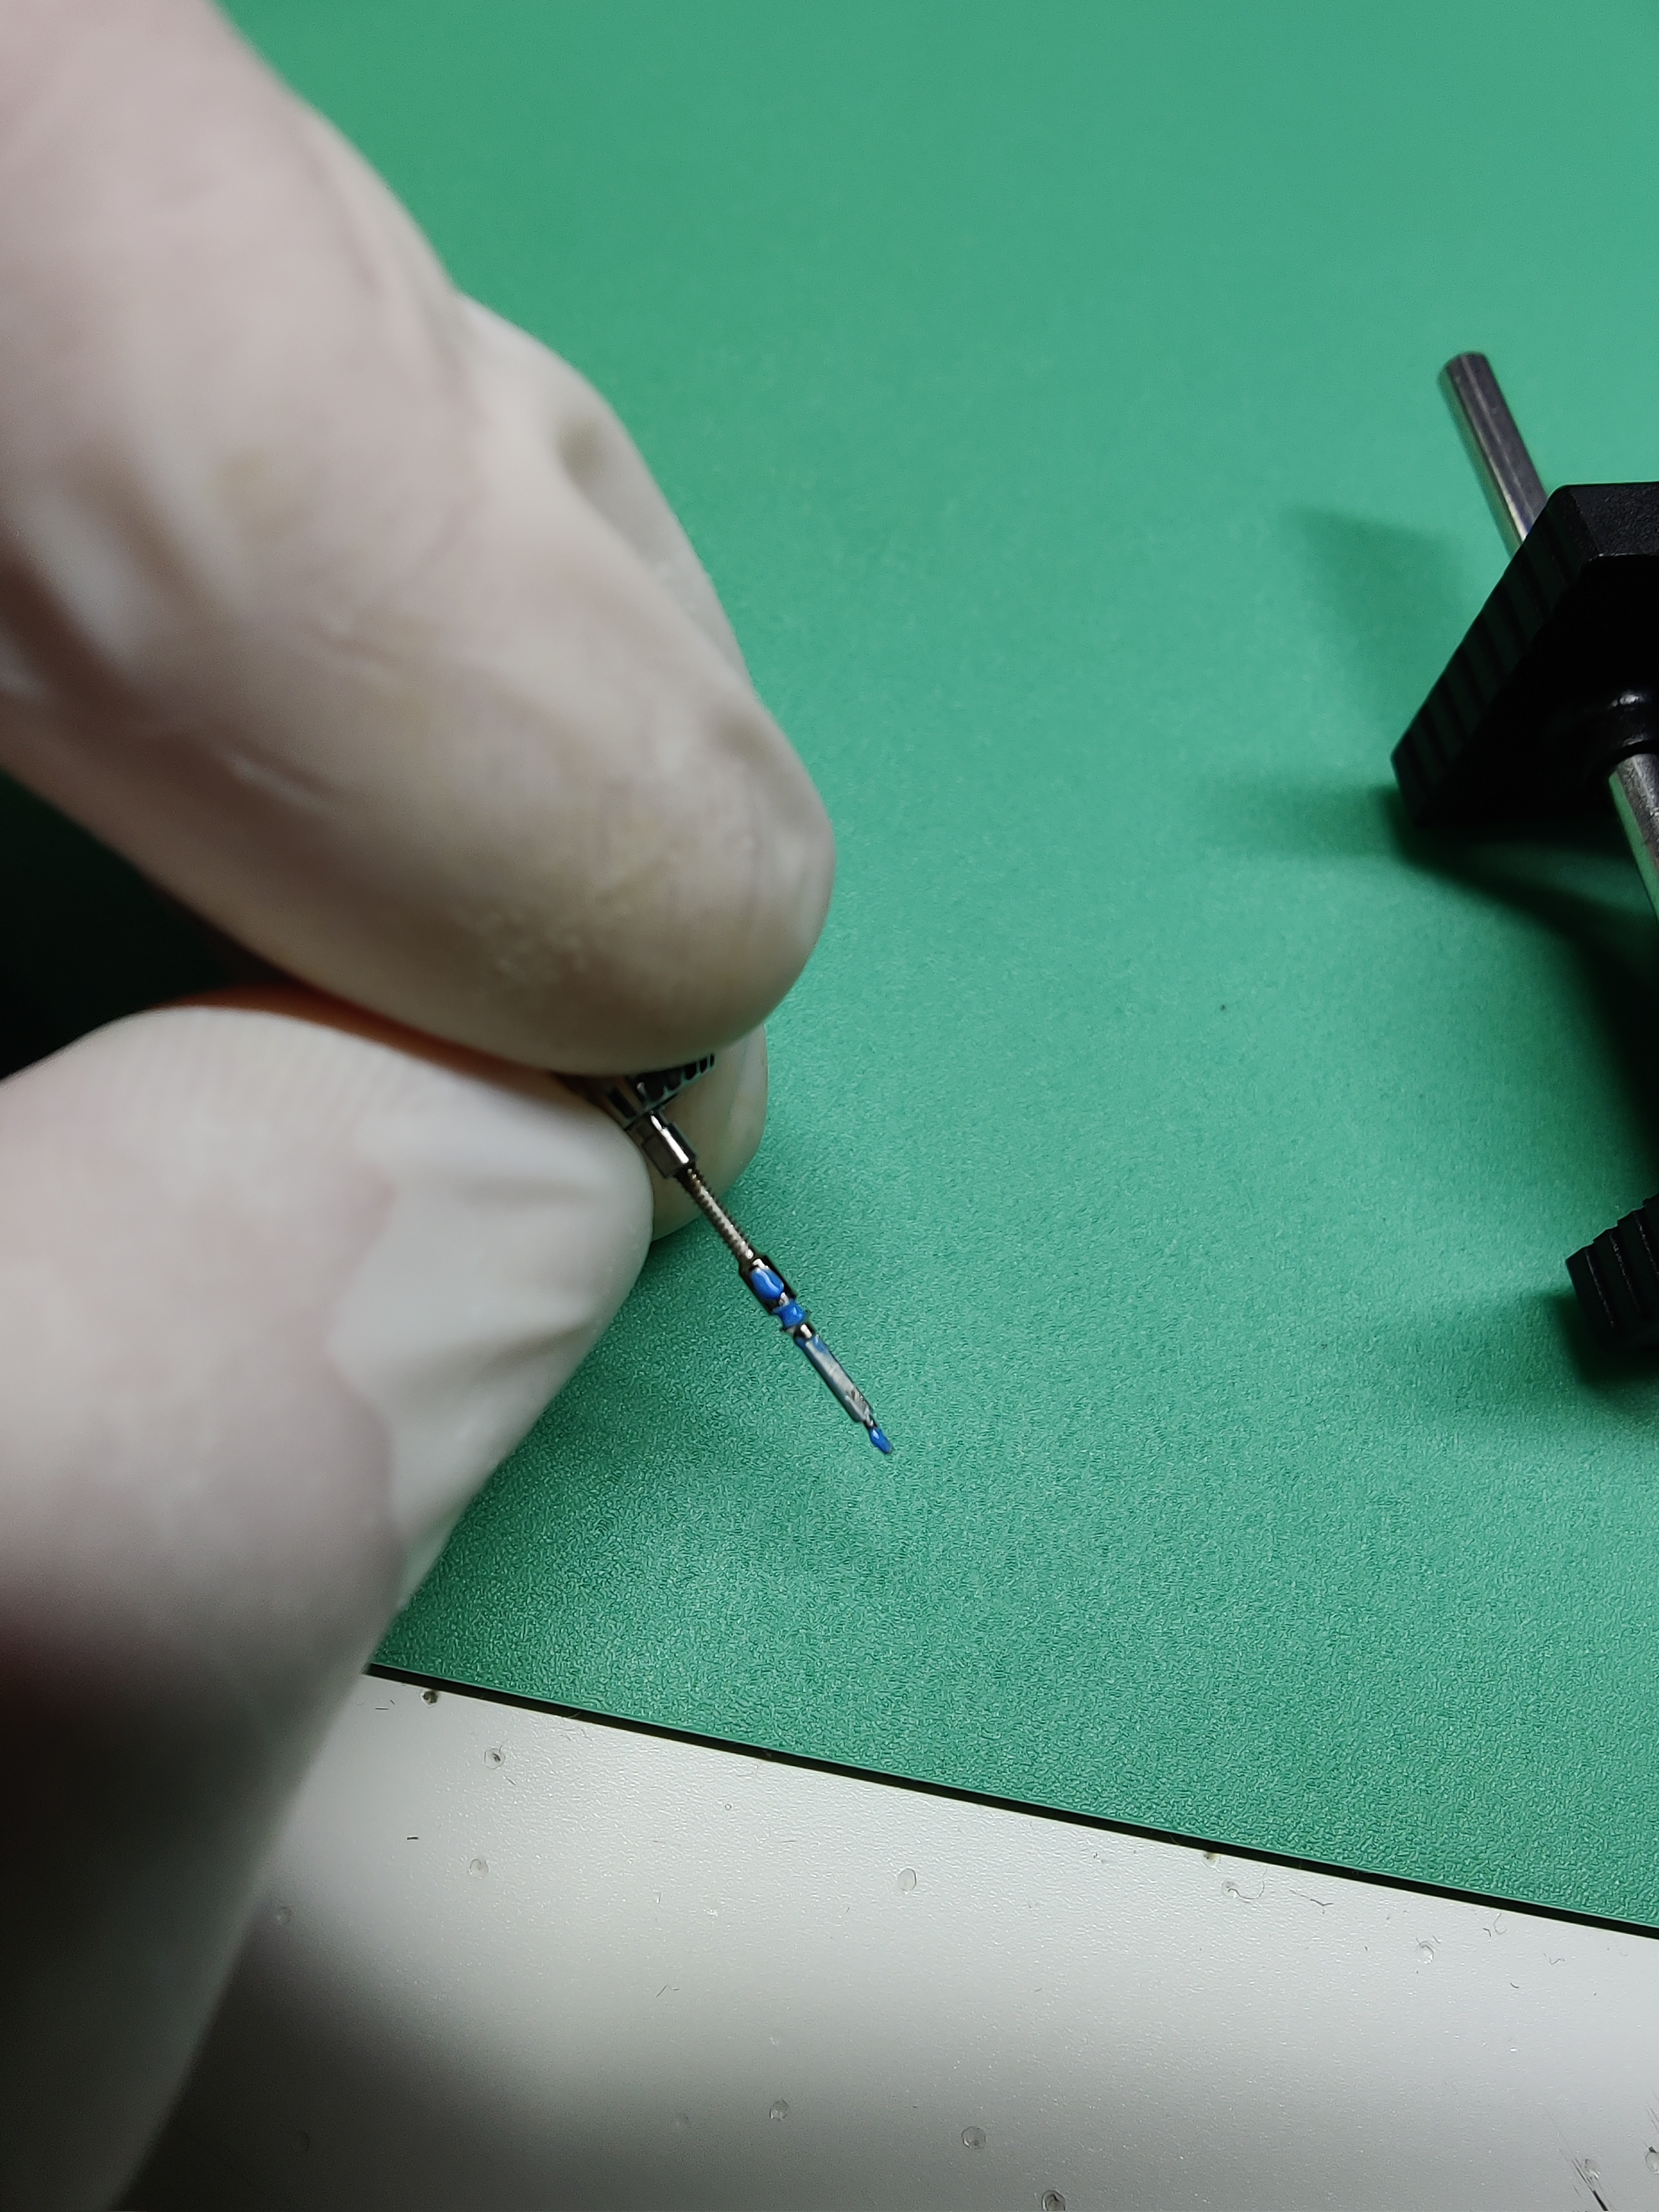
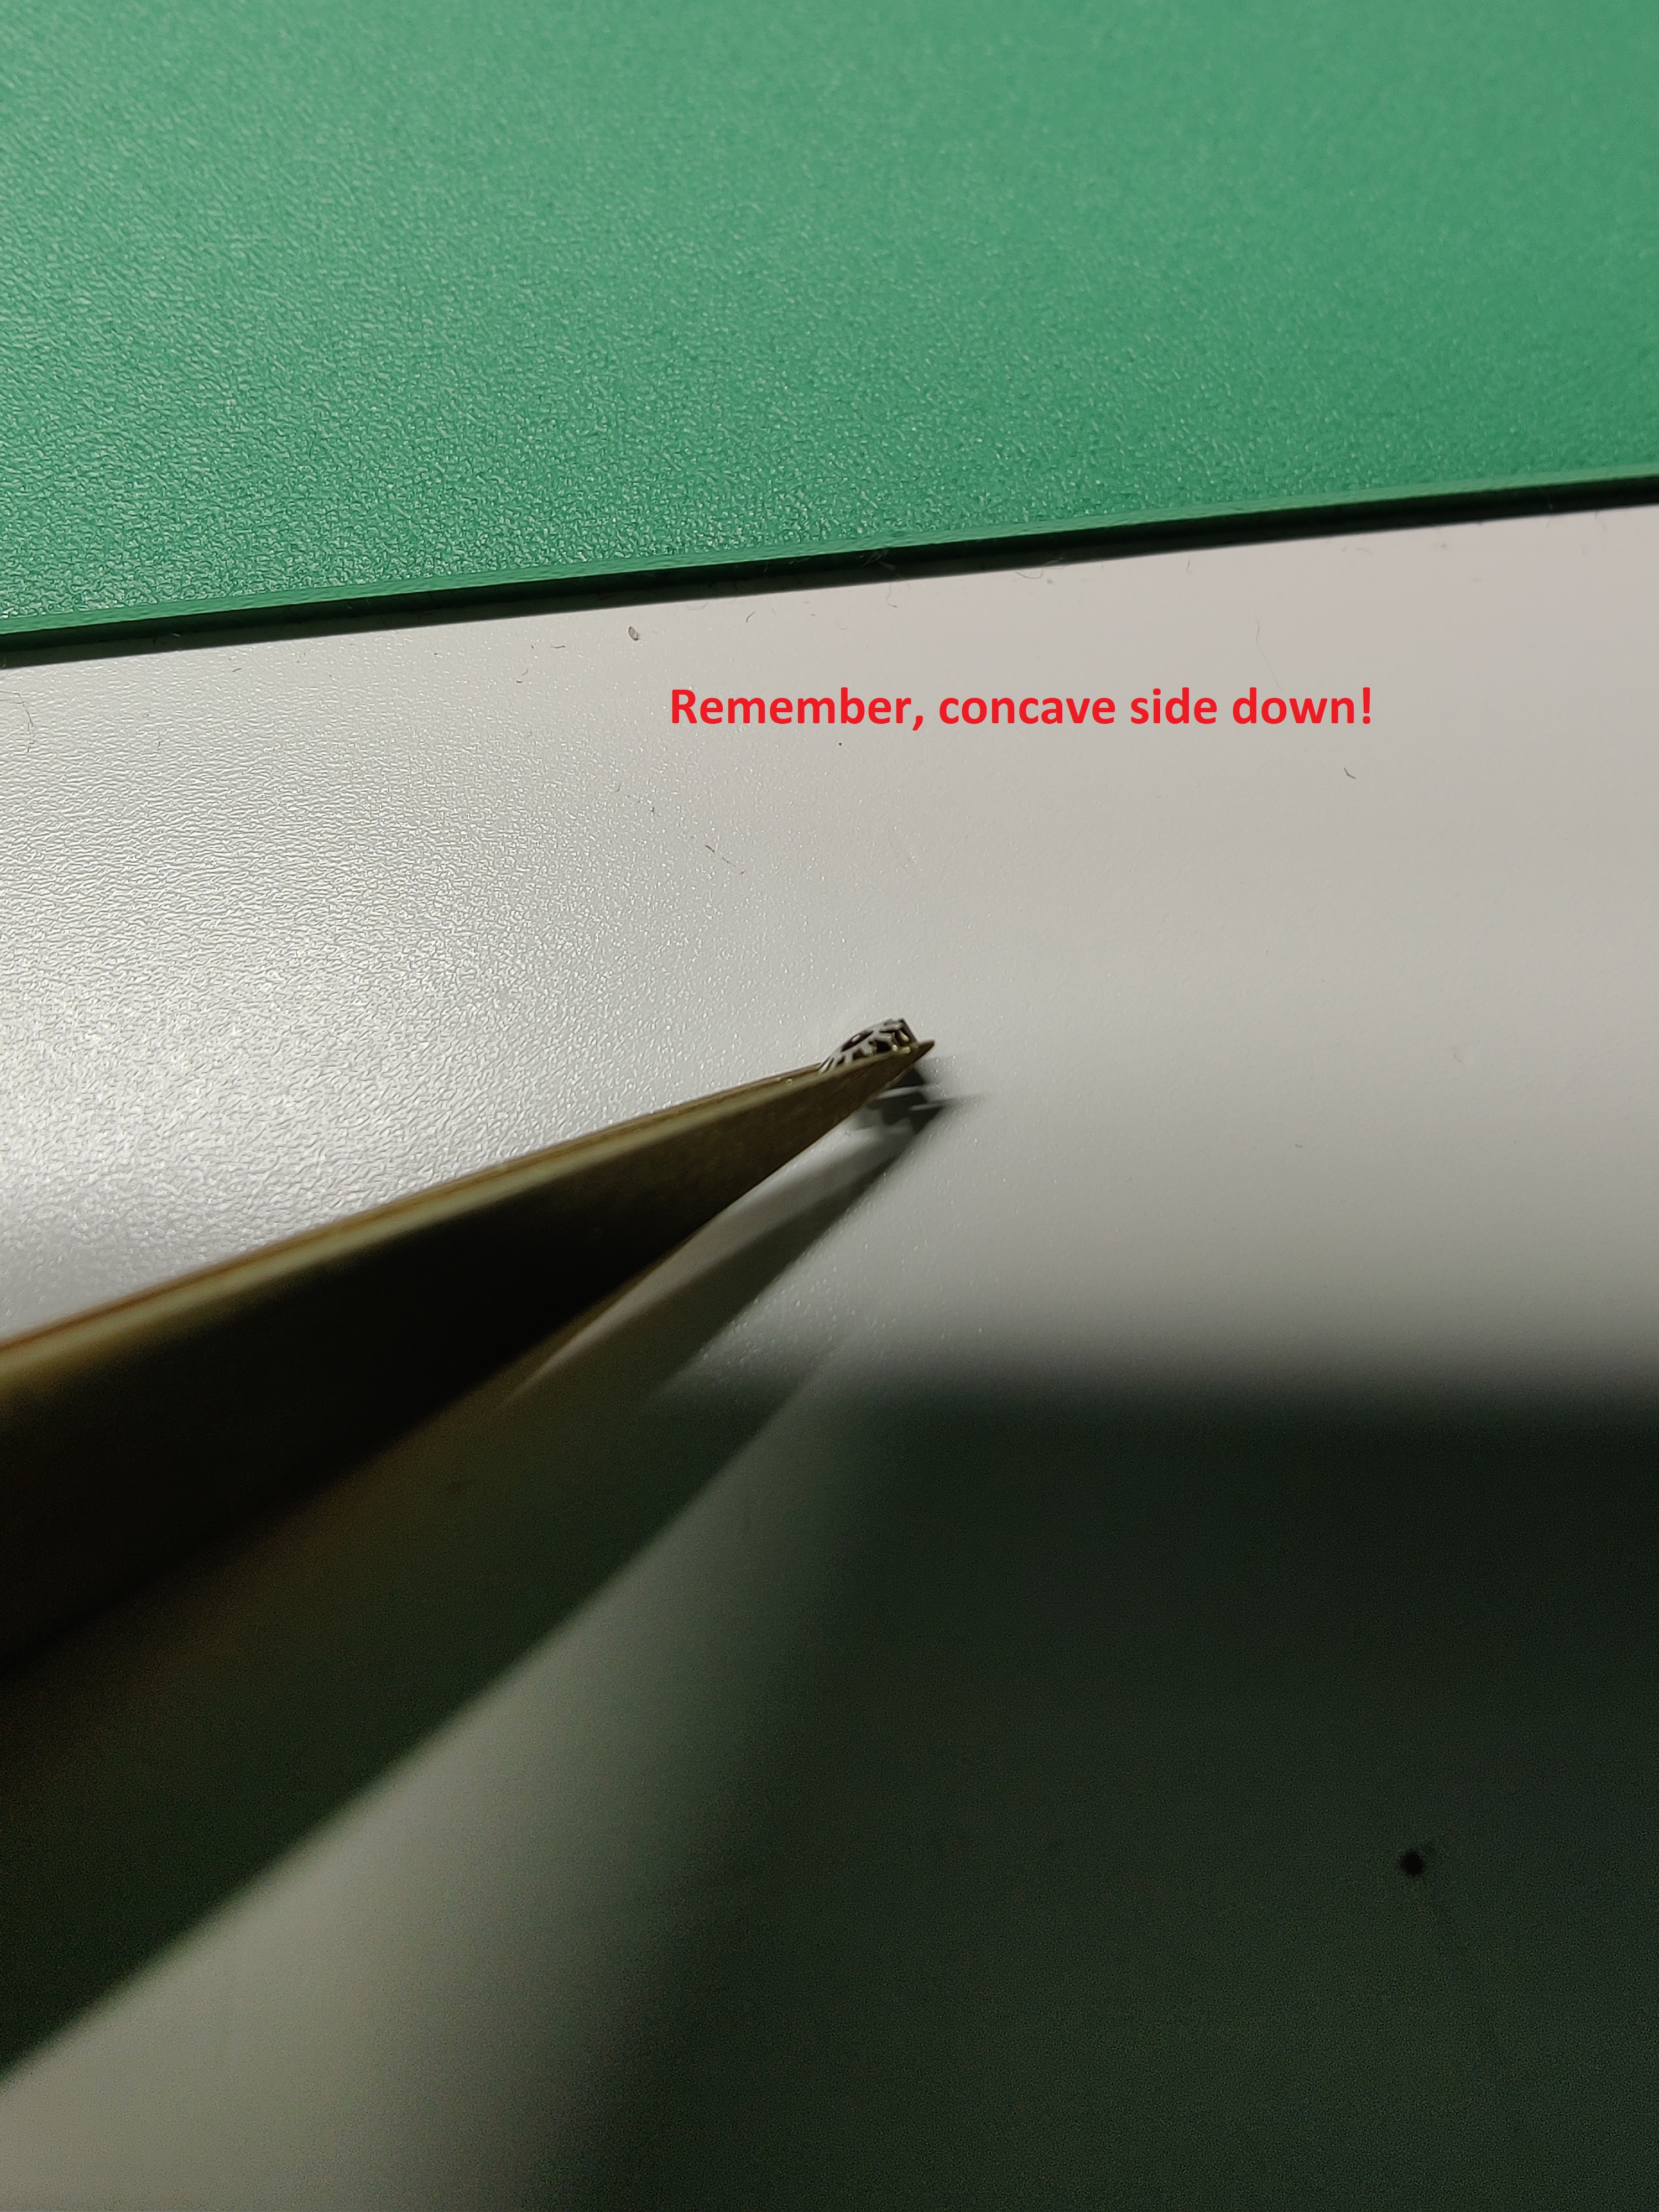
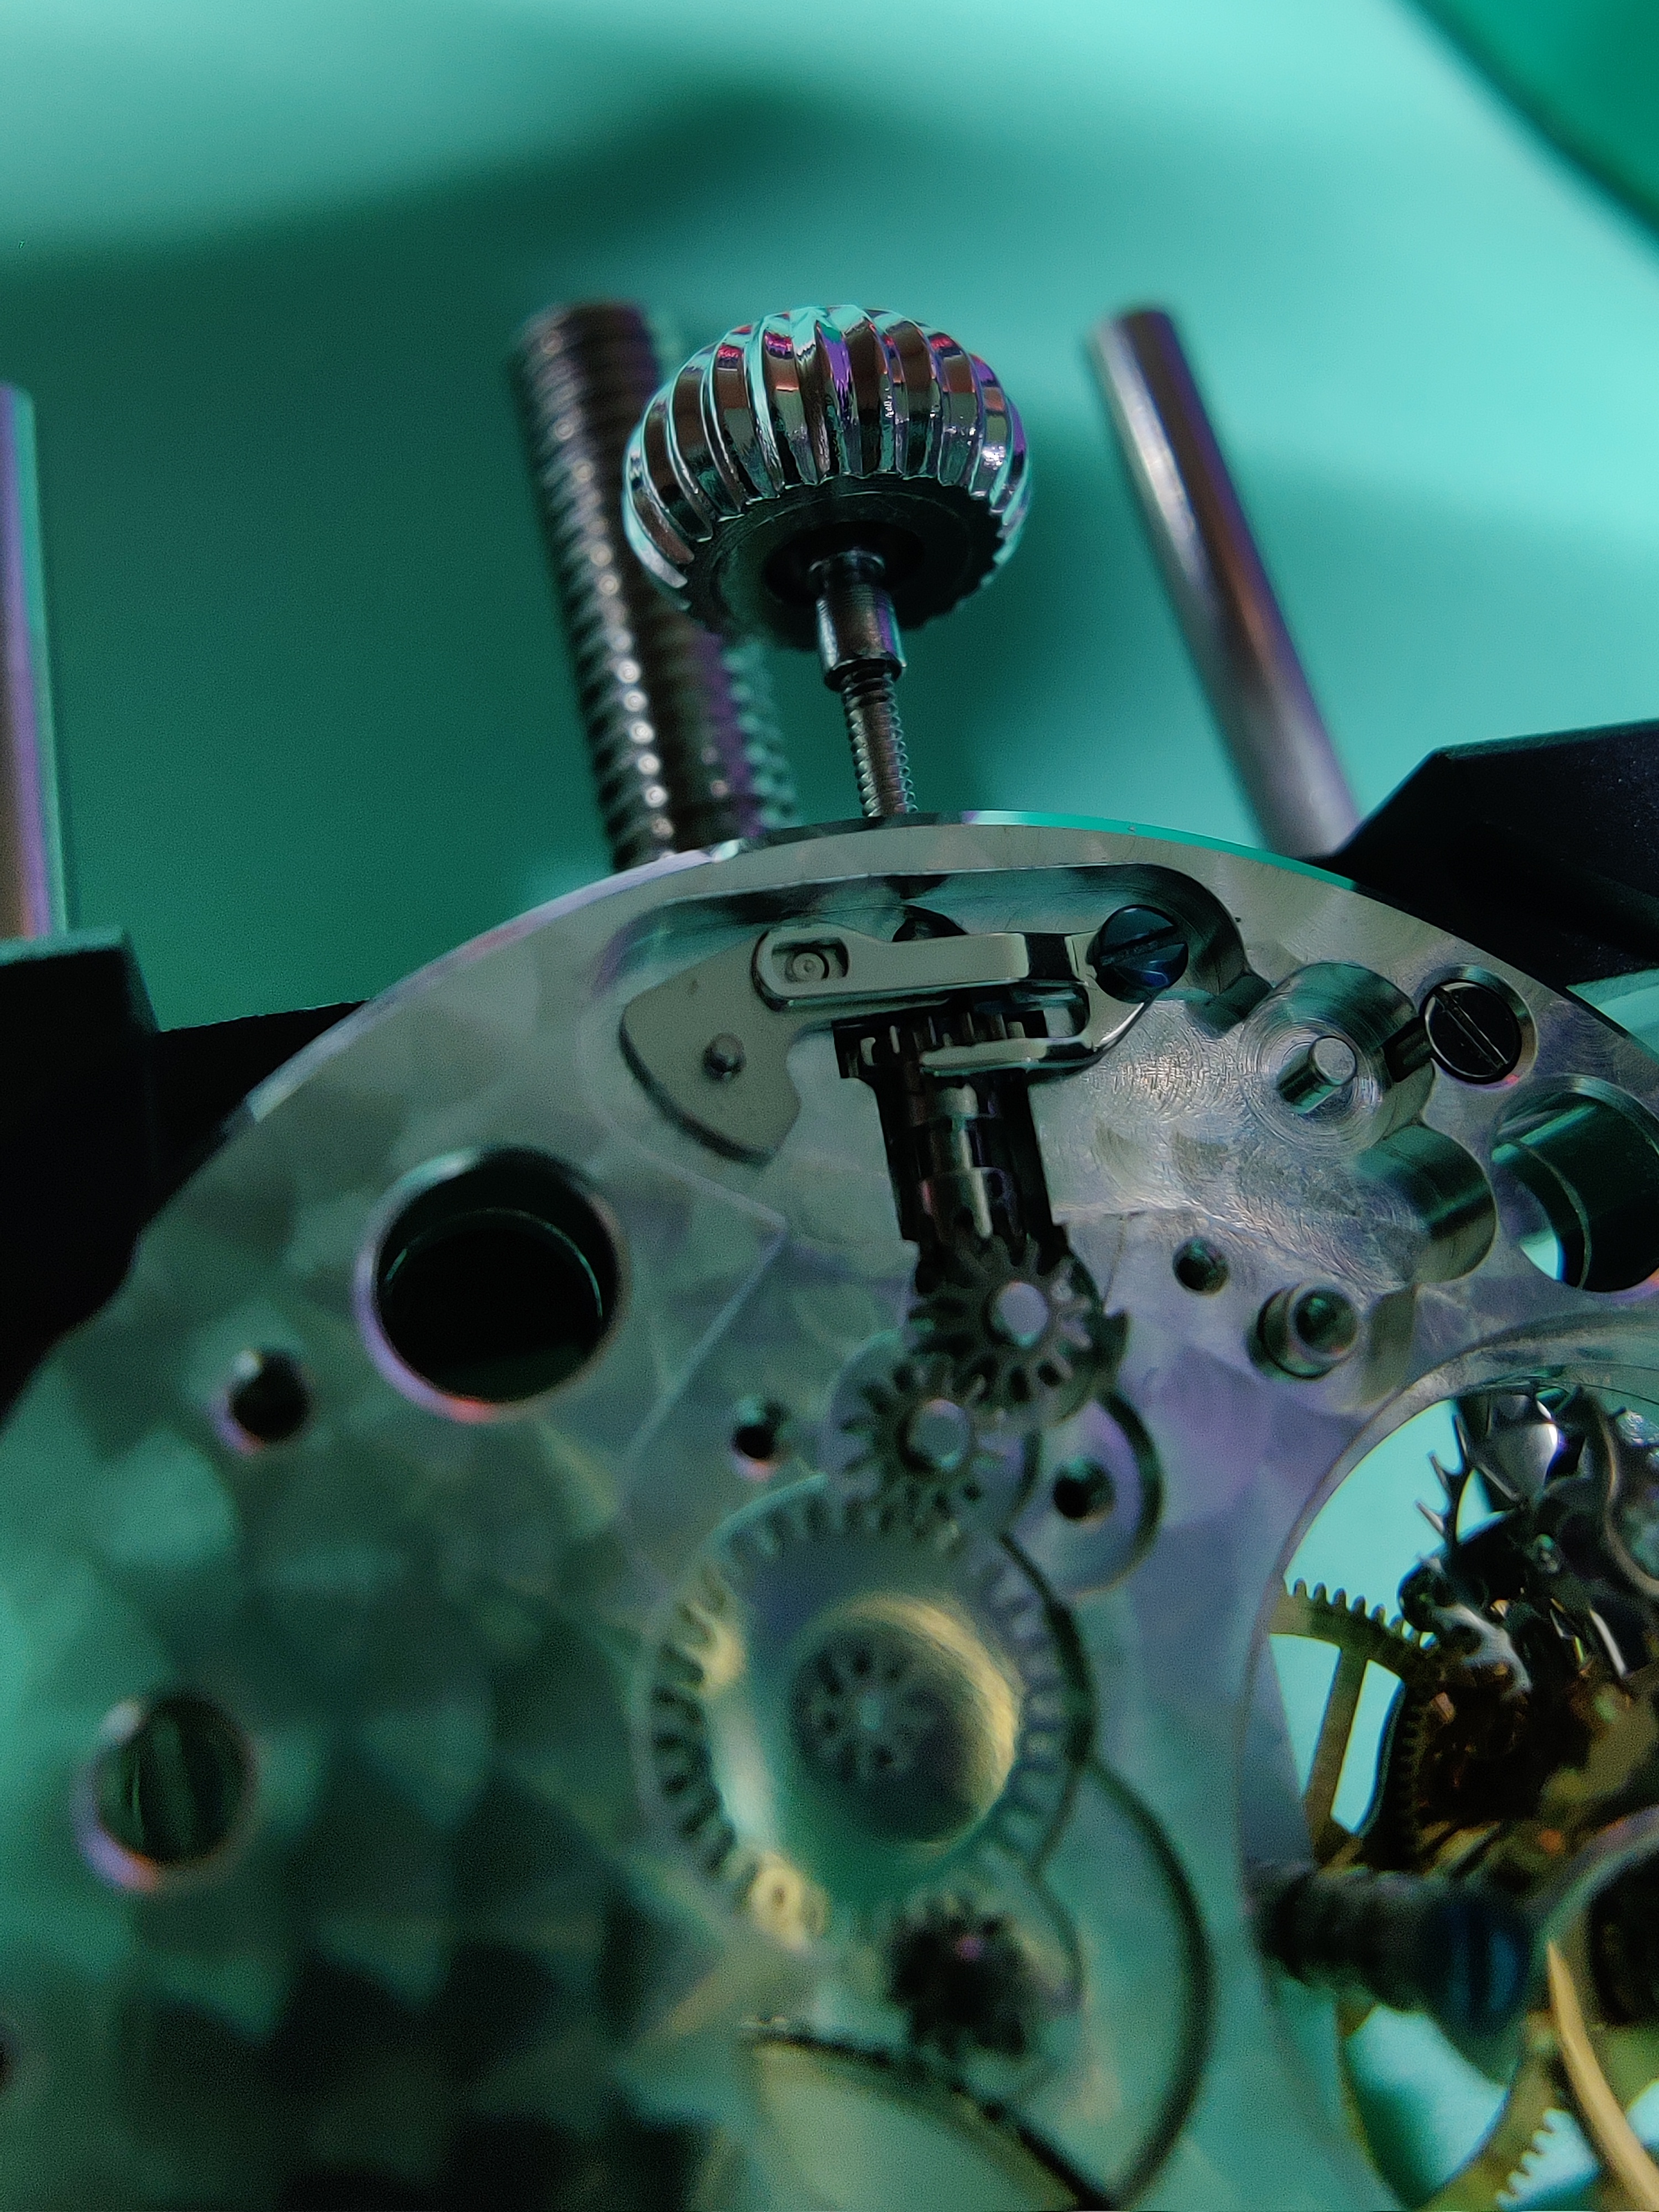
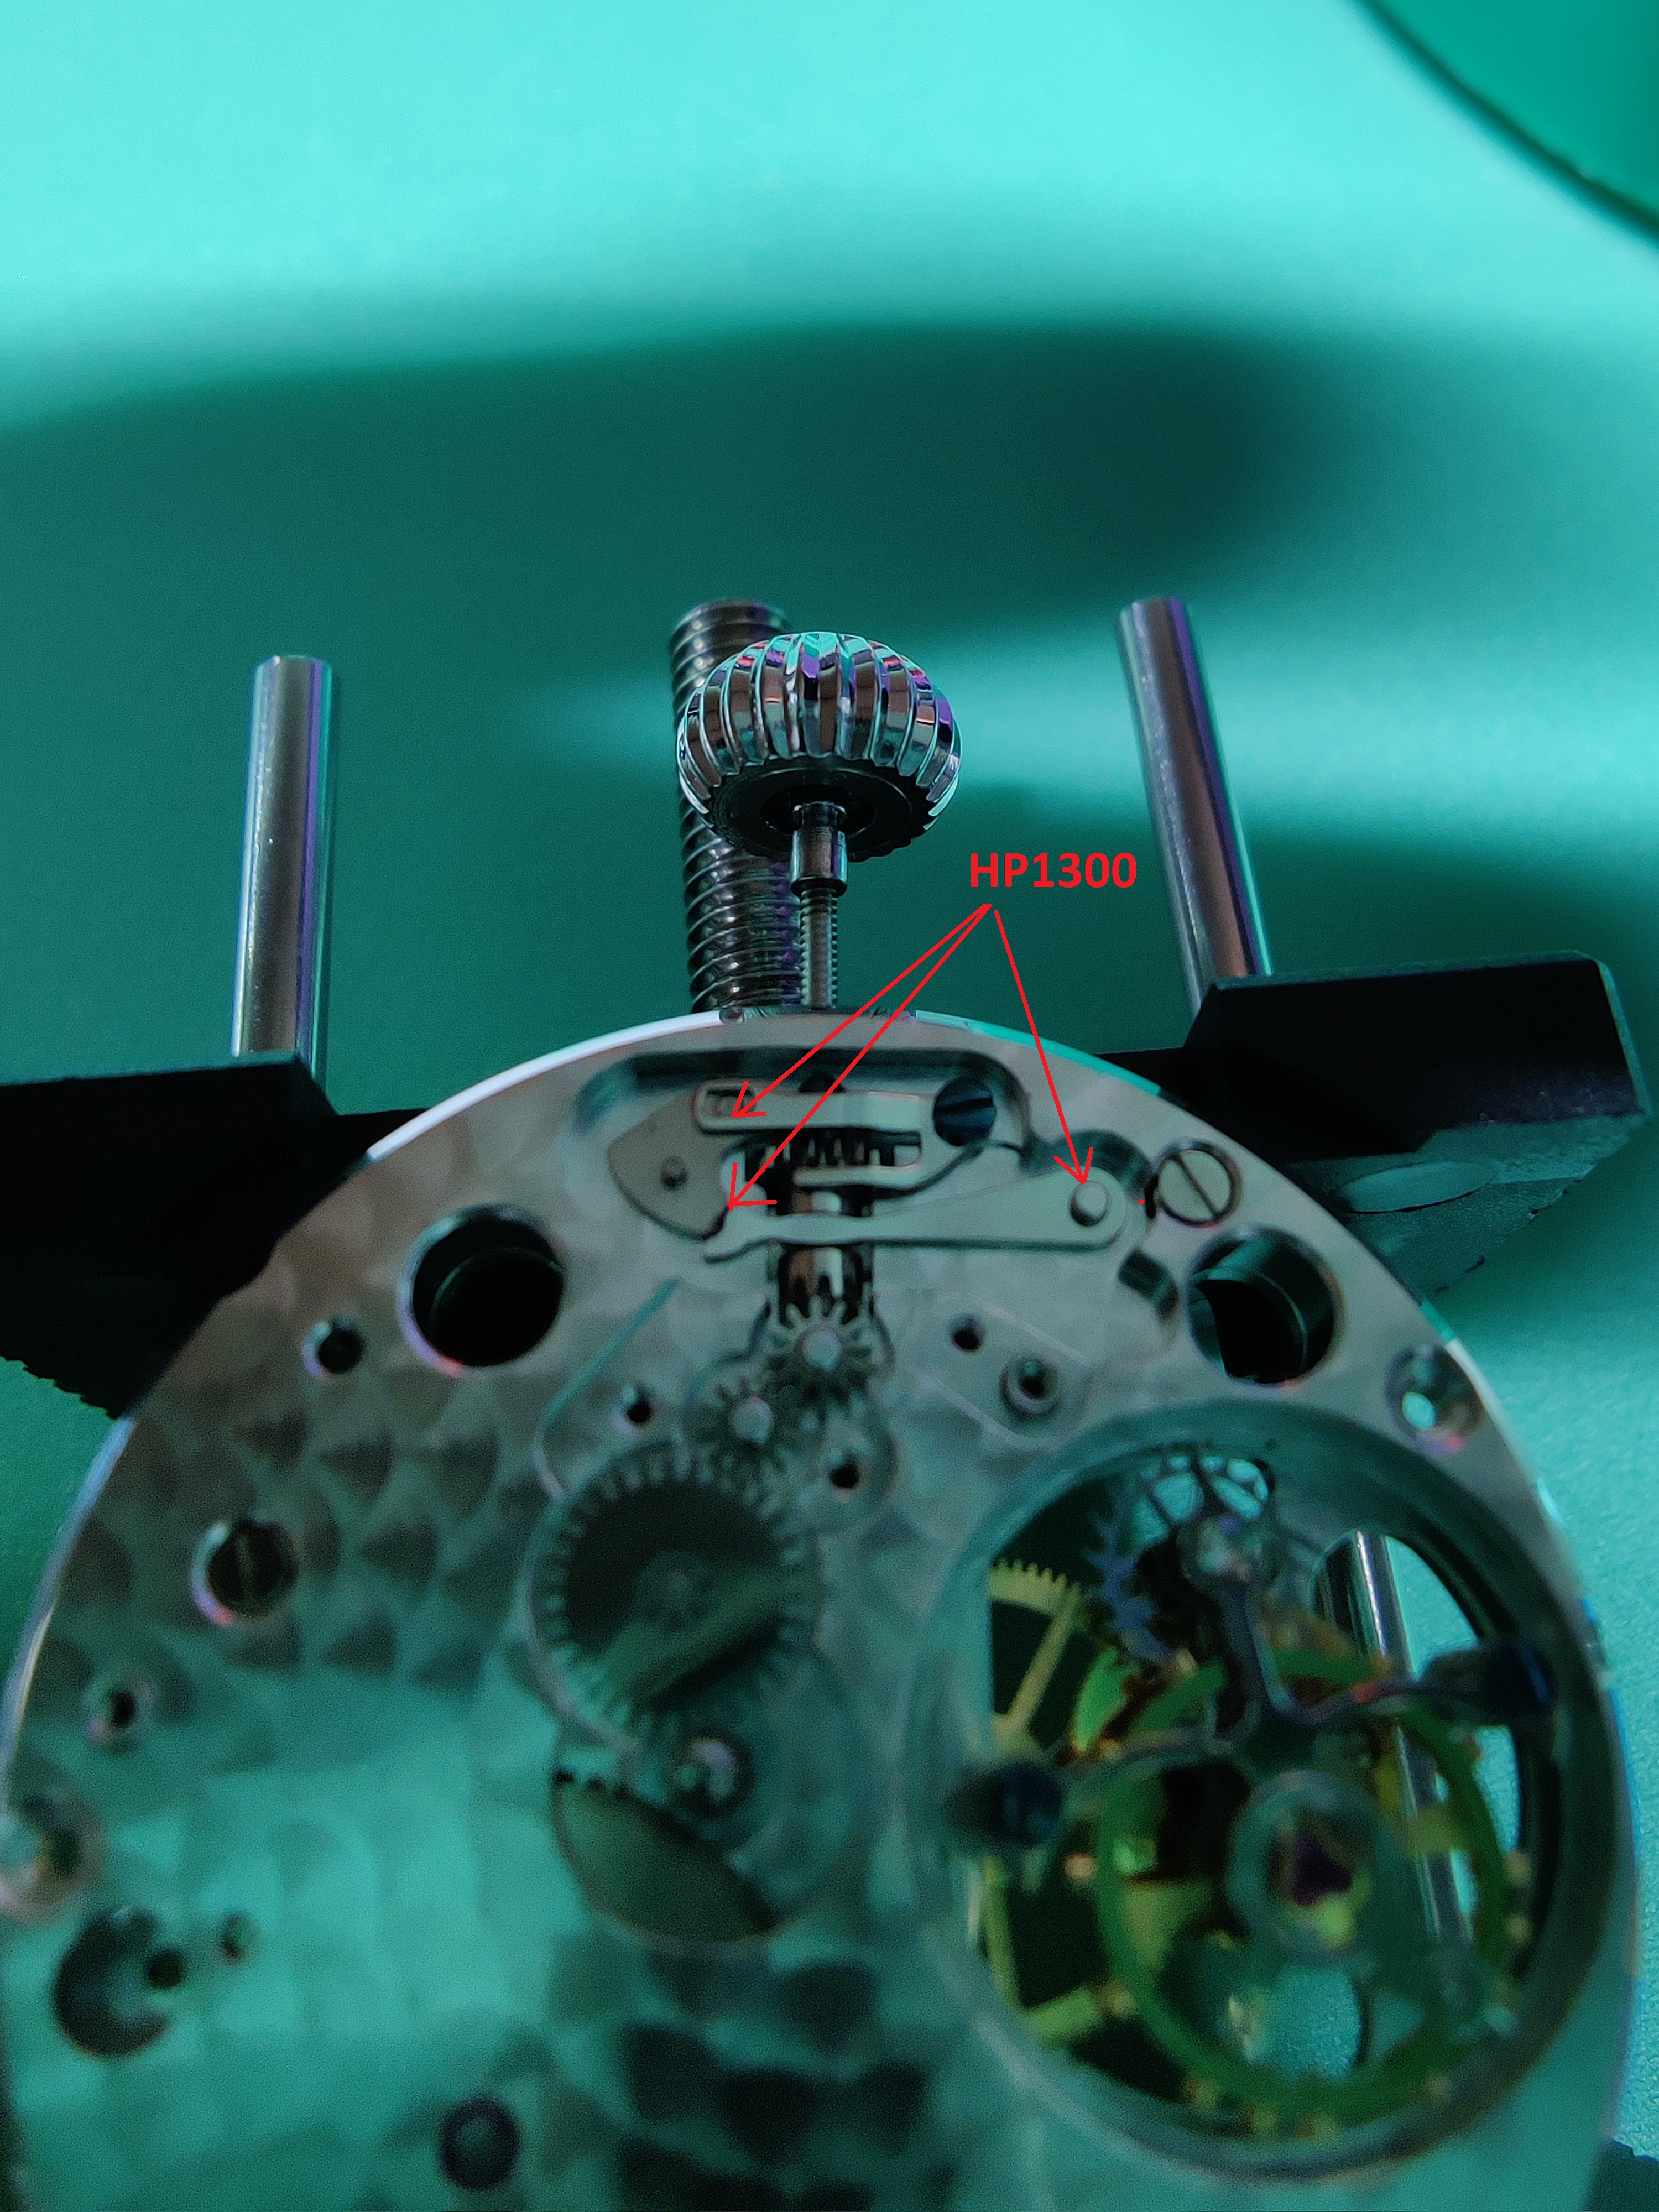
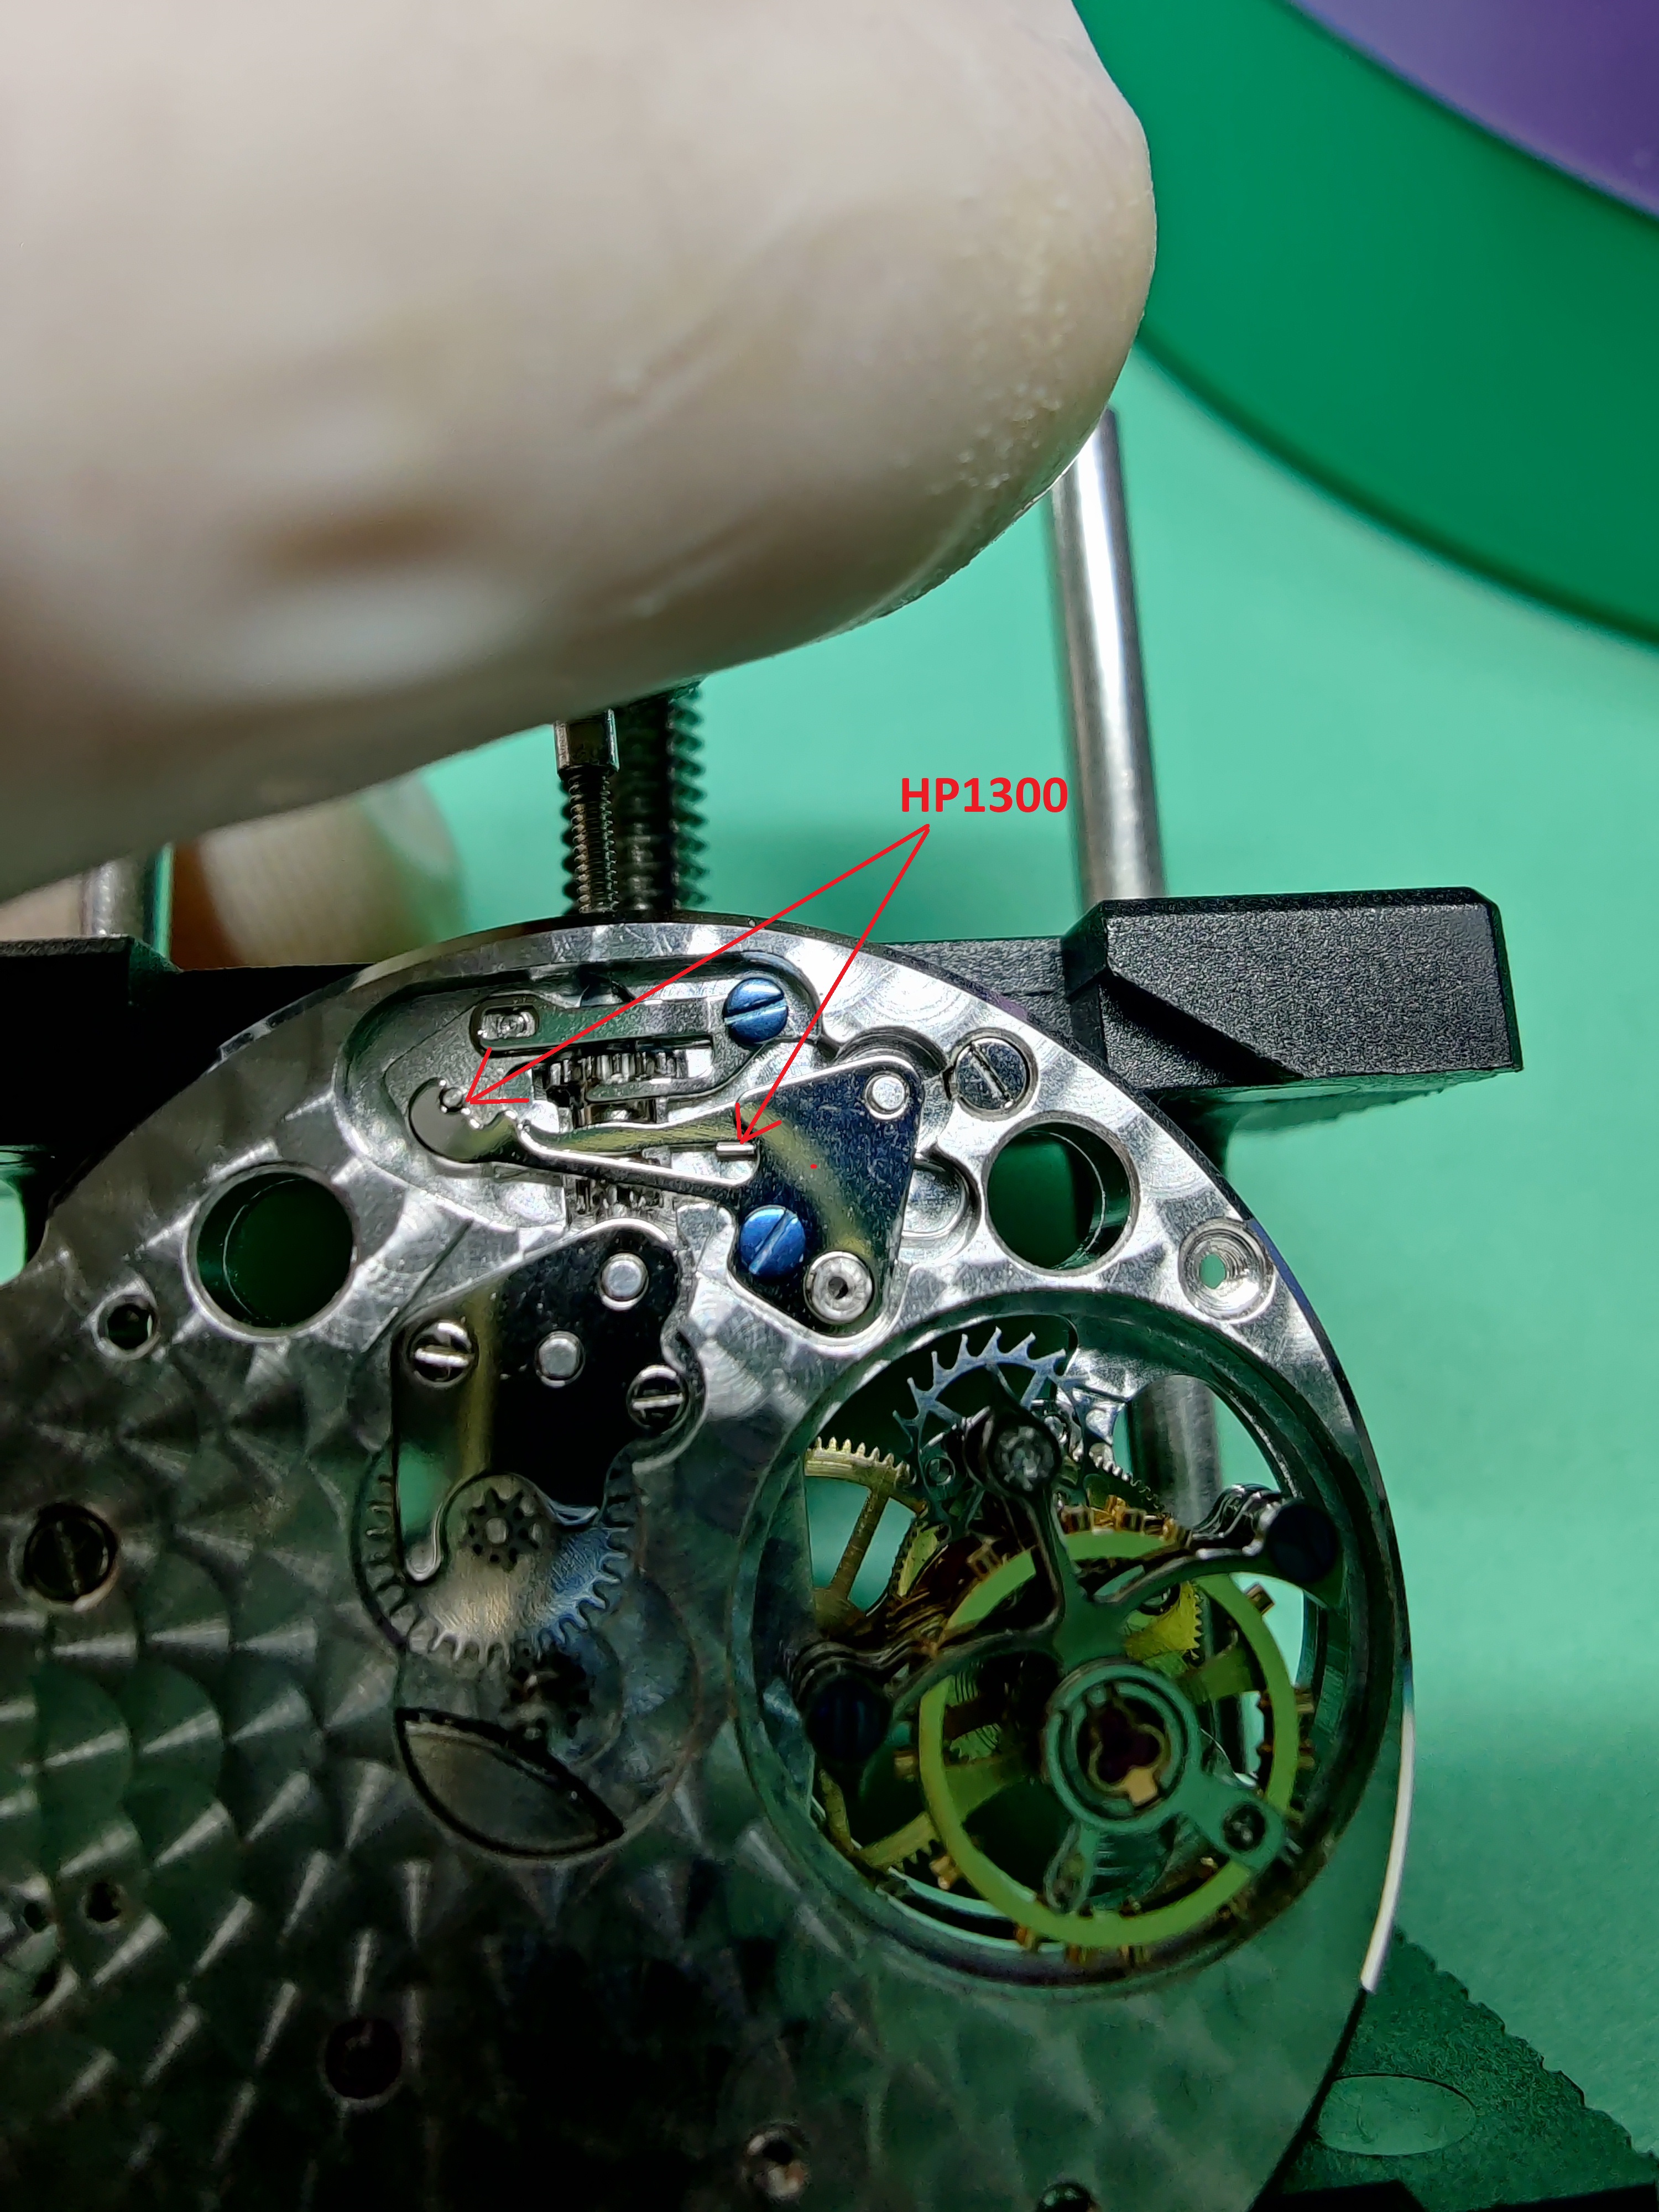
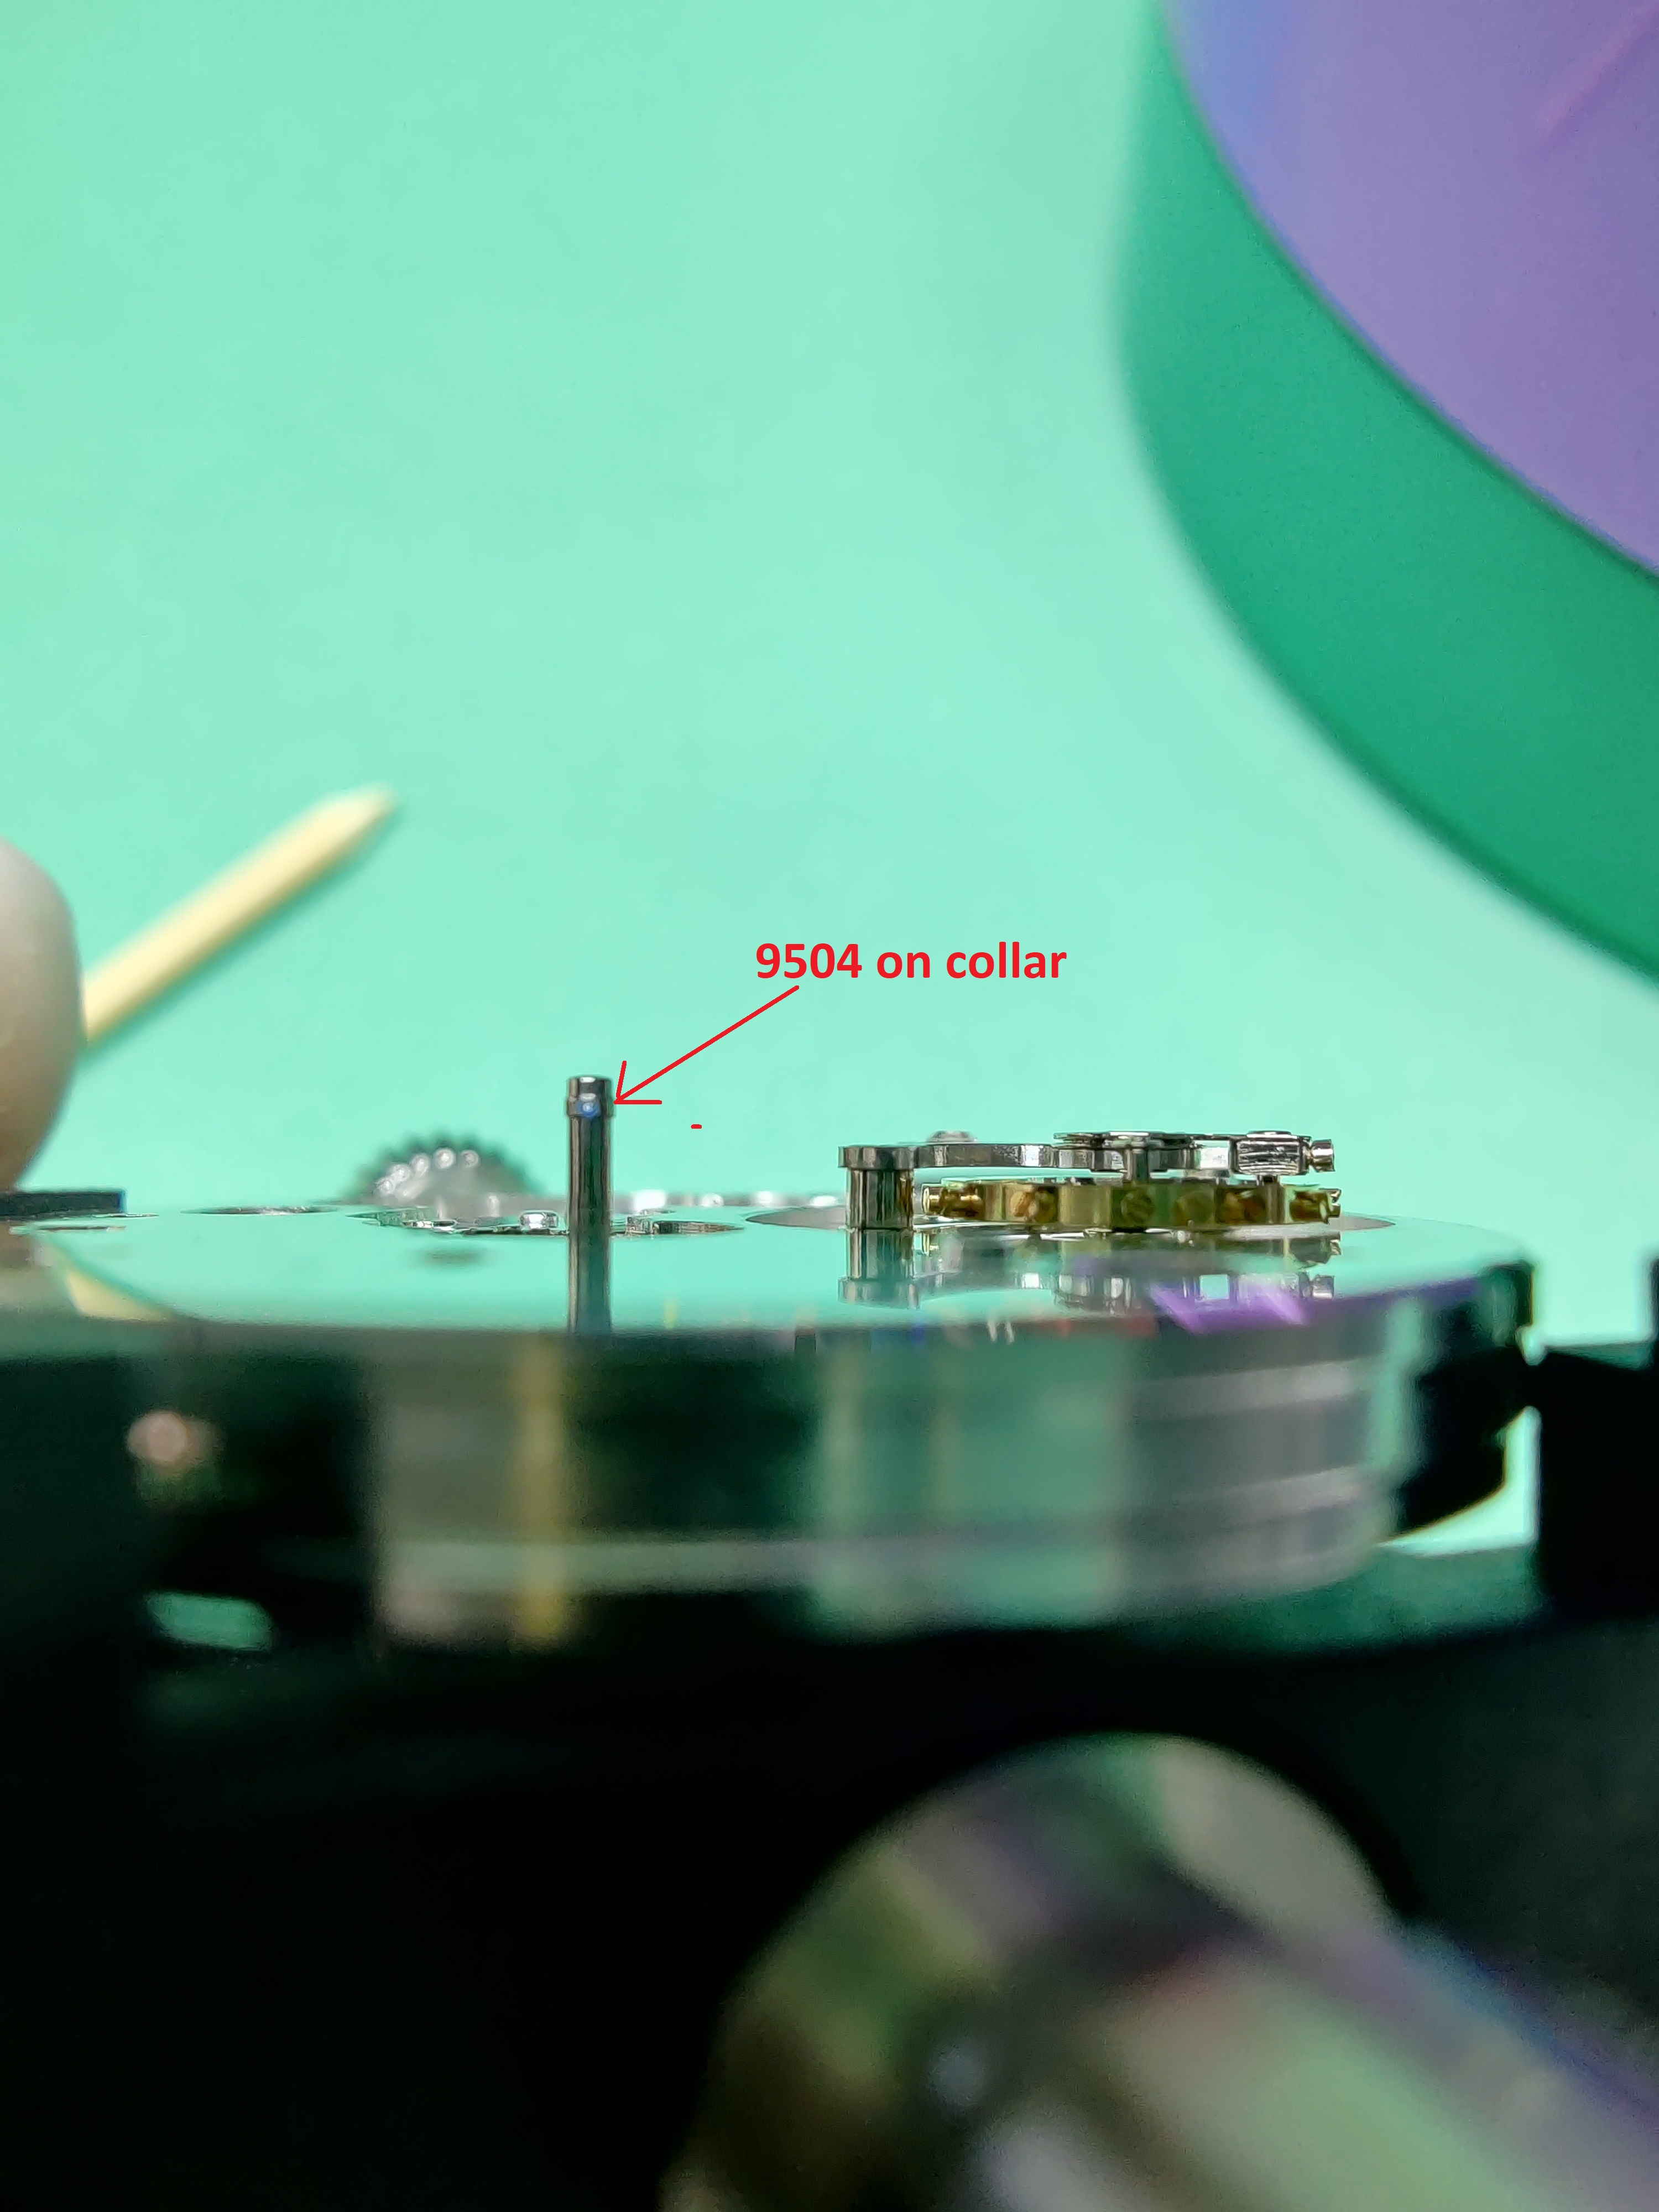
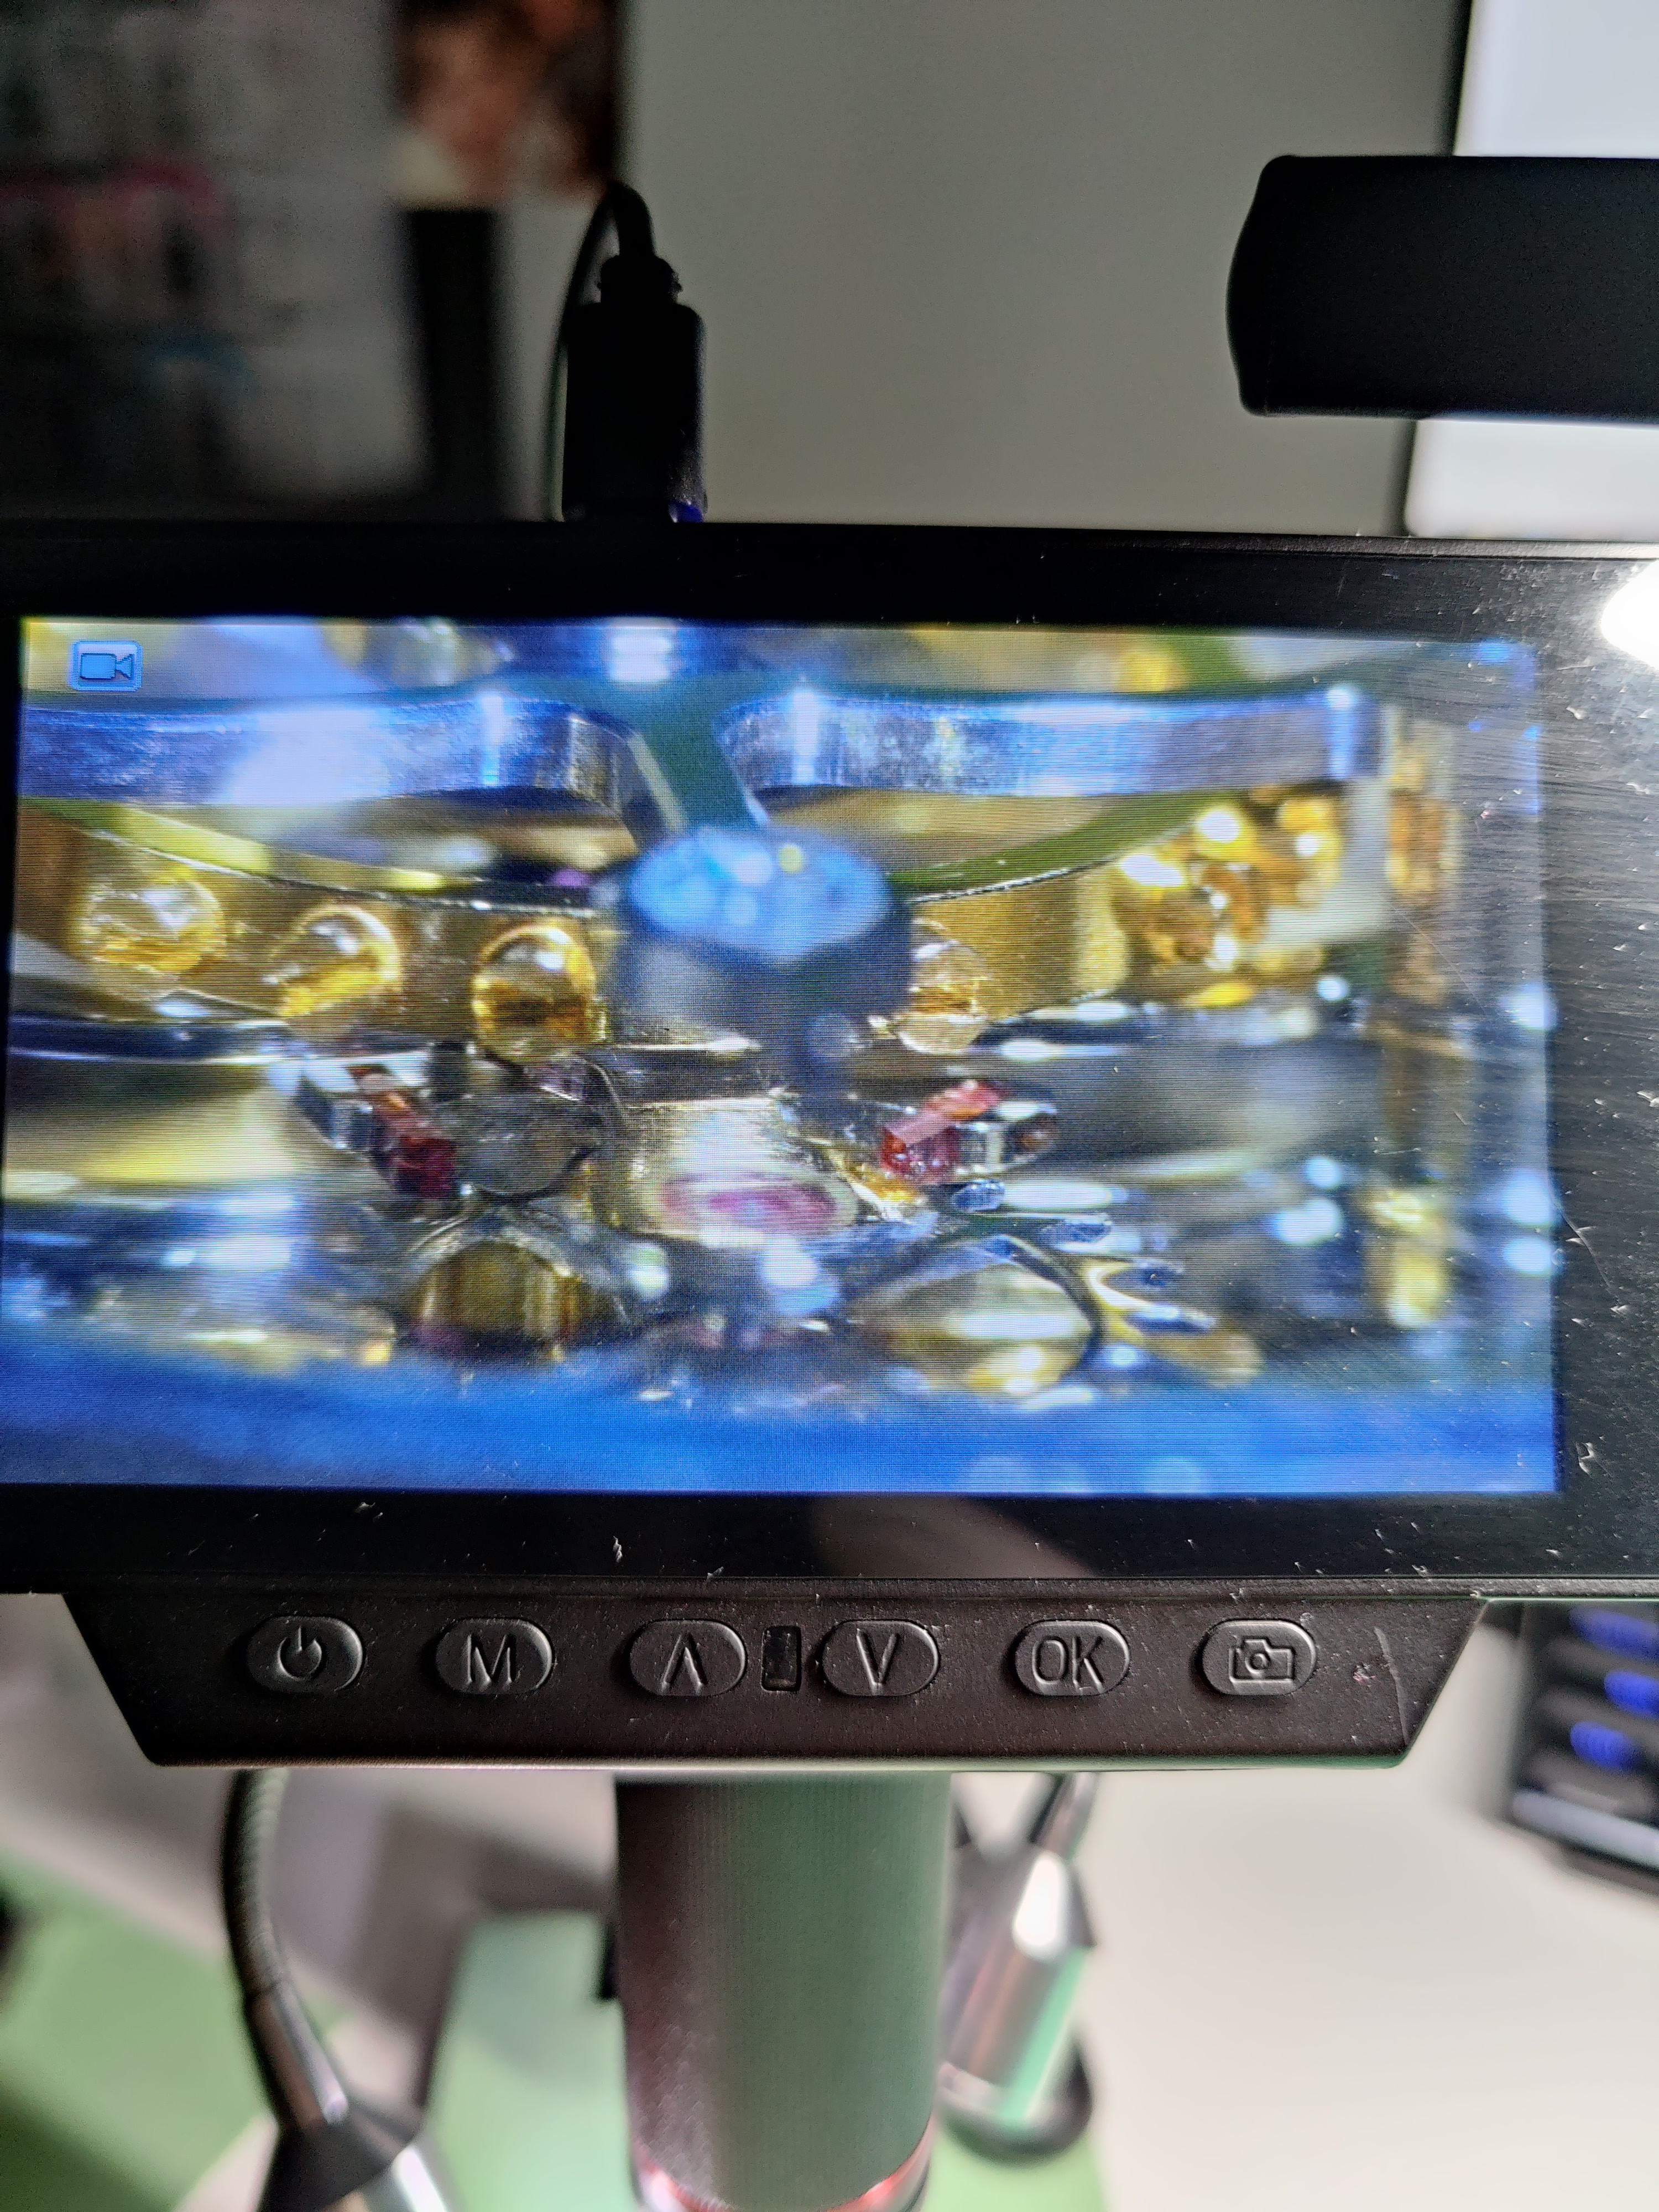
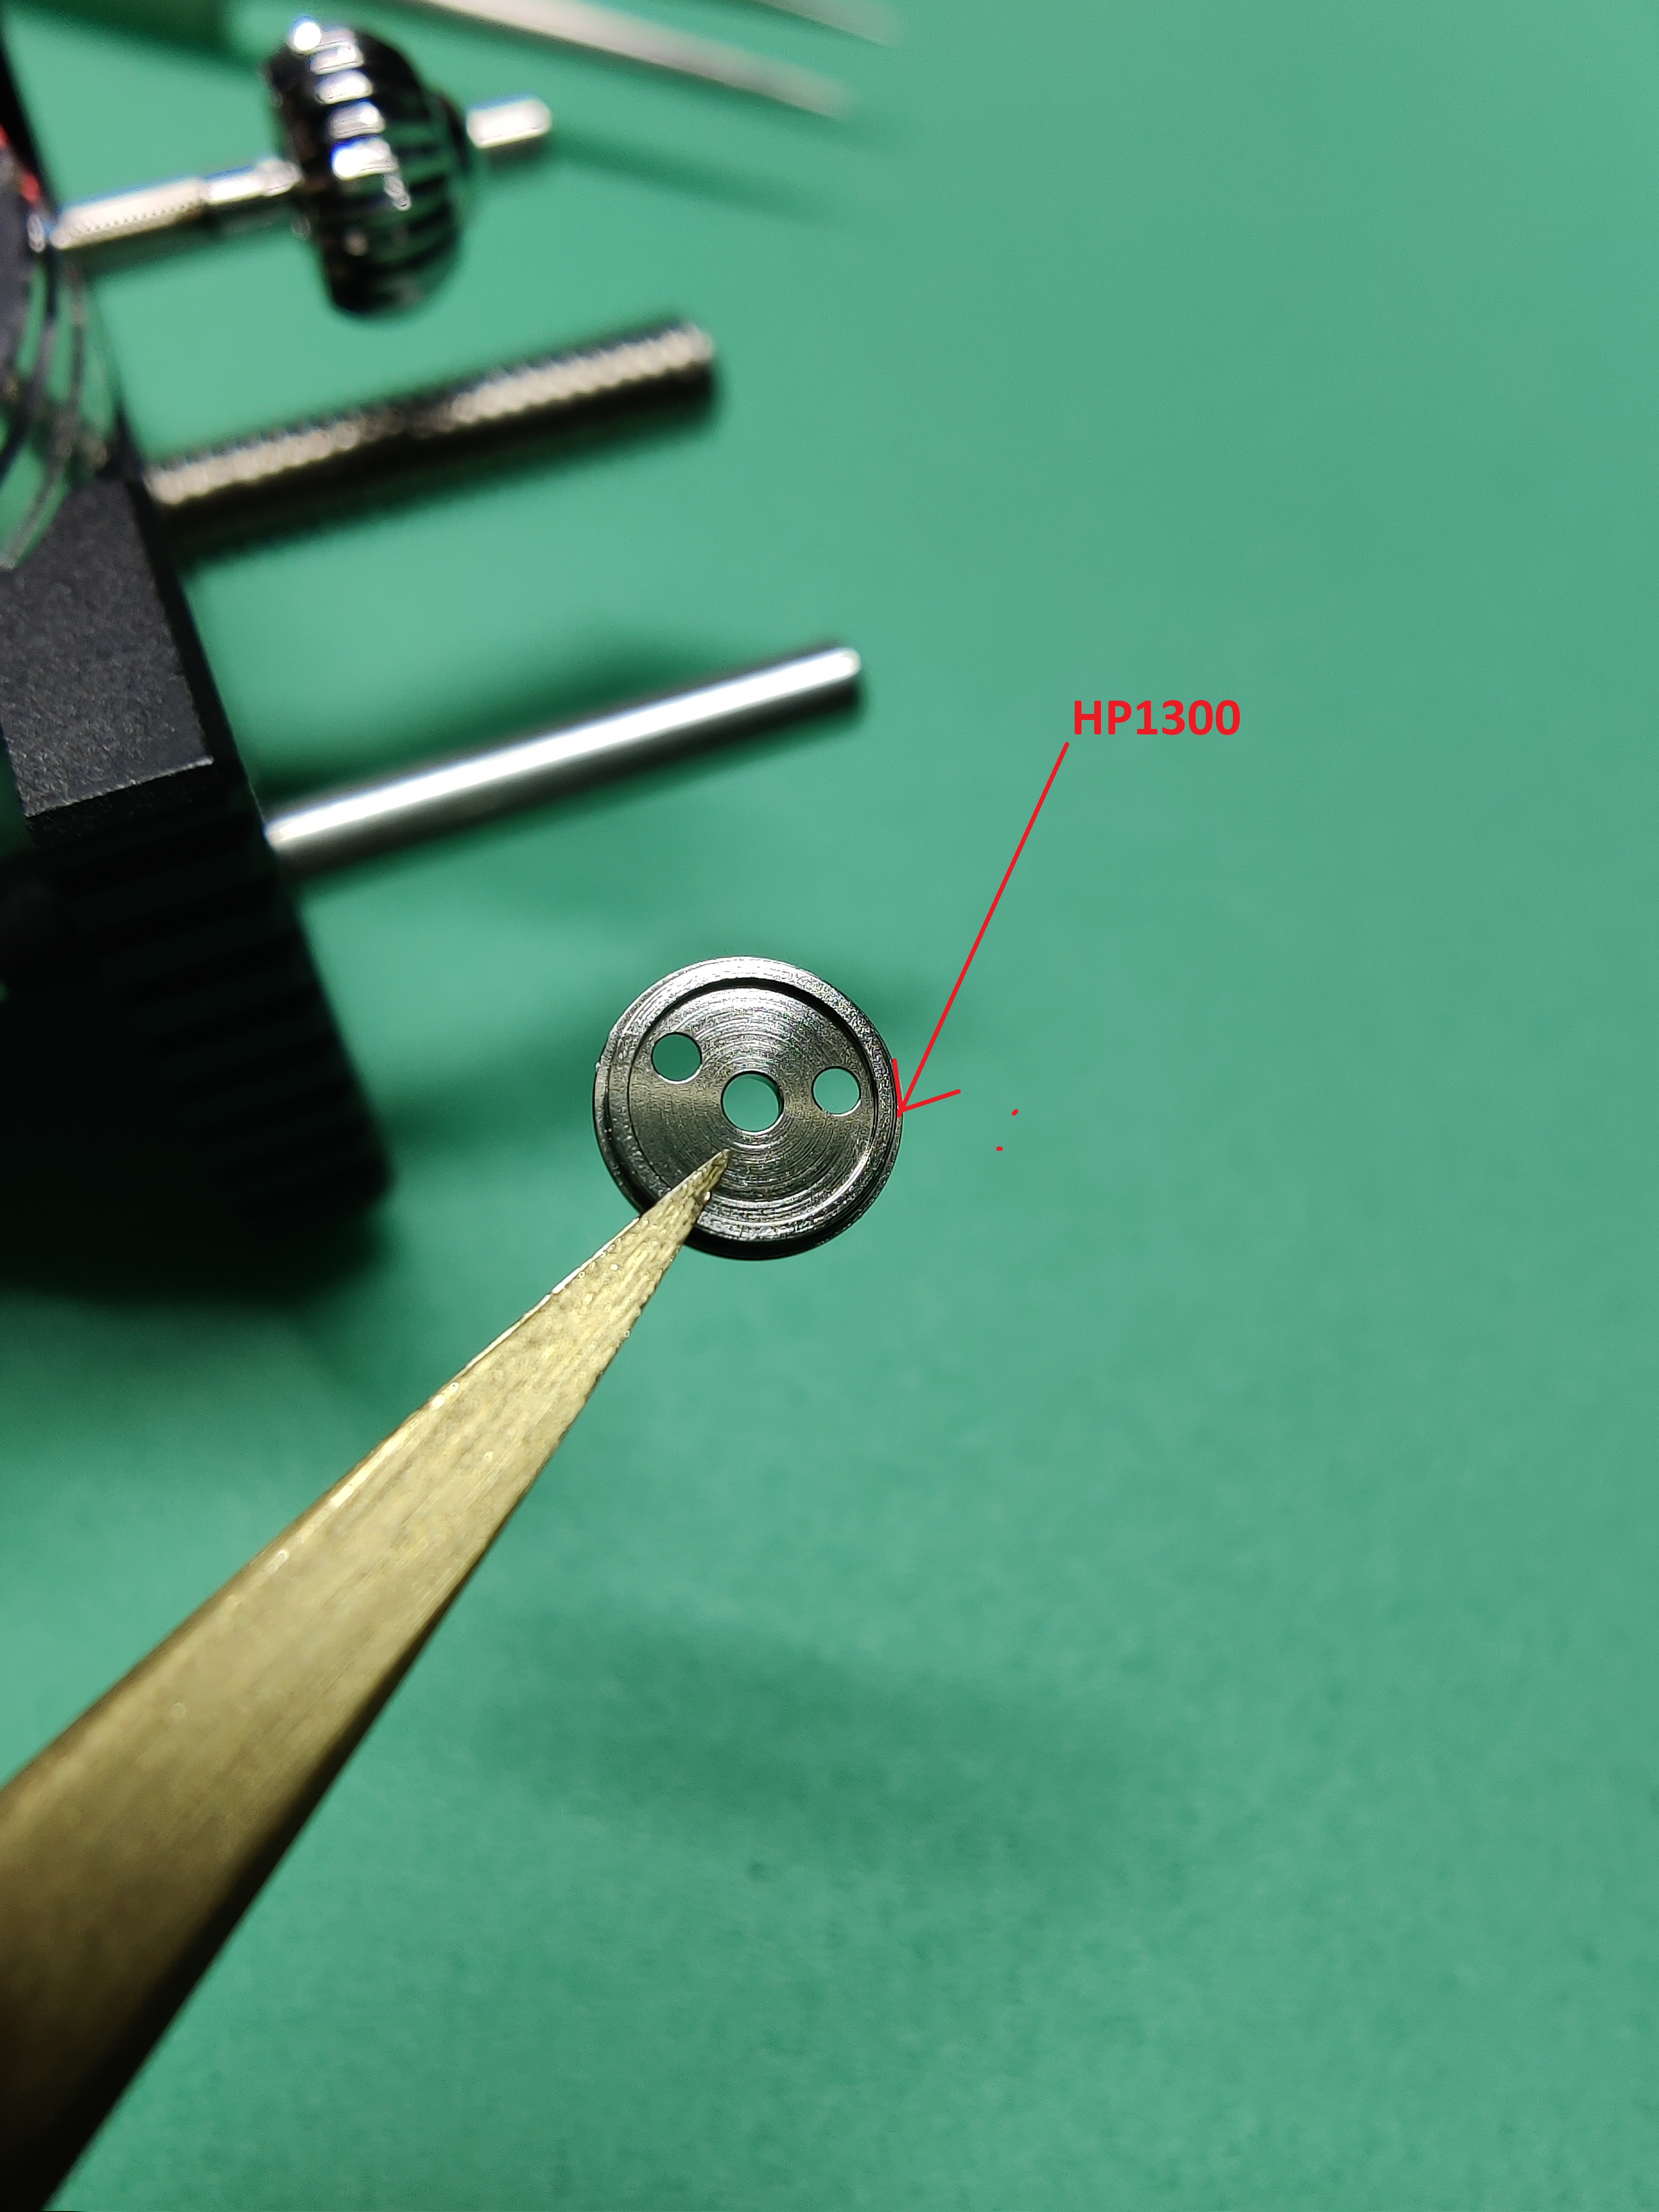
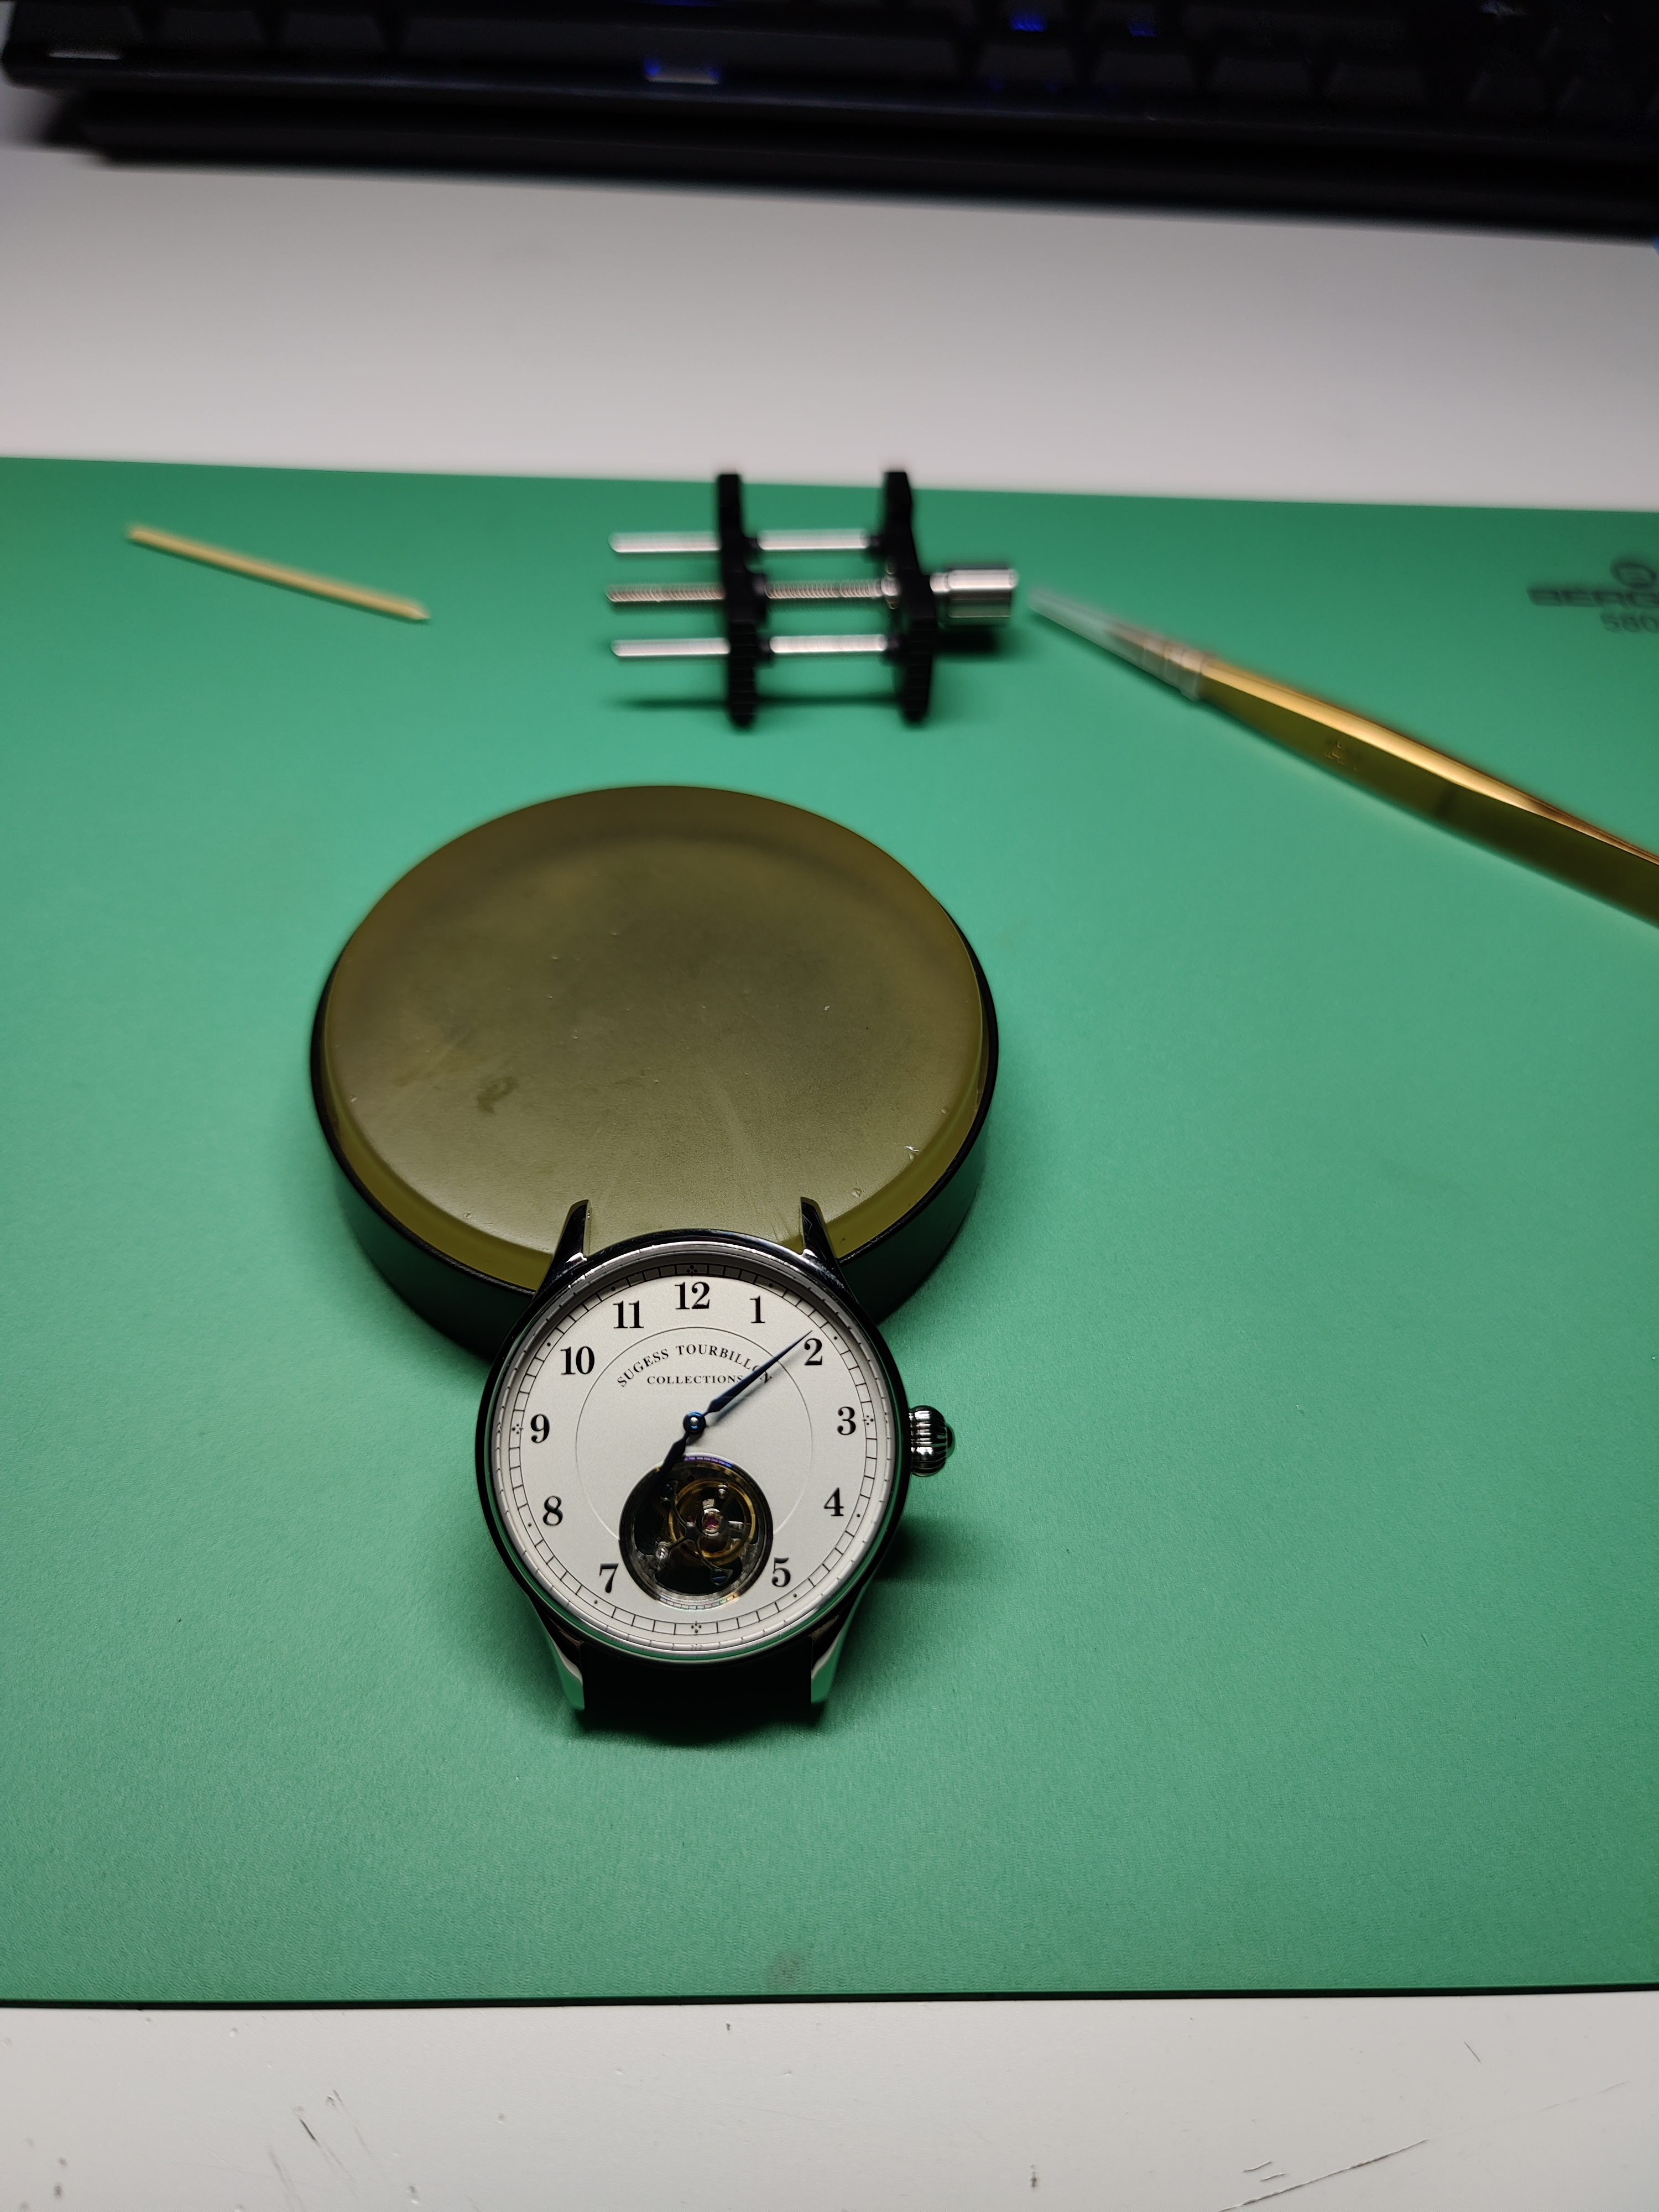
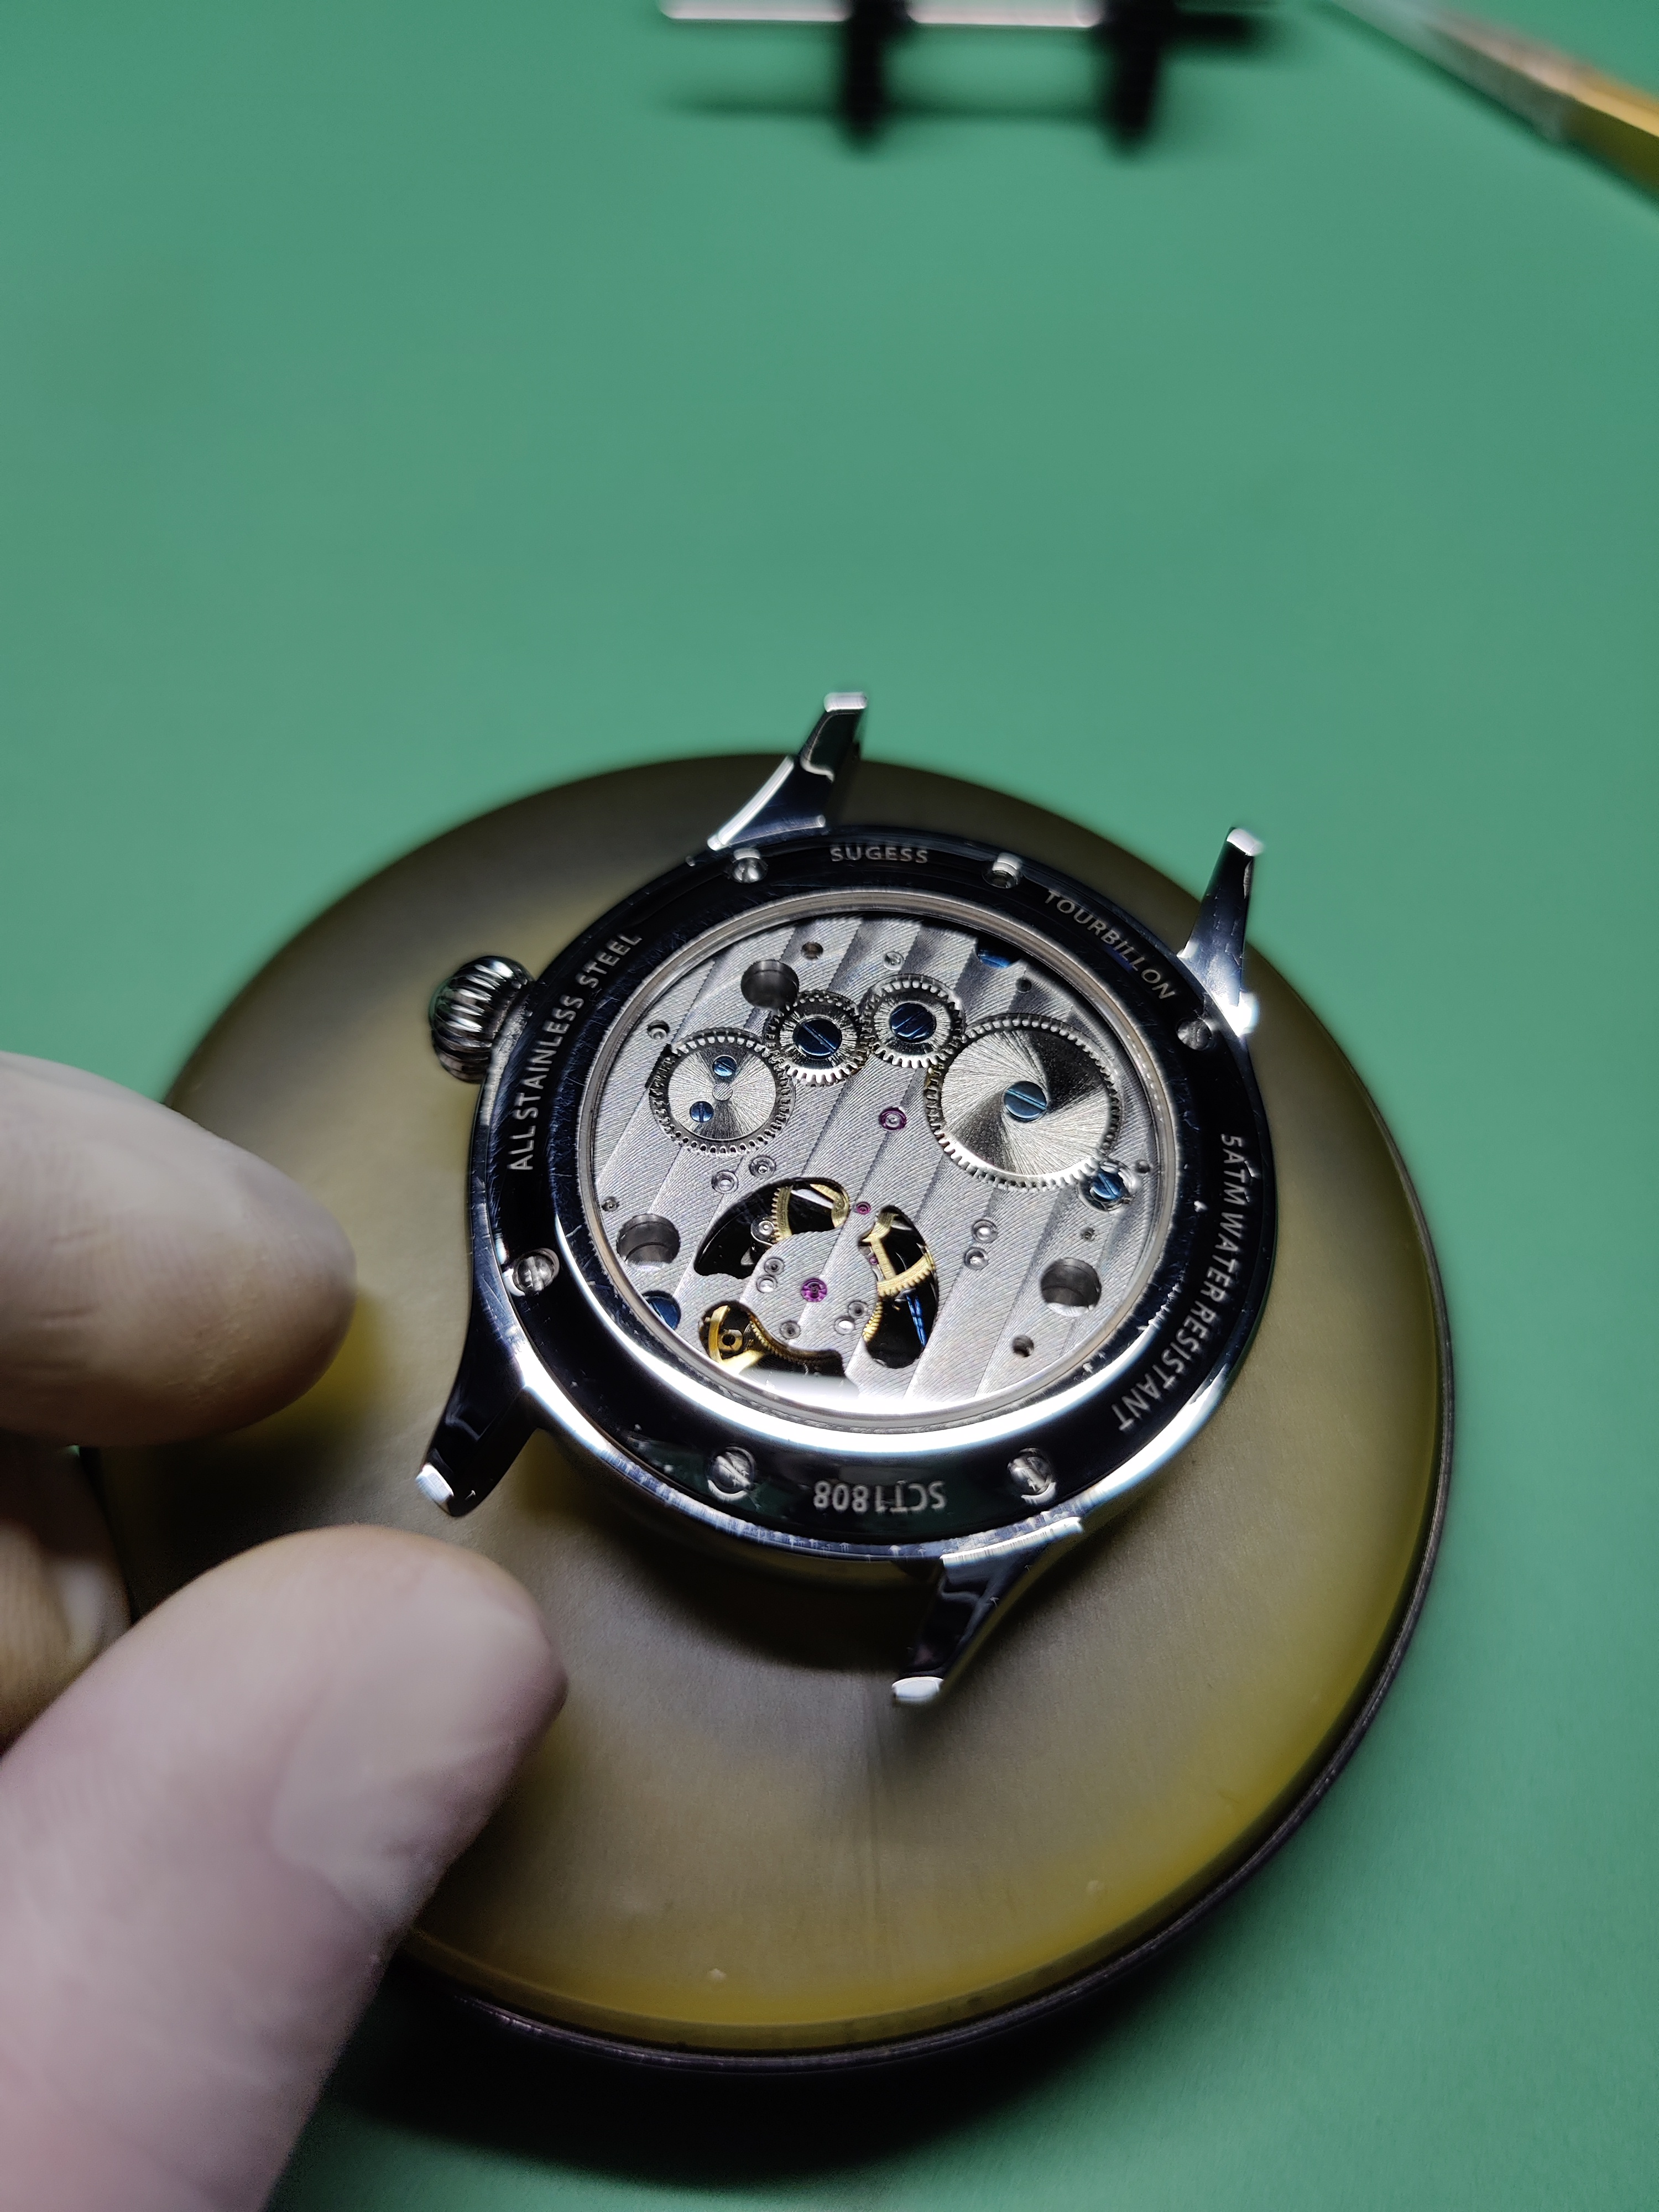
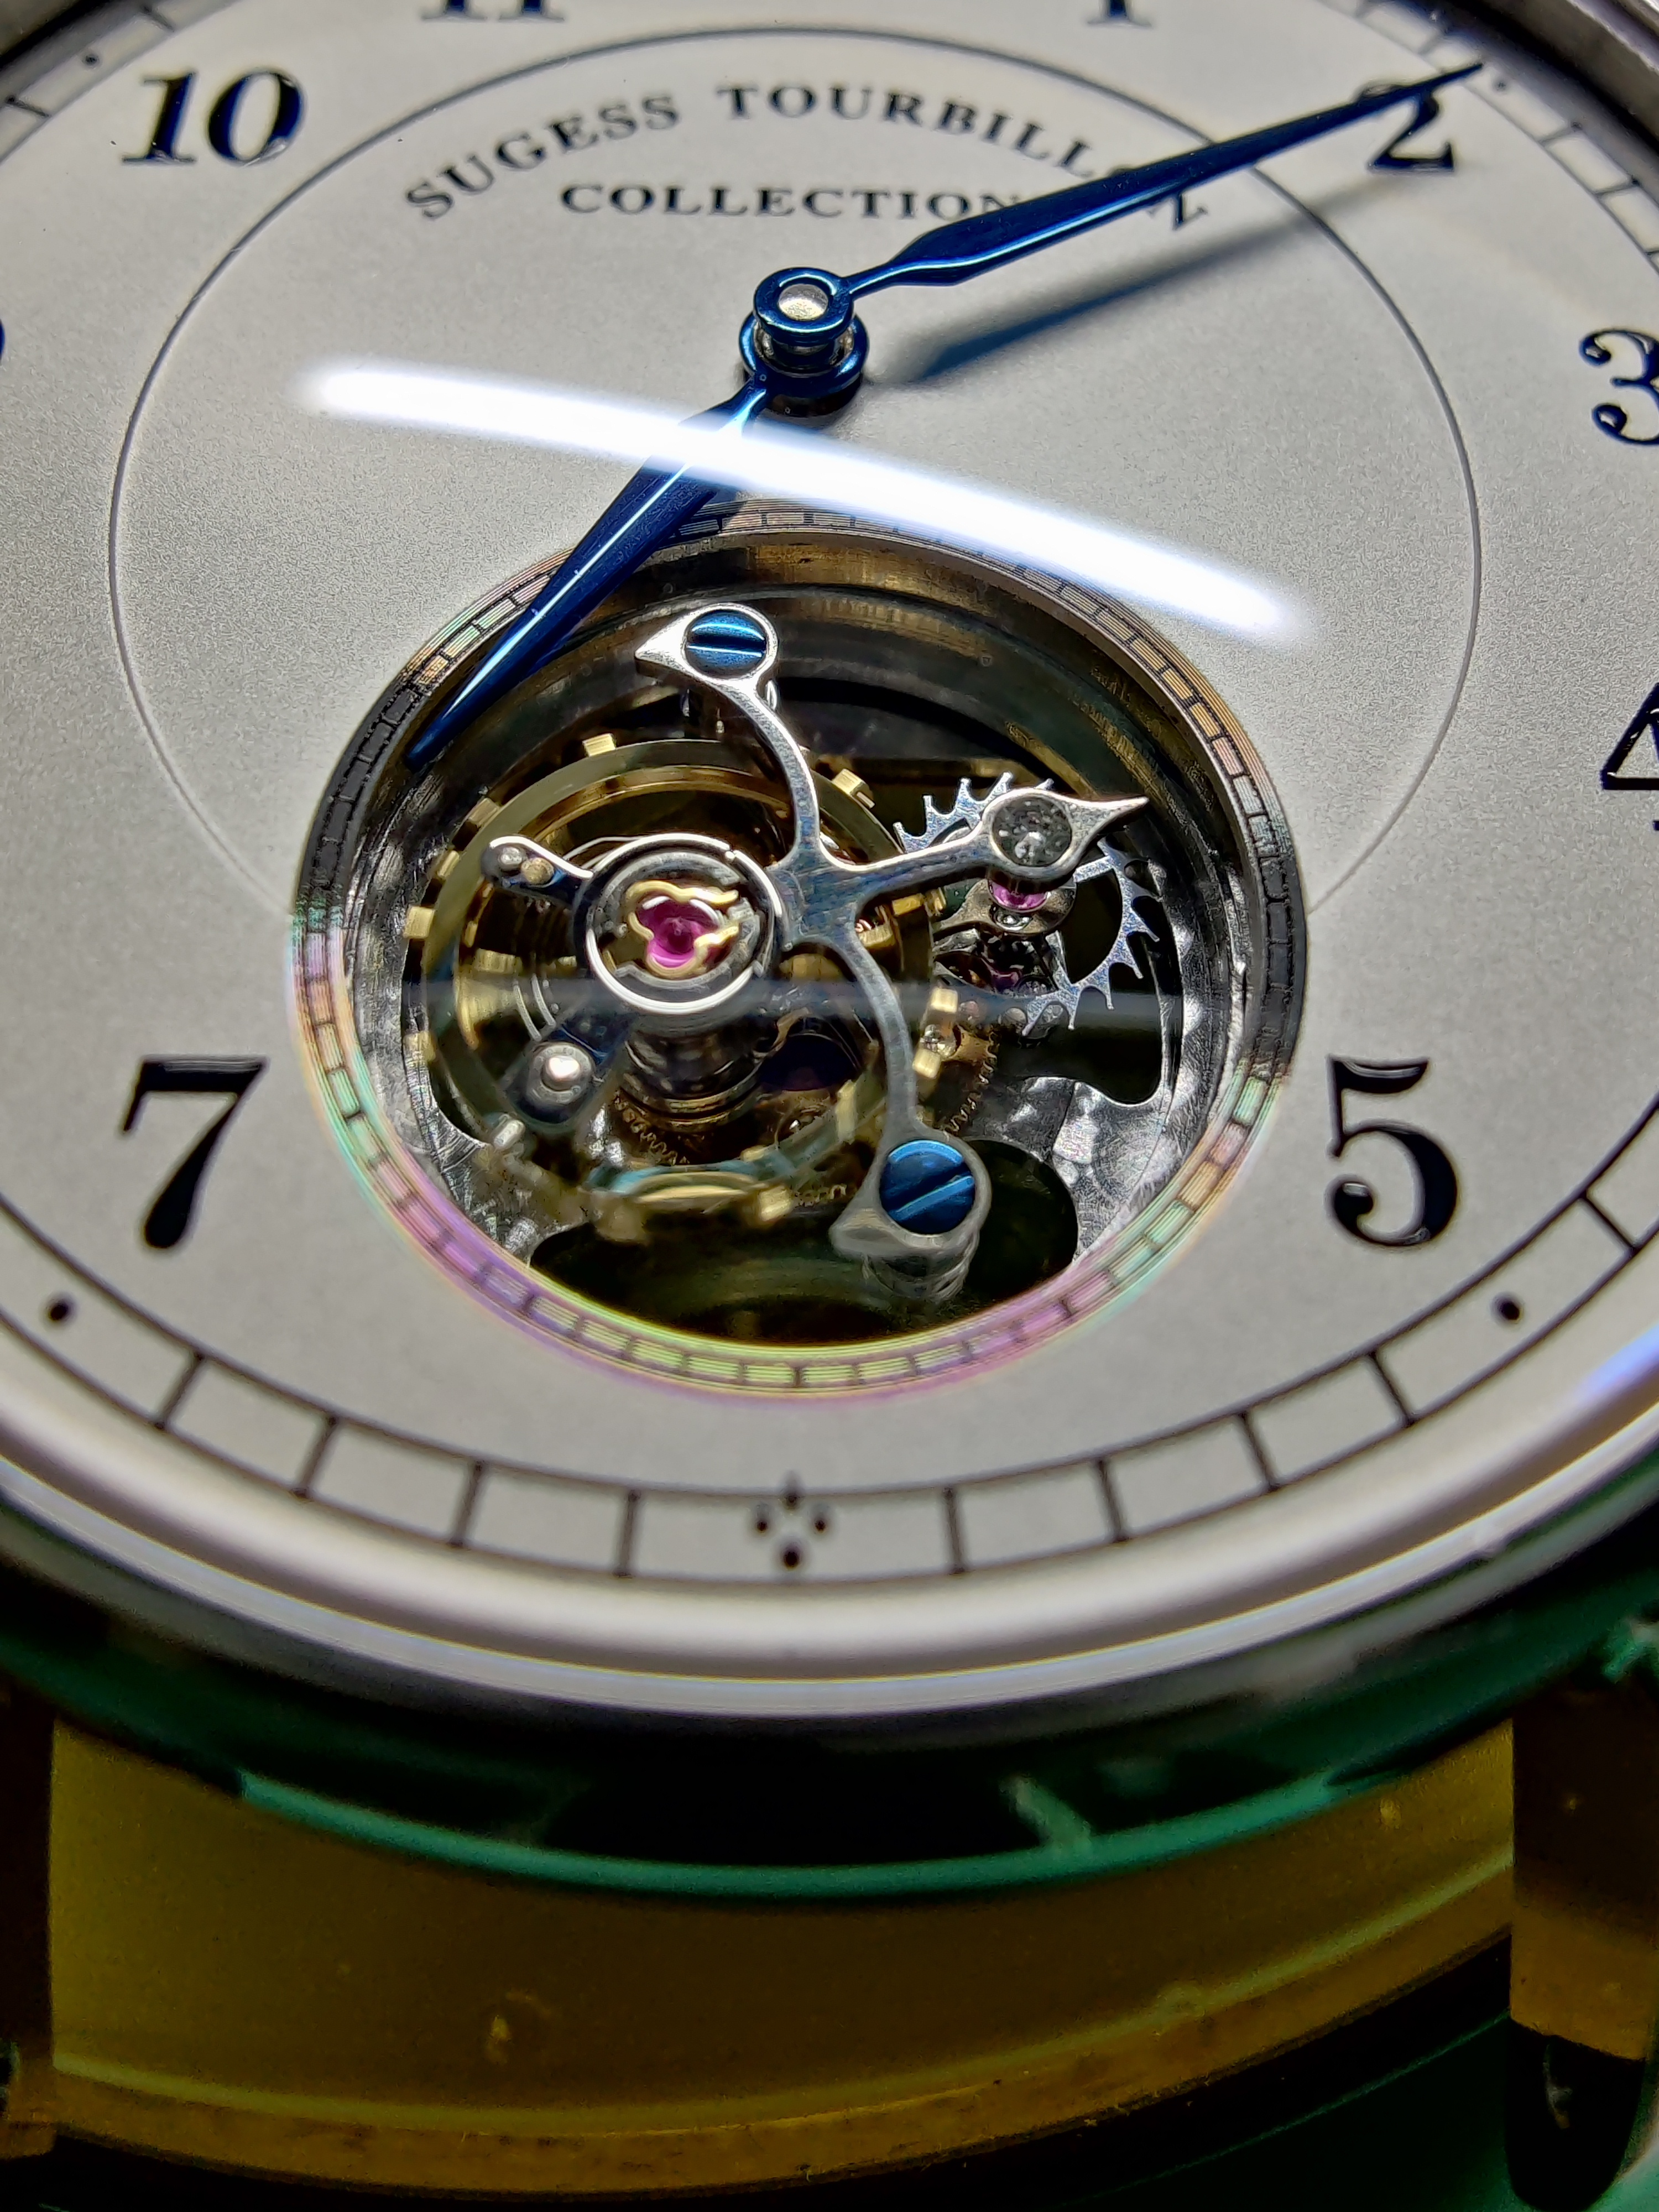
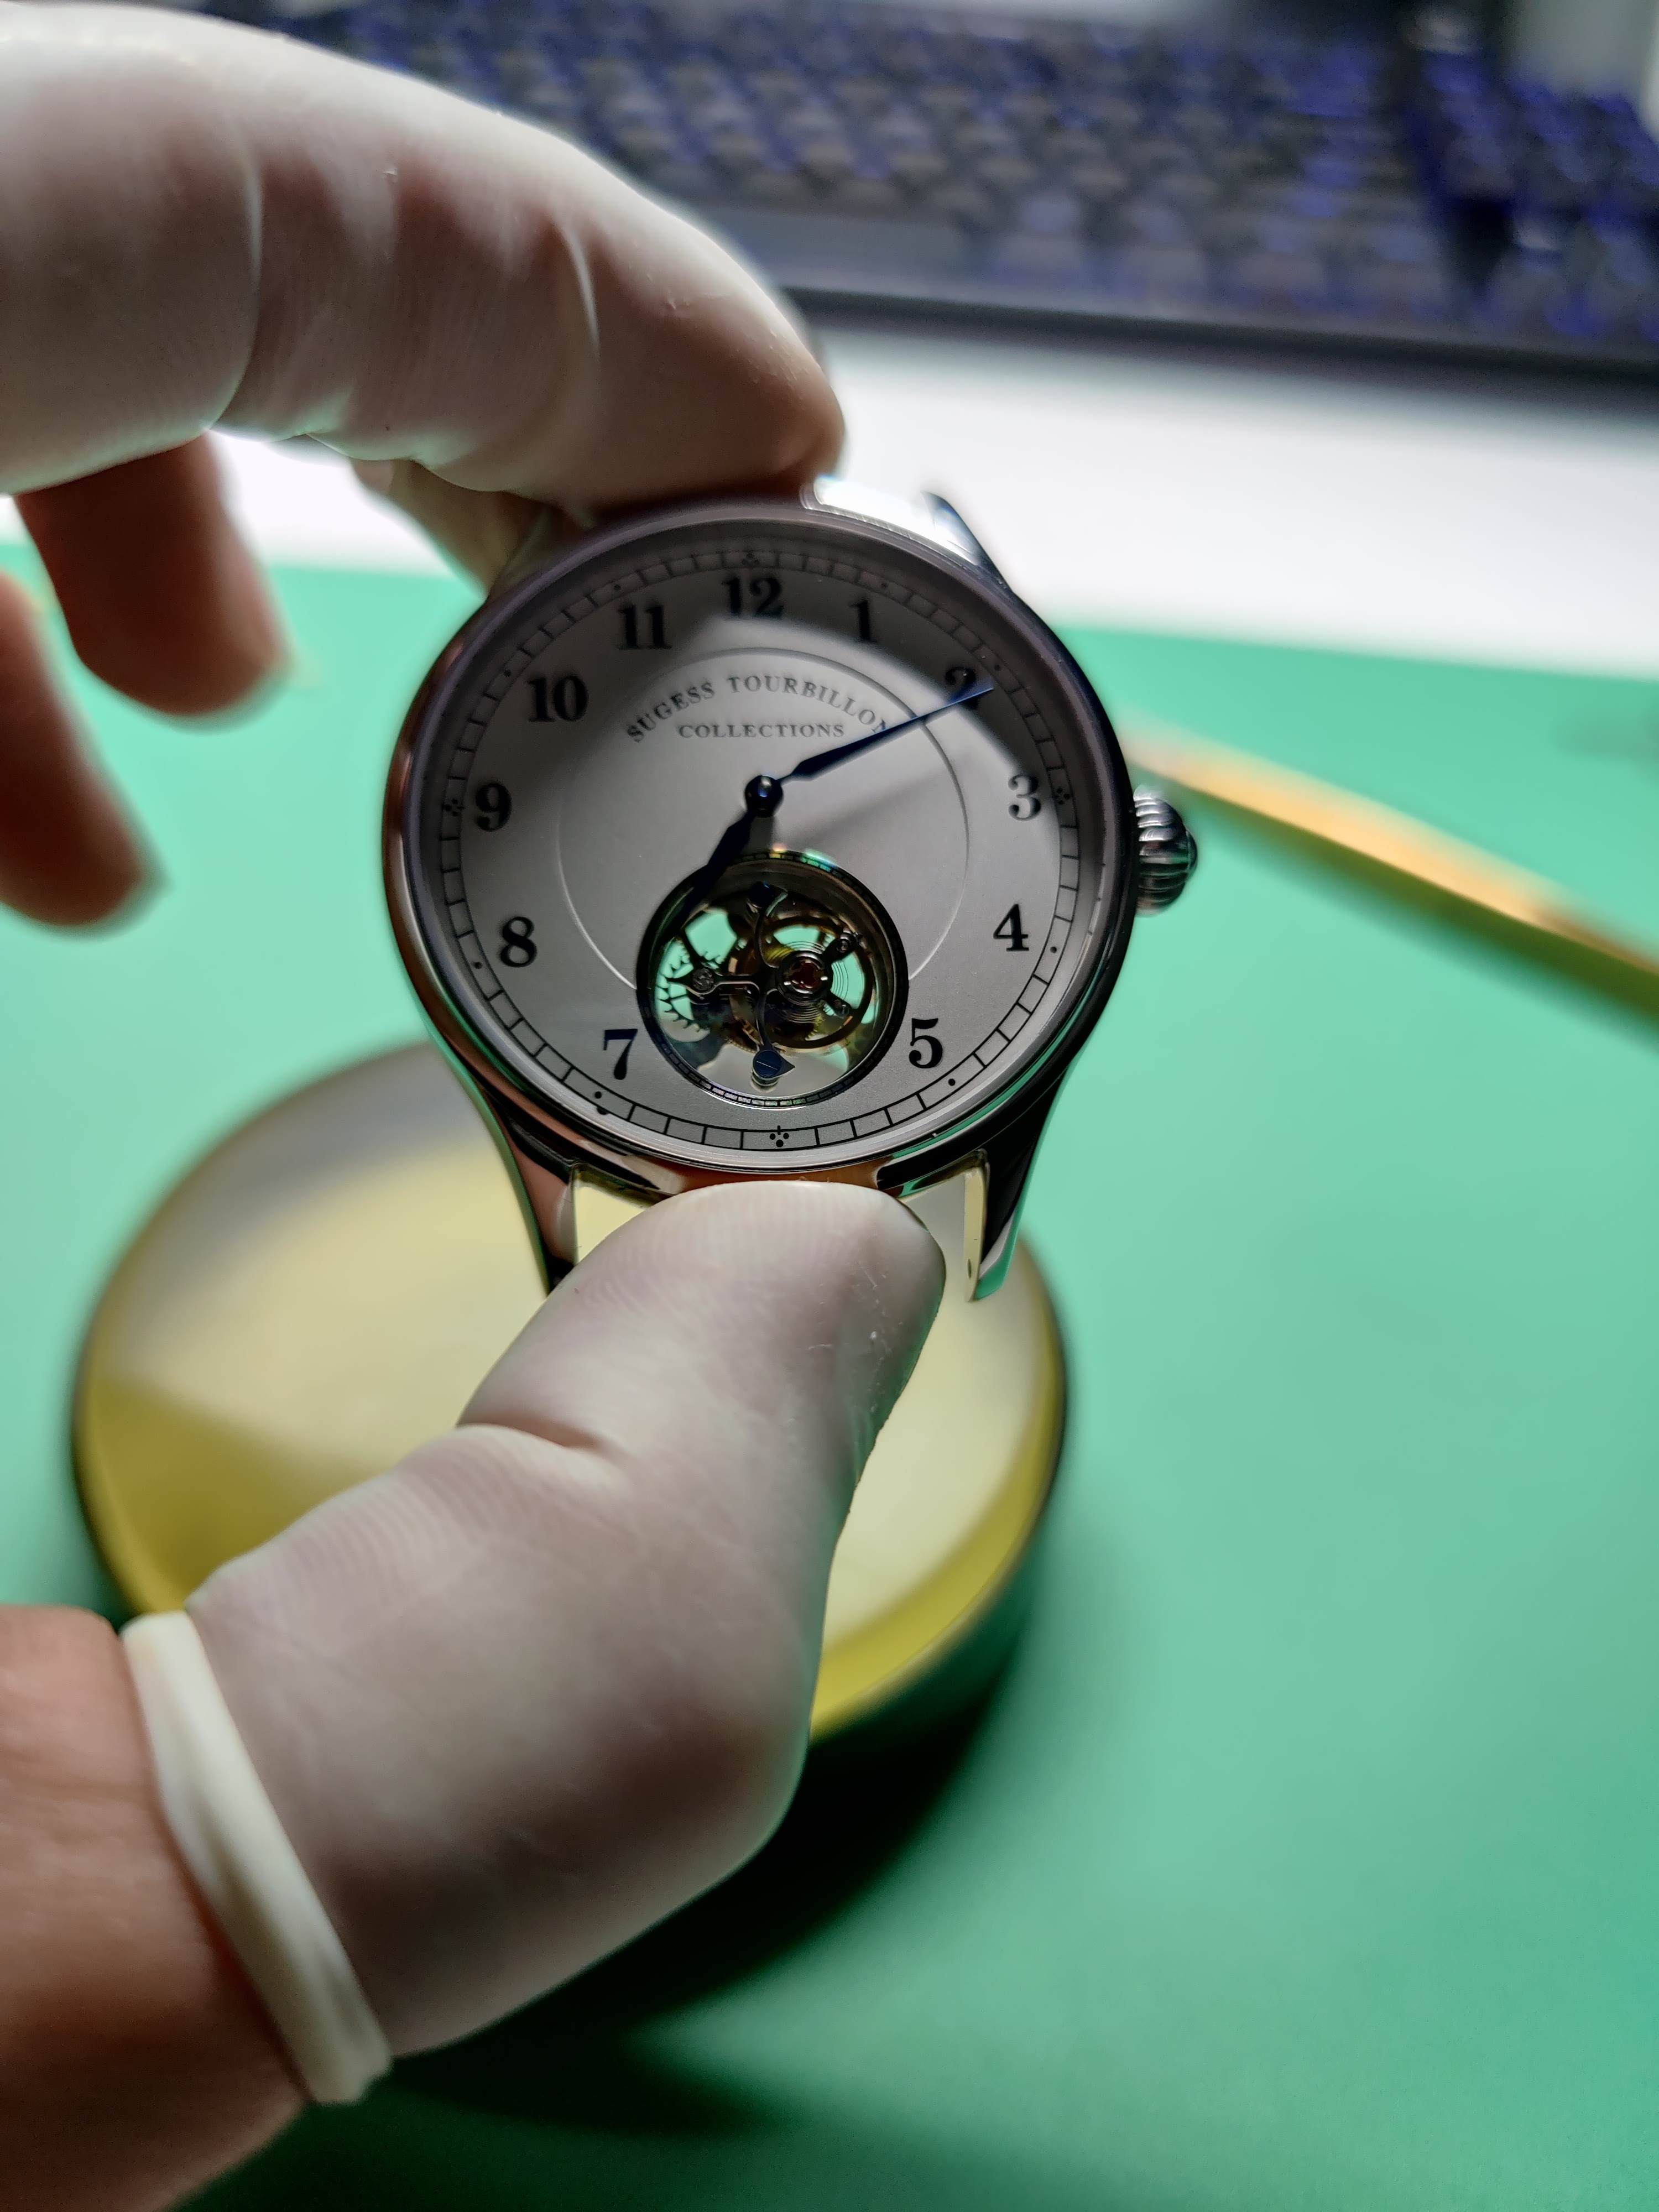
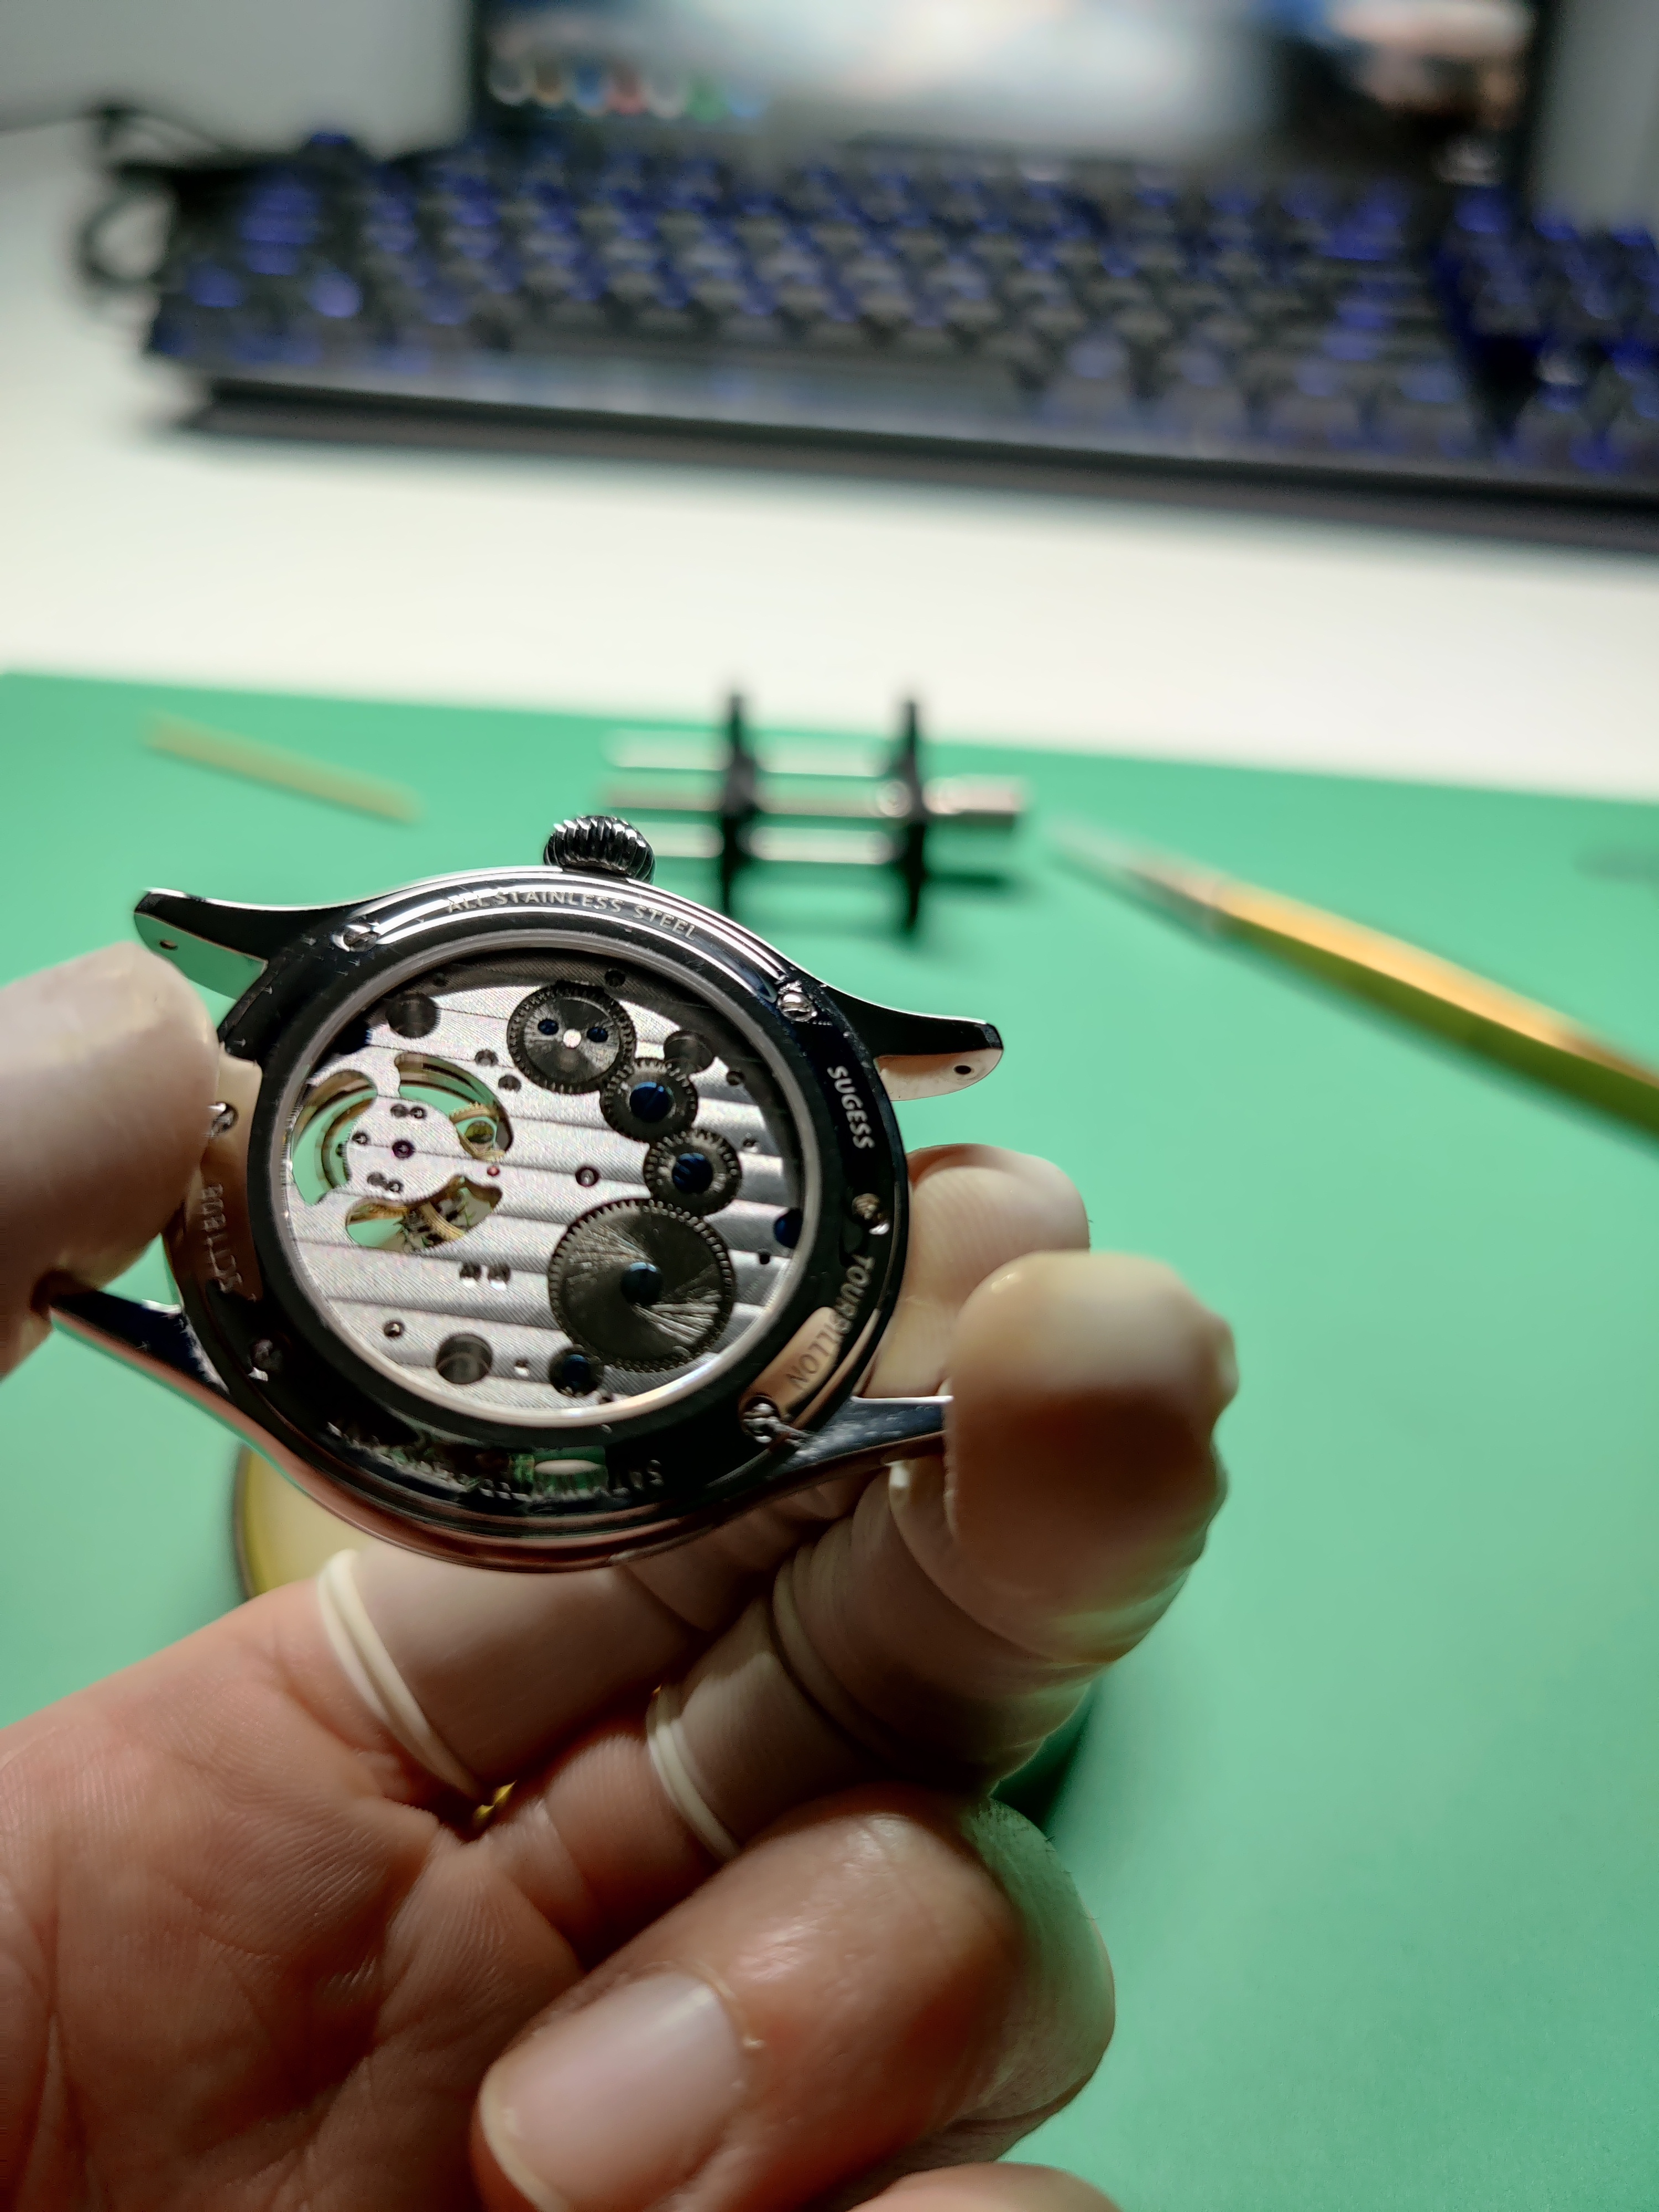
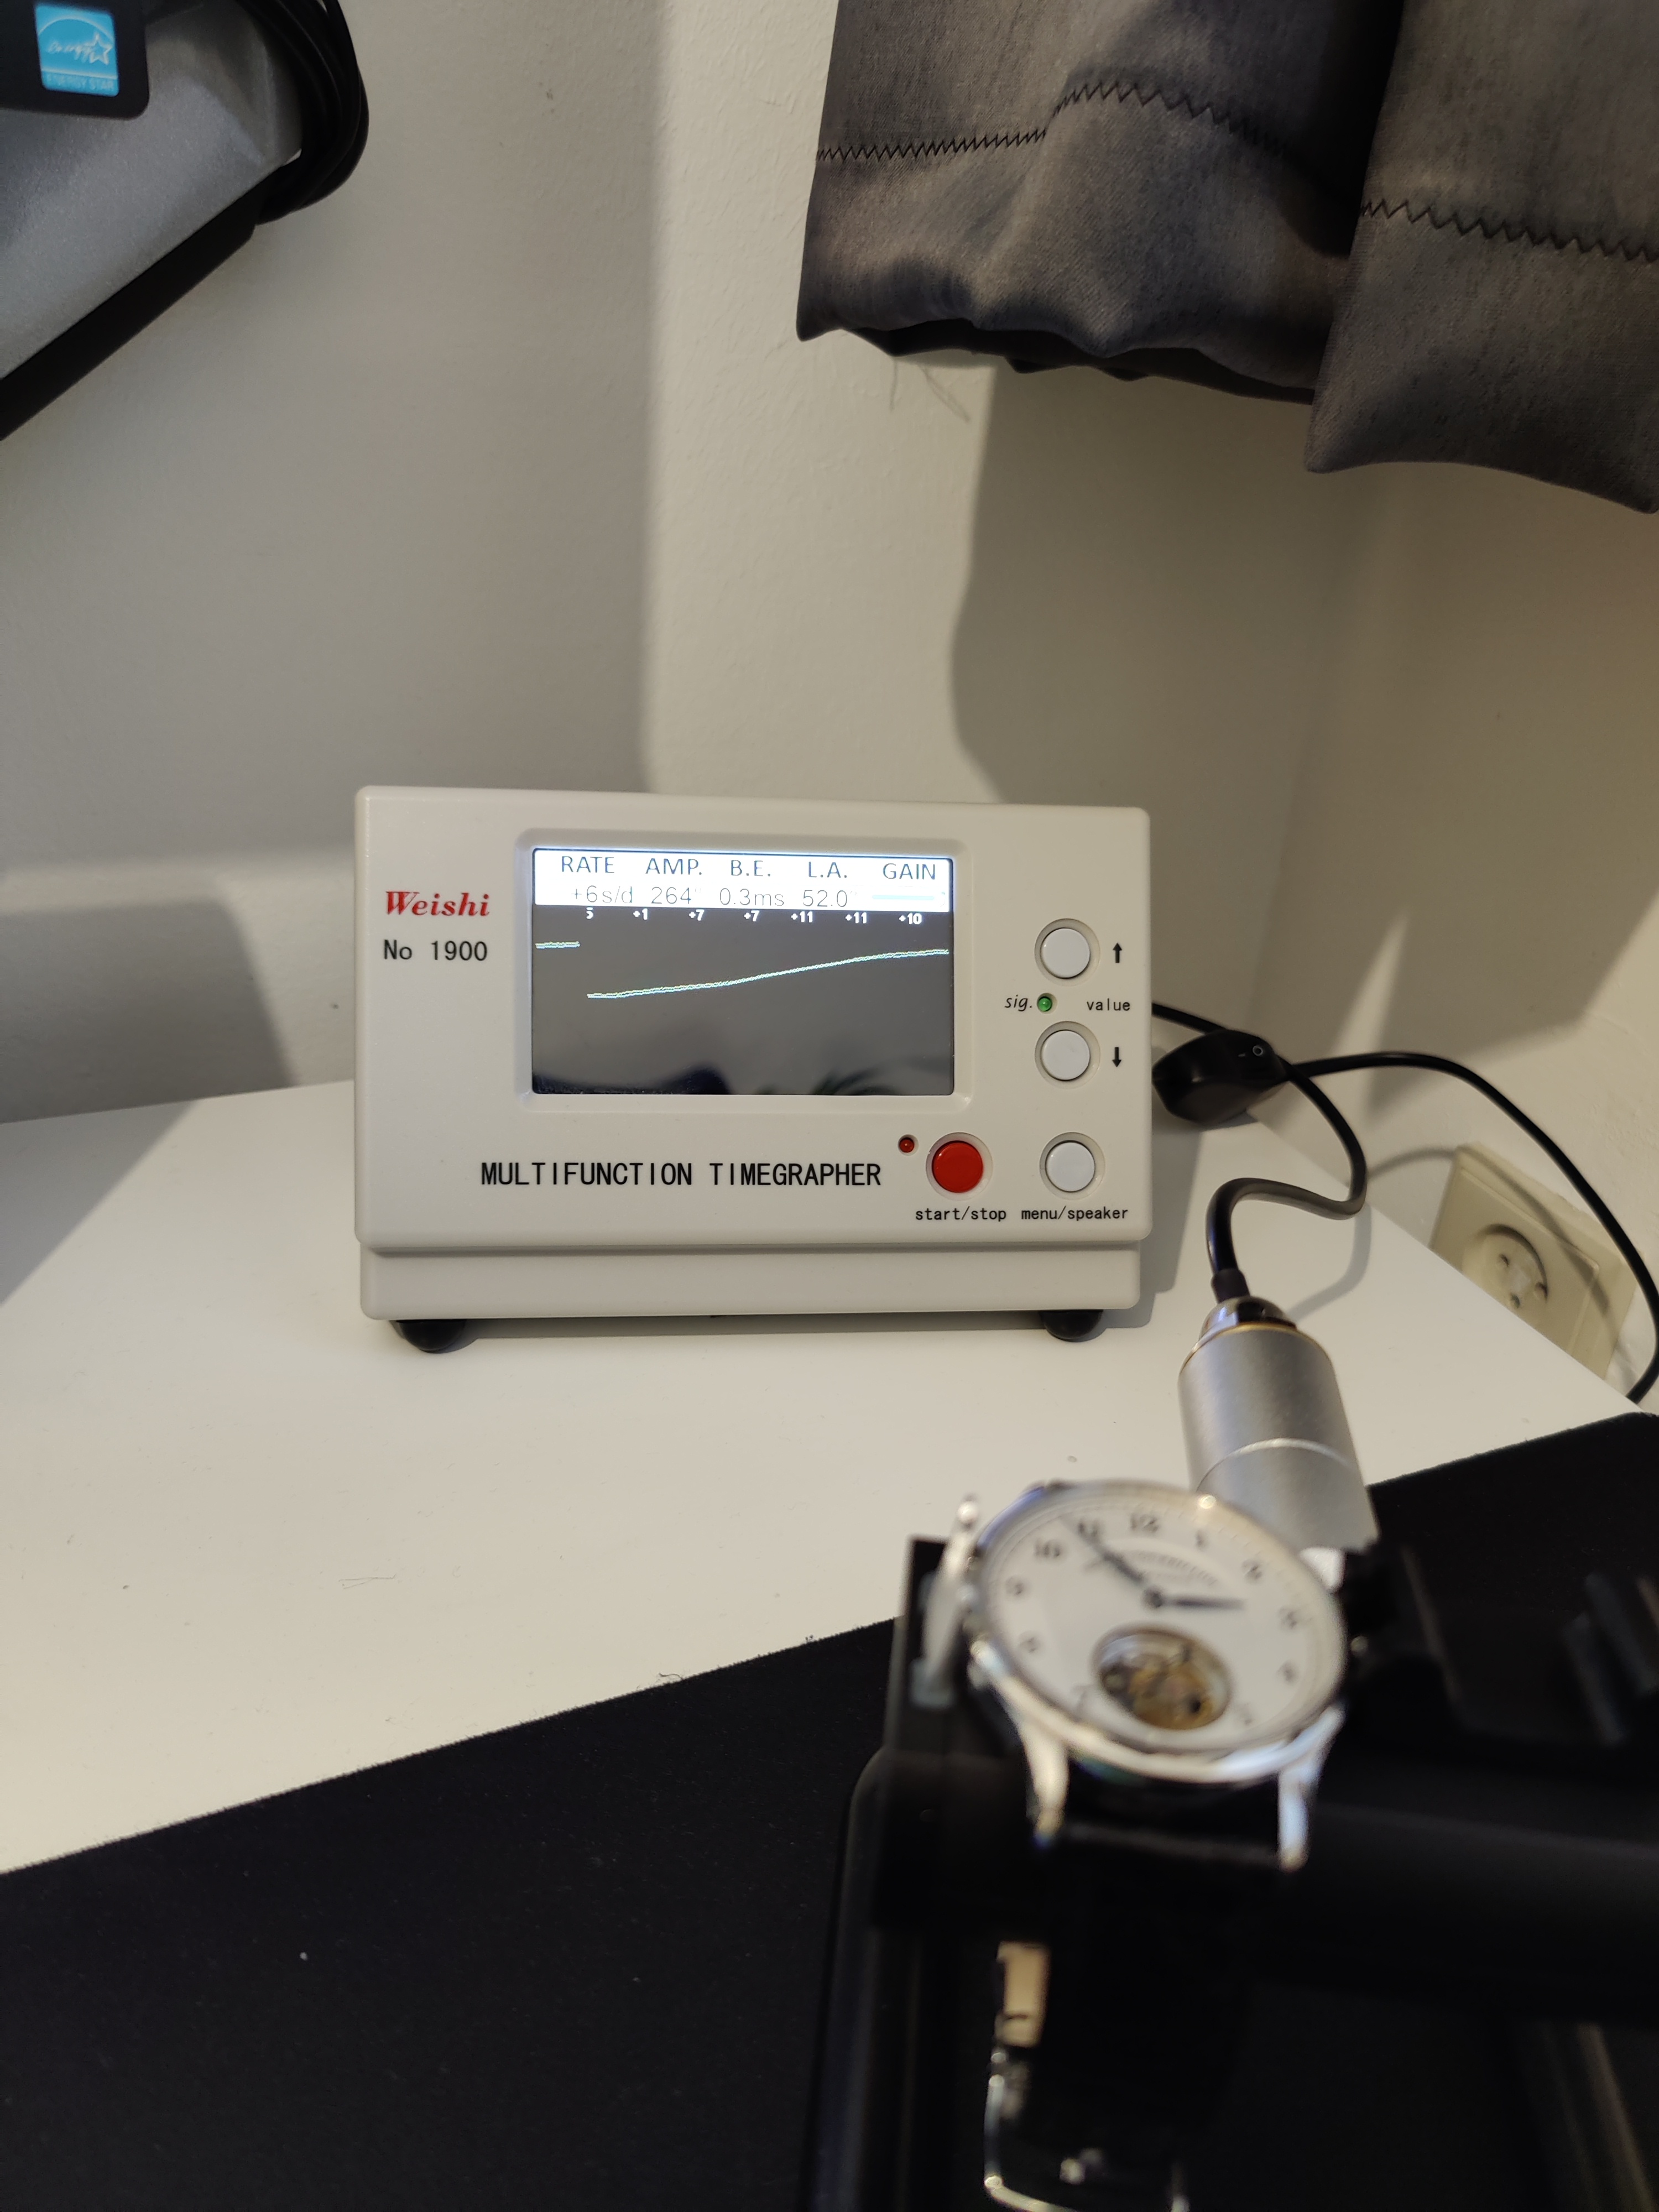
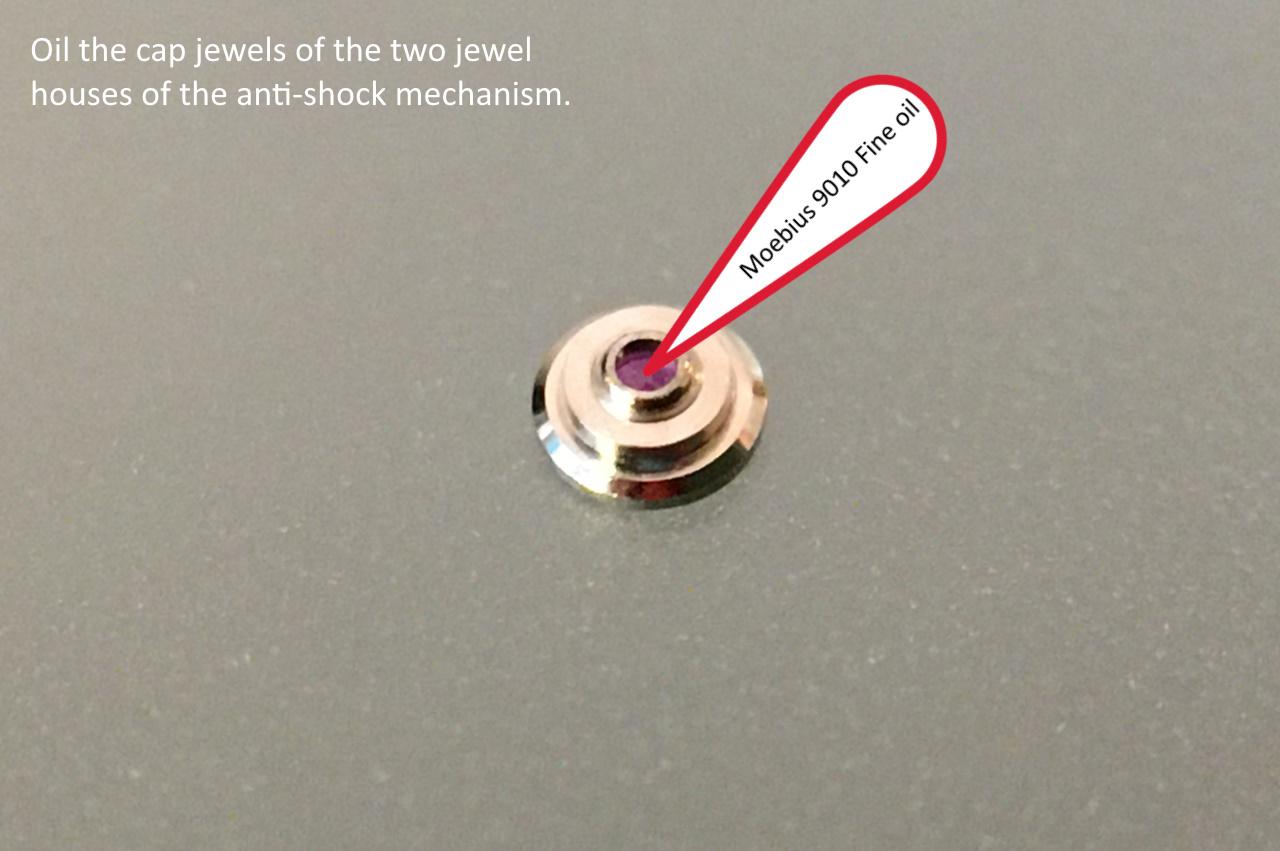
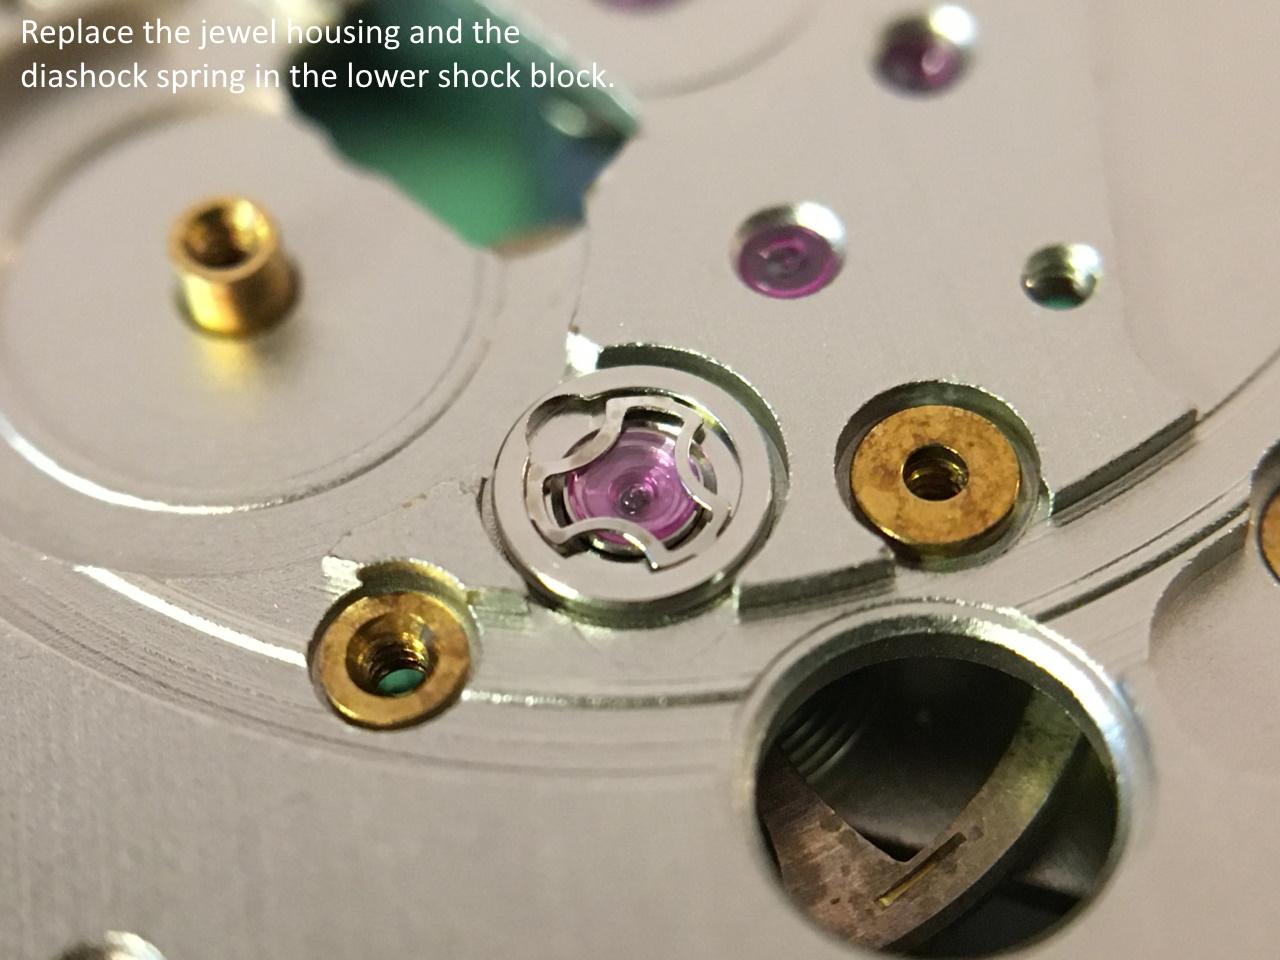
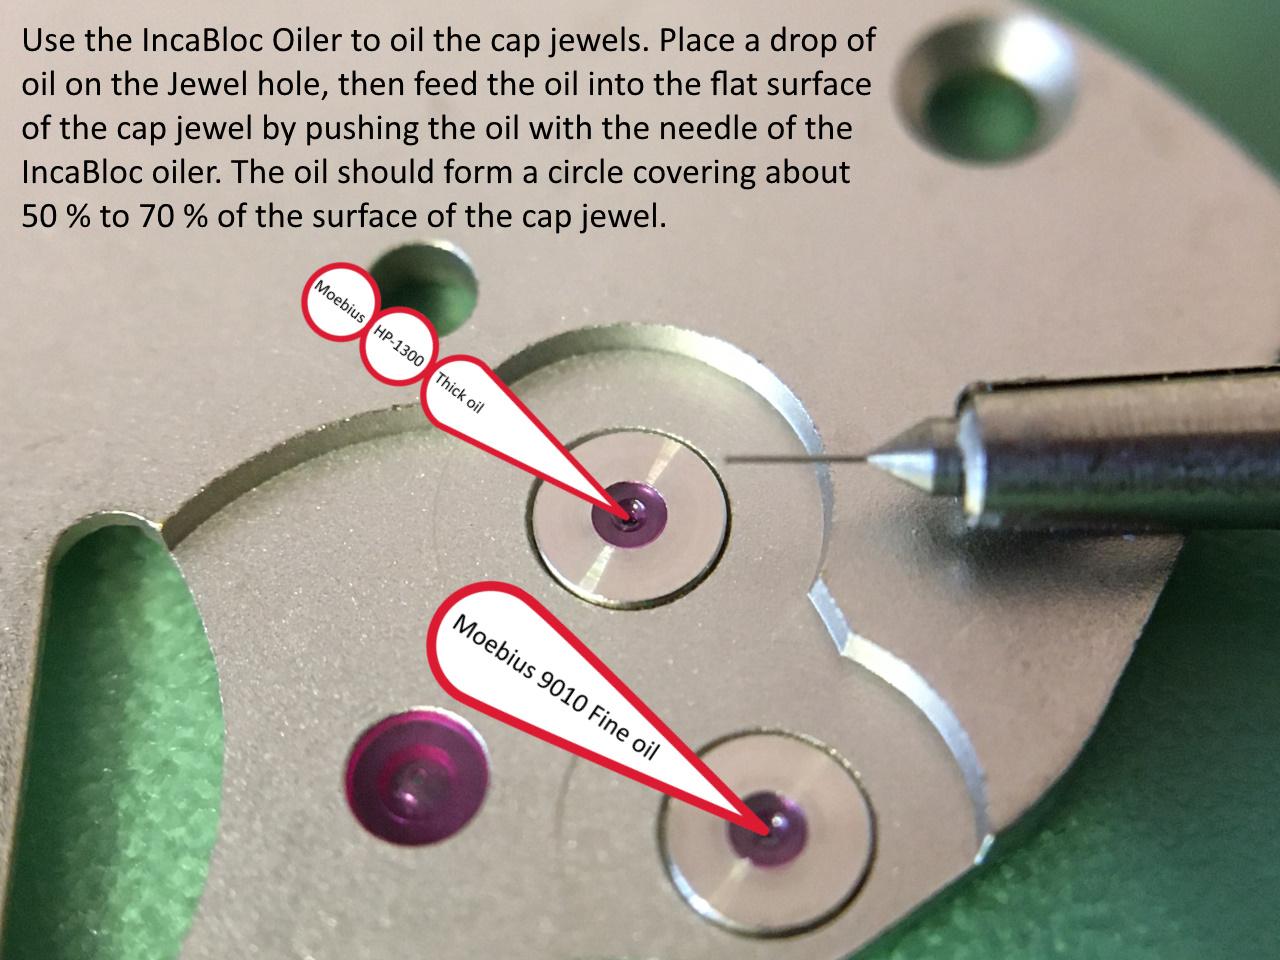
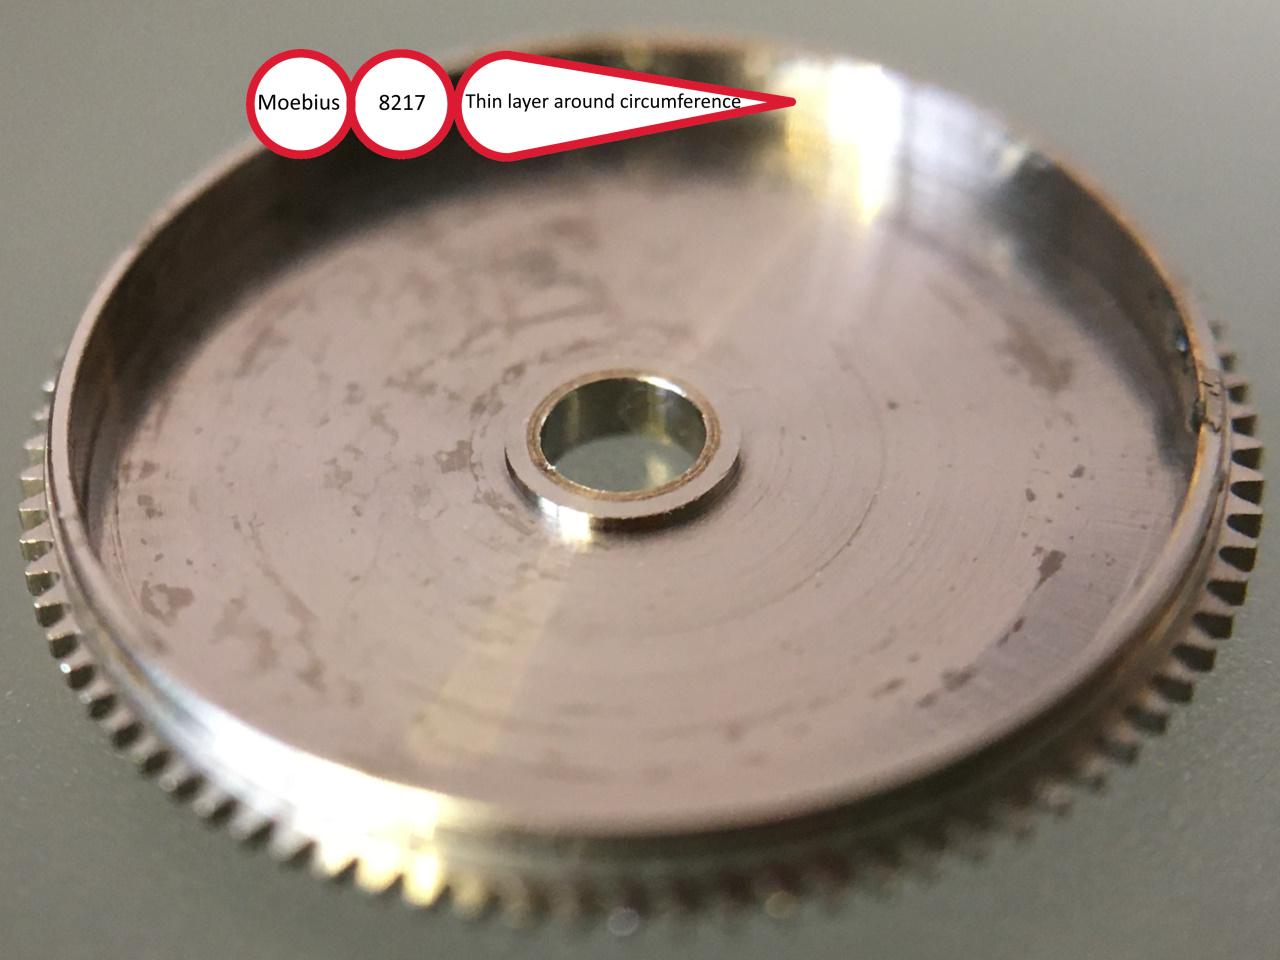
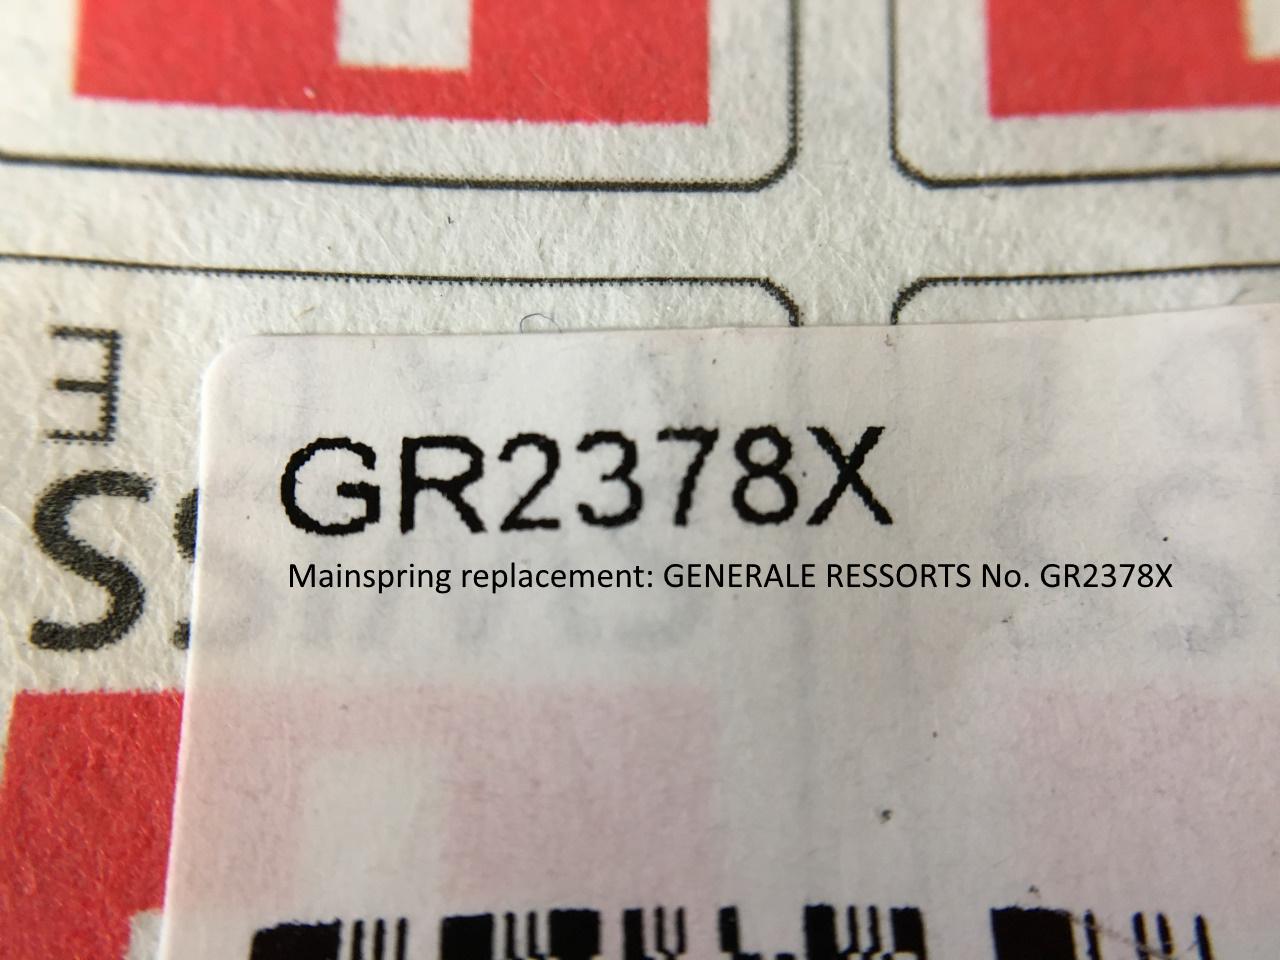
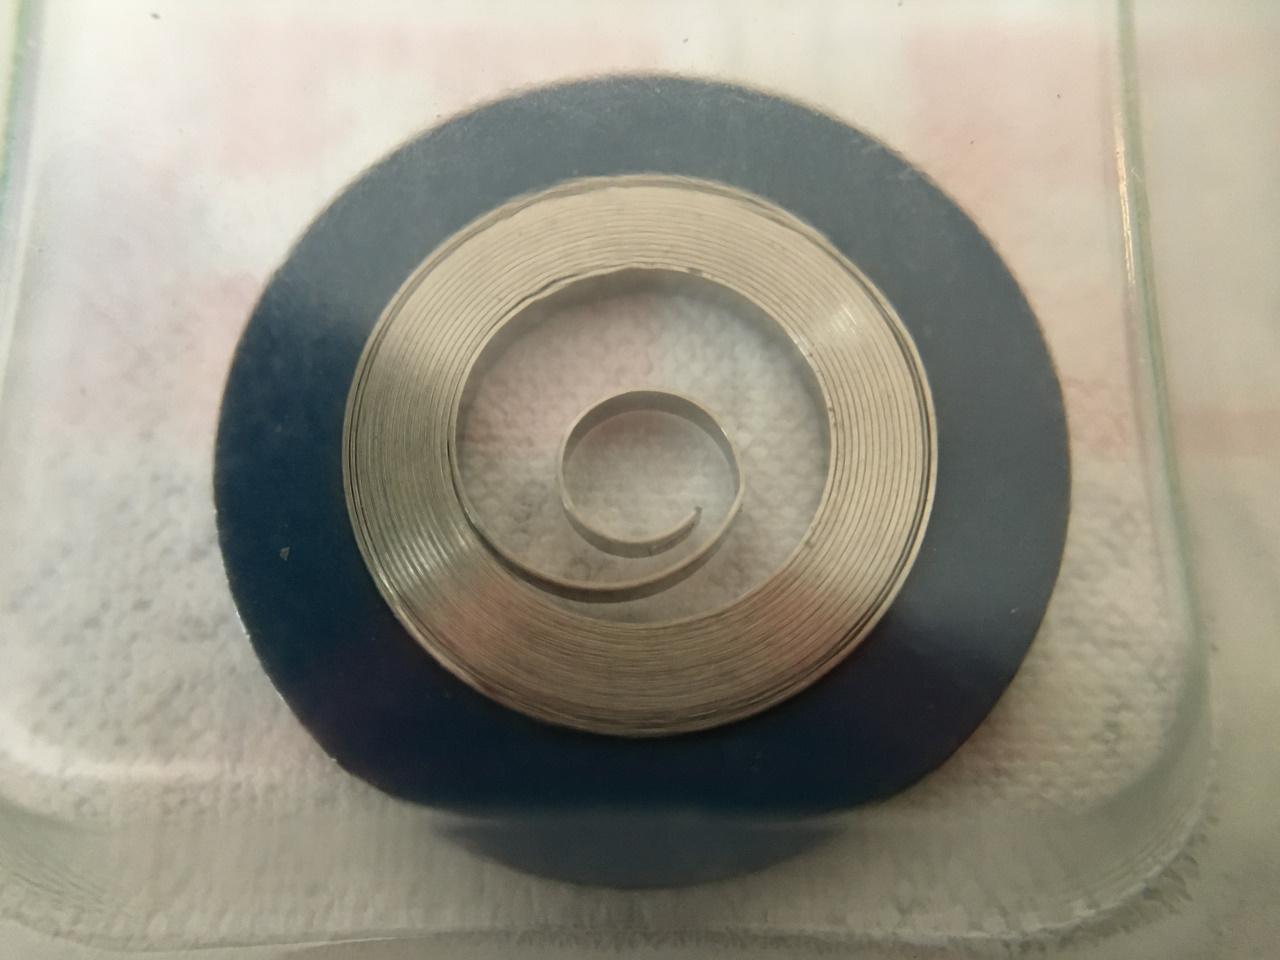
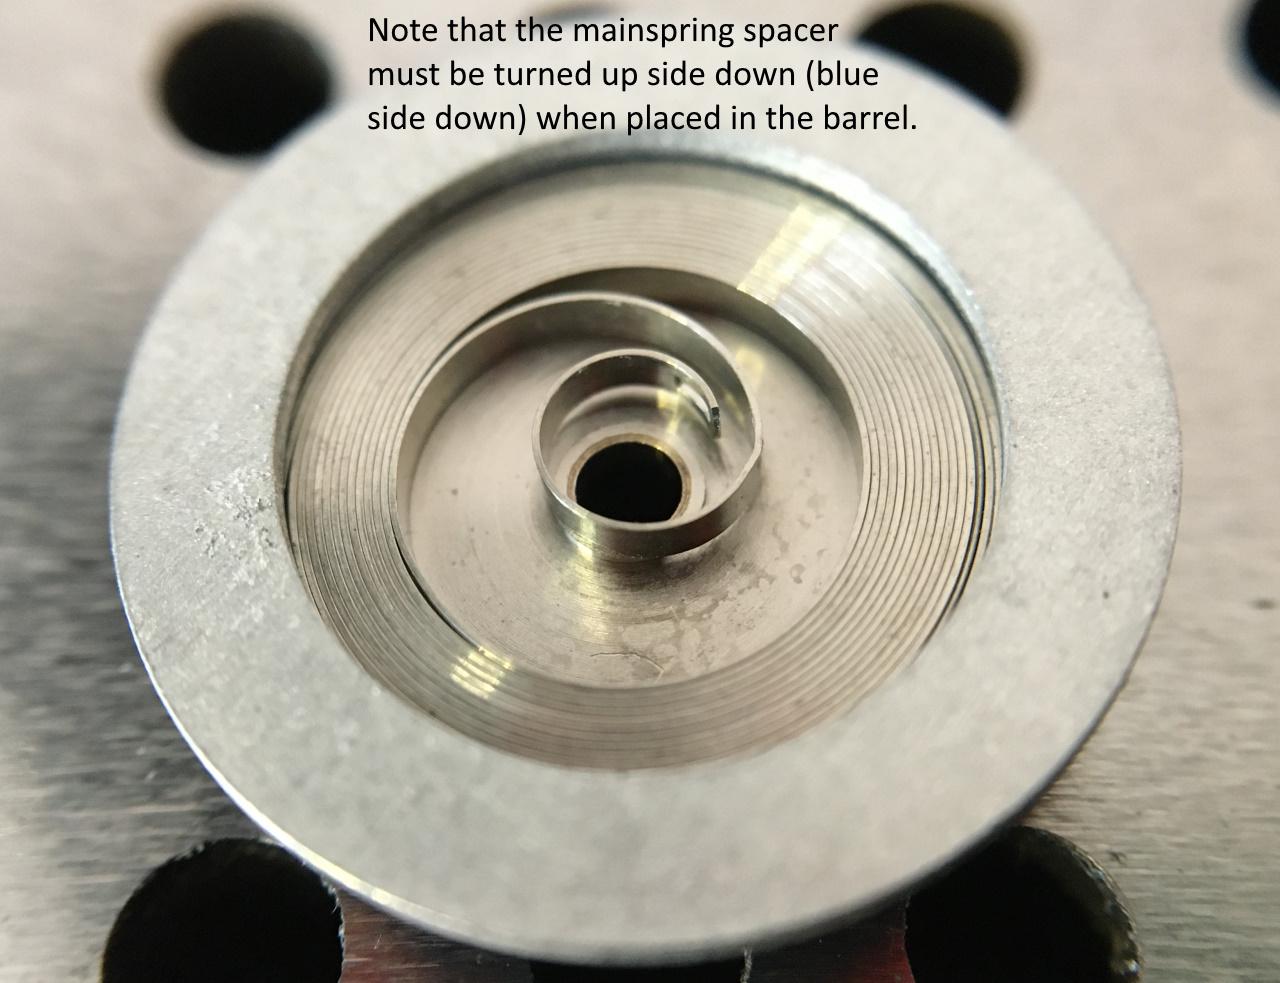
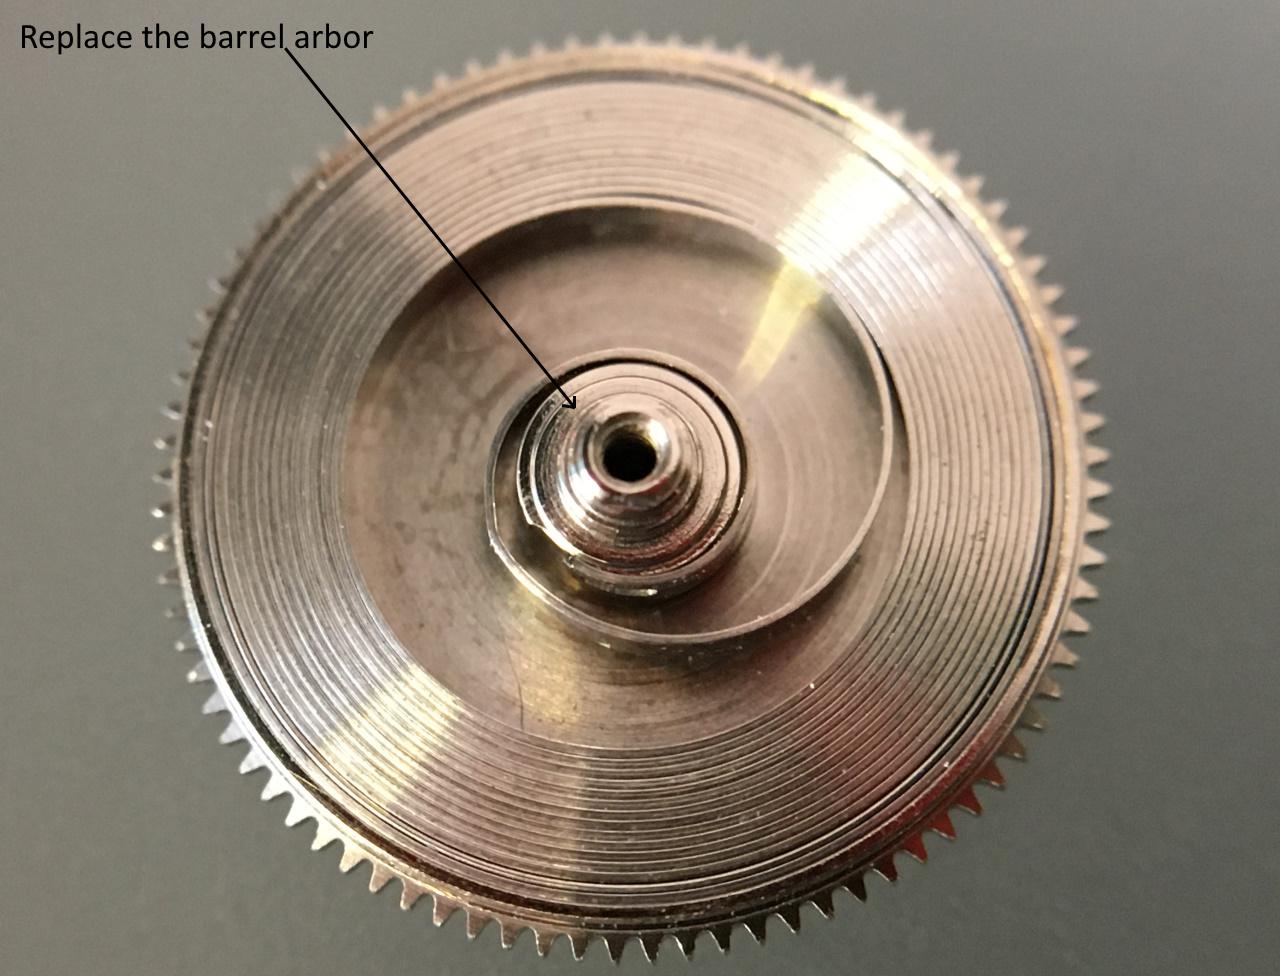
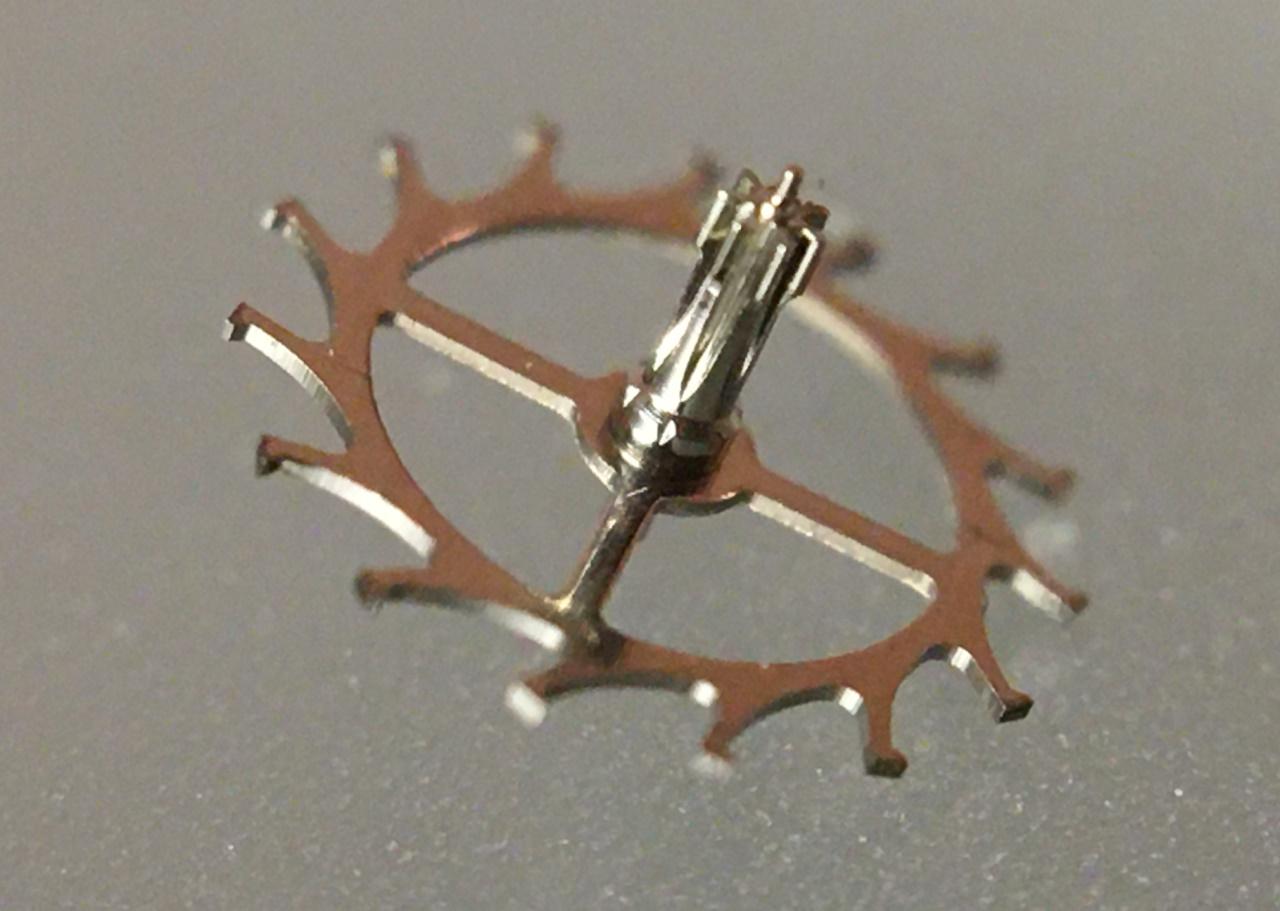
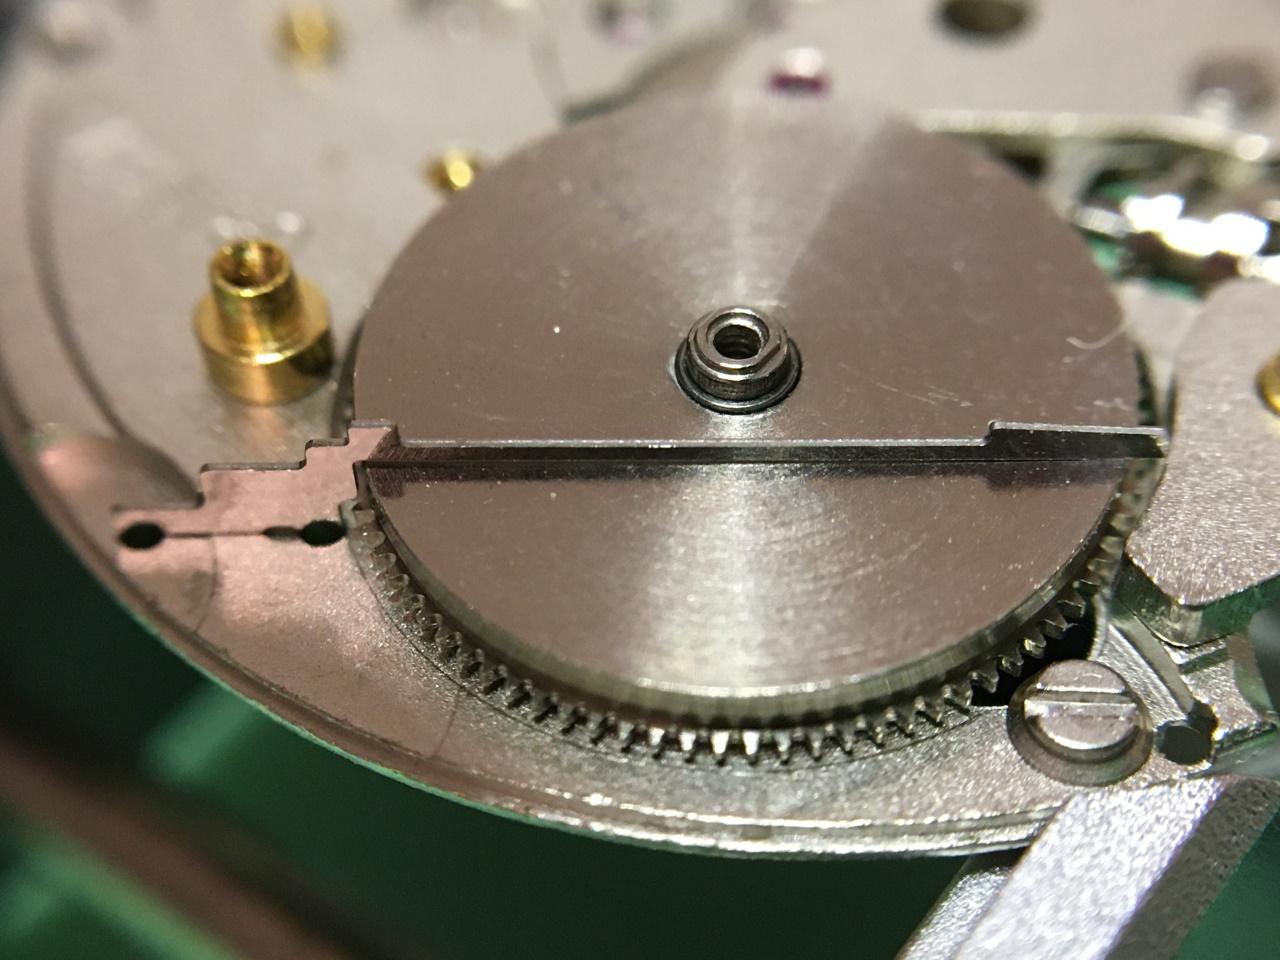
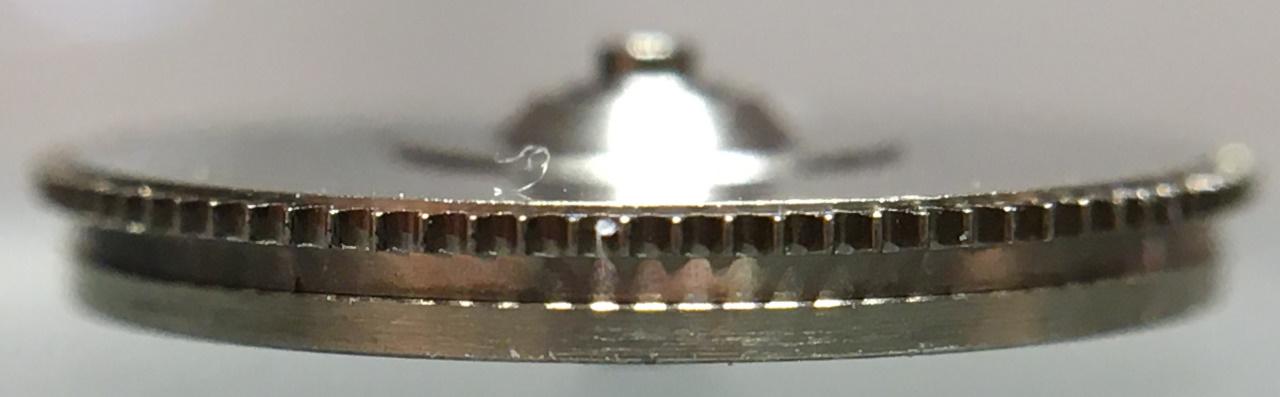
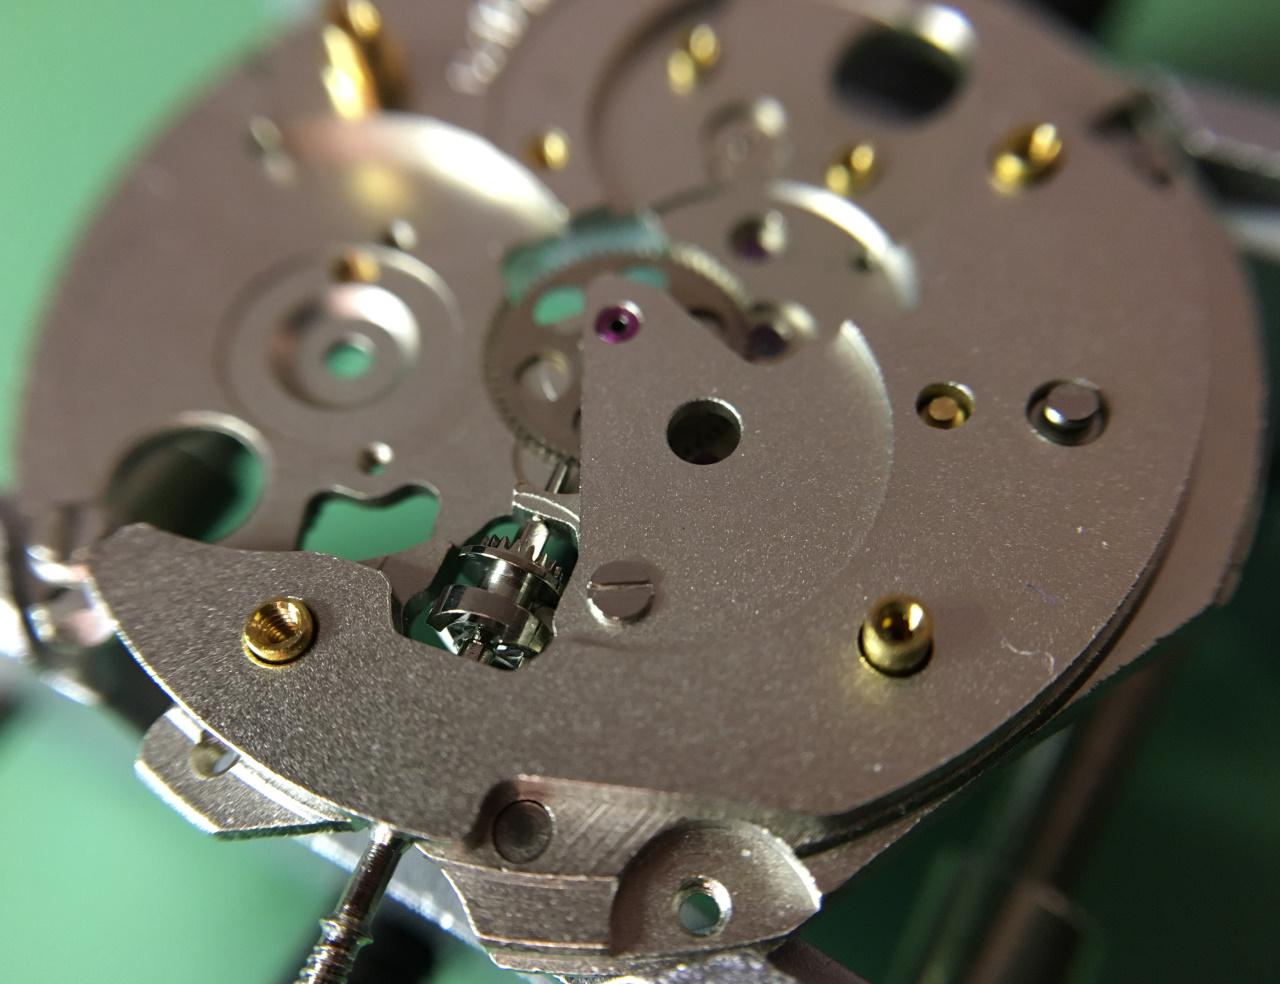
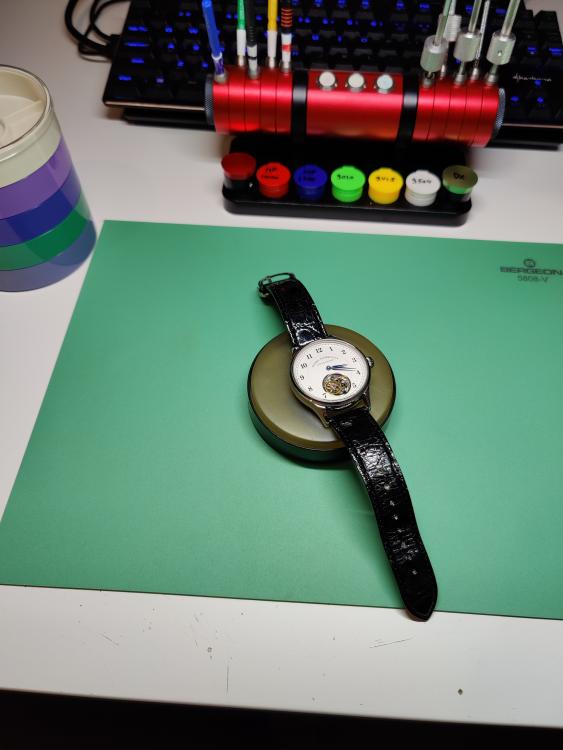
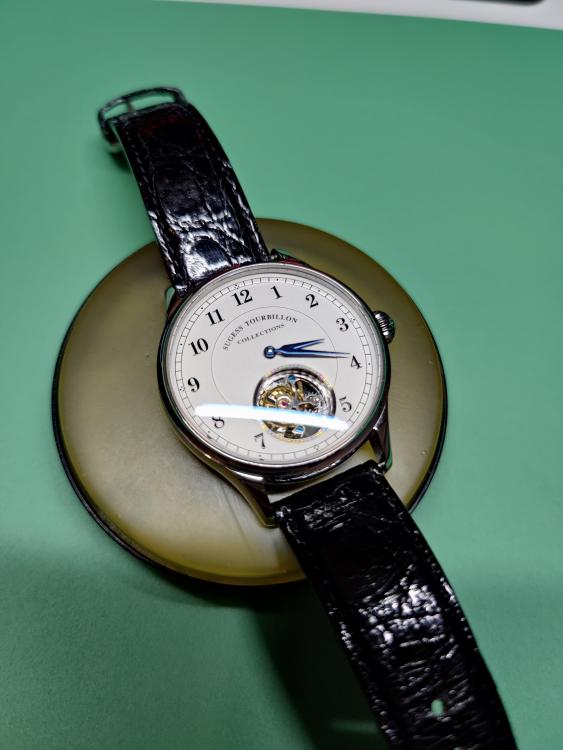
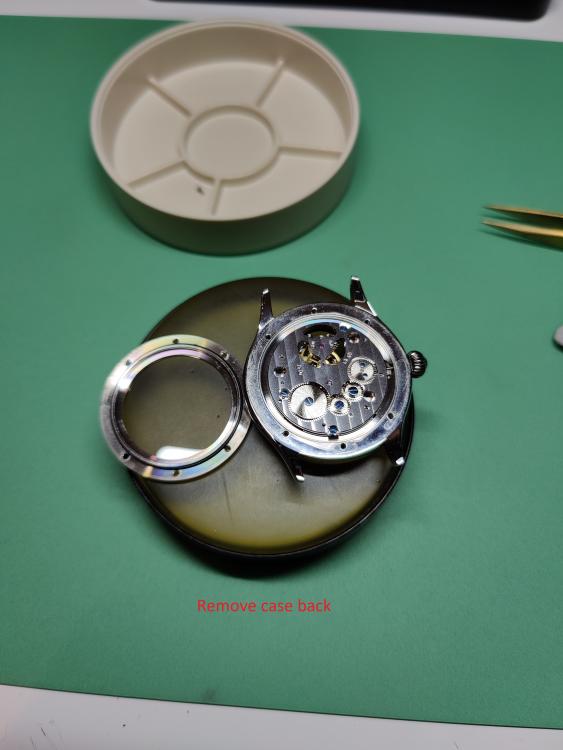
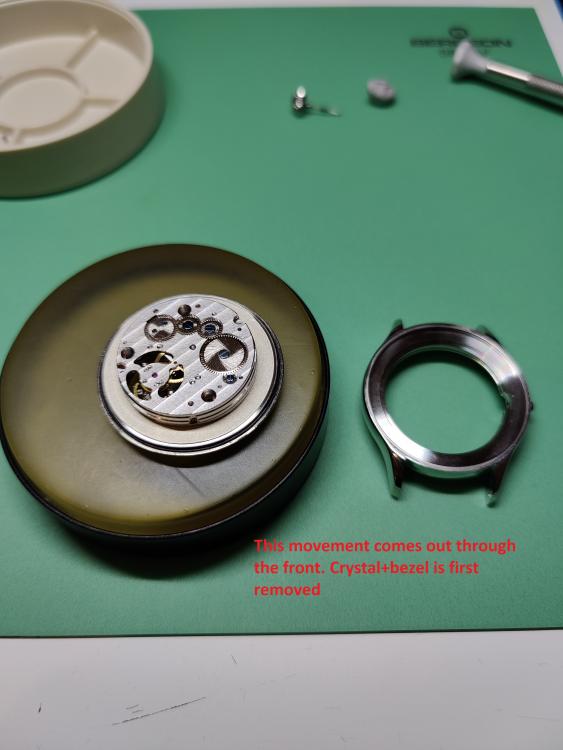
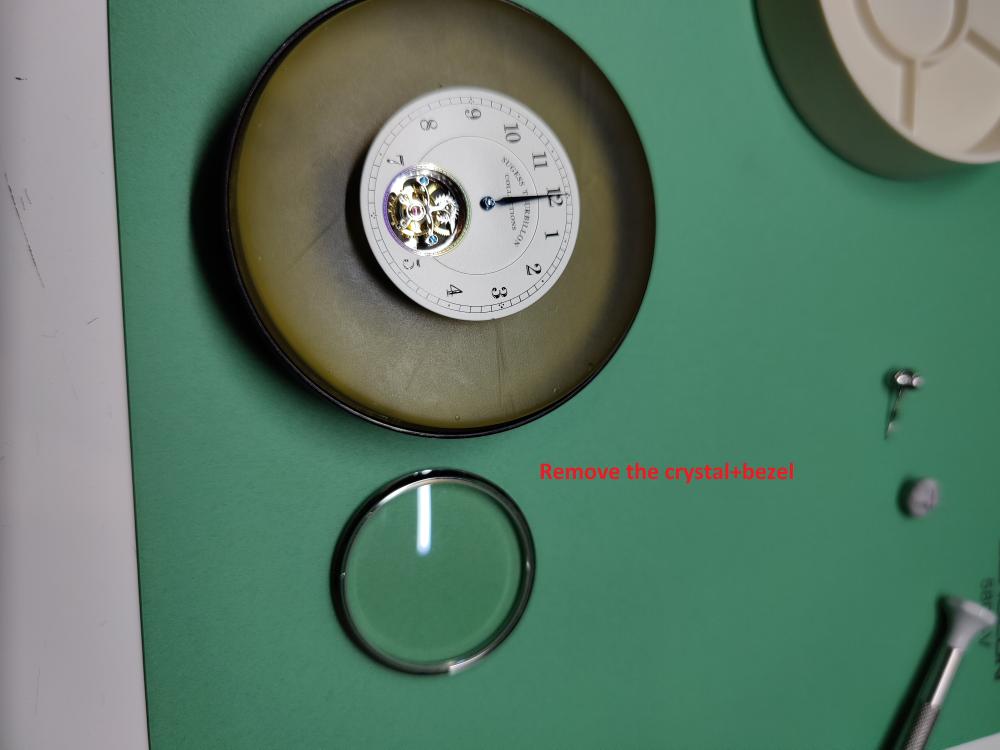
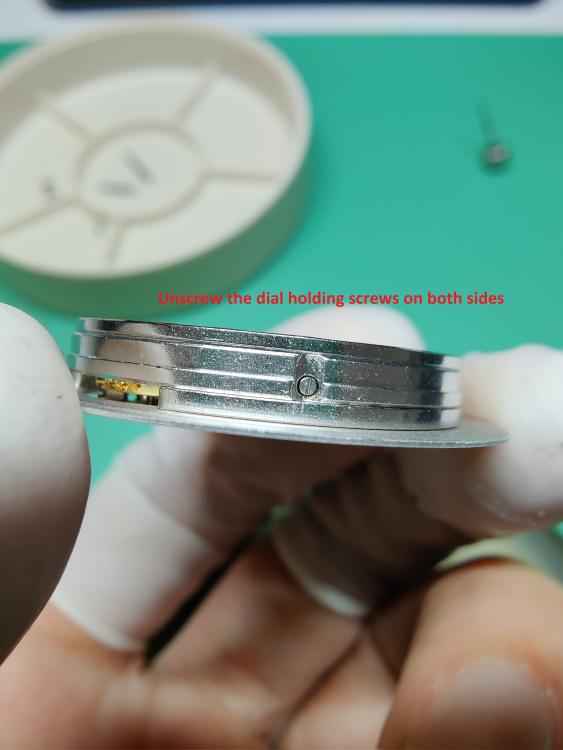
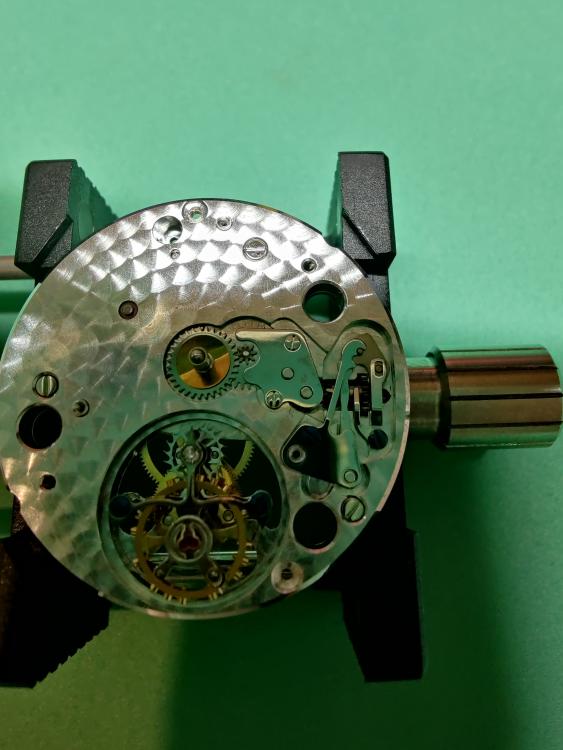
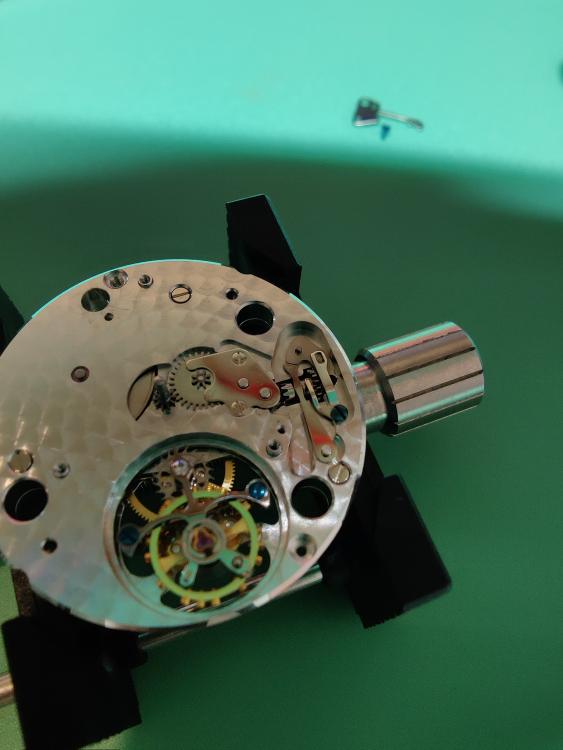
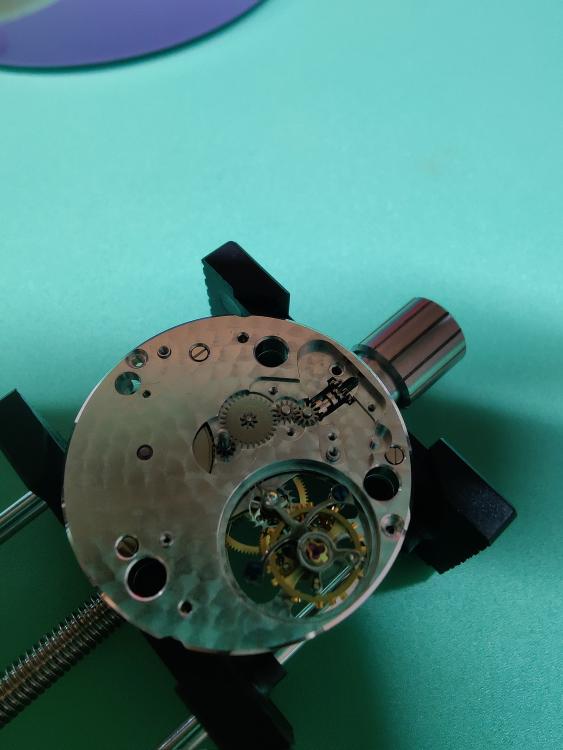
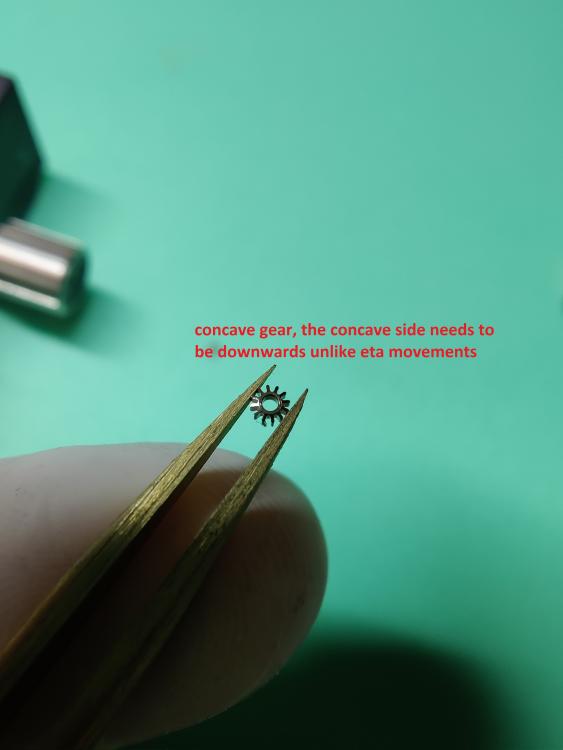
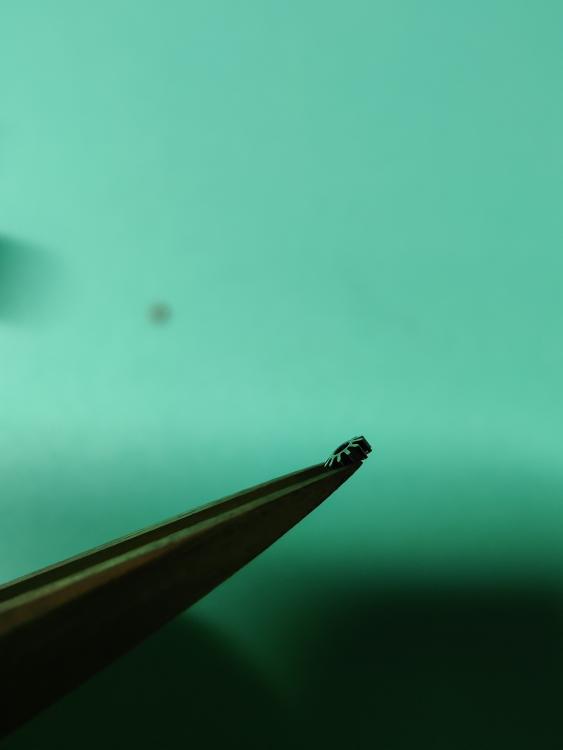
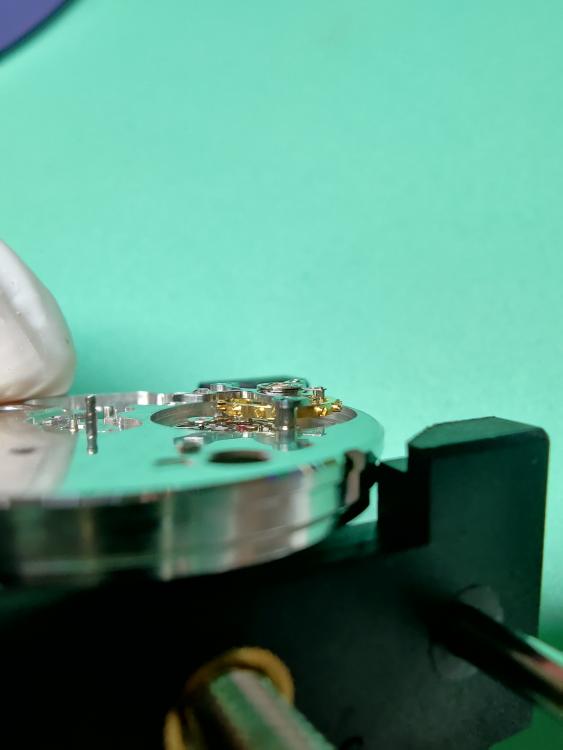
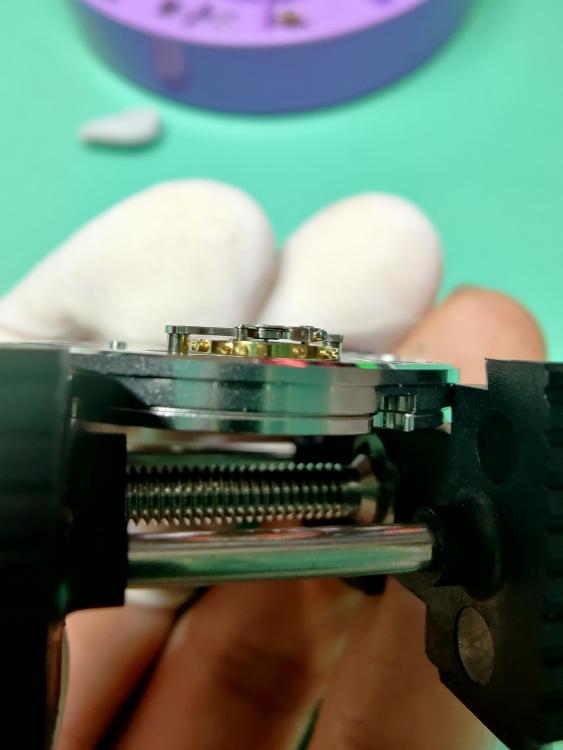
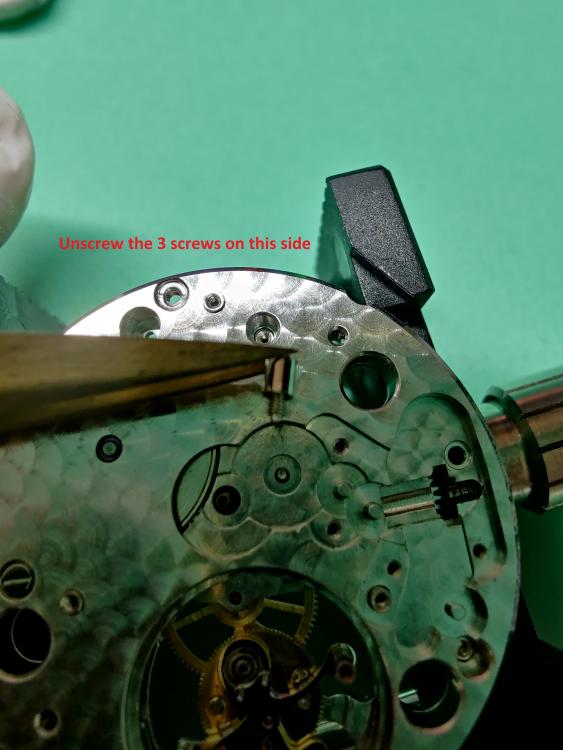
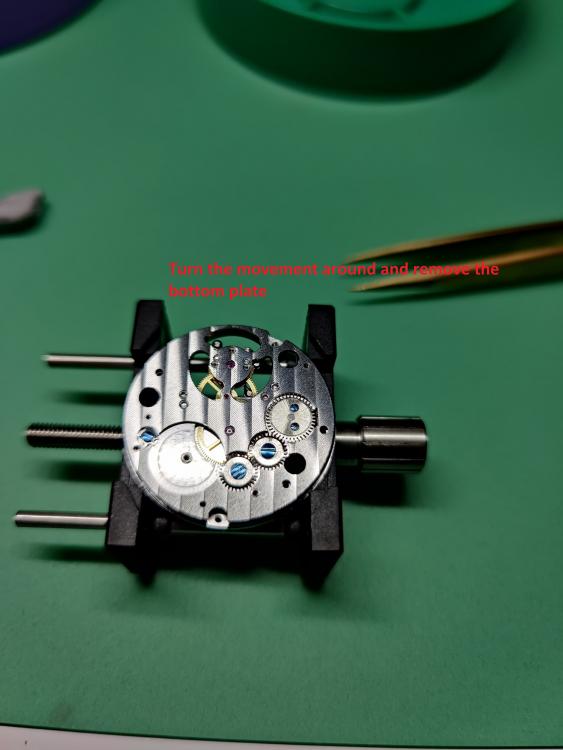
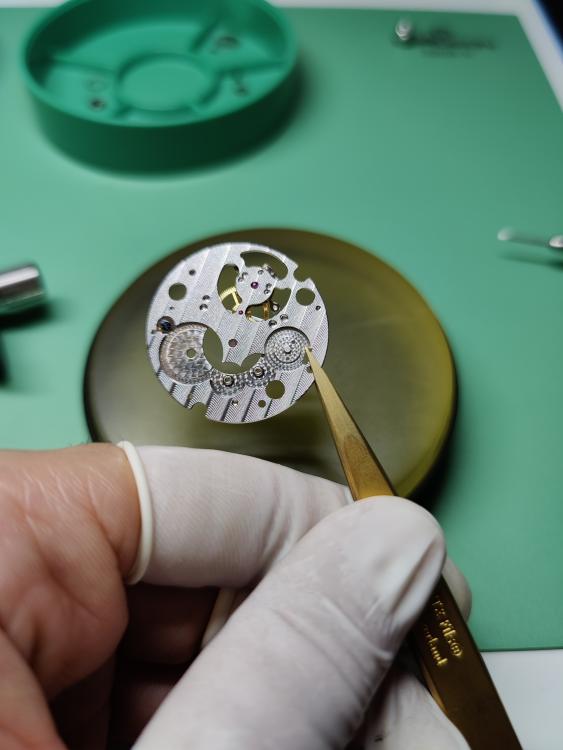
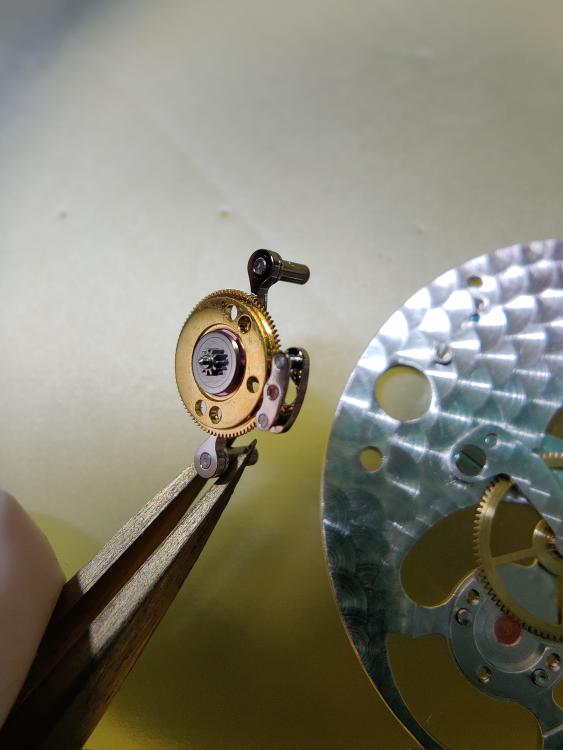
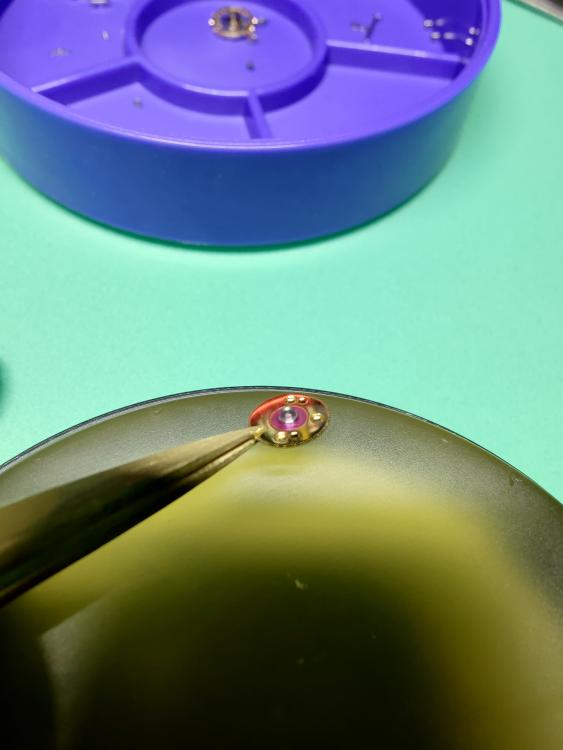
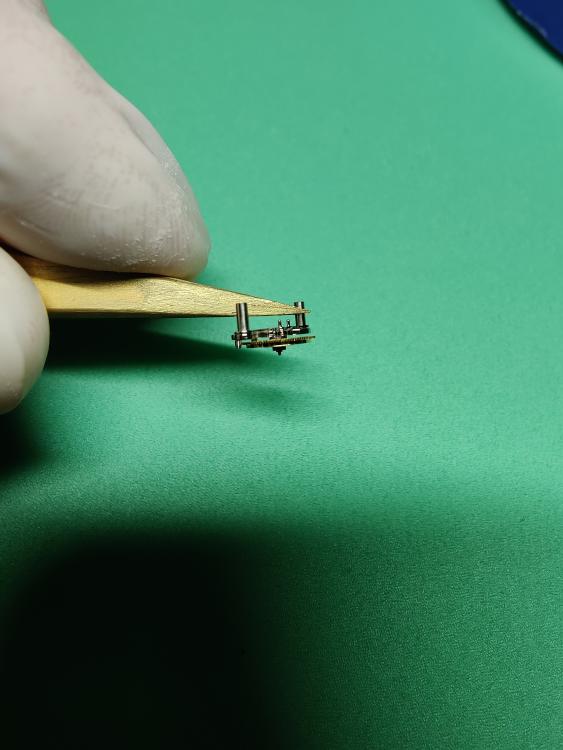
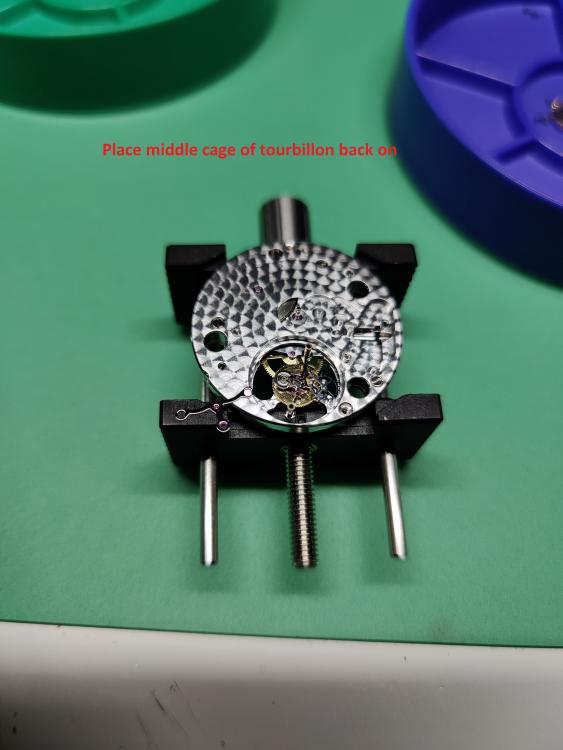
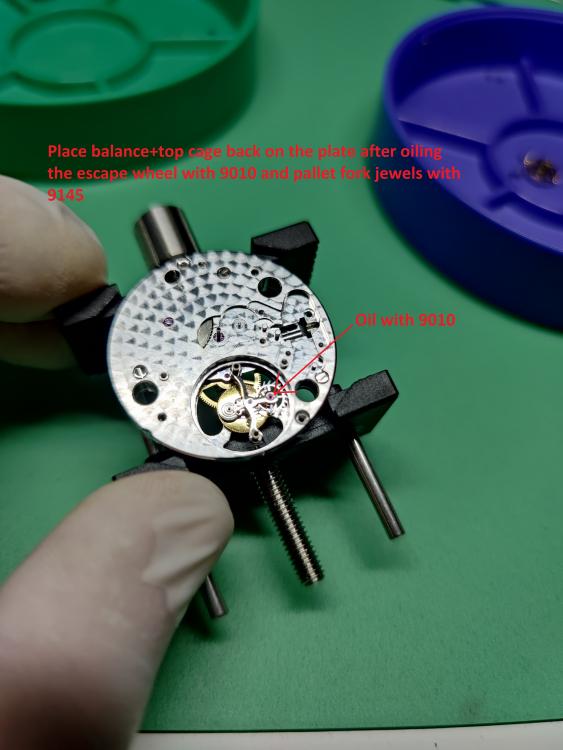
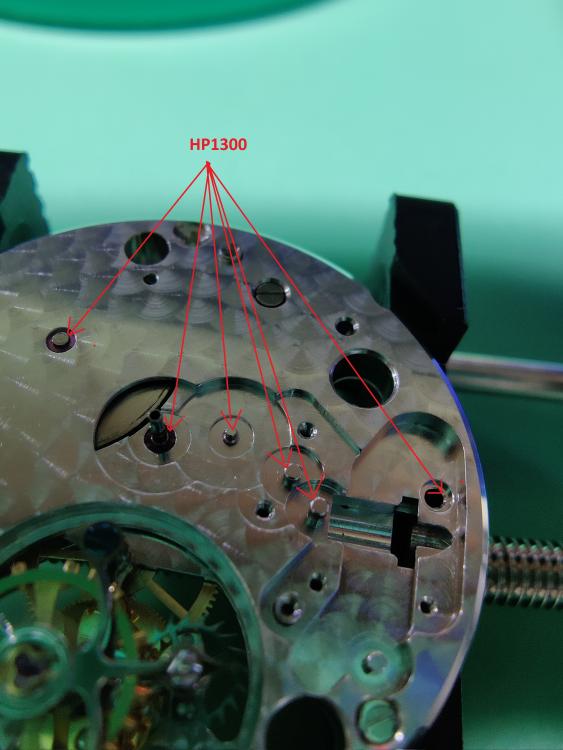
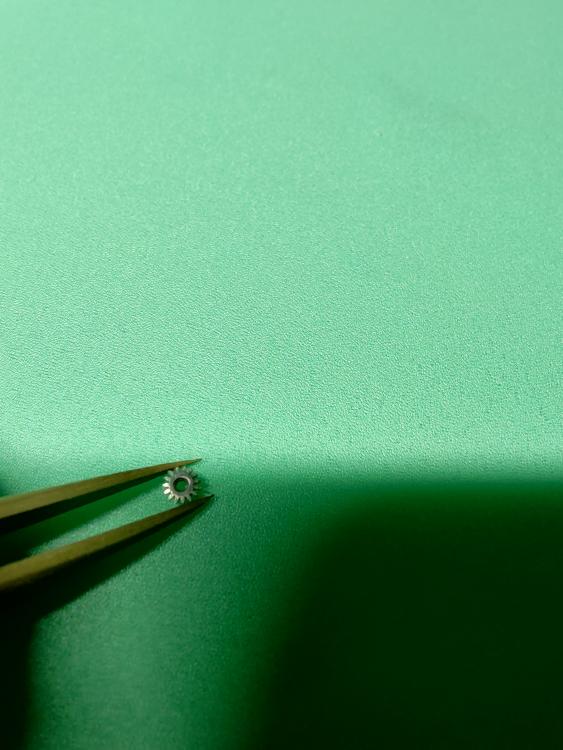
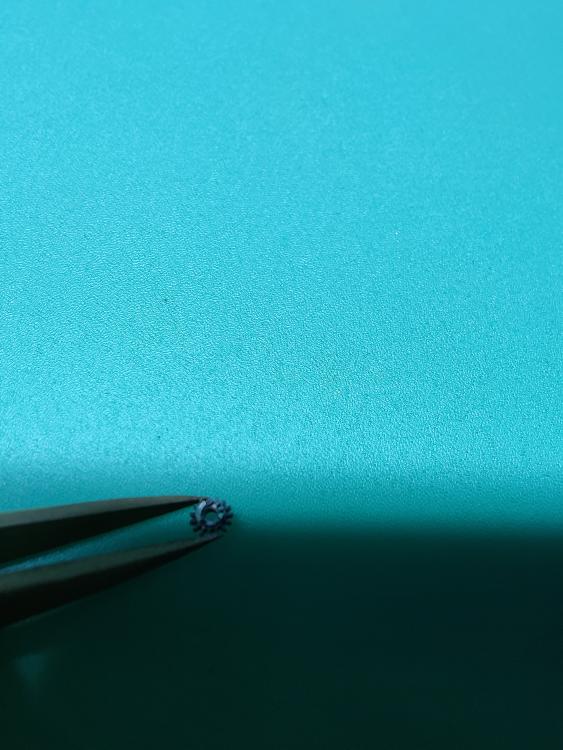
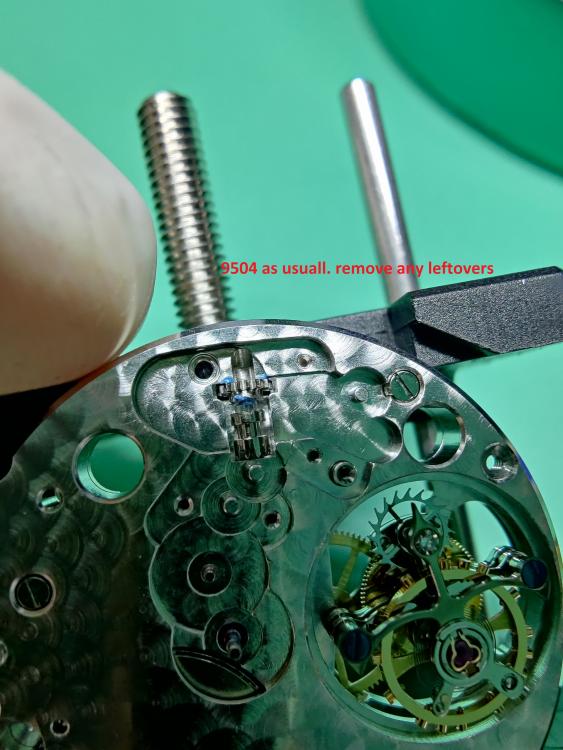
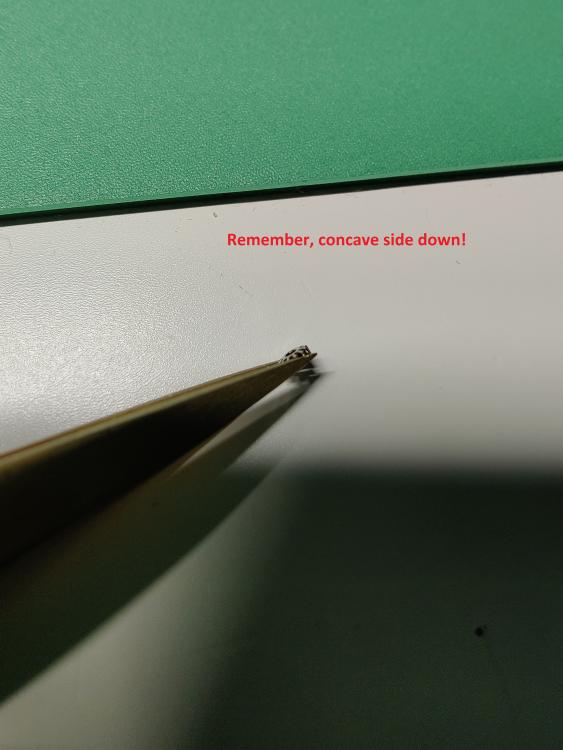
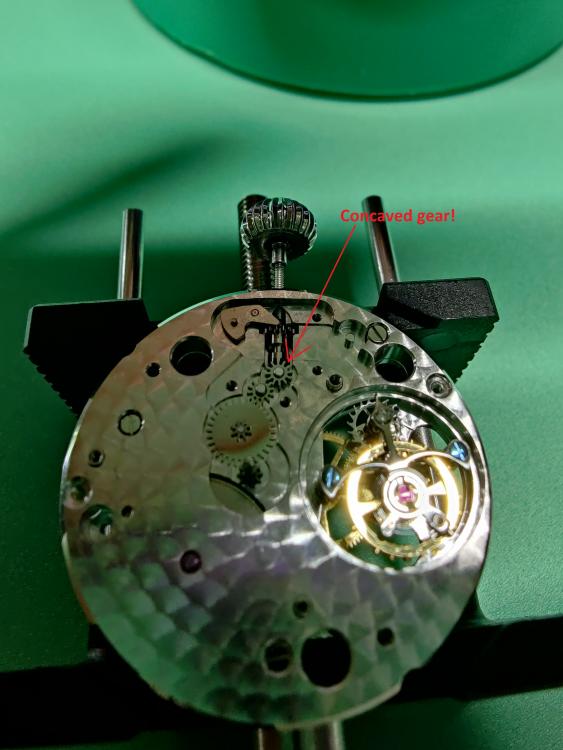
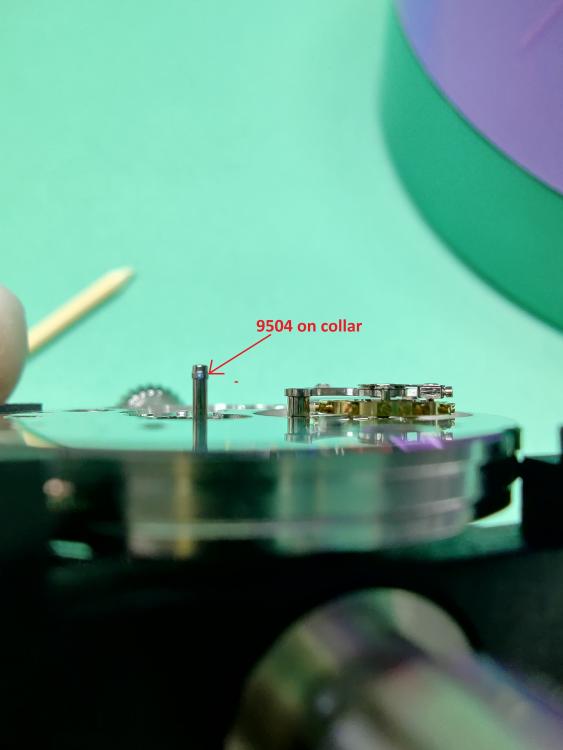
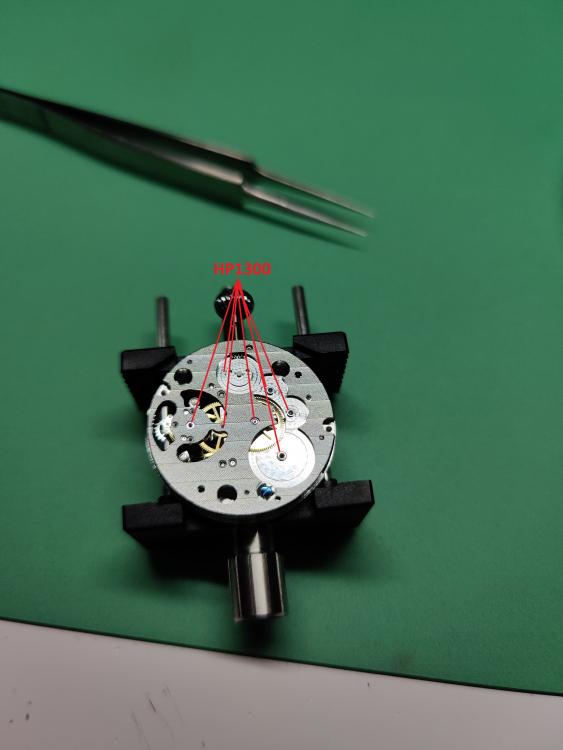
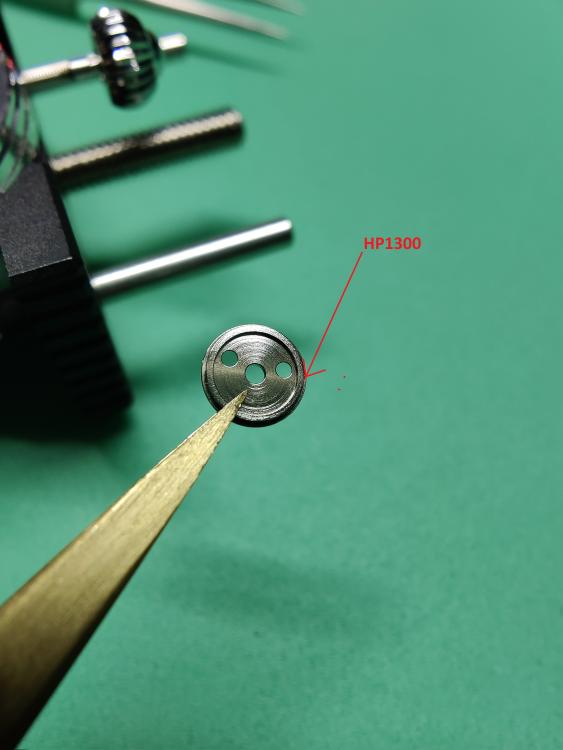
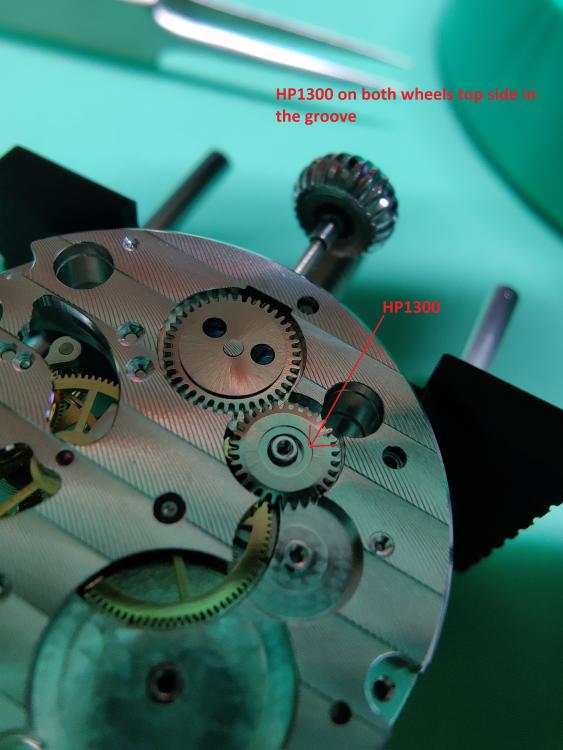
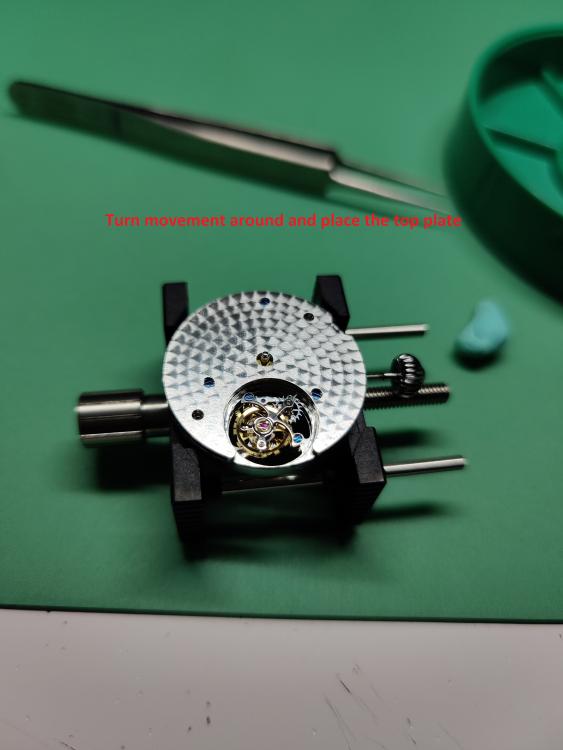
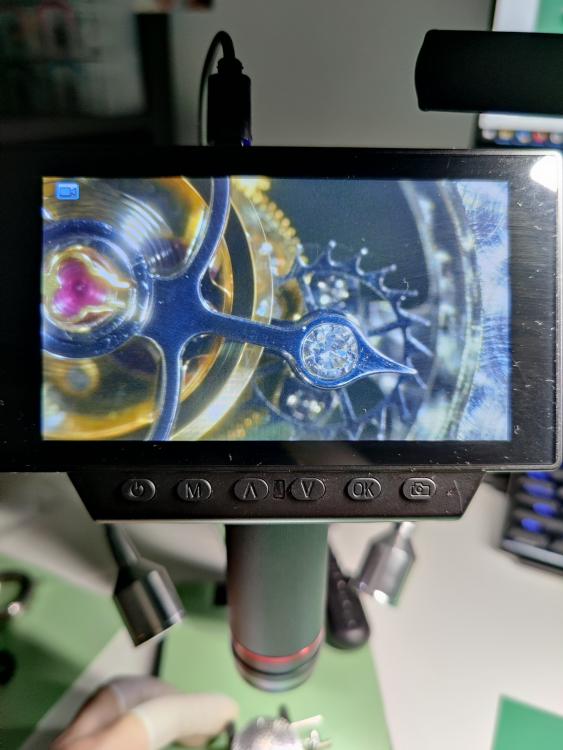
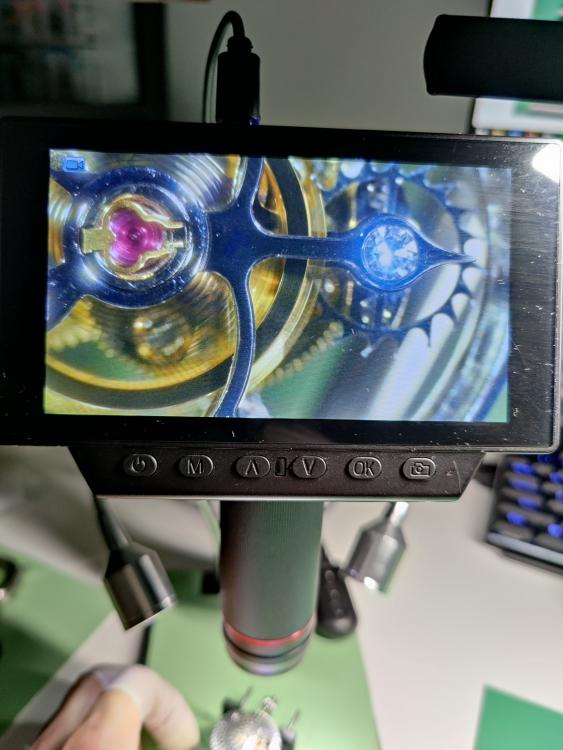
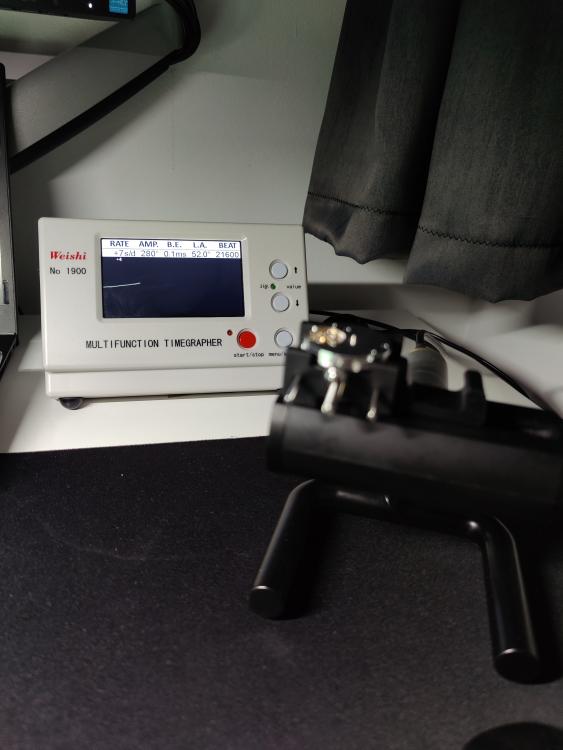
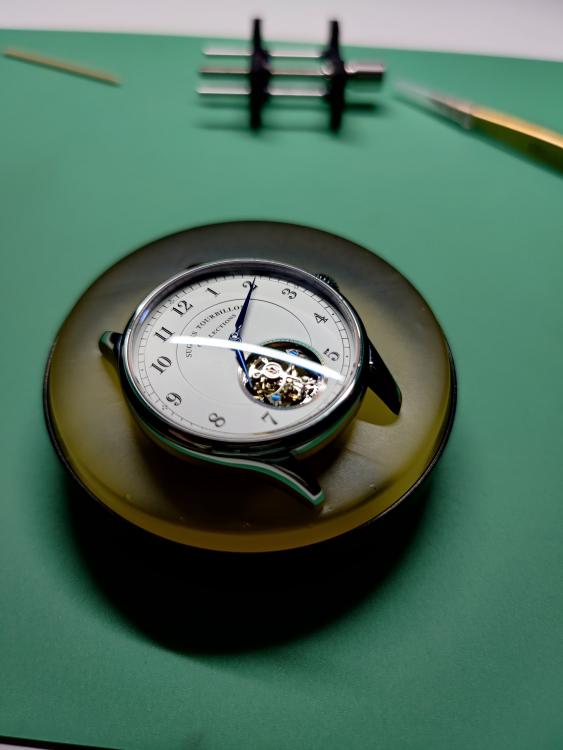
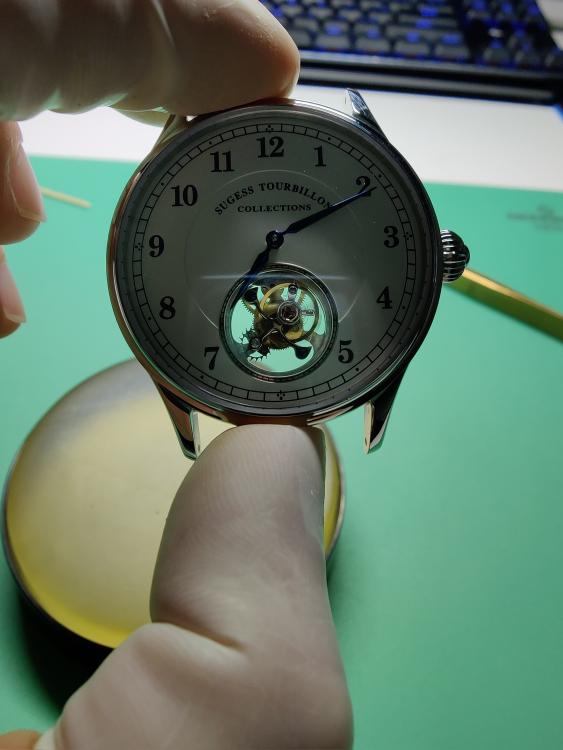
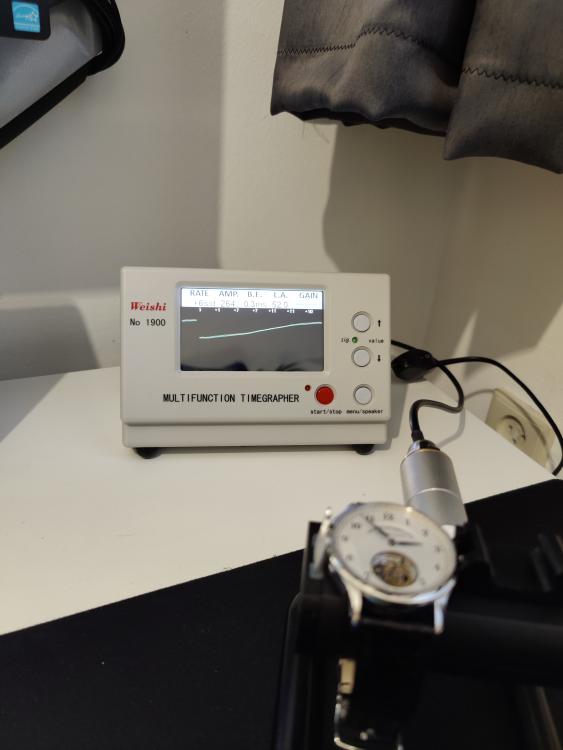
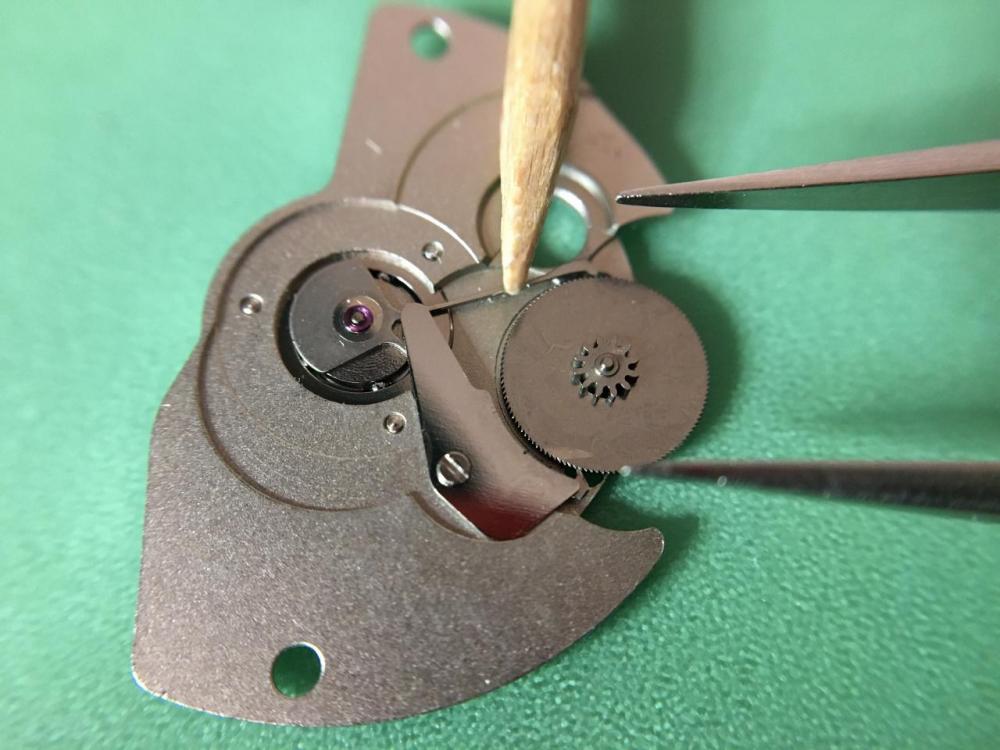
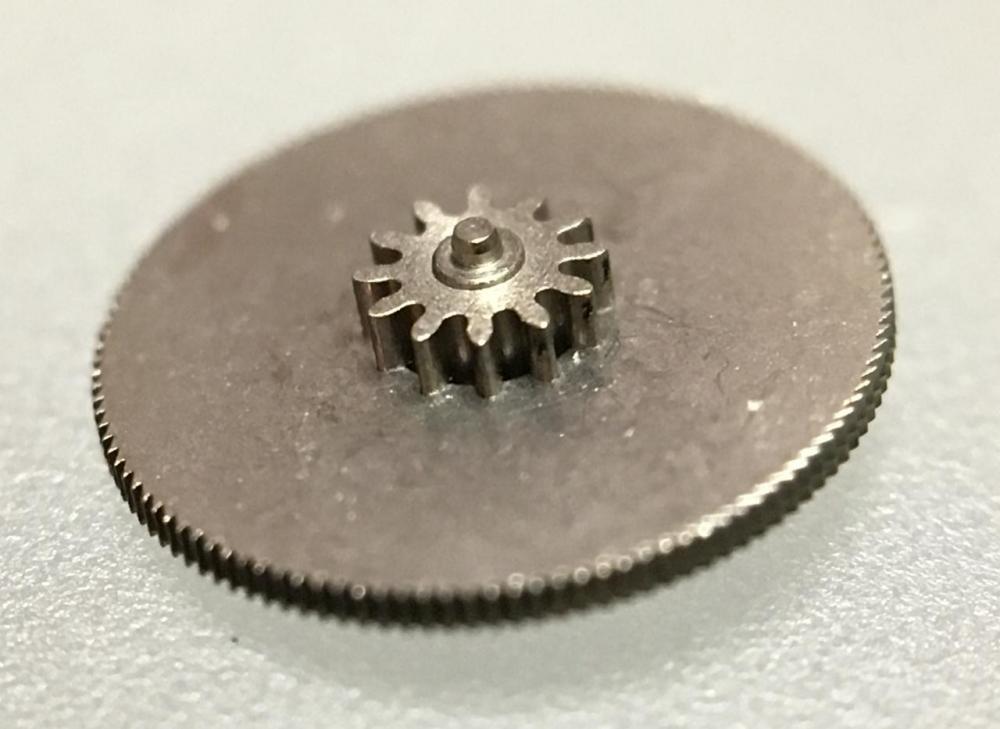
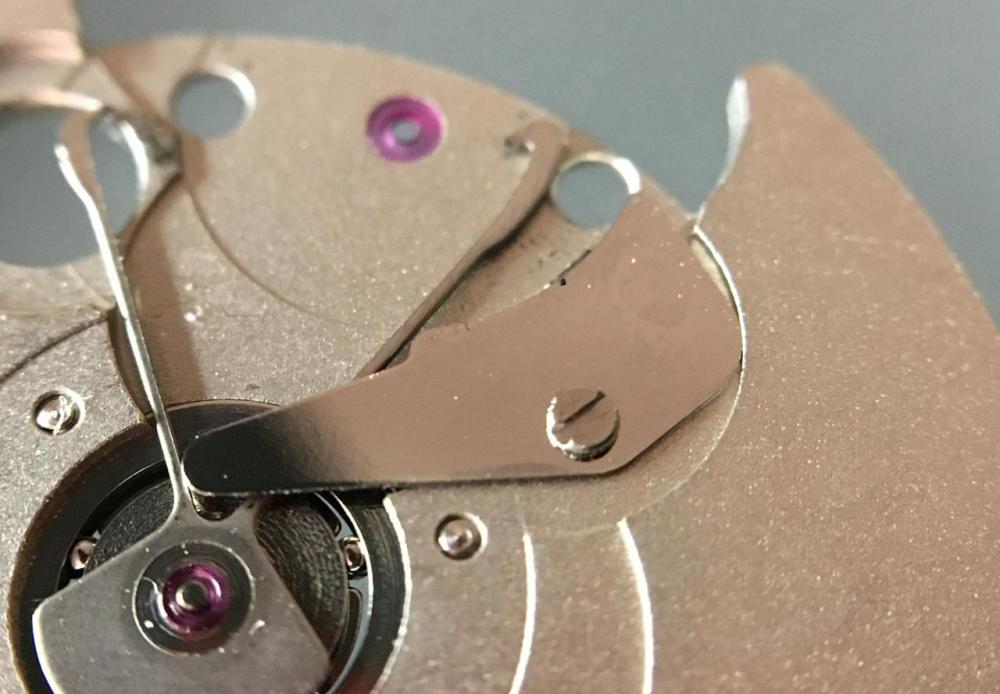
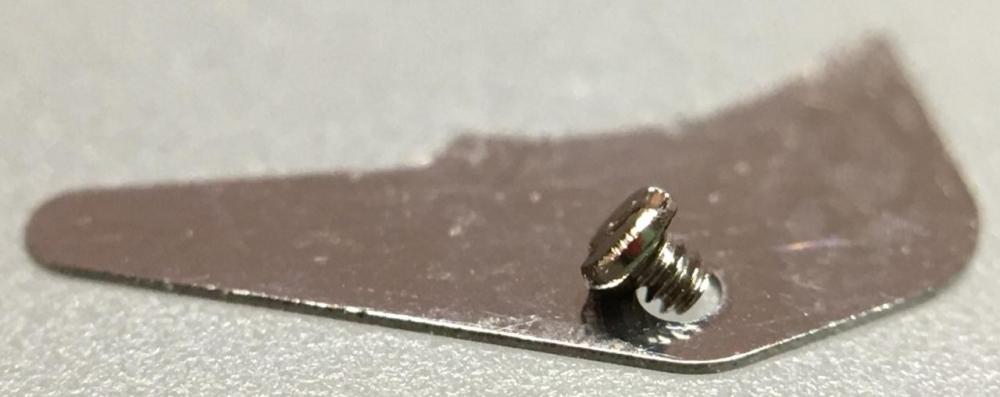
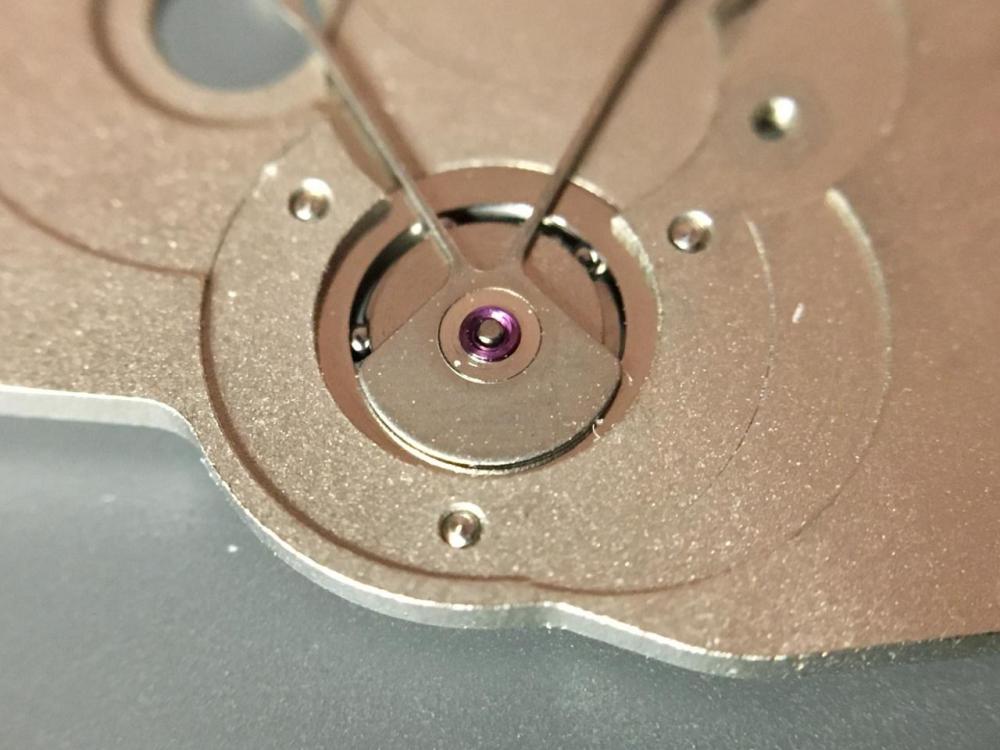
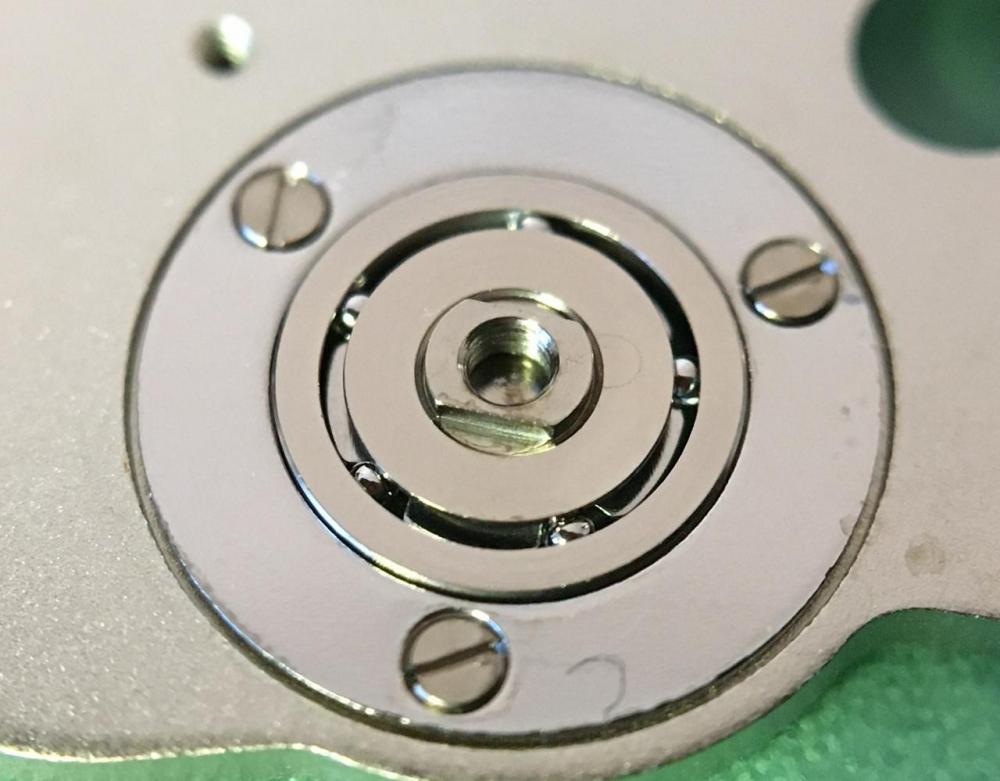
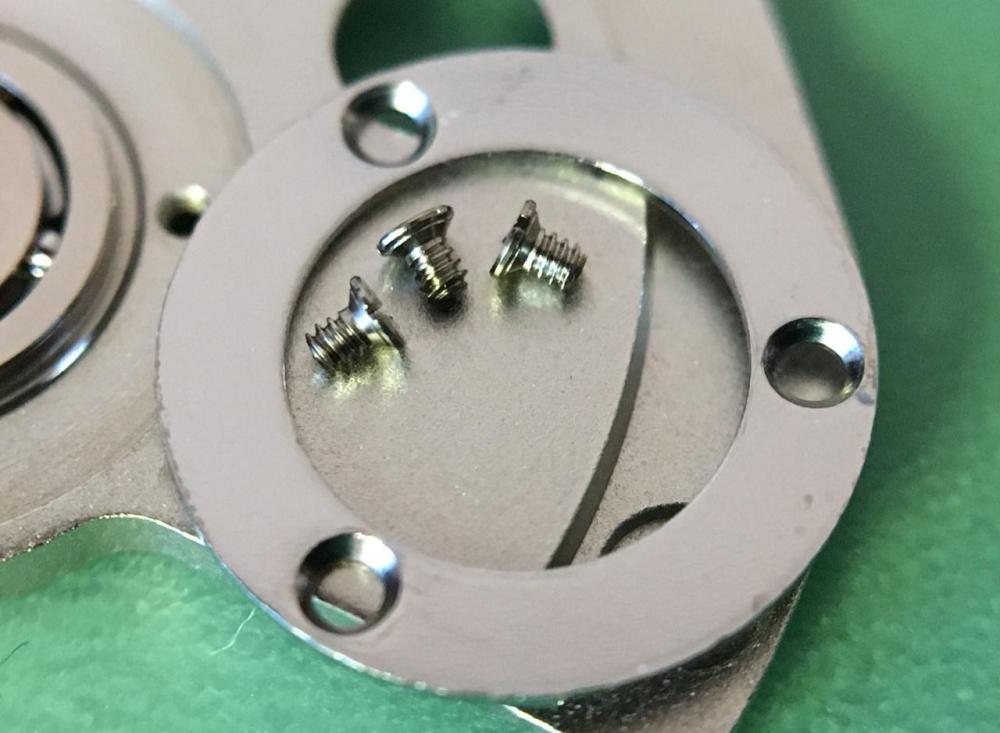
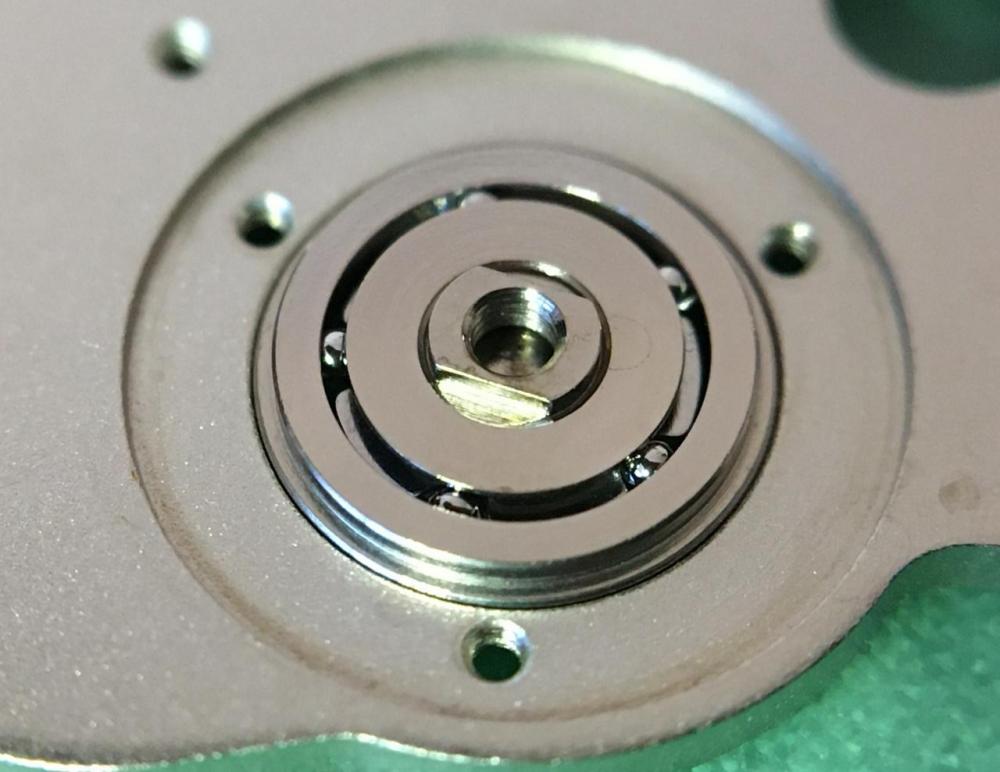
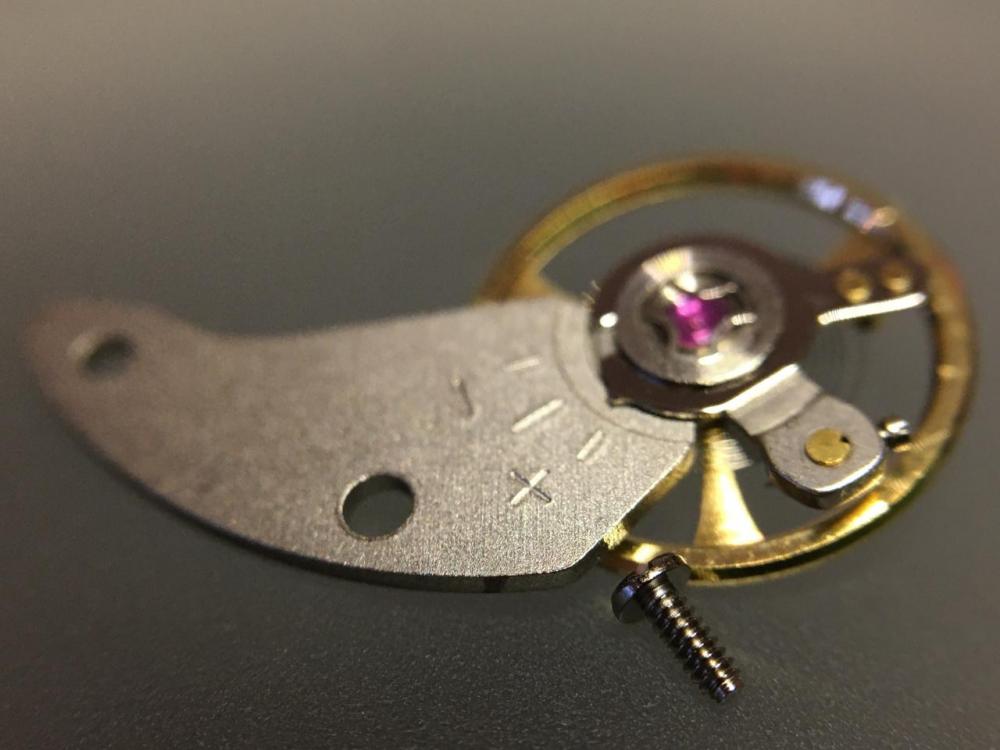
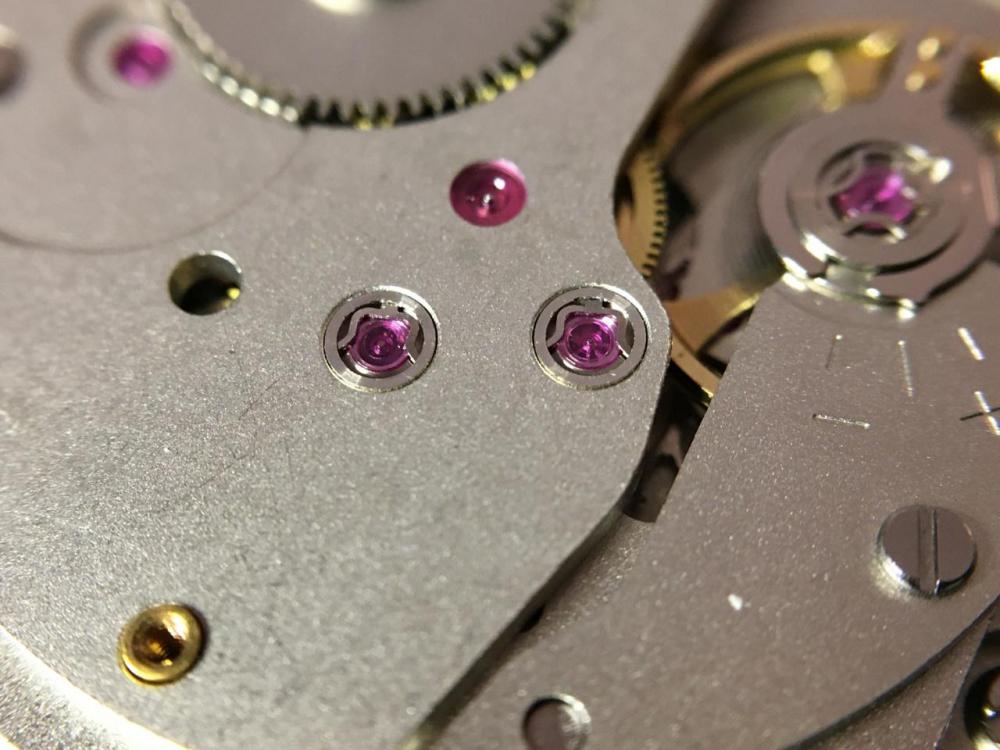
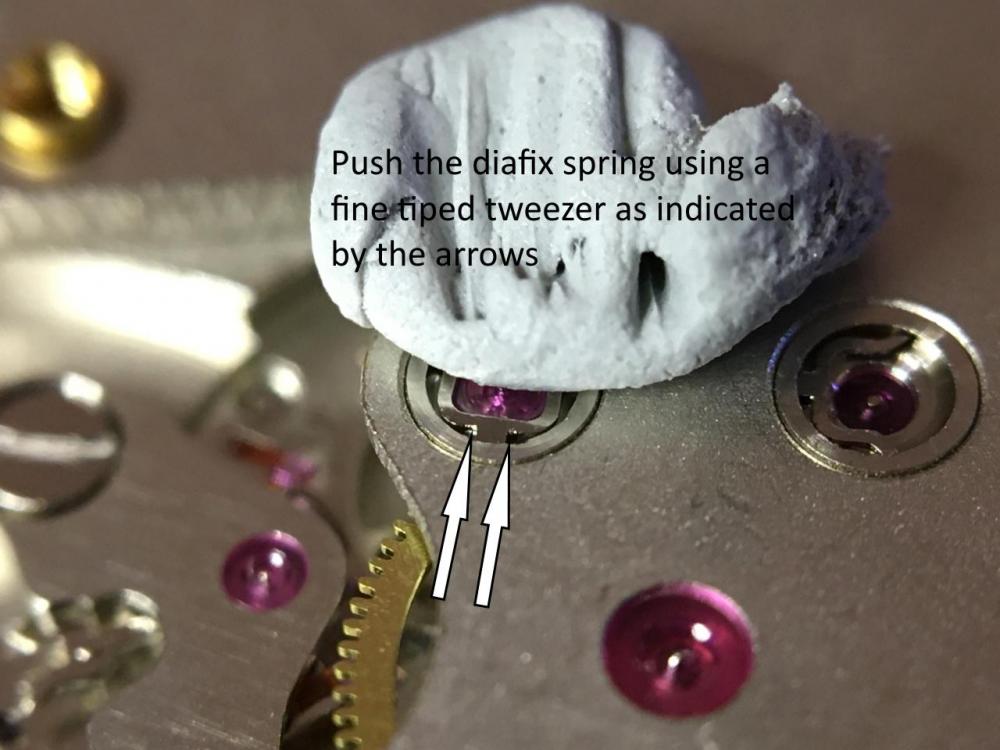
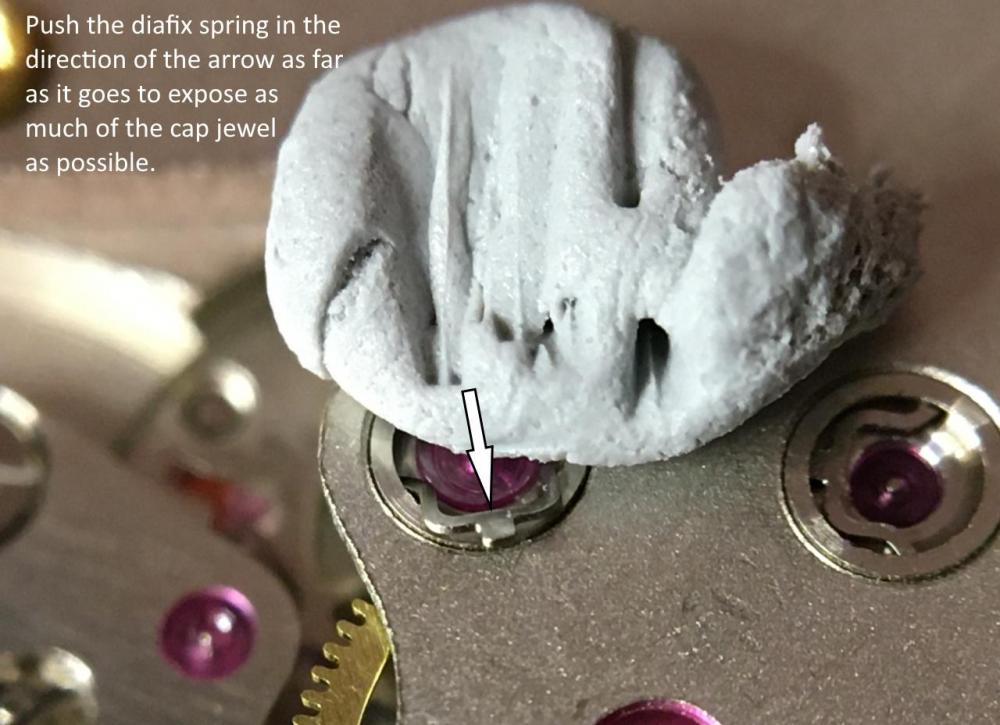
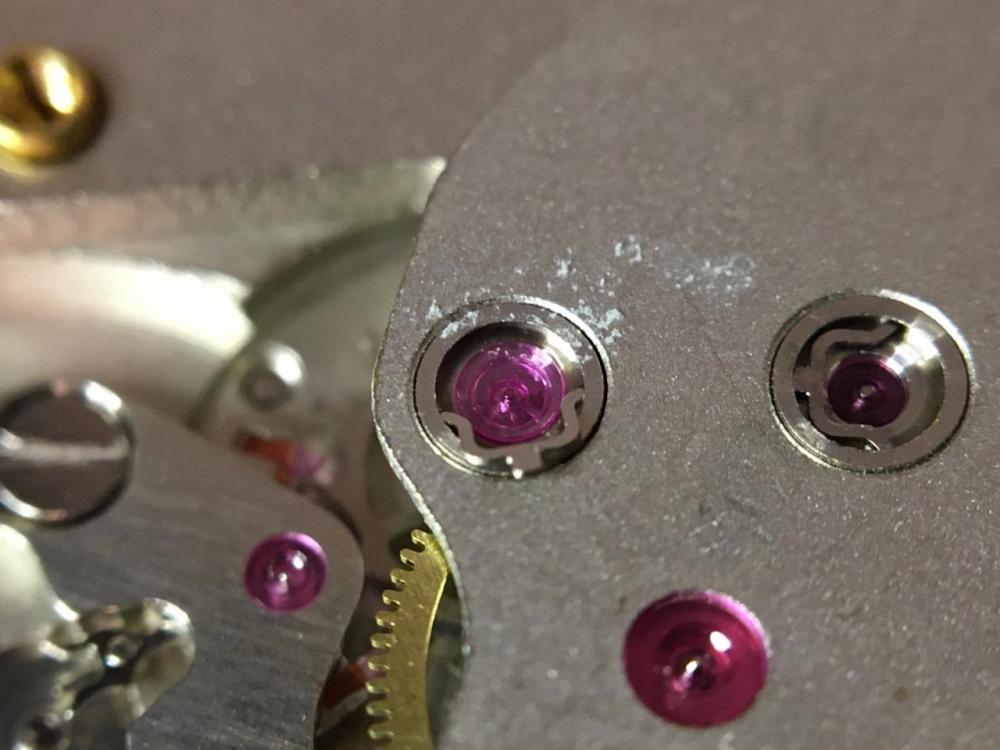
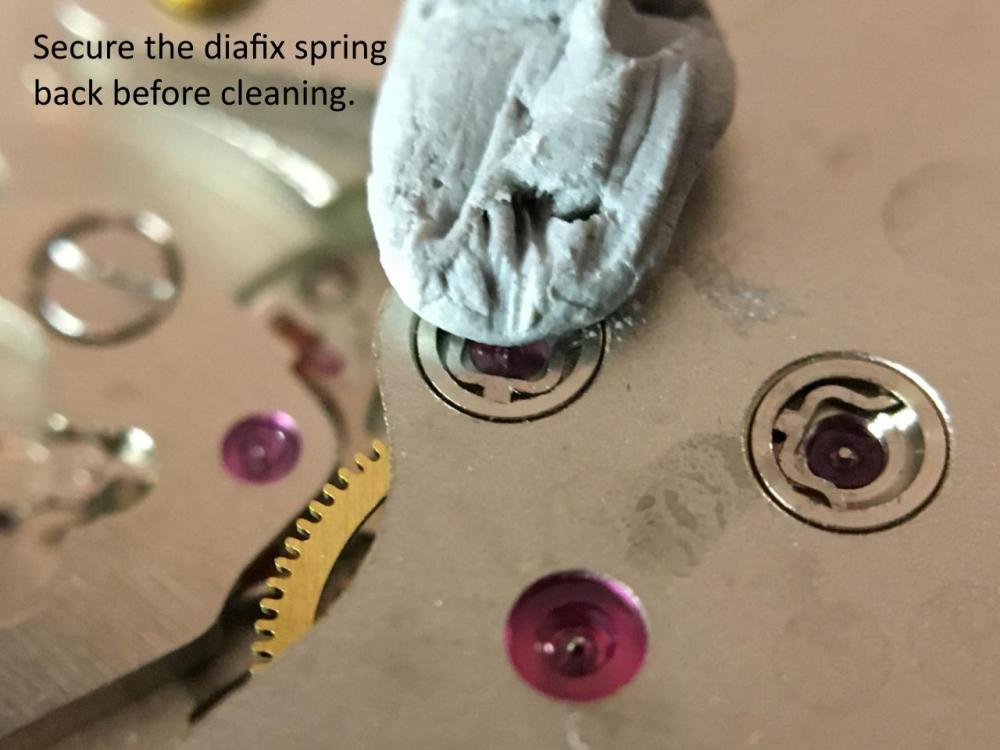
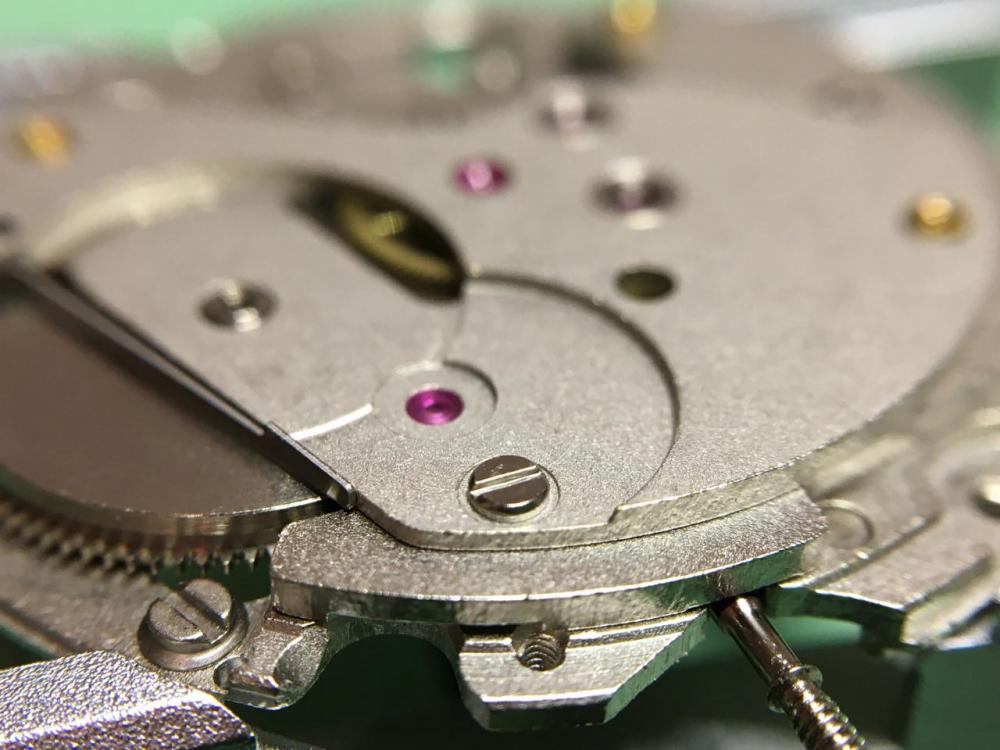
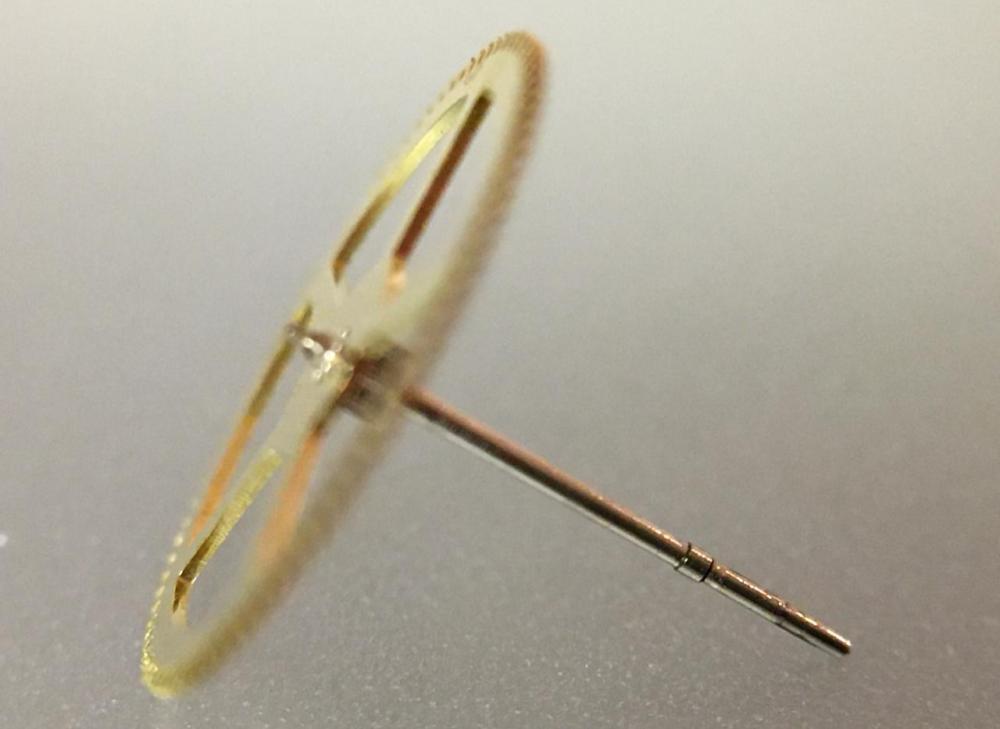
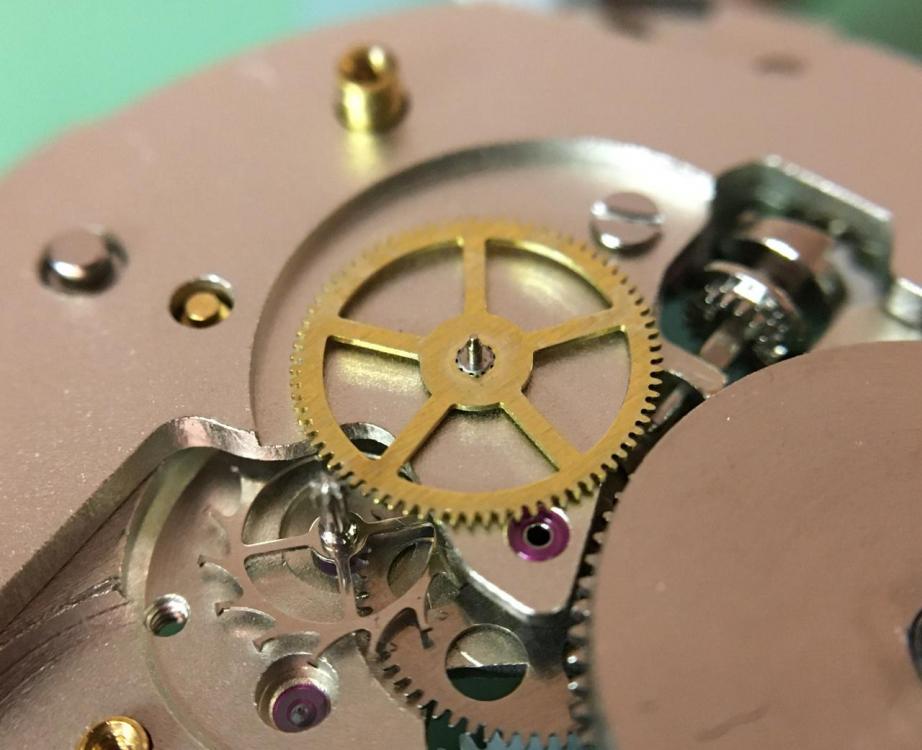
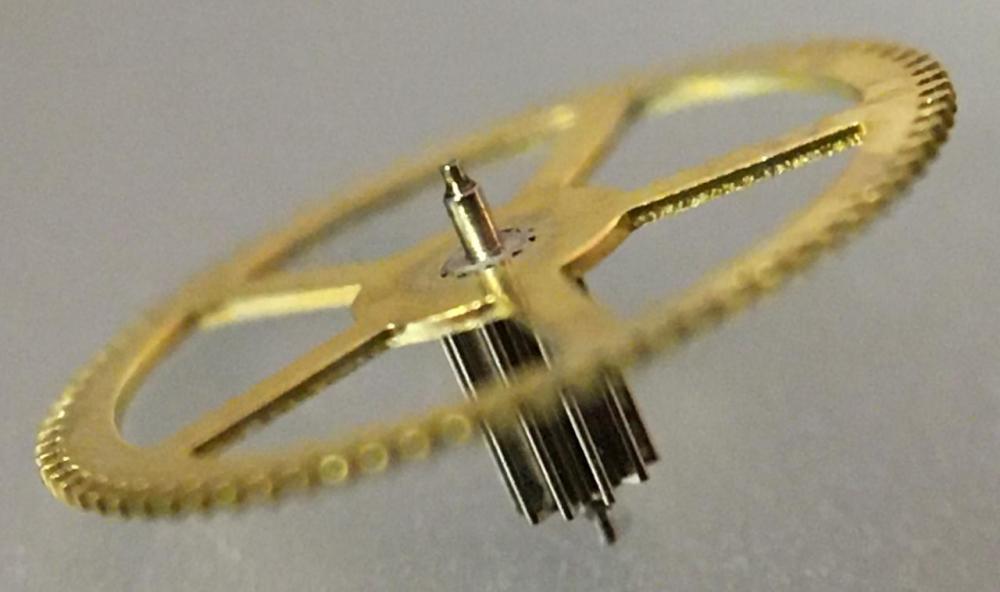
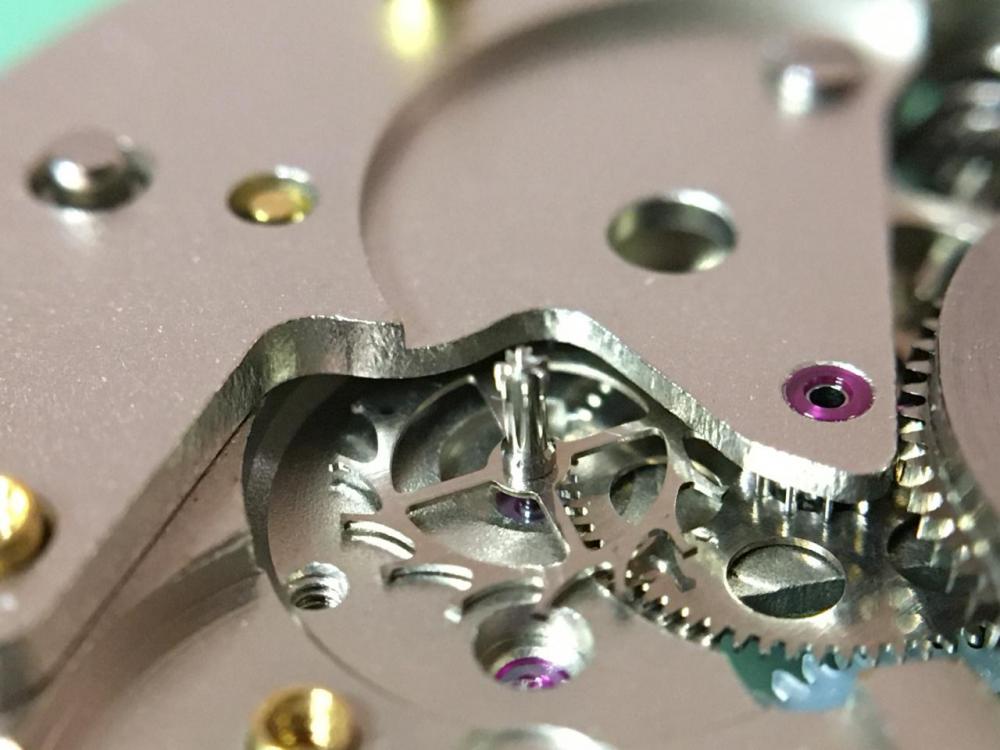
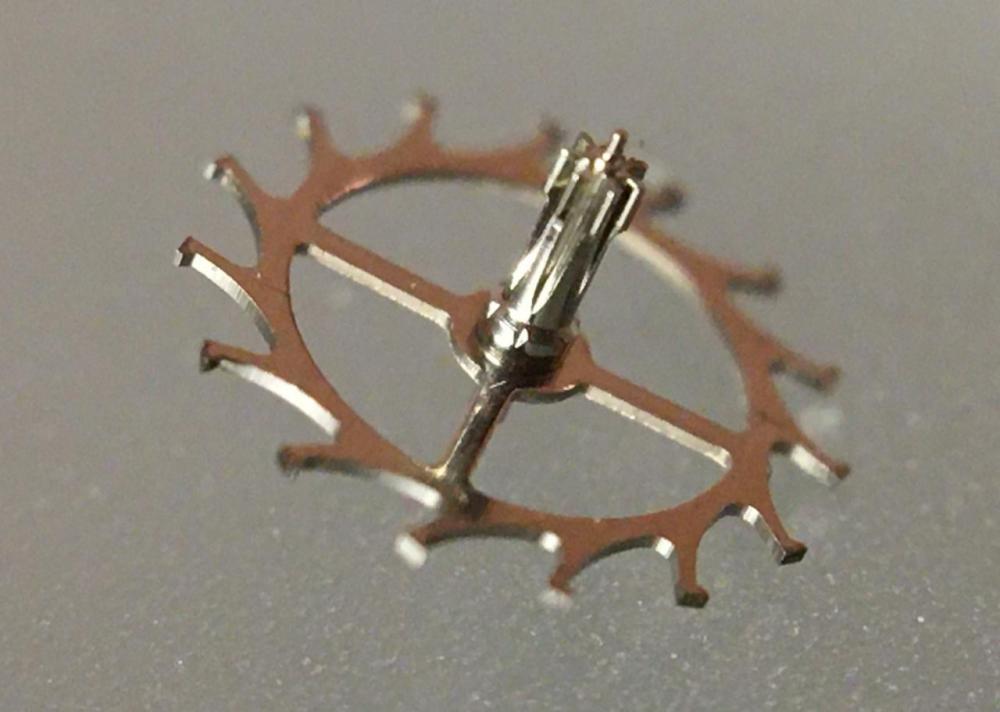
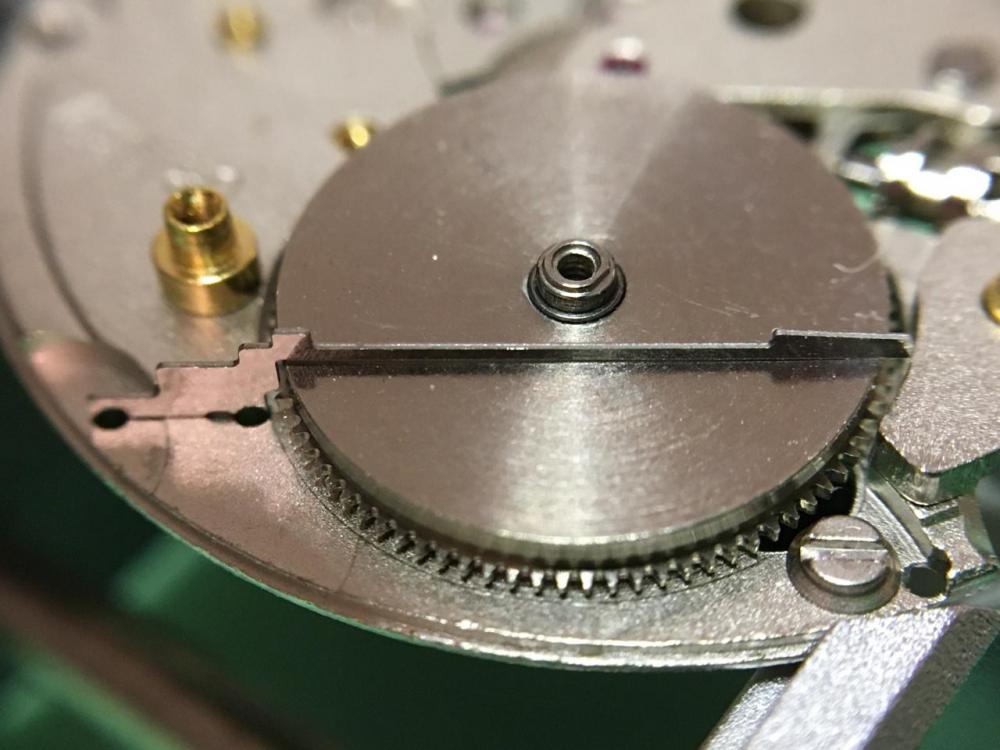
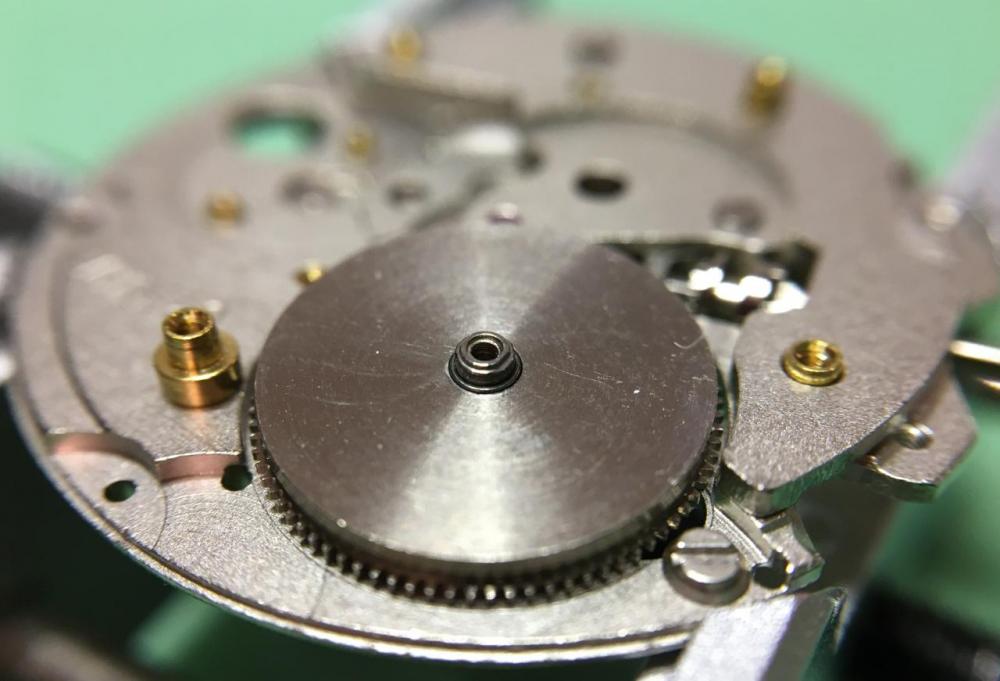
Hi all, Since it was impossible to find a how-to guide for servicing a tourbillon (in this case the seagull ST8000) on the internet, I decided to create one myself and share it on a couple of places on the internet. I hope you guys enjoy it and it will help you in the future. There are basically 2 types of tourbillons (other than multi-axles ones) 1. The brequet carroussel type (big balance wheel, turns 360 degrees around his own axle in 1 minute) 2. the blancpain flying type (the whole escapement and balance turn 360 degrees in circles like a planet in a minute) This is the blancpain version and is made by Seagull. I purchased this watch myself, both for the beautiful looks of an tourbillon and to do a service Conclusion: The tourbillon cage can be tricky as it requires balancing multiple loose parts before they can be screwed tight. Timegrapher cannot be used on tourbillons as the moving of the cage+balance will give readings going up and down at the same time, same goes for amplitude. Current timegrapher are just not made for tourbillon timing. It can only be timed in an old fashioned way, after 24h's checking. The ST8000 is very well made, be it Chinese. Finishing of gears and plates together with the thickness of materials makes it sturdy and built to last.


 1 point
 -
Very good and nice clear photos. Just one thing you forgot to mention and that is make sure you have all the power off before dismantling the movement . We don't want parts flying all over the workshop do we. Happy Christmas and stay save.1 point
-
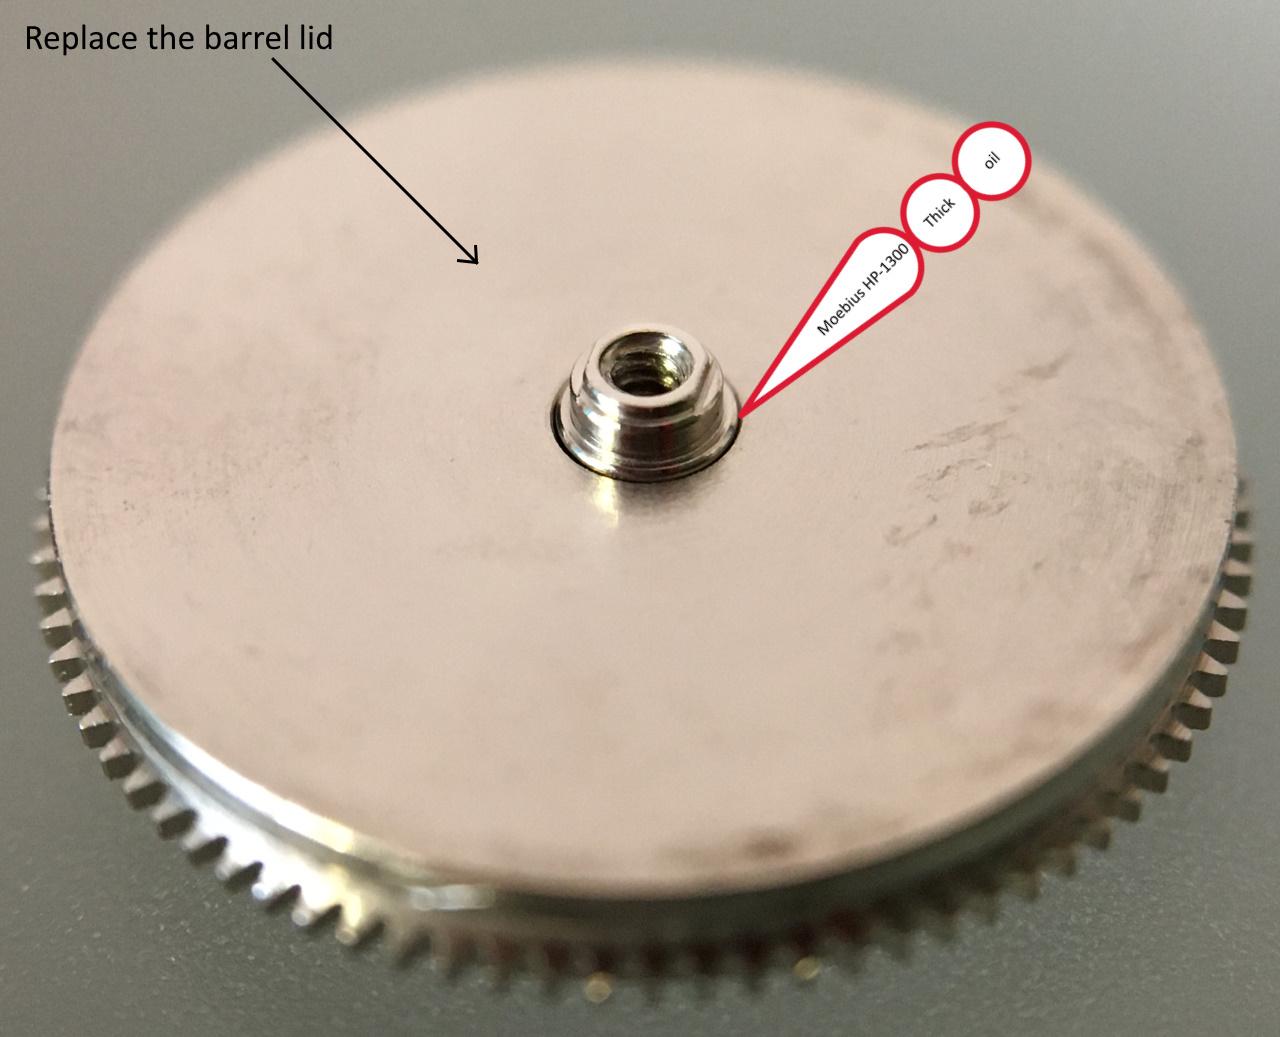
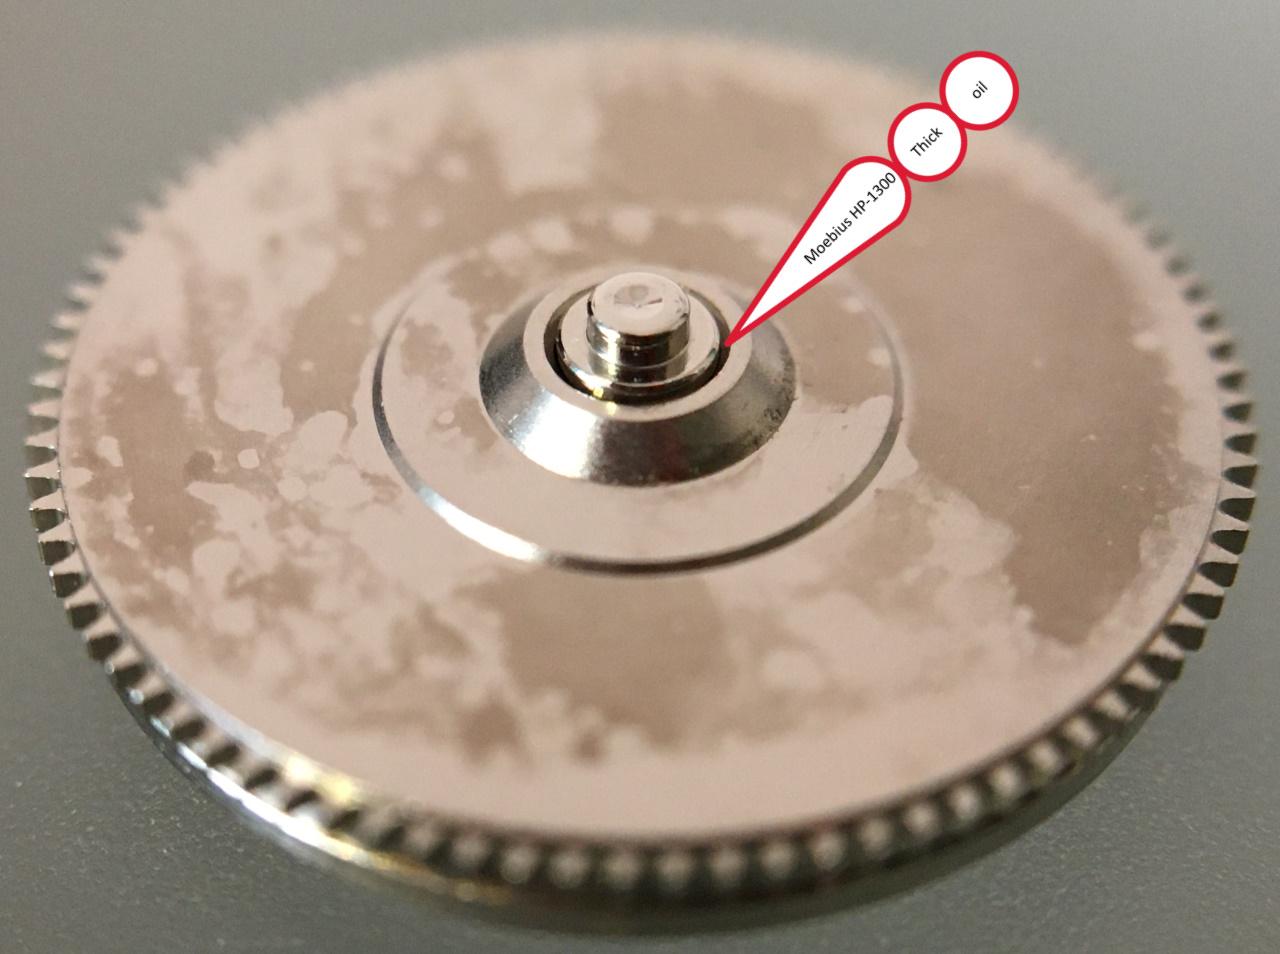
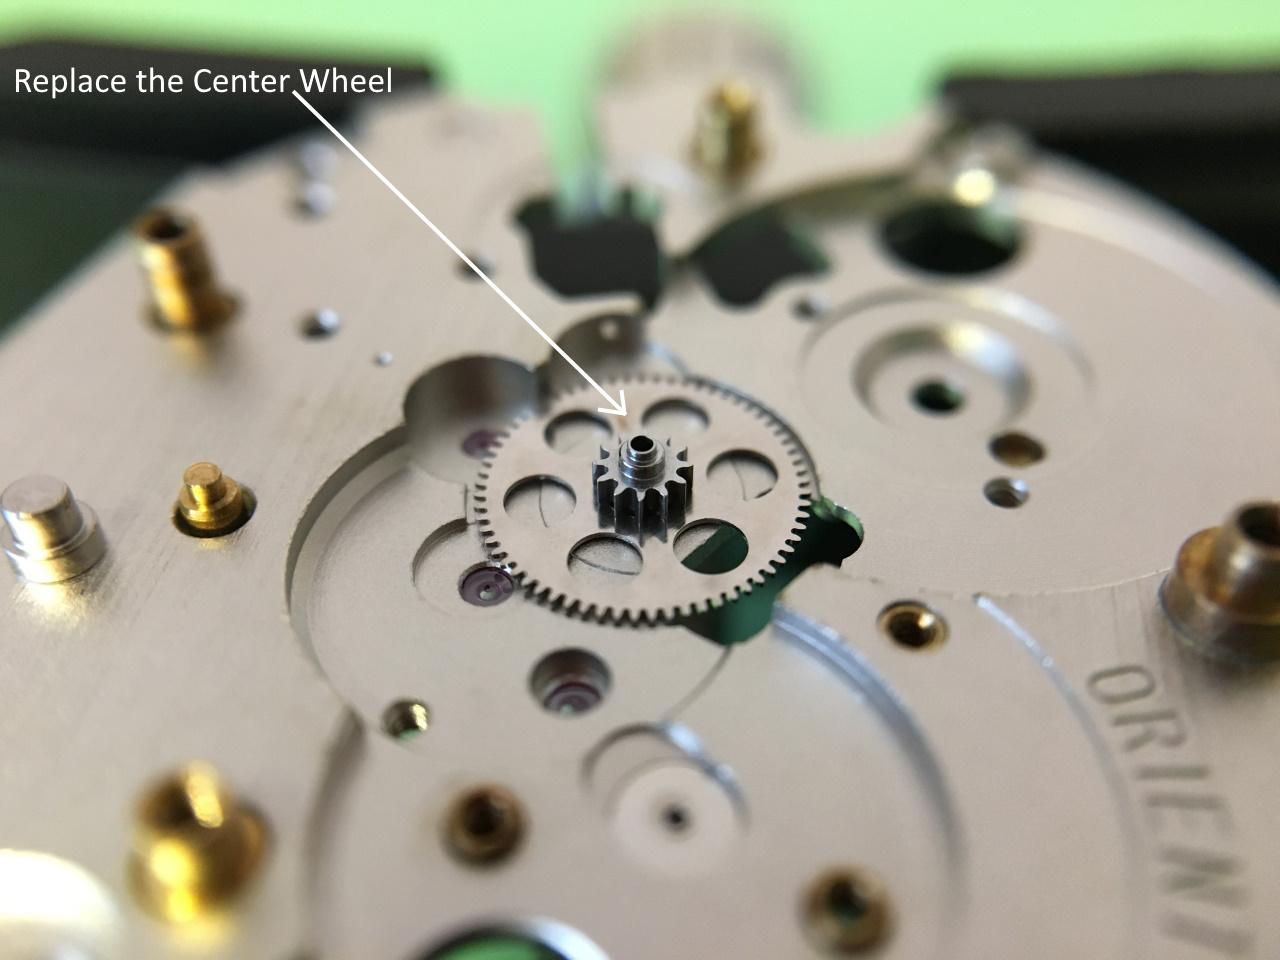
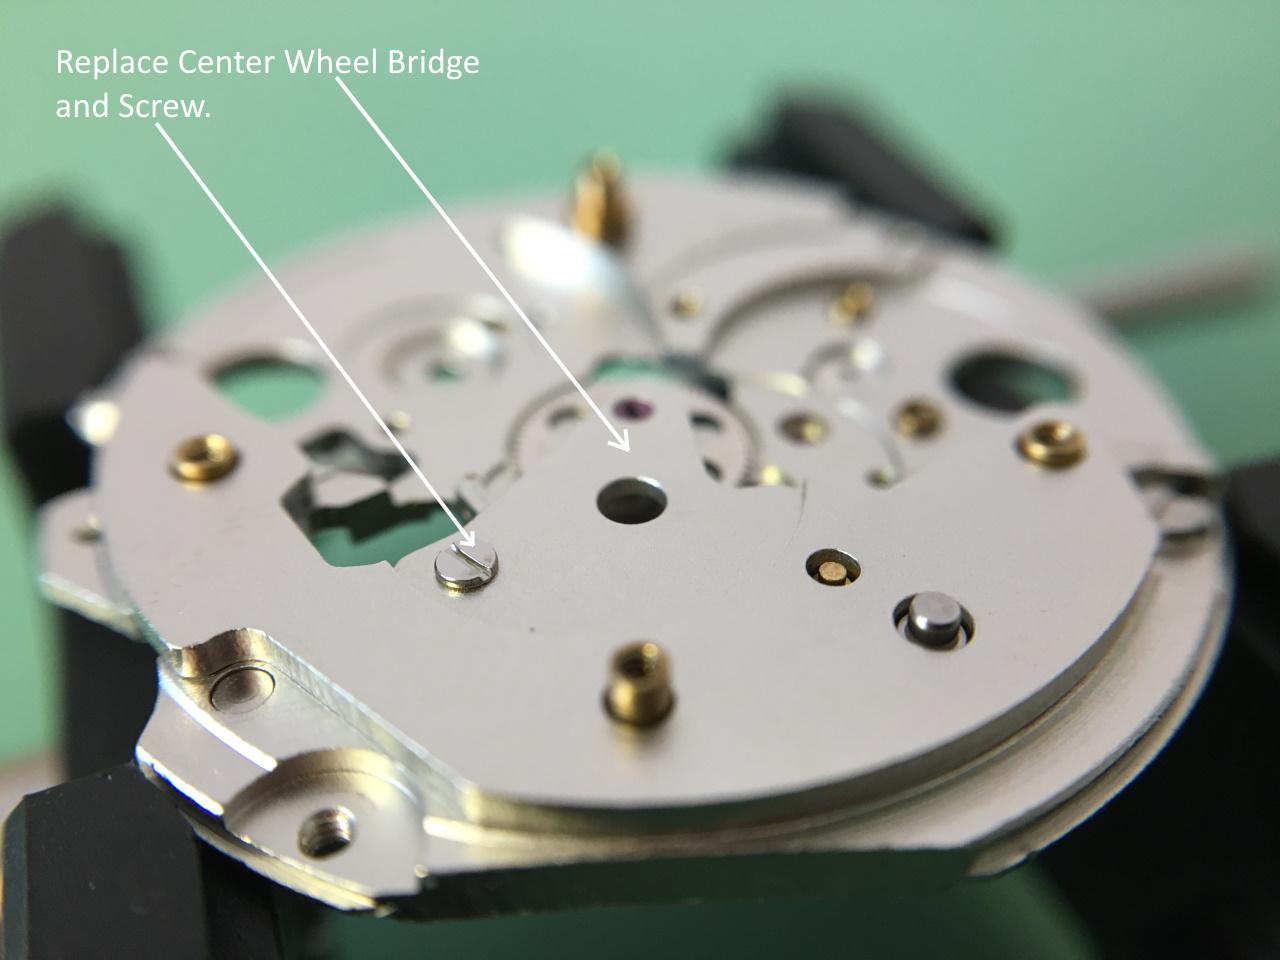
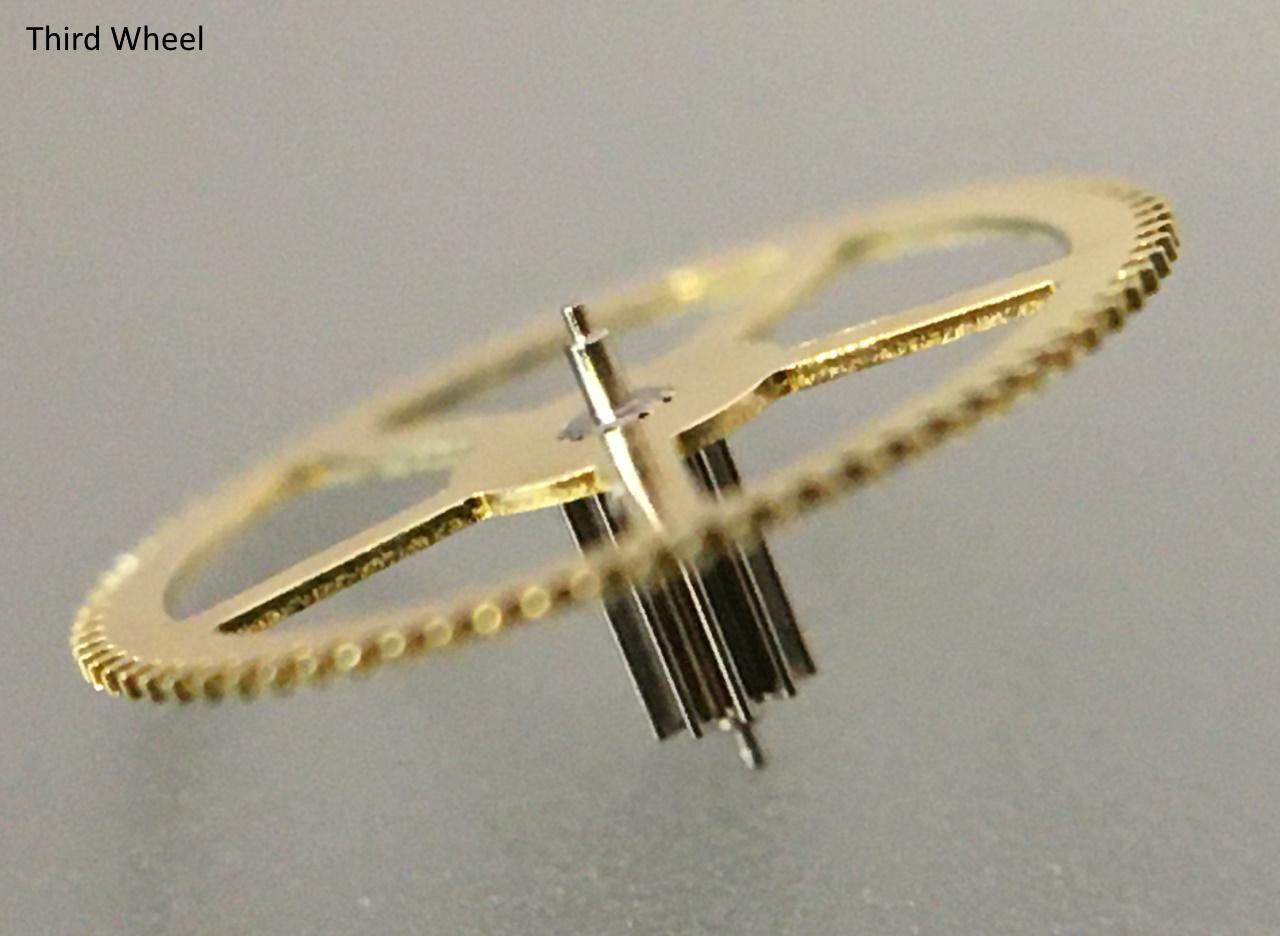
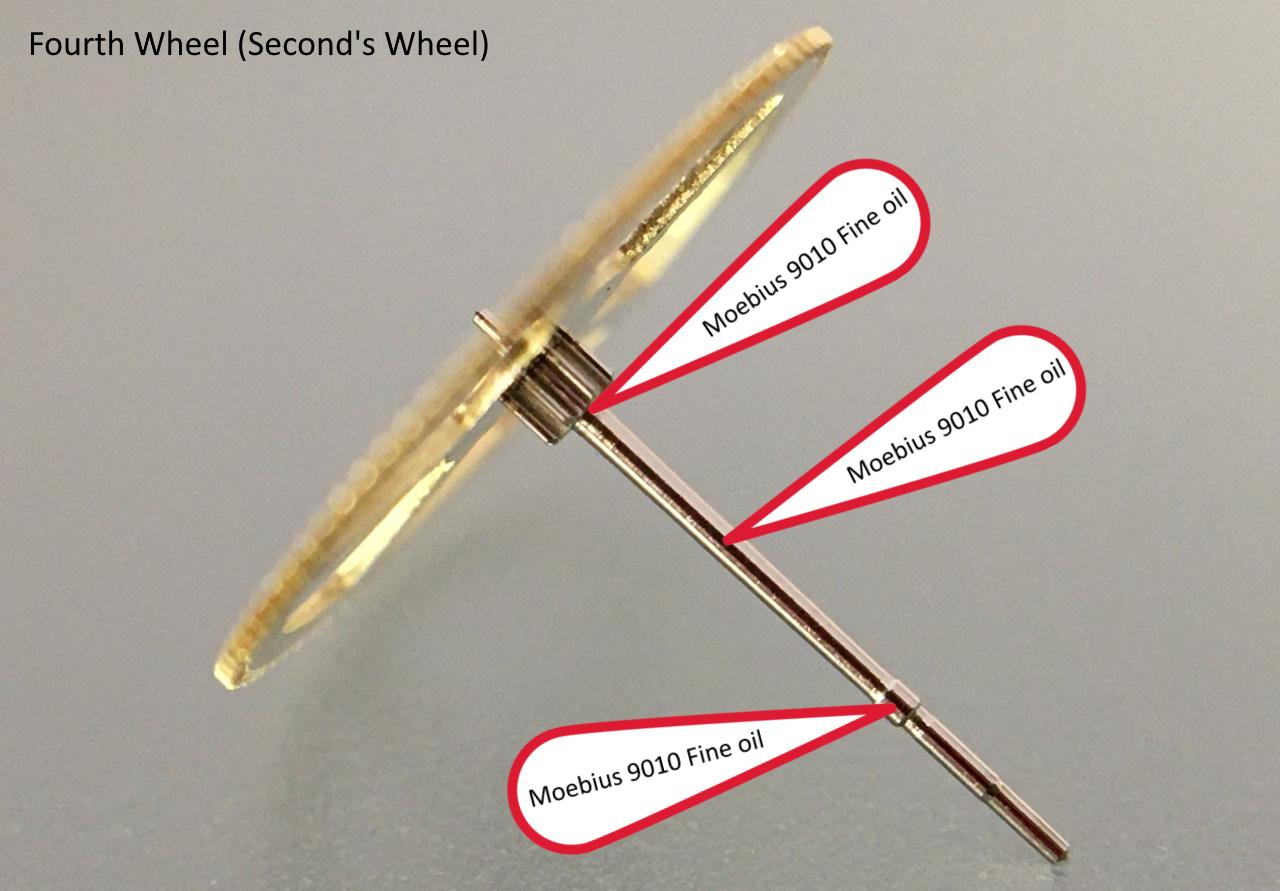
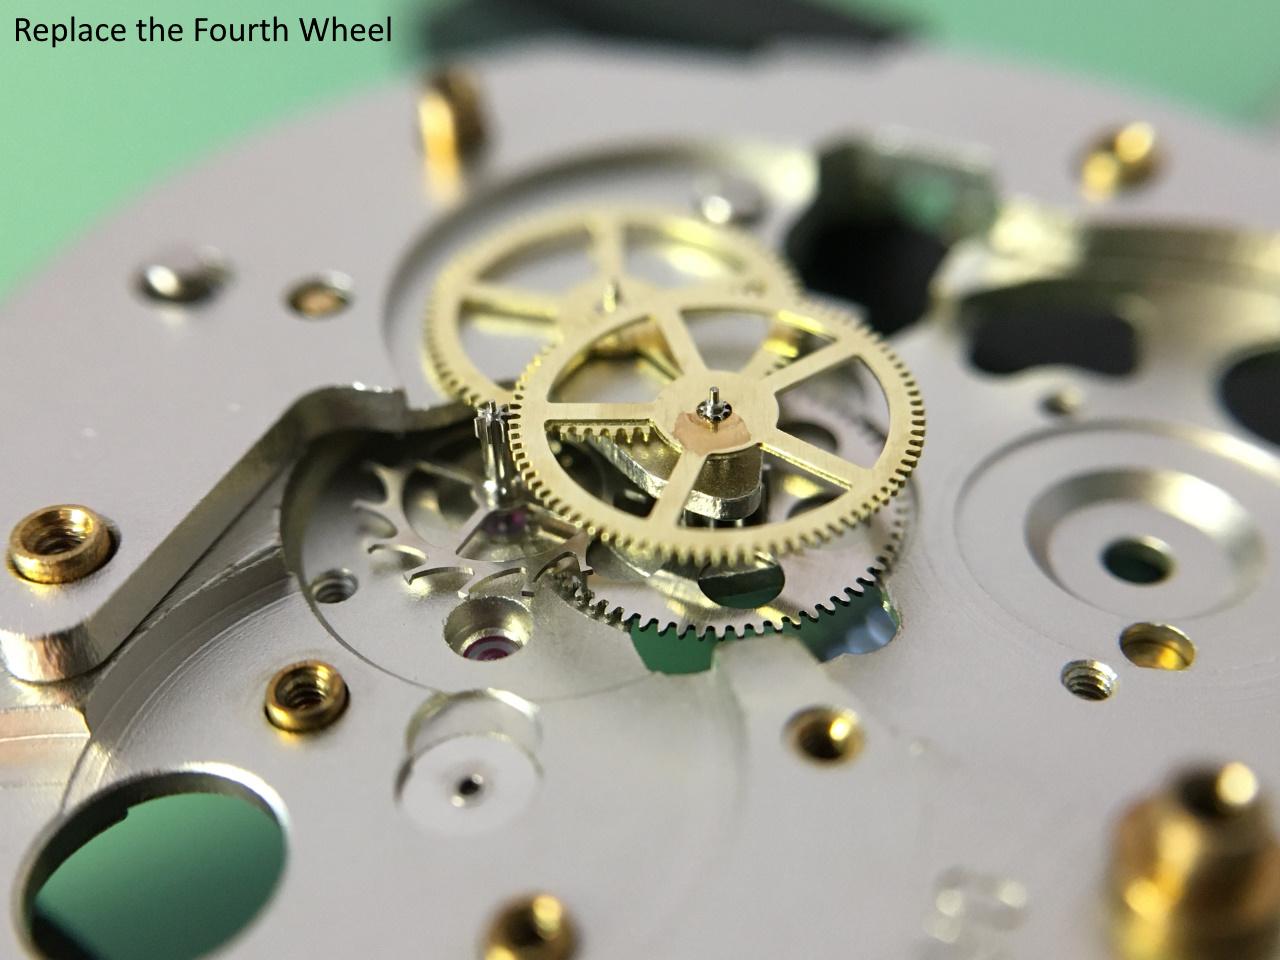
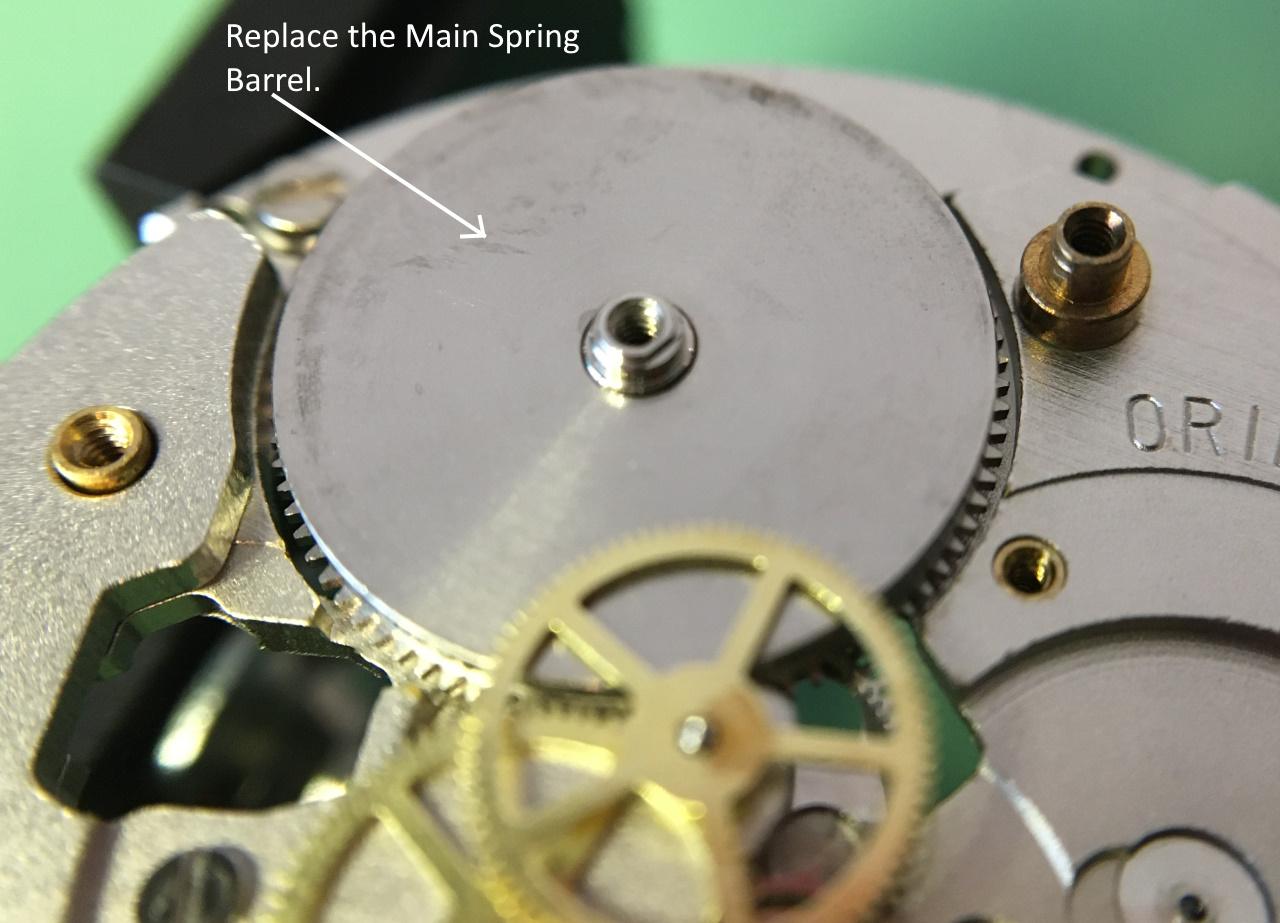
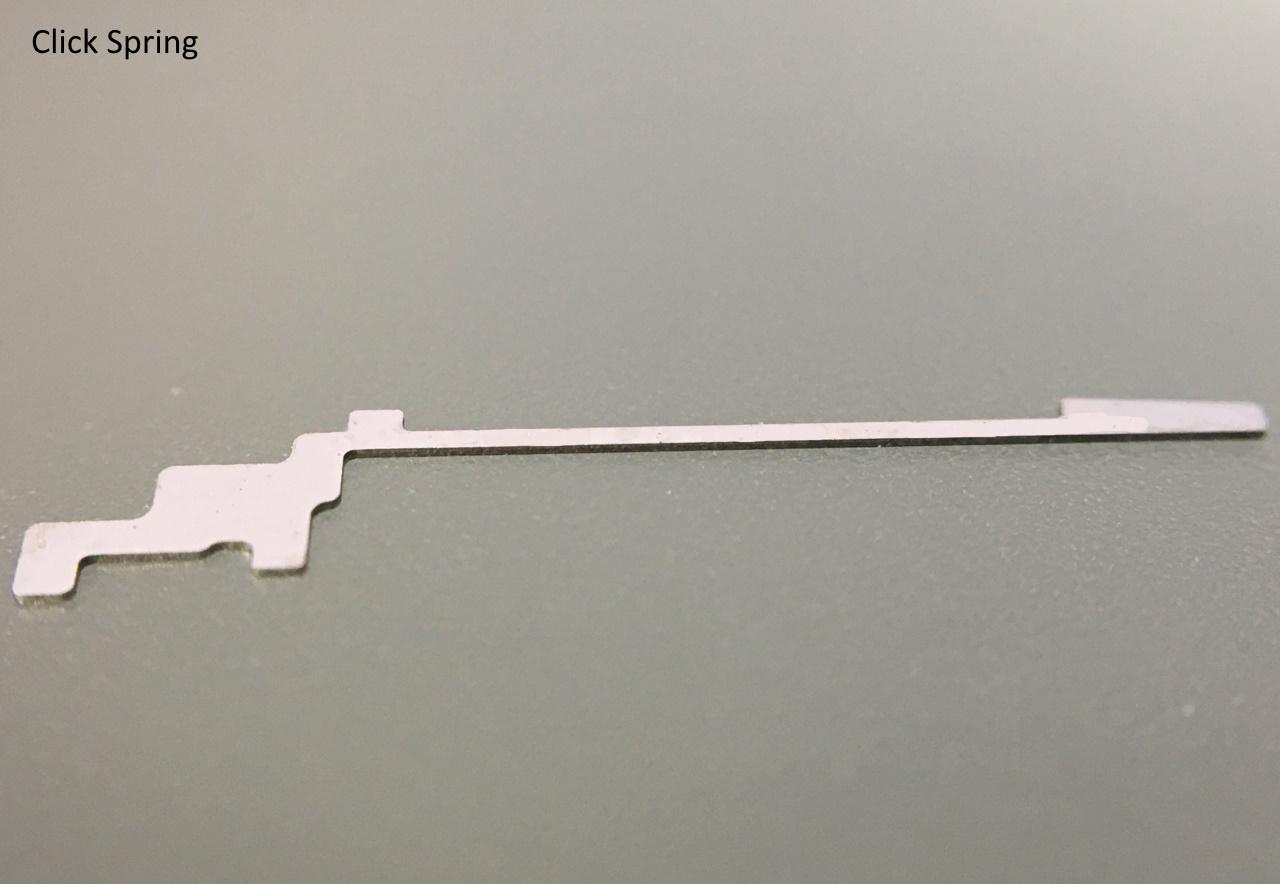
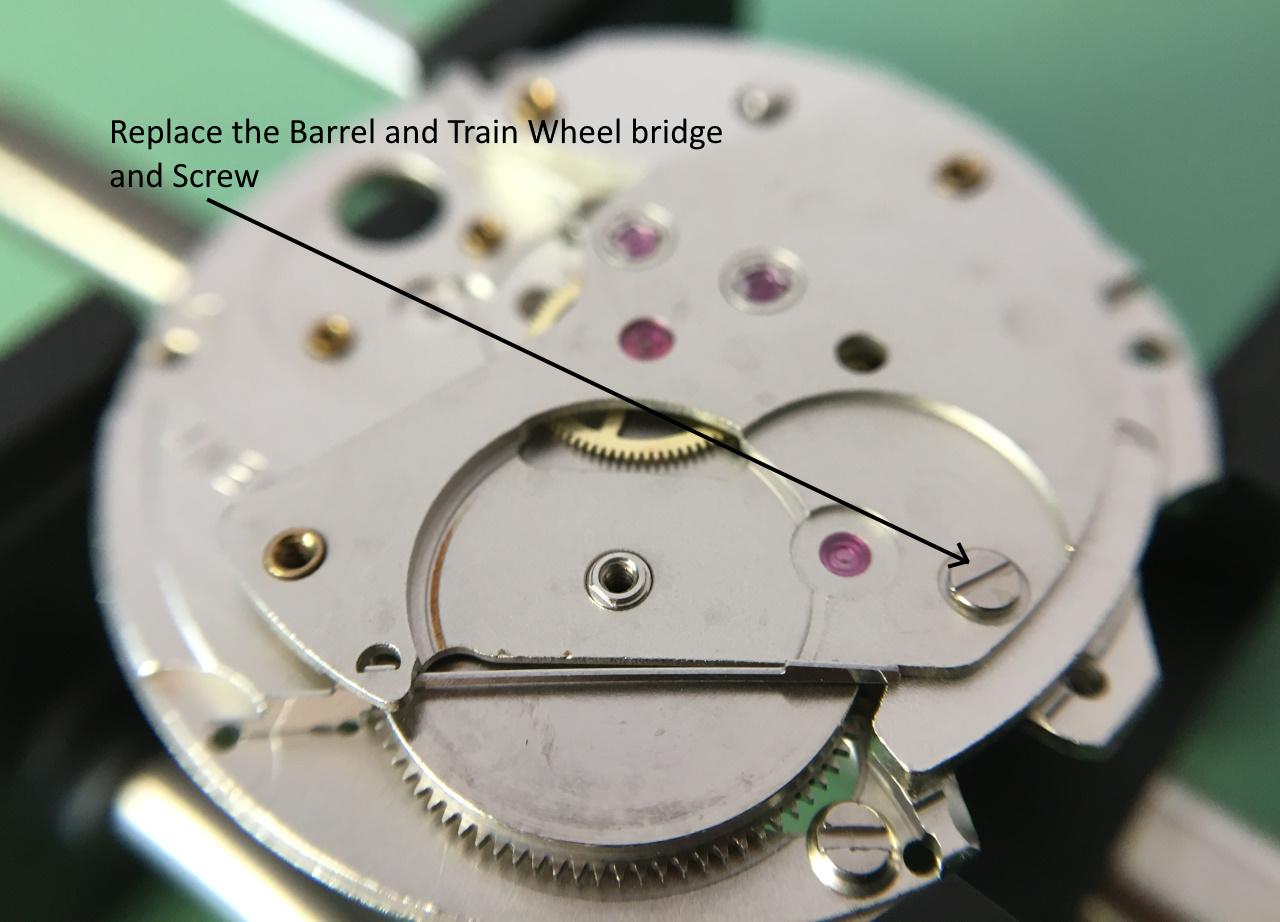
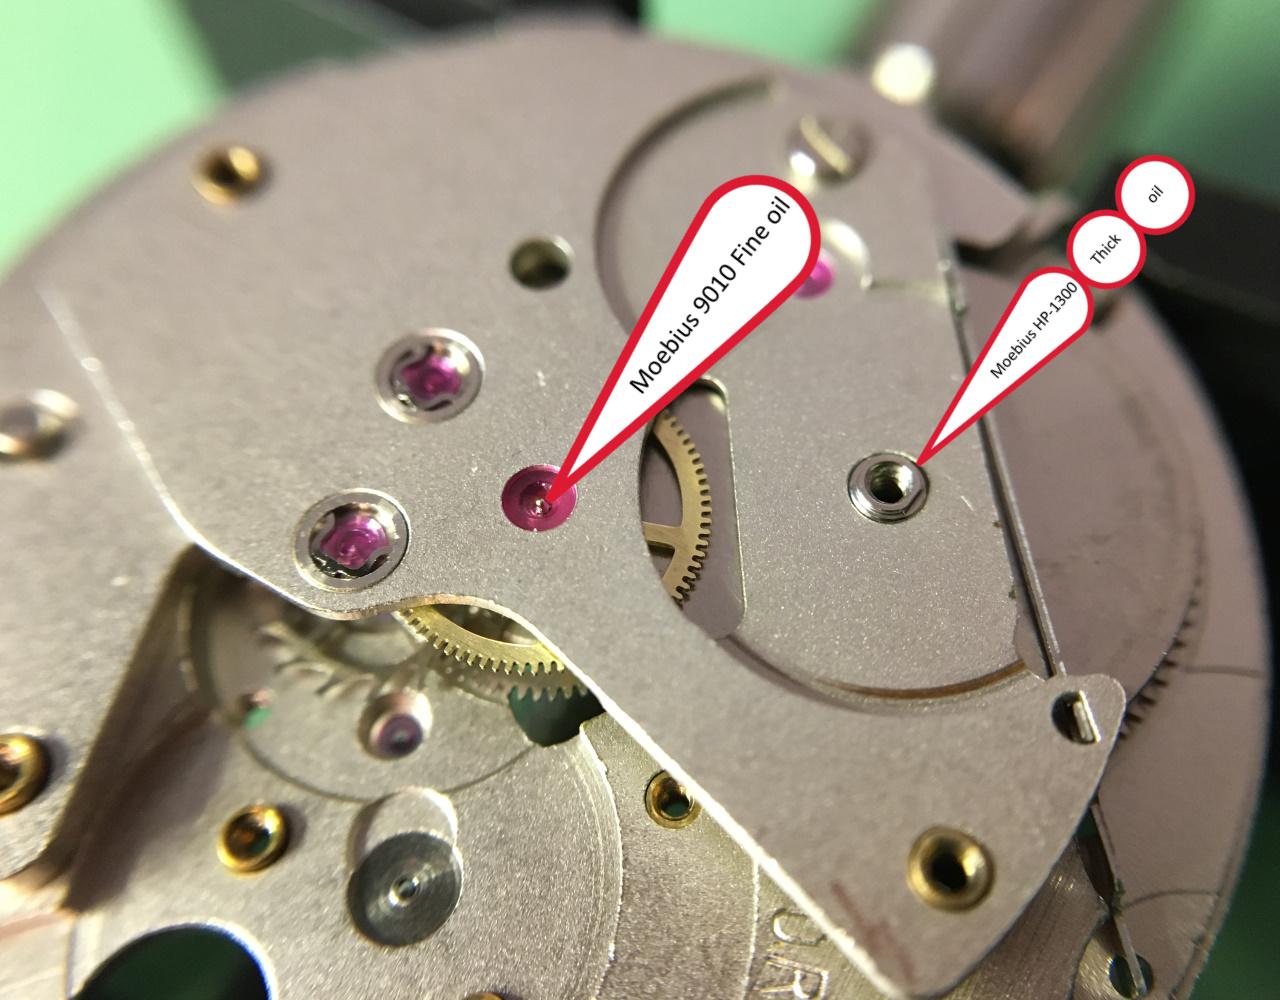
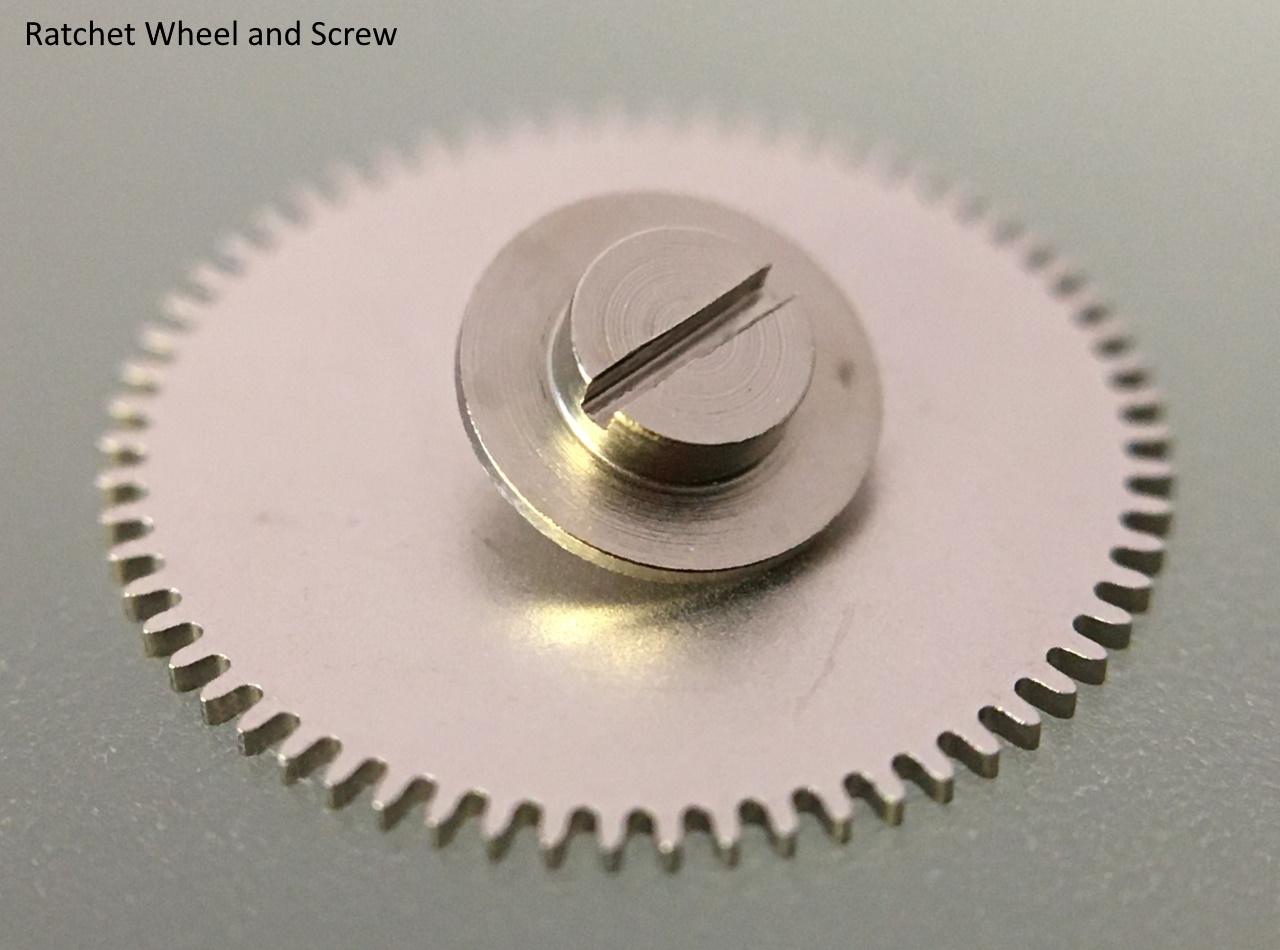
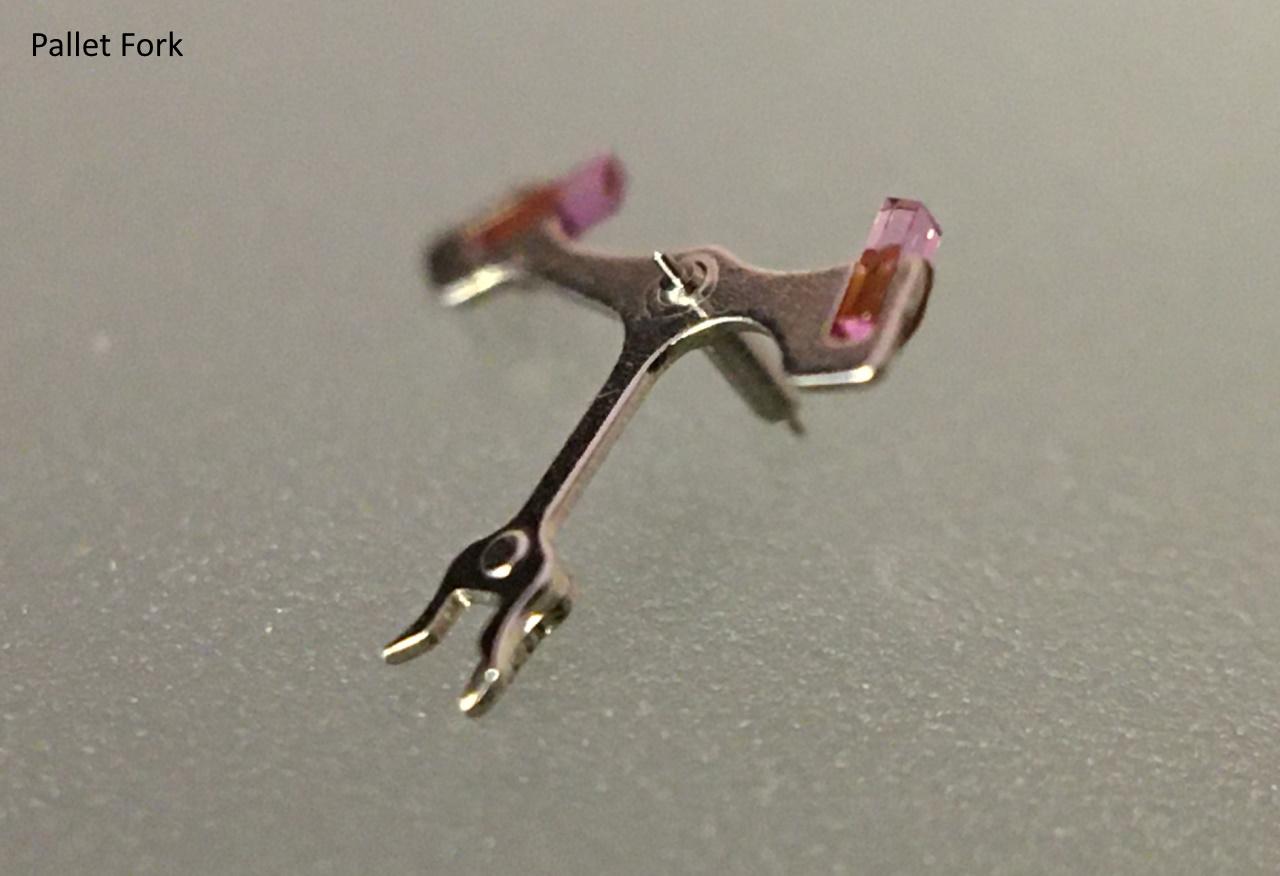
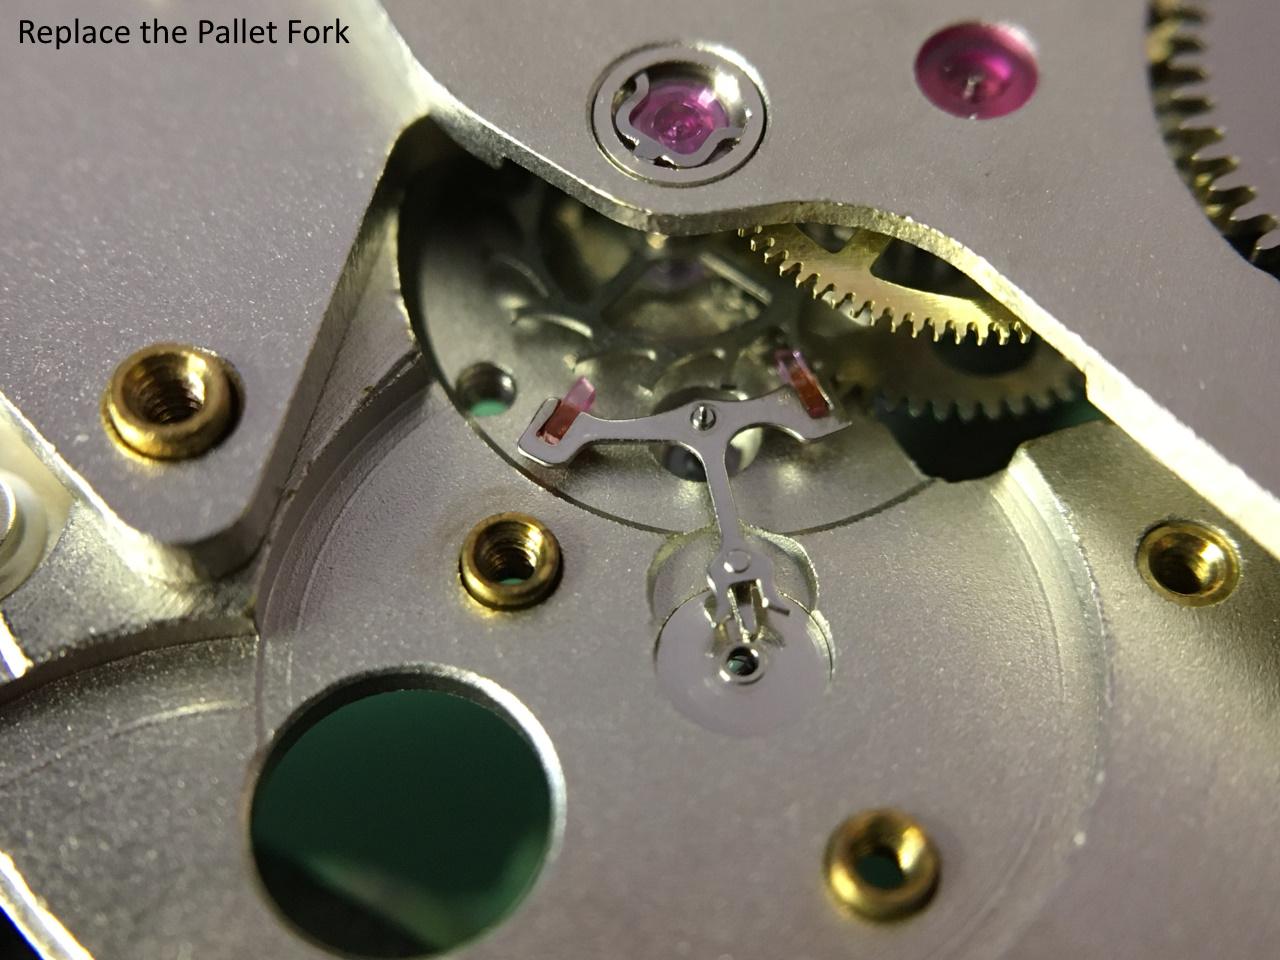
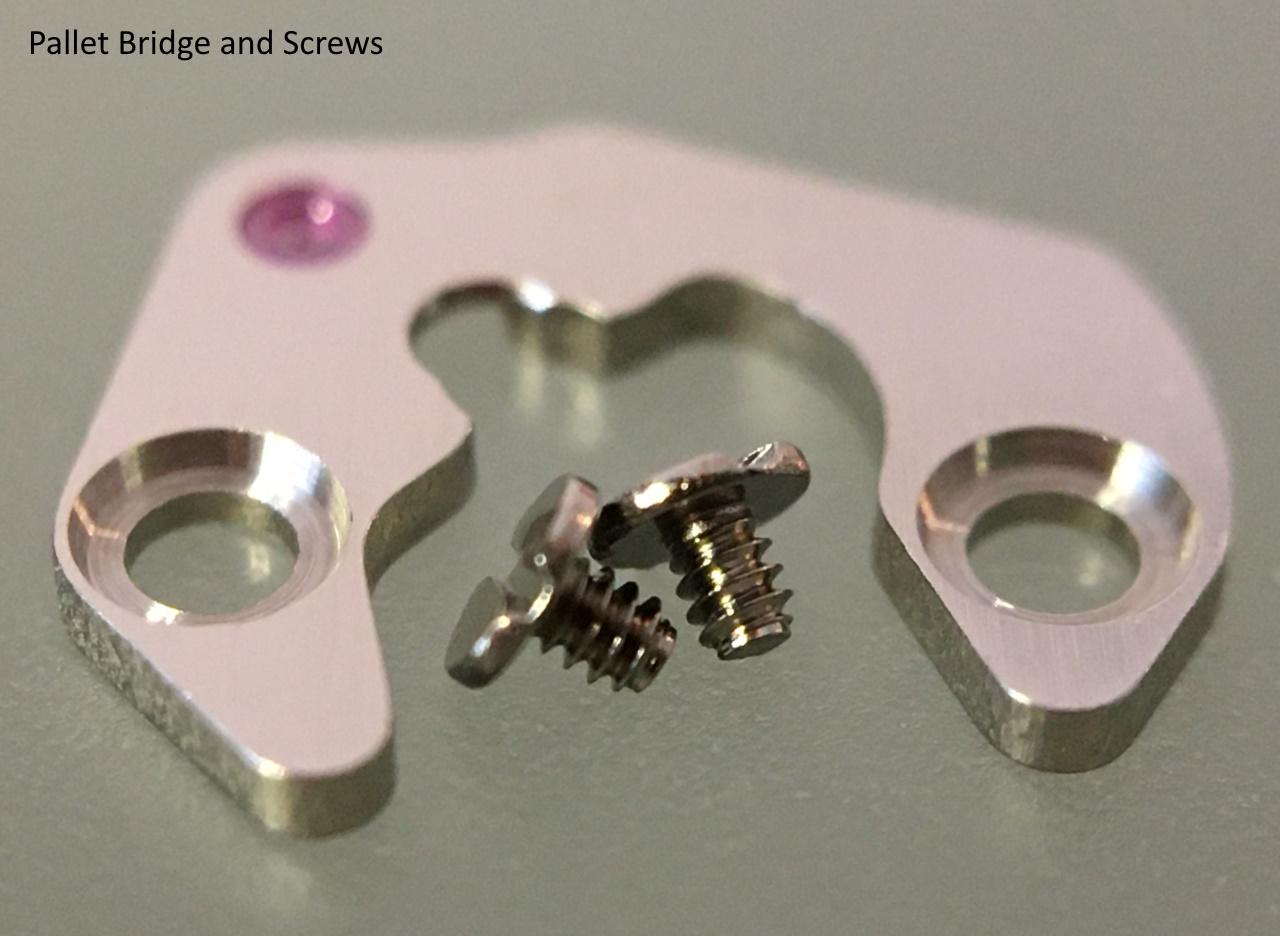
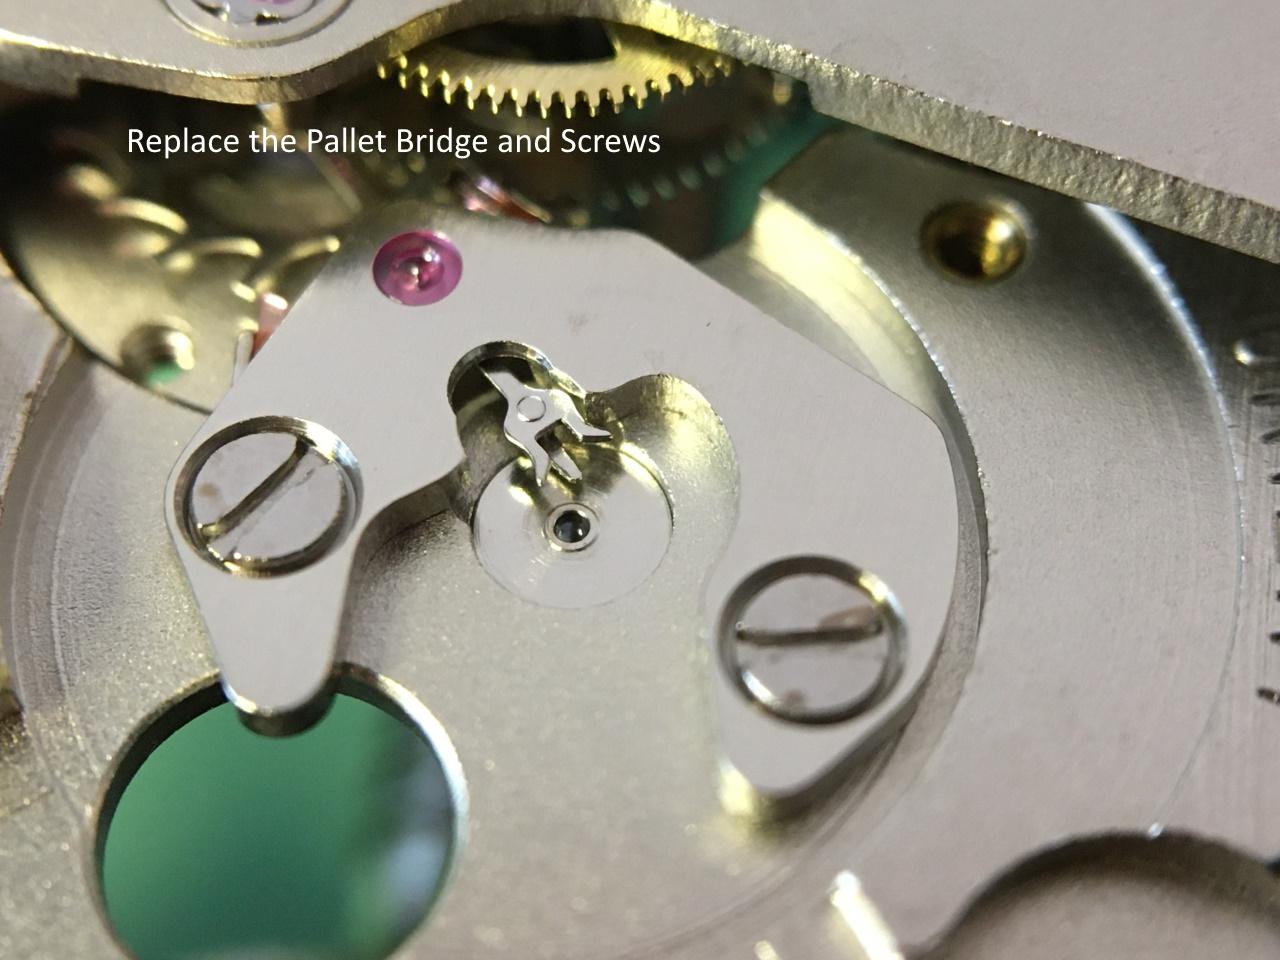
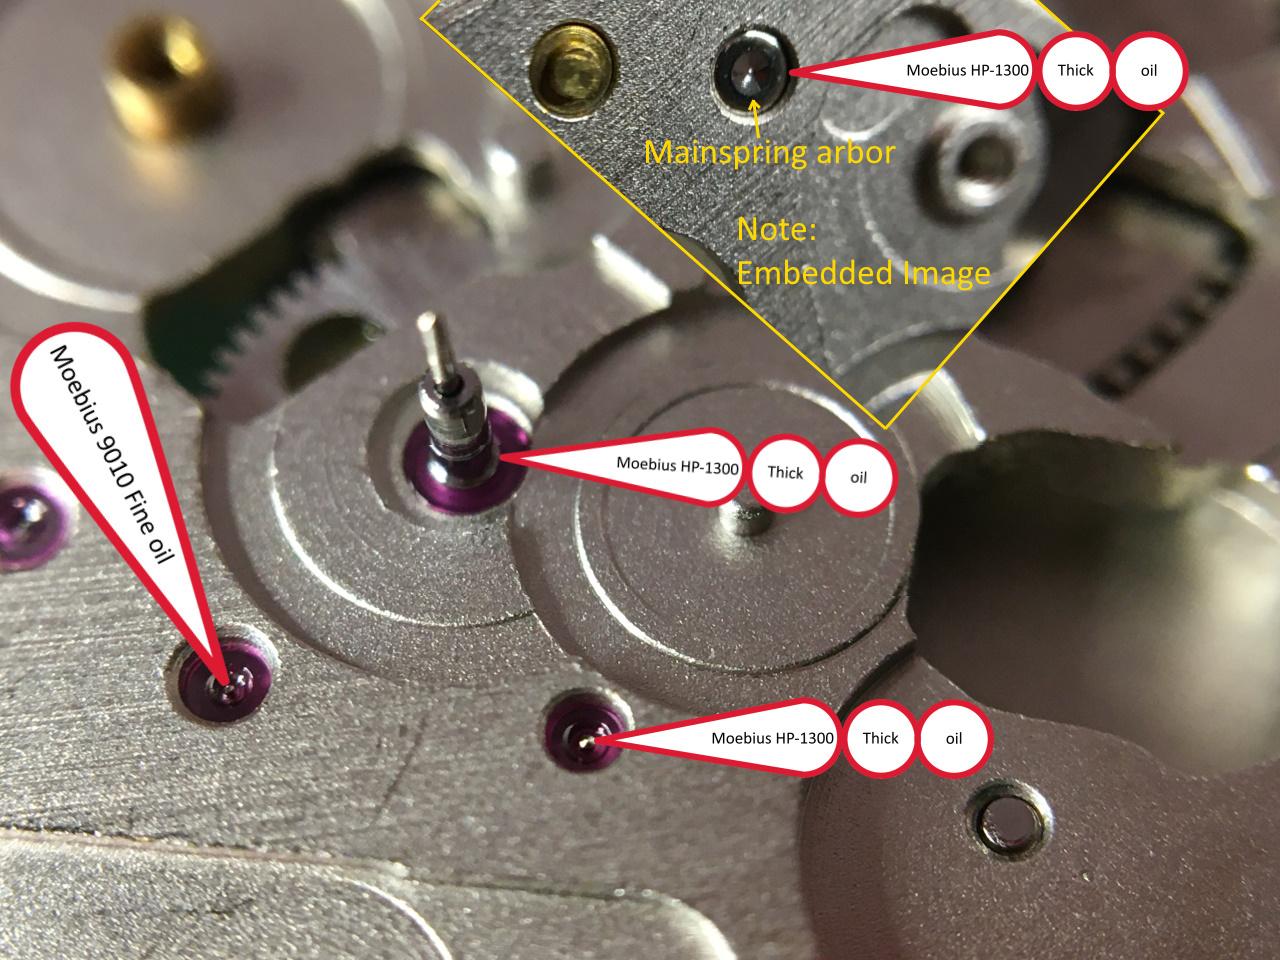
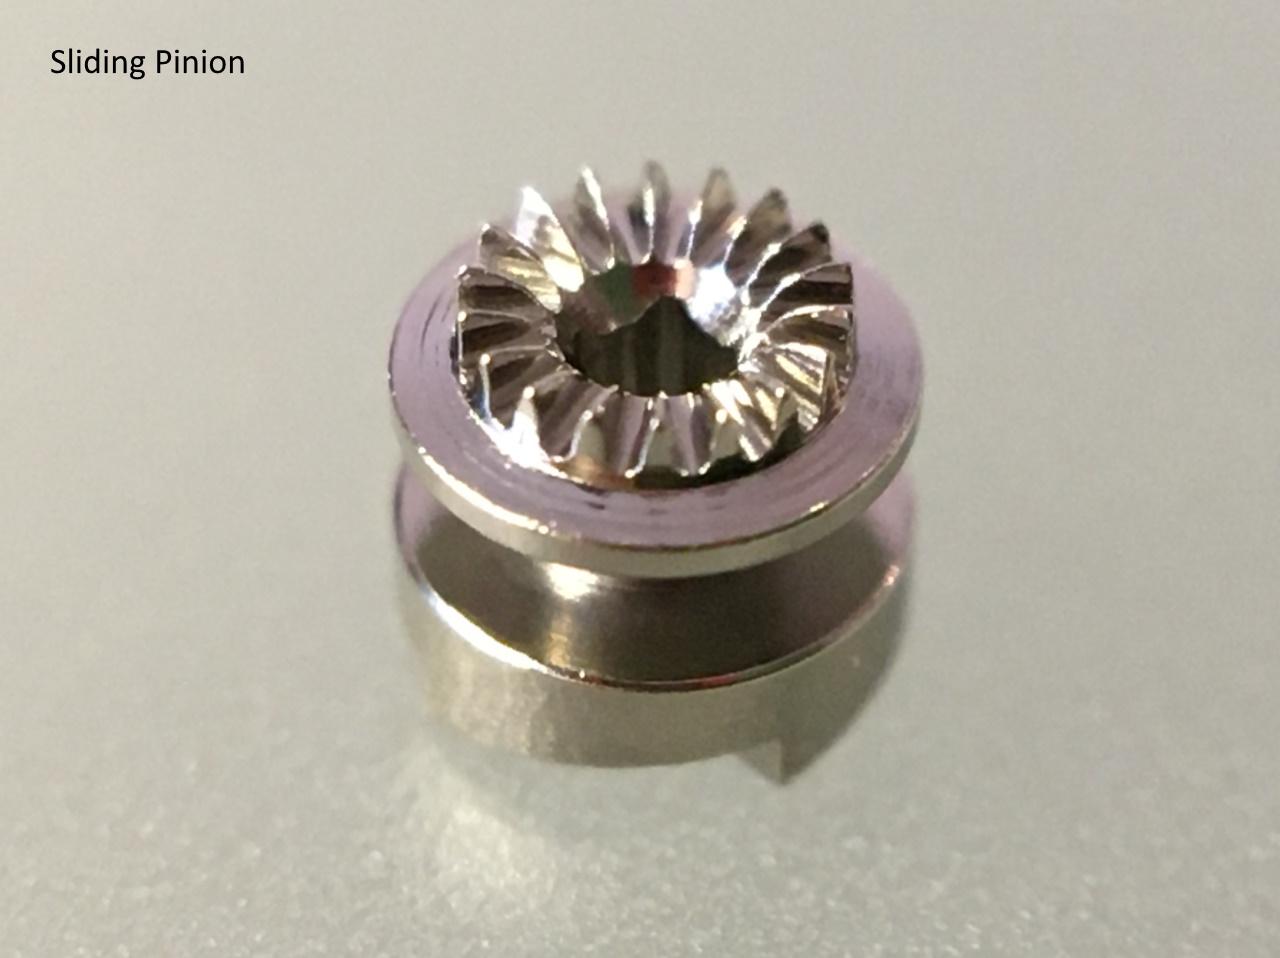
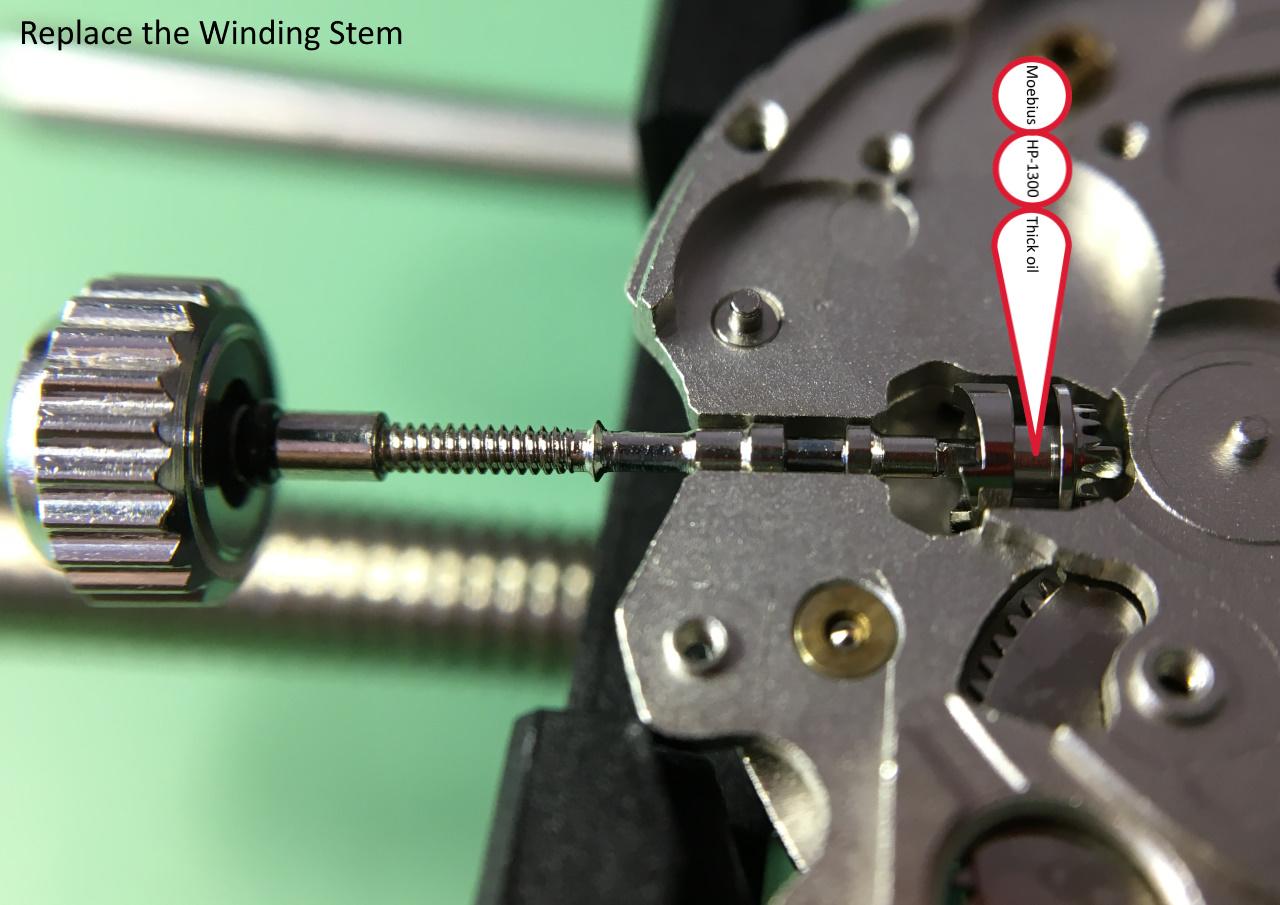
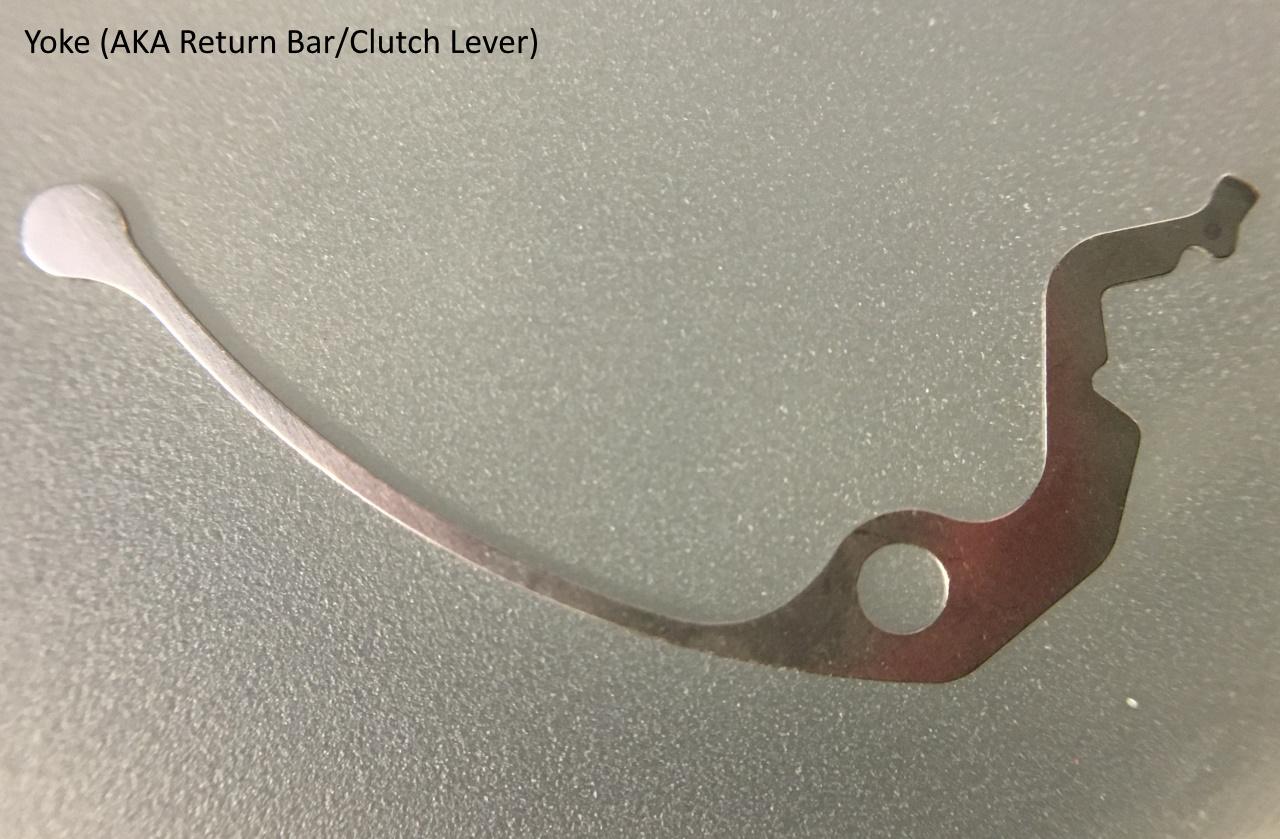
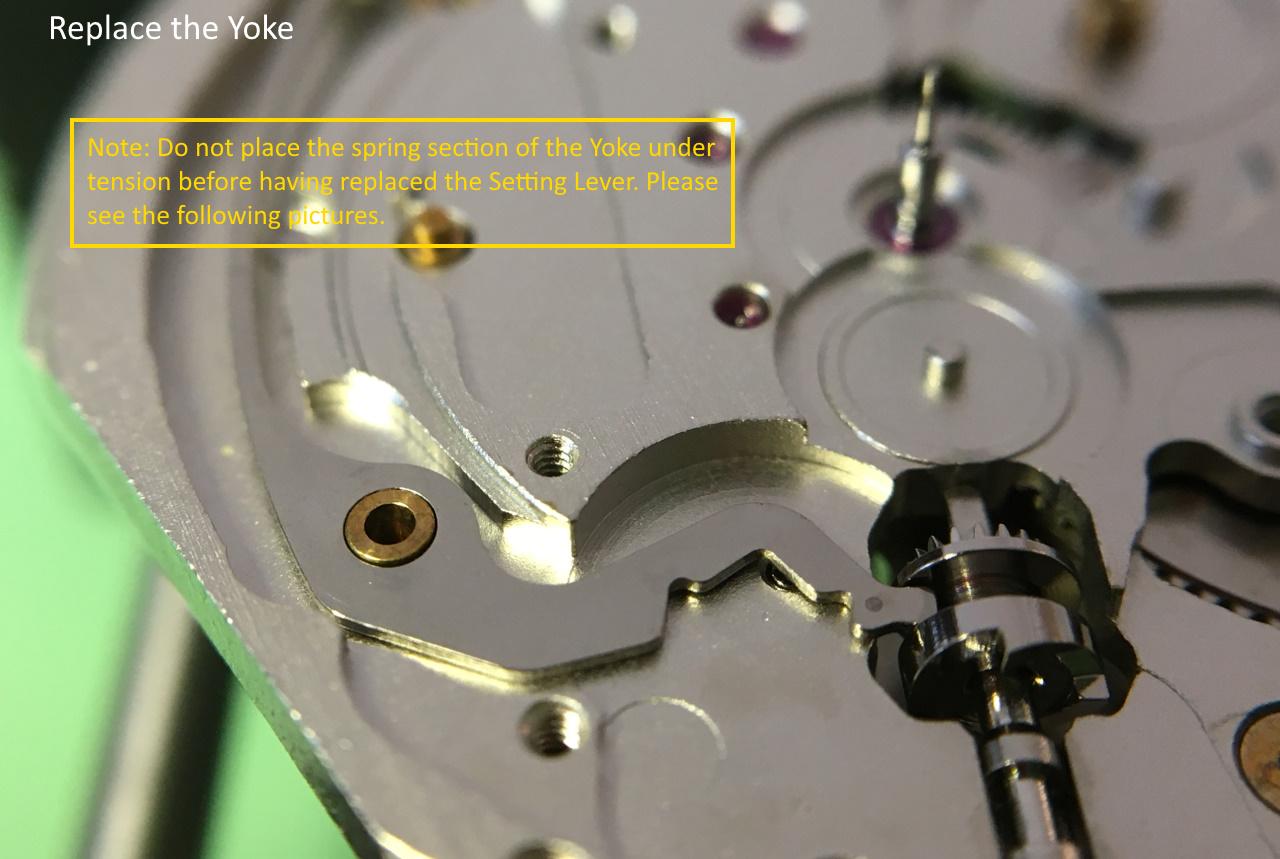
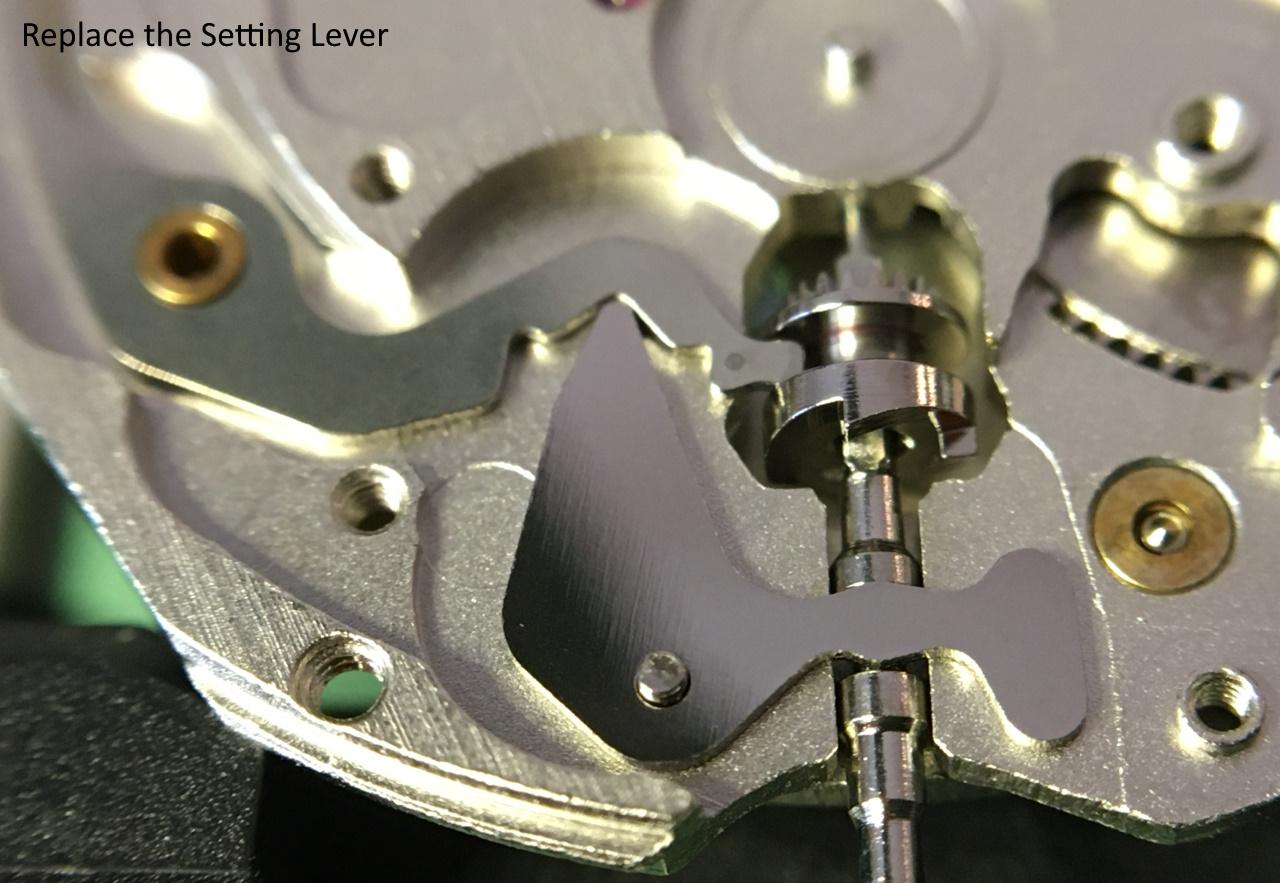
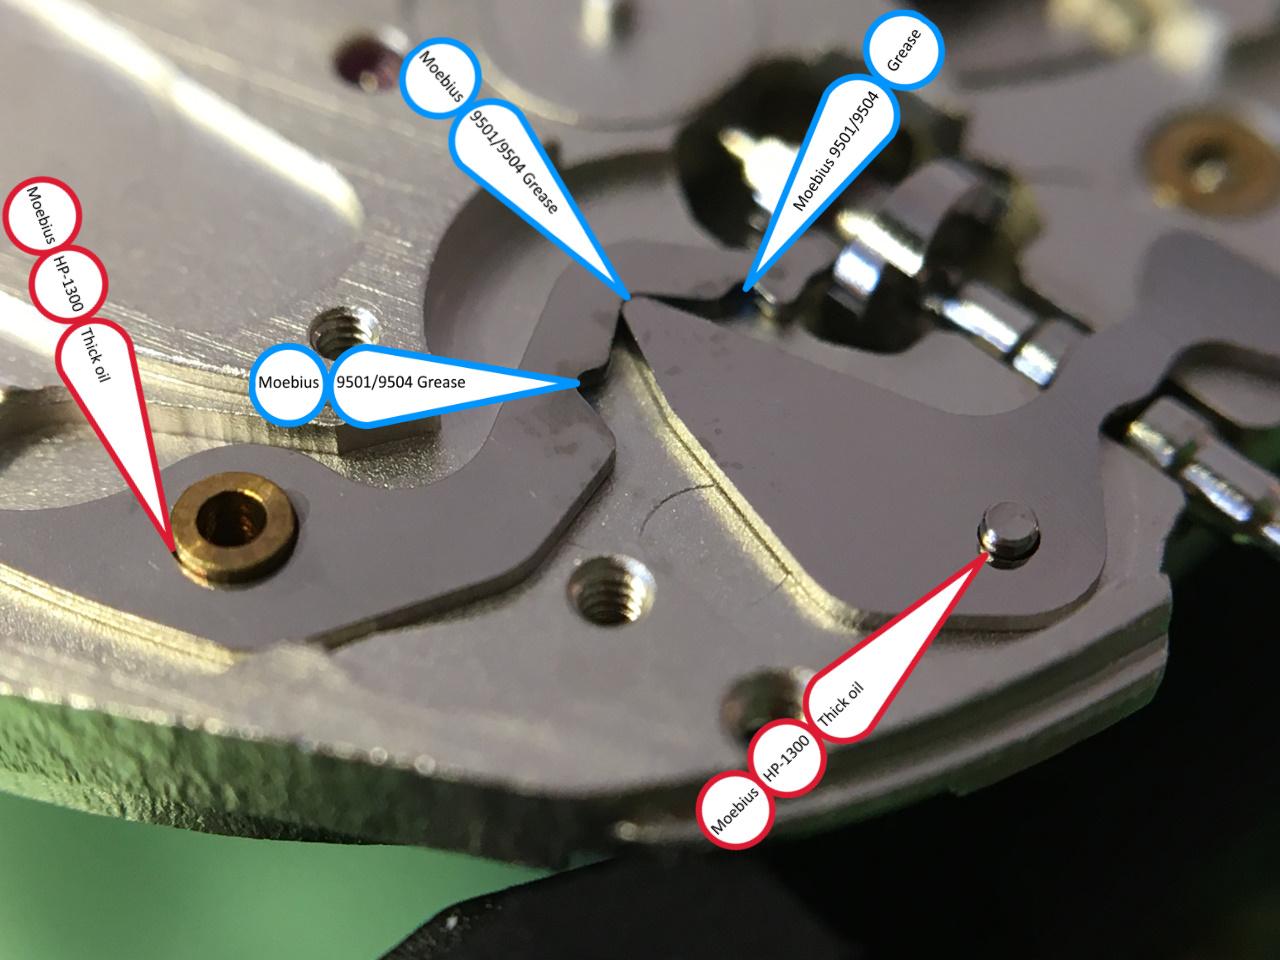
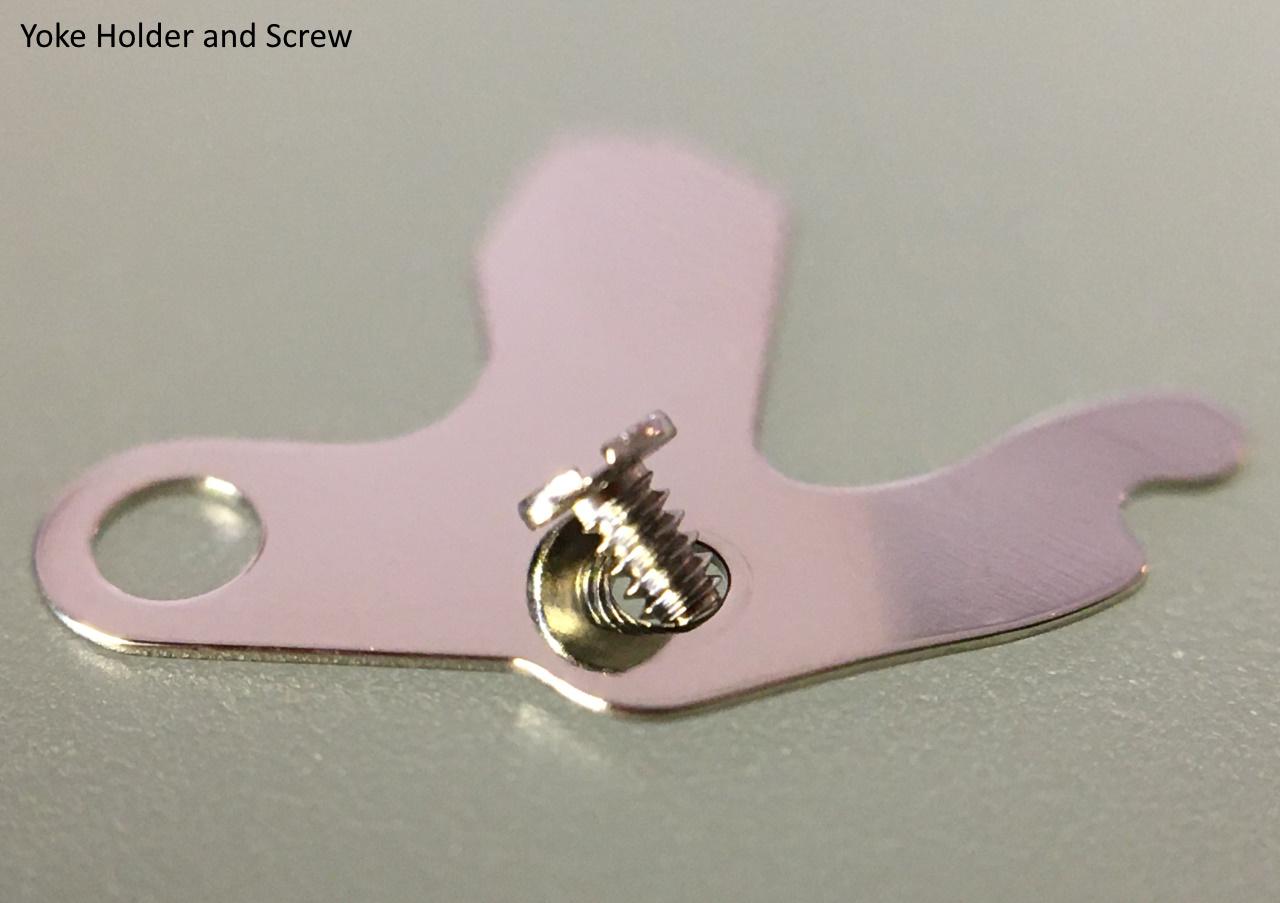
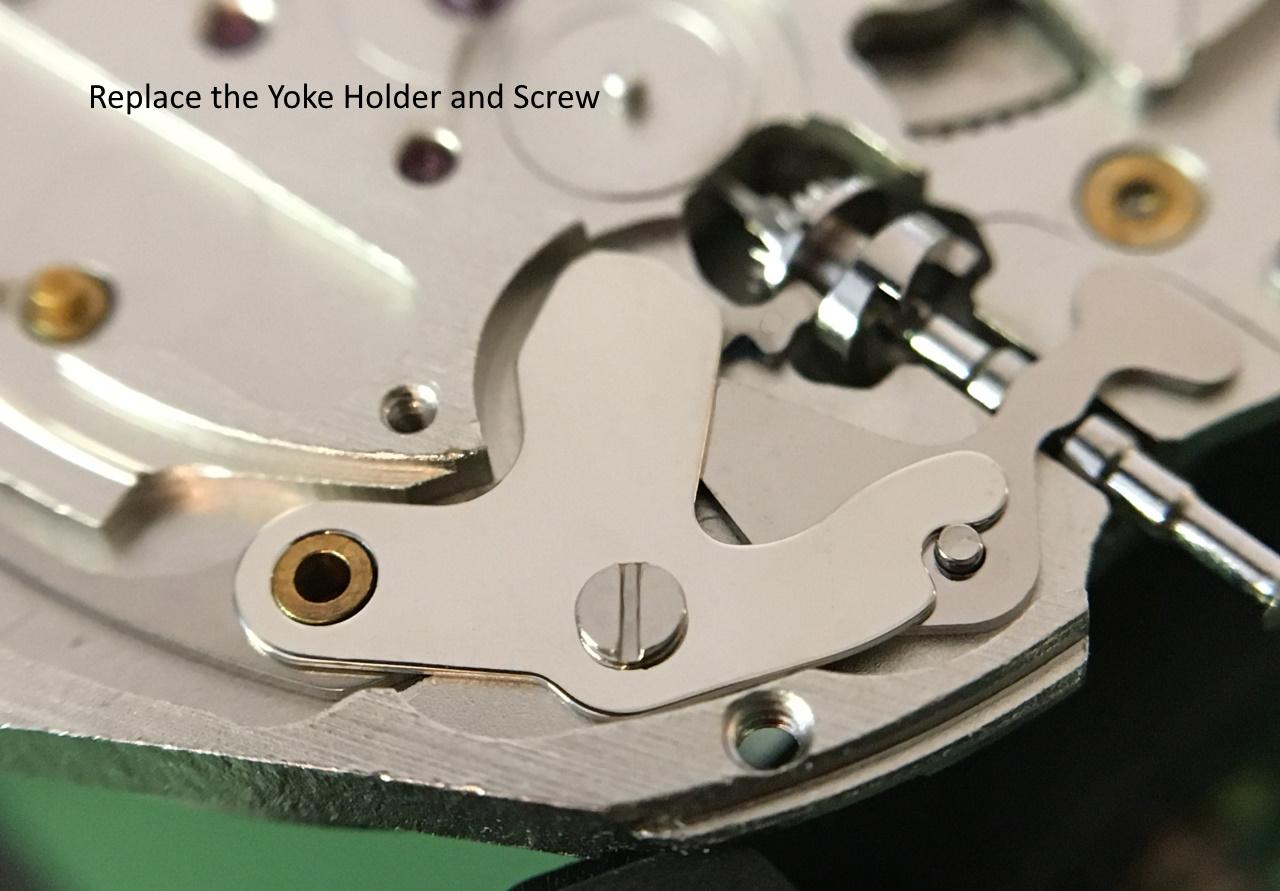
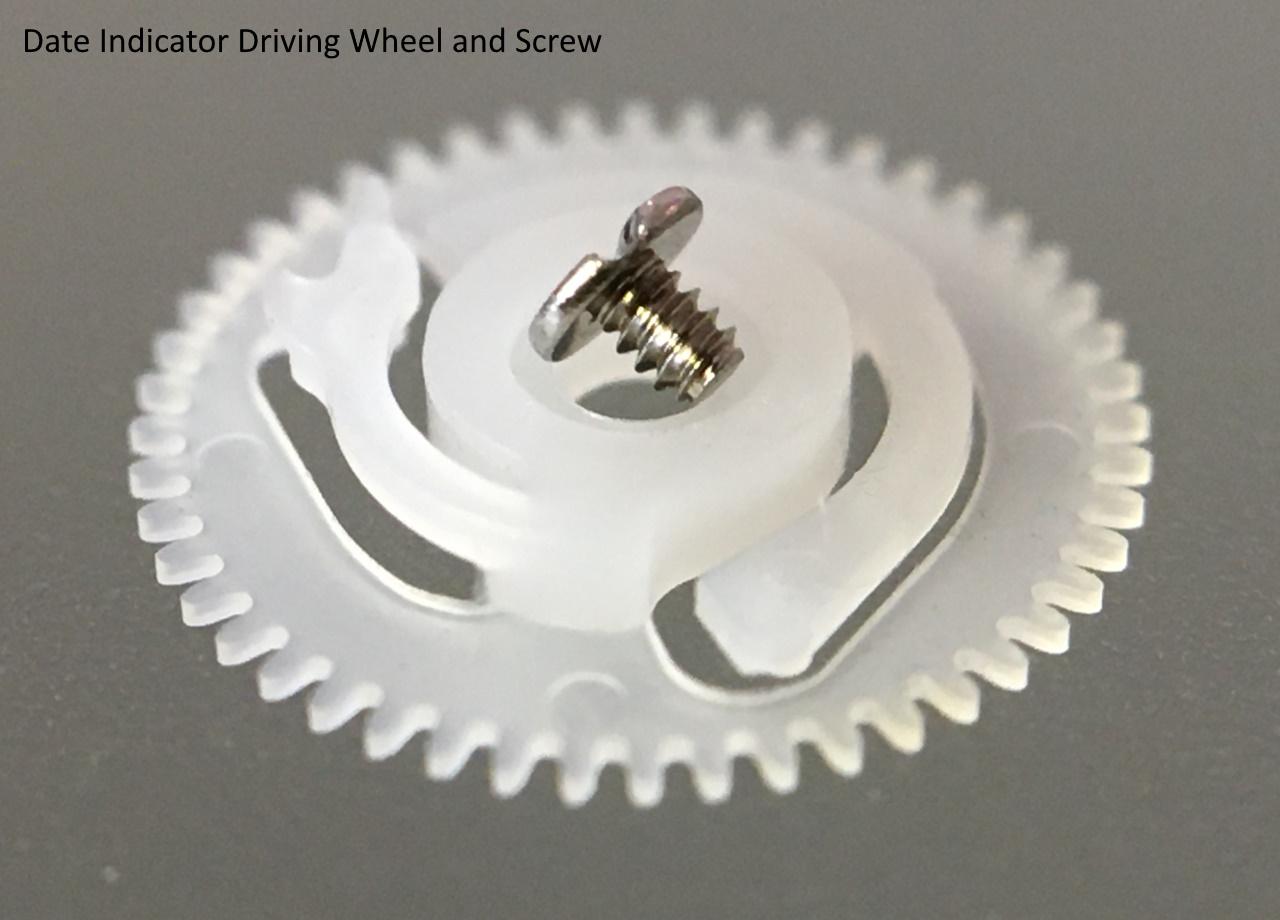
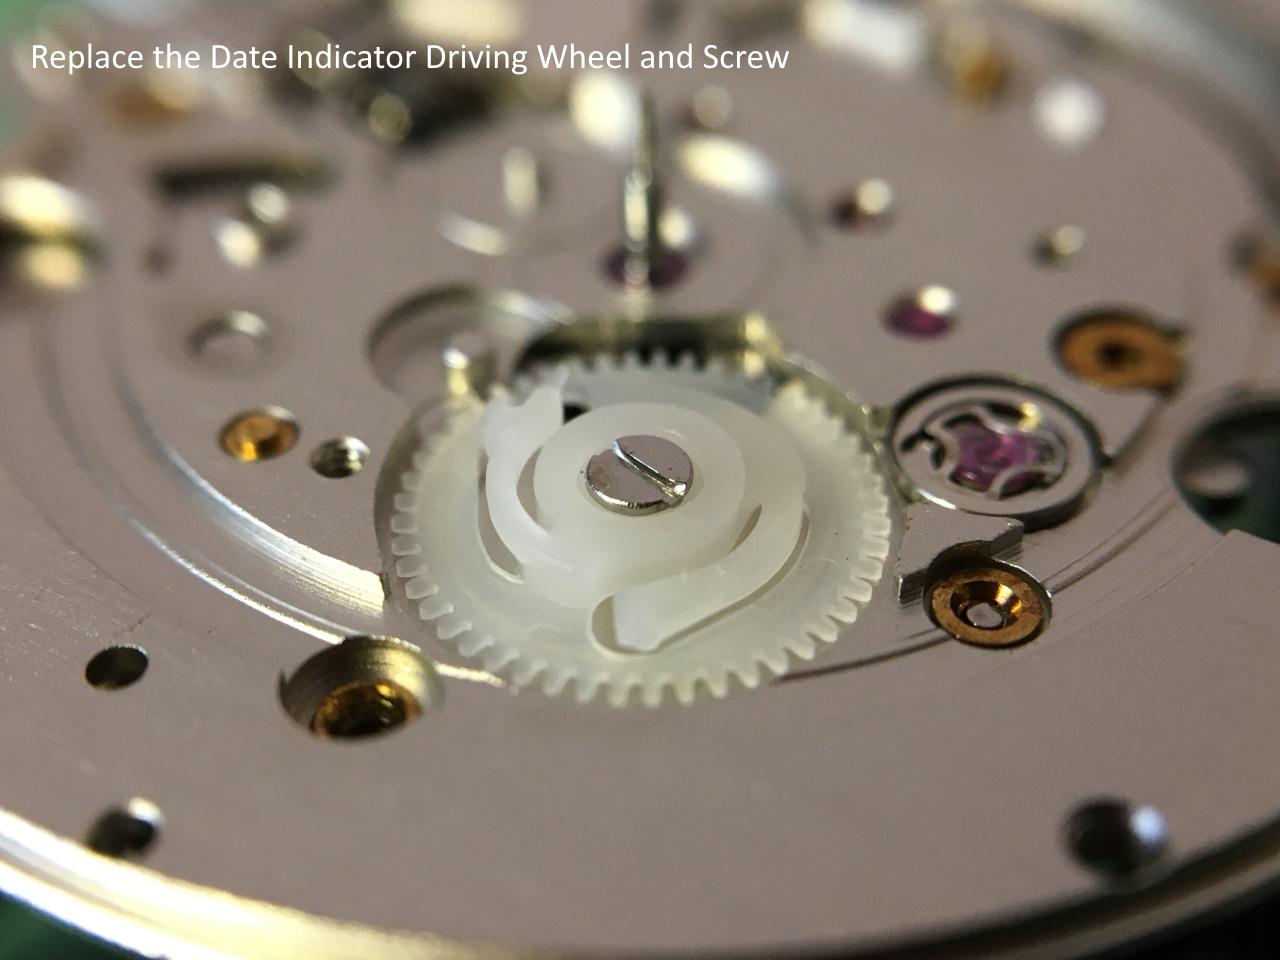
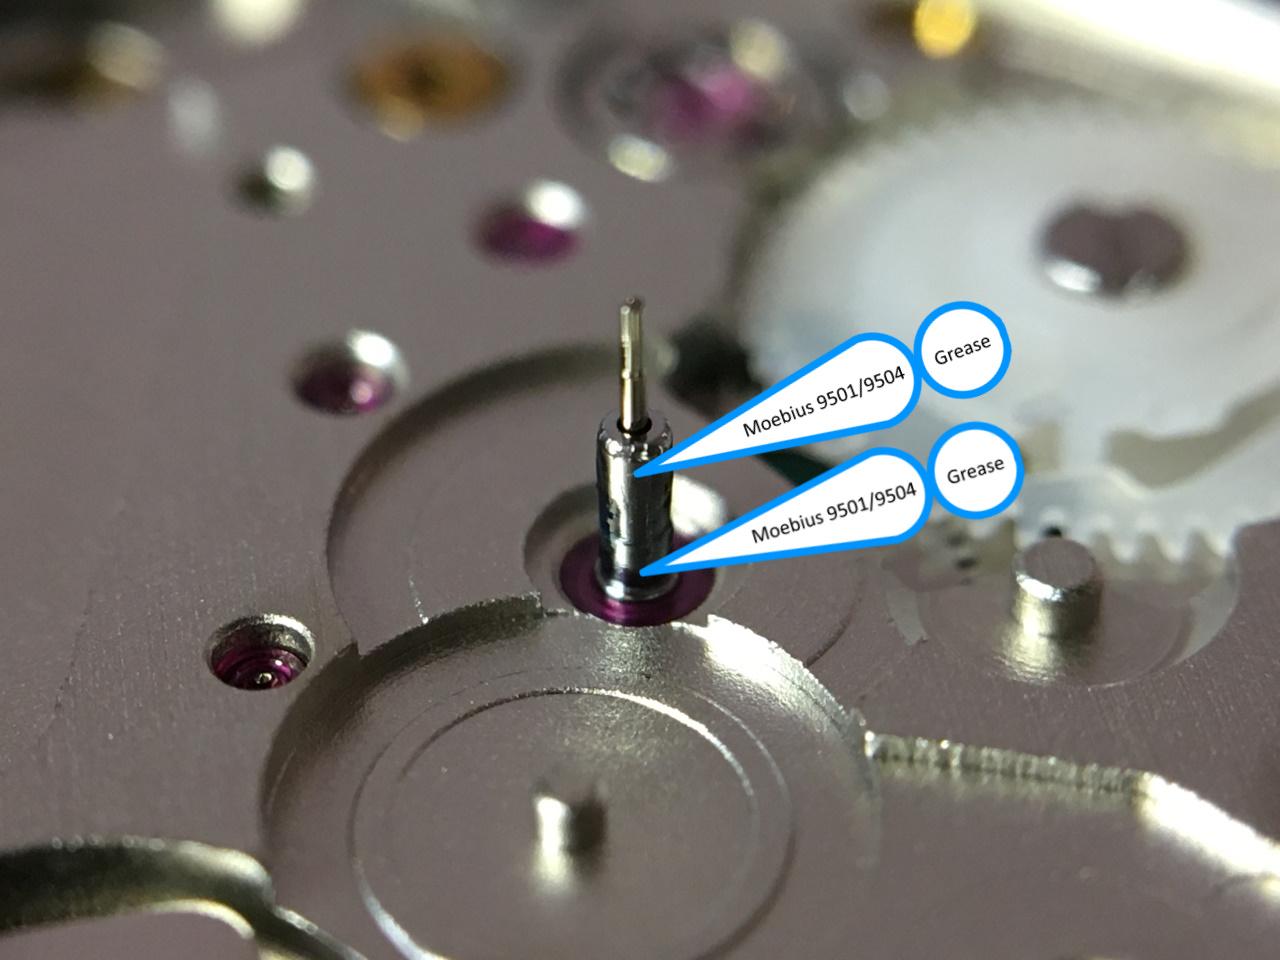
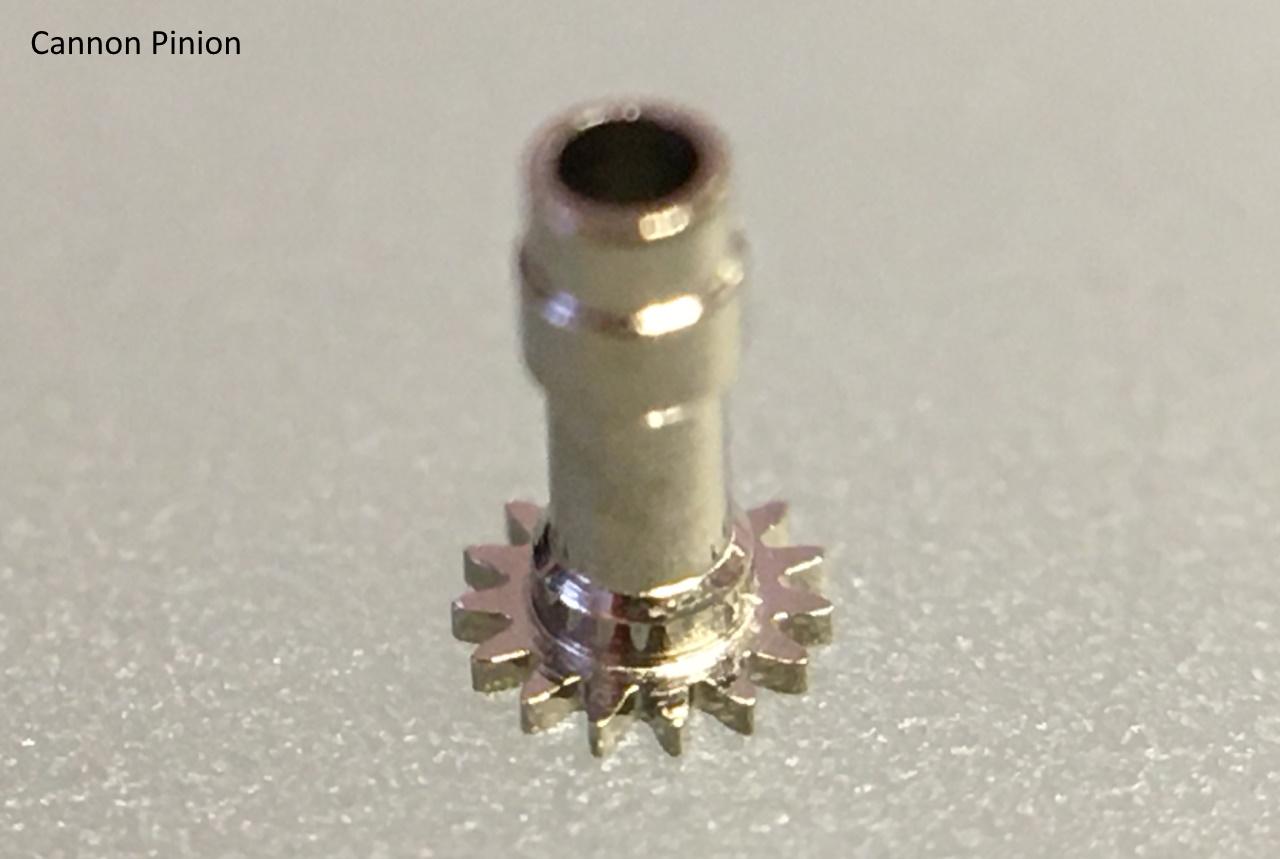
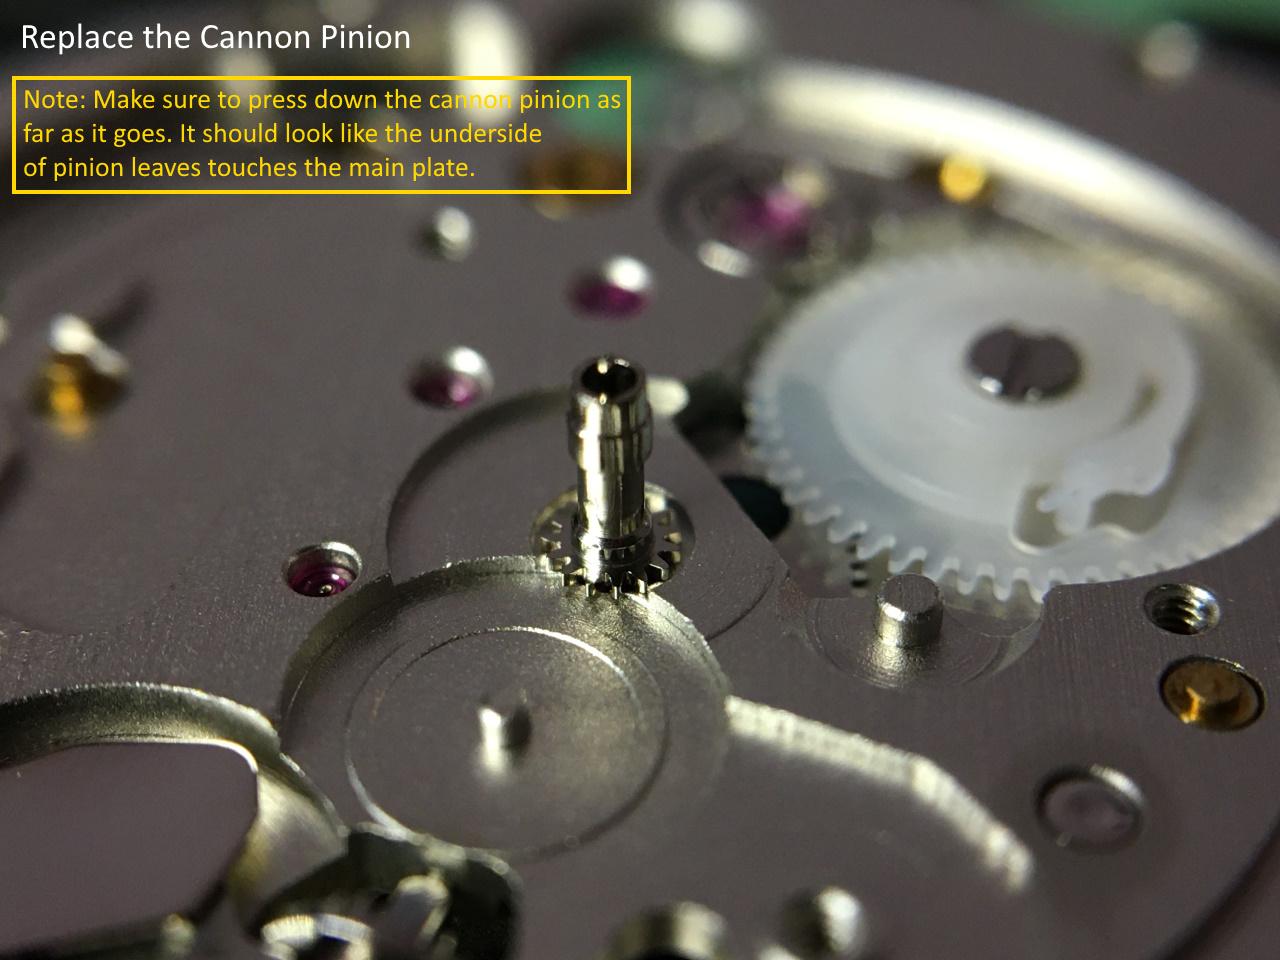
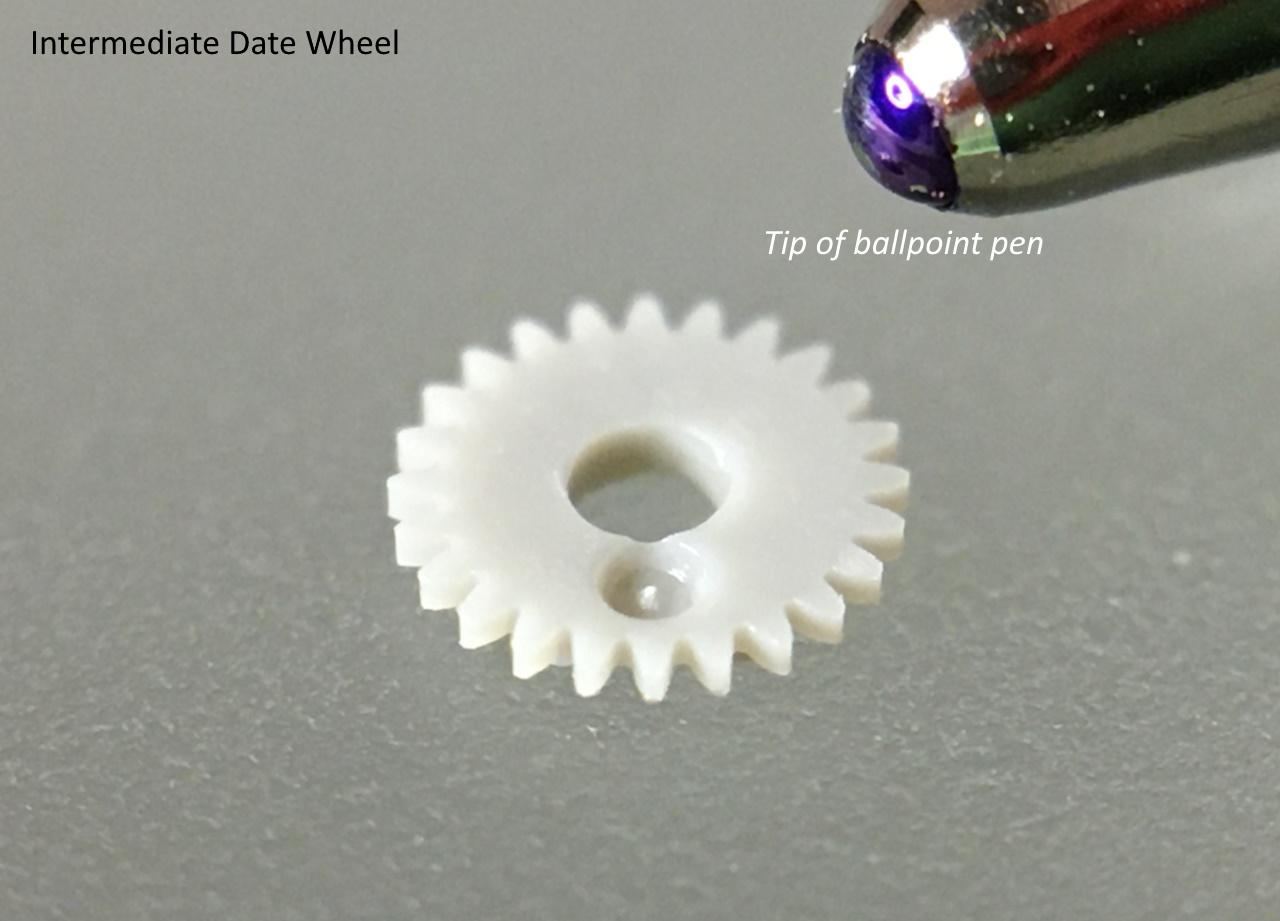
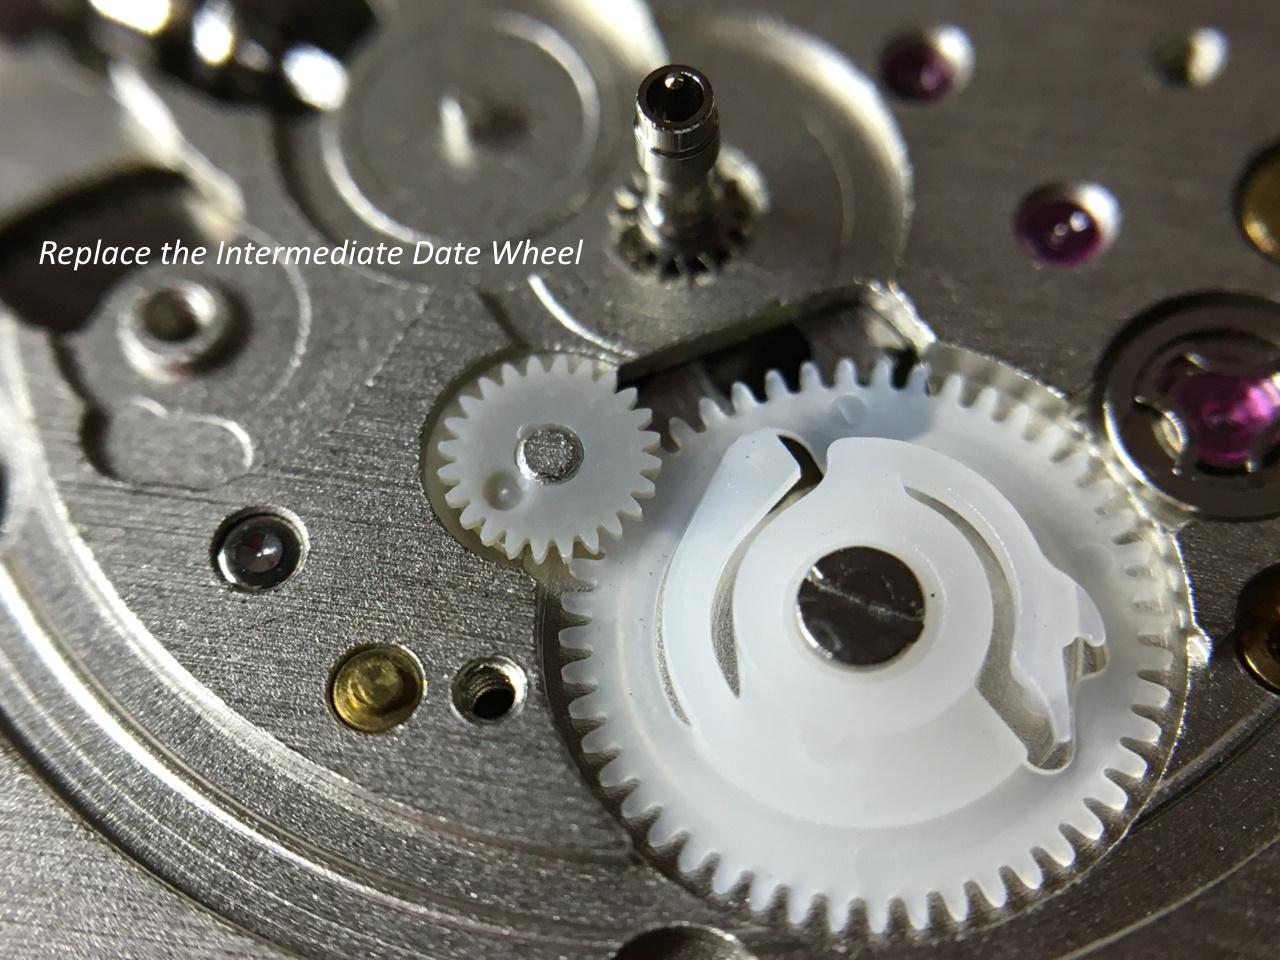
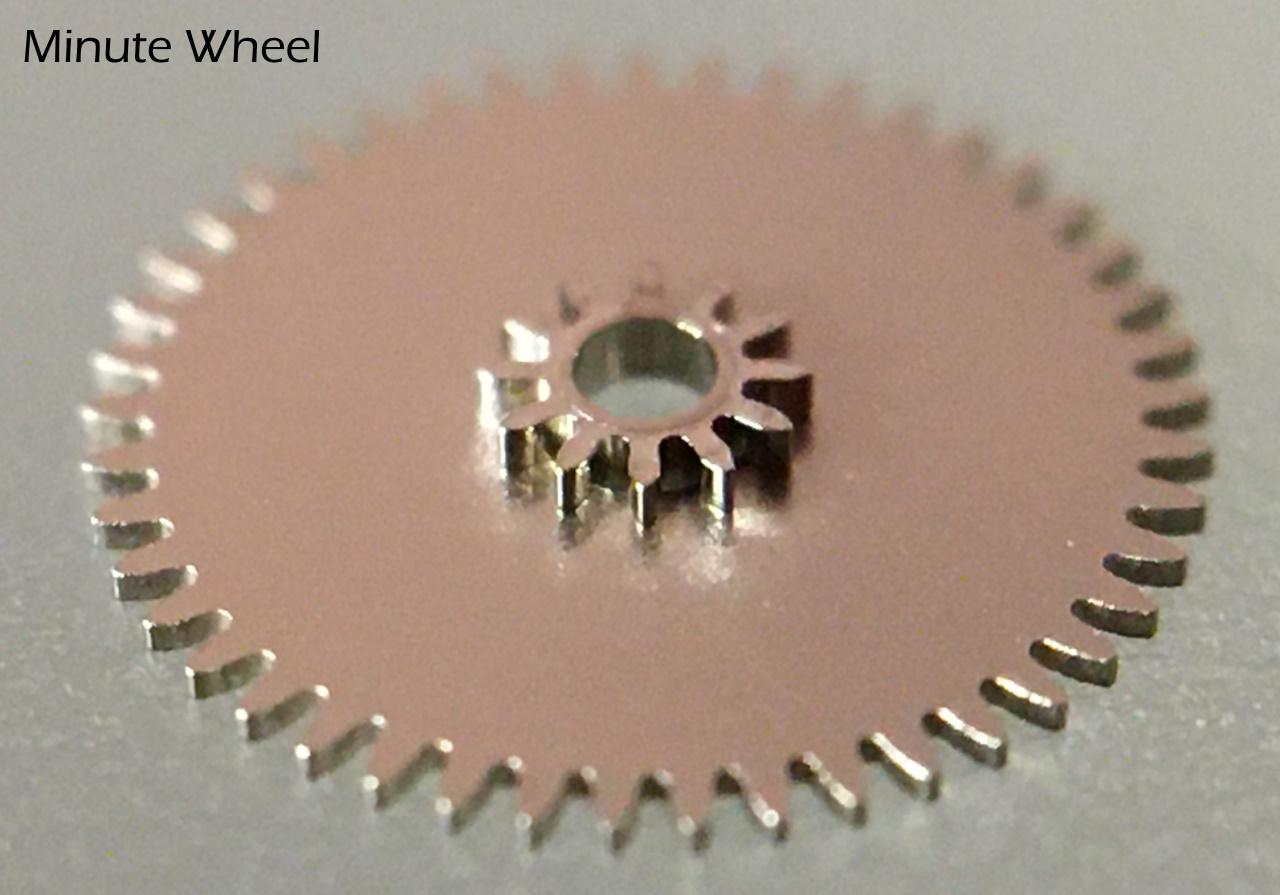
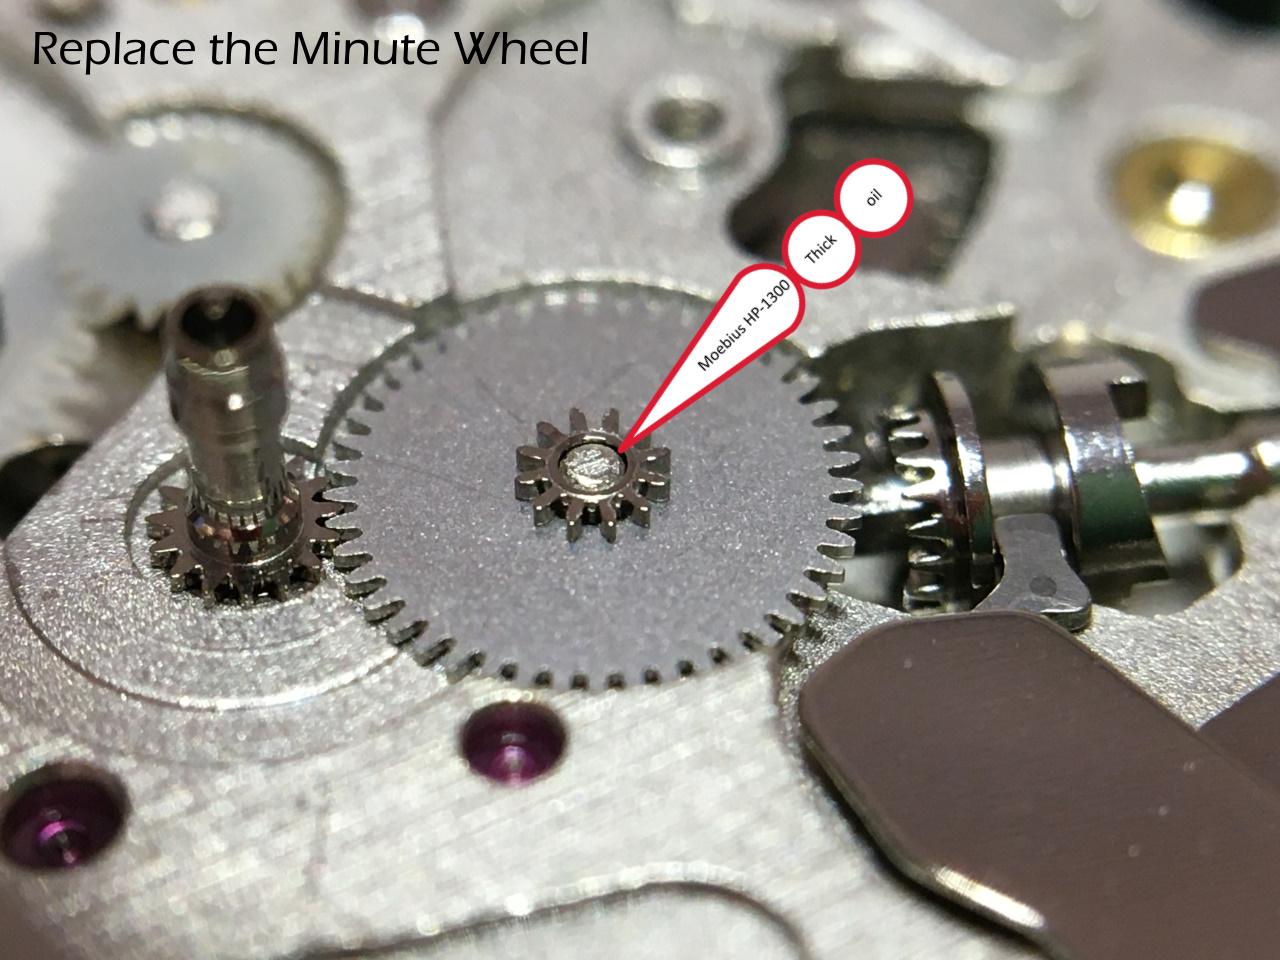
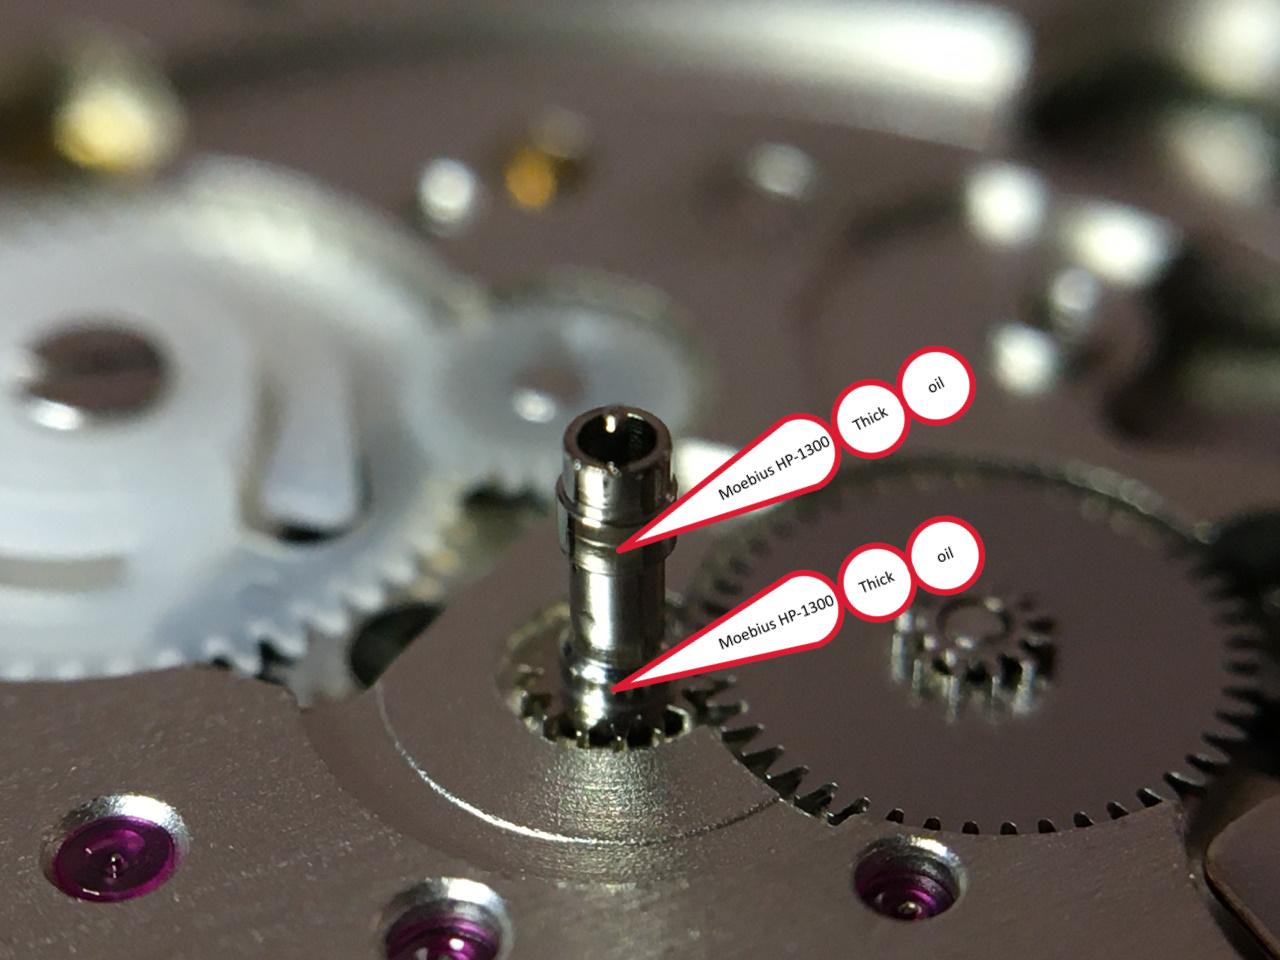
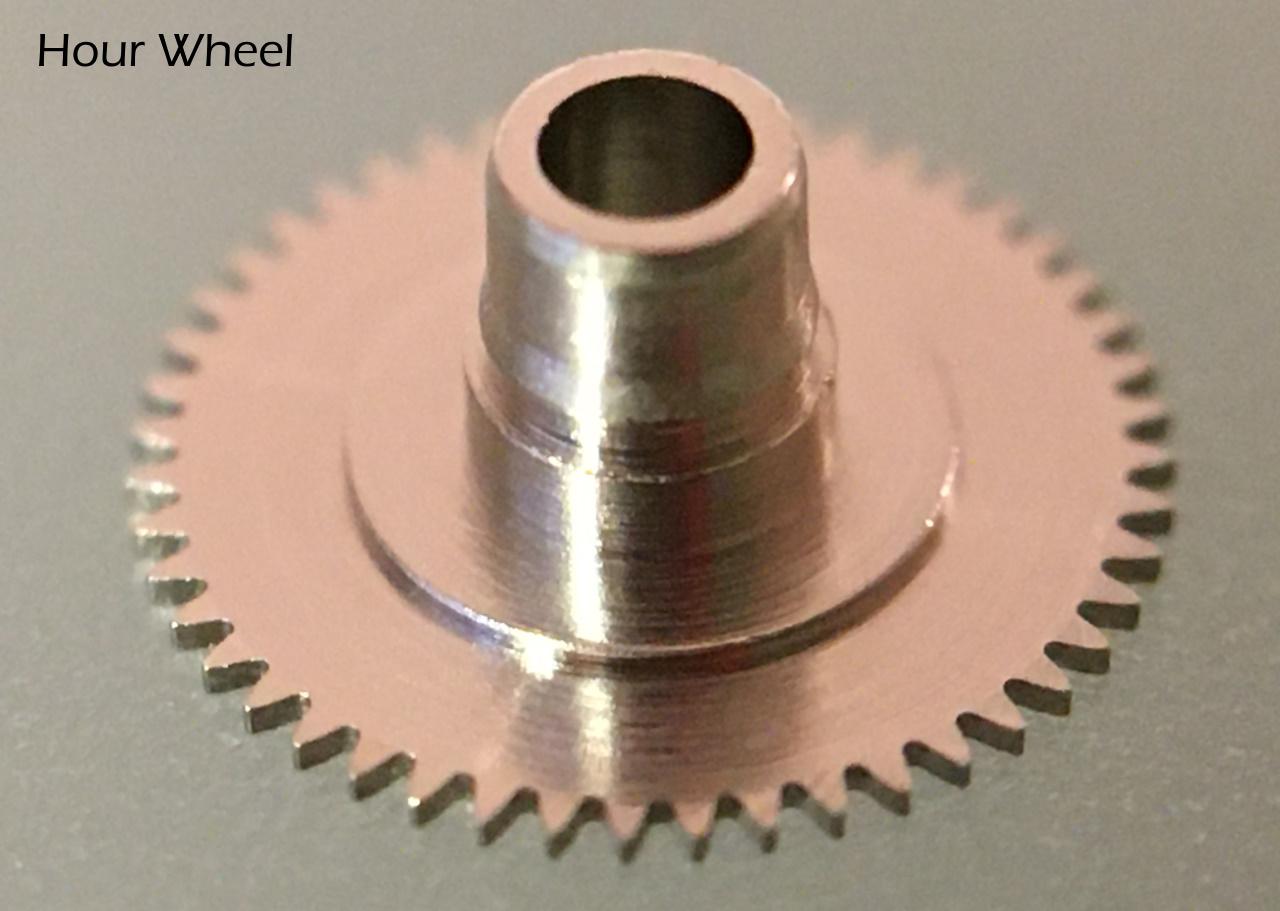
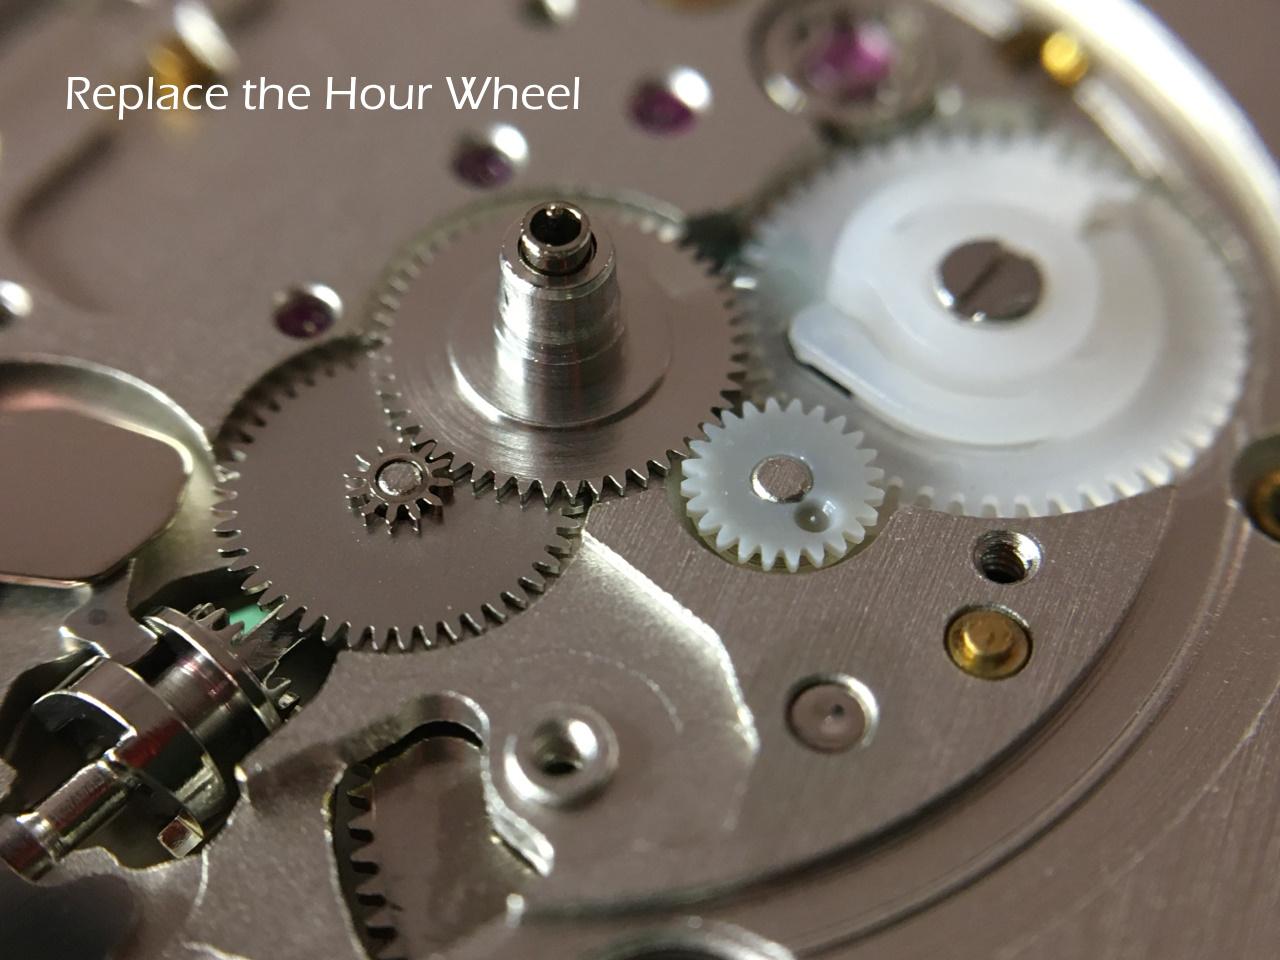
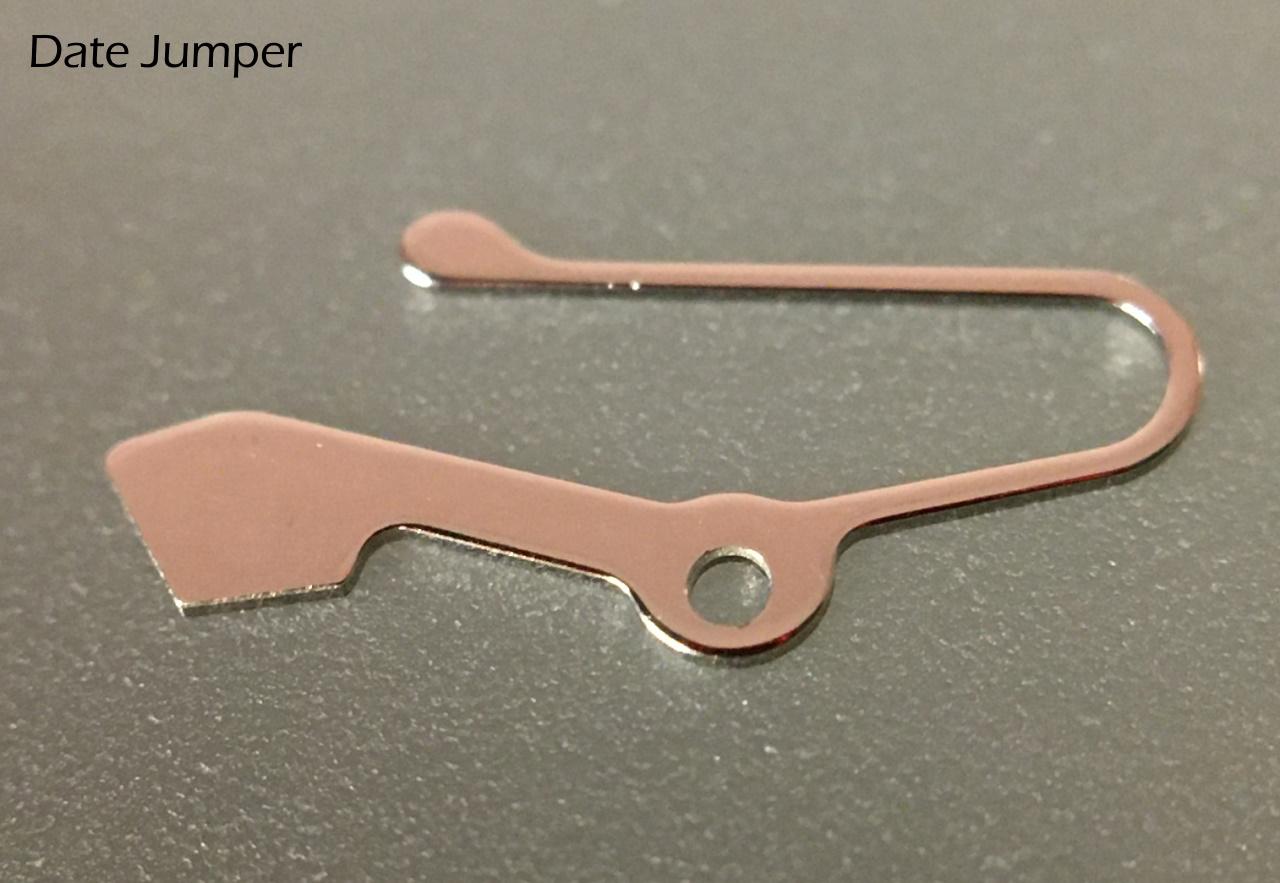
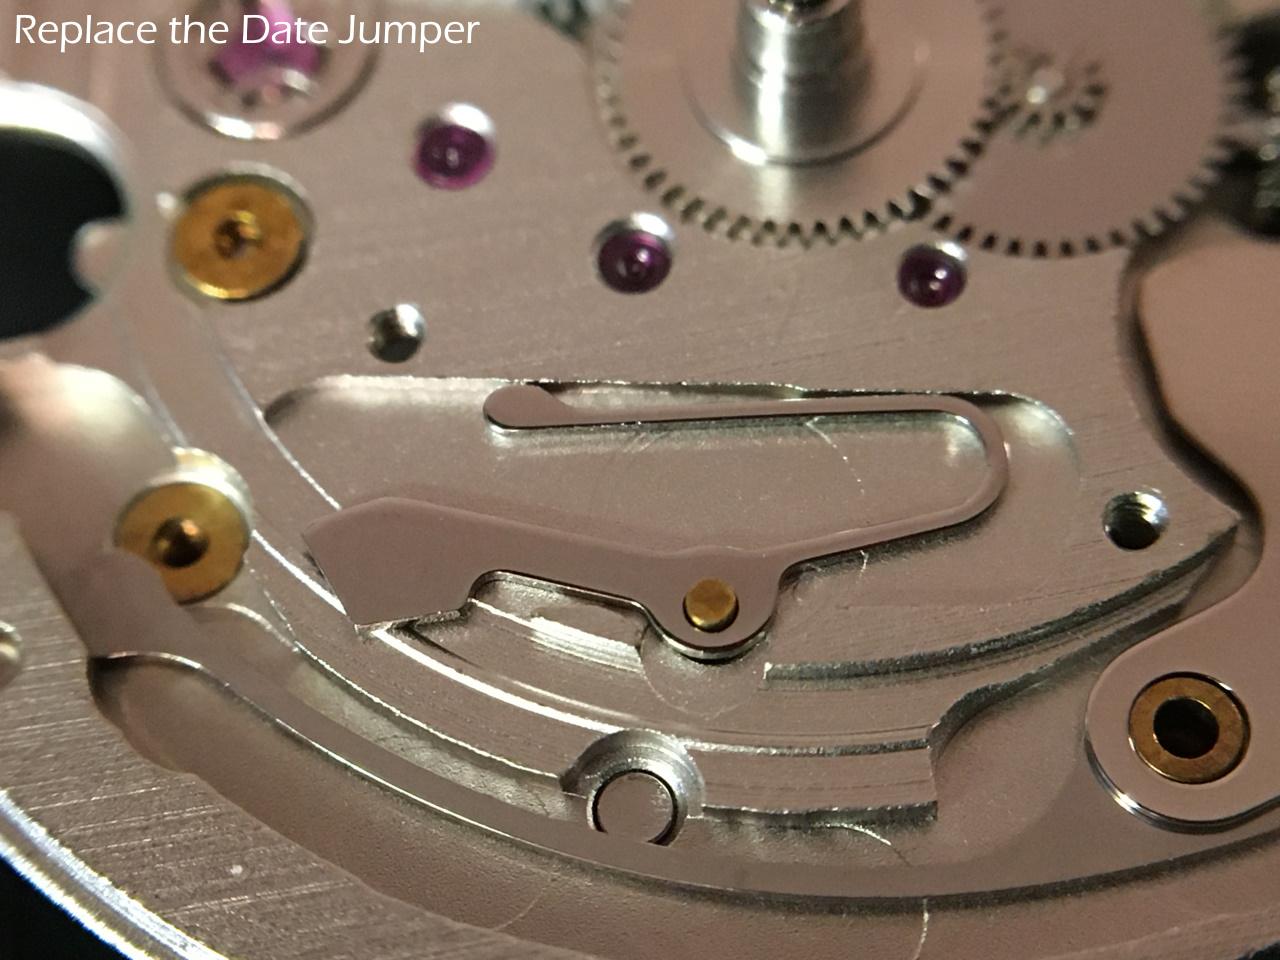
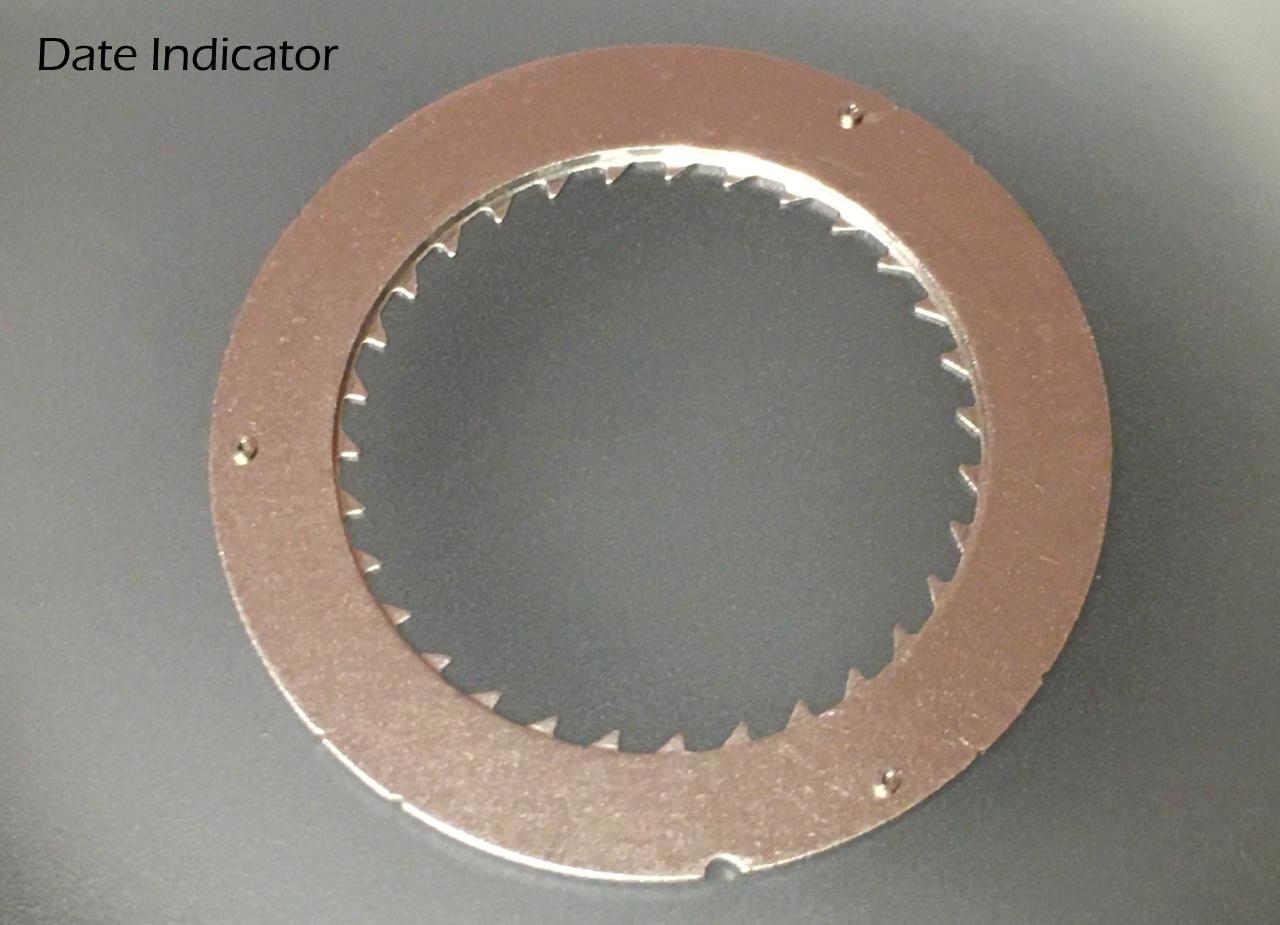
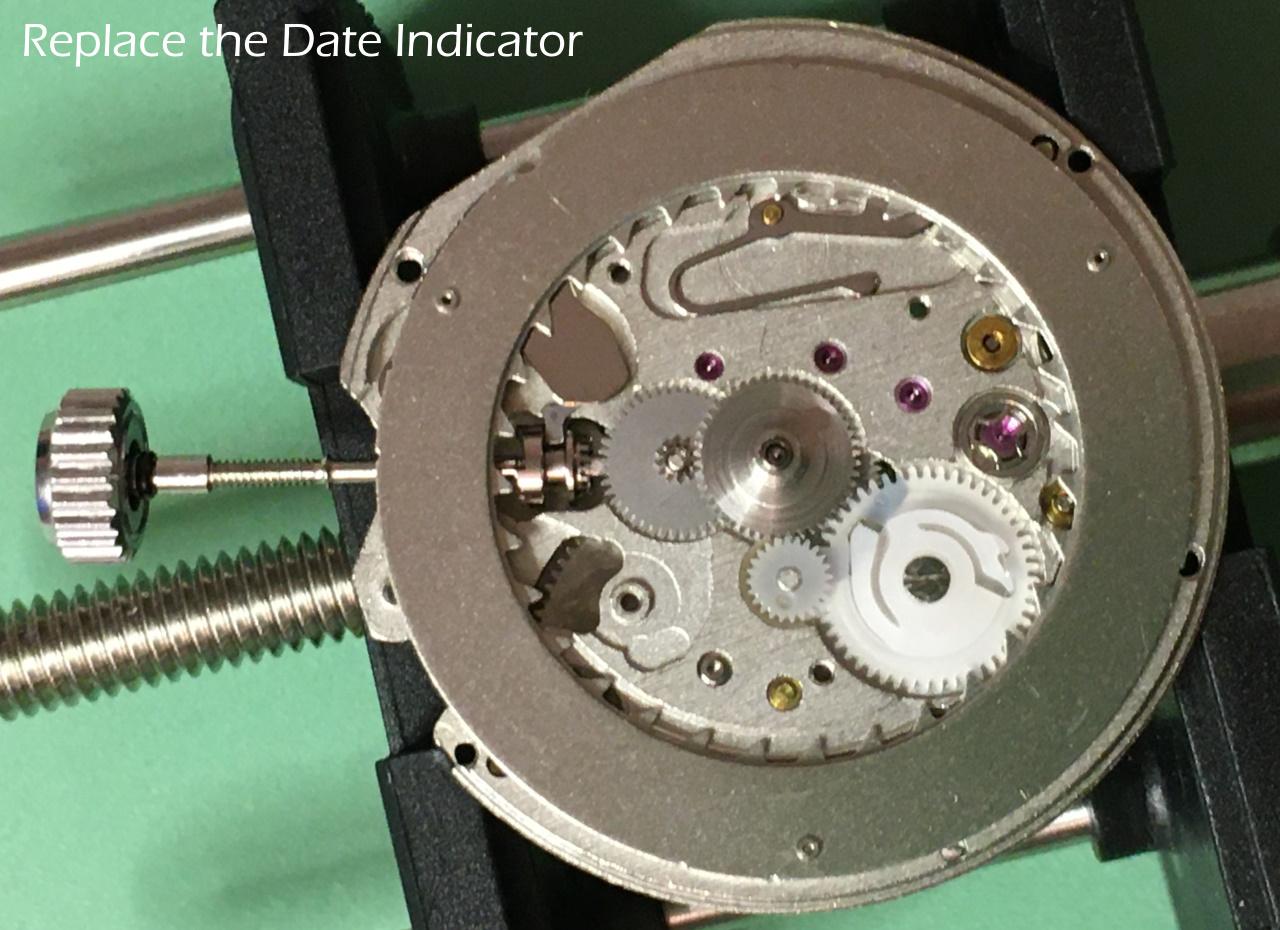
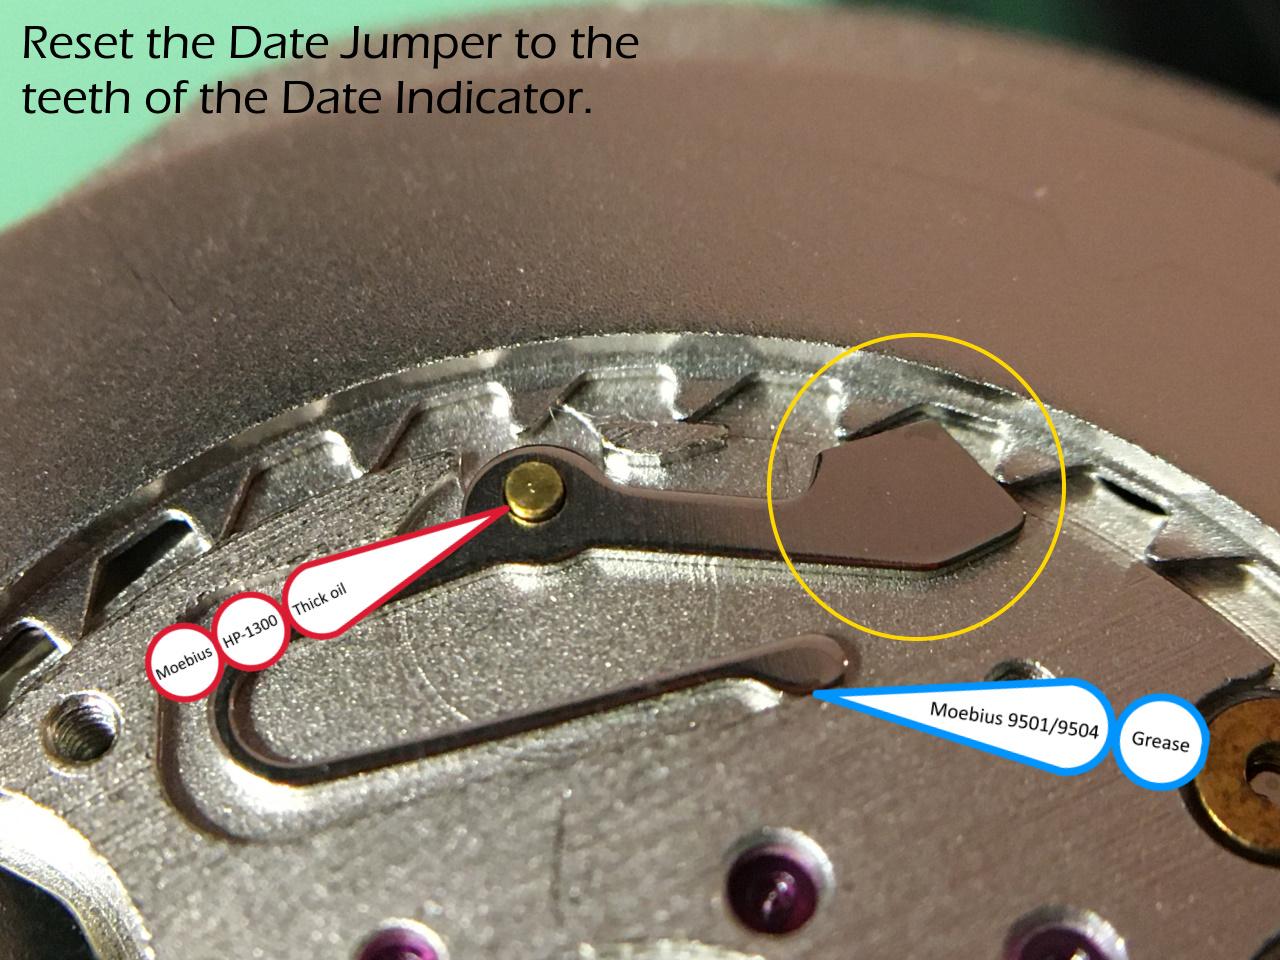
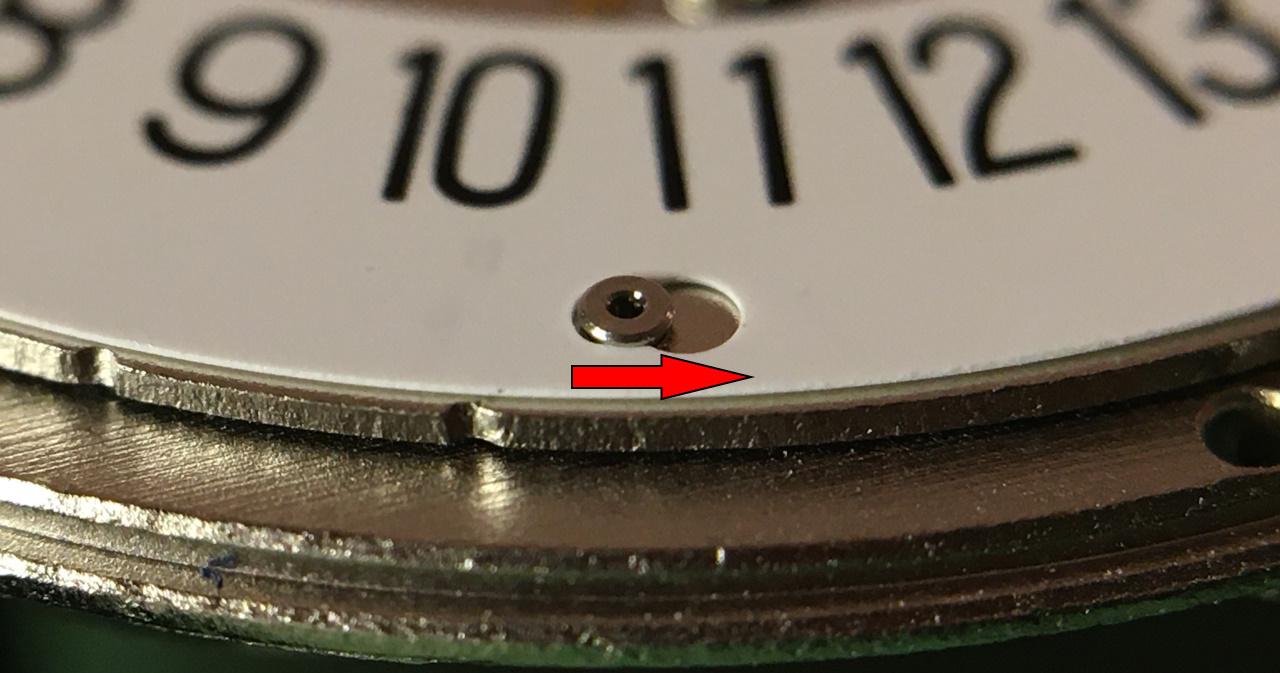
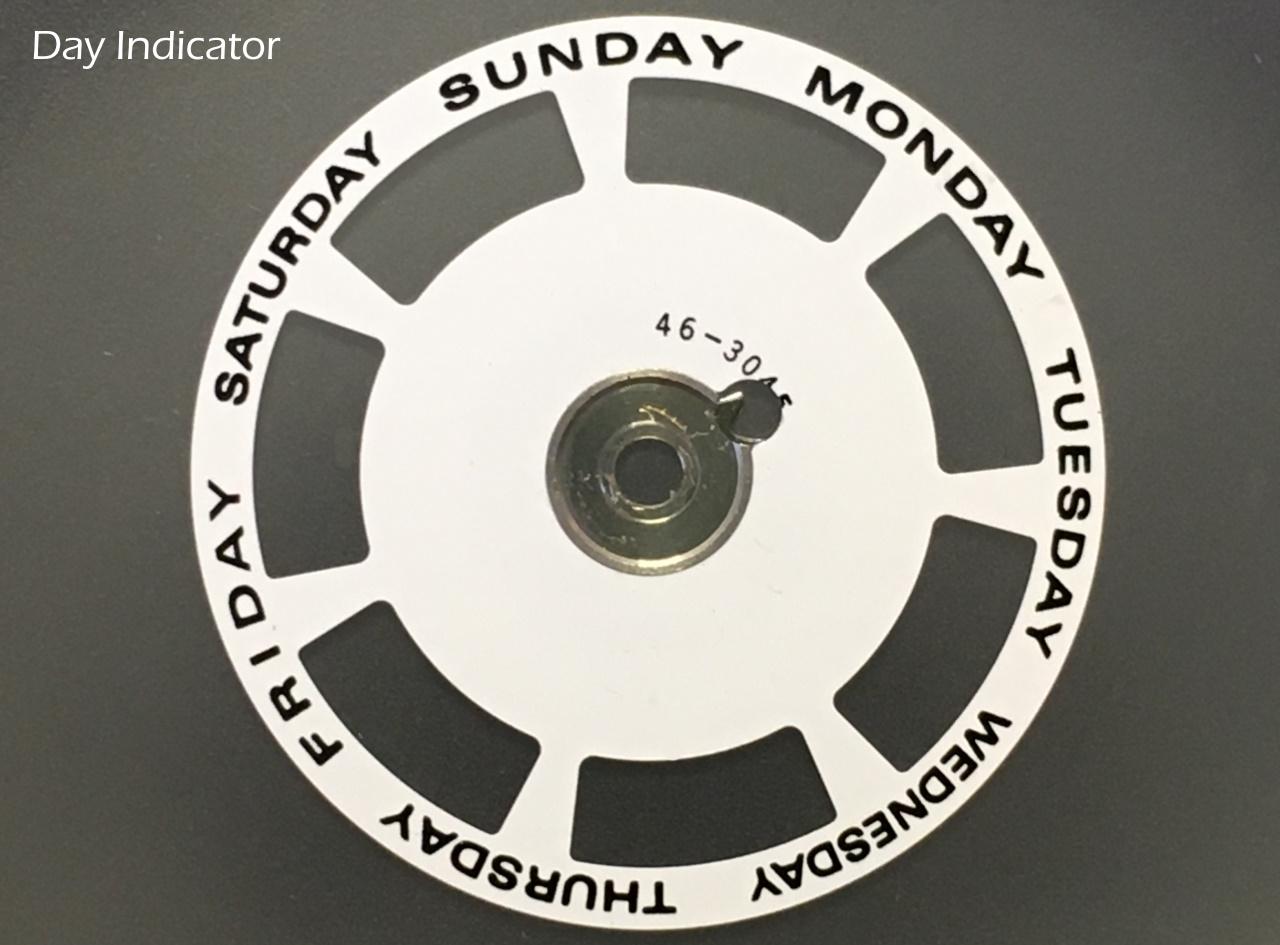
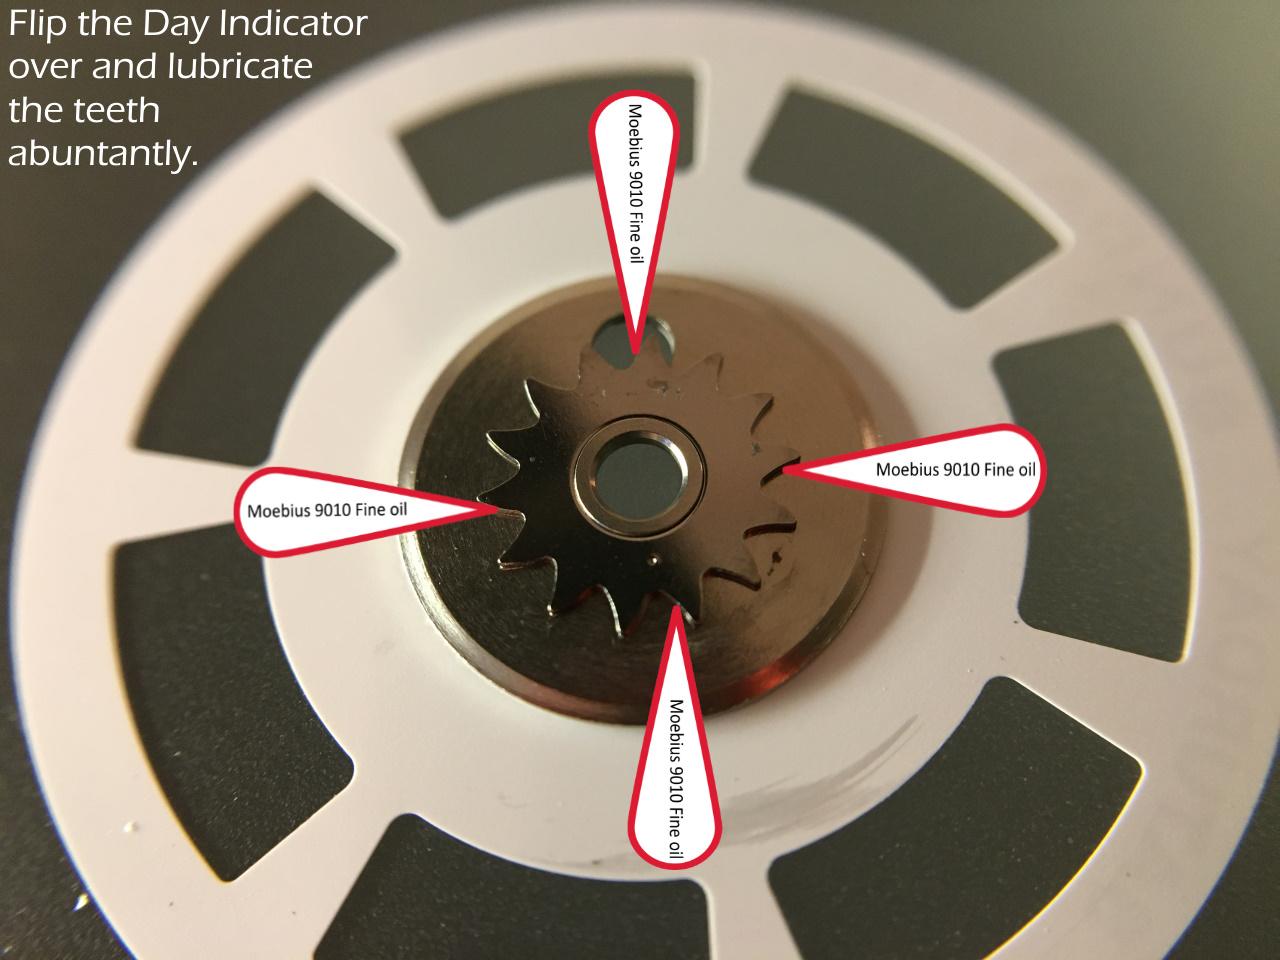
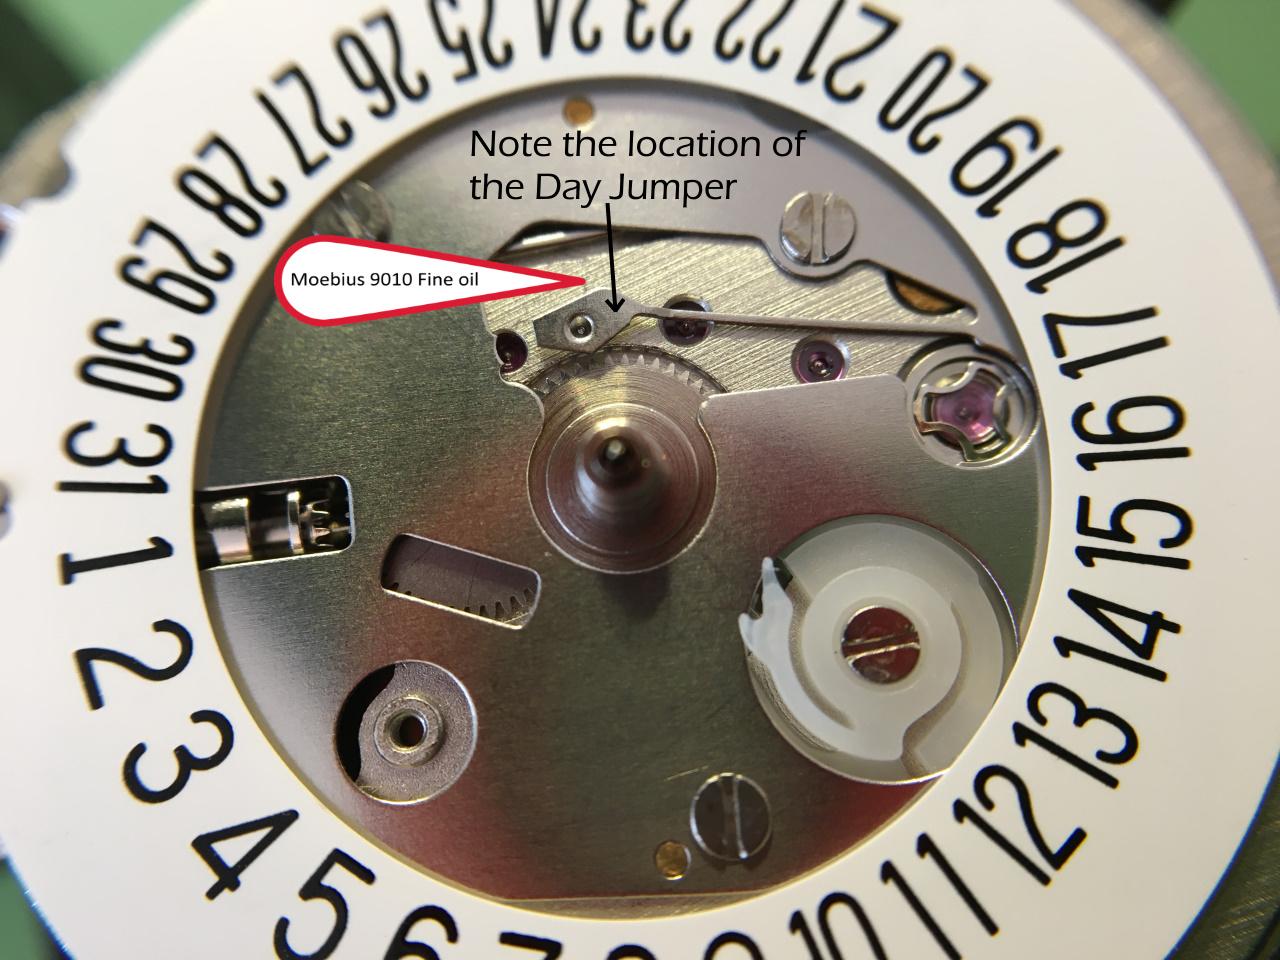
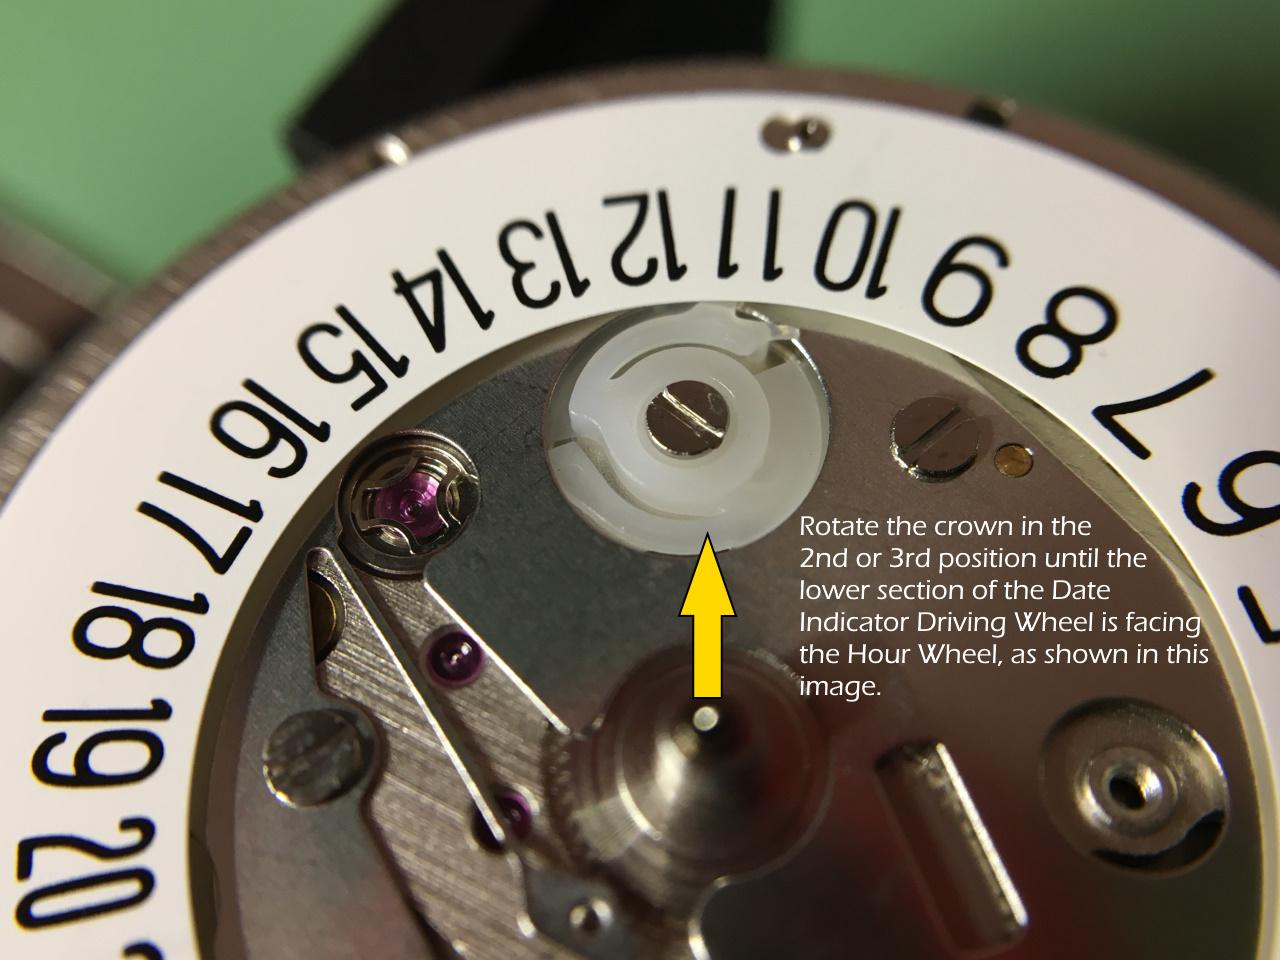
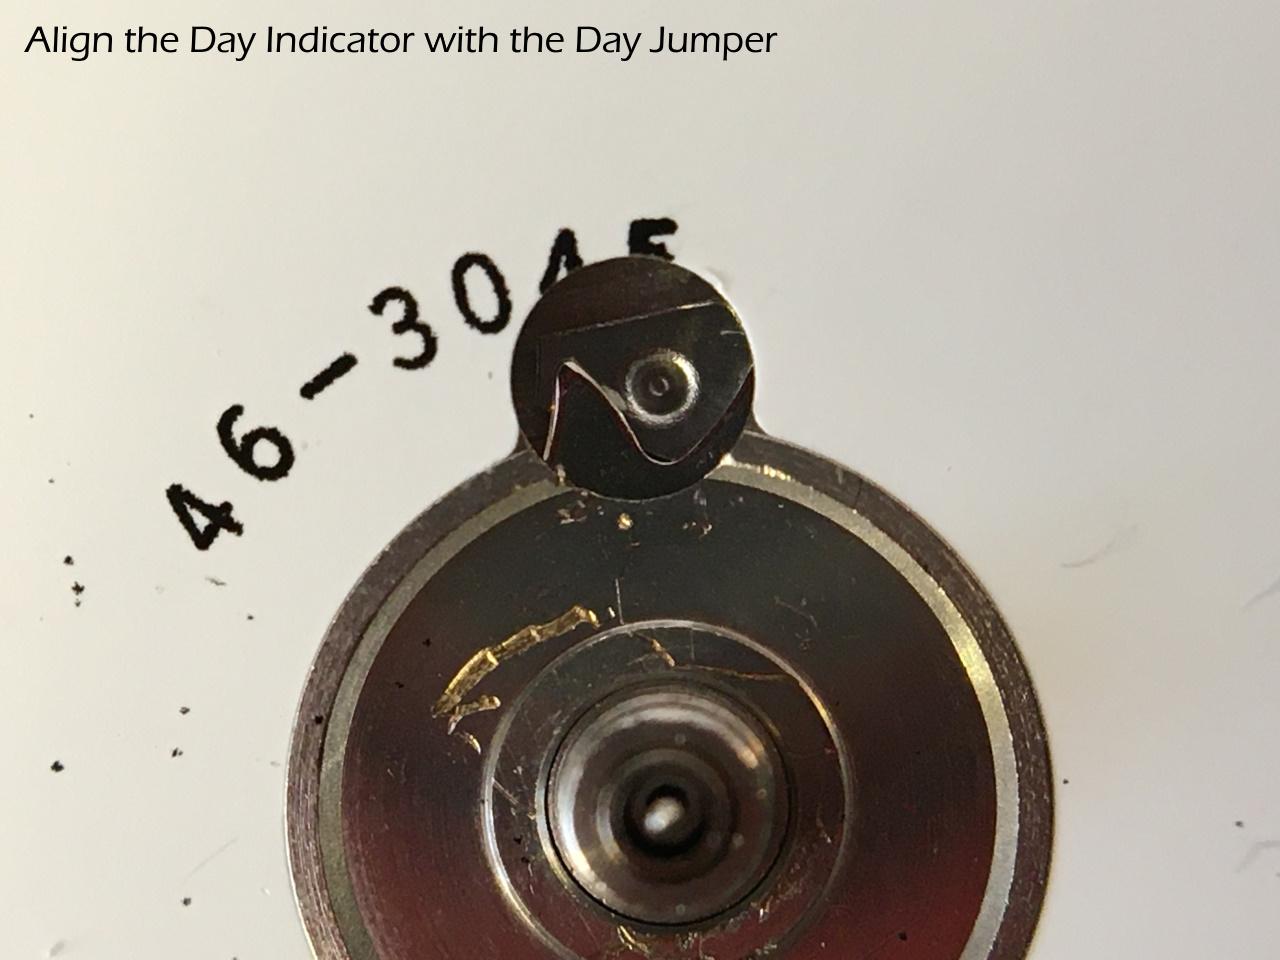
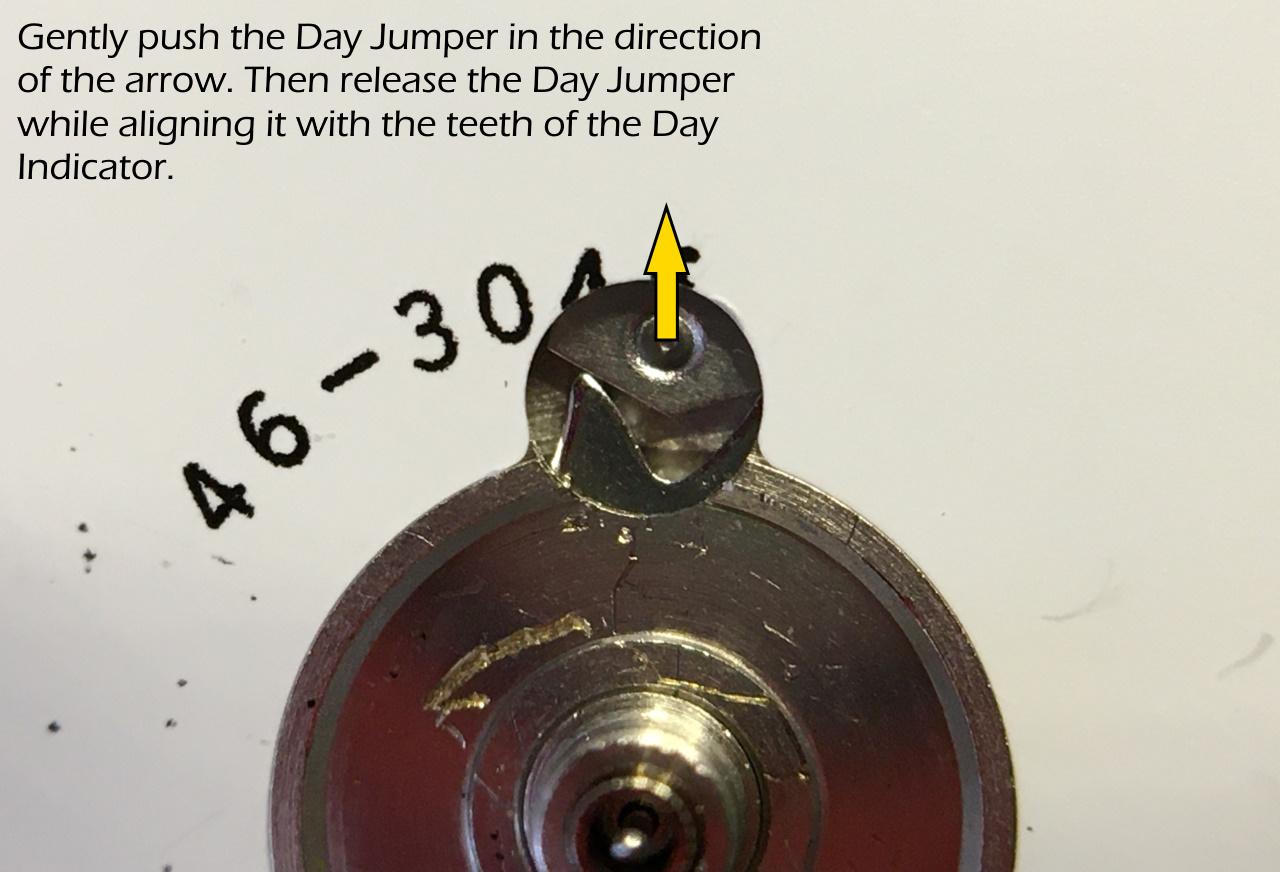
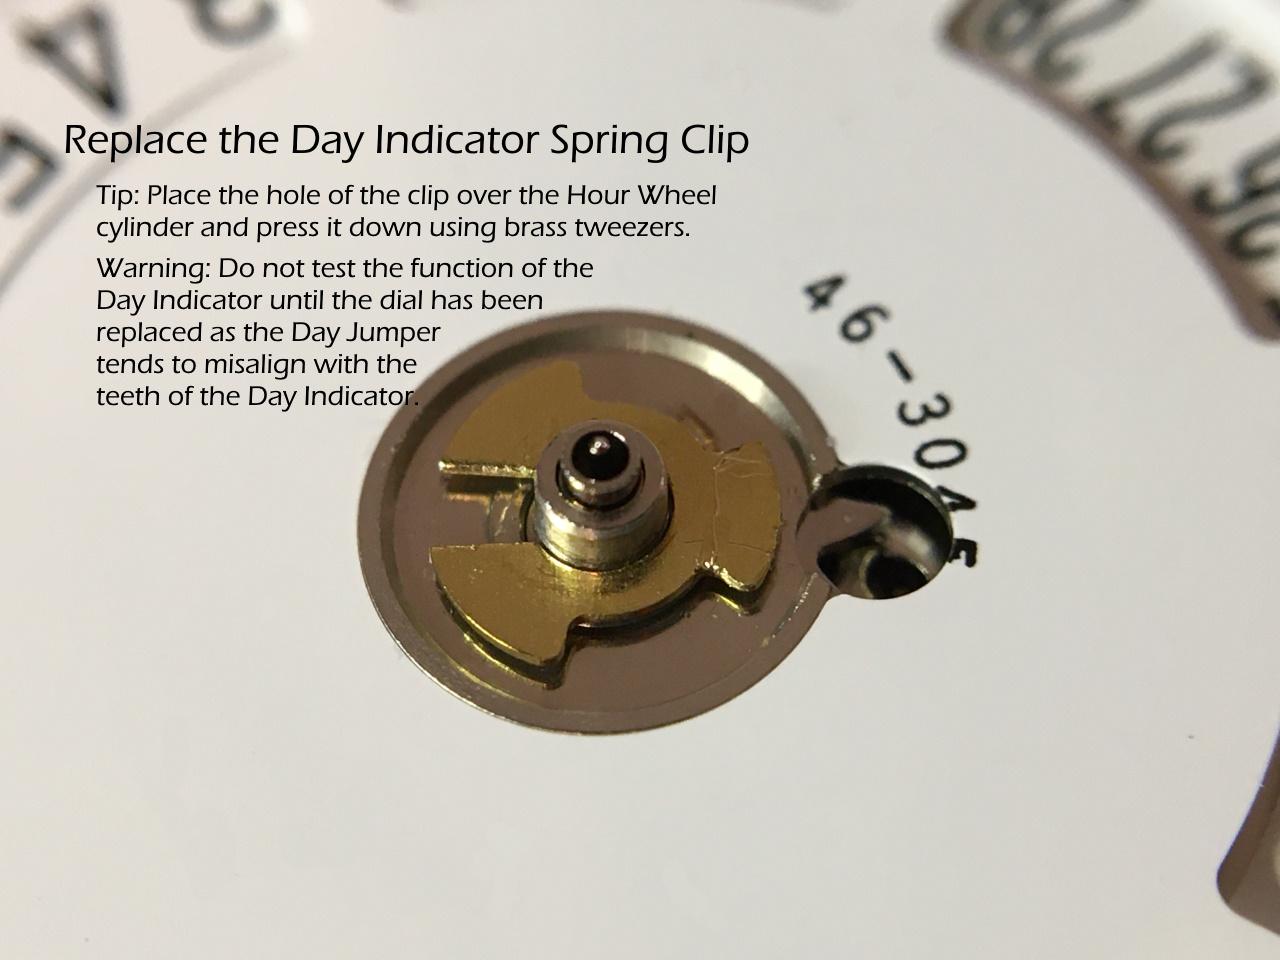
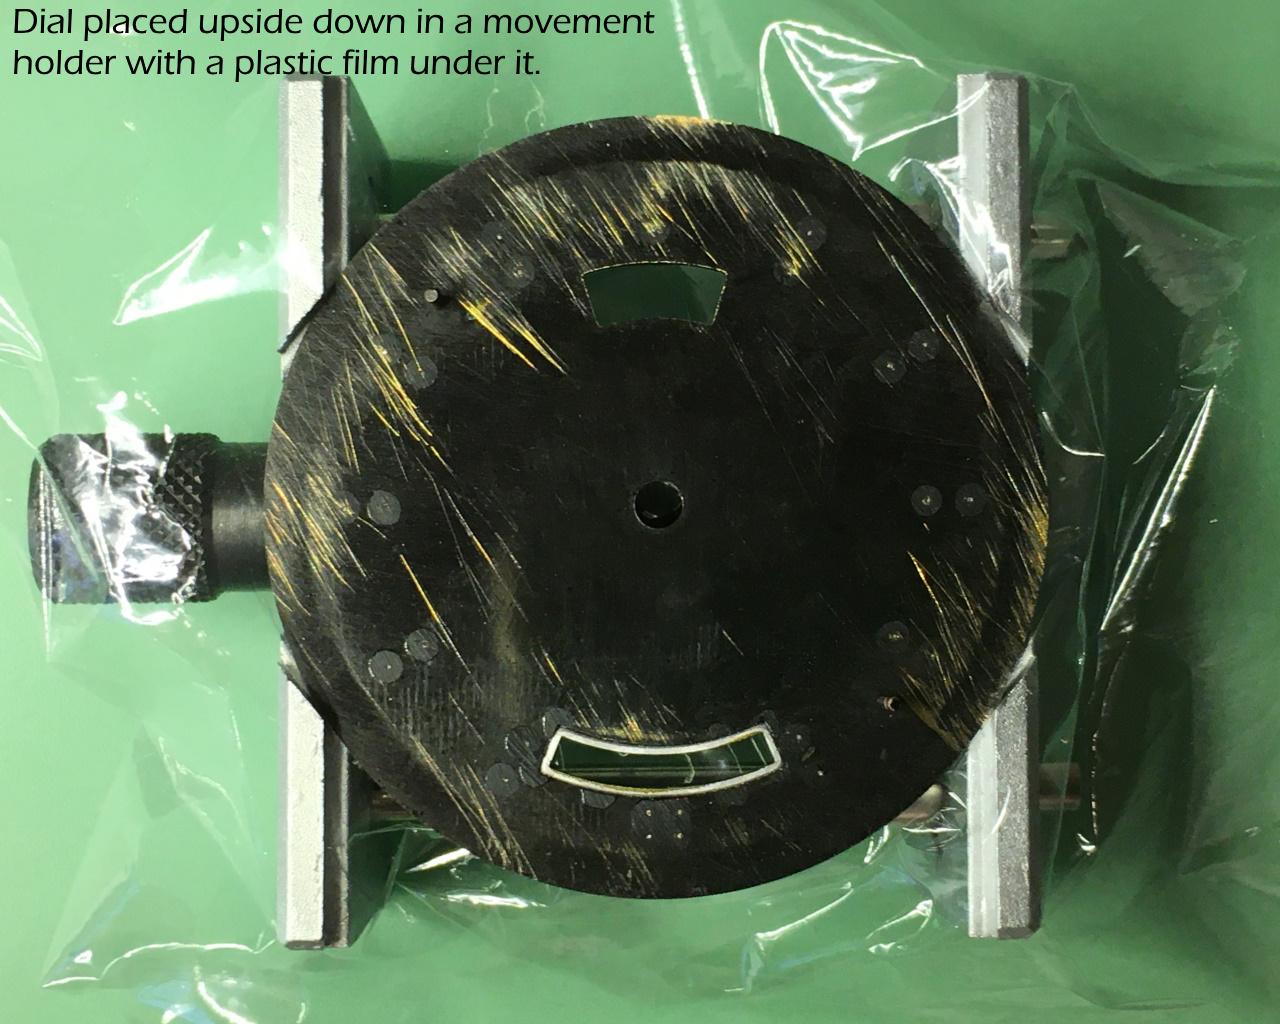
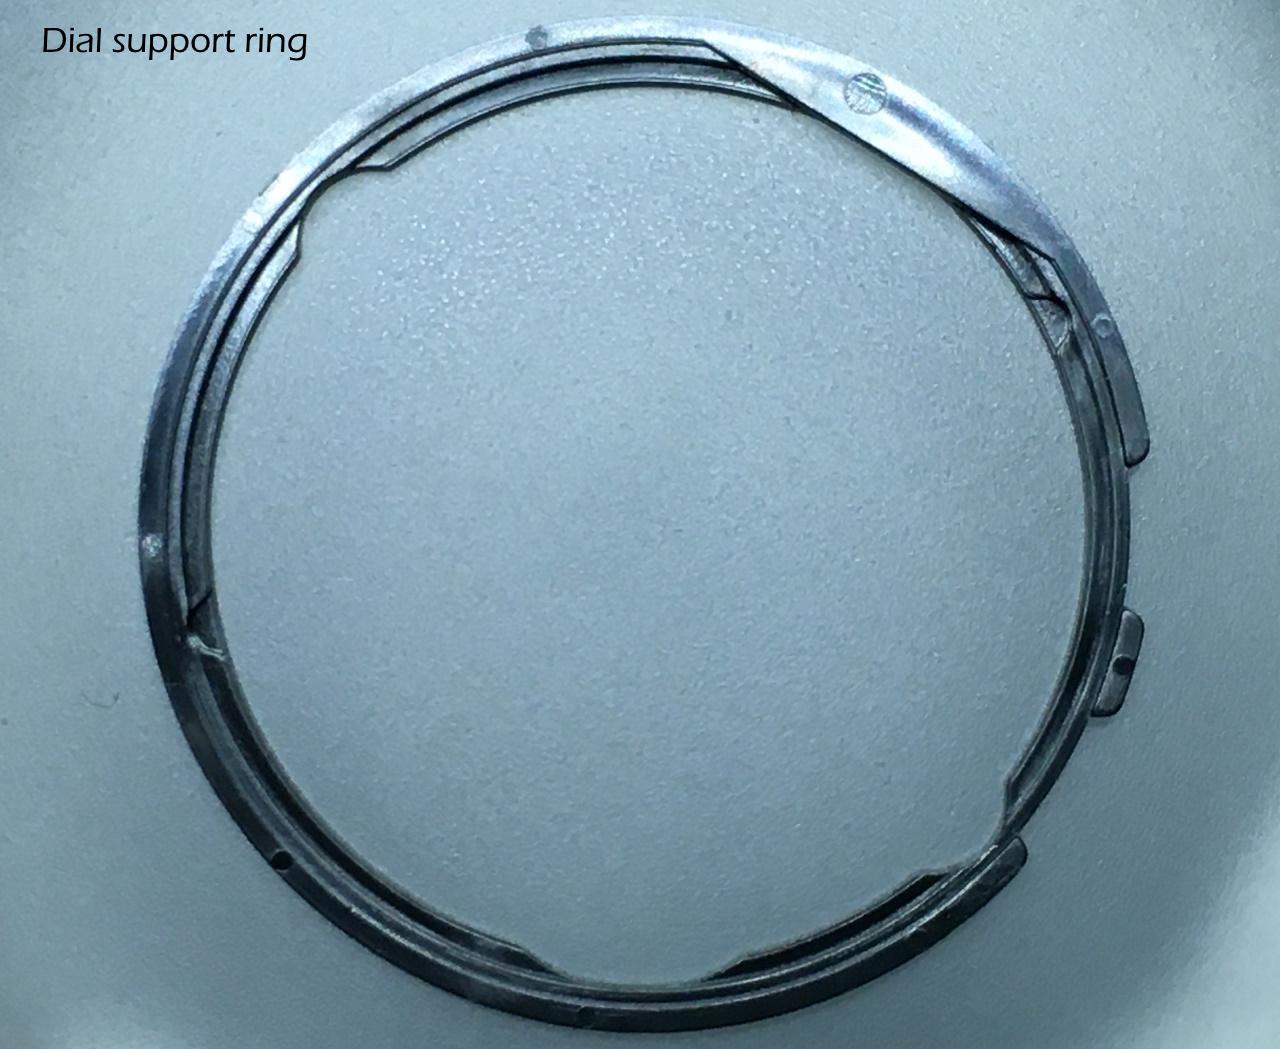
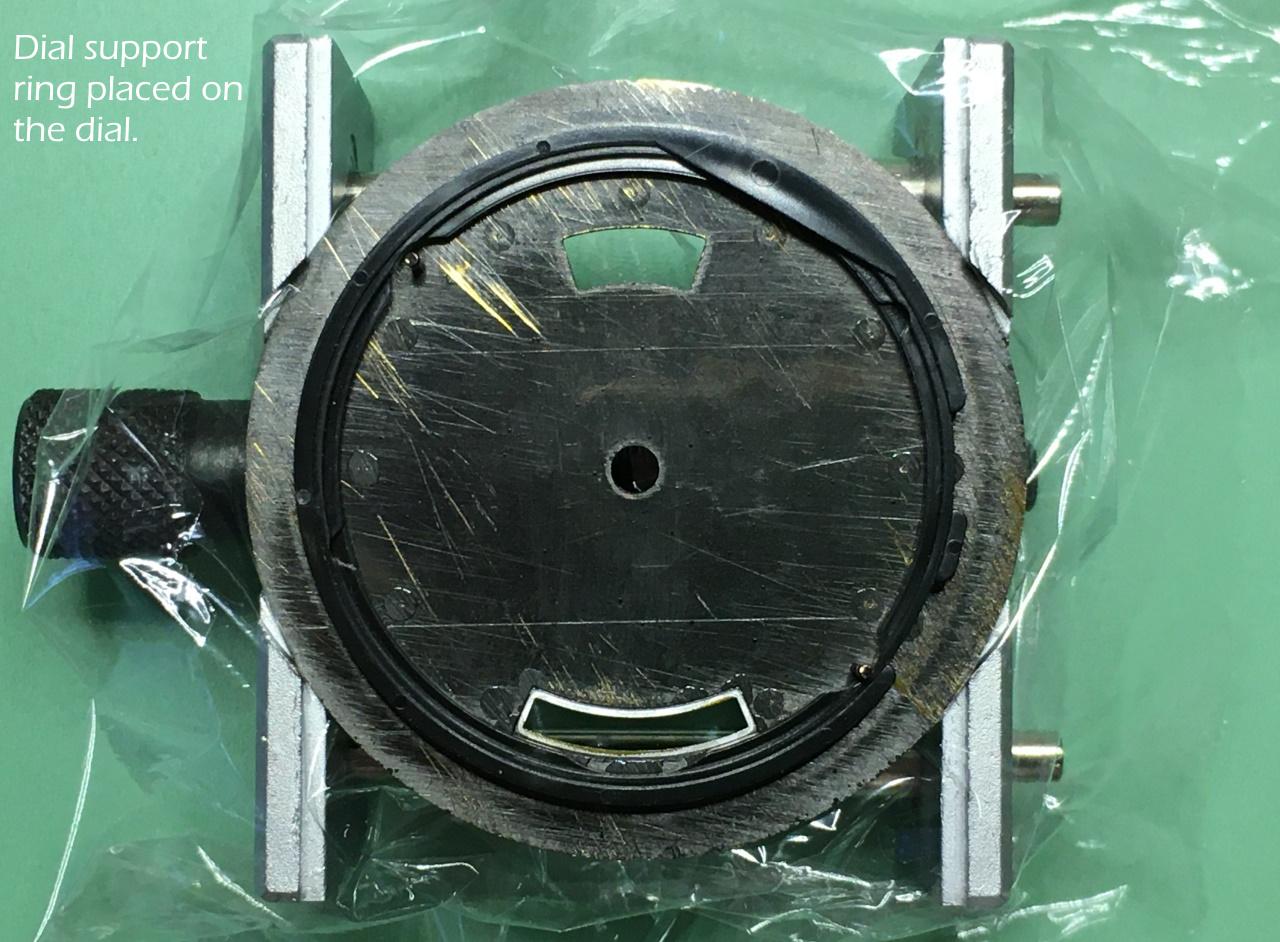
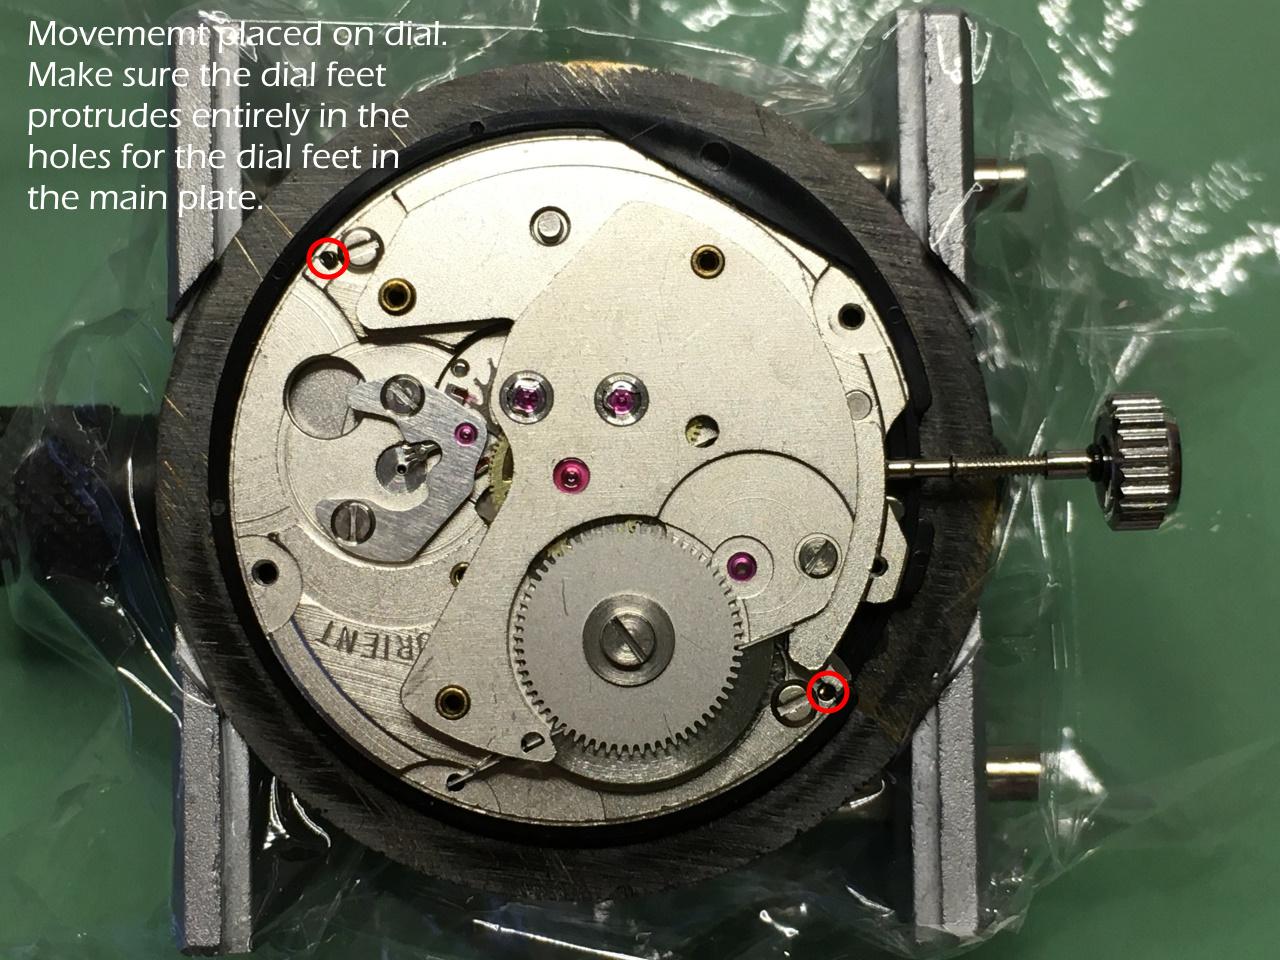
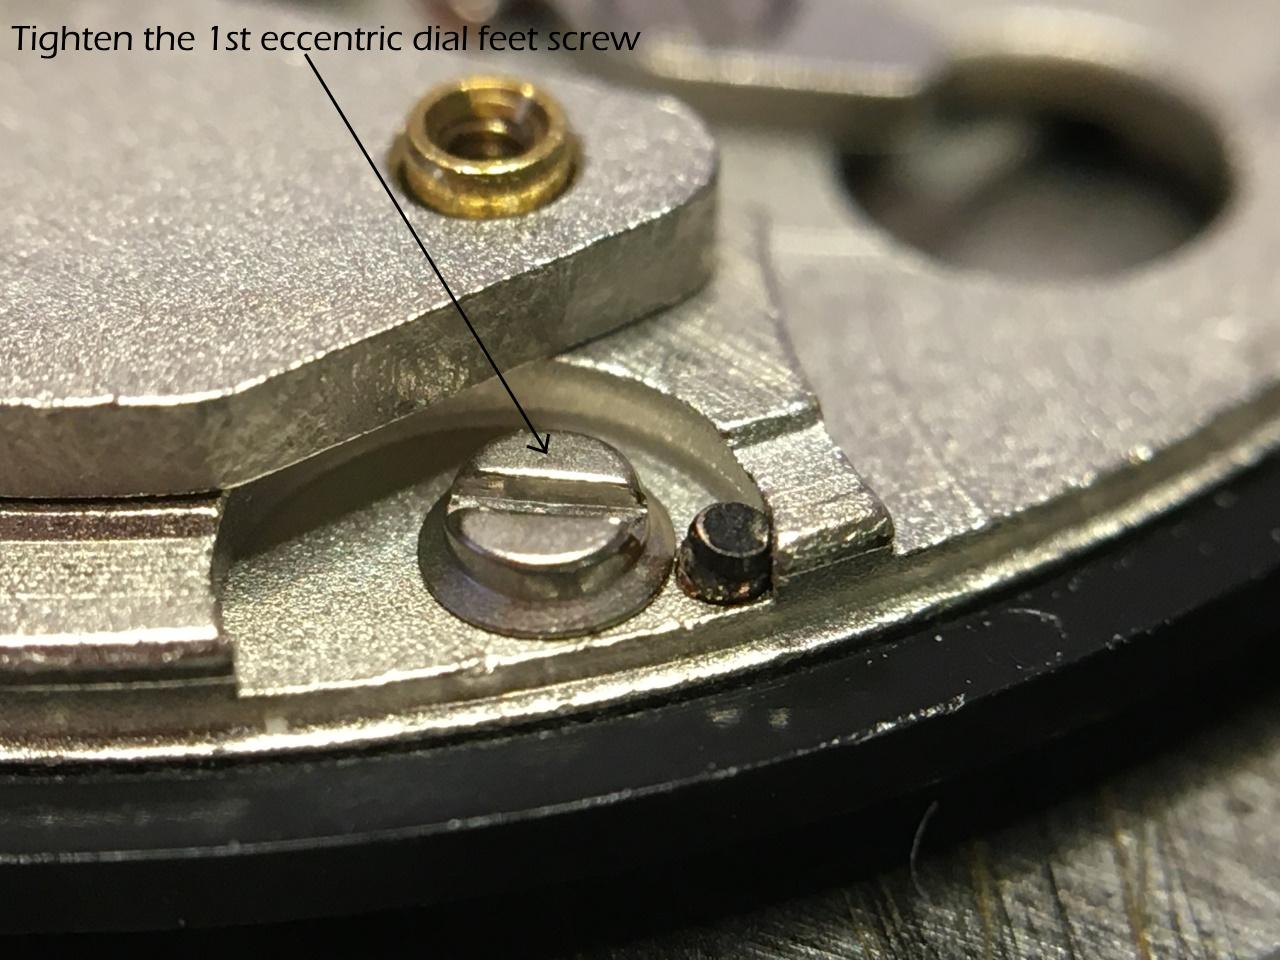
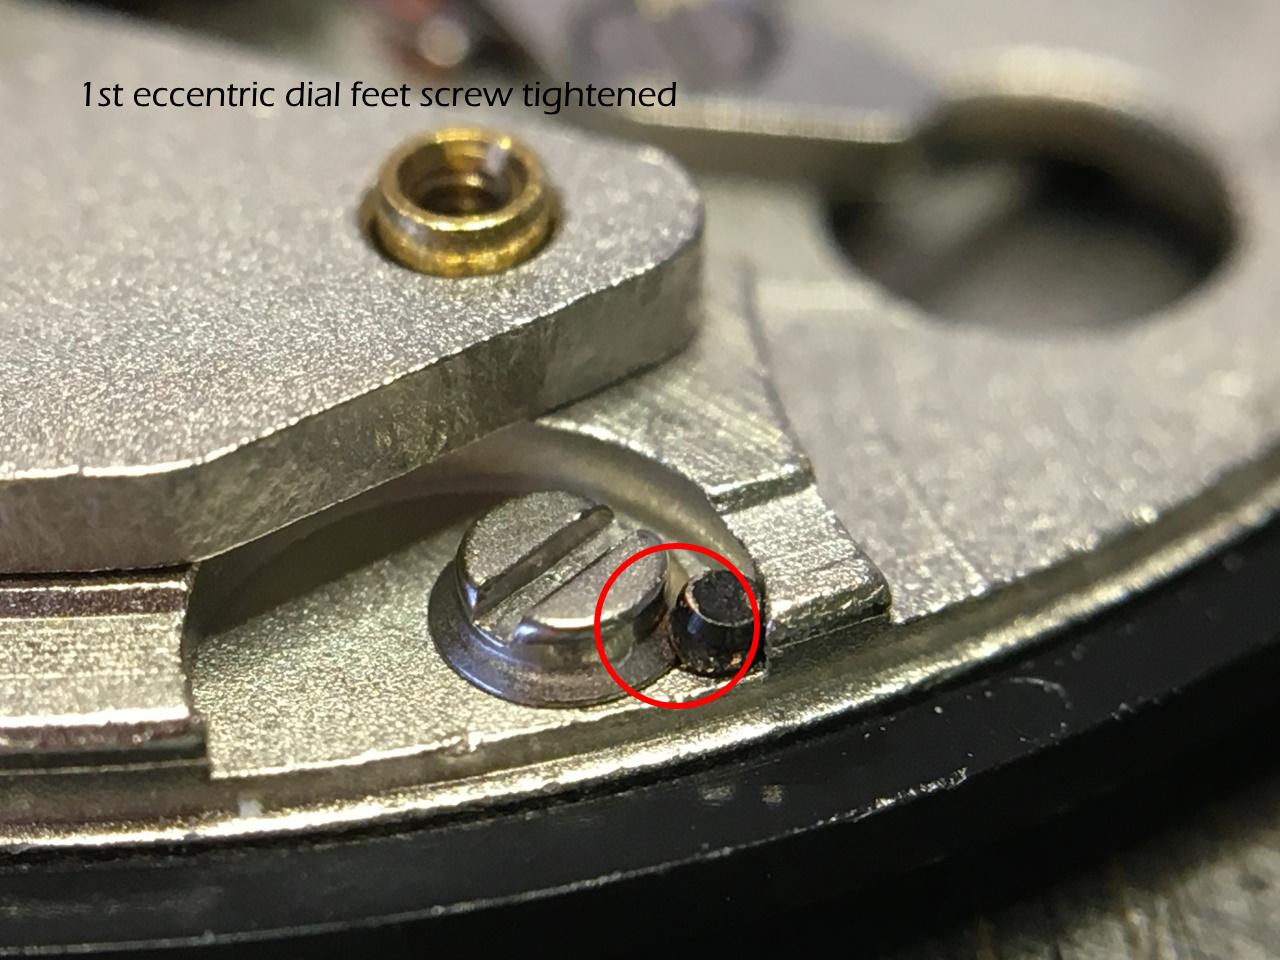
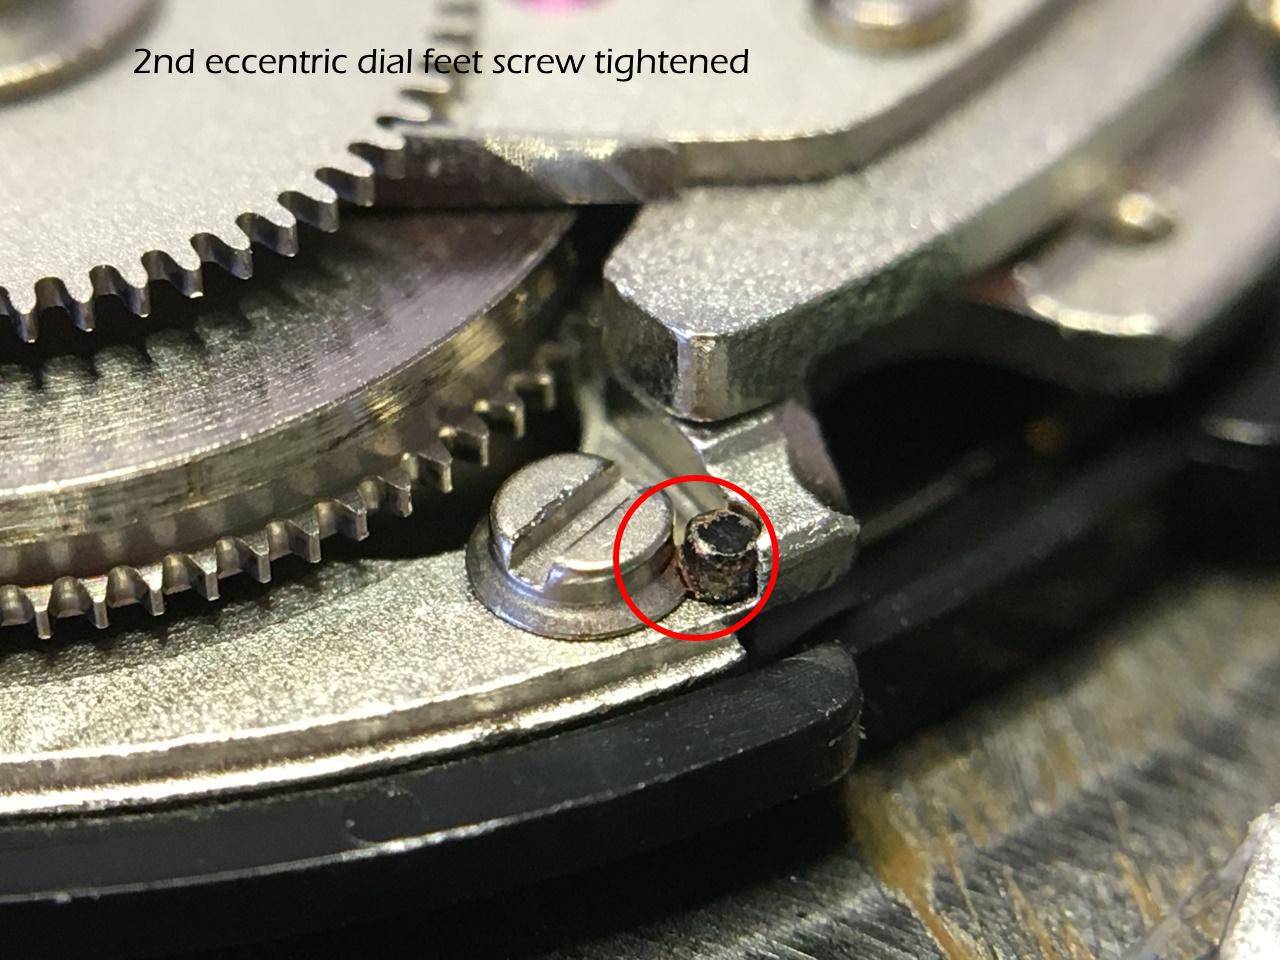
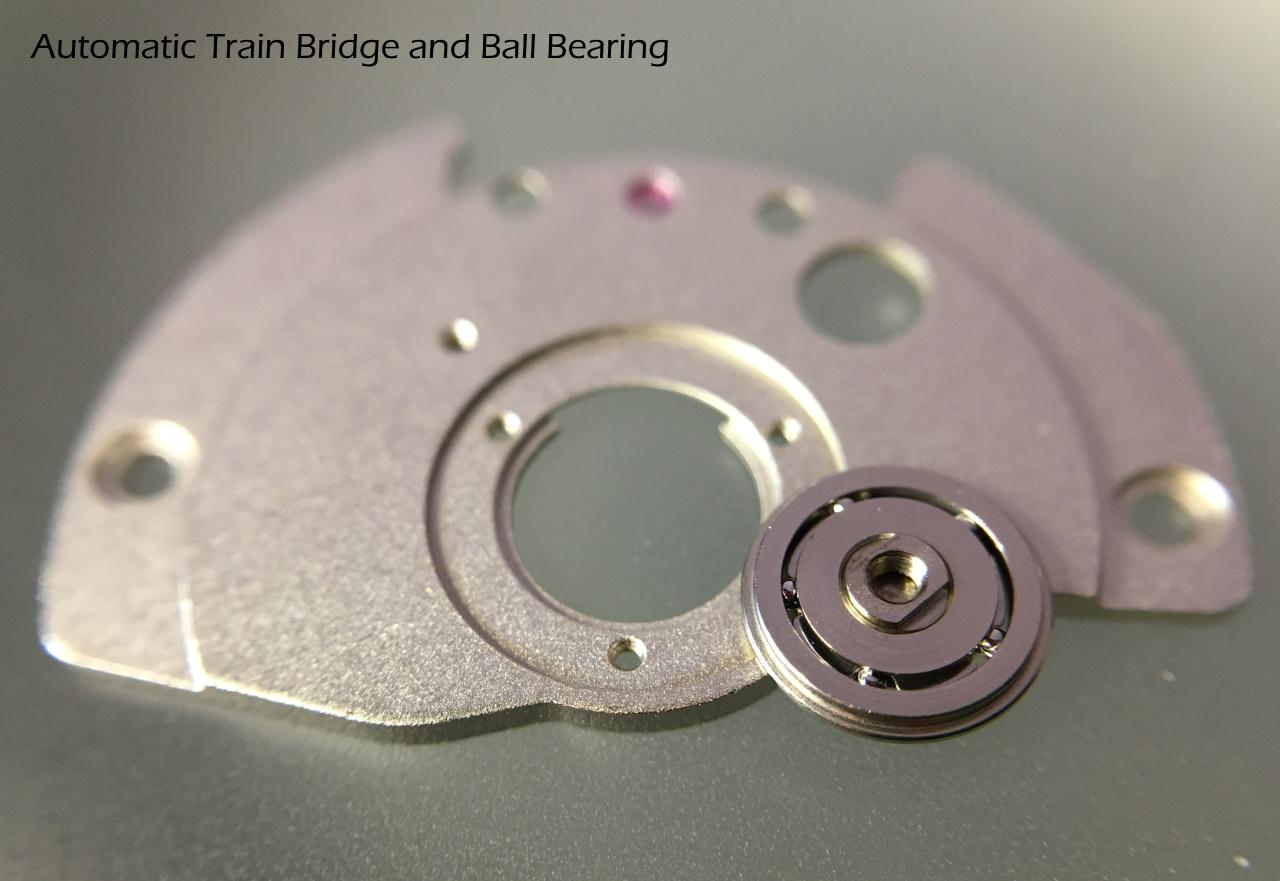
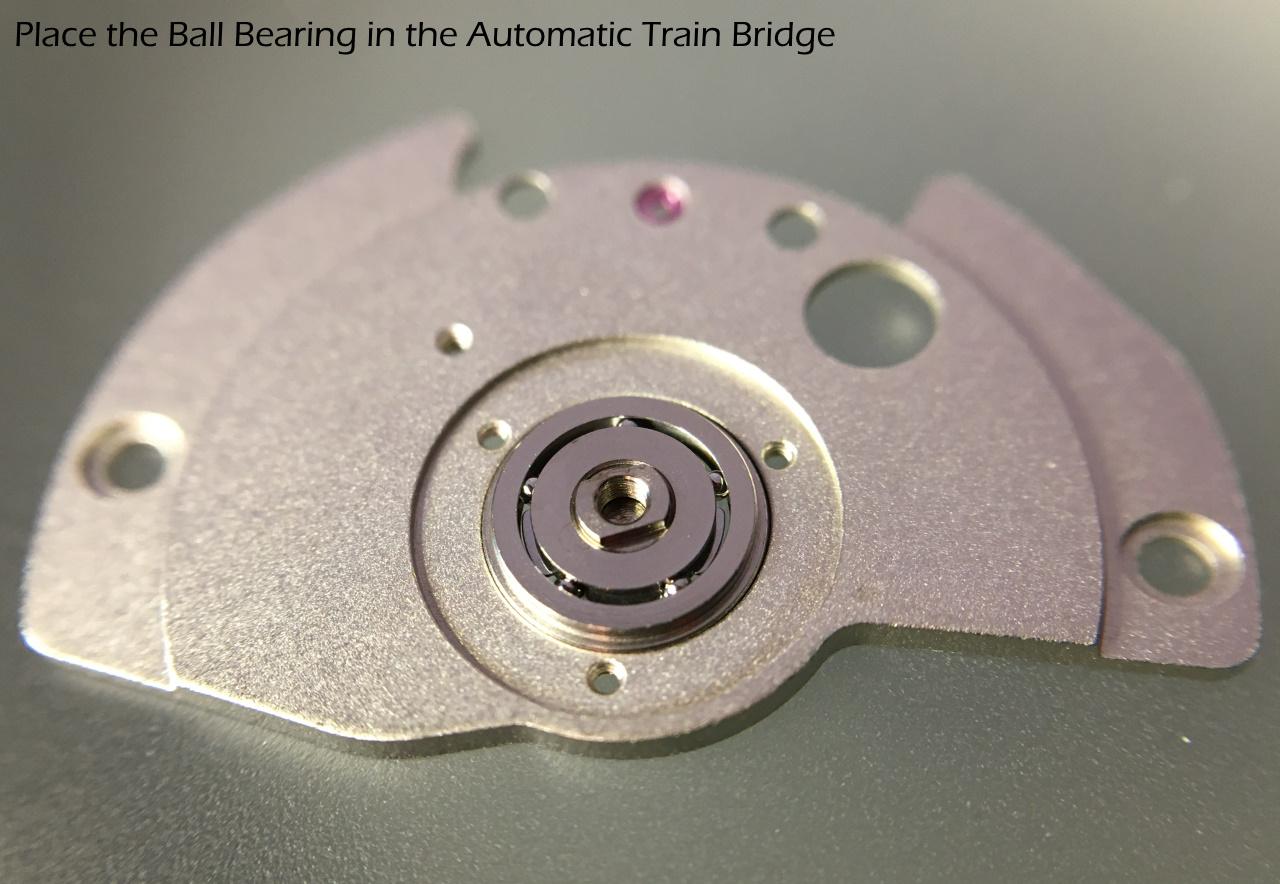
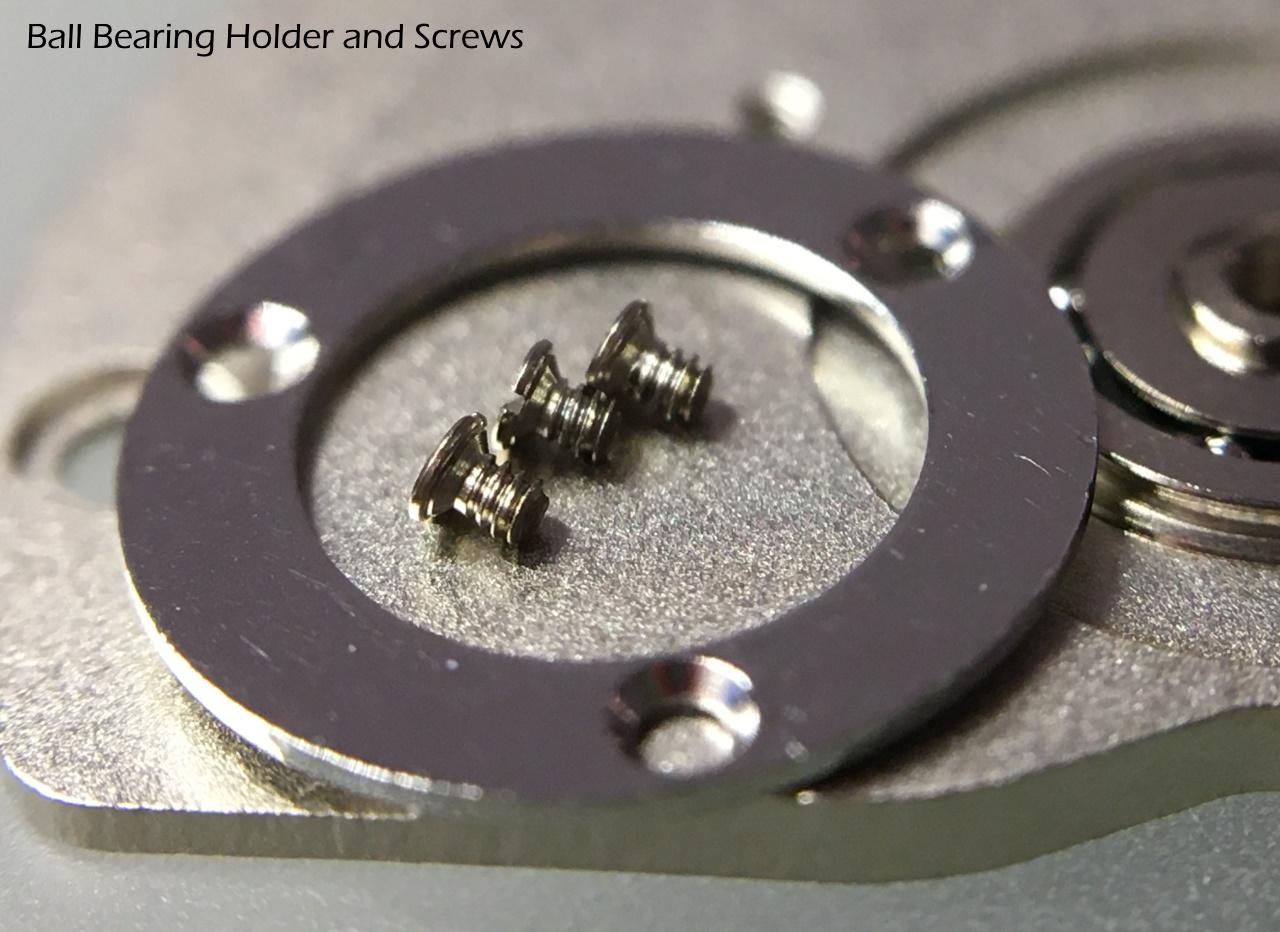
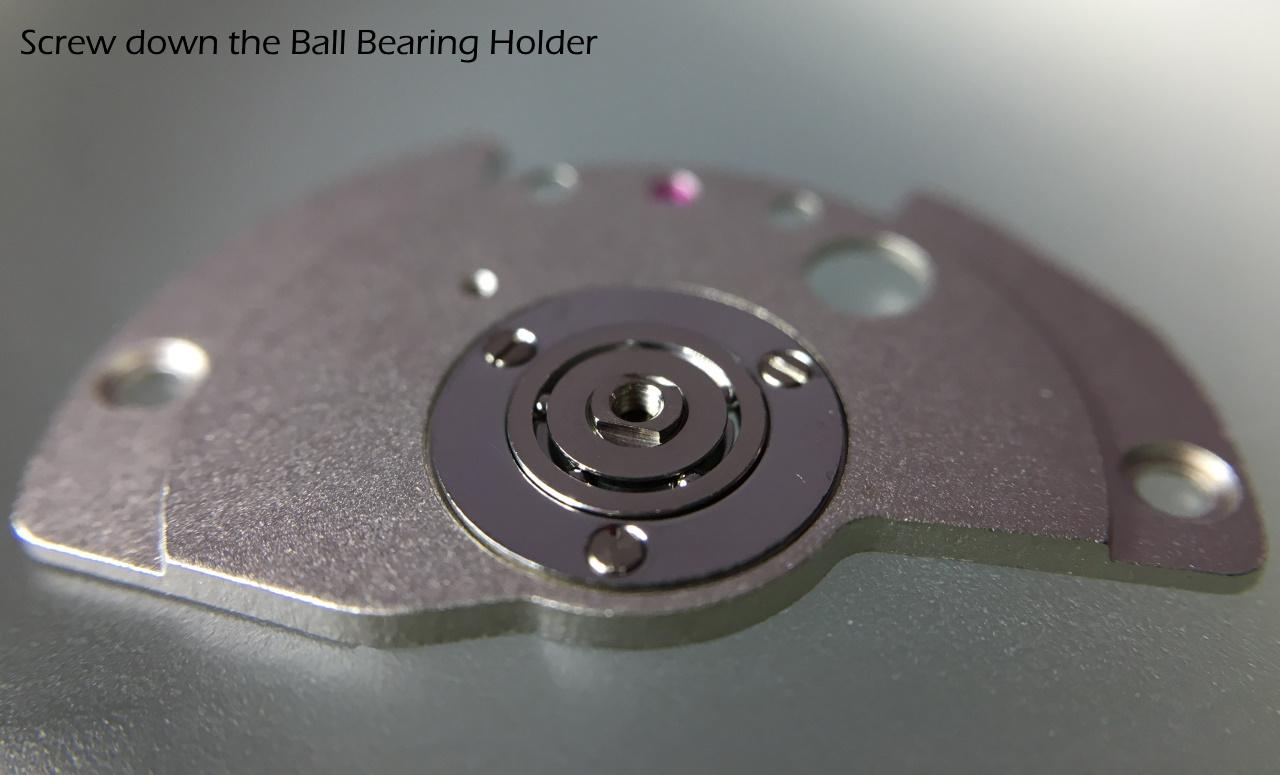
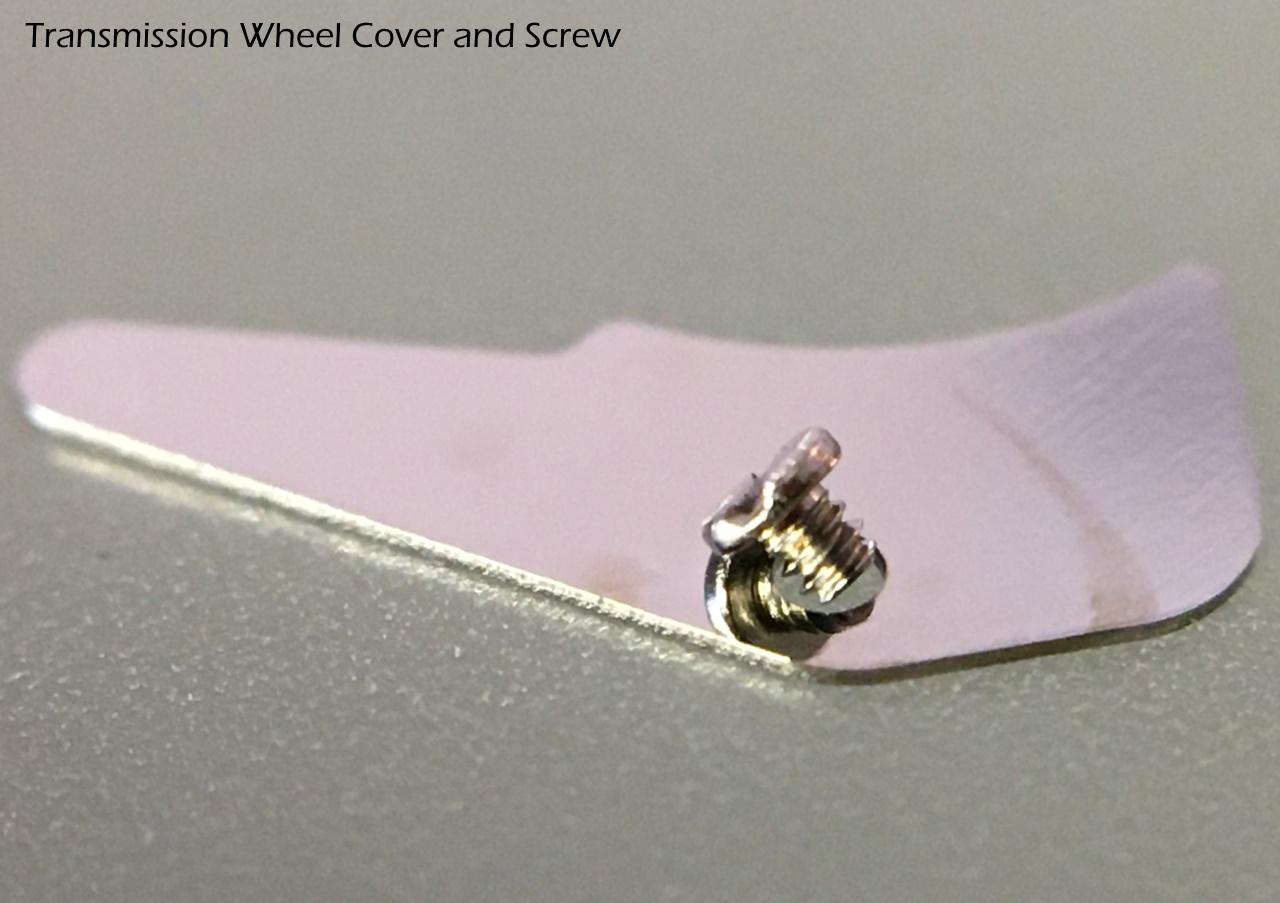
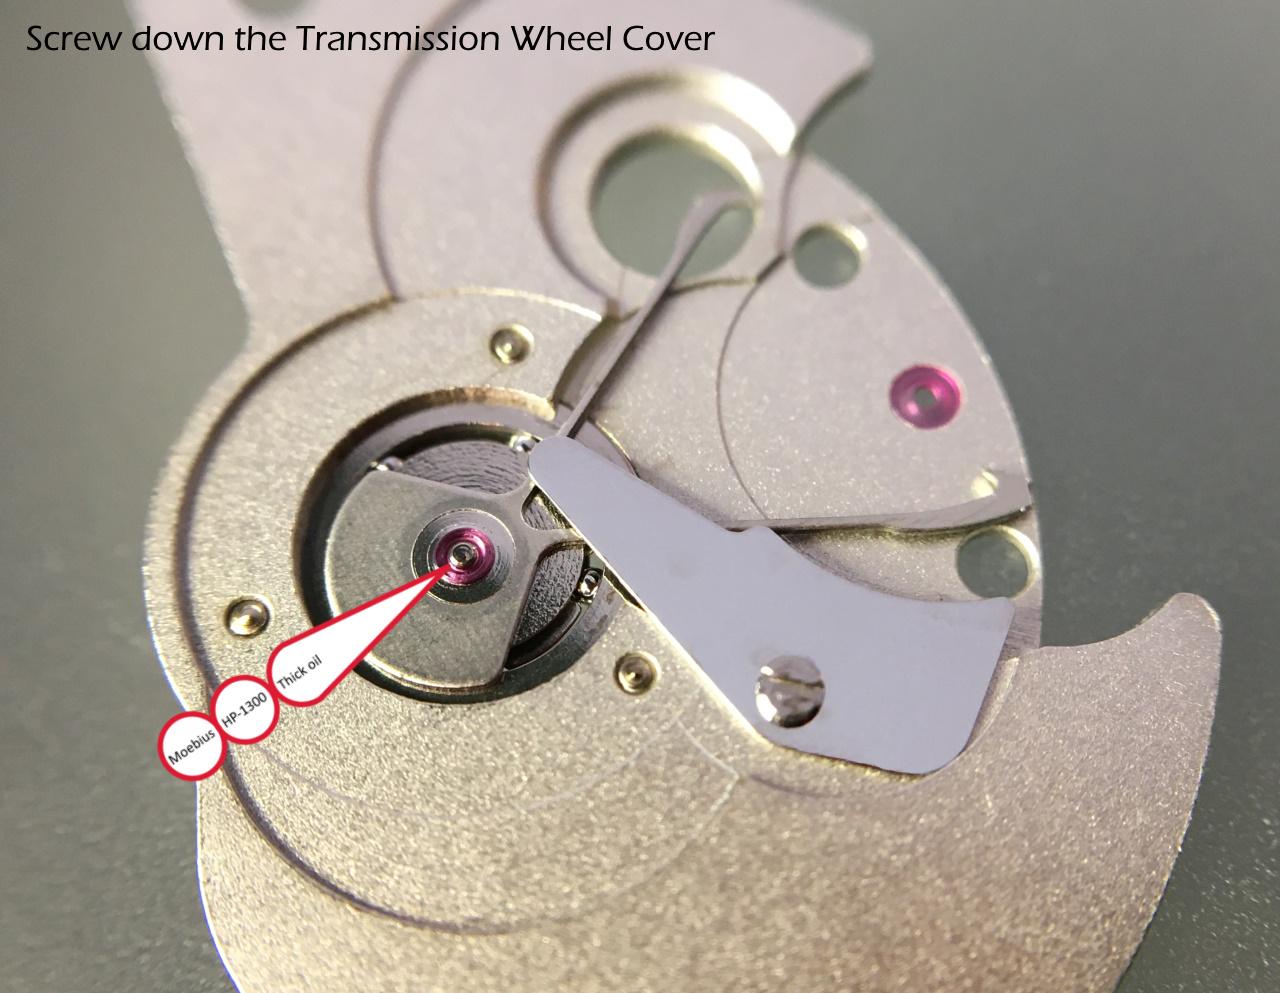
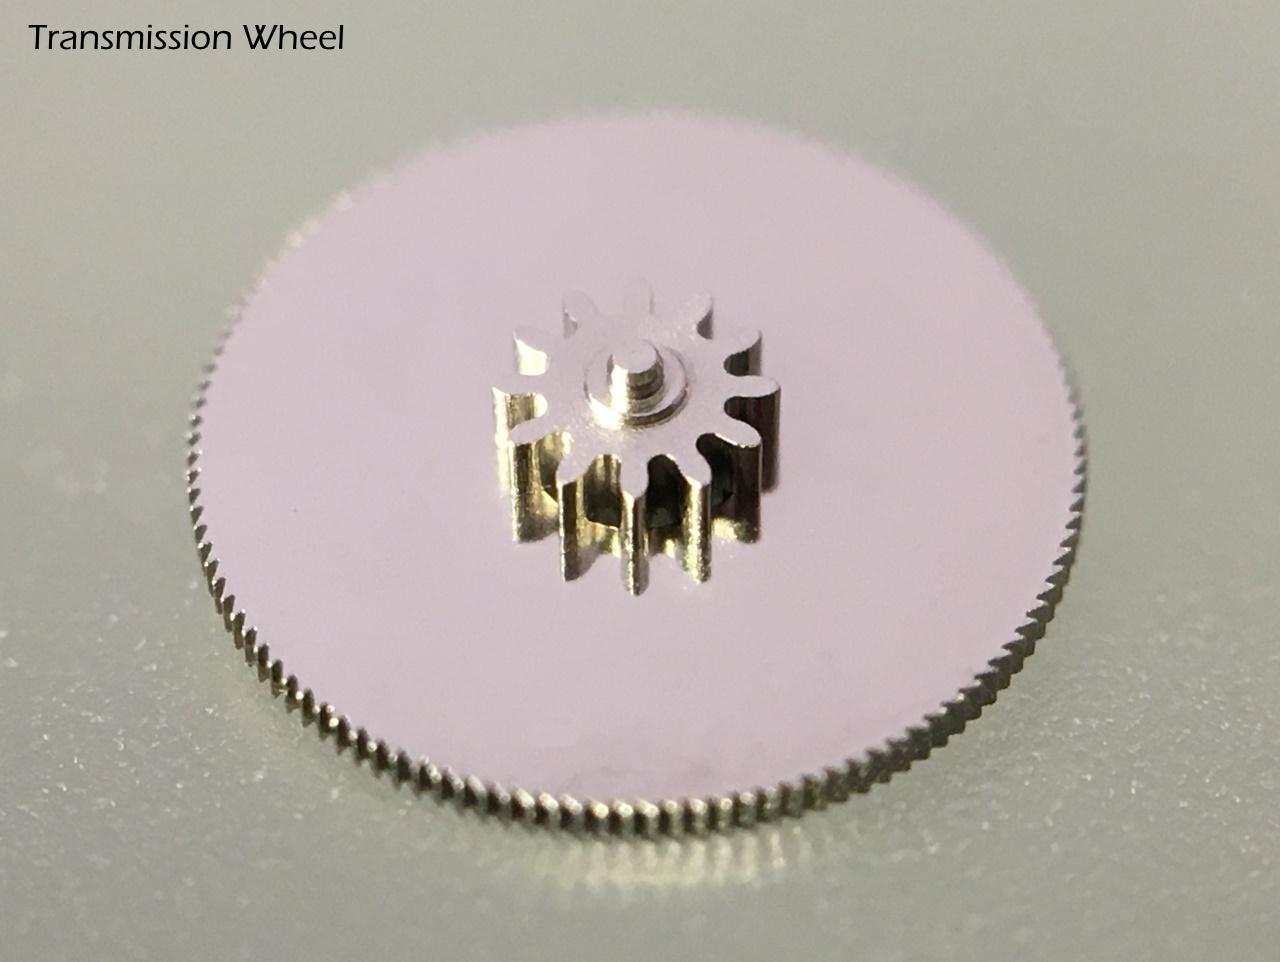
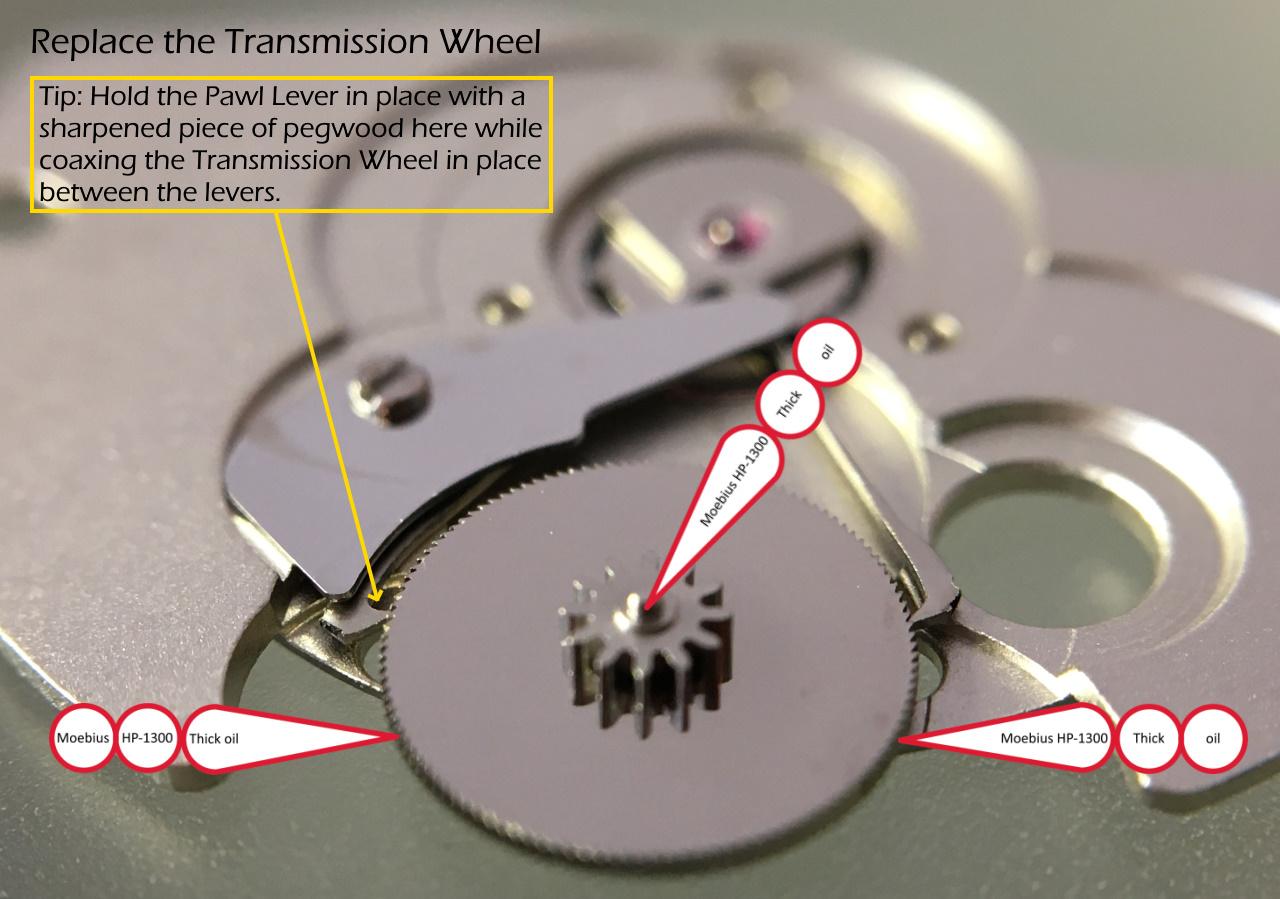
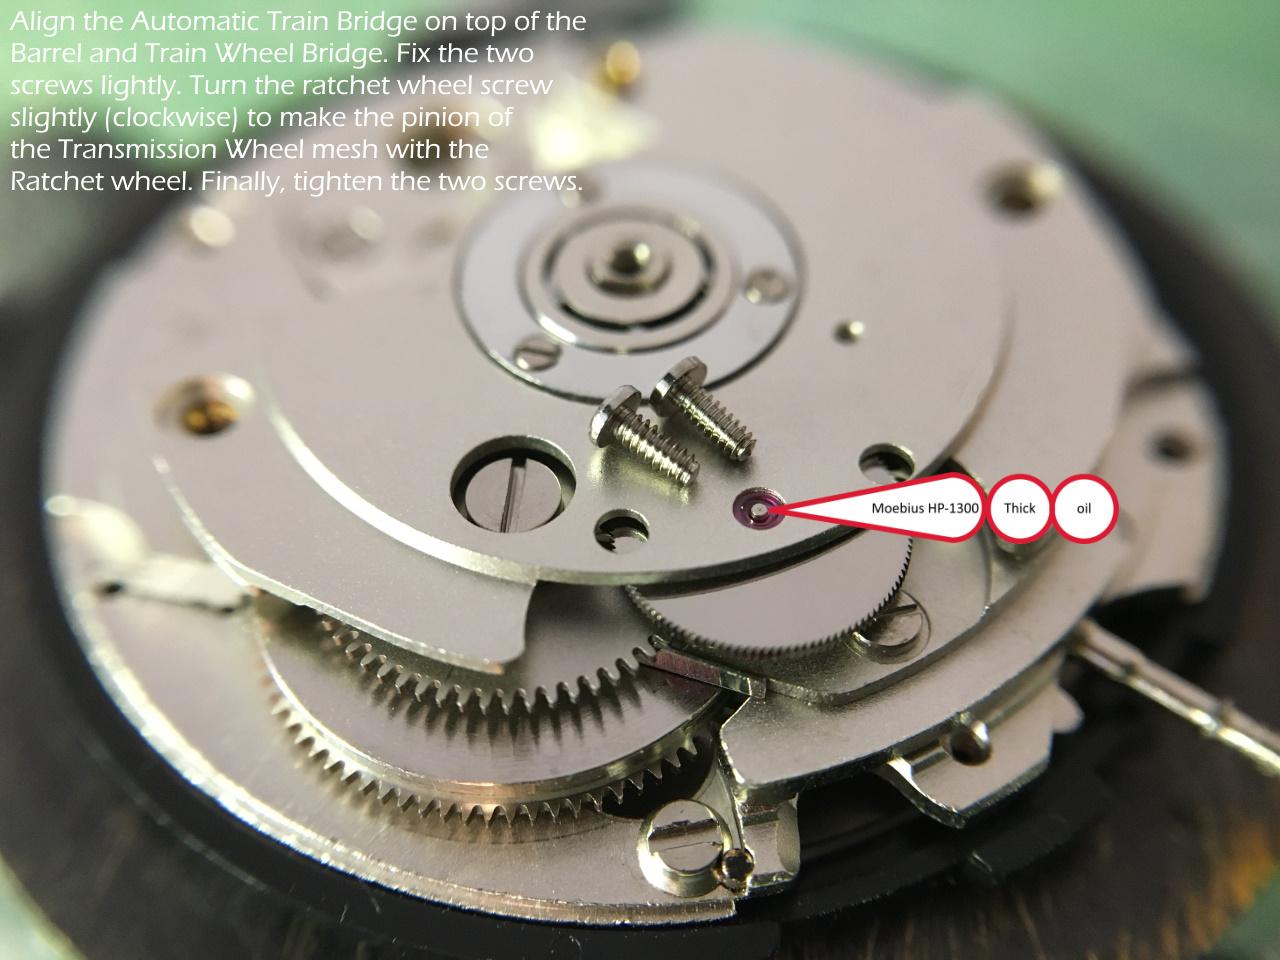
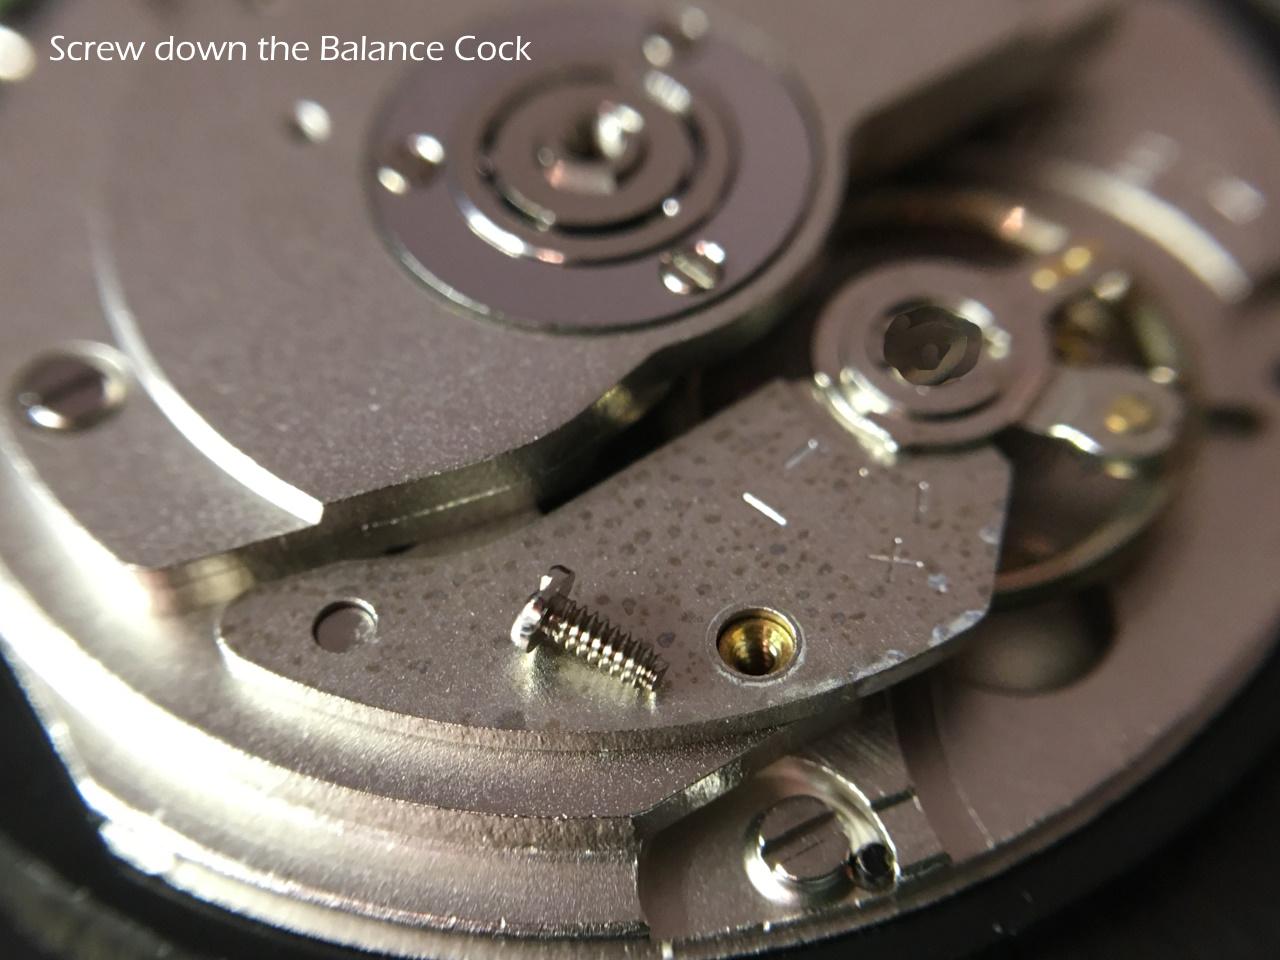
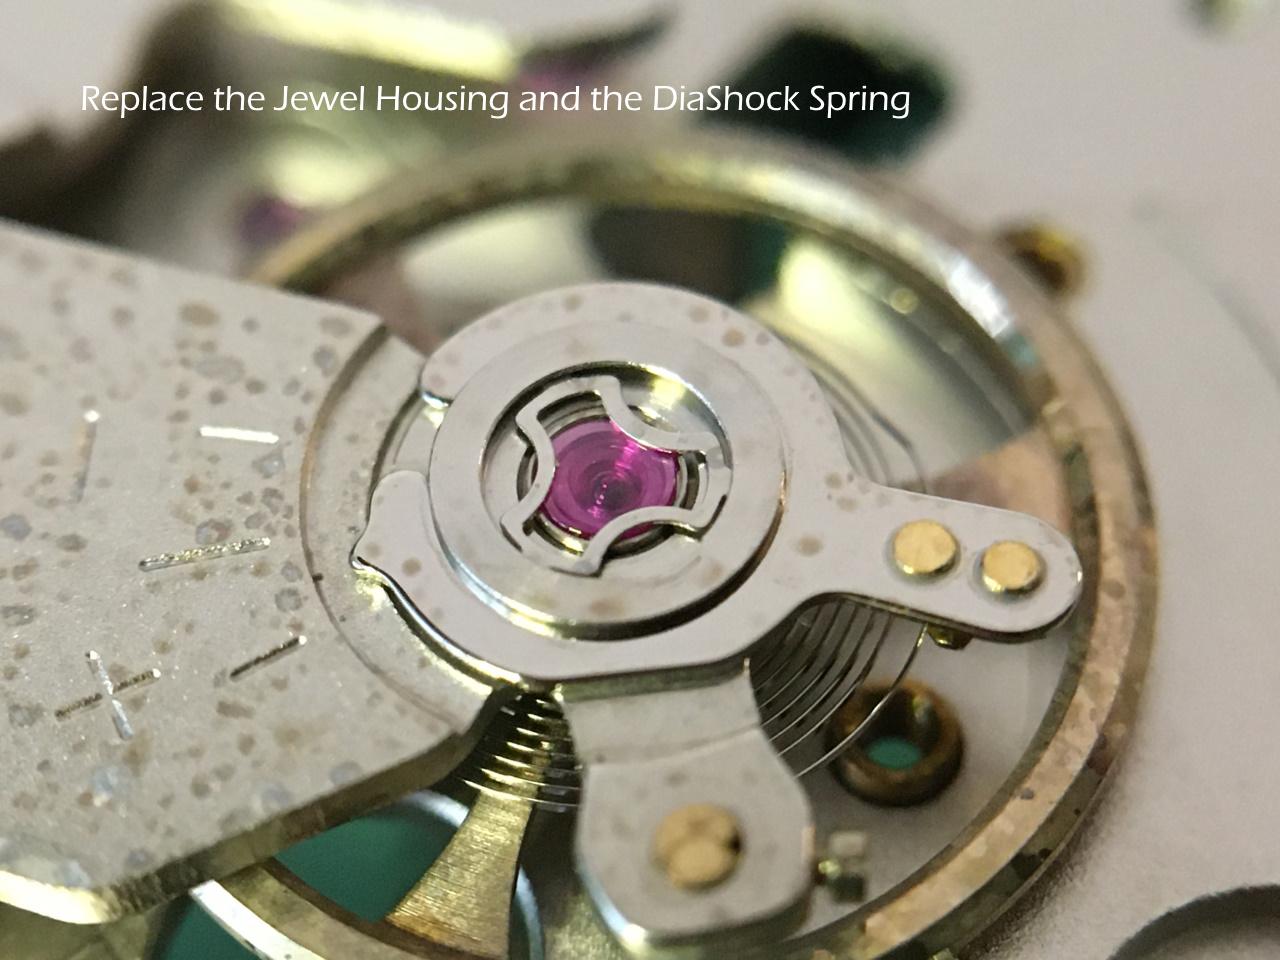
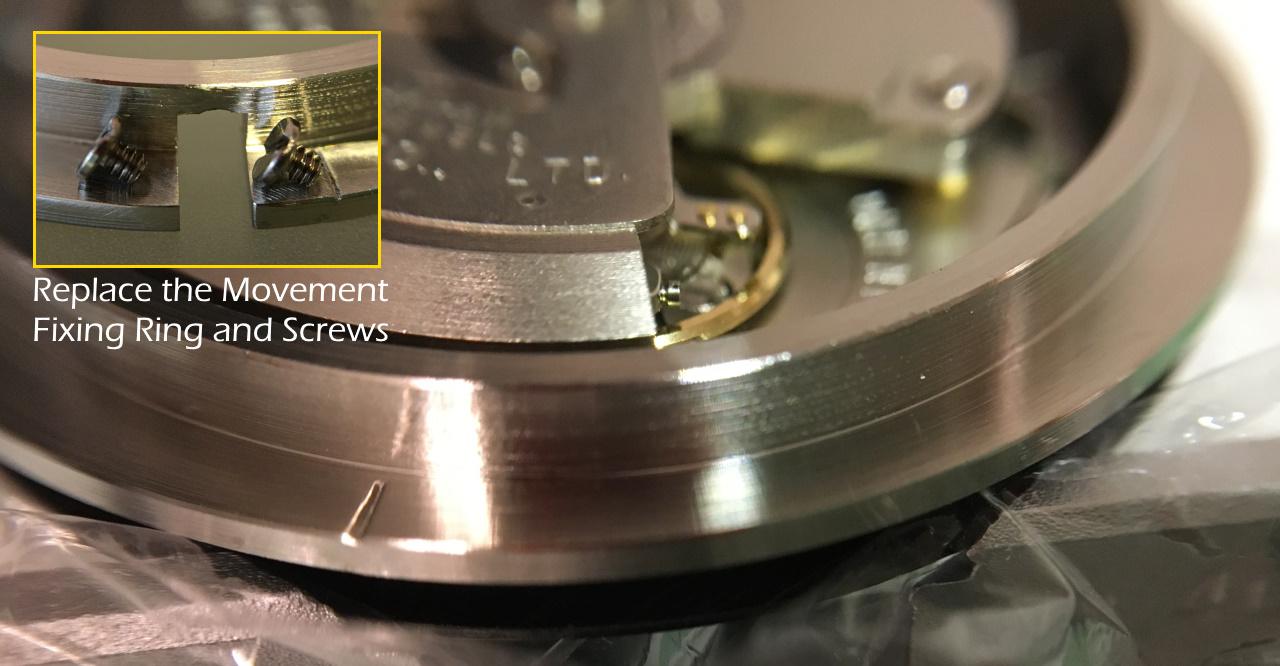
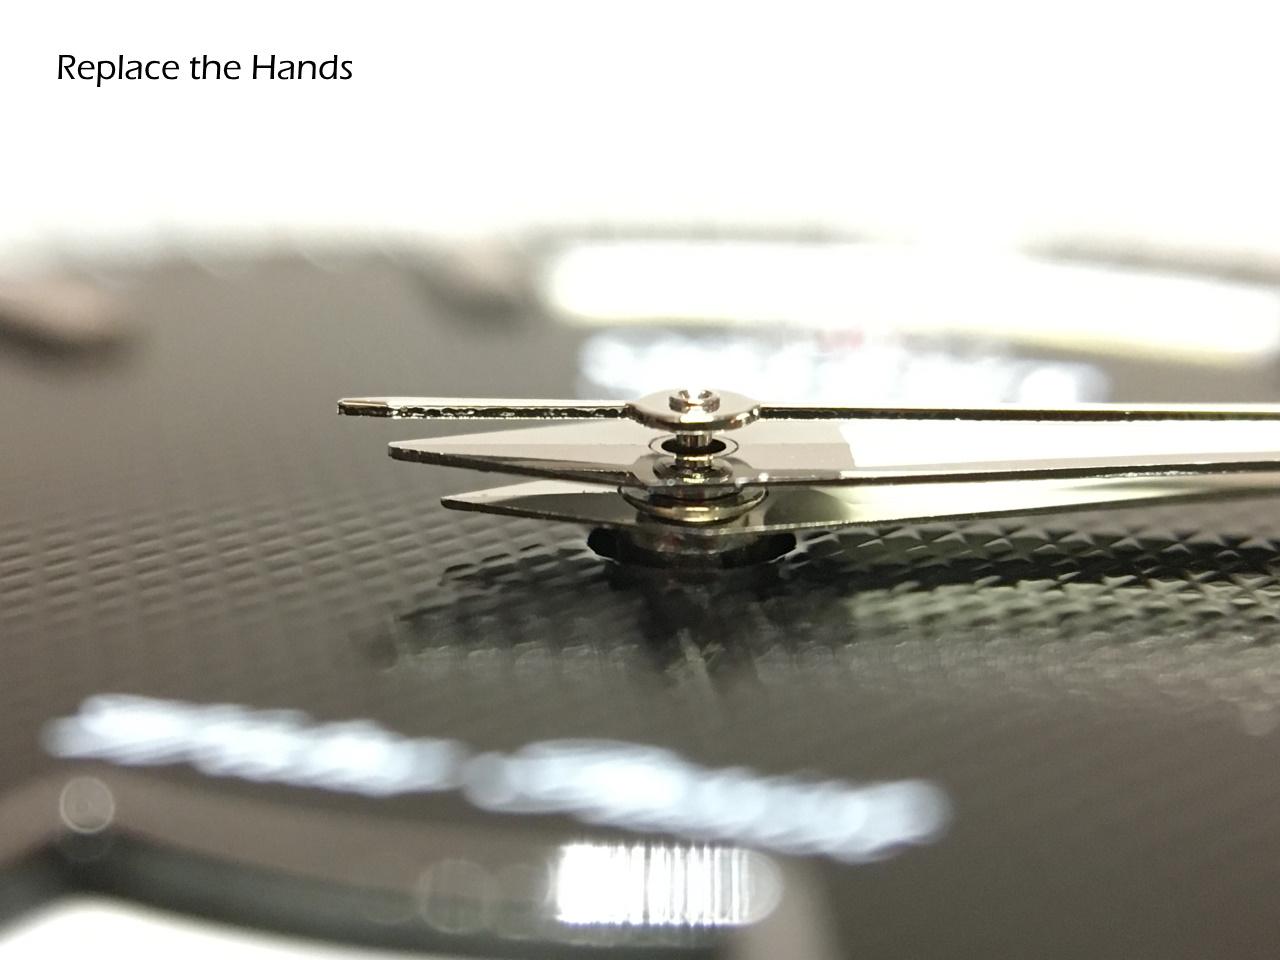
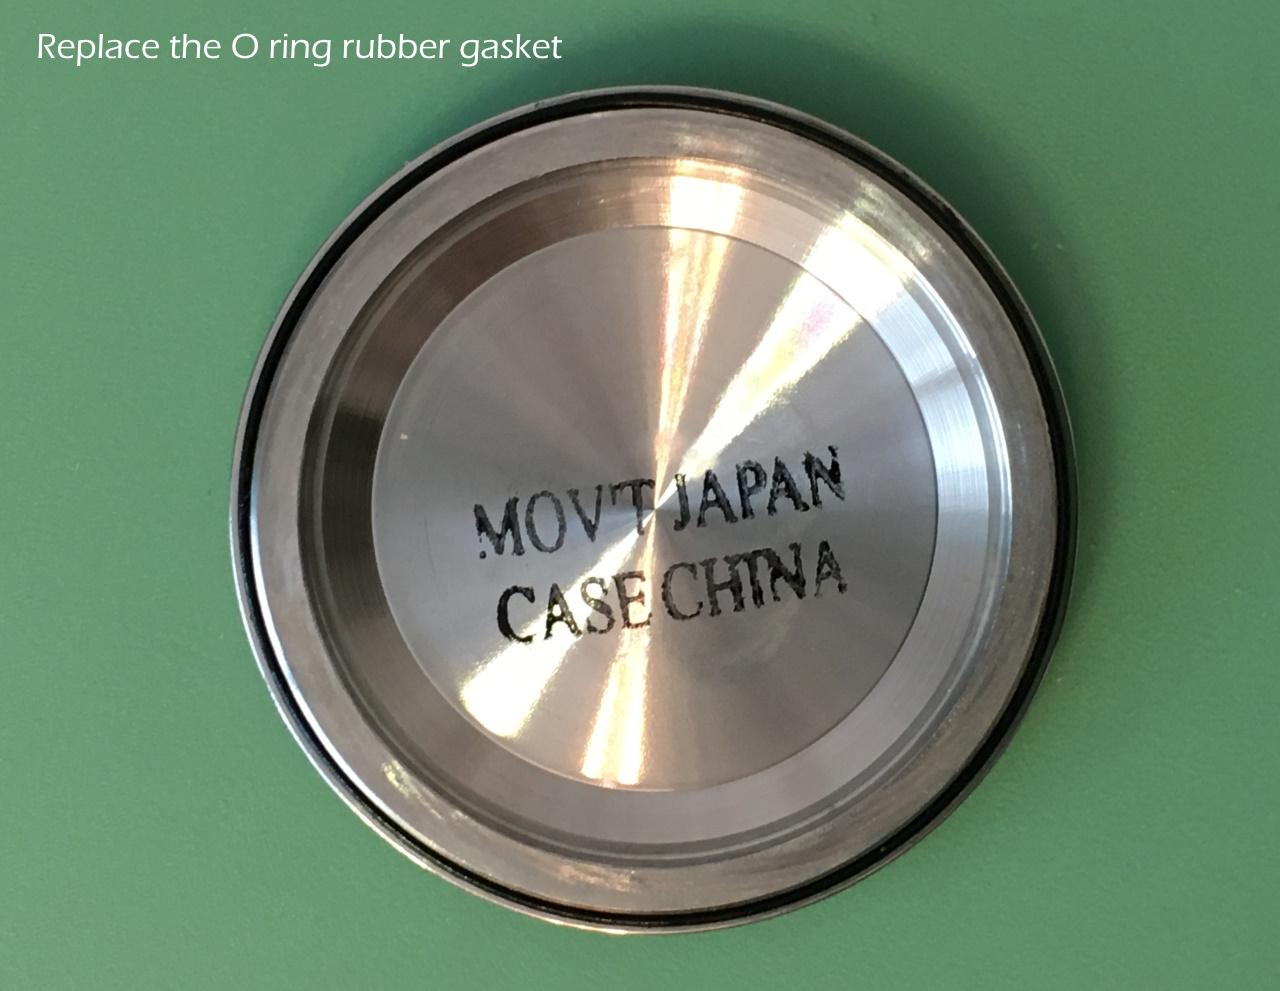
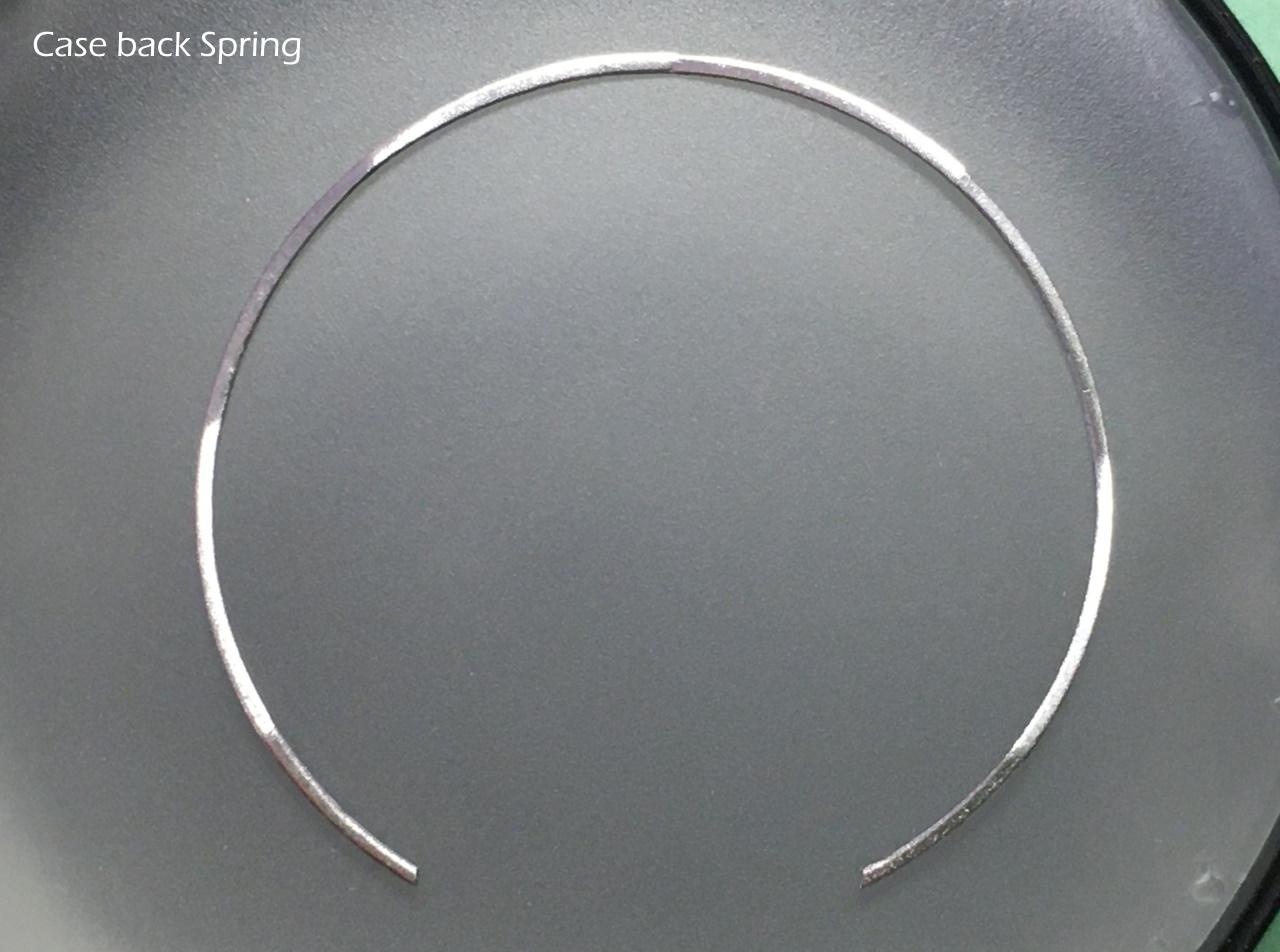
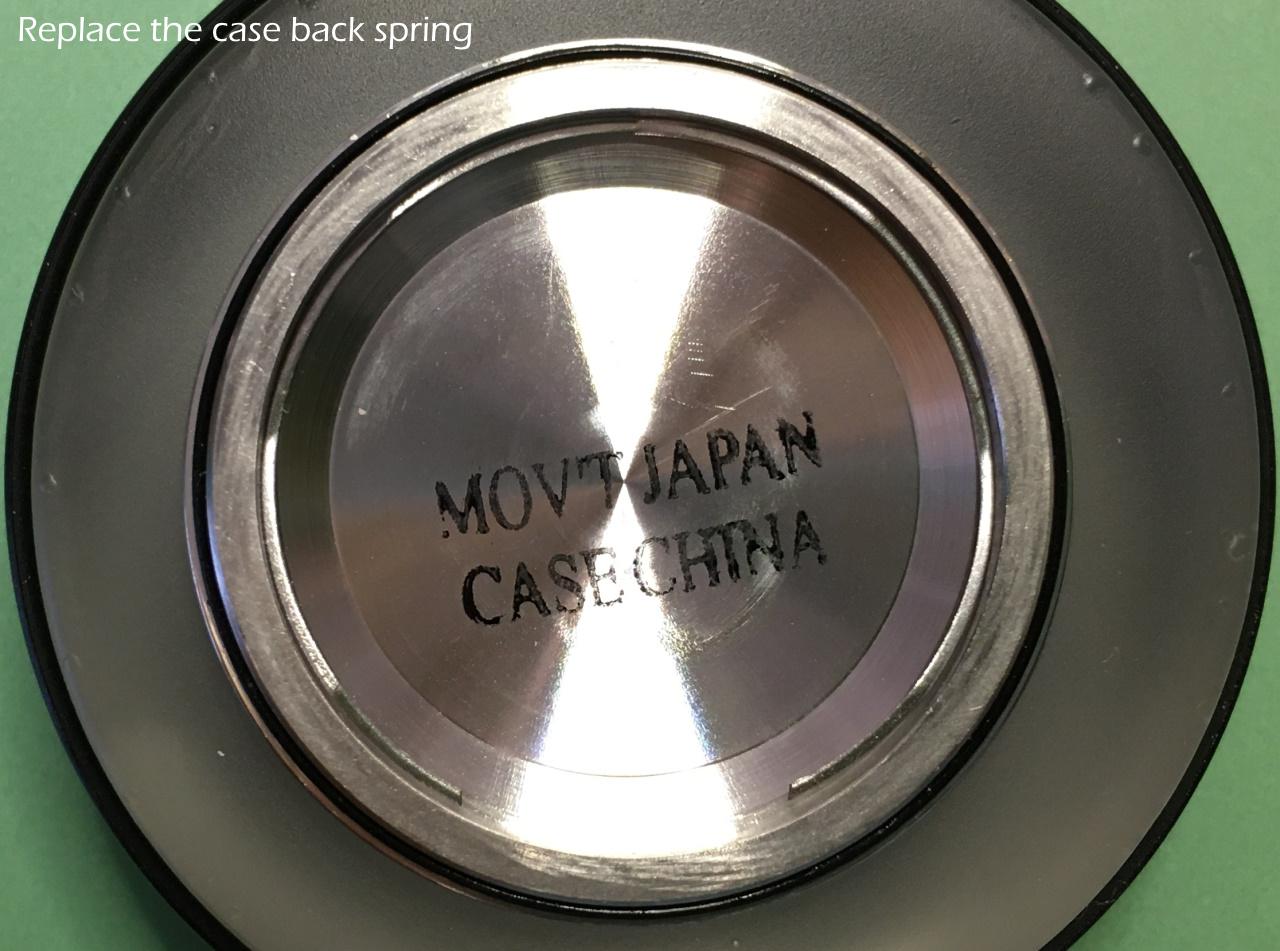
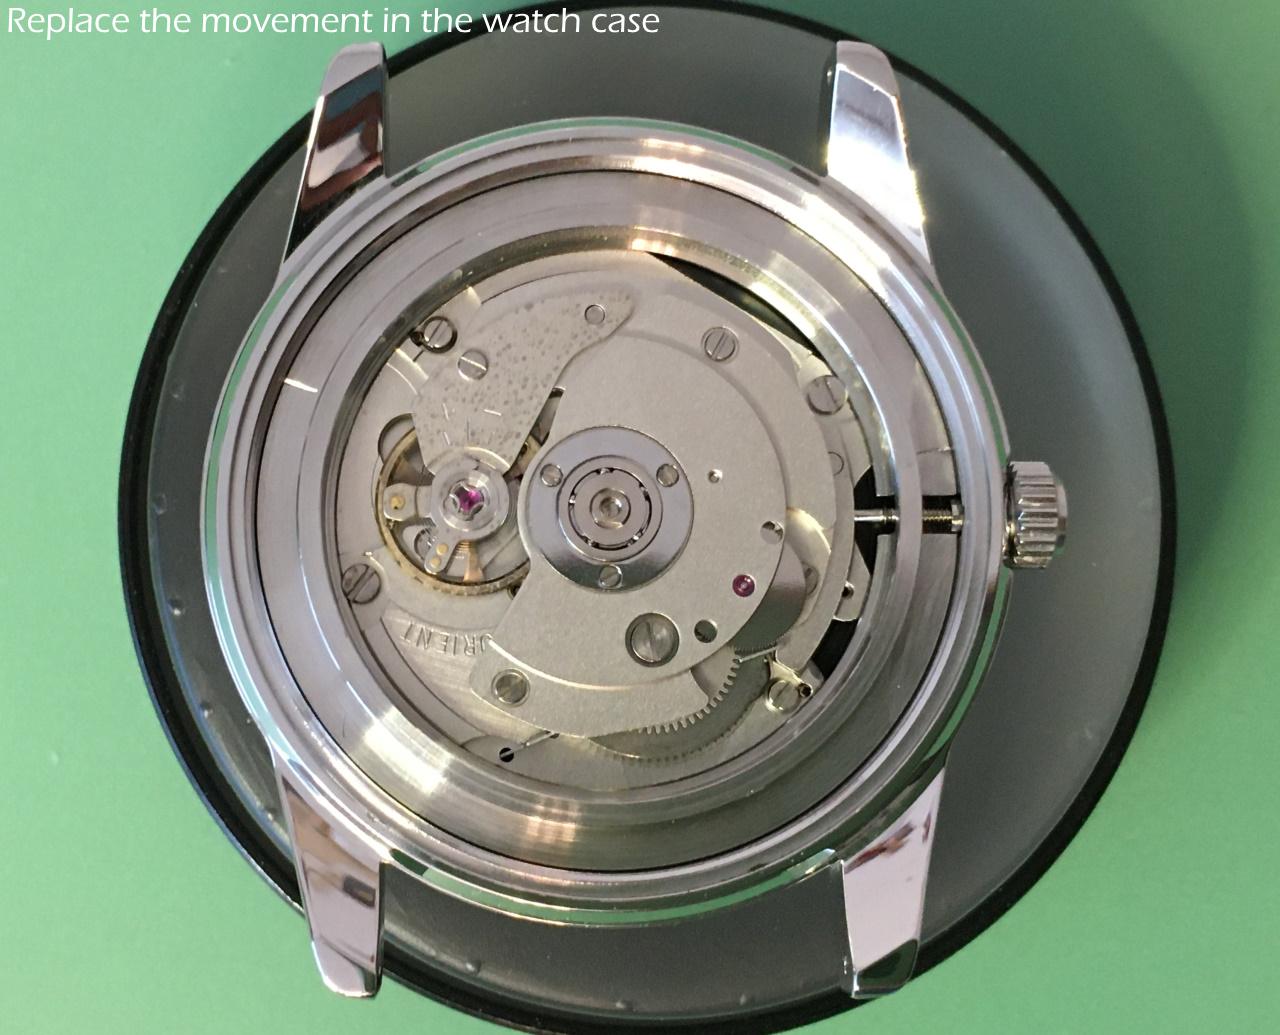
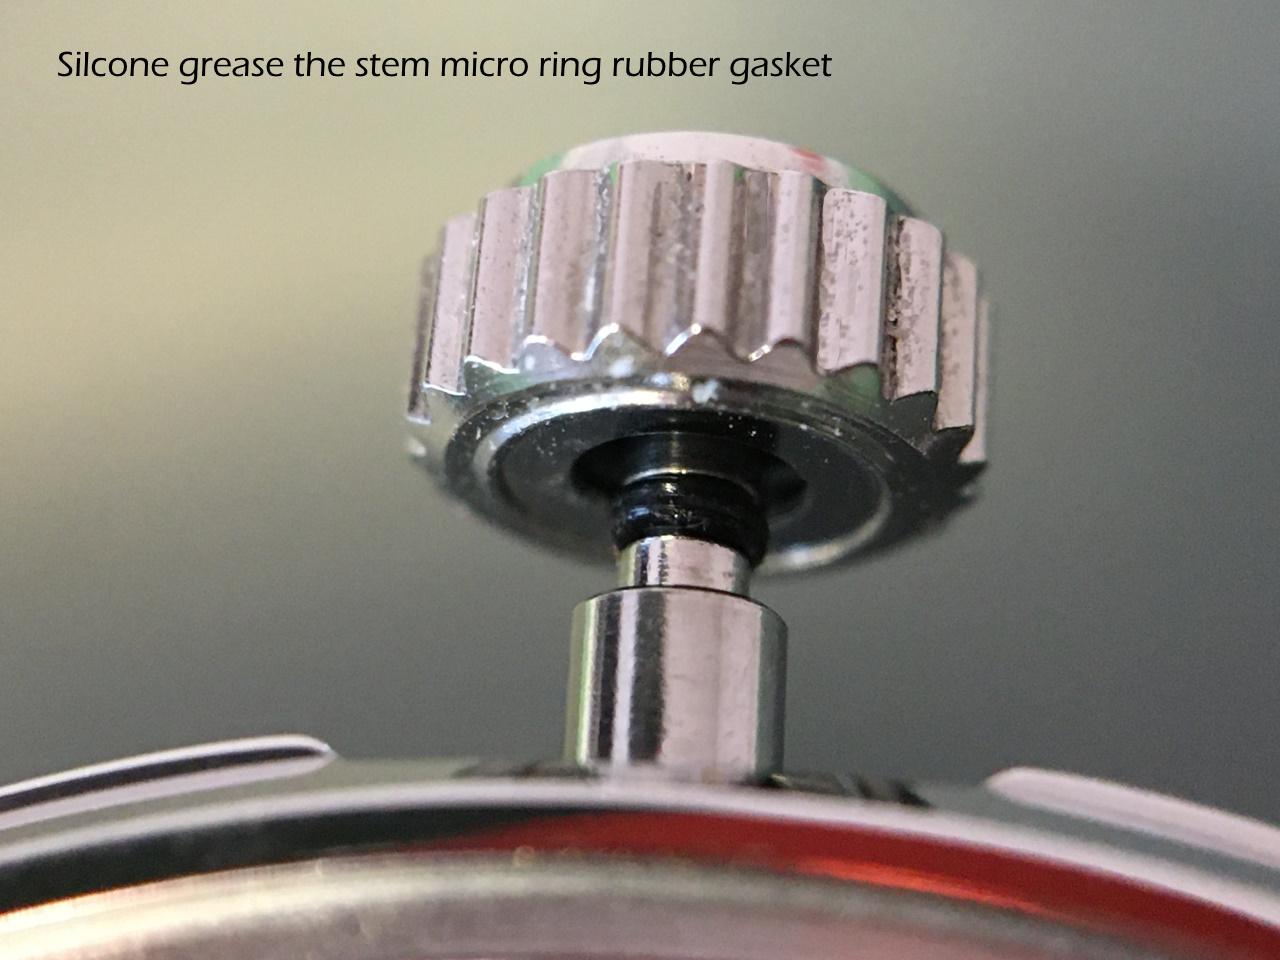
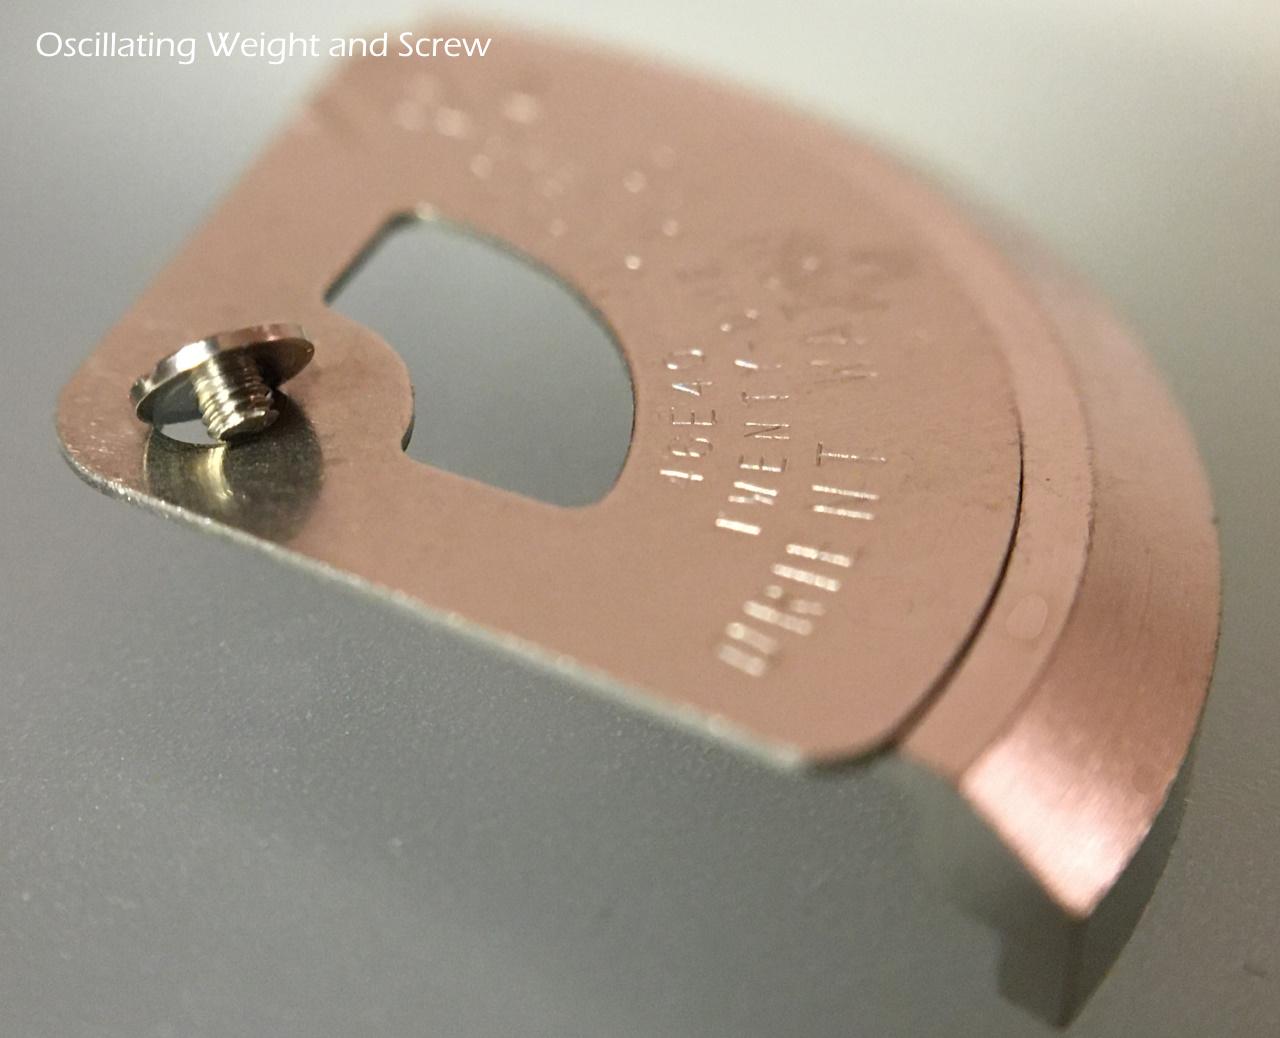
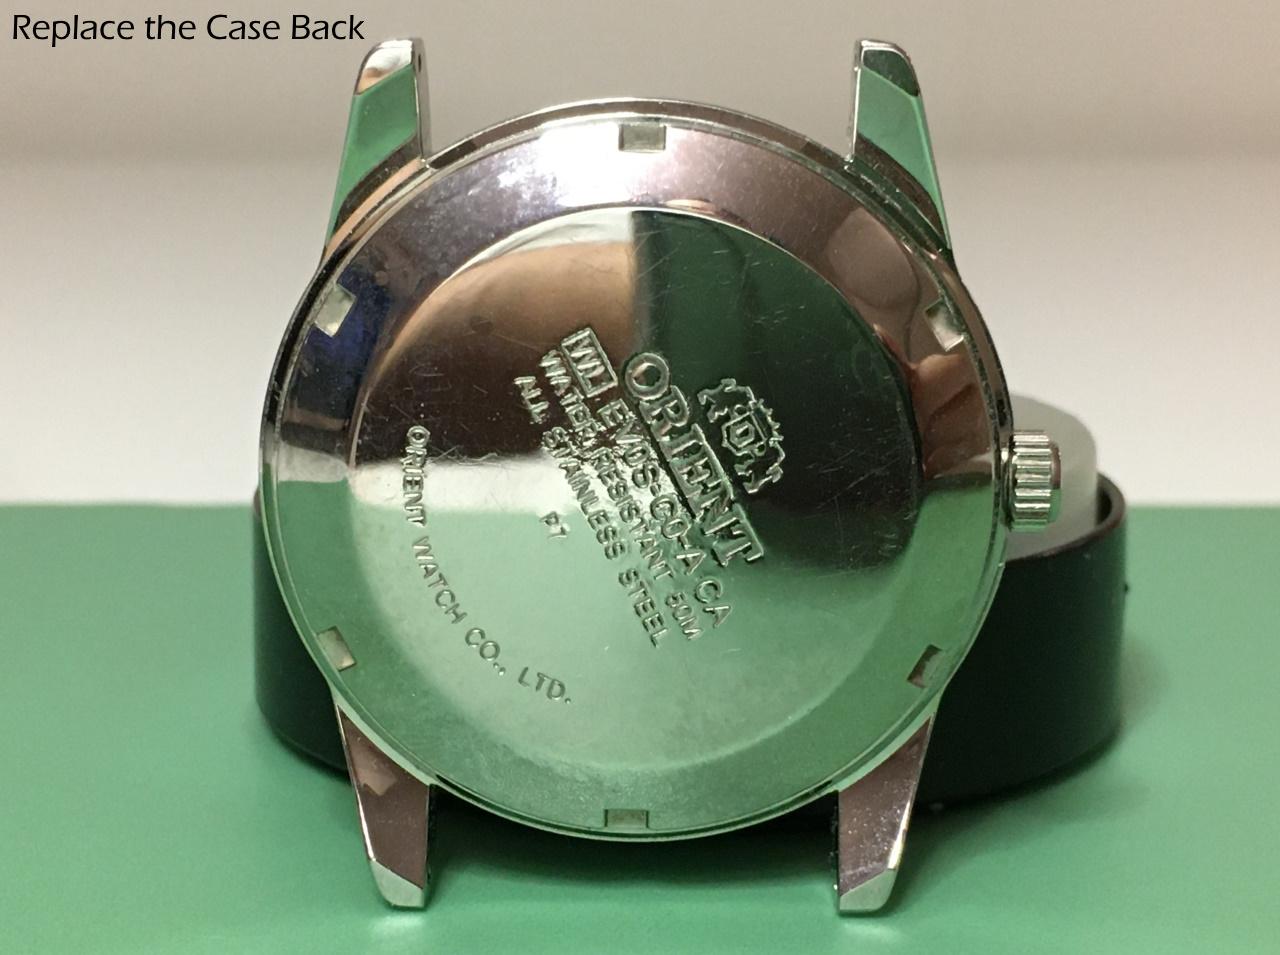
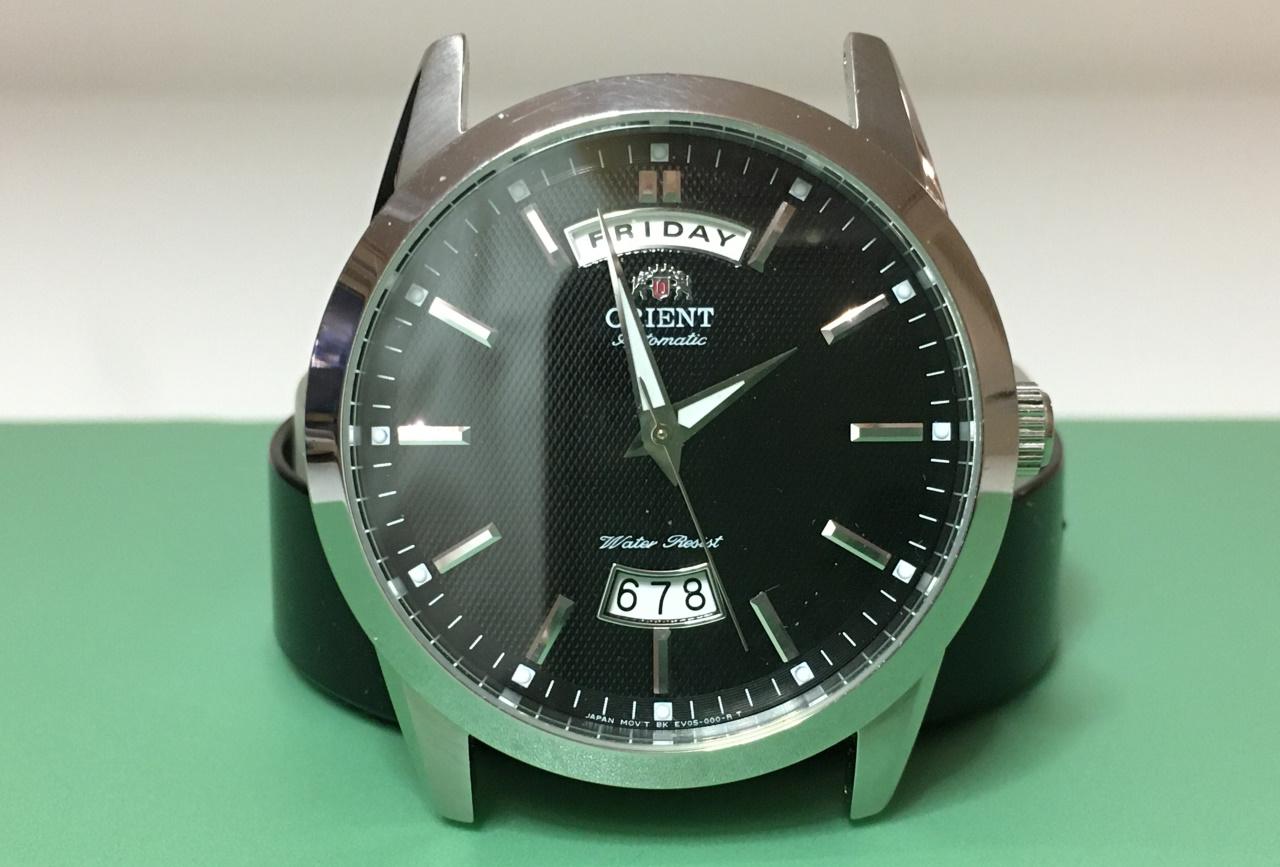
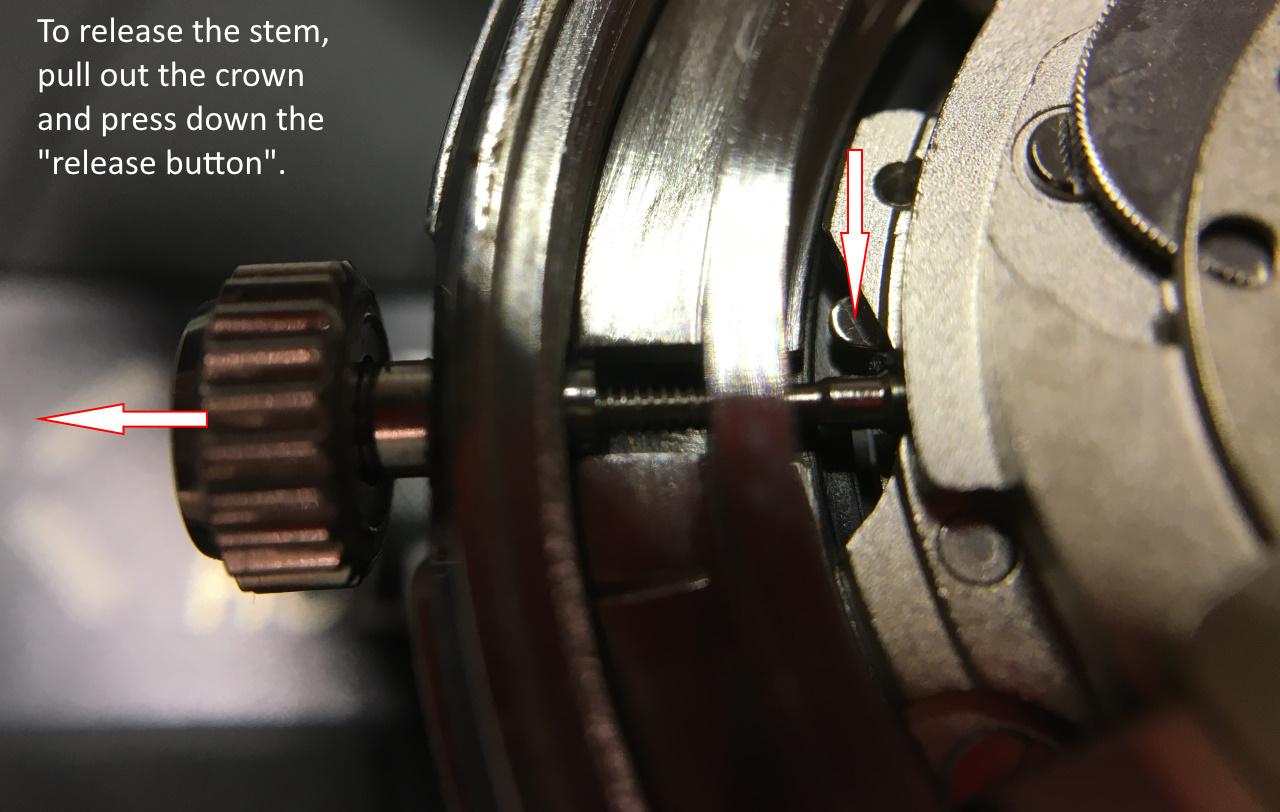
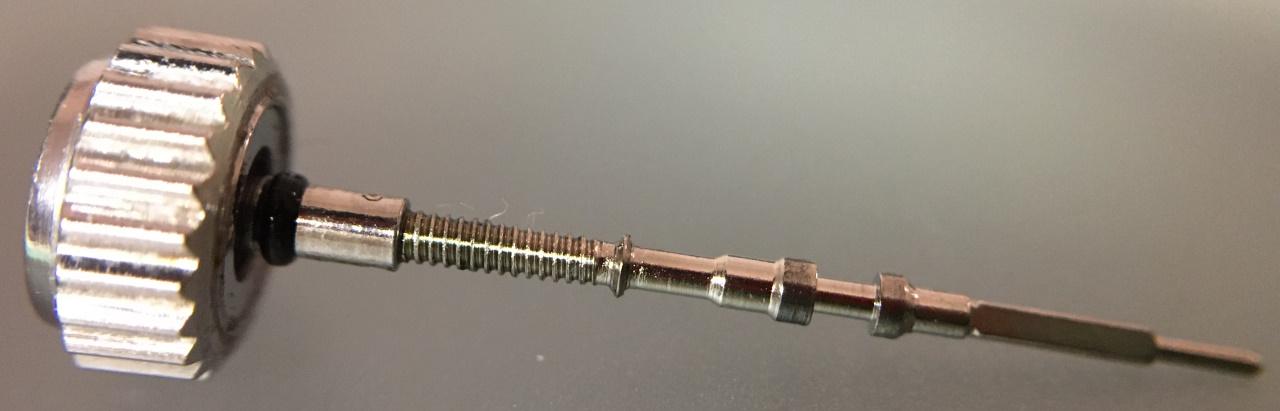
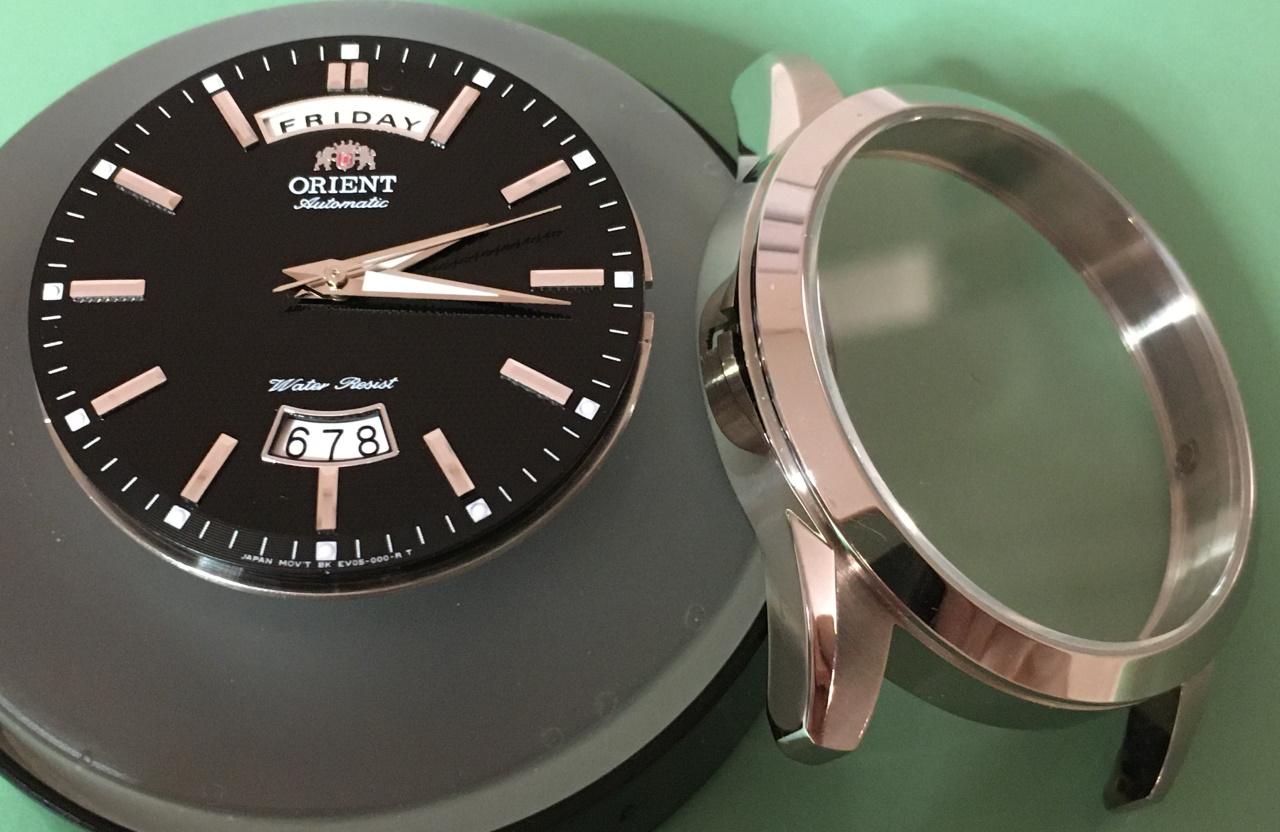
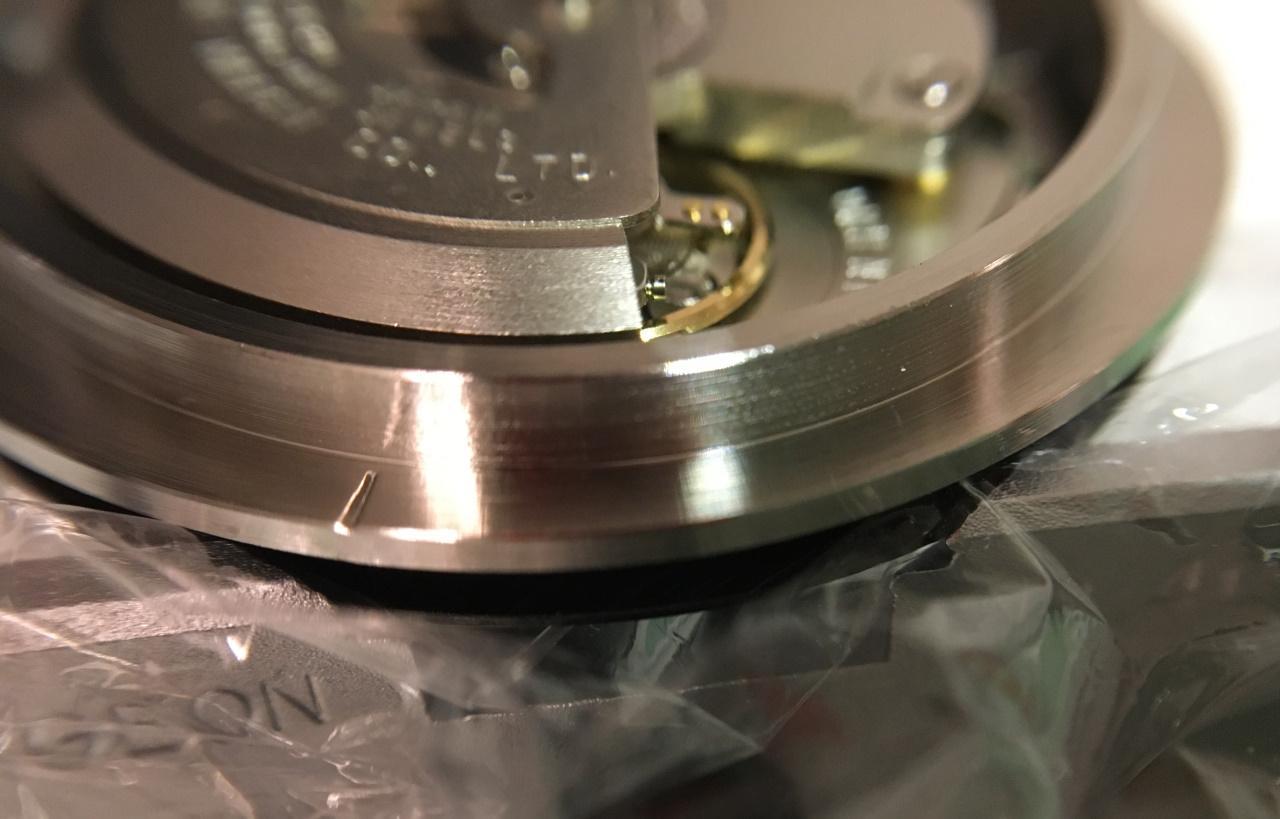
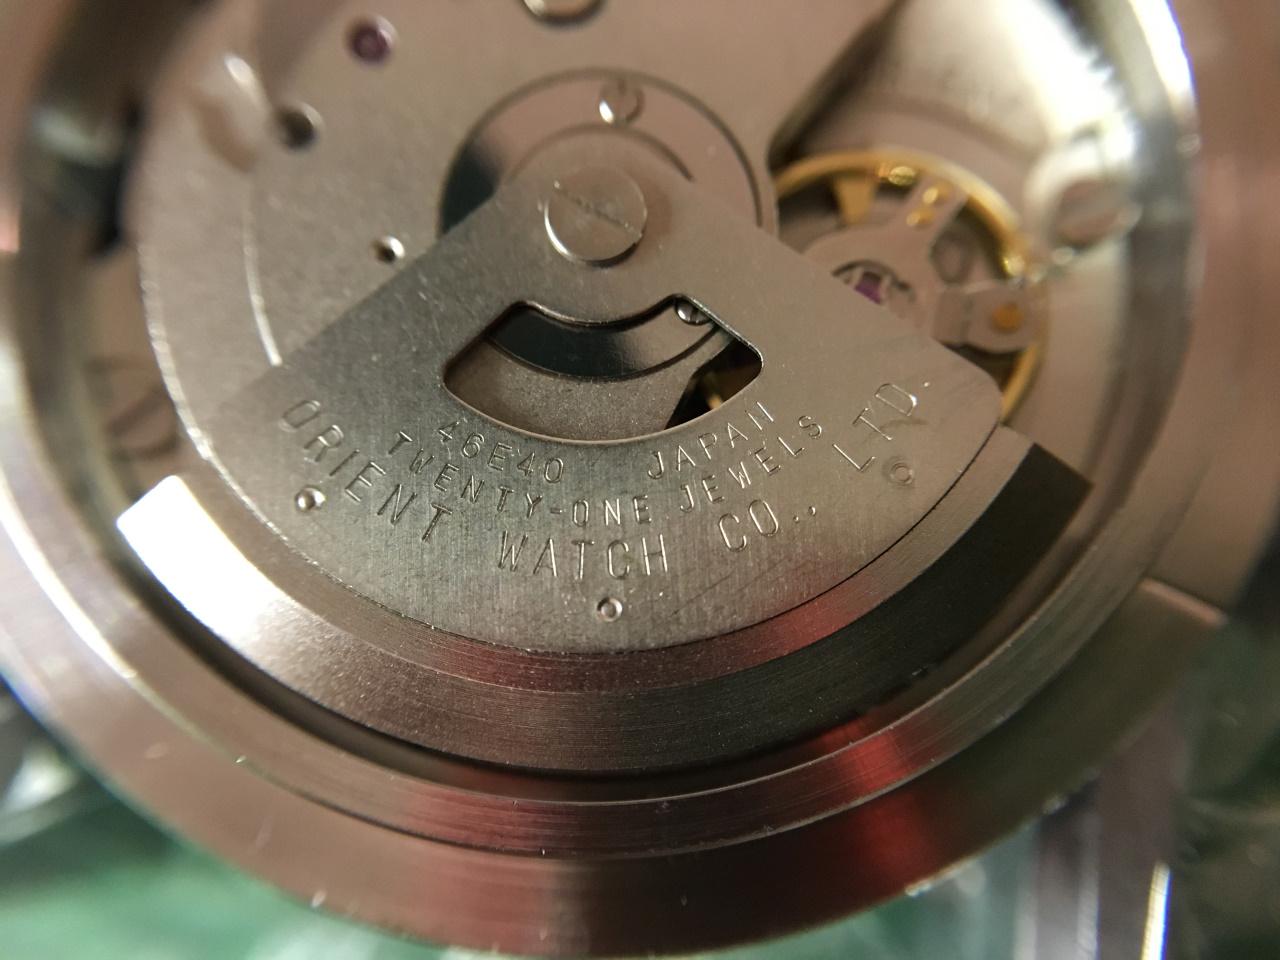
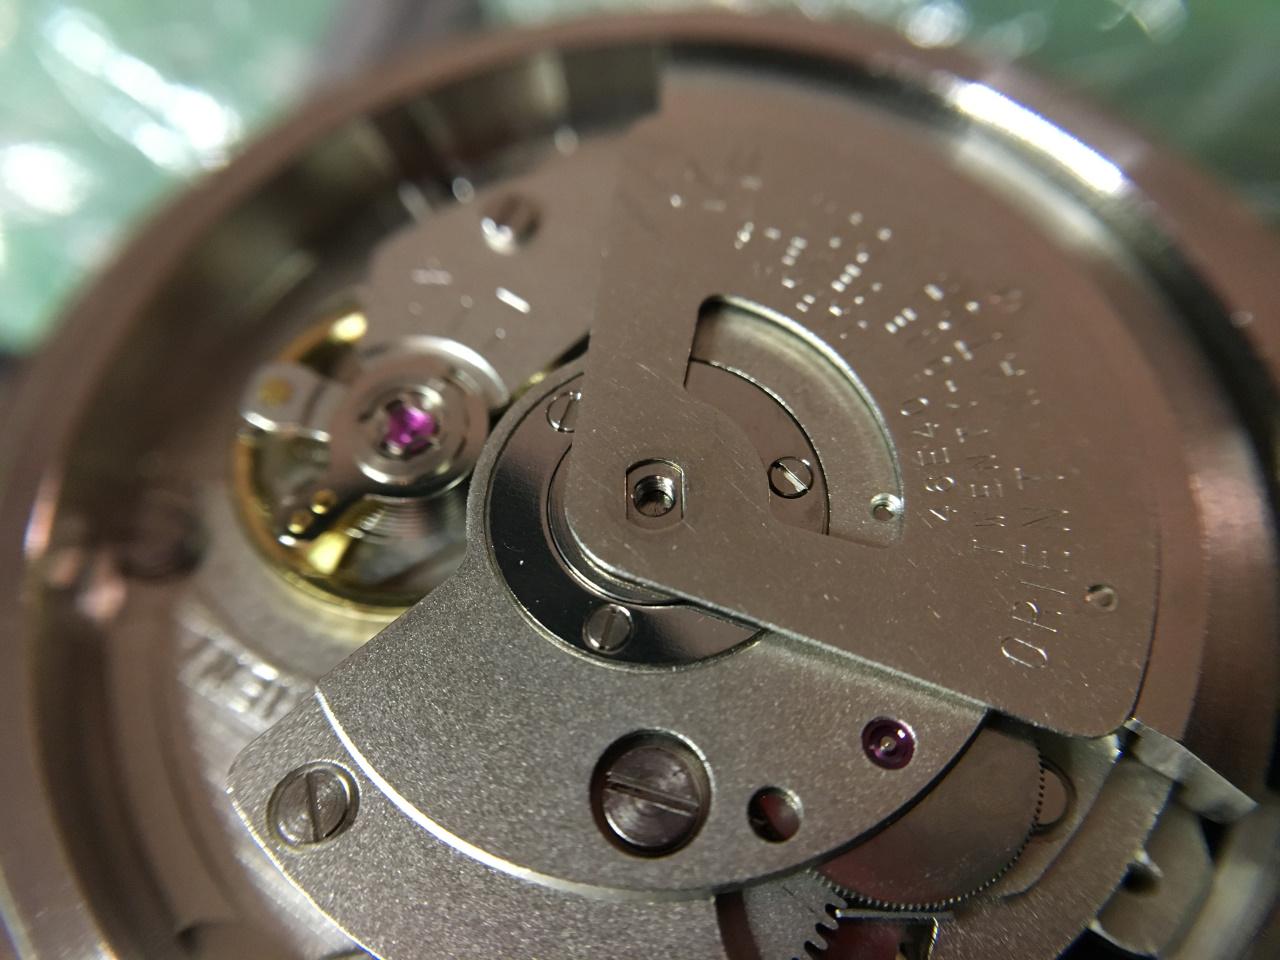
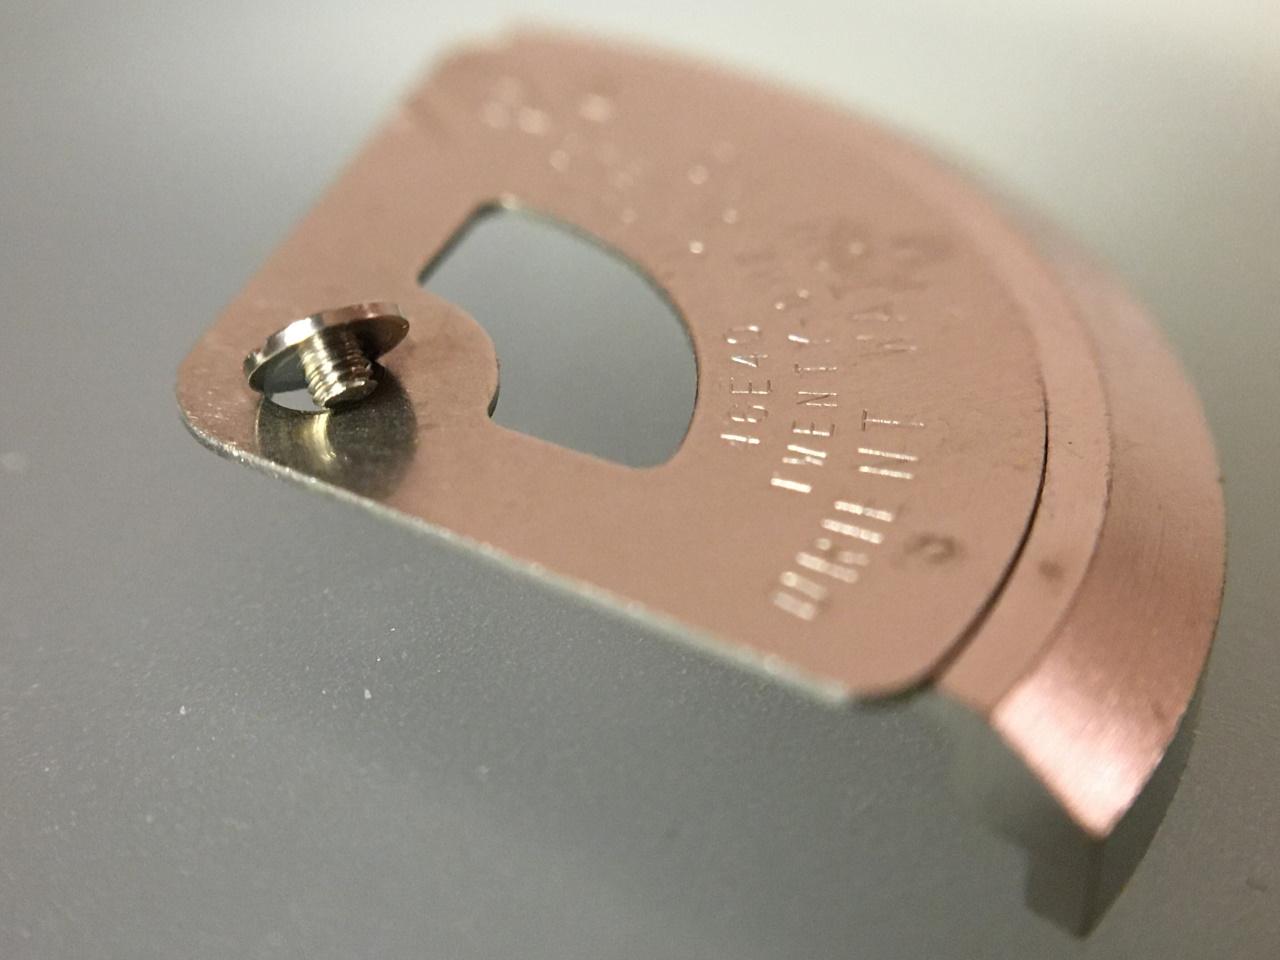
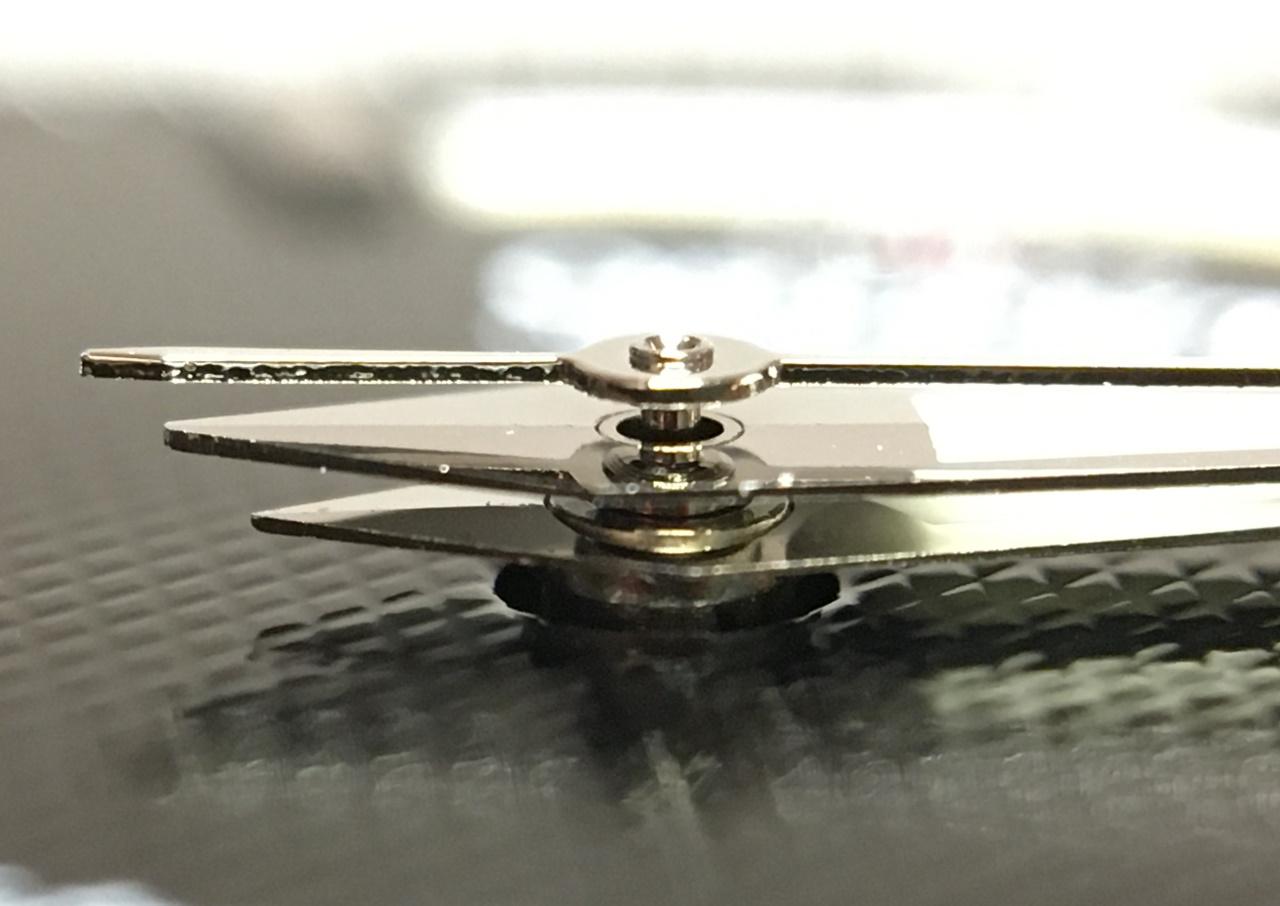
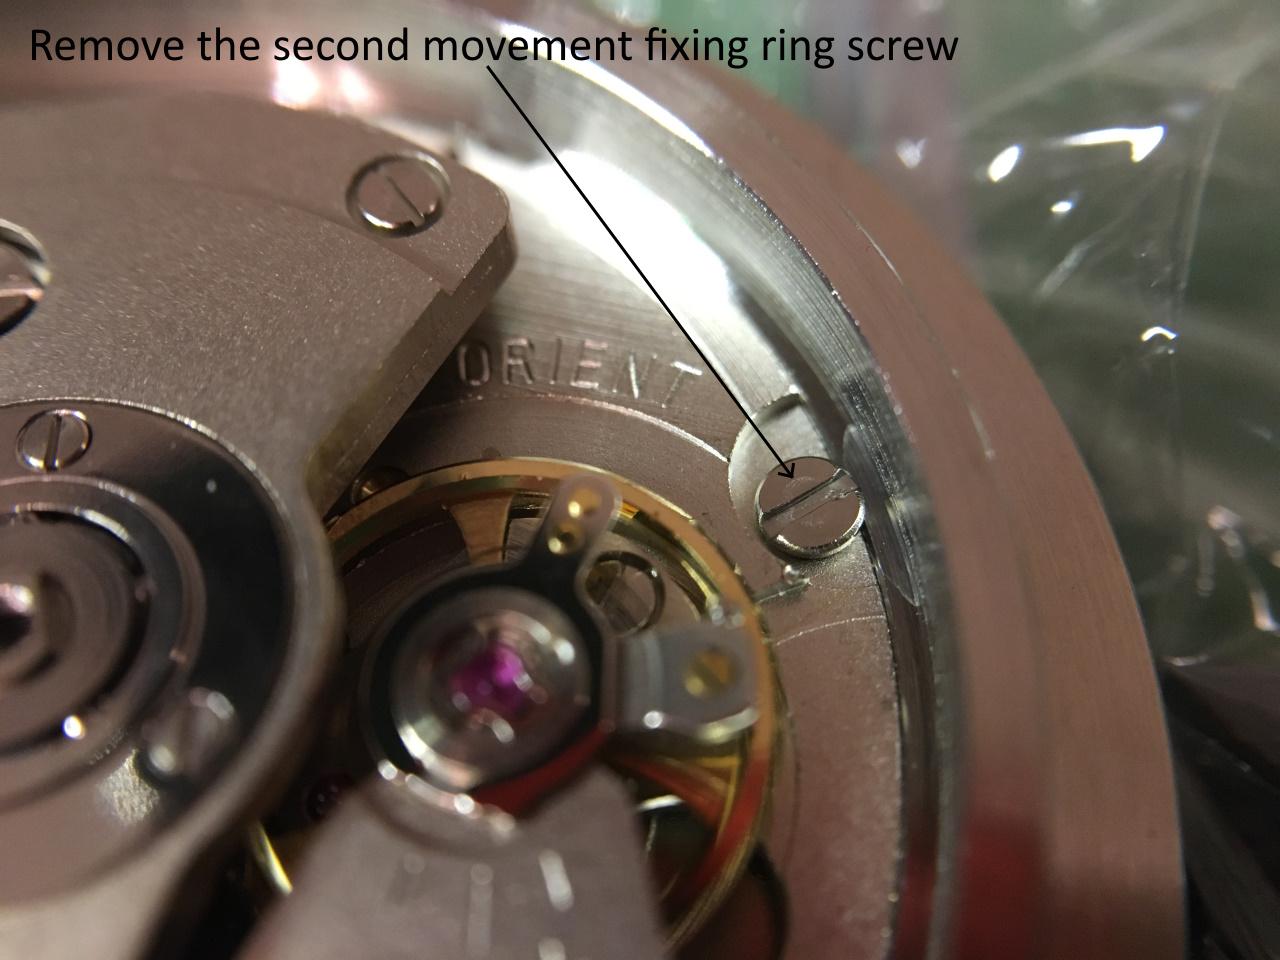
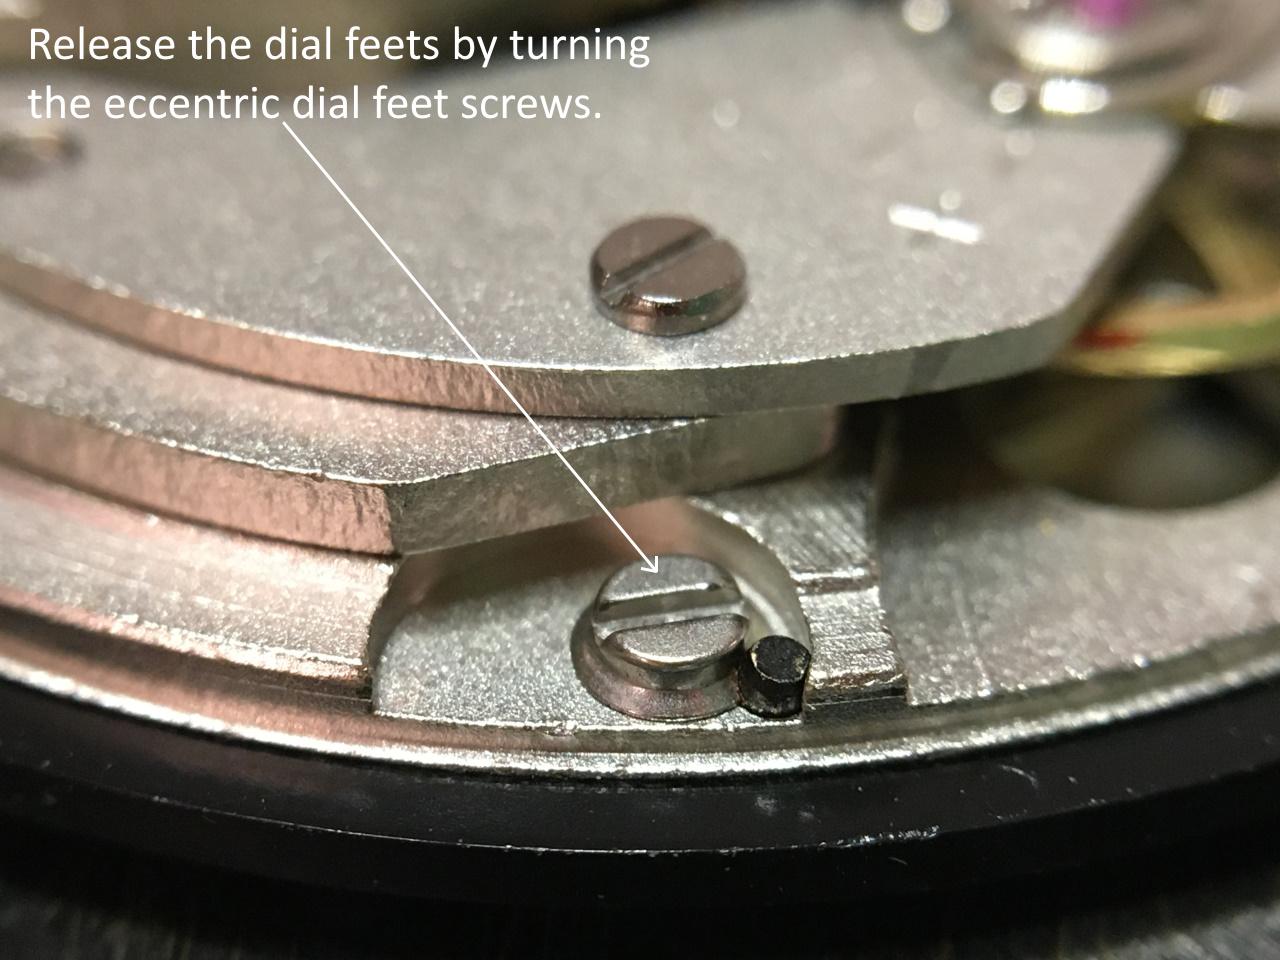
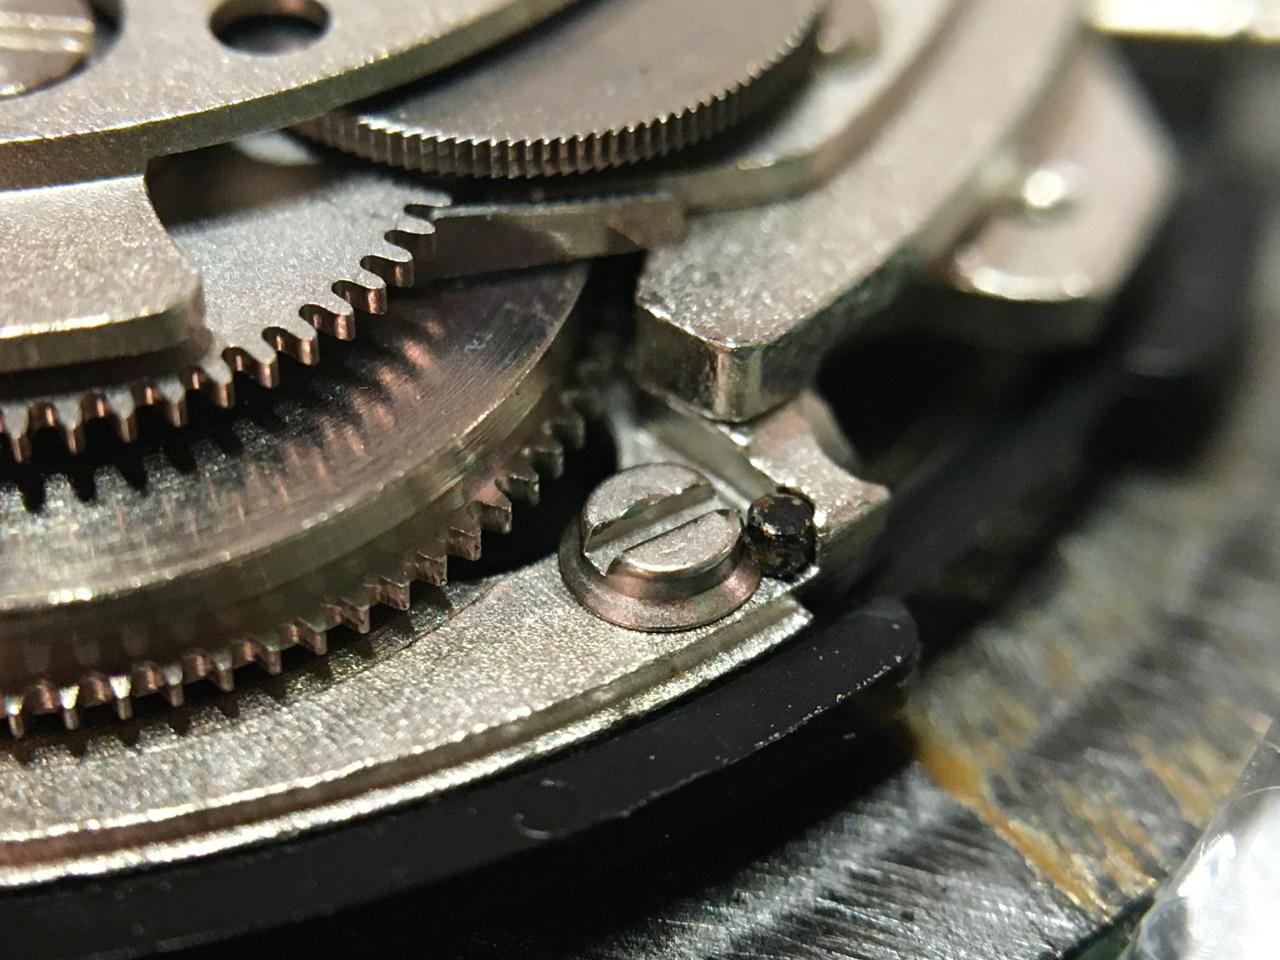
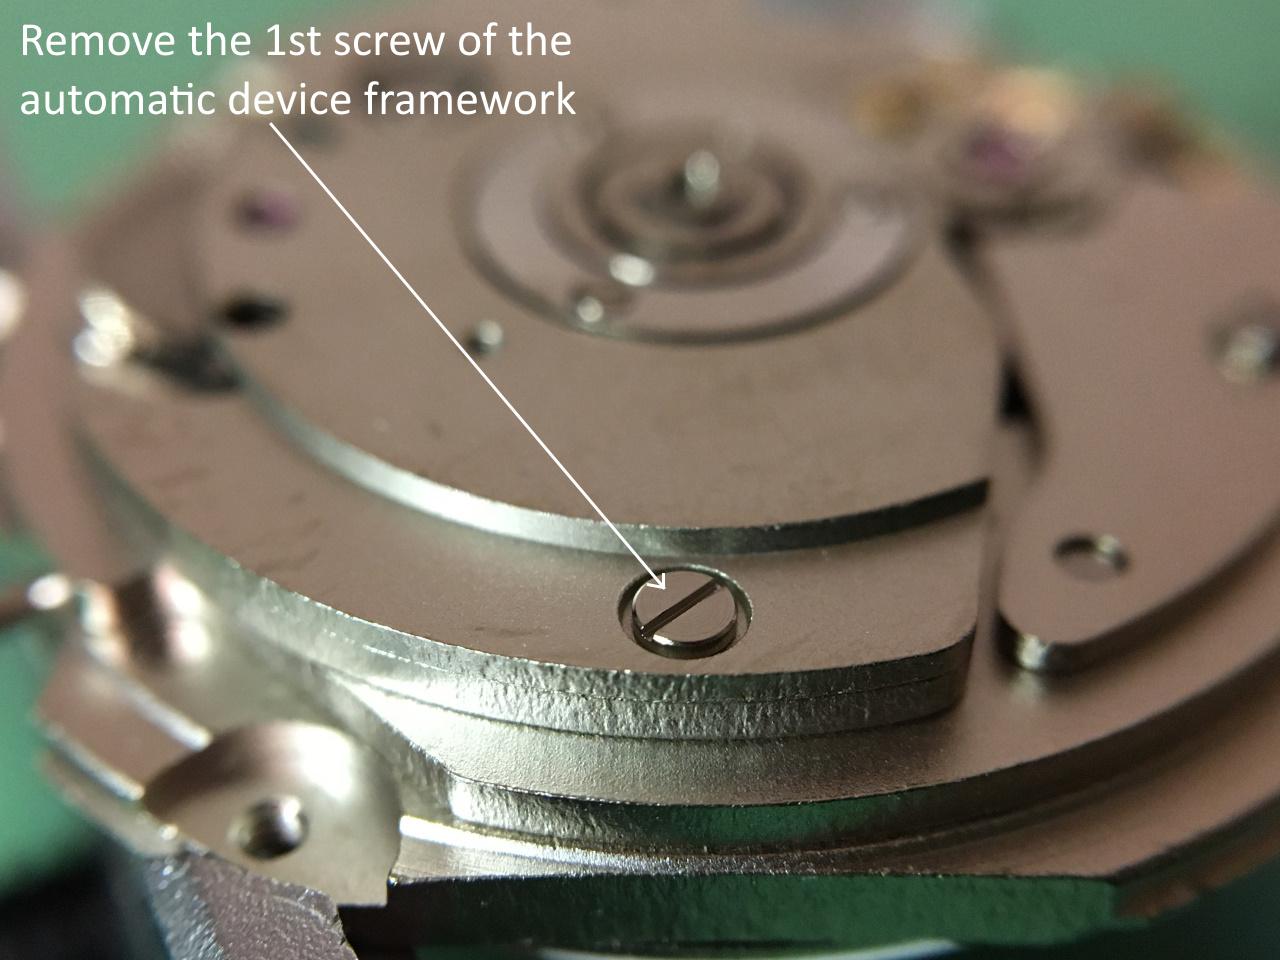
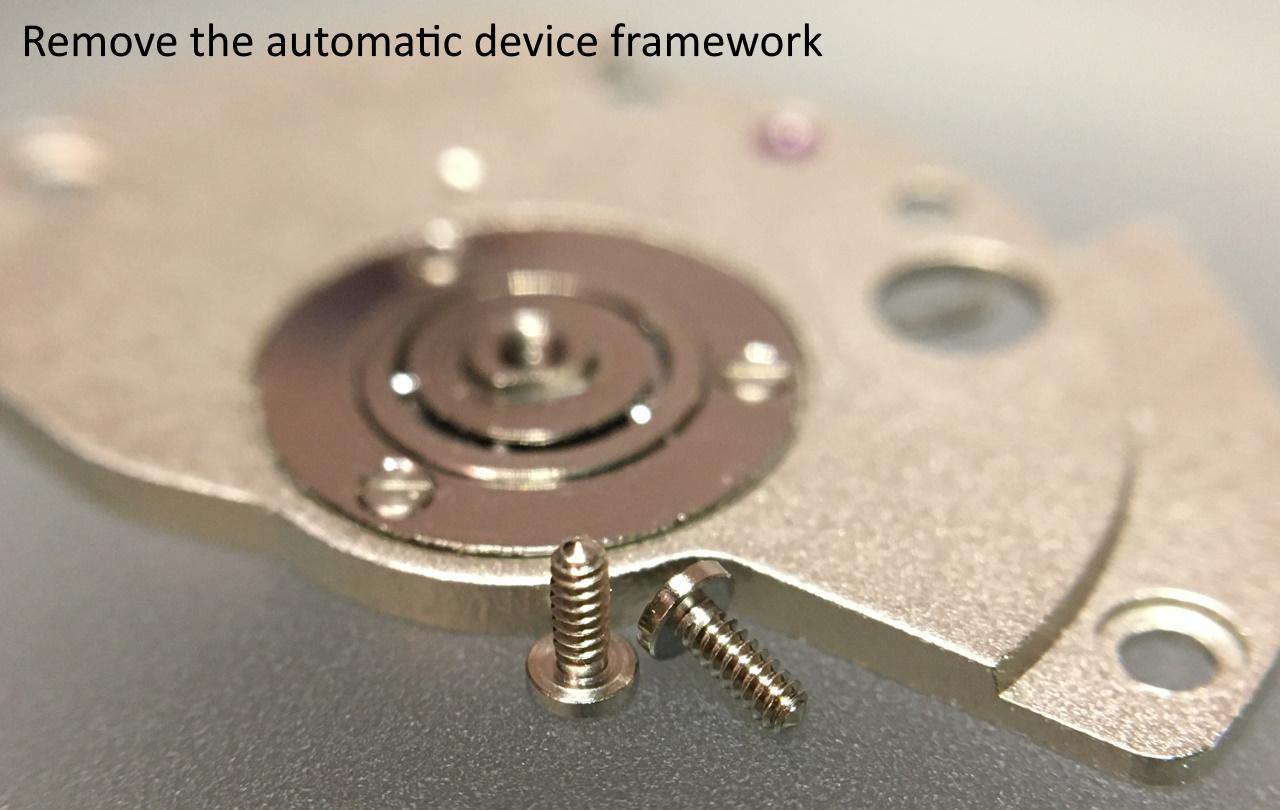
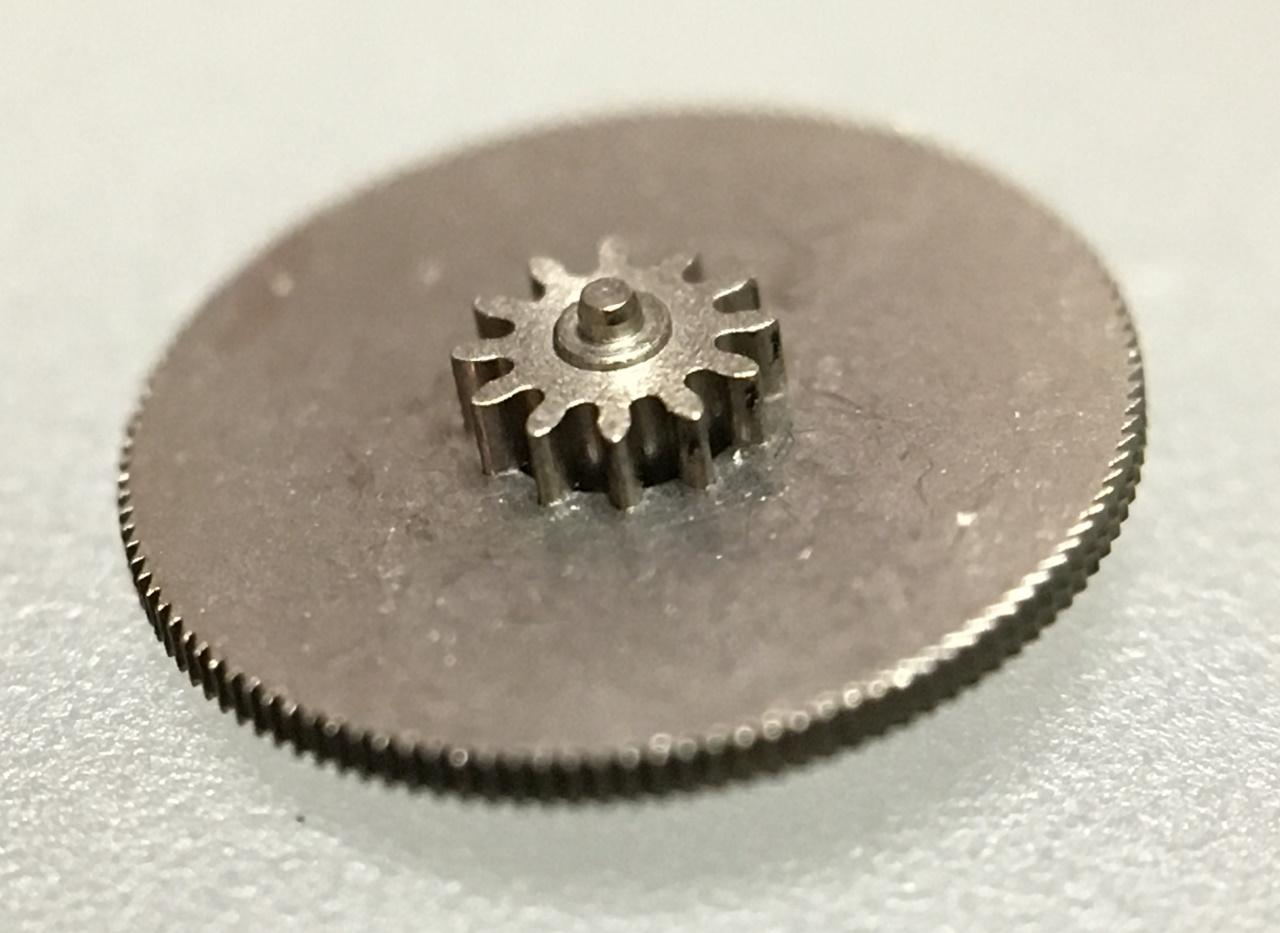
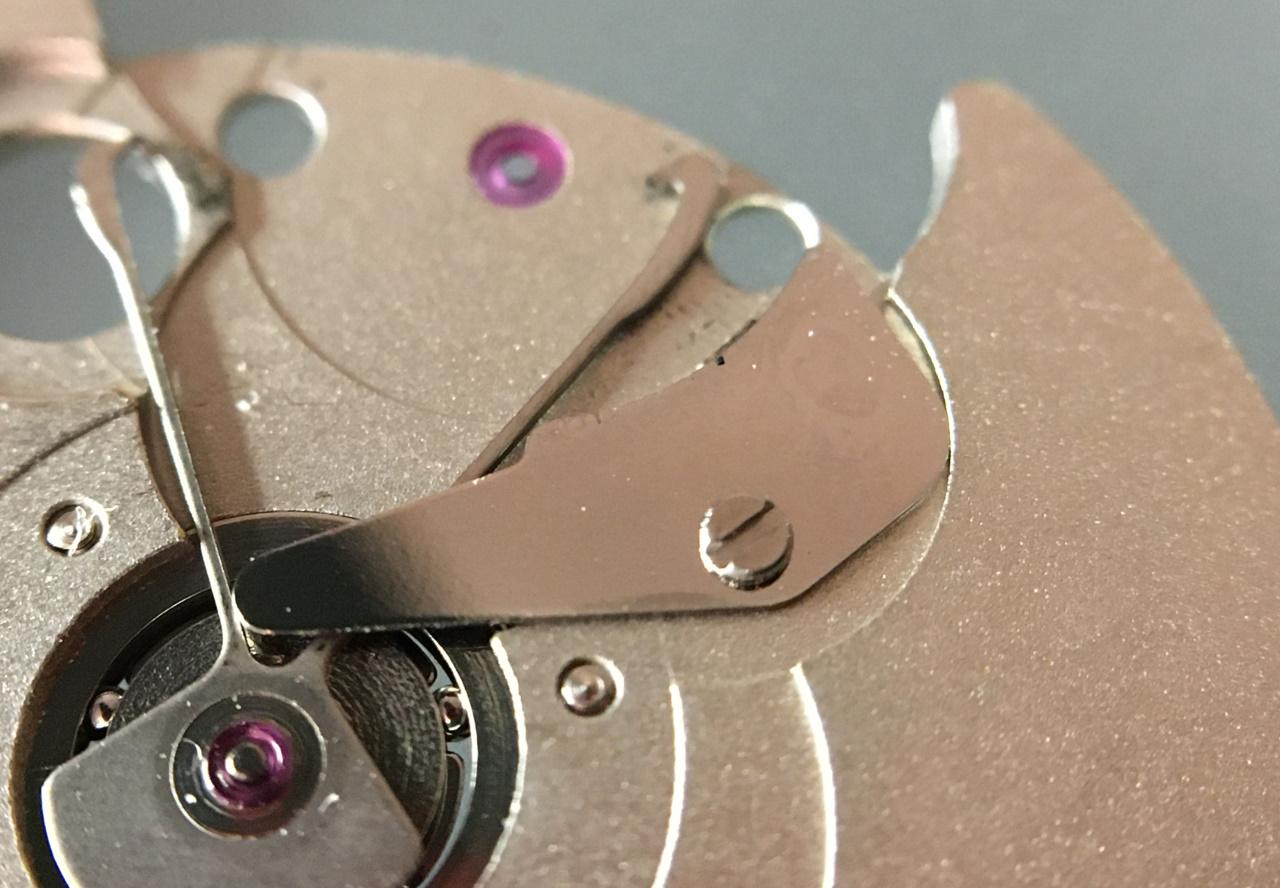
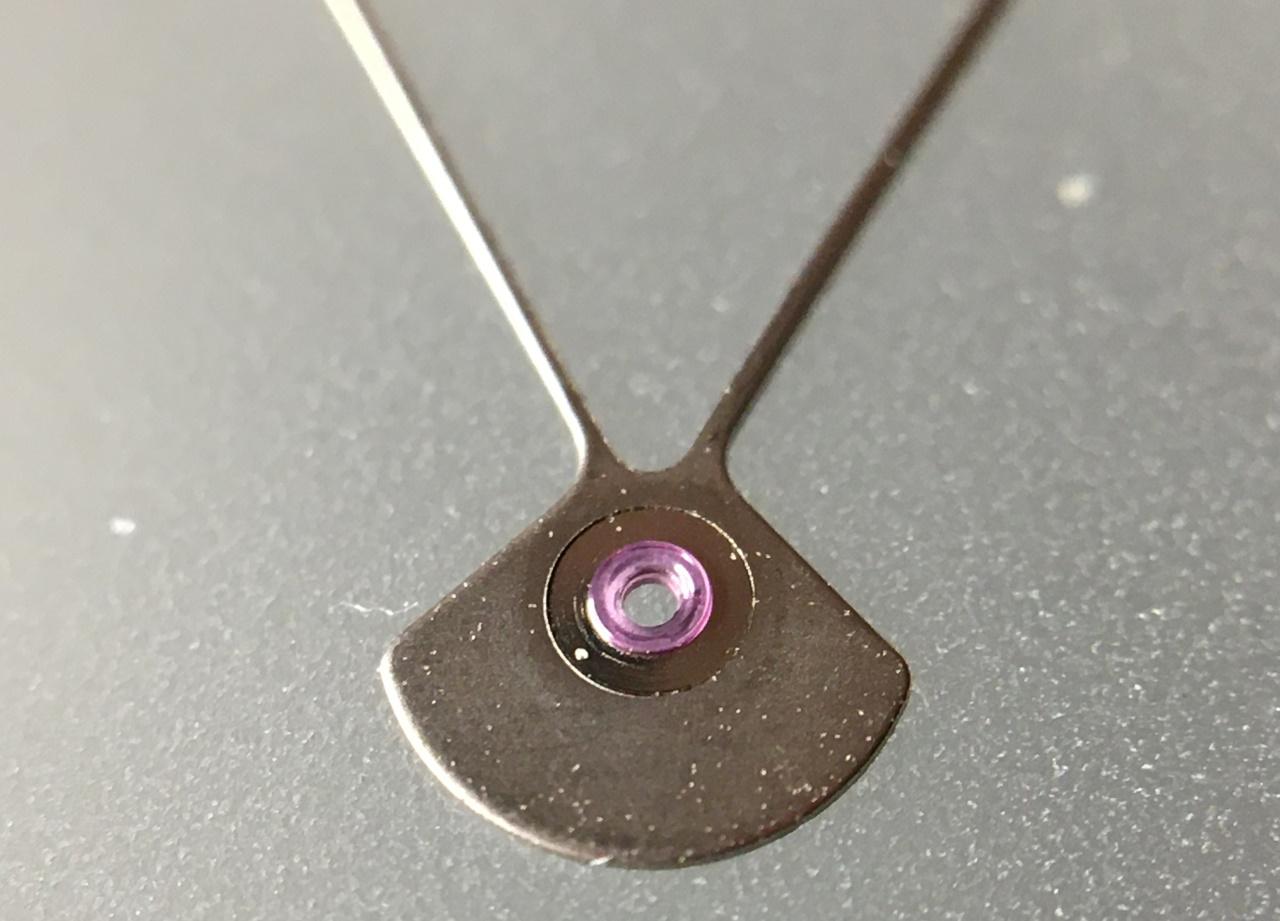
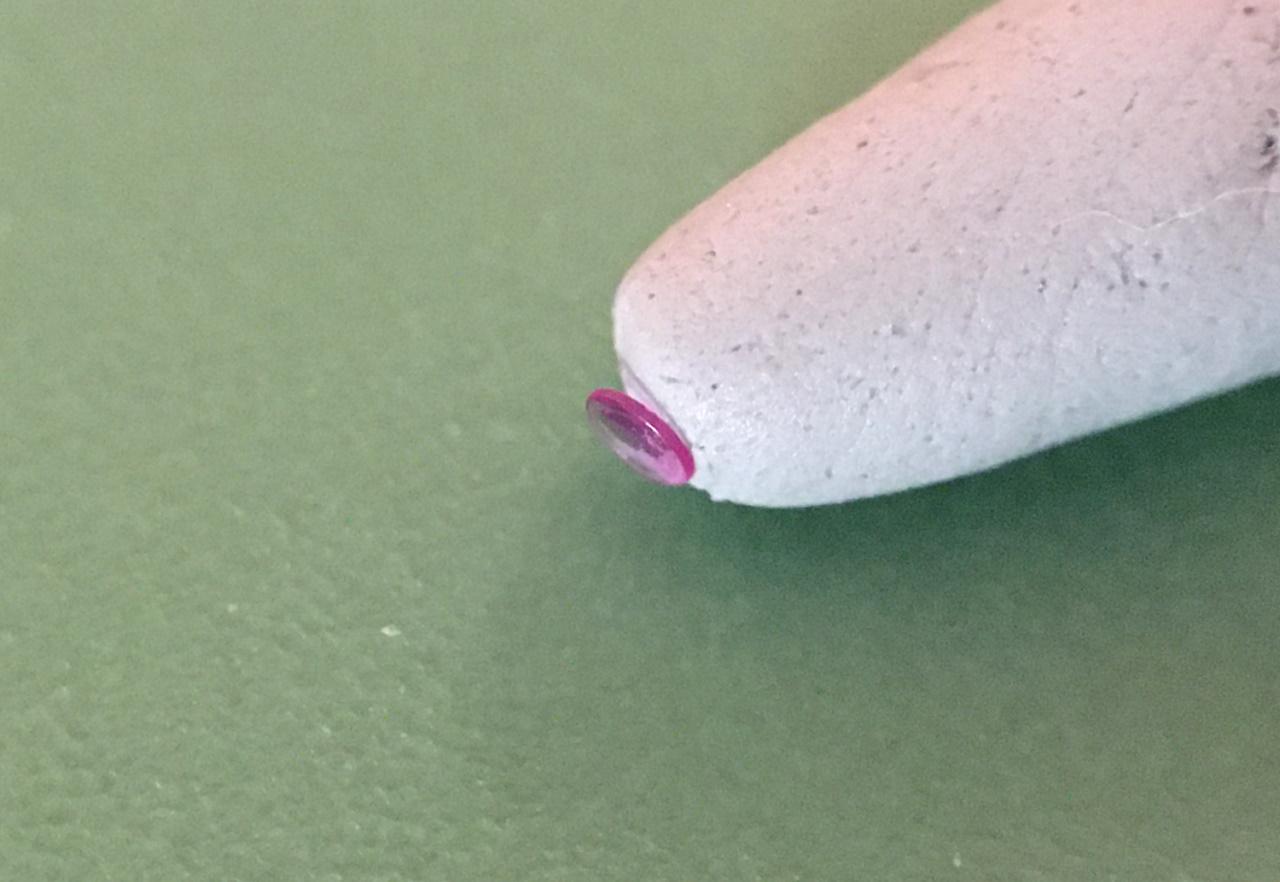
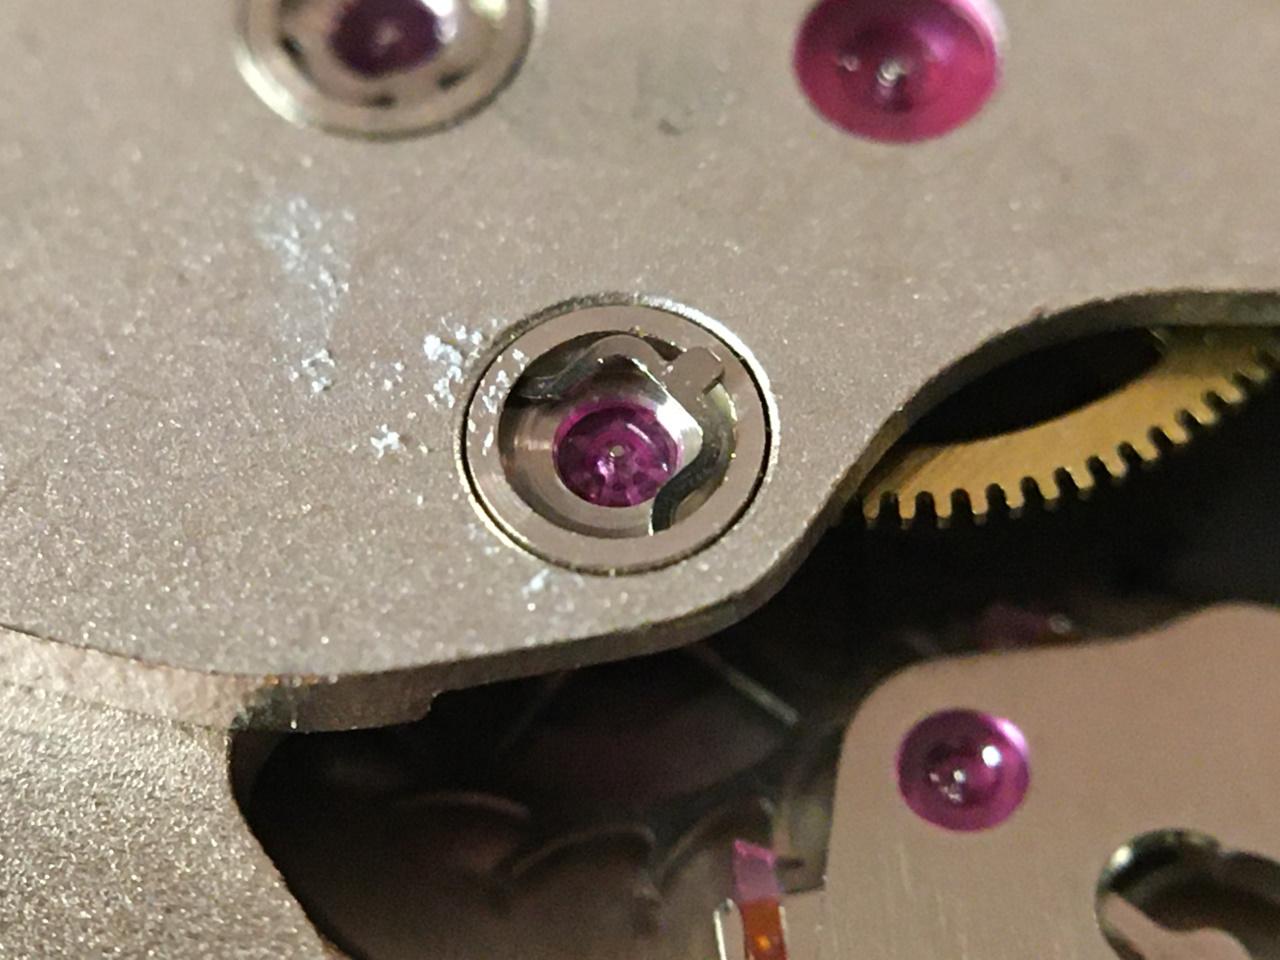
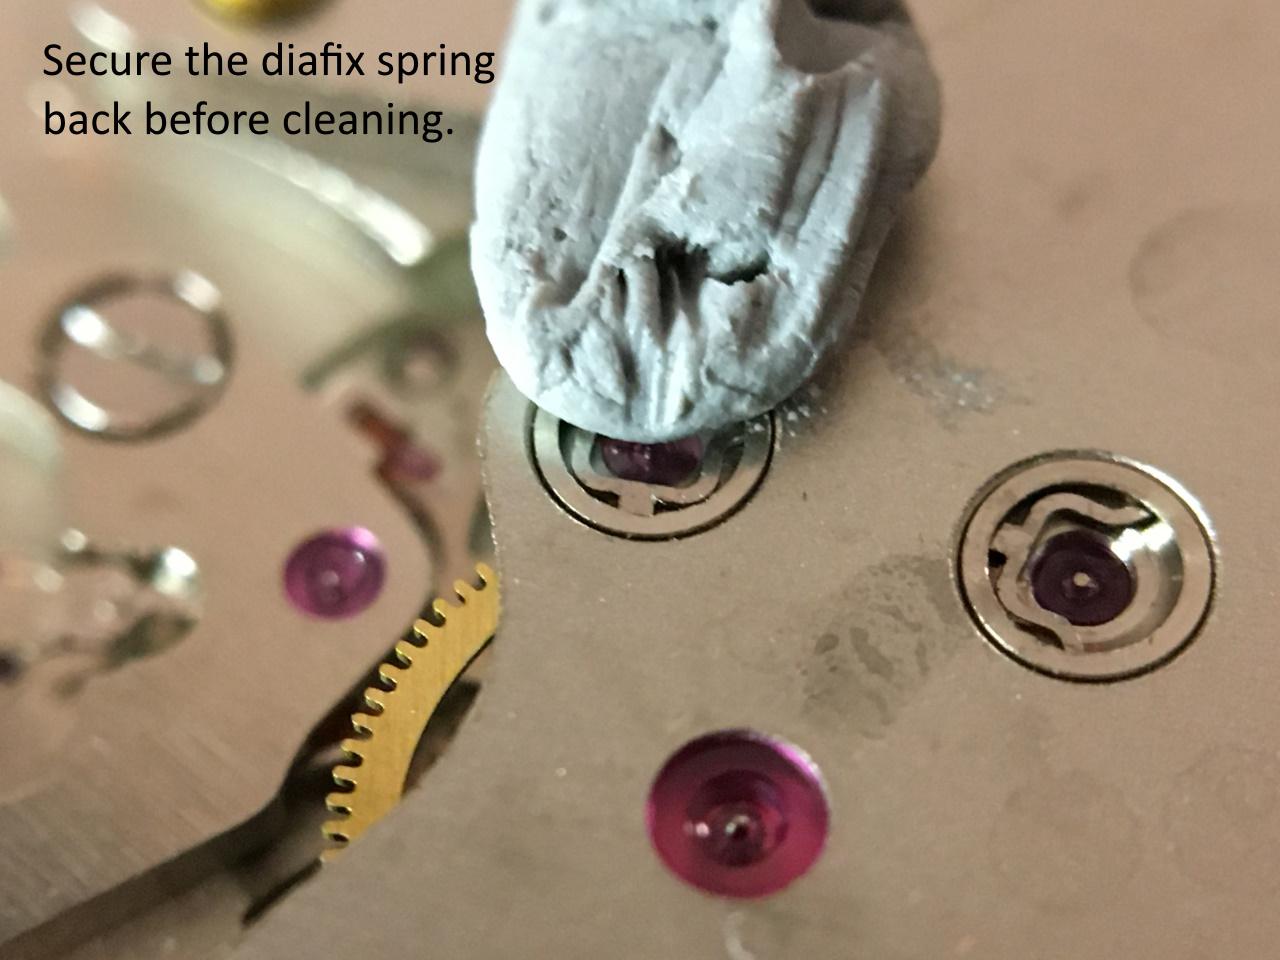
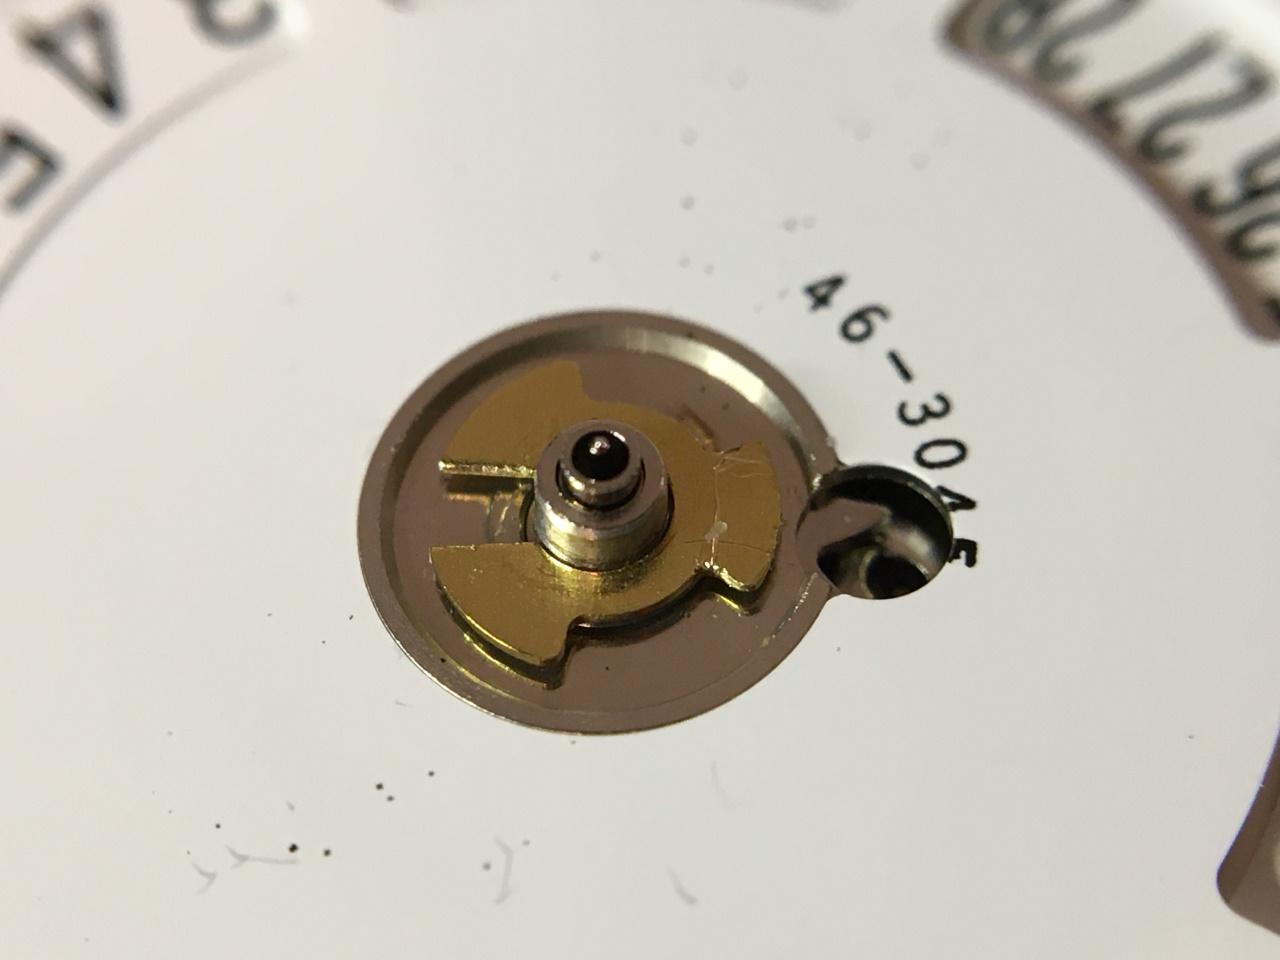
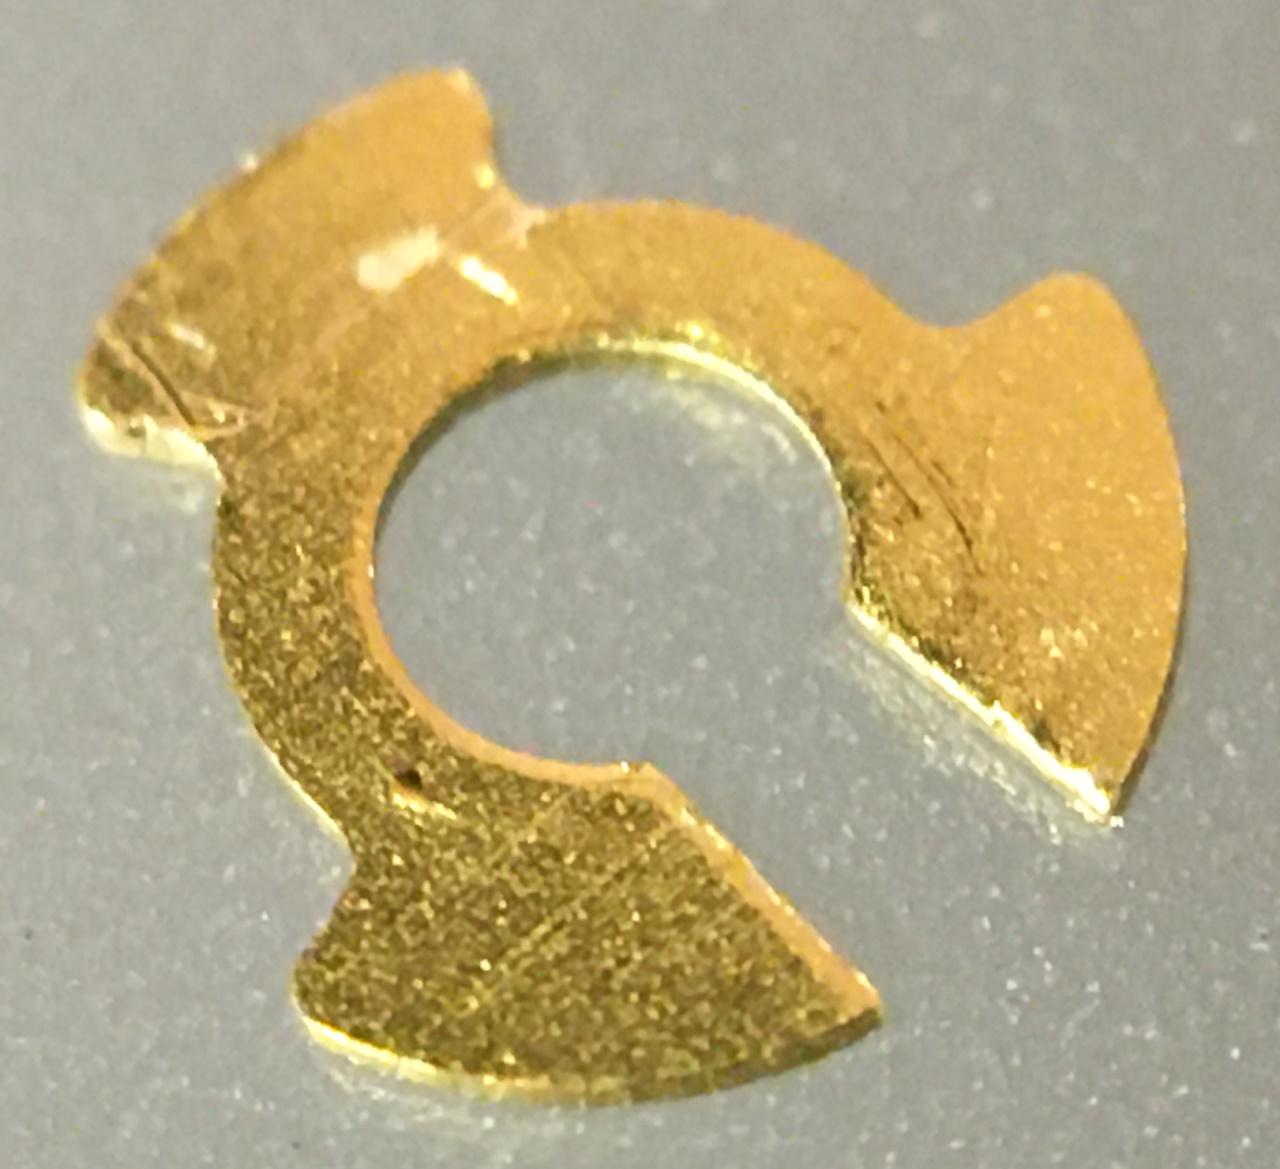
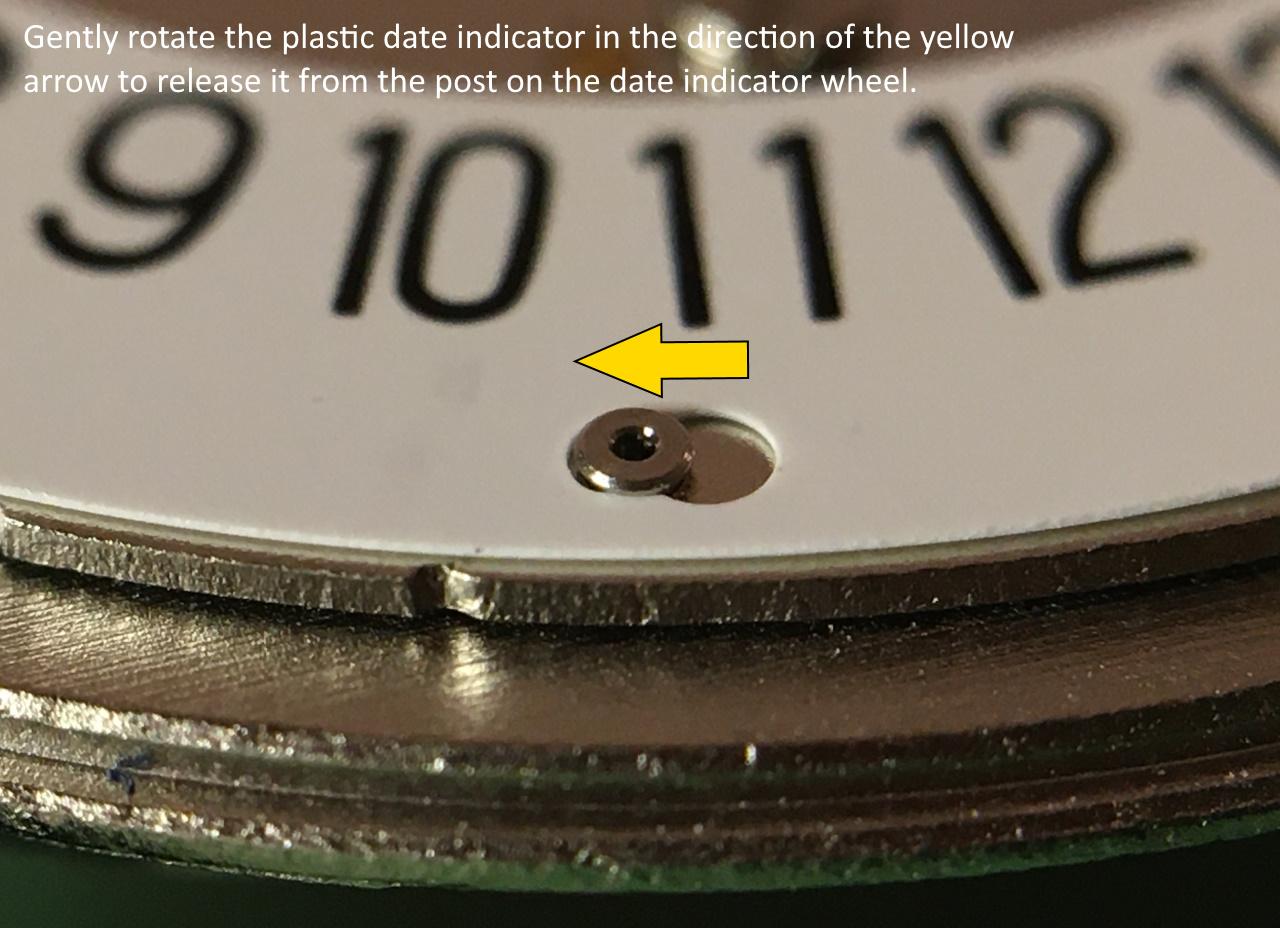
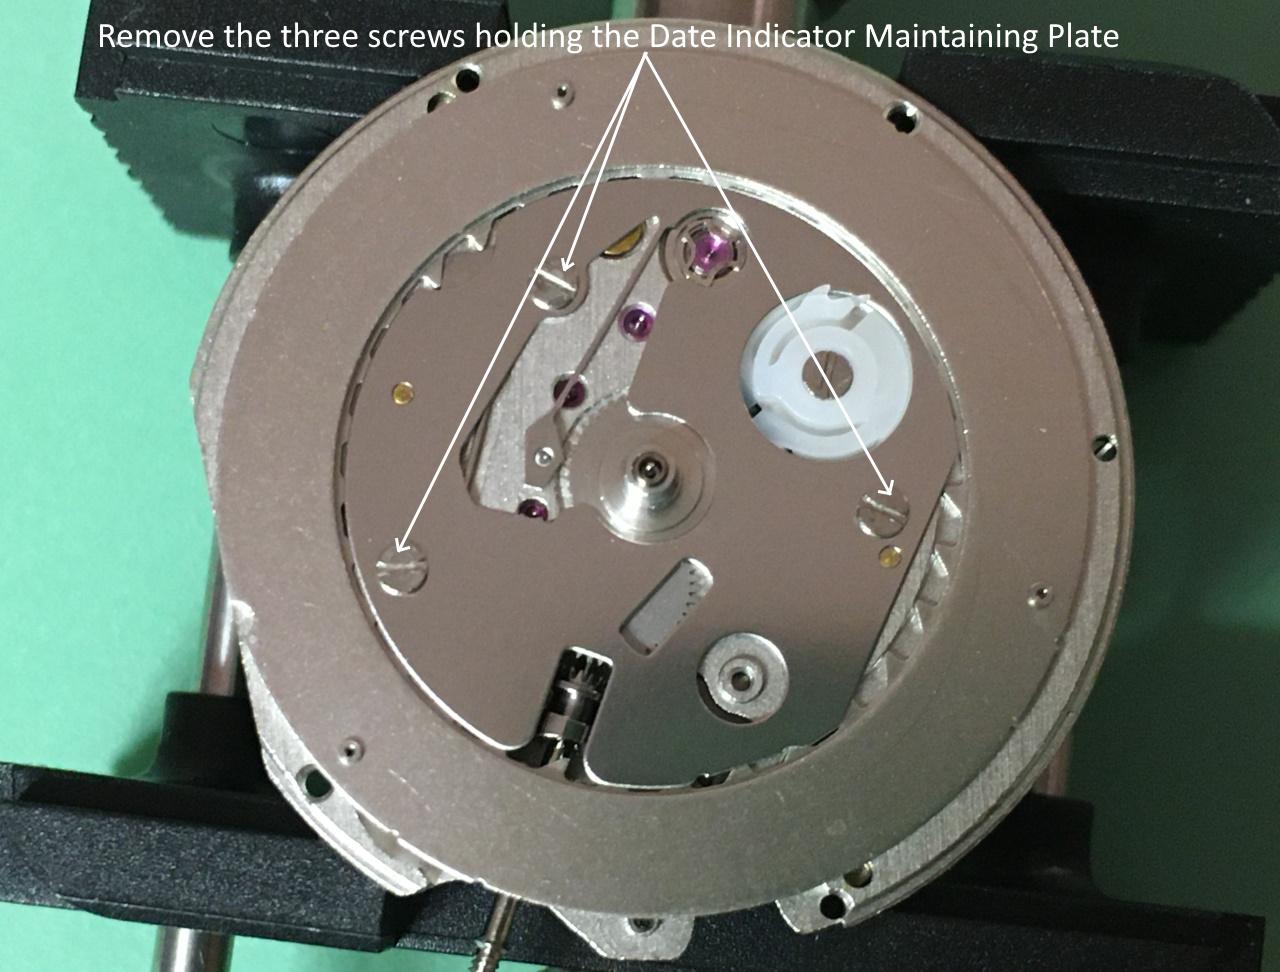
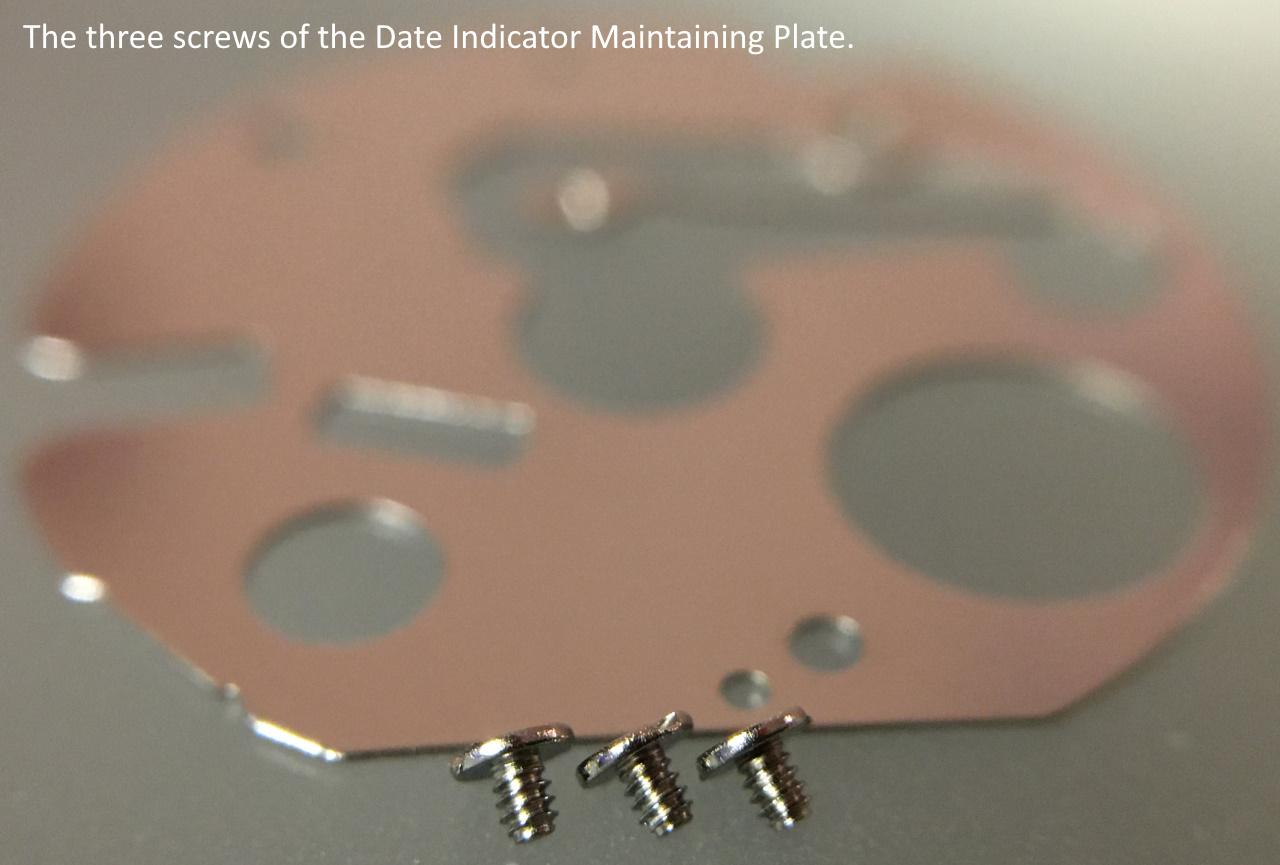
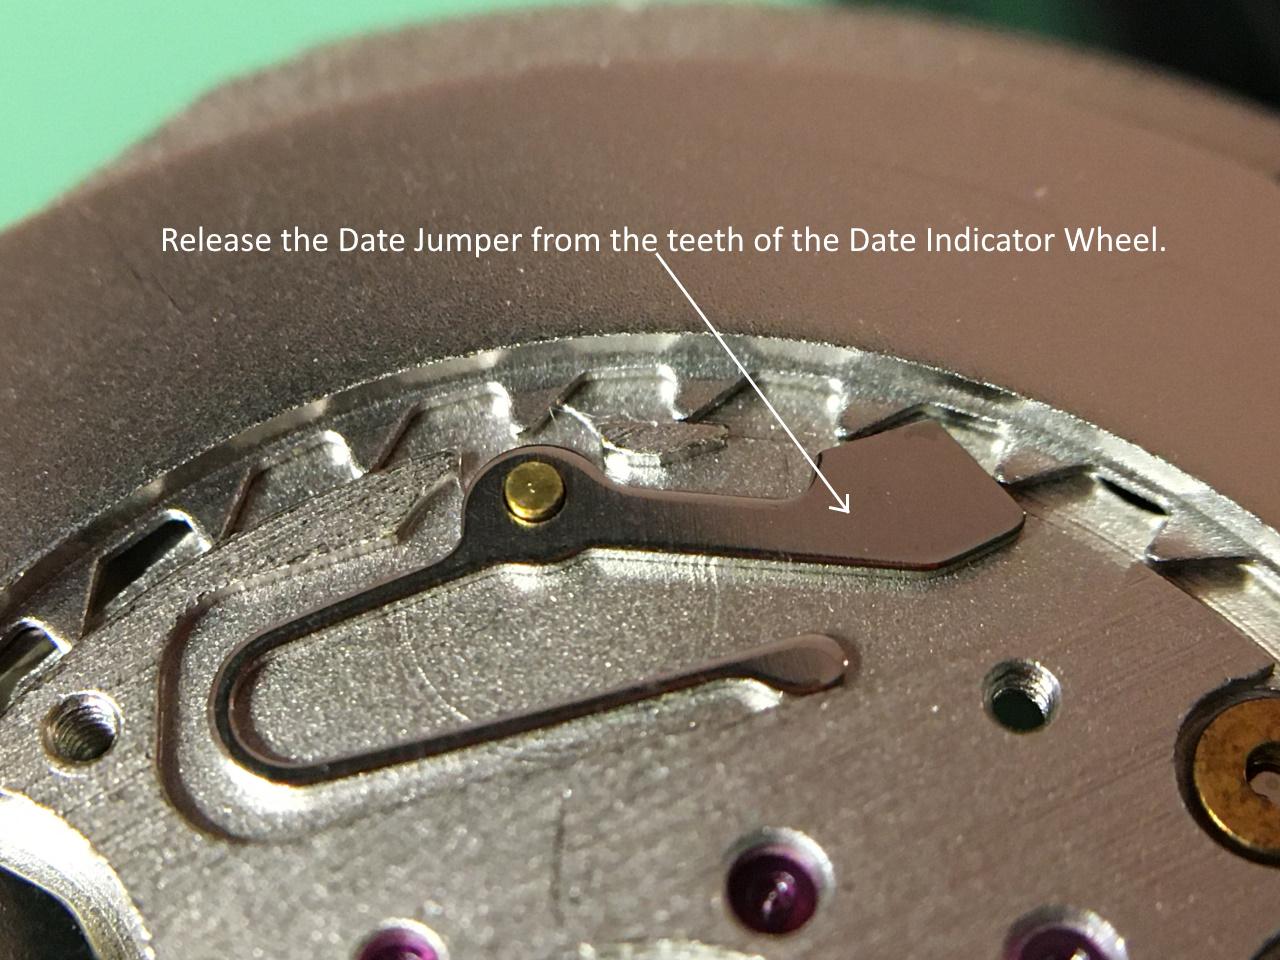
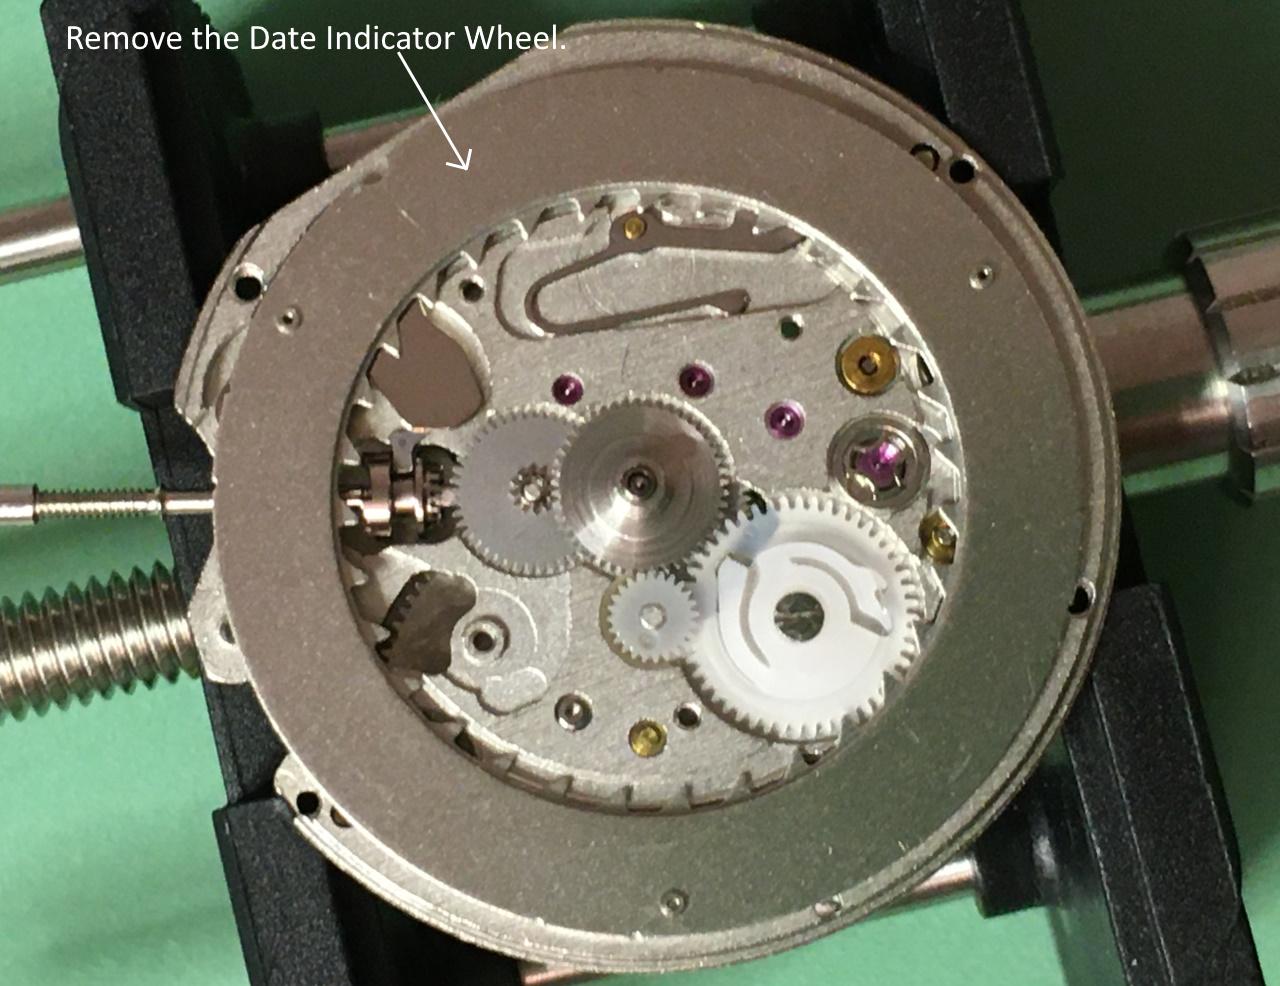
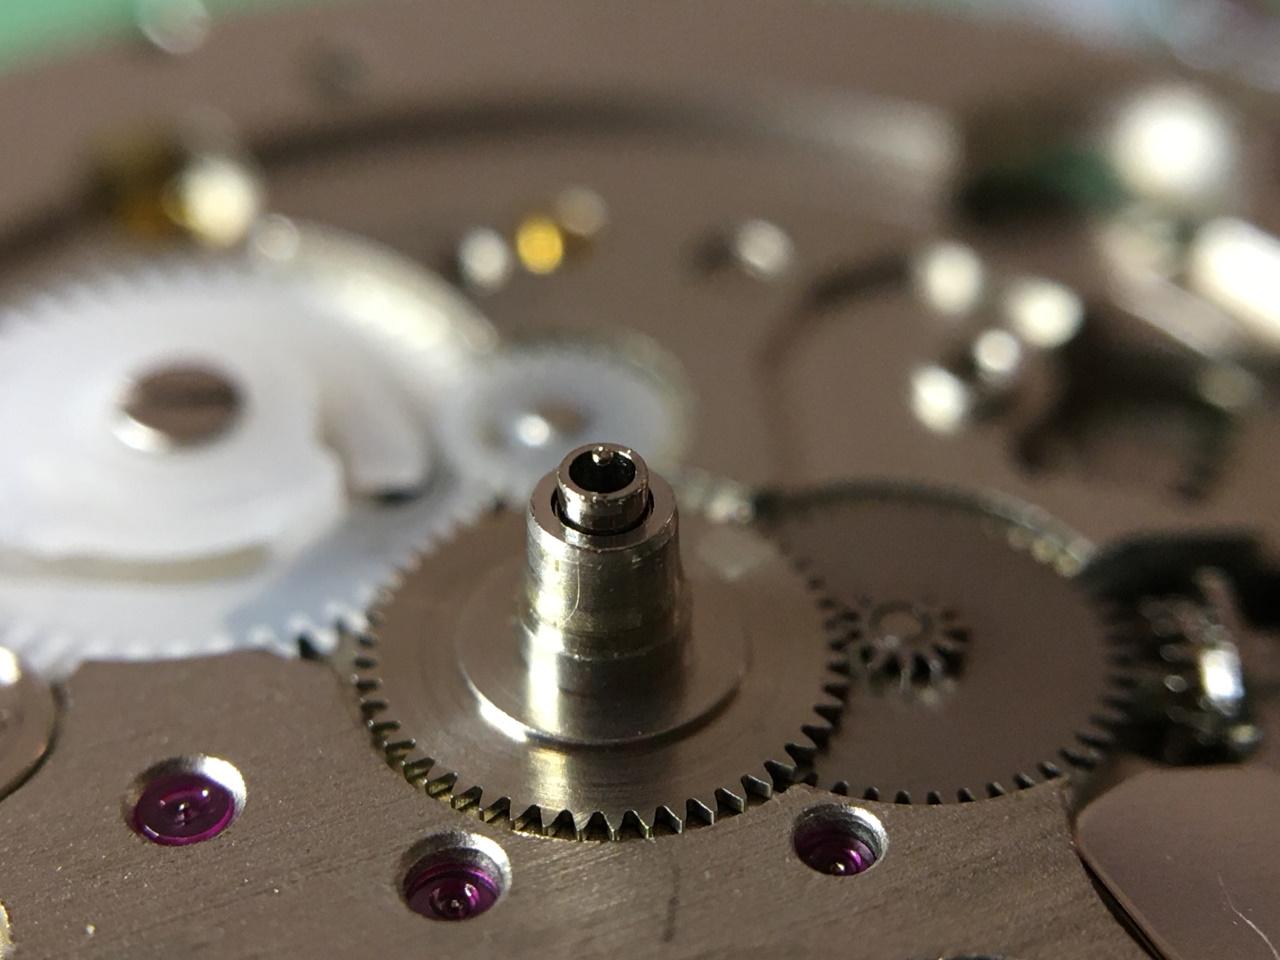
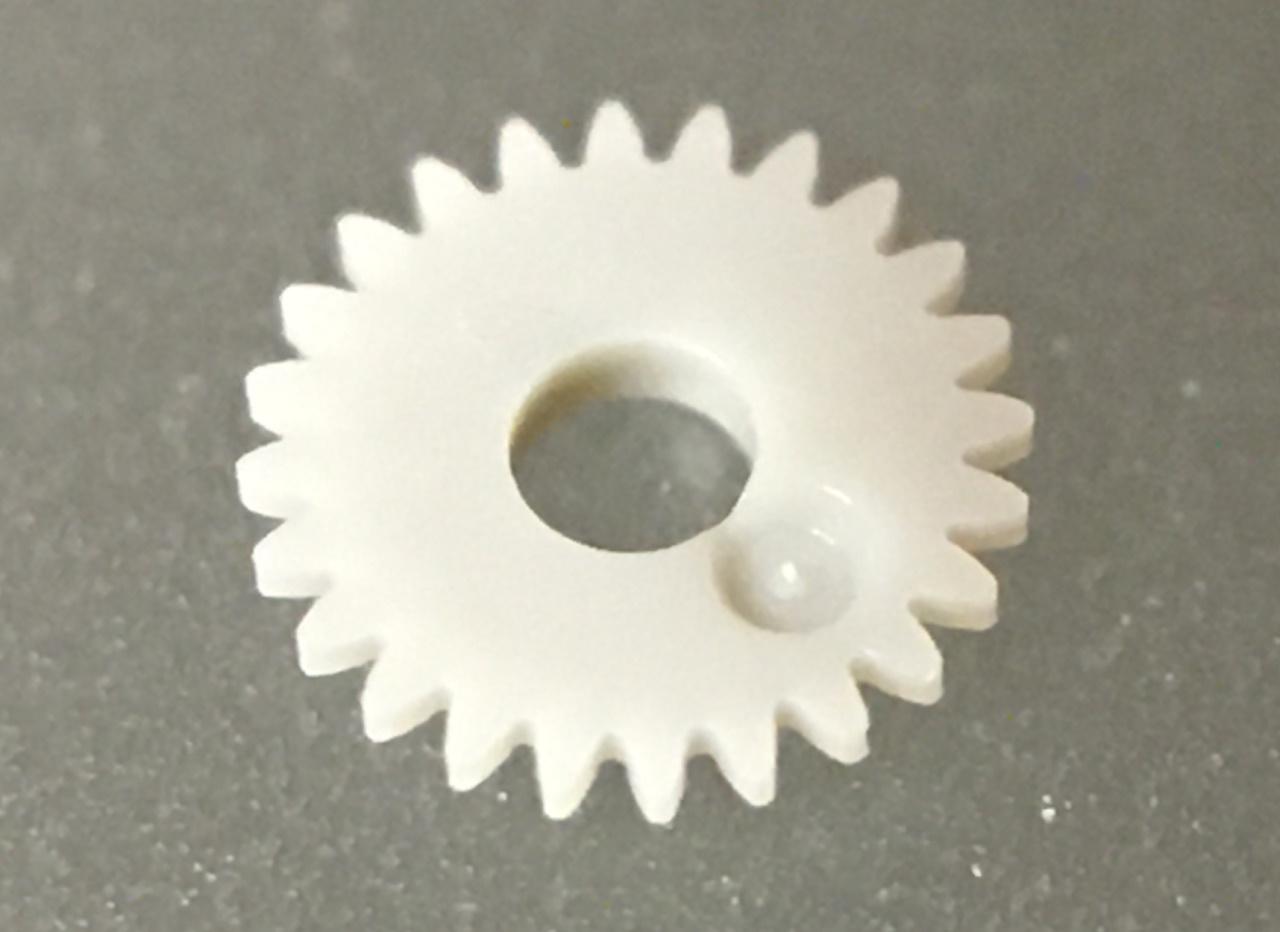
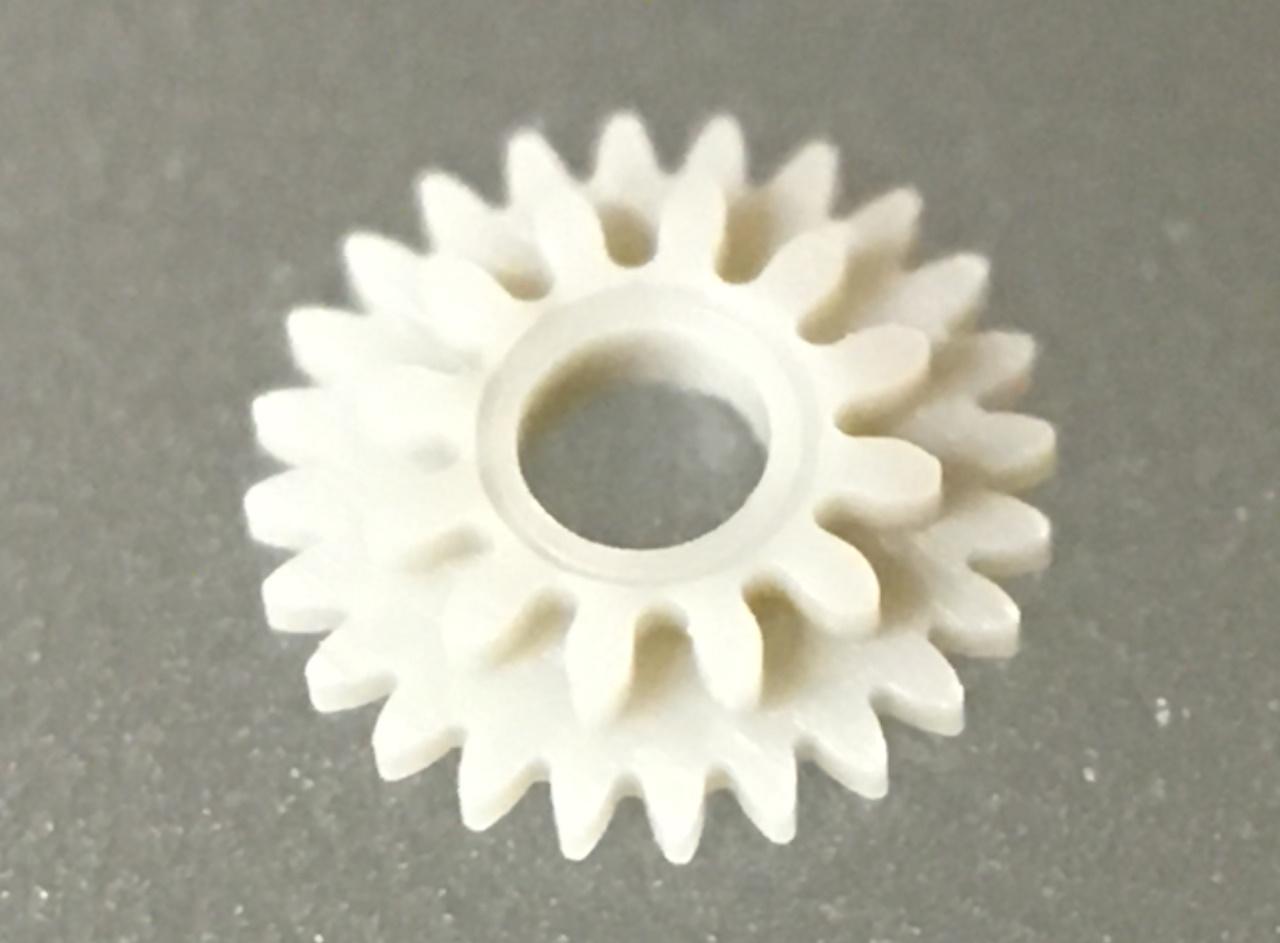
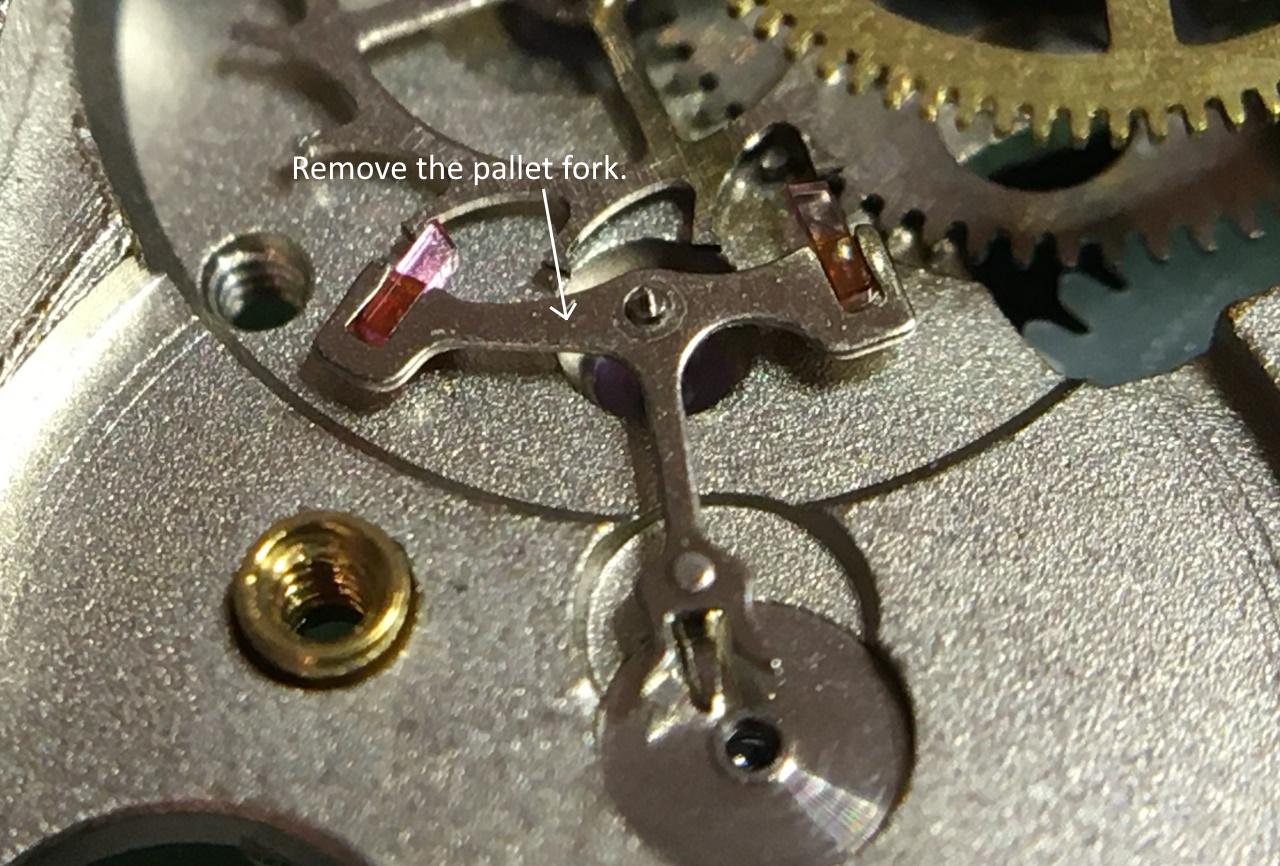
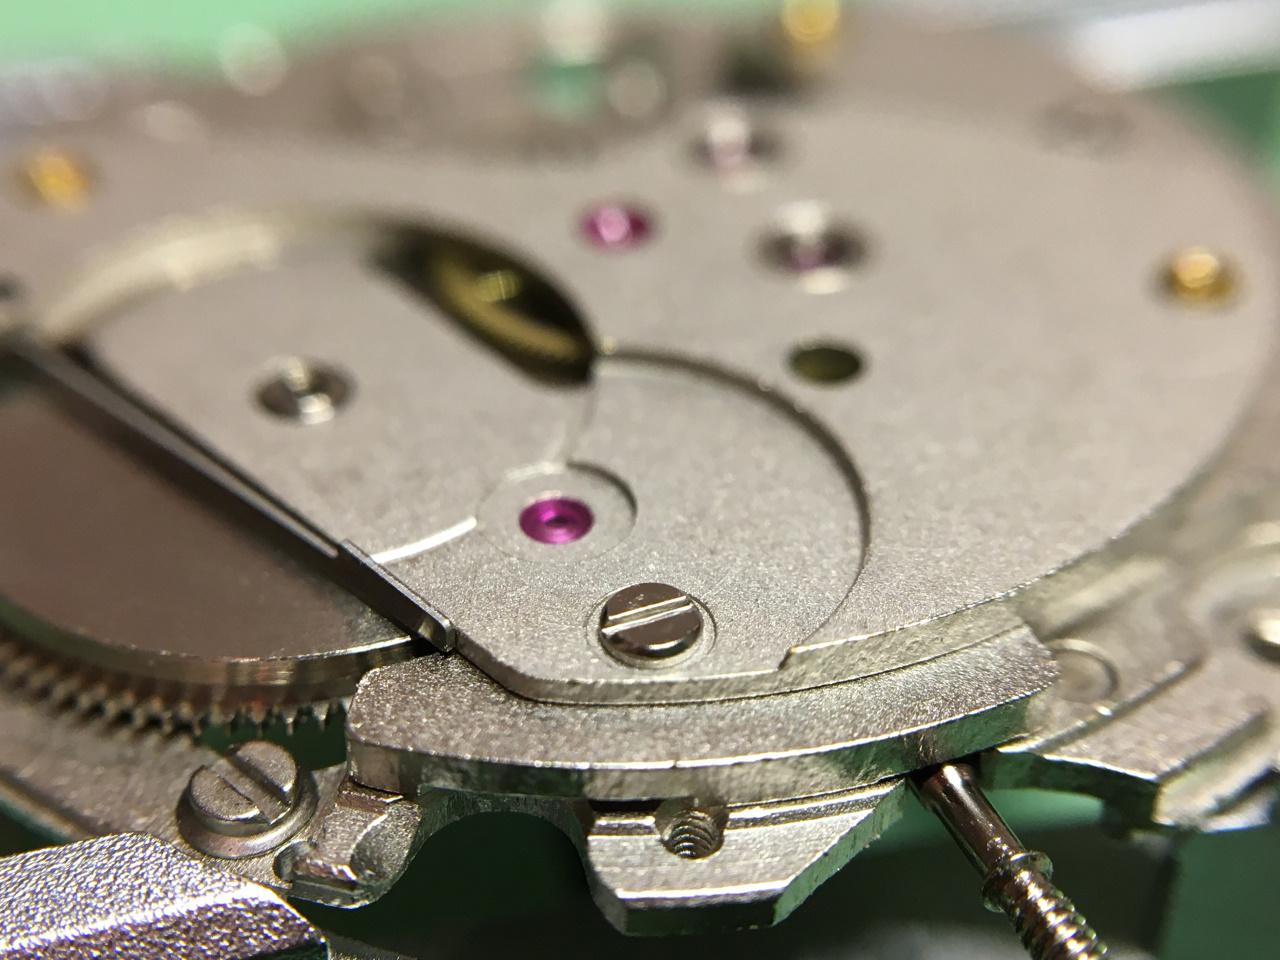
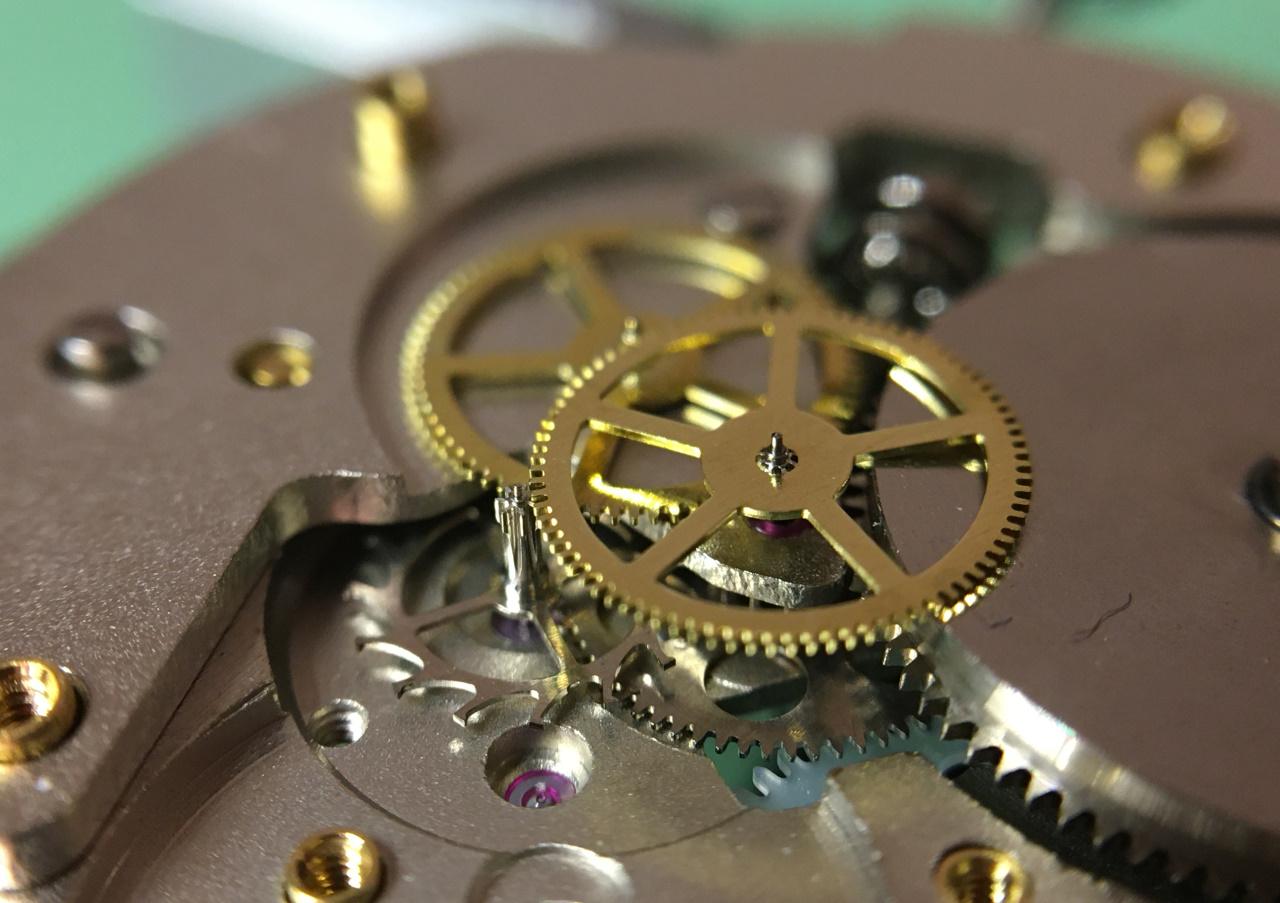
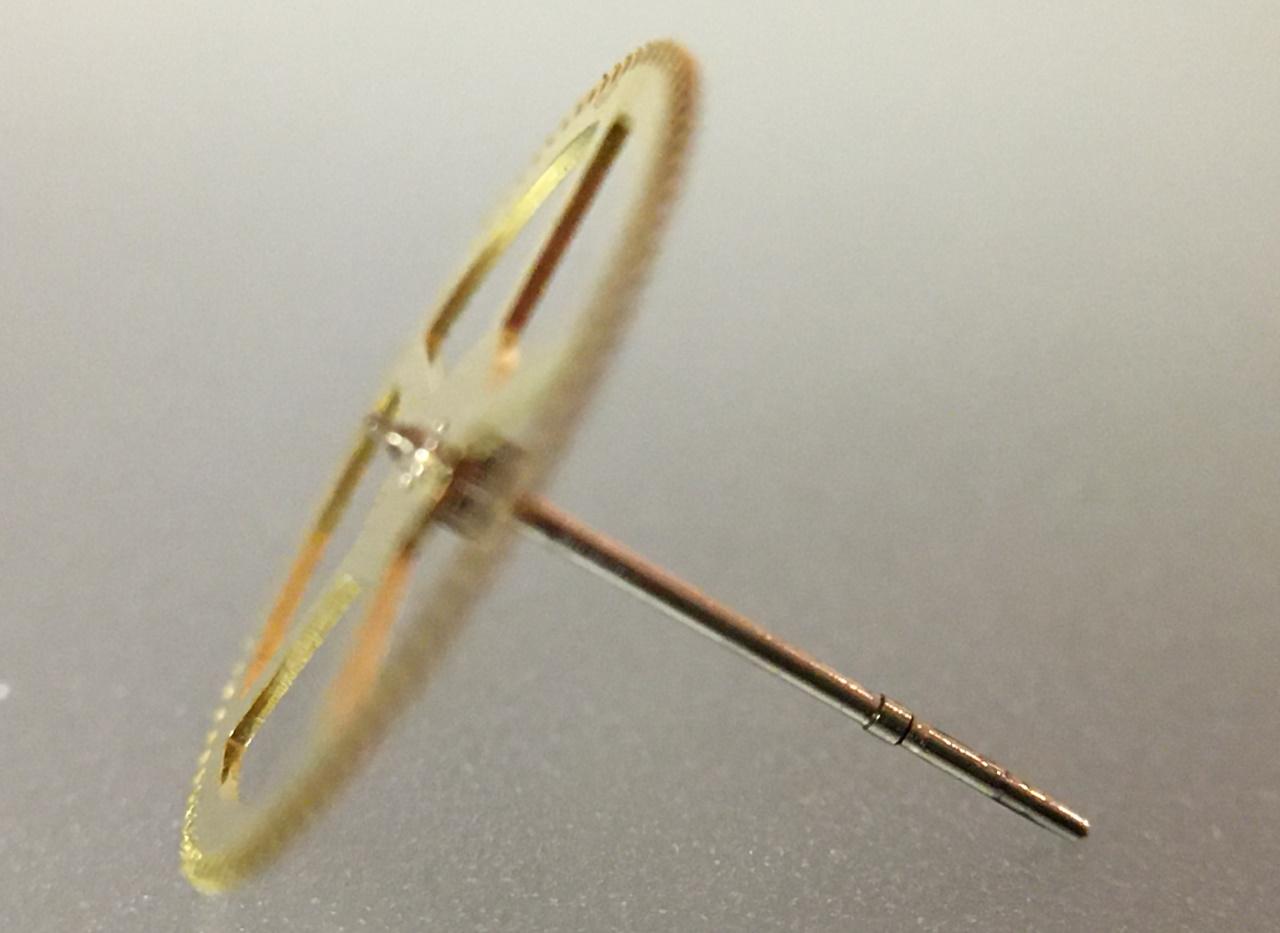
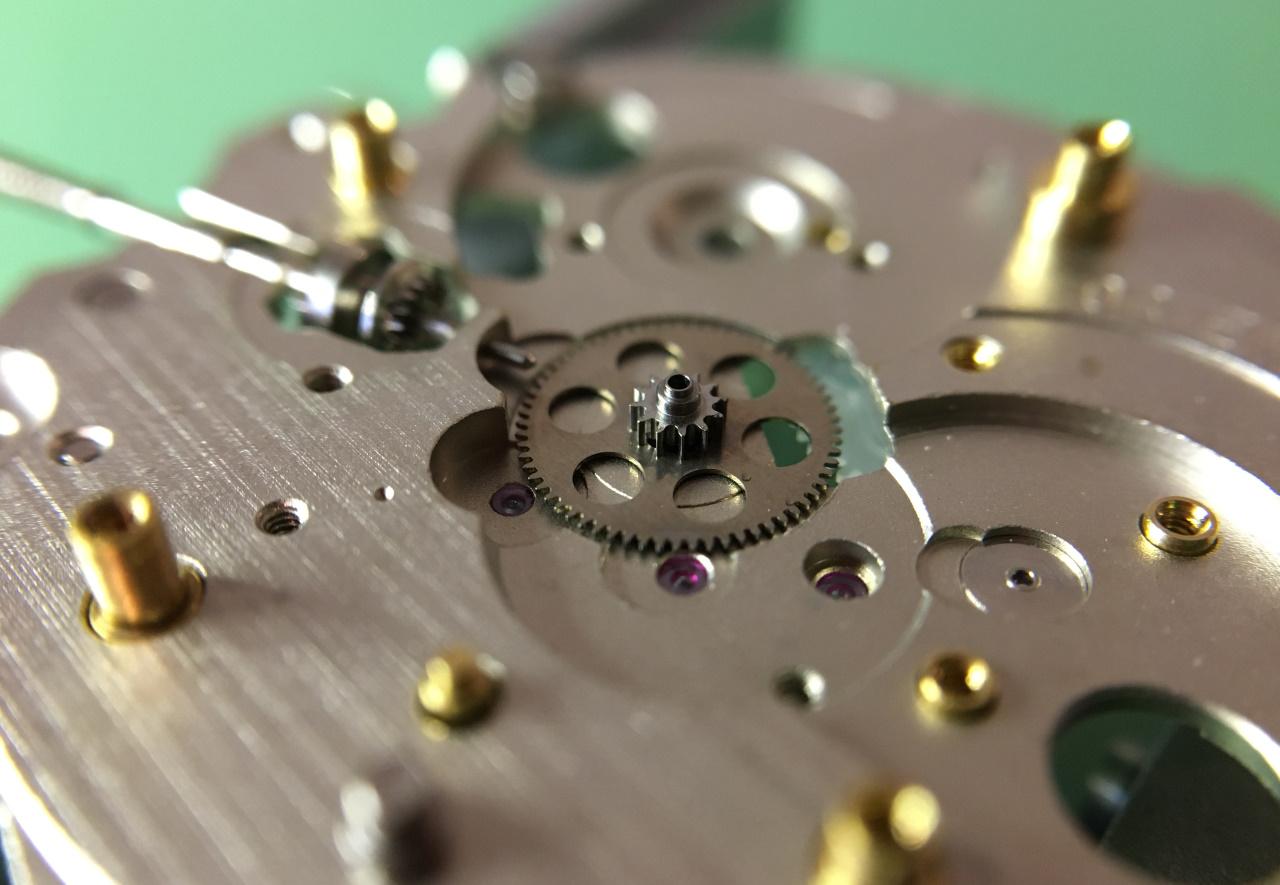
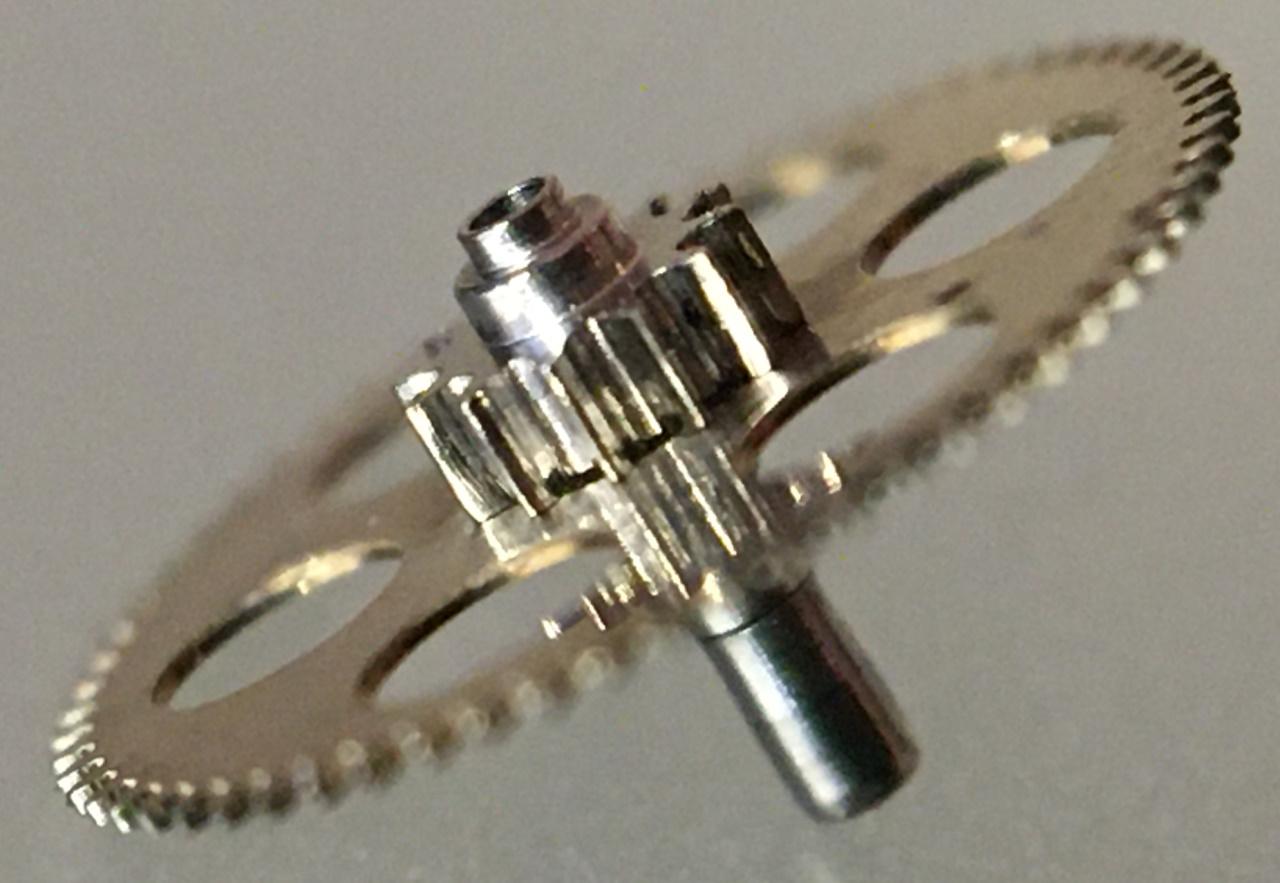
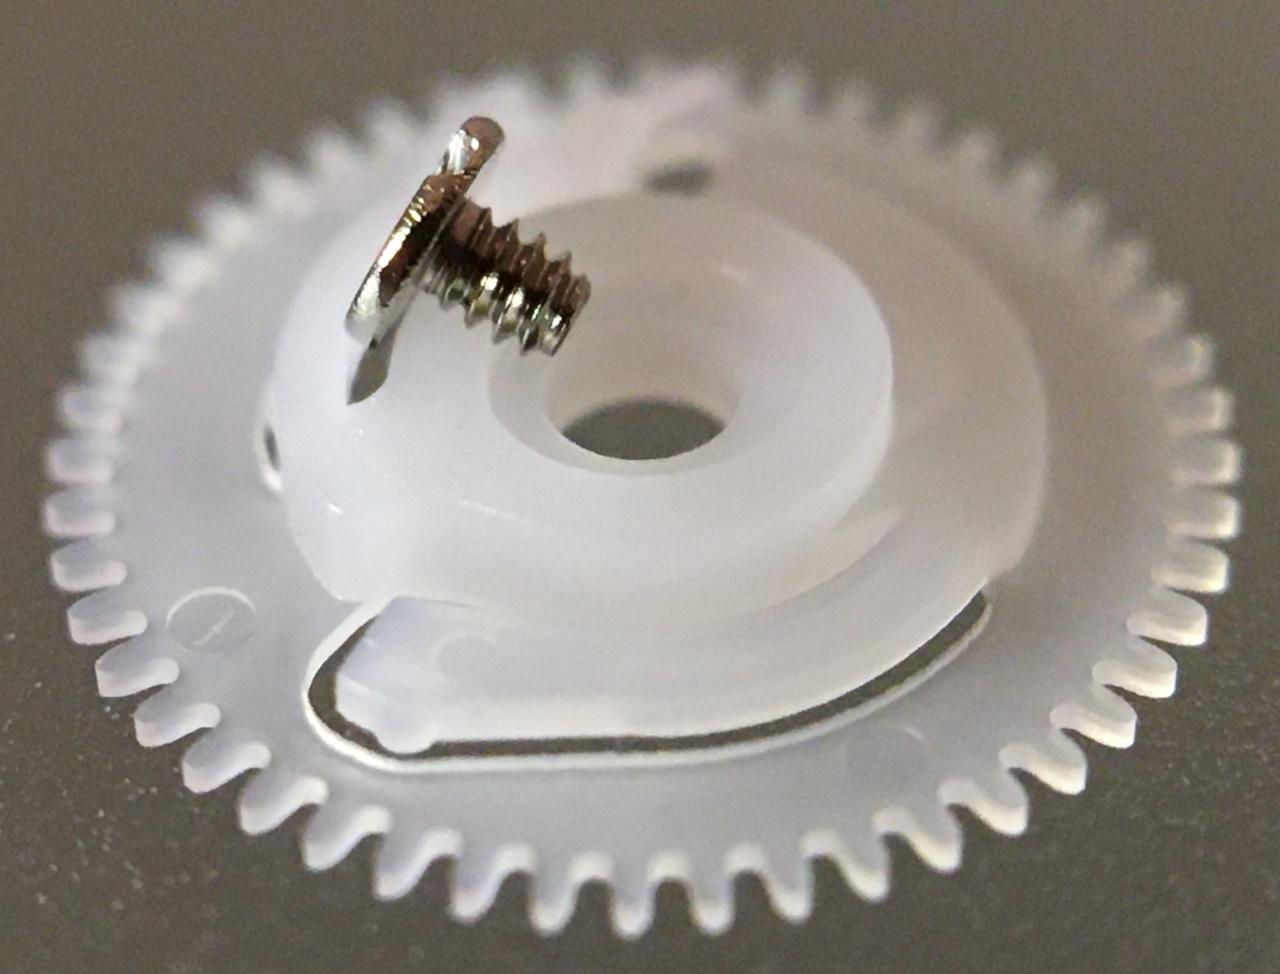
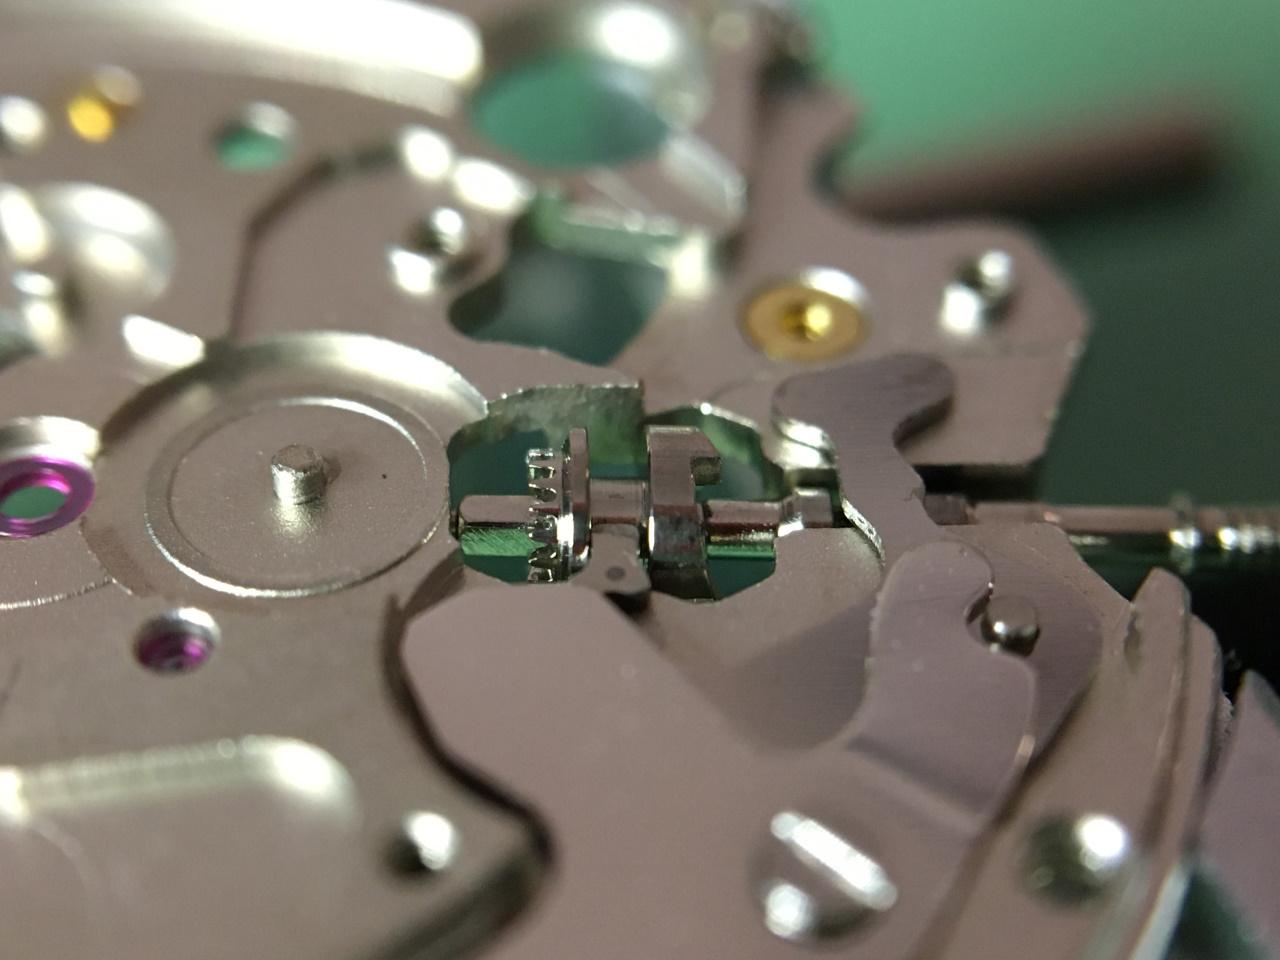
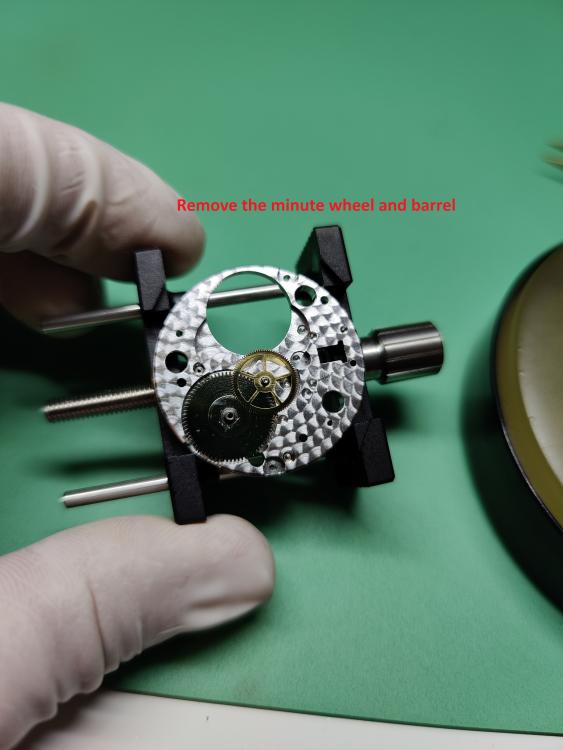
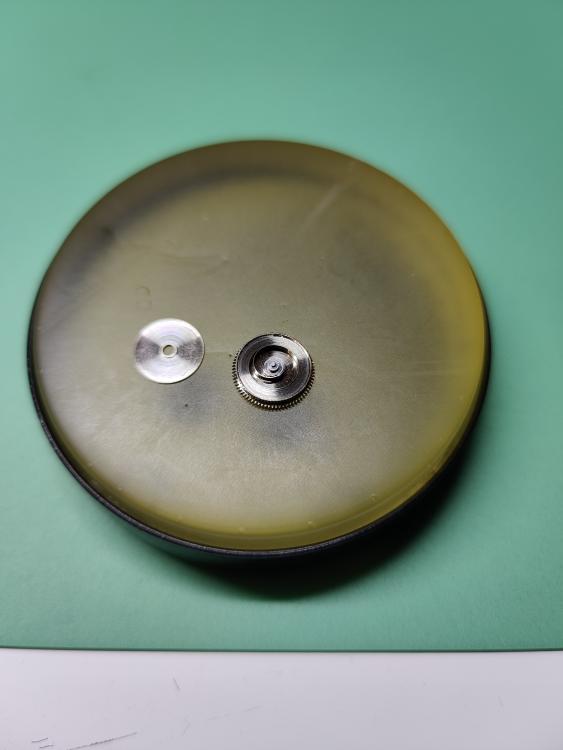
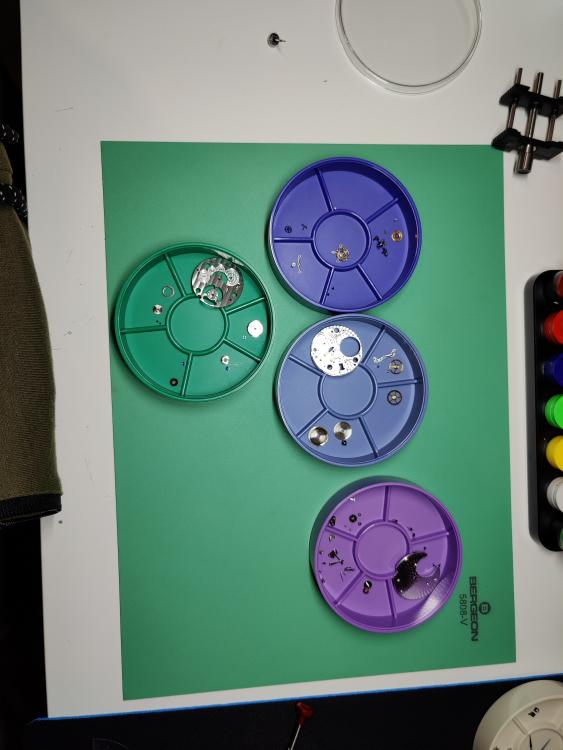
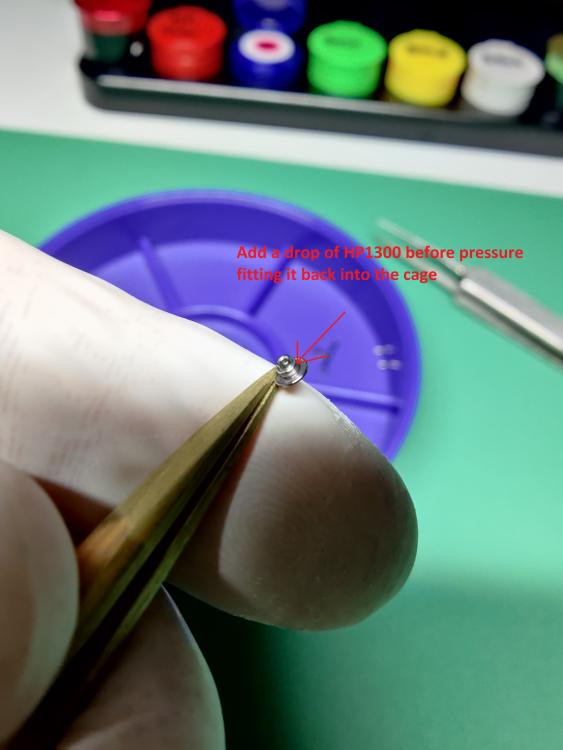
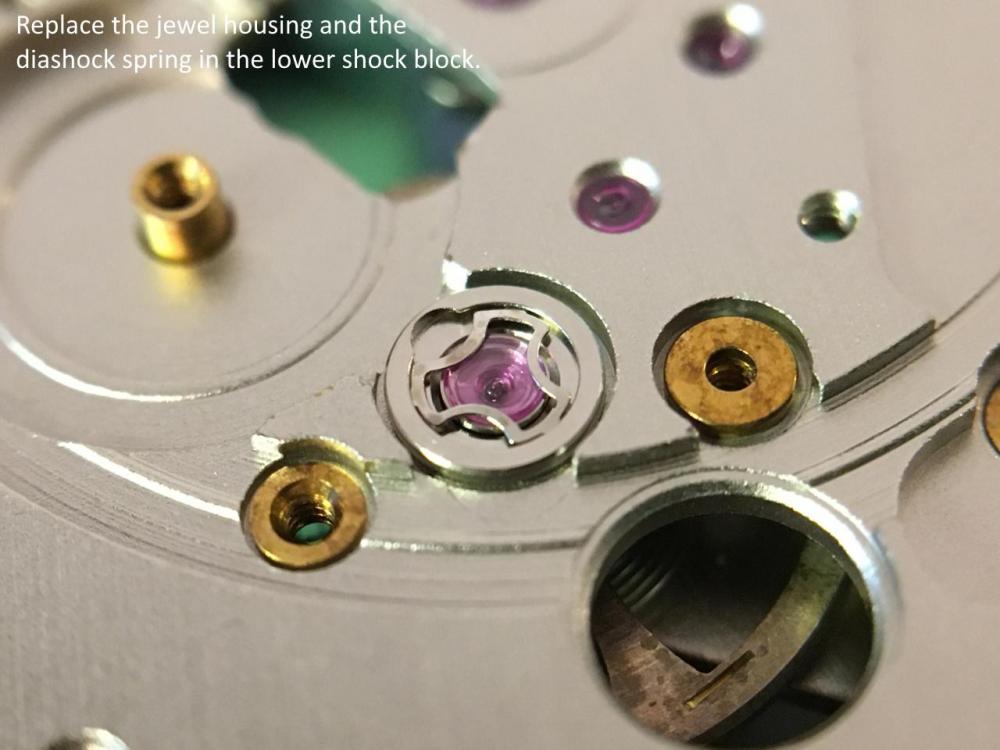
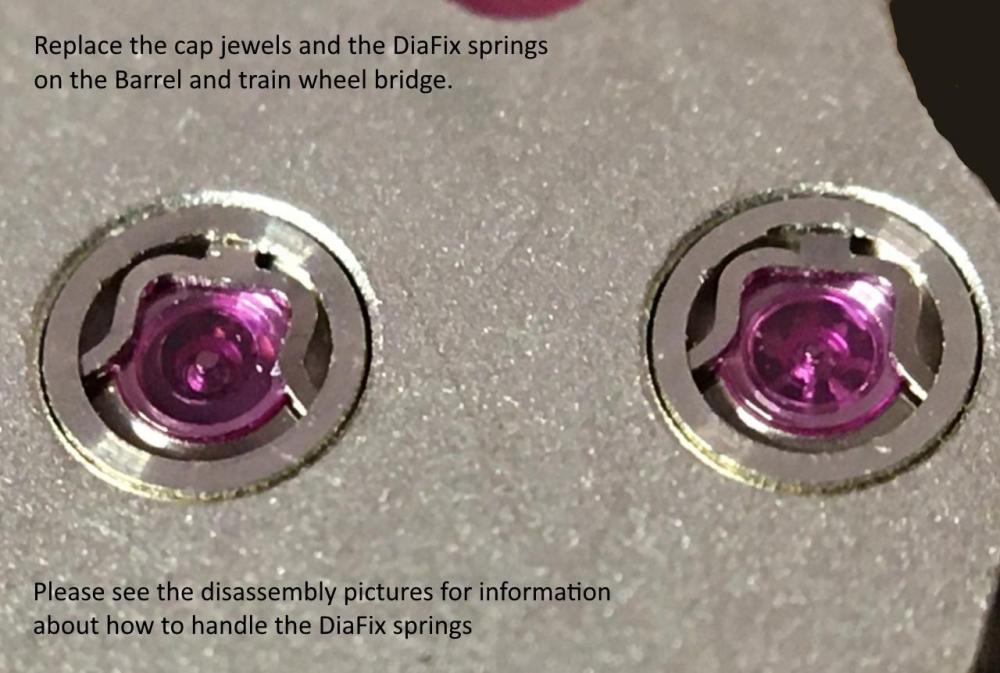
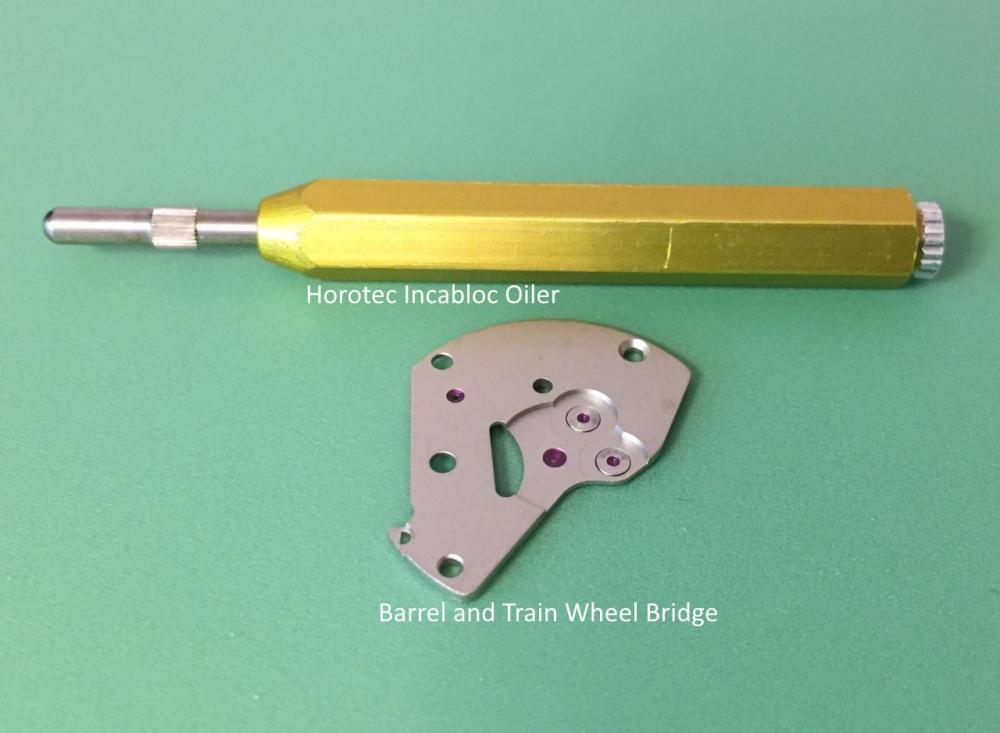
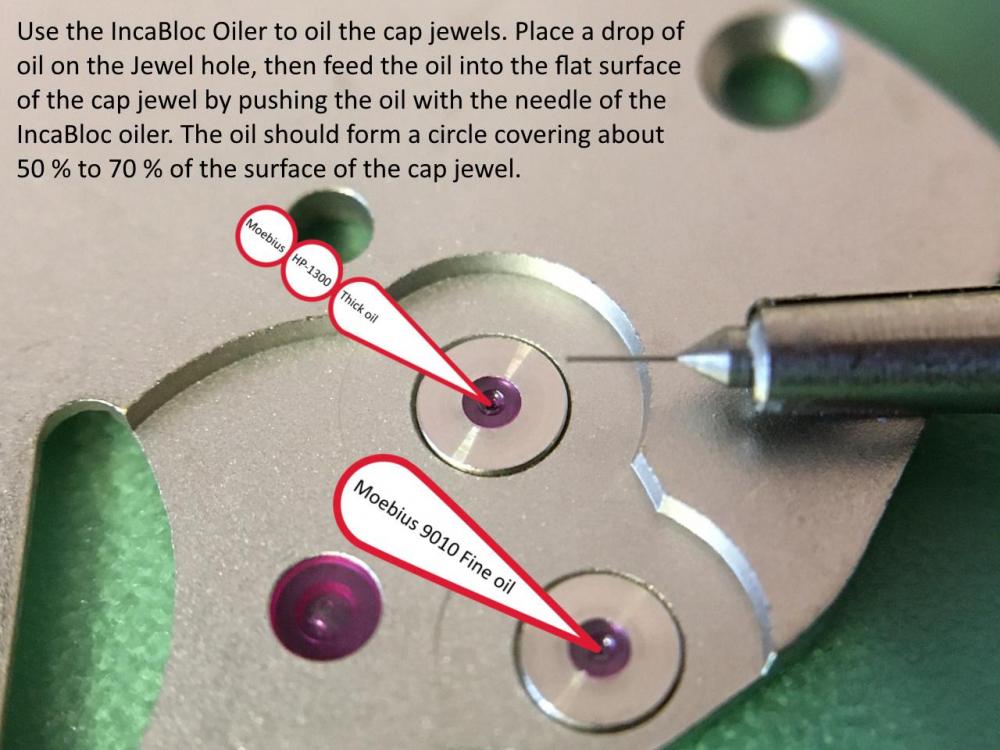
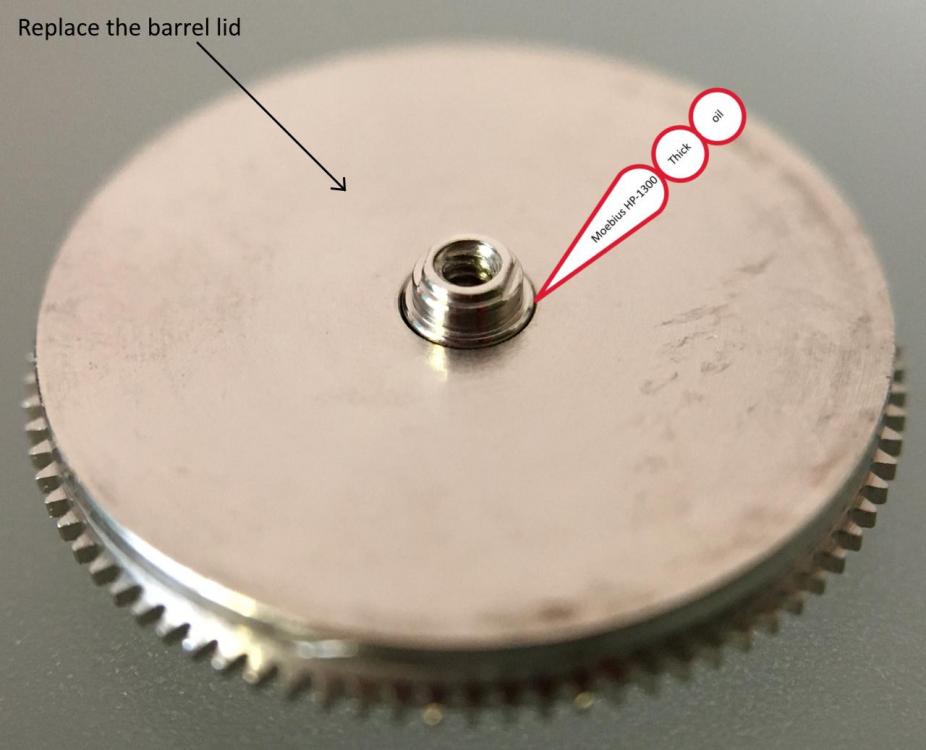
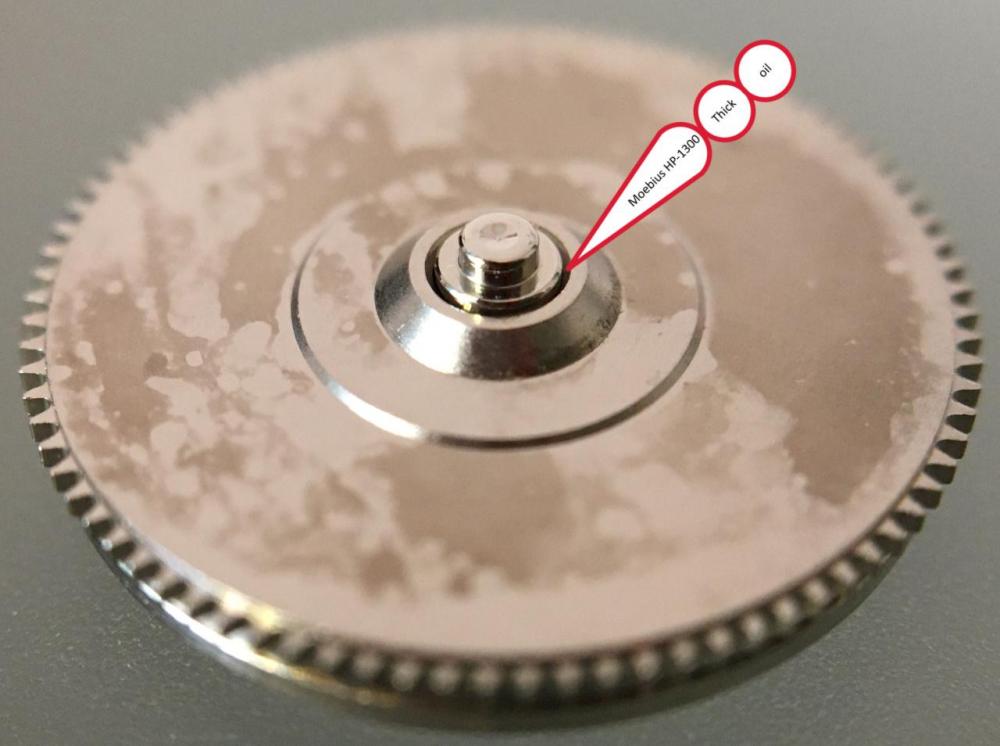
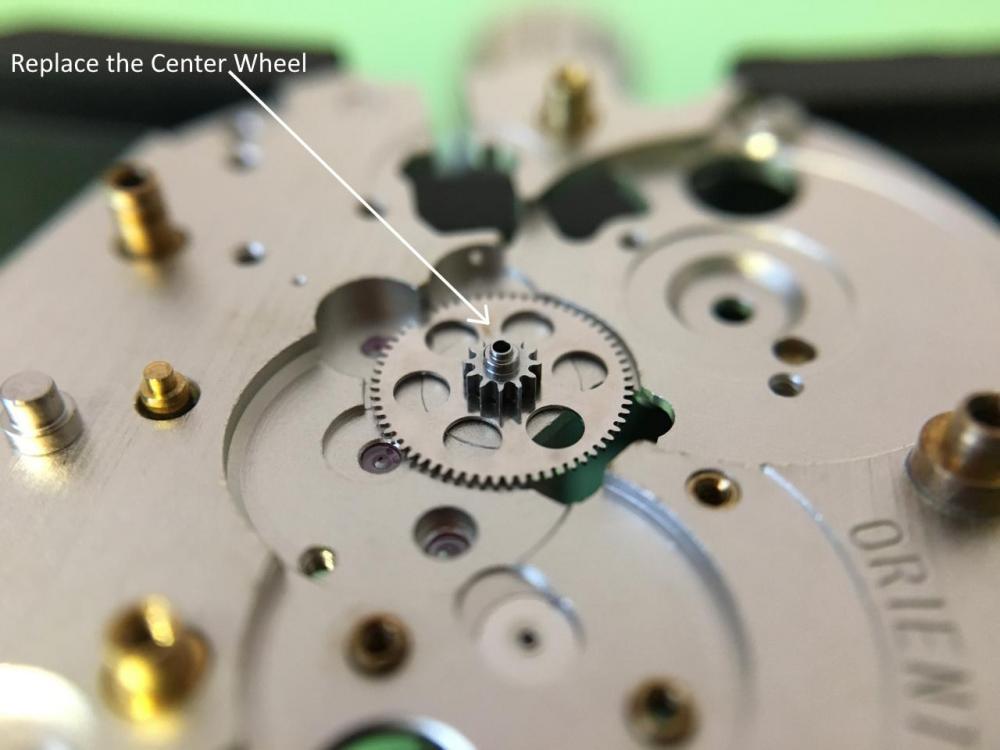
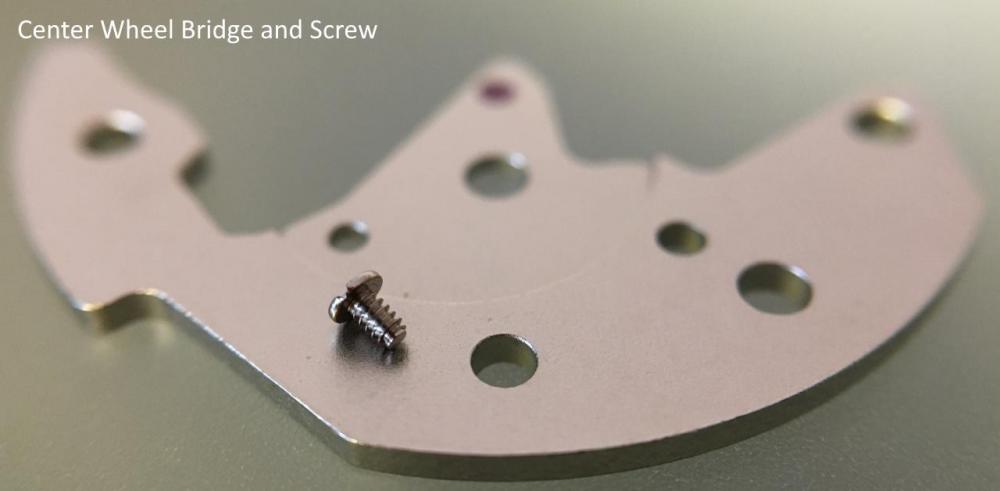
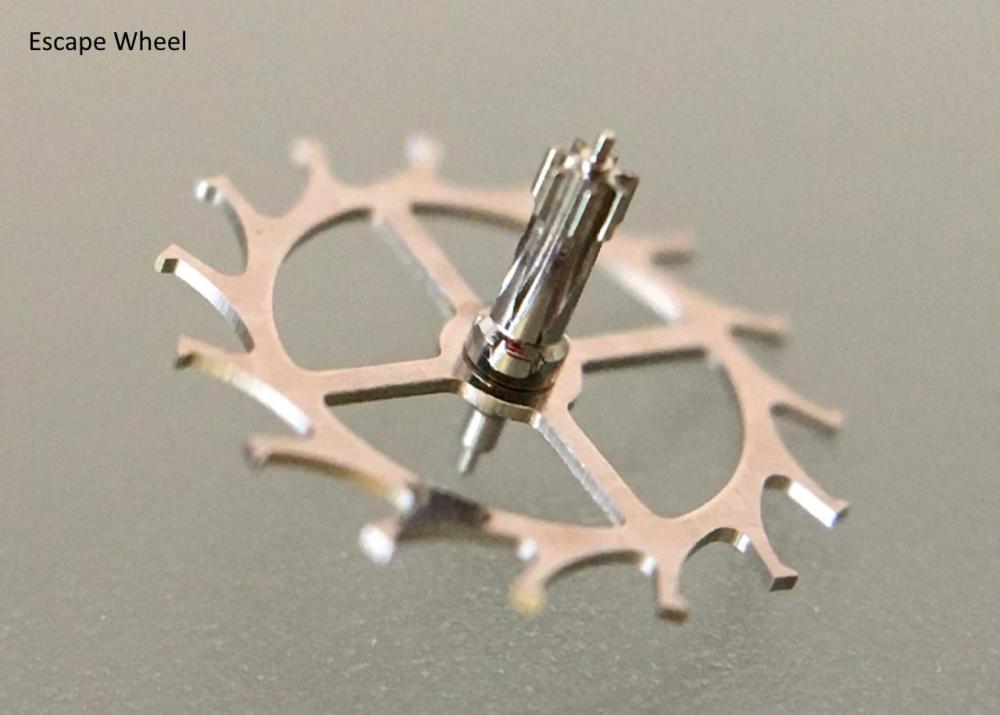
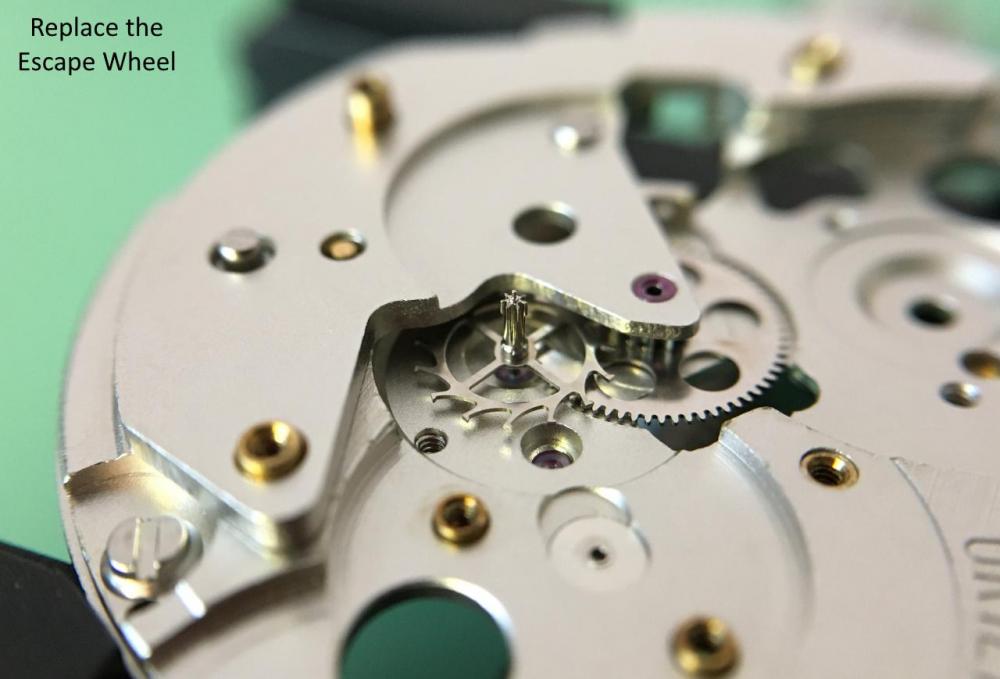
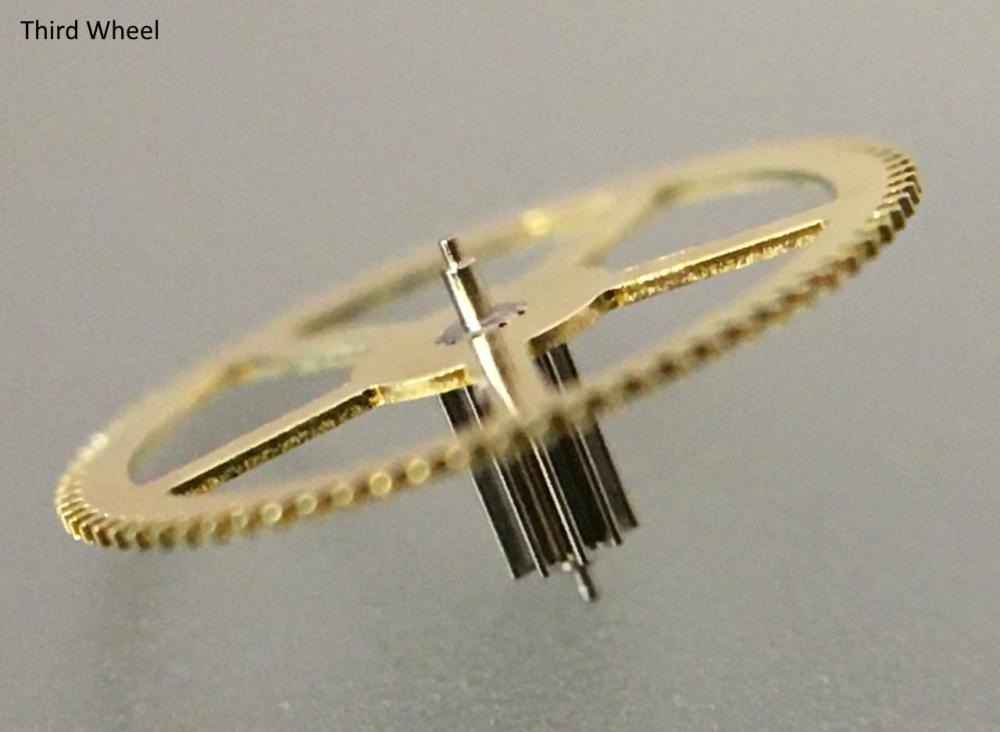
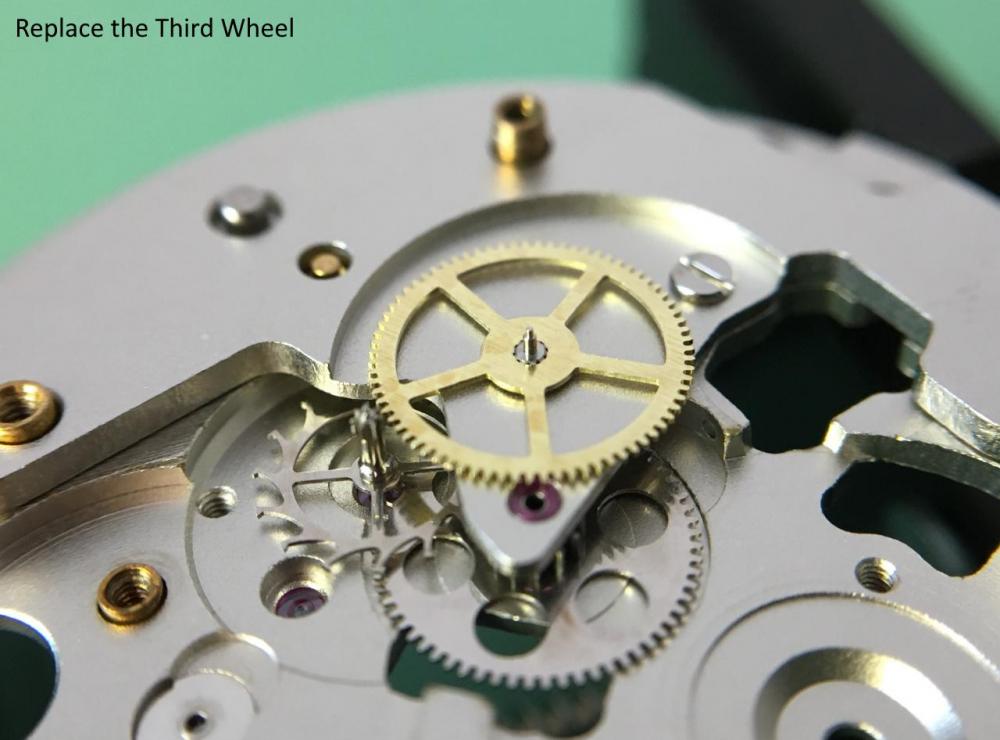
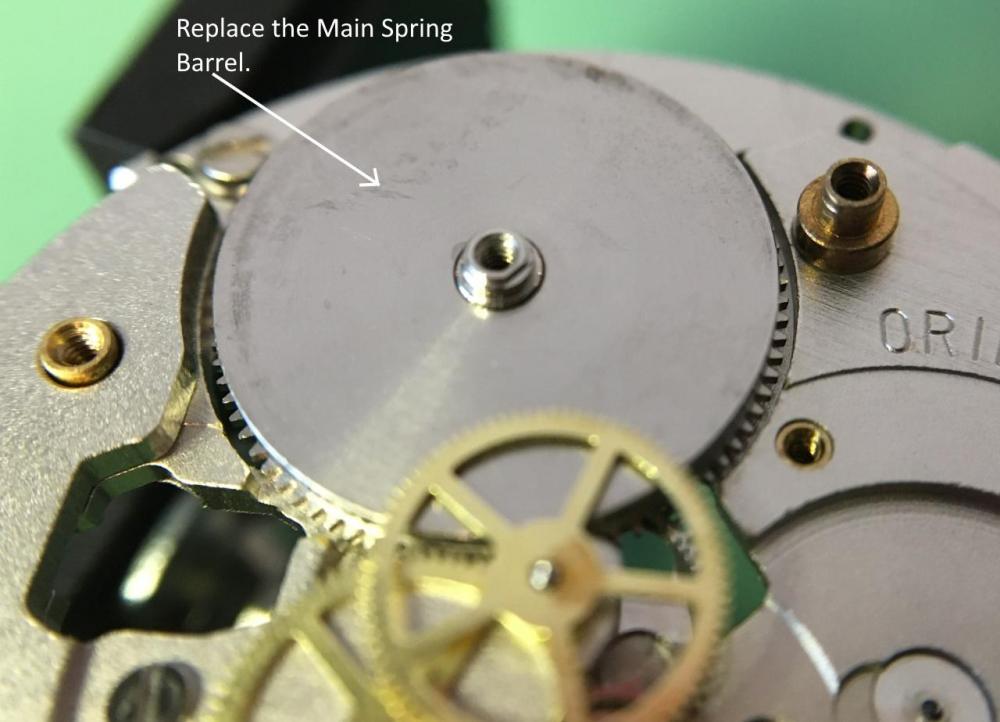
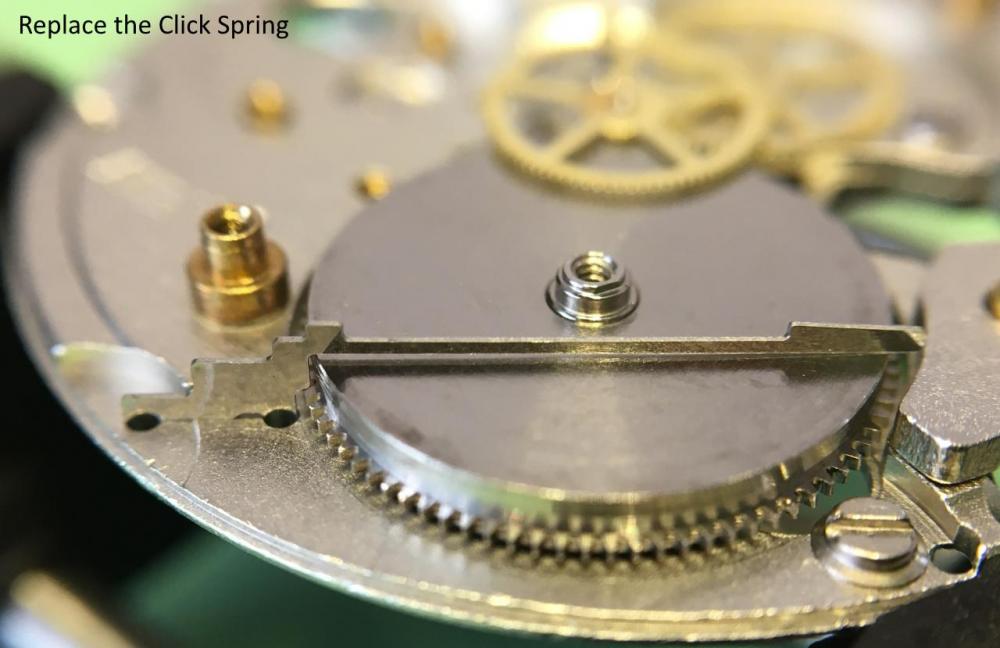
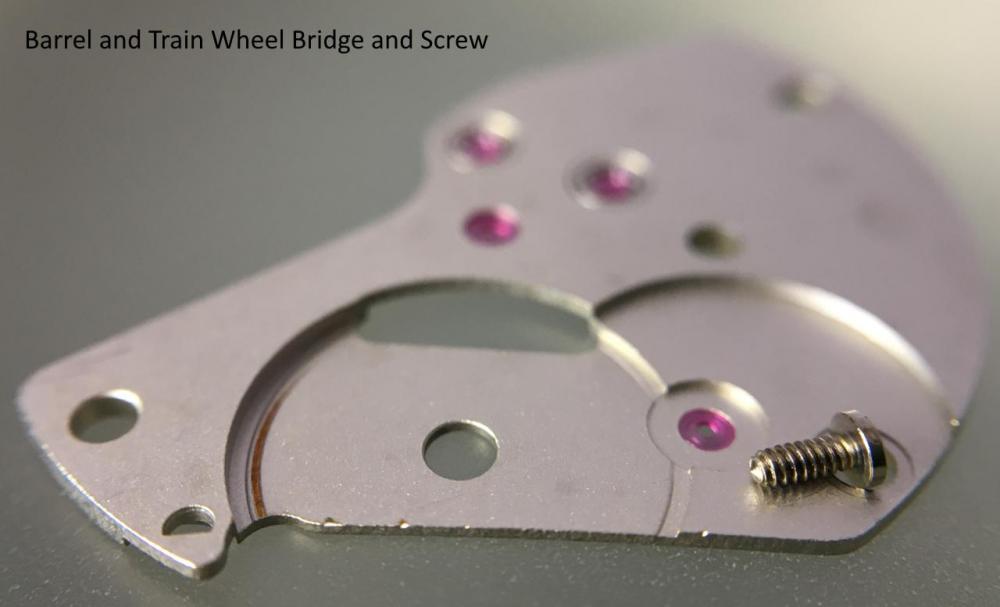
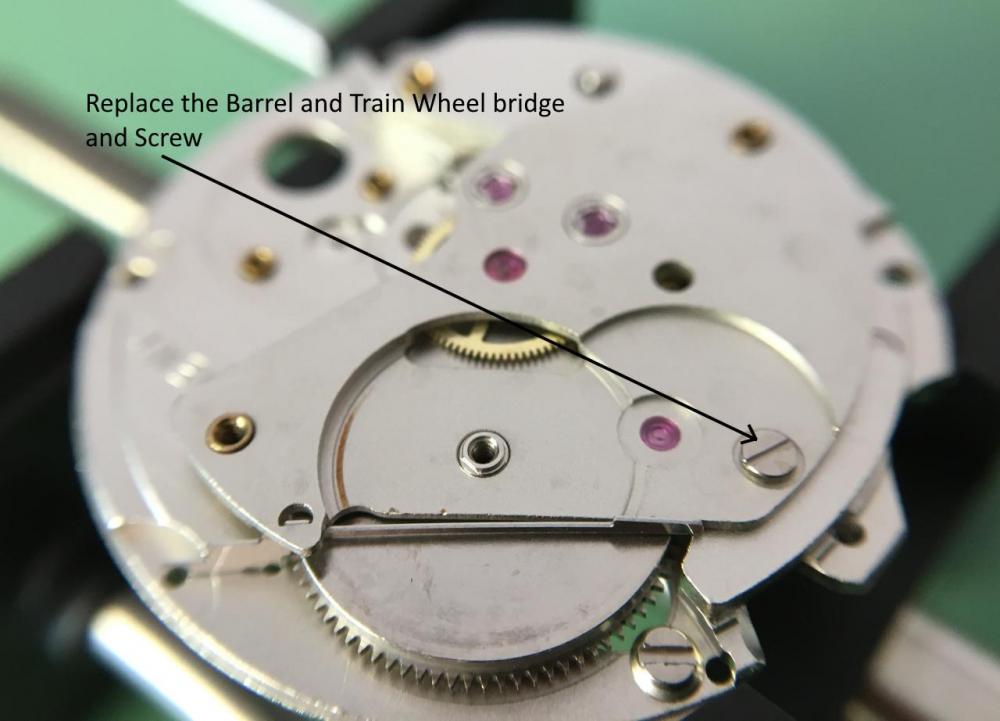
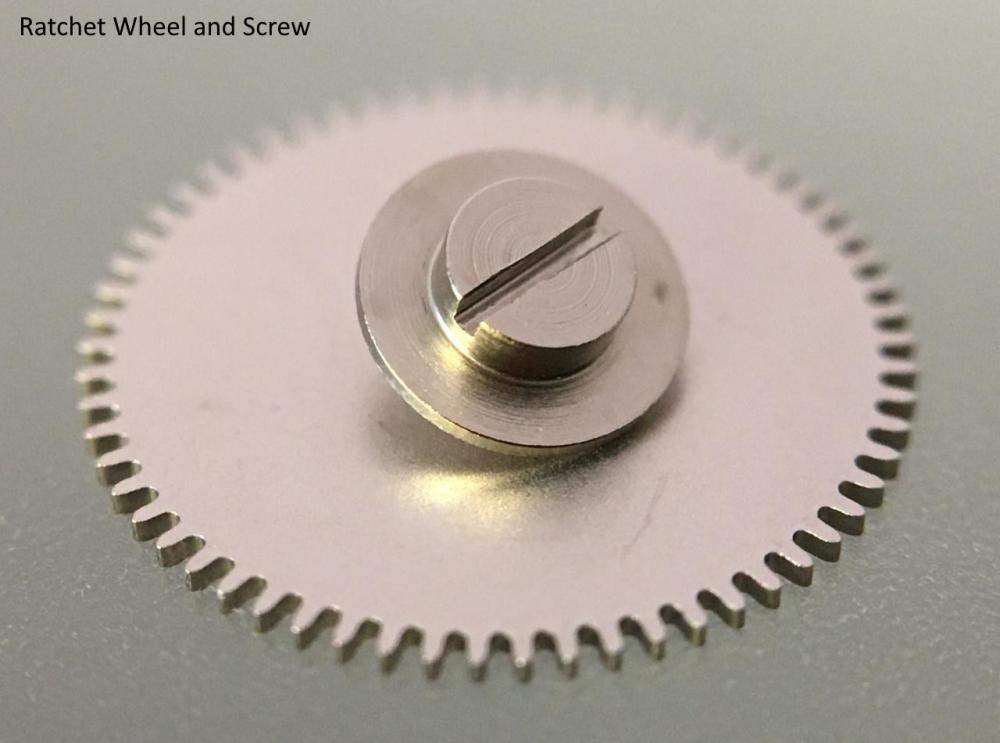
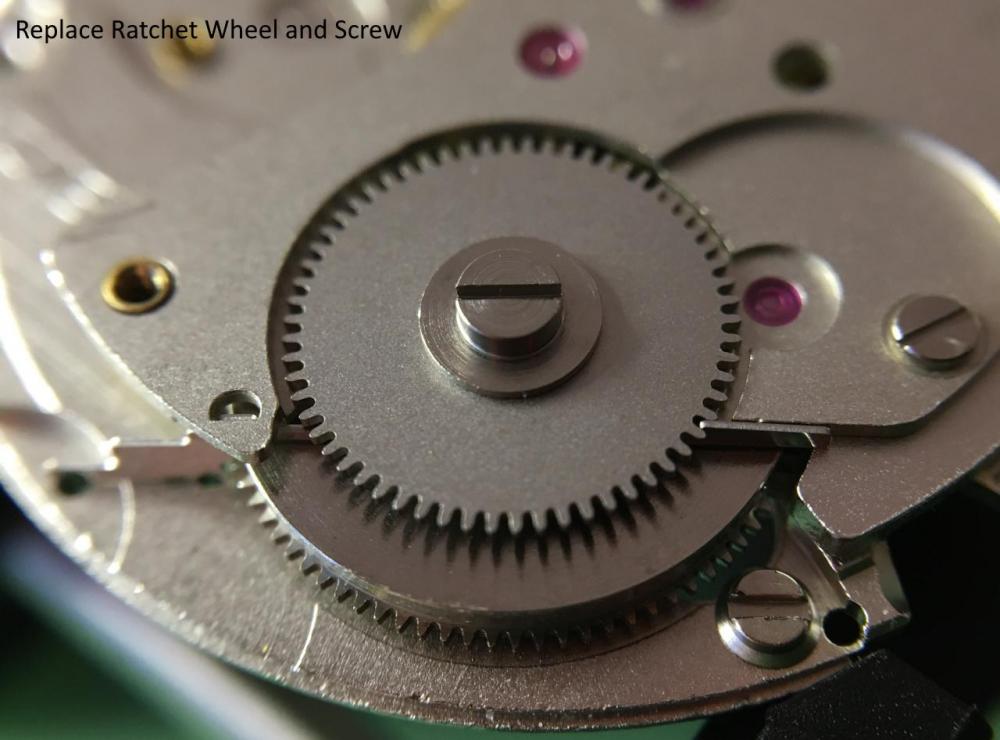
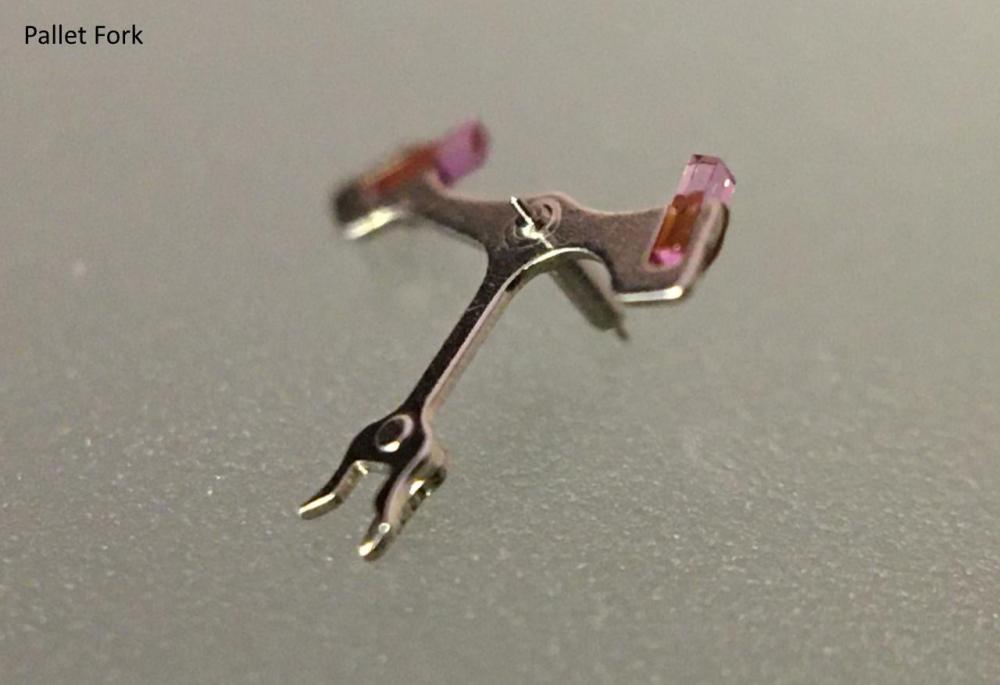
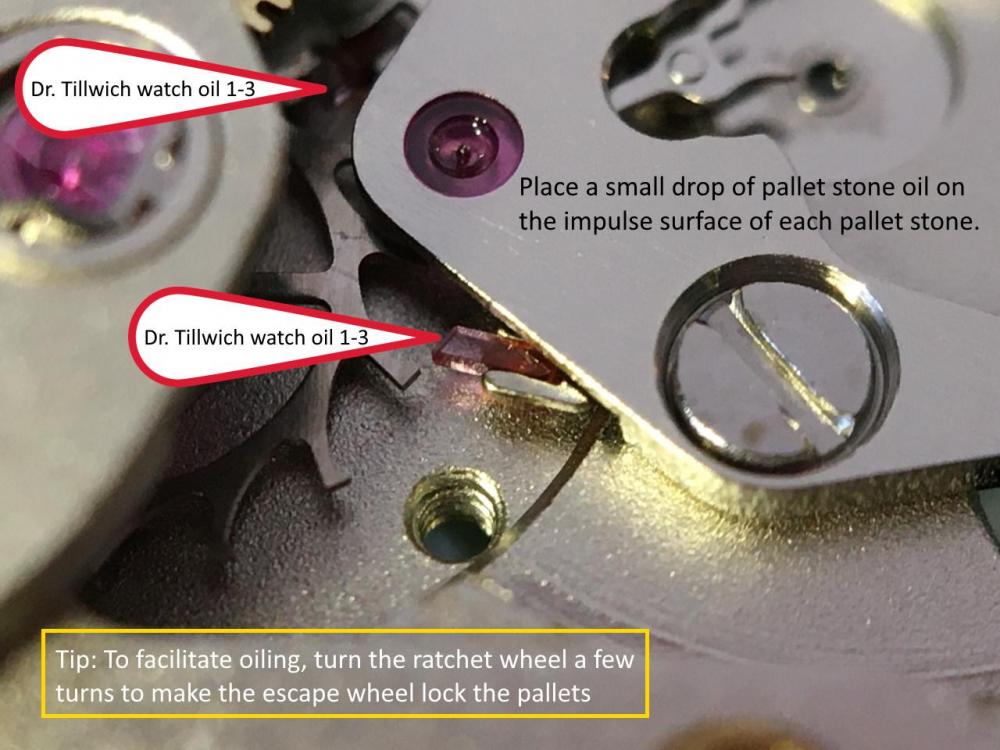
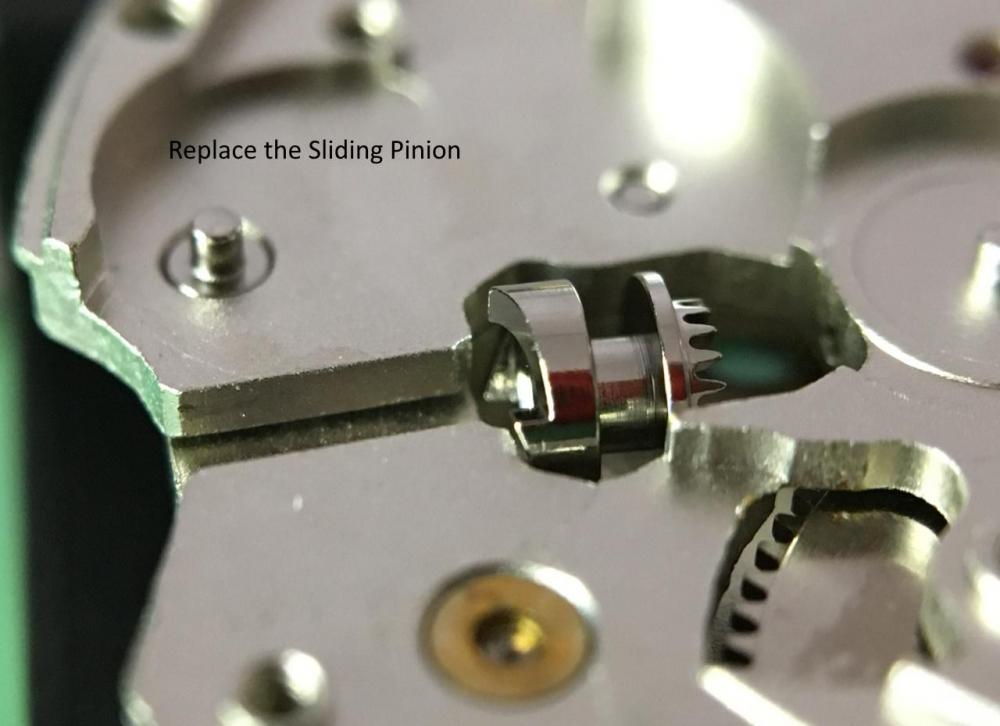
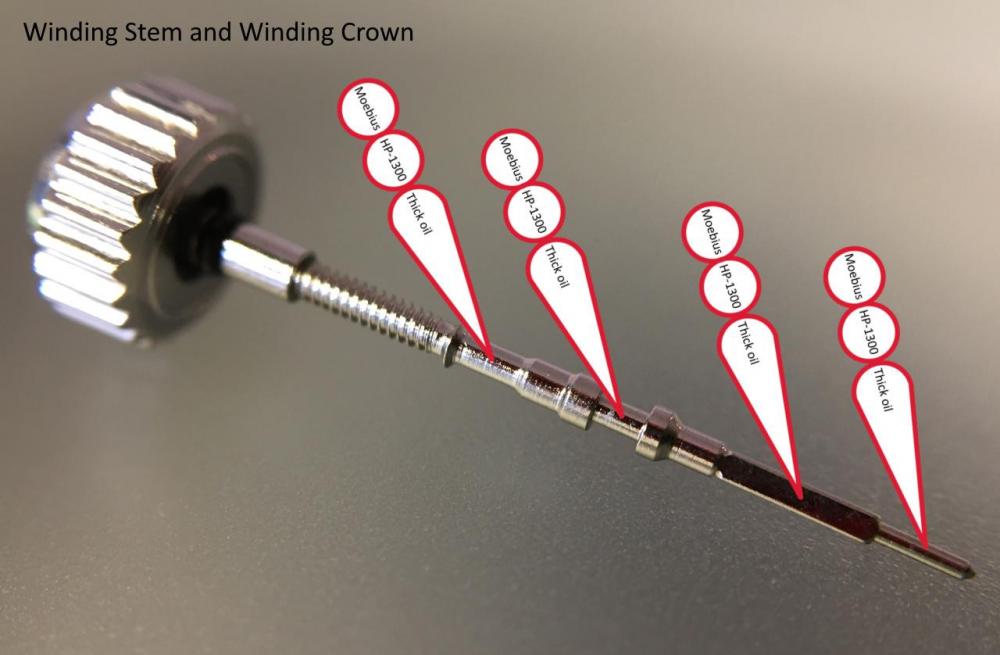
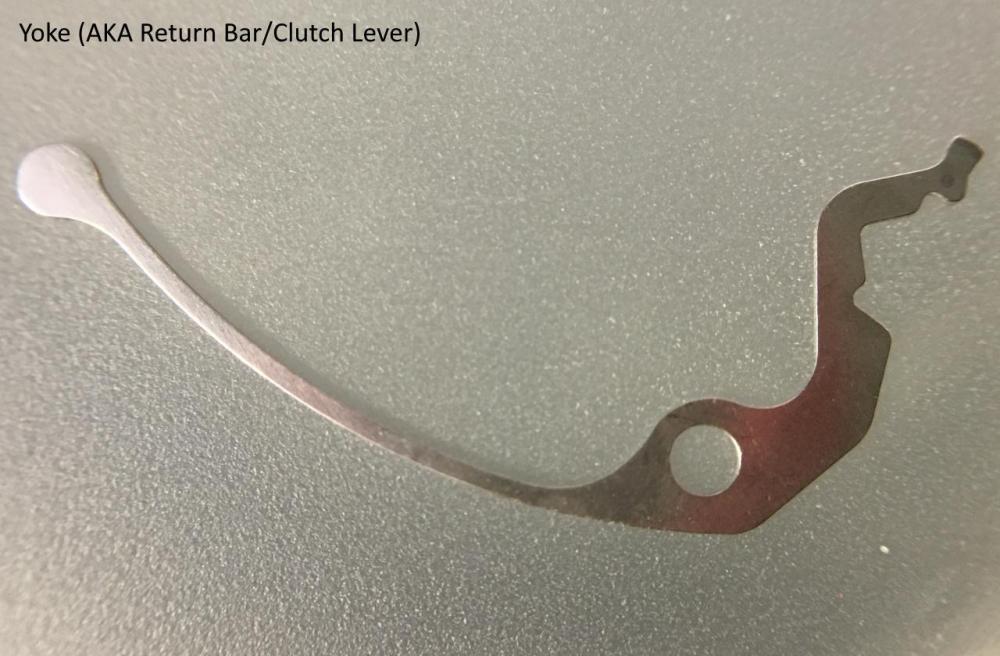
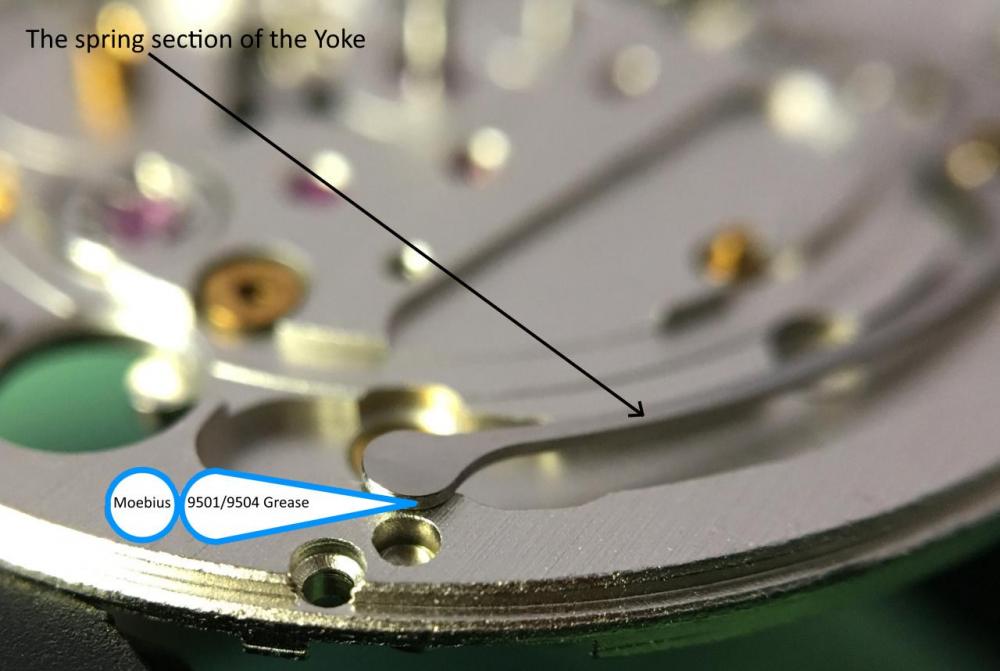
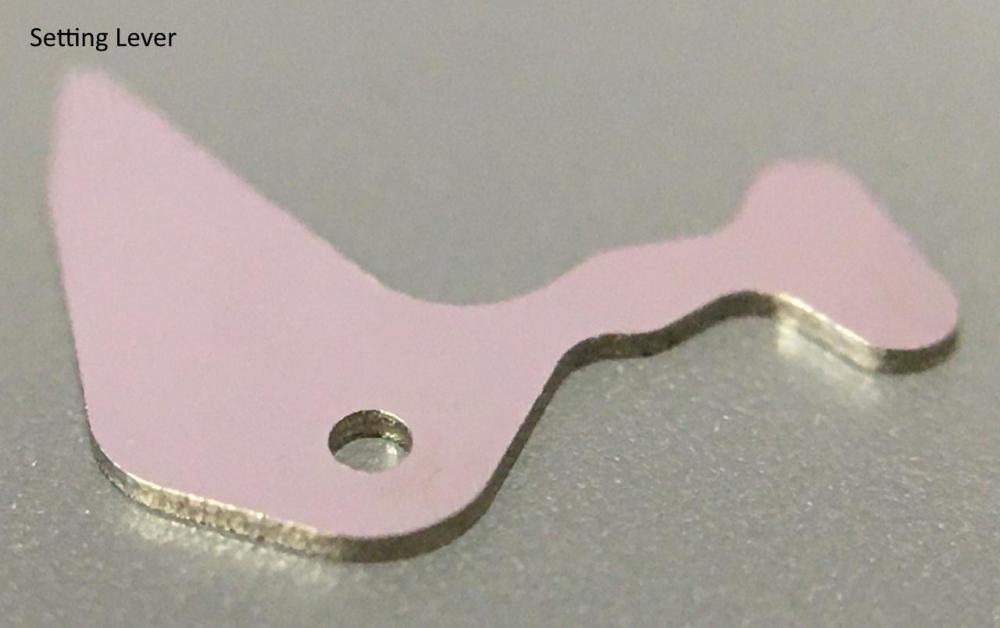
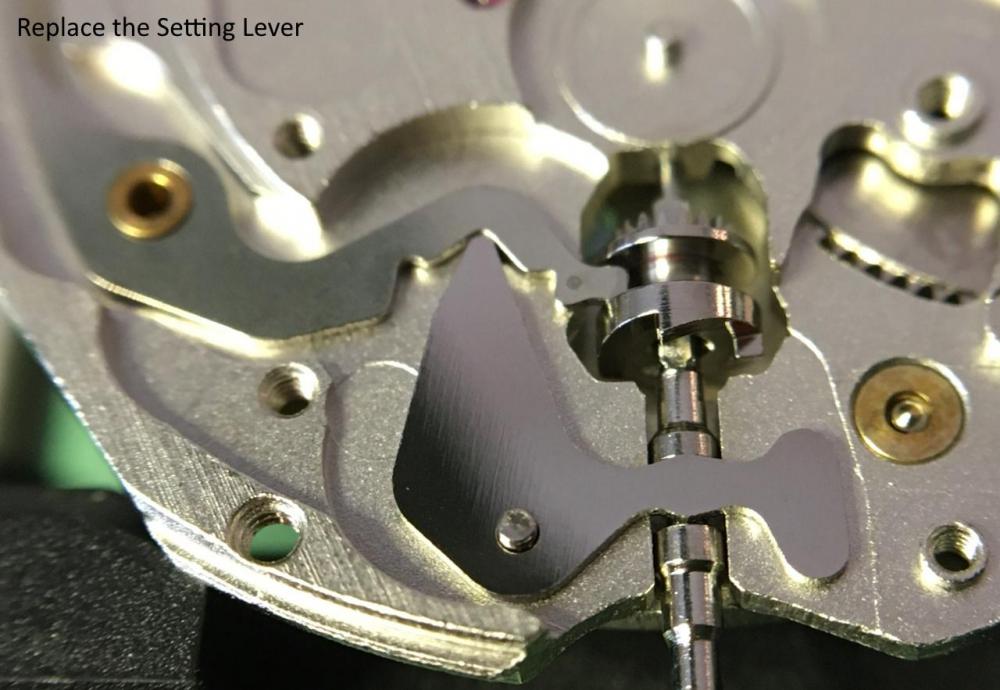
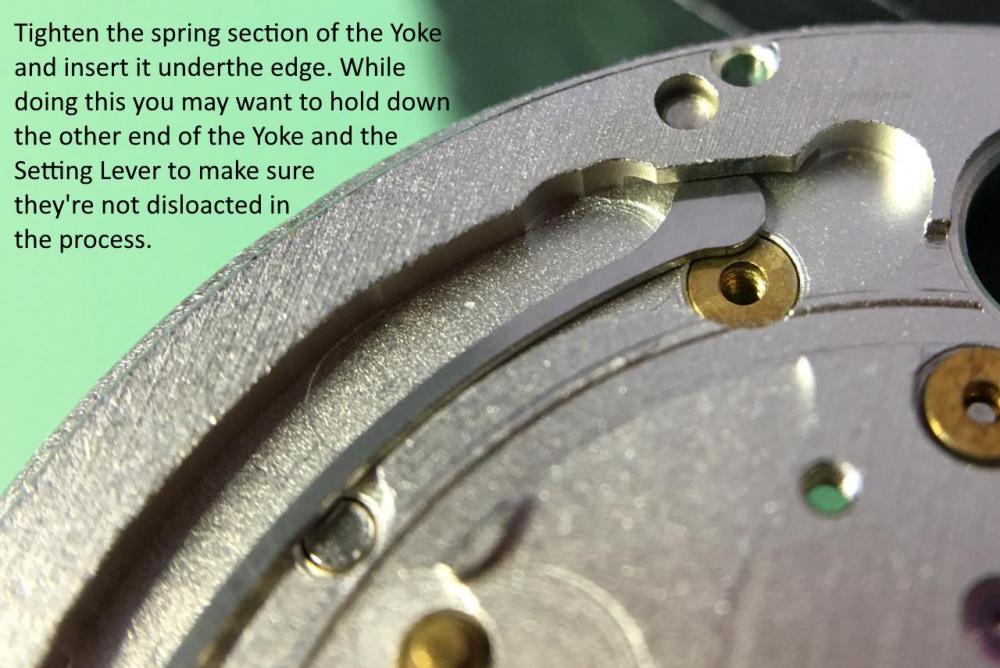
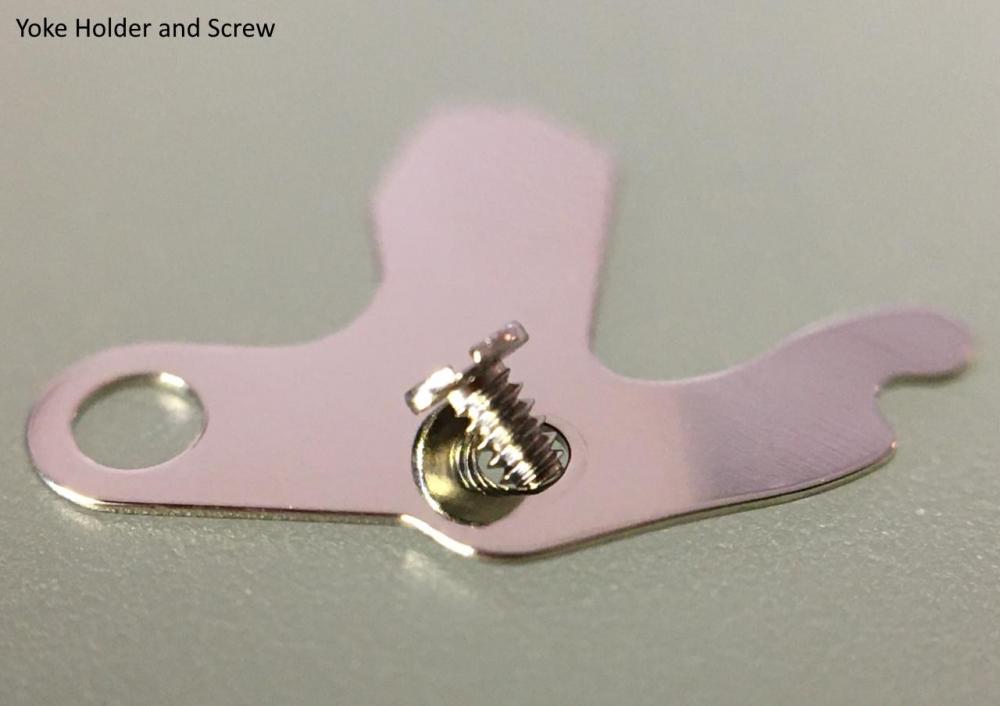
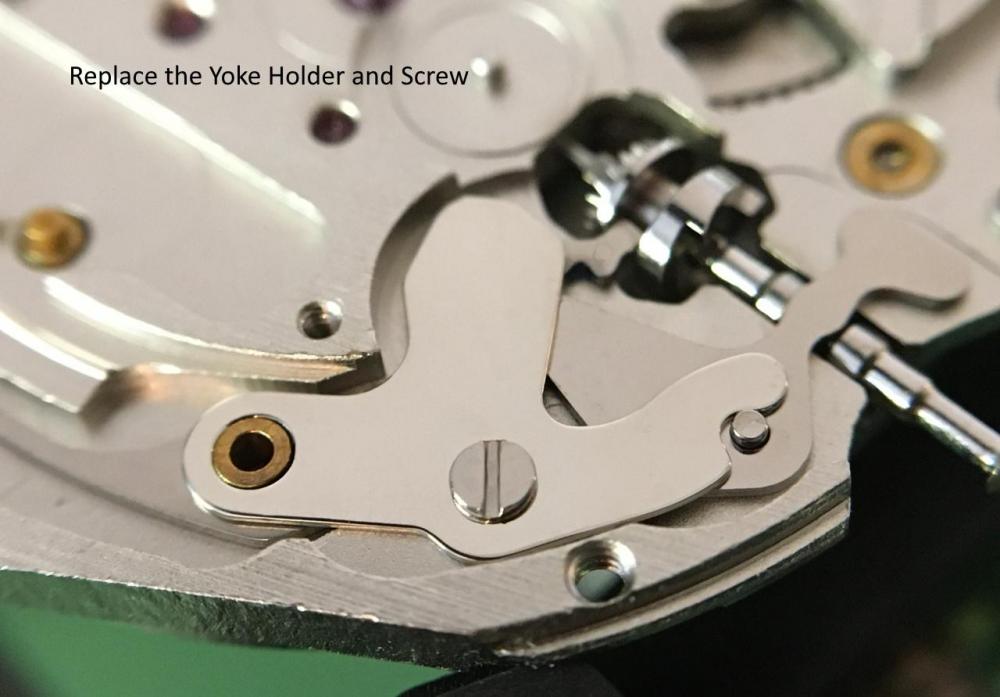
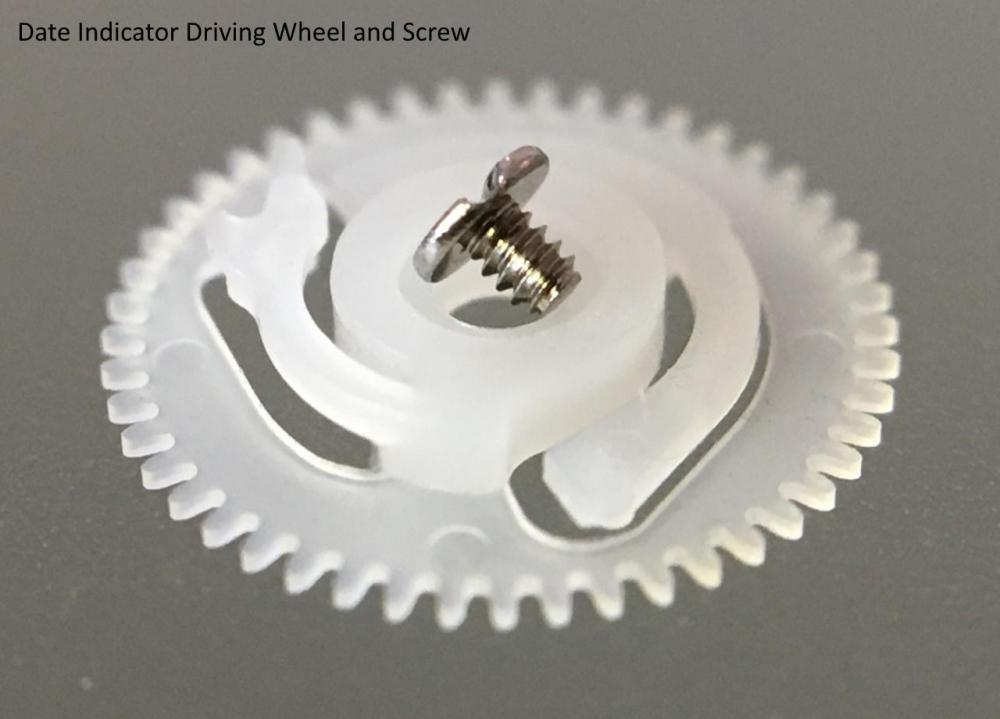
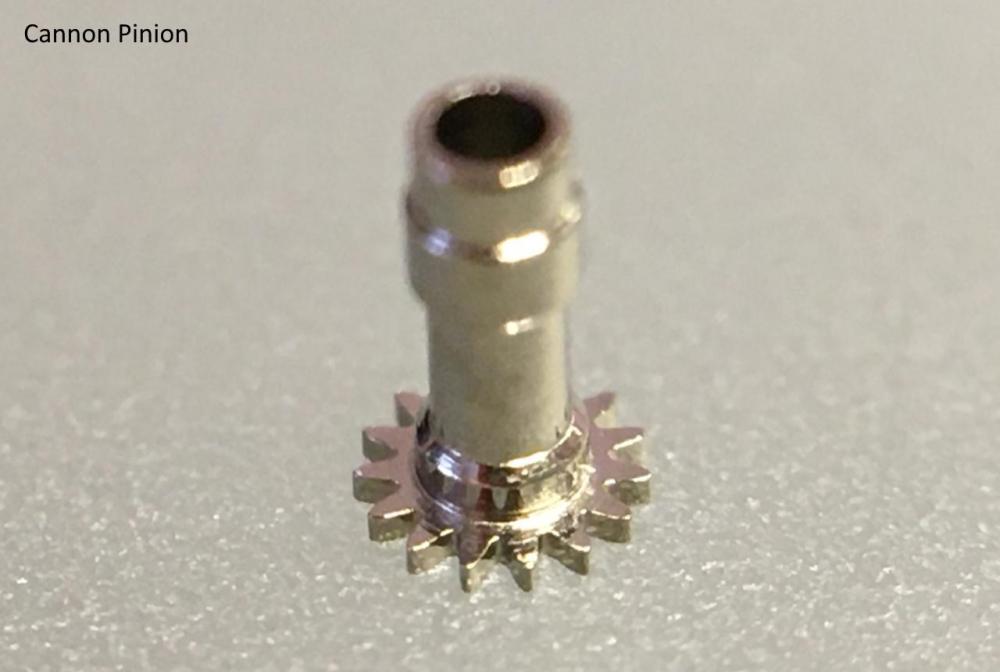
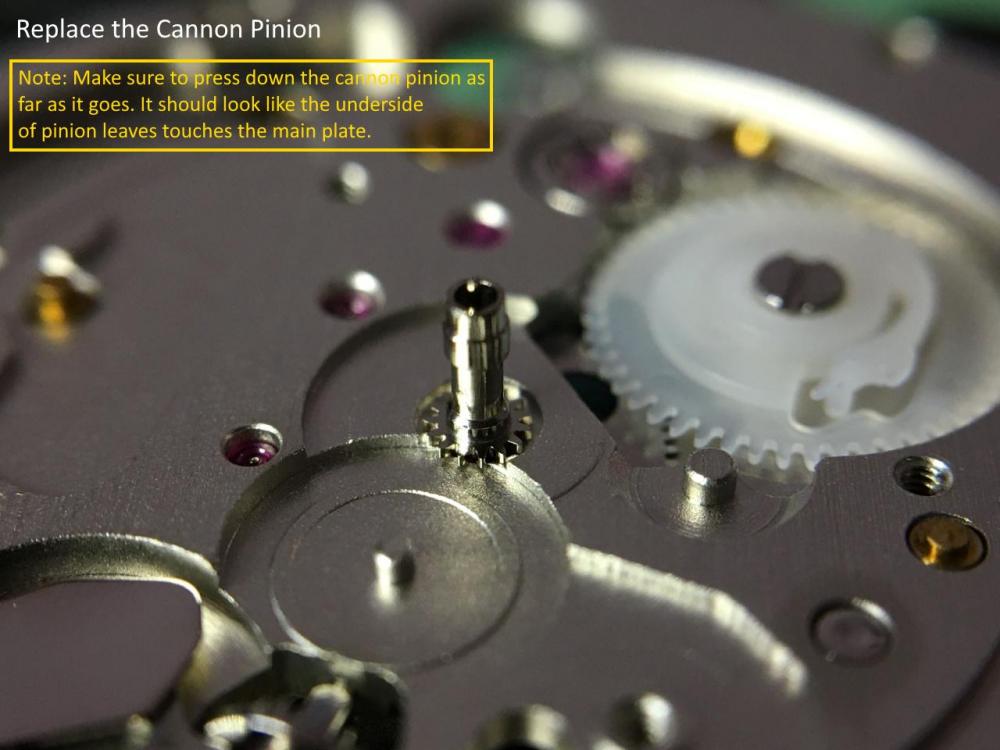
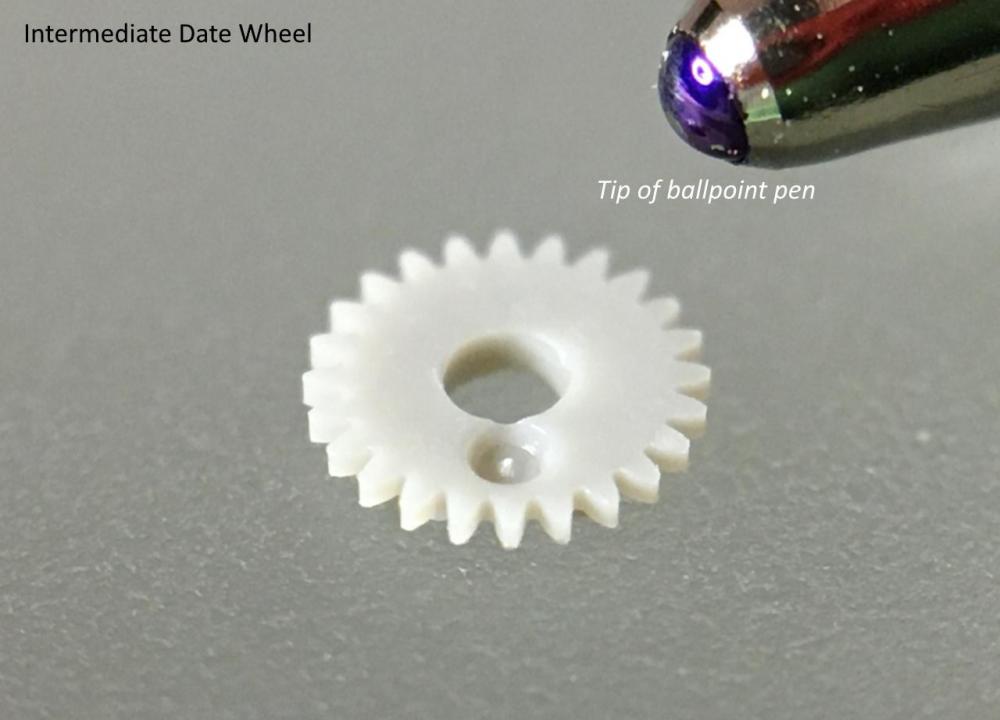
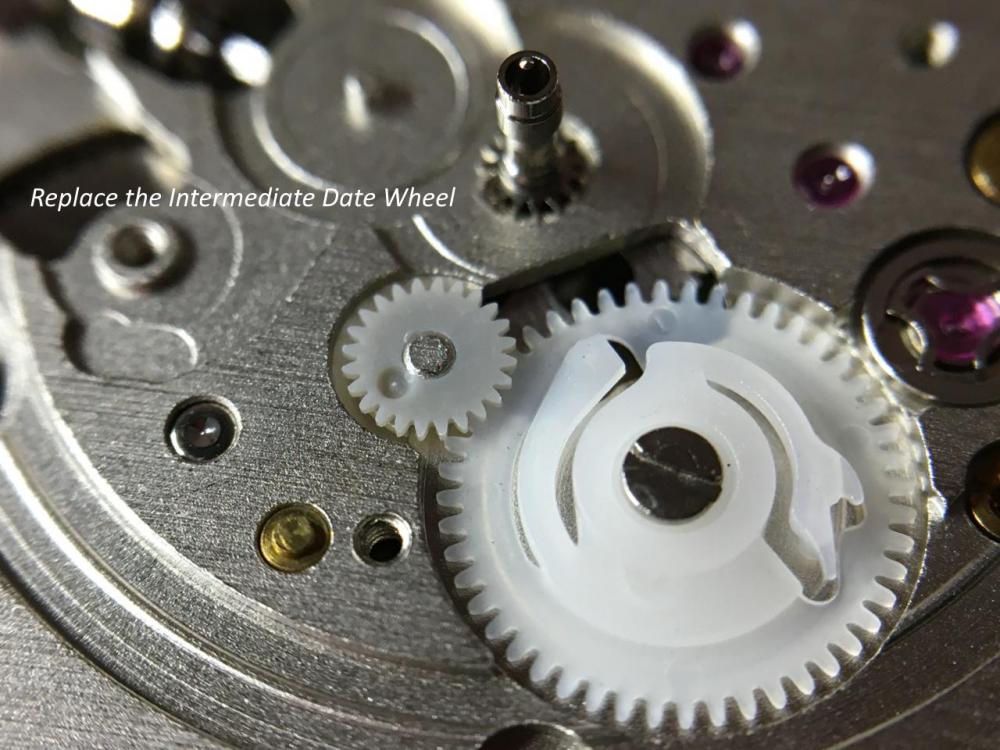
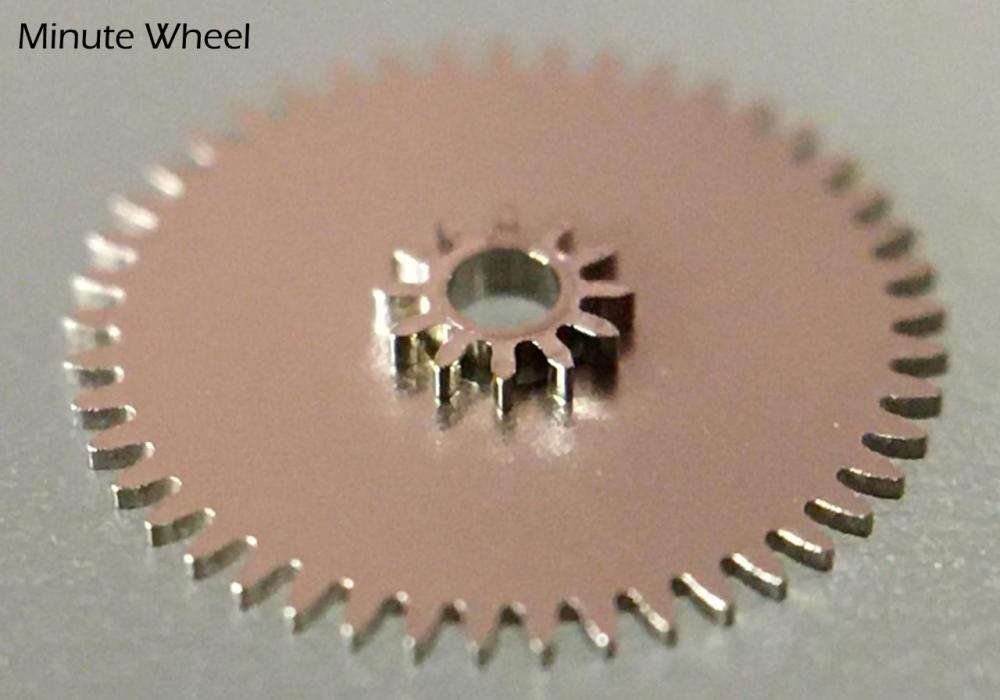
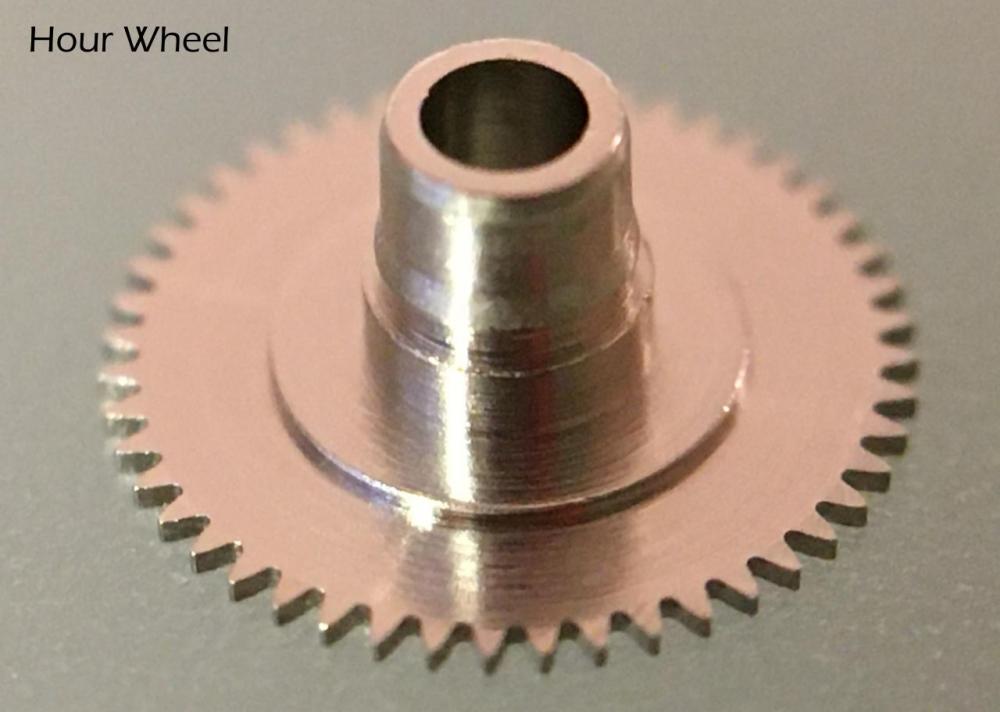
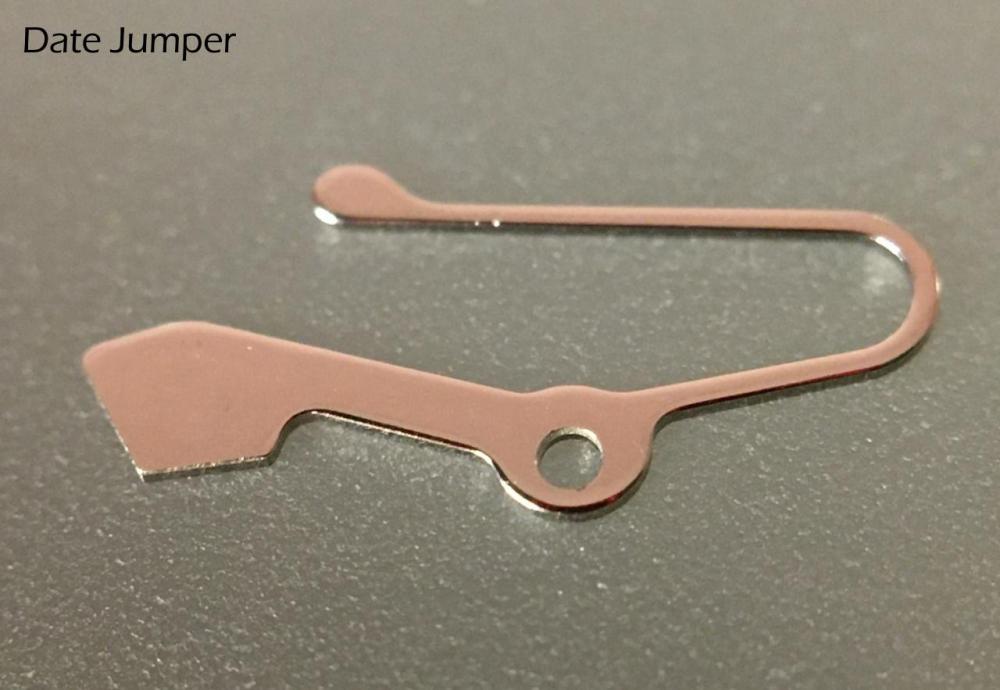
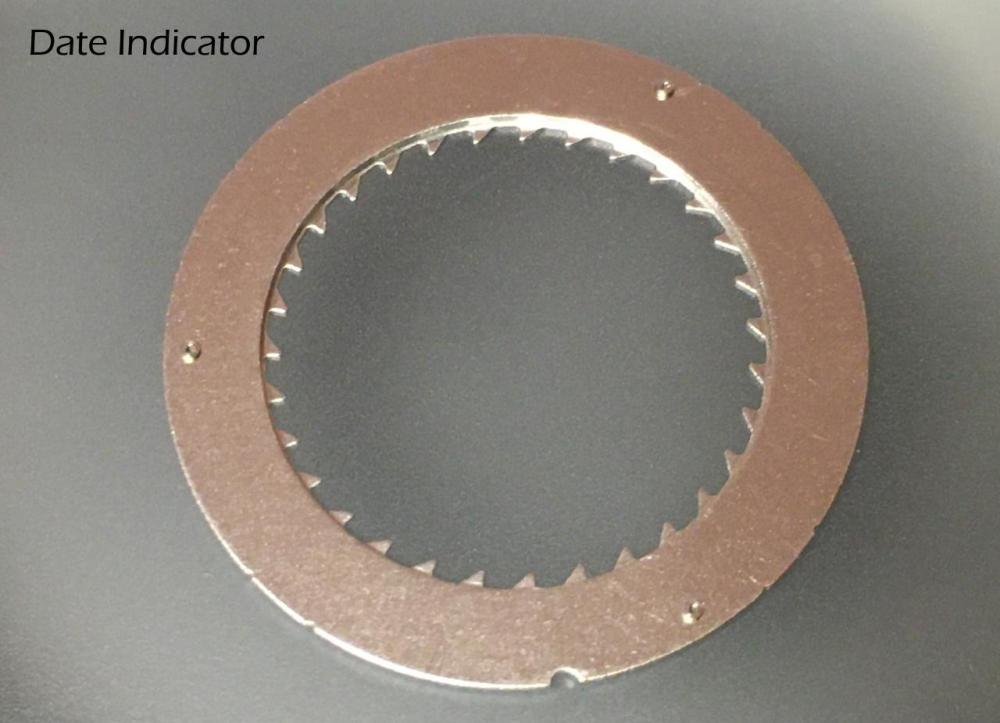
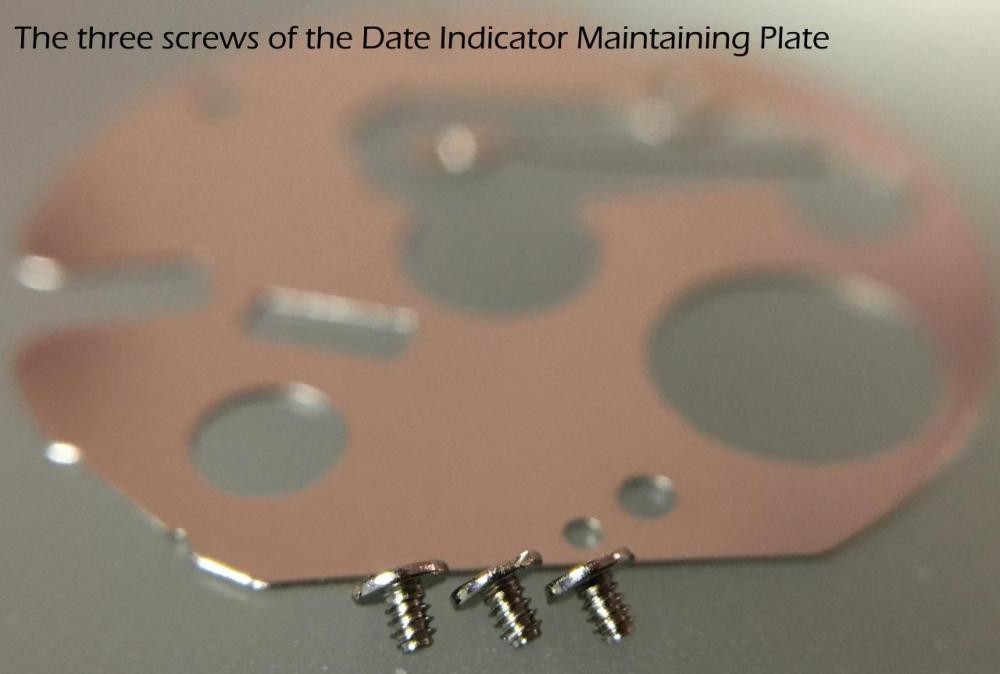
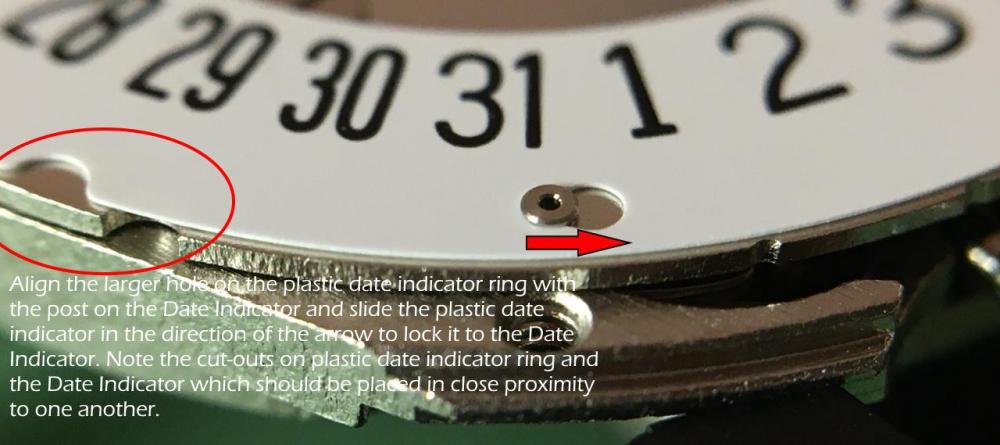
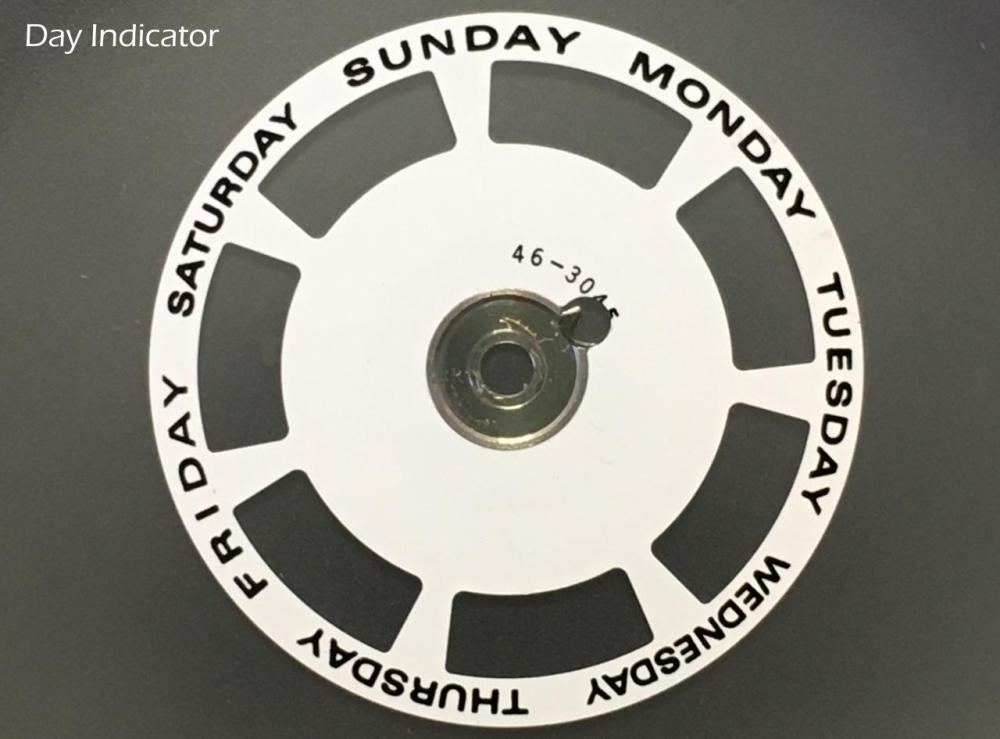
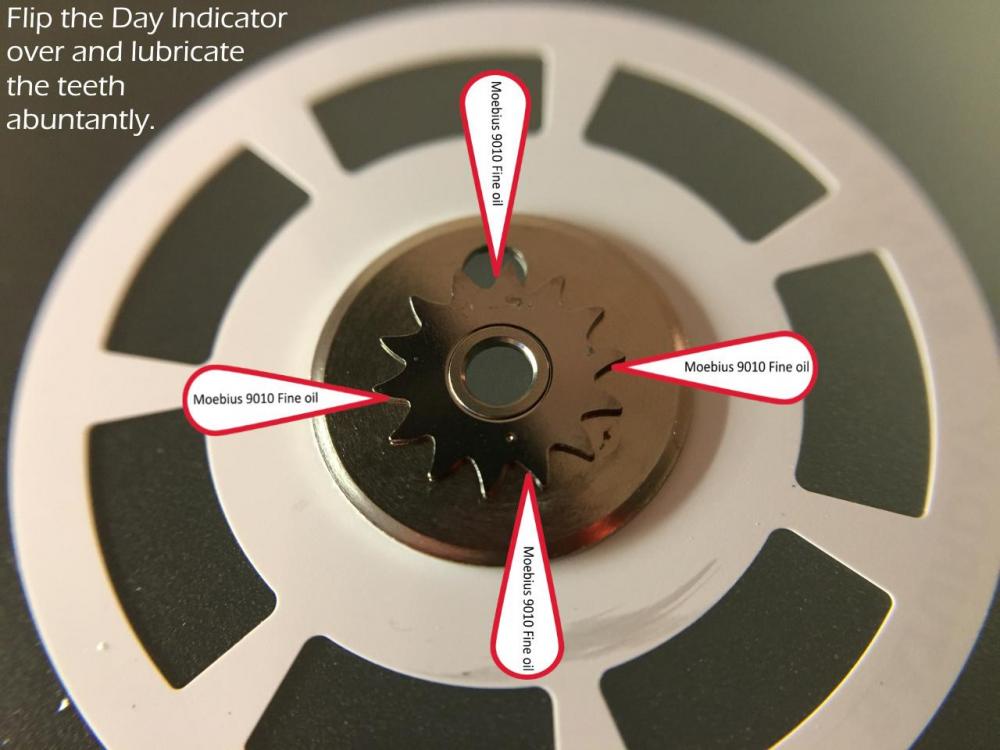
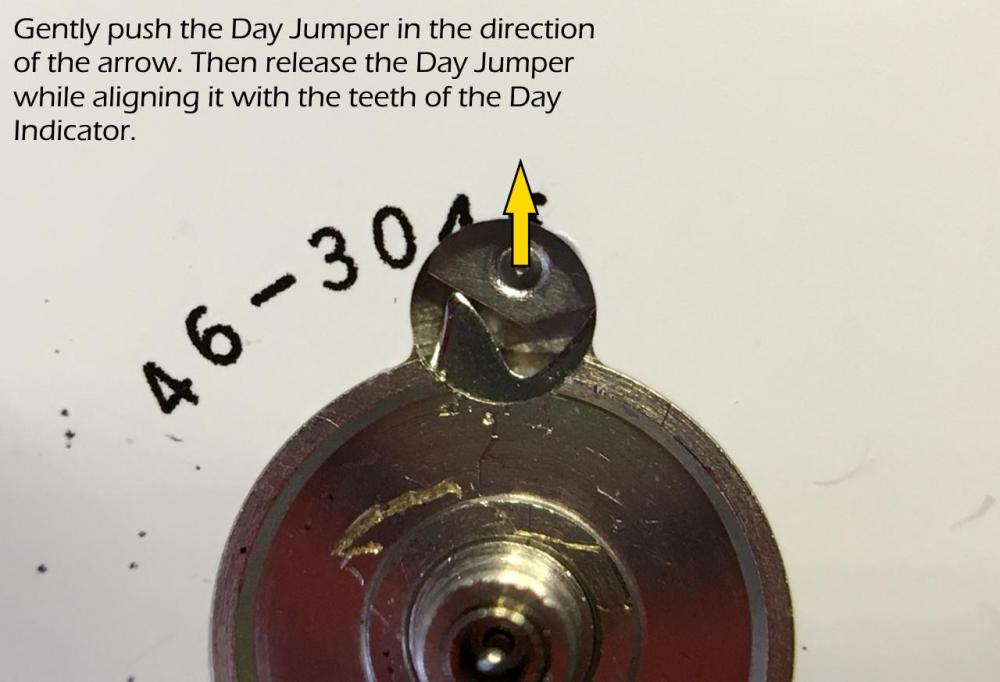
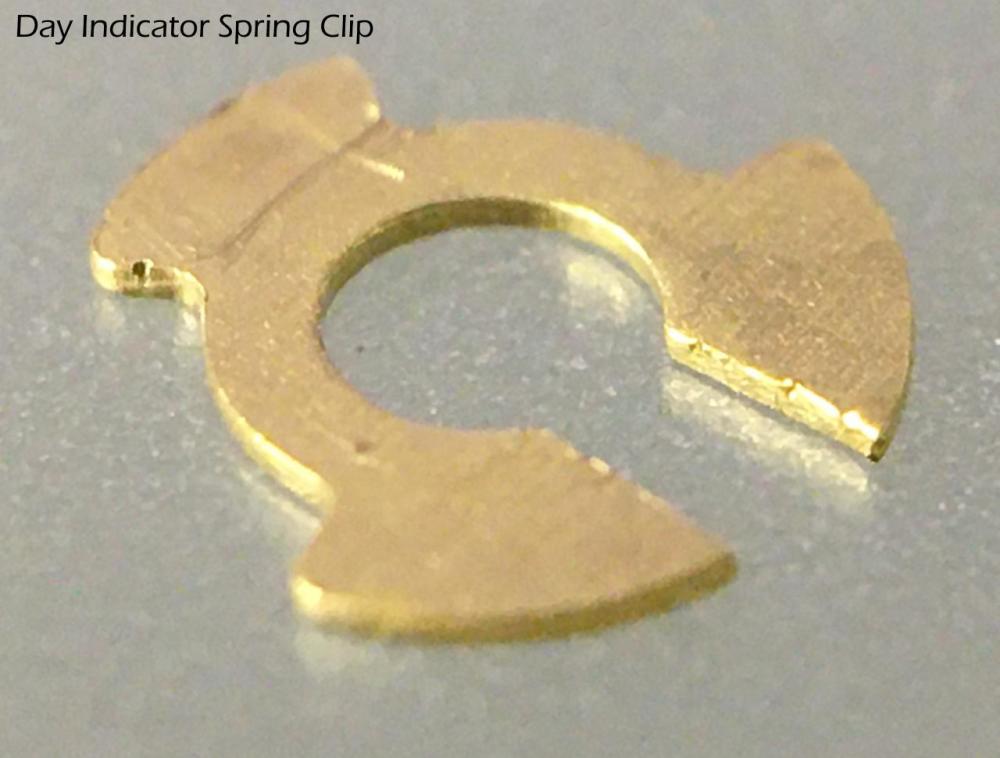
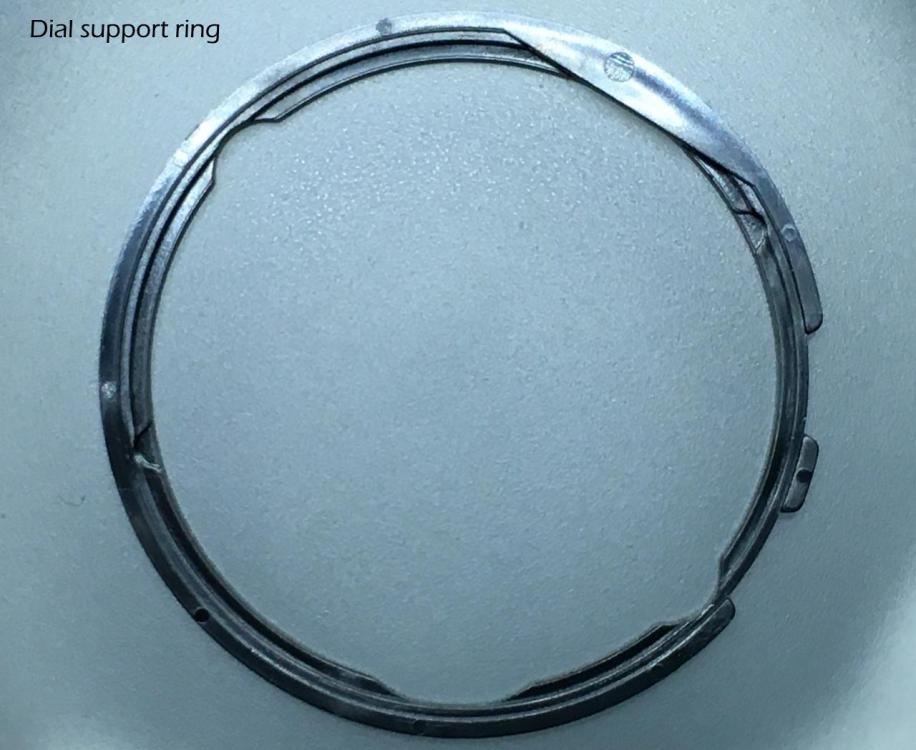
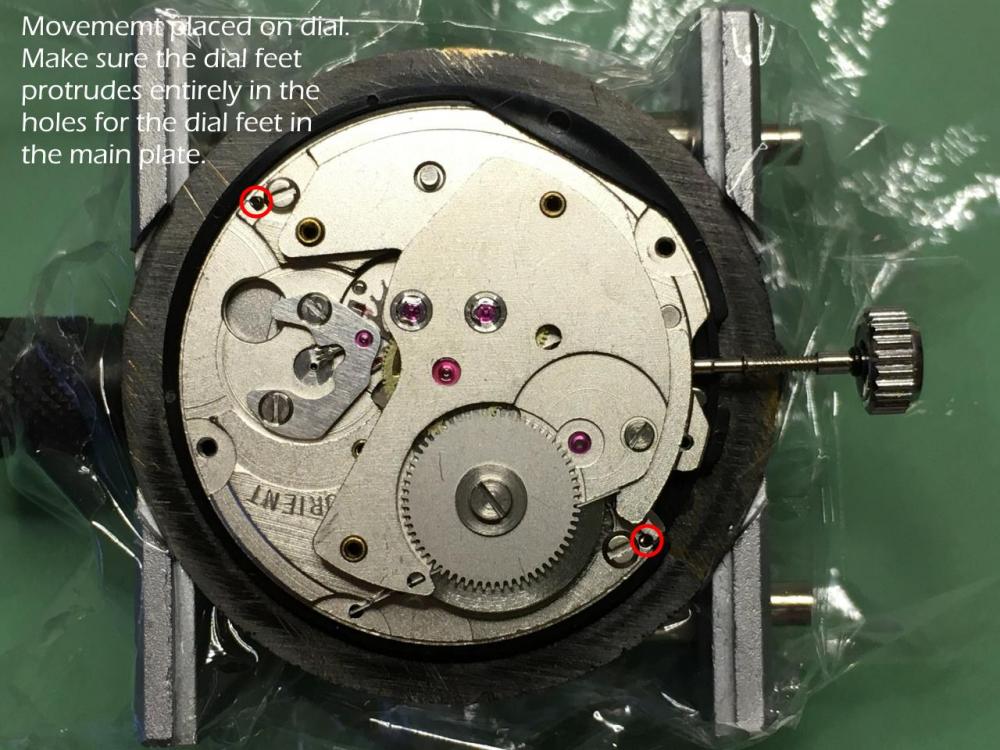
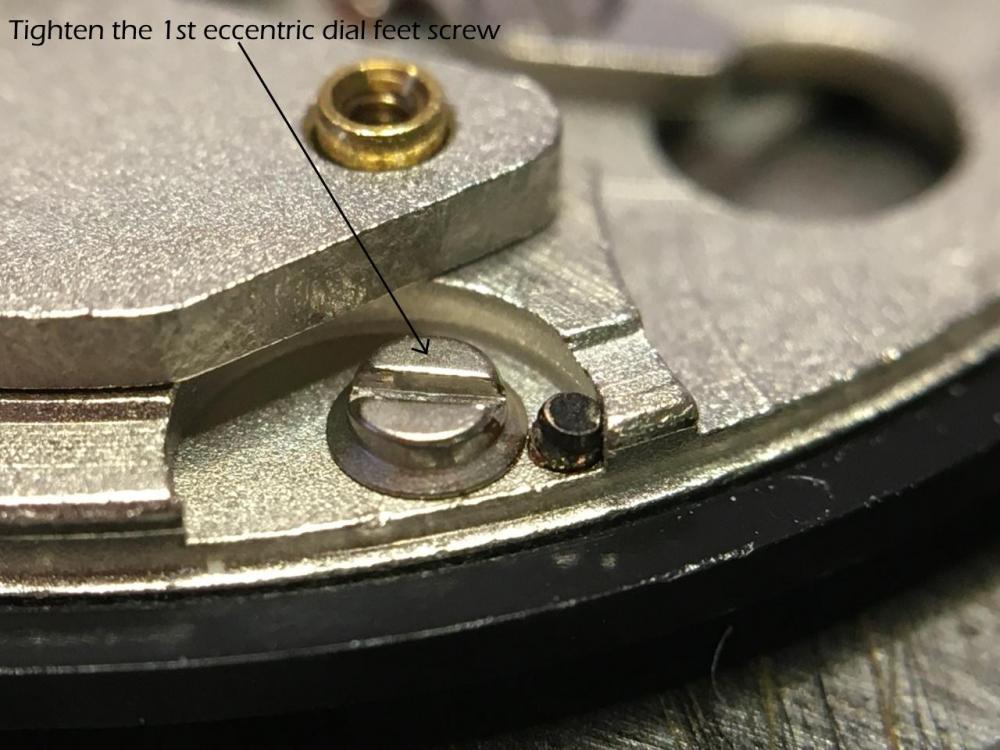
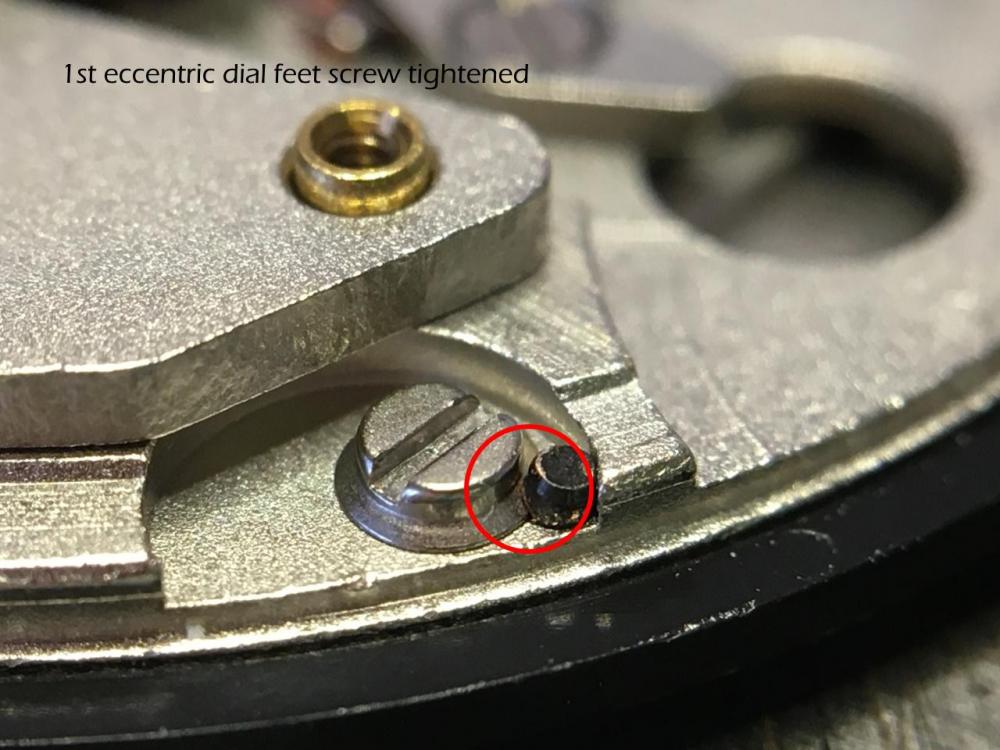
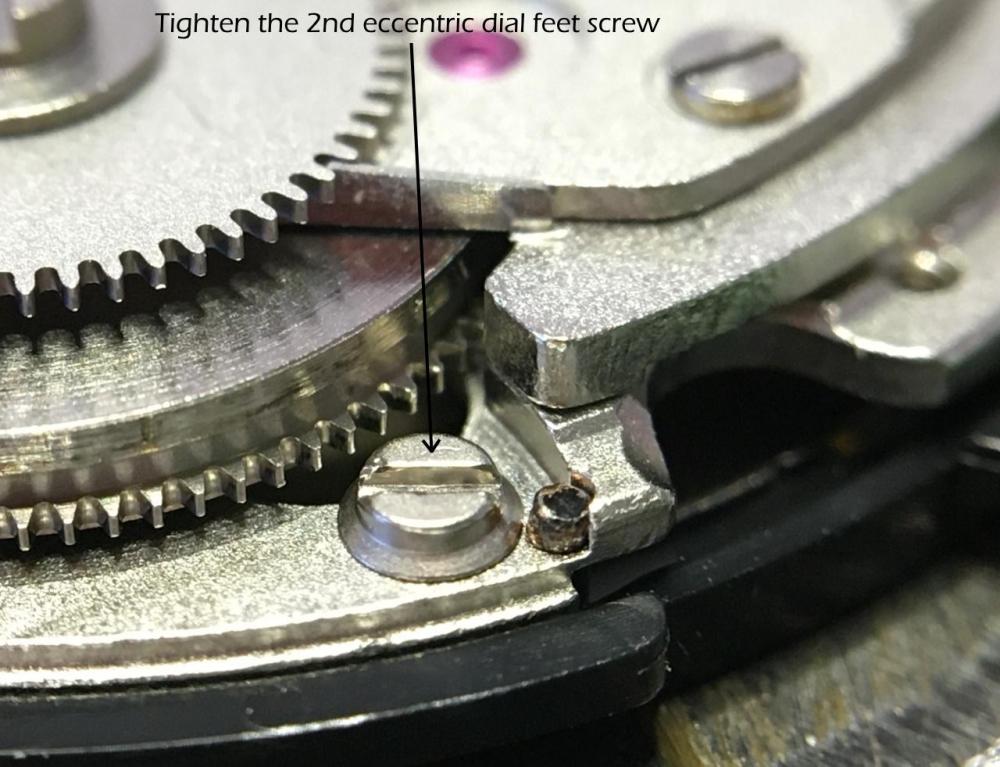
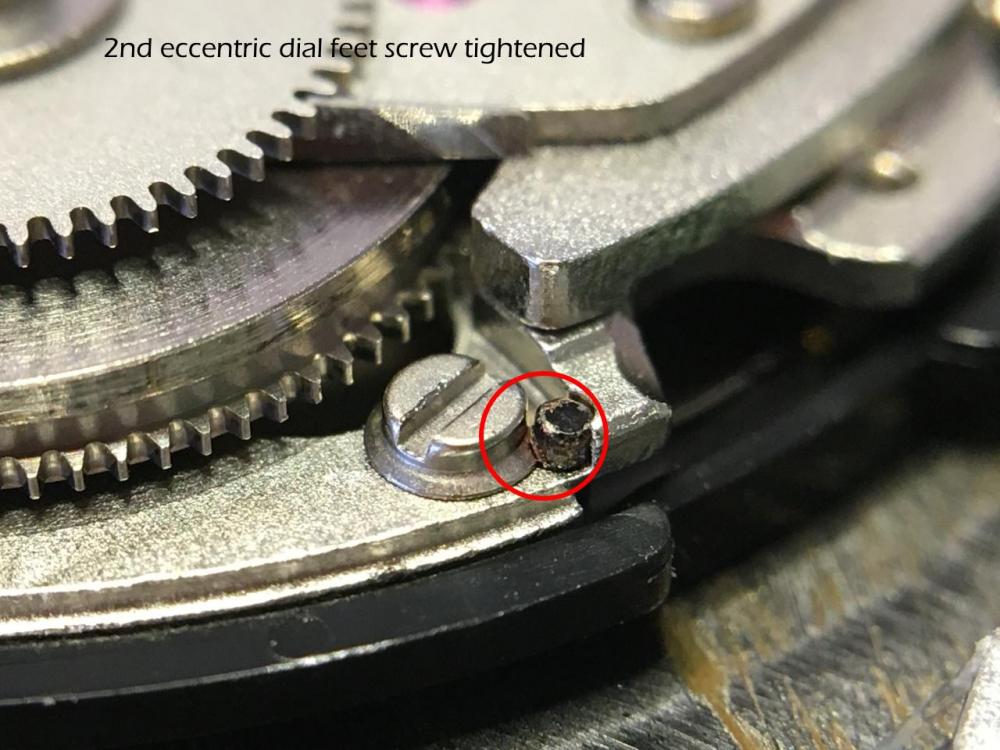
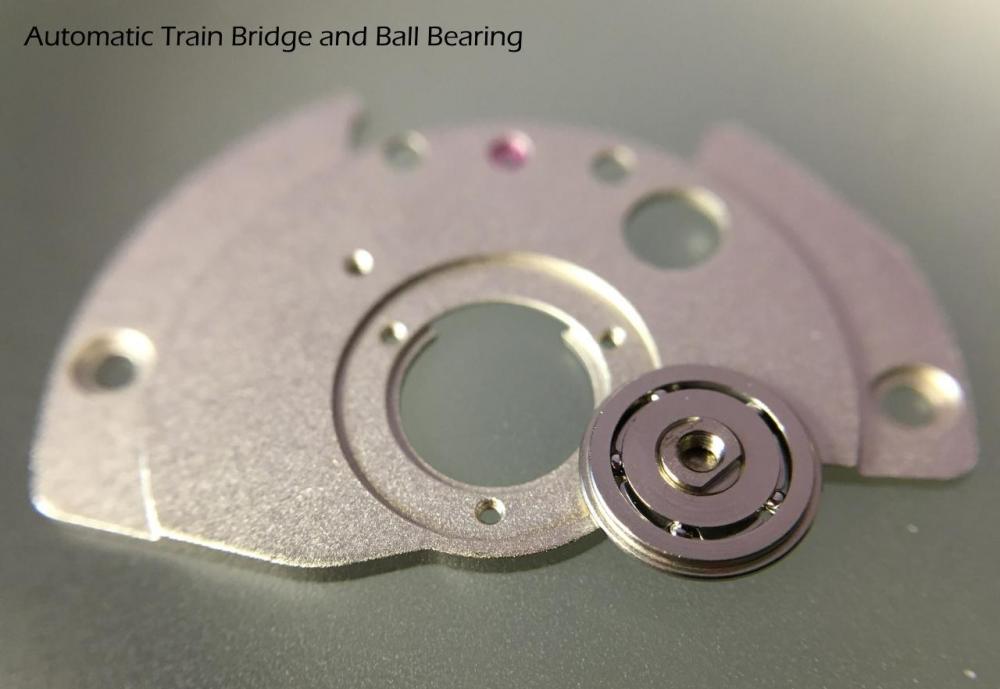
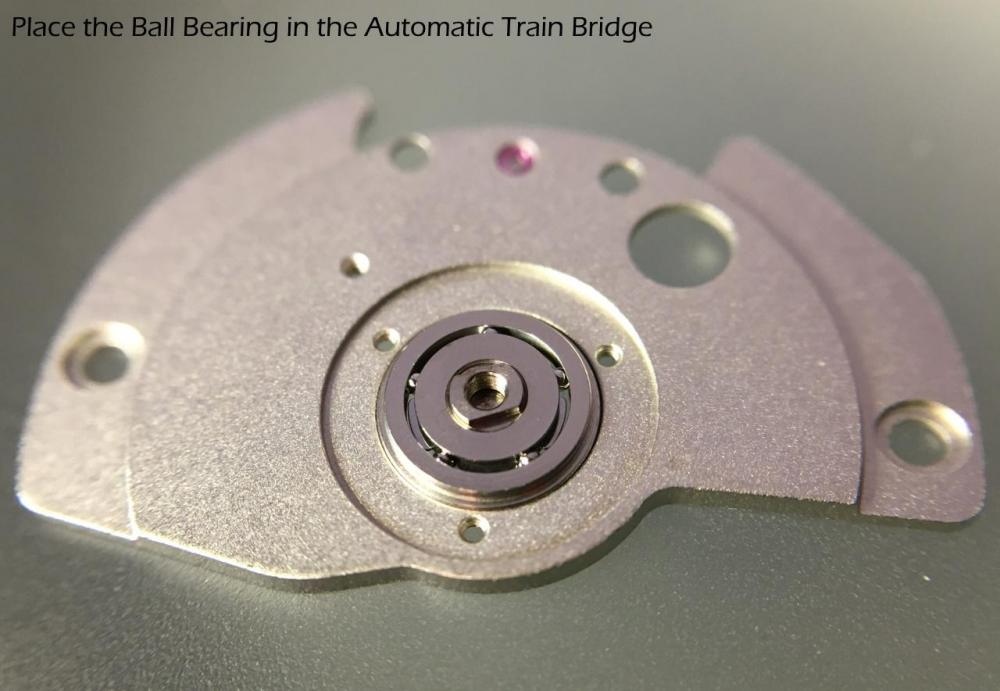
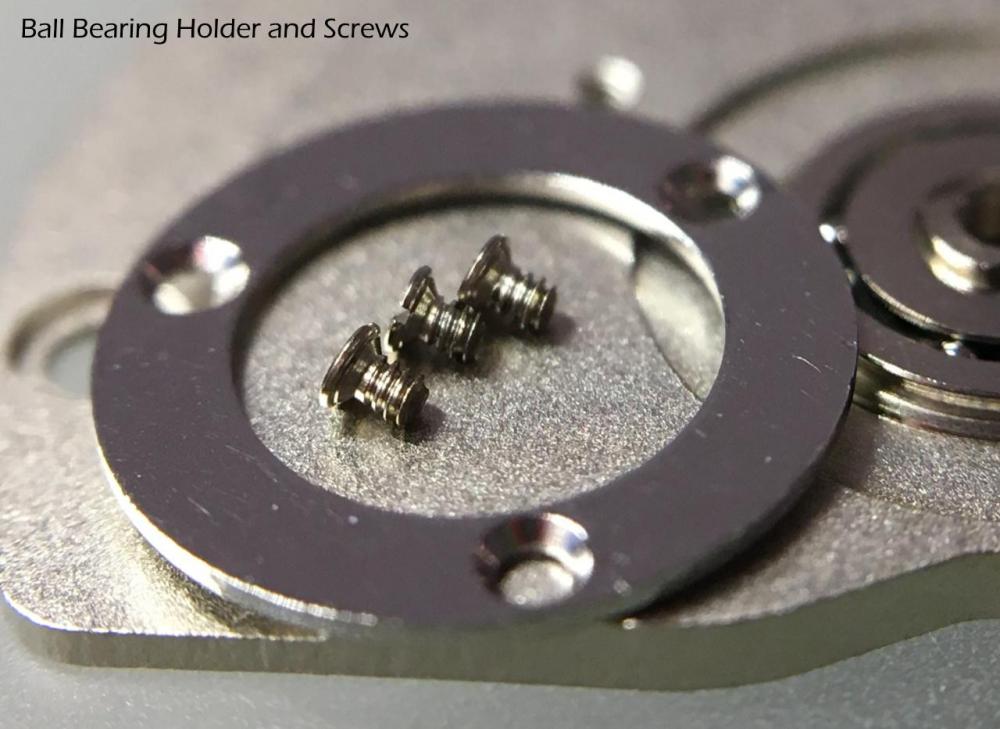
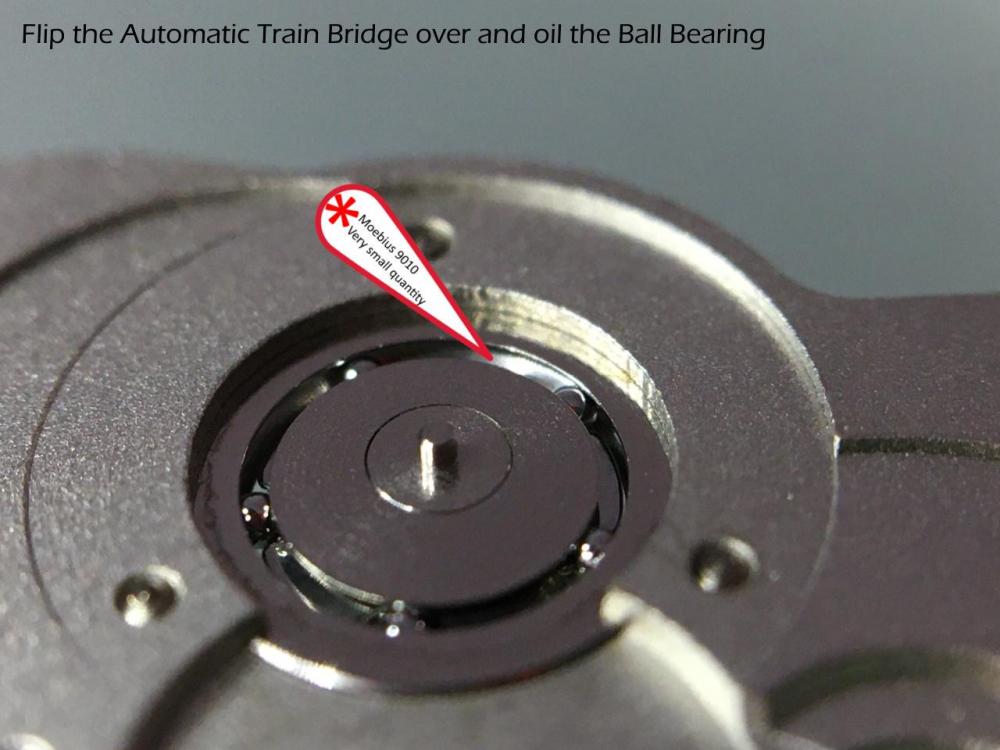
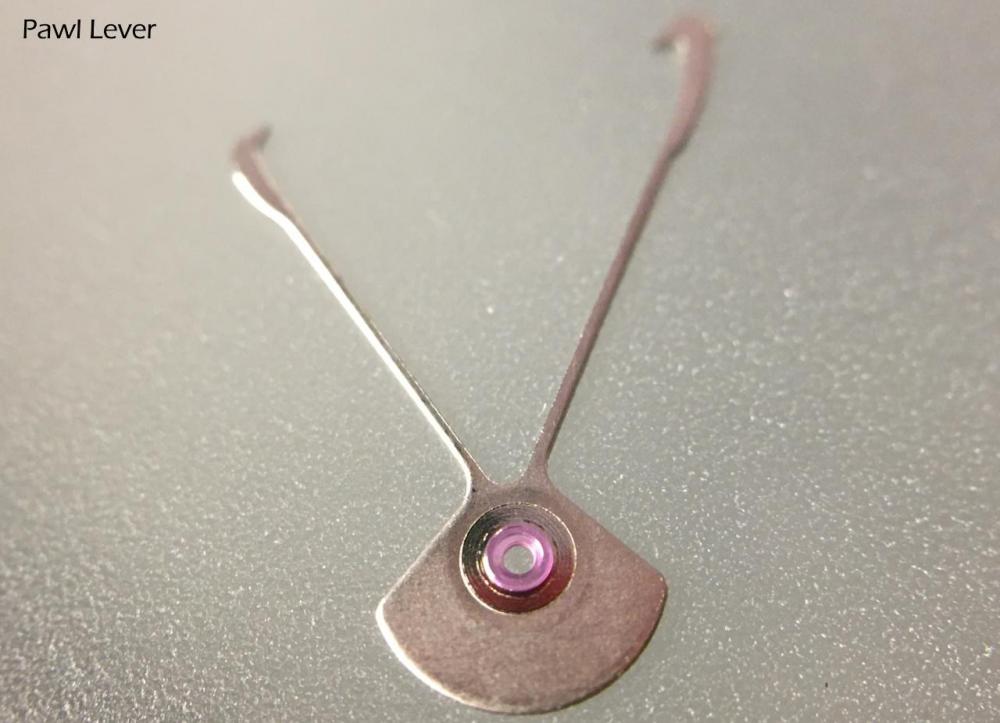
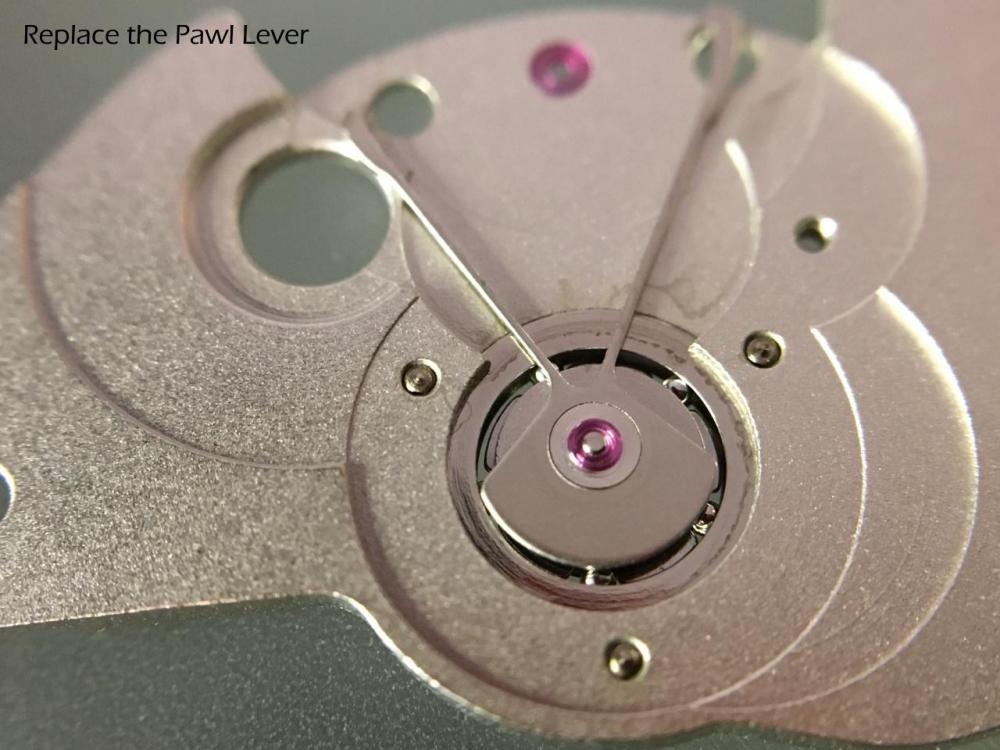
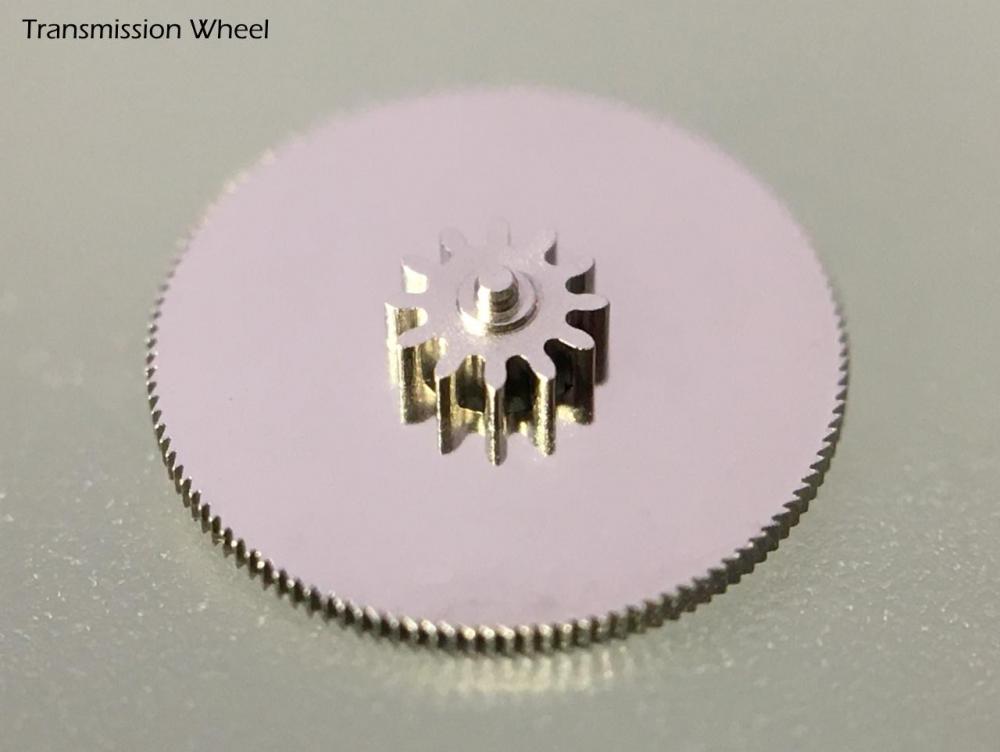
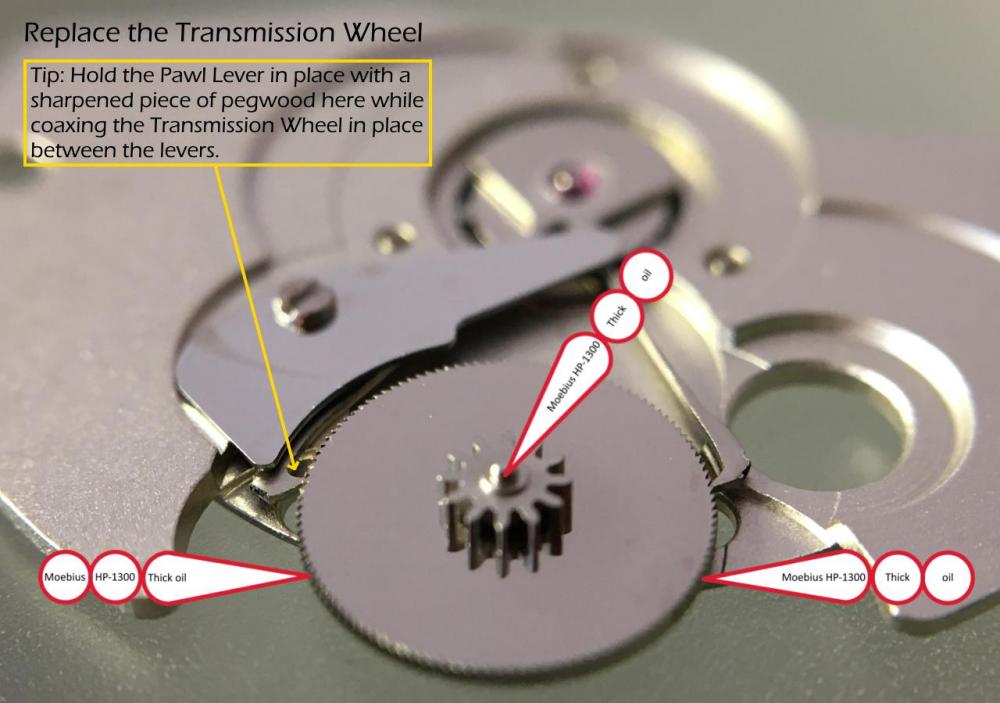
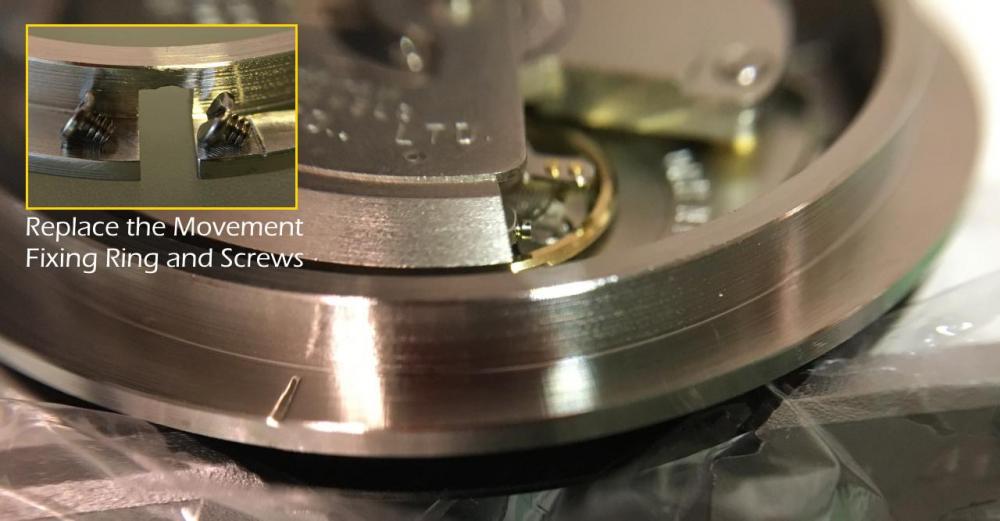
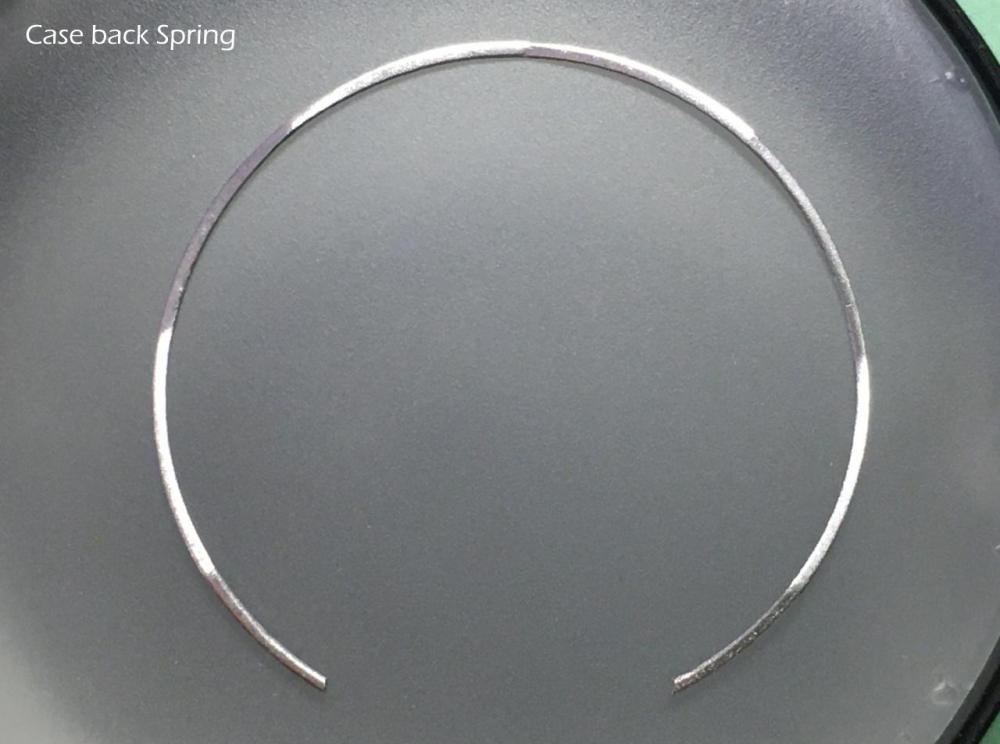
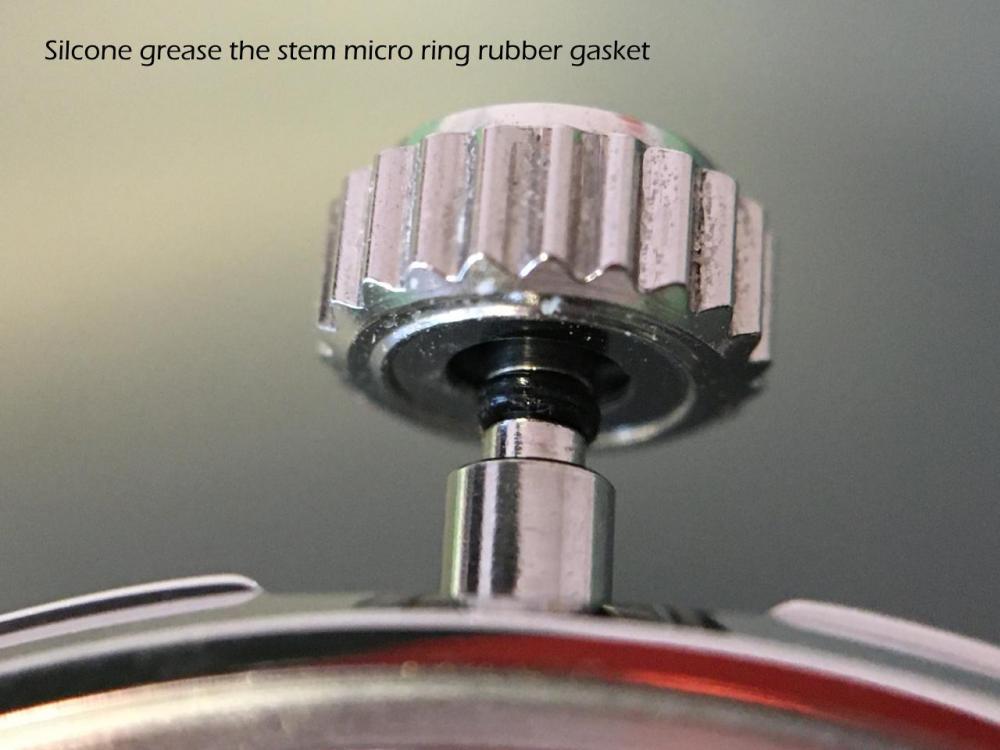
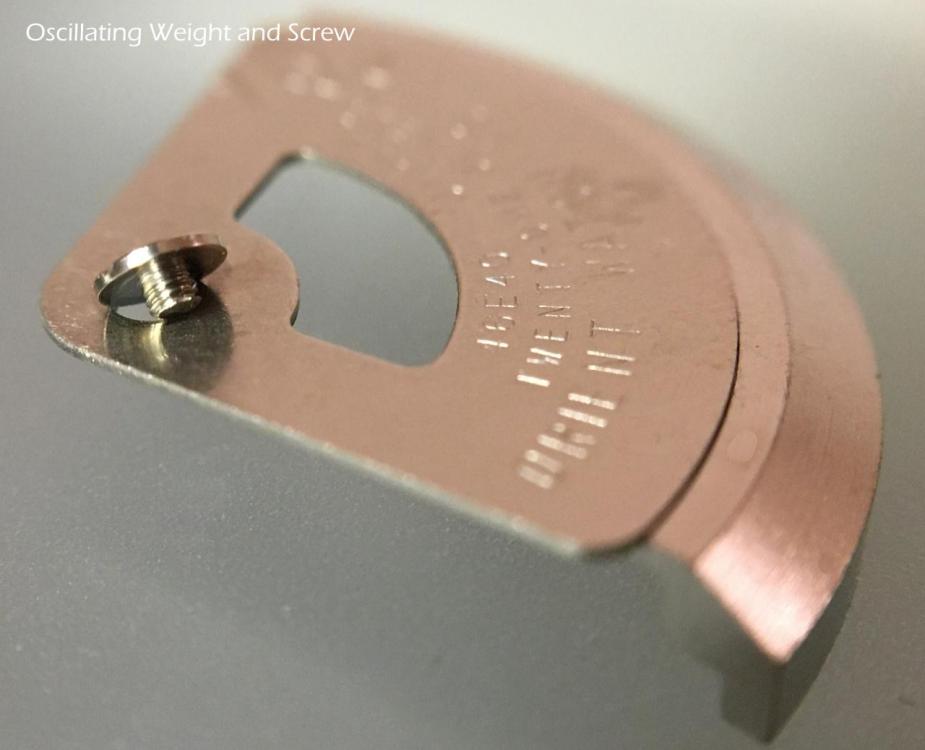
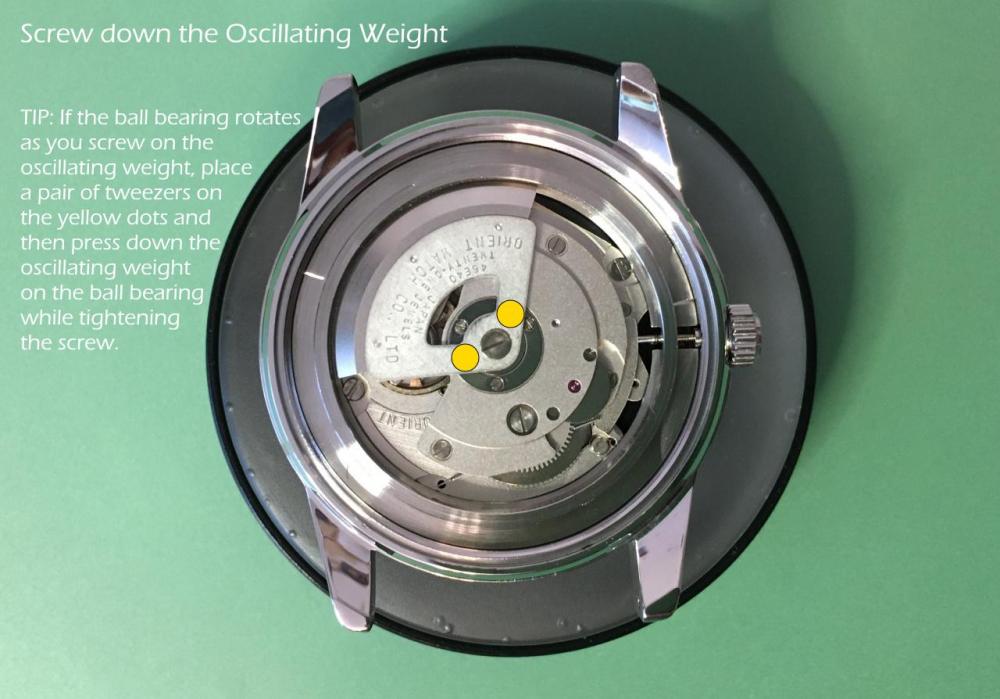
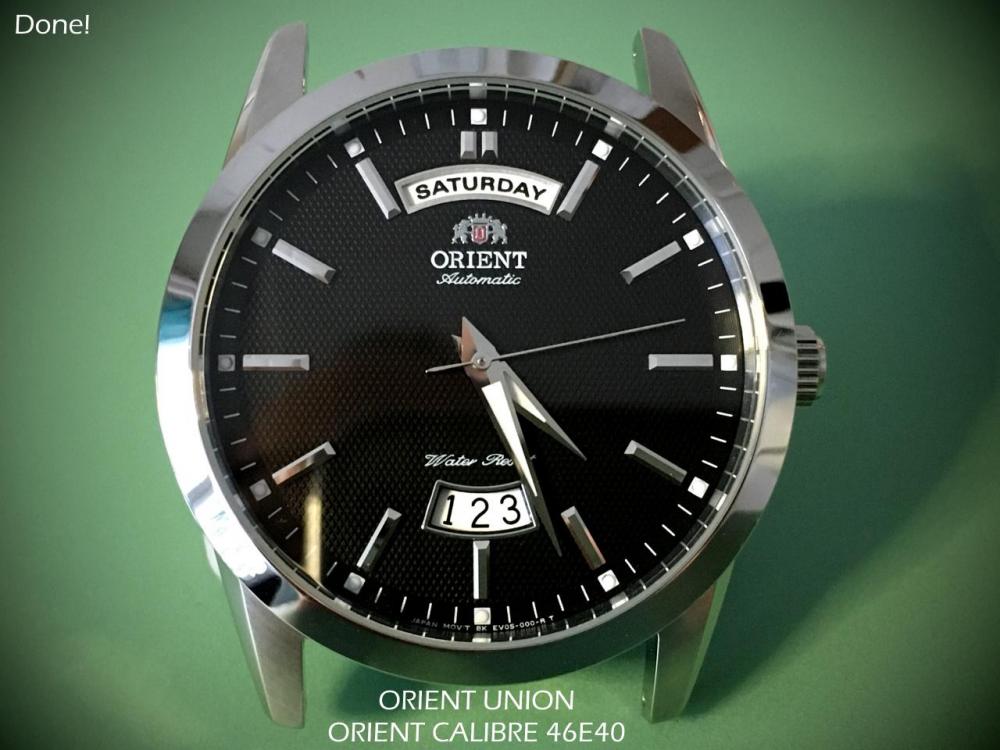
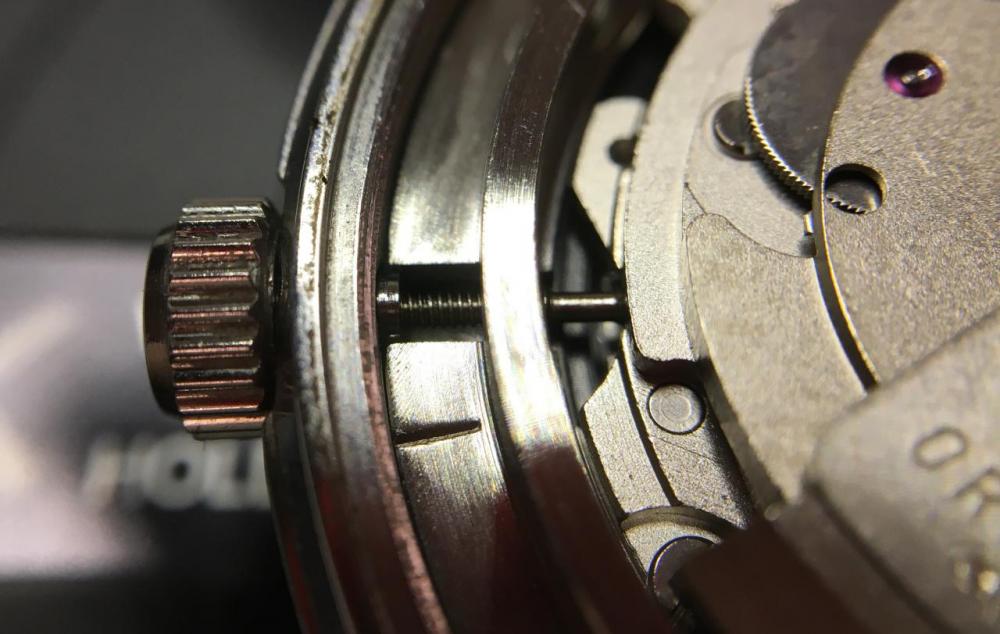
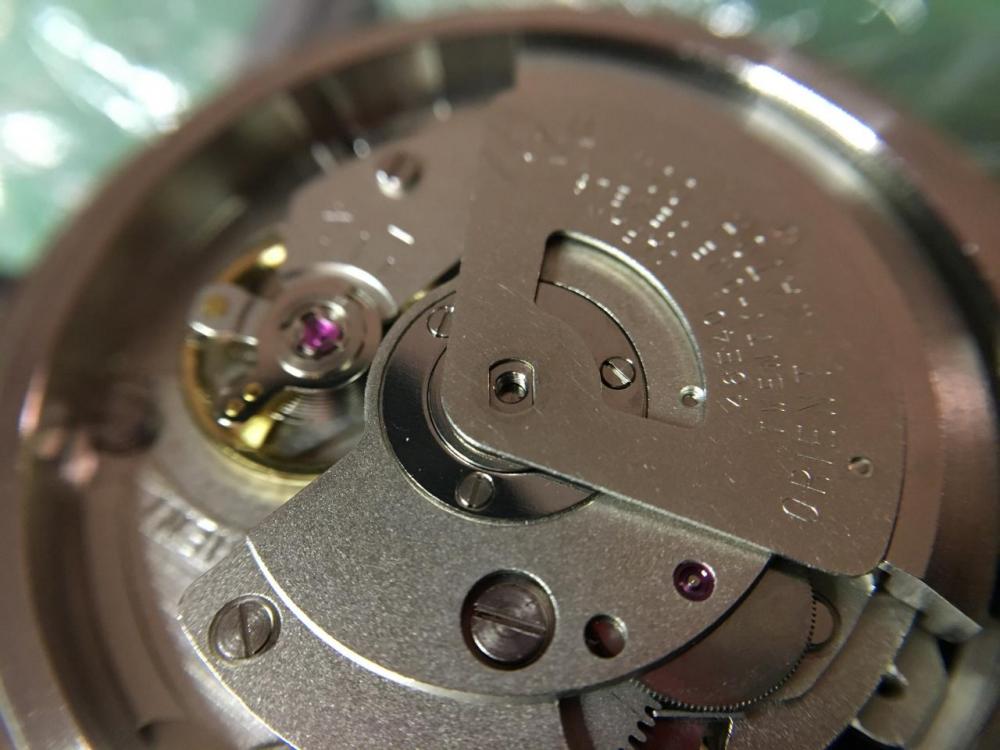
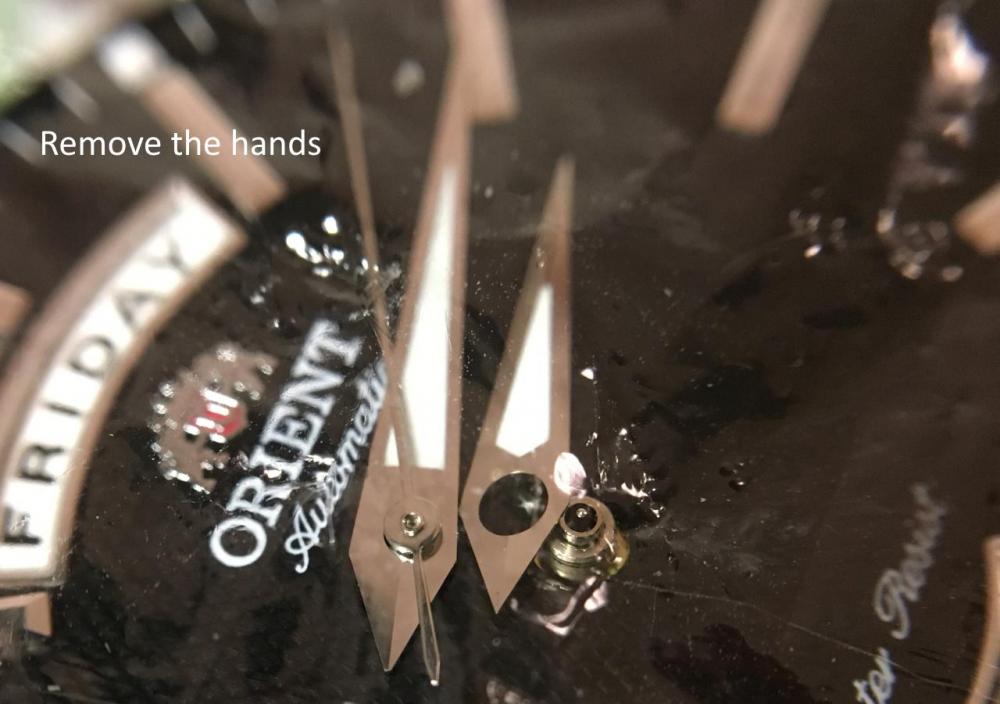
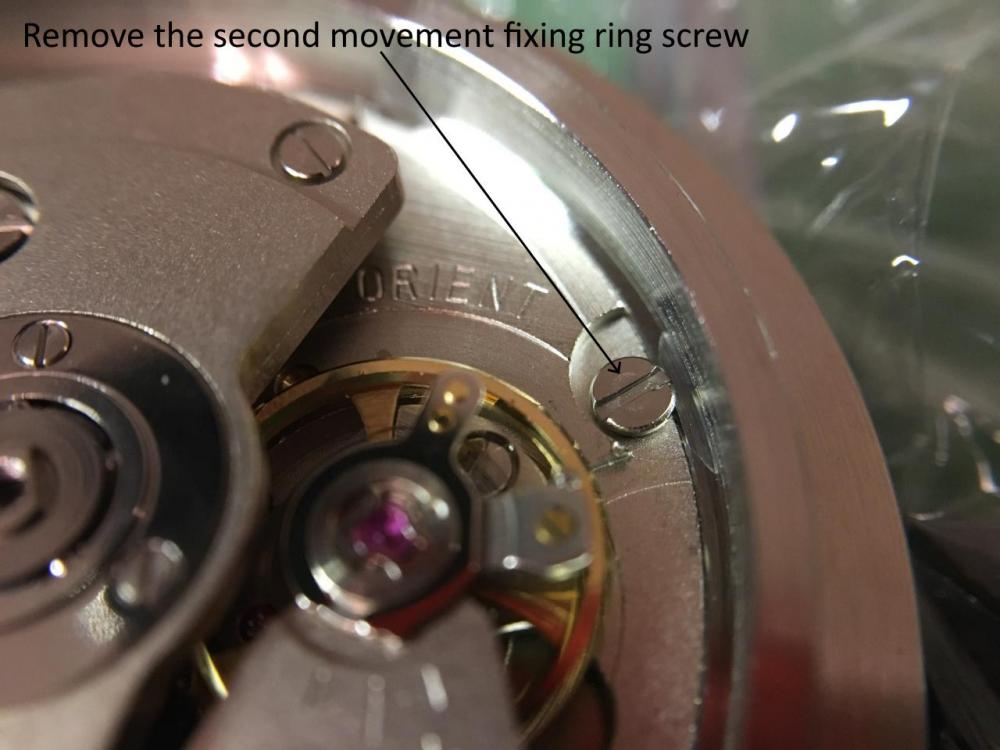
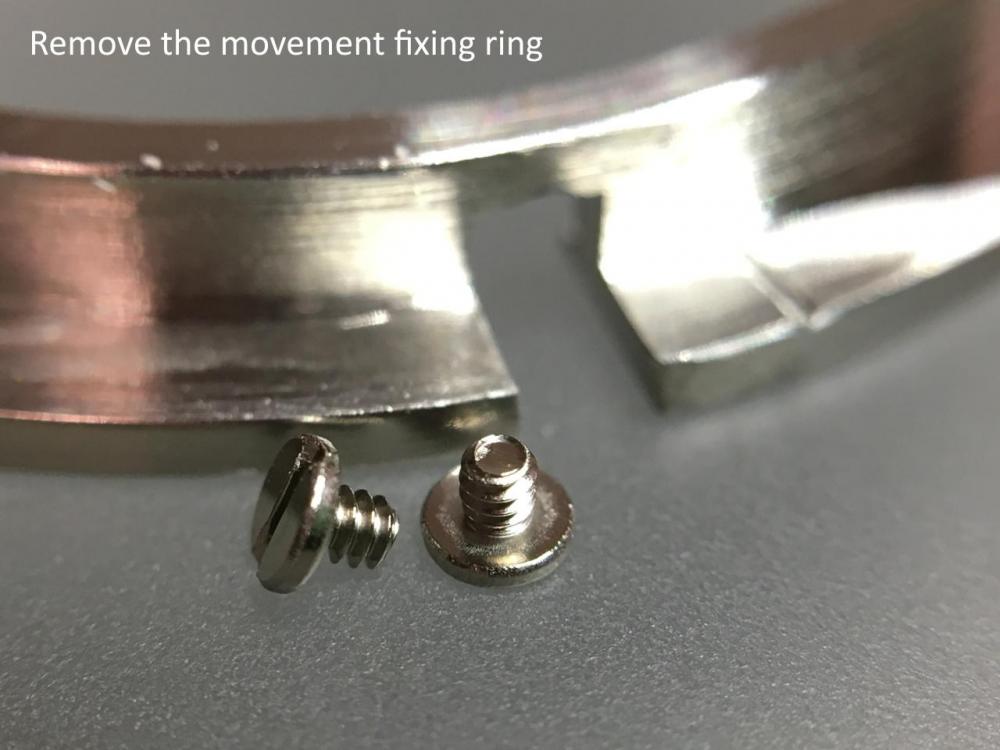
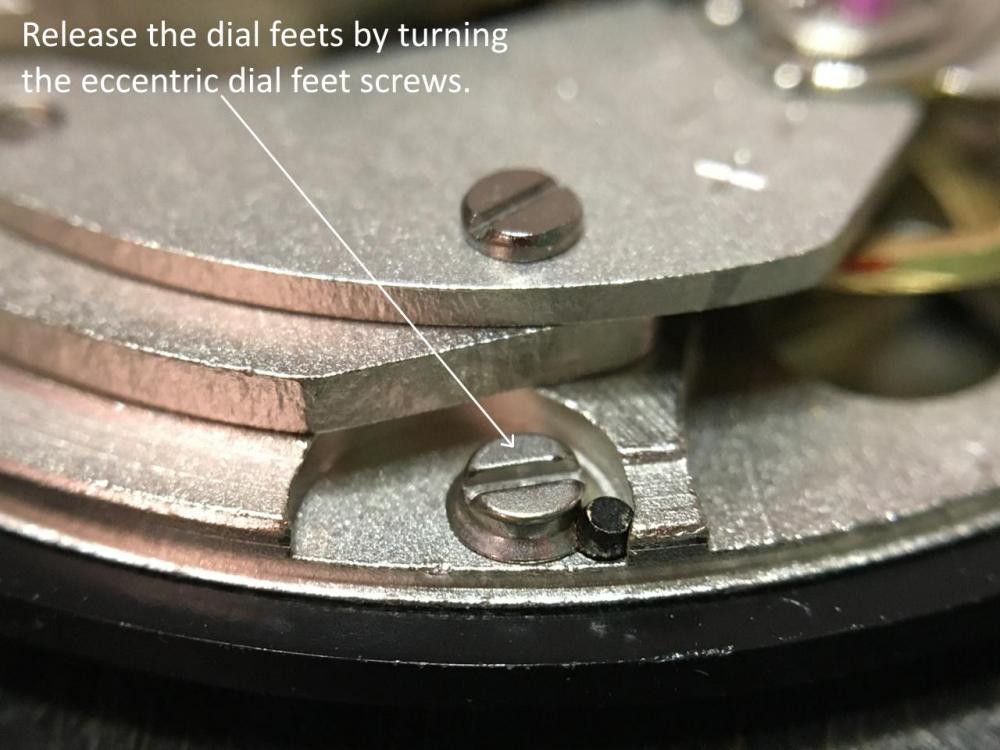
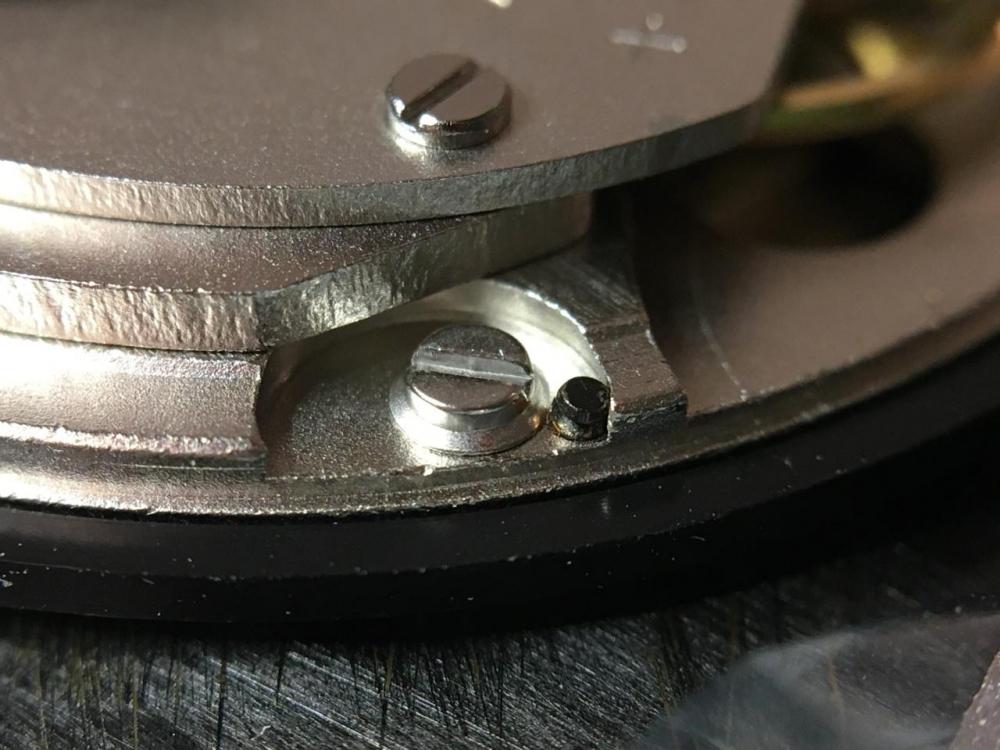
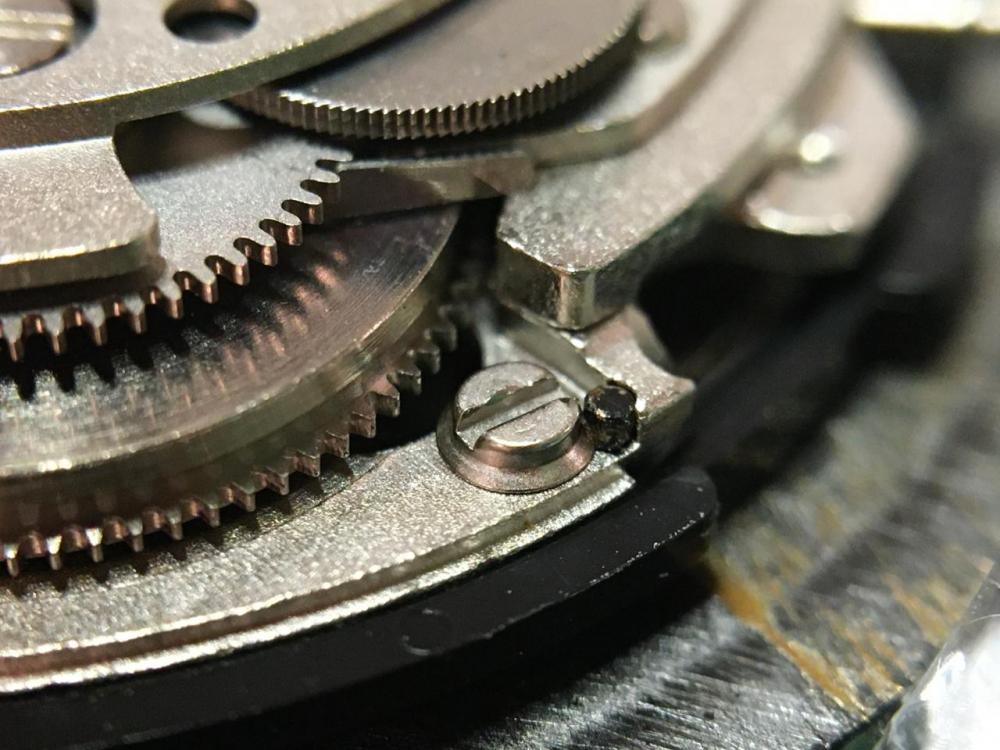
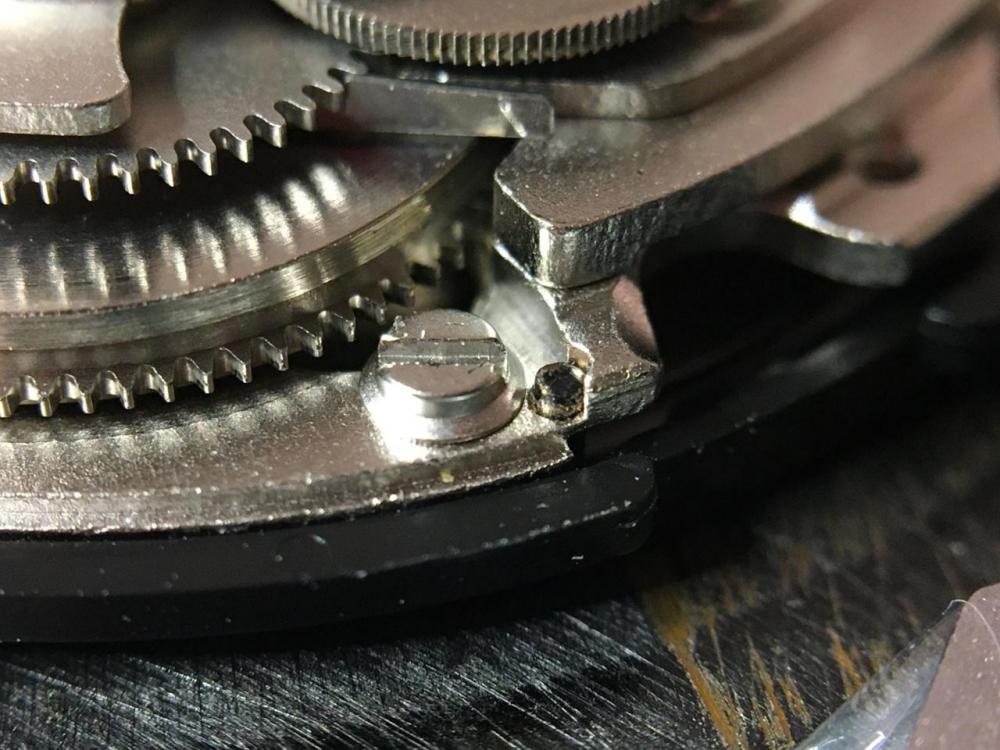
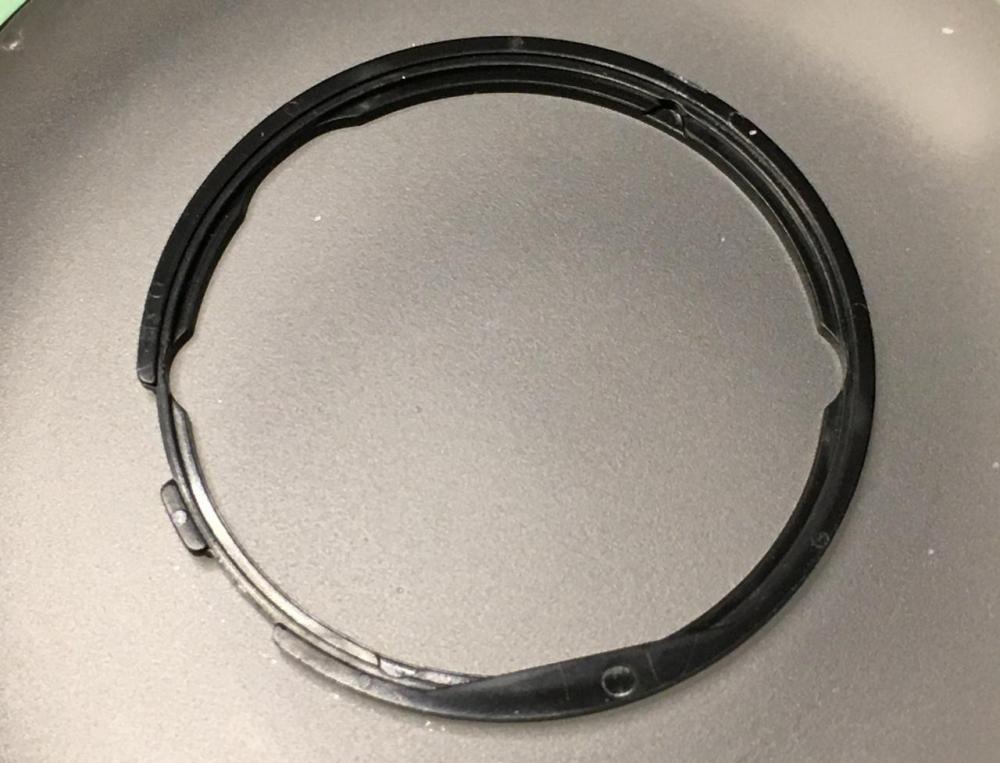
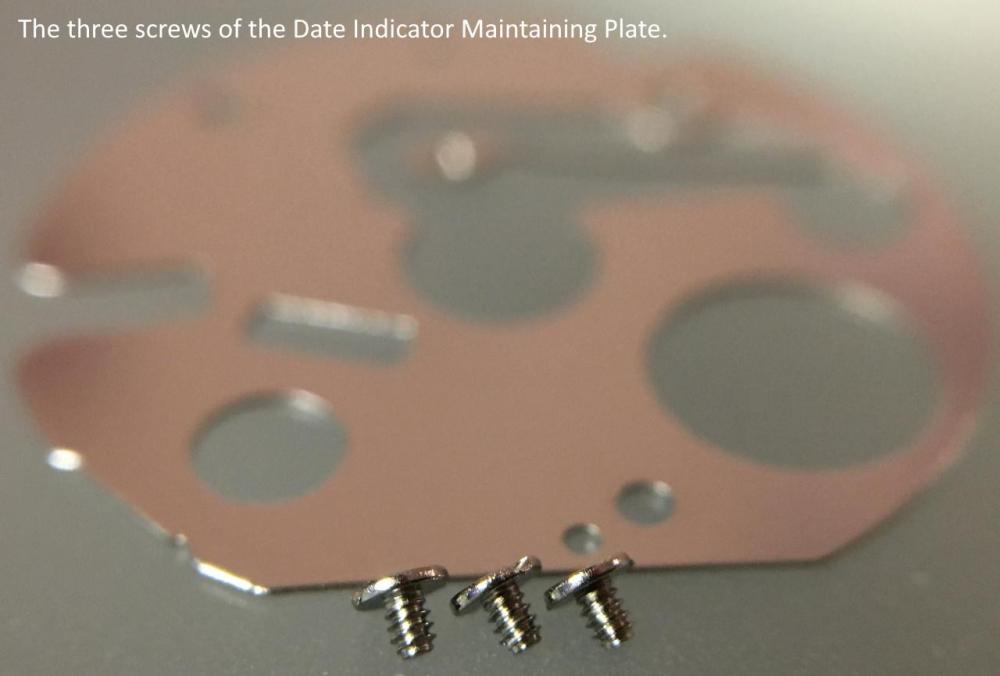
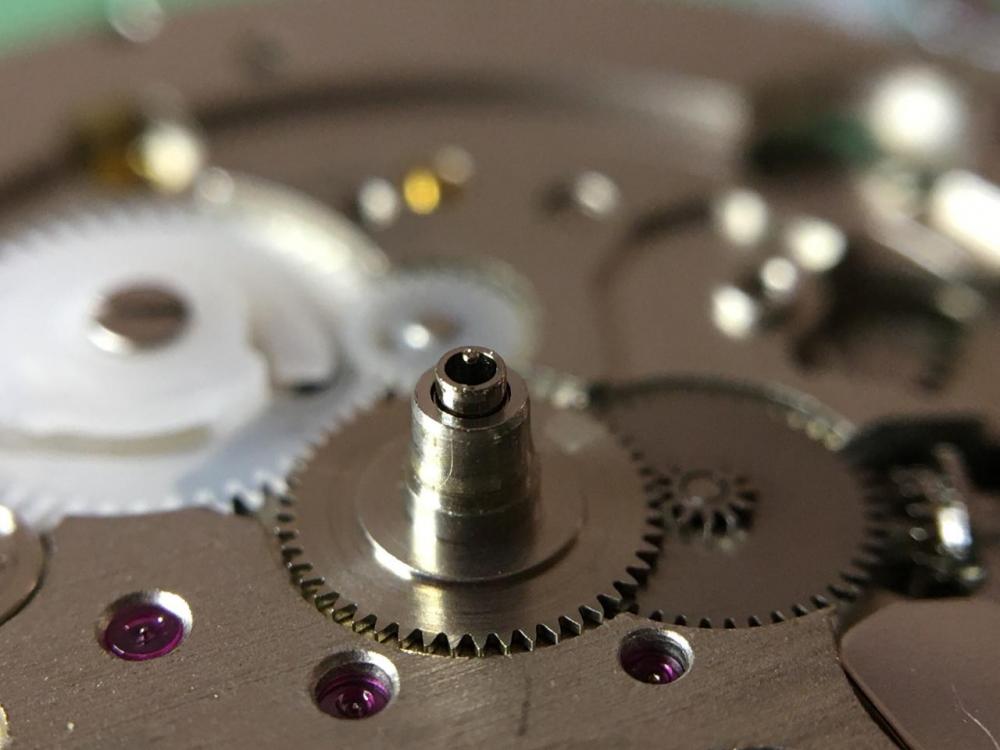
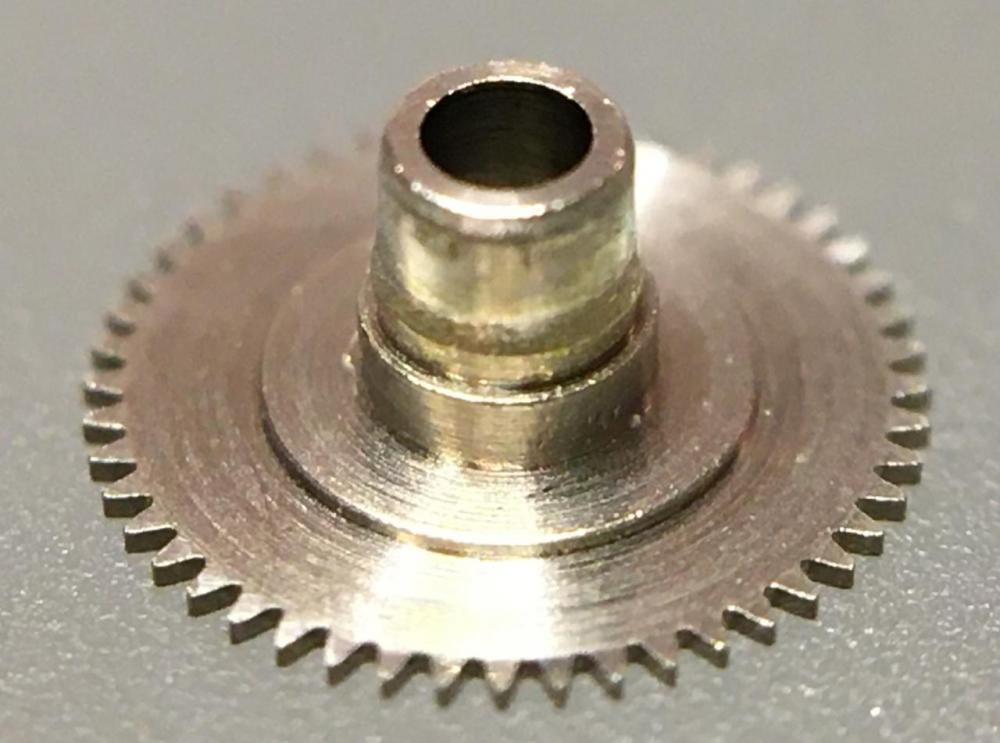
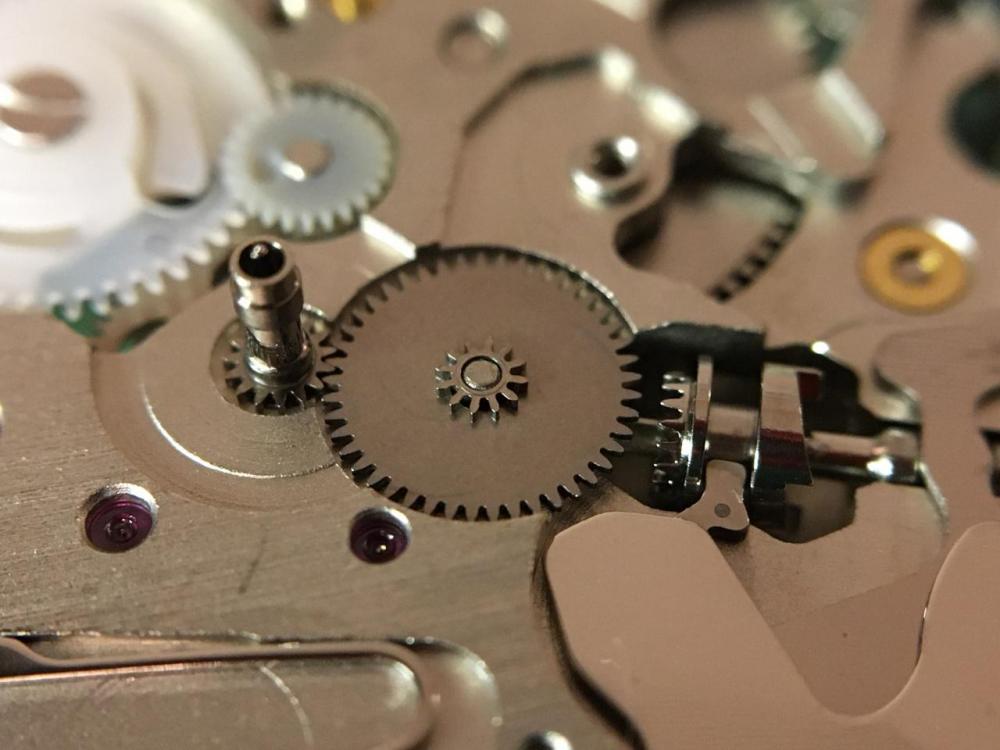
ORIENT Calibre 46E40 Service Walkthrough - Assembly


 1 point
 -
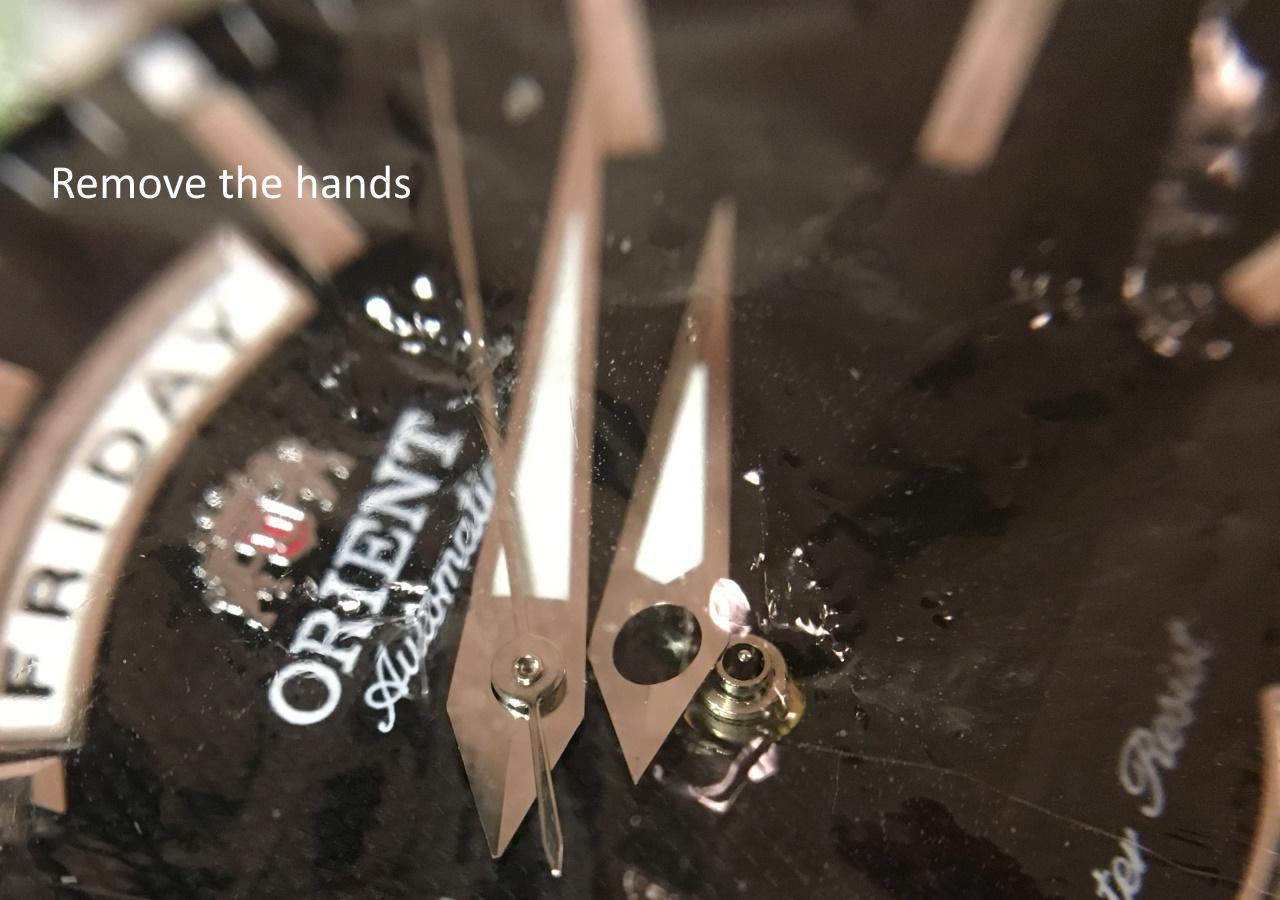
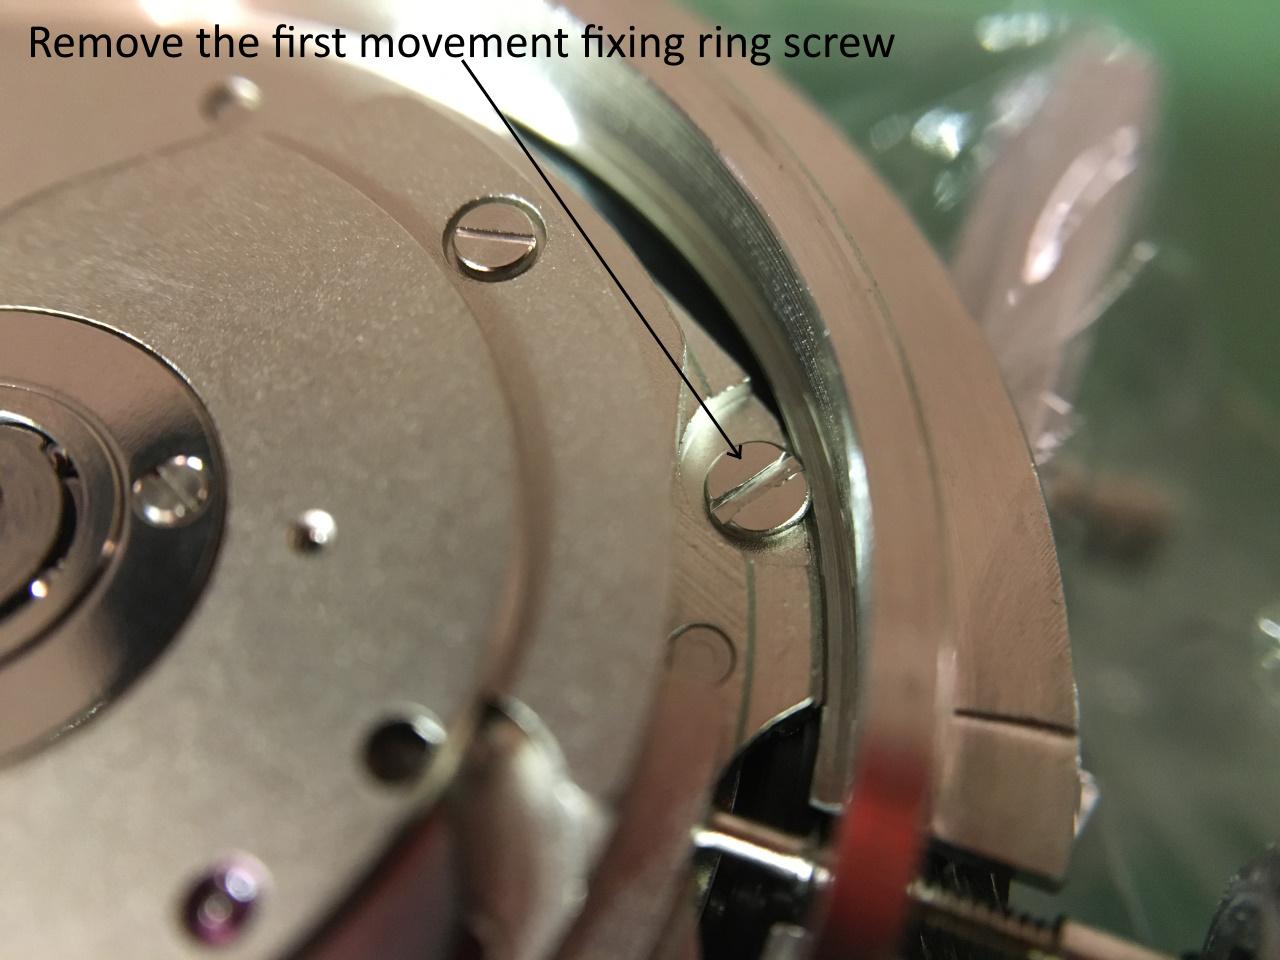
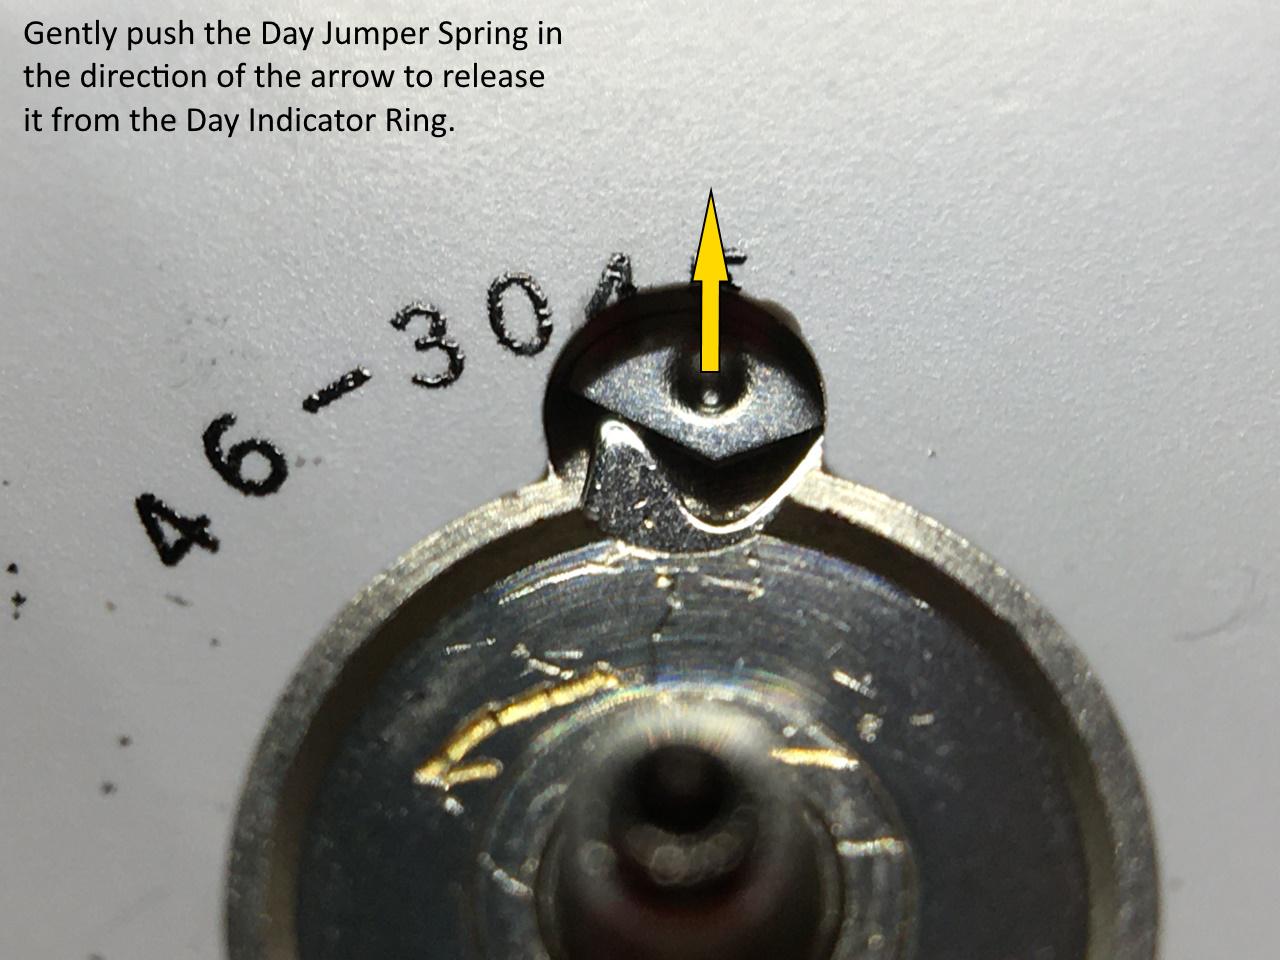
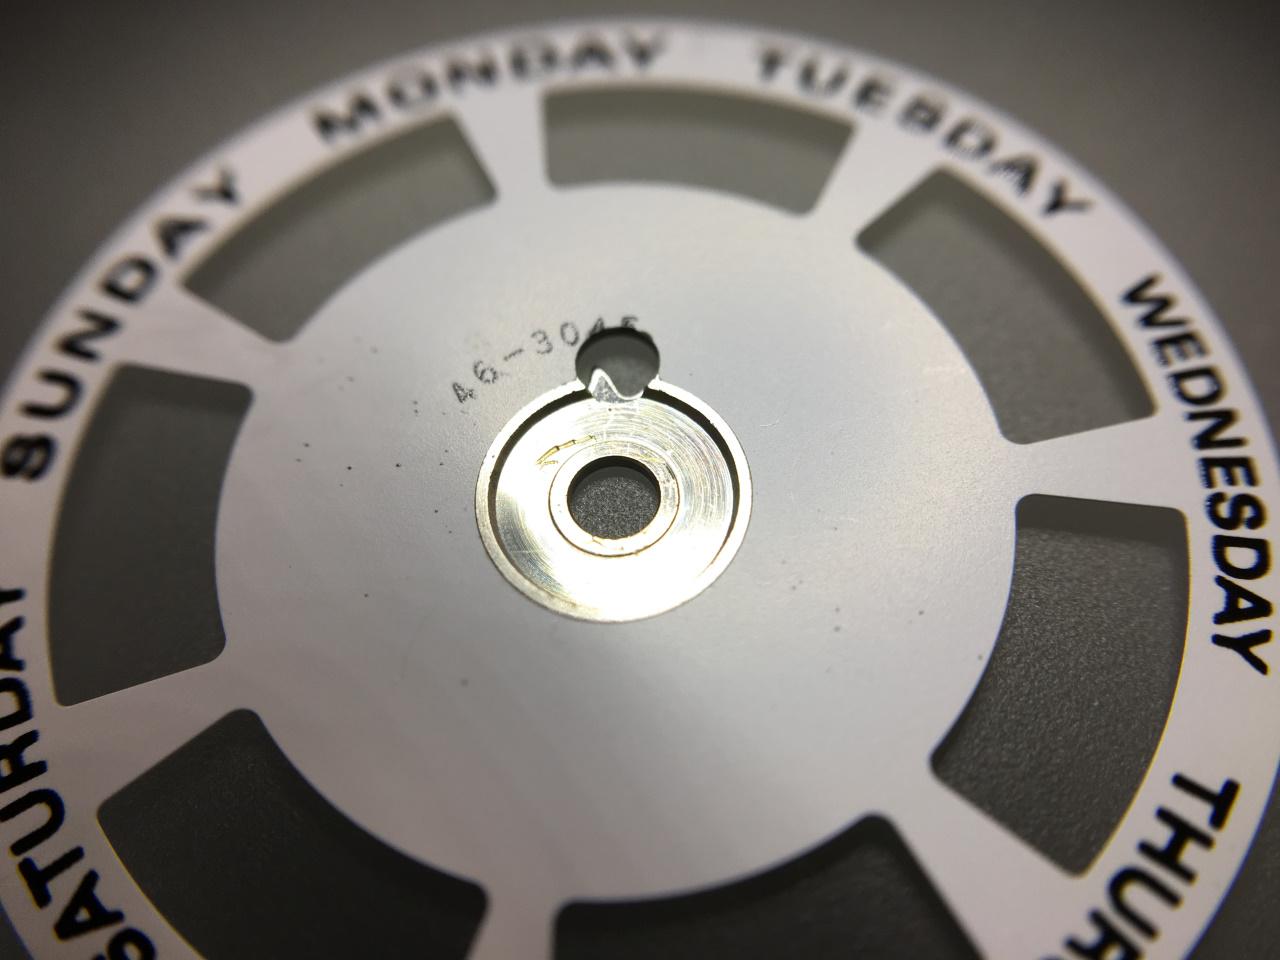
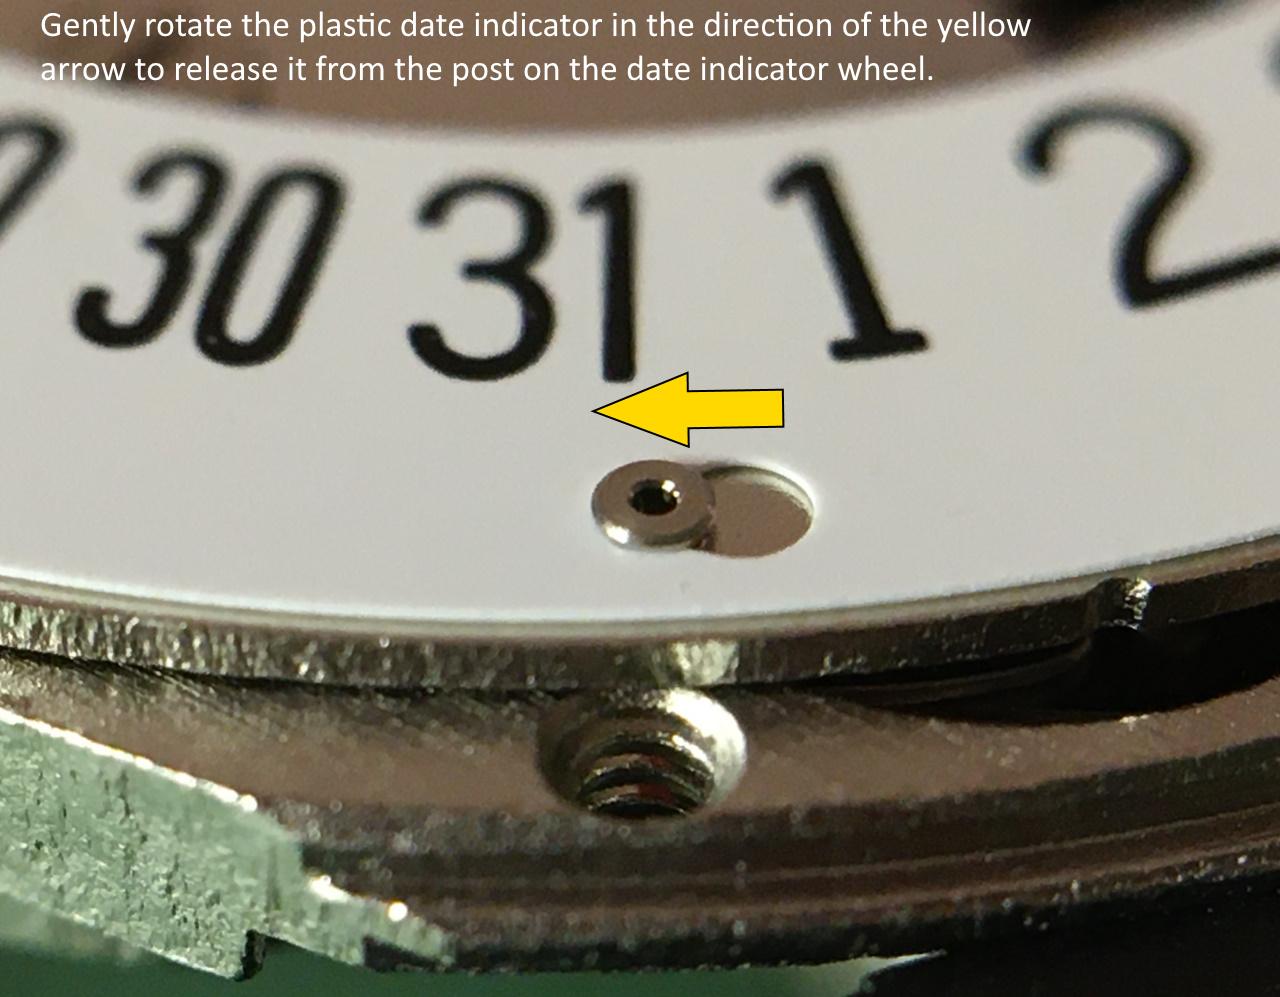
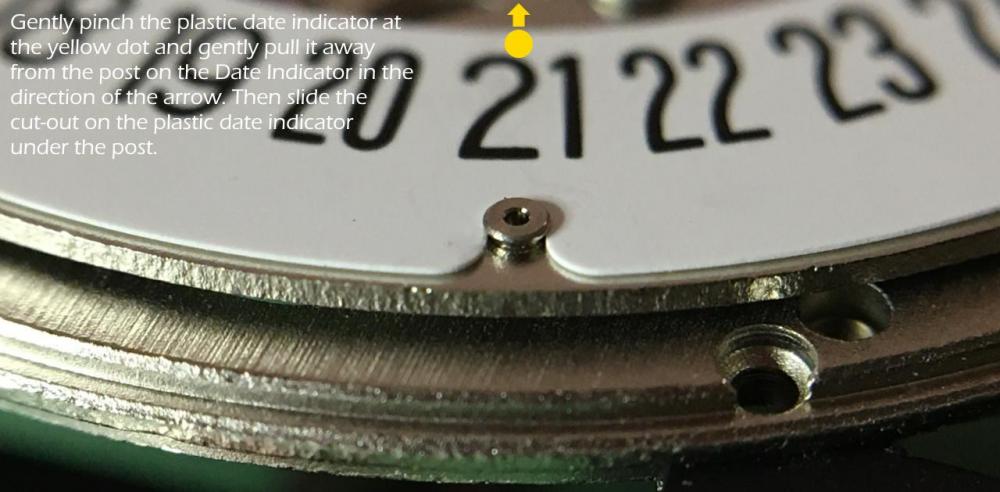
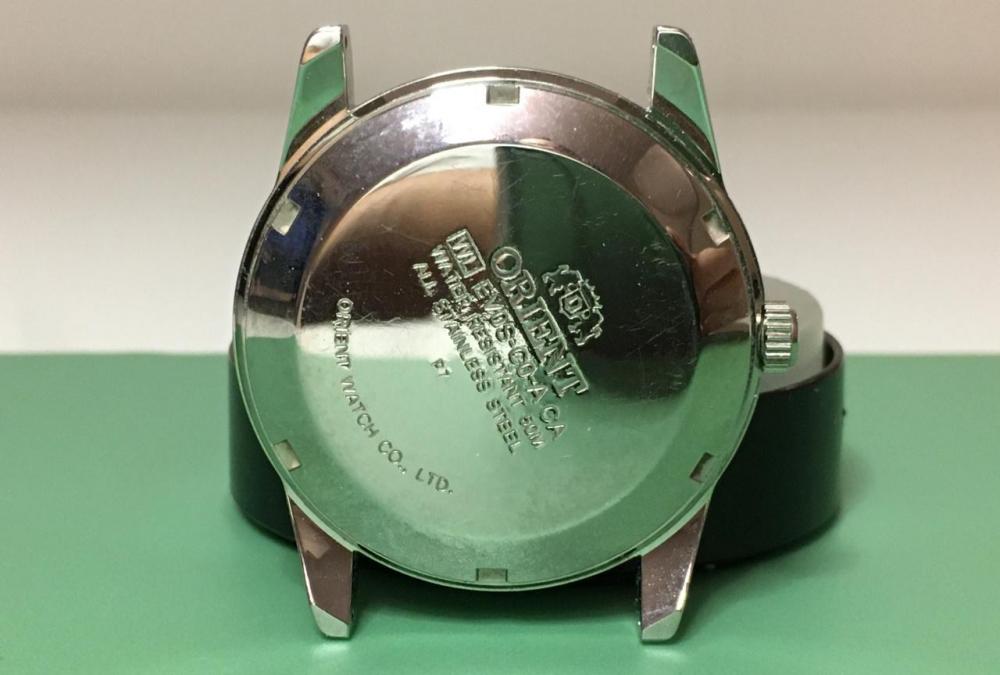
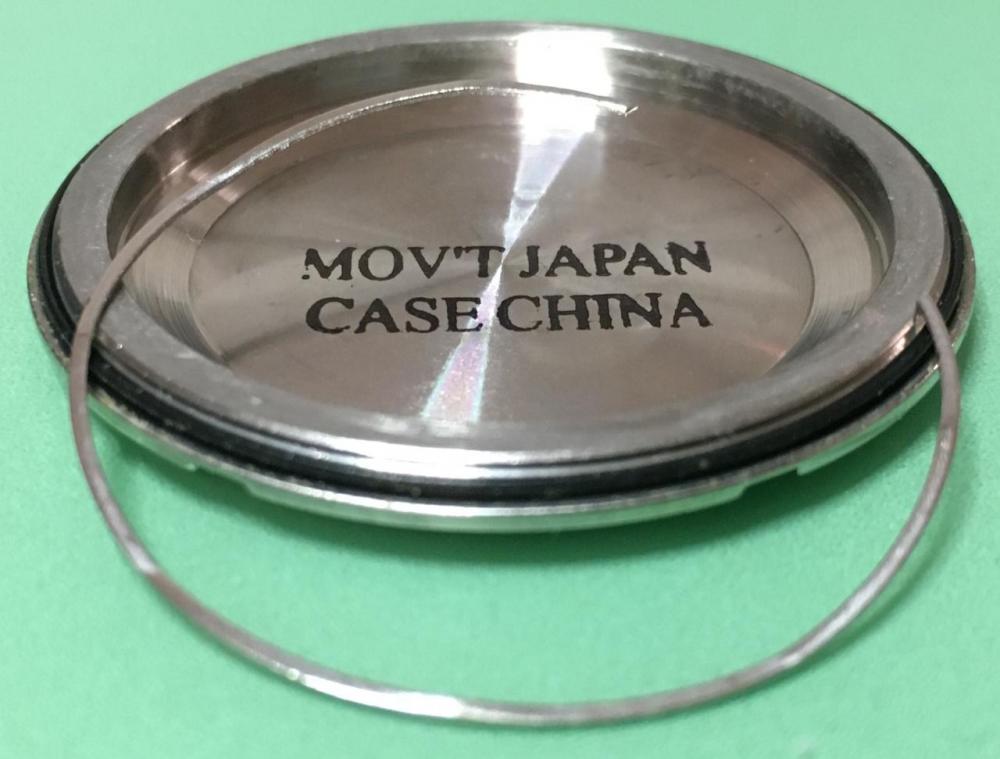
ORIENT Calibre 46E40 Service Walkthrough - Disassembly


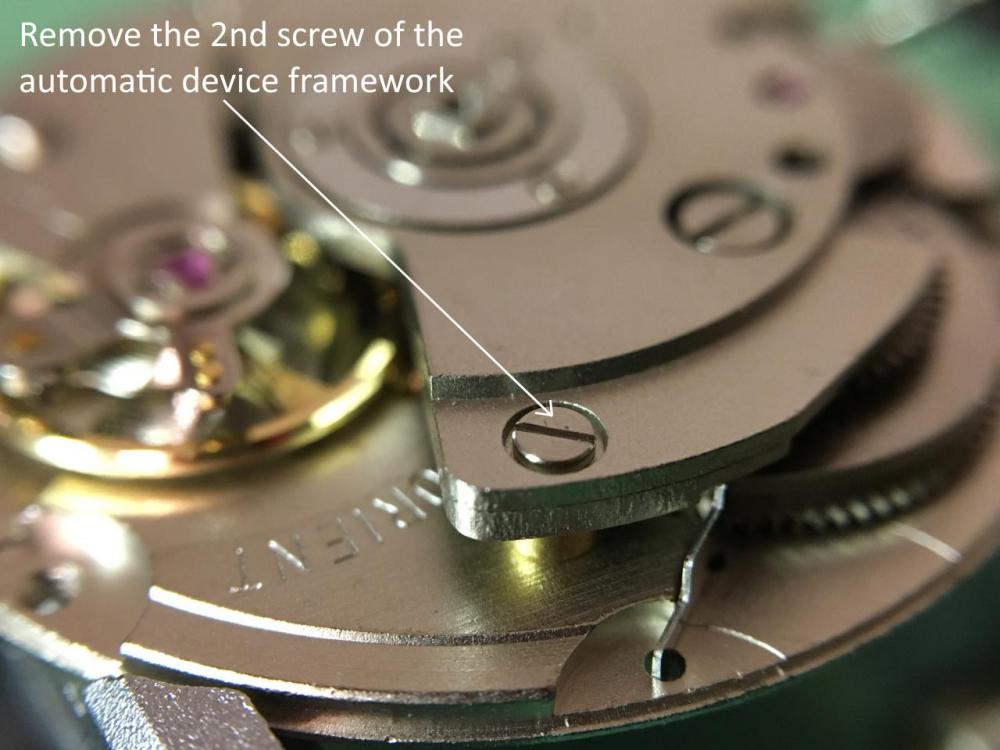
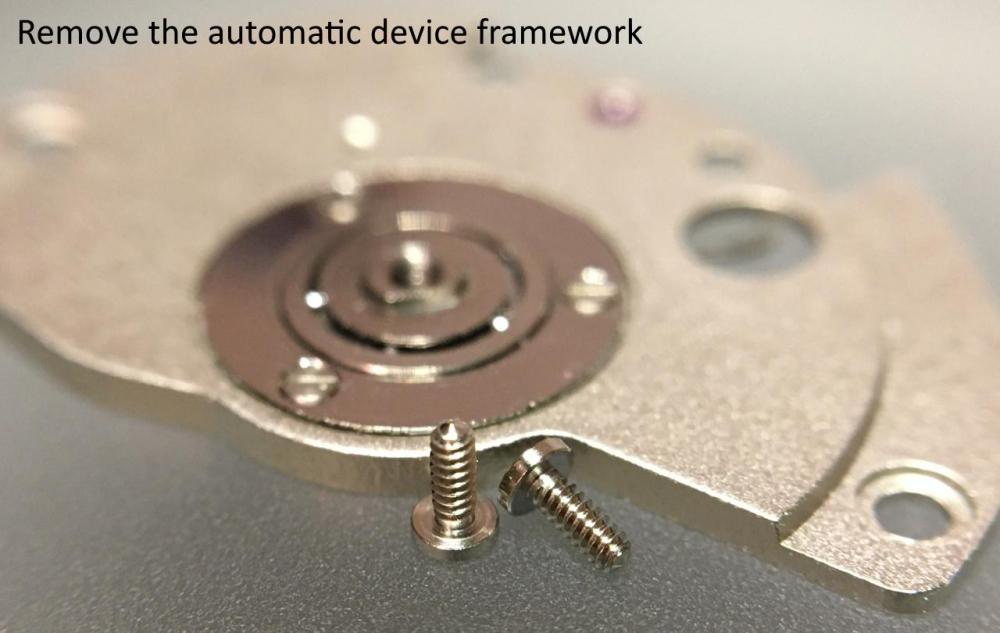


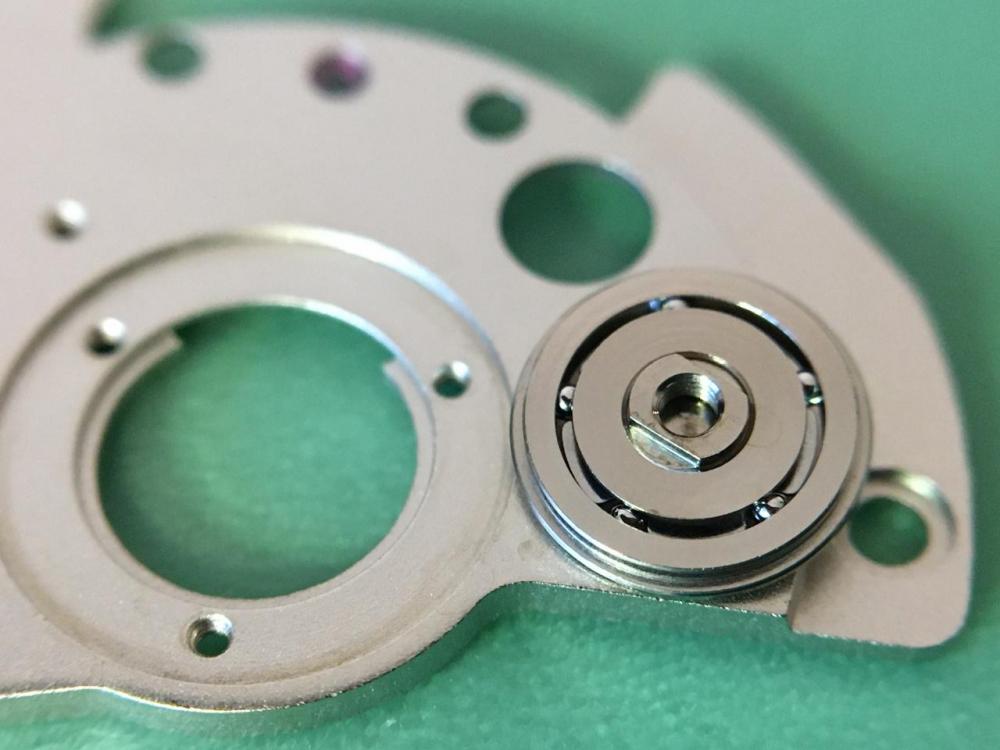

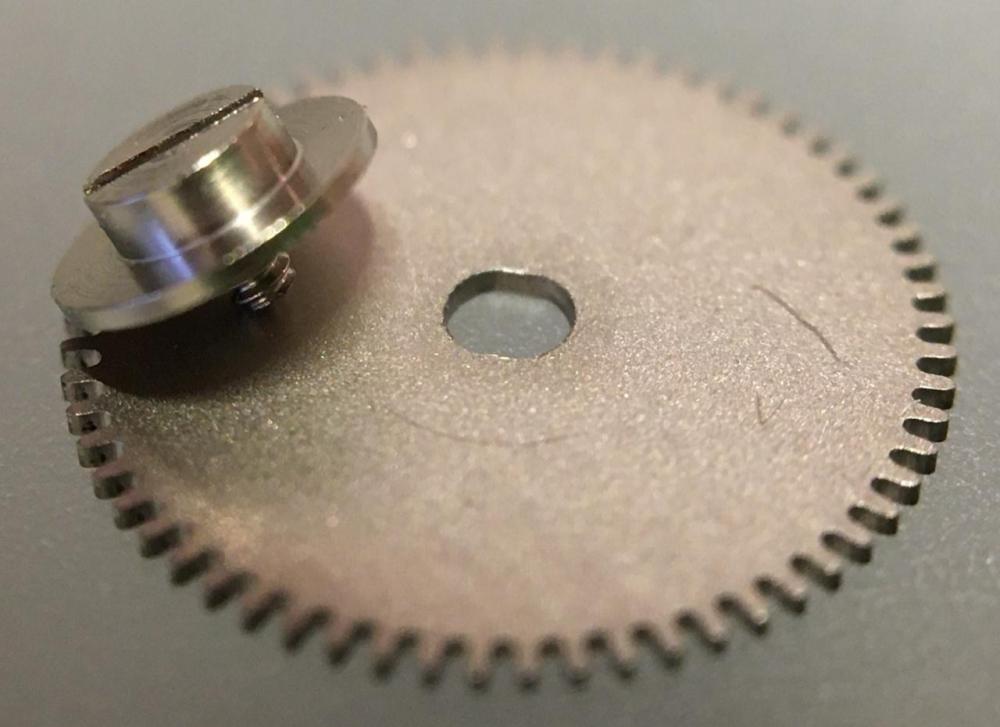


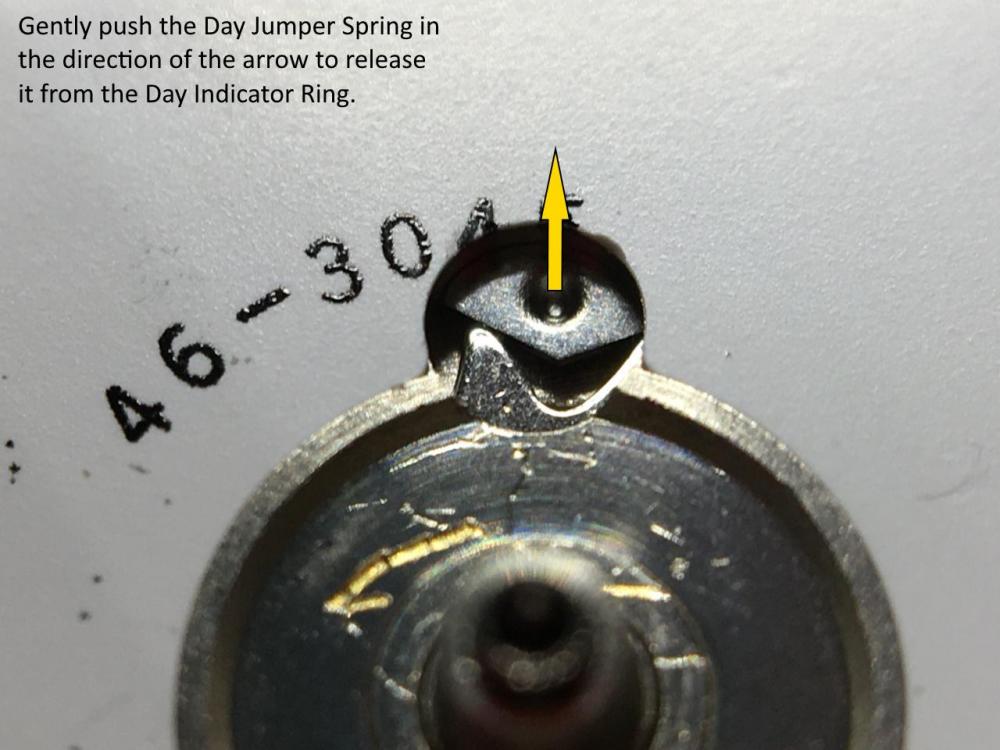
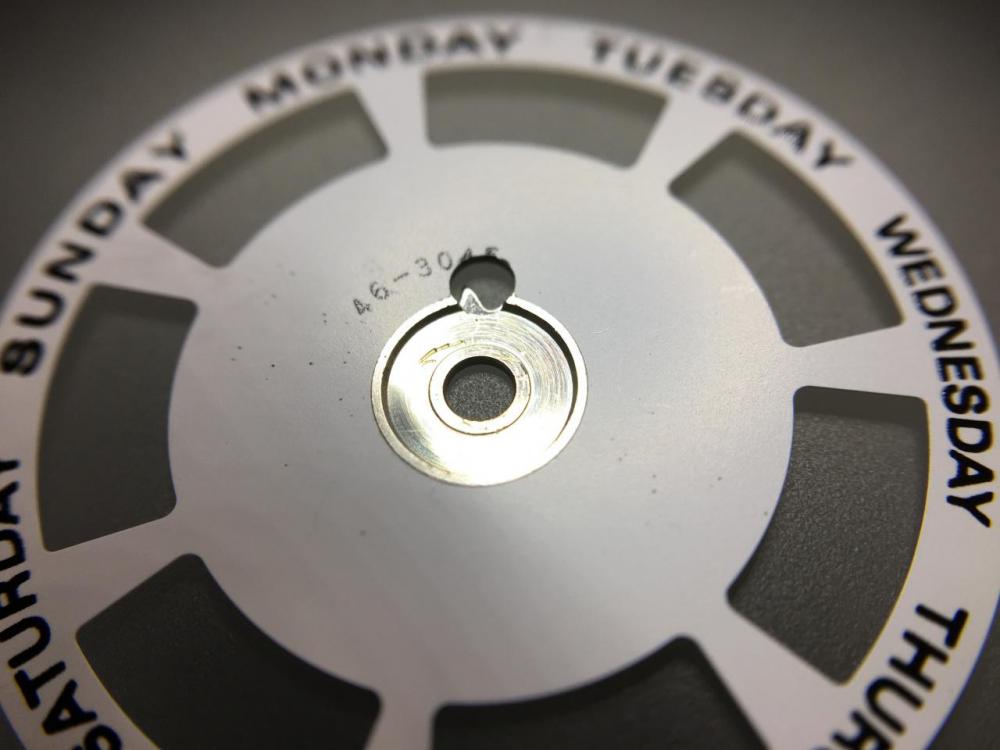
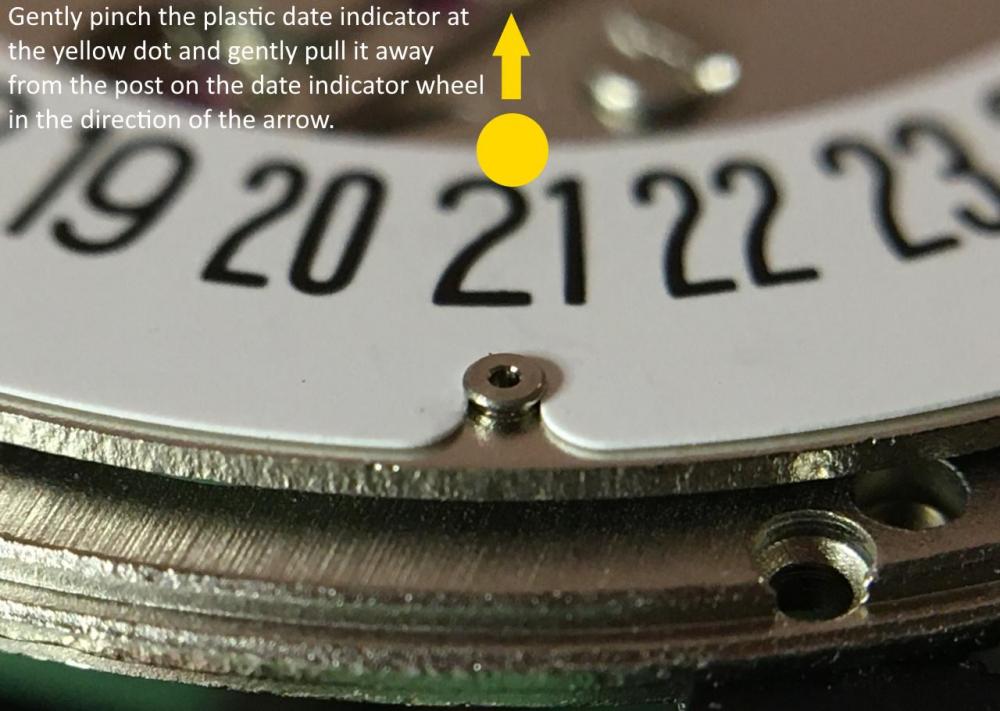


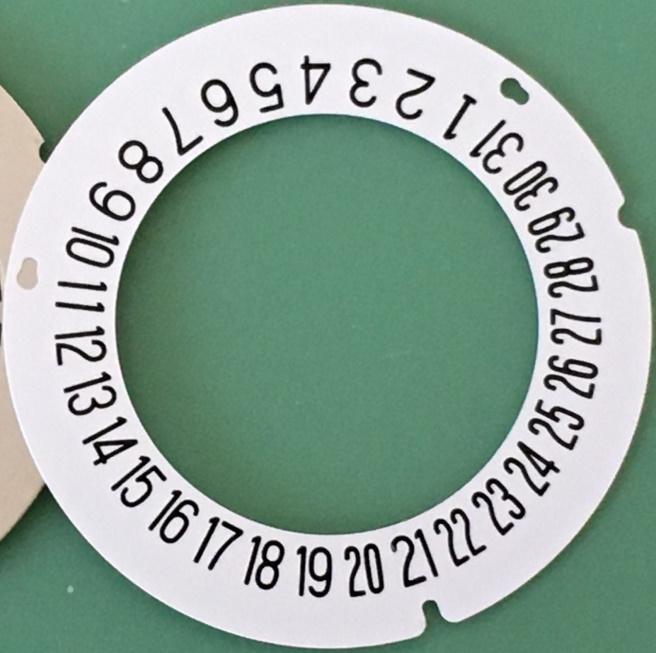


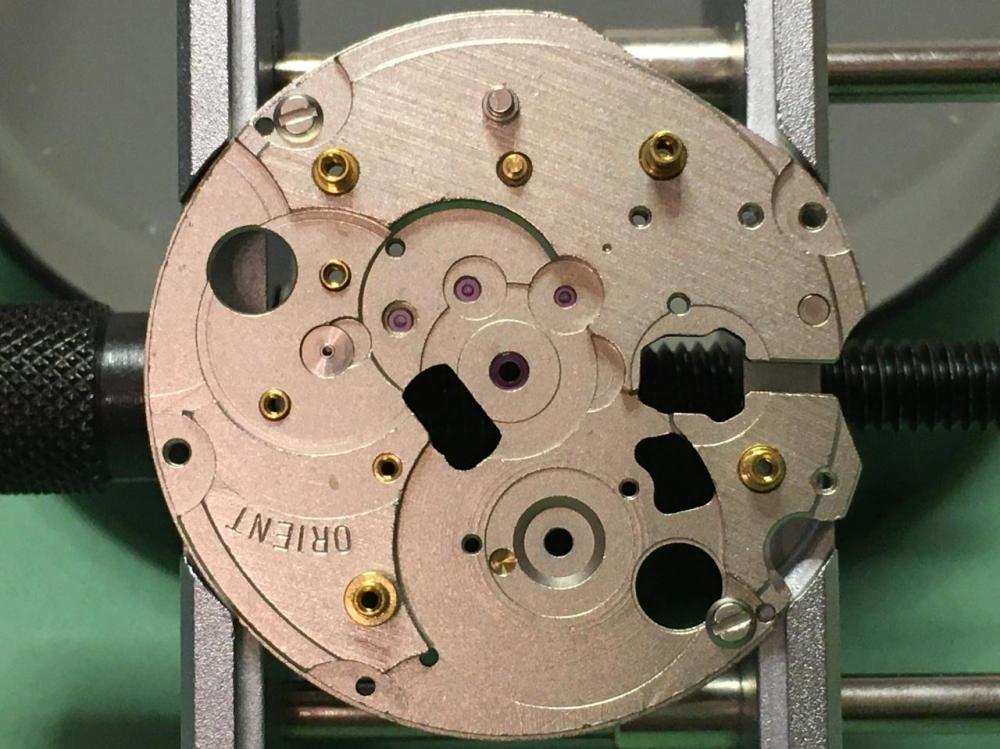 1 point
 -
I thought I should drop this here.. Esslinger do dial blanks, for those of you who want to experiment. Follow this link for more. https://www.esslinger.com/watch-dials-blank-brass-dial-discs/1 point
-
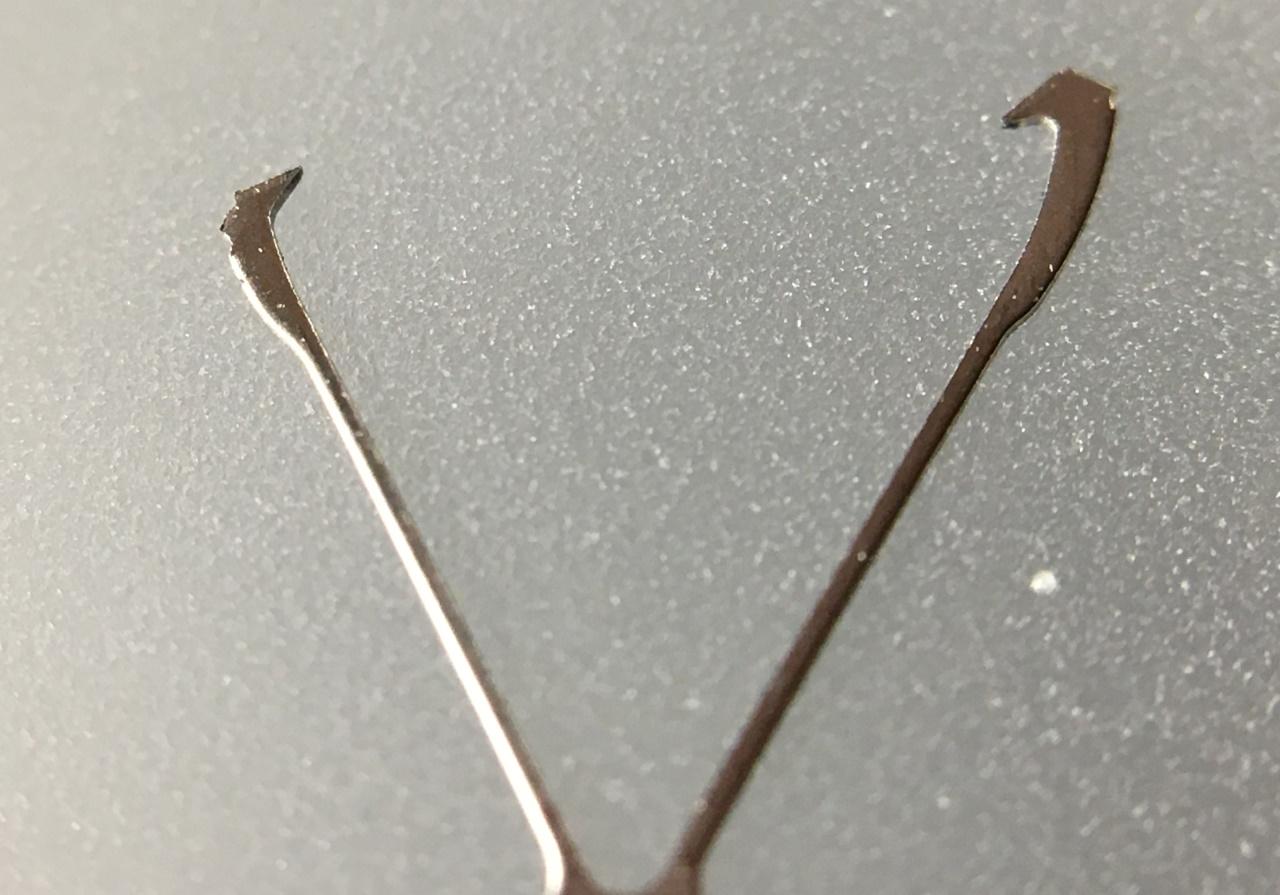
Thanks oldhippy, this is my "Jack the Gripper" in the photo - can I use this shape of "fingers" for real glass as well? When tightened too much, it grips so hard that it punches holes into the side of plastic crystals Can I use this tool for domed real glasses? PS Yes, I have a useless chinese as well, it has lasted for 10 watches, now every crystal slips out of the fingers.
 1 point


.gif.a670ee7538c0179d861f706a4066acc0.thumb.gif.43ba5ce8aa96fbdce358fd1c640dc0a4.thumb.gif.3d49446561727c1bb88677bdda098715.gif)