Leaderboard


Popular Content
Showing content with the highest reputation on 09/14/20 in all areas
-
In order to maintain a healthy and friendly community there are some restrictions for new members as well as benefits for those who contribute the most to this forum. It has occurred to me - or rather, been pointed out to me that I have never really made the details clear. And for that I apologise and I hope this post will be helpful. All members will find their current forum status in the left pane of any content they post on the forum (non-mobile) or by clicking on their display name to view their profile. MEMBER LEVELS NEW MEMBERS (Zero to 9 Posts) New members can post immediately and have access to most areas on the website. New members cannot customise their signatures New members cannot create polls but can participate and vote New members can edit their own posts within 10 minutes of posting that content New members can report posts to moderators New members can start up to 2 private messages per day and to a maximum of 1 recipient per message - with a 50 message storage quota New members are automatically promoted to full Members when they have posted more than 9 times and have gained reputation (*). MEMBERS (10 to 99 Posts with positive reputation *) Members can customise their signatures (**) Members can create polls as well as participate and vote in other member polls Members can edit their own posts within 3 Hours of posting that content Members can start as many private messages per day as needed and to a maximum of 5 recipients per message - with a 150 message storage quota Members are automatically promoted to Advanced Members when they have posted more than 99 times and gained 50 or more reputation points (*). NEW: ADVANCED MEMBERS (100+ Posts With 50+ Reputation *) Advanced Members can customise their signatures (***) Advanced Members can edit their own posts within 3 Days of posting that content Advanced Members can start as many private messages per day as needed and to a maximum of 5 recipients per message - with a 200 message storage quota Patrons and Supporters gain the same privileges as Advanced Members * Reputation is gained when you post content and other members react to that content - you can see your current reputation score within your info-pane, under your avatar. ** Members are allowed up to 1 link in their signature which MUST follow the forum rules and up to two lines of text. To keep the board clean we do not allow images in signatures. *** Advanced Members are allowed up to 2 links in their signature which MUST follow the forum rules and up to four lines of text. To keep the board clean we do not allow images in signatures. RANK TITLES Ranks are just a bit of fun to acknowledge your level of participation on this forum. It is mostly based on your post count. Your forum rank is displayed in the Info Pane of any post you submit on the forum and your rank is displayed under your Display Name. WATCH ENTHUSIAST - 50 Posted Content Items WRT ADDICT - 100 Posted Content Items SUPER WRT ADDICT - 500 Posted Content Items After you have posted 500 content items you will be able to customise your own Rank Title to display under your Display Name DISTINGUISHED MEMBER - 1000 Posted Content Items If you have any questions regarding the above then please post your thoughts below and I will try my best to answer.5 points
-
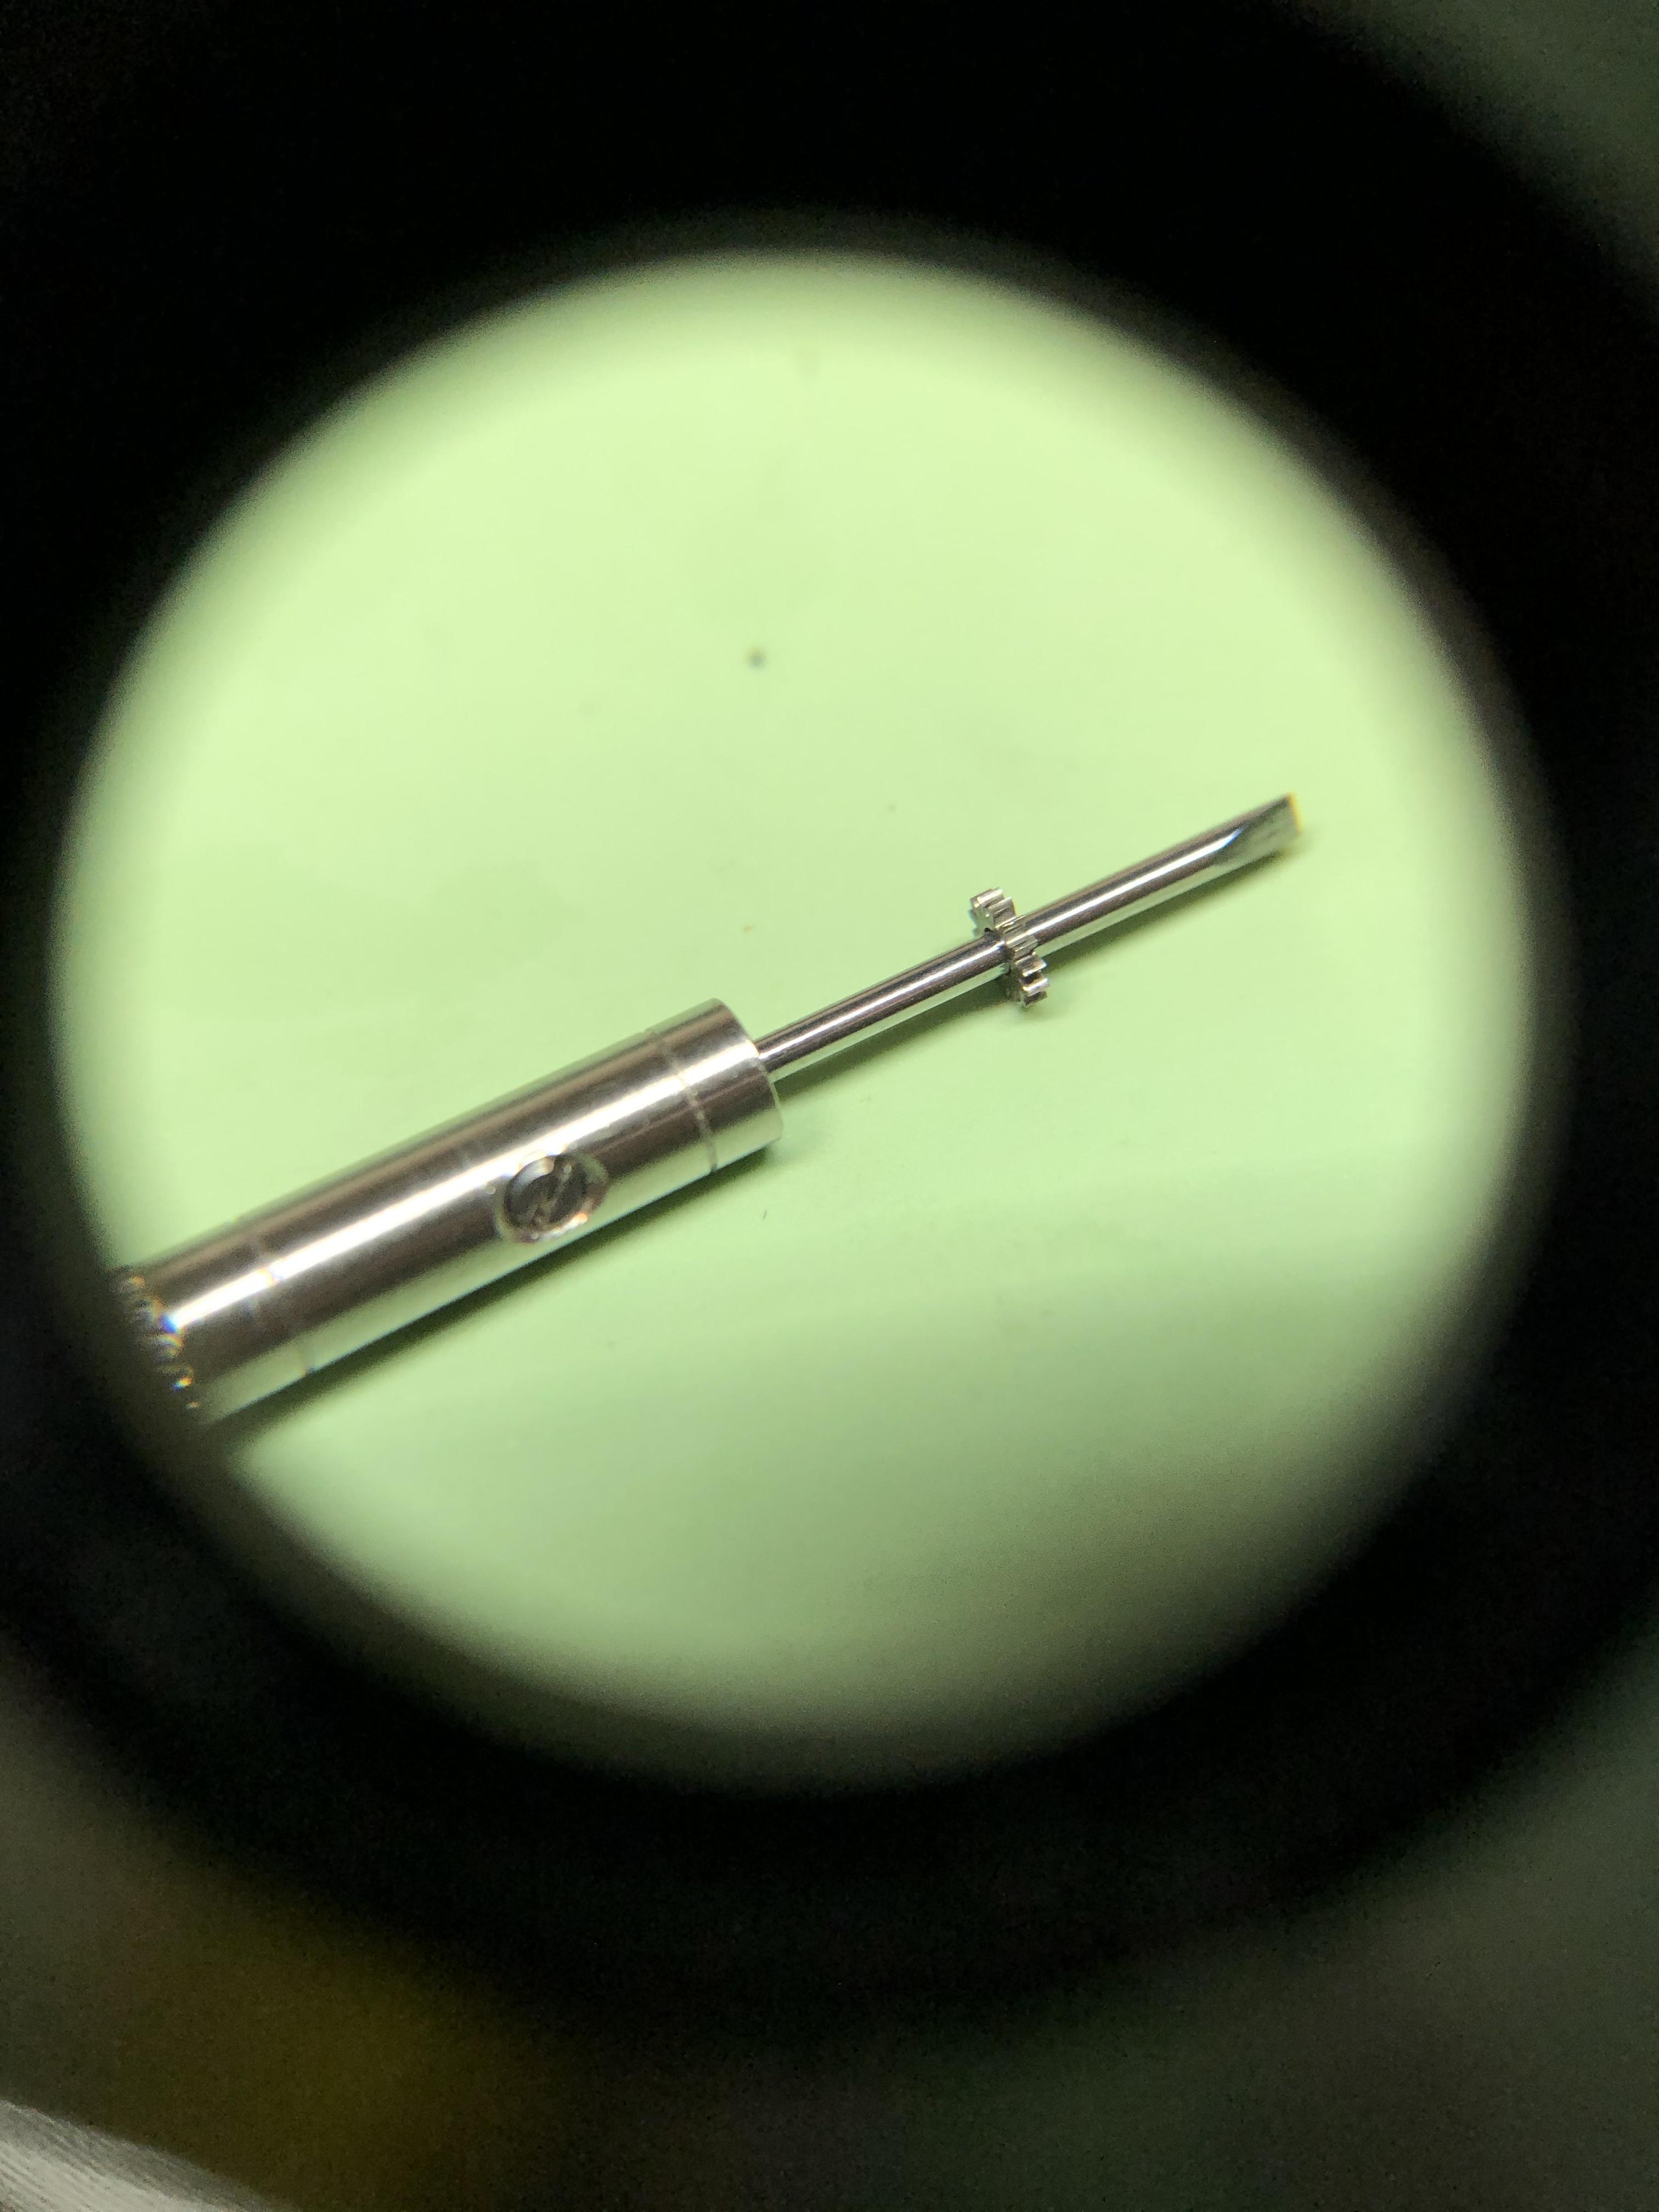
It's to unlock the cover of the movement. Shift it clockwise and you can take the cover off.3 points
-
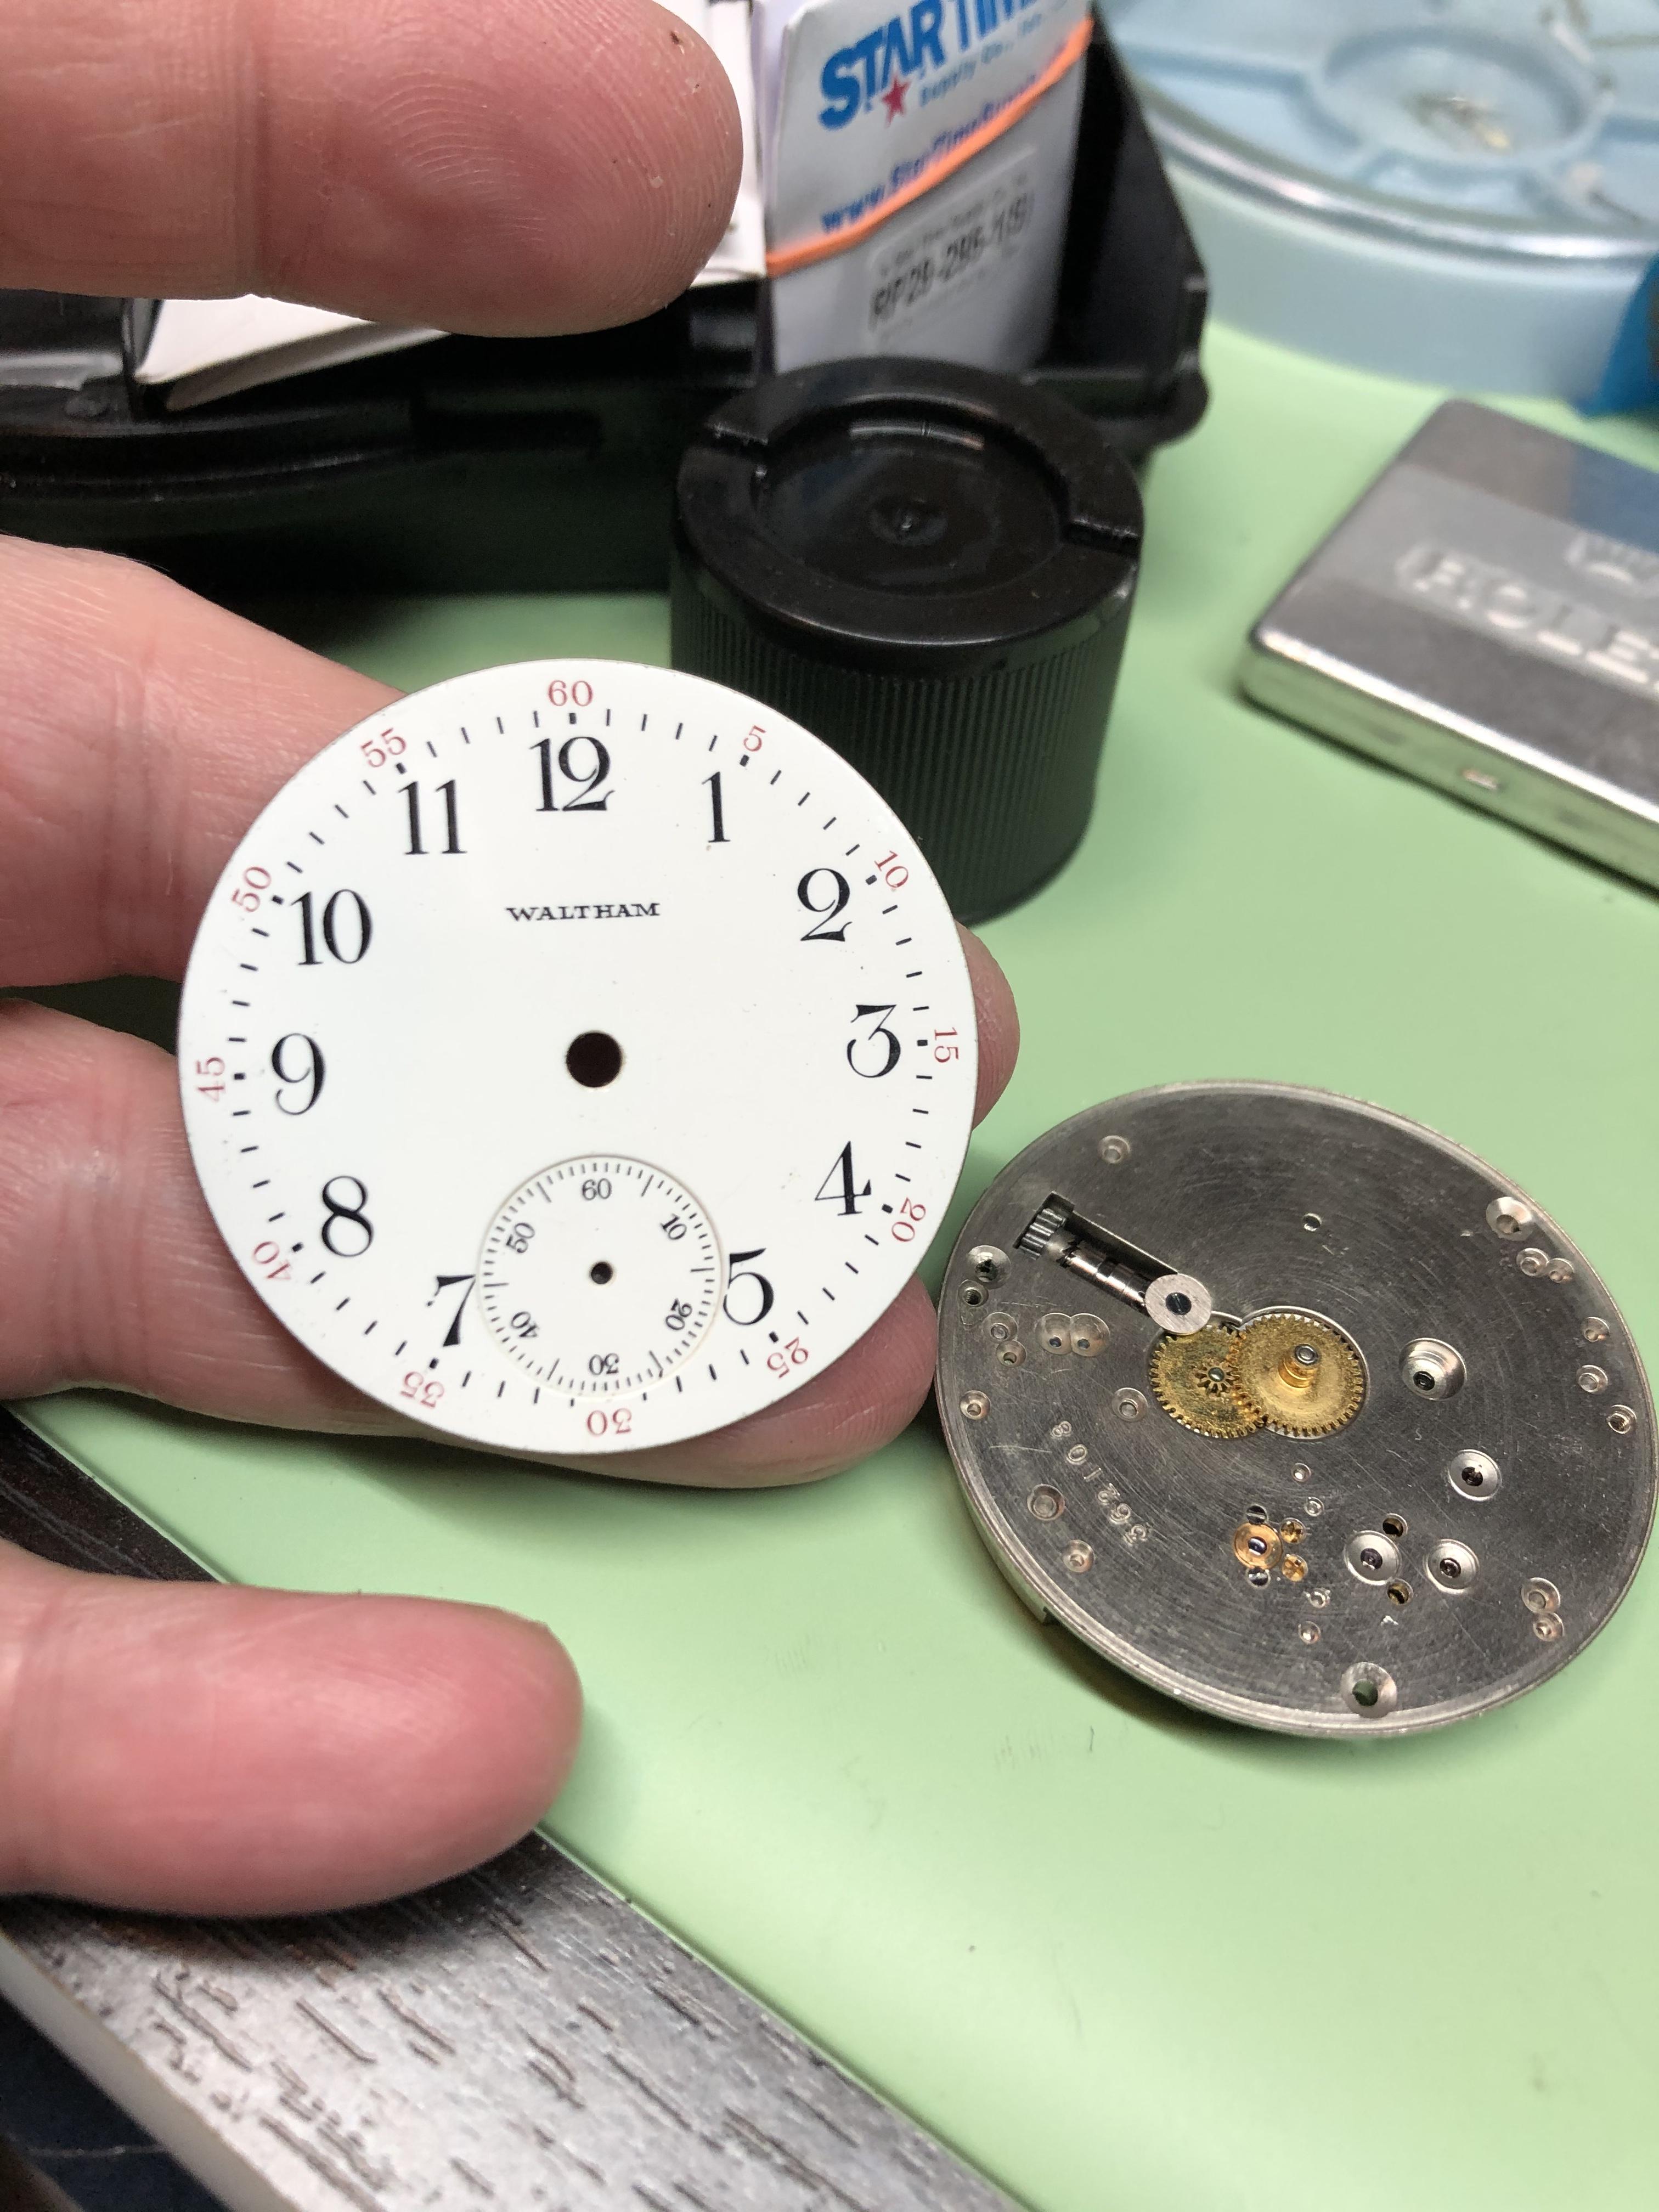
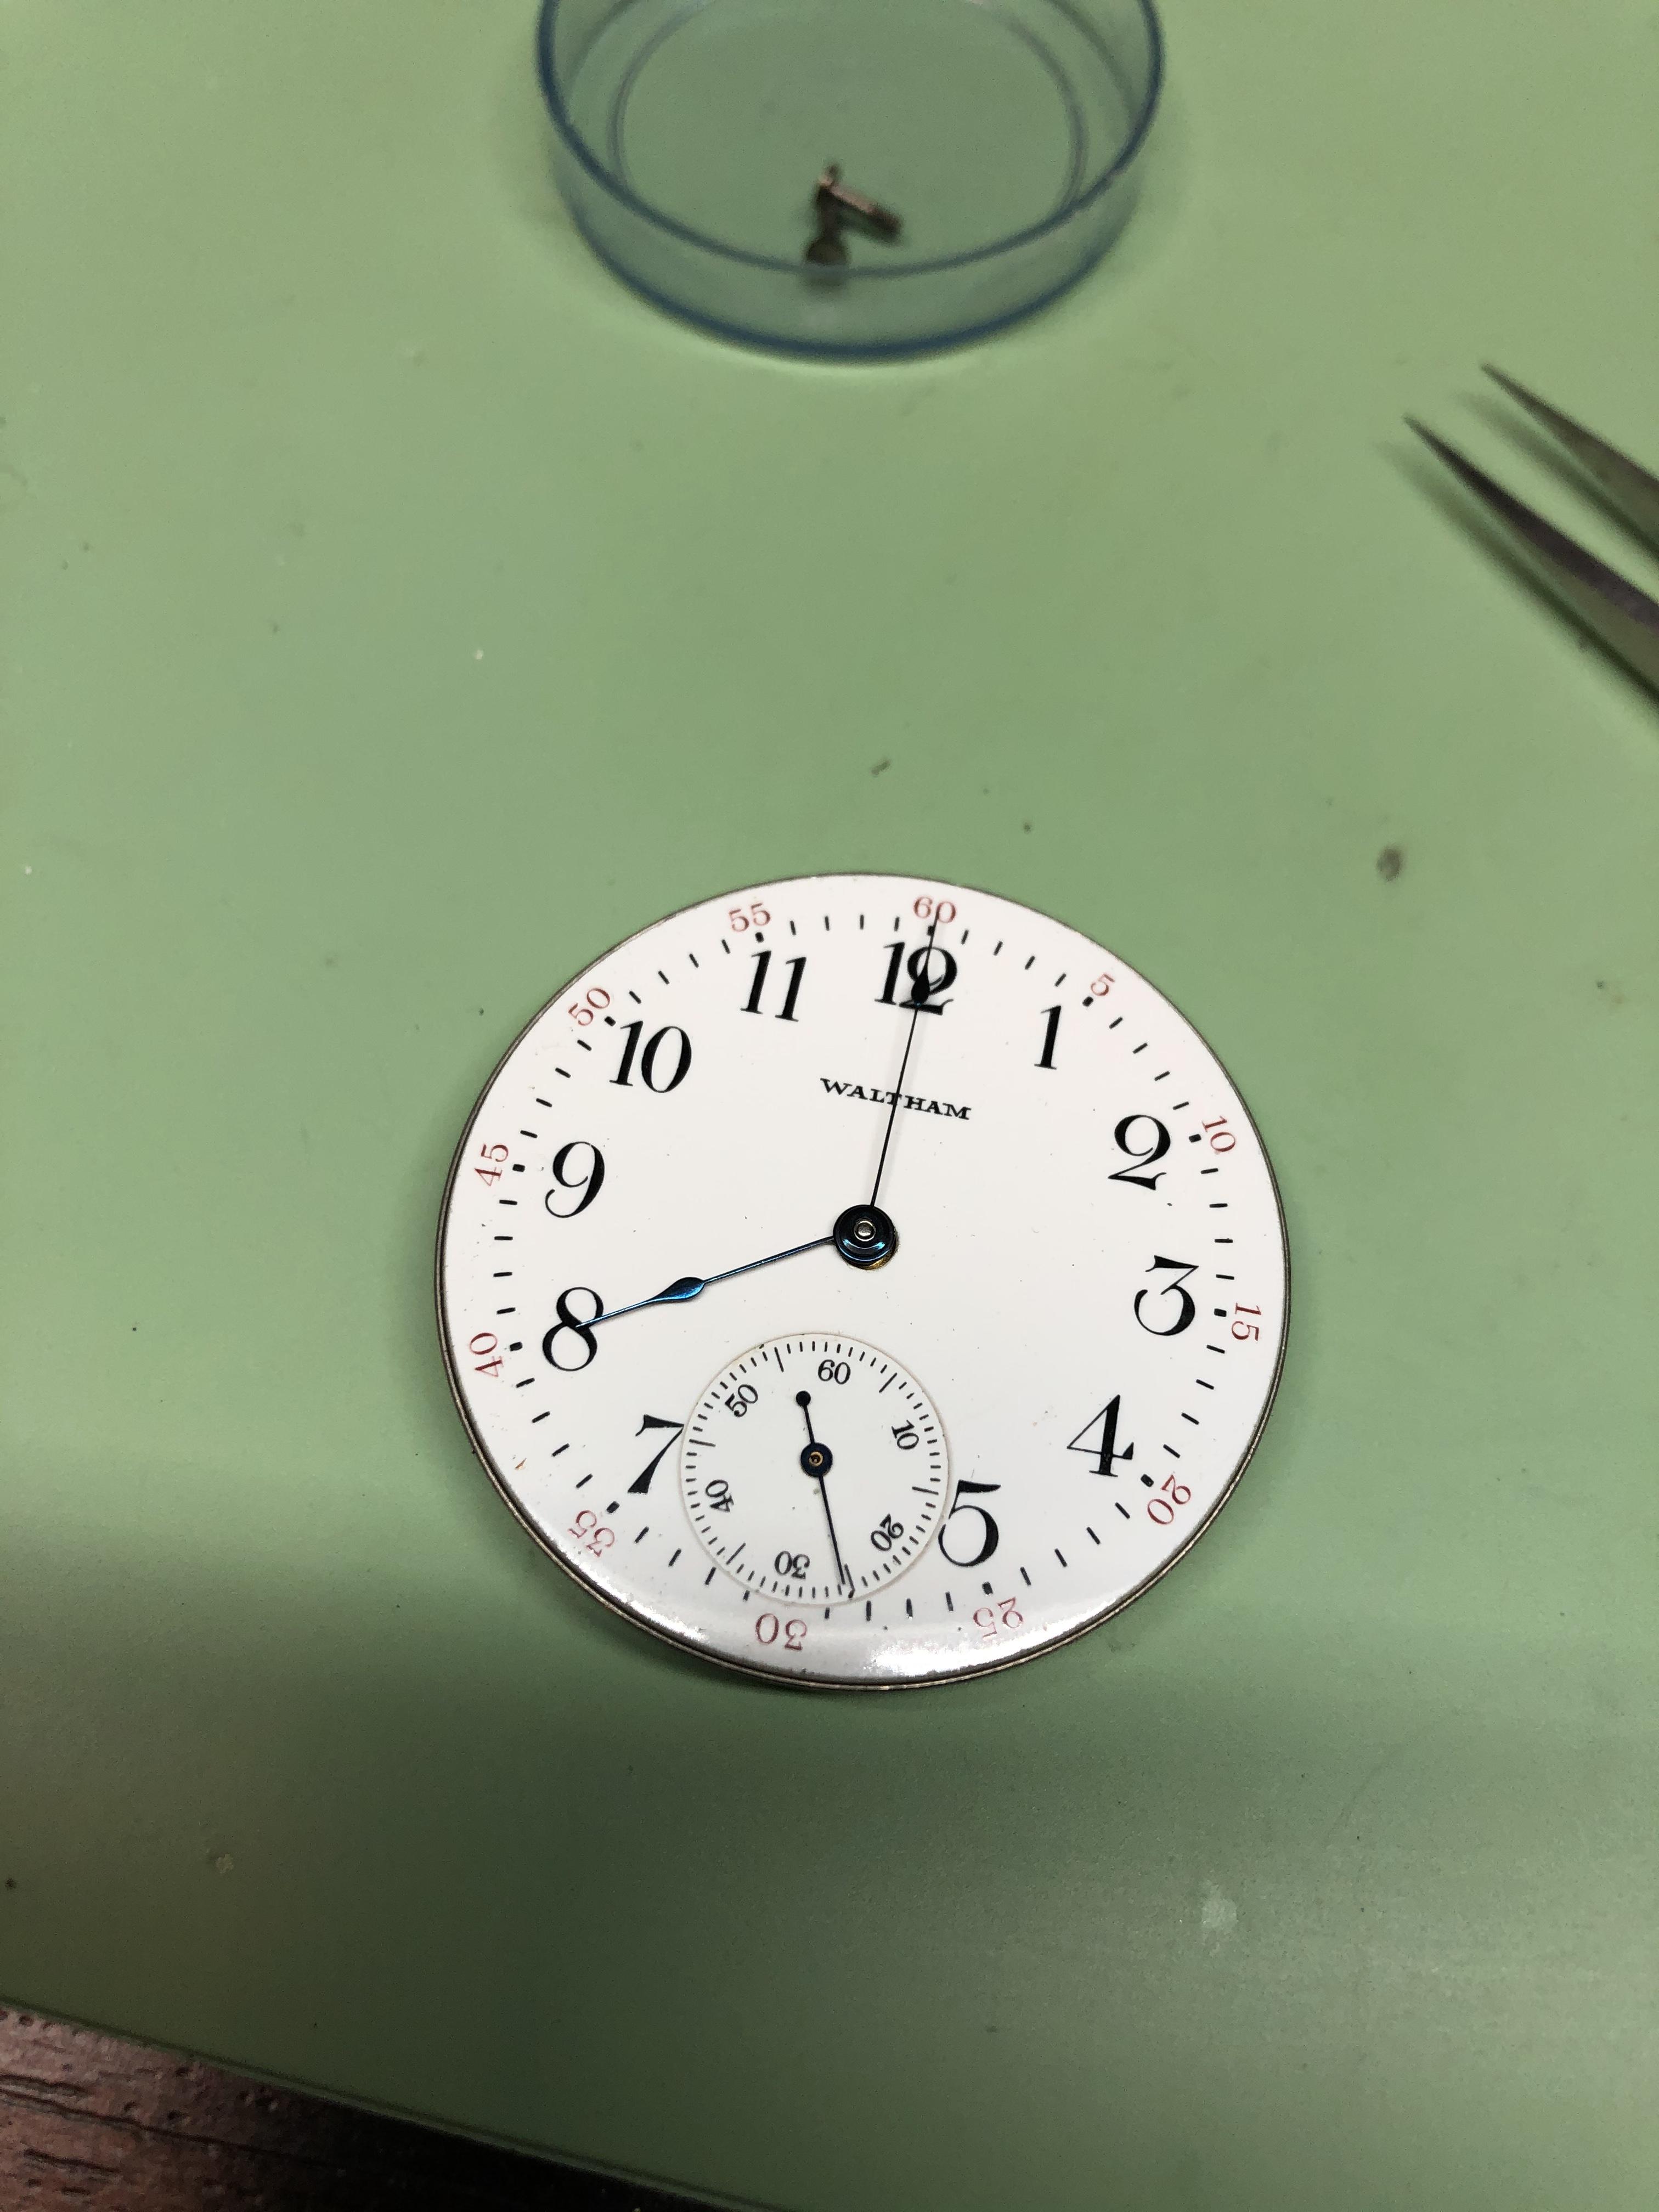
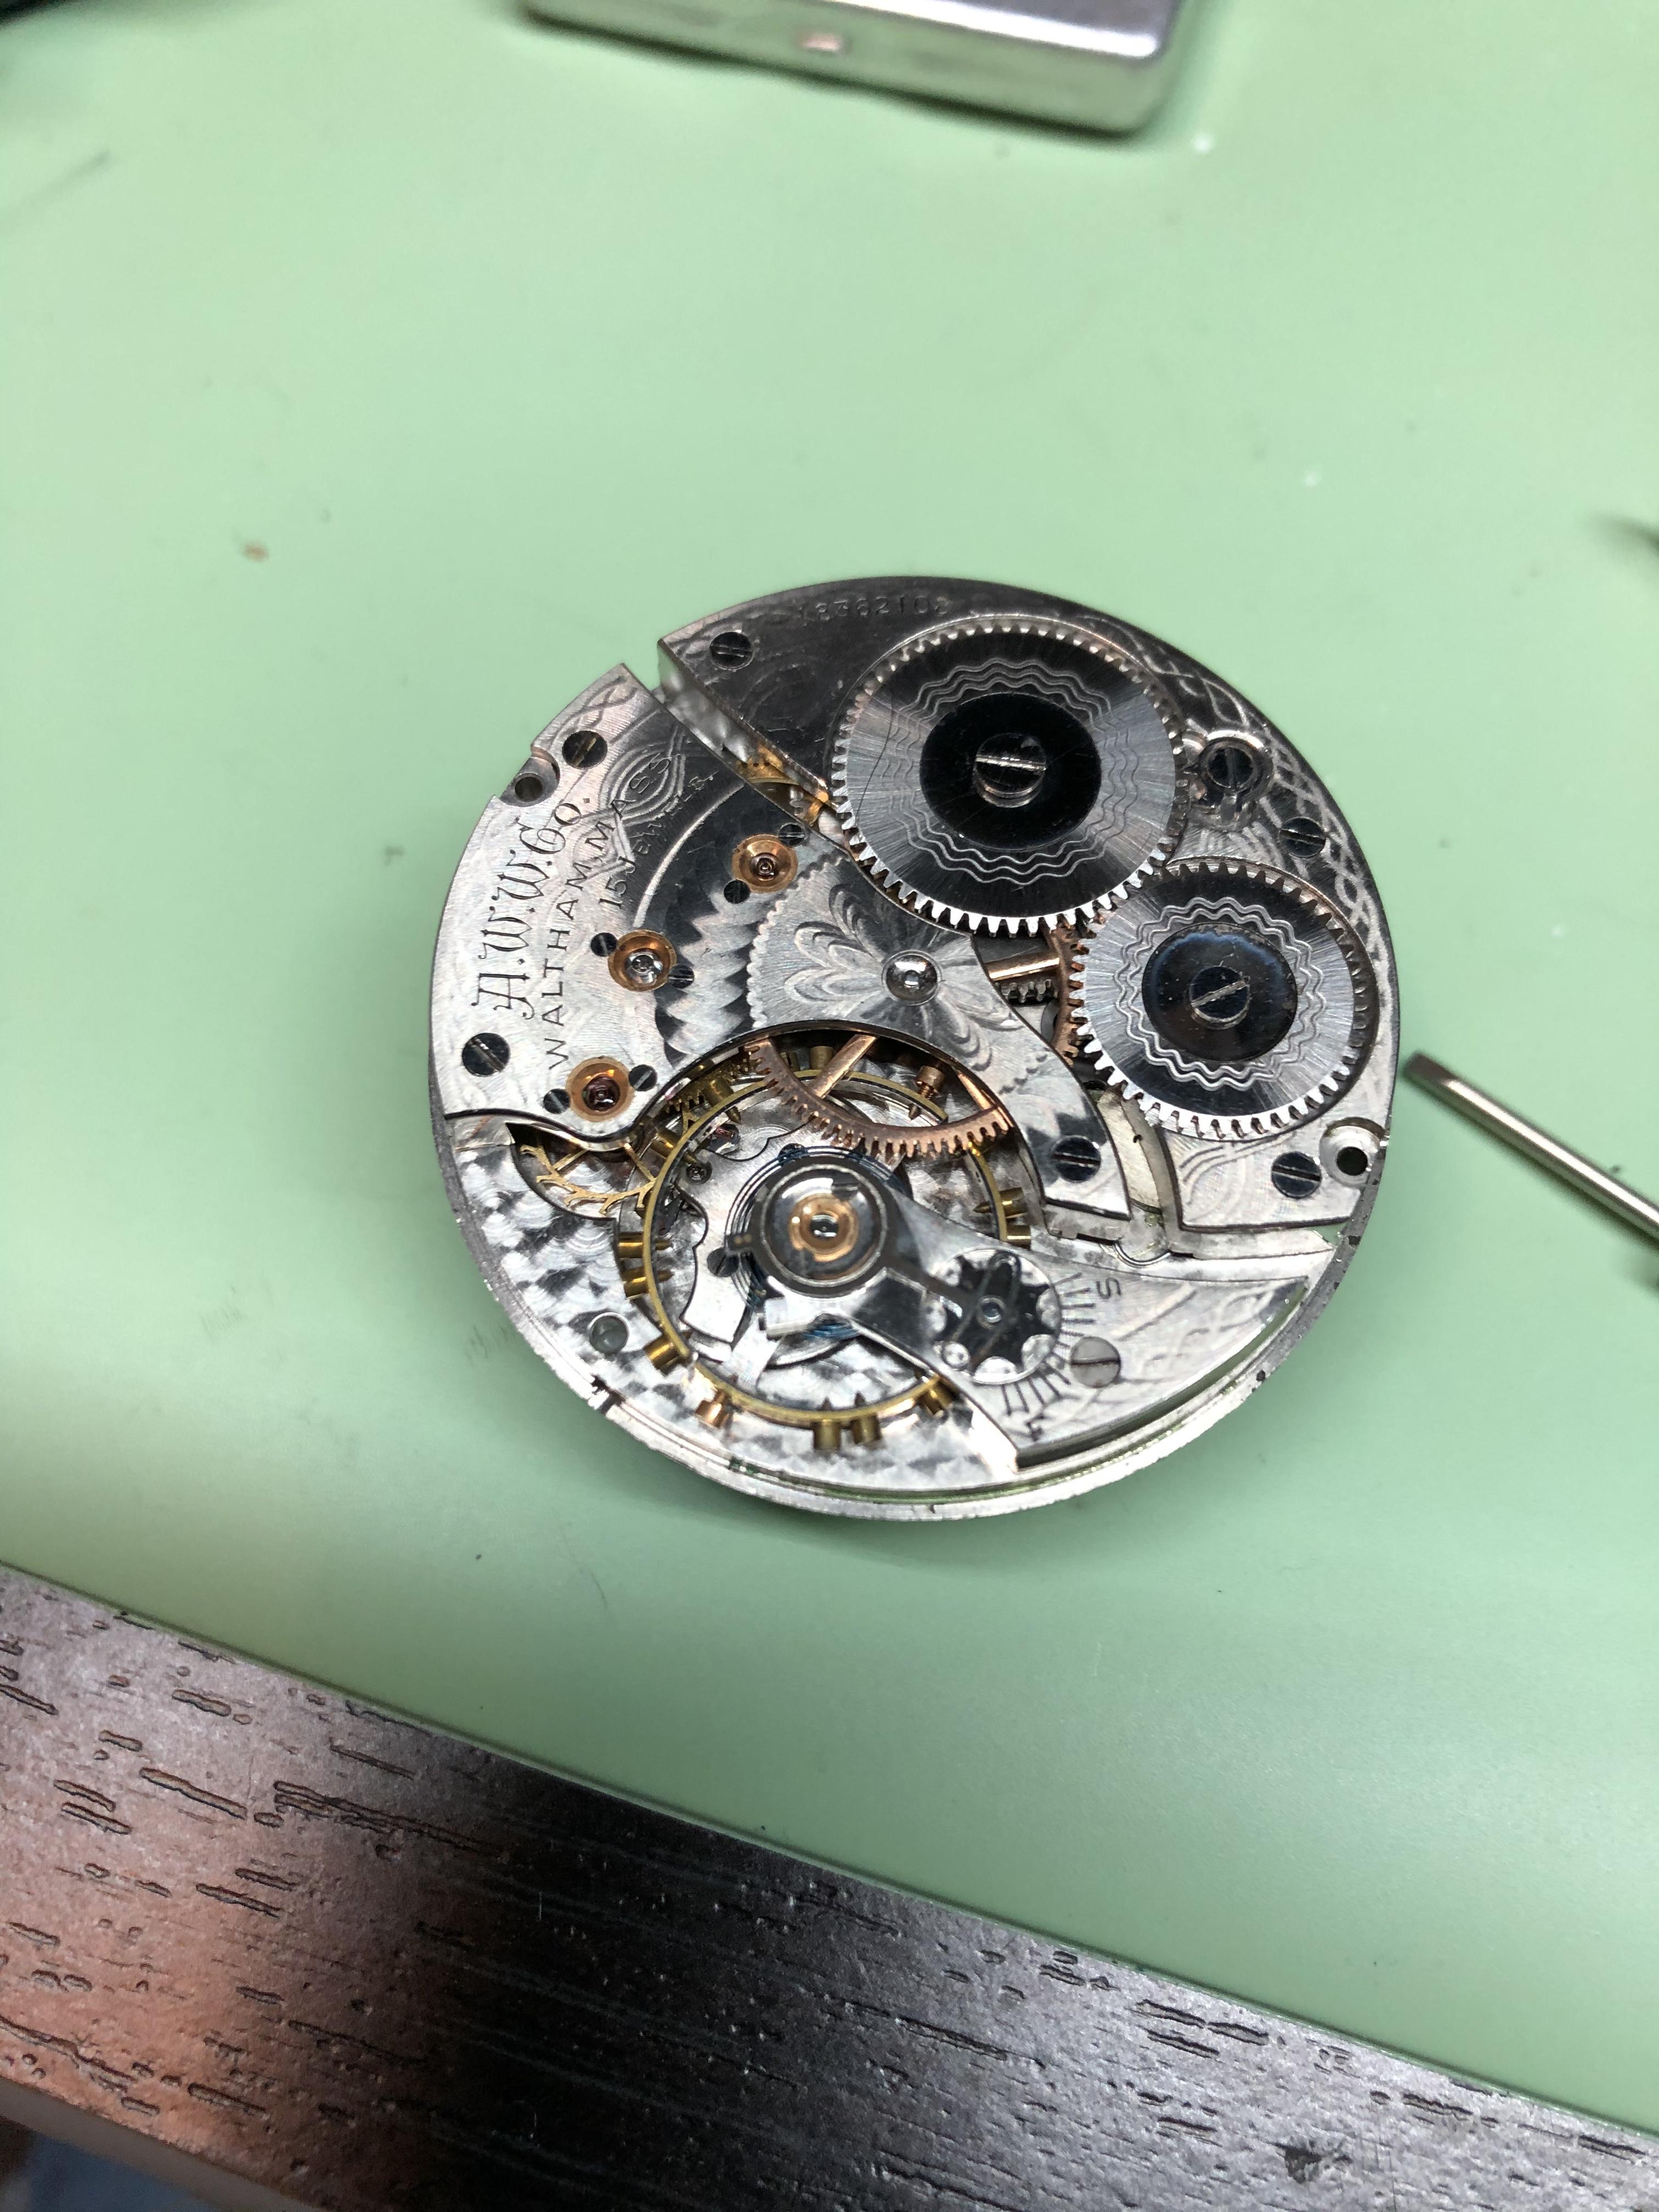
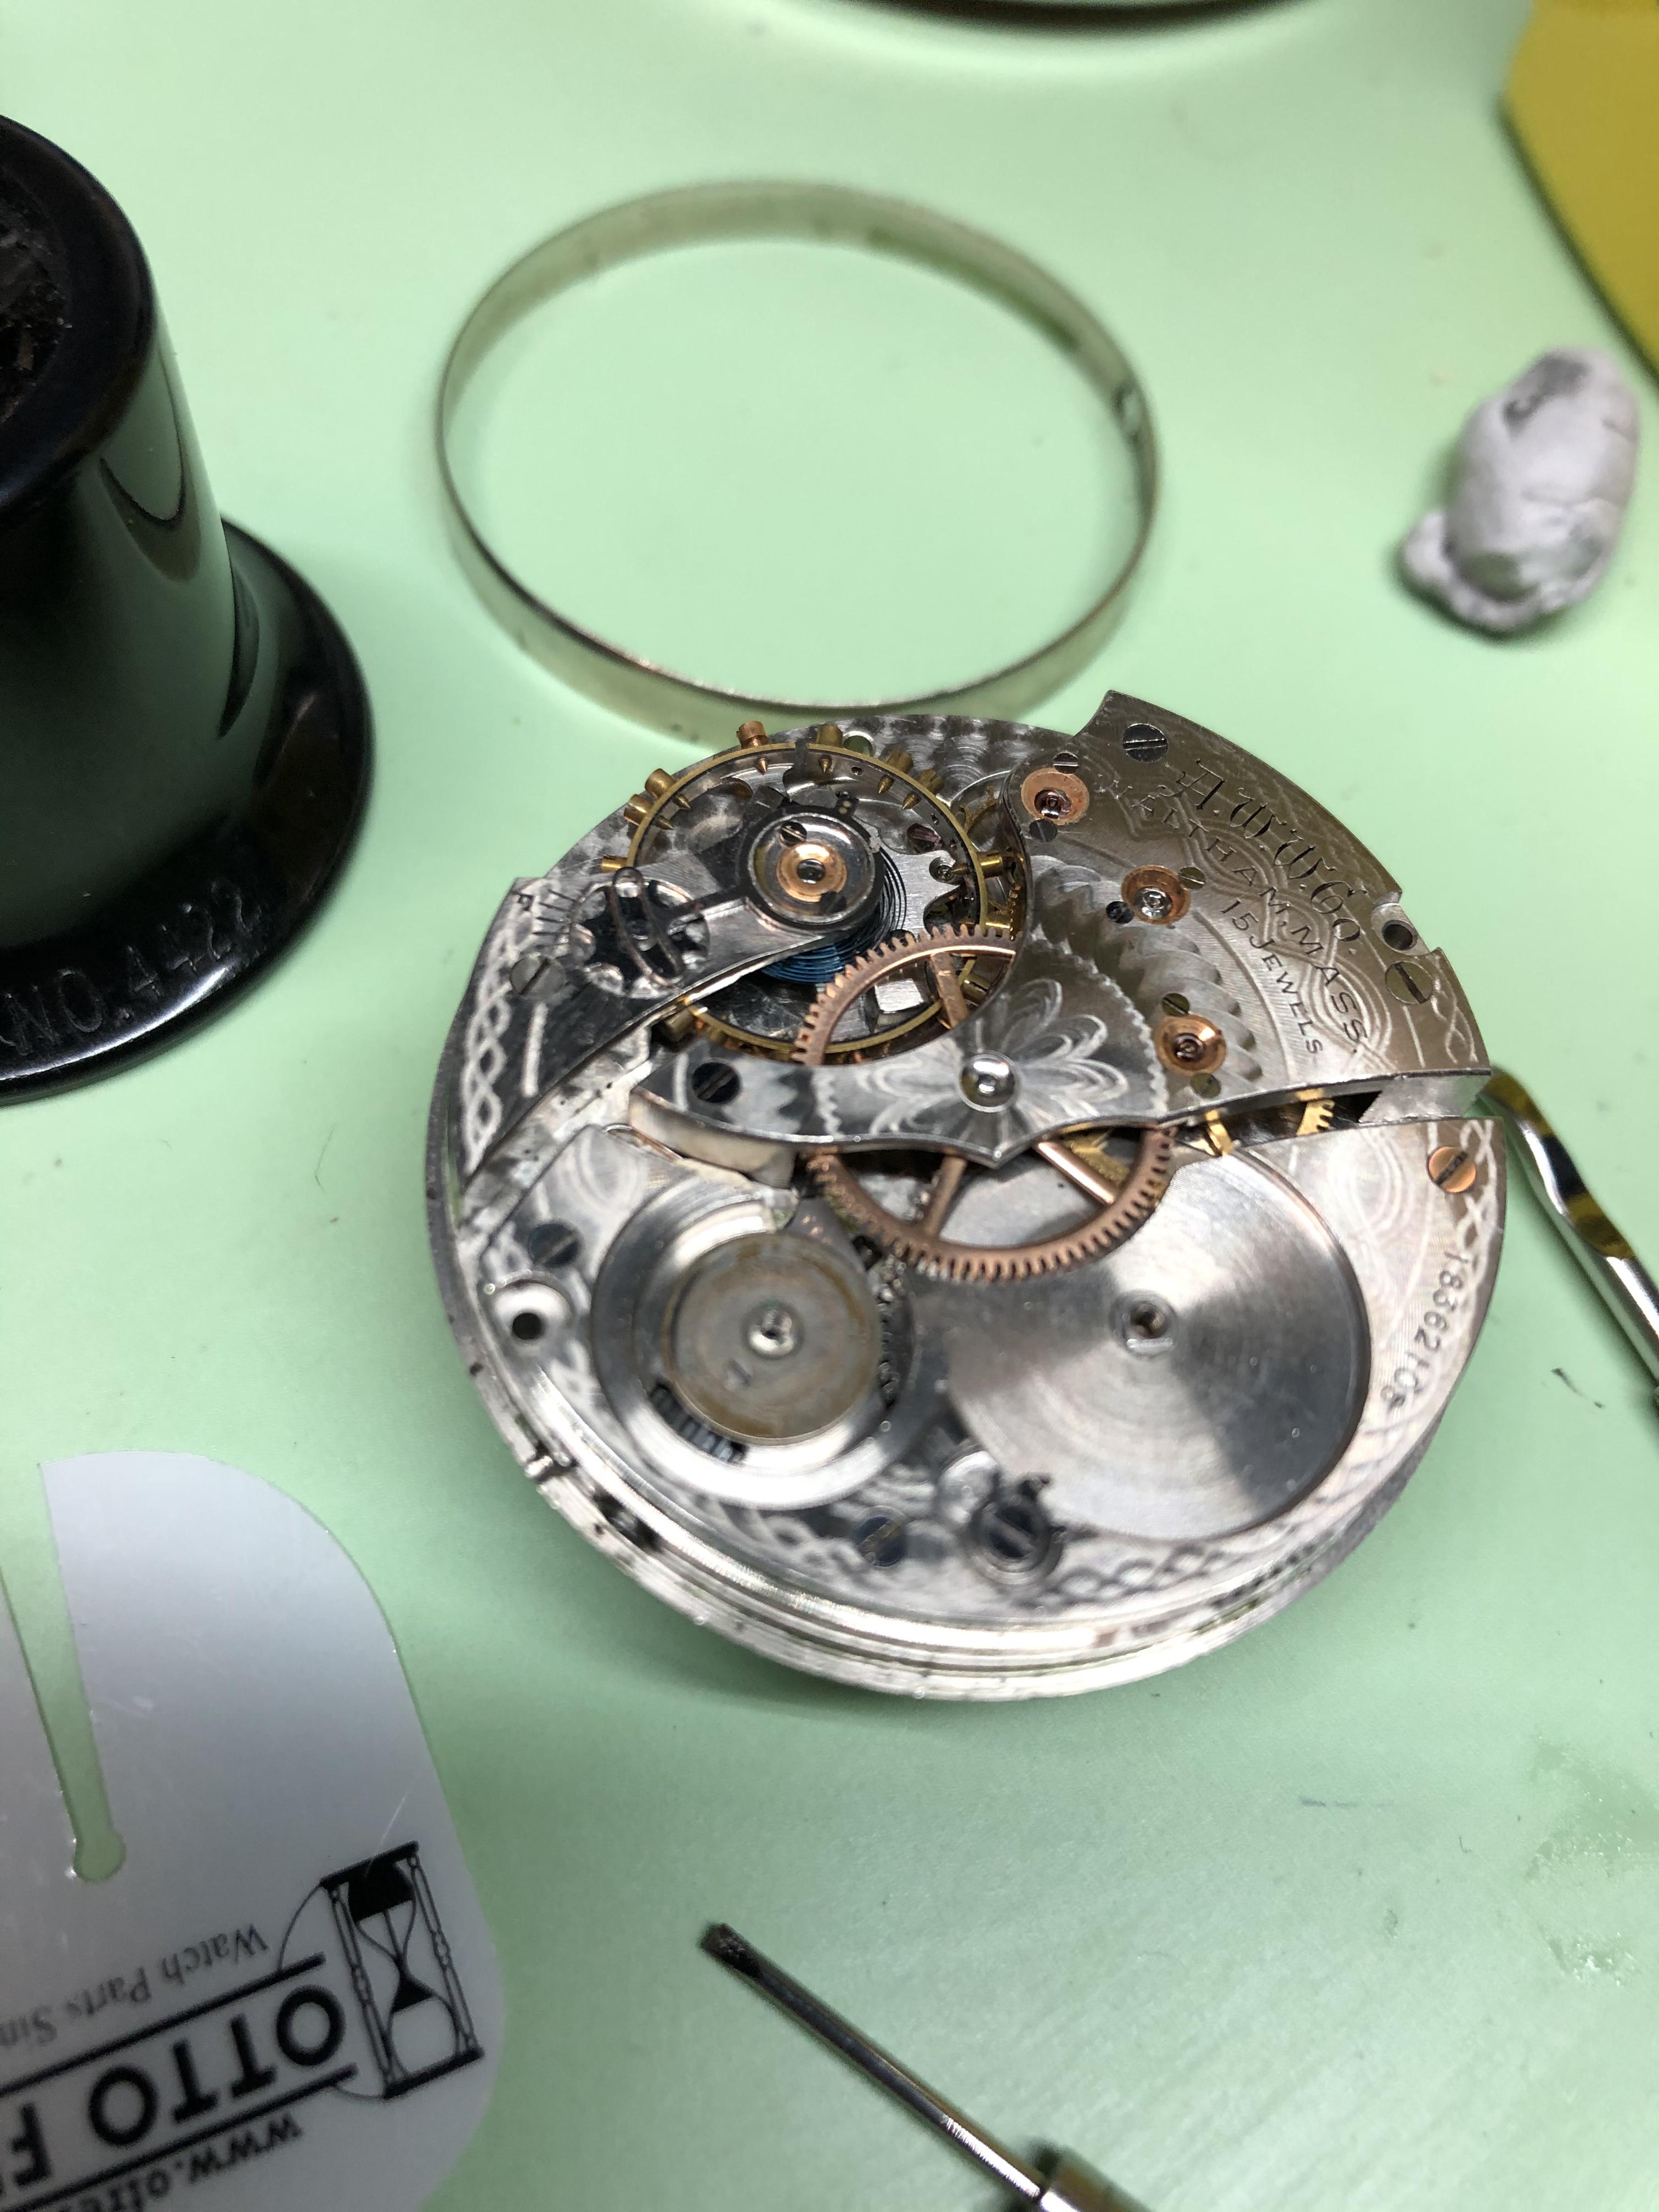
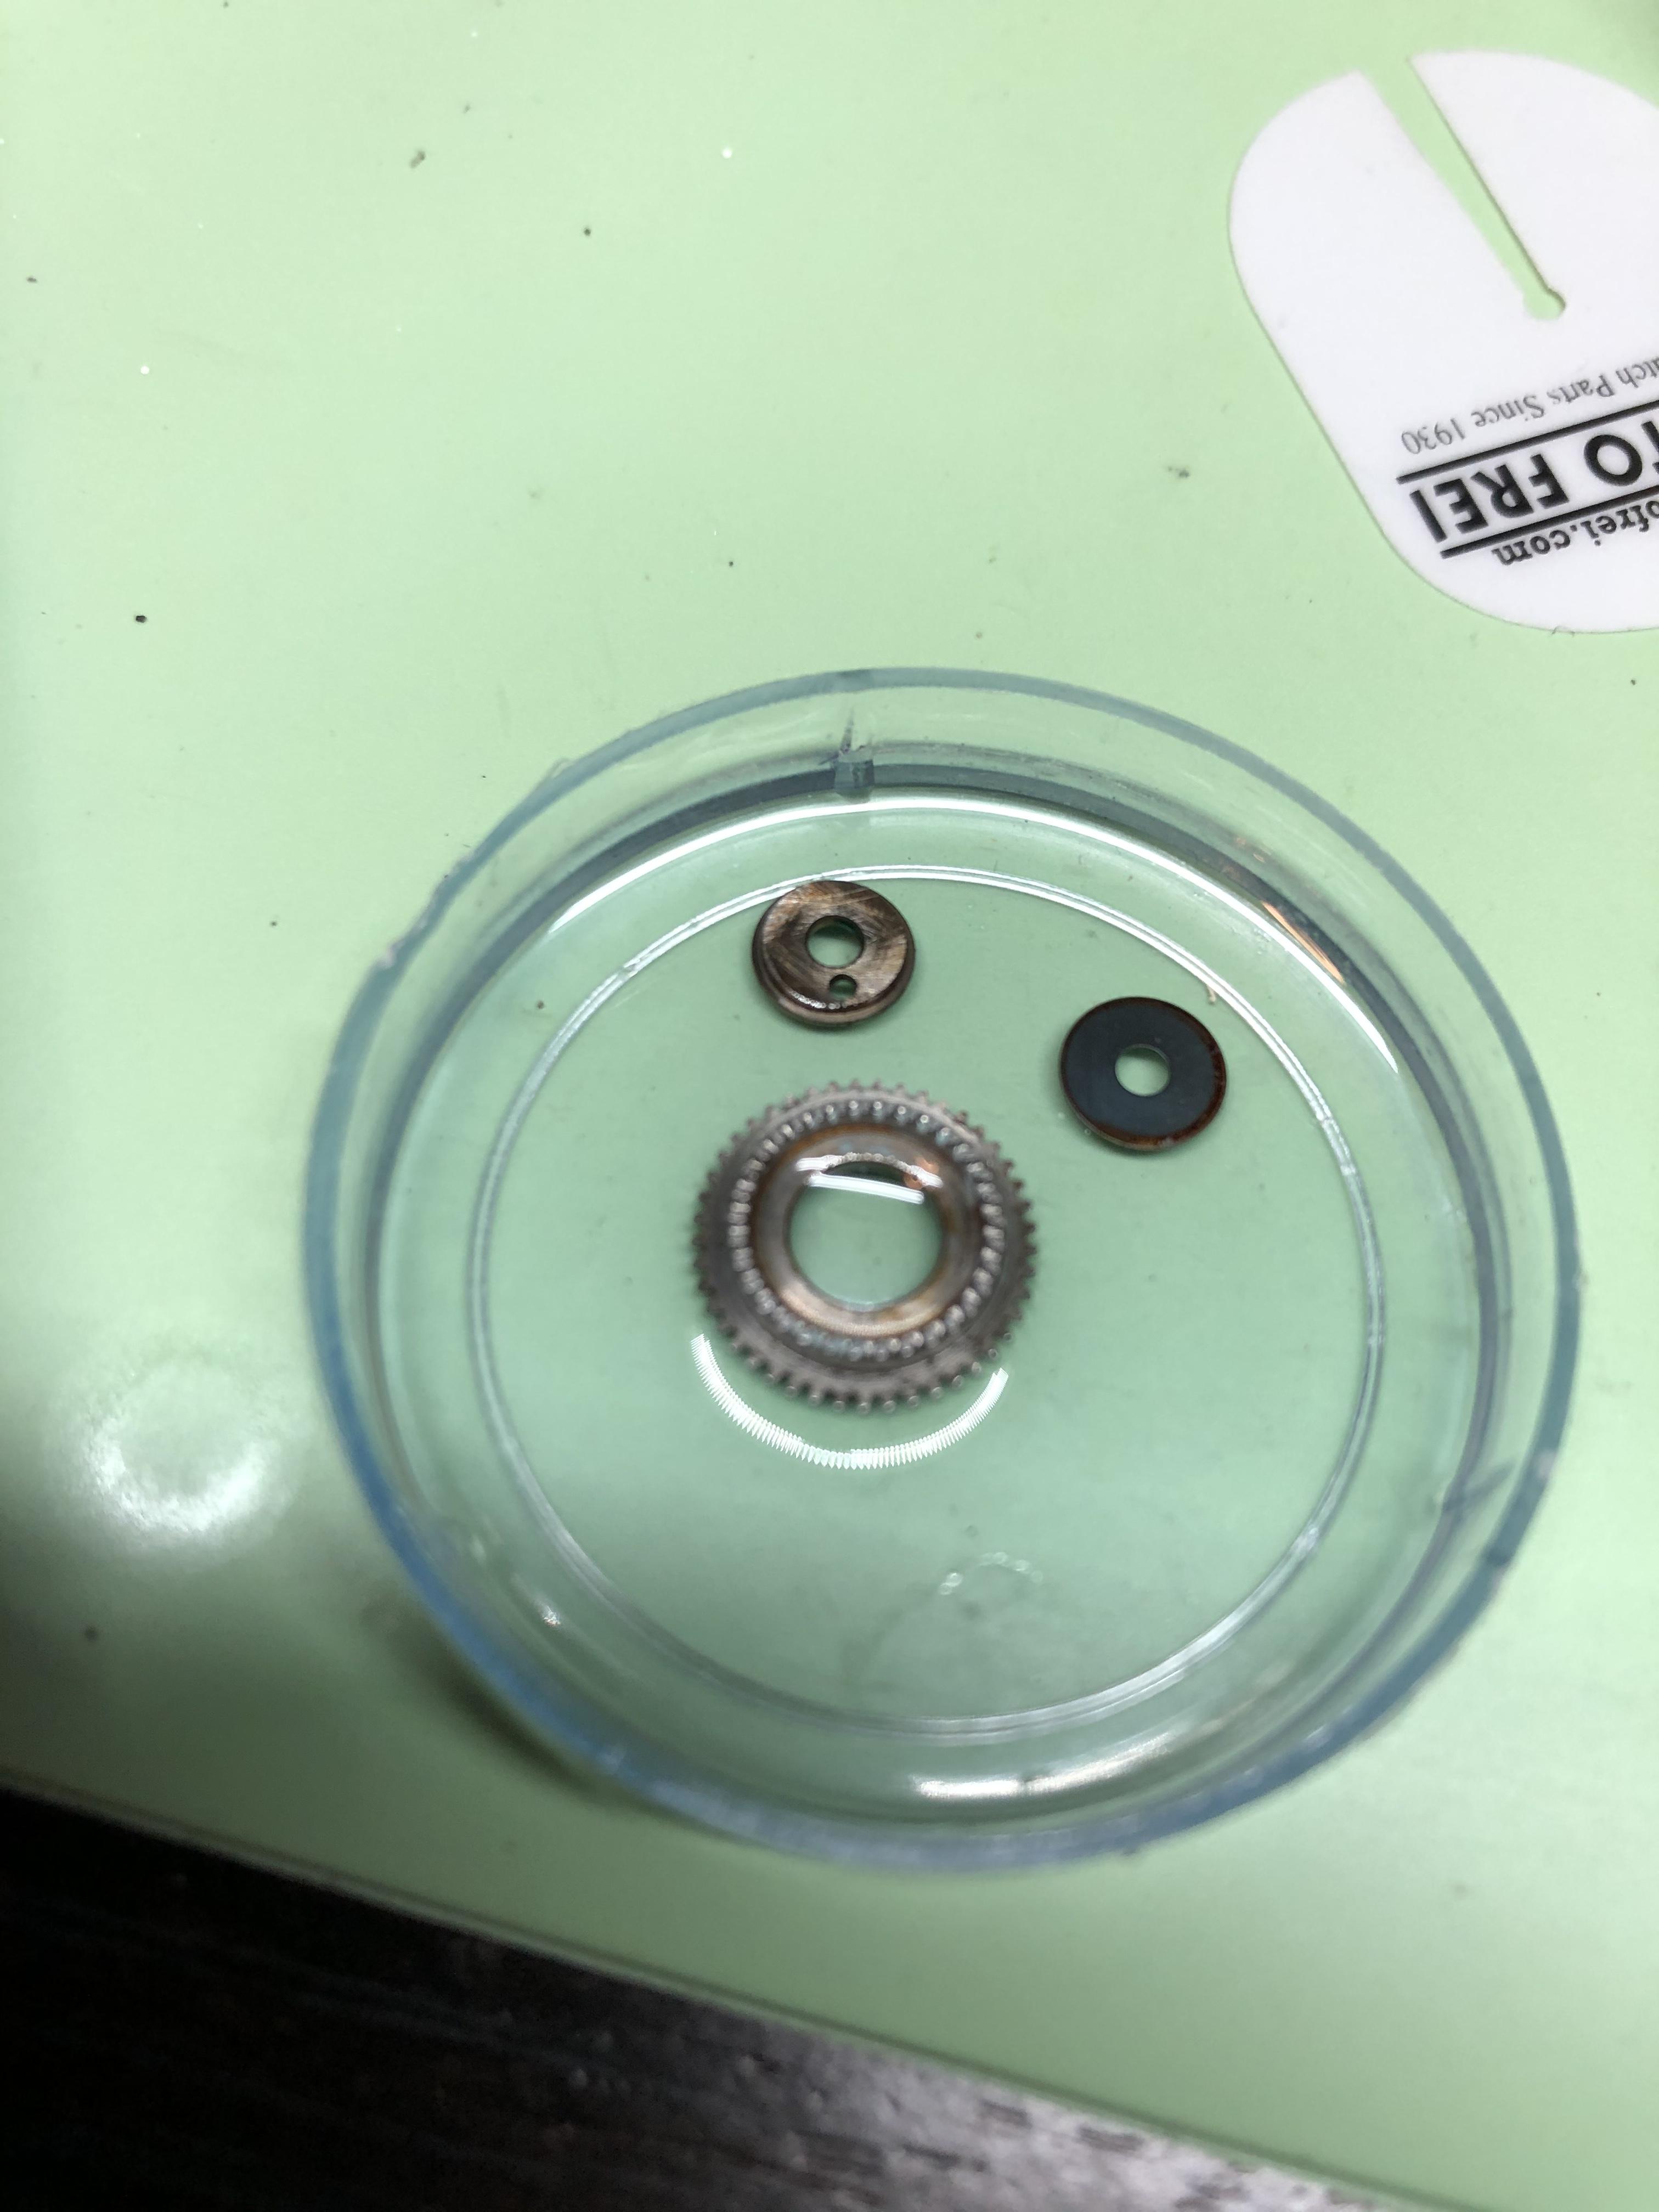
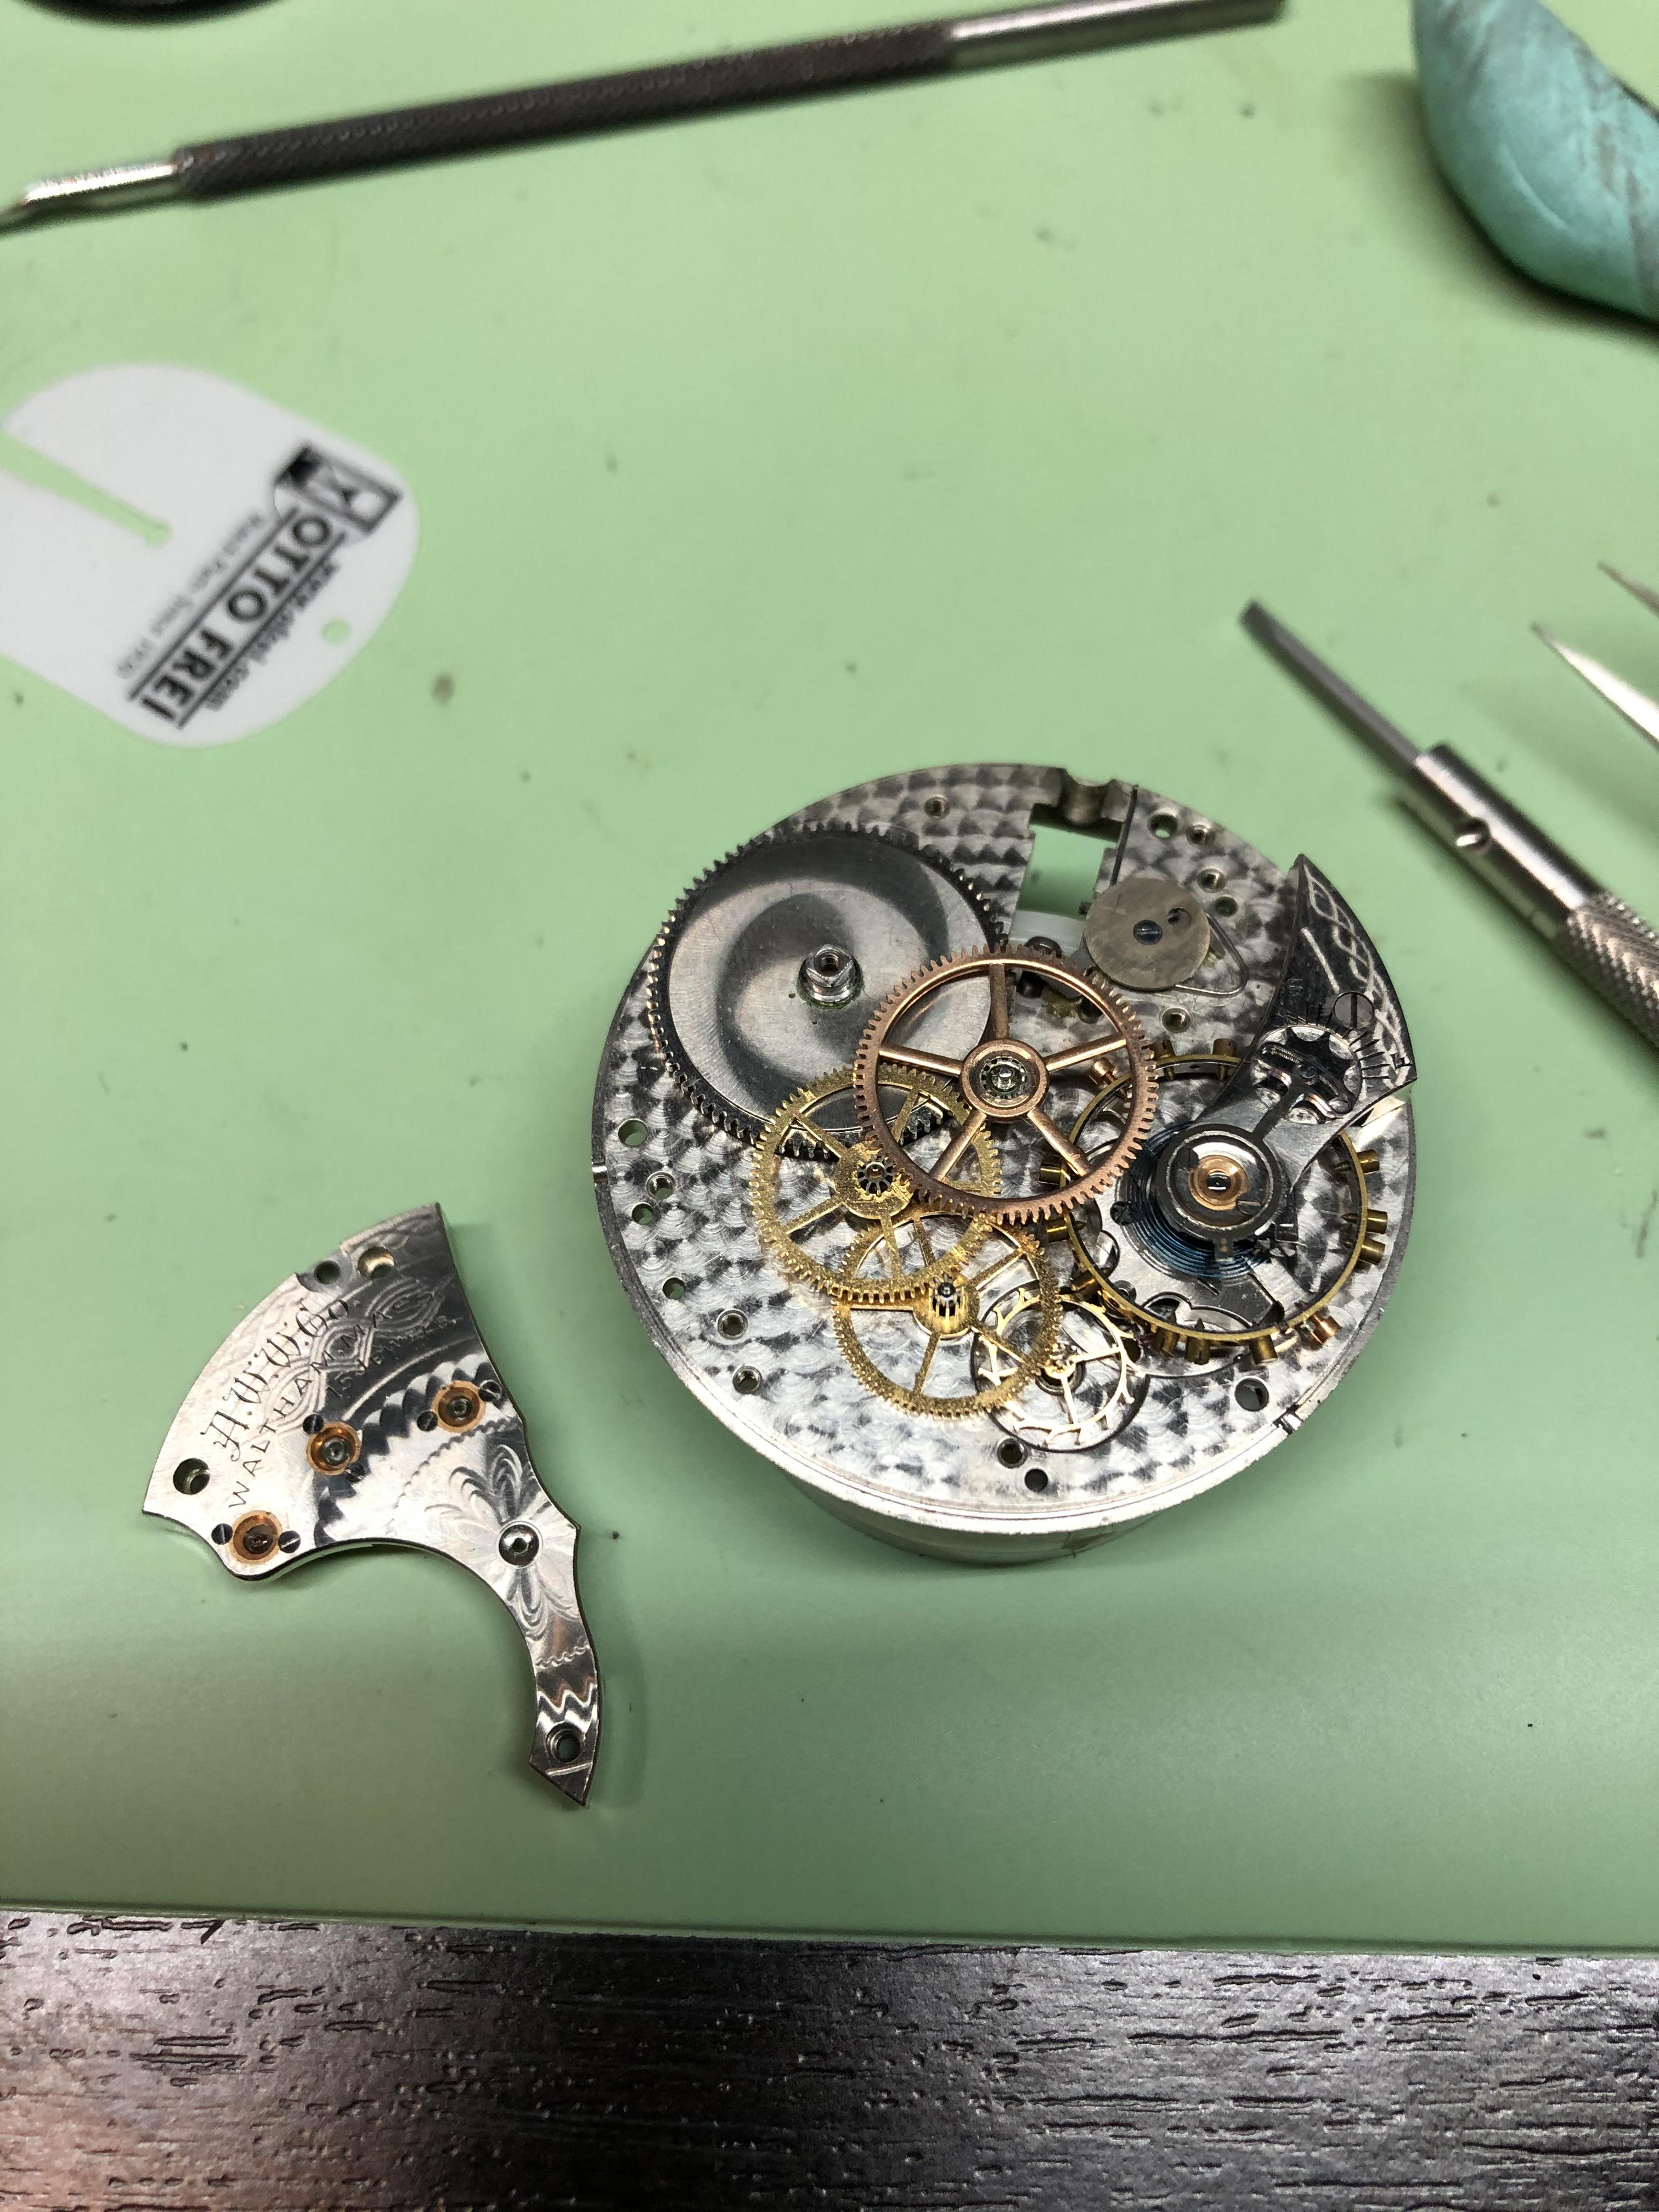
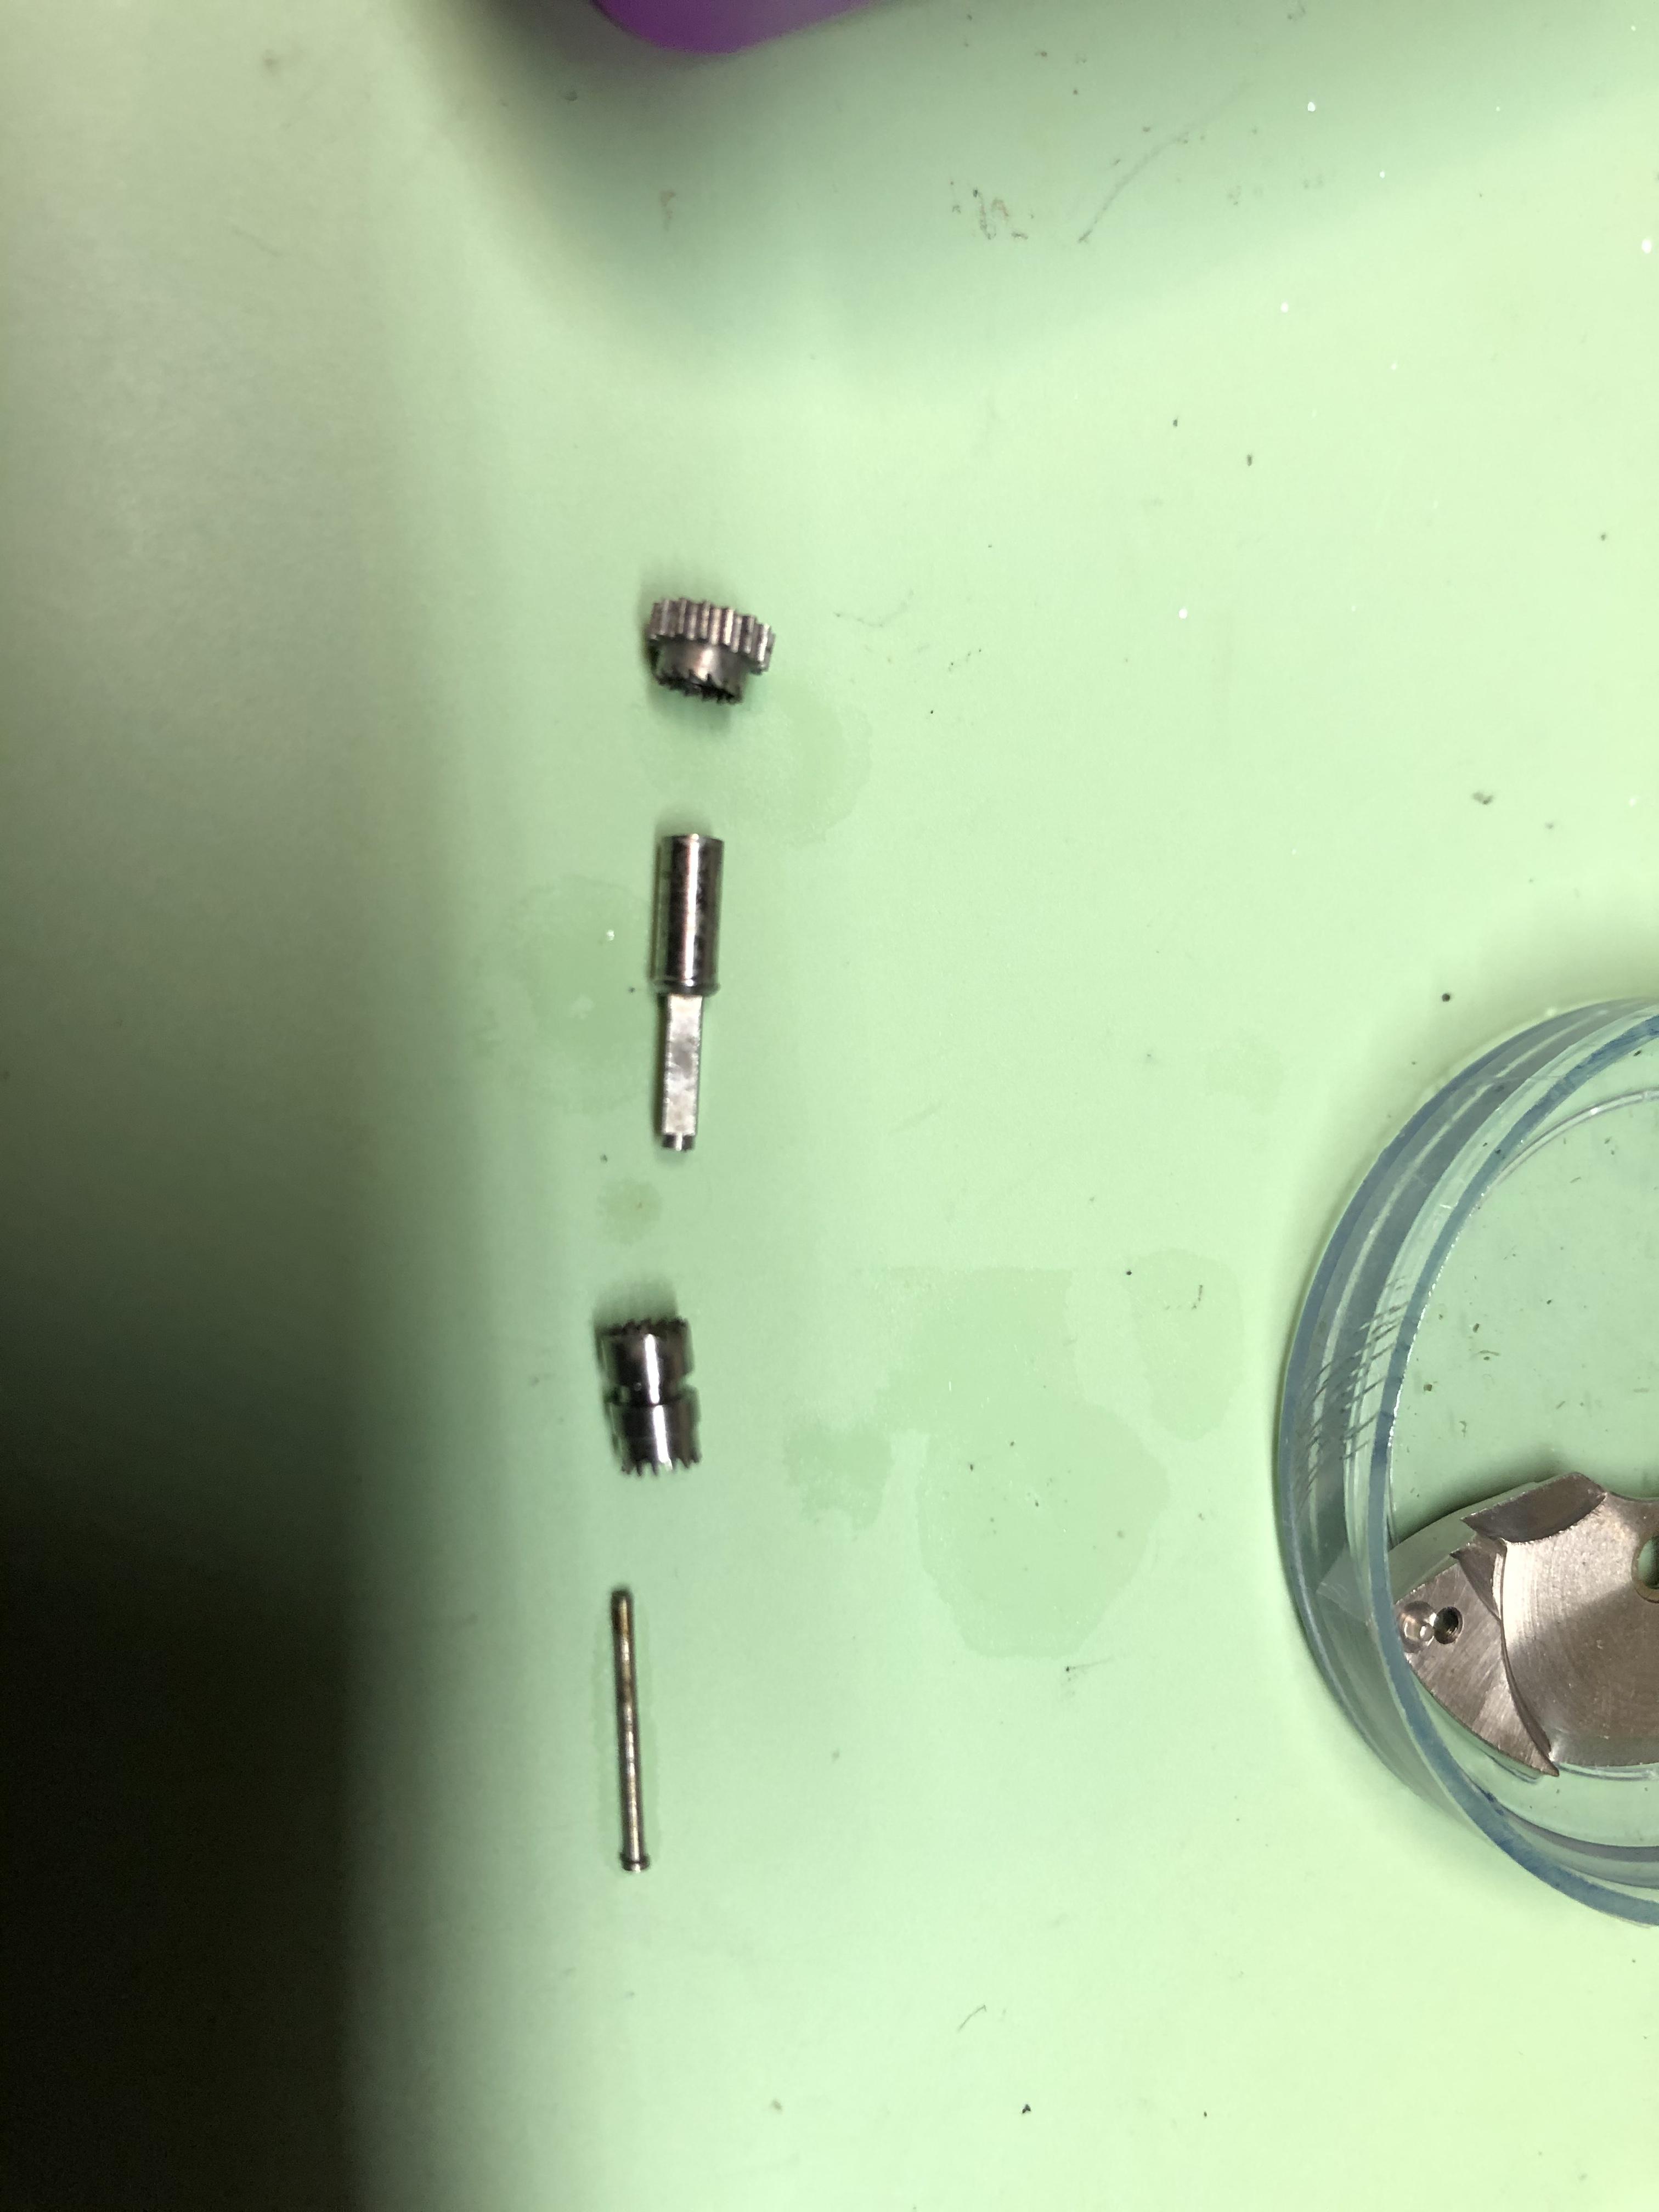
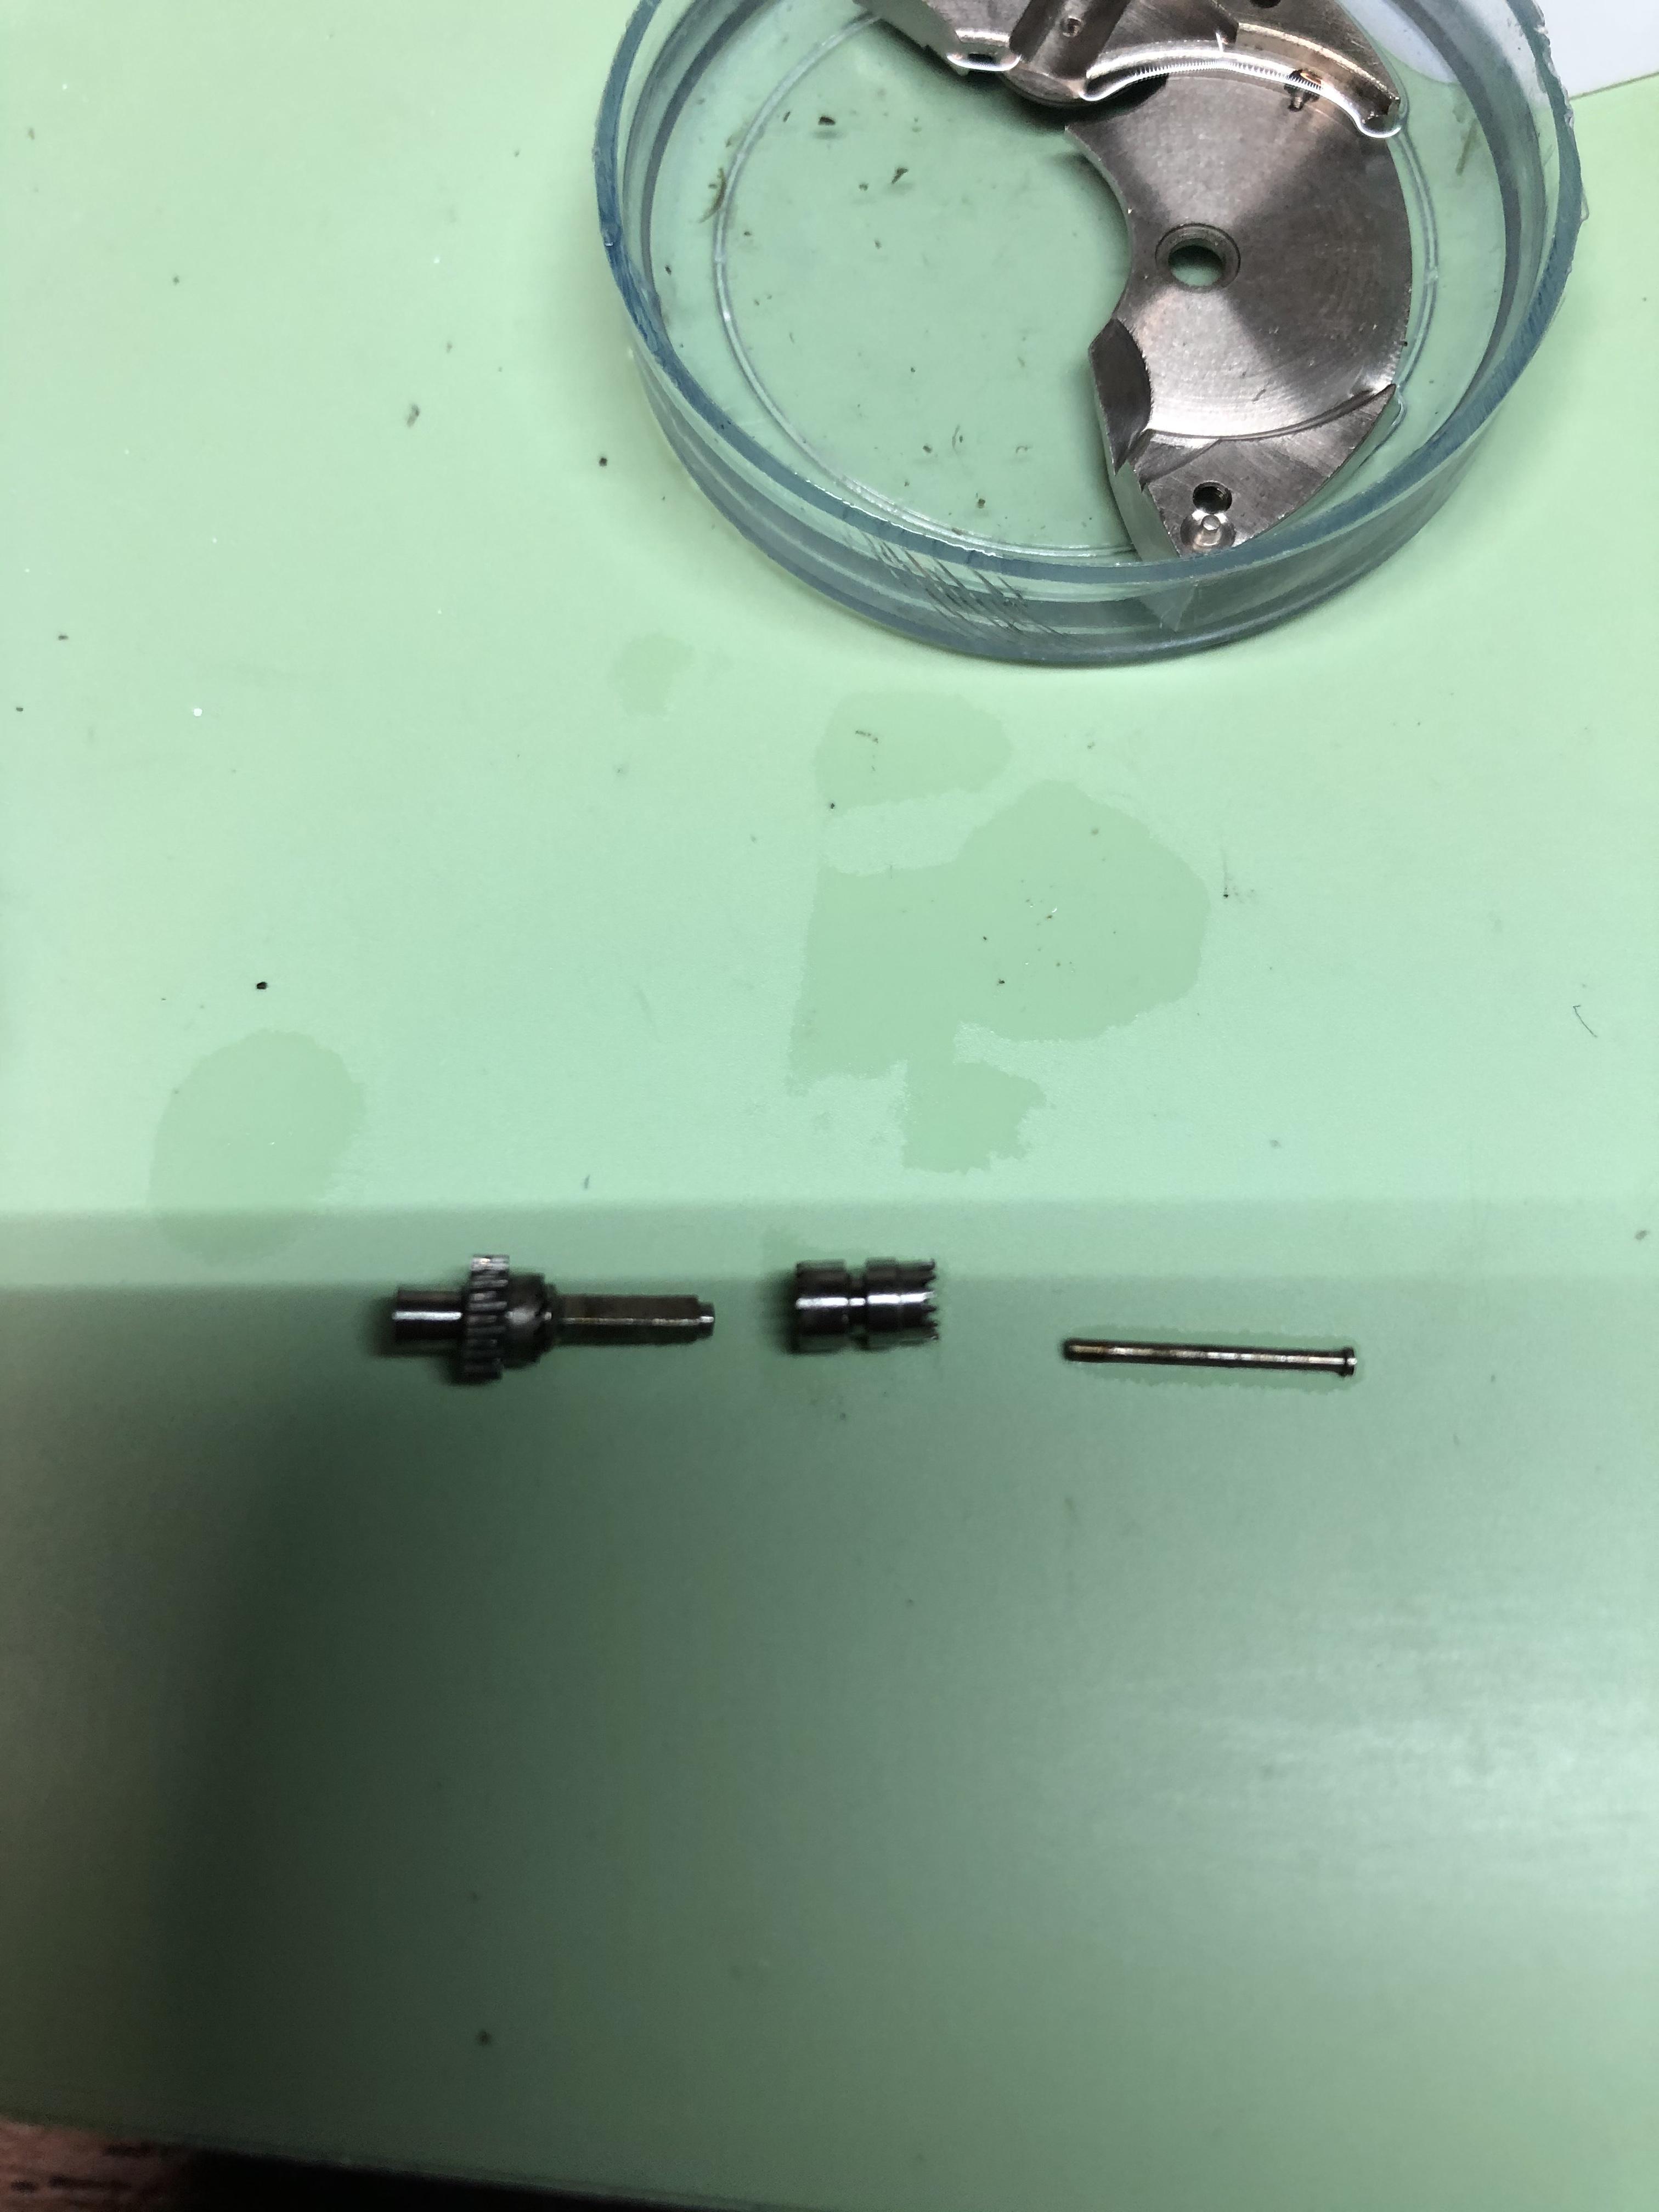
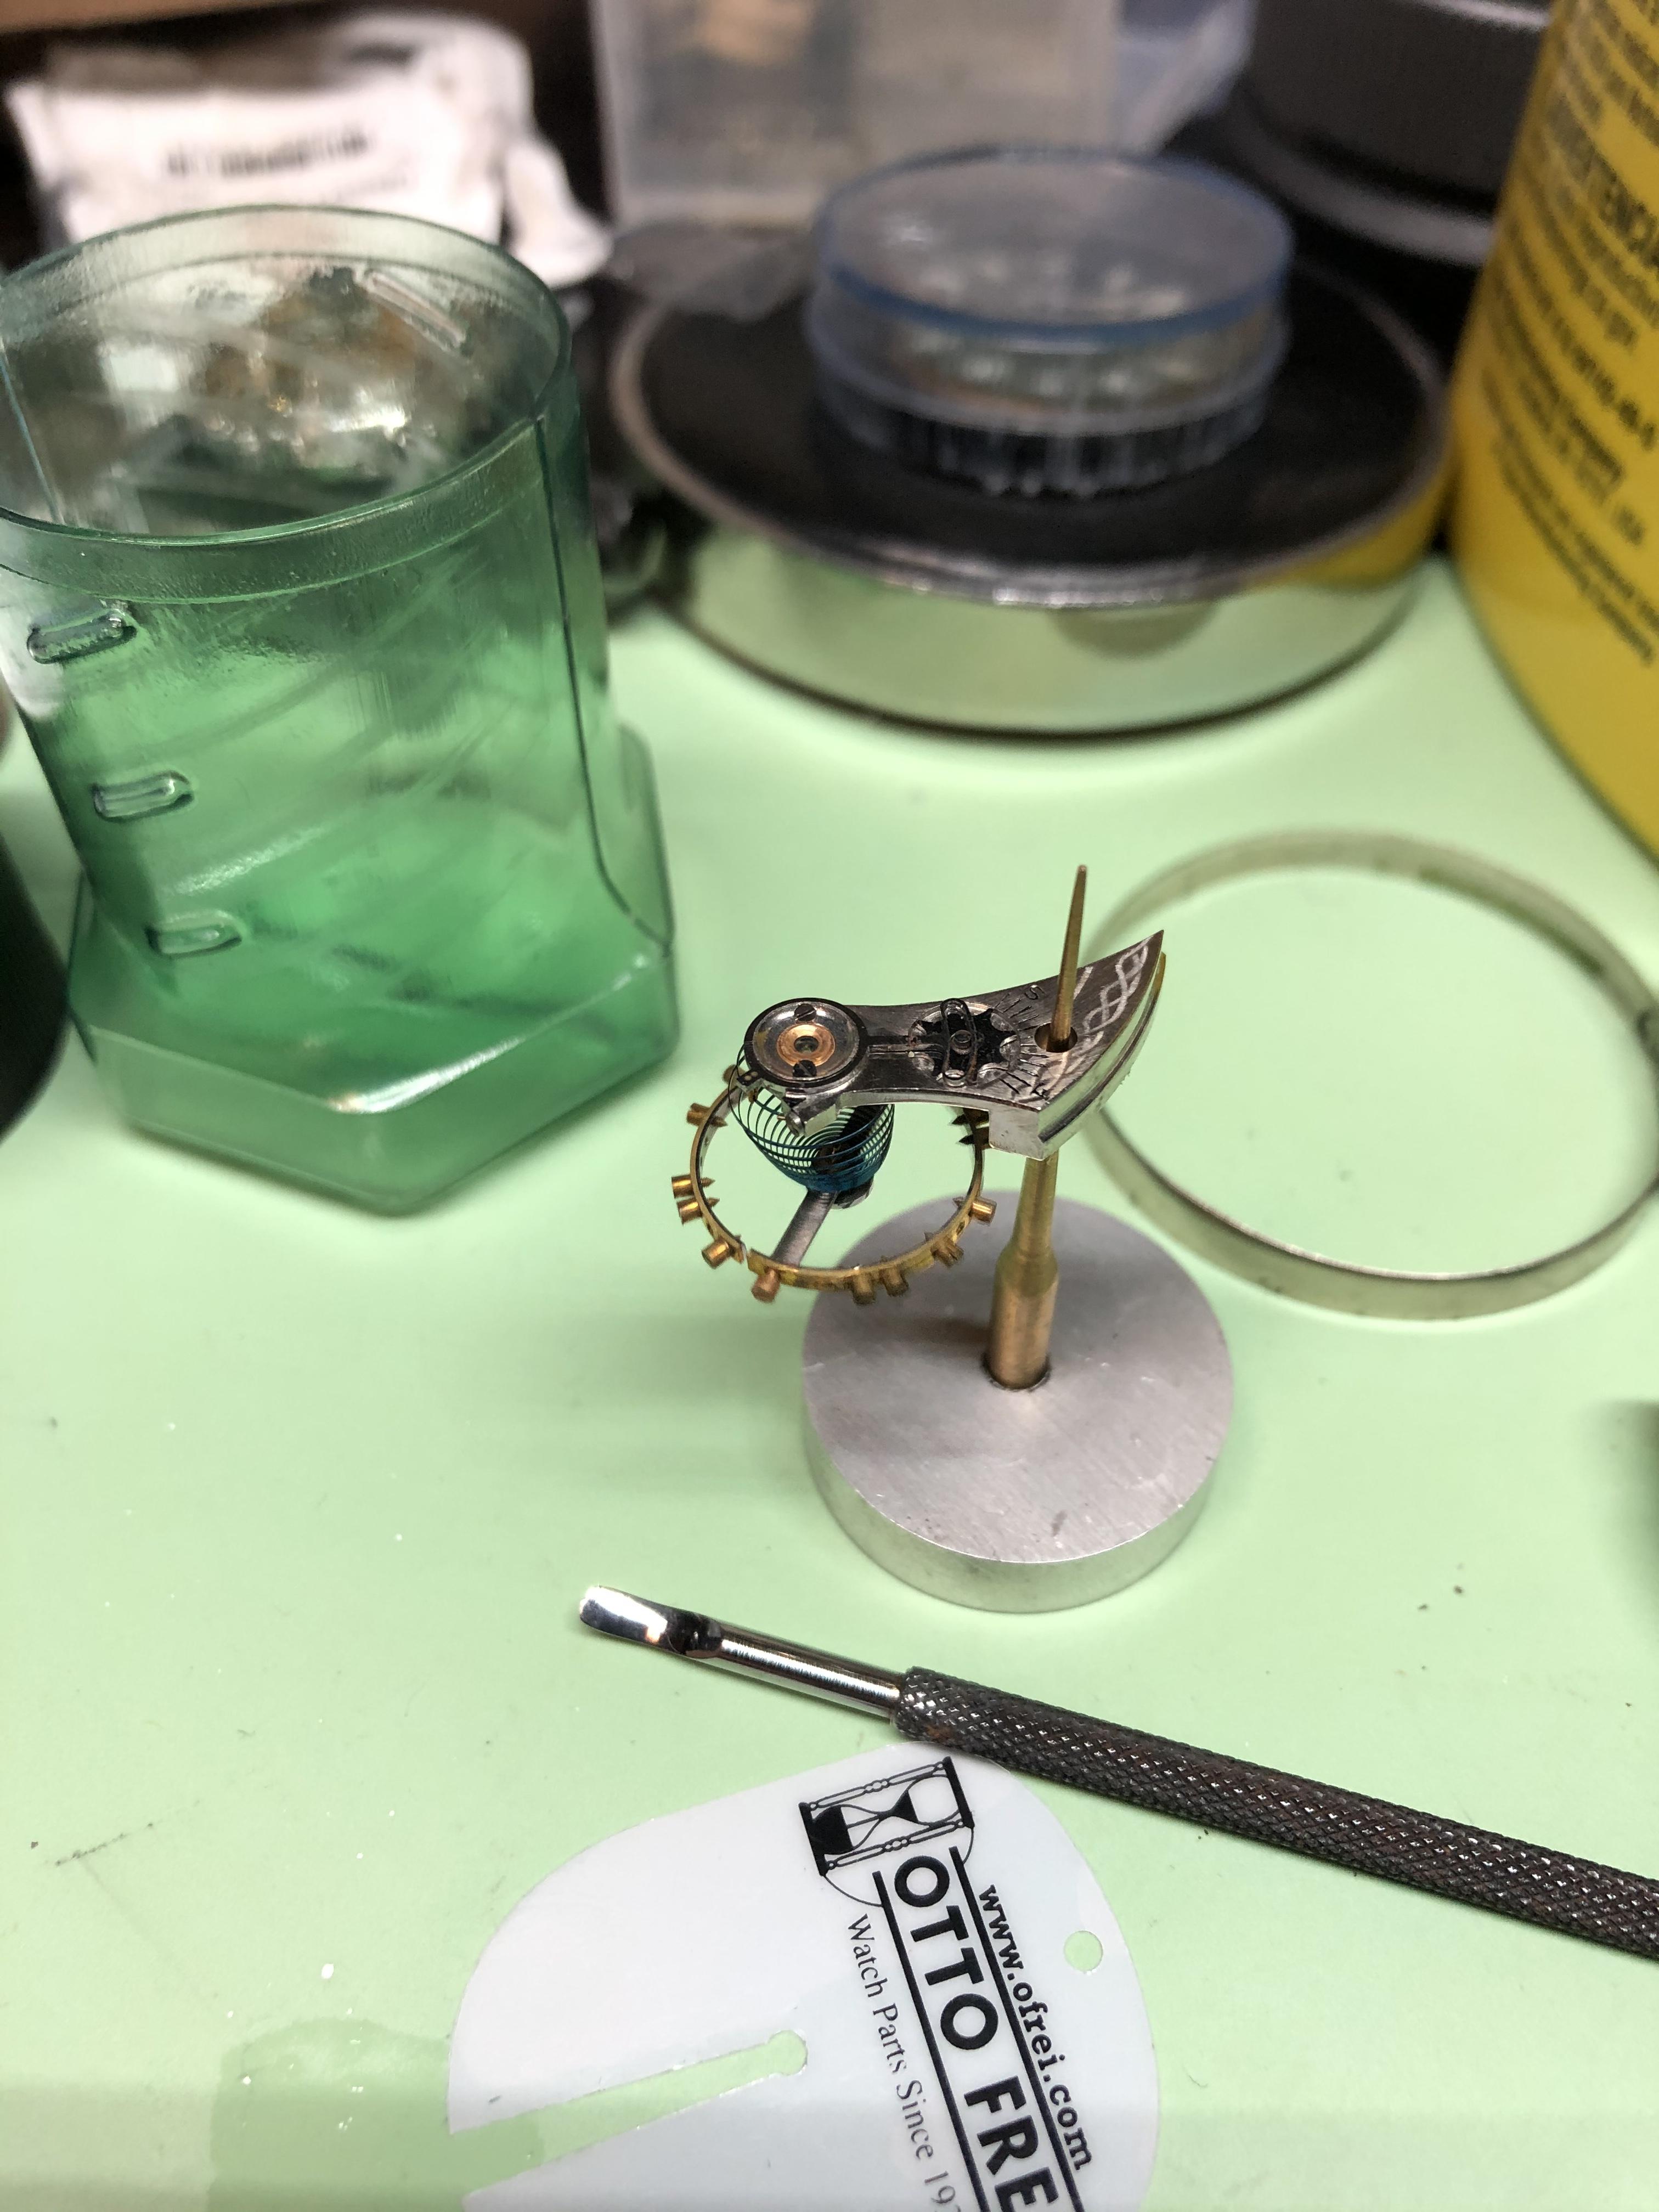
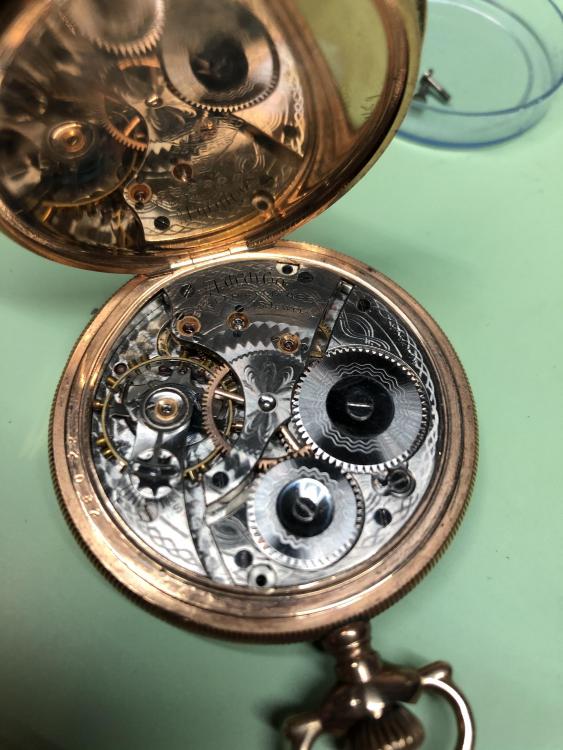
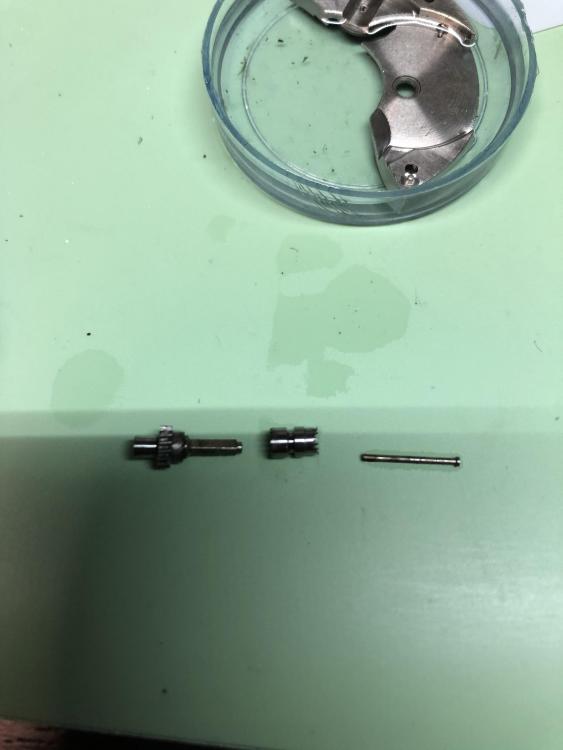
So, I thought this was going to be a repair. And maybe I’ll need a mainspring when it’s said and done, but so far it’s just petrified green oil/grease everywhere that’s made a mess. I had to pry off the train bridge because the pinion of one of the train was glued to the main plate with the other end glued to the bridge. I thought I missed something and it was hanging up, but it’s just old oil. The last guy was particularly liberal with the stuff around the keyless works. I tore that down, cleaned and re-lubed that. Works (a lot better) than before, which was not really at all. Making good progress but I had to call it for the night. Some pictures to chew on: (the barrel close up shows the green goo nicely)


 2 points
 -
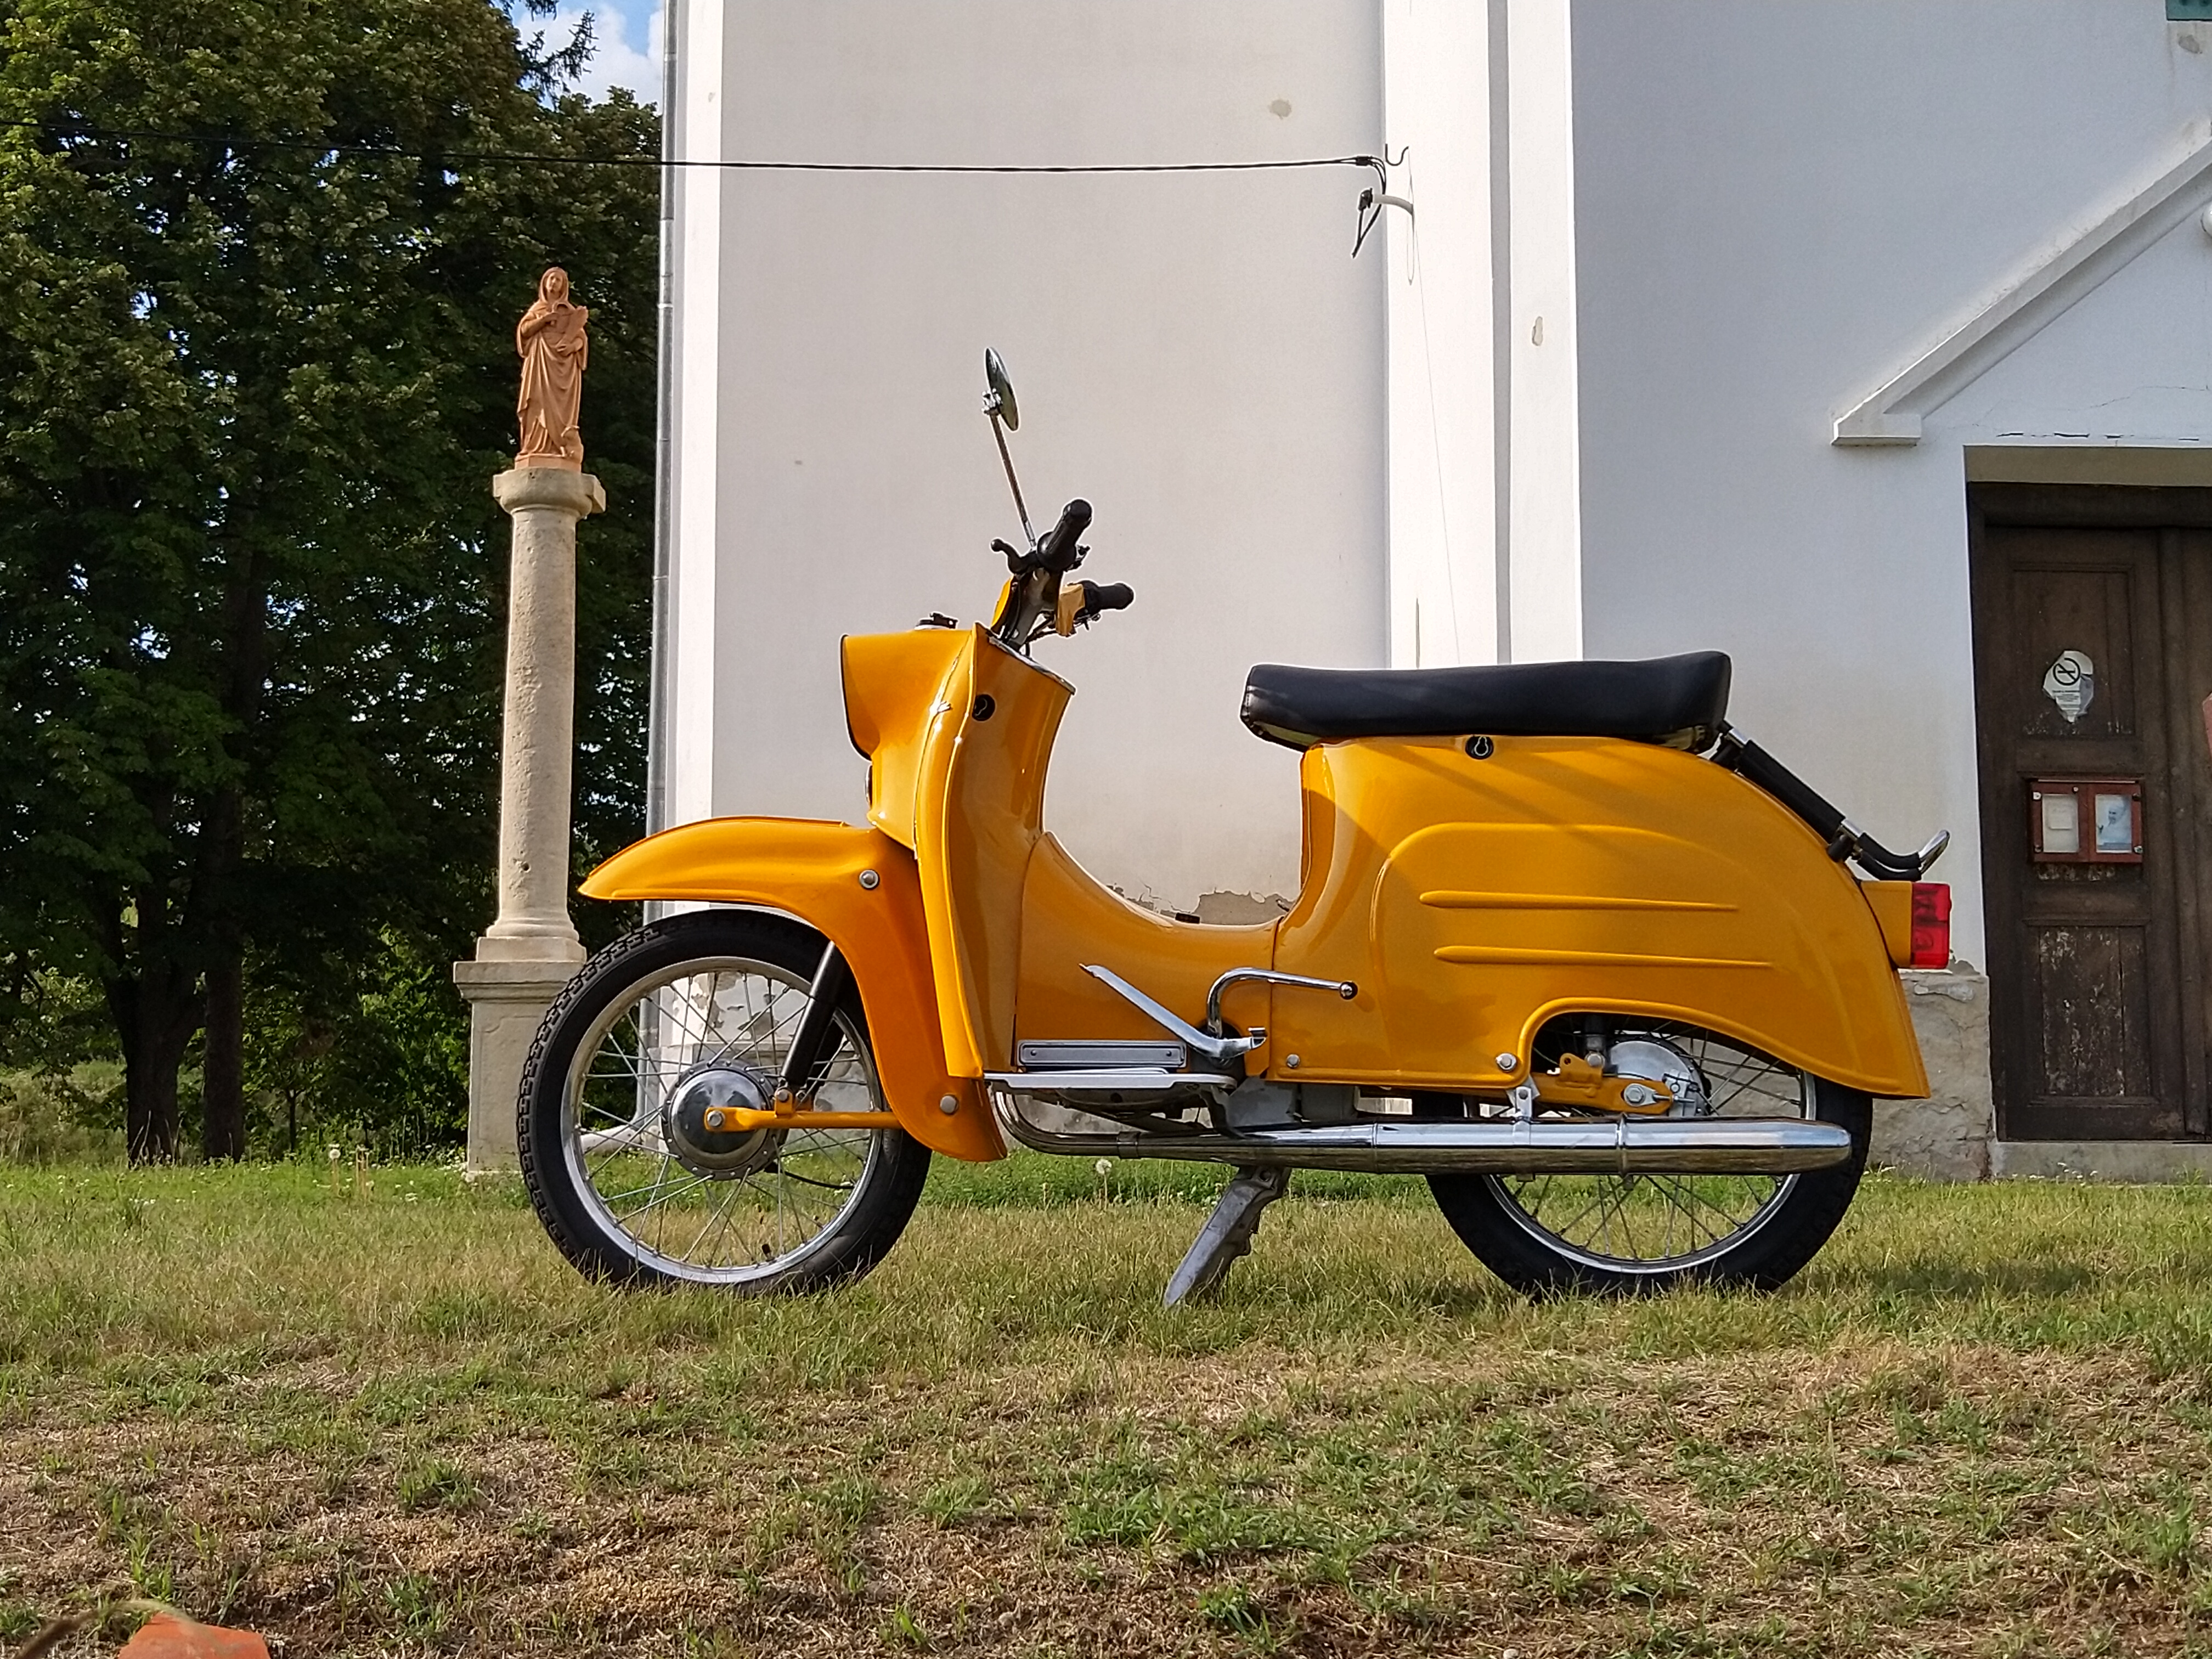
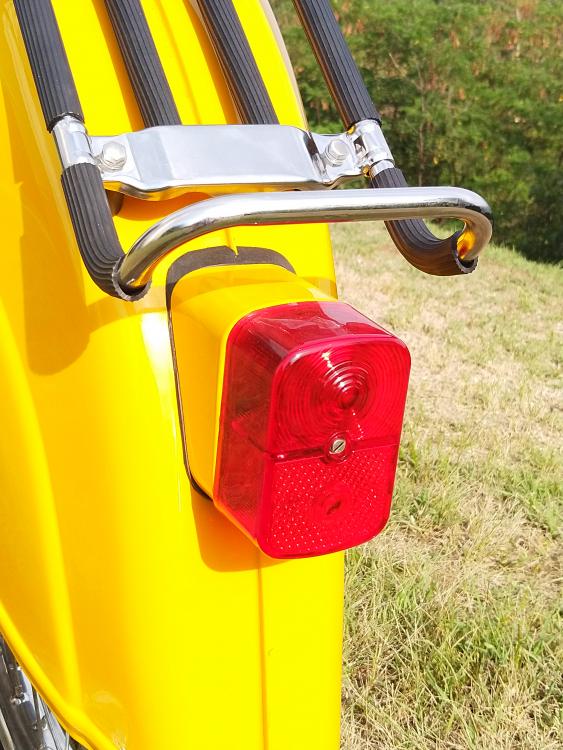
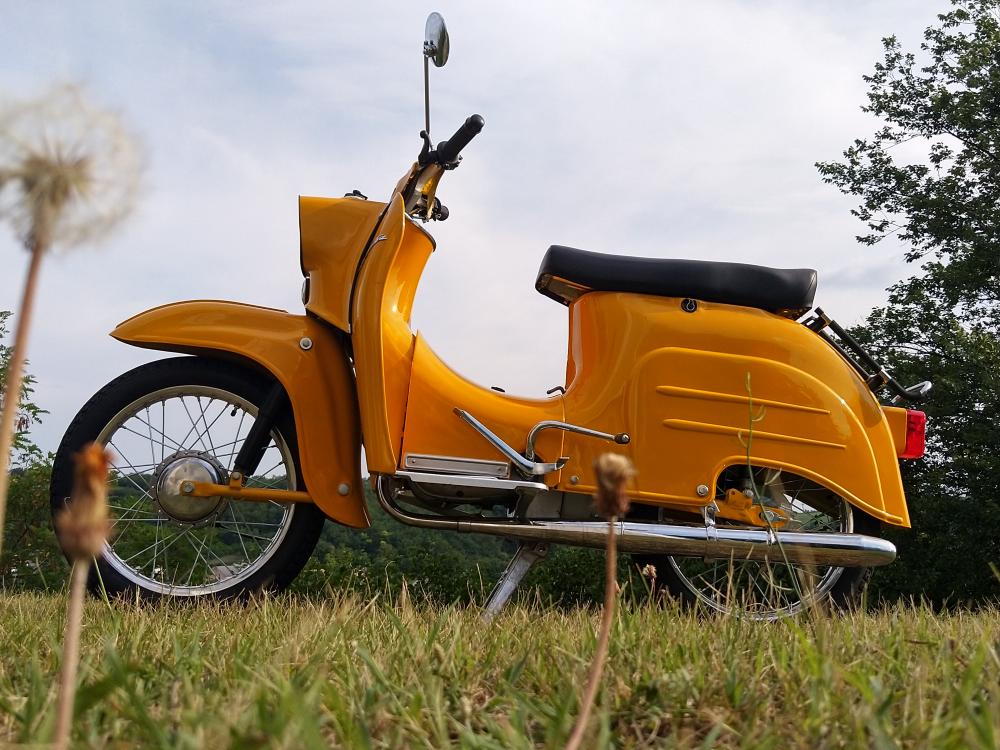
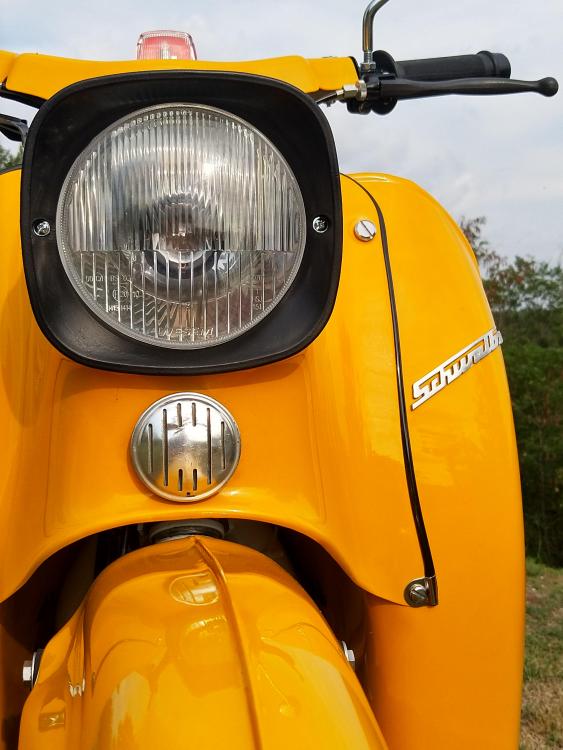
A Simson Schwalbe restored by my Dad. Probably it does not mean a lot to the ppl who did not enjoy the hospitality of the soviet/eastern block of Europe in the second half of the 20th century. I love every bit of it and I am going to be the happy owner of it!


 2 points
 -
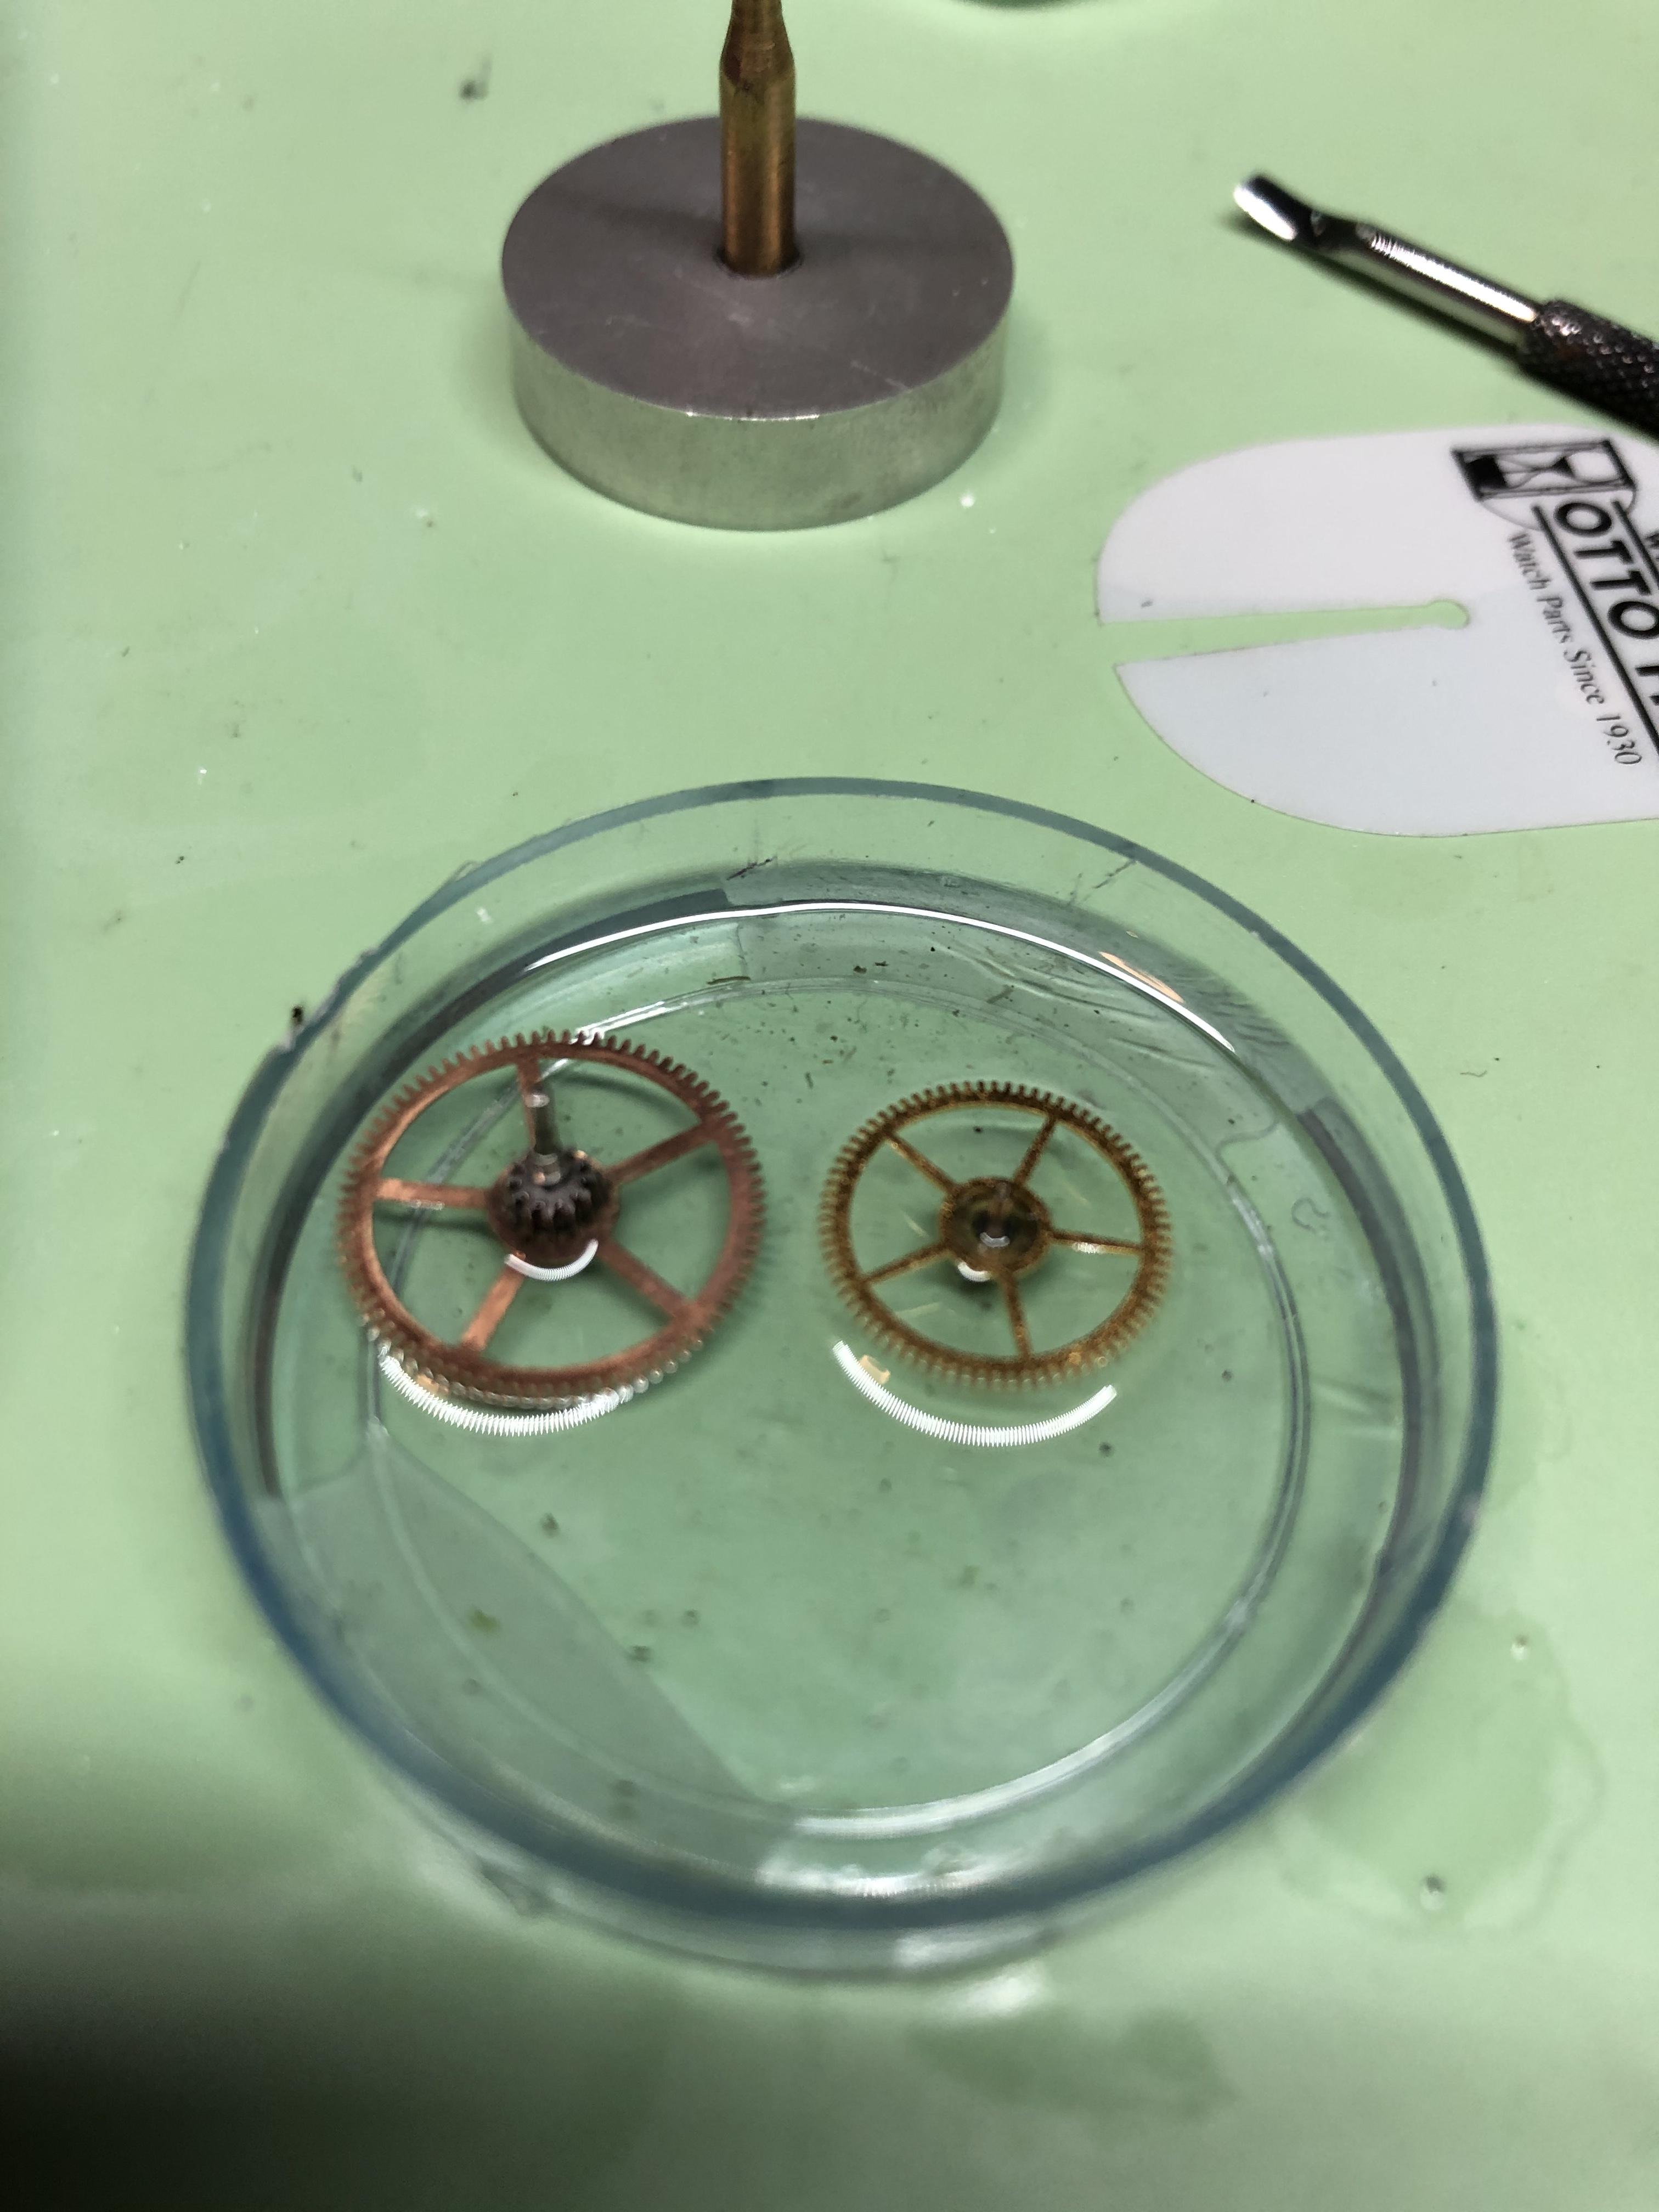
Ronsinol mostly. That's what's in the tray. I soak the parts a while and then rinse with clean stuff from the bottle over the tray. Plenty of chunky bits of crud in the tray! The hands, and a couple other small bits I used the one-dip on. I have not done anything with the balance wheel or cock yet. It seems the spring can be adjusted for length at the attachment point (does not appear to be a typical anchor that goes in at one spot only), so I'm not terribly inclined to mess with that. I may end up dipping the whole thing assembled and go from there, to avoid fiddling with the (beautiful looking) hairspring. Or, just clean the pivots and re-oil since the spring looks quite clean and the coils look to be laying perfectly as well. I don't have a working ultrasonic at home right now; and there are too many bits to bring it into work for cleaning. As long as I can fully clean the jewels and other bits (and it seems to be working well), I'll stick with this. I also have a small stiff brush for the stubborn areas. I could bring each bridge and corresponding parts in as "batches" but I don't think that's necessary. I may bring the case in however, to deal with the stem. It does not move very much from setting to winding and I think it should move more. I have applied a couple drops of oil to loosen it up (hopefully) and then I'll clean it out and see what's going on. It's all black with ancient grease (I assume) so I can't see anything right now.2 points
-
I want to make a dark theme but every time I try to make a change to the colours, it reverts back to stock colours spent about four hours yesterday buggering around with it. I will have another go today but otherwise will need to get the software developers involved to see why it won’t work.2 points
-
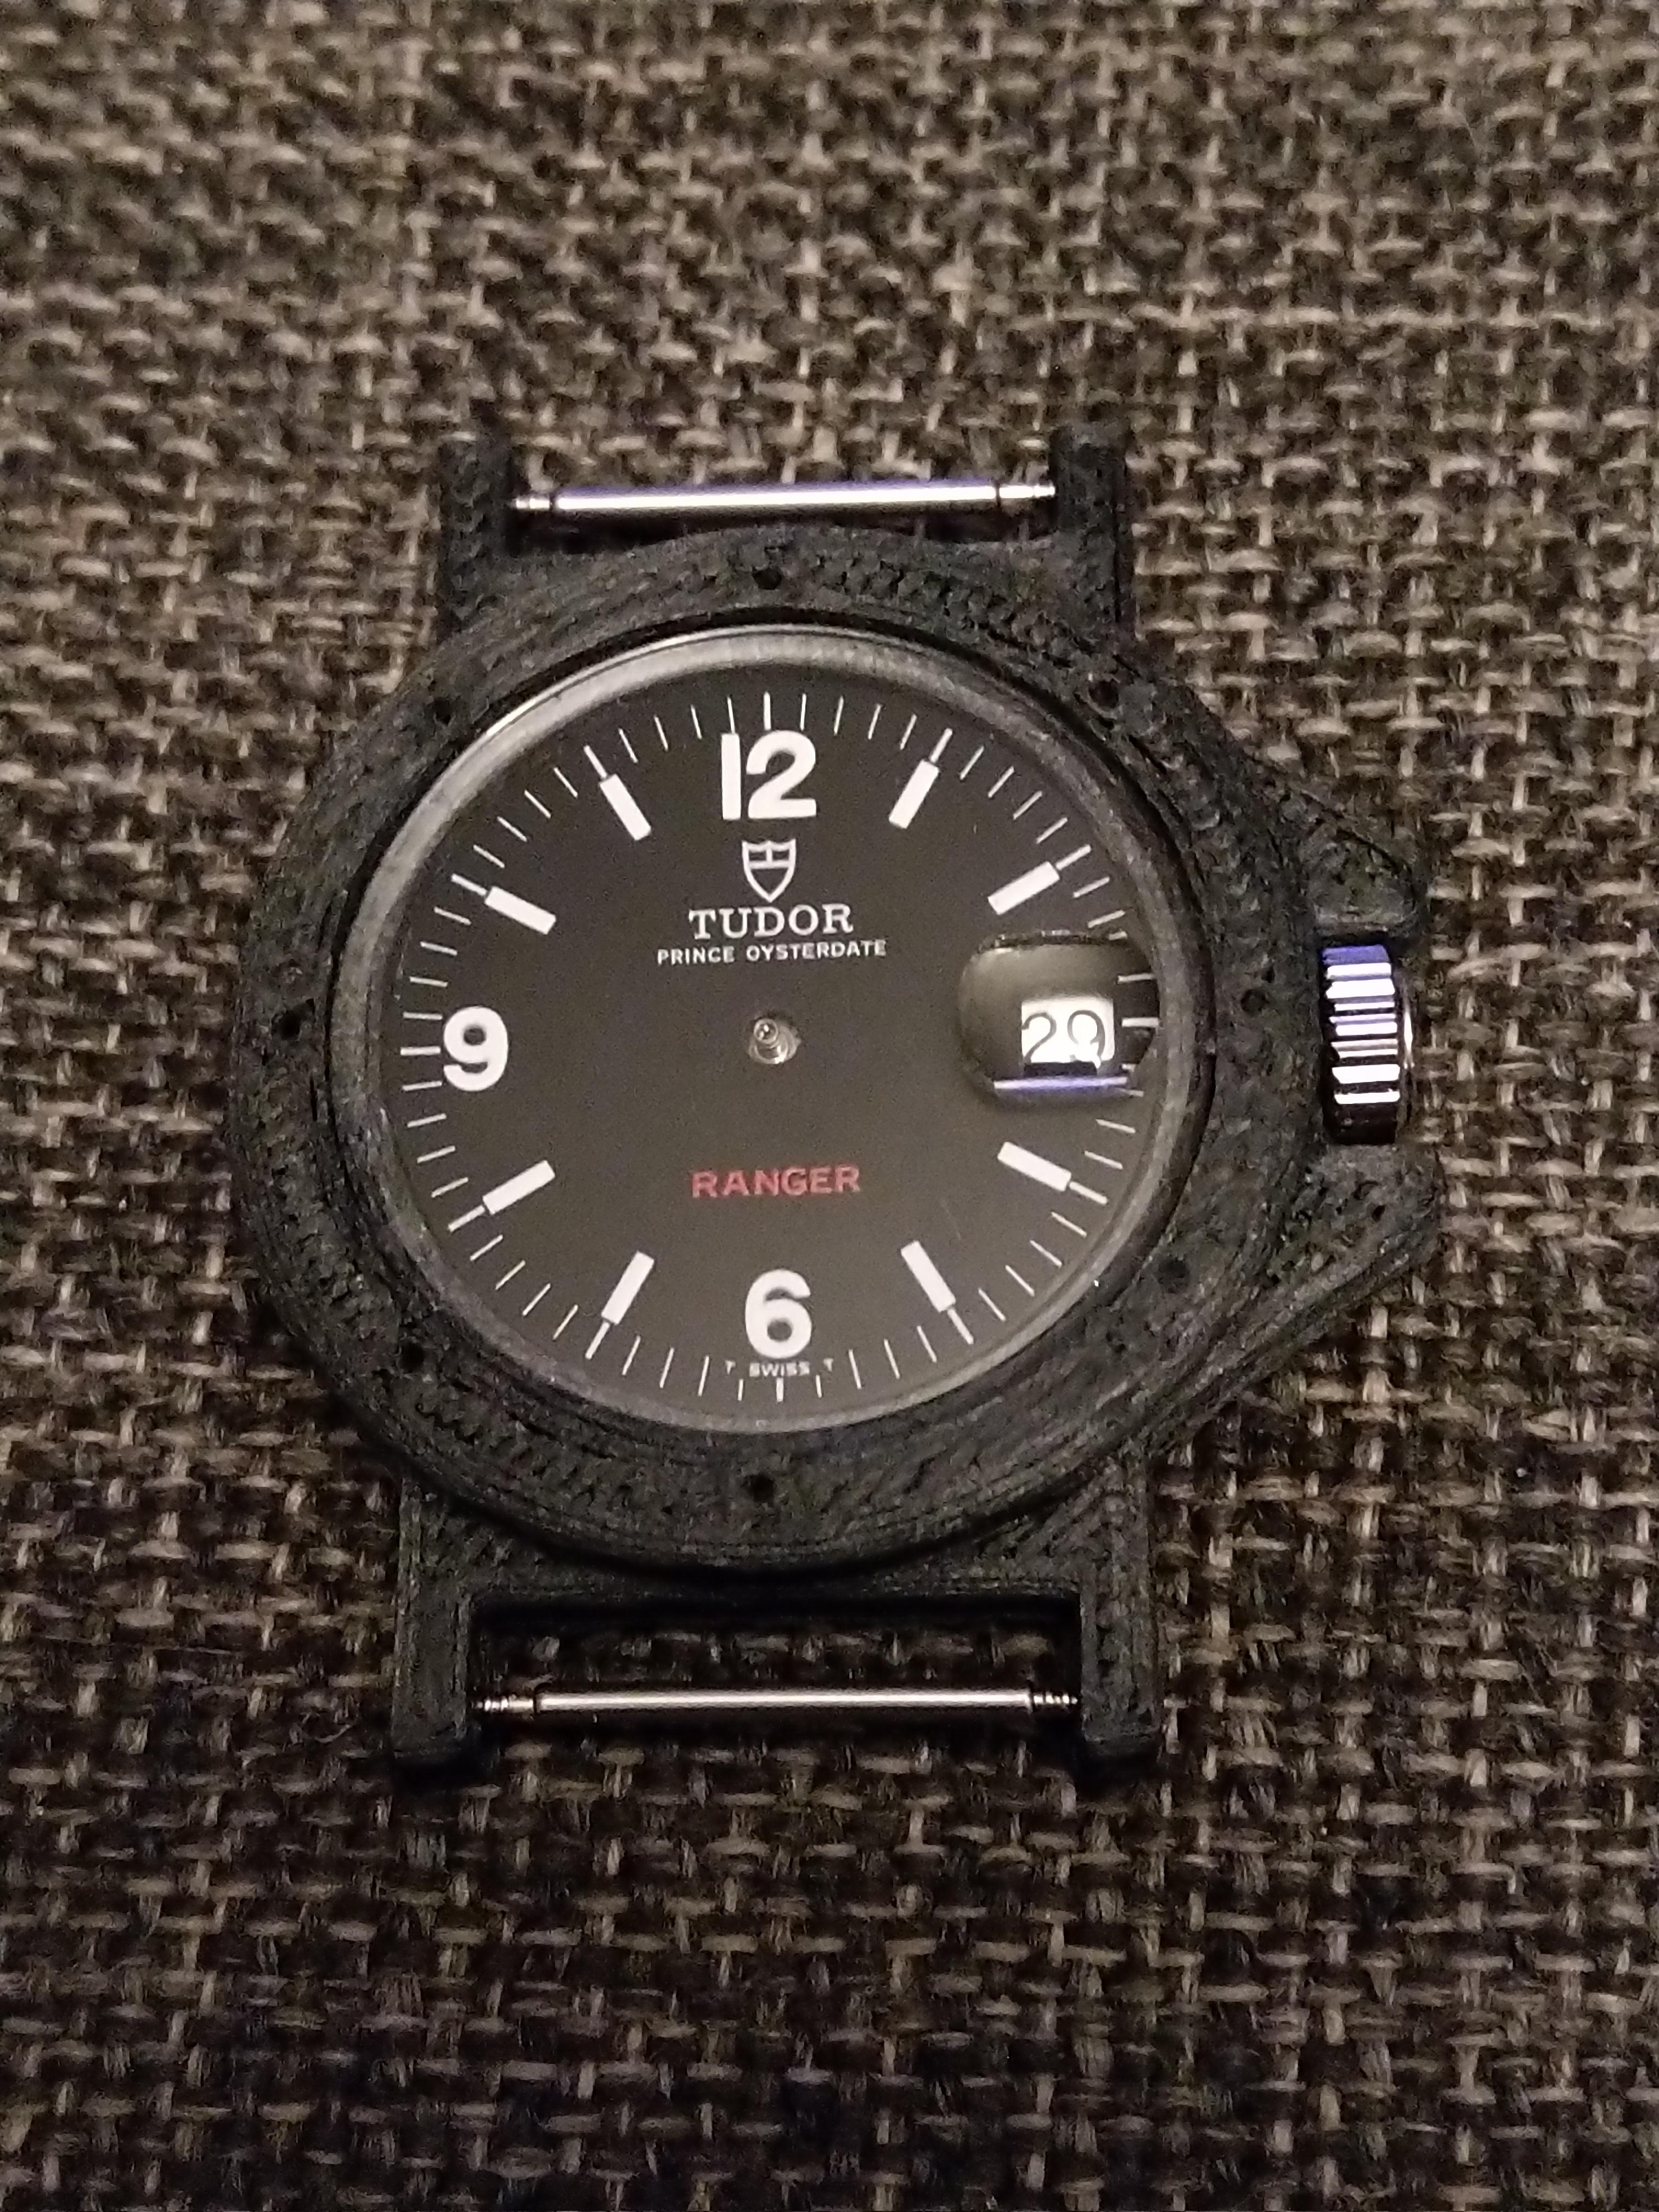
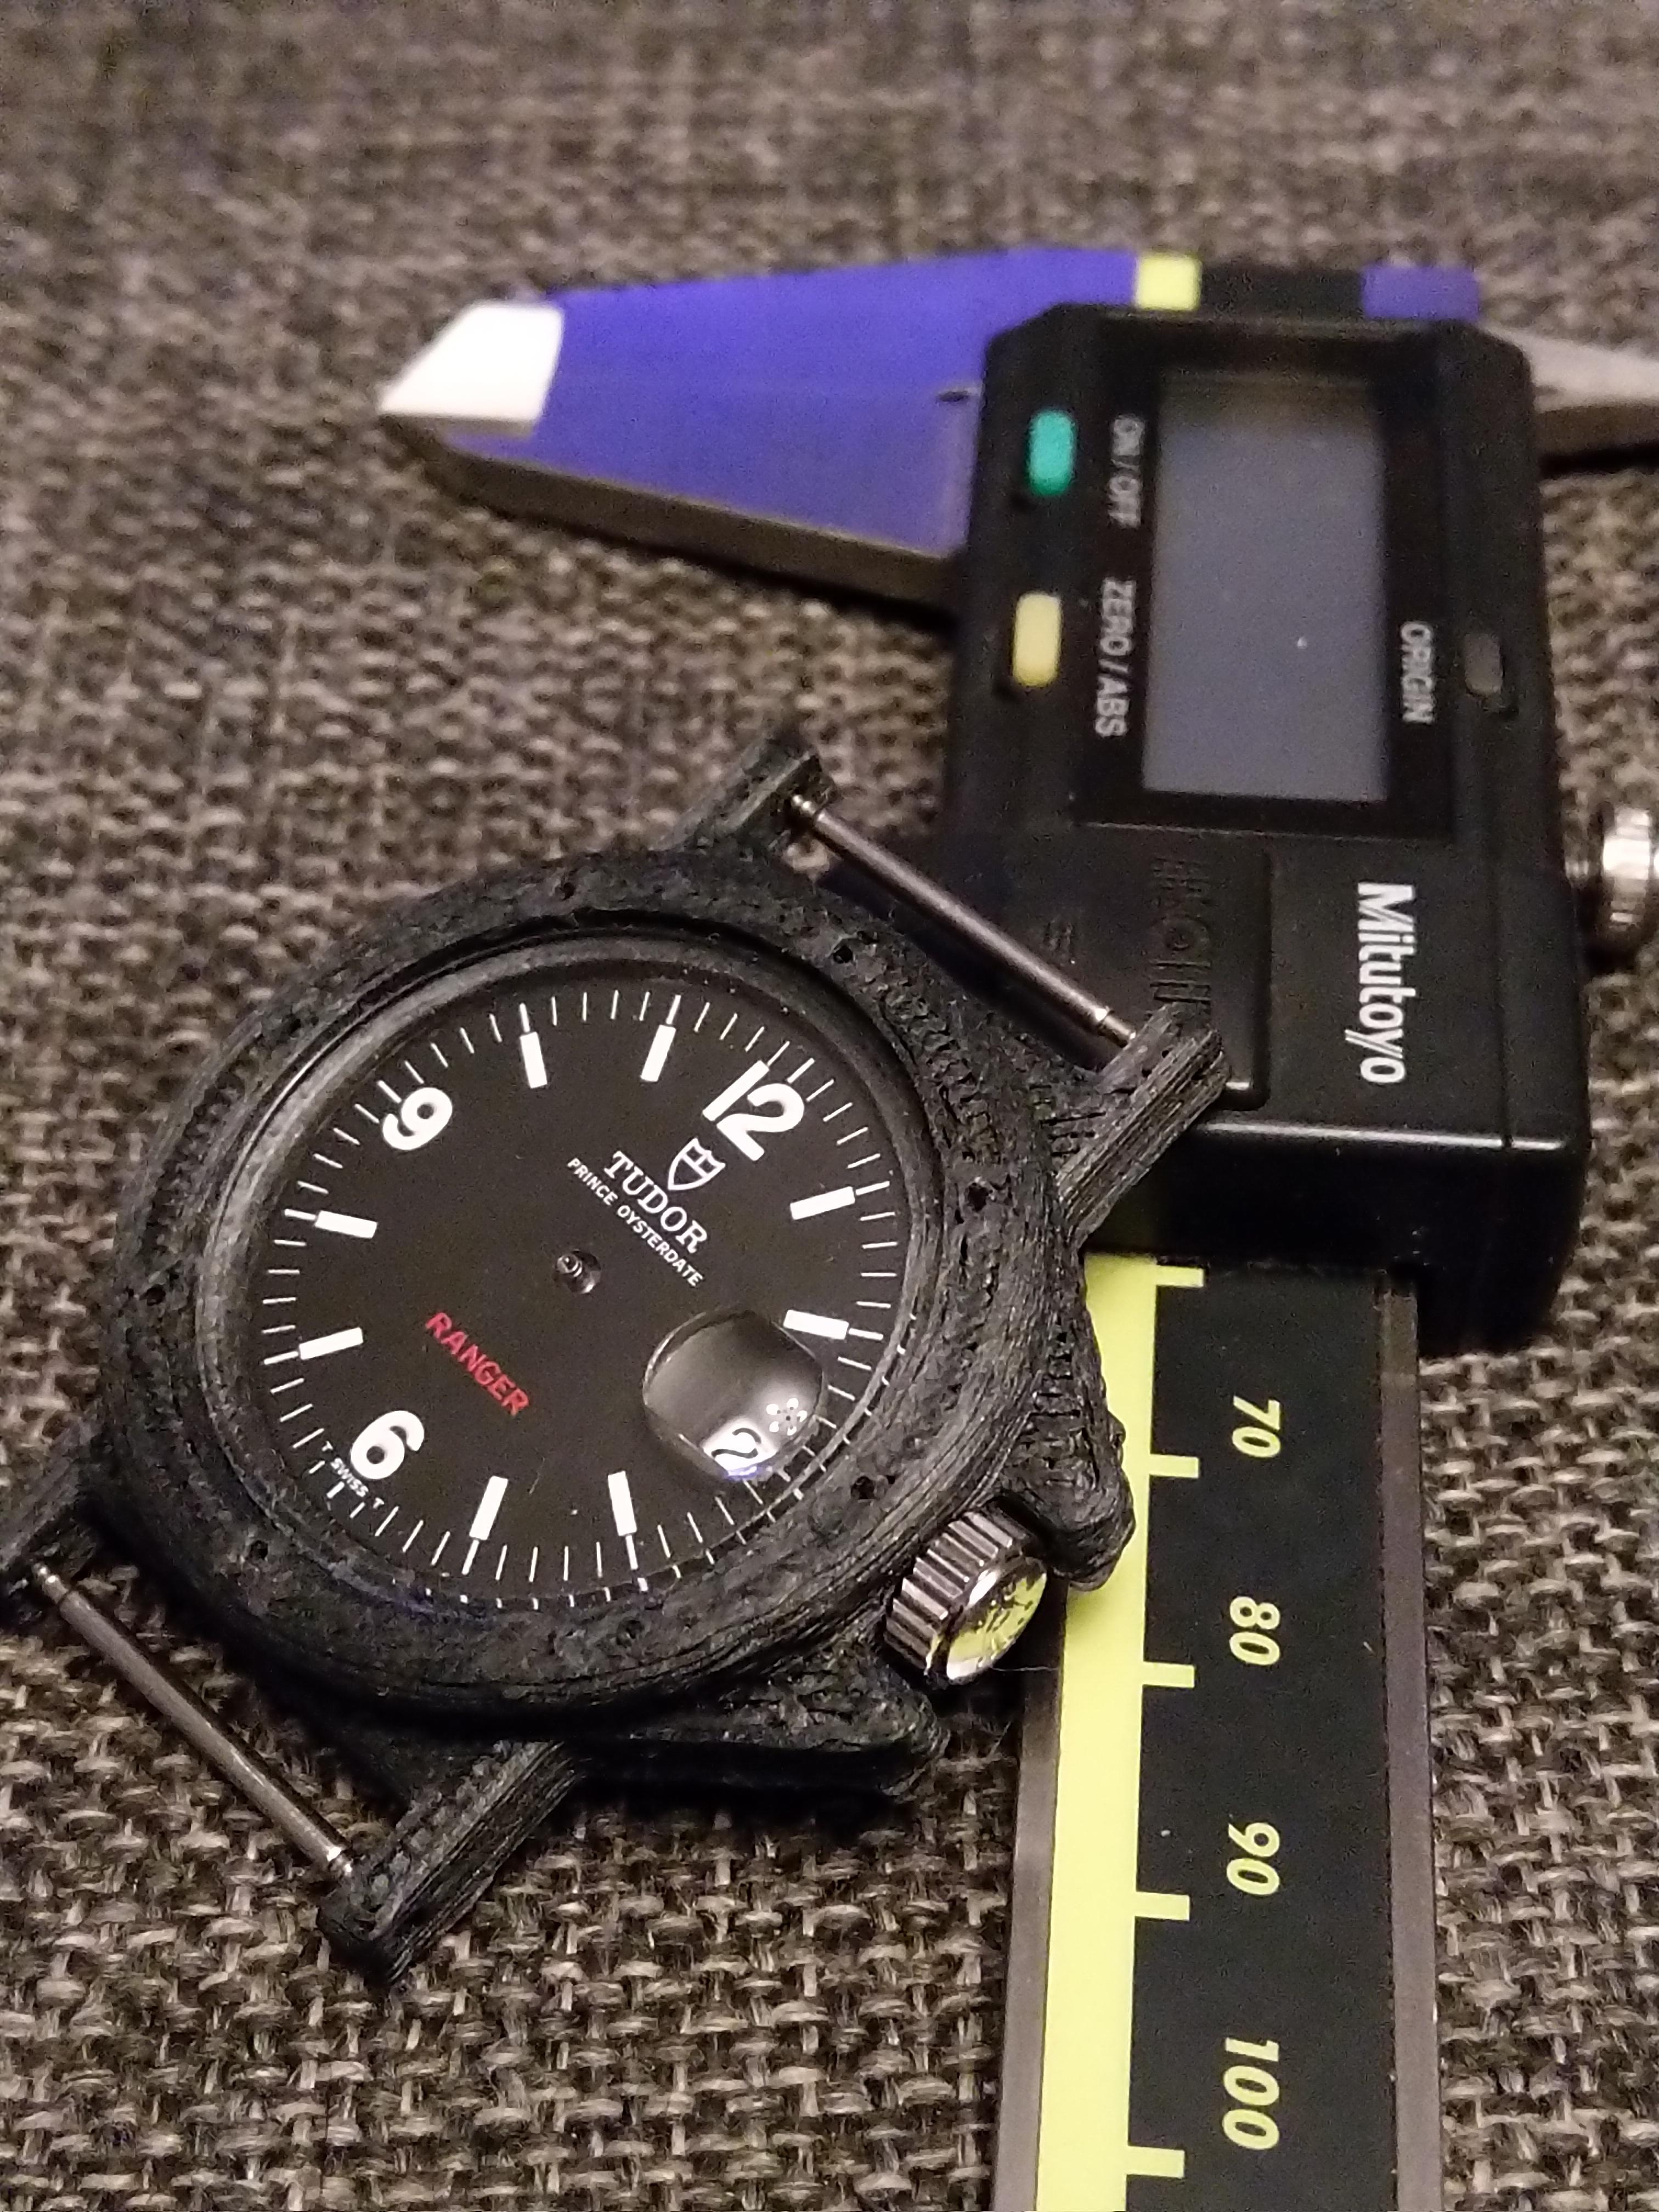
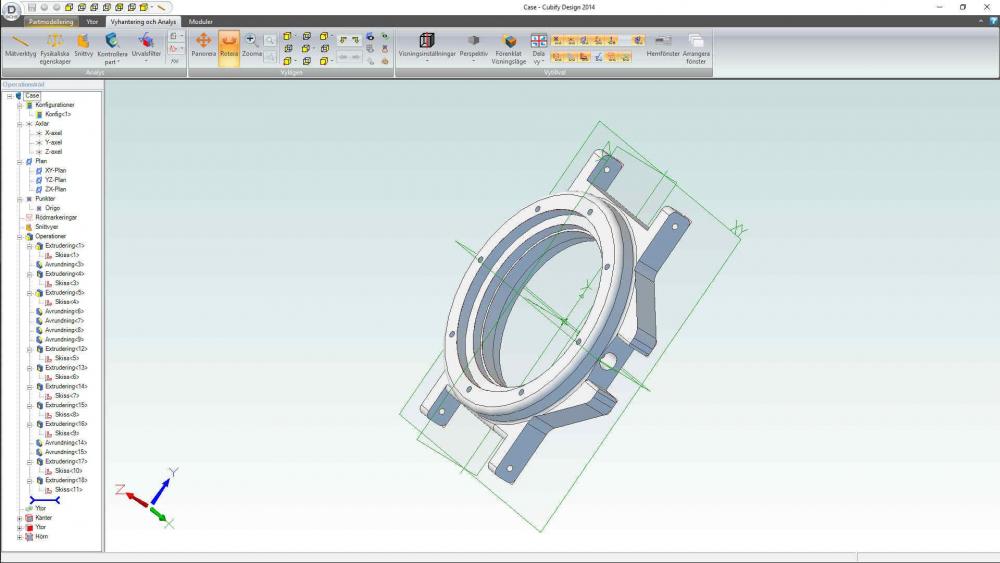
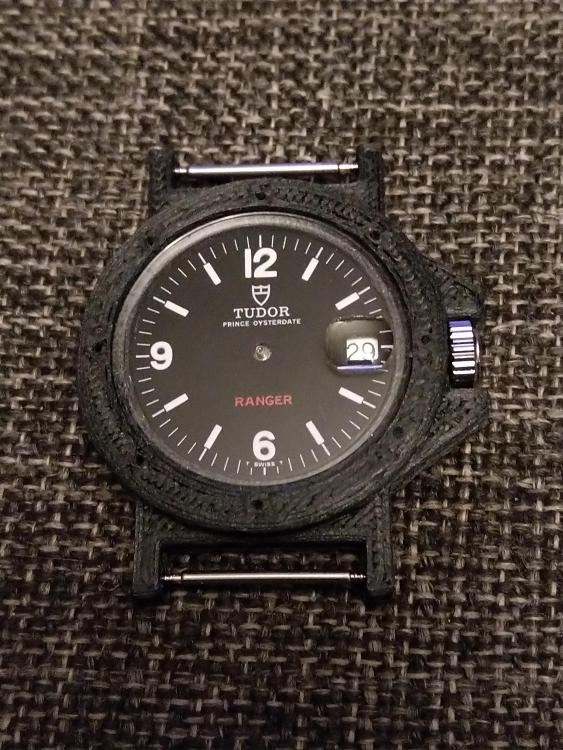
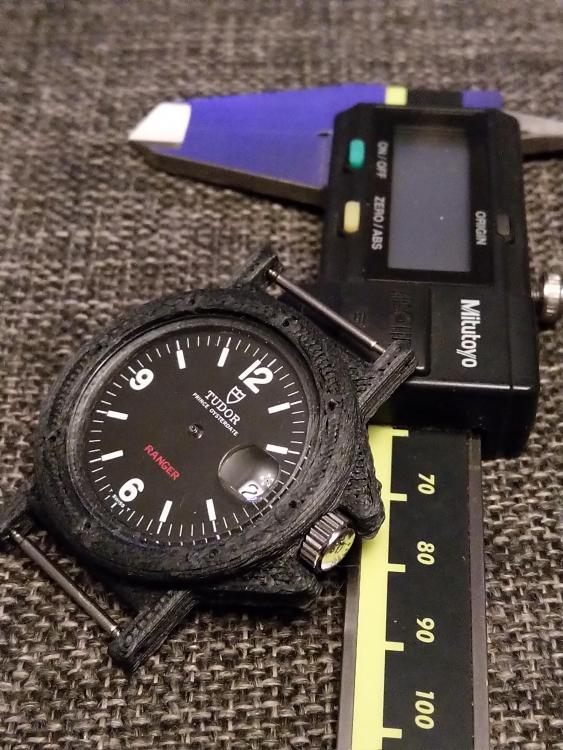
I couldn't help noticing your 3D printed prototypes seemed to be lacking holes for pushers and the stem. As a tip from the coach I would suggest you add every feature like this into your prototype so you see that the stem lines up with the hole in the movement, so the crystal has enough distance to the hands and they can go free and so on. The most 3D printers has enough resolution to let you try out things like this. In this example I have used carborfiber reinforced PLA filament and a quite crude stepping just to speed up the printing process, it takes around 22 minutes to fabricate this case for measuring and part fitting purposes. Keep up the good work I'm sure there are a bunch of people out there who are getting really inspired by this thread, me included.
 2 points
 -
you should put the screws back in as now is not the time to have them out. Then try sliding and taking the back off just so we can see what's underneath. As that is rust and looked like rust more likely the entire movement is gone but you won't know until you take the back off. rejecting a repair offers often times a good thing especially if there is sentimental value and definitely a good thing if it's not your own watch. It's hard to tell without the back off but if you're having mainspring issues there's a possibility that the fusee chain is broken. That is it has a fusee we can't tell that until the cover comes off.1 point
-
Have you tried to hit its side or top with your palm/fist?1 point
-
Flexible materials are trickier to print -- or at least print decently -- than regular plastics in an FDM style printer. Resin printers might give you a better result, but you also have to factor in the chemicals for those printers. I've printed a few things in flexible plastic and they look okay for utilitarian items, but for a watch strap? I don't know if it would be "good enough" to wear.1 point
-
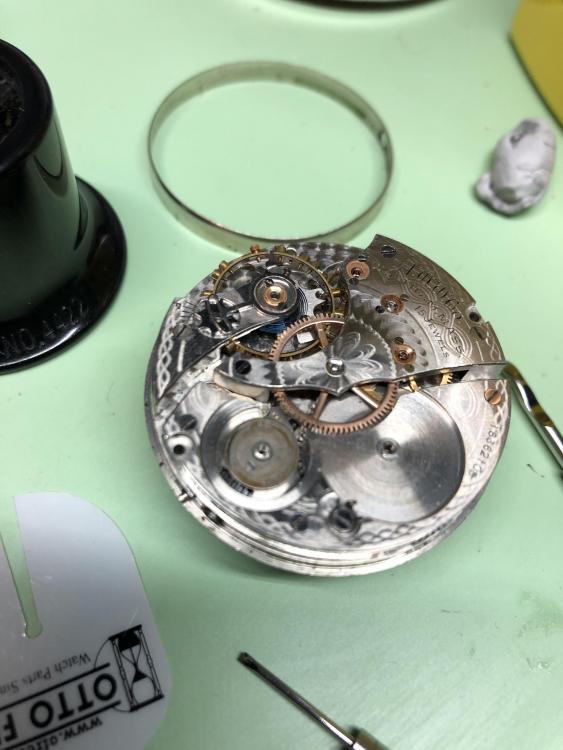
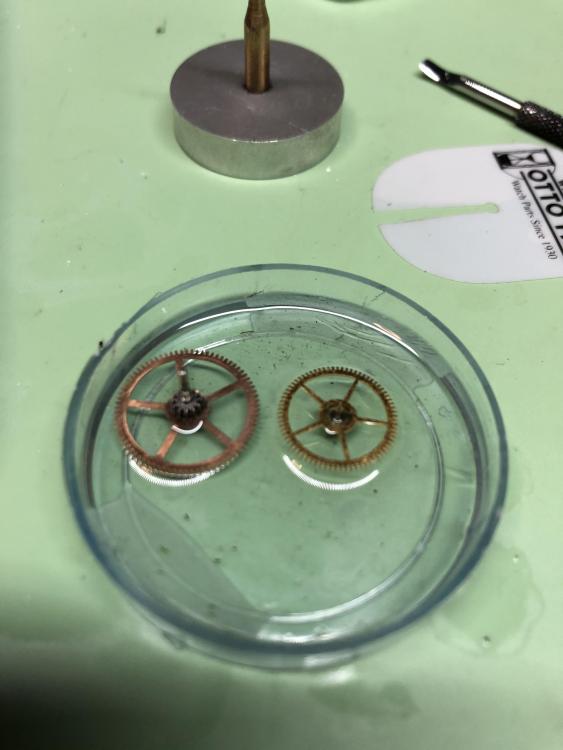
There are a couple pictures of the barrel because I thought it was nice they decorated both sides even though it is completely hidden from view in the movement. On the other hand, they did cut some corners by not polishing all the edges of the bridges... Hopefully I can get right back to this and finish it up.1 point
-
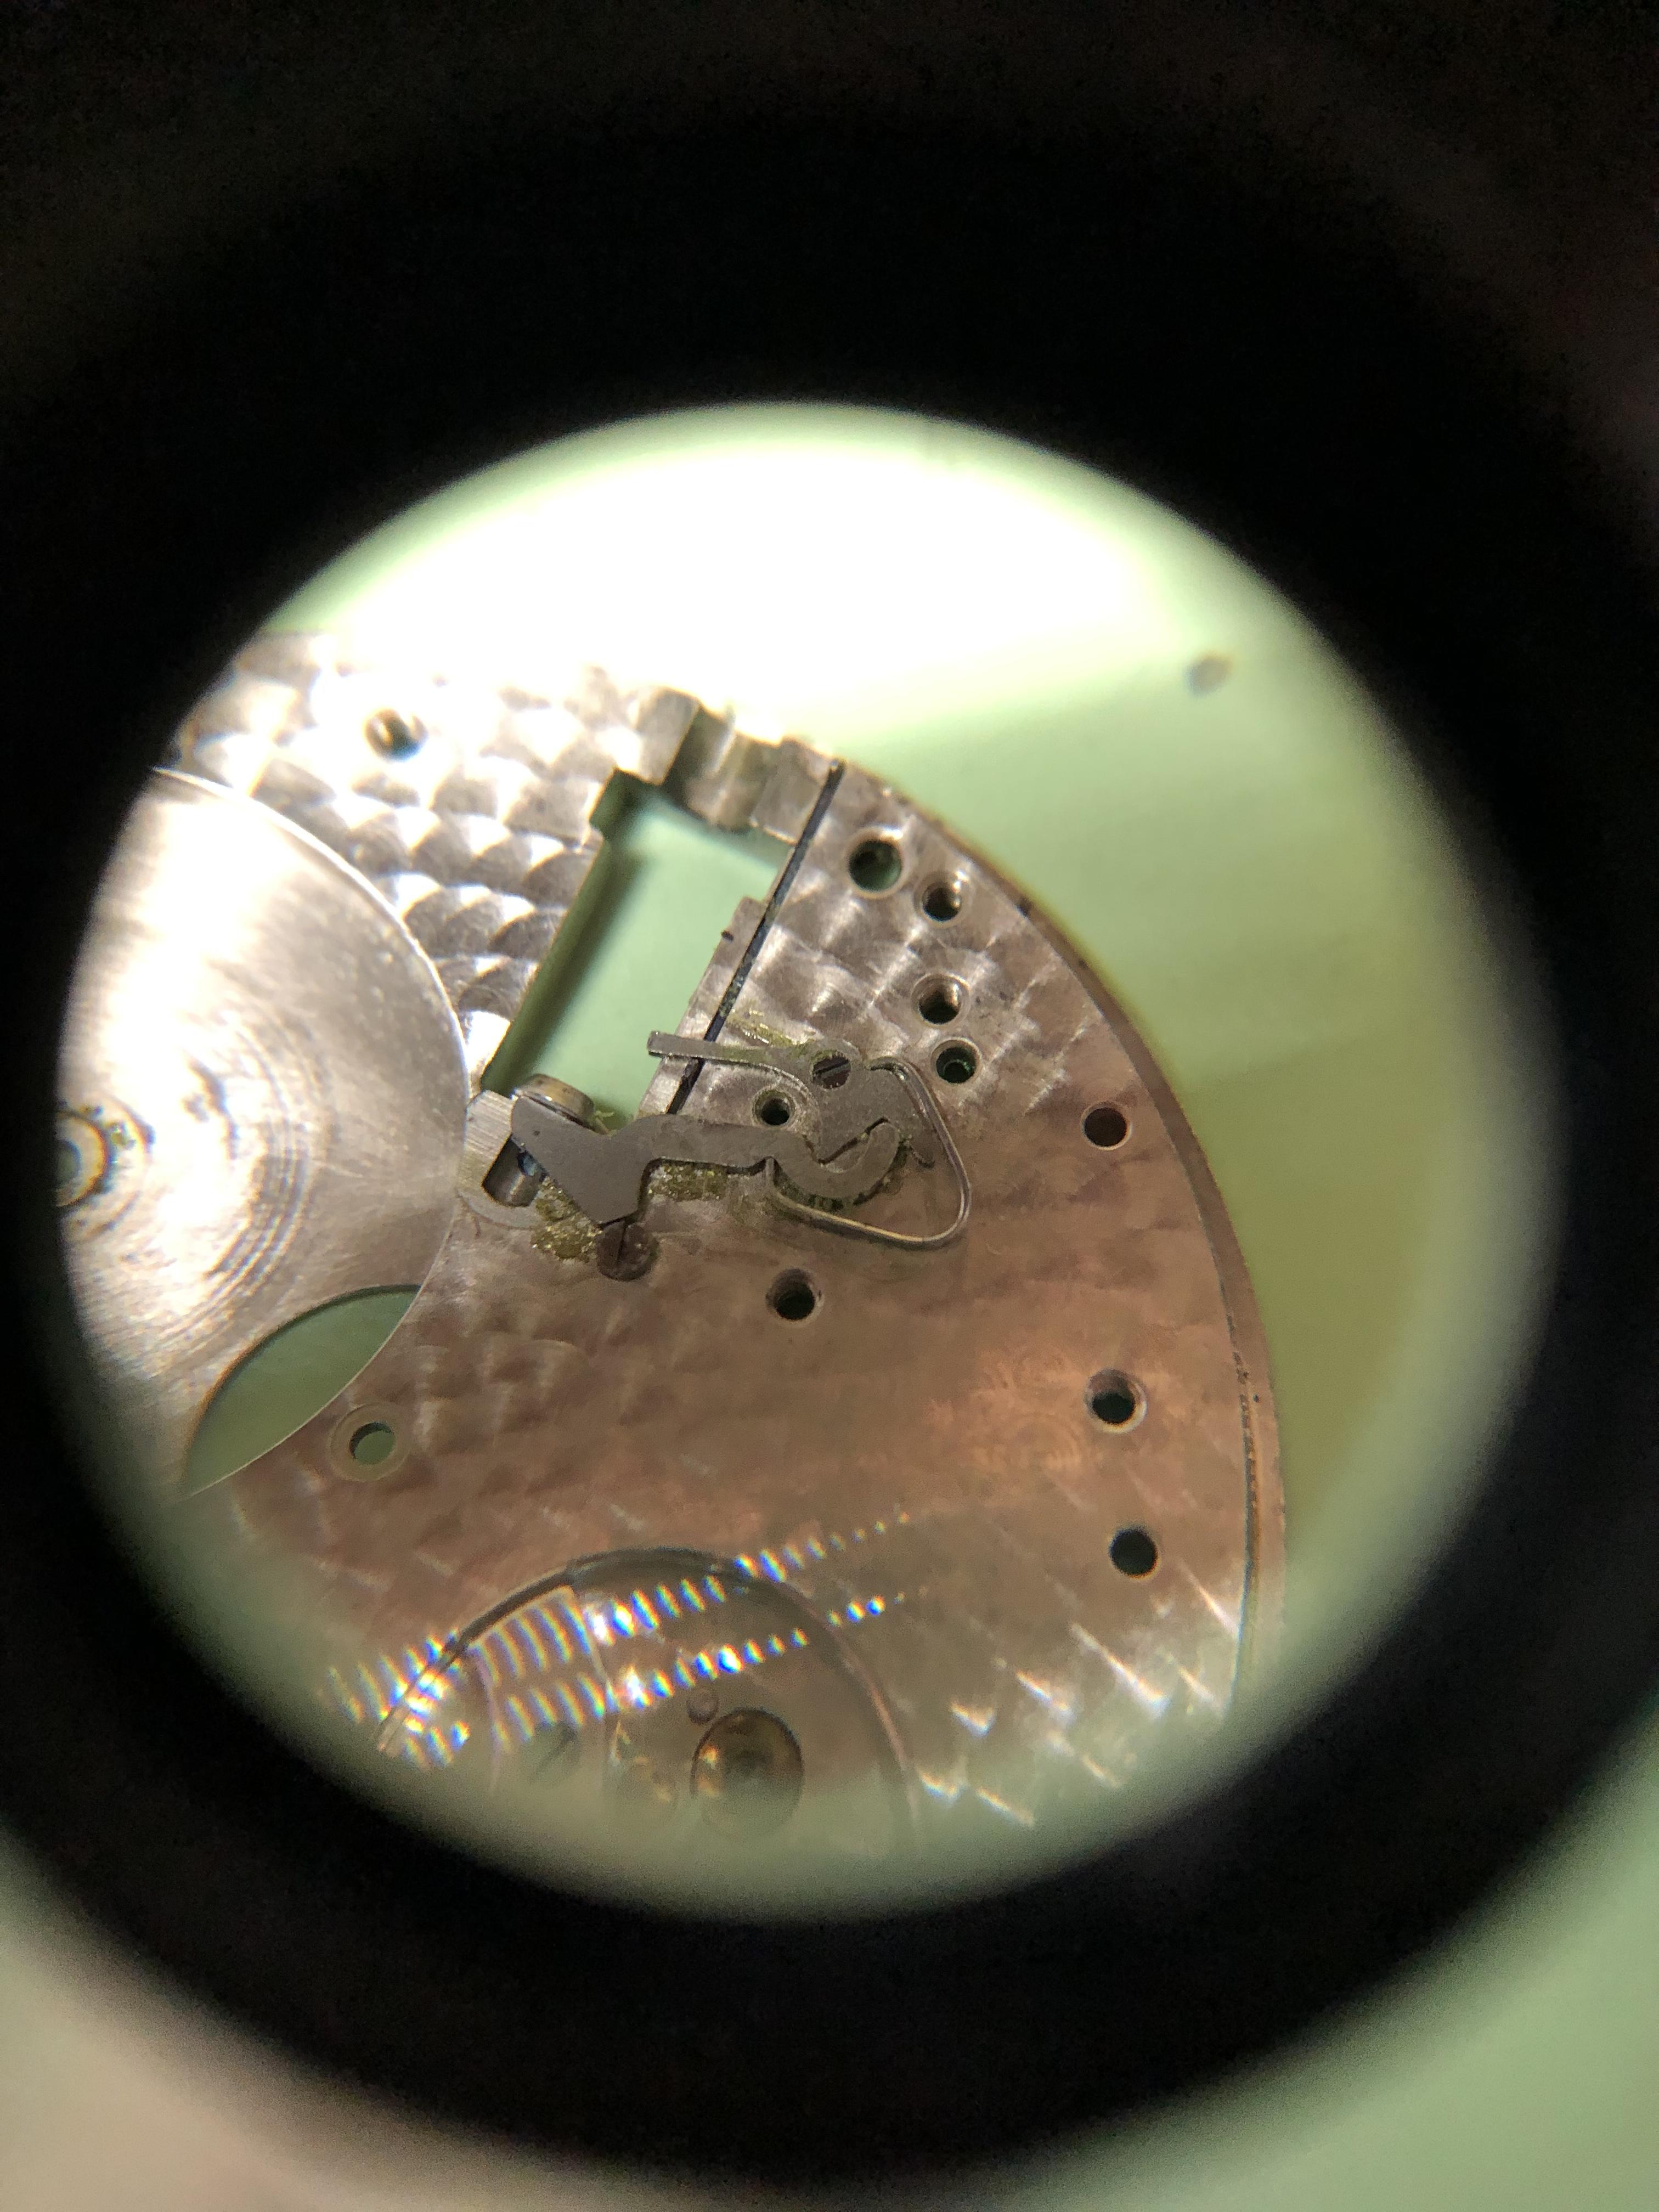
it's a safety feature to keep unauthorized users out of their watch. Unfortunately it doesn't prevent people from taking the screws out? it looks like you're missing a few screws? The The large missing screw is holding the balance bridge on so when you remove the cover be extremely careful that the bridge doesn't come off. Then it also looks like you're missing the two screws that holds the jewel assembly in place for the balance. I prefer to think of it as a safety feature. then there shouldn't be any shellac it should just slide and the cover should come off if there is shellac that's not a good sign combined with the missing screws.1 point
-
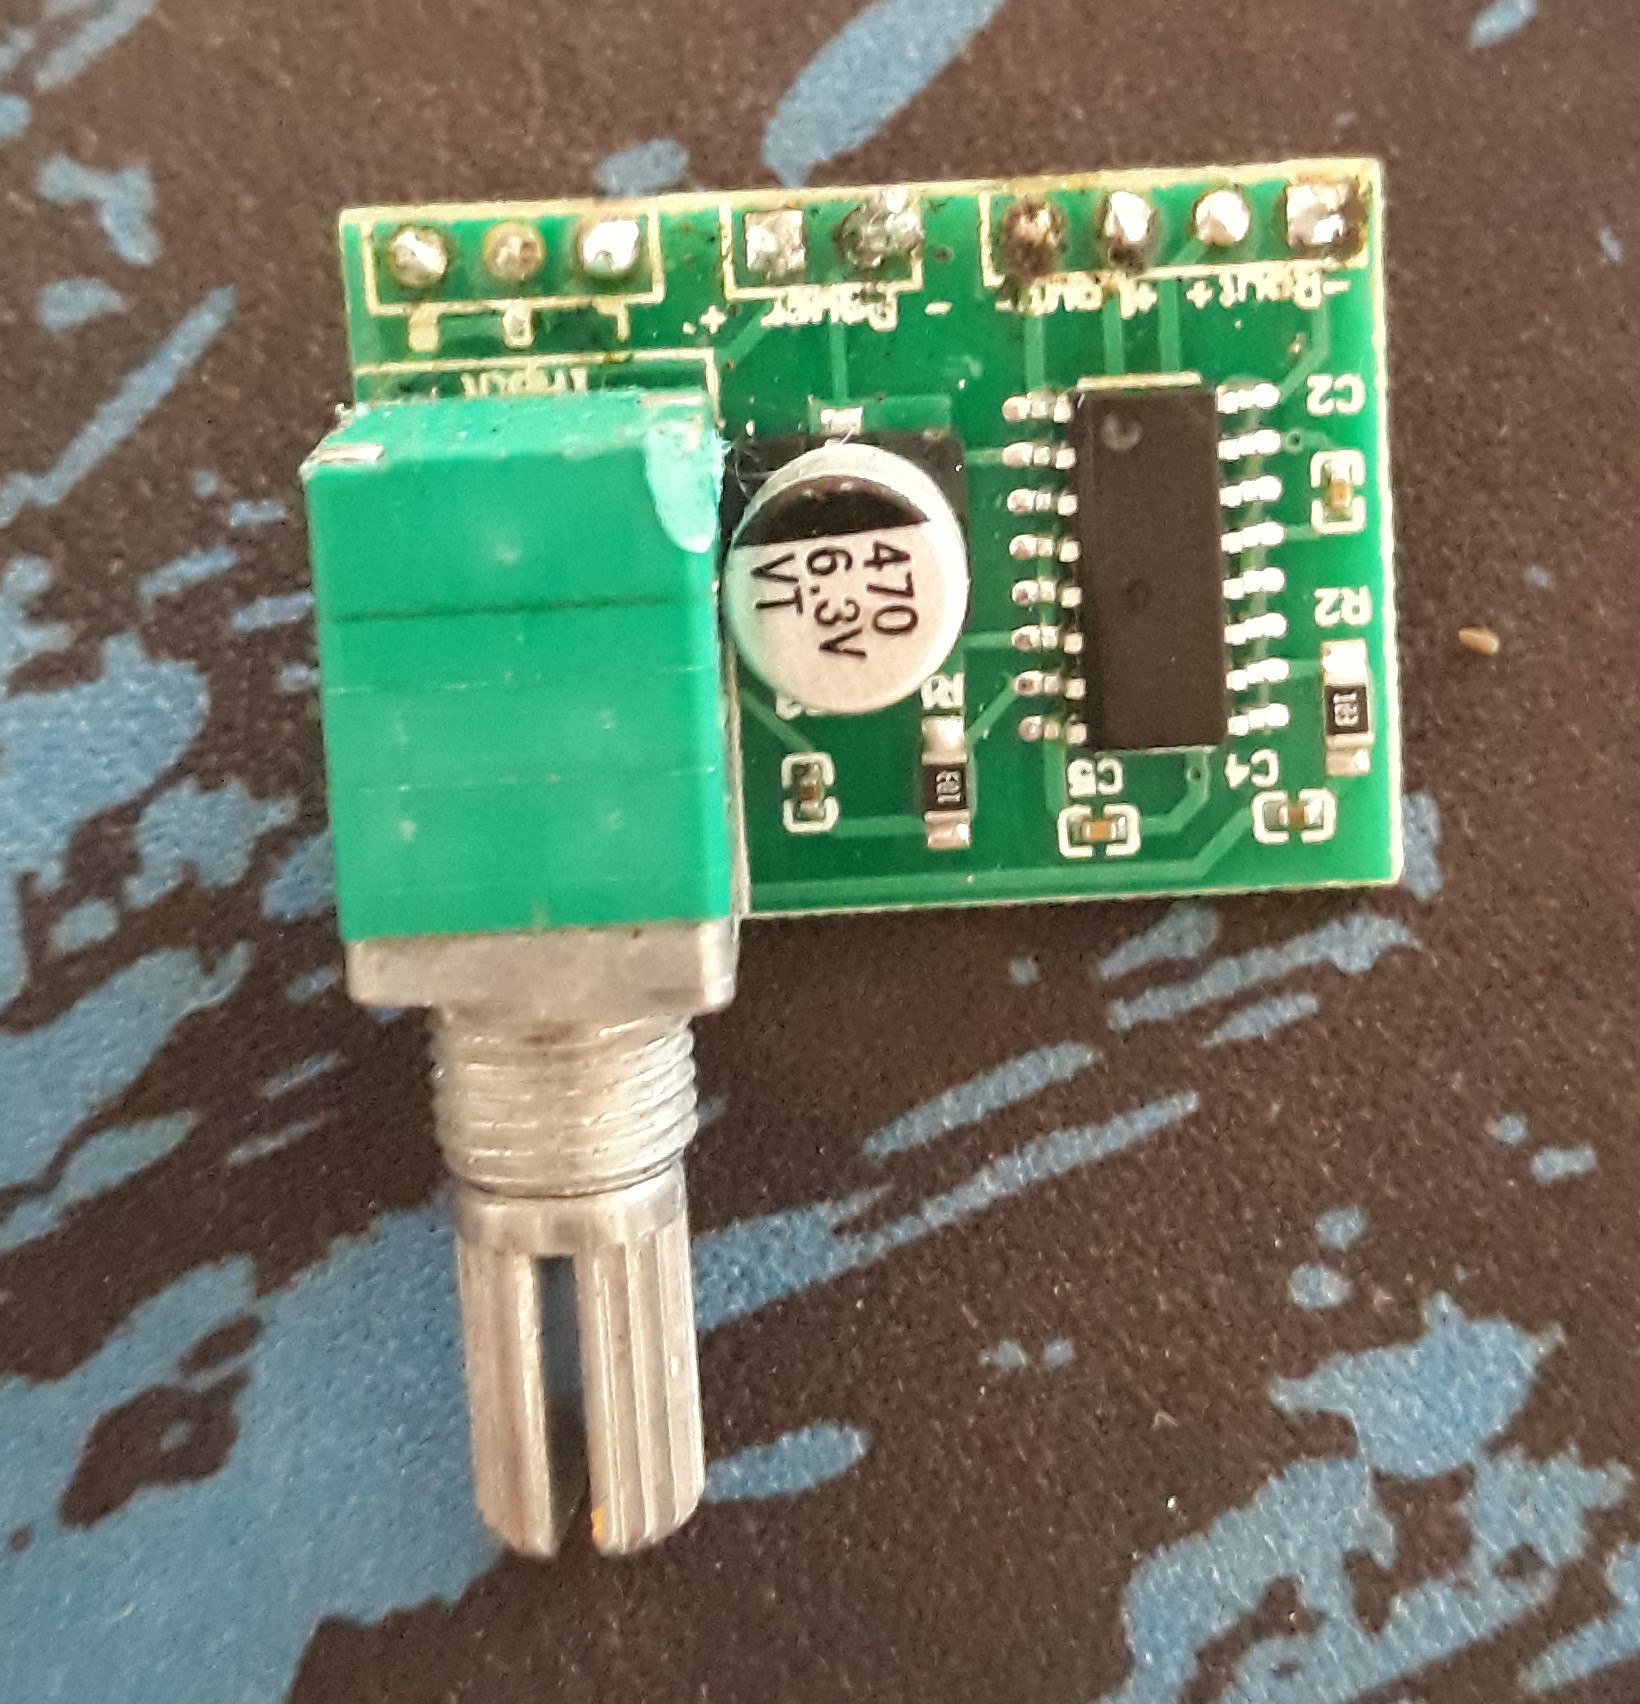
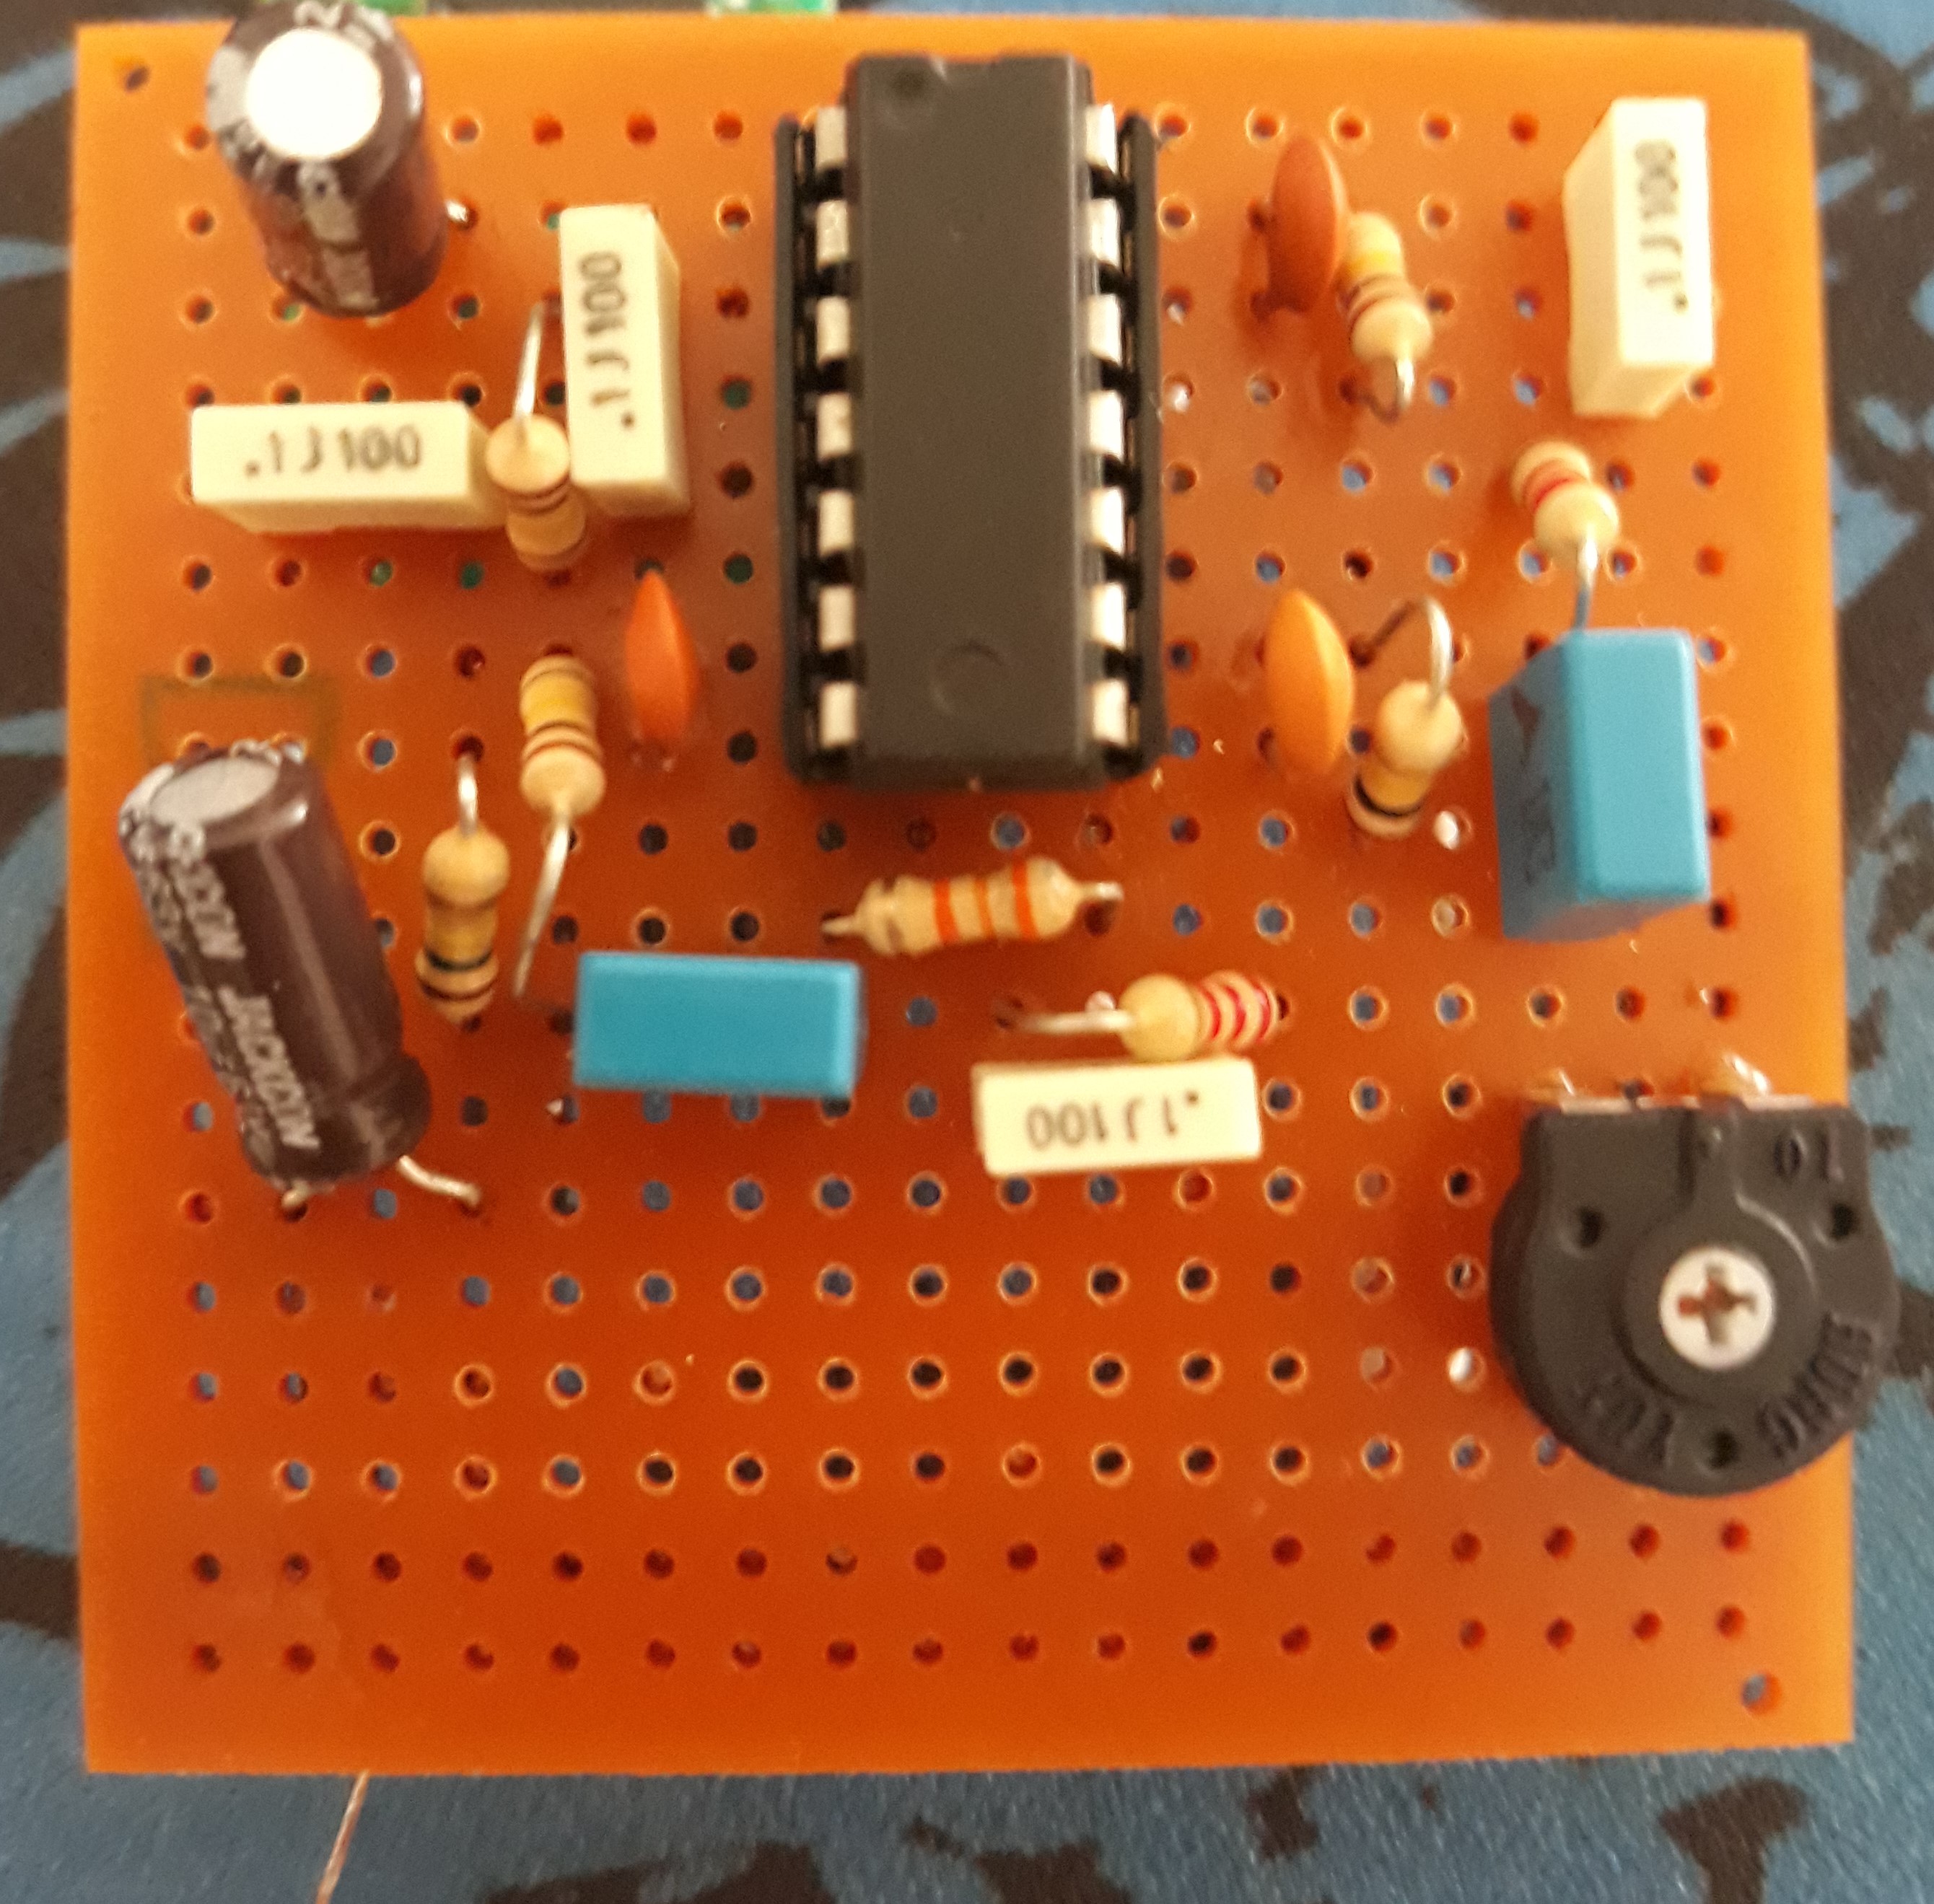
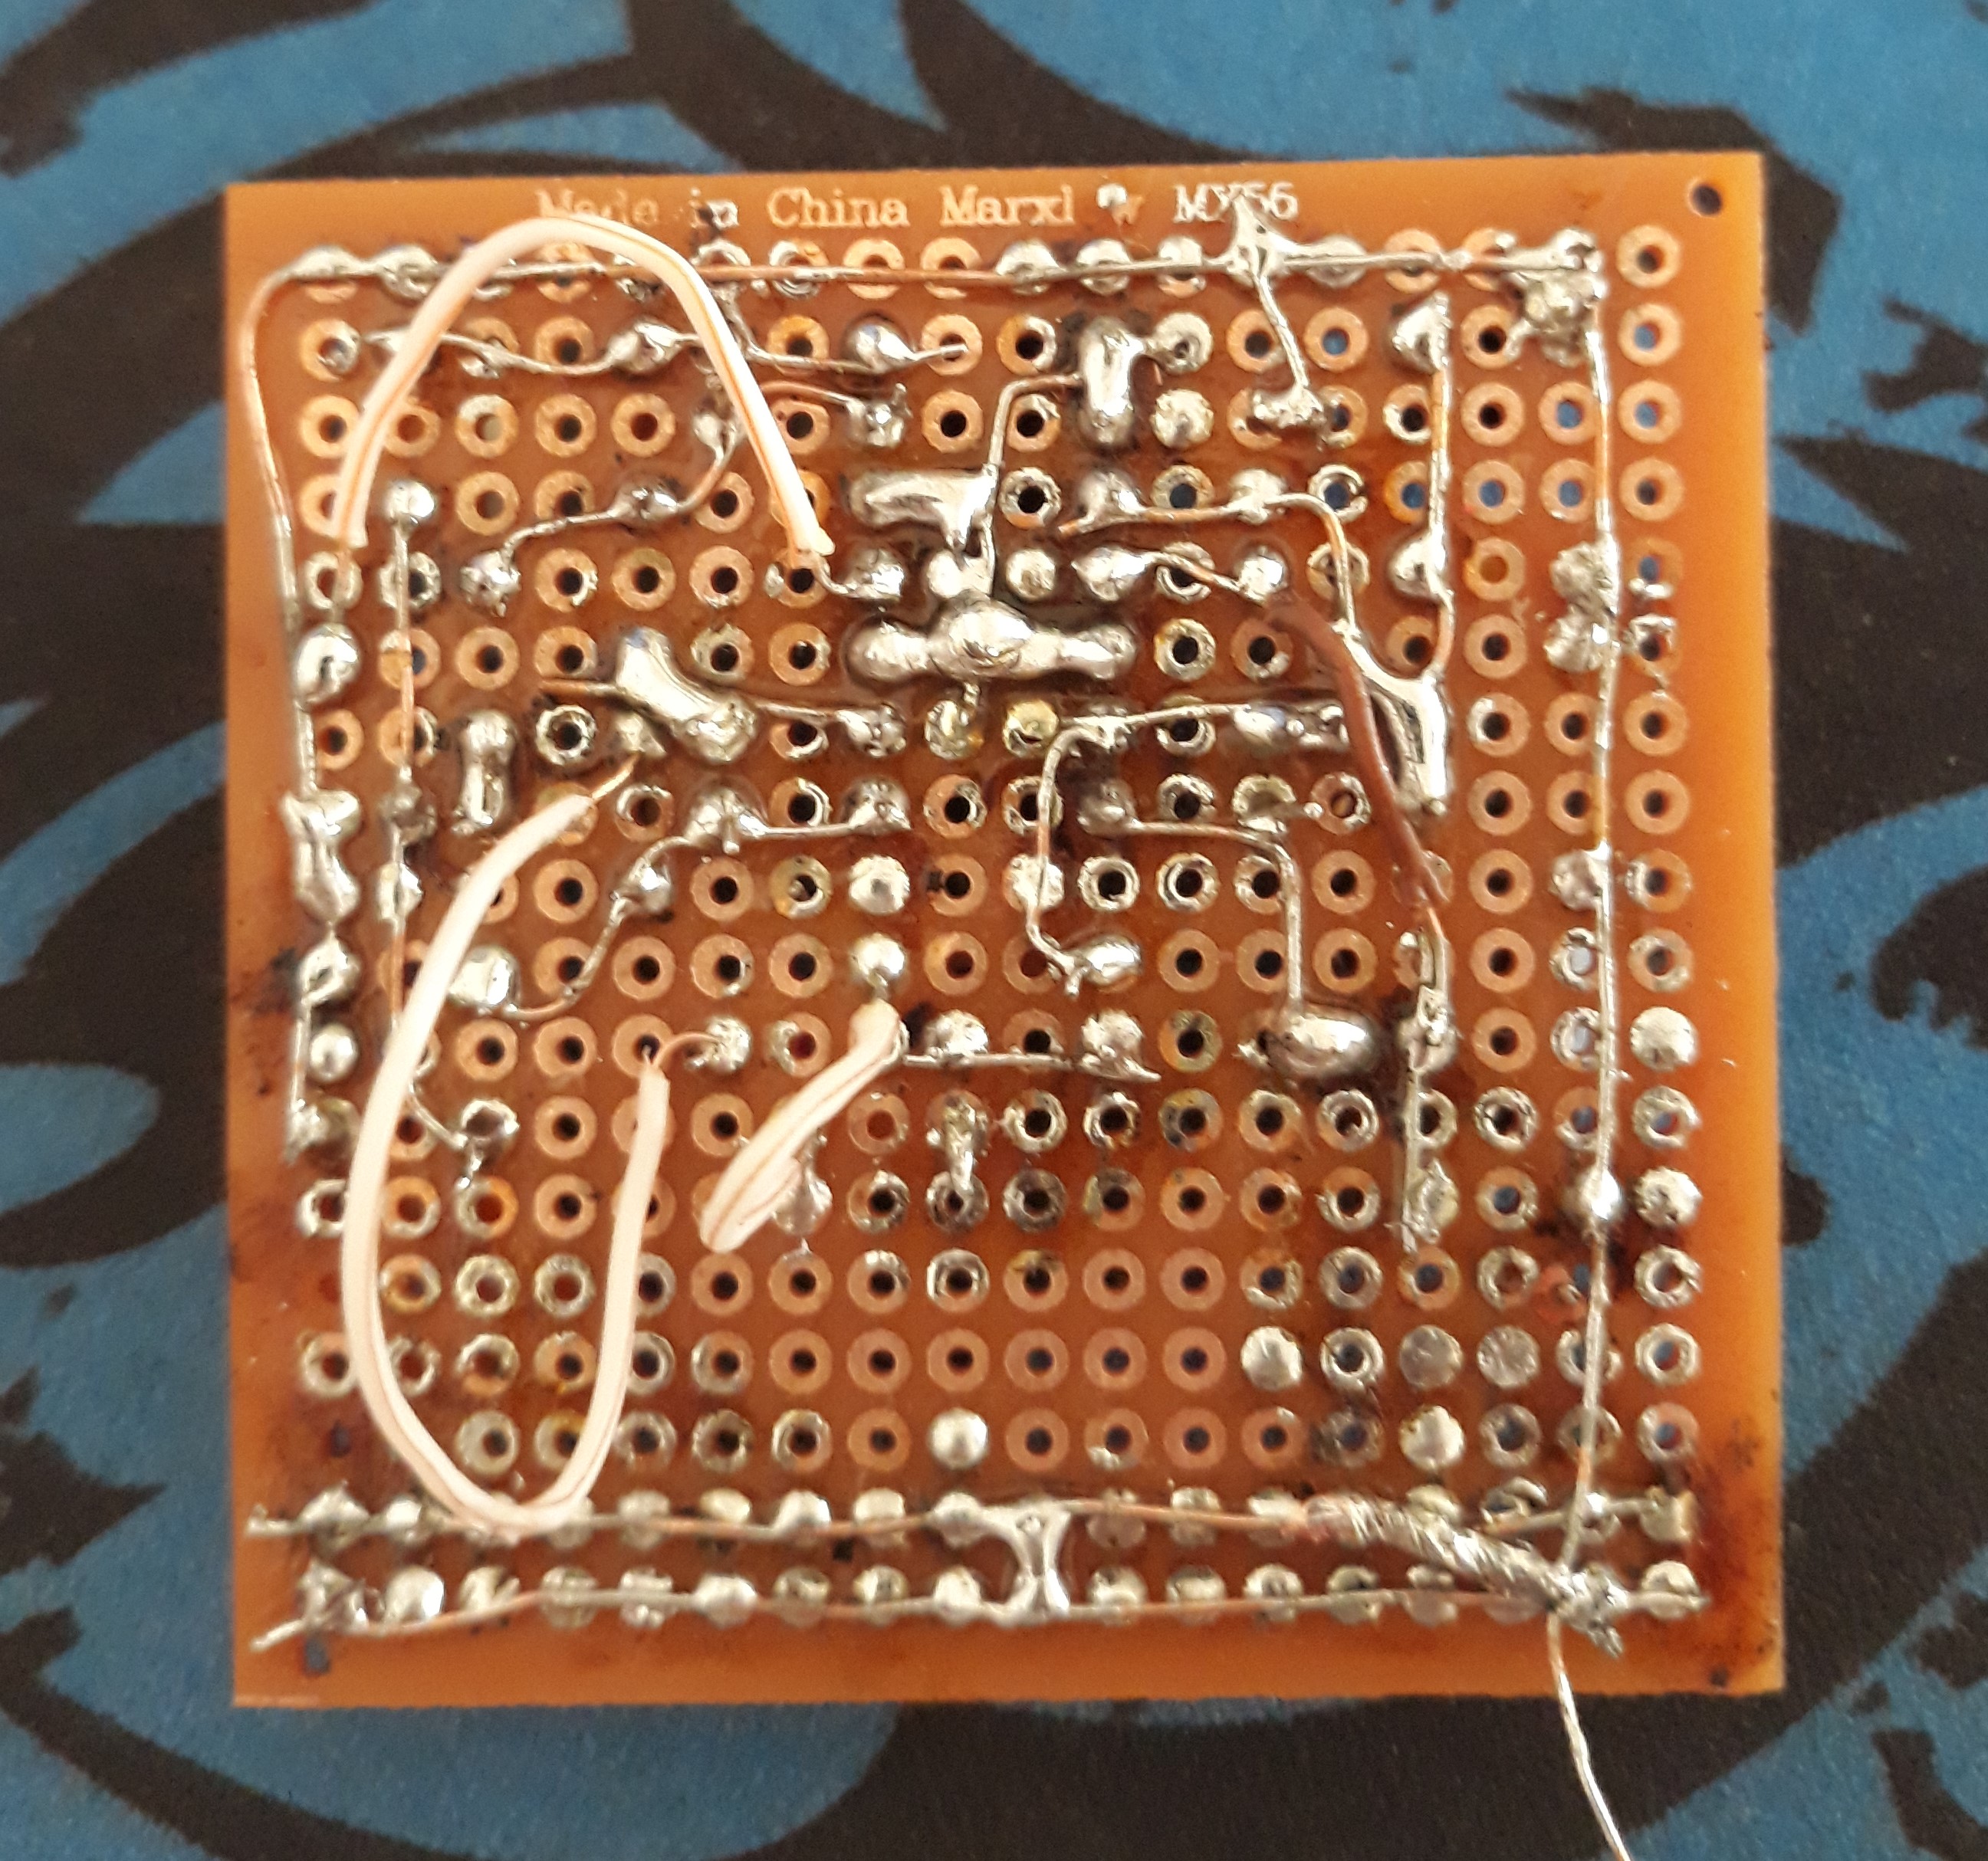
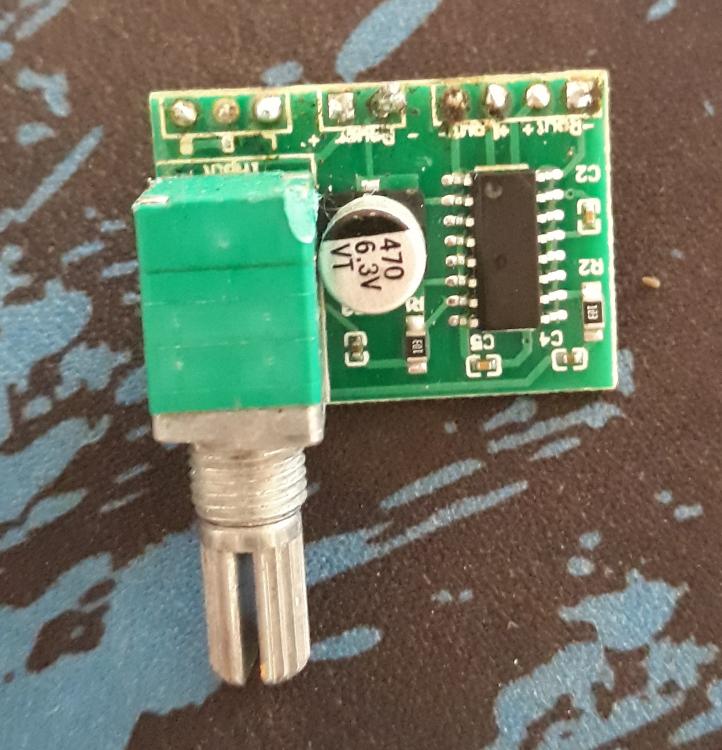
Hello everybody, I posted this topic a couple of months ago but my depression got worse and I spent alot of time just sitting around doing nothing, I satrted feeling better a couple of weeks ago so I decided to make this little "project" Please note that I'm not being stingy or I don't want to buy a proper timegrapher the thing is it's not really worth it for me to buy one because I'm barely finding a decent watch to work on every couple of months I'll most definitely but one if things get better. the other thing I want to point out is I have no idea what I'm doing I'm absolutely ignorant when it comes to electronics ad acoustics so I've been learning as I go. now I started buy buying this amp circuit thing with a bunch of piezo elements, I wired it and connected it to my laptop and it sounded decent with very low noise BUT when I tried listening to a watch the noise was lowed compared to the watch tick and I started experimenting with cables and options and nothing helped and the watch tick wasn't so loud anyway, I was using batteries and shielded cables as I have been told in the previous post. I did some googling and I found this video: I thought well this is easy I'll give a go spoiler alert it didn't work and I had the same problem watch tick to low and the noise is high compared to it. I wasn't ready to give up though so I decided to make this amplifier in Watch-O-Scope website: http://www.watchoscope.com/amplifier.html I got the components and sat down to make the circuit but the I realized I have no idea how to read schematics and make circuits so I had to watch some videos and read about it. the first version looked terrible and had a really really high noise so I thought to my self "I messed this up gotta start again" so I made another one which to be honest looked better than the first one (to me at least) and I was a little bit proud of my self but the thing is I didn't work either and had the same really loud noise I checked all the connections and everything seems to be fine I don't know what could be causing this and this is why I'm posting this long boring post. I tried pulling the laptop charger off and even tried two more laptops but it made no difference. can you guys tell me what I did wrong please?


 1 point
 -
That knob is in fact what you would use to regulate. It turns rollers that tightly pinch the hairspring. Turn it one way the rollers dispense hairspring, turn it the other way they retract. I think the drawbacks of such a system is obvious.1 point
-
Thanks! It was my grandfather’s and I also have a matching smaller one that was my grandmother’s. I also have a Hamilton, which was also his, which was fixed up in the 90’s and still working well. I want to get these going and see how they run.1 point
-
There is no jewel in center pipe. But that pipe is supposed to be counterbored at the bottom and the collar on the seconds/fourth/center wheel pivot is supposed to rest against that when you go to put it in. Looking at the picture of the dial side this end looks pretty busted so the pivot got nothing to stop against.1 point
-
I agree, The arbor passing through the centre pipe is in my mind a fourth wheel, as it is clearly driven by a third wheel and drives the escape wheel, which has to make it a 'fourth wheel', but ETA have decided in it's infinite 'Swiss wisdom' (and I use that term in the loosest sense) to call it something completely different, which makes no sense to call it a second wheel, which it certainly isn't. Rant over....1 point
-
Did you get the orientation the same? Some case backs have a stem cut-out. And what did you use to press the case back - is it possible it deformed? Finally, I presume the movement and dial are seated properly in the mid case?1 point
-
This is a win for sure Ammar, you well deserve a pad on the back for getting this thing come to life, tunning it is nothing but a second step at the most. No doubt building it empowers you with better understanding of how to use it. Congrat. All the best.1 point
-
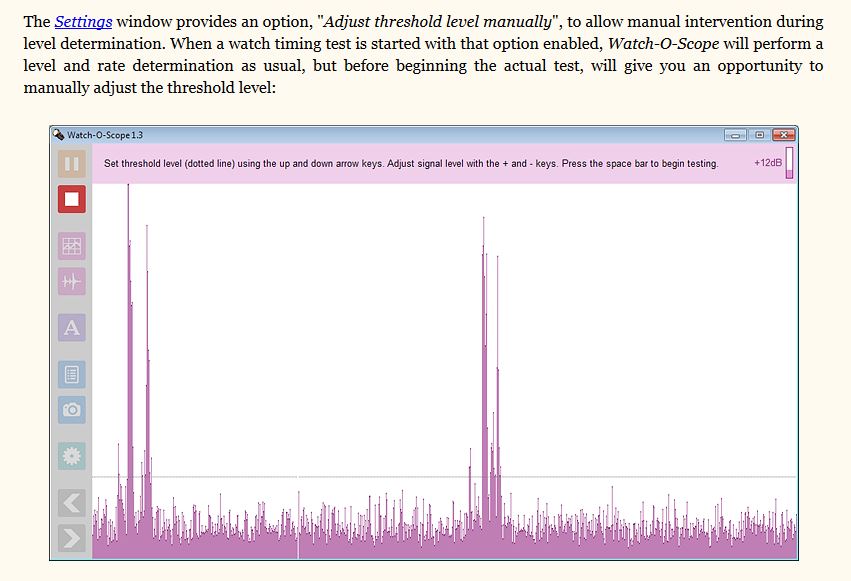
outstanding the amplifier appears to be working and I should praise you and be happy and not say anything that could be construed as naysaying. then I should sit back and watch you service your watches again only to find your back in the same place again it really adds to my problem of helping if everything I say is interpreted as being negative when I'm trying to help you. what you're demonstrating here is a problem that we've seen before fortunately you give us the oscilloscope so we can see what the problem is. I'm attaching an image I swiped it off the website where the software came from. It's part of the manual and you'll notice is a reference to settings. looking at your on oscilloscope you're not getting a good clean signal and you're not getting all of the signal each ticking sound has multiple of parts. without all the parts you cannot do amplitude but we can do rate and clean up your graphical display if you change a setting. if you adjust the manual threshold level as is referred to in the image moving that up out of the noisy area should improve things. then in the future when you get all of the signal and can do amplitude I have a website below the list of lift angles https://watchguy.co.uk/cgi-bin/lift_angles
 1 point
 -
Sent from my iPhone using Tapatalk Pro1 point
-
How can one tell if his Chinese watch has a PT5000, Seagull, or whatever other Chinese made 2824 copy? They purposely make the true origin and grading of movement impossible to discern for the consumer. Even the linked article clearly states the same: Given that some variations in quality and cost do exist, one can get an idea of the typical qualities of a Chinese 2824 looking at our Mark's videos1 point
-
Worked it out. I have now created a "Dark Mode" theme which you can change to using the Theme selector at the bottom of the website. I hope this helps1 point
-
I haven’t needed to with my new ones yet, but periodically I will polish my tweezer tips. The get scratched after a while and those scratches can cause scratches on what you pick up. I’ll fold 1000 and then 2000 grit paper in half (grit exposed on both sides) and grip the paper with the tweezers and pull it out. It makes them flat and smooth. I’ll do the outside occasionally on the polishing wheel just to make them look nice.1 point
-
I vote number three. Use an Oiler and apply just enough to make one complete revolution. If it’s bulging proud of the thread major diameter, blot some off. Too much and you will have a big mess. “Just a dab’ll do ya”1 point
-
I think they're intended to avoid scratching dials/hands/etc. I got a set of (something) tipped tweezers from Cousins a while back. The tips are very imprecise, and make them not the most usable things in the world. If the epoxy coating doesn't eliminate any precision, it seems like it would be worth a shot. Not sure how strictly they fall in the "can't do without" camp though.1 point
-
Was late trying to complete a repair and was tired. Got the Keyless works done and only thing left was the Pallet fork and the Balance complete which I didn't have installed yet. Started to wind the watch but was not getting any resistance from the mainspring. I stop and though was did I do wrong. So I pull the mainspring bridge back off, took out the the barrel, pop the lid and took a look at the mainspring, looks good, what the you know what's going on. Got everything back together then it hit me , you dummy the Pallet fork not in yet to hold the power. Moral of the story "No more work after 10pm.1 point
-
Glad to hear that.1 point
-
Dial has finally arrived. Its been a couple of weeks since I have been able to work on the build however I have some information regarding balance and will be back on it next week. Sent from my SM-G950U using Tapatalk1 point
-
I have a heartbeat. Im not celebrating just yet however. One thing I learned, I think I know where the gritty feeling is coming from. I noticed when putting together the rocking bar, several gears on that assembly are toast. A few of the teeth are worn pointed. I tried to take the best gears from all the spares and it seemed to help a bit. Im also not completely sold on the balance. I ordered two complete balance assemblies including the bridges. My aim was to avoid having to put these together as its a bit challenging, however when I unpacked the order the balance wheels were not attached to the bridges. I attempted one assembly and when installed the hairspring it doesn't seem symmetrical. I think I may have something here not correct. Im going to have to do some research to make sure im doing that part correctly. The mechanism used to engage the hairspring to the regulator is different on both bridges I have, one seems stright forward the other not so much. Anyhow I dare not put it on the time graph as I dont want to take the wind out of my sails just yet. One thing, I am pleased with the plating and finished look. Sent from my SM-G950U using Tapatalk1 point
-
I use to turn down the filling rate when just printing for meassuring purposes like in the pictures , the areas where the holes are are solid so you can get the tight fit you need to try out glass and movement, the glass is press fitted into place. The tube for the stem is a Rolex screw down type so there one just have to take into count the thread thikness. This takes the prototyping time down from 2 hours to 20-30 minutes. So it's just for practical reasons one don't use full fil when Printing the different versions. The final version is homogen and later on treated with aceton fumes to smoothen the Surface.1 point
-
That dial is perfectly aged. Anything you do to it is likely to make it worse1 point
-
Minor distraction for today. However I did have a lengthy talk with my machinest regarding material selection. Updates to follow. Sent from my SM-G950U using Tapatalk1 point
-
Be aware that some folk are allergic to Nickel, myself included. Last time I wore a nickel plated watch I had a severe rash all the way up my arm which took about 3 weeks to clear - nickel poisoning.0 points