Leaderboard


Popular Content
Showing content with the highest reputation on 07/22/20 in all areas
-
I offer this to you as encouragement. Stop just secretly thinking about it. Buy a watch with the part you want to work on already broken and give it a try. you will get one of two results. It will still be broken in the same way as you started with or it will work out. I call it the rule of 50. 50% it will, 50% it won't. It's like the old adage "you won't know till you try. Worst case scenario, you try it and don't like it. In that case resell the movement and the tools for what you have into them, and move on.4 points
-
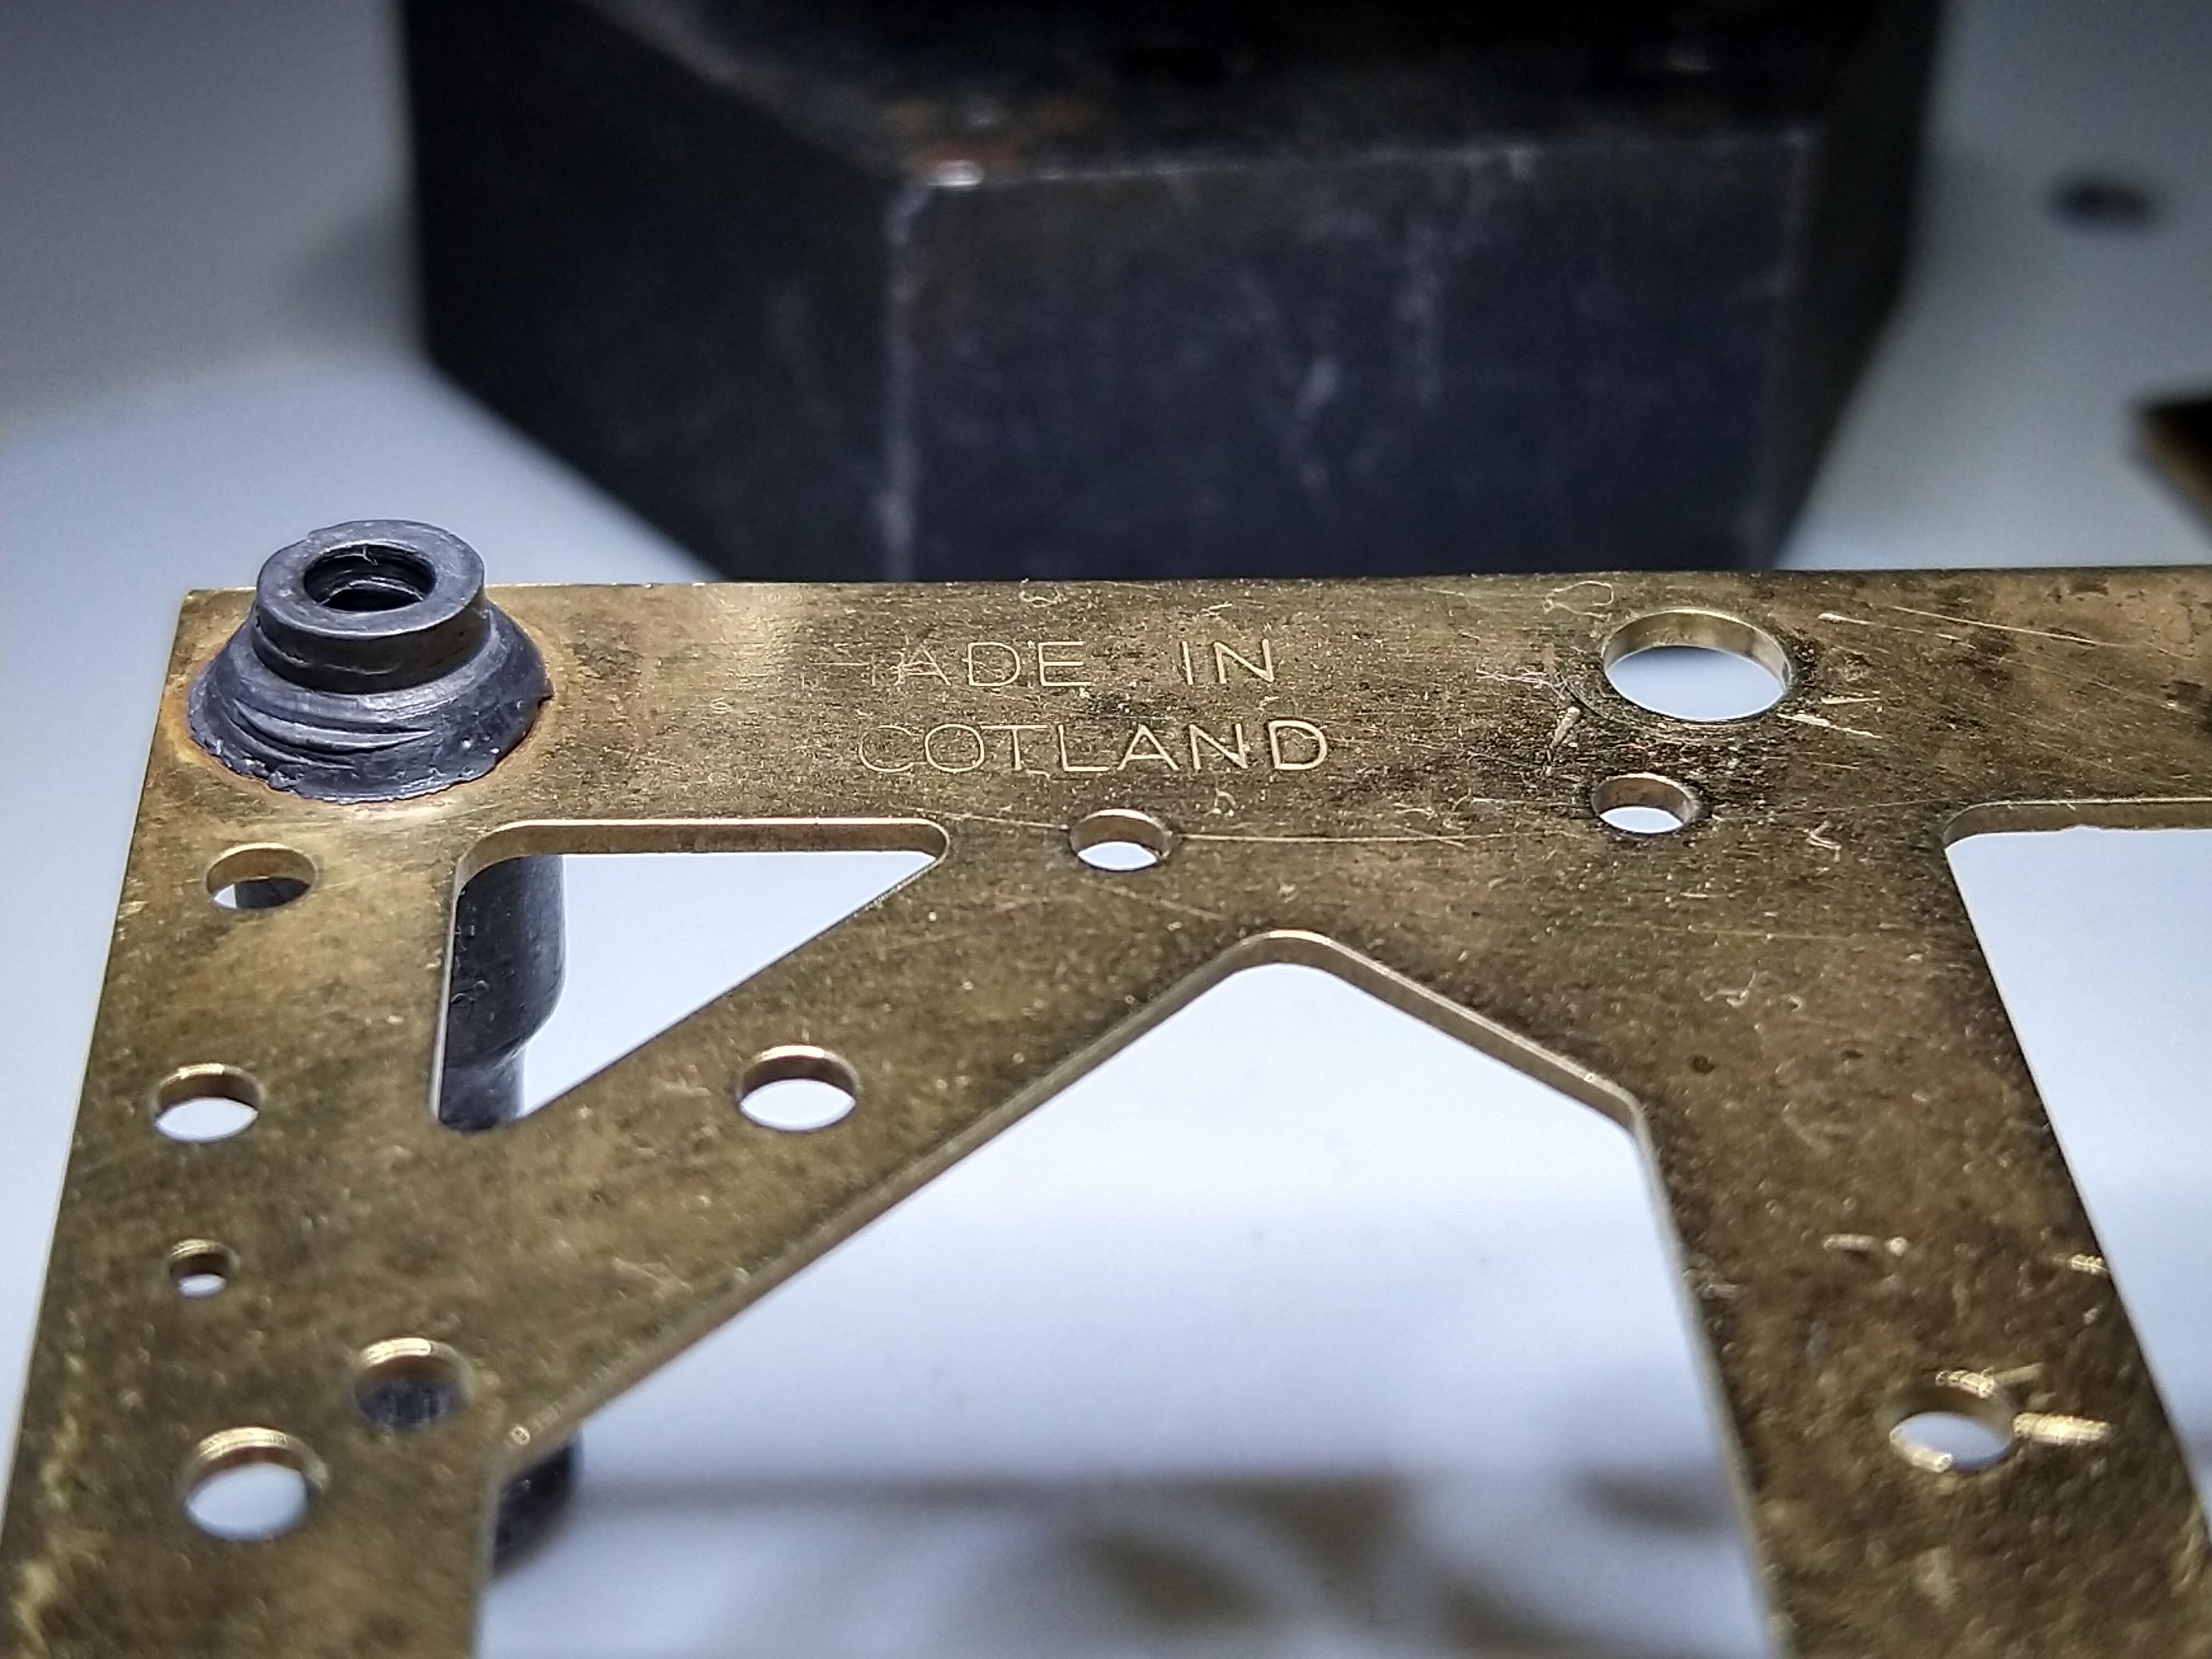
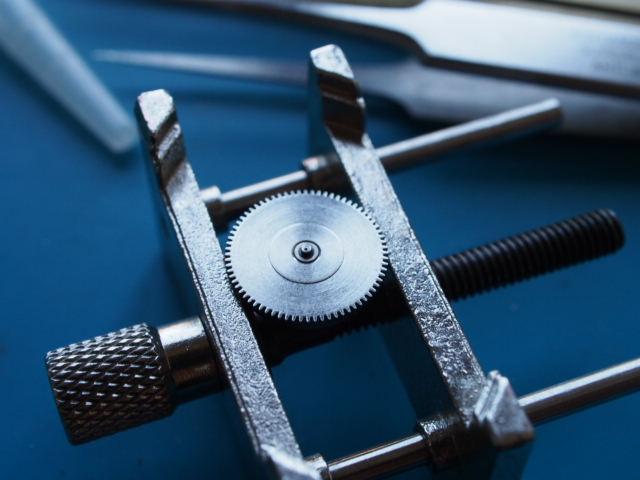
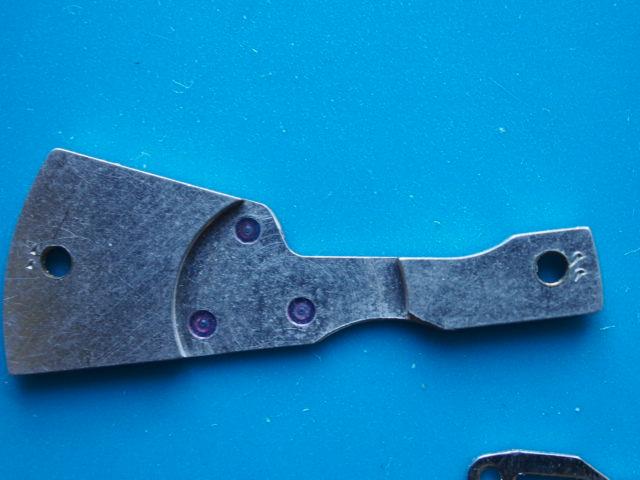
This is a rounding up tool (also known as topping tool). It will profile gear blanks that have been divided with appropriate slits or reduce and/or rectify the concentricity of existing wheels. It doesn't have the ability to divide, the cutters are designed to use the existing gear to index each toothspace. These were used a lot 120+ years ago to adjust gearing when making watches; before the "American system" took over watches were largely individually hand fitted. With a good set of cutters they are useful, in certain circumstances. I use mine a couple of times per year I guess.3 points
-
I have a video n my channel for hand winding a spring. its frowned at by many... but it works. as for new ones , no need to unwind. Just put over the barrel so it fits and use something flat to push it in. At least thats how I have done it anyway. Alignment is everything.3 points
-
A superb offer JD, both a scholar and a Gentleman. encouragement costs nothing as does a kind word. And Nora a If you never try anything you gain nothing . Like you a lot of years ago I changed balance staffs using a set of punches and a 36 hole stake and got good at it and glad i did it so when I use the staking tool I appreciate how good it is. So keep raising to the challenge3 points
-
I have done this number of times. First, years ago, it was a balance that I warped by tapping too hard when installing a staff. Then it was the occasional balance in pocket watches I was repairing that were “out of round” and also not flat. I got pretty good at Rounding and flattening balances. As well, I have had to flatten the arms in a staking set prior to bending the balance back to true. I have also adjusted the balance of the balance with the screws and washers. I have also undercut screws to adjust the weight. So I thought a video on this topic with some discussion on how not to screw it up in the first place, followed by how to fix it. And I have fixed a few. Sent from my iPhone using Tapatalk Pro3 points
-
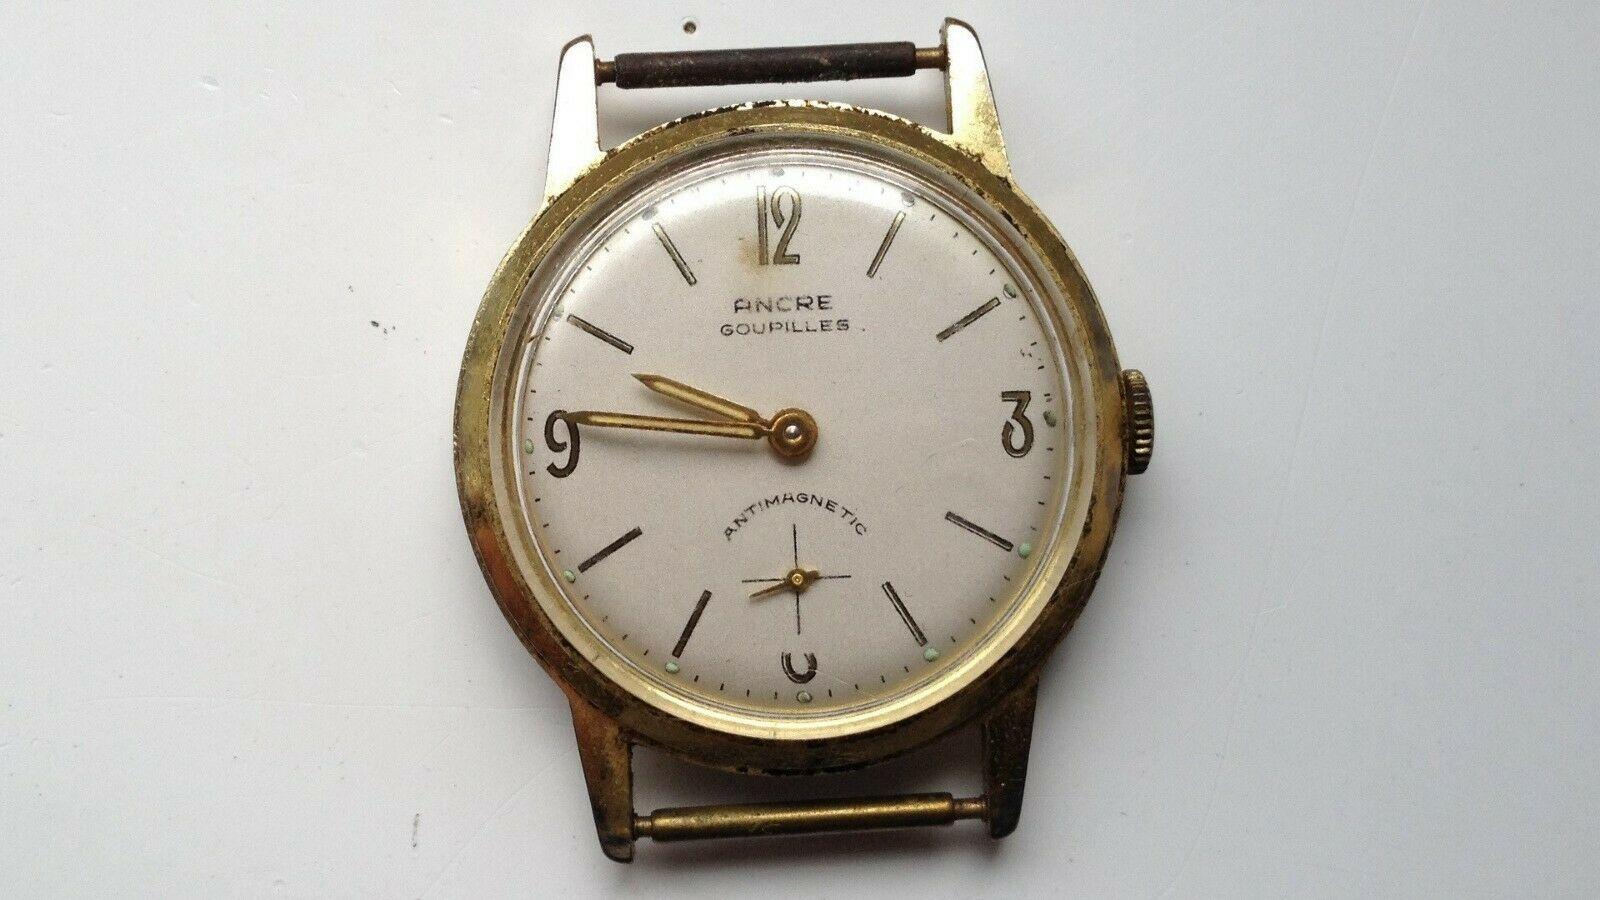
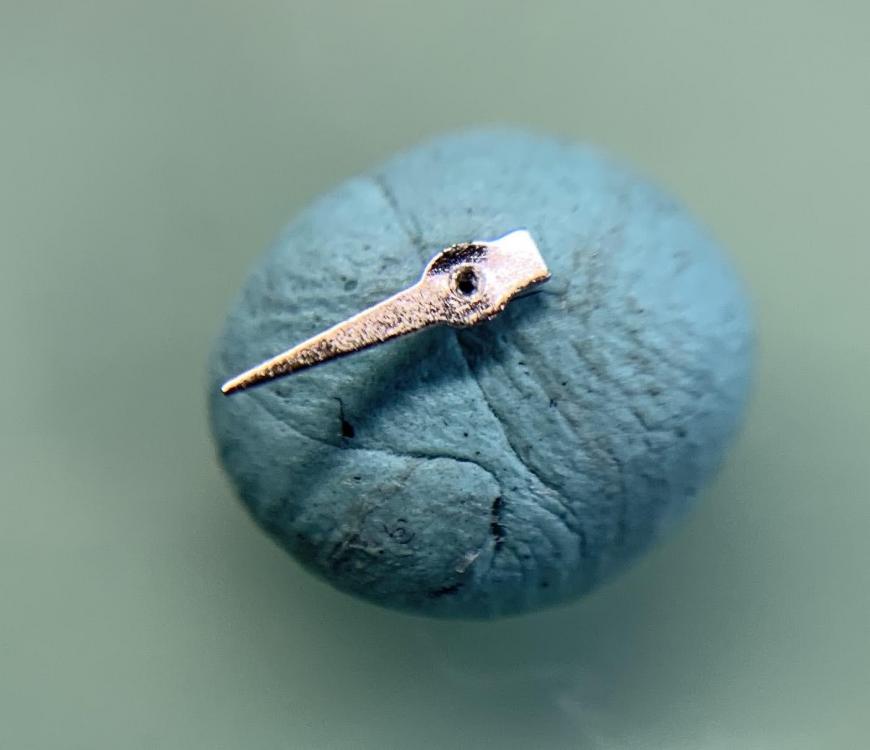
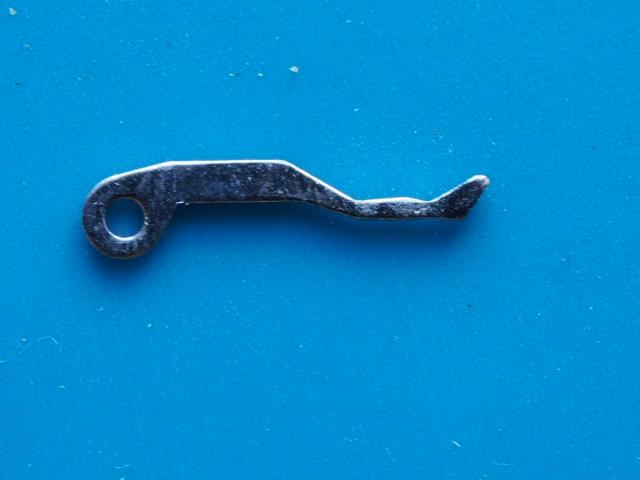
So Just a little update, I reassembled the keyless works and now the stem works as it should. I then rebuild all back to dial, that said I will now have to disassemble again due to @CaptCalvin wise advise on spotting why the hour counter continually runs. All practice I guess but at least dial side is straighforward enough. So I then turned my attention to the hour counting sub hand. I am still getting to grips with my staking set and in all honesty I dont really know how to use it for what its designed for. I;d love to change a staff one day but for now it was put into action for this tiny hand tube fitting. Fortunately the tube has a flange / shoulder so I was able to find a suitable hole on the staking plate that the tube would sit on this shoulder. I placed the hand on the top to line up and gently pushed on a bit just so it would hold the hand. I then flipped it over and put the hand tube up in a little plastic container, found a stake with a suitable hole to fit over the tube but only rest on the shoulder. a few hand pushes to the stake and it was back on much to my relief! Pretty small parts I have to say. I did not use any glue so I am hoping that friction will be enough to told it. Time will tell. The tail end of the hand looks bent downwards, the temptation is there to try and straighten that but I dont want the two separating so for now I will leave it as is. After a bath of nail varnish remover I then peeled off the remaining paint and then washed it in alcohol ready for painting. At this point I can now notice how damaged it is and the cause for the separation. I still insist this was not by my hand given the marks on the subdial where someone has not used any protection. The hand at its sides are slightly bent upwards. Suggesting some force, I did have to use a bit to get it off but using hand levers and rocking side to side I would not expect to see this type of damage. My experience tells me that damage is from a presto type tool ( I could be wrong) So onward to the painting. I have painted quite a few hands and always do it under a microscope where generally it looks terrible but to the naked eye pretty good. I used enamel (Humbrol) white paint, mixed with a little thinners. I apply with a green oiler and let the paint pool off the oiler onto the hand, with enough paint it will circle the hole without filling it. the long part of the hand can be done in a single stroke. I am pleased with the outcome however under the scope it has dried to a rough texture rather than smooth. Really puzzled why it would do this. So its now been 24 hours and by tonight 36, which should be enough time for the paint to have hardened enough to withstand fitting. On Seiko 6139's I have tended to paint the hand insitu as it then does not mark it when you fit. So I may still have to re-do this hand if it does not fit well. Wish me luck, not fitted hands on one of these so pressing and holding the flyback in one hand and fitting in the other is going to be fun. Fortunately for me this has an acrylic crystal that just falls out of the case so I will re-case and fit through the top to make reset easier to hold in. Still nervous, no idea why.... Thanks for you help so far guys. Brilliant stuff.
.thumb.jpg.3d5dbb5543f5f6c0031997eb1b9b9564.jpg)
.thumb.jpg.fa276c5e1aea404d7c84ce994d2baf80.jpg)
.thumb.jpg.f866a3f50429f30b13e26e88f2be58a9.jpg) 2 points
2 points -
So. Would you like me to make a video on how to straighten a Warped or Fouled balance using the proper calipers; etc? Sent from my iPhone using Tapatalk Pro2 points
-
It rather depends on what is worn. If you think about it, with the watch in new condition, then all of the bearing surfaces meet as they should, however as soon as things start to wear, then it introduces some slop in to the machine. This slop may be more of a problem with the movement in some positions than it is in others. If we take a simple example, the balance, and we reduce it to two cylindrical bearings (the top and bottom "holes"), two cylindrical surfaces (the pins in those bearings) and two end stones to stop the balance from moving up and down (end shake). If one of the cylinders wears to an oval, then the pin in that bearing can move around in ways that it is not designed to. If this bearing is uppermost, then it will have a different effect from if it is lower most. Similarly if the "pins" wear. Say the top one wears and gets shorter, then with pin that uppermost, the effect may be minor, but flip the watch over, and the whole balance will drop slightly, due to the shortened pin. This may be sufficient to actually stop the watch, or it may simply make it run erratically, or lower the amplitude. It might cause the hairspring to snag, or it may cause the top pin to drop completely out of its bearing depending on how much wear there is. You need to think of all of the components in the watch as having tolerances, much like any other machine. The difference here is that some of those tolerances are much finer than they would be in say something like a sewing machine or a car gearbox. If the components wear to the point that they are no longer within their acceptable levels of tolerance, then things will start to move around in ways that affect performance. Gear teeth may no longer mesh correctly. The hairspring may no longer stay within its designed parameters, and end up touching other parts or itself. Bearing surfaces may not touch, or may lock up and so forth. Magnification and good lighting is key to observing these things. Initially I suggest you need a good loupe (maybe get a x3 and x5 to start with) moving on to a decent microscope (say 10x to 40x). These will help immensely with observing what is going on, and with checking for dirt and wear. Search this forum for tips on magnification and cleaning, there is a lot of very useful information here.2 points
-
A stereo microscope is incredibly useful, I did not know that before I got mine. Check this post out: pivot holes I took me months to figure out whats wrong and the microscope helped me with this. I must say that my lack of experience was also responsible here, probably I could have noticed this with just using a lupe and having a good look at the pivot holes. As Andy said check the pivot holes and all the pivots too. I had a balance pivot with a mushroom effect, it was so bad that i had to use some kind of a force to pull the pivot out from the pivot hole and the watch actually run in certain positions.2 points
-
Just testing my contraption with some random stuff in my clinic. Using plain water only. Notice the huge vortex. Some anti-vortex baffles will definitely be necessary. Everything comes out magnetized but the good news is that the magnetic stirrer itself can be used to demagnetize the items. 20200722_100602.mp42 points
-
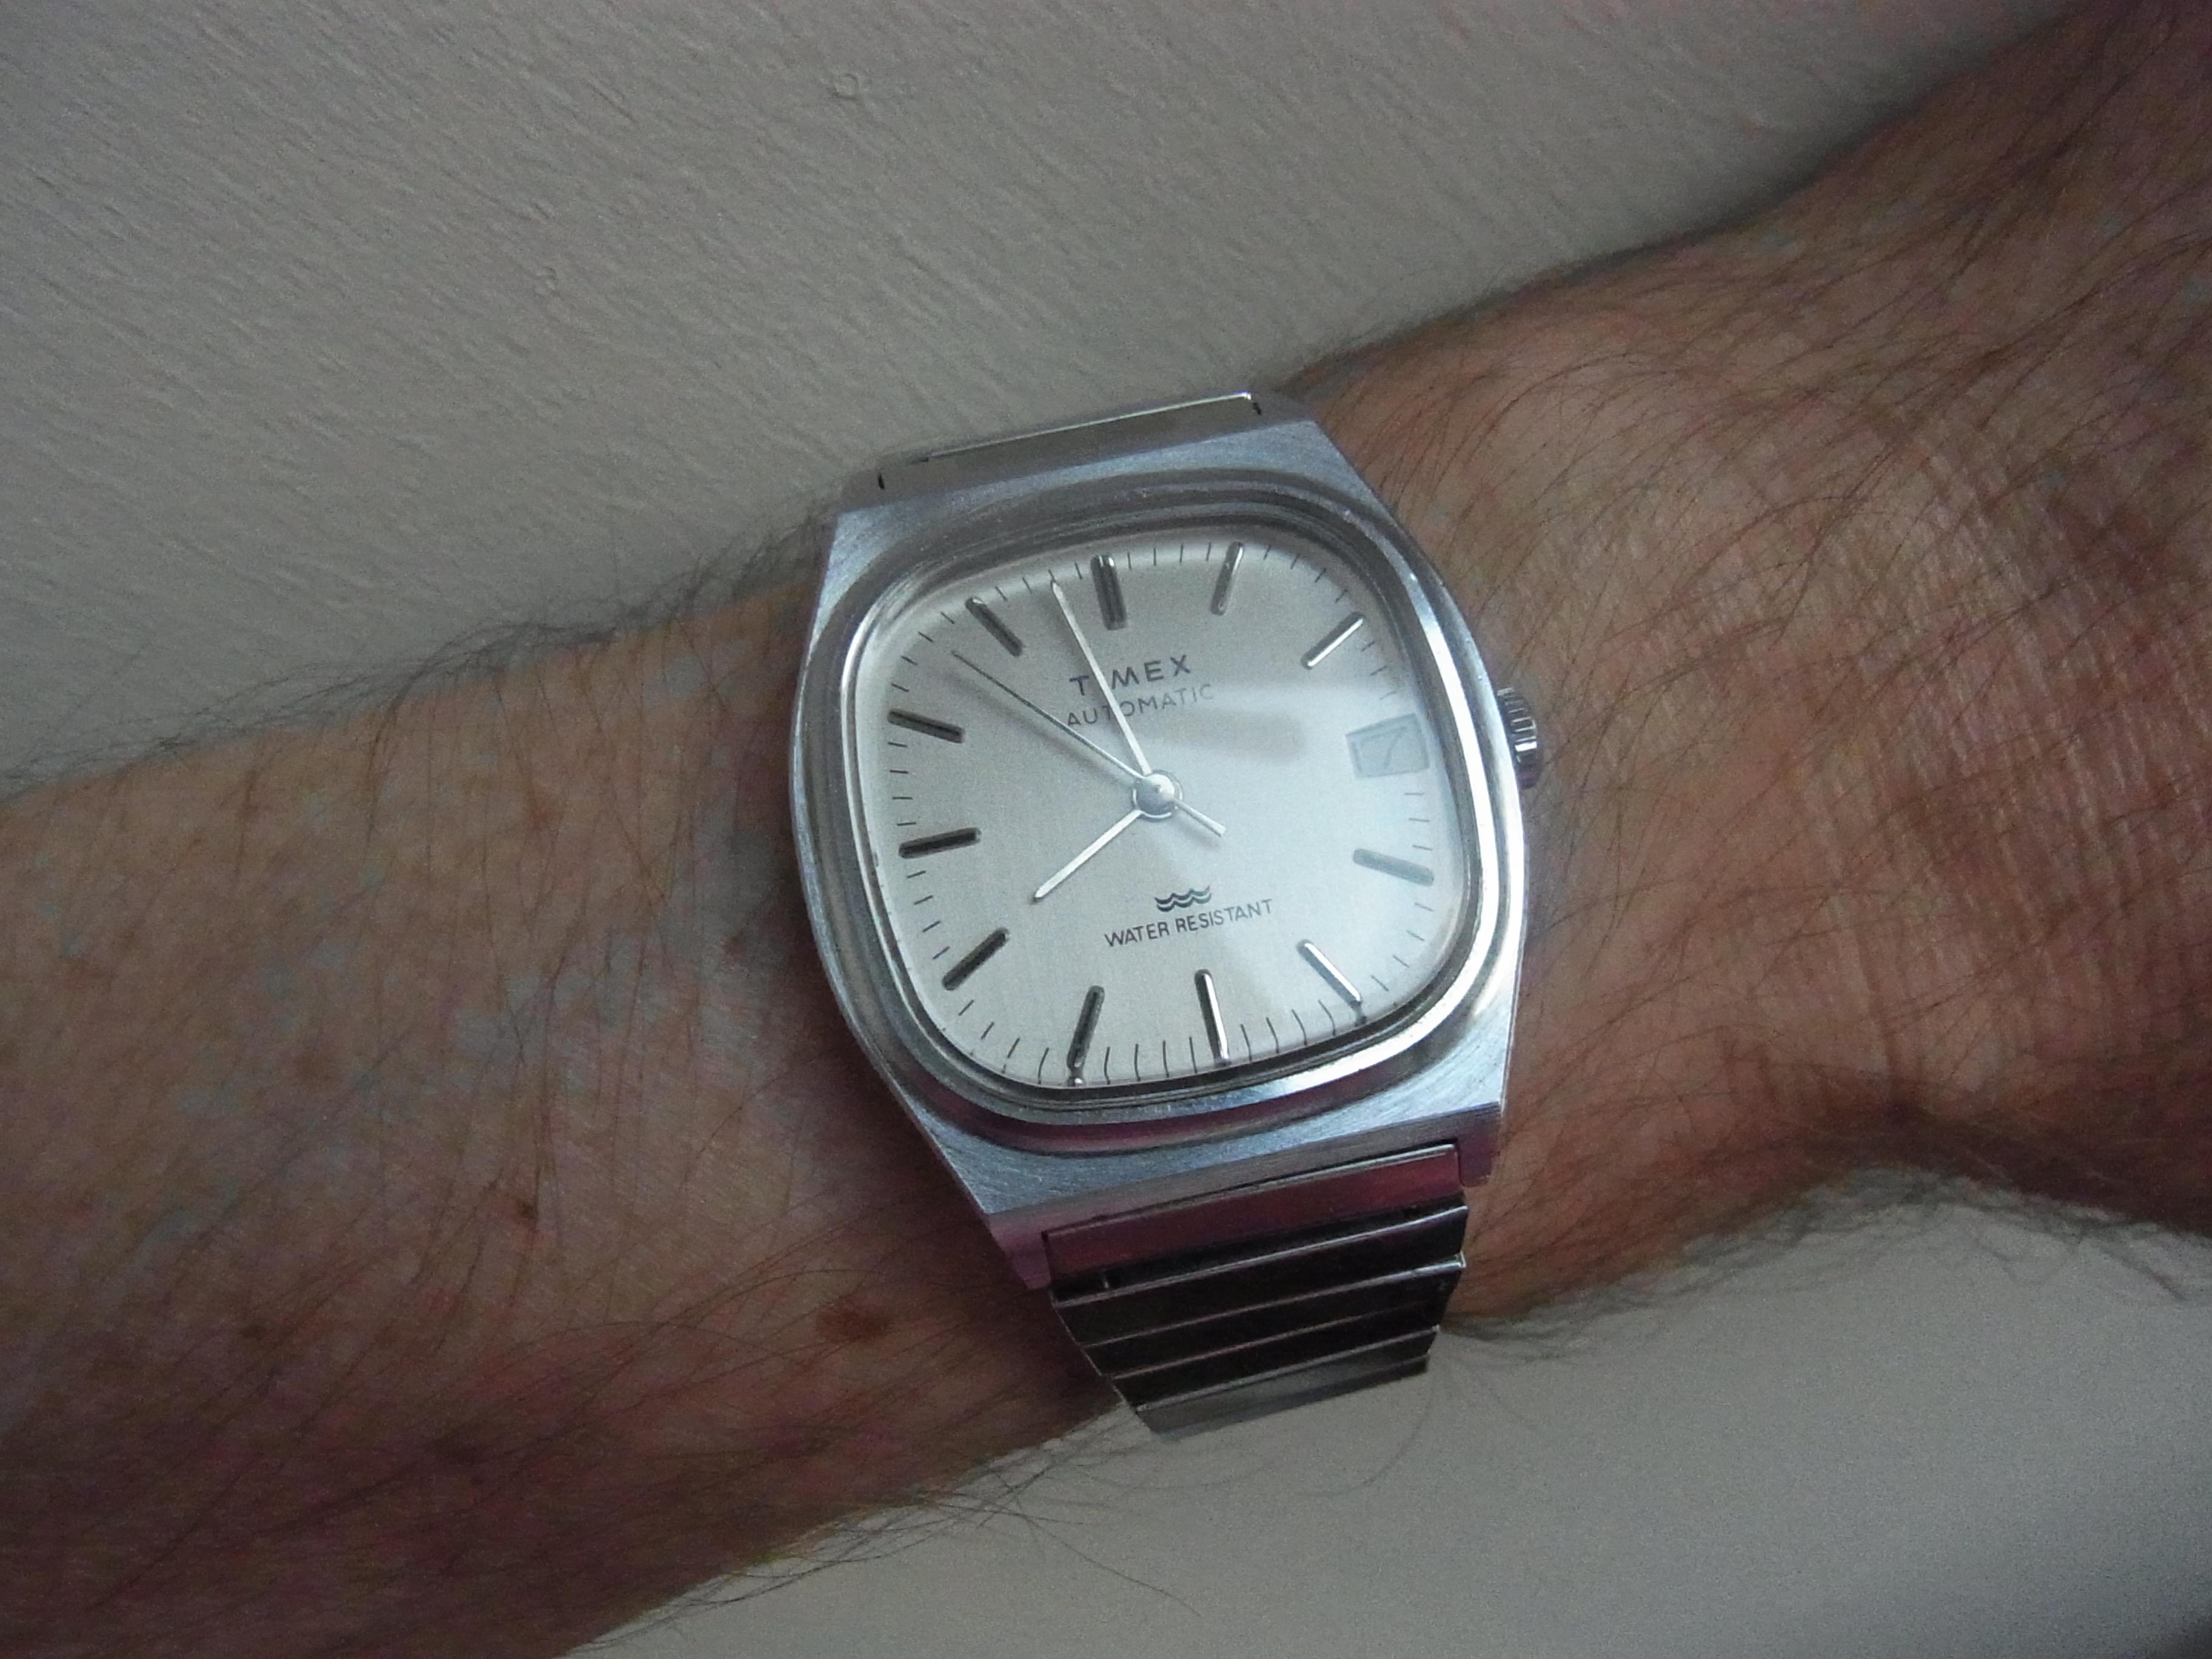
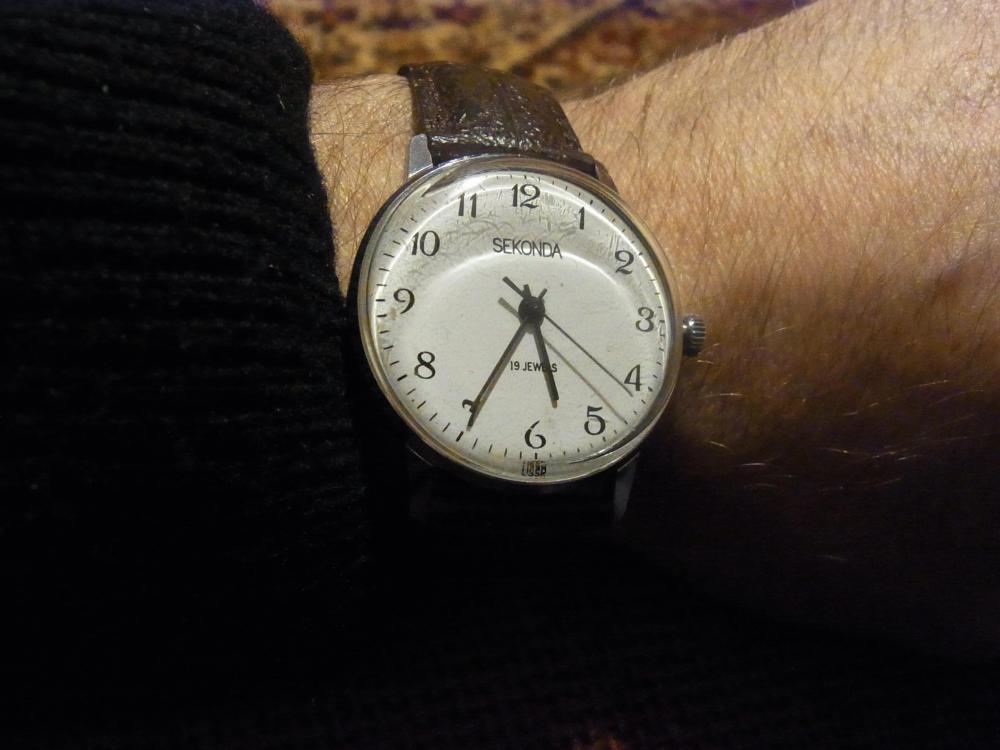
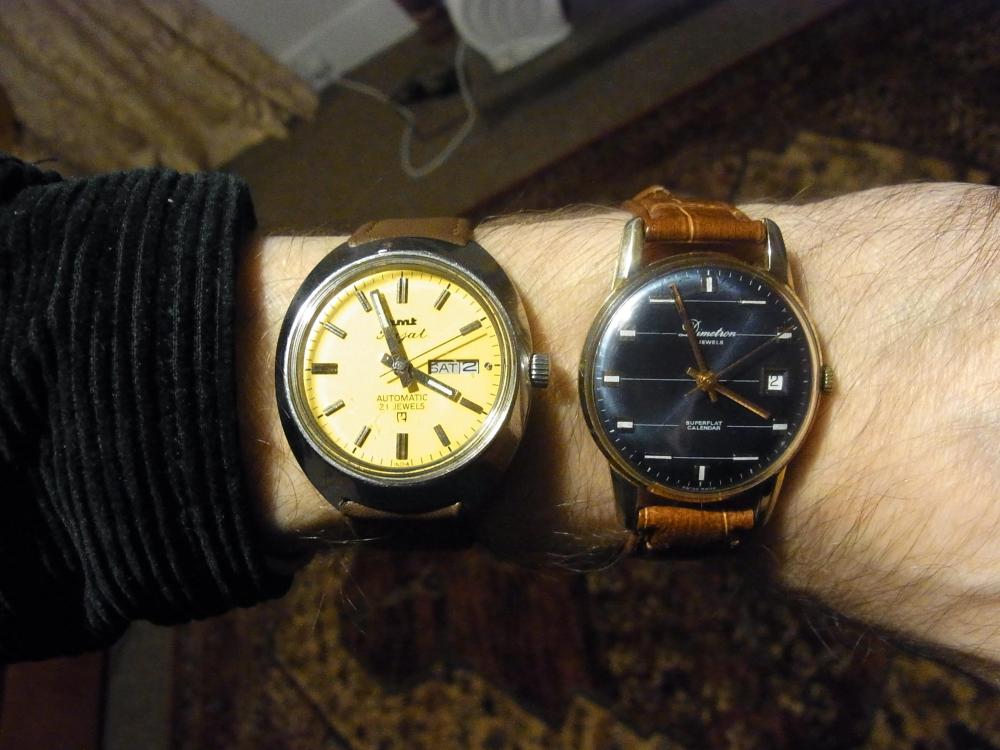
Hi I have a new 40mmHamilton King Khaki quartz coming tomorrow (Or rather, Later today!) I borrowed this pic from their website! It's actually on a mid brown leather strap rather than this dark one! (At least I think it is, The other pics have gone now!!) Can't wait for the knock on the door!! John2 points
-
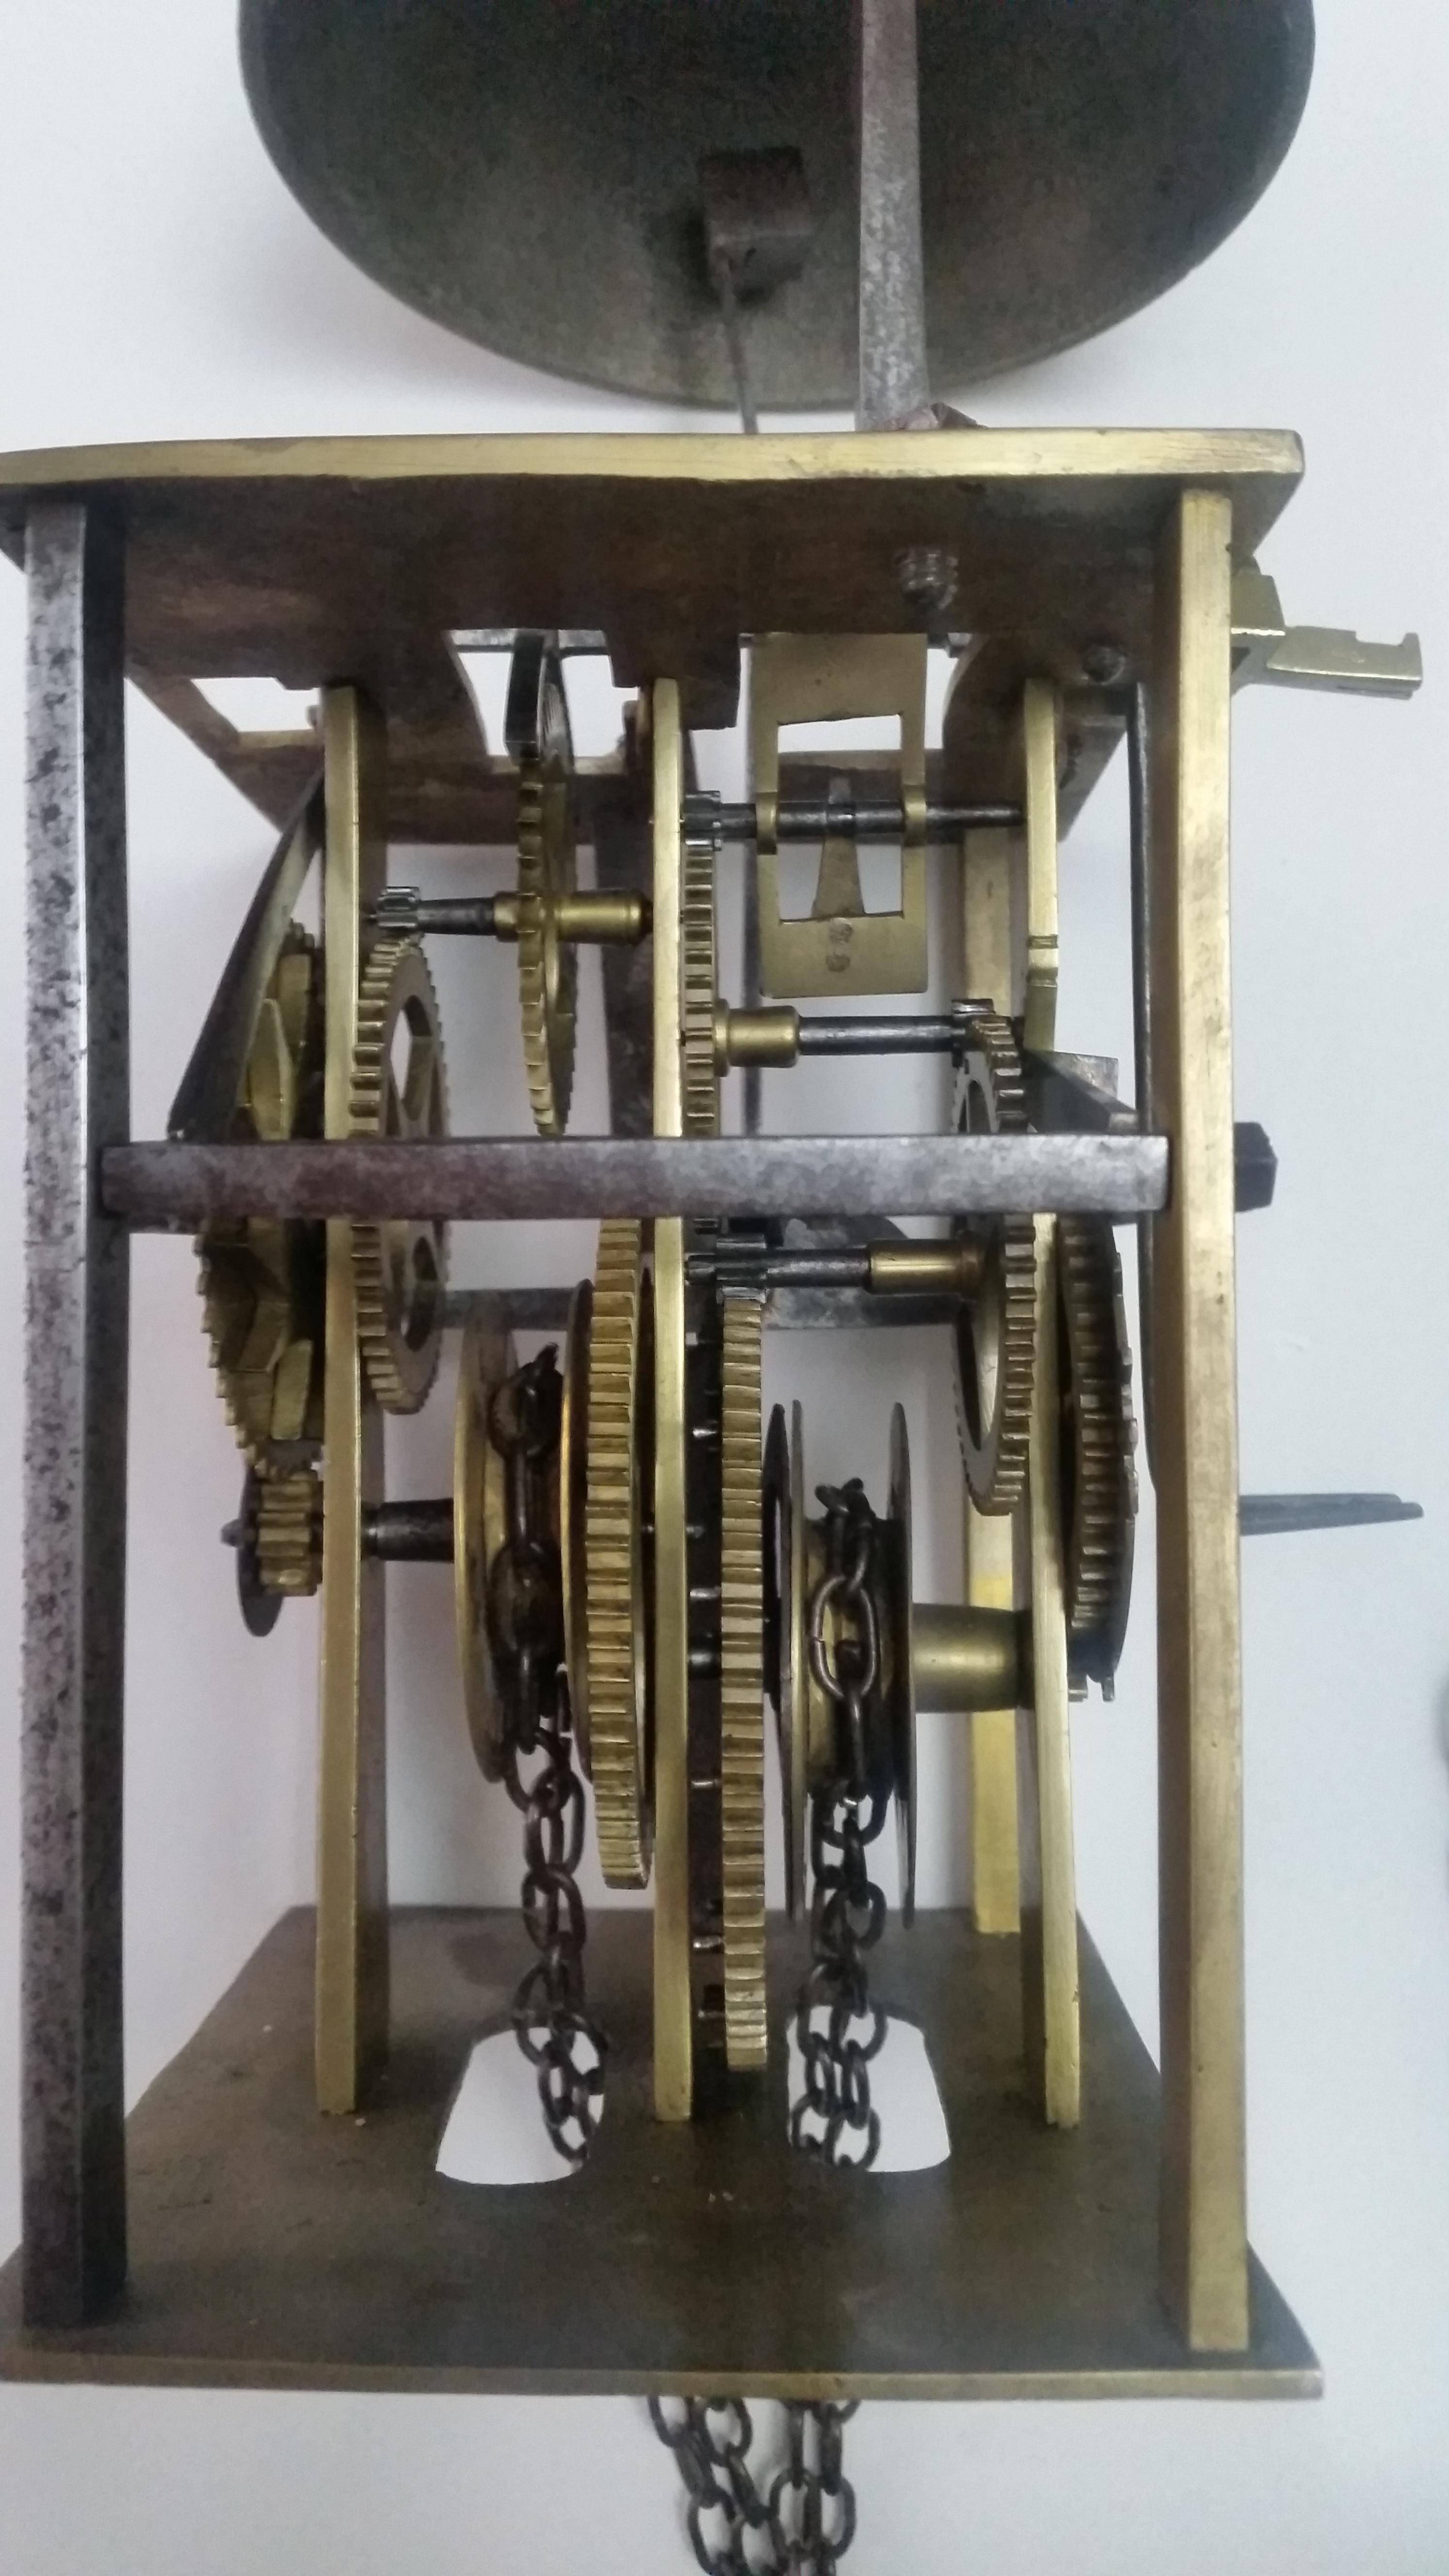
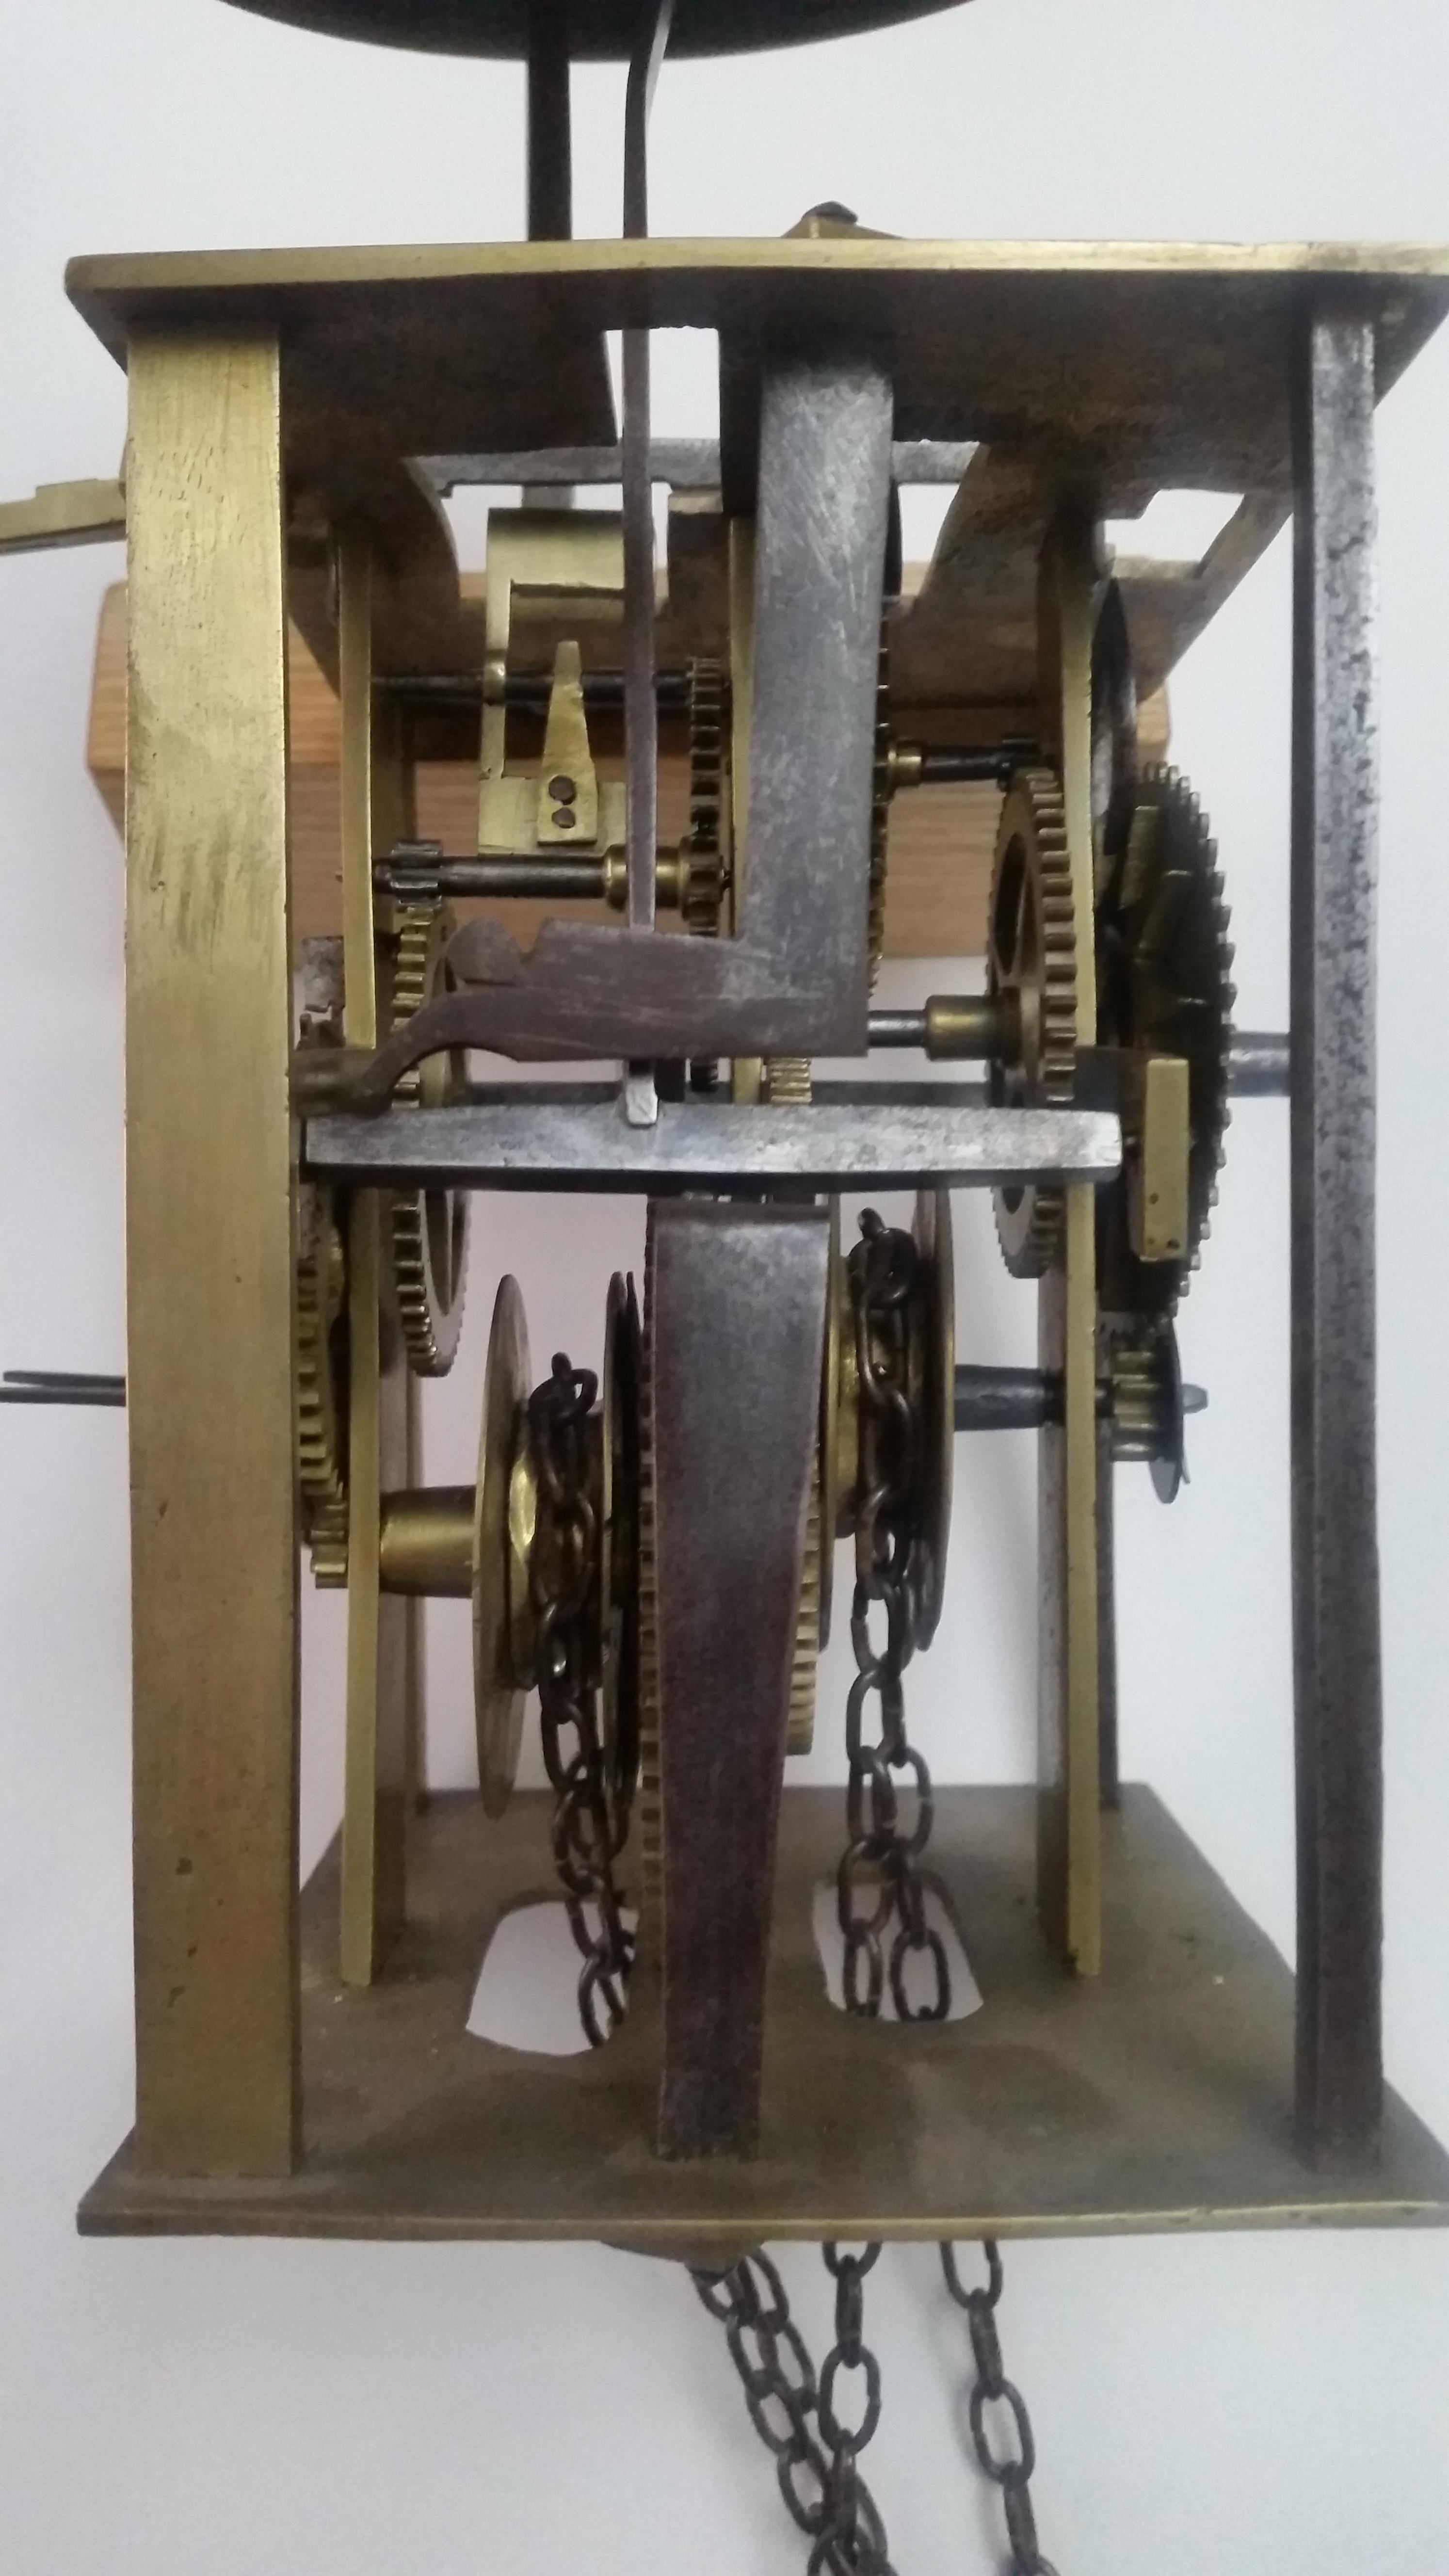
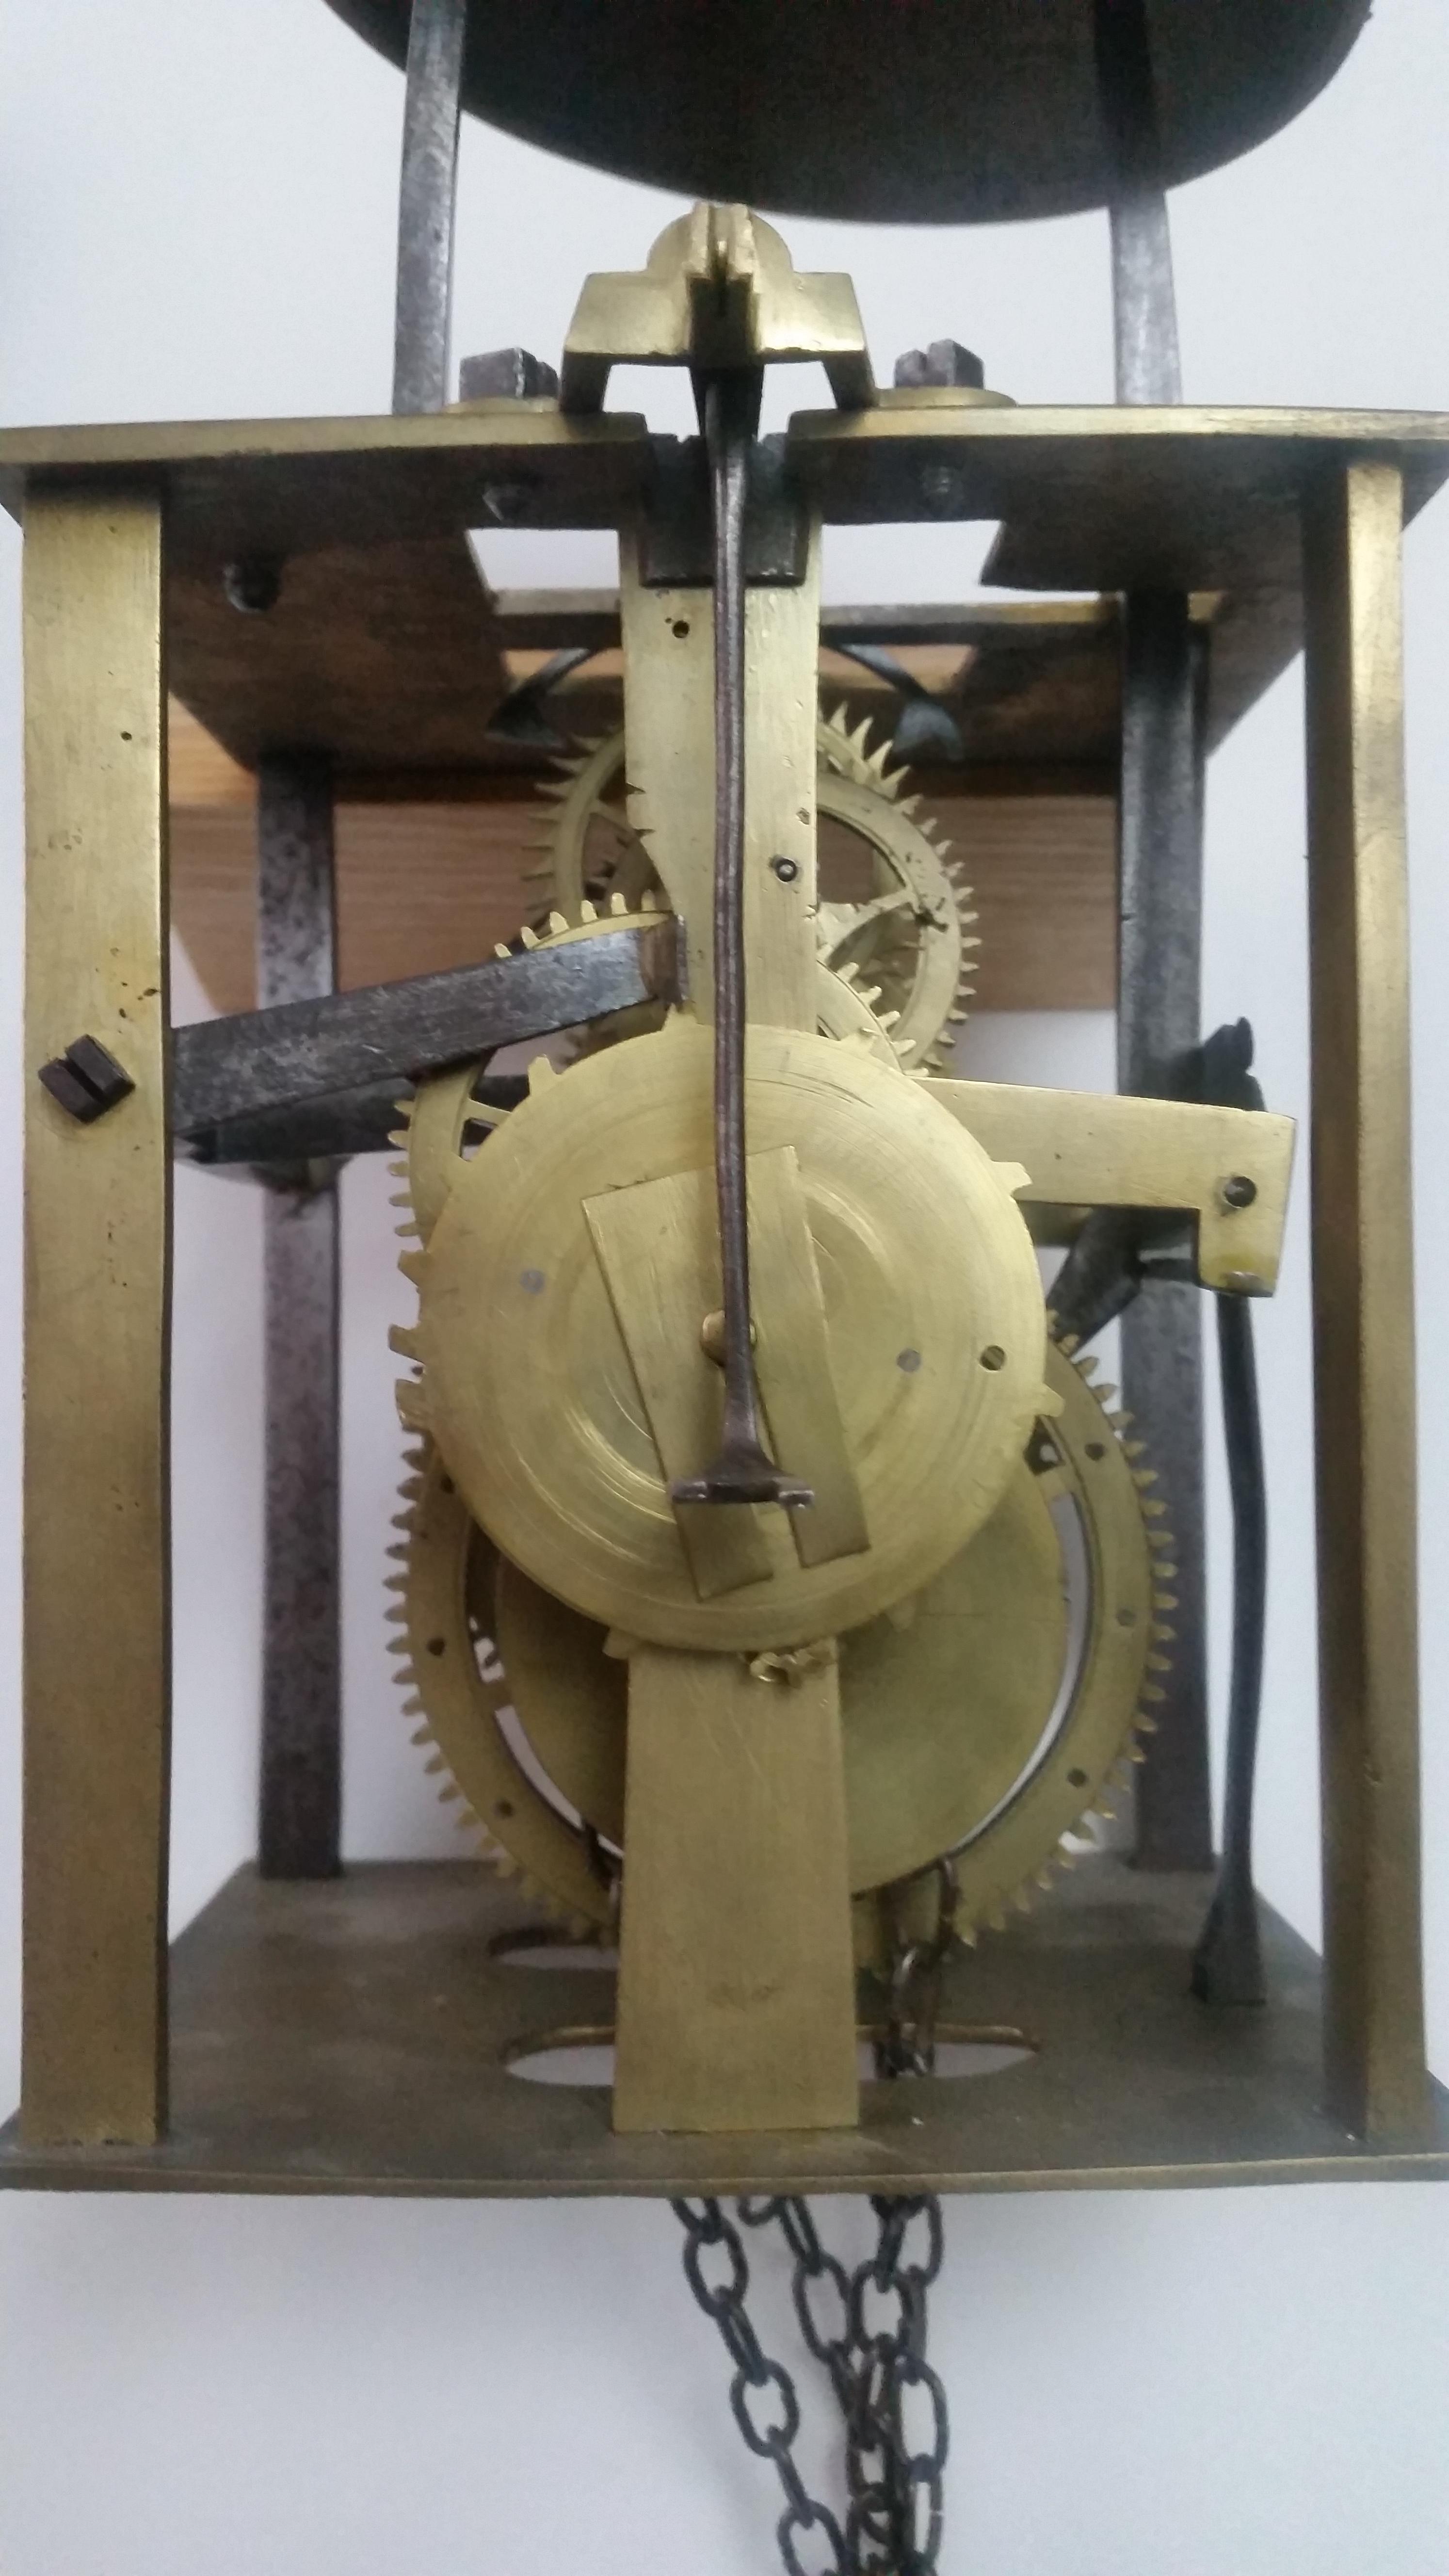
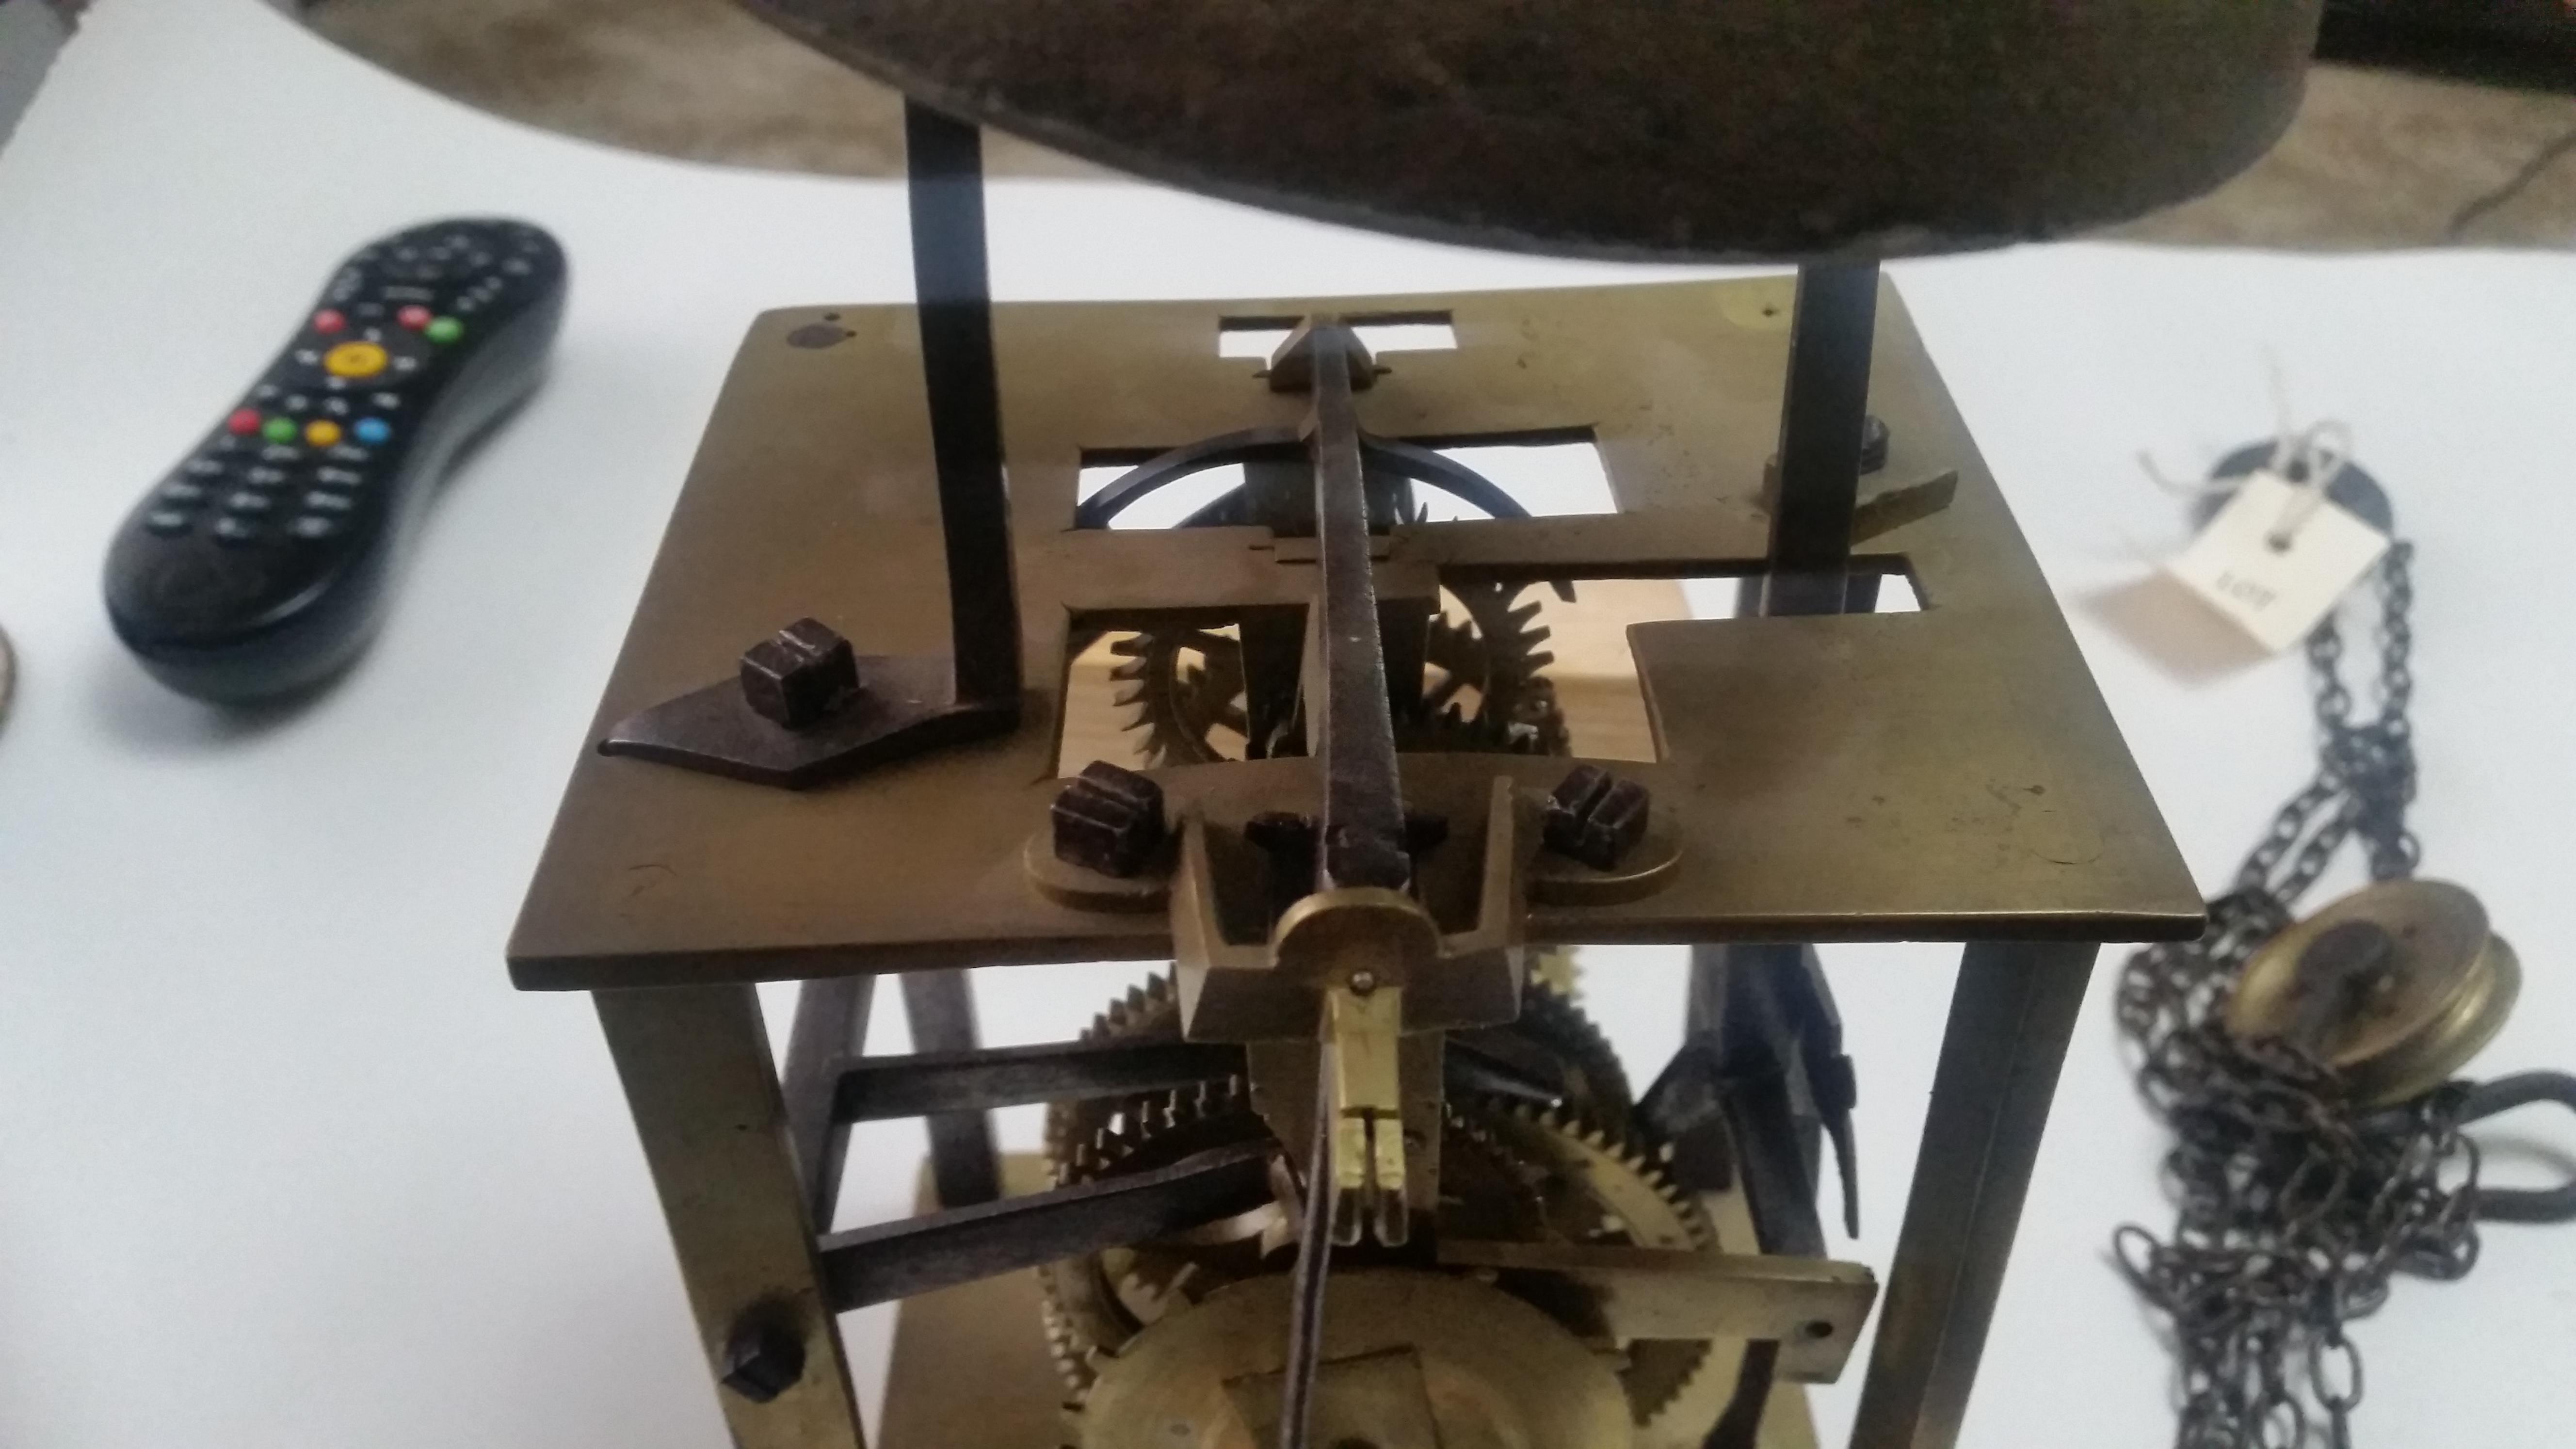
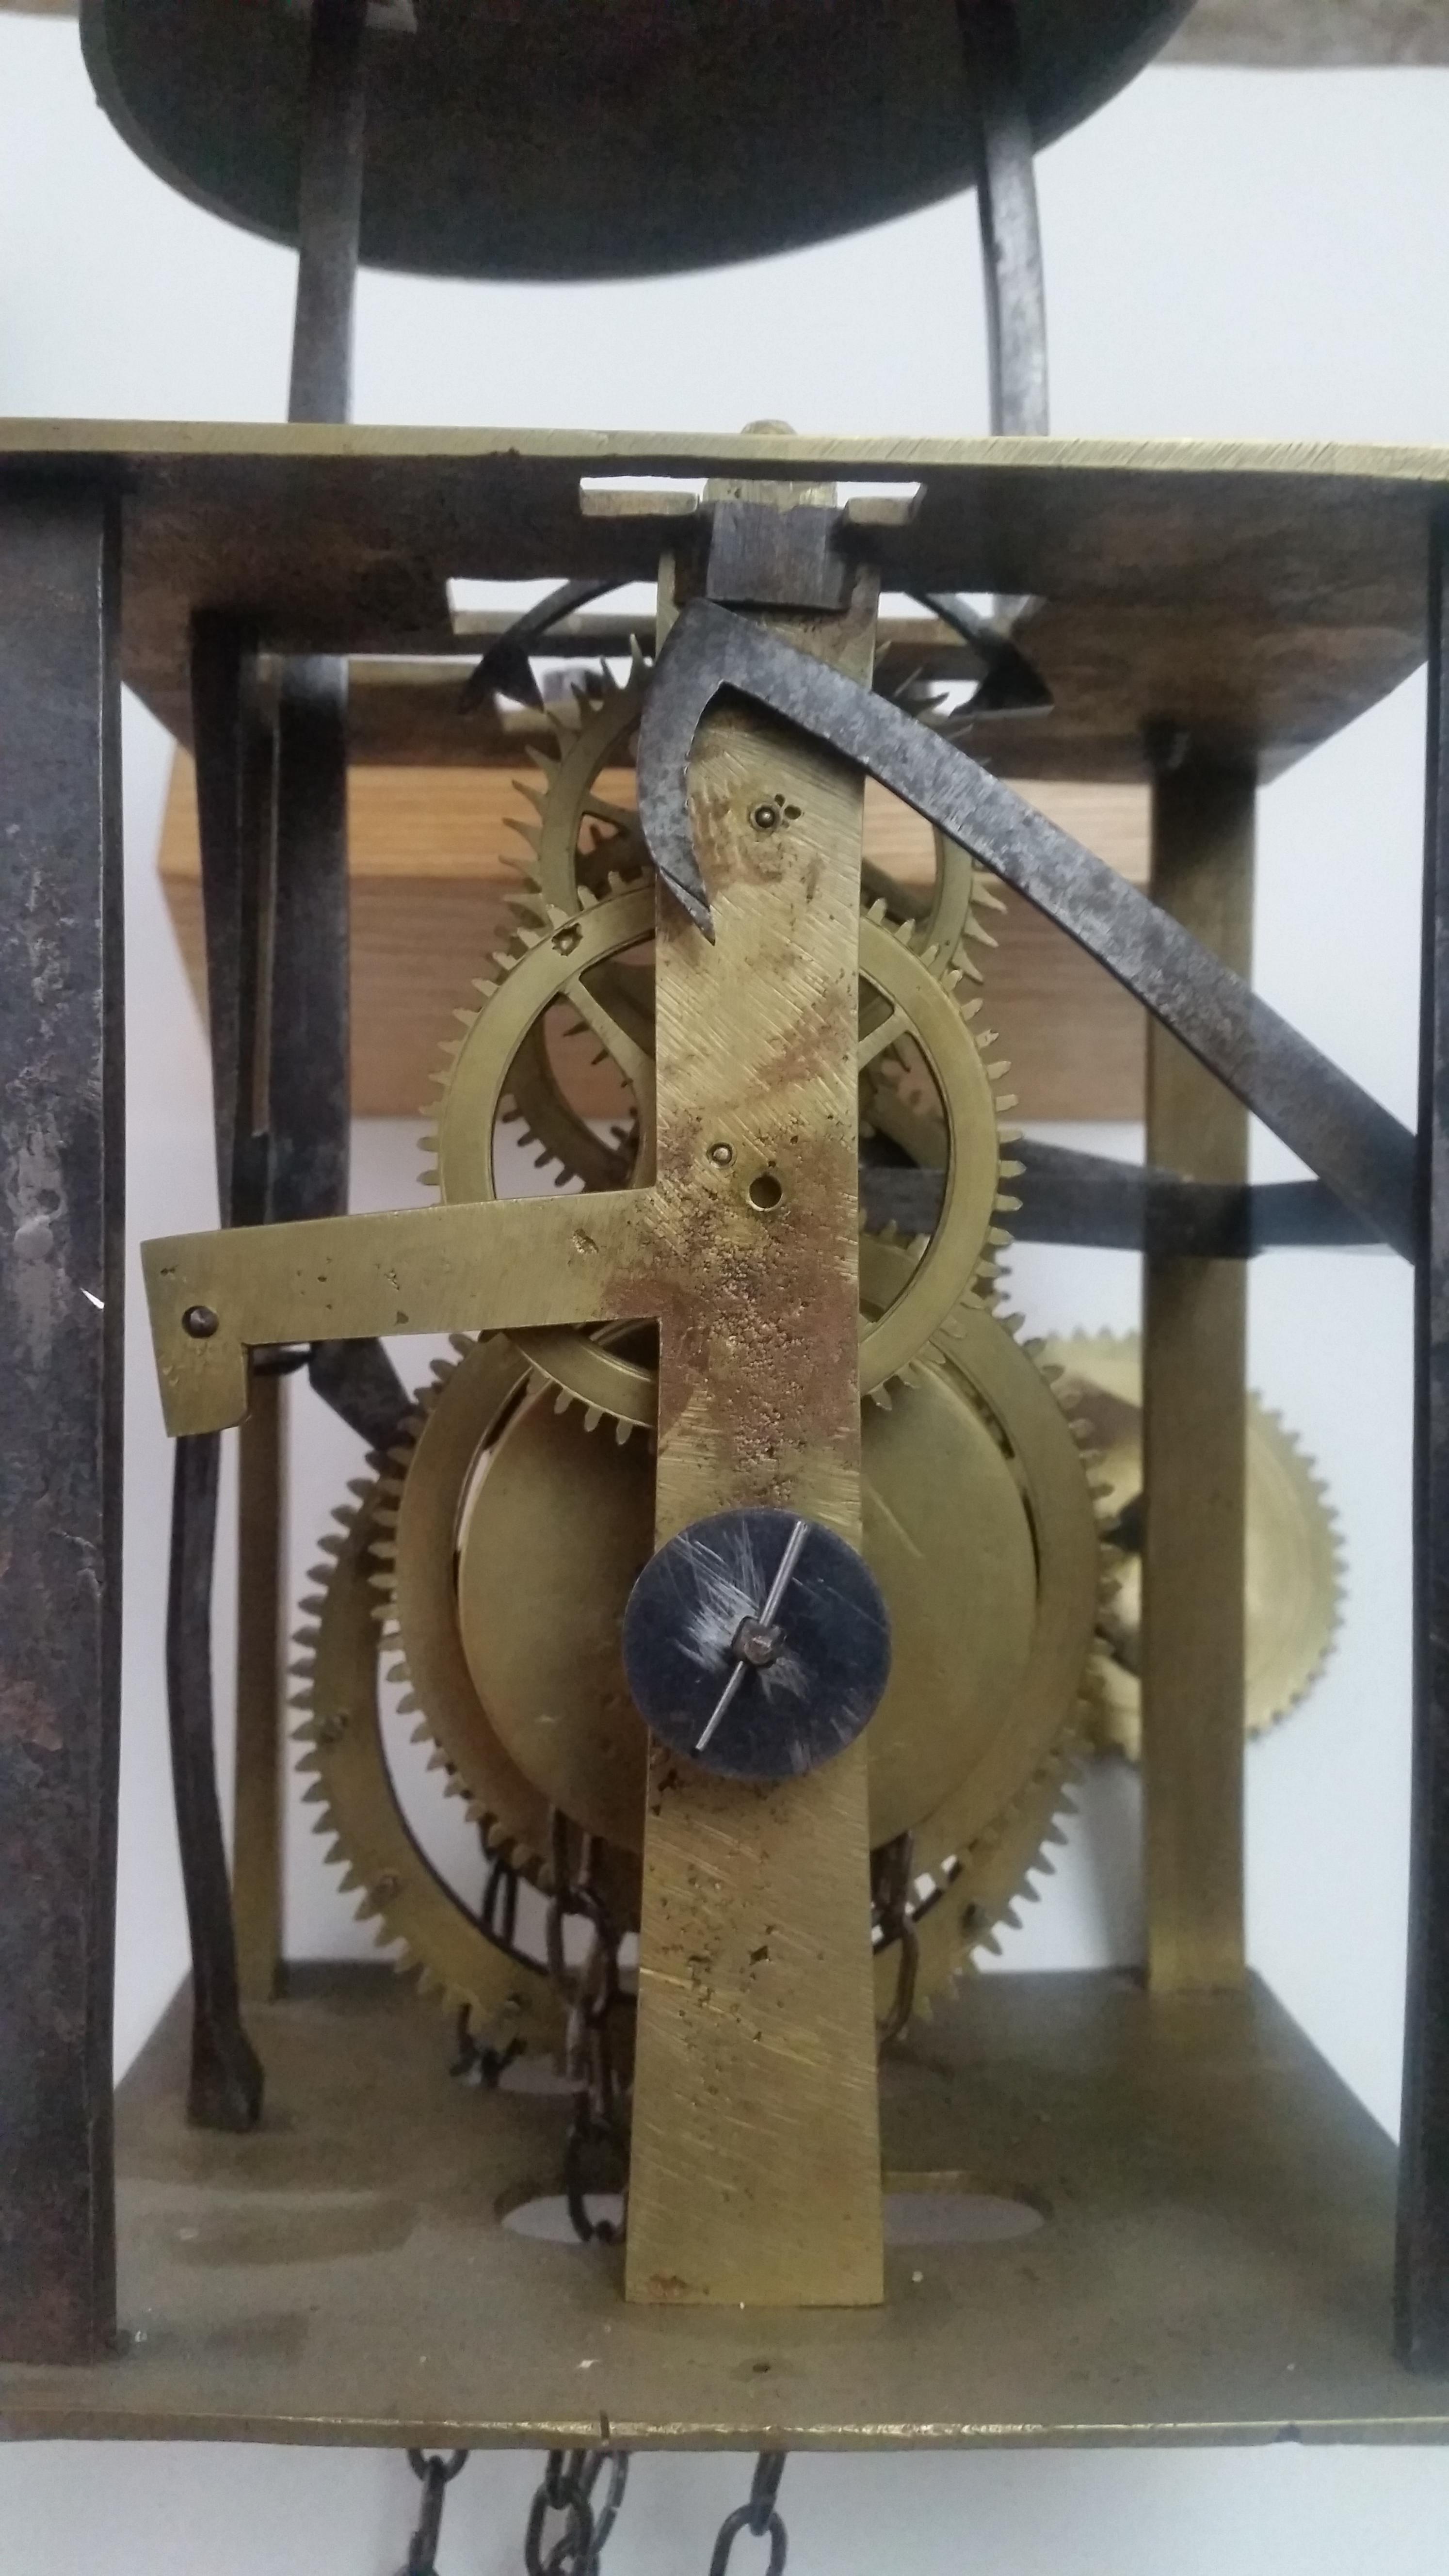
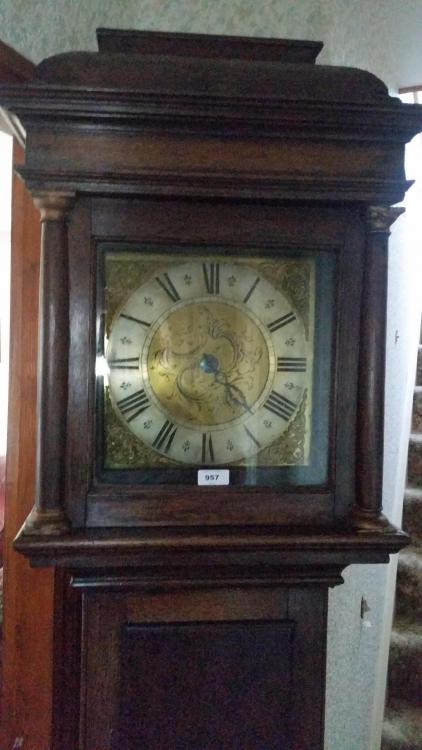
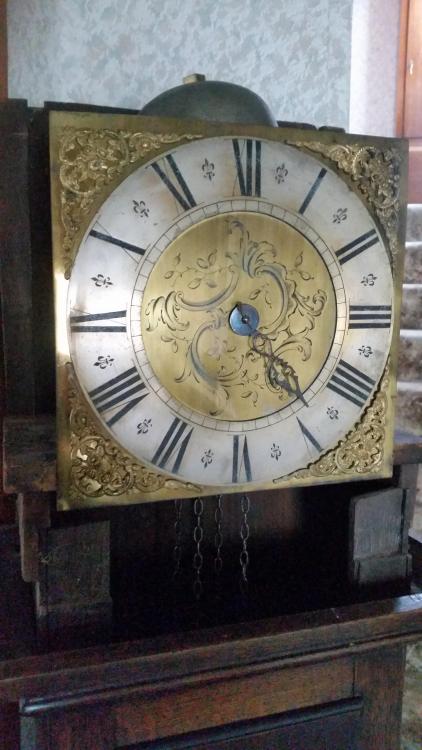
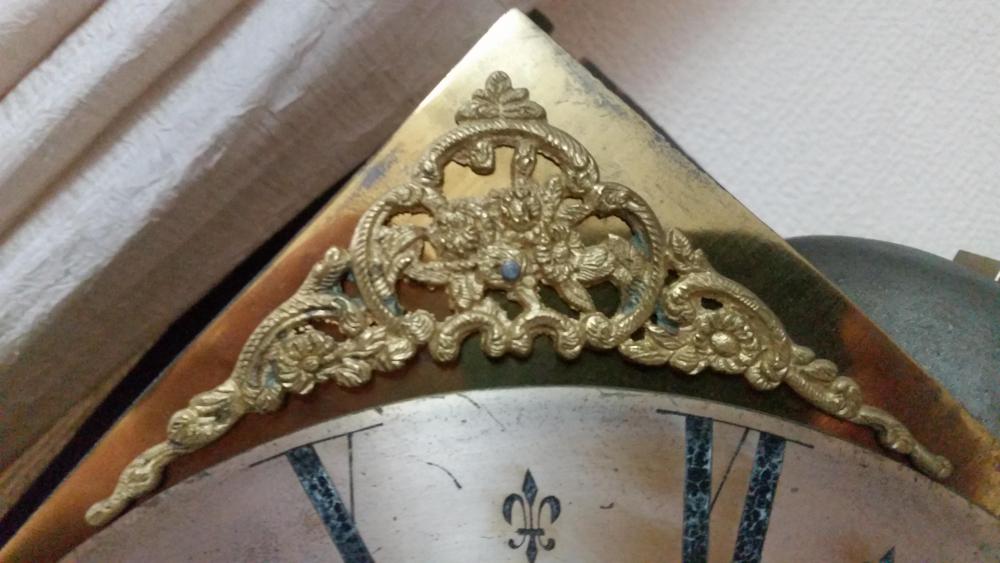
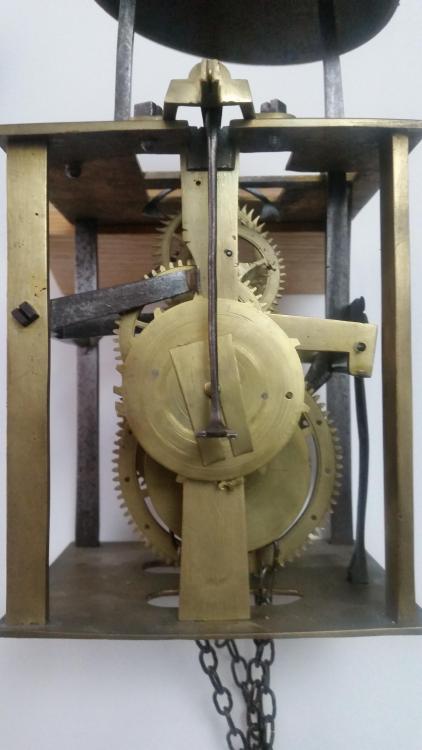
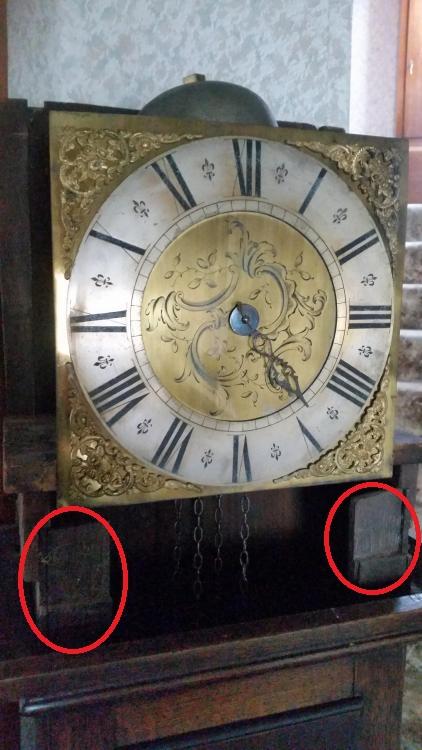
Hi All Acquired this longcase clock at auction last week, i am wondering if anyone could give an idea of date and maybe value. The case needs a lot of work, glue joints are failing everywhere, don't think the case is original (auction description), the dial also needs attention. The movement, all the bearing holes need bushing and the pallets are badly worn that said it does run and keeps decent time. Look foward to any comments Marty


 1 point
 -
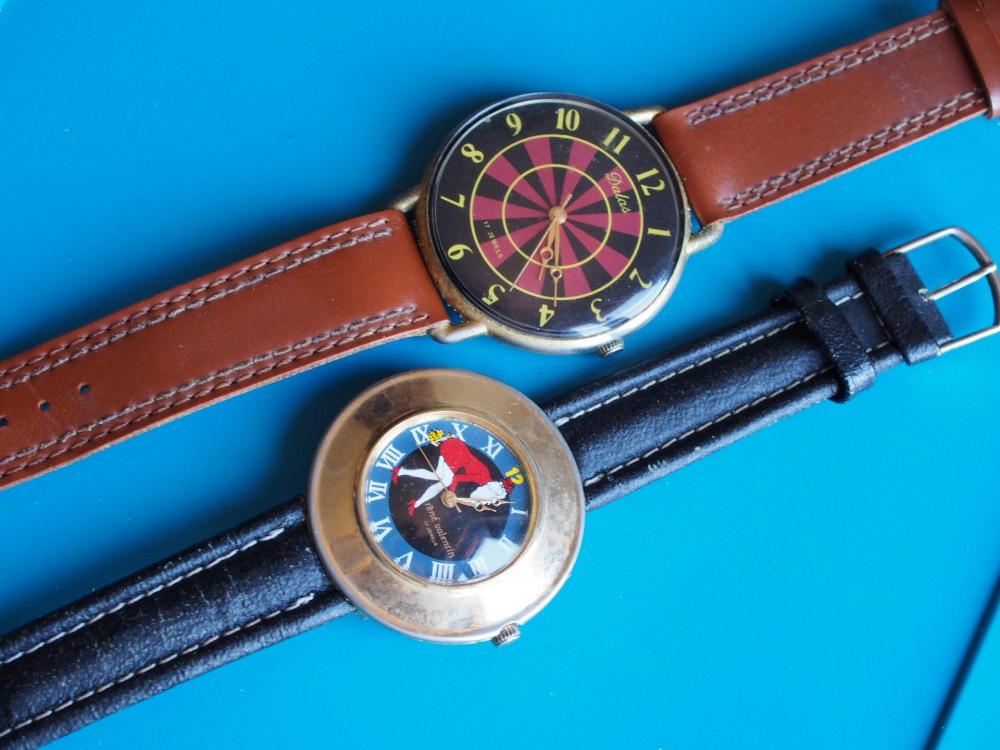
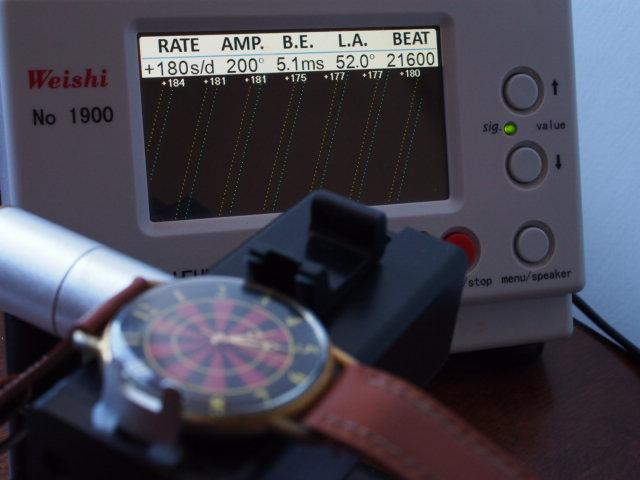
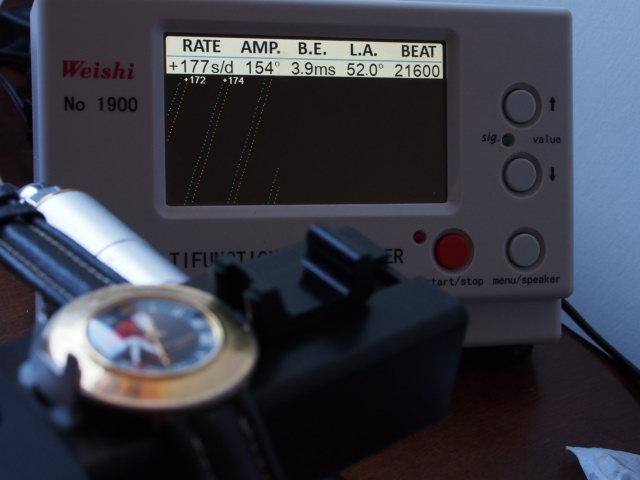
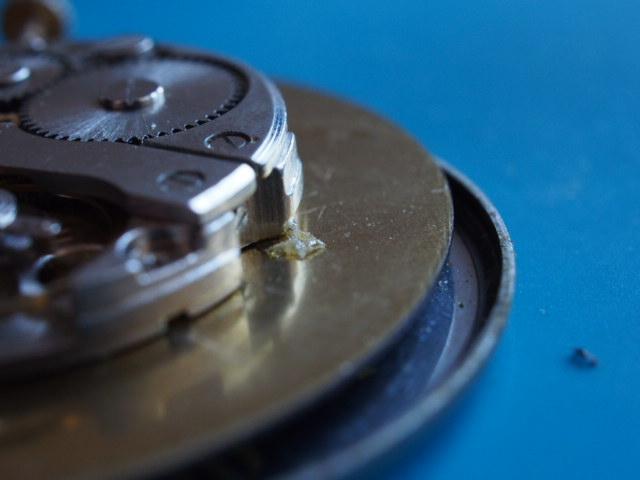
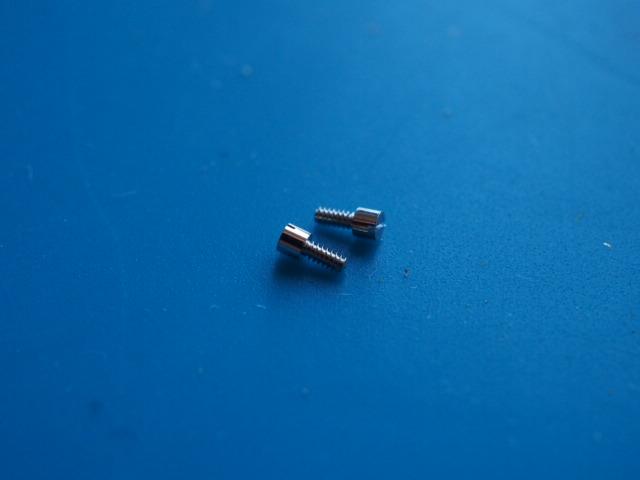
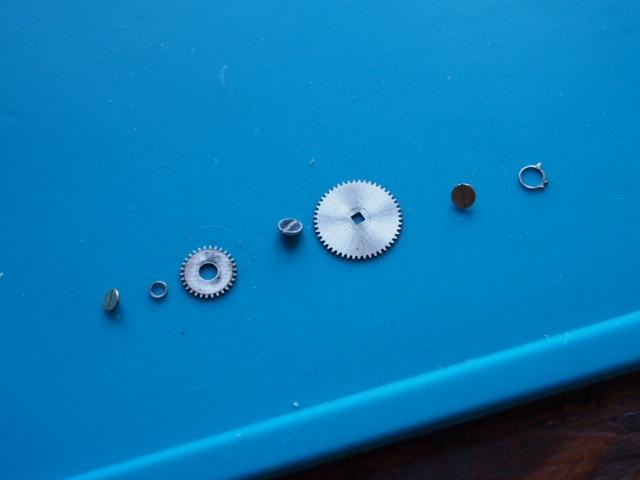
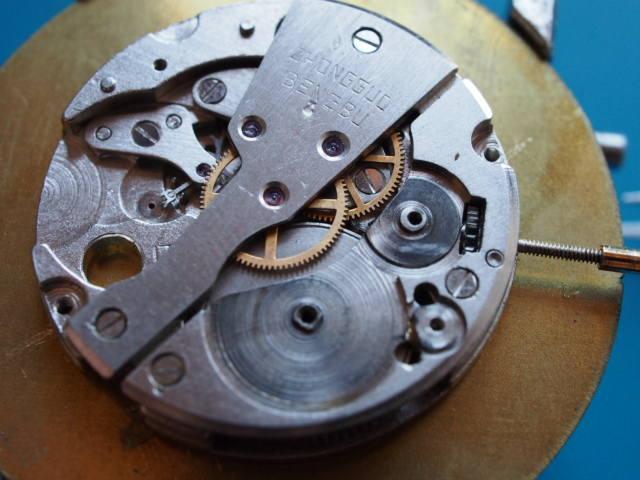
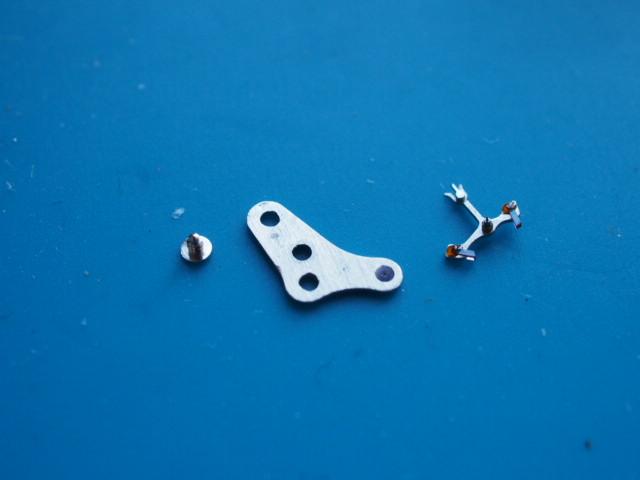
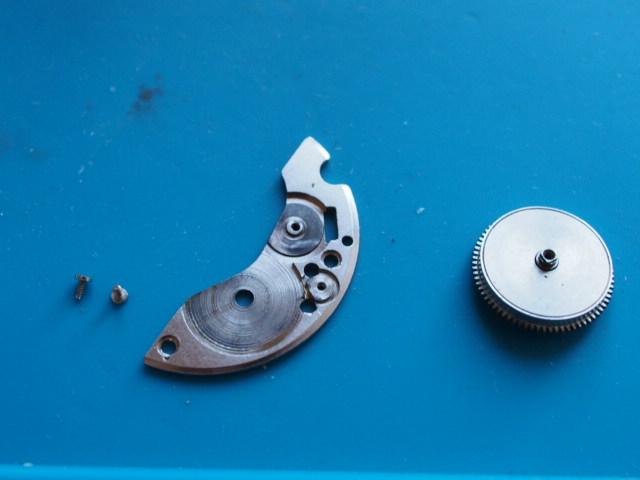
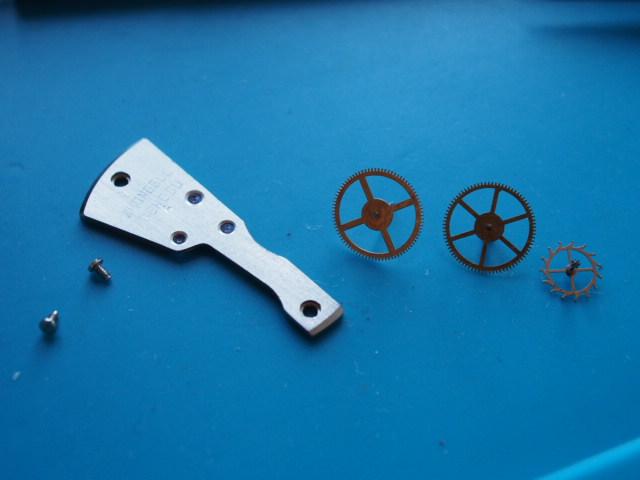
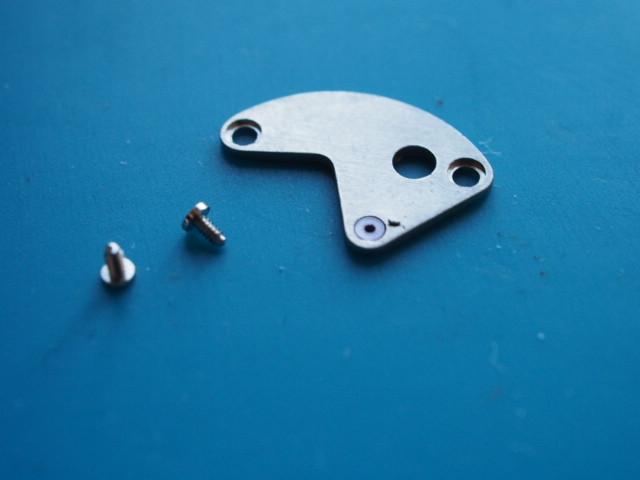
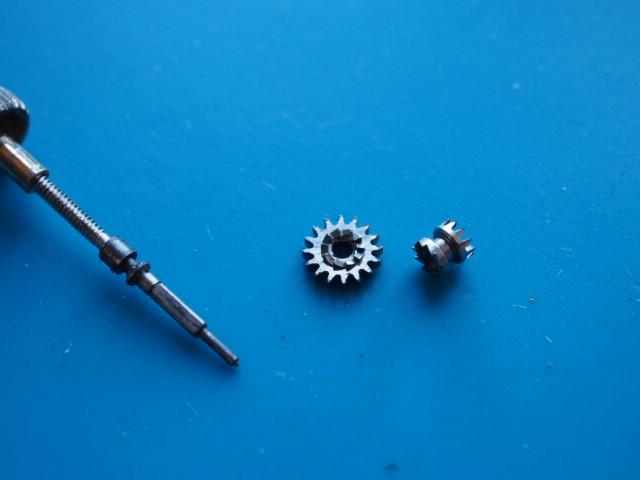
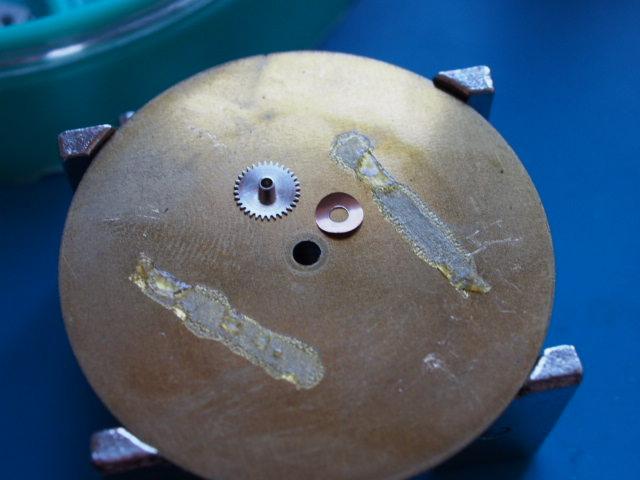
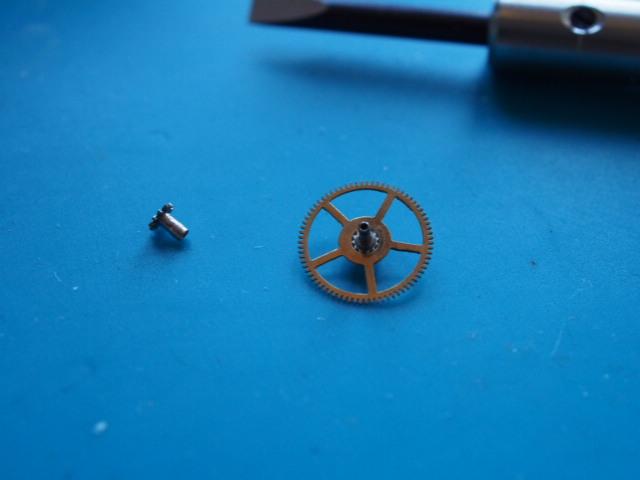
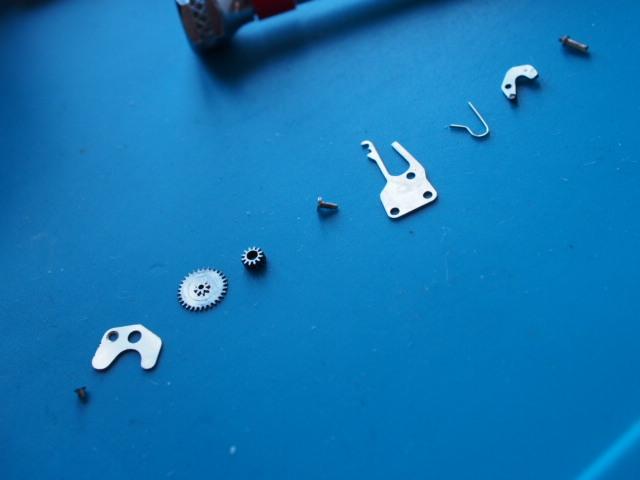
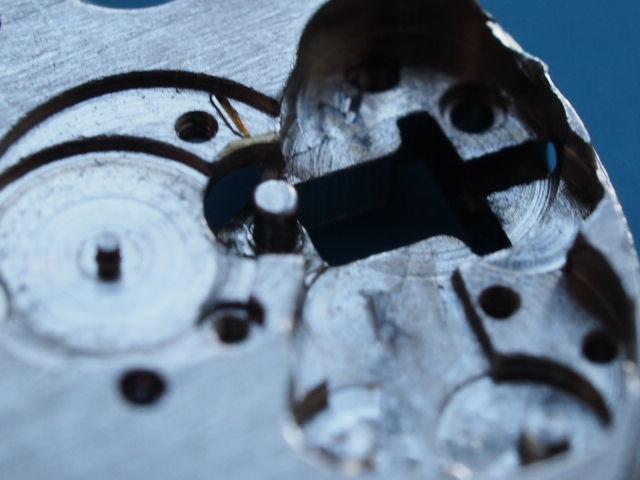
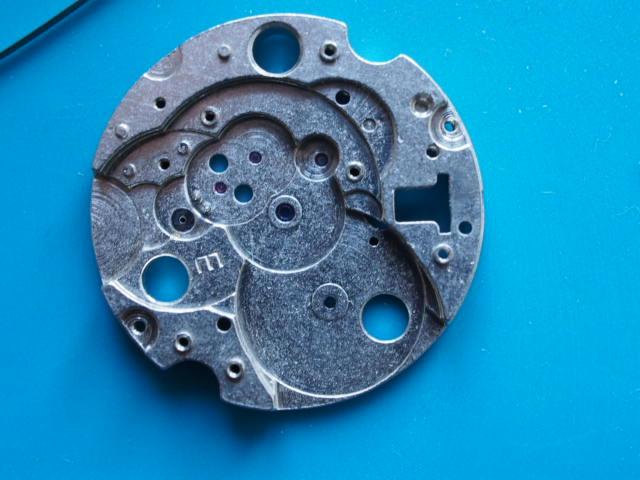
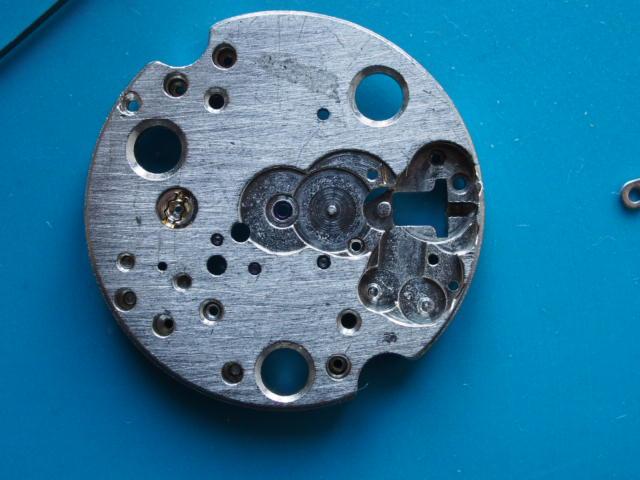
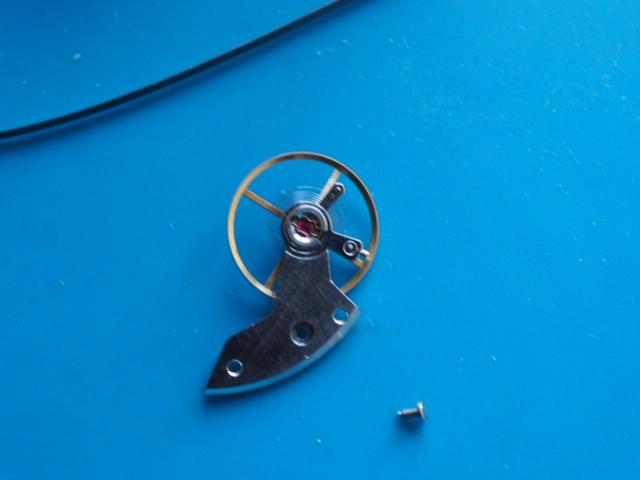
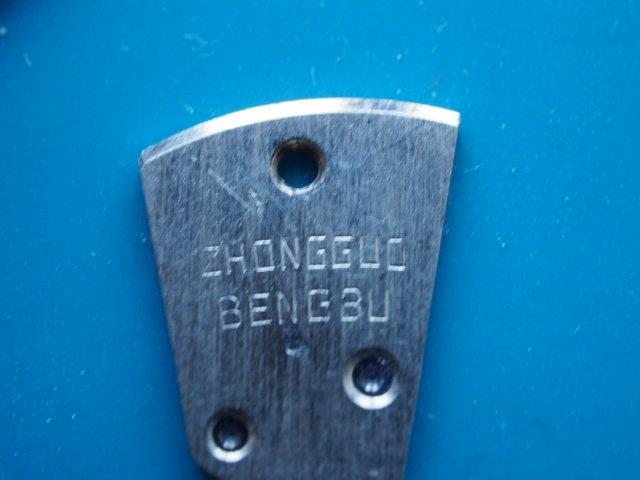
In one of my Uncle Mario's bags of modest pieces I found two Chinese "standard movement", aka Tongji. For those that don't know its history, it has been developed as a copy of the Enicar AR 1010, a 17 jewels mov't form the '50s that has been also made in COSC grade. The Chinese began producing it at multiple factories in 1972, and I believe is still made today. I will service both of them, as I'm curious to learn about any difference, if parts interchange, and such small things. Let me proudly introduce Darts Target, and (Farting ?) Lady. Target runs happily, but Lady only does for a bit when shaken. I will start with Target, and then move to Lady for comparison, with the hope of having them both run nicely. To be consistent with how the piece was made and repaired back then I will only do manual cleaning with basic chemicals, and use just two lubricant types. I also wanted to use my Chinese driver set, but the screw slots are of the narrow type so I will resort to my A&F set. If you have Chinese or Indian drivers that don't fit narrow slow when new, dress the tips to a thin wedge and, then buy another set for Seiko and all the rest. Target is actually a front loader, just pop the crystal out pushing up on its base. There are dial screws, but no dial feet, conveniently replace by glue. To minimize heath exposition I took the unorthodox approach of removing all parts on this side parts before warming the glue. Two dial screws that I can save for spares. Balance is shock protected with movable stud arm. Counting all parts that make it, these should be 17 Let power down by doing as to wind but holding the crown, keep the click opened with sturdy tweezers, and slowly let the crown turn in your fingers. Crown wheel screw is left handed, with its wheel and core, plus ratchet wheel and screw, click and screw that makes 7 parts. The latter two screws are the same, and all three have the same head size, WOW! Pallet bridge screw, bridge (which has a nice snug fitting), and pallet fork, 3 parts. Remove the barrel bridge first. Barrel complete is 4 parts, for a total of 7. Also remove the stem, sliding and winding pinions for 3 parts. Here's my method to open the barrel. Keep it upside down on the mov't holder and push the arbor down with the handle of the tweezers. The mainspring will not fully come out, but for safety sake keep a (gloved) finger on the lid and do this away from face and other parts. Of course I take no responsibility whatsoever. Slowly and patiently remove the mainspring and make the due observations. In my case it was totally dry, not flat, and the arbor does not want to leave the hook - I will not compel it to do so. Moving on to the main bridge, again a snug fit, then the usual train and escape wheels, 6 parts. It's marked Zhongguo (meaning China) Bengbu, that's the city where the factory was located. Center wheel bridge has two screws and these are the same as the other bridges! However to "precisely" set the train endshake, few notches have been punched on the underside. I could not remove the center wheel yet, but the total here is 4 parts. Few seconds of hair dryer and the superbly applied dial can be separated, dial washer and hour wheel set apart. The cannon pinion does not require any special tool to be pulled out and the center wheel simply dropped on the mat. The keyless / motion works is very simple, from left to right we removed the screw plate, plate, minute wheel, and intermediate wheel. Then the jumper screw, jumper, yoke spring, setting lever and its pin. 9 parts. Only the yoke was a bit more difficult to remove, requiring a bit of prying near its post, here's pictured separately. A notch was made near the plate screw to adjust its height The stripped main plate, E could be a variation or inspection identifier? I have counted 70 parts including jewels (plus or minus) for this simple movement. This concludes the first part, thank you for patiently waiting for the next.
 1 point
 -
Hello, As a 'Newbie' I'm browsing the net to discover technics , guidelines etc. on my new hobbie. I found that document from US war department dating 1945 about : 'Ordnance maintenance for Wrist watches' ...as you'll notice it's also an introduction manual for vintage watches, and some american watch models Looking at it, I thought to myself how lucky we're to have internet and online courses ... P.S : name of the attachment, is the official document name in US army archives TM 9-1575.pdf1 point
-
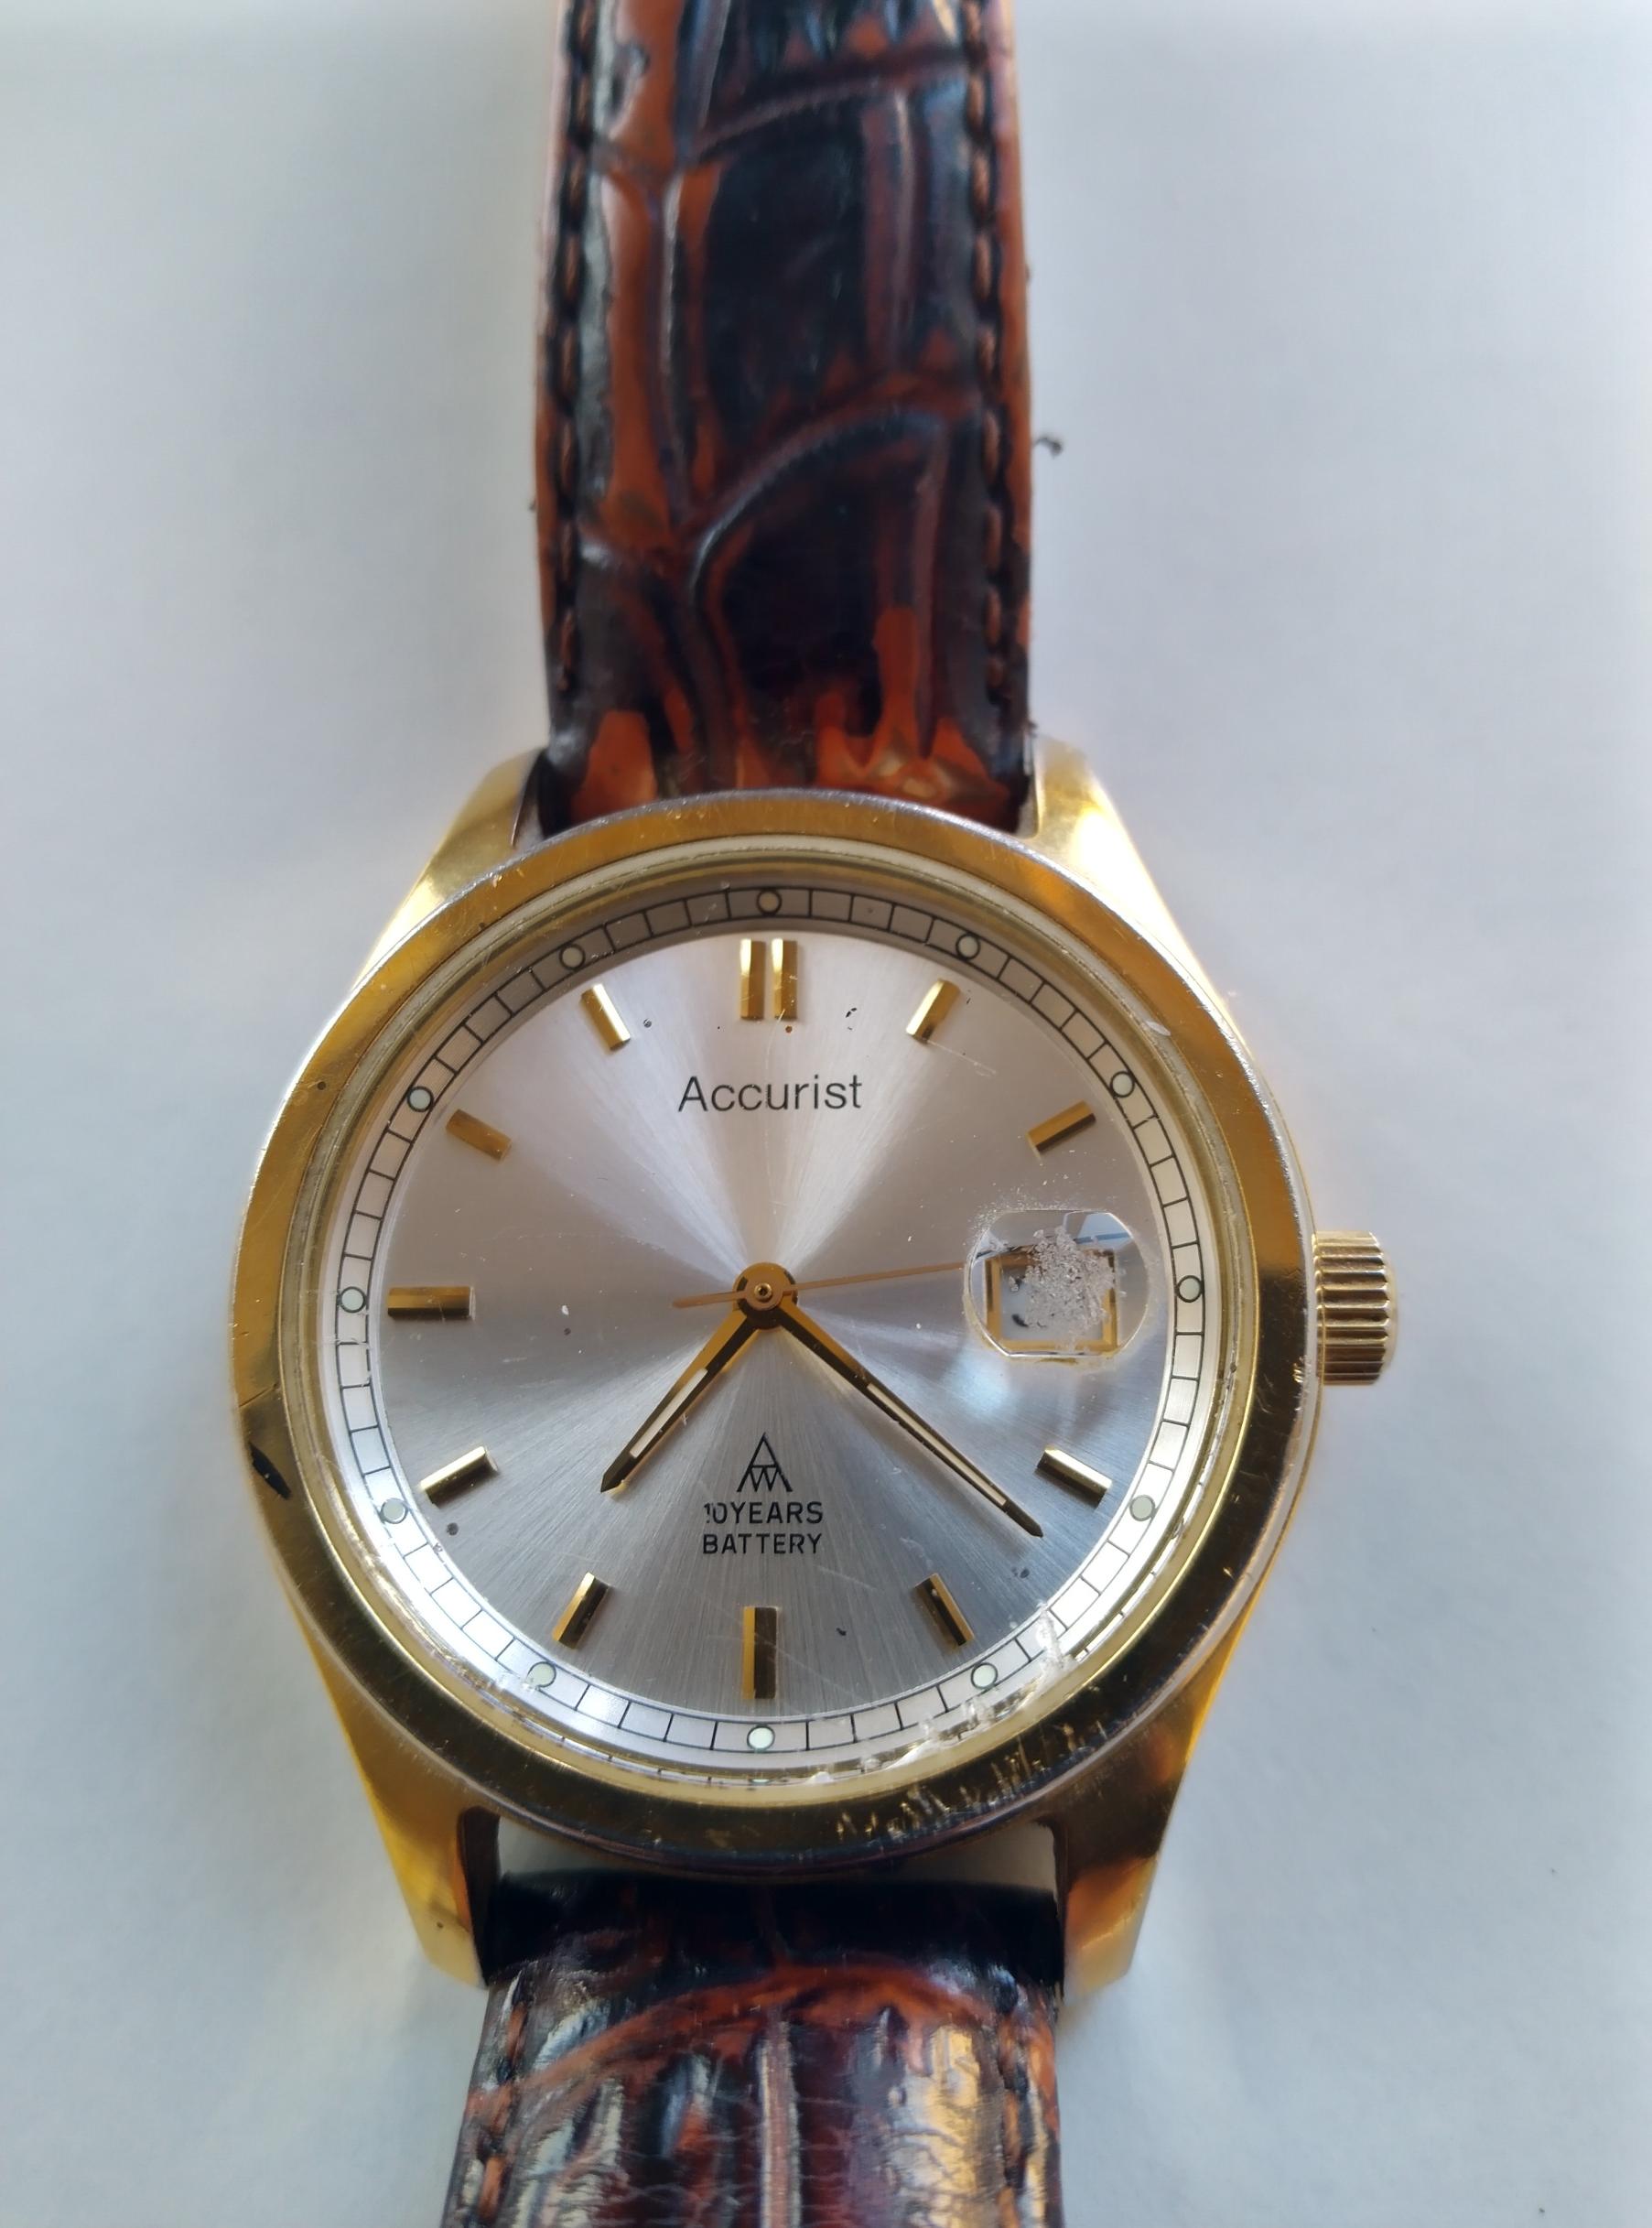
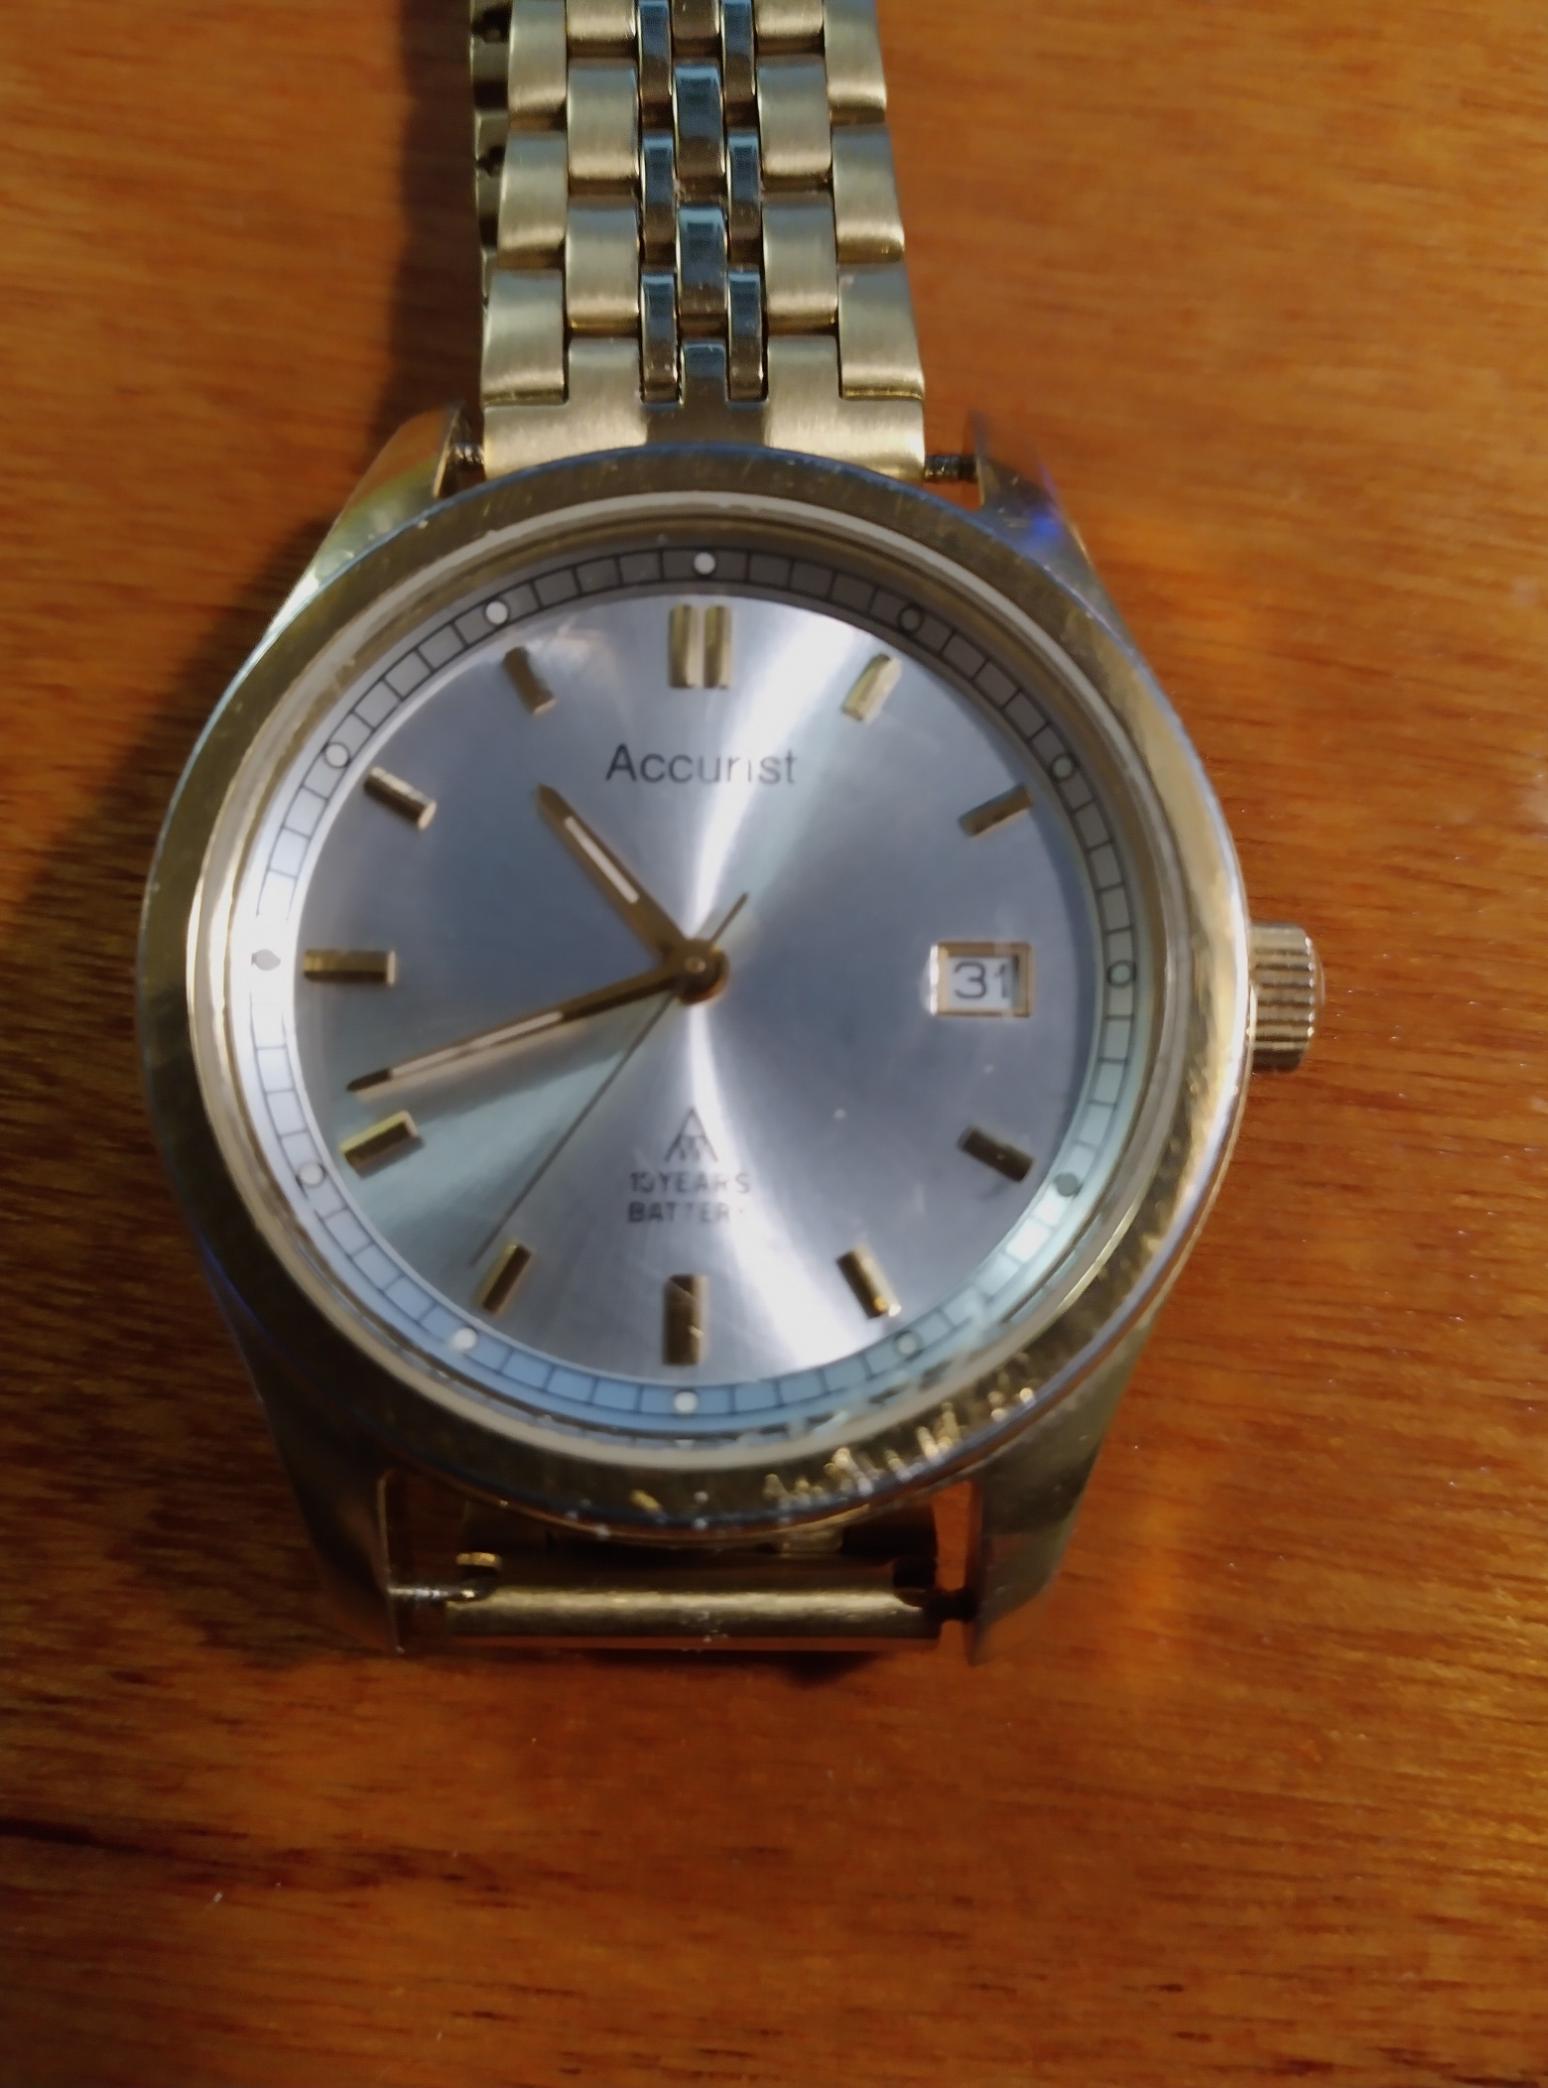
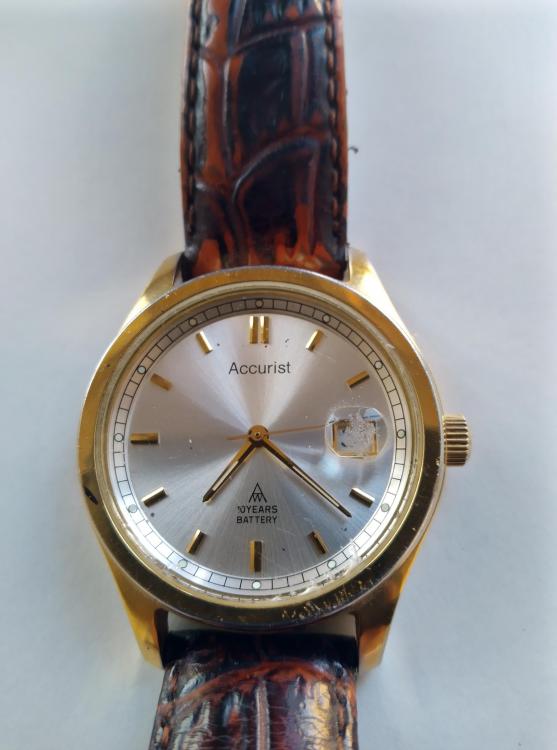
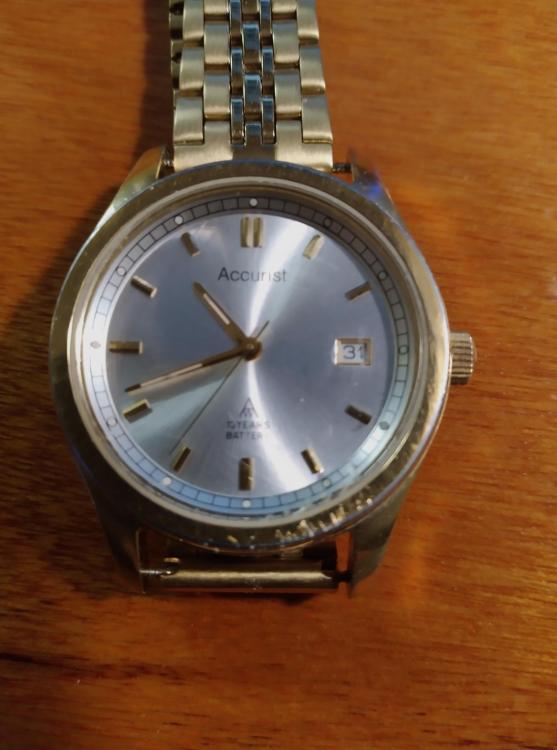
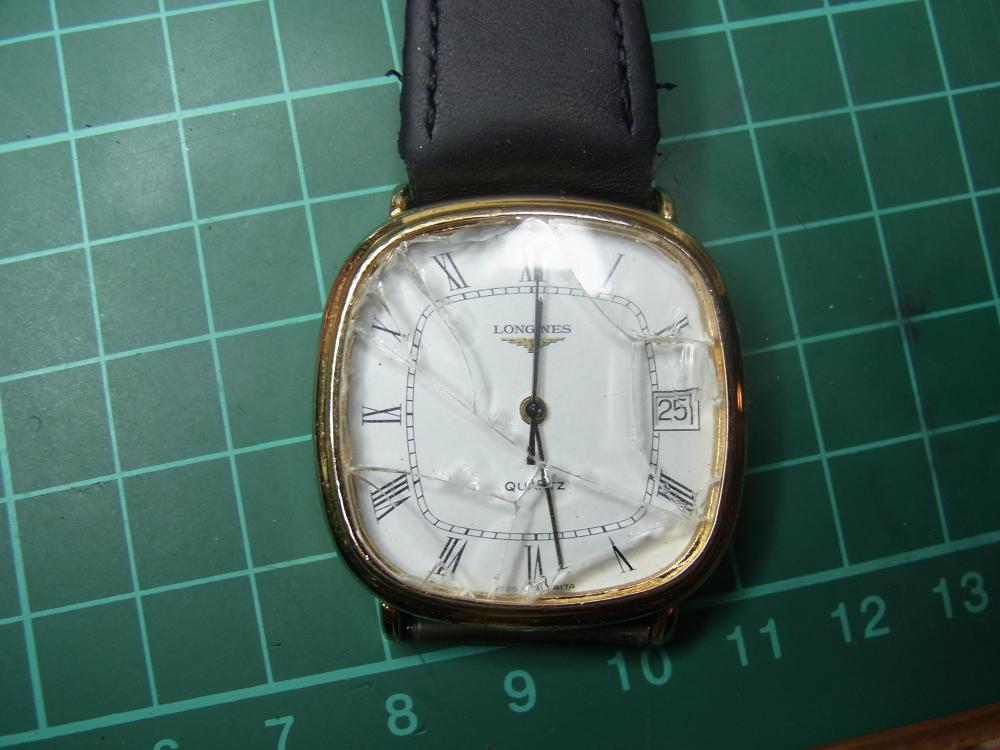
404 Club? Accurist MS075S 10 year battery life. Cost £3.10 P&P also £3.10 1-As it arrived. 2-With cyclops removed and new strap
 1 point
 -
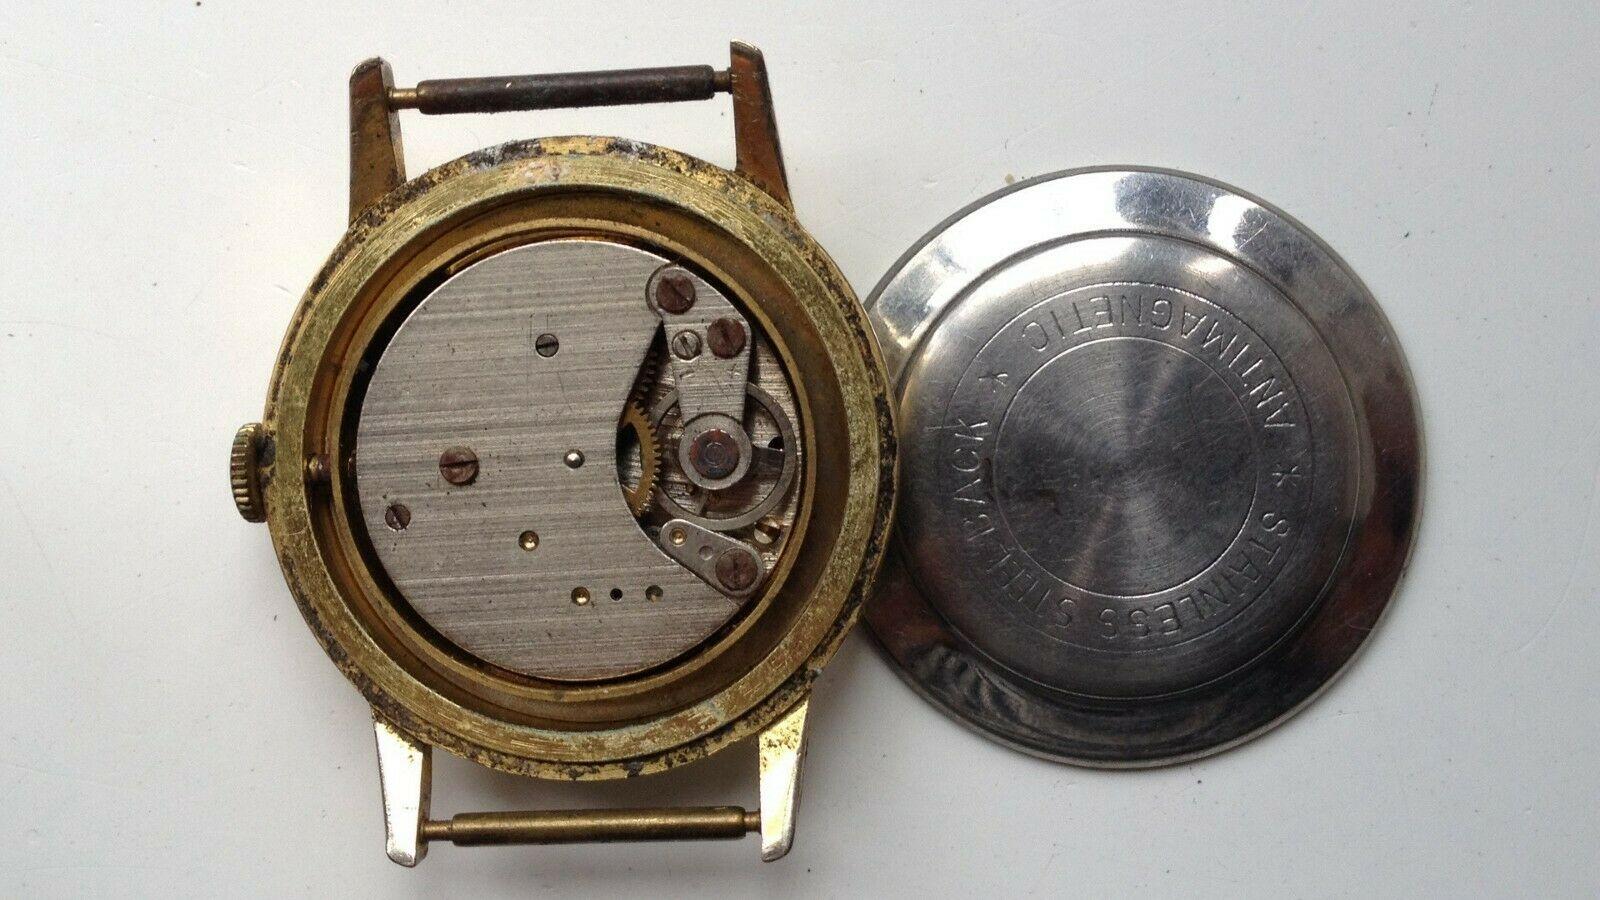
Another little known brand heading its way to the healing bench. This time it originated in, Schwenningen und Bad Dürrheim, Deutschland. This little Wilhelm Eppler movement looks in need of a good clean, and some minor rust removal, but for under four quid, what have we come to expect? More info about the manufacturer here -> https://translate.googleusercontent.com/translate_c?depth=1&pto=aue&rurl=translate.google.com&sl=de&sp=nmt4&tl=en&u=https://watch-wiki.org/index.php%3Ftitle%3DUhrenfabrik_Wilhelm_Eppler_GmbH&usg=ALkJrhjcJLUQvedGuteCCOne-lOaD94cxg

 1 point
 -
Typical bird cage movement. No fancy work on any of the steel. Going by the dial I’m assuming its 10 inch and the markings on the chapter ring, I’d say around 1730’s. No name on the dial that I can see. This would come under the term a county clock. Another thing that makes it early is the screw heads being square. Modifications have been made around the cheeks which I have marked in red. I can’t tell you any more about the case a I can’t see the whole case. If you are going to undertake all the movement work yourself, you are going to need a set of very good clock reamers/ broaches as many of these early clocks have extreamly hard brass and can easy take the edge of a reamer/broach. I have just seen your reply. What ever you do do not use a bushing machine, for starters they are a waste of money and you won’t find reamers big enough. Do all the re- bushing by hand. If you have a lathe that is even better. If you can make your own bushings even better. Bergeon clock bushings are really two soft for these movements.
 1 point
 -
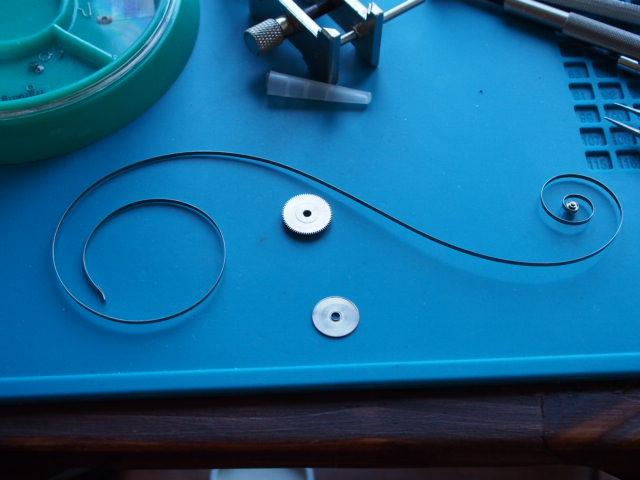
Hi Duke, You're correct in that you can simply transfer the mainspring from the ring into the barrel. Just make sure it's seated correctly and is orientated the correct way. I understand why you asked the question as it is a little daunting the first time you do it but if done slowly with a flat implement there's very little that can go wrong. Some people probably do it different but I've always used the other end of a pair of tweezers as they're solid and flat. Good luck! By the way I haven't sprung for a set of mainspring winders yet and have always opted to simply purchase a new mainspring and insert it using the above method. To help illustrate what to check for before putting it home I added a very crude image below. Just make sure it's all the way in up to the disk all around. Sent from my SM-T510 using Tapatalk1 point
-
Apart from other issues, since the barrel is greased before MS is pushed in, hand winding spring in becomes a greasy mess. Just push on the coil to insert it in, to avoid breaking the spindle, it should be slid in along the line of cut on barrel wall.1 point
-
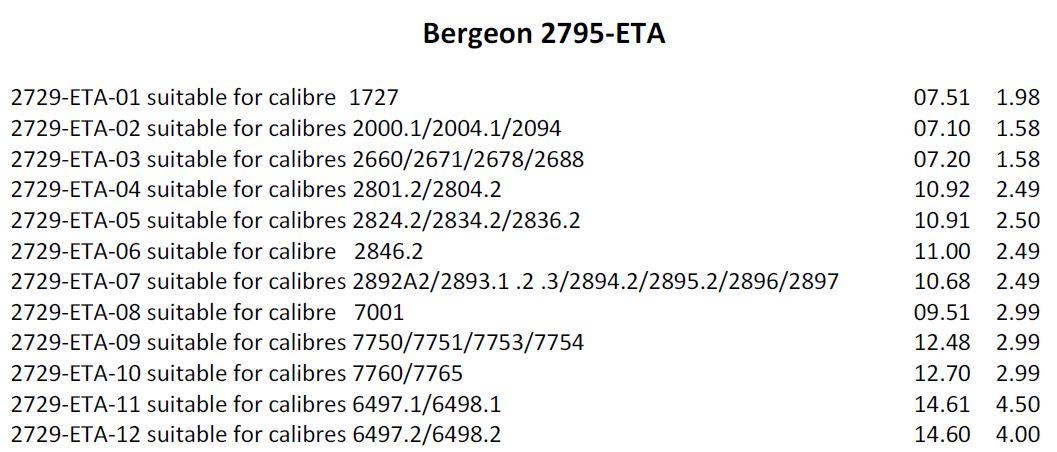
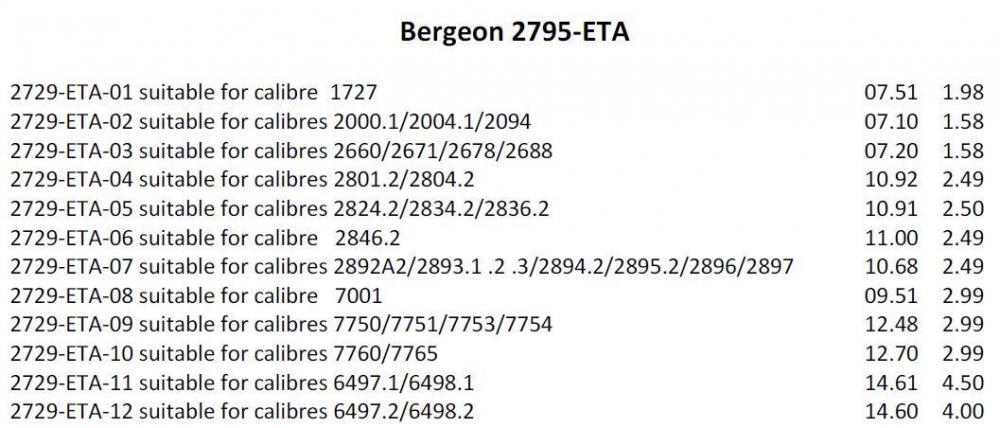
out of curiosity for sizing I borrowed the Bergeon 2795-ETA set of winders from work and measure them.
 1 point
 -
I recommend that you don't use it here. It causes many troubles and our Host Mark is about to remove support for it. The forum software is well engineered to allow full, unhindered support to all features from mobile devices.1 point
-
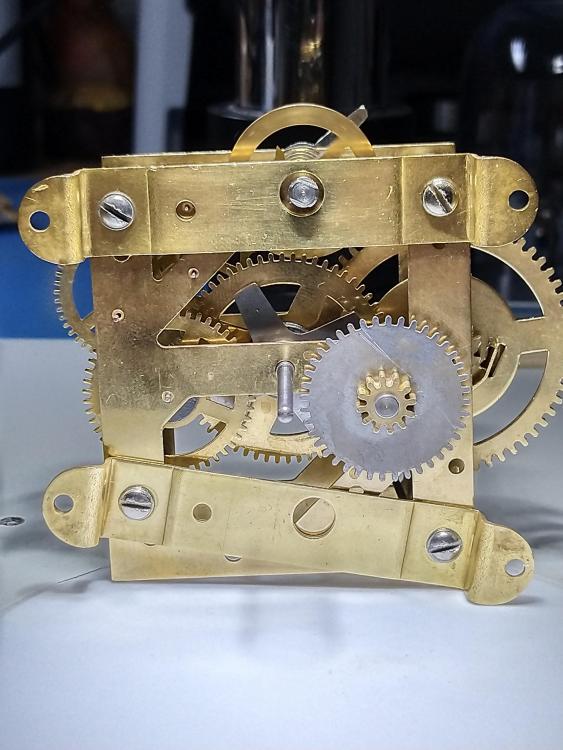
I copied two links at the beginning of this thread, but reading one of them again made me think and I believe it is worth copying its content directly here: Not all piggy banks are shaped like a pig. This one’s shaped like a clock. In fact it is a clock and it’s called the “Time Savings Clock”. You might ask, who would use such a clock to save their coins? Good question. Somehow, insurance companies figured out that their customers would, and they made sure each willing customer had one of these 1950’s coin-operated timepieces. It was a novel way to help them save money for their premium payments. The idea was that two British florins had to be put in the coin slot at the top of the case to keep the clock going. After all, who doesn’t want their clock to keep ticking? After the clock would run for a certain amount of time, levers and wheels in the movement would lock in place, and the clock would stop. So, time for some more coins. After the coin-drop, the clock movement was then free to tick away. The coins ended up at the bottom of the clock in a sealed chamber, and at regular intervals an insurance man would come to the customer’s home, unseal the chamber, collect the coins, then re-seal the chamber. (Photo on left shows a time saving movement and coins.) Beyond this clock’s novelty is something more. It’s not just a piggy bank and time keeper rolled into one. When I step back for a moment and look at its coin slot and numbered face, I see the clock as a symbol, one that reminds me of the value of time itself. Think of it this way: to get the clock to run, it has to be fed with money— and money, as we well know, is what we all use to buy something we value– such as a car, a home, an education, food, clothing, etc. By our putting money into the clock in order to keep it running, we are, so to say, buying time. Of course, time can’t really be bought, and the coins just get the clock gears to move. But in having to put something valuable, such as money, into the slot to keep the time going, the clock becomes a symbolic reminder that time itself is a thing of value. In fact, time isn’t just an equal among other things of value. Time has a worth that’s in a class by itself because there’s only a limited amount of it. And unlike many things that can be bought with money, time isn’t one of them. That makes time very precious. And when I get to thinking just how precious it is, I also get to asking myself how well I’m using it. And that leads me to other questions, about loved ones, the future…in fact the very purpose of life. So dropping two coins in the slot of a clock to pay for insurance premiums can turn out to be a whole lot more.1 point
-
Thank you for your help. God bless !1 point
-
Is this a brand new watch or is it new to you ie (scond user) ... If brand new it is likley a bit stiff an will wear in with use. As VWatchie said wear it and enjoy it.1 point
-
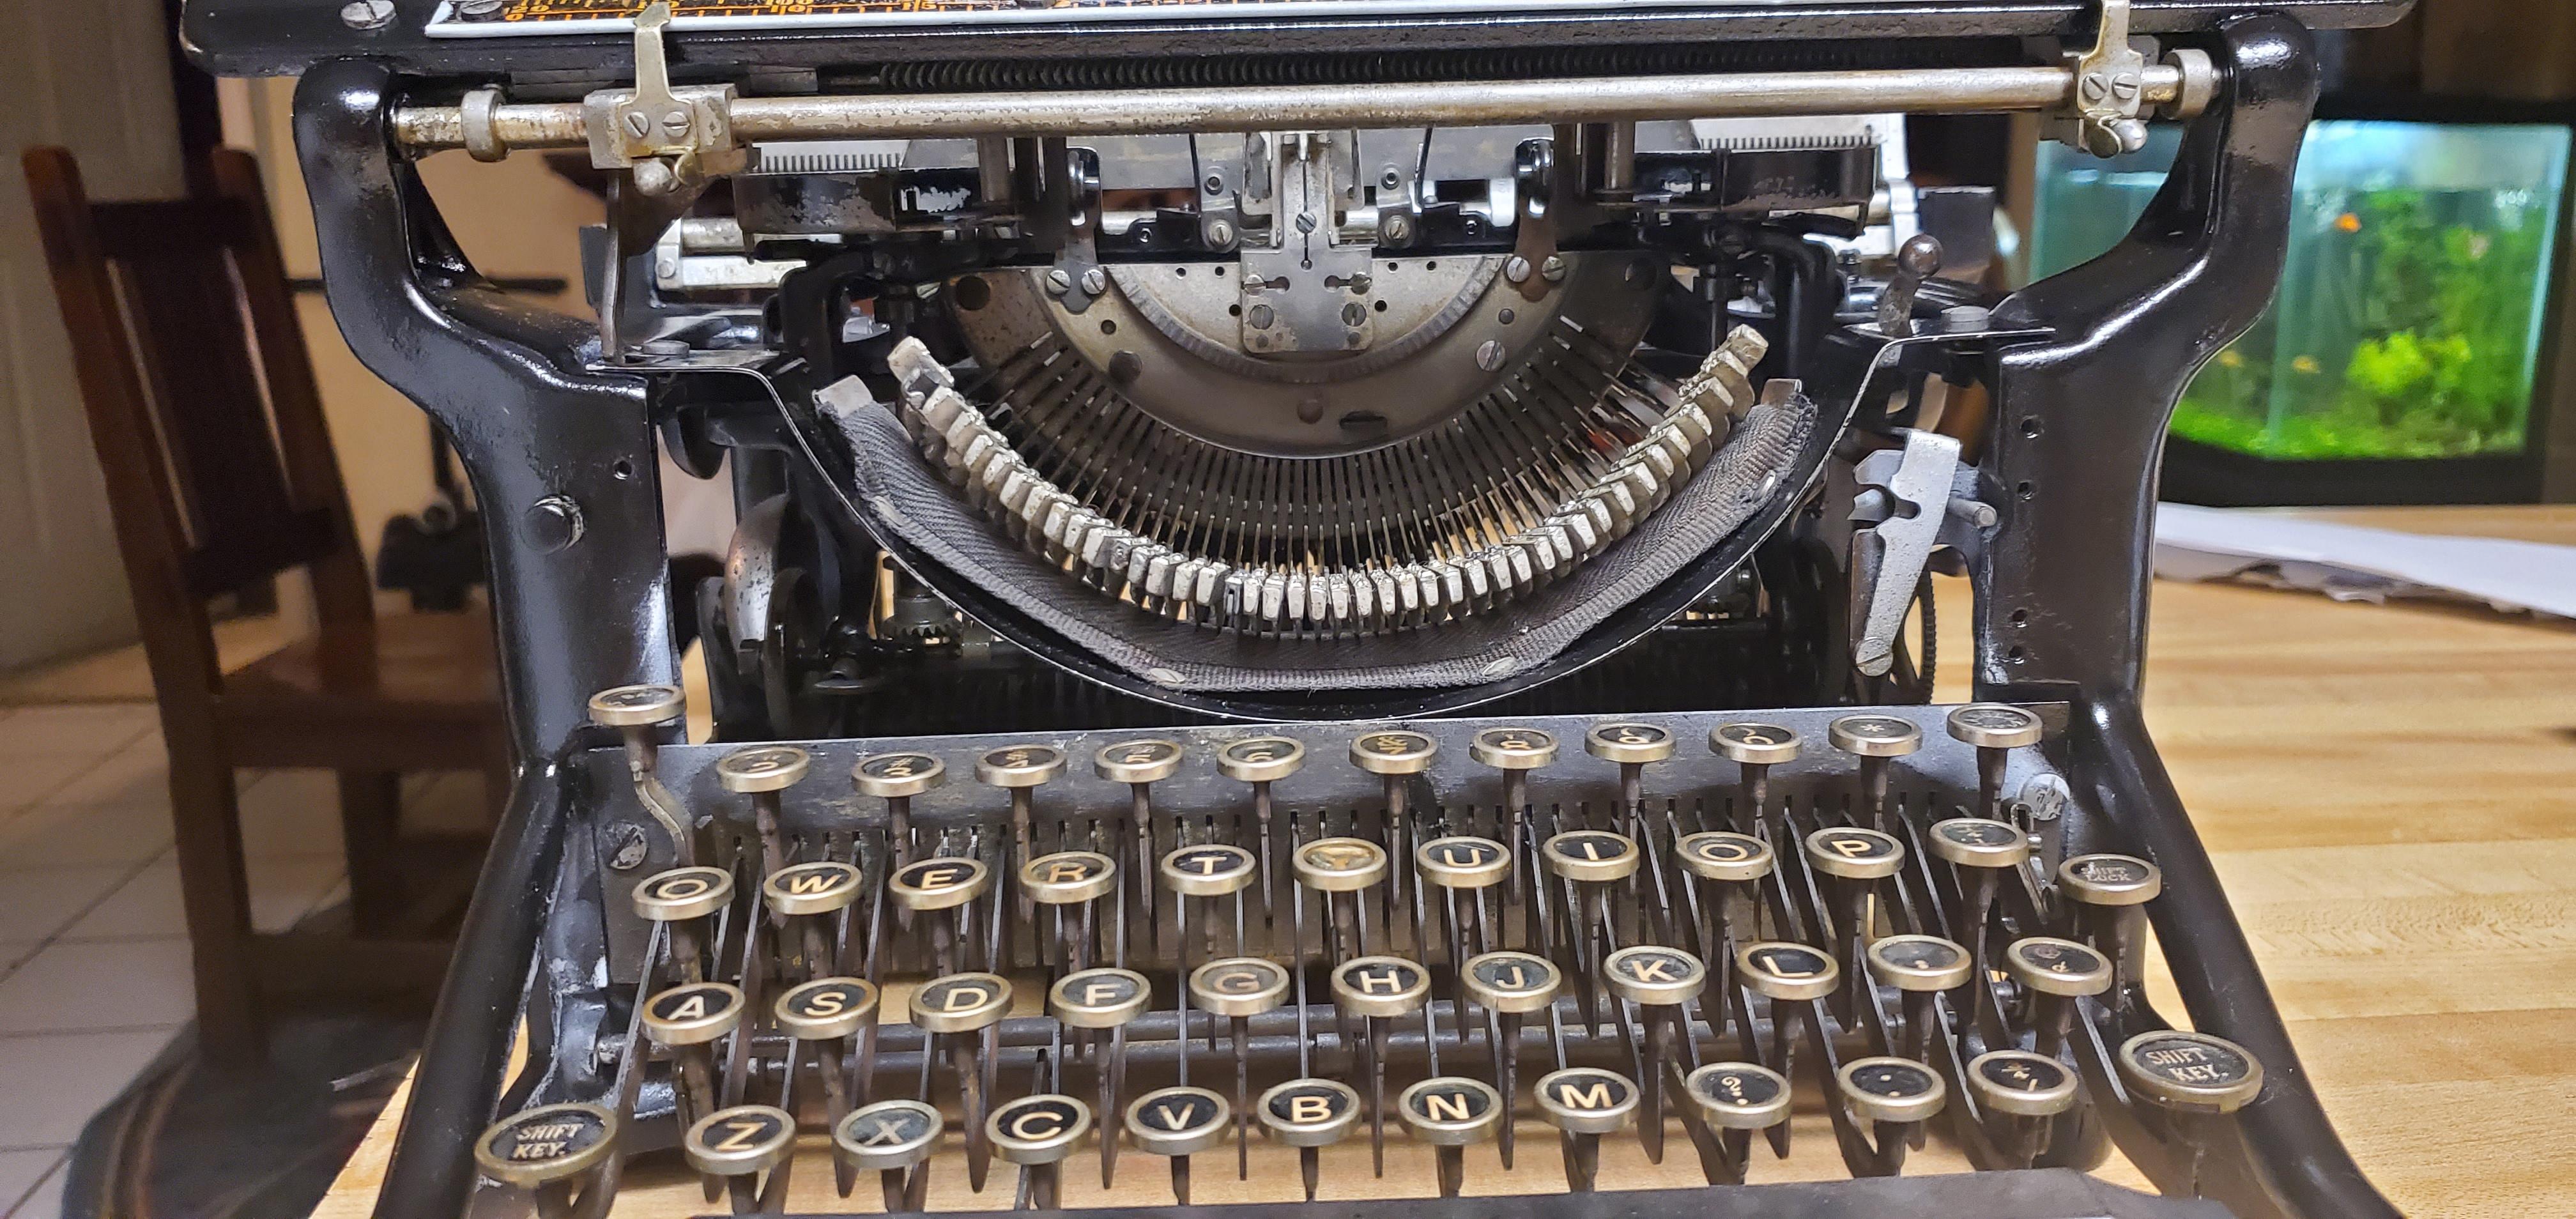
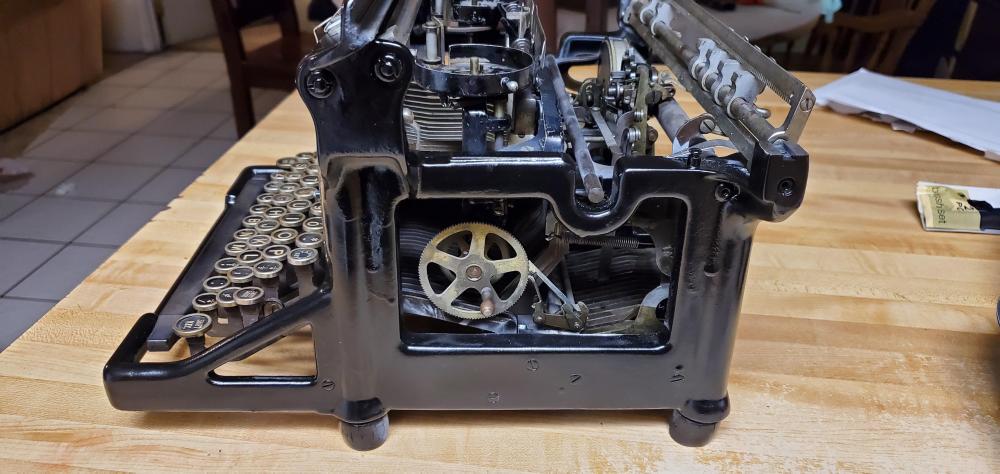
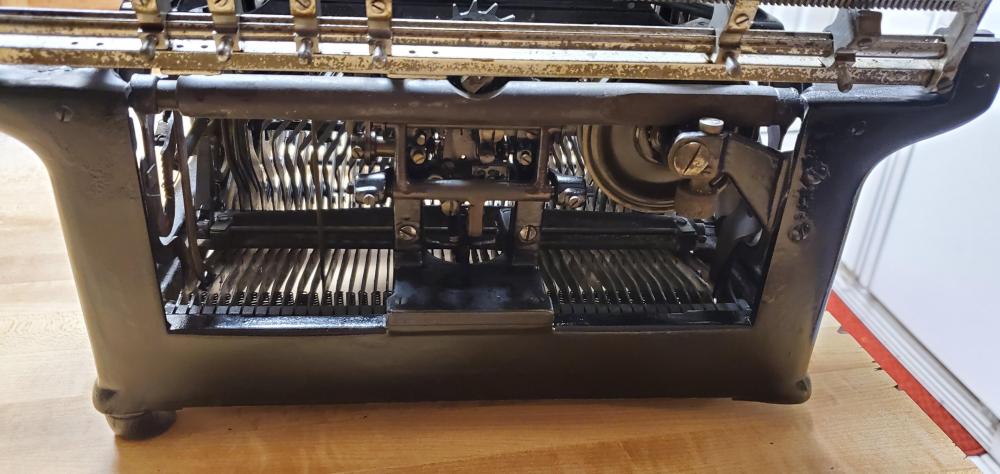
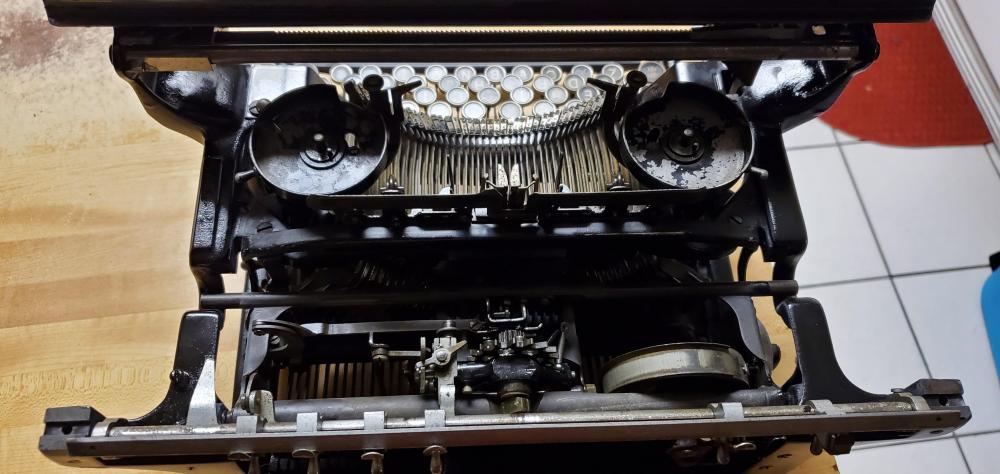
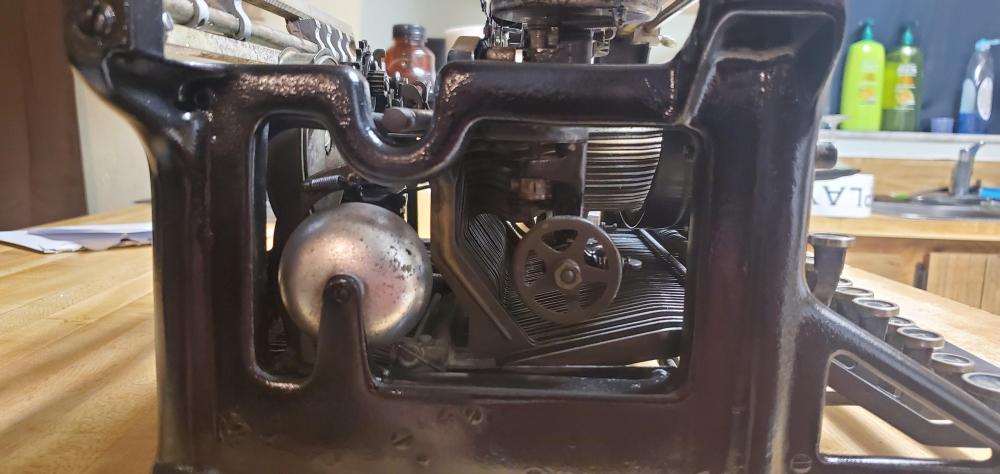
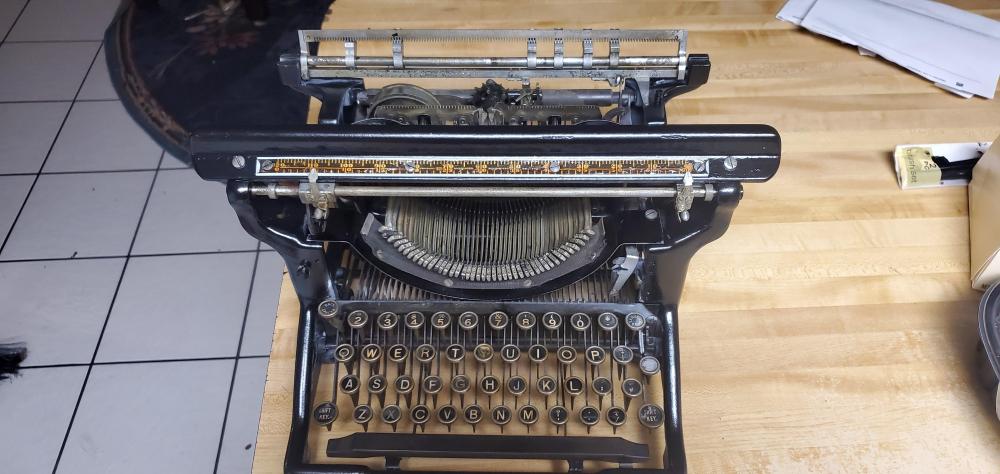
Thank you. Here is today's update. Color coat of black acrylic lacquer has dried nicely. What a fantastic paint btw! Looks great. I unmasked everything and began the task of lubricating all the moving components. Letters, numbers, spacebar, tab, shift, all of it. I partially assembled the carriage and confirmed function. All is great! I still have to source a drawband material, but I have a few ideas. Still a couple touch ups, but not overly concerned about them.

 1 point
 -
I am still using windows 7, with Firefox, but to enlarge the text on that I just need to hold down control (CTRL) on the keyboard and spin the thumb wheel on my mouse. It also works for most other things, PDF , word docs, excel spreadsheets etc.1 point
-
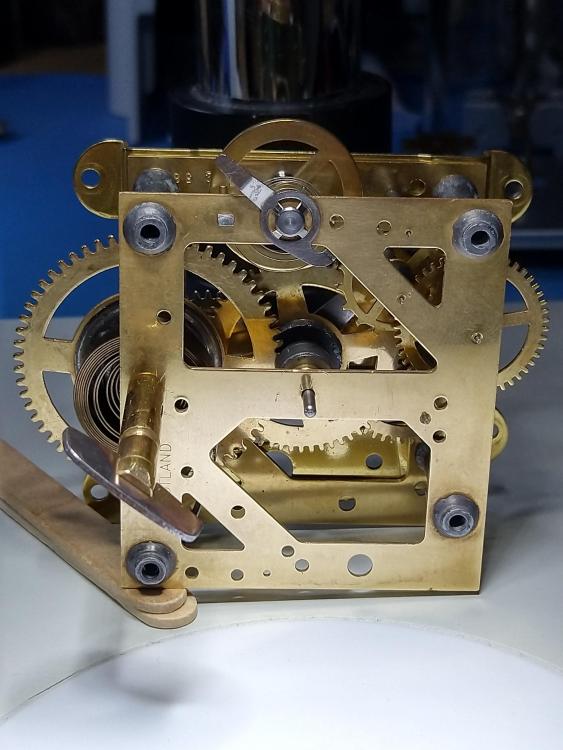
Hi Andy, thank you. I am not so impressed, I am satisfied though and calmed down to an acceptable level after the "hairspring bending". Unfortunately I don't have any technical specification, I need to talk to PITT WILLIAM ARTHUR i think. The only thing I can safely say at the moment that the clock is kind of running, but I don't know if it is accurate, I have not put the hands on yet and I have to prepare myself and family for a one month long holiday / remote work session starting this weekend. I wont be able to play with my toys during this period. I'd like to set everything correct and right not because of the value of the clock itself, but the priceless knowledge you could possibly obtain by it. Probably getting away will be a good thing, but it wont go without disturbance in the force, a Hungarian made watch crystal cutting tool is waiting for me at my destination. (The one you could see in this post: HORLA )1 point
-
Nice work. Considering the state of that hairspring at the start, very impressive. Do you know much about how it is meant to run, how many bph for example? Is it running accurately? I played the recording to my software time grapher, but it couldn't make sense of it, but that is most likely because it is meant for watches, rather than clocks.1 point
-
If you have access to a microscope, check all of the "holes" particularly on the balance and fork. Check the fork pins are not bent or heavily worn. Also have a good look at the balance, one of the ends may be worn or bent. Check that the jewels are in place on the balance, that the balance it fitted correctly and the jewels are undamaged, clean, and, if you have had them out to clean them, that they were re-fitted the correct way up. I think Cousins has the fork if you need it, and perhaps the balance complete. Whether it is worth purchasing spares is a moot point, since the value of the watch is not terribly high, however it is a nice clean example, so I would be tempted to get it working nicely if I didn't have to spend too much. If you are ordering stuff from Cousins, it makes sense to put in a larger order as it spreads the postage over a number of items and helps keep the cost down, so perhaps wait till you have looked at the rest, and figured out what they need too.1 point
-
Cousins may well have something suitable. https://www.cousinsuk.com/category/watch-glasses Failing that, post the dimensions, I may have something in the stash.1 point
-
I've been following this thread and watching its progression. That hairspring needs slight adjusting, you have to much touching it needs to be even and keep its shape no matter where the regulator is. Poor action on the balance, which suggest the pivots are slightly blunt or the cups are not smooth or both. The movement is in beat as it starts off well. Have you oiled the cups and the escape wheel? if so what oil did you use. Congratulations on your achievement.1 point
-
I love old Elgins and am also just getting started. I would suggest looking at a 12s Grade 303 movement. They are still plentifull and can be had for $20 to the door from Ebay if you are in the US. They are a 7 jewel so be sure to look closely at the pivots. If they look sloppy pass unless you don't care if it will hold good time in the end. If that seems a little small look at the 16s Grade 291 movement, also a 7 jewel. They are usualy about $5 more though. Happy Hunting Nora1 point
-
OH is our much respected moderator with the stage name oldhippy. A true gentleman from whom I have learned most of all.1 point
-
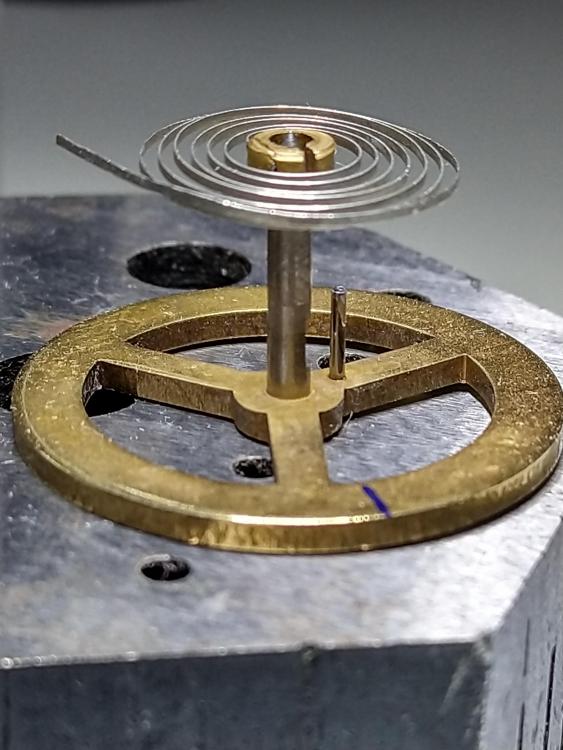
I start with the arms and some finishing touch on the rim. In case the wheel is out of round, a truing caliper is neccessary.1 point
-
CousinsUK stocks the caseback: Back Gasket, Rubber, Omega 088.5140NS Not in stock are: Crown Gasket, Omega 091TI0002 Gasket D3.2 D2 Ø0.6, Omega 088NS0435 Gasket D2 D1 Ø0.5, Omega 088.0436 Several case tubes listed: Omega 090ST1242 Stainless Steel Case Tube Pendant Case Tube, Screwdown, Omega 090ST4203 Not sure which is the chrono model one. Maybe try ebay.1 point
-
You can do things like that sliding emery cloth or or emery paper over the blade of a feeler gauge.1 point
-
Interesting mix of opinions here from experienced people... "Any time there is a disagreement between two rational parties, the answer lies in the middle". Also, "everything is gray, there is no black or white." Since the responses (here and elsewhere) range from "any deformation means replacement" to "don't worry about it you're fine", my takeaway is a little deformation isn't going to affect anything, but there's a curve of diminishing return with an assumed point where the cost of a new spring and the wear/performance intersect. Since there's a cost component, it's specific to each watch by value (market or sentimental). With an expensive watch with a high accuracy requirement or a sentimental watch without easy access to replacement parts, err on the side of a new spring. If it's a cheap watch that's not capable of especially high accuracy and the wear isn't that big of an issue (due to either a ready supply or replacement parts or a relatively low value), don't worry about it. Then draw a line between the two, and figure out where you fall on that line.1 point
-
Jump in the deep end! That's how winners roll! That's also how you break things, but you learn more and more quickly that way. Kudos.1 point
-
Are you sure that you used the correct screw for the end float adjustment and not the one with the slight chamfer on the head?........With every single one of these that I have worked on the balance can be locked by tightening the screw too much...... In true 'Blue Peter' fashion, here's some I did earlier......1 point
-
Can't really tell just from the picture, but the entry stone could be a little deep. The lever escapment is complex, and really needs to be approached in a logical step by step manner. If you move that entry stone in, you will reduce the drop lock on the exit side, which may or may not be ok. If you then move that stone out to increase its drop lock (and total lock), you will increase the drop lock on the entry. Or, it won't unlock anymore at all, as the fork hits the banking pin before the escape tooth can come off the impulse surface of the exit stone. Adjustments to stone depth are often on the order of 0.005mm (5 microns). It's good to have a way to measure how far you've moved a stone; Bergeon makes a tool for this of course. I don't like it, I use a measuring microscope, and heat my fork on a brass plate and move the stone with with either an oiler or clean pegwood; oiler to move it out, wedging it behind the stone in the slot and twisting, pegwood to push in, holding the fork with stout nickel (or brass) tweezers. The plate has holes in it to accommodate the arbor. Fork upside down. I use an adjustable heating plate under the brass plate (bergeon), but you can do it with an alcohol lamp like most books show. Mark has a video on it. I recommend Jendritski's book Watch Adjustment for a good description of the checking and adjusting procedures. But to get you started- With the balance in, power on the movement -stop the balance with a finger (with finger cot), and rotate it slowly until an escape tooth drops off one side of the fork to the other -observe the depth of lock at exactly that point. It should be, as a rough rule, about 1/5 the width of the pallet impulse face (just as a length reference). If you move the fork with an oiler toward the balance, the escape tooth should not come off the locking surface. If it does, the stone needs to come out -continue turning, the lock should increase, this is the run-to-the-banking, or slide, as the fork continues to the banking. Check the fork horn freedom along this time, this is the fork horn hitting the face of the impulse jewel (the safety action before the guard pin takes over). The total lock now should be roughly 1/3 the width of the pallet face. -check that you have freedom between the guard pin here, using an oiler to move the fork from the banking. Continue around the safety roller moving the balance and the fork -do this on both sides, entry and exit. If you have good looking drop lock on both, but excessive total lock, move the bankings in to reduce. If you have excessive drop lock, move one or both stones in as needed, keeping in mind moving one has the same effect on the other (for drop lock). If the locks all look good, but you have no or little guard pin clearance on one side, you may have a bent pin. This goes for the fork horns too, but that's rare to have a problem there. If the guard pin looks nice and straight, and the safety roller isn't damaged, it may be that the bankings have been shifted, both, in one direction and the stones moved to adapt, but now the pin is contacting the roller sometimes. For a quick cheat- and this is really a cheat, meant for folks who know how to otherwise check things- - move the balance until the escapement drops. Check the fork safety (fork horn clearance). This is, or at least should be, a little larger than the guard pin clearance, so the maximum "safety action" the escapement will see. You can move the stone in until you are just on the verge of unlocking when checking this clearance. Most of the time this will work, especially on a modern piece, and you will have safe escapement function with the stones in the fork as far as they can safely go.1 point
-
Your nose! always welcome.1 point
-
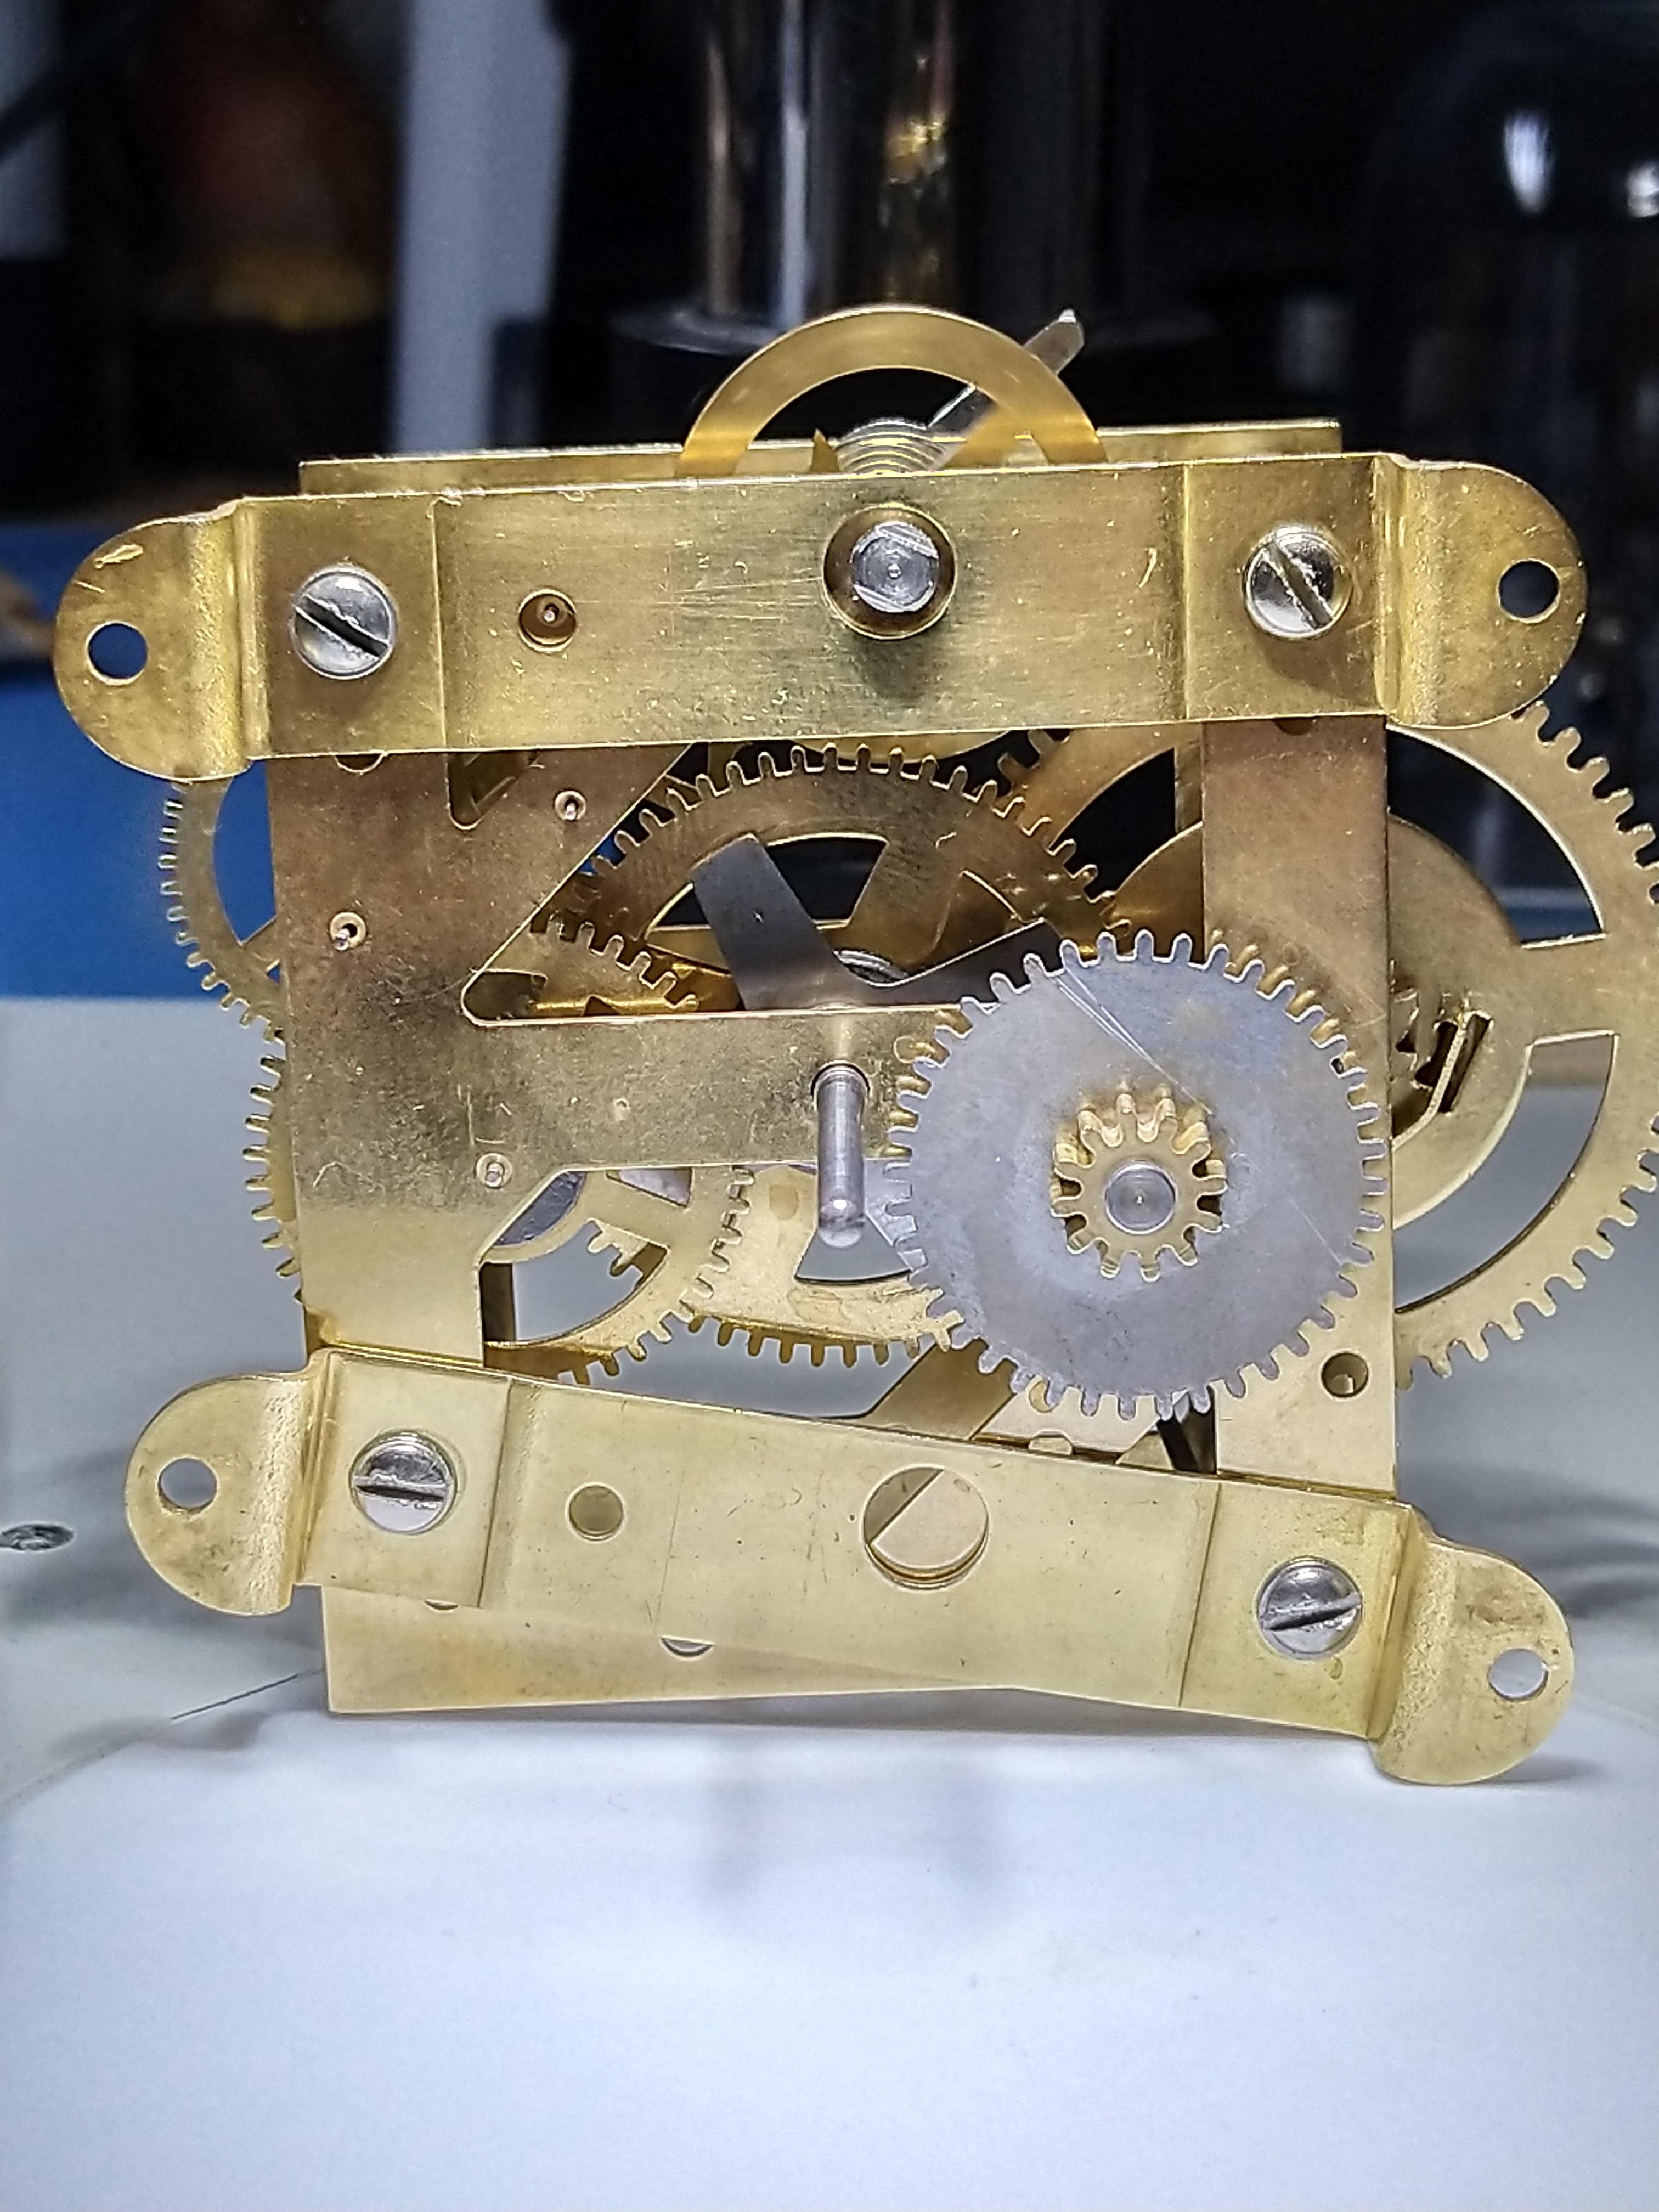
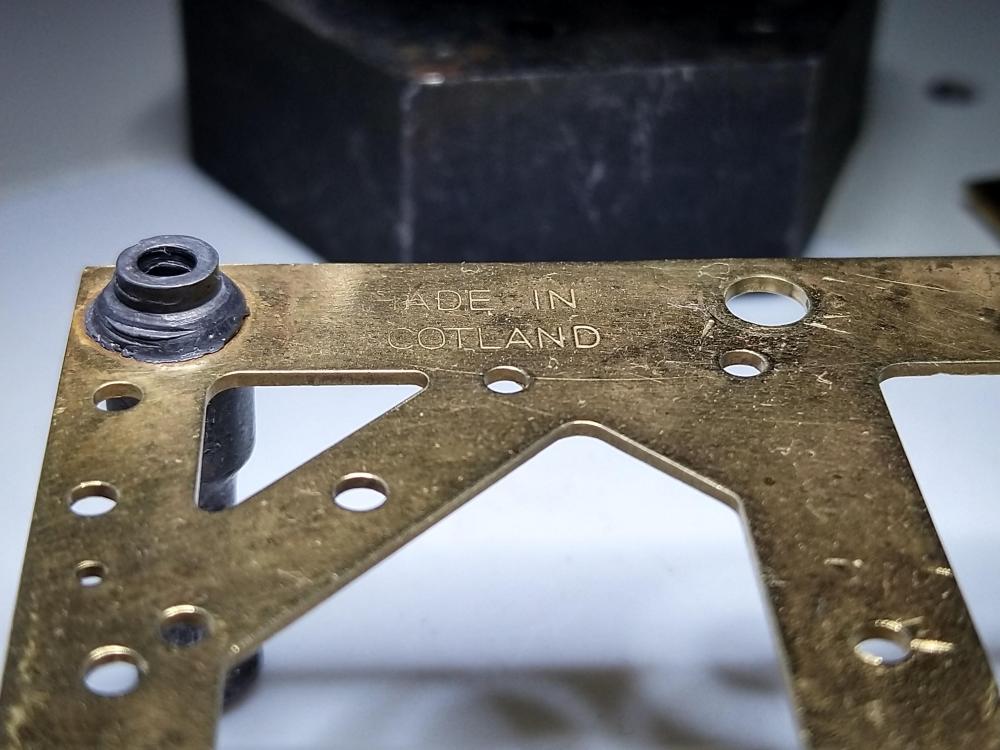
The best I could do with the hairspring, not perfect, but after so many defeat I call it a draw: The place where this wonderful piece of beauty was made, the person who operated the hammer did not have his morning haggis so M and S are missing: The movement together: I had no faith - plus a was lazy and did other important things as playing computer games -, that's why it was sitting on my bench and I did not touch it for a week or so, and i don't know if it is in beat, but it actually works! : time_savings_clock_movement.mp4
 1 point
 -
Close as I can find, 886 error is a database error, which is what I paid (U.S.) for my next project. $8.86 (+ $4.67 shipping).

 1 point
 -
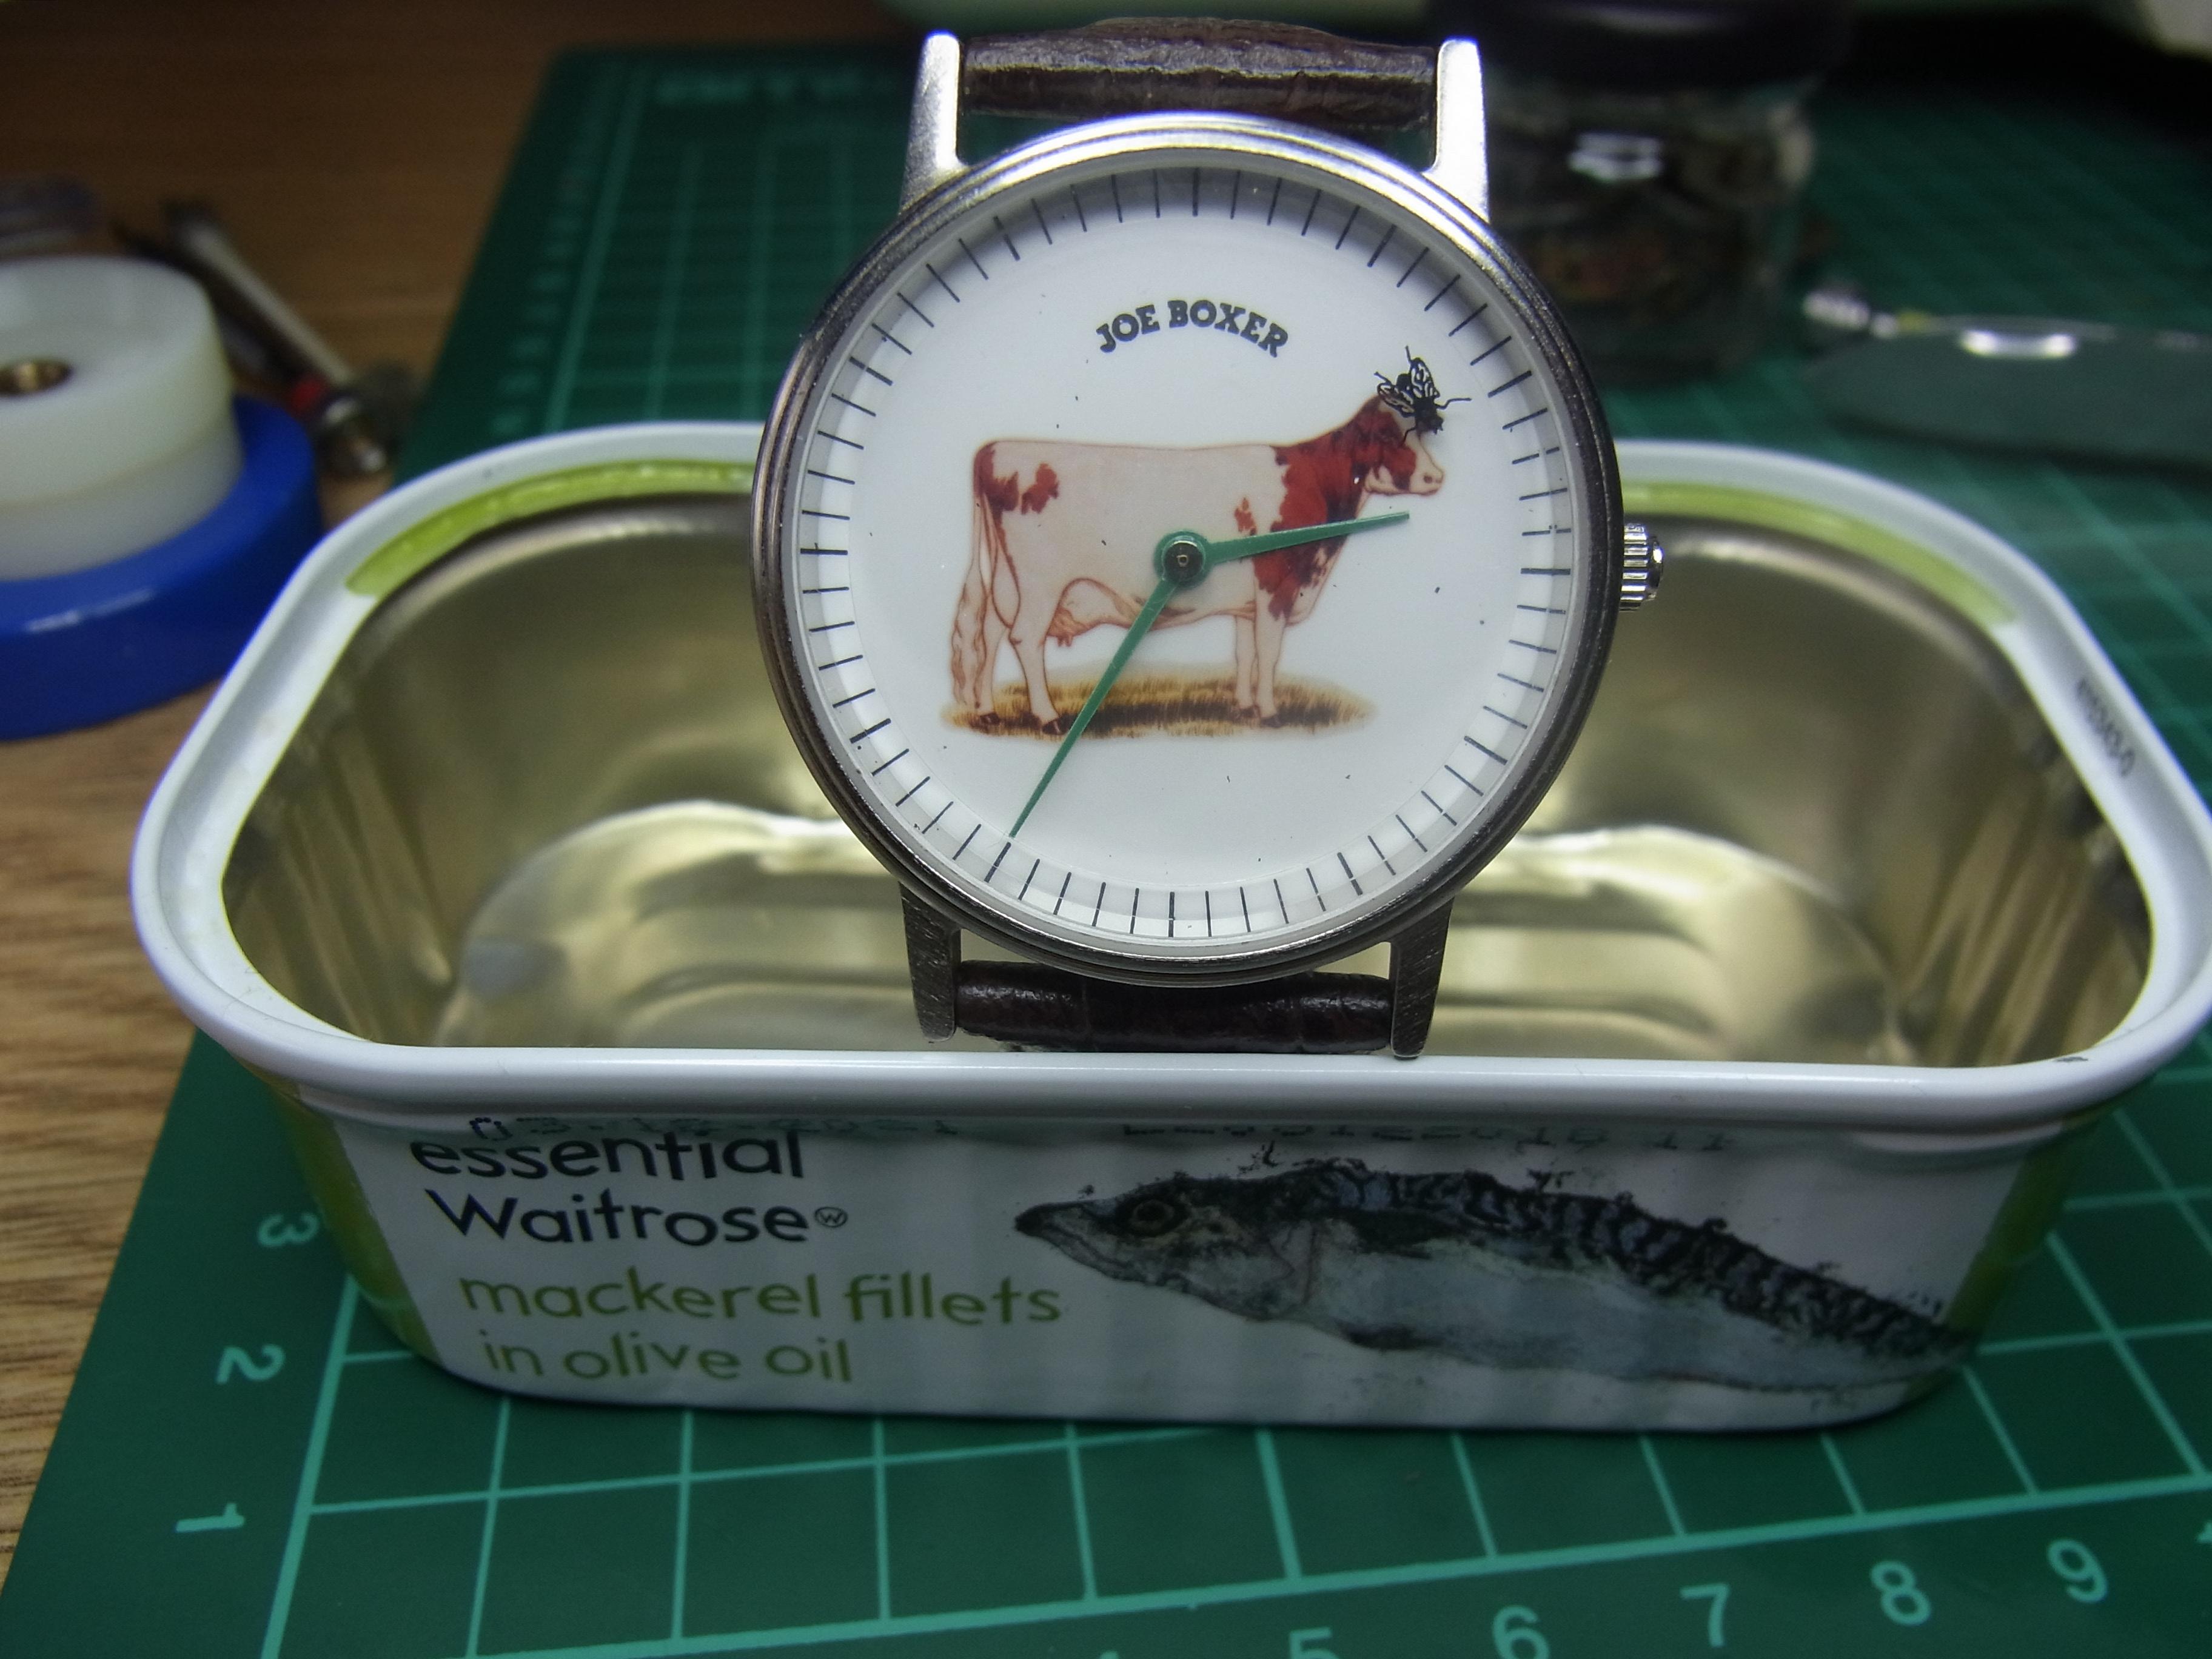
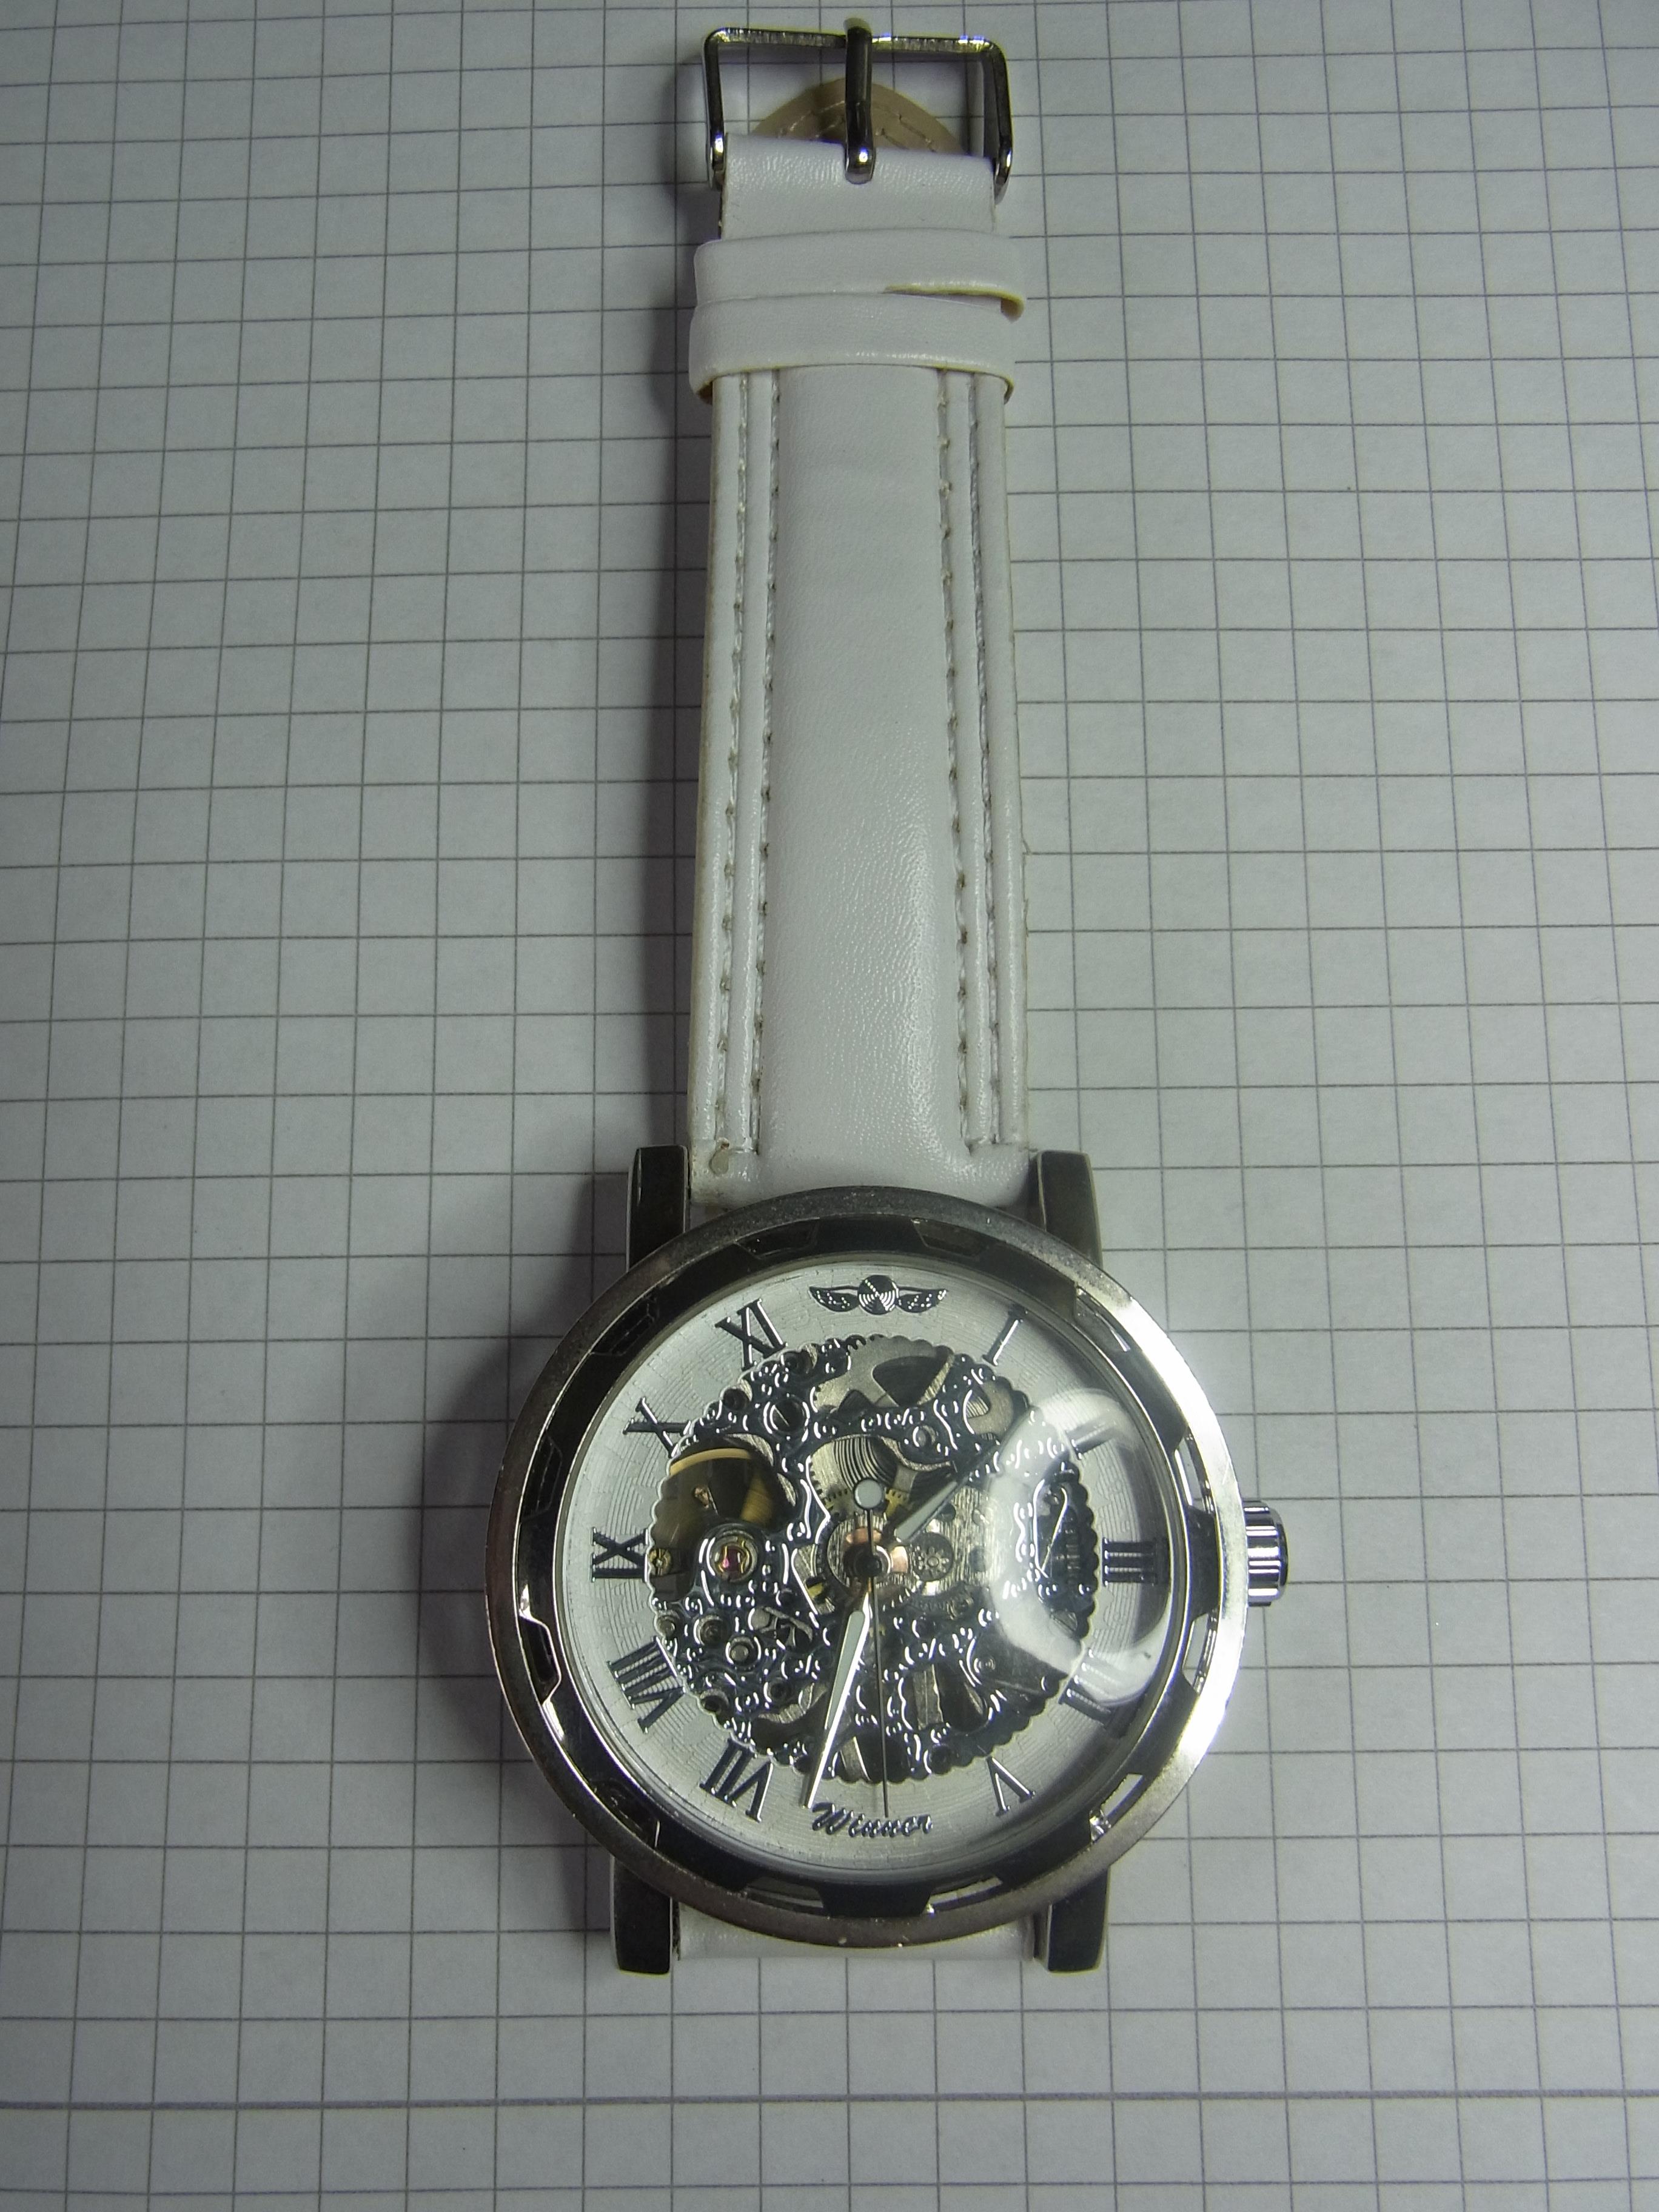
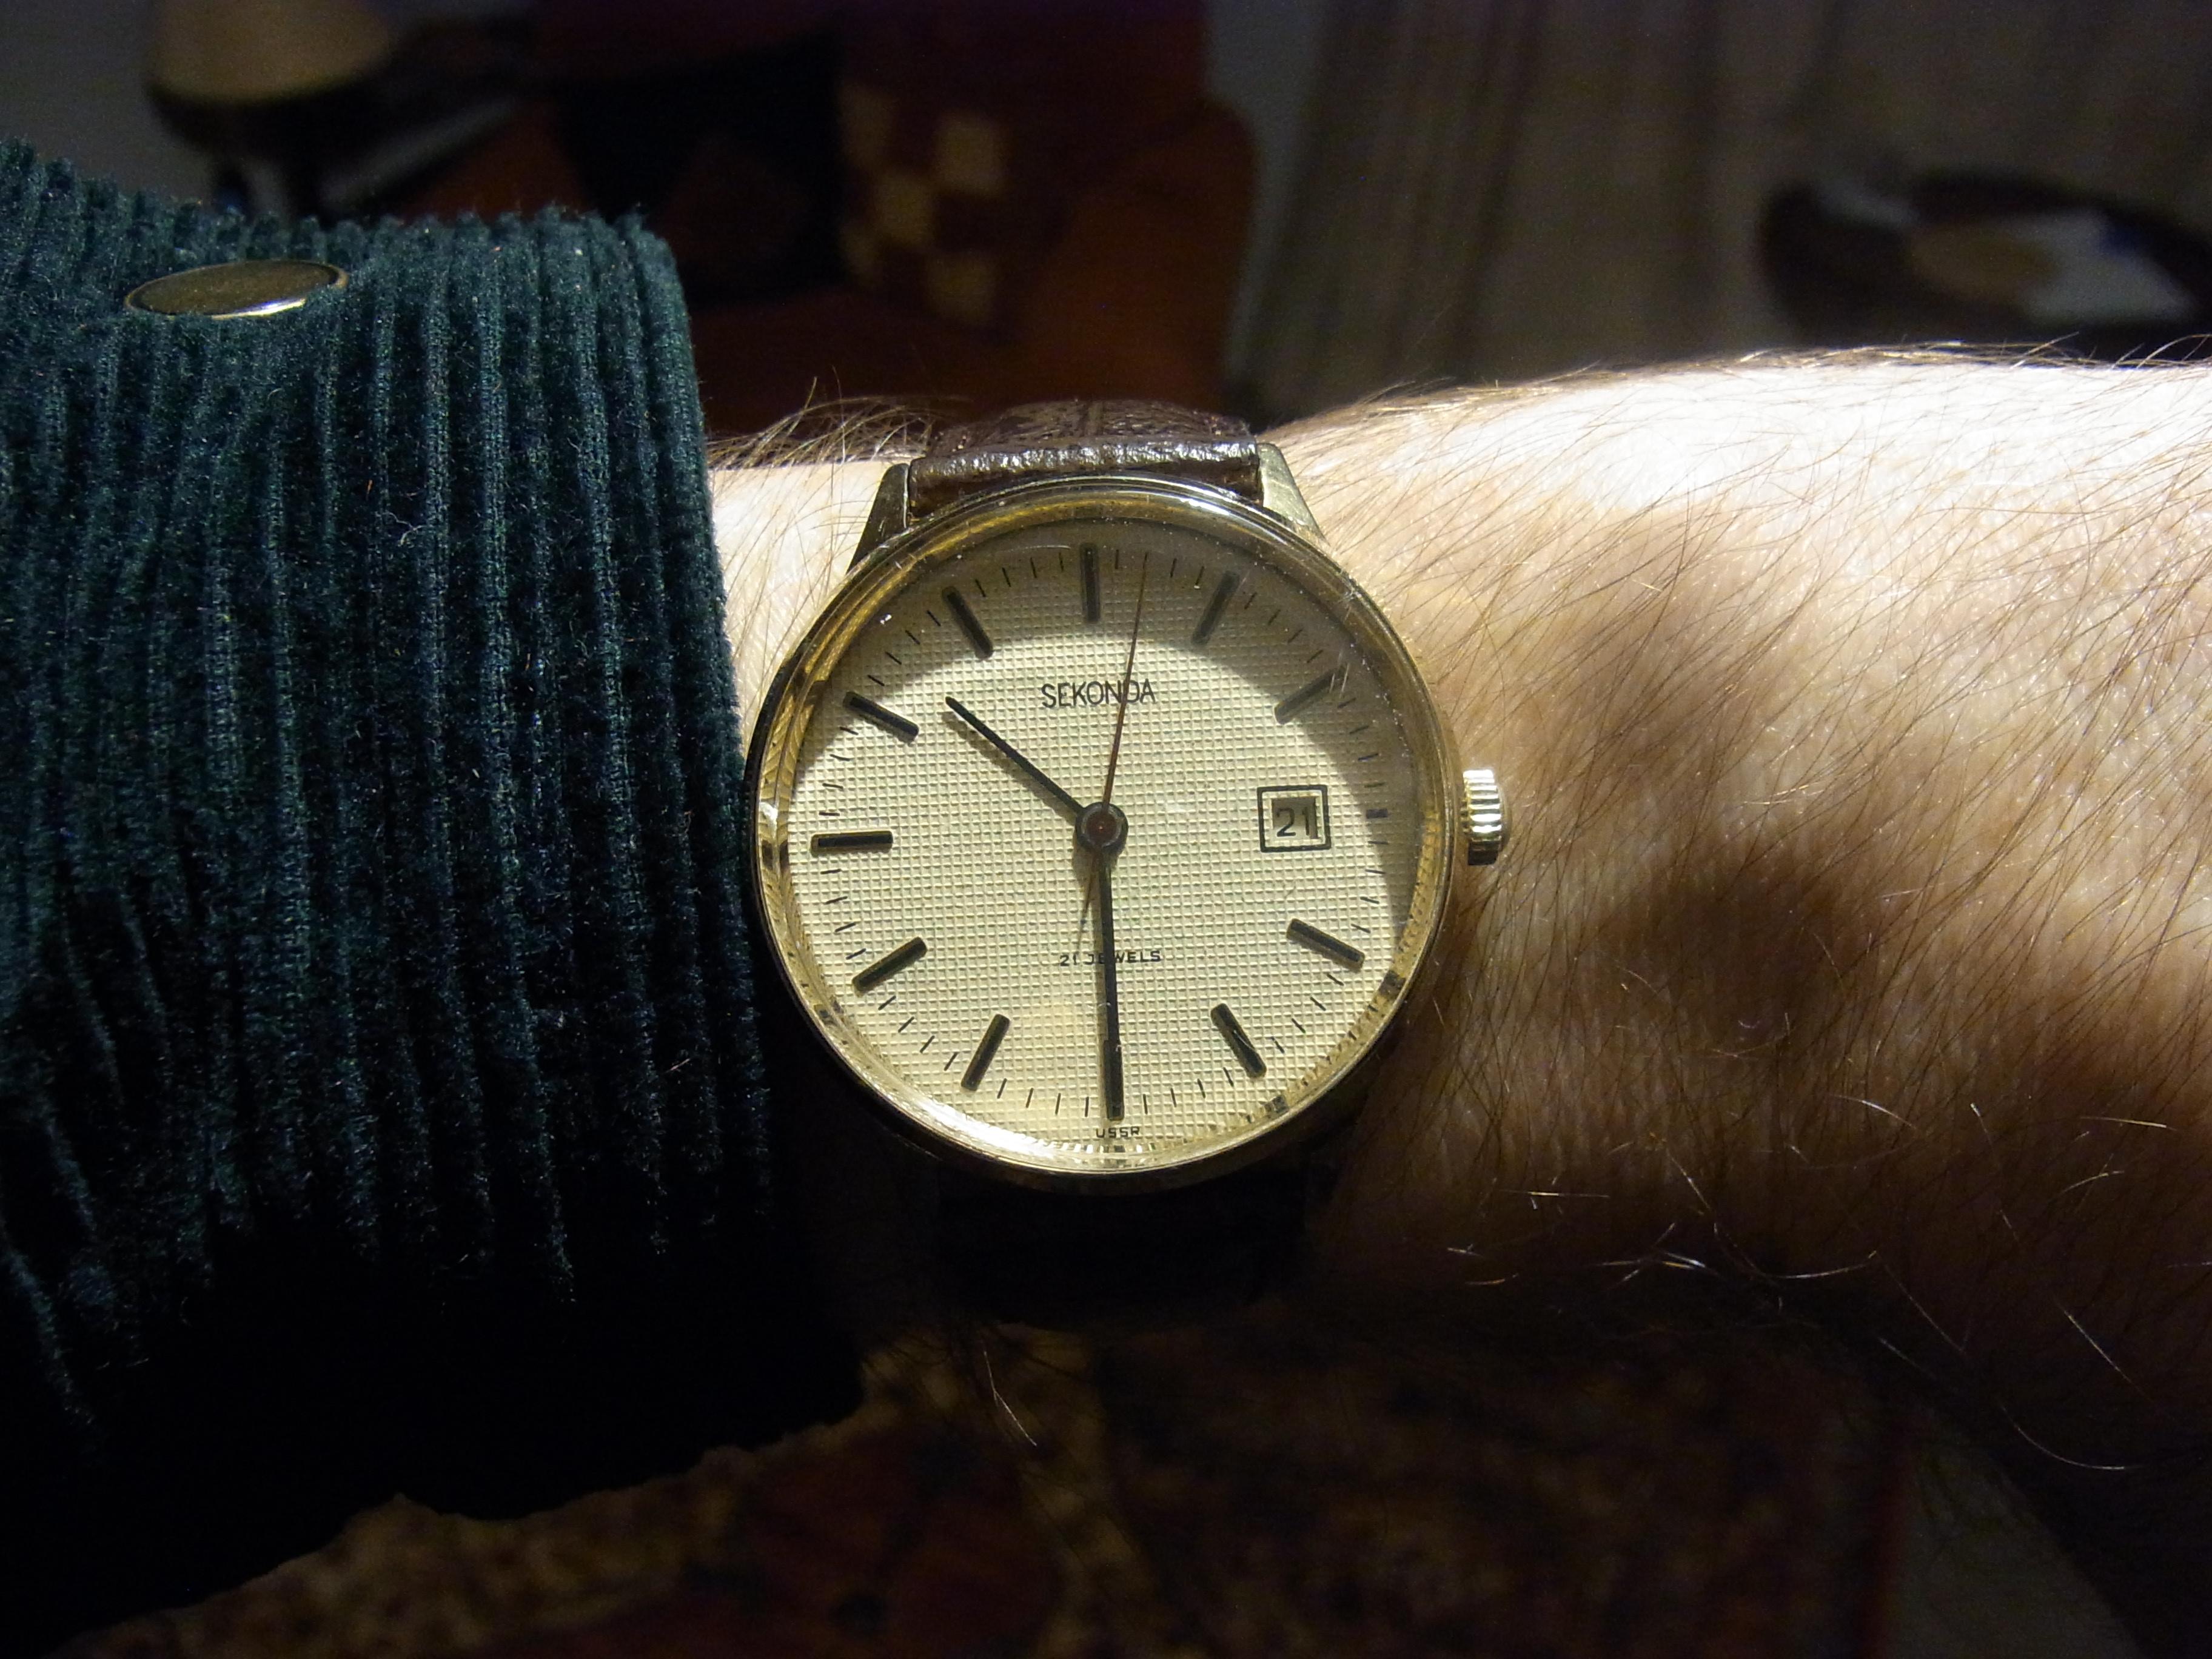
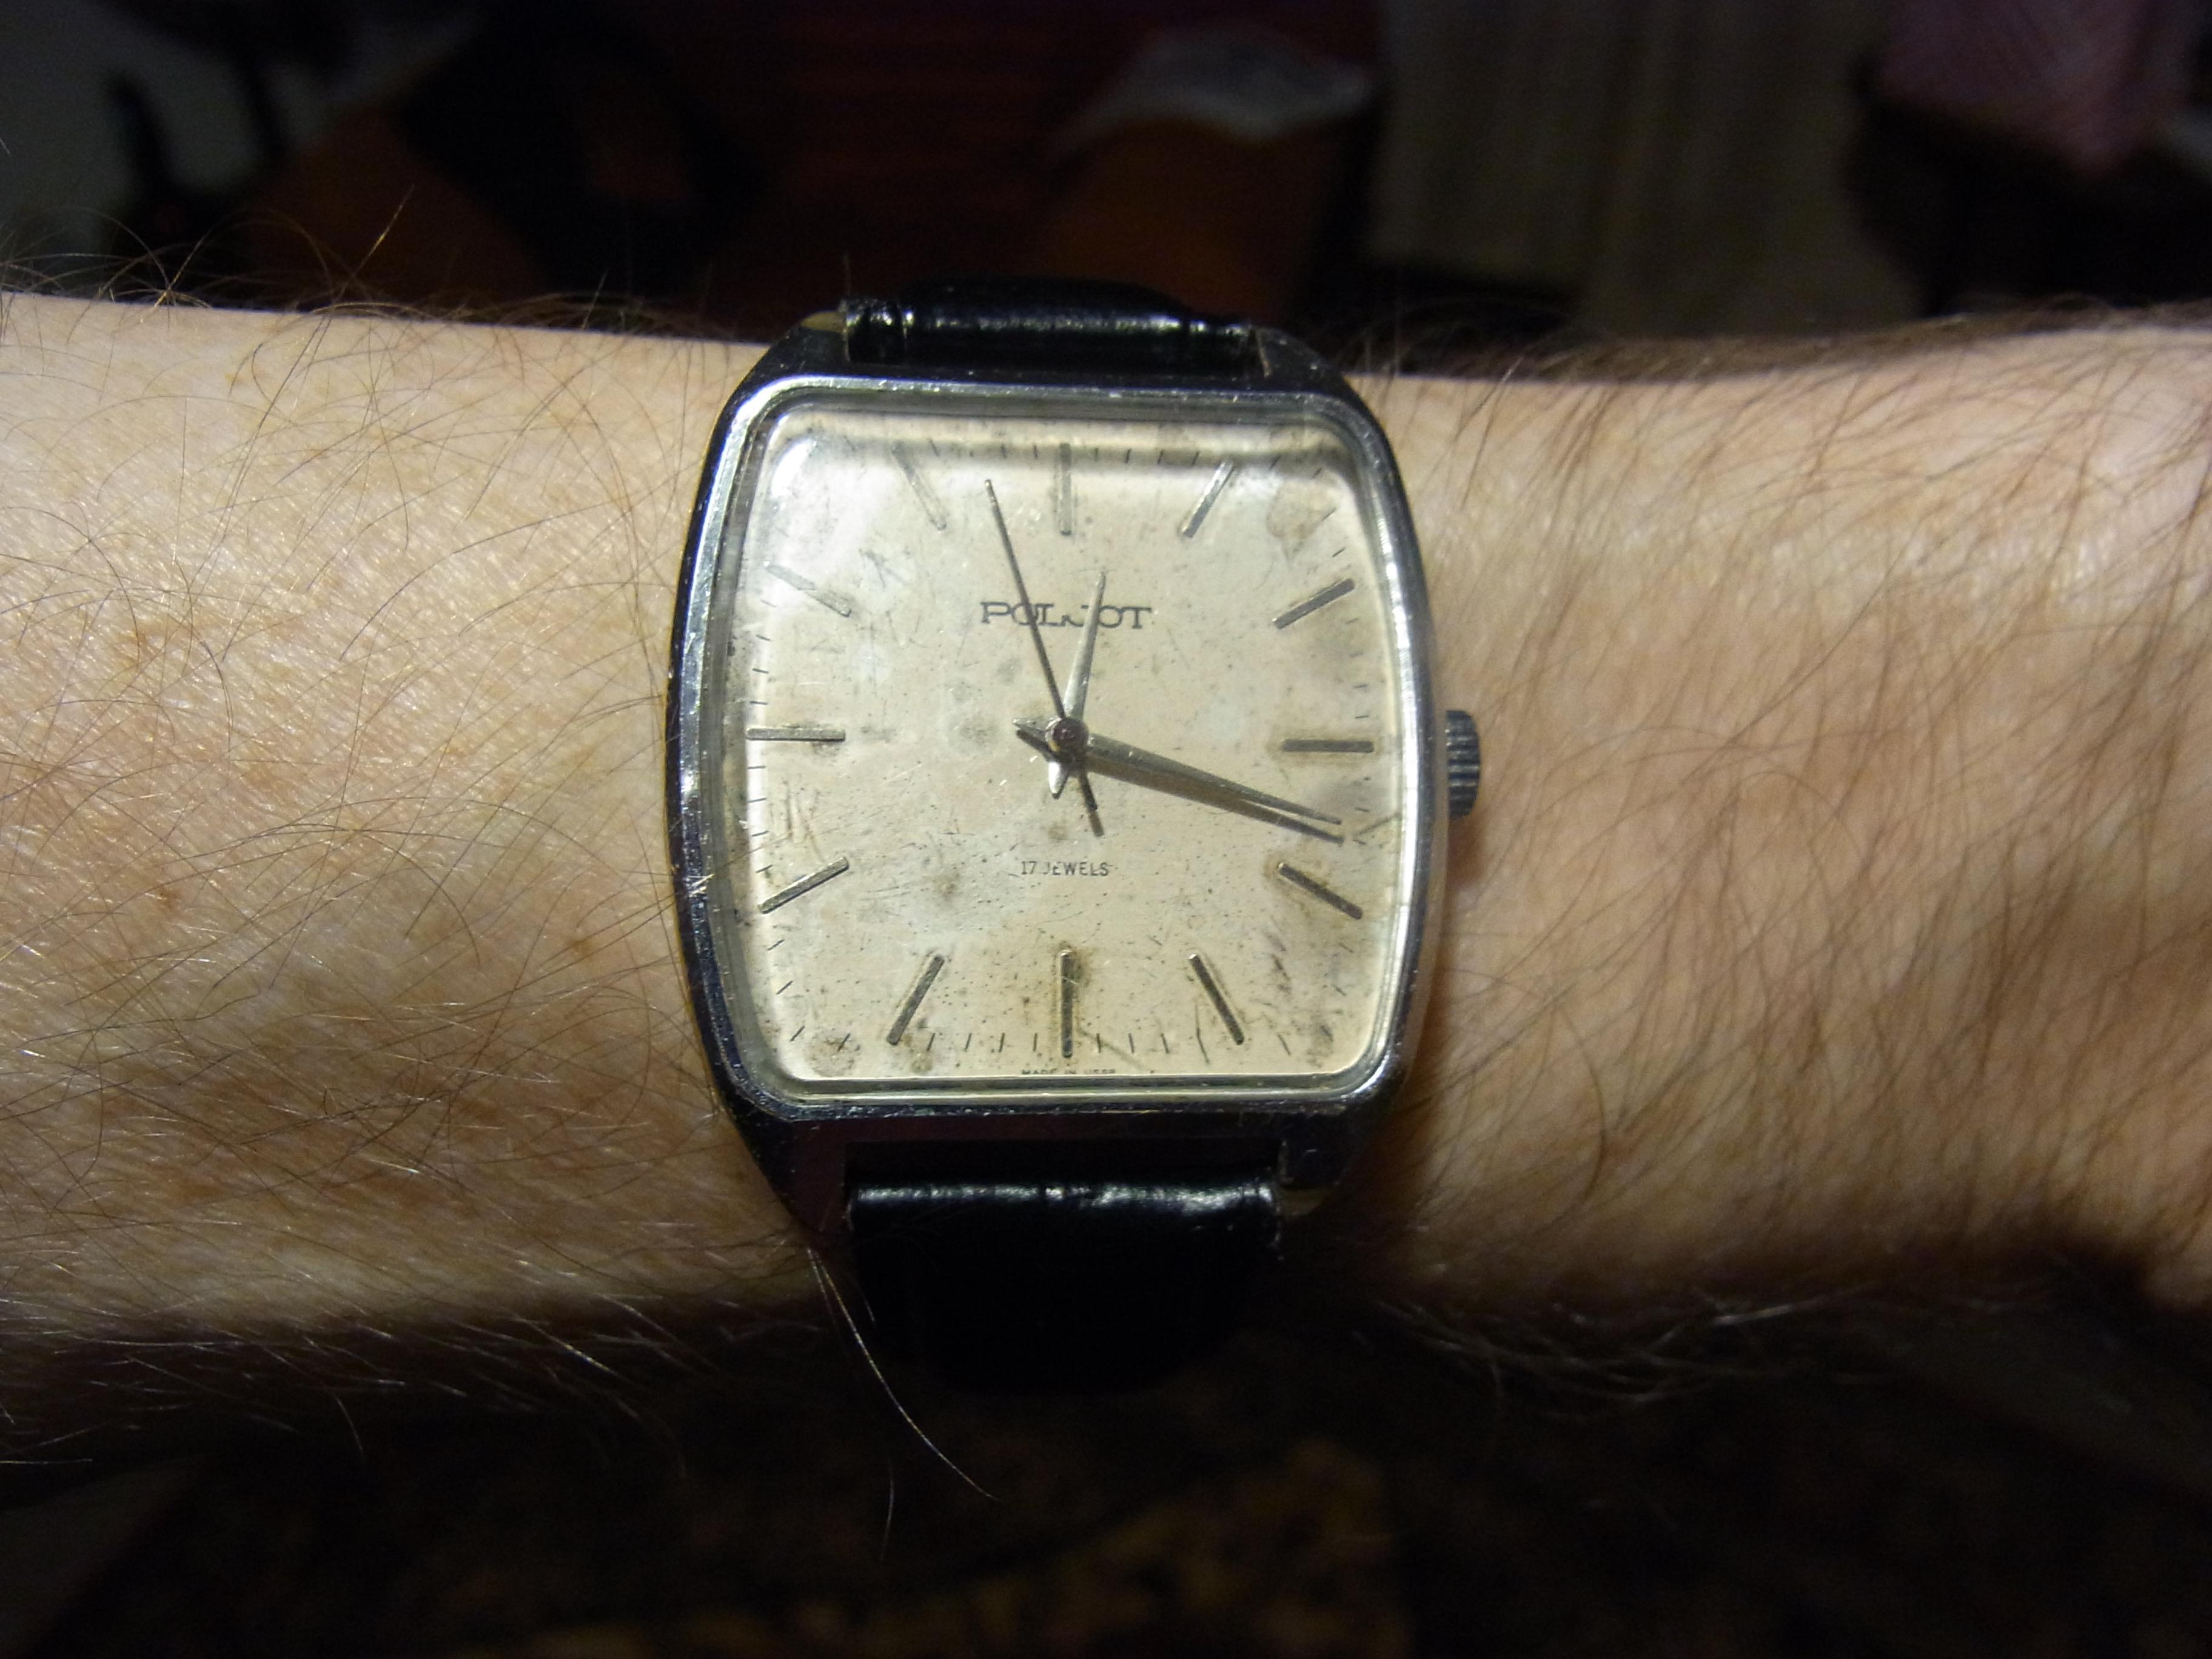
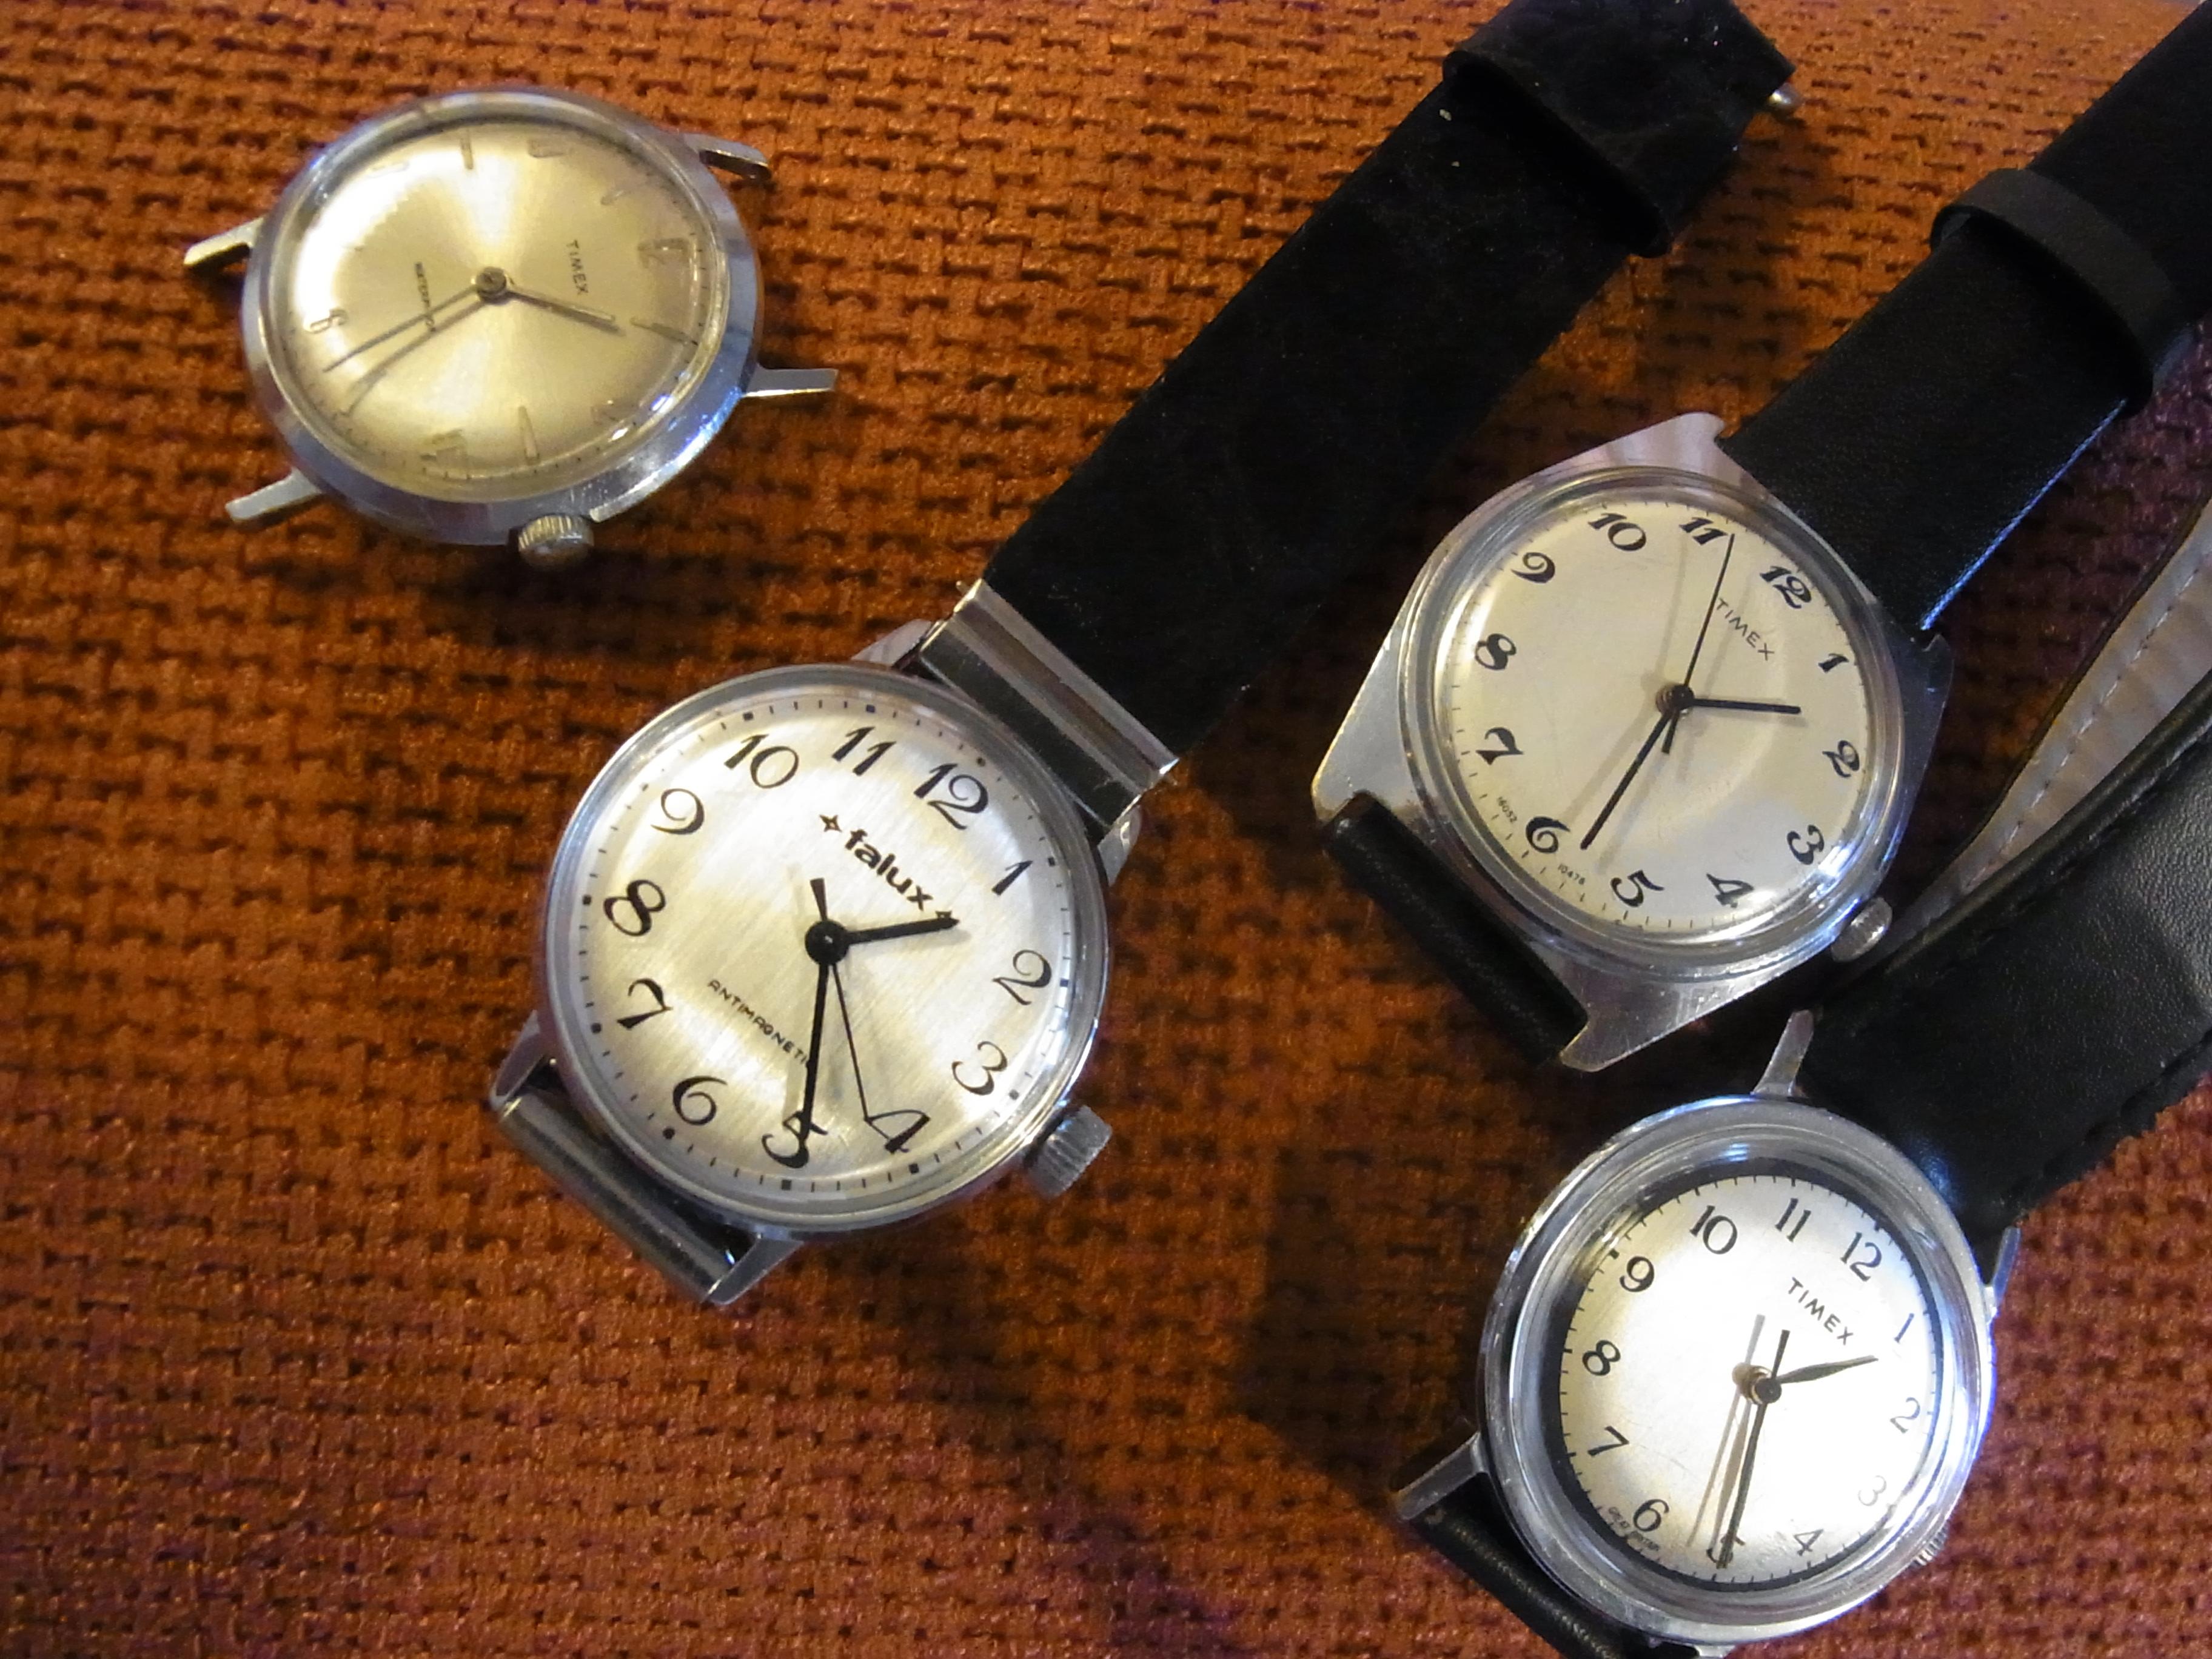
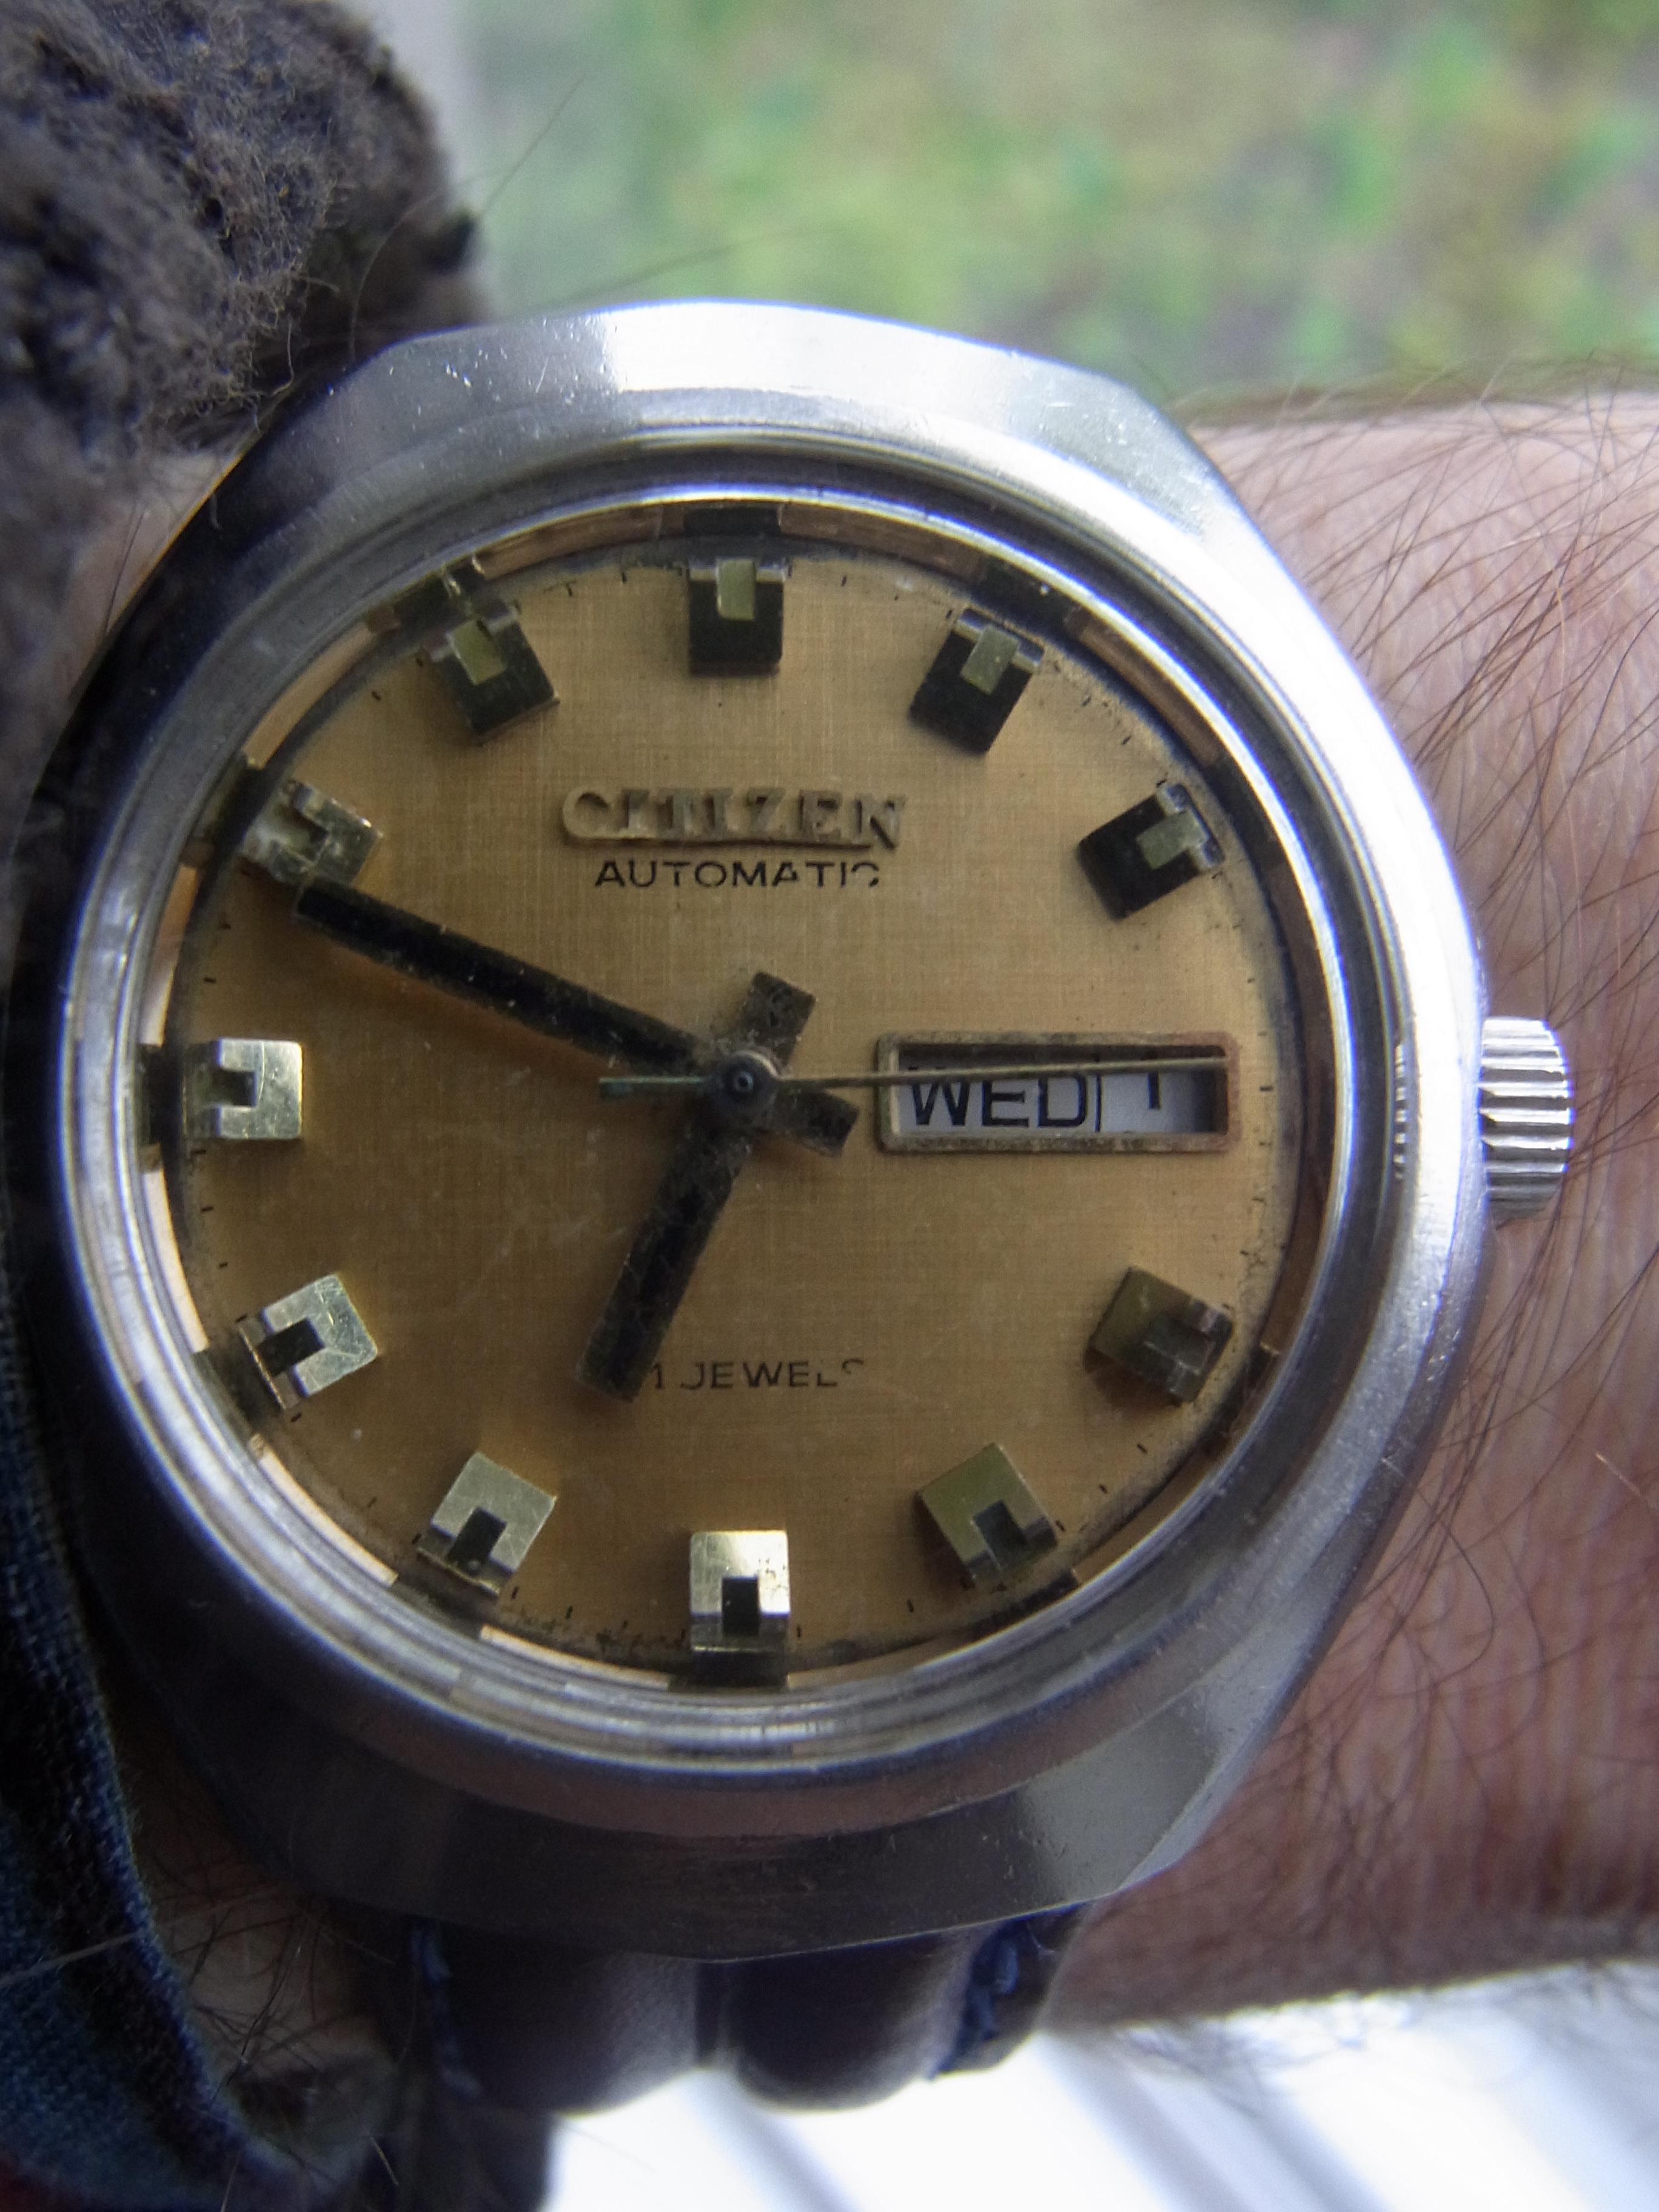
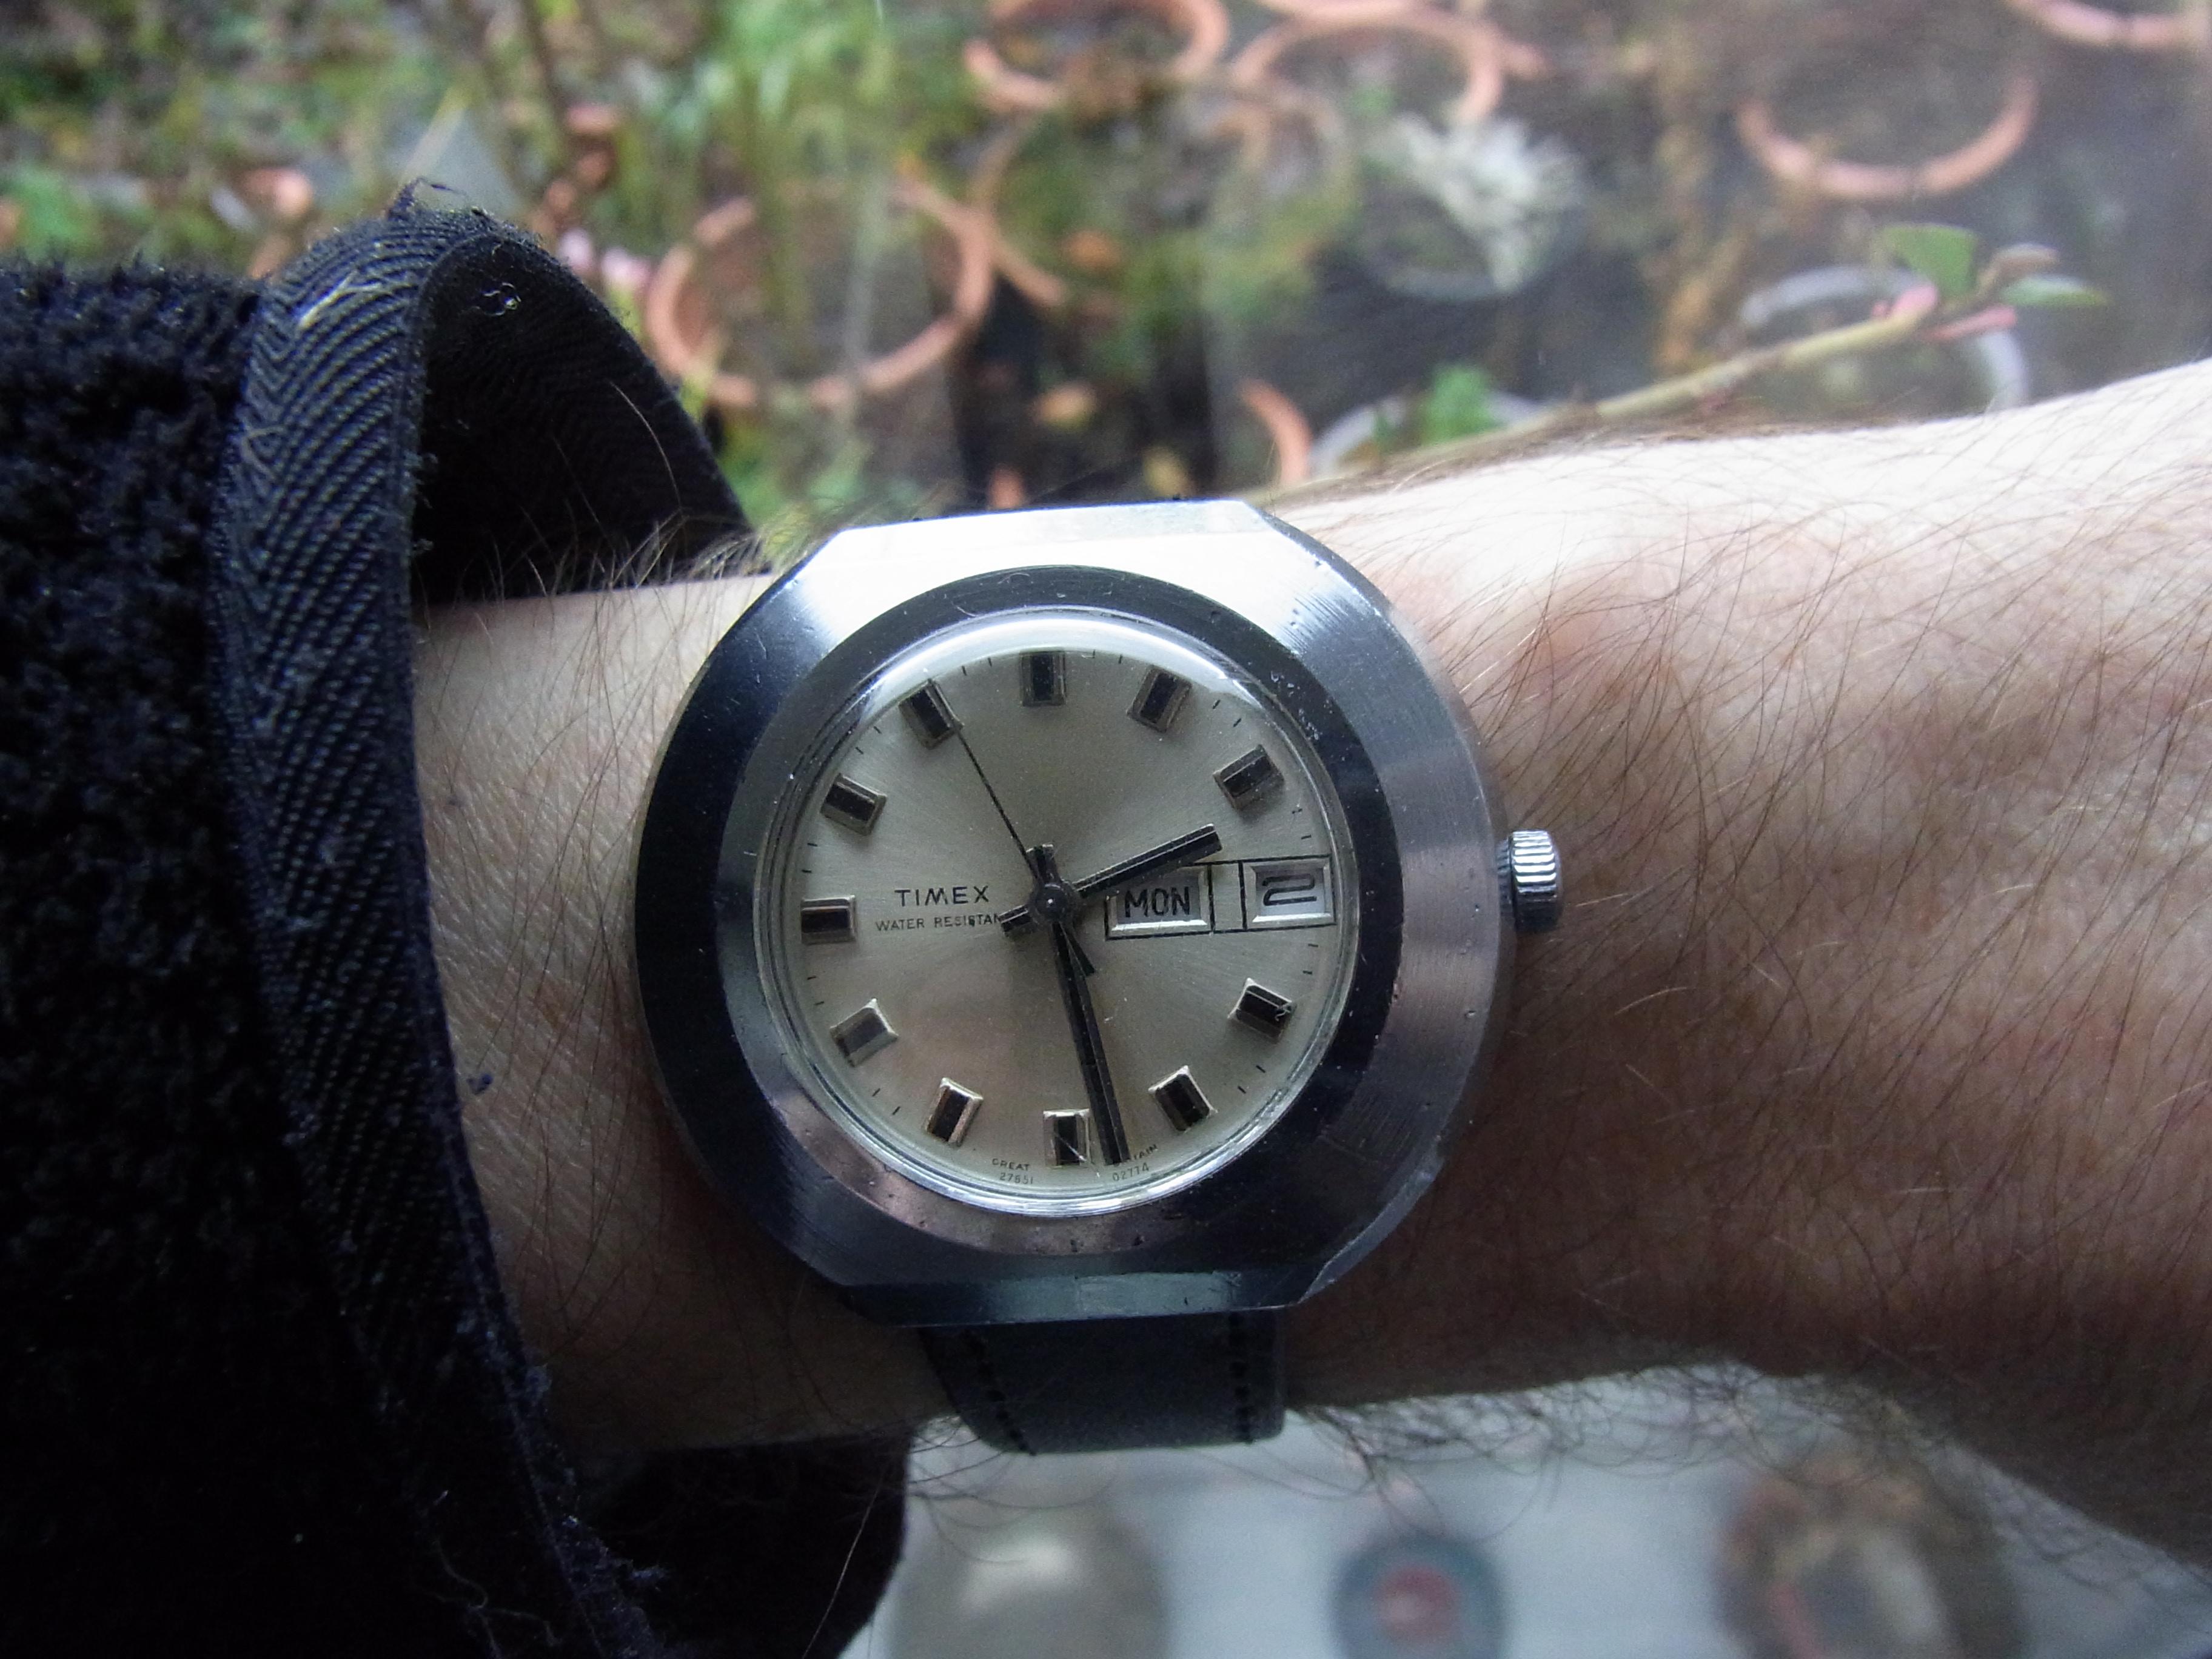
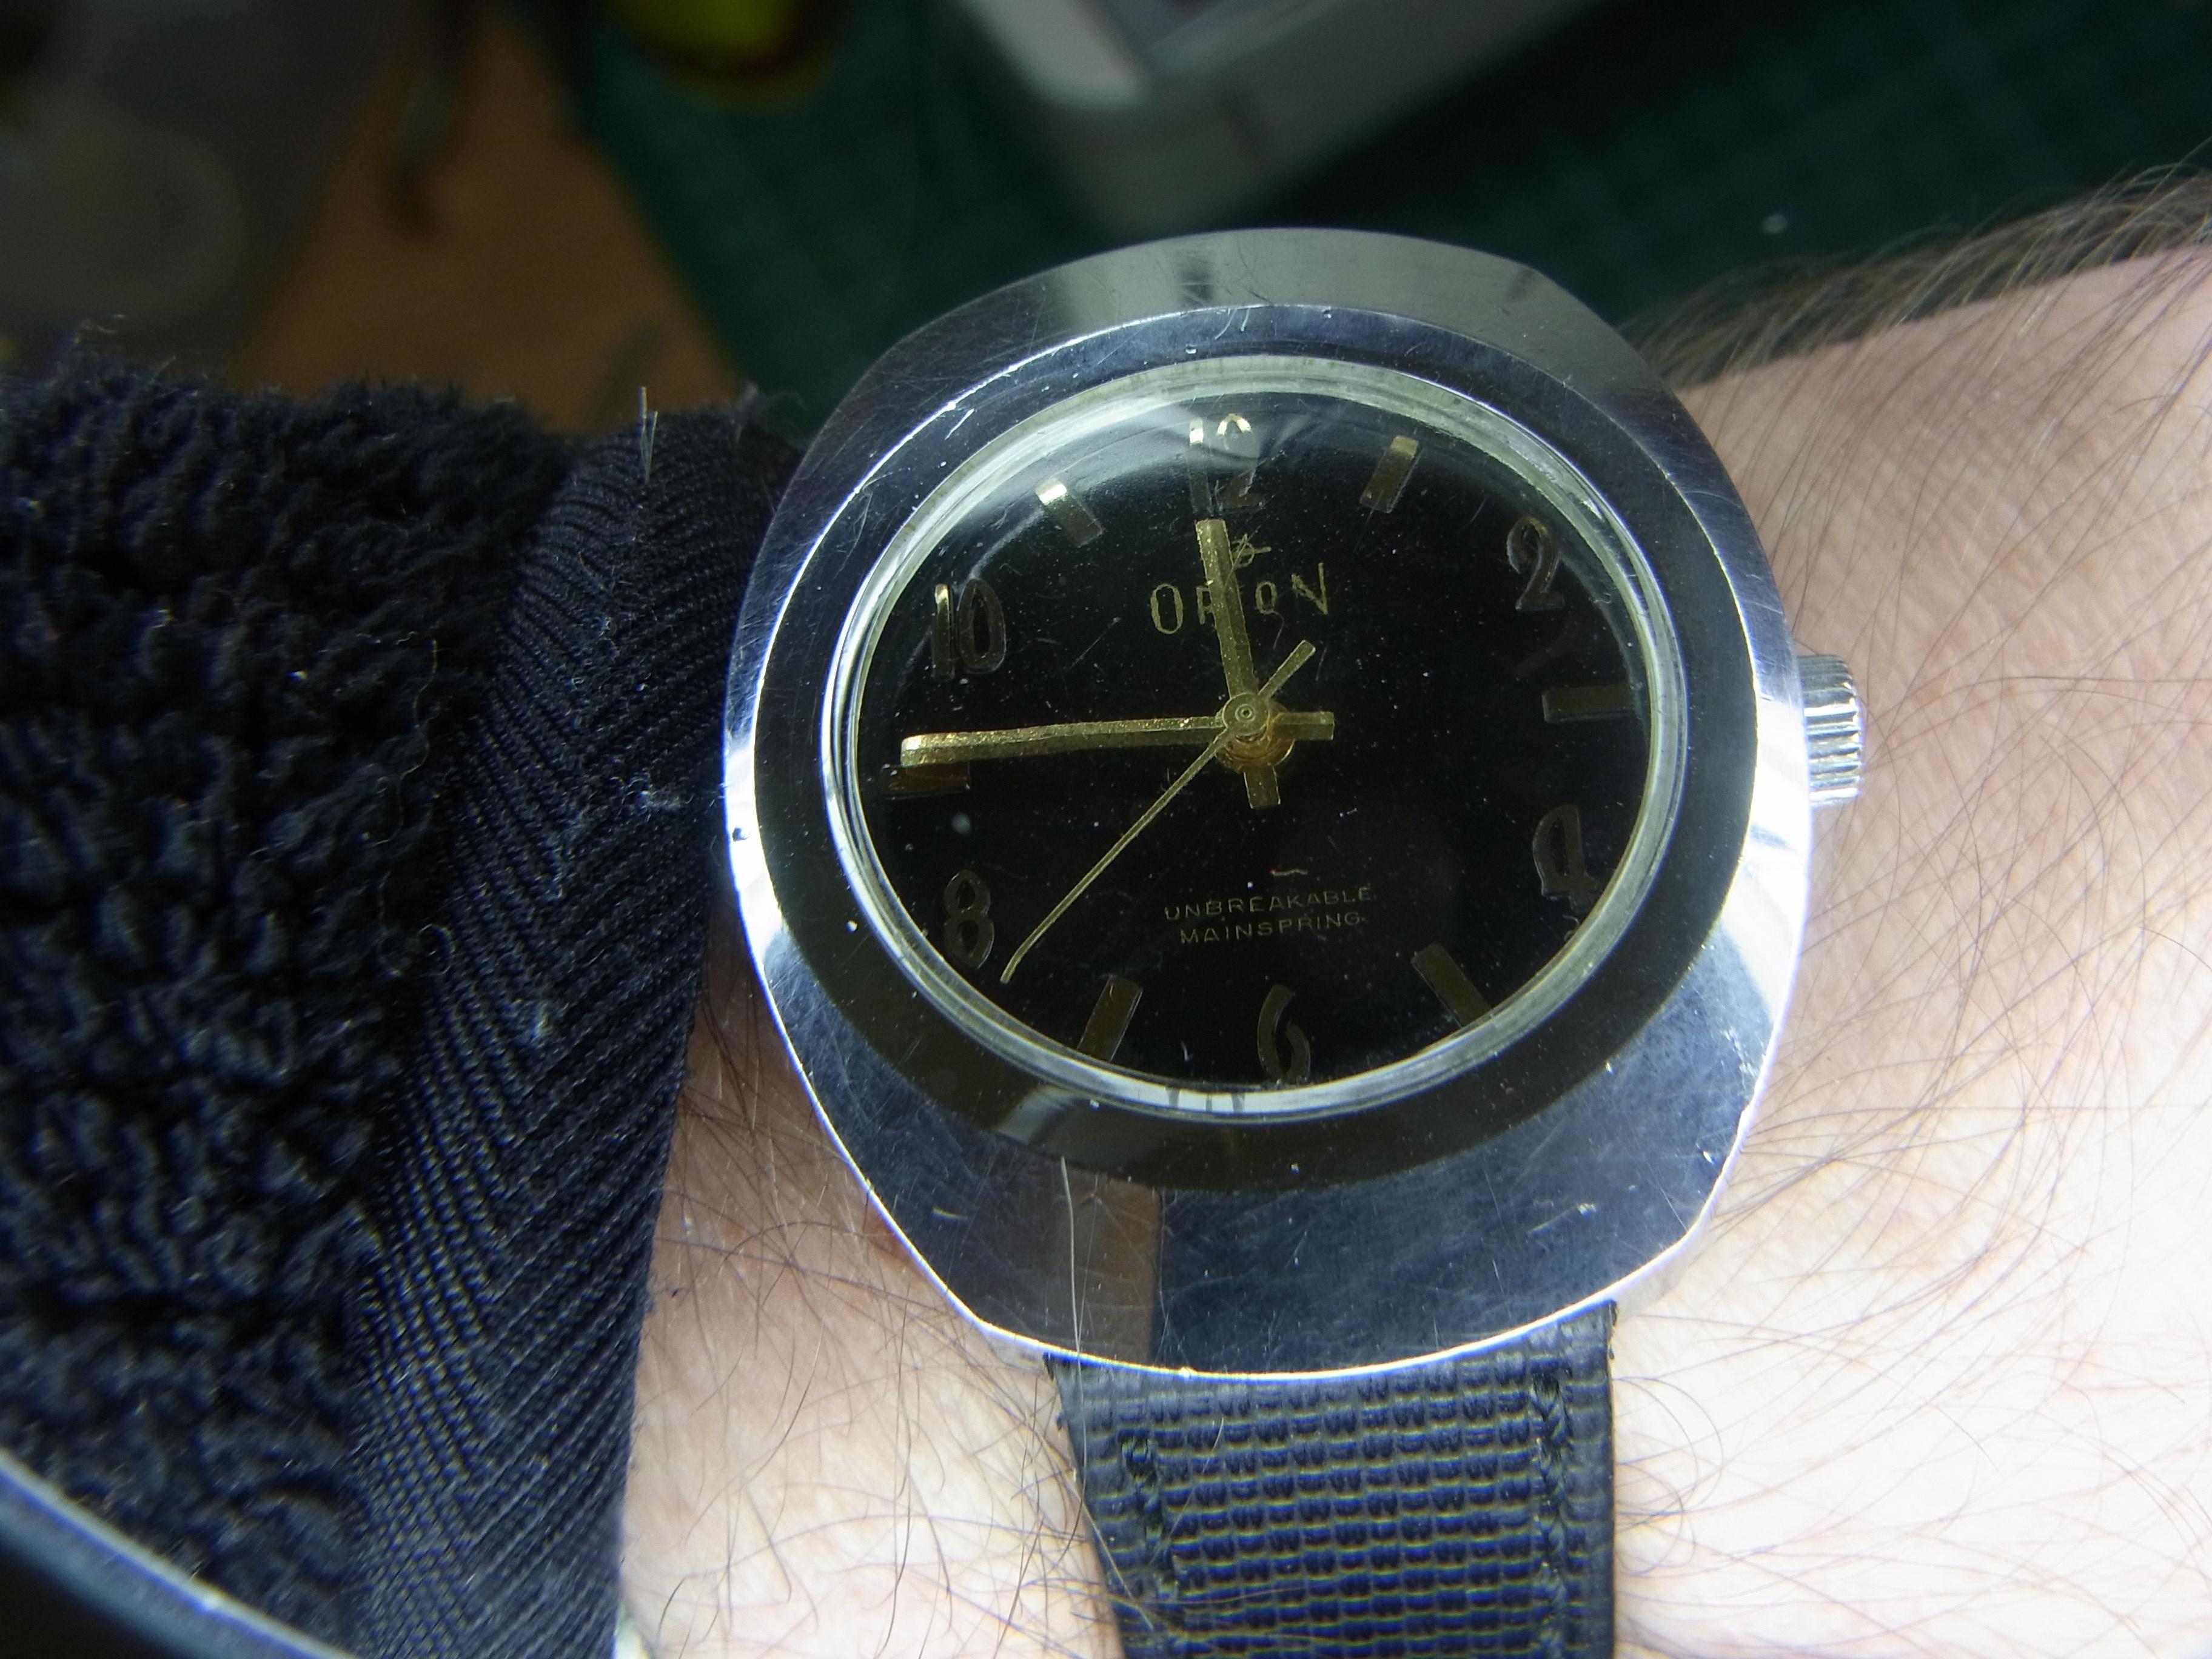
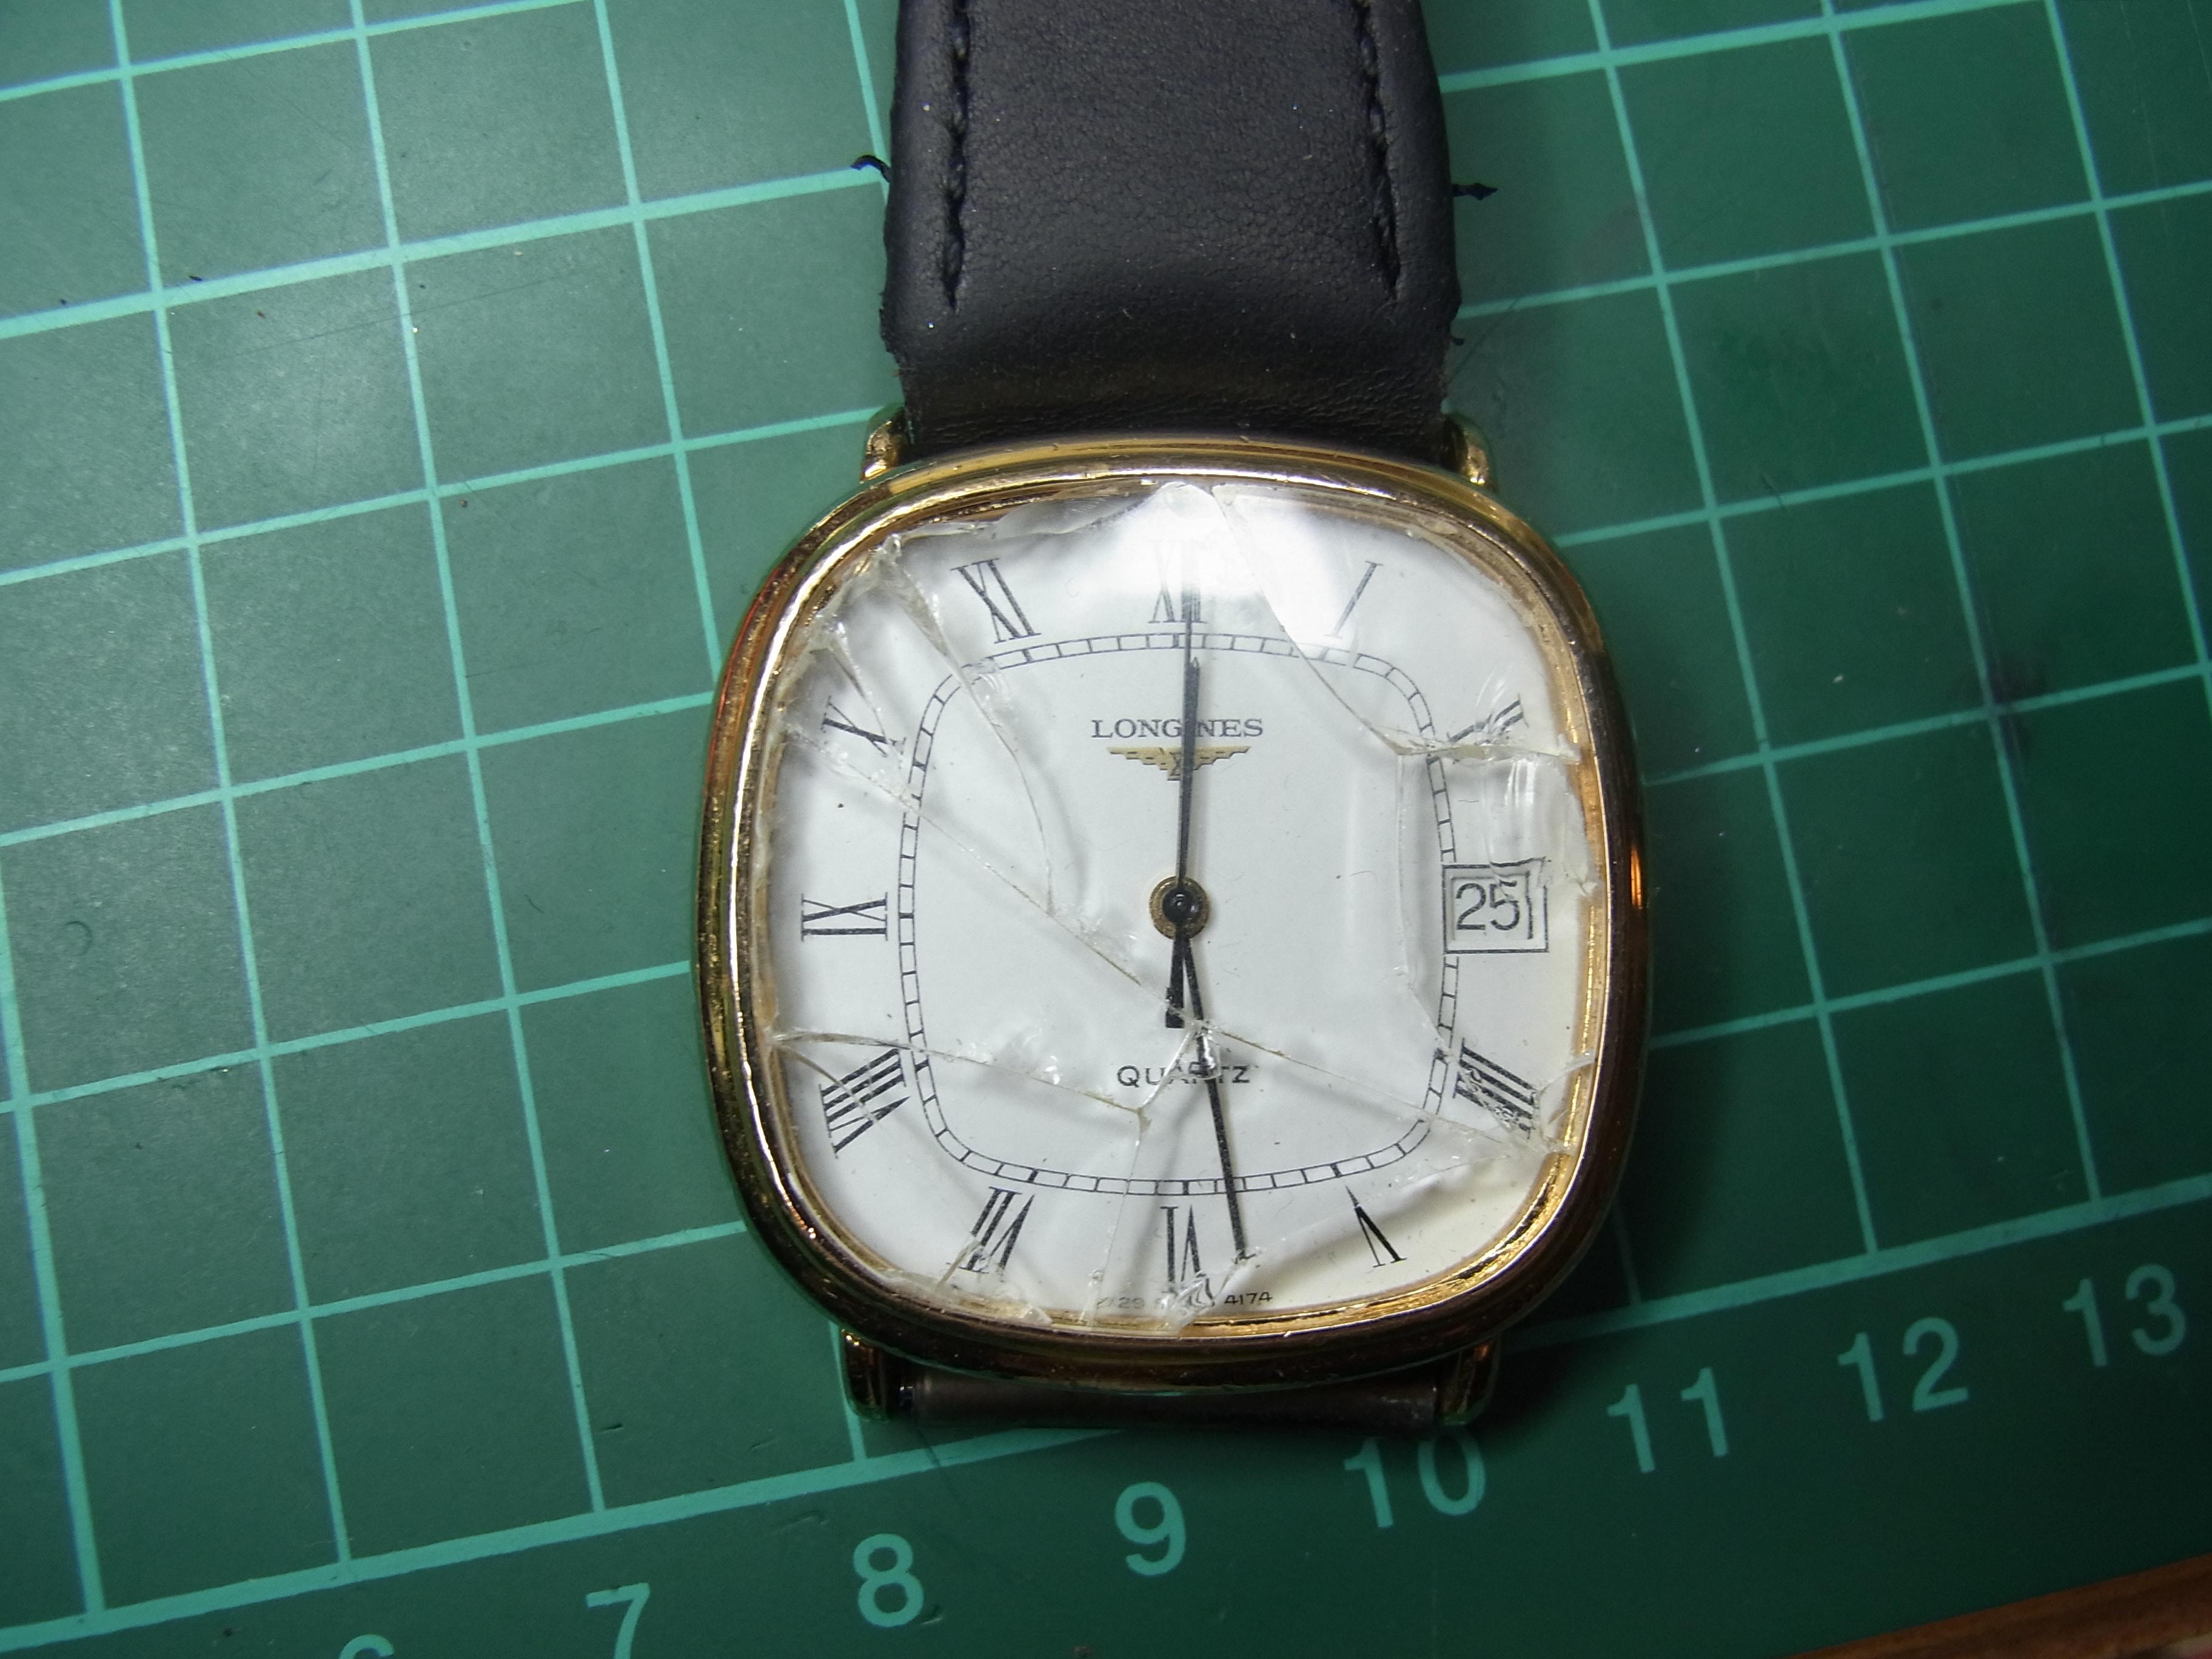
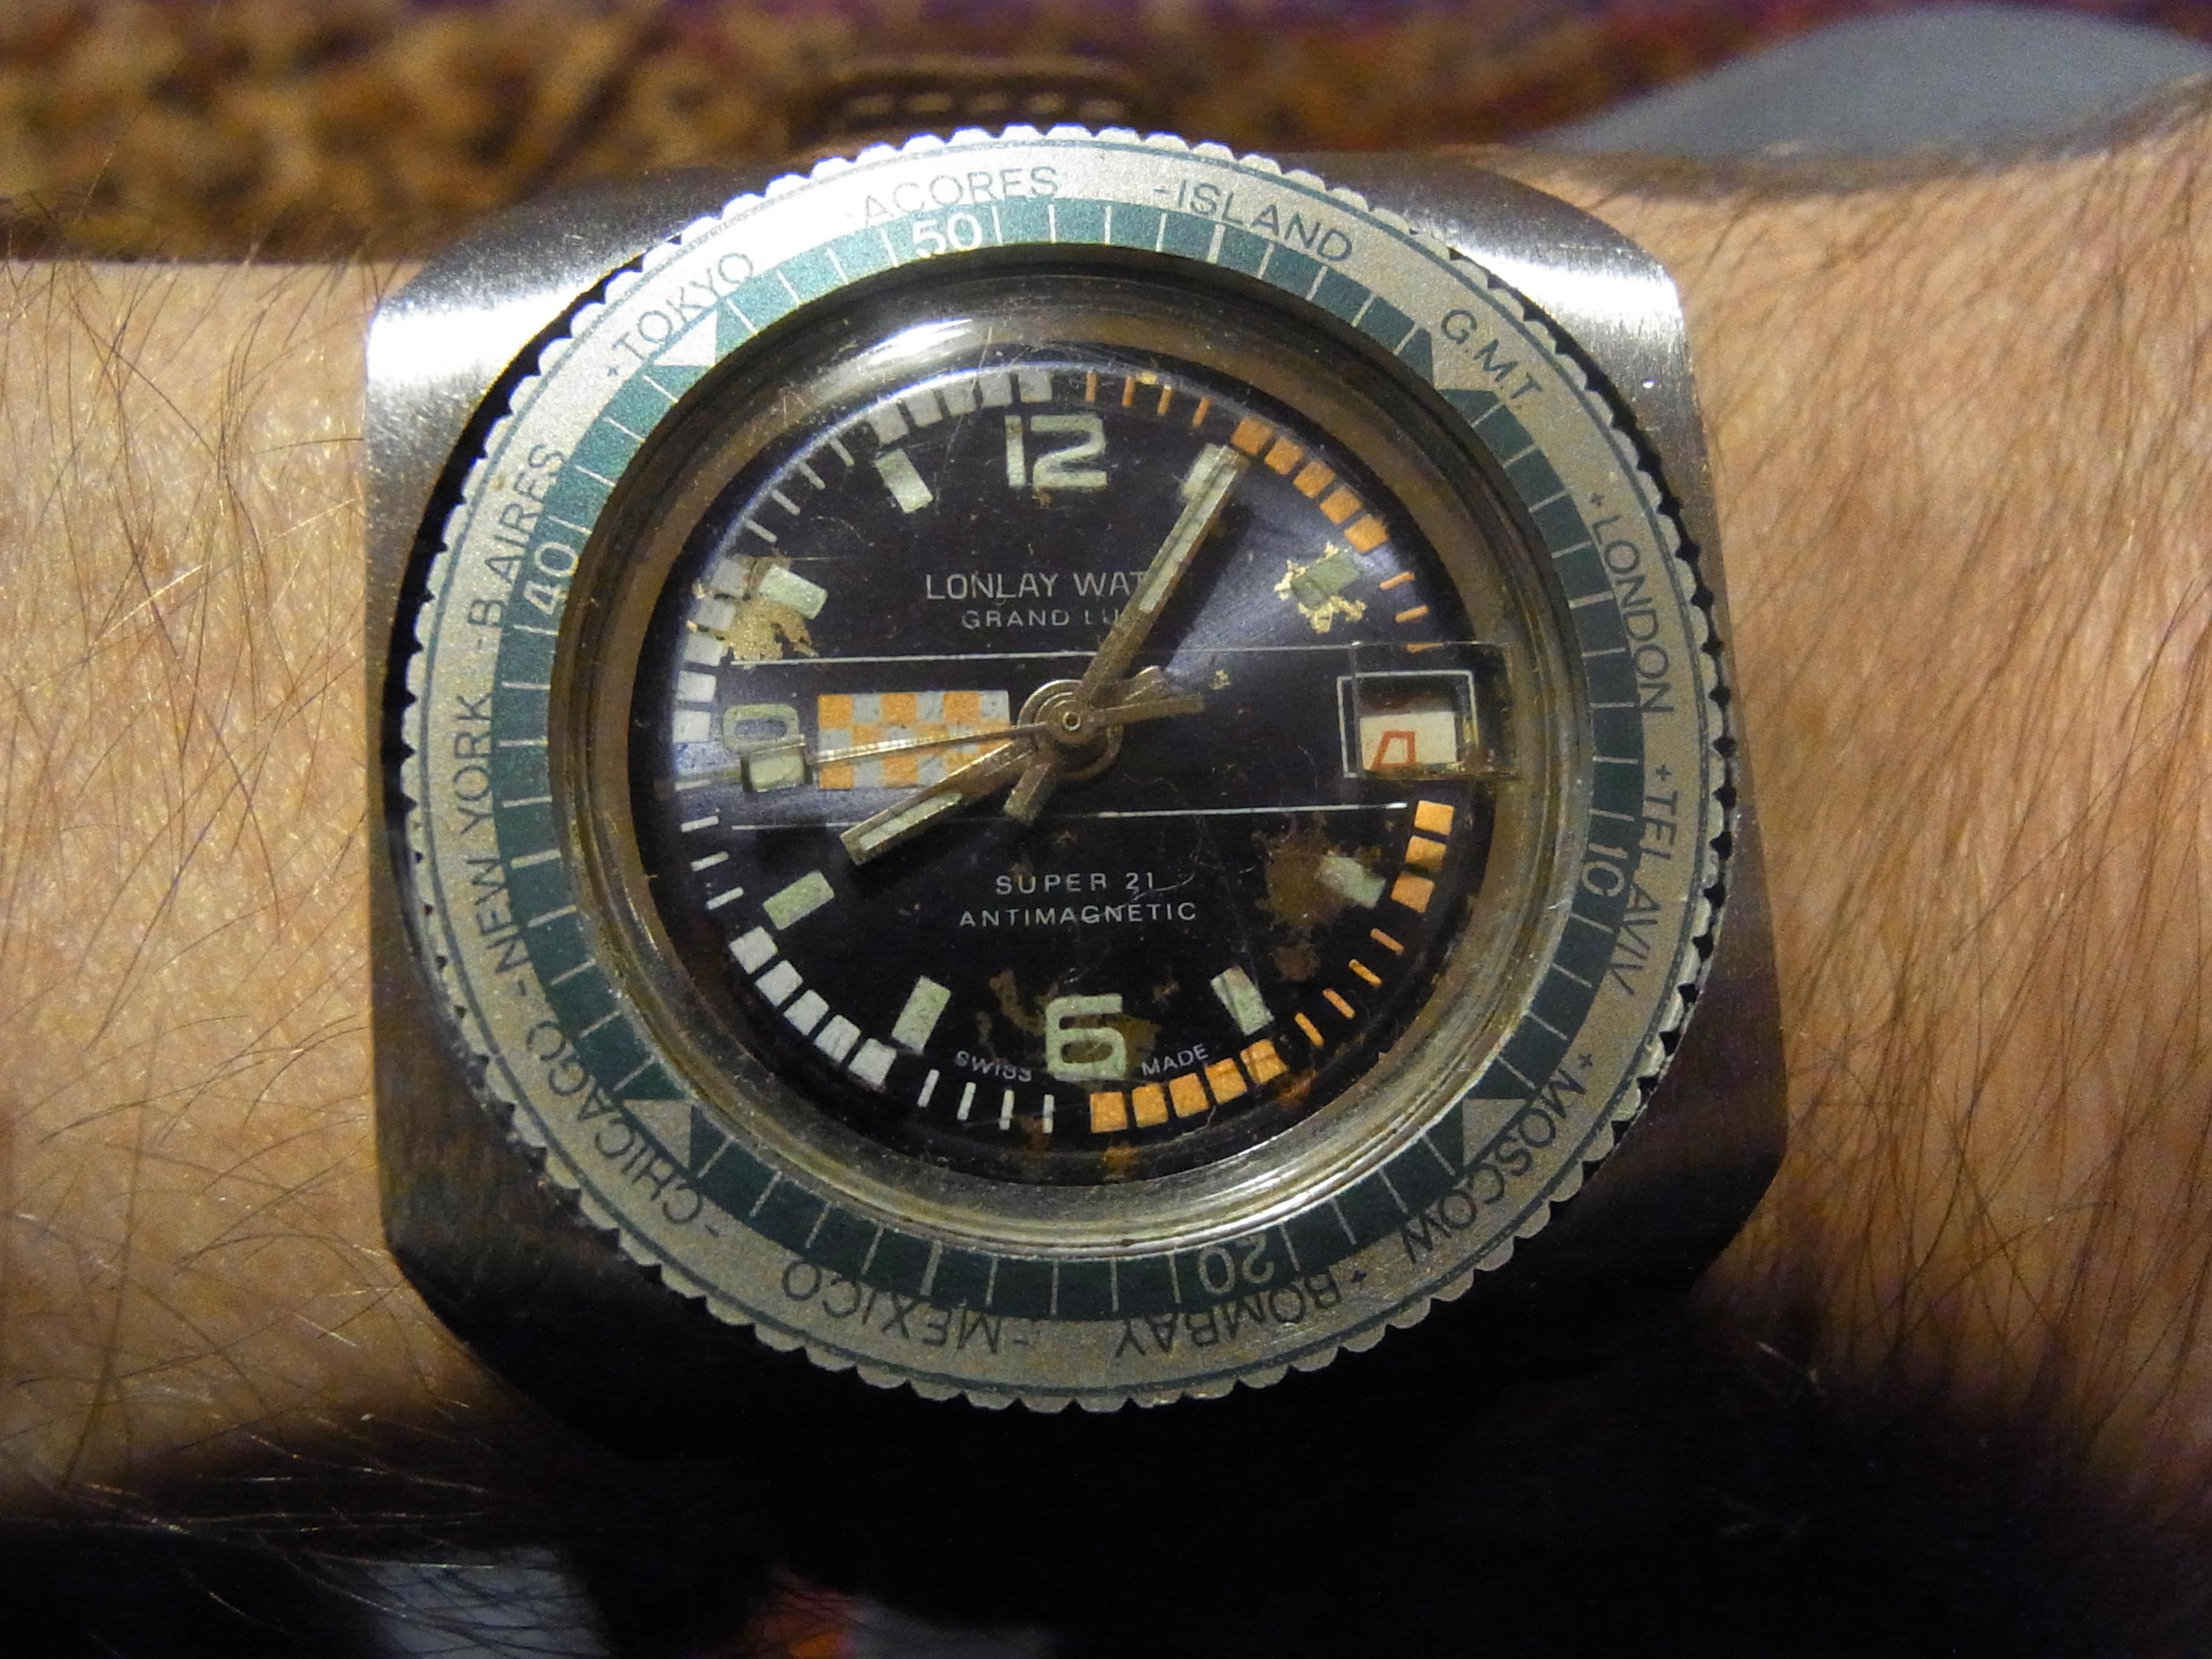
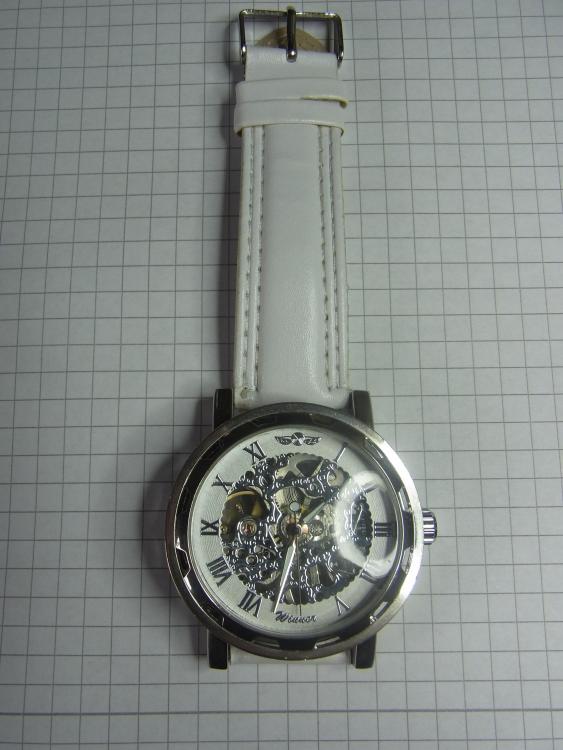
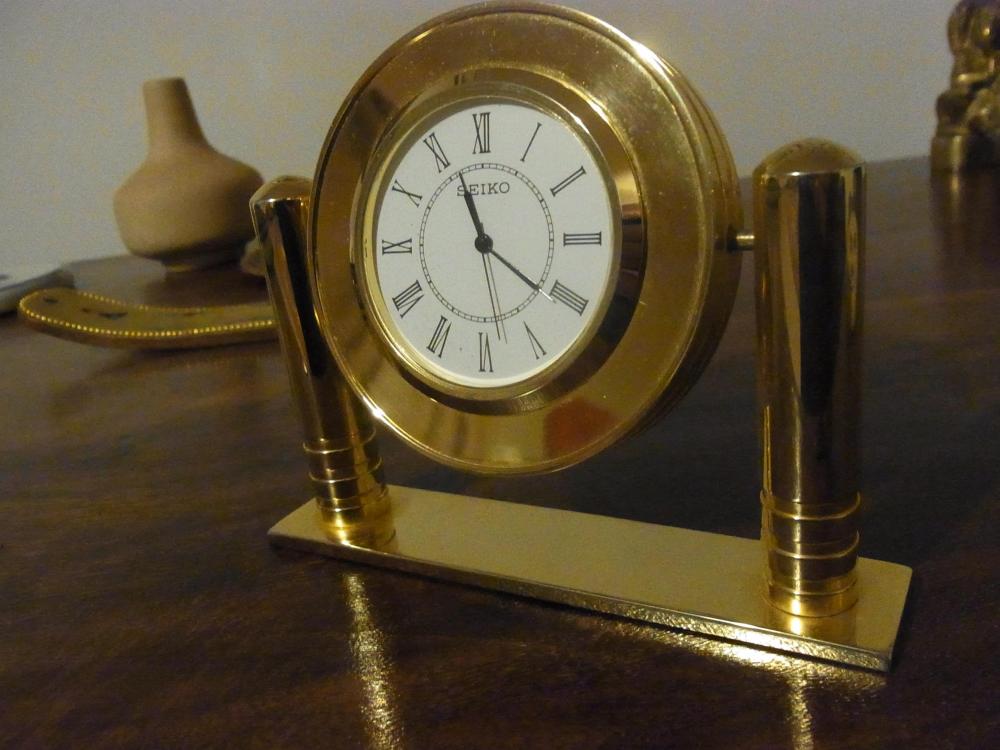
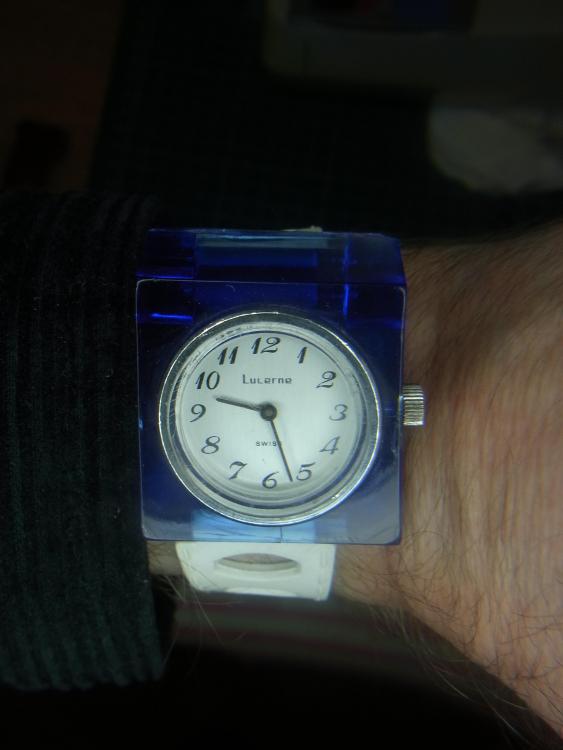
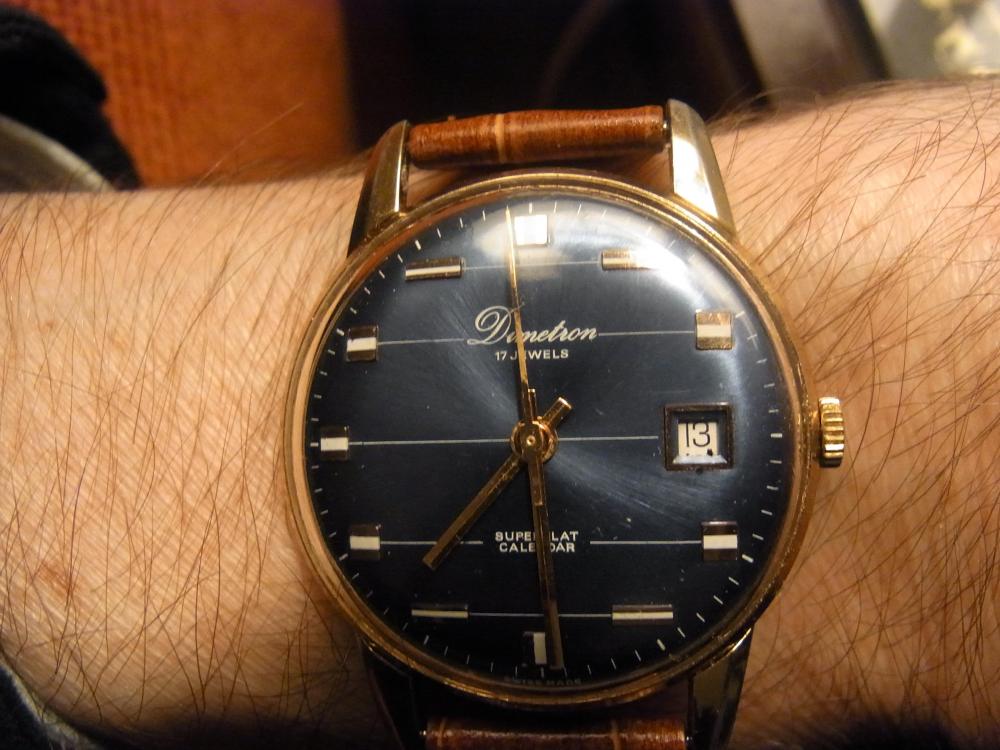
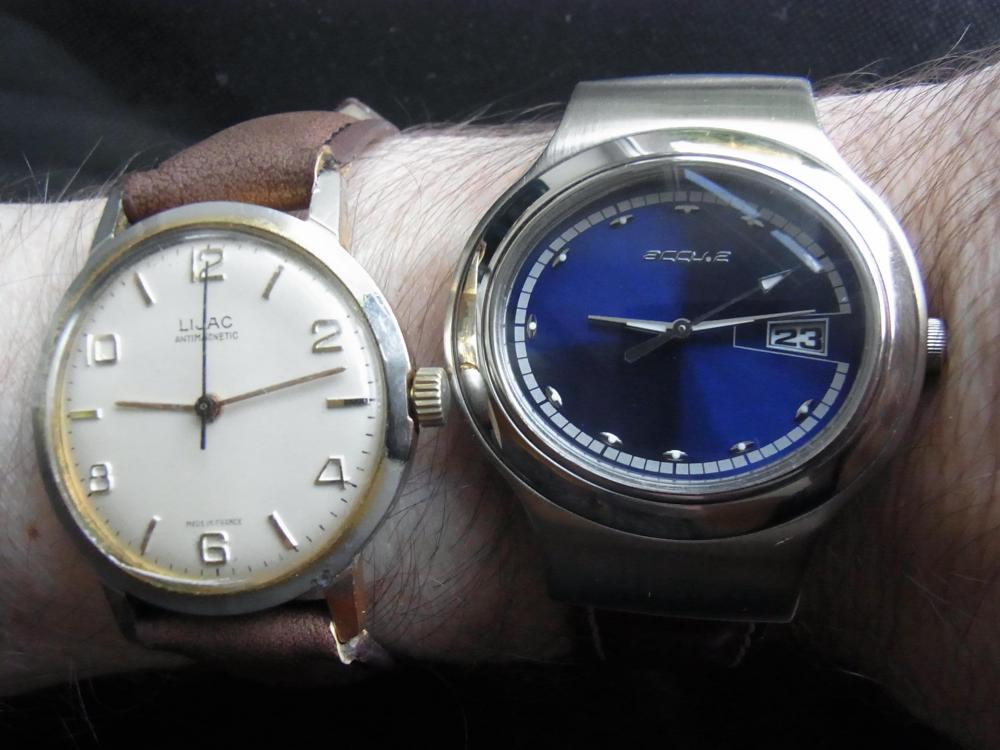
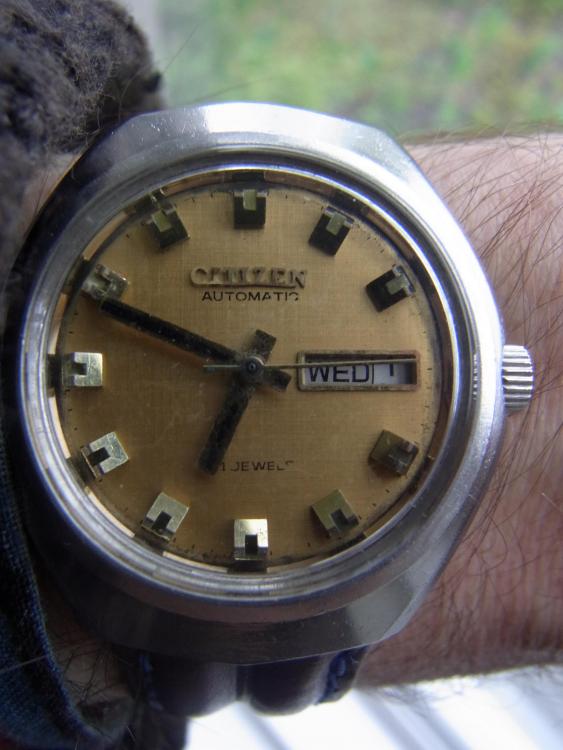
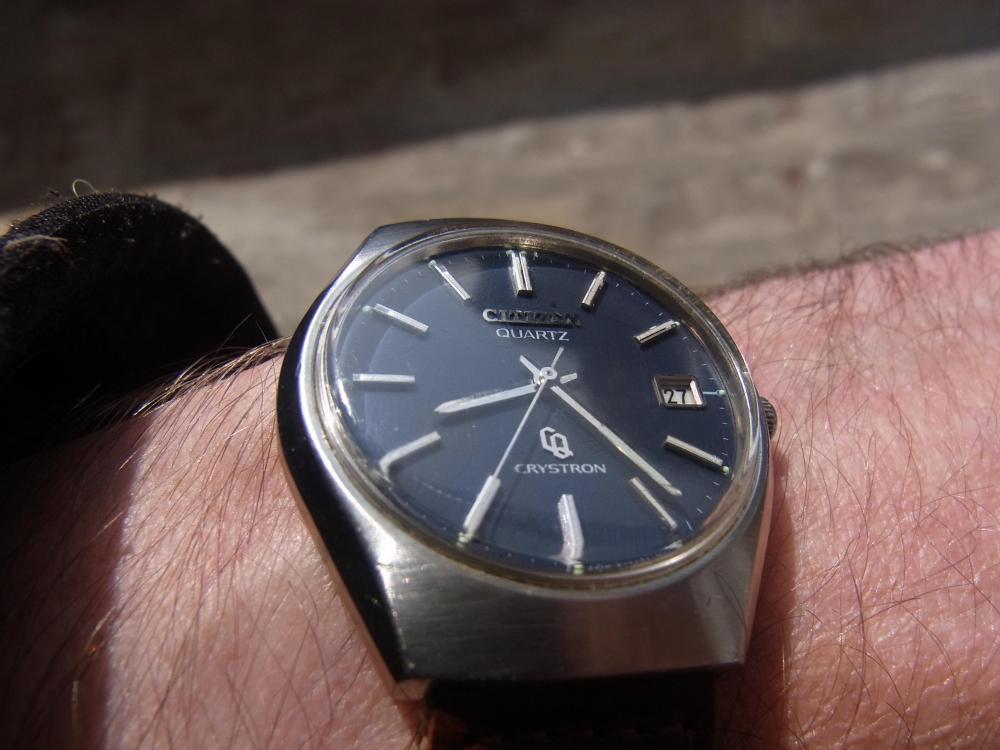
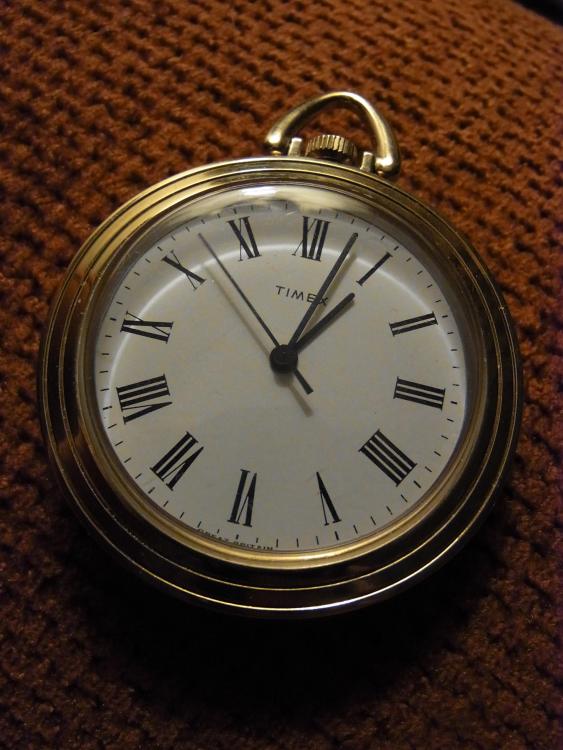
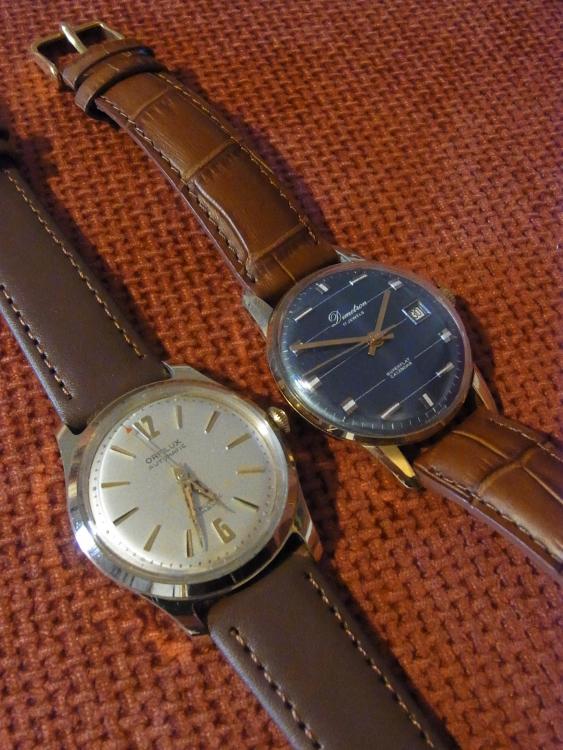
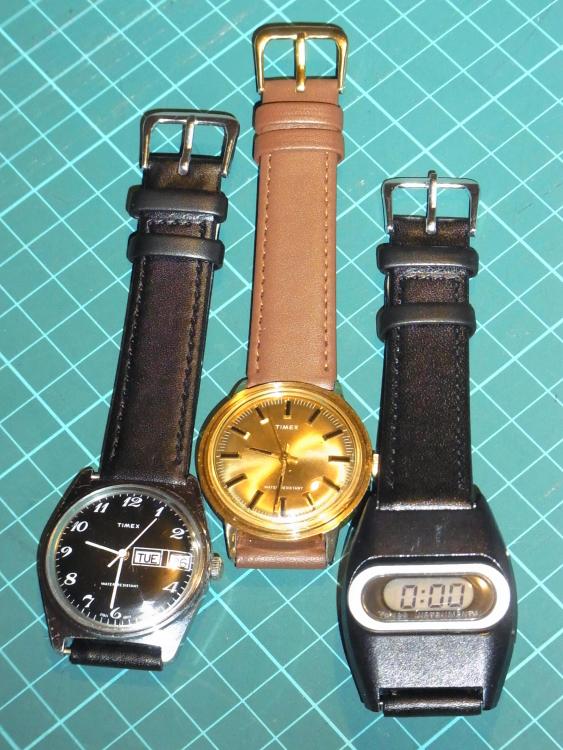
Hopefully this little lot will provide a bit of inspiration. Quite a few of them required some work, most needed a thorough cleaning, and almost all of them needed servicing, but this shouldn't be a bar to looking through the penny lots on ebay. A good number of them needed little more than a new crystal, a new strap, or even just a new battery. There are some unique and interesting pieces to be had for 404 or less, or to put it another way, less than a rather ordinary cup of coffee in the local coffee shop.


 1 point
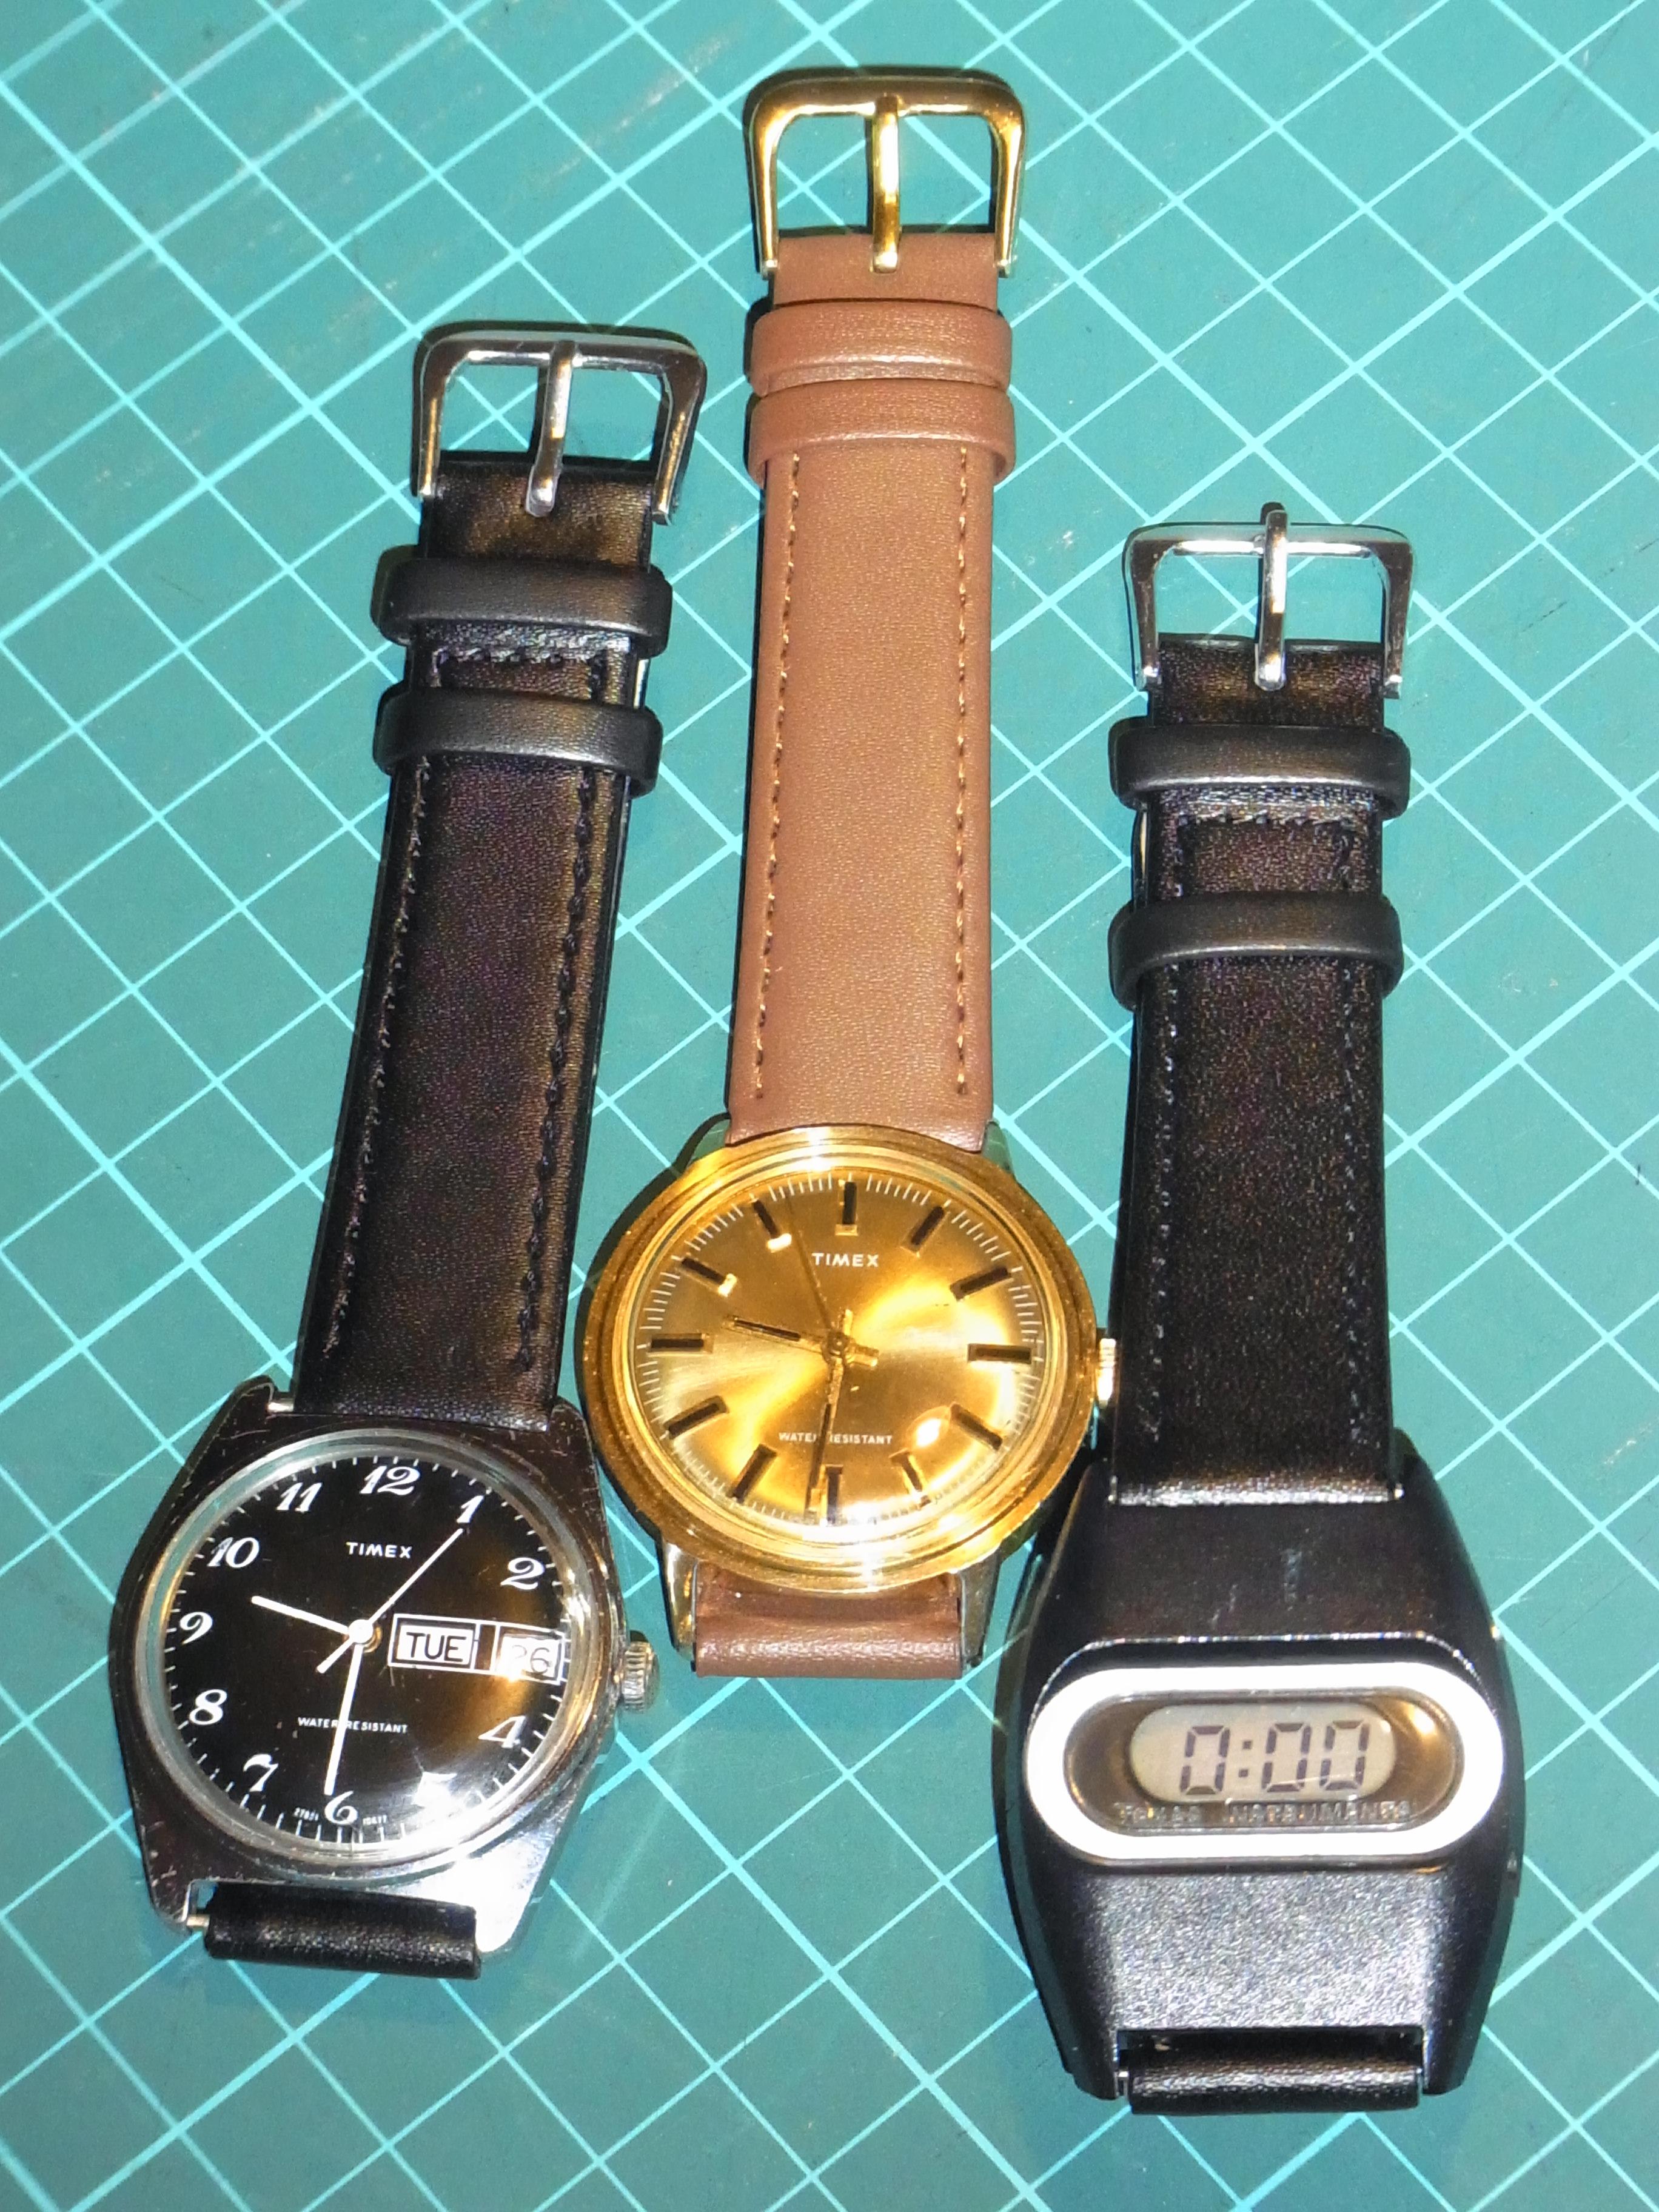
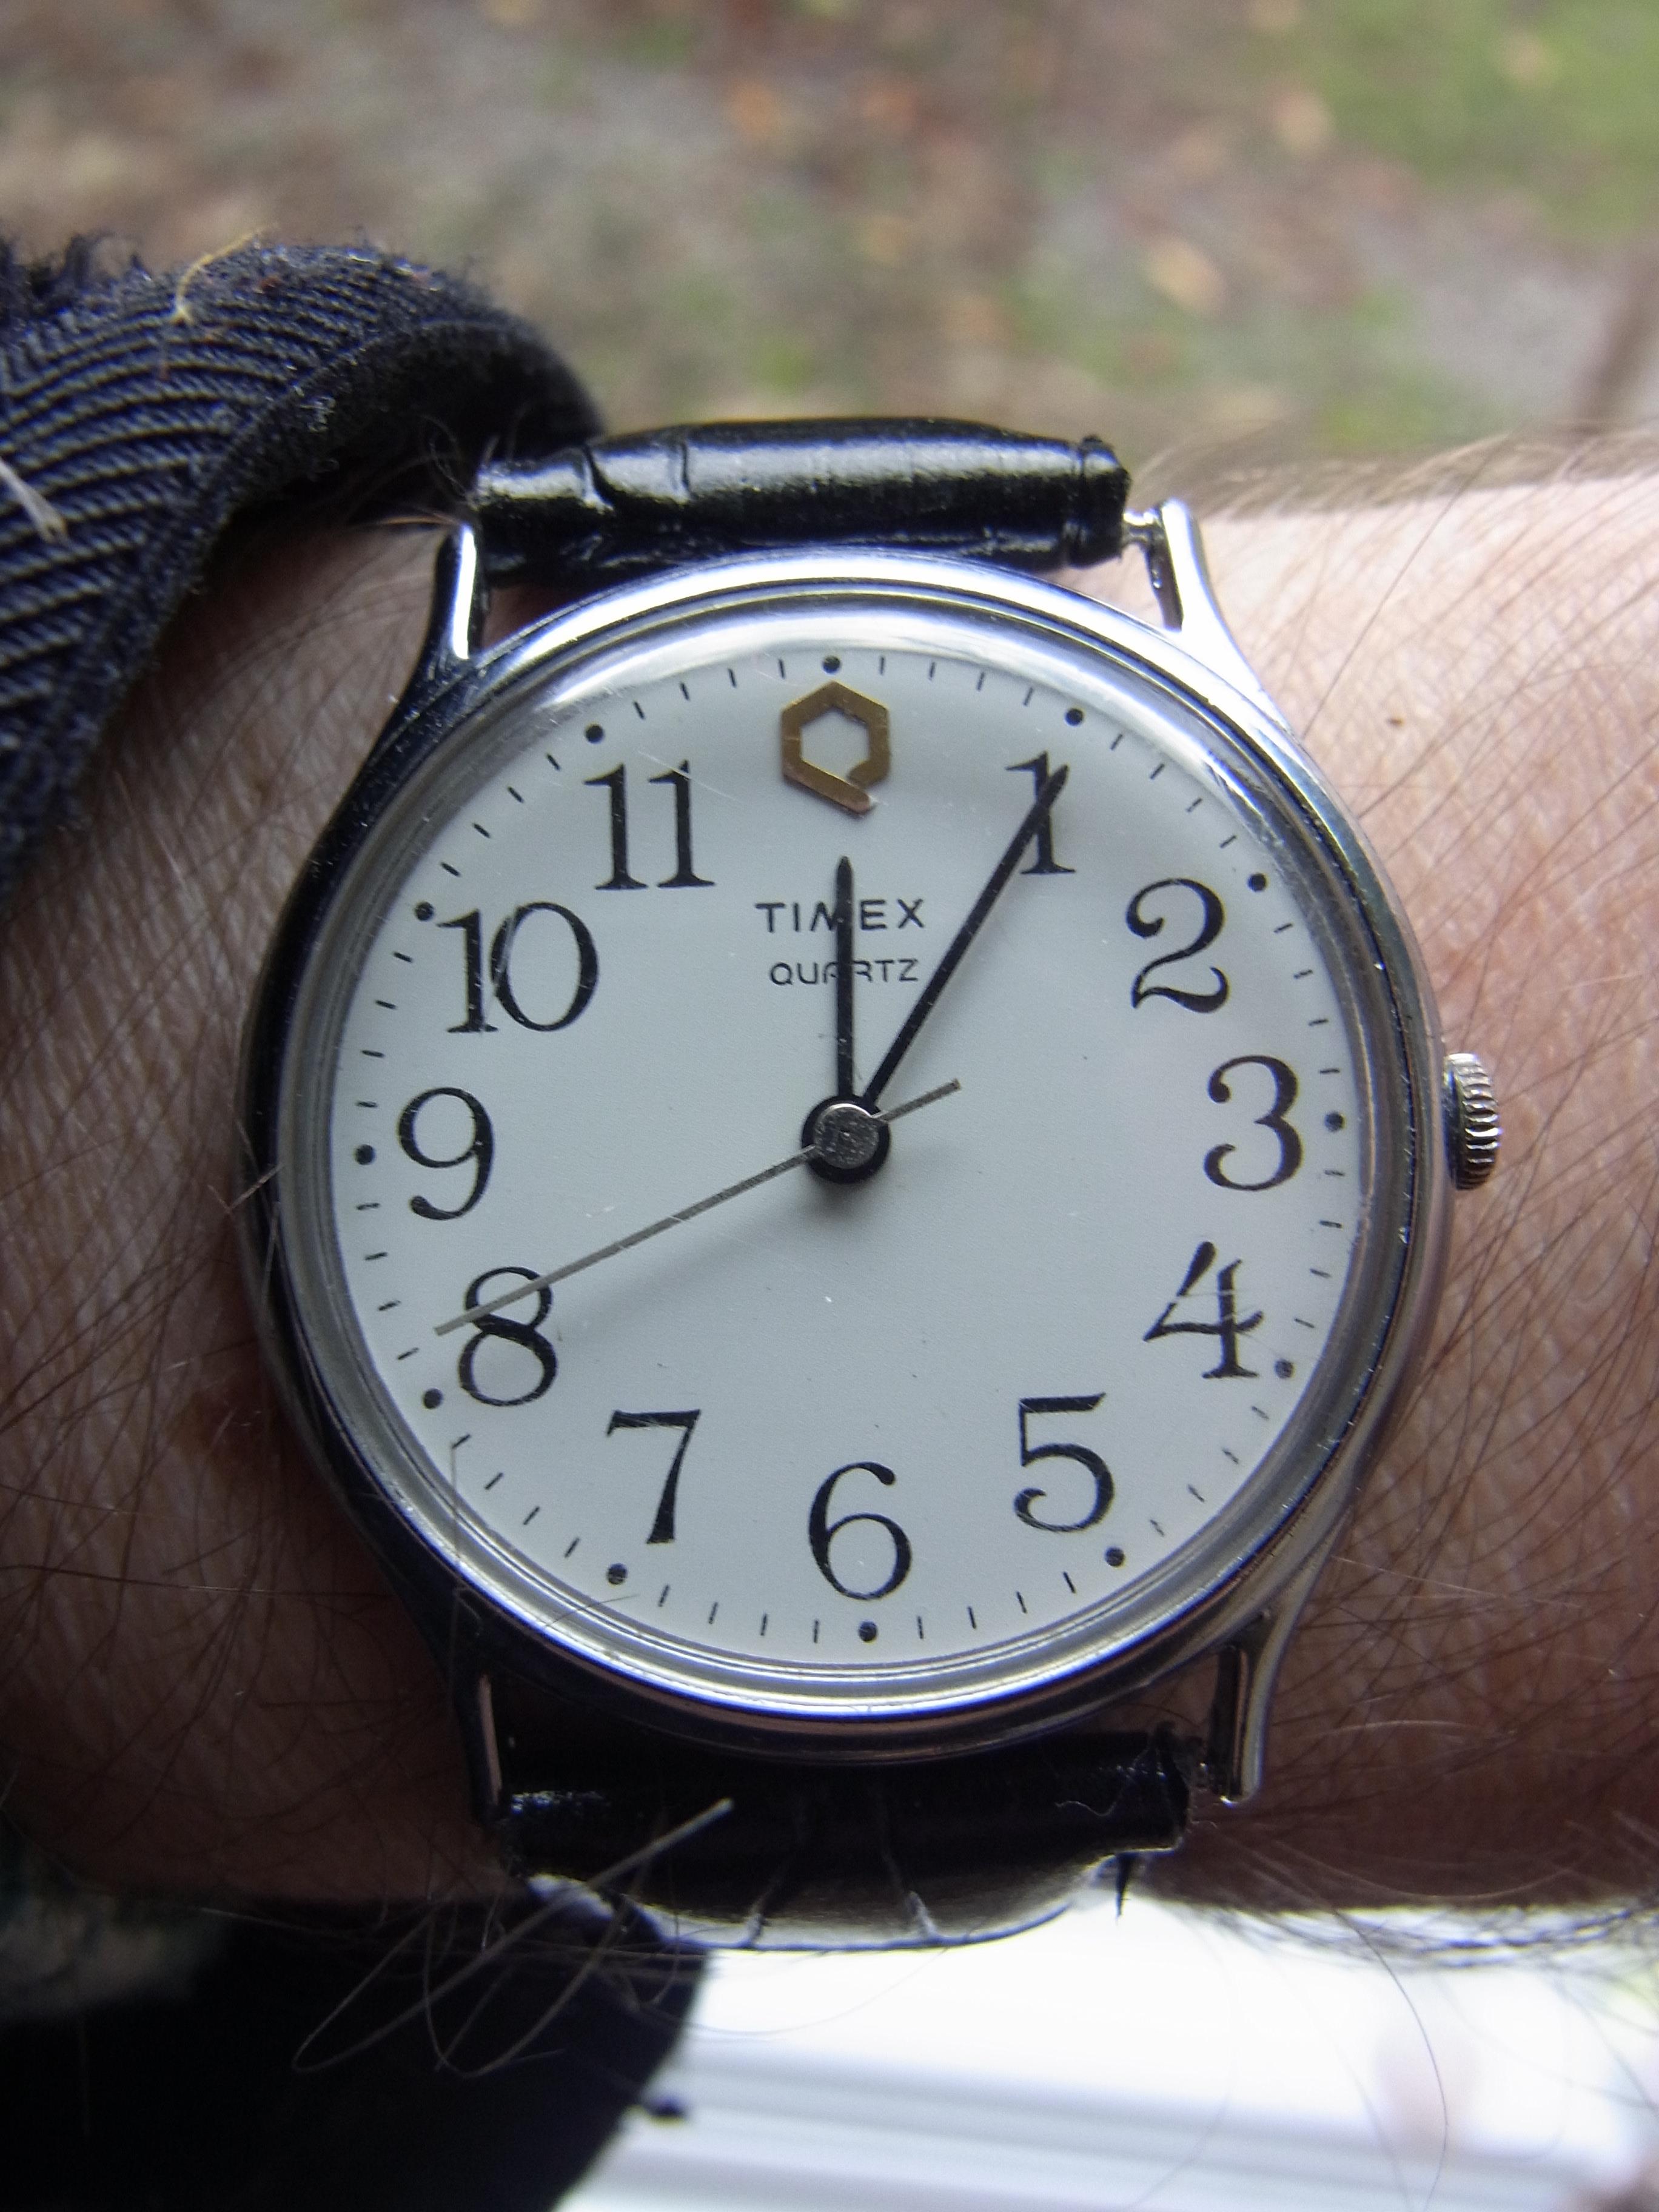
 -
There are many more, but its getting late here. I'll post another batch of honourable members of the 404 club soon.


 1 point
 -
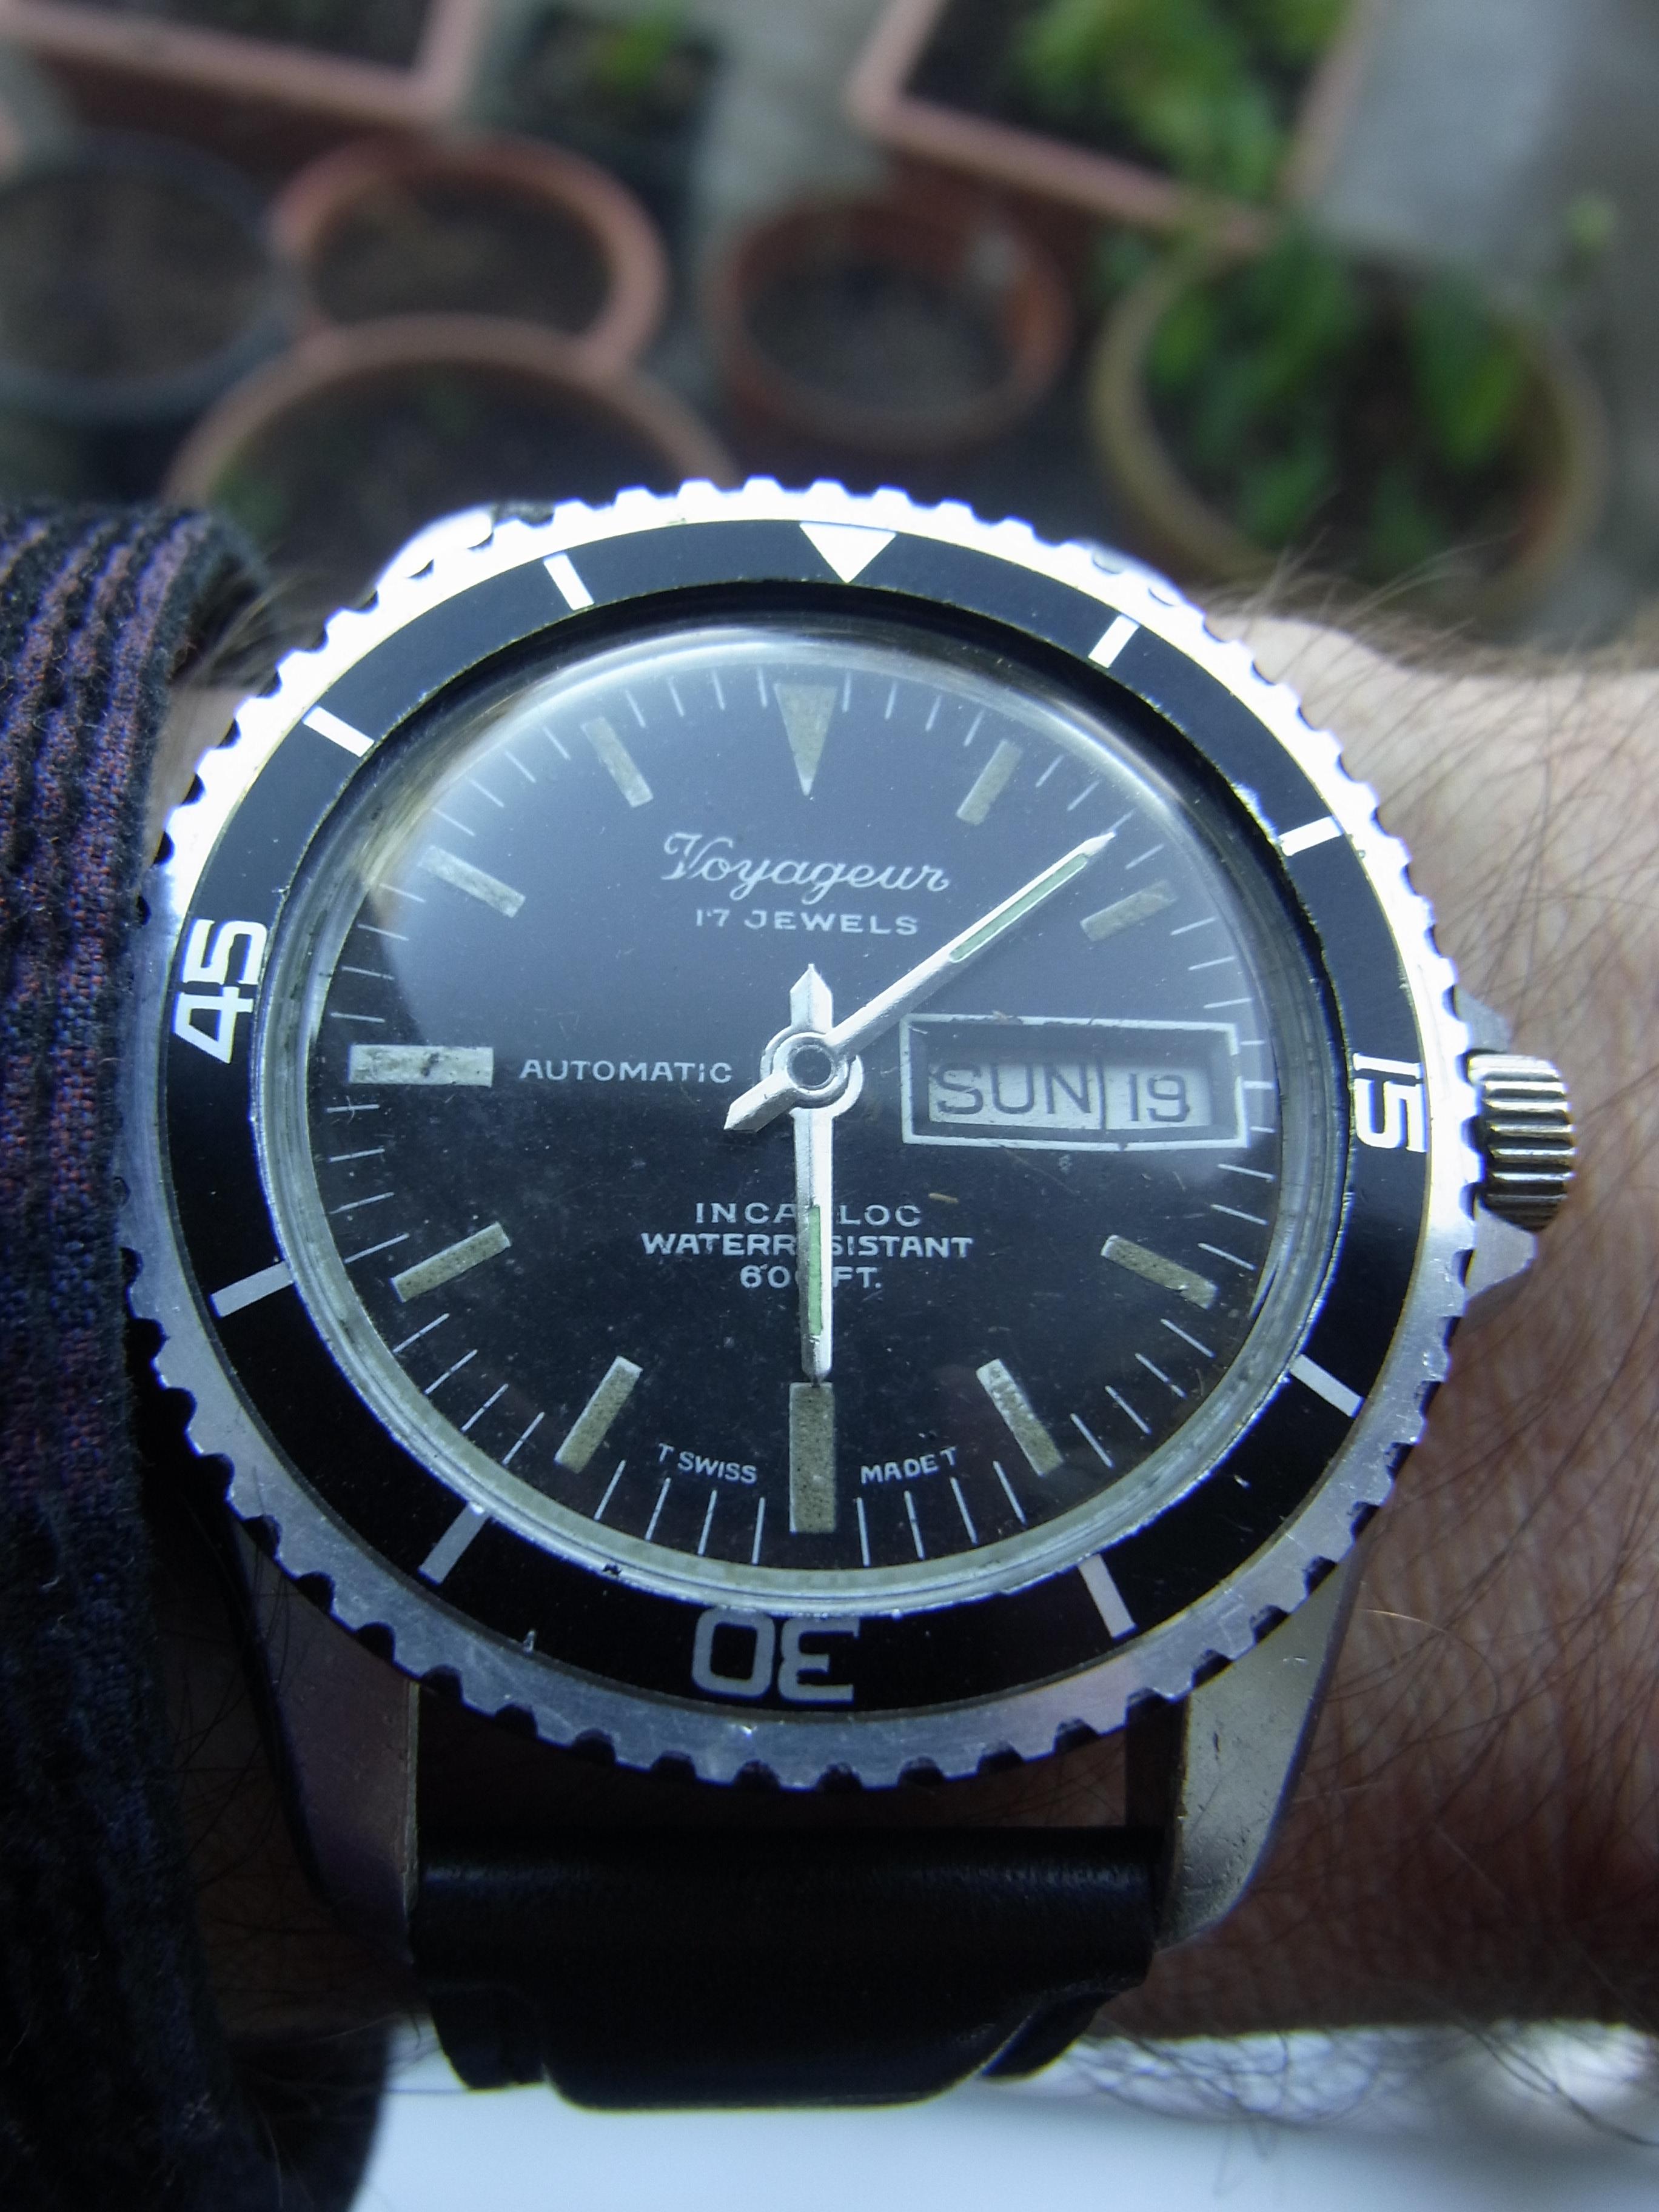
The watch that started me on this strange quest, the Ronda "Rondo-o-matic" based Sicura "Voyageur" got an upgrade of sorts today. This is what I unwisely bought in October 2018, and it has been a bit of a favourite of mine ever since. It still needs a set of more appropriate hands, but I'm confident that I'll come up with something eventually, meanwhile I fitted a dive bezel and replaced the crystal which I fitted a while back, and subsequently cracked. The watch has been bounced around the world since I first fixed it up, so it also got another quick service.
 1 point

.jpg.74b7f57f4994569fd7db6a7b29920959.jpg)
.jpg.1e517a98cee59560bcd8af2f0167d0cf.jpg)

.jpg.c4b8407334a2e558e10911e75246137b.jpg)