Leaderboard


Popular Content
Showing content with the highest reputation on 02/02/17 in Posts
-
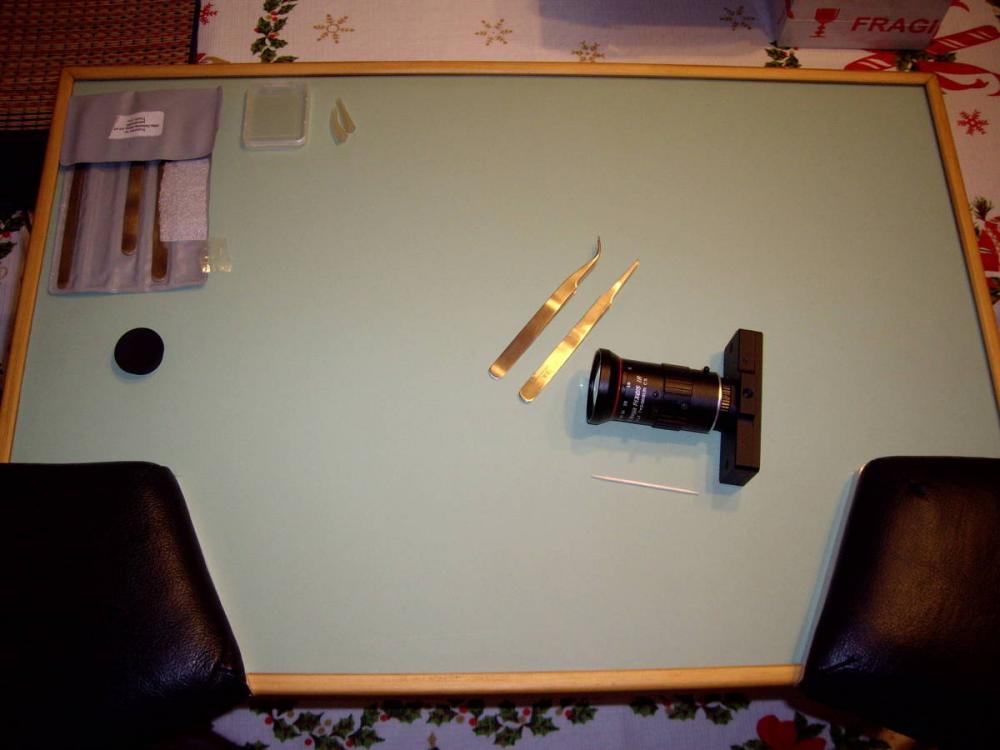
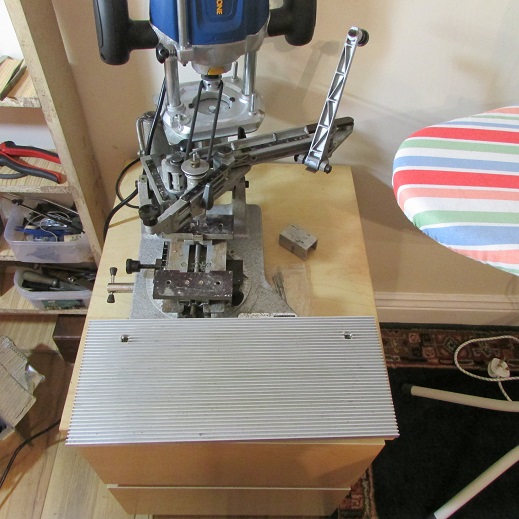
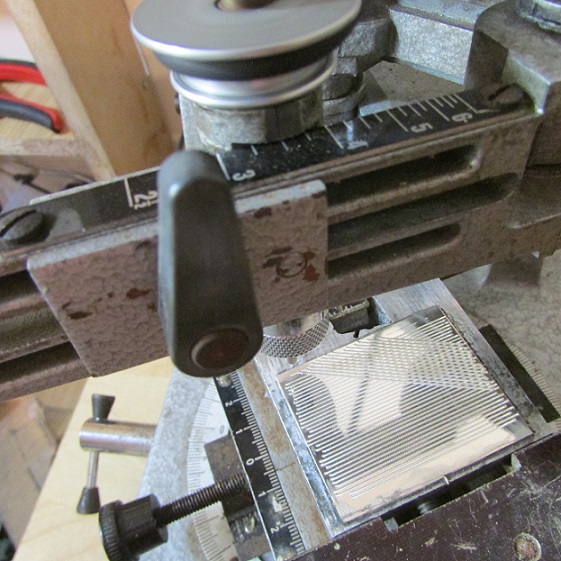
Hi everyone, I've almost finished making and testing my custom made camera for watch repair etc. I'm running tests at the moment and will share more information later on. This is what it should be able to do: Compact, Can be mounted directly overhead or for recording video and seeing in real time the watch being worked on, Working distance from 30 cm up to 55 cm, Plug it into a Windows 10, USB 3 or 2 port, to see in real time the watch movement being worked on, Capture to various video format with voice, Capture photos for reference, Connect to Skype for educational purposes Below is a couple of photos, the first one gives an indication of how compact it is, the second one (not from overhead but along a work surface) set at a working distance of 50 cm. The photo above was taken in my lounge with only LED room lighting. With the camera mounted overhead and a daylight LED lamp, the video and photo capture would be improved. The software that comes with this will enable me to zoom in live so that a sub dial would almost fill the screen on the computer monitor. WIN_20170202_12_14_15_Pro.mp4
 3 points
 -
The way I do it is keep the screw next to the part it holds.2 points
-
It's experience. Some screws have a look about them that helps you discern the bridge screws from the click screw and keyless works. Mostly, it's just from experience though. Novices (such as myself) replace the screw during disassembly so that they are not mixed up.2 points
-
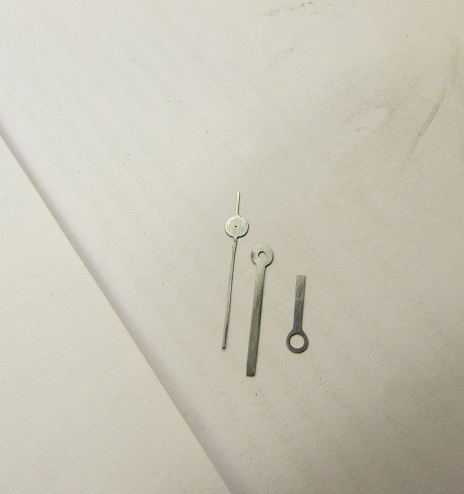
A bit more progress. Should be able to get a few more hours this weekend to get the hands finished
 2 points
 -
Hello everyone, my name is Johnnie and I live in Cambridgeshire but I am originally from London. I fell in love with watches at twelve when my grandmother bought me a Nidor Vibraflex!!! Long since lost sadly but will replace it when I find the exact same model. My interest is mainly in mechanical watches but I do have a few quartz watches! and about ten proper watches. I am 63 years young and never intend to grow up. My wife is mystified by my love of watches as I am late for everything! Best regards. Johnnie1 point
-
This works for me too. Unless the movement is really dirty, I don't bother cleaning screws, just another chance to lose one or two in the process.1 point
-
Other way around normally... http://www.watch-band-center.com/shop2/index.php?user=watchstrap&weiteres=151 point
-
Yeah, and fit vintage watches it's really important for the value to keep it original as far as possible... But thanks anyway Stian Sent from my VIE-L09 using Tapatalk1 point
-
I use ice cube trays and keep parts together in lots of small groups as rogart says. Remember to check each screw and it's location as you remove them... sometimes you will find 3 different screws on the same bridge. I often make a sketch to help remember those, but it also helps to stare hard at the parts and work out why as they come apart.1 point
-
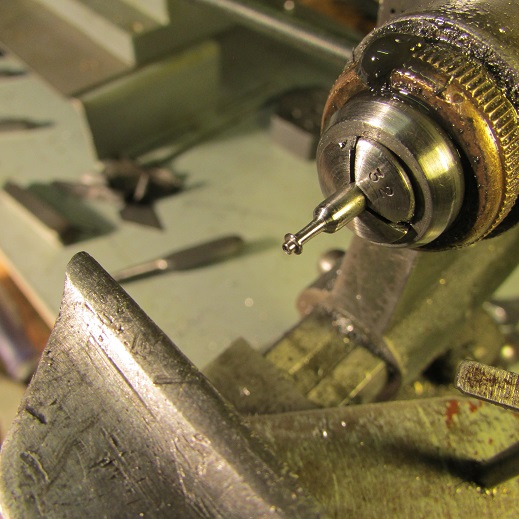
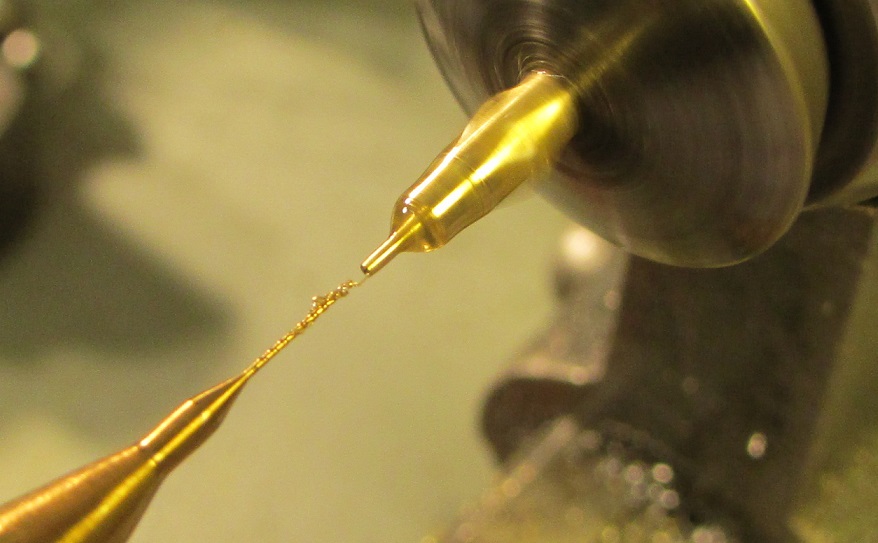
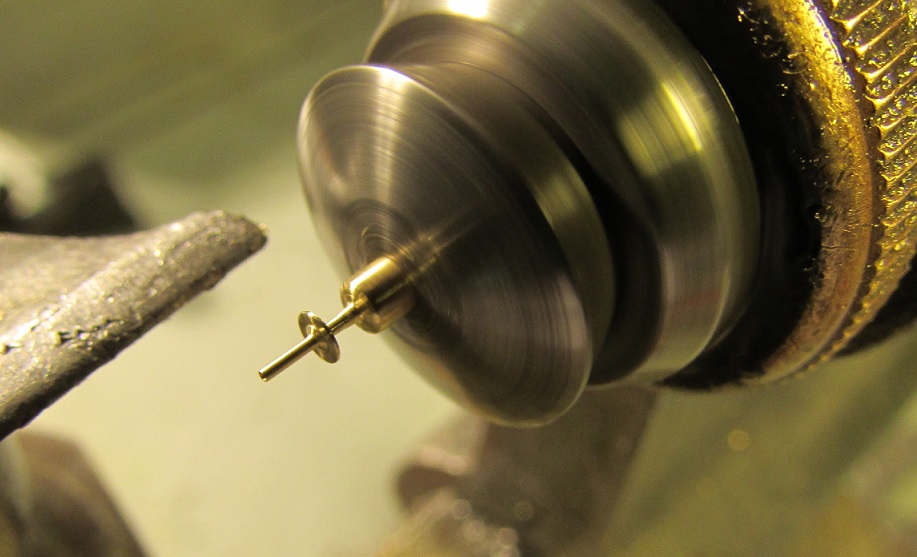
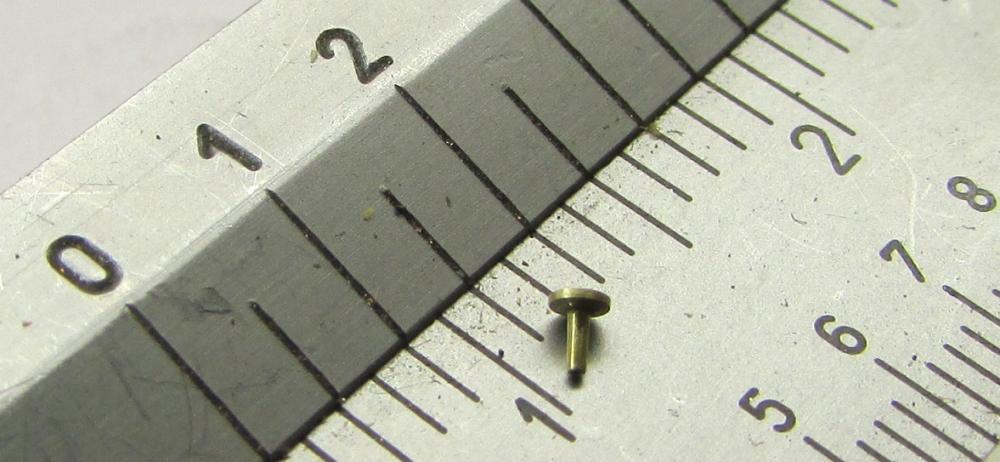
This is exactly what i did, grinded down the edge of my current projects replacement balance jewel Will post pictures tomorrow. An a video also.1 point
-
I have a few boxes i put the parts in? Each part in it's own little department? And screws for that part next to each bridge or balance? Pictures with a camera is great?1 point
-
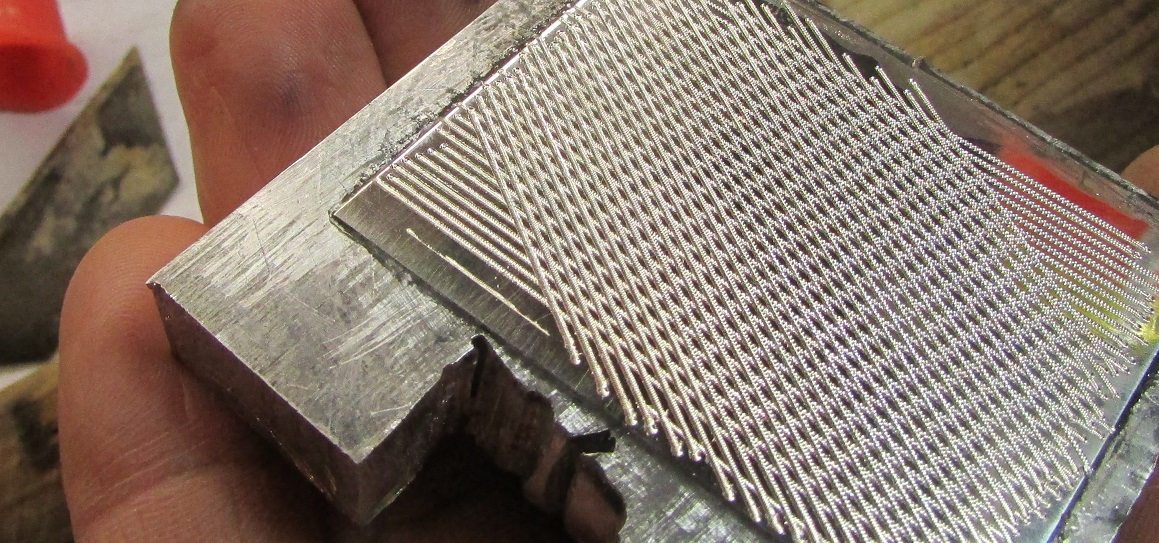
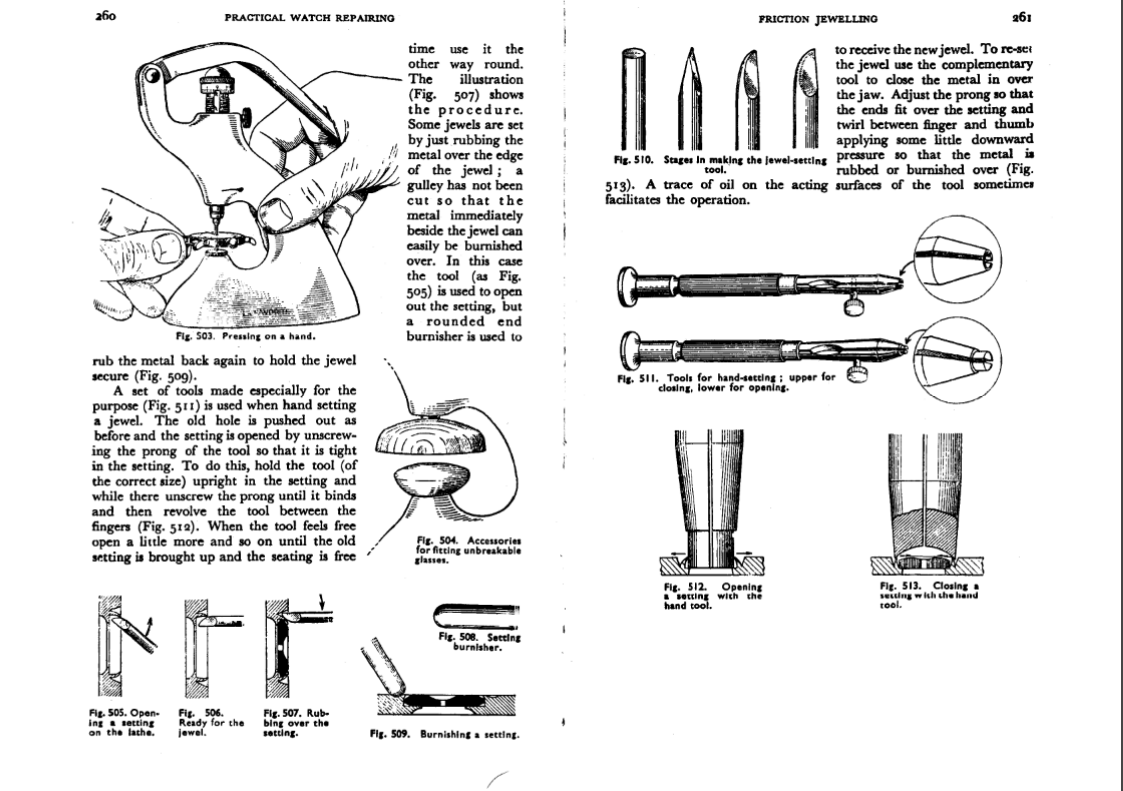
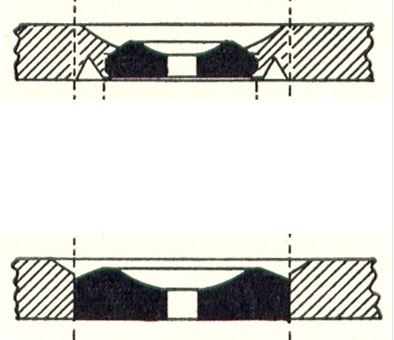
it depends upon the type of restoration were trying to do. Visual jewels such as plate jewels much older watches then it would be extremely unacceptable to do what were doing. Earlier jeweled watches don't even use Sapphire their various quartz crystals other hard materials or hopefully hard enough materials. So ideal perfect world would be to replace it with a burnished in jewel but where we going to find one of those? To understand part of the problem image below the top jewel is a burnished in jewel the bottom modern. The outer edge of the modern is smooth it does not lend itself to being burnished in. so it's equally unacceptable to burnished in a modern jewel because just not going to hold the shape is wrong. It is possible though to modify a modern jewel by knocking the corners off then it can be burnished in. But in some situations this is still to be a problem because the color of modern jewels is unacceptable. so in this particular case this is a Hamilton 12 size pocket watch nobody's going to care whether we use are burnished in jewel or friction jewel providing it's functionally correct. So you can use the old setting for modern jewel if you can open the hole up big enough to have a smooth edge for the modern jewel. Sometimes you cannot do that then you're going to have to make a new setting.
 1 point
 -
just apply a little penitrating, soak if posible - dry and heat with a jewelers torch. stem stub should screw out.1 point
-
Welcome! ETA 6497 or 6498 movements are good to learn on, there are a lot of resources out there for them. New ones are expensive, but there are Chinese clones available, and they can also be found in used Swiss pocket watches, such as the Arnex. They are bigger than most watch movements as they were originally made for use in pocket watches, and are relatively easy to work on. Have Fun!1 point
-
Wow! Someone who likes appropriately sized watches! I'm a little jealous, too, as I'm likely to be taking late retirement Anyway, a belated welcome!1 point
-
For this reason I did not purchase. The watchmaker I spoke to said that he did have a few tungsten gravers but only used them for cutting away vintage balance staff rivites as they seem to be made of stronger metal. He also said he could sharpen 6 HSS gravers in the time it takes to sharpen a tungsten.1 point
-
I think you are right. I do have the opening tool but not the closing tool. I ordered the upper jewel from Dave and it may o me with the correct setting if I am lucky. Else I will dive in and replace the jewel with one of the two techniques. Don't think I can friction fit the jewel into the setting if it is ment to be burnished in. Sent from my GT-N5110 using Tapatalk1 point
-
Here's how I do it: Take a piece of hardwood around 3mm thick. Glue a strip of 600 or 400 grit wet and dry paper to it. Stroke the abrasive against the surface and rotate the case slightly with each stroke. This sounds a bit basic but it is possible to achieve an excellent finish doing it by eye, I hold the case in my left hand and work the abrasive with my right.. You may to go over it a few times, but the end result is good. You have to imagine each stroke going through the centre of the dial, that's the way to get the angle correct. I`ve refinished several sunburst finished cases this way and people have always been impressed with the results. I was surprised how easy it is. I tried setting up a jig but found this method worked OK.. Best to practice on an old case to get the technique, and be sure to mask areas you don`t want to refinish. As with all things, there's a degree of skill involved and you do need to practice first. Paul1 point
-
The downside of tungsten carbide gravers as I understand it is they are a pain to sharpen. I spoke to a watchmaker at a BHI meeting last year on this subject and he also confirmed this. However they do apparently stay sharper longer.1 point
-
Could this be used as a lapping machine or is the disk too small? PARKSIDE Disc Sander http://www.lidl.co.uk/cps/rde/www_lidl_uk/hs.xsl/productPageFinder.xml?listId=1063&articleId=41505&type=offerdatelist&productId=41505&countryCode=GB Sent from my Honor 5c1 point
-
But this is a rubbed in type jewel setting. This should not be treated with the Seitz jeweling tool but with a setting opener and closer tool. Or a new friction fit setting should be made for the jewel. It seems to me that the jewel is off-center. Te balance wont be upright this way.
 1 point
 -
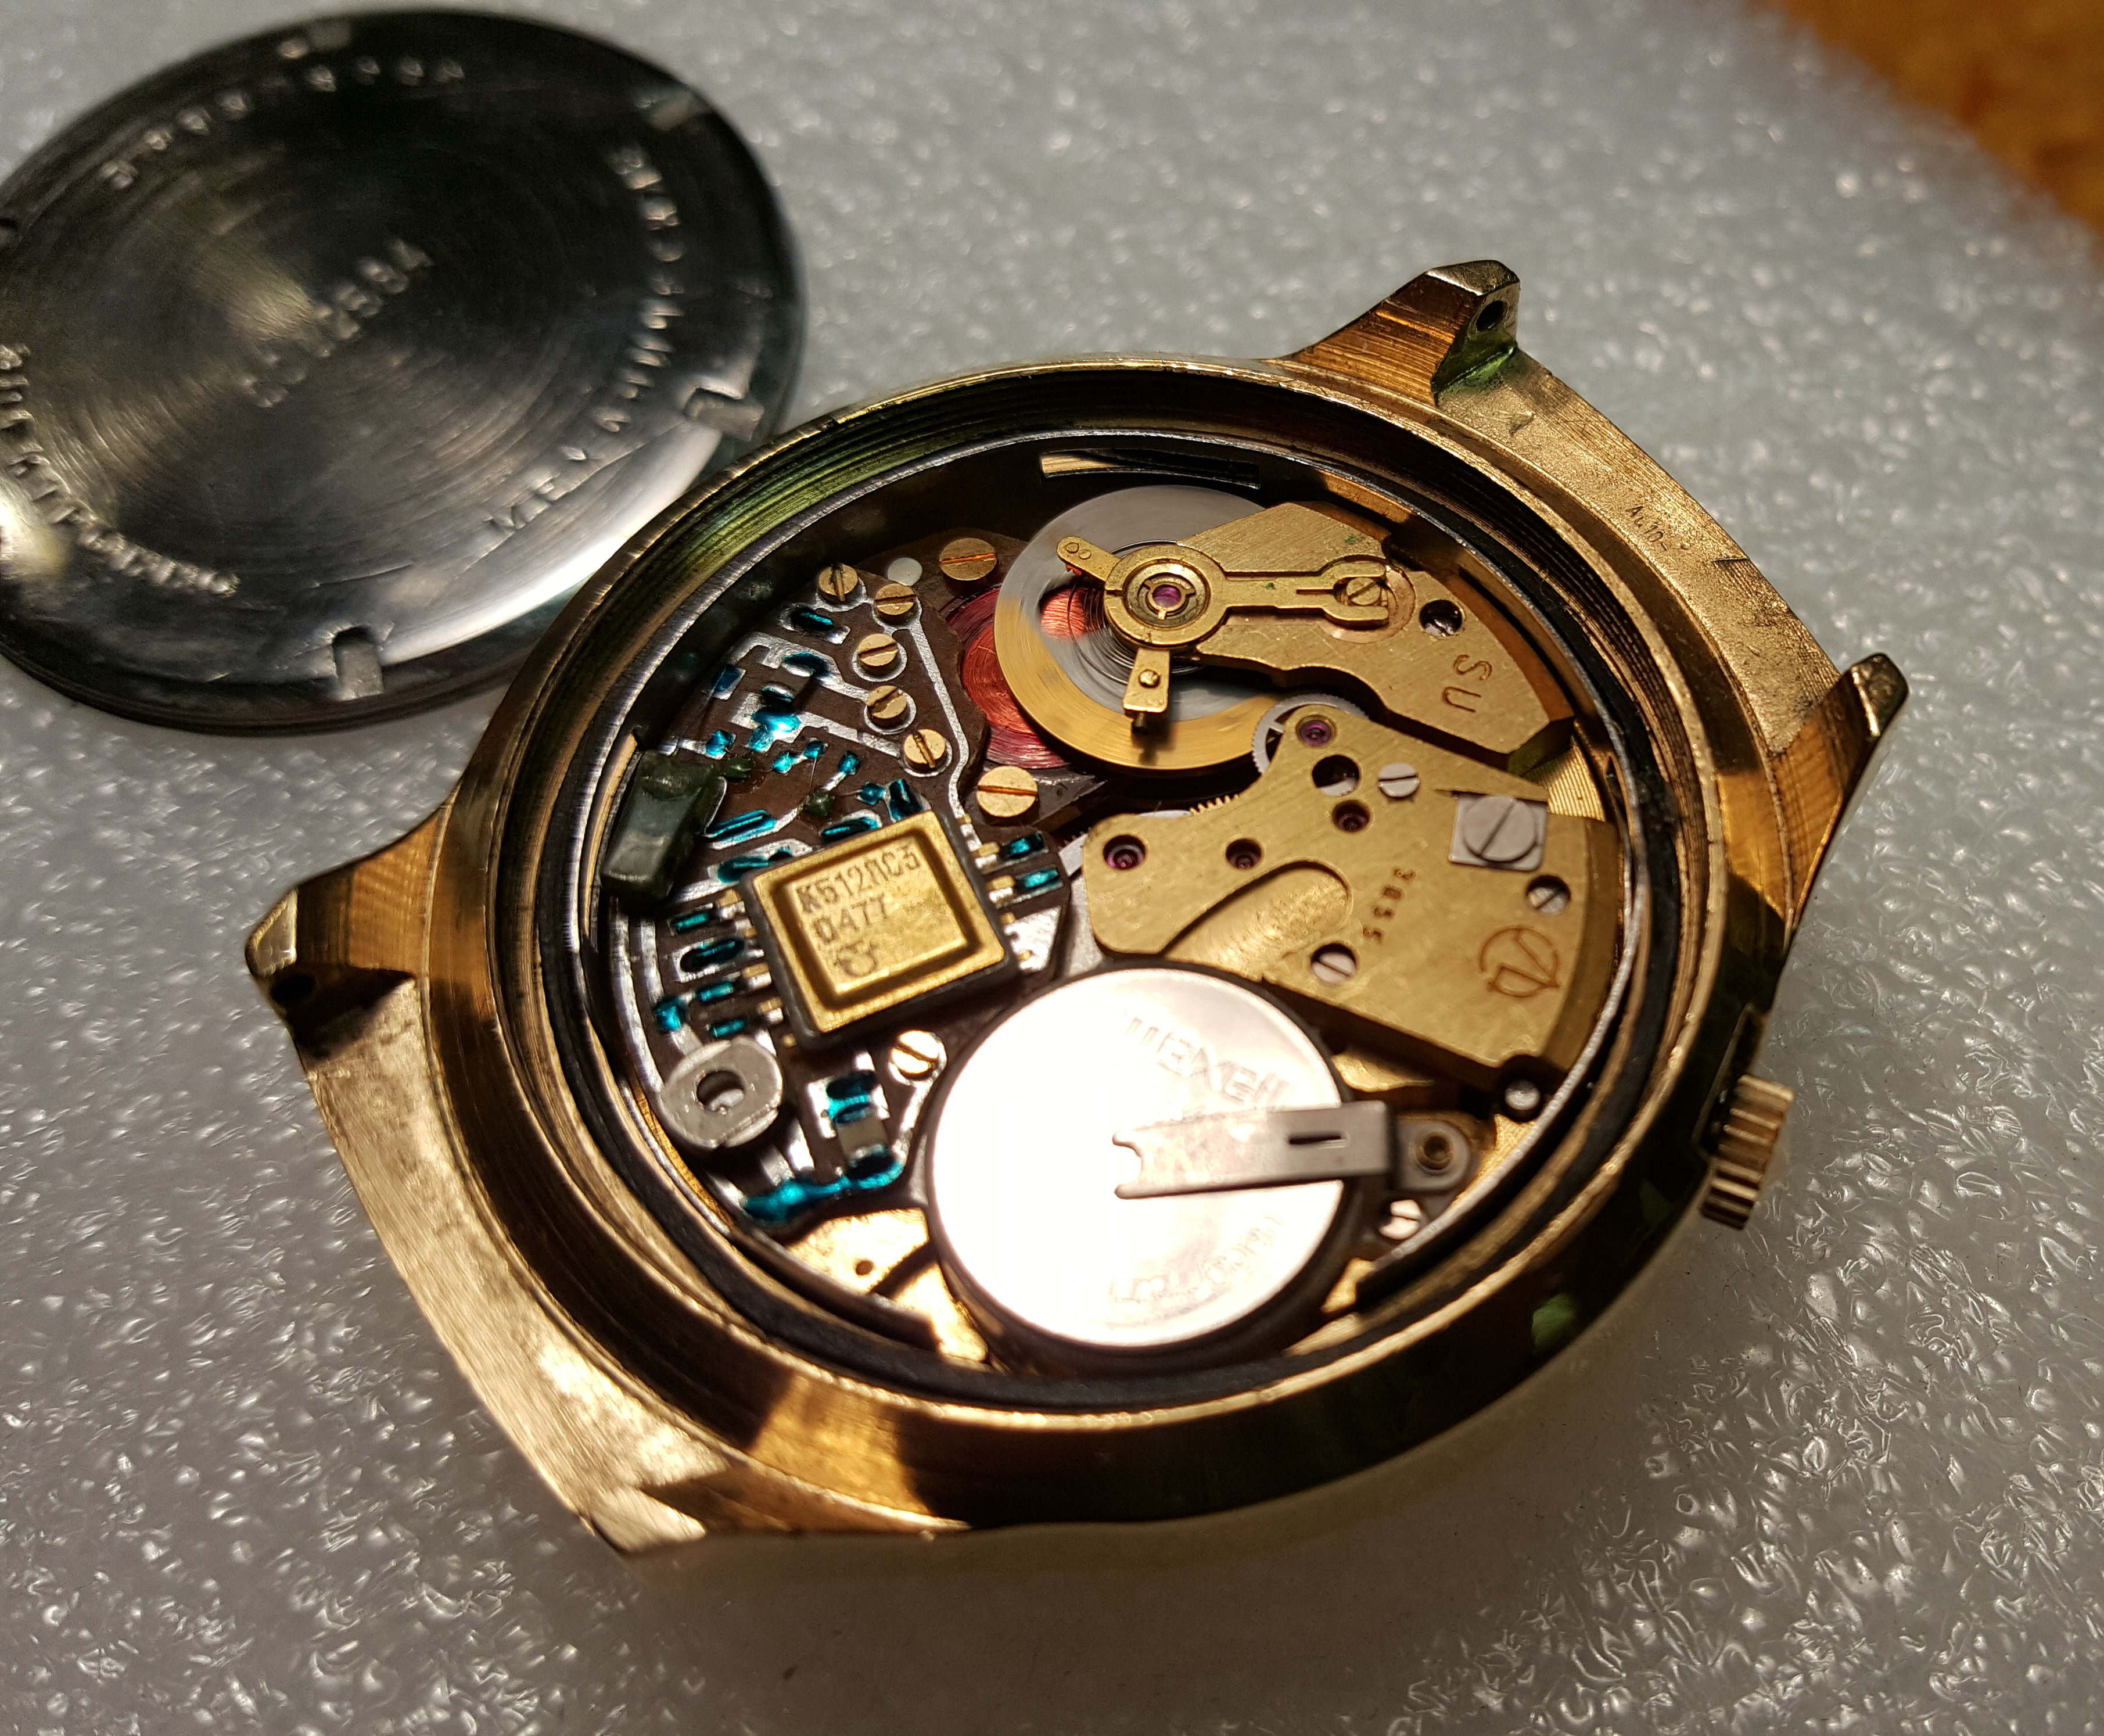
Bingo , you are correct ,...engineers were involved . Simply speaking , [ so even I can understand it ] , like a magnet , electro magnet to be more precise , a current is induced to attract the balance with the coil to some magnets in the base plate , the circuit is interrupted , then the hairspring causes the balance to return in the opposite direction , a current is induced to attract the balance in the other direction , once again the circuit is interrupted and the cycle starts over . If I didn't explain the exact operation , I'm pretty darned close .1 point
-
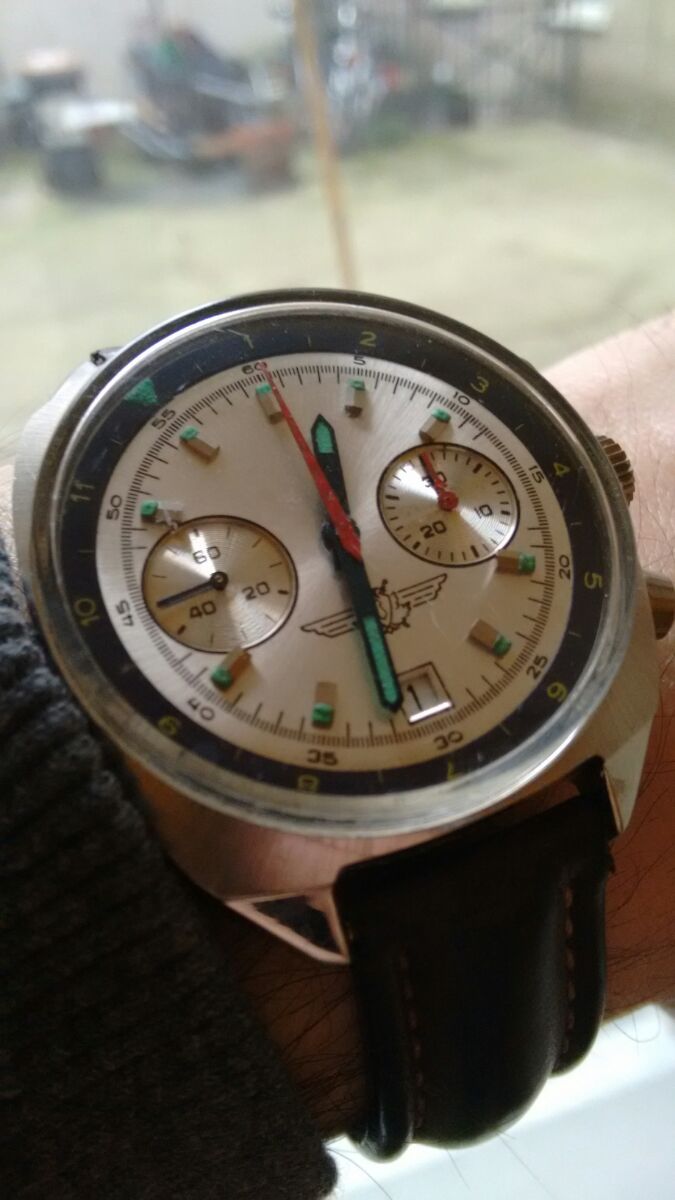
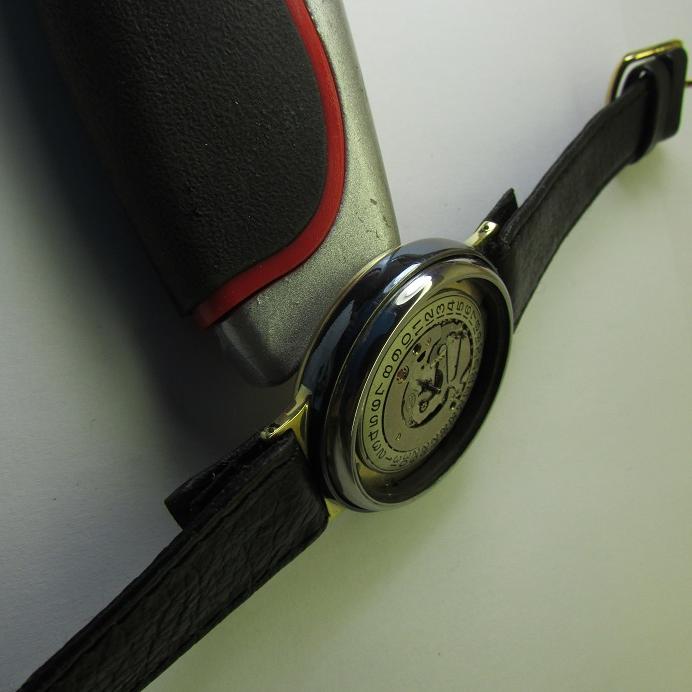
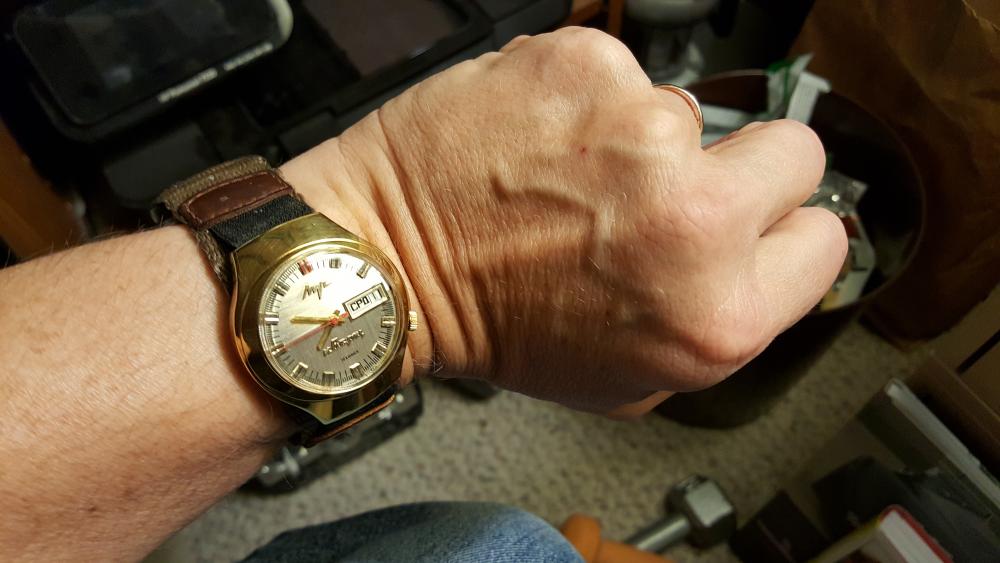
Revisiting the Luch I mentioned above, here's a better shot showing its size... it isn't really as huge as it appears in the previous photo, and I swapped the strap out for a more modest one that I feel suits it better. Here's a pic of the movement as well. Gryf
 1 point
 -
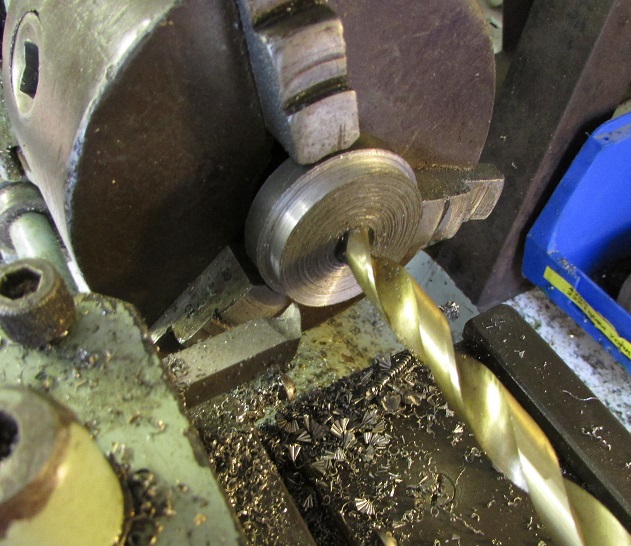
Blue steel pivot wire, in a British made B.T.M. Geneva pattern lathe from the 1940's, free hand using a HSS graver. The crucial factor is to ensure that the graver is properly sharp. A poorly honed graver won't even cut butter, but a properly sharpened one will cut blue steel easily, especially if you take your time and take fine cuts. Ideally you're looking to make fine dust rather than curly swarf, particularly when you get close to the final dimensions. I'm surprised to hear that Sherline suggested that their lathe couldn't handle blue steel. All the lathe has to do is spin the stock, it's the tooling that does the cutting, and watch makers have been cutting blue steel pivot wire using HSS tooling for a very long time.1 point
-
well chaps , you were all right. The watch bug got hold.... been reading the forums, got books for xmas, including the cooksey book, purchased 2 broken pocket watches and fixed them, acquiring tools now, this site is superb for learning/training - thank you Mark recently met a local 50yr + experienced watch repairman which is invaluable. Frightened now the watch collection starts....1 point
-
I'm only 49 and I feel old every time I get out of bed in the morning1 point
-
And here it is, happily ticking on my wrist today...
 1 point
 -
your hairspring picture looks like the hairspring you may be bent at the stud. This is why the coils are tight at the 3 o'clock position and greater spacing at the 9 o'clock position. So if rinsing doesn't work that's where I would look next. the reason I asked for the oscilloscope is if anything was rubbing inappropriately it should show up on the oscilloscope as additional sound here and there which would confuse the software and I don't see any of that. It actually looks like a normal running watch other than a just running abnormally fast. Which is what would happen if the hairspring was touching itself or even touching the back side of the regulator pin. then I'm noticing iyour oscilloscope diagram something that is set not correctly. The rate of the watch is measured from the sound of the roller jewel hitting the fork which unfortunately in this watch is extremely quiet. This is the first part of the waveform the line that's running across the screen tells the software where to trigger from currently it set to locking. To understand what I'm getting at in the user's manual for the software go to the section on the oscilloscope you'll notice the triggering line is really close to the bottom. It has to be above the noise and just catch the tiny sound of the roller jewel crashing into the fork. Then the second link different timing machine but explains this. http://www.watchoscope.com/manual.html http://www.witschi.com/assets/files/sheets/Test and measuring technology mechanical watches.pdf1 point
-
Don't think of it as victim, rather a patient that needs a doctor's touch. I could see in the pic that your primary winding wheel screw has been used a bit more than normal. (often an indication it had been over torqued at some point in time) Probably wouldn't hurt to capture each step of disassembly with photos, in case you are called away from your "victim". Good luck and if you get stuck with something, just ask, someone should be able to help.1 point
-
Good choice big, simple and working.1 point
-
Unless it is white ? I was going to respond with a phrase using the words "spit" and "swallow" but I am afraid George or another admin would have to censor it - either way it was a good catch. Cheers Vic1 point
-
And its almost done, the ALVIN covering needs to relax a little while longer, then I can adhere it down with double sided tissue tape, and then add mat edging, and finally unpack my tools, and resume work. Almost there, covering needs to relax a while longer, then to adhere and trim by Micky Aldridge, on Flickr1 point
-
watch cleaning machines? who needs them.? if it is a hobby, one should enjoy cleaning.! also; cleaning is part of a proper inspection.1 point
-
Yes the glass fibre brushes need to be used with care. I have a no-name brush that sheds very little and would not know how to replace it. Brass brushes are probably better for resistant muck and then the microfibre mops for light cleaning. These are remarkably good for removing surface grime and can be rinsed in detergent to prolong their life. https://www.cousinsuk.com/product/microfibre-head-cleaning-swabs Do not use brass brushes on gold-plated bridges and plates. Here the microfibre swab is essential. Regarding the use of water in the US bath. My baths both have stainless steel tanks and plastic baskets, so no rust. The watch parts are in glass jars with the appropriate cleaning solution. Rinse is always distilled water, compressed air blower, and then fast warm air drying - never any rust.1 point