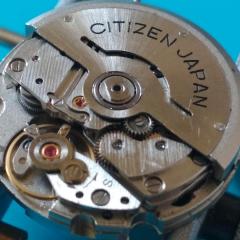
Jump to content

Citizen 8110A Bullhead my first restoration


Recommended Posts

Hello everybody,

I open this thread to archive works on Citizen 8110A Bullhead. I purchased this watch in poor condition as You can see on the photos.

IMG_20190726_150413.thumb.jpg.9f4473e410540032622b527c3fea5bc6.jpg

IMG_20190726_150418.thumb.jpg.4a38072ac902086c9980050d8d1fd841.jpg

Cause I have serviced few chronographs in the past I decide to try restore this watch. Maybe is not ractional from the economical aspect but we do this because we love it ;) So let's open it.

IMG_20190726_163859.thumb.jpg.71eab91cb5fcb18517dd6d481e0205b1.jpg

Hands are in good condition (required repaint and relume) but the dial has broken legs and tachy scale is faded :/ I think it's really hard to find orginal and there is no gold aftermarket replacement - sad. Look at the movement.

IMG_20190726_164726.thumb.jpg.b0a91a8005294d4f7314b0e64dd9b6cd.jpg

IMG_20190726_165123.thumb.jpg.fabd196e21f9db49eabddbf4b677d0d3.jpg

IMG_20190726_170139.thumb.jpg.9eff1565f461ff21d4f011d2f98d04b6.jpg

IMG_20190726_170158.thumb.jpg.24fa12f58df328701e880134d2d52f15.jpg

IMG_20190726_170456.thumb.jpg.2a0df5a9d3cd28161392eb2edc54fa05.jpg

IMG_20190726_170619.thumb.jpg.1cf97878b8a45254fa4e3e1185613955.jpg

IMG_20190728_112049.thumb.jpg.9c8adece9aea8d330ef75c66a67d3781.jpg


Gosh, what a dirty place ;) It needs good cleaning and oiling. 
But the biggest problems are this.

IMG_20190726_174450.thumb.jpg.0b8ff4c78afcc66f4caf067ccc2ec0b4.jpg

IMG_20190726_232921.thumb.jpg.b5695774dcf9daaa5a1e41224019441d.jpg


Broken post on main spring bridge and missing rocking bar core and screw in gear train. I need to find replacement.

While I'll be working on movement the case and pushers are send to renew - putting new gold plated coat

temp.thumb.jpg.3626dce9871fc6d7a2c80ccd56307769.jpg


IMG_20190726_173138.thumb.jpg.6b716d9ab40113d98d68cff381ac588a.jpg

Stay tuned ;)


  • Like 1
Link to comment
Share on other sites

3 hours ago, jdm said:

Good project. Have you considered replaying parts yourself, isn't much difficult or expensive. 

Which parts did you mean? I don't have idea for the broken post on the barrel bridge. Maybe spot welder...? 

Yes, the screw for the rocking bar and winding wheel could be easy to do.

2 hours ago, rogart63 said:

Not the most easy watch to start with ? The broken post on the barrel bridge i have seen before. Common problem. You will have to find a  new or used bridge. speedtimerkollektion had some before. 

Yes, already I have "new" barrel bridge.

2 hours ago, vinn3 said:

  good show,  very good pic.s.     the watch is a "raceing  timer" ?       vin

Thank you ;)

Link to comment
Share on other sites

10 minutes ago, jackie01 said:

Which parts did you mean? I don't have idea for the broken post on the barrel bridge. Maybe spot welder...? 

Sorry I meant replaying he gilded parts. The broken post would have to be made new on the lathe, that's a master watchmaker job, maybe you can start looking for a working donor watch. 

Link to comment
Share on other sites

21 minutes ago, jdm said:

maybe you can start looking for a working donor watch. 

I found parts and while I was waiting for them I decided to take care of the hands and bezel. The chrono hands looked bad - faded and there were paint chips. Hour and minute one had no lume.


IMG_20190731_184929.thumb.jpg.0ca876a2e7a6de26a10d6d71676a1b95.jpg

IMG_20190731_184942.thumb.jpg.1d1b6b2ce651b82cfb46ce72fc45b2ba.jpg

So i scraped old paint from chrono hands and repaint them. I think they're look ok now. I washed hour and minute hands and removed old lume and add new one. There's result of works.

IMG_20190731_190912_HDR.thumb.jpg.e518ac00f2da5527c832ce86373745f8.jpg

IMG_20190731_193542_HDR.thumb.jpg.77f34da0621d677aacf6142be971b80b.jpg

IMG_20190731_202122_HDR.thumb.jpg.b7bff933e211f376176d52f86685021e.jpg

IMG_20190731_202217_HDR.thumb.jpg.15b1fdcc6e3a94c2d65b7b1b5cb53625.jpg


Bezel (as you could see above) was in badly condition too. It was shabby. So I had use sandpaper, matted it and repainted.


IMG_20190802_100550.thumb.jpg.ba853a15320ee35e0e1f504bde859b35.jpg

IMG_20190802_100559.thumb.jpg.e025addc6e6743a5d1ddf8b17918a6e6.jpg


Next step will be cleaning the movement part and assembling it. I thing it's the most difficult part of restoration...


Link to comment
Share on other sites

55 minutes ago, JONICURN said:

looking good, keep us posted

Thank you.

Work goes on. . Cleaning and assembling top side of movement. Time set working well, day and date quick set working, zeroing hour chrono wheel working. Some progress. Now it looks so shiny compared to what it was here.


IMG_20190802_211211.thumb.jpg.02a1b42b849c1651f04ee59caac590e0.jpg

IMG_20190802_212916.thumb.jpg.059403ece0ad31984df04bb021abd99f.jpg

IMG_20190802_215401.thumb.jpg.87c9c560f862b830d3e03d595199c46c.jpg

IMG_20190802_215829.thumb.jpg.9752ac994e48d9bdd6b3b22f0eb075b4.jpg


This original dial is not suitable to use it after the restoration. I can't find any aftermarket gold one - they are not produce? confused.gif There are only yellow one - do you think it will be look ok?


Link to comment
Share on other sites

Meantime waiting for the parts so I polished back case


IMG_20190805_133413.thumb.jpg.e12fdc911023682719df39c901491e58.jpg


Just arrived - goldplated case and pushers. How do they look?

IMG_20190809_115330.thumb.jpg.250fc823de559ae2f1e1136e81be64be.jpg

IMG_20190809_115338.thumb.jpg.b24b45a88c30230aa9269b9f421d46a4.jpg

IMG_20190809_115402.thumb.jpg.b7a96d48e1a5ee02df22024e33d58189.jpg

I think it will be looks fine. Also there is new crystal replecment inserted in the repainted bezel


IMG_20190809_115516.thumb.jpg.cc5654324a527b061334edde57d74ef4.jpg

IMG_20190809_115525.thumb.jpg.c121c055425ba78df5cf1b7adfc901ff.jpg

I can't wait to see final result of my works icon_smile.gif


oiled.jpg.03bd31cc30d32cce8d275b30bbc388d9.jpg


Link to comment
Share on other sites

Ok, I need technician help. I assembled the movement and there are two small problems:

First: when I stop the chrono the minute chrono counter still works. Where I should find cause of it? I think that the lever I marked on the photo is the minute brake and maybe there is too much cleareance beetwen it and minute wheel? Am I right?

Second: When chrono works balance amplitude is ok but if I stop the chrono, balance amplitude is fallen. I thinh there is too much friction somewhere. Maybe I must oil the plate which I marked on the photo above? This plate drag the clutch down and maybe too it's stops the balance ? 


Update:

I was thinking all night long and couldn't sleep well. I analyzed what could cause problems I had described above. Disassembled the chrono bridge one more time and I found that blocking lever for minute recording wheel was slighty bented. With my heart on my mouth I have started to straighten the lever and voila success. I take a look of the second's chrono wheel and clutch. Small amount of oil goes in the place I suppose have to much friction. And as result is good working movement, zeroing and stoping chrono. Now it's time for tests before dial and hands go on their place.

IMG_20190809_170720.thumb.jpg.afc45752500a3301210b2e62a7af4e4a.jpg


One more thing - there is no screw on the pawl winding wheel. I found screw but it's head was too small. I made small washer from the razor blade. Maybe it;s don't look great but it's work well. If you someone have this screw please let me know.


IMG_20190809_171052.thumb.jpg.41e4e7e294aaadd563fdd5a2e72d3b59.jpg


Balance amplitude looks very well ;) I hope the end of project is soon...

  • Like 1
  • Thanks 1
Link to comment
Share on other sites

I had tested movement function by three days: zeroing, flyback, day and date set, day and date change - everything ok. So it's time to pack it all together into the case. New aftermarket dial just arrived ;)

1.thumb.jpg.9c346be318a955be6d9e836363ebff88.jpg


2.thumb.jpg.8f28cde209975f5f22d8901c6ccd8236.jpg


I decided that I'll choose aftermarket yellow dial. Orginal doesn't have legs and somone used glue to set it to the movement in the past. I don't want do that and what more the tachy scale is gone. 

It was not an easy decision but eventually orginal dial stay in a box - maybe I could fix the legs somehow in the future ( soldering  ) and use it again  I never did it before but I love new challenge to face with it.

Stay tuned cause I had some fricky me out adventures with movement ;)

Link to comment
Share on other sites

So it's time to take the watch into one piece. It seemed to be easy so I have started - hour hand, minute hand, zeroing chrono, minute recorder hand, hour recorder hand and the last sweep second chrono hand. I zeroed the chrono, attached position, pushed it down. I think great - it's done ;) I started the chrono and after few seconds tried to zeroing. Pushed the reset button and .... what the heck? : -s Pusher was hard. I was affraid to broke any lever so decision could be only one - disassemble movement again: - | I took over chrono bridge and cleaned it with all reset chrono levers. Small amount of fresh oil and voila - works. : -! All that was left was to press bezel with crystal, put the new gold plated bracelet and have a enjoy of the watch. 
I know it's not pristine, have some drawbacks but I feel proud to back this one to life. icon_wink.gif I enjoyed some much during this project. I hope You too.

There is still accurate tuning and amplitude measurement but it must wait until I buy a new microphone for timegrapher. I am sure I will inform You about the result. So stay tuned.

IMG_20190814_175624.thumb.jpg.001dc5757f960da242bdc81f8cf5a78c.jpg

7.thumb.jpg.0313fb16c868c736d1c5b95e54330786.jpg

1.thumb.jpg.66f02b513a236ed9a95da768a0ed2f39.jpg

2.thumb.jpg.5d51698aa9fdf74c5725cde09650b297.jpg

4.thumb.jpg.b19f9842e94c18f4527762e501b11daf.jpg

5.thumb.jpg.246b207b82f905504c124d4911f55cb1.jpg

6.thumb.jpg.d68bdc8d34cfd98b2becb9eb85e3b431.jpg

3.thumb.jpg.d9cf81d57f97e351f8aaf66fe7226cf0.jpg


  • Like 4
Link to comment
Share on other sites

  • 10 months later...

HI, very nice work.I have also a question and a project of my own; the same watch, and one day I could fell the bezel moving a little and I just pushed it out from the case.It looks like it was glued in place; is it the normal procedure ? to glue it in place or do you have to use some king of gasket when you put / secure the bezel to the case ??? Thx a lot Mirel 

Link to comment
Share on other sites


  • Similar Content

  • Recently Browsing

    • No registered users viewing this page.
  • Topics

  • Posts

    • Yes, I was referring to the (jewelled) gear train with HP (most of the time, I use 1300, but when Rolex says 1000, I'll use 1000).
    • did I miss the update of the message of something changing?      
    • I suppose it would depend upon what your lubricating with those? for instance what does the manufacturer say about those lubricants? I have a PDF from the manufacture and a rather peculiar statement found on the bottom of the chart. my suspicion is the reason the recommending would be without epilam the HP oils like the spread except when they're in Ruby jewel's with steel pivots. tableEN lubrication 2020.pdf
    • These types of hairsprings become weak with age and very fragile. Which I expect it is that giving you trouble, and that wheel is not the correct one, if it were not bent I don't think the movement would run as the teeth are not the correct height. The problem you have is price which depends on you. It can be repaired but is it worth it to you, because there is little value in the clock. A wheel can be made and hairspring replaced. Or hang on to it and keep looking on ebay which is your best bet for replacement parts or even a complete movement but it will be like finding a needle in a haystack. 
    • I did that also for a few movements - well, mainly in/around the train jewels. I made big efforts to epilame the mainplate WITHOUT getting Epilame into the Pallet fork jewels (where it's not supposed to be, right?). I made litte barriers with Rodico around that jewel and used drops from a syringe to apply on the rest.  However, I've now stopped doing this. For three reasons: 1. It's a hassle and consumes more of this liquid gold. 2. I didn't see the need when using HP1000/HP1300 lubricants and grease for most part. The two places where I'd use 9010 (i.e. escape wheel and balance) receive Epilame in specific places... or the cap-jewel-setting of the balance suspends the oil sufficiently be capillary action (see my "conflict" about using Epilame on the balance jewels).  3. Lastly, and here I really wonder about yours and others' experiences: I felt that applying Epliame to the train jewels left them looking hazy (borderline dirty) compared to the (painstakingly achieved) sparkly clean results of my cleaning process. I just can't help but think that the Epilame residuals would mix with the oil and cause more friction/wear. I don't know.    simple: it'll stay there. It won't move any further. That's exactly what is happening if you epilame a cap stone. You end up placing the 9010 right on top of the epilame and the oil will sit nicely on that spot.
×
×
  • Create New...