Leaderboard


Popular Content
Showing content with the highest reputation on 11/19/20 in all areas
-
Cock screw is the one that holds the cock down on mainplate, in cases you suspect end stones might be pushing on pivot end( no or very little end shake) you can releive such possible pressure on end stones by loosening the said screw, if the are no end stones, the jewel itself can be pushing on shoulder seat of the pivot. Shelac is the stuff that acts like glue but wont hurt the base metal over time, it is used on fork pallets jewels to keep them from moving in fork slot, nearly all petrolium base cleaning solutions dissolve shelac rendering pallet jewels loose to move in the fork slot, which ruins escapement at the pallets and can be a cause for a host of escapement disfunctions.3 points
-
Okay I really need one of you to start a company where I can just call you up and tell you all the watch parts I need and you run around like an idiot and try to find them. Let me know when your new company is up and running please. I have a long list.2 points
-
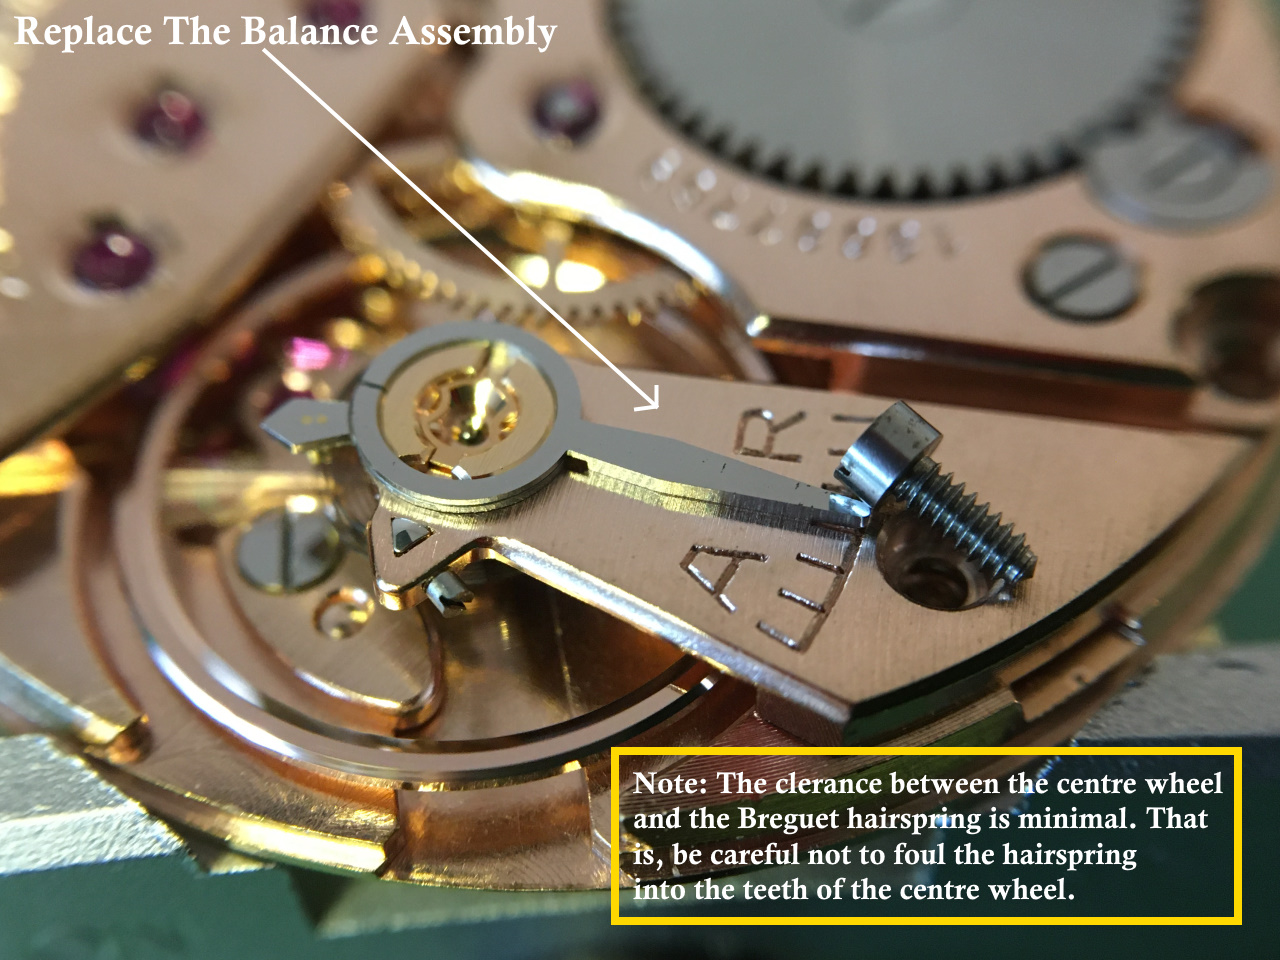
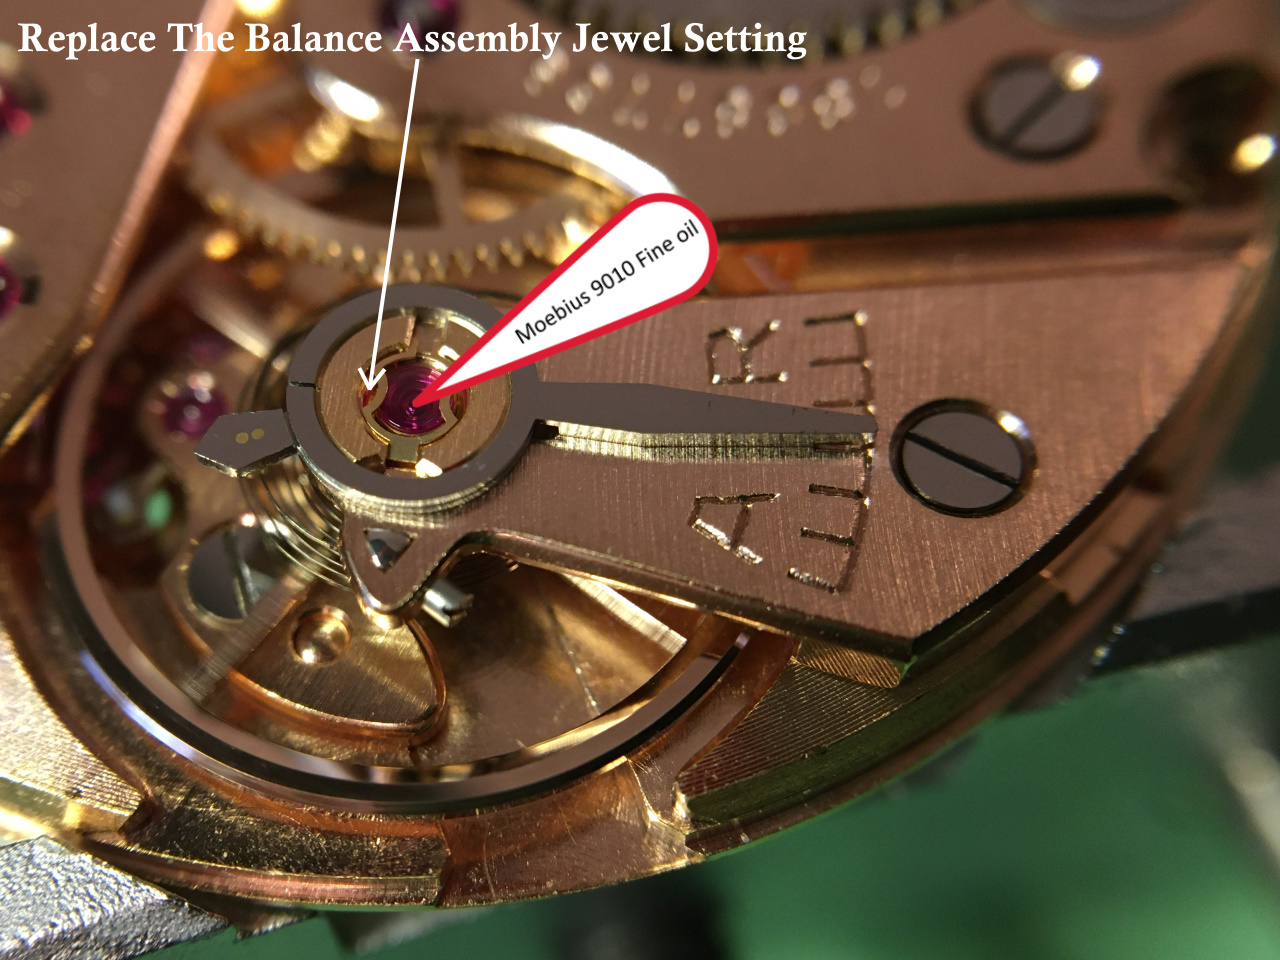
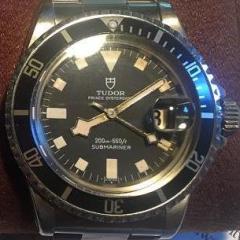
out of curiosity why did you replace the entire setting? normally the above answer would be fine except this is a Rolex watch. Rolex is obsessed with end shake so often times they will have procedures to make that adjustment easily especially on the balance bridge. rather than explaining the procedure I'm attaching a section out of the manual. You'll notice there's a screw specific for adjusting the end shake. If somebody had zero idea what that screw was for an rotated it that would be the problem.
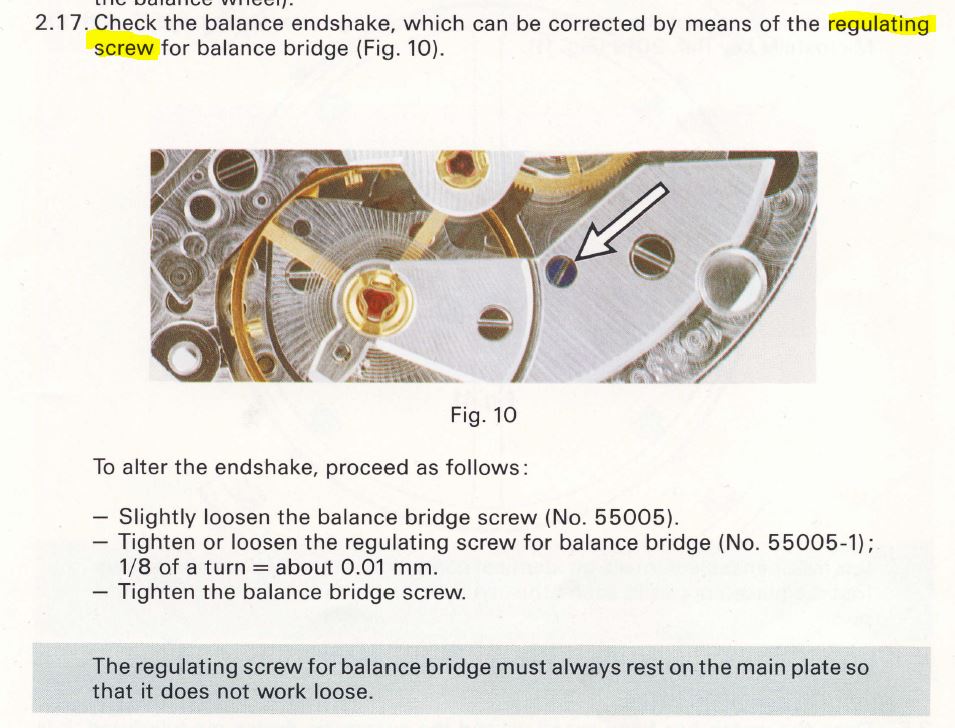 2 points
 -
My mentor taught me a trick which he learnt from his Swiss master. Wrap a tiny blob of Rodico on a pegwood, like a Q-tip. You'll save a whole lot more of the stuff. And change it more often. He also told me that the stuff from stationery stores, like Faber Castell's, work perfectly well, and at a fraction of the price of Rodico.2 points
-
Probably not what you want to hear, but for the Rolex and Tudor cases I seem to gravitate to, I found the best method is to hold the case in my left hand, and the die with a handwheel in my right hand. Sometimes I may wear a thin leather glove, but often not. I like to be able to balance the downward pressure and rotational force, so it does not "chatter" out of the grooves and also that I am not applying undue pressure to the threads once it is spinning. I have an aluminum case holder with the four Delrin covered pins and either the case pops out of the pins, or the pins pop out of the base. Since throwing that across the room in a fit of rage, my life has been easier.2 points
-
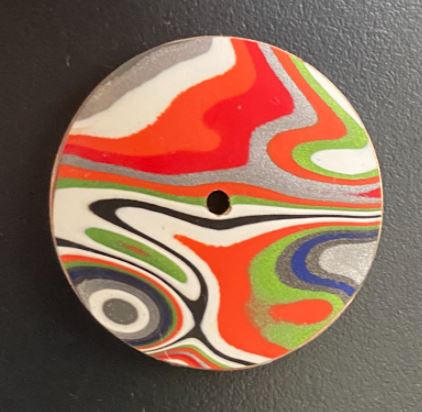
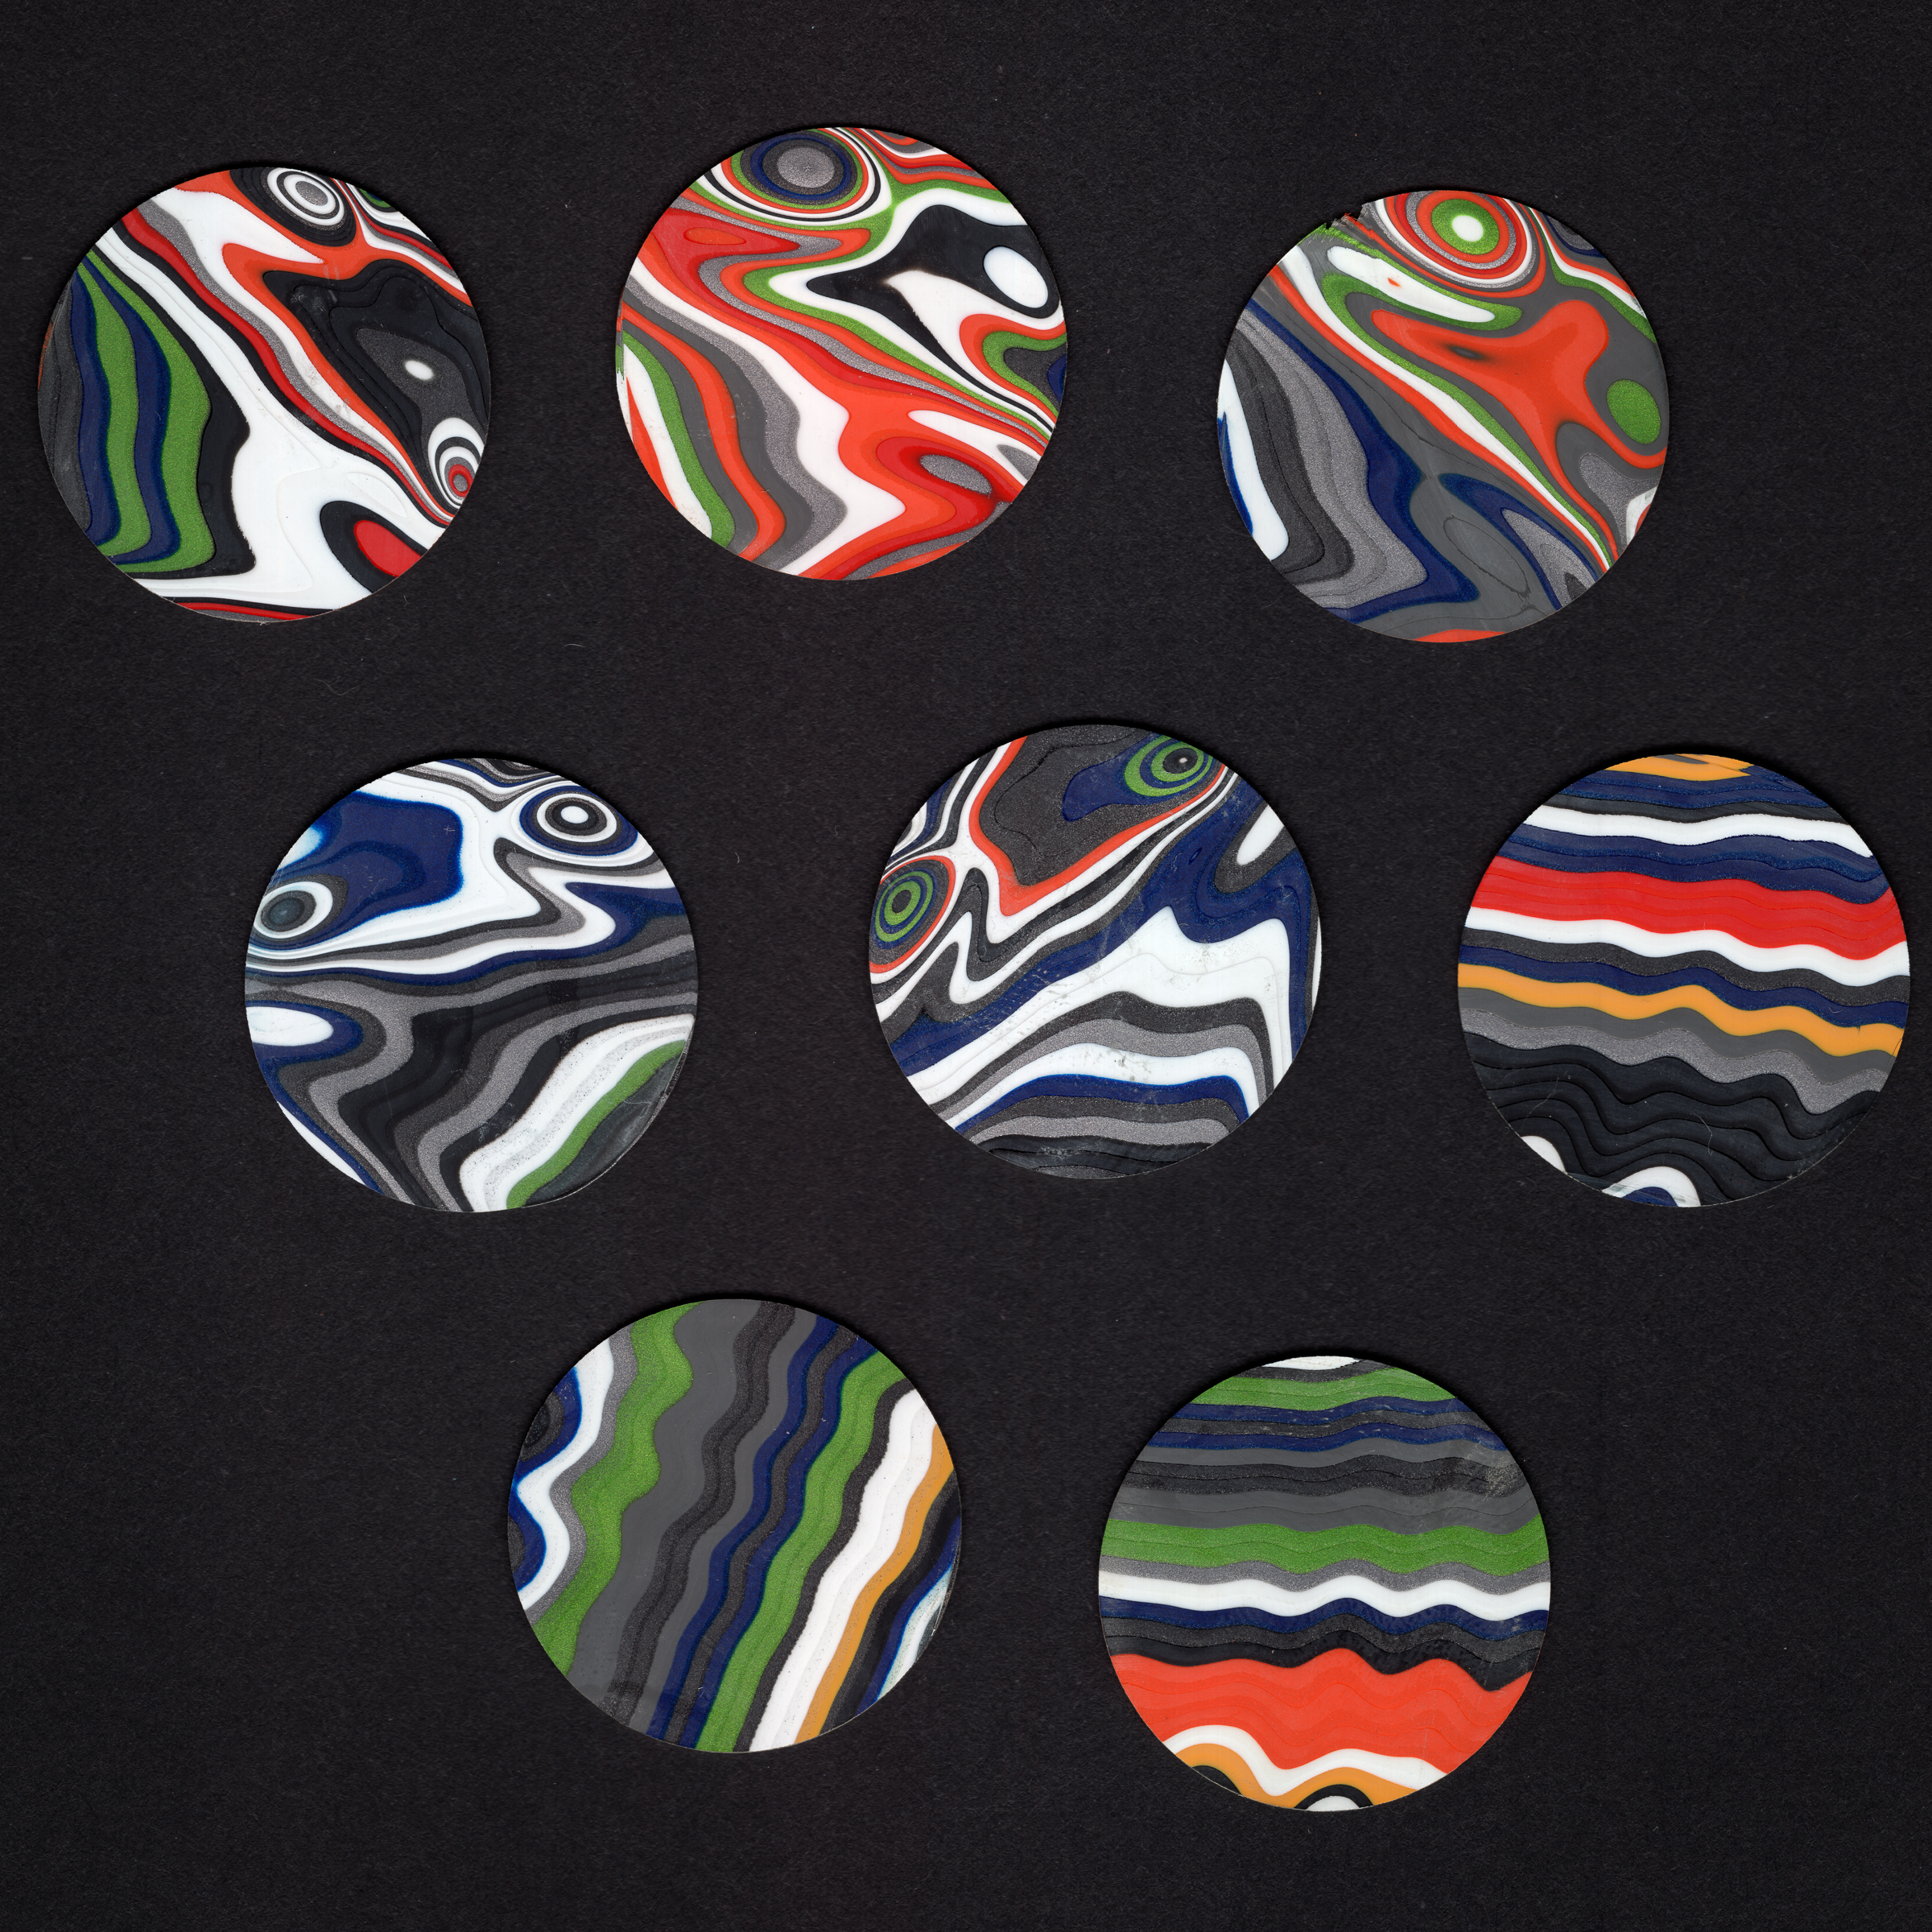
Yeah, I've tried a few things: brass scarf, powdered marble, brass plates, etc. If I've learned anything about bluing steel, is that what works well for one person won't necessarily work for another person. I'm able to consistently and cleanly blue hands, but the much larger surface area of the chapter ring is a significantly greater challenge. If anyone wants to learn how to blue hands or screws, the most foolproof and consistent method I'd recommend would be to use an inexpensive (<$100) precision-controlled digital soldering station with some sort of brass heating platform attached. This is what G.O. does, and it really does look like the sweet spot in terms of repeatability, consistency, and price. For one-off bluing of a couple of screws or the occasional hand set, any of the time-tested methods should work fine with significant practice. \\\ Thanks for the compliments @MechanicMike! \\\ Please forgive the poor quality of these snapshots, but here are a couple more examples. (Along with everything else, I'm really working to improve my wristwatch photography. It pains me to share quick snapshots now, but it's a ton of work to produce really high quality photographs. I'll be writing up a technique/walkthrough for taking high quality wristwatch photos and sharing it with the group when things calm down. With luck, it'll help folks take better picture of their watches ... and maybe make a little more money on their eBay sales.) This finished watch is an SNKK27 with a dial that really reminds me of a topographic map. This dial sitting by itself is way more vivid and psychedic, and I'll be putting it into a watch today. Here's a heartbreaking (to me anyway) image showing just how delicate and difficult this stuff is to work with. I absolutely loved the crazy pattern and colors in this dial, and it was likely to be my "keeper" fordite dial to commemorate this project. It reminded me of a psychotic duck. This dial made it almost all the way through my manufacturing process, surviving being cut with my saw, trimmed to fit the dial, and being ground/polished down through 400, 800, 1500, and 2000-grit sandpaper. On its final polishing step (wet 3000-grit sandpaper), I overpolished this dial and exposed the brass underneath the fordite layer. This is most visible at around noon in the picture below. Dang. Adding insult to injury, the fordite chipped when I drilled its central hole. This was around 8 hours of work down the drain. I can definitely say that I've figured out a LOT of ways of screwing up the manufacturing process for these dials. And I'm confident in saying that I'll continue finding new ways to screw it up. Here's a fun one that took me by surprise. I was working with a fordite section that wasn't completely flat out of the saw. I didn't think that this was a big deal, as it ranged from 0.5mm at its thin end to 0.75mm at its thick end. It turned into a big deal when I made two additional mistakes: 1) I forgot to rough up the brass dial blank before applying epoxy; and 2) I didn't weigh down the fordite section enough while the epoxy was curing. The uncured epoxy allowed the fordite section to slip off of the dial while curing, leading to a very thin and fragile fordite layer that was securely epoxied to half of a dial blank. Neither were salvageable. I have found some tricks that have improved the process too. I had been using hot glue to hold my fordite cores to the "wafer chuck" on the Buehler Isomet during cutting. This worked okay, but the hot glue failed after 3-4 cuts, which resulted in a lot of wasted time and miscut fordite sections. The better solution has turned out to be using epoxy to glue a LEGO piece to the end of the fordite cores, and then using a vise chuck to hold the LEGO piece during cutting. This works awesome. I've also figured out that an ideal fordite section is almost exactly the same width (0.5mm) as the blade I'm using to cut it. This has made eyeballing the width of my cuts much easier, and has significantly improved the consistency of my cutting. Cutting has gotten MUCH better having switched to a 5" blade and using LEGO pieces with a different chuck. This low-tech kludge is working AWESOME. I did find a good source of brightly colored hands of different designs, which I'll be tapping into if I continue building fully-assembled and upgraded Seiko watches. I'd honestly rather just be making dials. I'm learning that there are really big differences between different types of fordite. The more subtle (whites/blacks/reds/silvers/blues) fordite is from an old Jeep assembly line. The wild psychedelic stuff is from the old Mustang assembly line. The materials feel different to work too. Also, I've discovered that some rough slabs of fordite have big bubbles or inclusions in them. One $50 rough slab I bought was so riddled with inclusions that it produced a grand total of one usable fordite section. Here's an example of some of the psychedelic colors and patterns I can get out of "Mustang" fordite: I'm still working frantically to get my first 10 dials completed. I had a major breakthrough in that I received my order of 200 half-height (0.2mm) blank brass Seiko/NH35/NH36 dials from the Chinese factory yesterday. I had stalled out because I had worked my way through my first 12 half-height dial blanks and was completely out. Ordering directly from a Chinese factory was a lot less painful than I had been lead to expect, but I think I got lucky and don't have QC problems because of the simplicity of the parts I had ordered. If I have time, I'll share some of my notes and experiences about what it has been like for me to work with an Alibaba manufacturer to build custom parts. I'm currently reaching out to additional Chinese suppliers to try to see if designing and manufacturing a run of *carbon steel* Seiko-compatible handsets is feasible. A lot more can go wrong there, and that's going to be a much longer-term project. Ideally, I'll be able to design hands that are inexpensive to manufacture, come ready-to-blue, and can accommodate lume (which I'd be applying myself).

.thumb.JPEG.bf1deafff7ae5fab24f5f24368521aab.JPEG)

.thumb.JPG.43eb4d1a9f82c0fb5b3821be79e7306d.JPG)
.thumb.JPEG.7cbbec89923d63eec7f45b269b1f06a1.JPEG) 1 point
1 point -
The odd behaviour suggests some other alloy, or the mercury is somehow sticking to the glass. There are a number of low temperature alloys including Woods metal that might work as pendulum, since they contain heavy metals like bismuth and lead, and which become liquid at less than the boiling point of water. https://en.wikipedia.org/wiki/Wood's_metal Mercury amalgams are very odd. https://www.youtube.com/watch?v=2JW8YGTdTjA .. and then there is Gallium1 point
-
Thank you for your patience and understanding and please accept my apology. Wishing you health.1 point
-
Hi Following Nicklsilvers lead I have attached the sheet for the 424 for your interest.1 point
-
Have a look at this site run by Christian Dannemann "The Watch Guy". I believe that it is available for anyone to use.1 point
-
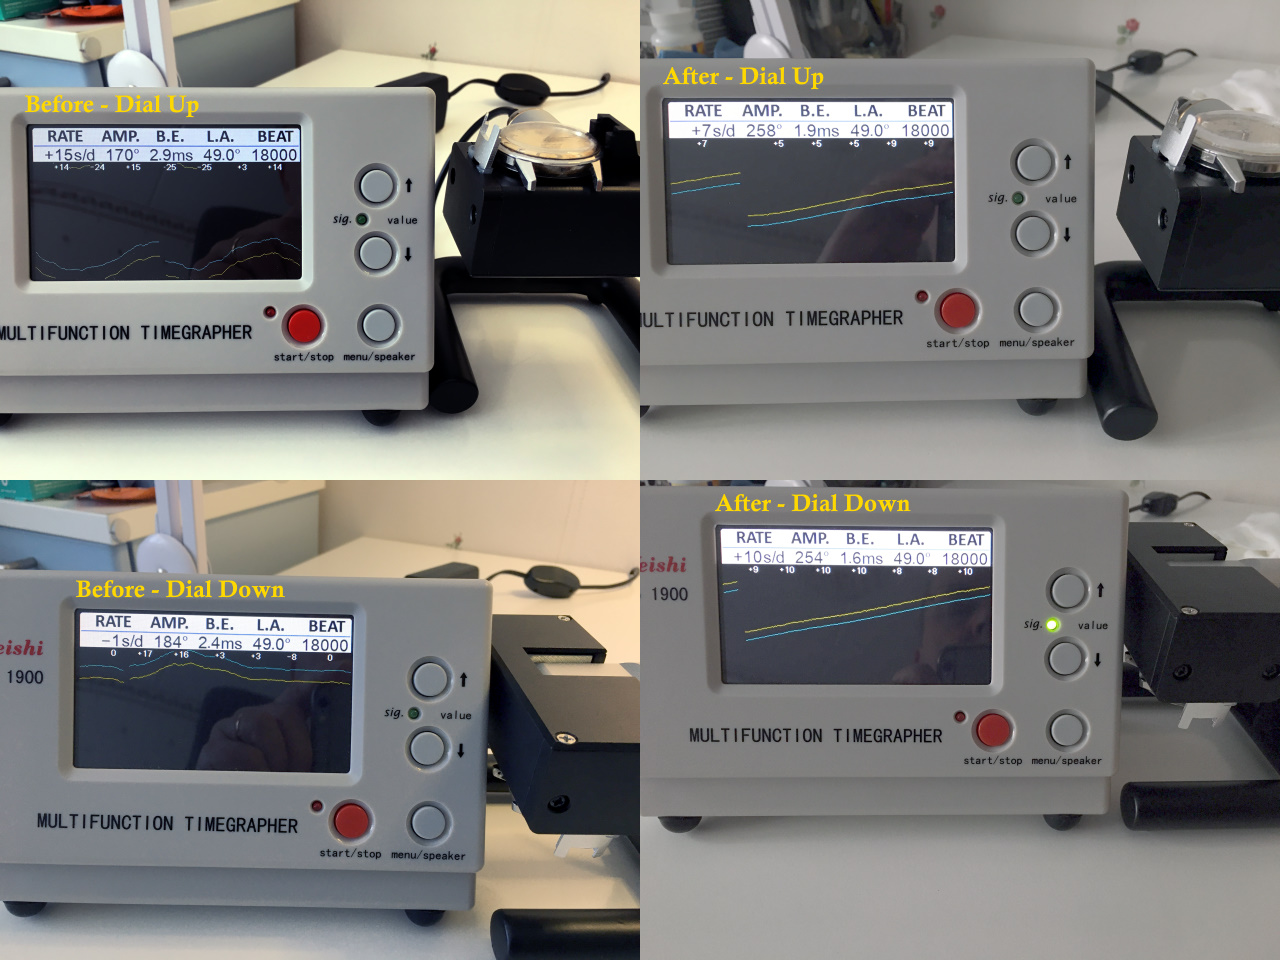
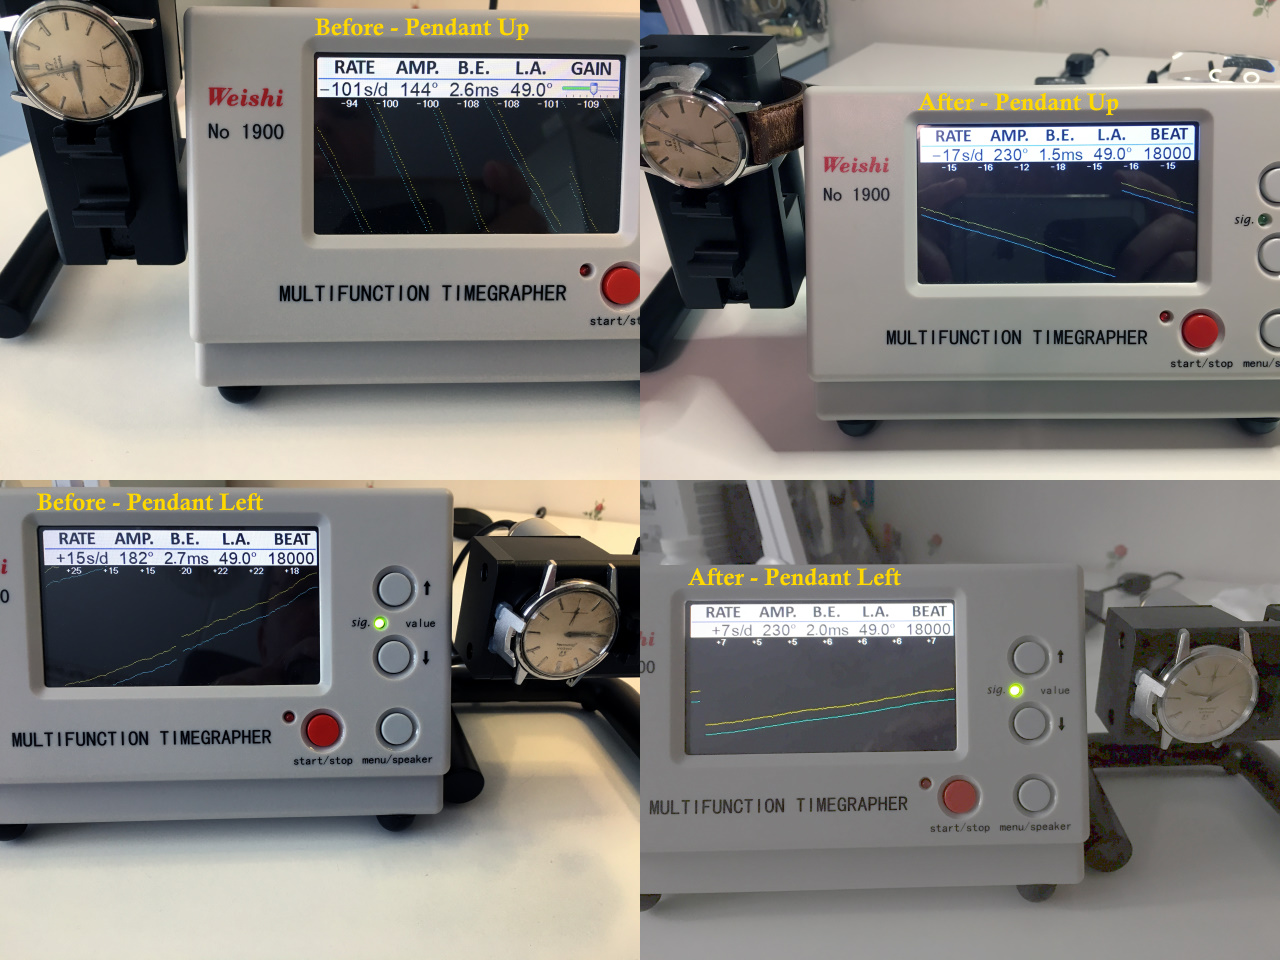
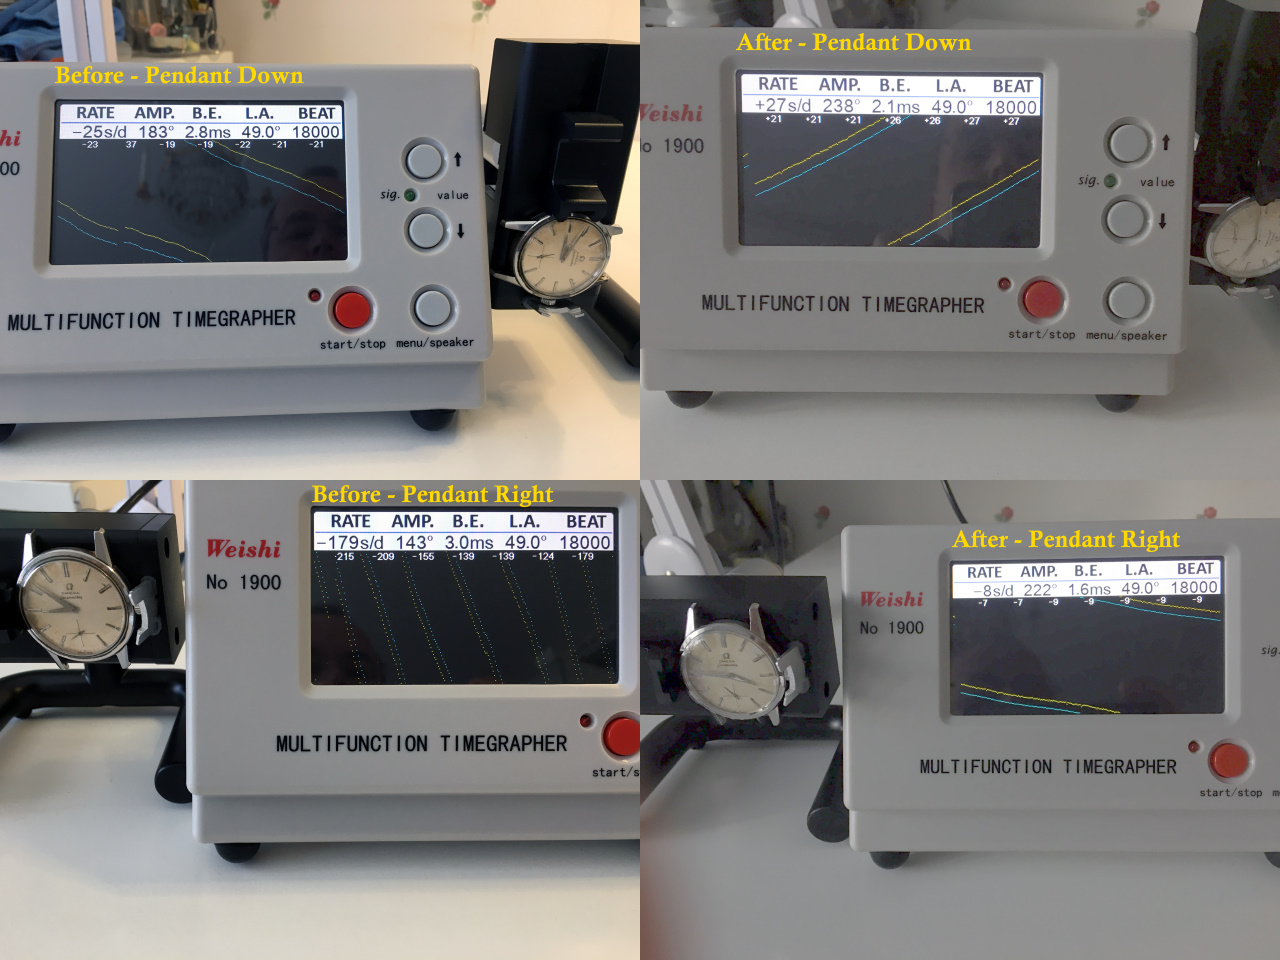
@VWatchie Seems some videos produce more questions than answers - compared to reading books by proven expert authors (the old fashioned way, I know). To your initial question: Dynamic poising is to be handled with care. Conclusions are valid only, if the watch is in perfect technical condition! The mentioned watch differs by more than 50 degrees in those two vertical positions. Here the rate difference can come from isochrone effects (rate dependent on amplitude) - in that case, poise conclusions are not valid at all! Also a TM amplitude measurement can be unreliable, the real lift angle may differ from that listed in tables. So keep far away from 220 degrees for poise testing, best 180 degrees or lower (lower will magnify the error). Frank1 point
-
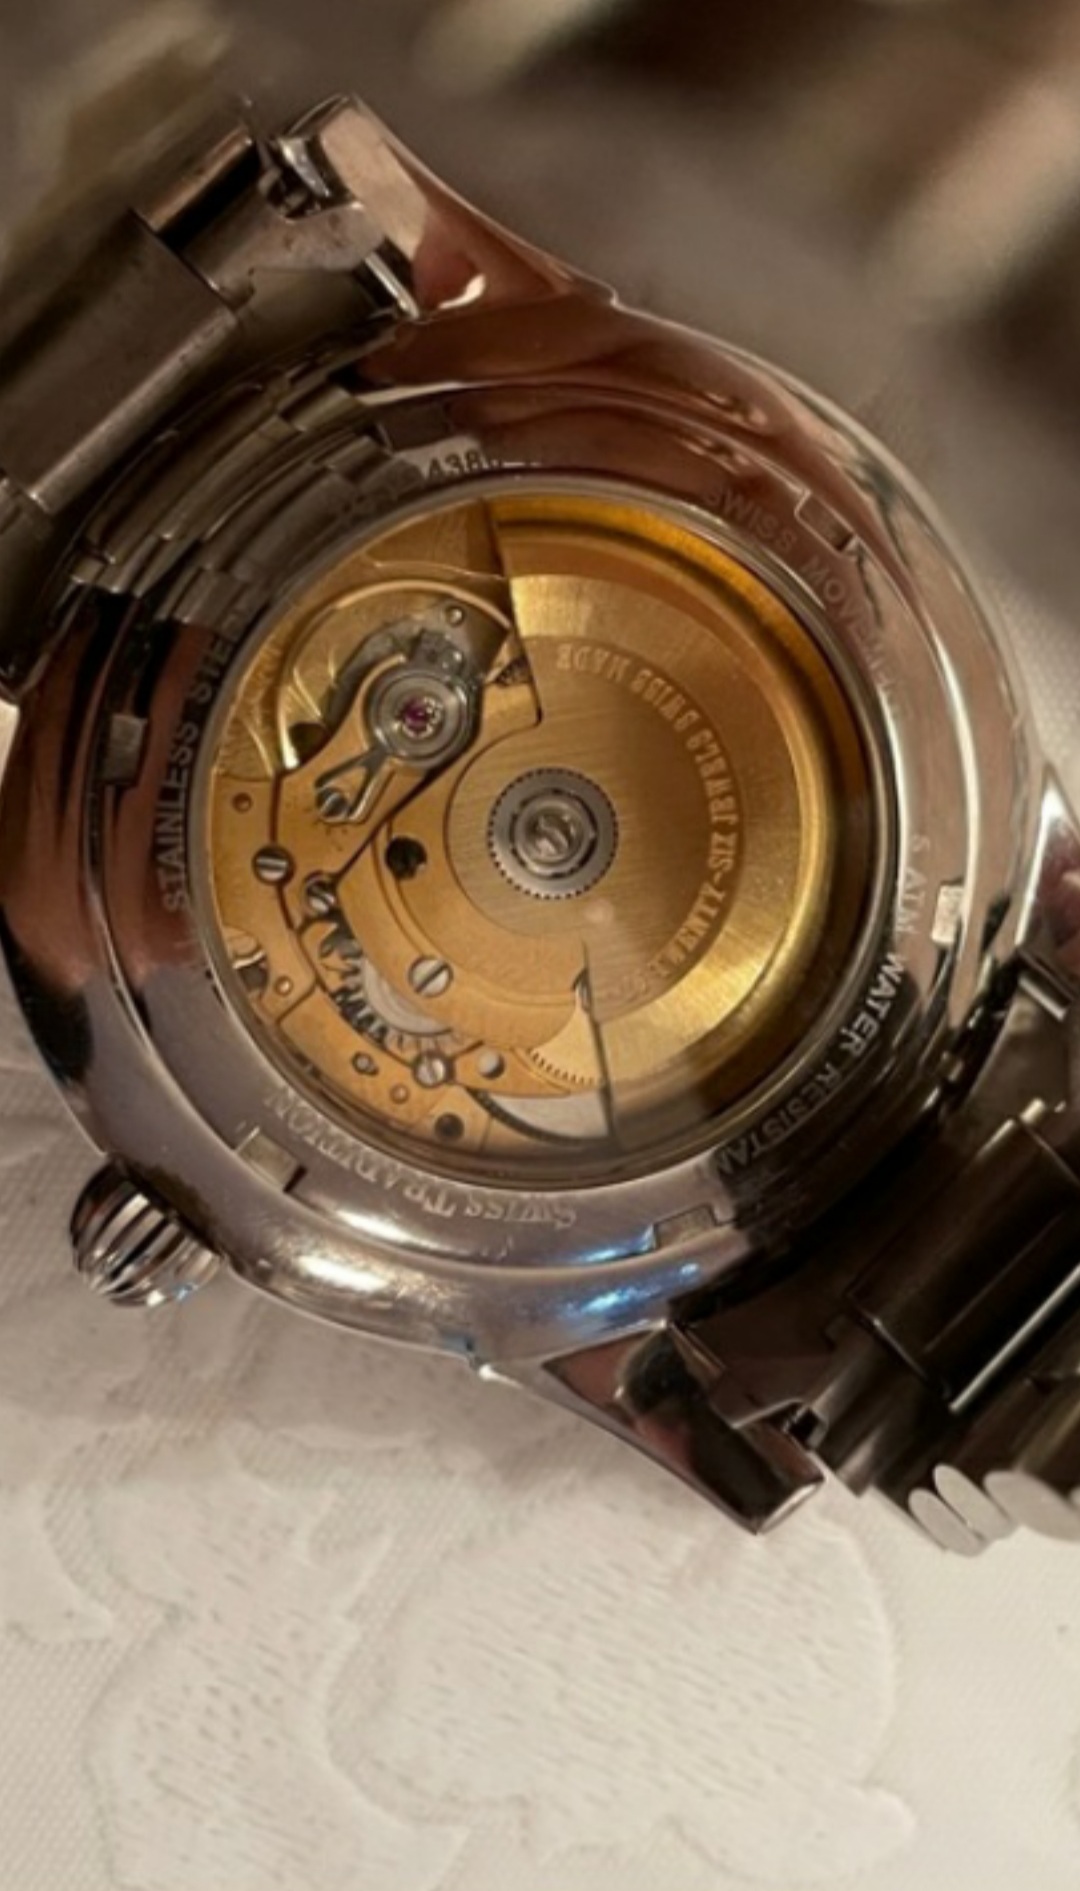
I don't think it's a hodgepodge. LeCoultre made a number of calibers on that base, the most common being the 424 and 438. You can tell the difference by measuring the movement thickness. 410 is 3.35mm, 424 and 438 are 3.50mm, then 413 is 3.90mm. The only way I've been able to tell the difference between the 424 and 438 is by the crown and ratchet wheels, they have finer teeth in the 438 (30 teeth in the crown wheel). Yours looks to me like a 424.1 point
-
The amount of exposure doesn’t matter- the end shake does. Try Joe’s idea of loosening the cock screw and see if things improve. If so, you may need to press the setting out a hair. Did you happen to do any hair spring work? At rest, is the roller in line with the pallet fork (straight line between balance pivot, fork and escape wheel)?1 point
-
Welcome enjoy the forum. PS be warned horological can become compulsive1 point
-
Welcome! You will find all the information you need here, and a lot more. Your wife may have gained a battery but lost a husband.1 point
-
So you got some or little endshake, just as a test: loosen cock screw 1.5 turn see if oscil speeds up. Do you see any shelac keepin pallets put?1 point
-
nope Bob at ofrei has got that job locked down. he's no idiot by any stretch of the imagination and is a good guy but he does the running all over the place looking for stuff for us customers. but yeah I absolutely get your point. well if you had the scratch and could afford a pro parts person, you'd still have to put in the time waiting for the actual part to get to your hands and into the watch. so ya might as well forgo the parts person and occupy your time looking for parts lol my worn circular path of travel is between Esslinger, Ofrei, Ebay, a few odd stops at Cousins and AE, then back to the start.1 point
-
yep. mine looks like what a cat might cough up... I've seen that A*F stuff just the other day and thought I might give it a run..1 point
-
think about a burnisher like a file except it's teeth are superfine. Then to be technically correct they range from superfine to something that looks polished no teeth at all. you can remove a small amounts a metal than later basically polished by compressing the metal. If done right you end up with a really beautiful mirror finish black polish that's hard.1 point
-
isn't that what we call a watch material house?1 point
-
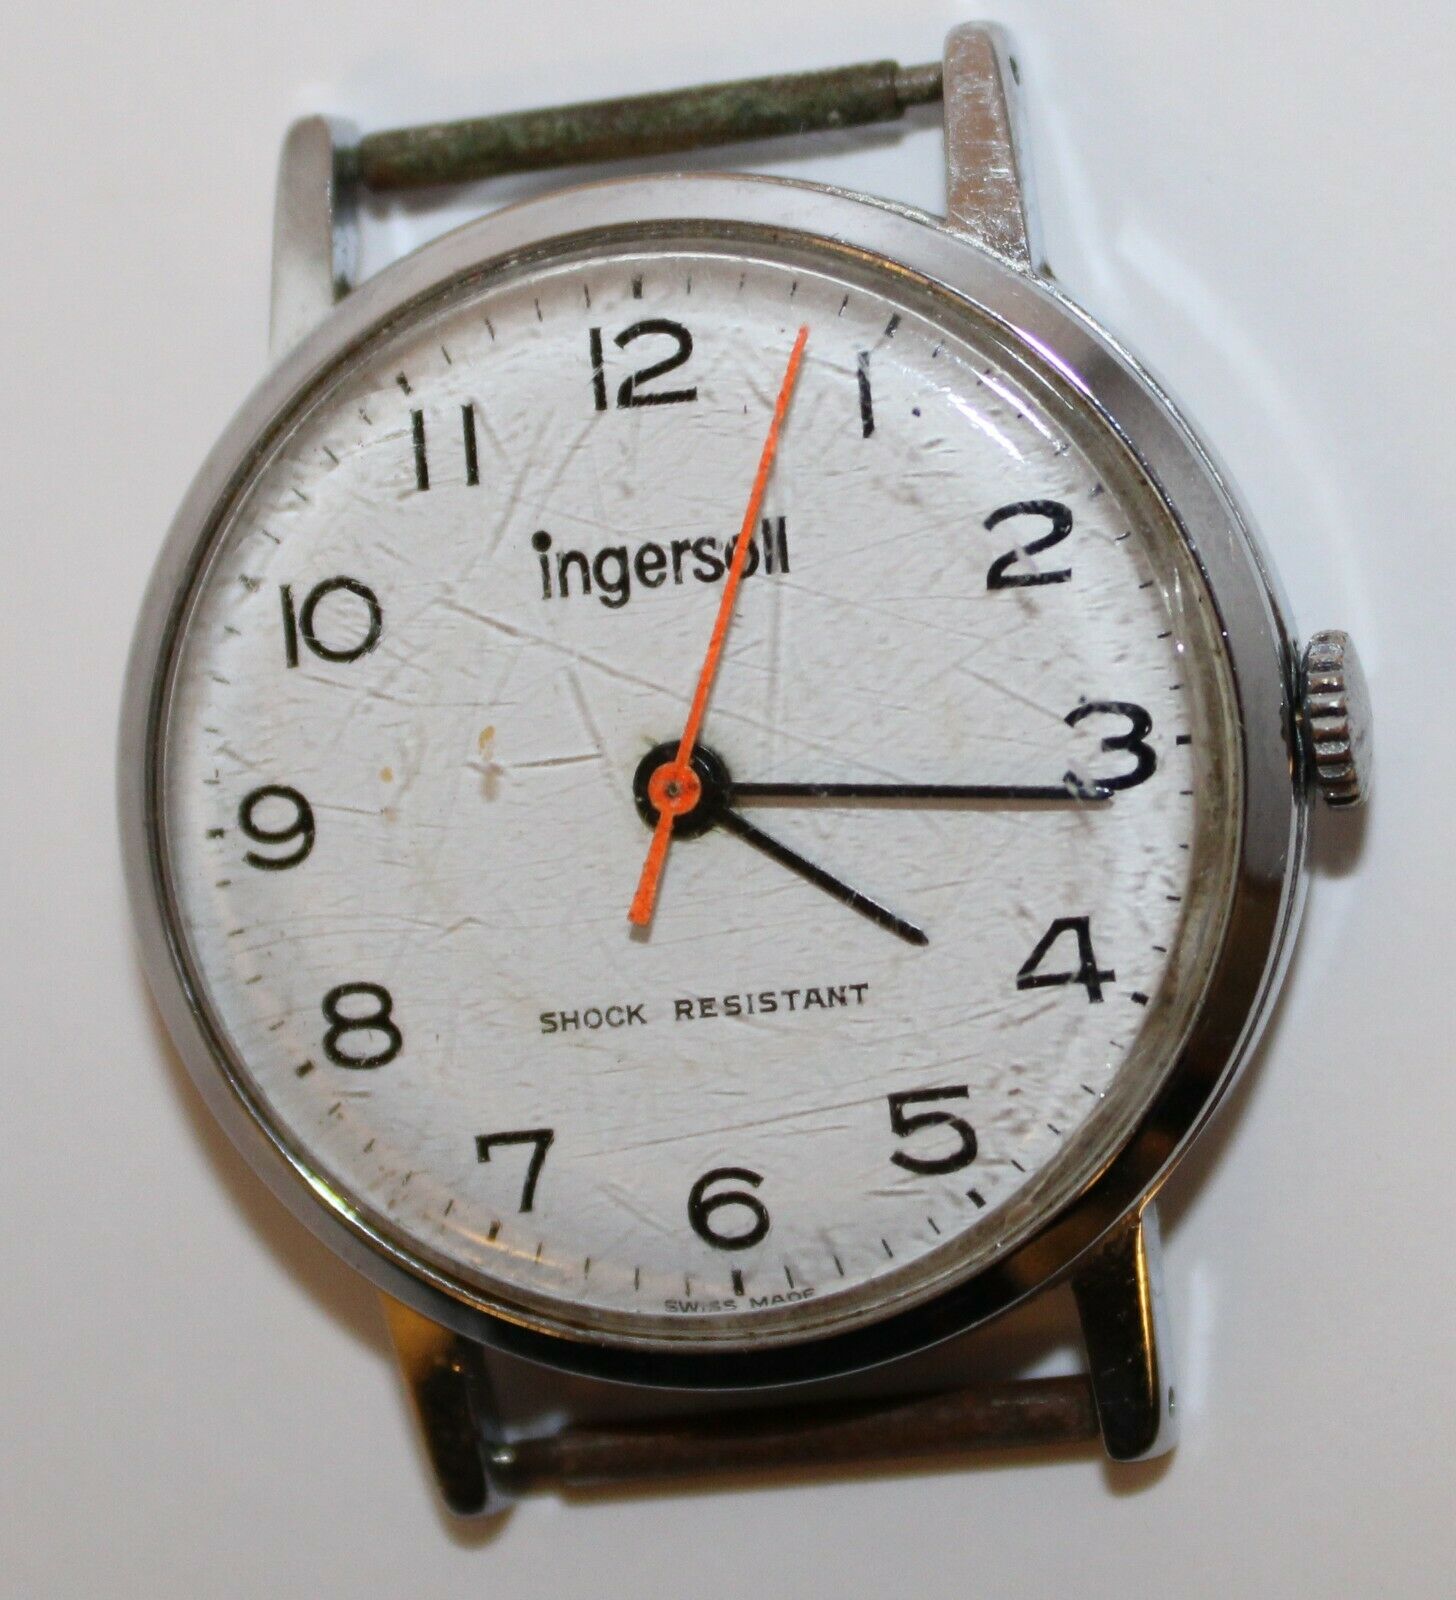
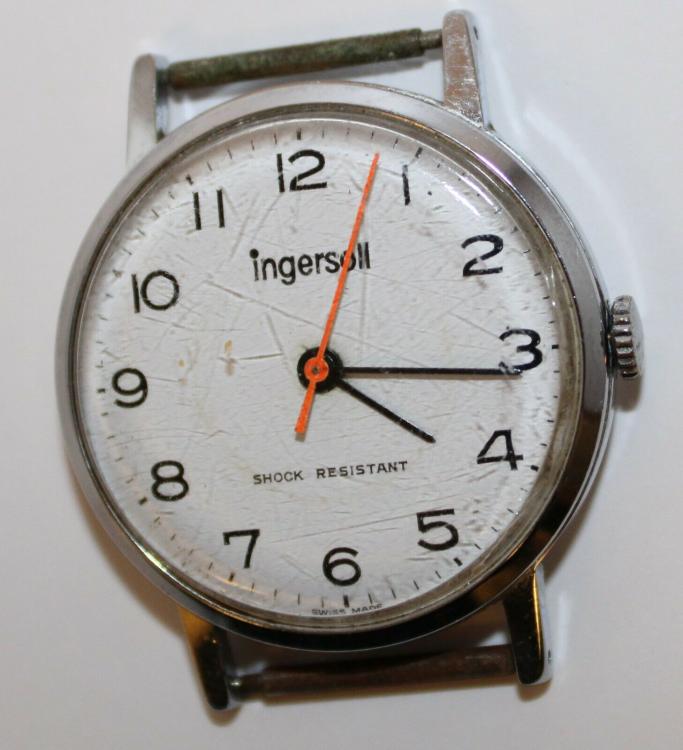
Another prospective 404 club non runner. Probably a jewel free pin lever. I suspect a clean, service and polish will bring it back to as new.
 1 point
 -
There's no cleaning it, as above, keep a little clean piece for clean stuff and the dirty for odd jobs. The Premium Rodico is total garbage. I don't know a single professional who likes it at all. I haven't tried the A*F, but they recently were bought by an industrial tool supply house here, and I suspect their offering will diminish quite a bit.1 point
-
I've often seen watchmakers videos on YouTube where their Rodico looks like a small dirty rodent. I expect that if it gets any more hairy it'll scurry itself off to the bin. I also keep a clean piece, for cleaning inside of crystals before final casing. Anyone used any other type? A*F Rub-Off Cleaning Compound?1 point
-
Hi Neil A bit beyond the newbie then if you have amassed the tools already. the attached you may find interesting. Witschi Training Course.pdf1 point
-
Hi Neil and welcome to the forum I have attached two documents that you may find useful regarding watch repair, there is also another tool lost on the site, found through the search function on the home screen by DrG who is a member. Again its a comprehensive list. cheers 1612608791_ToolsfortheHobbyist (1).pdf TZIllustratedGlossary.pdf1 point
-
I always have two pieces in use. The “clean” piece, and the “dirty” piece. I use the dirty one mostly, and the clean one for critical stuff. I also occasionally knead it to expose a “clean” area- clean enough for the task at hand anyway. It picks up the dust from the air and bench so keep it under cover when not in use I also have one bar of gray premium rodico. I hate it. It’s softer and stickier- it tends to leave bits of gray rodico behind. Seems like chewing gum actually. I may give it another try but i feel it is not worth the up charge.1 point
-
Hi Mike I used the same stuff (typeclean) when servicing typewriters may years ago for cleaning the type heads once it was used up and dirty it went in the bin. The old stuff from using on watches can be reused for holding parts on the bench when measuring or other like tasks but the bin is where it usually ends up. Premium Rodico is likly to be an altered formula designed to remove money from your pocket it will be a bit more tacky so it collects more dollars/pounds .1 point
-
looking at your stuff, I keep getting the Wave of Kanagawa effect. you know?1 point
-
aluminum. hmmmm. ever try brass or brass chips in a chip tray?1 point
-
holee smokes thats nice!1 point
-
you are soooo right. the gooey swirl marks have become the bane of my existence and can drive you insane, trying to get rid of them. get the largest fluffiest (is that a word?)muslin or cotton wheel, use light pressure and turn rpm down seems to work alot better but polishing can still be a challenge. especially when people make it look so easy.1 point
-
had to look at this again-you're probably way ahead on this now but hey, I think this chap ring lo9oks cool as is! ?1 point
-
Hi Yasser right, Have a look via the search function . top right on the home screen. use the phrase ""BFG 866 walk through"" then scroll down the results and look for Jon "Baumgartner BFG 866 Walk through" Jon did quite a comprehensive walk through the diss assembly and re assembly of the BFG 866. A study of his posts will give you the information In graphic detail. It is very Good1 point
-
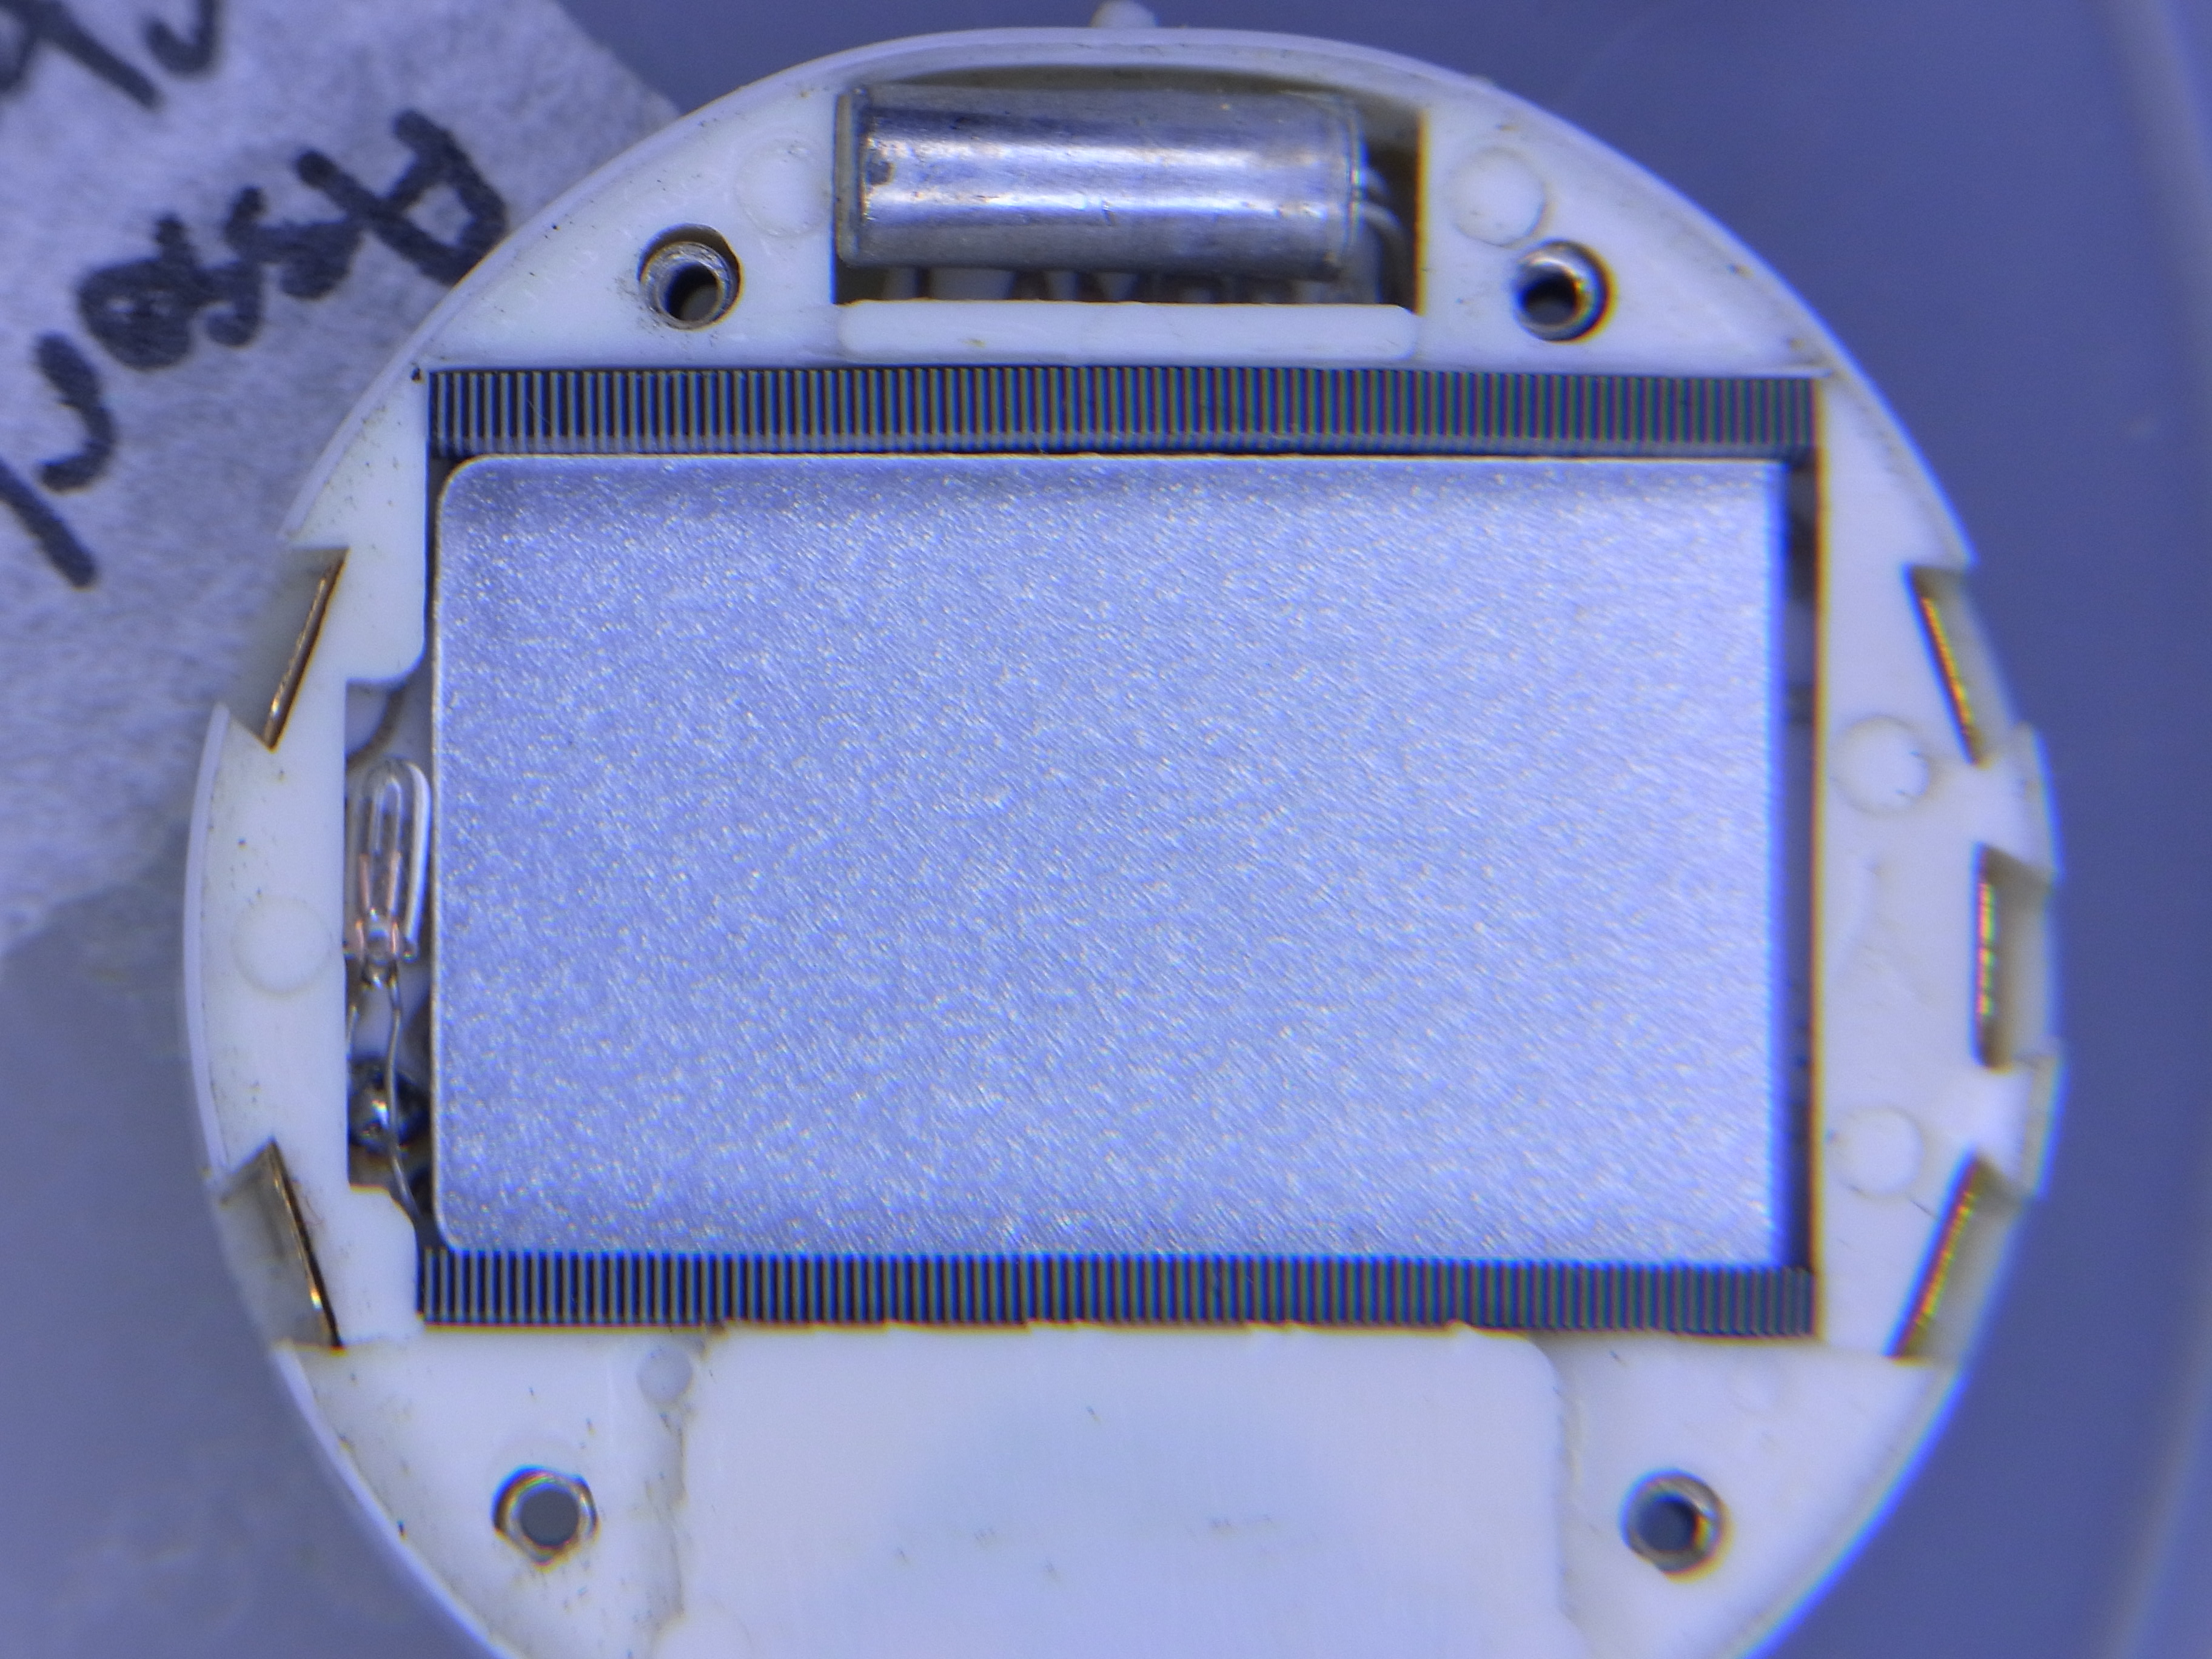
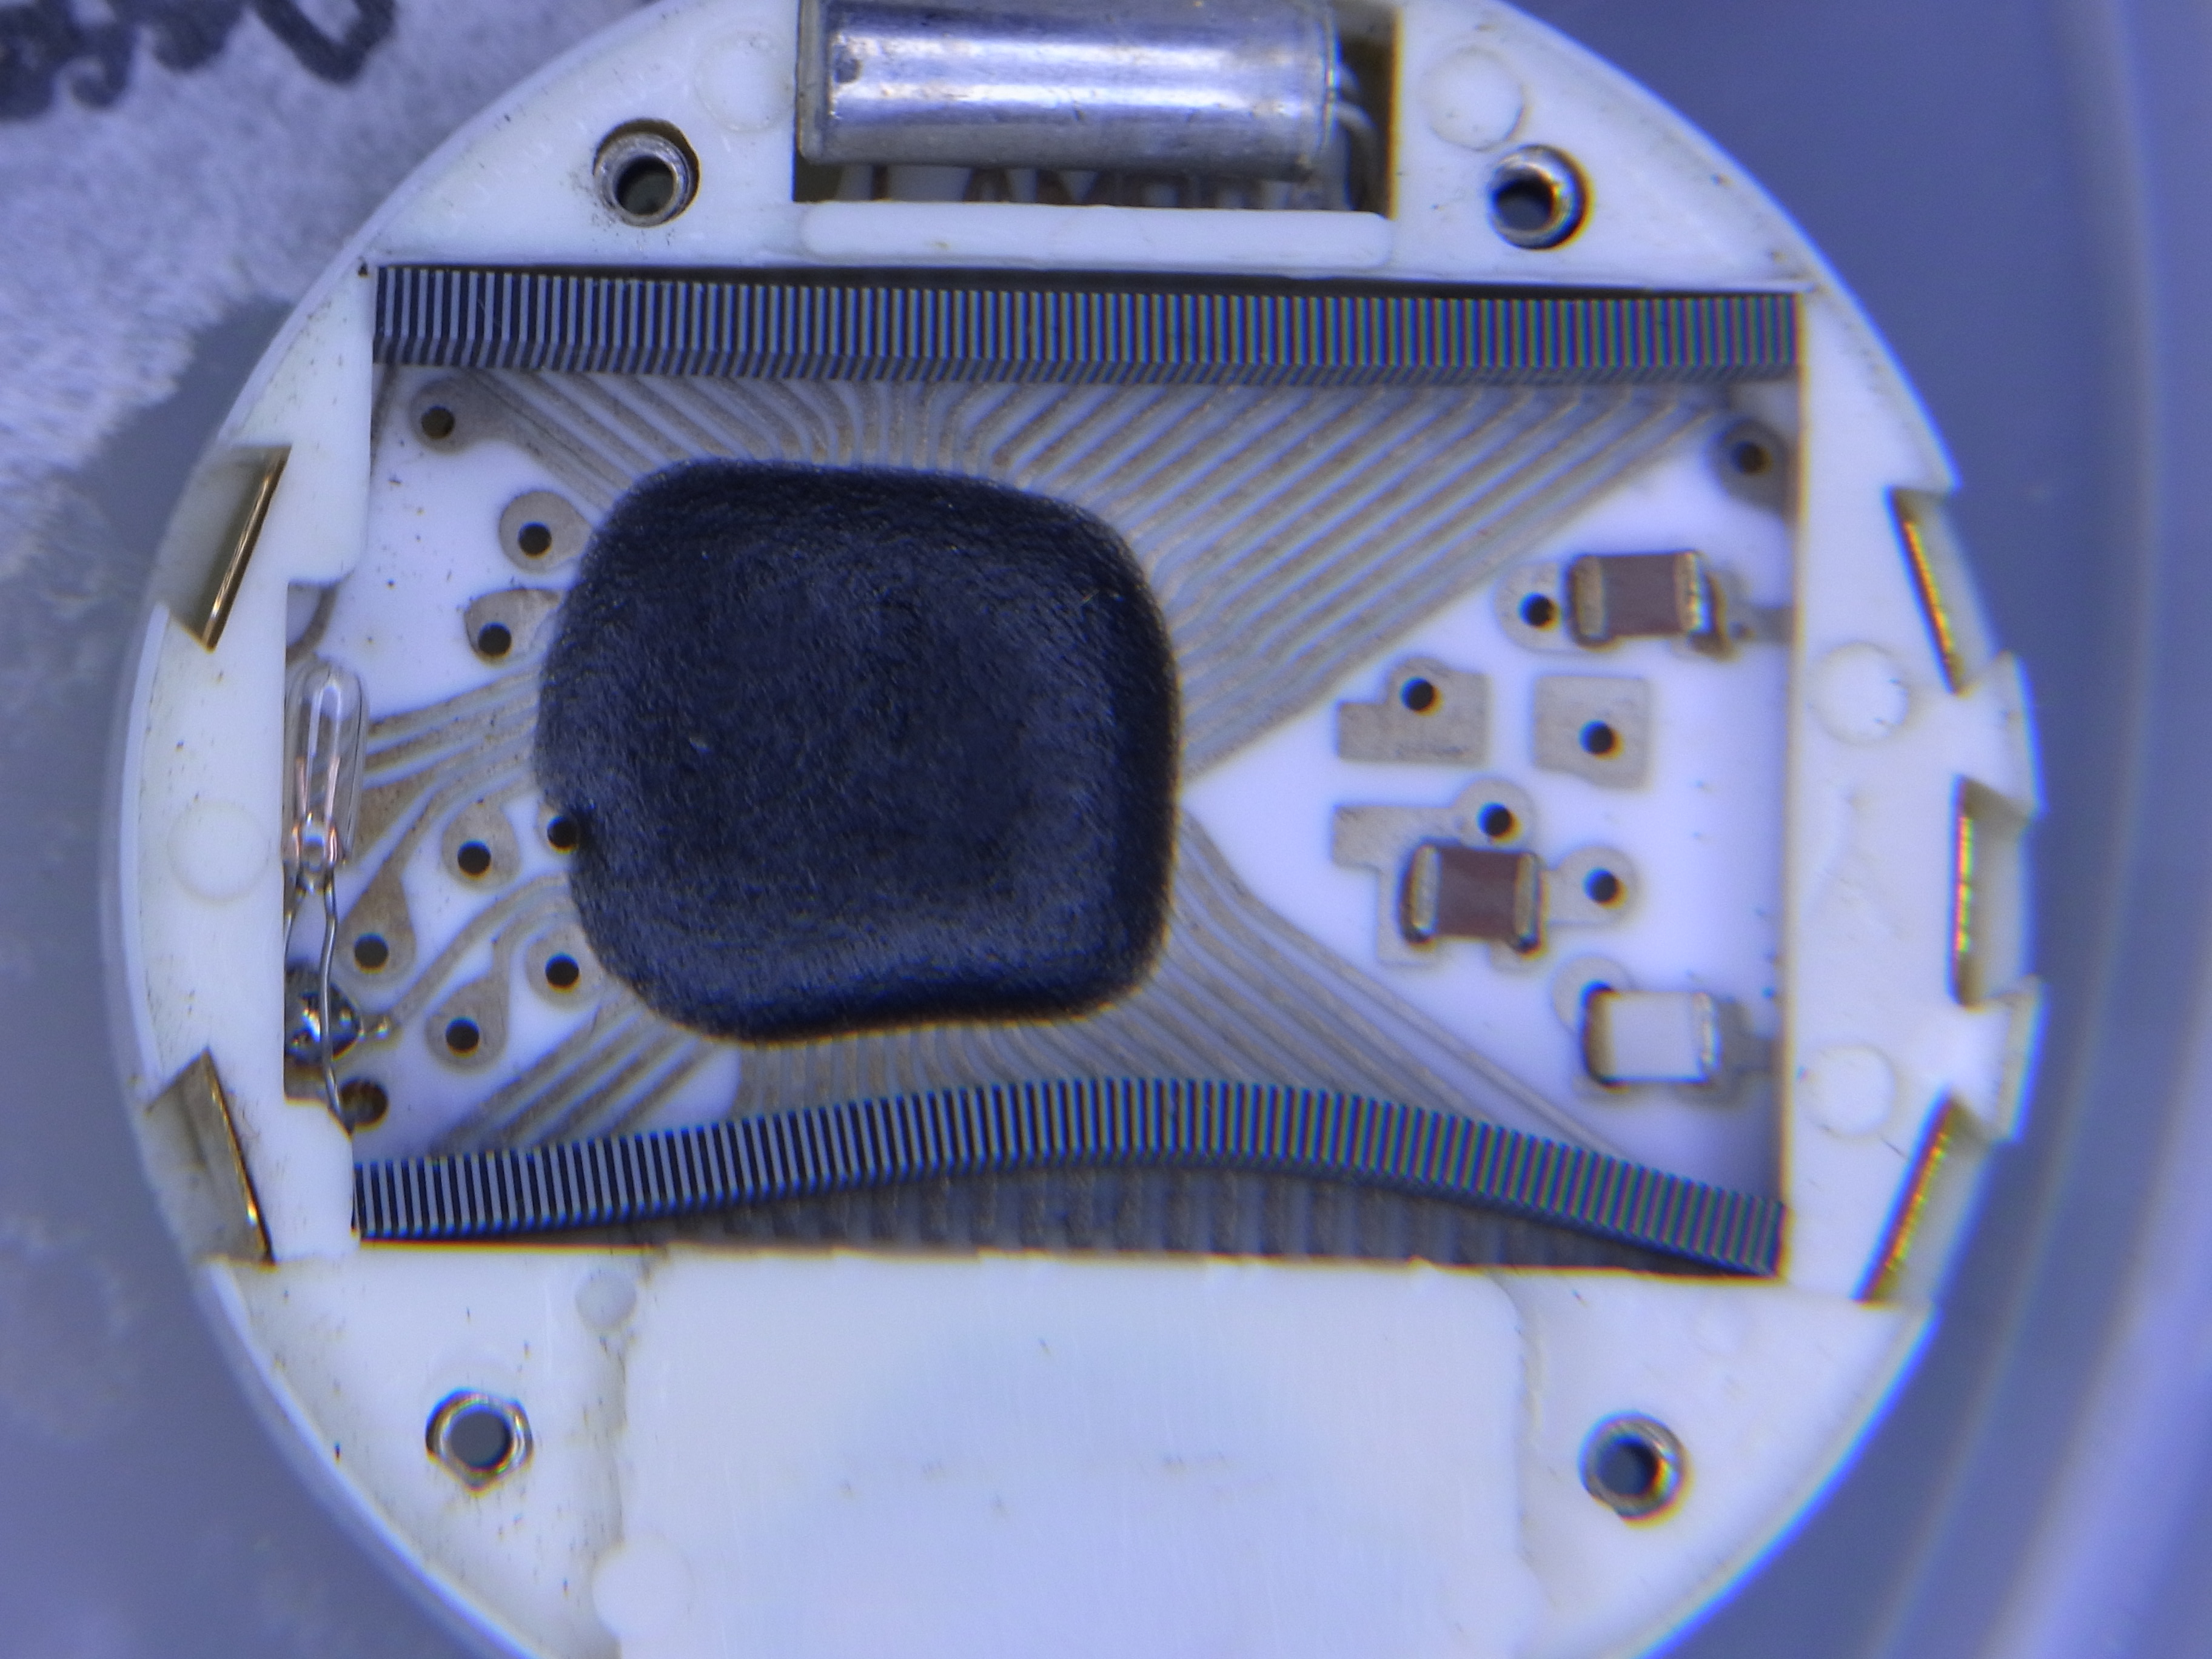
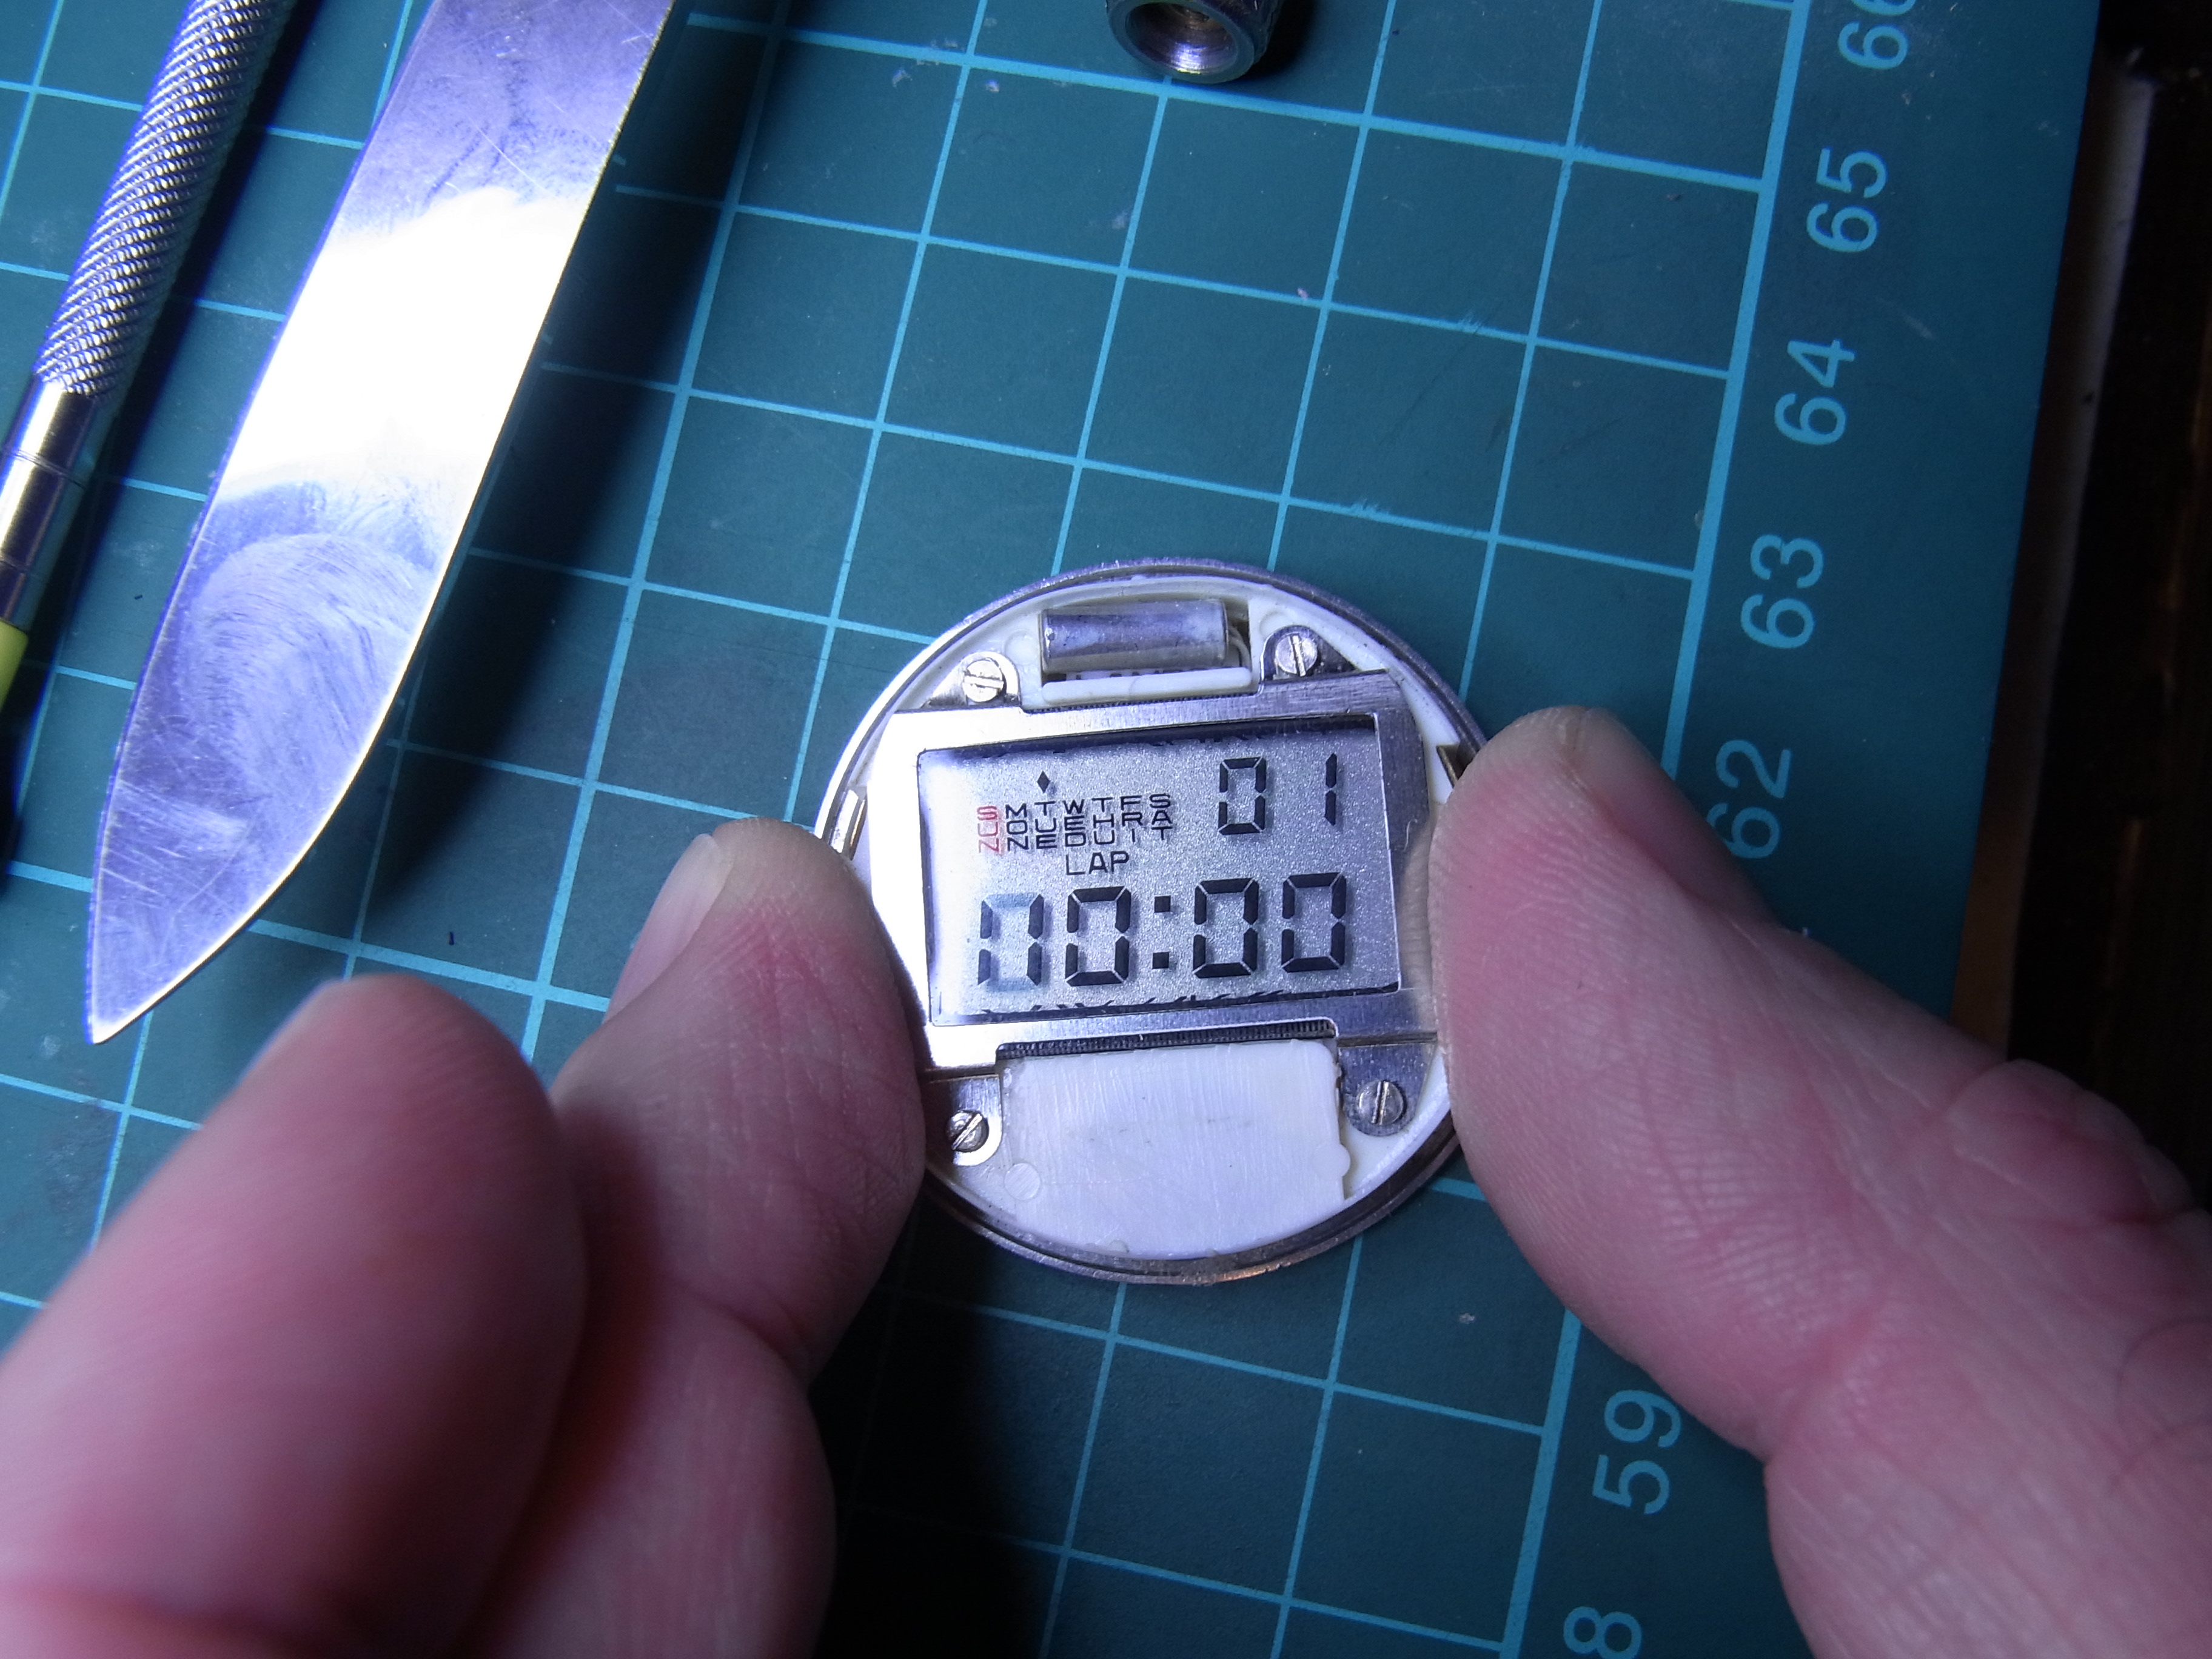
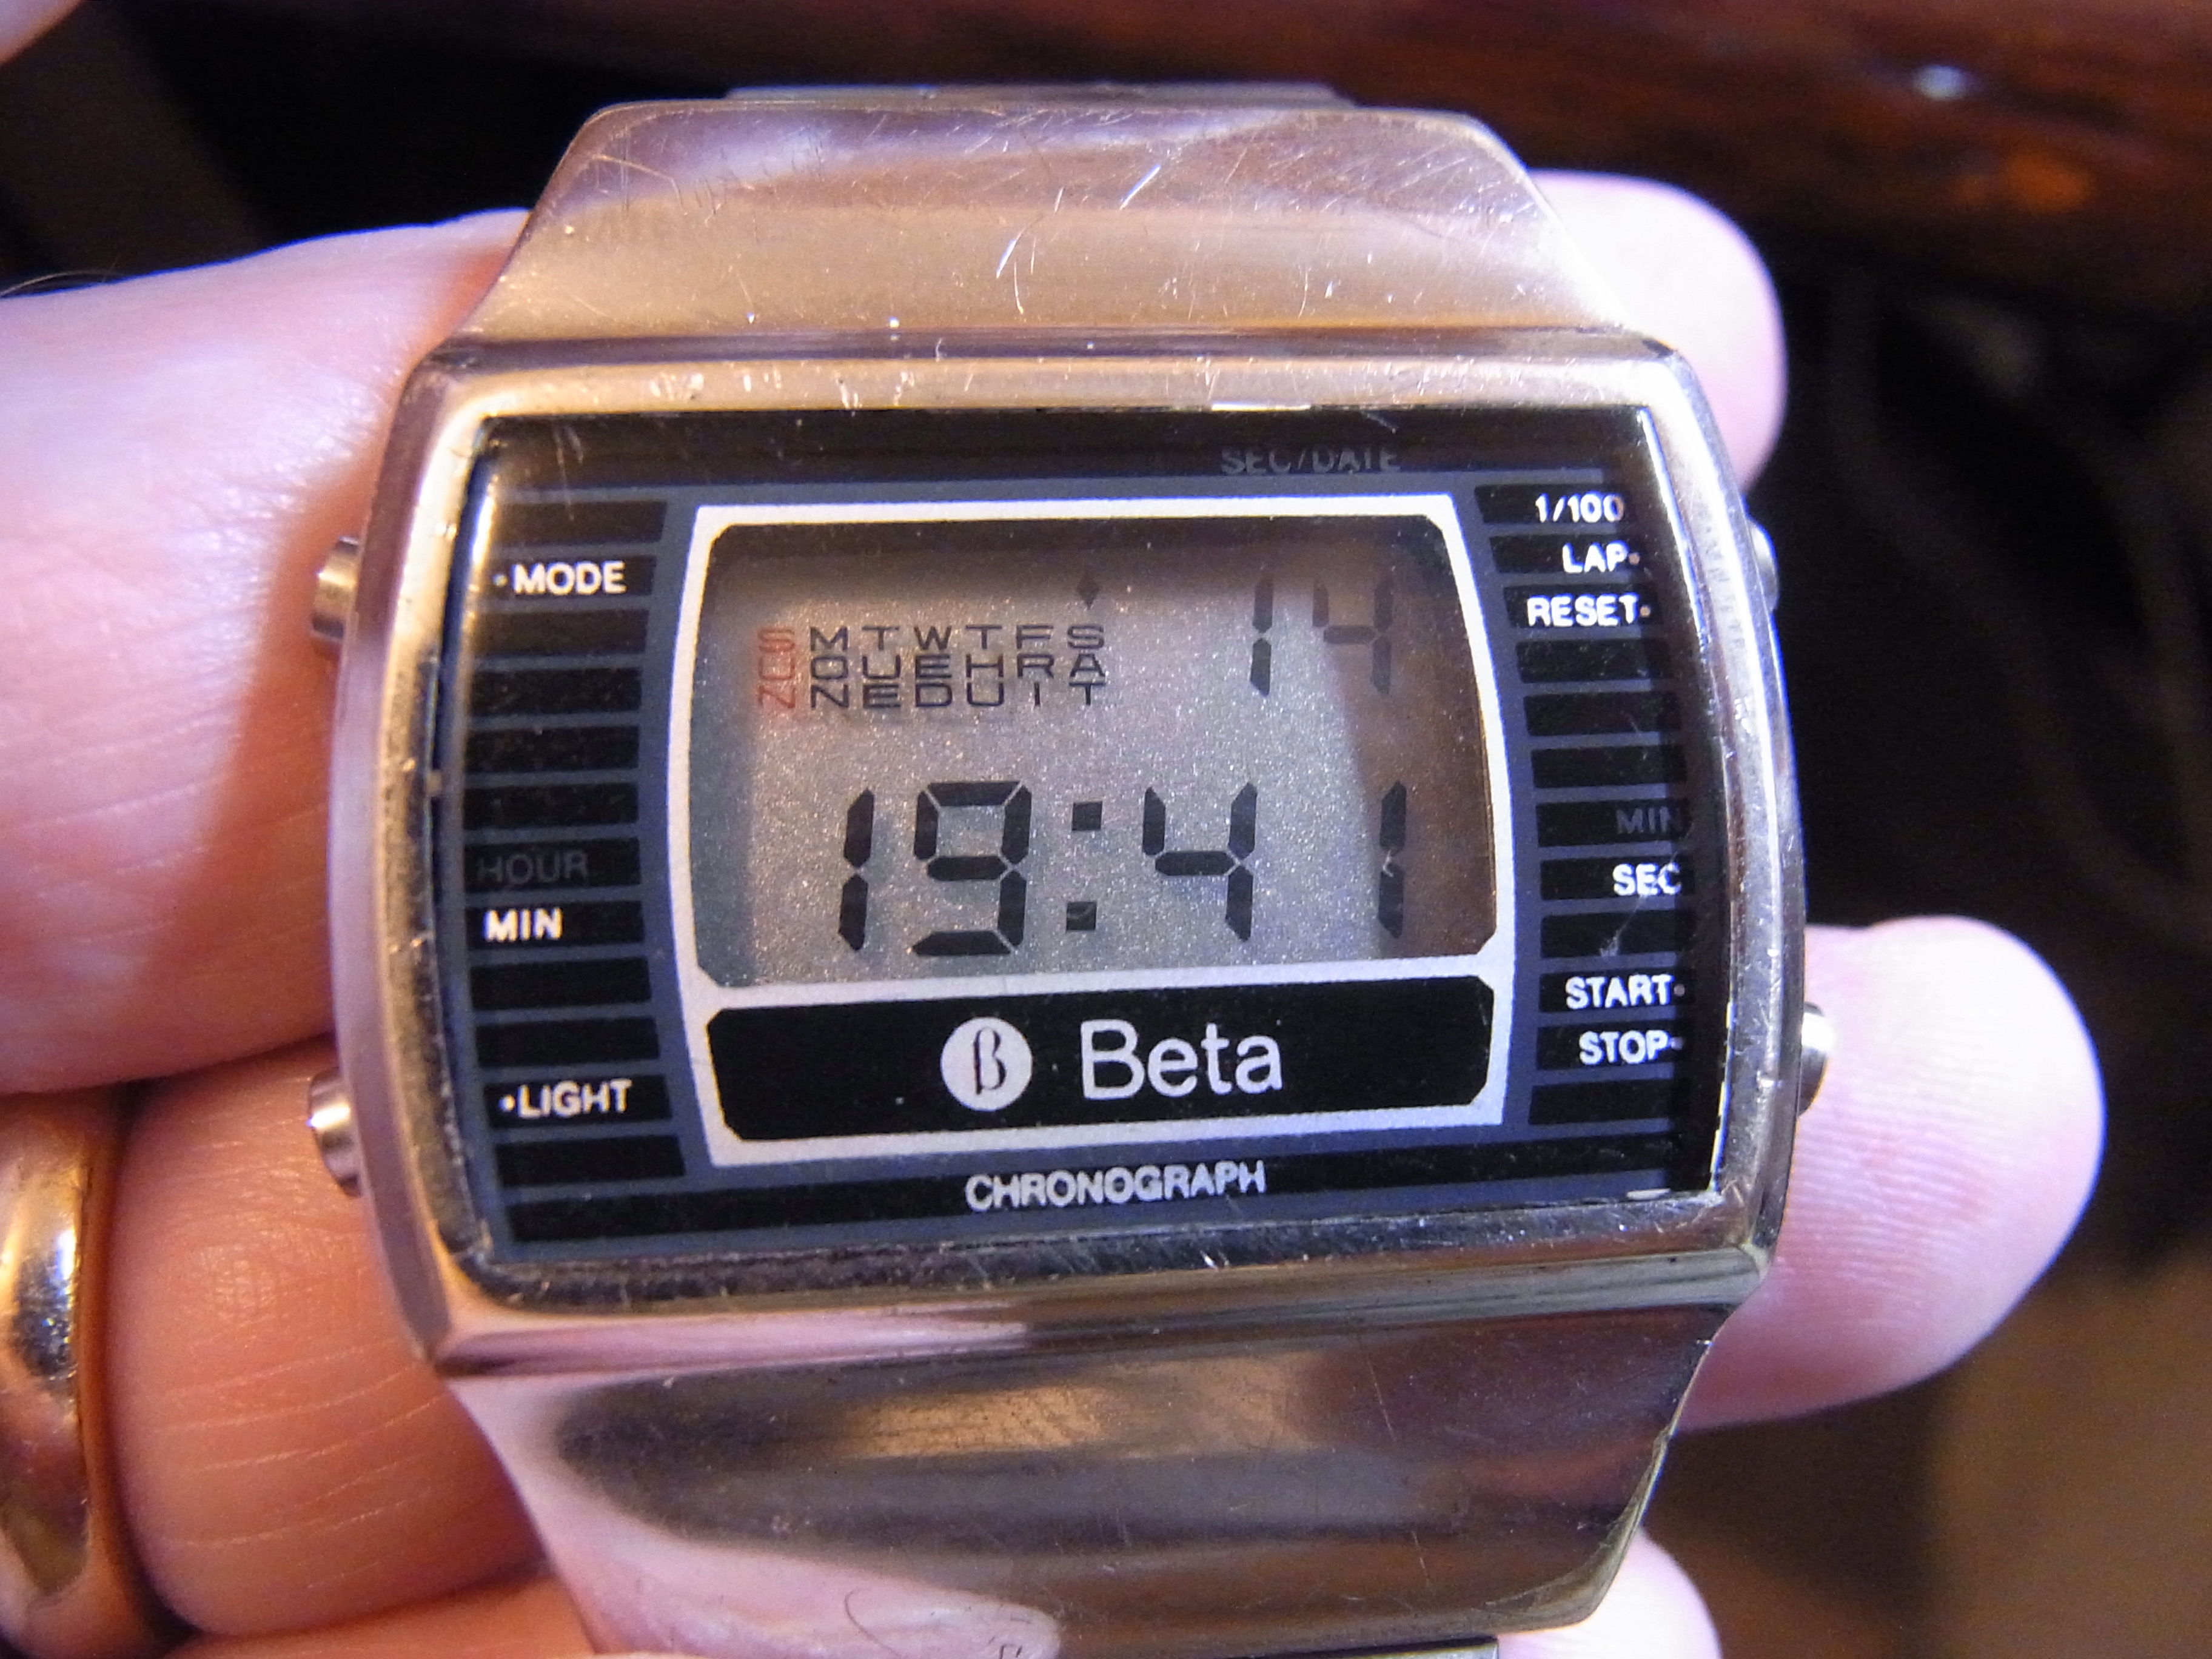
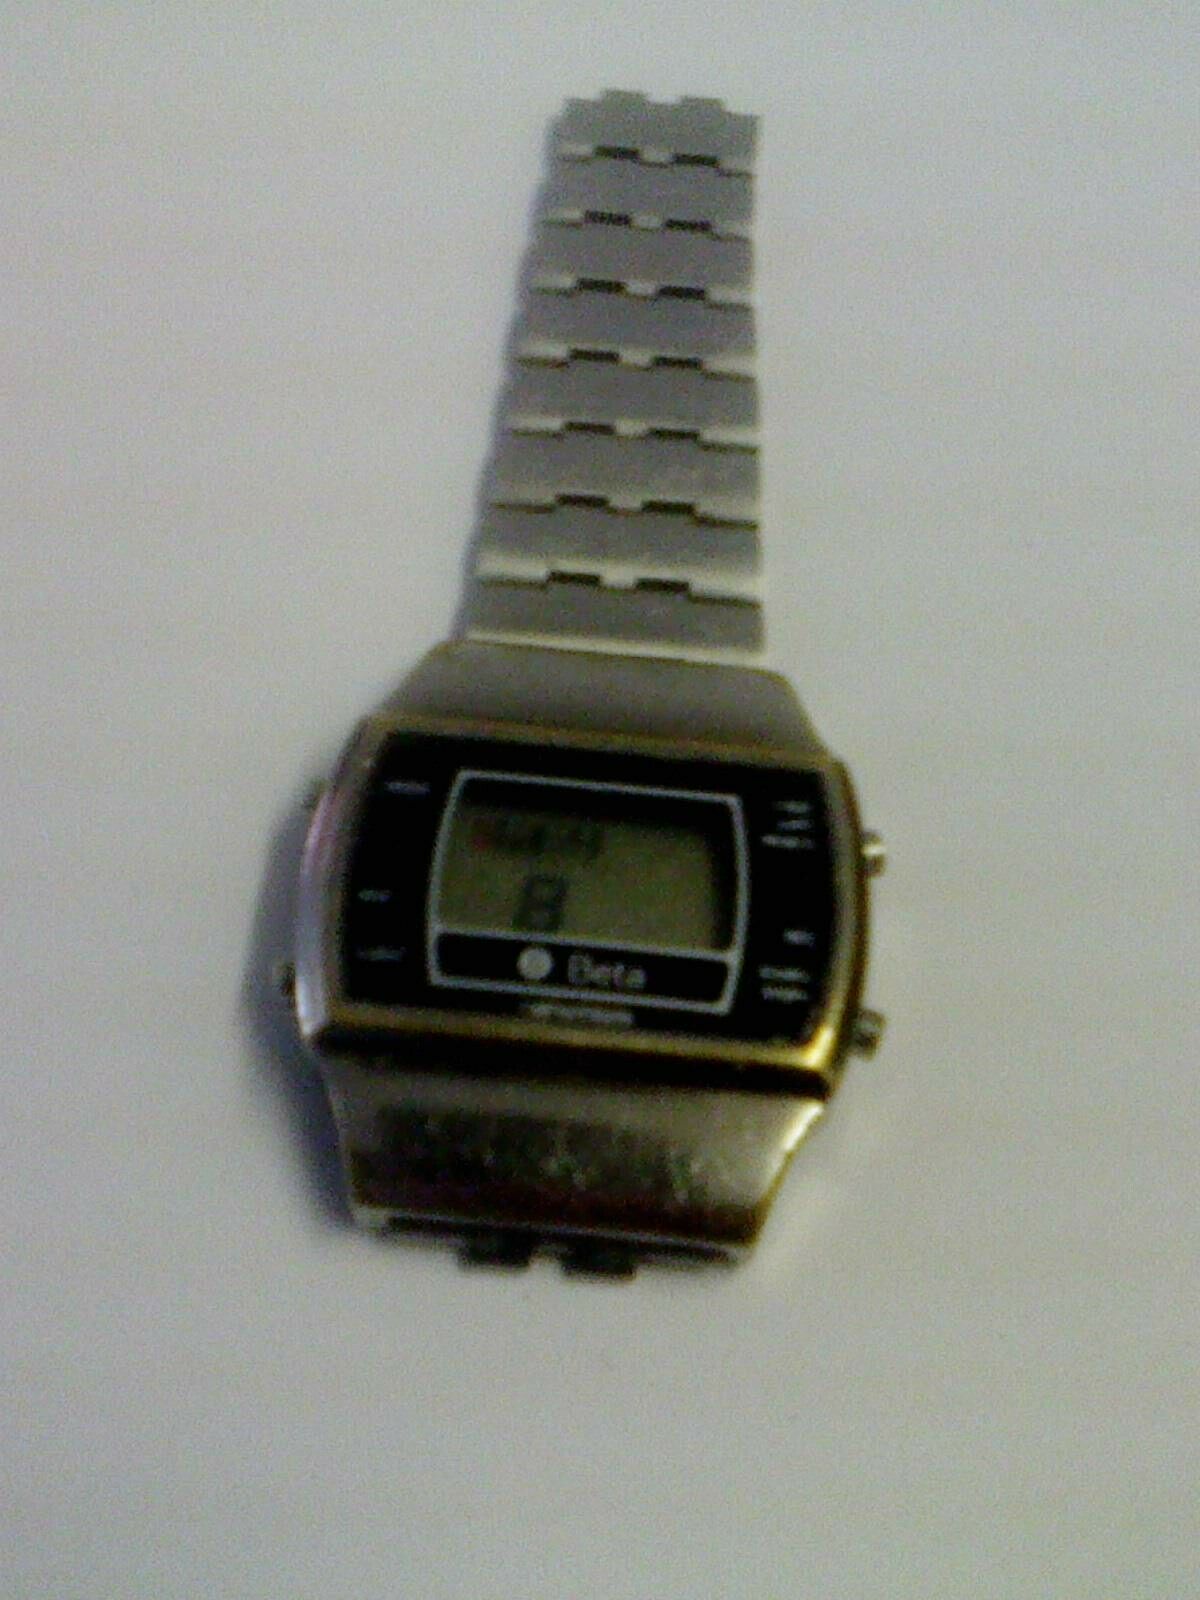
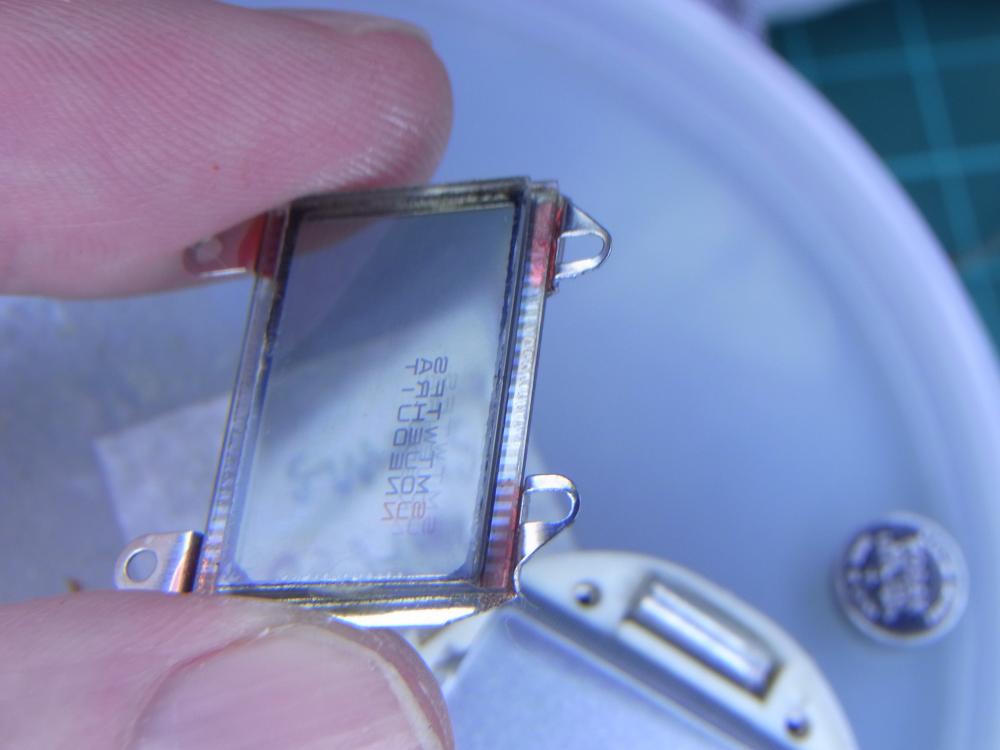
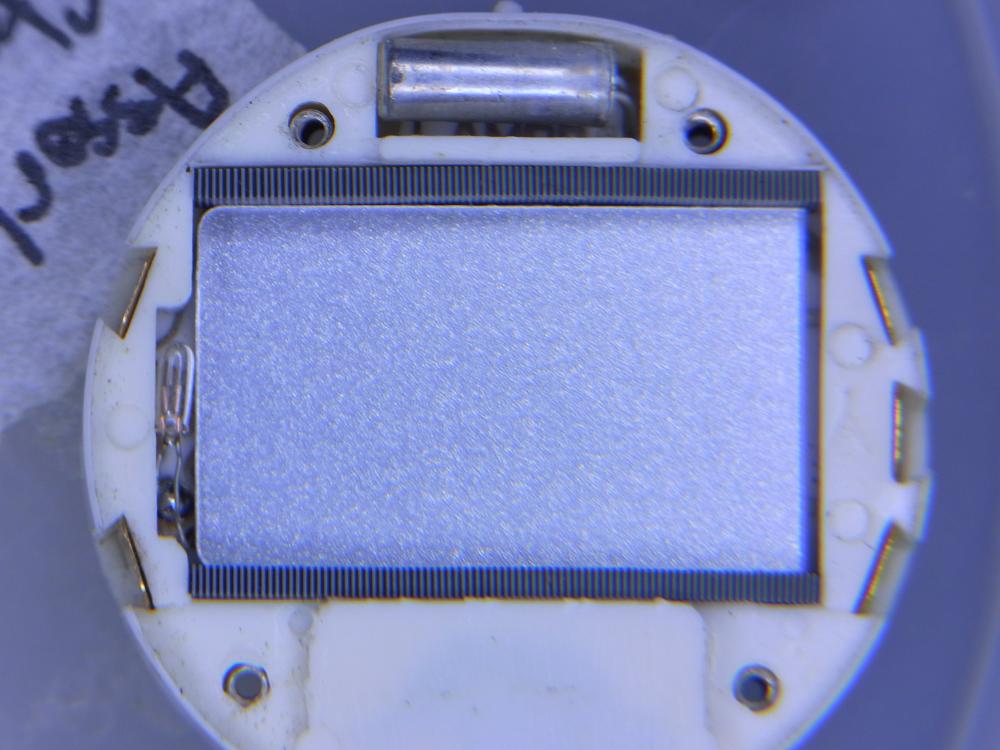
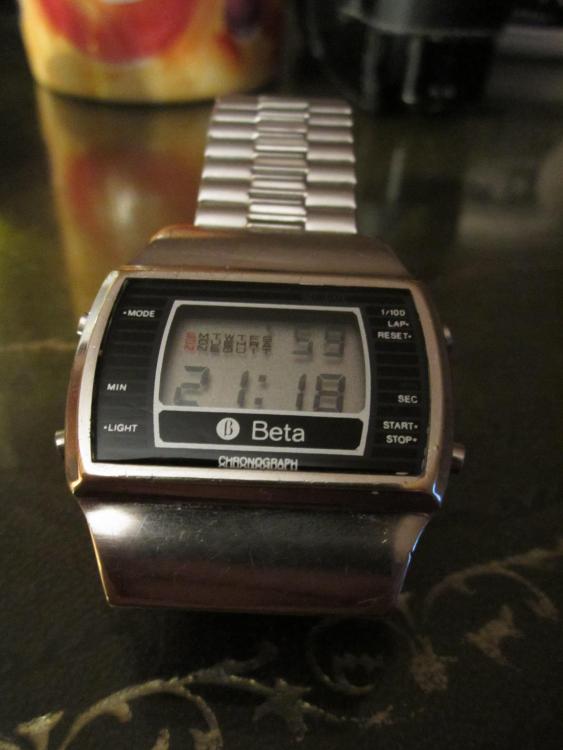
Some pictures of the Beta LCD watch that I posted in the 404 club thread. LCD modules are actually pretty easy to work with if you can use small screwdrivers, magnification and perhaps occasionally solder or conductive paint. Generally there is not much you can do with faulty LCD modules other than clean everything. They rely on a 'black blob" to do all the clever stuff, and a quartz crystal to keep the time. The blob cannot be replaced, but sometimes the crystal can. In this particular case, I did do a little light surgery to the board, which had a corner cracked off it. The two pieces were re-united with a tiny drop of cyanoacrylate glue (superglue) and the track that was damaged in the breakage was repaired with conductive silver paint (available from the usual suspects via ebay). Things to be aware of. 1) The LCD is made of glass and is therefore very easily broken. 2) The connection between the glass and the main circuit board relies on a thin strip of conductive "rubber". This strip is actually a sandwich of alternating conductive and insulating silicone rubber polymers and is often referred to as a "Zebra strip". This strip can deform and expand, due to ingress of moisture or solvents. You can, at a pinch, sometimes get away with shortening it by a couple of stripes, if it has swollen to the point where it is too long to fit in its original location. 3) The conductive layer on the glass (indium tin oxide) can be carefully cleaned with lighter fluid or isopropanol, however take care with the solvents you use as they can affect the zebra strip and cause it to puff up. Clean the zebra strip by gently rubbing it with an ink rubber. If you absolutely must use a solvent on the zebra strip, use a very small amount. Lighter fluid is usually safe on the zebra strip, but your mileage may vary. 4) The battery contacts often get covered with leaked battery juice. This is generally alkali, and you can attack this crud with a little bit of white vinegar on a cotton bud. This will neutralise the alkali but should be cleaned off with plain water and perhaps a little dish soap and allowed to dry completely before re-assembly. There is a slight chance that the crud may contain mercury or cadmium, in which case, wear gloves when dealing with it and avoid breathing in the dust. Generally though, it is likely to have zinc, manganese or silver salts, which are still not a good idea to ingest, but far less of a worry. Wash your hands afterwards. 5) You can sometimes fabricate replacement battery contacts from copper strip, fine stainless steel wire, or thin brass stock, depending on the application. Note that it is almost impossible to reliably solder to stainless wire with lead free solder. 6) There needs to be even pressure on the zebra strip to ensure that it makes good contact with the glass, but remember it is glass, so if you crank down too hard on things, the glass will simply break and your LCD module will be toast. 7) The front of the display contains a polarizing filter and the rear generally has a reflector, if you forget to fit either of these, then the display will not work. 8 ) Contact between the pushers and the module selects the various functions, so the case of the watch is often used as one of the parts of the circuit. Current flows from the battery through the case, then through the pusher to the contact on the side of the module. If any of this path is broken or dirty, then the buttons wont work, so make sure everything is shiny and clean, and that any contact spring between the watch module and the case is fitted, and makes good contact. 9) In older modules like this, the back light is a filament "grain of wheat" bulb rather than an LED, and when the battery starts to get a little weak, pressing the button for the light can sometimes crash the module, simply because the bulb draws too much current, and causes the voltage in the cell to drop, and thus the controller circuit to "brown out" and crash. Here is a before and after shot. The before is from the ebay listing. .. and here it is after a little TLC There isn't much to put you off having a crack at repairing LCD watches. They are small certainly, but they are relatively simple to deal with if you follow the basics and clean and inspect everything carefully. Furthermore, this one only cost one penny at auction, so you can pick up a few bargain basement ones to practice with very easily.


 1 point
 -
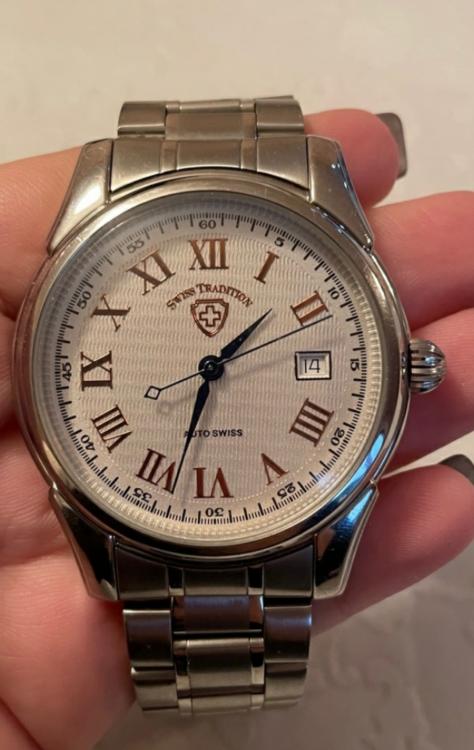
Can anyone help me with this one. Just bought it and it was pretty inexpensive. Swiss tradition automatic and looks to be a sw200 movement. I can't seem to find out a thing about the company or the watch.
 1 point
 -
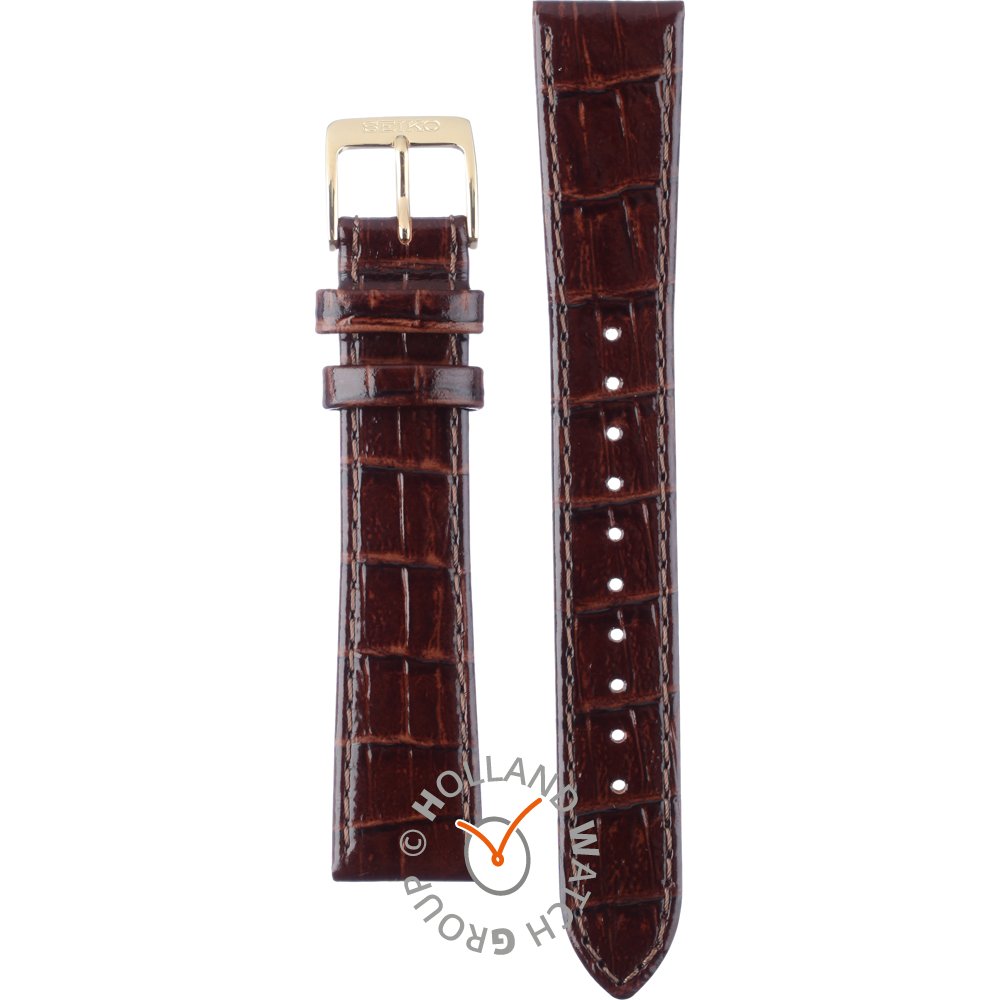
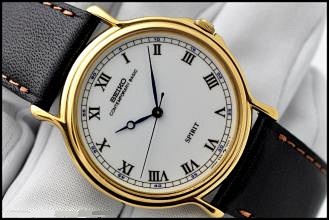
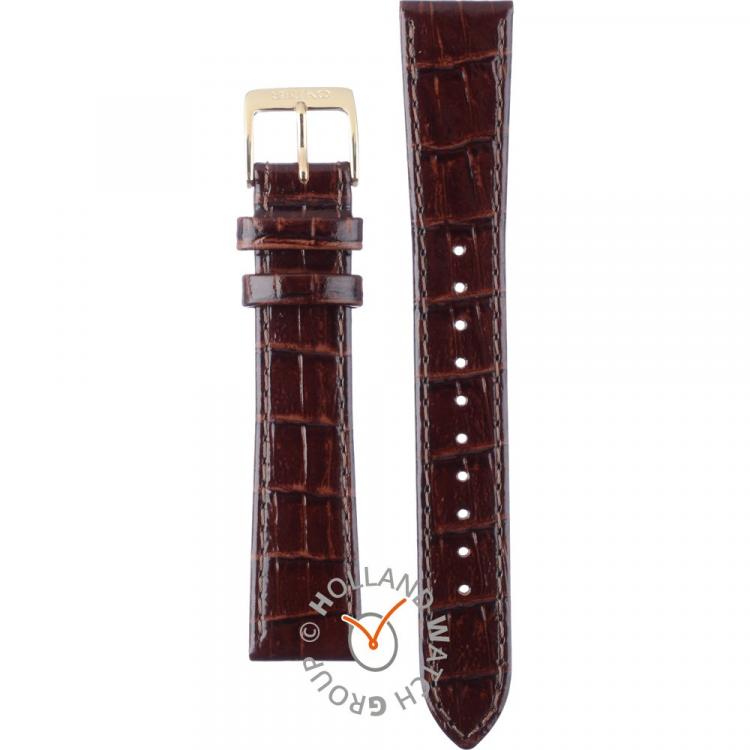
Seiko Spirit/Calibre 5S21 Amazingly sssssmmmmooooth second hand !! Been wanting 1 of these for quite awhile. Pics borrowed from web. Ordered this Strap for it too.
 1 point
 -
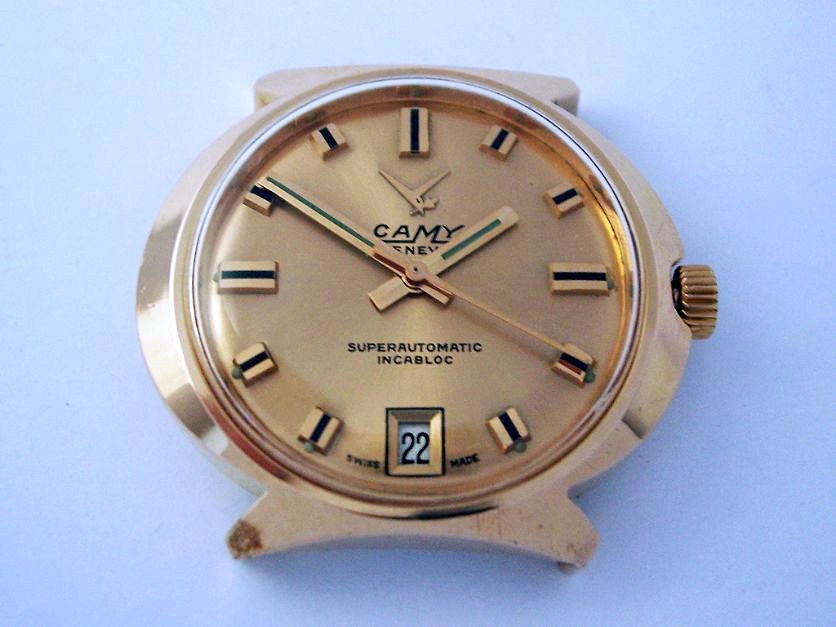
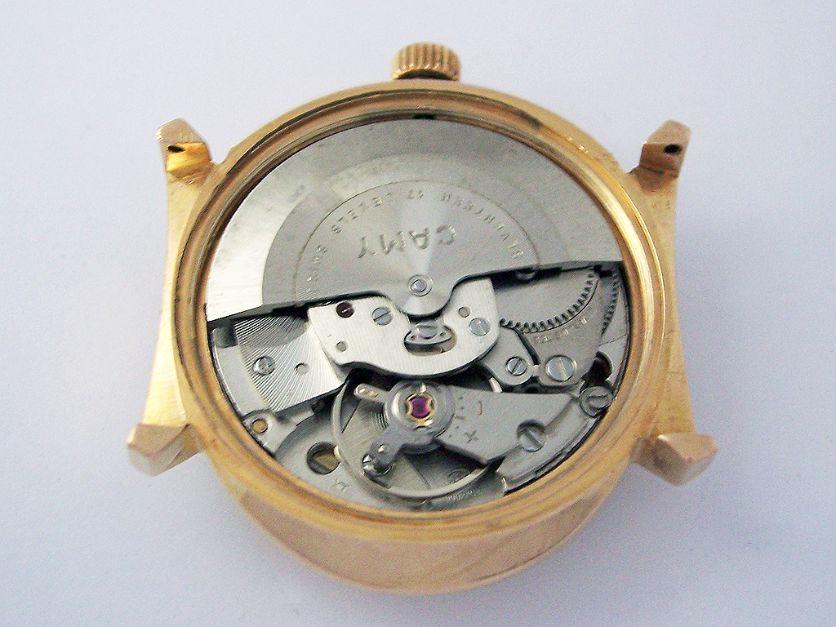
Got this Camy back from service today. AS1903 movement.......
 1 point
 -
Performance over the long haul is where synthetics shine. Less oxidation (drying out) and inherently more slippery than natural carbon chains. More consistent batch to batch as well. I have some snake oil which I market for turntables and tape deck oiling, that performs exceptionally well there. I use it on pocket watches too. I have recently used it on a dial indicator mechanism that was acting up, which probably could have used 9010 in stead, but it is working better than ever now. That is unjeweled, which may be why. But wrist watches, I stick with the usual suspects. Did you see my post about finding pure linseed oil, almond oil (and other oils) at the art supply store? It is used for making oil based paints, but I know traditionally these types of oils were used for lubrication as well. Despite the art store mark-up, still much less than Mobius... They might be fun to play with as well.1 point
-
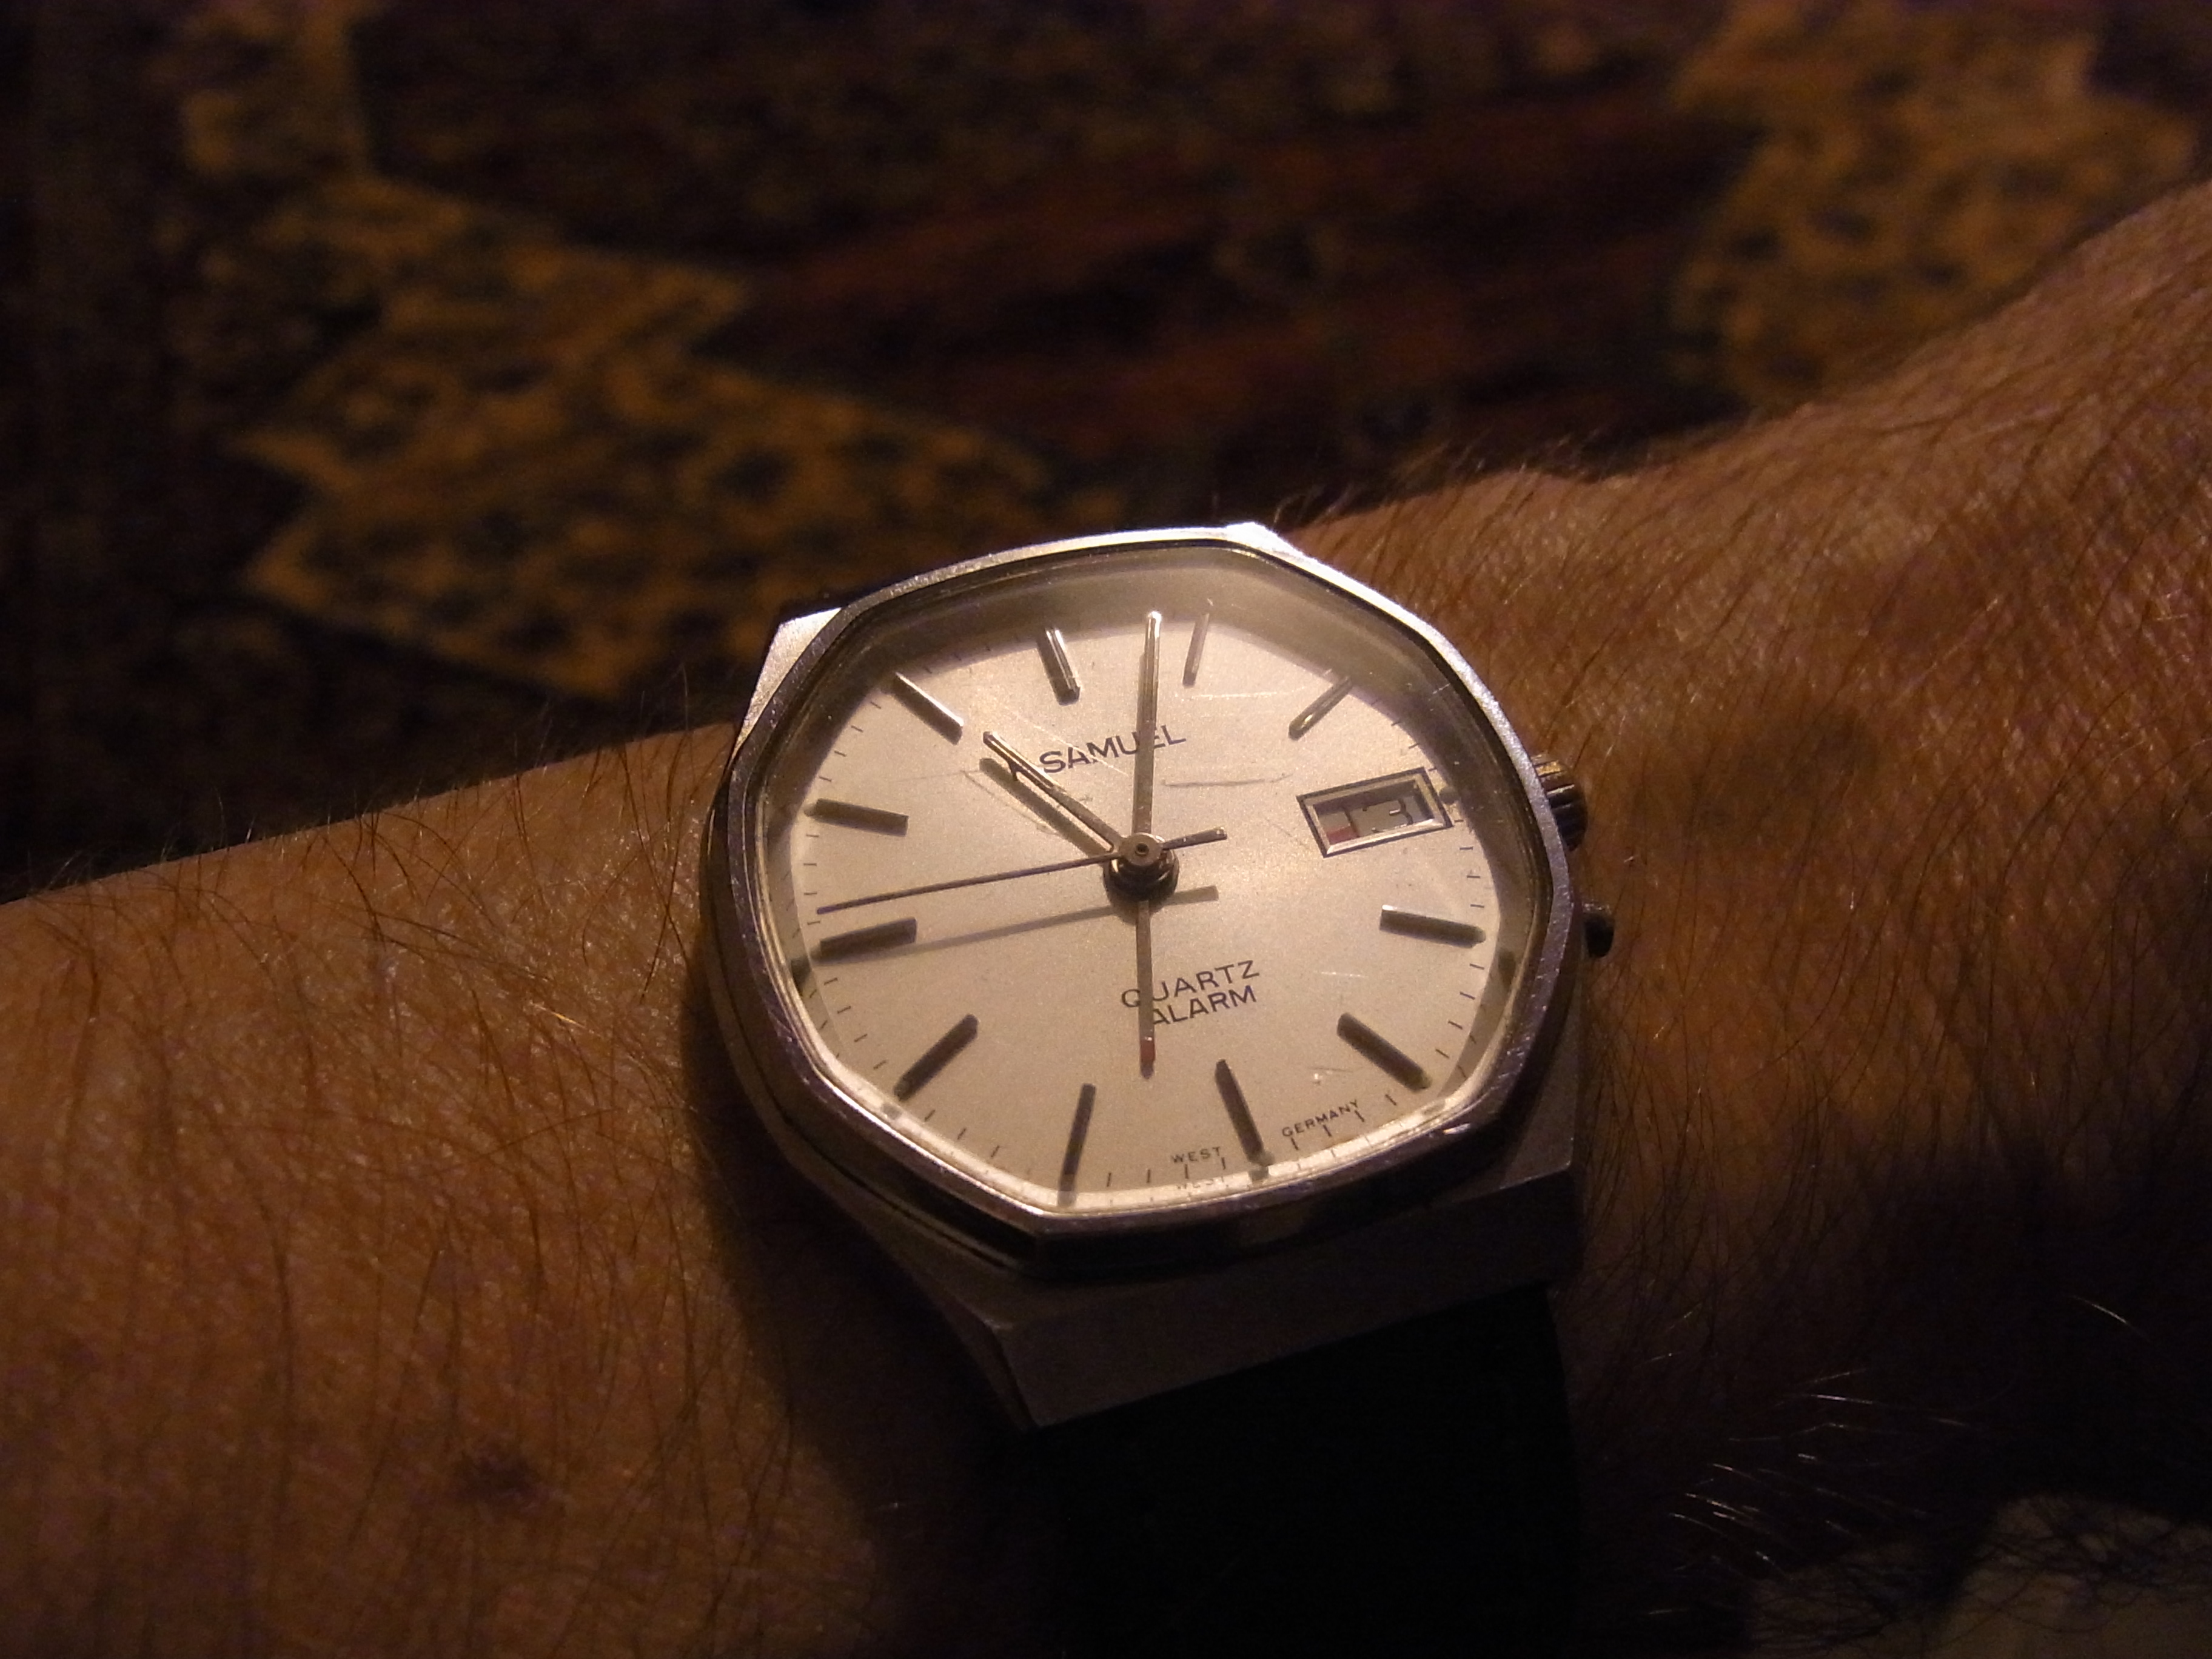
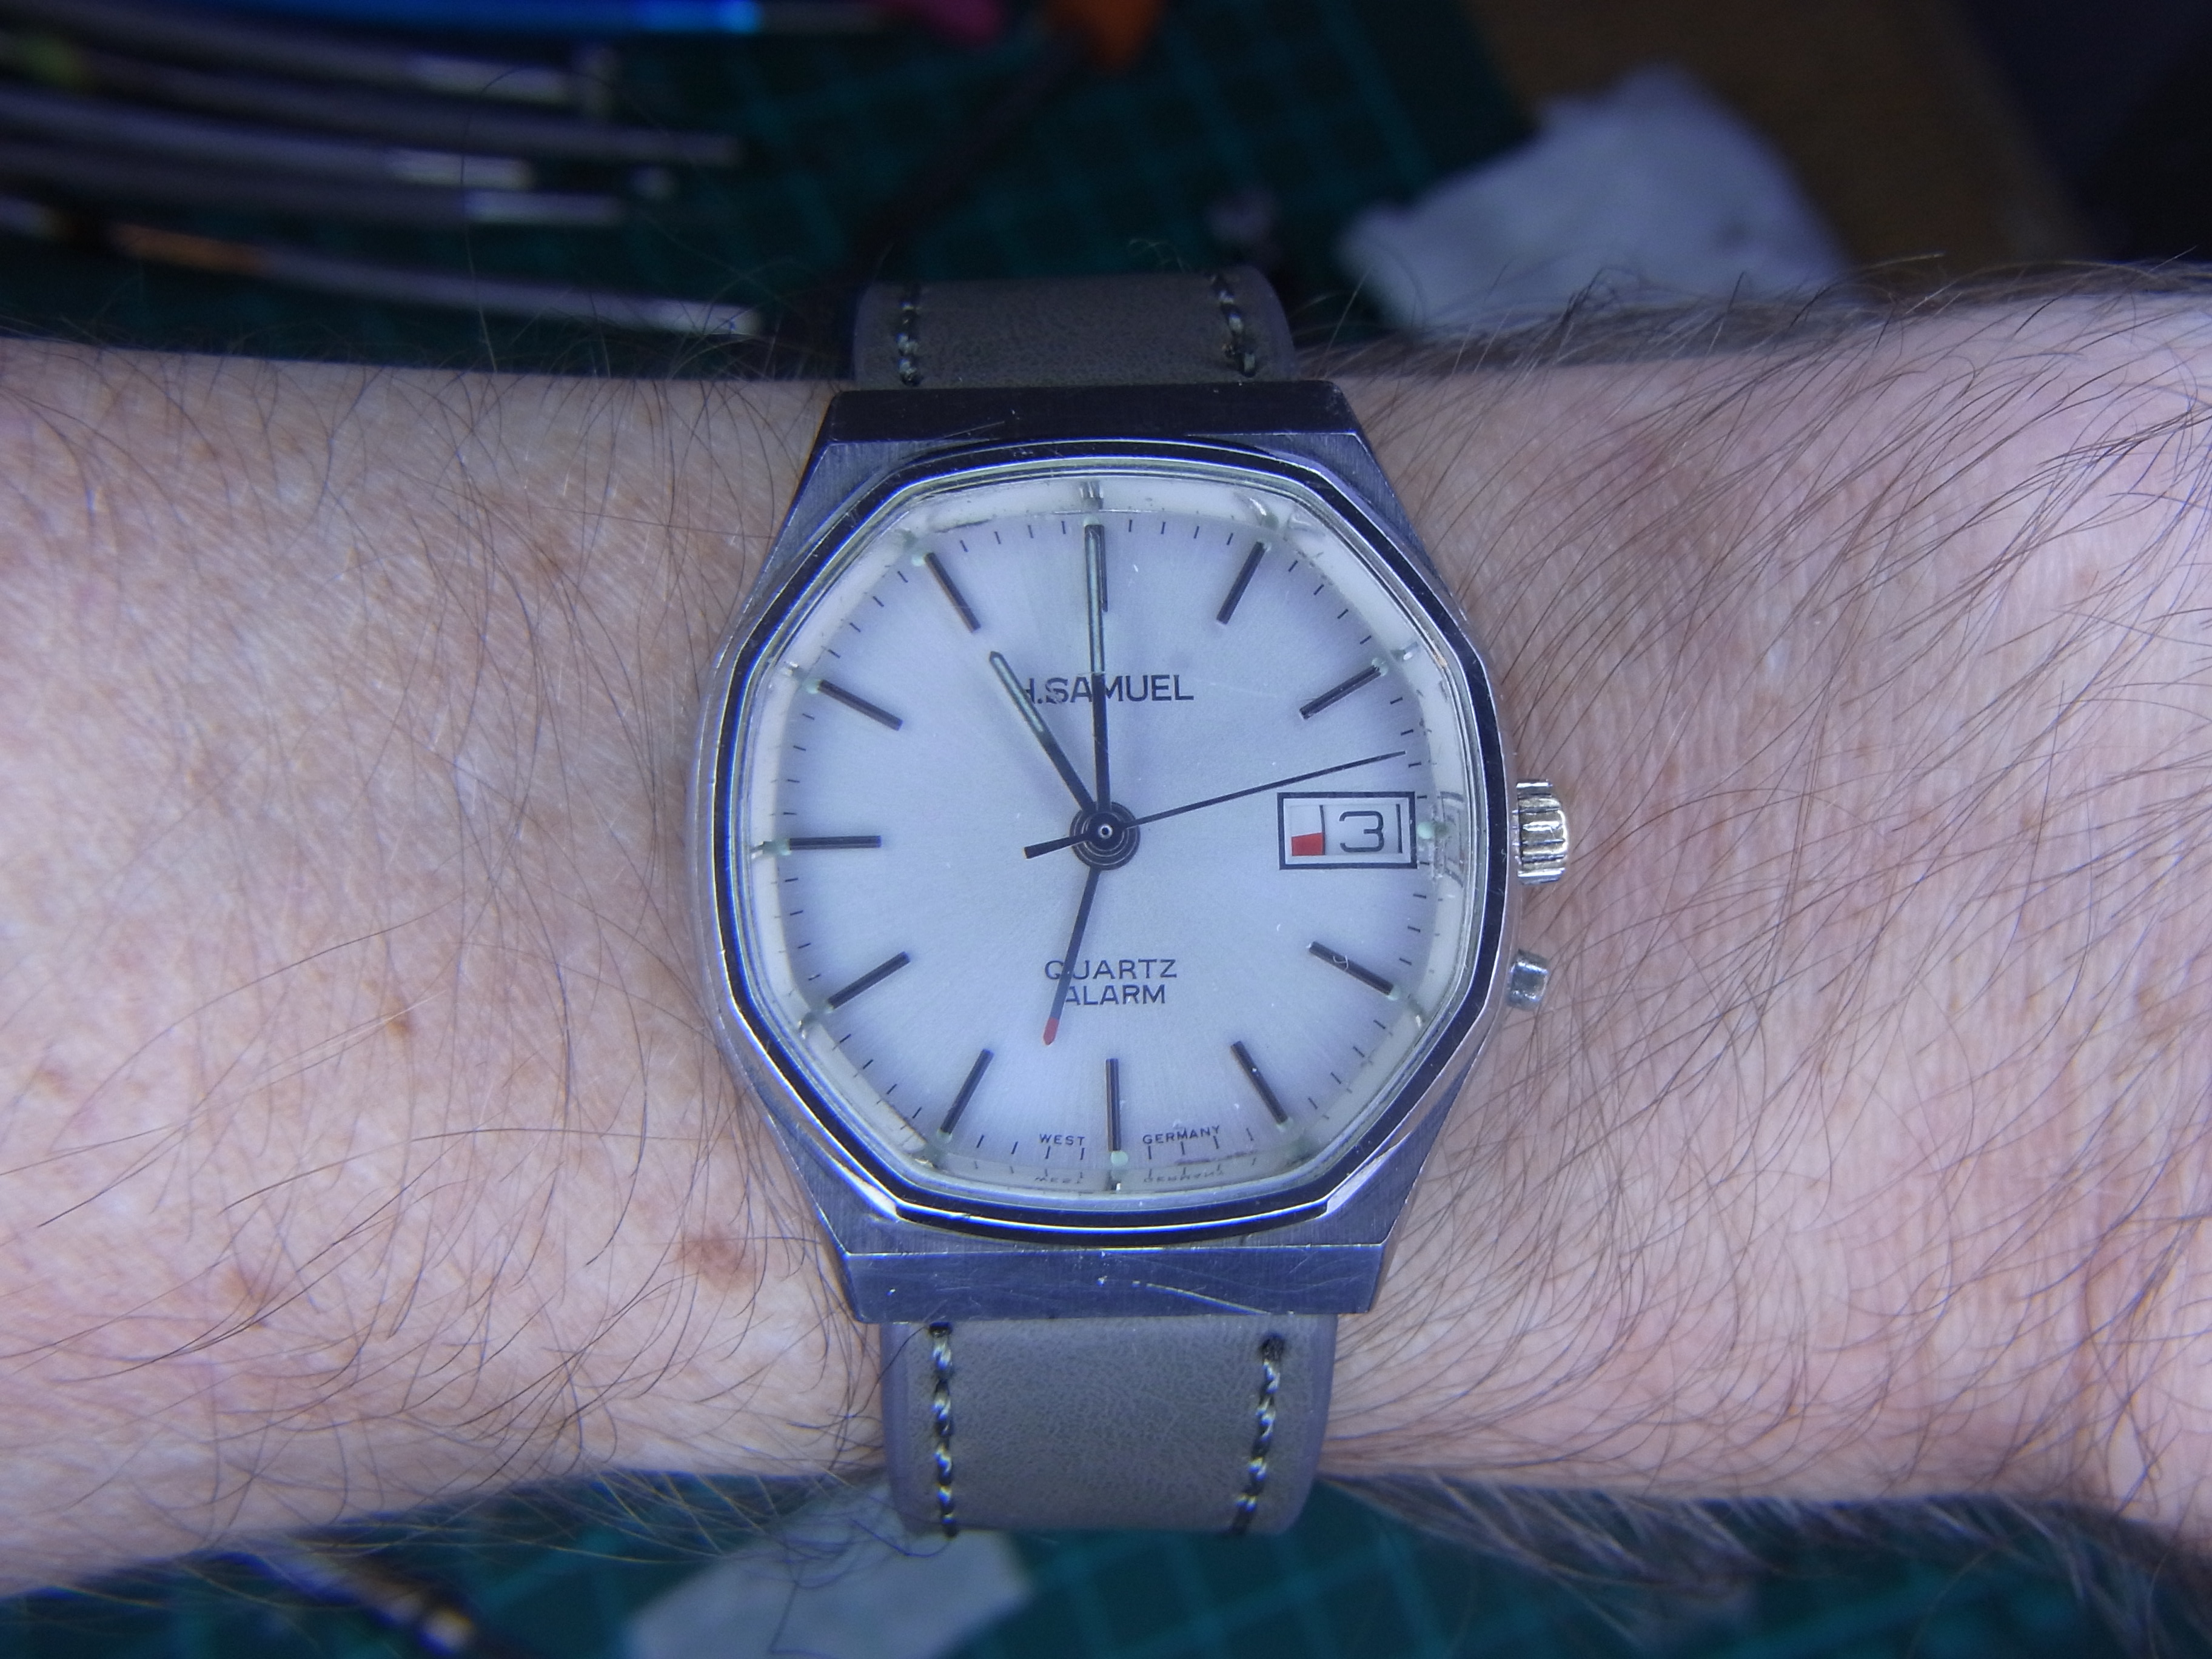
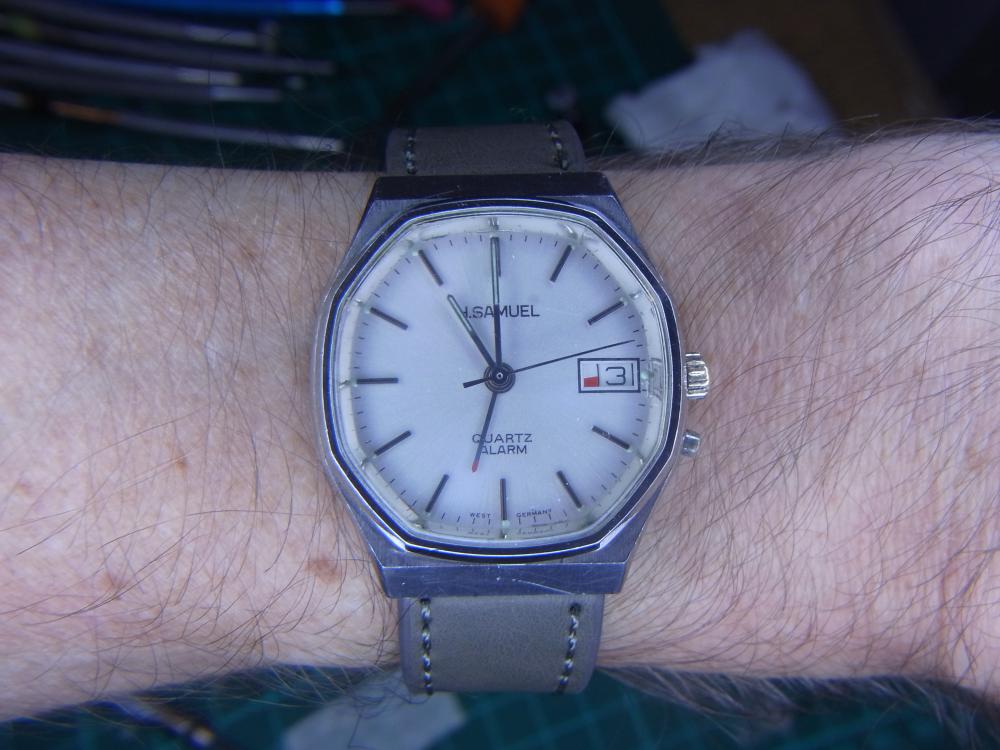
Another 404 club member. This time a bit of a curious quartz number. Made in West Germany apparently, but I'm not sure who actually made it. It does have a few minor battle scars, and someone has lost the spring that makes contact between the buzzer and the PCB, so I need to figure out where that was fitted and replace it, so the alarm may or may not work at that point, but currently it is silent.

 1 point
 -
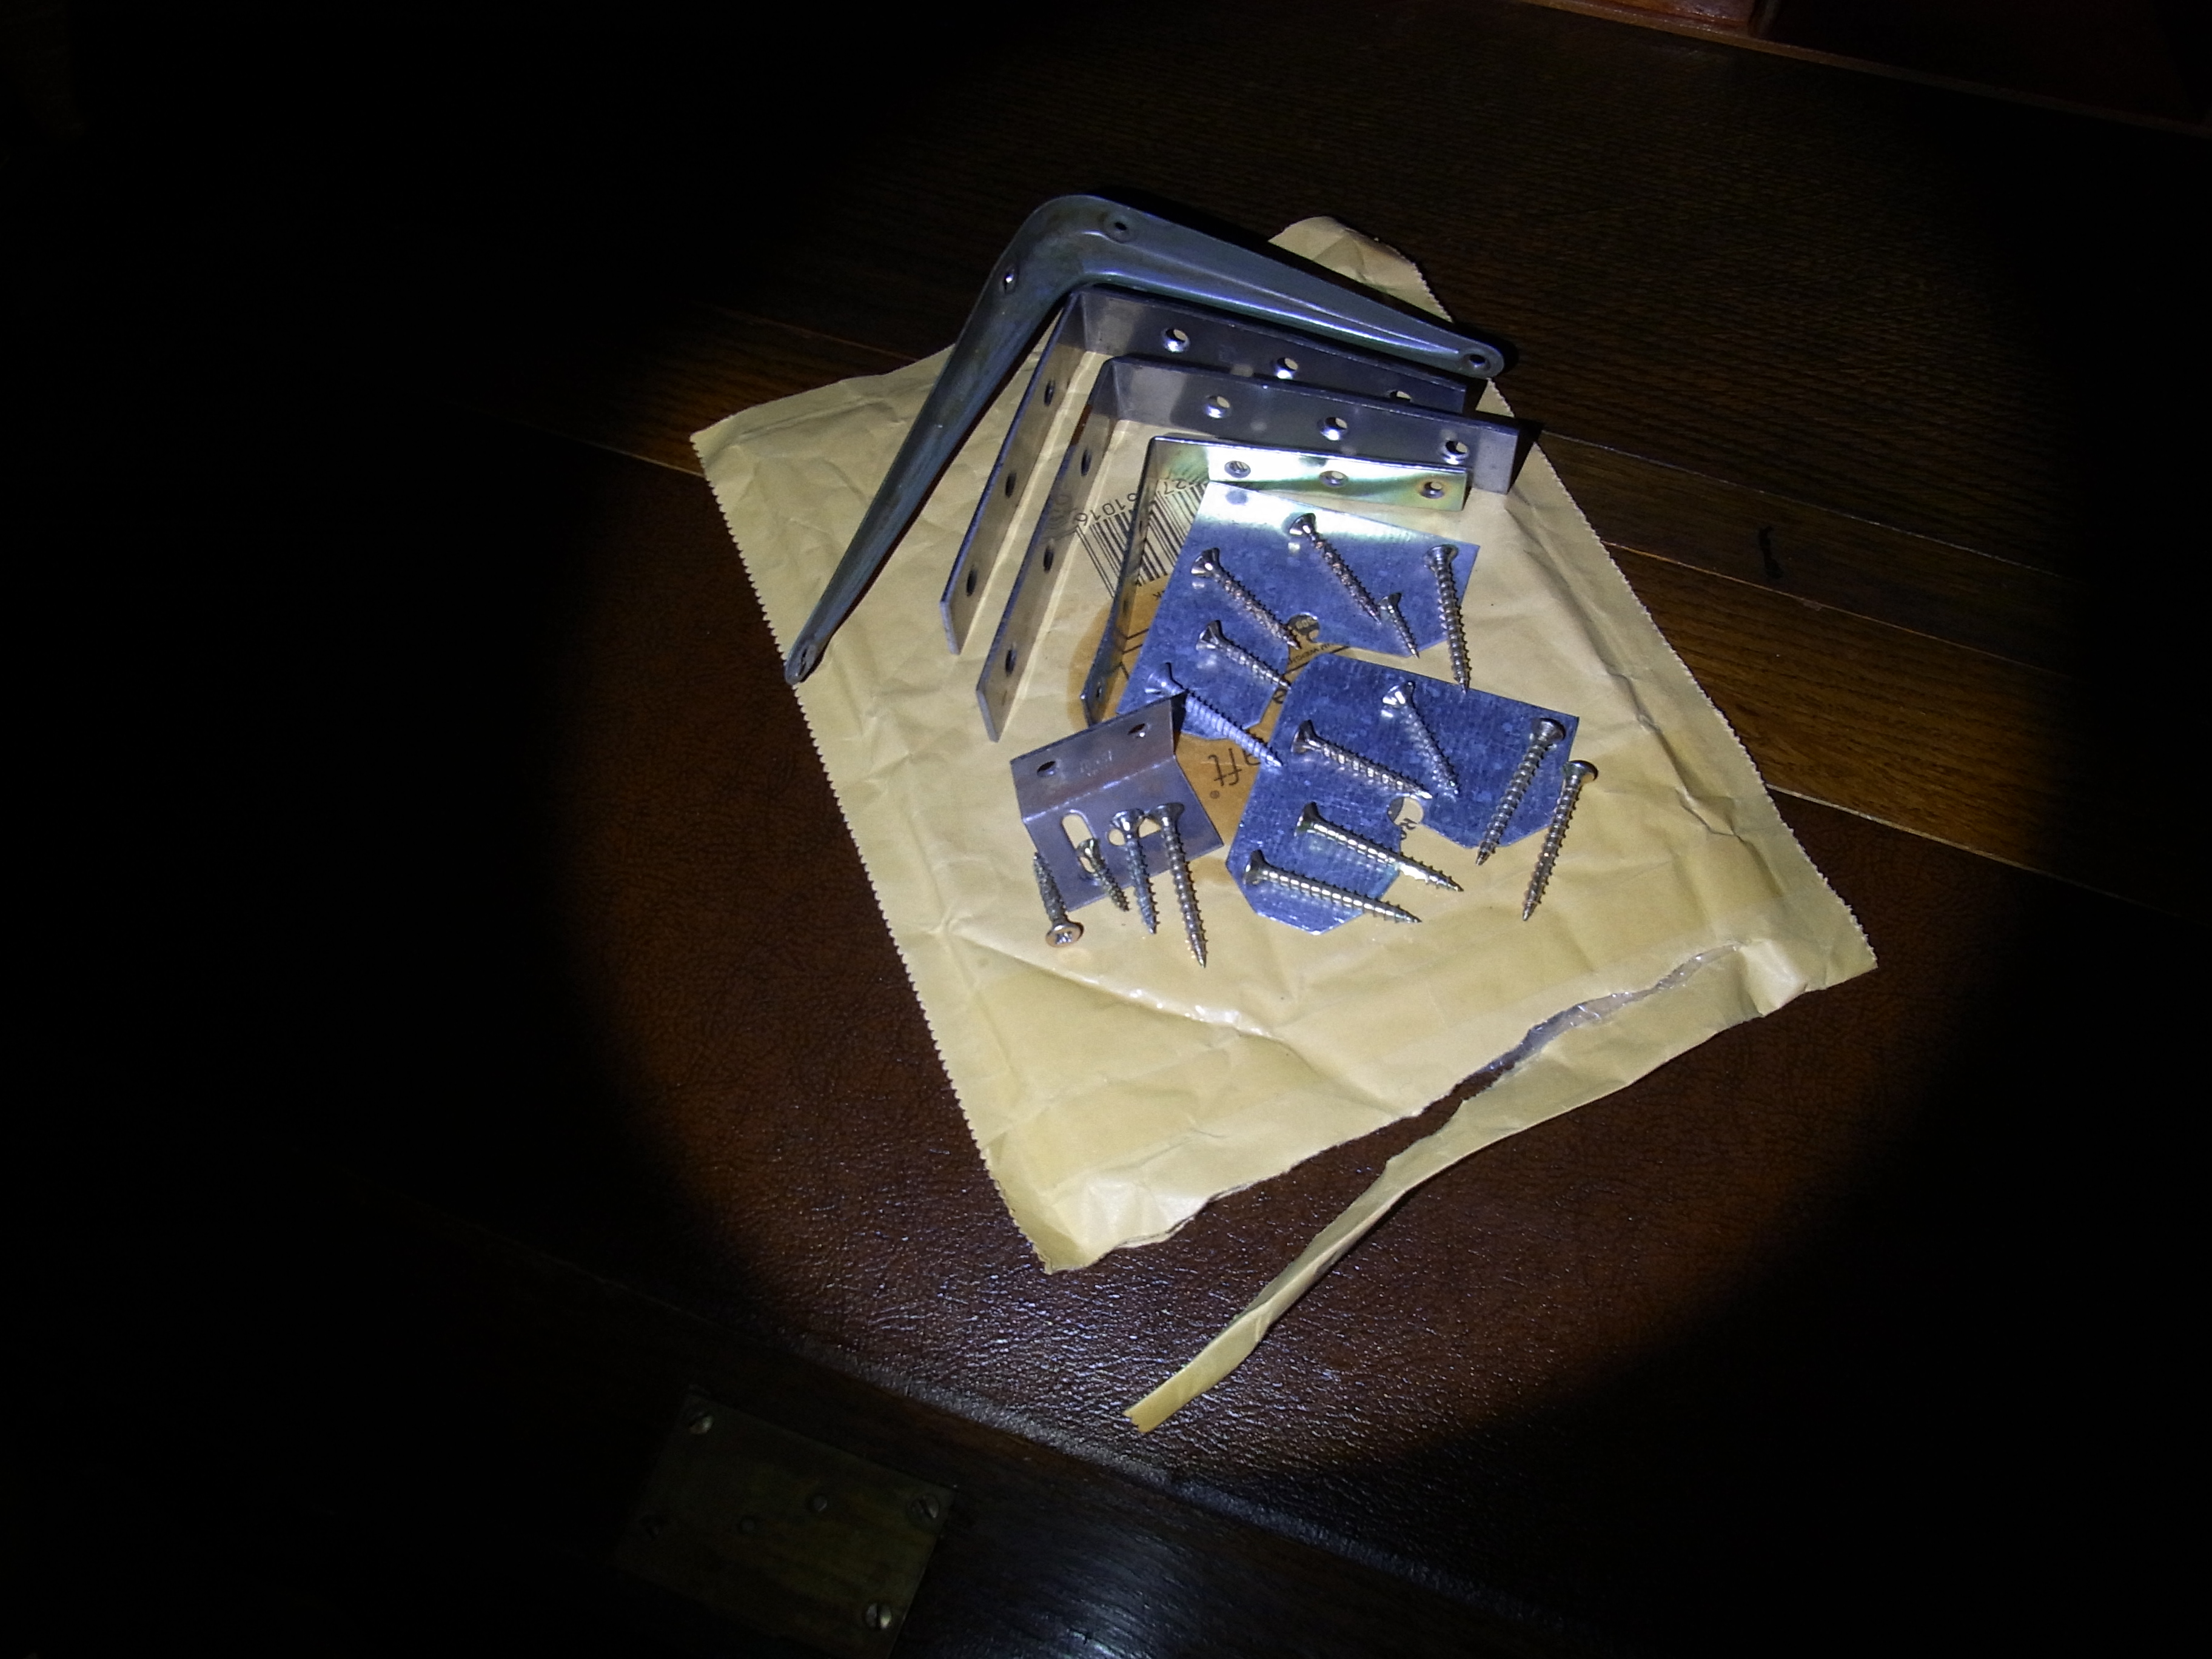
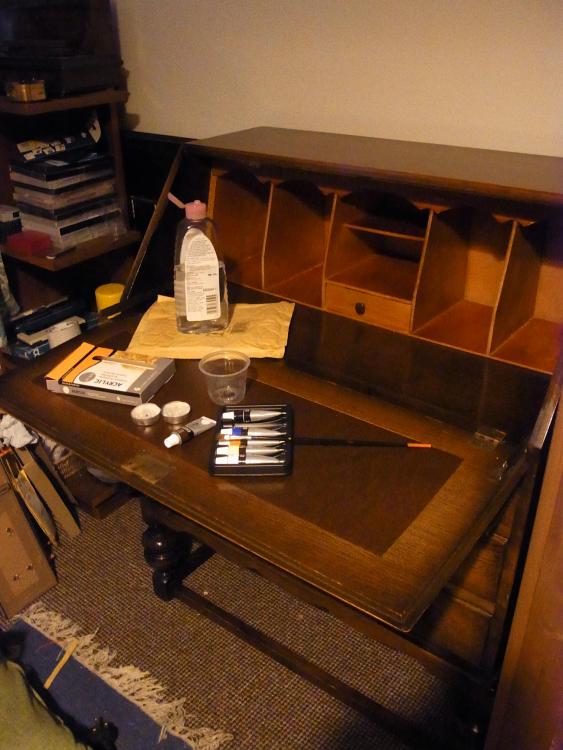
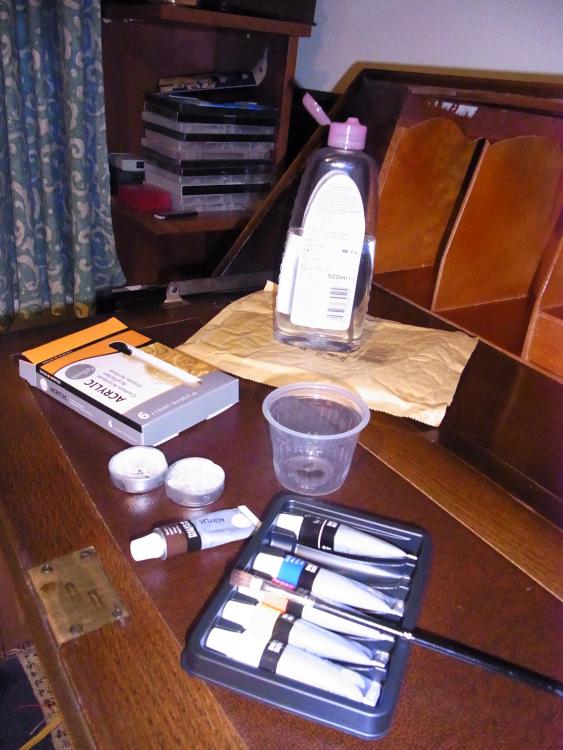
The other day I spotted a writing desk on Freegle which I thought might make a nice watch repair work bench. Touching up a few minor blemishes with a spot of acrylic colour. I'm currently using an ugly old chipboard computer desk, so even of the Freegle item was not in perfect shape, it couldn't be any worse cosmetically at least, so I enquired and was offered it. A little baby oil was used to remove some sticky residue from Sellotape and other random stickers. When we got there to take a look, there were some pretty obvious bodges holding the thing together and I was swithering about whether to leave it, but what the heck, it was free. As they say, you should never look the proverbial gift horse in the mouth, so I popped in the back of the car and thanked the previous owner profusely for their generosity. Smith and Rodger wax finish applied to the wood restores the surface and closes up the worst of the dried up finish. A couple of days back, having sprayed it with copious amounts of antibacterial spray and further more, having left the thing out in the shed to "de-covid" I attacked it with a screwdriver, removed the bizarre array of ironmongery holding it together and took a good hard look at it. It seemed to be all there (although arguably, the same might not be true of me of course). The "leftovers". Sitting on its polished top, "legs akimbo" as it were, on a couple of garden chair cushions to protect its finish, I dismantled all of its "undercarriage", and set too with sandpaper, chisels, wood-glue and clamps. I did resort to using one screw to glue and screw one of the spacer blocks, which had split corner to corner. The rest was restored with glue only, back to its original state (if you ignore all of the screw holes added by the previous owner). The leather writing surface was removed and re-glued as it had come adrift. The only problem is, I've made such a good job of it, my wife has decided it will look very nice in the study. Oh well, back to the old computer desk, I guess. You know what they say, no good deed goes unpunished. ?
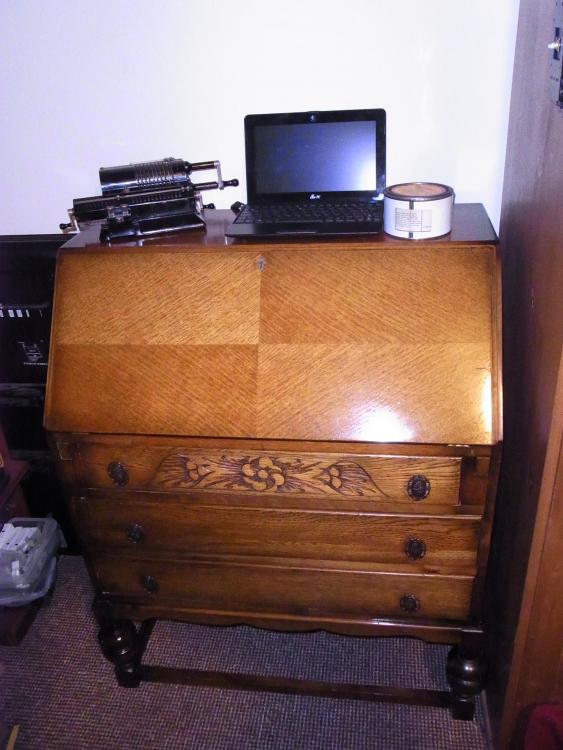
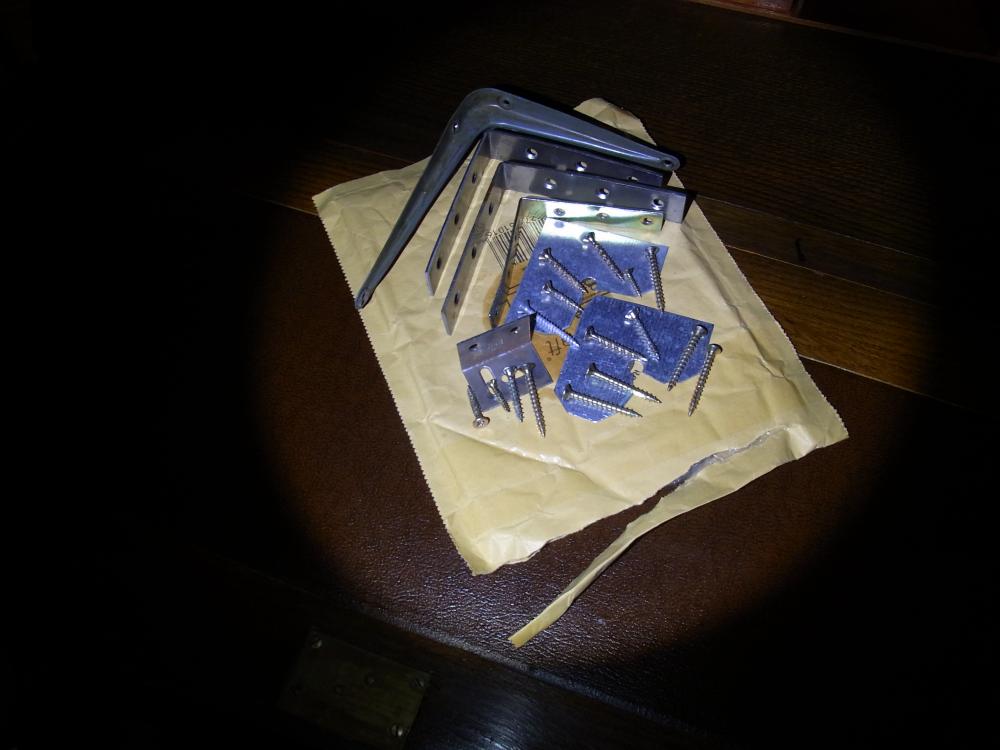 1 point
 -
Cheap screwdrivers and cheap tweezers avoid. The screwdriver blades will break the tweezer ends will go out of shape that is if the points measure up In the first place and snap. Buy the best you can afford. Cheap tools make work hard.1 point


.JPEG.496fbe70bcefad6626d8e13f49259156.JPEG)
.JPG.5837c96c3230faae4f5721580d7600f0.JPG)
.JPEG.8fd7cba2123e6823b226b8431b09d4fe.JPEG)