Leaderboard


Popular Content
Showing content with the highest reputation on 09/08/16 in all areas
-
Cheers mate! Yesterday was the BIG day, I put together the final parts on my Antima Sport Professional. After doing my first total service on a movement. I had not a watch cleaning machine, so I had to build that as well... It was the same Antima that I have put out a photo of on the forum on the 29 of march, when I introduced myself as a new member. Antima Before Antima after Thanks to you guys for all help.... No we have to test it and see how i runs over a period of time....4 points
-
The hair spring is usually pinned to the collet in much the same way as it is to the stud at the other end so it's perfectly possible (if somewhat fiddly) to re-attach it. Whether or not it's a good idea depends on why it has become detached in the first place. If it has simply become in-pinned then there should be no problem. You will need a brass taper pin, fine tweezers, a very steady hand, and the means of removing the excess taper pin once it is in place. If on the other hand the hair spring has broken at the collet then there are two major issues to resolve. 1. You have to remove the existing taper pin and the broken end of the spring from the collet. very fiddly and you might be better off with a new collet. 2. The old hair spring is now too short. You will need to reshape the inner coil to fit the collet, and then add weight to the balance to bring the timing back into spec. You will probably need to reshape the outer coil as well to bring it back into alignment with the regulator. Fiddle but not impossible.3 points
-
Hello remember to turn the crown in the hand setting position and advance the time so that the date just jumps to the next day then set your hour and minute hands at twelve you don't want the date to be changing at 3 in the afternoon.2 points
-
Looks like I have another 7t34 needing George's skill. First I'm going to find out if spare links are available as it is sized for a child's wrist [emoji20] Seiko 7t34-0aa0 with inner sliding scale2 points
-
When you first cleaned the movement did you open the mainspring barrel? and if so what state was the main spring in? When there is a problem with insufficient power at the output end of the system it's worth bearing in mind that as well as losses within the system the problem could be insufficient power going into the system at the other end. If you took the mainspring out for inspection, cleaning and re-ubricating, how did you get it back in? hand winding or mainspring winder? The main spring should lie flat on the work bench without any twisting or buckling. If it doesn't then power will be lost in the barrel as the edge of the main spring bears against the barrel lid and base. It is very easy when hand winding a spring back into the barrel to introduce out of flat distortions which is why a main spring winder is so useful; it significantly reduces the risk of this kind of problem. With the spring out of the barrel did you check the end shake, side shake, and free rotation of the barrel around the arbor, this is another potential source of loss. Once you are happy with all of the above and you have checked that all of the pivot holes are really clean and there are no cracked or chipped jewels then the next step is to test at each stage of reassembly. Sometimes the only way to isolate the problem is to test each wheel individually, even if it means lots of taking apart and putting back together again. Start with the barrel bridge. Install the barrel and test its freedom to rotate in situ, then move on to the train bridge and install just 1 wheel and put the bridge back on. Test the freedom of the wheel using a blower, and check side and end shake. Once you are happy add the next wheel, replace the bridge and test again. If all is well then add the next, if not then take out all of the wheels except the last one installed and test that one on its own. If it doesn't spin freely on its own then the place to focus on is the pivots. If it does spin freely on its own then reinstall the next wheel back to see how it performs when it interacts with that. If that is where the problem is then inspect the teeth on both wheels and pinions; you're looking for debris, and damaged or worn teeth. Also check the pivots again. It is possible that a pivot which is slightly bent can still spin freely in its jewels on its own but has a lateral oscillation which can interfere with the depthing with its neighbour. Follow this systematically through the entire train from main spring to escape wheel and you should find the issue.2 points
-
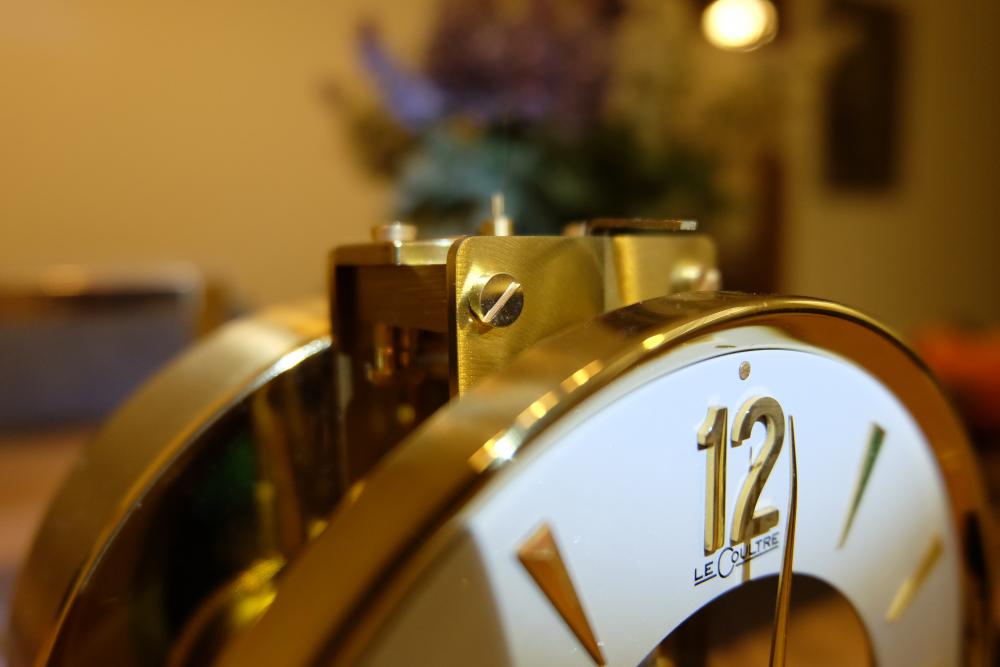
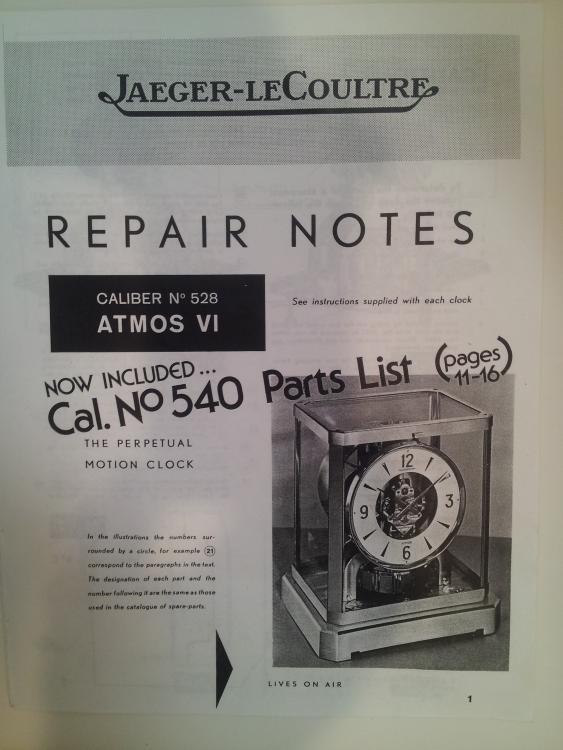
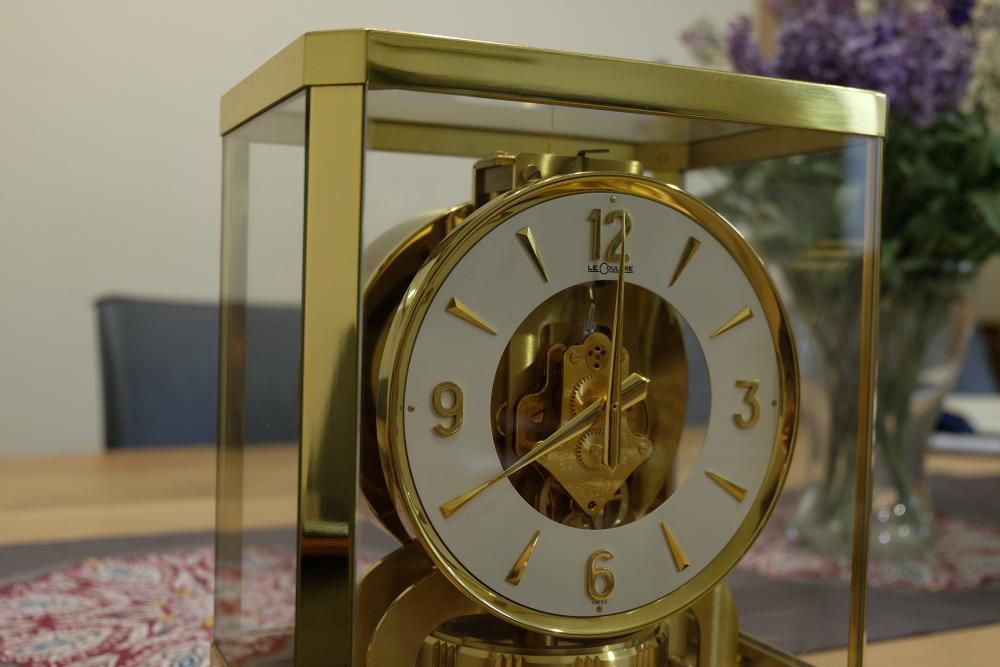
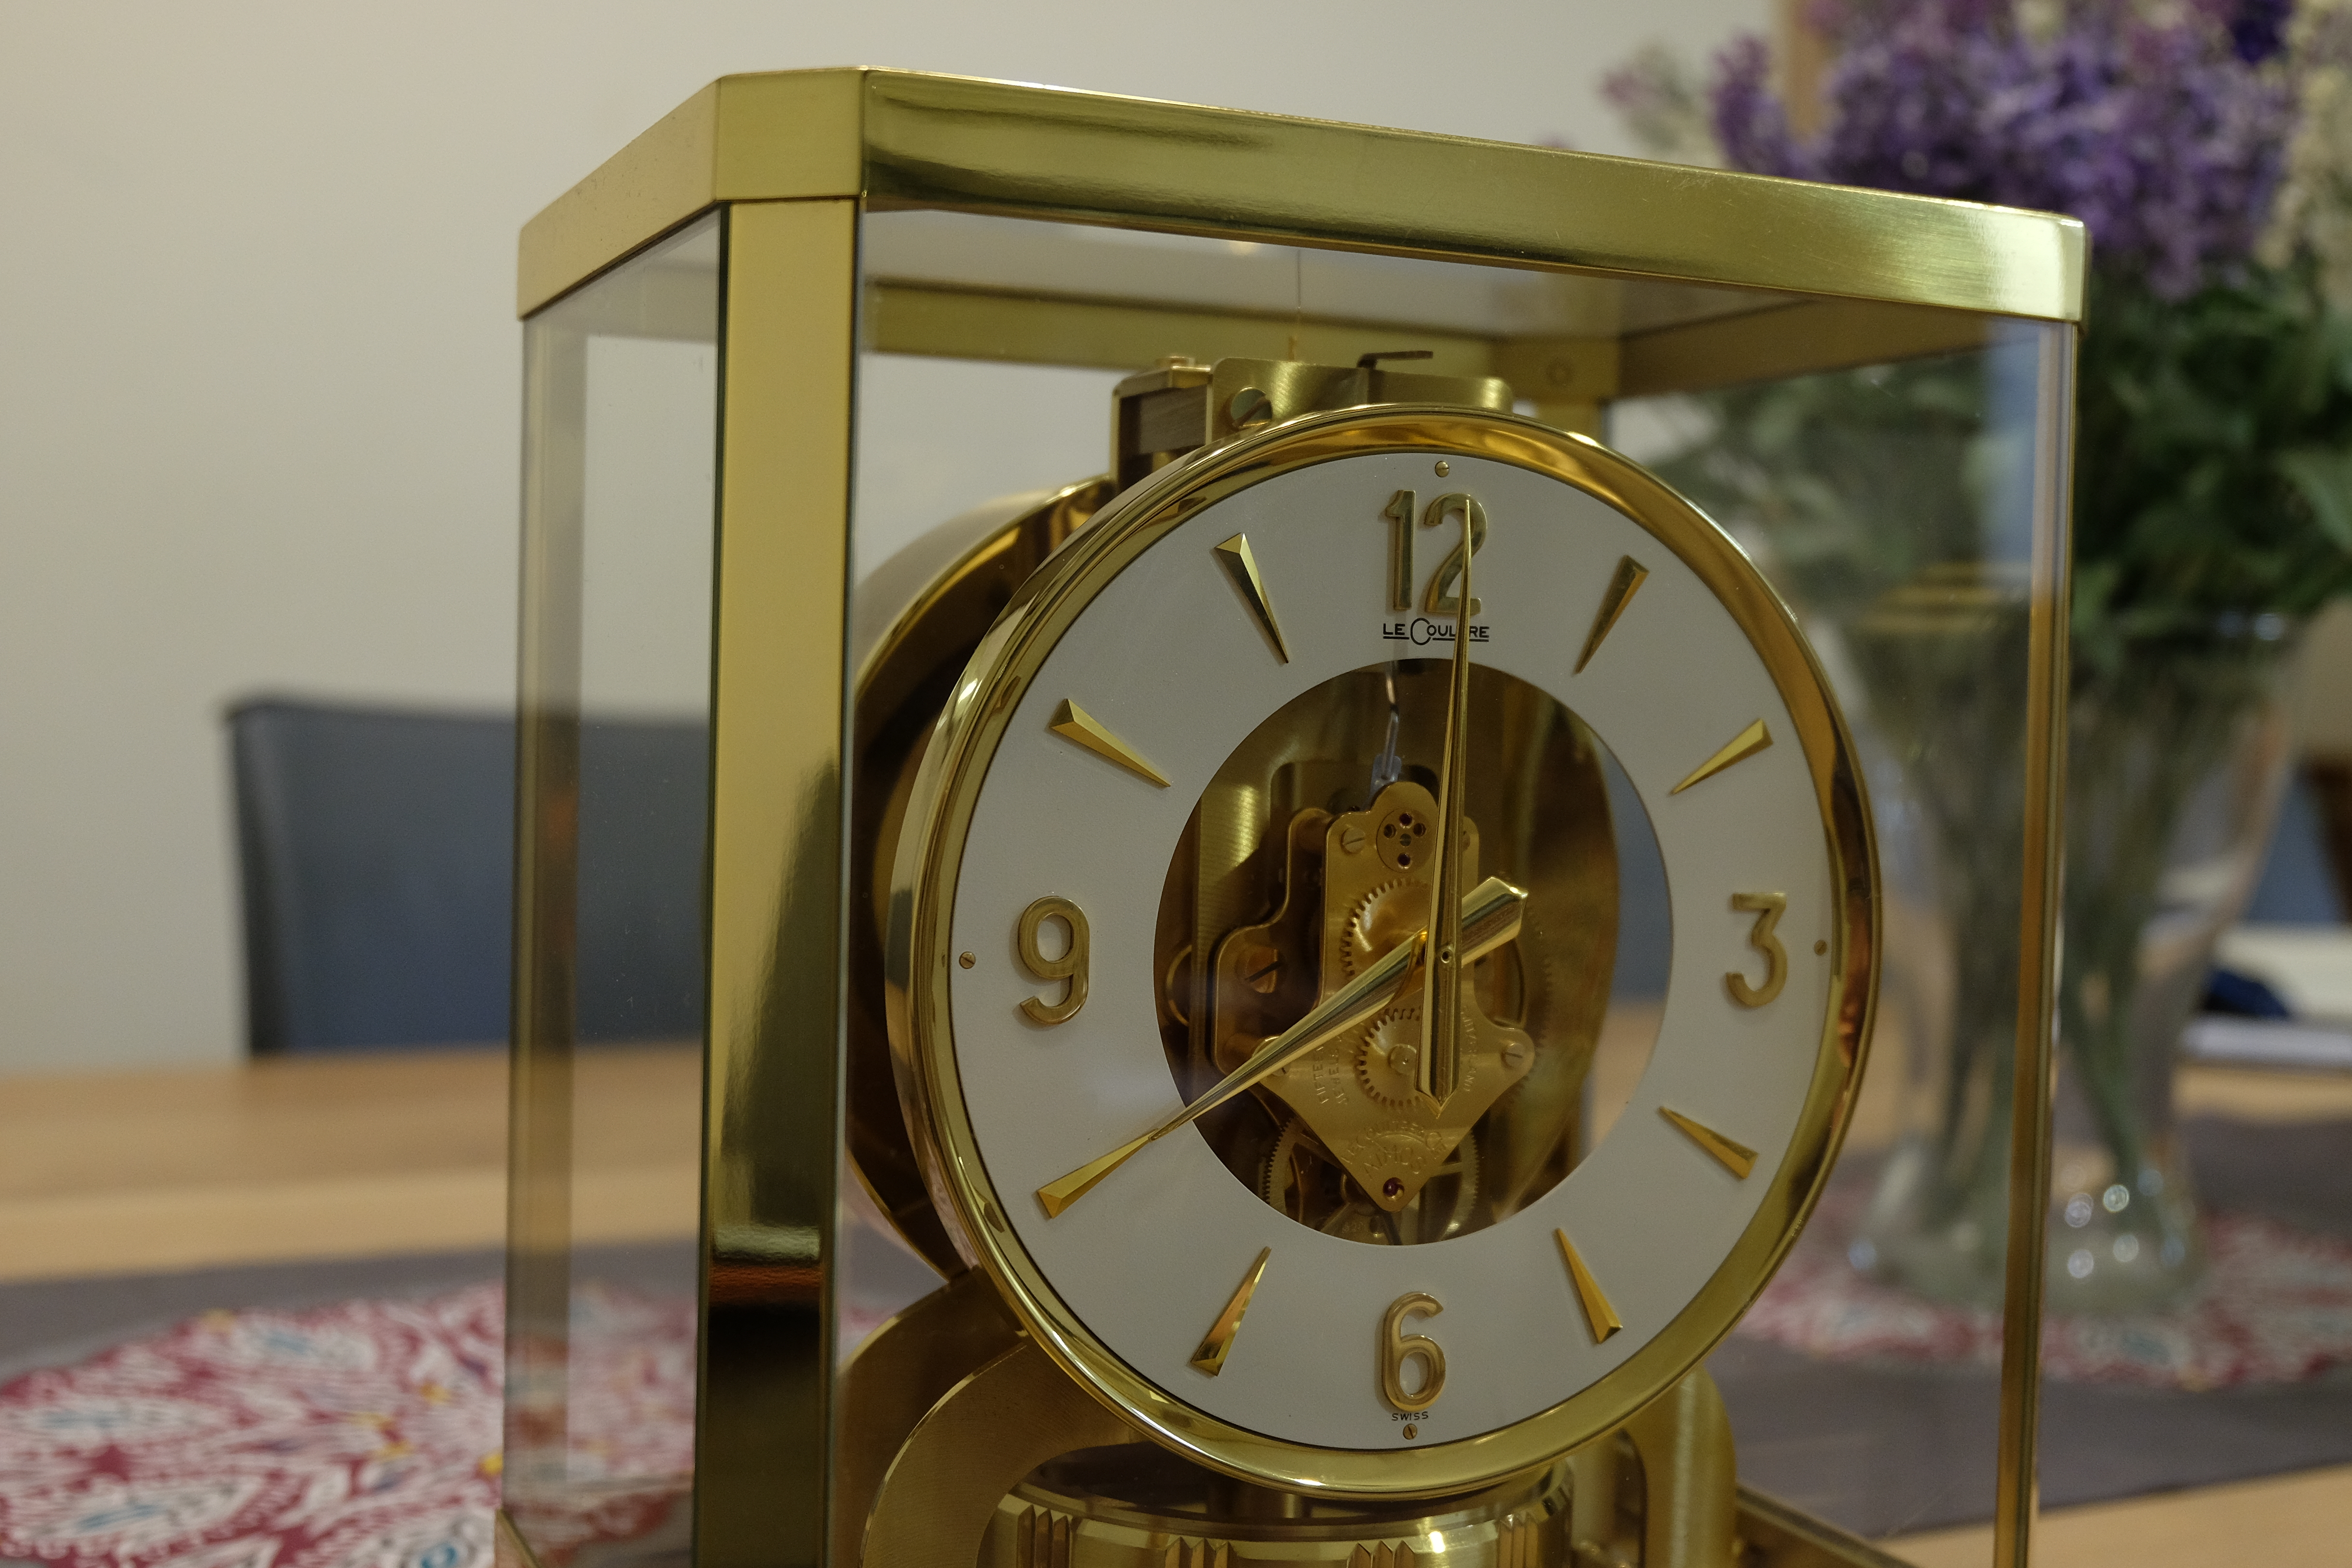
This is my Atmos cal 528 story circa ~1960 – its been years that I’ve put my eyes on Atmos clocks looking in its beauty and clean / sharp looking as well as their technical structure. In the country where I live, I’ve never saw any Atmos clock new or pre-owned for sale therefore I decided to buy on Ebay. At that time, I didn’t think that I’ll have to fix it I just want this “furniture” at my saloon. When unpacking the clock at home, I figured out that the chain is broken. I can’t tell if this happened due to shipment or it was originally broken but no matter - it was broken and here is where the adventure starts…(broken chain means winding mechanism is out of order). As watch/clock hobbyist, there was of course only one option – jump into it, ignoring those who claims that even the experienced and professional clockmakers shouldn’t touch Atmos without the proper skills and knowledge. I’ve started to read the available material on the WEB, spending time to understand each and every step. I bought also the repair PDF notes with explanations and dedicated tools like hands remover since without it, you will damage the minute pivot. Repair notes: Hand remover: Also, I couldn’t find a proper screwdriver since for some reason, the standard screwdrivers blades are 0.6mm or 0.8mm while this screws require 0.7mm blade. Important to mention is that without perfect fit, the screws will be damaged and if there something I hate is to see those signs on the screws because of using improper screwdriver (or sometimes due to non-skilled hands). Therefore, I took 0.8mm and resized it to 0.7mm. Also, need to say that this screws are having a large “cap” so once they are tightened, they are very difficult to be removed. One of the screws: Another mission was to get new chain but this was found easily online. It took me about 5 month to complete the study and buy everything. Before I started the work, I did few inspections looking for other potential issues: 1) I manually wind up the spring to the desired tension (according to the spec). I found the clock is running although the amplitude was lower than the spec (spec is 360 – 540 deg). 2) I checked that the bellow is functioning – measuring at room temperature and after refrigerator. It looks that bellow is ok In order to replace the chain, I had to remove the dial, bellow, motor, front plate and the main spring. I didn’t disassemble the balance system as in my inspection, it was looking functioning properly. I disassemble the motor gears and cleaned the holes. I also disassemble the mainspring and cleaned it and oil it. It looks that the clock wasn’t serviced for a long time. There are only few points to lubricate the clock. Most of the friction points must not be lubricated! Then I installed the new chain following the instructions of the required distance between the ratchet and the bellow to allow the optimal torque for the windup process. Then, I’ve put everything back and wind-up the main spring manually to its base level means that from this point on, the bellow will wind-up the mainspring according to the thermal changes and the power that ran-out from the spring. The clock came back to life and I was able to monitor the mainspring winding up properly. This can be done by following a moving red point located on the barrel arbor ratchet winding system. The chain and the red dot: The clock is running ~2 years keeping excellent time after this service however, the amplitude is about 330 and even less, while the spec requirement is 360-540 deg. I’m trying to look for the reason but so far I didn't found. There is still work to do but so far I’m really proud of it. This is just beautiful, I hope you like it:


 1 point
 -
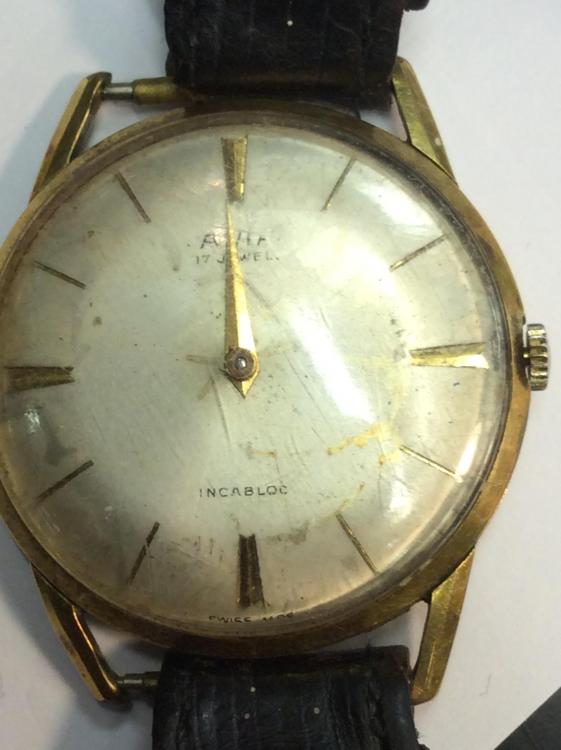
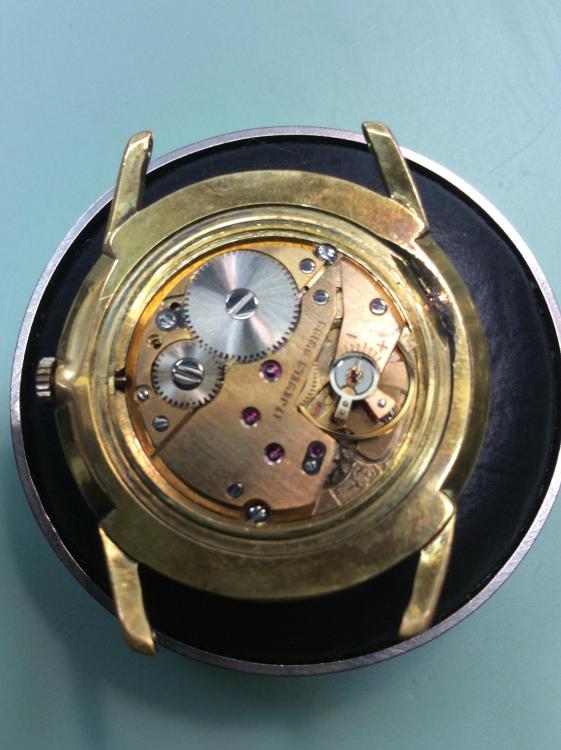
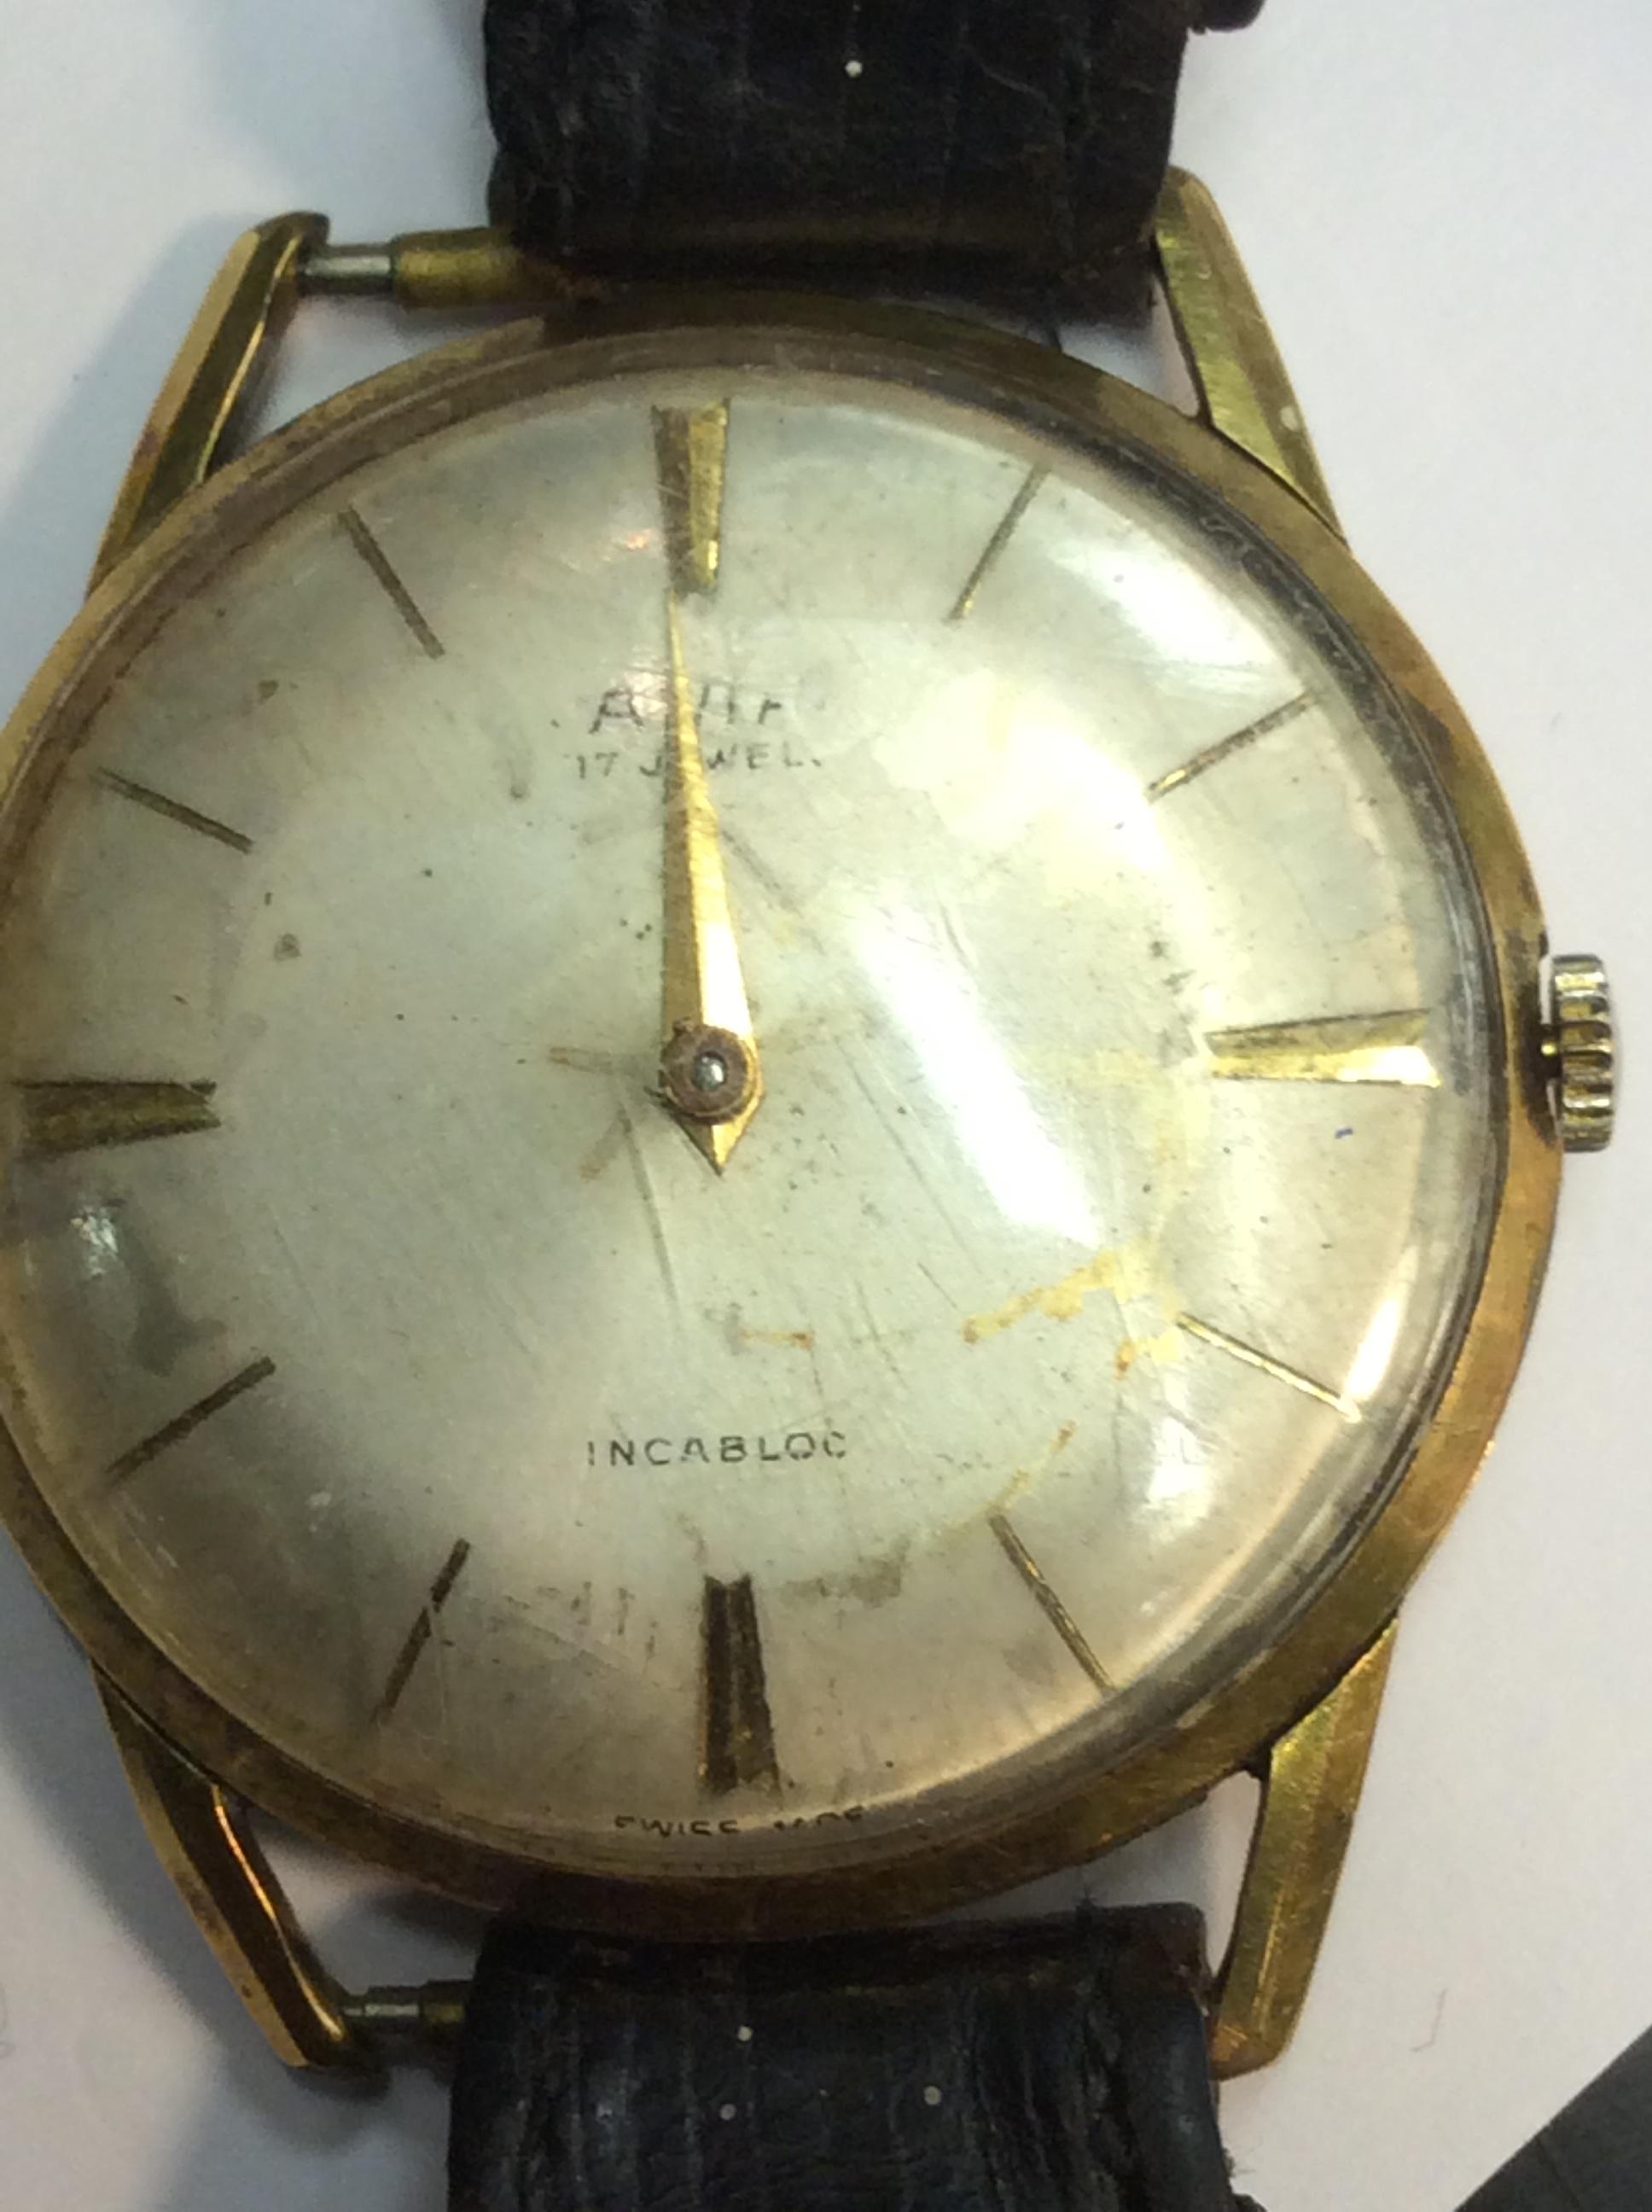
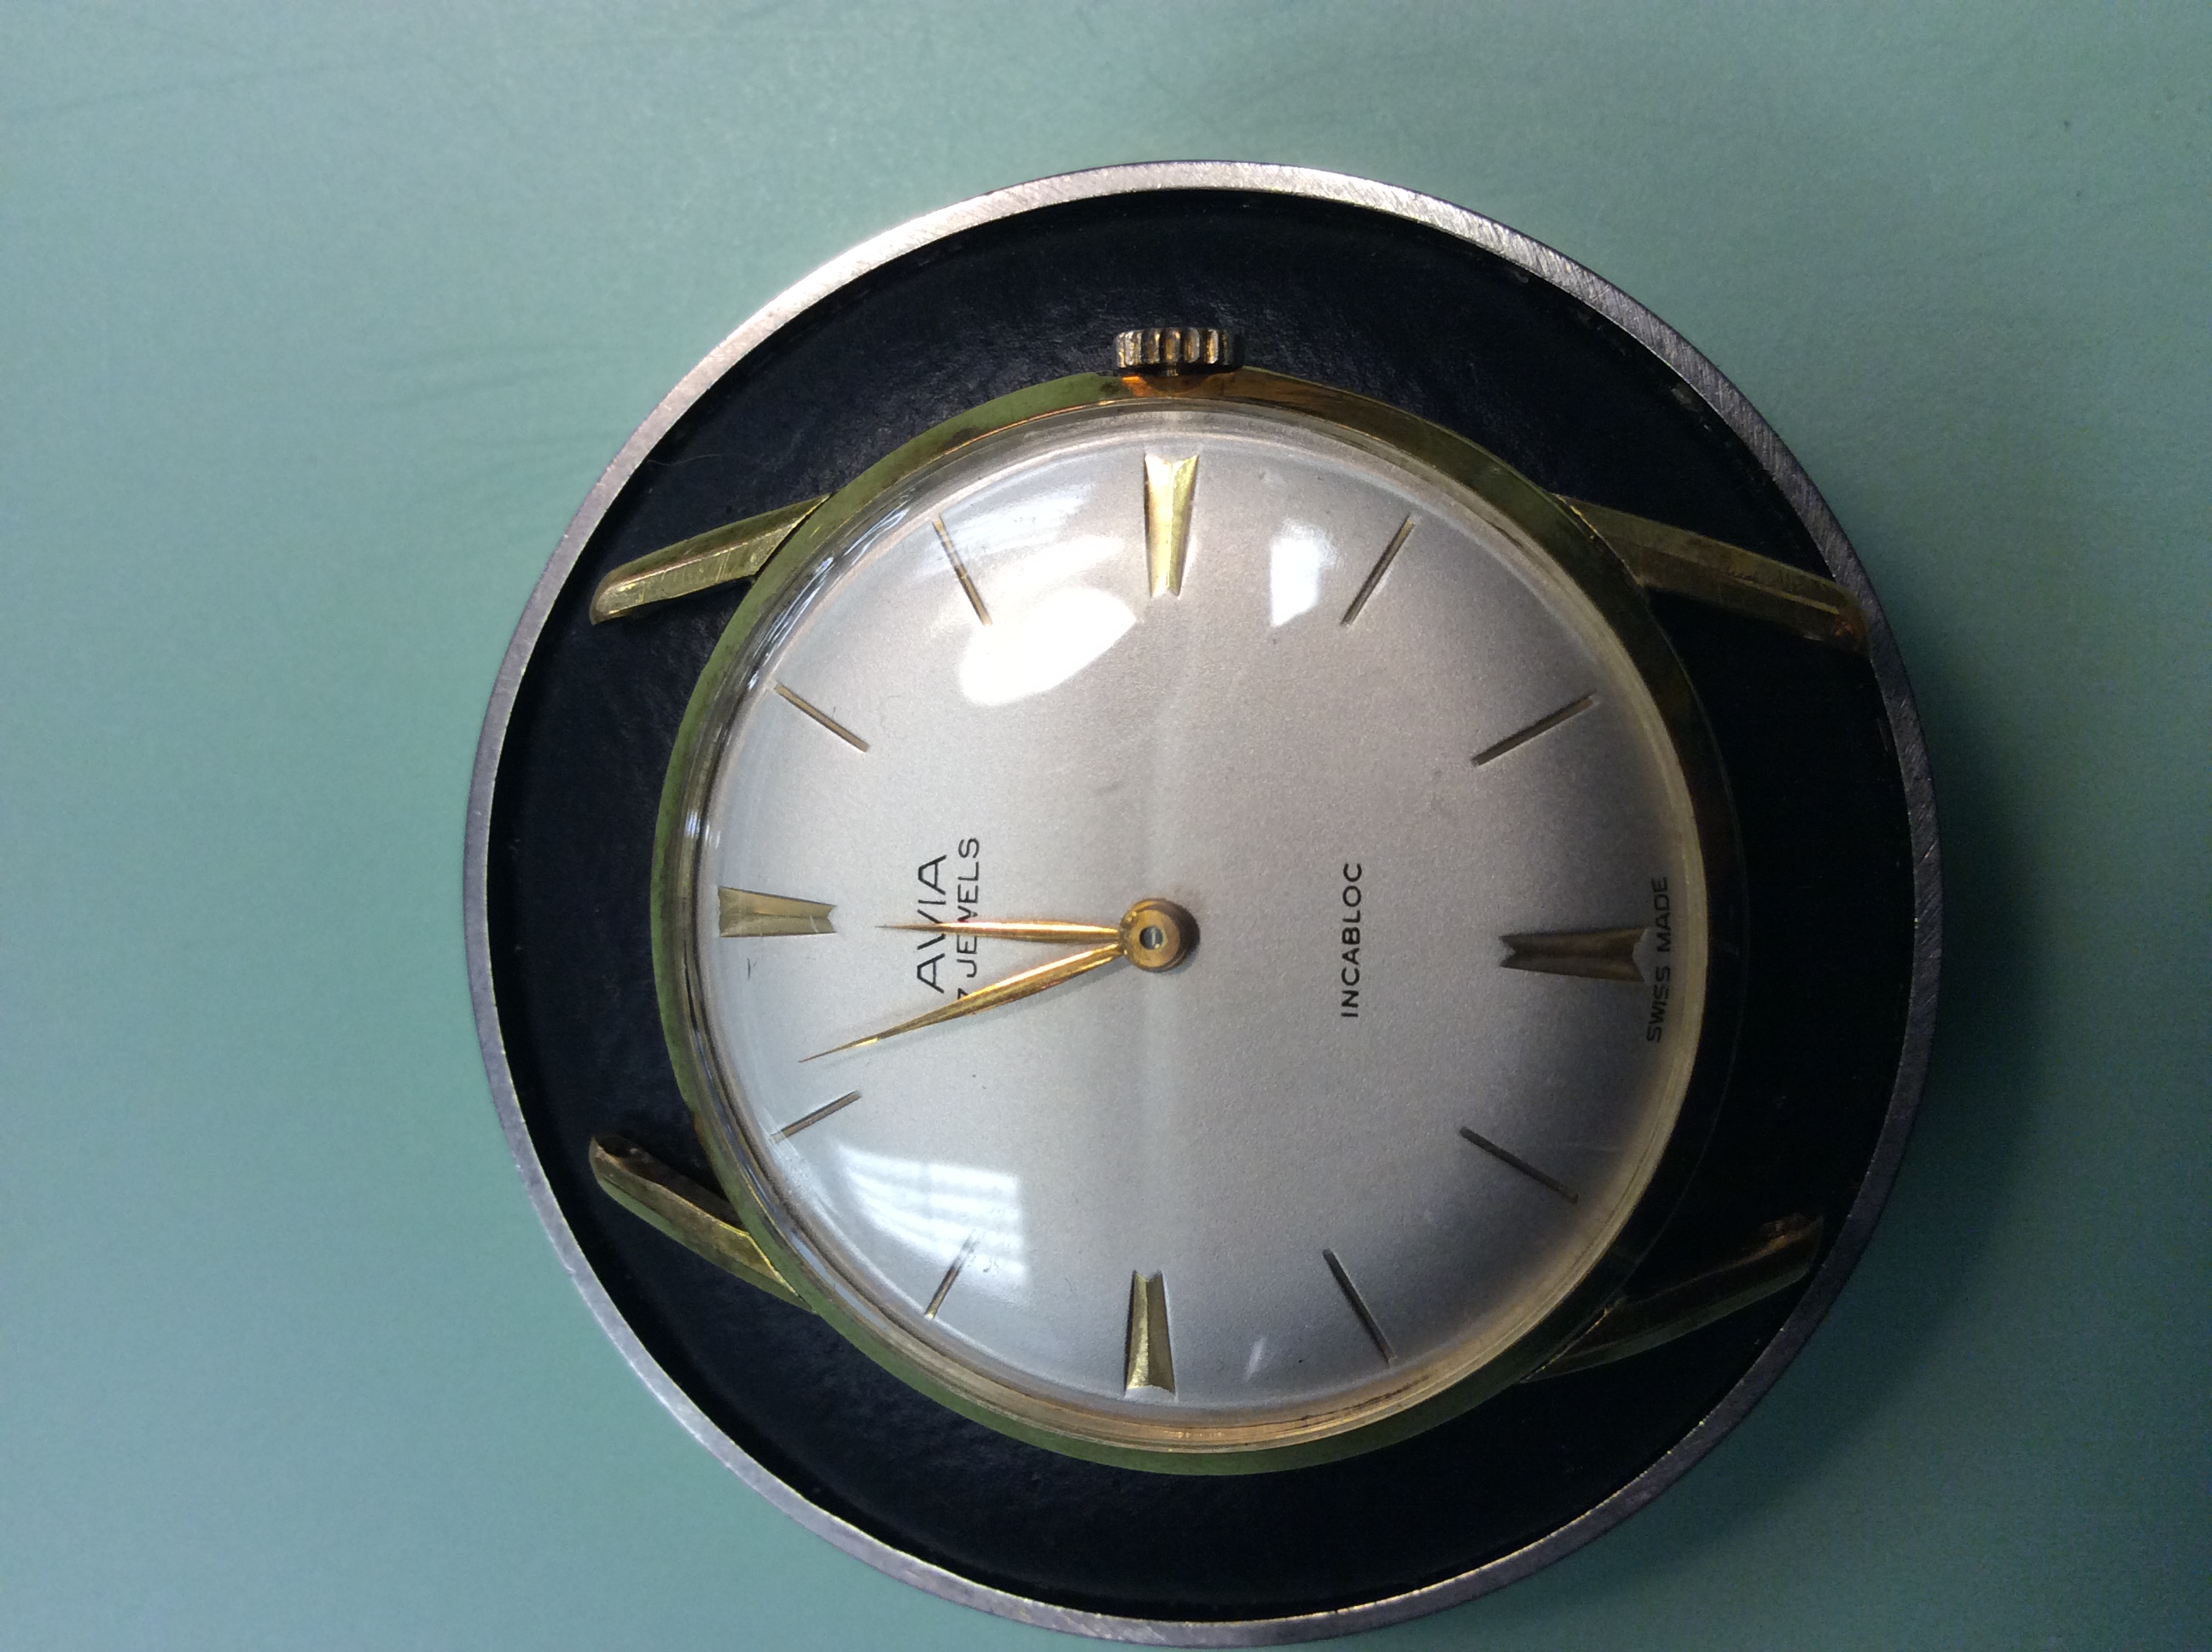
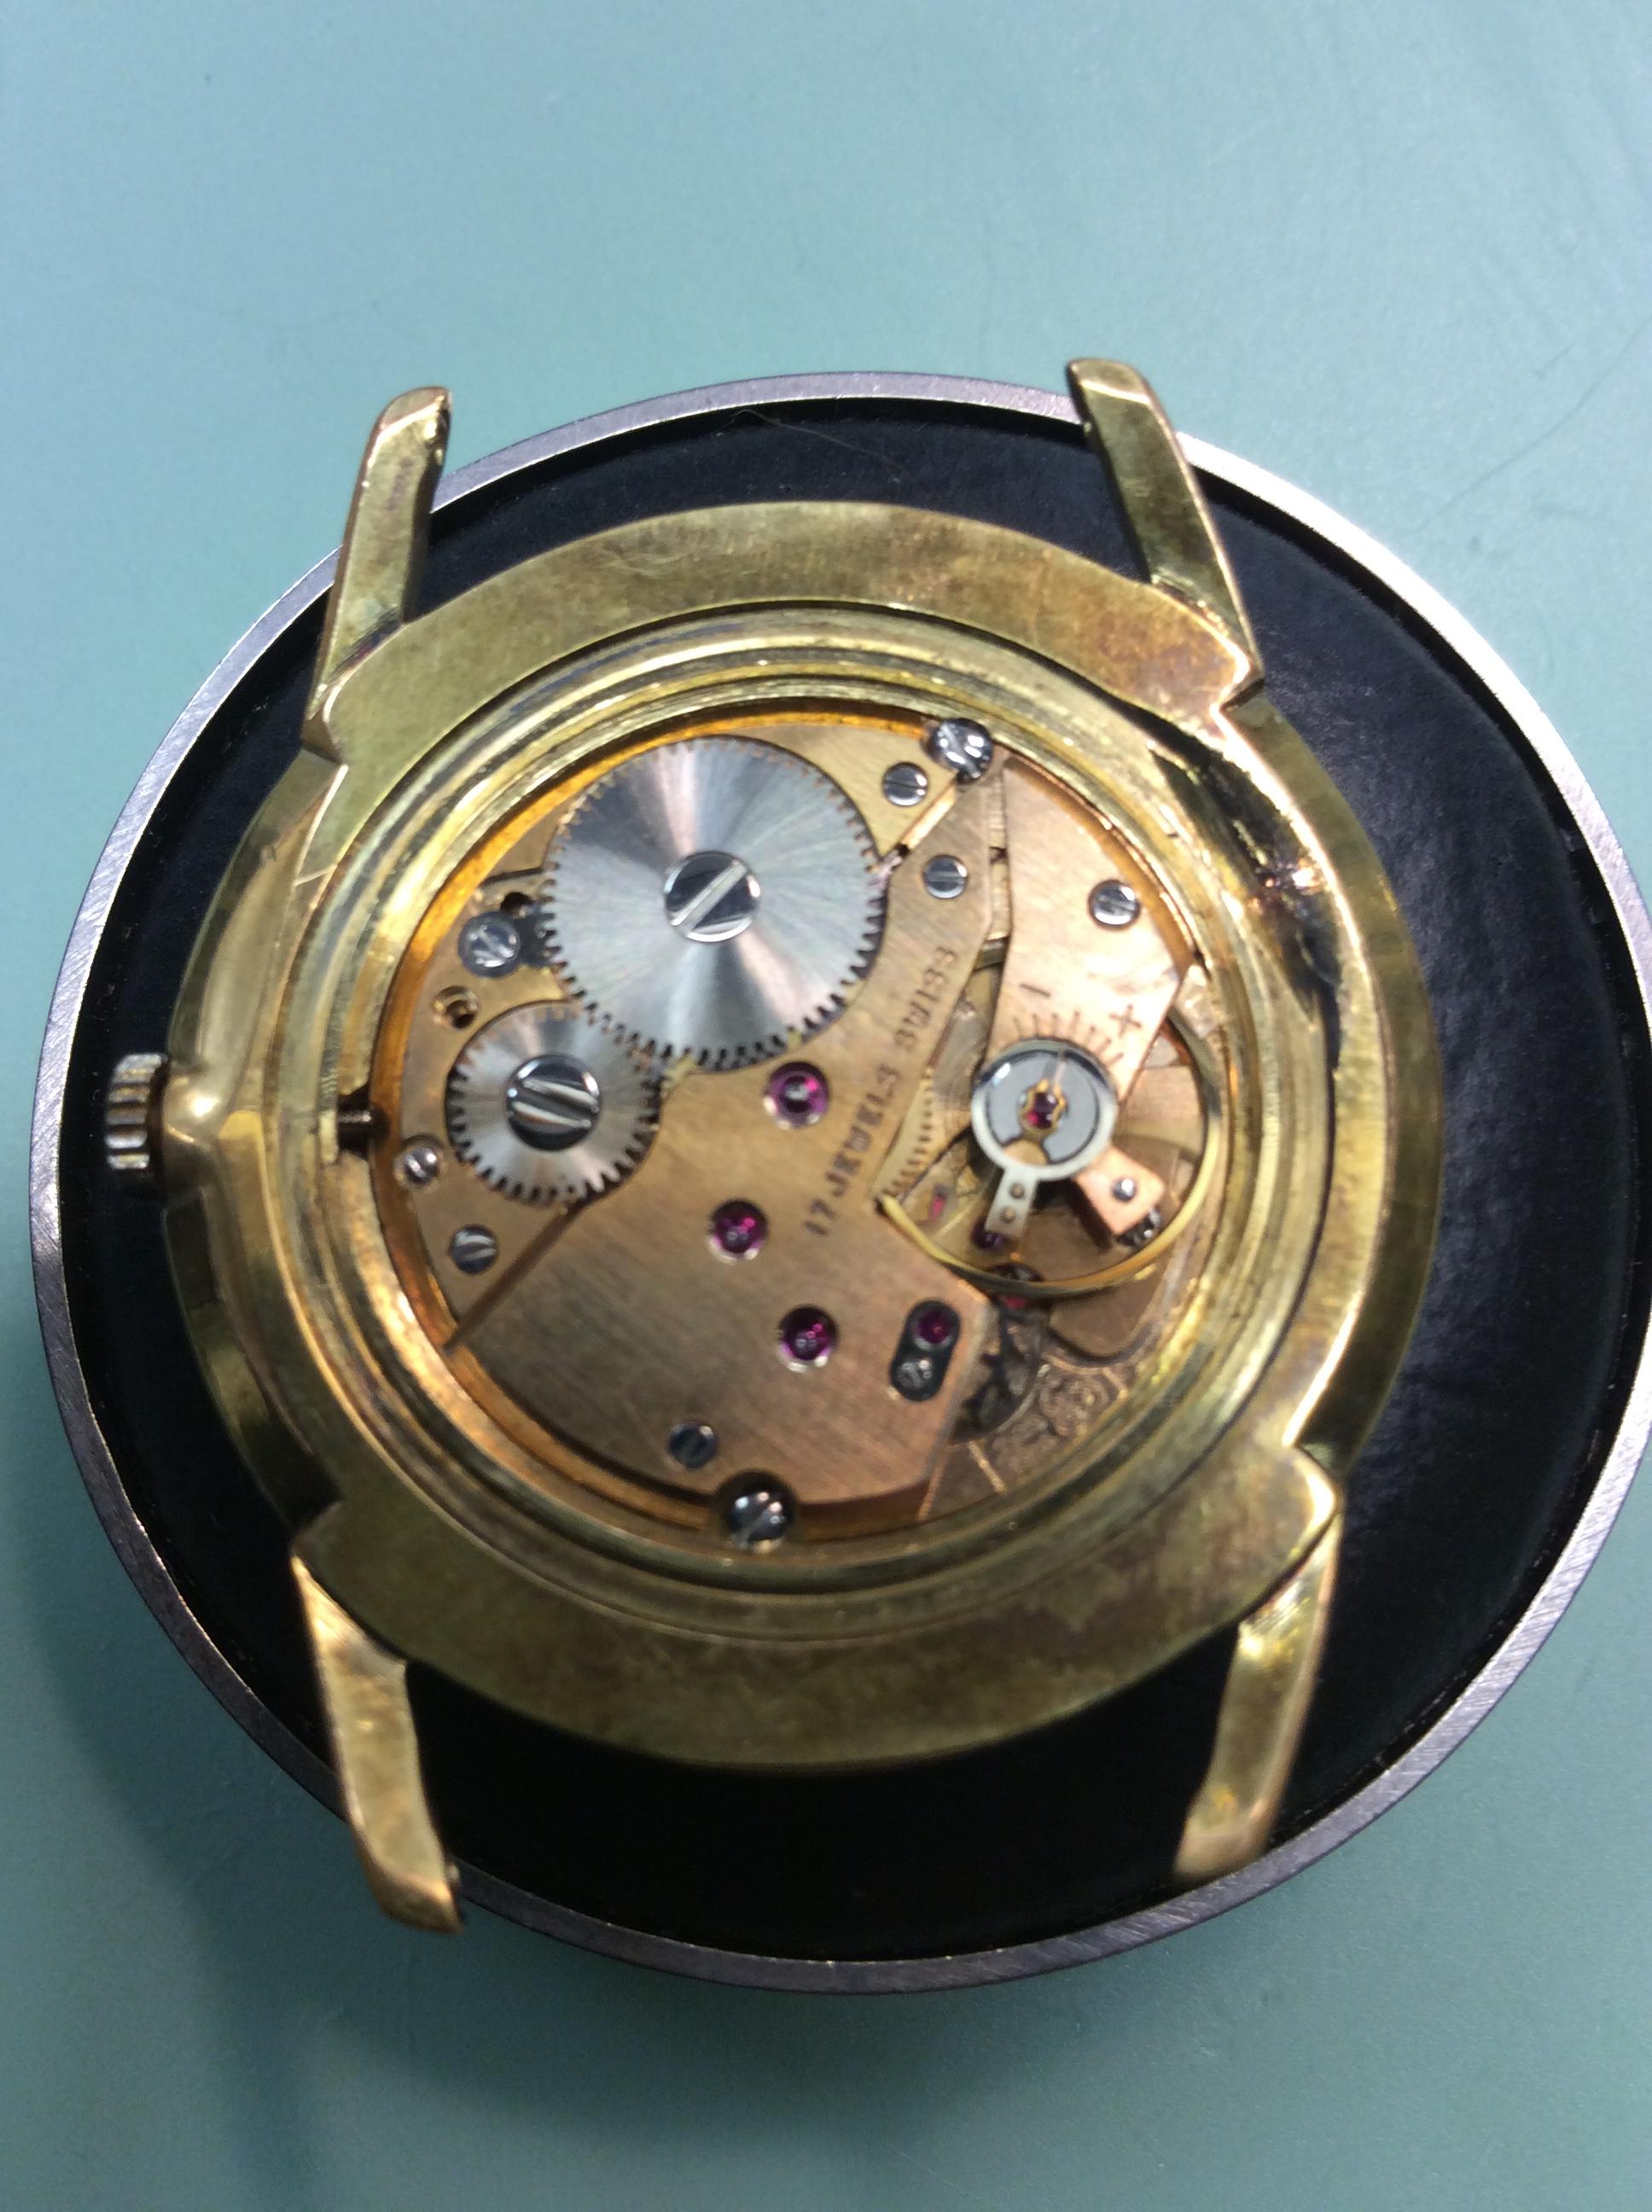
Good evening everybody my name is David and this is my first post. I'm a big fan of Marks YouTube Channel and keep up to date with all his videos. The most informative and detailed, easy to follow walkthroughs that I have came across. So, Mark, if you read this, thank you and well done! I am in the industry and have been for years now. I started by working for a well known high street watch repair chain (not sure if I'm allowed to mention the name) and after working with them and working my way up I decided to open my own watch repair shop in Nottingham City Centre. We've been running for almost a year now and going very well. I've attached a couple of before and after pictures of a recent repair to an Avia watch we have completed for a very satisfied customer. Probably my favourite repair to date purely because of the customers tearful reaction on collection. The best thing about this industry is the sentimental attachment people hold to their watches. What do you all think? I am always looking to broaden my knowledge which I have noticed this forum is very useful for. I can also offer any advice and help with anything that I have experience in. Please feel free to reply to this message and say hi. David


 1 point
 -
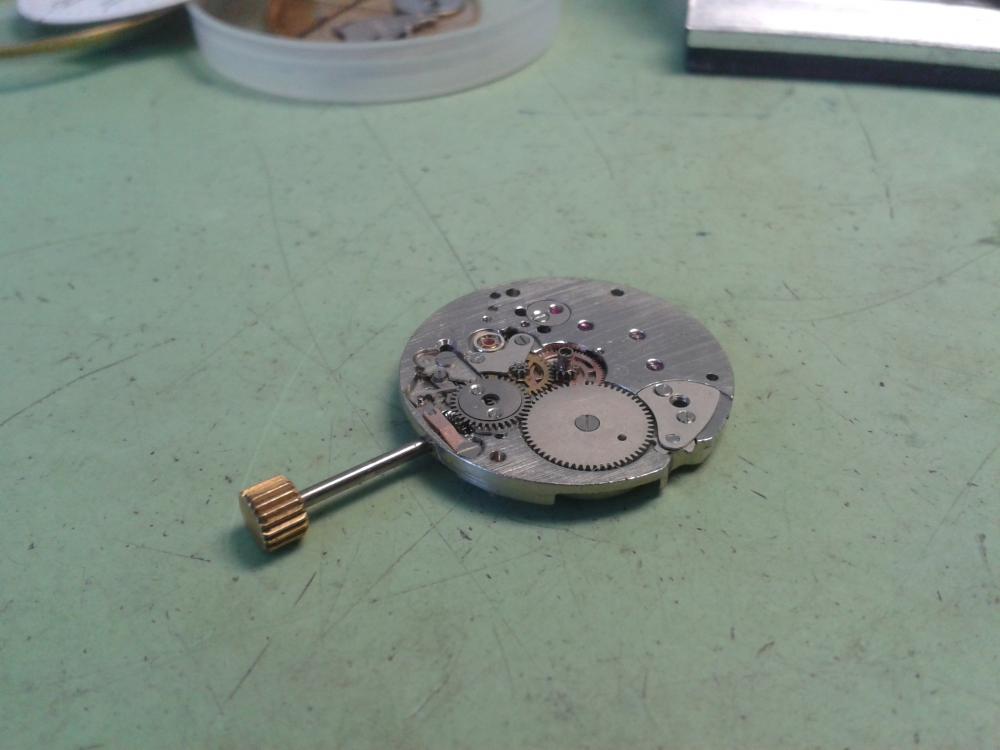
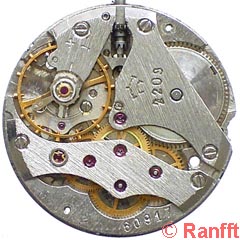
Well in the back of one of my draws,i Found a slim sekonda pocket watch, Reketa 2209. Not too sure why I decided to fix it up,other than the fact that it wasn't working. Needed a mainspring or so I thought, hmmm teeth missing on the barrel, fixed that and then I found that the second wheel also had teeth missing. When I tried to get the second wheel I thought iwas going mad, no 2nd wheel listed, turns out it's listed as a intermediate wheel or a transmission wheel. Well I got it working now, it's not one I would normally do but, well a change is as good as a rest. I had a look on the internet to see what was said about the movement , turns out that people don't like working on it because it has five wheels Under the plate, what a lot of rubbish, I managed it after 2 pints of Stella, and it's running like a dream. I thought I have a 1/2 decent picture of the dial but I can't find one, but to look at the dial it looks like any other sekonda watch.
 1 point
 -
You could find some new gaskets on Cousinsuk. if you could installed them yourself? Change case back gasket and helium valve gasket also. Then it would propebly work again . Pusher Gasket, Omega 088NS0437 https://www.cousinsuk.com/category/omega-case-parts1 point
-
Also be carefull hands wont touch each other as they turn , and the second hand not to be too high because might be slow down by the glass when you fit the movement in the case.1 point
-
I'm waaaay too slow at typing!1 point
-
first of all its a very reasonable question , not stupid, and as cad said turn the crown in the hand setting position and advance , as soon as date disc moves to next number, push back in the crown and set both hands on 12. in that way you are certain that the date will change at 12 o clock1 point
-
Ohh there you are Geo1 point
-
Ditto... Where are my manners!! Hello Pip and welcome.1 point
-
The first thing you'll have to do with your watch is to turn the movement with the stem in the setting position until the day just trips. Now very carefully fit the hands in the twelve o'clock position. This will ensure that the day is synchronised to change at the correct time.1 point
-
Whoops forgot to say hello so HELLO1 point
-
12 is actually the only number that you can have both hands pointing at simultaneously and have the correct relationship between hour and minute hands. First of all you need to advance the time (as if the hands were already installed) until the day/date just changes. The idea is to stop at the instant the day/date changes so if the 6119 has instantaneous date change (I can't remember off hand) you might need to have a couple of goes to get it just right. If it is a progressive change then things are a little more forgiving. Date change happens at midnight so if you stop advancing the crown at that instant and install the hour and minute hands to read midnight they will be correct. The seconds hand can be installed anywhere as it runs independently of the setting works.1 point
-
welcome to the forum. put the hour hand and the minute hand pointing at the same number, like 121 point
-
Hello David and welcome. Lots of info on here for you. Anything you want to know just ask.1 point
-
I rebuilt the movement and the watch today, took lots of pictures and even made a video. I will upload everything later.1 point
-
You know my address1 point
-
Thanks Robert!! Yes, this is the watch I bought in 1977, when I was 14 years old. I paid with my own money.. So now 39 years later, it have now been updated And as good as new....1 point
-
Lovely restoration David, and welcome from another newcomer, albeit one who is a beginning amateur at best. Sent from my brain using evolution and electricity.1 point
-
Thanks for joining and introducing yourself. Nice restoration! I can see why the customer would be happy.1 point
-
Welcome to the forum David, it's good to hear from you. I have edited out all references to self promotion of your business to comply with our forum rules.1 point
-
The vikings communicates always in the native language Vic! Morten1 point
-
Welcome from Miami, FL, the land of the eternal sunshine and Invicta watches....when it is not raining or they are assembling them watches in China! Glad you joined us, David! We will surely be asking you a lot of questions...and will try very hard to come up to good answers to yours! There are other very experienced watchmakers around as well as very new people exploring watchmaking. Cheers, Bob1 point
-
Hats off to you sir, WELL DONE! I have two 7T32's on the bench right now, one is complete and running, but no case or brace, the other I got in a pile of misc, thought just in case I needed parts. Those appear to be 'hot' items, since I have not been able to locate a inexpensive case to transplant running mov't to. Anyway if I have problems, your service will help! THANKS! Dave1 point
-
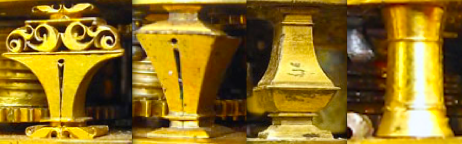
I stand corrected they are tulip. Left to right: tulip, Egyptian, square baluster, round baluster pillars.
 1 point
 -
Oh thessler, it is missing SIX no, ELEVEN parts on that set! Give it back...as a matter of fact, give me the guys address and the set and I'll tell him a couple of things...THE NERVE, giving away an incomplete set! Hum!!! Ok, I had my joke and now for the real thing....that jeweling set, is worth probably more than the L&R watch cleaner you picked up (considering all the "tools" included and the great shape it is in)...so enjoy! If you need some more "parts" for it, cousinsUK and ofrei have them in stock. Cheers, Bob PS. Check the size of the tools before ordering replacements, since I believe the black Seitz is before they changed to, what was it, 4mm? Please, correct me about this, someone!!1 point
-
Hello and welcome! Very nice collection.1 point
-
Hehe, not my invention1 point
-
Looking at the inside of the hairspring to me it looks as if it has broken away from the collet.1 point
-
RE - "Nice with several Norweigan here . Good luck with BHI course !" "Howay Morten divint dee that ah wus vary puggled bonny lad" - Come on Morten don't do that I was very confused my friend Thank heavens for google translate - but it does not do Geordie (dialect from the North East of England) ! Sometimes dialects make it difficult even within the same language. Incidentally thats another thing that is good about this forum - representation from so many different countries, it just brings home the fact that we are all the same really. Hope the cricket is chirping away happily now Stian. Cheers, Vic1 point
-
You'll have to get a watch that's a bit fast to make up for the lost time ...1 point
-
But..bu...bbut...the fourth wheel is right there on the picture of the carpet!!!! Ha, Ha, I got you there! Good luck trying to find that wheel in THAT carpet!!! Well, no, seriously, sorry you lost that wheel, it happens to the best of us. I just had to have a little laugh to make up for the many hours I spend looking for the parts I loose....As a rule of thumb, after losing 4 parts I get one back and the count resets once the house is cleaned! Cheers, Bob PS. Good progress and I'm following it with a lot of interest.1 point
-
Sent from my iPhone using Tapatalk1 point
-
[emoji278] [emoji279] [emoji280] [emoji281] [emoji282] [emoji283] [emoji284] [emoji1]1 point
-
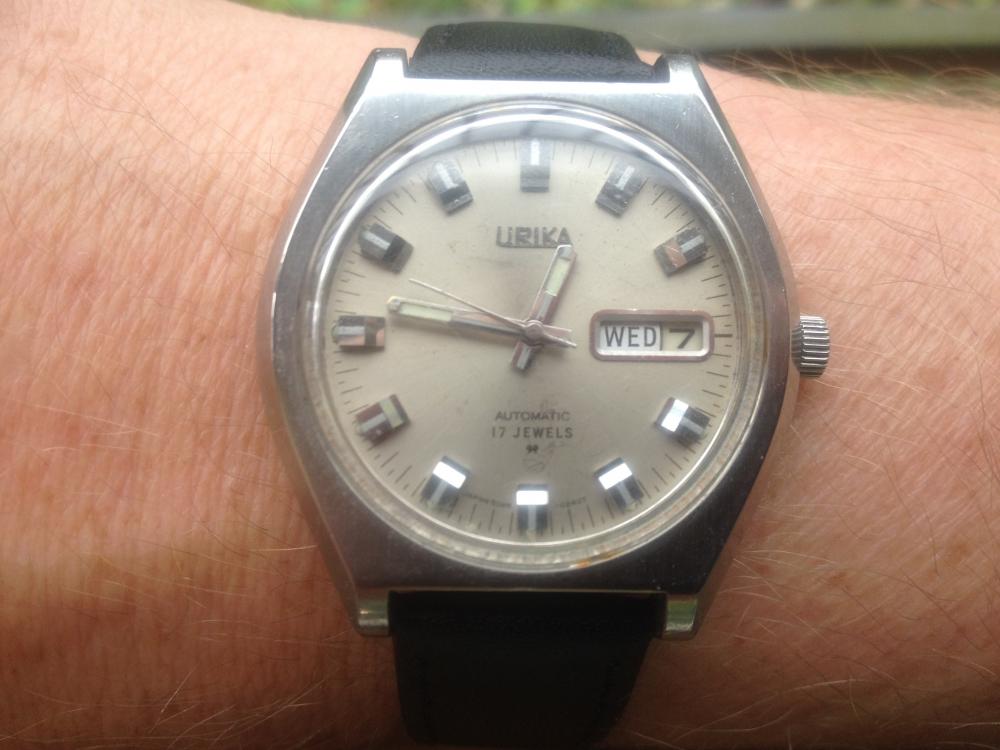
Not a Seiko but still Japanese one of my refurbished Urika's for me today.
 1 point
 -
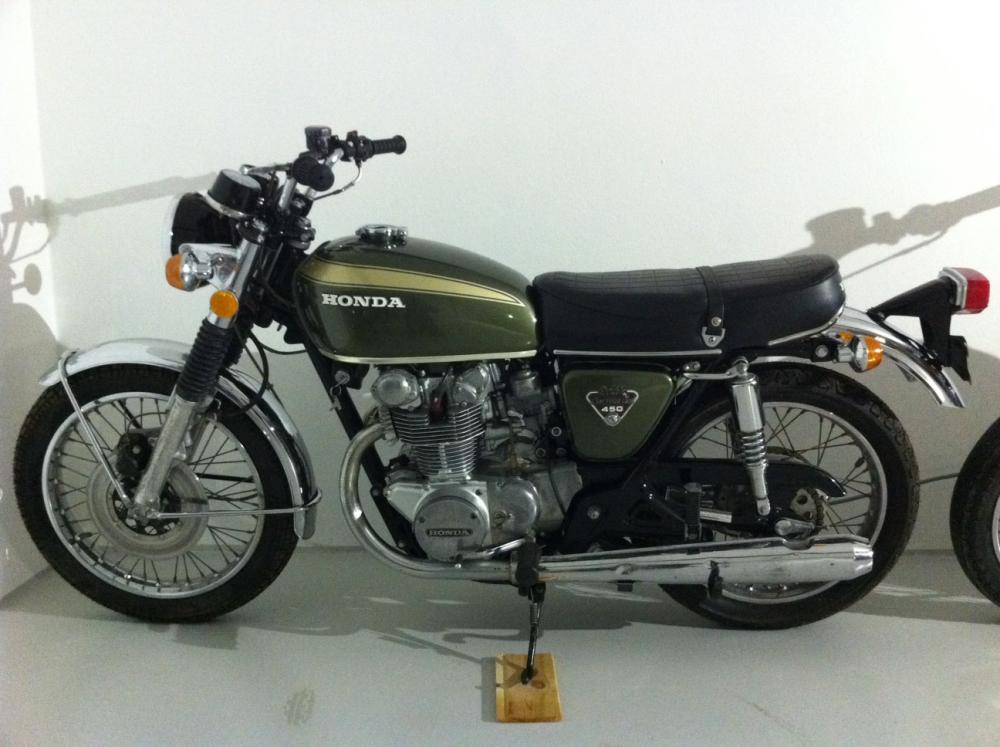
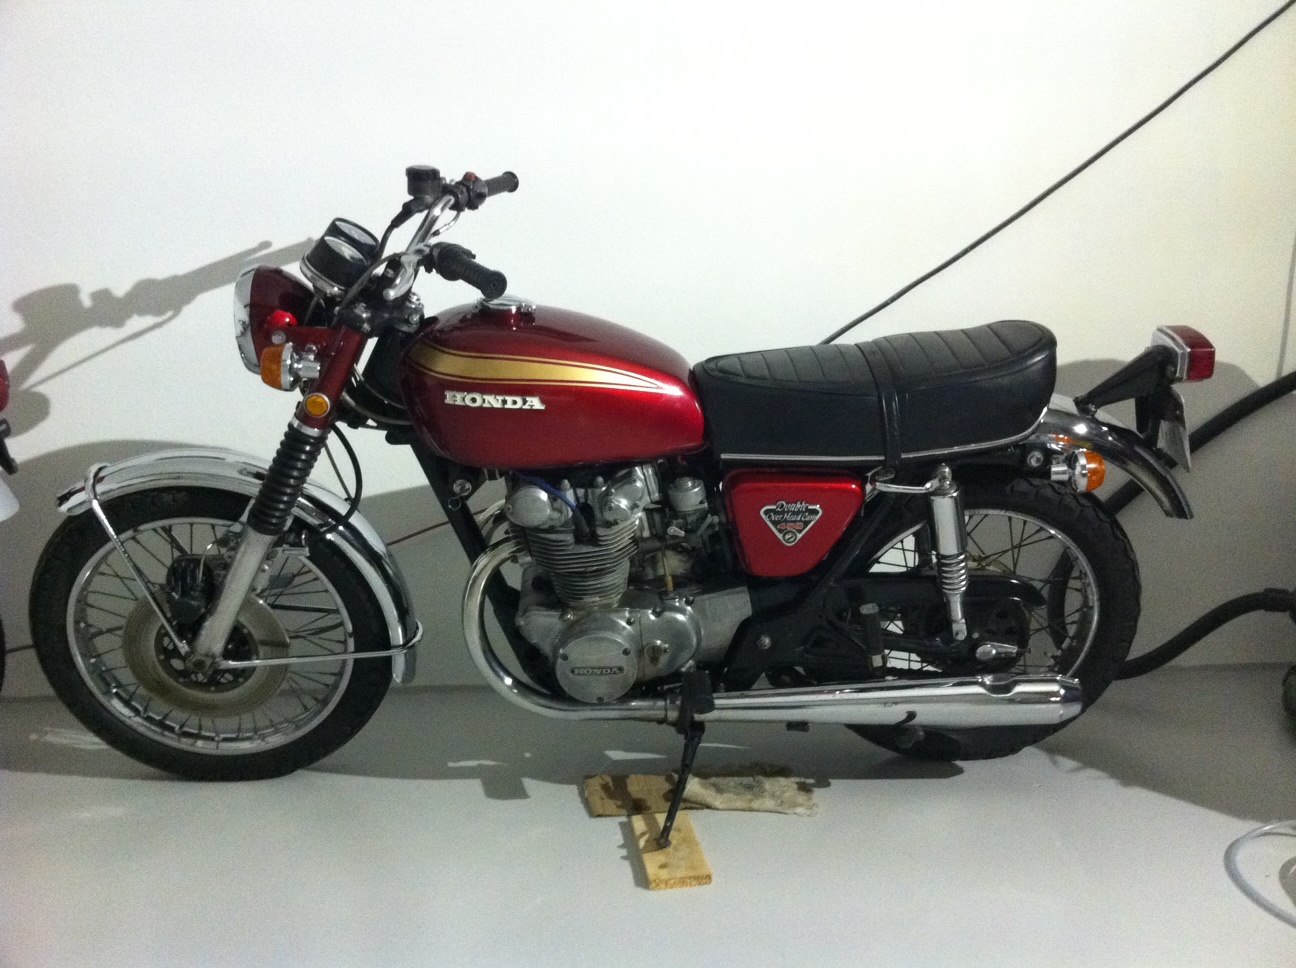
Hey Geo! Very nice bike!! What Is been done to it? Build from scratch or.... And I can see this is the right brand! Im into bikes myself, a little older thoug...

 1 point
 -
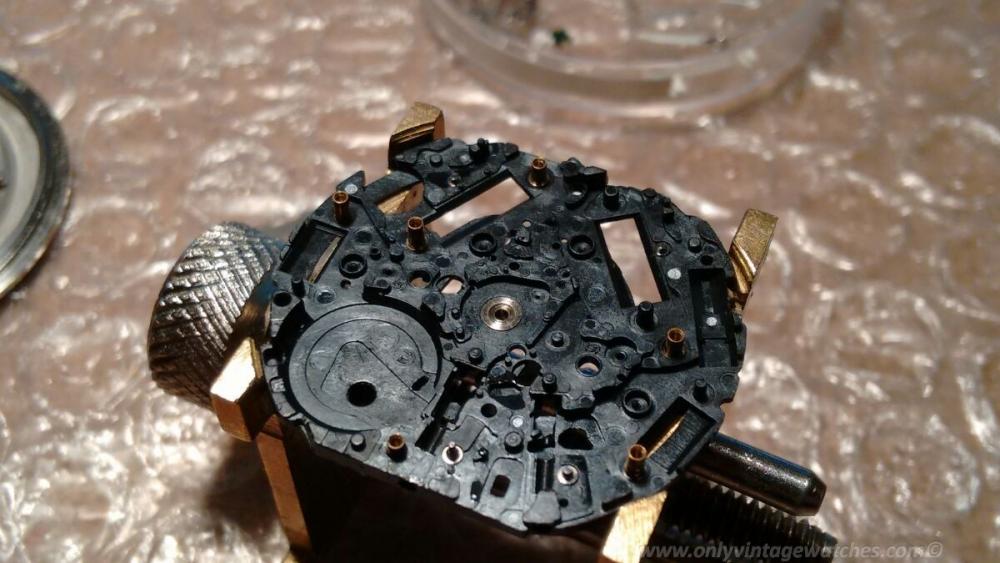
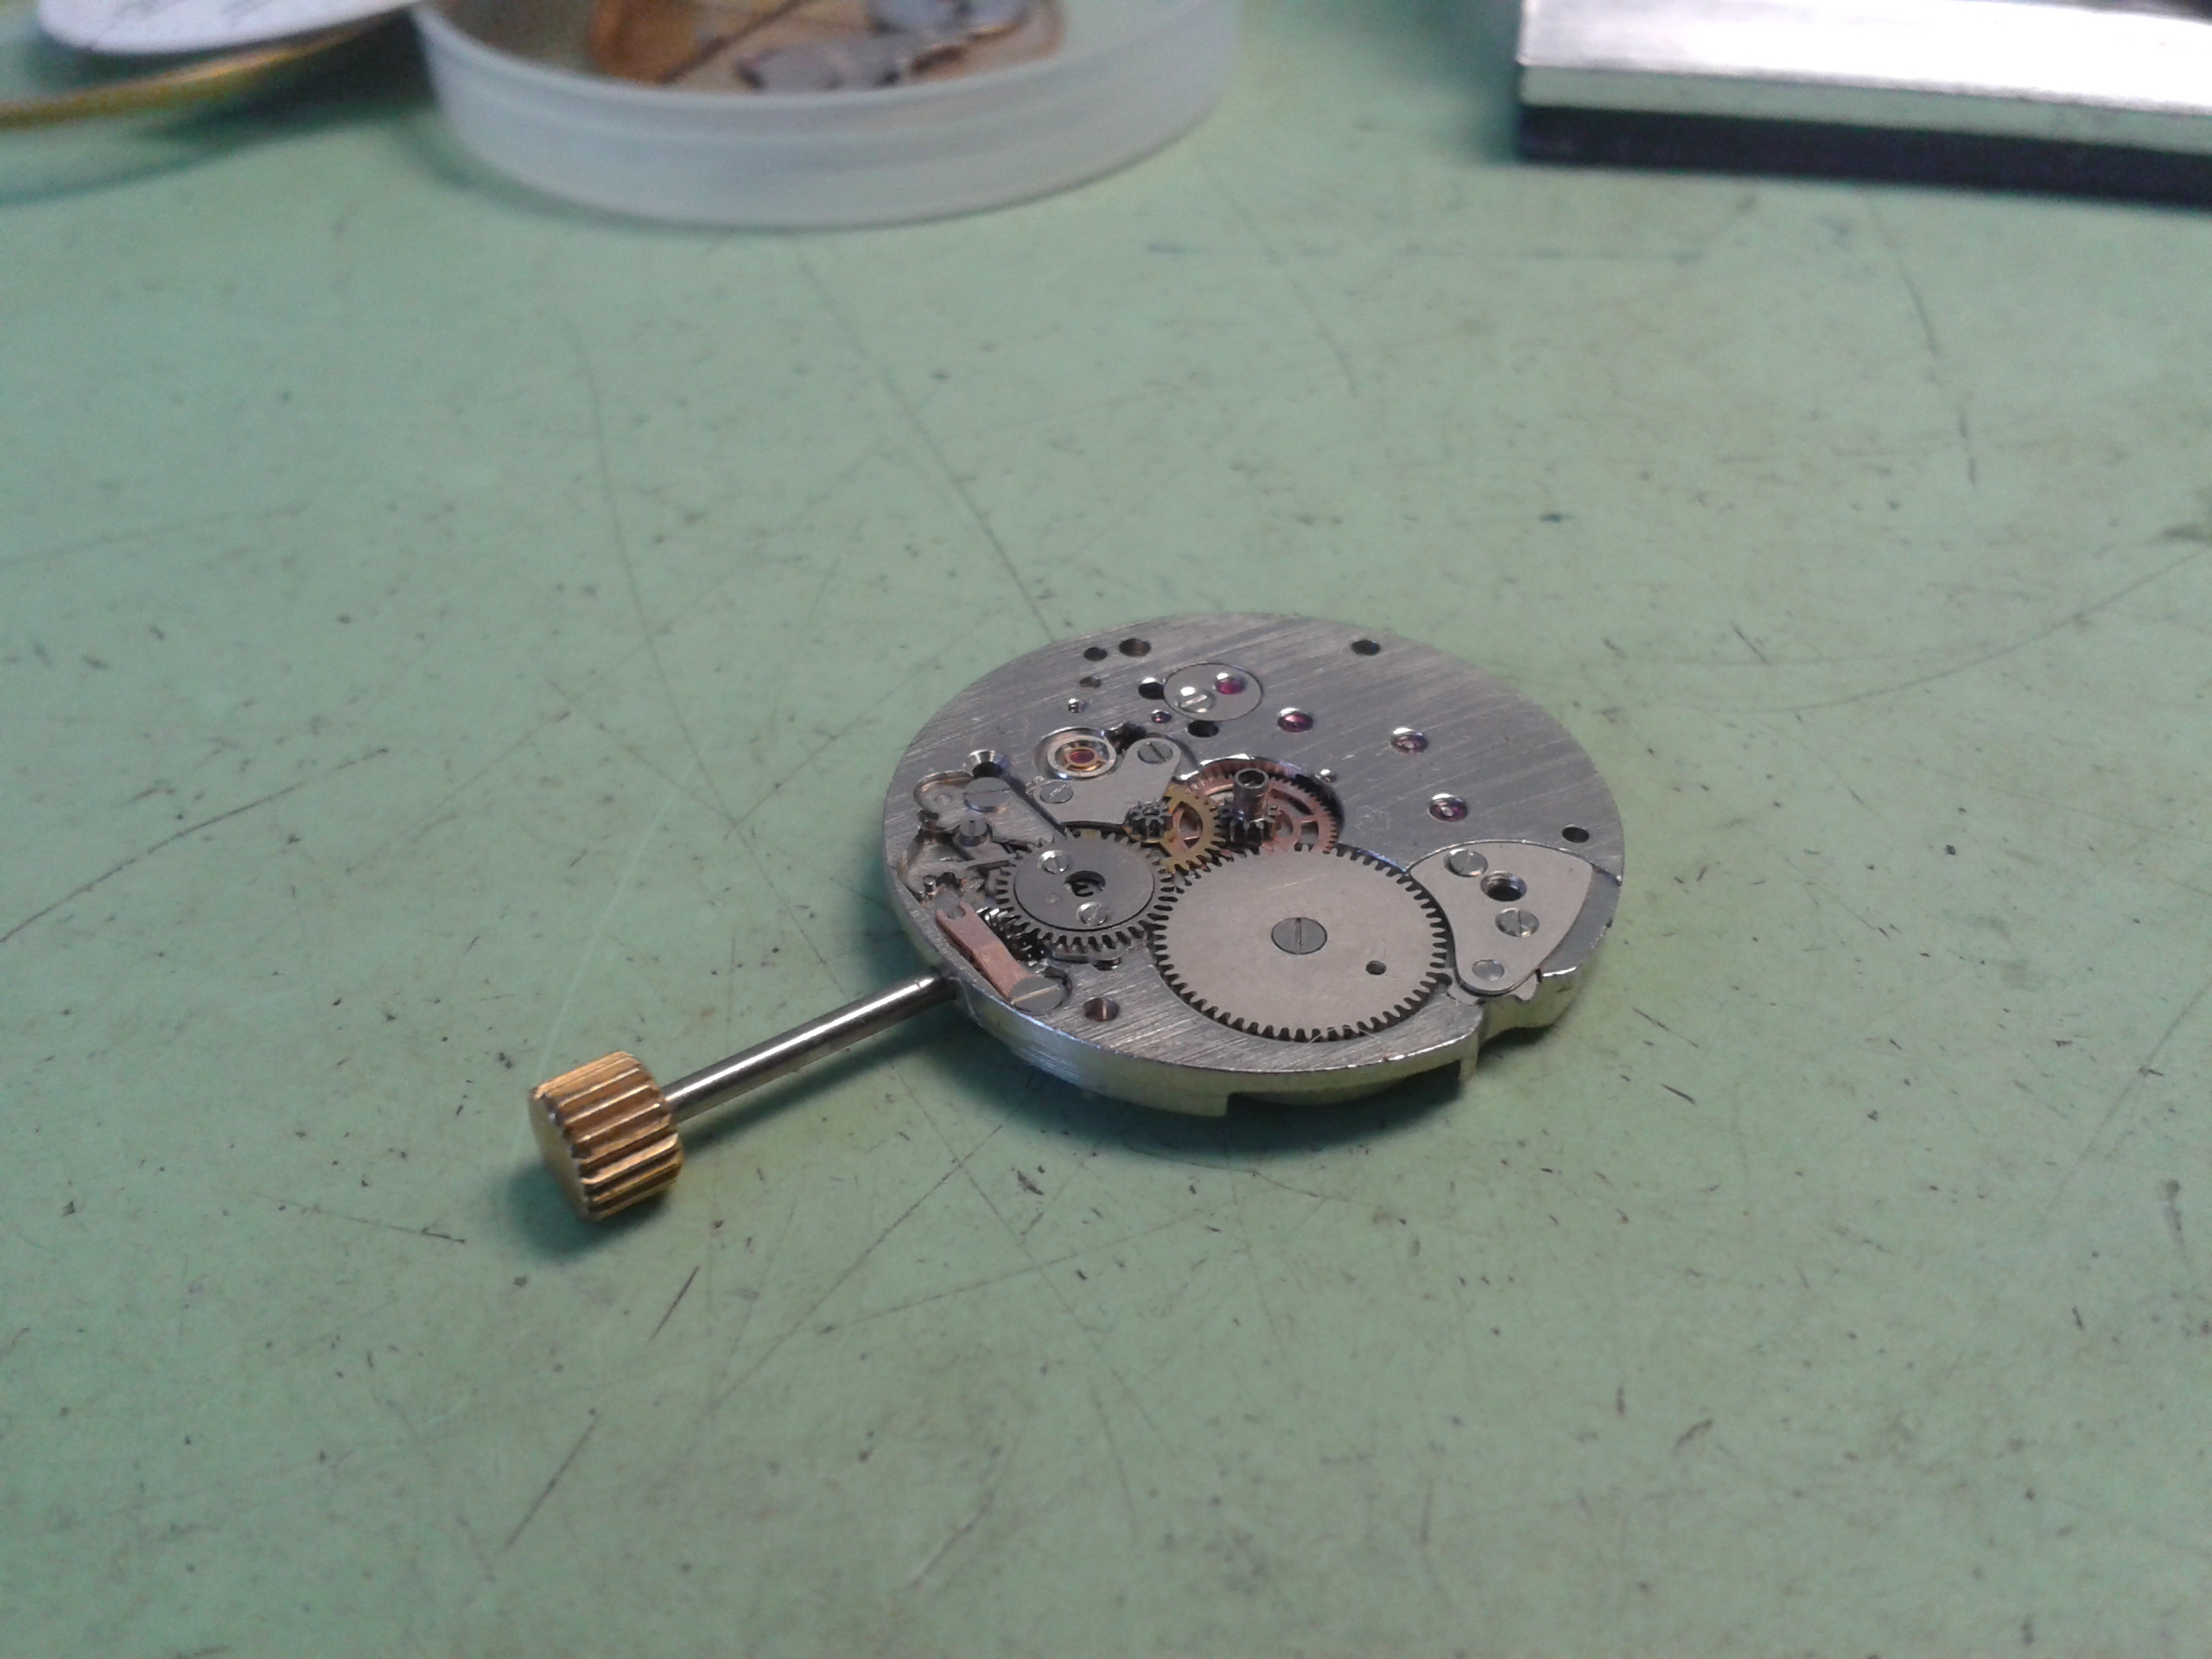
And finally the base plate, naked.
 1 point
 -
Just completed a cleaning of a watchcase & a Waltham 15j Pocket watch movement. Then I put them together to make a whole watch. Neither came to me as a whole timepiece. I have been looking for an unusual case to put the movement in & I found it at Dave's watch parts. The movement was very dirty and very sluggish & the case was very tarnished with dings and scratches. The crystal was not bad with a lot of small scratches (fixed with cerium oxide) So here are the before & after shots
.jpg.be4483543f8e4c029661bac425807a80.jpg) 1 point
1 point -
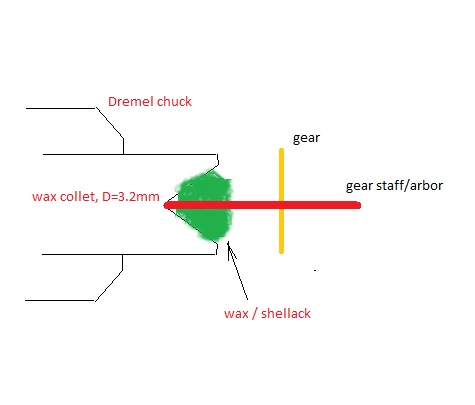
Well, You need at least a wax chuck and mount the gear in wax/shellack and make it centered while the glue is soft. It wont be concentric if mounted directly in the Dremel. I would do it like this. Take a 3.2mm diameter possibly brass rod and find its center in the Dremel. Turn a cone in the end. This will be concentric. Now add wax or shellack in the cone and while hot put the gear arbor in it. Then turn the Dremel slowly and with a toothpick align the other end of the arbor centered. I am using an AC speed regulator for my Dremel, or using the low speed stage. Try it first with a piece of steel not with the gear you want to reduce the pivot Important, dont take out the wax chuck before the job is done. You wont be able to mount it concentric again.
 1 point
 -
Hi Hzaidi3, welcome on board. Is this the first watch movement that you have taken apart? The reason I ask is that it's not one that I would recommend as a starter as they can be particularly fiddly. However, it is perfectly doable. To answer your questions; 1. For general oiling you need oiling pins like https://www.cousinsuk.com/product/oilers-3-in-1-af-swiss I would use either the extra fine (red) or the super fine (black) for most of the oiling on a 5M42. You will also need a good loupe so that you can properly see what you are doing. One of the most common mistakes with oiling is to use too much oil and being able to see what you are using helps to avoid that. 2. The pivots n quartz movements particularly can be very difficult to align and really all you can do is to keep trying, gently nudging each wheel until everything is in place. An oiler (clean) is actually quite a good tool with which to gently coax things into position, and again, a good loupe will help you to see if the pivots are seated or not. Only tighten the train bridge screws up once you are sure that the pivots are correctly aligned else you run the risk of breaking the pivots. There is a trick to getting the rotor to behave. Place a screw against the rotor pivot on the opposite side of the main plate to the side the rotor installs so that the magnetic rotor holds the screw in place. In so doing the screw also helps to hold the rotor in place. 3. When it comes to syncing the hands to the date change, without the hands installed rotate the crown (in time setting position) until the date just changes, then install the hands pointing to midnight.1 point
-
Stoo, have a close look at the hook on the main spring arbor using your loupe. That should give you all the information you need to determine the orientation of the spring in the barrel.1 point
-
Why oh why oh why???............luckily it didn't go through to the dail side...must have been at the hands of a precision WD 40 oiler..they used the straw!!...1 point


.jpg.6225a64433578a11e0218b27c20b13f5.thumb.jpg.d82b0cd1e370f3a3a59a06afa957d184.jpg)