Leaderboard


Popular Content
Showing content with the highest reputation on 10/04/19 in all areas
-
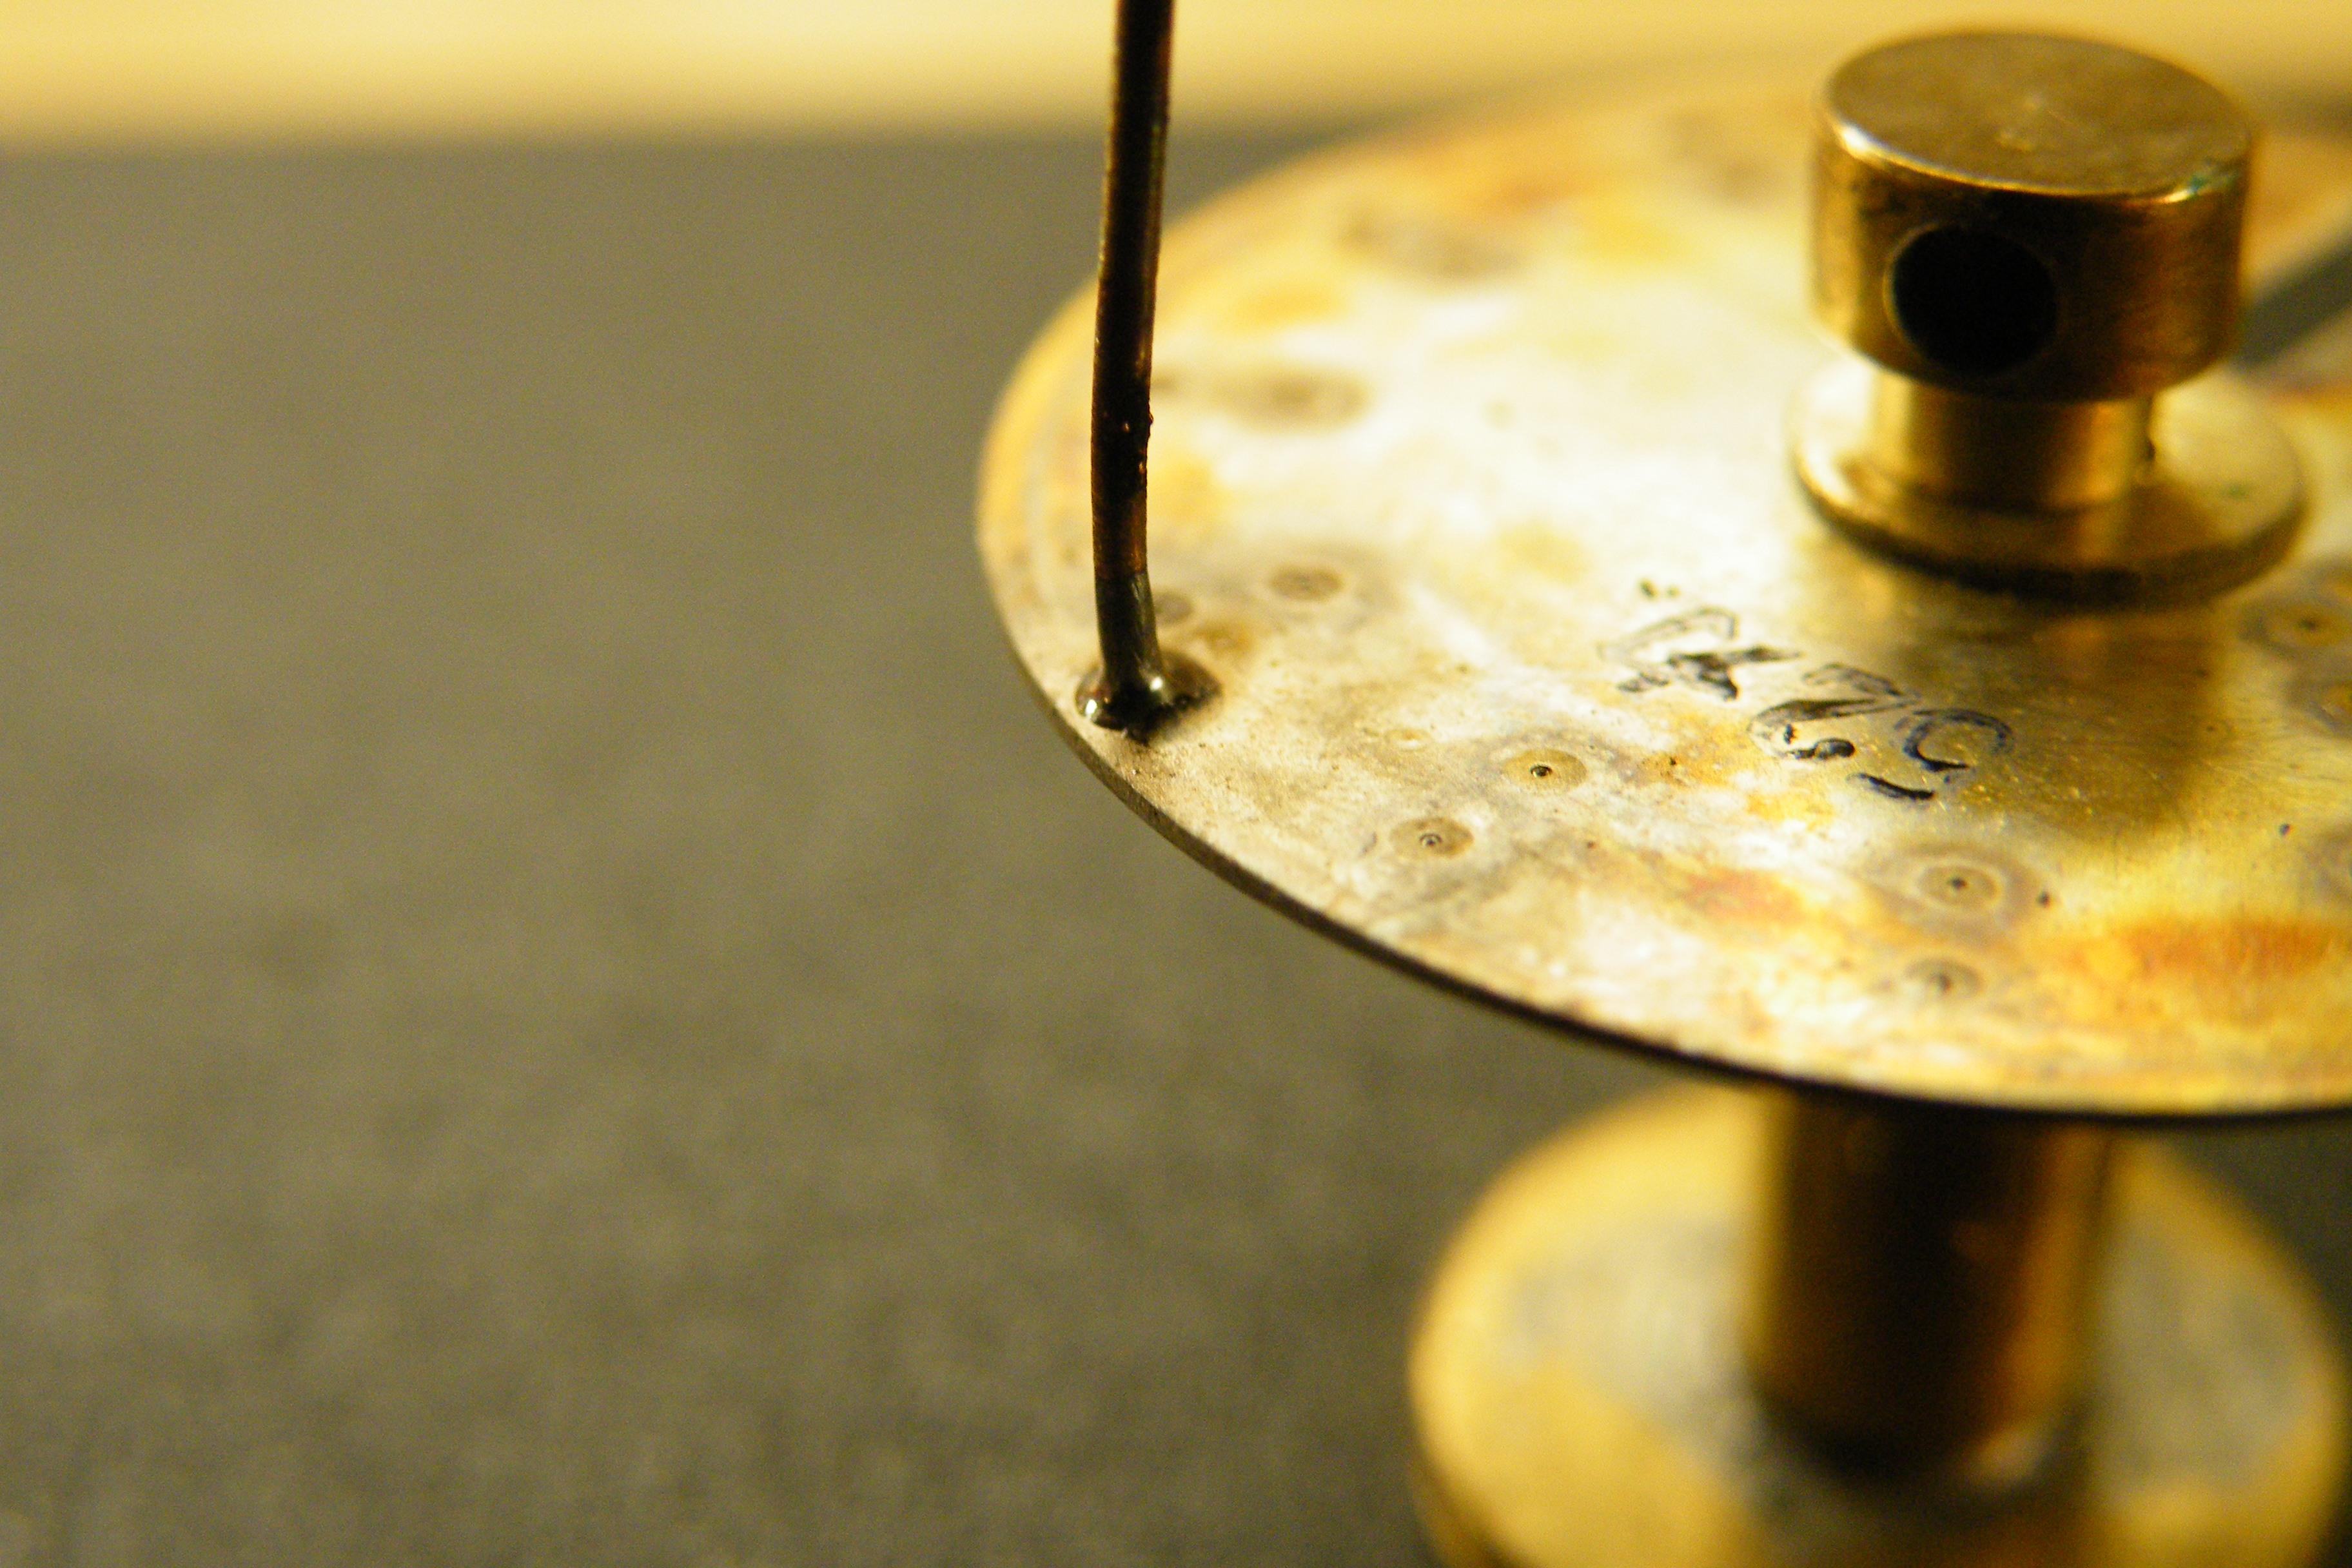
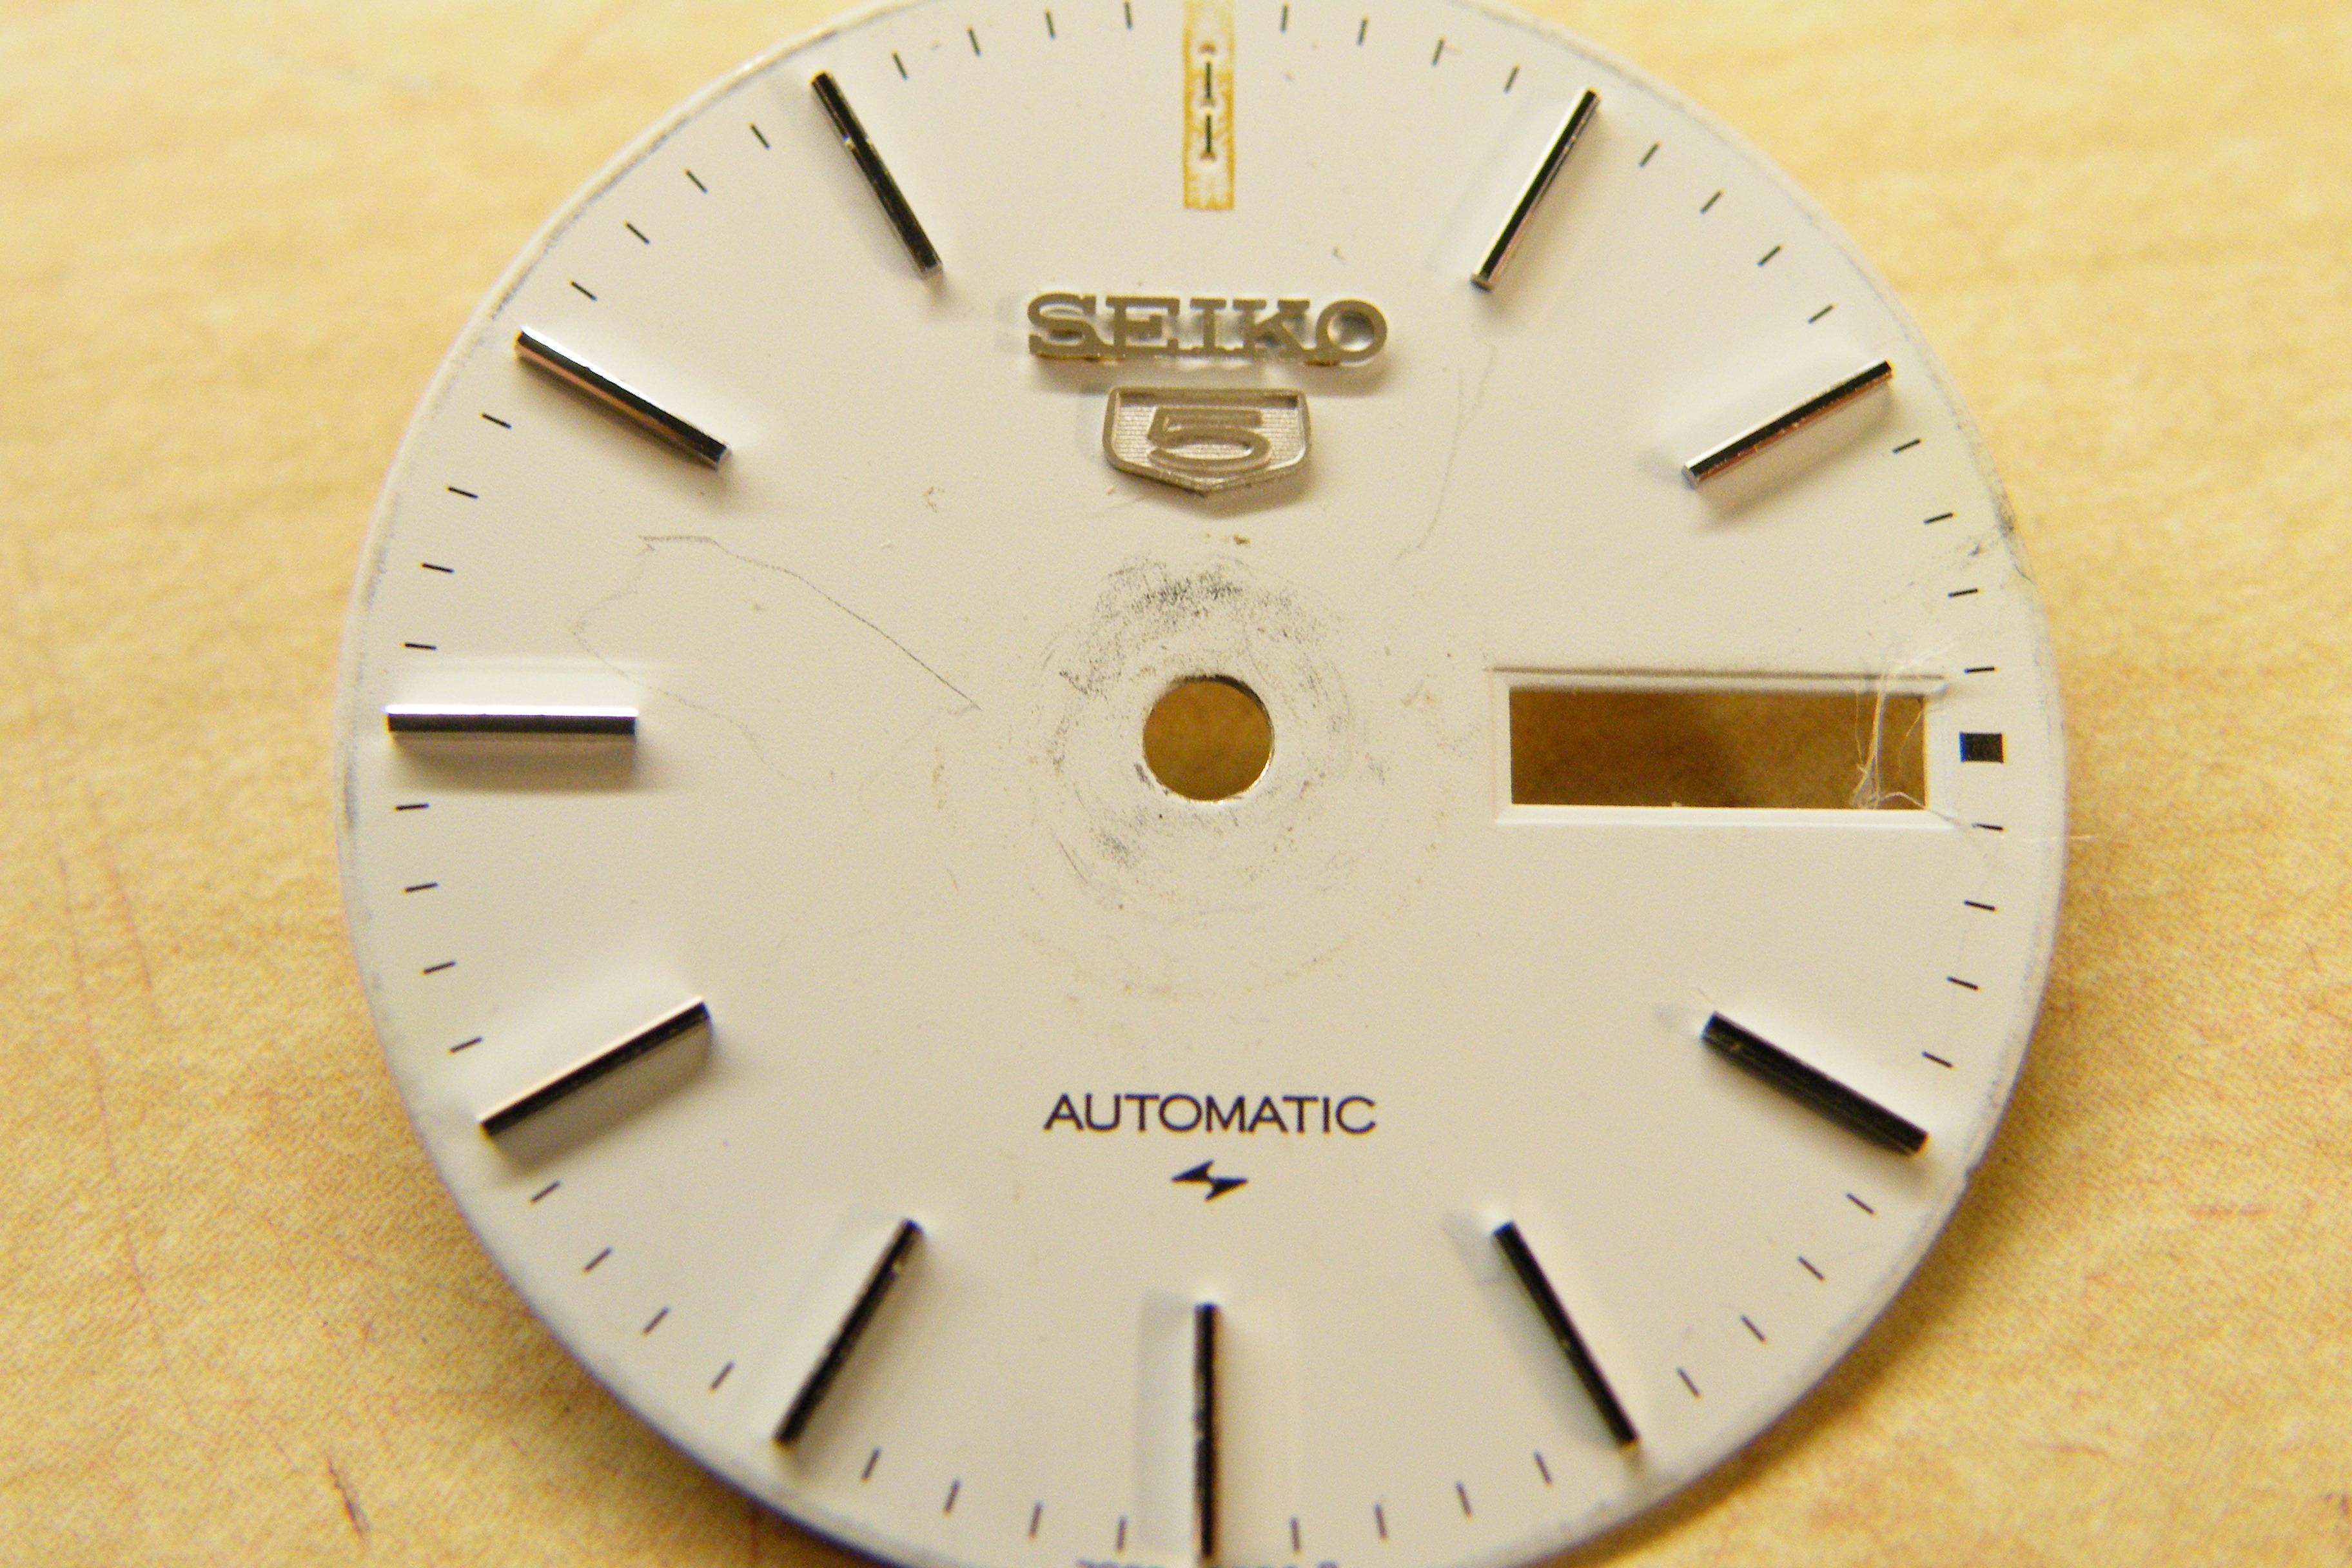
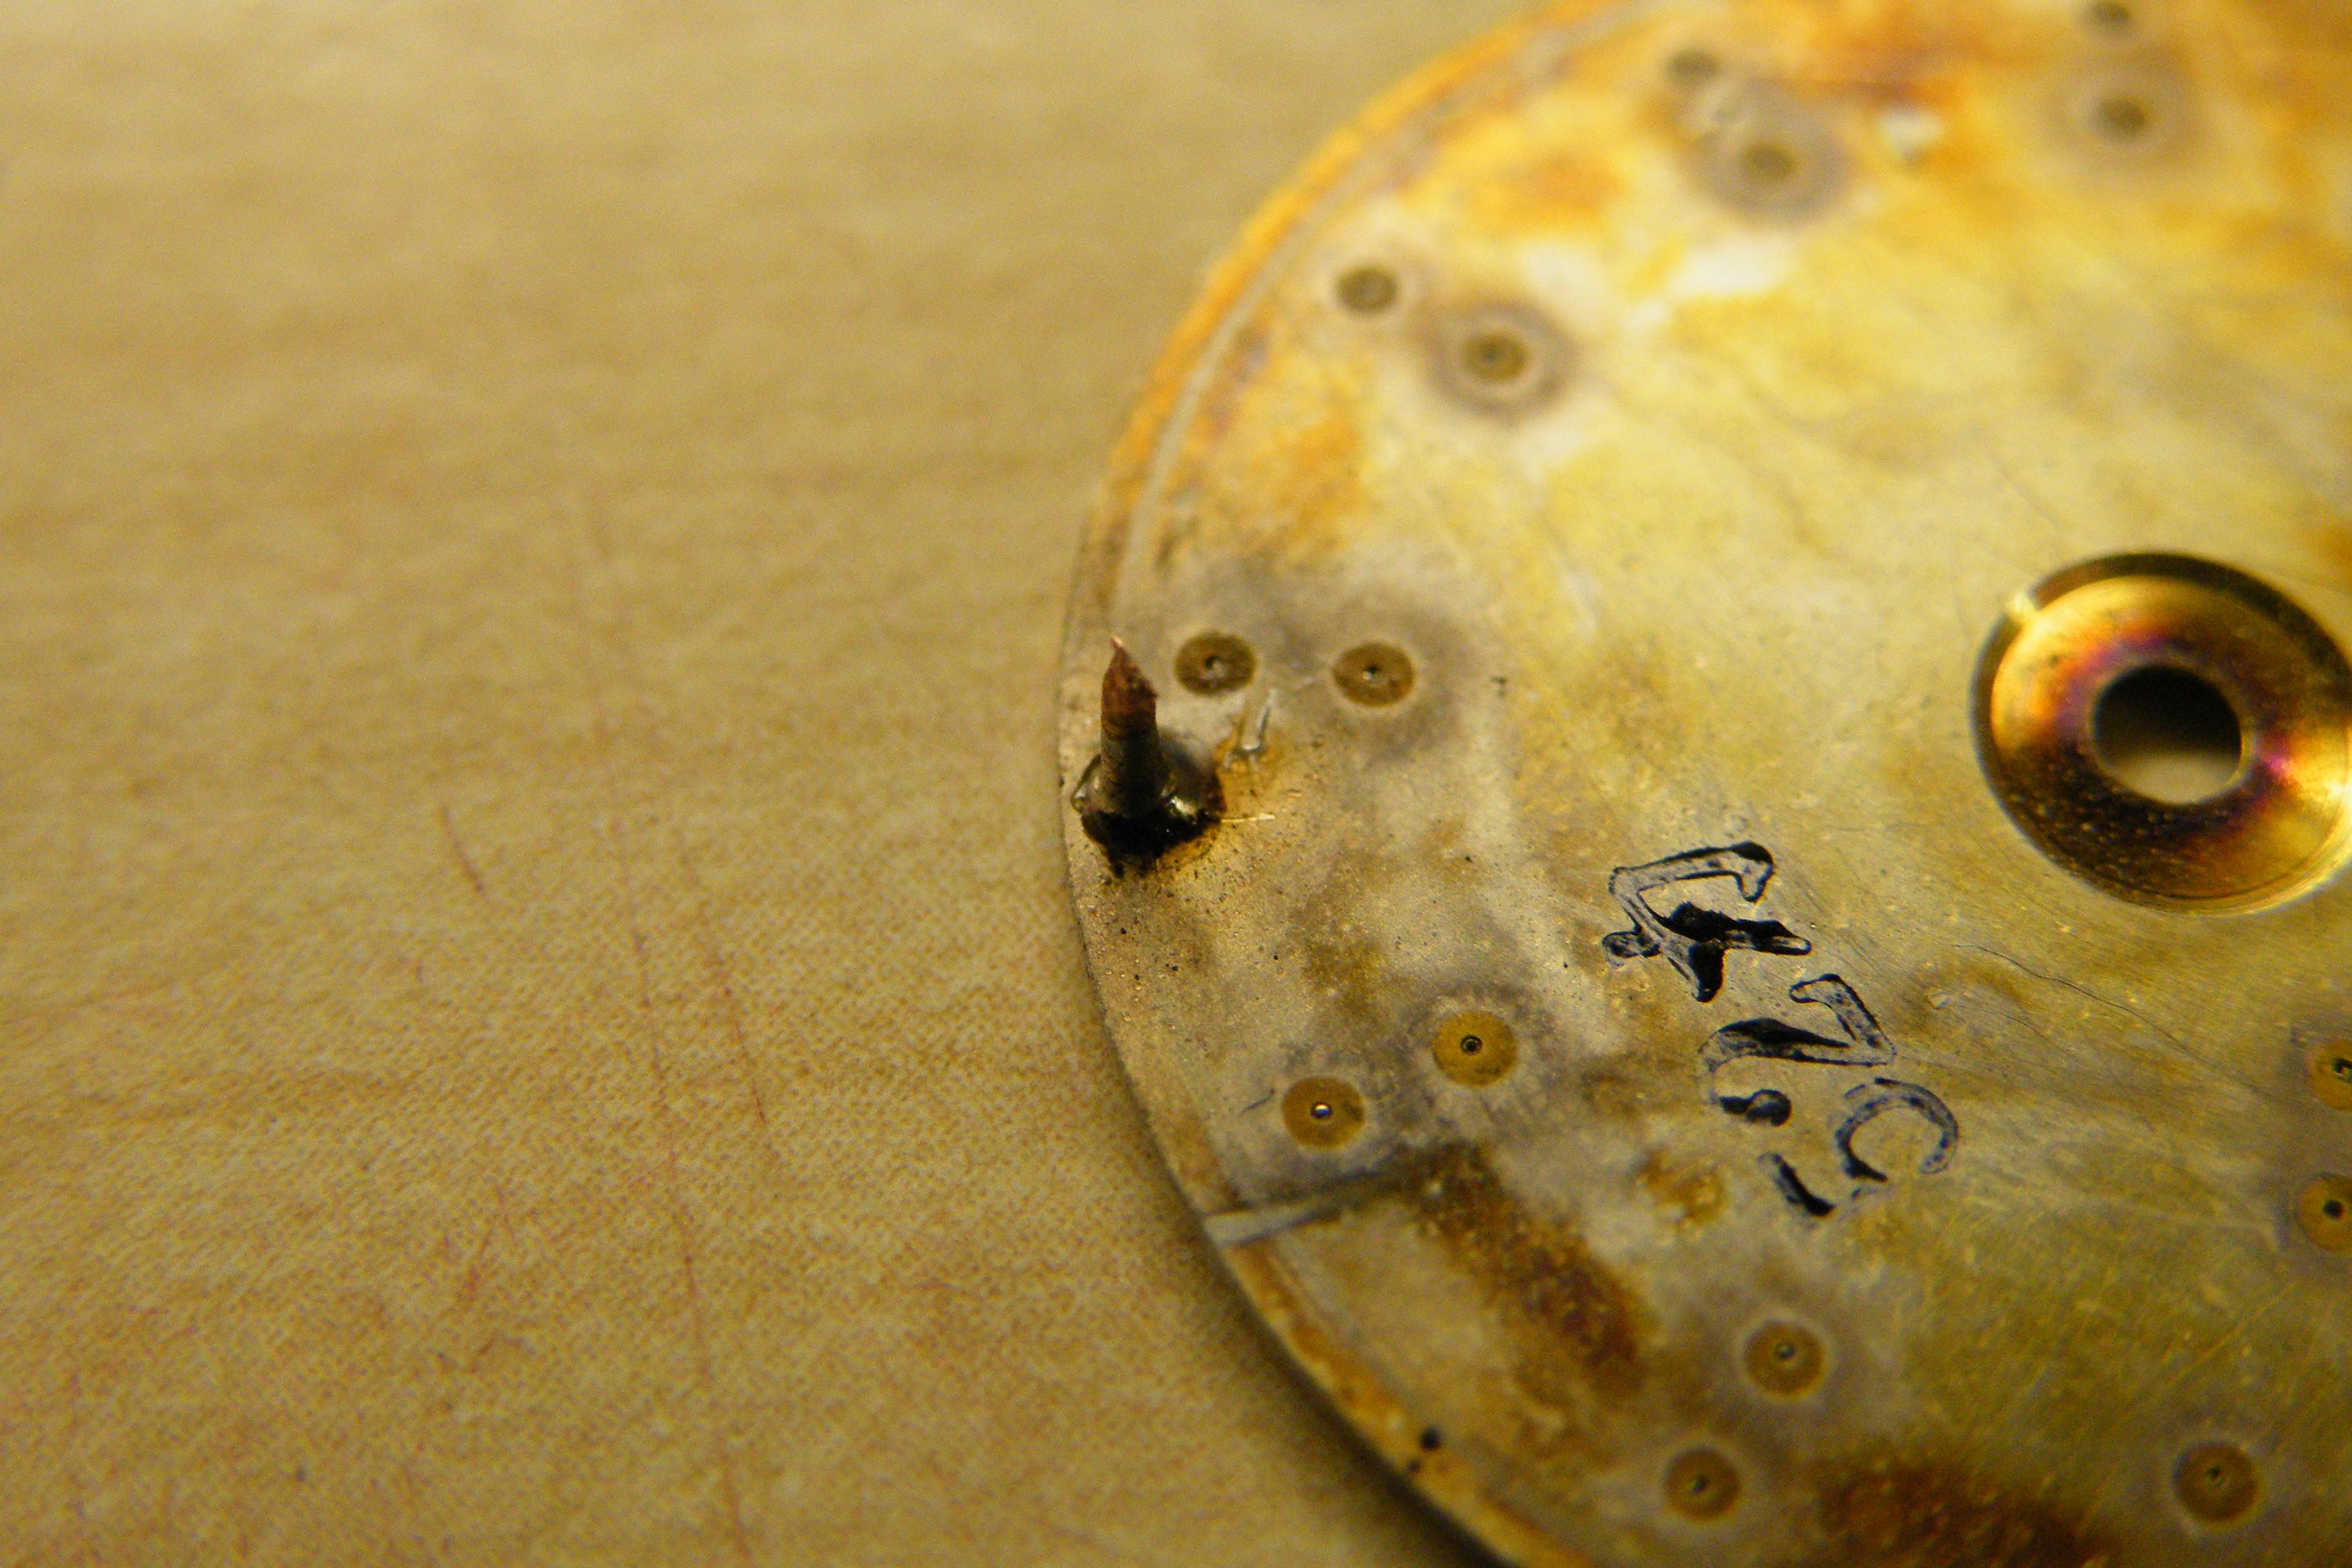
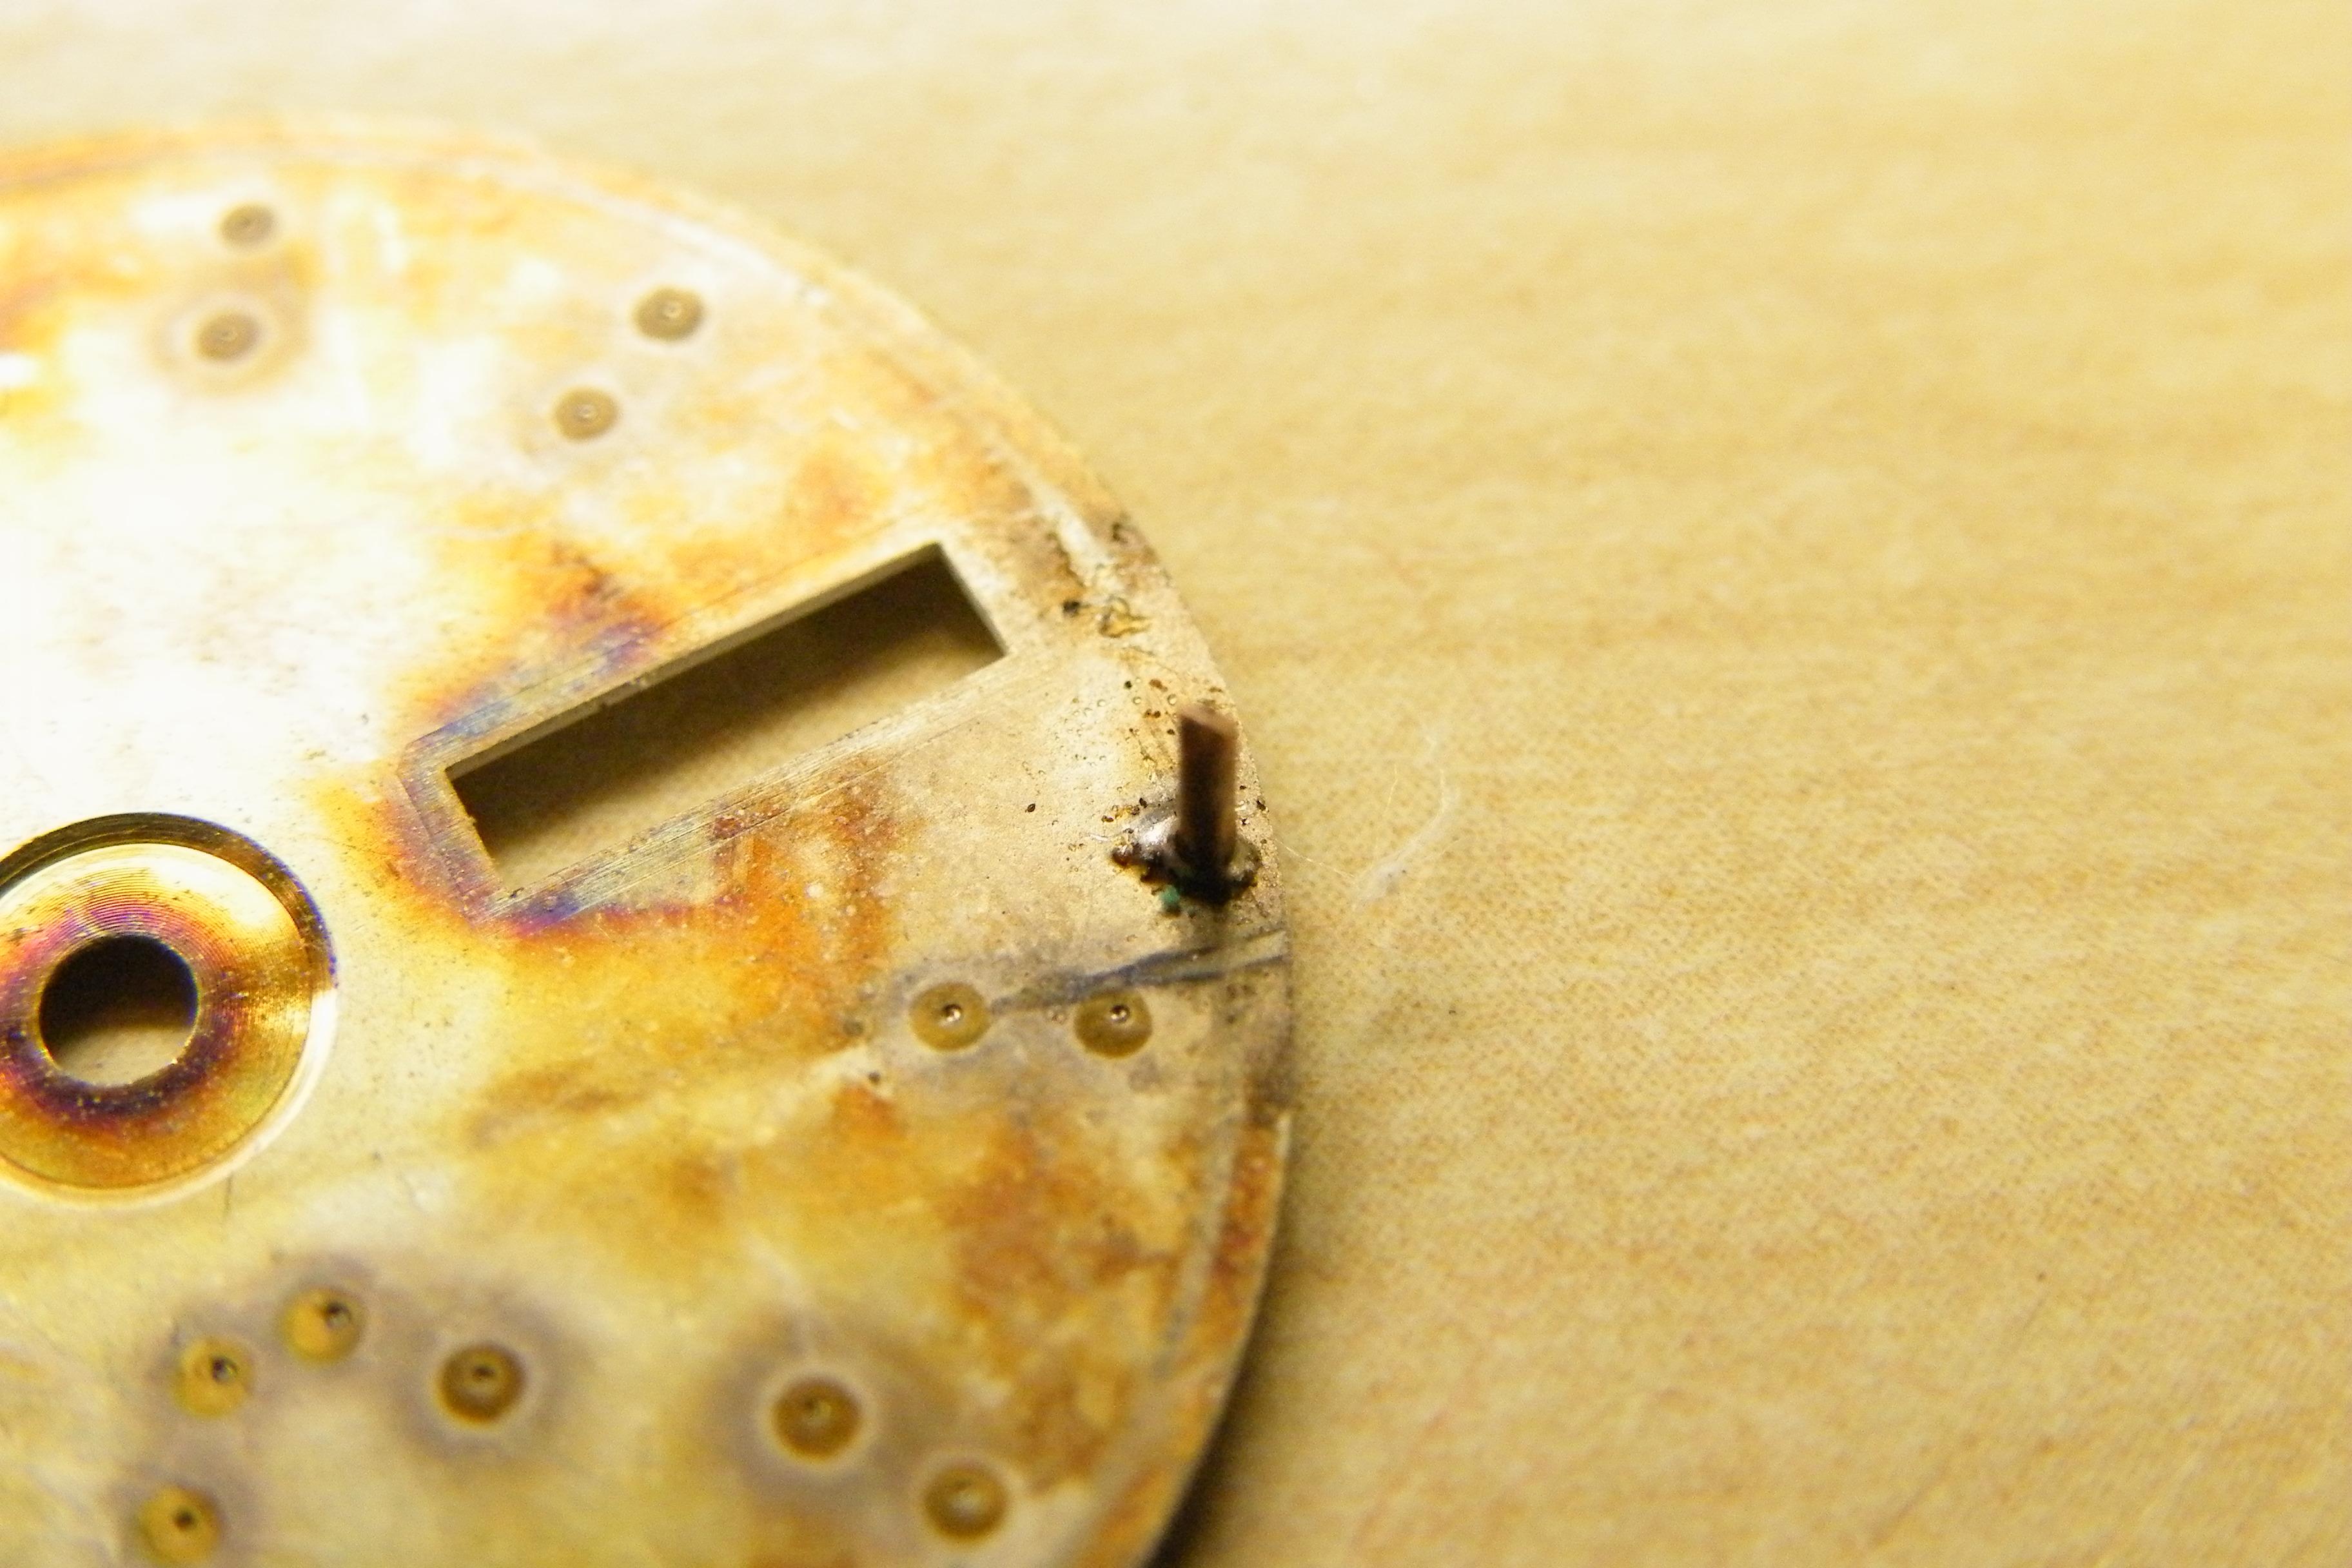
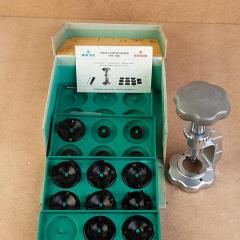
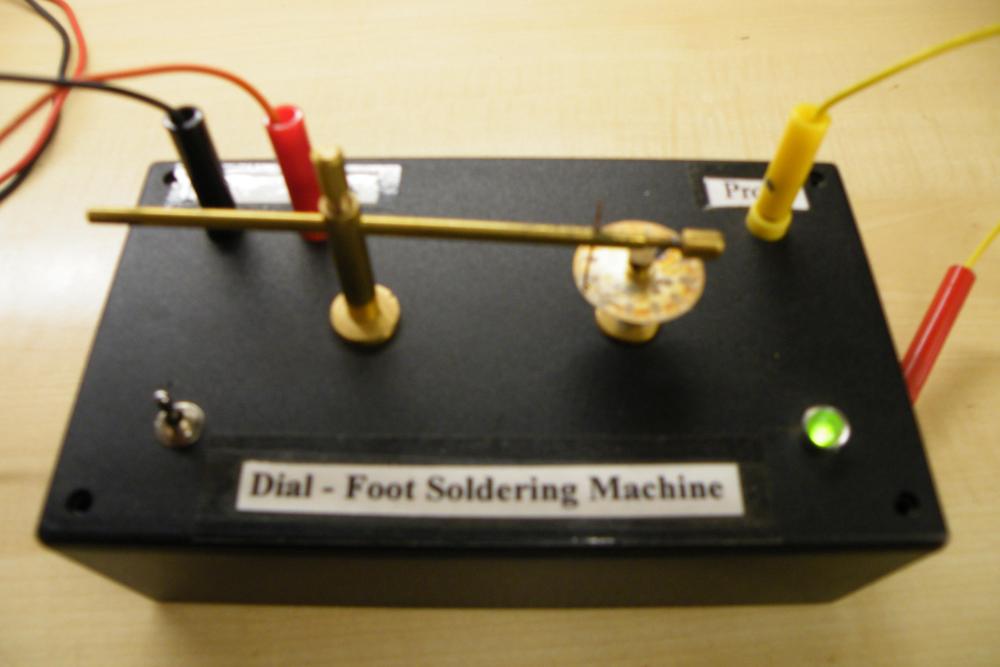
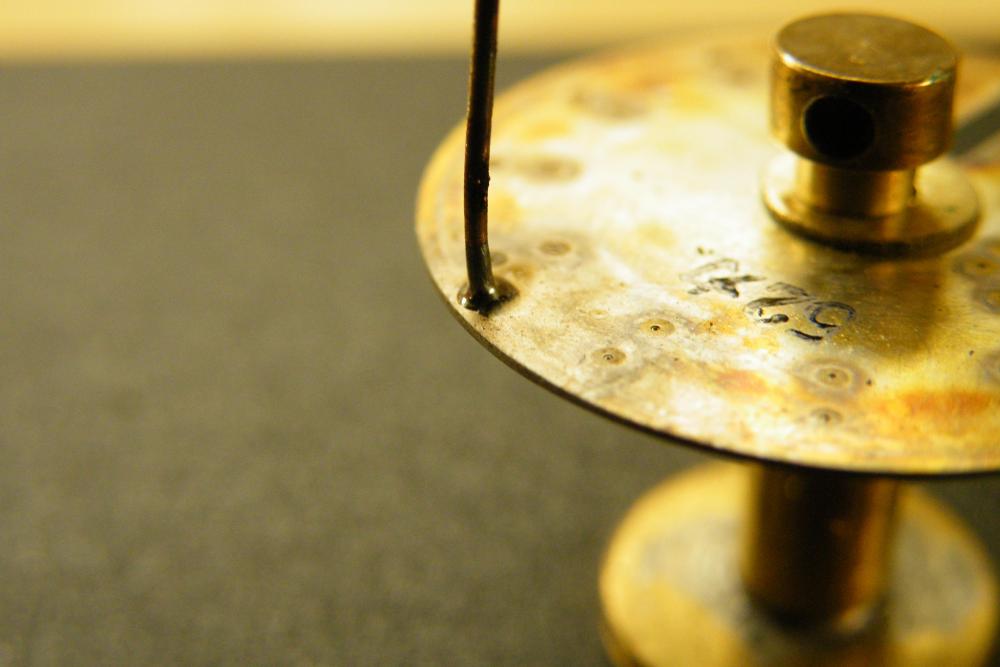
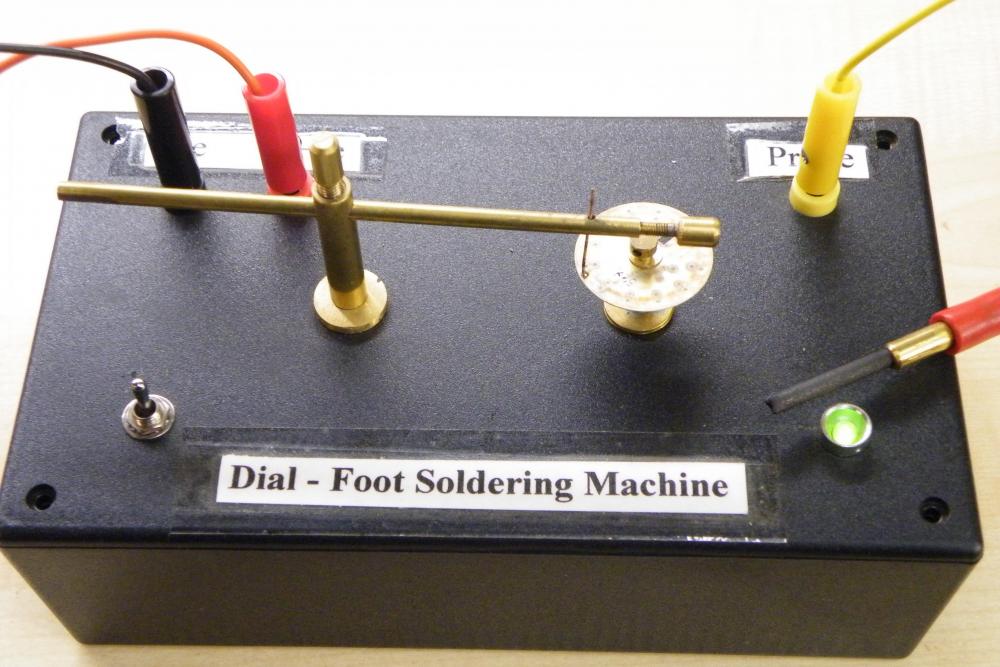
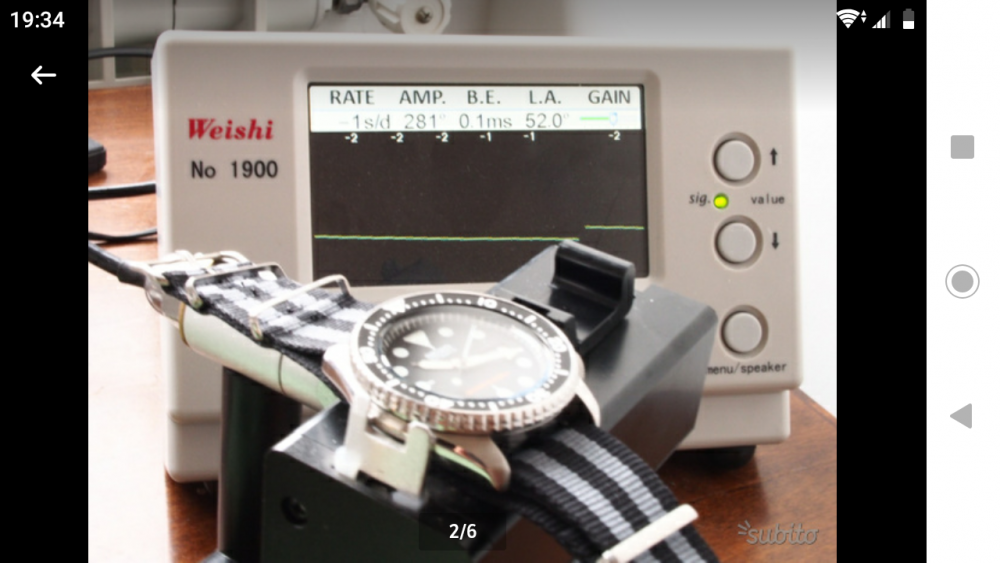
Hi Working on a seiko 7009A today, a bit of a wreck. Dial loose intermediate date wheel u/s, all back up and running but had to sort out the dial so I dug out the dial foot machine build a couple of years ago, as you can see by the pics it still works and no marking on the dial. It was build from readily available parts. The power source is a car battery charger which plugs into the unit. the probe is the carbon center core from a battery. I belive it goes under the heading of cold soldering, basicaly it provides an arc at the bottom of the dial foot wire where you place some flux and bits of solder. the resulting arc melts the solder and attaches the foot wire. Any body interested can find the details on the net. The origionator of this particular design was one Dirk Fassbender the details he put on the net are still there or alternativly there is a book, Quartz watch retro fitting by Wesley R Door, available in America but not so easy over here in the uk. I have some pictures I copied from the net that give the basics. All it is is a transformer providing the Arc not hard to build and a very hand tool to have in your collection..

 5 points
 -
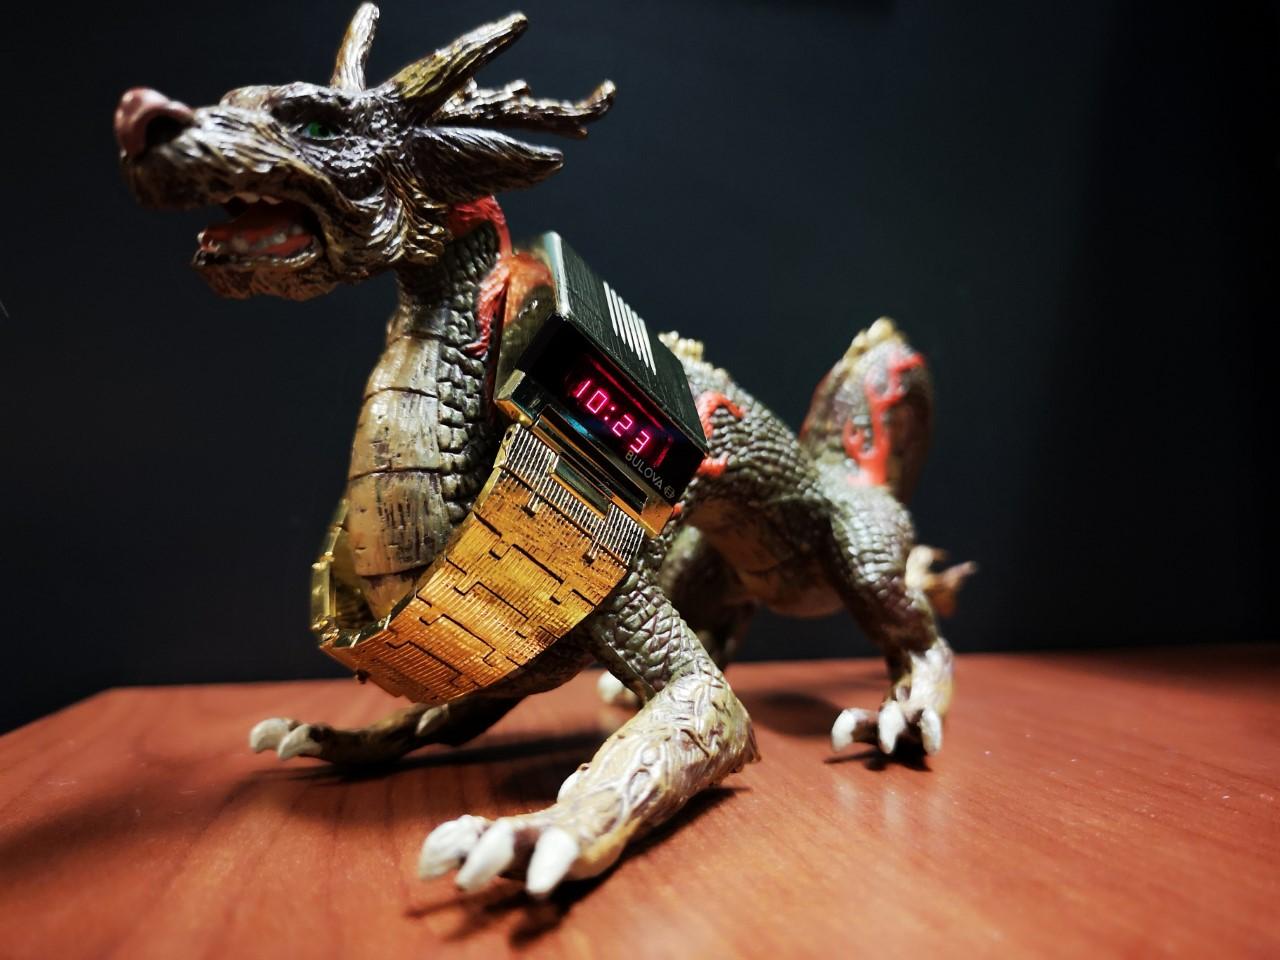
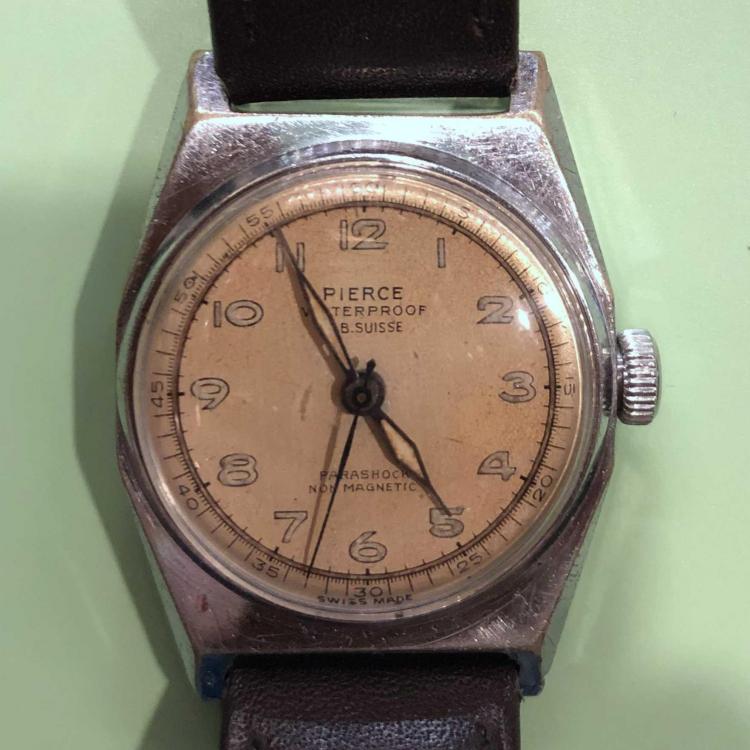
Just wanted to show one of my favorite pieces in my collection. I have had this watch for almost 10 years and I love it more everytime I wear it. I was very lucky to find this at a flea market sale for $100. I only wish I could find an original bracelet that doesnt bankrupt me!
 2 points
 -
Here a little walkthrough the servicing of my Rolex 5513, calibre 1520. Sorry for the funny english, I'm no native speaker. I'm not a professional watchmaker, this is only amateur-work. I start by opening the case, taking off the automatic device and disassemble it. Now I remove the movement and take off hands and dial. Removing the cannon pinion. Now it's time for the balance and the pallet fork. Continuing disassembling with ratchet and train wheels. Next one is the barrel bridge. I decided to use a new mainspring. Now it's time for the keyless works. On the other side of the movement the spring for stopping the balance. Removing the screws for the movement and the dial. And reassemble the balance for protection reasons. Ok, everything taken apart, ready for cleaning. Best regards Erik1 point
-
Hi the regulator pins are not meant to be bent as this will effect the rating of the watch as the gap in which the balance spring operates will be incorrect. In your case the boot shaped leg has to turn thro 90 deg to release the spring. Some of these legs are tight, Use a screwdriver which fits the slot and place the balance cock on a firm surface and with firm pressure attempt to turn the leg. If you manage this there is just a chance you will be able to stroke the fine pin upright with fine tweezers, stroke it along its lenght carefully do not attempt to bend it straight or it will break off.1 point
-
Thanks to all who helped with this post. Unfortunately none of the offered solutions were suitable for me. I eventually ordered a pack of 5 Kif 3-2 (elastor) from Cousins as the Kif6-1 is no longer available and donor movements could not be found or were extremely expensive for just 1 tiny spring. The Kif3-2 is only very slightly different in design and the overall length is 1.5mm cf 1.6mm (they are unbelievably tiny) but it fits and sits ok. I did have some fun trying to get it to engage and managed to bend one out of shape, so having 4 spares turned out to fortunate. I managed to fit using the method suggested by another forum member (cant find who! but thanks for the input), which was to fit the jewel and lay the spring in position on top and then push it into hinge part of the jewel holder. Easier said than done, I failed with tweezers and eventually managed with a 0.5mm screwdriver after about 1.5 hours of trying!!! The balance seems to be swinging fine so I now need to re-clean and check all is well before final assembly. Now having a few days winding down rest from this project and doing something a bit easier !!!1 point
-
Hi I have got one almost the same diesel but unfortunatley its is dead given to me for parts but havent the heart to strip it down, I could find no technical data on this watch so in the box it stays for now. I think it was adiesel BZ7080.1 point
-
This pdf will help you to understand the working of the strike side. You say I should add that the gear train does spin but won't stop, is it escaping one tooth at a time from the pallets? Levers-2 (1).pdf1 point
-
Welcome, very nice collection...love the jump hour watches1 point
-
work of a professional, well done....1 point
-
maybe this can help?411_920_complet_2208.pdf1 point
-
For fitting the gear to the rotor, you don't really need a special tool, my staking set doesn't even have one so big! You can punch it out from outer side (which faces the inside of the caseback) by using a suitable blunt punch. Even a wooden dowel works.. For installing you can also use a suitable wooden dowel but relieve the inside first to clear the pivot. Just go slow and constantly check to make sure it goes in straight. Anilv1 point
-
I think they mean something like a jeweler/dental burr to cut the tube a bit. We did the same on tubes to hold repeater components in production but just used round burrs. Normal burr angles are 90 and 70, there are 60 degree chamfering tools a bit larger (Eternal has them cheap). But really you just want the screw to get "tight" a bit lower. If it was me I'd just grab a round burr that hits kinda tangent on the 60 degree angle and go slowly. The tool needed to increase freedom seems way more complex. For that I'd chuck it on a faceplate but I have a dedicated setup for that and it'd take about 3 minutes plus possibly grinding a lathe tool and degluing time.1 point
-
Hi and welcome to the forum. It would be a boring world if we all liked the same things, Me if it ticks I like it.1 point
-
An eclectic and interesting collection. Very nice!1 point
-
Welcome to the forum.1 point
-
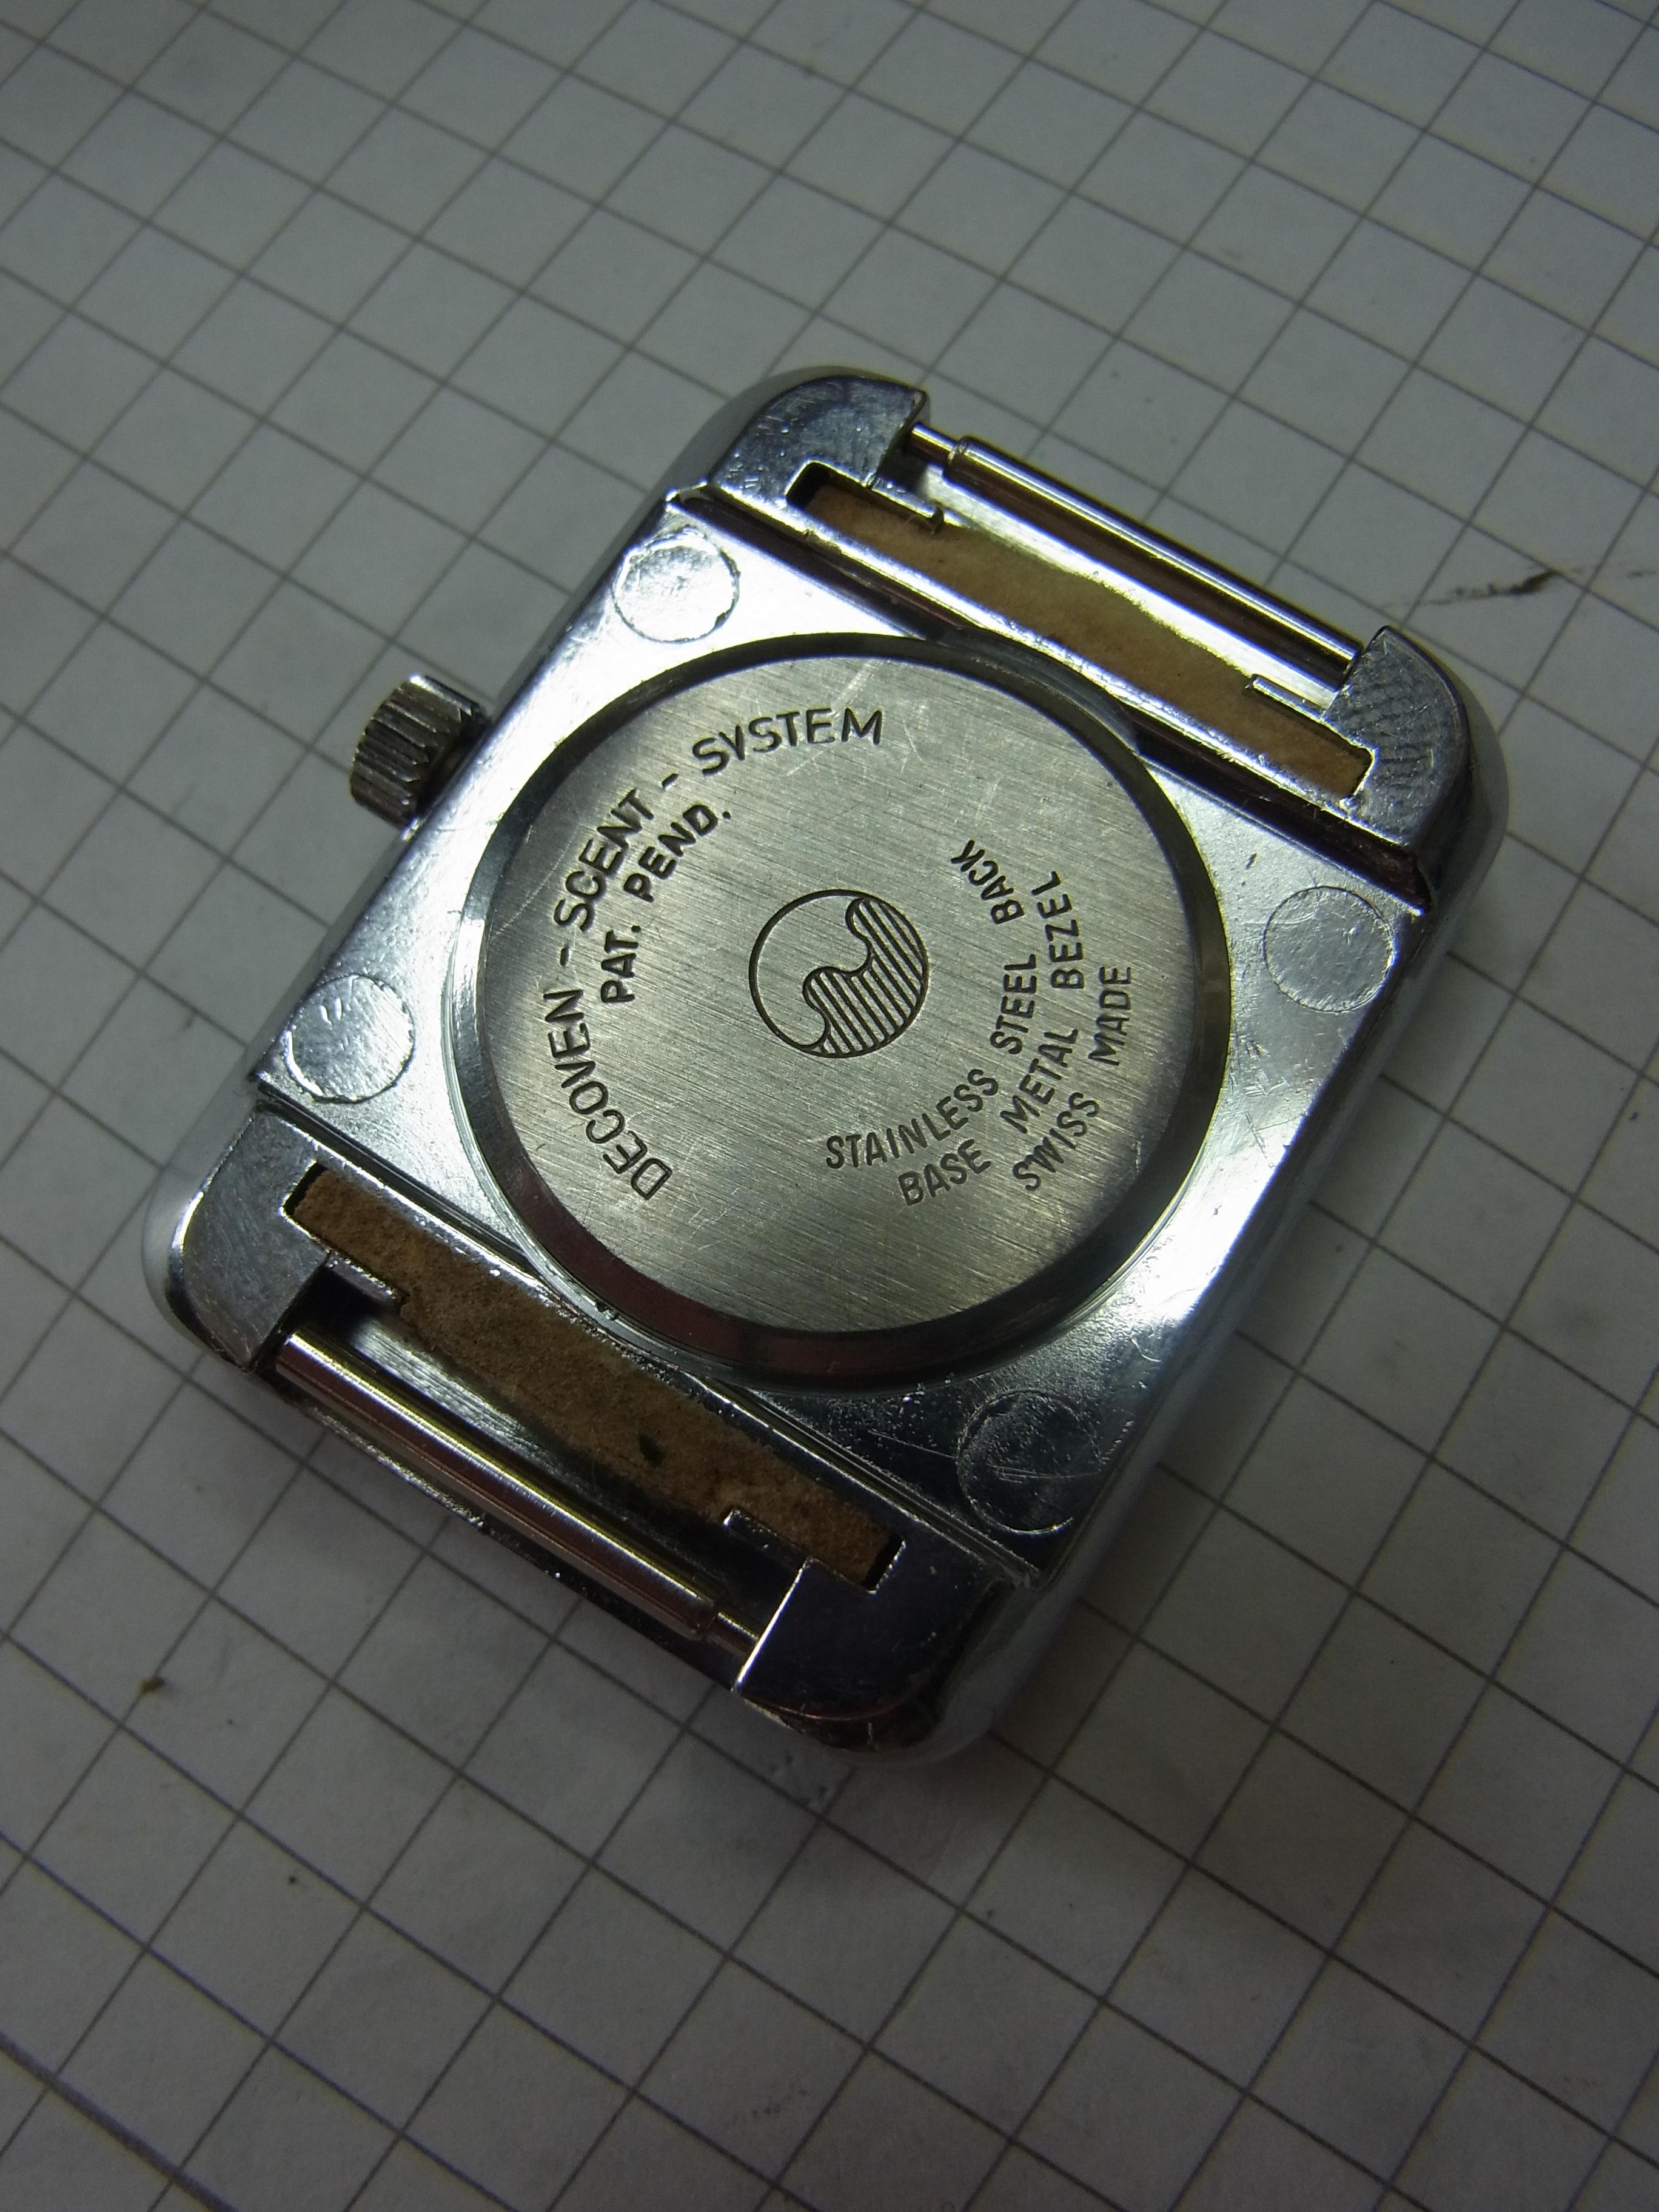
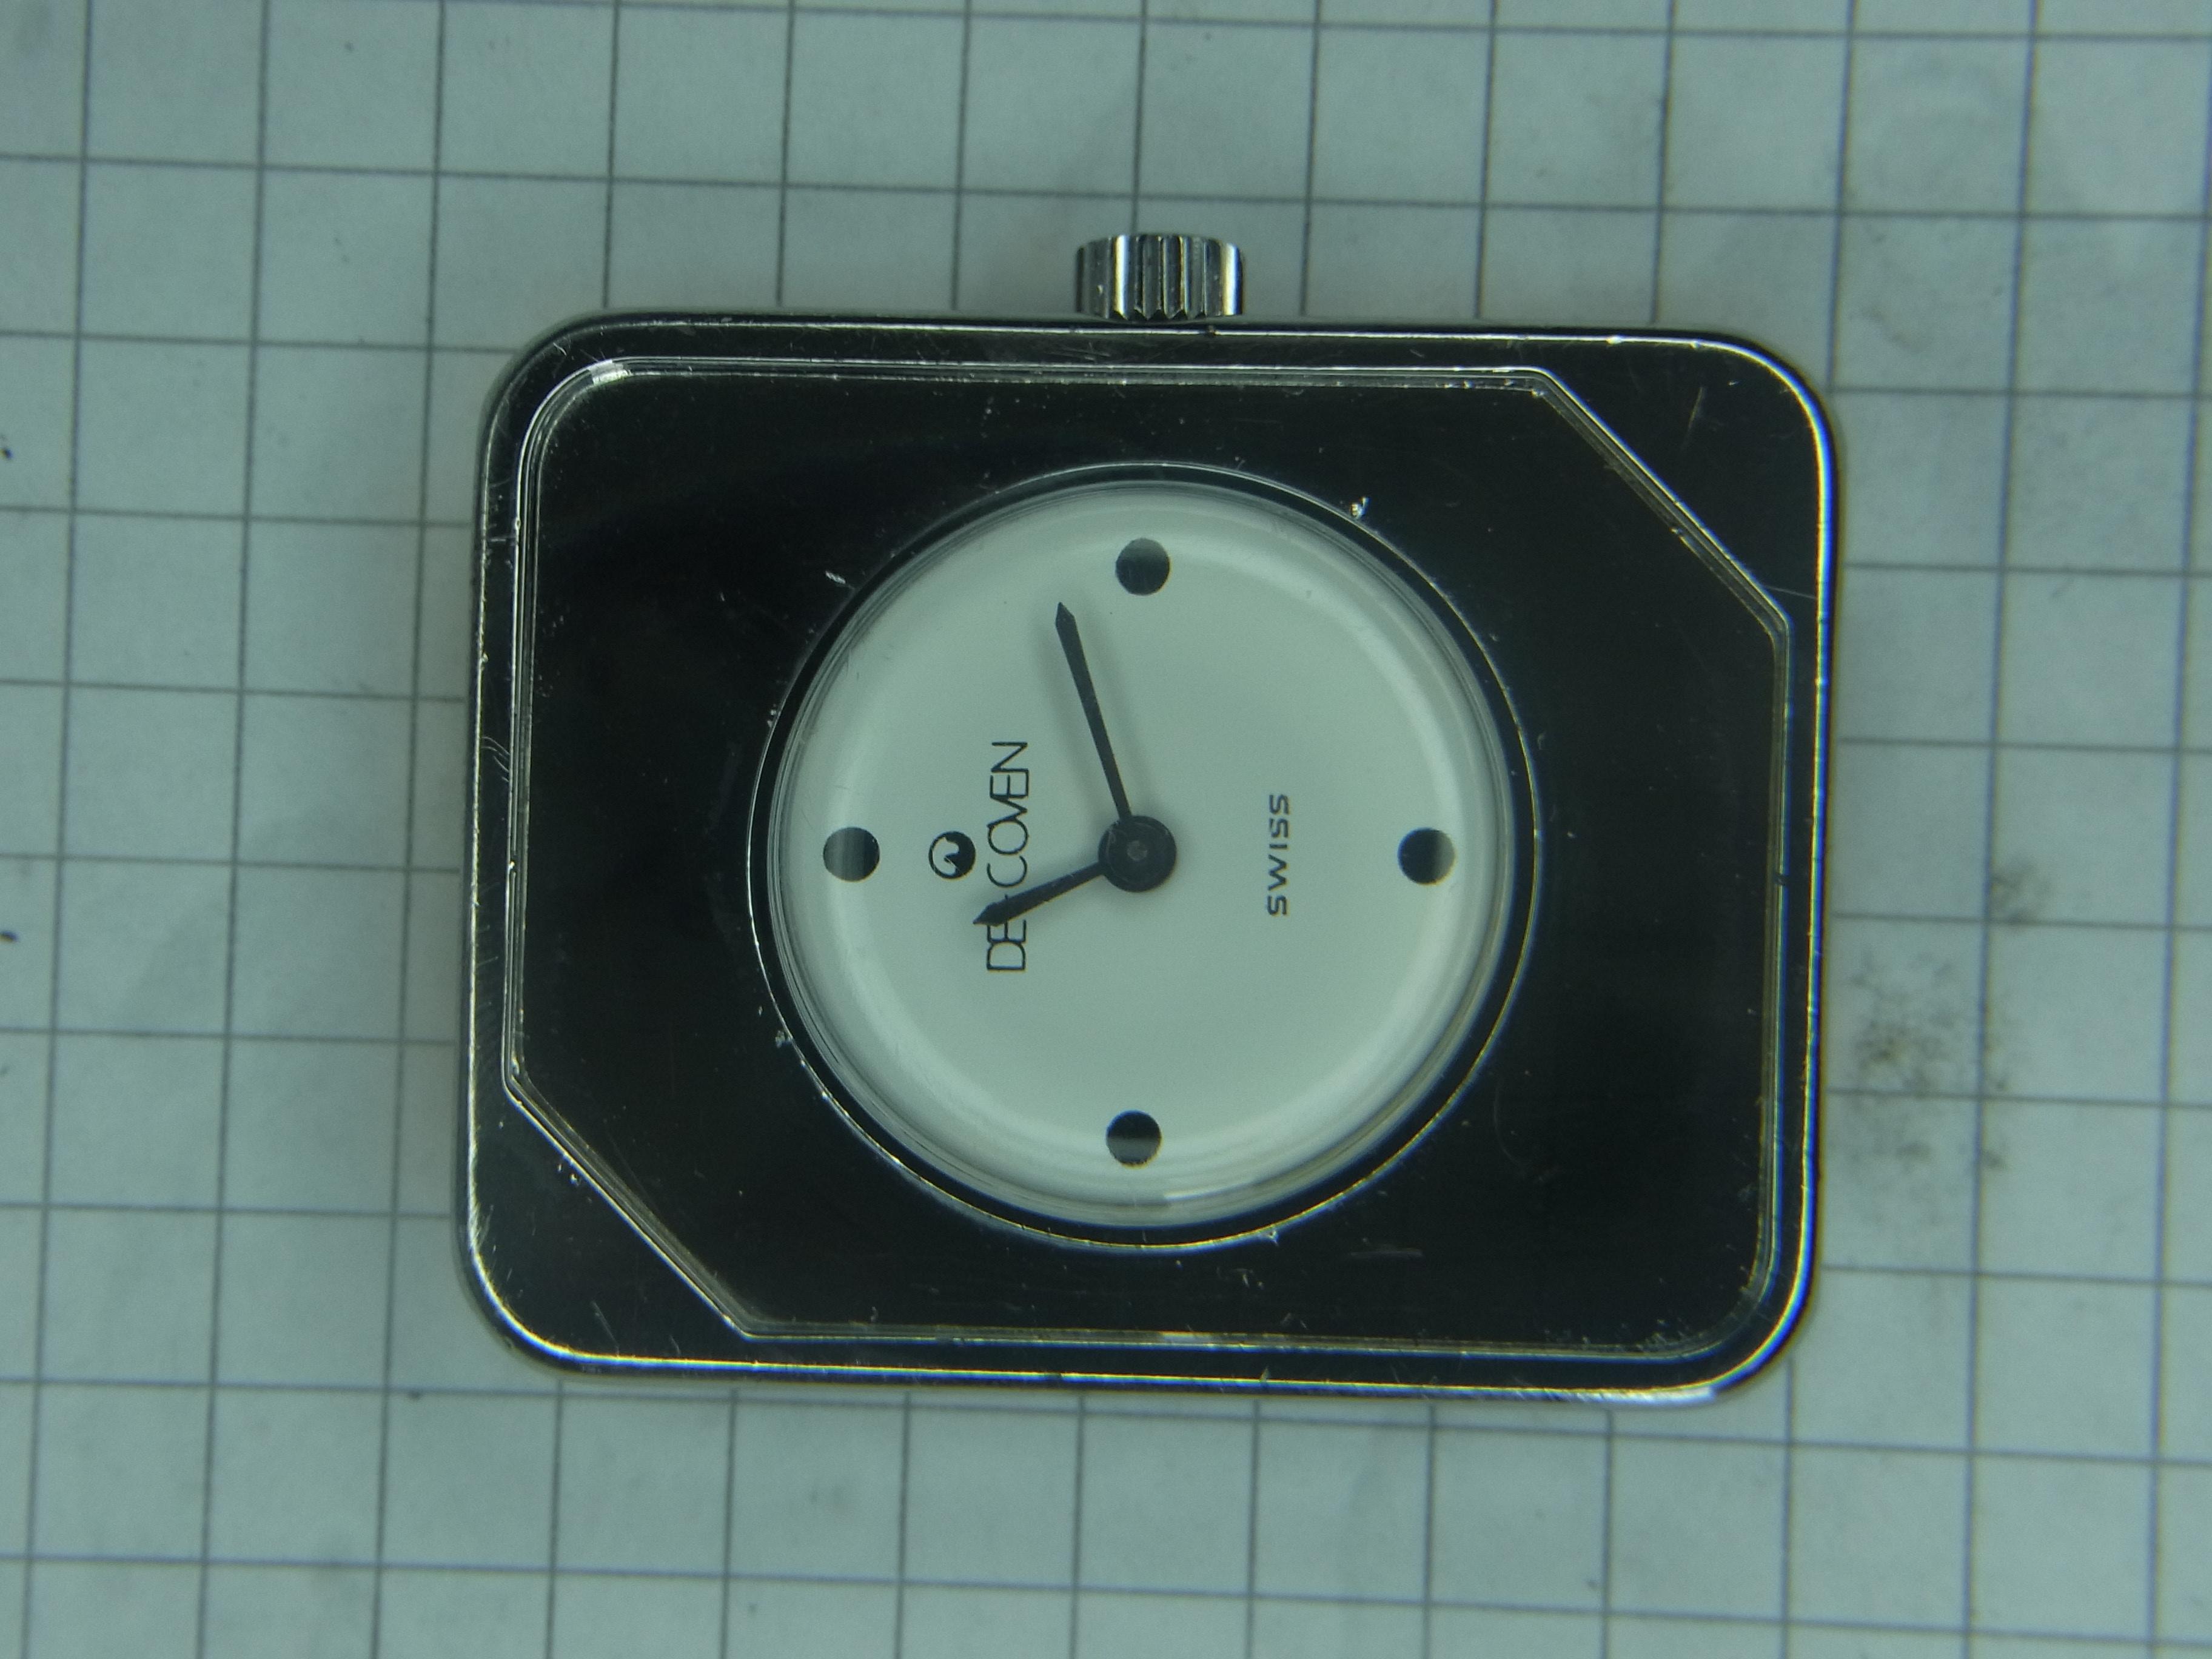
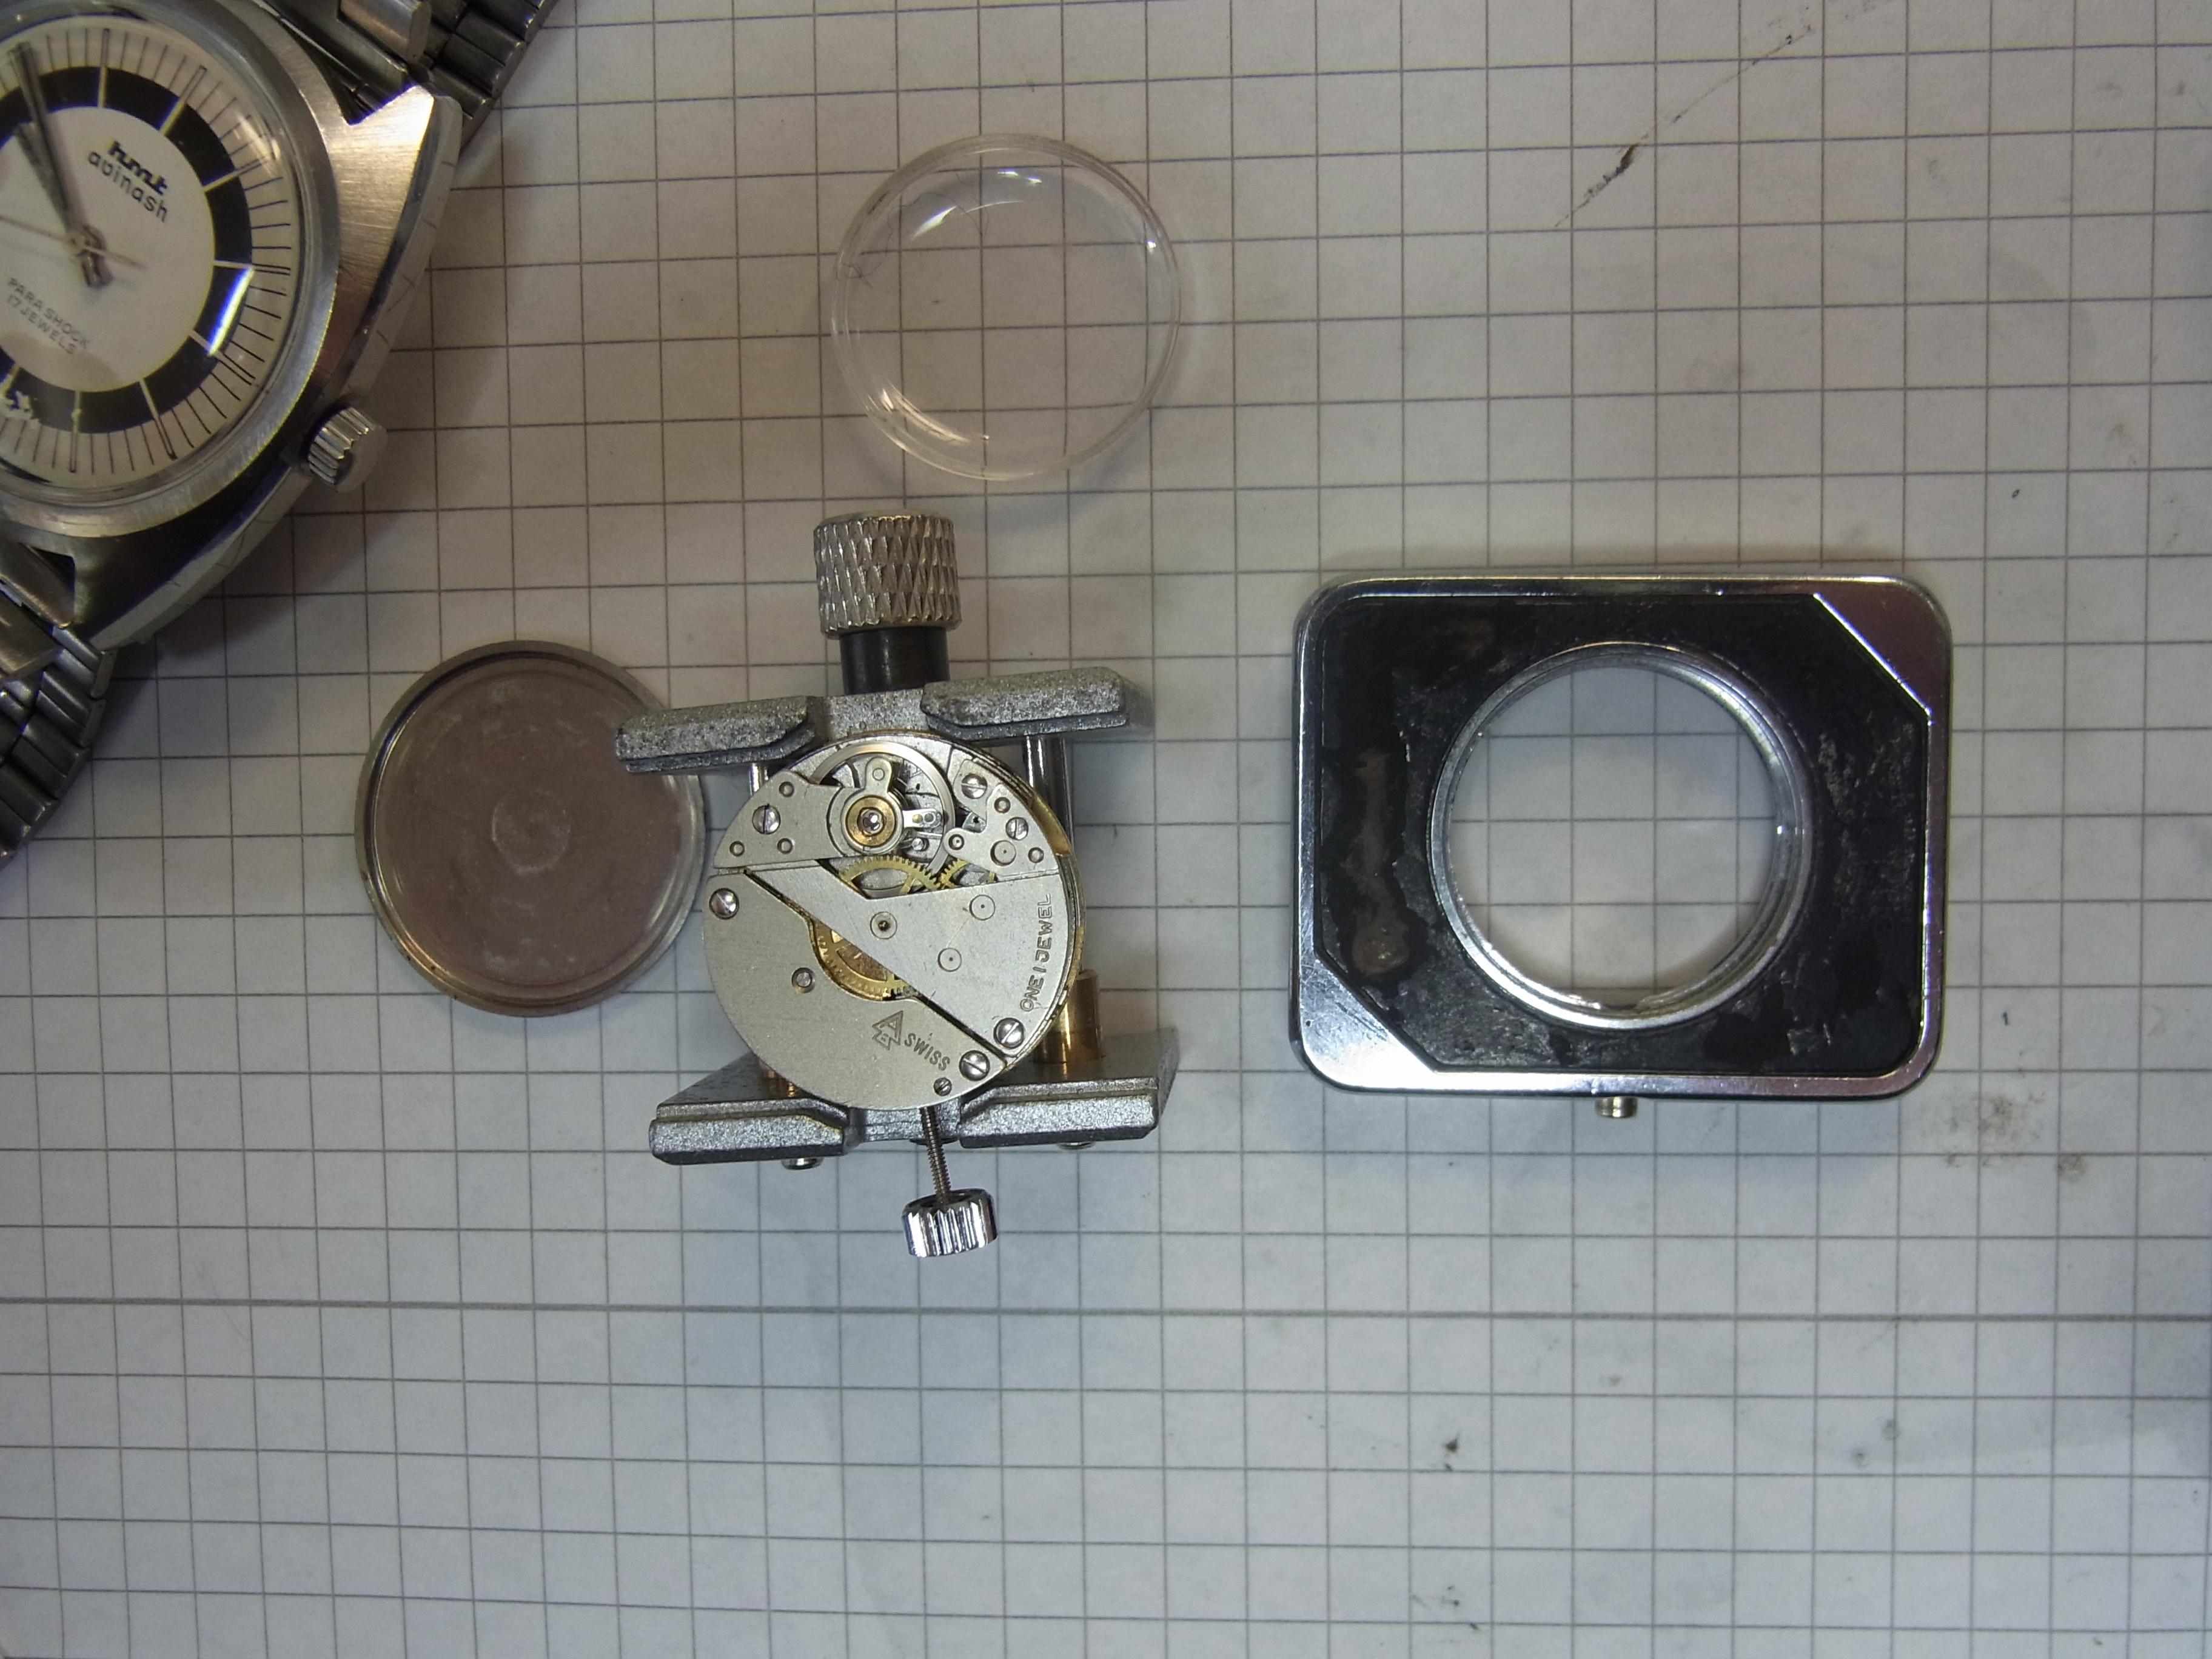
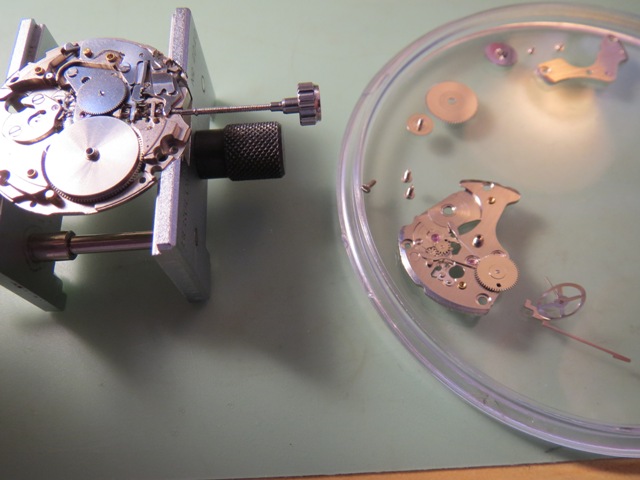
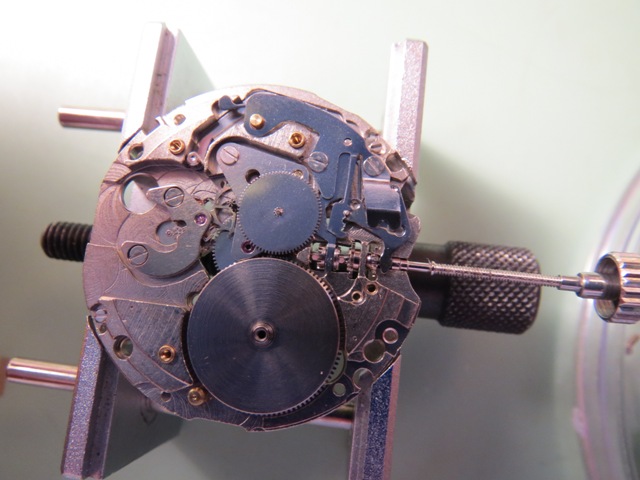
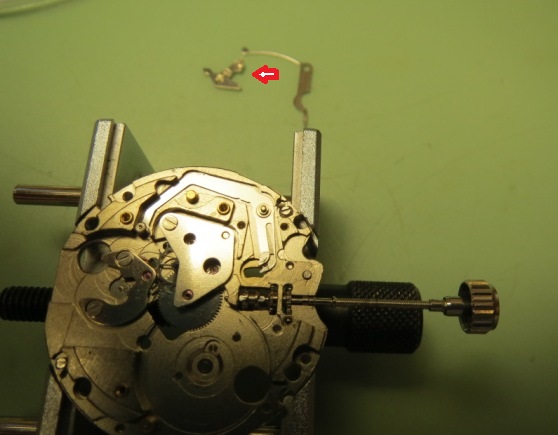
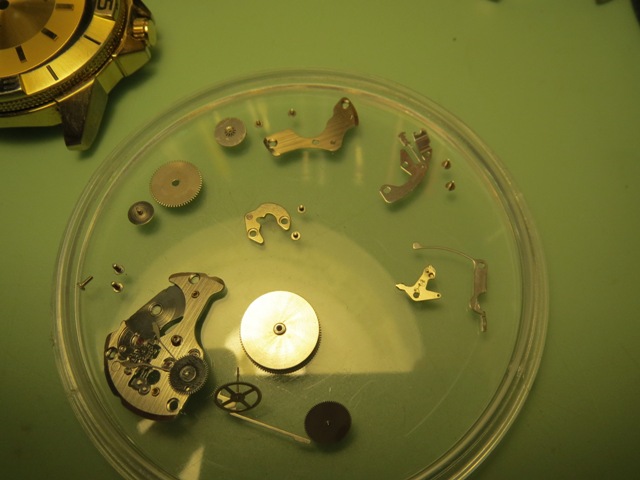
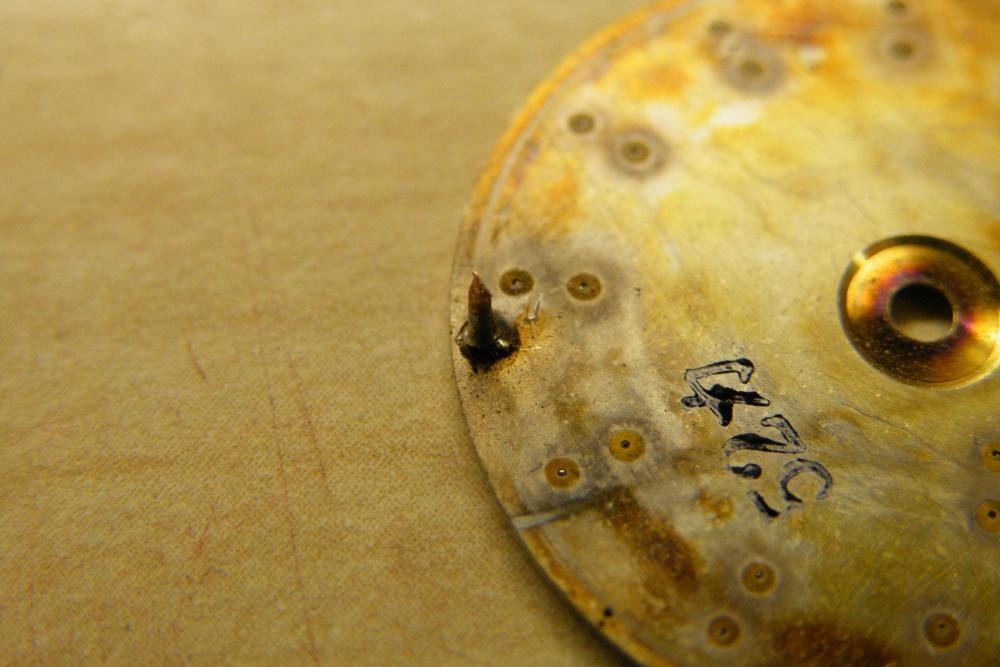
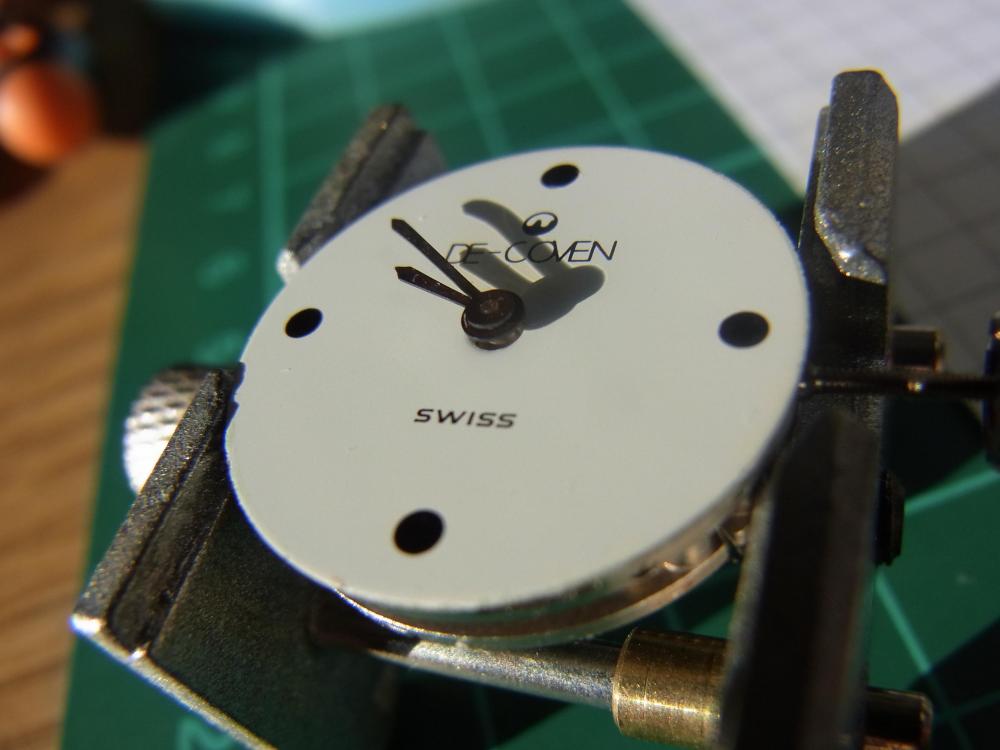
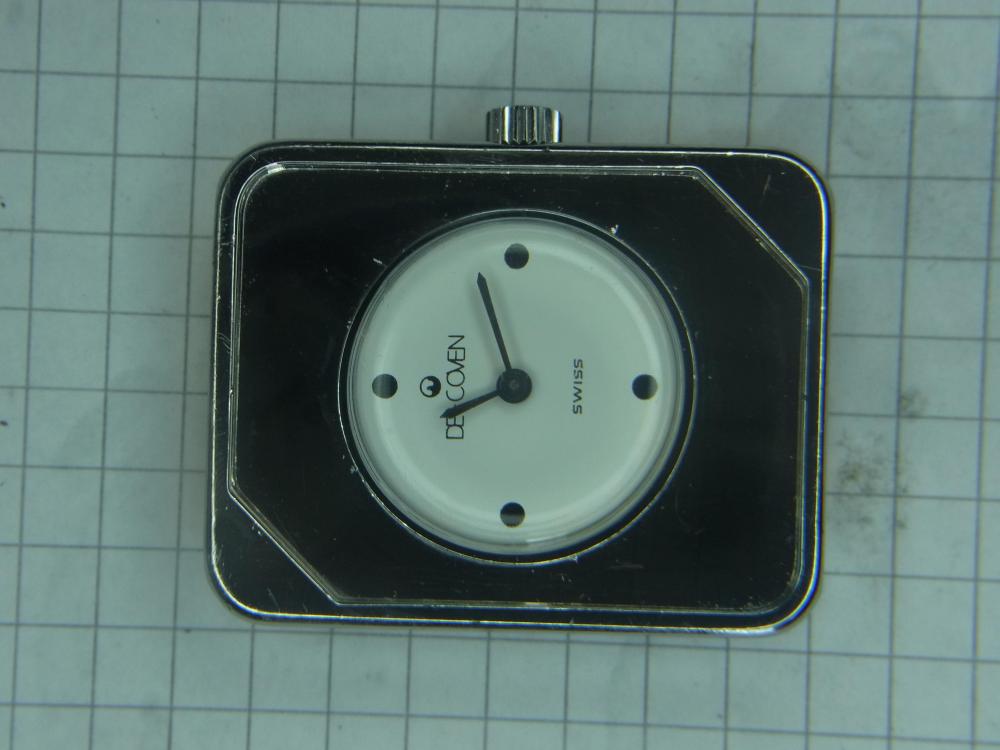
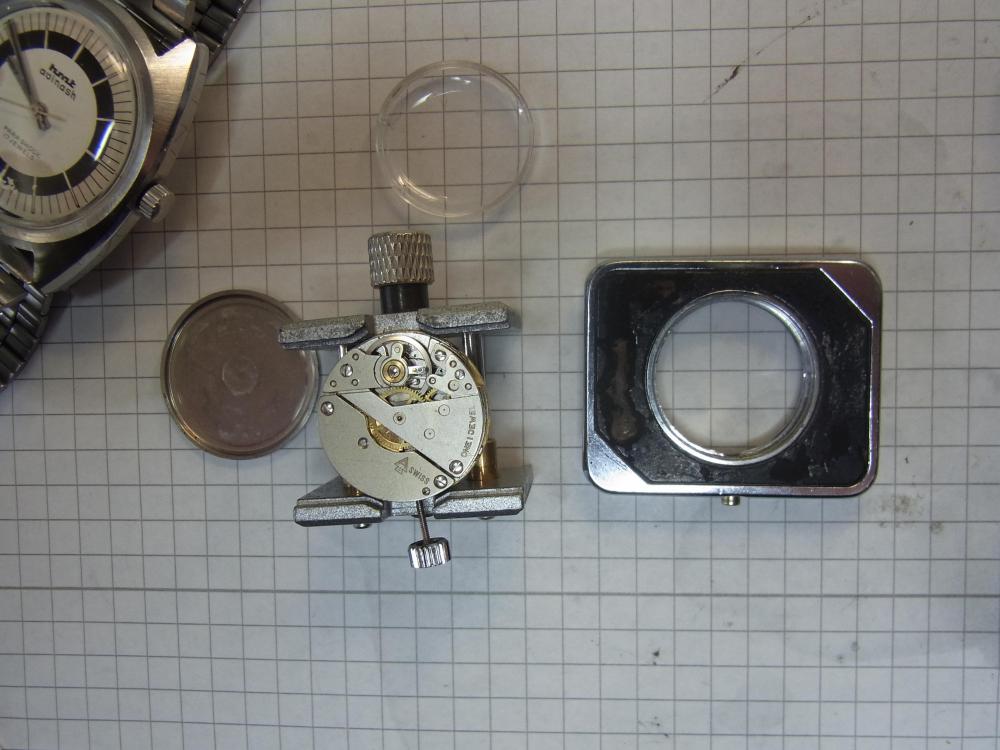
Another of those De Coven "Patented Scent System" watches turned up in the penny lots on e-bay, so I fired a single shot caffè latte's worth of filthy lucre at it, and this is what arrived. It needs the decorative insert replaced, and I have a few choices in that regard. There are a couple of De Coven examples on the web, with either a faux perlised marble insert, a leather one, or a red faux soapstone looking thing... or... I could use my imagination and produce something outlandish. Any thoughts? The same style of case back as the previous one, and the same felt scent pads. All of the sticky black goop removed. The money shot. What makes it tick, or in this case, stubbornly refuse to tick, or even wind, until stripped, cleaned and oiled. A humble one jewel number.

 1 point
 -
Found!!! I've downloaded a new video editor program, and I was playing a bit to get used to it. Then I saw someting below the balance that shouldn't be there...1 point
-
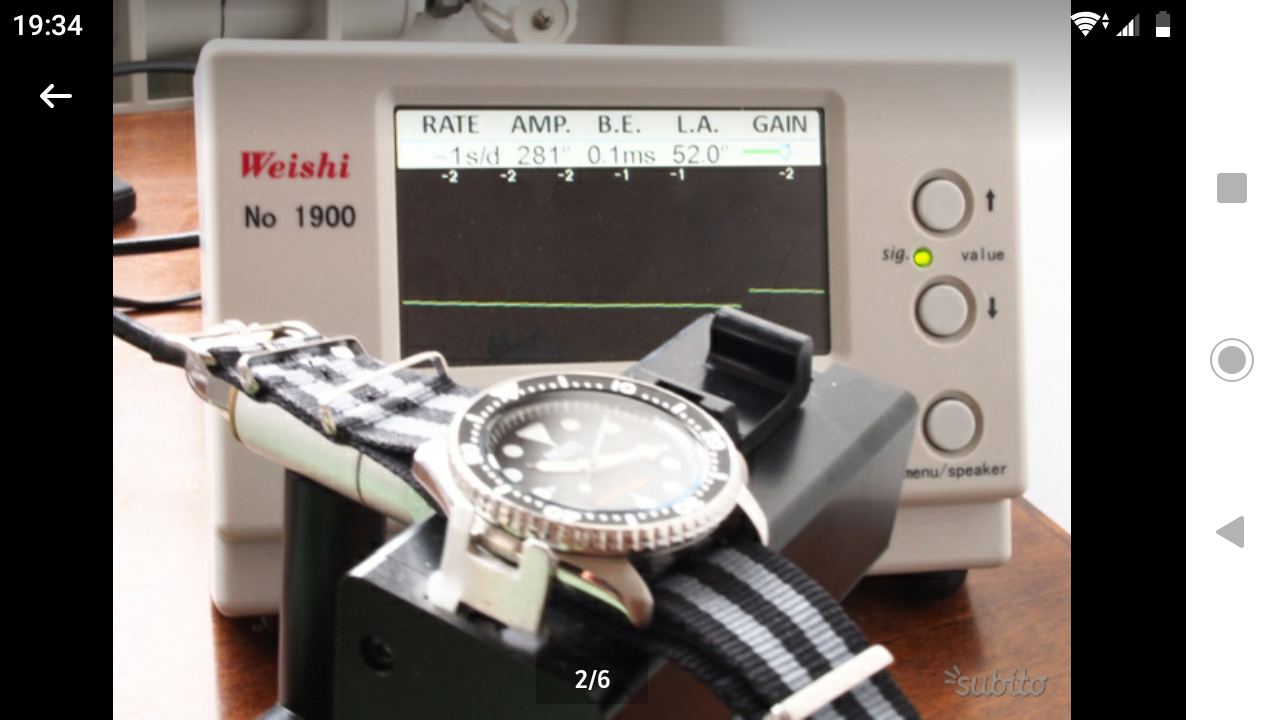
From this To this After servicing the only things left to do were to wait for the lubricants to spread and gently correct the HS a tiny bit.

 1 point
 -
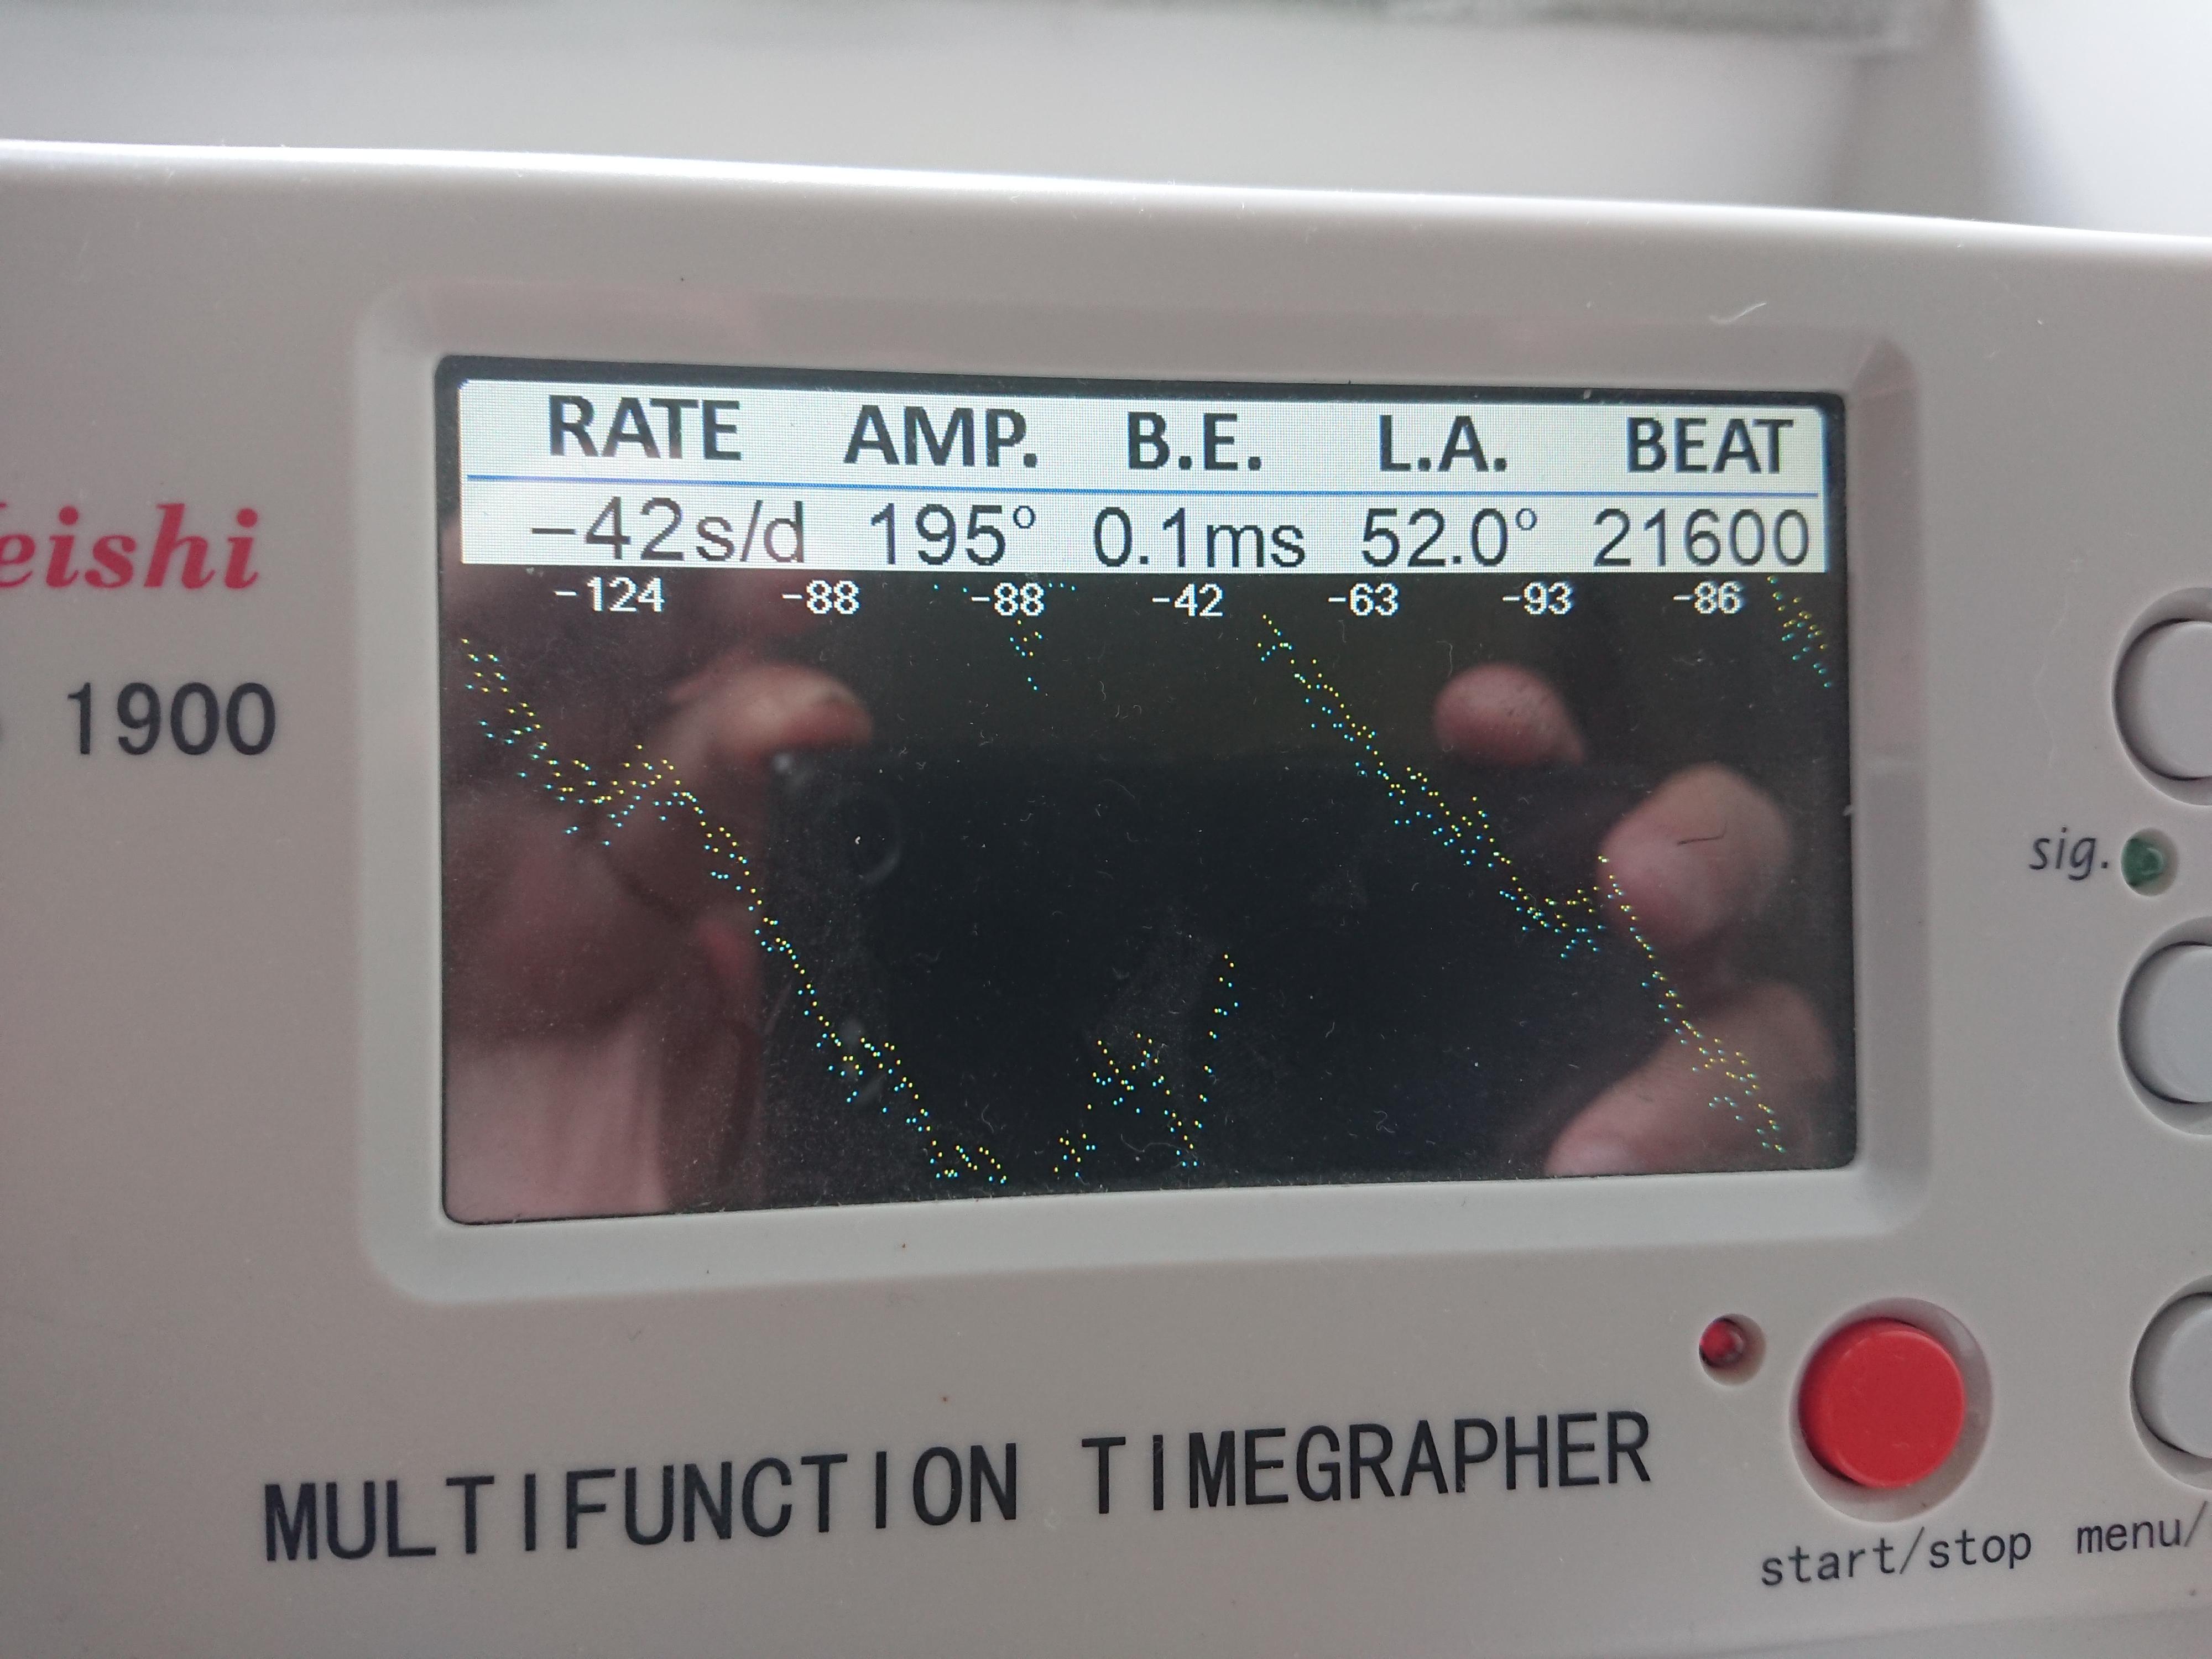
Timegrapher...only place where a flat line looks good.1 point
-
Hmmm, how about the 6 positions, and after 24 hours? Just kidding, that looks awesome. Makes it worth all the time spent crawling on the floor looking for parts (one of my teachers called it the watchmaker prayer time).1 point
-
Very cool! Or brilliant! Depending on where you reside. That is an excellent idea Sent from my iPad using Tapatalk1 point
-
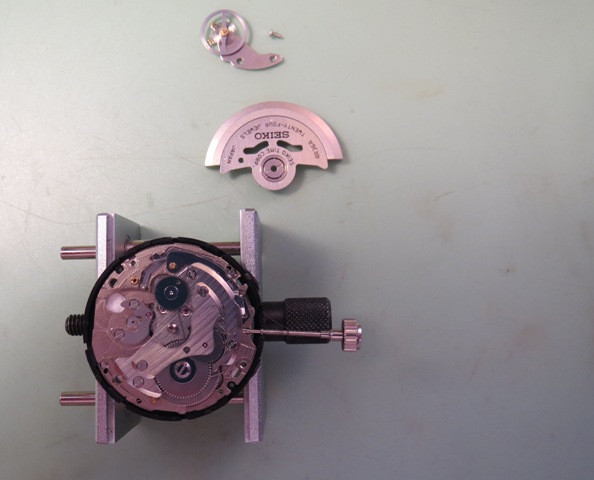
So I haven't been updating this much as it was taking a super long time to get parts. I was able to order a new balance staff buuuut in the process of switching over the hairspring and little jewel thing (still learning) I damaged the hairspring quite badly. Before attempting this operation I made sure to check that I could order a complete balance from jules borel, just in case. So, $90 later, I had my new balance. I was actually able to clean up the modifications that a previous watch "repairer" had done. I think they were trying to use a balance staff they had lying around to just get it running again but they really just made a mess of it. Putting everything back to factory brought the endshake into an acceptable amount. It's been running for a few weeks now without issue. Super happy to finally have fixed this watch and be able to wear it!!!
 1 point
 -
Since lubrication technics and material seems to be a frequent returning subject I thought one could collect some links and pdf files on the subject in ONE Place so it is easy to find them. Here comes my contribution in this link Collection. Moebius ------------------------------------------------------------------------------------------------------------------------------------------------------------------------ Home (list of lubricants) http://www.moebius-lubricants.ch/en/products/oils New (Just a lubrication chart) http://www.moebius-lubricants.ch/sites/default/themes/moebius/extras/pdf/tableEN.pdf Old (Moebius sales program, more detailed information) Moebius Sales program.pdf British Horological Intitute (BHI) ----------------------------------------------------------------------------------------------------------------------------------------------------------------------- http://www.nawcc-index.net/Articles/BTI-The_Practical_Lubrication_of_Clocks_and_Watches.pdf American Watchmakers - Clockmakers Institute (AWCI, Nice and detailed pictures.) --------------------------------------------------- Train Jewel Lubrication https://www.awci.com/watchmaking-excellen/applying-oil-to-train-jewels/ Cap Jewel https://www.awci.com/watchmaking-excellen/cap-jewel-preparation/ Pallet Fork https://www.awci.com/watchmaking-excellen/lubrication/1 point
-
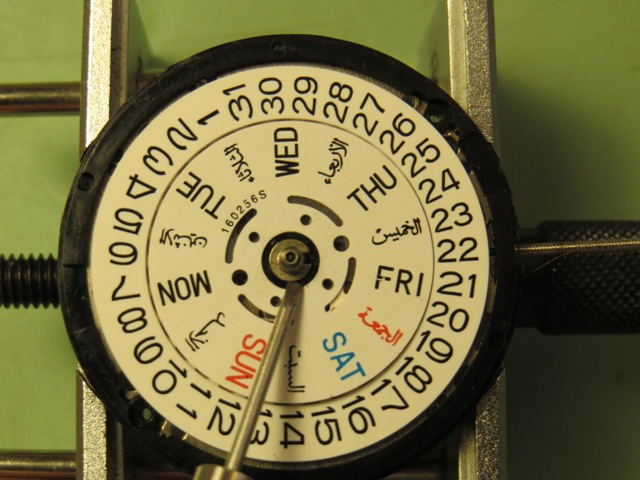
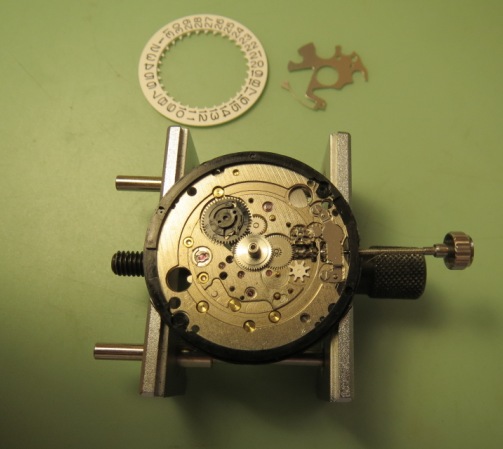
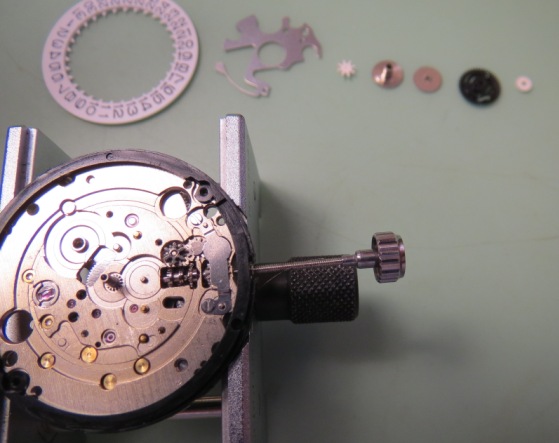
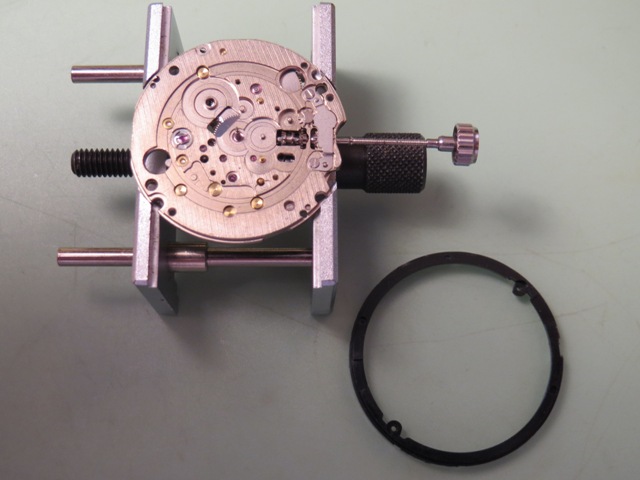
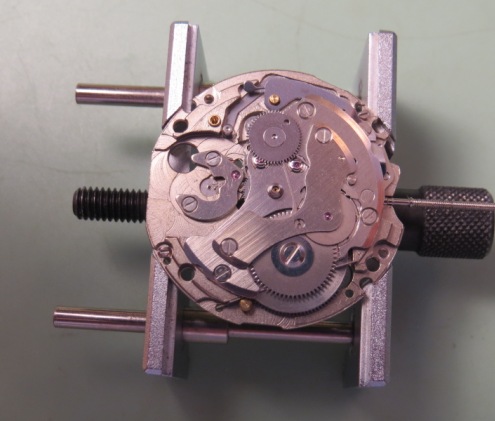
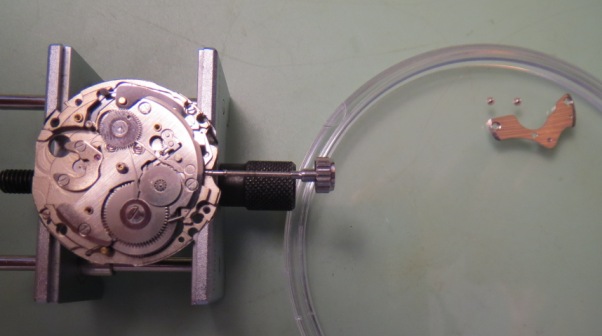
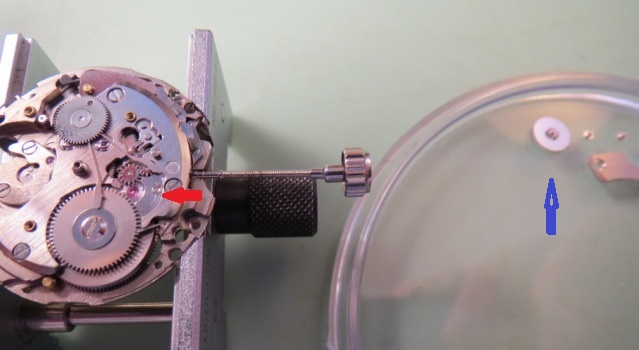
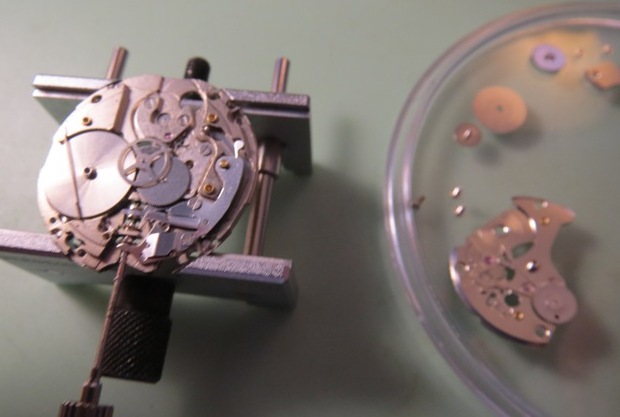
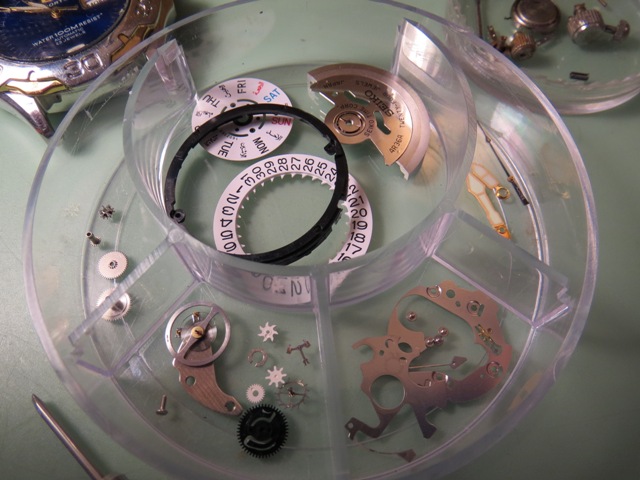
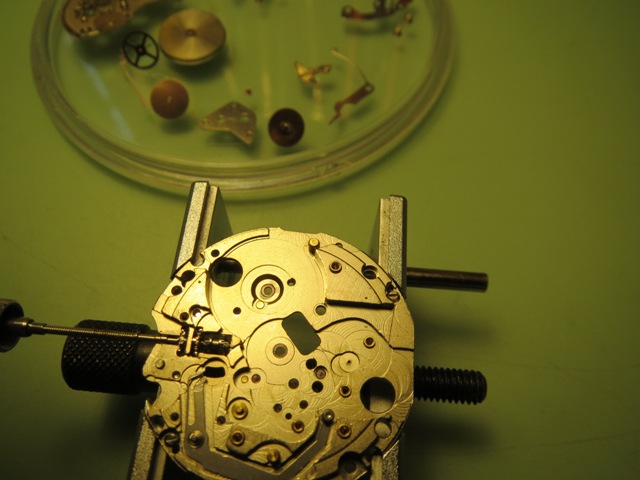
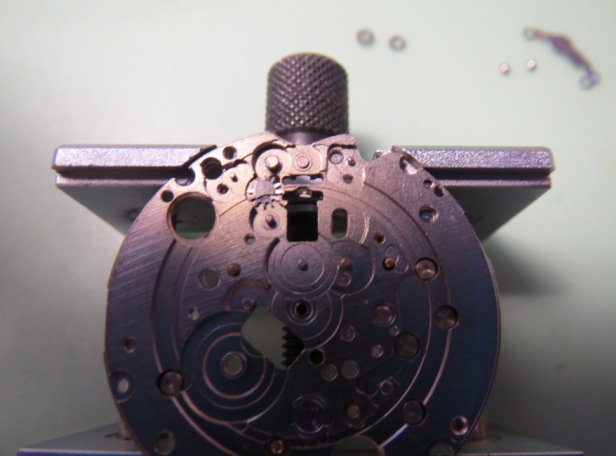
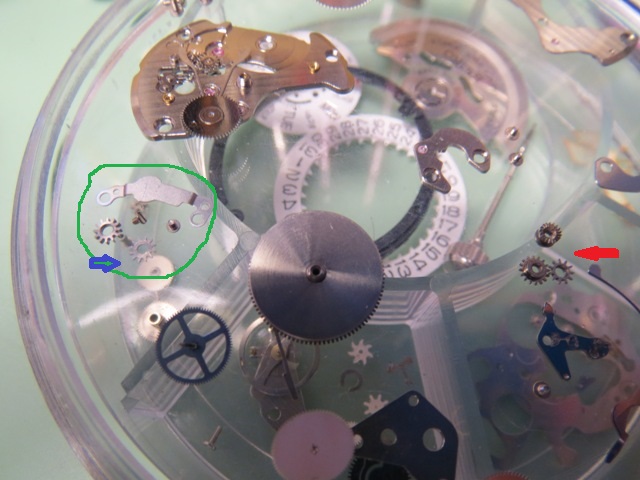
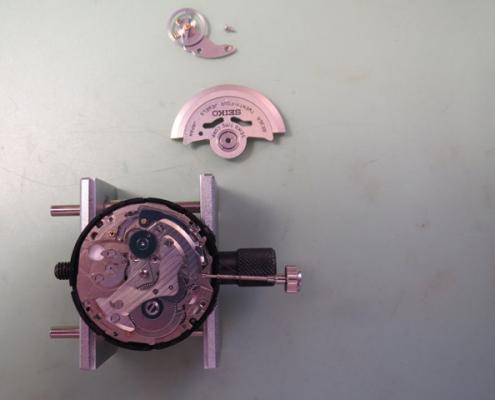
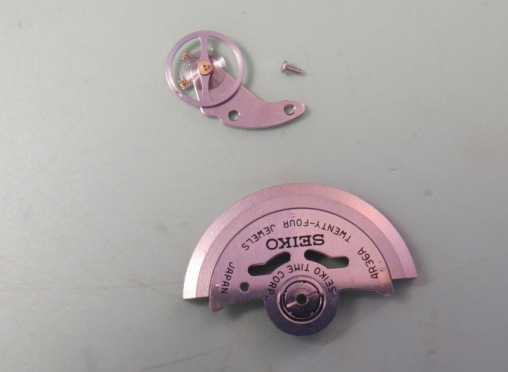
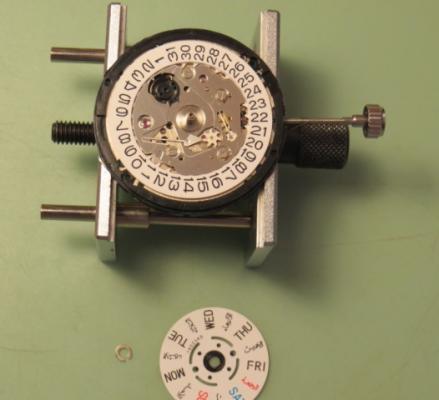
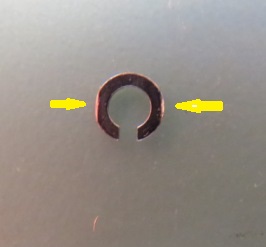
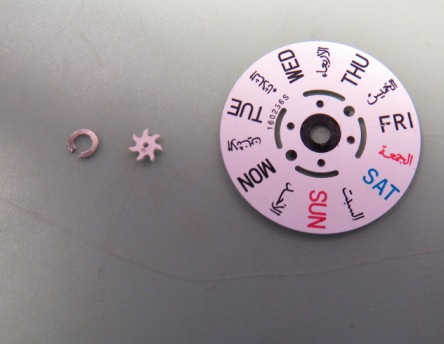
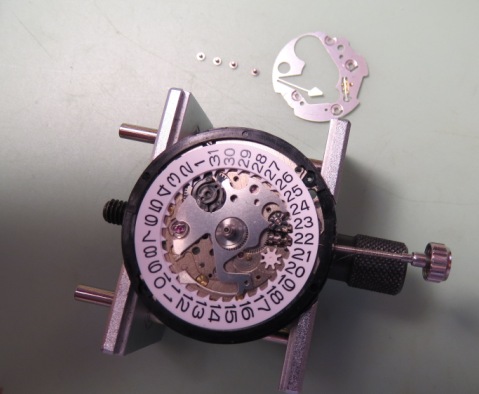
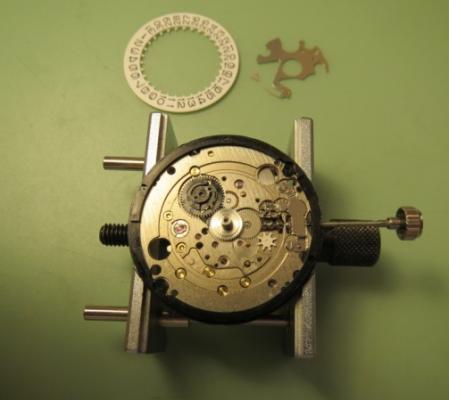
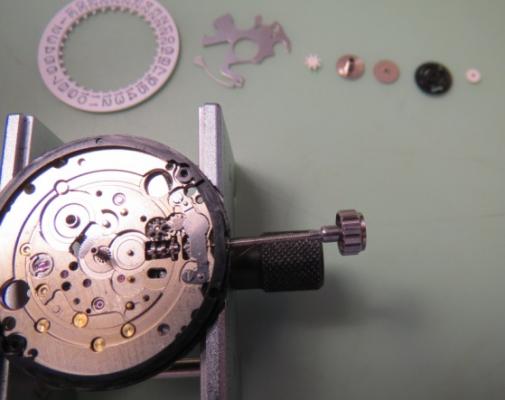
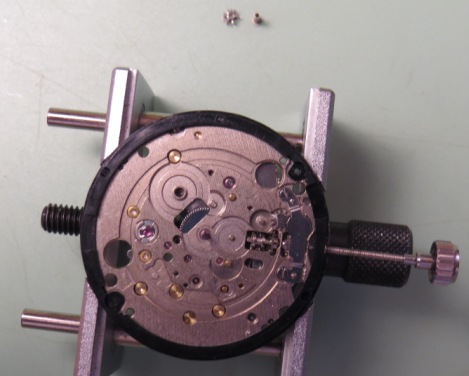
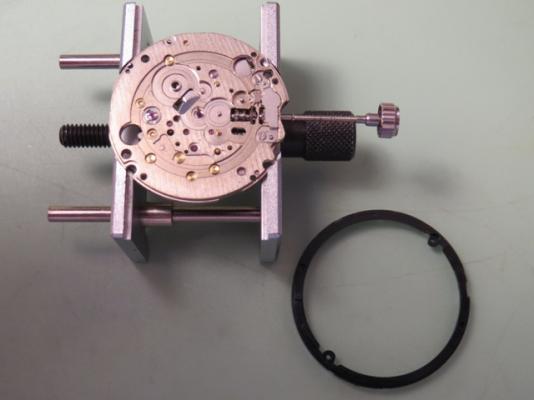
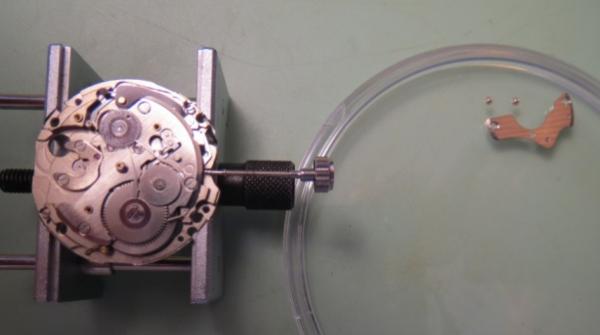
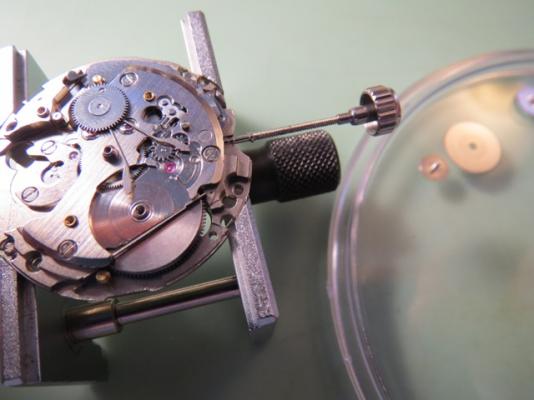
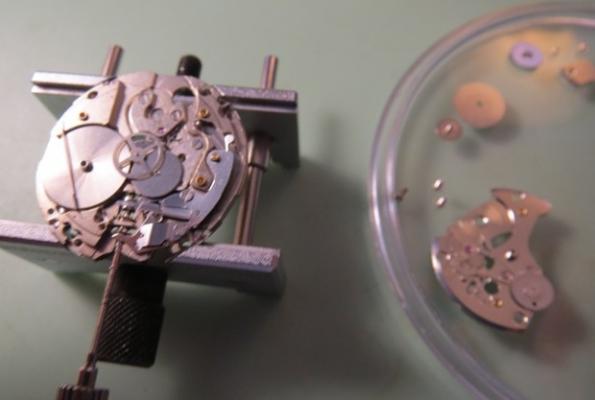
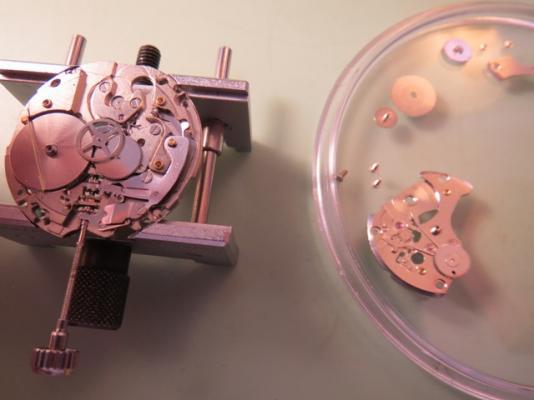
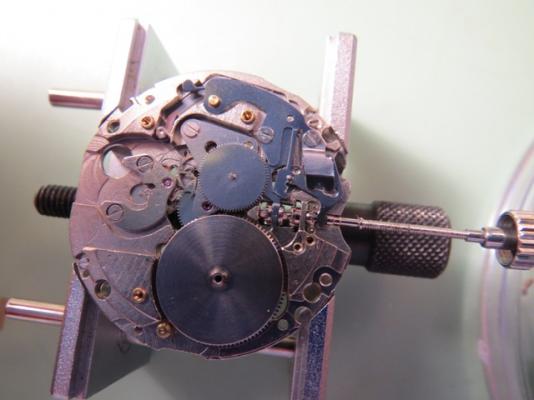
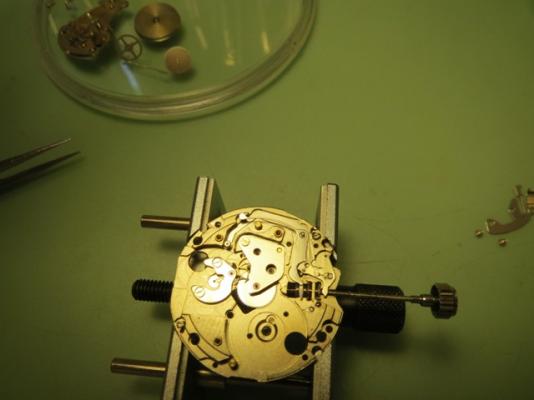
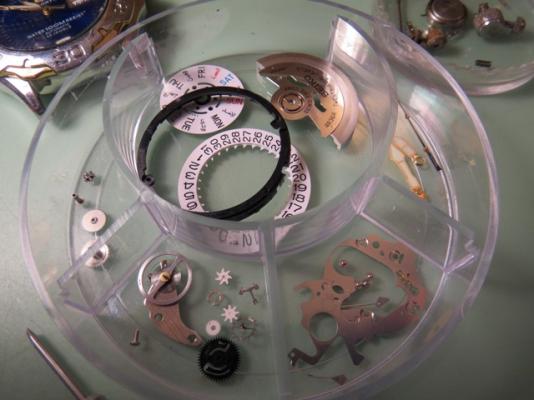
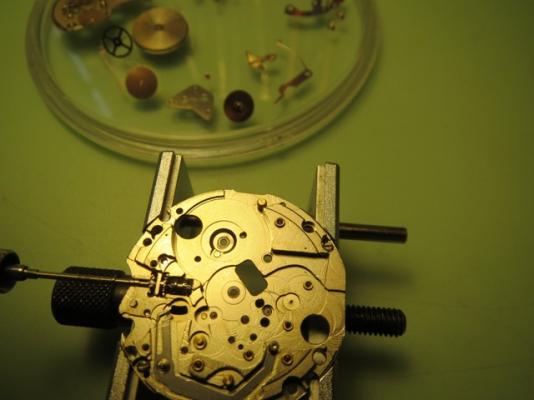
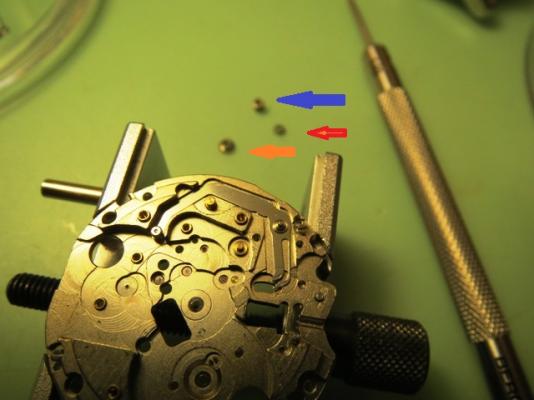
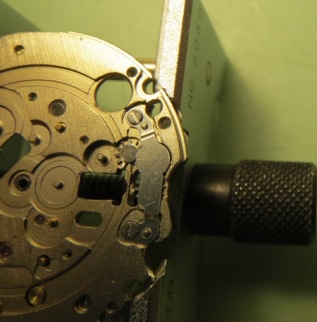
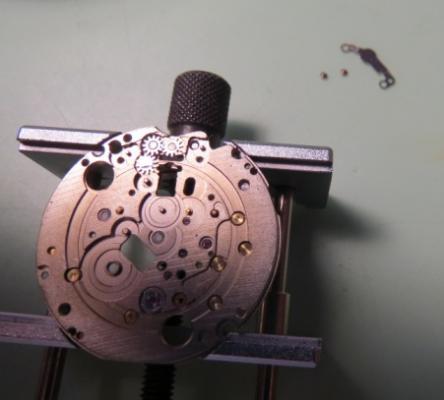
Seiko NH36 Walkthrough This walkthrough complements the 7S26/7S36 excellent walkthrough on this site by Lawson (http://www.watchrepairtalk.com/topic/682-seiko-7s26a-complete-service-walkthrough/). I strongly recommend to check out Lawson's walkthrough first). This is a more recent movement based on the said 7S26. It is a 24 jewels day/date, center seconds, movement with hacking capabilities and manual wind. The ligne is like its predecessors ~12. It is popular in the new Seiko models and Invicta watches among others. In brief, former movements didn't have hack or manual wind. Still, several parts are interchangeable with the older 7Sxx series. Here is the service data: 6810_Seiko NH3 Series Part Sheet.pdf My first step here will be to remove the "oscillating weight" and balance and place in a safe place. Those parts could be easily damaged so we put them out of harm's way. Starting on the bottom side, normal removal of "snap for day star with dial ring" Note that the reverse of the snap has indentations to fit a small screwdriver and lift it clear of the day disc (yellow arrow). This is standard for this movement family and snaps, day disc and date rings are interchangeable. The other picture shows the snap right side up. Under the day disc: Showing the "intermediate wheel for date corrector": Moving on, "date indicator maintaining plate" and related screws. No philips proprietary 4th screw here, all four are the same... Date jumper and date dial: also "Day Date corrector wheel", "hour wheel", "minute wheel and pinion", "date indicator driving wheel" and "intermediate date driving wheel and pinion": "Canon pinion" and the new addition for this movement "Day Date corrector setting transmission wheel E": Removing the "Dial holding spacer" (this one is from a 7S26 not the original one which is thicker): Turn over Baby! Ehem, just the other side view... :) More changes are introduced: We remove the "automatic train bridge" and screws: Notice the added 24th jewel (red arrow) to accommodate the newly designed "second reduction wheel and pinion" (blue arrow) which is much thinner than in previous movements. Removing "ratchet wheel" and its screw (nothing new here): Removing the familiar "Barrel and train wheel bridge with hole jewel frame", notice the familiar "long screws" inherited from previous designs: This bridge has been modified also to add the manual winding mechanism. More on that later. Removing the click and the "fourth wheel and pinion": At this point we remove the rest of the loose bits ("Third wheel and pinion", "scape wheel and pinion" and "barrel complete with mainspring": Then we remove the "Yoke spring" and characteristic "long" screws (different from the ones used in the balance cock and "barrel and train...bridge": Removing the "yoke" and the "setting lever", note how the lever shape has changed from the previous models: The story so far after removing the "center wheel bridge" and its short screws, the "center wheel and pinion", "pallet bridge" and "pallet fork": On the main plate, showing the added "balance stop lever": And the "day-date corrector setting transmission wheel A" (red arrow), "winding pinion" (orange arrow) and "clutch wheel" (blue arrow): Close up of what is left on this end: Removing the "guard for day-date corrector setting transmission wheel" and short screws. Underneath the "day-date corrector setting transmission wheel C" and the "Day-date corrector setting transmission Wheel B": After removing the transmission wheels B and C we are left with the built in wheel on the frame: Notice that transmission wheel "B" (blue arrow) is thinner than its counterpart "C": Next: "Barrel and train wheel bridge with hole jewel frame" disassembly:


 1 point
 -
Here we go with part 2. Now it's easy to note, that I'm not a professional as the cleaning equipment is only... ehm... semi-professional. Special treatment for the balance and the pallet fork. The equipment for oiling and grease. Inserting the new mainspring. Reassembling the train bridge. Surprise: Much easier than on other watches, the parts fall into correct positions by themselves. Nice. Barrel bridge and ratchet system. The keyless works. Assembling and oiling the Pallet fork. The return of the balance. A drop of oil for the balance and escape wheel stones. Winding up and...it runs! Oops, some adjustment needed. Better. Reassembling the automatic device. Inserting the screws for movement and dial. Time for the cannon pinion and the hour wheel. Bringing back dial and hands (oh, I love those Maxi dials). Back in the case... ...and completed with the automatic device. Some grease for the gasket. Got it. It's called a wrist watch, so it's for the wrist not for the safe.1 point