Leaderboard


Popular Content
Showing content with the highest reputation on 11/20/20 in all areas
-
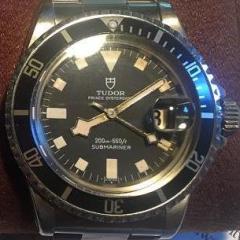
Very Rare "Mystery Dial" battery powered and never needs winding. Only 3 easy payment of $19.99 but wait there is more! figured it was time to decompress ?
 3 points
 -
Use an endmil rather than a drill bit. Still go slower than normal for the diameter. Normal would be quite fast (around 1000 rpm I guess) but I’d probably go at 200 or so to avoid heat buildup.2 points
-
Drilling the center hole try using a smaller pilot drill first, also try a piece of masking tape over the blank prior to drilling. I suspect that slow speed rather than high speed may be the way to go too.2 points
-
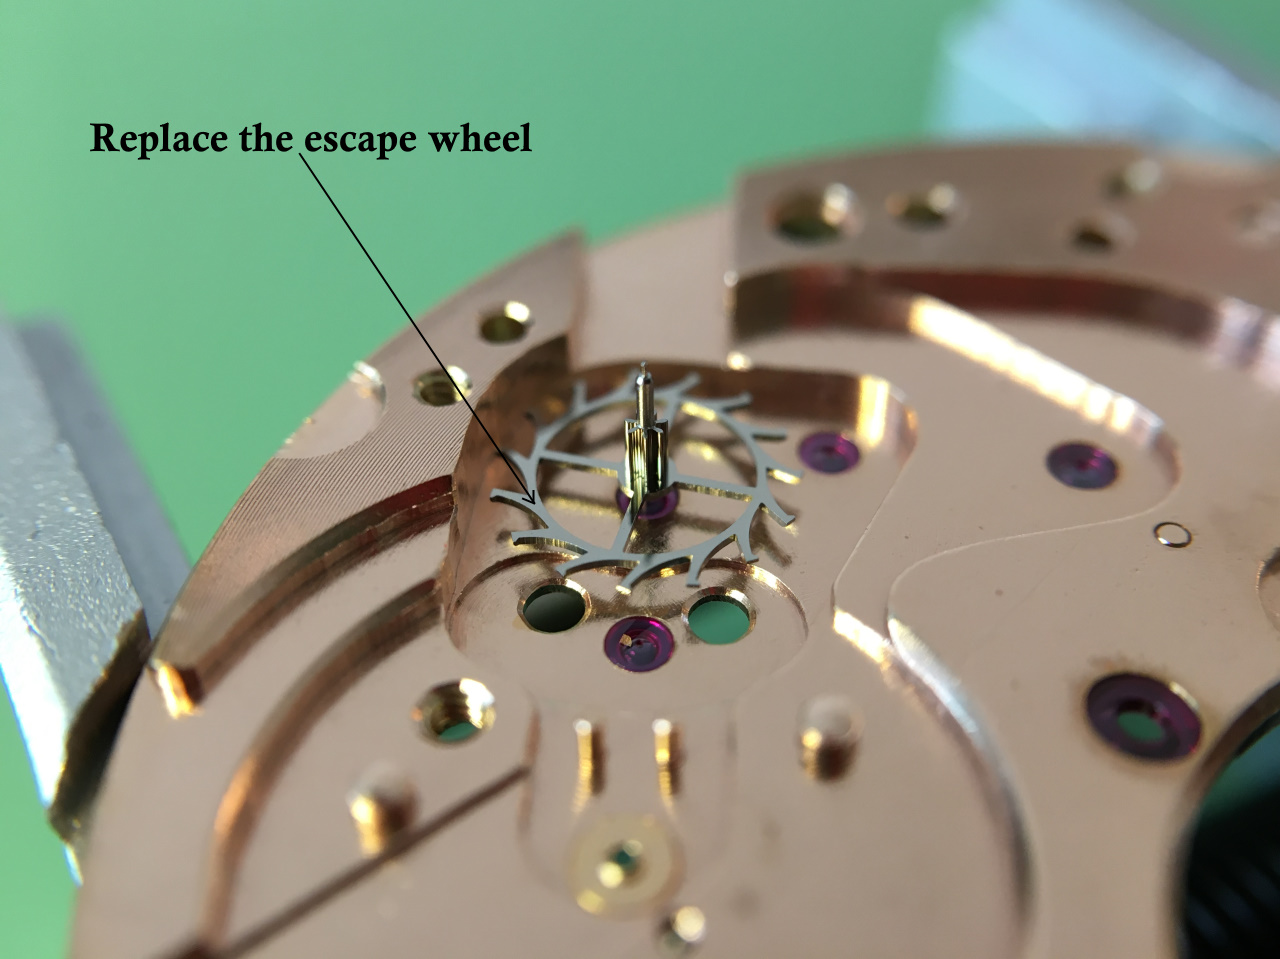
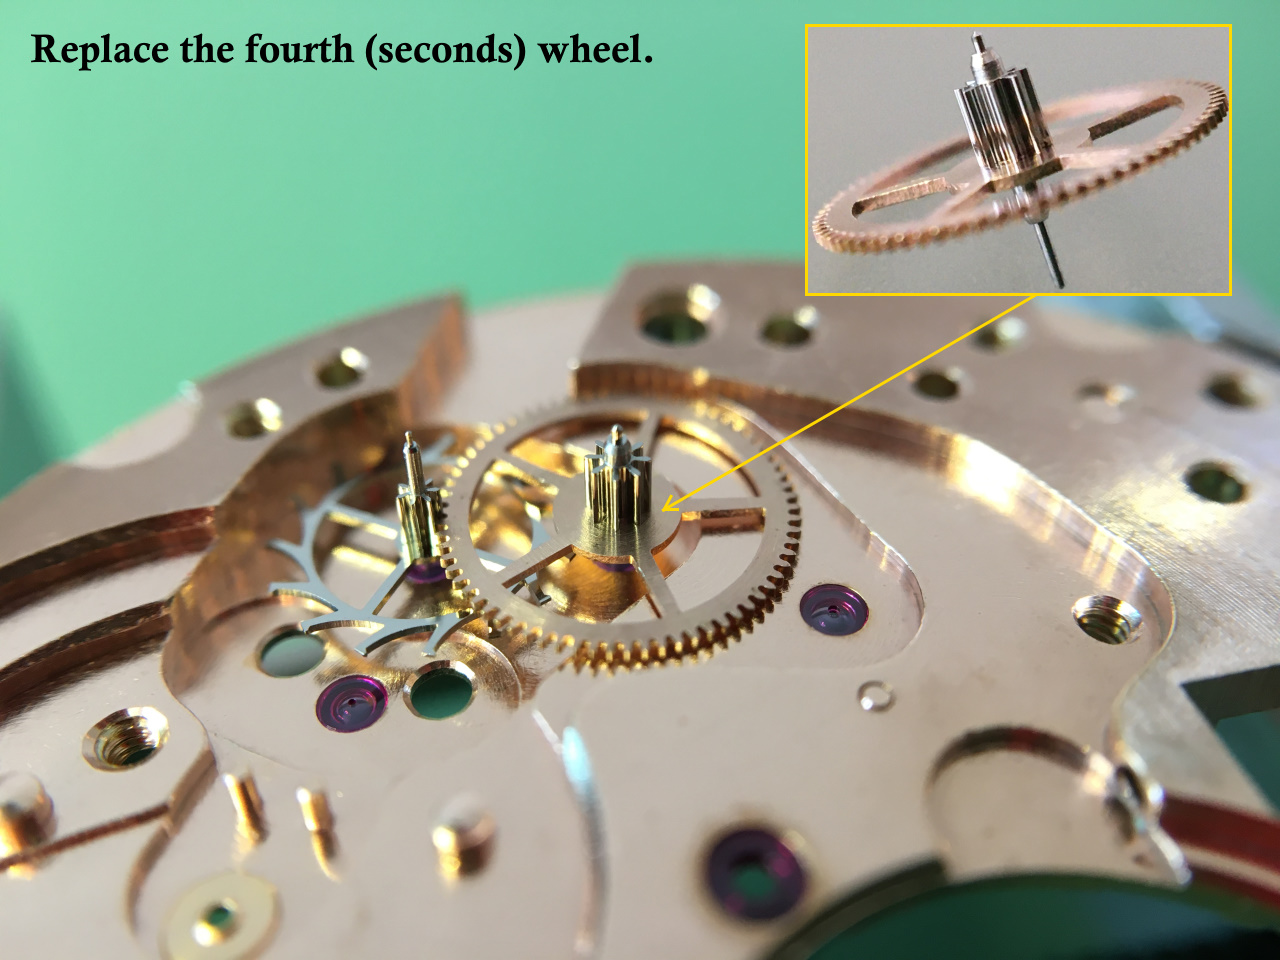
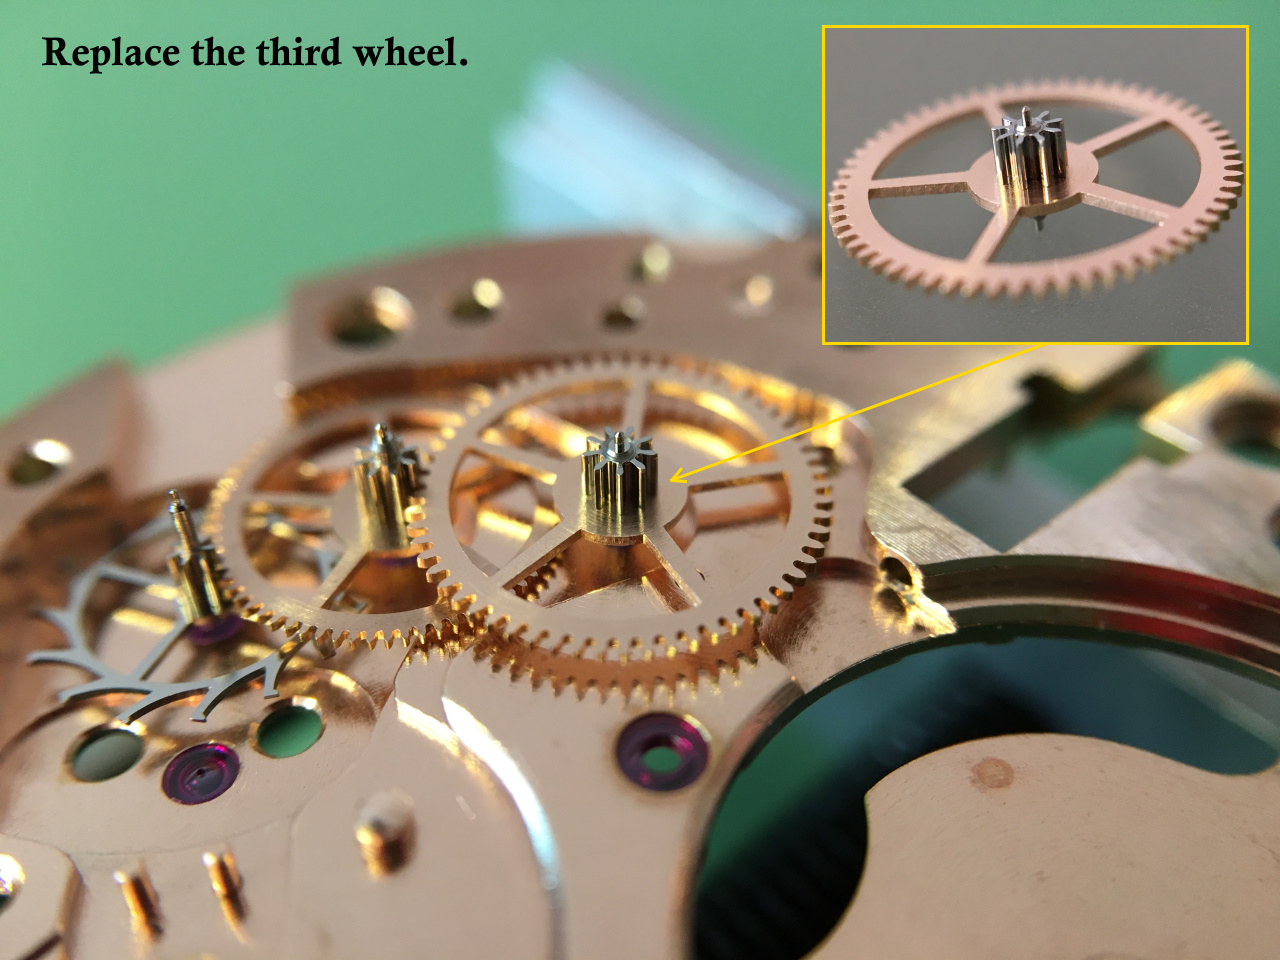
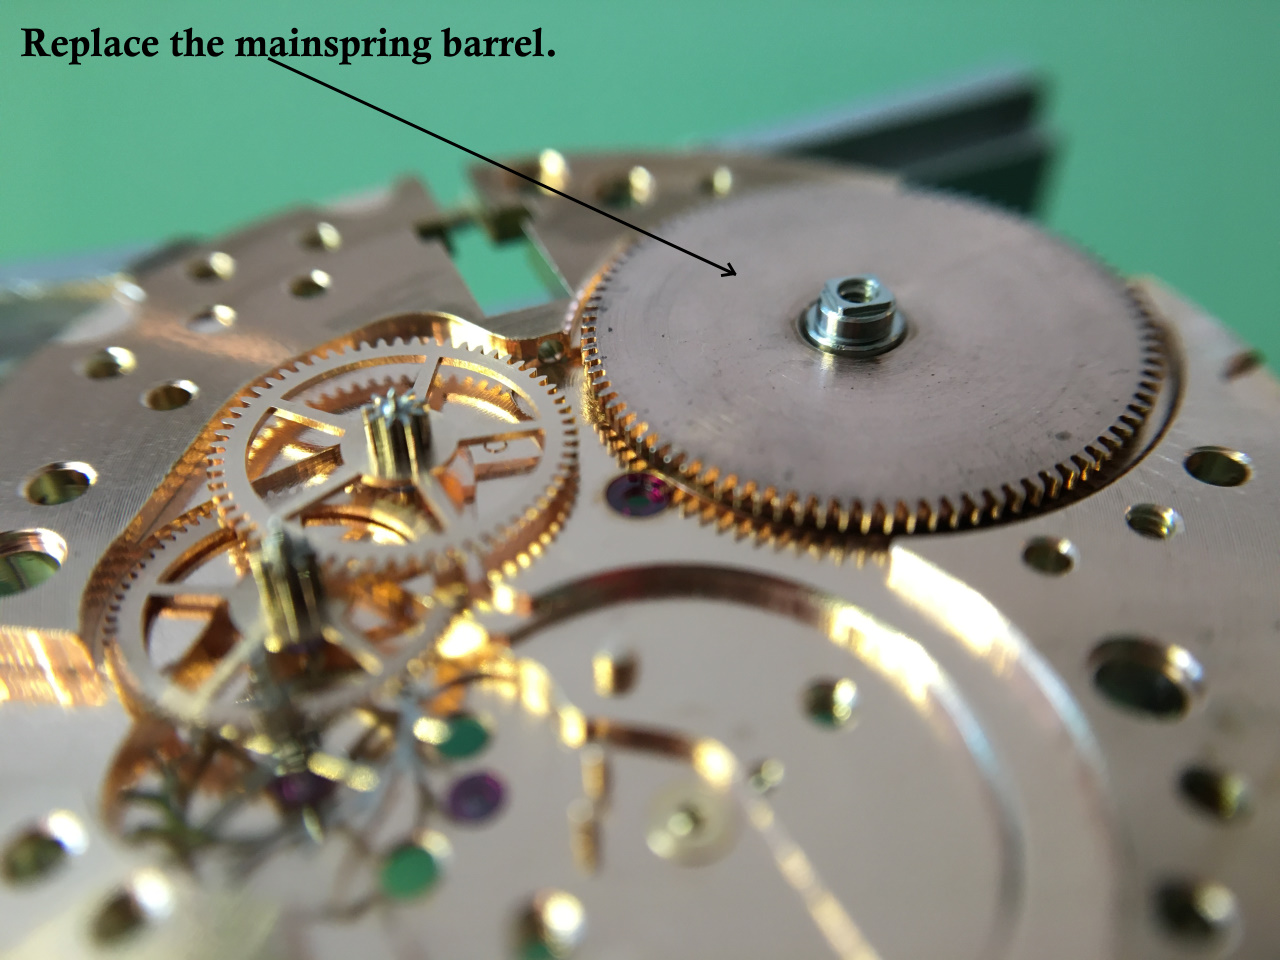
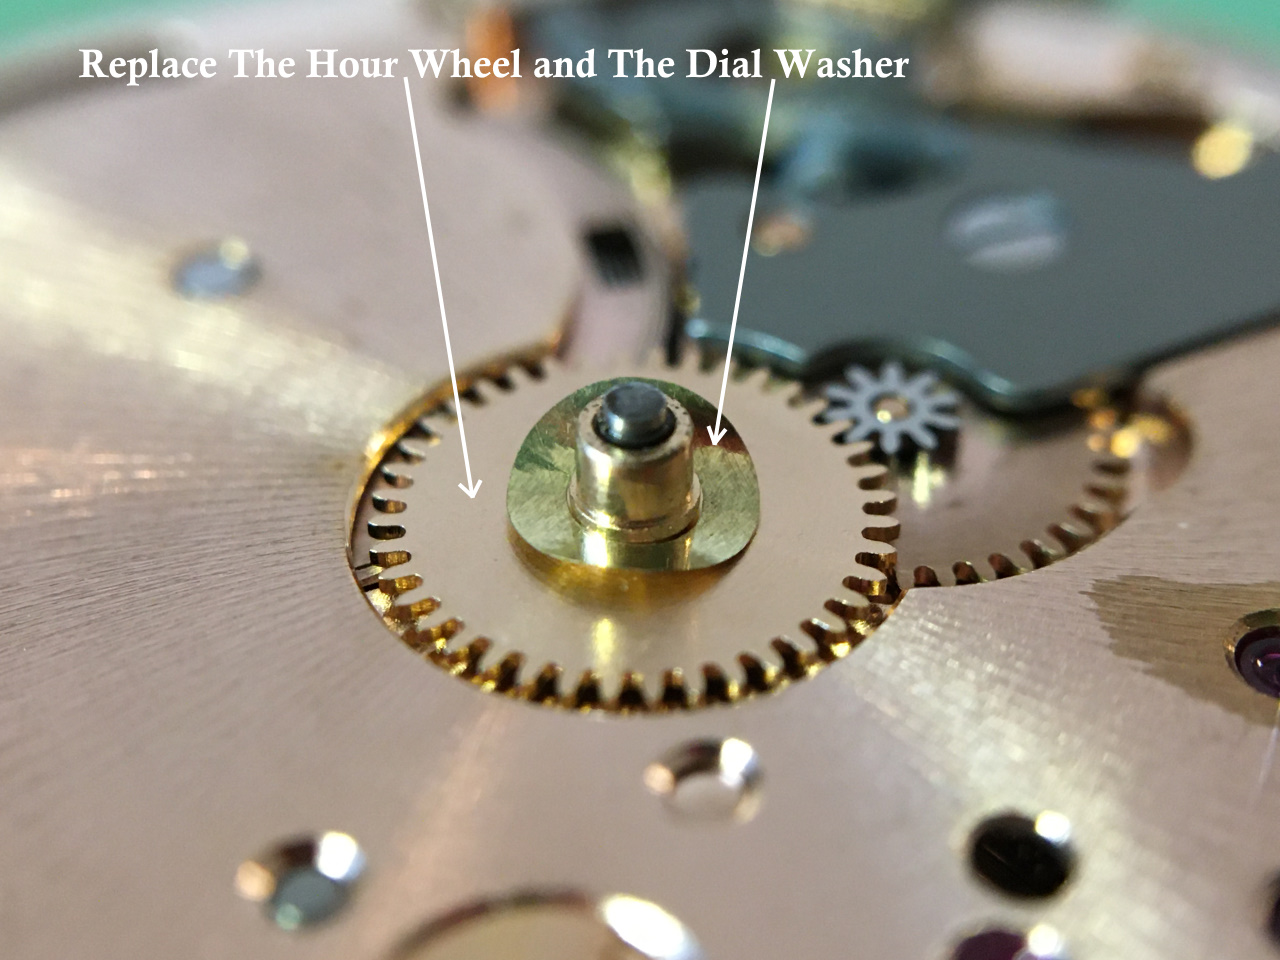
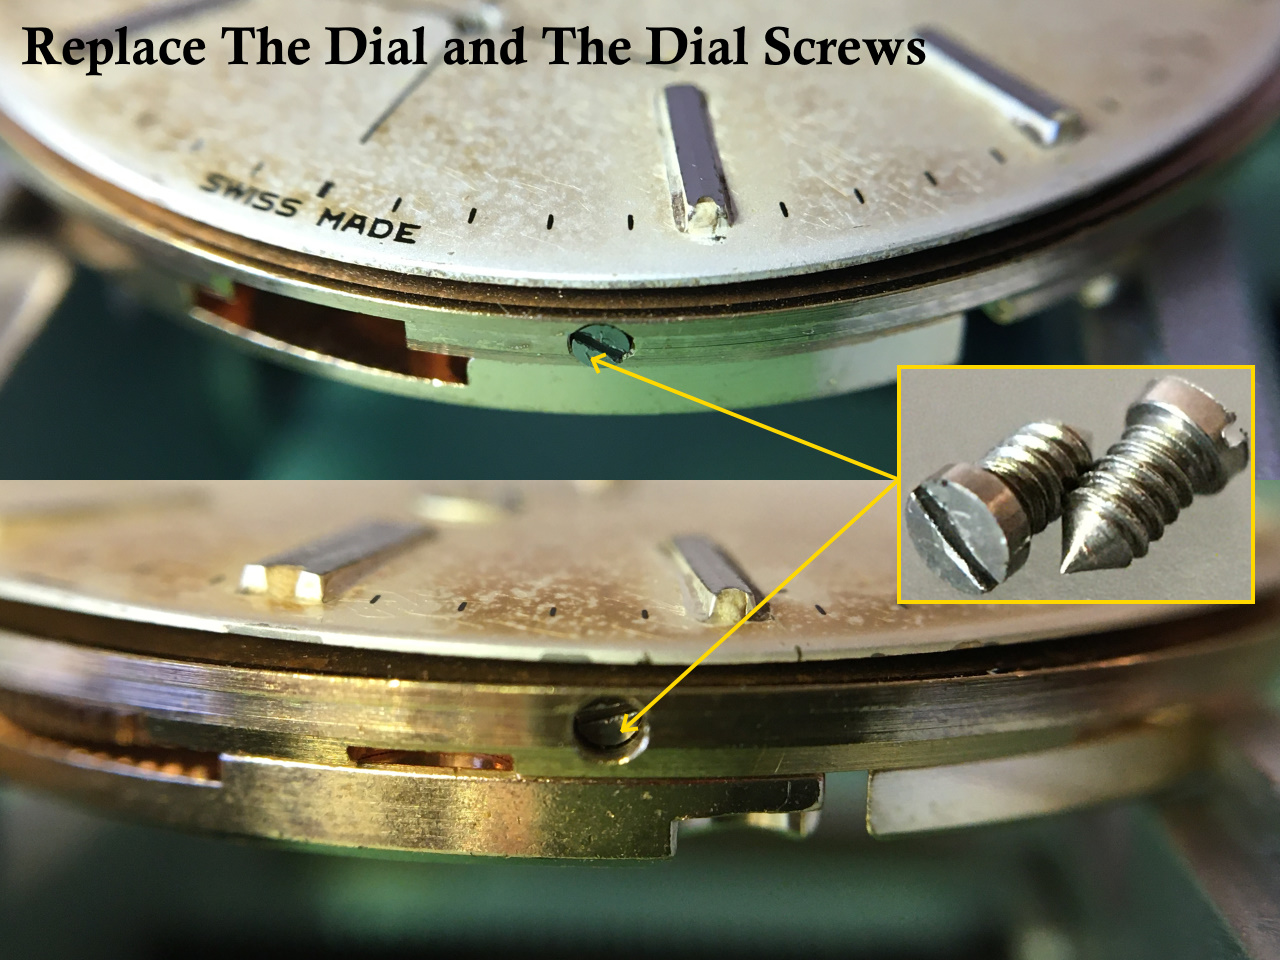
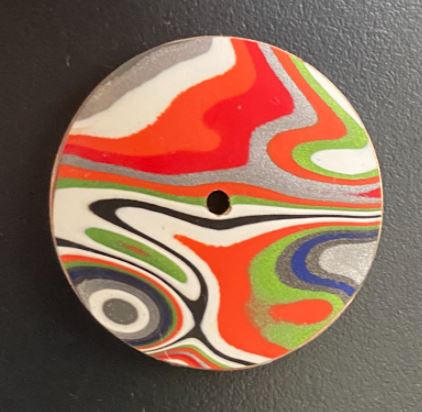
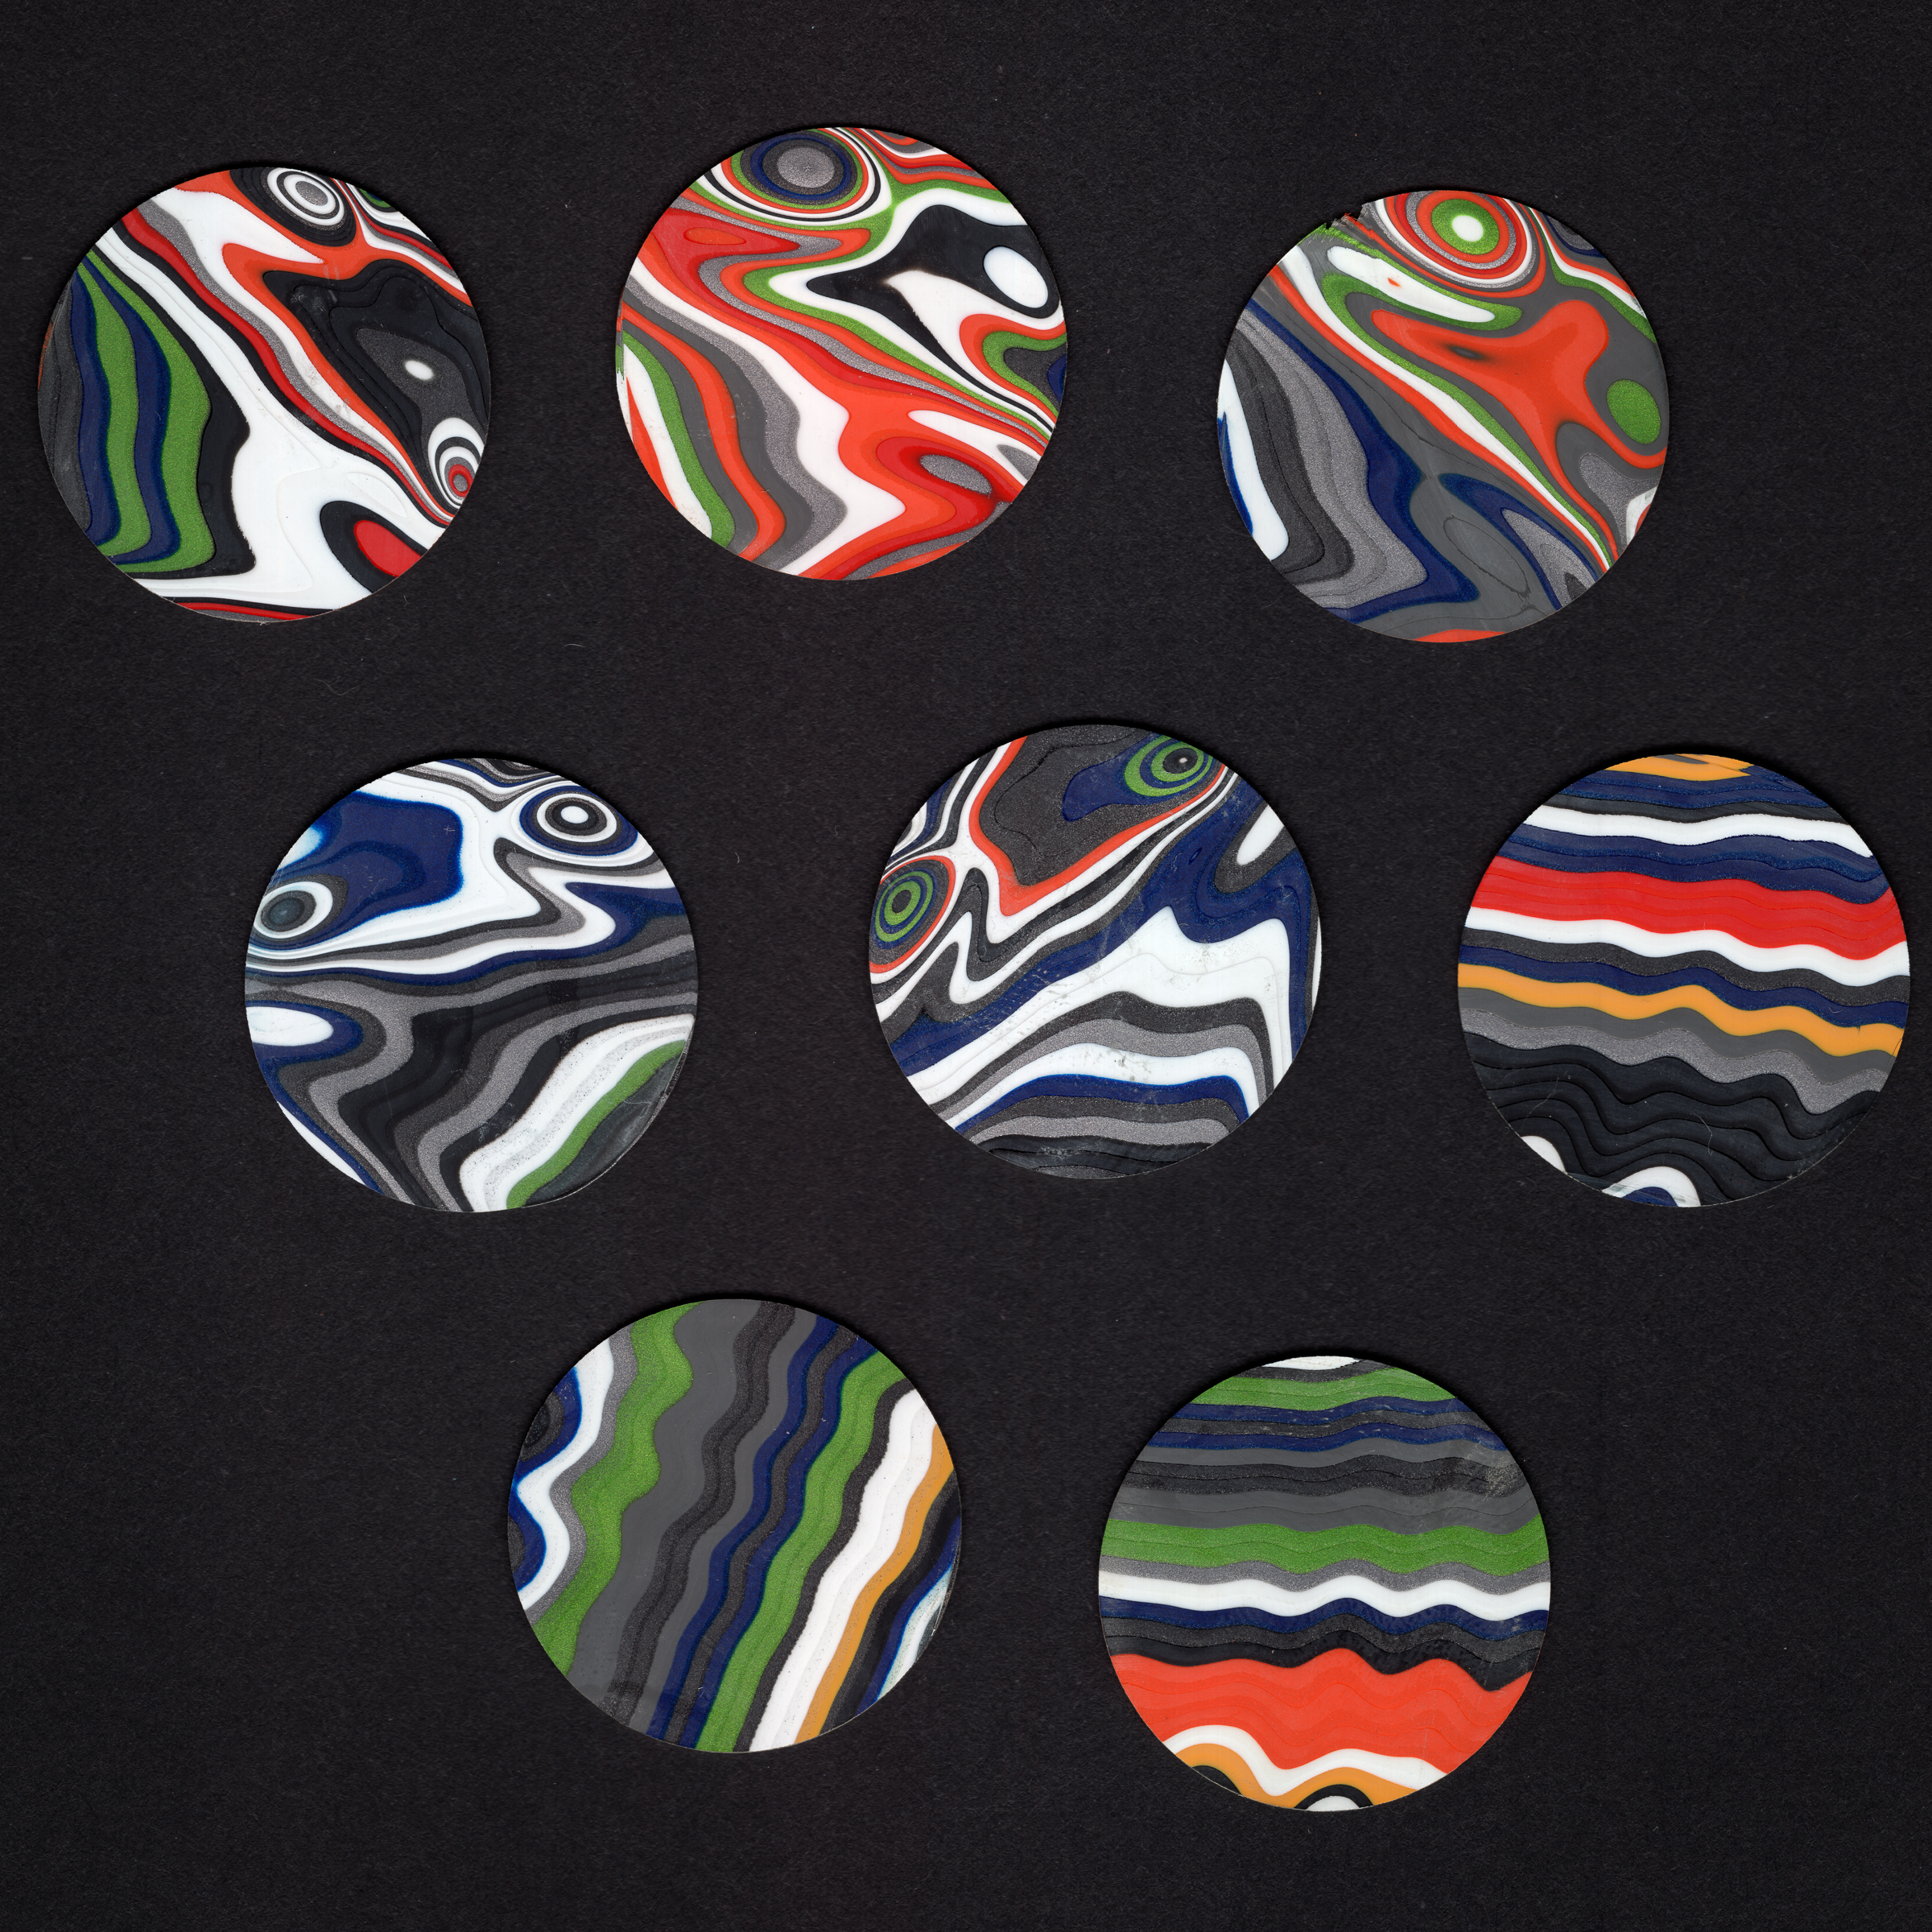
Yeah, I've tried a few things: brass scarf, powdered marble, brass plates, etc. If I've learned anything about bluing steel, is that what works well for one person won't necessarily work for another person. I'm able to consistently and cleanly blue hands, but the much larger surface area of the chapter ring is a significantly greater challenge. If anyone wants to learn how to blue hands or screws, the most foolproof and consistent method I'd recommend would be to use an inexpensive (<$100) precision-controlled digital soldering station with some sort of brass heating platform attached. This is what G.O. does, and it really does look like the sweet spot in terms of repeatability, consistency, and price. For one-off bluing of a couple of screws or the occasional hand set, any of the time-tested methods should work fine with significant practice. \\\ Thanks for the compliments @MechanicMike! \\\ Please forgive the poor quality of these snapshots, but here are a couple more examples. (Along with everything else, I'm really working to improve my wristwatch photography. It pains me to share quick snapshots now, but it's a ton of work to produce really high quality photographs. I'll be writing up a technique/walkthrough for taking high quality wristwatch photos and sharing it with the group when things calm down. With luck, it'll help folks take better picture of their watches ... and maybe make a little more money on their eBay sales.) This finished watch is an SNKK27 with a dial that really reminds me of a topographic map. This dial sitting by itself is way more vivid and psychedic, and I'll be putting it into a watch today. Here's a heartbreaking (to me anyway) image showing just how delicate and difficult this stuff is to work with. I absolutely loved the crazy pattern and colors in this dial, and it was likely to be my "keeper" fordite dial to commemorate this project. It reminded me of a psychotic duck. This dial made it almost all the way through my manufacturing process, surviving being cut with my saw, trimmed to fit the dial, and being ground/polished down through 400, 800, 1500, and 2000-grit sandpaper. On its final polishing step (wet 3000-grit sandpaper), I overpolished this dial and exposed the brass underneath the fordite layer. This is most visible at around noon in the picture below. Dang. Adding insult to injury, the fordite chipped when I drilled its central hole. This was around 8 hours of work down the drain. I can definitely say that I've figured out a LOT of ways of screwing up the manufacturing process for these dials. And I'm confident in saying that I'll continue finding new ways to screw it up. Here's a fun one that took me by surprise. I was working with a fordite section that wasn't completely flat out of the saw. I didn't think that this was a big deal, as it ranged from 0.5mm at its thin end to 0.75mm at its thick end. It turned into a big deal when I made two additional mistakes: 1) I forgot to rough up the brass dial blank before applying epoxy; and 2) I didn't weigh down the fordite section enough while the epoxy was curing. The uncured epoxy allowed the fordite section to slip off of the dial while curing, leading to a very thin and fragile fordite layer that was securely epoxied to half of a dial blank. Neither were salvageable. I have found some tricks that have improved the process too. I had been using hot glue to hold my fordite cores to the "wafer chuck" on the Buehler Isomet during cutting. This worked okay, but the hot glue failed after 3-4 cuts, which resulted in a lot of wasted time and miscut fordite sections. The better solution has turned out to be using epoxy to glue a LEGO piece to the end of the fordite cores, and then using a vise chuck to hold the LEGO piece during cutting. This works awesome. I've also figured out that an ideal fordite section is almost exactly the same width (0.5mm) as the blade I'm using to cut it. This has made eyeballing the width of my cuts much easier, and has significantly improved the consistency of my cutting. Cutting has gotten MUCH better having switched to a 5" blade and using LEGO pieces with a different chuck. This low-tech kludge is working AWESOME. I did find a good source of brightly colored hands of different designs, which I'll be tapping into if I continue building fully-assembled and upgraded Seiko watches. I'd honestly rather just be making dials. I'm learning that there are really big differences between different types of fordite. The more subtle (whites/blacks/reds/silvers/blues) fordite is from an old Jeep assembly line. The wild psychedelic stuff is from the old Mustang assembly line. The materials feel different to work too. Also, I've discovered that some rough slabs of fordite have big bubbles or inclusions in them. One $50 rough slab I bought was so riddled with inclusions that it produced a grand total of one usable fordite section. Here's an example of some of the psychedelic colors and patterns I can get out of "Mustang" fordite: I'm still working frantically to get my first 10 dials completed. I had a major breakthrough in that I received my order of 200 half-height (0.2mm) blank brass Seiko/NH35/NH36 dials from the Chinese factory yesterday. I had stalled out because I had worked my way through my first 12 half-height dial blanks and was completely out. Ordering directly from a Chinese factory was a lot less painful than I had been lead to expect, but I think I got lucky and don't have QC problems because of the simplicity of the parts I had ordered. If I have time, I'll share some of my notes and experiences about what it has been like for me to work with an Alibaba manufacturer to build custom parts. I'm currently reaching out to additional Chinese suppliers to try to see if designing and manufacturing a run of *carbon steel* Seiko-compatible handsets is feasible. A lot more can go wrong there, and that's going to be a much longer-term project. Ideally, I'll be able to design hands that are inexpensive to manufacture, come ready-to-blue, and can accommodate lume (which I'd be applying myself).

.thumb.JPEG.bf1deafff7ae5fab24f5f24368521aab.JPEG)

.thumb.JPG.43eb4d1a9f82c0fb5b3821be79e7306d.JPG)
.thumb.JPEG.7cbbec89923d63eec7f45b269b1f06a1.JPEG) 2 points
2 points -
My pleasure glad to help1 point
-
funding is now open to help develop the solar powered version. ?1 point
-
I wouldn’t go with a center drill. They are stiffer, but still have an included angle point, which pulls outward as it cuts (That’s what raises the burr on a chunk of metal) The endmil is flat on the end, (well, a square end one is anyway) and won’t raise the burr as much (and therefore shouldn’t be as inclined to chip) as it bores. Also interesting reading (if you can find it) is the proper way to grind drills for various materials. But I don’t think a drill is the right choice here. Finally, dressing the center hole with a counter sink (by hand) may help reduce the risk of chipping. More finally, if doing a lot, make a full support jig. Top and bottom plate with finished size holes so the paint is fully supported at the point of boring.1 point
-
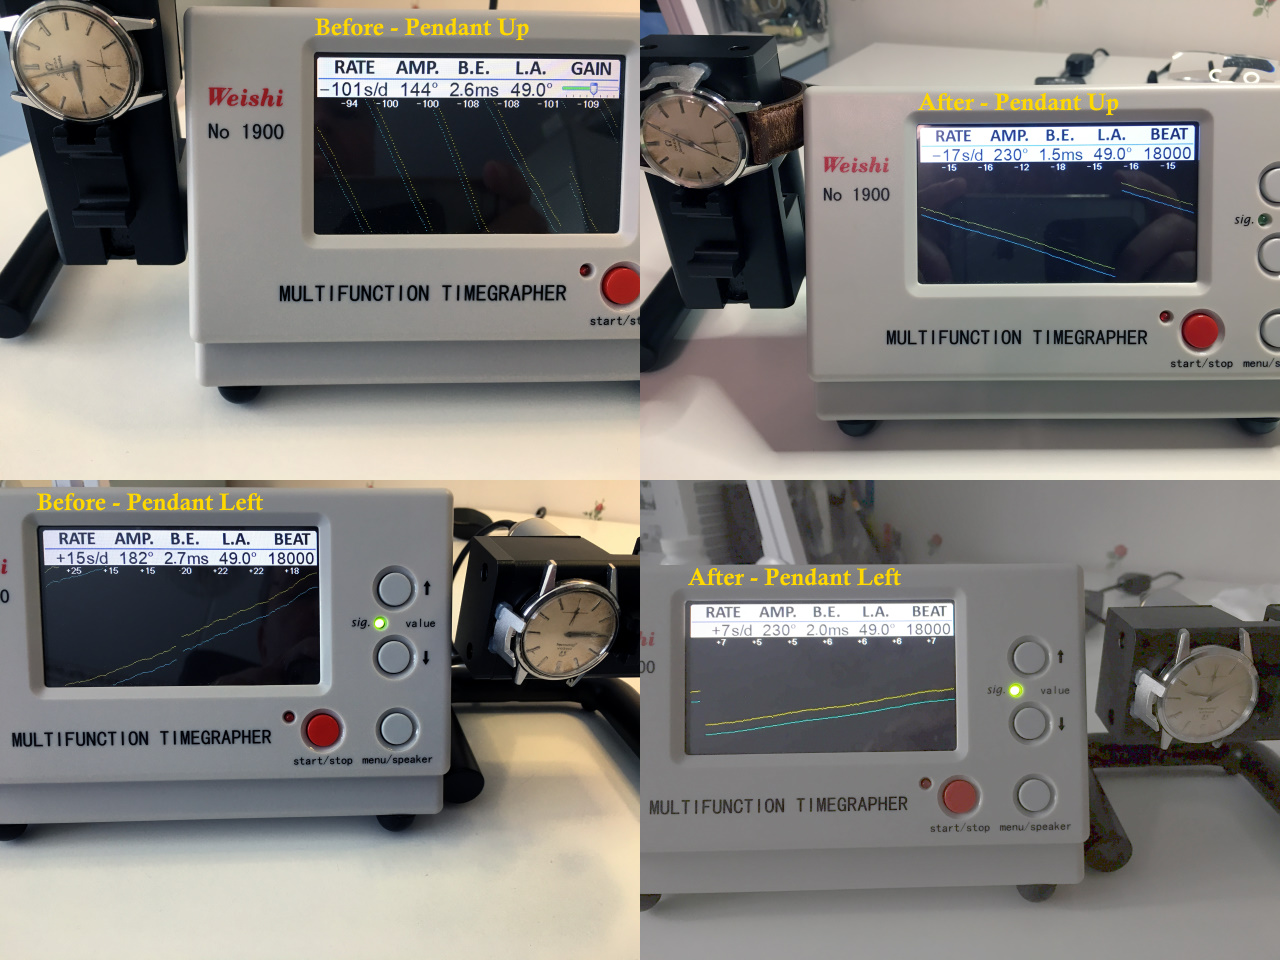
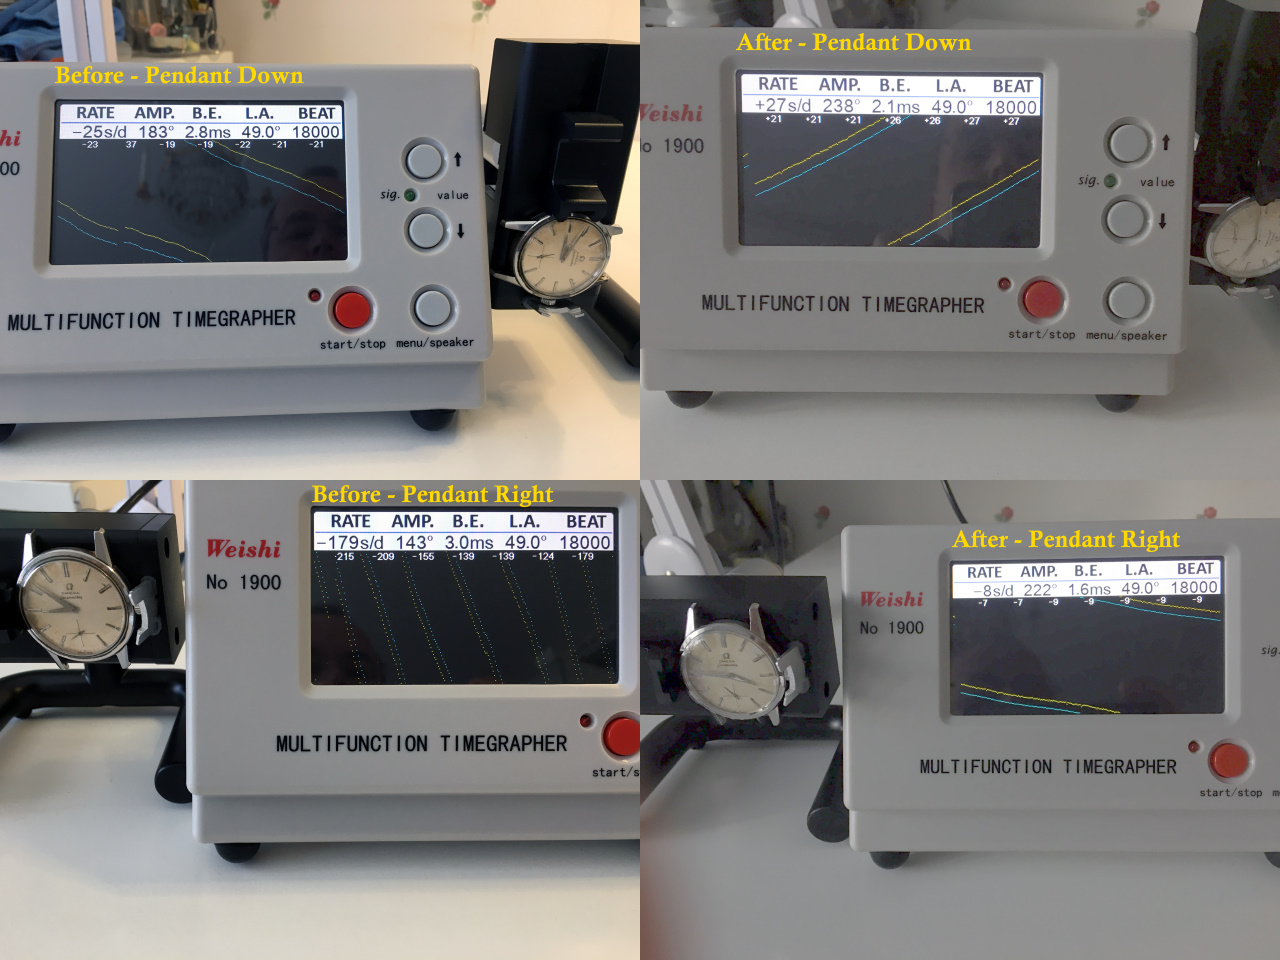
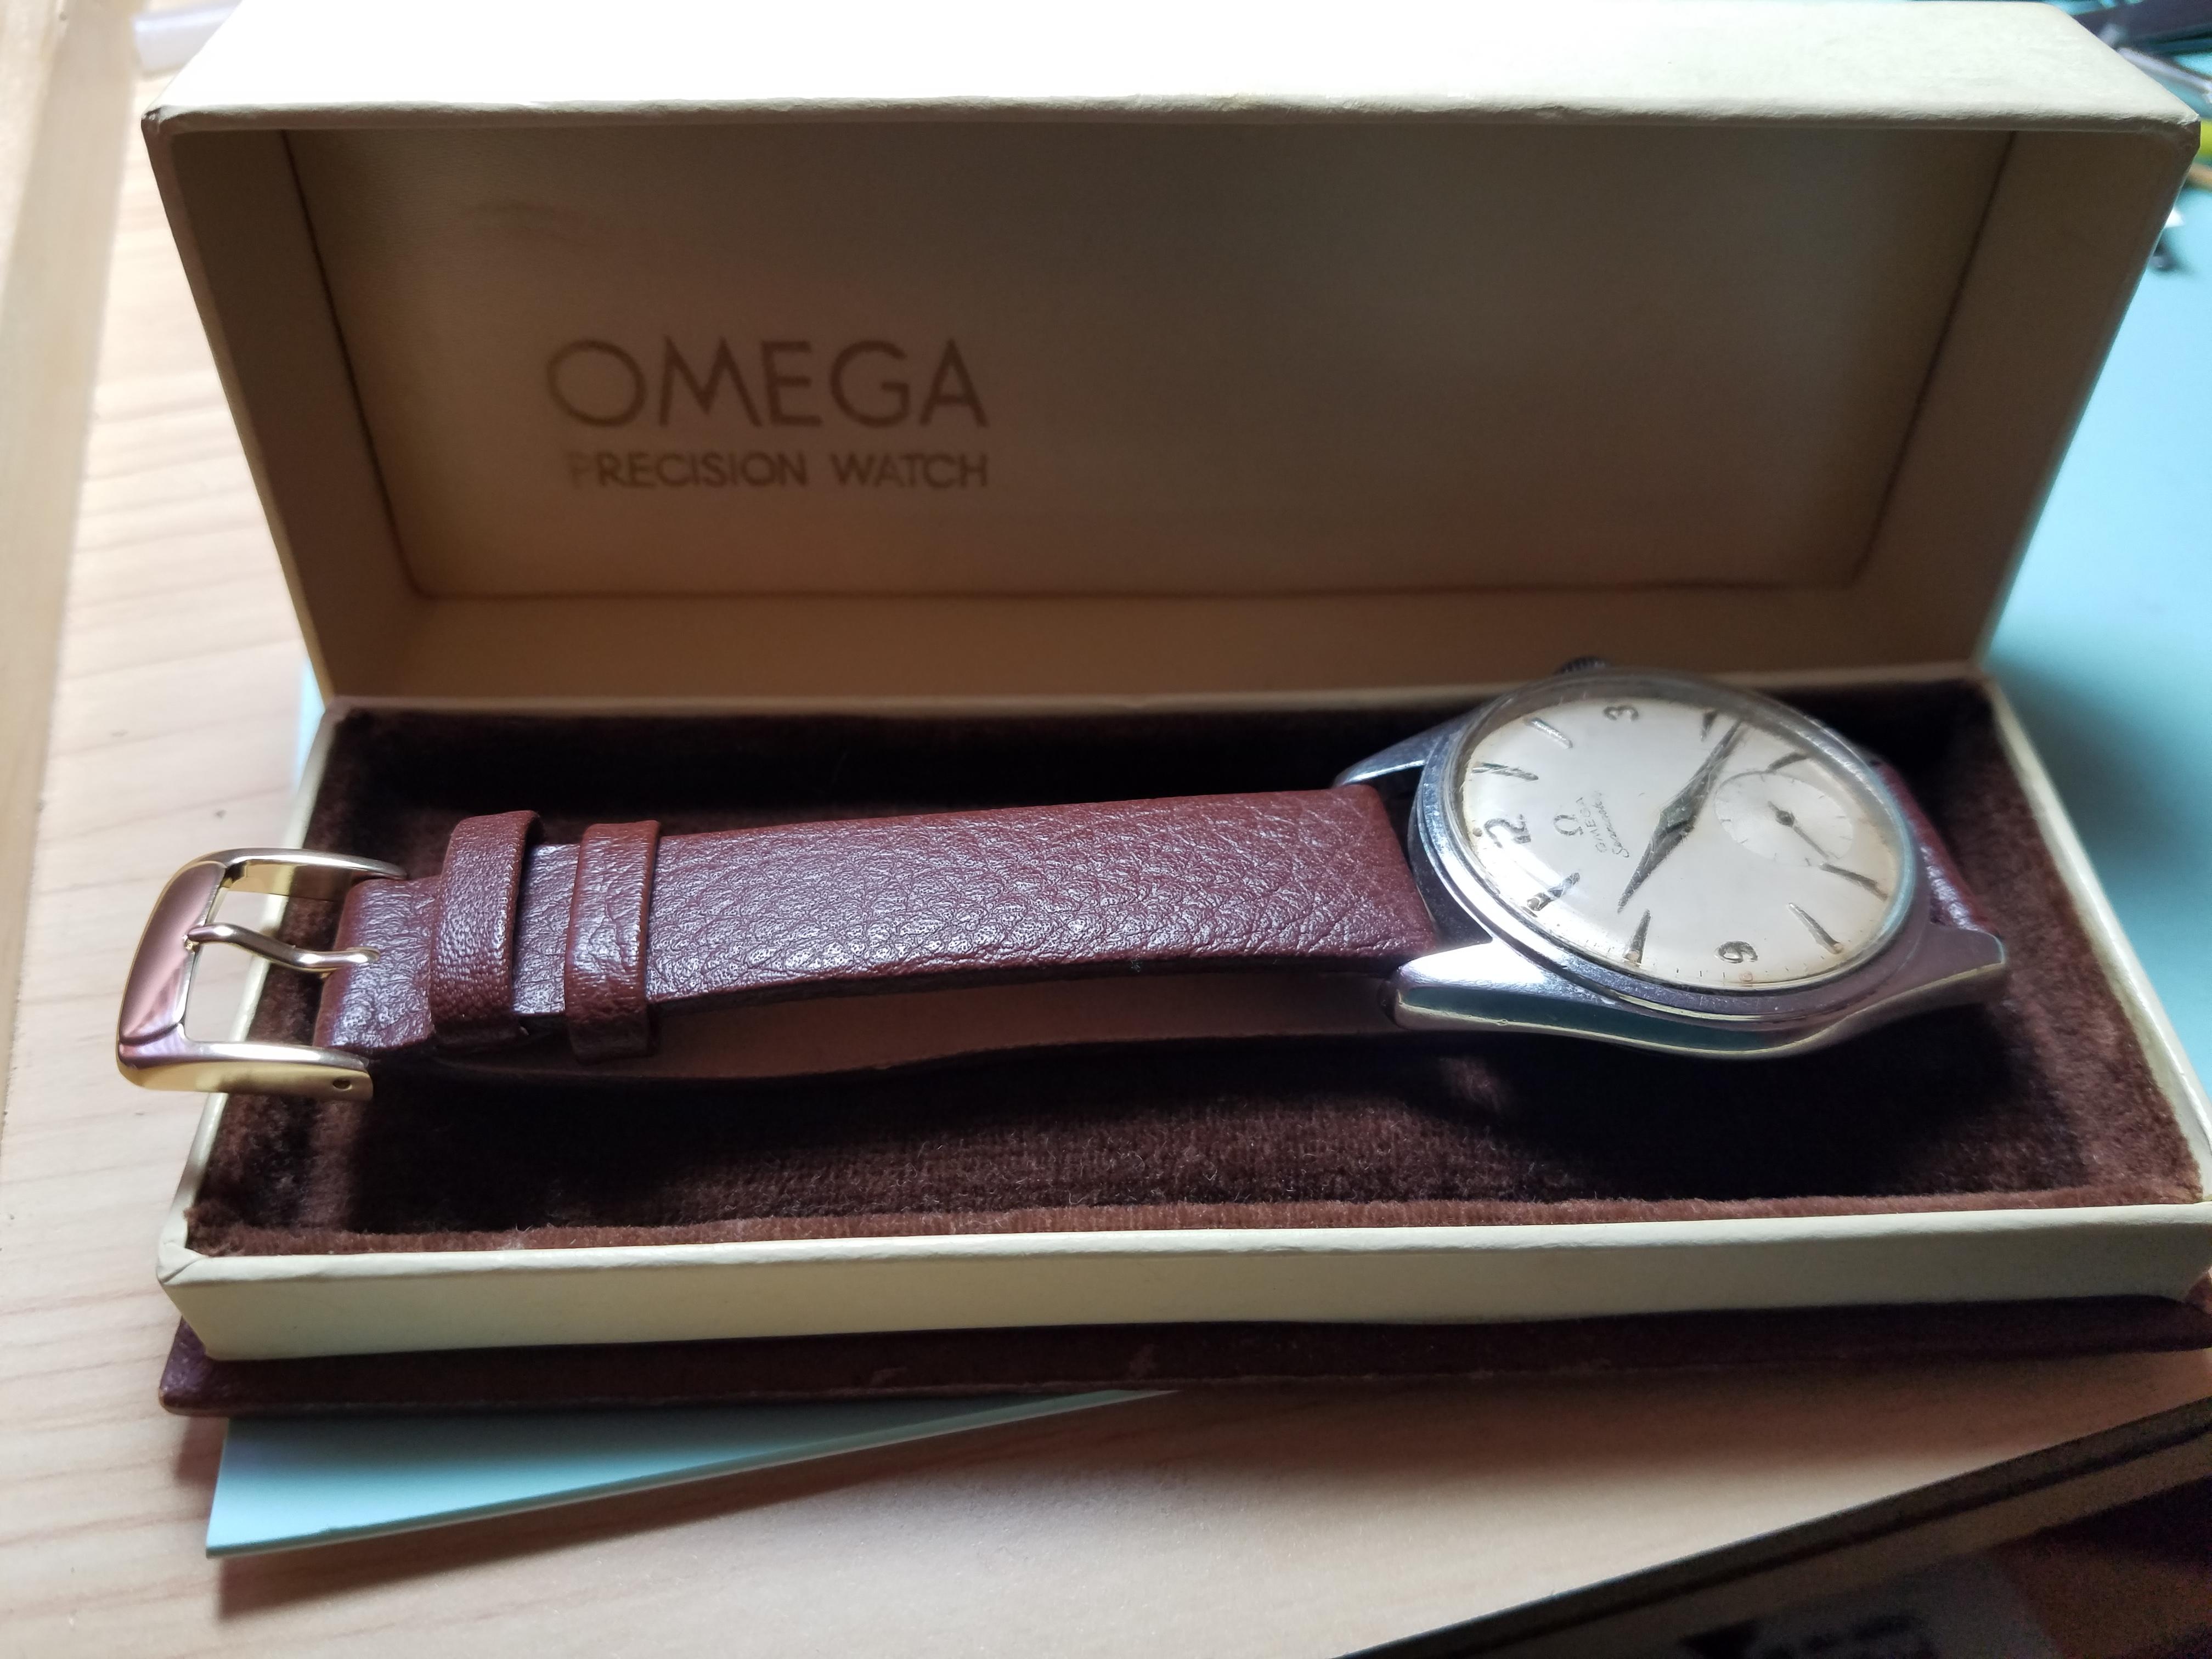
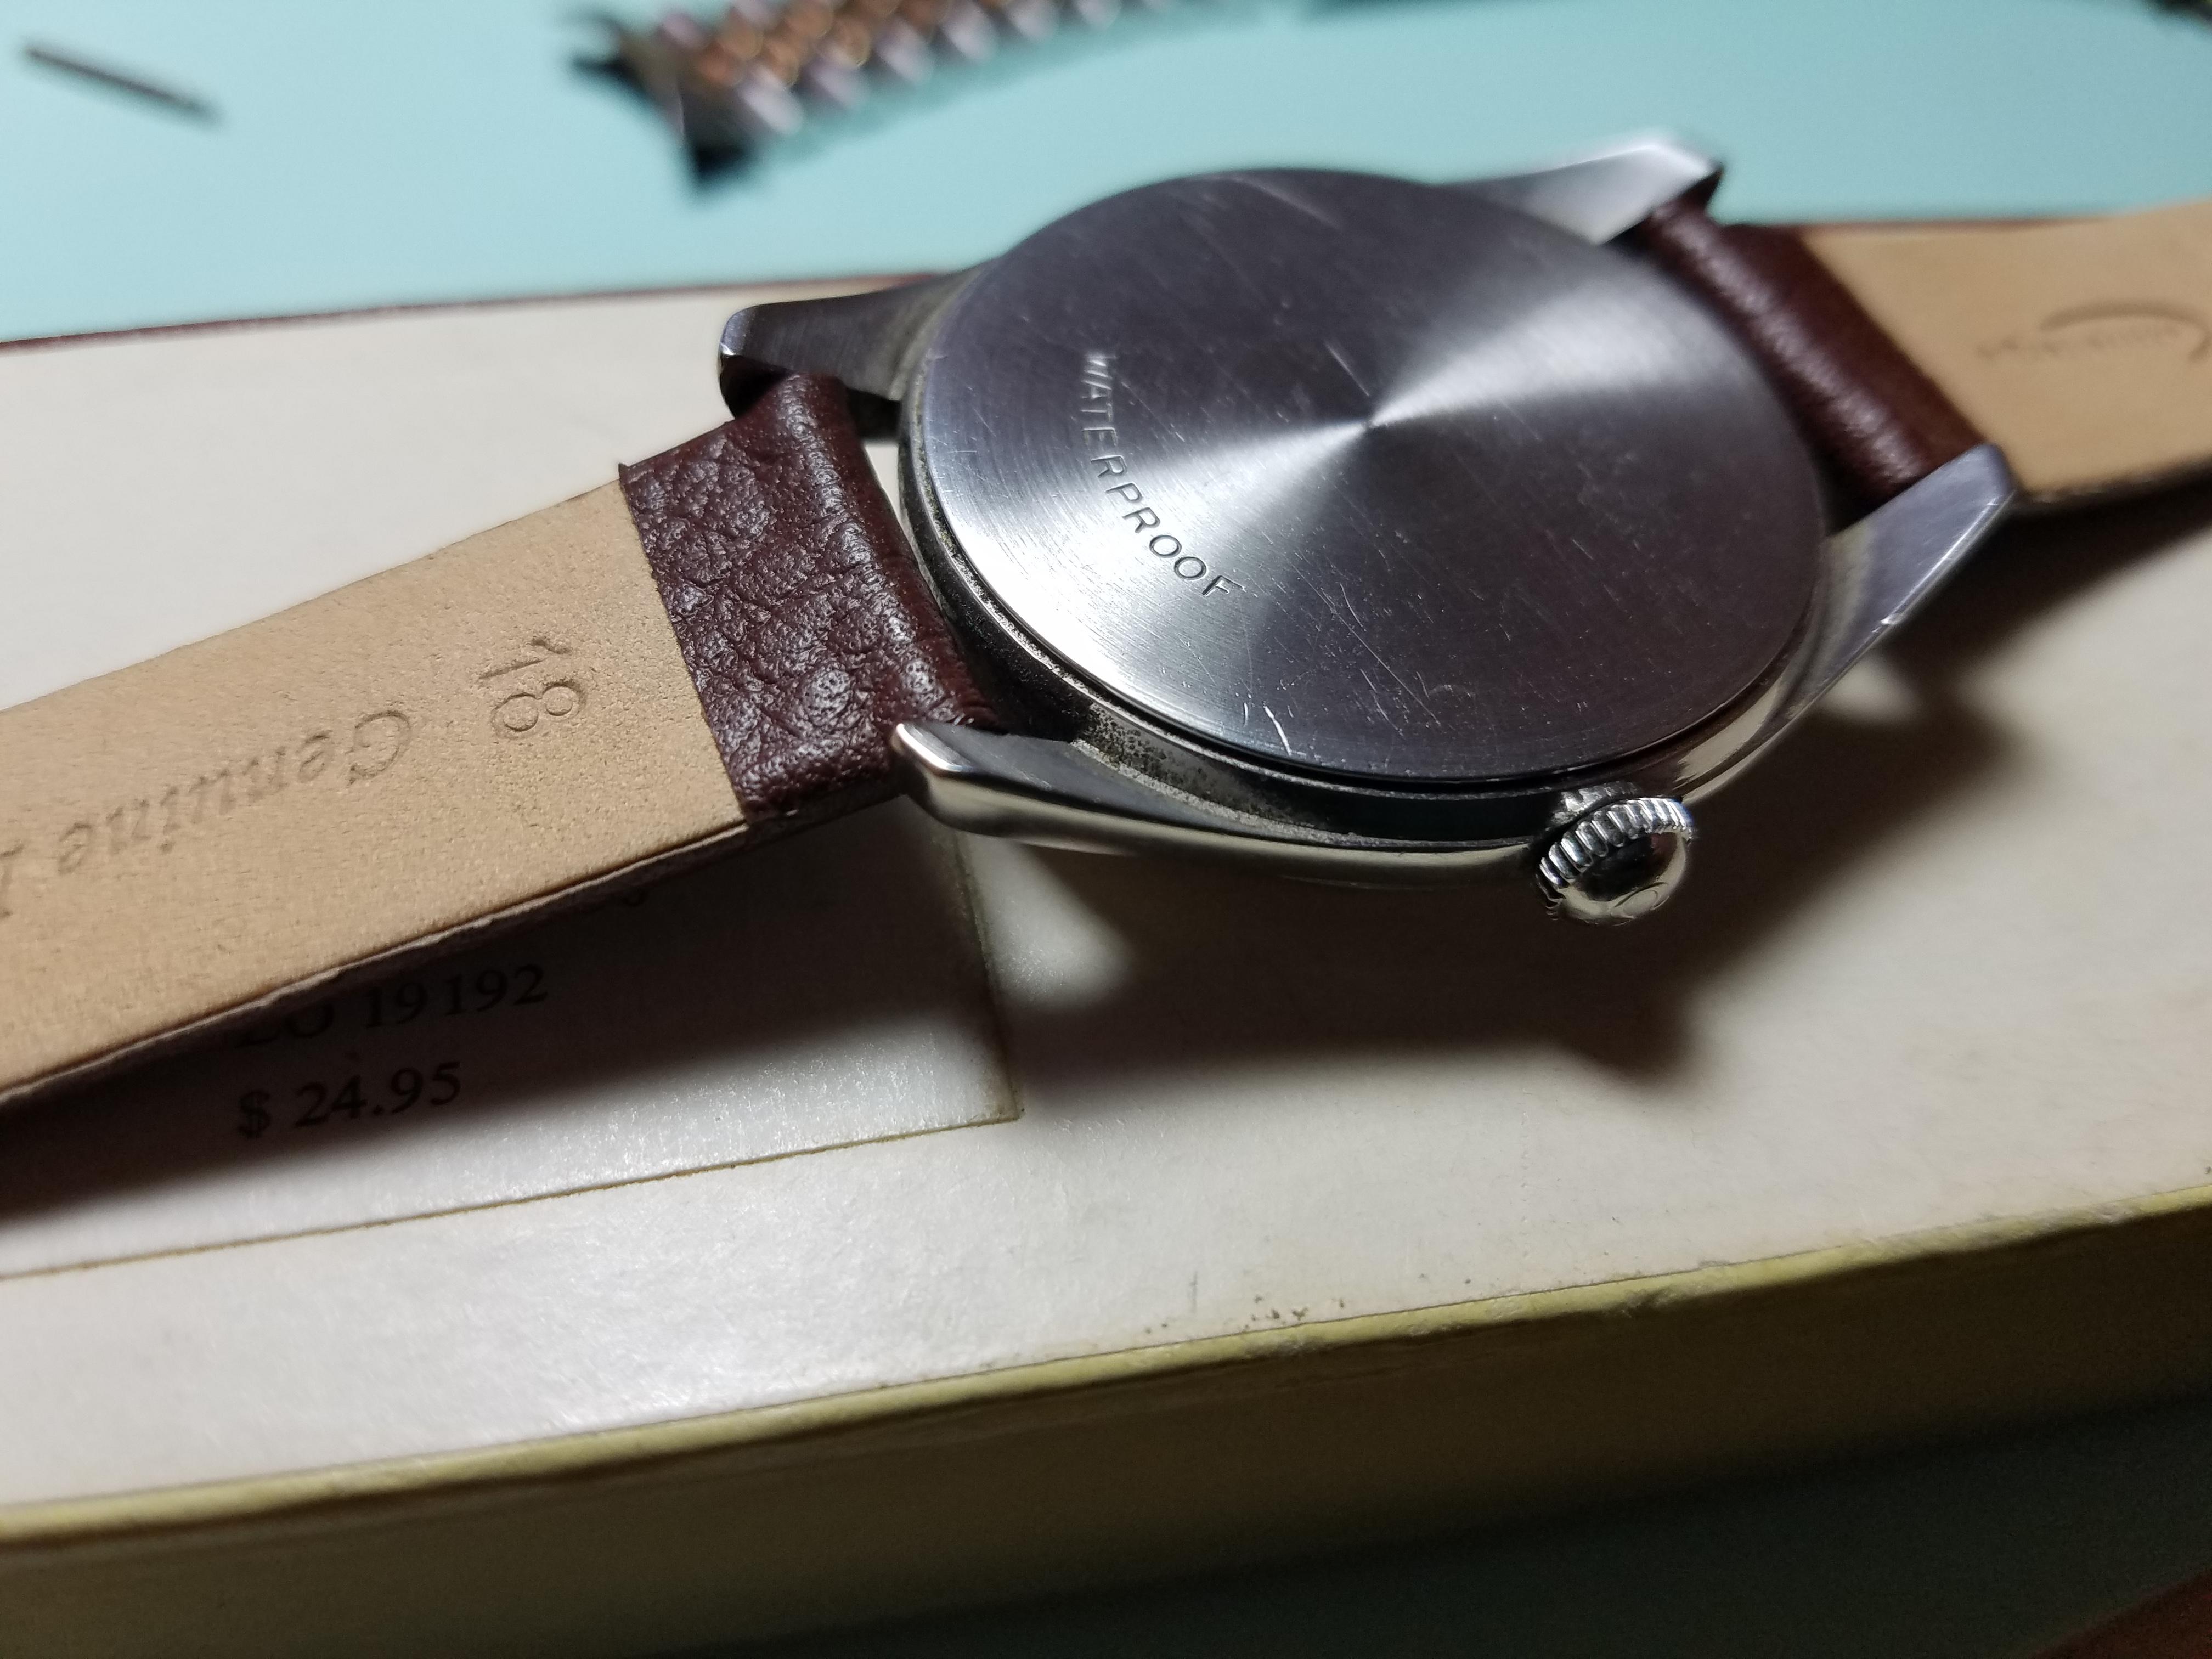
I would be suspicious if this is a real Omega? It might be but that stamping on the back looks pretty bad. The movement would really give us a clue.1 point
-
Well thats a bit unfortunate, from the enclosed blurb they are based on or exact copies of the bulova accutron made under licence, hope the attached will be of some use in determining the model you have and give you a lead as to the exchange unit if it can be found. One would suppose they are interchange able. I have also attached the sheet for the 214 which will be pretty close to the 218. Also have a look at Ranfft for the Bulova 218 for more tech details. Bulova Accutron 214.pdf Citizen - Electric Watches.html1 point
-
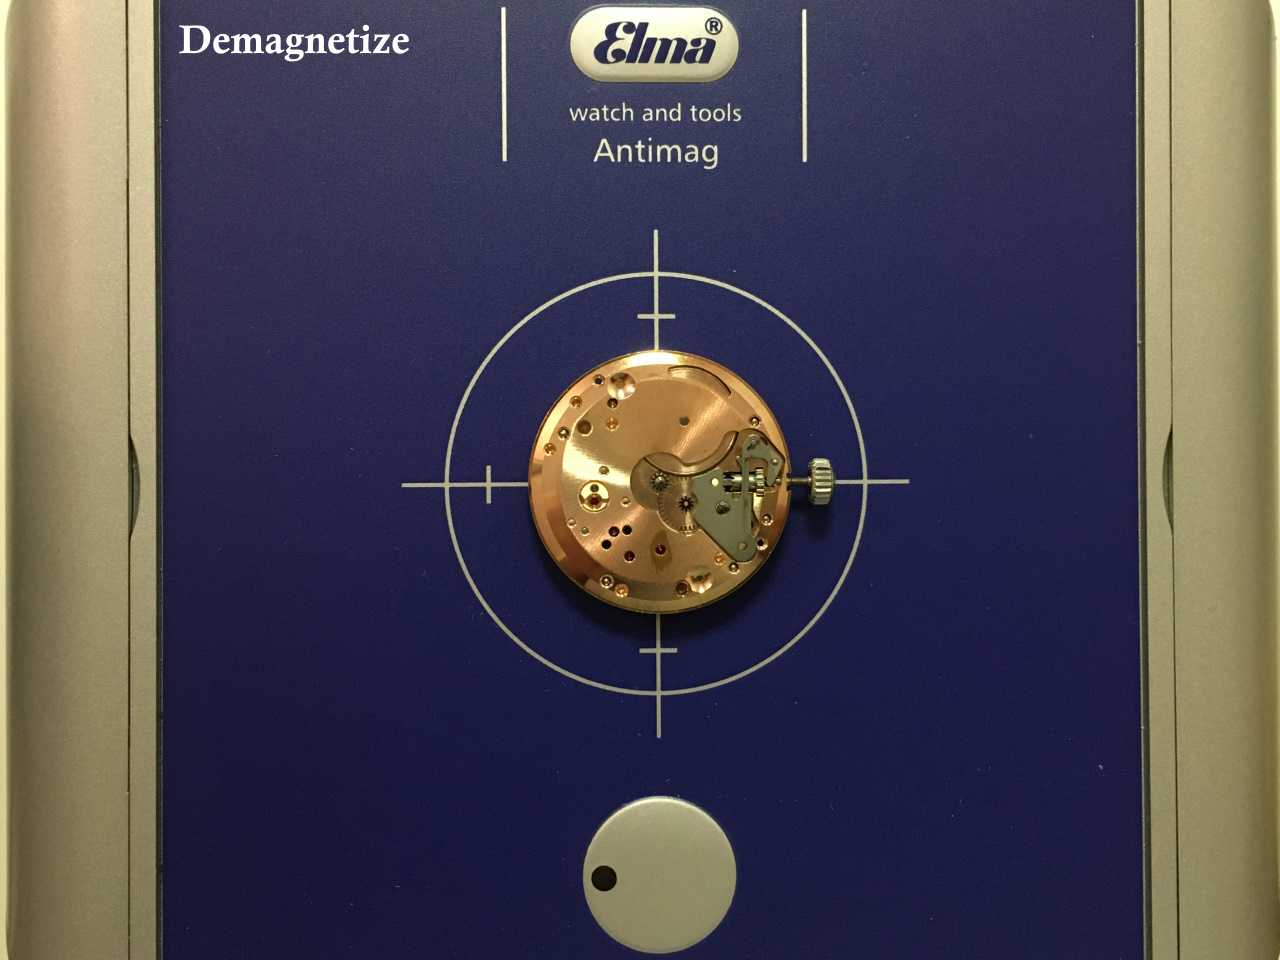
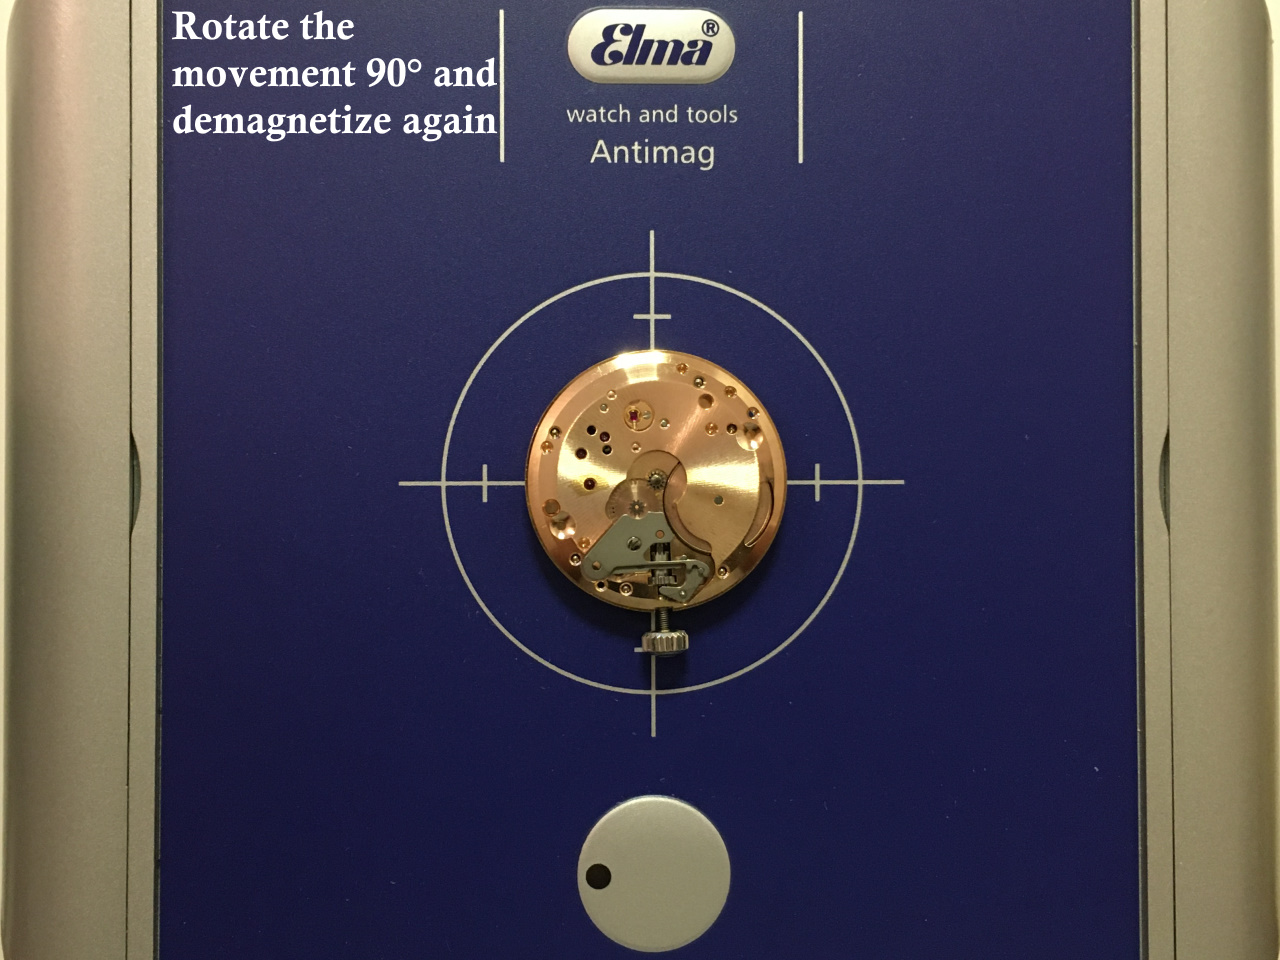
Do you feel the tweezer vibrating slightly when you press the red button? If you don't, the demagnetizer might be defective.1 point
-
A ward of advice. This applies to the UK. Do not except the first offer. If it is a genuine Omega you need to take it to around three different places to see how much they will offer you. It will depend on the weight of the gold. Any thing that is not gold they will remove that might include the glass if the case is gold. Do you intend to sell it for scrap or or are you wanting an insurance value they will ask you as the prices differ a hell of a lot. Are you sure it is a genuine Omega? If you are not sure post a photo of the movement and we can tell you. Just make sure you don't get taken for a ride.1 point
-
These blue boxes usually work fine, if the tweezers are still magnetized try again. Remember to put the tweezers over the tool and hold the red button pressed while you slowly move the tweezers away from the tool, at least one meter. Then you can release the button and test again if it worked.1 point
-
or a center drill maybe? https://www.mcmaster.com/carbide-center-drills/ this is just an expensive carbide example I pulled up. but you can buy these anywhere and of a myriad of metals and sizes. a center cutting endmill too would work. Andy's idea of a pilot drill with tape on the opposite side is good too. as a machinist i have used all of these methods and still do.1 point
-
a few new ones I'll have to try! including the soldering station too. keep up the good work it's fascinating. nothing I've seen before in my short time as a hobbyist. and the Lego connection...!1 point
-
I love Legos! well, I used to anyway as a kid..1 point
-
The crown is too big.1 point
-
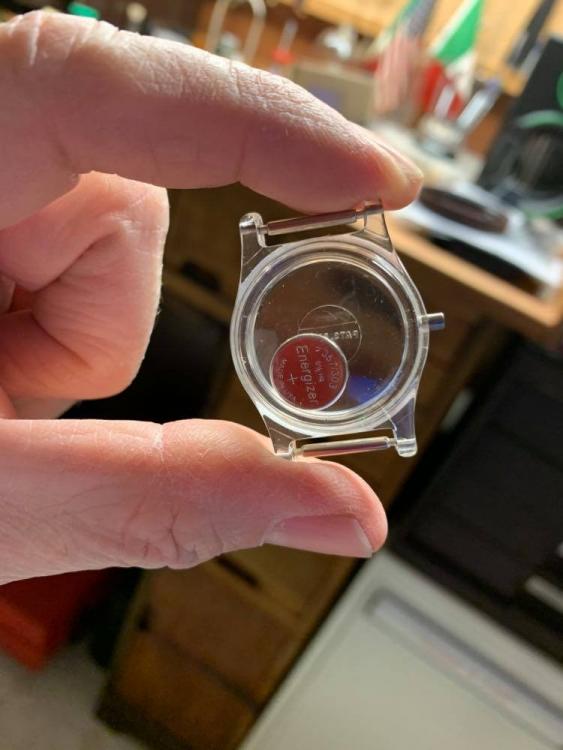
Clearly its the bargain of the century. I particularly like the crystal clear lettering on the transparent dial, and the limpid hands and ice like case is a master touch. Now open your wallets everybody and repeat after me.. "Help your self!"1 point
-
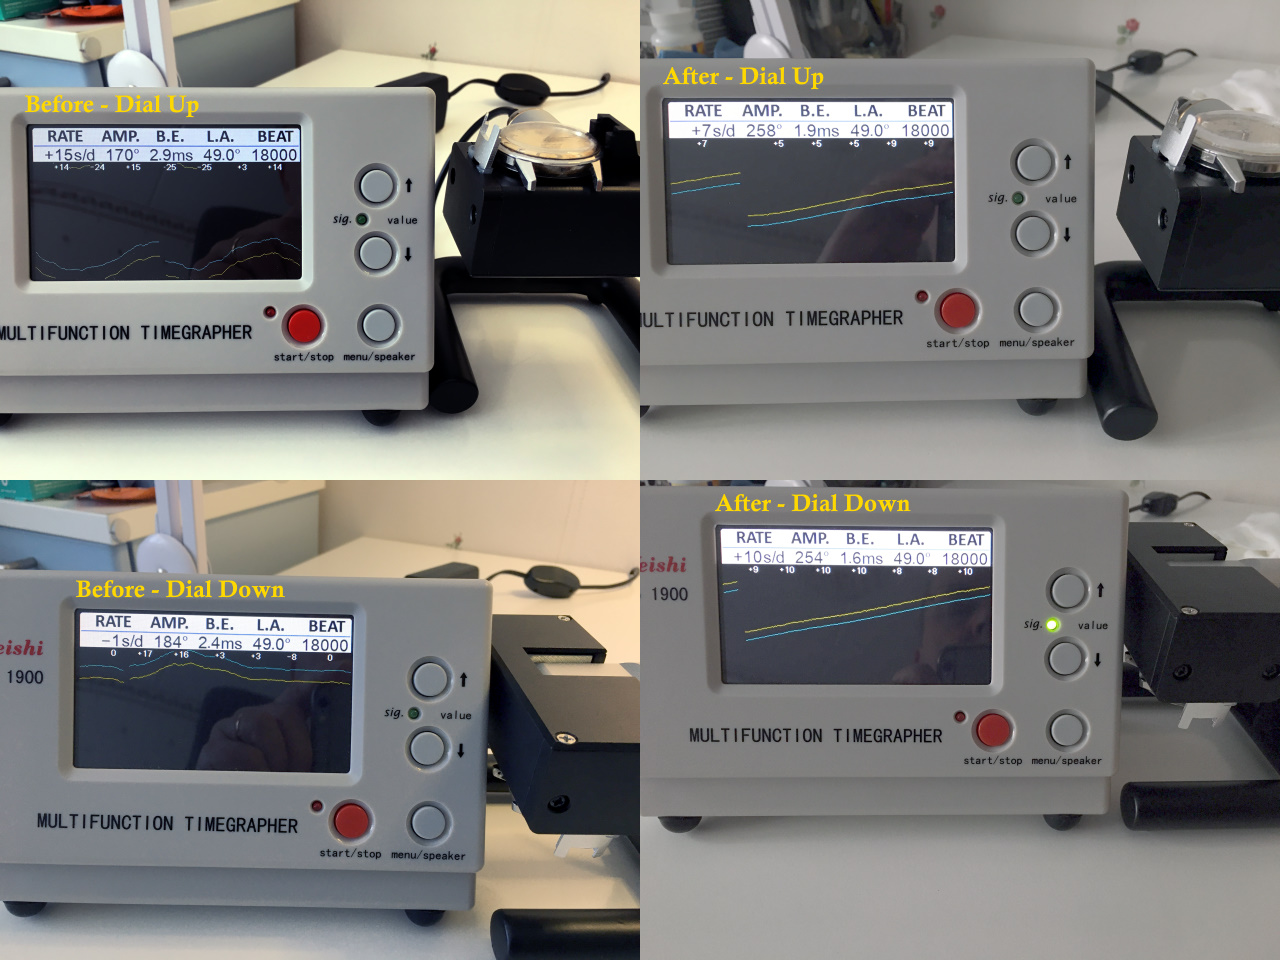
Well, I got the new mainspring. Its ticking away at +2 seconds a day dial-up. This is my first success story. Thank you all for your help. It goes with me everywhere right now.1 point
-
Cool... I wasted a bit of my life on that Lego site... I remember the old "expert builder" sets from when I was a kid...1 point
-
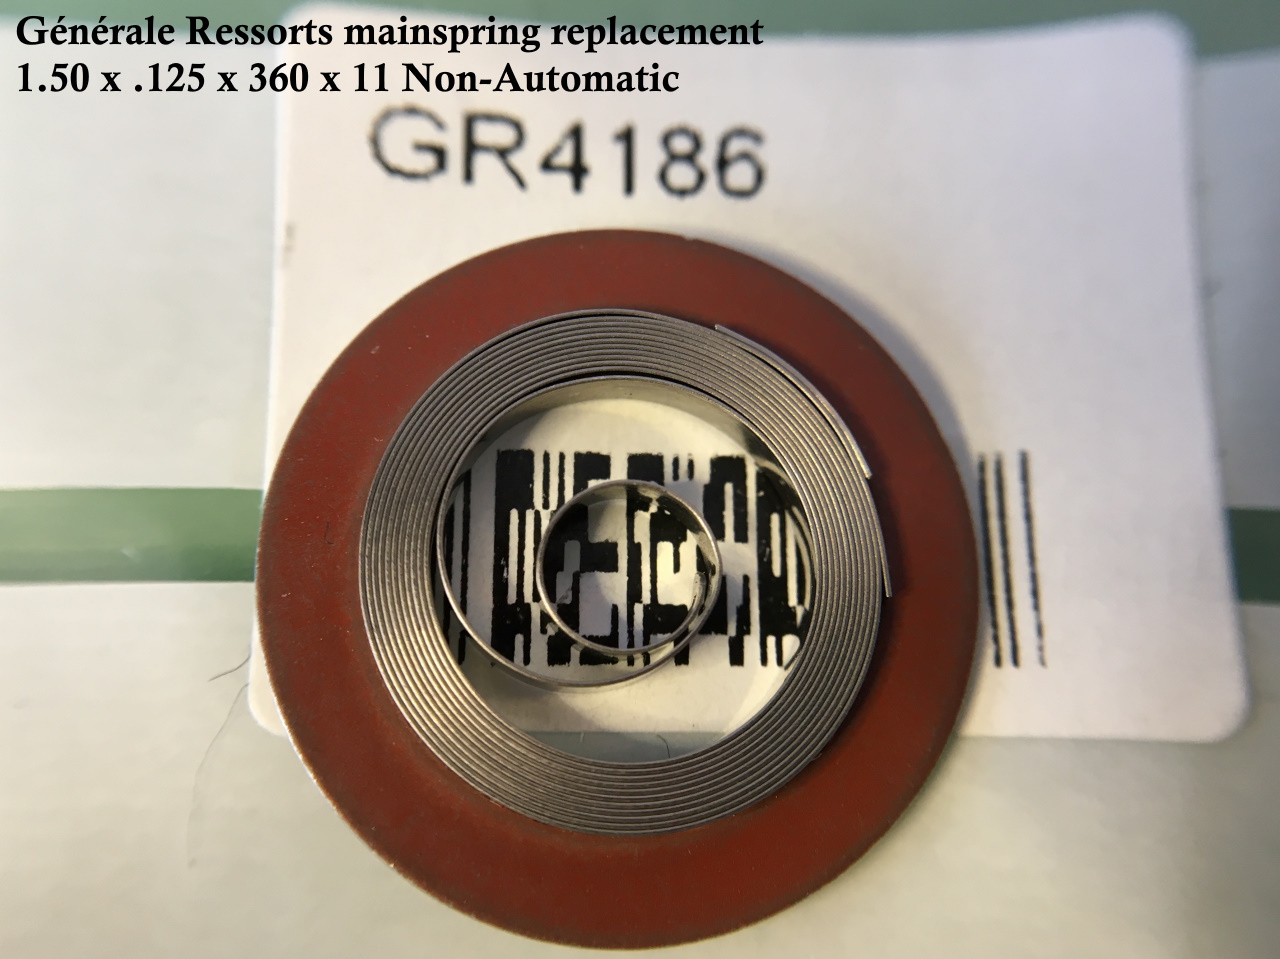
Fantastic walk through, thank you! Have you measured the ID of the mainspring barrel? What was it? 11mm or 11.5mm? Have you measured the old mainspring to see if it matches the new GR4186 ? Could you please upload a photo showing the shape of the old mainspring? Was it S-shaped? I am asking these questions based on my experience with 30mm Omega watches , when cataloguing information did not match the actual original parts. The ID was off, the thickness of mainsprings was also of (same 1.5mm height though). And lastly, about GR mainsprings?: you were lucky to get a nice and clean GR4186 mainspring, which according to GR is supplied "teflon-like dry lubricant" coated. Several GR mainsprings that I received did not look that shiny. In fact, they were coated with anything but "teflon-like dry" lubricant. Perhaps an old stock? Thus I had to clean it and lubricate with 8200 grease. Did you apply White Luminous compound on the Hour Minute hands?1 point
-
Have a look at this site run by Christian Dannemann "The Watch Guy". I believe that it is available for anyone to use.1 point
-
I think you’re right. Use a new gasket and VERY LIGHTLY lube it with Molykote 111. Too much lube and it’ll creep up the crystal. Like wipe off half of what you might use on a case back gasket. It should just be darkened by the silicone- not really shiny with it. If the gasket is used/old/compressed it is likely to leak. I think these are only 50 or maybe 100 meter depth rating (for this reason) anyway. A round o ring may work if you can wrangle it into position before placing the crystal. I’d probably uncase the movement so I could check the cleanliness of the crystal before buttoning it up.1 point
-
I use ofrei quite a bit. Other than my latest experience, they have been good, and competitive on price. I also use StarTime, who seem less popular here but their service is good and website easier to navigate. Slightly more expensive that ofrei, and only “new” stuff. Ofrei is where you find old stock. He has a bunch of JB Champion bracelets in stock at the moment...1 point
-
That's what I need is Bob. I never tried Ofrei. I'll have to give them a try. Thanks for the tip.1 point
-
Hi Markr will this do find attached cheers 3564_Citizen 0200, 0201, 0271, 0272.pdf1 point
-
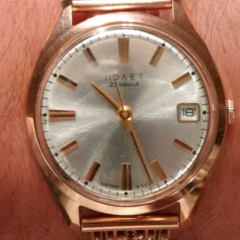
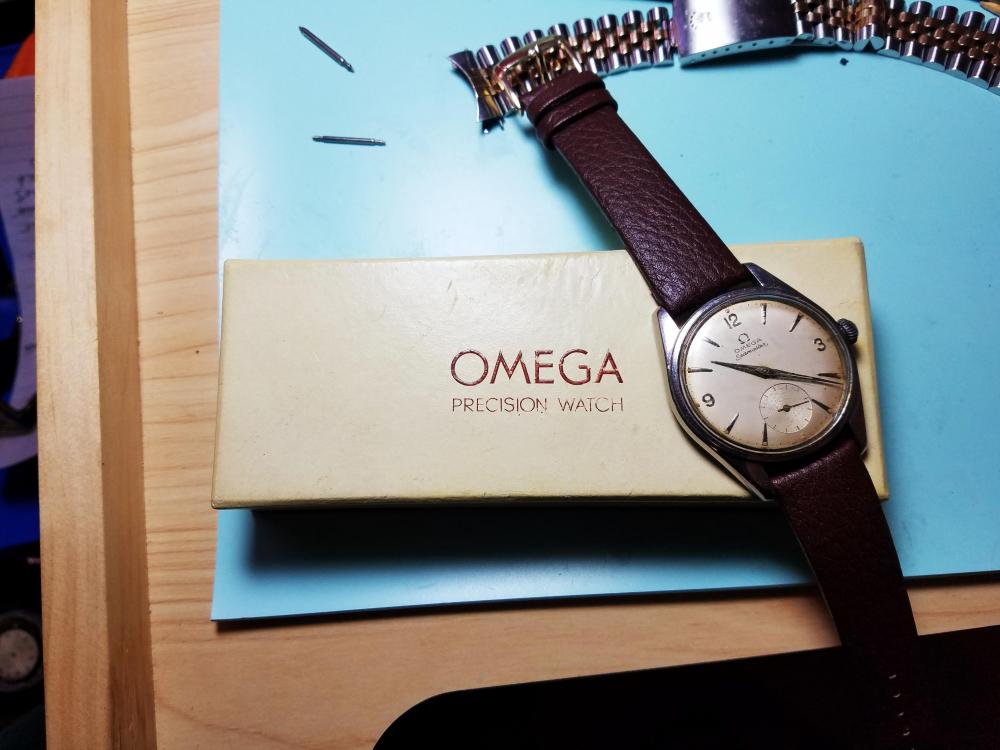
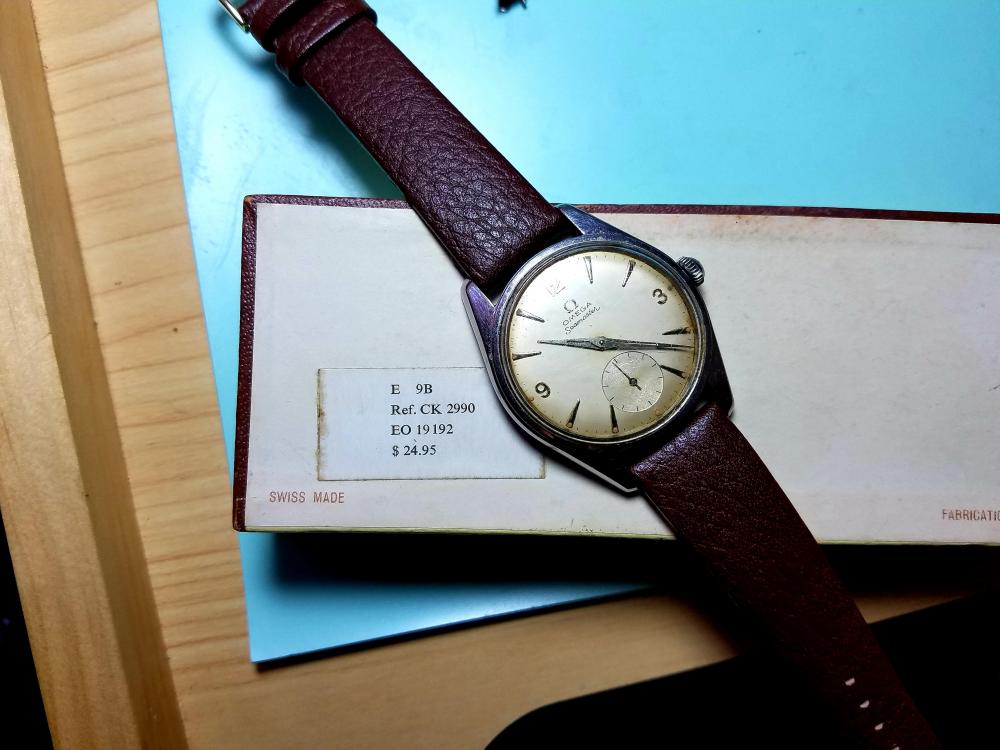
Well, its not coming it arrived and I am elated! A 1958 CK2990 Ranchero case with its original box! Although not technically a Ranchero, collectors call this particular 2990 a 'Seachero' due to the fact that they share the same case as the Ranchero. It sports a 267 Cal. And is 36mm wide. The watch is virtually untouched - all but the band. Original polish and movement. To have the box is extremely rare as they were only made for 2 years. The previous owner's DNA and grime is still on the caseback and lugs. Timed it and it's running slow. Will service the movement.

 1 point
 -
Arrived Sent from my iPhone using Tapatalk Pro1 point
-
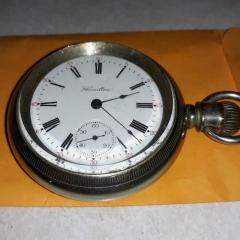
Hamilton 992 with a salesman case. Sent from my iPhone using Tapatalk Pro1 point


.JPEG.496fbe70bcefad6626d8e13f49259156.JPEG)
.JPG.5837c96c3230faae4f5721580d7600f0.JPG)
.JPEG.8fd7cba2123e6823b226b8431b09d4fe.JPEG)