Leaderboard


Popular Content
Showing content with the highest reputation on 01/20/20 in all areas
-
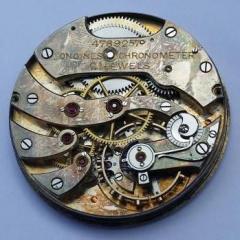
If you're new to watch repair I would put this one aside for now. Full plate watches are not easy to work on, and there are zero spare parts for this watch- aside from making them. When you are really zooming on regular modern manual wind watches come back to this one.3 points
-
In school we had curved tweezers and #5. It was up to each student to find what they were comfortable with; most ended up just using the 5s. We started with large springs, like from Big Ben alarm clocks, working down to little bitty ones. First we would straighten out a coil totally straight, then recurve it. Then we formed letters of the alphabet (really, haha). The spring needed to stay flat through all of this. Then the teacher would take a virgin spring and introduce errors in the round, and in the flat, which we had to correct. This was over a couple of weeks. When we could comfortably fix springs that had no collet or stud or anything, we would start making corrections in the watch. When we could do that, we finally learned to vibrate them. There are springs to be found on Ebay and from some of the material suppliers; it's very worthwhile to get some and spend some time figuring things out and gaining skill.3 points
-
Hi for manipulating balance springs I made a pair of tools from large sewing needles, the point fitted into a handle or dowel and the head of the eye stoned off leaving a narrow fork with wich you manipulate the spring. These are not my invention but somthing I got out of a watchmaking book and with care they do work, They are not a substitute for tweezers but an addition to use whilst engaging in the black art of balance spring work.2 points
-
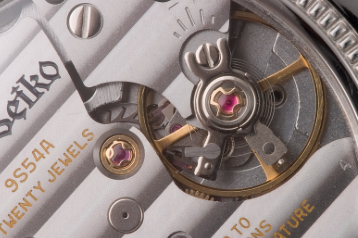
I recently put up a post about a Rotary watch that needed a new shock spring. Just a heads up it looks like the latest caliber of Rotary watches have Seiko movements fitted. The error I made was I thought the springs were KIF Trior BUT they are not although they look very similar they are a unique spring for Seiko's. Spot the difference see pics attached. I have found one from a donor movement. KIF shock springs.pdf
 2 points
 -
Hi I think saswatch said it all and as he says never be afraid of asking questions we all started some where we weren't born with the knowledge we learned it.1 point
-
I made a few of these too using pegwood, but i have a vintage set that has one that is sorta shaped like an L except the bottom point sticks straight up when tool is vertical, this tools works wonders when trying to separate coils or trying to widen them. Iam curious how you did this. I once watched a video when a guy took a hairspring that where the coils where touching on one side and way apart on the other, and he put a pin through the collet then grabbed the stud with a pair of tweezer then pulled it all the way out straight, he then let it wind back up slowly and when he was done the HS was perfectly round, it was unbelievable, i tried doing this myself but can never get it right, its def an art, think the angle he did it plays a big role in his success but just can never seem to get it down.1 point
-
Hey first of all never be afraid to ask questions even if they seem redundant, you may get the occasional "there are many other threads on this topic" from certain members but I would say 99% of the users on this forum compared to other forums will genuinely still want to help, including me. Dont waste time or money on software, get a timegrapher 1000 it can be had for about $150 and it works surprisingly well. Just note it will only be the most accurate with complete and utter silence. As far as as setting a bridge goes it takes practice, when i first started it would take me hours and several attempts to get it right, sometimes resulting in bent or broken pivots, know i can almost lay it right on with perfection. just note to never put any excess pressure on the bridge. Gently resting your finger helps to keep bridge in place but i recommend trying to do it without doing this because when you are new you tend to tense up and you can unwillingly put too much pressure on the bridge. Sometimes you can lay it right on top and just jiggle it a bit to get one or two of the wheels in. Then checking them by moving the wheels up and down (do note Spin them until all wheels are set), and by doing this it will allow the teeth of the wheel to set in the pinion of the next wheel thus lining up the pivot of the next wheel in the train. I do this with movement at eye level. Under 10x+ magnification looking from the top you can actually see the pivots in their respective jewels. Slight manipulation with a pair of tweezers can also be used to set the wheels, but dont actually grab the wheel with the tweezers just gently movie the pinion until the pivot seats. Having all the wheels lined up before laying the bridge down also helps with this. Check the pivots from the top make sure they are all in and bridge is laying flat on the main plate. If all pivots are in then use light finger pressure while placing screws in, before screwing move the center wheels make sure all wheels are spinning freely, do not take finger pressure off the bridge yet you want to screw each screw in, if its 3 screws then start with the outside screws first. DO NOT screw the screws down all the way, just until you feel light resistance. Checks the wheels spinning again while still keeping finger pressure. Now you want to turn each screw a half turn one by one then check the free spin again, at this point you can remove your finger from the bridge. NEVER screw down a plate or bridge without having finger pressure it can result in bent or broken pivots.1 point
-
Here's how to remove the crown/stem and then you should be able to lift the movement out. I use a hat pin to push the dimple on this type of lever and hold it down while pulling on the Crown. Sent from my BBF100-2 using Tapatalk1 point
-
Someone knowledgeable told me that it doesn't fit actually and from photos it actually seems to be right (or wrong in the case of julesborel website). The wheel probably fits but it is the "normal" short pivot version while I require the long pivot one which extends upwards where another wheel goes into.1 point
-
Have you looked for an ETA 1011 part? Should be the same. At least Jules says so. http://cgi.julesborel.com/cgi-bin/matcgi2?ref=V]^DZL Can check if i have an old movement here in the scrap .1 point
-
Just as many many brands put their name on calibers made by a different maker today so they did in the past. Up to the end of the 60s Hamilton made their own stuff, then moved operations to Switzerland, then by the mid 70s were bought by the company that became Swatch Group. So this movement was made by ESA (basically ETA), and they put the Hamilton name on it and a new caliber number. Here's a link to the Ranfft page on this caliber http://www.ranfft.de/cgi-bin/bidfun-db.cgi?10&ranfft&0&2uswk&ETA-ESA_91541 point
-
Verkmästarna didn't have it Was obsolete there also.1 point
-
I suspect you need multiple cliche'. Since the process of loading the pigment on to the cliche' involves squeegeeing it on, and since you need to let each colour dry before applying the next, I would think the workflow involves careful registration of each cliche' and each blank, in order to allow accurate multiple applications of pigments. For example if you look at this dial, you can see there is a white base coat, presumably spray or powder coated, followed by the main grey artwork, and if you zoom in and look carefully you can see this is overprinted with the black layer, as the Luch logo is obviously on top of the grey. Furthermore I spotted another version in which the stars, and some other details are infilled with red. This red layer would make that particular dial a four stage process. Base coat, grey, black, red. Each of which would require a different cliche'. There would also probably be a top coat of some kind of finishing lacquer, and at each stage, the dial would have to be baked, or allowed to air dry, or fixed in some way, depending on the process and materials used to avoid pigment bleeding from one stage into the next. A key point to take away from this is that your cliche' registration or positioning must be very precise, and your dial and cliche' must be re-positioned exactly at every stage otherwise you will get mis-registration faults in your finished piece due to rotational or lateral registration issues. In the case of the above dial, this would probably be less obvious, but in the case of the one where the stars and other details are infilled and finished in red, this would be absolutely critical. I presume therefore that the cliche' must either be a standard size, or there must be some sort of registration marks on it to ensure it sits precisely in your dial printer. The dials are obviously all the same size, but again there may be features of the printing outside of the visible area (alignment dots or cross hairs) that allow precise alignment of each print layer. Alternatively, the key may be the dial feet, which may be dropped in to a suitably drilled carrier plate to ensure correct registration of each dial in the batch as it is placed on the dial side of the printing machine. EDIT: Here is an example with the red overprinting. As you can see it is a little scruffy, and some of the stars have become dislodged and misplaced elsewhere on the dial, but it is till pretty obvious the red was originally placed on top of the other coloured layers. Furthermore, if there was a lacquer layer, it was incompatible with the red paint, since the stars have flaked off individually. More likely, there was no top coat. This form of dial printing (pad printing) process is therefore a form of "intaglio" printing.1 point
-
HI if the balance moves freely and the fork moves freely and the movement is wound then there is a blockage in the train First let down all the power on the mainspring , Once done remove balance and the fork. Now try the train wheels just jiggle them are they free if so put two turns on the winder, does the train move ok , If so, replace fork and balance and put some turns on the spring and try again, Does it work ? If not its a strip down and check all the wheels mainspring pivots clean and re assemble this is the same if it works it will still require a strip down clean and lubricate.1 point
-
Risk of mishap is greatly reduced if the regulator and stud arms can be moved smoothly, I often remove/ clean and make sure both function correctly before disassembly.1 point
-
Someone noticed too much end shake and decided to close it up? You usually see this on the barrel hole as theres are lot of force there but not usual on the centre wheel. Anilv1 point
-
You came to the right place with like minded fanatics! Welcome! Sent from my iPad using Tapatalk1 point
-
the reverse could also be true.1 point
-
Welcome to the forum.1 point
-
Welcome to the forum, enjoy1 point
-
Yeah must have stolen that bracelet from his wife..it needs to go.1 point
-
Picked up this Delbana 17 jewel Incabloc recently for next to nothing. That's not a good sign... Well, there's your problem... A donor mainspring and a good bath and now it's keeping good time and awaiting a new crystal and bands. I may have to do some research here on restoring hands as the luminous paint is long gone from these and the second hand was originally bright red.1 point
-
Hi BiH welcome to the forum, You would be surprised at what they dismantle and spend hours looking for bits on the floor. Fond memories of Germany, Moenchengladbach, Erlelenz, Willich and Wuppertal working on the military bases, long gone.1 point
-
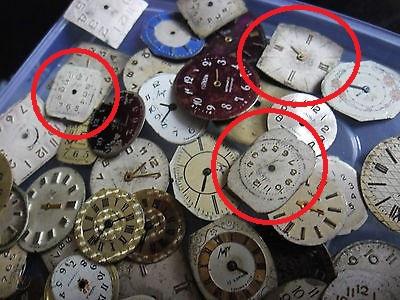
Watch dials such as this type can be cleaned with a clean pencil rubber.
 1 point
 -
Thank you for your introduction and welcome to this friendly forum.1 point
-
Check this http://www.startimesupply.com/merchant2/merchant.mvc?Screen=PROD&Product_Code=S5M42 and this http://www.startimesupply.com/merchant2/merchant.mvc?Screen=PROD&Store_Code=1&Product_Code=YT62 If you are in the UE/UK maybe someone, excluding Cousins, has it. Now if wanting for a cheap and practical repair, forget about "Kinetic", try fitting a proper size common battery.1 point
-
Thanks for your thoughts,I have invested in a second hand air cleaner from ebay ,and now have clean air blowing over my work bench hoping that this will work. if not it should keep me cool in summer. Regards, OldTwit1 point
-
Hello people, I promised to let you all know what the problem was with the Panerai. There was a problem with the two setting wheels. They use some kind of grease, and far too much. As I removed their bridge, the wheels came of whit the bridge as if they where glued. So I cleaned the parts carefully and oiled them again (little D5) and put all together again. Afterwards it runs nice again. Thank you for you help.1 point
-
There are many ways to skin the cat.... but You can get excellent results using a felt wheel, high quality like Bergeron using a heavy cutting compound. Buffing should remove MINIMAL amount of material but the combo of 1. Felt + 2. Heat + 3. The compound will actually move material from taller sites into deeper (nicks) ones. This is where a case can lose its form and symmetry. Buffing alone won’t get you there... this has to be followed by polishing. For a nice polish a non braided cotton wheel with white followed by yellow compound really bring up the shine. I have a couple examples: Sent from my iPhone using Tapatalk1 point
-
Have a look at this. This will give you an idea what you will need. Don't forget protect your eyes. I recommend you remove the watch movement. http://www.instructables.com/id/How-to-Polish-Stainless-Steel-Watch-Basics-of-Poli/1 point
-
I appreciate the help nonetheless. Have been emailing multiple stores and no one has it.0 points