Leaderboard


Popular Content
Showing content with the highest reputation on 07/22/19 in all areas
-
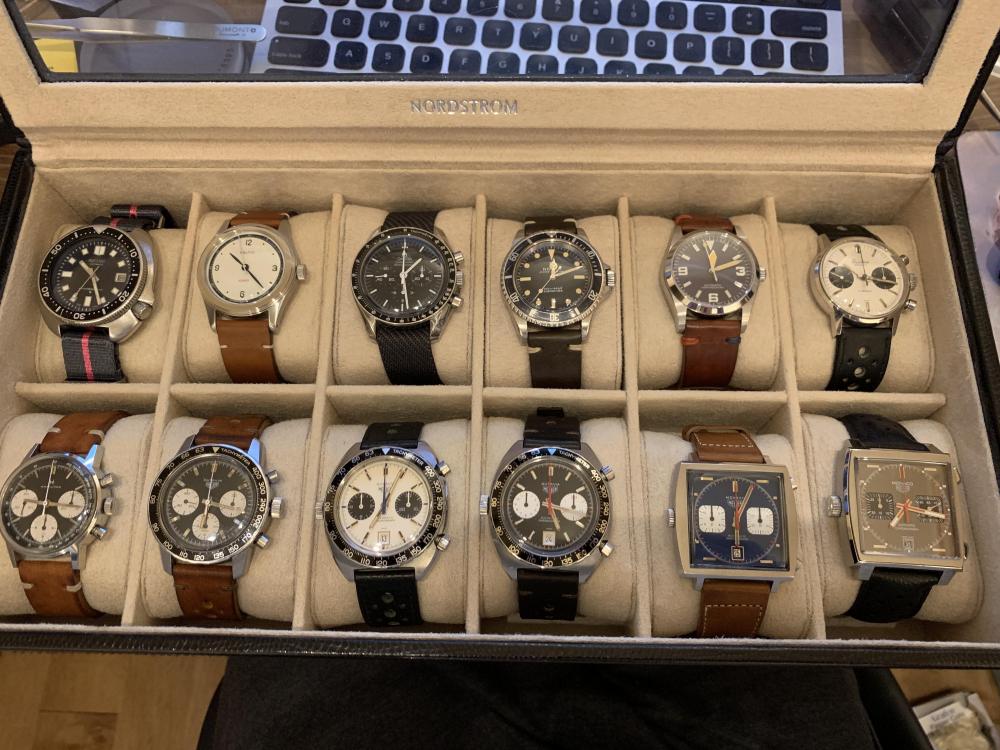
I have a few more but these are the “keepers” that are in regular rotation Might make a separate projects post but the blue dialed one with no brand name is one I made from parts from eBay after getting inspired to do so by mark’s project.
 4 points
 -
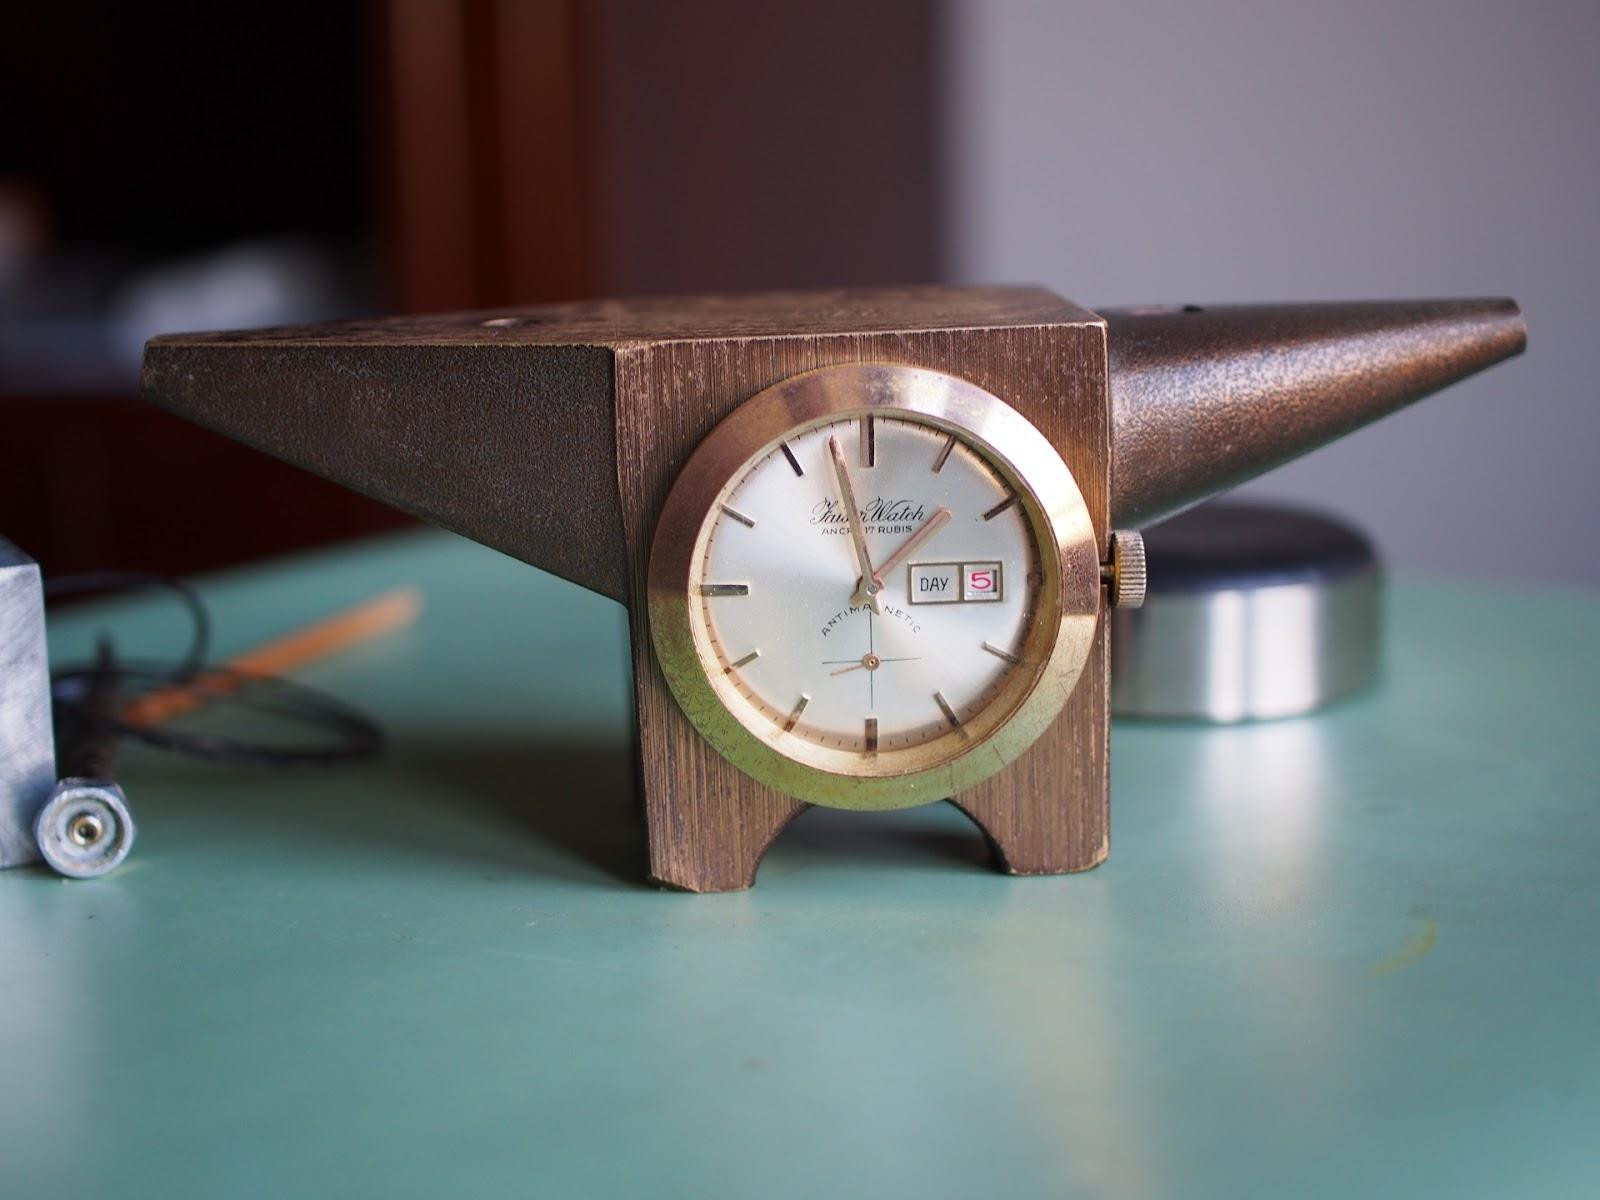
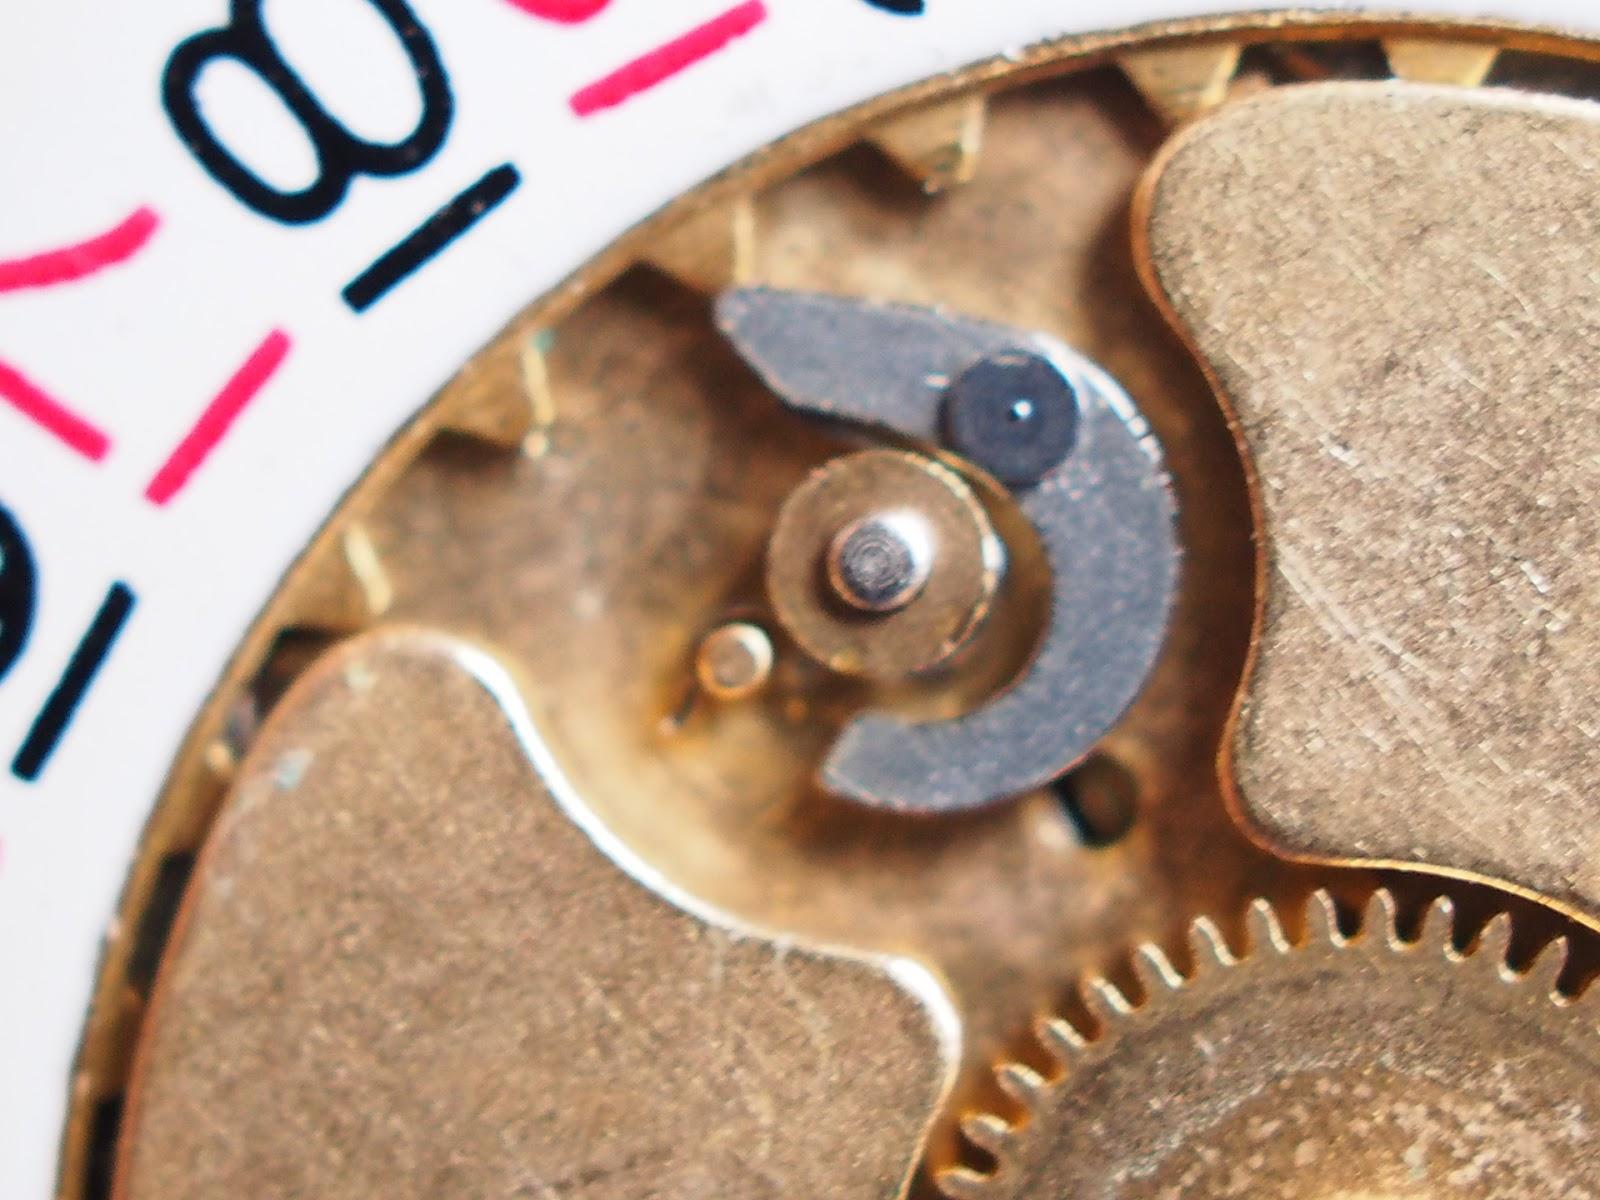
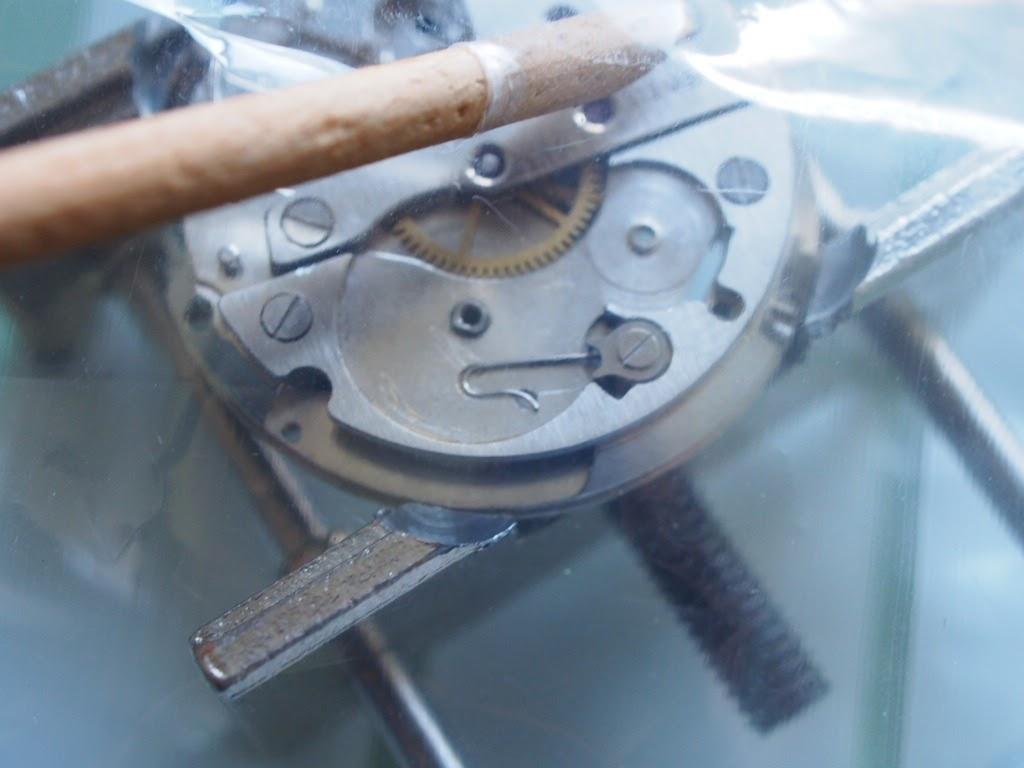
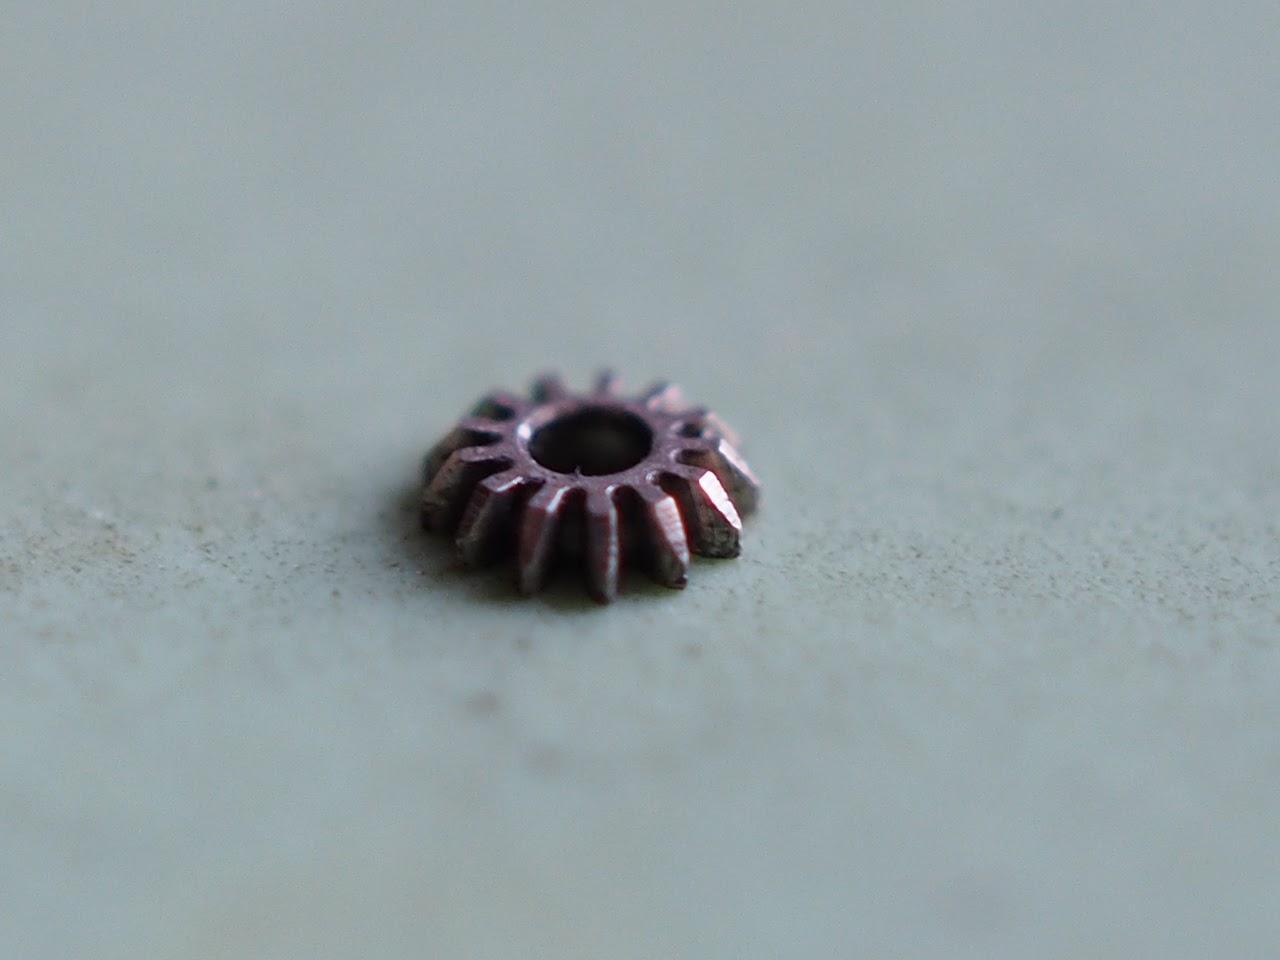
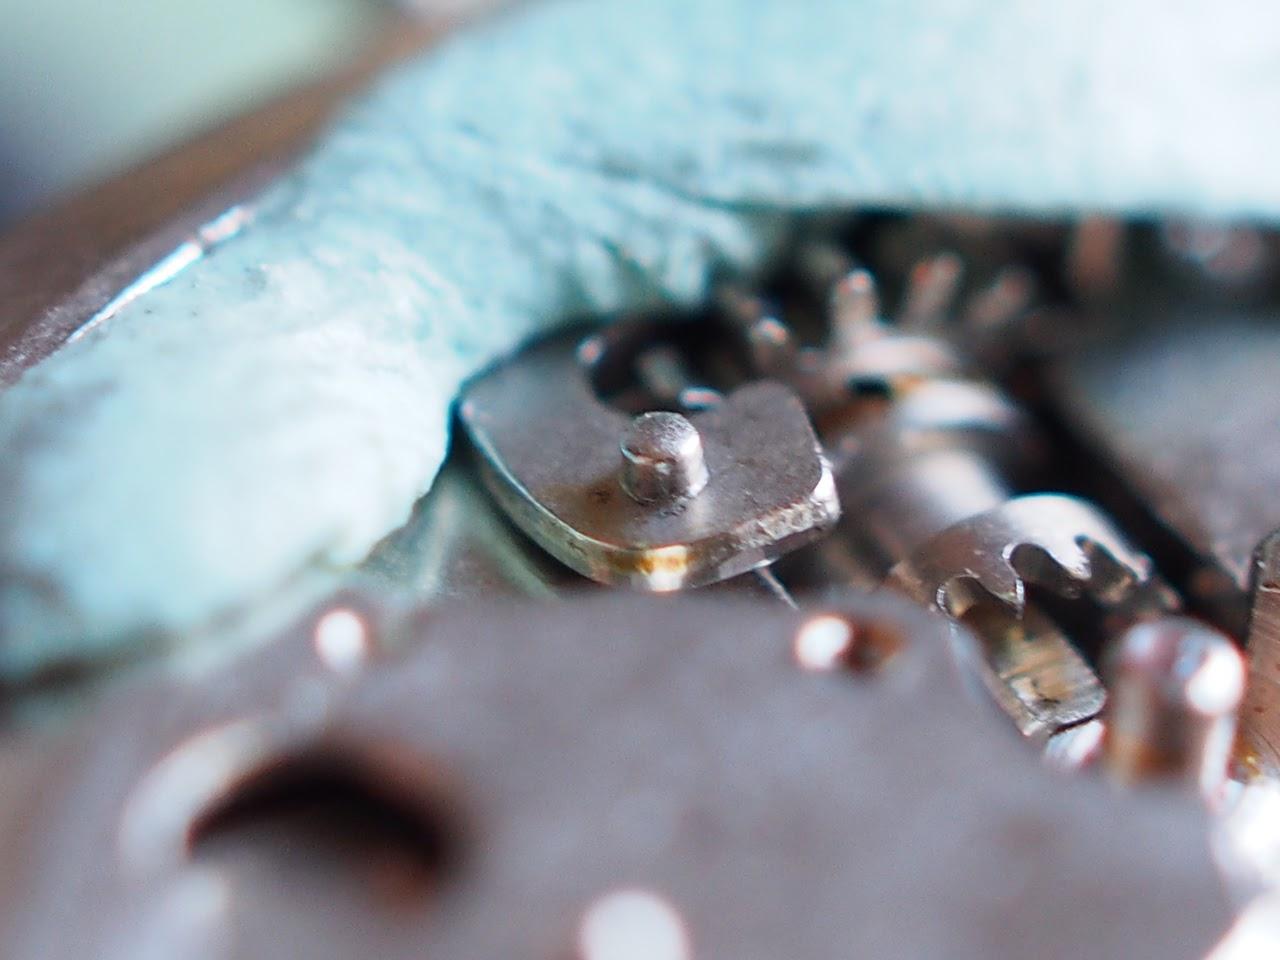
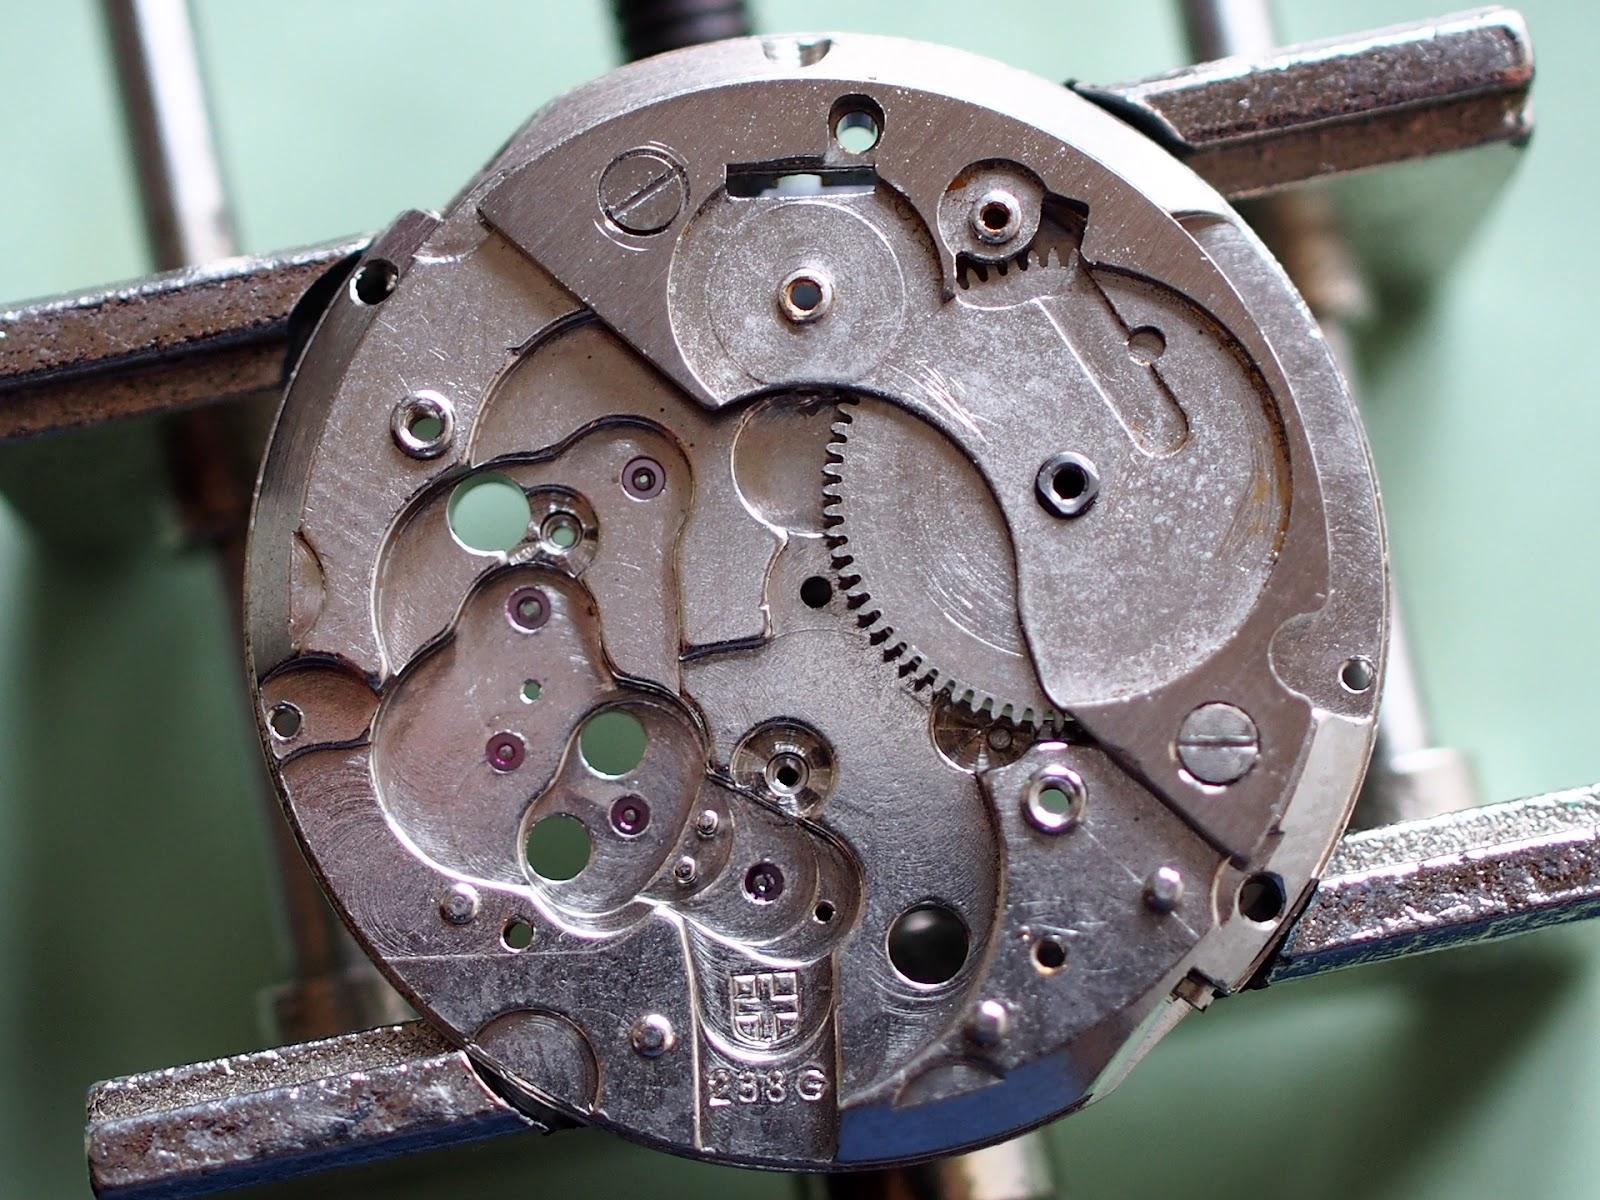
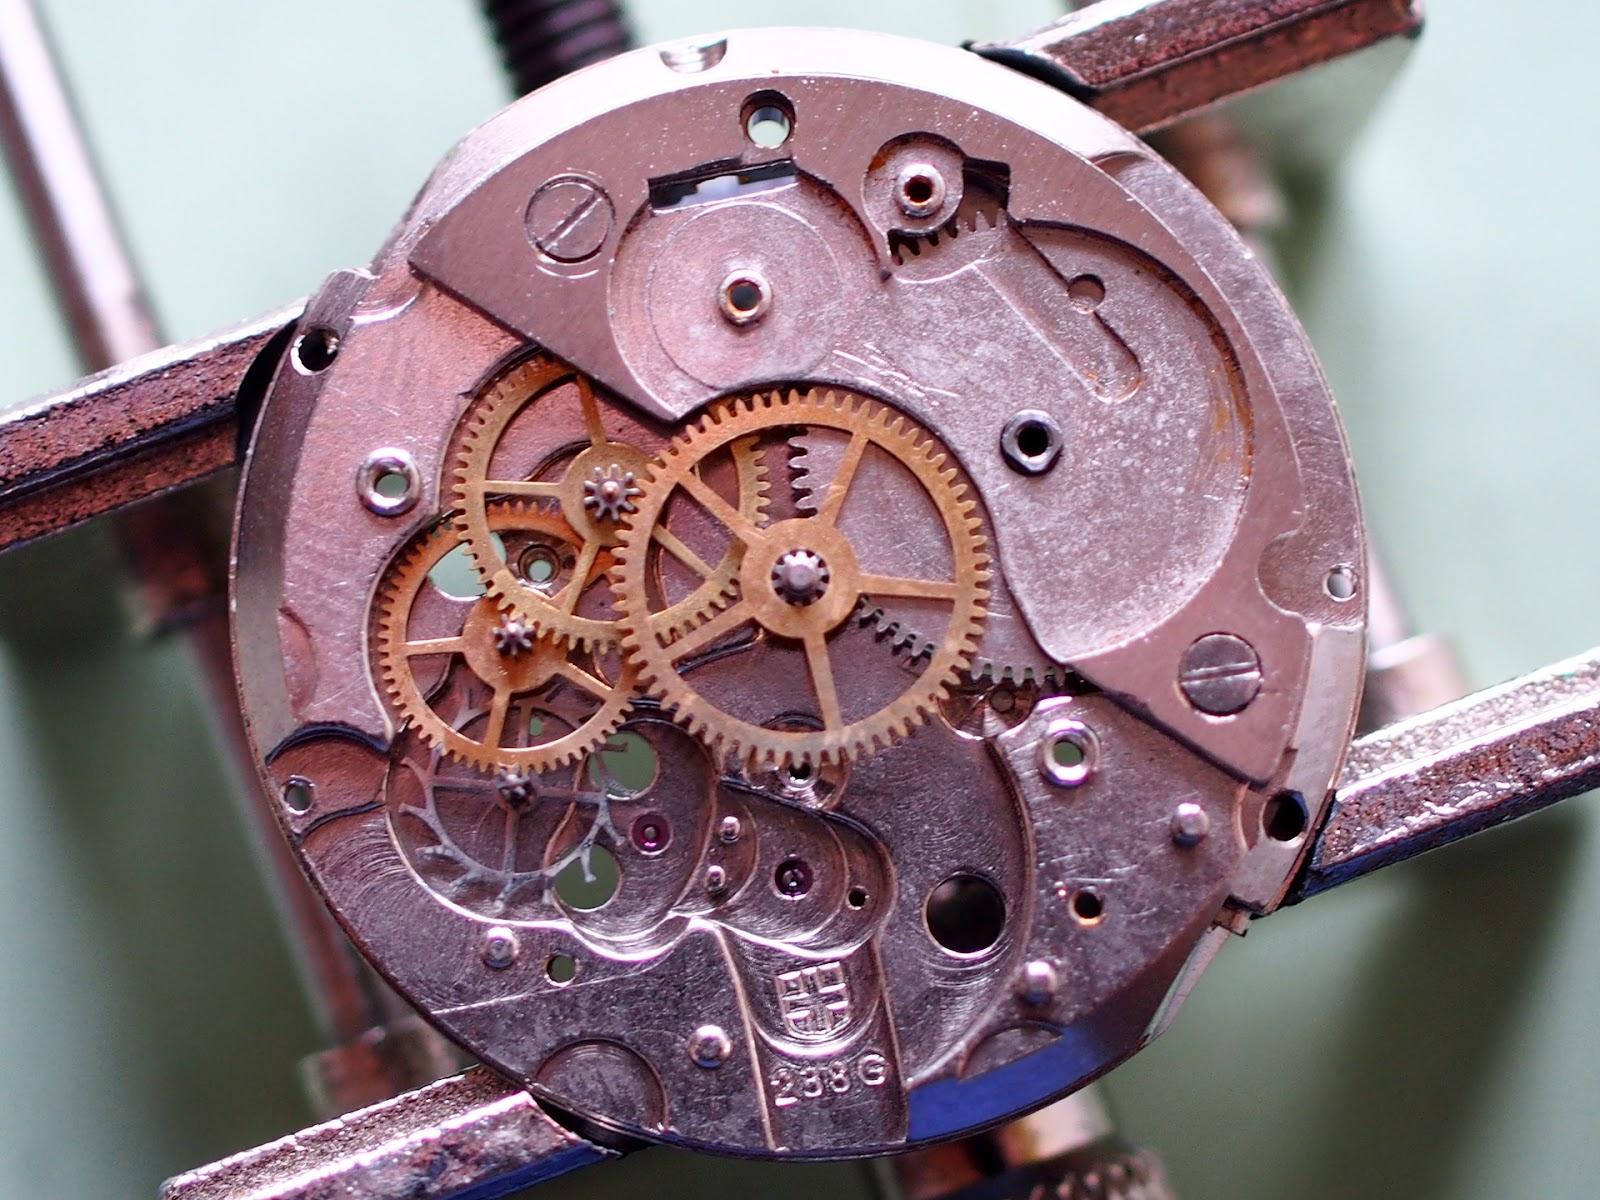
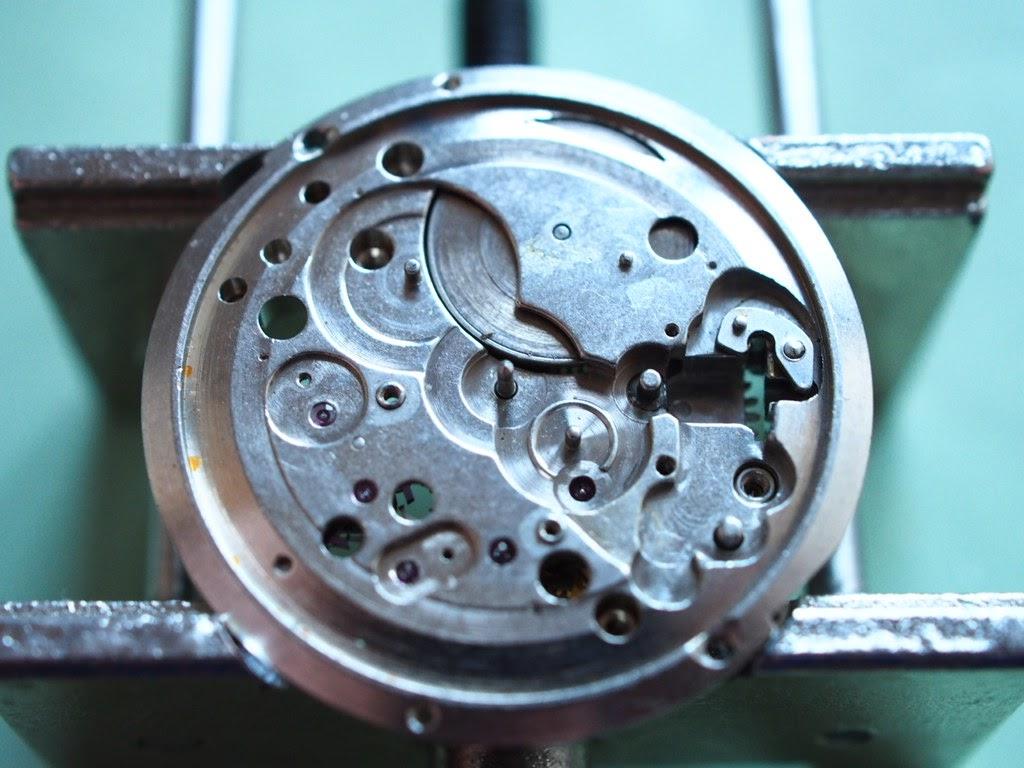
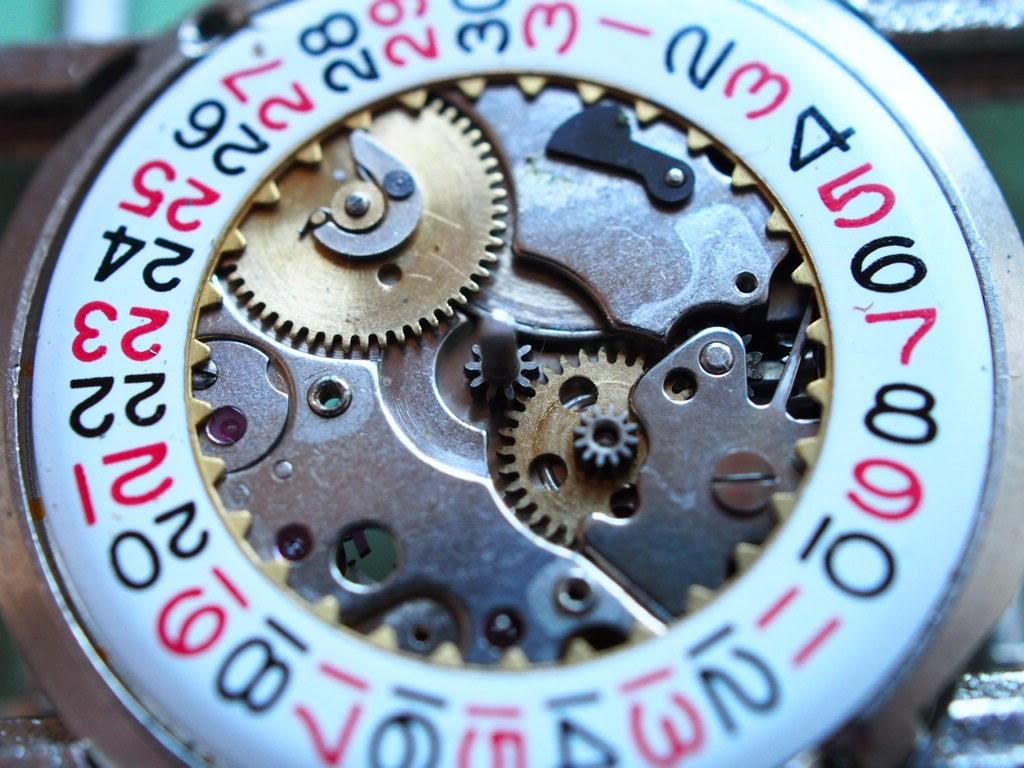
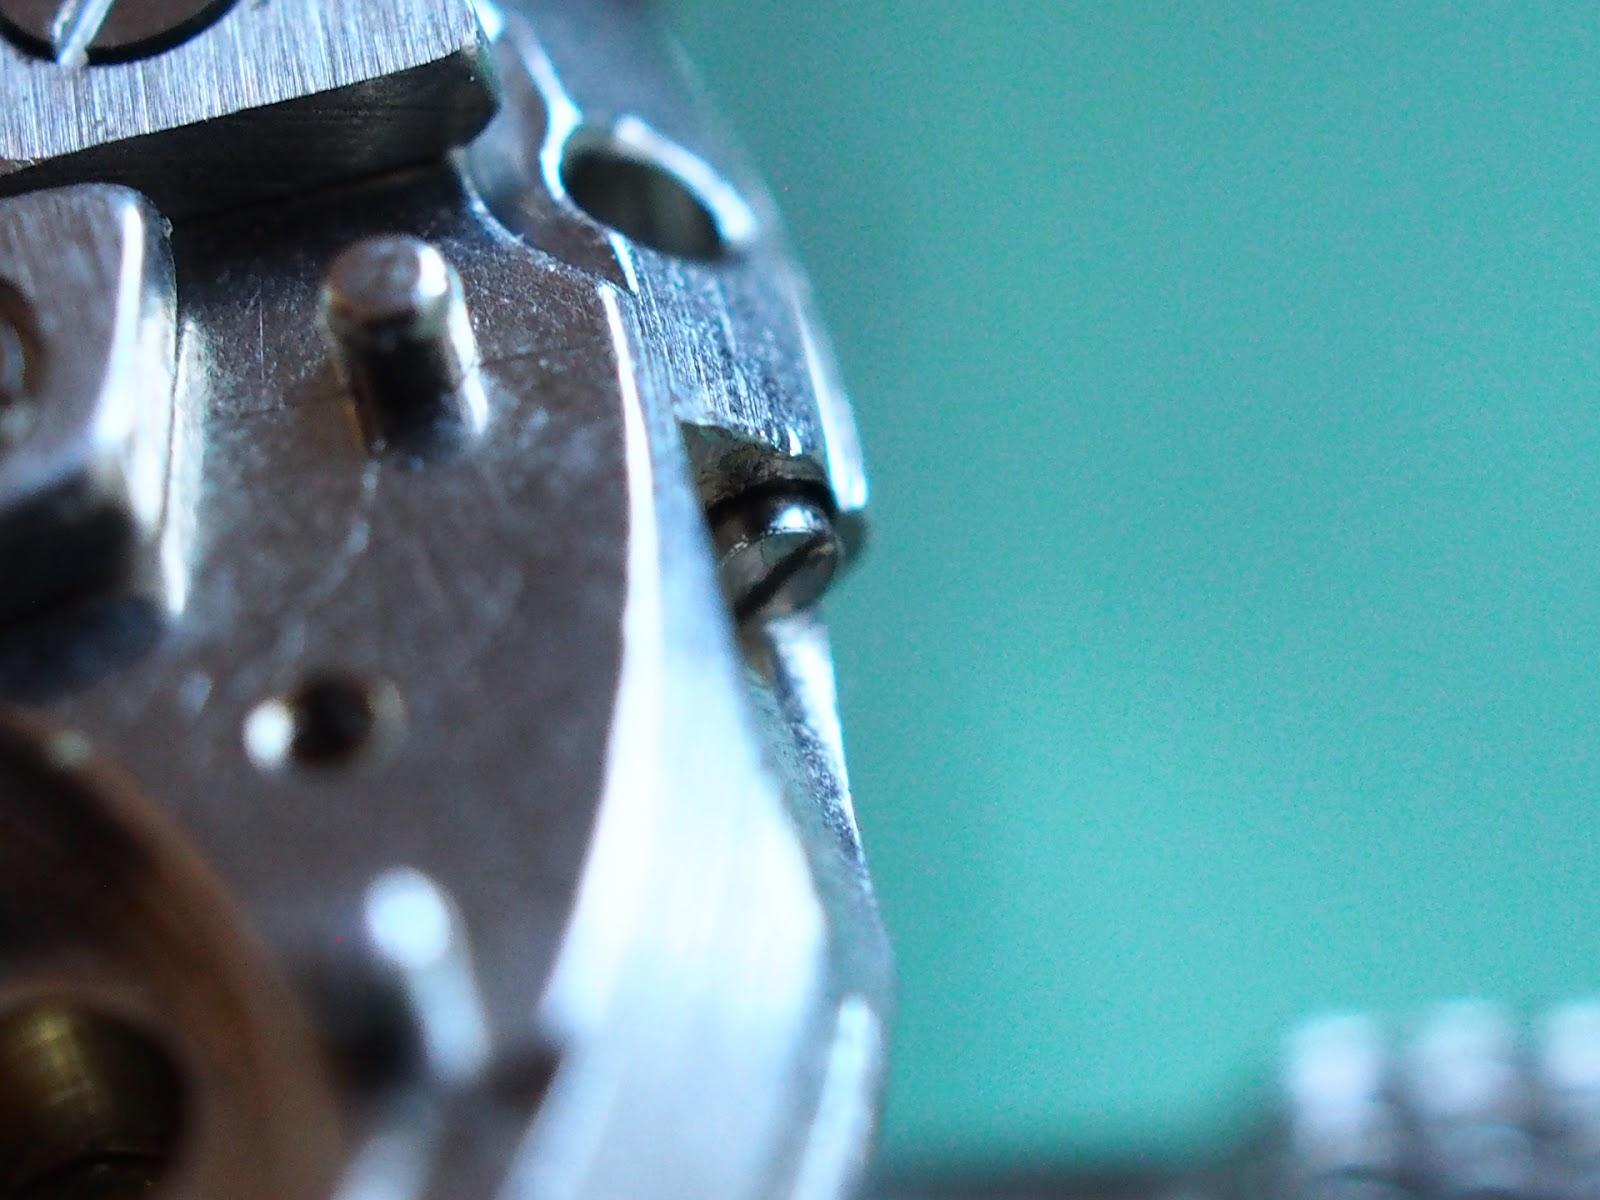
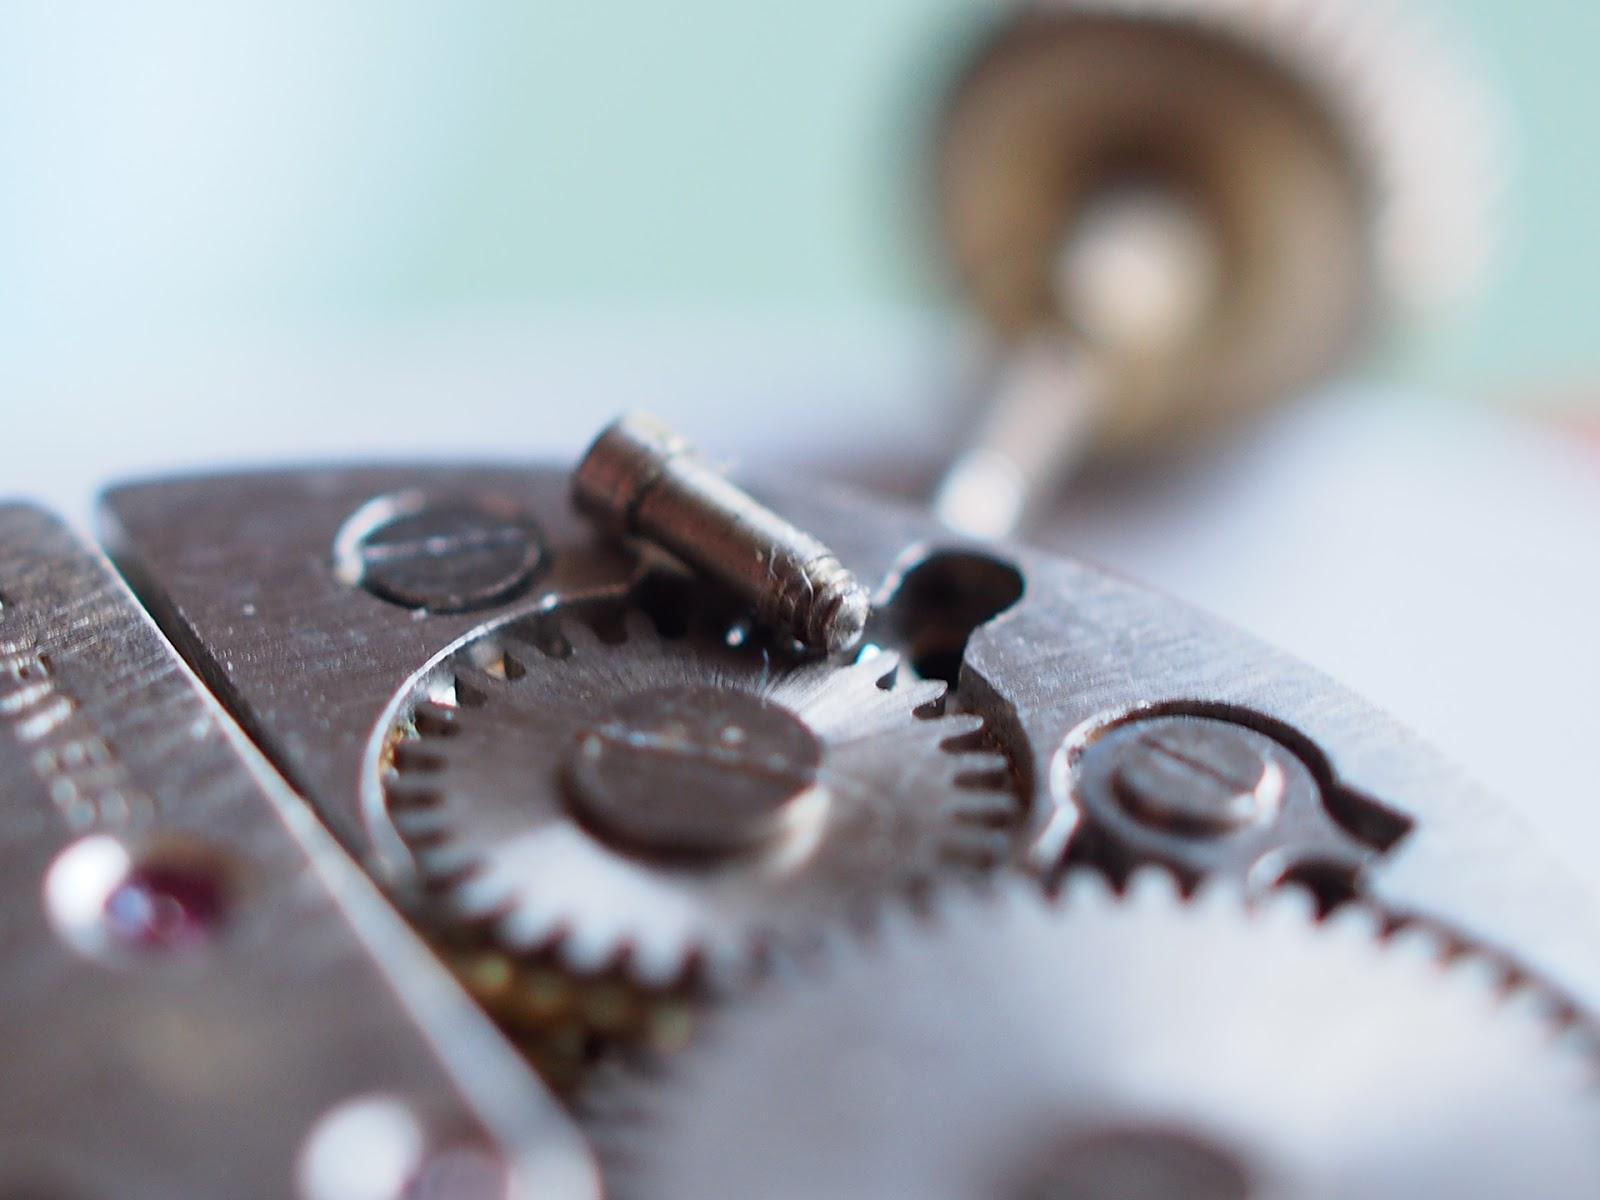
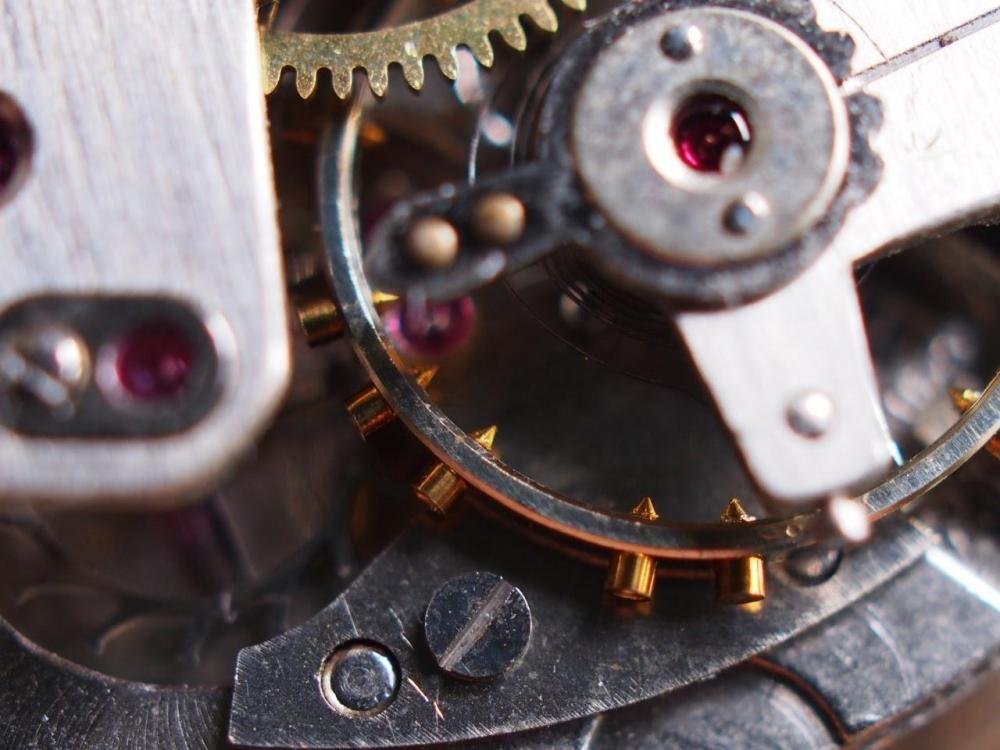
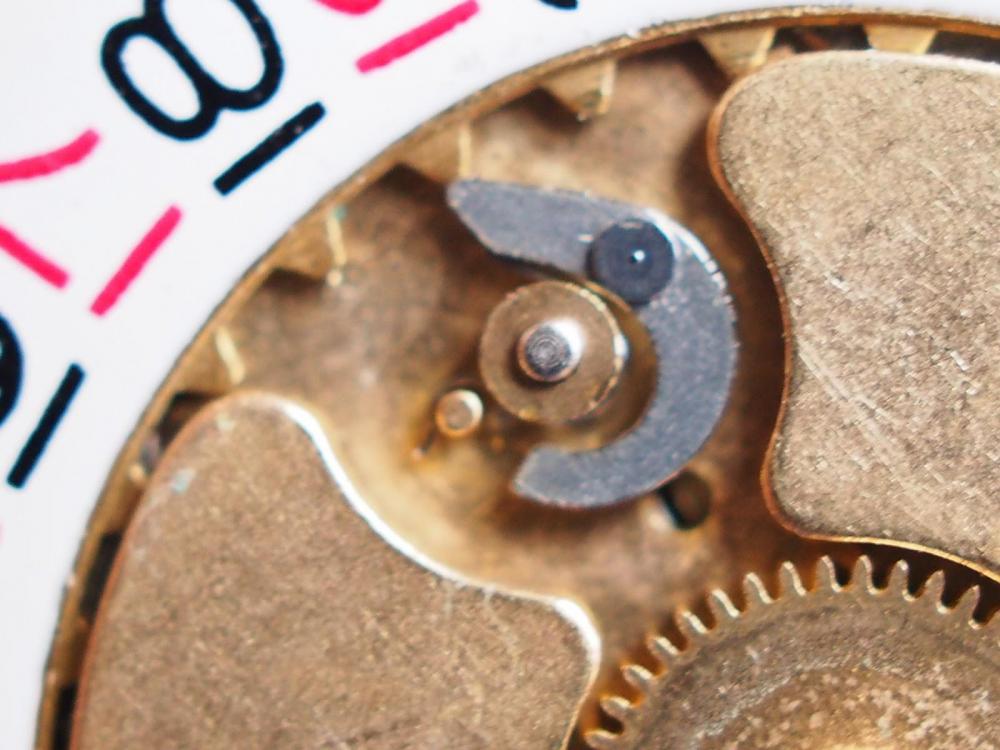
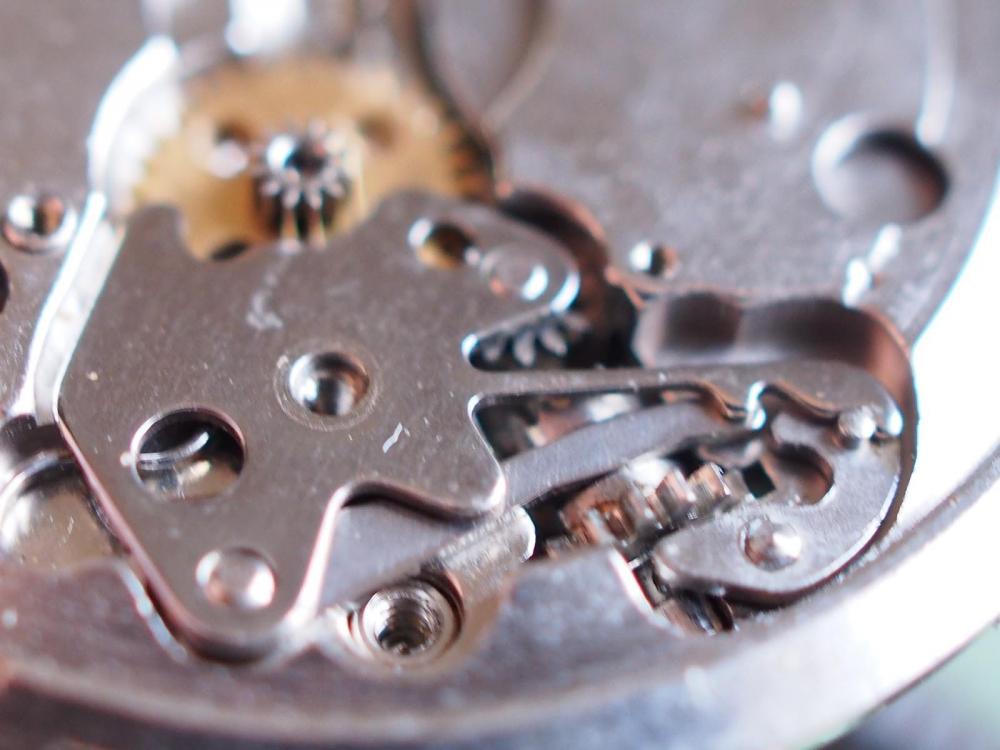
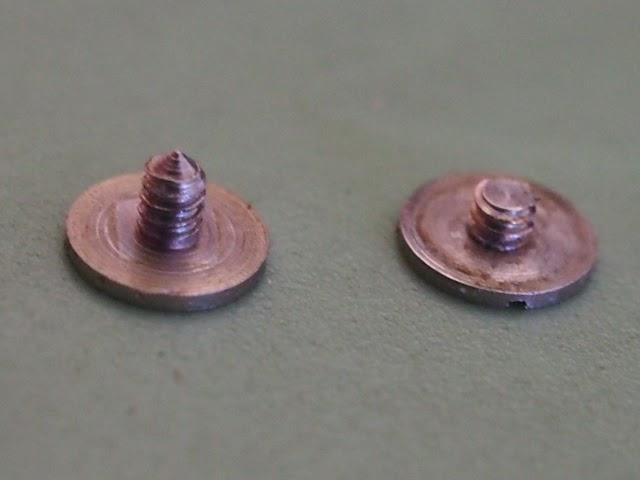
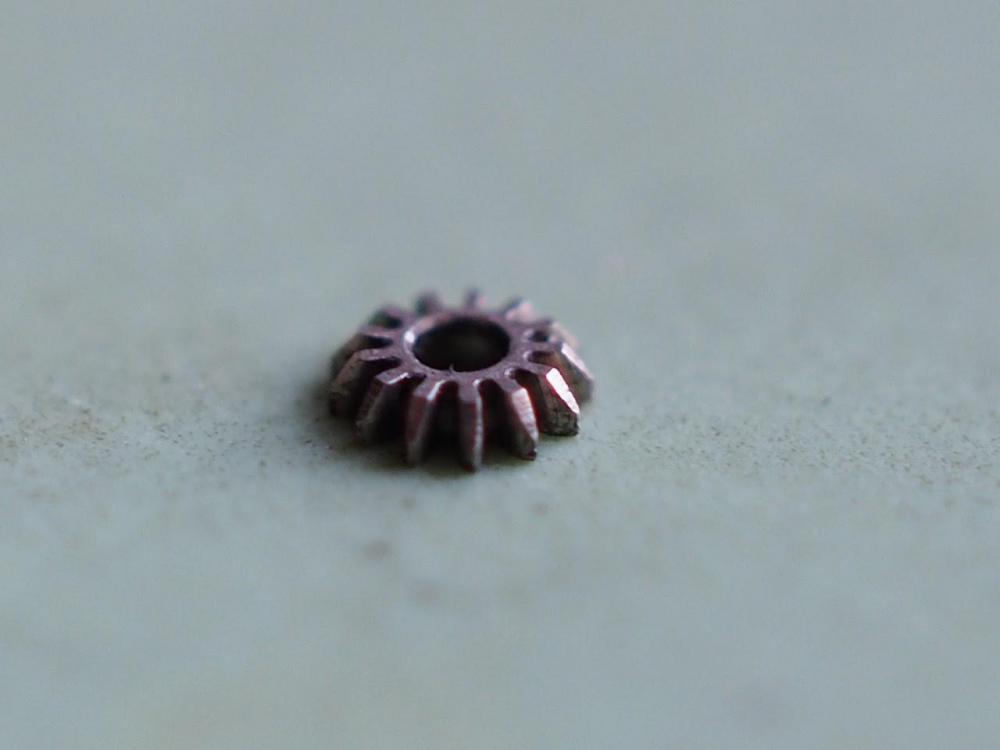
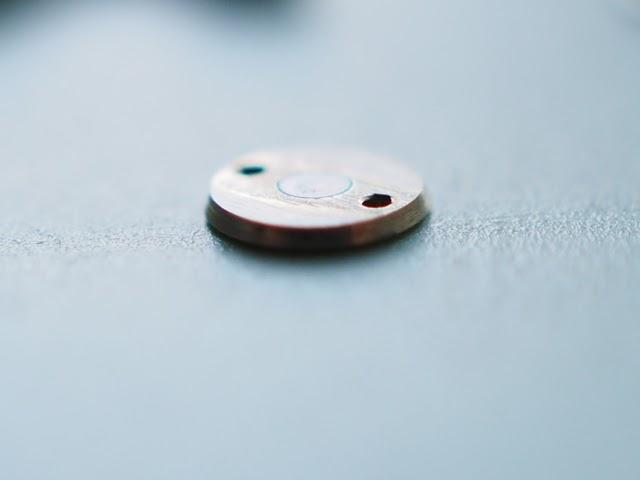
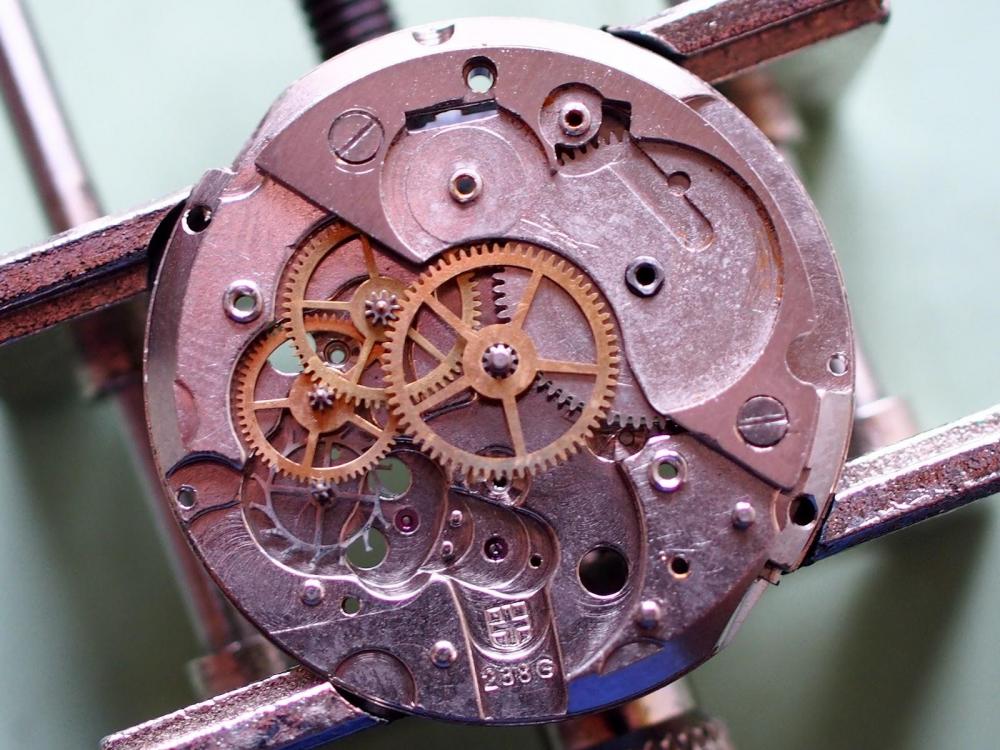
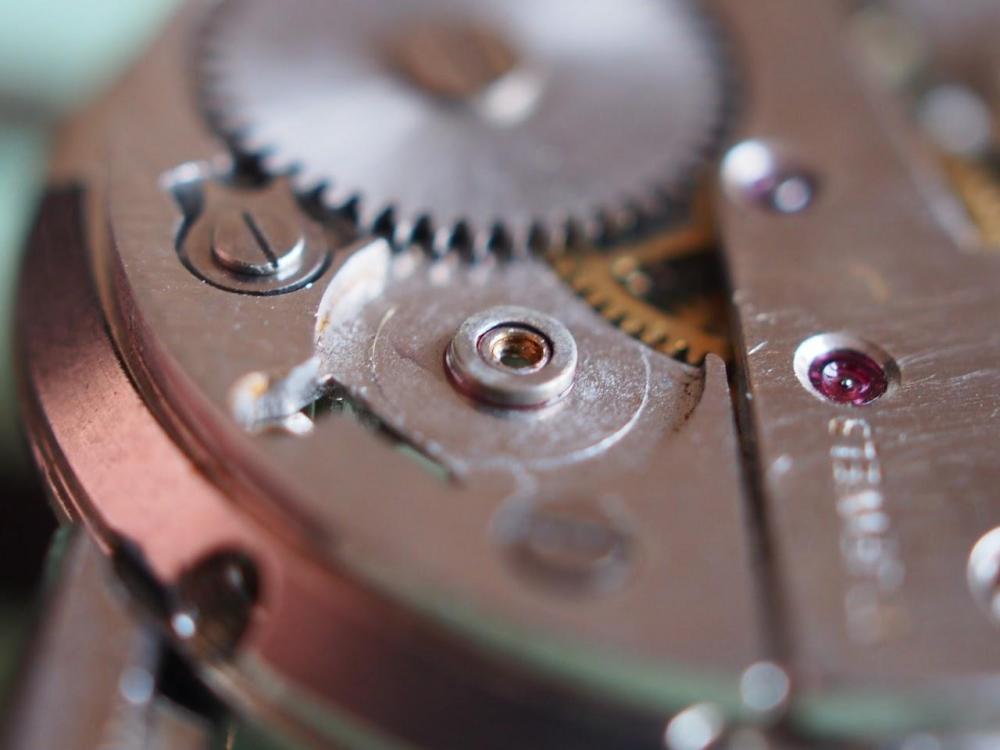
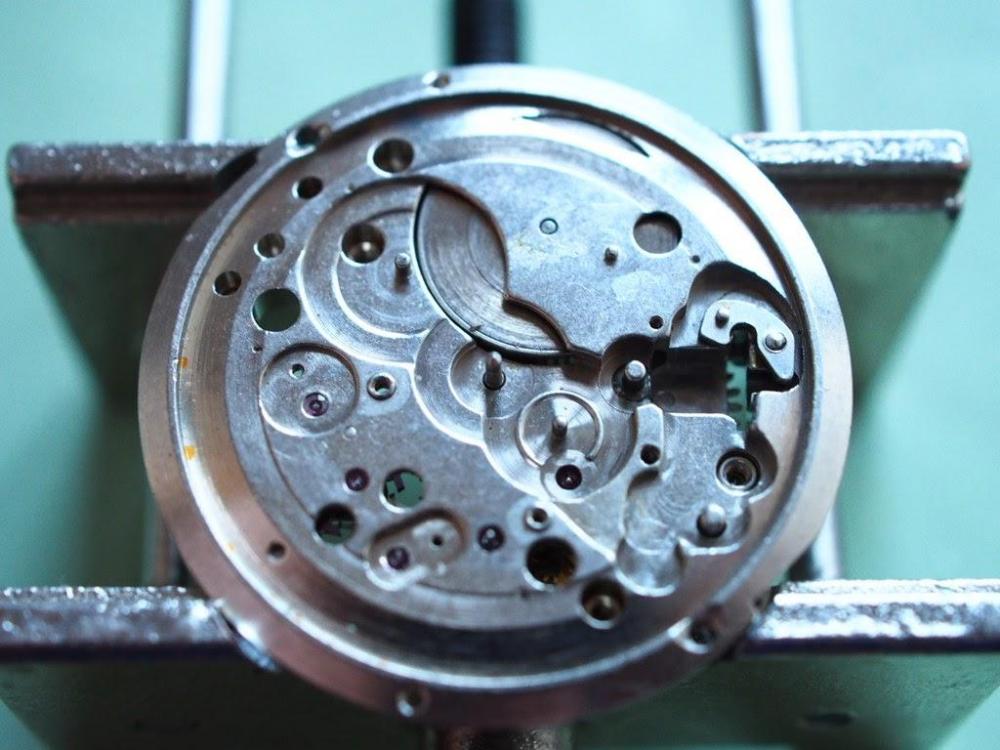
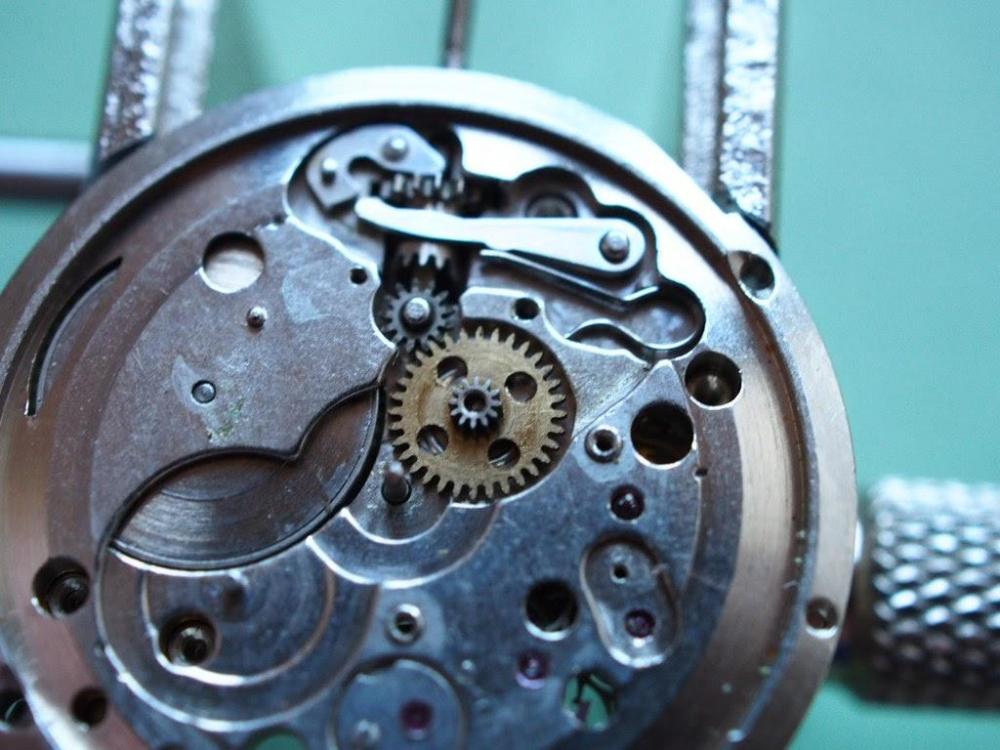
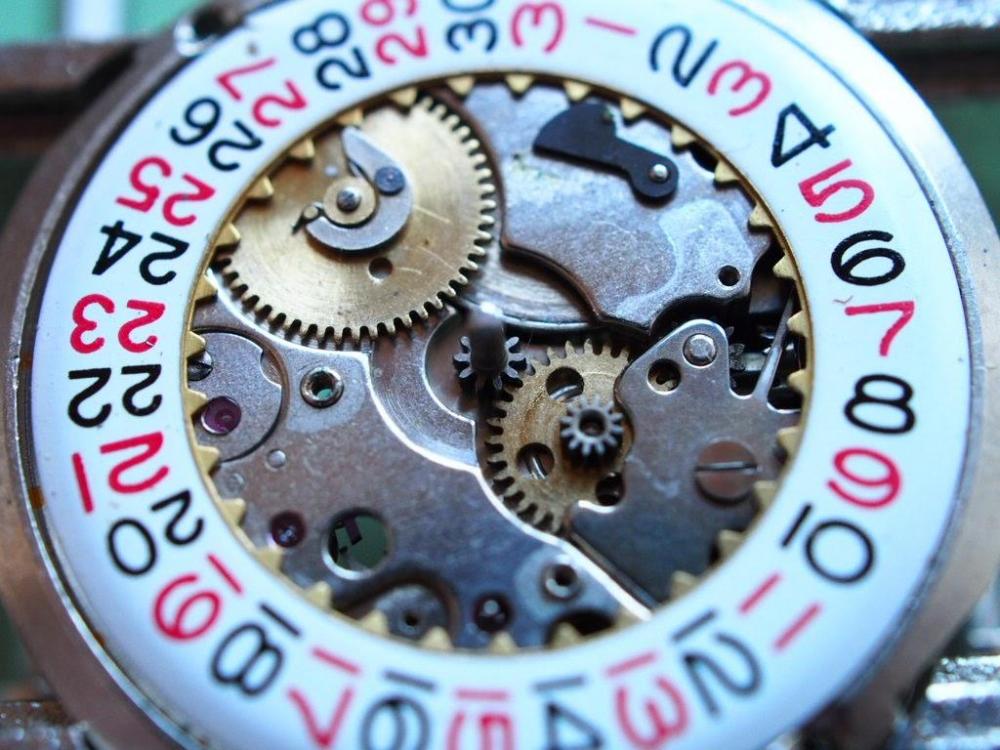
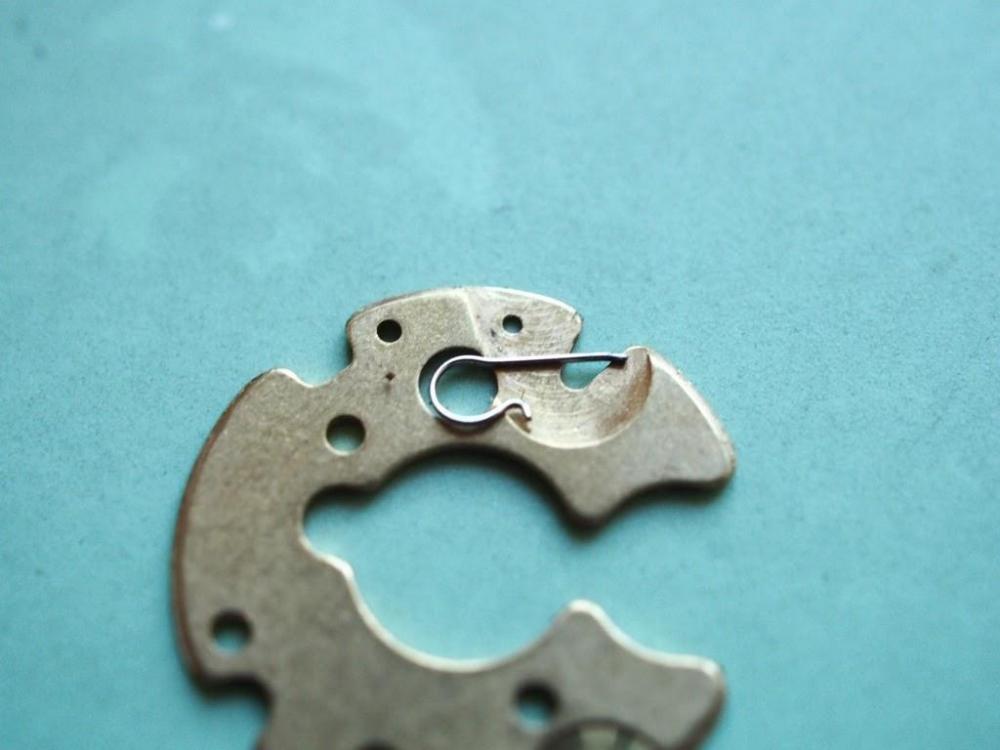
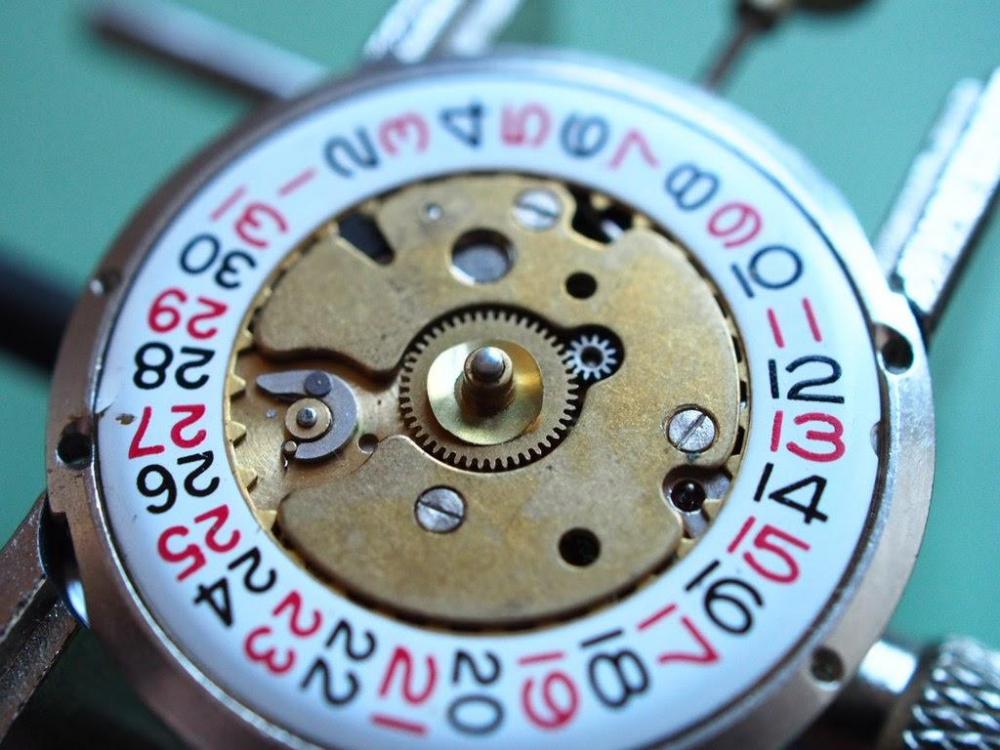
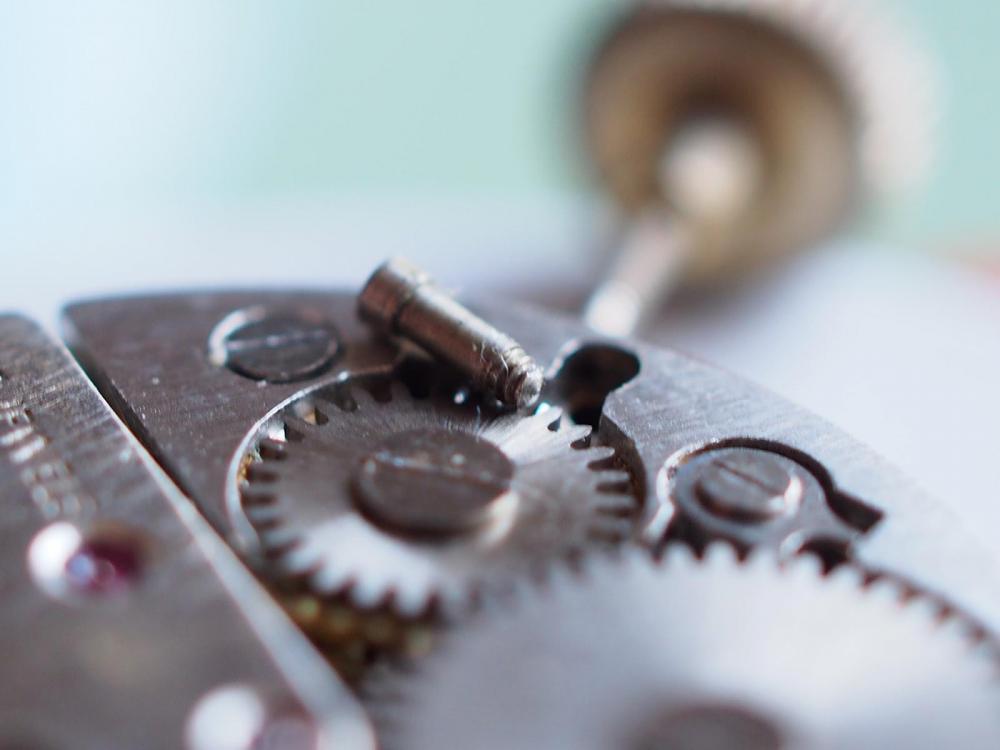
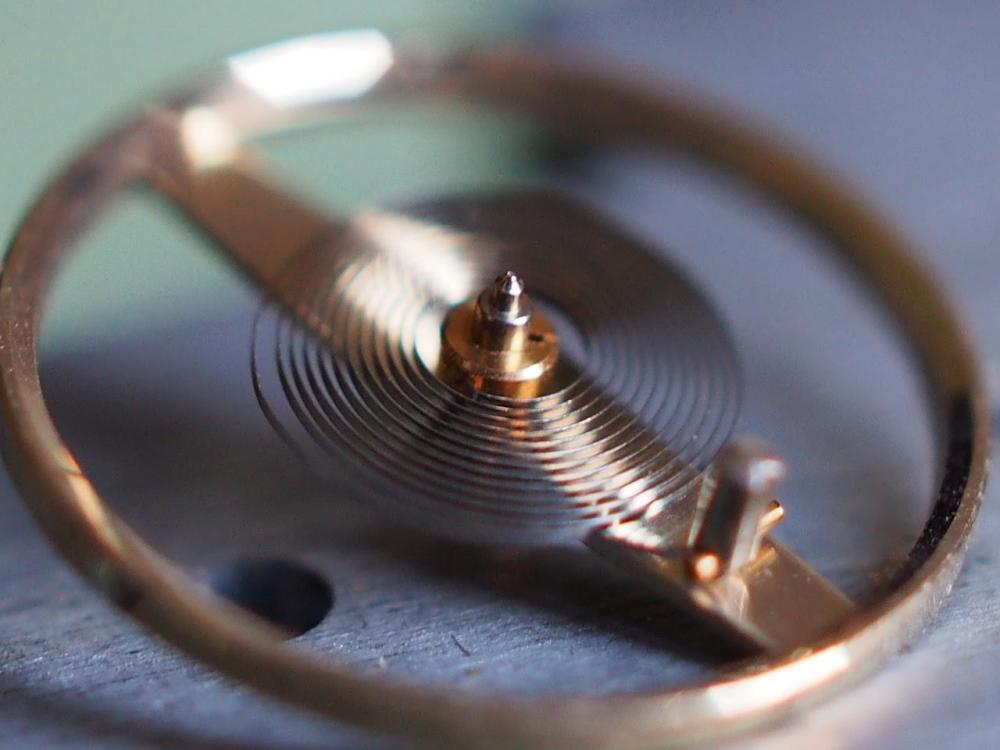
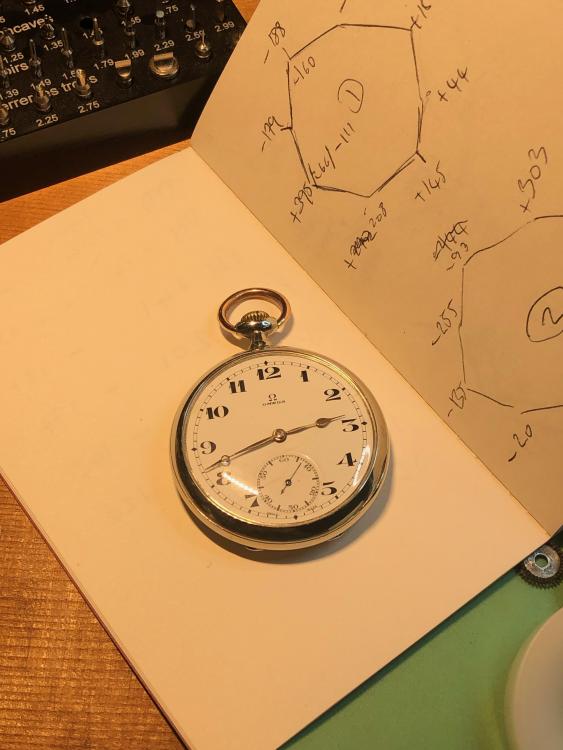
This is well made mov’t that wasn't running. No surprise, as both balance pivots were snapped, there is no shock-protection on this version. I'd classify this mov’t not the best for an absolute beginner, it's 11.5’’' size is fine but there are three flat wire springs not very friendly, many small screws all of different sizes, so to require a full set of screwdrivers. It is interesting to observe how many construction details that have evolved from this old design for reasons of optimization, cost and part count reduction. Let’s get started. To release the stem undo completely the setting lever screw,, then either pull it out, or be careful as it likely will drop as you turn the mov’t over. Dial screws are on the sides and best handled with a 0.70mm driver. Especially if you’re using an ultrasonic cleaner it’s a good practice to remove them to reduce the risk of dropping during work. Remove the dial washer and hour wheel, since the date ring spring holds on the other side of calendar plate I suggest that for caution you place the mov’t in a plastic bag after removing the three screws, and before lifting the plate. The day spring is tucked under the calendar plate, which I have turned up to show in the below picture You can put away the bag for now to remove the date ring, wheel, and finger, as well as the cannon pinion and the setting lever screw. Now lift the setting spring to reveal the joke and its spring, be cautious when removing the latter. Remove the joke, setting wheel and pinion, clutch wheel, sliding pinion, setting lever, as well the balance cap jewel, and we're done with this side of the mov’t. Strangely, the escape wheel cap jewel was missing. In reality the picture above has the setting lever still in place since I had not removed its screw yet. Now for the other side. Since I had removed the balance cock already, it’s now time to let down the mainspring with the usual pegwood braking technique. We can now remove pallet cock screw, pallet cock, pallet fork, escape wheel cap jewel, And crown wheel (left-handed). Also remove the crown wheel spacer pictured below. Remove the winding wheel screw and wheel, then be careful in removing the click spring, time to use the bag again perhaps. Finally remove the click screw and click. Having taken apart the complete winding system we can now remove the two train bridge screws and the bridge. Train is of the classic type, three wheels plus the escape one, which can now be removed. And finally two more screws for the barrel bridge, the bridge and the barrel. About the barrel and mainspring (sorry, not pictured) I opened the lid and found everything clean and in order. Since I was not to replace the mainspring I took no further action on moved to general cleaning. I did a couple washes in petroleum ether (refined naphtha) and isopropyl alcohol but some opacity remained on the plates, so I left these in ammonia-based cleaner for few hours, then rinsed in petroleum ether. Note that the latter (unlike lighter or engine fuel) contains no oils, fragrance or other additives, and leaves no residue at all. Much better, barrel and bridge already in place! About reassembly, I will not detail all the steps, but only highlights some important aspects. For lubrication I’ve only used three modern, fully synthetic products by Moebius: HP1300 for high-torque parts like winding and setting. 9010 fine oil for other pivots and jewels, it’s easy to apply from the outer side of the hole jewel. 9415 for pallet stones, only because I’ve just received it. Below from left to right, escape wheel cap screw, lower balance cap screw, balance upper cap screws, All have different sizes, so unless you photographed or otherwise set these apart you’ll have to use some logic to refit correctly. Same goes for all the other screws… they may look the same.. but they are not! Below the balance upper cap jewel. It also holds in place the regulator arm, for this purpose it’s slightly beveled. You will have to fit the setting lever on the dial side, and its screw from the other. Just use some rodico to keep the lever in place. The setting pinion goes with the bevel toward the sliding pinion. Ratchet and crown wheel screws have different head dia. length and thread direction. You may want to use the plastic bag to fit the click spring safely. Fit the click first, then the long leg of the spring under it, then the bent leg to sit firmly. The yoke and setting lever springs are also a bit tricky. All these pivots and sliding points are lubricated with HP1300, don't forget to test the working repeatedly before moving forward. I've found the date ring spring to be the most difficult, because it’s underneath the calendar plate as shown in the disassembly picture. After the spring is in the plate either fit it with a siding manoeuvre to place the spring against the date finger, or position the plate with the screws kept loose, then push the spring in place by the cut that is on the plate for the purpose. There is no date quick setting on this basic mov’t, that is done setting time back and forth across midnight. The finger on the date wheel is pivoting when moving backwards with the help of a really small spring. However doing that much setting counter-clockwise every other month does not damage the escapement, as sometimes is feared. The replacement balance complete came in the “a vis” version, which are there for poising, not rate adjusting. Actually I think the stubs are pressed not screwed. One last detail for the correct installation of the dial washer. Flat side faces and slides on the hour wheel, you can use HP1300 there. The edges somehow grab on the bottom of the dial. This veteran Swiss could have rewarded me a bit more on the instrument, but I hold no grudge to it and won’t try stunts as fixing beat error at the hairspring collet, adjusting for positions, or getting the missing cap jewel. And that is why I won’t, it would not make much sense for a desk clock! Now, who should own something like that? My friendly blacksmith, of course! I hope you have enjoyed my “no pretenses” article!
.thumb.JPG.b79e1aece1c8cda4ef86a375f3ad4012.JPG)


 4 points
 -
And here it is completed. It's been a long process. Lots of cleaning and polishing, a new balance staff, replacing 2 cracked jewels, all kinds of escapement issues. Thanks HSL for the roller! Everything is running great now after 12 rounds of dynamic poising. It's within 30 seconds per day in all positions which I can live with. But most importantly within 8 seconds dial up and pendant up. Pretty good for a century old watch.
 3 points
 -
Hi The train wheels are all free running, does the pallet (fork) snap backwards and forwards cleanly when moved, without the balance in , If the action is sharp and crisp the fault lies within the balance area, Is it in beat is balance spring fouling the cock, is the spring concentric, is impulse pin loose , Pallet stones in good shape and not loose, pallet stones locking and un locking ok these are but a few pointers to check before trearing it to pieces again. Doubtless other members will have other actions for you to look at.2 points
-
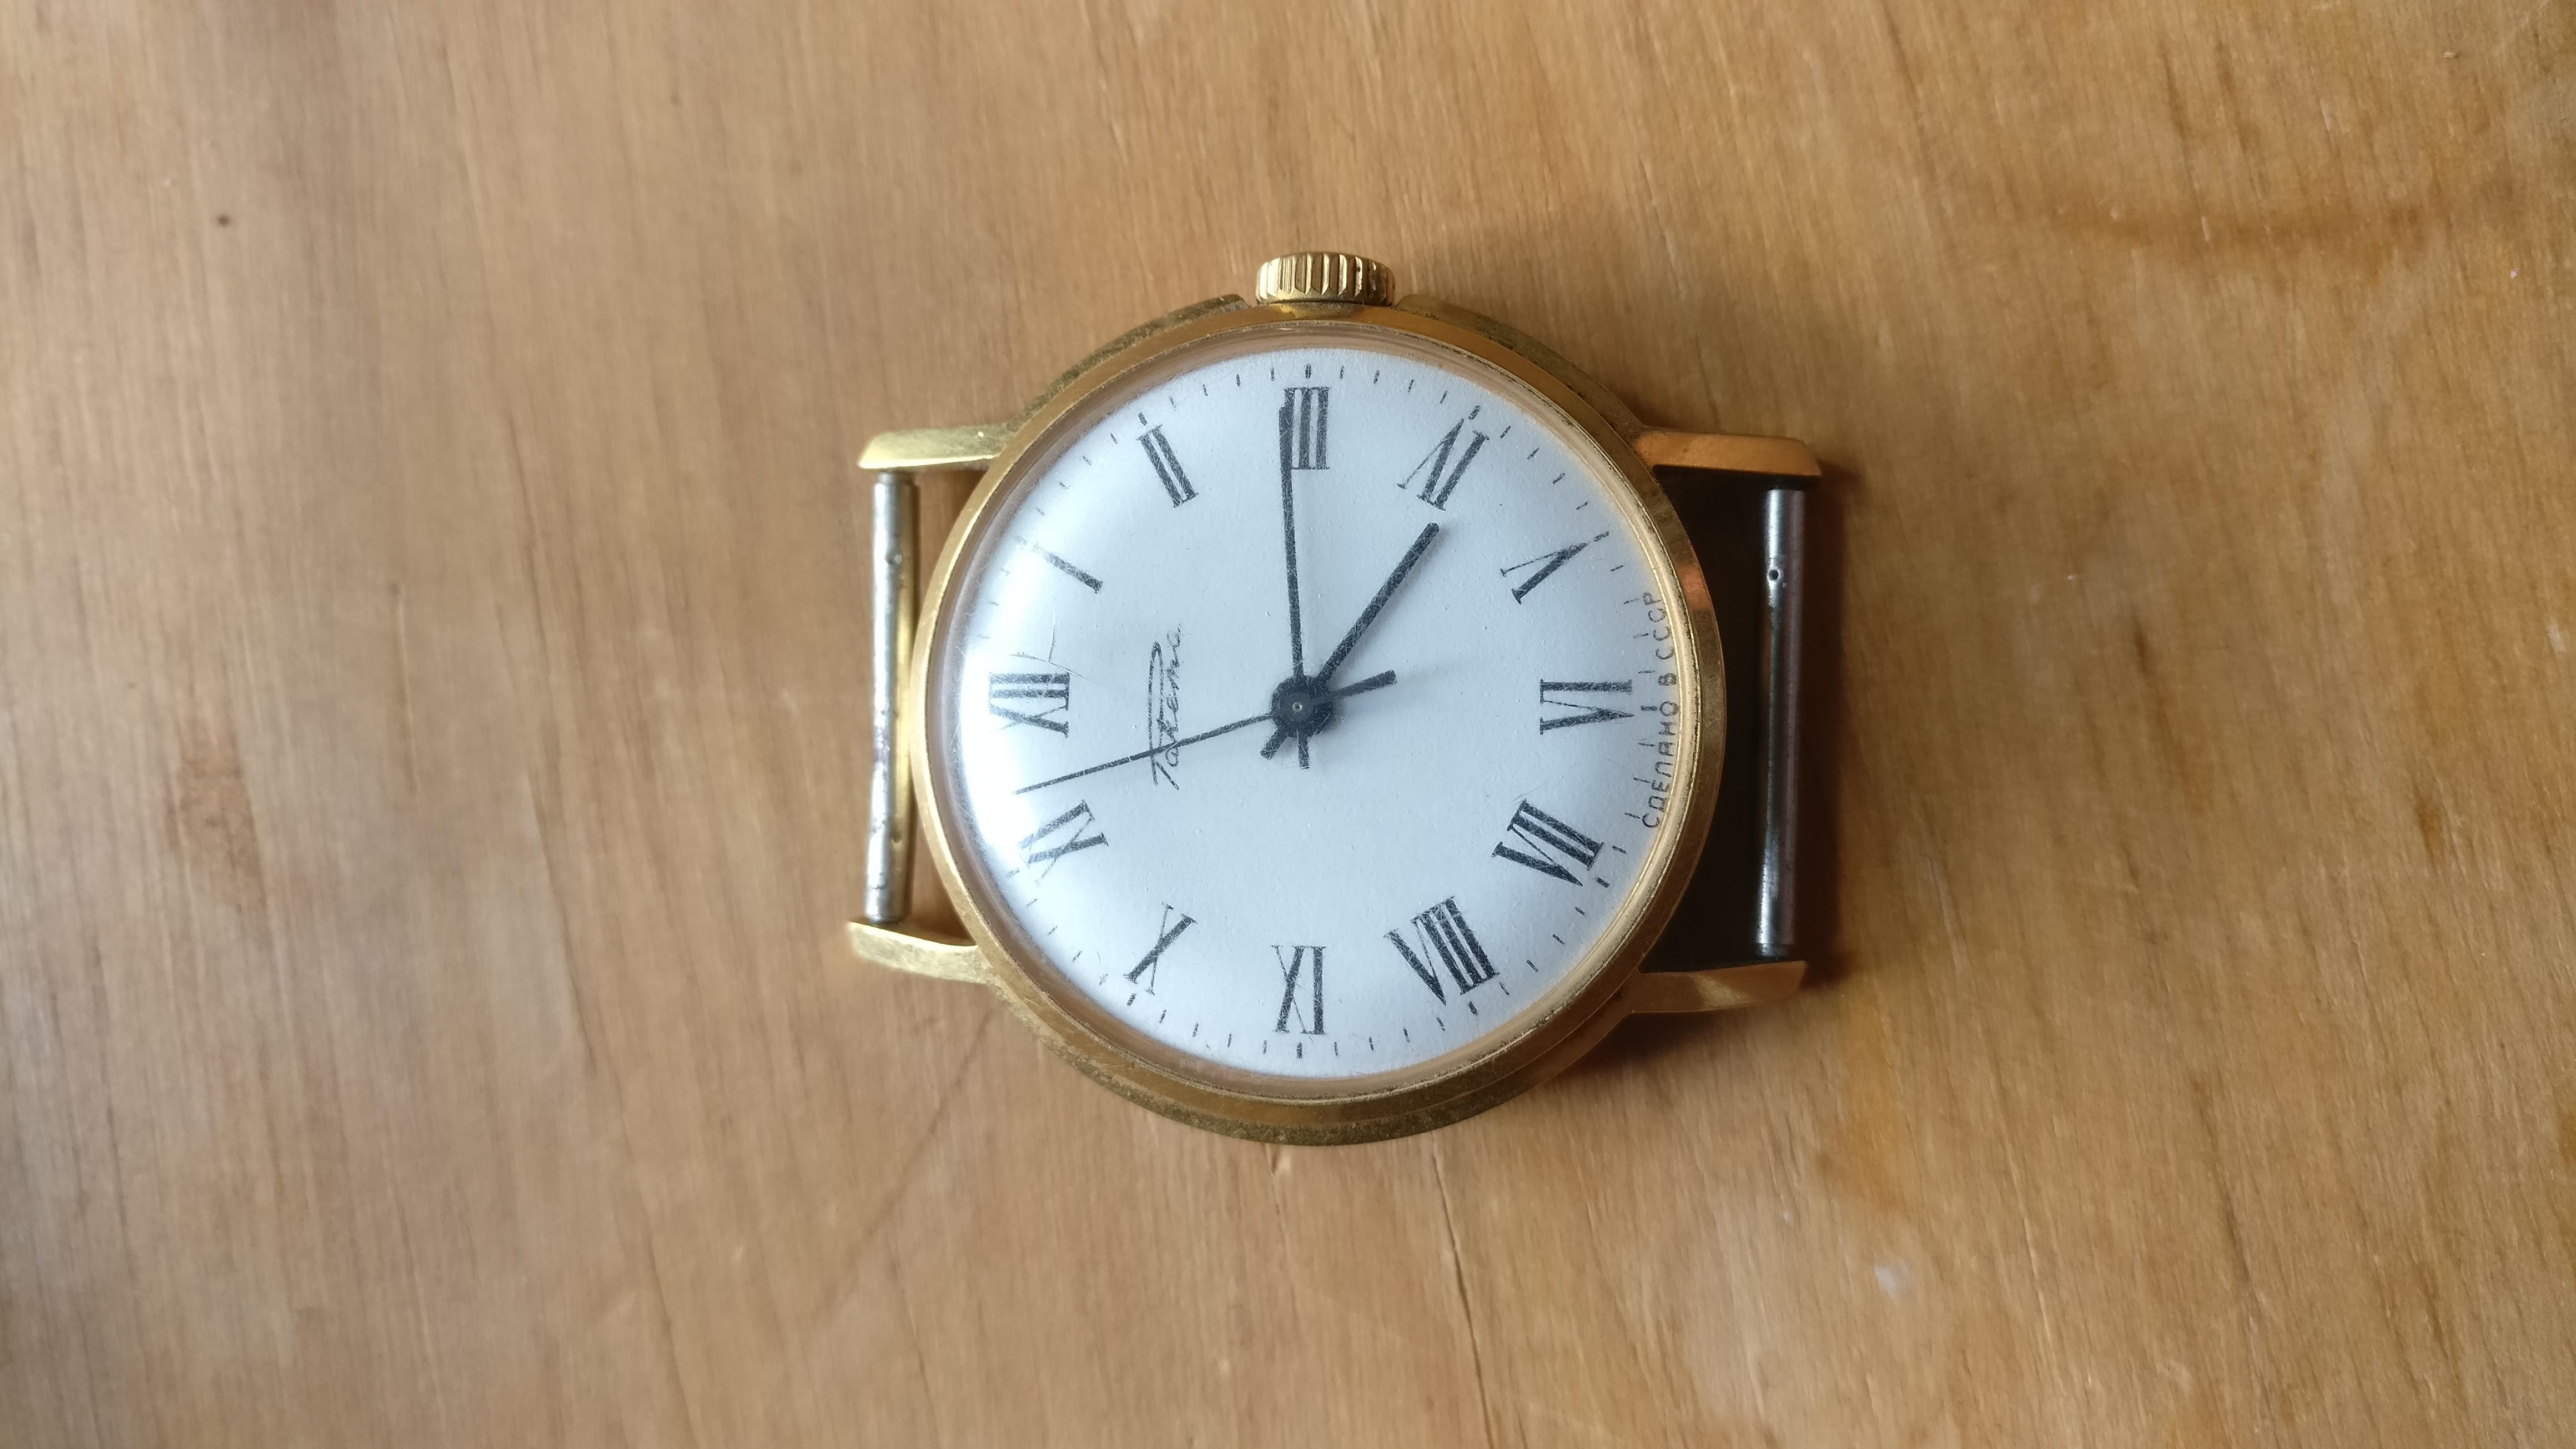
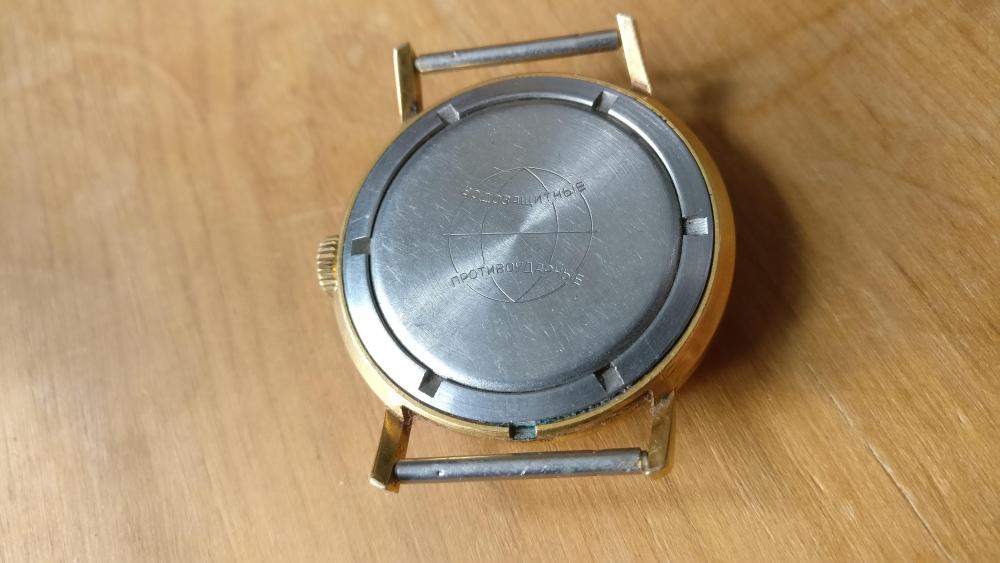
Nice watch @rhyj and a great movement (I would expect a Raketa cal. 2609) for any beginning watch repairer! You can see how the case back is removed in the video below. The movement in the video is a Vostok 2409 but the principle should be exactly the same. You'll find several videos on the same channel working with the Raketa movements and many other Russian movements such as Vostok, Poljot, etc. Now, be aware that the guy (Ratfaced Git) working on these movements is a self-trained former car mechanic who always insists to do things in his own way, which sometimes isn't best practice. That said, he was a huge inspiration to me when I got started. He just goes for it! No fear, no regrets! Good luck!2 points
-
You need a case back opener that fits the notches to unscrew the case back ring. This lifts away separate to the case back which sits on a wide flat rubber washer and is located by a tang.2 points
-
Hi everyone, Any ideas how to get the back off? it looks sunken in so the notches don't really help. I'm completely new to this, does anyone know anything about the watch, or could translate what's on the bottom of the face? Just out of interest. Thanks, ryhj

 1 point
 -
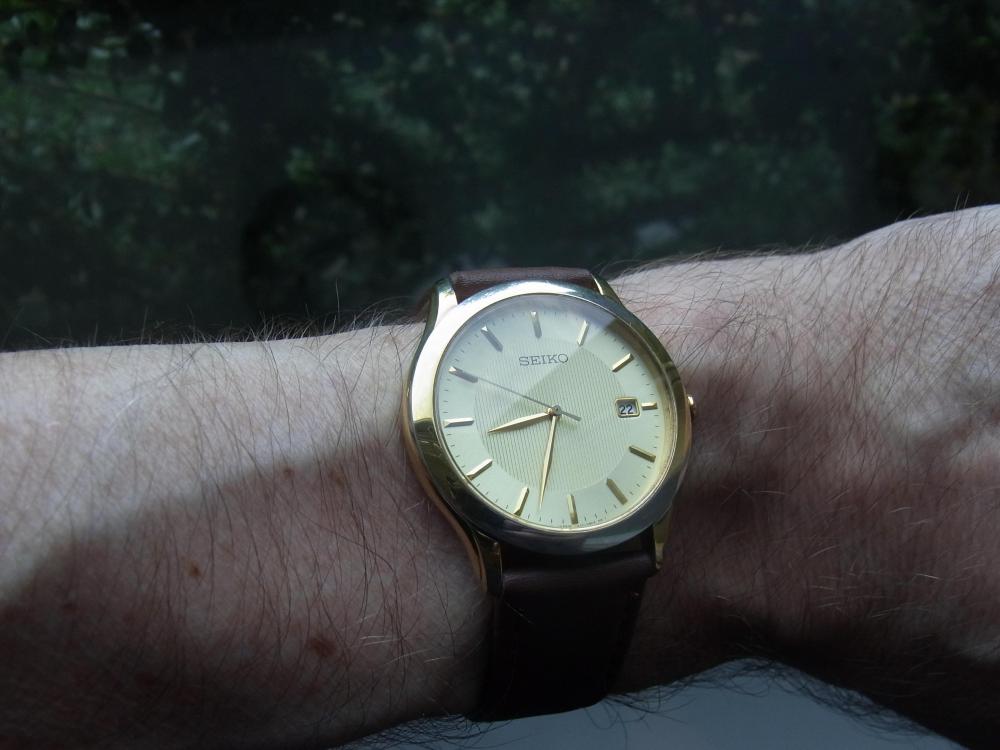
It is a Seiko day for me too.
 1 point
 -
Hi Cousins.uk have both types Shock and Ord at £8.95 part No 721. Tech sheet attached. 2858_FE 233.60,233.66,233.67A.pdf1 point
-
Universal jaxa back opener gives a choice to use two or three bits, use two bits across , better results than three for this type of back screw.1 point
-
Near mint 7a28 today1 point
-
The Russian words on the case back mean "Waterproof" and "Shockproof". Raketa means "Rocket" and СДЕПАНО В СССР means "Made in USSR". The name Raketa came about in the dawn of the space age.1 point
-
Good advice above and if you're just starting out you can't go far wrong with the style @Nucejoe mentions which looks like this: And сделано в ссср on the bottom of the dial? It simply means 'Made in USSR'!
 1 point
 -
Your common JAX back opener advertised above for 6.99 bucks.1 point
-
older Bolivas have the same case back. you don't want to "cross thread" the back. get a good case back opener. vin1 point
-
I have a nice big concrete block outside. I feel like taking this POS, putting it on that block and pounding the shit out of it until its a nice homogeneous, flat piece of metal.1 point
-
check each as old hippy said but end shakes on a 3rd wheel allow a lot more play than lets say a balance or escape. you can get away with too much end shake and not loose much amplitude, too little will def not work though and will def result in a very low amp and or stop the movement. train wheels being loose is always better than too tight in my opinion1 point
-
This is a two train Westminster chime ? the pendulum rod will hang to the very bottom of the movement plates which places the pendulum bob just below the movement , the suspension spring and rod would be 5 1/8 inches. Photos would help. https://mb.nawcc.org/images/attach/taming_the_sessions_2-train_4th_edition.pdf1 point
-
I still have a couple in the "to do" pile, I'll no doubt post pictures when I get a chance to look at them. They are great fun to work with, and with quite a number of suitable franken-dialed potential parts donors regularly turning up on ebay, they generally fix up quite easily. I would say they are probably one of the best value mechanical watches out there. Well designed, owing to their Citizen heritage, well built with Indian flair and Citizen quality control, easy to service and most importantly perhaps, almost indestructible.1 point
-
Thank you ! :), it works. I aligned the jumper, and when I rotated the calender wheel manually it suddenly snapped in. Now the date has is nice "snap" once it changes the date :).1 point
-
You could check each wheel individually. That way you will not have anything obstructing your view. I always screwed the plates down to test.1 point
-
Got the Bergeon No 5500 crystal press and I can now, first hand, testify to the validity of oldhippy's statement I'm really excited to own this professional tool. I made up my mind to video document my very first attempt at using it and for those of you interested you can watch it below. It is, shall we say "an interesting experience" to see yourself demonstrate something in a video. It's hardly an action movie and I probably could have edited out more than 50 % of it. Anyway, I enjoyed making it and I hope you will enjoy watching it. If you can't wait for the "juicy part" scroll to 10 min 15 seconds.1 point
-
To go back to the Singer sweing machine for a second.. you might like this. ‘Birth Of A Sewing Machine’.1 point
-
I was keen to see what you would come up with regarding modern tools. The one you have recommended looks a bit flimsy and cheap. This is the sort of thing I had its tough and robust.
 1 point
 -
clear the bench, I have something to play with.....
 1 point

.JPG.5cb8495387fb0270488969ce54715e65.JPG)