Leaderboard


Popular Content
Showing content with the highest reputation on 03/07/19 in all areas
-
That's the thing with the various "removing tools", they tend to work OK until they don't. I know not everyone has or wants a lathe, but it really is the best tool for removing staffs, my preference is to turn off the hub for zero risk of enlarging the hole. I have used the K&D tool in the past, fairly often when I was working in a trade shop while in school. No lathe in that shop. I imagine it works as well as a Platax, which is to say pretty well. I still have the tool but it hasn't been used in 20 years.2 points
-
Thanks all for your replies. I appreciate it. I’ve found the solution. It turns out that the tightness of the screw for the operating lever (8139) must be very tight. Maybe a hair tighter than you think it can or should go. Once tightened, all worked great for both watches that had the issue. I was thinking originally that there was too much friction, too much tightness in some screws, so I started loosening some, obviously with no success. Very glad to have solved this problem and to share. re:screws in the wrong place, I learned some time back on the forums a clever trick. Put the chrono screws back in place after unscrewing and removing parts. This way, screws always in the right place. Huge time saver. all best,2 points
-
Brass keeps the heat it doesn’t spread the heat outwards. Some people use brass filings. This is the way I used to blue screws. Remove the entire burr with a needle file and use various grade of emery, I used sticks, sometimes cloth. Wash out the screws in my old watch cleaning machine. I had an old copper penny (copper is as good as brass when it comes to heat) that was bent at an angle and held in a mini vice which was held in my bench vice. Sprit lamp underneath the penny, when the penny got hot I would put the screws one by one on the penny and blue them, as soon as the screw was blued drop it in clean oil, I used 3 in 1 this will add a shine to the screws. When all done wash them in the cleaning machine again. All nice and blued (the same colour blue for them all) ready to use when assembling the movement.2 points
-
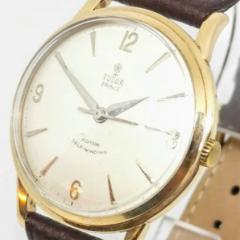
Cheers Mates! This time Im working on a Baumgartner 582, Buler Aeromaster. Watch did not work because the impulse stone or finger was on the opposite side of the pallet fork, and when feeling the collar on the spring. It was very very lose. It almost fell of... My question is: Can this collar be pressed smaller? Or if I do that, can I be sure the balance staff is not ground down to much? Is this usual practice for an watch maker ? Or is it better to get en replacement ? (spring and balance wheel) Again, again thanks for all help, .... :-) Best Regards Armand
 1 point
 -
Tooooo much information.... Bod1 point
-
I like that i really need your help to repair my dad Chronosport UDT type 1 (wich share the same case & movement) I send you a pm1 point
-
If you look at the manufacturing information document it specifies that a serial number is placed on the mainspring barrel bridge which is what you have which means this is a chronometer grade movement. Then of course the 2892A2 Is the base movement. The other number is usually a date code possibly a location and a date code of where the movement was manufactured. When the watch is on the timing machine is it entirely reassembled? when you're having a problem like this I wouldn't put the automatic back on or any of the calendar components until you getting something decent on the timing machine.1 point
-
37 ? You guys are CHILDREN !!!!!! Of course its not too late... Don't be absurd ! I must warn you however , If you are itching you have been infected . This place is like a leper colony, we all have the same disease.welcome.1 point
-
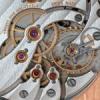
I find it hard to see how you could get such an extreme rate change such as the graph posted below, unless it was related to the vibration of the hairspring. Are you absolutely sure that it isn’t contaminated or rubbing/sticking? I have noticed when working on a relatively new 2824 yesterday that they do seem to be susceptible to drying out and possibly wearing slightly at the escape wheel which results in a sludge embedded in the escape wheel teeth. This can potentially require careful cleaning with pith wood if your cleaning solution does not remove it. However, it’s unlikely to cause as drastic rate changes as you are seeing, unless the overall amplitude was extremely low.1 point
-
Okidok, then I will try to gently tightening the collar first, and see how that turns out... Many thanks to both of you !!1 point
-
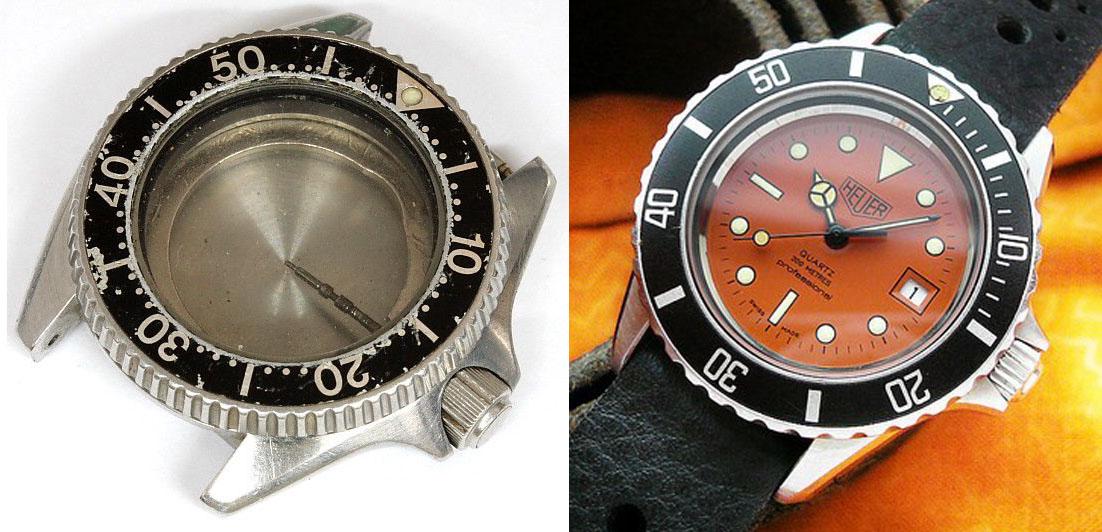
Some news about the casing of that dial I've had the opportunity to get a 2625-001 Seiko case, which is not in really good condition. But just have a look at that comparison pic below ... it seems to be a good start case for a 980.016 hommage. I'll probably (certainly) have to redo all the dial making process as the rehaut opening is really short on the 2625, and the date window will be a little too close to the rehaut but if it's not under the rehaut I will live with that. Plus I'll probably build a custom "bakelite" bezel (in fact plexiglass with a printed underside). As I will redo the dial I have decided to change the color. I will make it pistacchio green and spray some really thin gold powder on the decal prior to varnishing. So if I succeed the dial should look matte in certain lighting conditions but sometimes there will be shiny gold spots
 1 point
 -
The Aeromaster is a cool Watch I have one of those too stored in the corner of my dark abyss. The HS looks like the original one so I can't see why that would not resonate correctly. But sometimes when serviced one use the HS collet slot to adjust the impulse stone to the correct position. When doing this one might widen the slot or gap a little bit and the end result is what you seen in your Watch, the impulse pin moves to a erratic position. Gently tightening the collar will solve this problem but be carefull when doing this so you don't mess up the HS. Gluing anything into Place in a watch is not anything I recommend to do. In this case you might want to adjust the collar position a bit and that will be impossible if glued into place.1 point
-
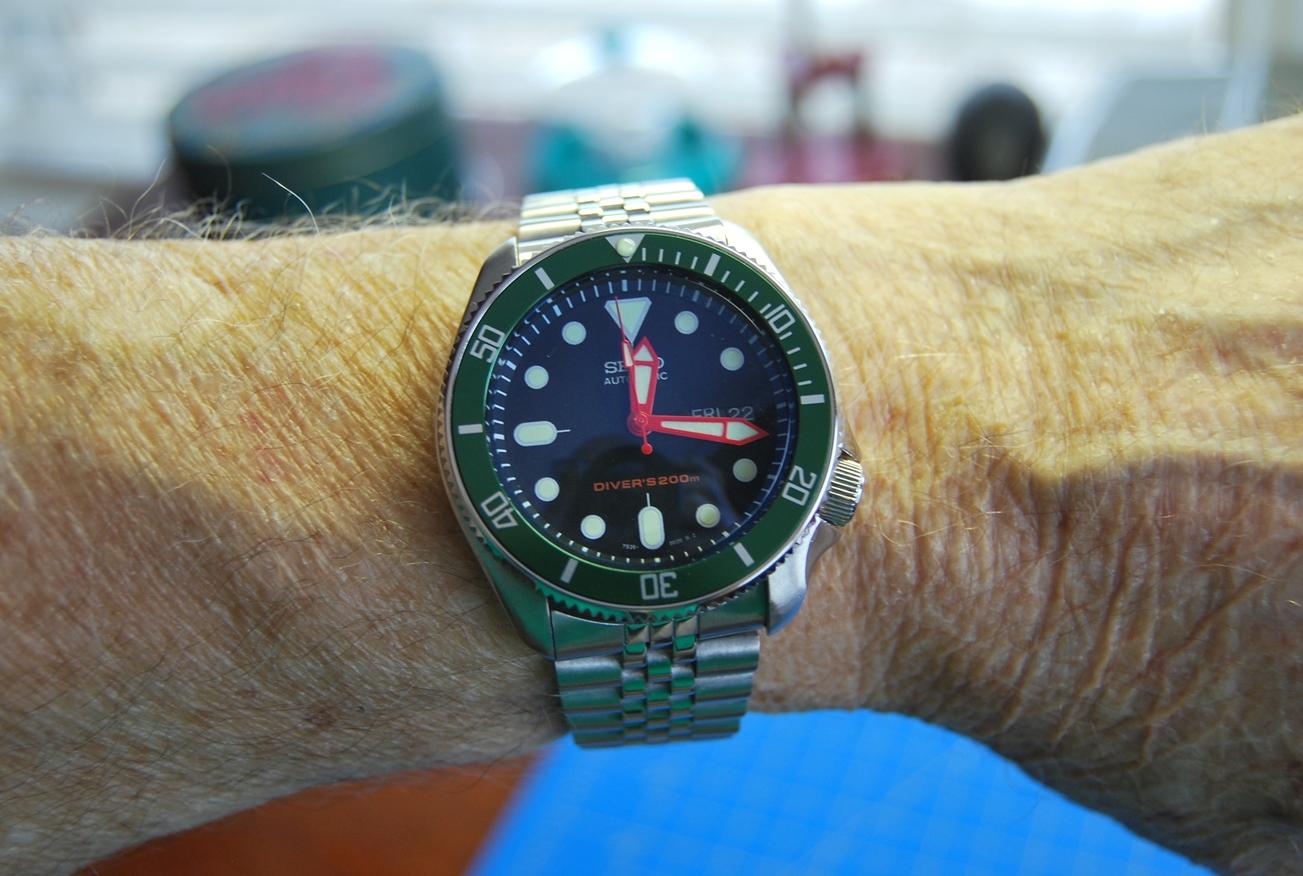
Well let's see those Seiko mods folks!! Replaced the original 7S26 movement with a 7S36 due to failure of the original after 22 years with only one maintenance. My bad! New aftermarket hands with Super-LumiNova, custom coin edge bezel from 316L stainless steel, green aftermarket insert and a new double seal crown. Lots of fun with this one.
 1 point
 -
The remover is the part that has a black top which doesn't have a fixed hole unlike all the other punches and stakes.1 point
-
Good advice in prior posts. I've the C version of the type of staking set that the video that video in OH's posting has a link to. The D version has the addition of the base for the tool. The Unruh-Max, the tool for balance staff removal, appears at 1:05 in the video. It doesn't come as part of the C set and I don't think it's part of the D set as standard. There is one currently on e-bay UK which looks to be ok. Item 153398604657 (I've no connection to this item.) I bought mine on e-bay a few years back following a prior post on this forum. It can be used with most staking sets not just Bergeon branded sets. I have used mine on a few pocket watches. The K&D tool that you have a link to is a different tool but fundemenly is designed for the same task as the Unruh-Max. That is they are balance staff removal tools. Whichever tool you choose to use to remove the staff, you will need a decent staking set of punches and anvils to rivet the new staff on to the balance wheel. Sent from my moto g(6) play using Tapatalk1 point
-
The key to removing balance staff is not to damage / bend the balance arm. The platax tool used correctly supports the arm and the correct tool to be used with a staking tool also supports the balance arm. However for this reason I always now remove as much of the rivet as I can before pushing out the old balance to avoid any possible damage to the arm.1 point
-
It looks like it will. Have a look at this link. https://www.youtube.com/watch?v=IergivNiBl01 point
-
I have not taken pictures - sorry normally I do but this job required 120% concentration and a lot of lateral thinking the very small pin was very difficult to remove that was holding the HS end in place. Eventually I got it moving and out, but it was not very tapered. i ended up taking ages to reshape it slightly with 2000 grit paper. it turned out it was easier to cut the HS and remove the pin then. obviously I had to estimate the bend to put back into the spring, and then shape it again slightly when back in situ and pinned. the pin was fiddly as hell to get back into place, thank god for No5 tweezers. then checked the shape of the spring again and tweak accordingly I ended up refitting the balance complete and moving the adjuster to give me a visual line for working out the orientation of the pallet jewel, taking it off and turning the collet until I was happy, did that a couple of times. overall about 4 hours1 point
-
I have blued hands & screws and I found the key is absolute cleanliness. To absolutely make sure after rubbing down I use methylated spirits which works great for removing all grease. The slower it is blued and the more even the heat the better.1 point
-
The filament should do the trick too. It was a while ago i tried out these products not just on watchprojects but also on mobile phone cases, for the kids. The only disappointment was the thickness of the plating which seemed to wear of quite fast.So it seems the product I used isn't very partyproof .1 point
-
check the right screws are in the right places1 point
-
Had a similar issue on a 248. In my case the part of the fly back lever which gets into contact with the pusher was bent.1 point
-
Have you changed any parts? I have noticed that some parts are different even if they are Landeron 48 . I had the same problem but can't remember what is did to fix it? Maybe a screw in the wrong place?1 point
-
Hmmm ... to late for a tutorial on that one but I'm looking at another vintage those days. If I win on the bids I'll mod it so I'll take pics of every step. Envoyé de mon Moto G (5) Plus en utilisant Tapatalk1 point