
Leaderboard


Popular Content
Showing content with the highest reputation on 01/24/22 in all areas
-
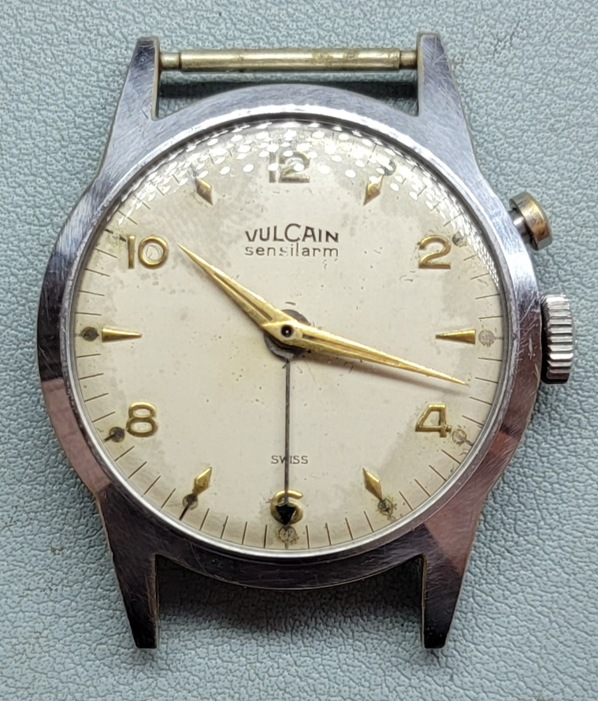
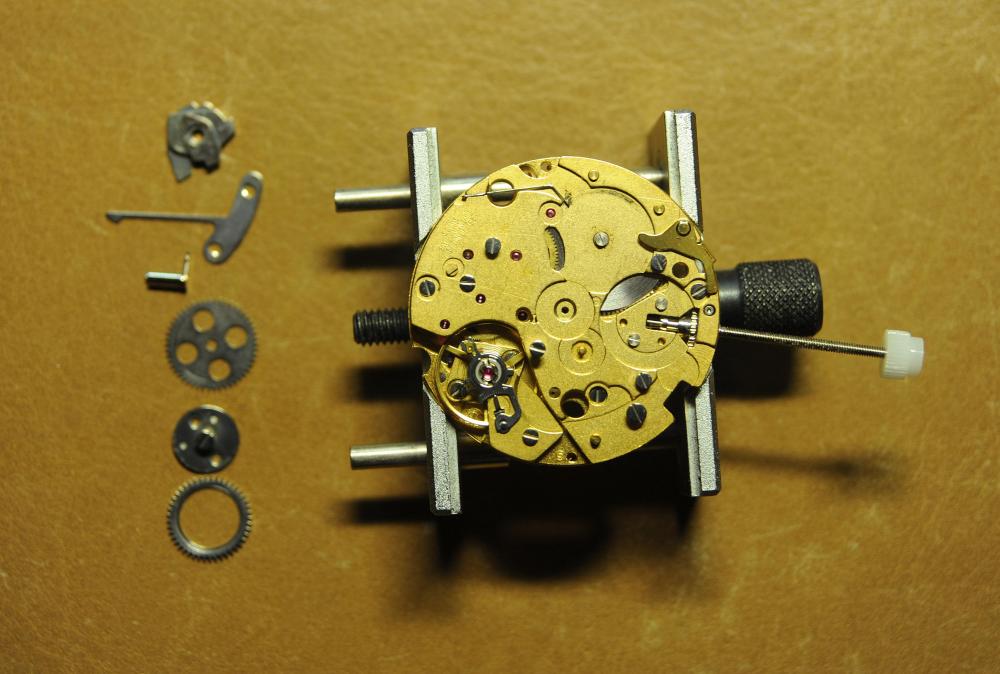
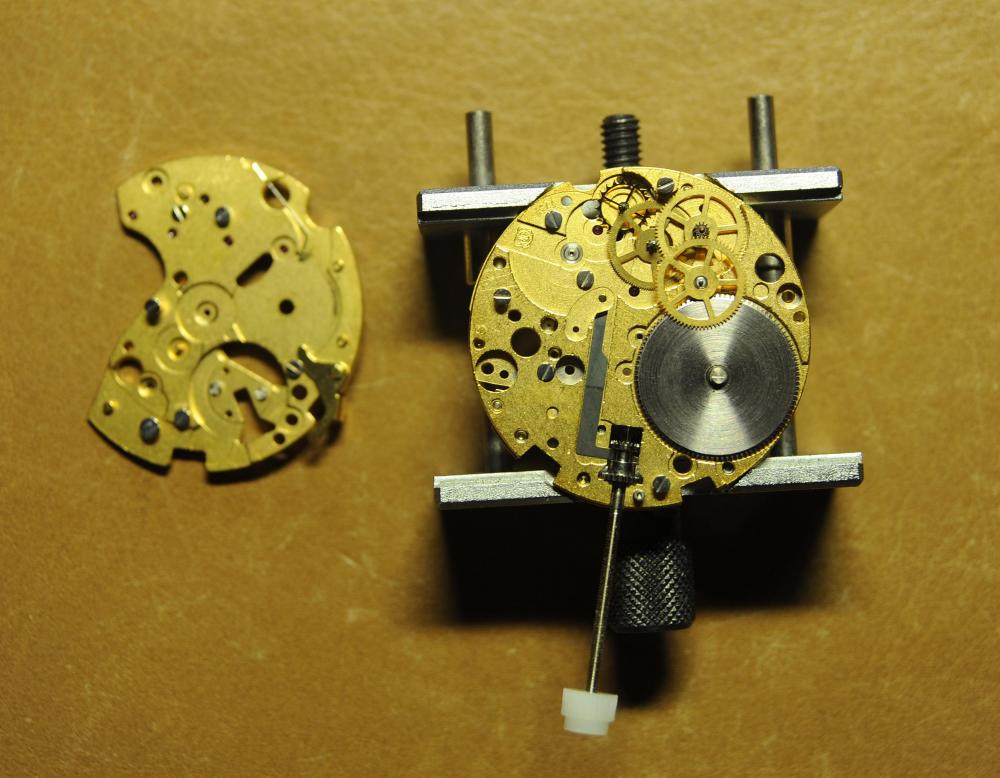
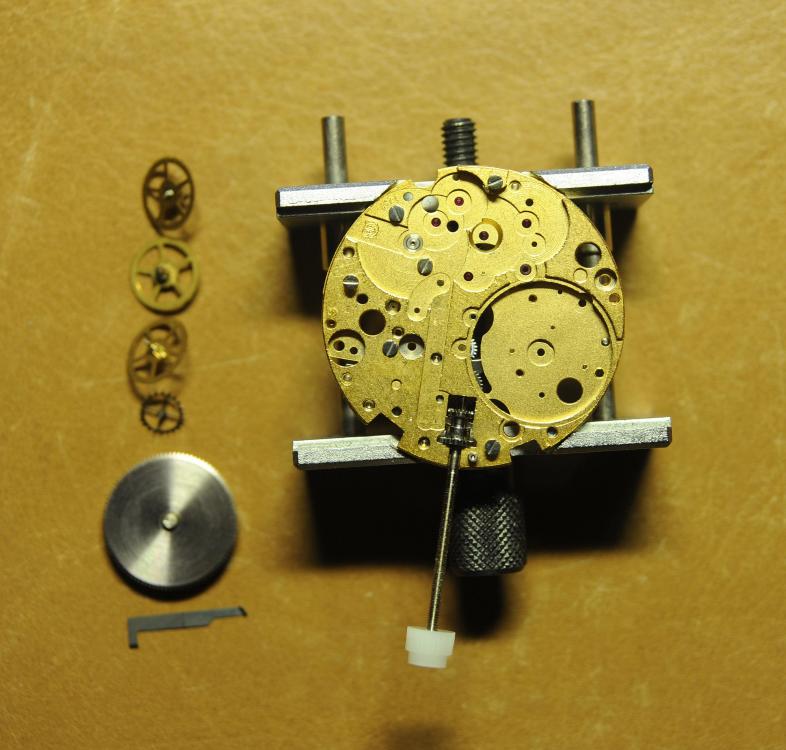
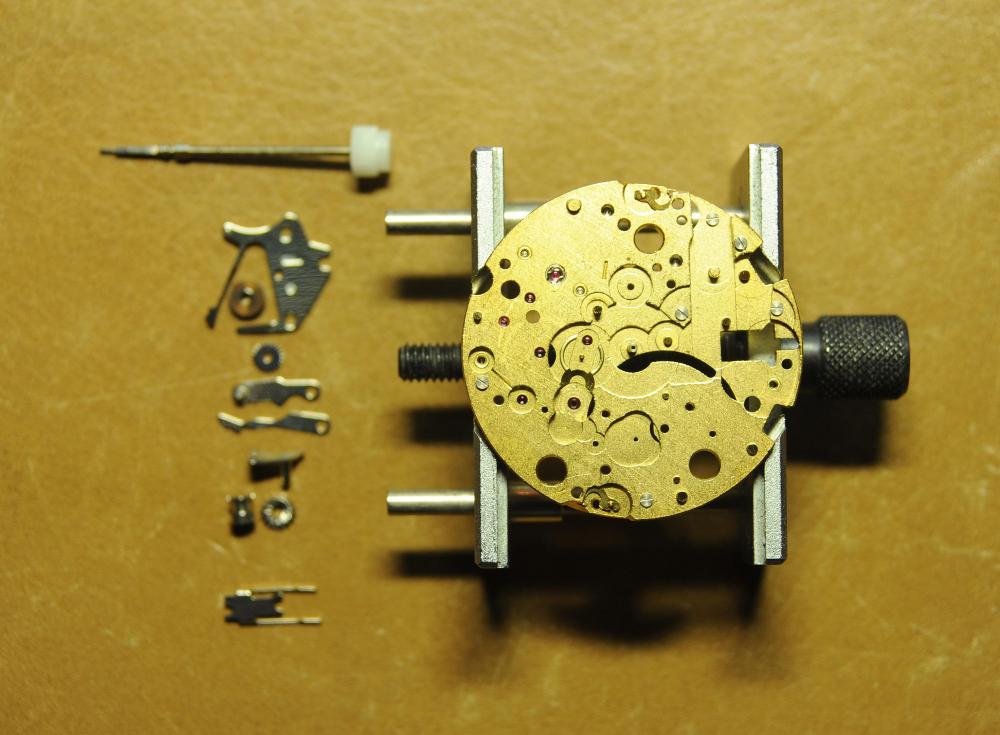
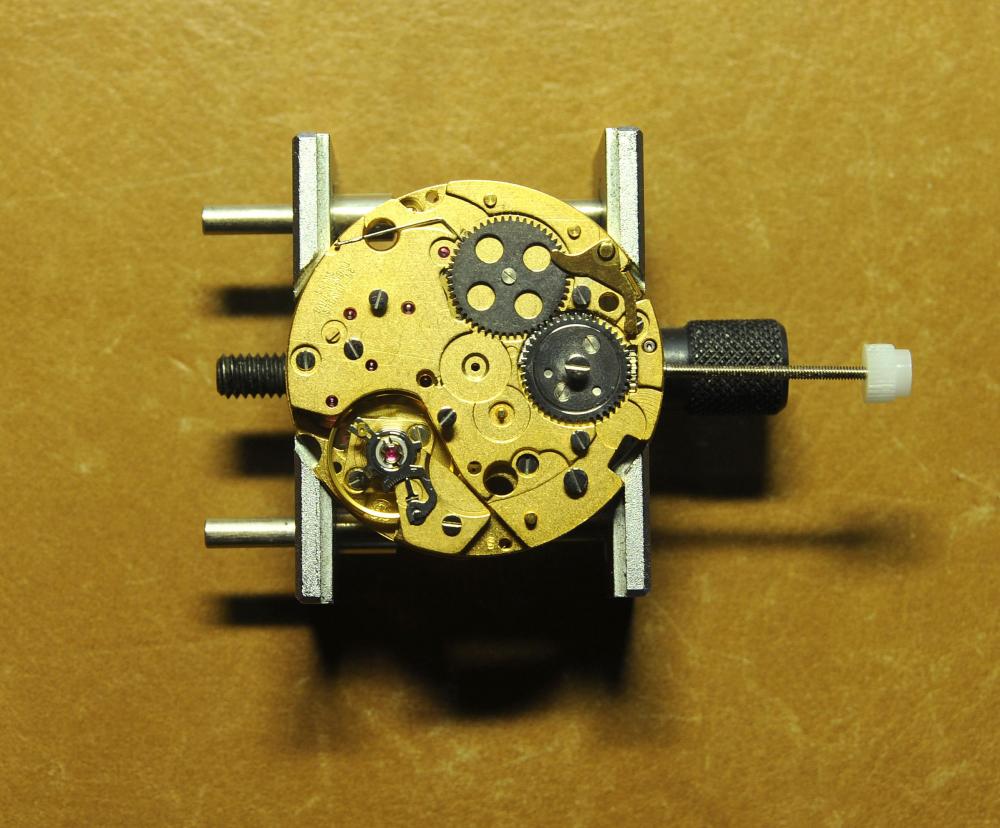
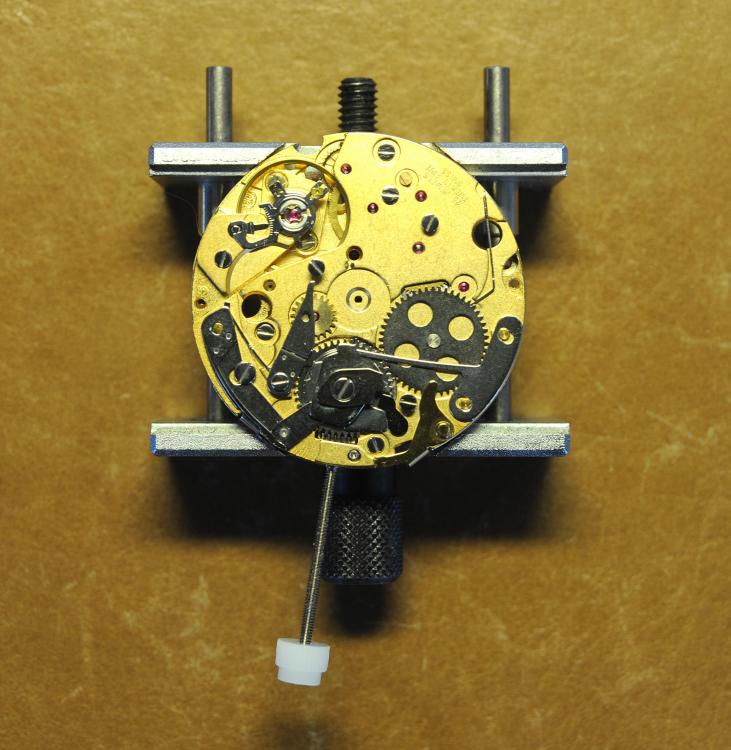
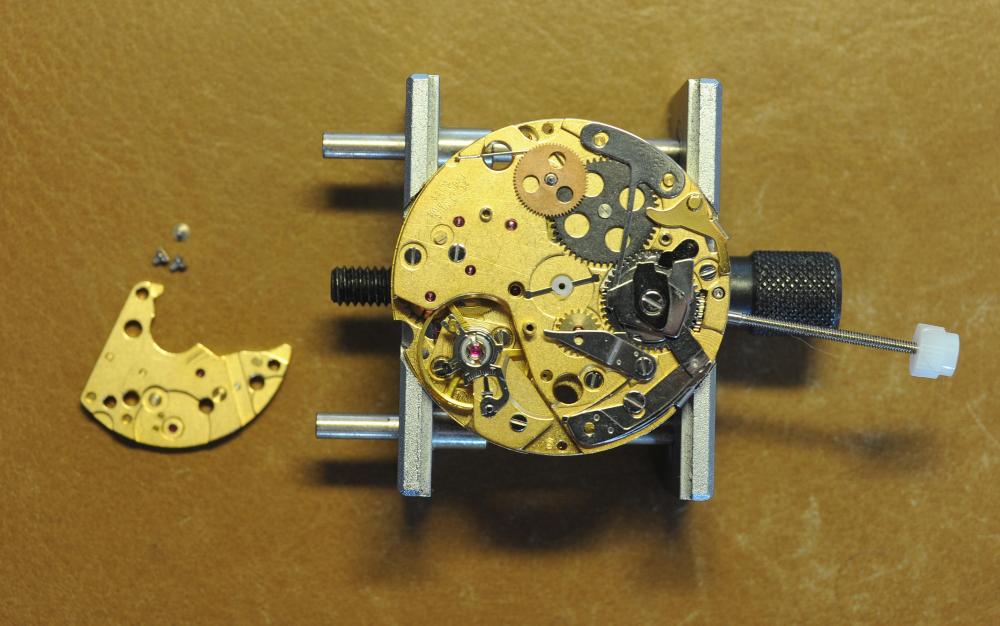
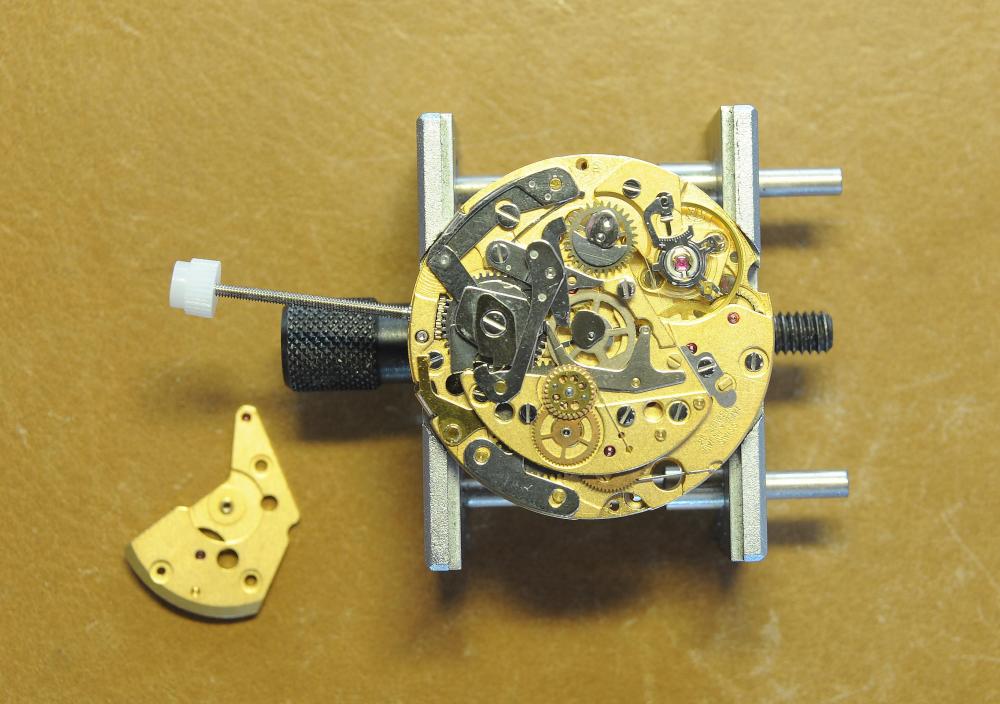
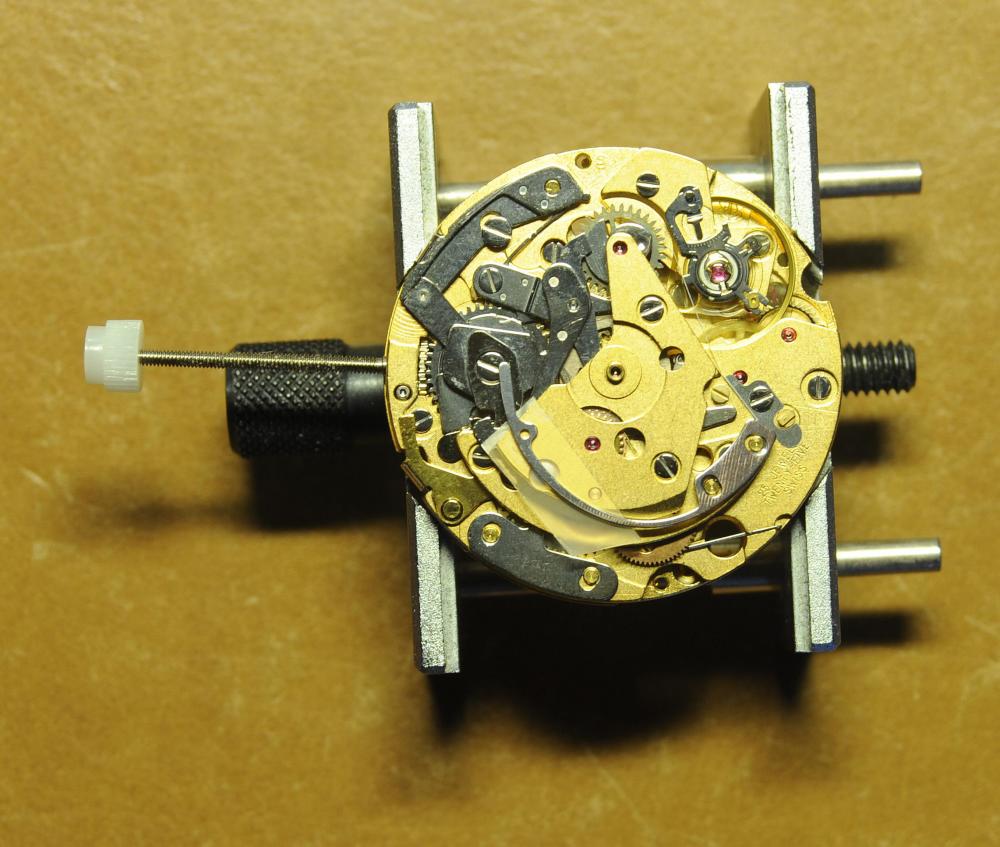
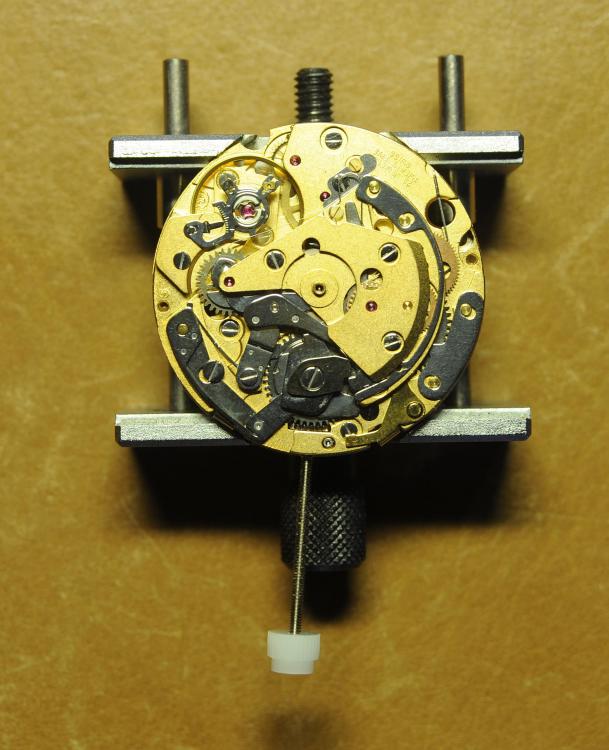
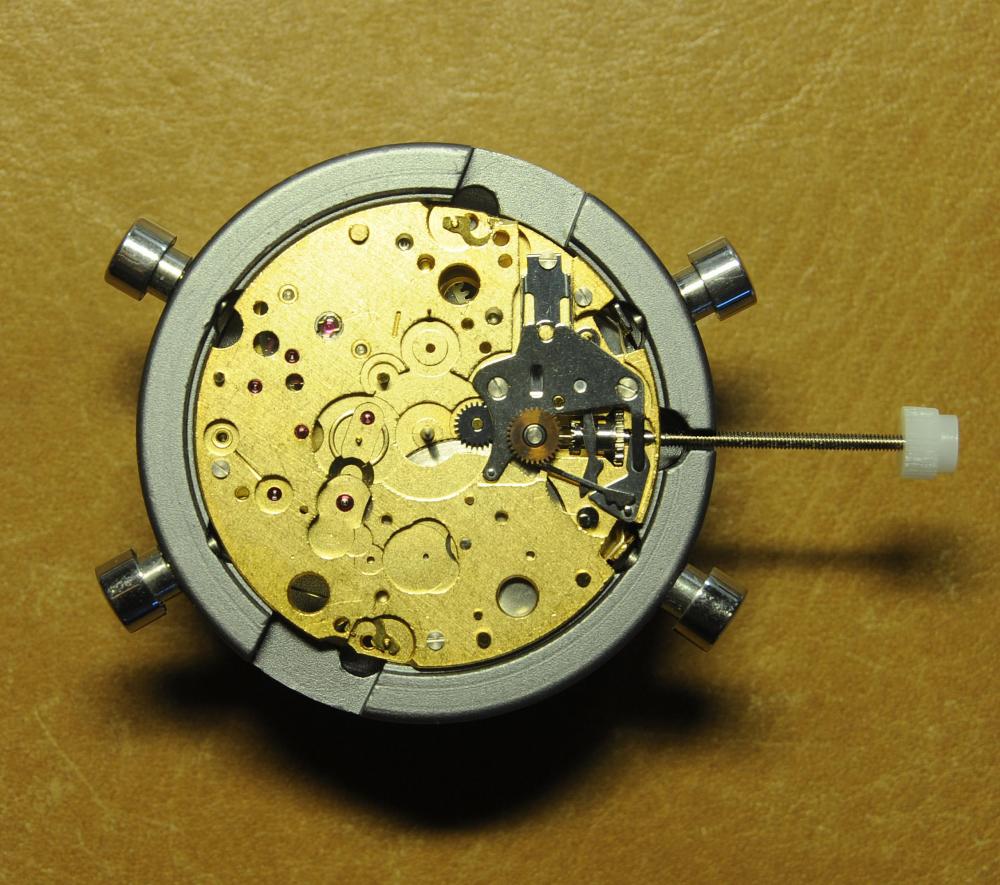
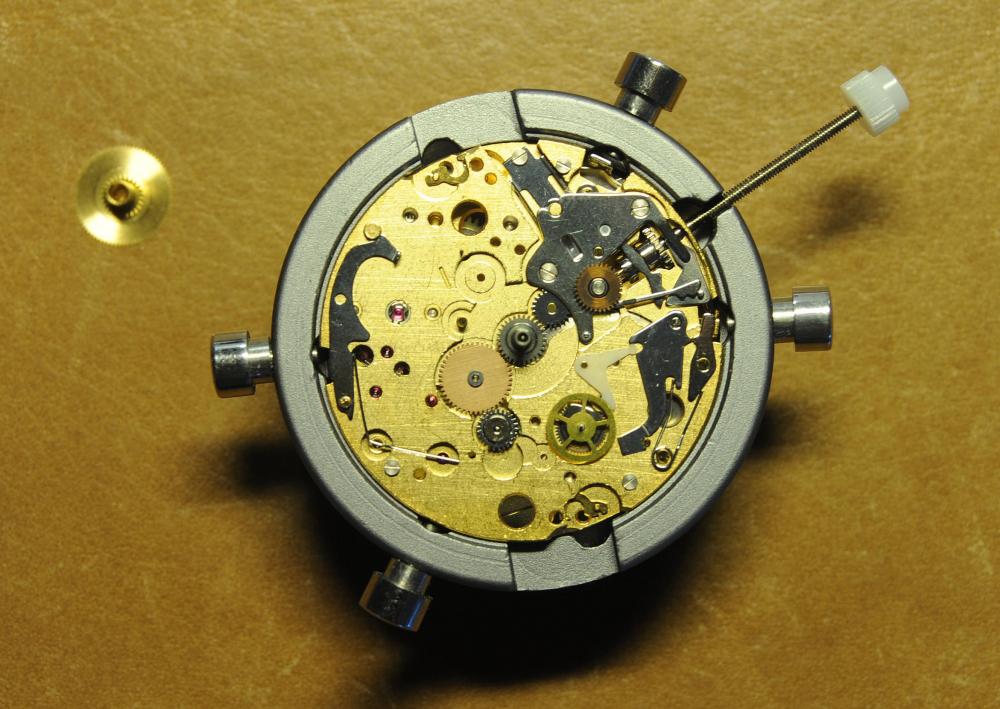
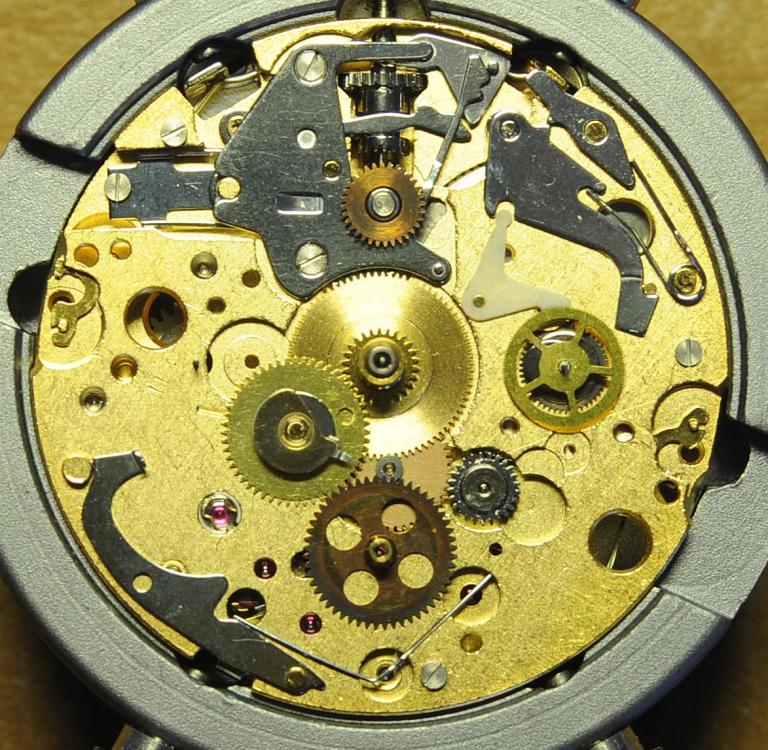
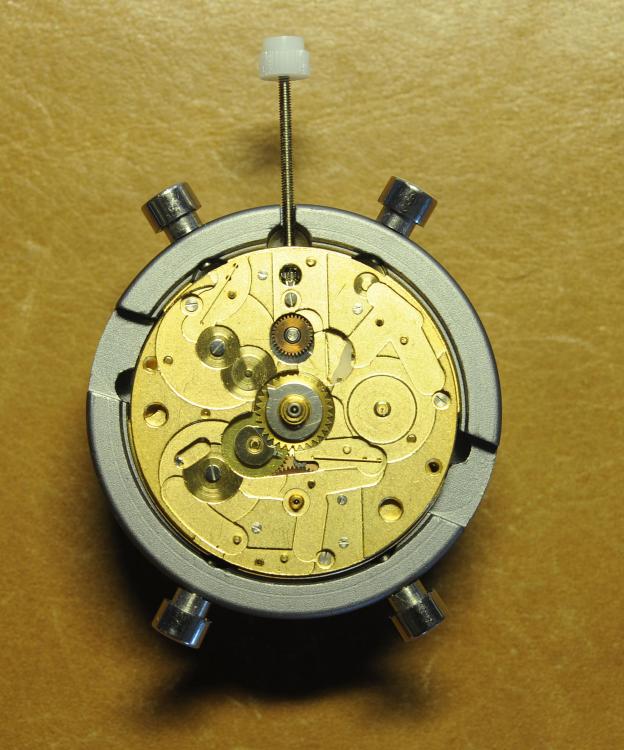
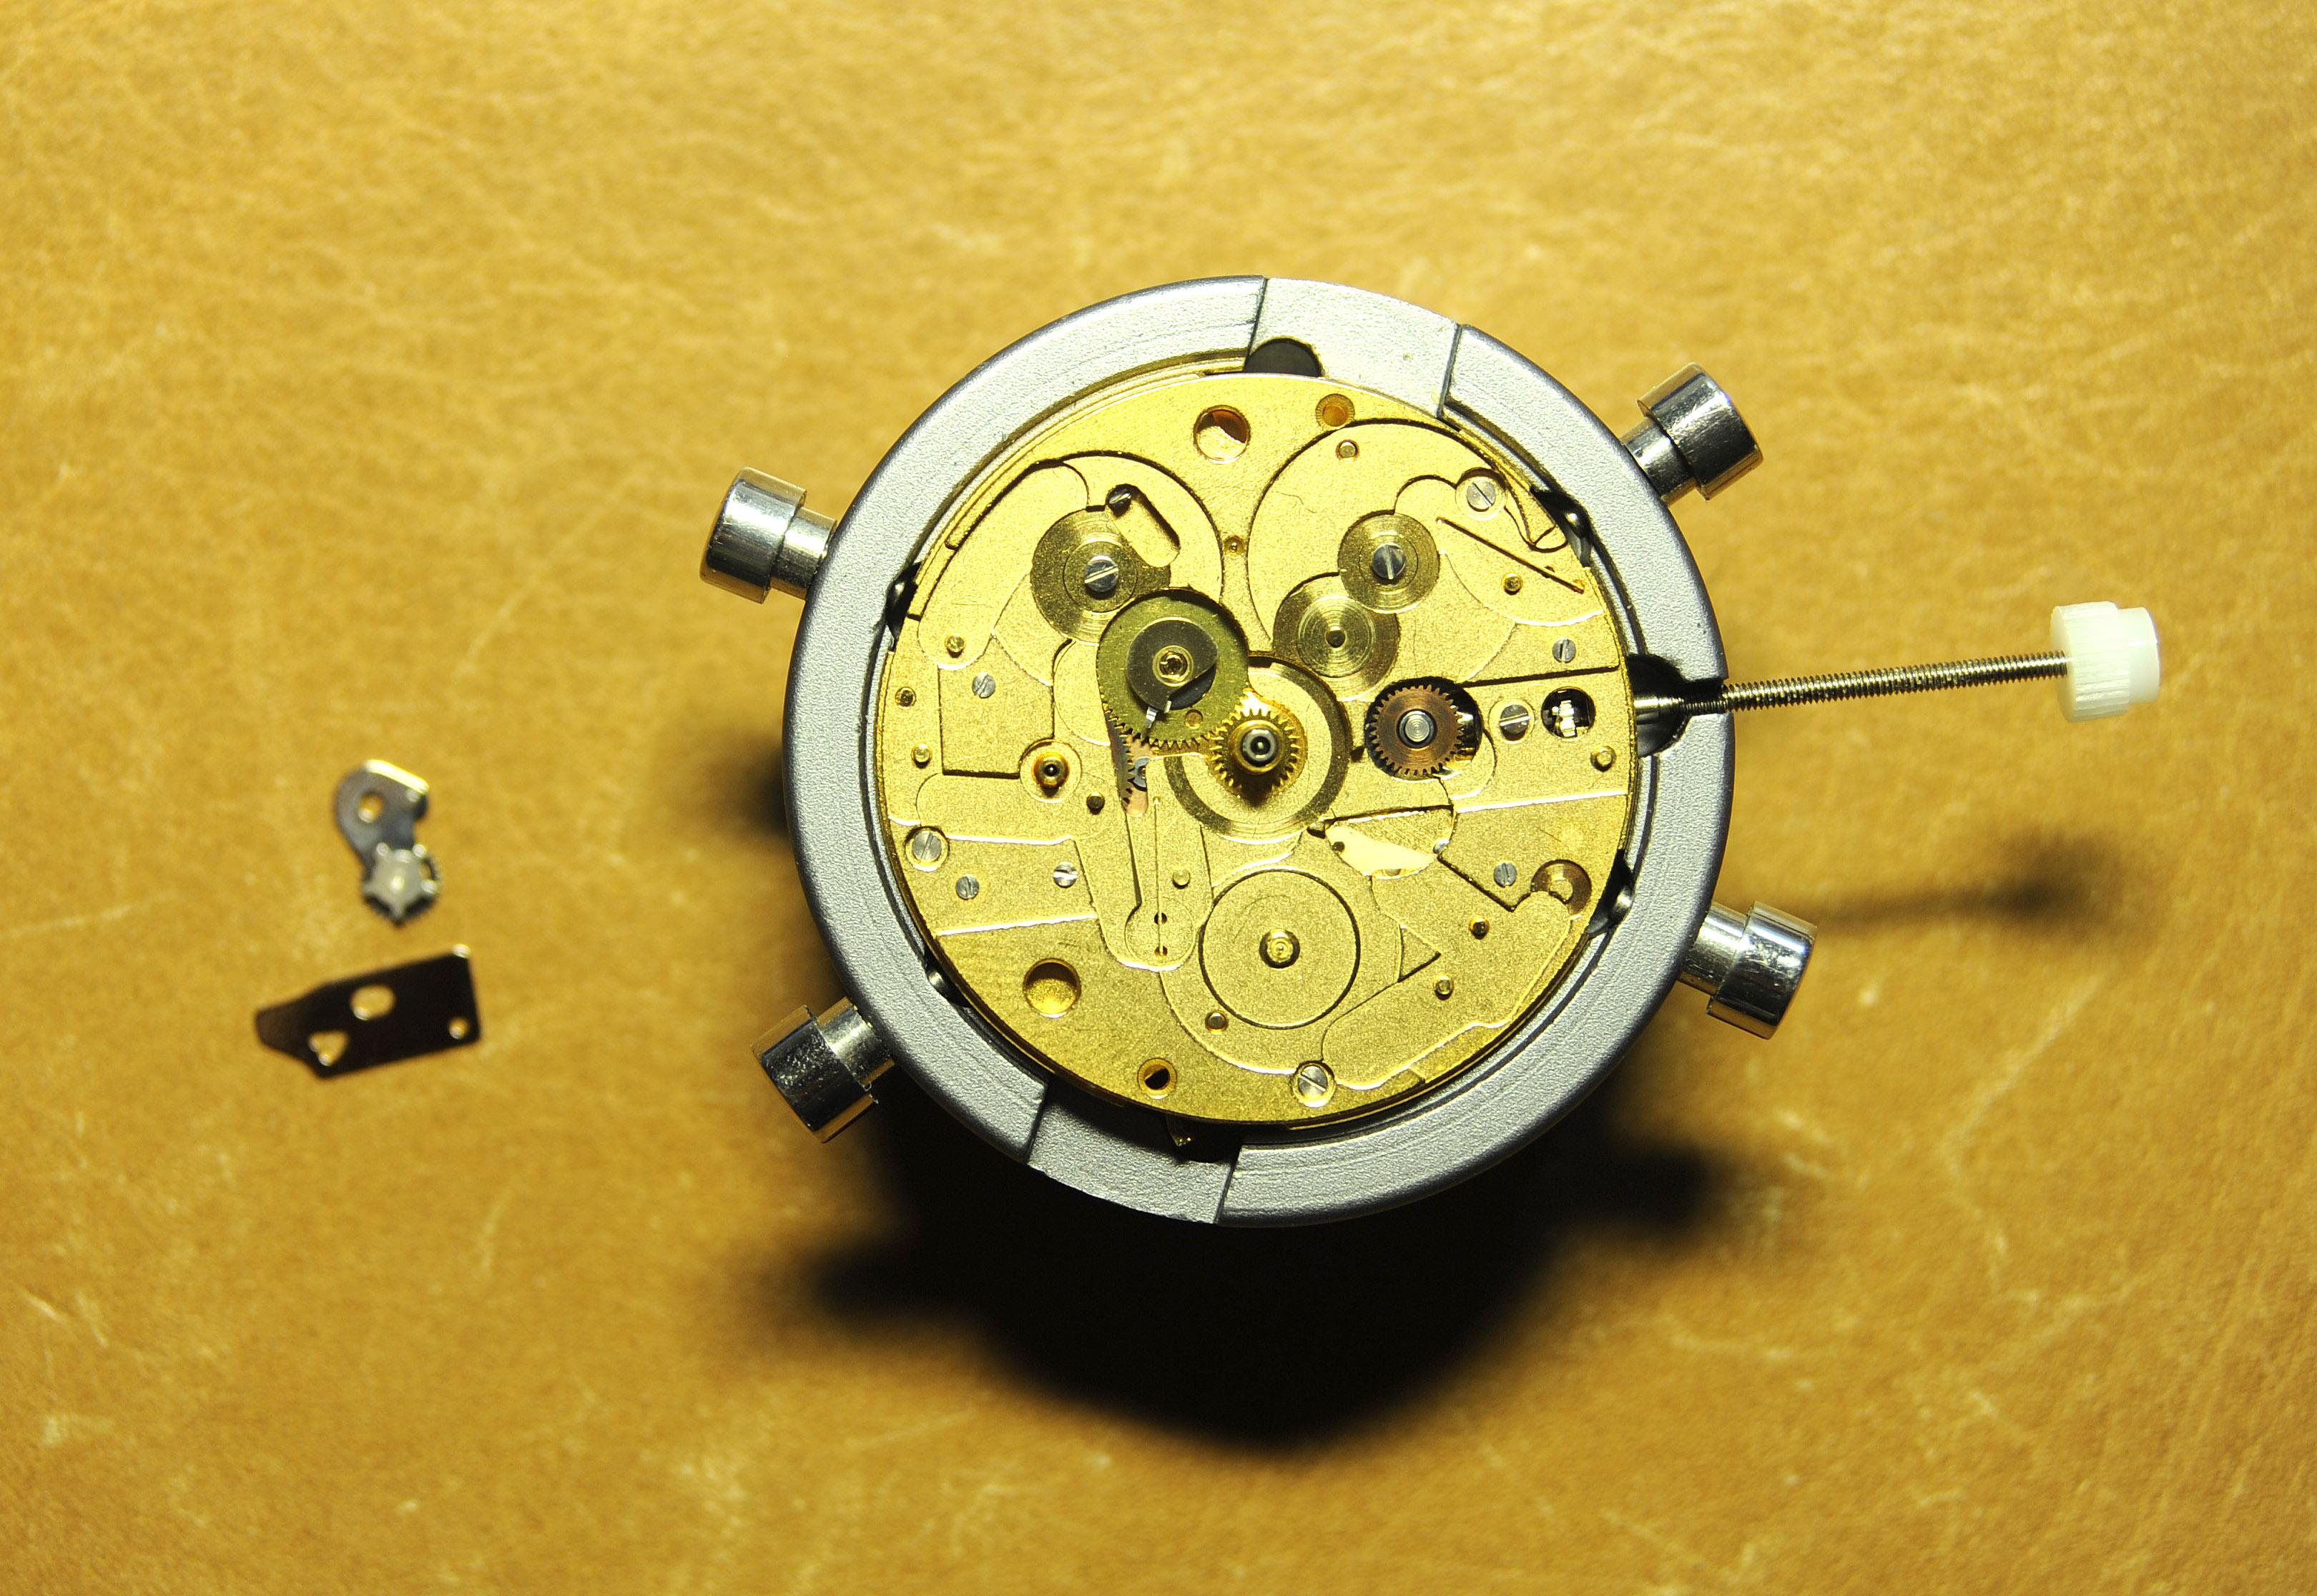
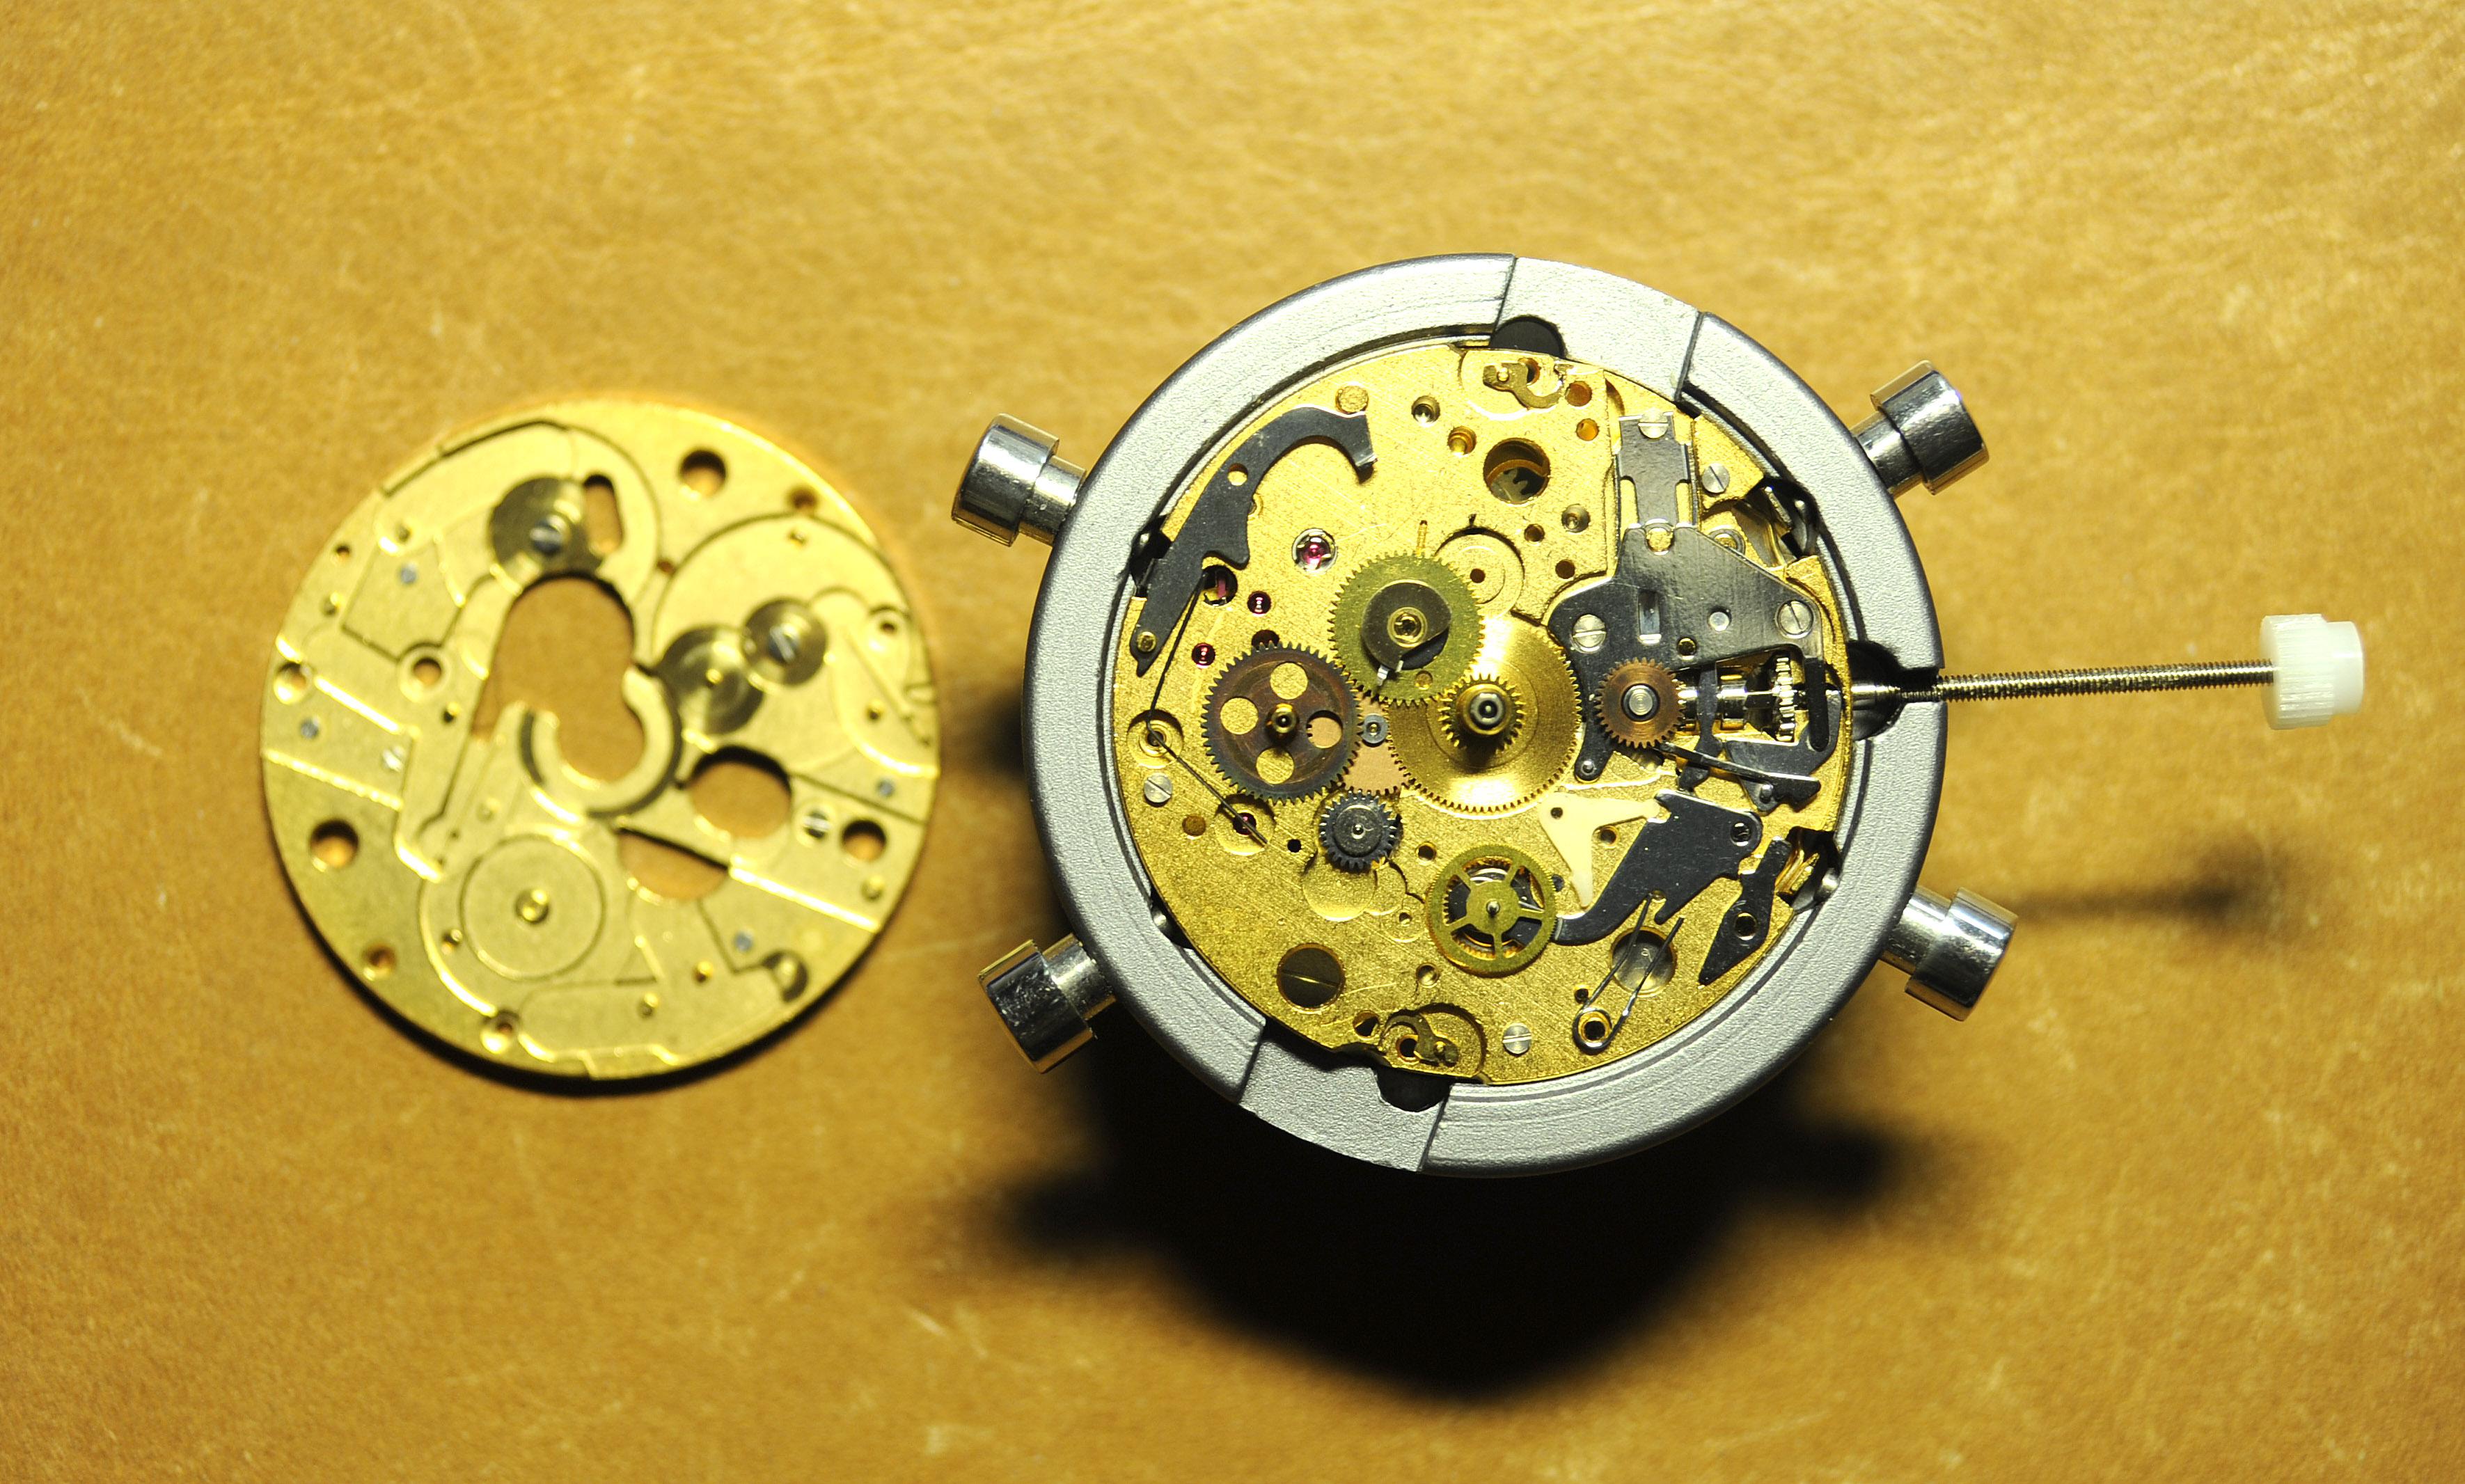
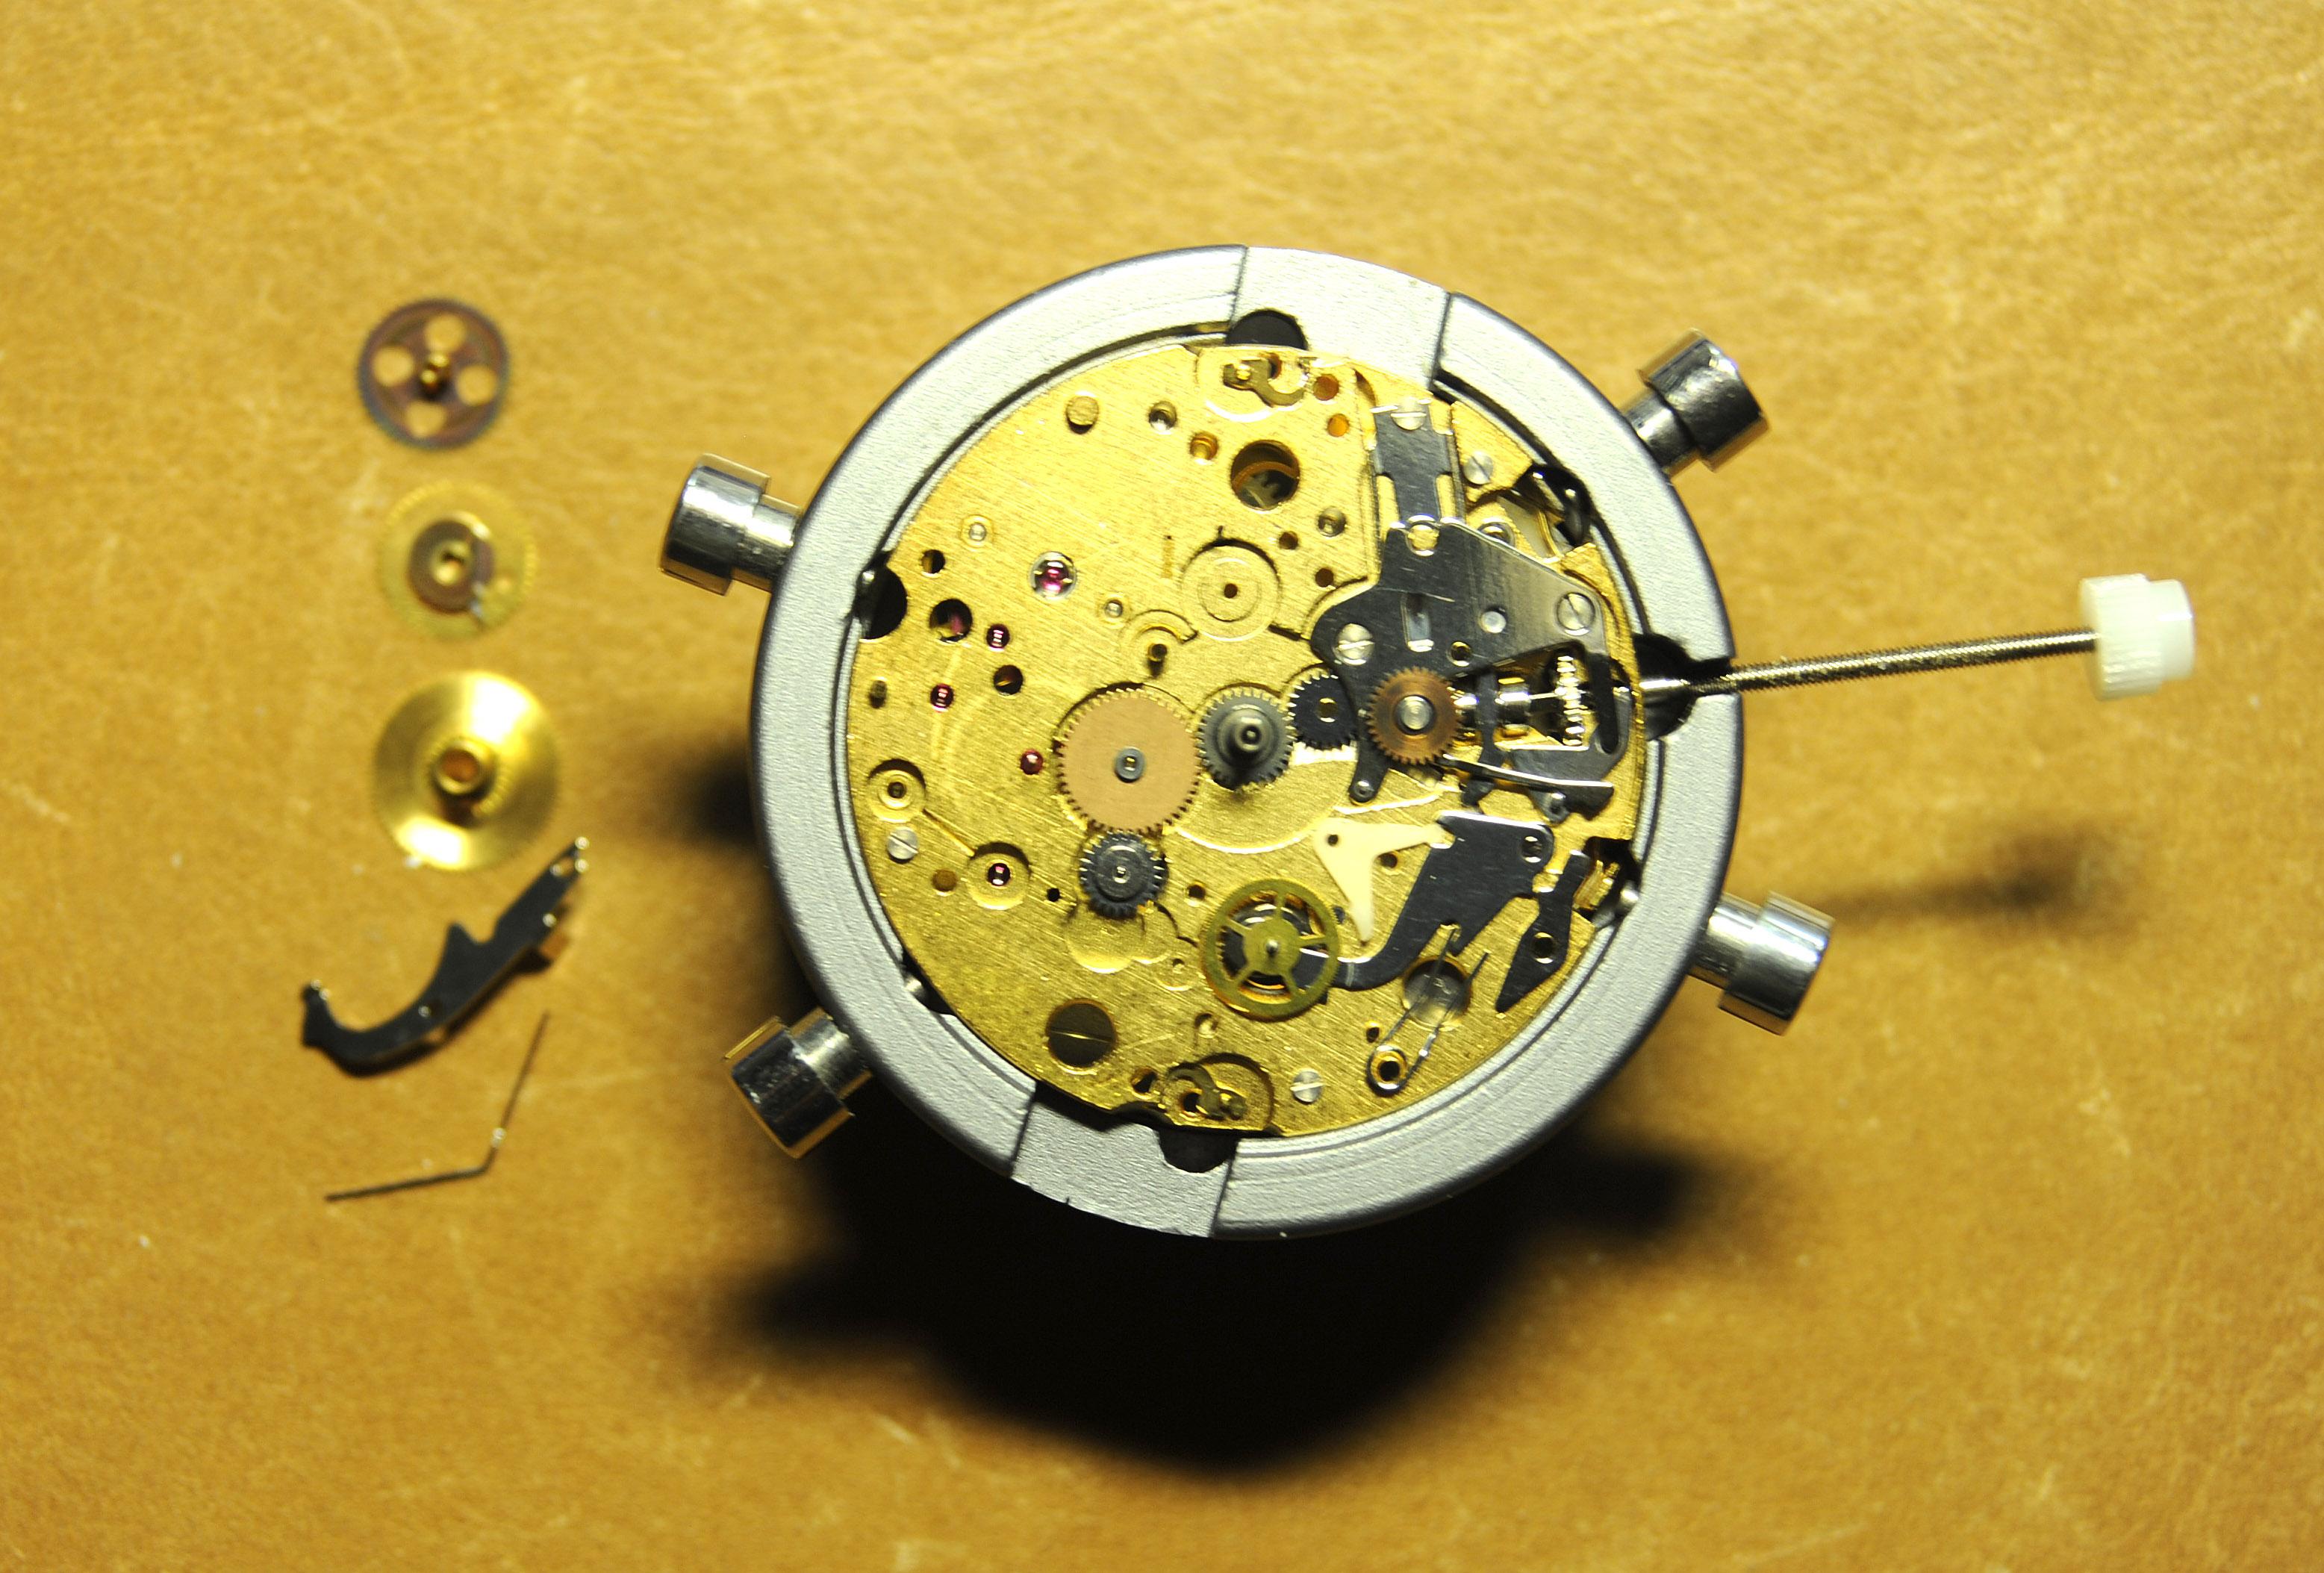
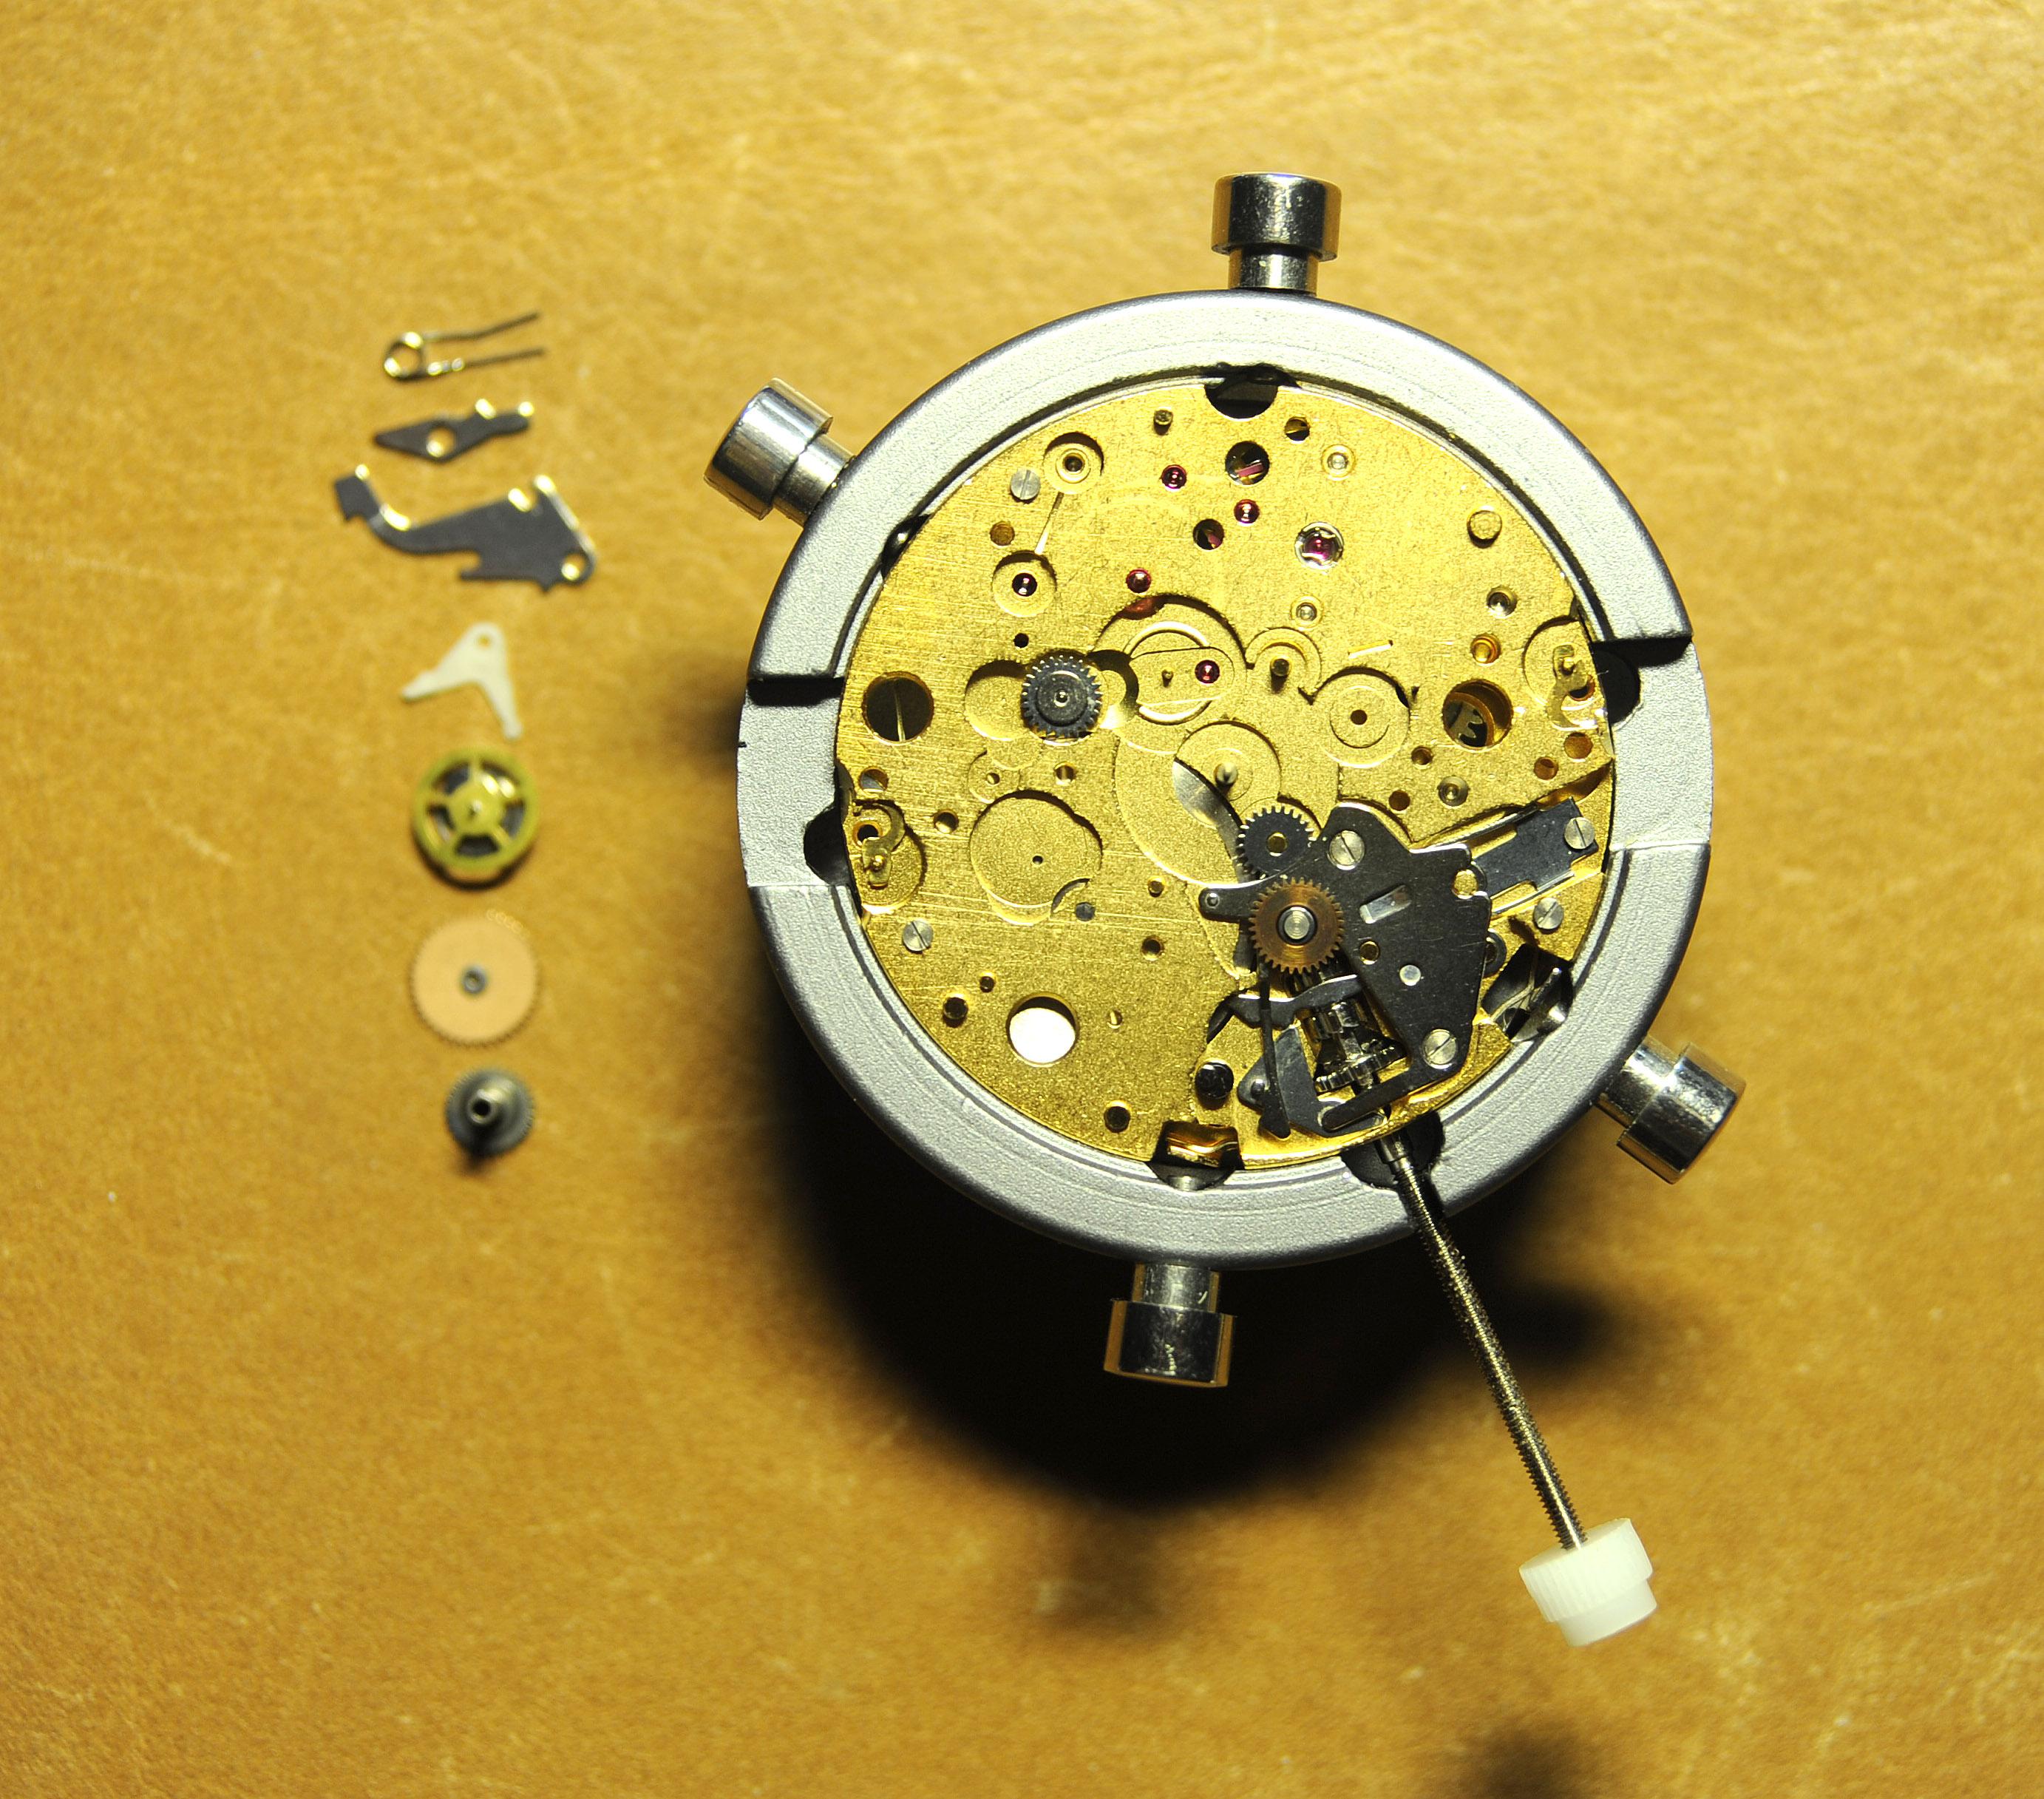
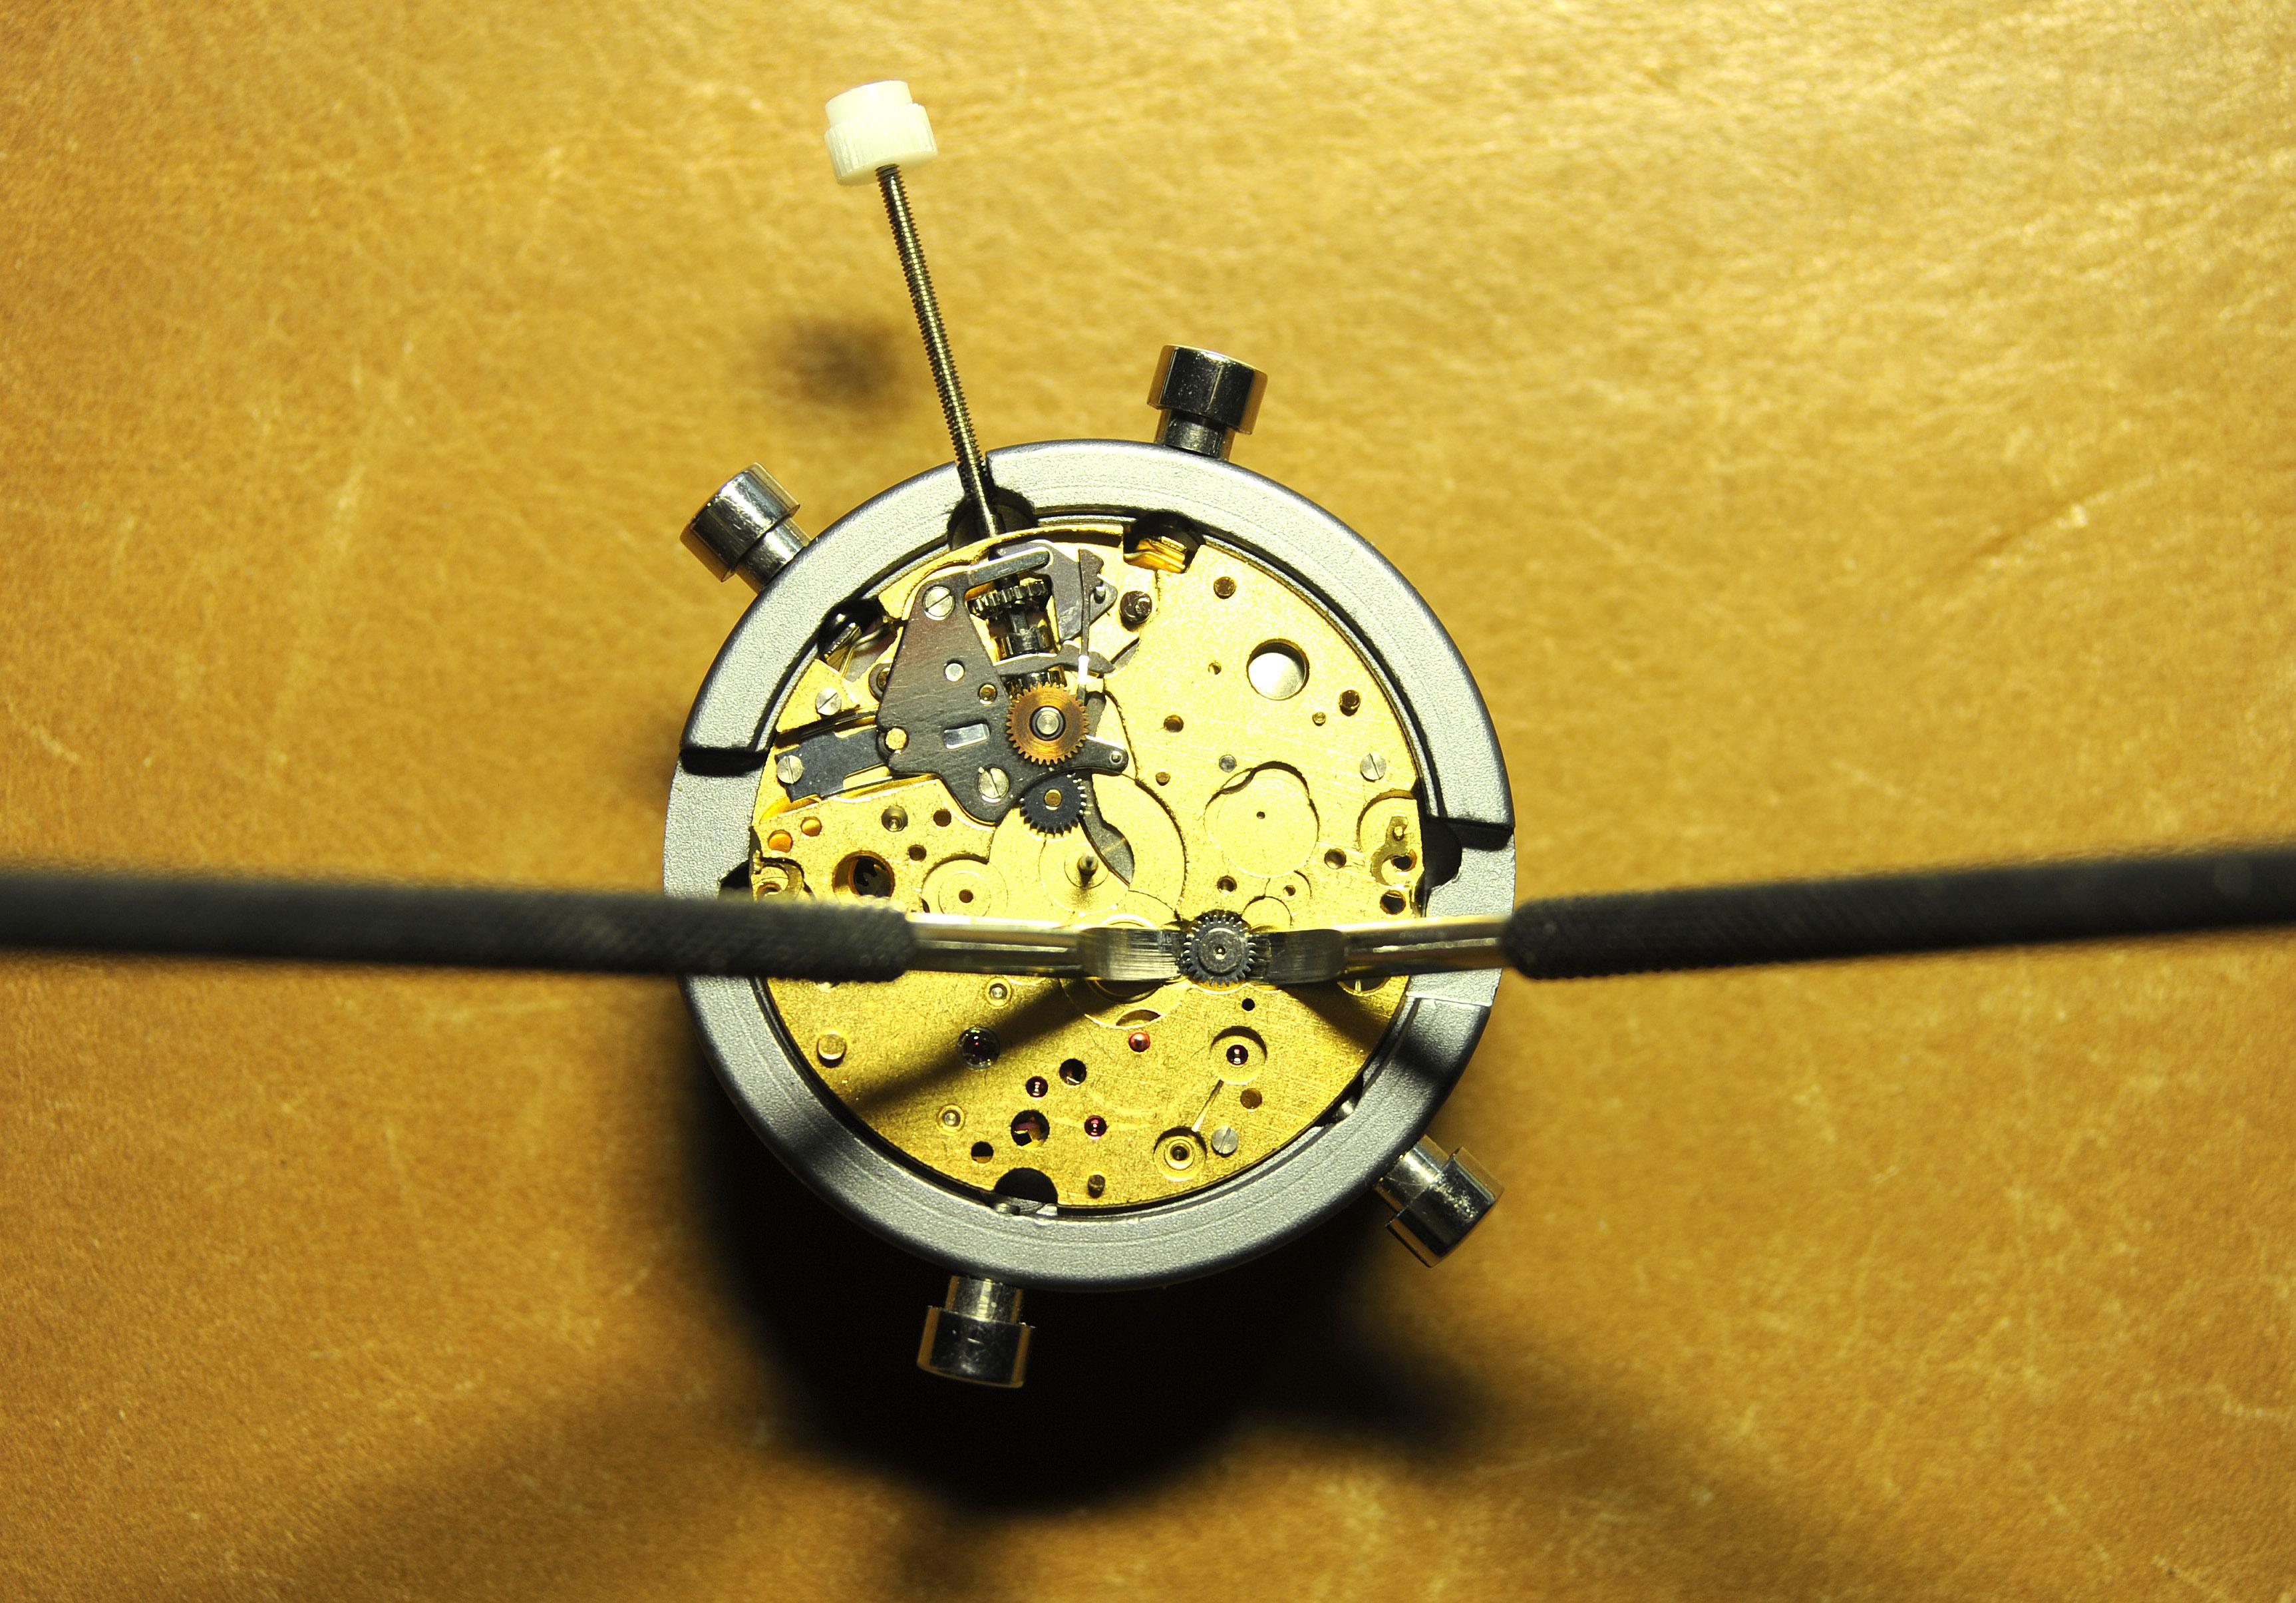
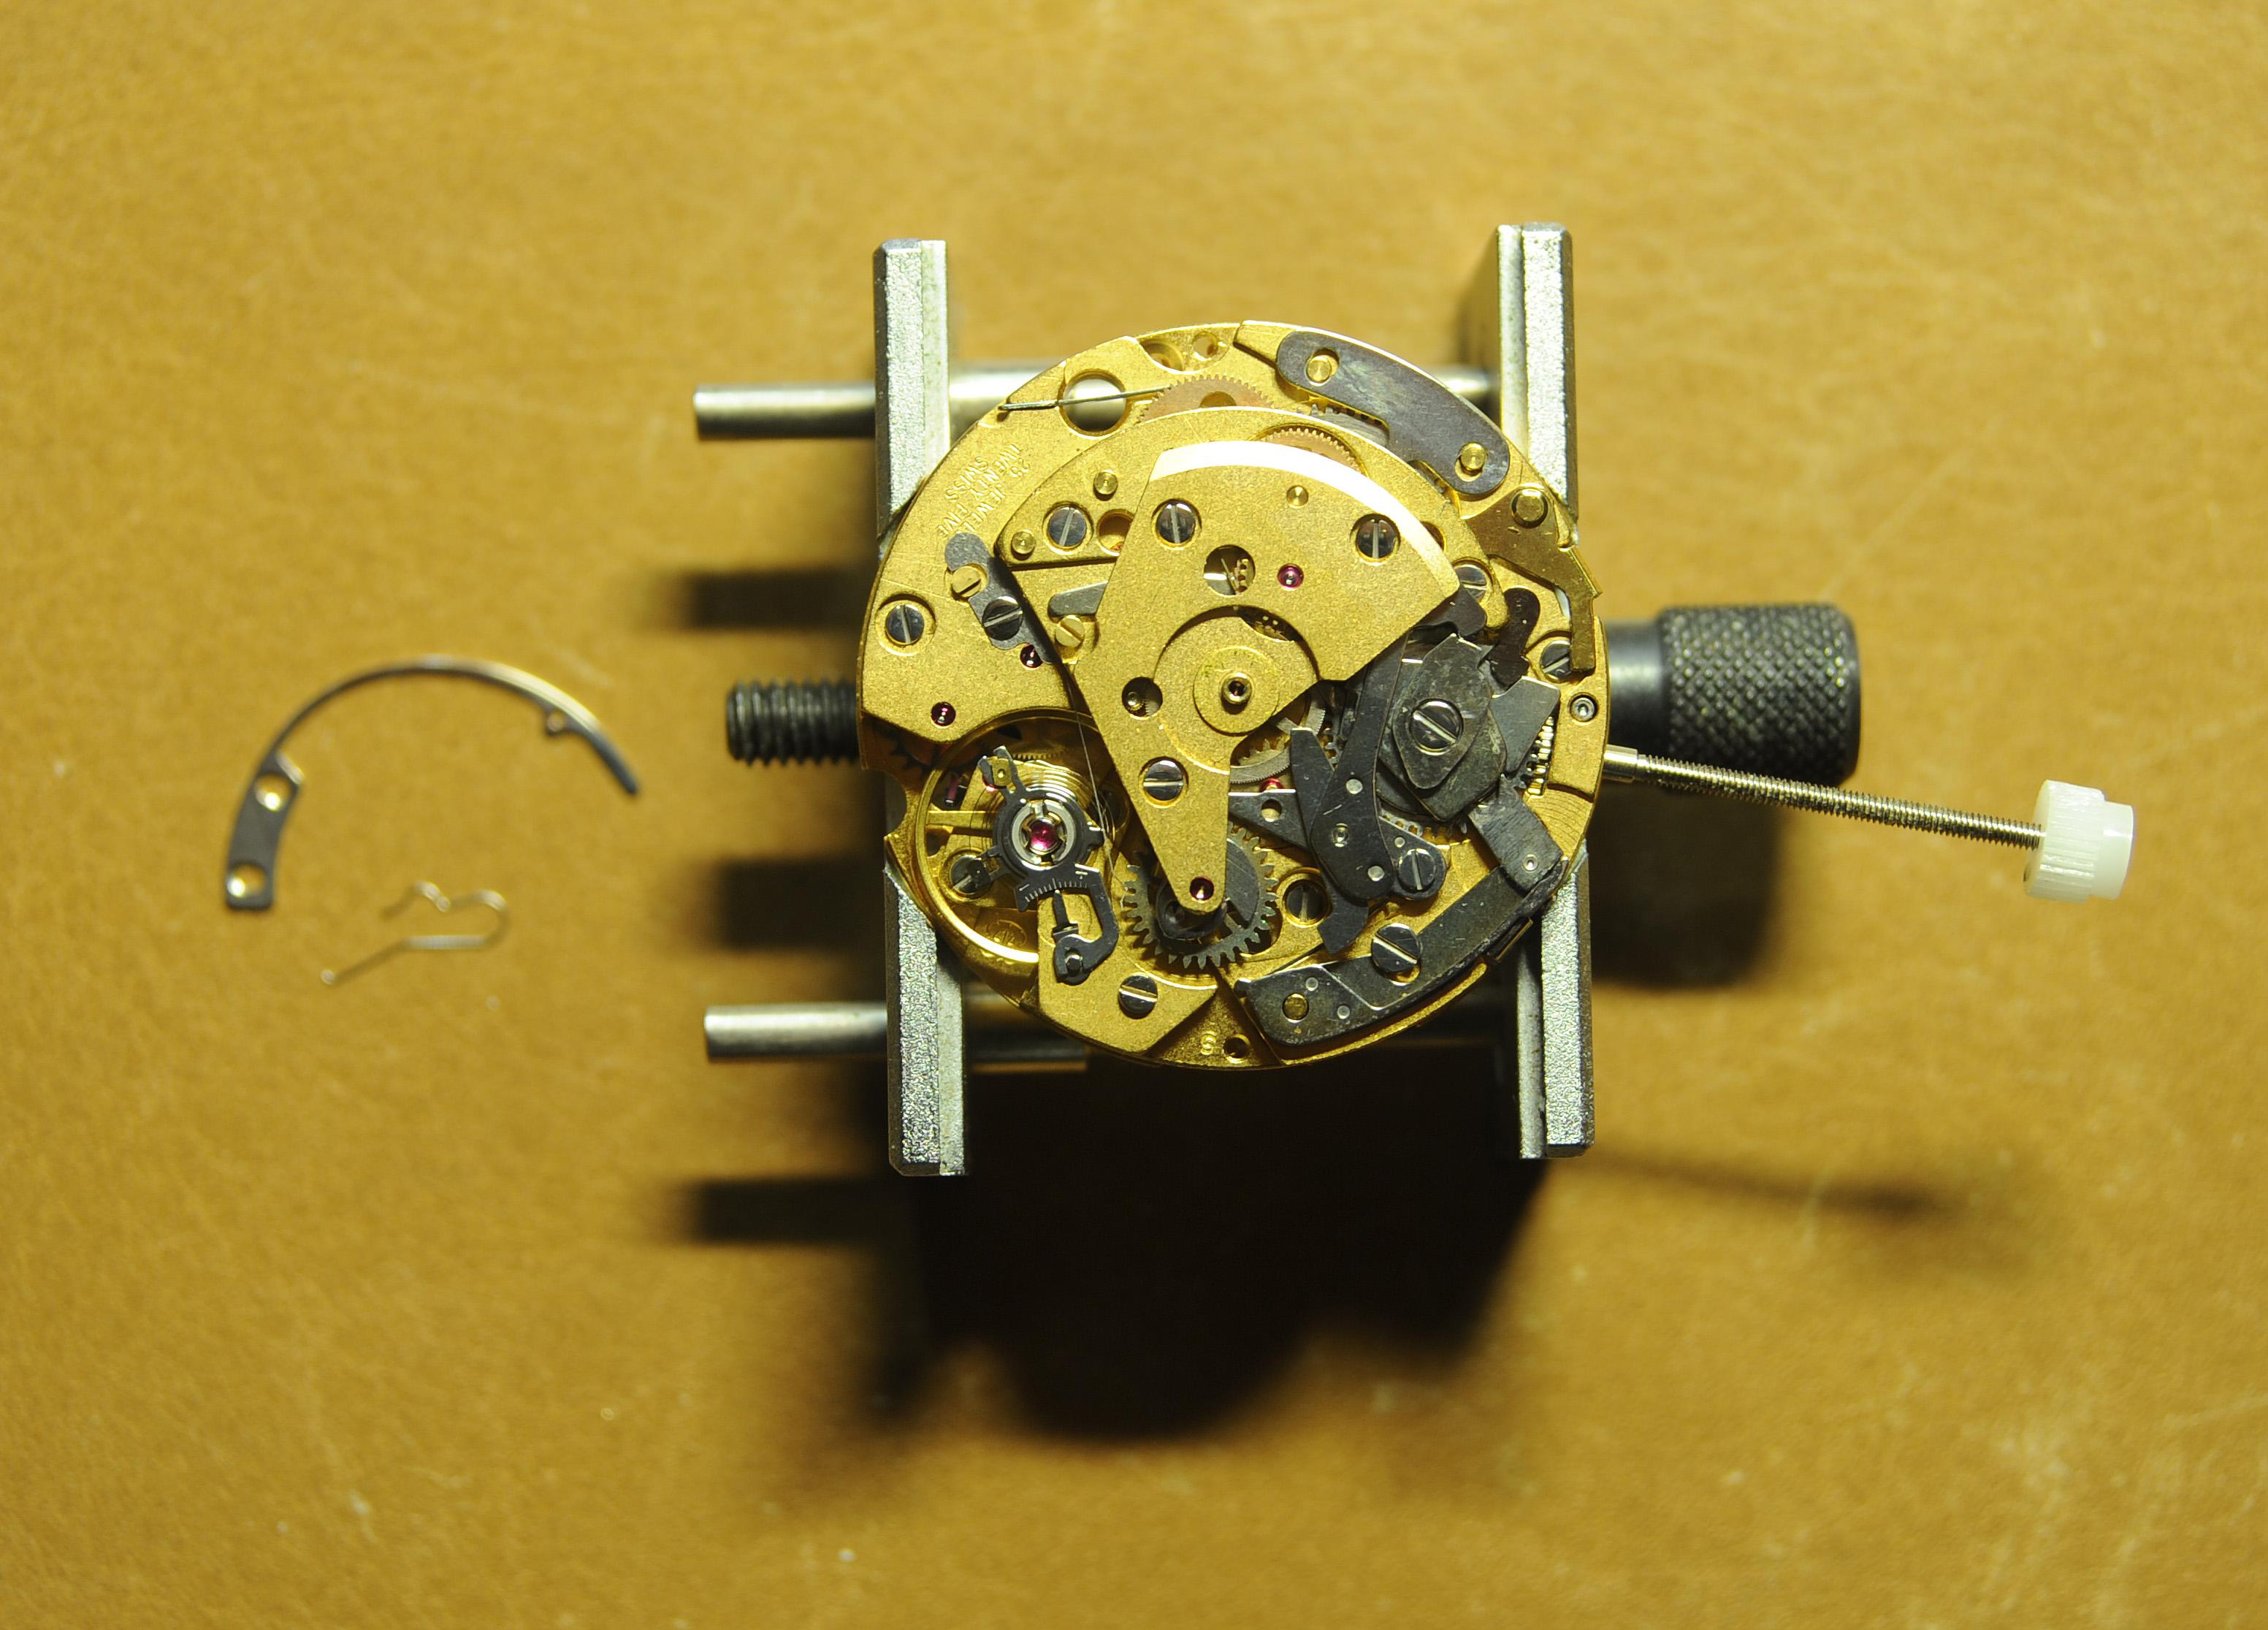
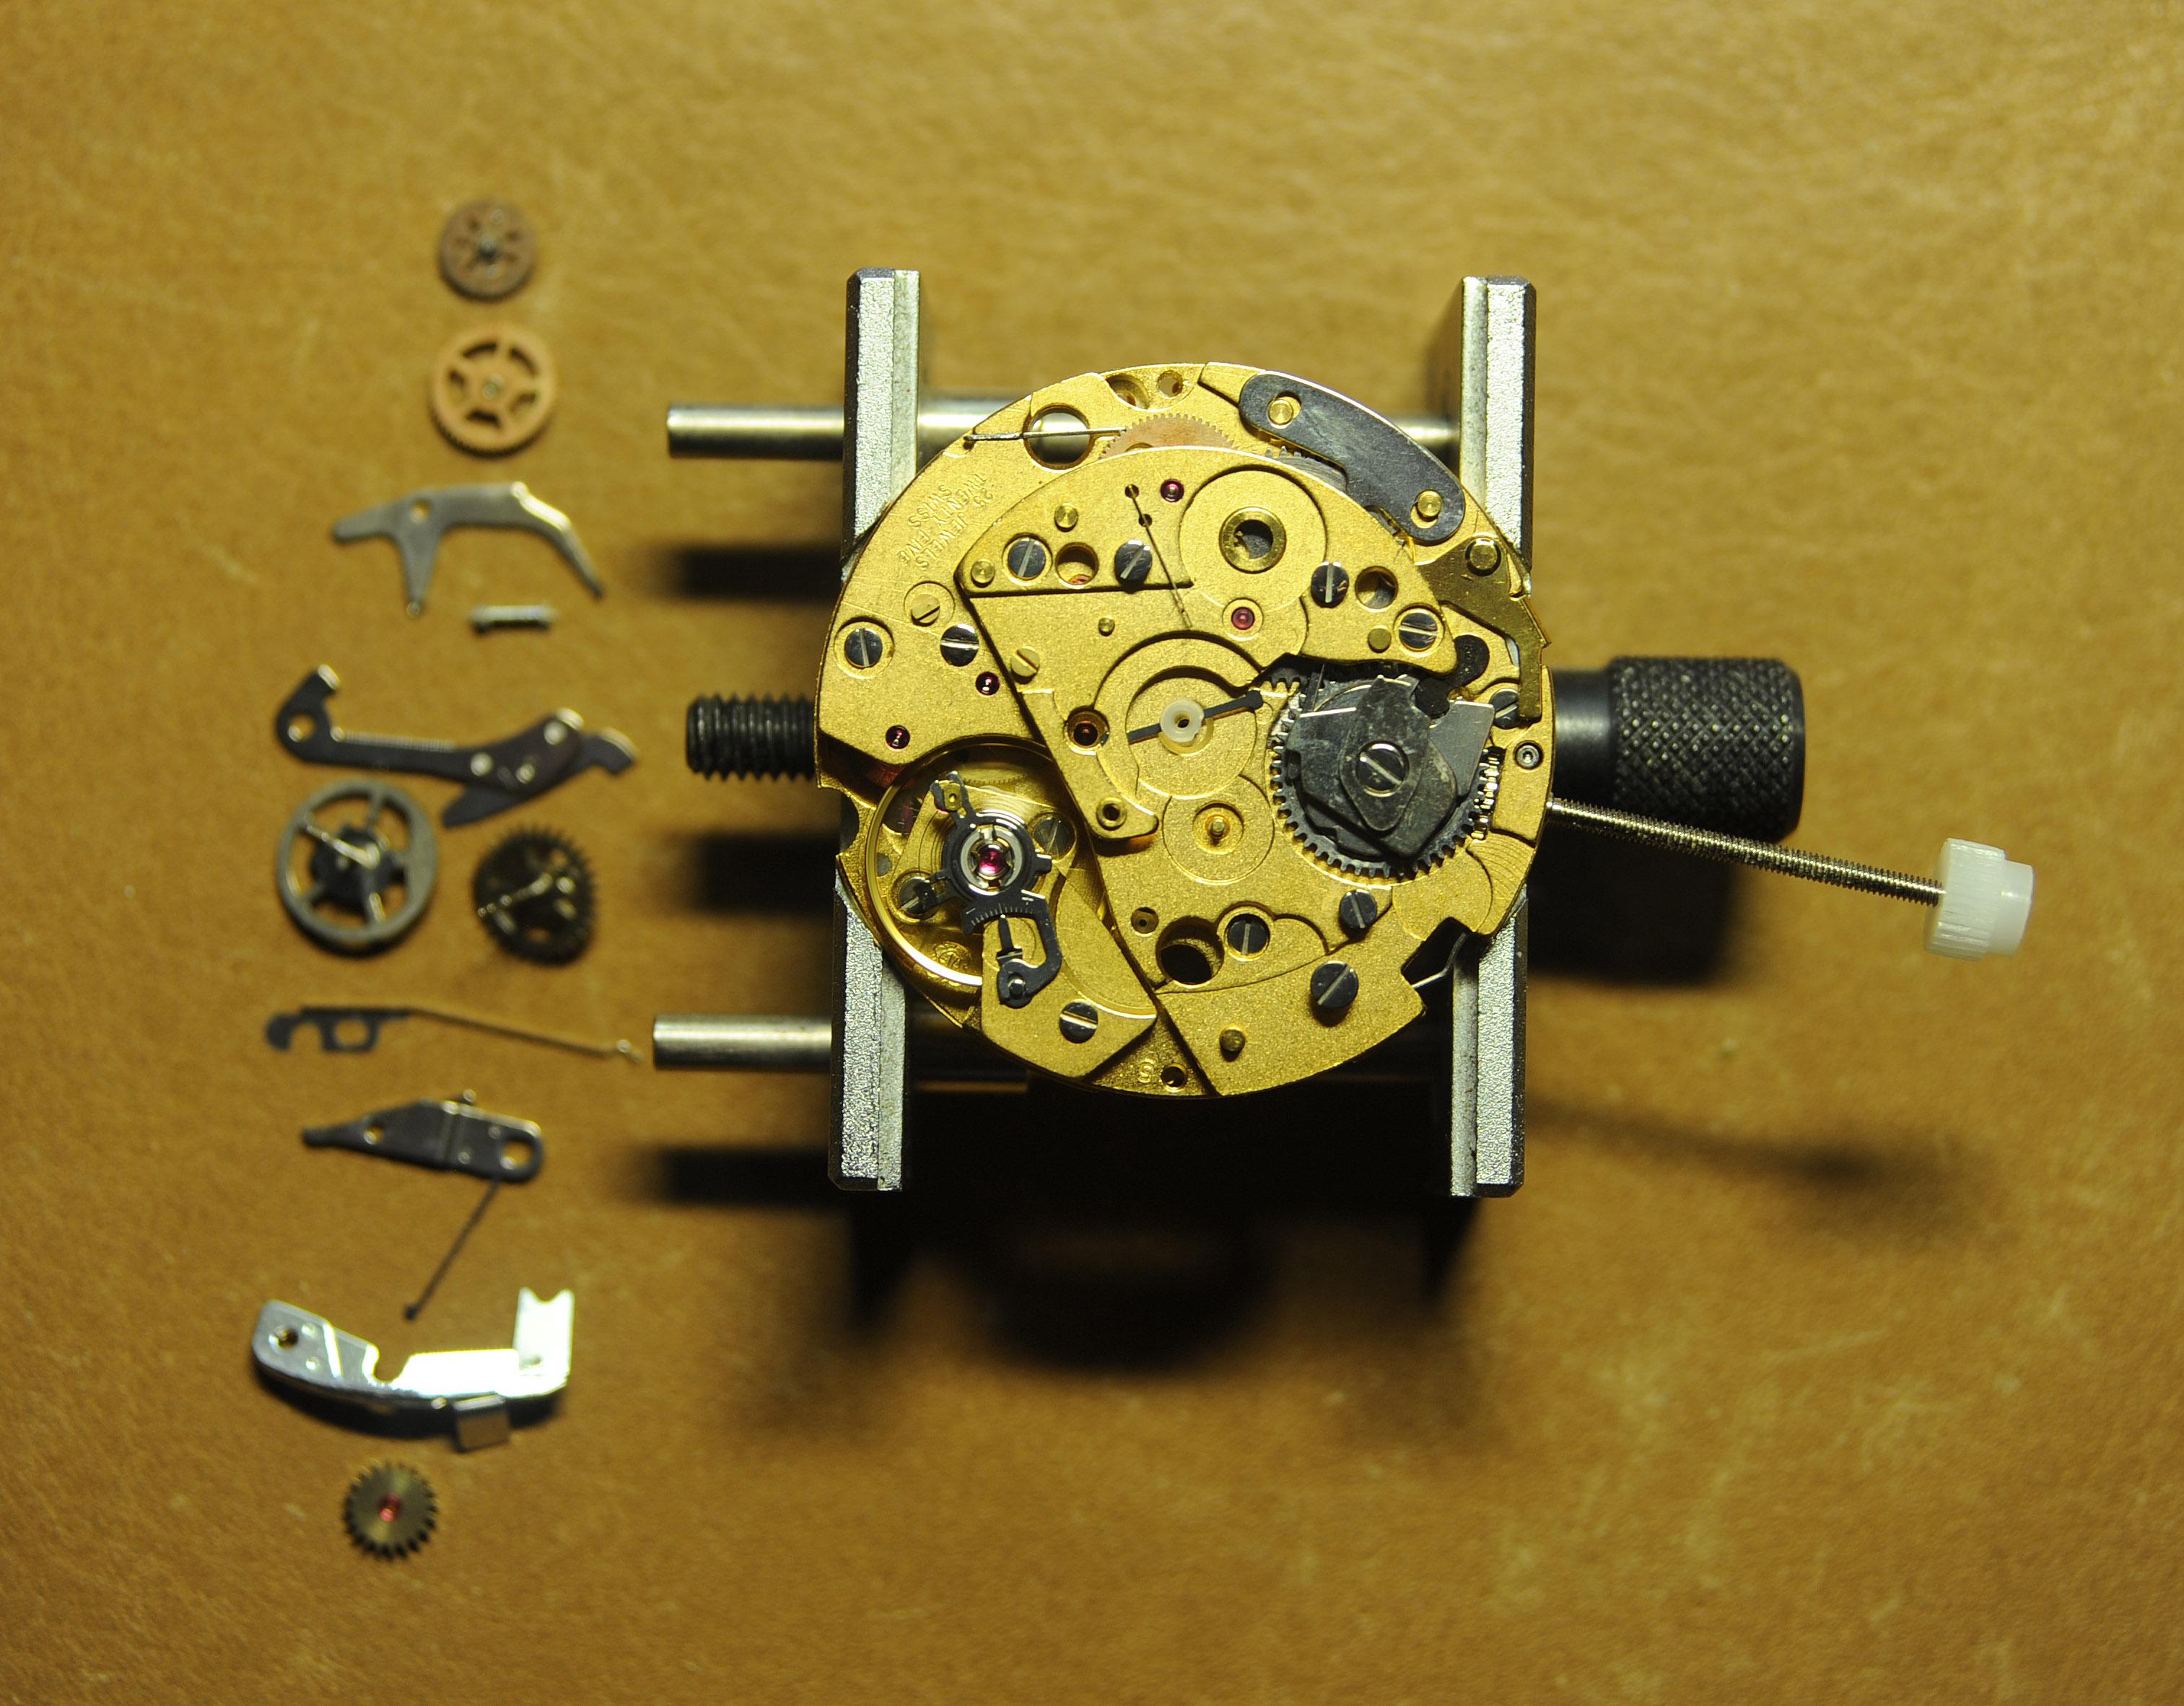
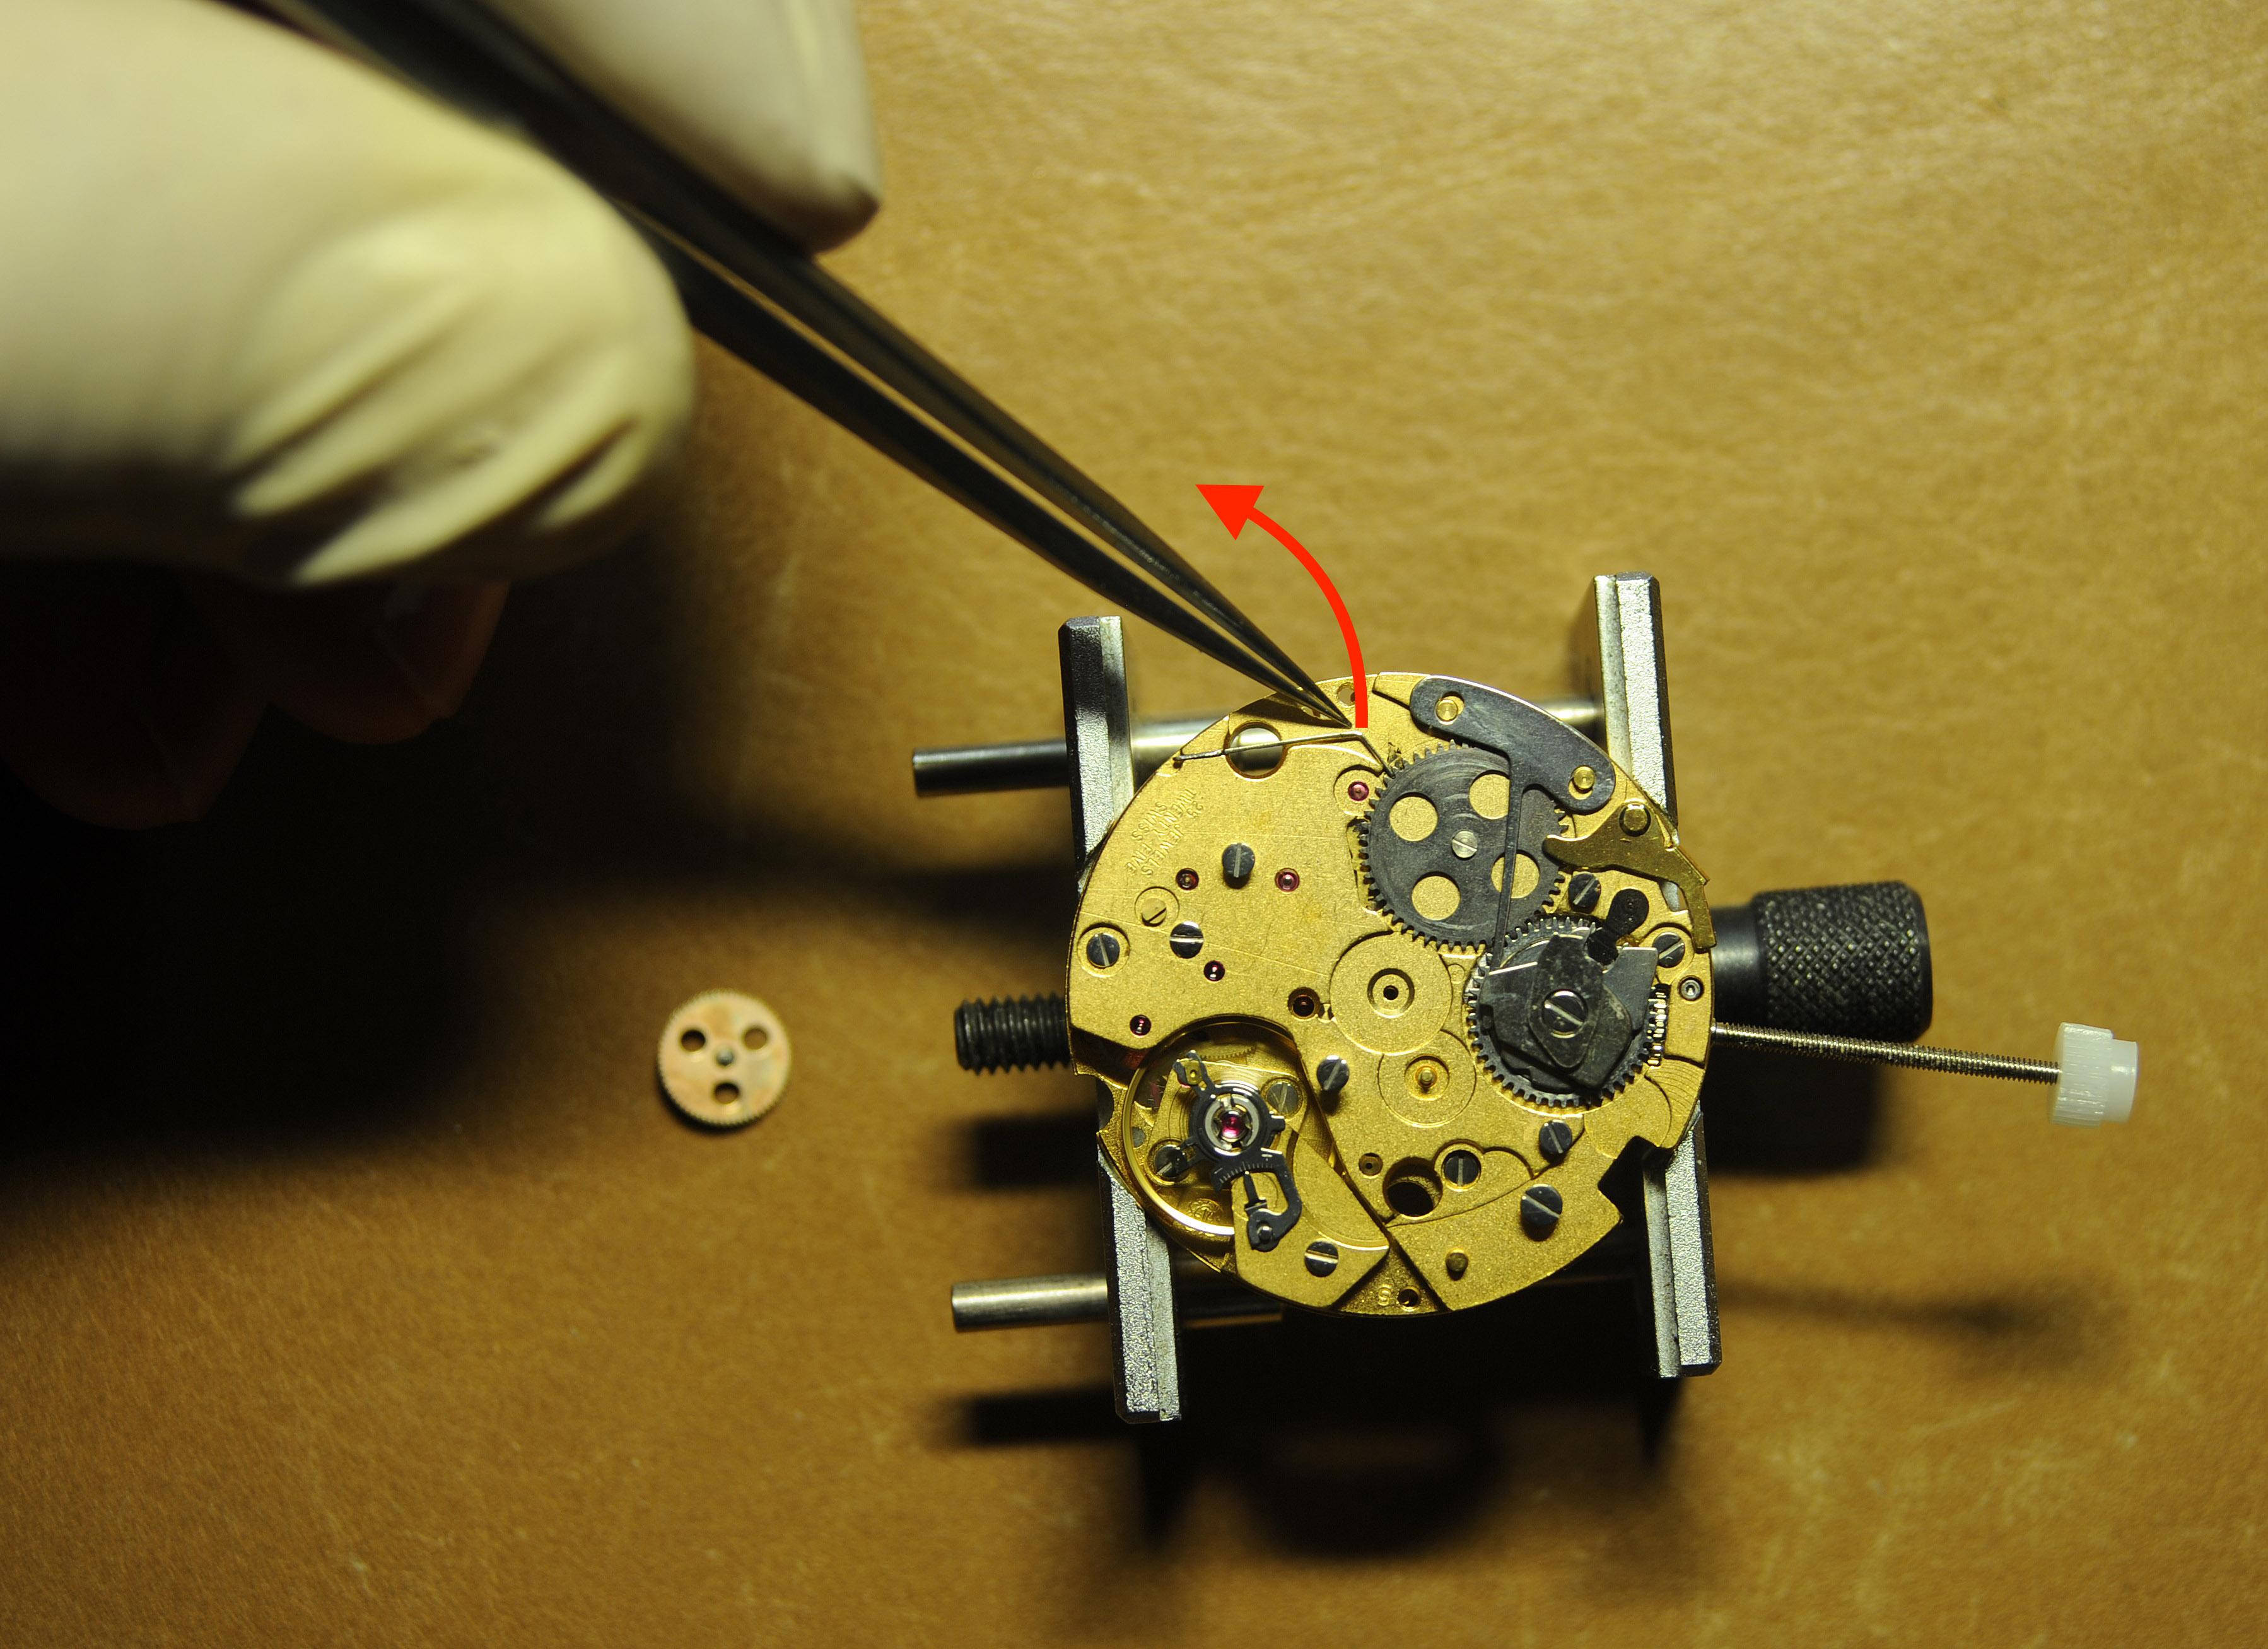
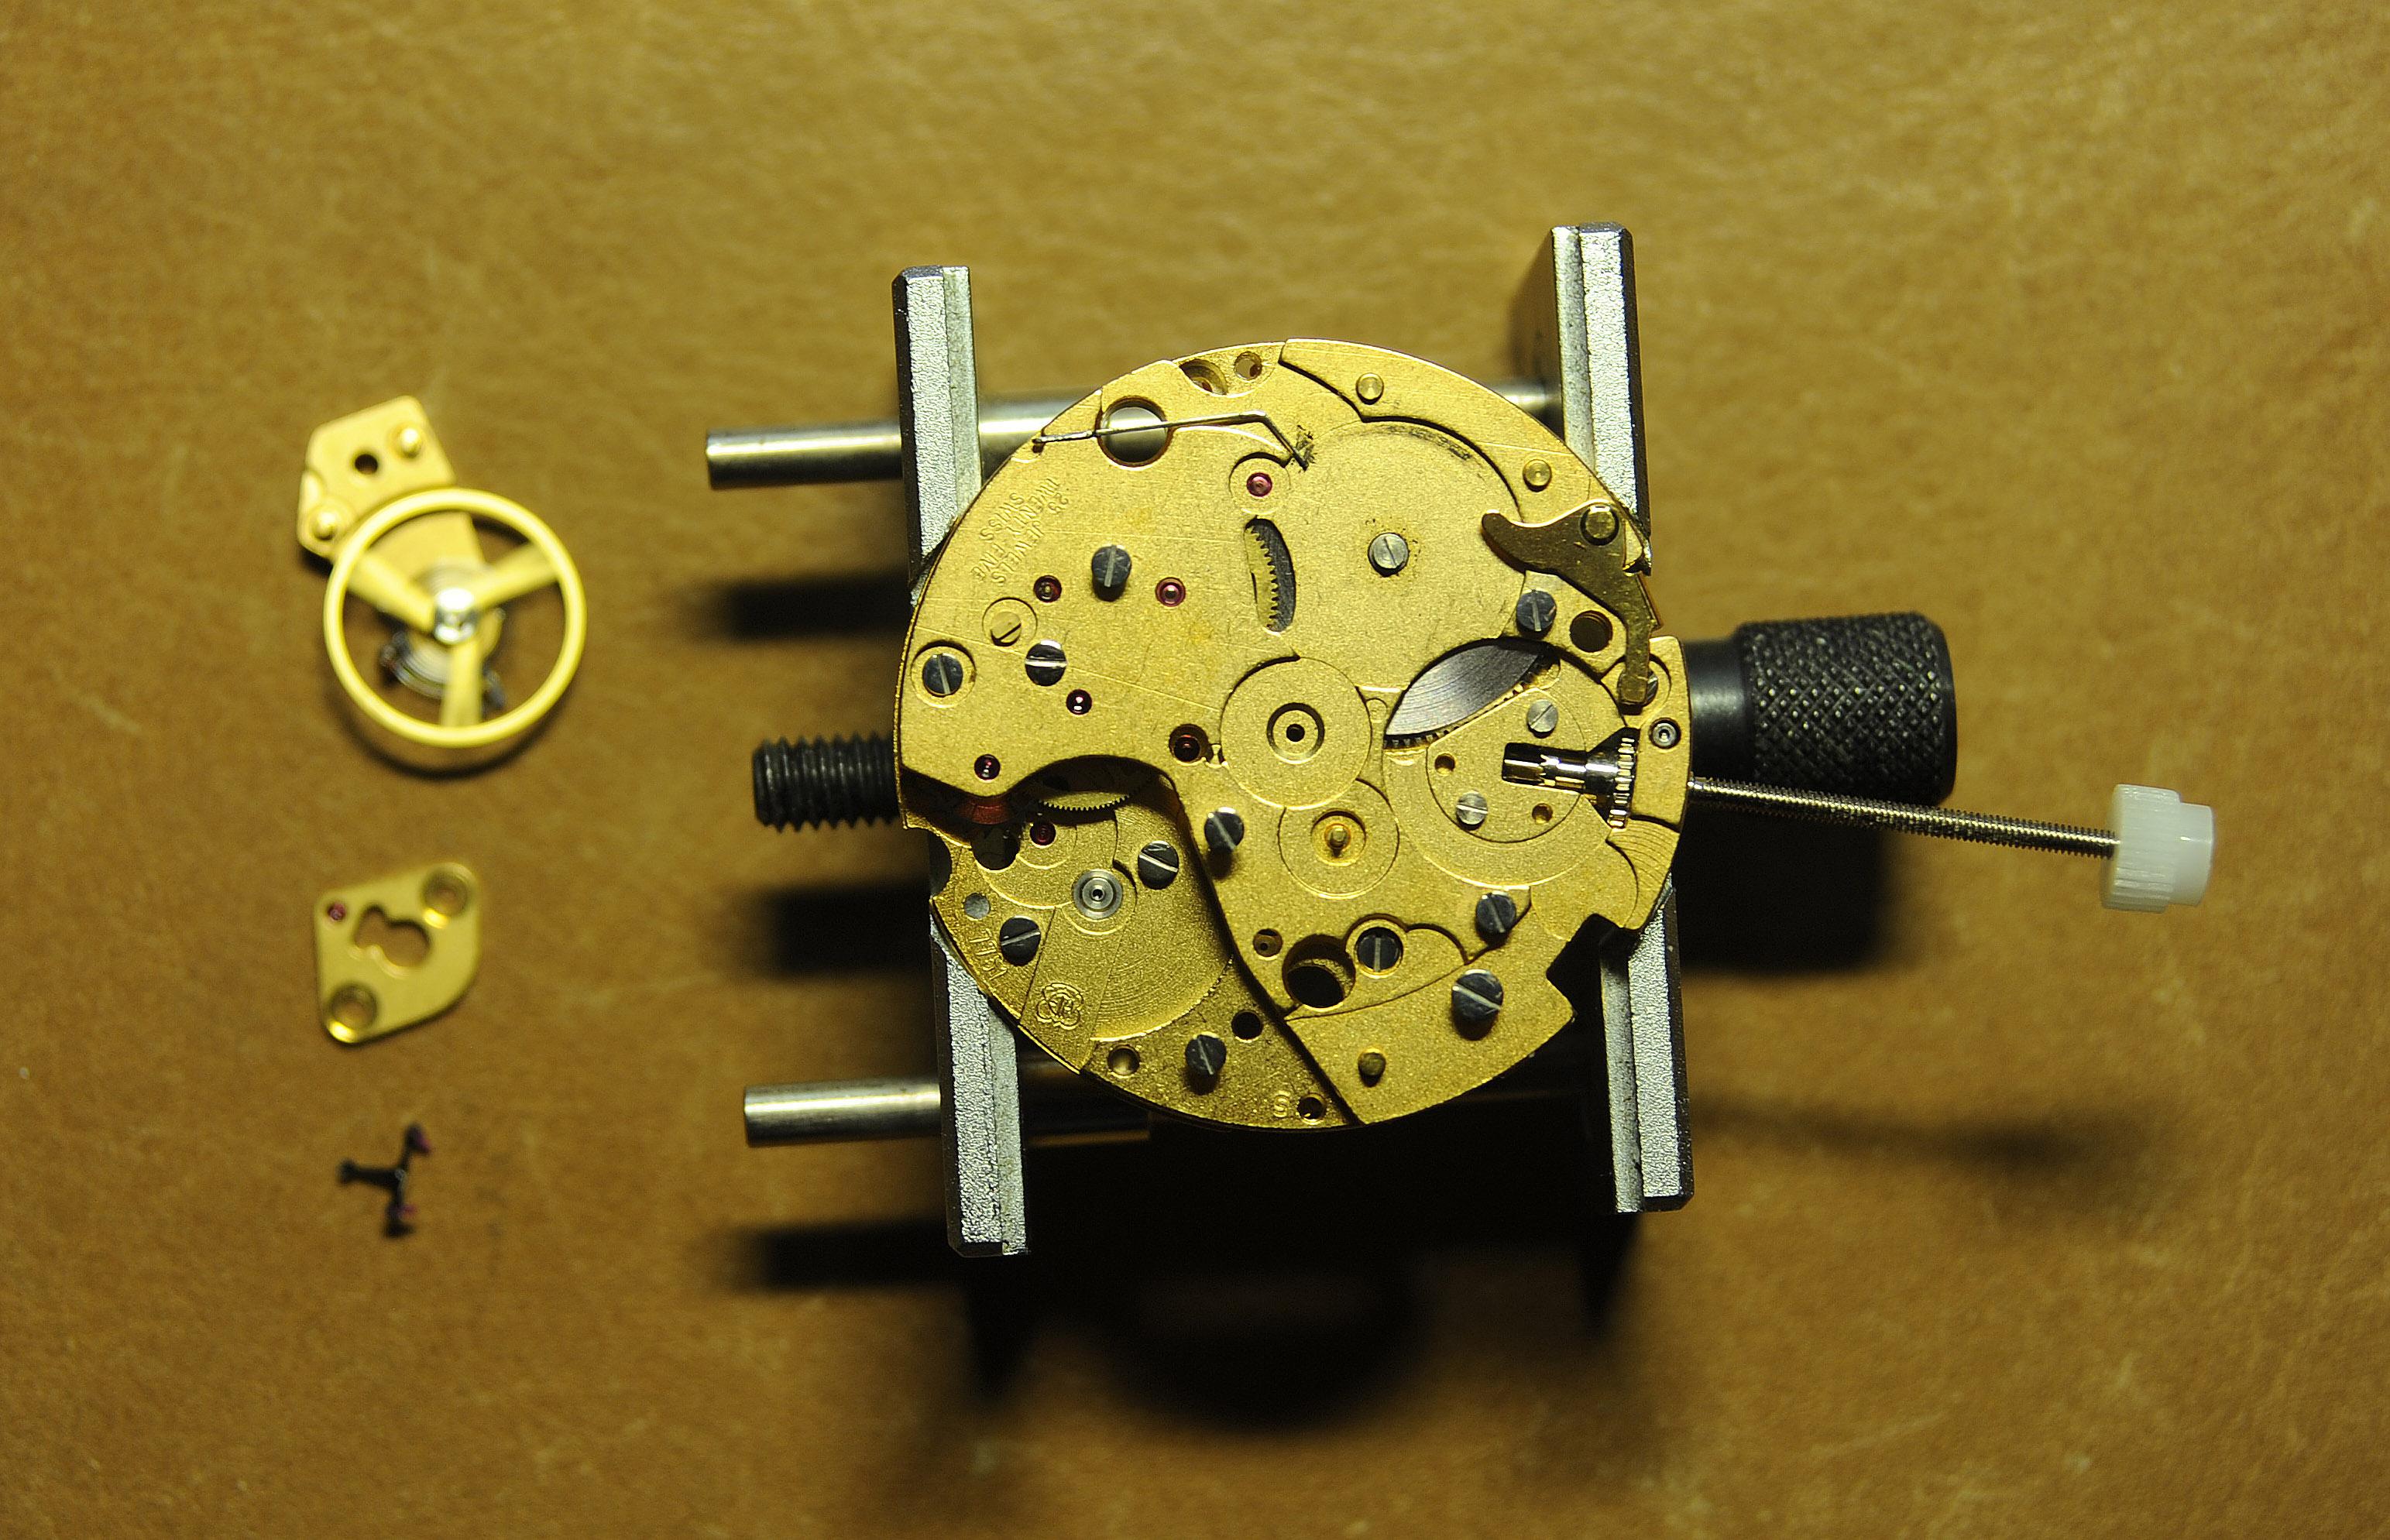
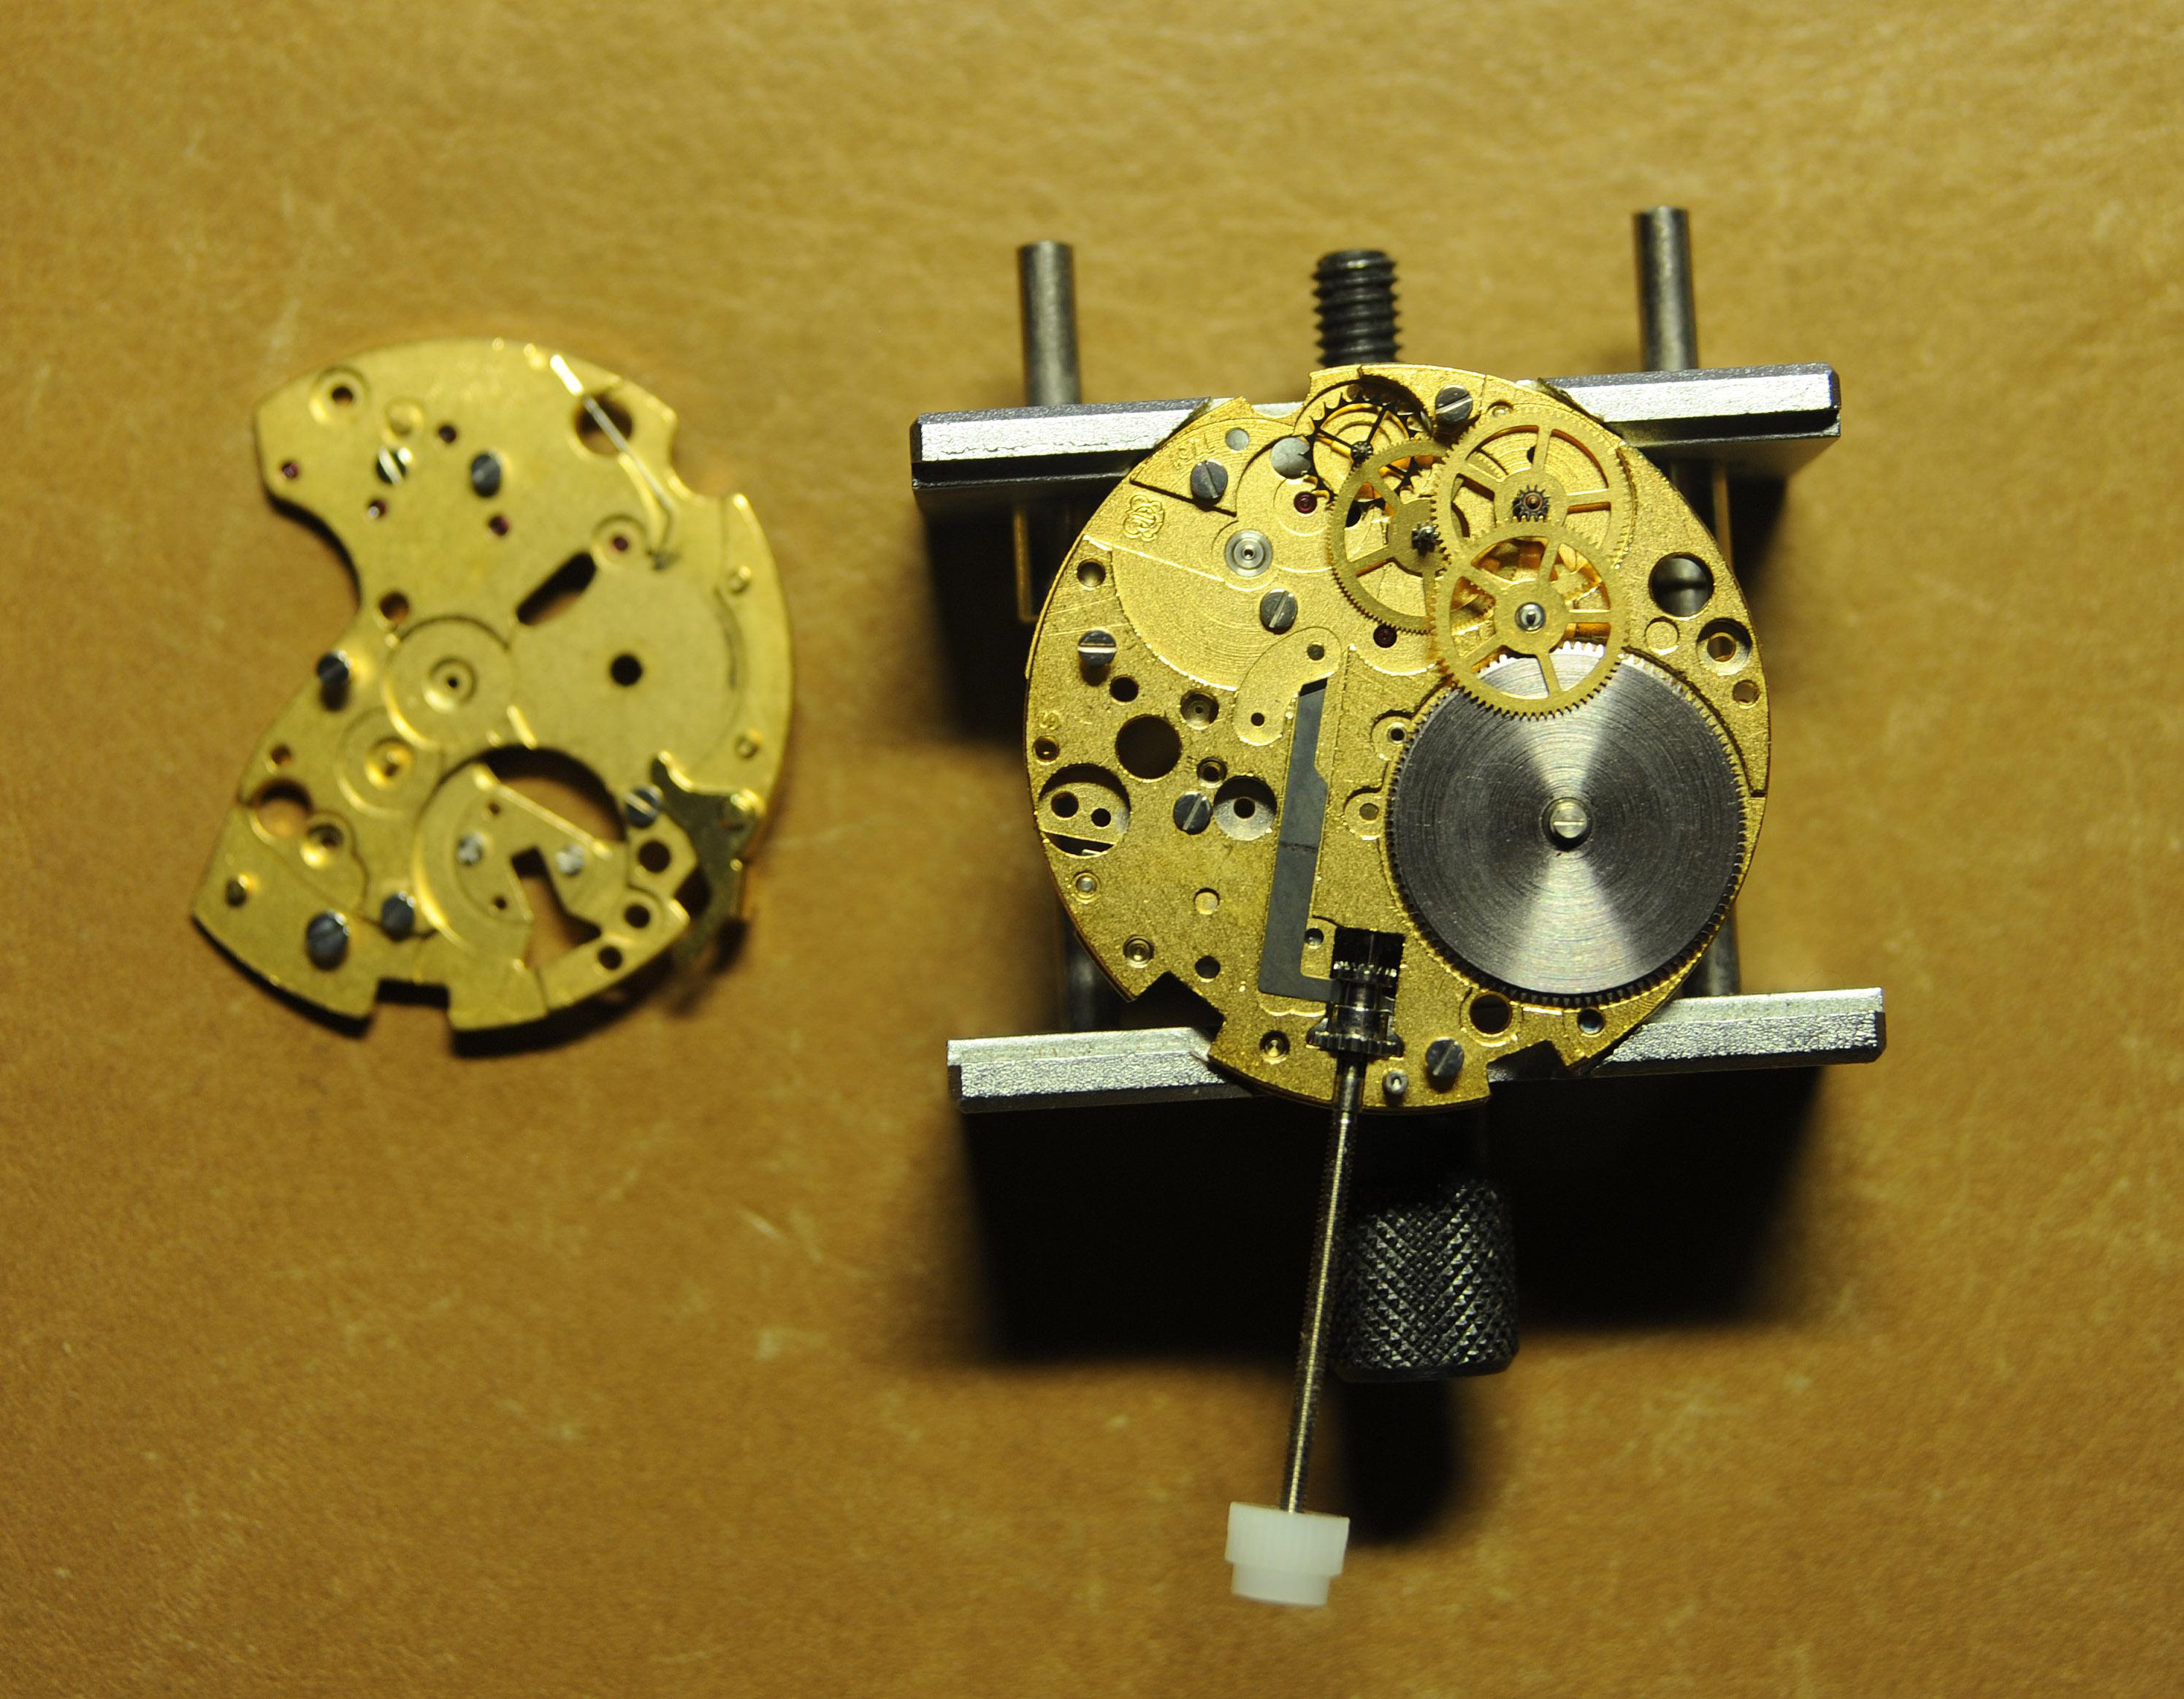
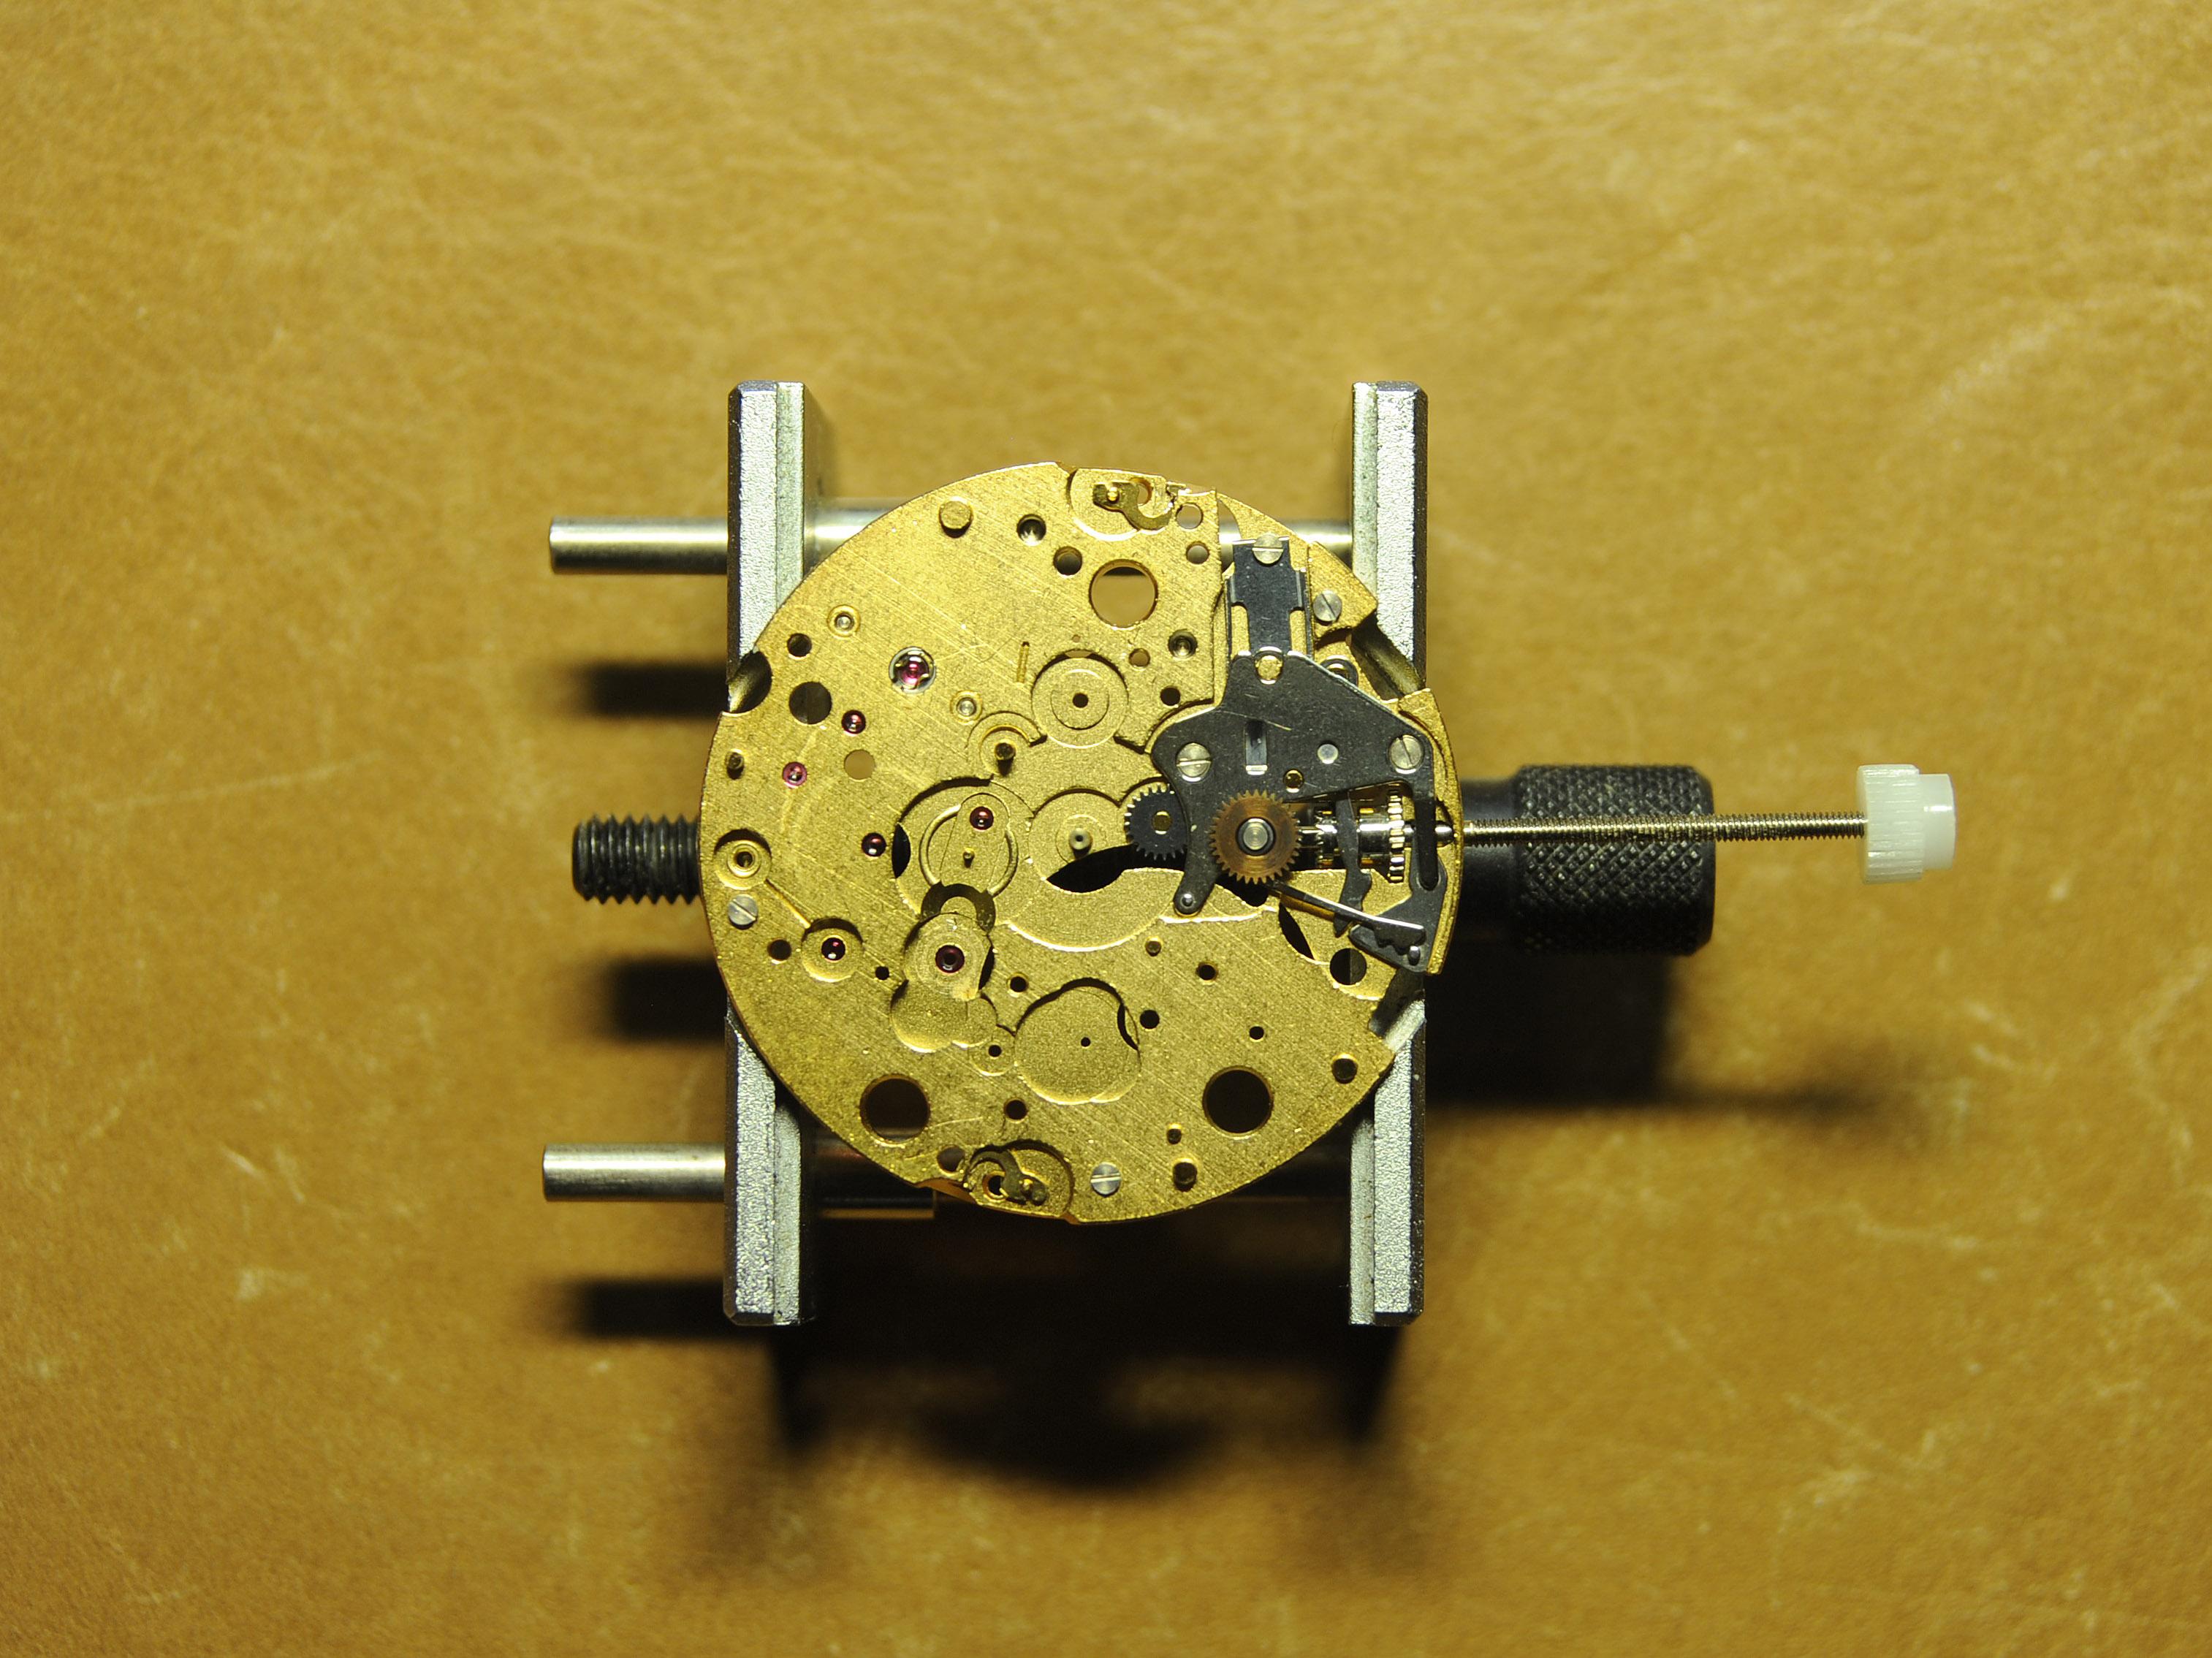
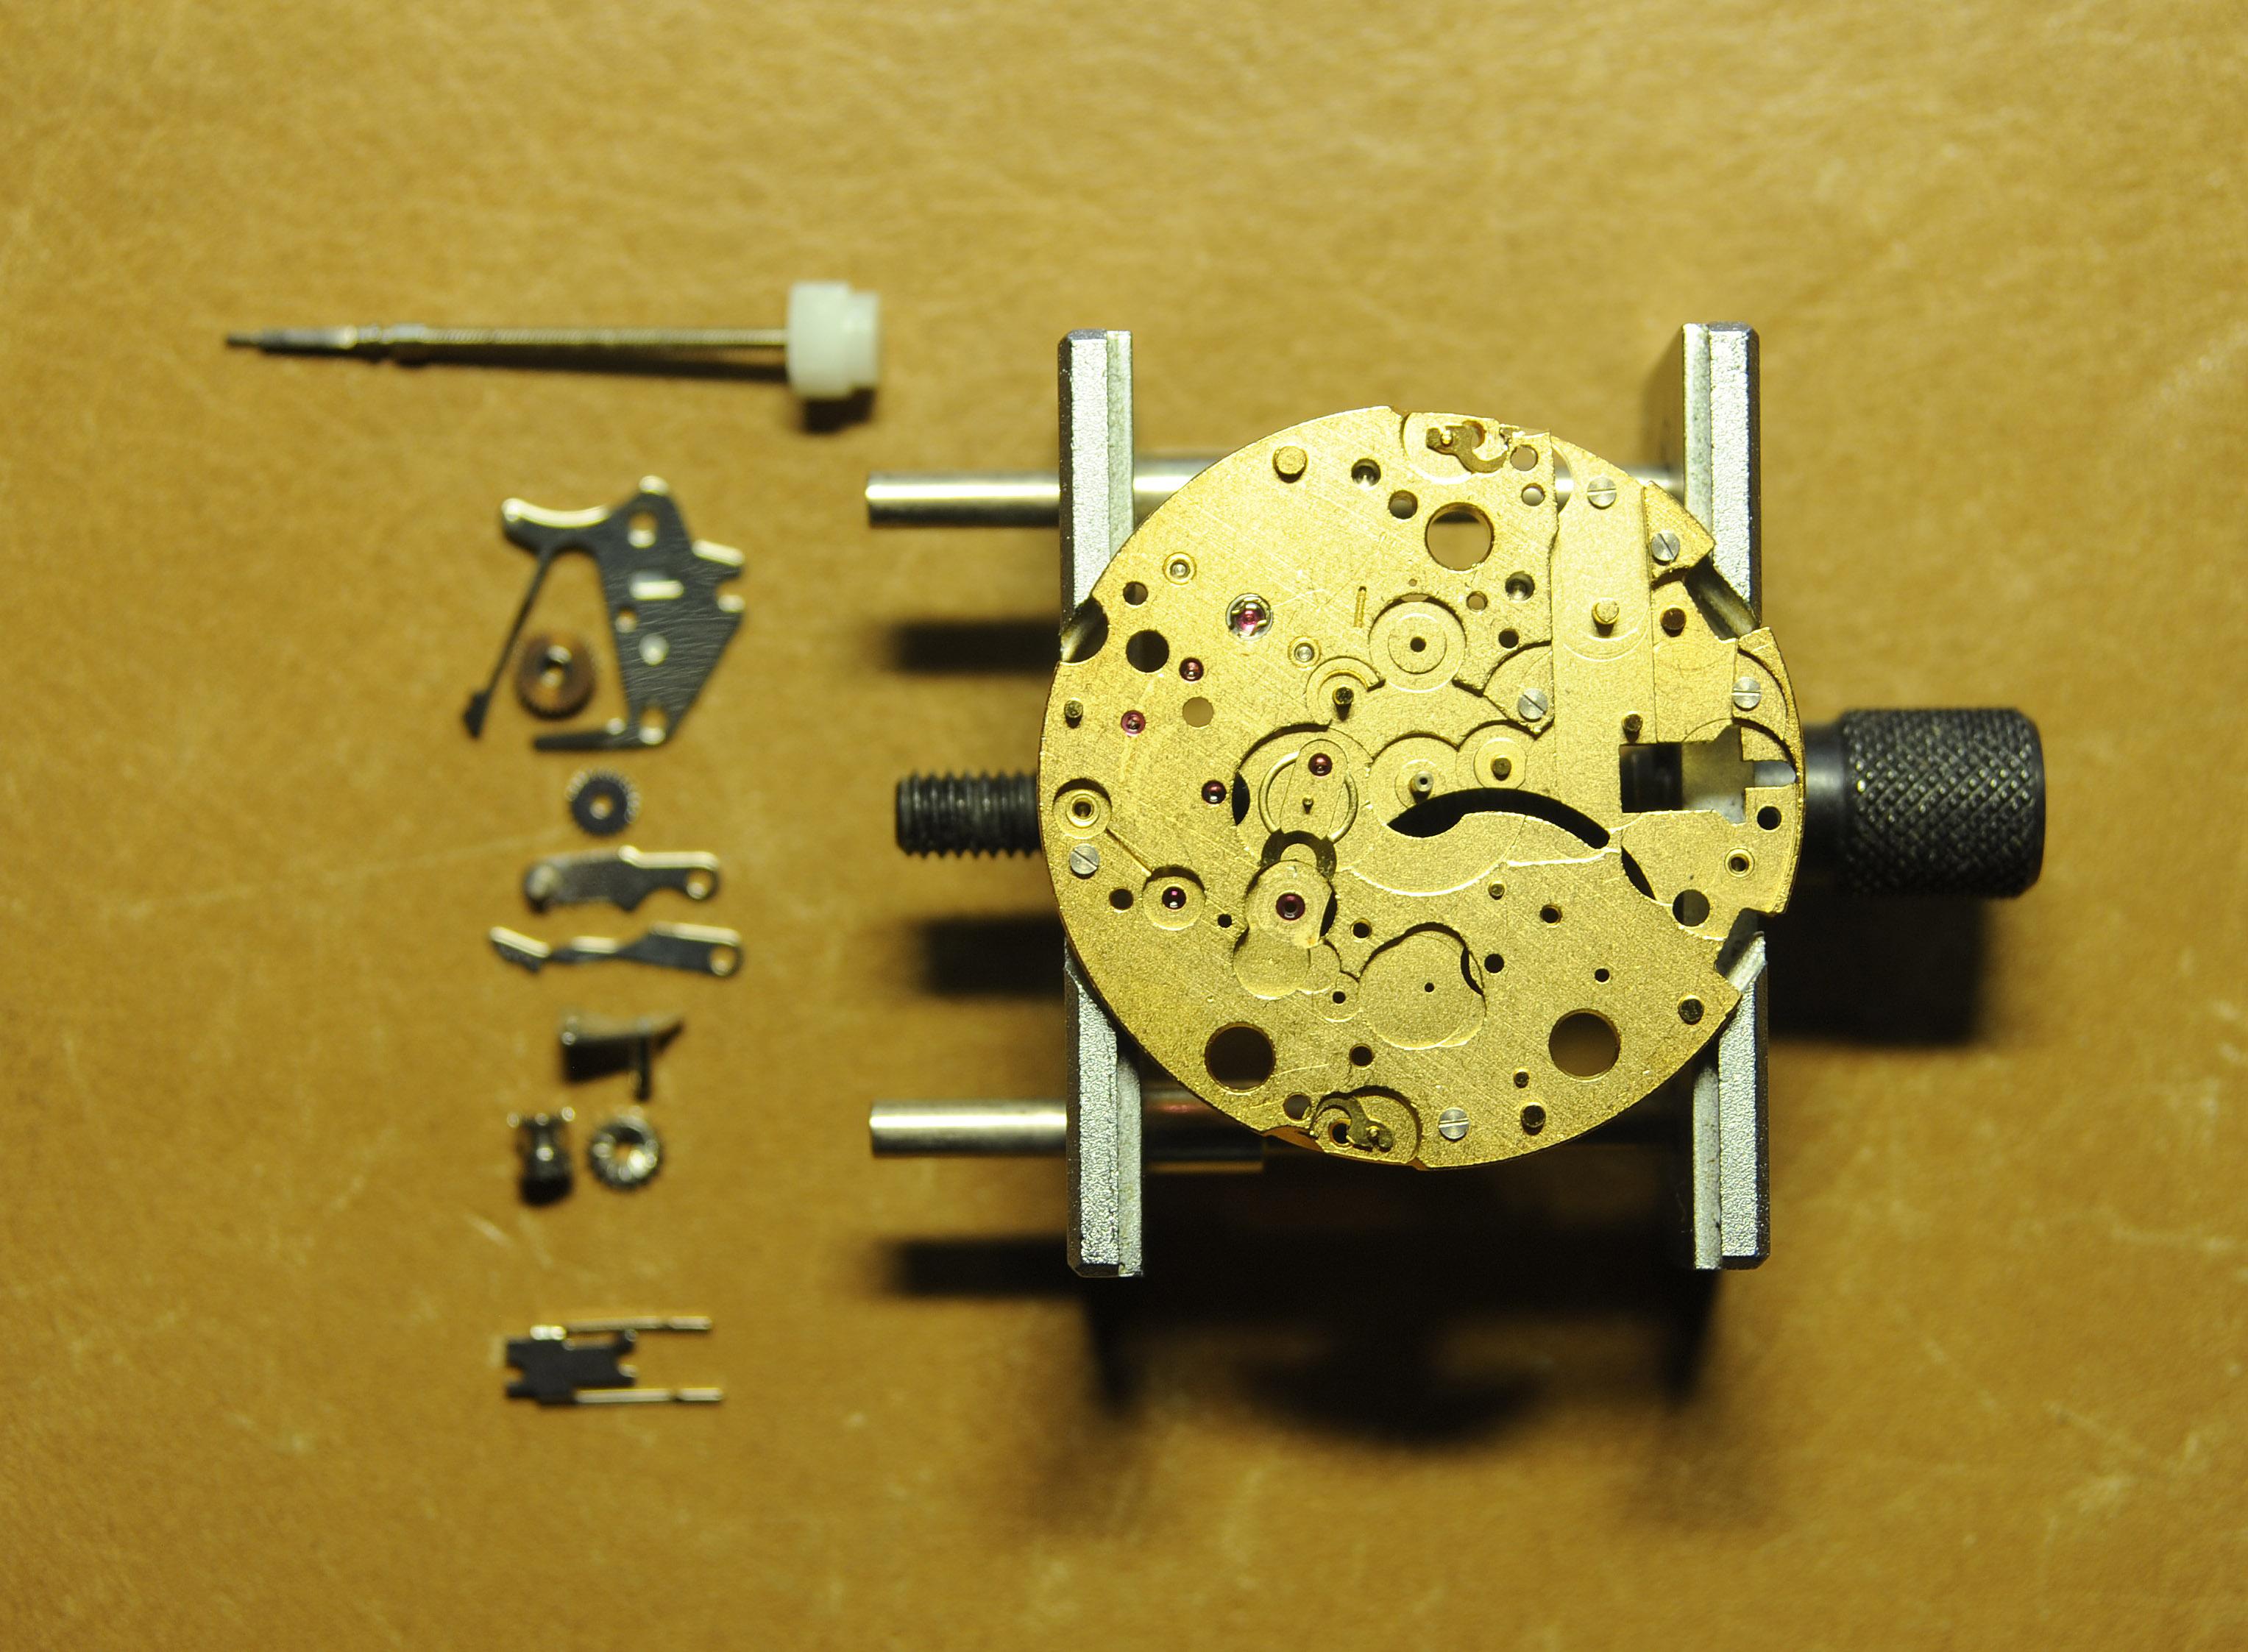
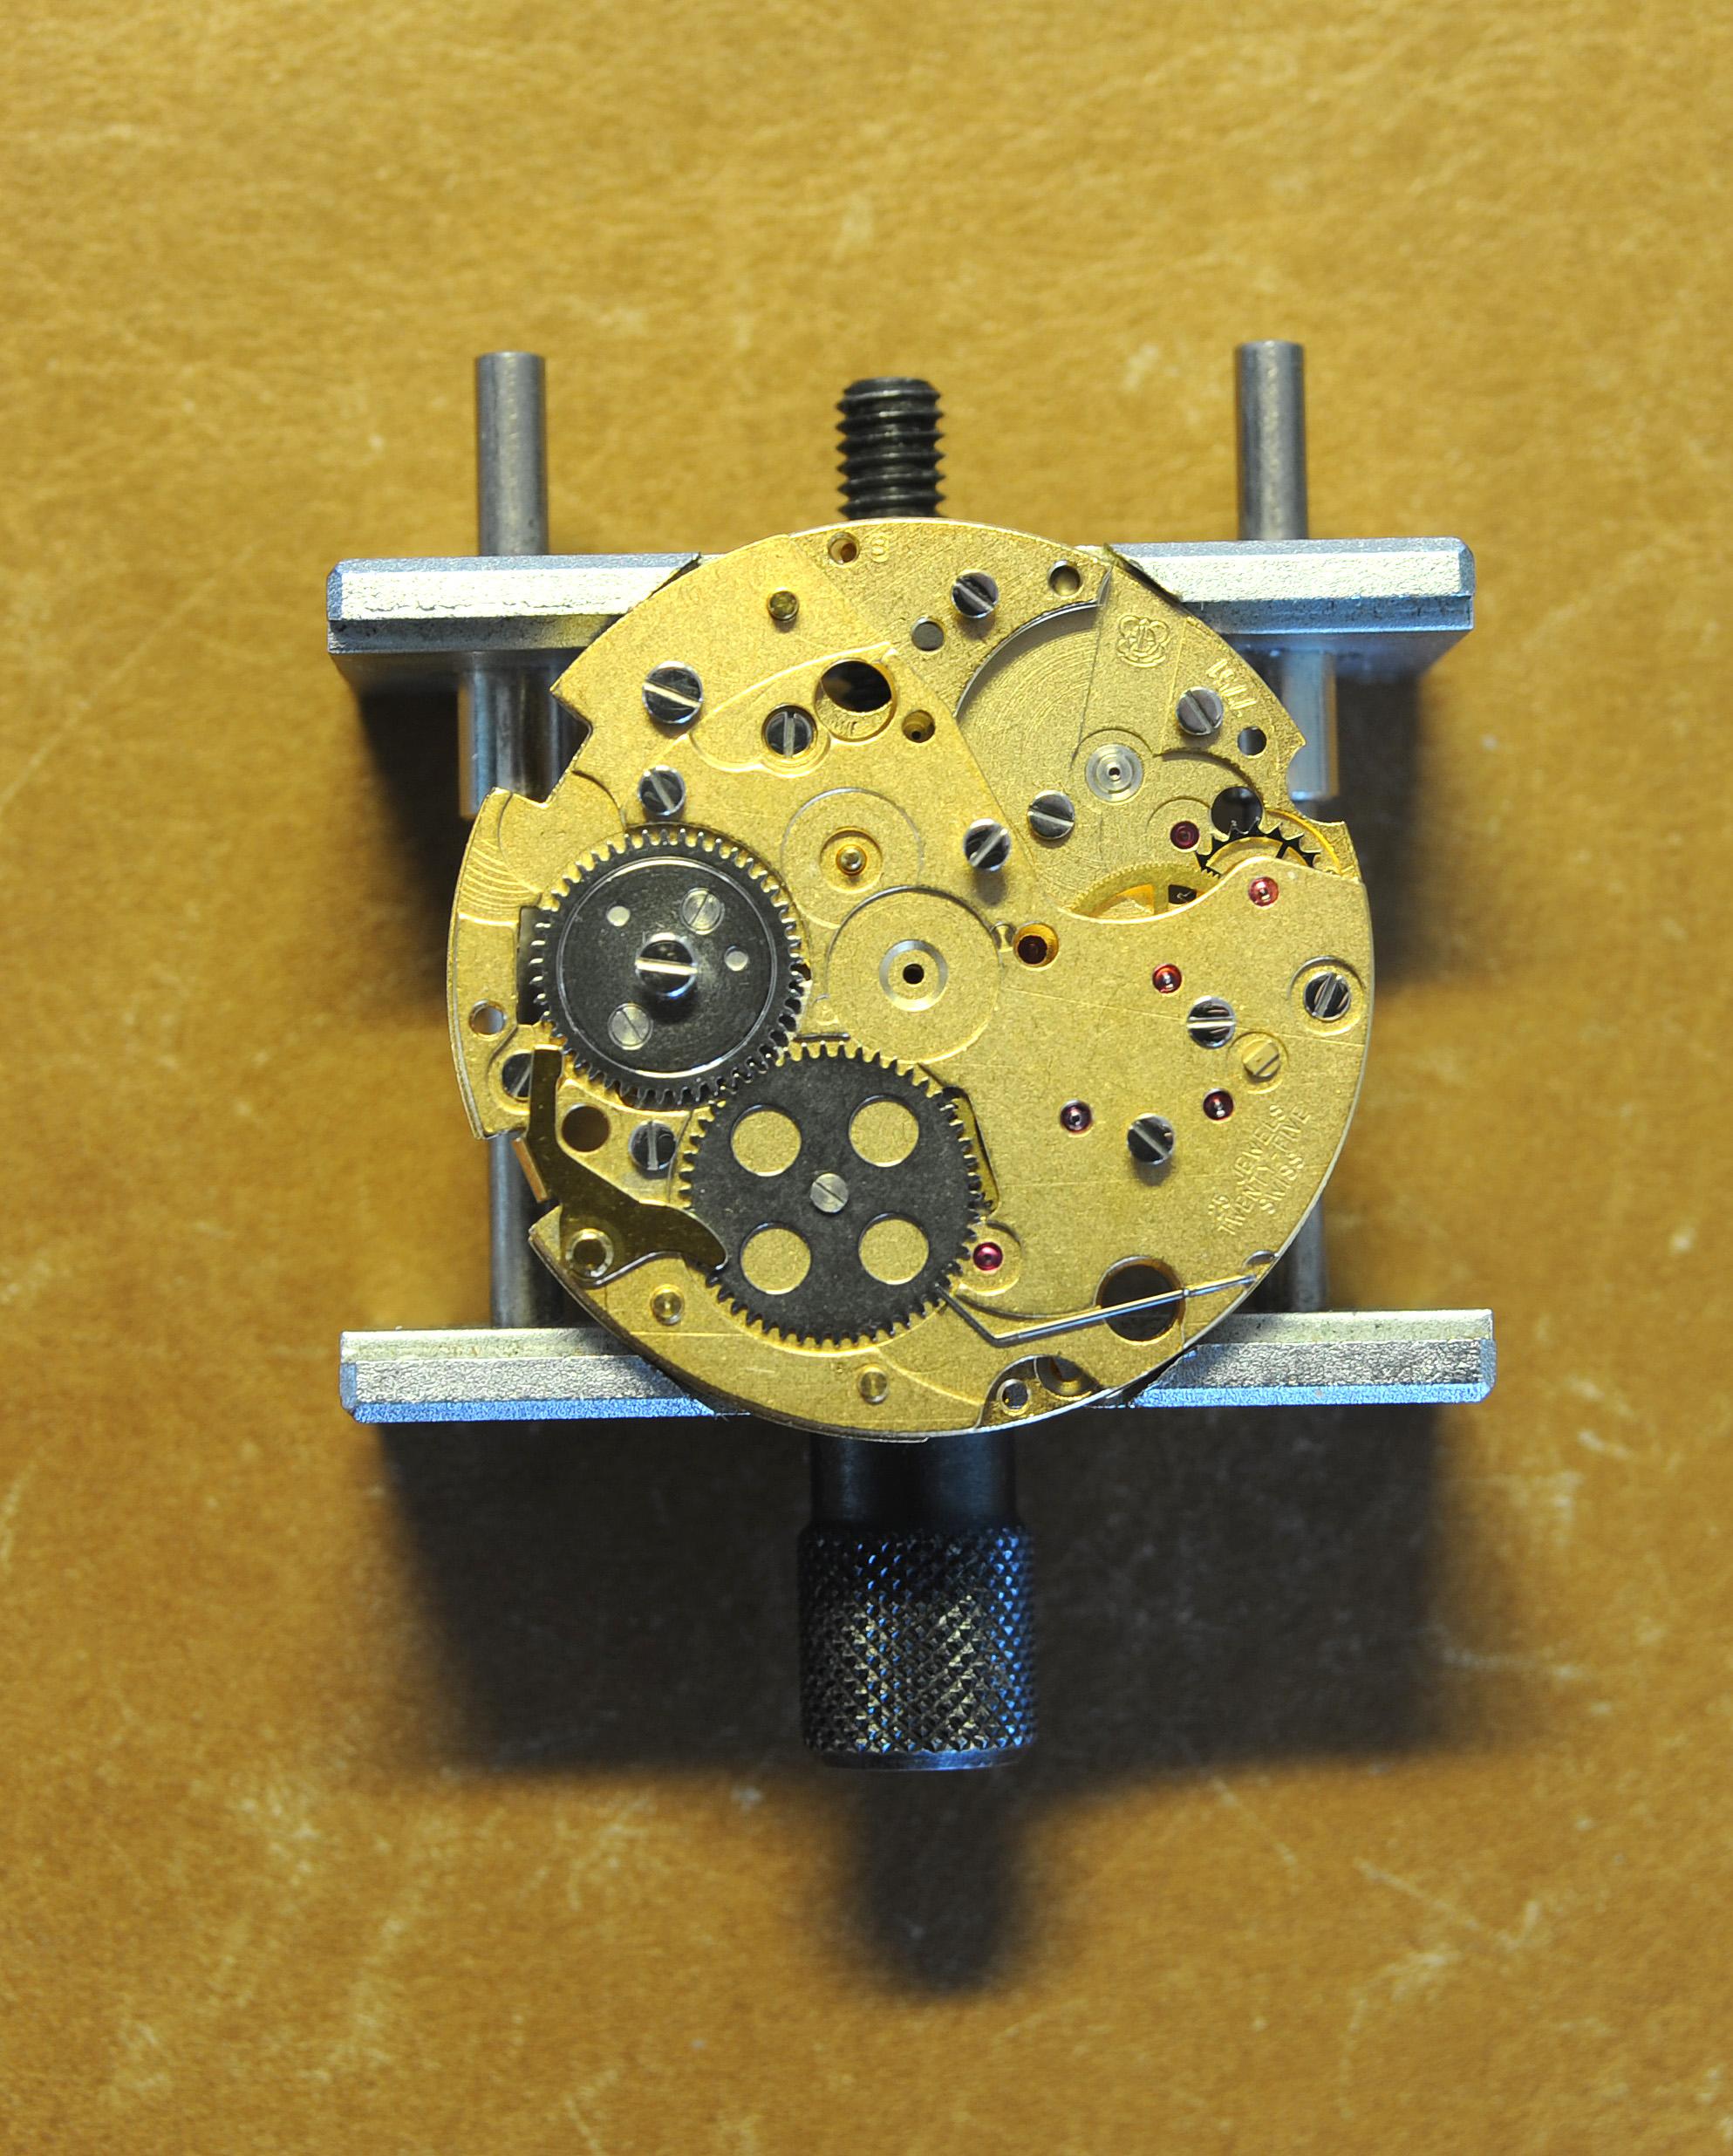
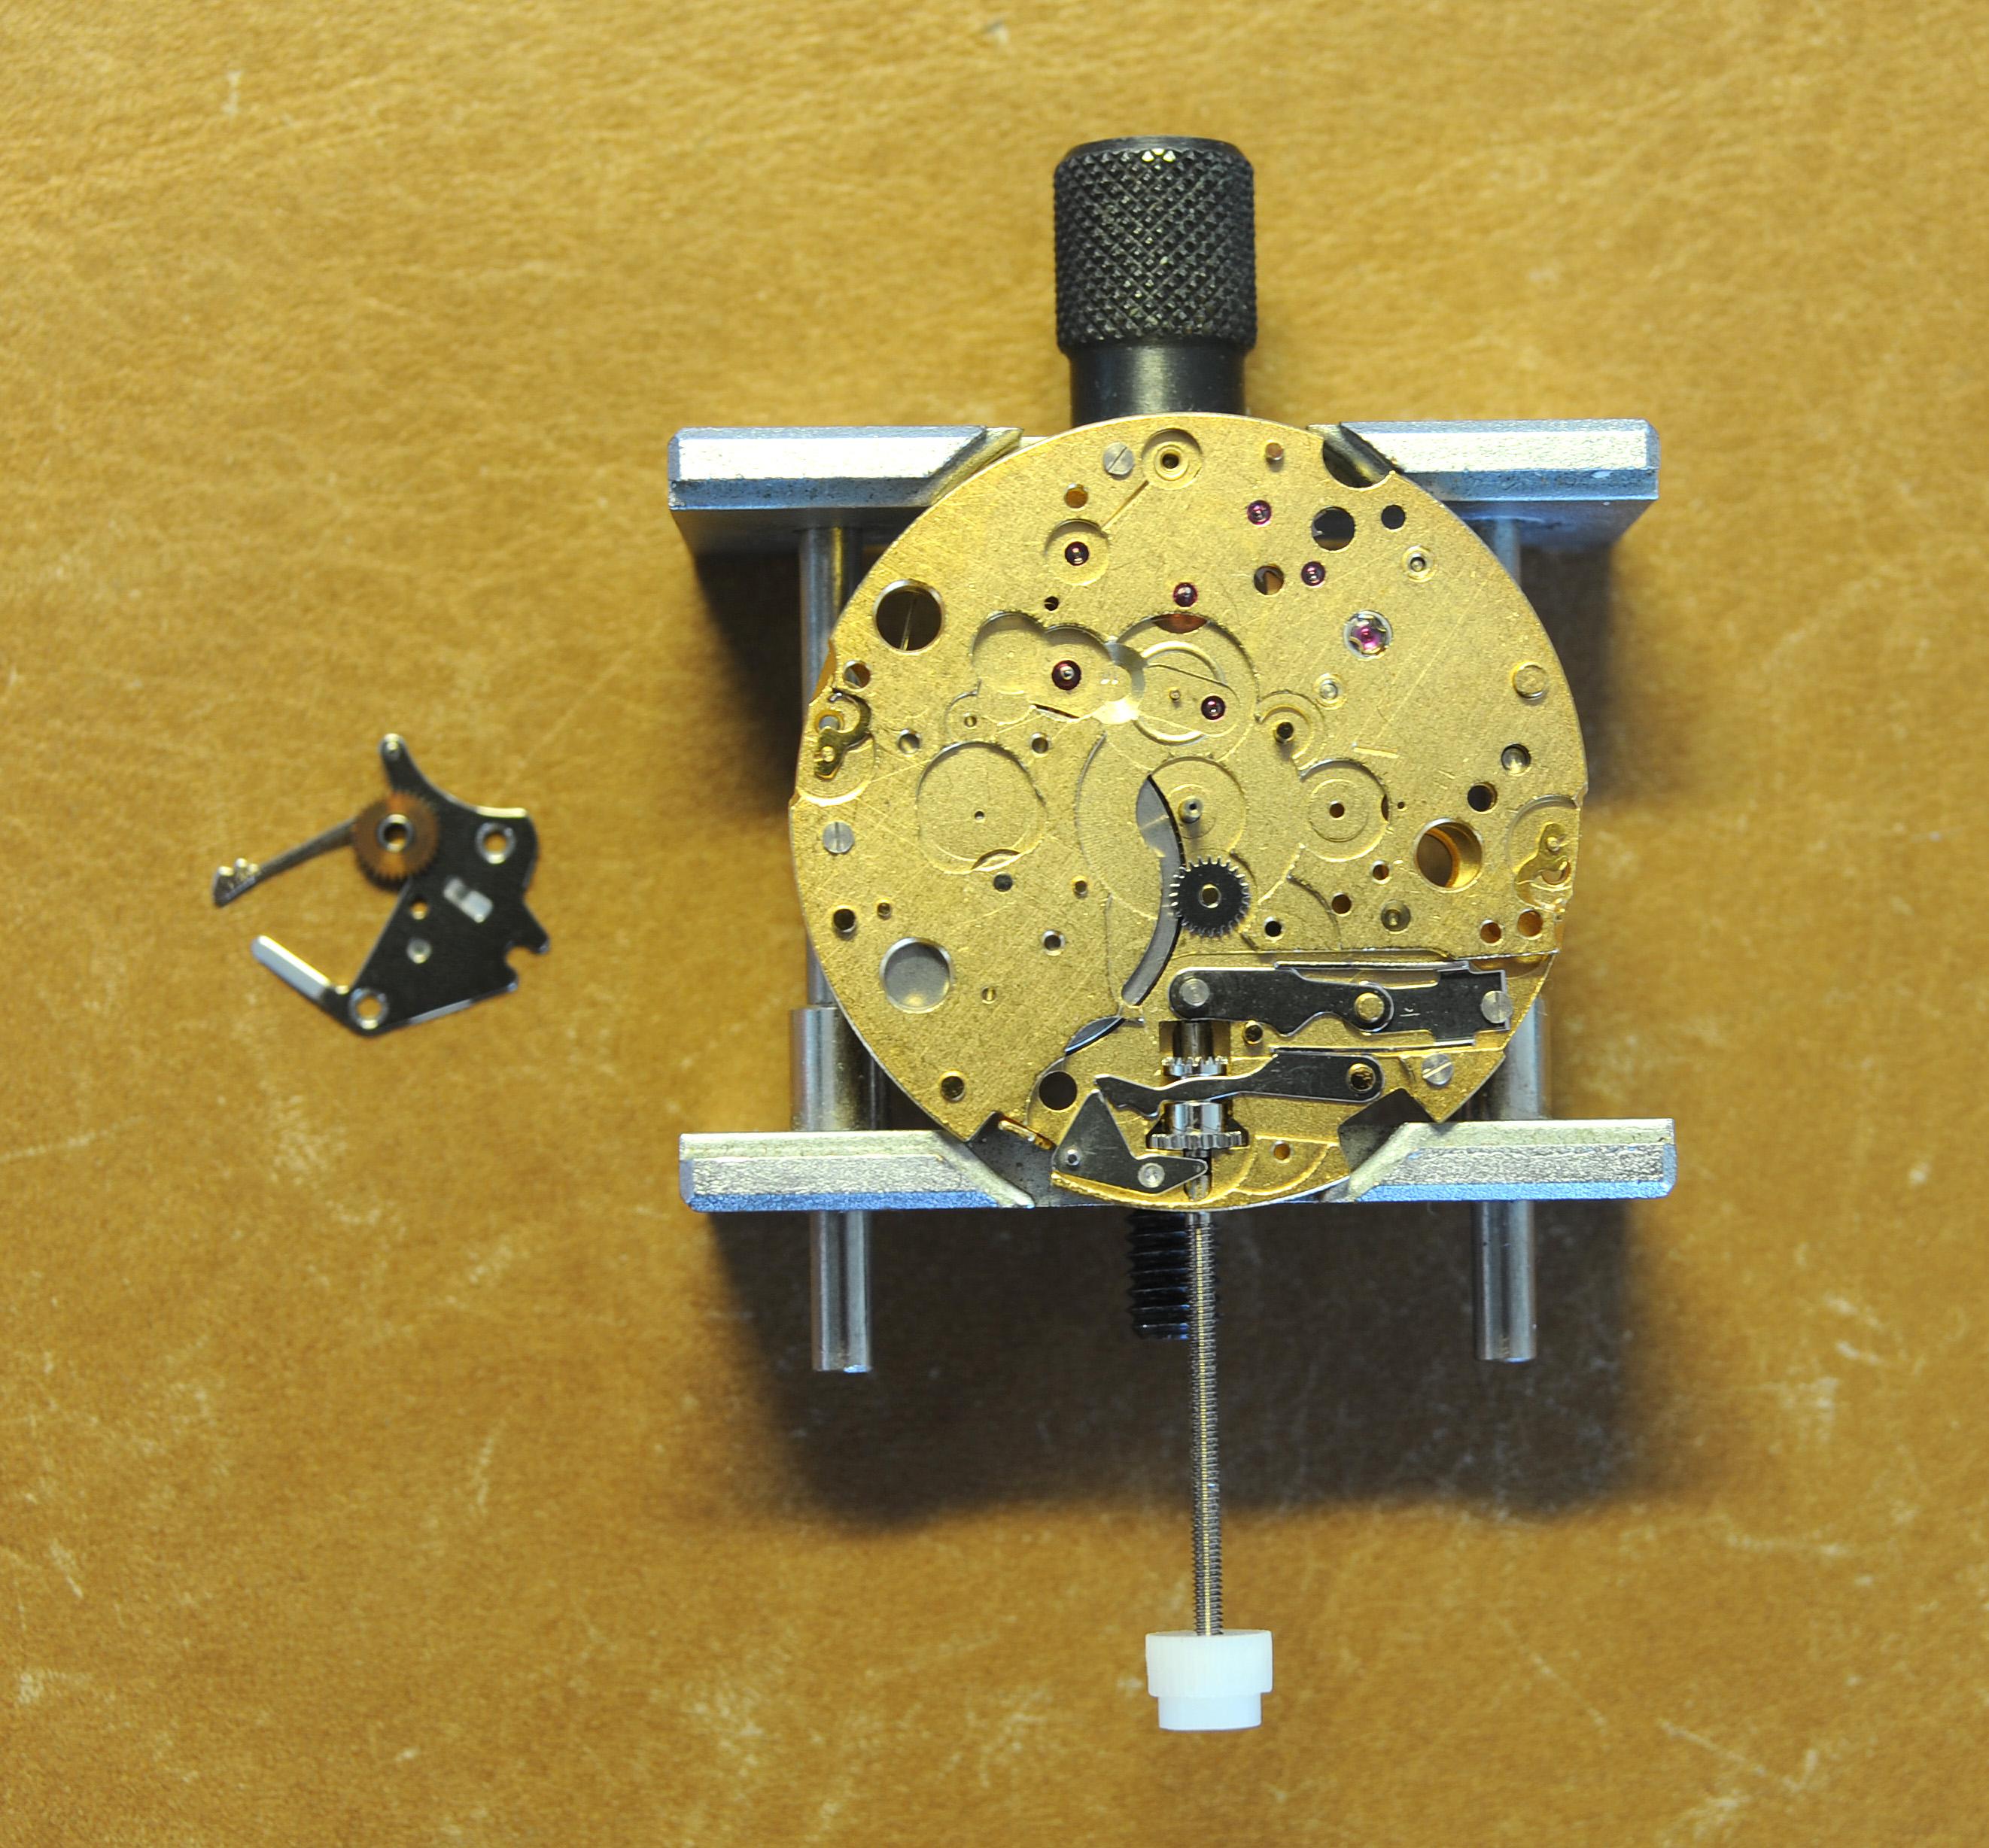
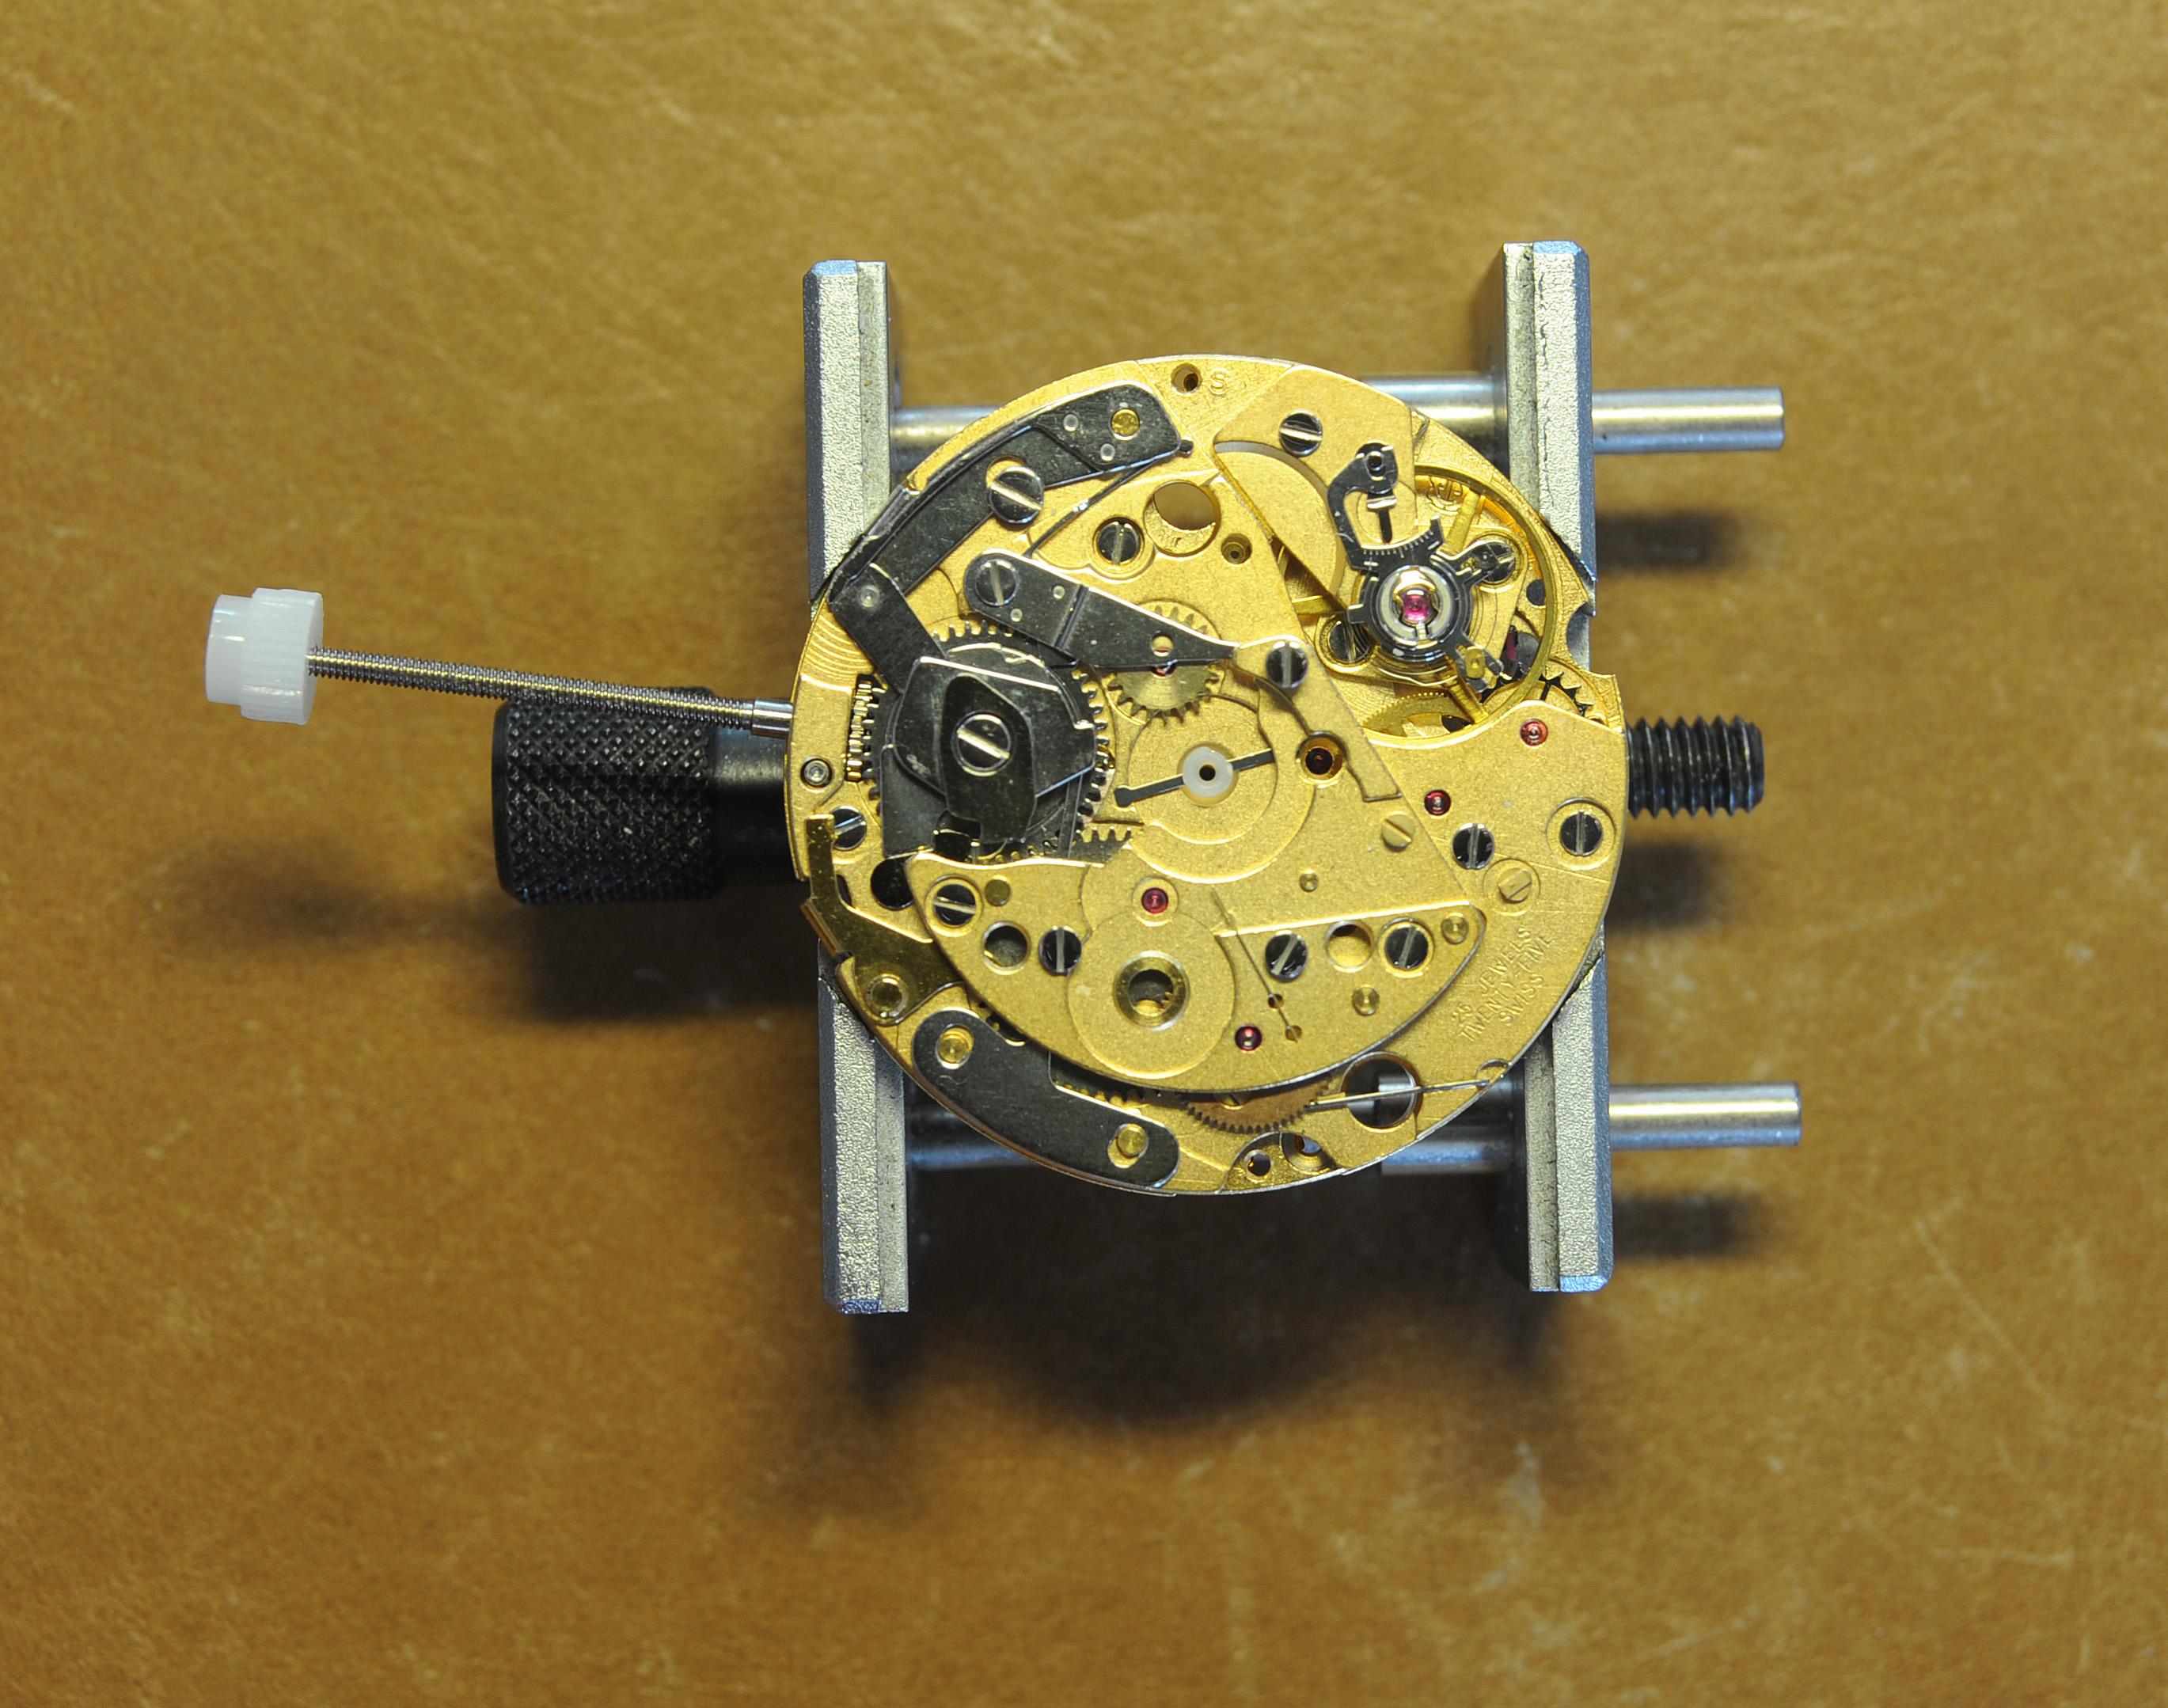
Updating to THIRD Vulcain Cricket (Sensilarm) done except for the sweep second hand. To bring this one to life I had to: 1) new staff 2) turned a new pusher 3) replaced keyless works (clutch and winding pinion, crown gear, setting lever and setting lever screw) 4) sweep second pinion I am now in the hunt for a sweep second hand. I put a lot of money into this thing...I think...it has been going on for about nine months. Bought parts on ebay, NOS material houses, donor watch, and I made the pusher.
 4 points
 -
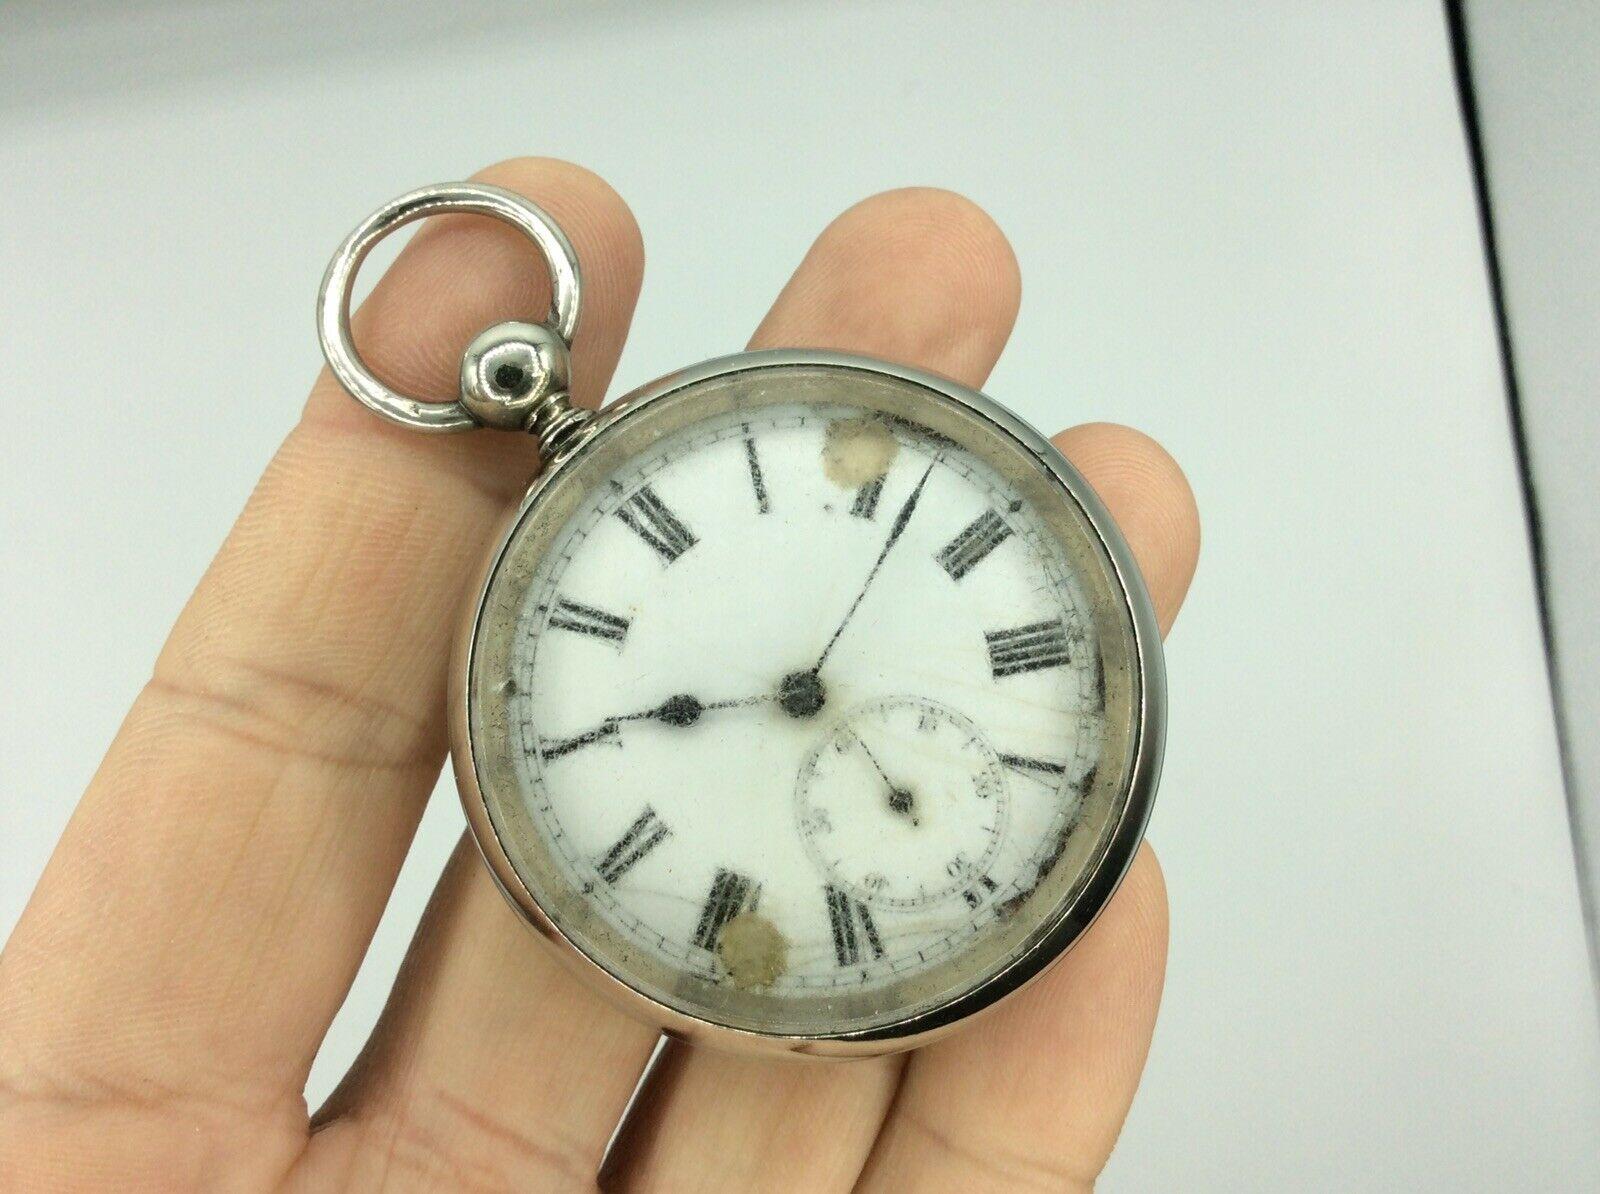
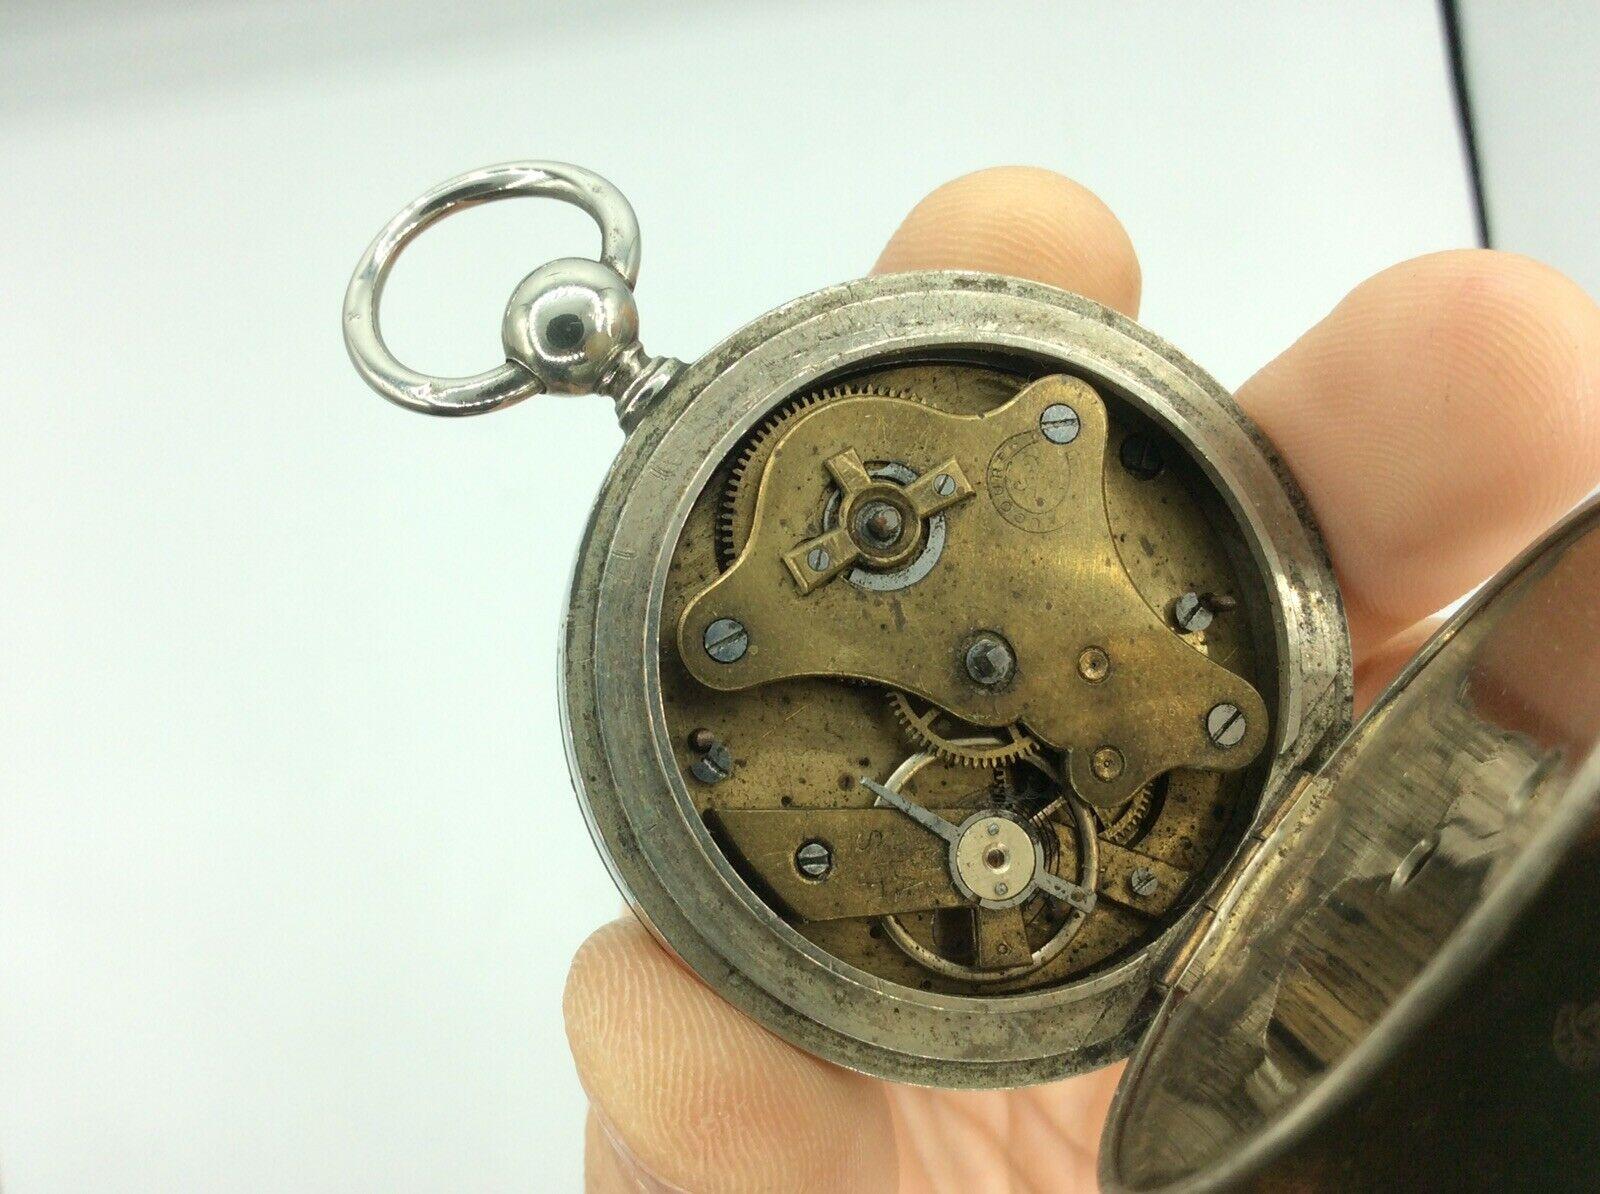
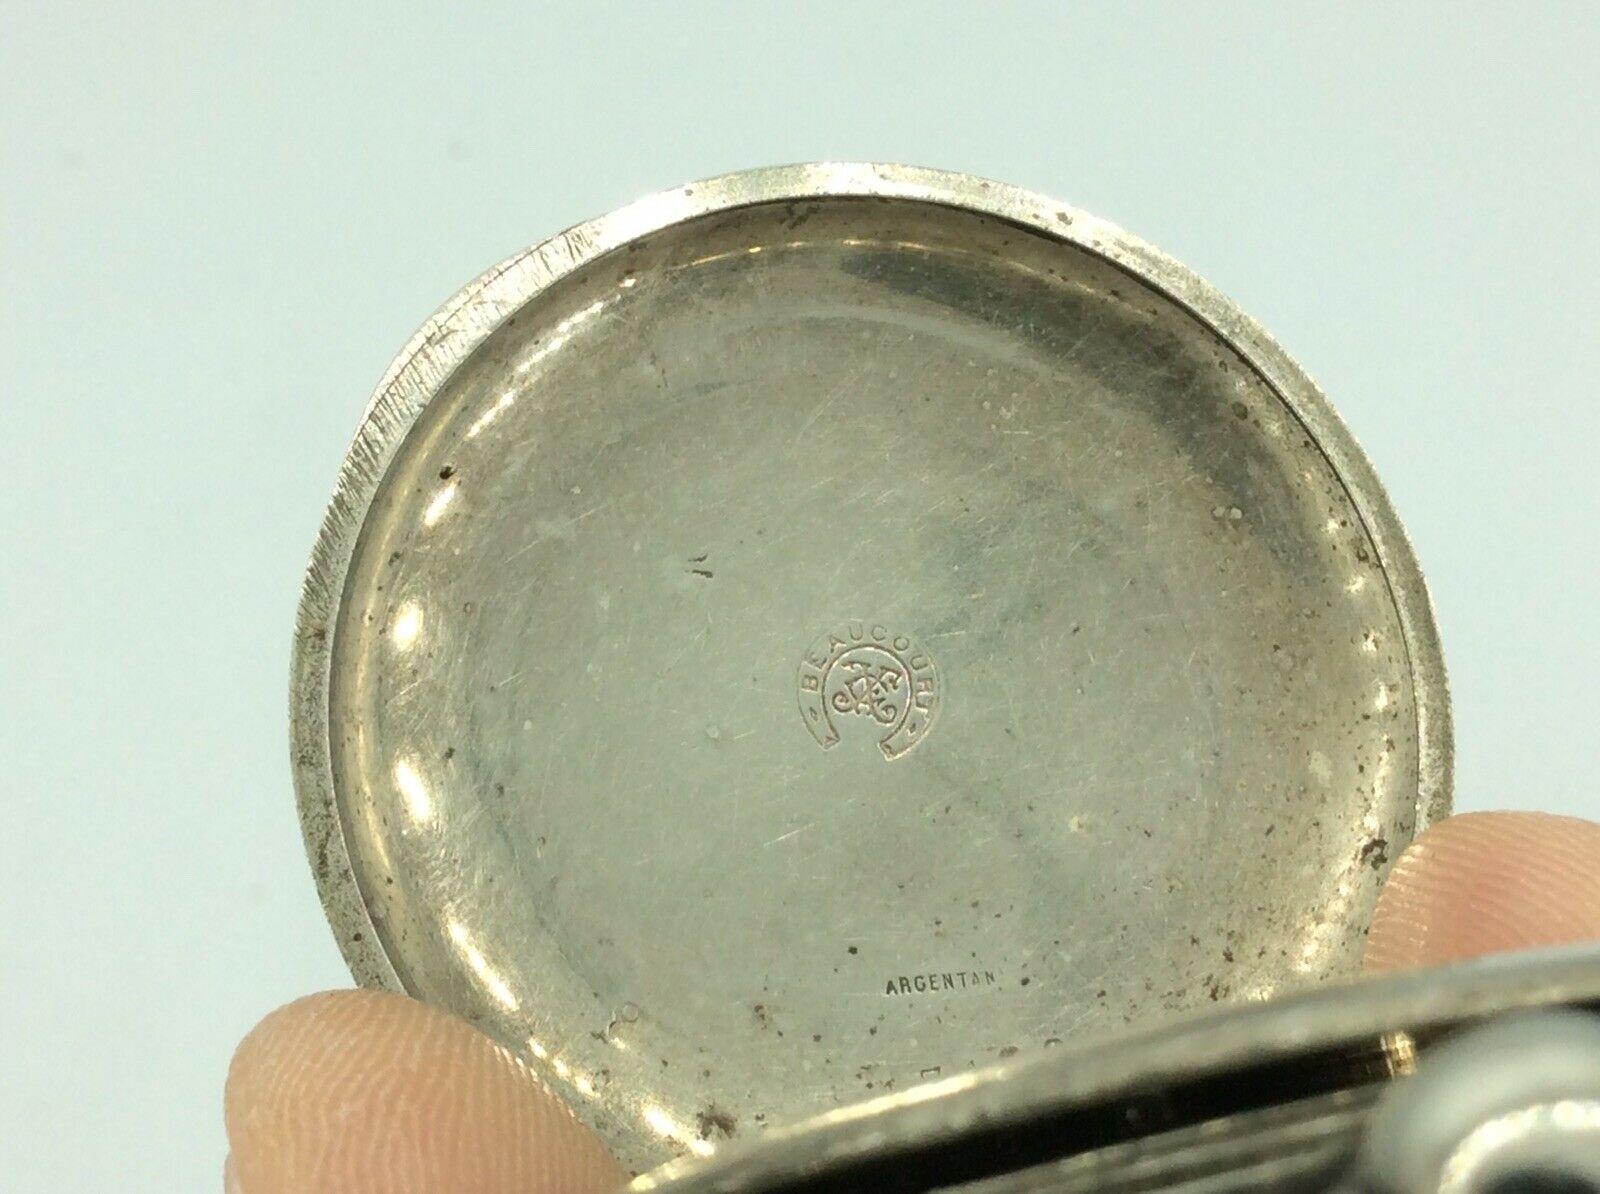
A French Japy Freres & Cie. Beaucourt argentan key wind and key set pocket watch , some time after ca. 1850 for 0.99p The glass is in rough shape, but may be polish-able , and the dial, similarly is pretty rough. The adjuster is worryingly skewed, suggesting the balance shaft is possibly damaged, but for the price, I can't complain. It is obviously also in dire need of a clean and service. (source) More about Freres & Cie. here.


 3 points
 -
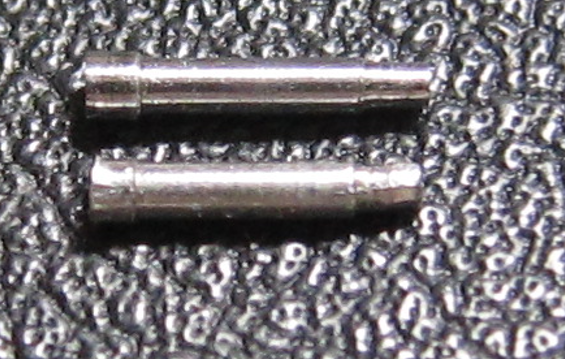
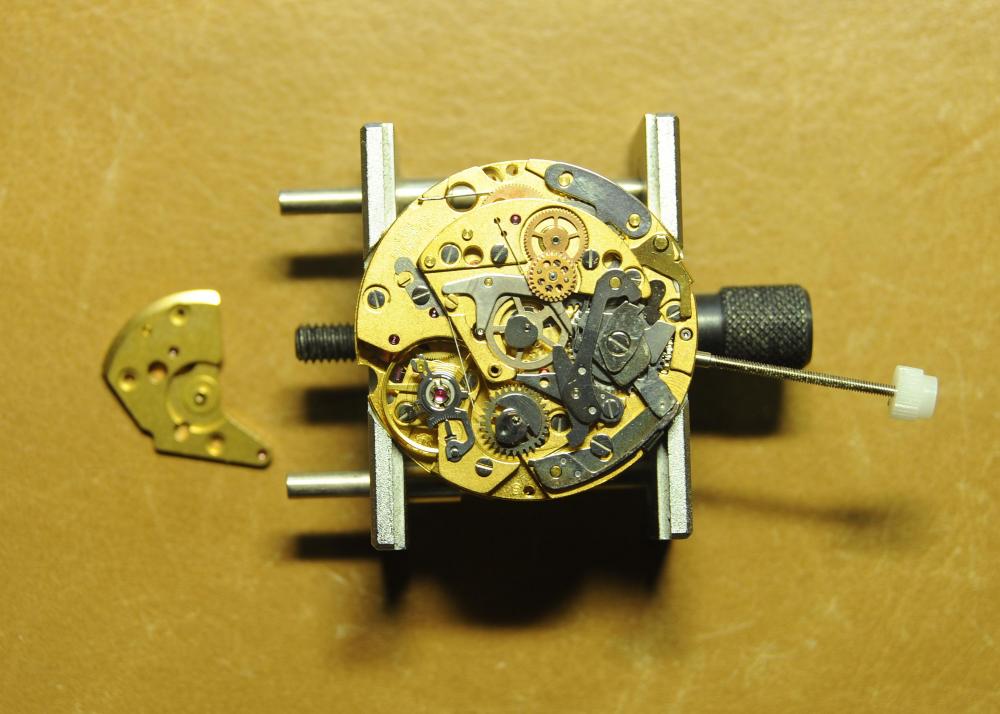
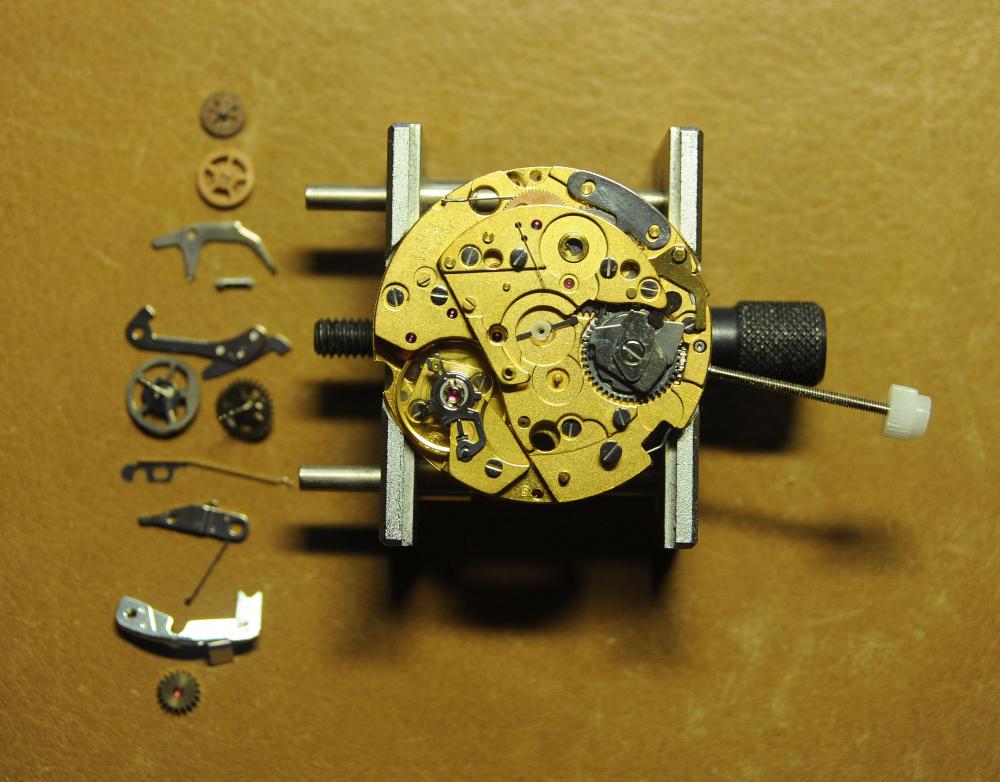
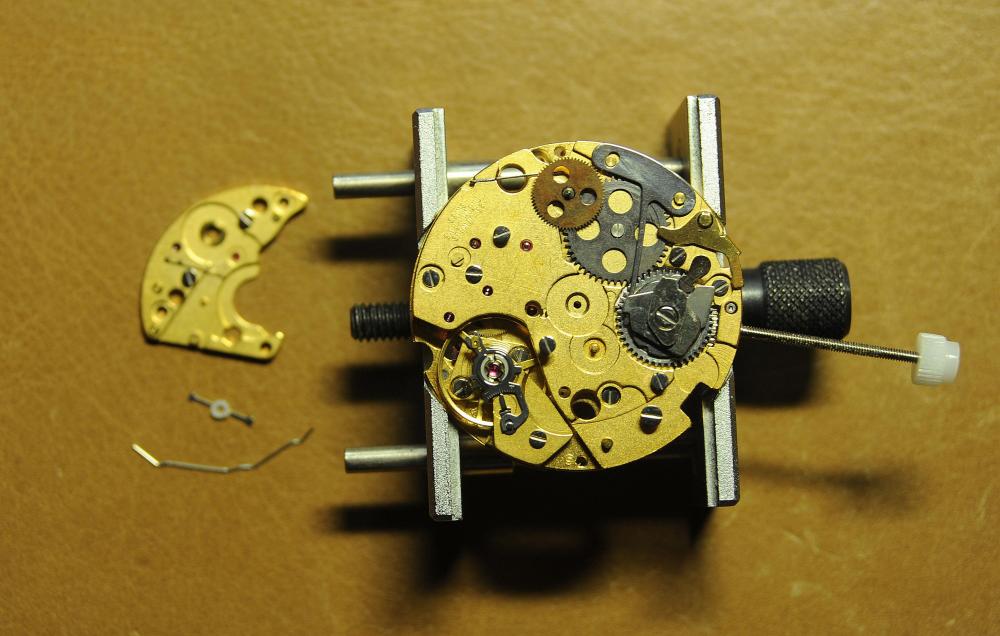
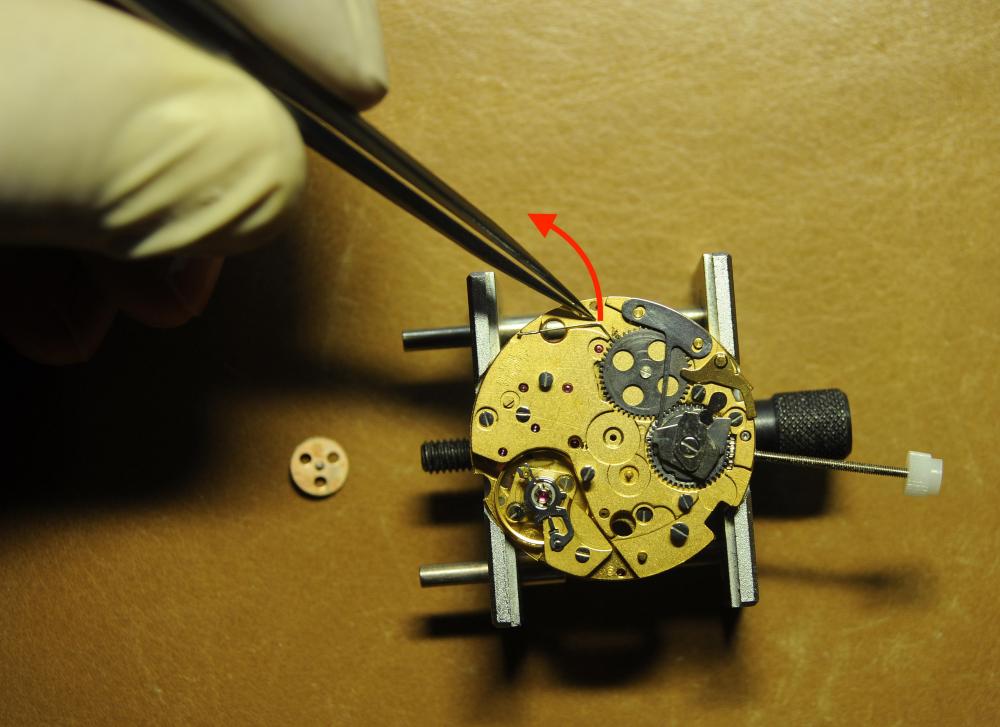
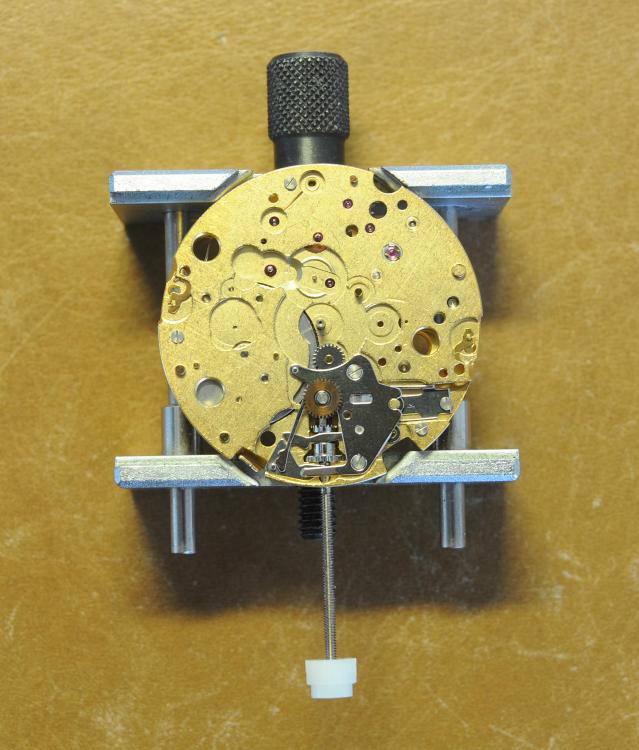
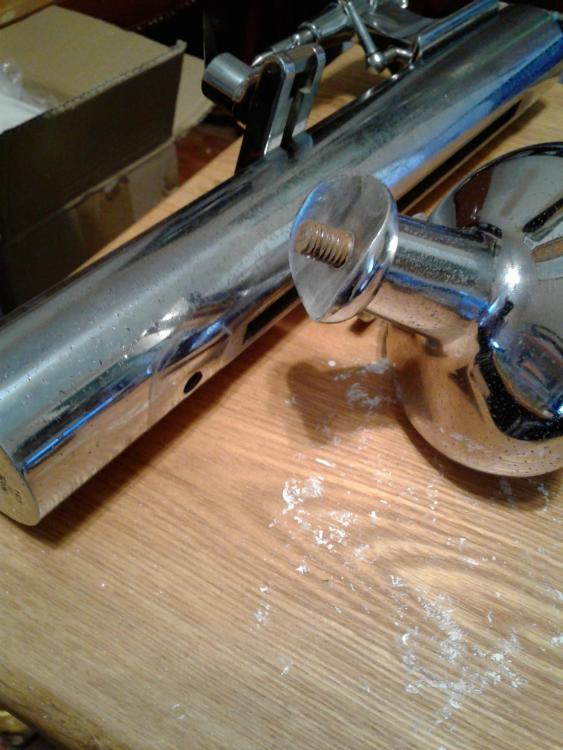
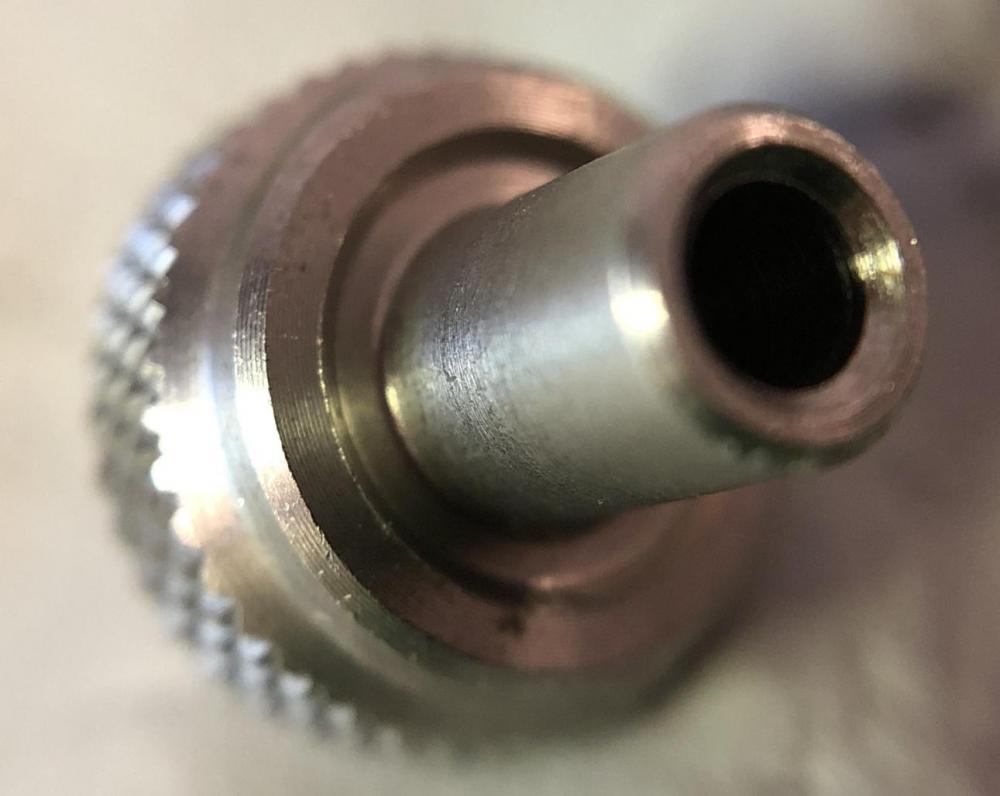
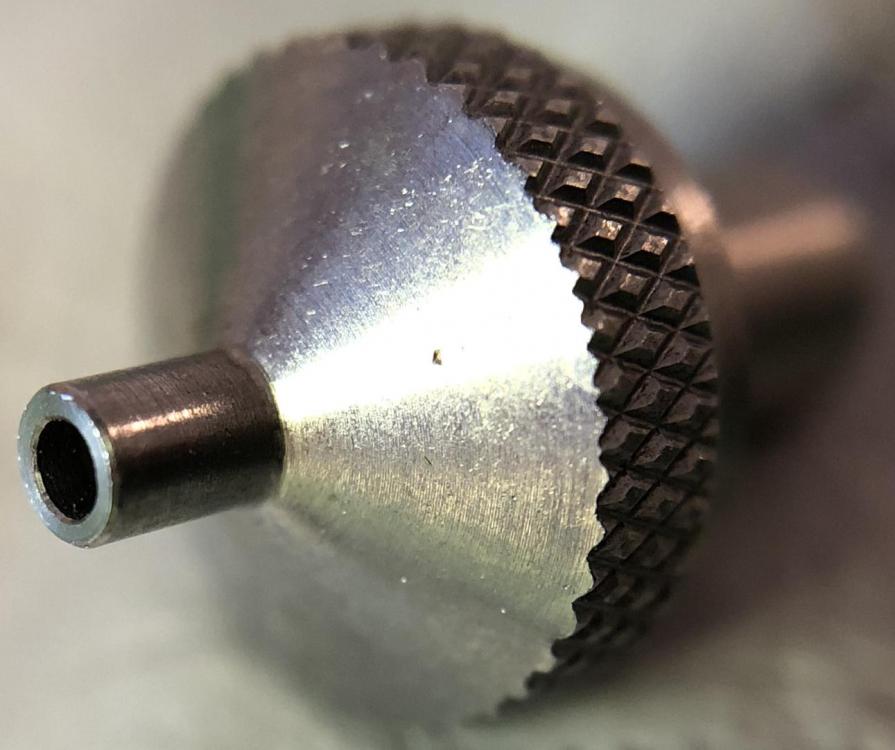
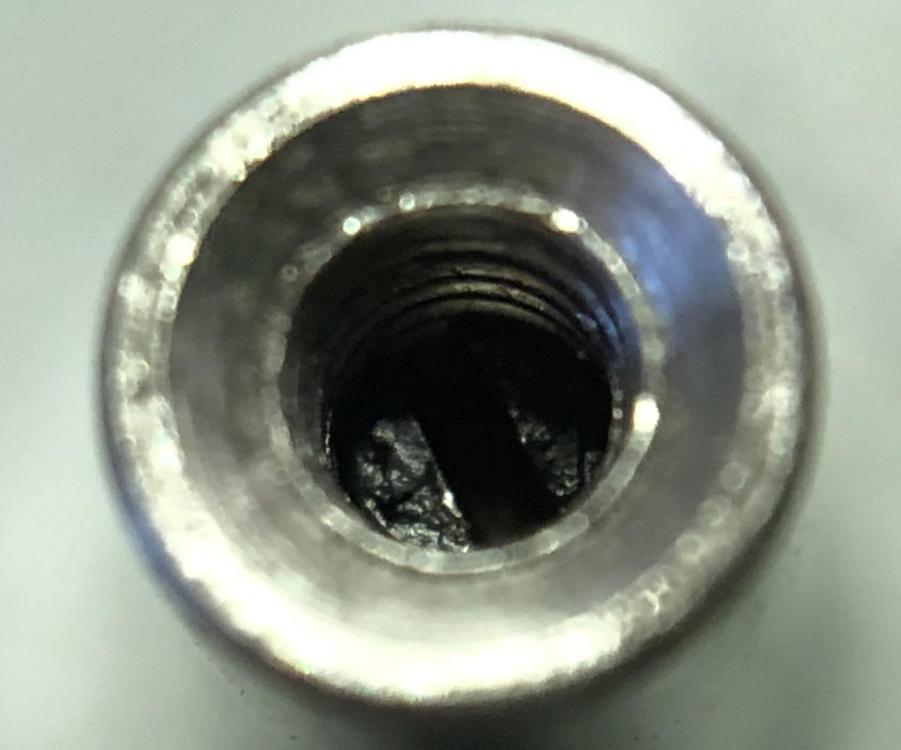
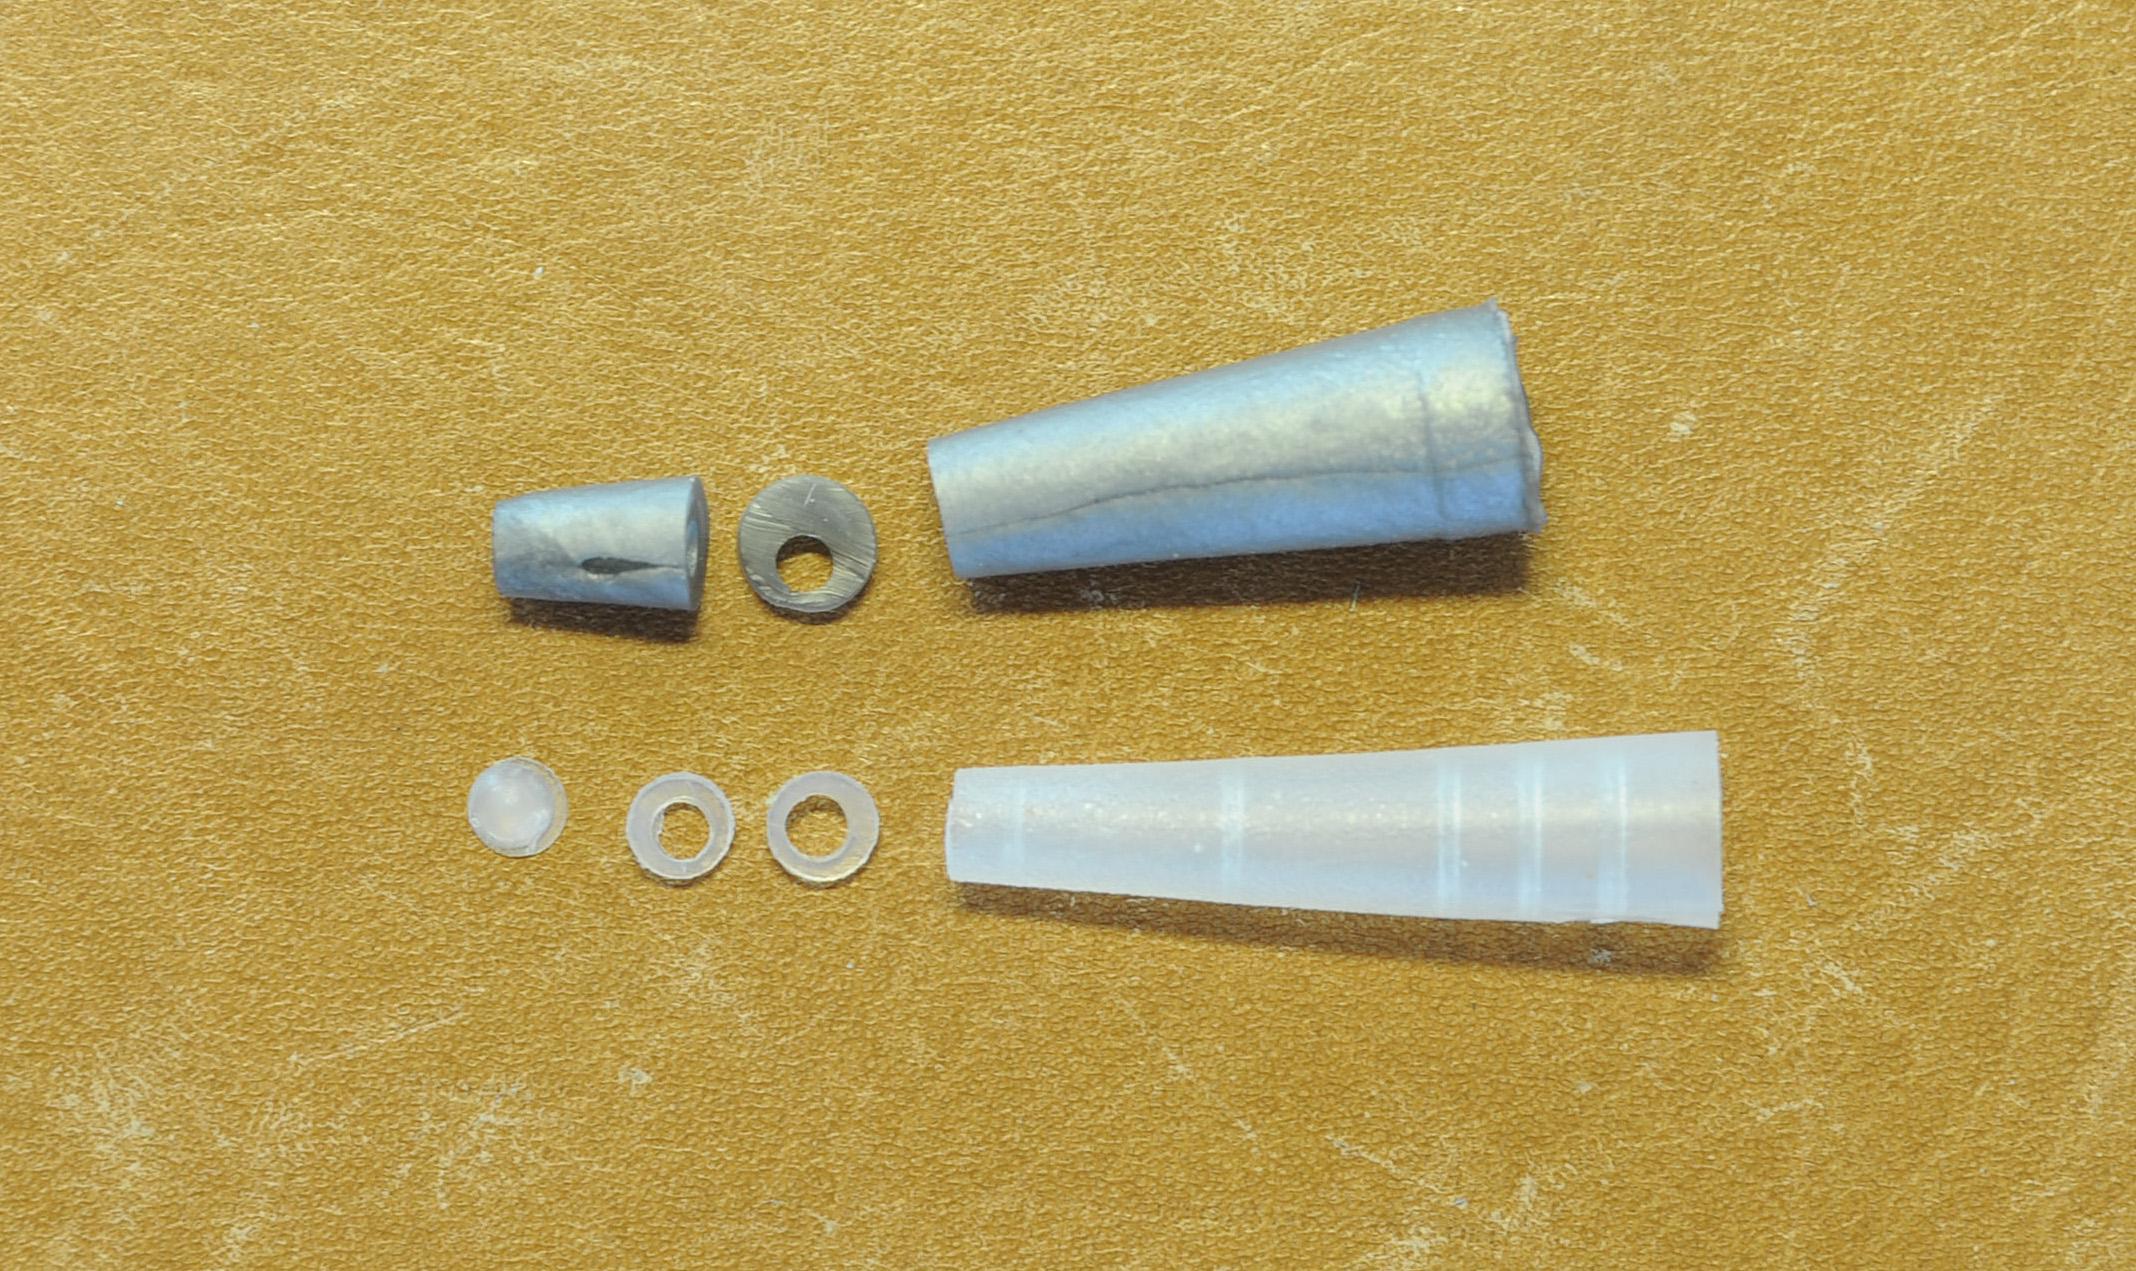
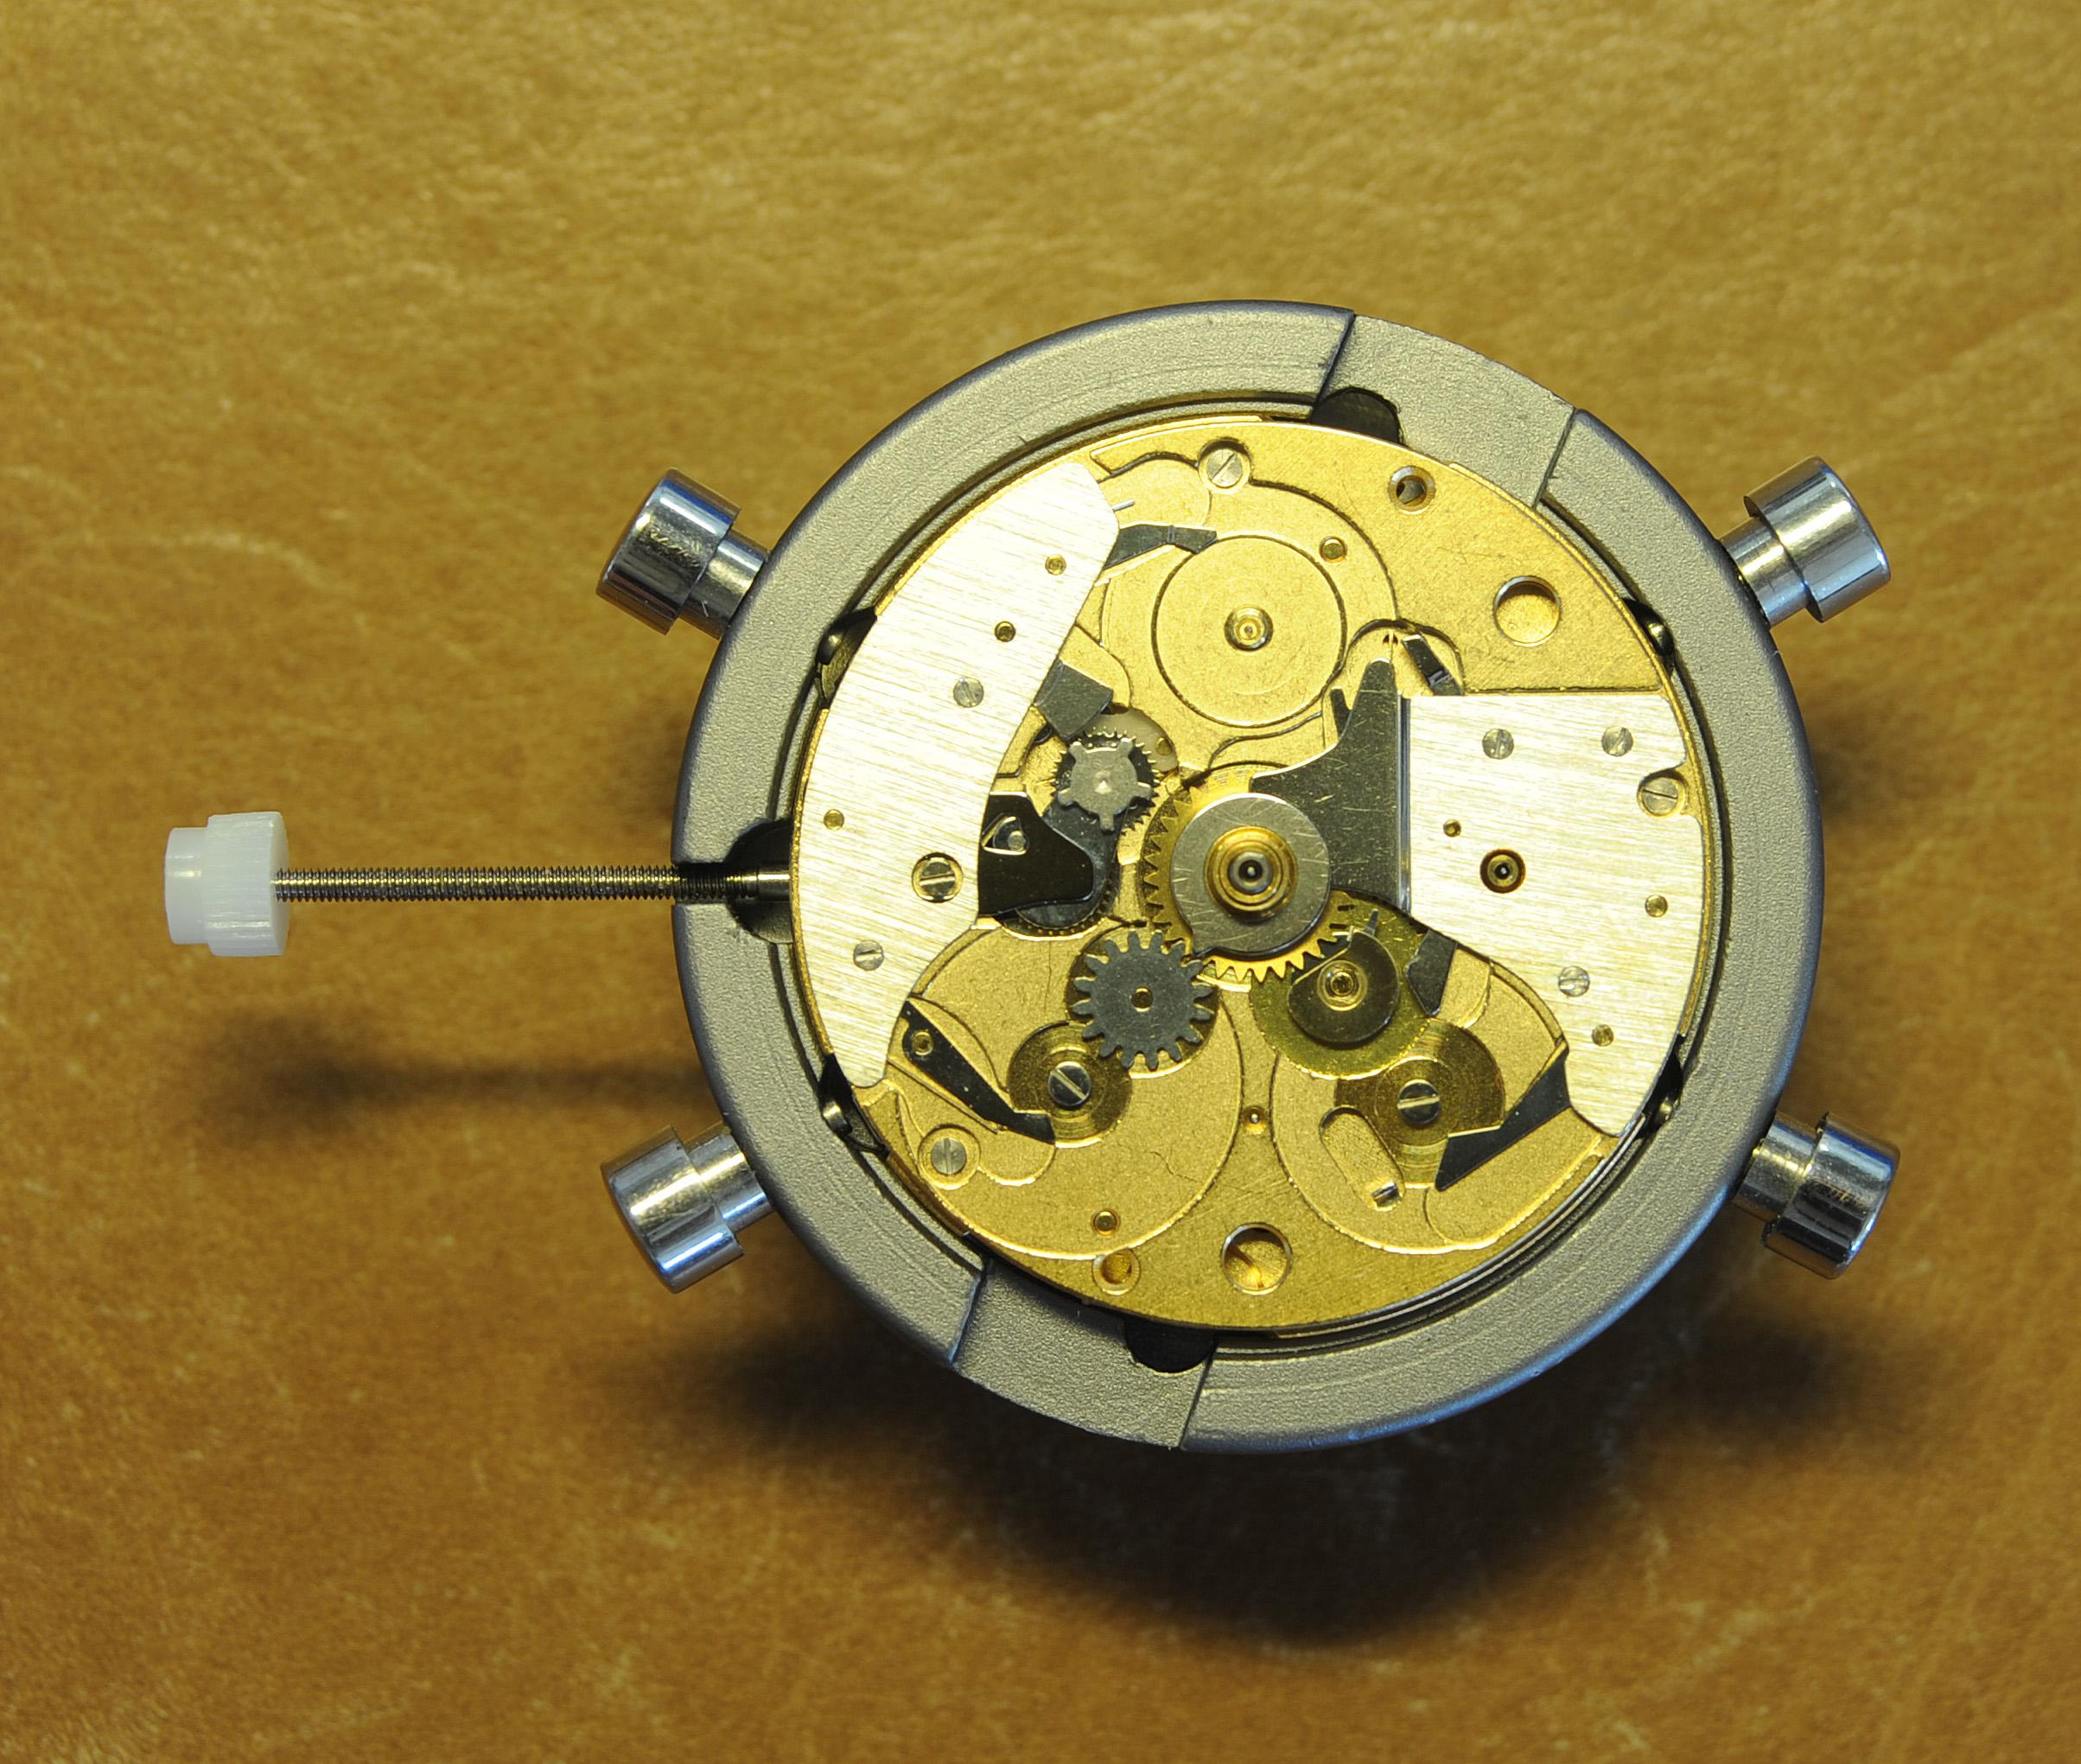
Been restoring another cricket and discovered that the pusher stem seems to be damaged, so I decided to turn a new one. Notice that I made the each end a little longer than the reference piece. I can shave it down if necessary. I made the narrow end on the right a little bit larger in diameter than the sample because I noticed that the pusher button was not seating well (still loose).
 1 point
 -
I've been passively on the lookout for a nice kitchen timer for a while, but nothing has ever popped up that really caught my interest. One of the German manufacturers (I forget which one off the top of my head) has a 50s design kitchen clock with a timer in the base. It's neat, good looking, but they're extremely expensive, and most of the ones I can find are new and quartz (quartz almost always means not interesting). Is anyone aware of any good quality, interesting, well designed kitchen timers? I'm mostly just interested in timing my coffee/tea steeping, cooking tasks, etc., but if it's not worth the effort to track down, I'll just keep using the microwave/oven timers. I figure the last century must have produced SOMETHING that will scratch my itch for such a ubiquitous task.1 point
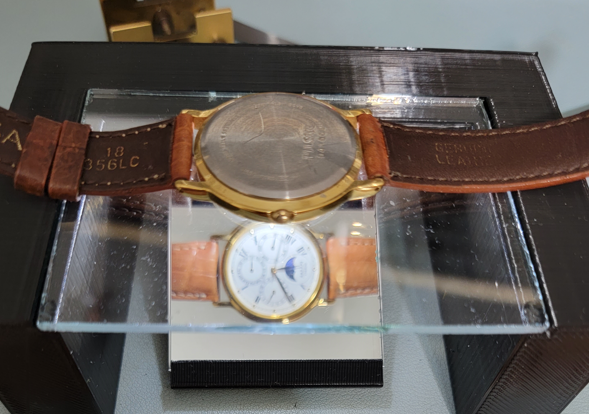
-
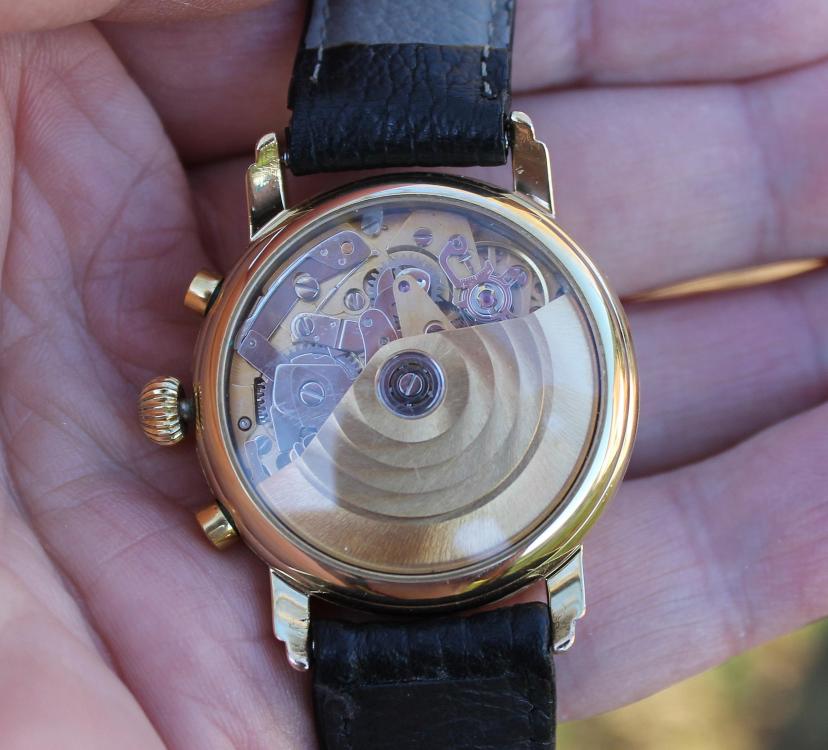
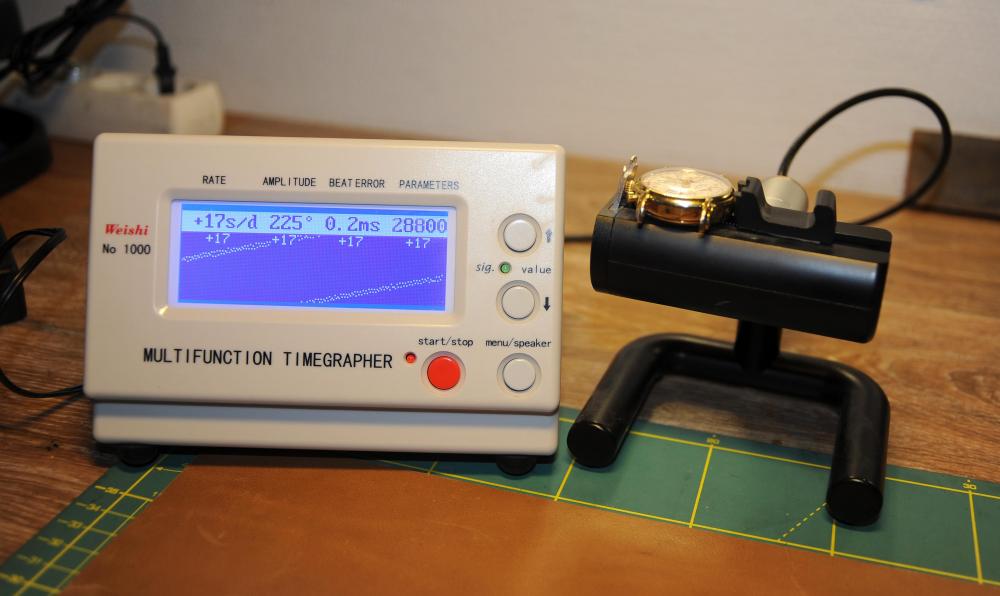
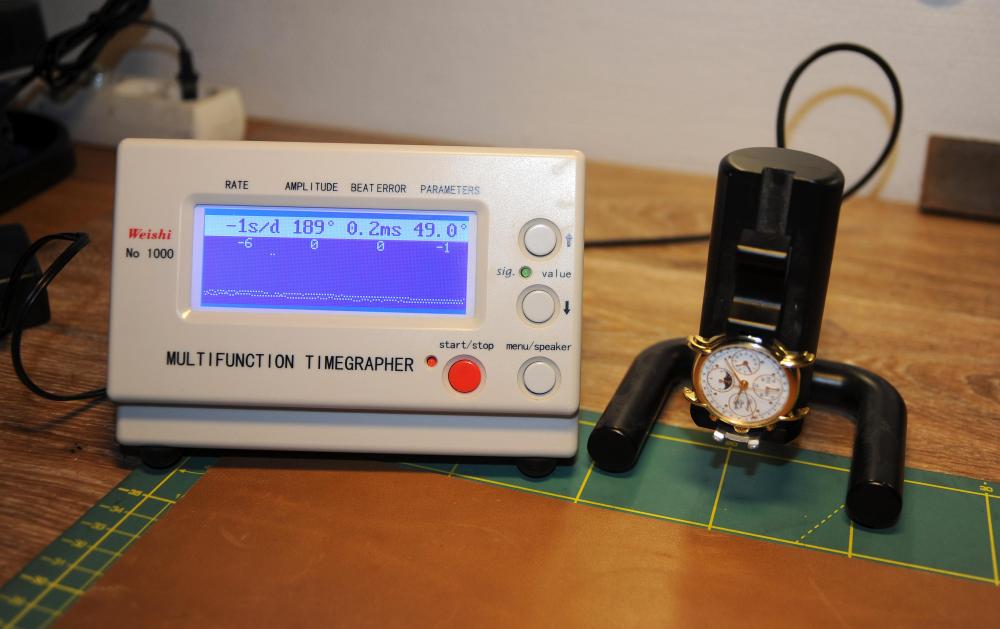
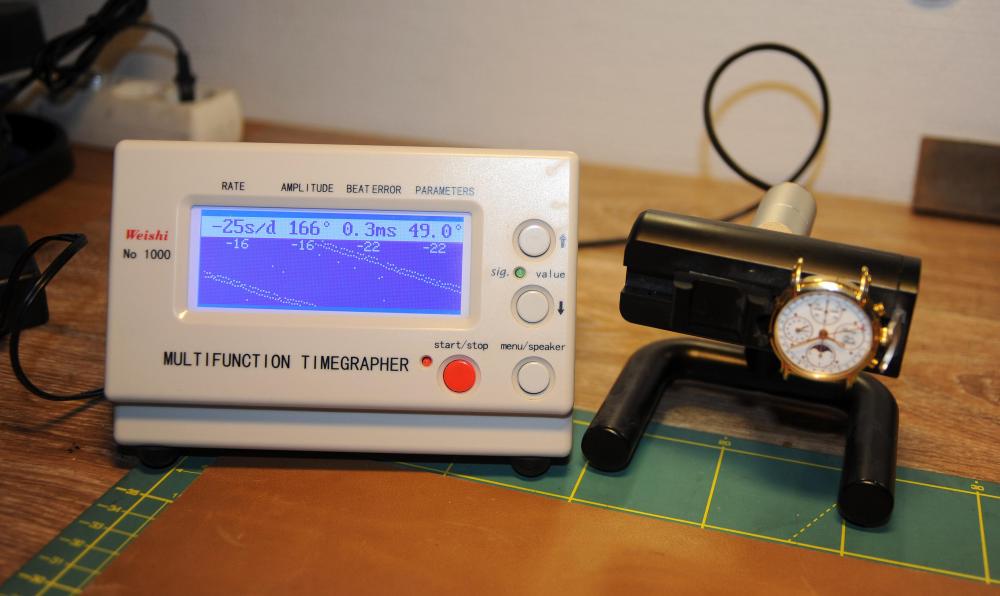
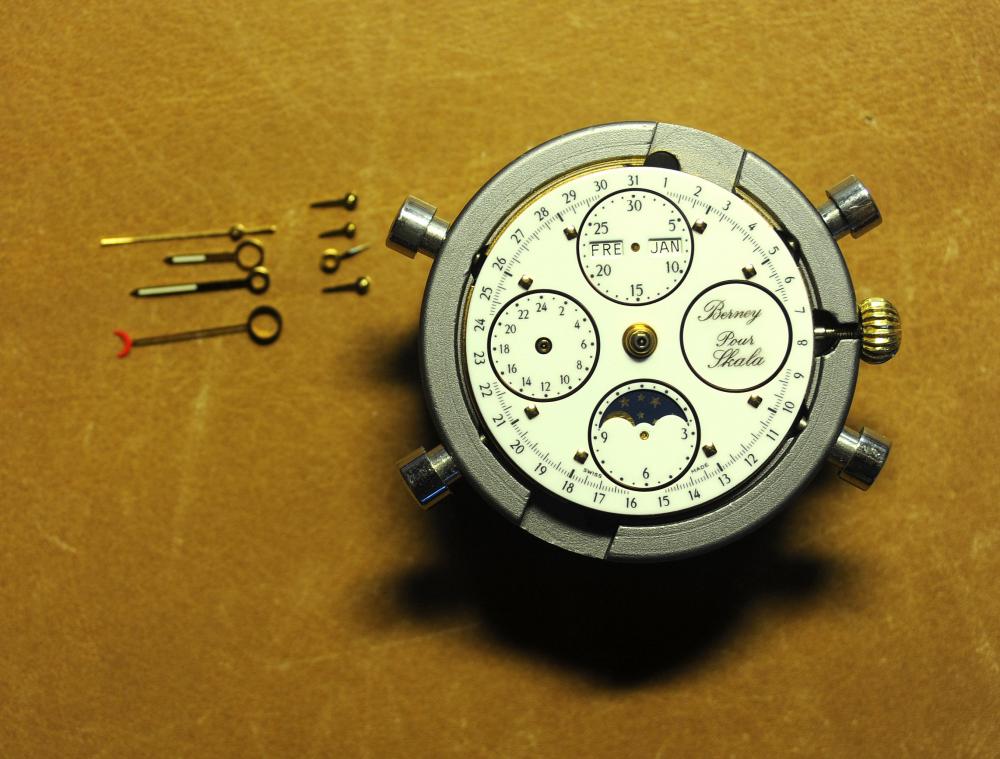
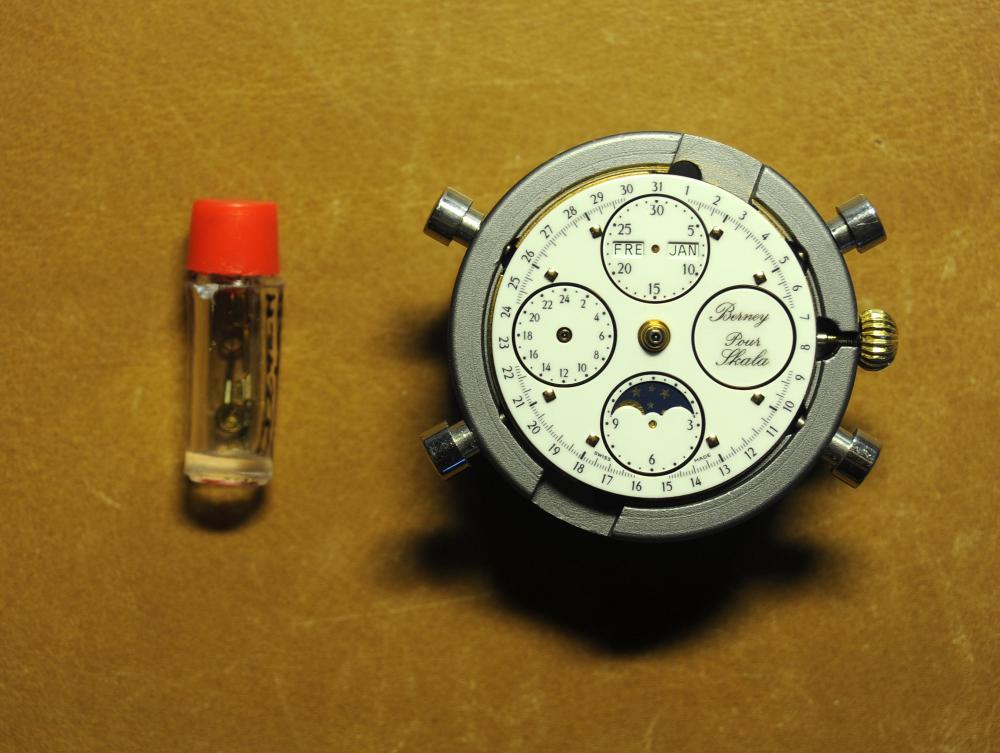
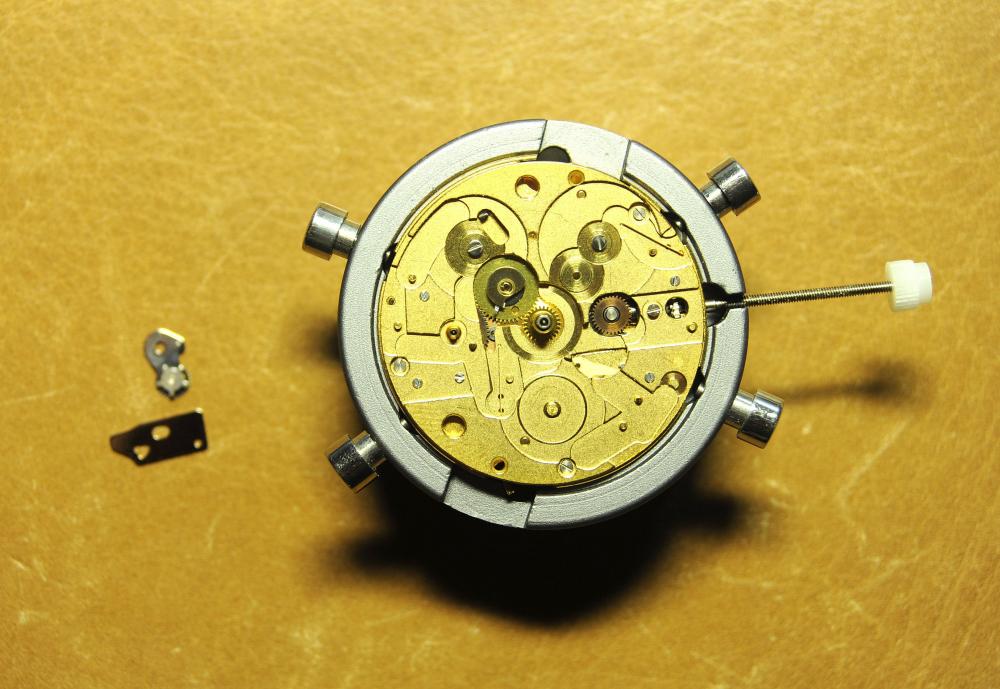
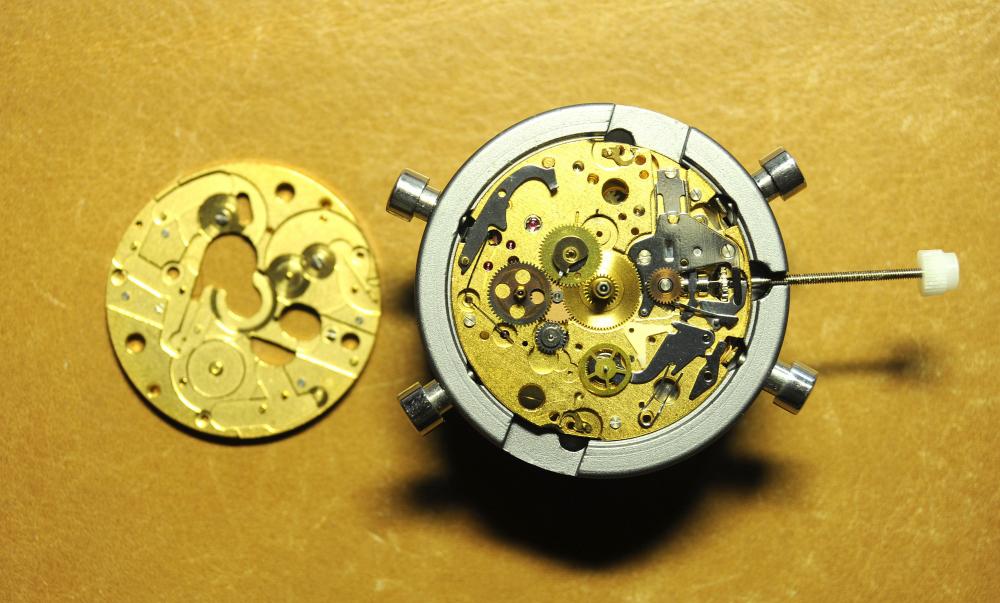
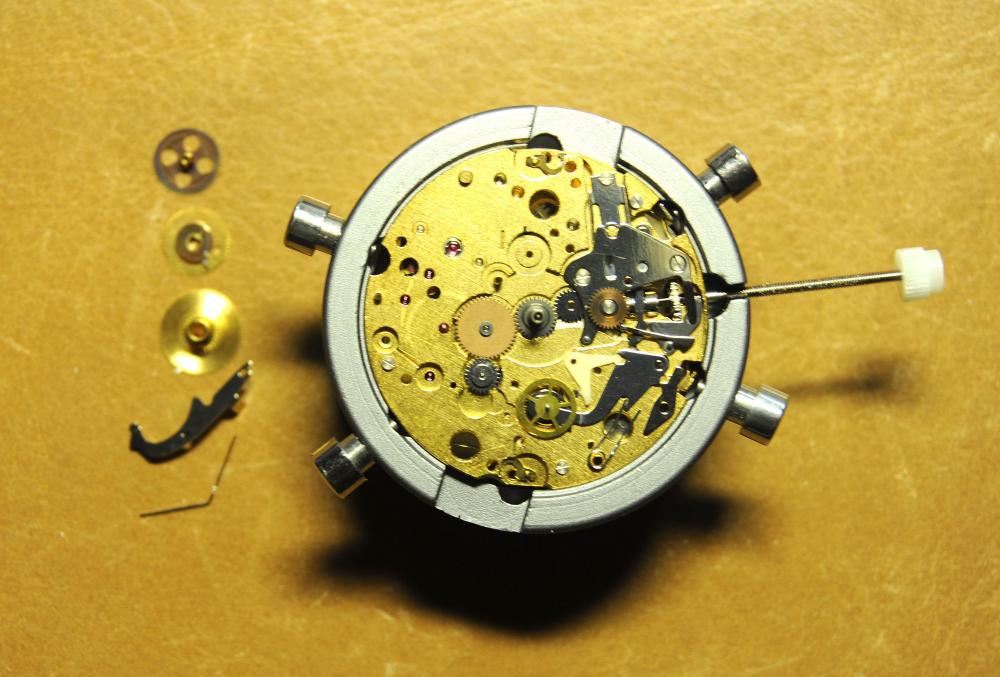
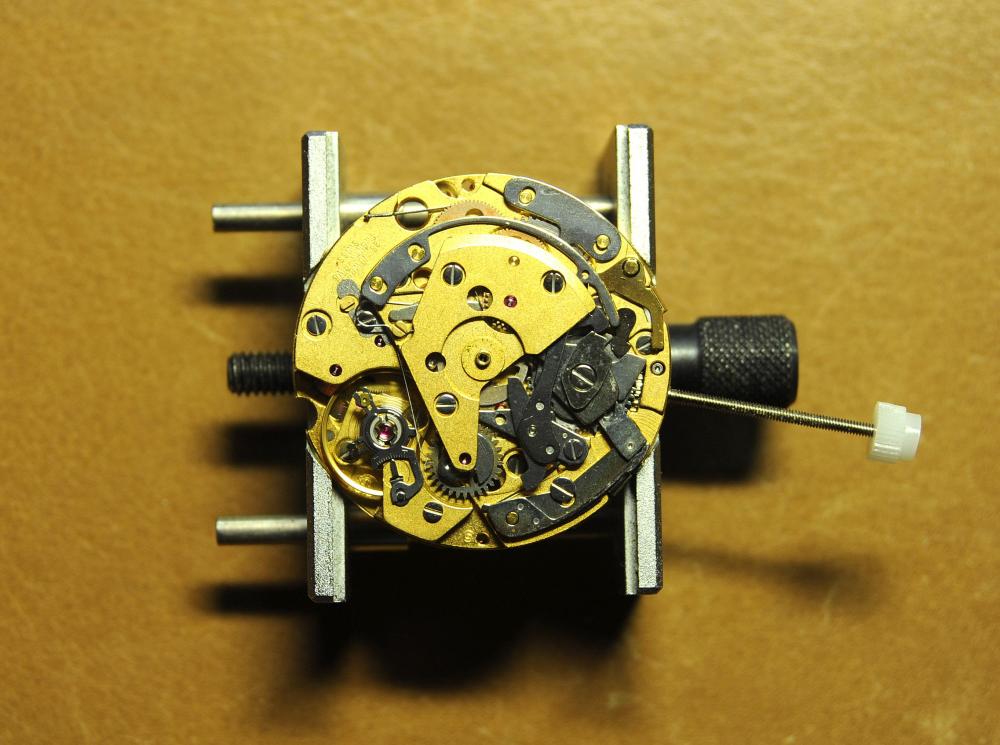
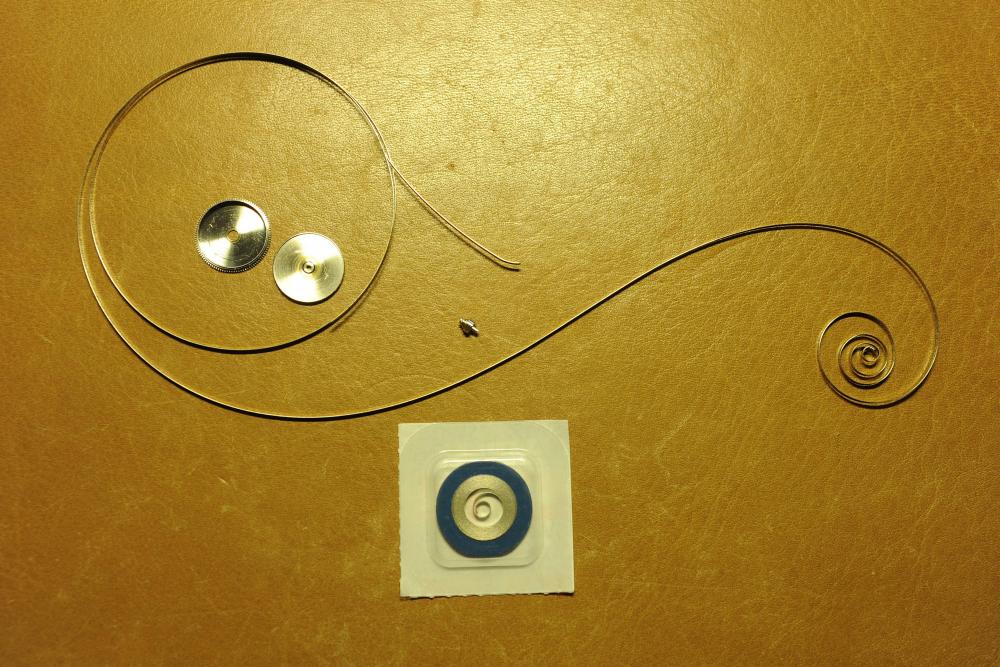
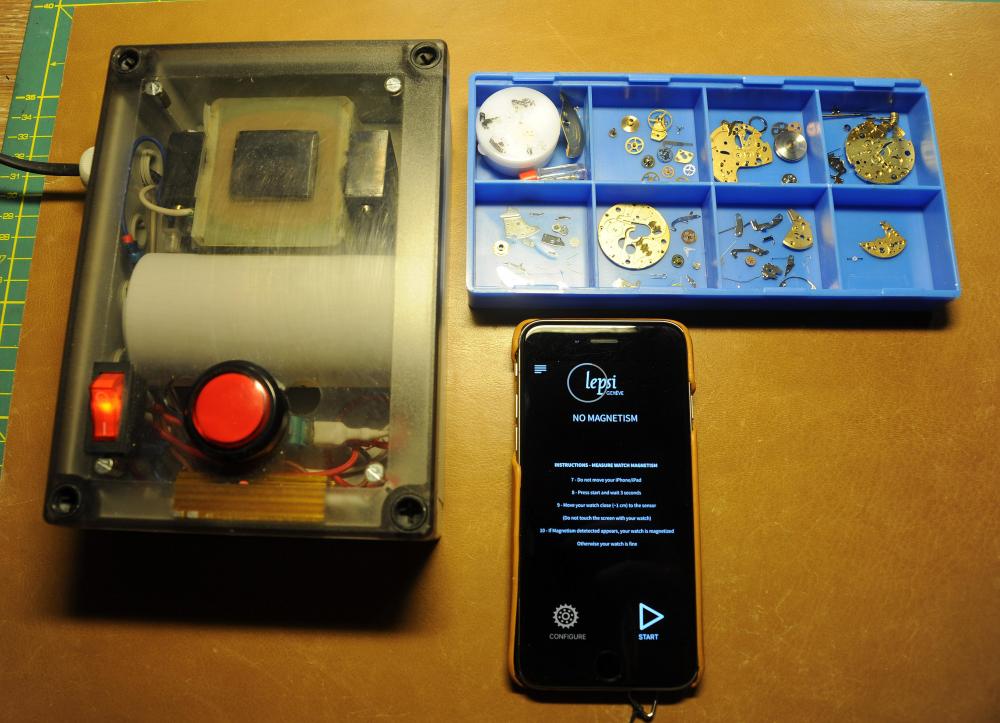
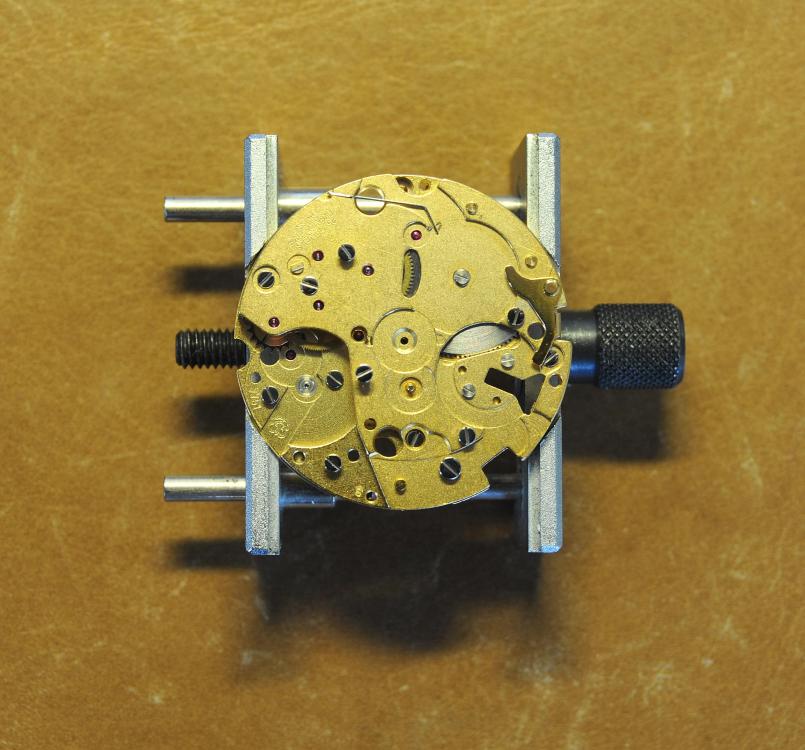
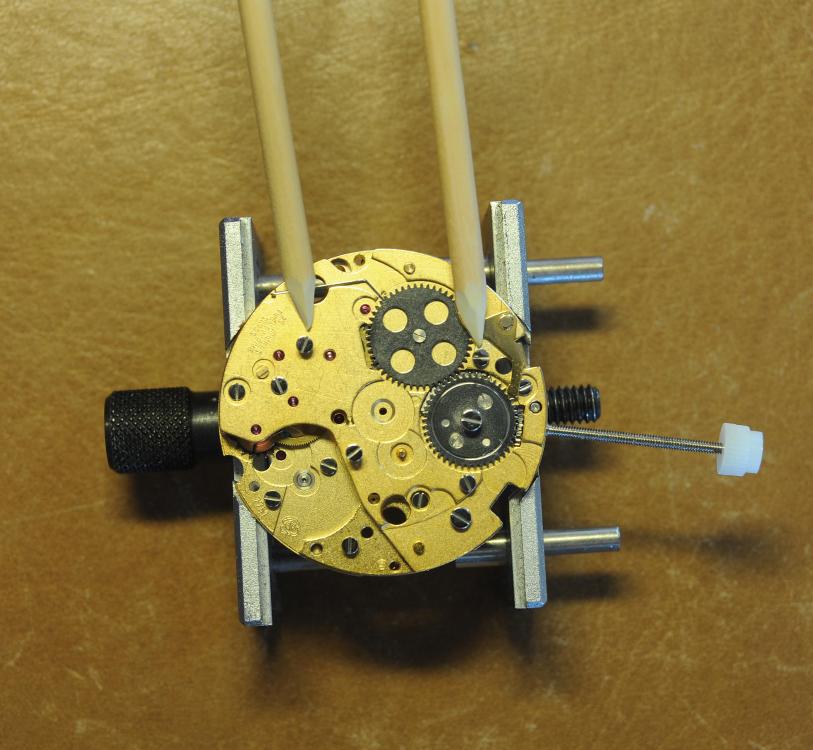
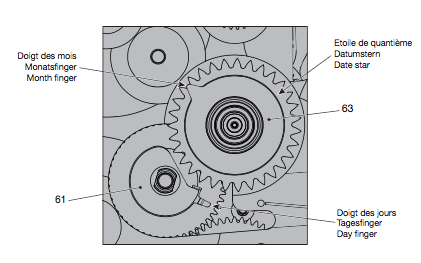
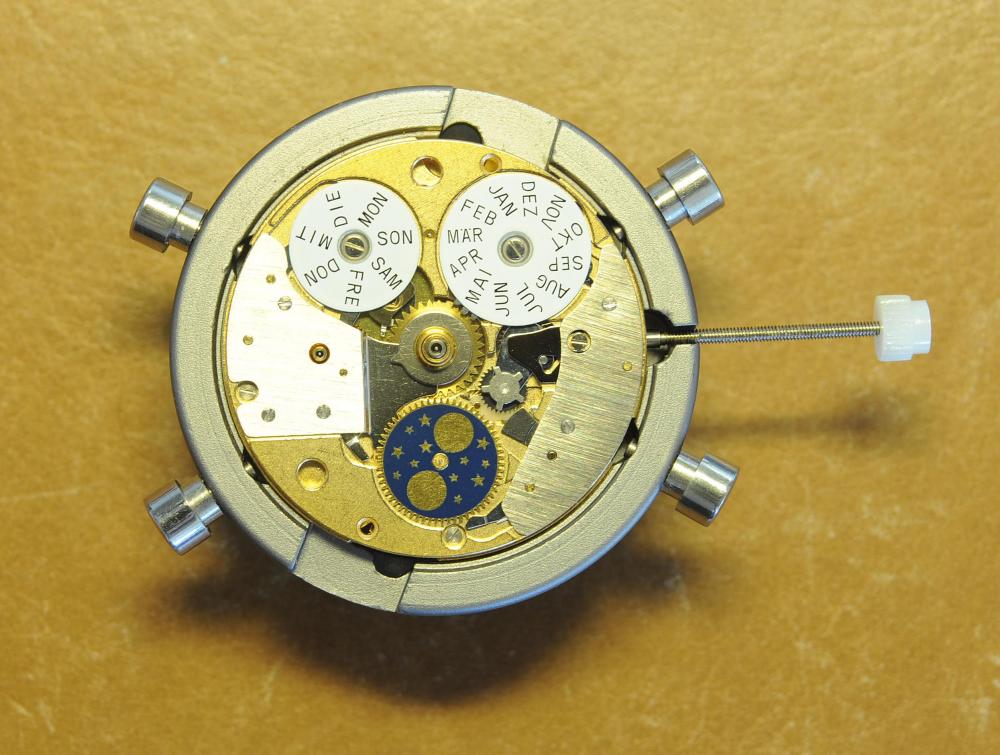
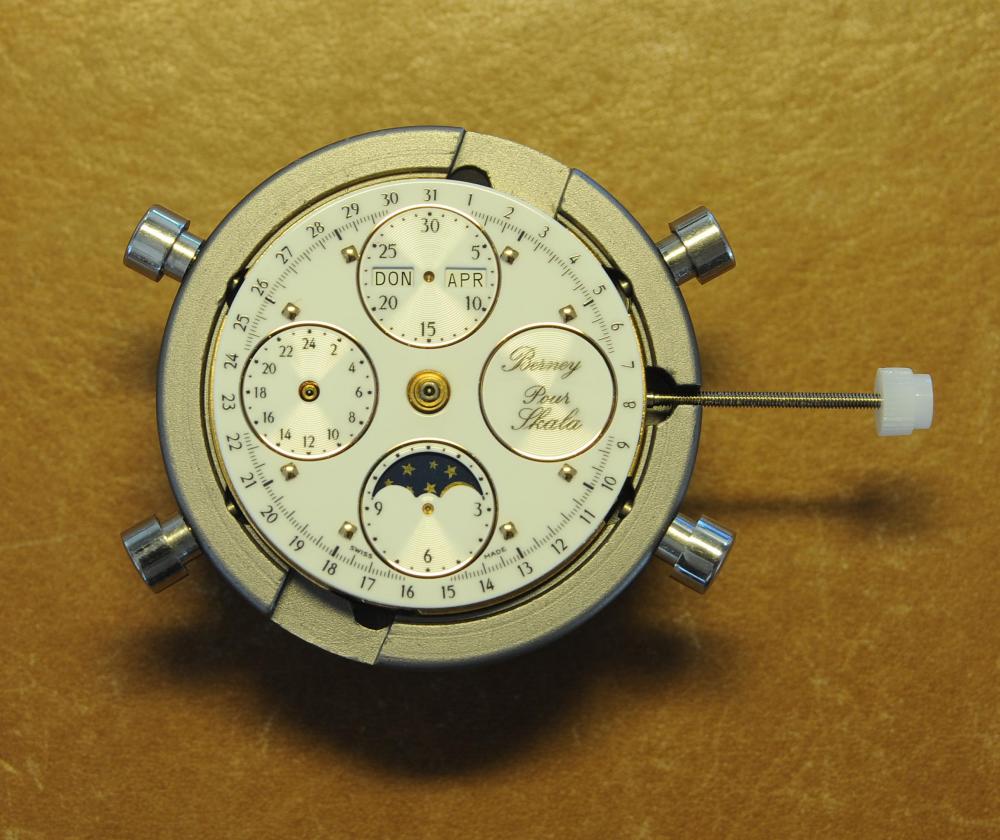
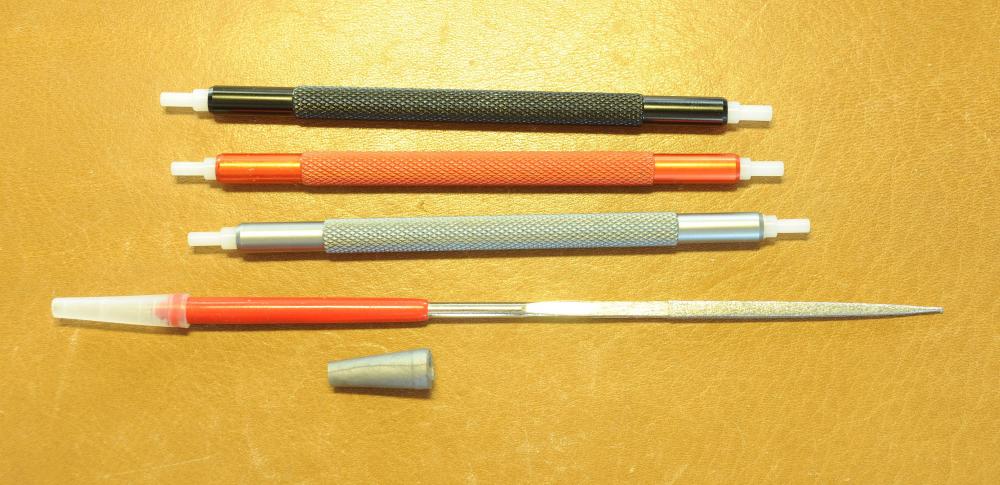
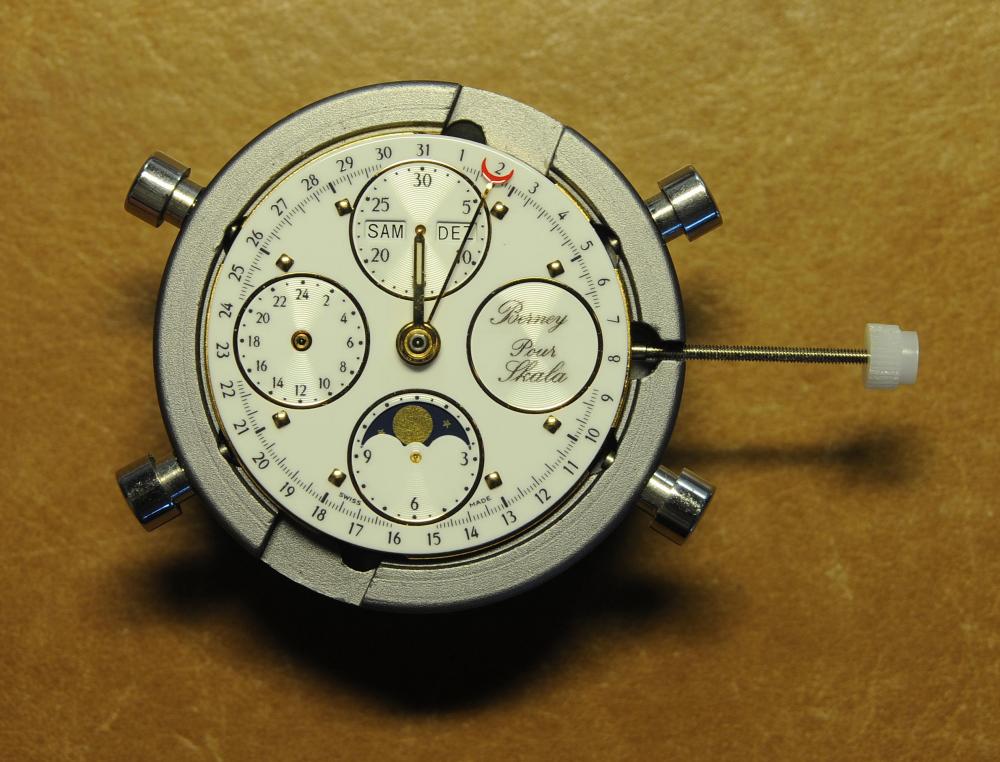
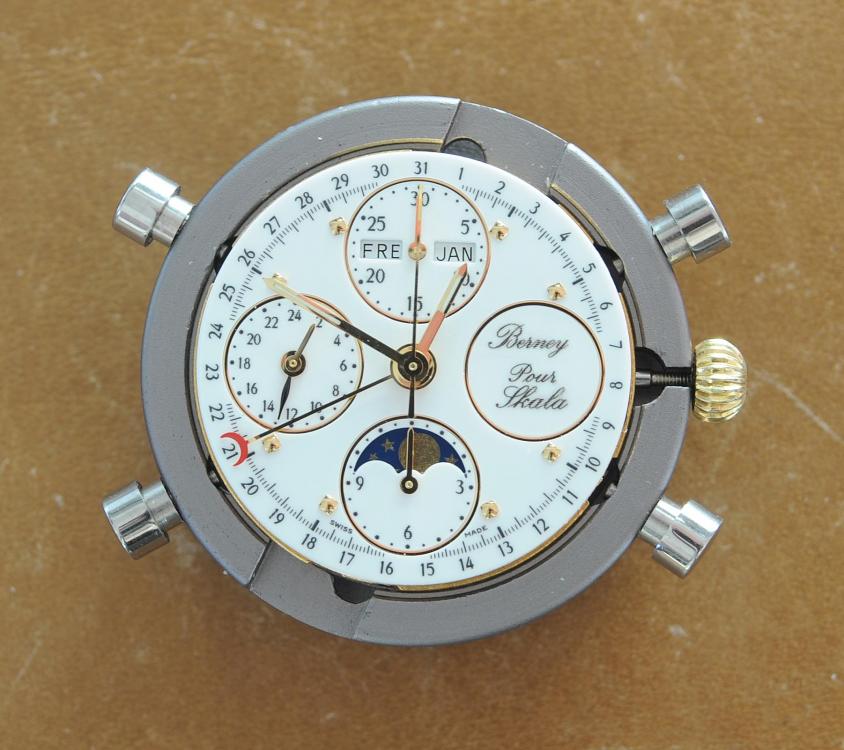
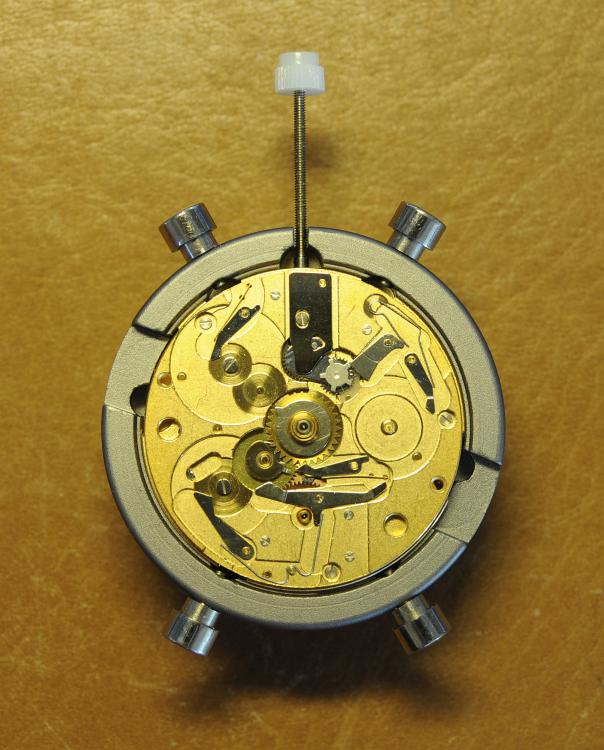
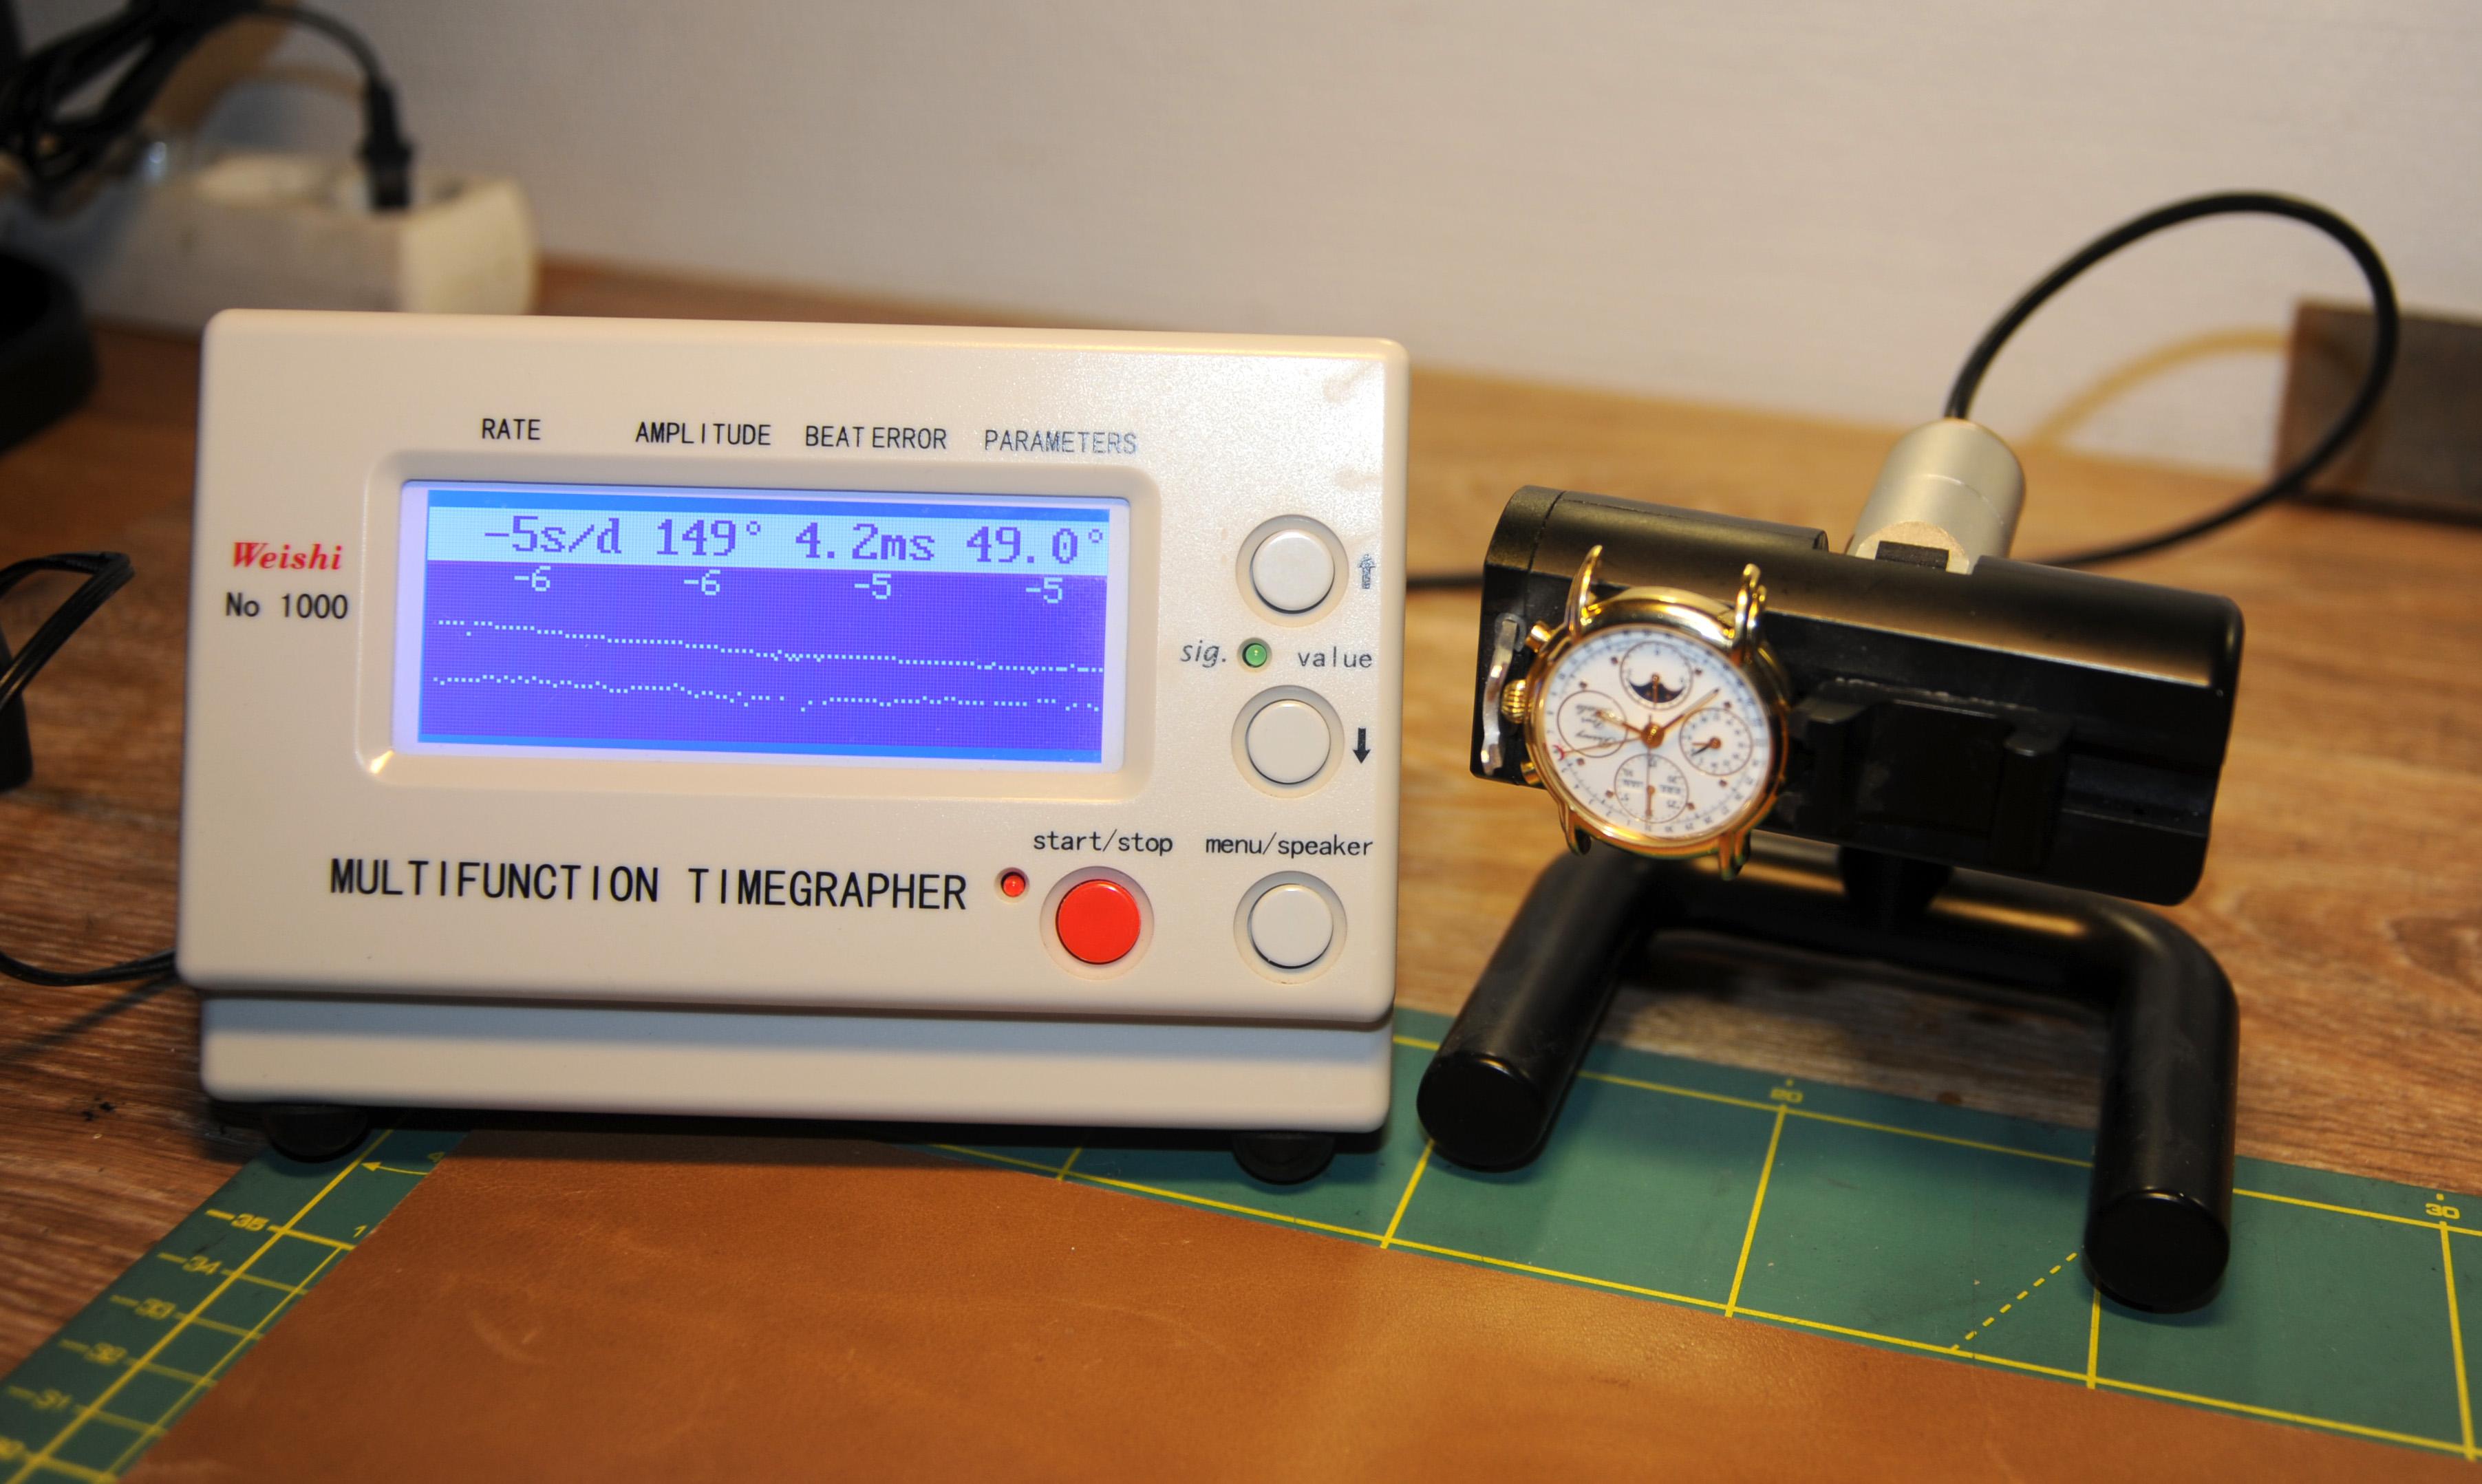
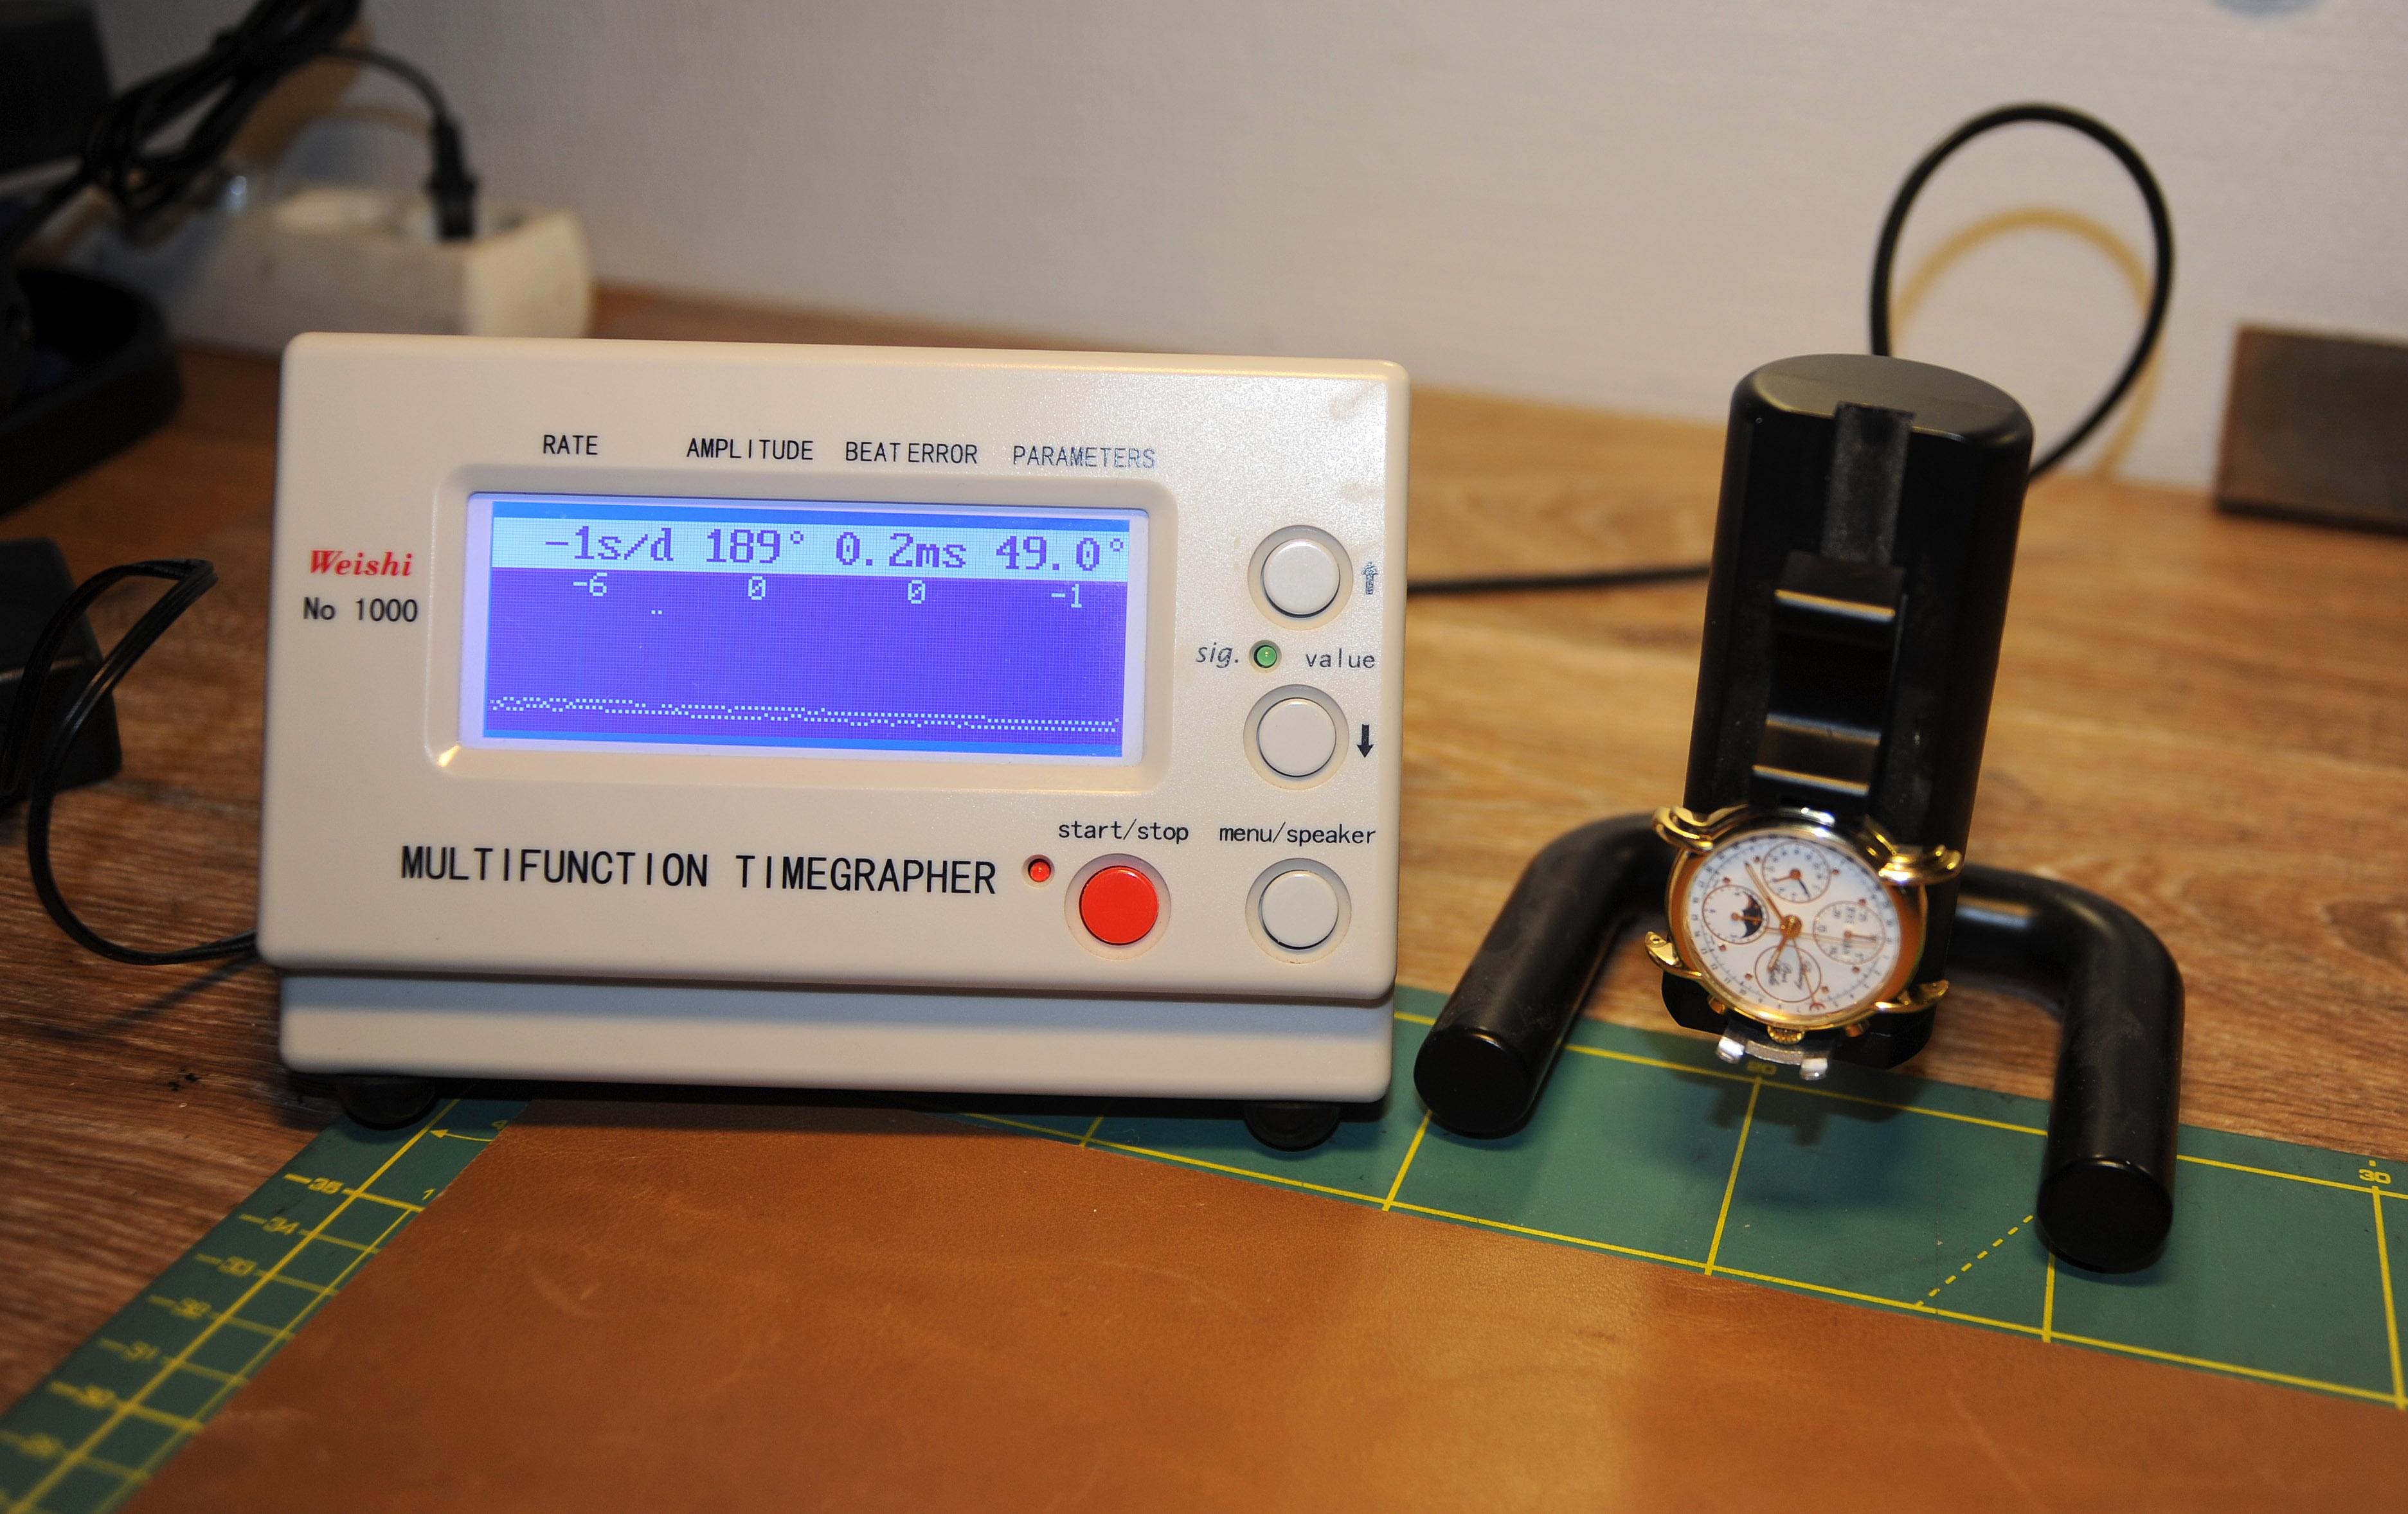
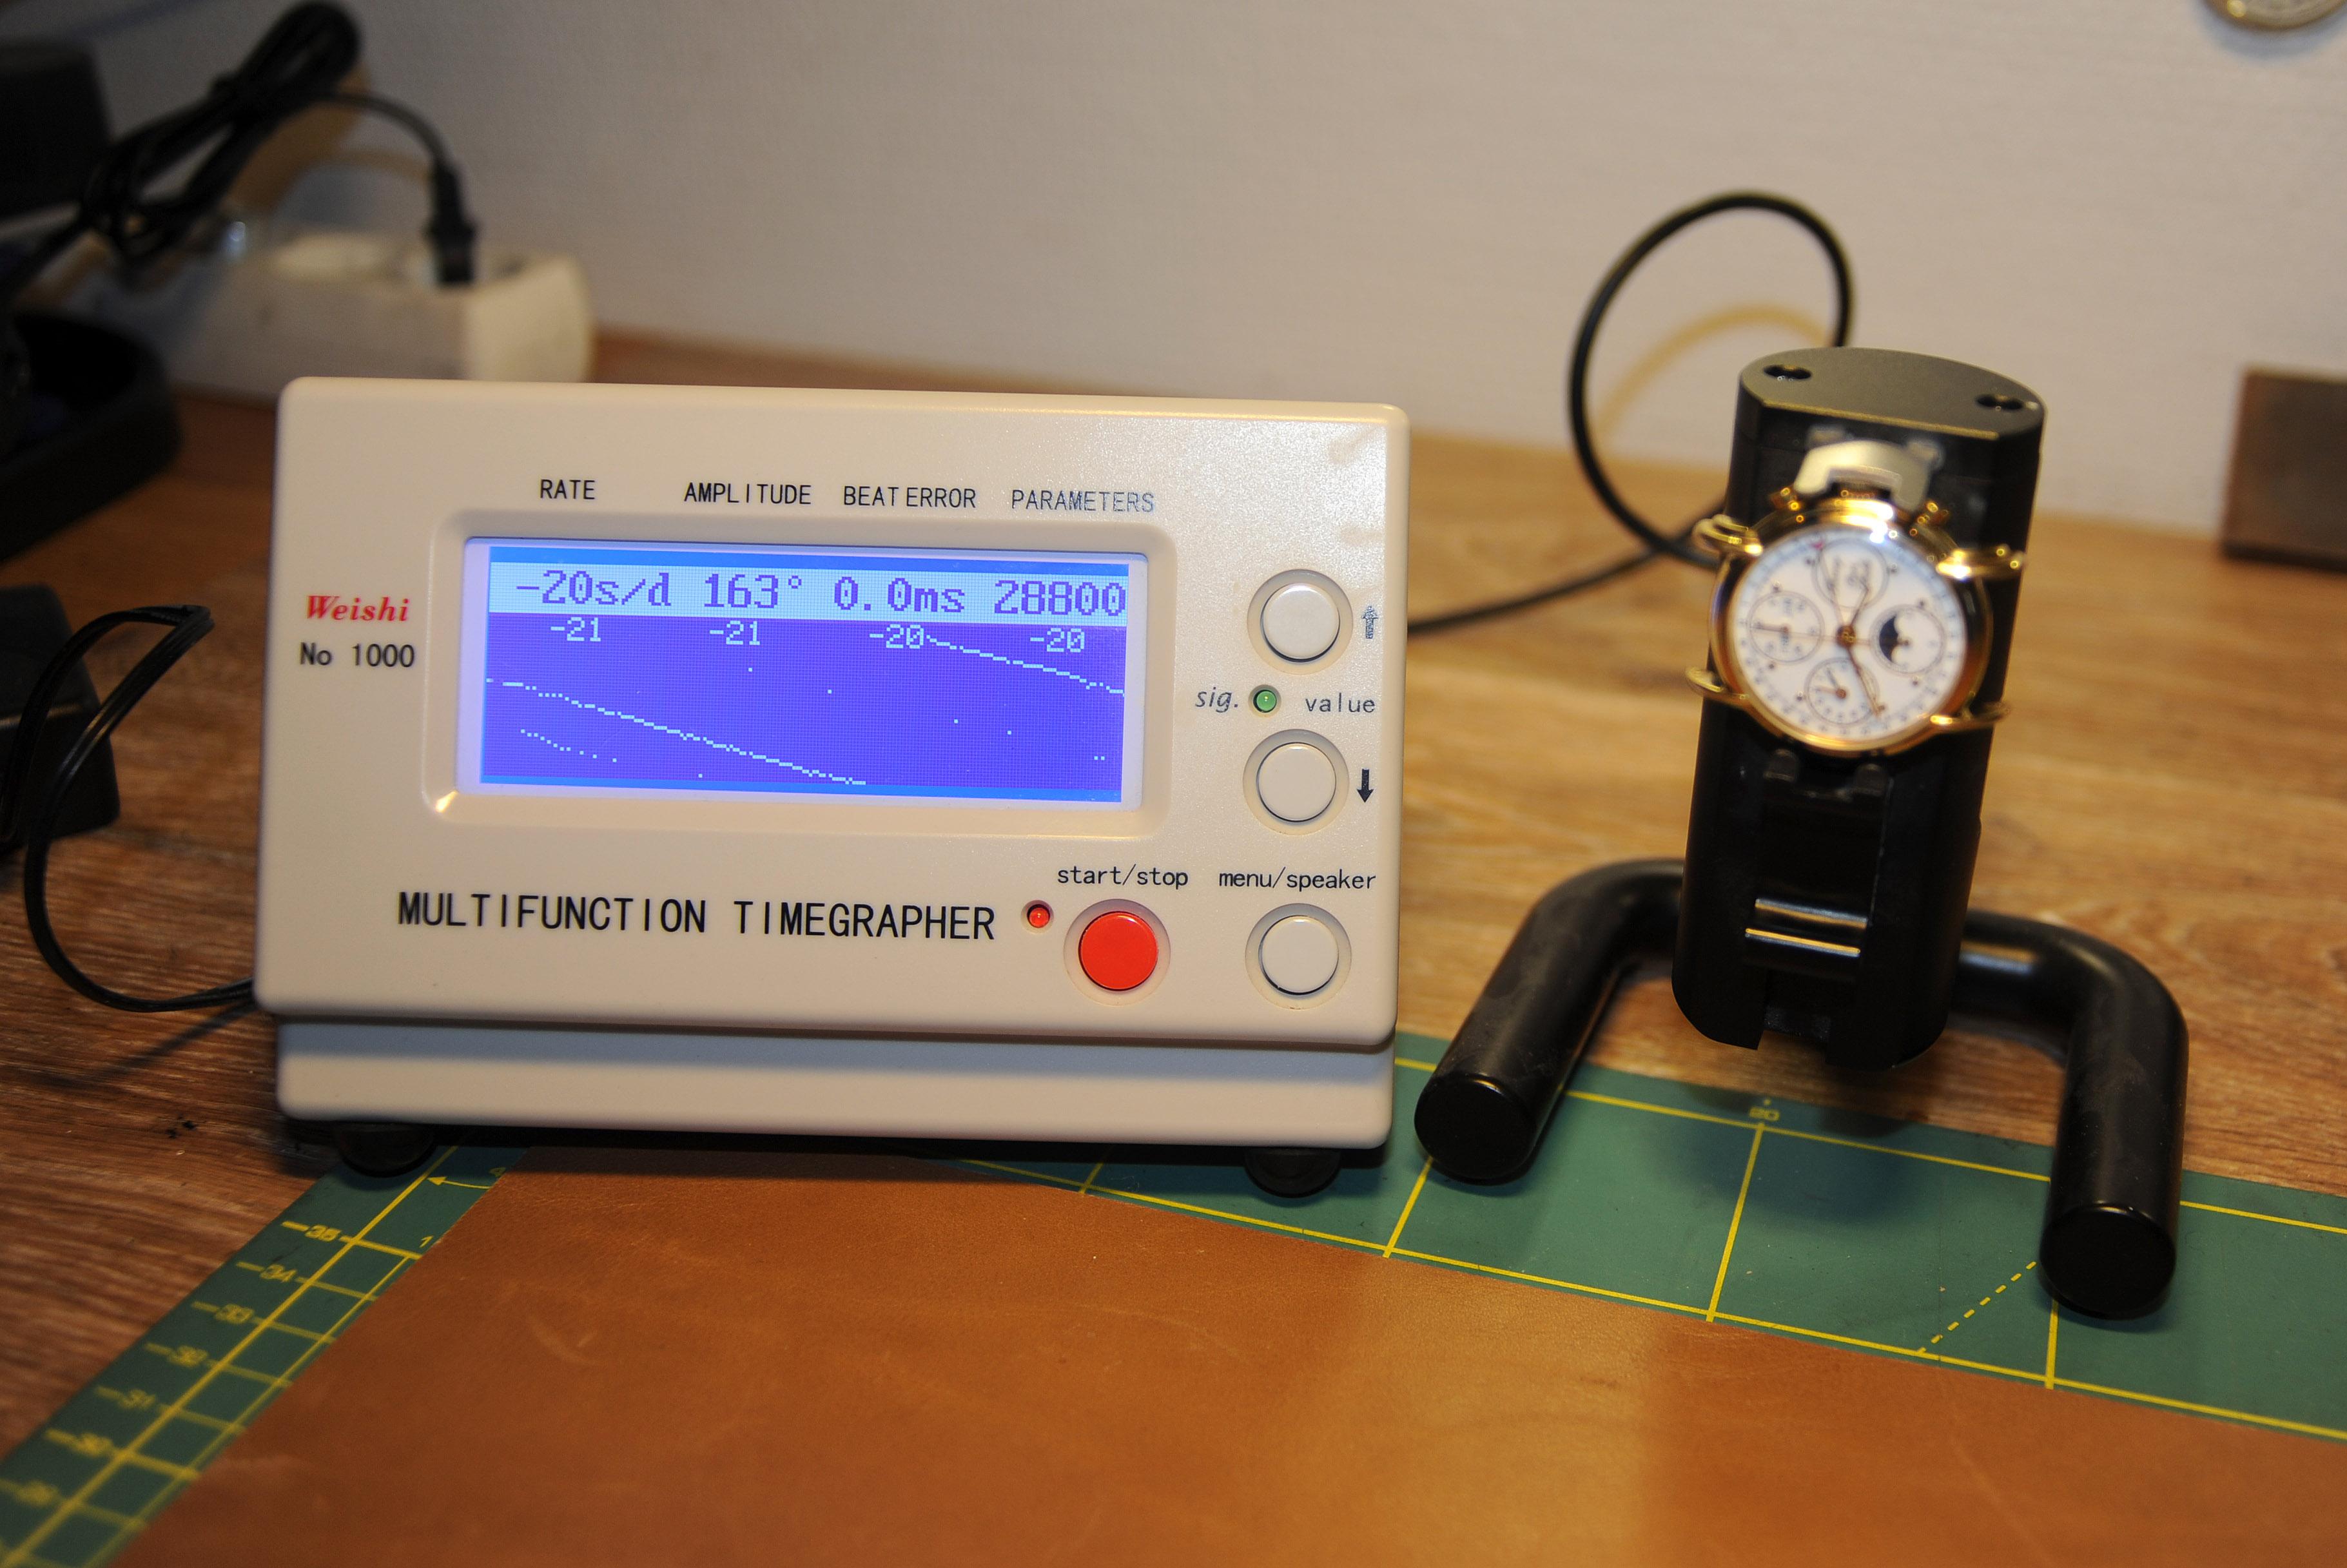
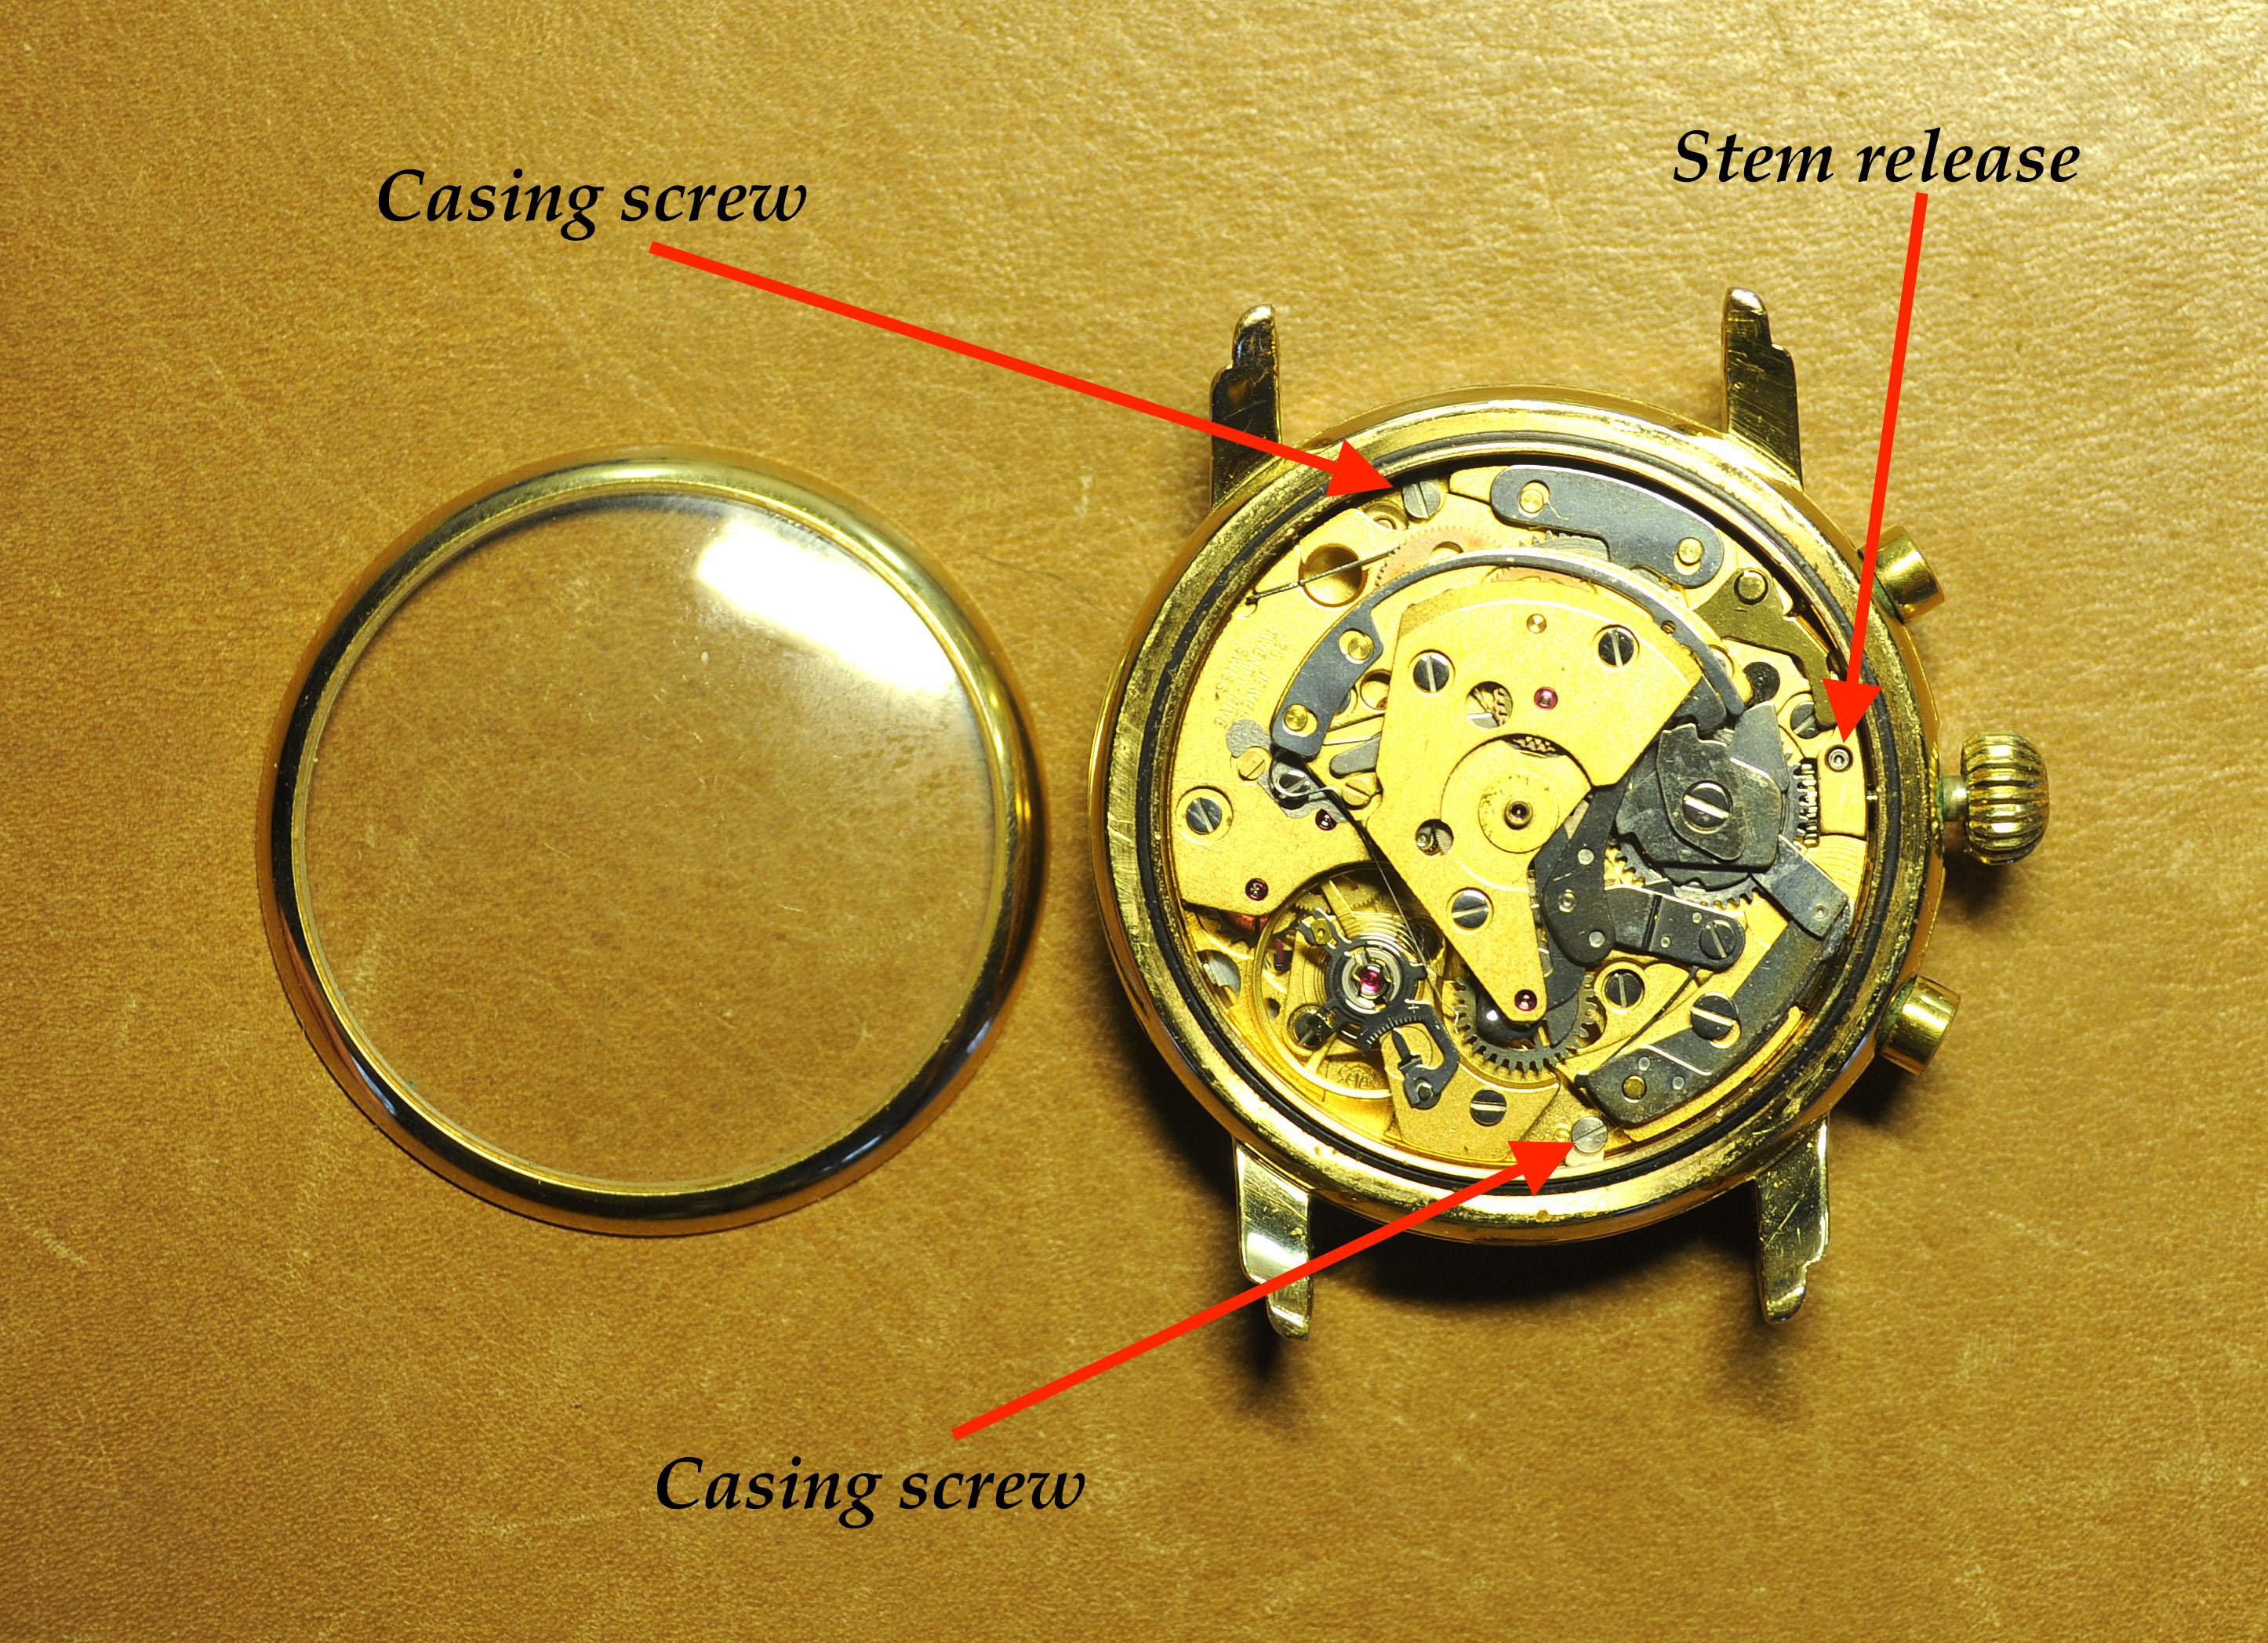
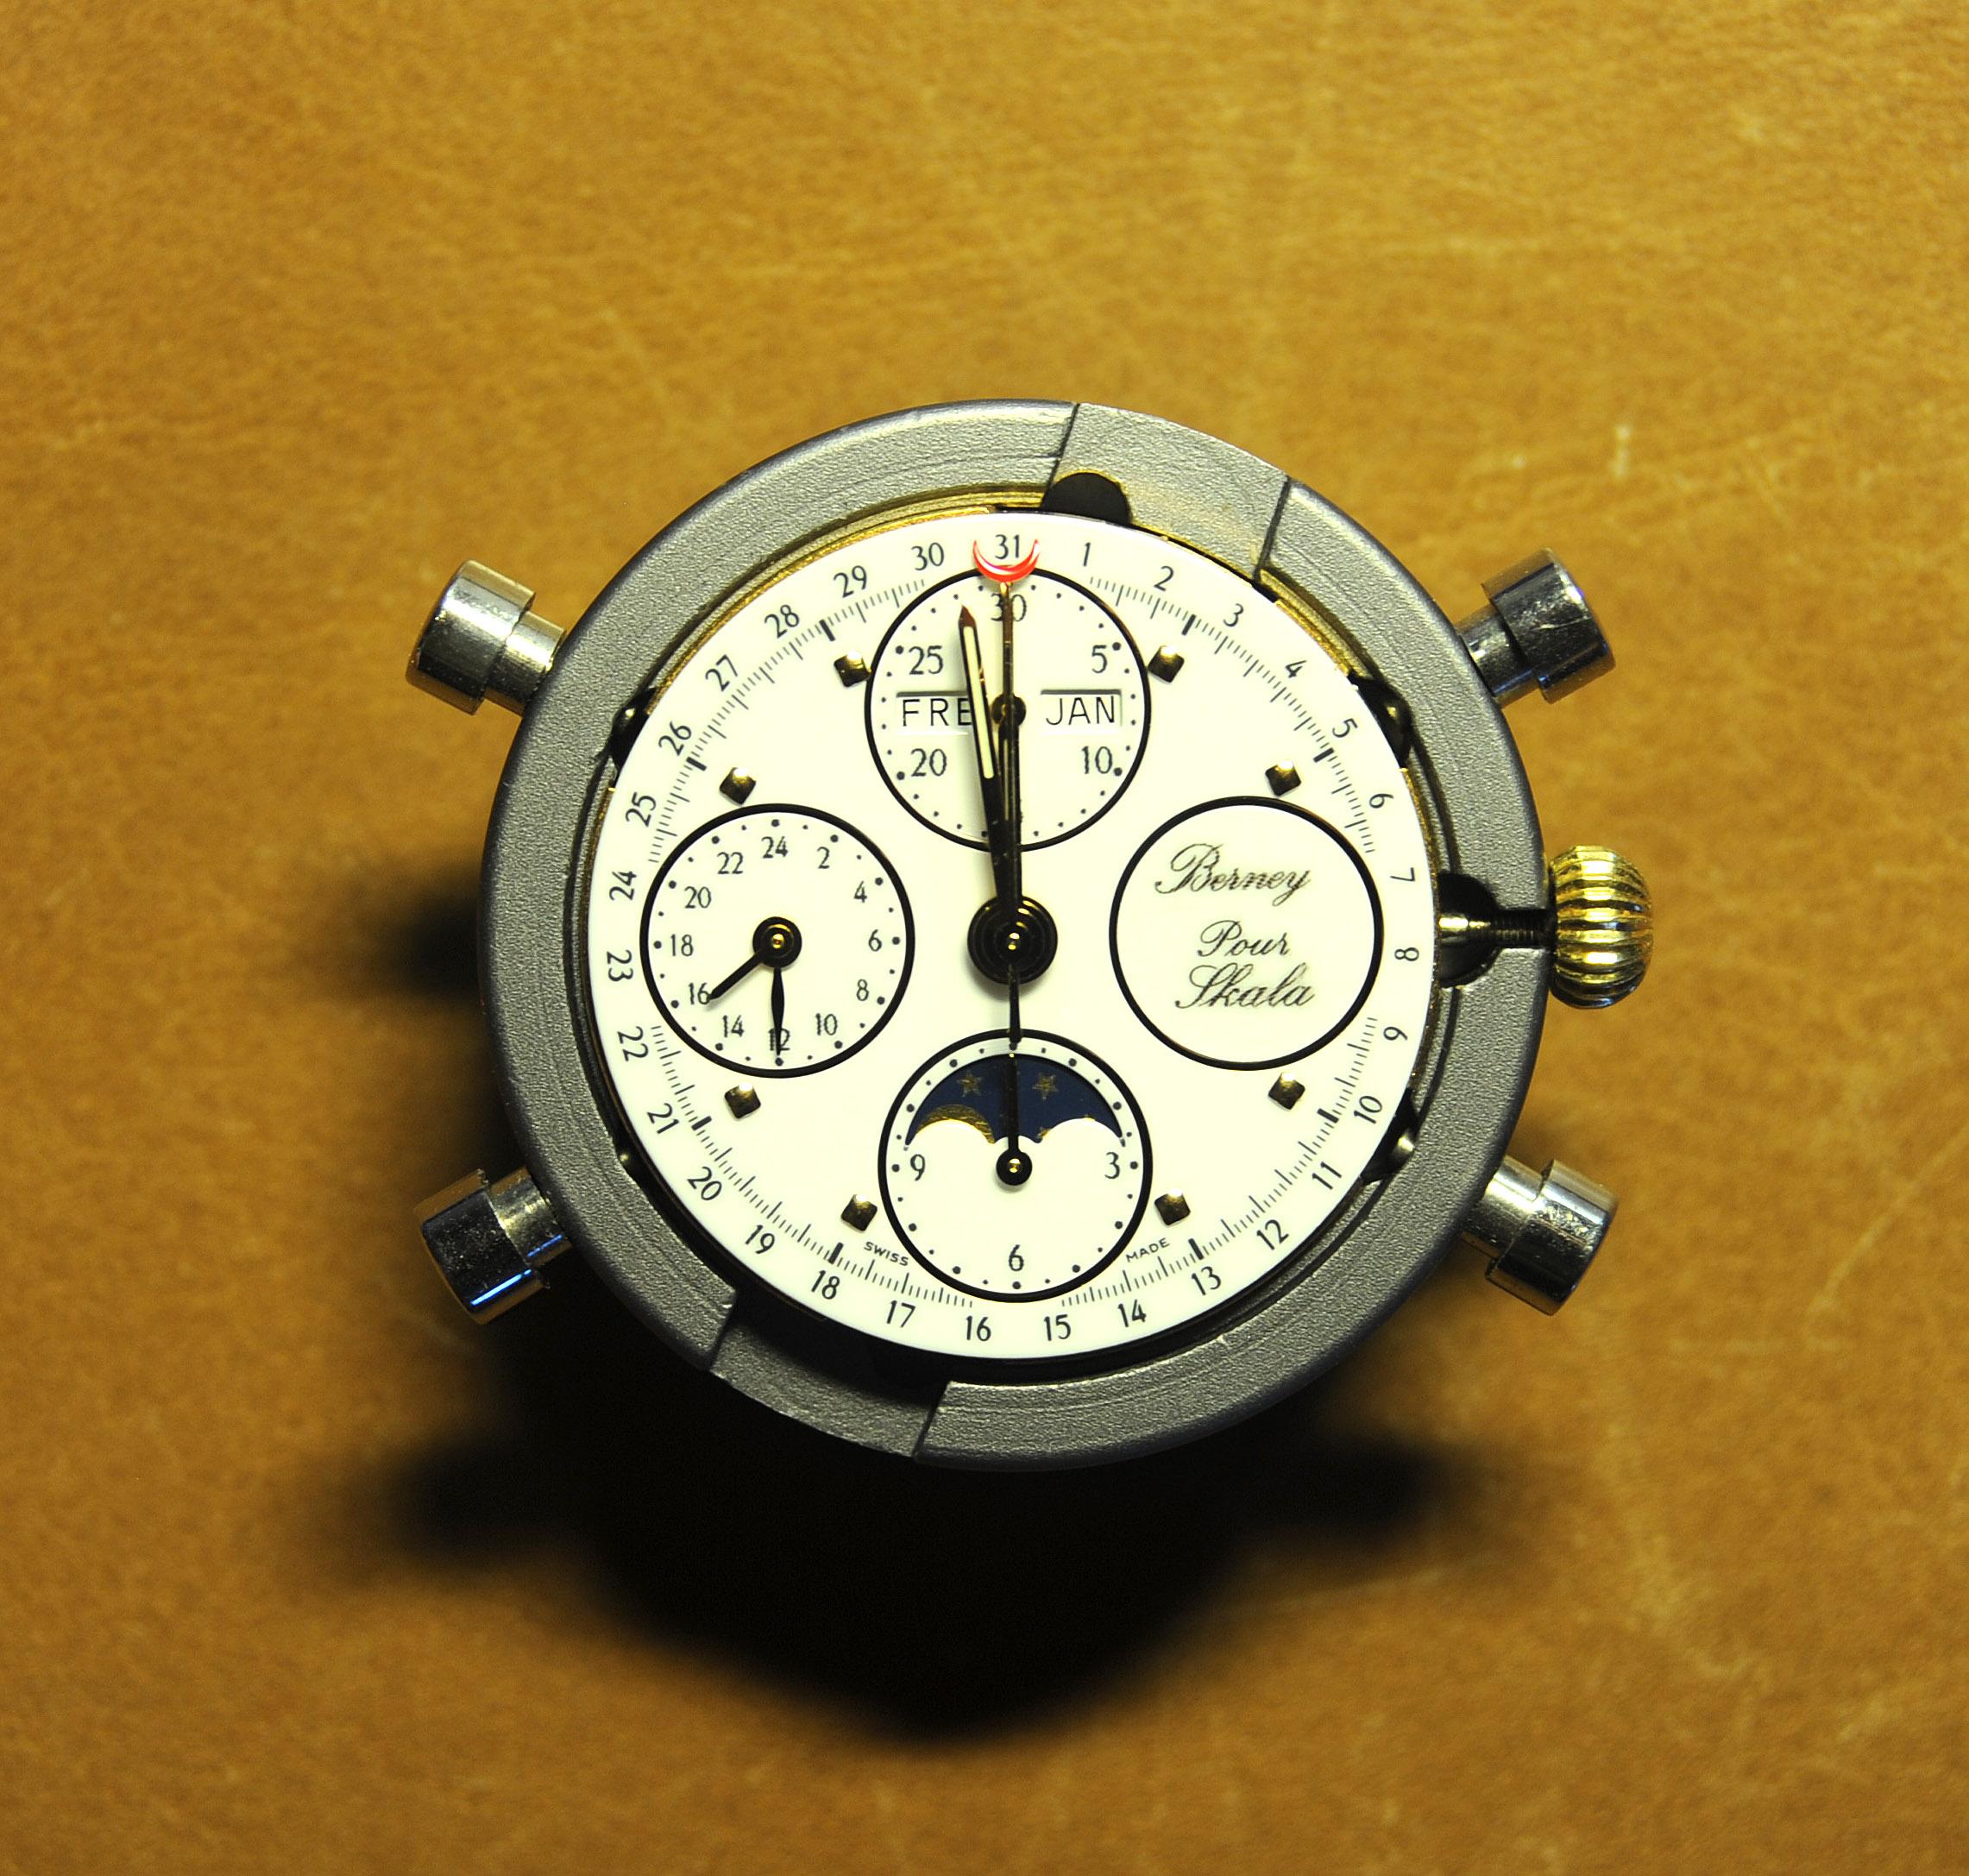
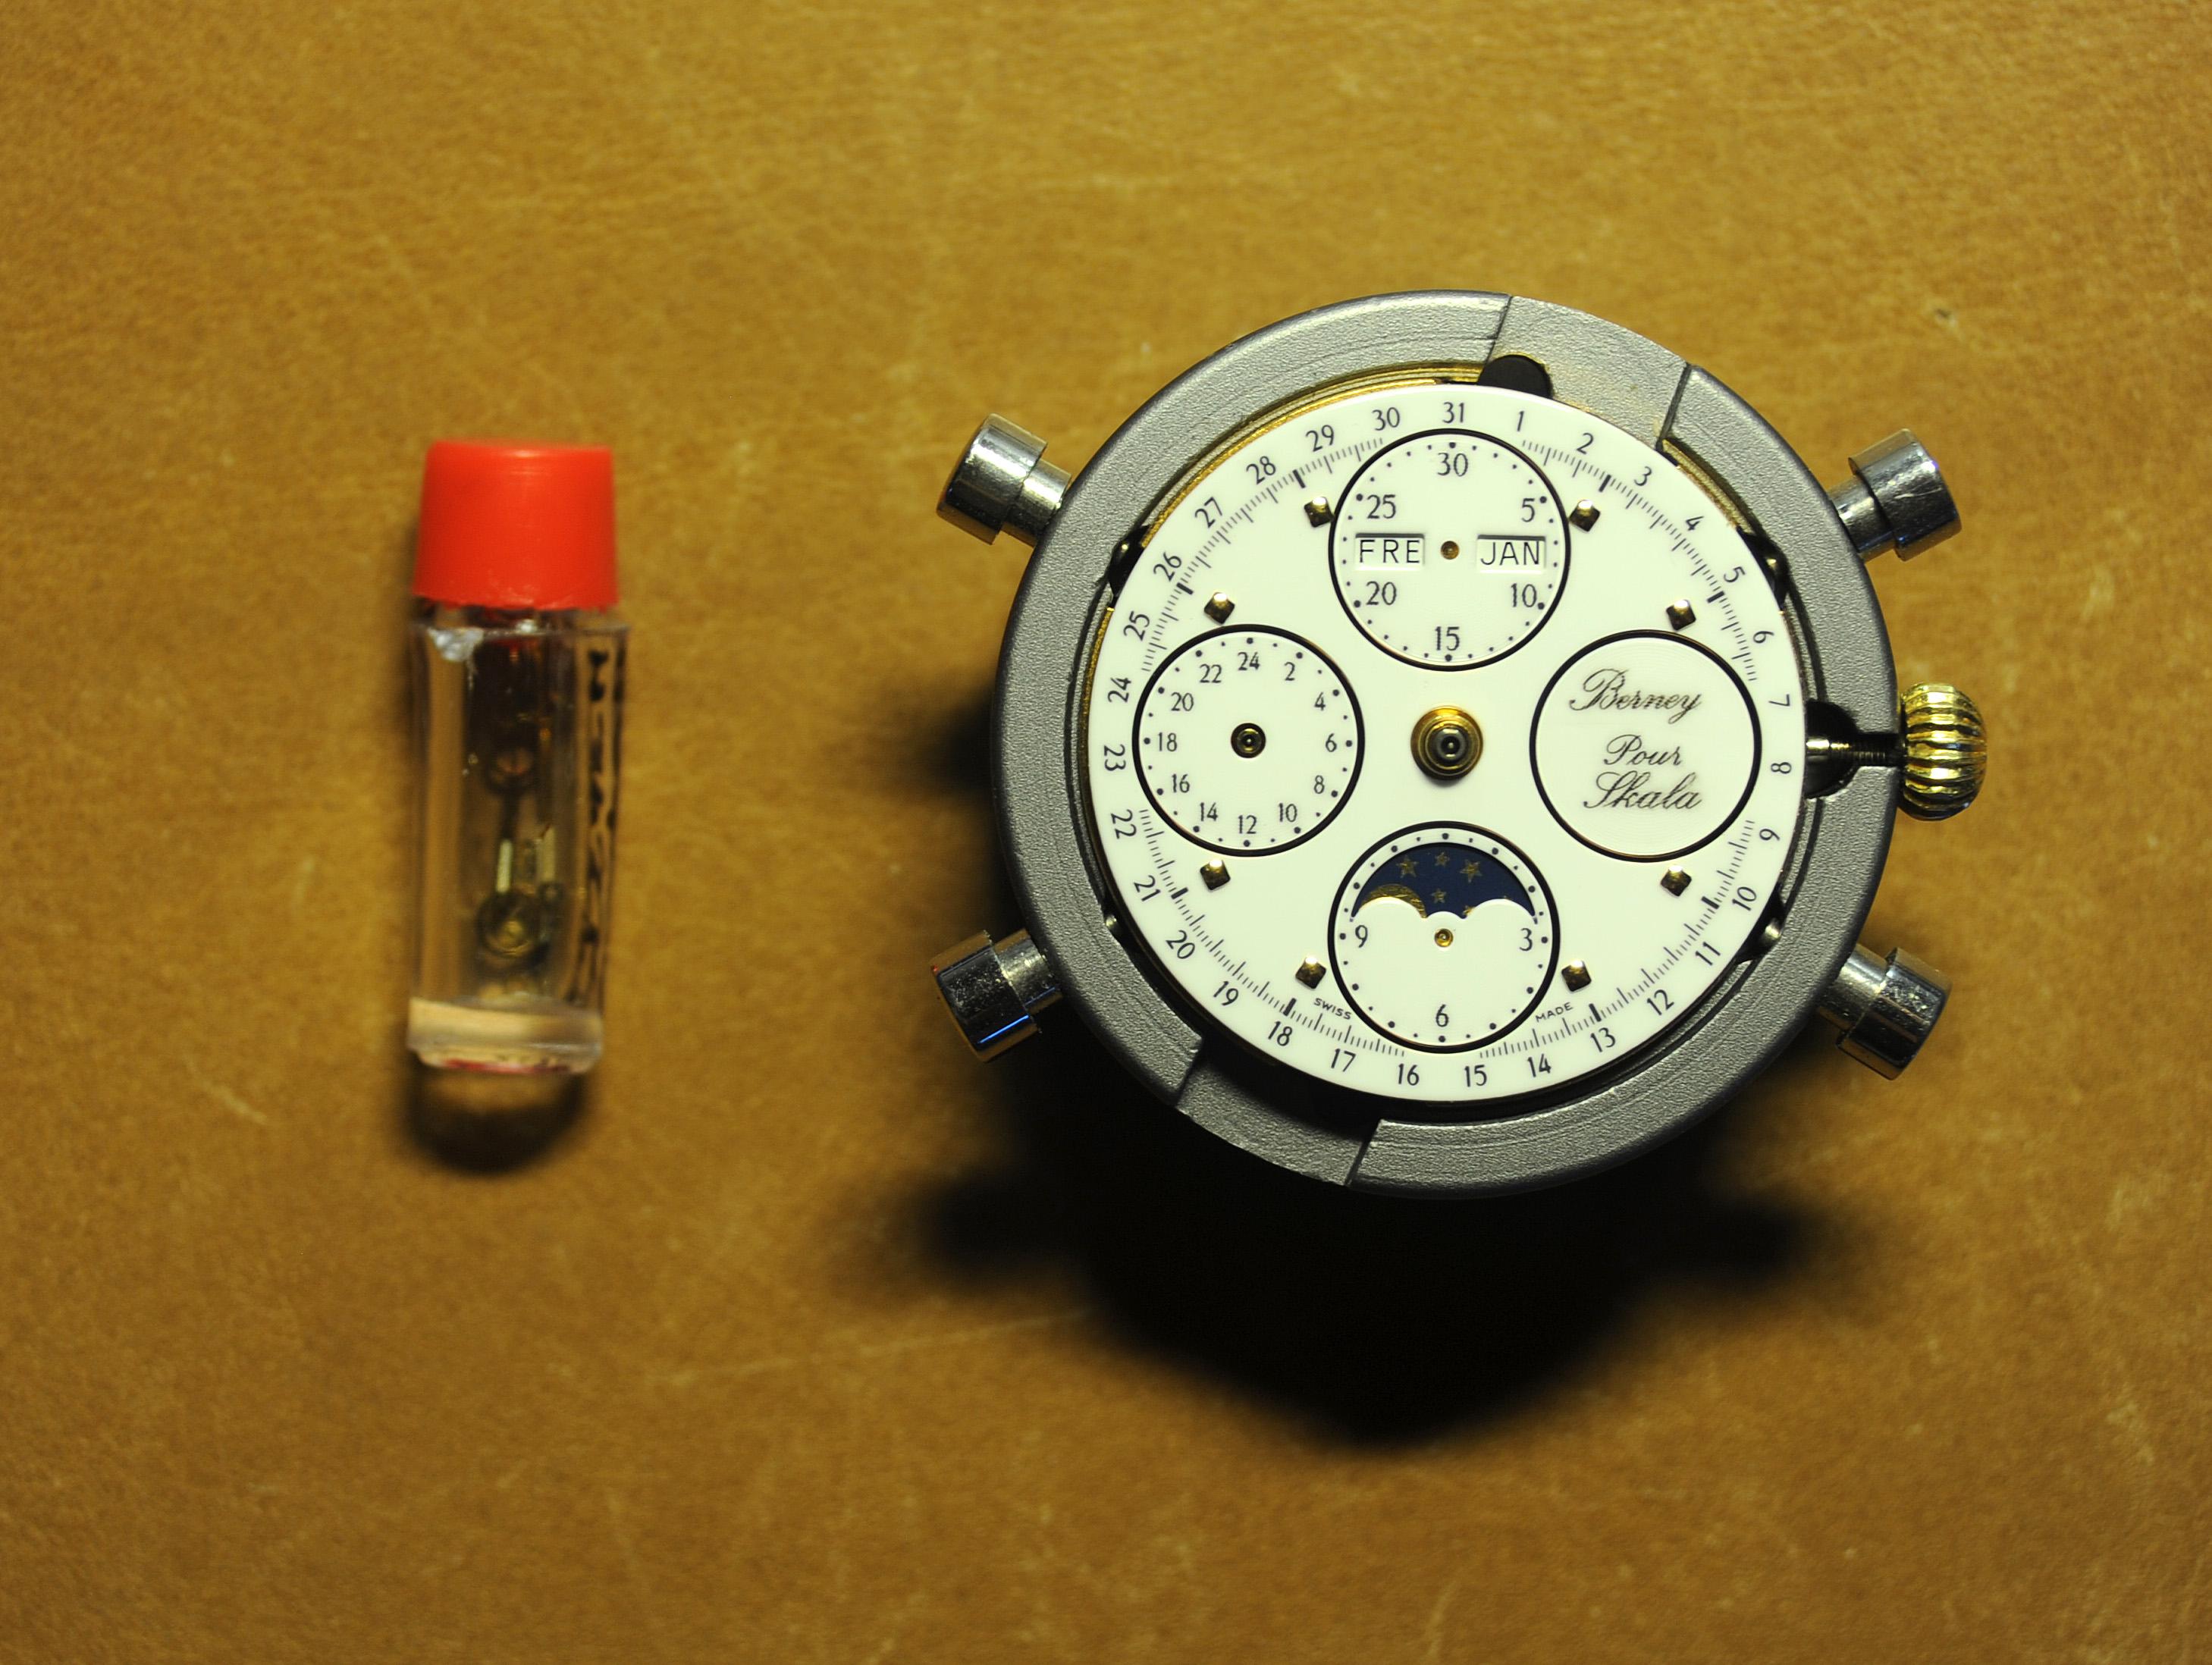
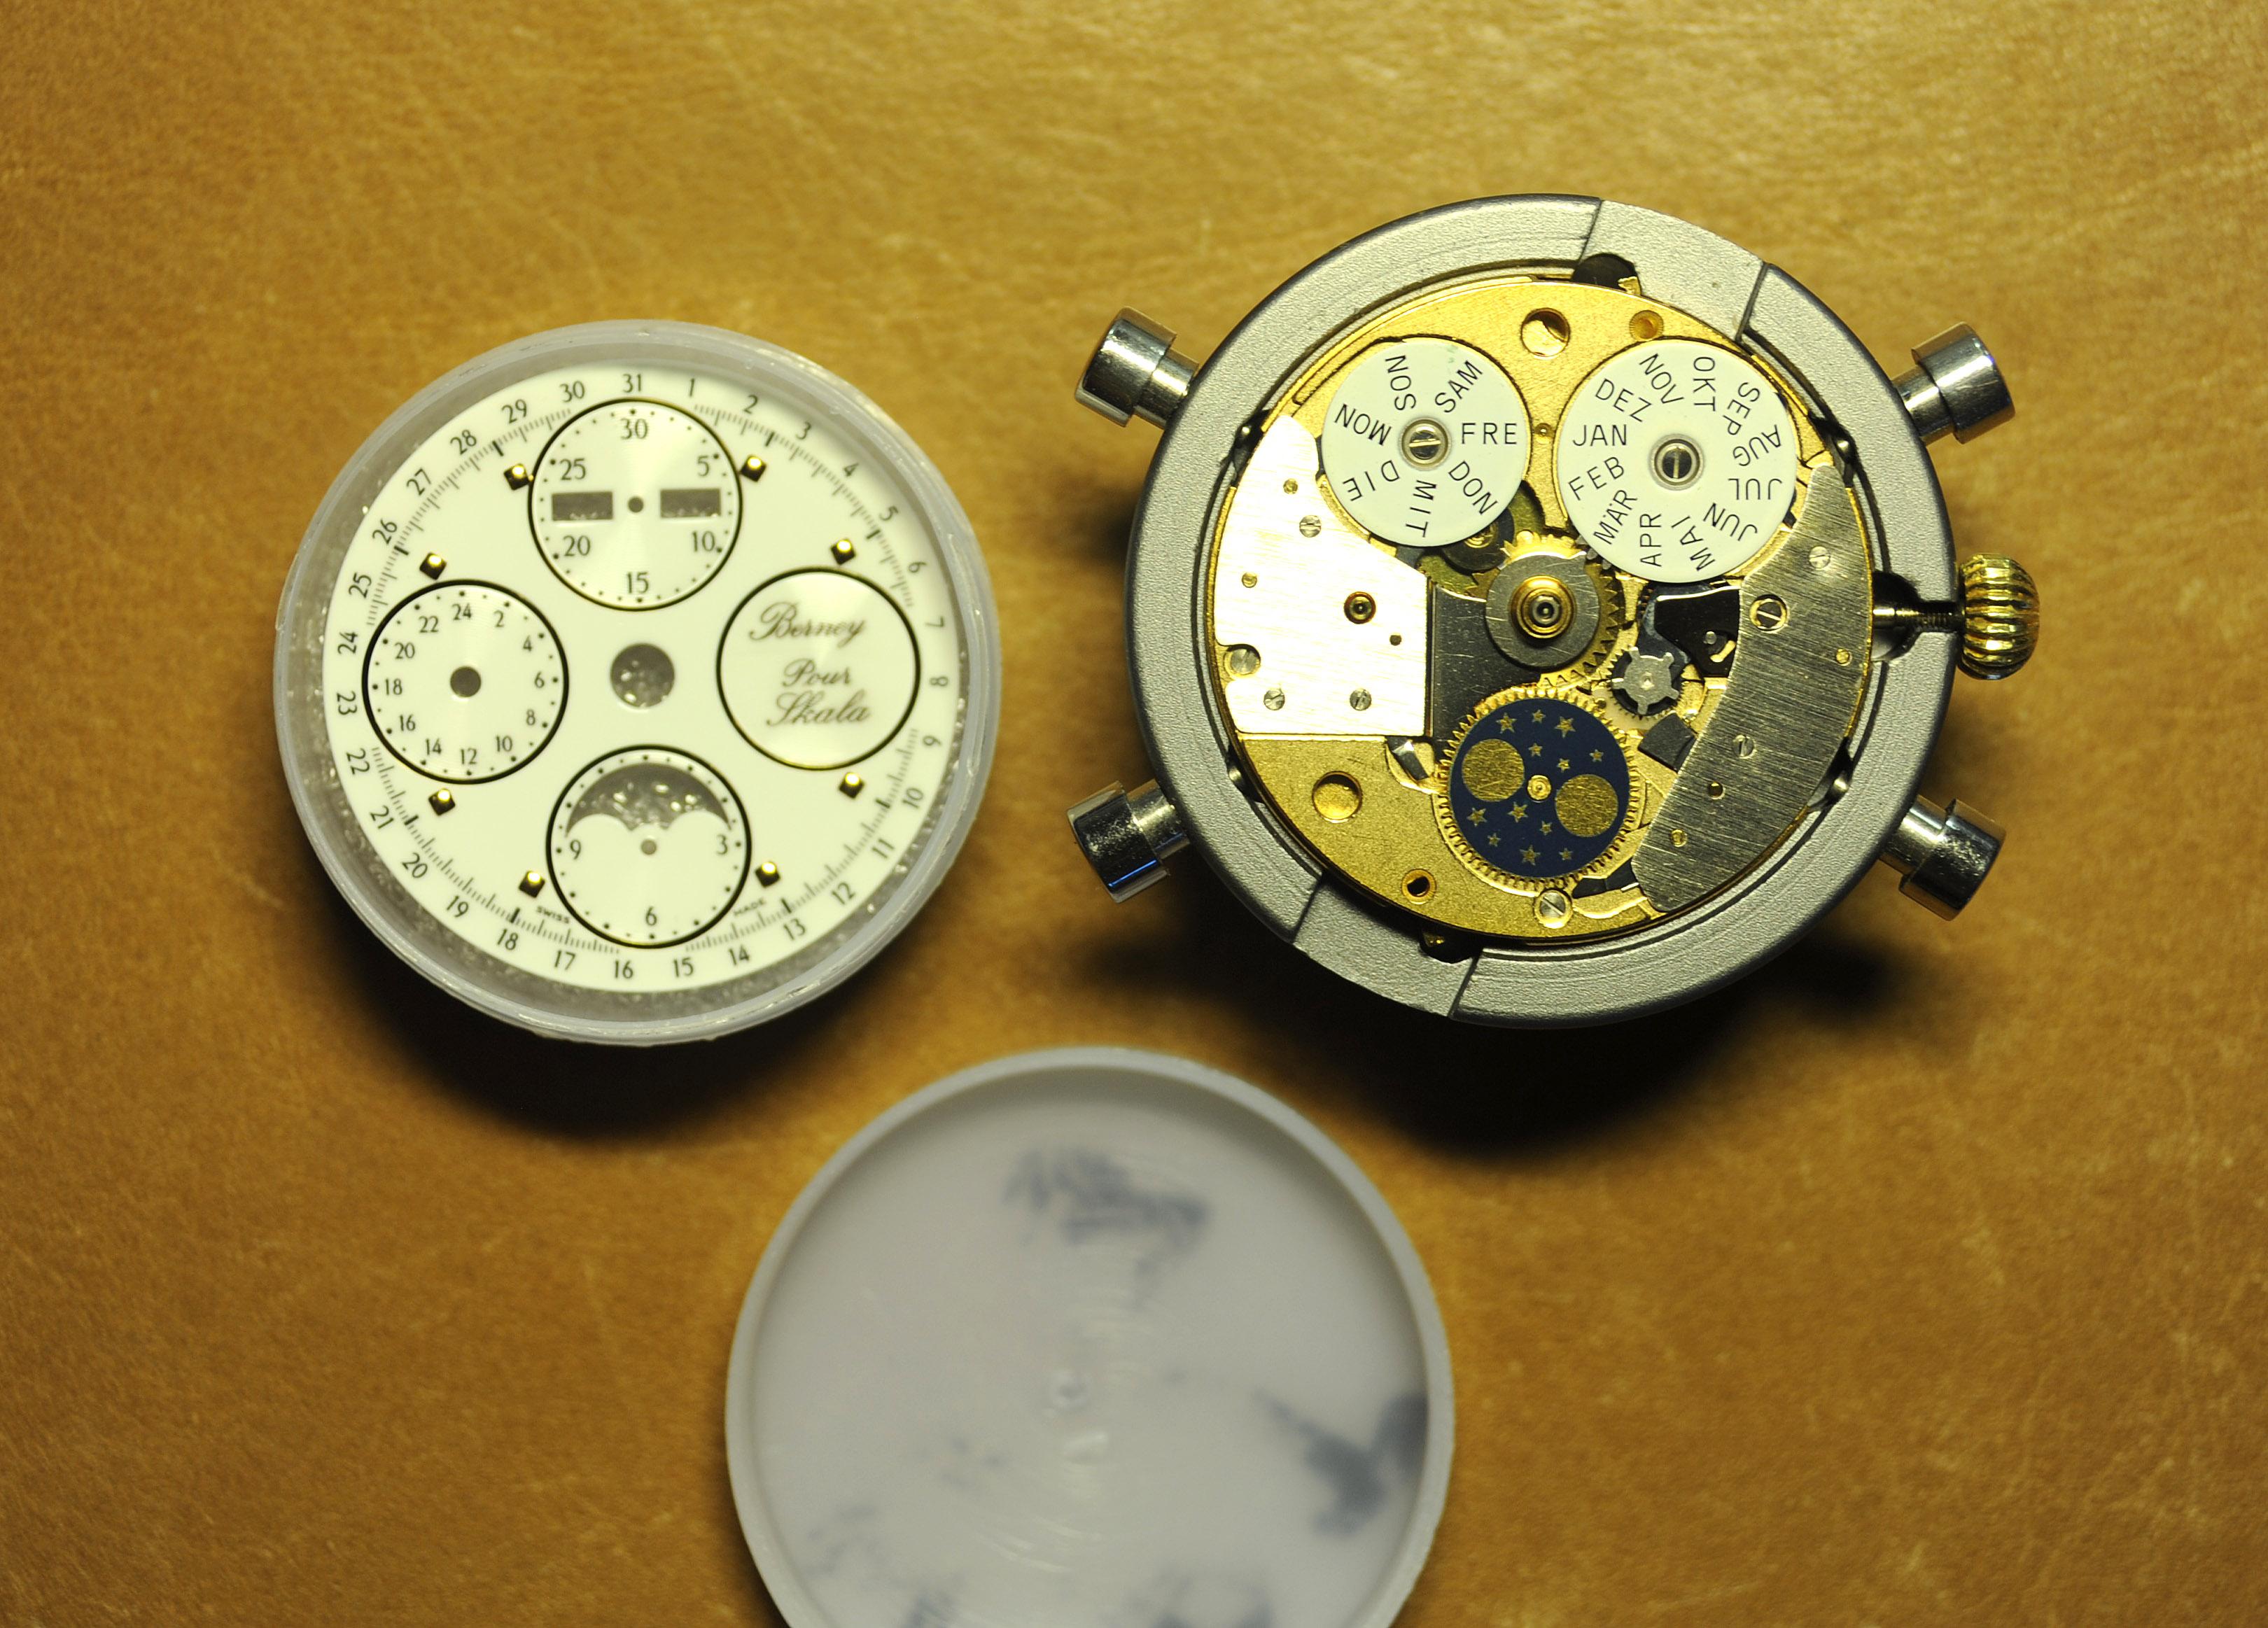
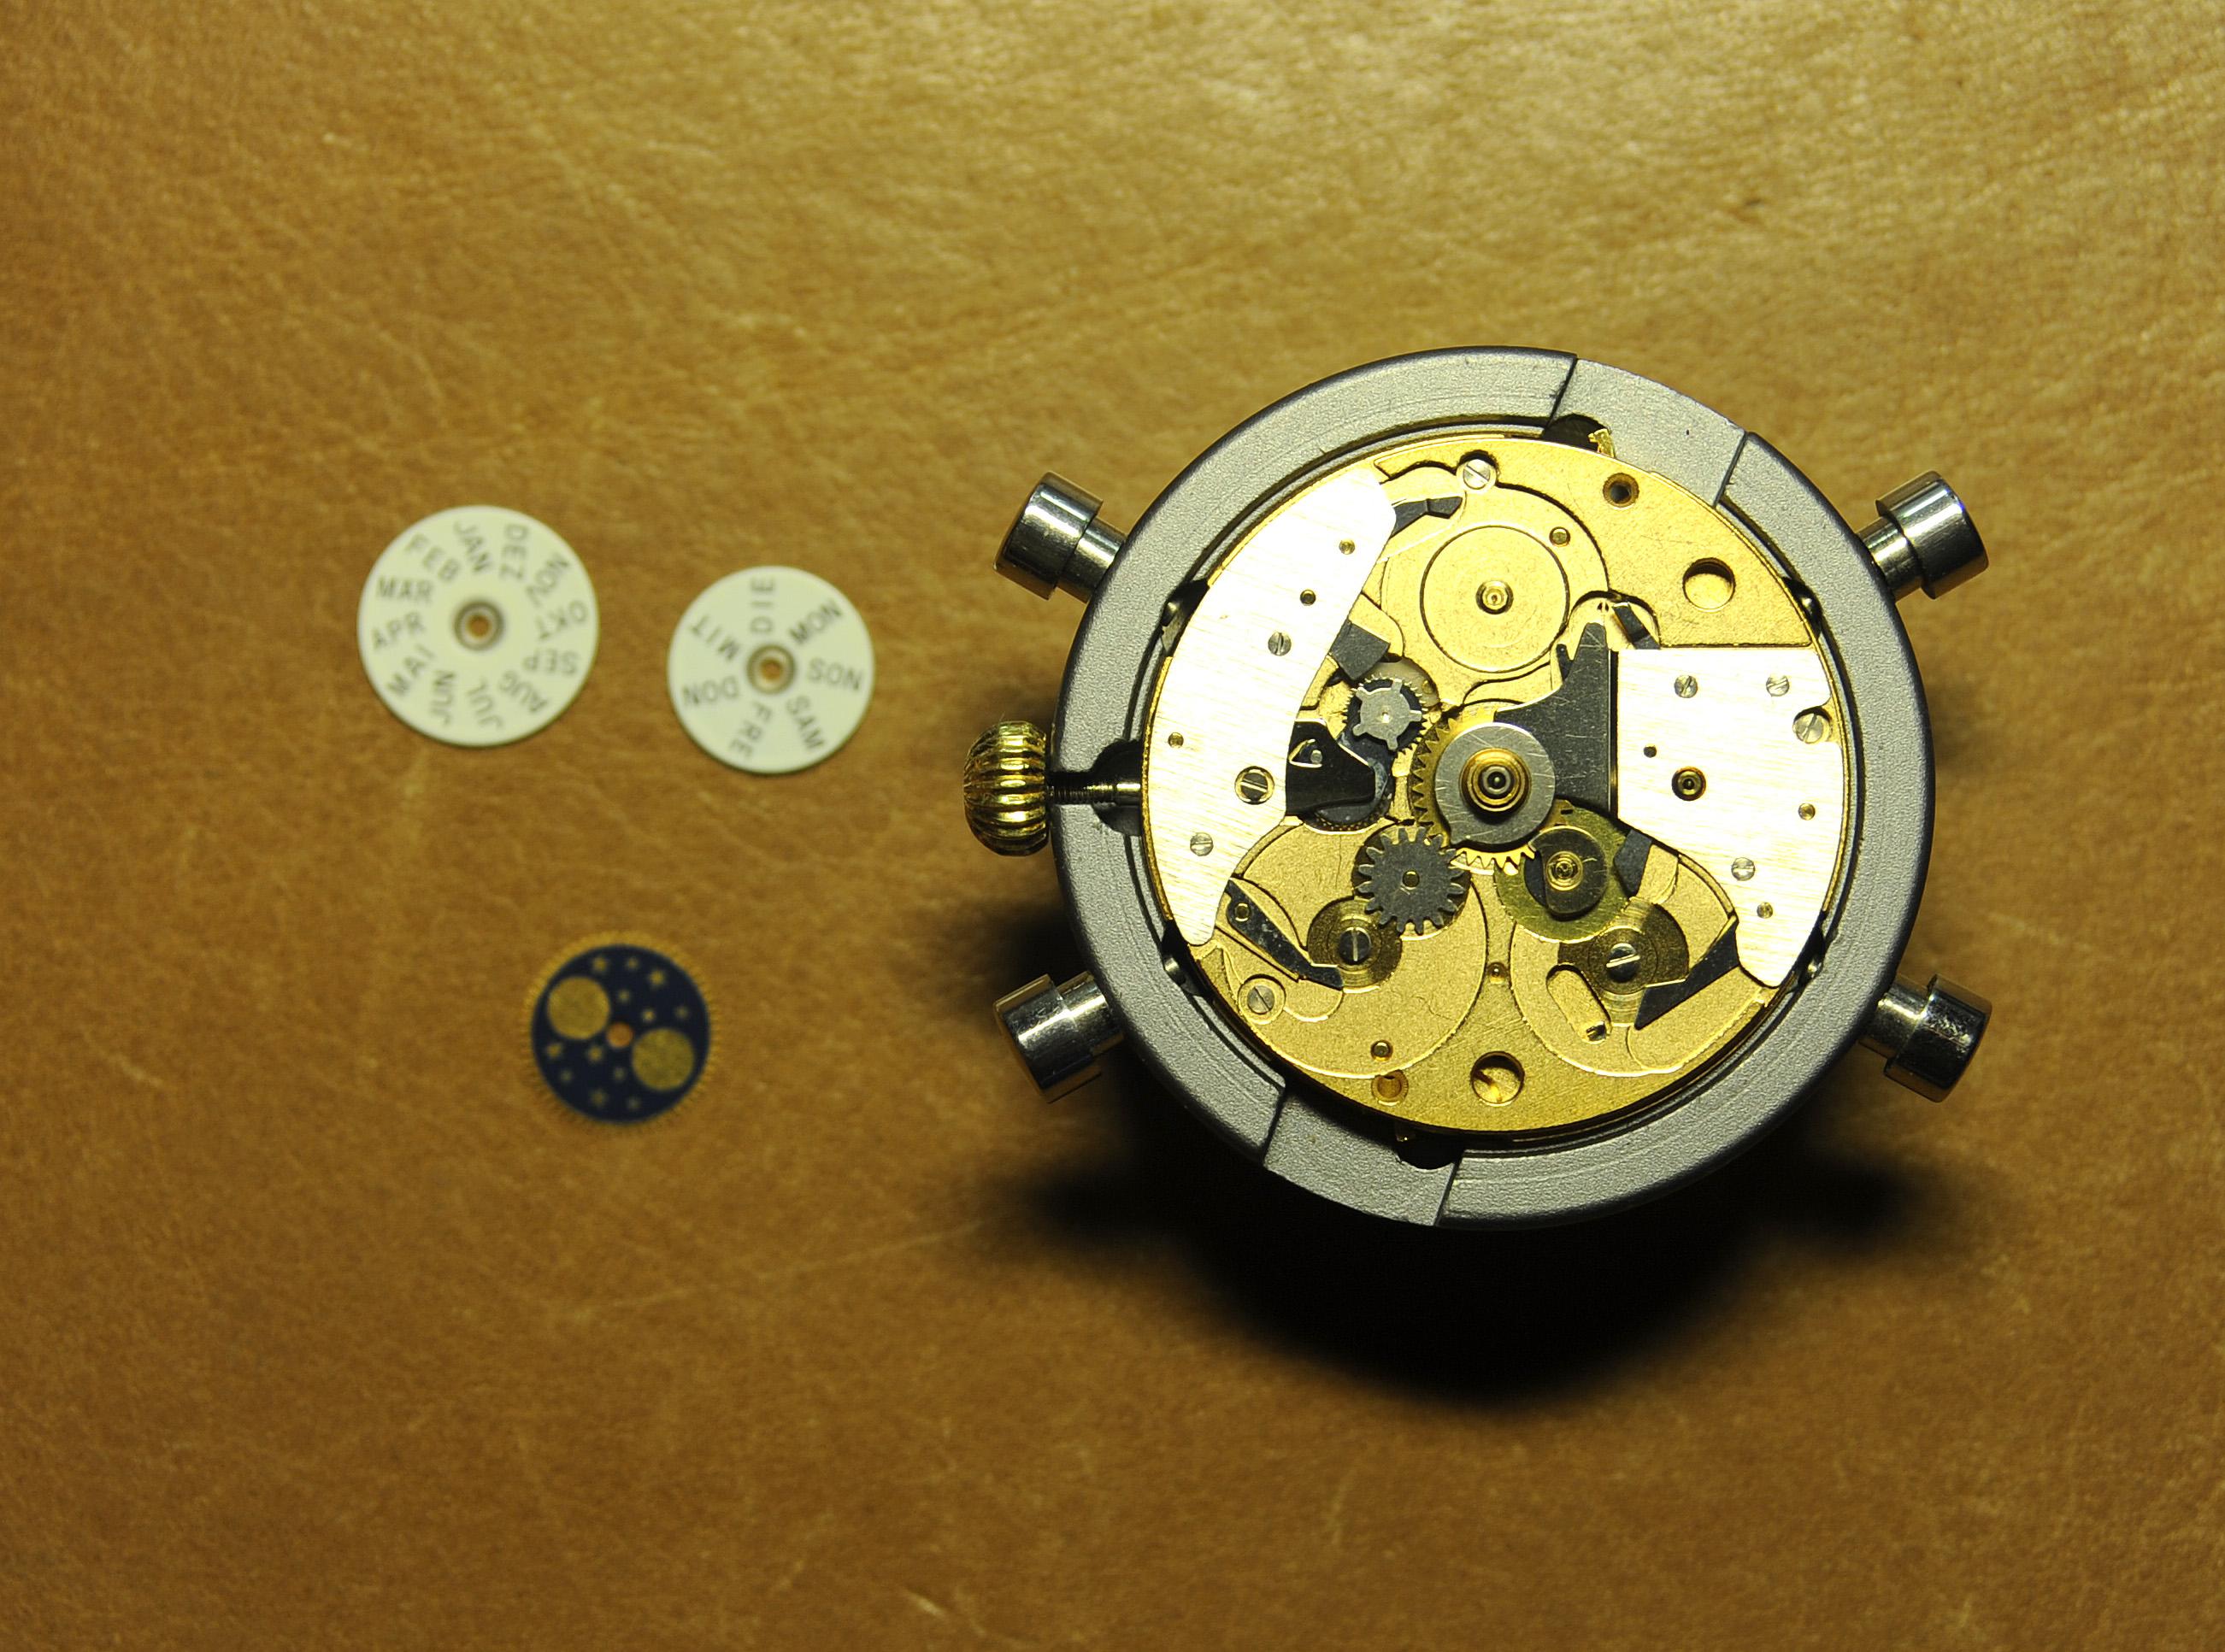
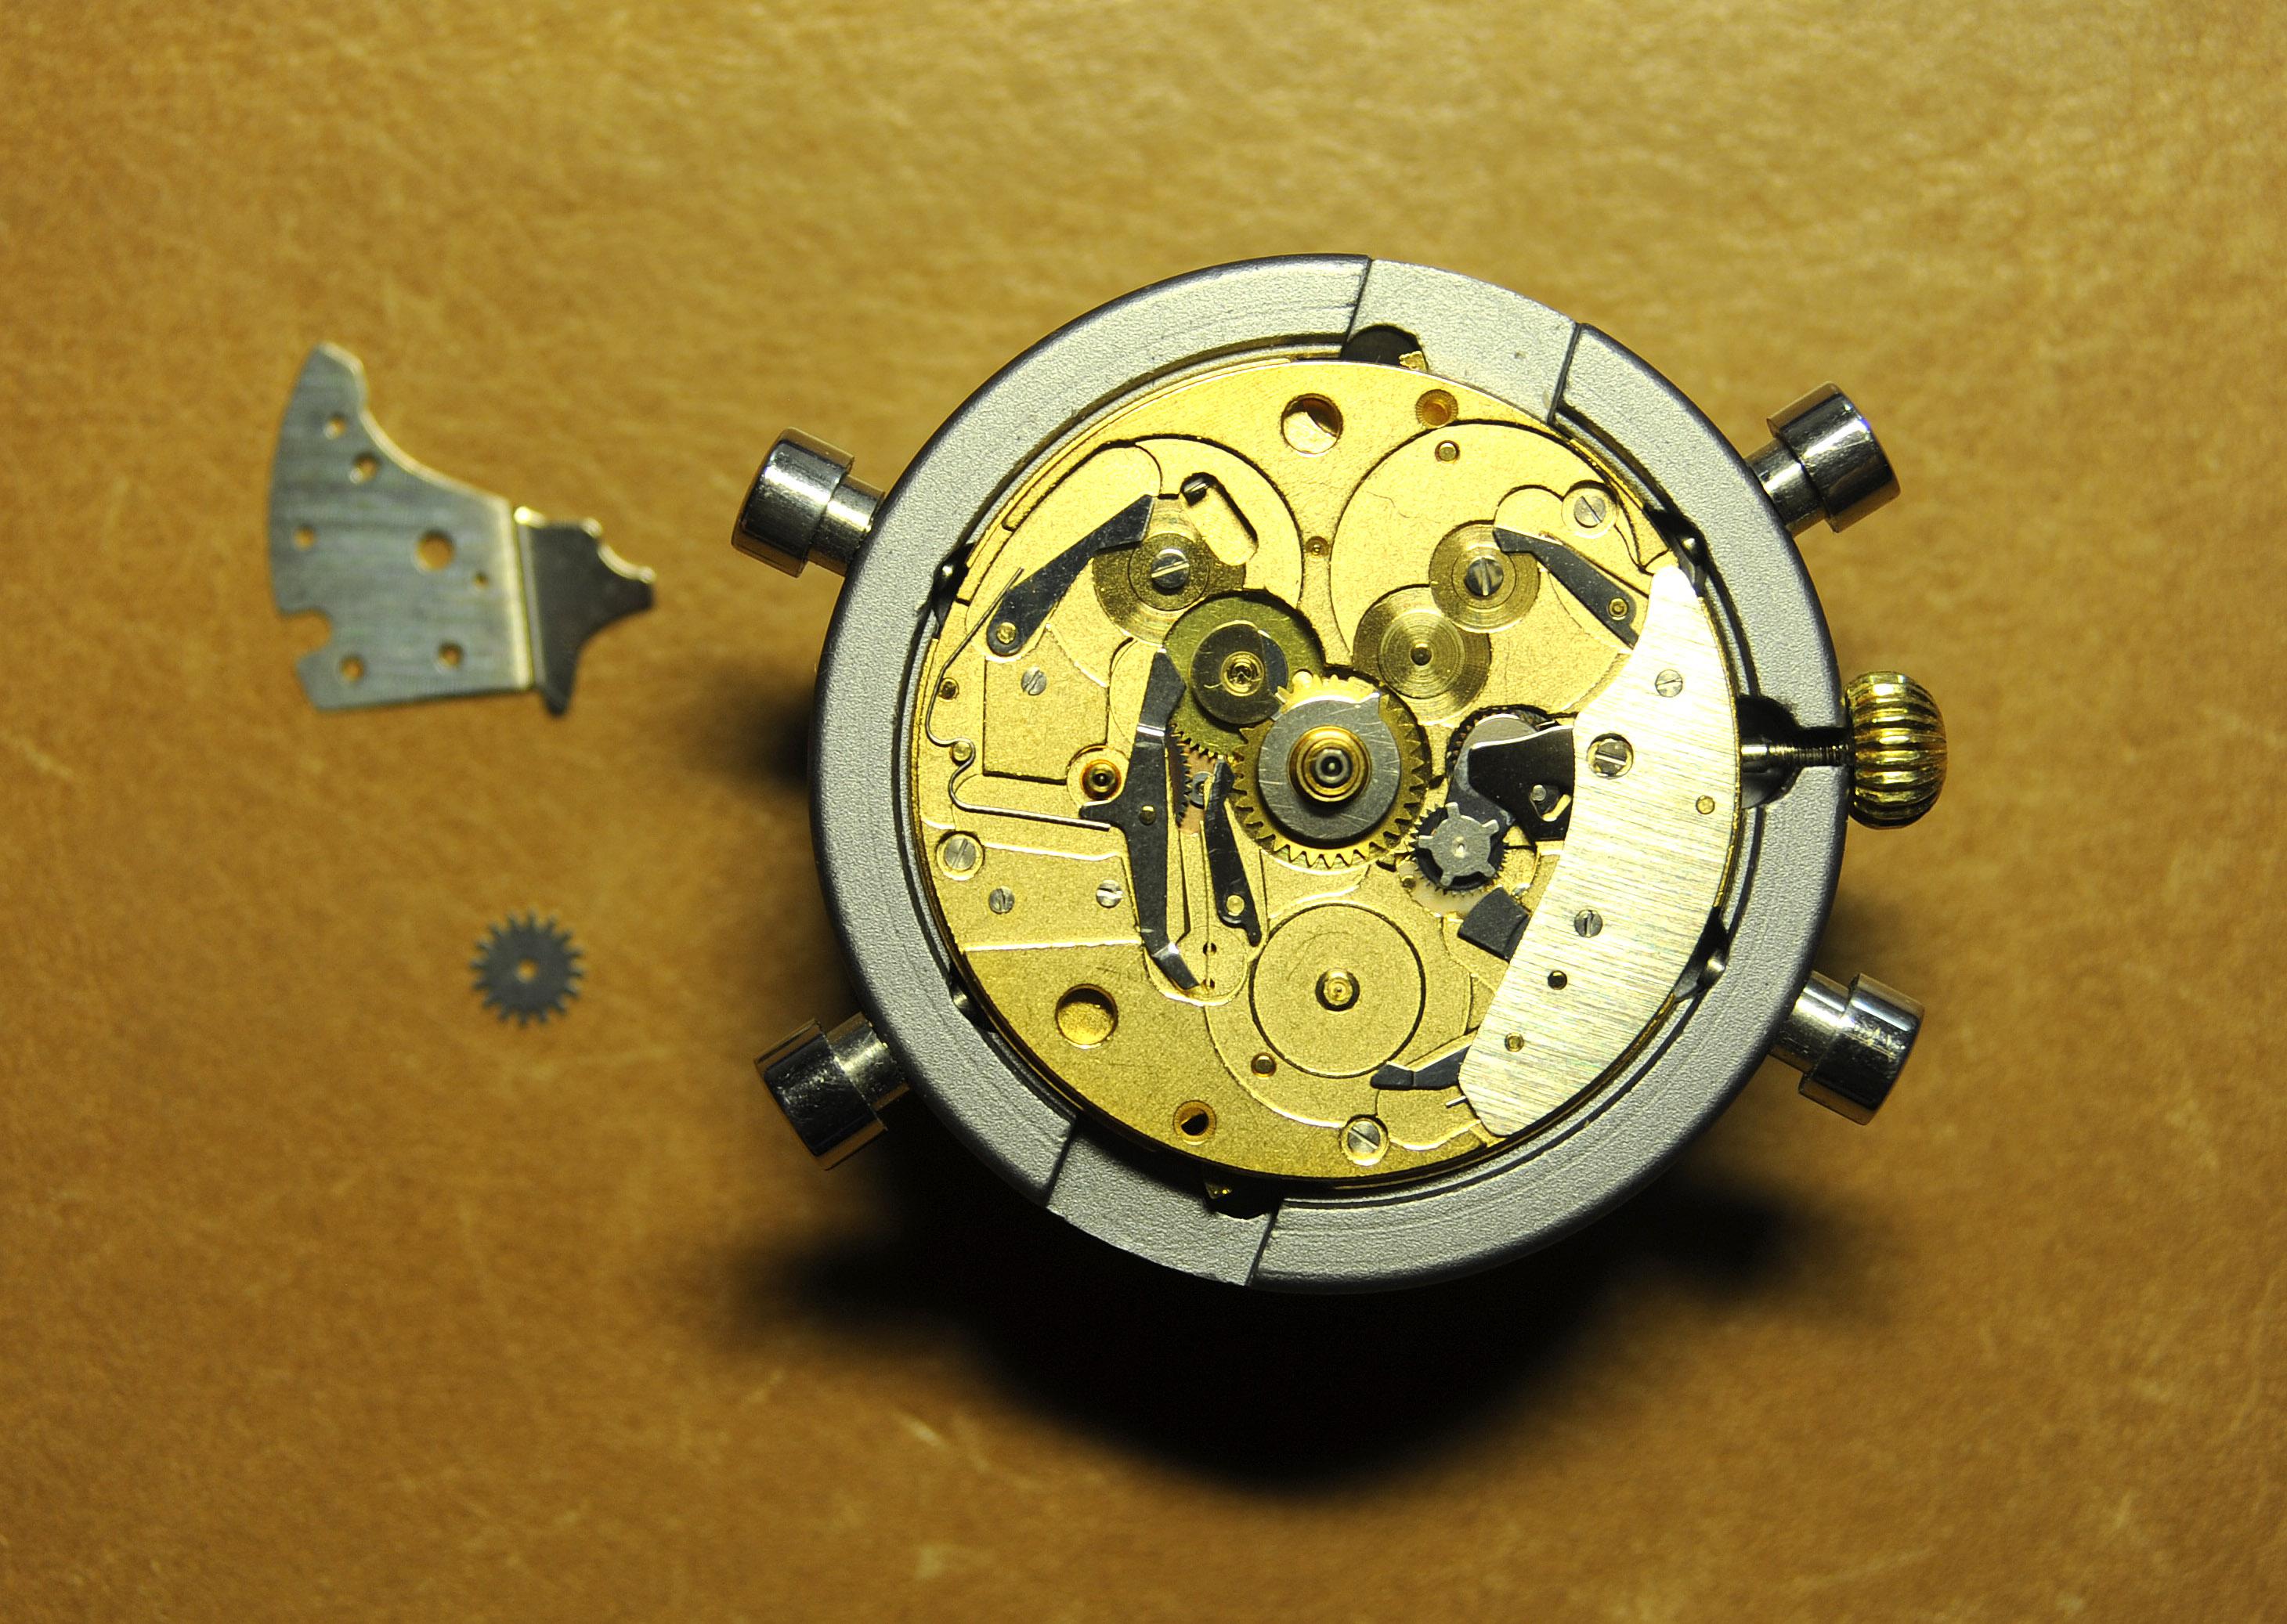
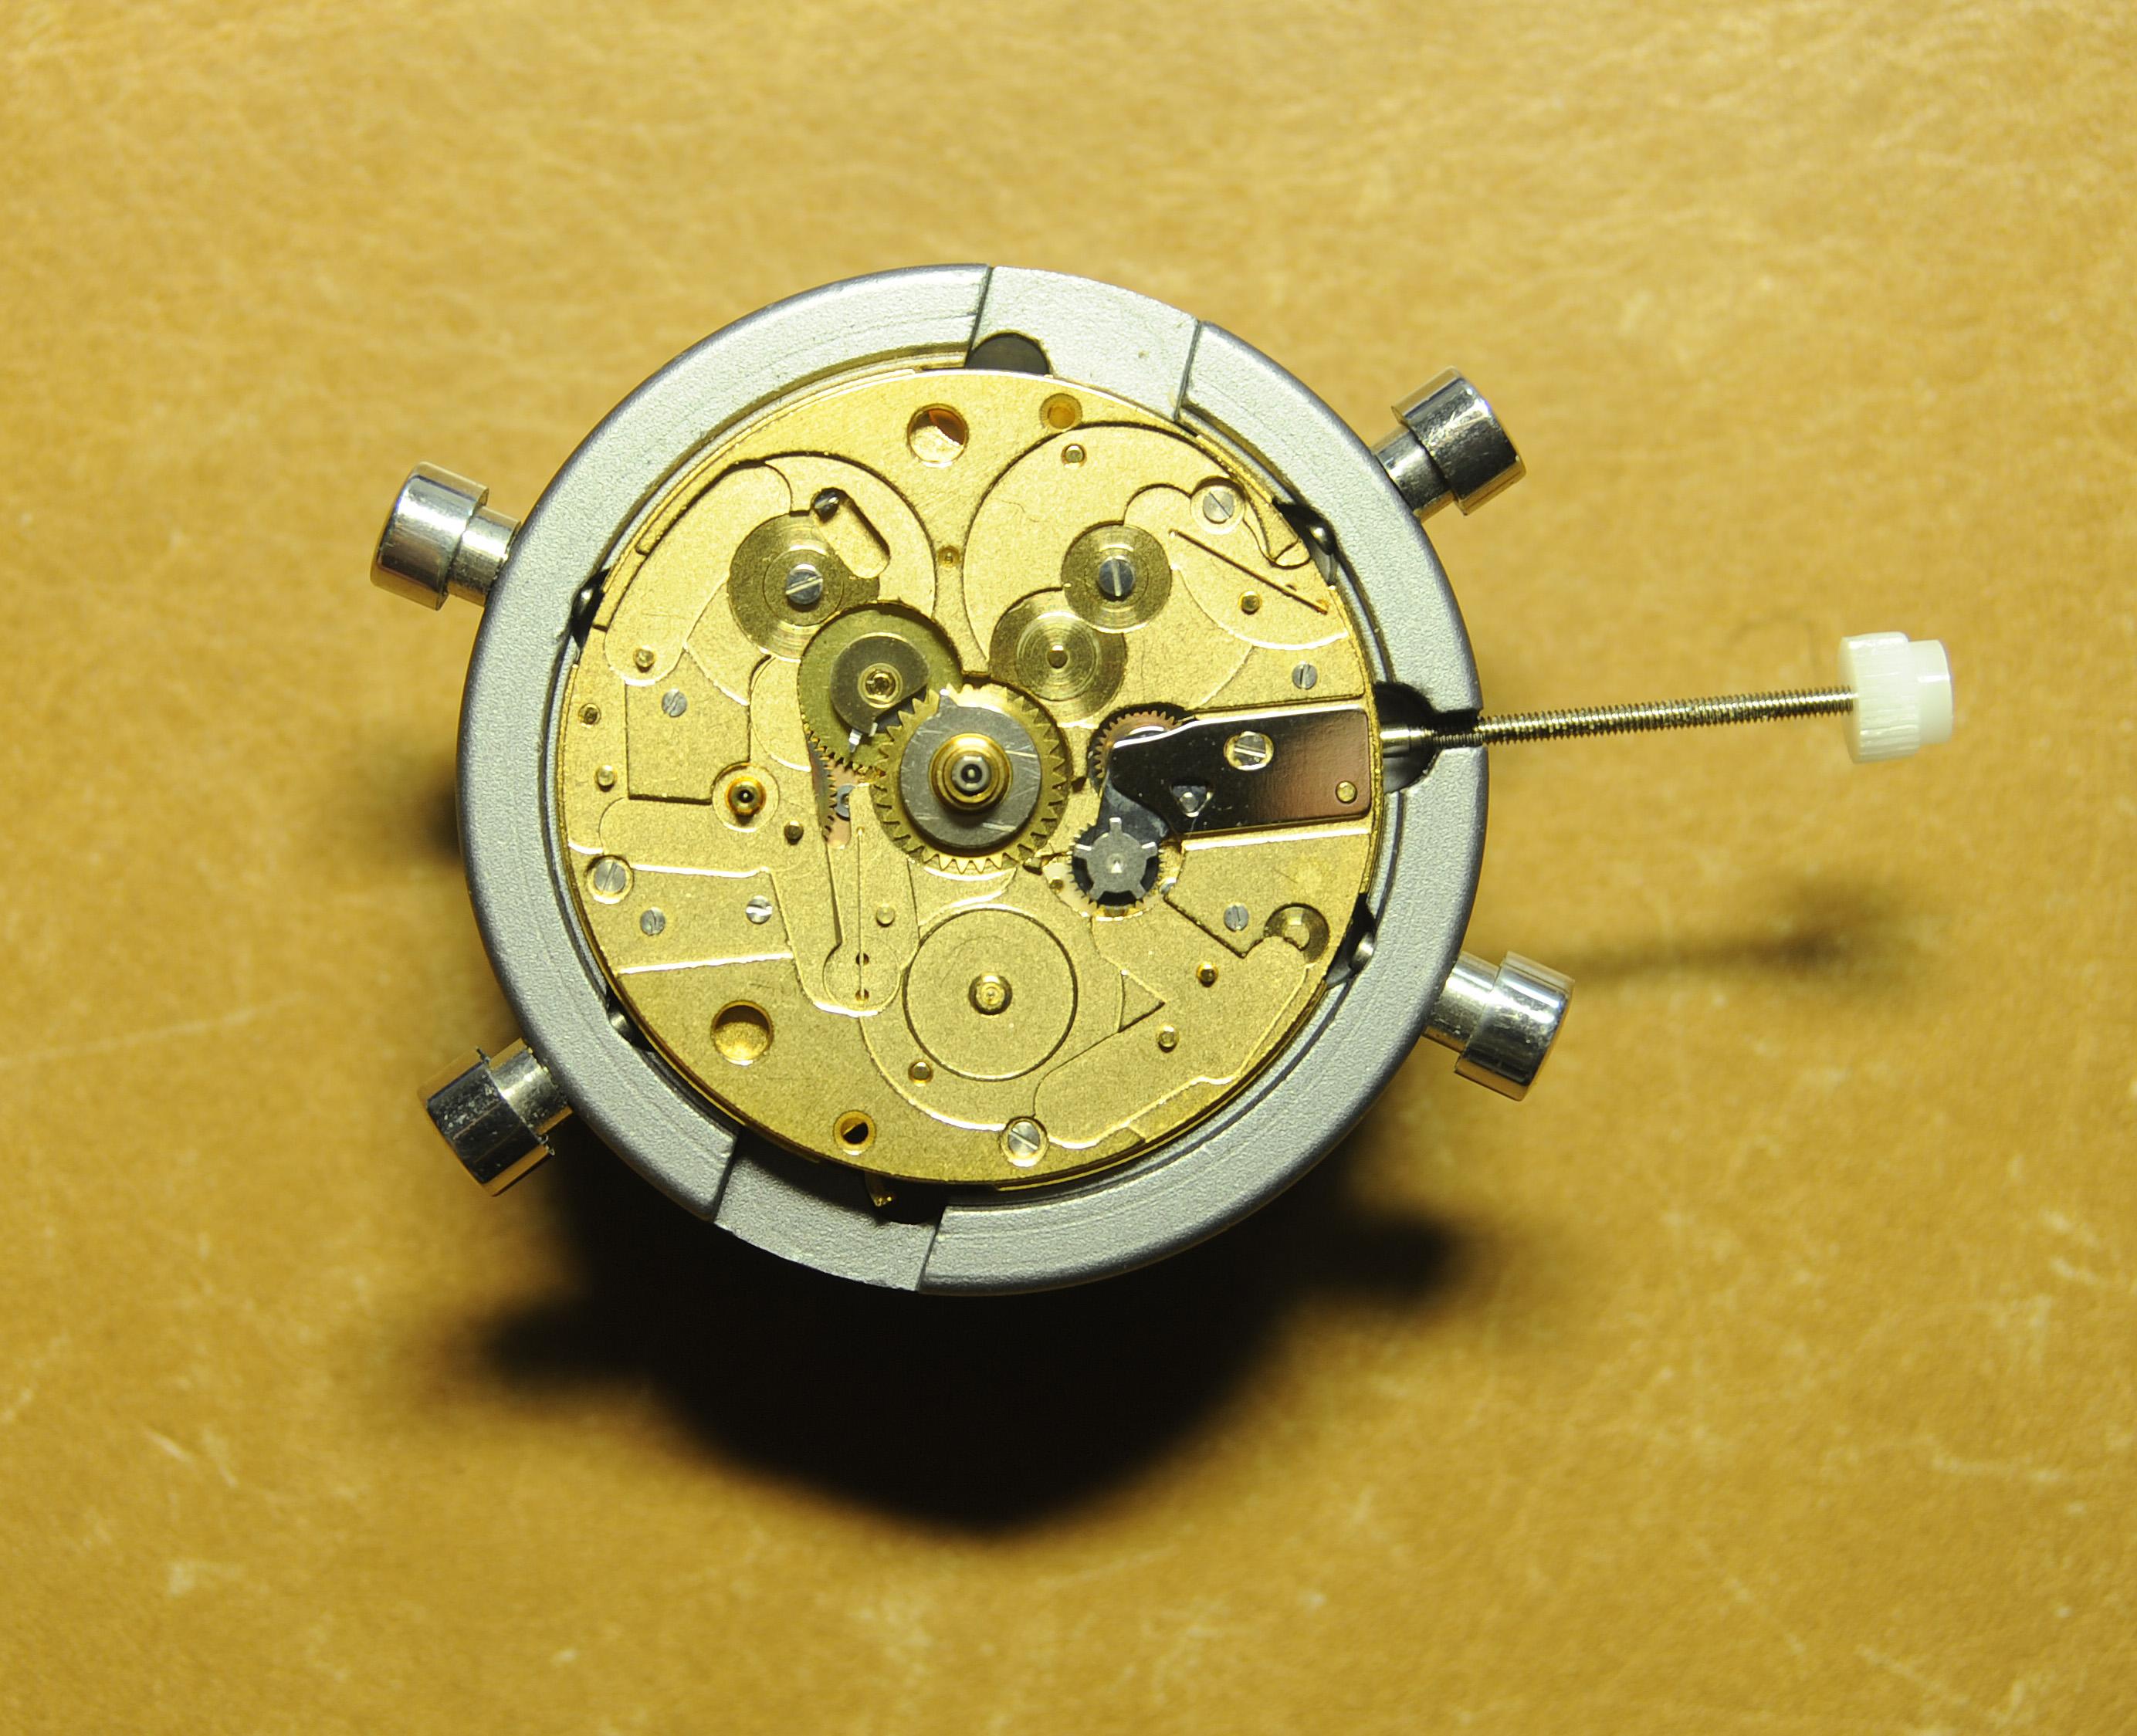
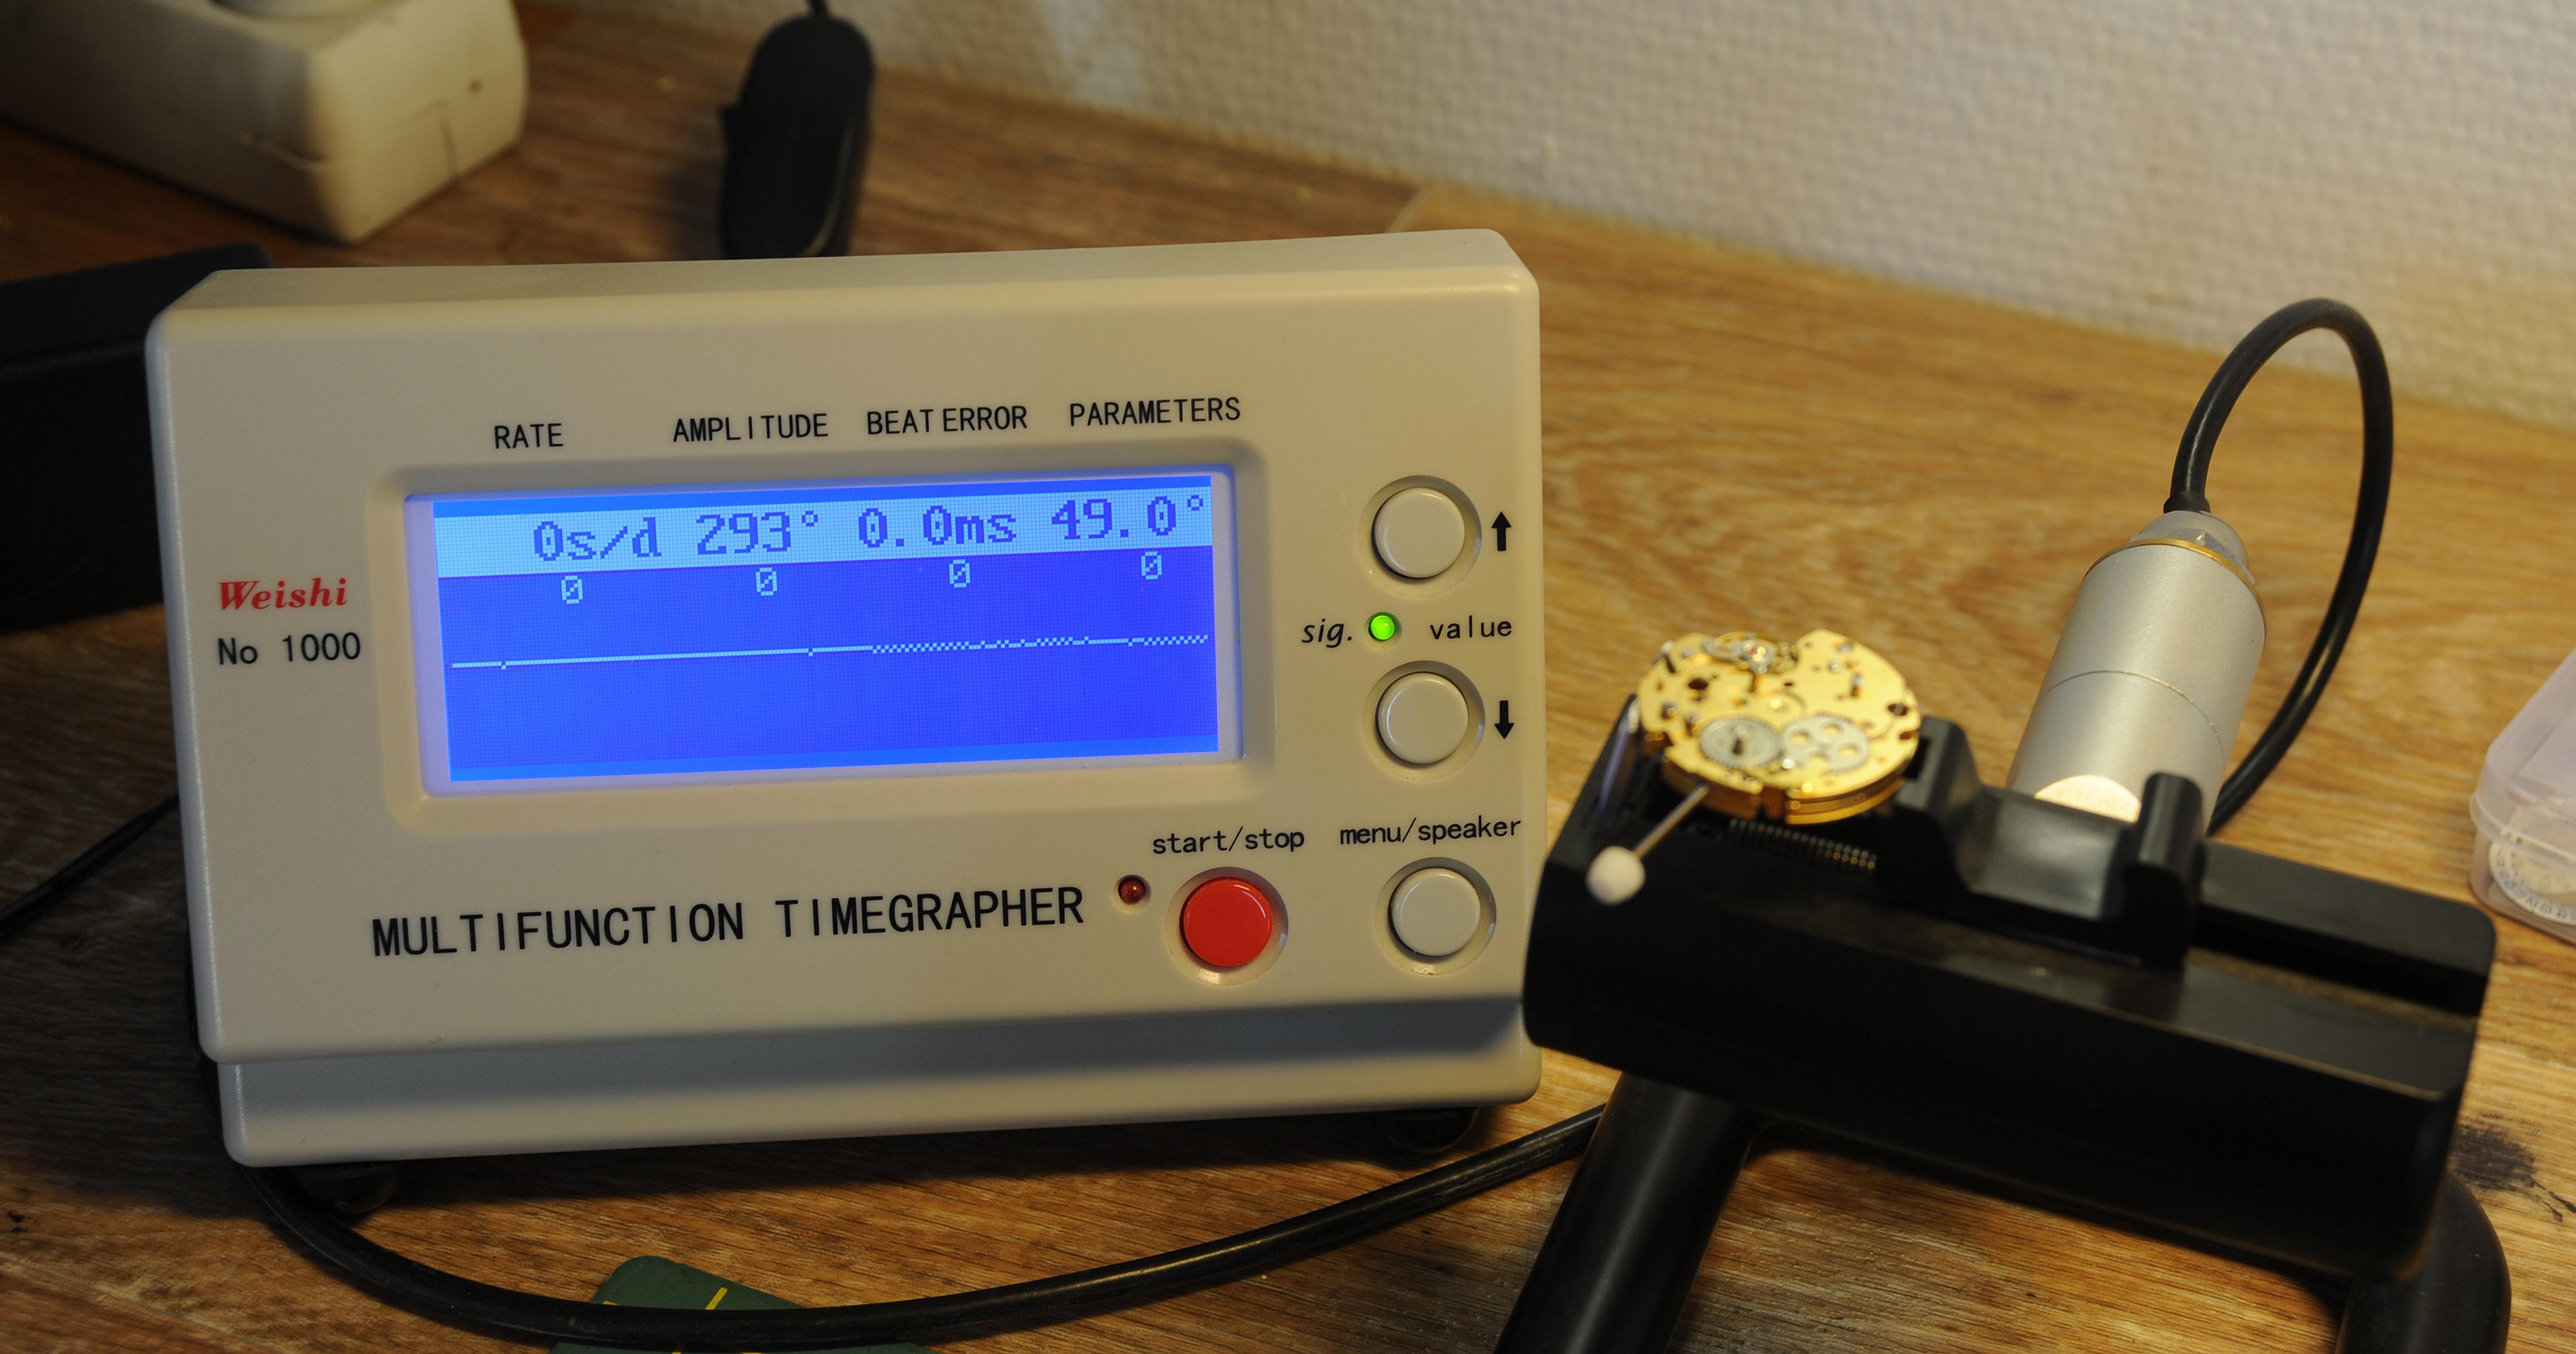
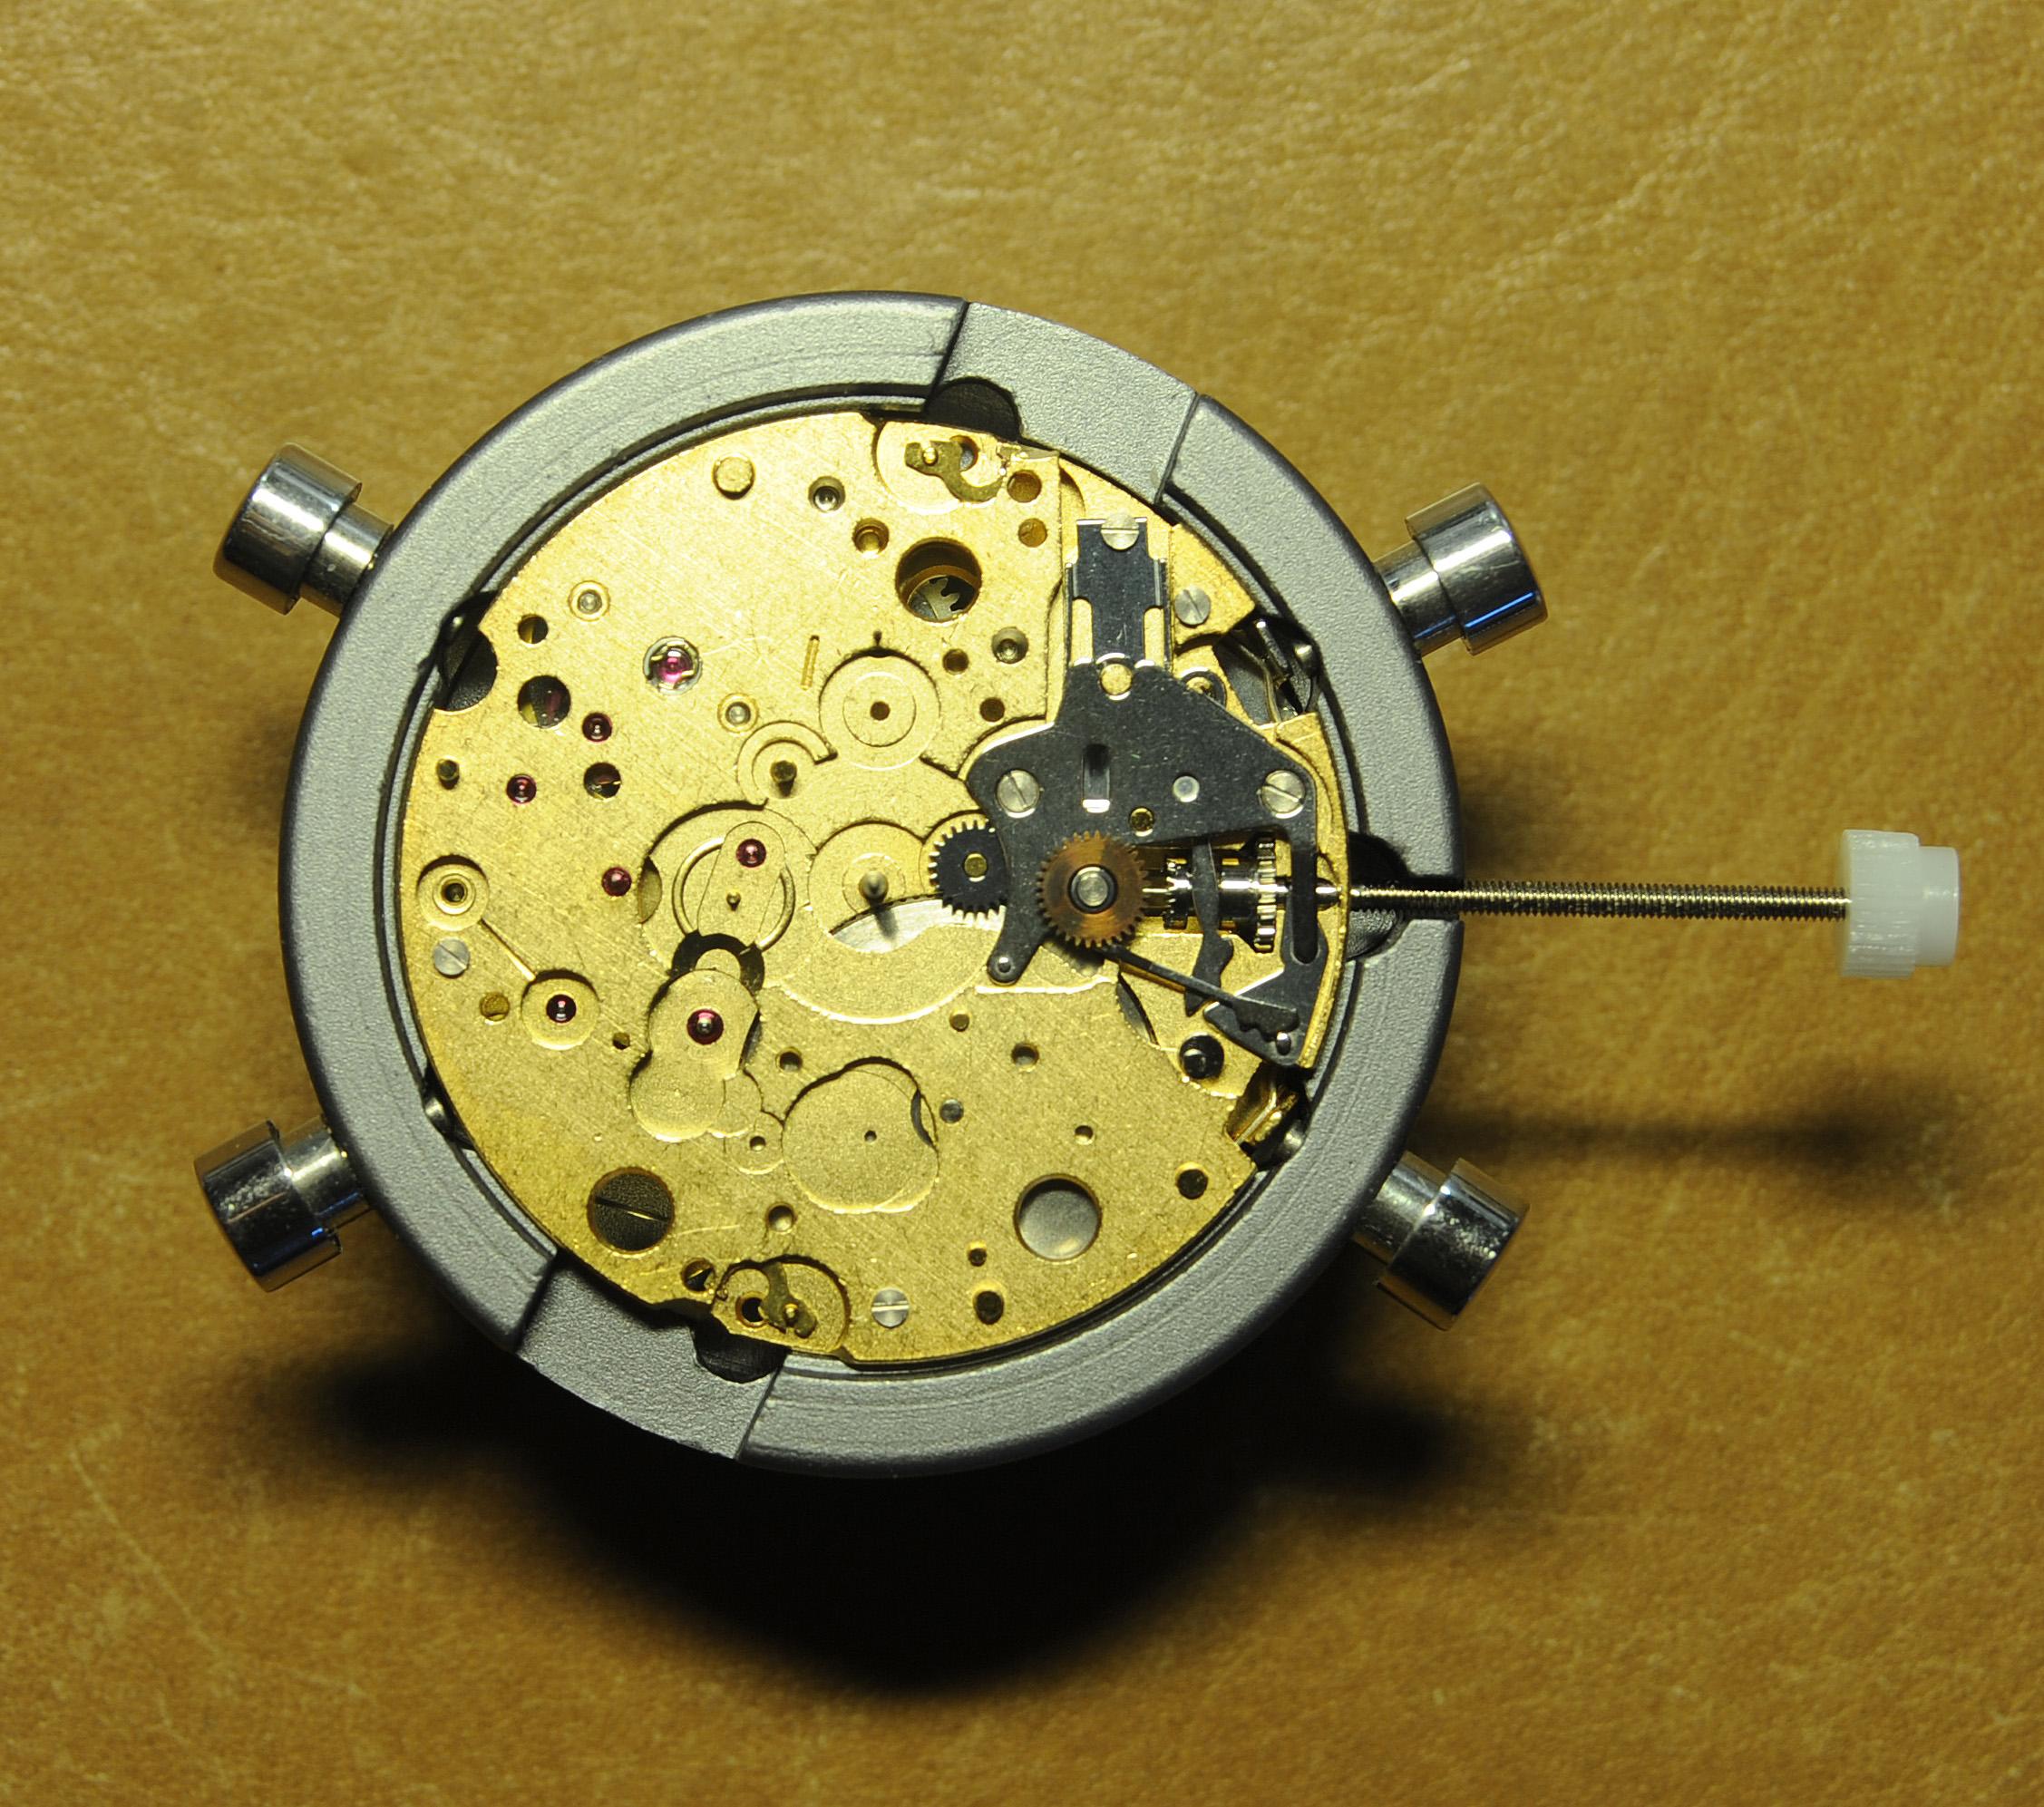
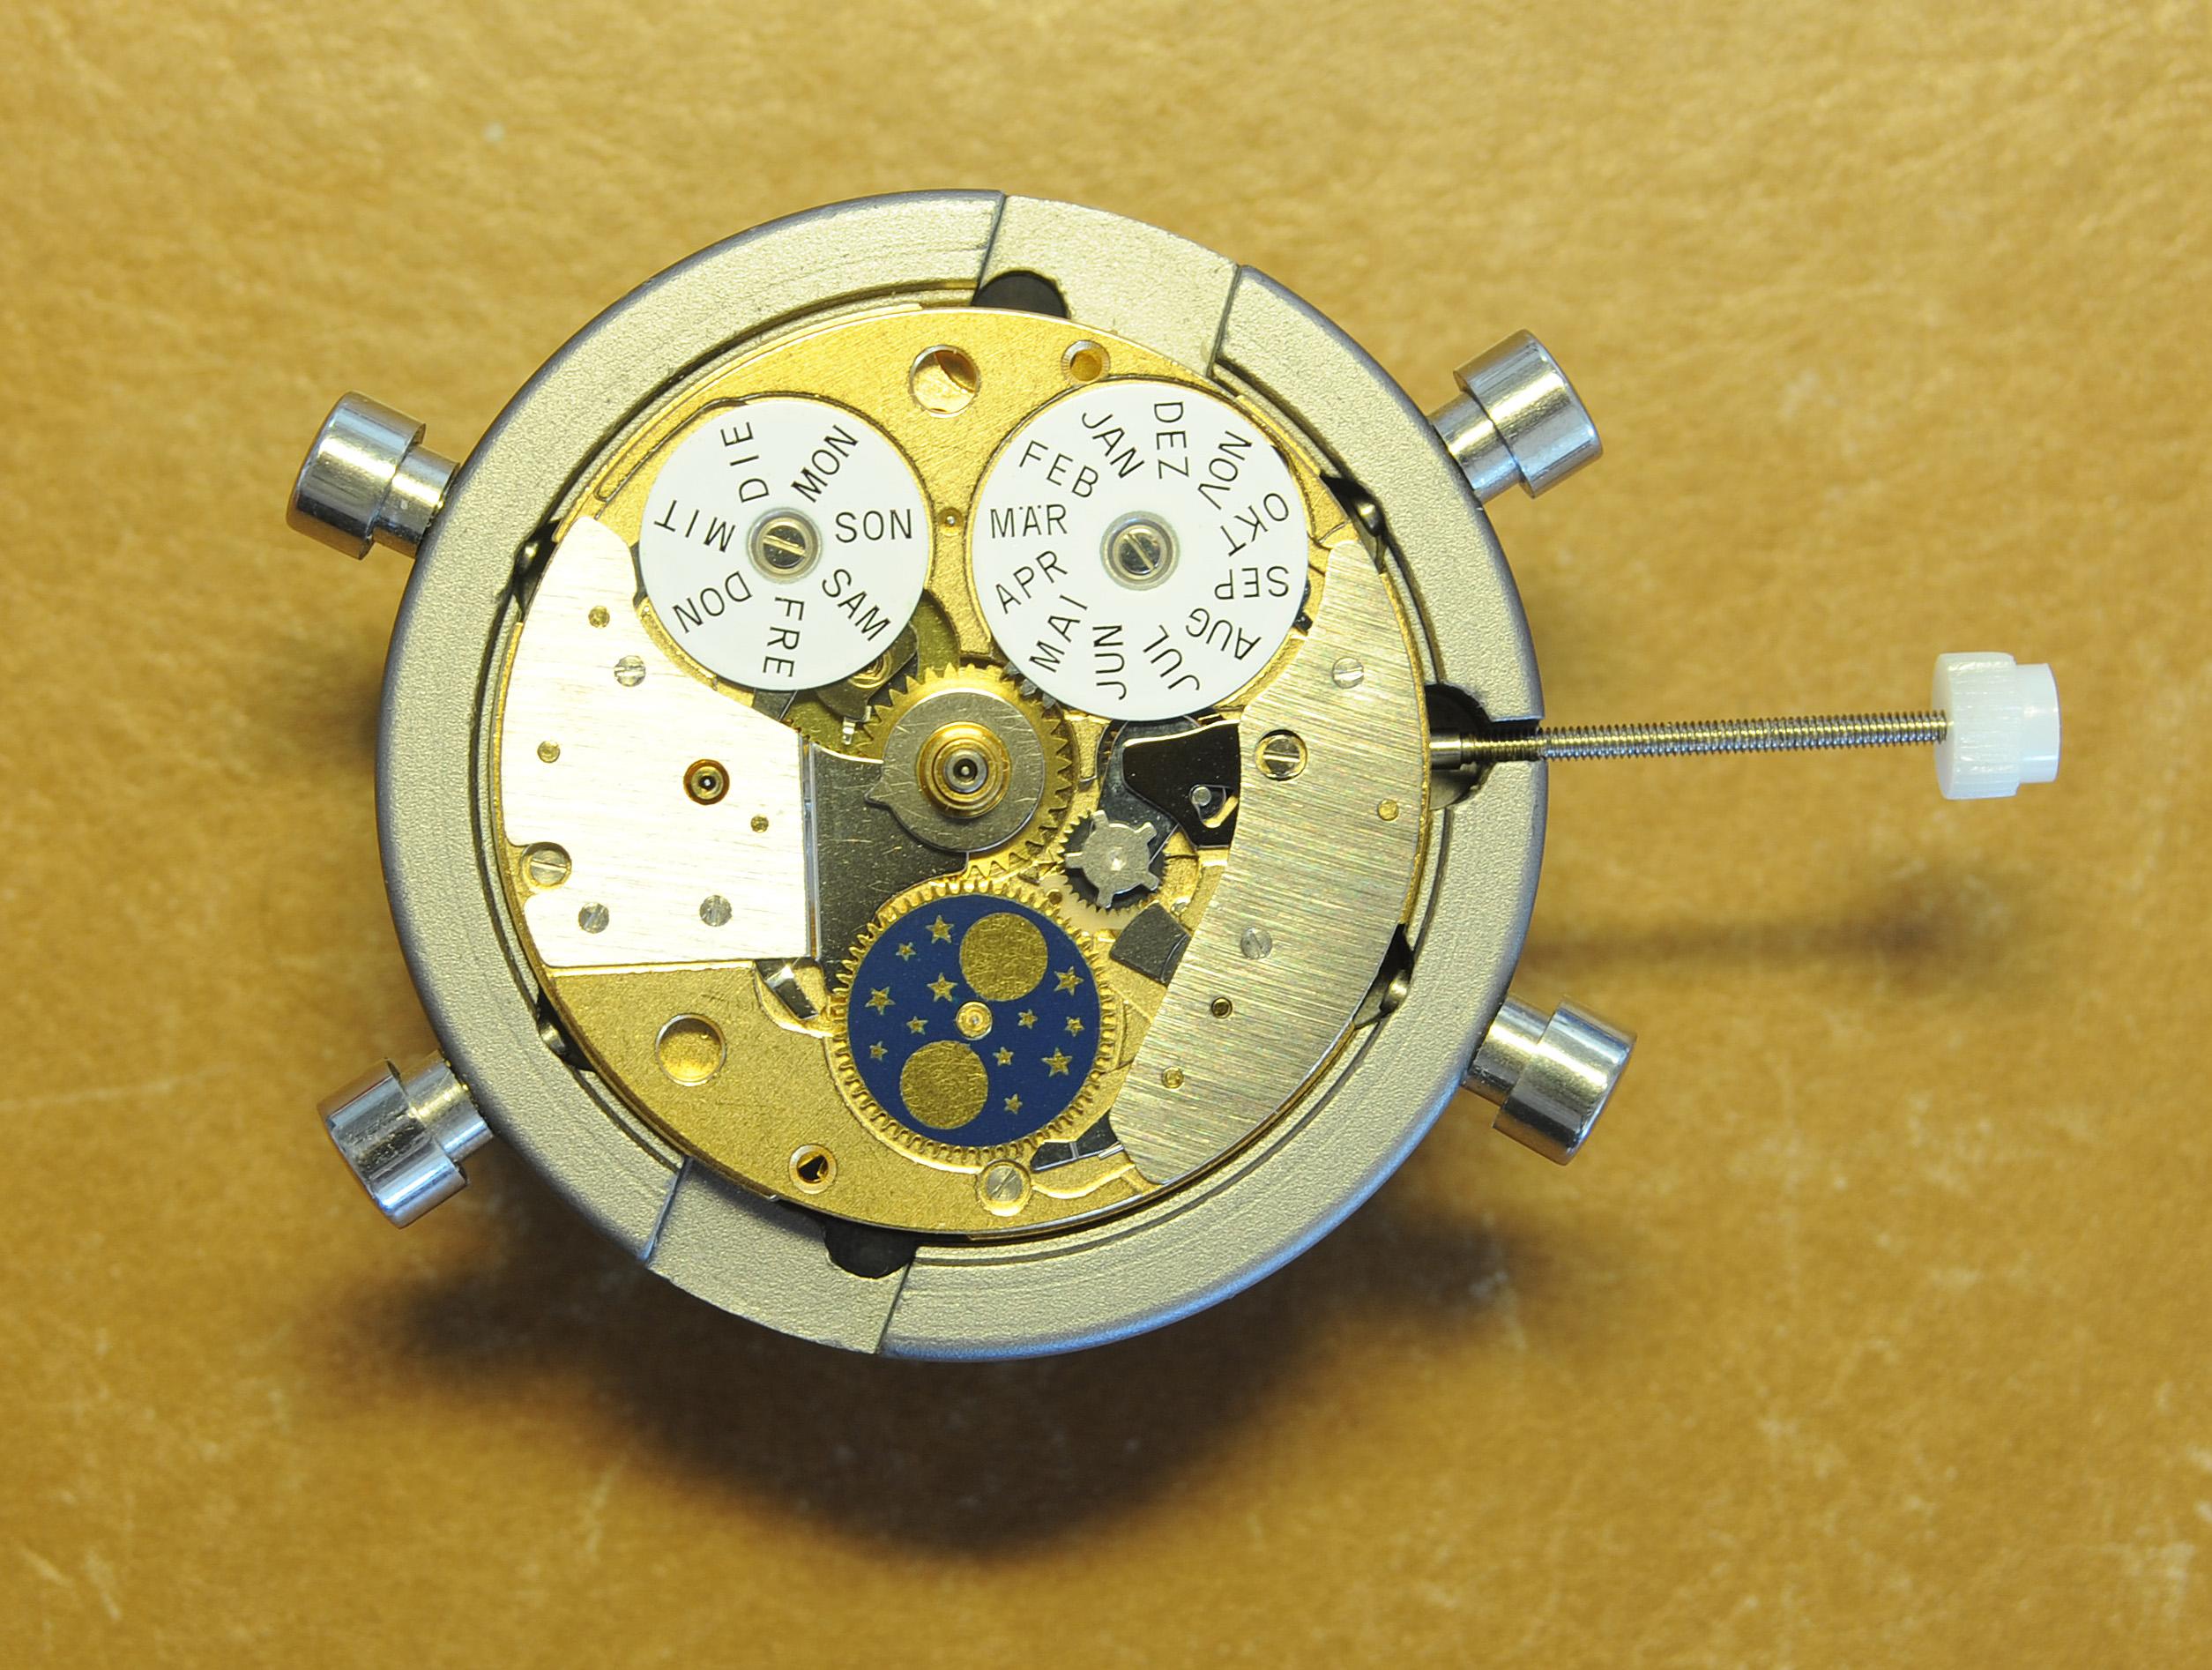
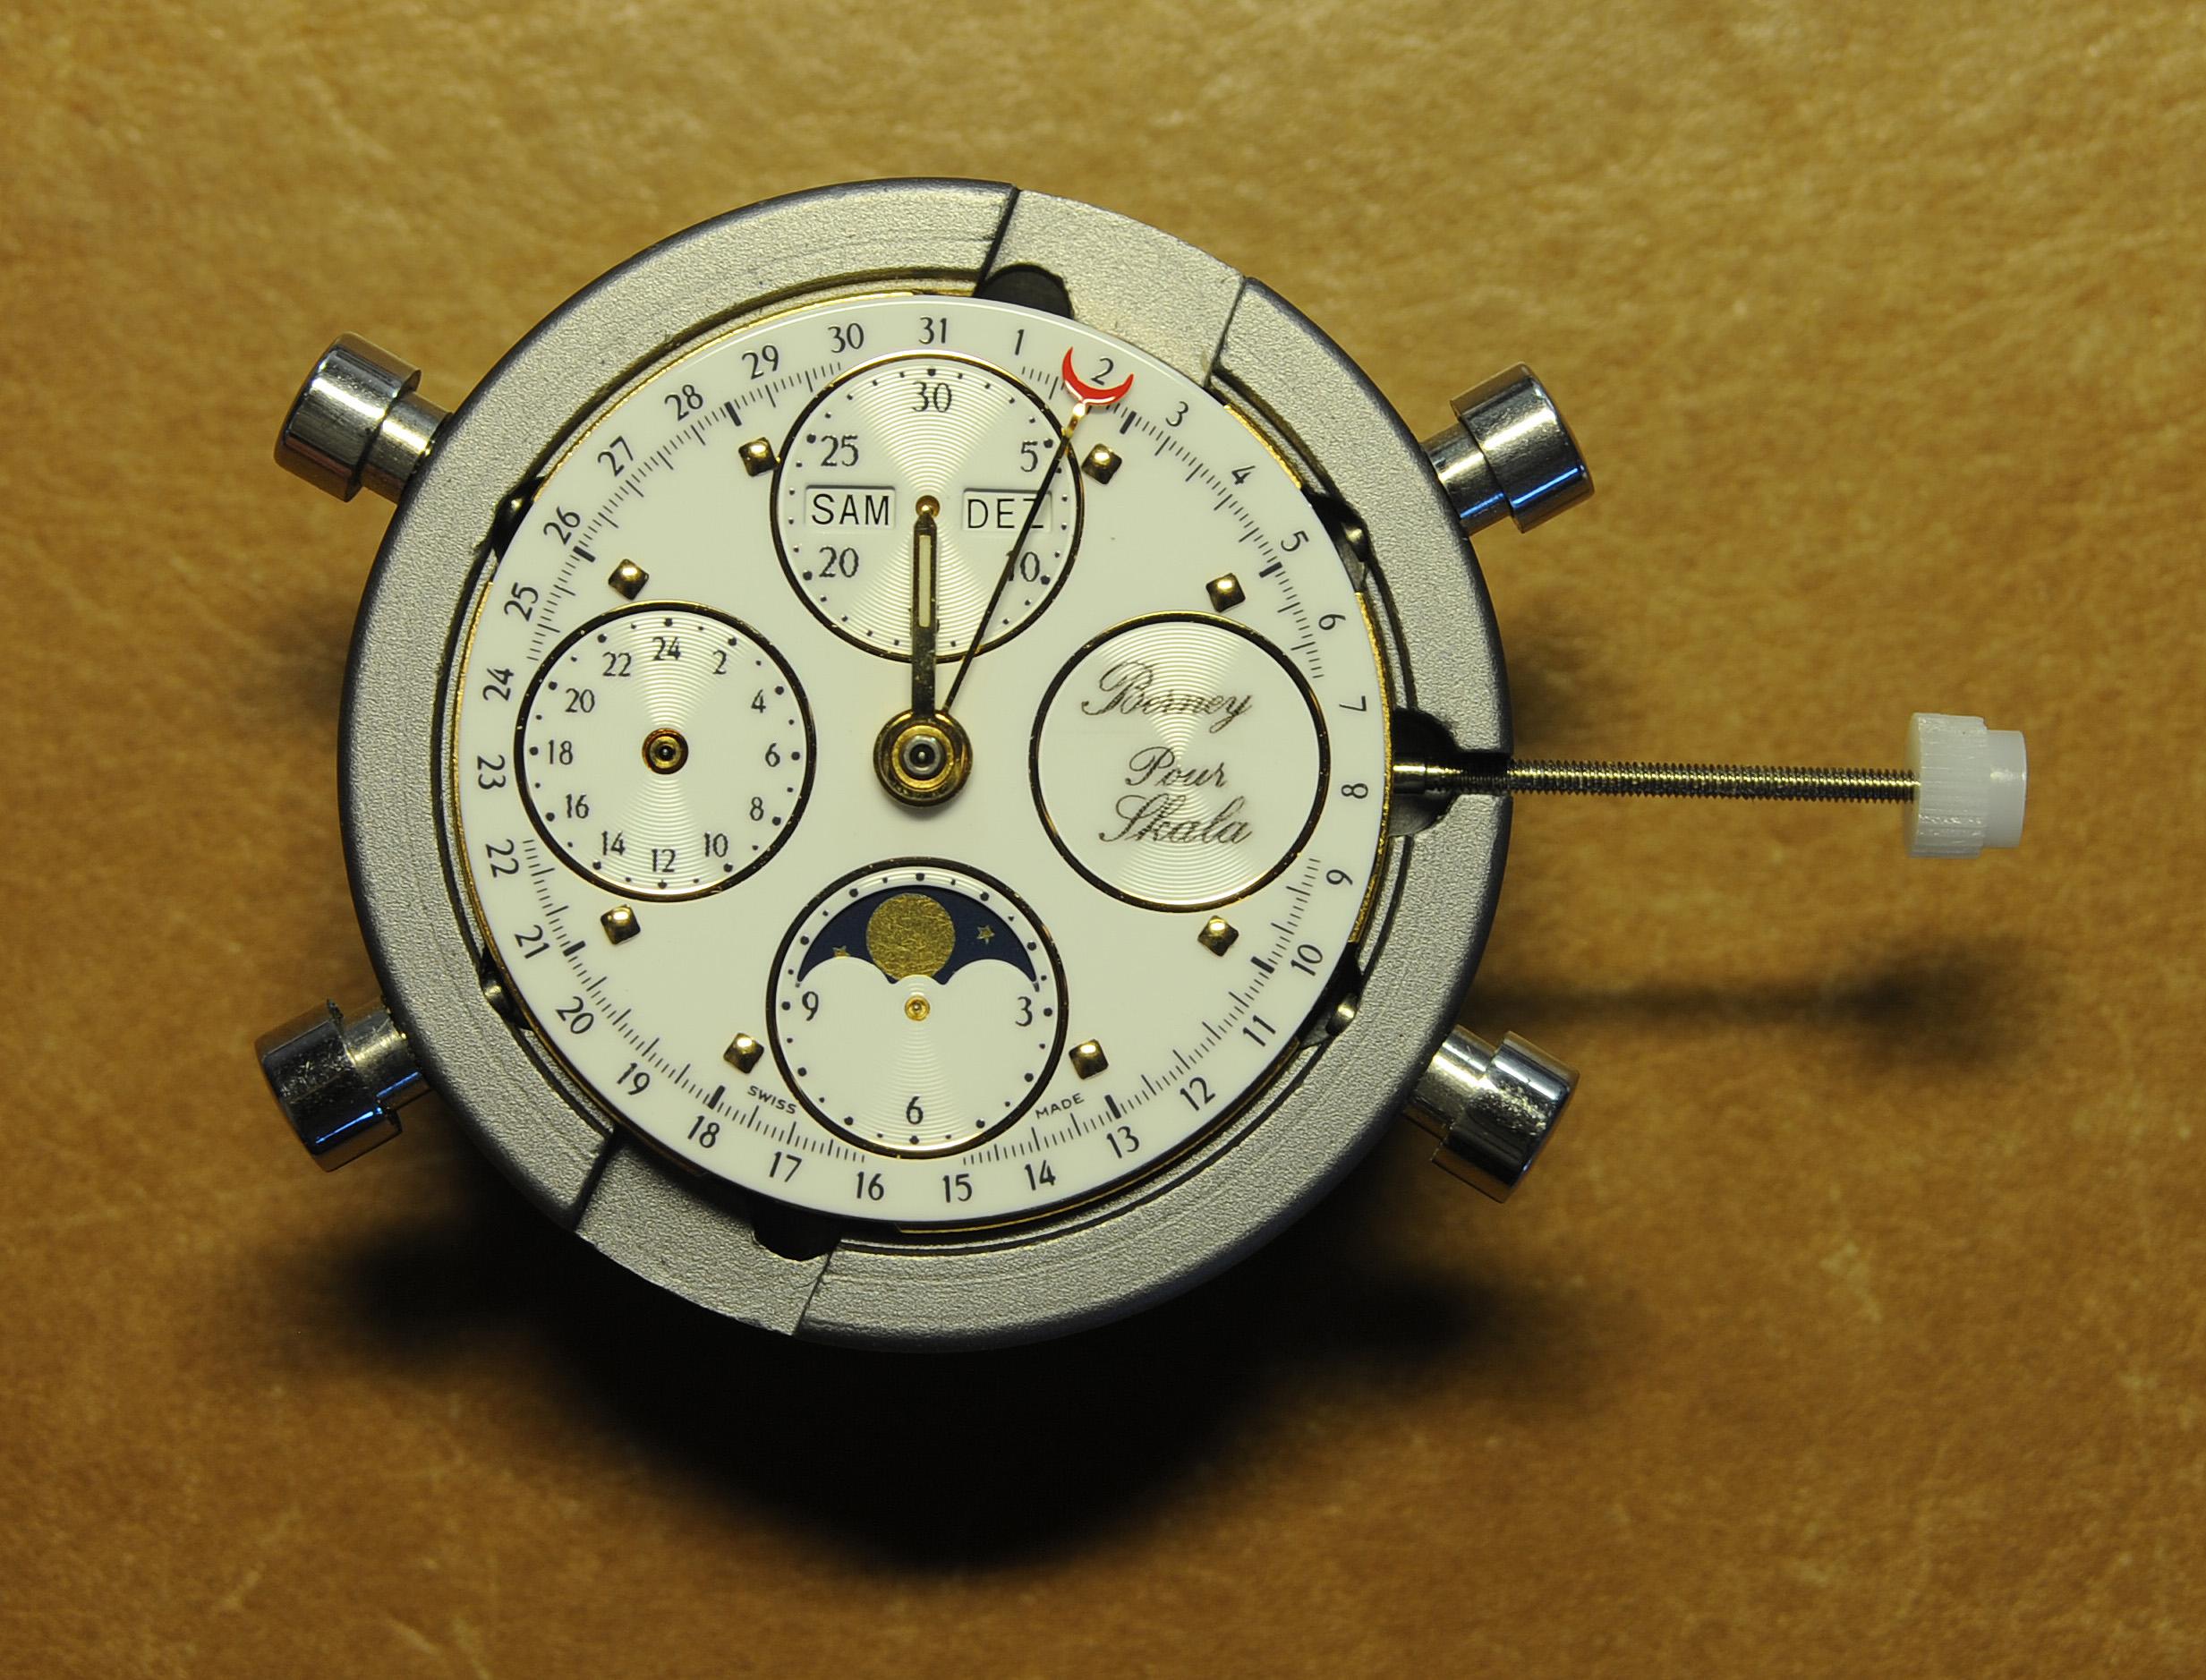
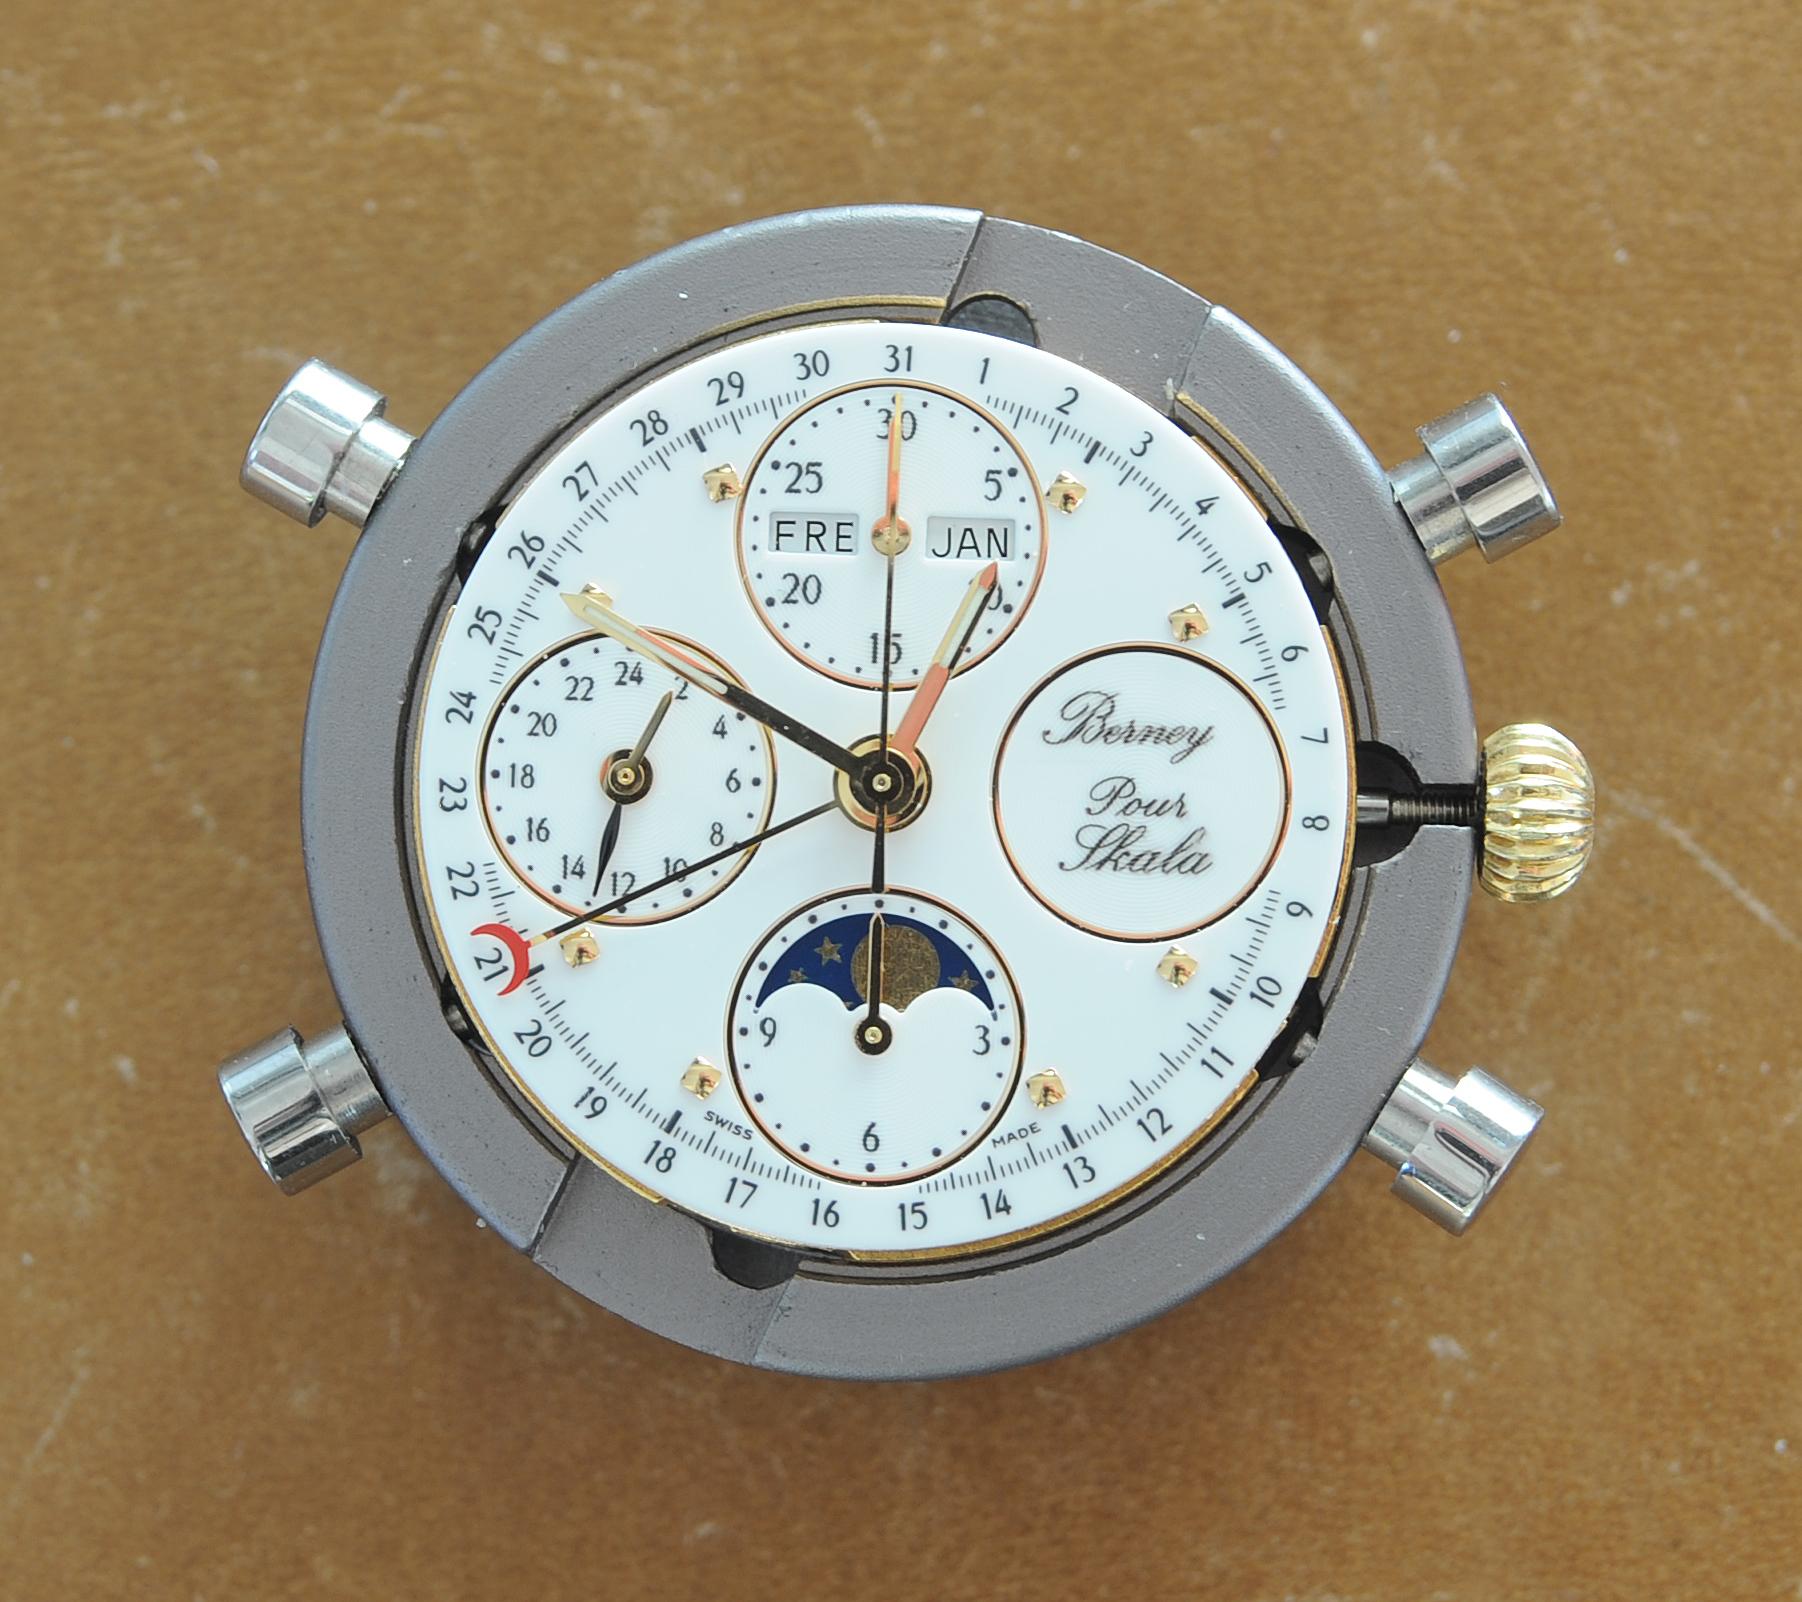
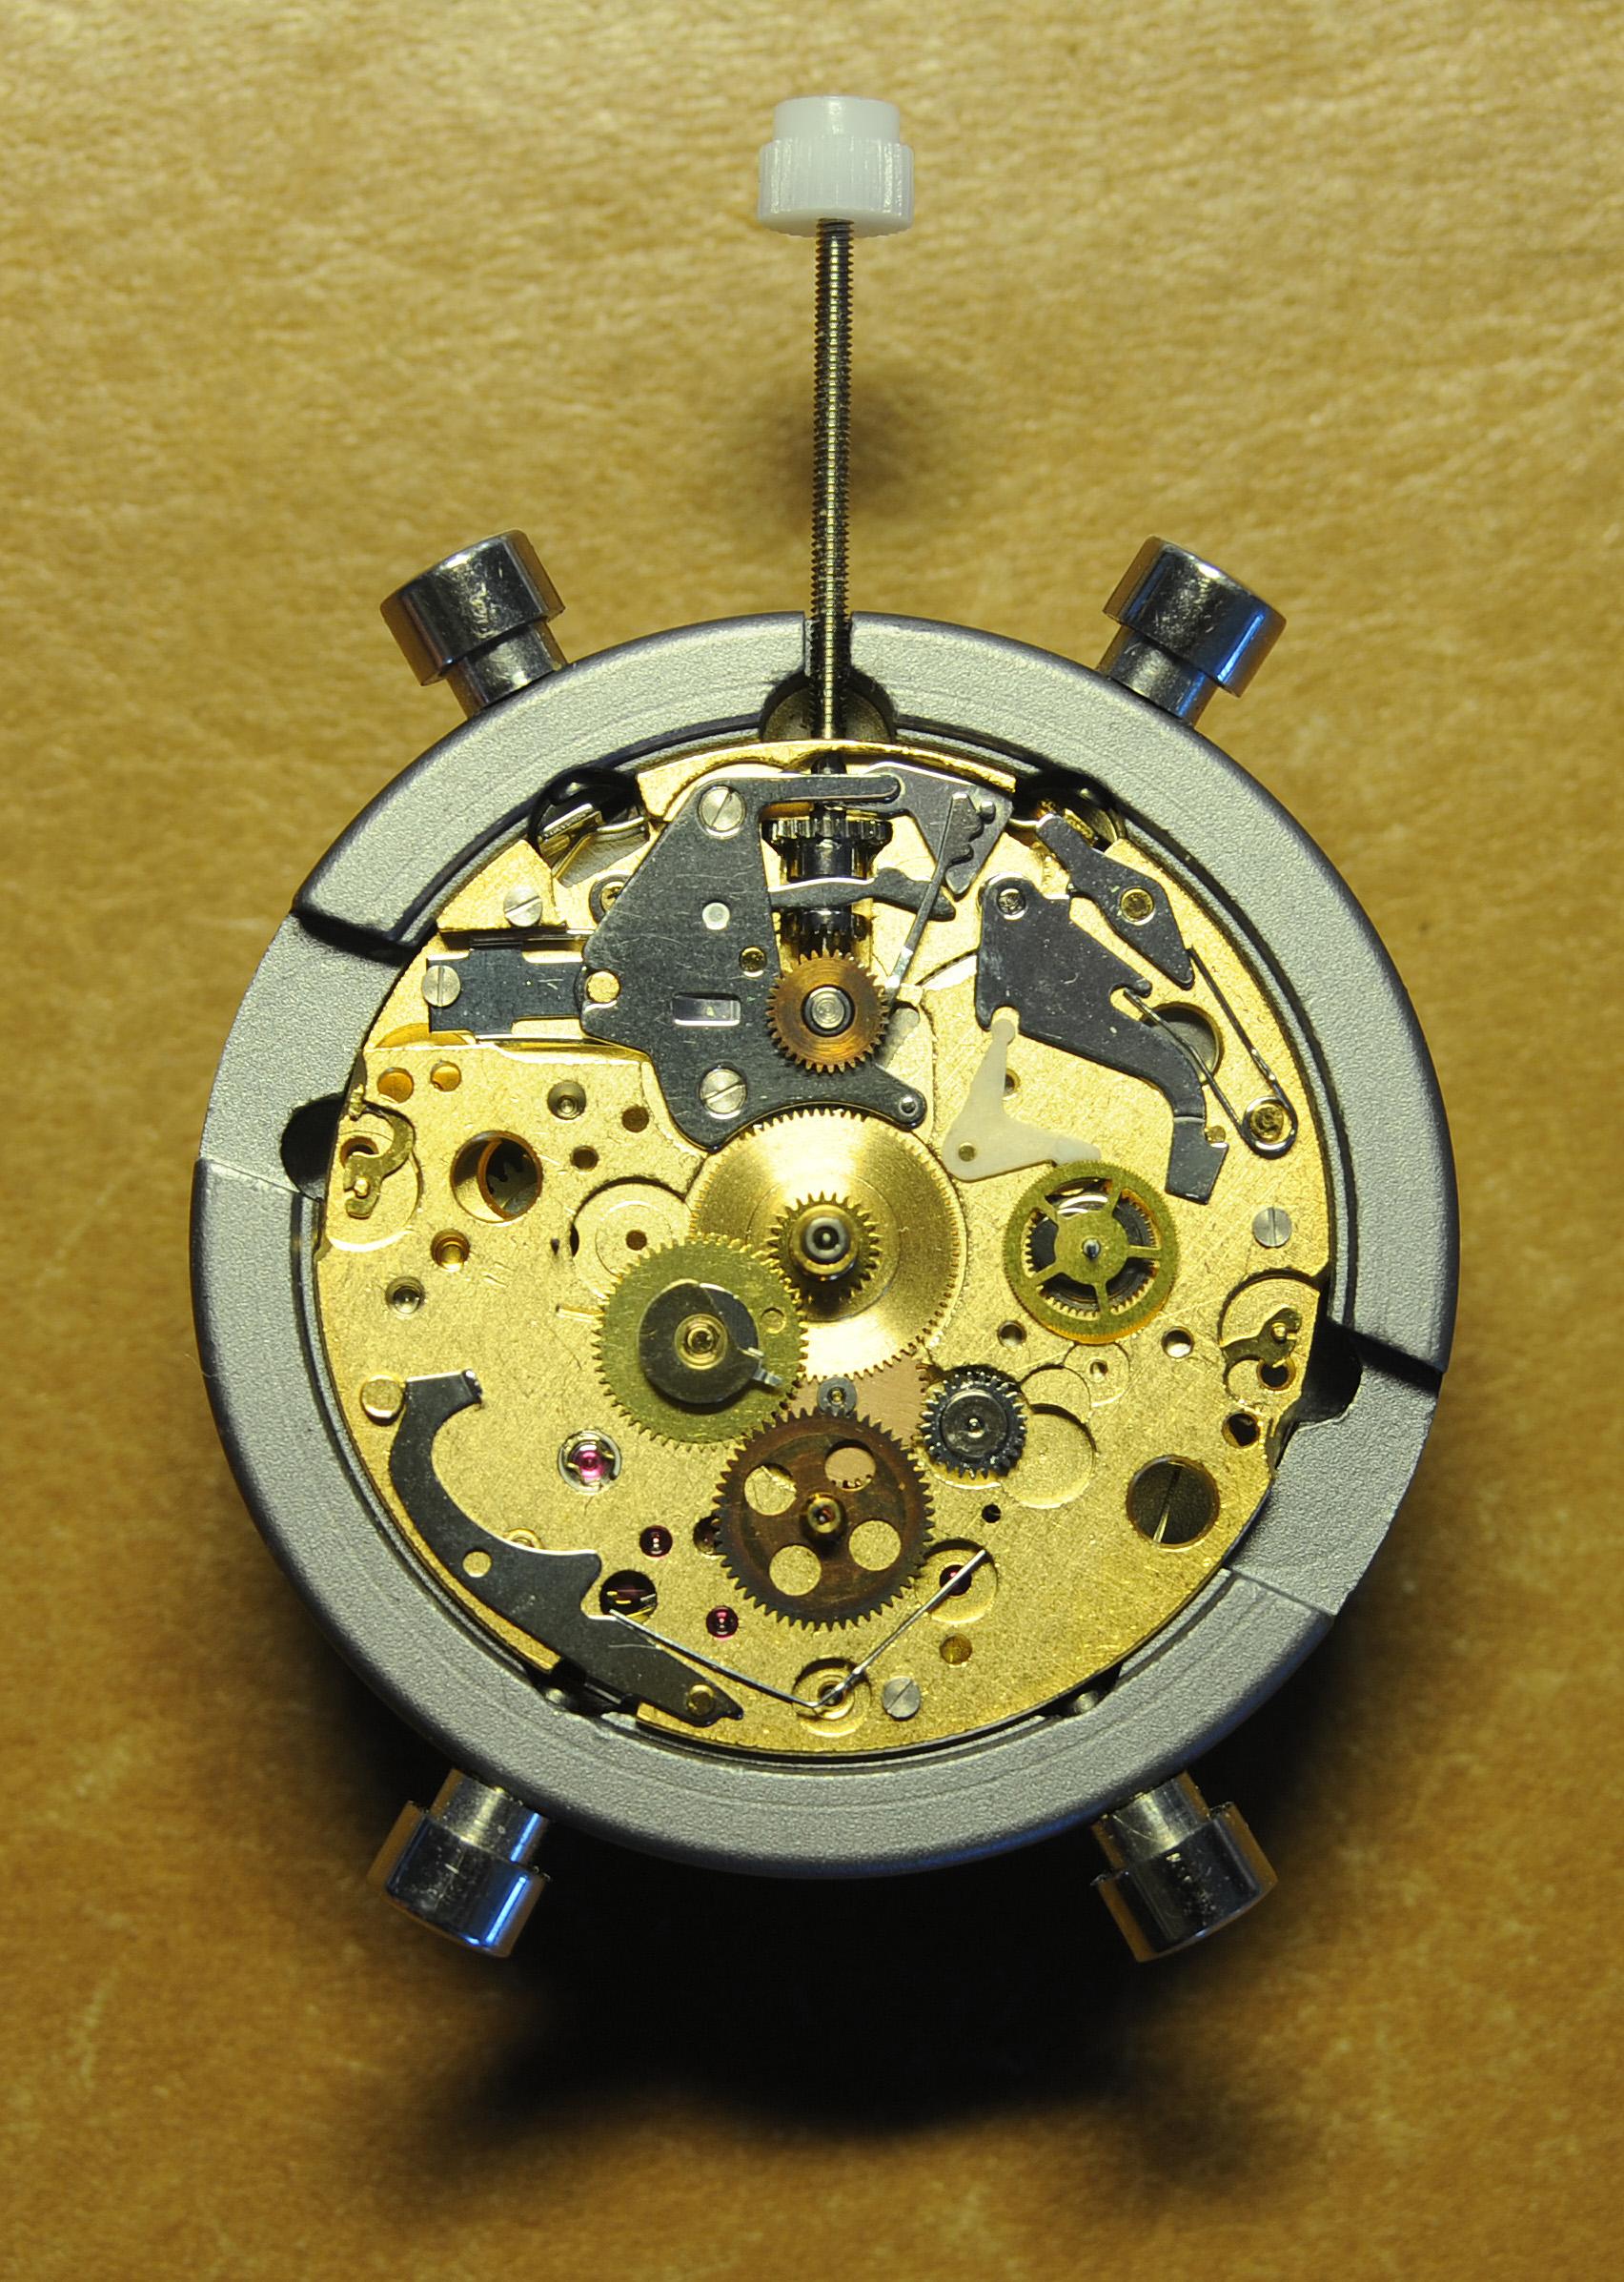
Valjoux / ETA 7751 Triple calendar moon-phase; This gold-plated Berney-Blondeau S.A. with an ETA 7751 belonged to a German gentleman who received it new on his 60th birthday in 1995. Through the years he kept the original box, the warranty card as well as the 1995 price-list and the dealer’s business card. He has worn the watch only on social accessions and the watch spent most of its time stored in a "Panzerschrank". According to the original price-list, the 1995 purchase price was 1450 CHF. As you can see, the watch held up pretty well, only a few small scratches in the front- and rear mineral-glass crystal and on the top of the lugs some of the gold-plating has worn through. The watch ran, all function did work. It had never been serviced nor opened Disclaimer; This walk-through is written in the way I do it. That's not to say it's the most correct way of doing things but as they say: there are many ways to Rome, all leading to the same result. Neither do I, as a hobbyist, have fancy horological equipment such as a cleaning machine or a "sterile" & "dust-free" room and therefor the end result will not be "Rolex"-standards. All I can say is that I'm always give it my best shot and I will mention problems encountered or were I went wrong, so you don't have to Without any further ado, let's dig into this beautiful & complicated watch ...... First make sure that you downloaded the latest ETA 7751 "Technical Communication". Throughout this walk-through I'll use the same parts reference numbers as used in the "Technical Communication". Below the currently latest September 2021 version; 7751 manual.pdf Before having done anything to the watch, I tested all the functions for proper working and took the timegrapher readings to see if there was anything which needed special attention. These readings can later be compared with the readings after the service. Dial-Up; Dial-Down; Crown-Right; Crown-Down; Crown-Left; Crown-Up; From the readings, it's clear to see that the watch needed a proper service. The back-lid, just like the front-crystals found on pocket-watches, required a knife-type case-opener. Checked out the oscillating weight ball-bearing, it had next to no play and therefor good for another round. Removed the oscillating weight (48). Removed the two casing-screws and clamps, pulled the stem and flipped the case over onto a soft pillow. With the watch-case removed, the winding stem re-inserted and the movement was placed in a proper 7750 (or family) movement-holder. To me, working on these movements a proper movement-holder is paramount. During the disassembly of the movement I encountered some problems and without this holder I most likely would have made scratches or worse..... Pulling the 8x hands; they all came off without any problems. All the hands safely nicely stored in a small plastic container. The same counts for the dial, after the removal directly stored in a plastic container with on both sides of the dial a soft lining. Removal of the Day & Month indicator disk (78) and the Moon phase indicator (79) The keen observer may have noticed that there are no screws next to the movement holder, for example the two screws holding the Day & Month indicator respectively. When working on complicated movements or movements which I'm not familiar with, I took on the habit, when possible, to replace the screws in the same hole as they came from. For sure, it's more work, but some movements do have multiple types/sizes screws and it will become a big puzzle if you store them in the same container / basket. Replacing the screws works (most of the time) very well for me, but in some cases the replaced screws shoulder-out deeper than as they would have done when holding the part above. The protruding screw may touch parts below or when replacing bridges, prevent the bridge from not seating fully "level". To me, replacing the screws thoughtfully is far simpler than facing a huge sorting puzzle later. Removal of the combined maintaining plate (76) and the Month star driving wheel (77). The three tiny screws holding the maintaining plate (76) were extremely tight. I couldn't loosen them with my standard (new) screwdriver bits so I had to grind the screwdriver bit to match the exact the same shape as the screw-grooves. Only then, with "force", they came loose and I was glad for having a proper movement-support! One slip of the screwdriver, with the force that was required, could / would have easily made a deep score in the plate or worse ........ Removal of the Day jumper spring (71), Day & Month jumper (70), Day jumper (72) and the Moon phase yoke (73) plus an early warning ! With those parts out of the way, the Moon phase platform (75) had to come off. Assuming that the with the arrow highlighted screw was one of the screws holding the platform down, I turned the screw only to discover that it was the moon-phase corrector eccentric ....... Oops !! The setting of the eccentric has to be checked at the end anyway, but now I know for sure that it's set wrongly. Removal of the Moon phase jumper (69), Corrector maintaining small plate (66) and the Moon phase jumper spring (67). Still in the picture the Date & Month jumper (74) which should have been removed before this picture was taken. The original stem was replaced by a longer stem to adjust the Calendar driving wheel (61) which was holding the Date-star (63) down. Removal of the Date-star (63, shown in the previous picture) together with the Date-corrector (65) and the corrector maintaining small plate (66). Removal of the calendar platform (62). Slowly back to familiar ground; a standard ETA 7750 starts to appear ... Removal of the Hour wheel 24hrs H1 (59), the Calendar driving wheel (61), the Hour-wheel (60), the Day corrector (58) and the Day corrector spring (57). The removal of the Hammer-spring (56), Set hour-hammer operating lever (53 & 54), Hour counter lock (55), Hour counting wheel (52), Minute-wheel (51) and the free Cannon pinion (50). Pulling of the Driving pinion (49) has to be done carefully; either with a pair of hand-levers or two small screw-drivers. The upwards force on either side of the pinion has to the equal or you may break the pinion of the great wheel (16) (a previous experience has taught me so !! ) Flip the movement over and from here on I'm using a Bergeon 4040 movement holder. First the removal of the Hammer-spring (45). When removing this spring I had up till now difficulties avoiding making a small mark in the Automatic device bridge (44). It was our WRT-member "Nickelsilver" who tipped me off using a piece of Scott tape over the edge of the bridge. This worked very well and for the first time I was able to remove the hammer without leaving a mark! Thanks Nickelsilver! The hammer-spring (45) and the Clutch-spring (47) removed. Remove the Auto device bridge (44). Removal of the Reversing wheel; (43), Reduction wheel (41), the Clutch (40), Oscillating pinion (39), the Hammer (42), Chronograph wheel (37), Minute-counting wheel (38), Minute-counting jumper (46), the Lock (33), the Operating-lever (36) and the Minute counting driving wheel (19). Removal of the Chronograph bridge (34), the Friction spring (32) and the Operating lever spring (35). After the removal of the Ratchet wheel driving wheel (33) it's time to release any residual power in the main-spring. This can be done by holding the crown, lift the Click-spring (20) and slowly release the tension by letting the crown slip through your fingers. Removal of the Chronograph cam (29), Cam jumper (28), Detent (30), Ratchet wheel (23), Crown wheel core (22) and Crown wheel (21). Removal of the Balance Assembly (26+27), Pallet bridge (25) and Pallet fork (24). Removal of the Barrel bridge (18). Removal of the power-train; the Great wheel (16), Third wheel (15), Second wheel (14), Escape wheel (13), the Movement barrel (12) and the Stop lever (17). Flip the movement over for disassembling the keyless works. Removal of the Setting lever jumper (11) together with the Intermediate setting wheel (10), the Time setting gear (9), Rocking bar (8), Yoke (6), Setting lever (5), Winding stem (4), Winding pinion (2), Sliding pinion (3) and the Yoke spring (7). All the parts safely stored in a compartmentalized box with lid, ready for cleaning & demagnetizing. Regarding the "wear & tear" of all the watch-parts; it was clear to see that the watch hadn't seen a lot of use. The Oscillating weight ball-bearing (48) was good, reversing wheel (43) looked good etc. However, I decided to change out the main-spring. This type of barrel has a lid which cannot be "pushed" open. To open the lid, I place a sharp knife in the groove between the barrel and the lid and while pressing down on the knife roll the barrel, in my case on a "soft" leather underground to avoid doing any damage. This widens the groove into a small gap and with the smallest screwdriver one can pry, going around the barrel, the lid off. When done carefully you won't leave any marks. Barrel & Arbor cleaned, braking-grease applied ready for the new spring. Apart from a few (see "technical communication" !) the parts were soaked for 24hrs in Zippo lighter fluid and pegged; all the sprockets, pivots and jewels. Thereafter all the parts were checked for magnetism. Instead of using the unreliable compass method, I'm using an App called "Lepsi" on my iPhone. This App doesn't tell you how much magnetism there is, it only indicates whether there is any. The distance of the object above the screen, by which magnetism is detected, gives you some indication of the strength of the magnetic field, but nothing more. For me, when magnetism is detected, that's enough reason to "Zap" that part on my no-nonsense self-build demagnetizer. Of course, in reality the demagnetizer is not placed anywhere near my iPhone or the other watch-parts / metal-objects like here on the photo. Also, it may be a good idea to take your watch off during the "zapping” operations! Quite a few parts, particularly in the calendar works, were magnetized. With the main-plate anti-shock Chaton cleaned, pegged, cap-stone oiled and re-installed in the main-plate (1), the assembly of the 7751 can begin. Escape wheel (13), Second-wheel (14), Third-wheel (15), Main-spring barrel (12), Great-wheel (16) and Stop-lever (17). Installation of the barrel-bridge (18) (by a 7750 the wheel-train the and barrel-bridge are combined in one bridge). Make sure that all the wheels turn fine before tightening the screws; check, check and double check. Again, if you using the re-installed screws method, some screws may protrude the bridge. (I took the "warning picture" below a little later, so don't look at any additional installed parts) All the Lubrications as per the ETA 7751 "Technical Communication". These two re-installed screws do protrude the Barrel bridge (18). The one on the left will touch the Great-wheel (16) and the one to the right may just touch the main-spring barrel (12). Back them out far enough so they don't cause any trouble. The installation of the Crown-wheel (21), Crown-wheel core (22) and the Ratchet-wheel (23). With the movement turned over, installation of the keyless works; Sliding-pinion (3), Winding pinion (2), Winding-stem (4), Setting-lever (5), Yoke-spring (7), Rocking-bar (8), Yoke (6) and placing of the Time setting gear (9) before placing the Intermediate setting wheel (10) and Setting lever jumper (11) as a "combination". Keyless work completed. Check for proper working! Installed the pallet-fork (24) and the complete balance assembly (26 & 27). Cleaned, pegged the balance Chaton and oiled the cap-stone. Before going any further with the assembling, I tested the power-train and escapement for any irregularities. On the timegrapher the readings were looking a whole lot better than initially. Instead of picturing each position, here are the readings; DU & DD both 292-294 degrees, 0 ms and 0 s/d. CU: 244, 0.1, -14 s/d CR: 249, 0.2, -16 s/d CD: 252, 0.1, -6s/d CL: 262, 0.0, -5 s/d Even though I adjusted the Etachron as good as I could, that's to say centring the hairspring between the two regulator pins and thereafter reducing the regulator pins gap to the point that the hairspring could still, but just "breath", the positional deviation with max. 16 seconds is slightly higher than I was hoping for. Then again, it's not a chronometer grade and each position produced straight lines, so I think that with some daily-rate adjustments the watch will run just fine. Once satisfied with the running of the power-train and the escapement, the assembly of the chronograph can start. Cam jumper (28), Chronograph cam (29), Detent (30), Minute counter driving wheel 30 minutes (19), Lock (33), Operating lever spring (35) and the Operating lever (36). As said; lubrication as per "Technical Communication" and test the proper function of the start/stop and reset levers. Placement of the Ratchet wheel driving wheel (31) and the Friction spring chronograph wheel (32). Install the chronograph bridge (34); don't forget the lubricate the Reversing wheel jewel on the bottom of the chronograph bridge before placement. Also pay attention to the reset-lever, it has to be pushed in so the bridge can sit level & flush. Check the working of the Ratchet driving wheel (31) and the reset lever before tightening the bridge screws. The placement of a well lubricated Reduction wheel (41), Minute counter jumper (46), Oscillation pinion (39, biggest sprocket down), seconds recording Chronograph wheel (37), Minute counting wheel (38), the Clutch (40), make sure that the oscillation pinion pivot is engaged), Reversing wheel (43) and finally the Hammer (42) before the Automatic device bridge (44). Before installing the Automatic device bridge (44), lubricate the jewel for the seconds recording Chronograph wheel underneath the bridge. The installation of the Automatic device bridge can be very tricky. It's very easy to touch the Clutch (40) and the pivot of the Oscillation pinion comes out. Before inserting or tightening the bridge screws, double-check the placing and working of every component!! Once the bridge is installed and with the relevant lubrication done, before mounting the hammer-spring (45) and the Clutch-spring (47), all the functions of the chronograph can be checked & tested; the engagement of the oscillation pinion, the smooth running of the seconds recording chronograph wheel, the advancing of the minute counting wheel, the start/stop- and reset-levers etc. Next is the installment of the Hammer-spring (45) and Clutch-spring (47). To prevent scratches on the Automatic device bridge (44), as per brilliant idea of WRT member "Nickelsilver", a piece of Scotts tape was taped over the edge of the bridge. With the installment of those two springs, the assembly of the chronograph is completed Movement flipped over and placed in the 775x movement holder. Installment of a well lubricated Driving pinion (49), The Cannon-pinion (50), the Minute wheel (51), Hour counting wheel (52), Set hour operating lever (53+54), Hour counter lock (55) the Hammer spring (56), the Day corrector spring (57) and the Day corrector (58). The build-up, up till the Day corrector spring (57) and the Day corrector (58), was identical as to a standard 7750. The Hour wheel 24hrs (59) drops over the Second wheel (14) pivot. Attention: Sadly, no picture but when installing the Hour wheel (60) over the Cannon pinion, one has to lift the Minute wheel (51) slightly and to make sure that the hour wheel teeth do engage in the small minute wheel sprocket. Once they engage, both wheels can be lowered in place. Finally, before installing the Calendar platform (62) the Calendar driving wheel (61) with the "day finger" pointing as shown. From here on I pulled the winding stem to stop the running of the movement and thereby avoiding the advancement / altering of the positions of the wheels. The installation of the Calendar platform (62) can be a bit tricky. It's all too easy to dislodge the hour lever (53) and the Hammer spring (56). Make sure that the platform sits flush with the Main plate (1) before tightening the 3x screws. Place the Day star (63) as shown in both above pictures. Placing of Date + Month jumper (70), the Day + Month jumper (74) (Both jumpers are identical), Day jumper (72), Moon phase yoke (73), Day jumper spring (71), Date corrector (65), Corrector maintaining small plate (66), Moon phase corrector (68), Moon phase jumper (69) and Moon phase jumper spring (67). Installation of the Moon phase platform (75), the Combined maintaining plate (76) (Be aware that the top of the Combined maintaining plate slides in the gap of the Day Star) and the placing of the Month star driving wheel (77). Placing the Month & Day indicator disk (78) and the Moon phase indicator (79). Adjusting the Phase corrector eccentric (64) wasn't that hard as I feared. By adjusting the eccentric one determines the "depth" of the Date corrector (65), shown by the blue arrows. Set too high and the top-sprocket of the Date corrector (65) won't even touch the Moon phase corrector (68). Set too deep the top-sprocket of the Date corrector will jam the Moon phase corrector (68) into the Moon phase indicator. The "depth" has to set such that the sprocket of the Date corrector (65) pushes the Moon phase corrector (68) just far enough so that it will just advance the Moon phase indicator by one click before the top Date corrector (65) sprocket releases the Moon phase corrector (68). There is clear information about the Moon phase corrector "depth" setting in the ETA 7751 "Technical Communication". With all parts installed and tested as far as possible, the dial goes back on. Before re-installing the hands, I re-lumed the minute & hour hand with new high-class LumiNova. Both hands now re-lumed and drying before the installation. Placing the long Date indicator hand required a bigger size hand-pusher which I didn't have. The idea was born to cut a tweezer protector-cap from the top until the required size was obtained. Stuck to protector cap onto the handle of a diamond file for more stability / pushing-power. It worked like a treat Turn the date quick-set until the month indicator disk changes month, that will be the first (1) day of the new month. The rest of the hands (8! in total) to be set at 24:00 midnight when the day indicator disk changes. Detailed instructions about the "shift tolerances" are described in the ETA 7751 "Technical Communication". All the hands installed and correctly set on the month / day / date and moon phase. The 18th of January 2022 had a full moon. The German gentleman received the watch when he turned 60 in 1995, now I'll continue with his watch as from my (65th ) birthday in January 2022 I'm still awaiting new crystals and once the case has been restored, I'll add the final picture of the fully restored/serviced watch. I really enjoyed working on this watch and even though I sometimes feel that contributing to this current WRT-forum has sadly become a bit of wasted time, I do hope that my write-up, perhaps found via Google or some other search machine, will be of some use to somebody, at some point in time Endeavor, Denmark


 1 point
 -
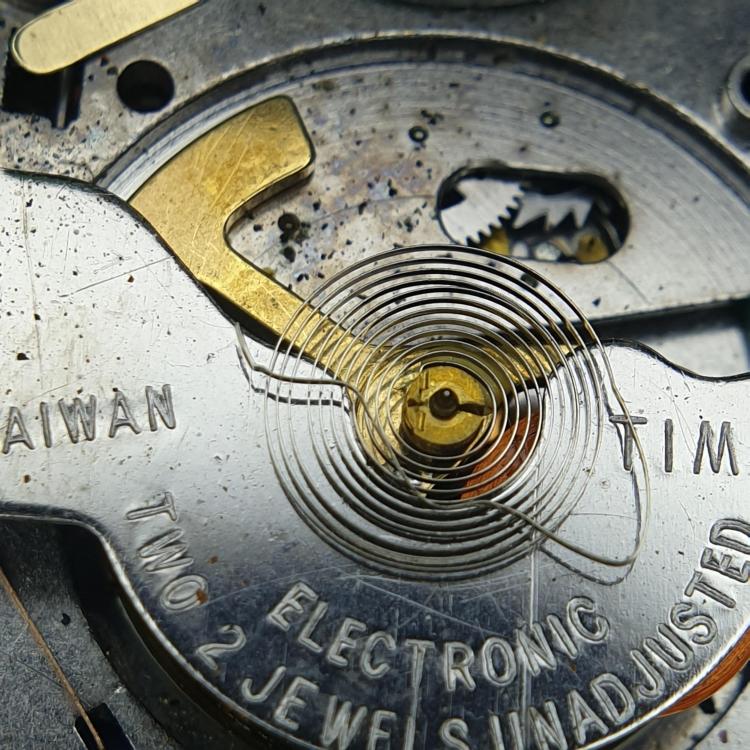
I found a box of watches at the back of my cupboard that I had totally forgotten about. In it was this Timex electromechanical quartz watch. It had a nice dial but everything else was about was cr*p. I took off the caseback and found that someone had gotten into it before. The hairspring was mangled until it had an "overcoil". And the back must have been left open for some years as the was cockroach poop inside! As there has been recent interest in Timex Electrics, I thought I'd refamiliarize myself with them, to be able to give better advice. Looks like I'll be busy for awhile.

 1 point
 -
nicklesilver, You haven't lost your touch in those couple of decades. You were exactly correct. Screwed right out with very little effort. Thanks a bunch. jim
 1 point
 -
I thought that crotons were the things that you added to soup.1 point
-
Great walk through! Very detailed. Thanks1 point
-
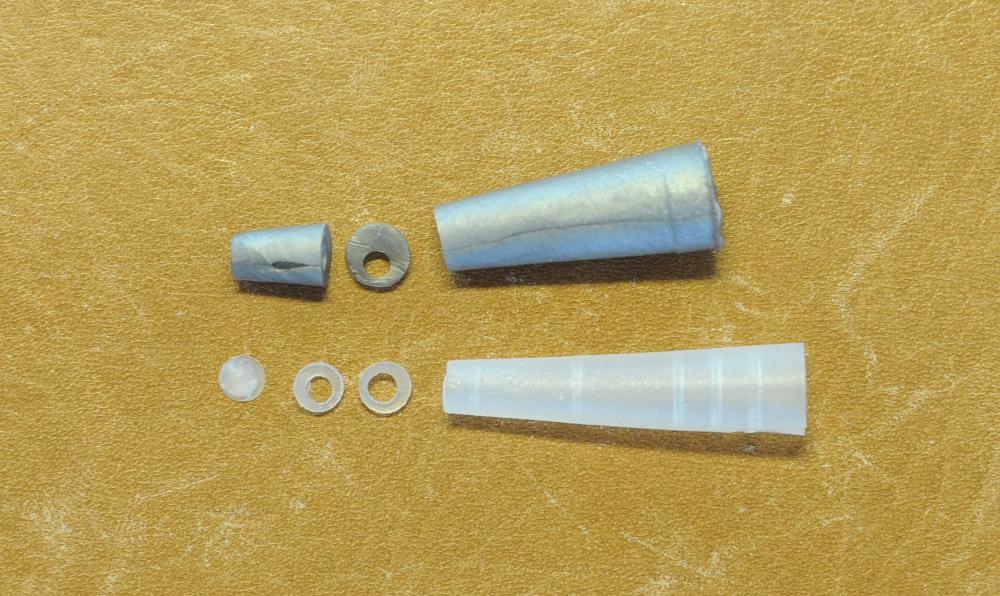
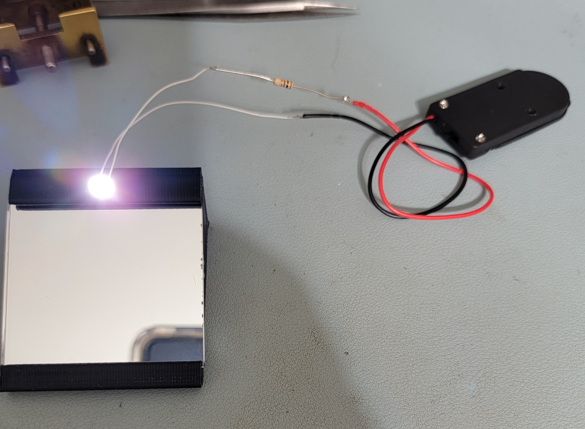
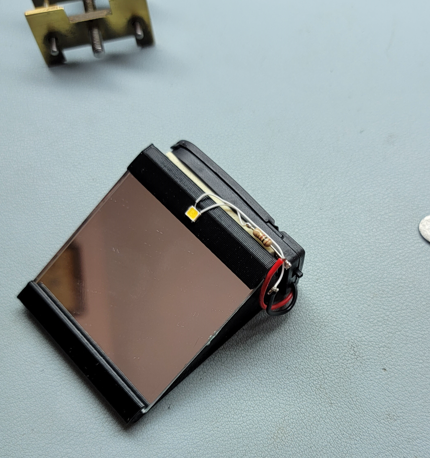
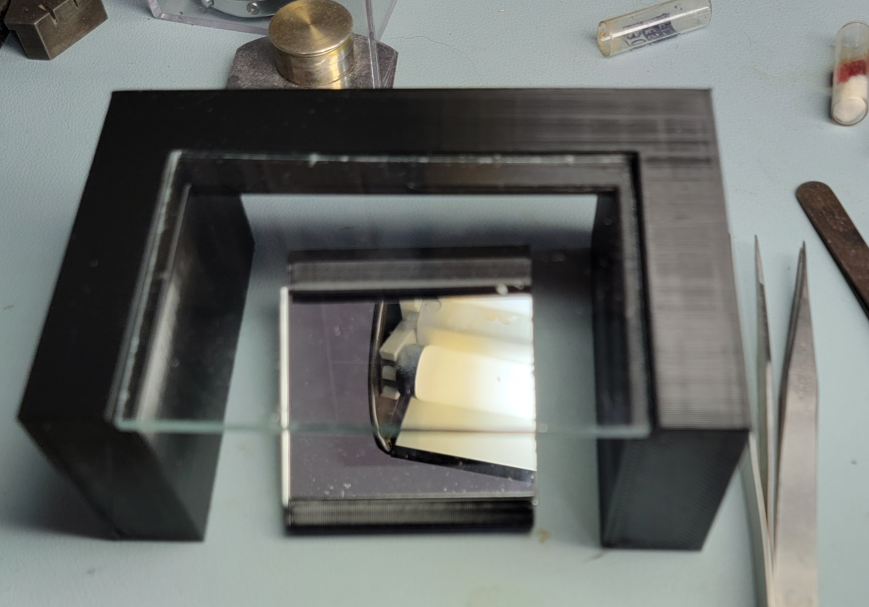
I discovered that this thing NEEDS LIGHT. I cannot see the face of the watch on the glass because it is too dark. Using a COB LED that I salvaged from a light bulb (one of many) and a dual 2032 battery holder/switch, I cobbled together this solution.
 1 point
 -
Hi according to the database its dated between 1913 and 1914 and is a 19Ligne1 point
-
Hello and welcome to the forum. attached is a document worth reading. TZIllustratedGlossary.pdf1 point
-
Hi Nearly all the makers as OH said are different, subtle but different and are as such not interchangeable, I think there is a mougin movement in my stache with a broken pallet arbour so the barrels are intact, I will have a look see what ive got and will be in touch.1 point
-
Thanks for your comment Endeavor. Yes i had wondered about the possibility of learning those skills myself, but tooling up to do all the things i will want to do like properly clean the parts change the glass, polish the case, brush the bracelet might be almost as expensive as a service and as you say i know i will need parts. Would be very satisfying to be able to do though.1 point
-
Is this it? http://www.ranfft.de/cgi-bin/bidfun-db.cgi?10&ranfft&2&2uswk&Omega_19LOBNN1 point
-
Yes. Good old Timex! It's like their engineers sat around all day looking for ways to frustrate watchmakers. I learnt this from JerseyMo too. You see the little bar sitting in the winding stem groove? Try lifting it out of the groove and the stem will release. Easy!1 point
-
Maybe this Unitas logo? Looks a lot nicer than just "UT". https://www.watch-wiki.net/doku.php?id=unitas1 point
-
The 2.3mm arbor should be small enough for most springs. That's about the size of my smallest arbor. Though I had an Eterna which was smaller than that. I broke 2 springs before I could get the inner coil bent correctly. Don't worry too much about lining up the hole in the spring with the arbor. As long as the inner coil is small enough, use some strong tweezers to push the arbor in, start it at an angle, then just twist it until it the hole catches on the arbor.1 point
-
Thanks, JohnR, that did it. I was able pry the back off at the slot located just below the crown. Prior attempts at removing the crystal with my lifting tool were not successful as I could not get a good grip on it even though it has worked well on other watches.1 point
-
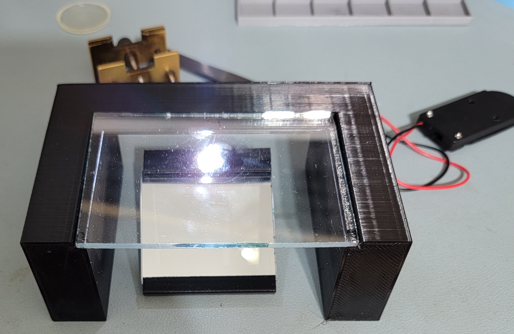
I decided I needed more viewing area. Here is the next REV of prototyping. Picture a little fuzzy but you get the idea
 1 point
 -
Those screws are to be removed to take the back plate off, to stay on the safe side, put some penetrating oil on them and dress your screw driver for a good fit. Spares are hard to find in my neck of the woods anyway.1 point
-
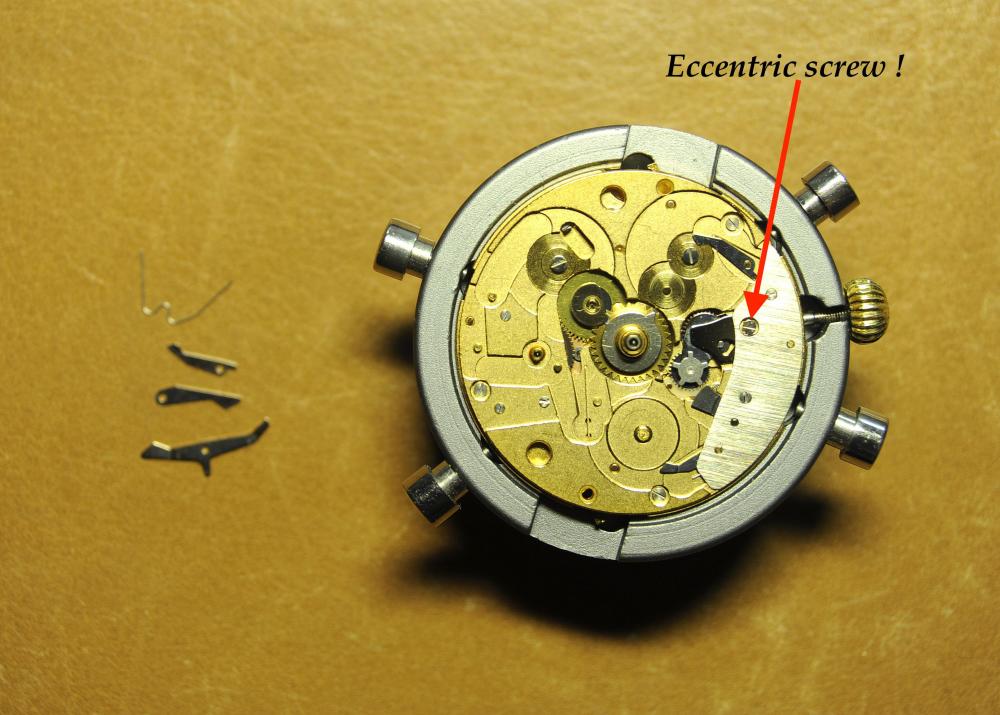
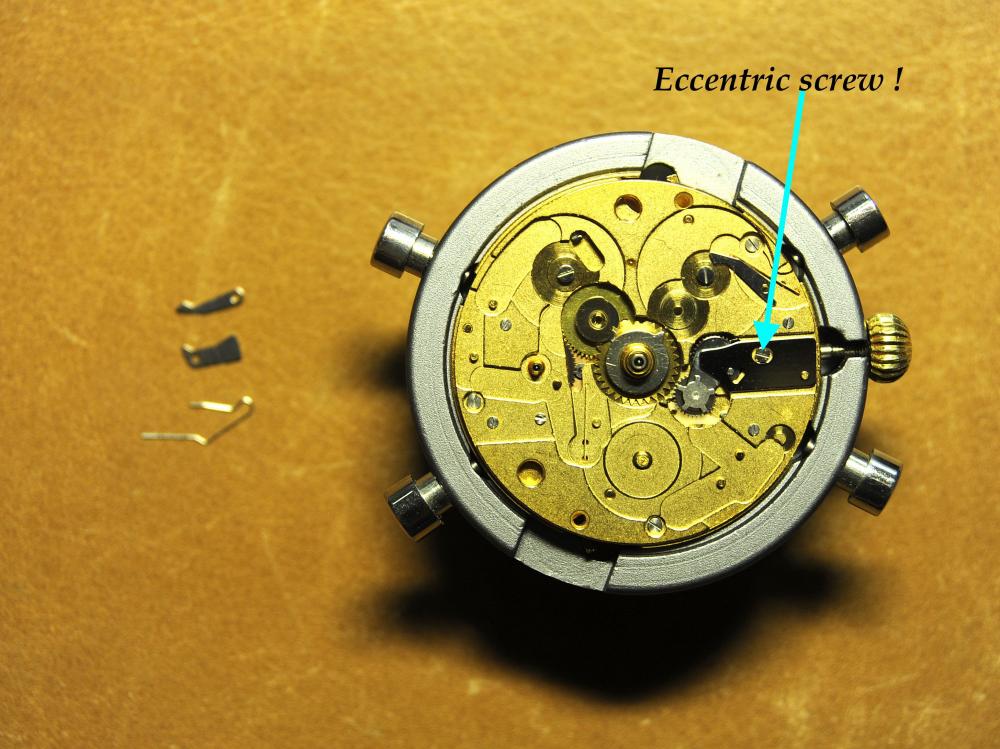
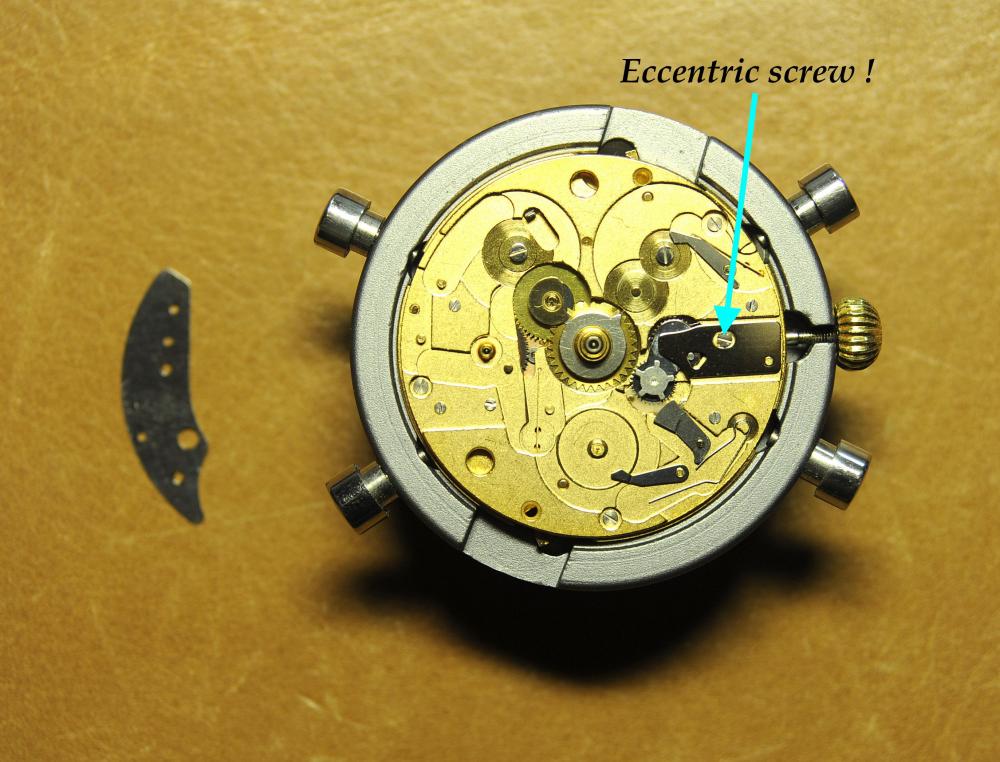
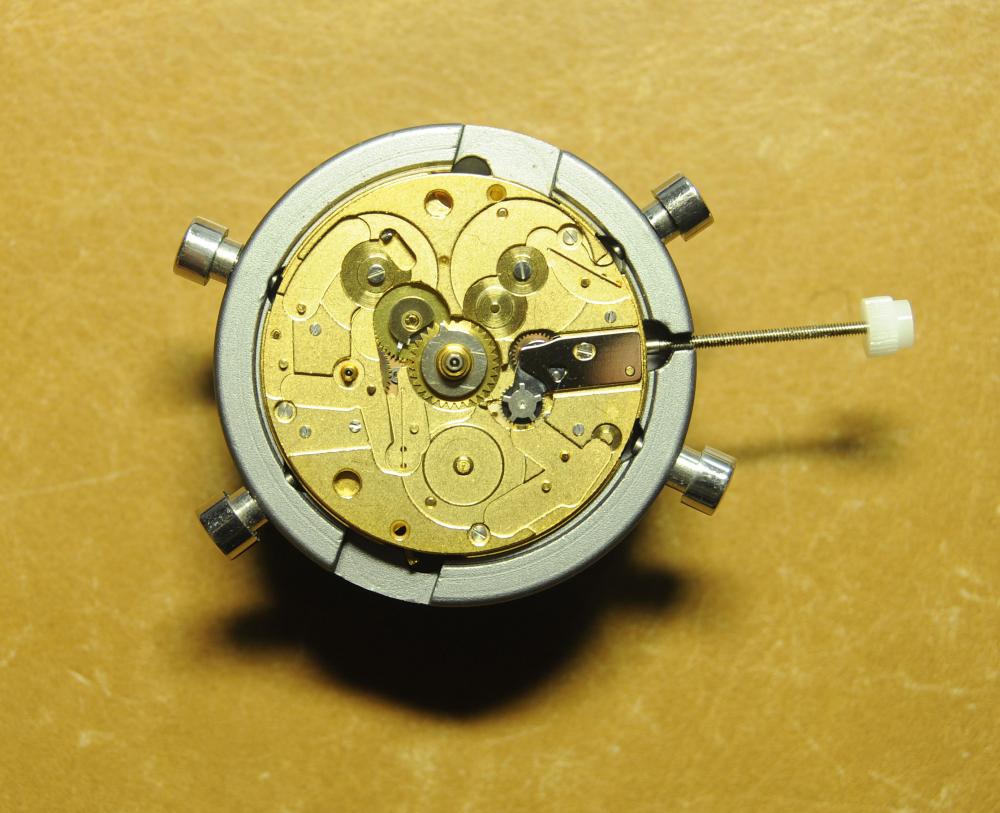
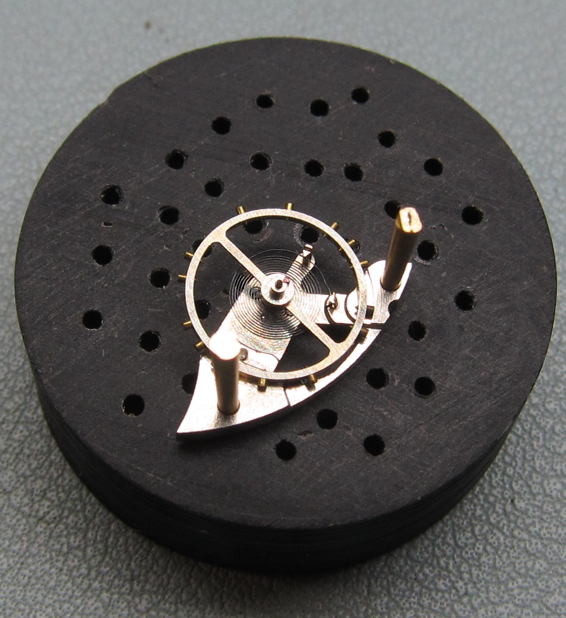
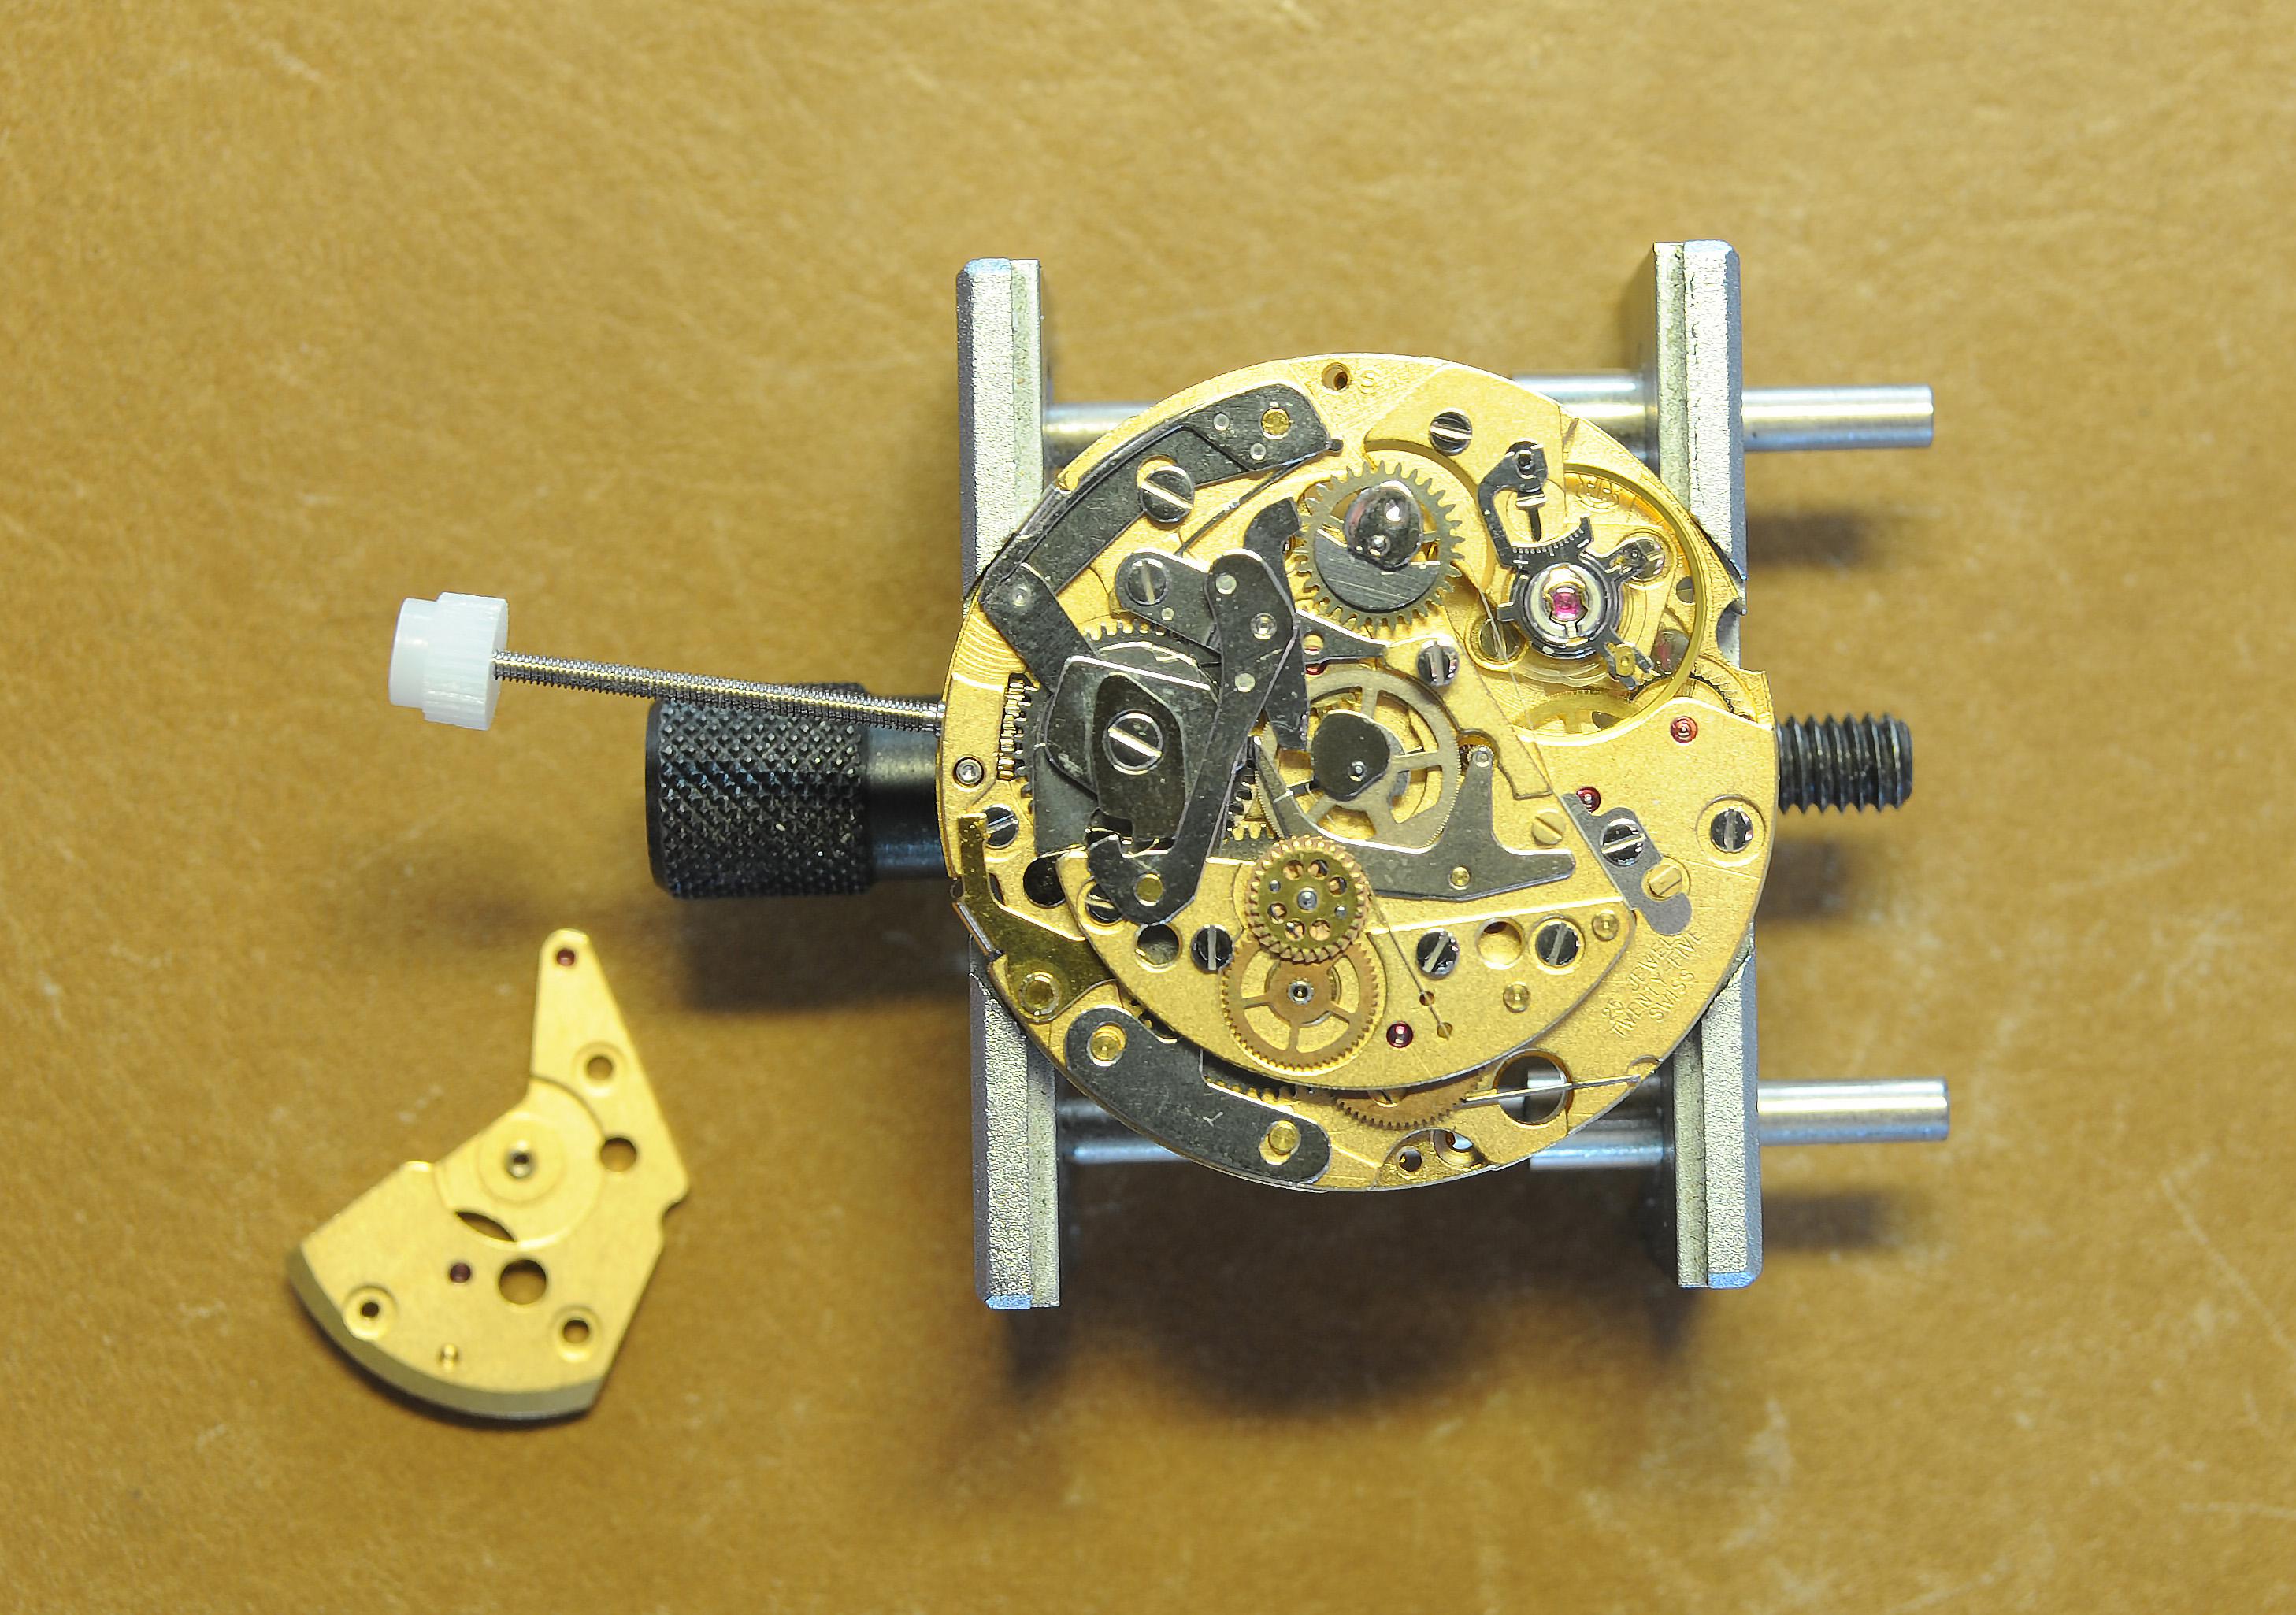
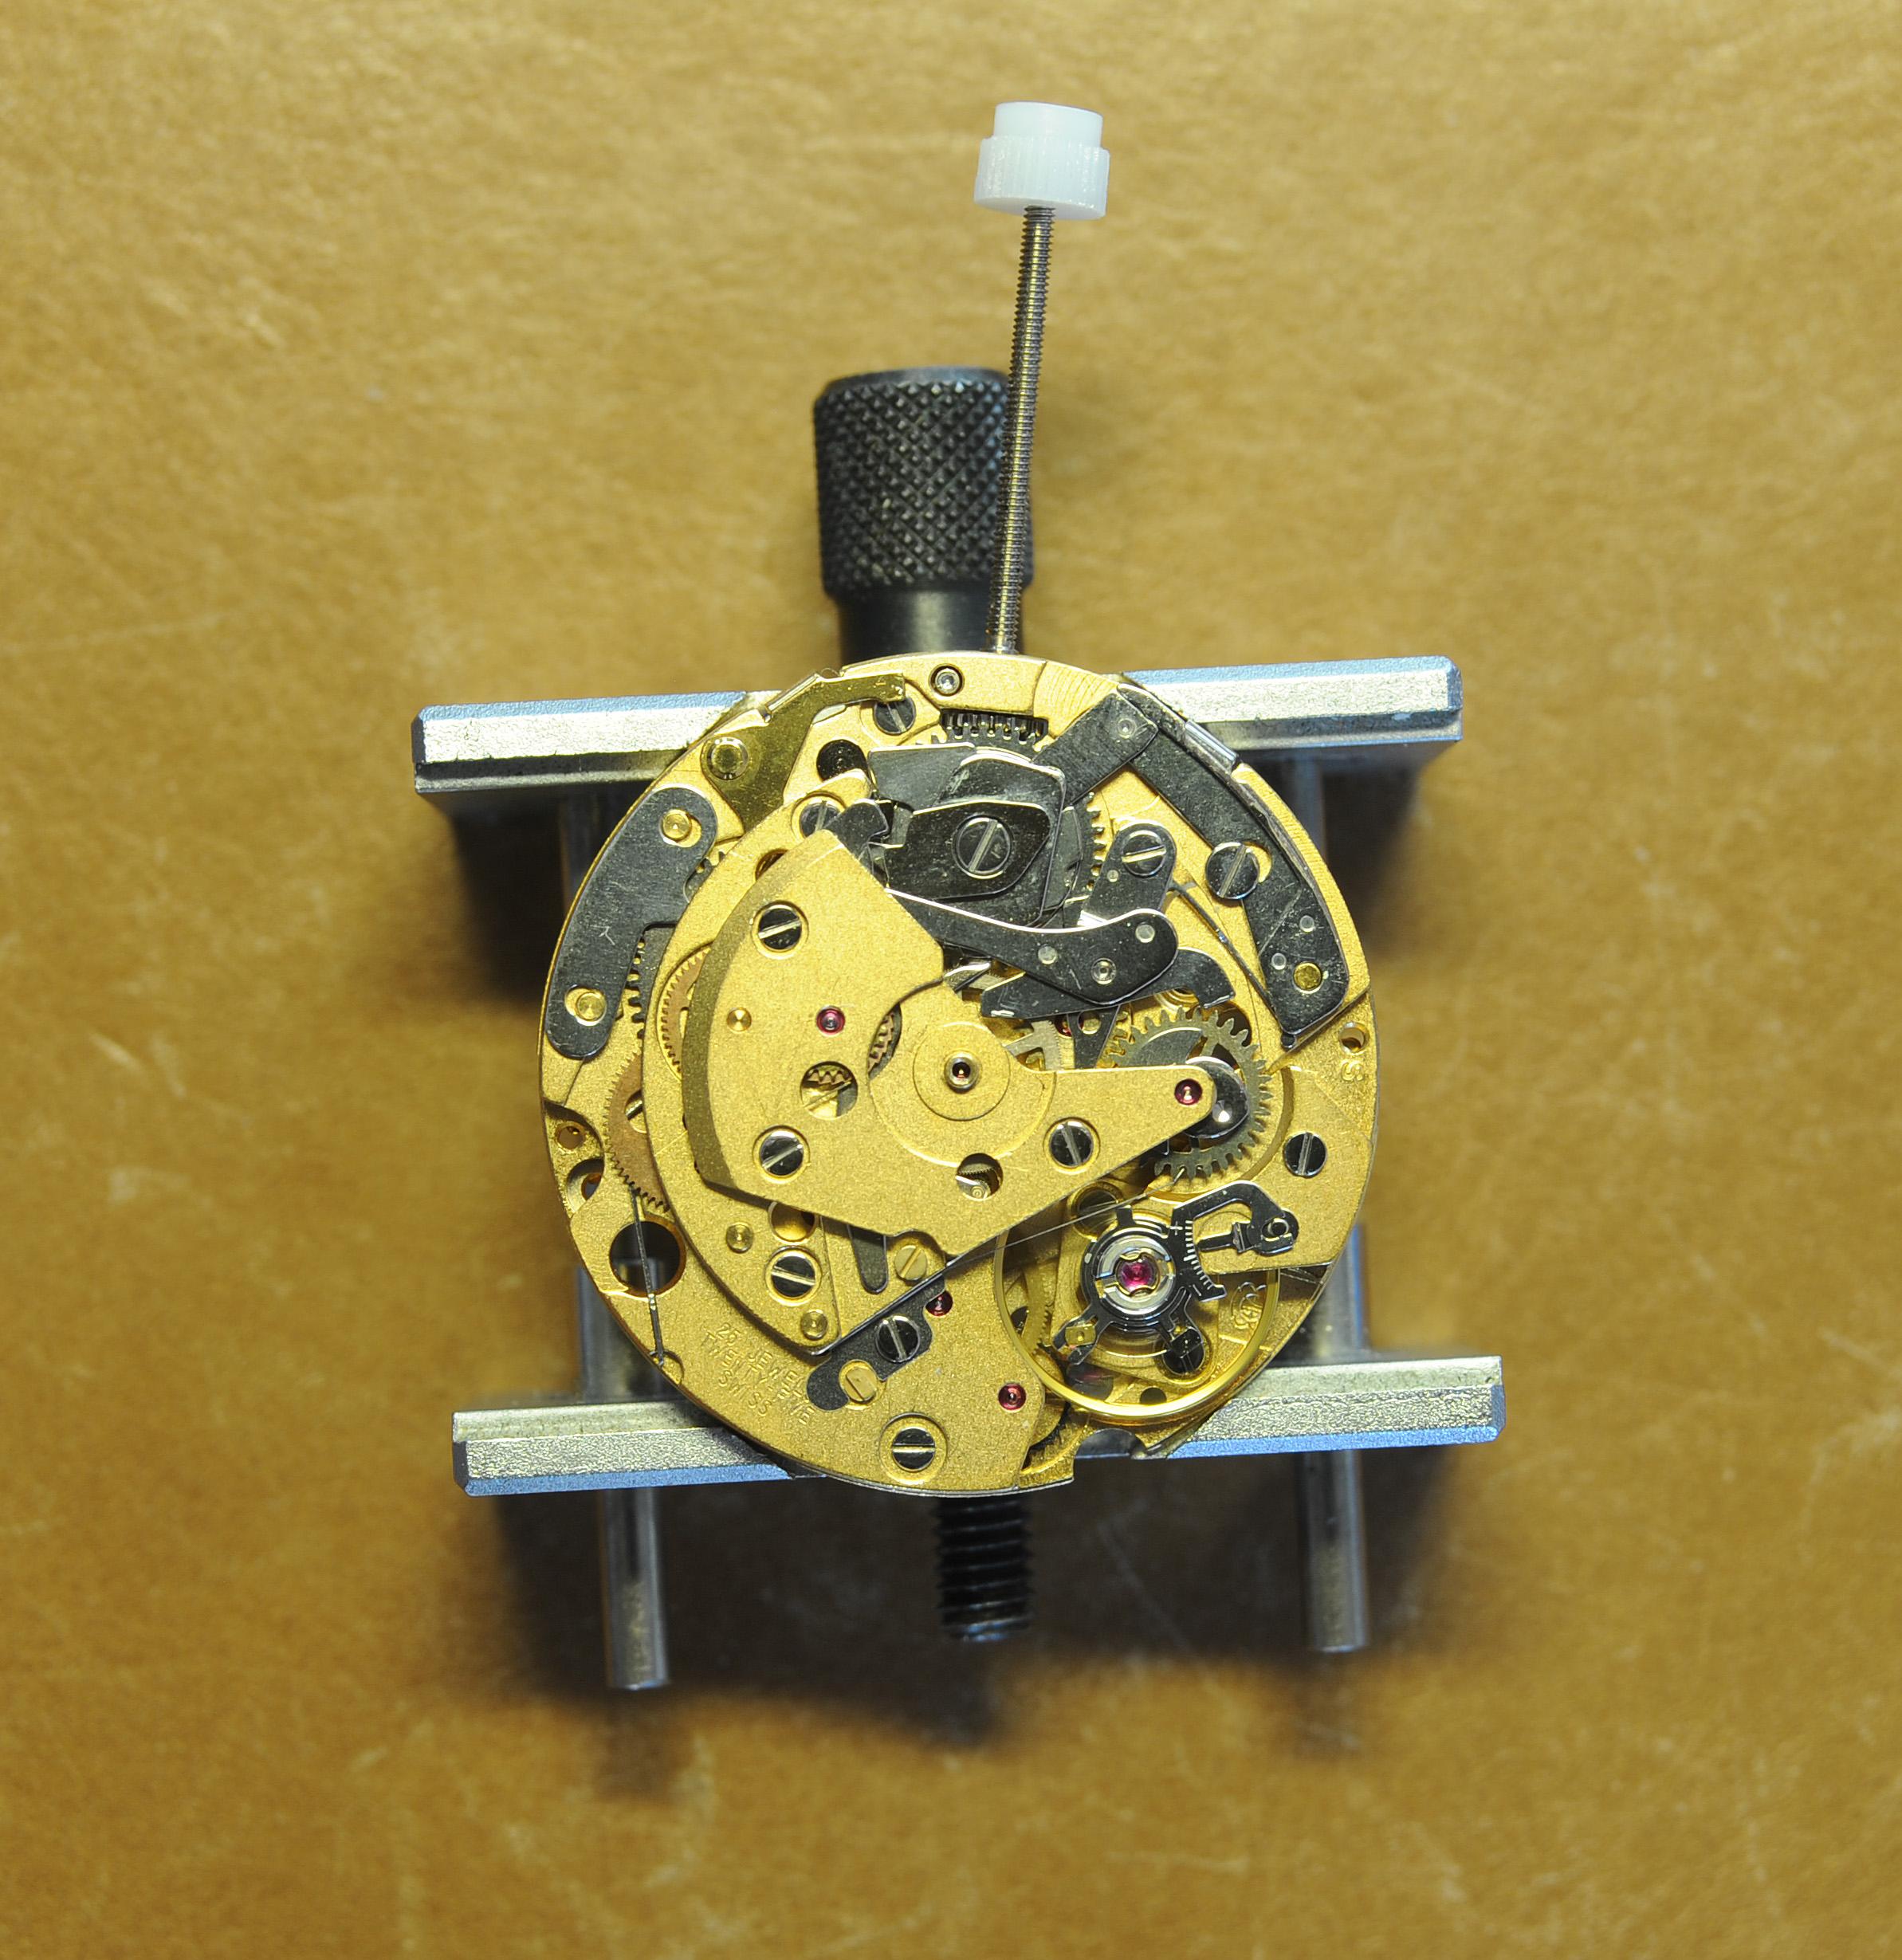
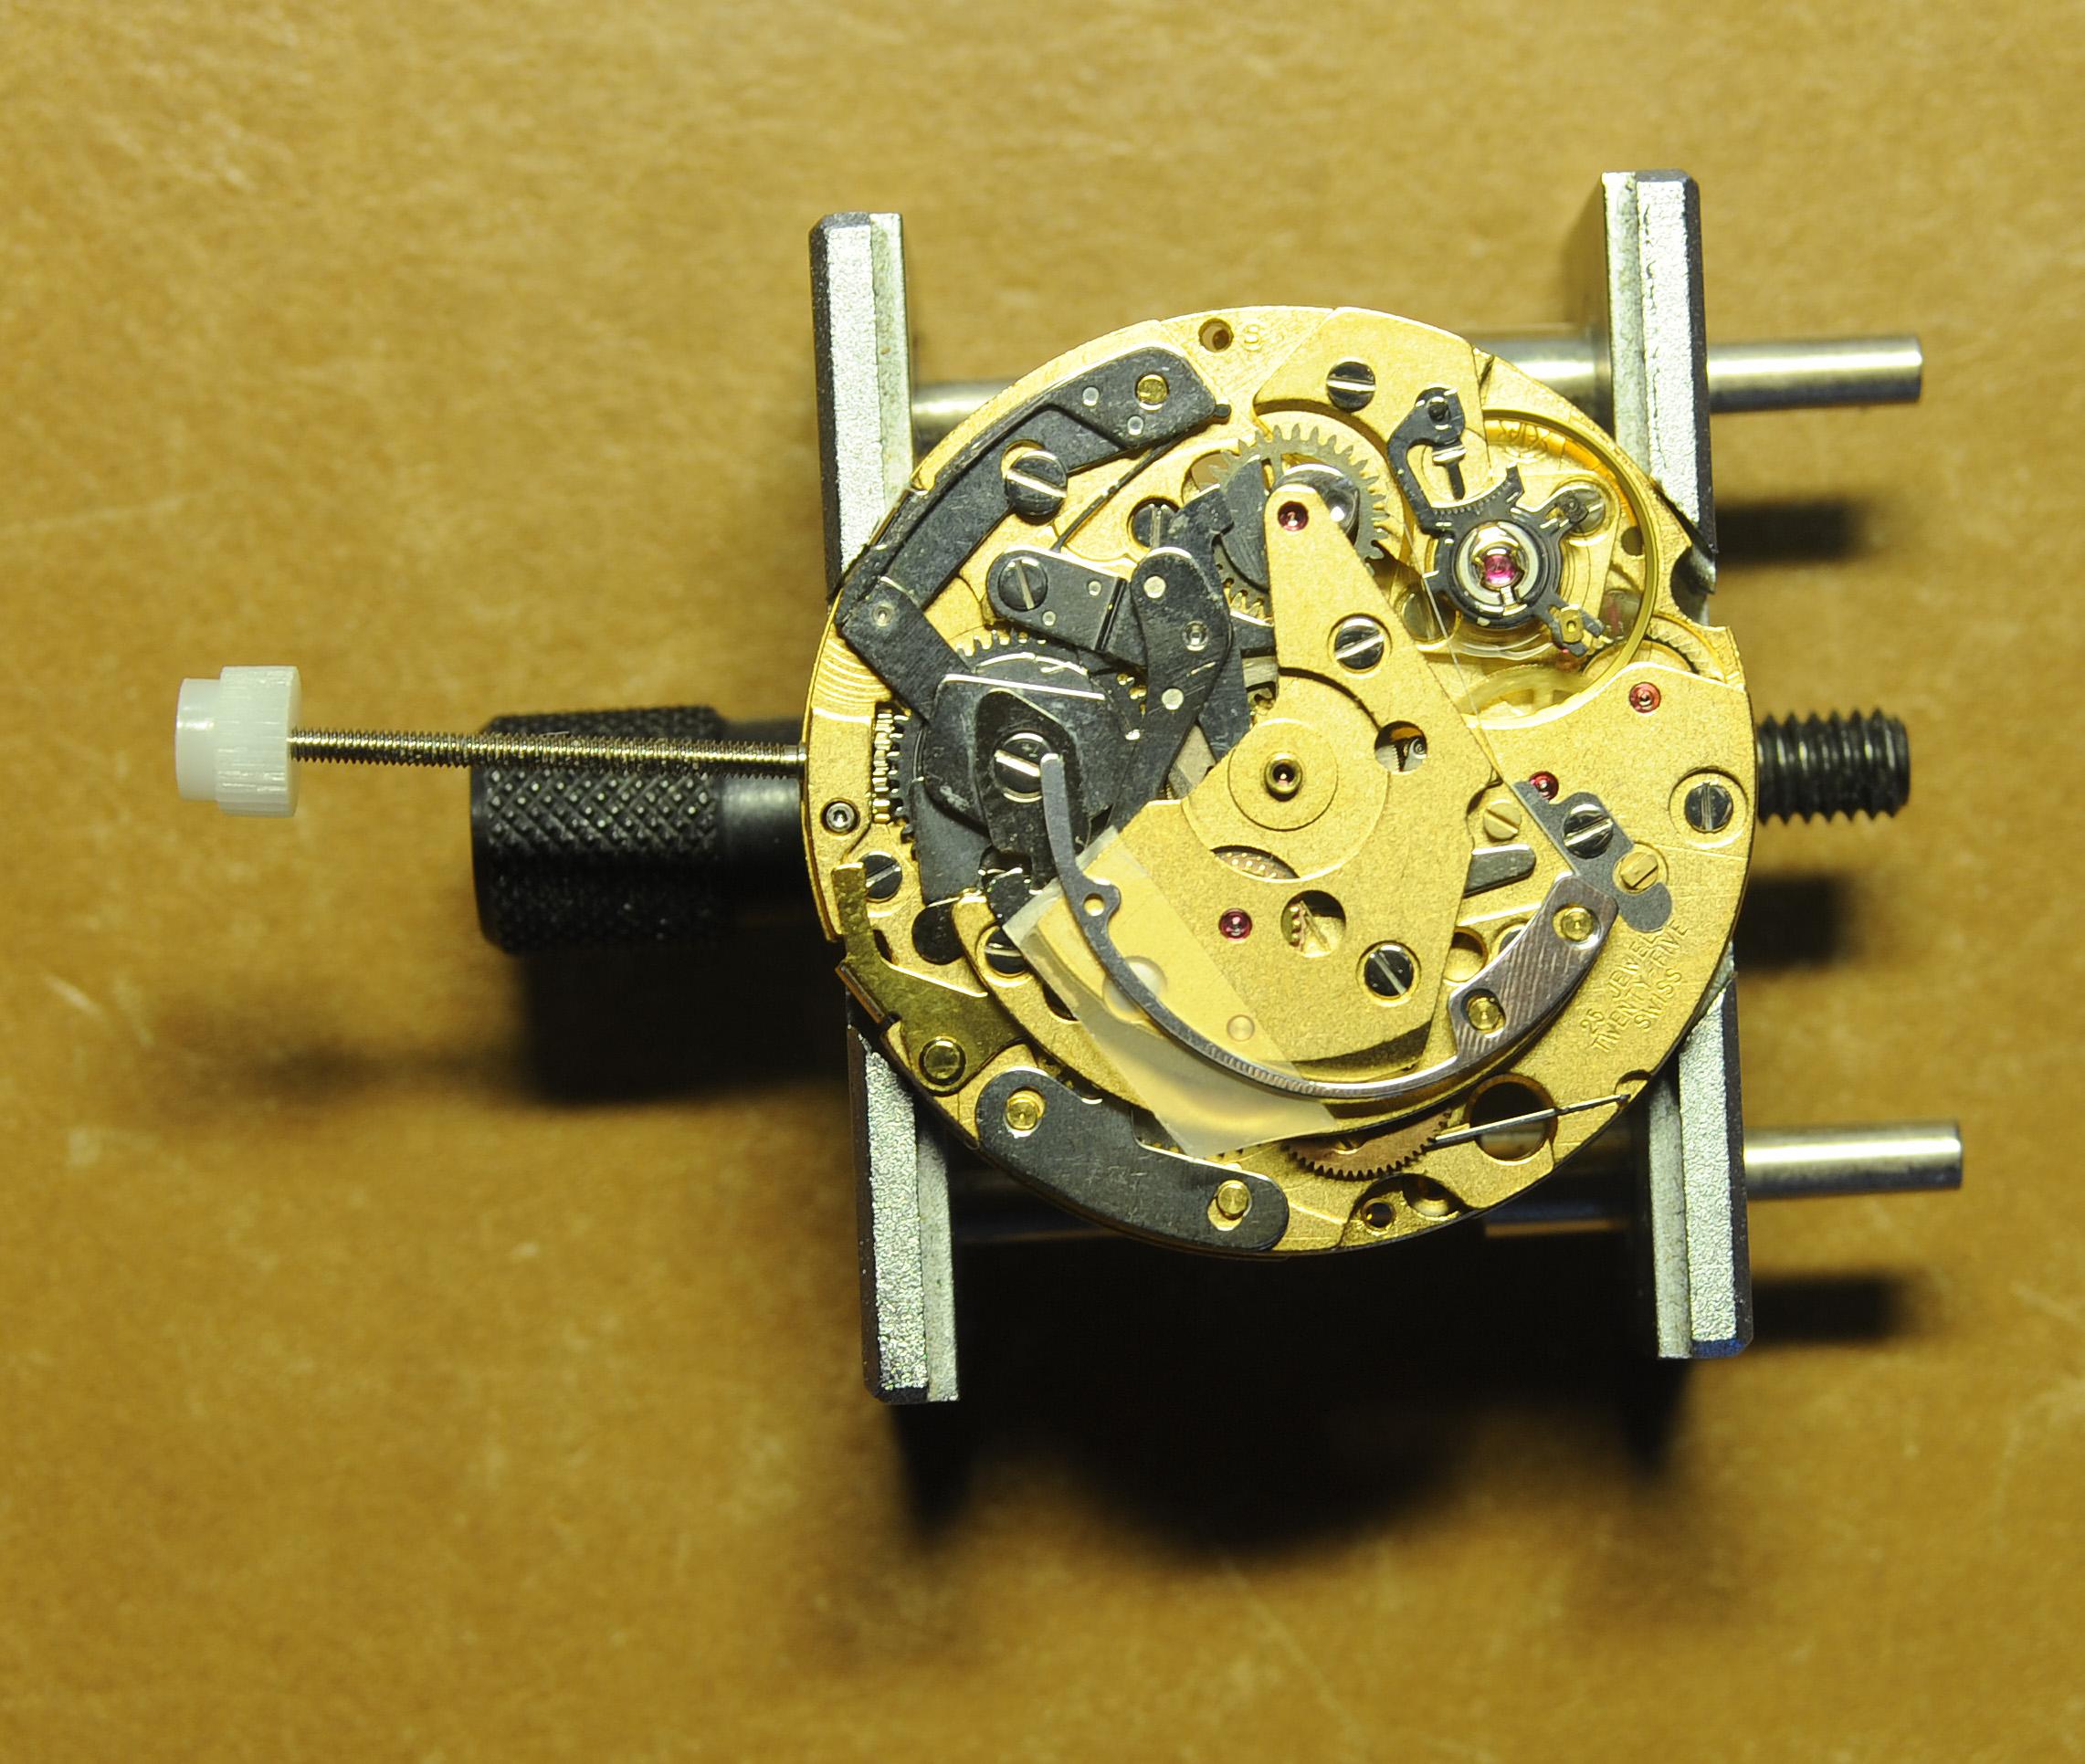
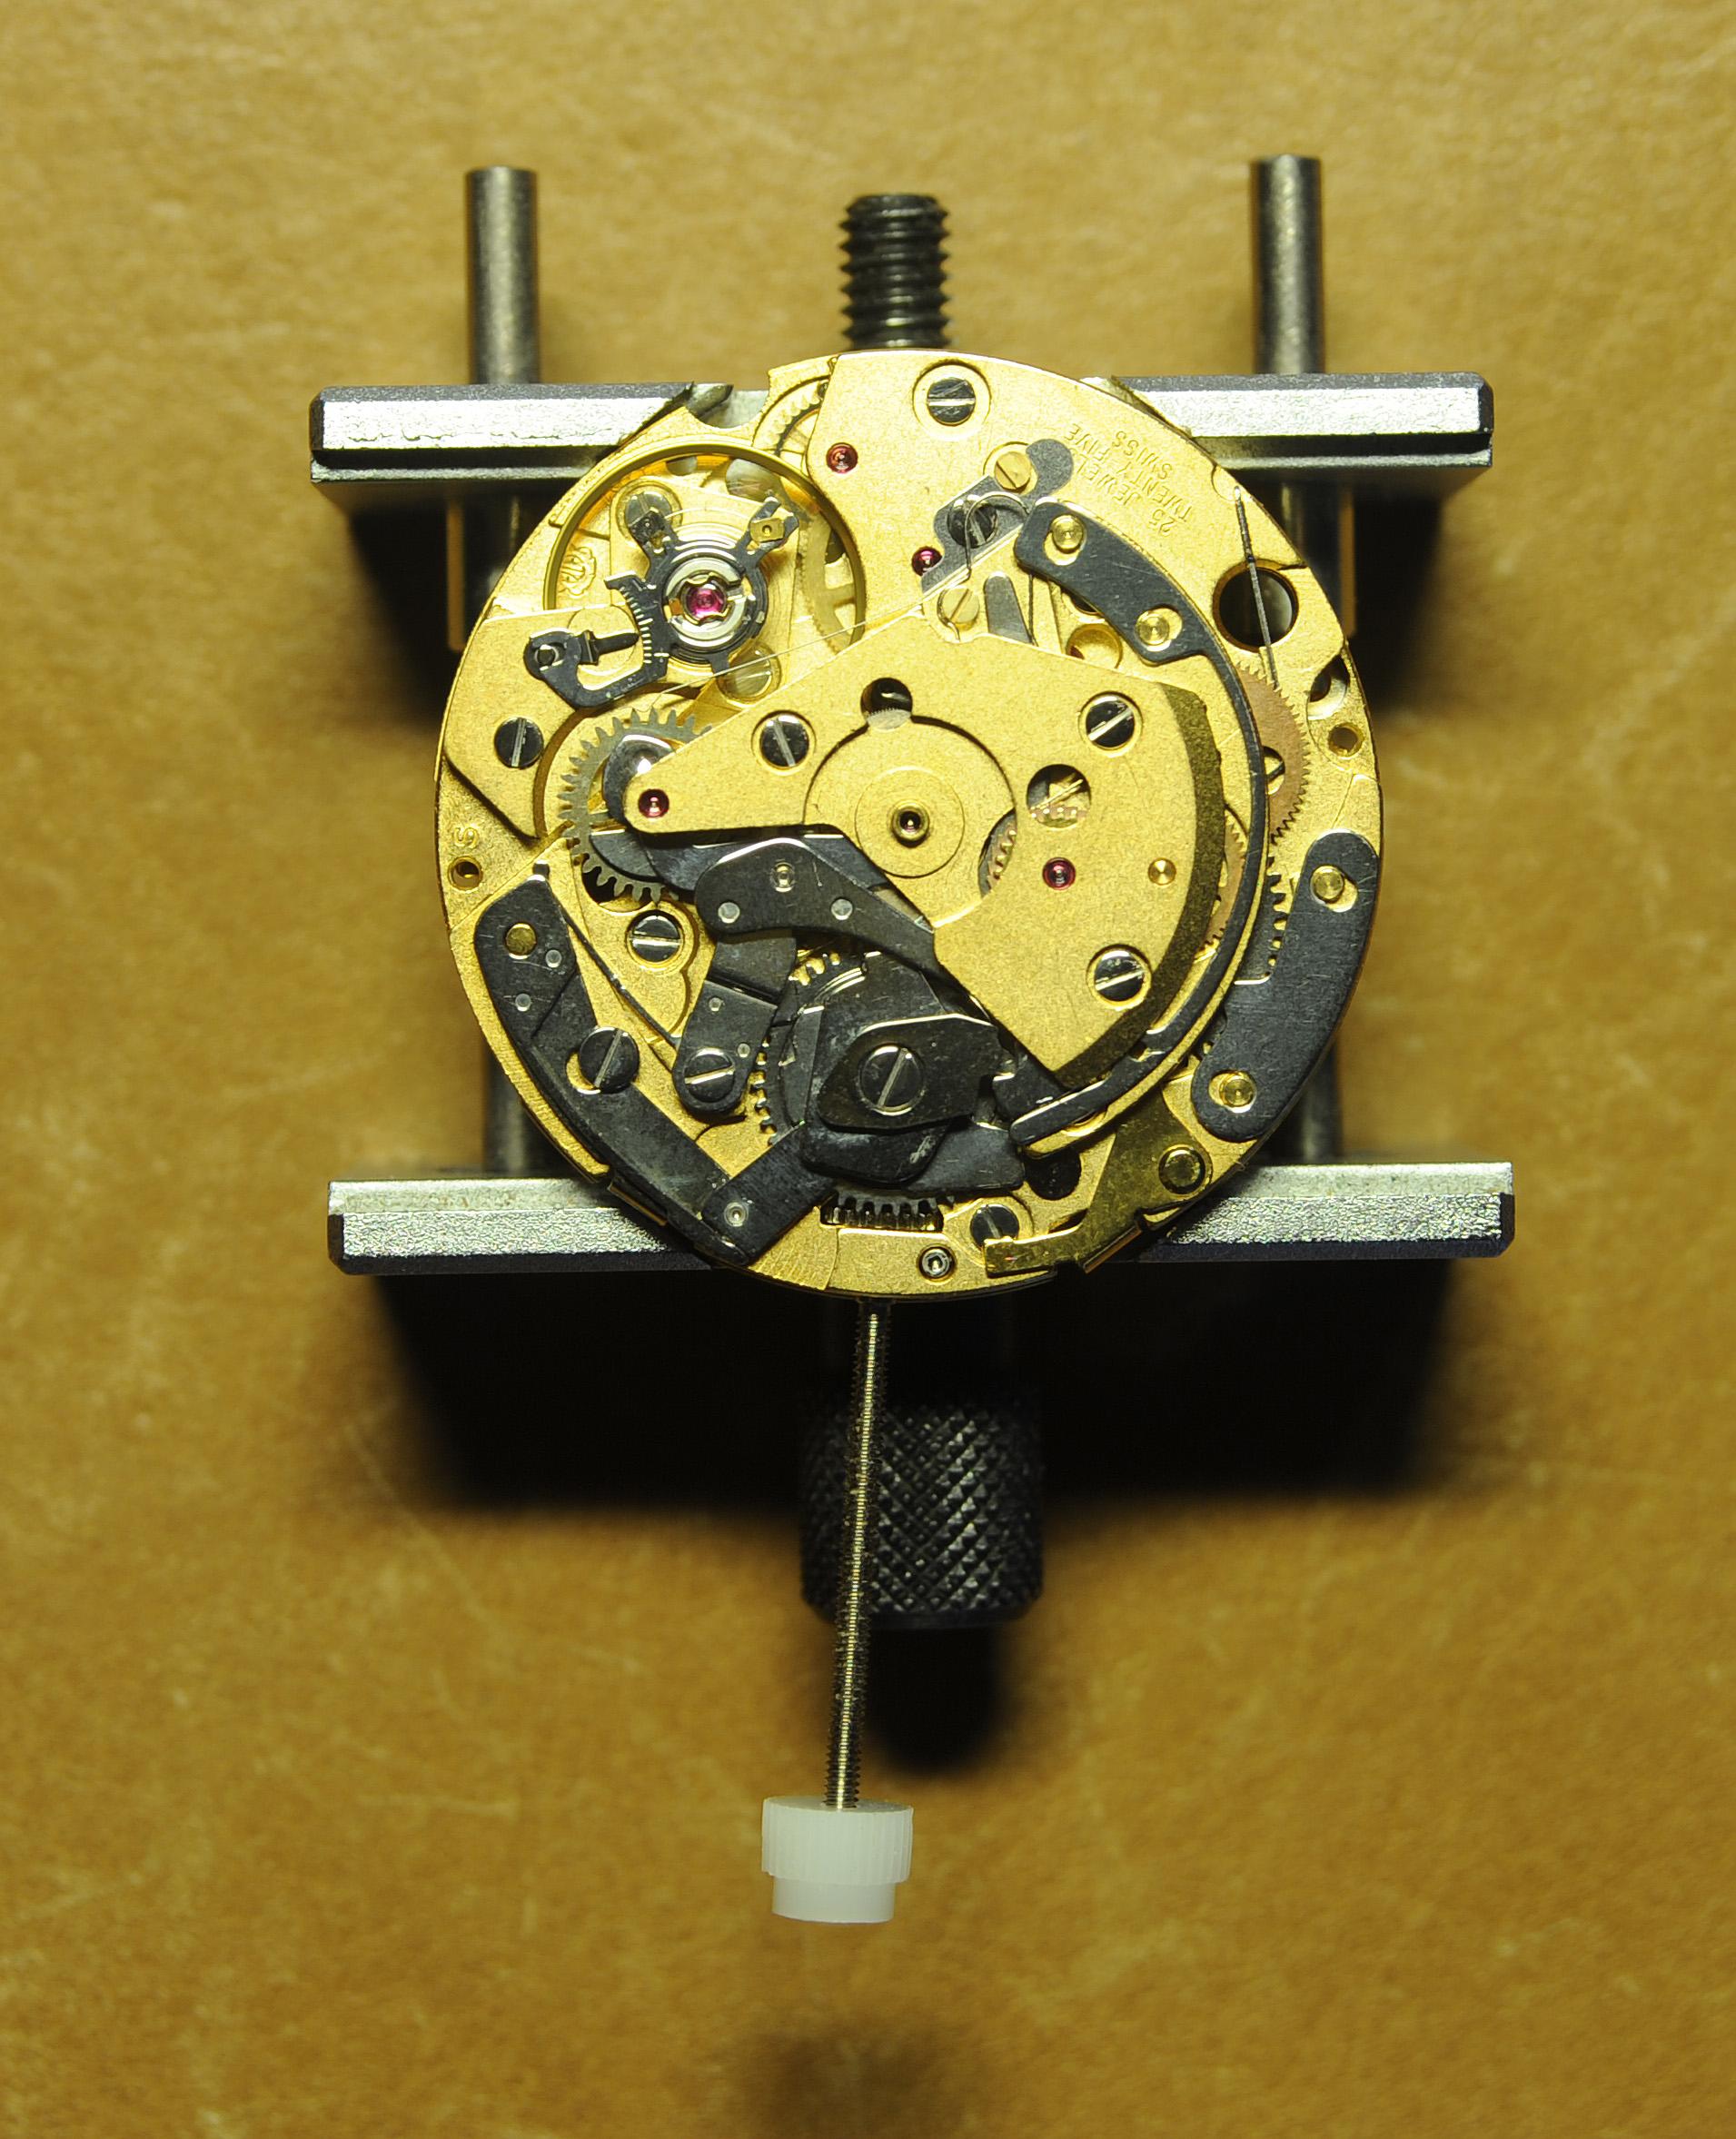
Stabilizing the balance cock while removing the balance and hairspring (removing stud, and turning the shoe) is always challenging for me because of stabilization. I think I have solved this today. I printed this multi-hole base to mount the balance cock and using brass tapered pins I do the stabilization. My example here is probably the optimal case because the cock has two holes (balance for a Vulcain Cricket 120). I will report back on success with single-hole cocks.
 1 point
 -
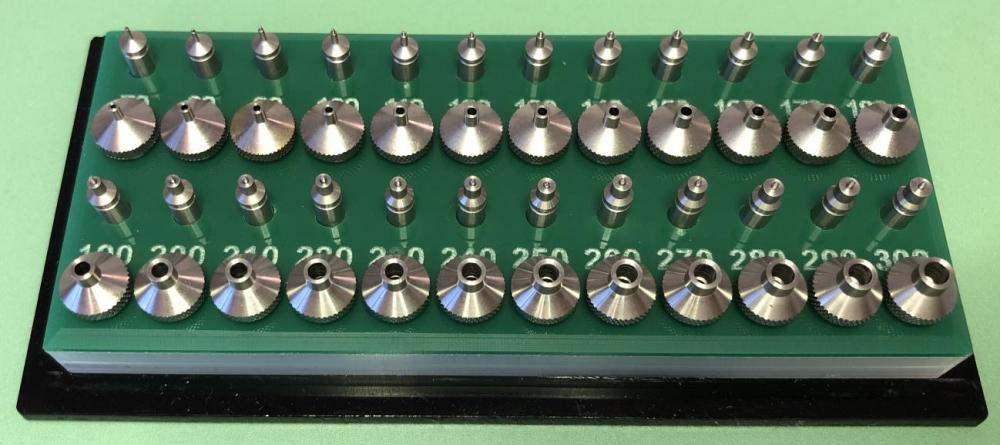
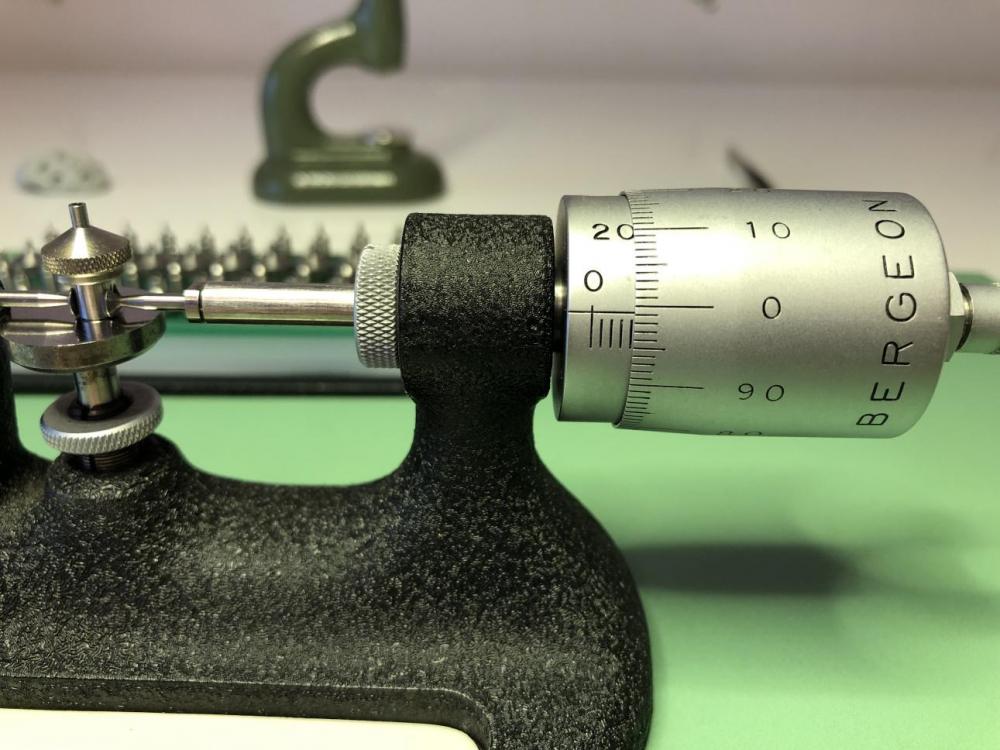
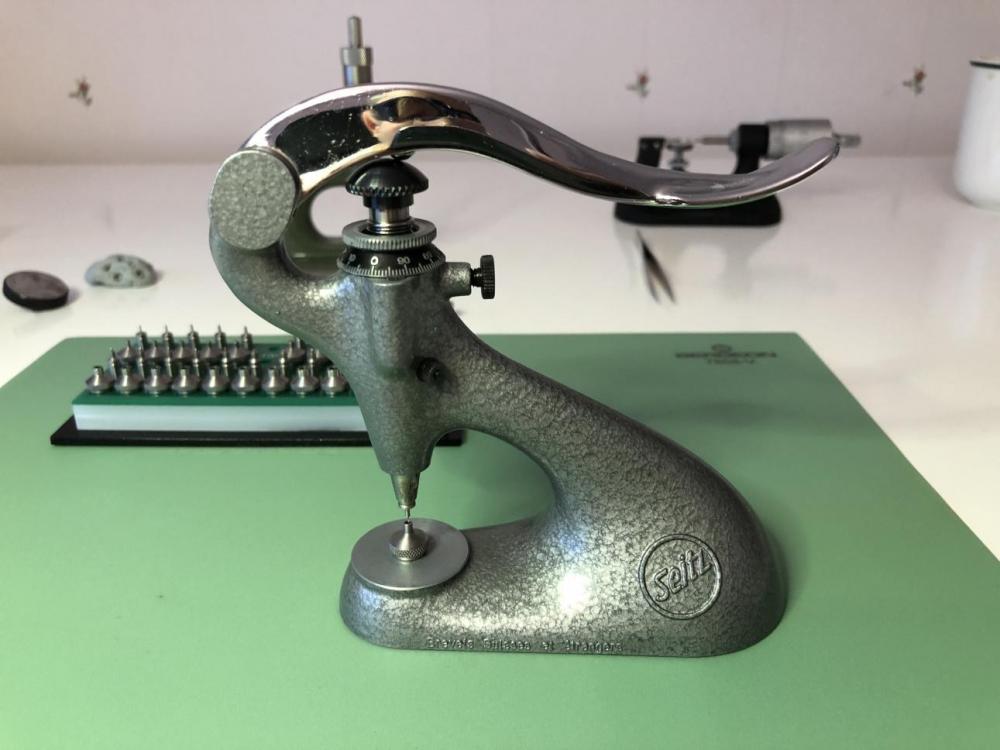
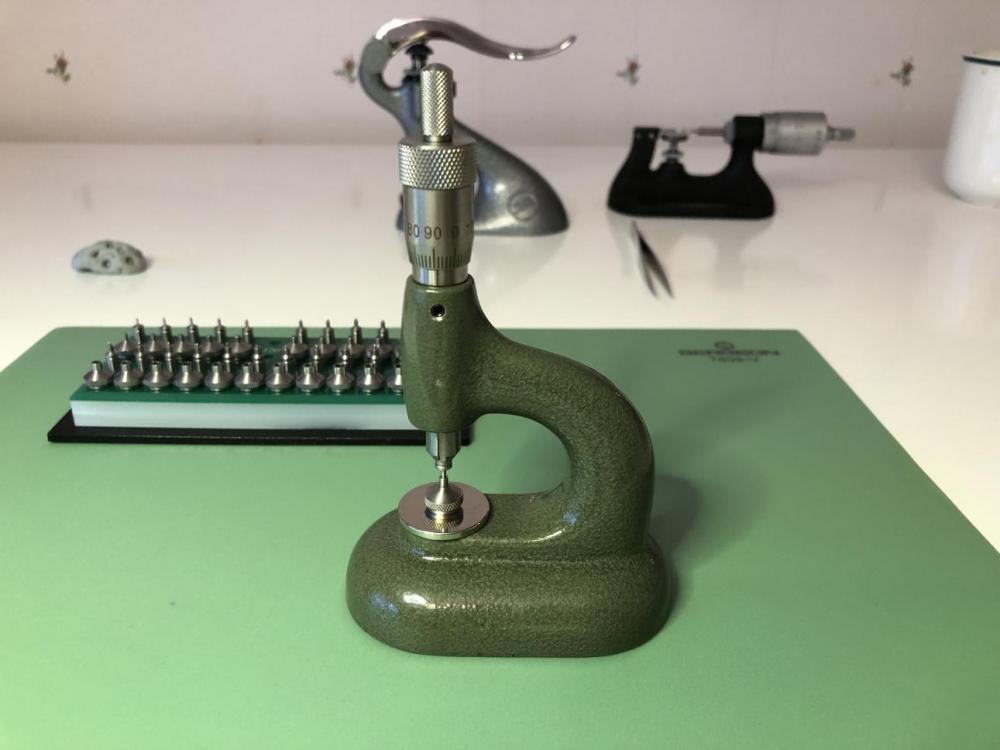
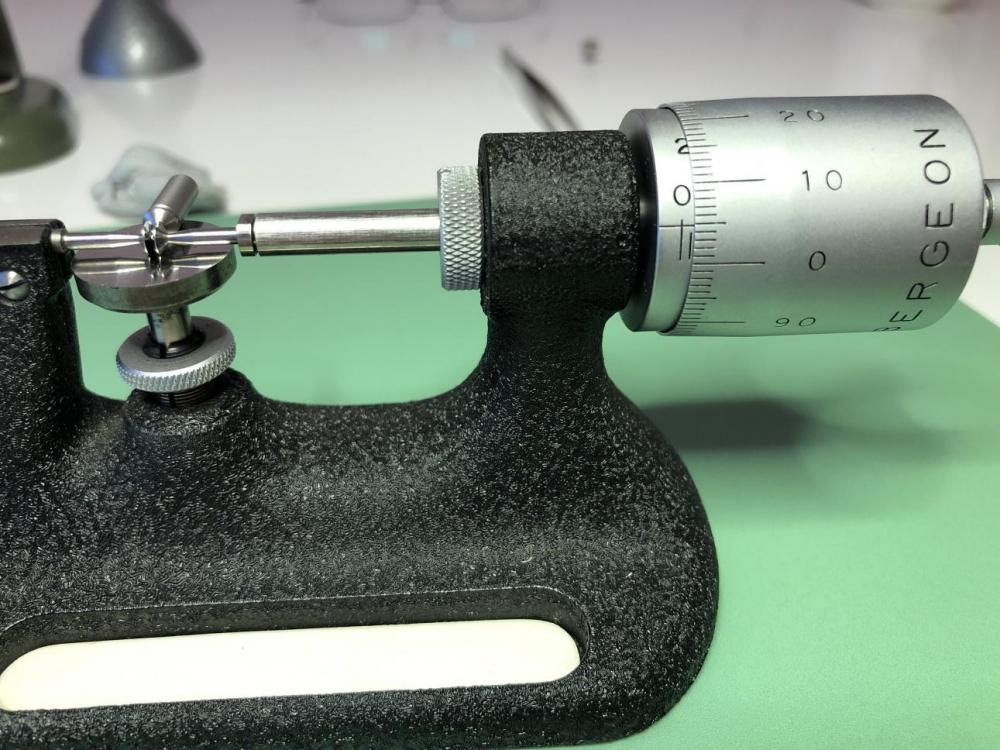
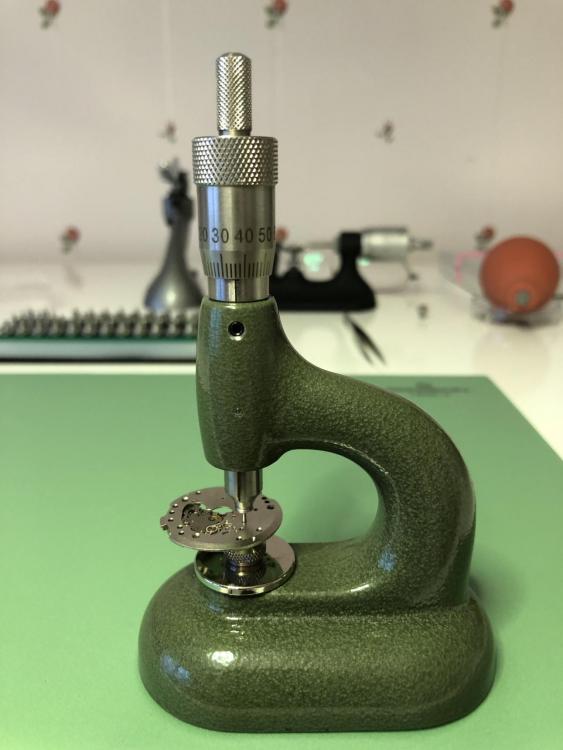
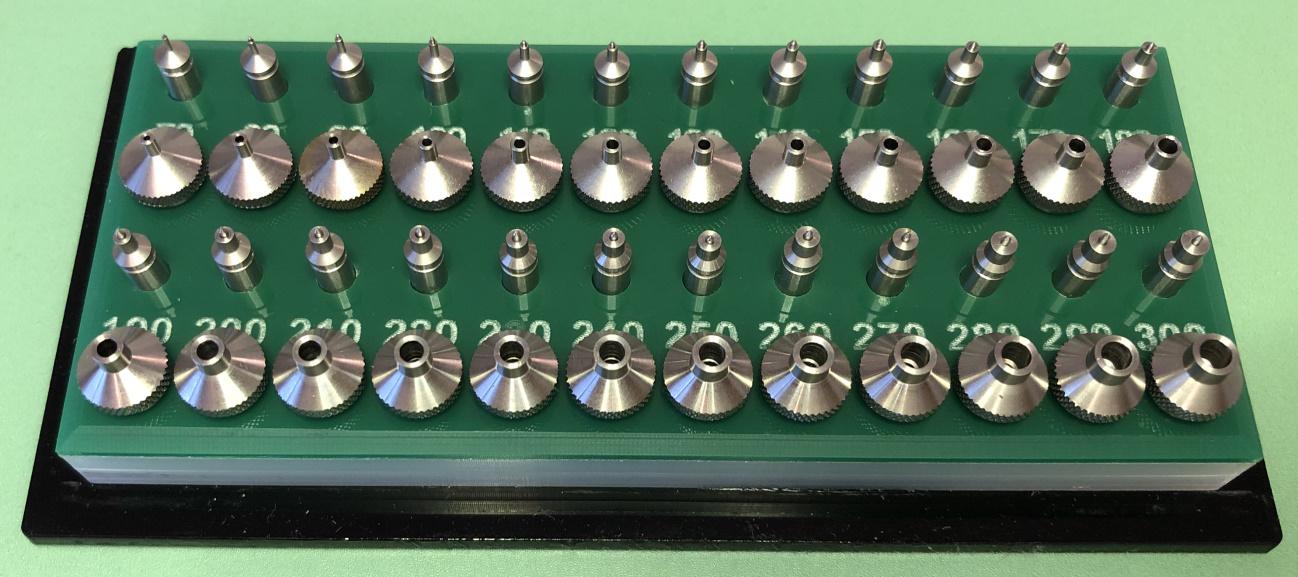
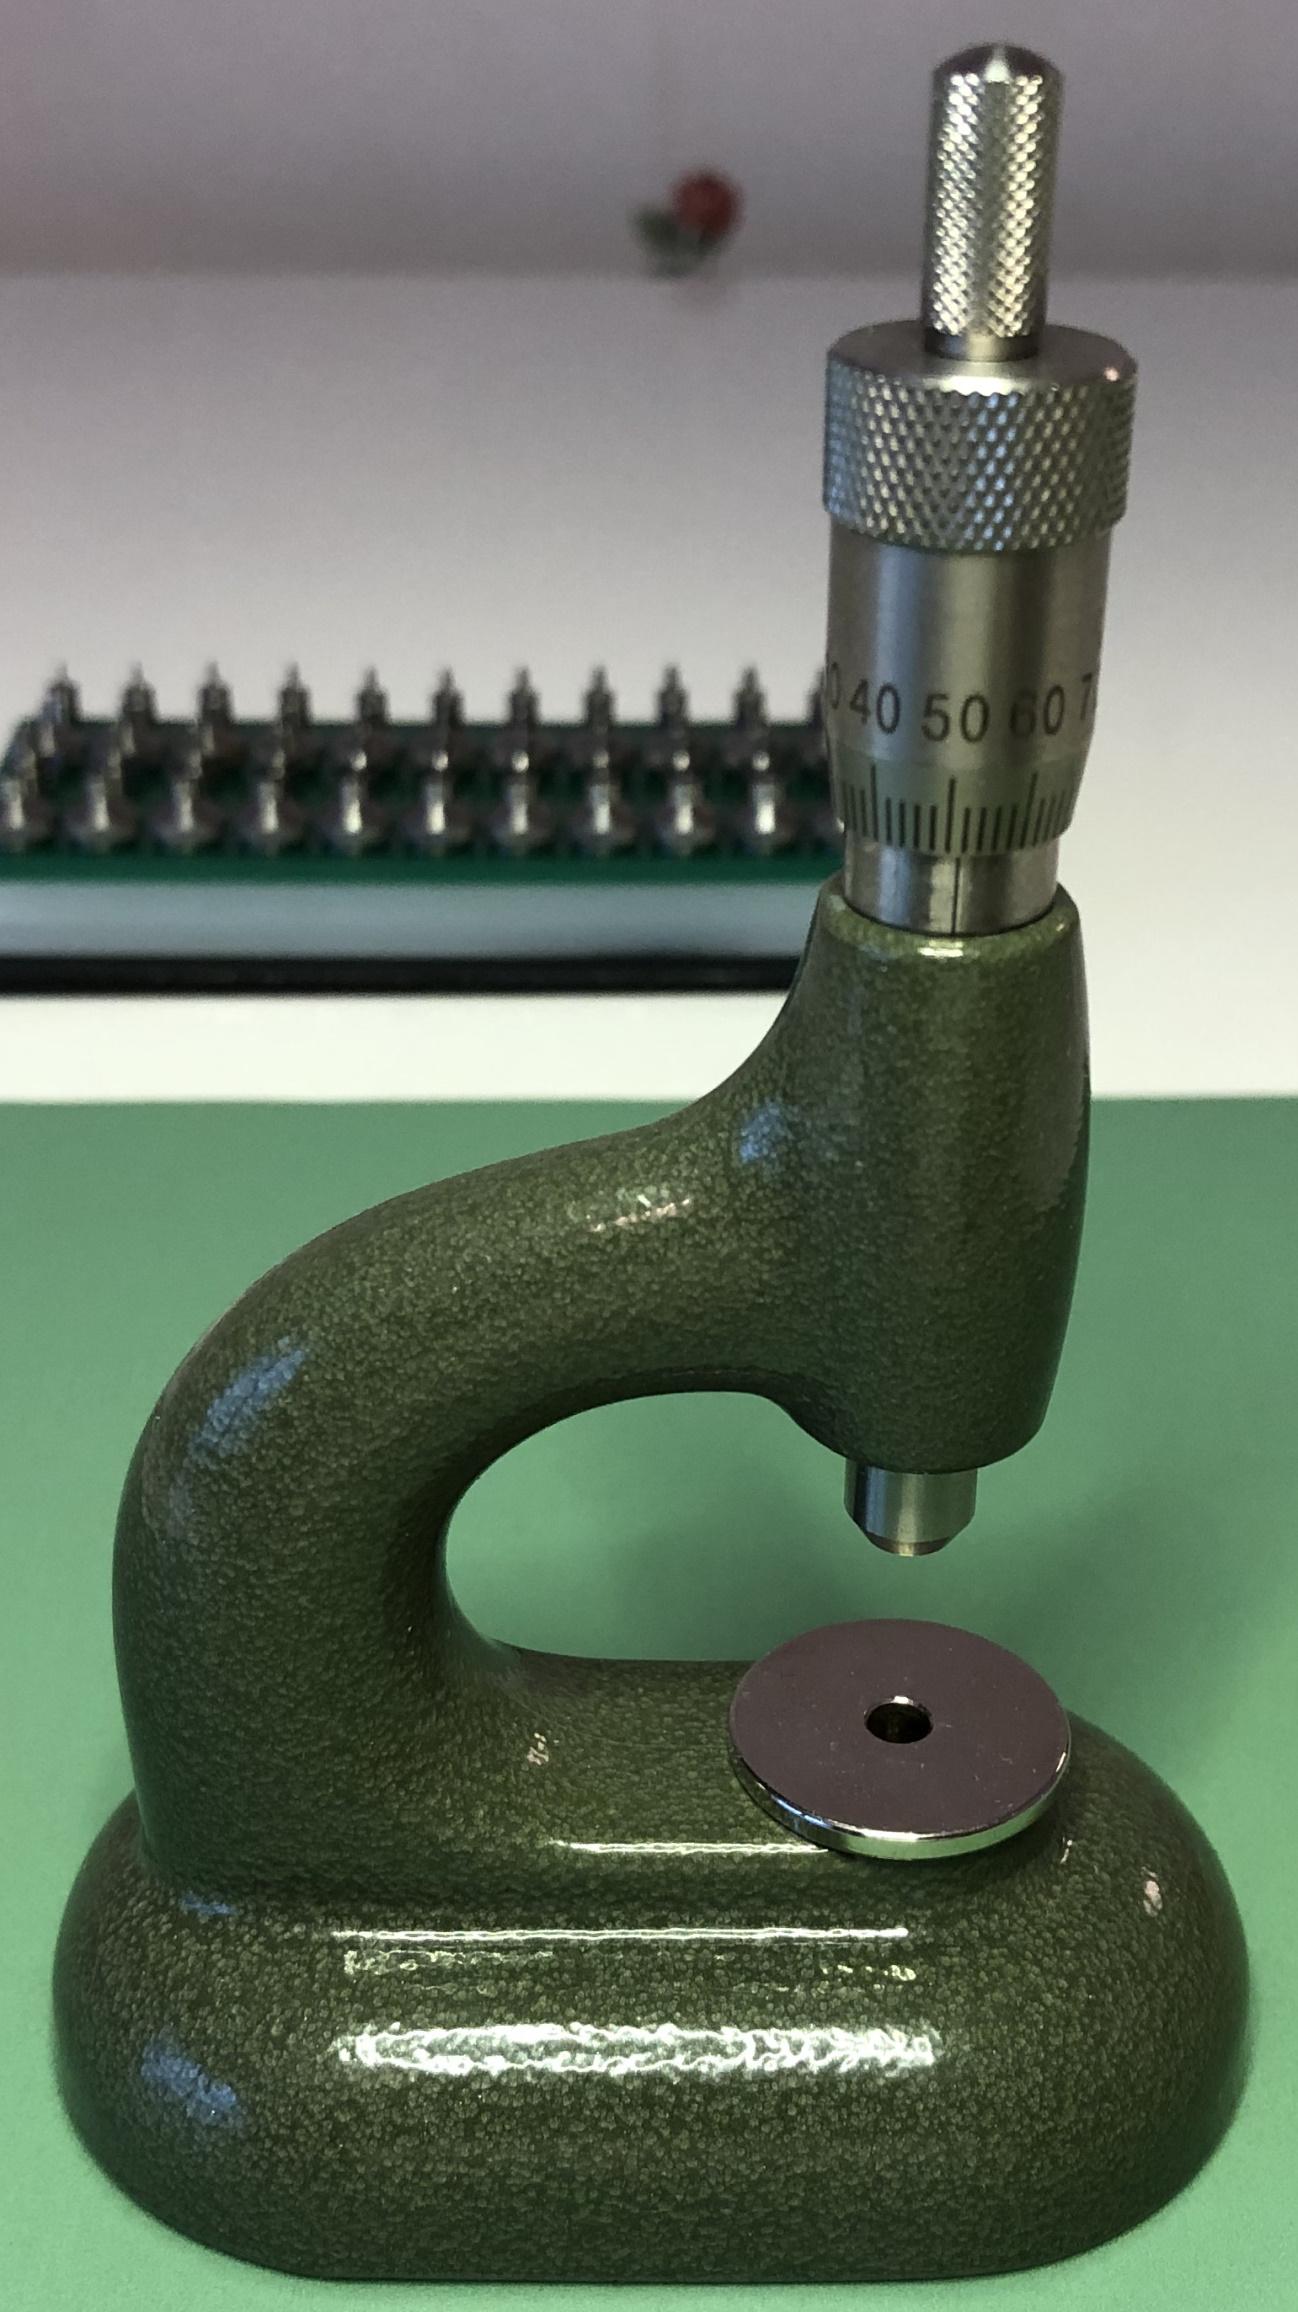
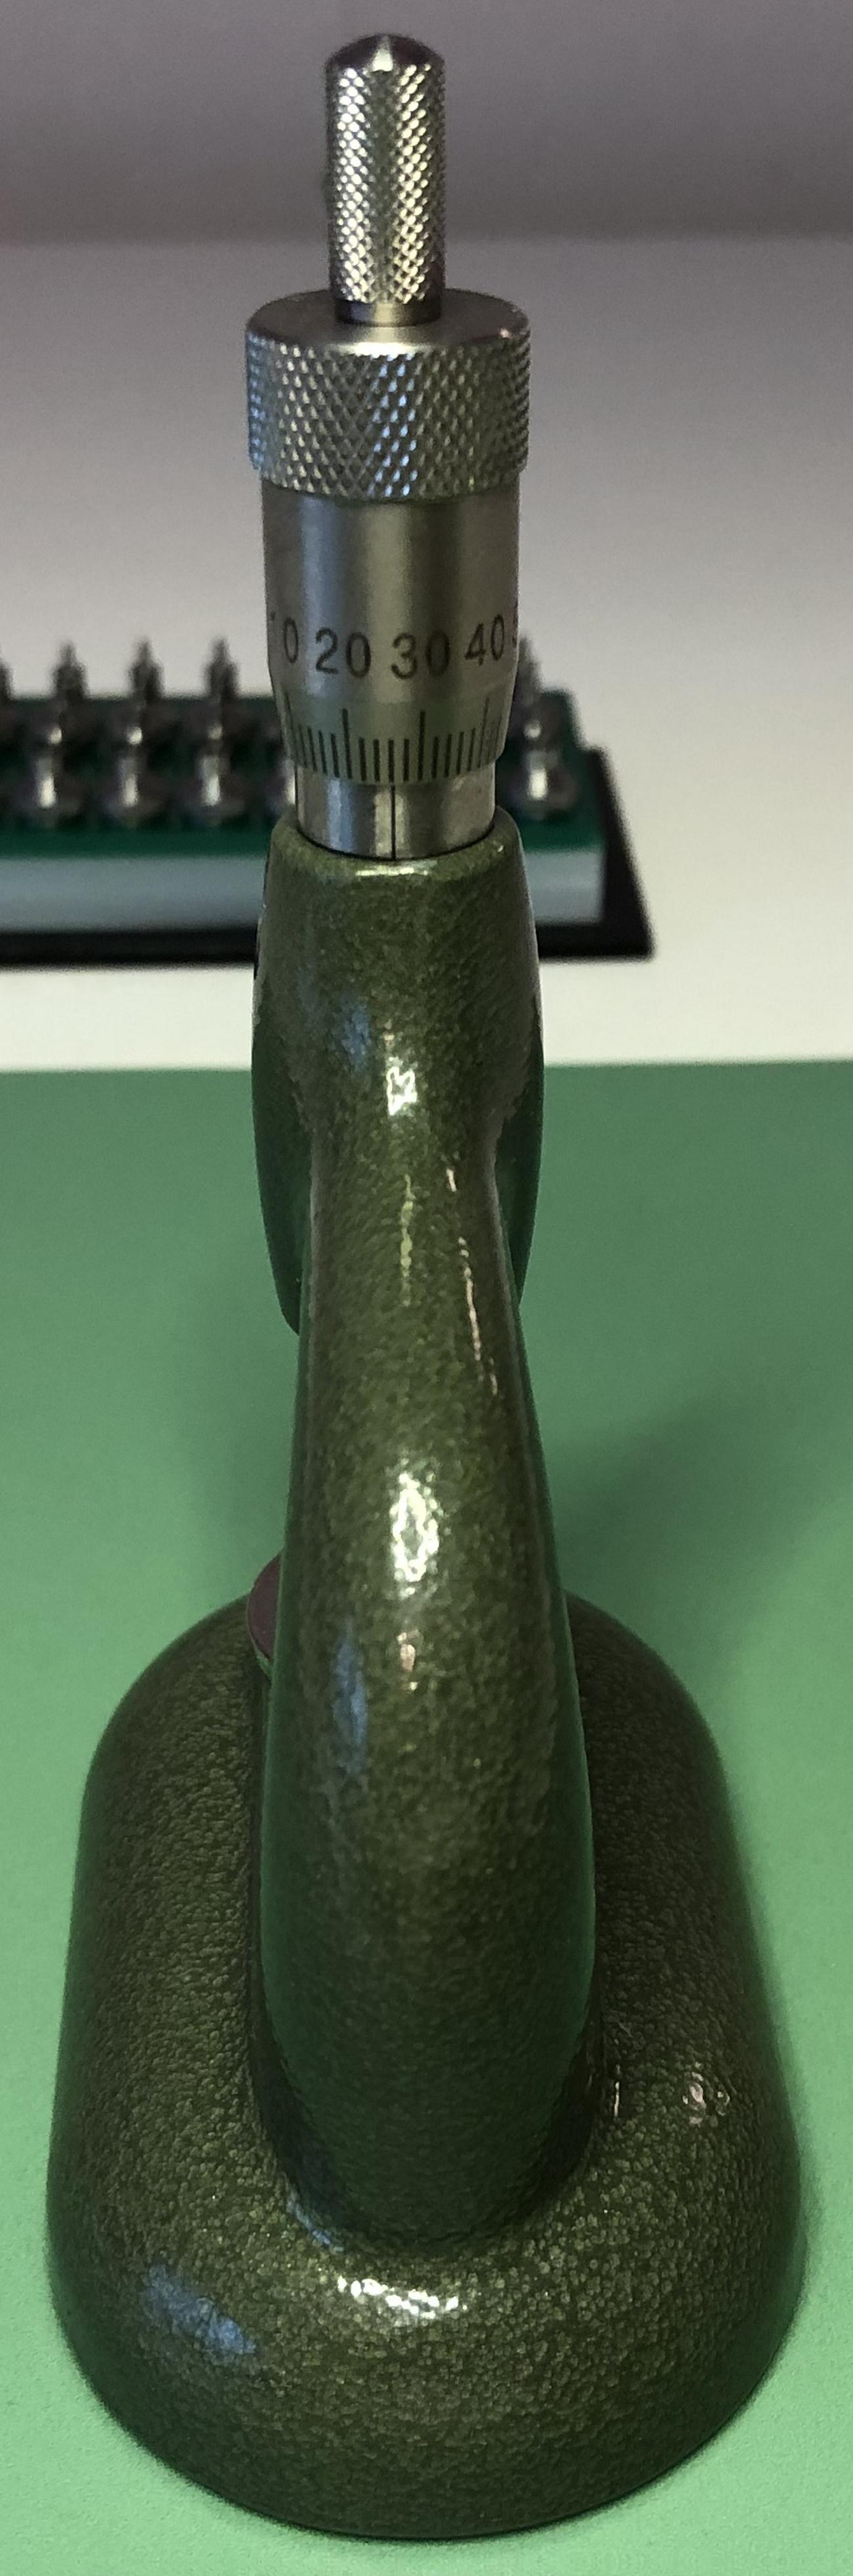
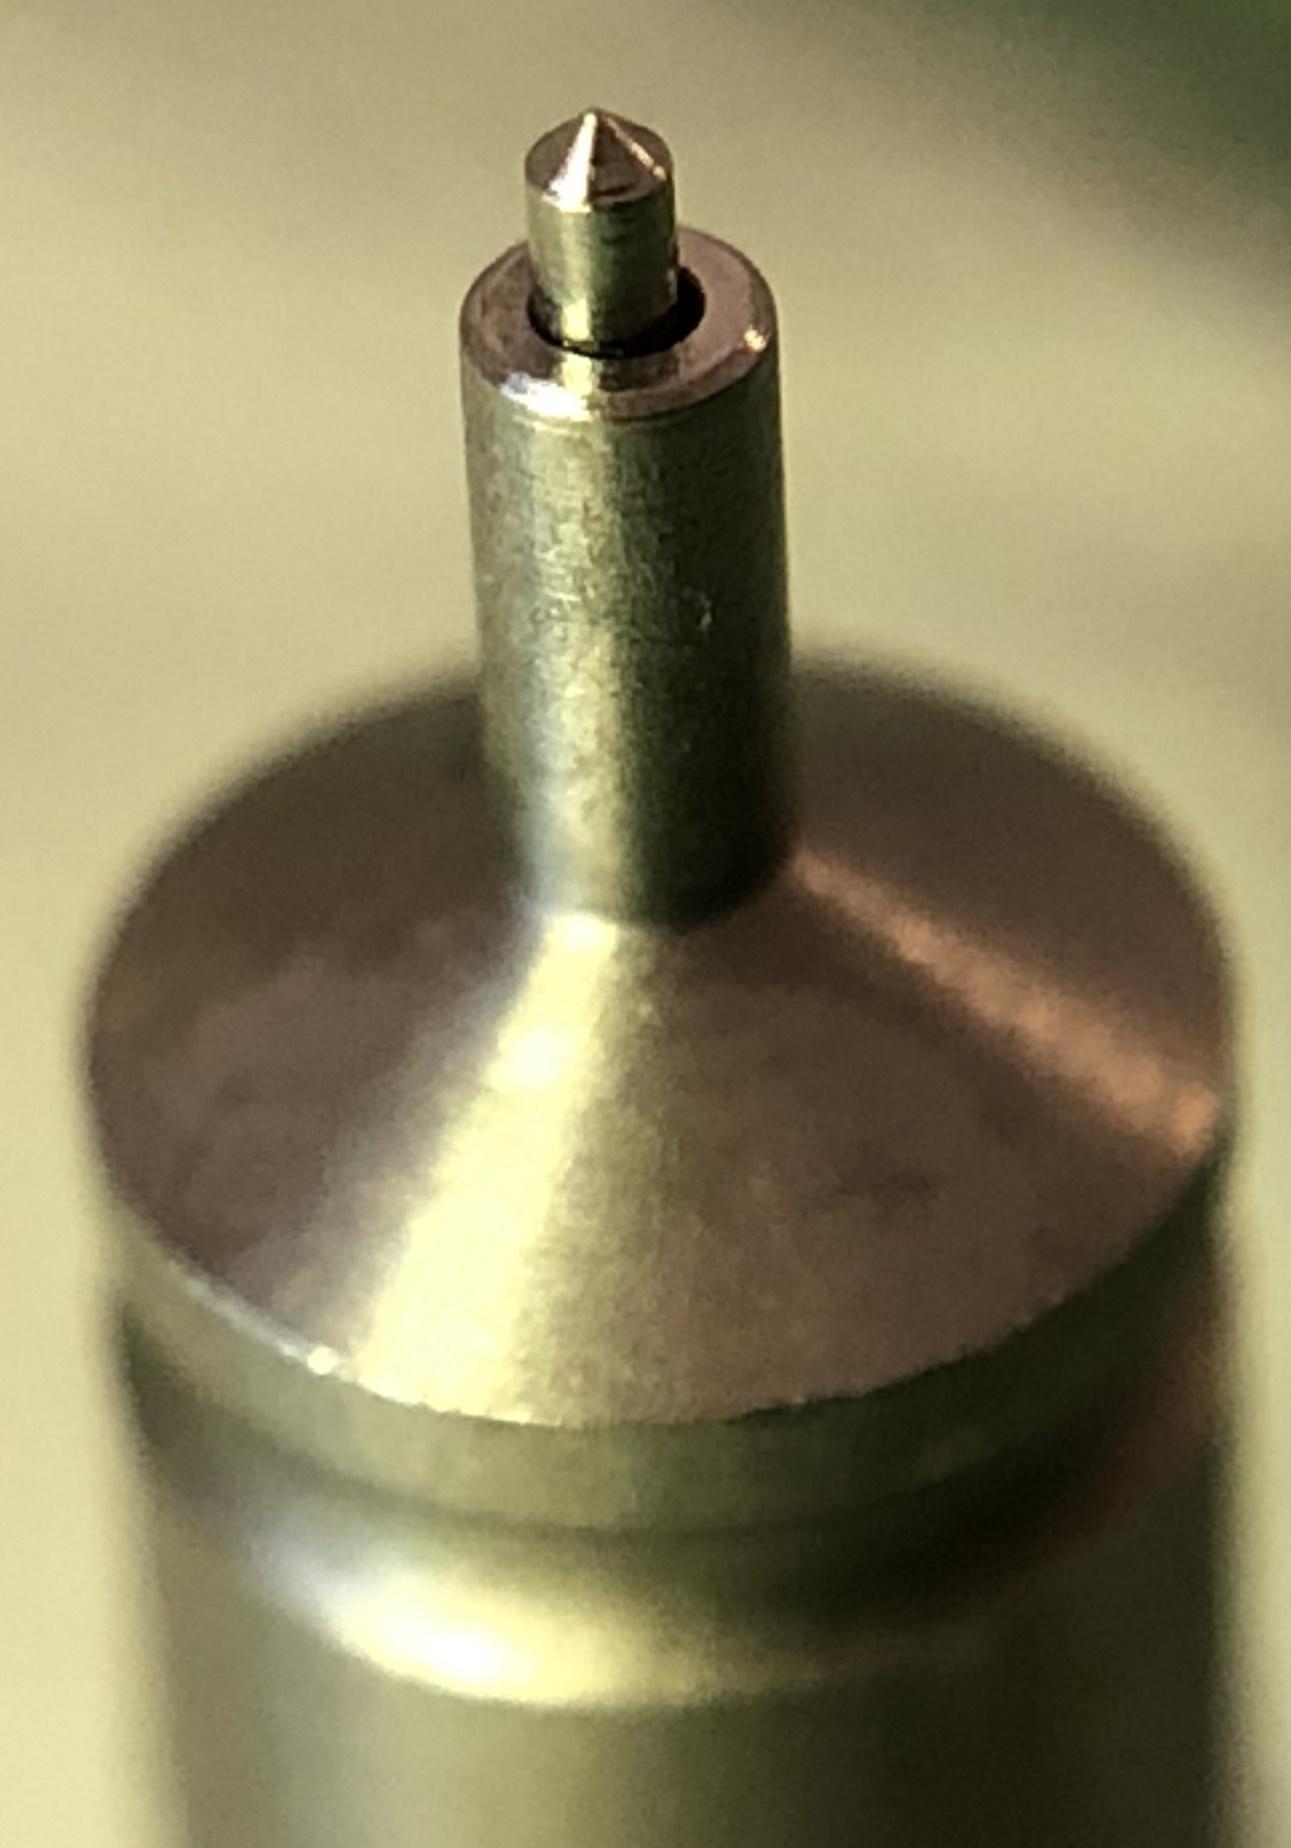
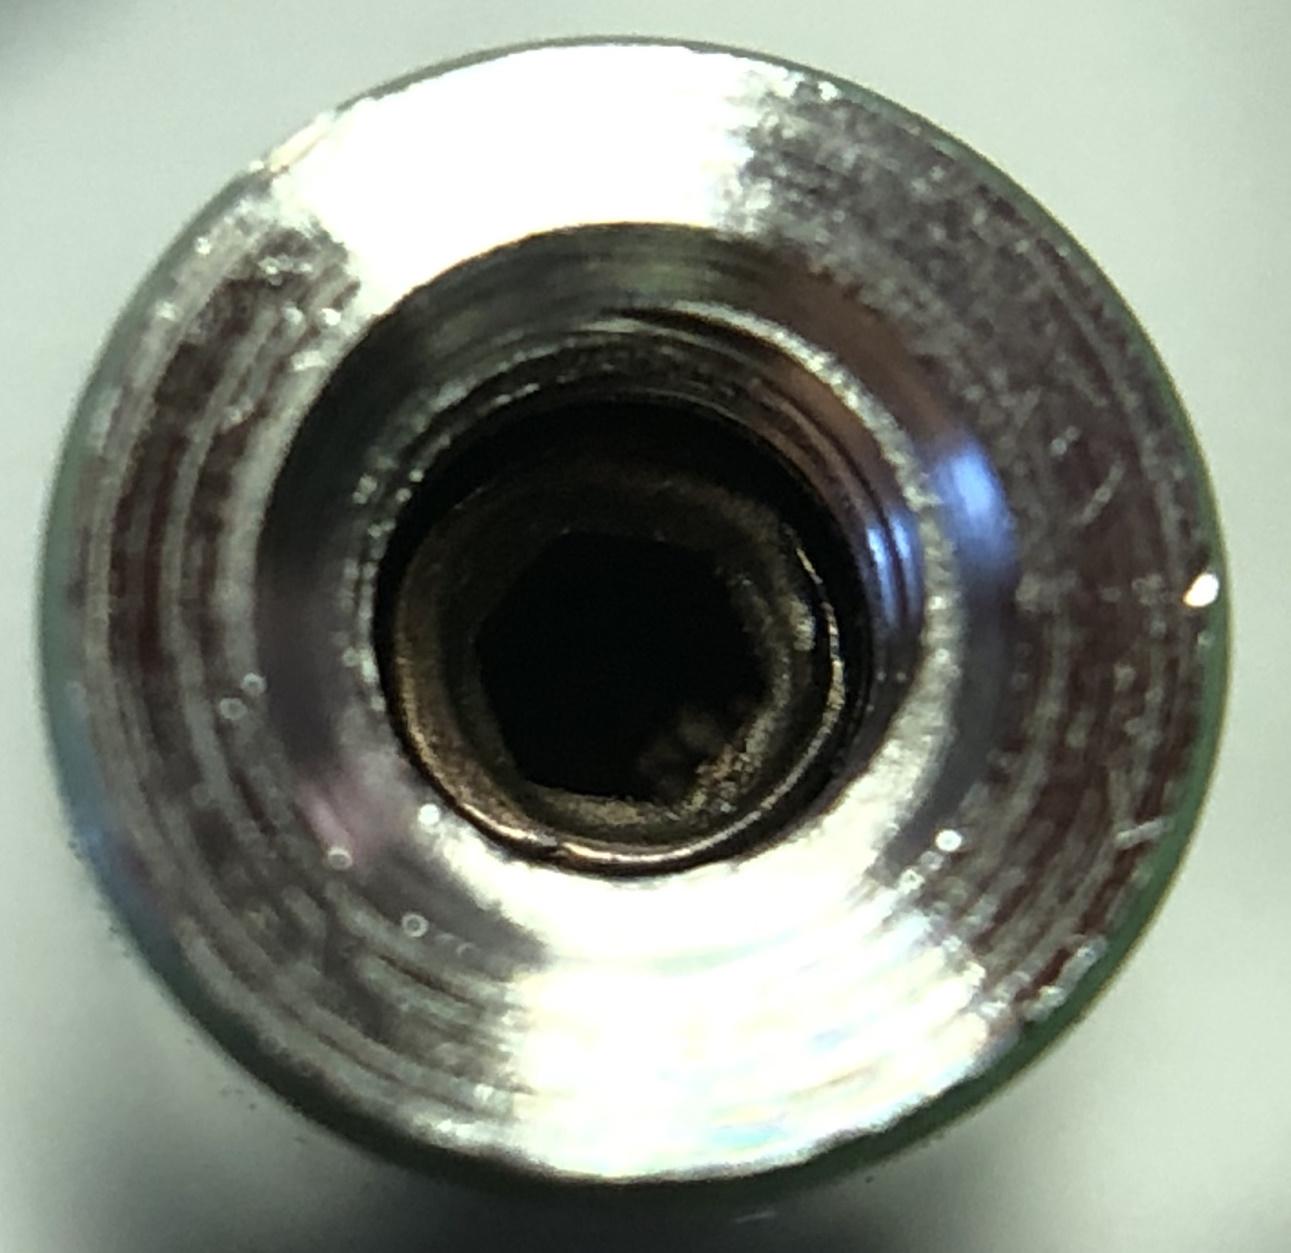
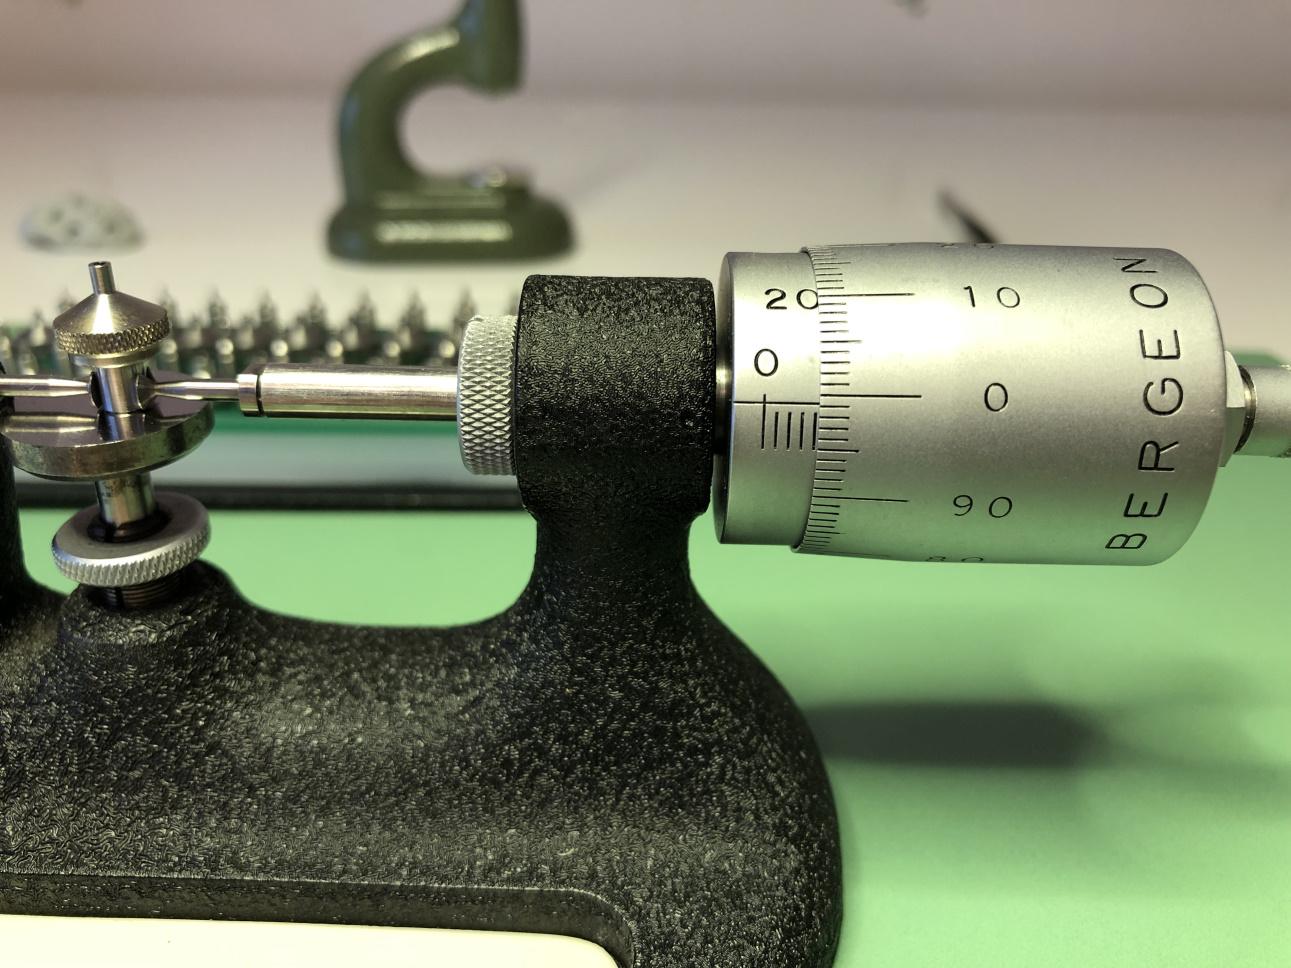
A couple of weeks ago, or so, I got my AliExpress Chinese Horia jeweling tool clone having 24 pushers and 24 anvils. So, it took approx. a month for the package to arrive. That's a lot less than I had expected. Another pleasant surprise was that it wasn't delivered from China but from the Netherlands (another EU state), so no additional fees had to be paid. Yippee! Anyway, it wasn't until today I had a chance to take a really close look and give it a try. Here're some pictures... (Click to zoom in!) Unlike the Seitz jeweling tool this tool does not have a "threaded cup" to catch the jewels pressed out all the way Anvil bottom-side Anvil top-side Pump pusher Pump pusher bottom-side (spring held in by screw having a slot) Pump pusher bottom side (spring held in by a hexagonal screw) Overall, I must say everything feels very well made and exceeded my expectations by a margin. Why some pump pushers uses a normal screw and some a hexagonal screw I have no idea, and I didn't try to remove any of them. The screws look like they could be made of plastic and they don't look all that nice. I don't know what the original Horia pump pushers look like, but the Seitz pump pushers are, is this respect, of a much better design. I measured the diameter of five randomly selected pump pushers and they all had the given diameter minus approx. 5/100 mm, which of course is necessary to make them pass through the holes for the jewels in the plates and bridges. I also measure the foot of a few randomly selected anvils and they all came in at 3.99 mm. So, as an added bonus the anvils and the pump pushers fit perfectly (near zero shake) in my Seitz jeweling tool (and in the clone tool) as well. Nevertheless, after having adjusted just a few jewels I already prefer this type of jeweling tool. With the Seitz tool you must always assert pressure on the handle, but since the Horia type uses a screw it frees up one hand and makes the operation feel both more precise and safe. The only drawback, of course, is that the Horia jeweling tool can't be used for reaming, so for that reason I'll be keeping my Seitz. Using my caliper I also measured the distance between the anvil and the pump pusher, then rotated the screw 360 degrees (1.00 mm) and measured again. The difference between the first and second measurement was just a few hundreds of a millimetre (minus the added millimetre of course) and my caliper is naturally not as exact as my Bergeon micrometre. So, it would seem the Chinese got the threading on the screw just right as well! Conclusively I must say that my very first AliExpress buy of a watch tool was a (somewhat unexpected) success and I wouldn't hesitate one bit to recommend this tool. The finish is not up there with the Swiss (Seitz and I would expect Horia), but it does what it's supposed to and it does it well. And, considering the price difference between the original tool and this clone, I'd say this is a no brainer, especially if you're a hobbyist.


 1 point
 -
Yes I was talking about the balance pivot. And roller table is the same as impulse roller. John is right with the terminology, stumps and anvils are the same, stakes are the "pushers" in a staking set, and pushers are pushers. The bottom right 6 pieces in your Seitz are stumps. You'll definitely want more. Horia sets often come with a stump for every pusher. A nice thing with Seitz (and Favorite and Chatons SA) is the spindle that carries the pushers has a 4mm hole, the same as the locating diameter of the stumps (also most staking set stumps), so the stumps can be also used as pushers. I do this all the time. Including a pic of "some" of the stumps and pushers I have around. The middle rack with 50 or so stumps are the ones I use the most. Also a Horia with a stump in as pusher.
.thumb.JPG.b3910c67c0bb2e5157878654fb82d2cc.JPG)
.thumb.JPG.b44bf7971e95e45de8a420626412c9ee.JPG) 1 point
1 point


.JPG.a89b767813922532639e0a4c453f81e3.JPG)
.JPG.d4751037eee2613e2aa8a9fa027eb7f5.JPG)