Leaderboard


Popular Content
Showing content with the highest reputation on 03/15/21 in all areas
-
LOL. In my Junior year in college, I failed a test. Decided that I would never be an engineer. Woke up the next day and continued the journey. Now I have a Ph.D., co-authored an engineering textbook now in third edition...founded a company, sold it and retired...40 US Patents...so...what am I saying? Never give up! OH...and I have TWO watch benches!!! You may have blown out the first chip. Kinda unlikely because these are pretty robust. Remove all of the chips except the ground generator and the first opamp. Ignore everything else. Validate the dc voltages on the first stage before moving on.3 points
-
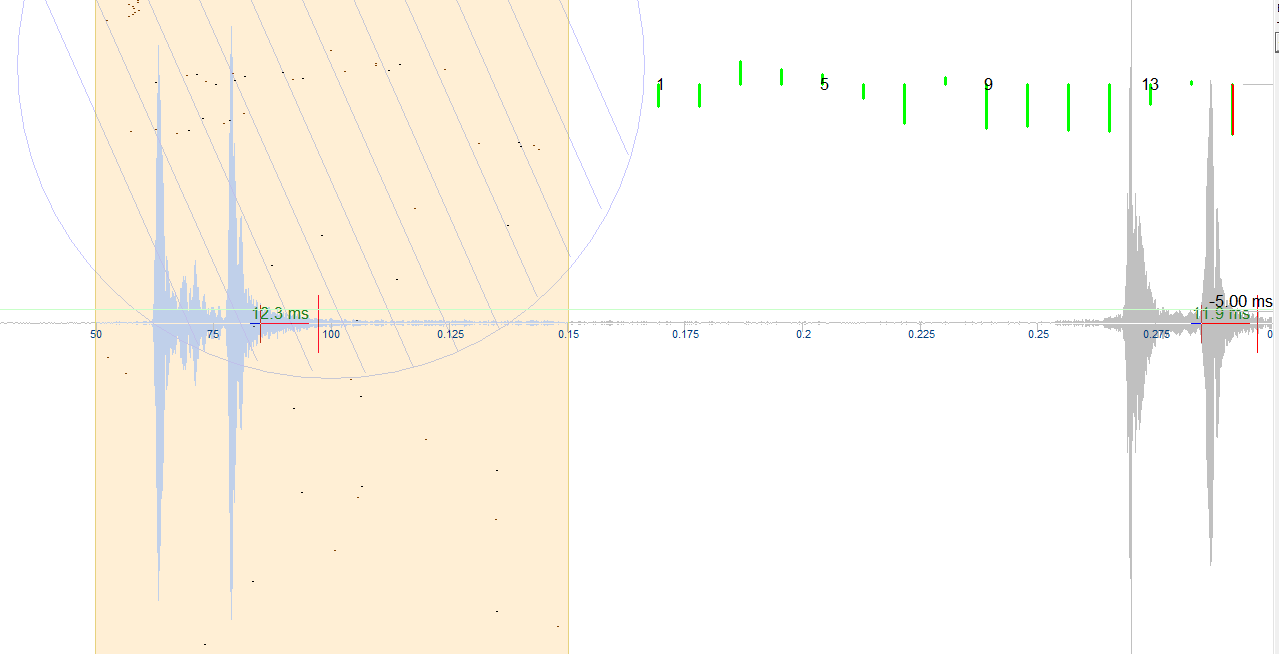
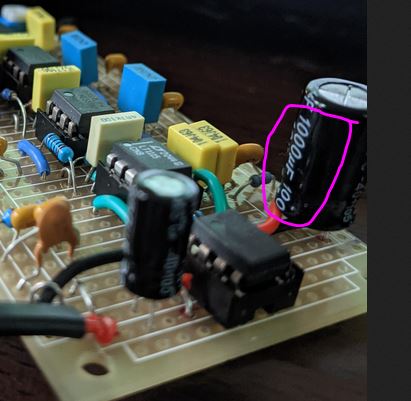
IT IS WORKING! VERY NICELY! It was the 1000u capacitor that was the problem!! THANK YOU for all the help! I will post more info later when I get back to the shop.
 2 points
 -
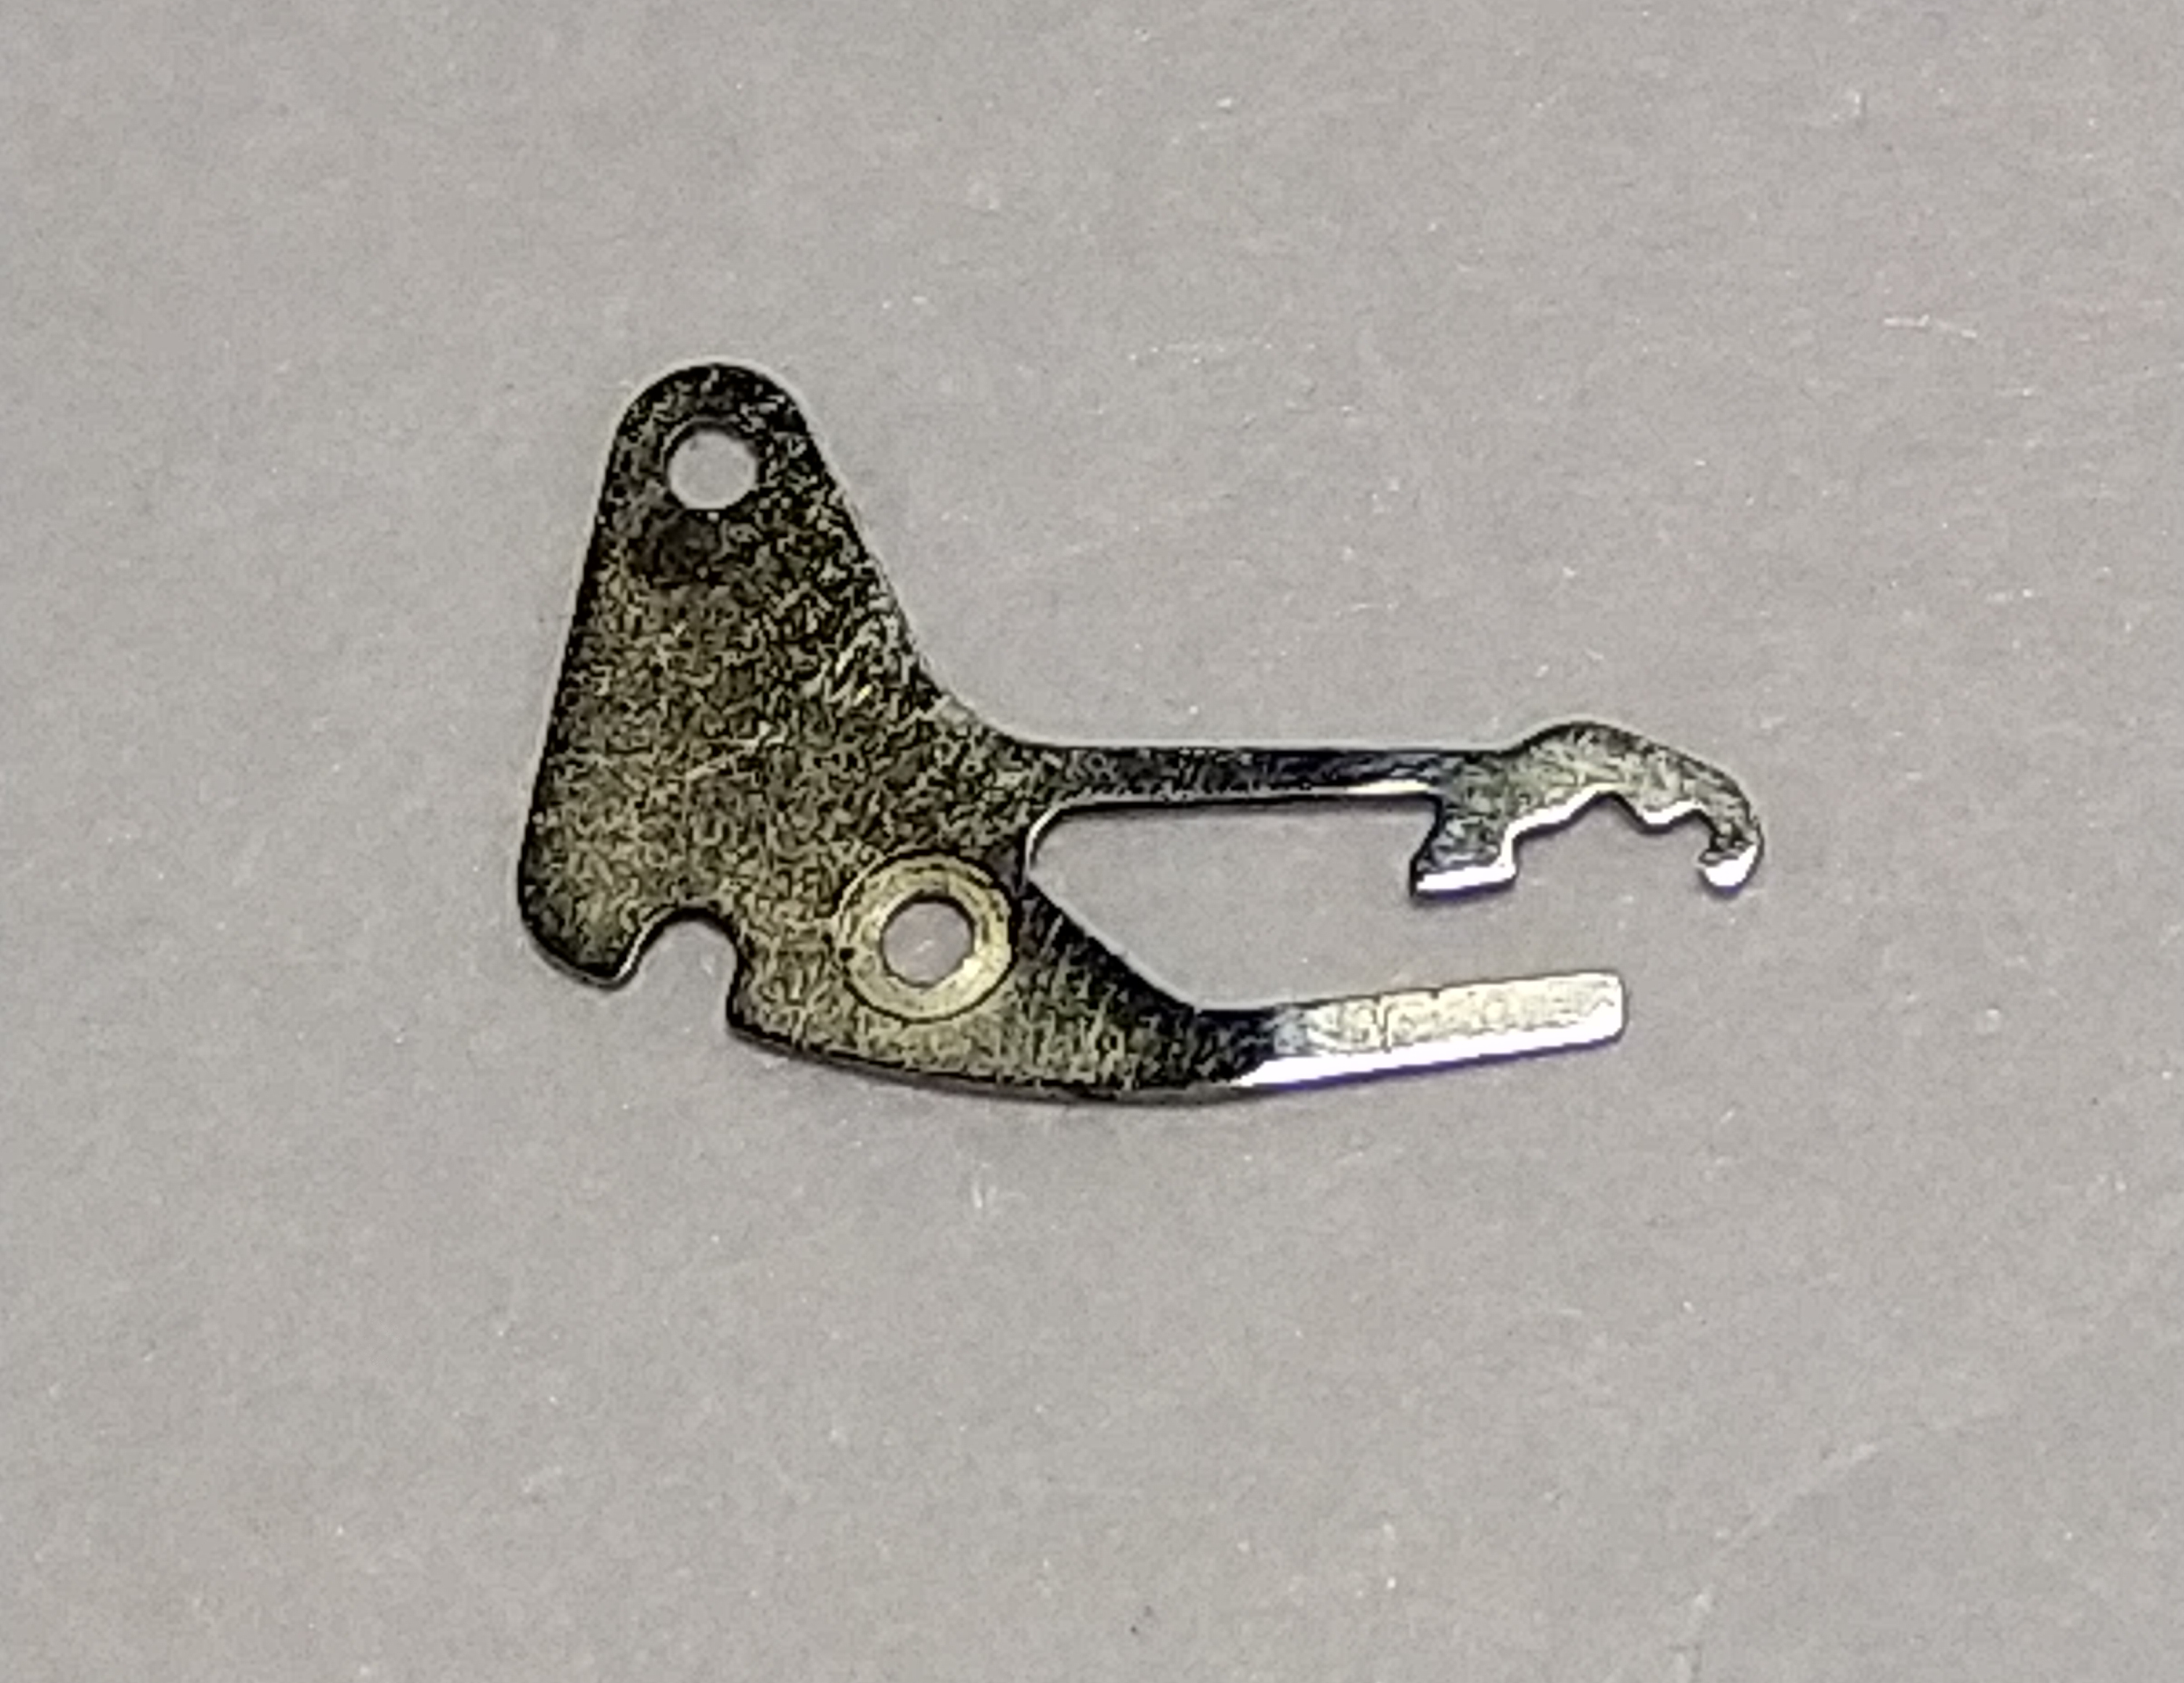
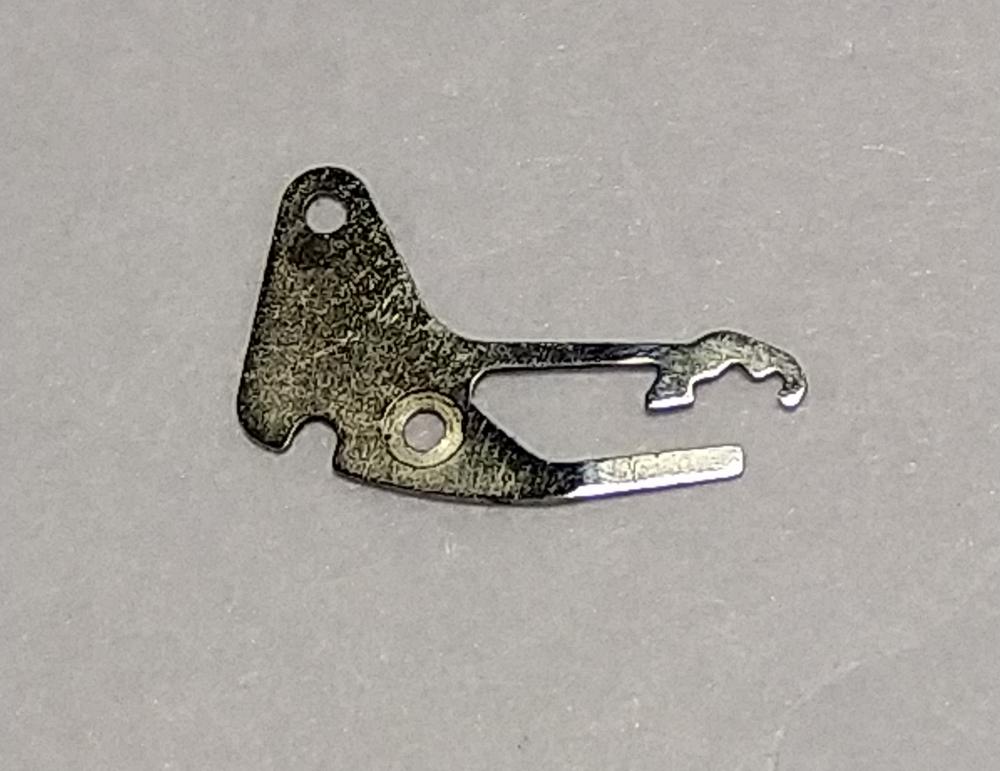
If you don't find one I can send you this used one, don't know why I save all these quirky parts.
 2 points
 -
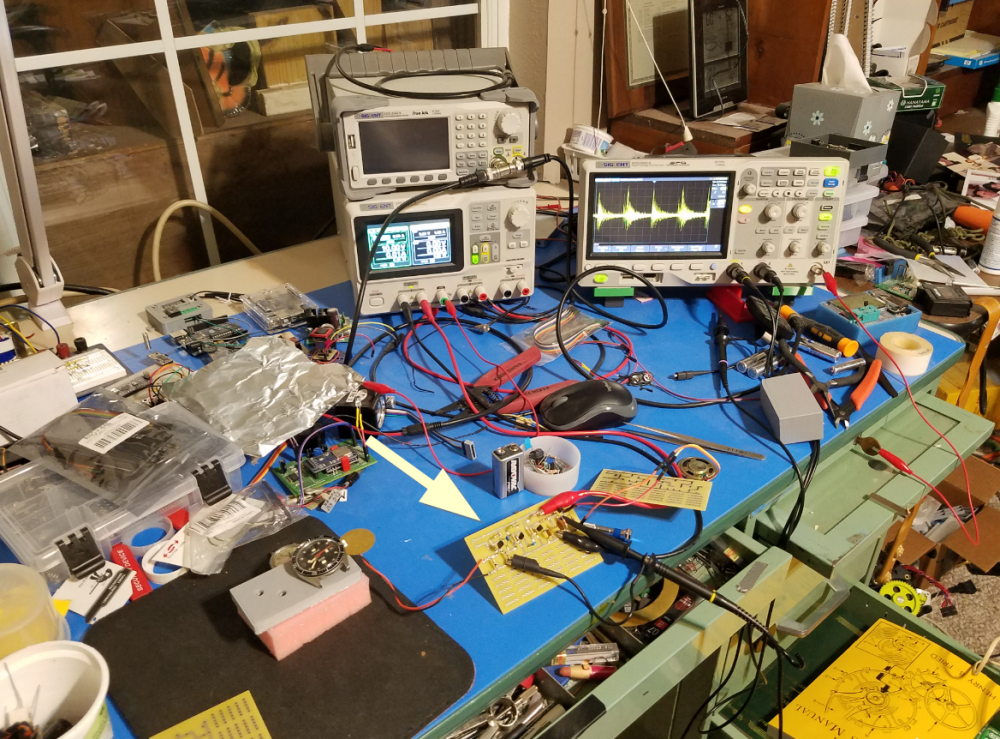
Yup...its a mess
 2 points
 -
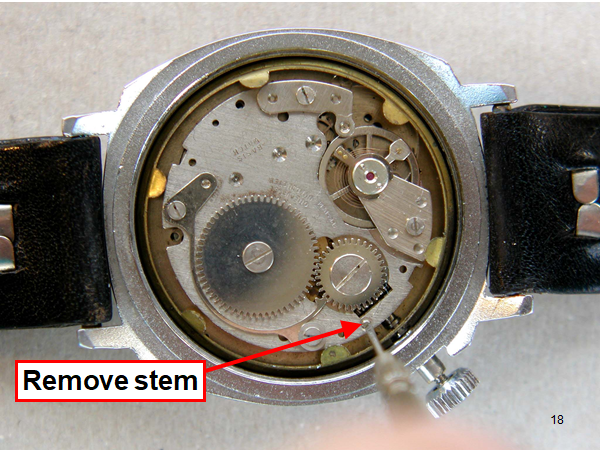
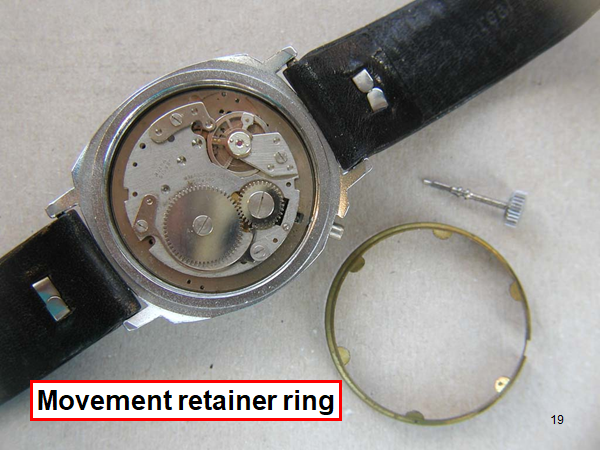
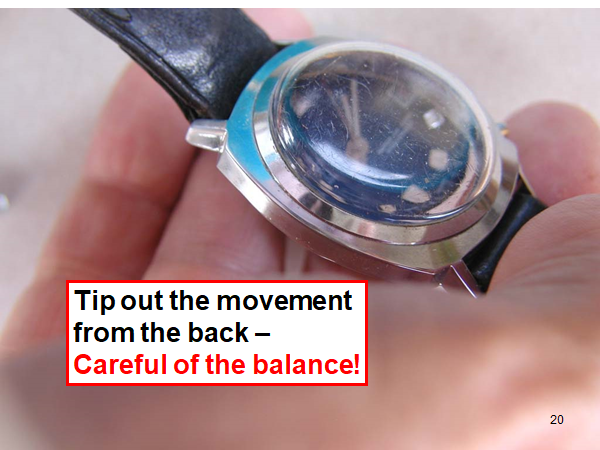
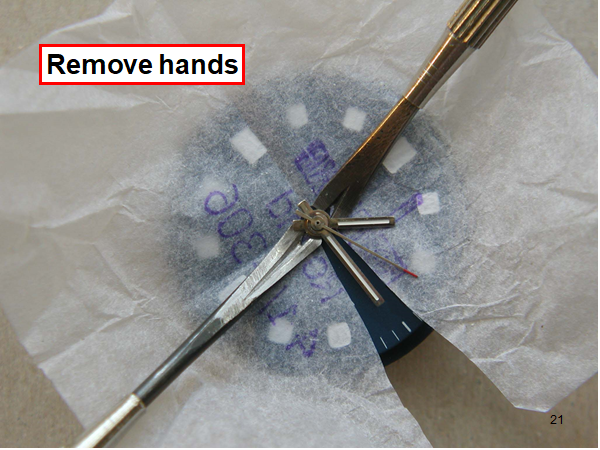
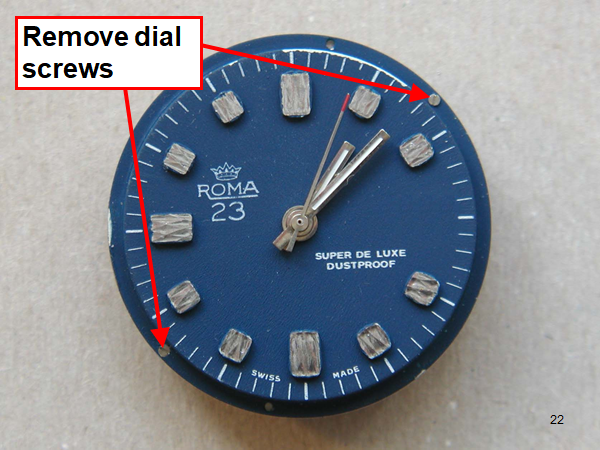
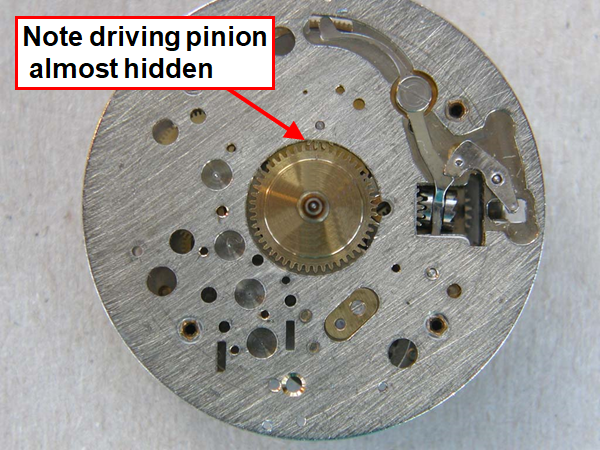
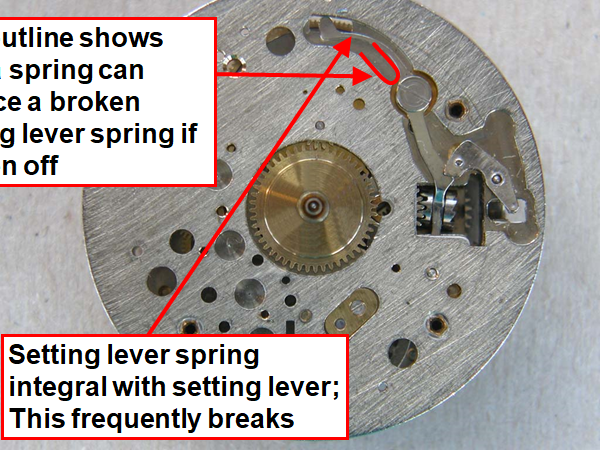
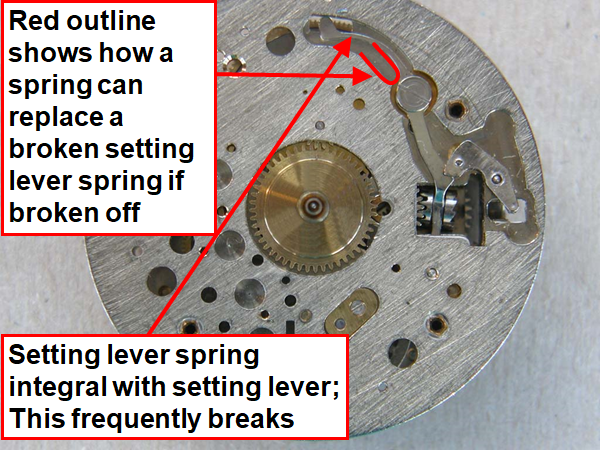
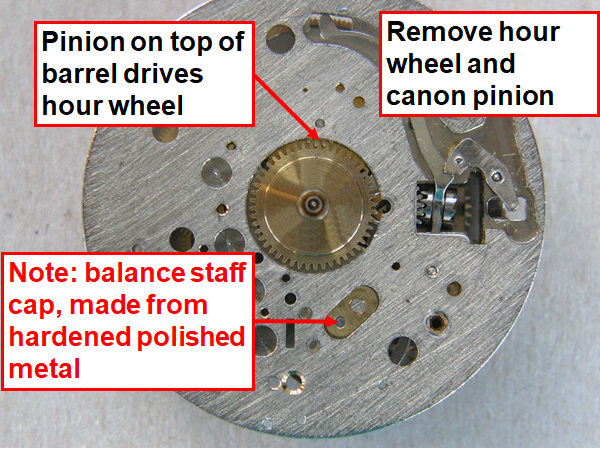
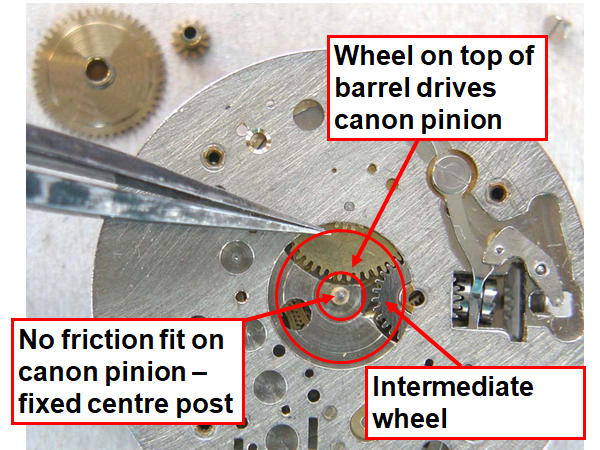
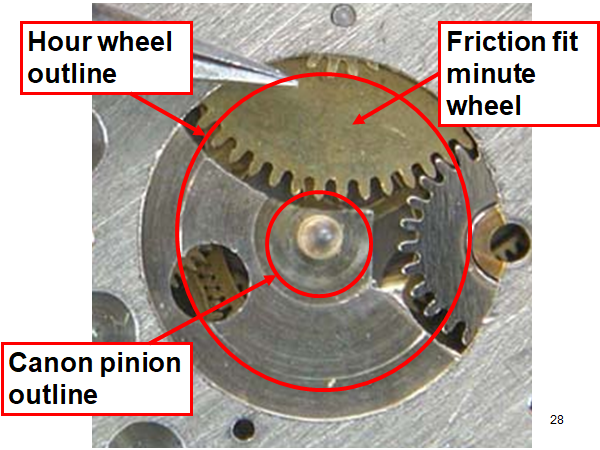
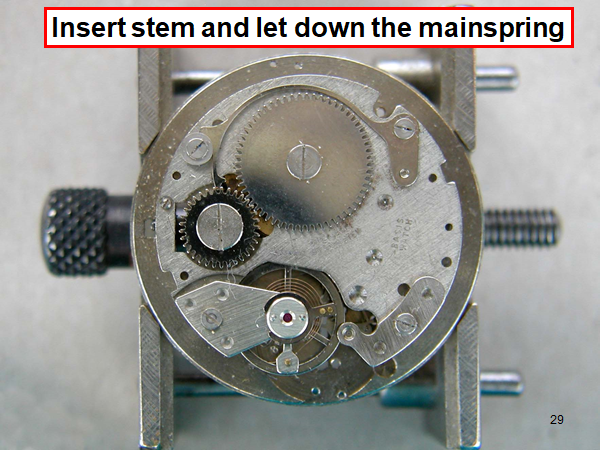
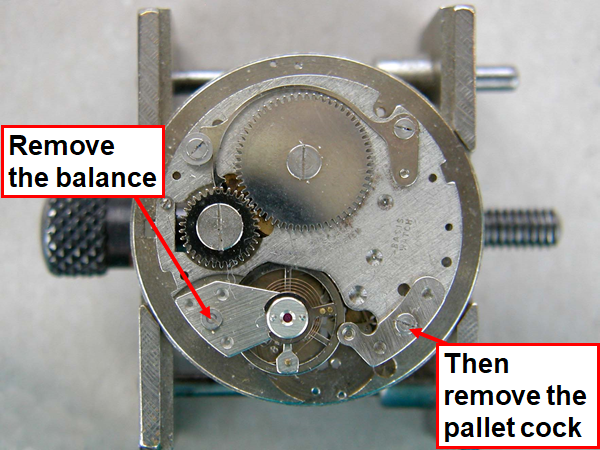
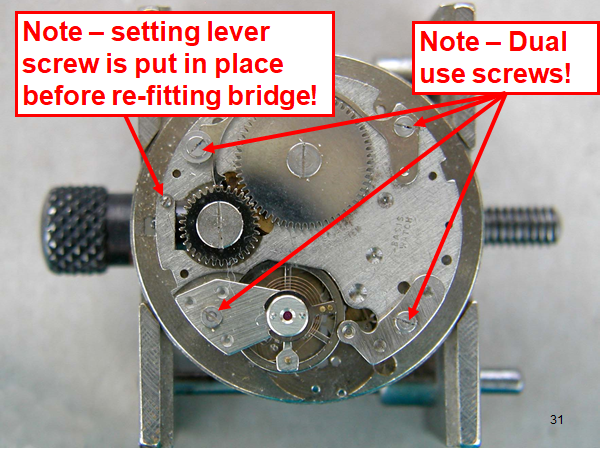
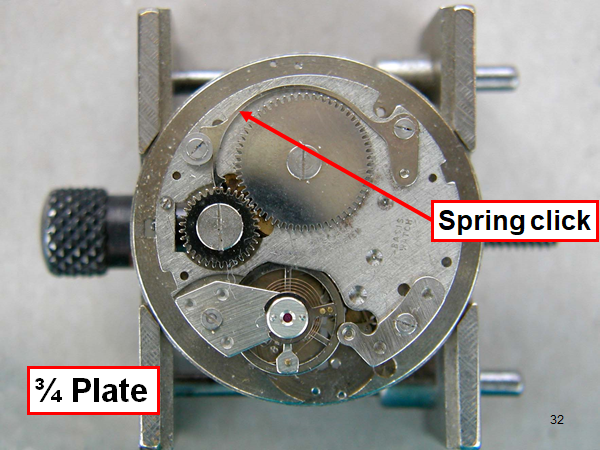
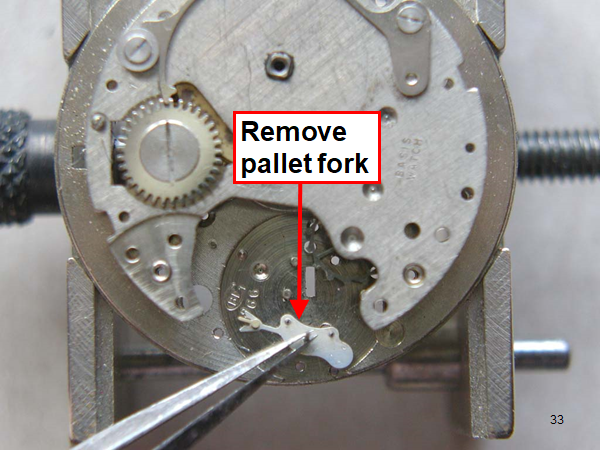
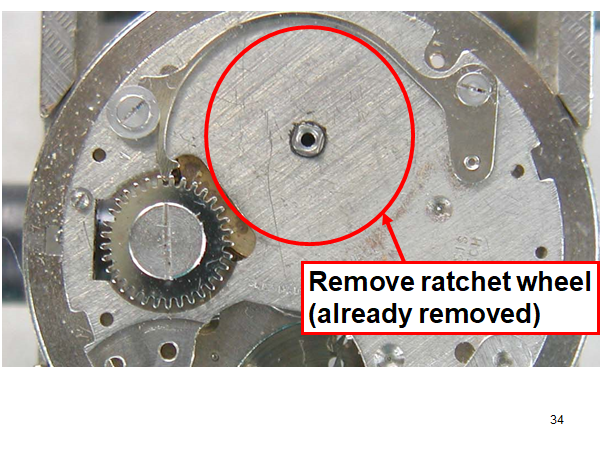
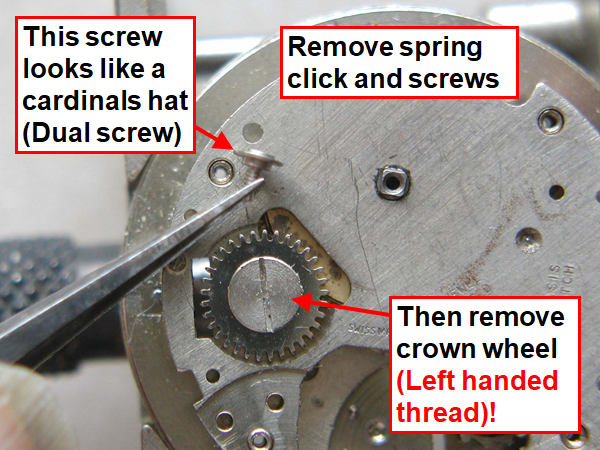
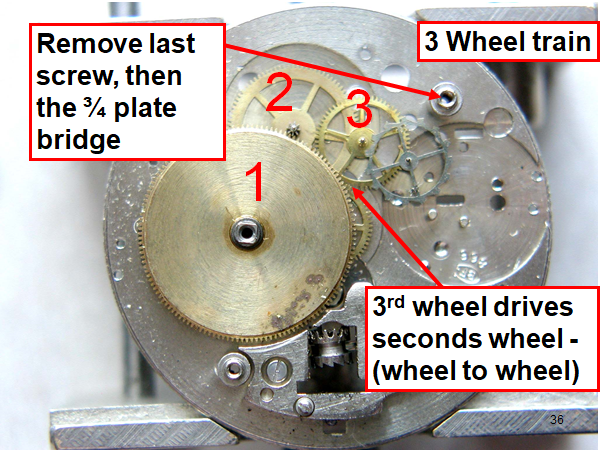
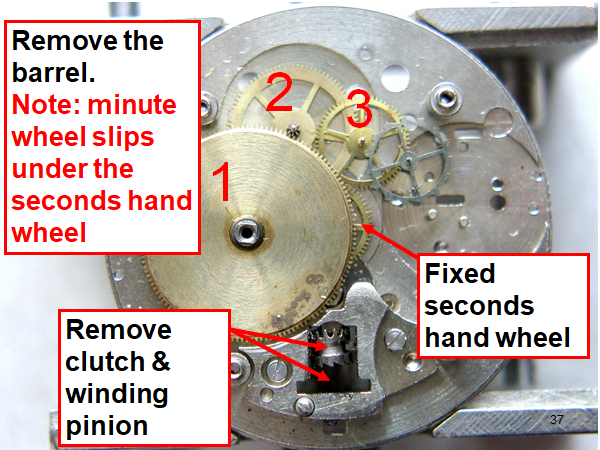
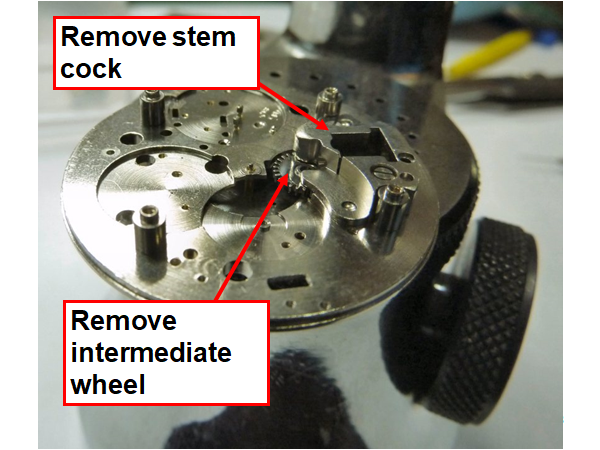
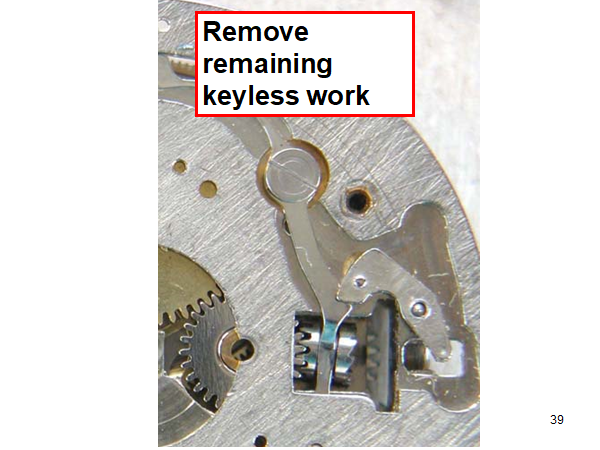
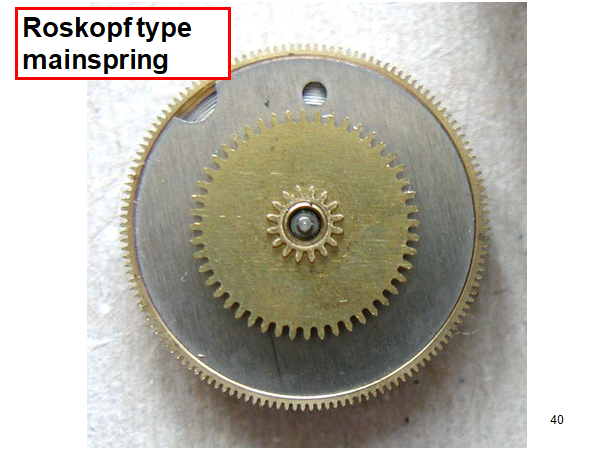
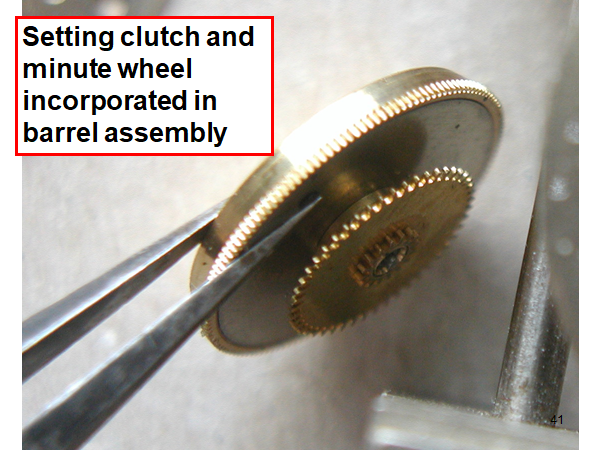
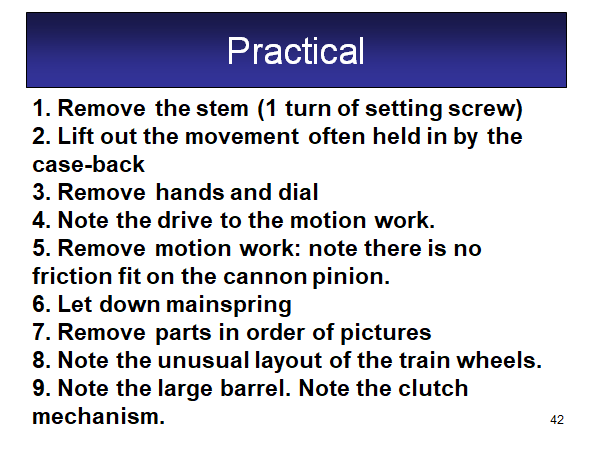
Hi, I teach watchmaking to complete beginners at Epping Forest Horology Centre, close to Epping and this is one of the lessons on the BFG 866. I wanted to show my class a classic pin pallet (Roskopf) movement and how to service it, as many watchmakers won't touch these watches as they hold no monetary value. Turn the setting lever screw 1 to 1 and a half turns to release the winding stem A piece of watch paper or small plastic jiffy bag to protect the dial, whilst removing the hands The driving pinion is part of the friction fitted minute wheel on top of the barrel. This work in a similar way to a friction fitted canon pinion to set the watch hands Remove the keyless work: setting lever, held in place by the setting lever screw, screwed from the other side of the mainplate, then the yoke, which sits on top of the clutch (castle) and also the winding pinion. I have three other lessons on this movement that cover bringing the watch 'into beat' as well as taking apart the friction fitted minute wheel from the barrel, lubricating and staking back on to achieve the correct friction setting and finally how to remove the centre seconds wheel safely and refit using a staking set. Many people leave the friction fitted minute wheel on top of the barrel, not realising the amount of old grease that can't be cleaned out from it, as well as not removing the wheel of the centre seconds arbor and again not cleaning out the pipe which has old grease inside. Hope you enjoyed the tutorial? More to come....
 1 point
 -
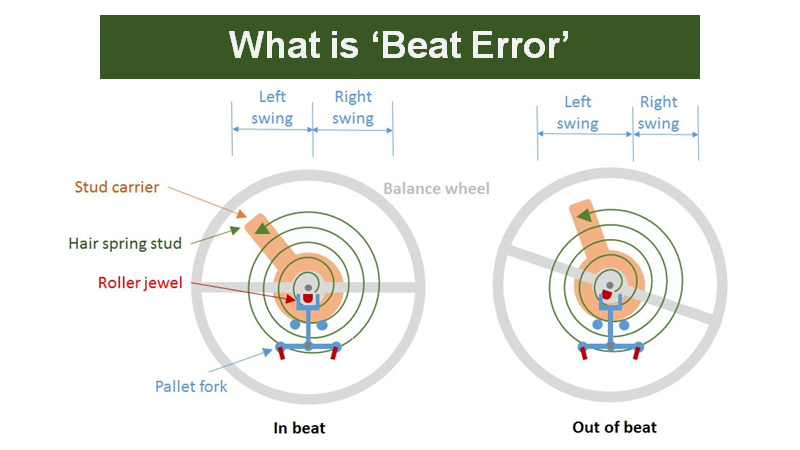
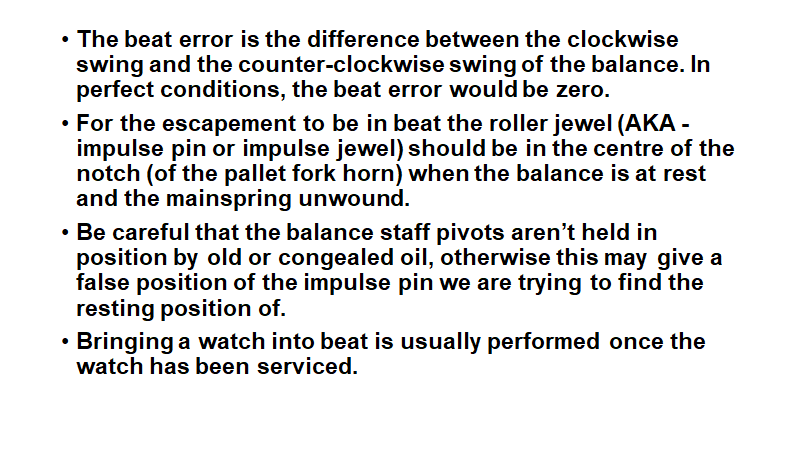
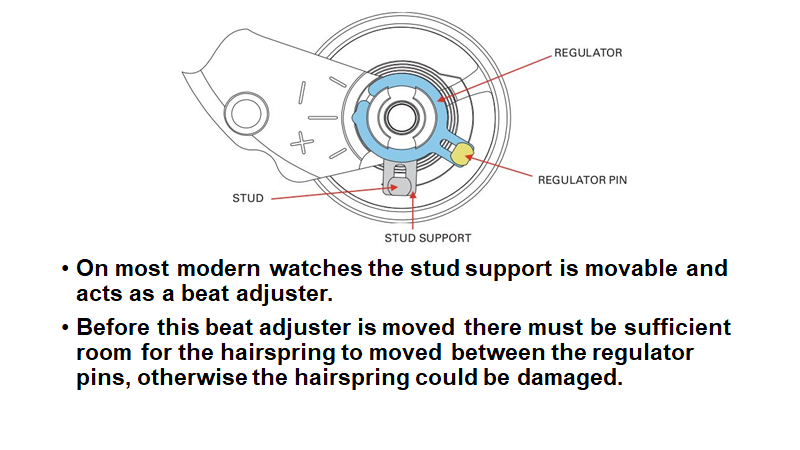
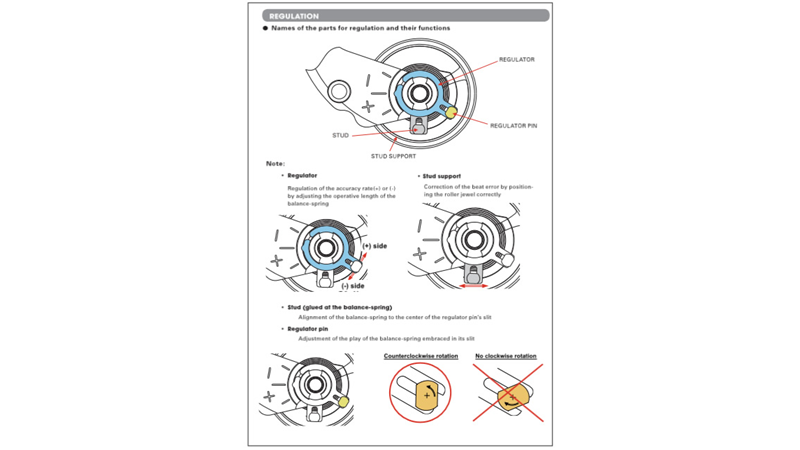
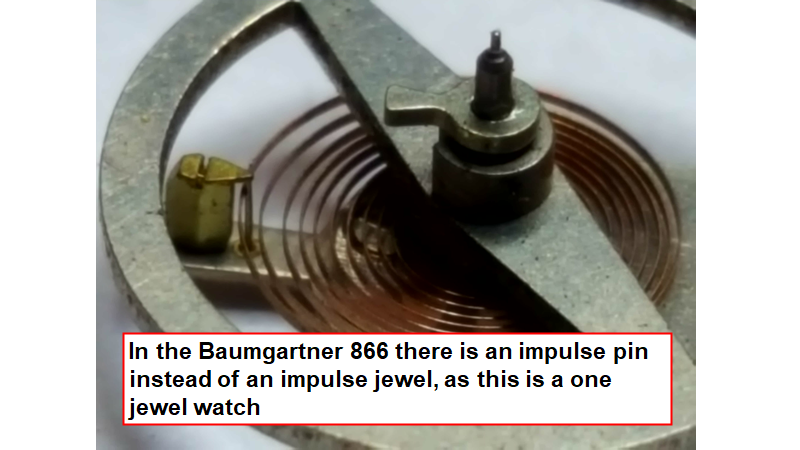
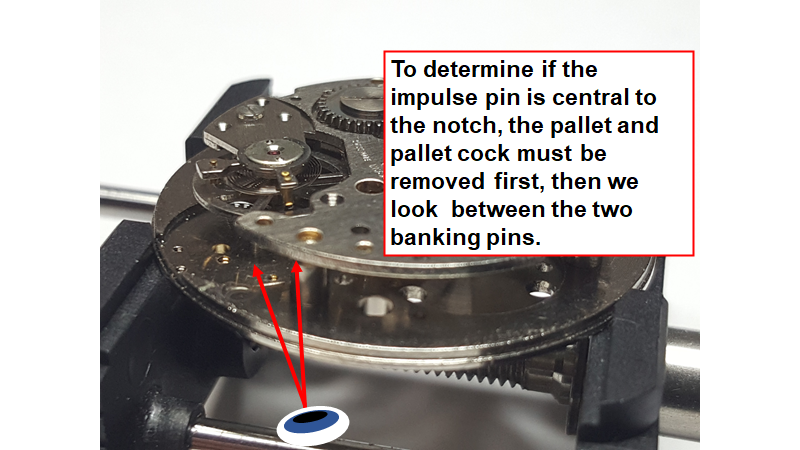
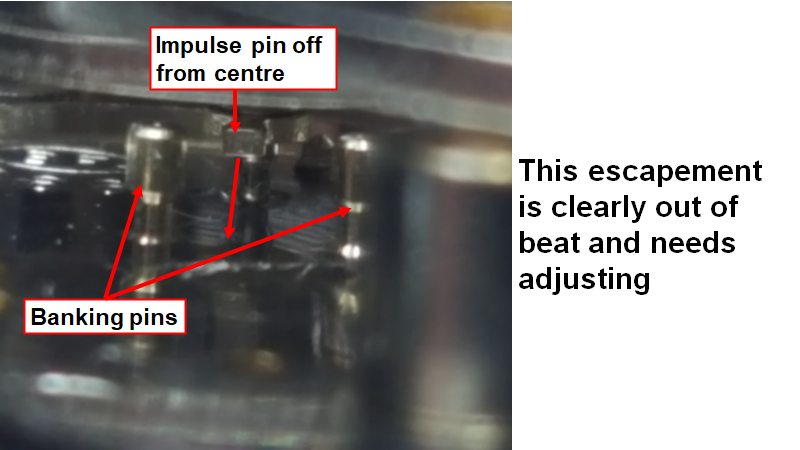
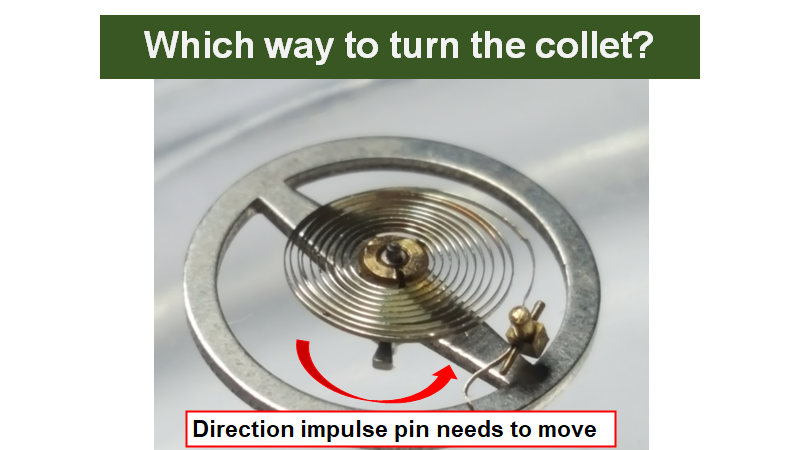
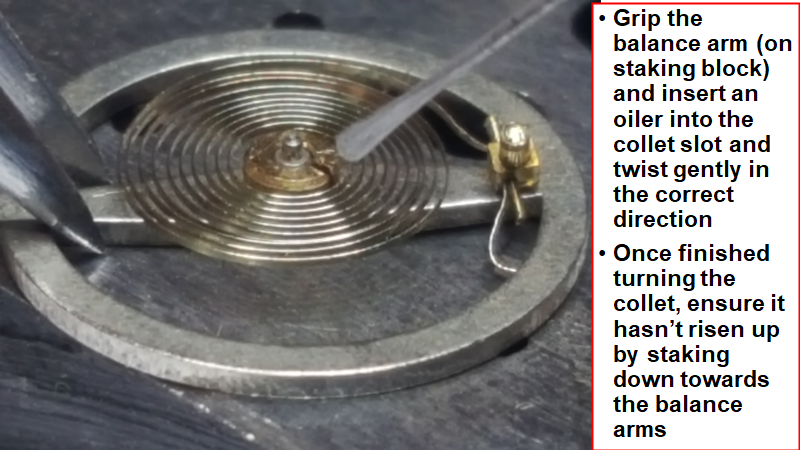
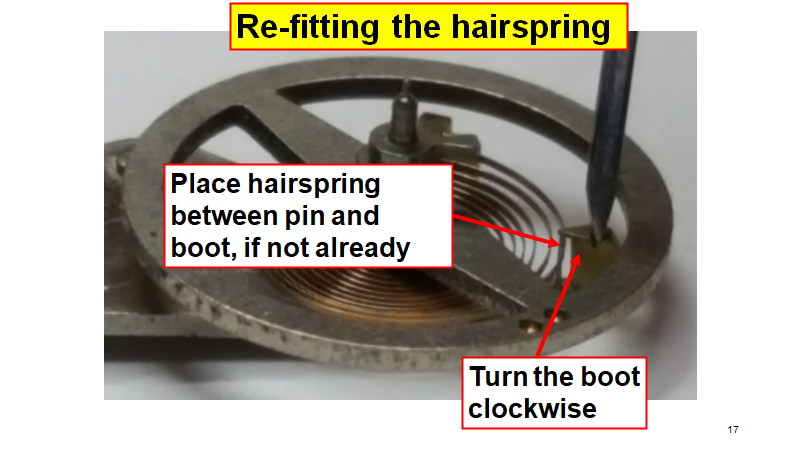
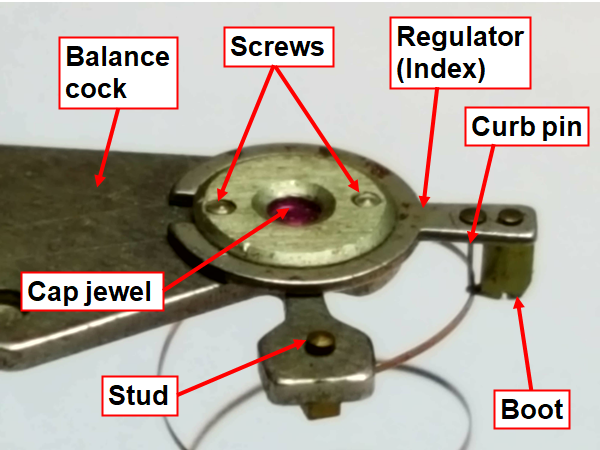
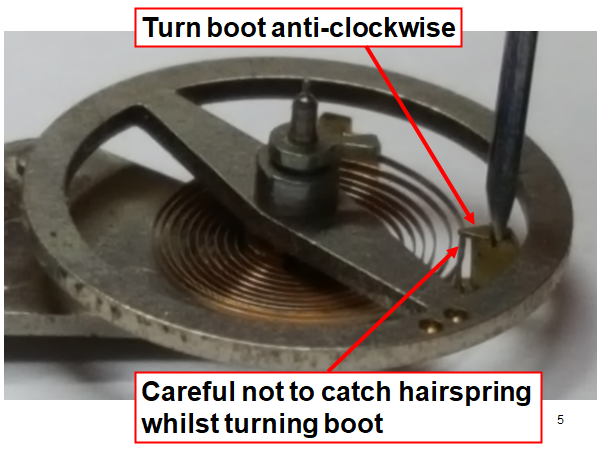
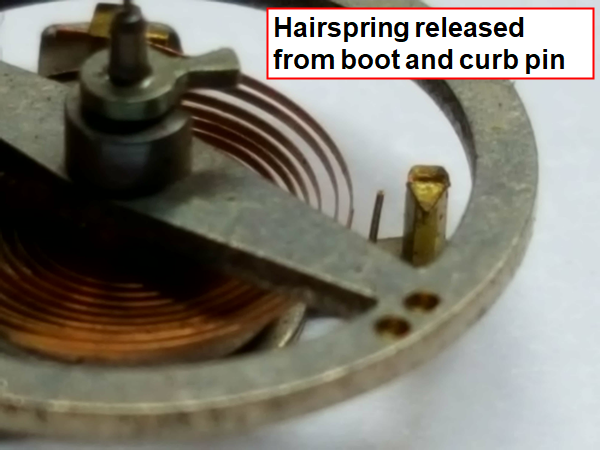
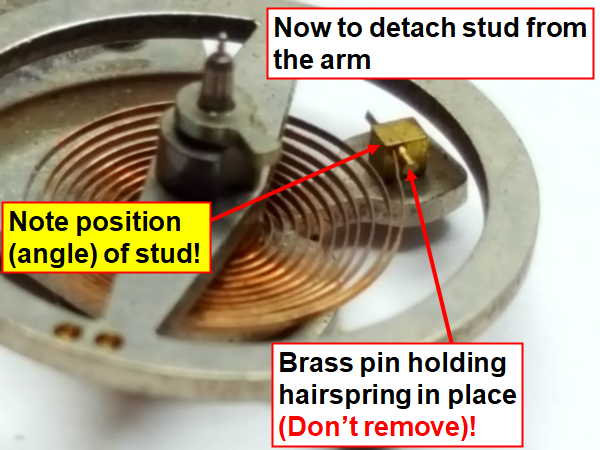
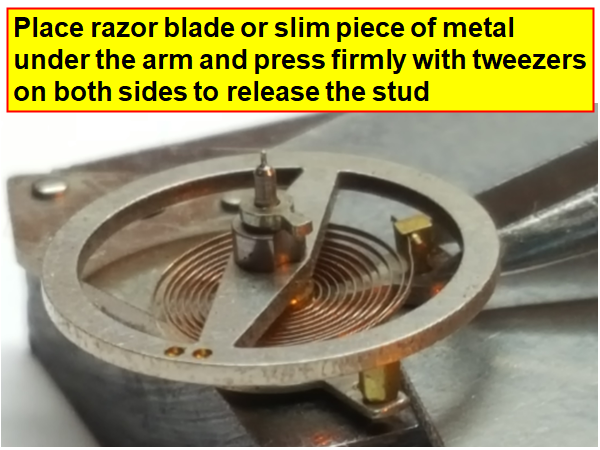
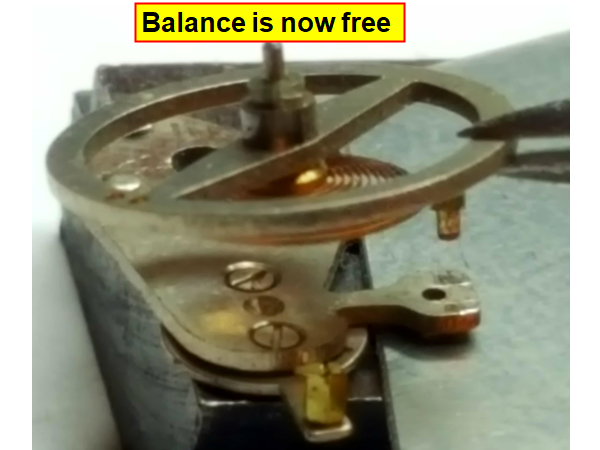
Hi, This is the third instalment on the Baumgartner BFG 866. I wanted to show how to bring the watch into beat On a previous walk-through of the BFG 866, I have described in detail how to remove the balance and hairspring to be able to oil the cap jewels As you look between the banking pins, the impulse pin is off to the left side slightly, putting the watch out of beat. The collet is turned in the opposite direction to the direction the impulse pin needs to move. So if in this case the impulse pin needs to move anti-clockwise to get it perfectly between the two banking pins, then the collet needs to be twisted in a clockwise direction You can attempt to turn the collet whilst fixed to the balance cock, but there is a much greater risk of damaging components, especially the hairspring. This is the way I teach my students, as it gives them the skills and confidence to remove the hairspring and balance from the balance cock and while removed they can oil the cap jewels as I've shown in this other walk-through on the BFG 866. I've got two more walk-through's on the BFG 866 that I'll post on the subject of adjusting the friction fitted minute wheel that is on the barrel and removing/re-fitting the centre seconds wheel and oiling the movement...


 1 point
 -
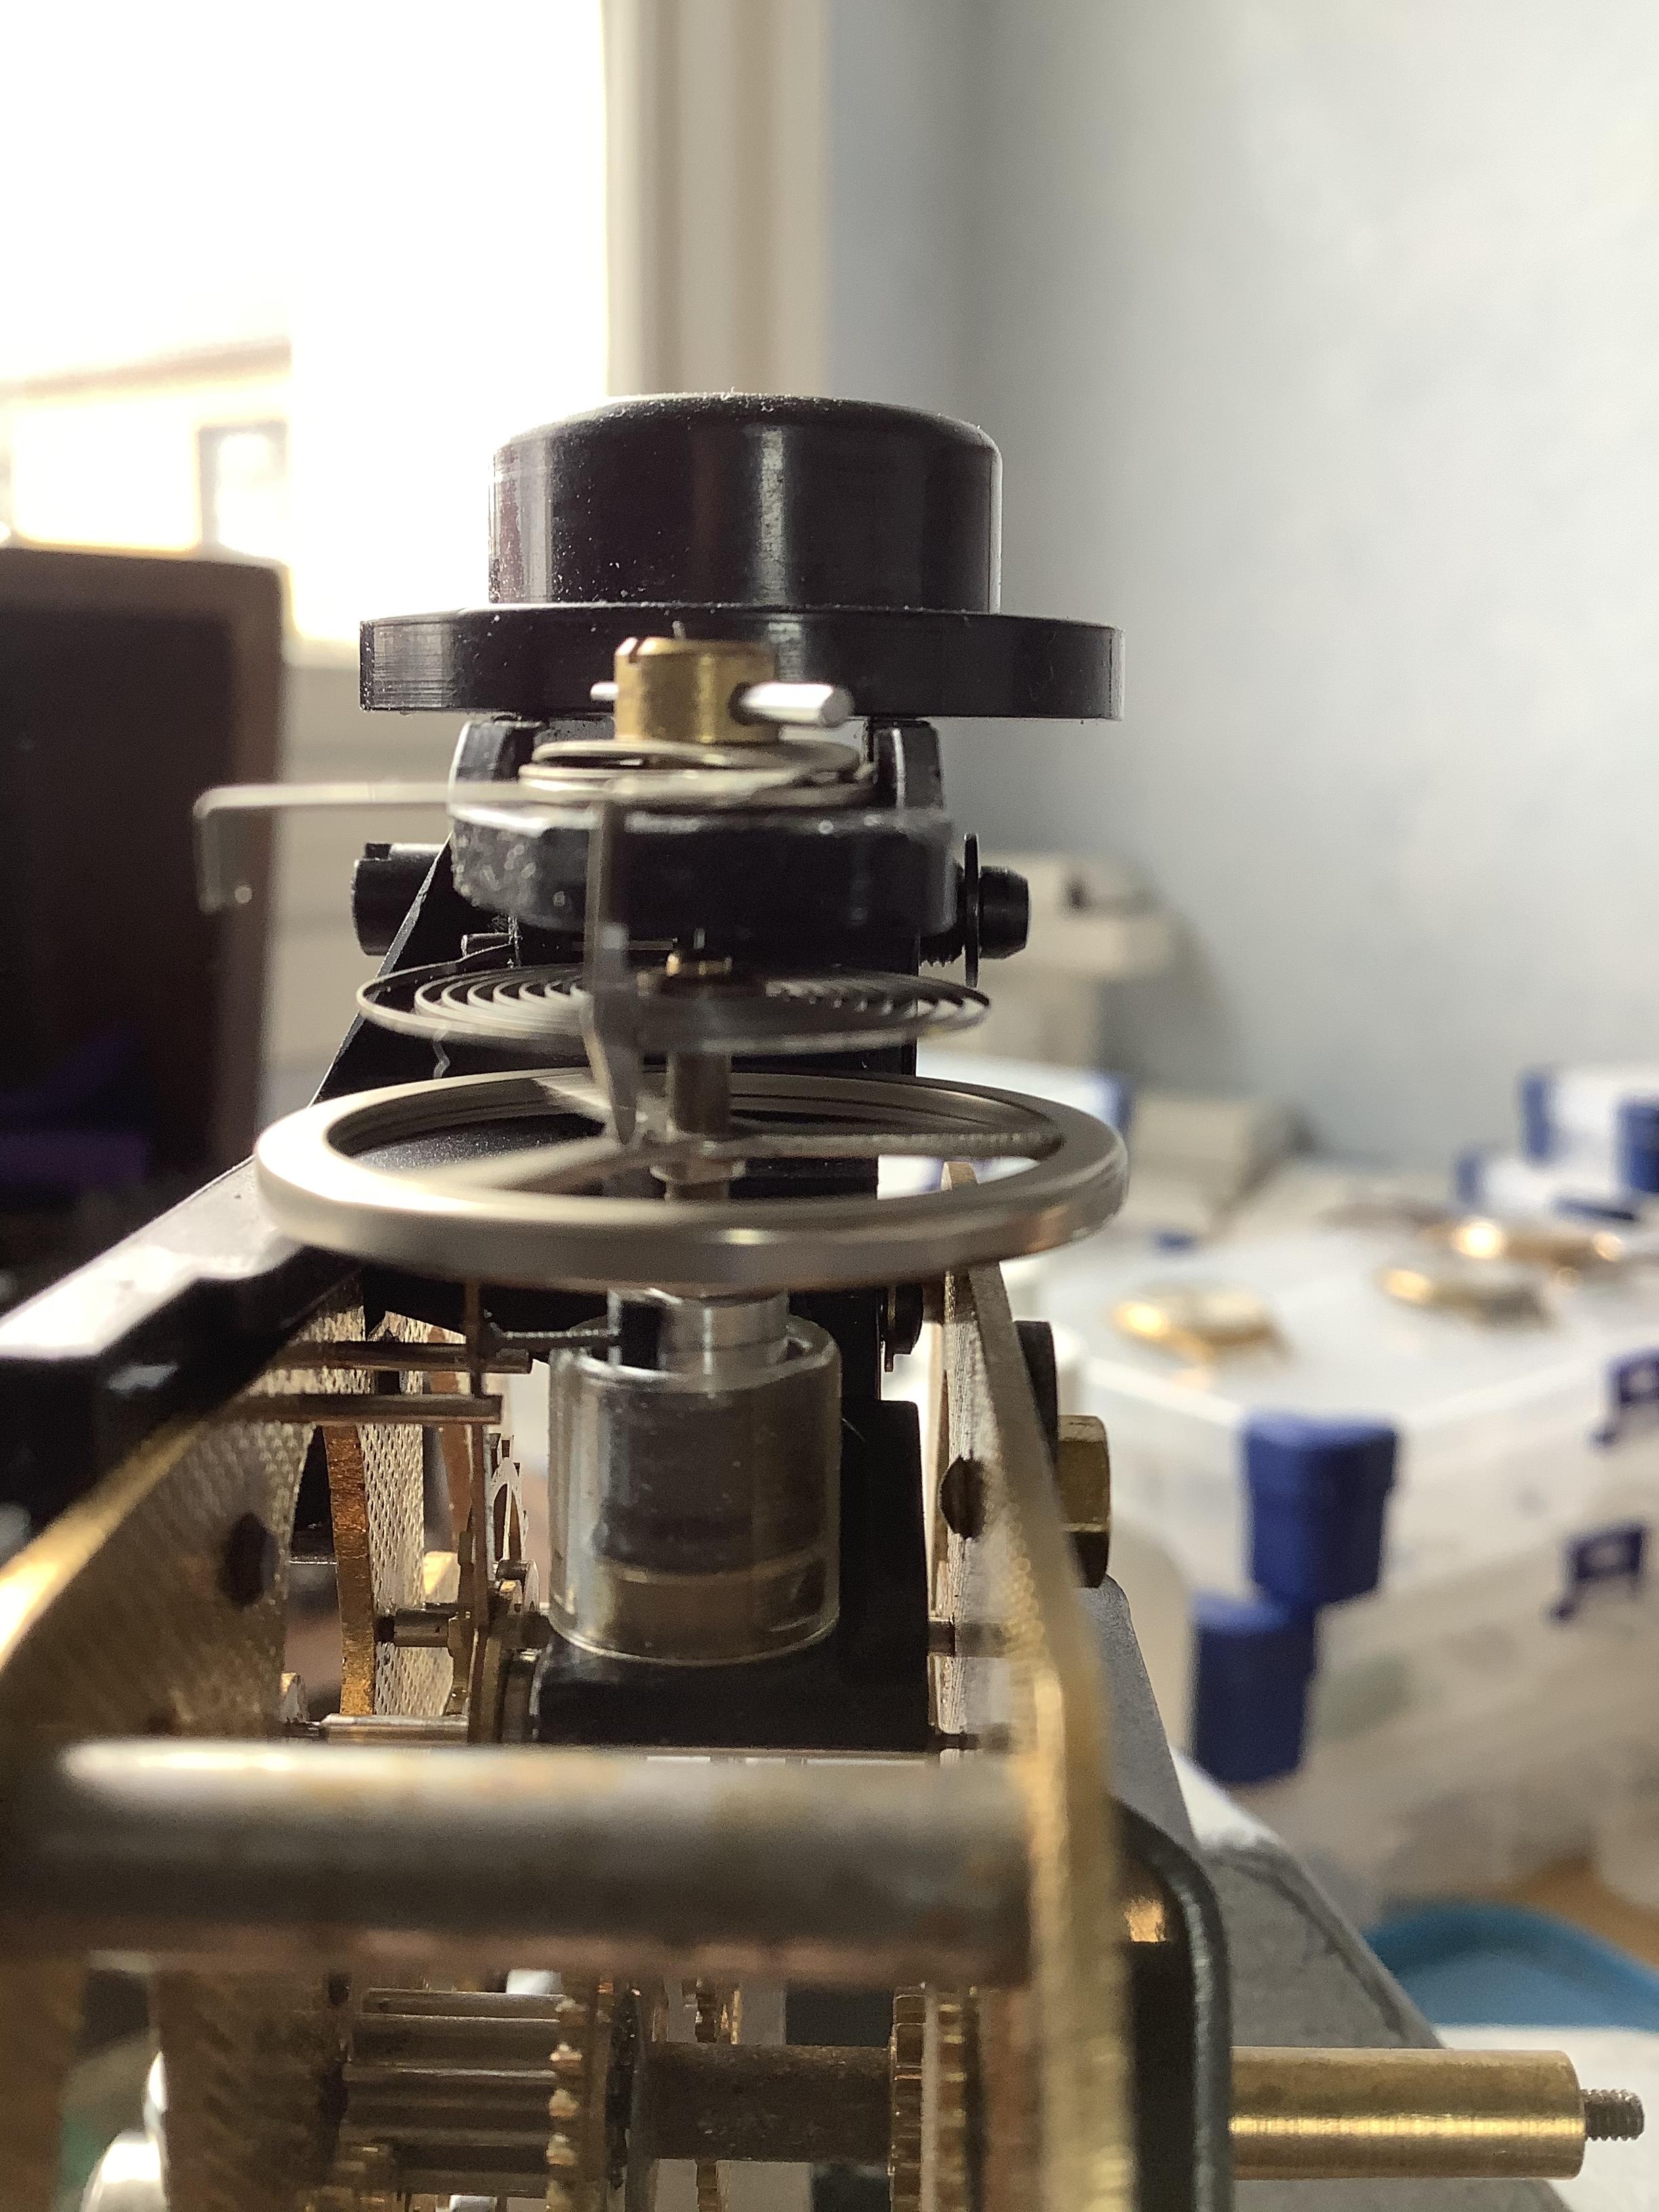
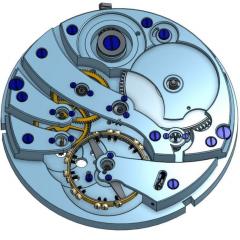
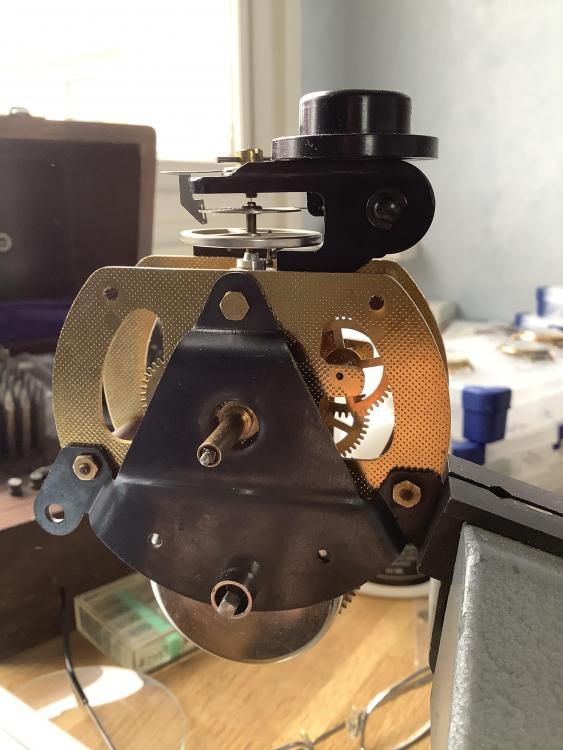
Hi all, I got another 60’s kitchen clock to work on. Movement photos are attached. one of the wheels needed a bit of attention and I got that fixed and after some basic cleaning and oiling, the movement runs. The overall design is however new to me and I would appreciate any advice on service and lubrication ”specials” as I’m a newbie on these ”big things”. Fundamentally I guess it’s a pin lever design? The balance wheel appears to be ”floating” by using what I suppose are two opposite mounted magnets and there’s a thin metal wire going through the ”staff” to keep things in place. Should end with really low friction but obviously only works when the movement is correctly placed. Curious to hear if this needs any special consideration or just leave as is? Thanks!
 1 point
 -
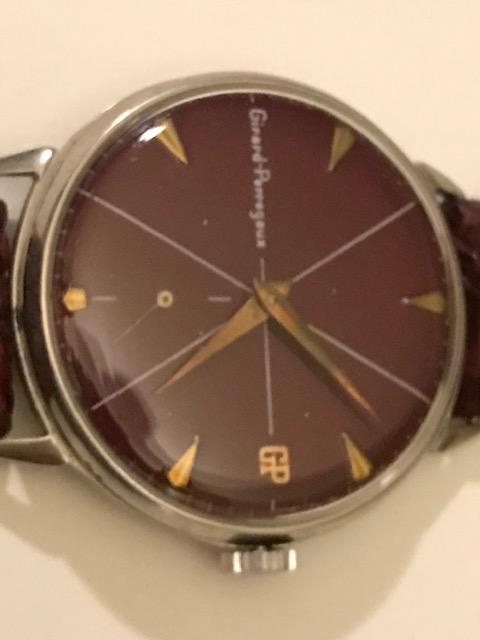
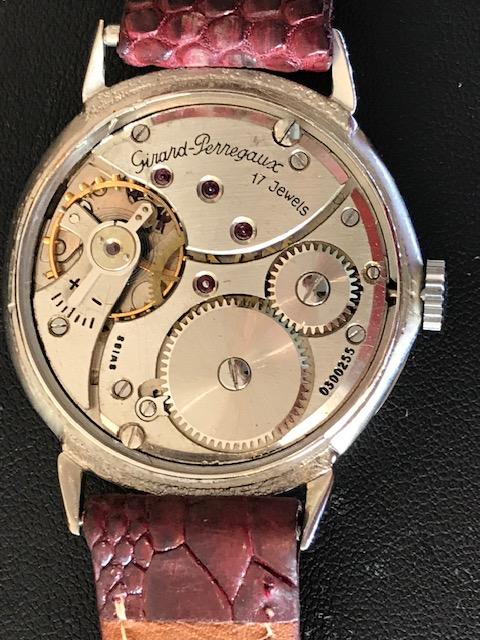
Greetings, I fell in love with this watch the minute I saw the dial (no pun intended) and bought it at auction basically without having any idea about its provenance. I’m not sure all the bits and pieces are original. I was hoping someone might have some thoughts about its history. I am fine if it’s some sort of bizarre combination of GP parts. I confess to wanting to replace the case with something a bit sturdier; but won’t do it if that’s the original case. (The crown is unsigned and the steel case just feels wrong somehow.) Anyway, here are some pictures (sorry (1) one photo is sideways and (2)I forgot to take a photo of the inside of the case back).
 1 point
 -
hello from Greece! I'm jerry and i have both a repair shop and a workshop in Athens i'm third generation watchmaker from uncle and his father who brought me up like a child of their own. i'm happy to see good qualitly works and my passion is watch restoration 1900/1960 models1 point
-
Dear JD, No doubt this is a Jabbeedoo if ever there was one. Cheers from Hamburg, Alex1 point
-
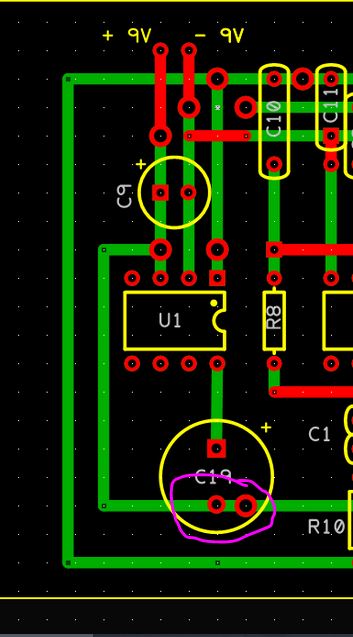
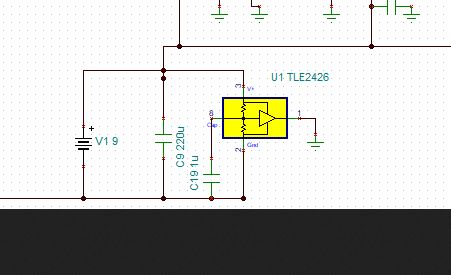
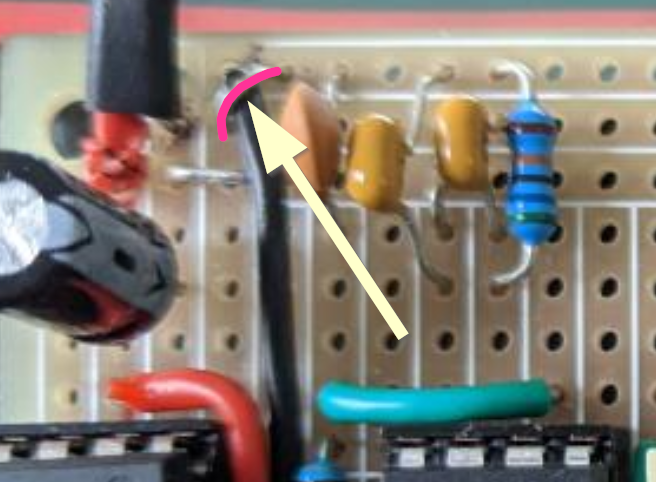
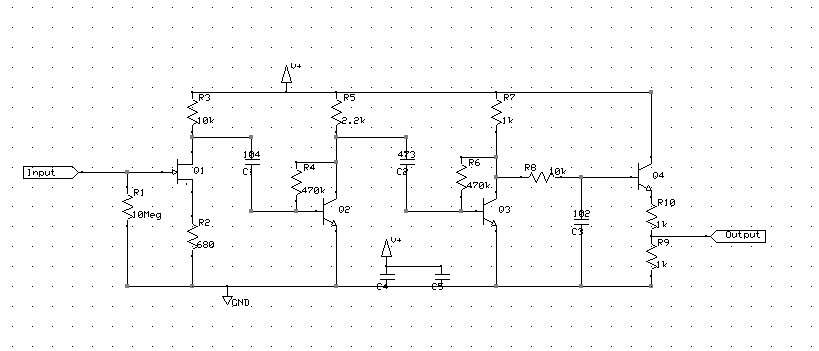
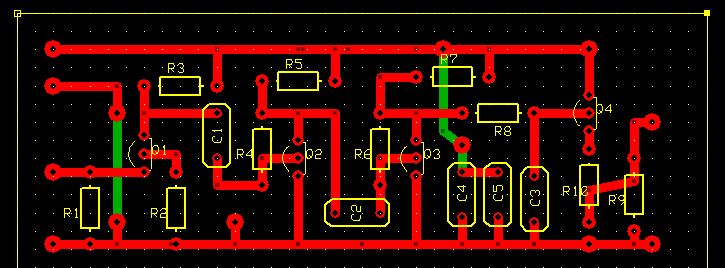
I'm looking at only Virtual ground wiring I would recheck all the connections. Just make sure they're going where there supposed to be. I have a hard time following part of it and it almost looks like solder bridges. The noise reduction capacitor goes between pin 8 and pin 2. If you look at your circuit board layout it's wired between pin 8 and 3. Then according to the image it's 1000 µF Versus the data sheet and your schematic of 1uf. So it looks like noise reduction capacitor is the wrong physical size wired incorrectly but it probably it's not what upsetting the voltage although it is a really big capacitor. Then because it's so much bigger than the input capacitor I'm guessing you swapped those perhaps? I would probably use a ceramic capacitor for the noise reduction rather than electrolytic.
 1 point
 -
oh back in my old shop we would call that a "goes-in-ta". ? as in that goes into the pile of stuff we have no idea what it is.1 point
-
I believe the contacts of the display switch have oxidized and are not closing the circuit properly. If the switch is replaced, I believe the circuit would work just fine.1 point
-
These numbers are not good. Maybe the rail splitter is bad. Do this. Remove the jumper indicated in this picture. Remove all opamps. Only the rail splitter plugged in. Apply power and measure between pins 1 and 2.
 1 point
 -
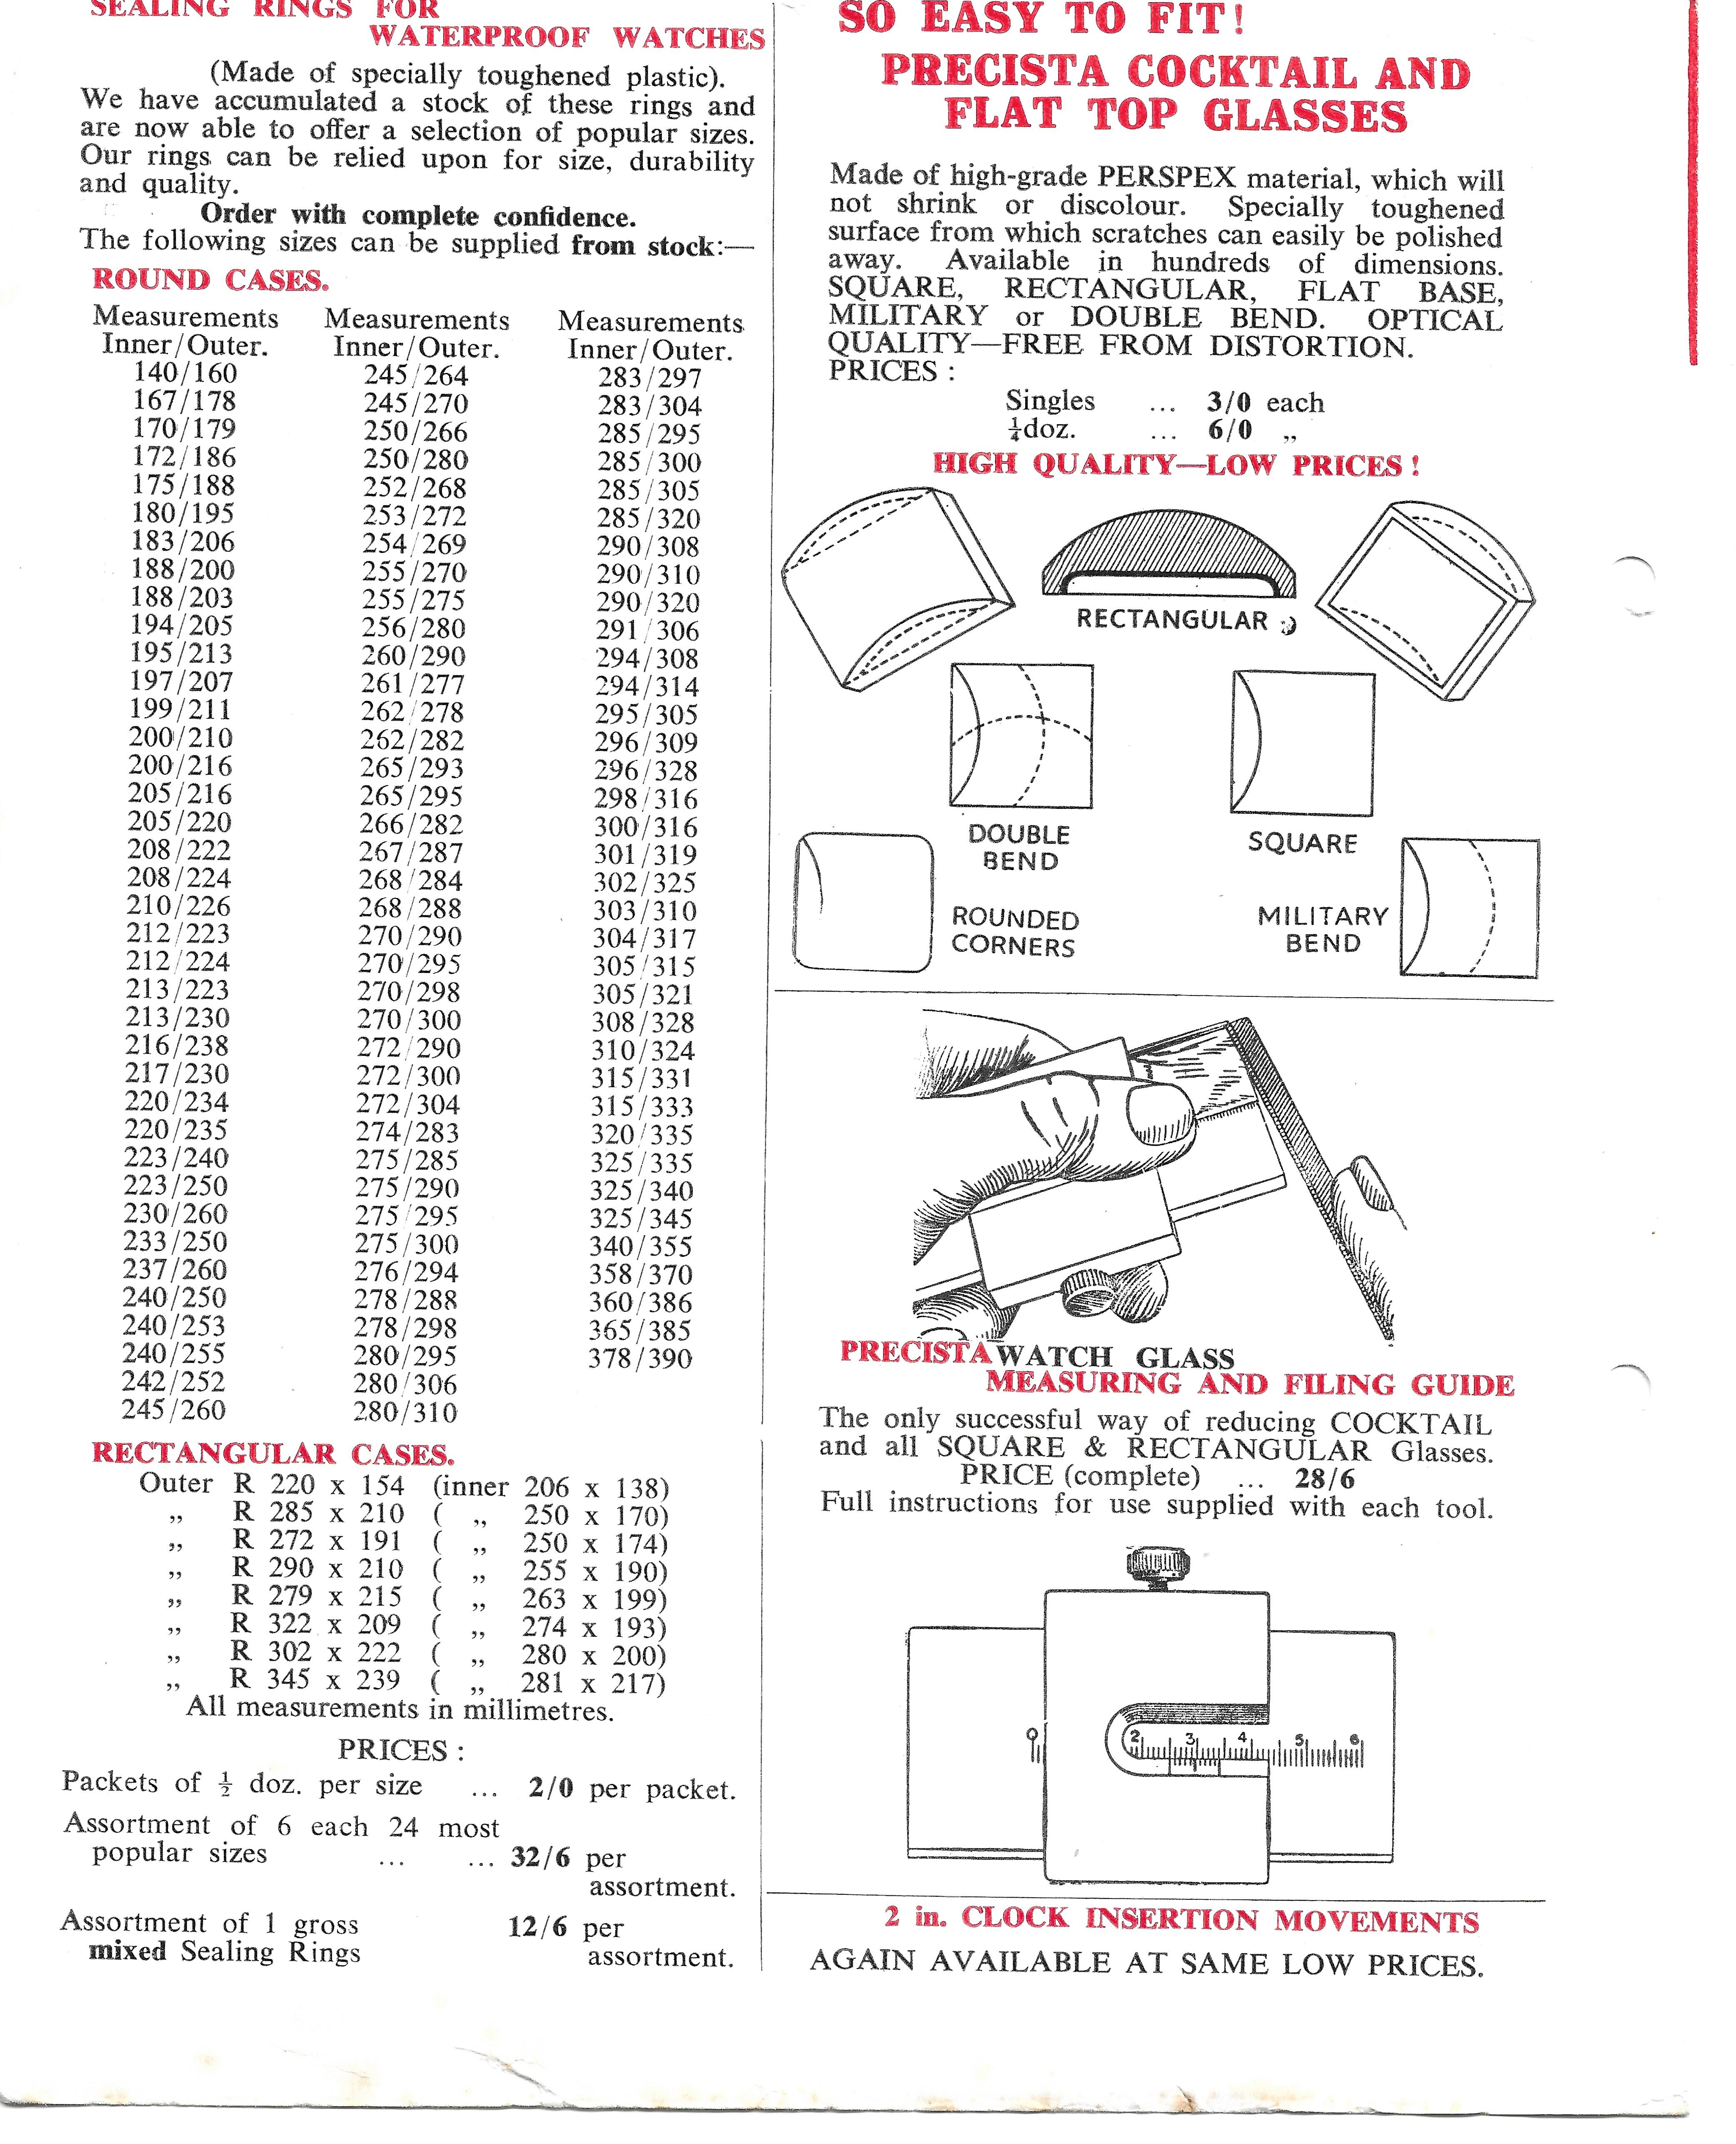
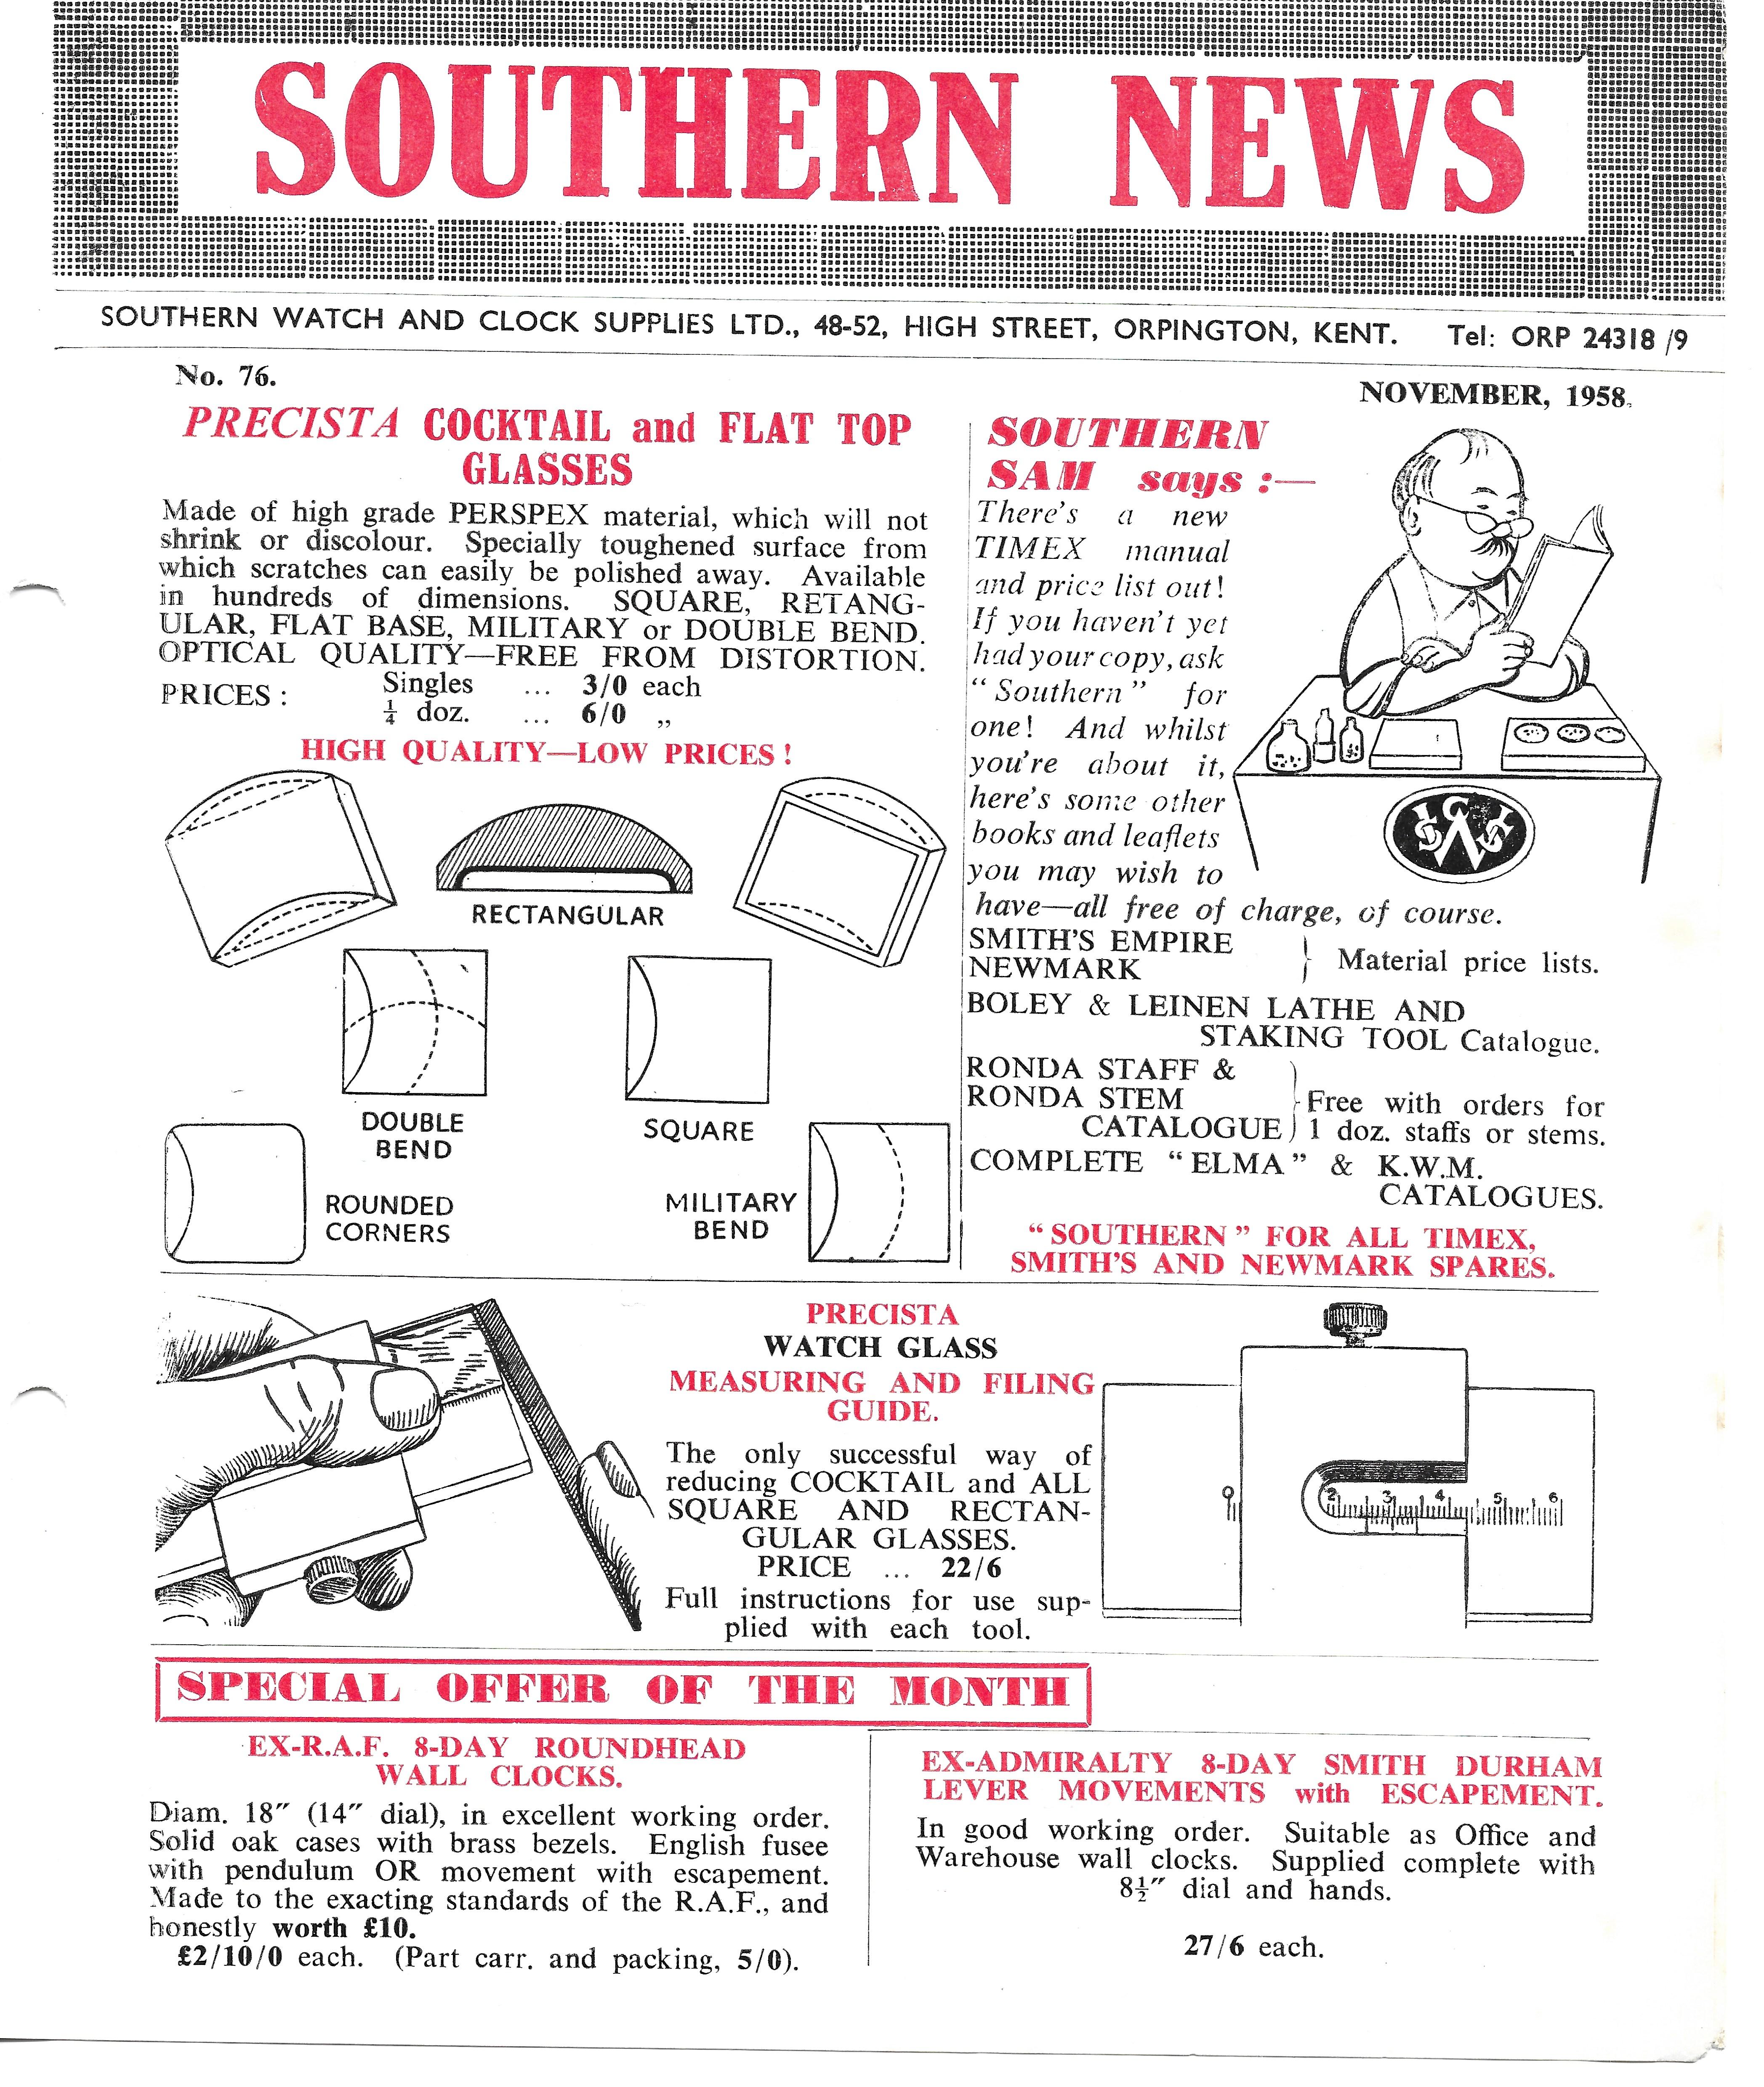
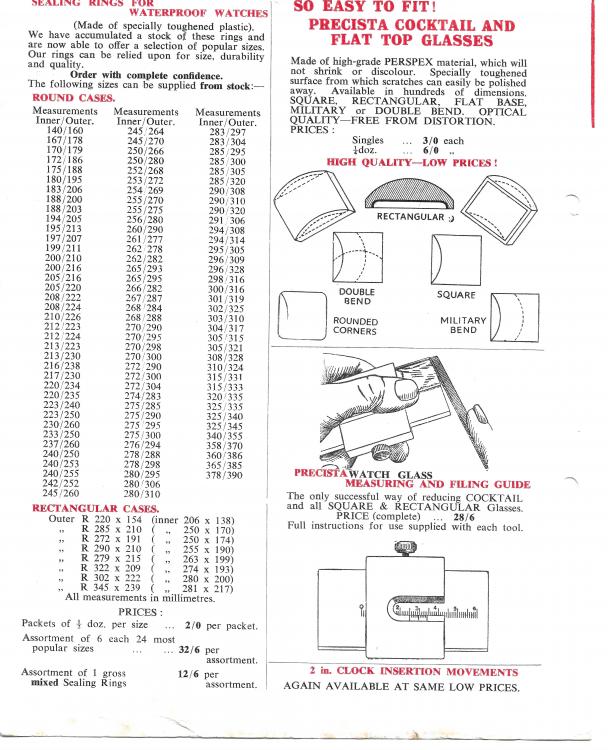
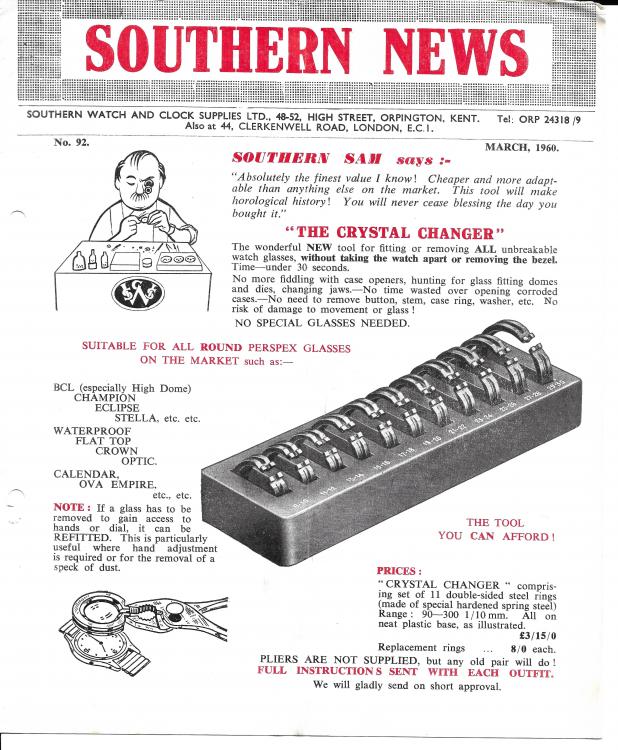
And a measuring and filing guide for perspex crystals:
 1 point
 -
https://www.google.com/url?sa=i&url=https%3A%2F%2Fmb.nawcc.org%2Fthreads%2Fadjusting-floating-balance.144478%2F&psig=AOvVaw1oc_-vi0UeSBdRGDff653M&ust=1615889868482000&source=images&cd=vfe&ved=2ahUKEwjXkZD-iLLvAhUJgM4BHY2mBTcQr4kDegUIARCaAg The extract from the NAWCC explains the workings of this "Floating Balance" not quite Hermle but a neat Idea all the same.1 point
-
You may find the links below interesting. I was kinda hoping for a DIY repair site but didn't find that. I have a suspicion they may have had a high failure rate but I could be wrong. http://pulsarledtime.com/home.php http://www.oldpulsars.com/1 point
-
Looks a kif trio, not incab, there is a special tool for this Remove and put the bridge on a hard surface to gain more control over the task (important). The wooden tool anvil speaks of is a good idea. many approaches have been discussed before. I slide two prongs in the groove , hold the spring down under my thumb nail ( you have more control with your fingers as compared to tools) turn the spring with tweezers (move each prong a little at a time) to get the third prong in the groove. Rinse and dry.1 point
-
I chose a different solution and rolled my own sense amplifier. Here is the schematic and board layout. Boards came in last week and it is working. I don't get quite the filtering of the opamp version, but it seems good enough.
 1 point
 -
post your expresspcb file here. I will make the companion schematic to validate...perhaps even send for boards.1 point
-
Thank you, I will do so. You can never have too many benches! Or tools for that matter. You would enjoy my shop for sure. I have been in the business for almost 30 years. I am lucky to have a very well equipped repair and manufacturing facility. Tons of fun. I also teach advanced manufacturing and CNC programming at our local Community college so I am trying to do what you are doing... teach others...1 point
-
For a battery powered circuit, everything is floating, so the classical meaning of "ground" does not apply. For opamp circuits such as this, it is convenient to call the mid-rail voltage "ground" but beyond convenience, it has little meaning. As far as current capability, the virtual ground generator can source and sink 20mA. The only place any 'real' current is required from ground is via the 680 ohm resistor (which is not necessary IMO). It is less than the 20mA spec limit. I am pounding my head against my screen and my fists against the keyboard...why...Occam's Razor.1 point
-
Very good. Excellent. I don't understand the lingo very much but, I enjoy the comments and I learn. I also want to congratulate the work of @CWRNH, it honestly looks neat and tidy.1 point
-
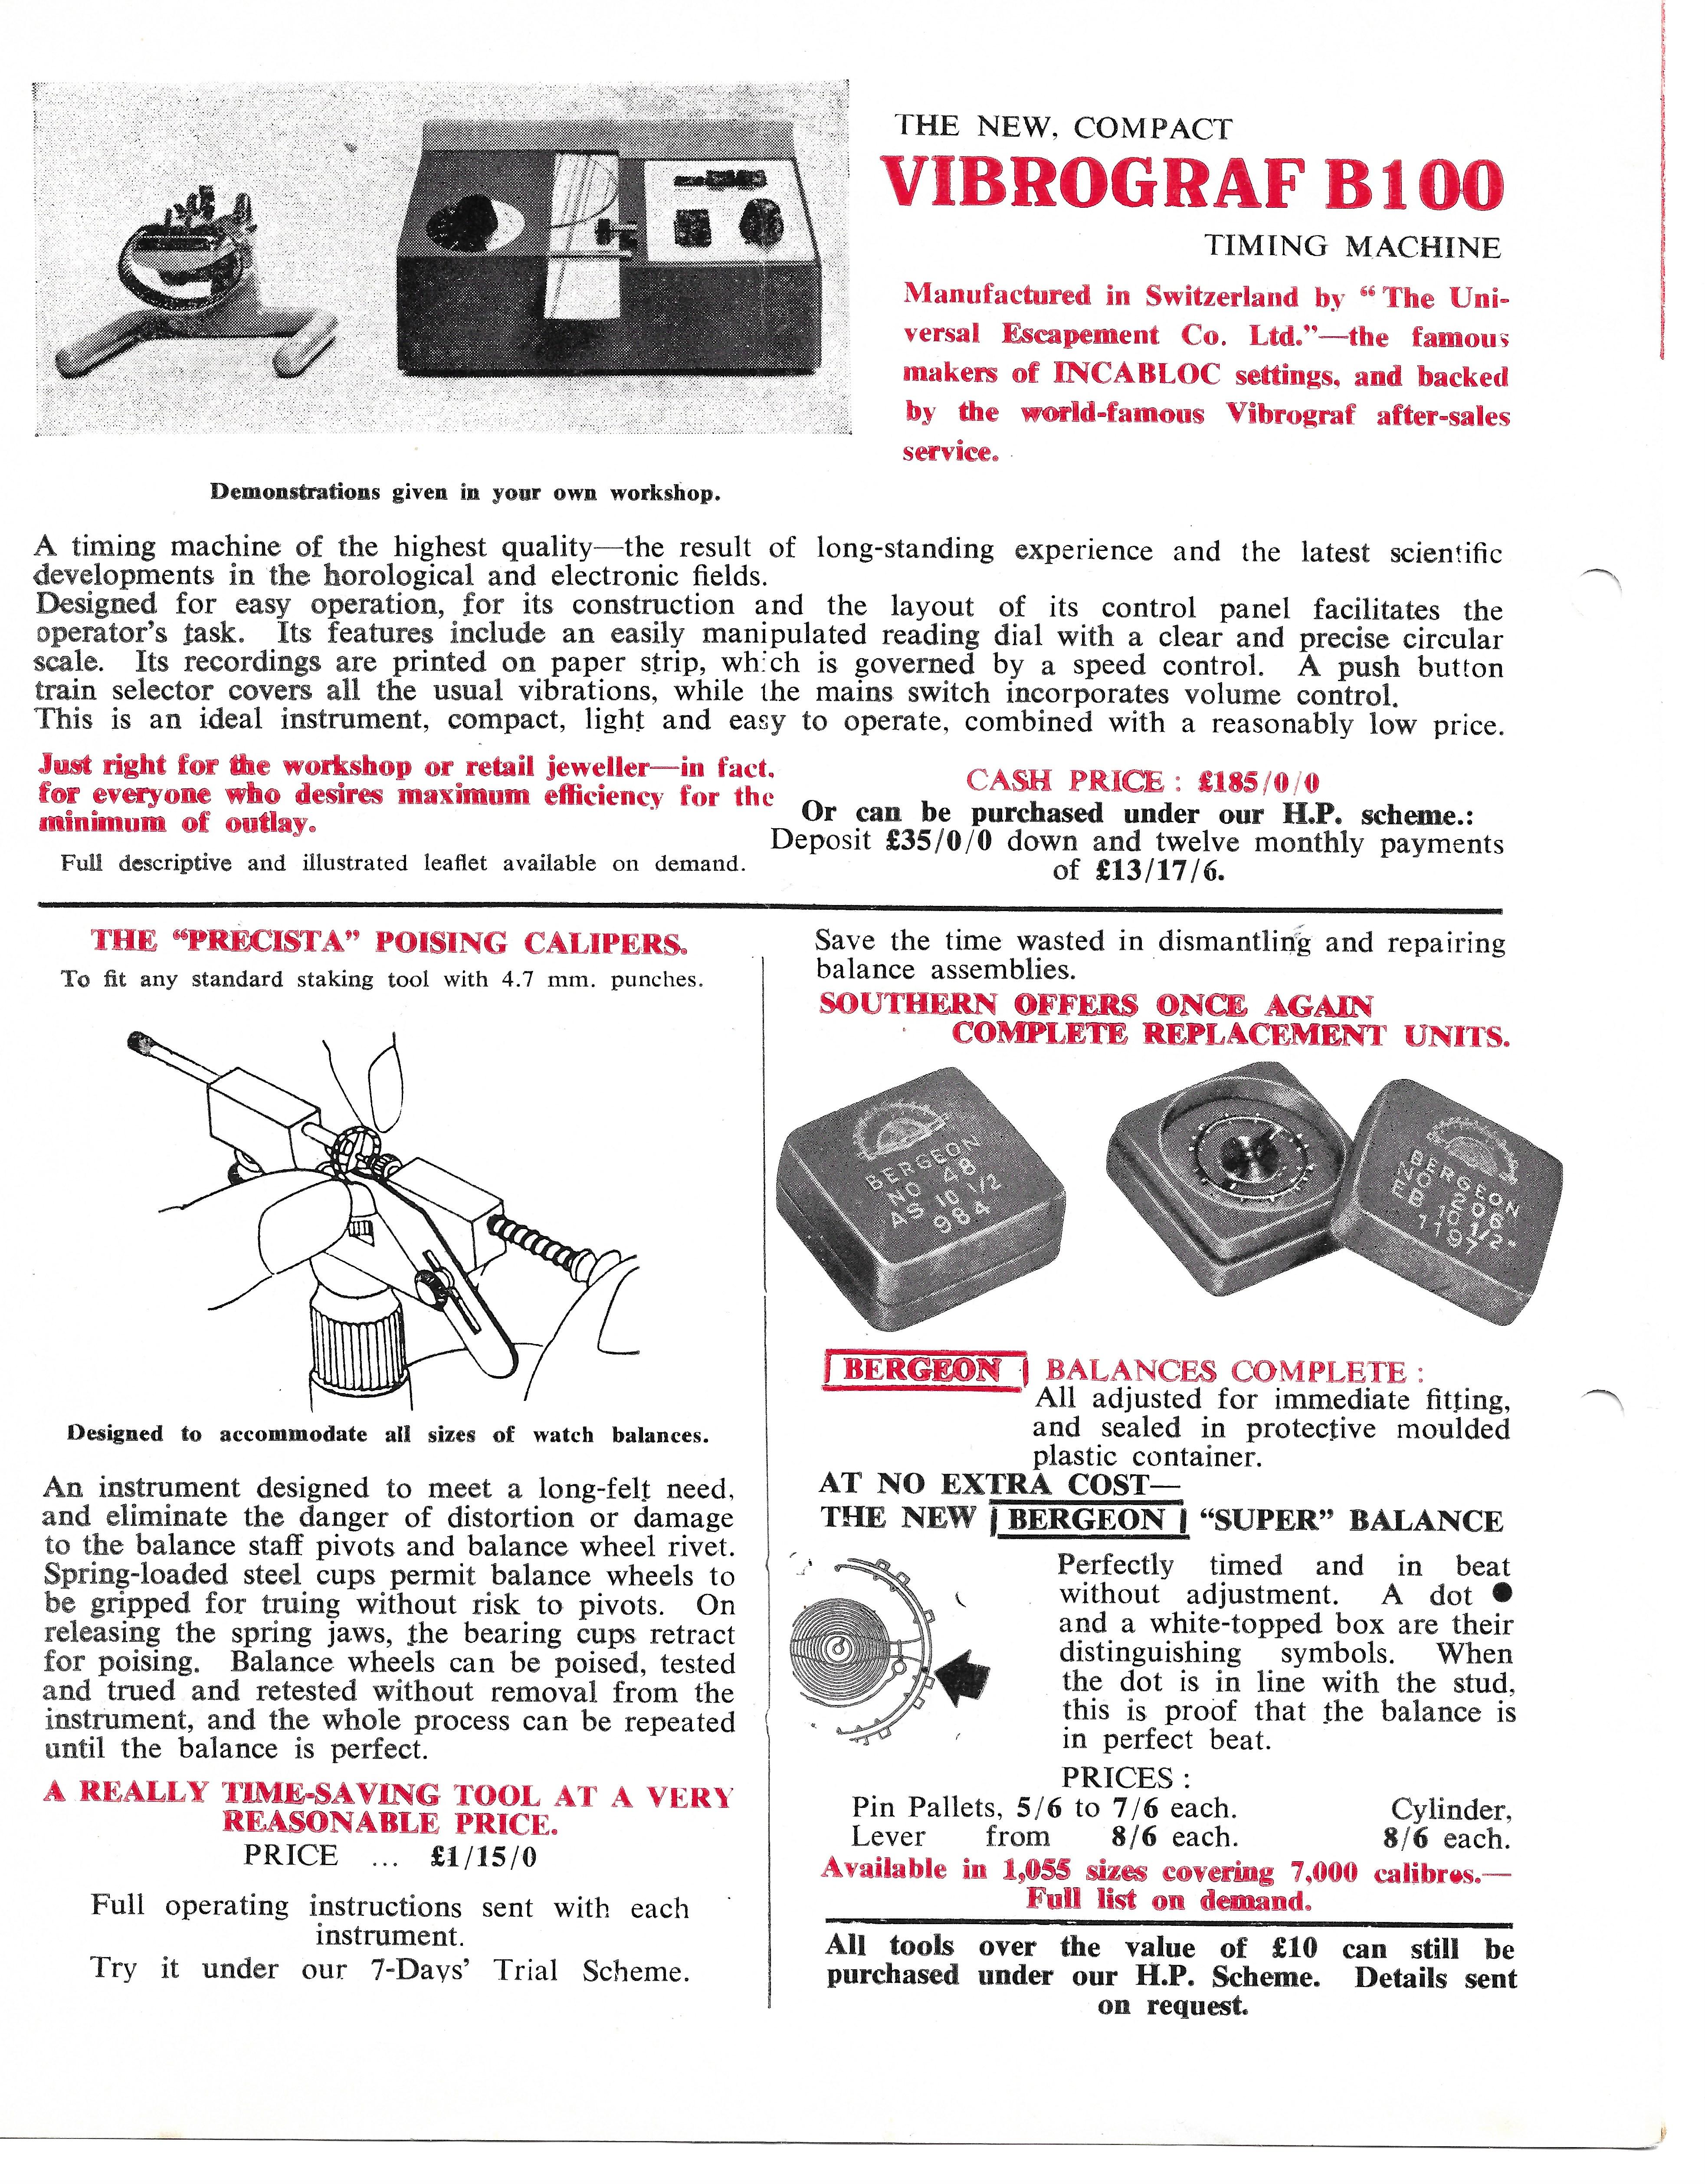
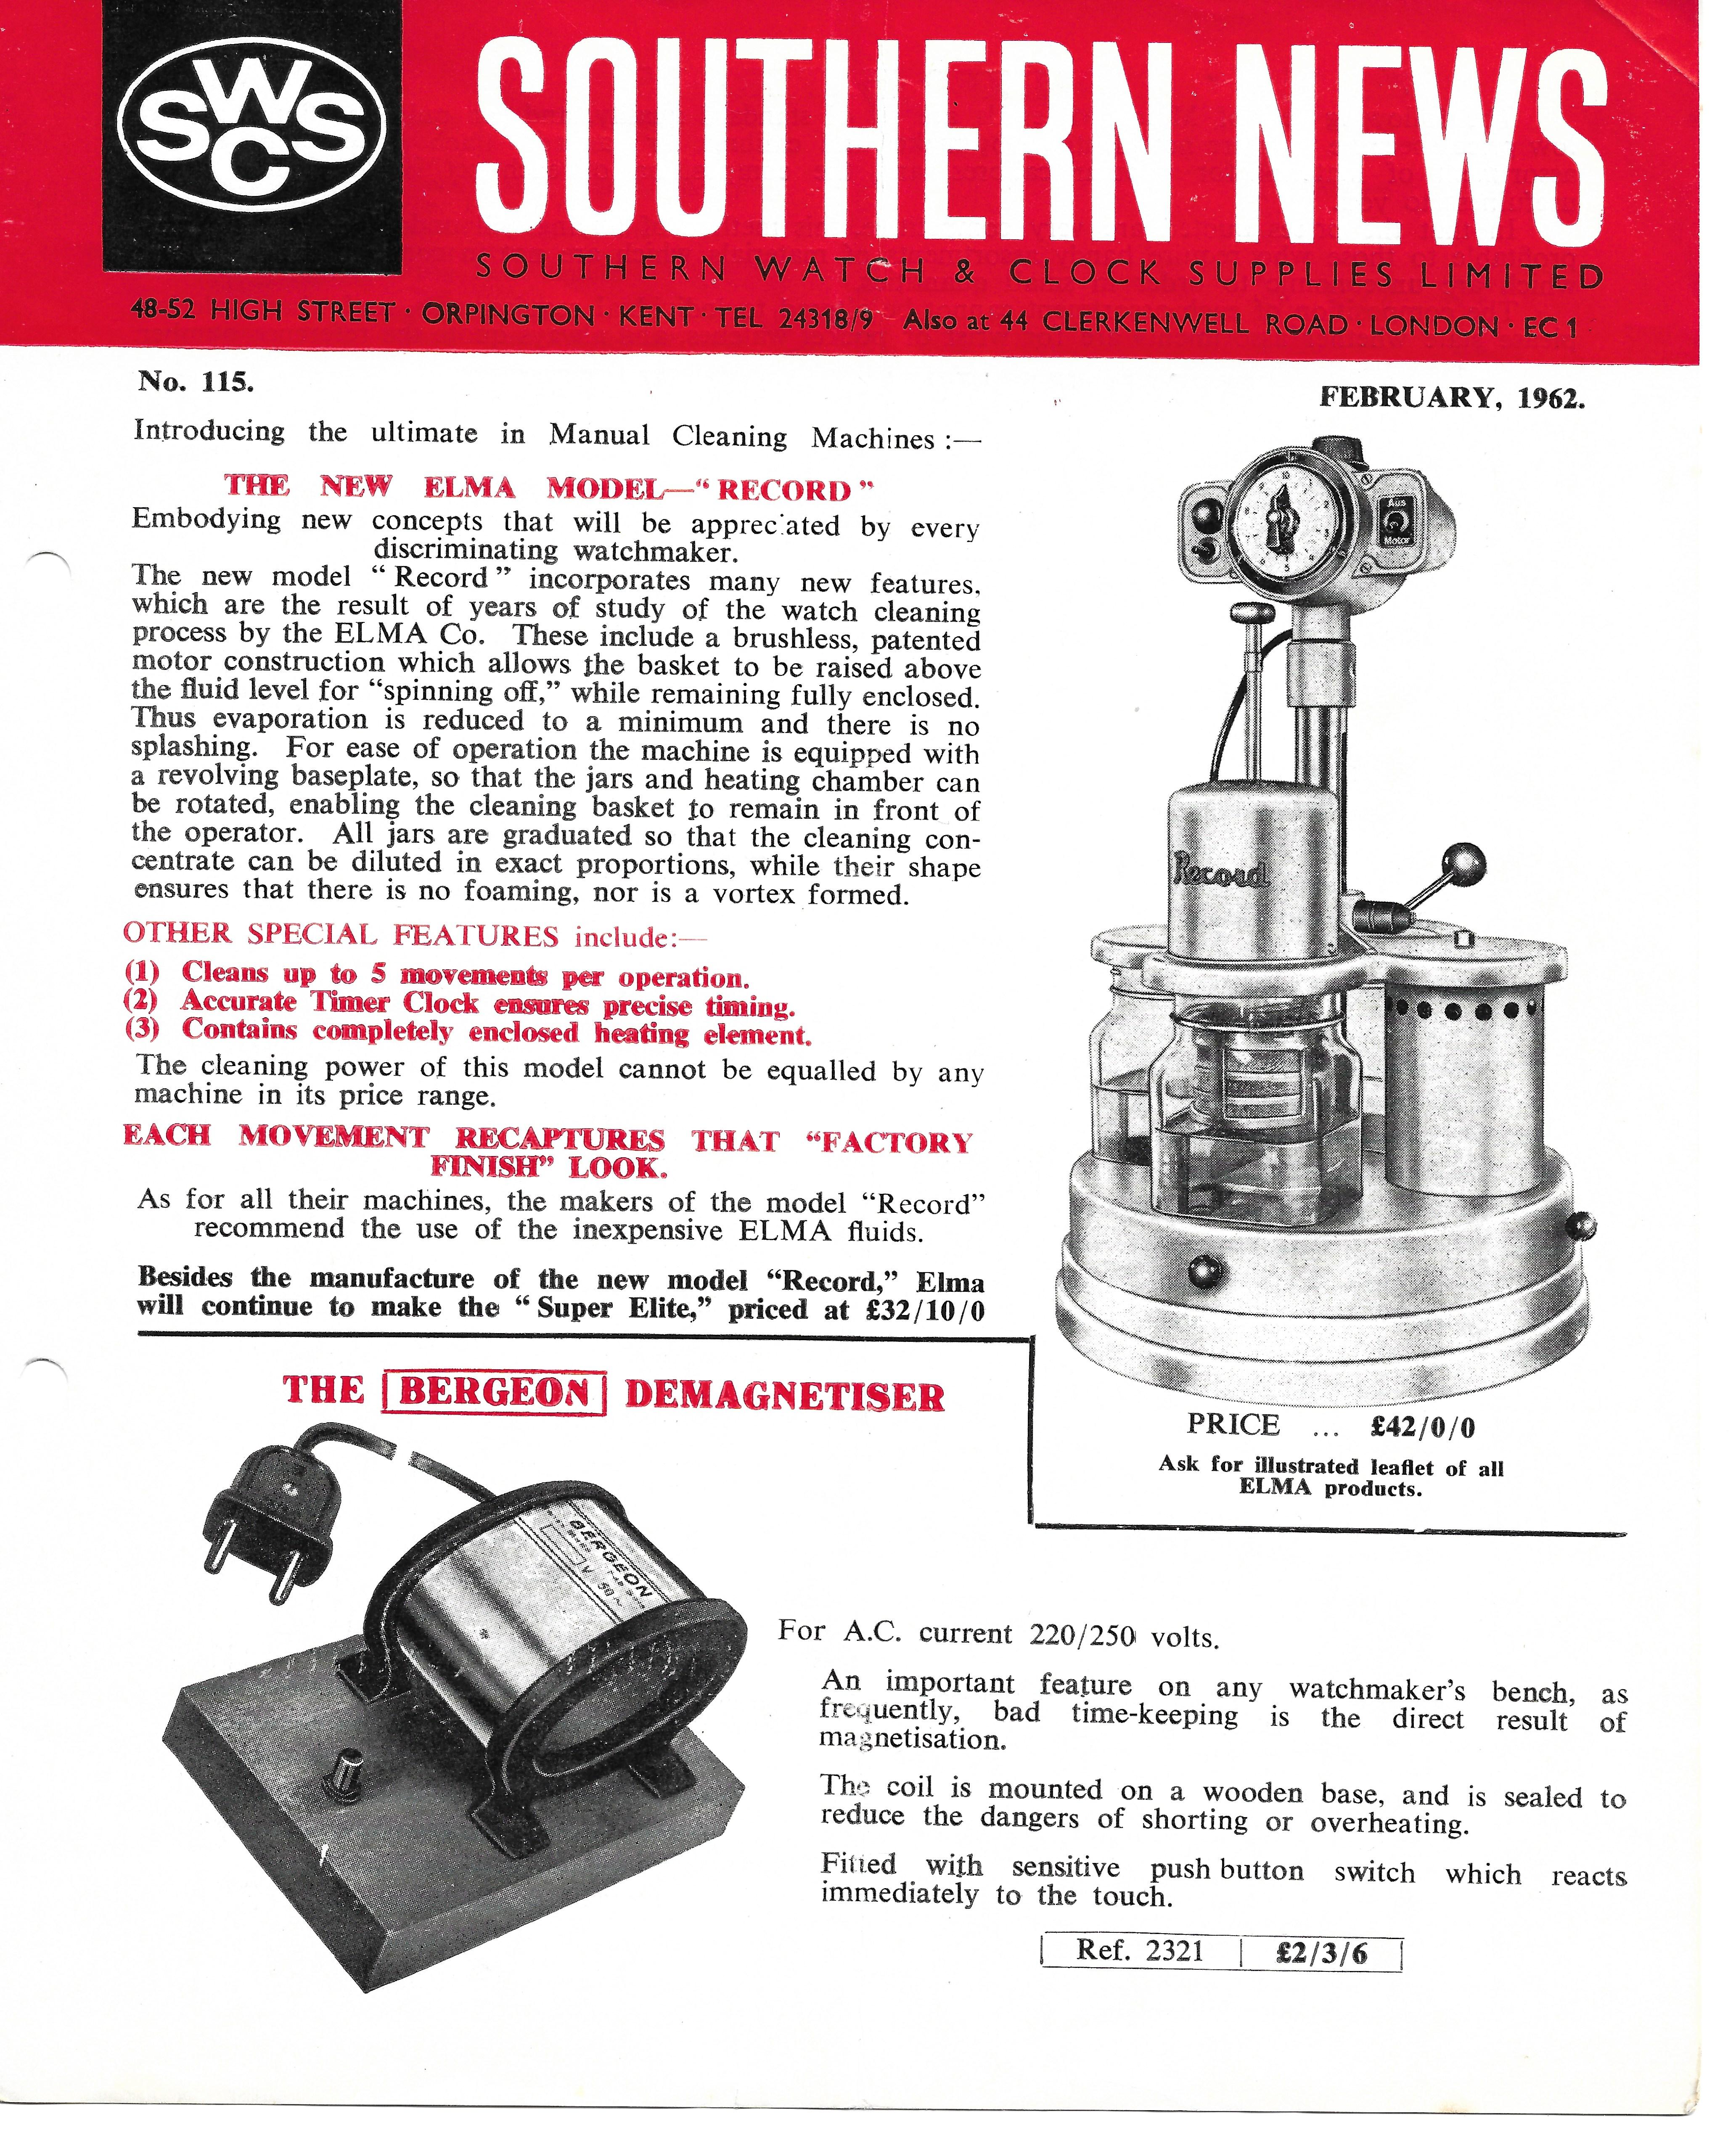
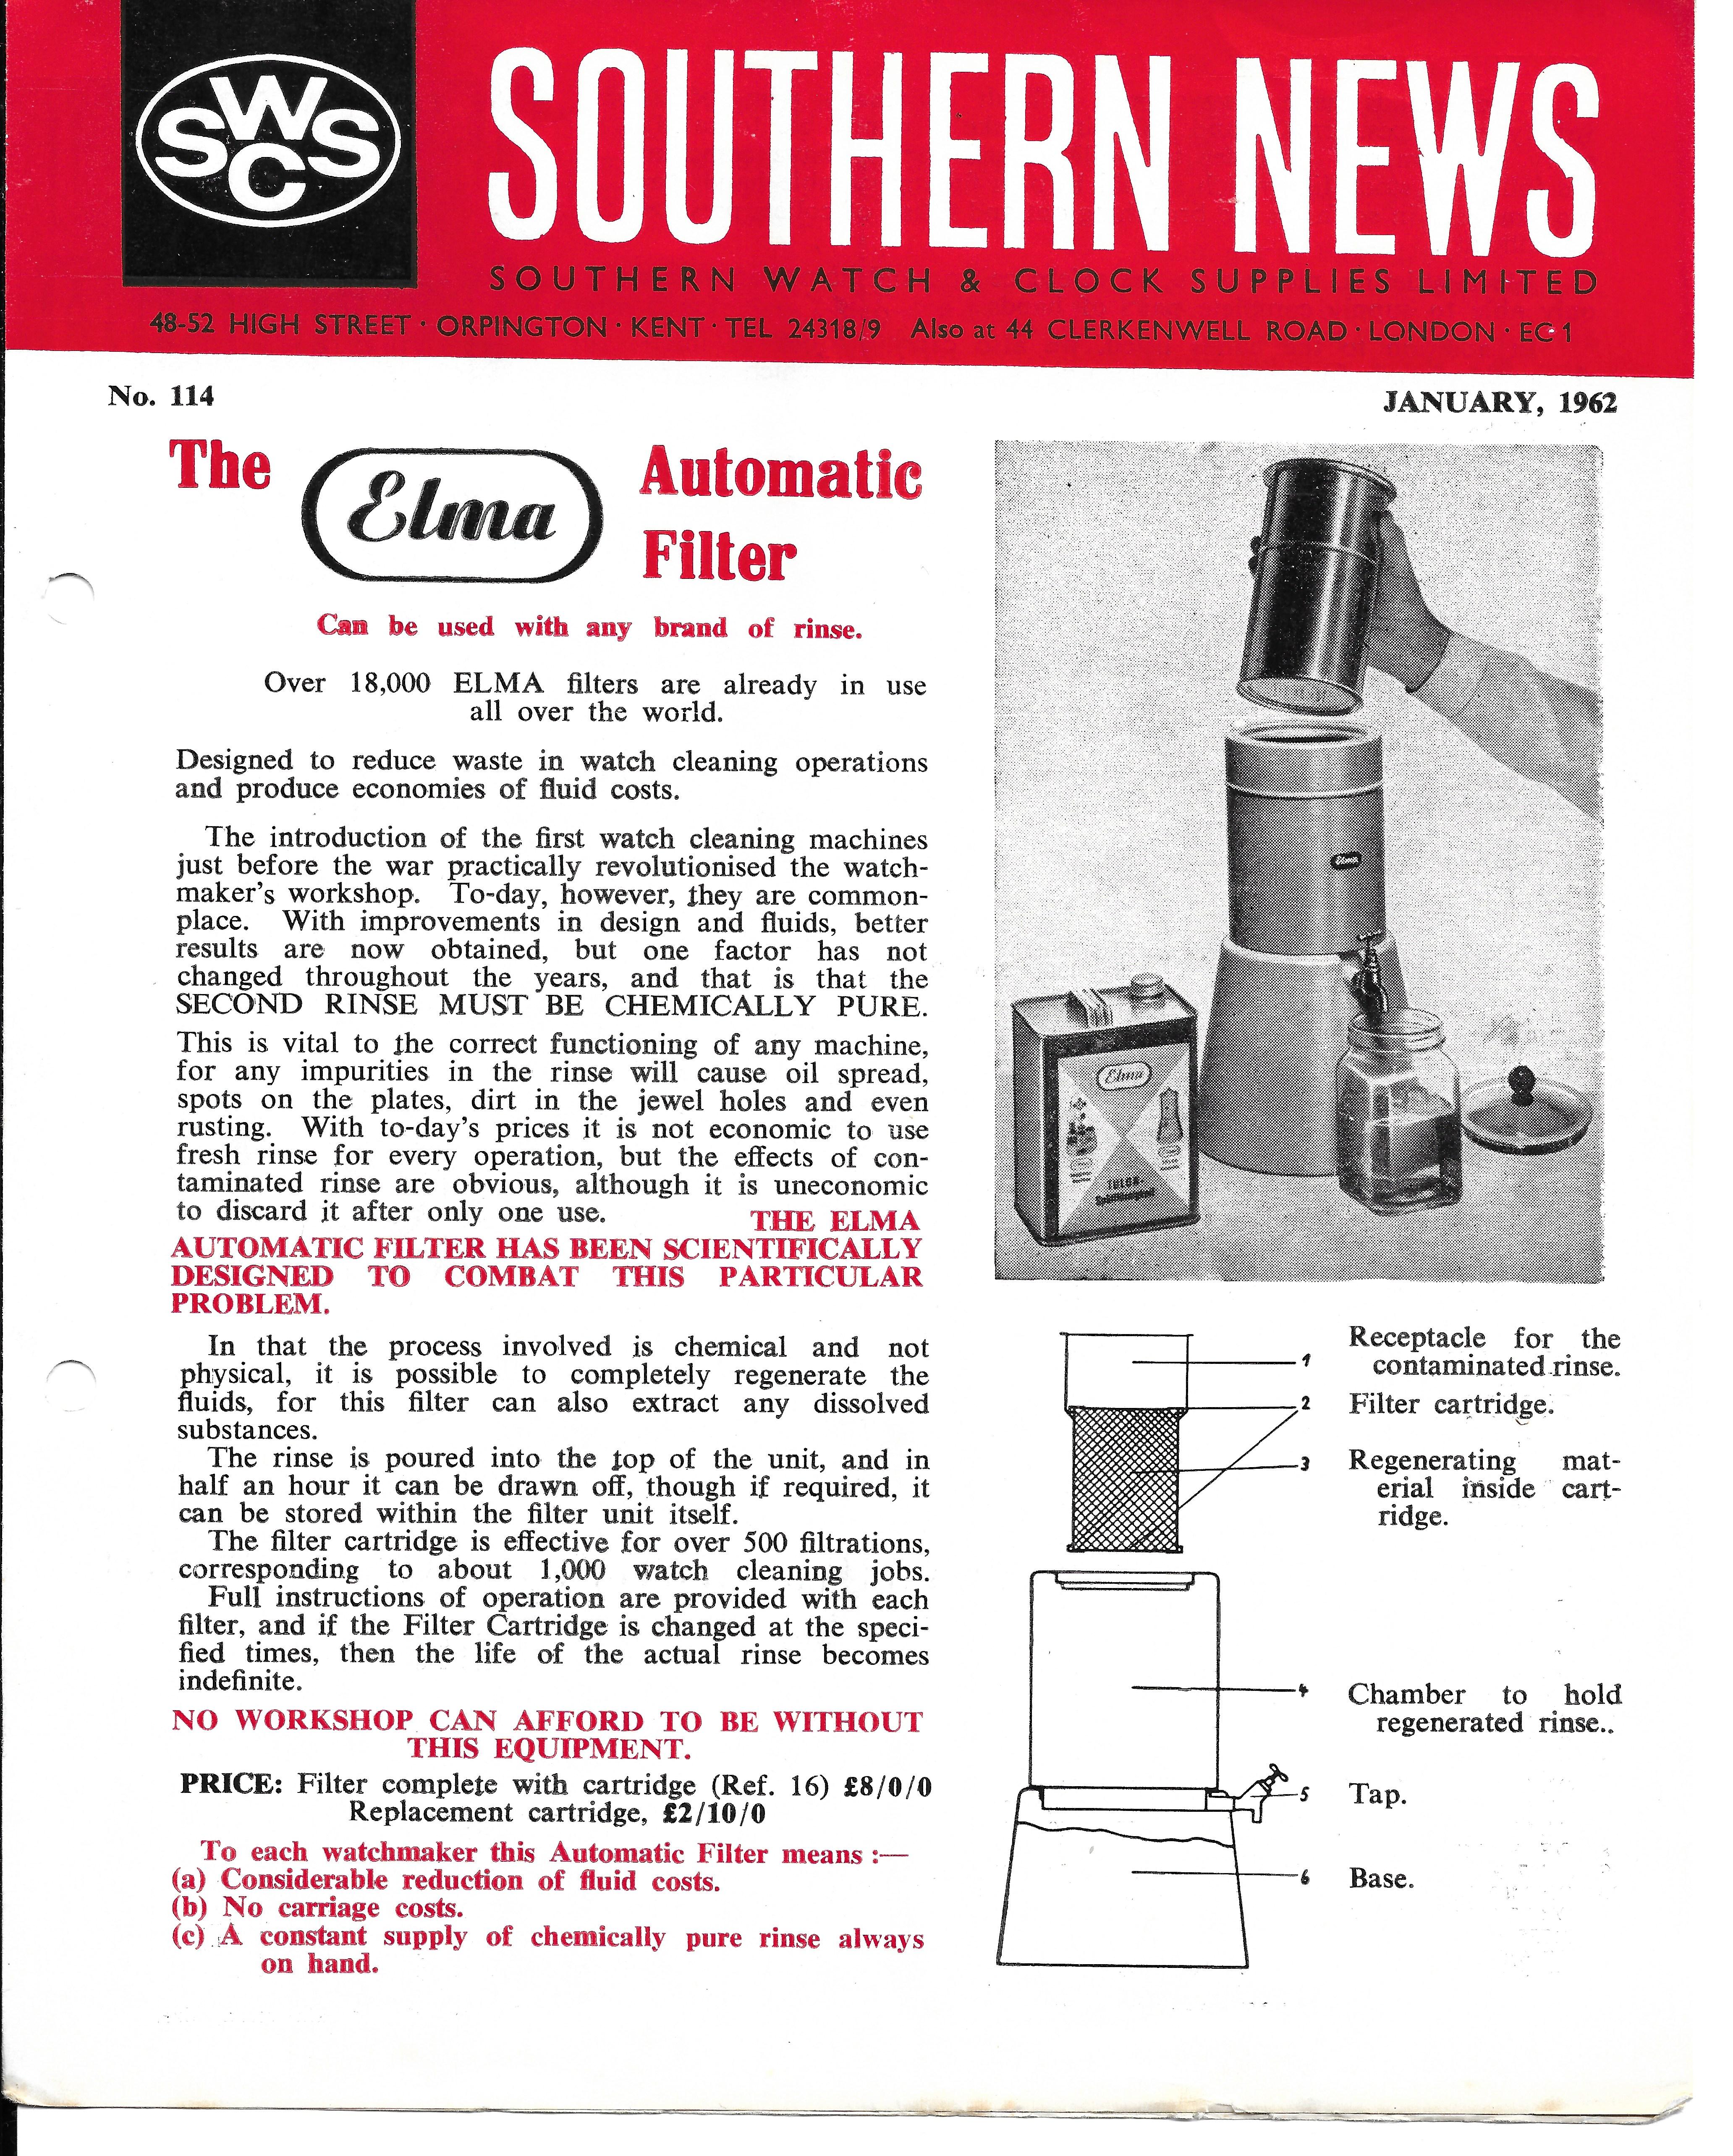
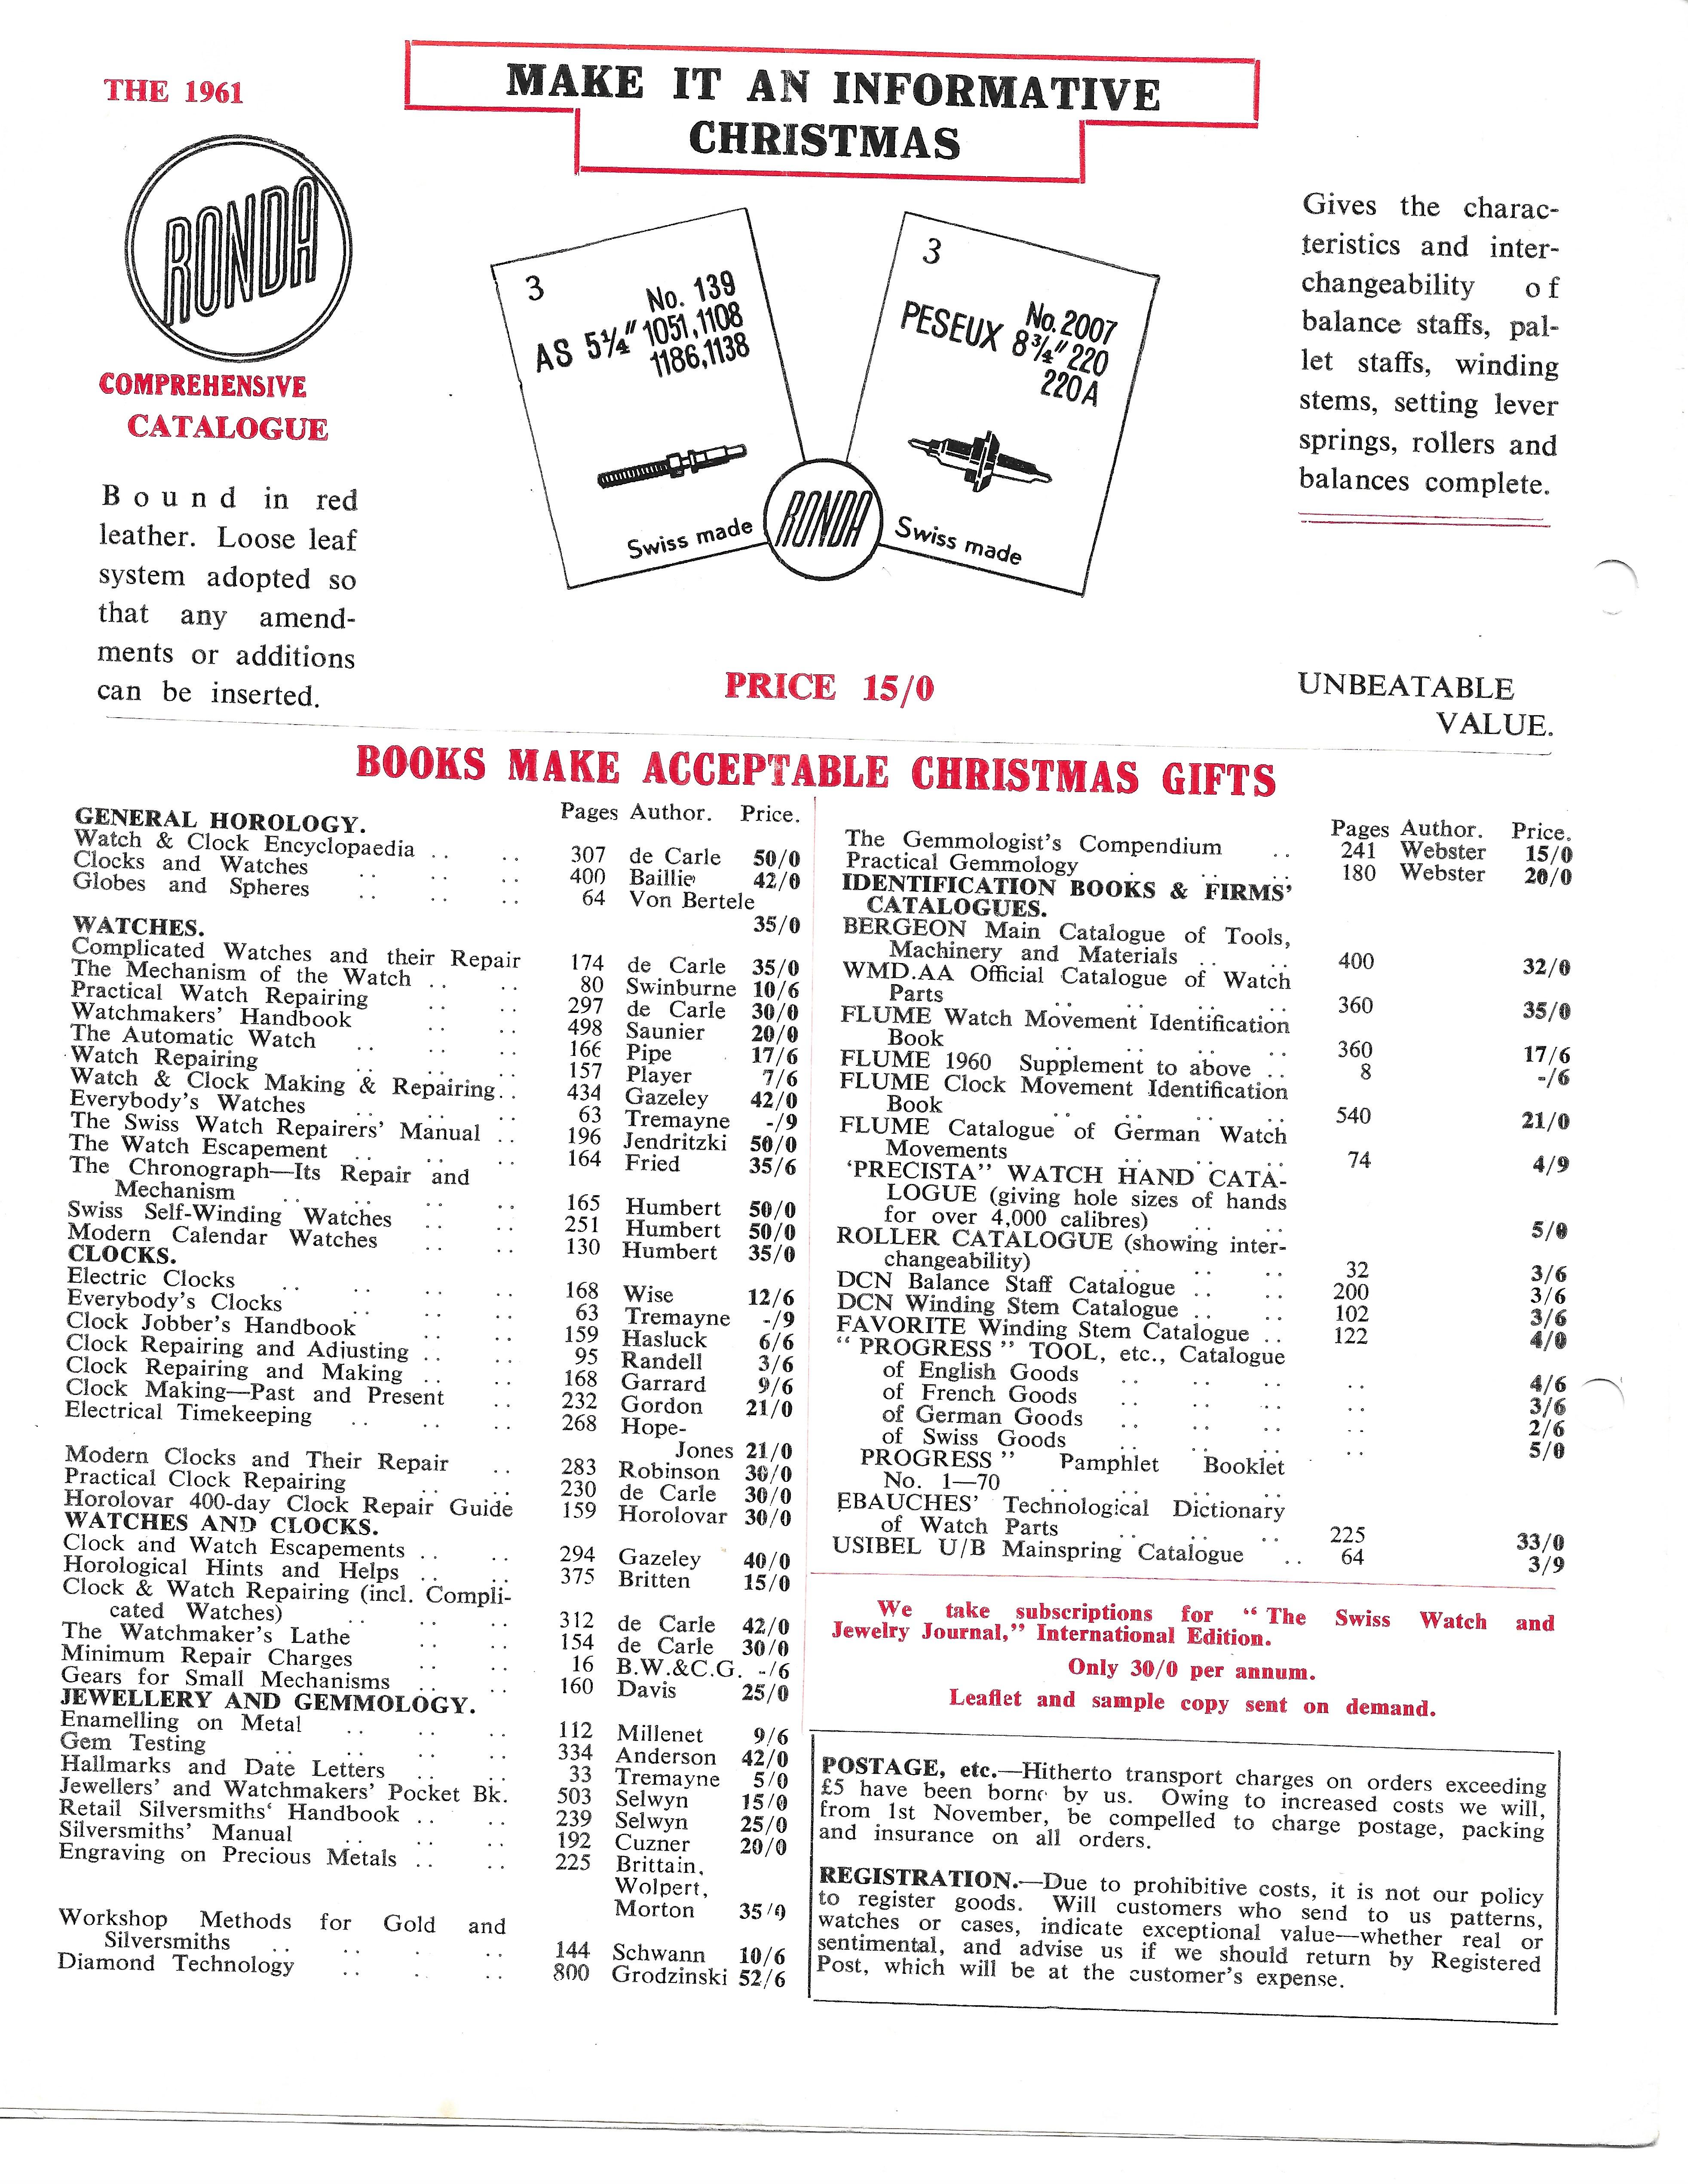
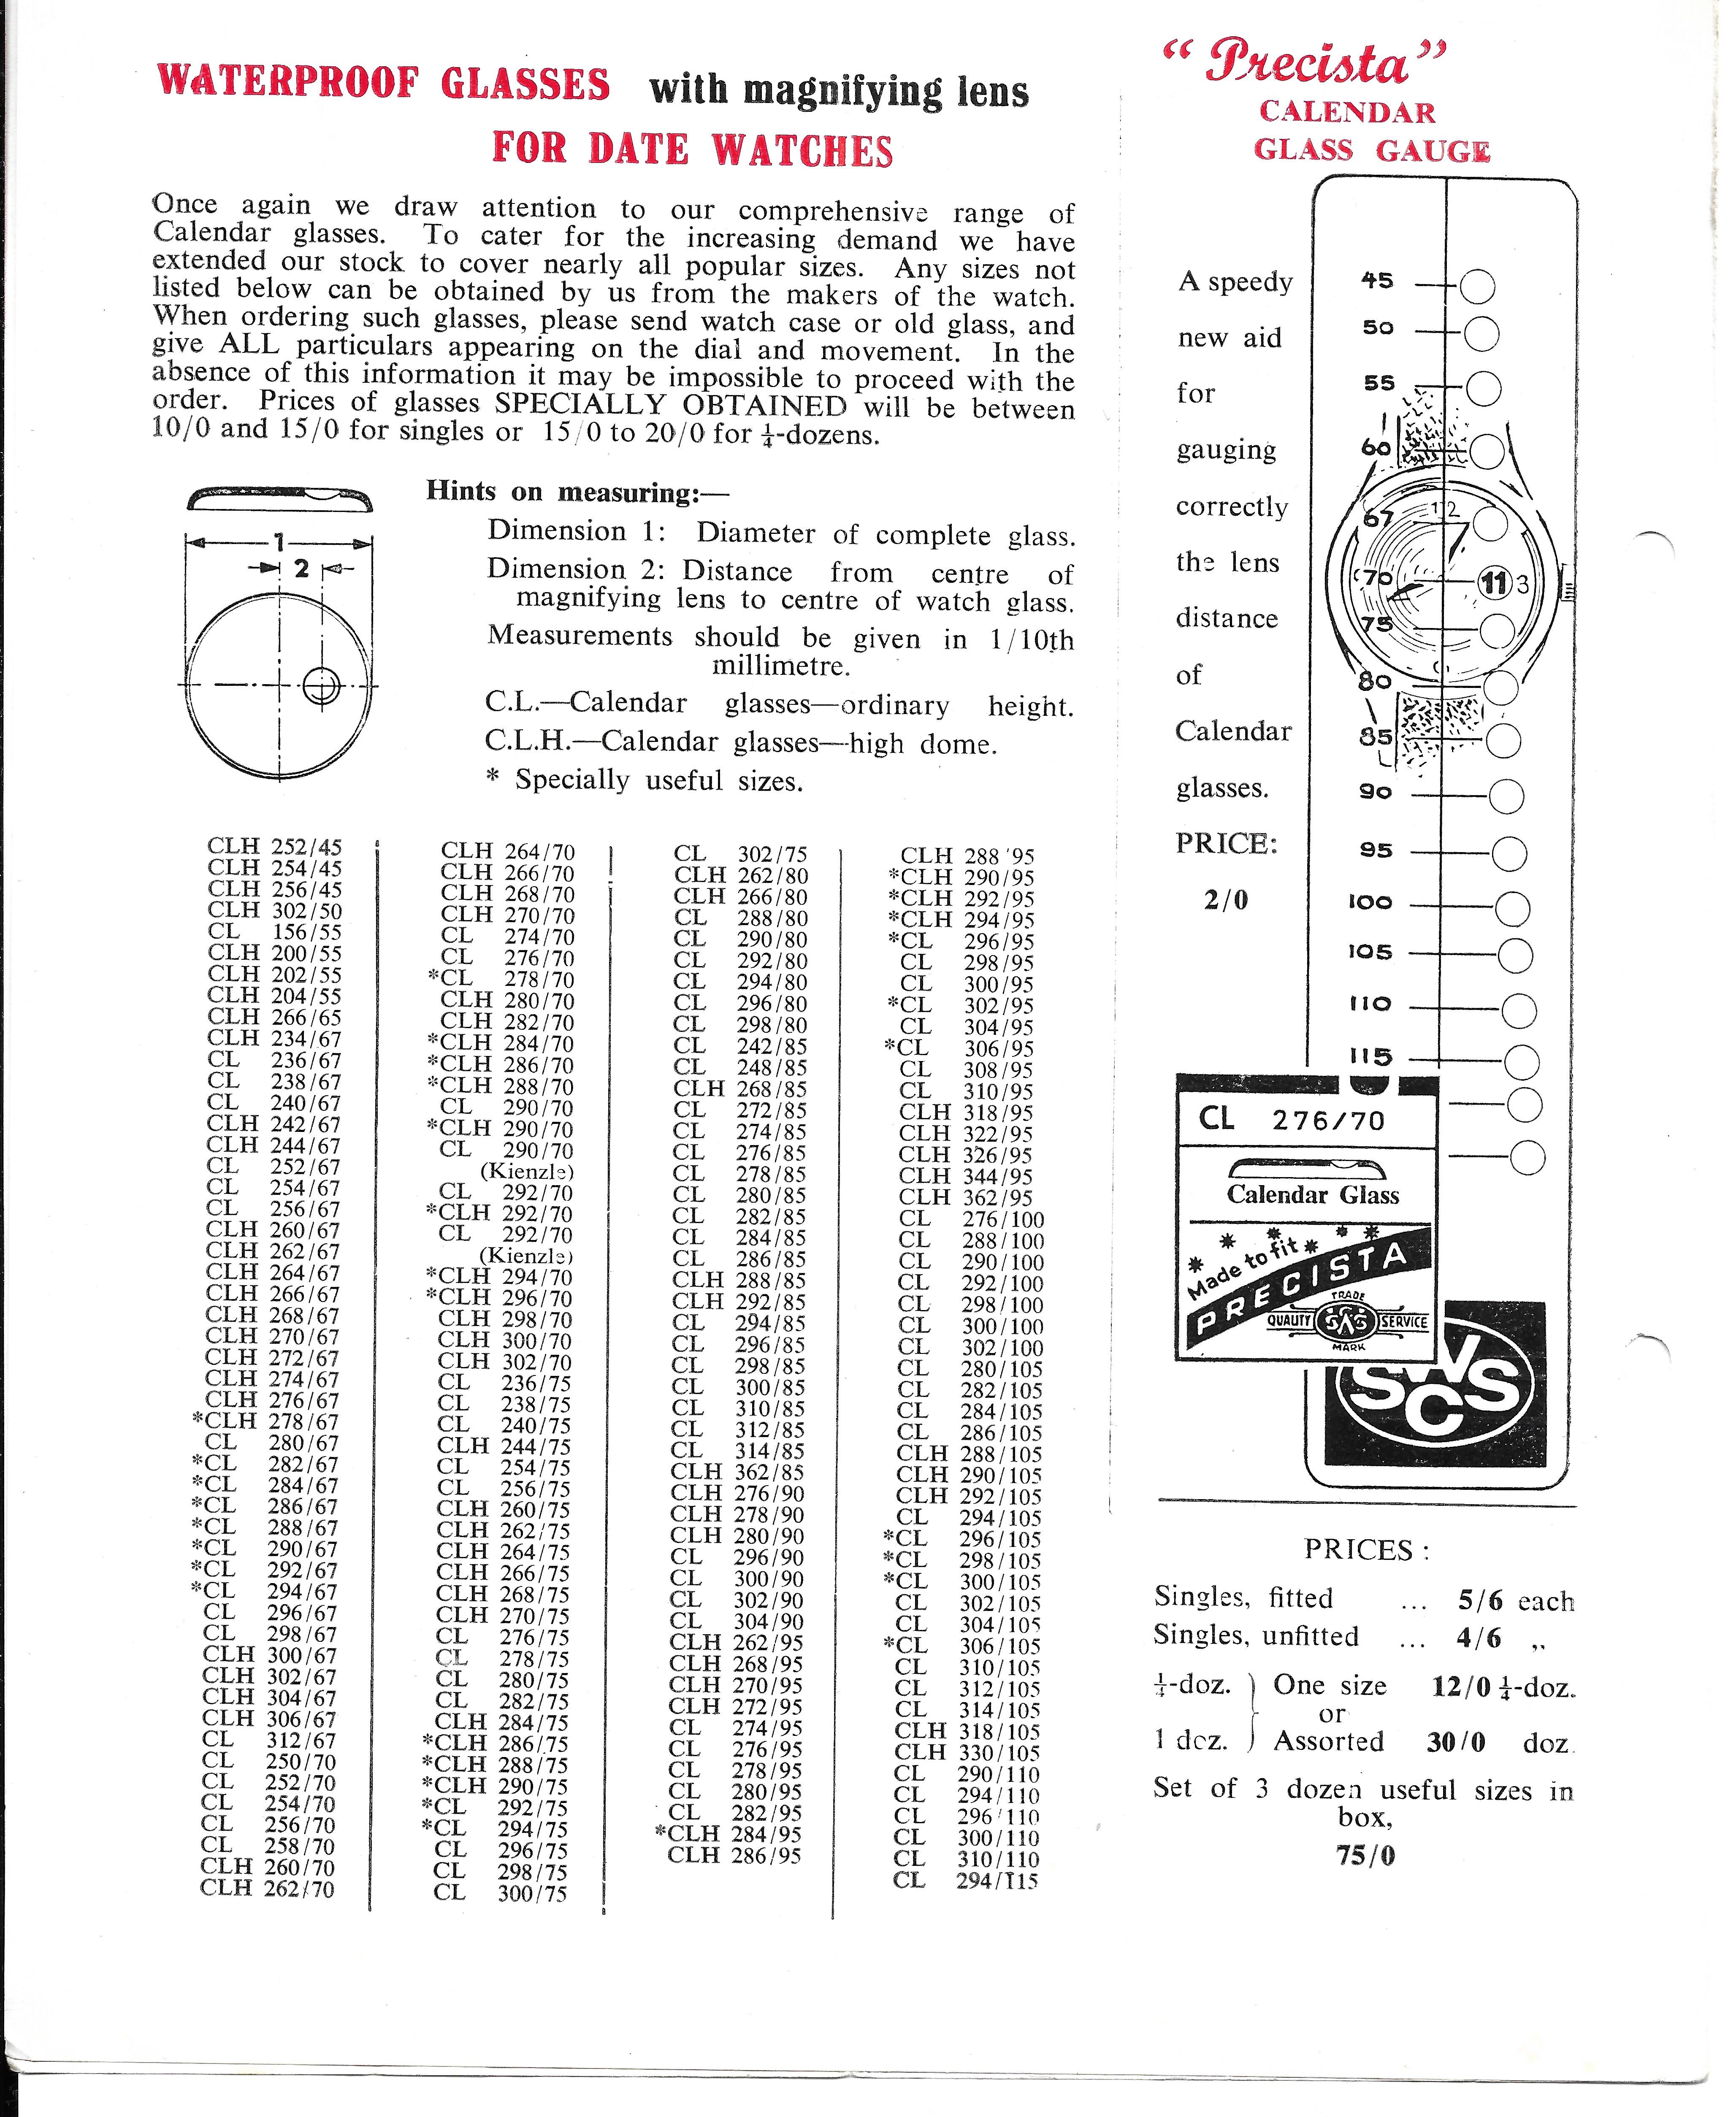
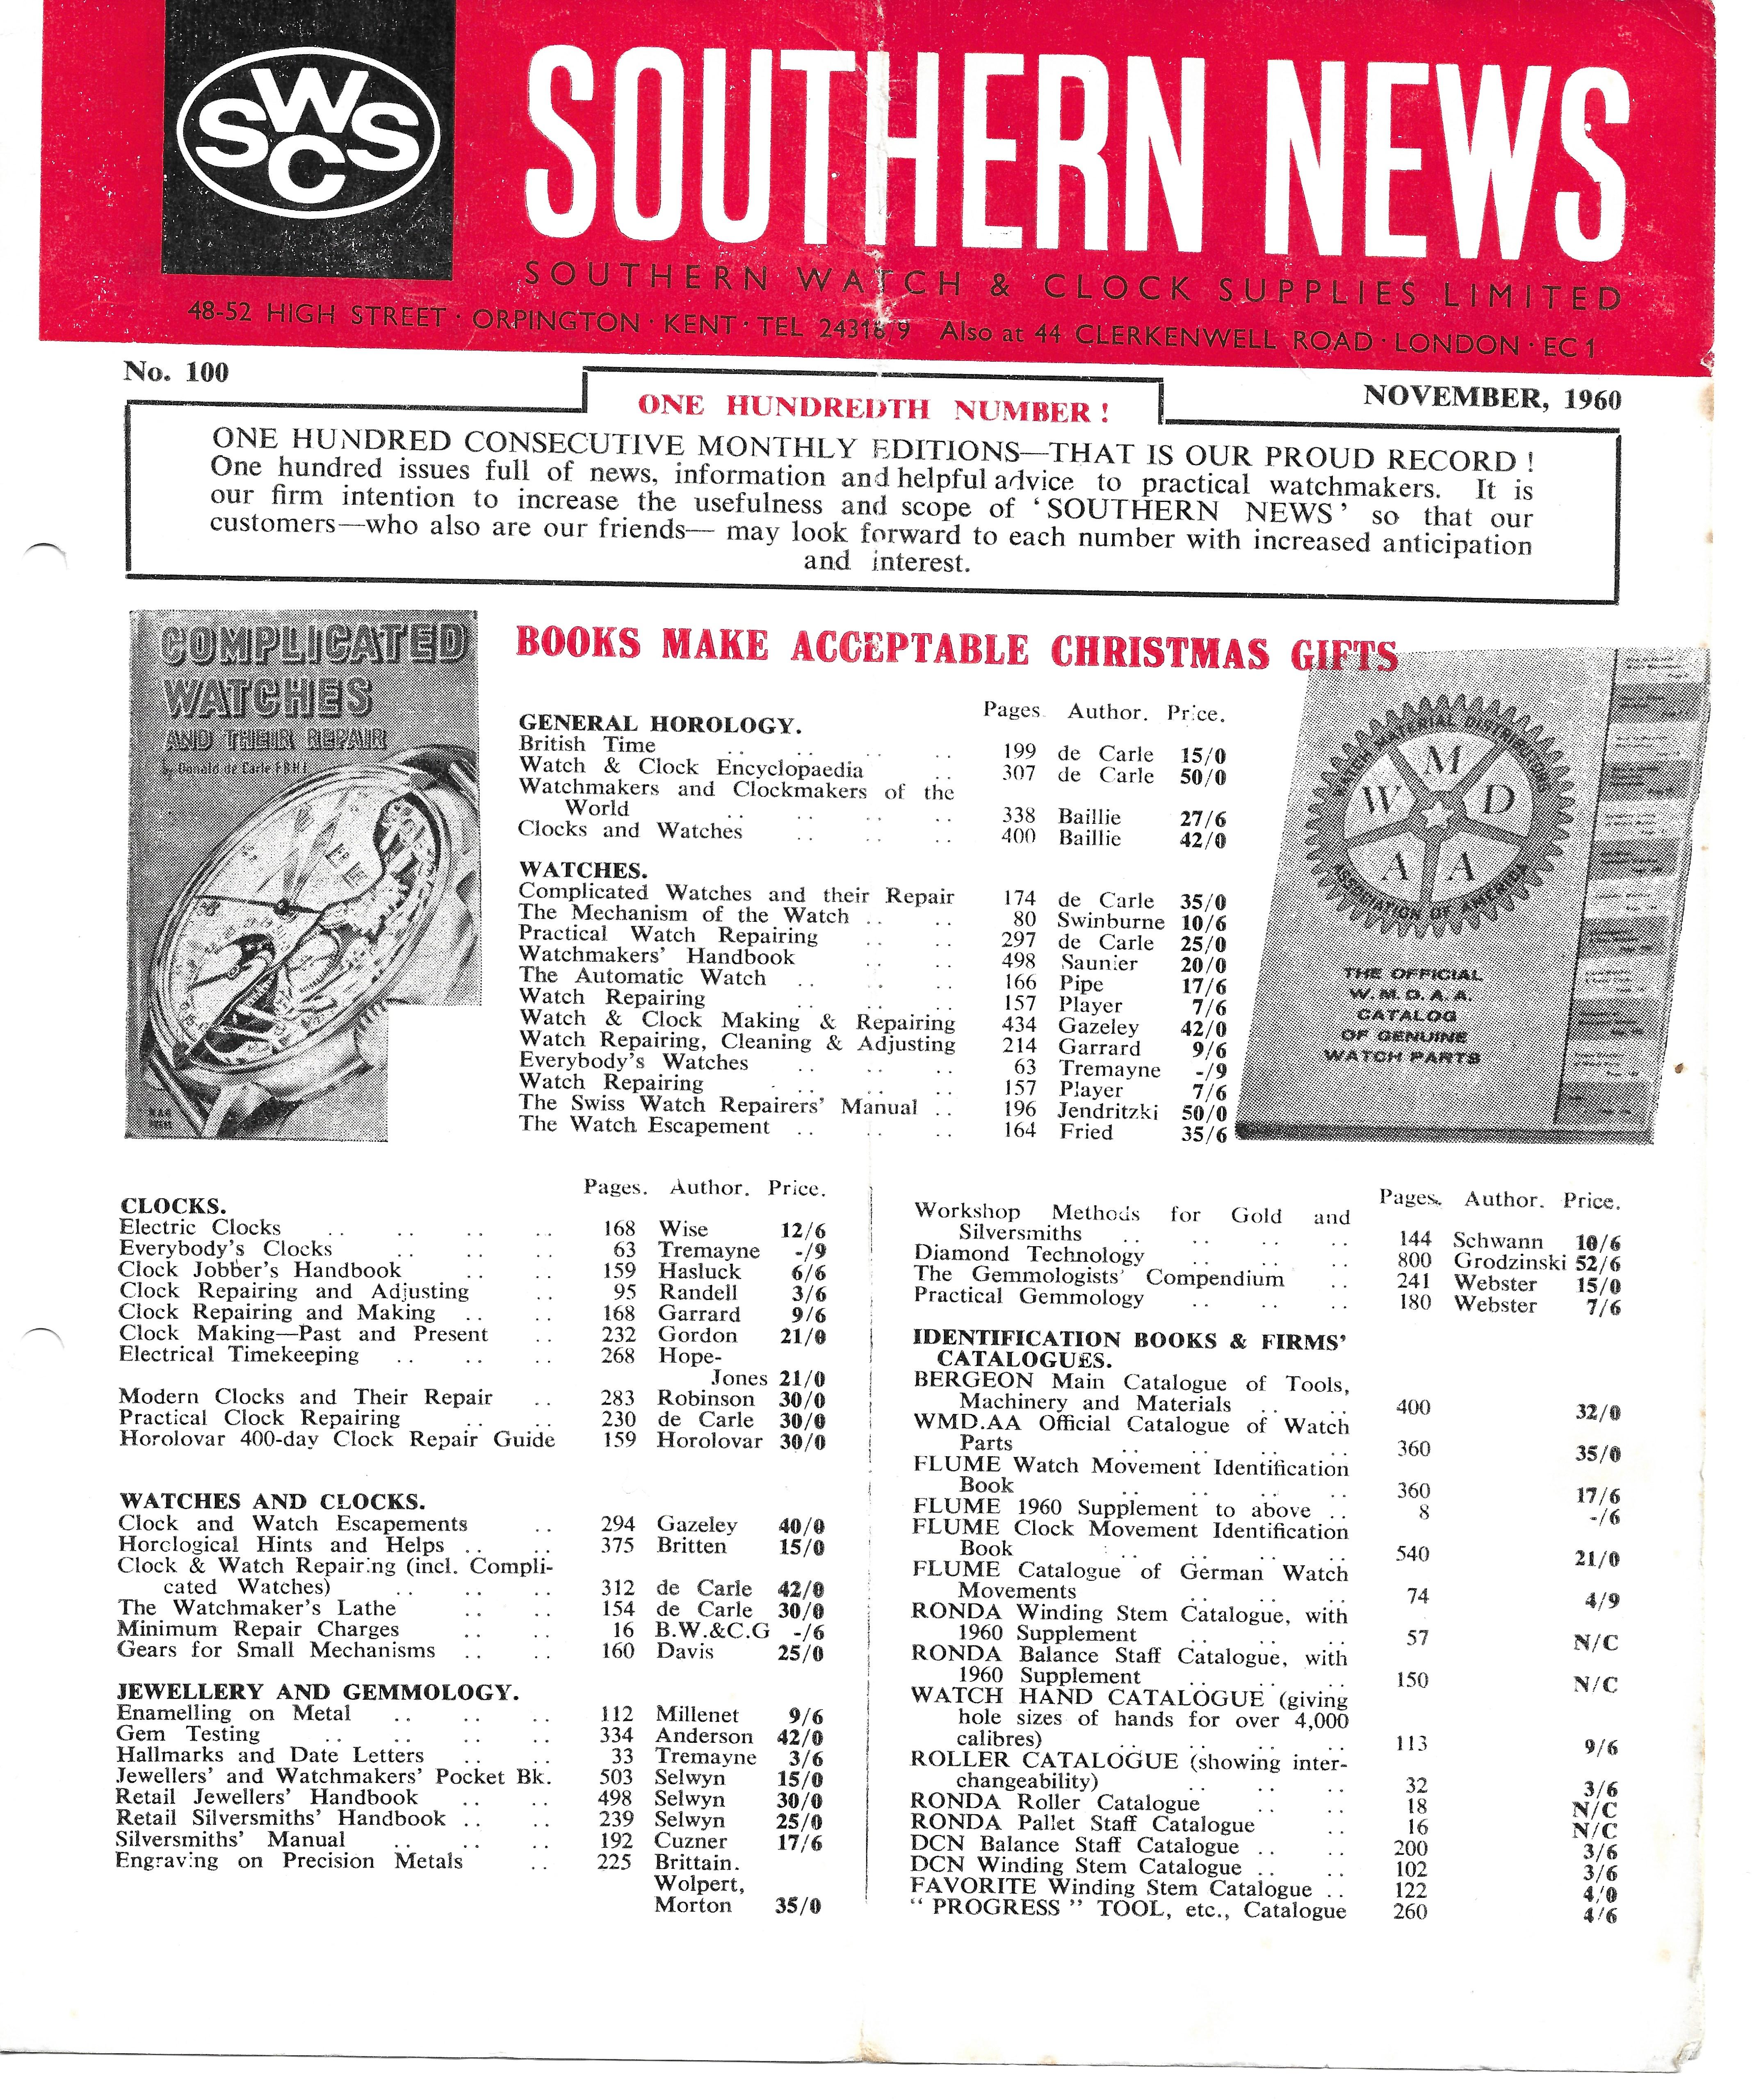
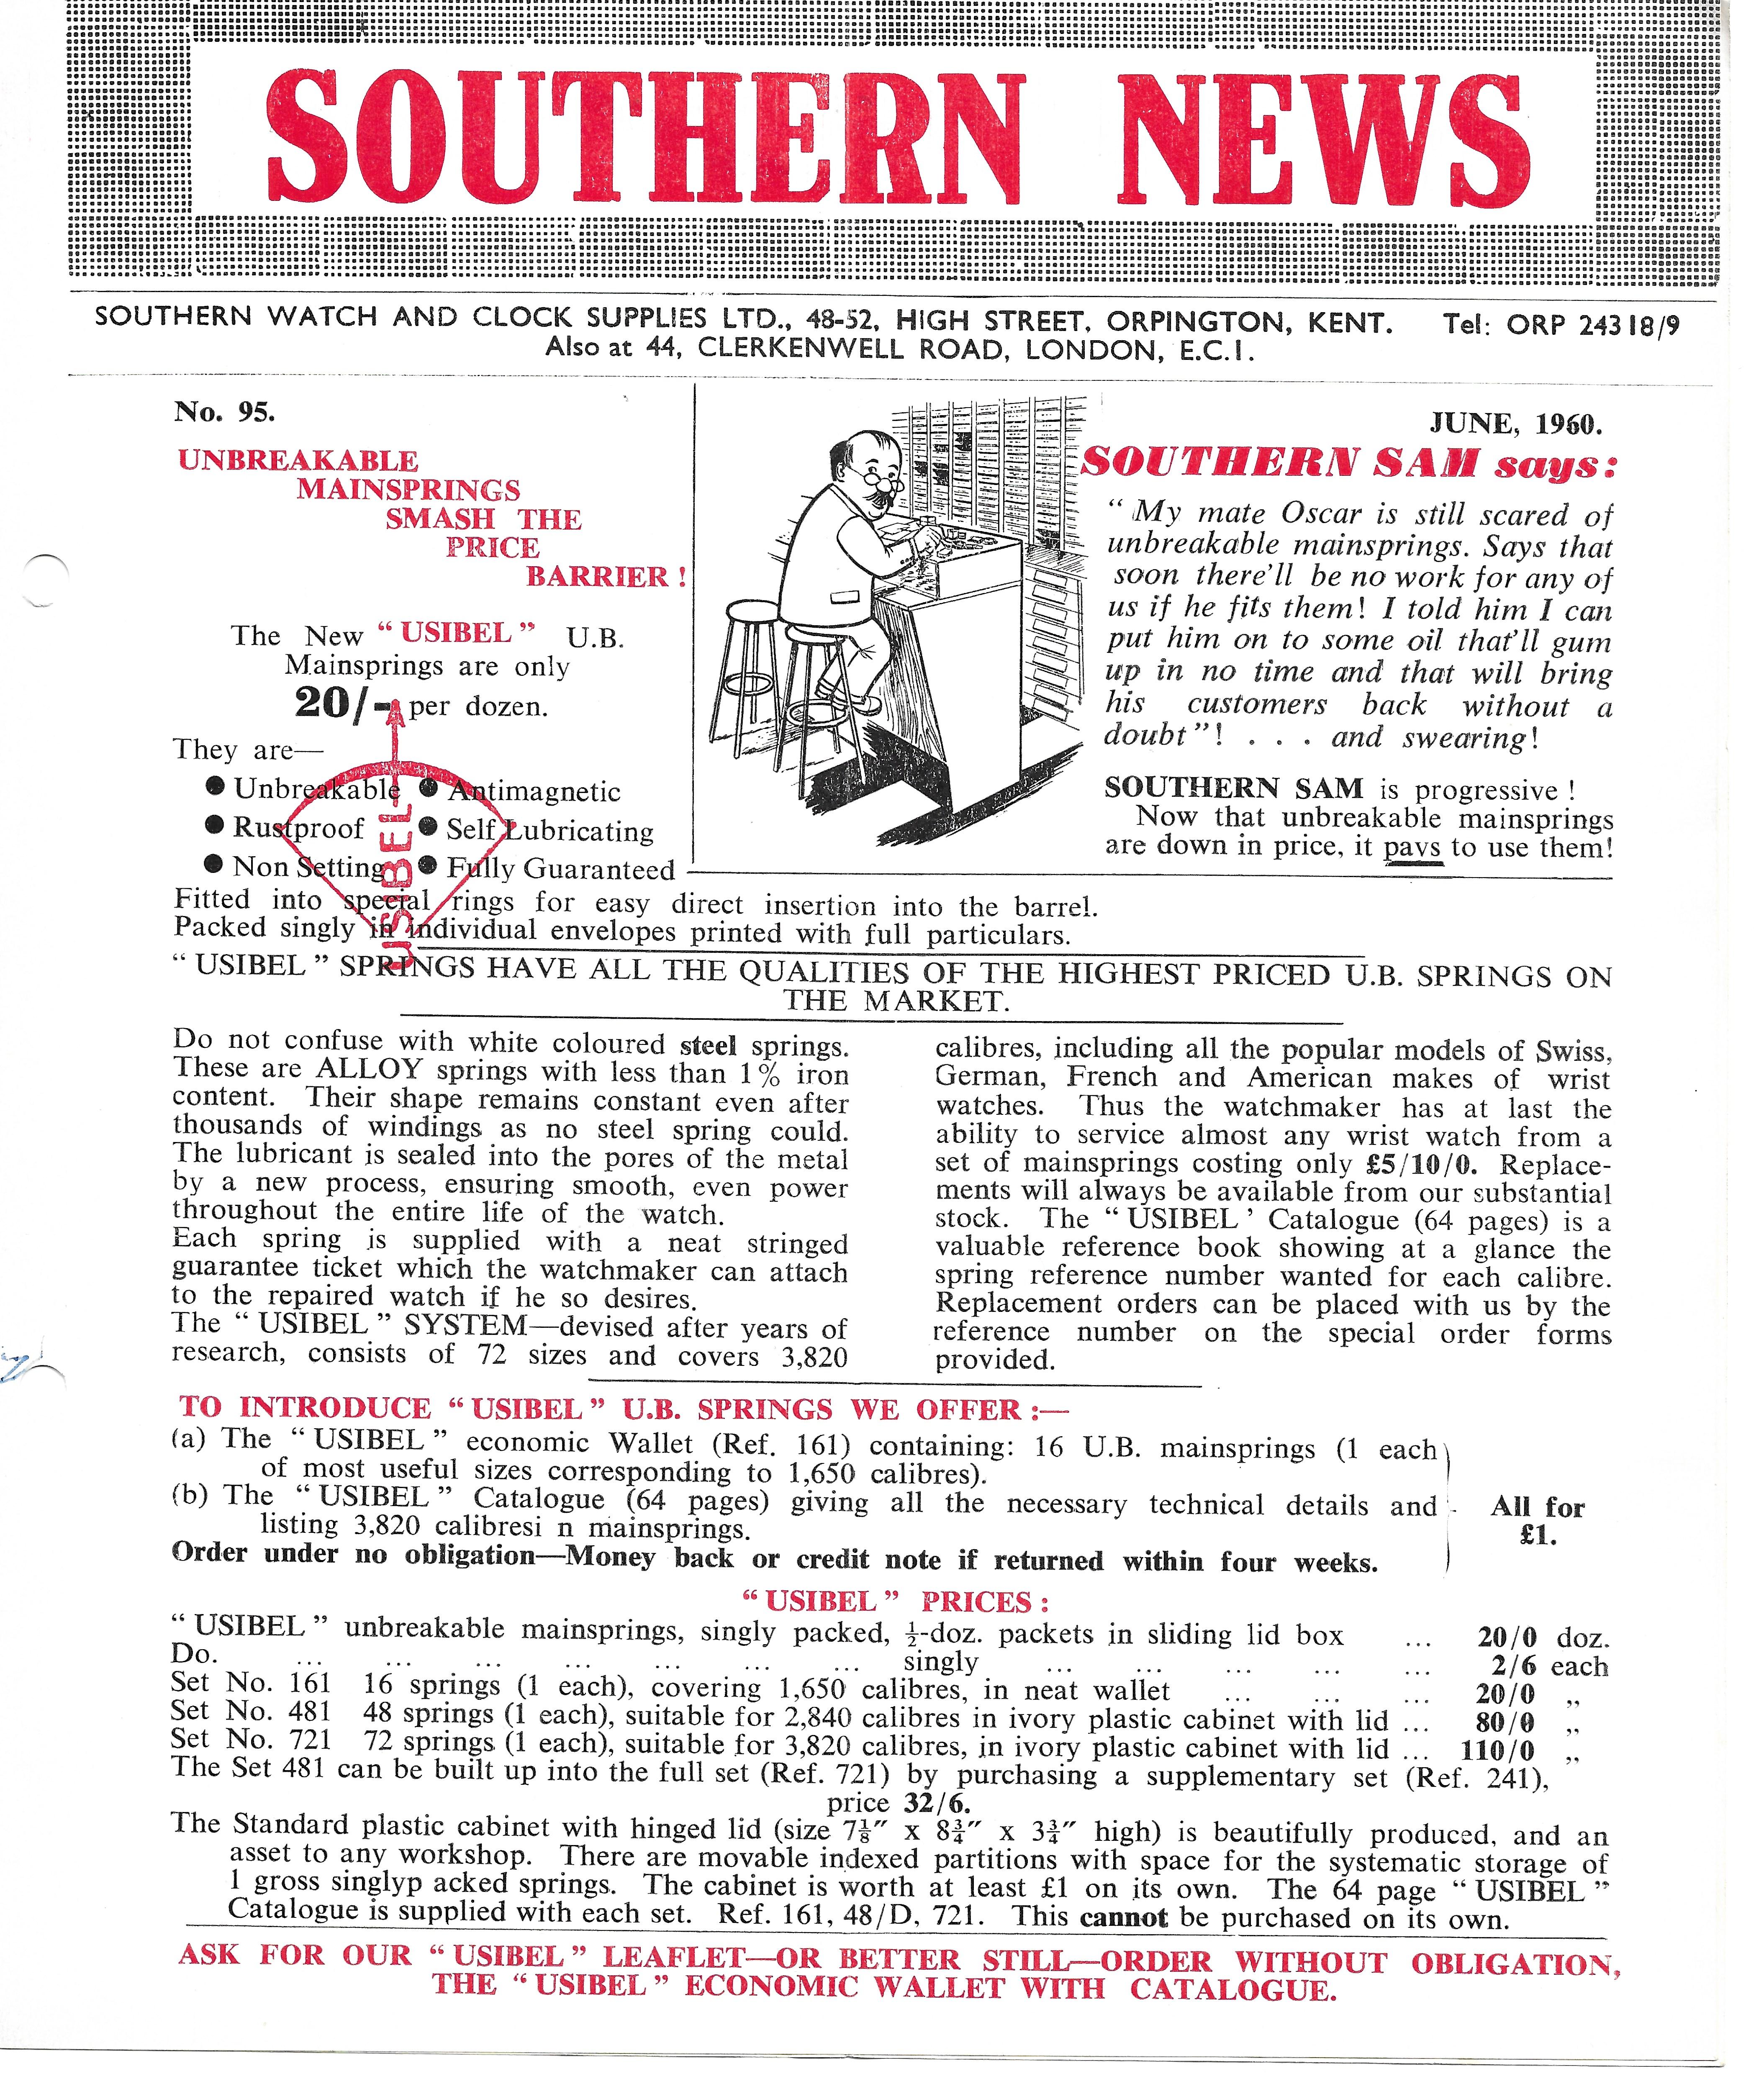
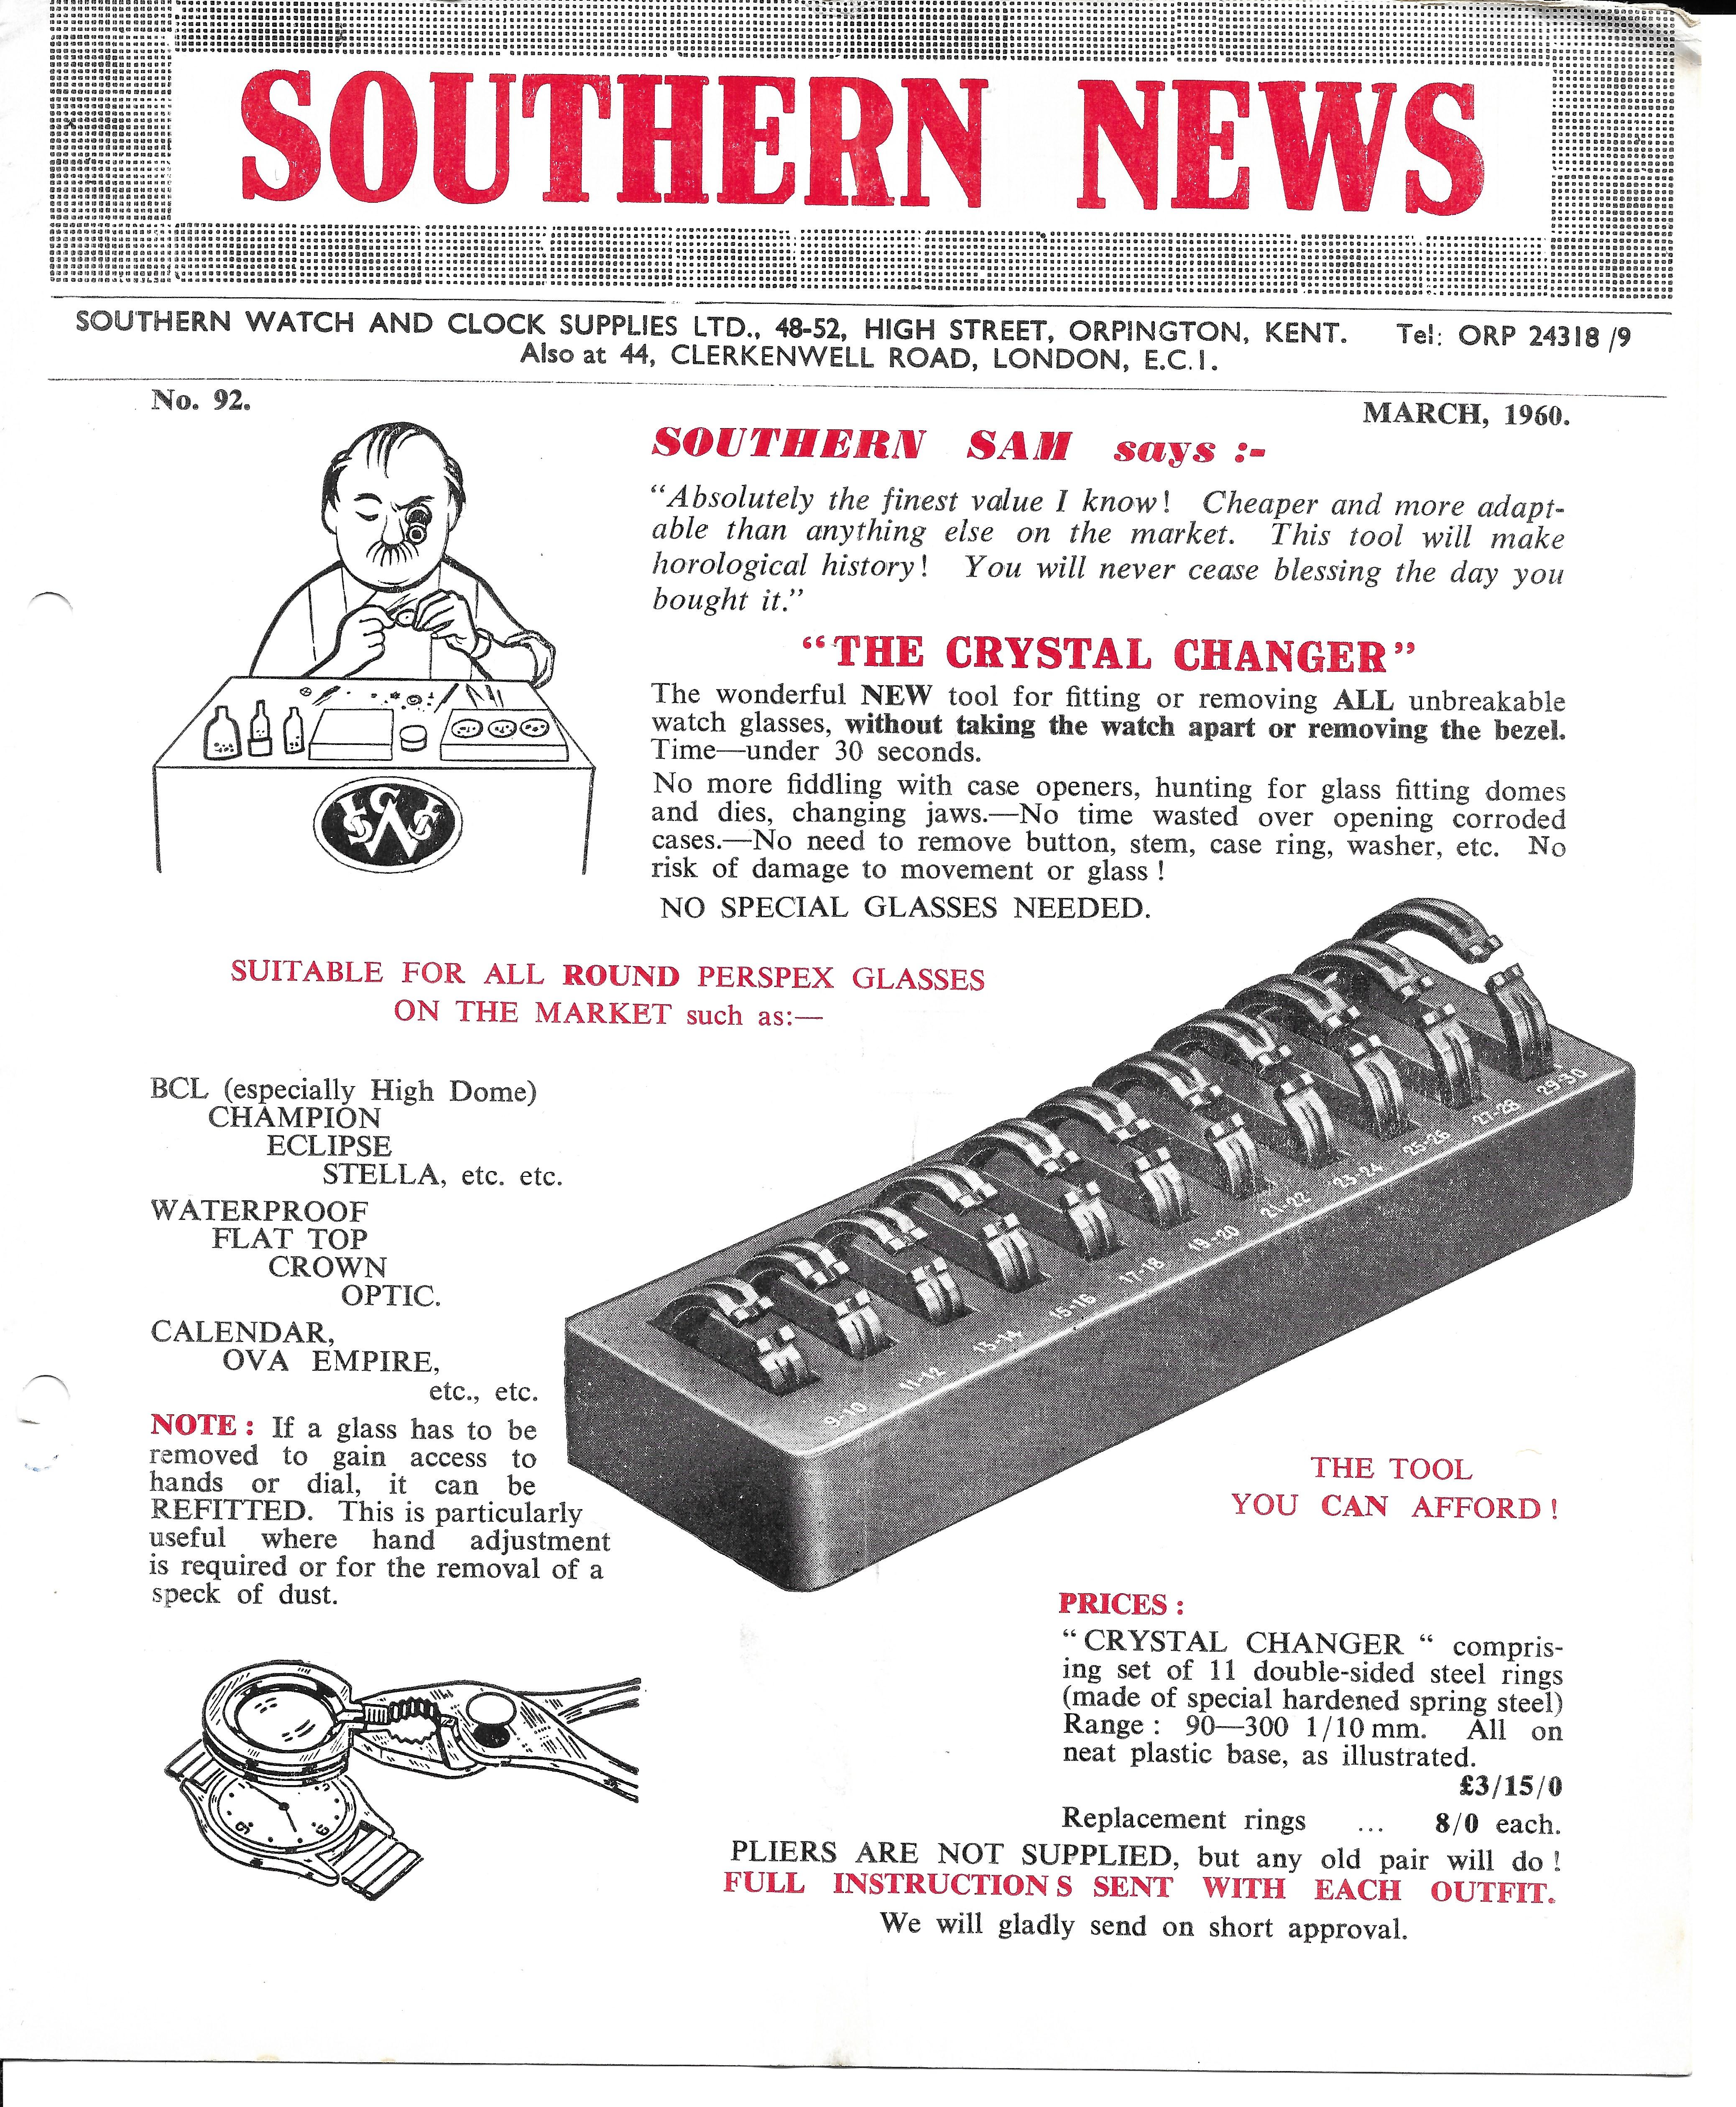
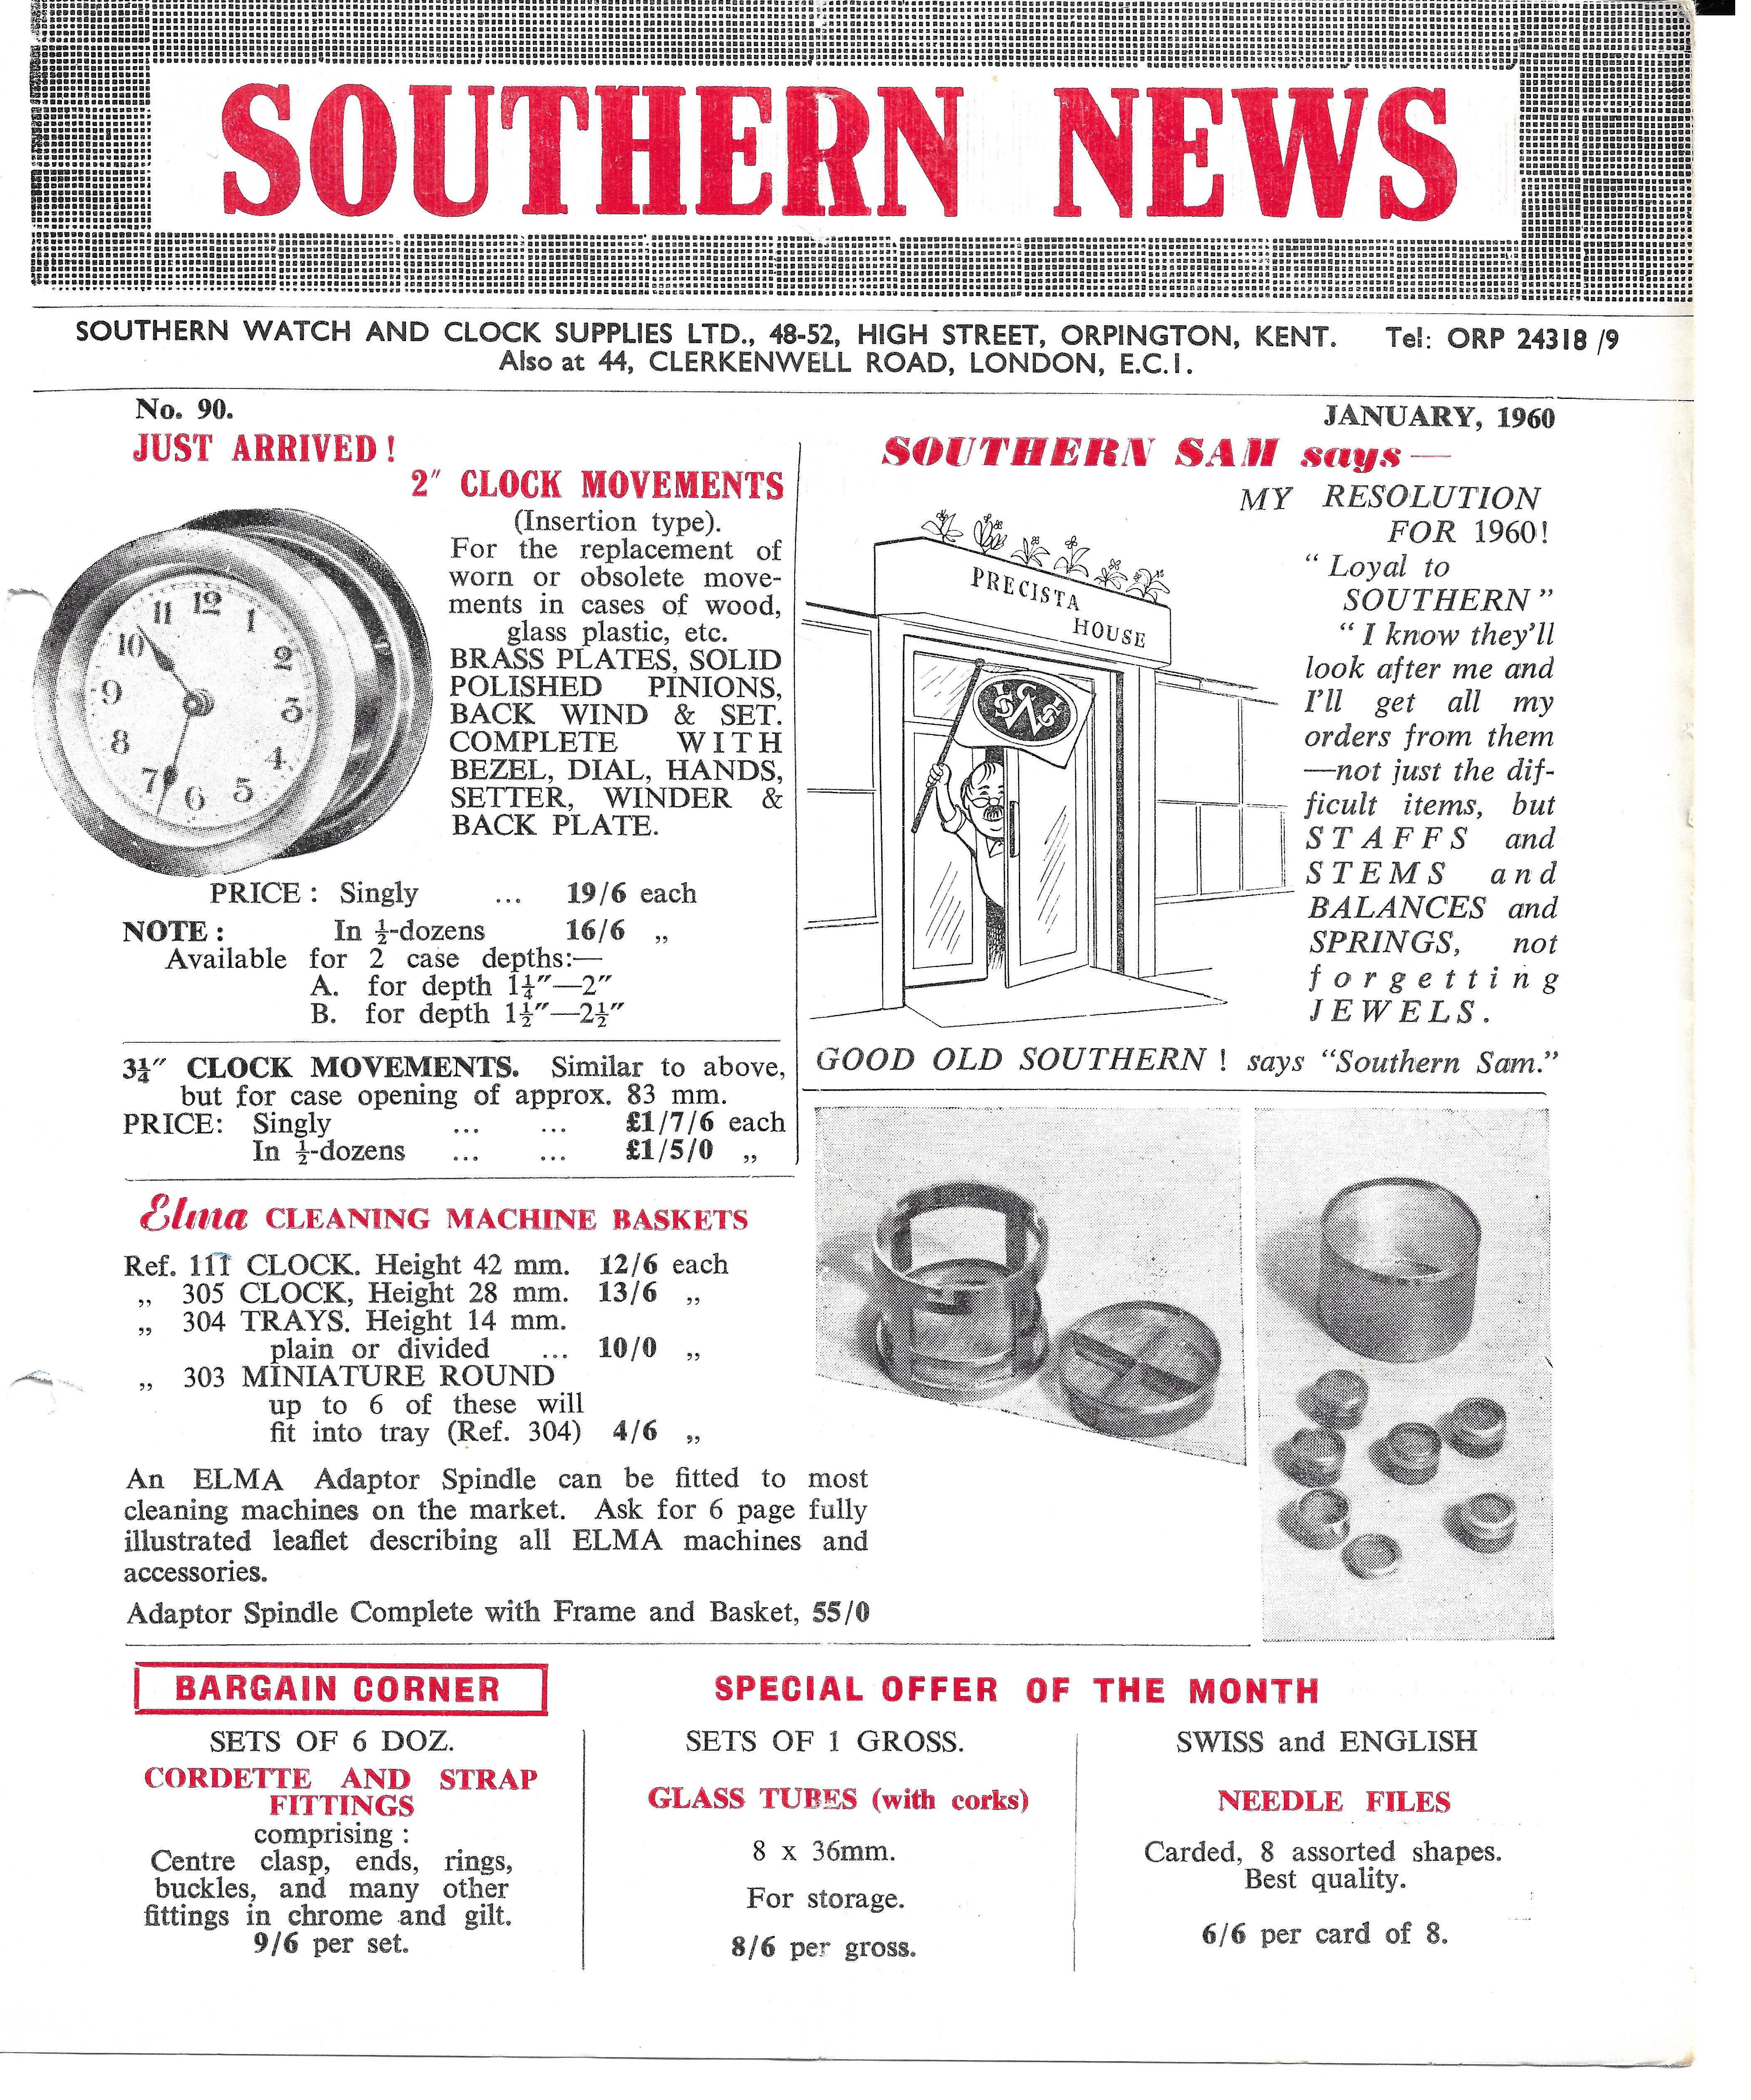
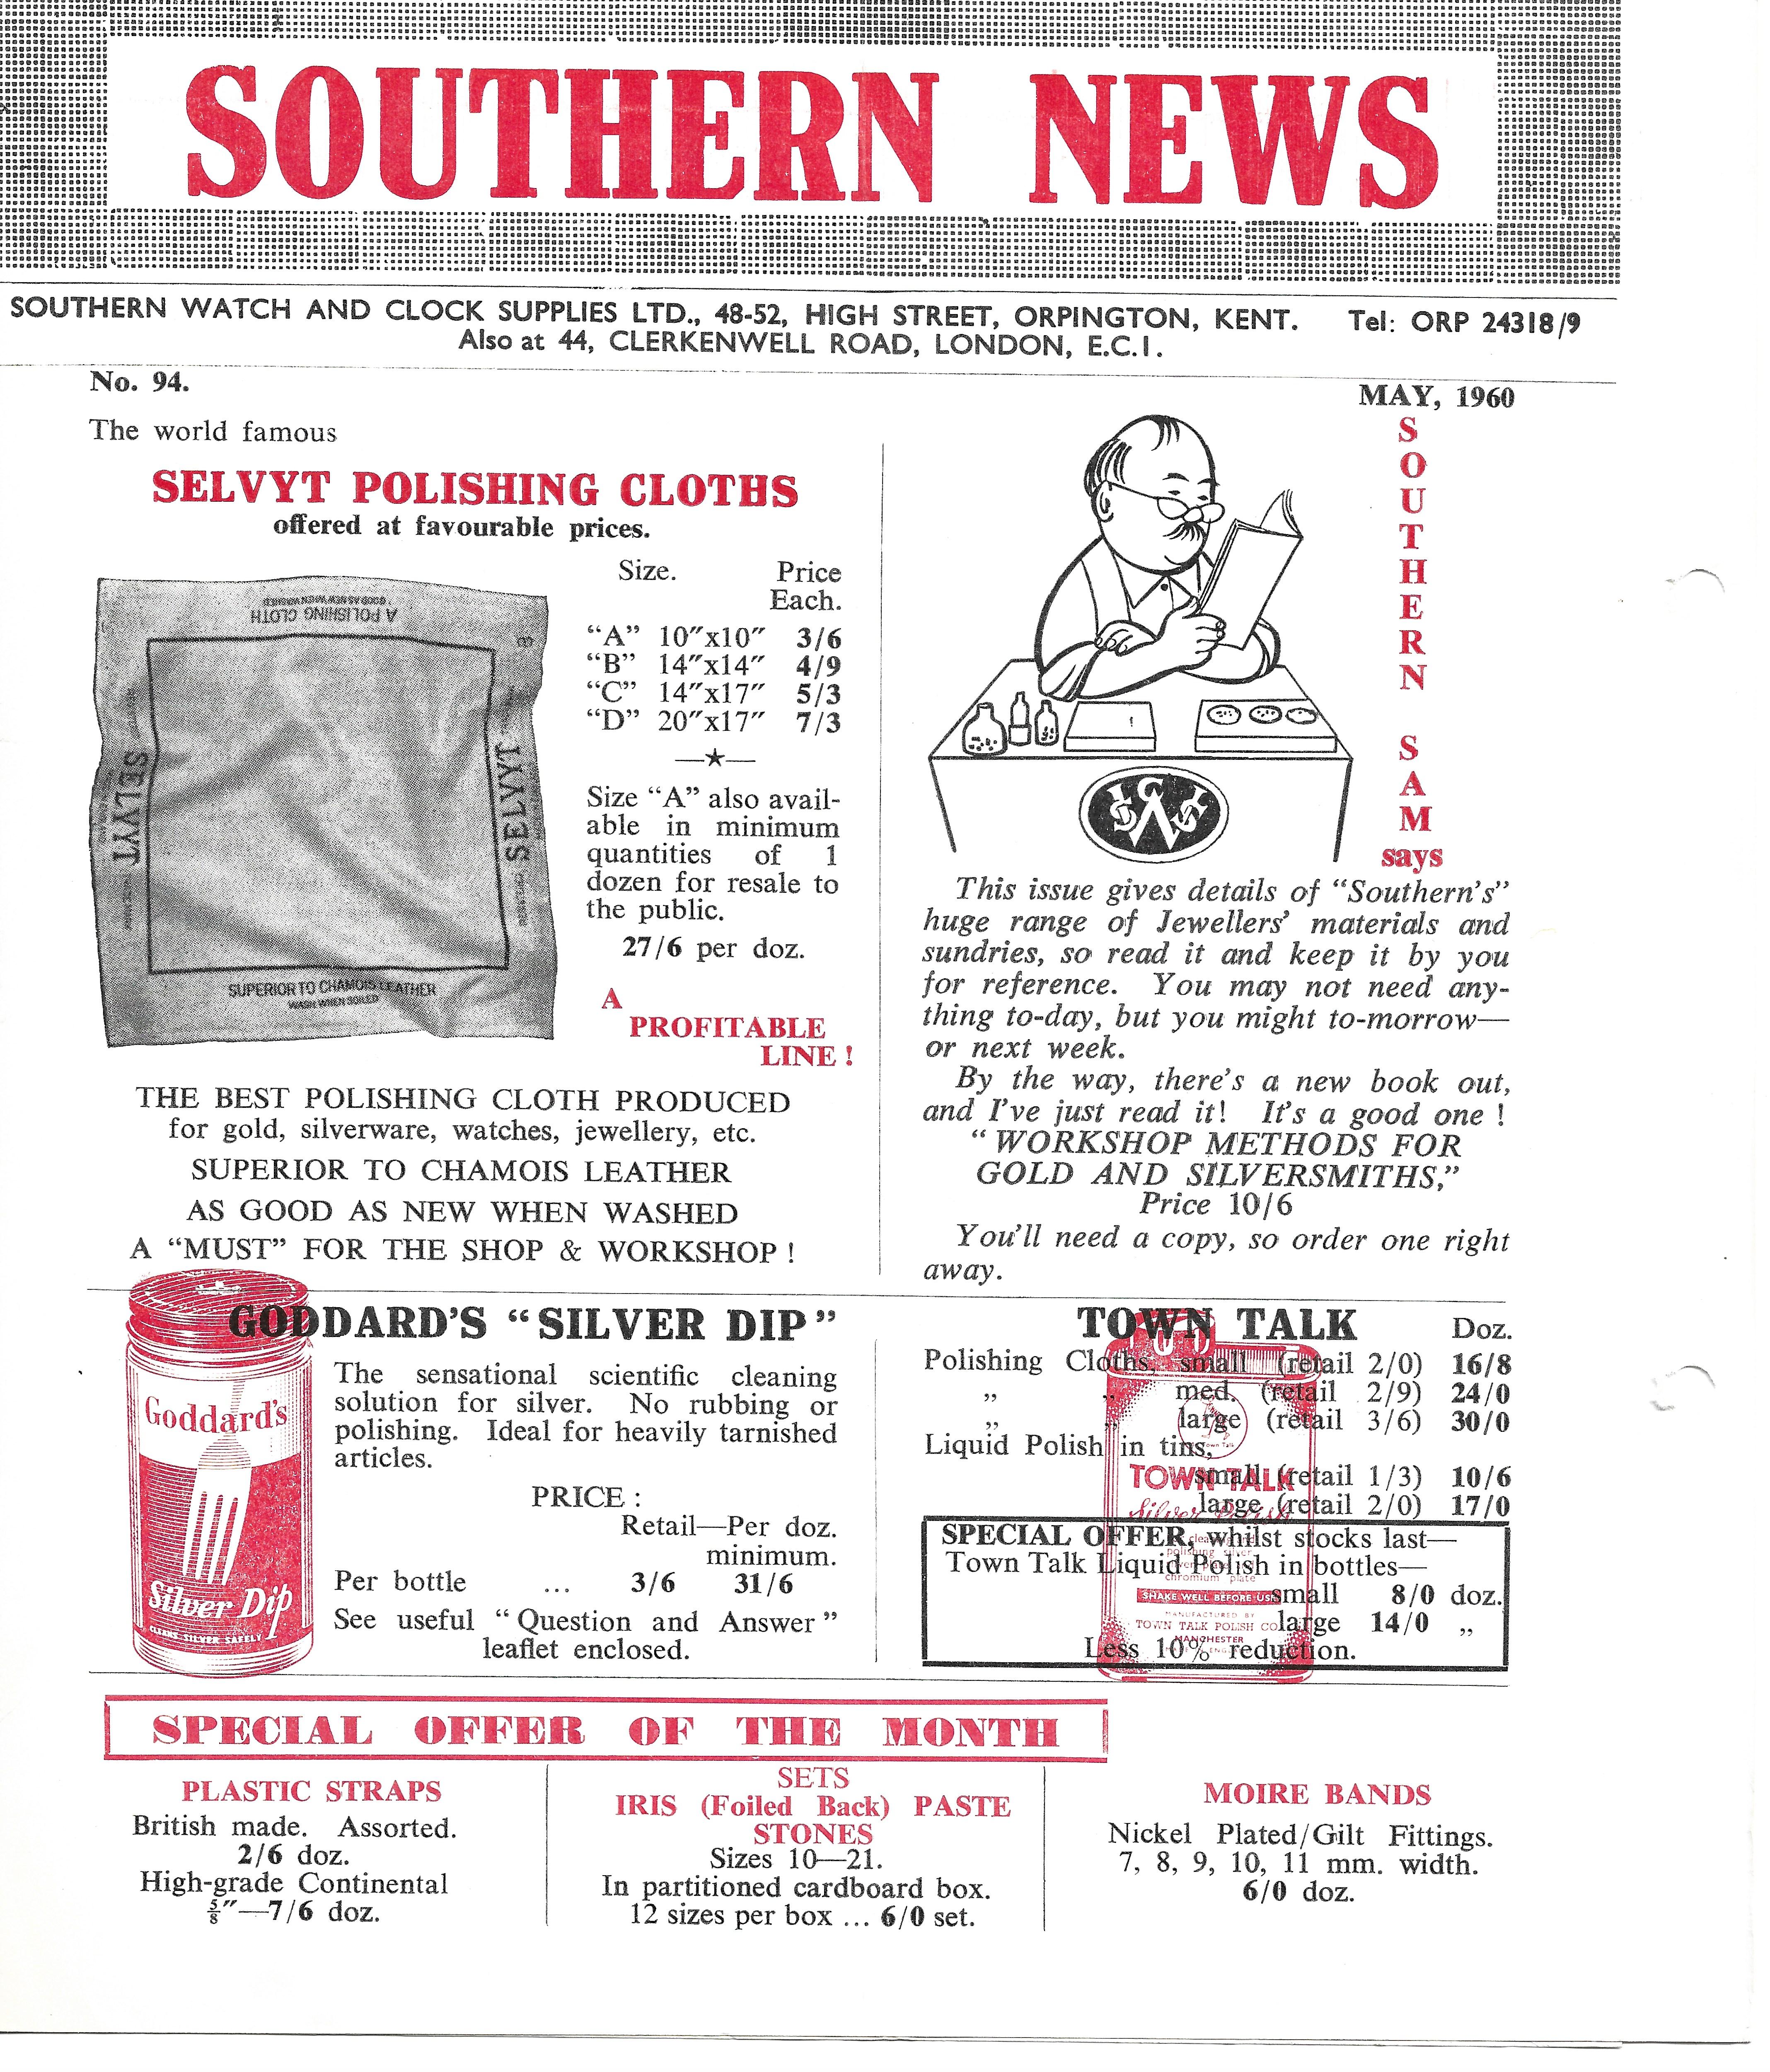
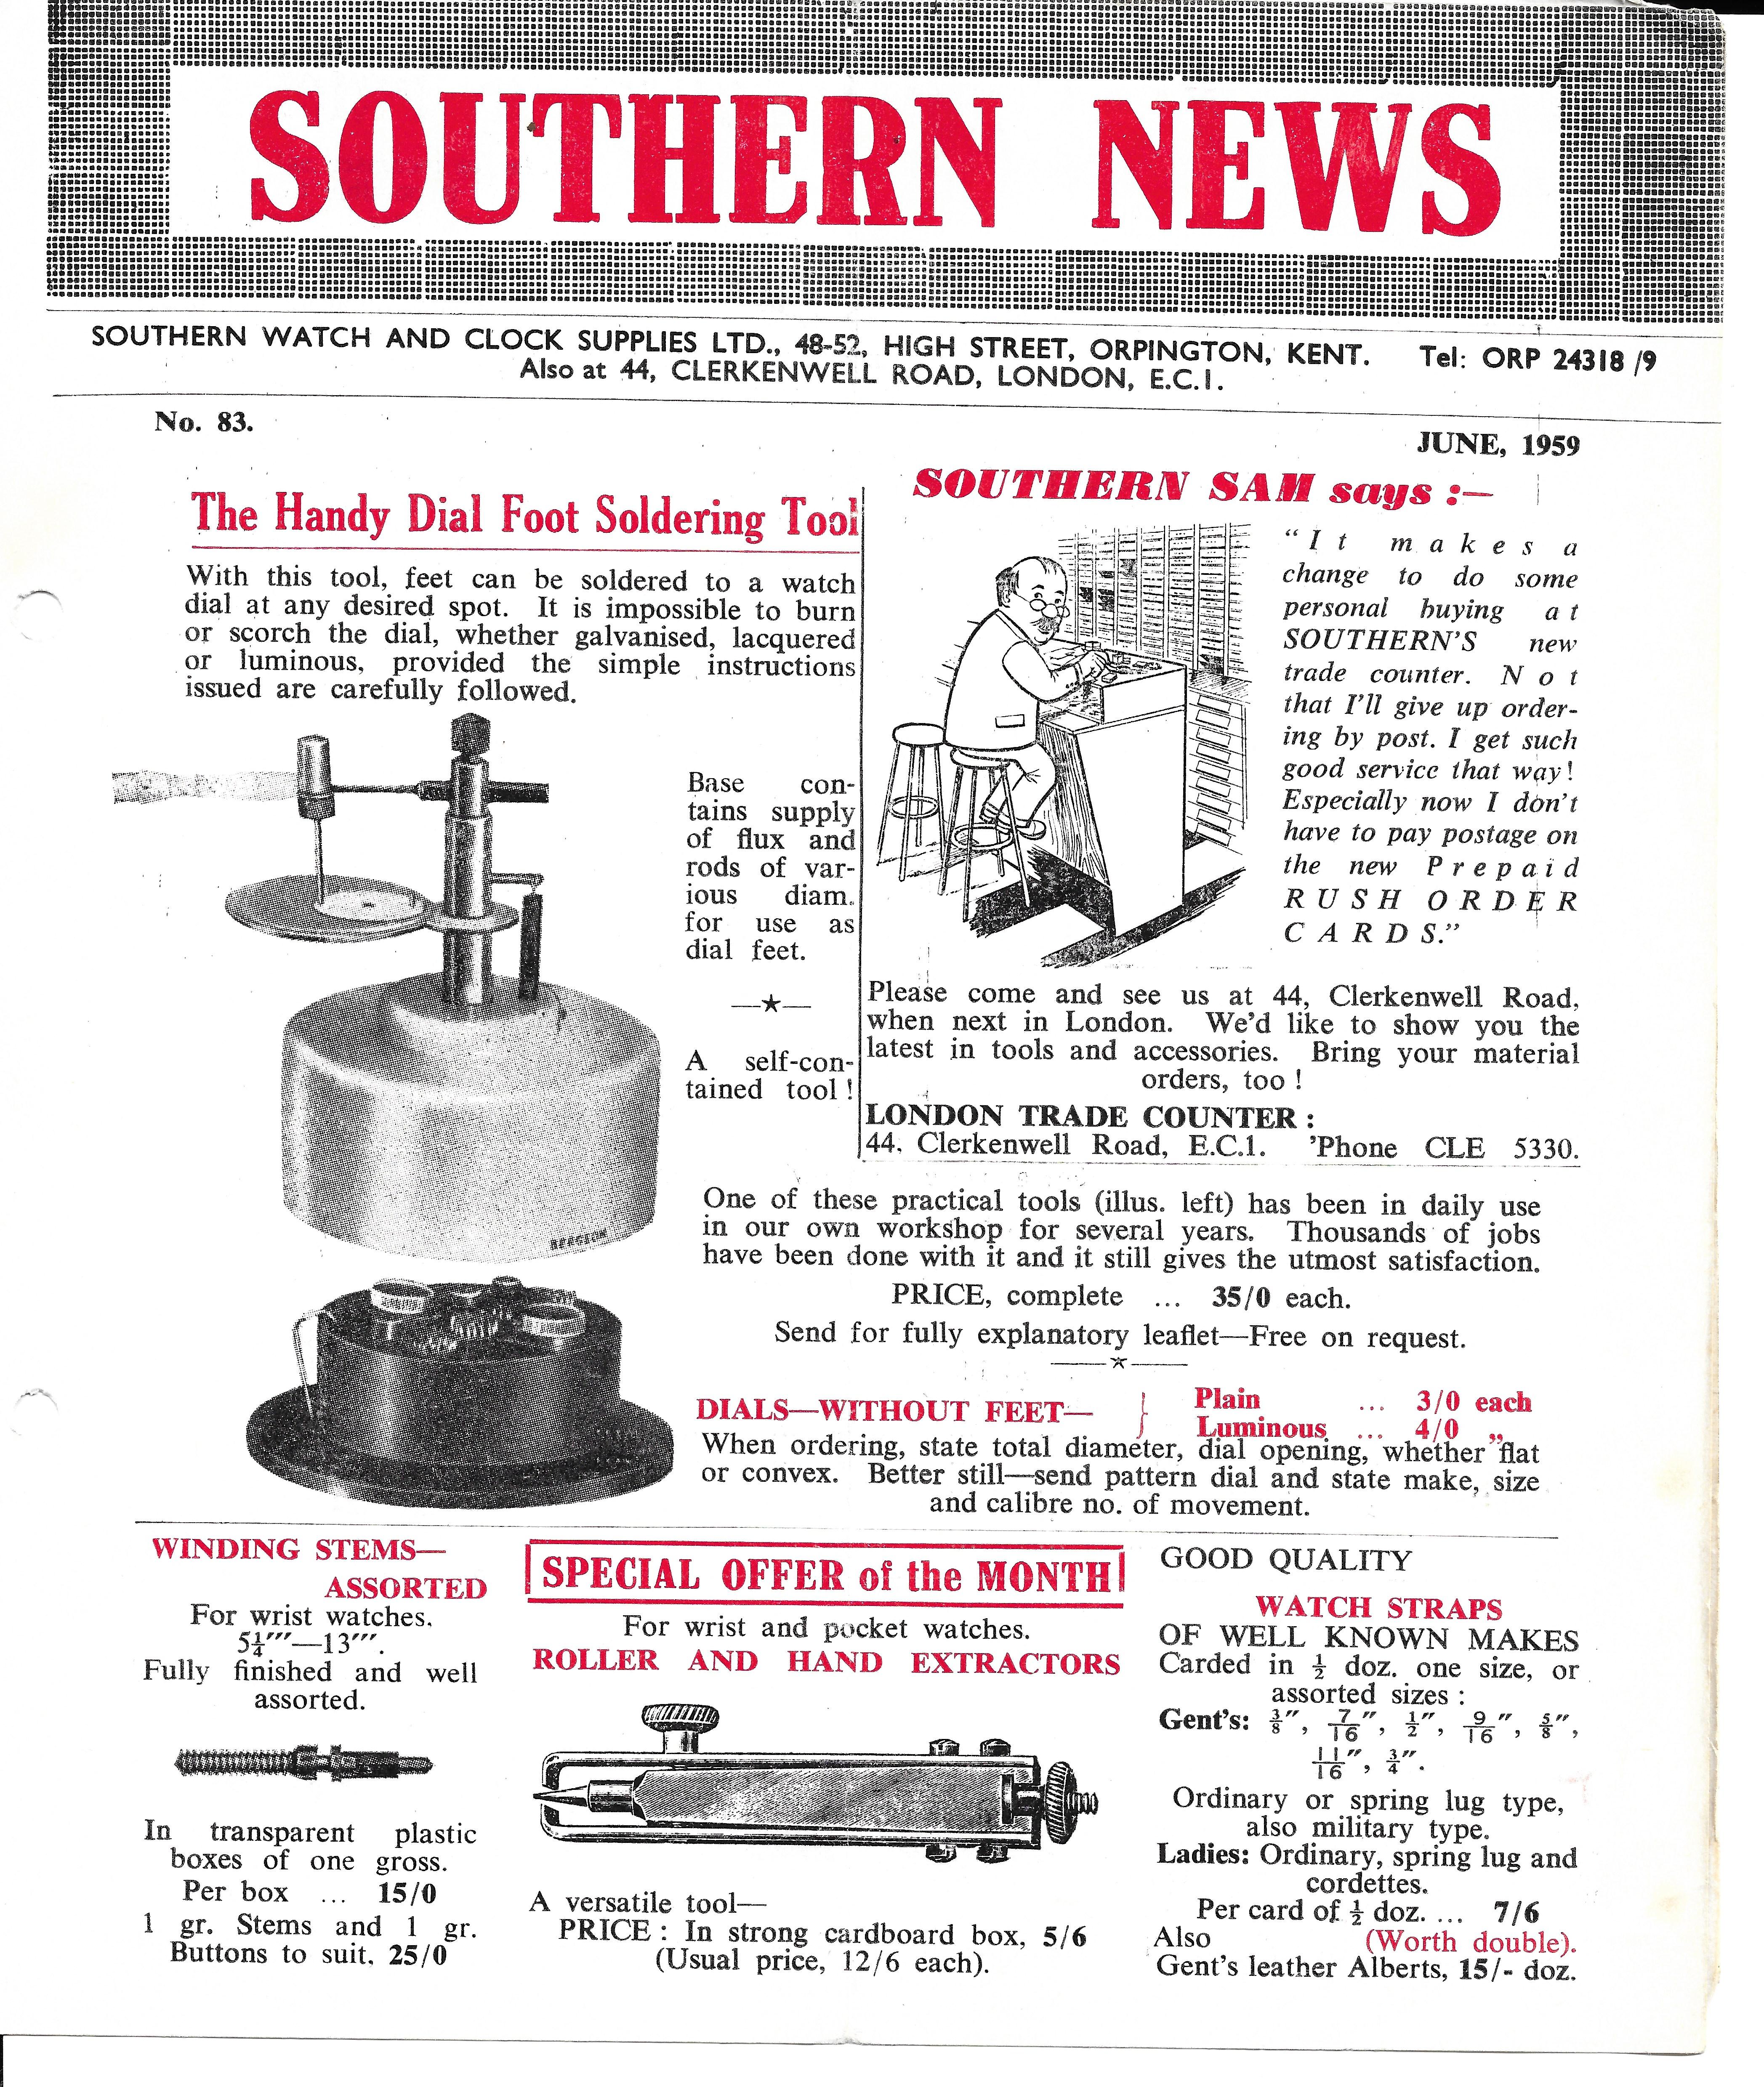
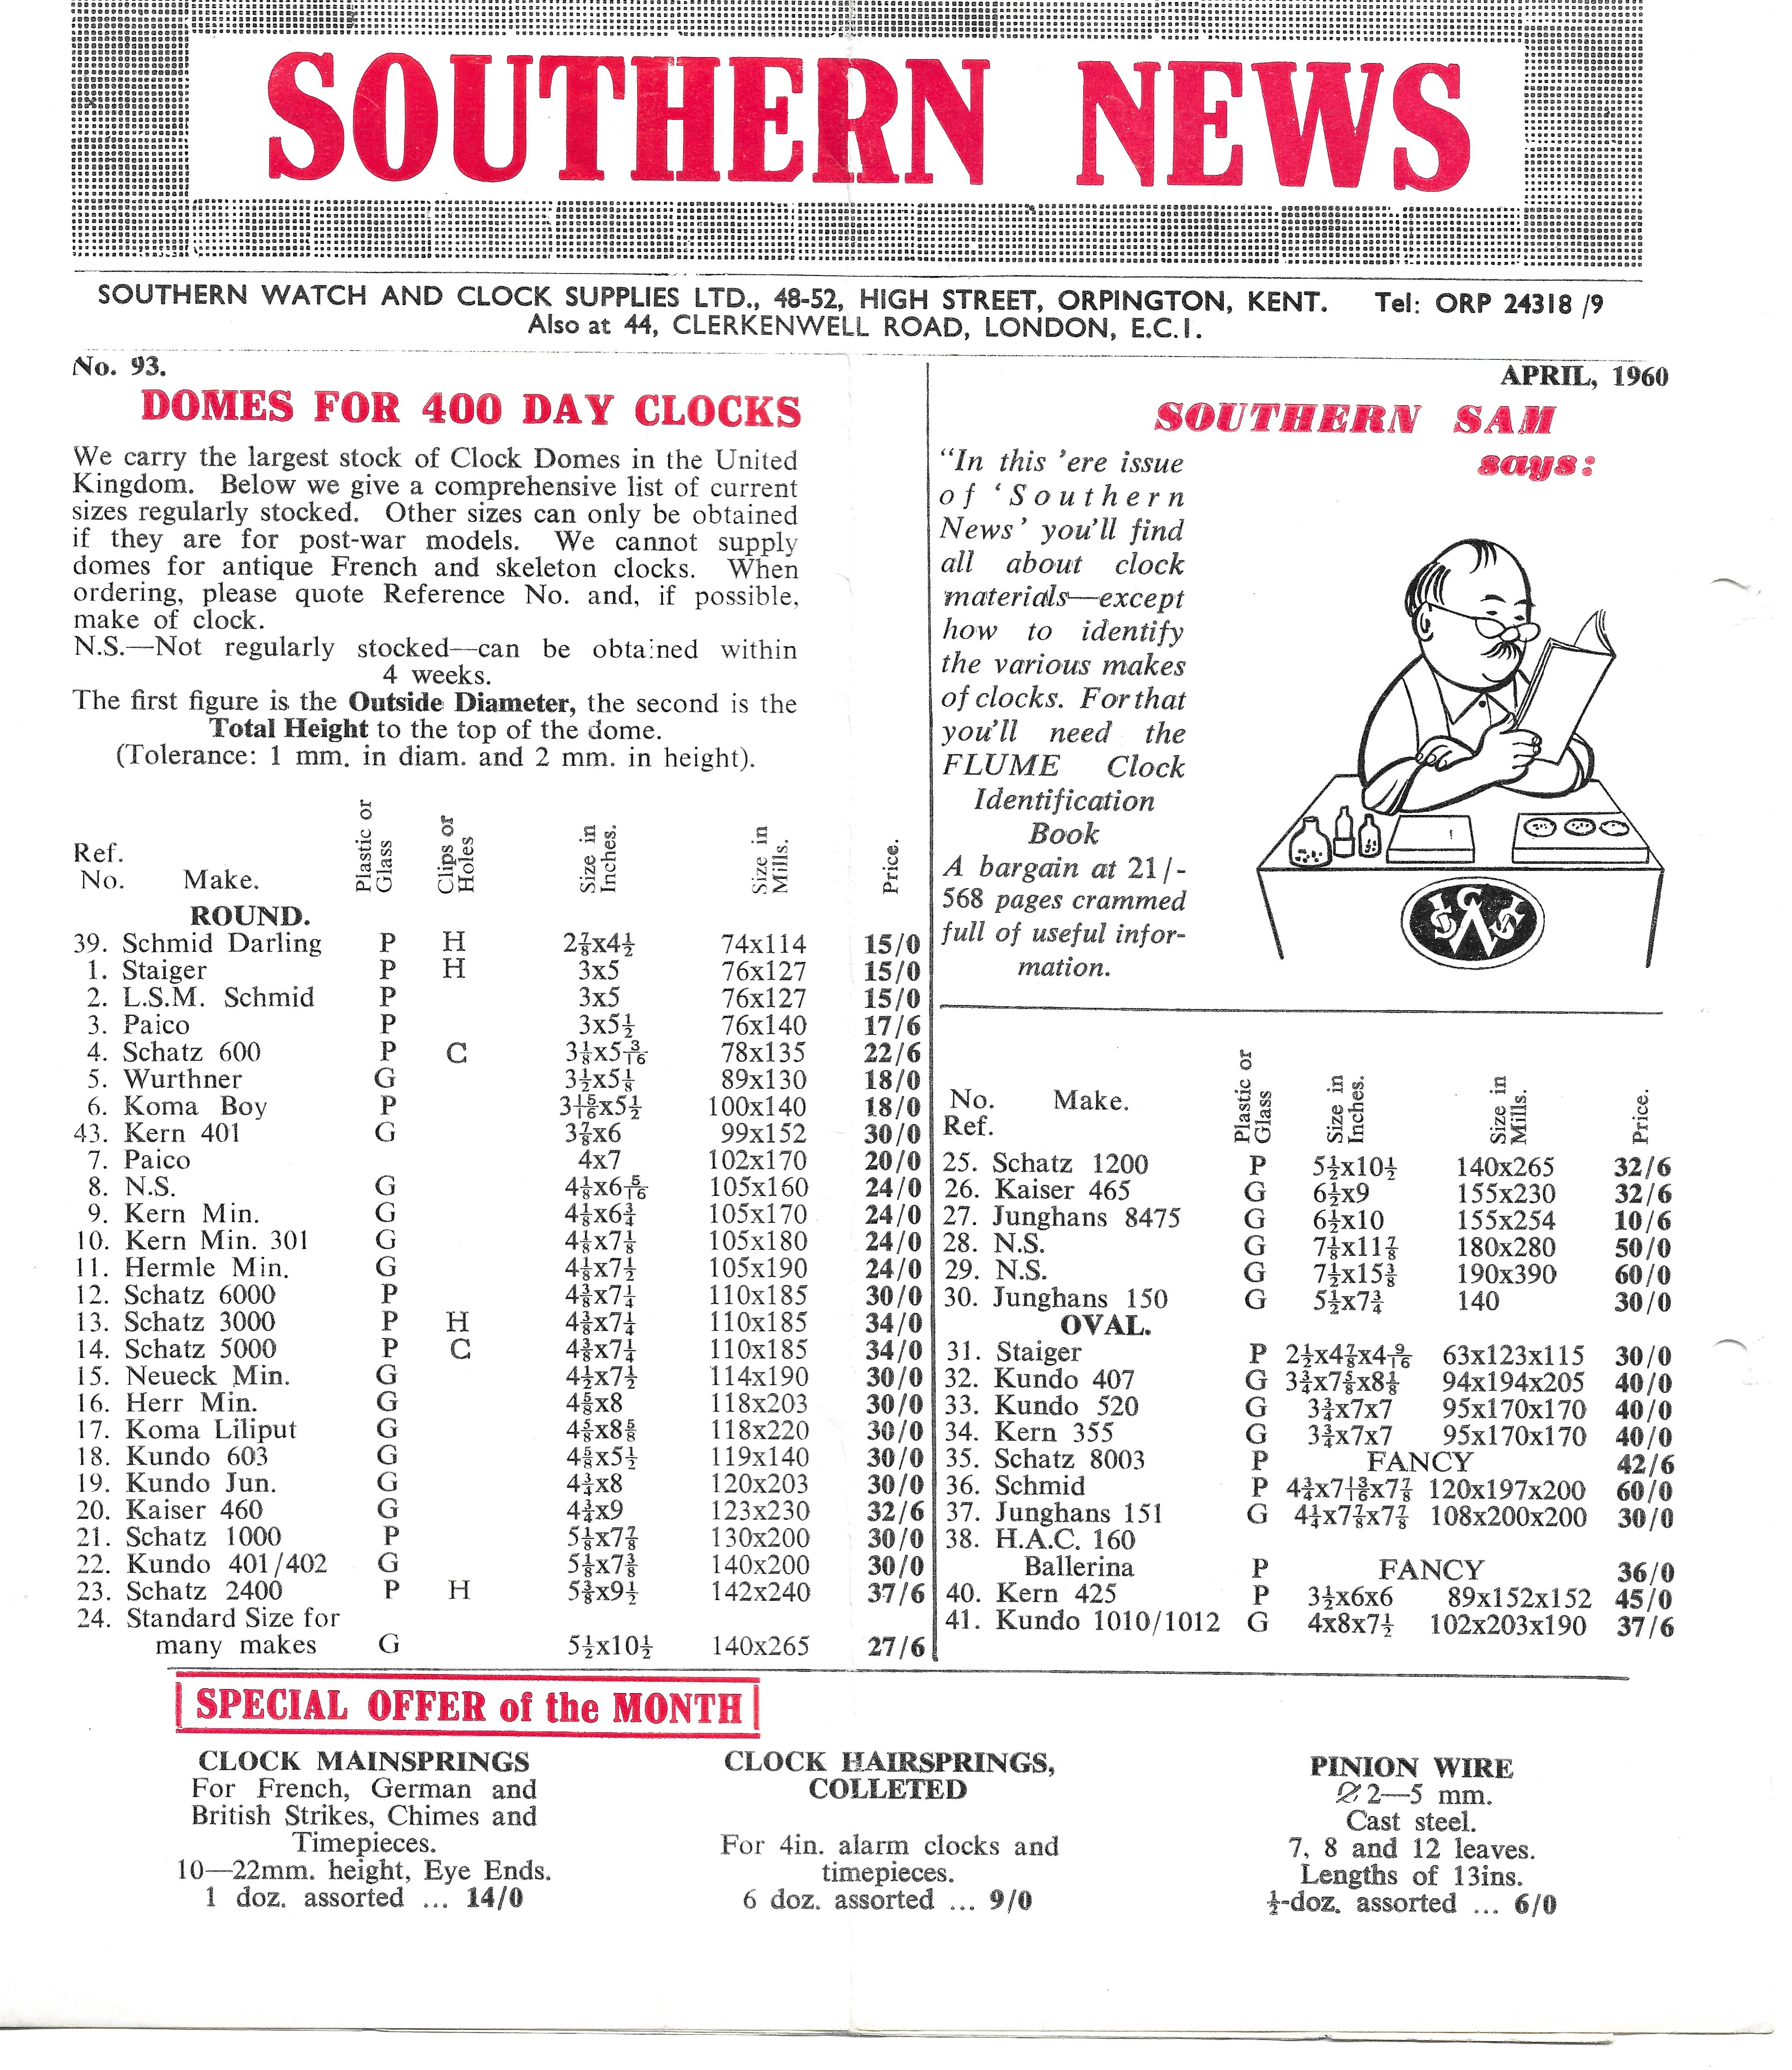
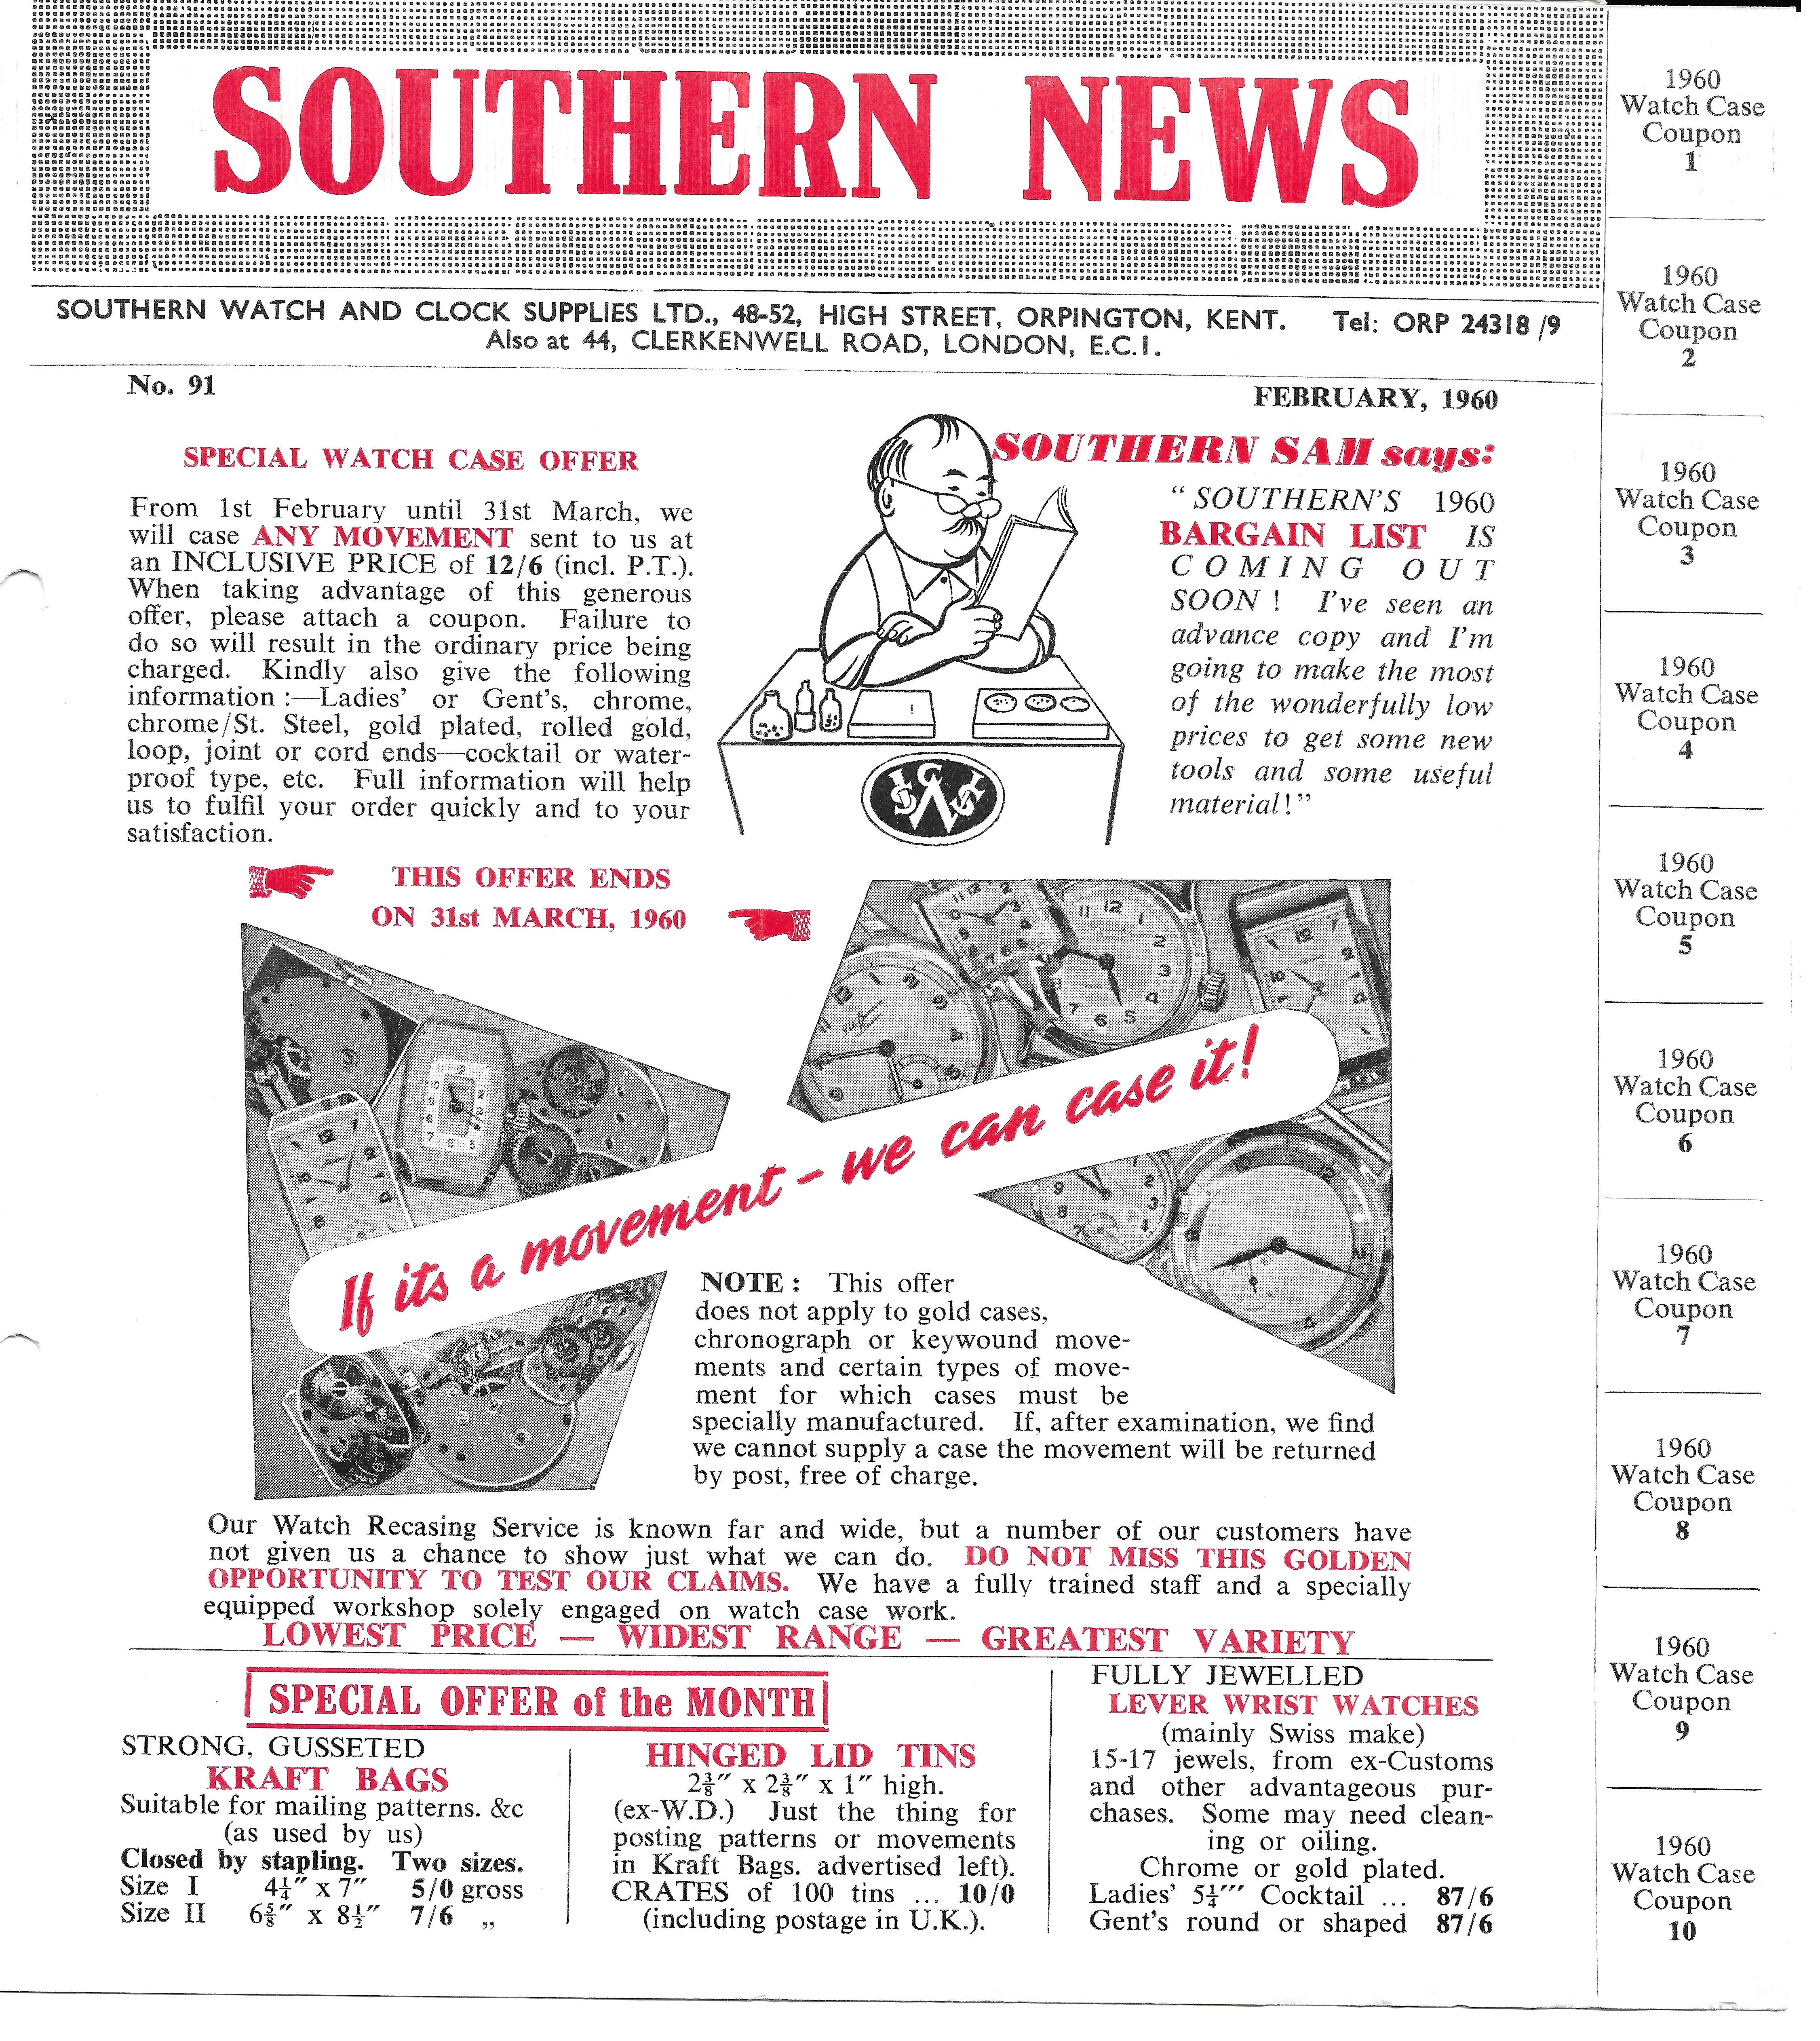
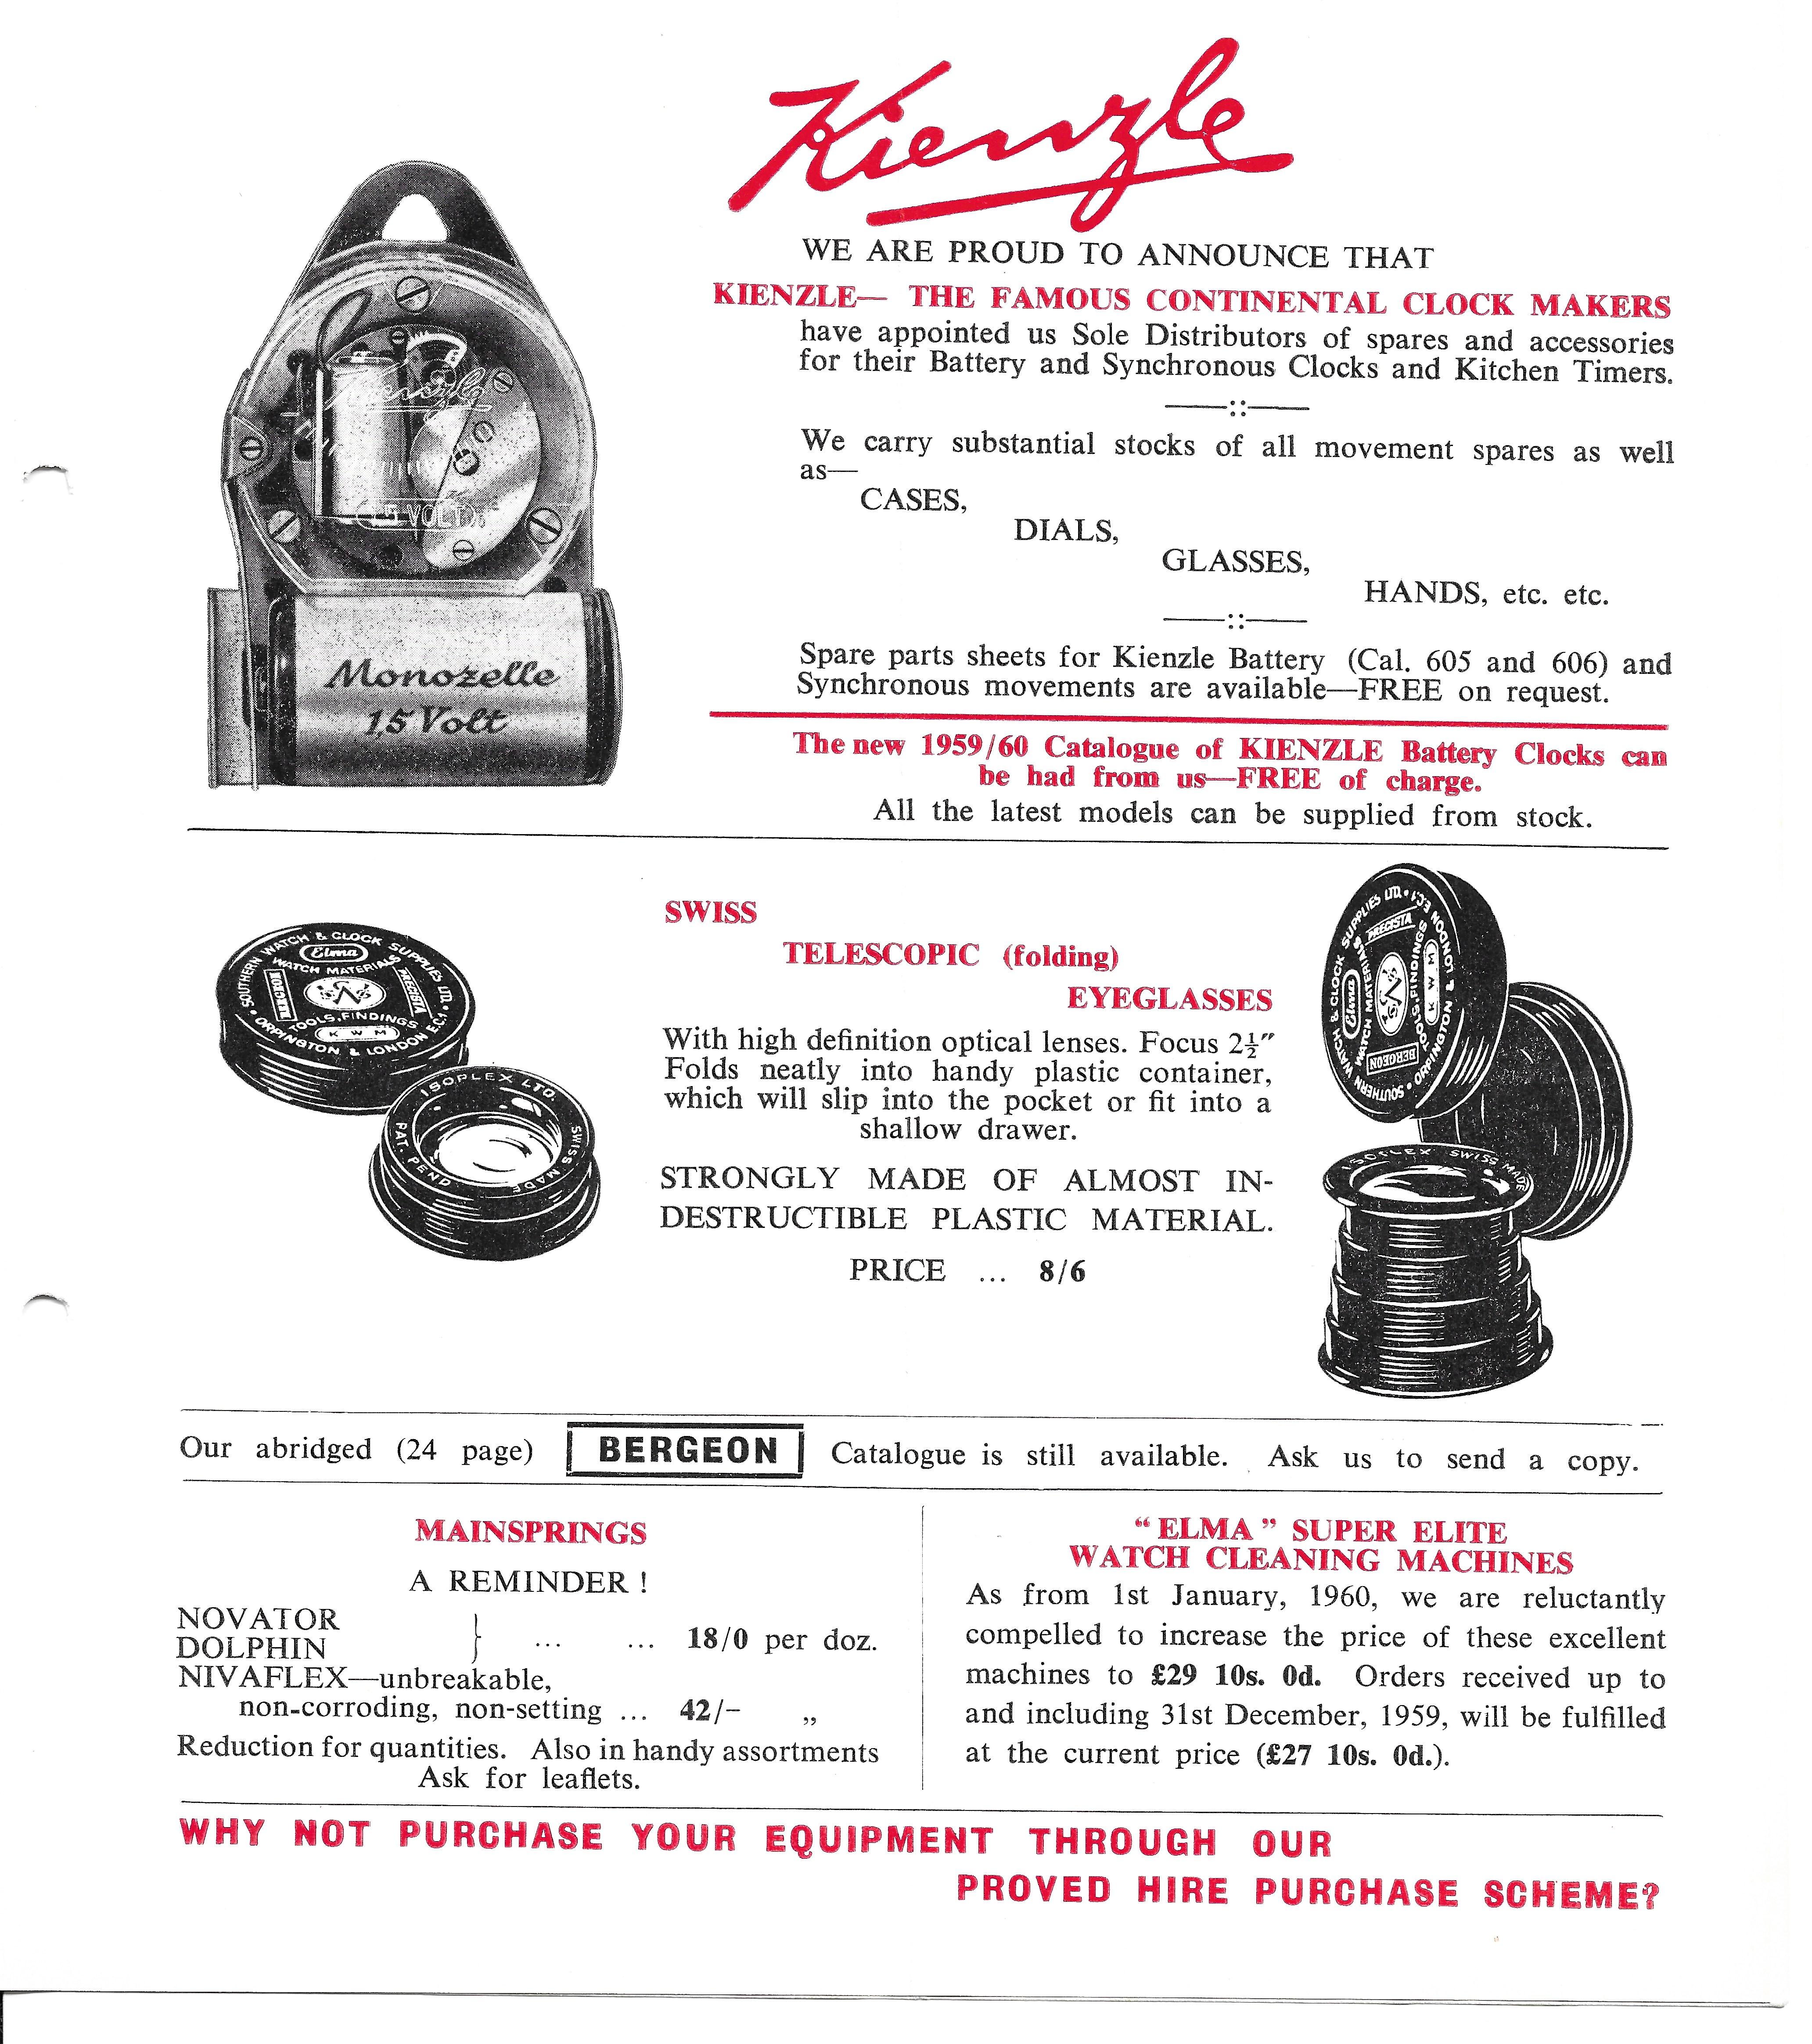
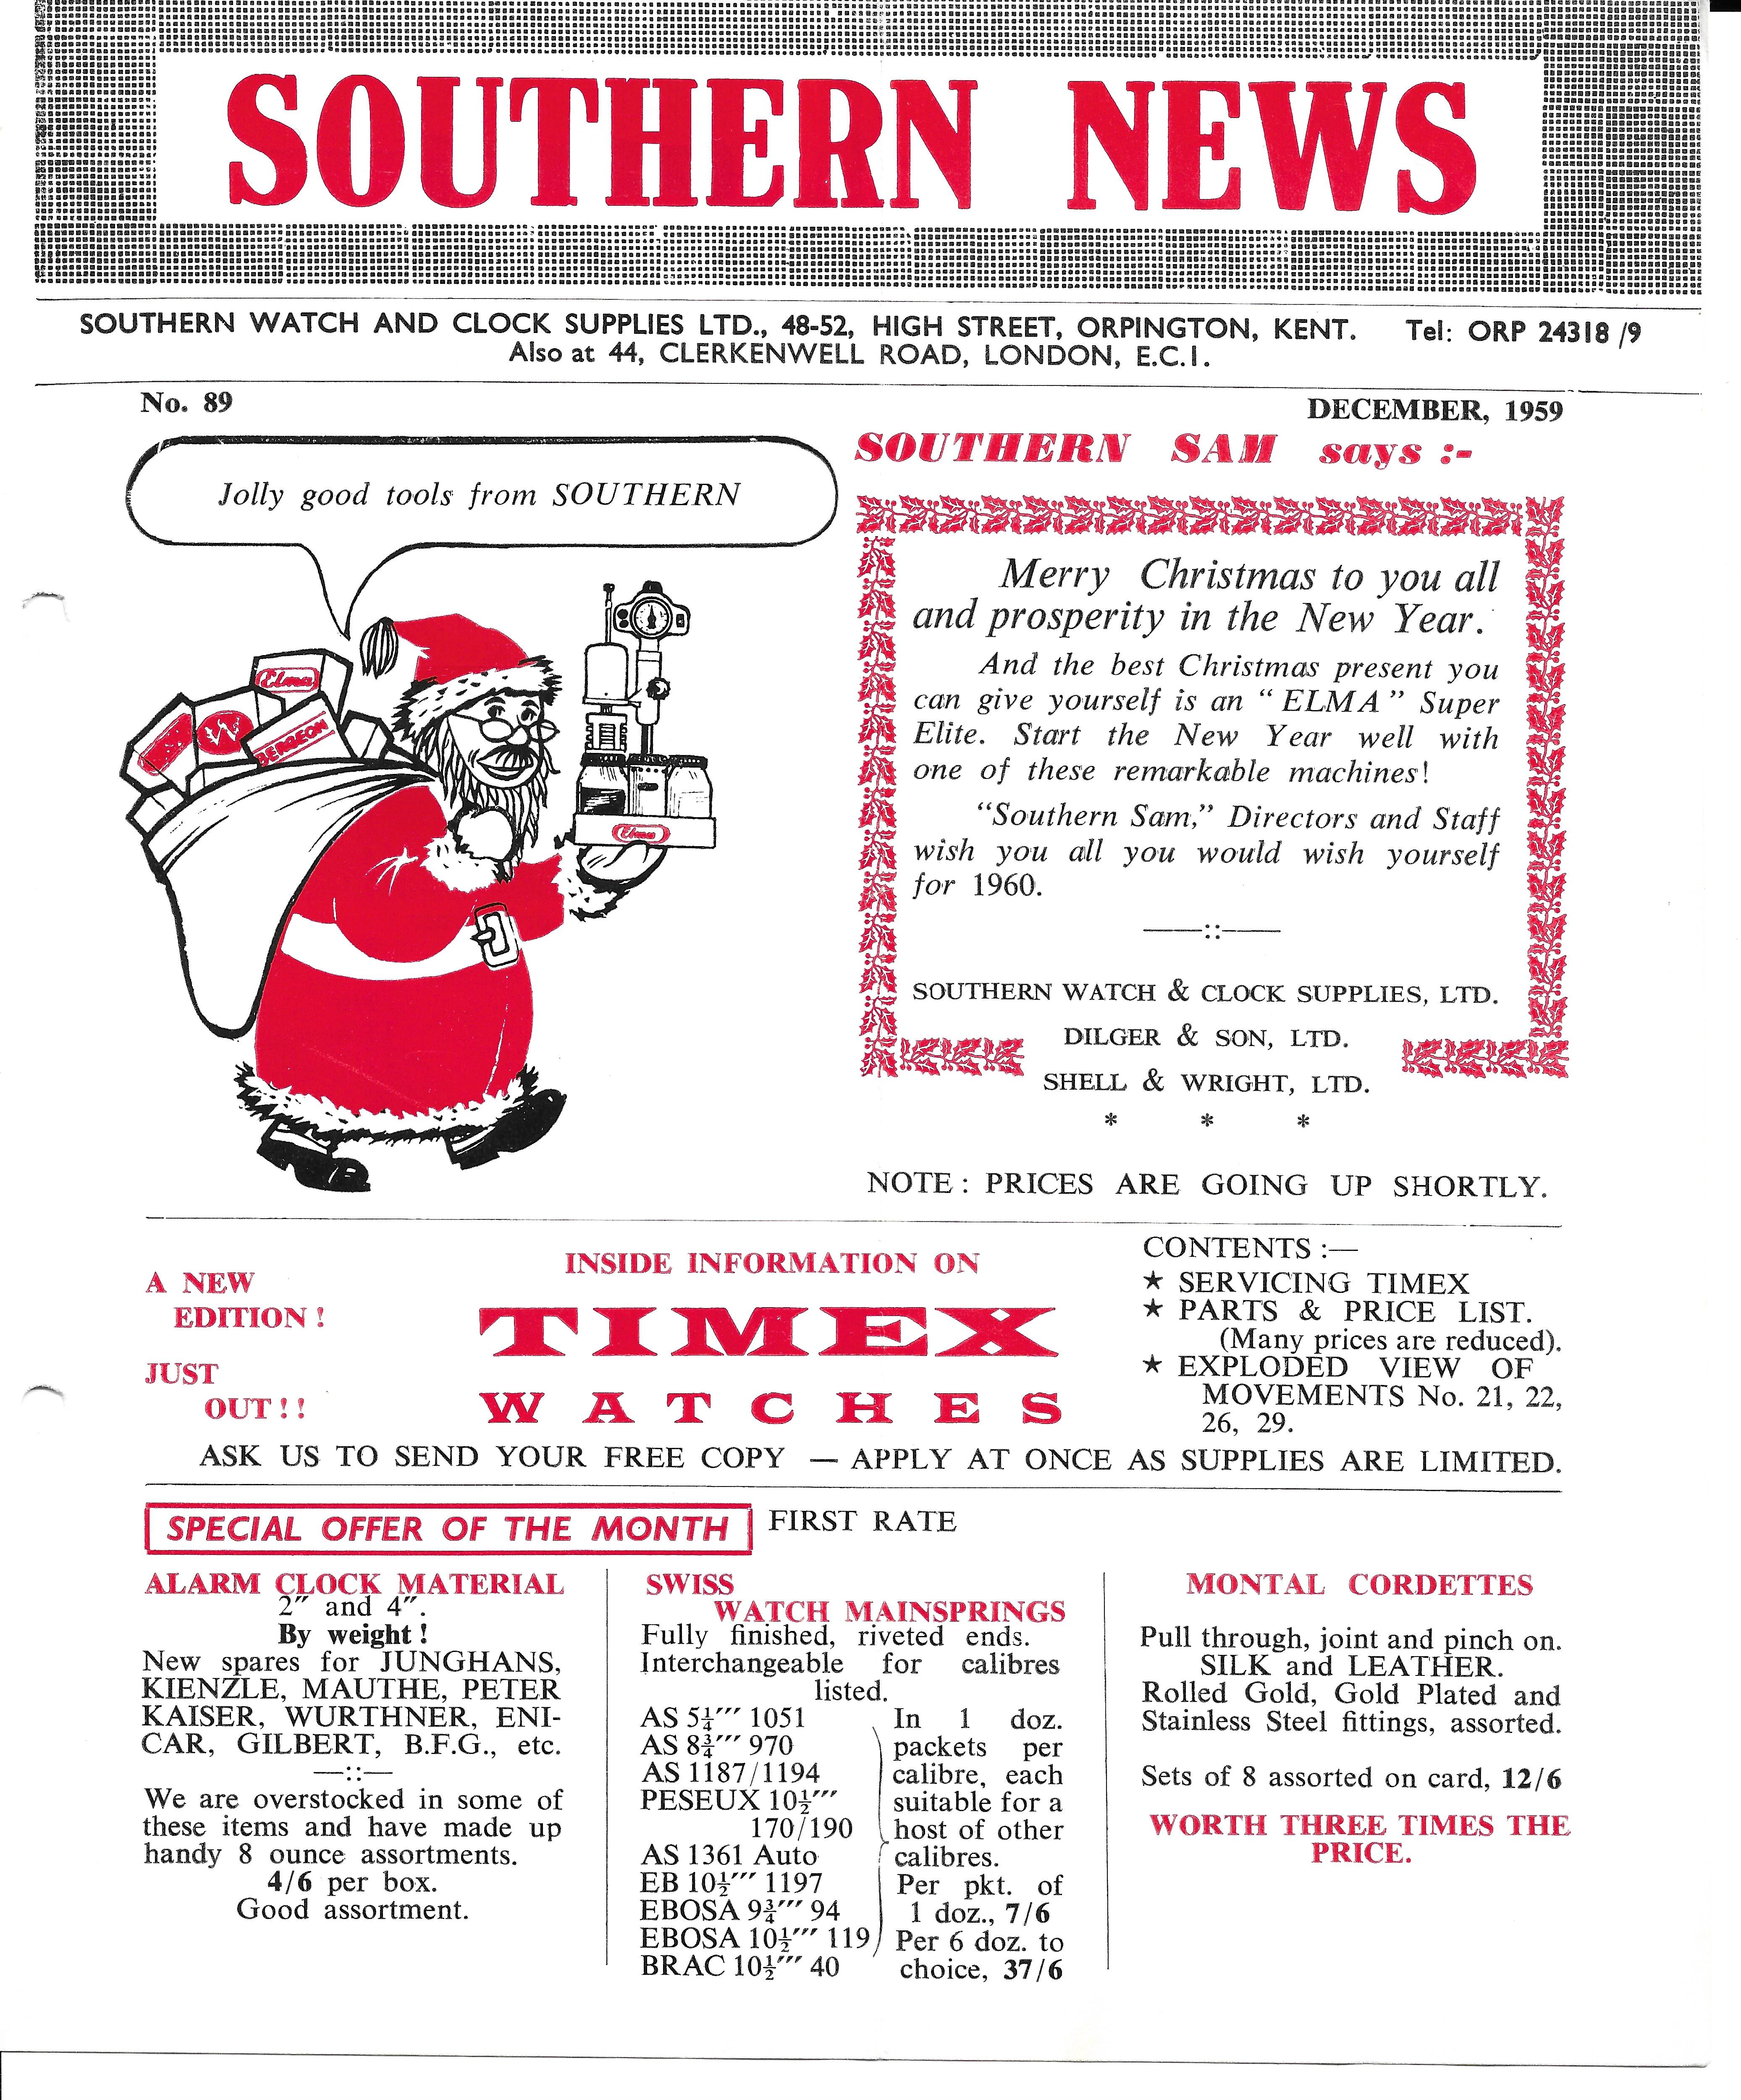
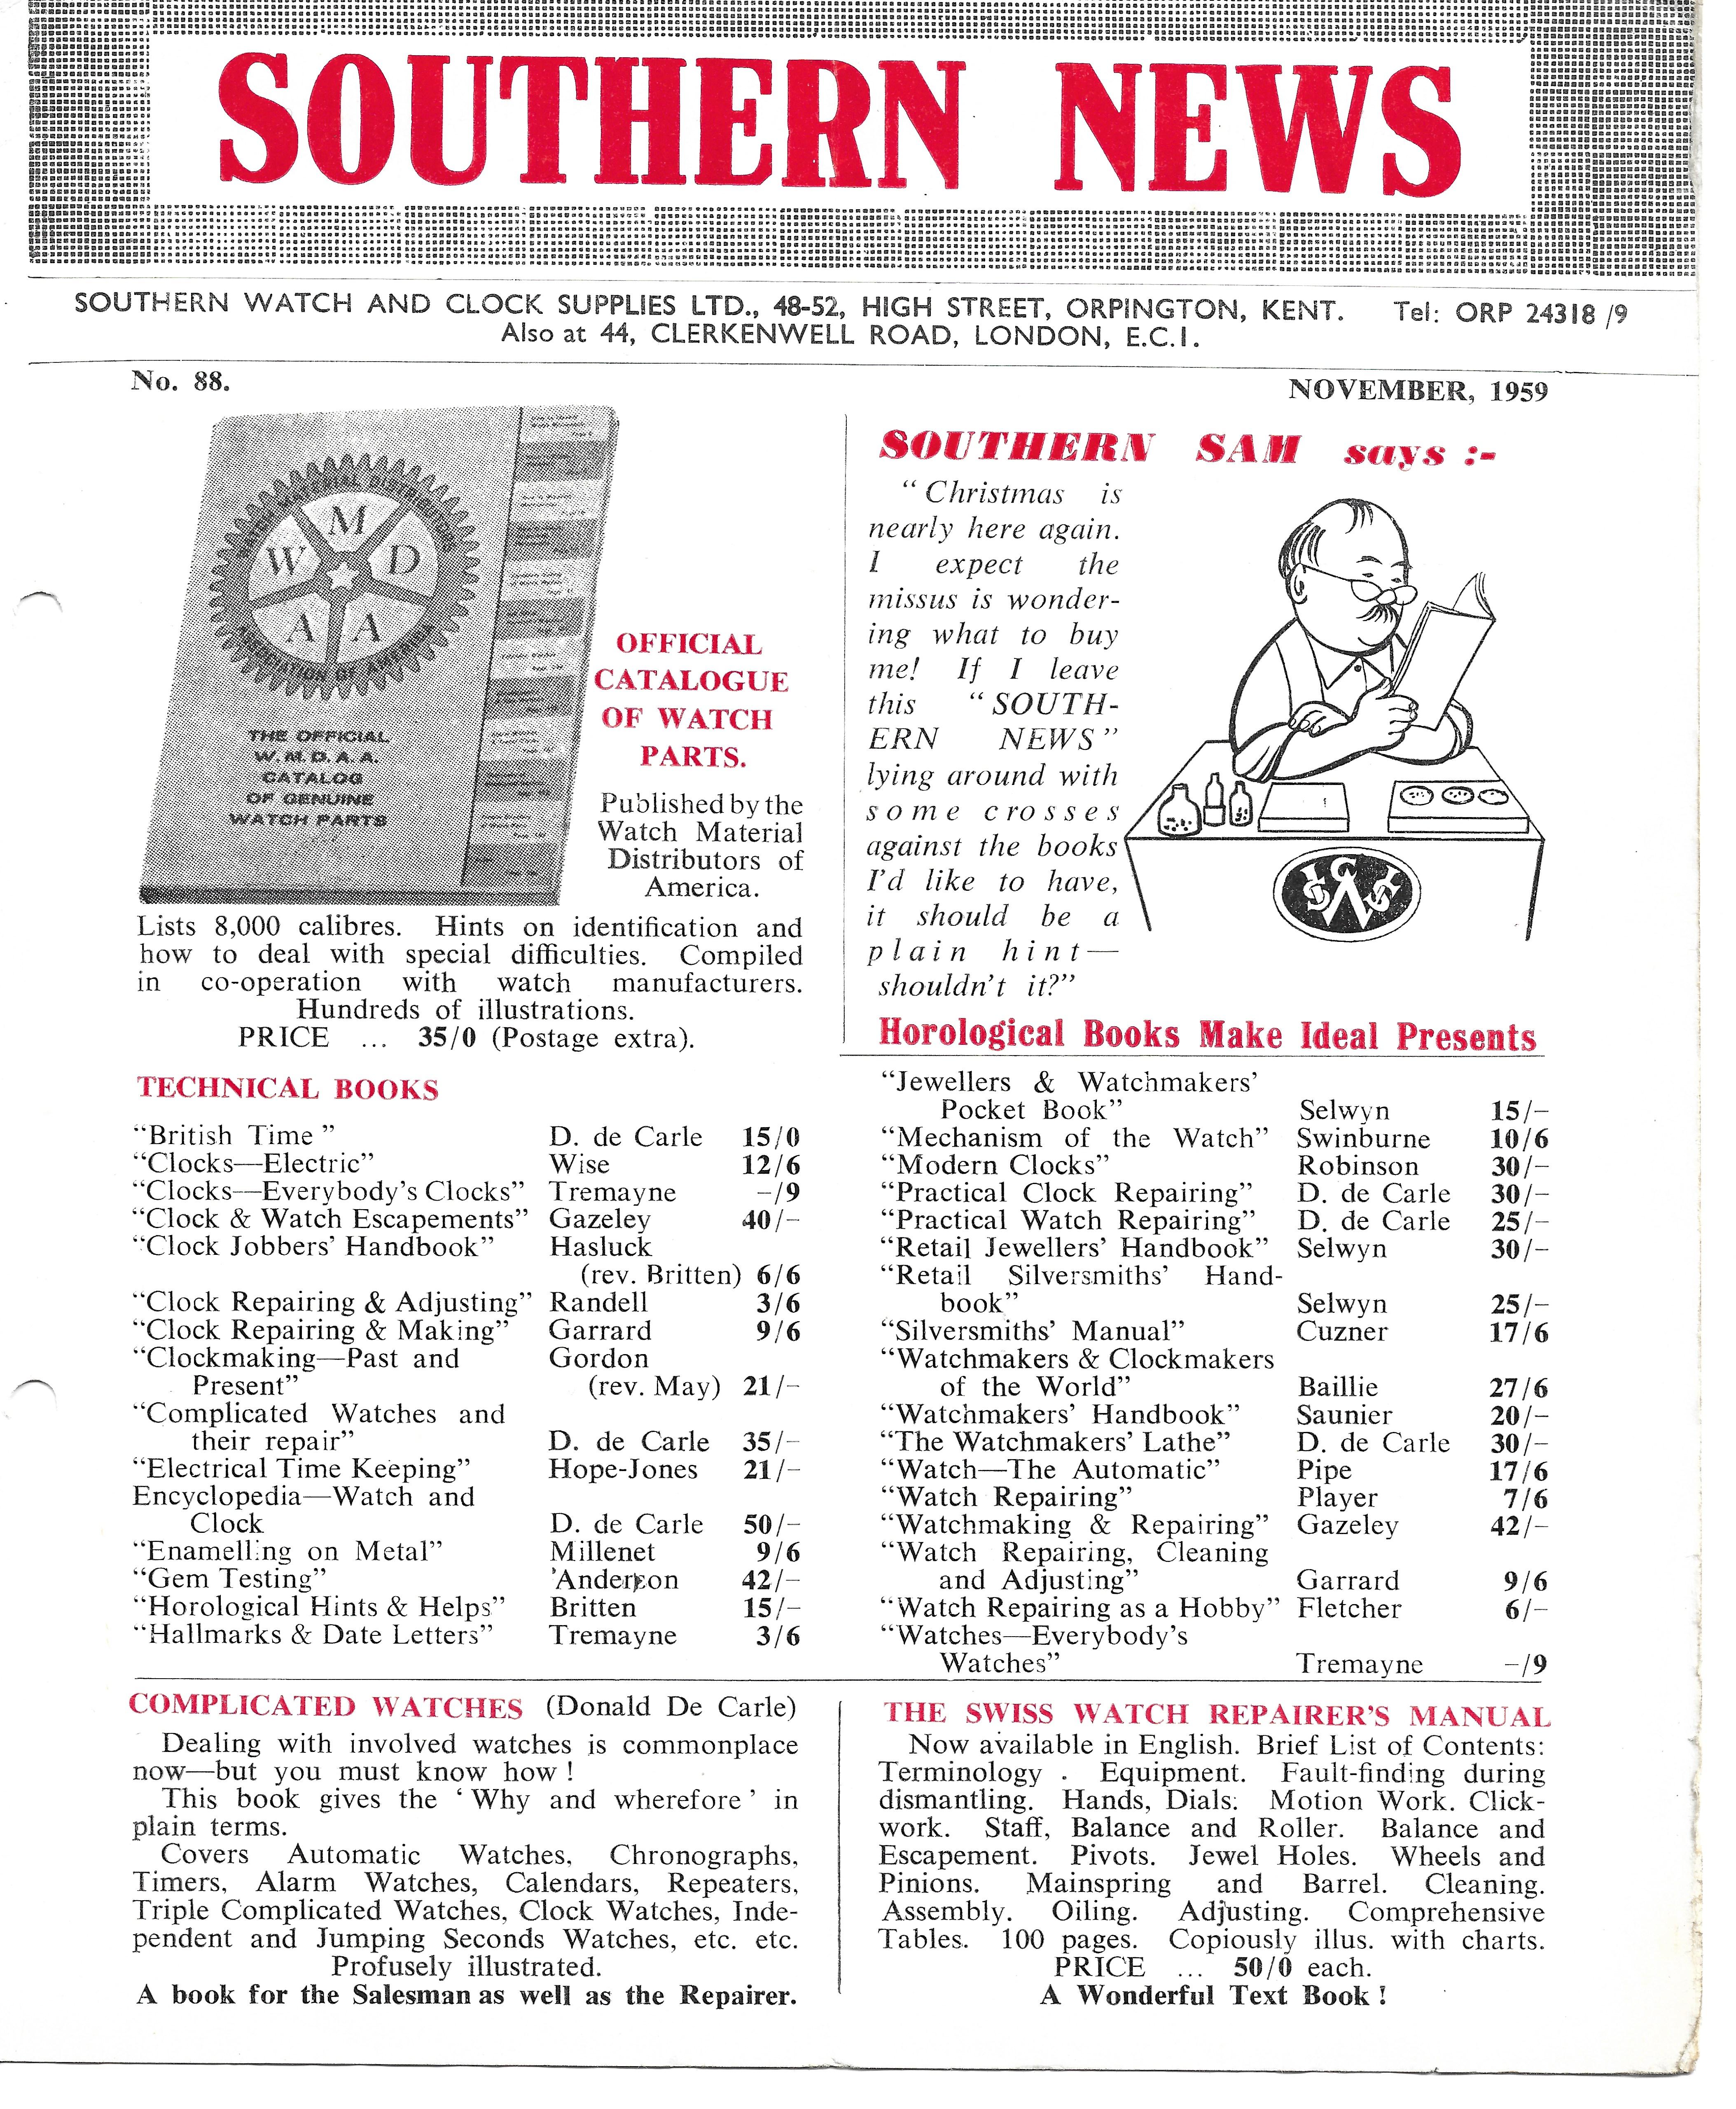
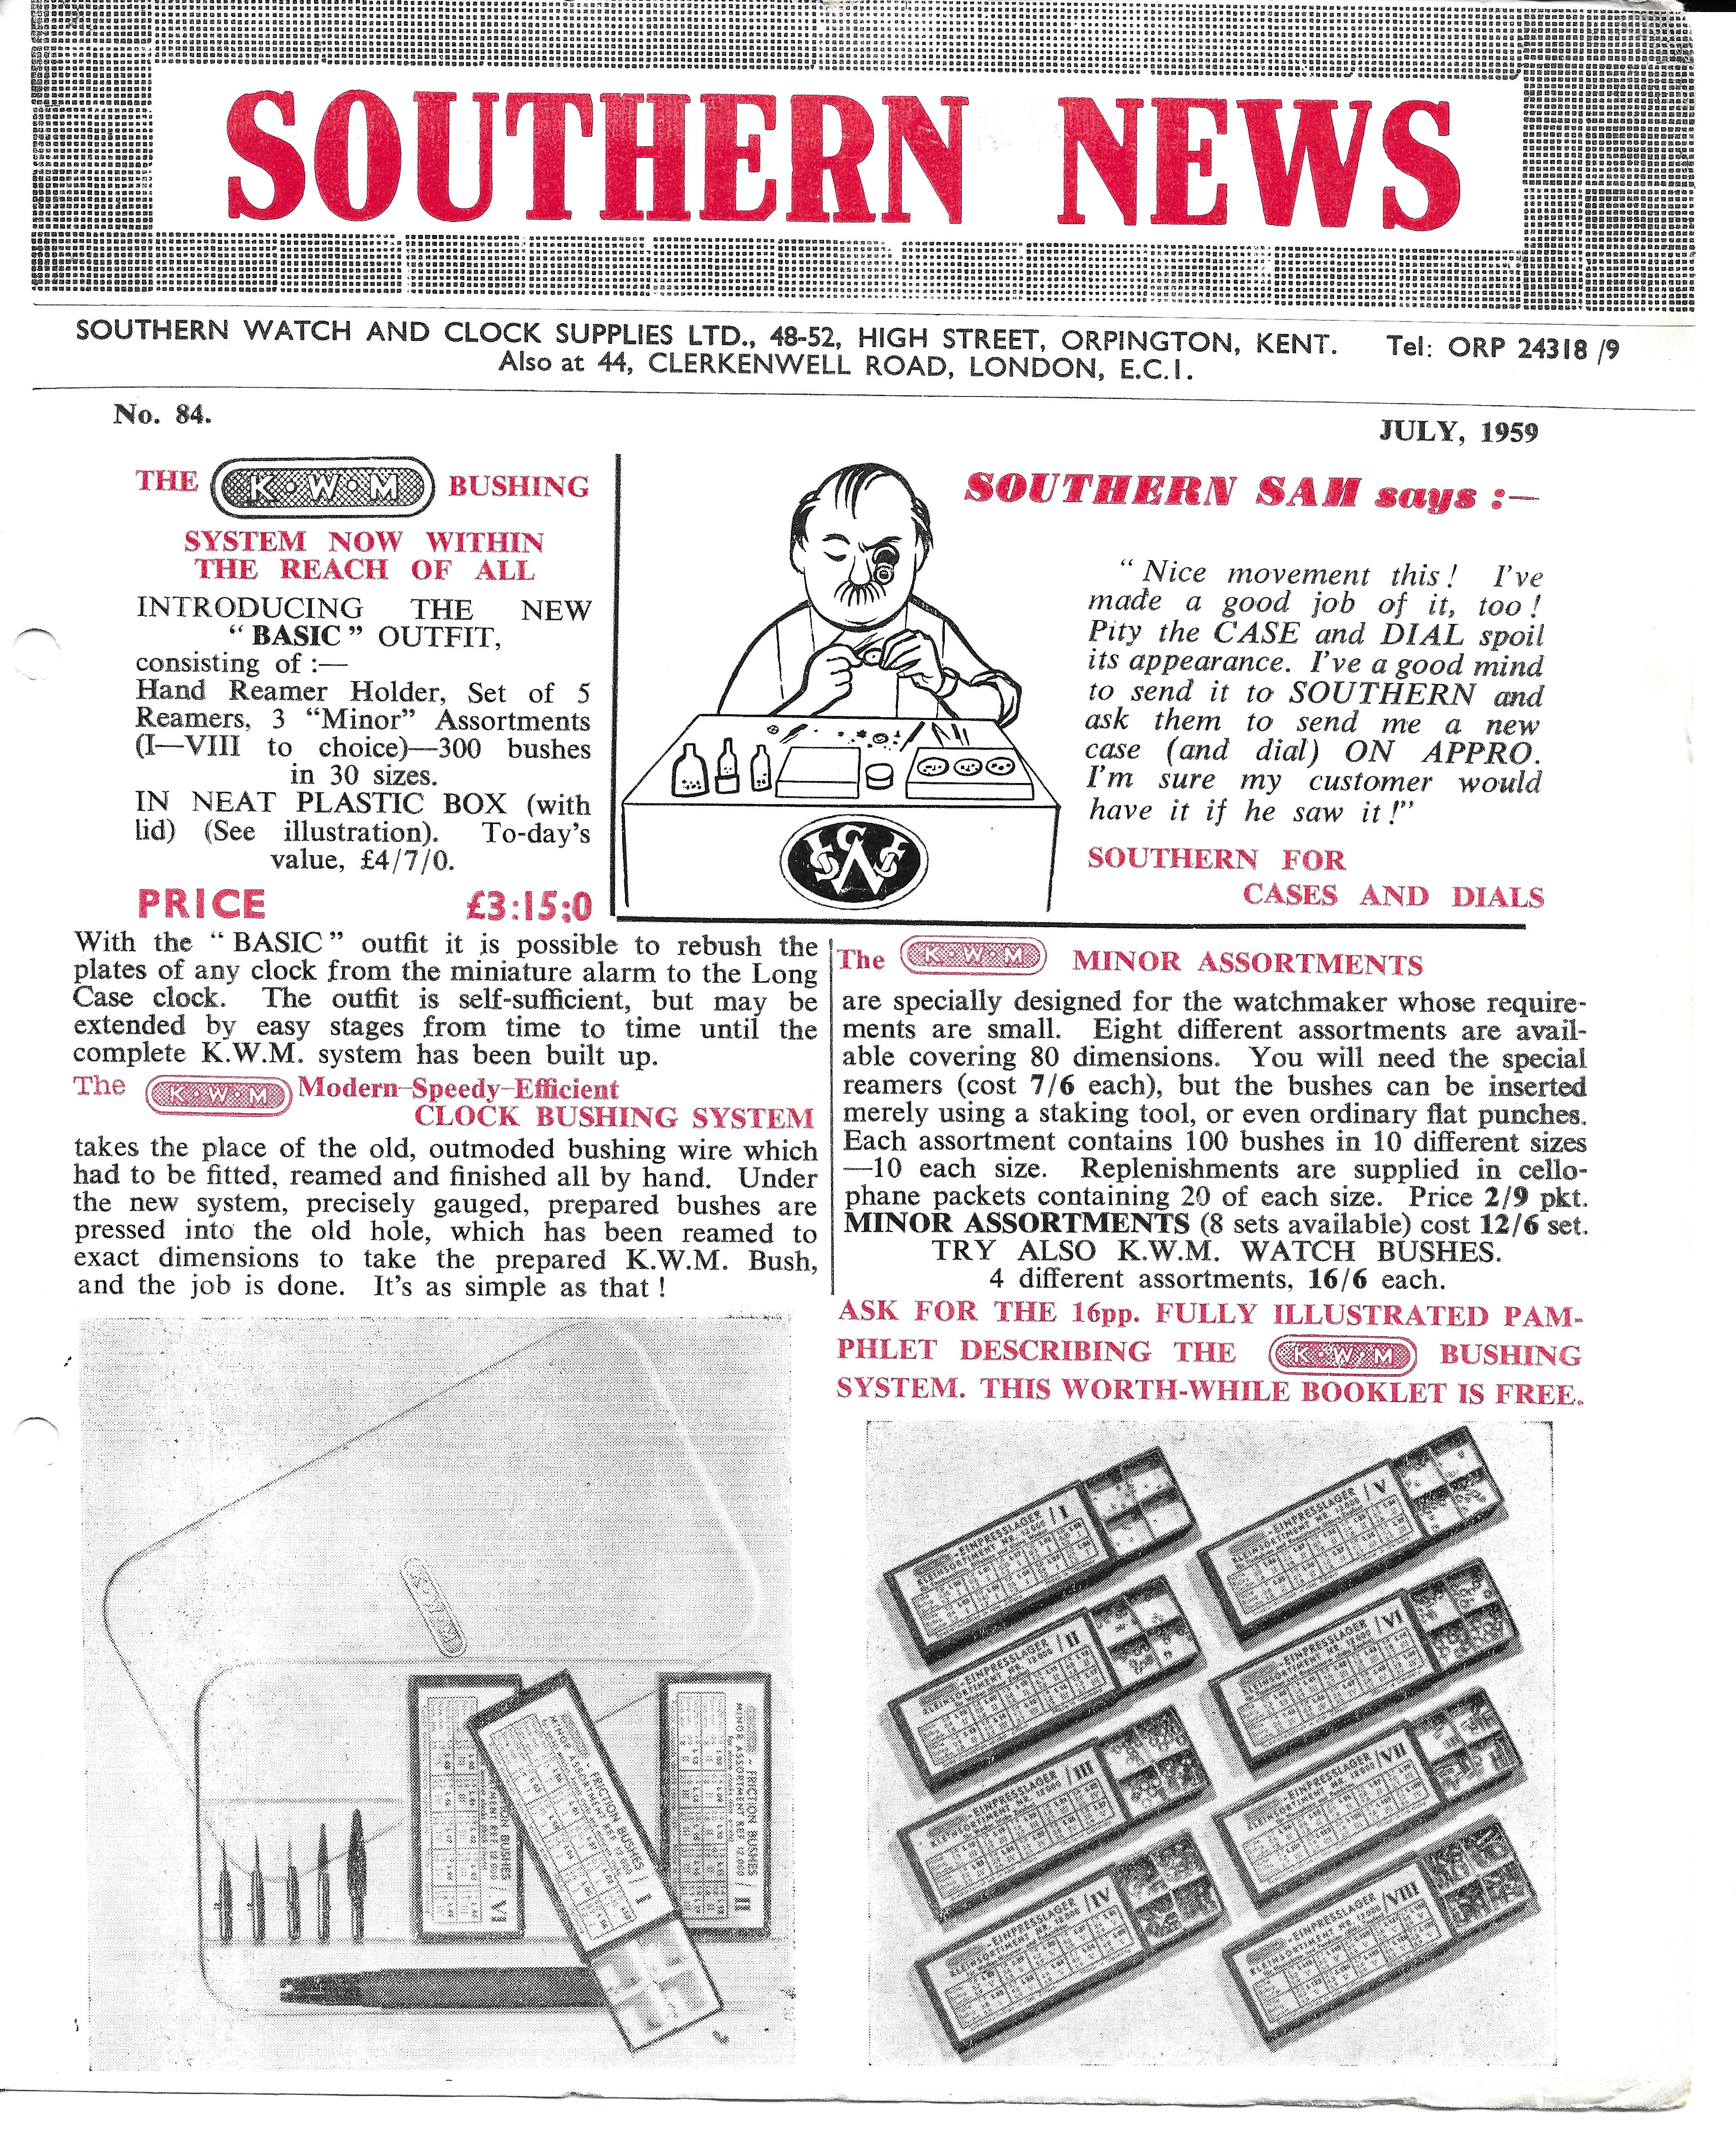
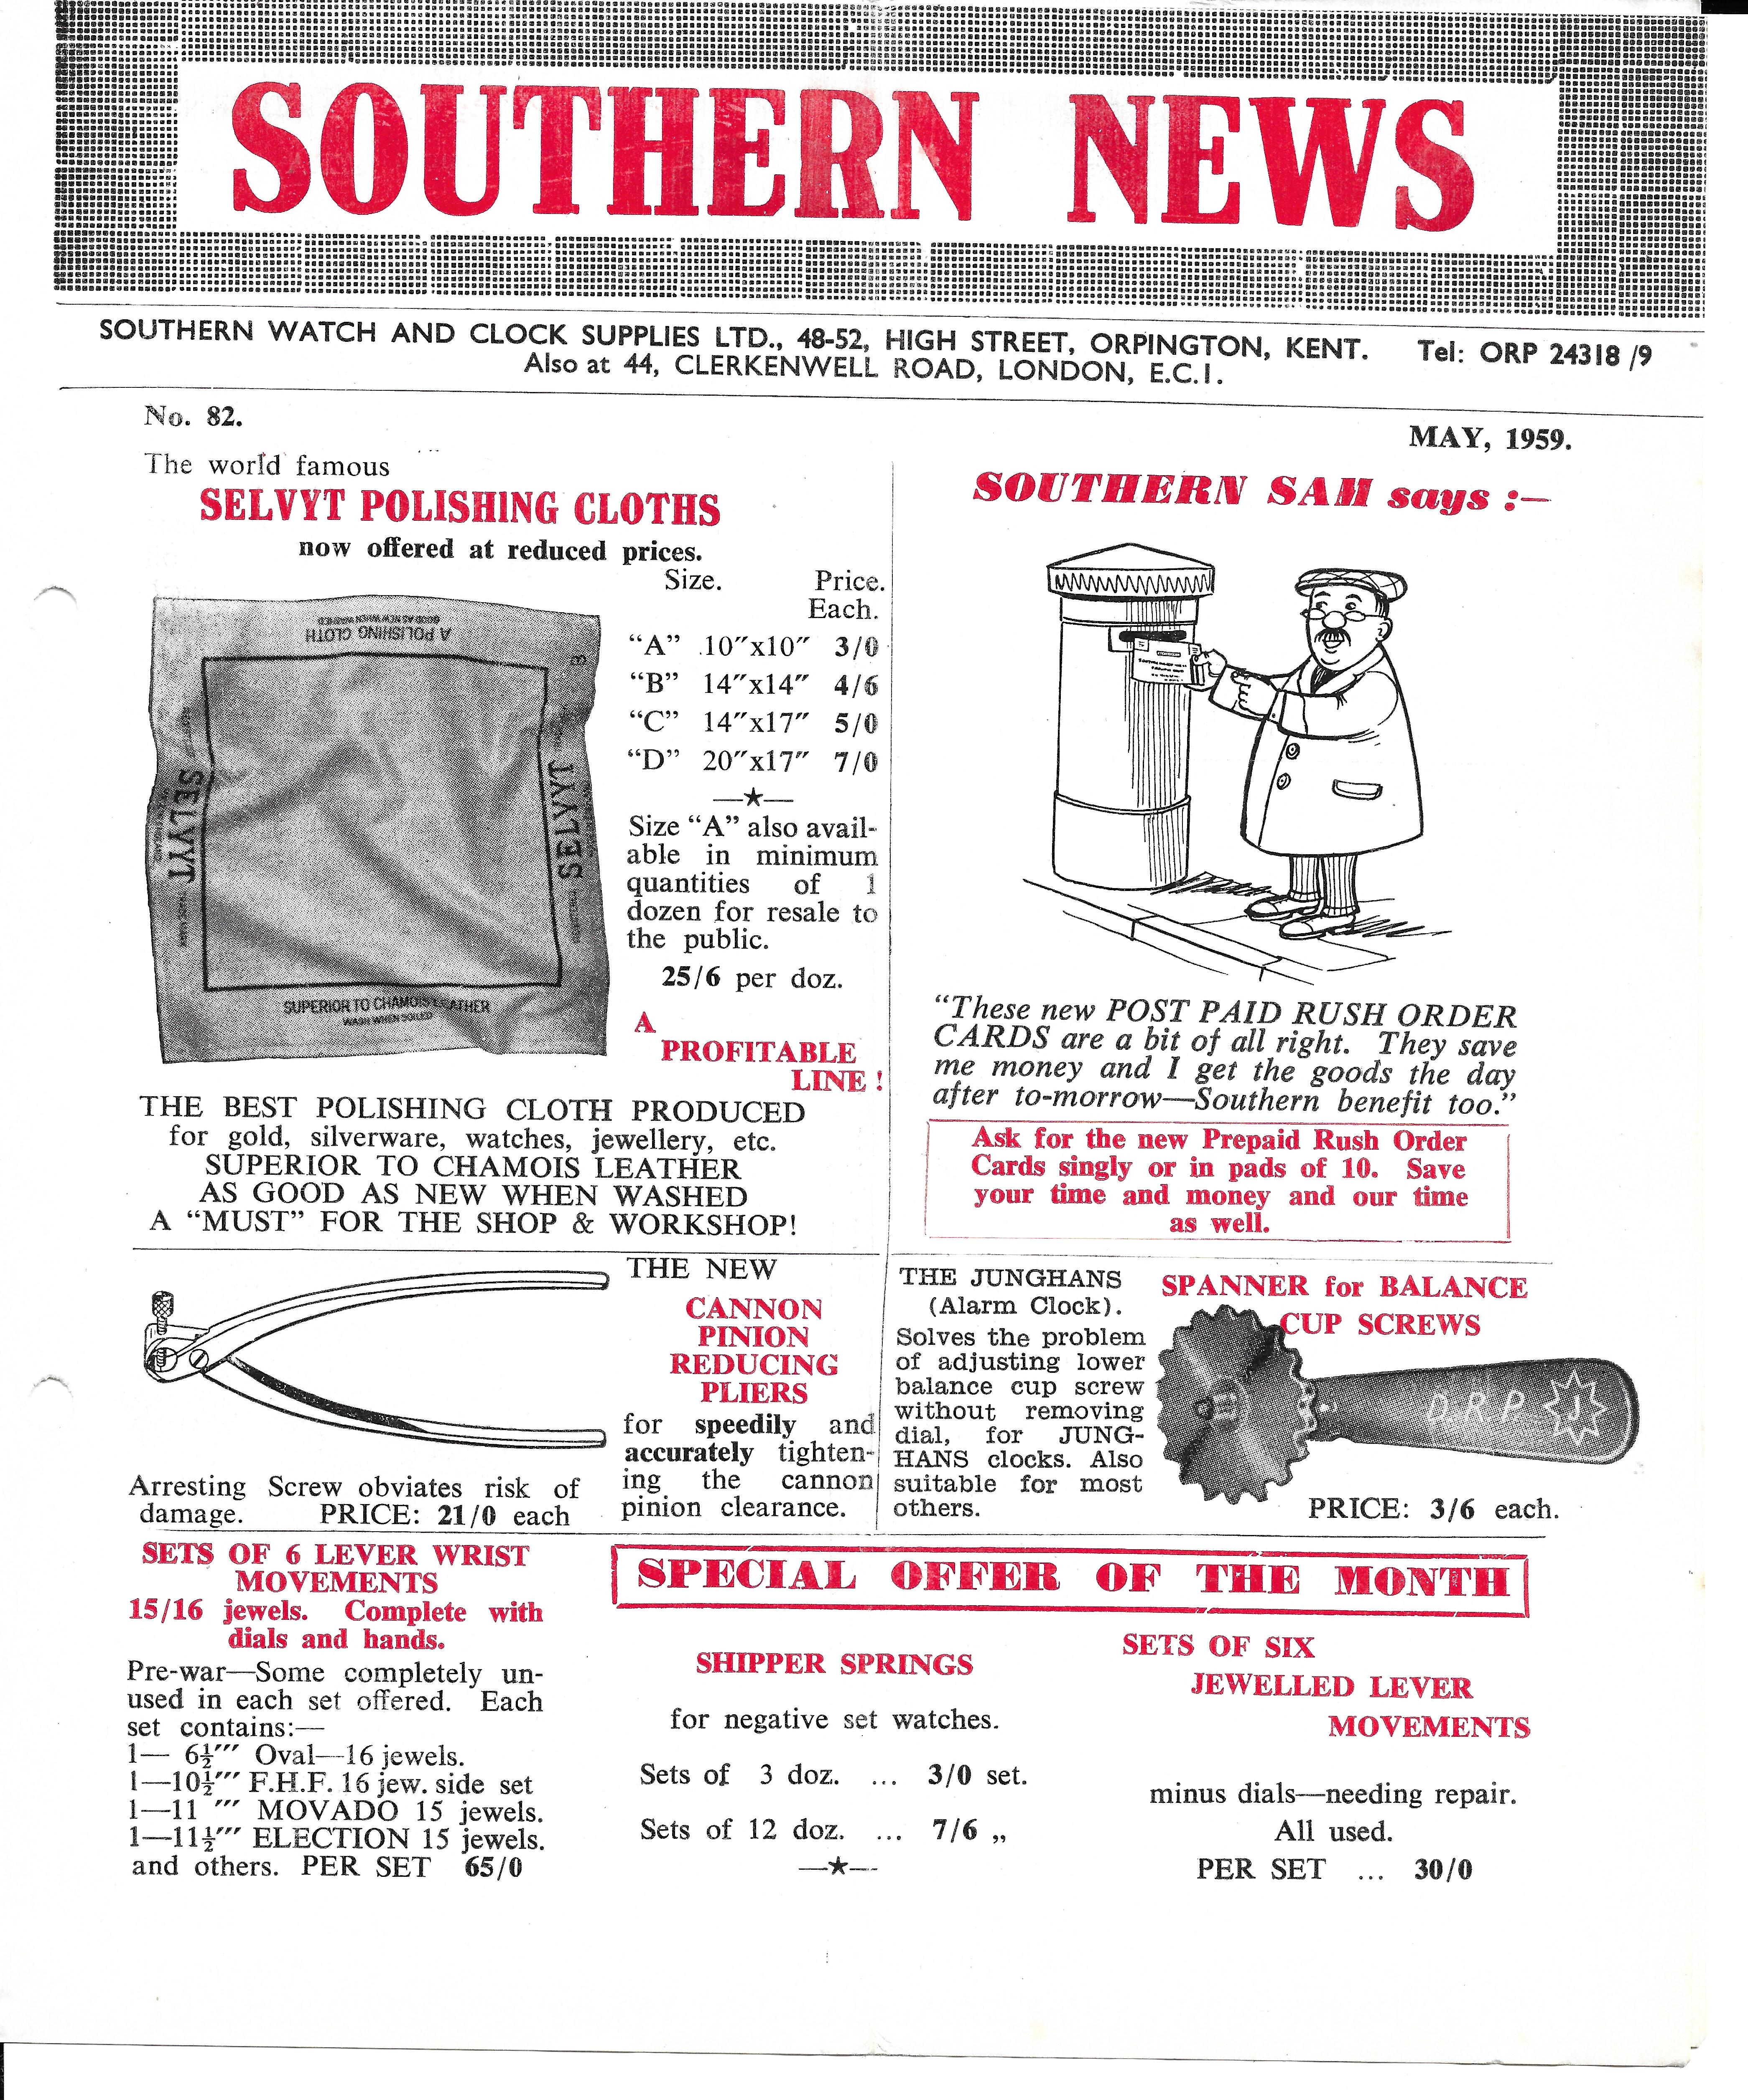
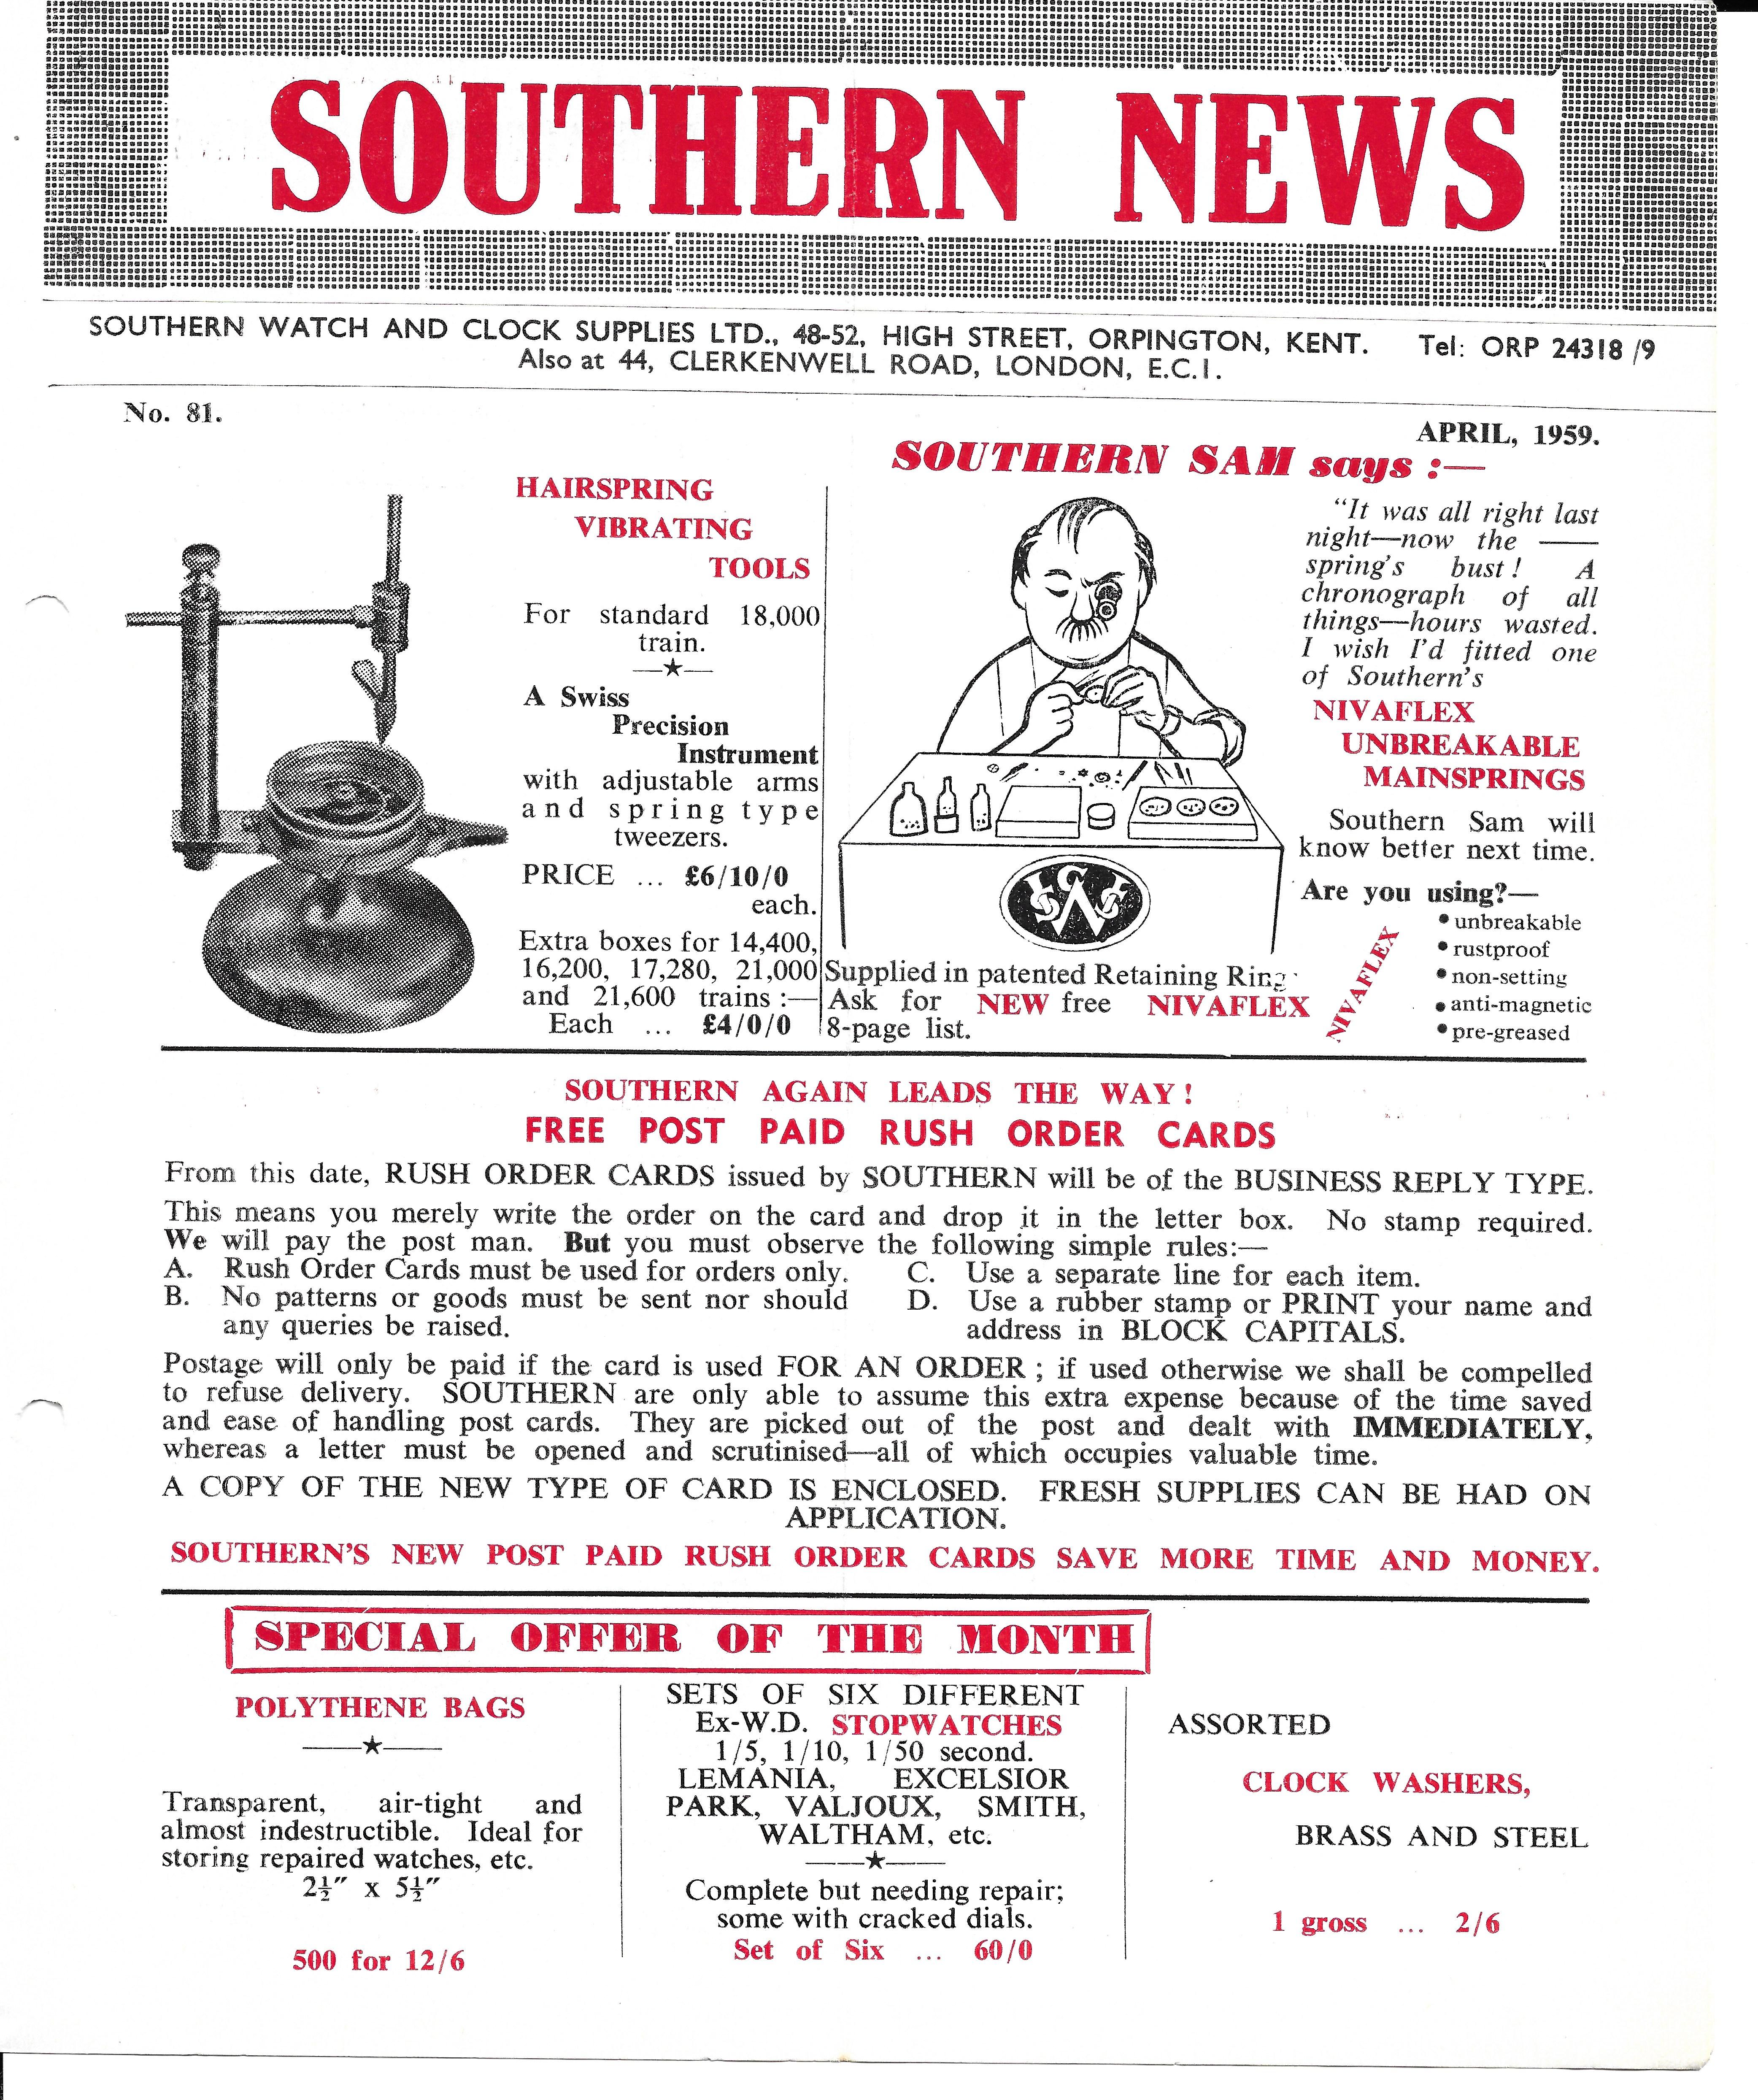
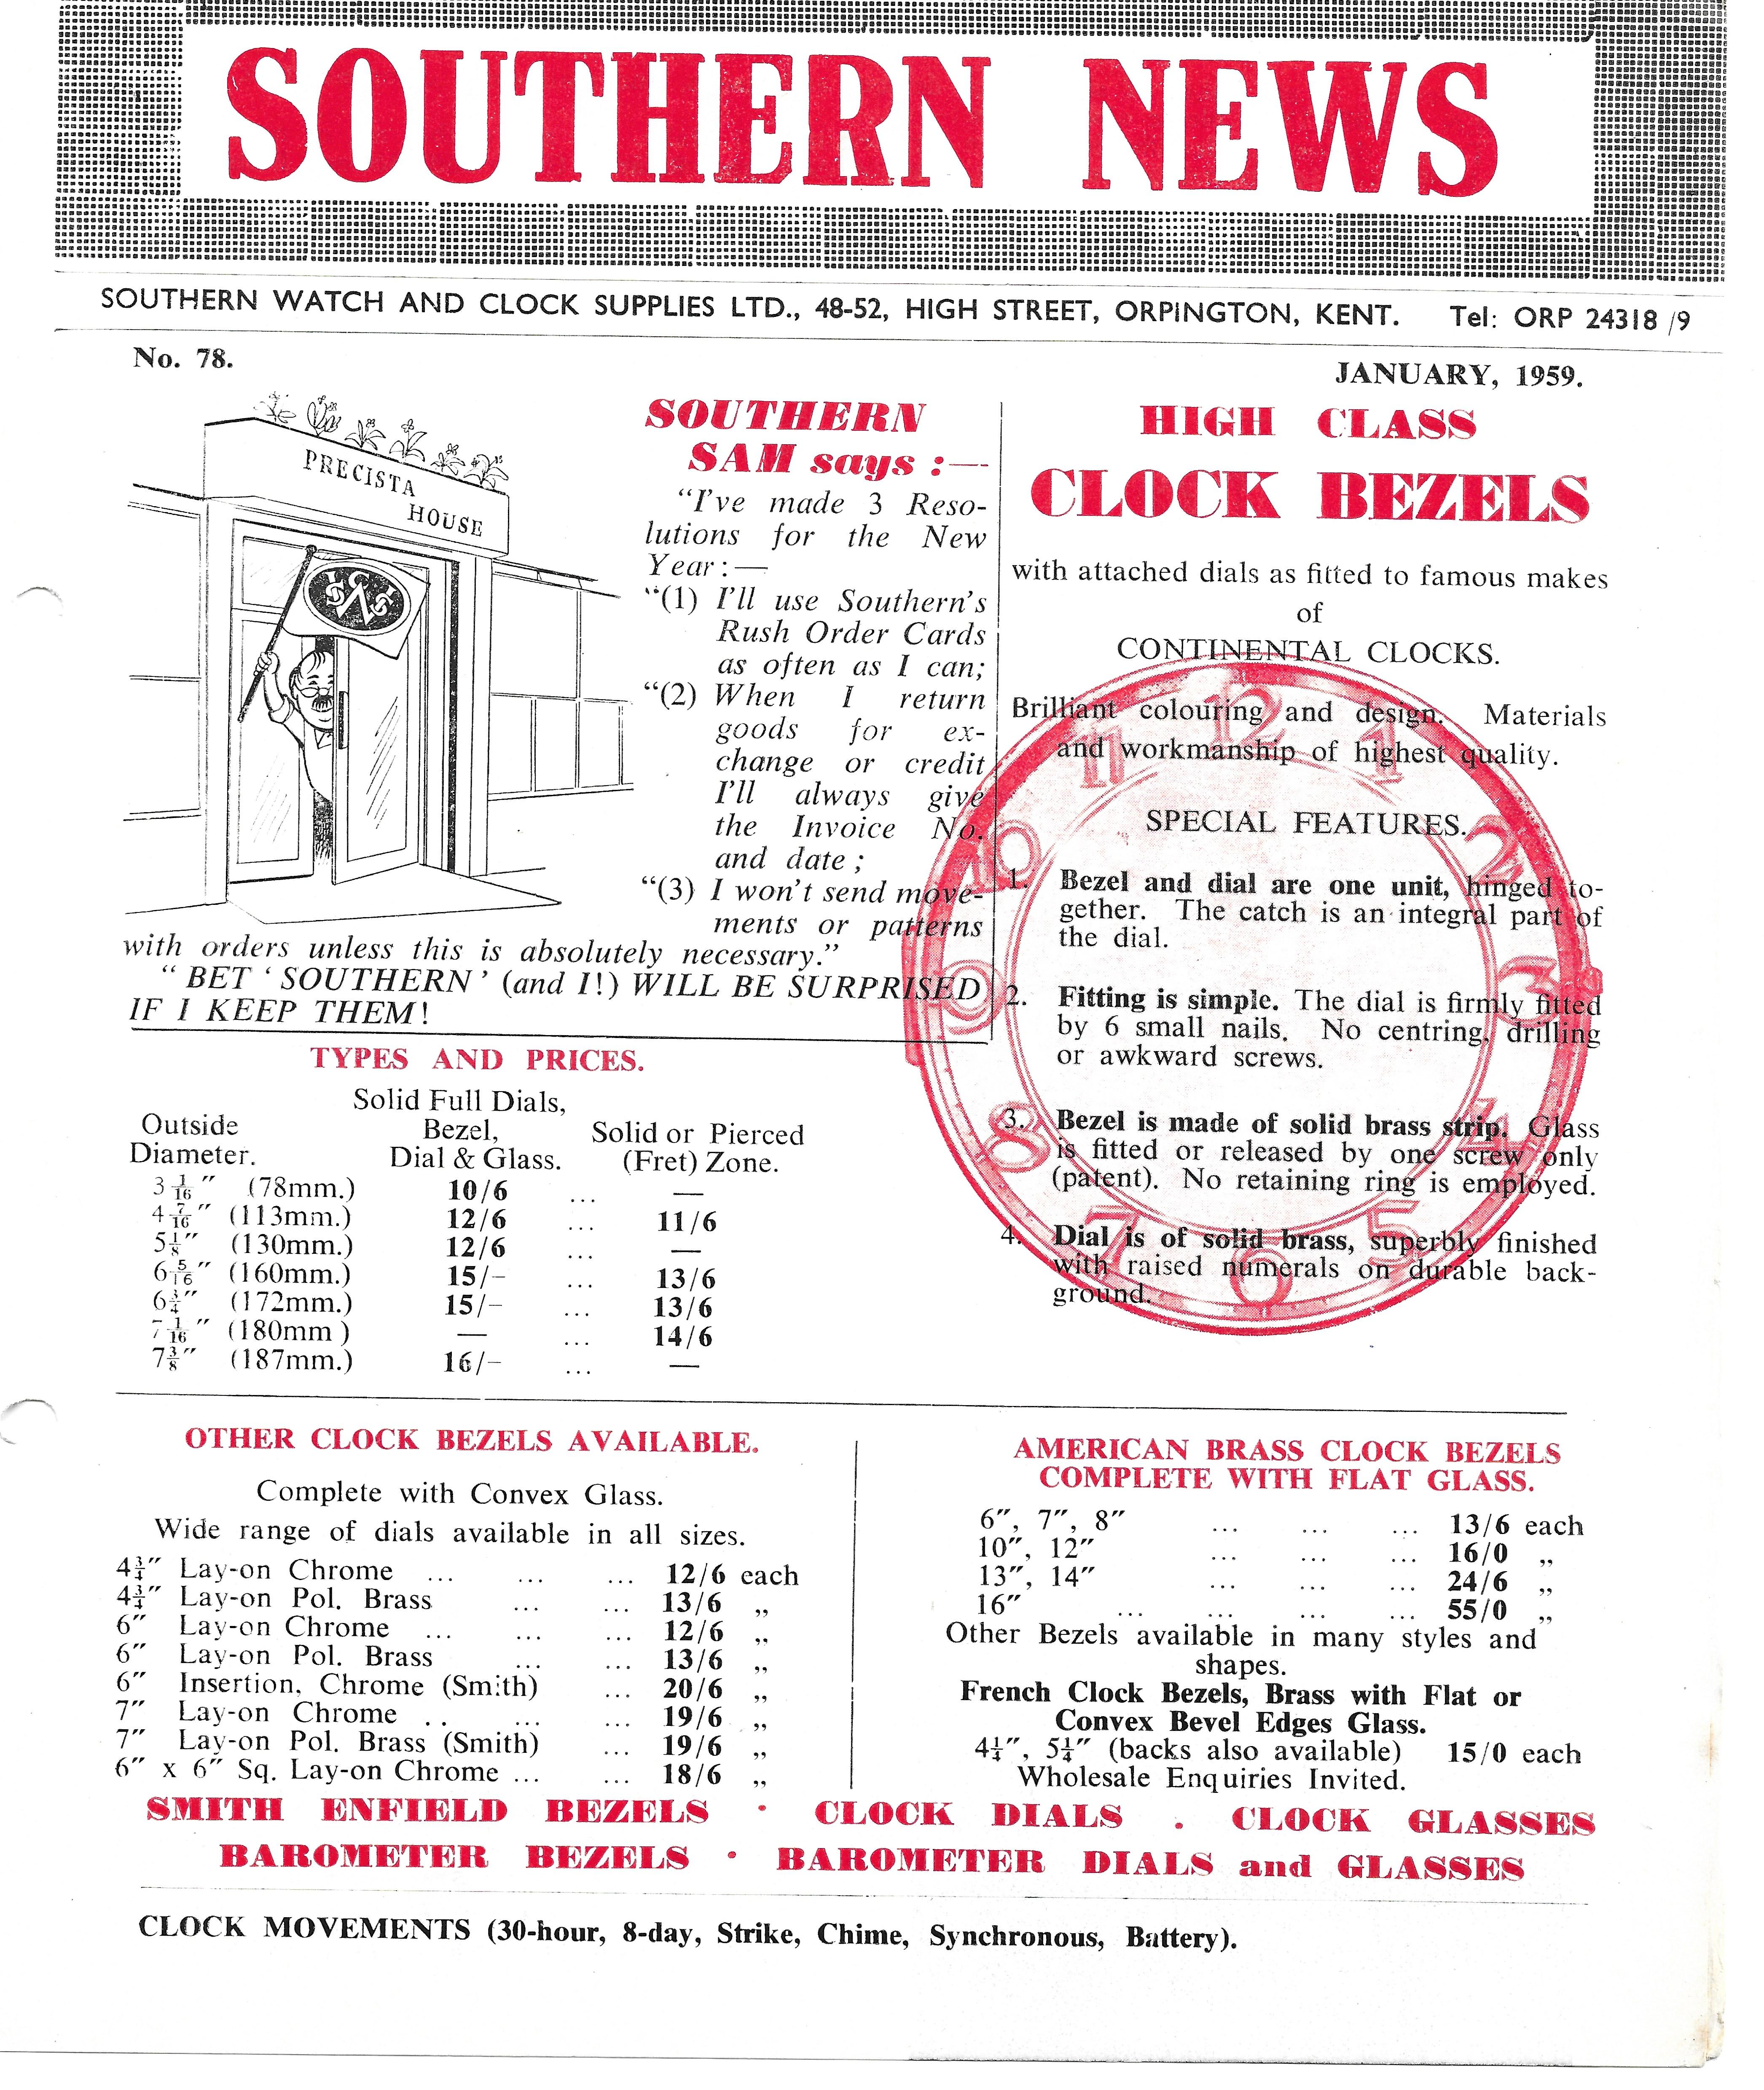
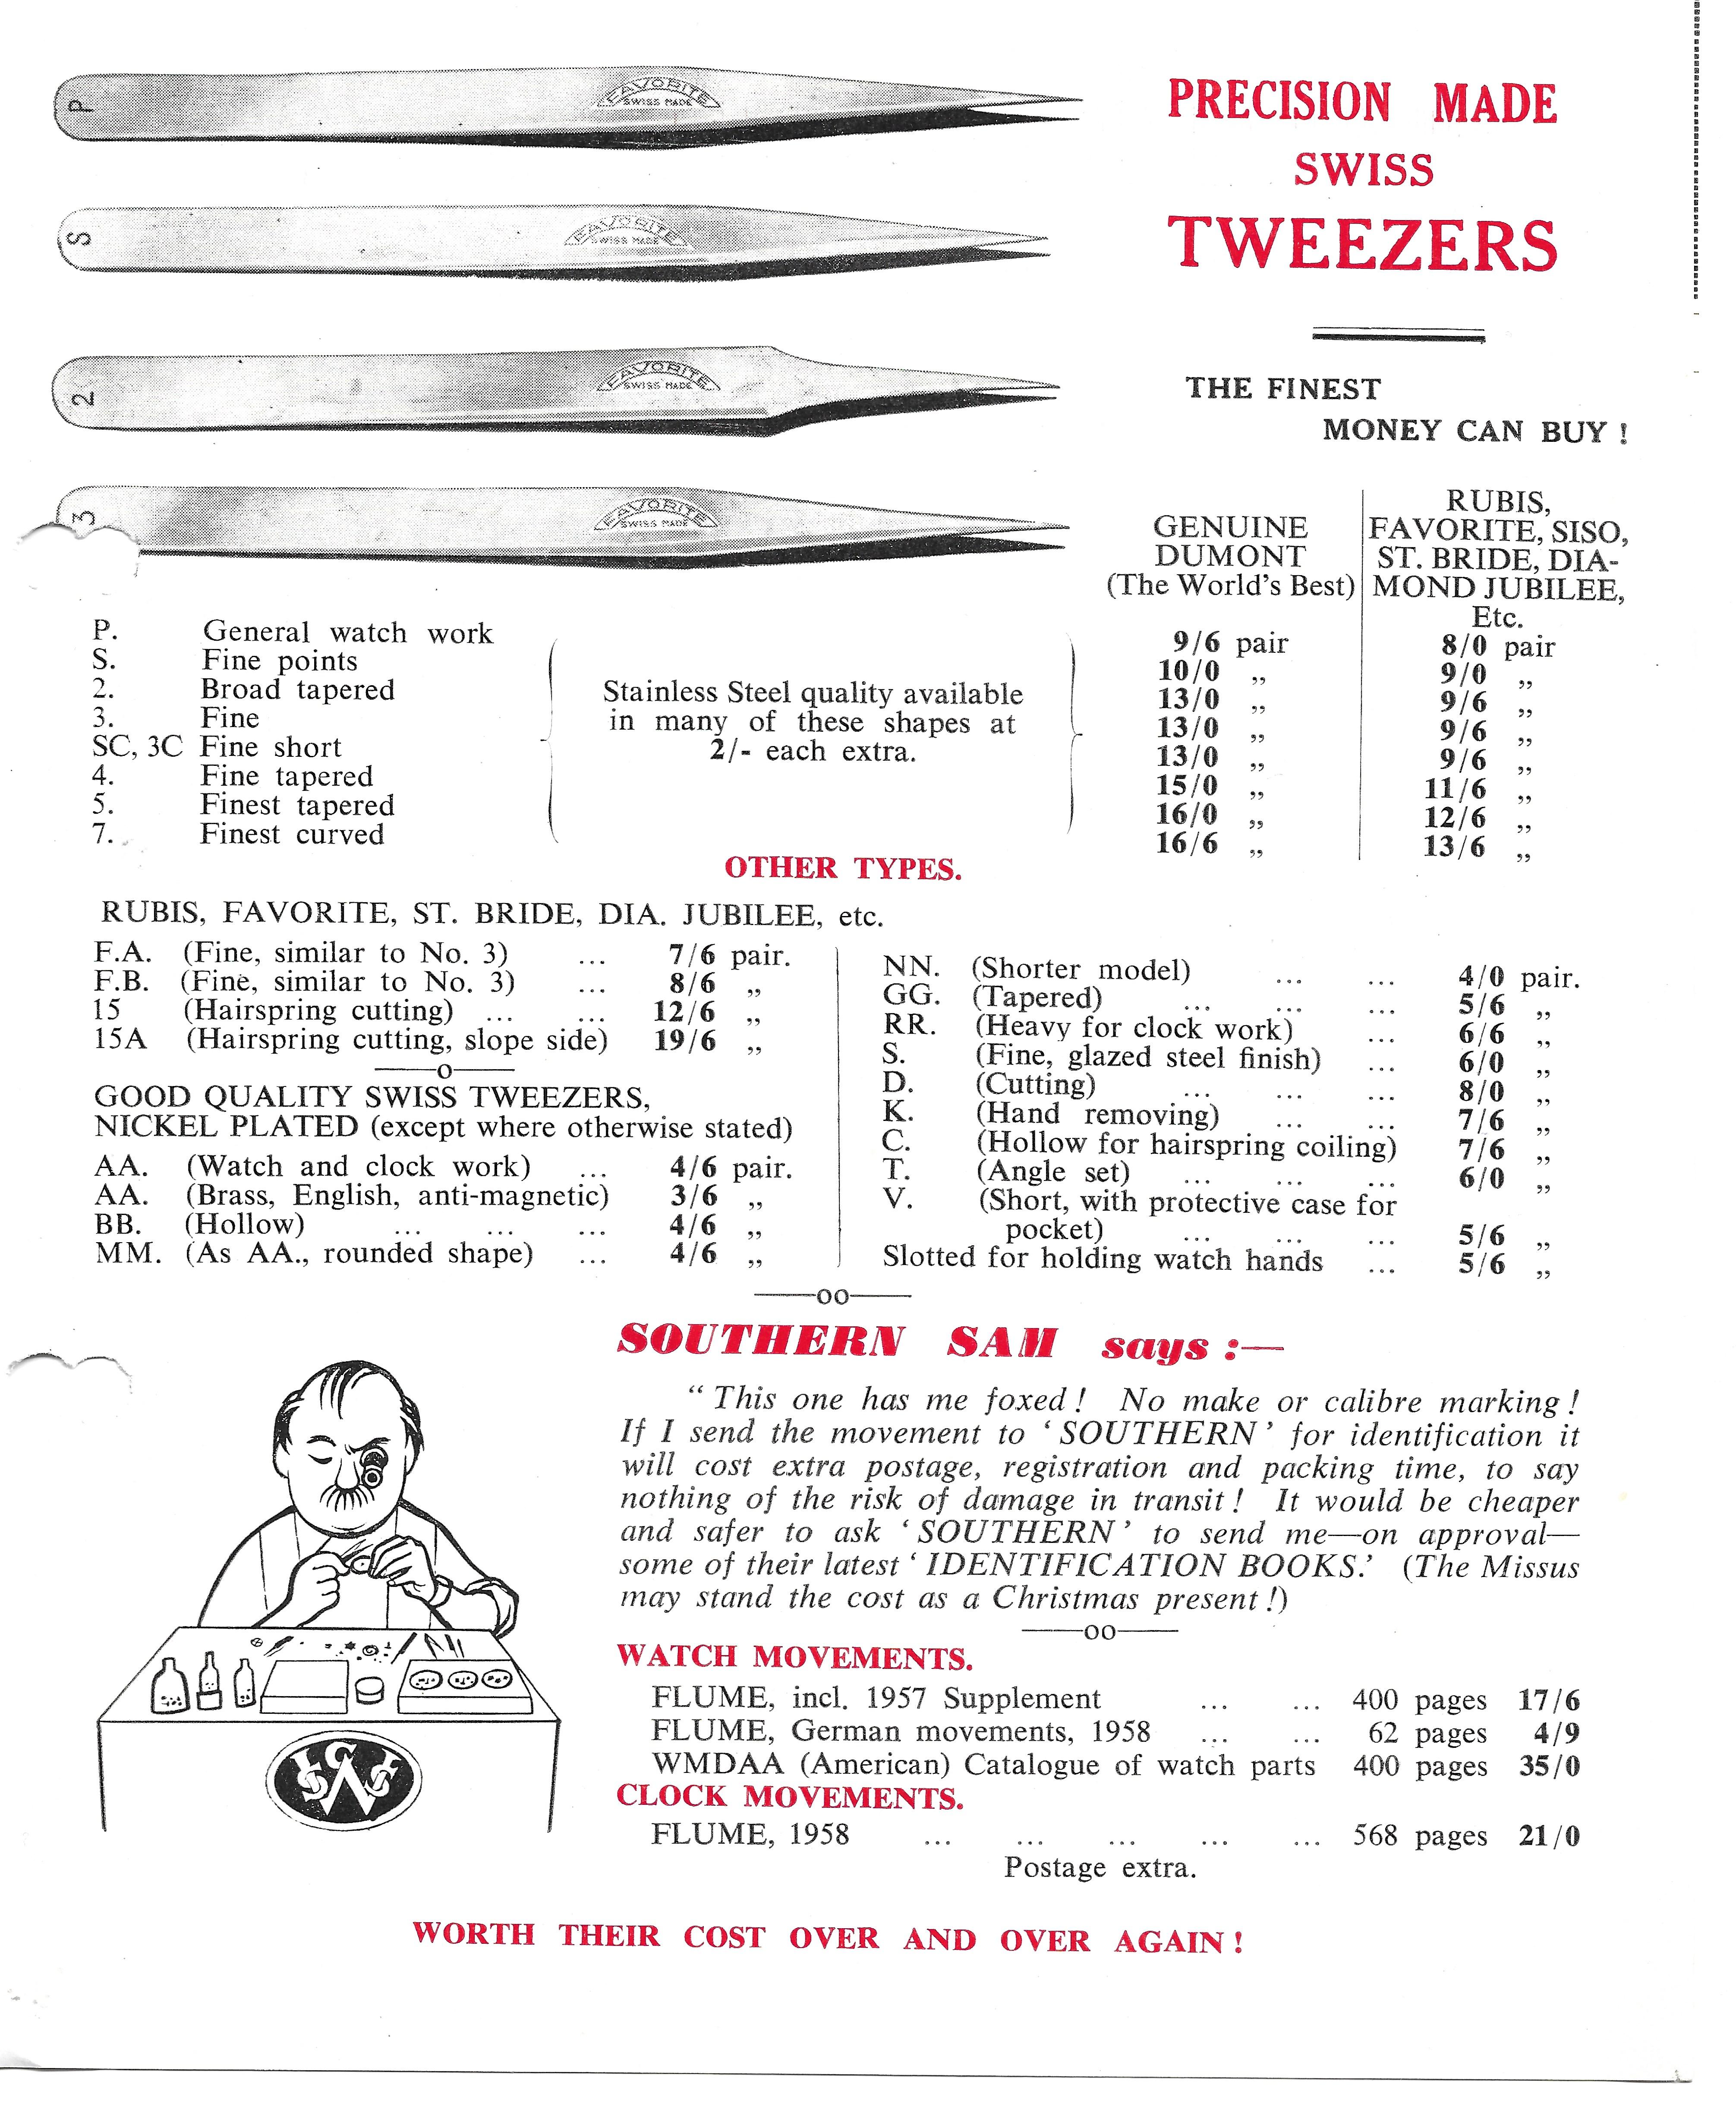
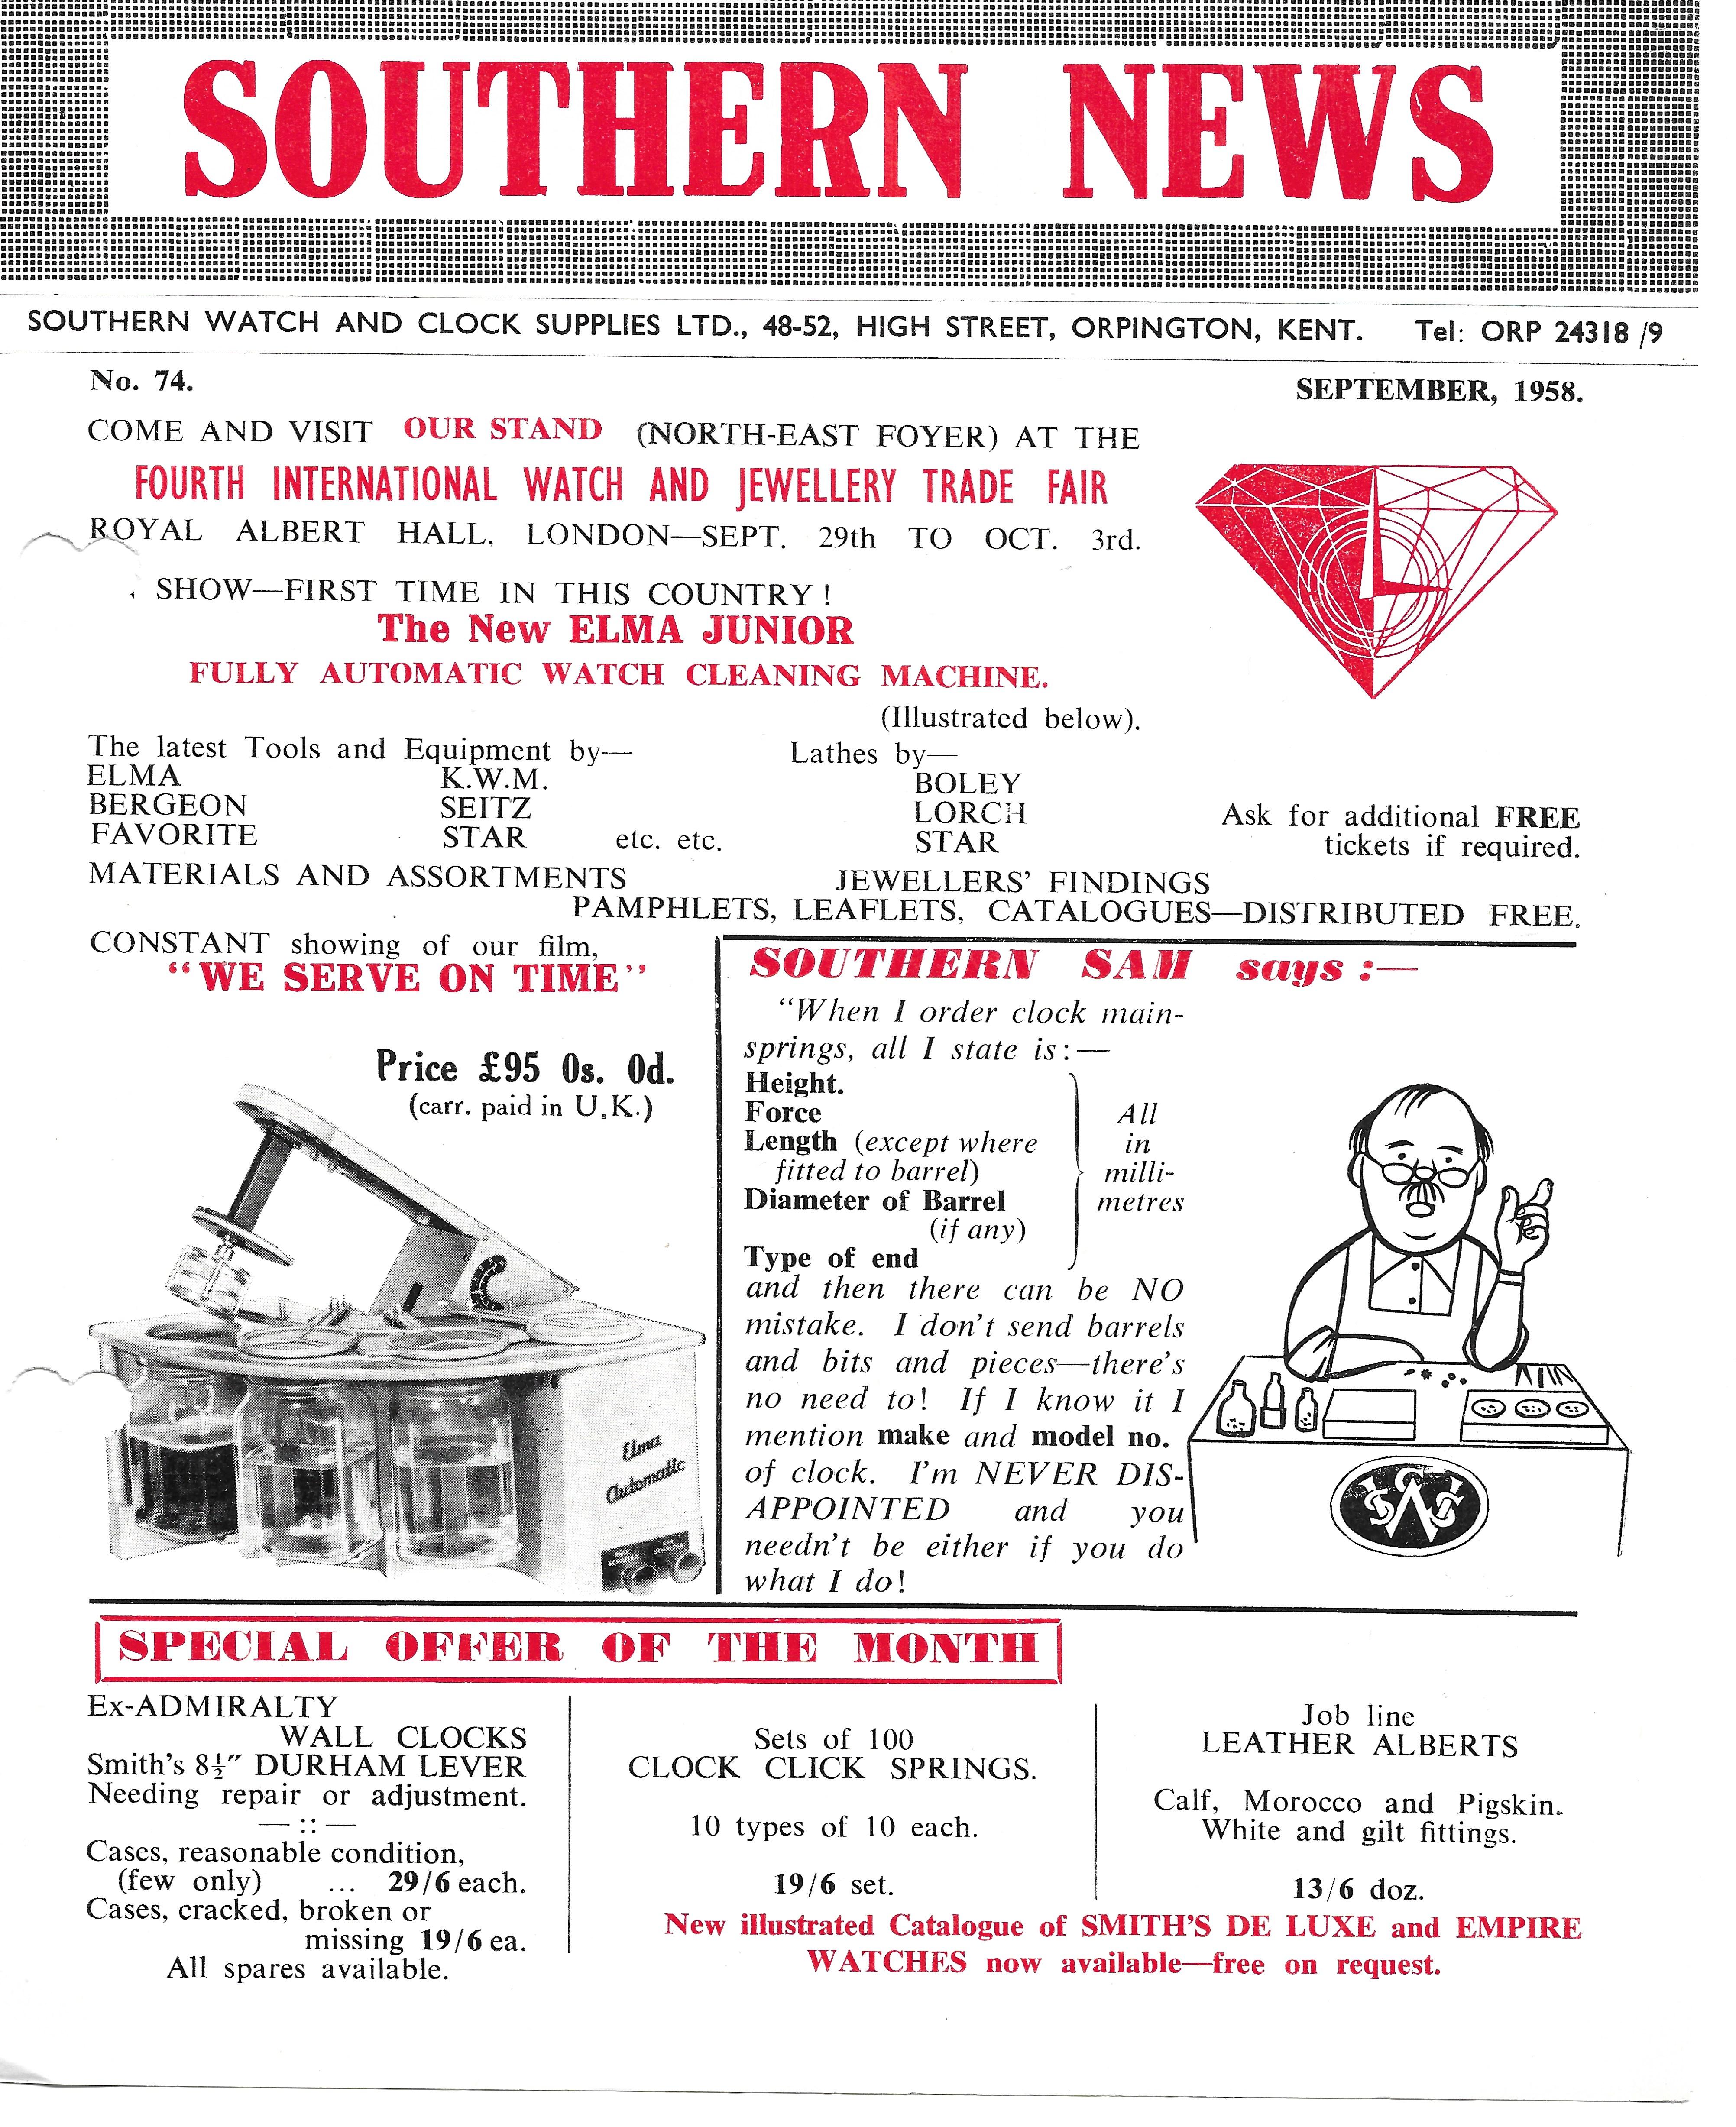
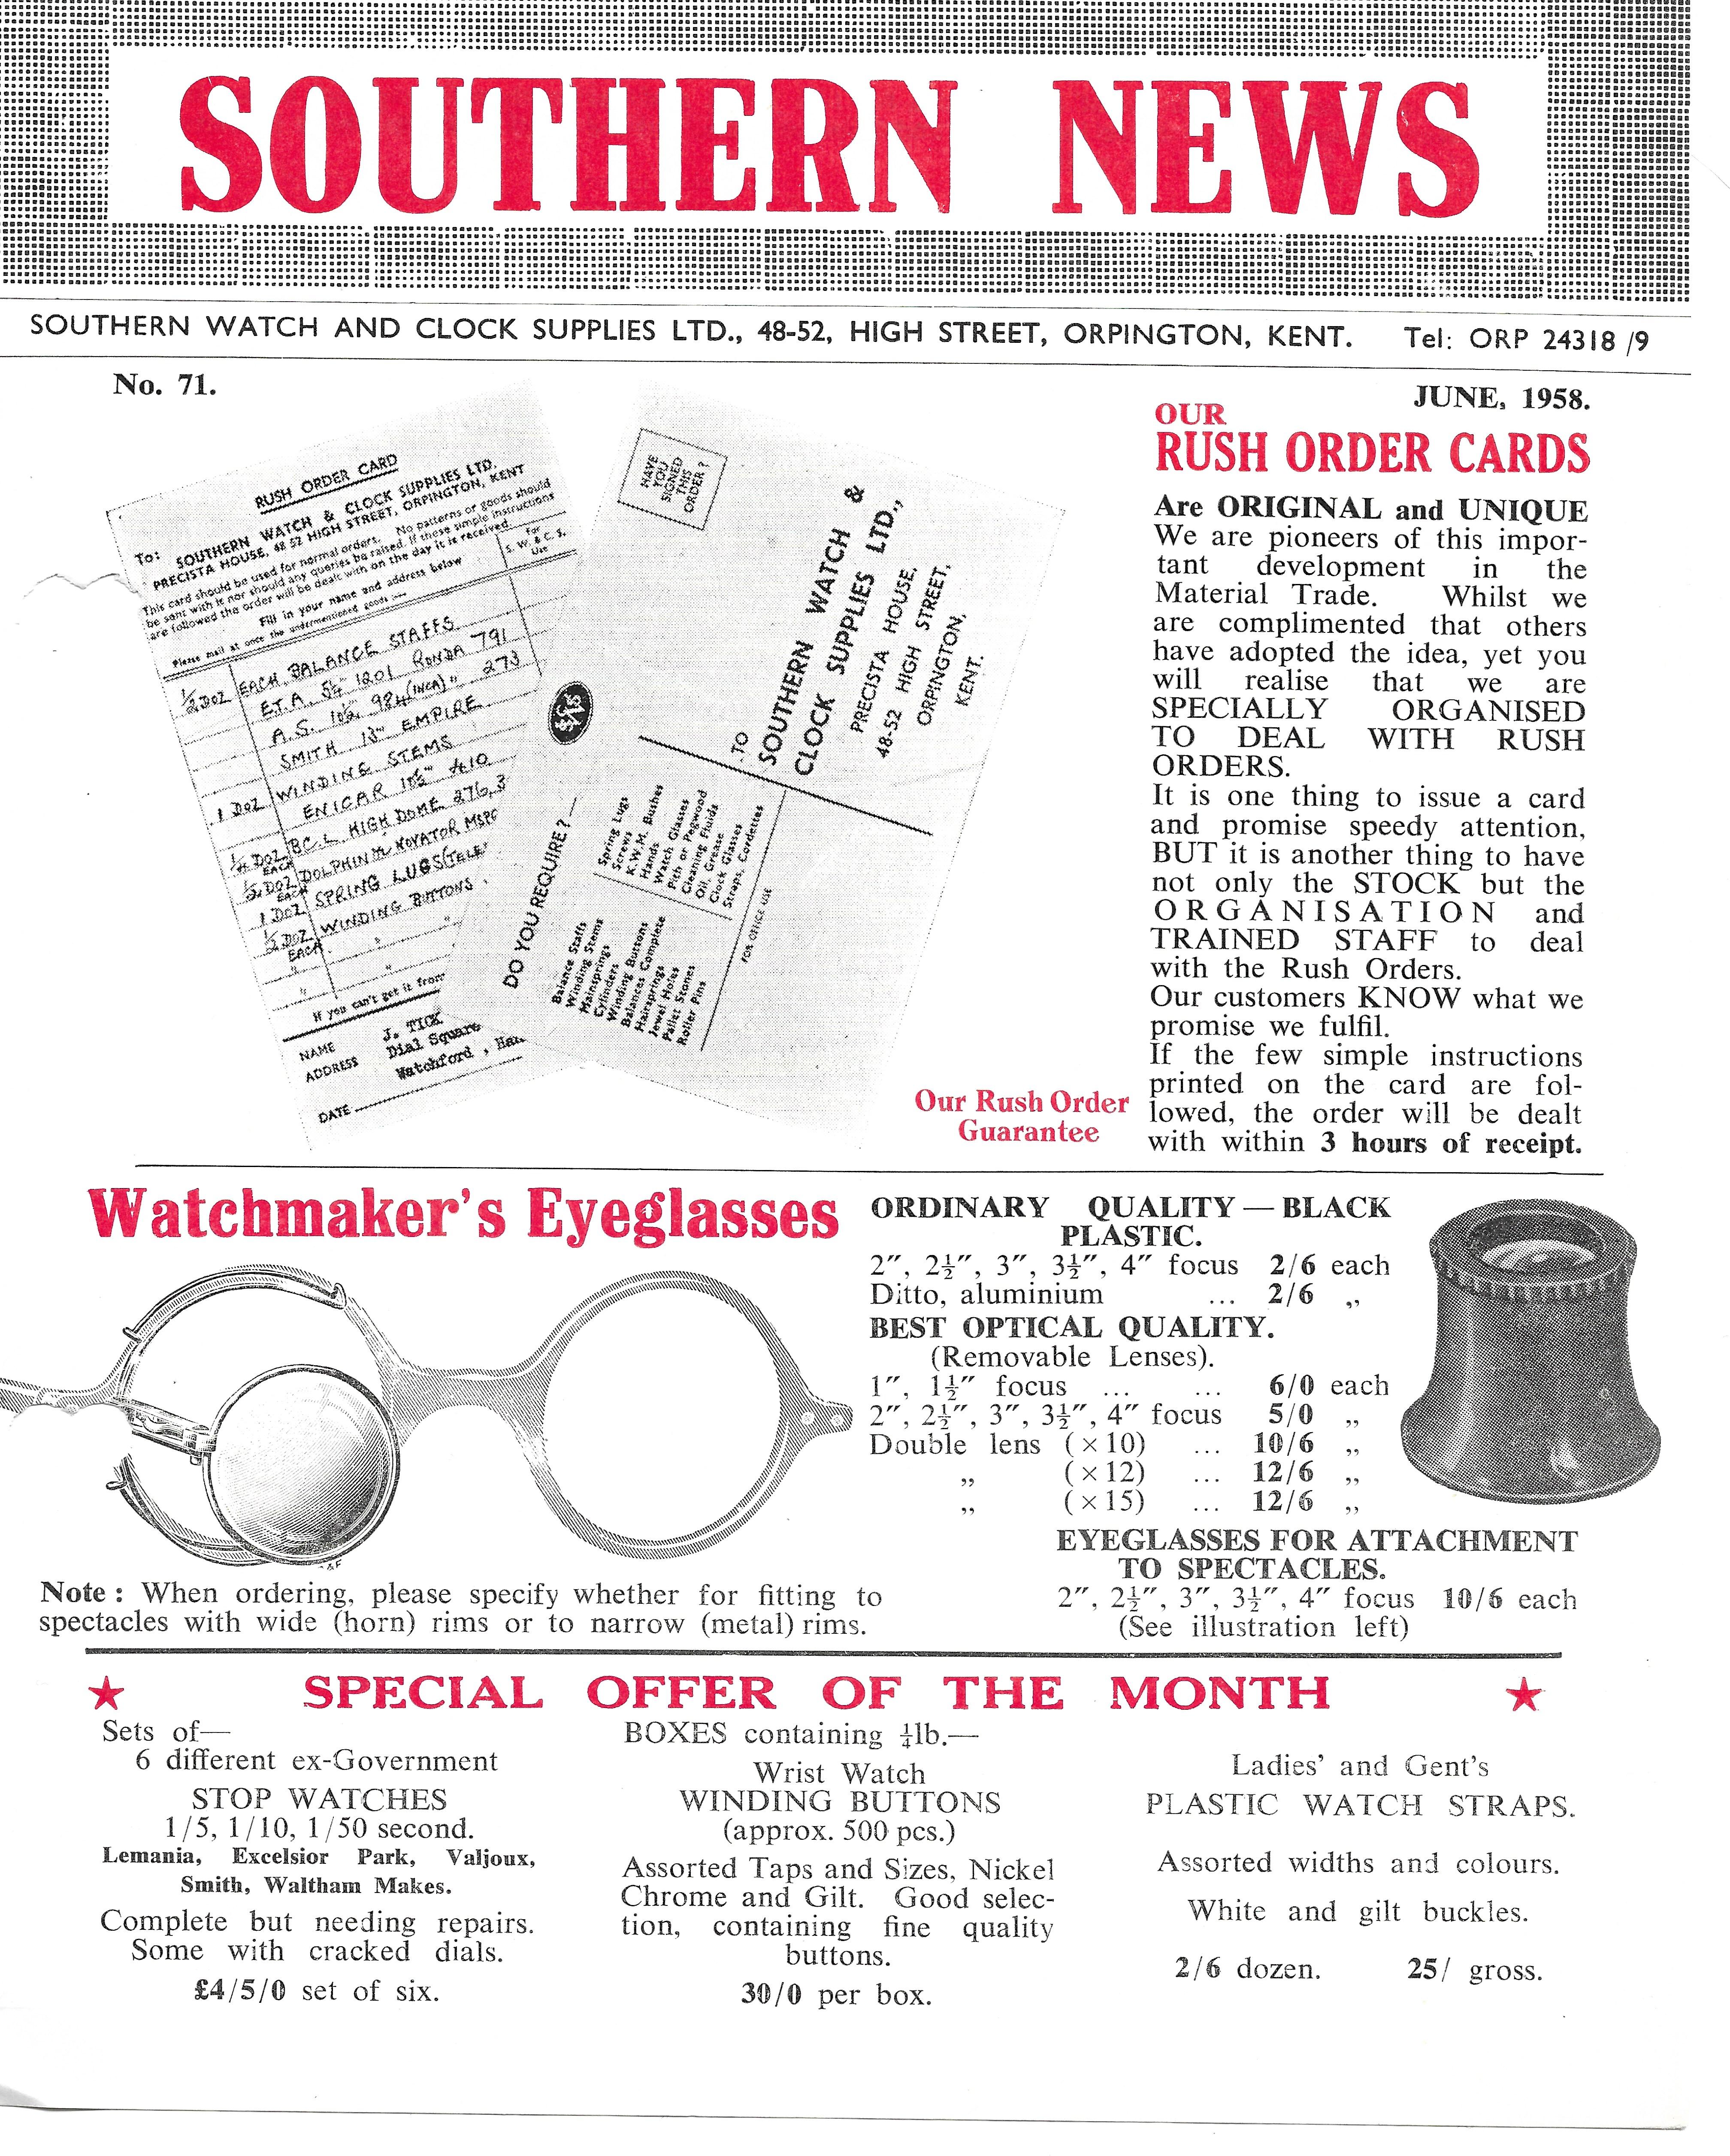
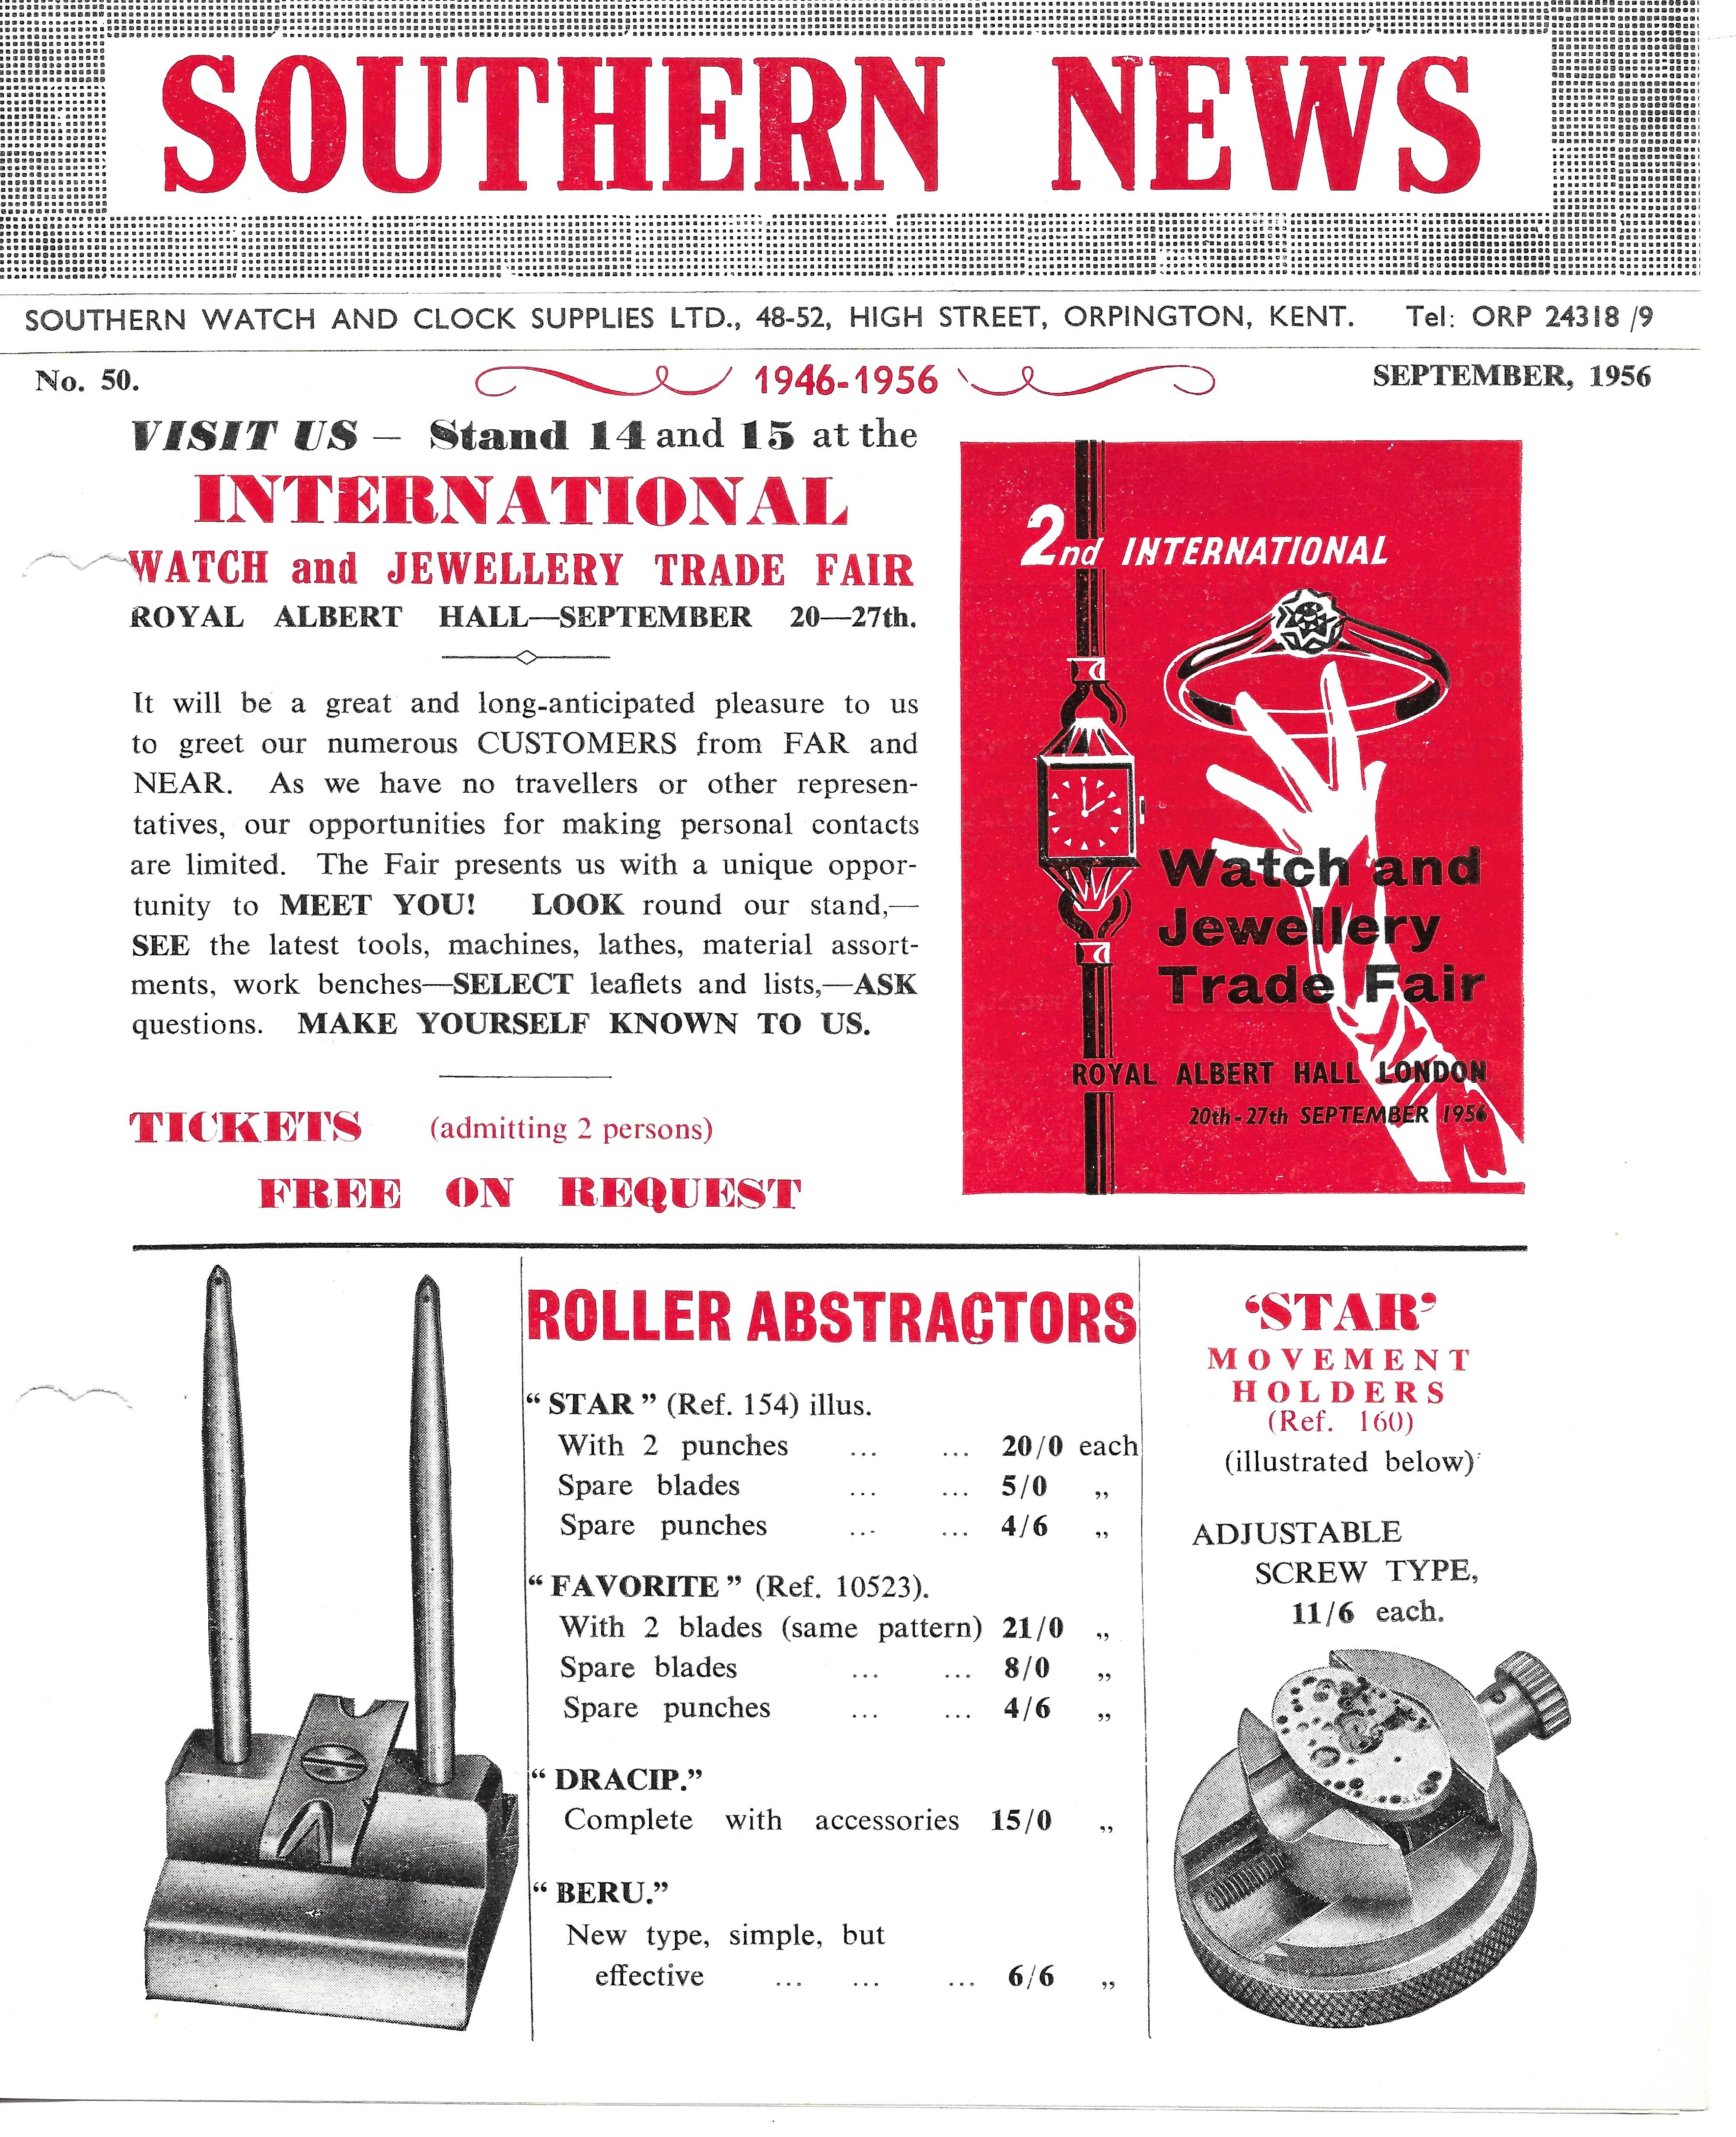
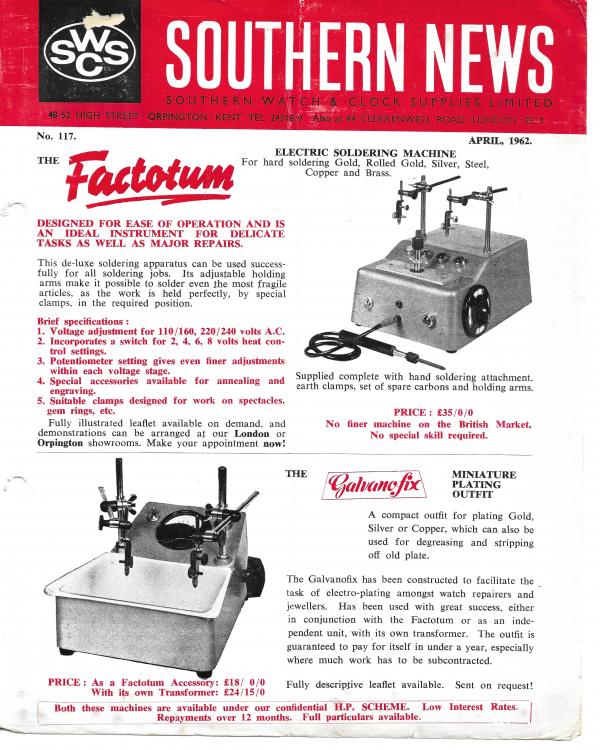
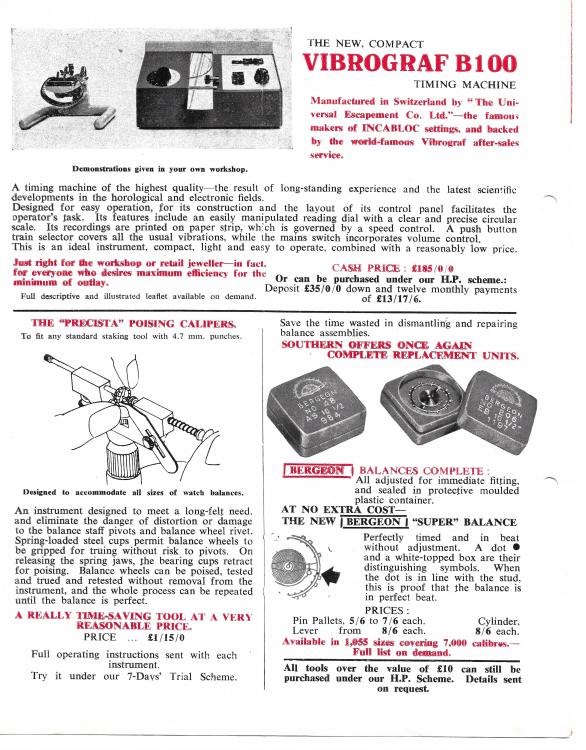
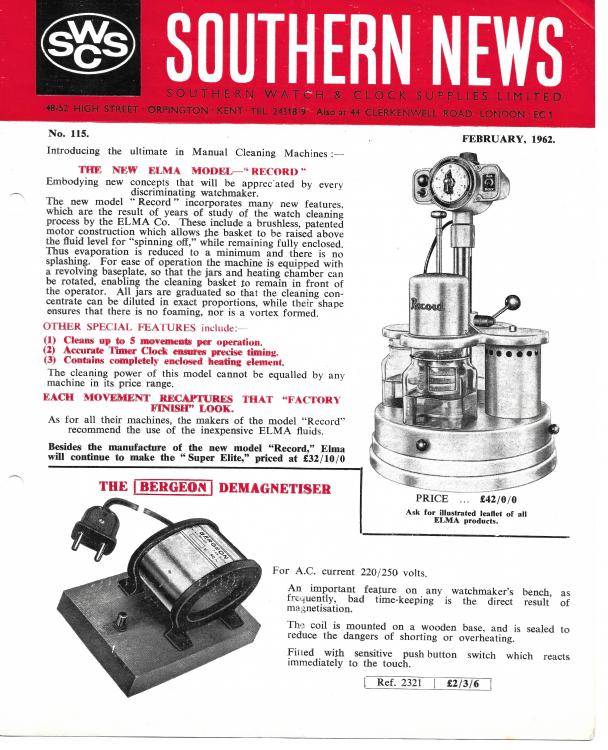
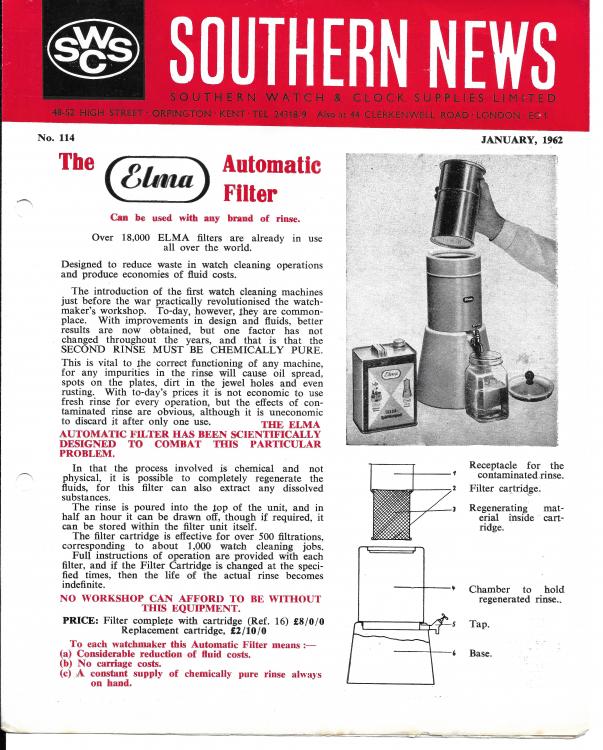
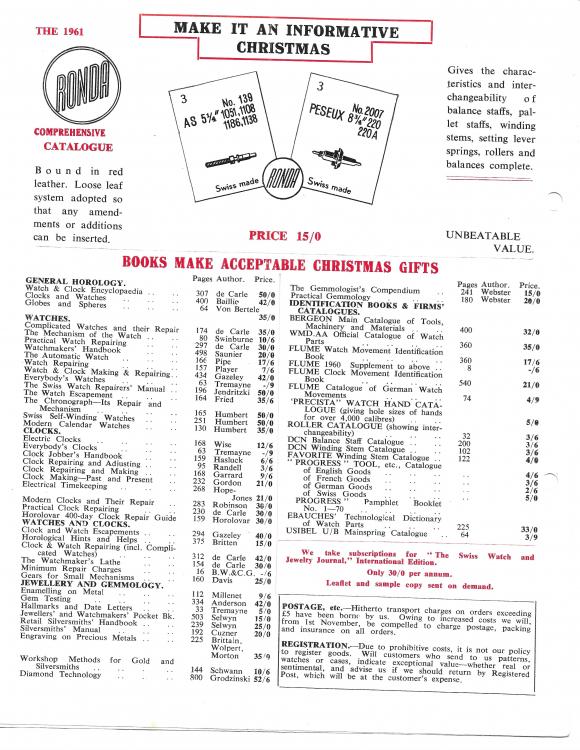
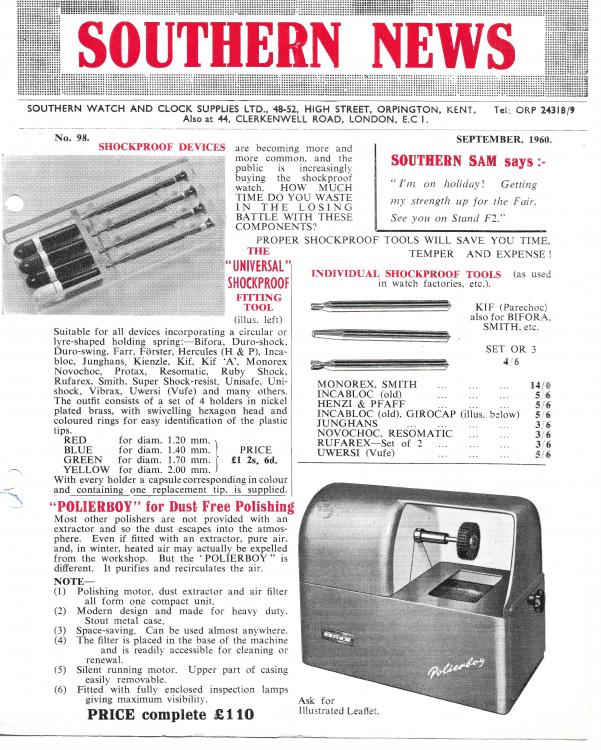
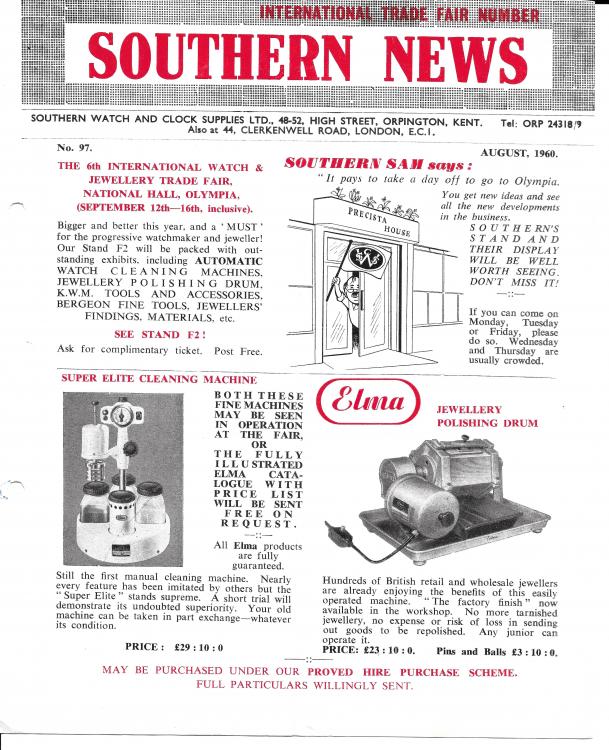
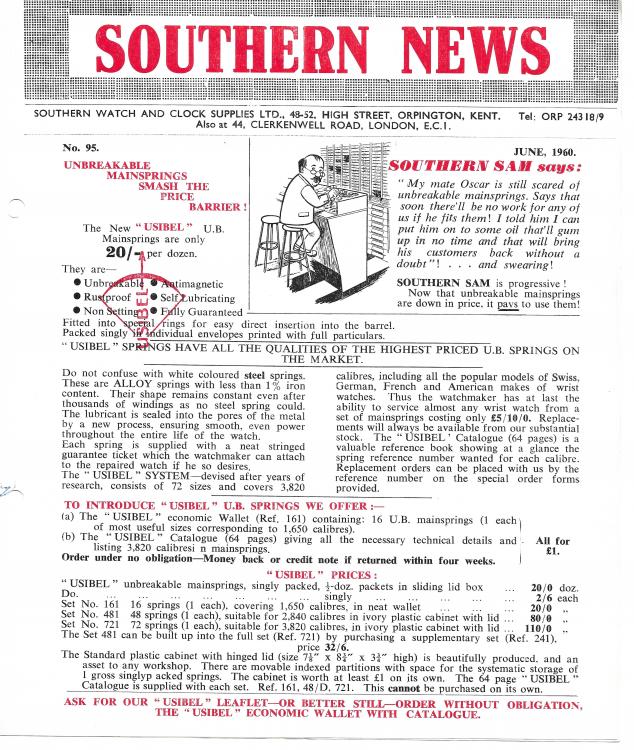
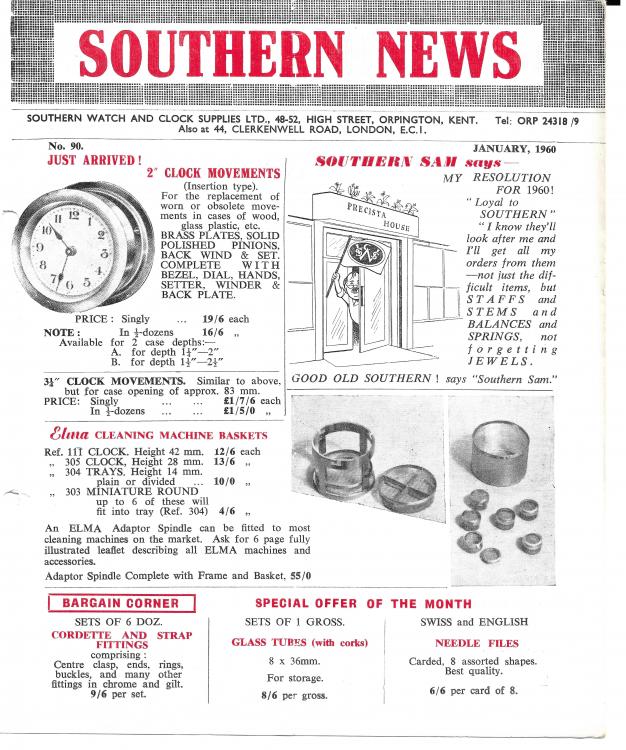
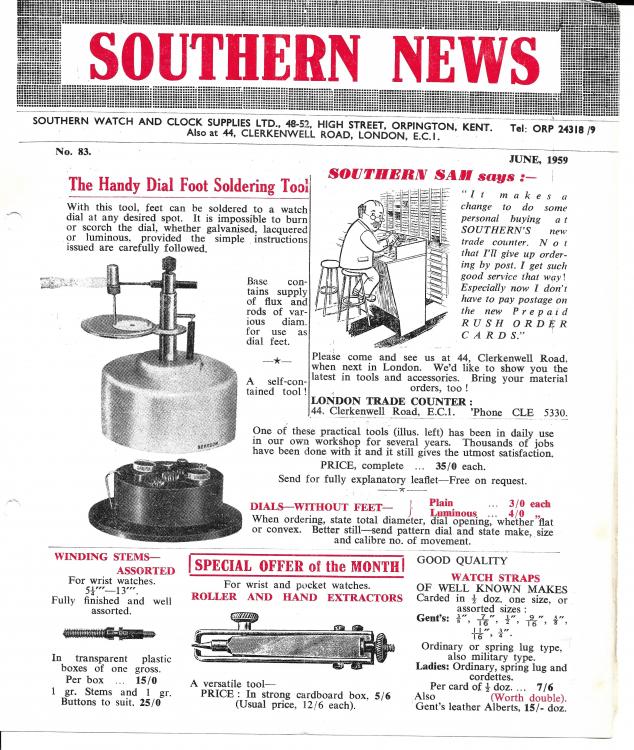
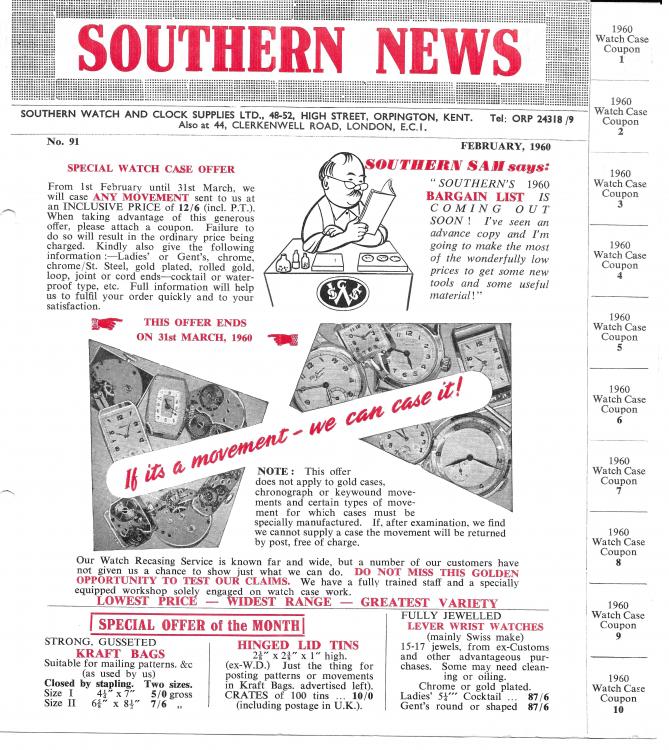
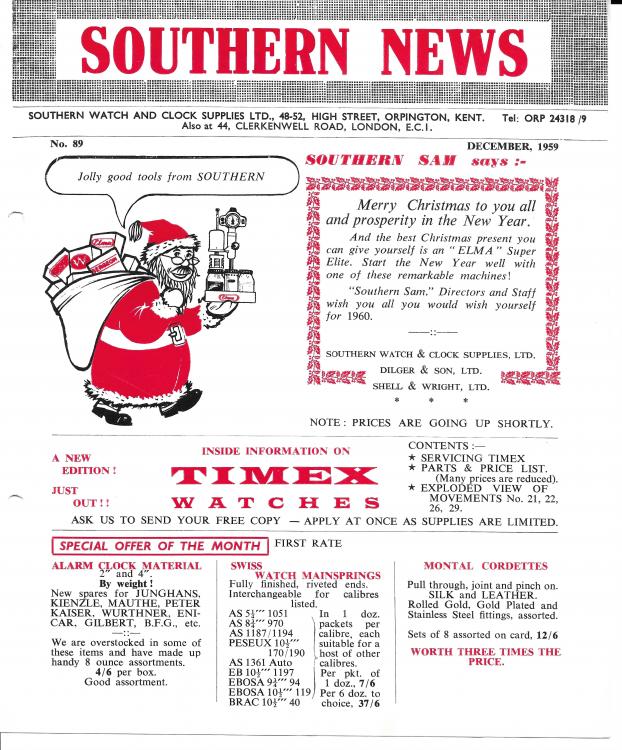
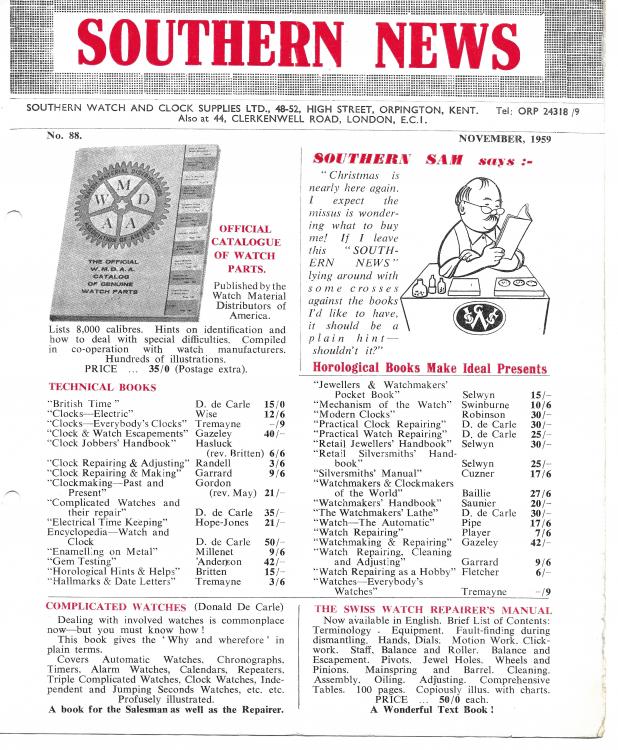
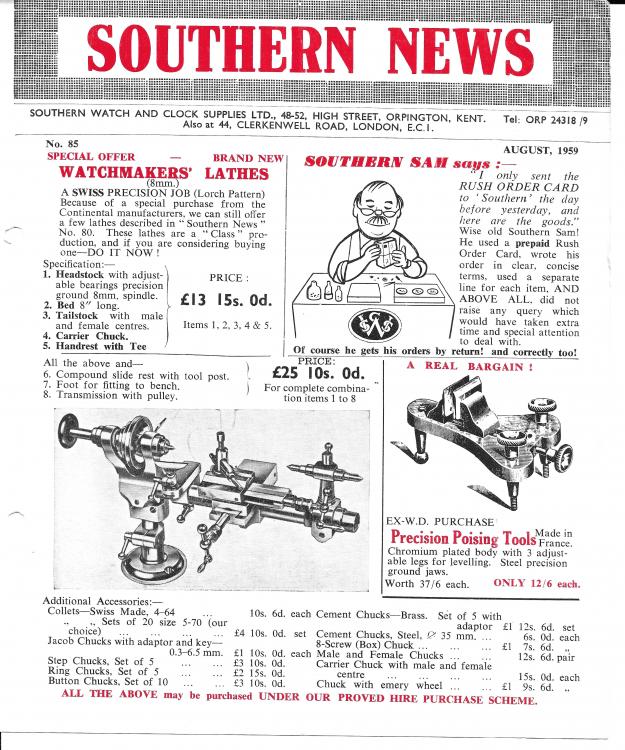
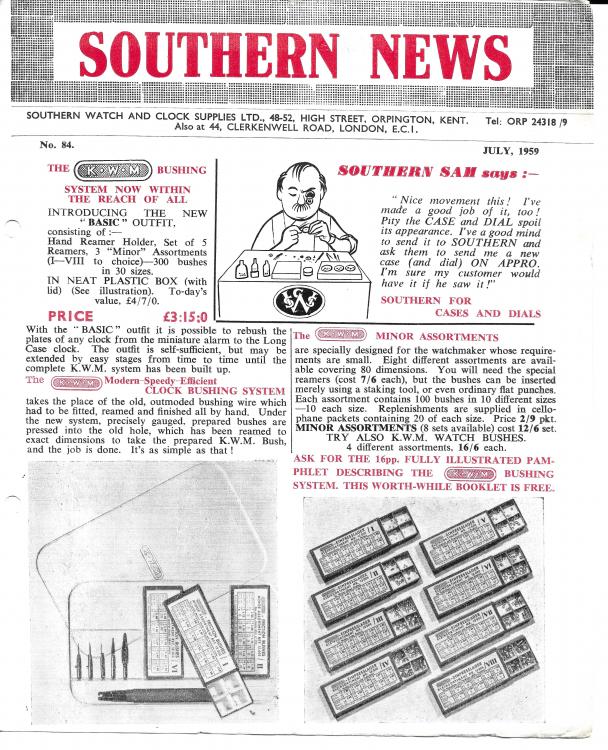
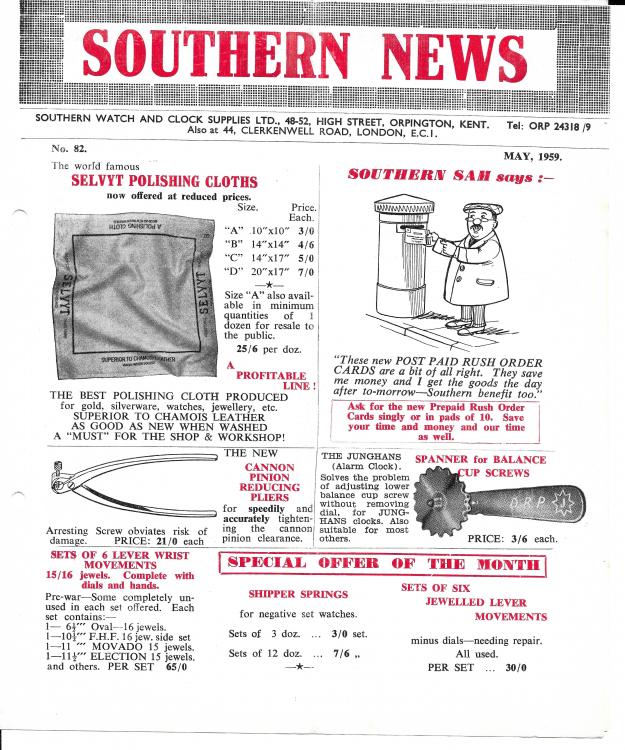
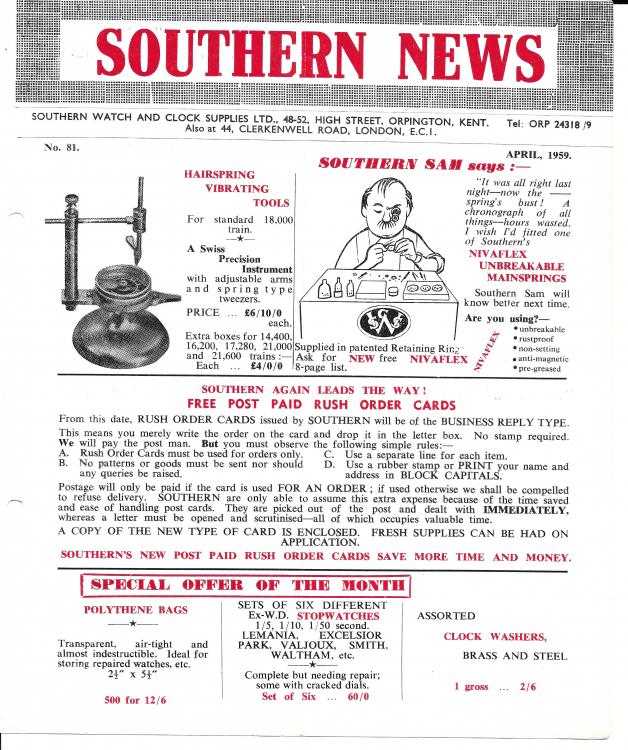
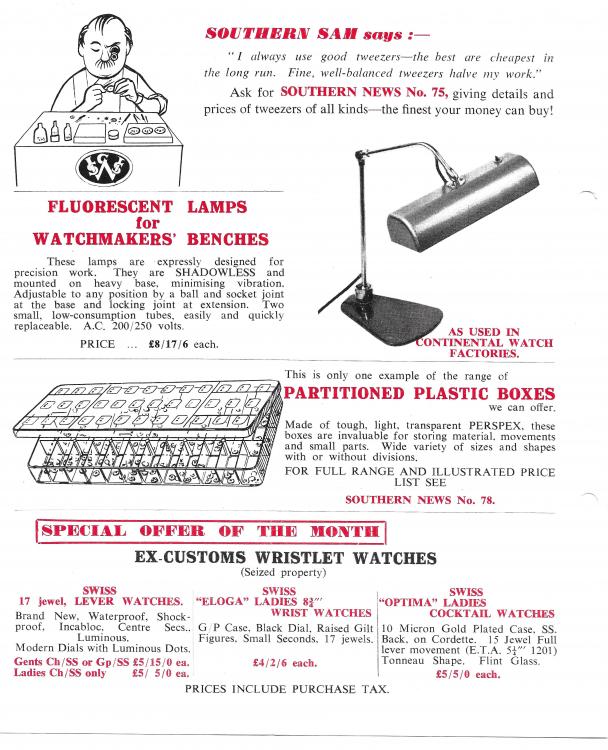
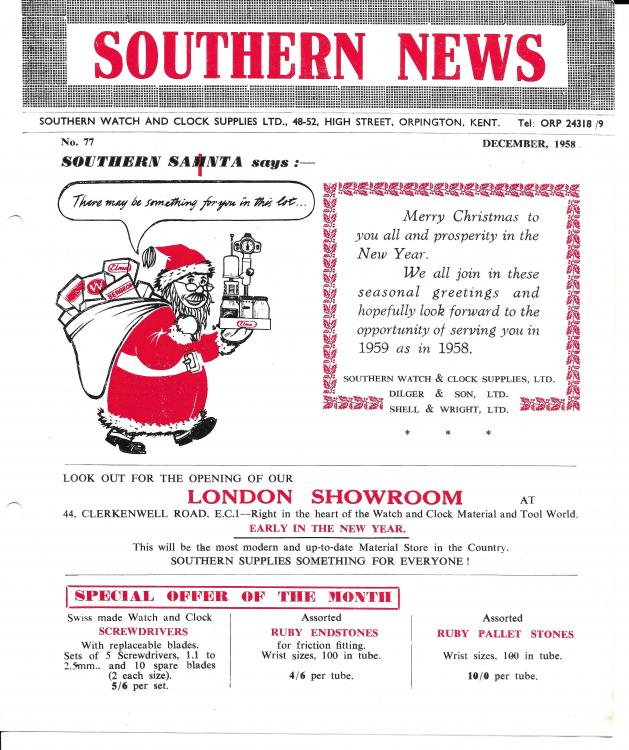
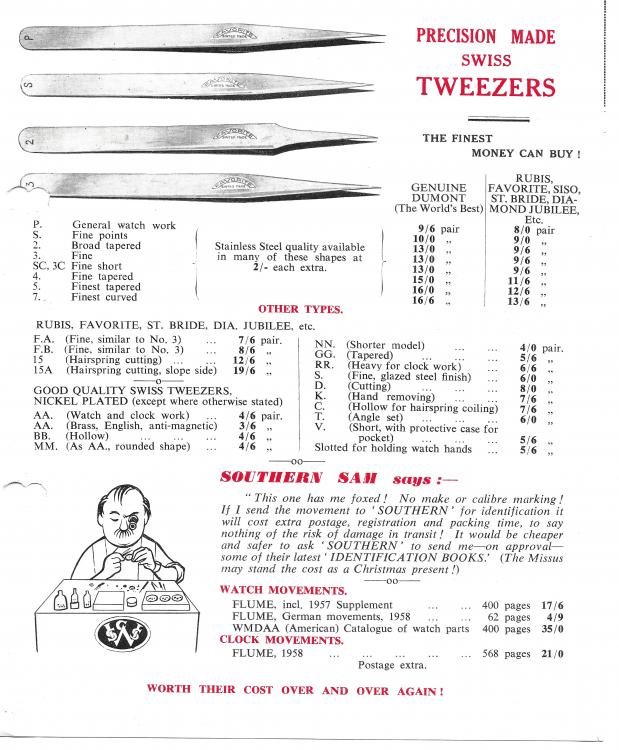
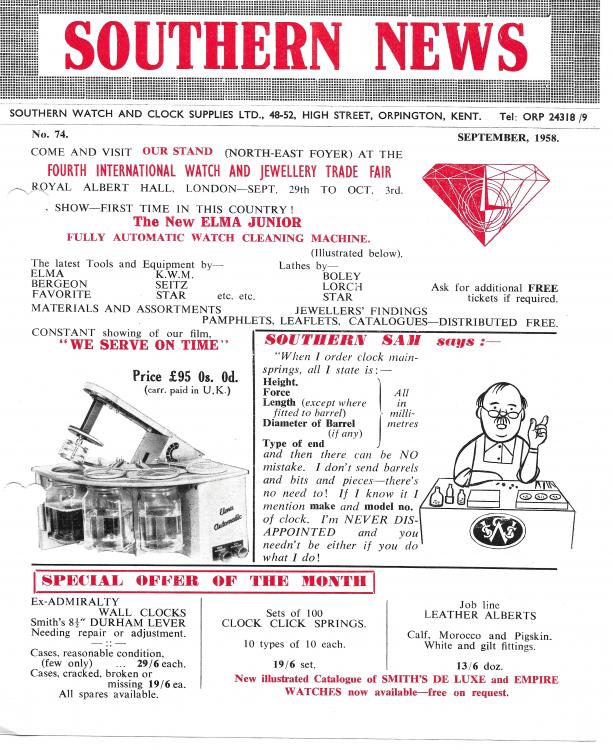
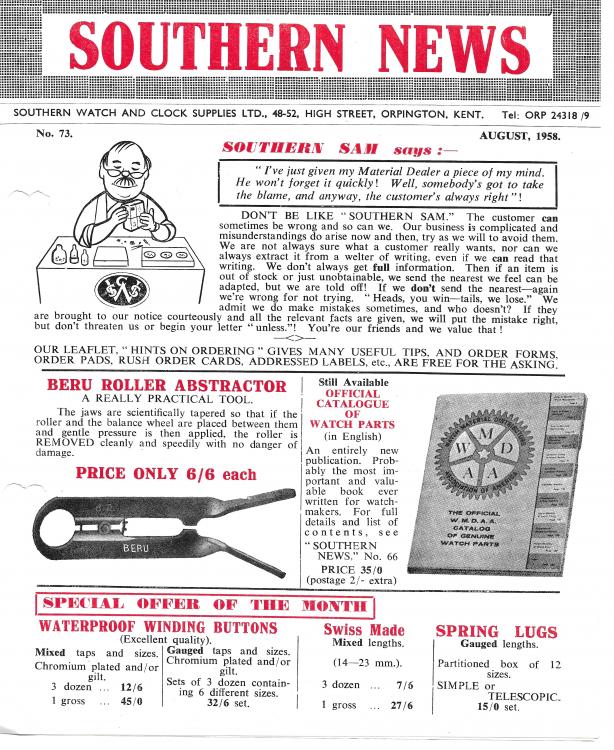
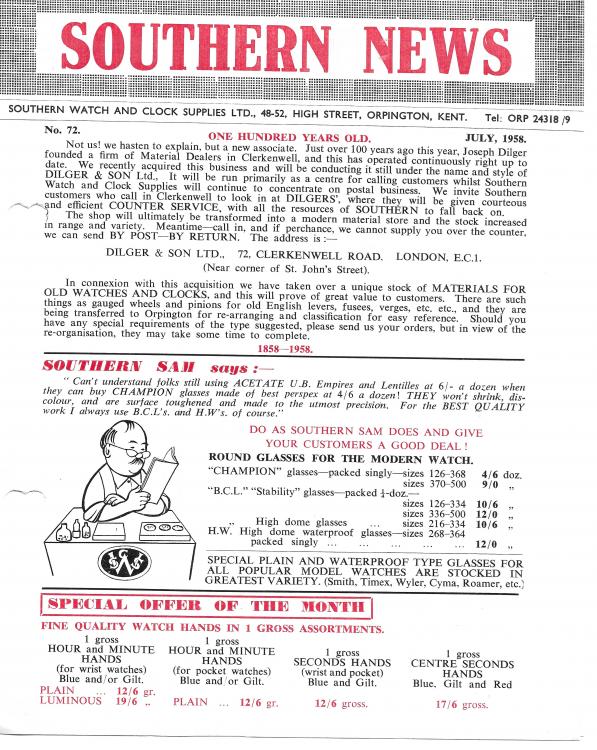
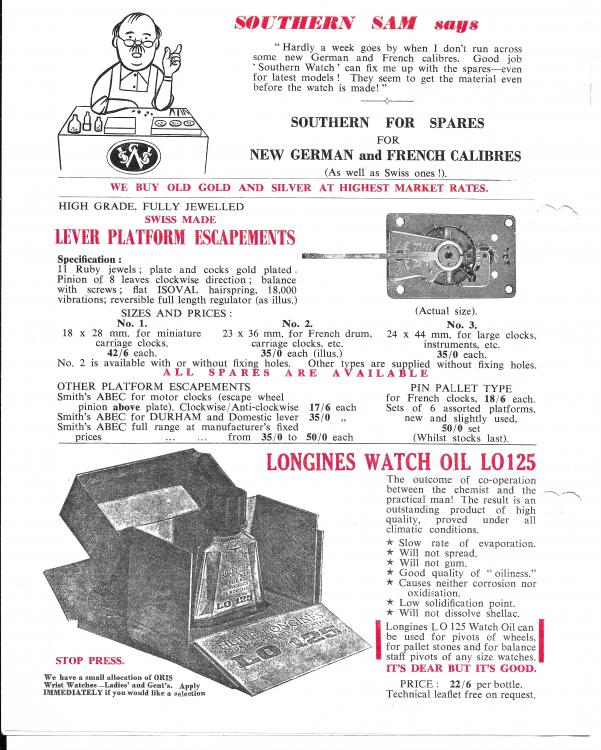
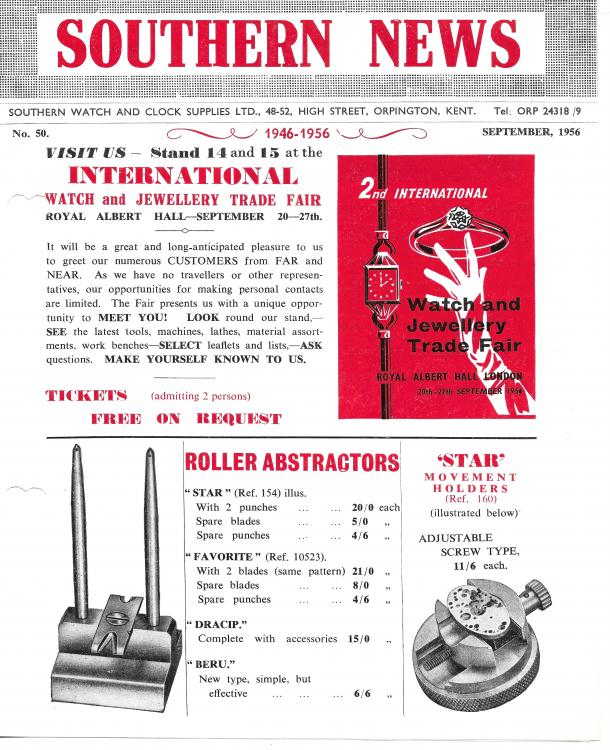
Even though these are "just" leaflets it is an extraordinary reading. As I mentioned i have the issues between May 1956 issue nr. 46 and April 1962 issue nr. 117, but I don't have them all I have gaps here and there, however these leaflets give you a chance to have a glimpse into a watch and clock parts supplier life in the 50s and 60s and trough them into a watchmaker life that time. They give you an endless source of information/observations and for those who lived it trough it is probably not so interesting, but for us who were born later and new to the watchmaking industry it describes a fascinating and probably in certain ways troublesome world prior to the internet and online ordering. First of all these are the times before the decimal days introduced in 1971 when 1 pound was 20 shillings and 1 shilling was 12 pence, or 240 pence was 1 pound. The Southern Watch and Clock Supplies Ltd. started to operate just one year after WW2 because issue nr. 47 tells us that the team went for a holiday-study tour to Germany and Switzerland to celebrate the 10th anniversary a few months before the short lived Hungarian revolution: 2nd International Watch and Jewellery Trade Fair: Rush order cards to ease the ordering in 1958: The first time I can see "Southern Sam" appear: Aceton vs Perspex and SWCS aquired DILGER and Son Ltd in London: Customer complaints, DON'T BE LIKE "SOUTHERN SAM.": 4th International Watch and Jewellery Trade Fair and some advise as how to order mainspring: IDENTIFICATION BOOKS (The Missus may stand the cost as Christmas present!) ? Timex manual and price list out: Southern SAMTA (note the M crossed) ? , London Showroom is opening: To ease the ordering and return process: The best are the cheapest in the long run: Nivaflex unbreakable mainsprings and Clerkenwell road, London is in the header: Customers still dont understand how to order properly: ? Cases and dials: They still don't get it: ? Gift ideas for missus: ? Jolly good tools from SOUTHERN: Kienzle: 1960 bargain list: Clock materials Flume Clock identification book: Silly customers still struggling: ? Jewellers' materials: Loyal customers: "THE CRYSTAL CHANGER": Silly Oscar: 6th International Watch and Jewellery Trade Fair: Southern Sam says "I am on holiday!" and it seems he stayed there forever as I cannot see Southern Sam returning from this point on in the issues ? The ONE HUNDREDTH NUMBER, new header: 7th International Watch and Jewellery Trade Fair: Waterproof glasses with magnifying lens: Books: Elma filter: Elma "RECORD": VIBROGRAF B100: And the last issue I have nr 117 with a Galvanofix miniature plating outfit. It might be a long post, i just picked these pages for now as I found them interesting. I would love to have all of the issues, but it is probably a mission impossible. I zipped and attached the pics I scanned because the original copies are a bit more readable. Enjoy. ? Issues I have: 46, 47, 48, 49, 50, 54, 65, 66, 69, 71, 72, 73, 74, 75, 76, 77, 78, 80, 2x81, 2x82, 83, 84, 85, 88, 89, 90, 91, 92, 93, 94, 95, 97, 98, 99, 100, 101, 103, 105, 106, 107, 108, 109, 110, 111, 112, 114, 115, 116, 117 SWCS.zip


 1 point
 -
Welcome to the forum Jerry. As a qualified watchmaker, your opinion will be well sort after.1 point
-
Thank you for your introduction and welcome to this friendly forum.1 point
-
Welcome to WRT.1 point
-
Hello and welcome to the forum Jerry, professional advice is always welcome.1 point
-
Welcome to the forum Bob. Funny you should say 'Better than meditating'. Most of Mark's videos have peaceful music playing them. I know I play ambient music (not mine unfortunately) when I am working. I am watching the National Clock & Watch Museum YouTube videos and in the background? Keyboard. Seems to be a common theme.1 point
-
Hello and welcome Bob to the forum the destroying is part of the leaning process we have all done it and most of us survived.1 point
-
Shouldn't that be "slightly less than two glasses"? ?1 point
-
For me, this is a single glass of Lagavulin on the bench beside me. Throw a nice album on the turntable, and I can think of no finer way to spend a quiet evening.1 point
-
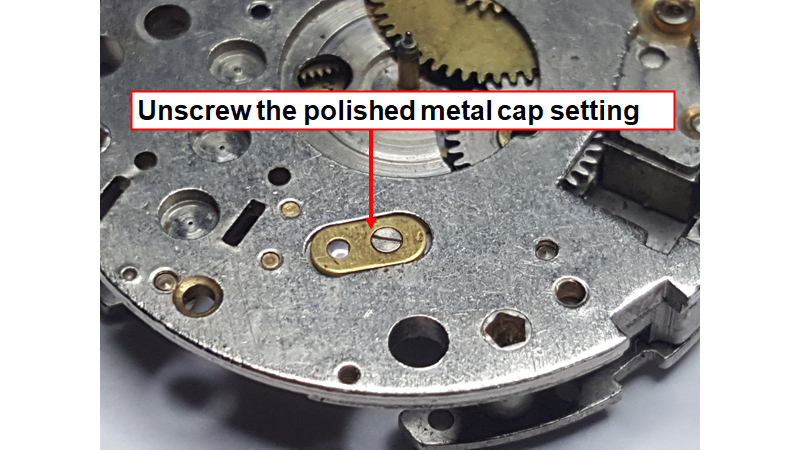
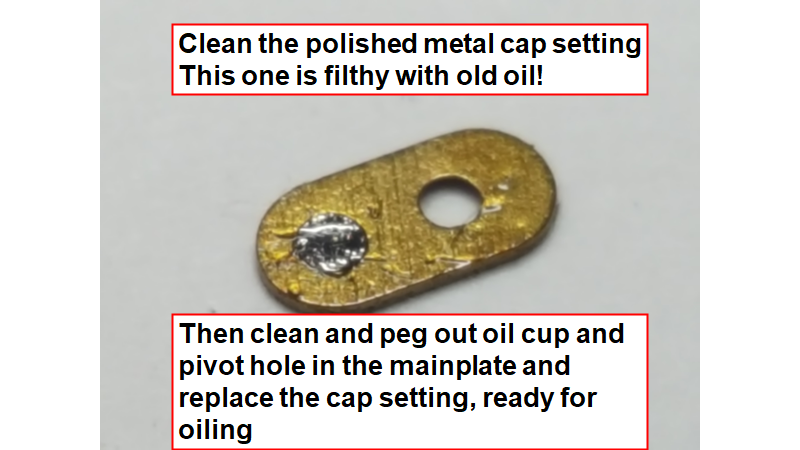
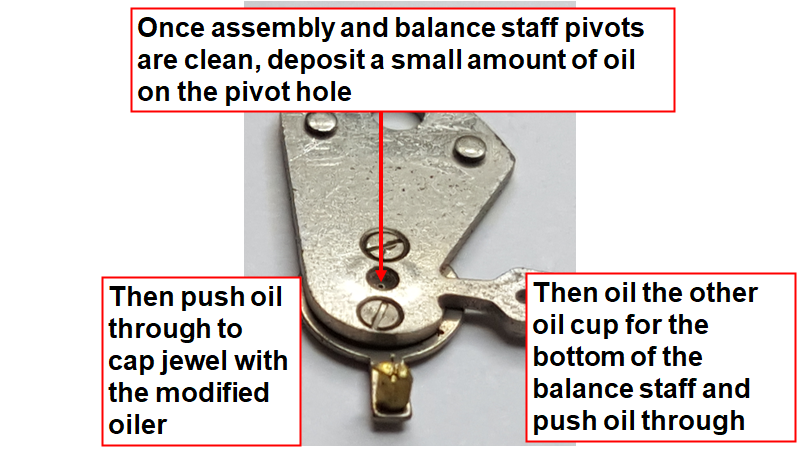
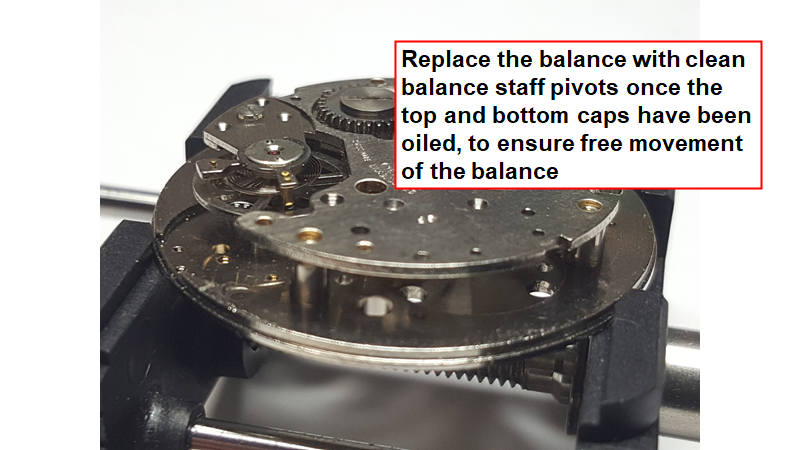
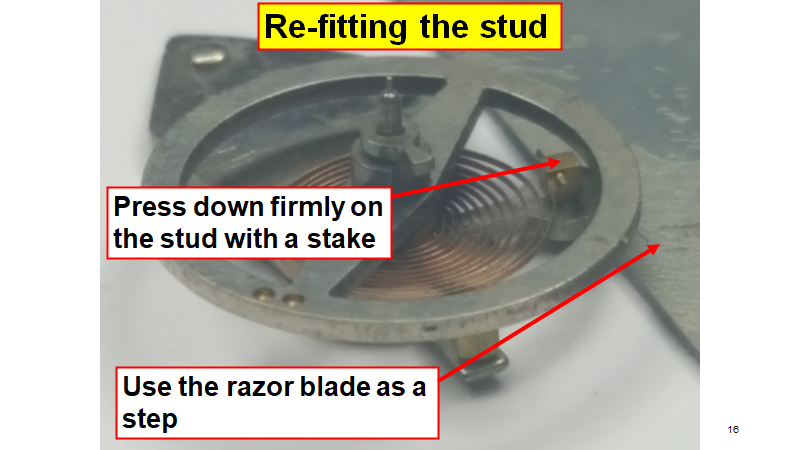
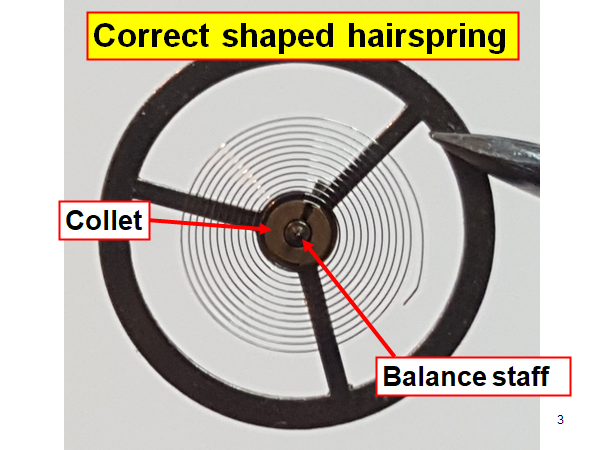
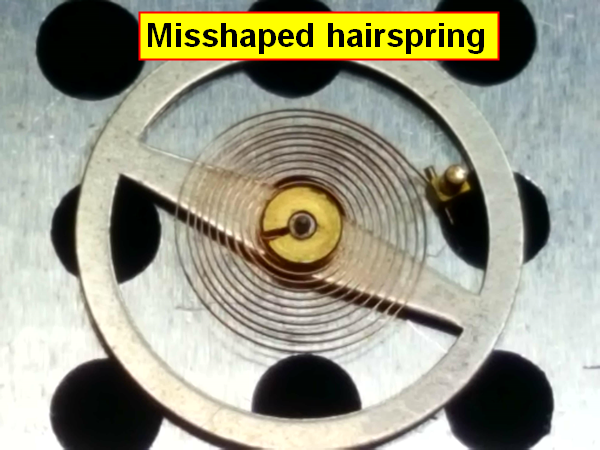
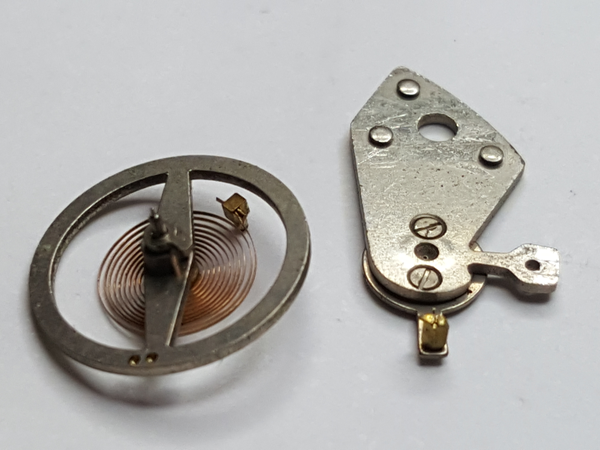
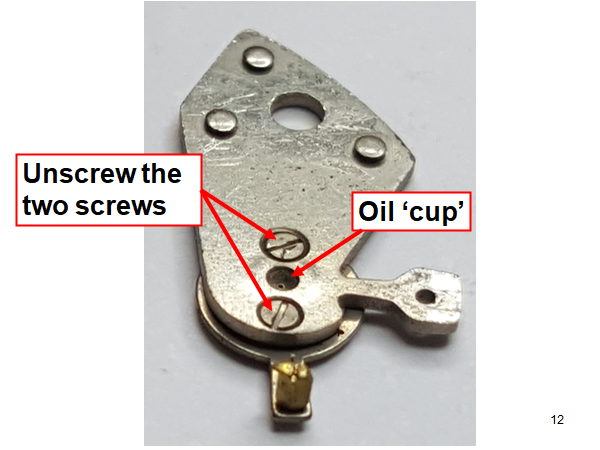
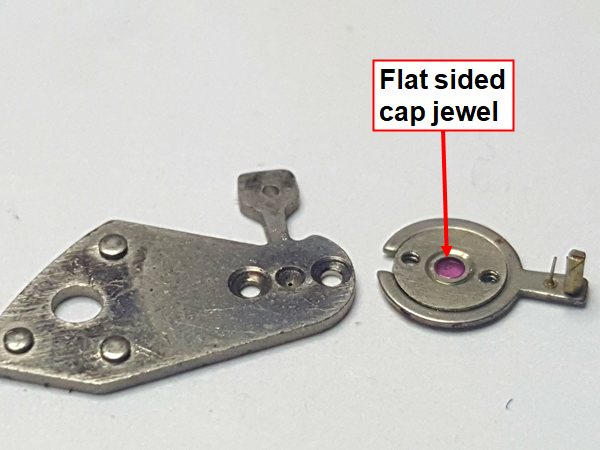
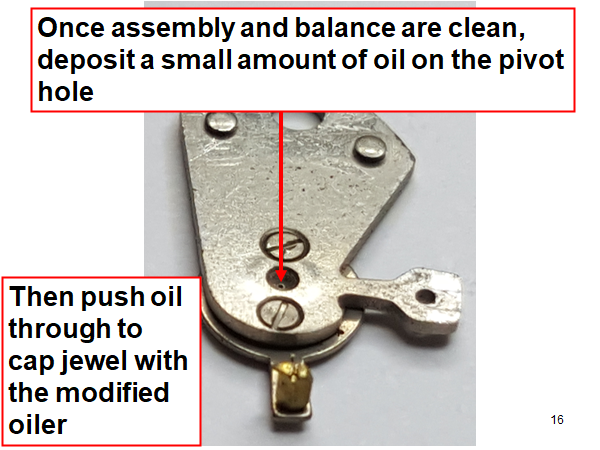
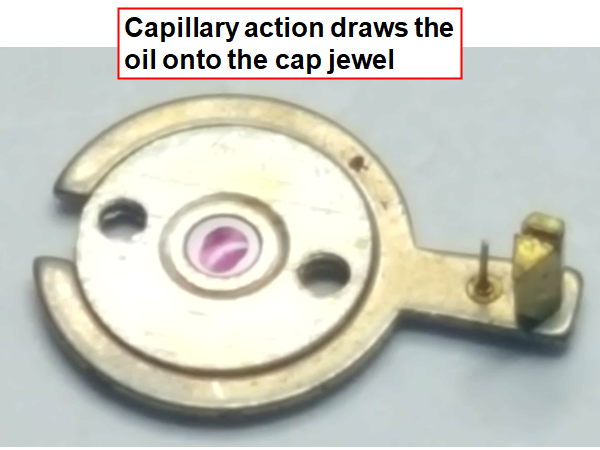
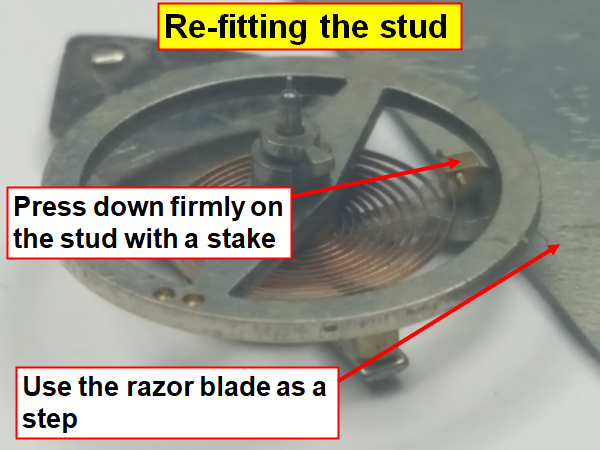
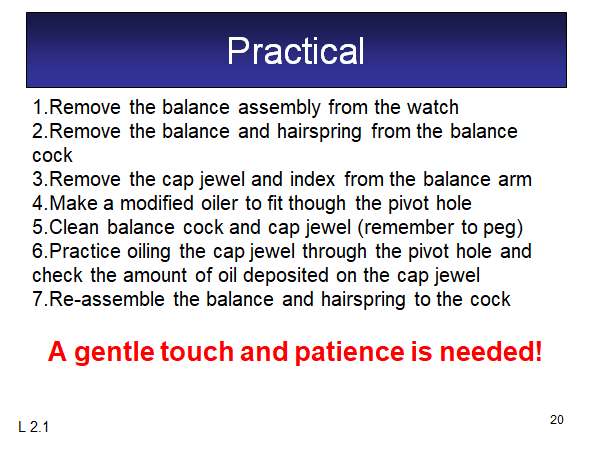
Hi All, I posted a while ago a walk through of the Baumgartner BFG 866 and wanted to add to it, especially as there is little out there to explain how to oil the cap jewels of a non shock proof watch. This is the balance cock of the BFG 866 and as you can see it has a cap jewel held in place with two screws, screwed from underneath. Some pull the hairspring out of the way to oil through the oil sink, but I find it safer to remove the hairspring, but also it is good practice to do so. If the balance and hairspring is removed the shape of the hairspring is seen a lot easier and any manipulation can be done. The hairspring may have to be taken off the balance if it isn't a simple tweak. Removing the balance from the cock is quite simple Measure the balance staff to find out how big it is, so when we make a tool to push the oil through to the cap jewel, we will know the correct size to make We need to unscrew the cap jewel to clean it Now we are going to hone an old oiler to fit through the hole in the oil sink that the balance staff pivot passes through Be careful not to damage the pivot hole Once the balance cock and setting has been cleaned thoroughly, we can then oil the cap jewel through the oil sink with Moebius 9010 If you are not sure you have oiled it enough, or your technique is correct, remove the cap jewel and have a look. Obviously before screwing back the cap jewel it will have to be cleaned properly again This is a safer way than oiling whilst the hairspring is attached to the balance cock. It may take a while longer, but it is a lot safer! It is also good practice in removing the balance and hairspring from the cock, but also checks the state of the hairspring, especially the uniformity of all the coils and how the hairspring is studded onto the collet The other cap jewel in the mainplate would be oiled in exactly the same fashion. Trying to oil the cap jewels and then fixing them onto the setting isn't a good way to oil them, as the oil will probably be smeared when re-fitting them. This is the way I teach my students to oil their non shockproof cap jewels I Hope this helps someone else in the future. More BFG 866 practicals to follow....


 1 point
 -
Hi Guys At an auction recently I purchased a box of watch mainspring winders which cost very little money as most people did not know what they were. Now not having done any mainspring work yet I thought I would try them out. The K & D 126 is complete but can anyone give me advice on how to use it please? I know that the right size winder fits into the end of the little handle and then there is a little rod and extension piece? which go through the handle to push the spring out so the question is how does the little crank handle wind the spring in as its a very loose fit. The other item in the auction was not named but consisted of a tube with finger grips. ten different size winders and ten different crank handles. Any help would be appreciated Chris1 point