Leaderboard


Popular Content
Showing content with the highest reputation on 11/29/20 in Posts
-
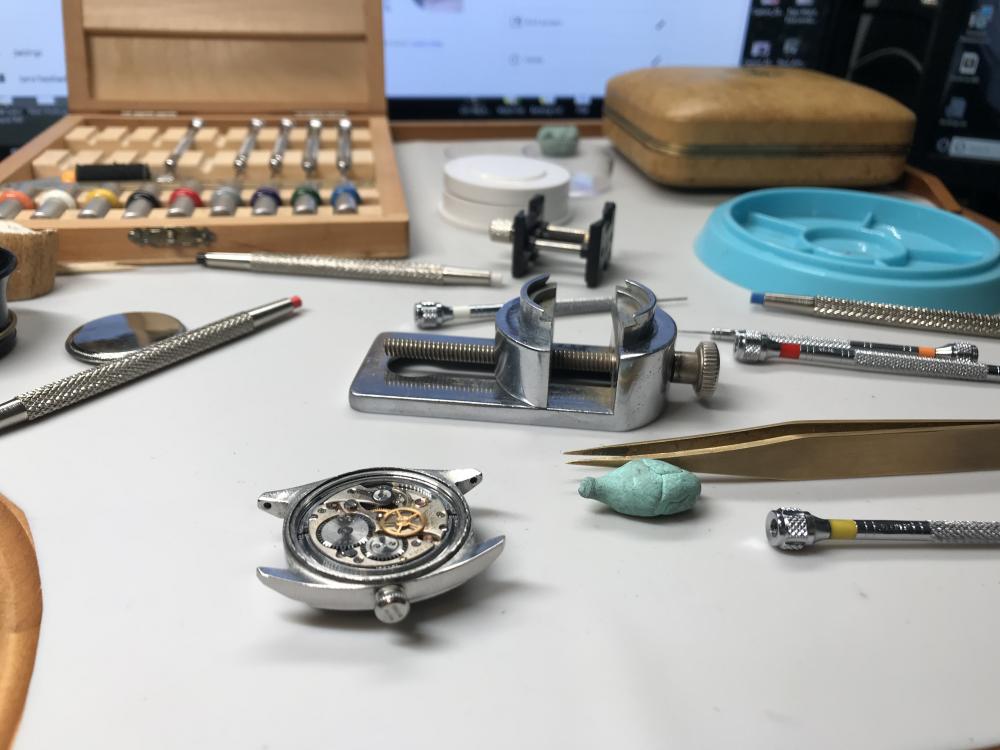
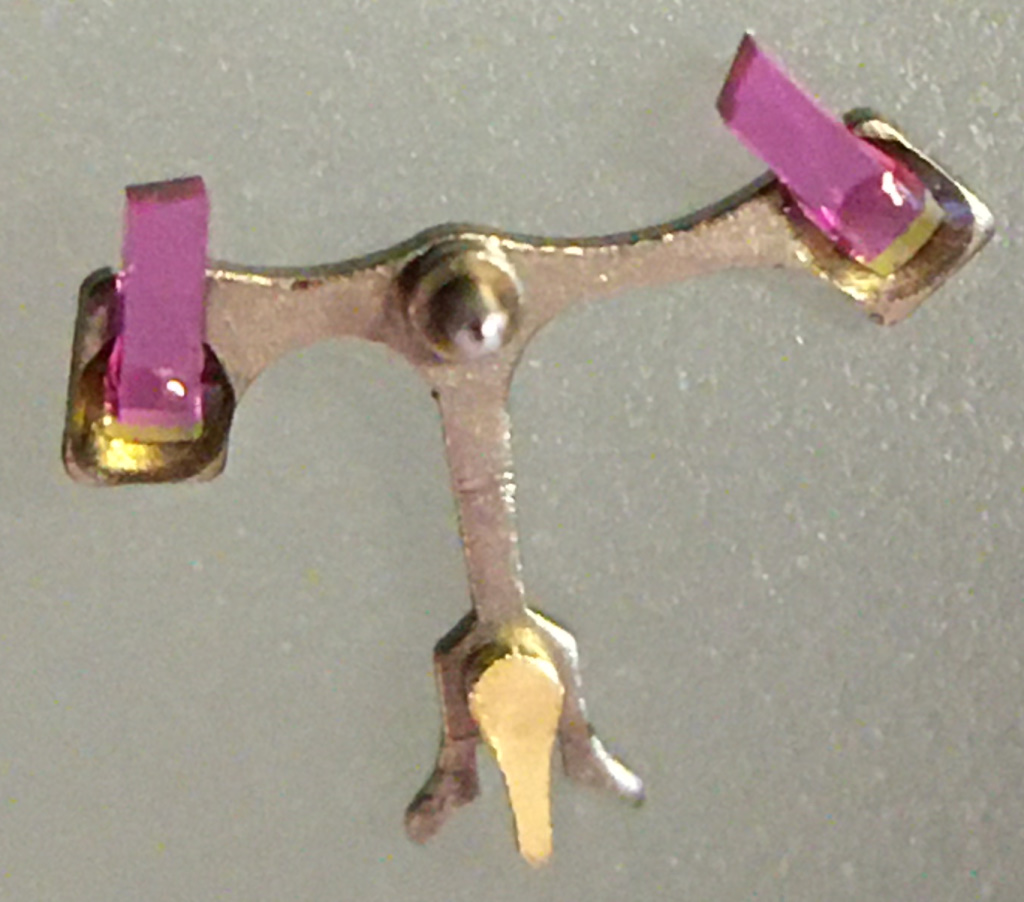
Intro A while back I successfully made my first attempt refitting and adjusting pallet stones using shellac. It was something I had dreaded doing (it seemed difficult) but in the end it wasn’t that difficult at all. Having gathered experience from a few years of handling tiny watch parts using tweezers and having developed some left-hand dexterity as well (I’m right handed) probably helped. Anyway, I thought I’d share the experience with anyone who would be interested and hopefully there’ll be some other WR-talker, now or in the future, who’ll find it useful. If you’re new to this topic you might find this page and this video on the watch repair channel a good start. As I didn't want to risk ruining my Gaston tool I melted and prepared the small pieces of shellac on a chisel tool (my improvisation) that I happened to have in my tool box. However, the chisel tool had a very tough plastic y surface but I was able to burn it away to expose the bare metal with my alcohol lamp before melting and forming small pieces of shellac on it. However, the pieces of shellac needed were much smaller than what they looked like to me in the video. My way of making even smaller pieces was simply to poke the small pieces that I had made with tweezers once they had cooled and were hard. Setting and adjusting the pallet stones was easier than I thought it would be. I didn't realize the fork slots for the stones pinch the pallet stones (Vostok calibre 2414) and actually keep them in place before the shellac is applied. So, I could replace the pallet stones and then check and adjust the locking depth to the escape wheel teeth before applying the shellac. A bit fiddly yes, and you do need to develop some dexterity with tweezers before you try this but not to the point that you break a sweat. Anyway, thank god for my stereo microscope! Anyway, it was my first attempt, and as is common when you try something for the first time, I made a mistake. Despite very consciously applying what I felt was a little too little shellac it still flooded the stones and a large portion of the fork when it melted. Also, I applied too much heat so that the shellac started boiling creating bubbles. So, I decided to start all over. Fortunately, the “industrial isopropanol” (so called on eBay) that I have is very efficient so no problem removing the shellac from the stones and the fork. The second time around I only used a minuscule amount of shellac. Also, I heated the Gaston tool holding the fork in short turns, just so that the shellac would fully melt without staring to boil. Much better! The following is what I would suggest based on my first experience: Basically, follow the video I linked to above. In the video, Mark pokes and scrapes the fork and the stones with tweezers to get rid of old shellac. I tried that, but it wasn’t very efficient. Instead I would let the pallets soak in industrial isopropanol for about 10 minutes and then use a paintbrush to brush them clean. The shellac dissolves completely in the isopropanol and the stones can then be easily removed and further brushed if required. To insert or slide a stone back into the fork slot I found holding the fork by the end of the slot (opposite side of where the pallet stone is inserted) with tweezers (left hand) was giving me the most control. I placed the pivot of the fork (guard pin up, of course) in a small hole in my staking block while inserting/sliding the stones with another pair of tweezers (right hand) into the slots. After having applied the shellac Mark suggests re-heating the shellac to adjust the stones. I was worried that it might result in a mess if I tried it, so I decided to do the adjusting before applying the shellac as shown in this video. The slots for the stones pinch the stones pretty well so if you're careful while you're testing the lock to the escape wheel teeth this method works well and won't dislocate the stones. However, to make sure, double check the positions (depth and angle) of the stones before applying the shellac. Now, the tiny piece of shellac should be placed on the rear section were the stone meets the fork. Mark is clear about this in his video but for some reason it completely passed me by when I made my first attempt. In my second attempt I followed Mark's instruction, but the piece of shellac, being very asymmetrical in shape, was difficult to place in the right spot. However, after warming the pallets to the point that it had only softened the shellac a bit, I discovered, to my surprise, that I could manipulate the shellac into the perfect spot with the tip of my tweezers, without the shellac sticking to the tweezers. Of course, as I've come to realize, every repairer must find his or her own way, but hopefully you'll find my "discoveries" useful. Above is a picture of the result. It's not perfect but still worked very well. The amount of shellac on the entry stone is a bit too little, and there is a < 1 degree tilt on the exit stone (which, of course, can’t be seen in the picture).
 4 points
 -
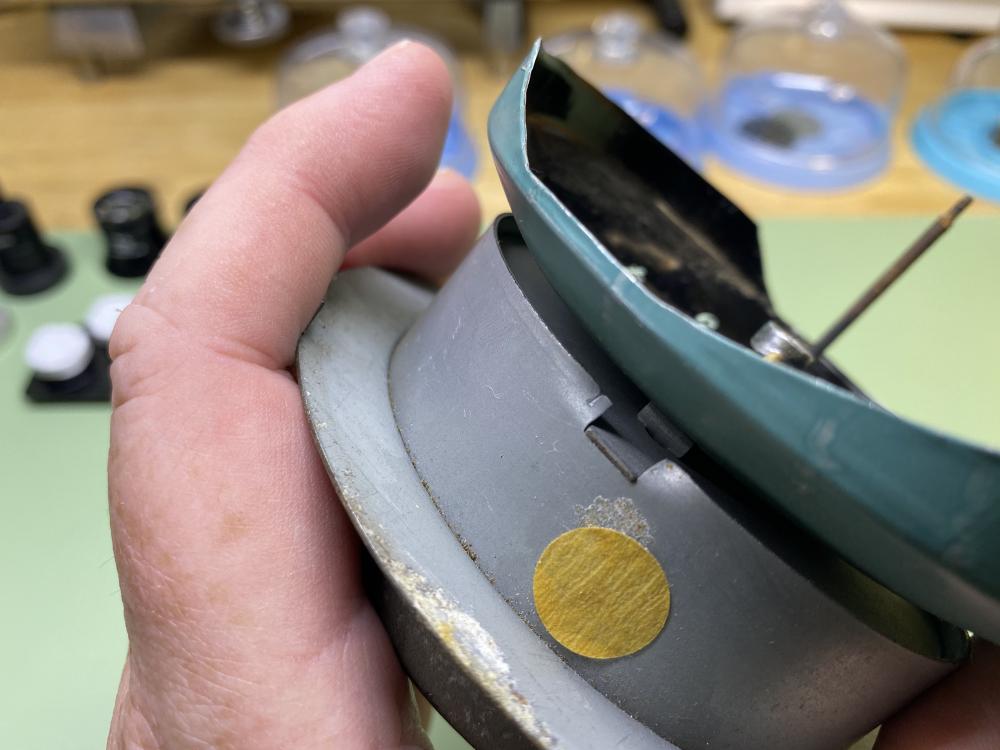
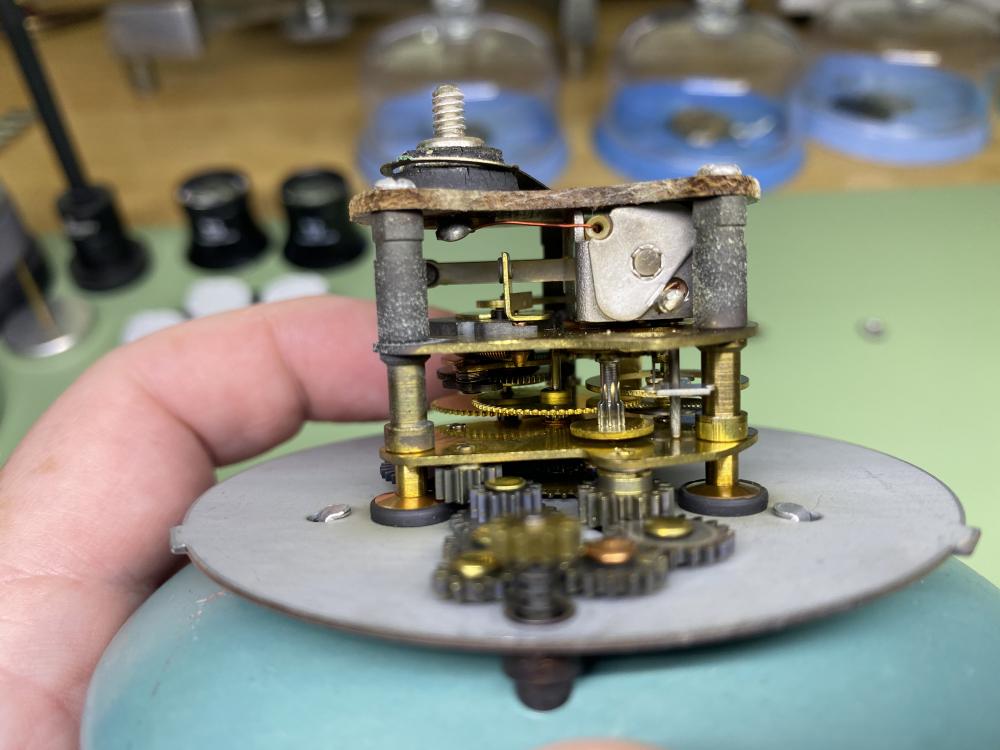
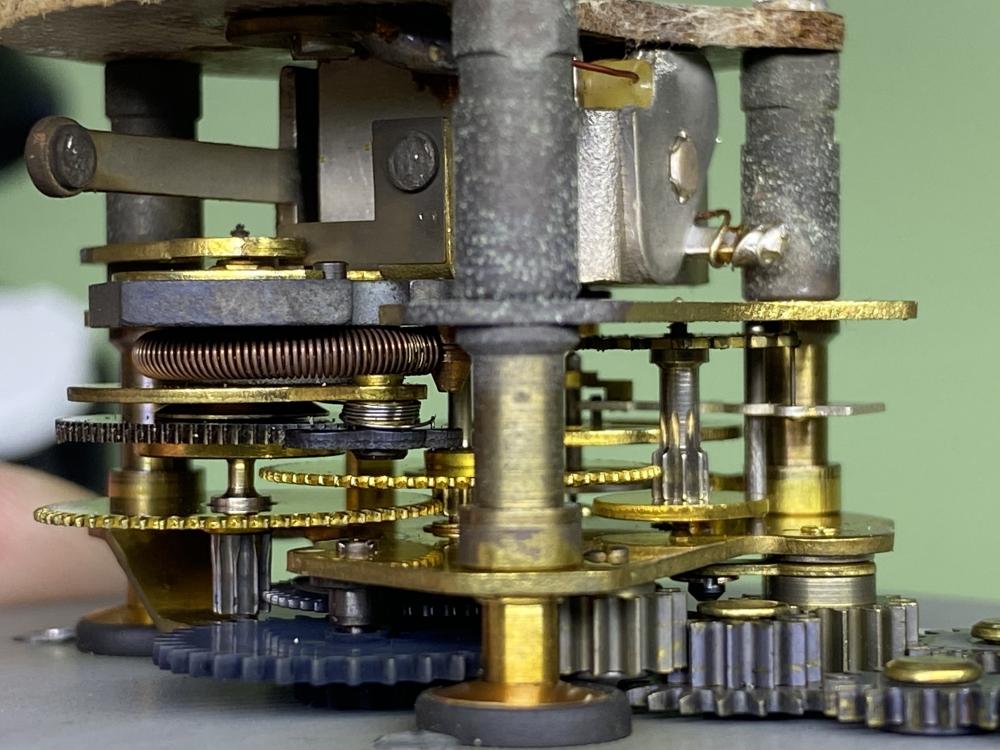
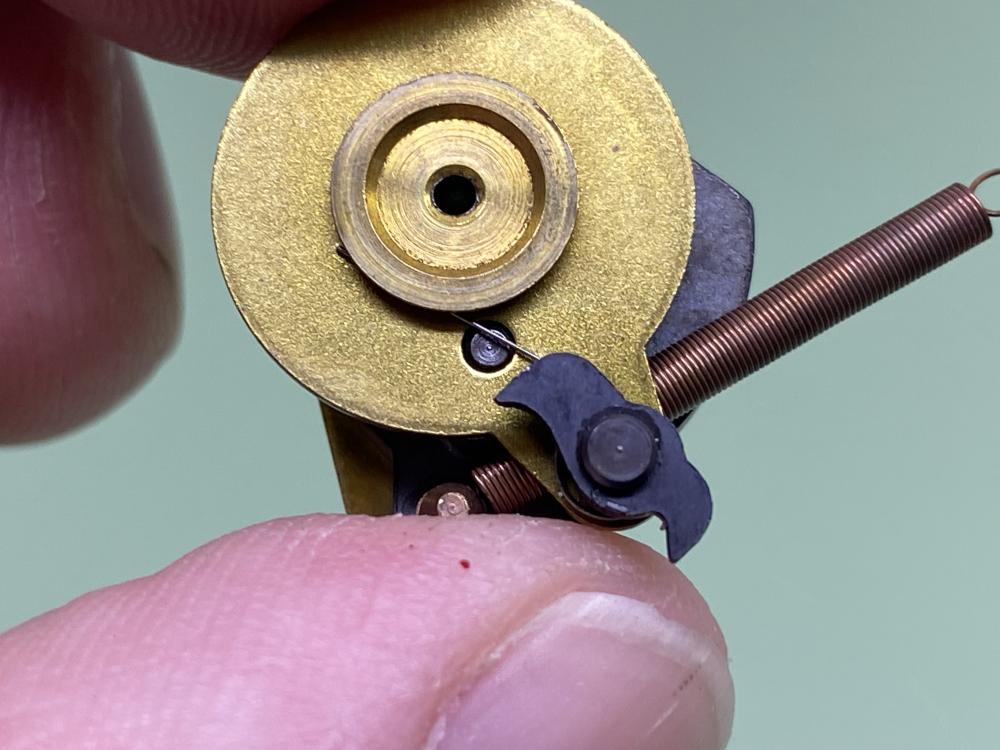
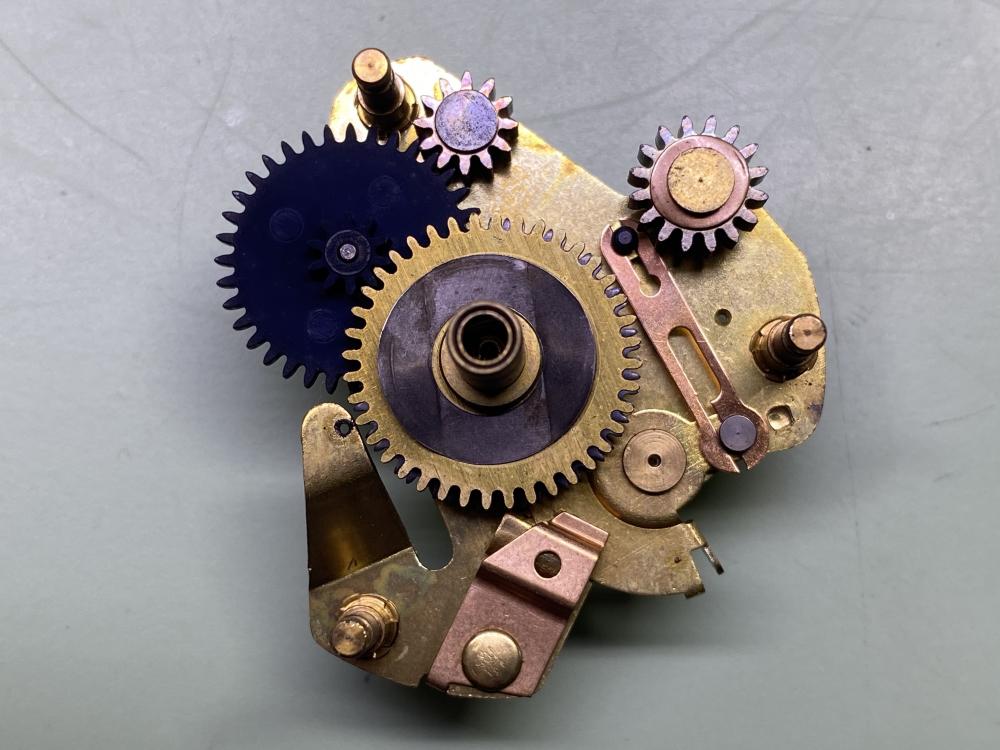
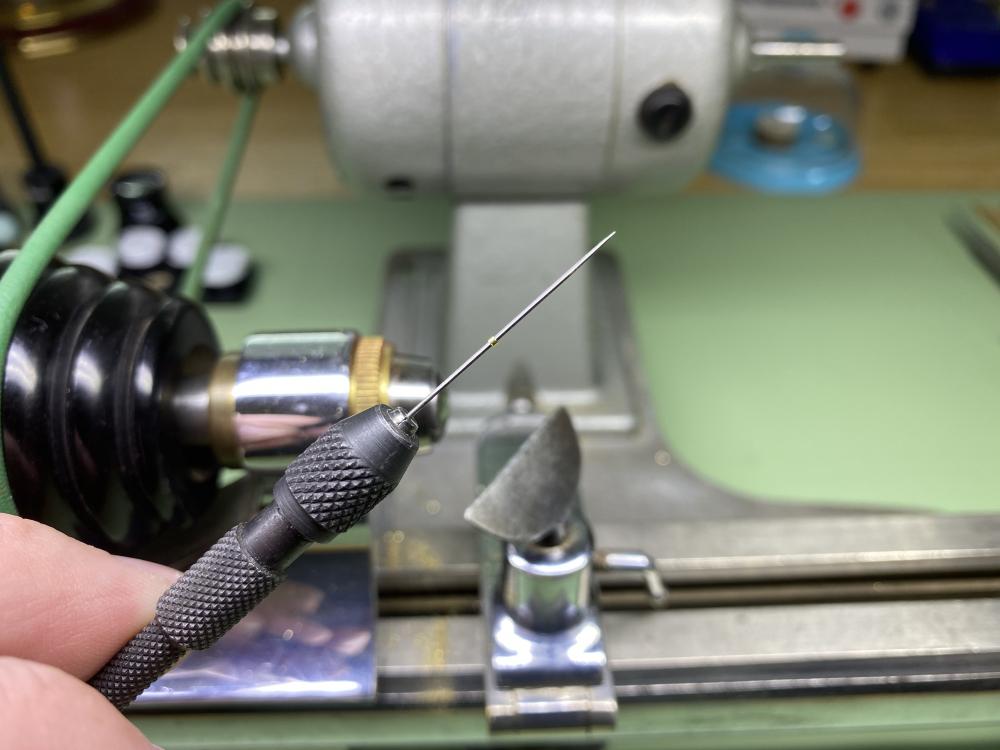
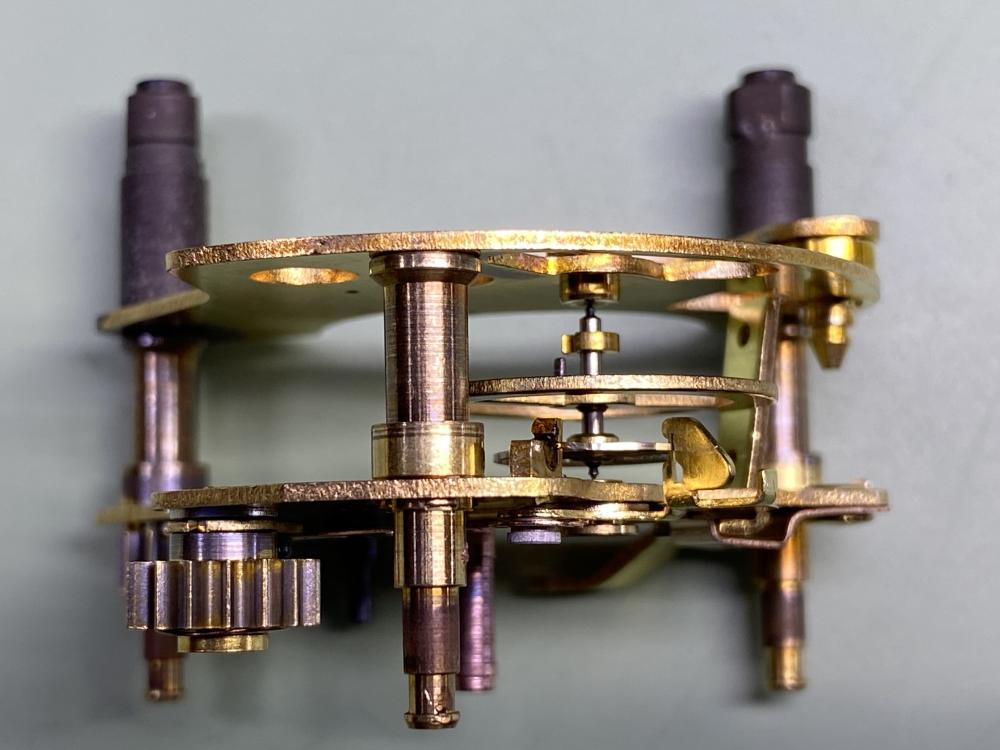
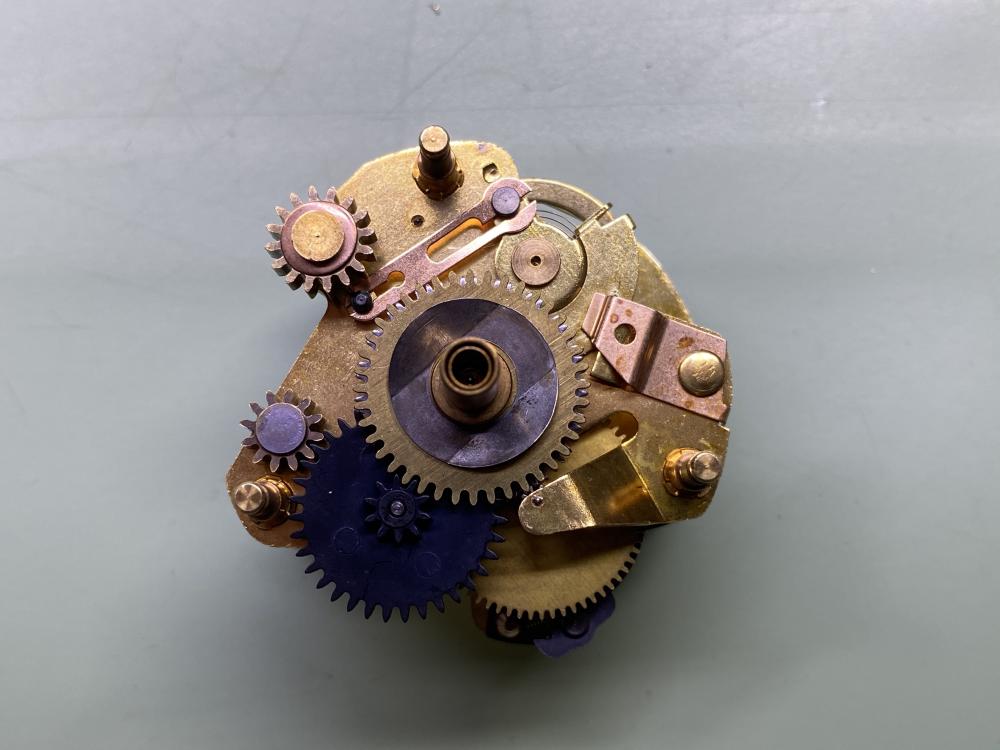
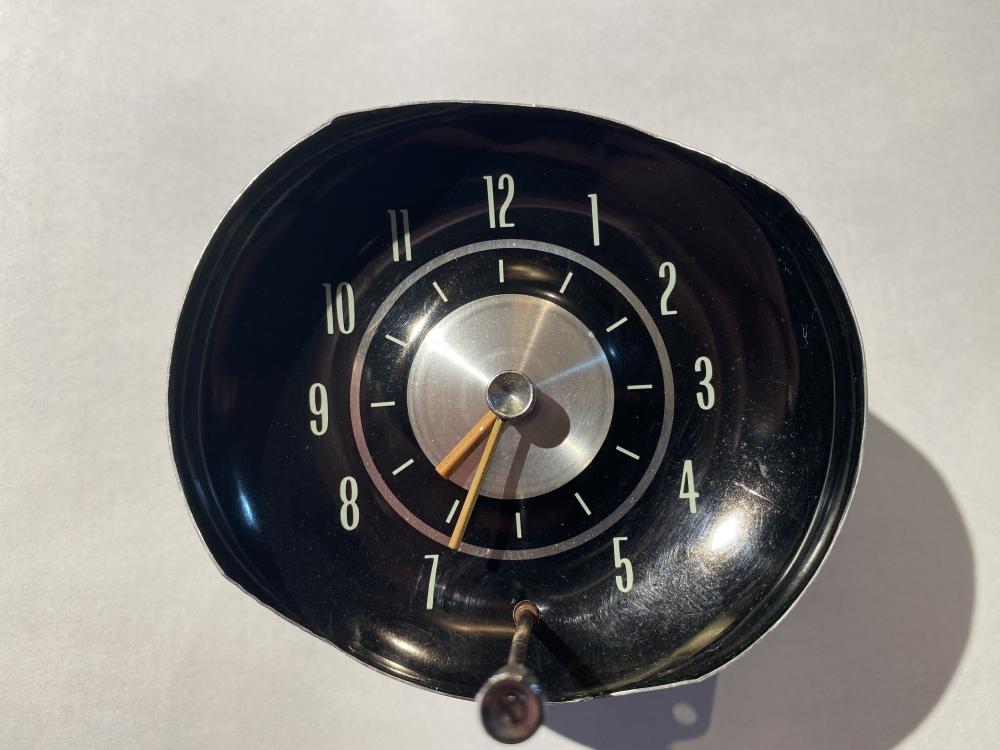
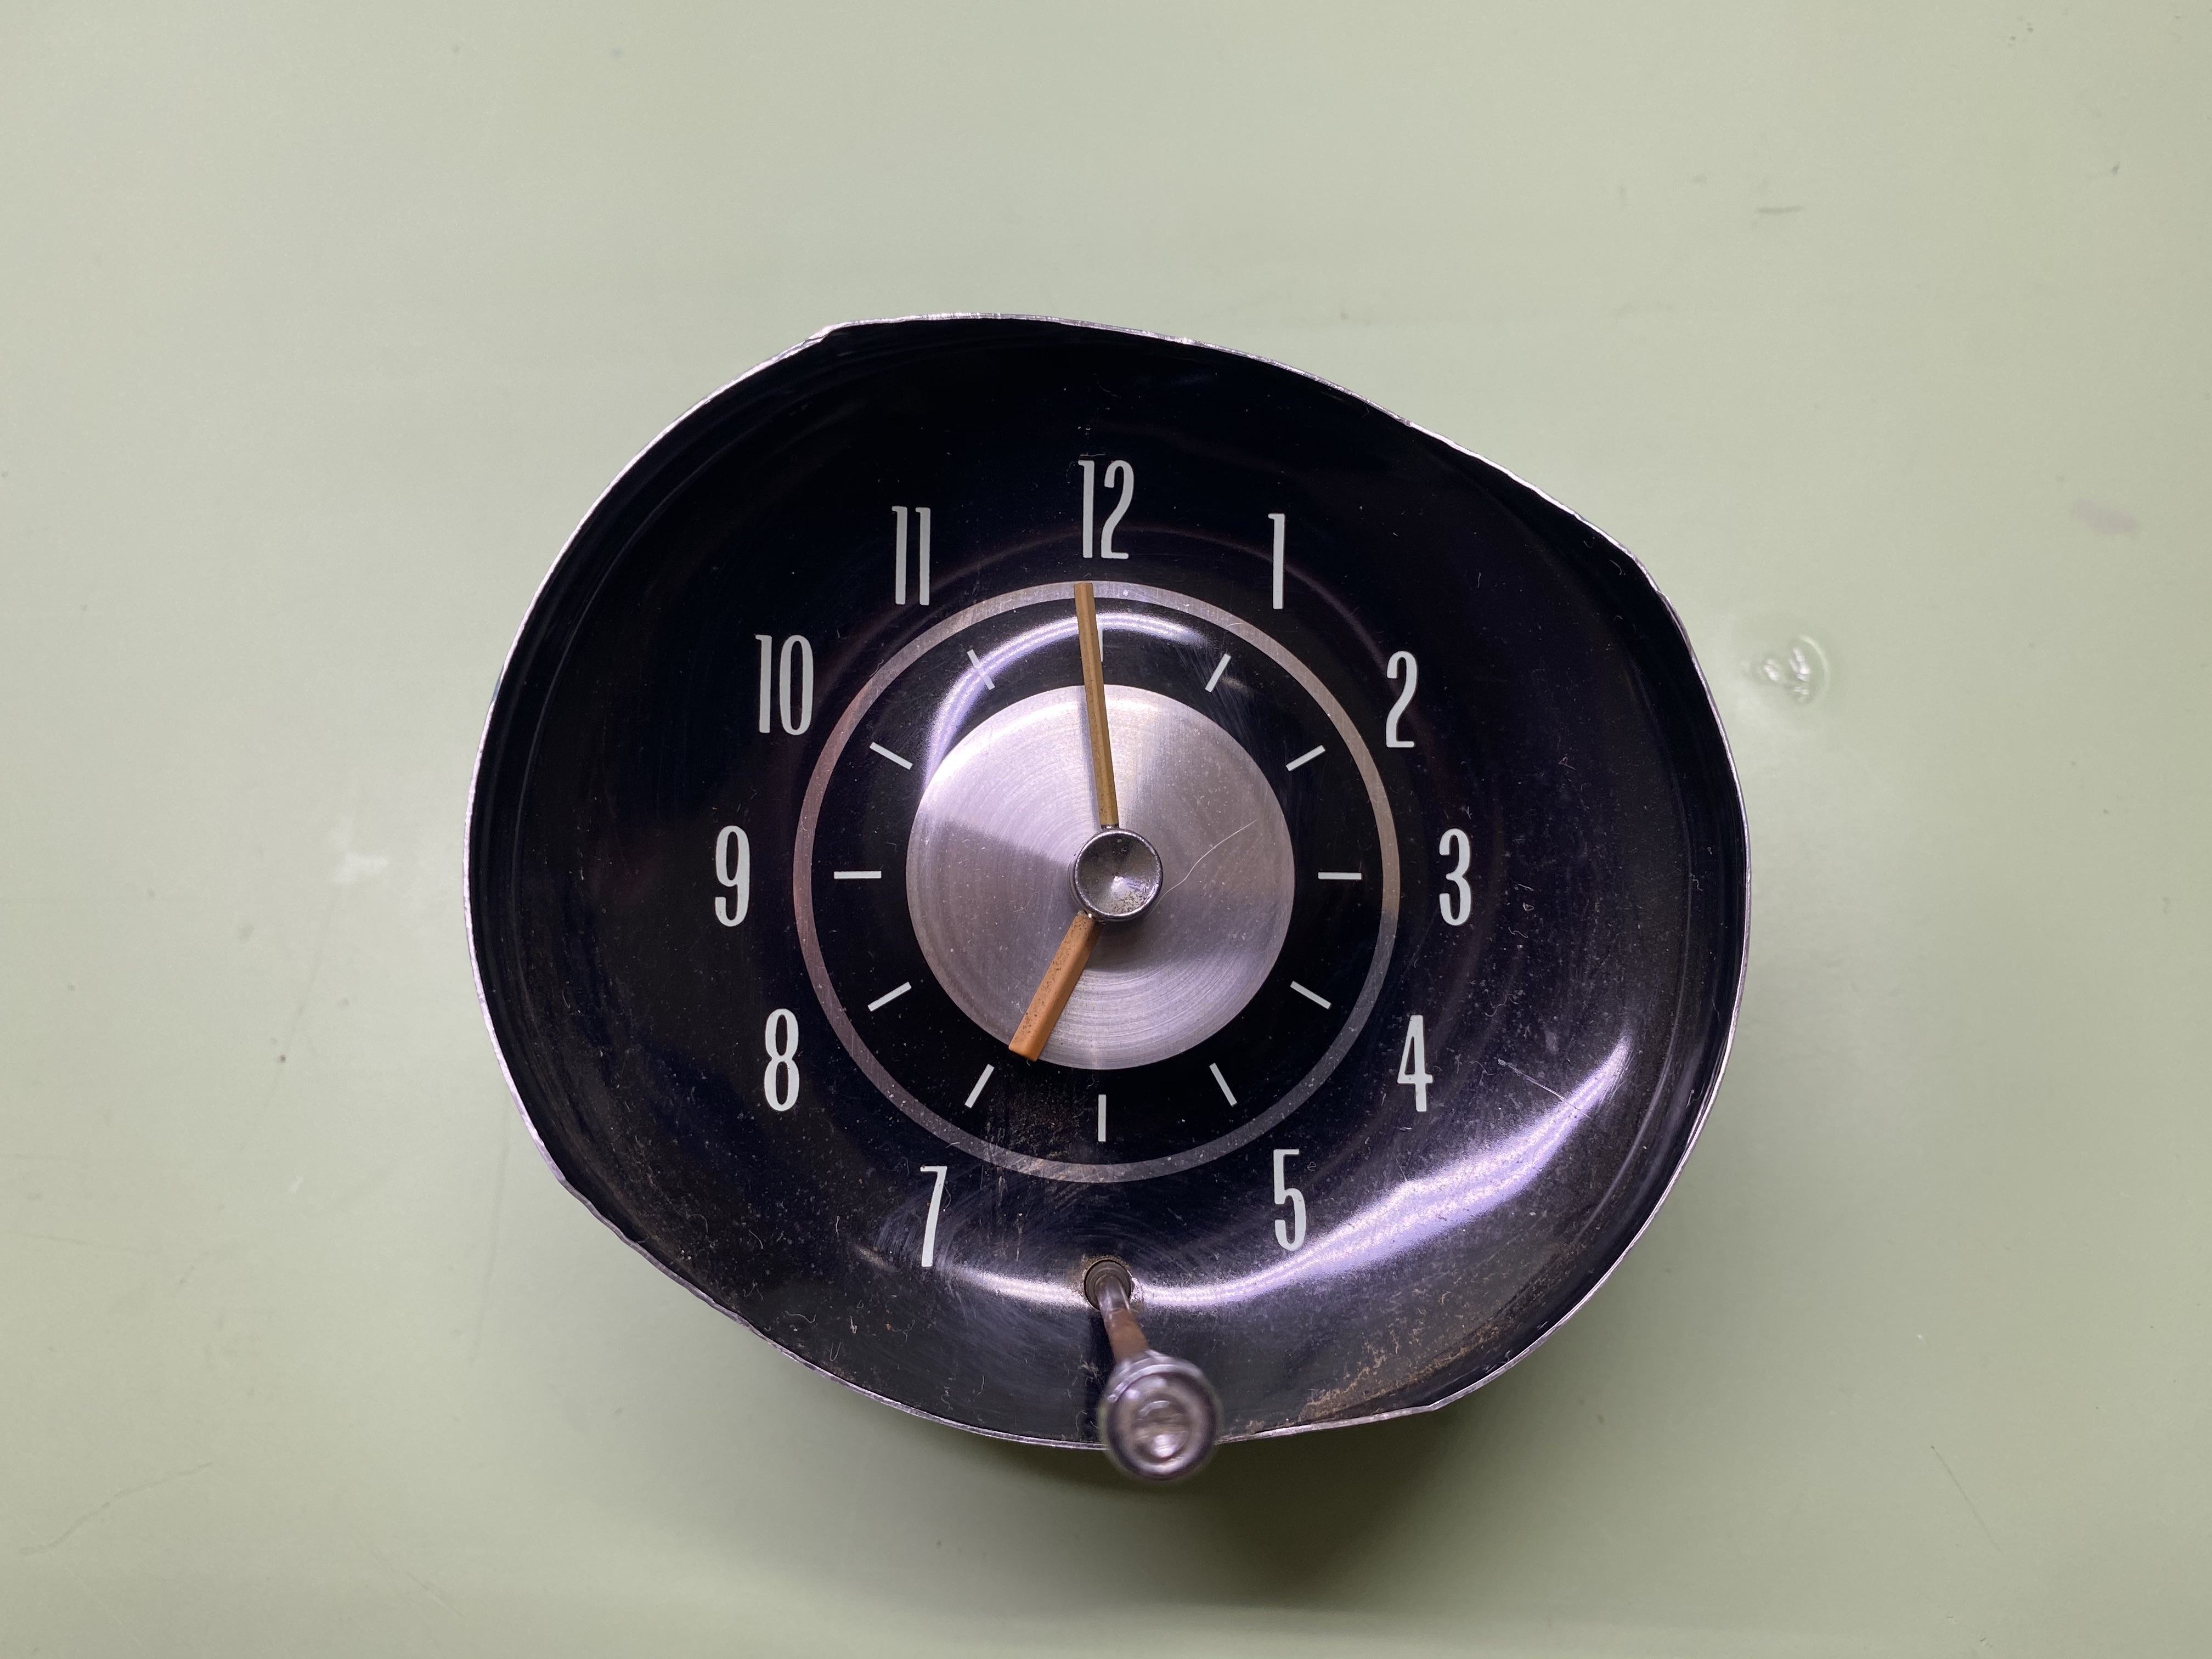
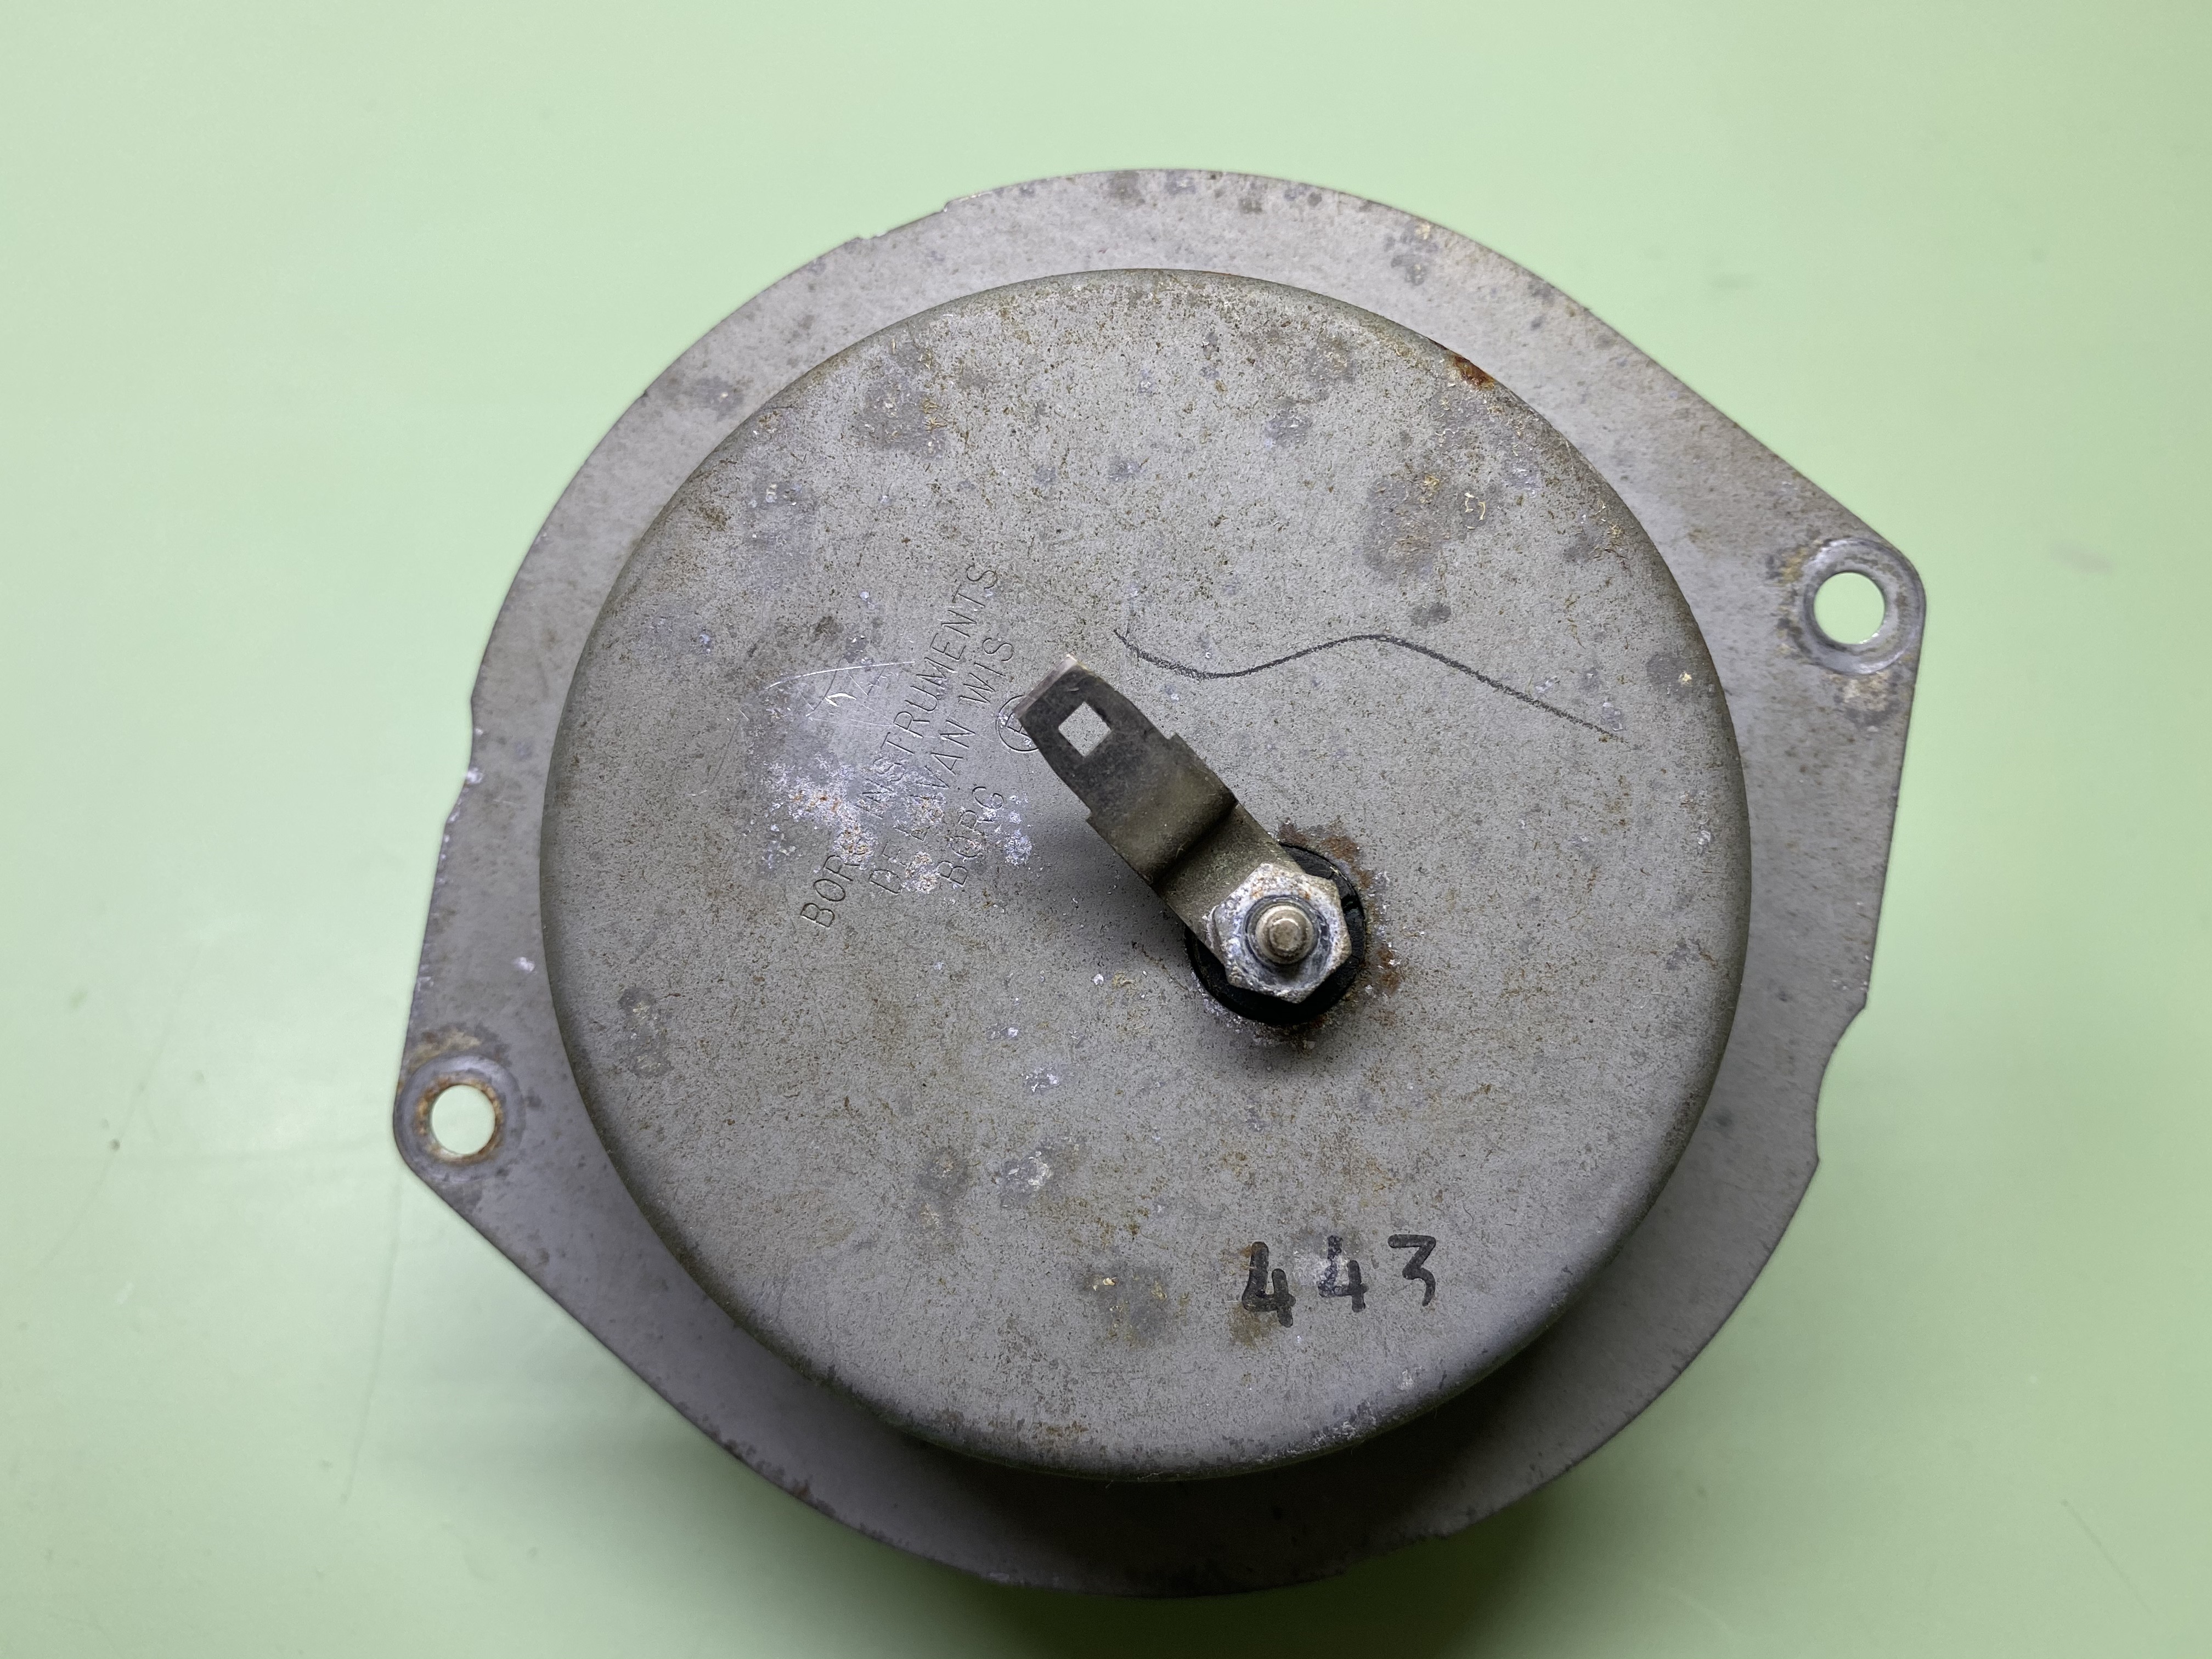
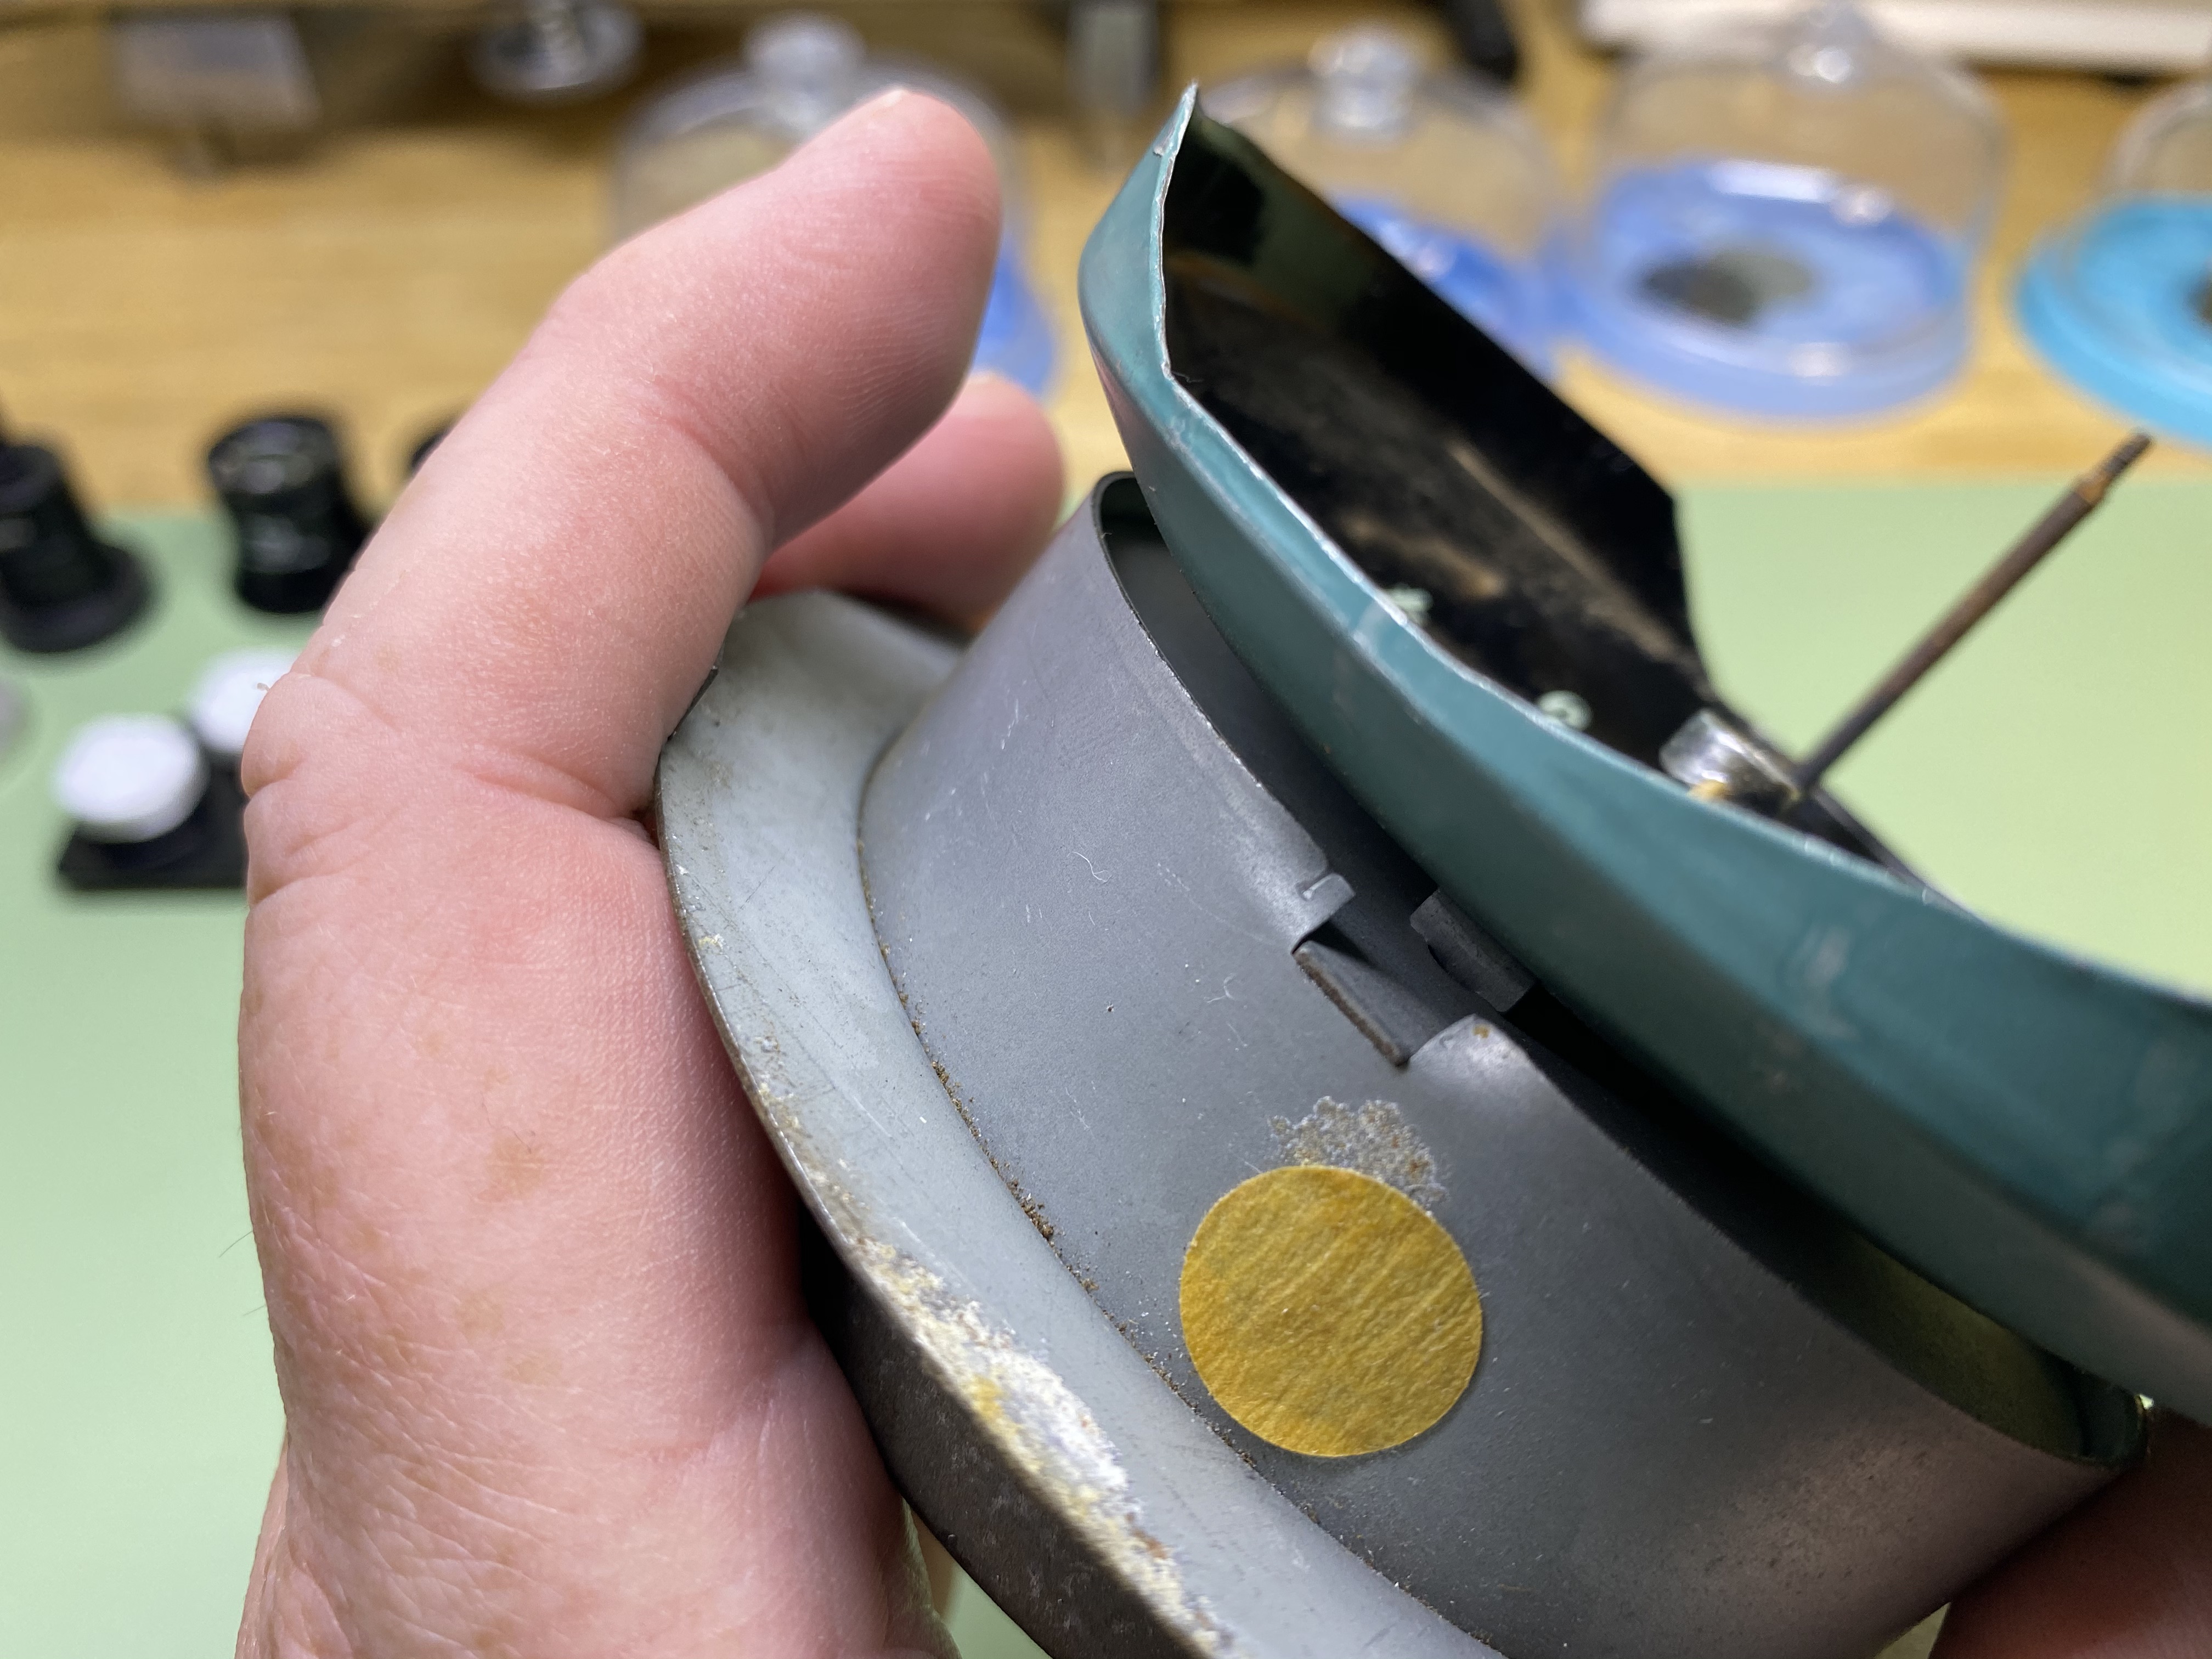
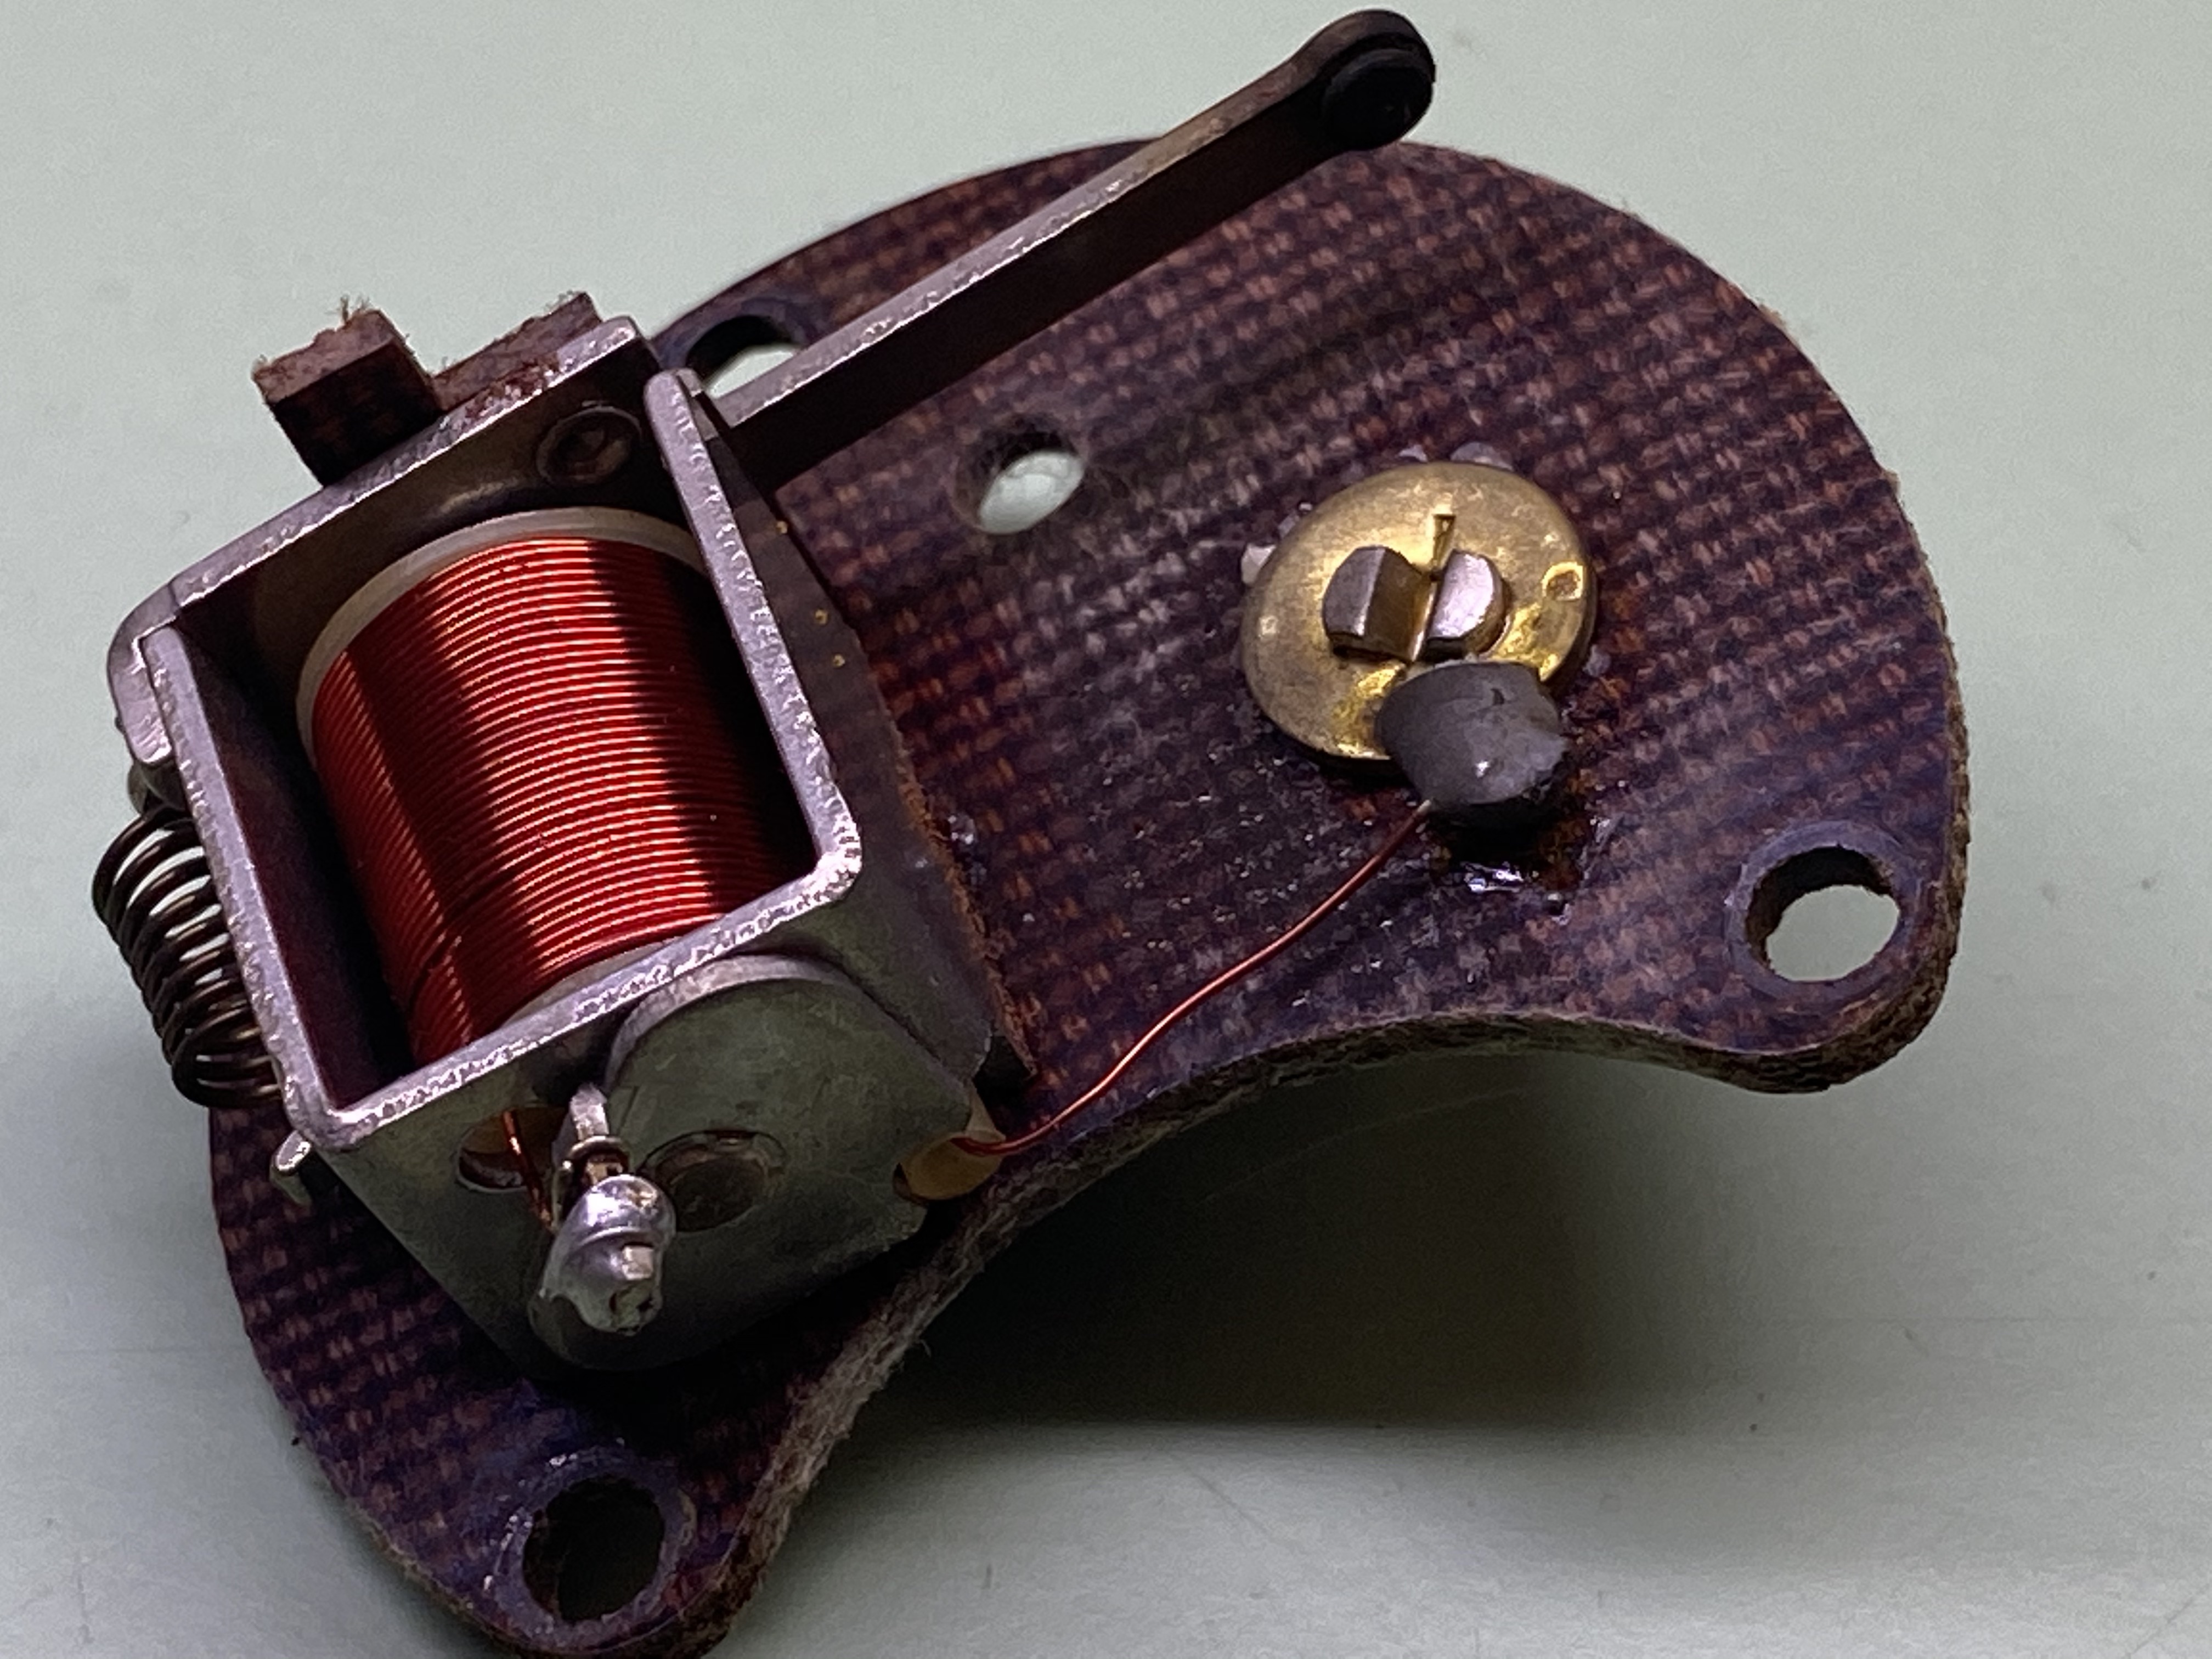
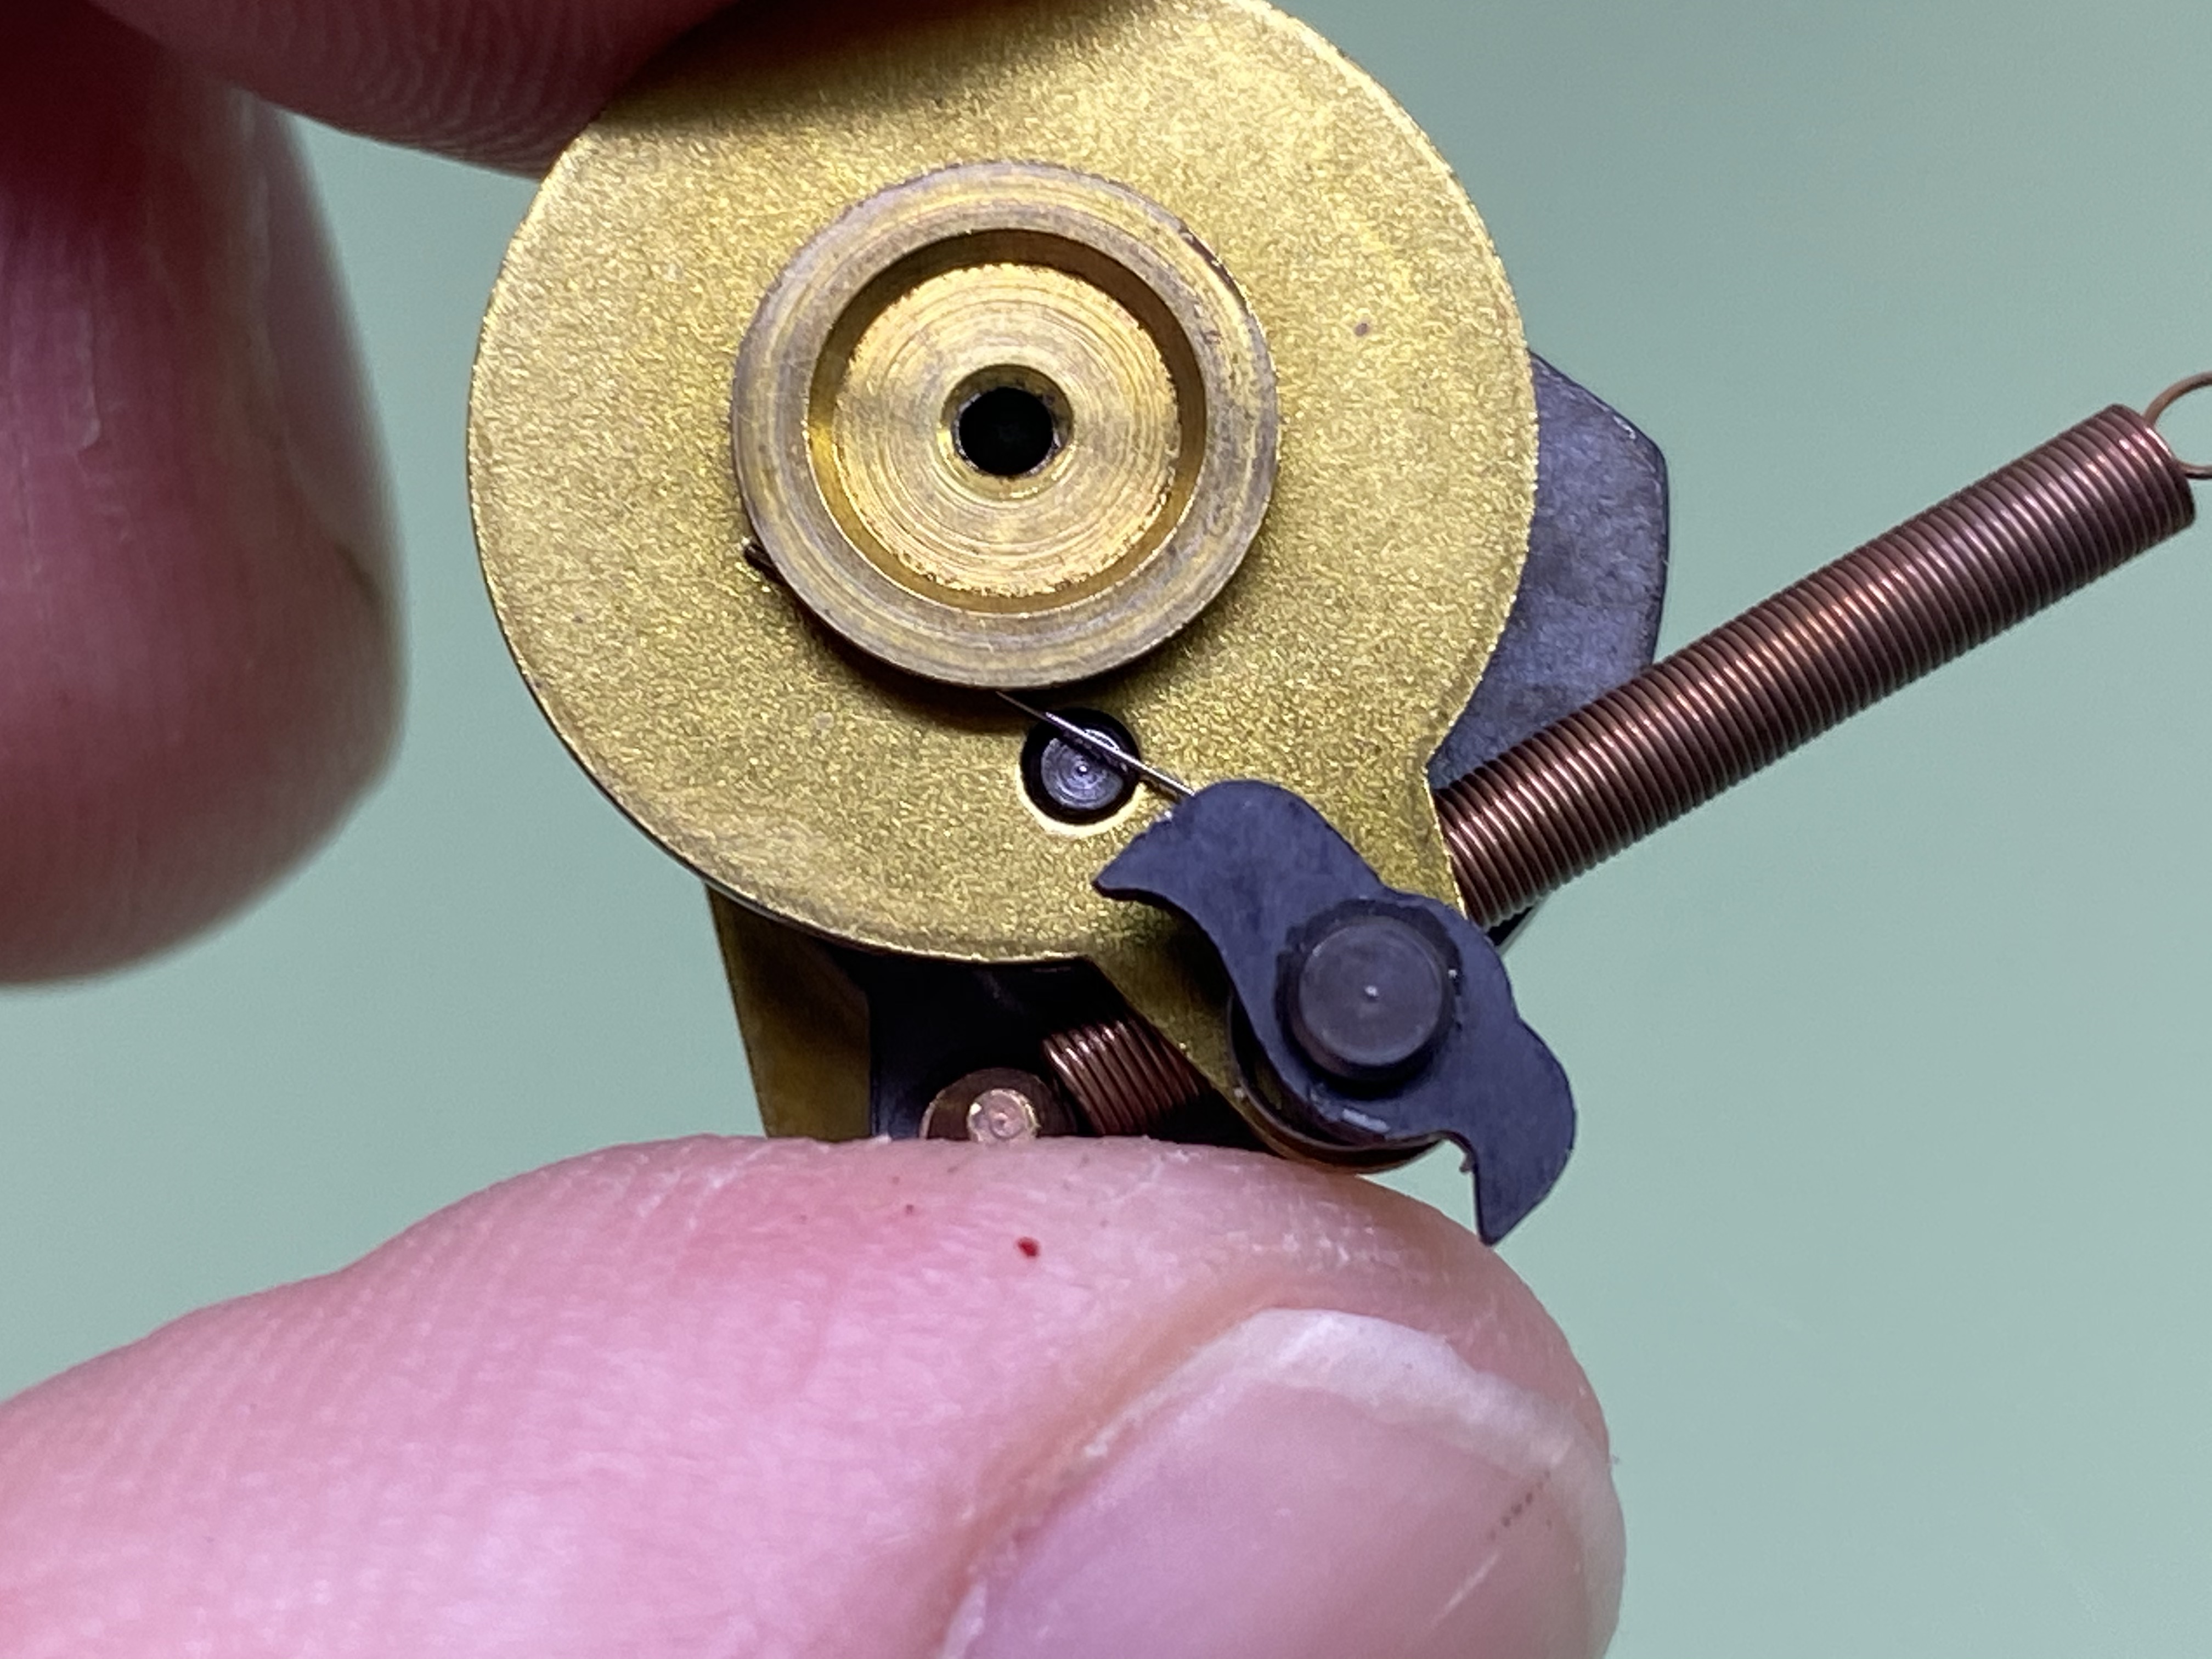
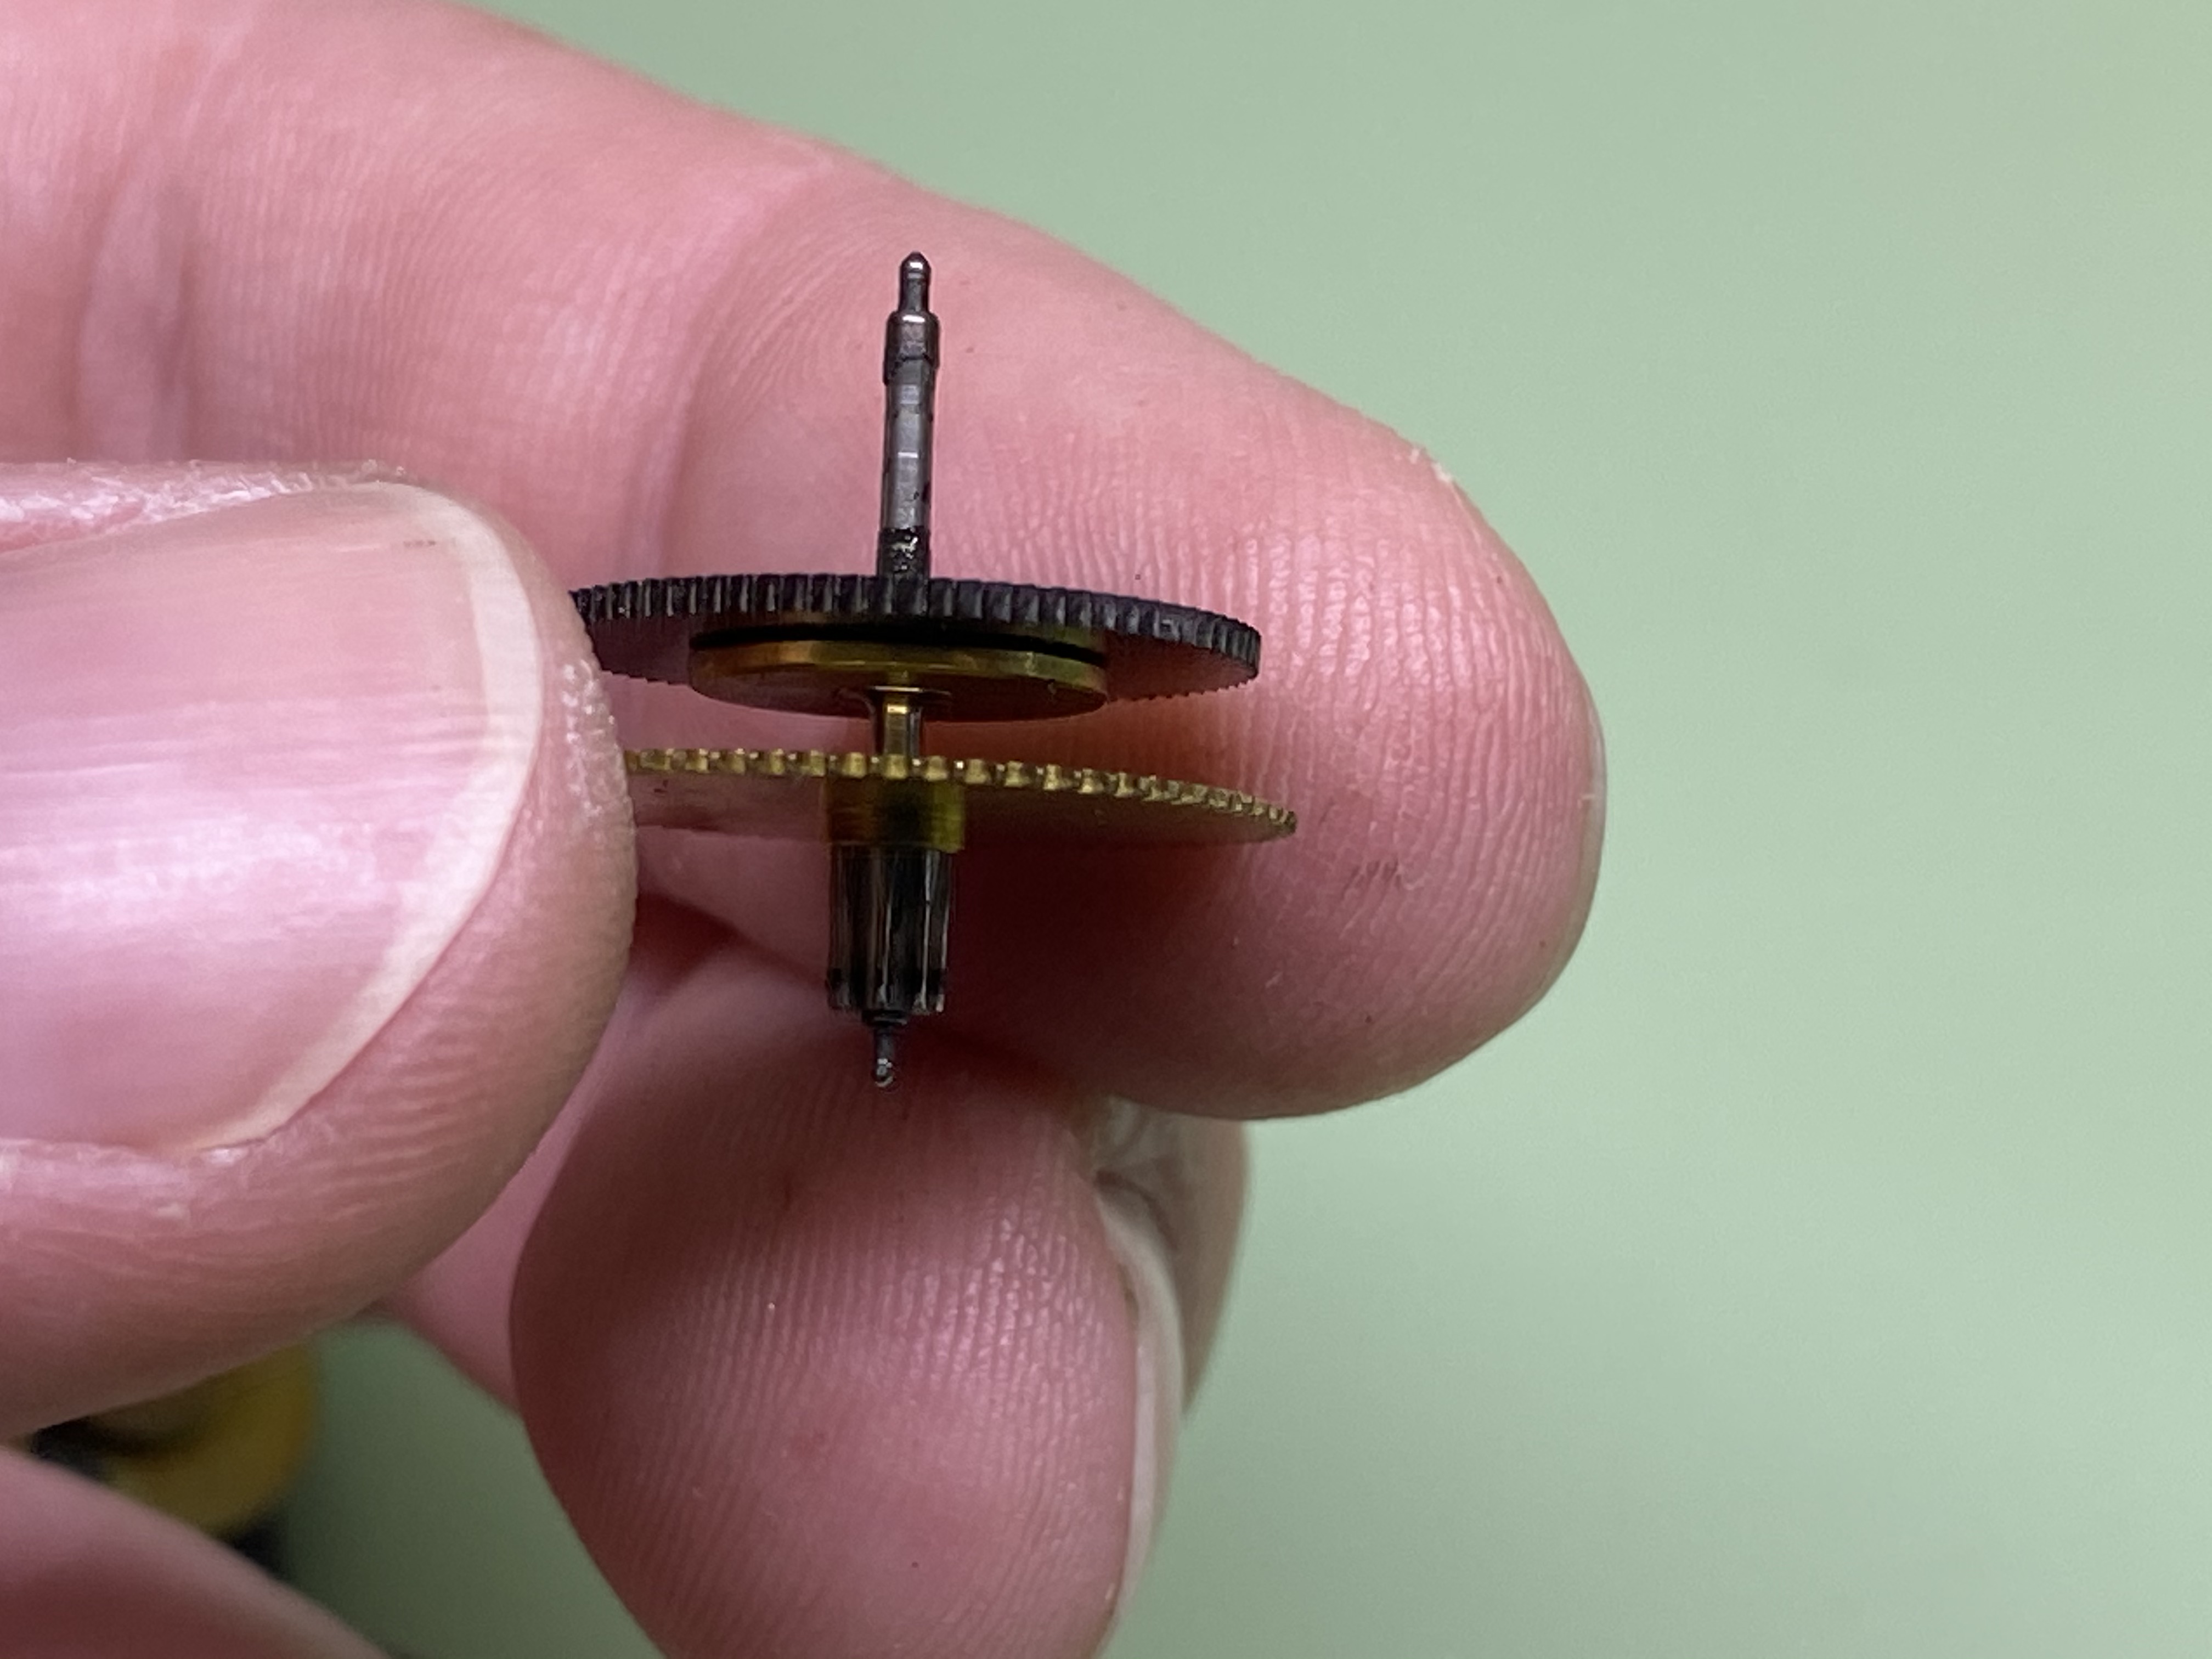
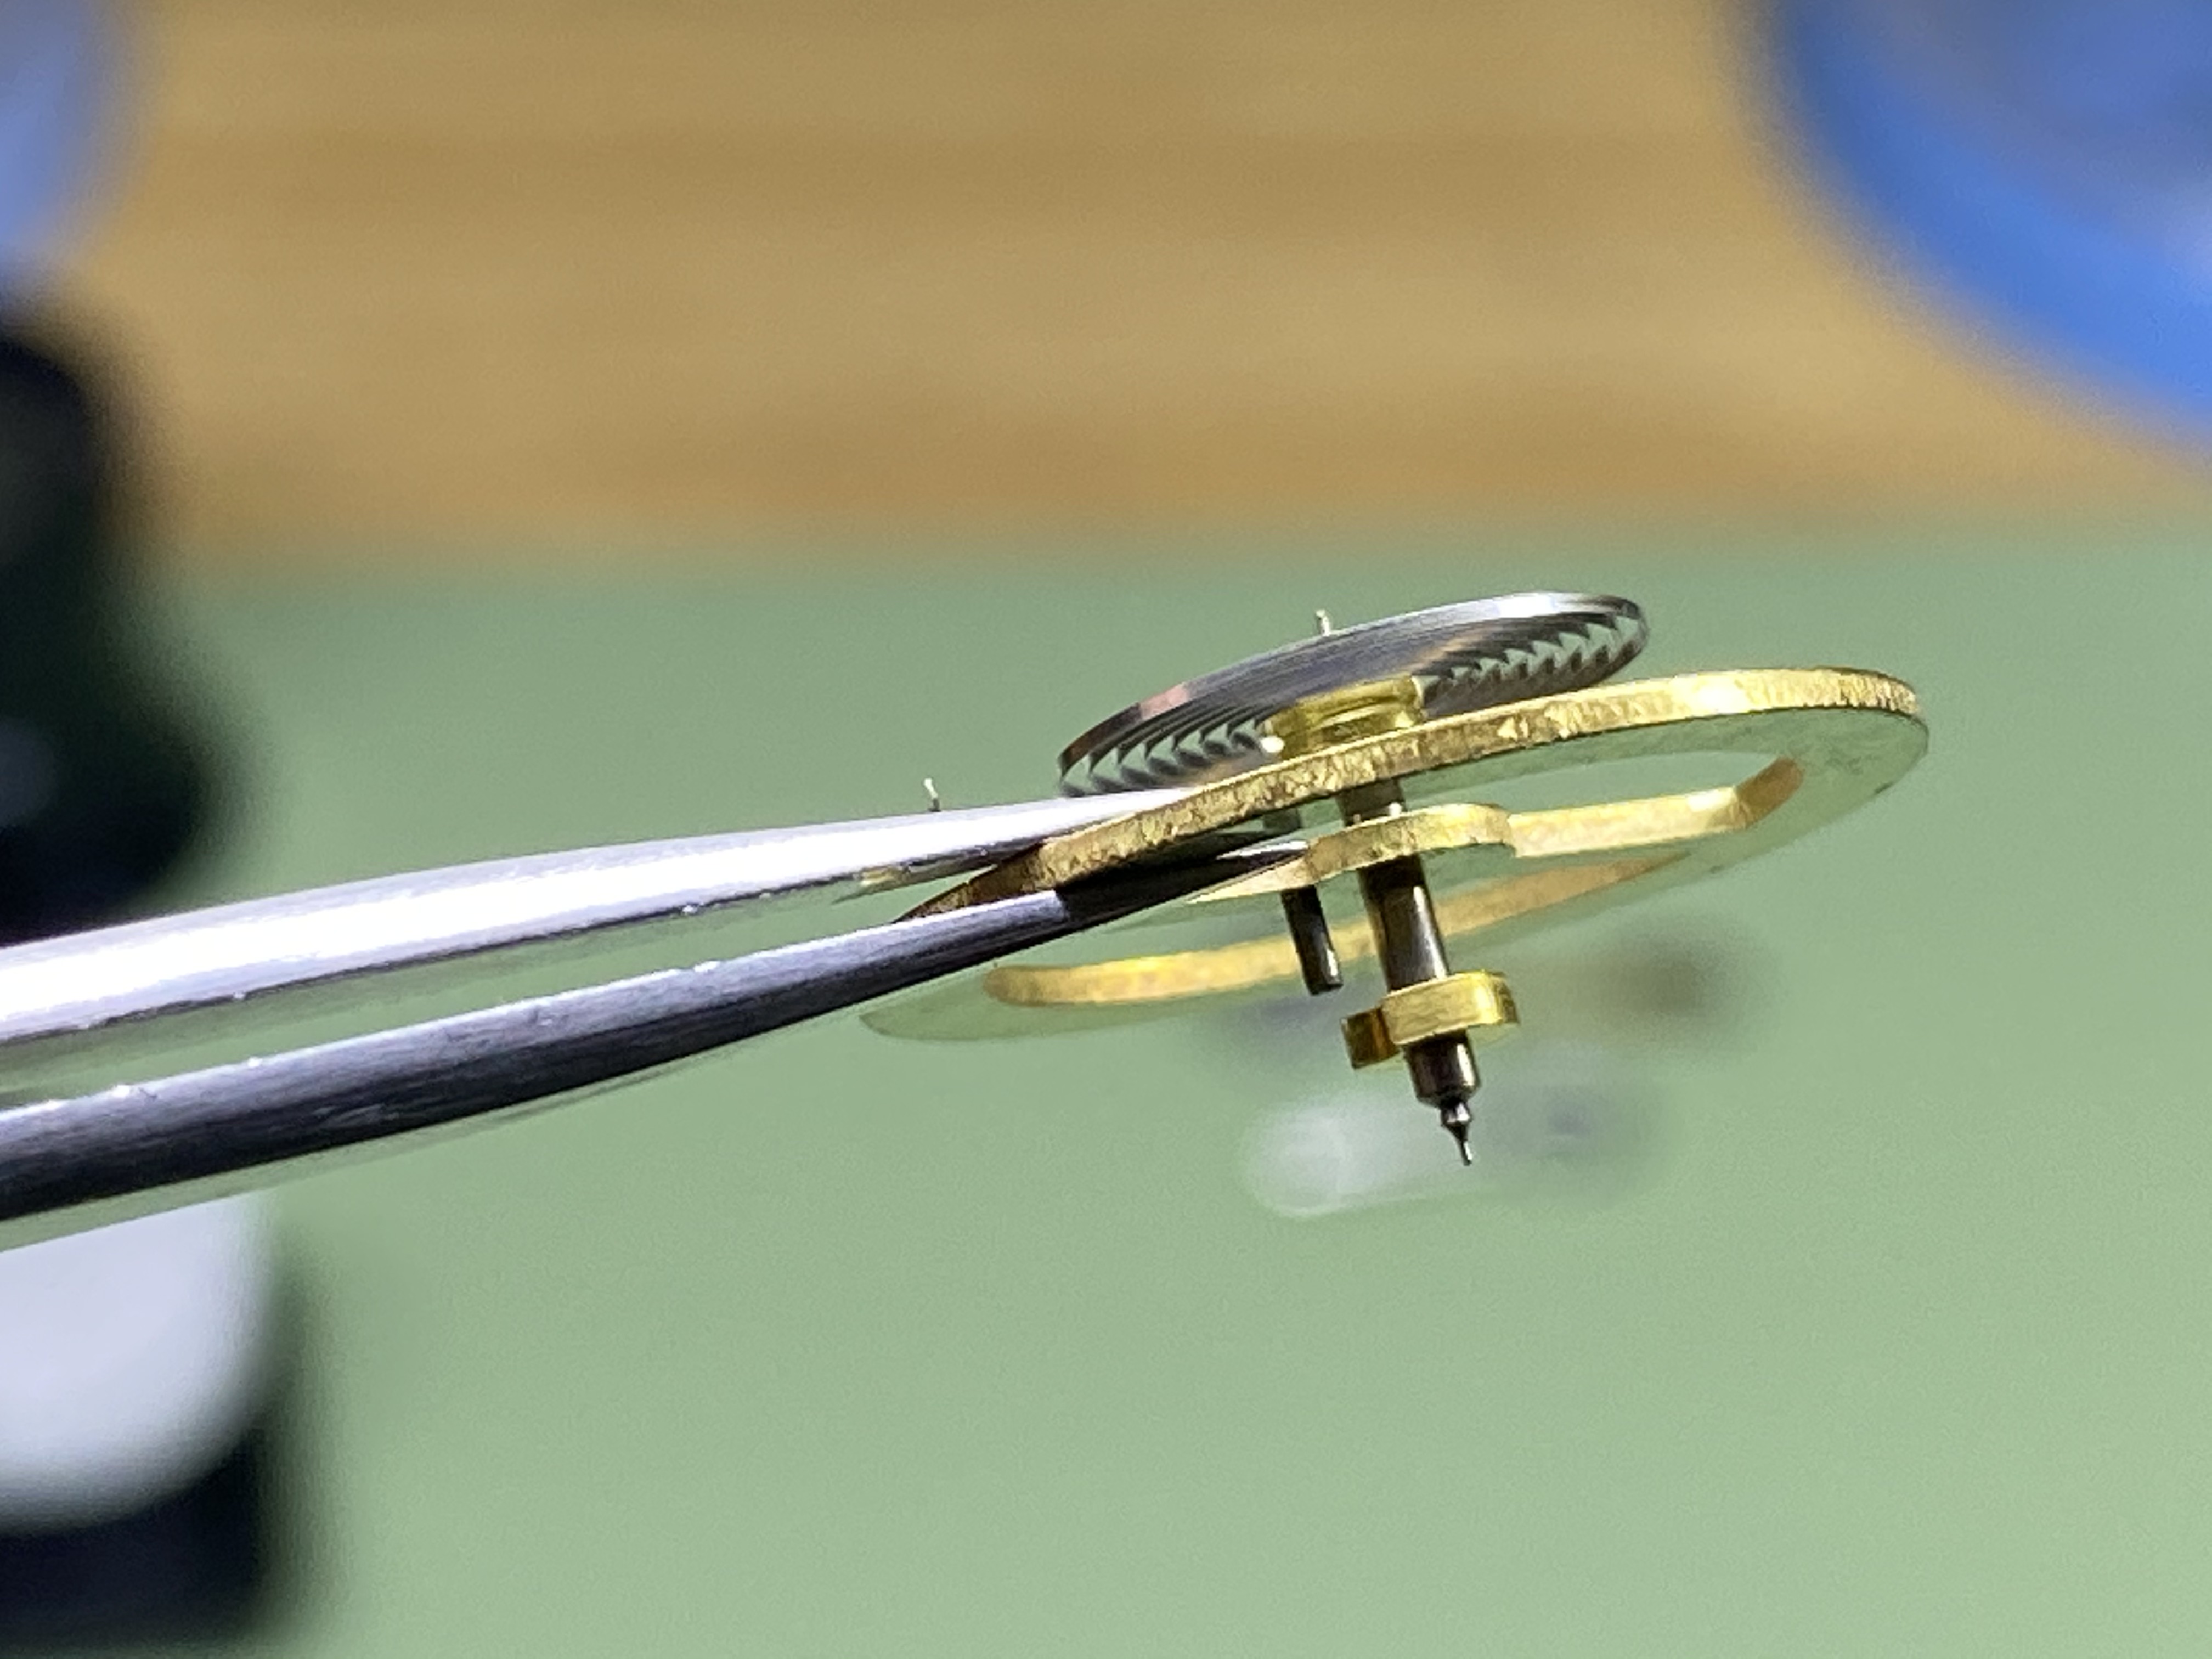
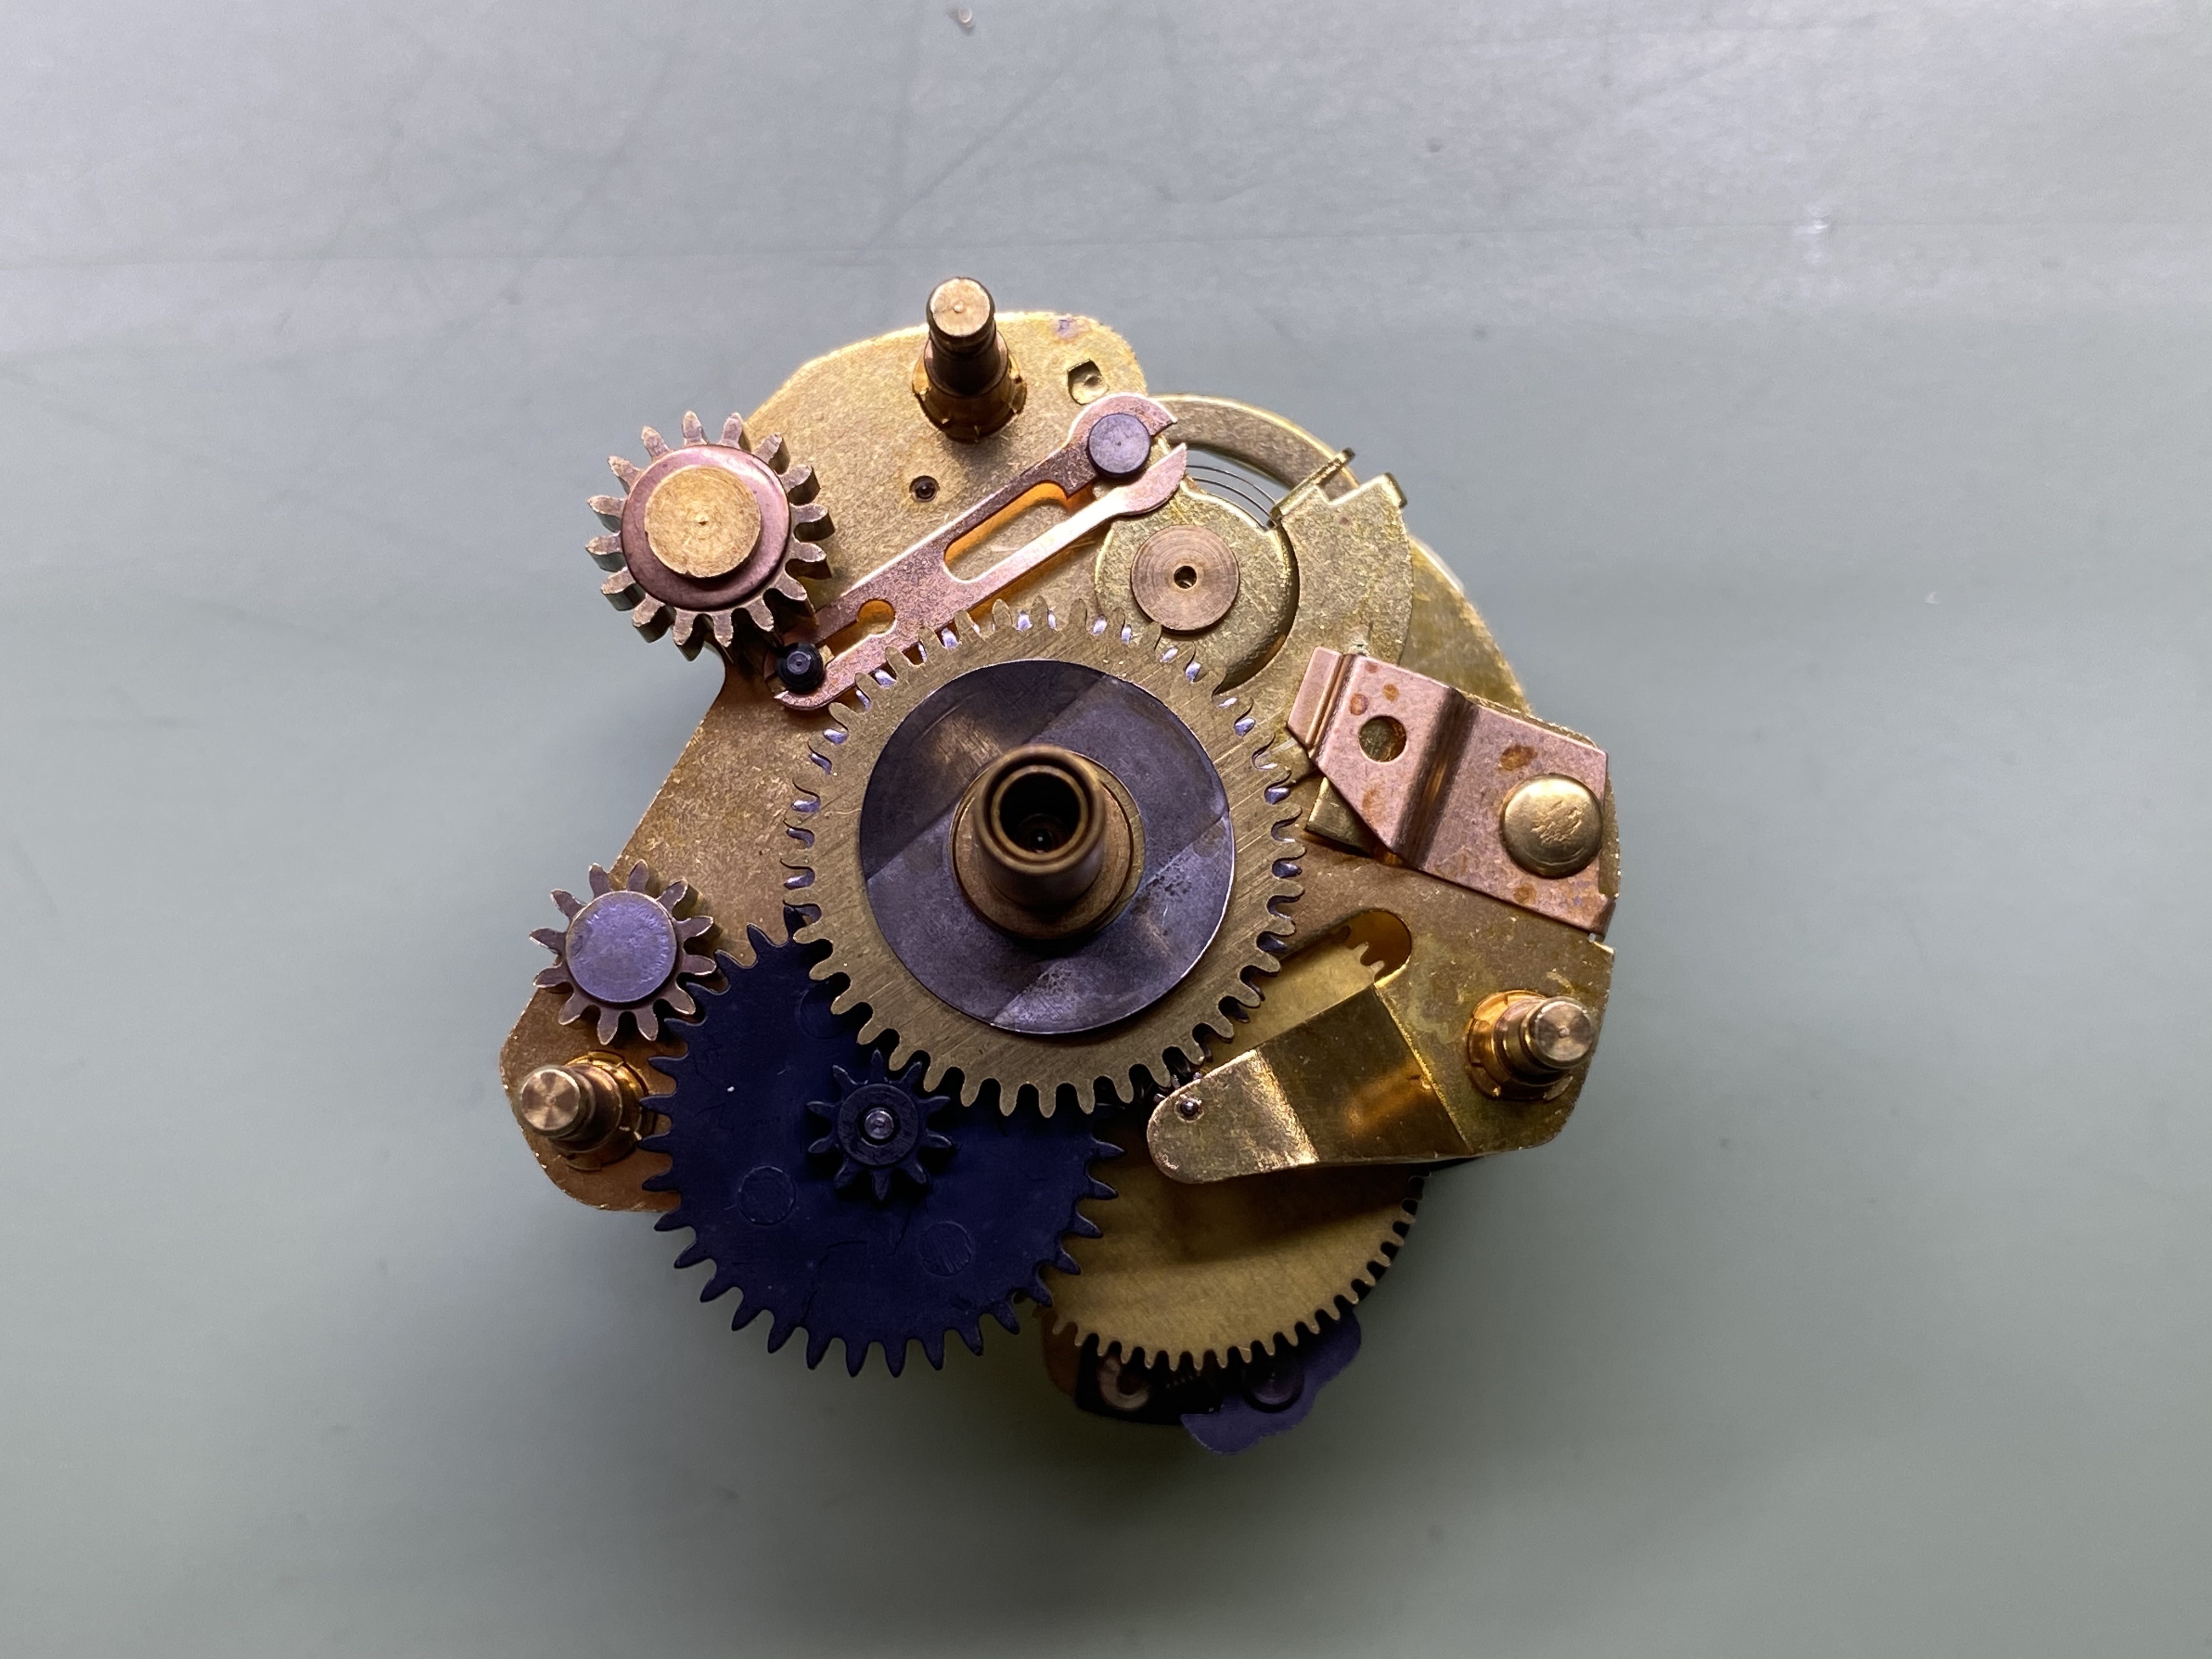
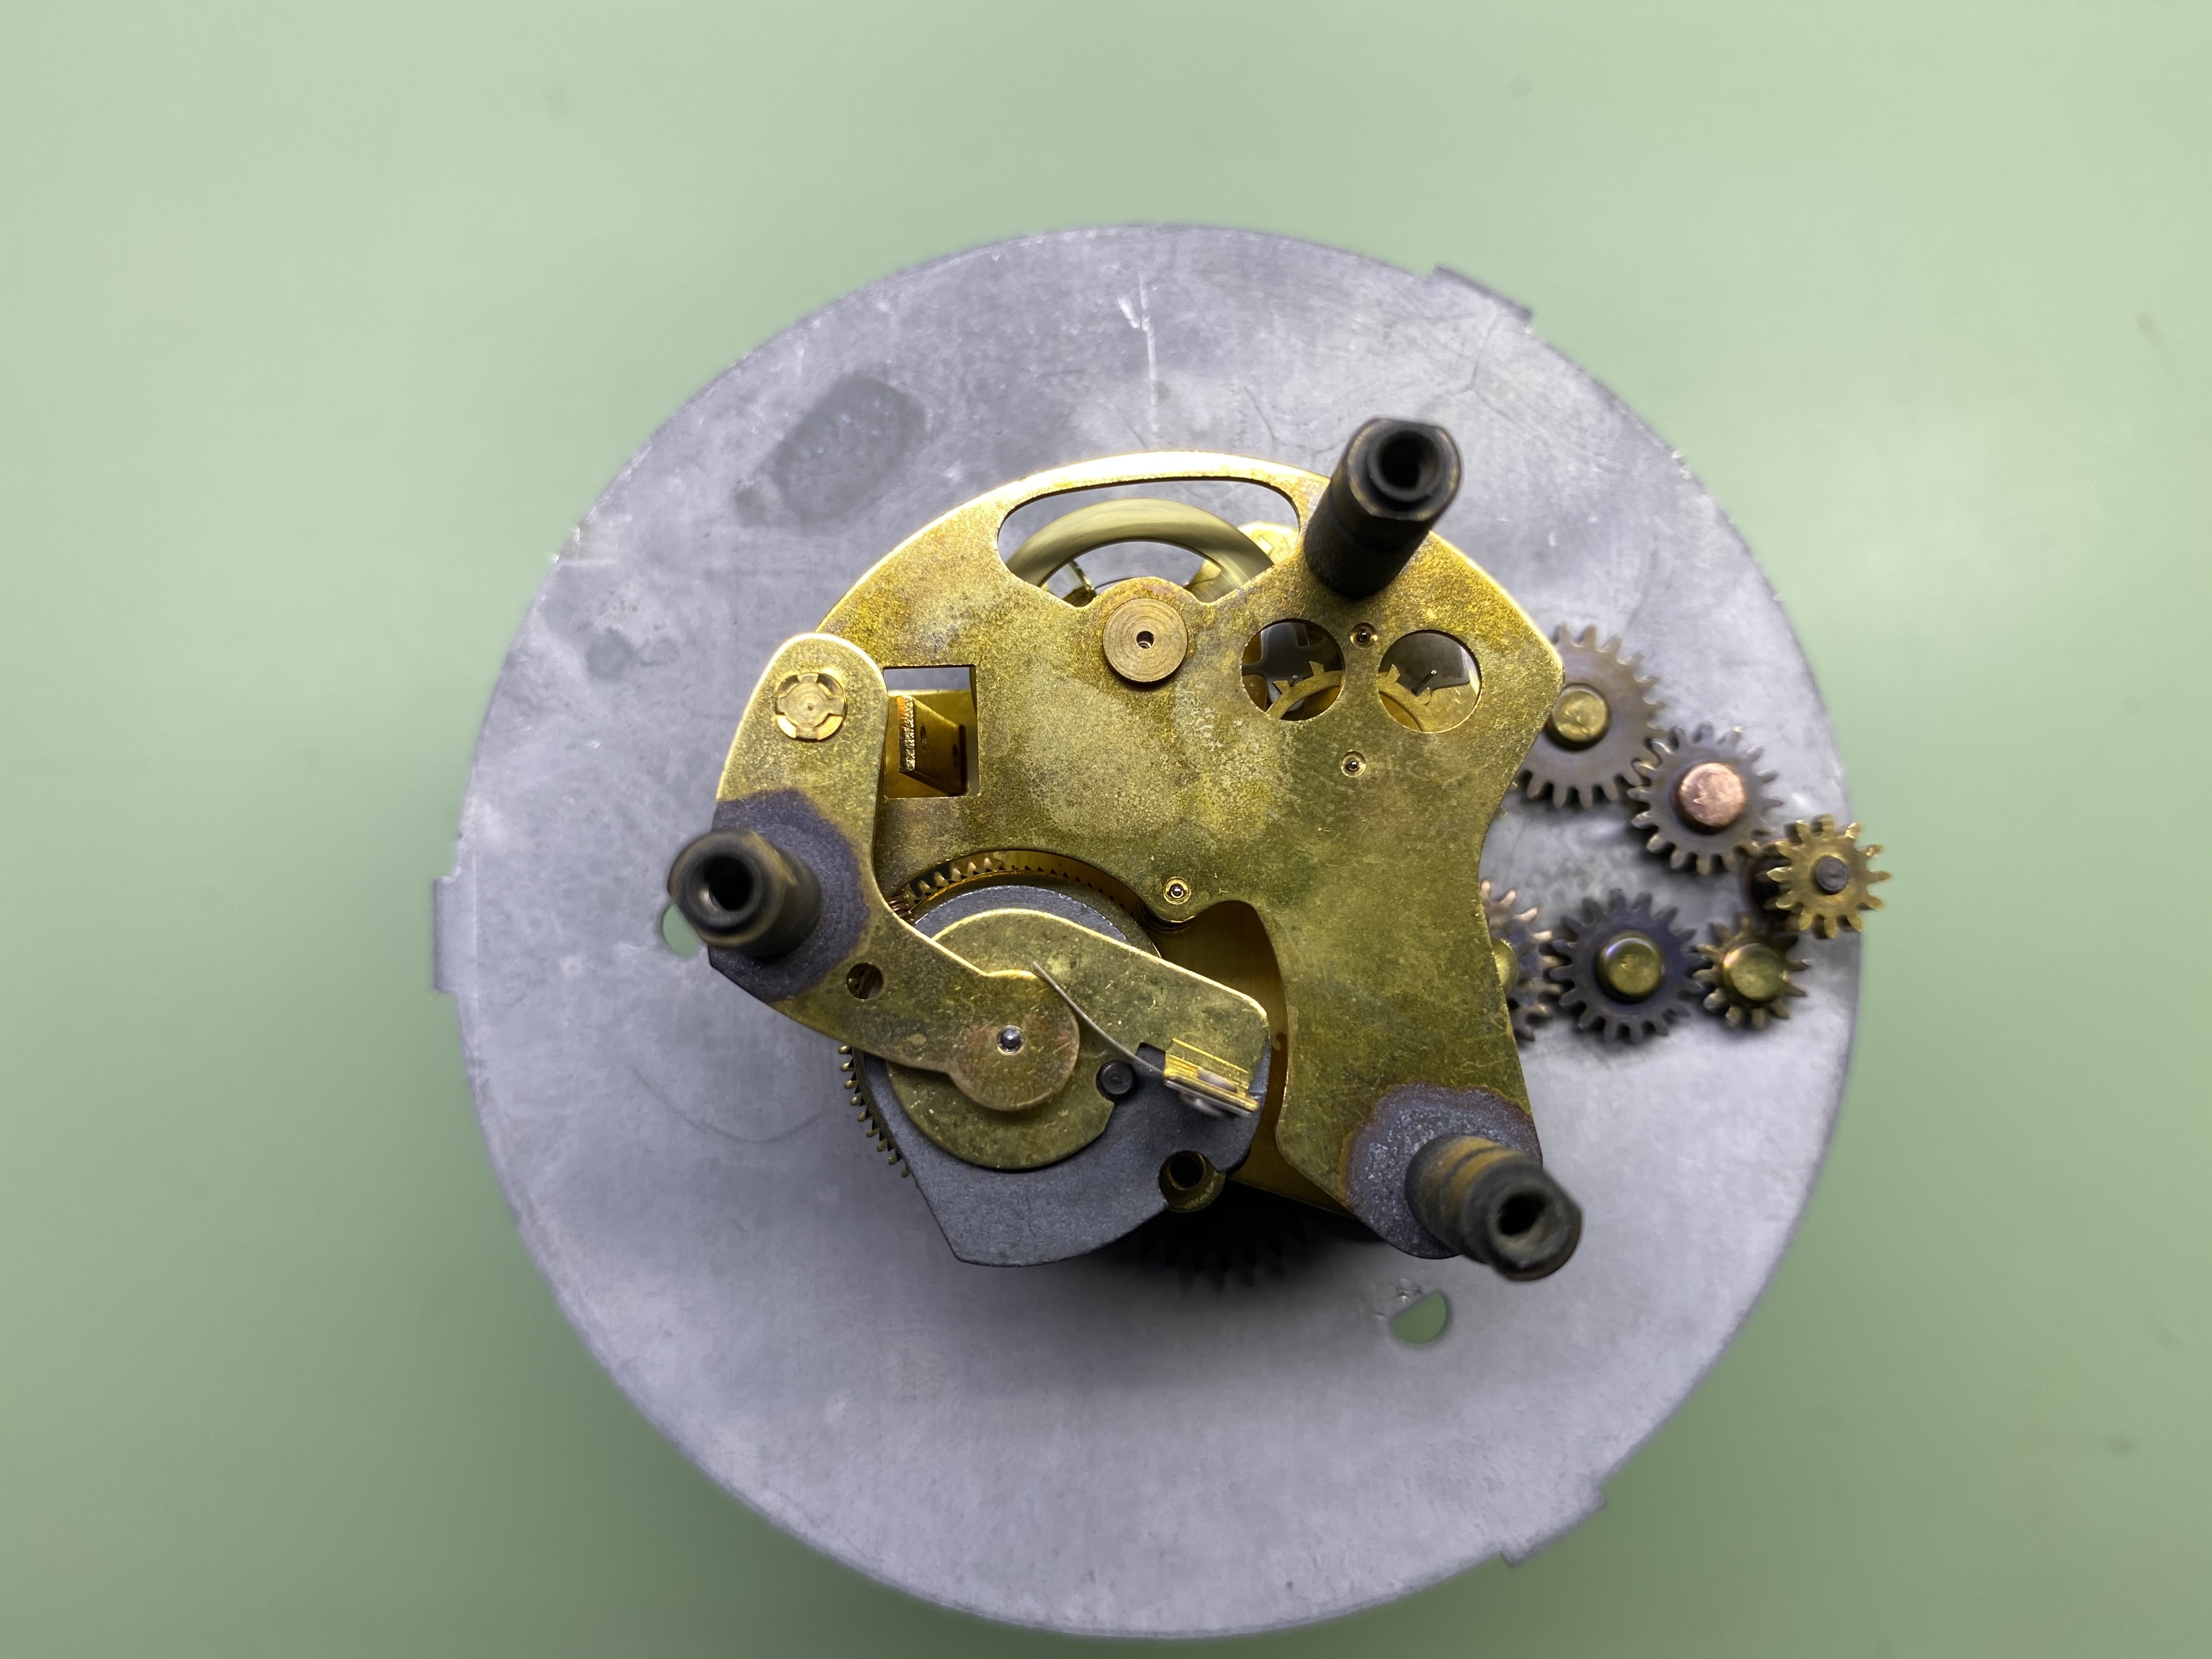
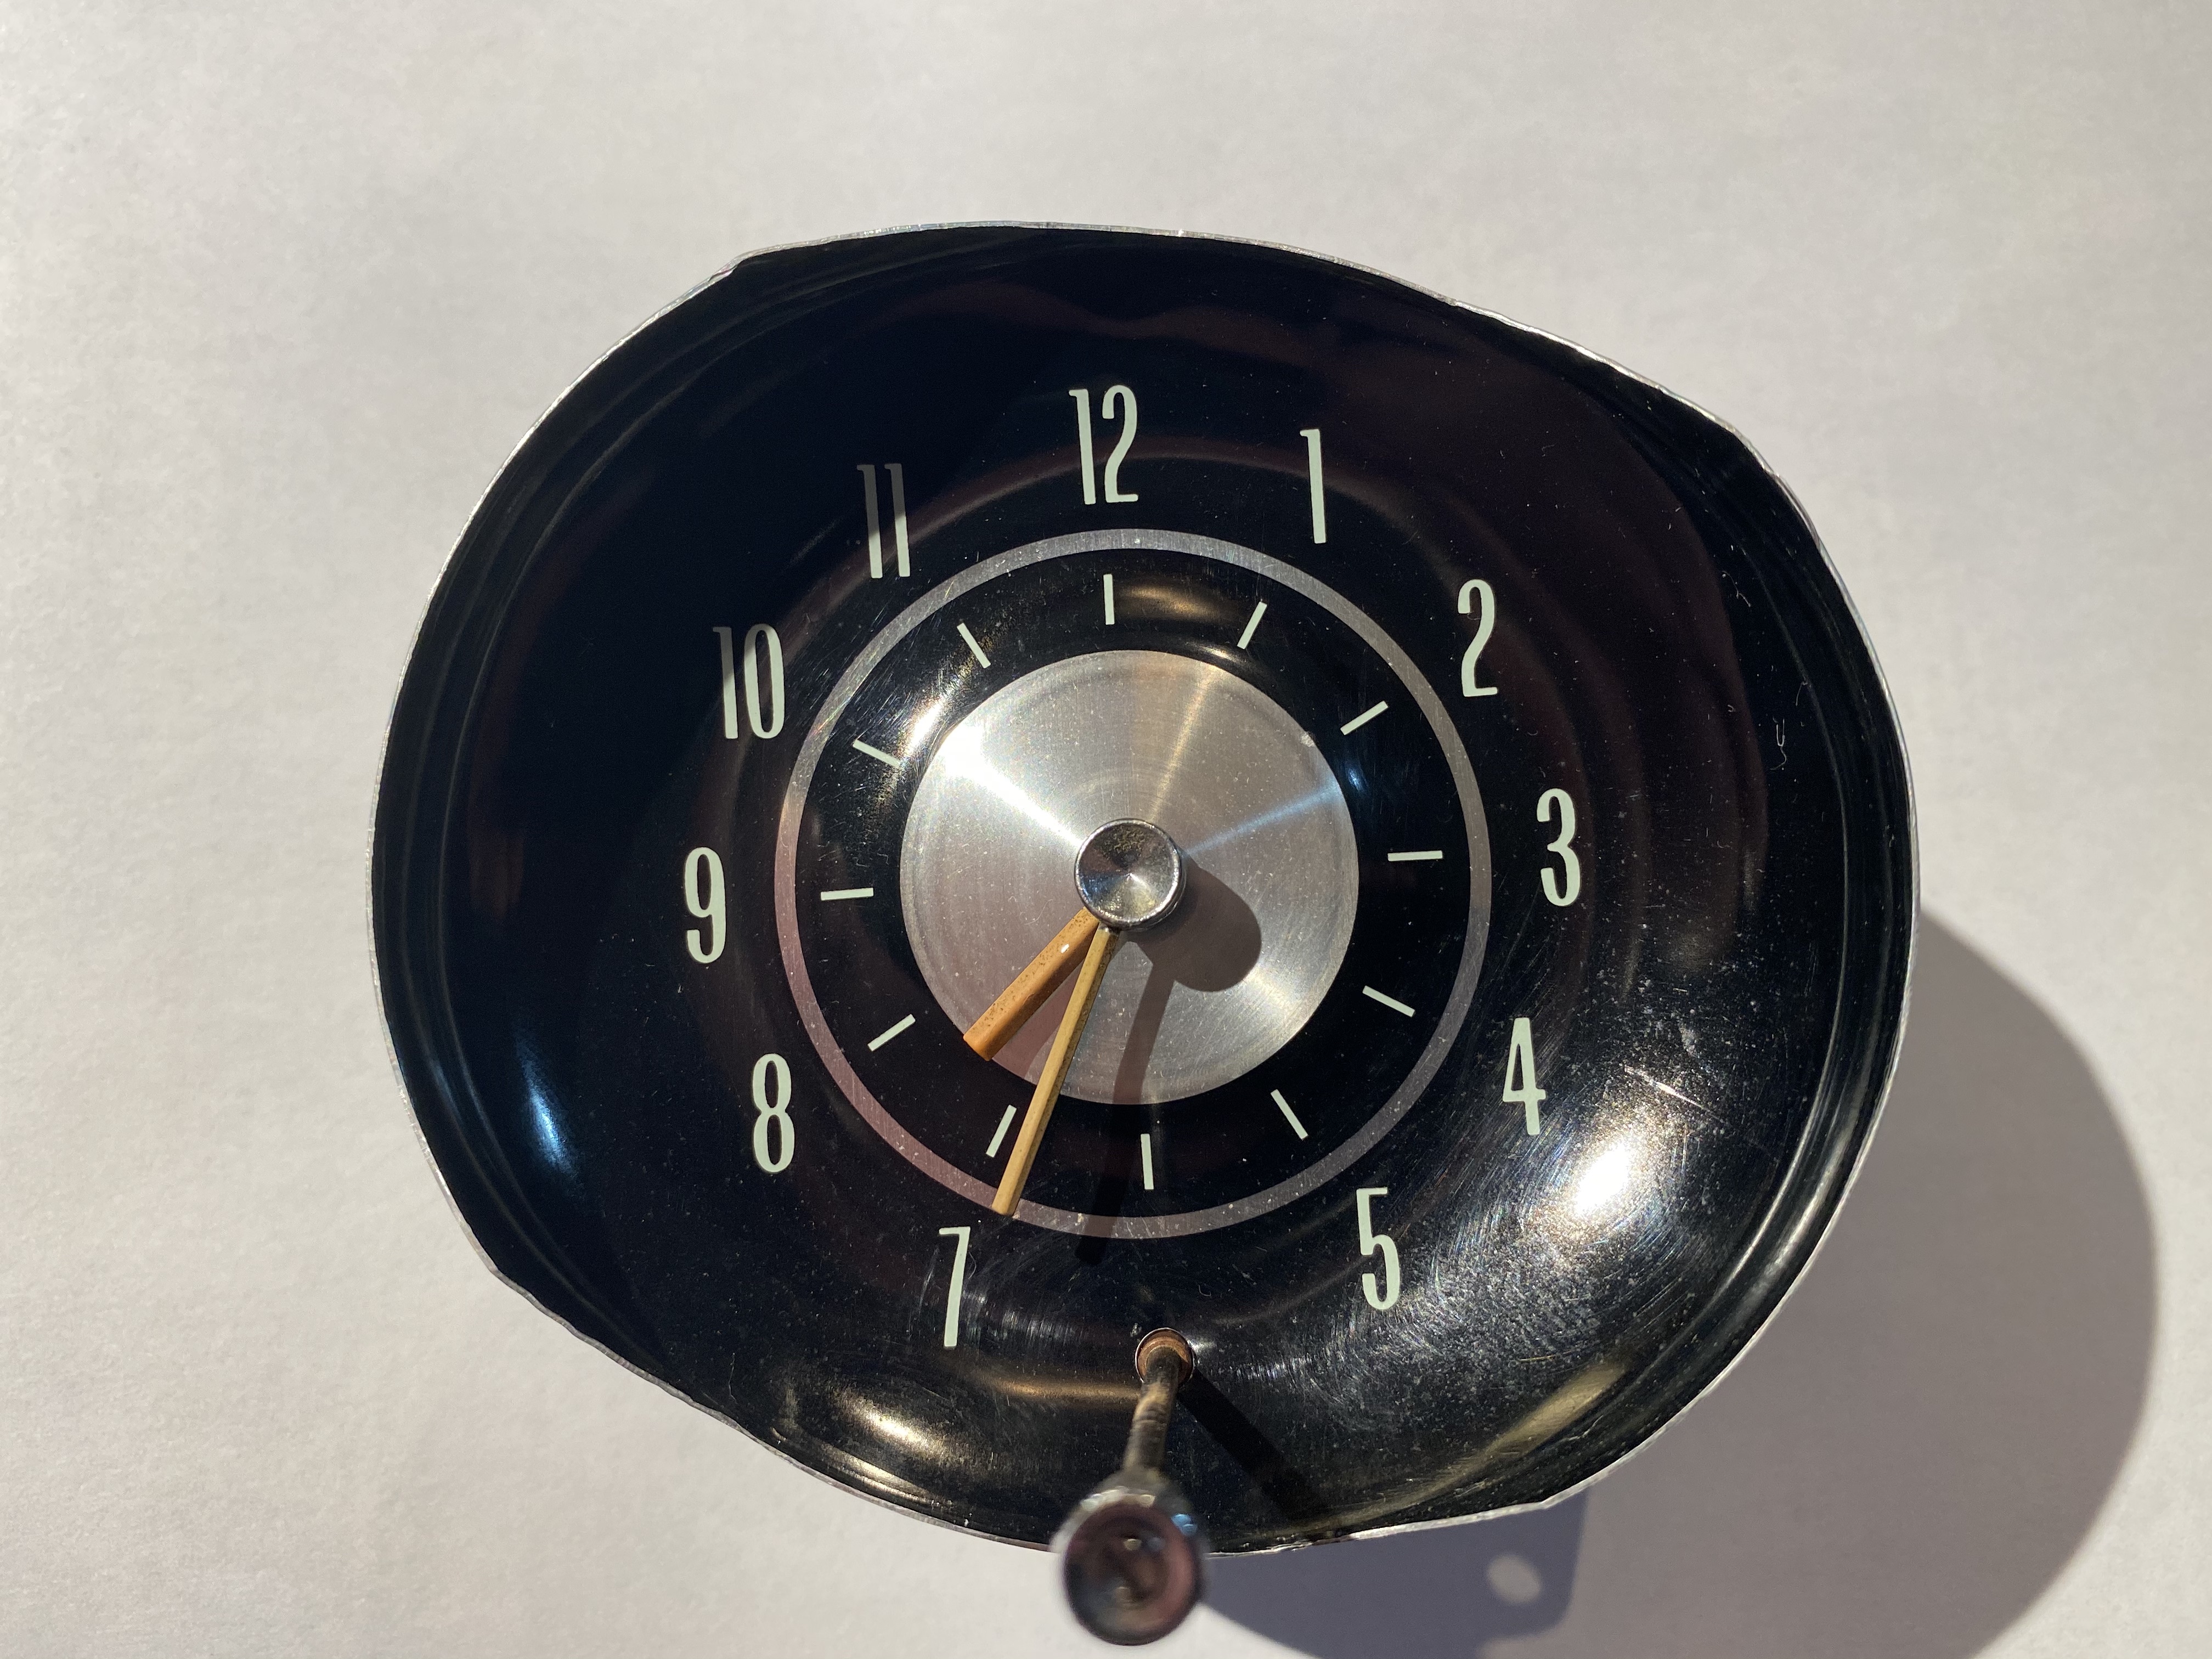
This is the dashboard clock my father pulled from his 1966 Chevrolet El Camino earlier this year. The clock didn't run at all and he asked me to take a look at it. Knowing nothing about automotive clocks I was intrigued and rushed over to pick it up. It's a simple affair with just two hands and a knob to adjust the time. No winding is necessary. On the back of the clock housing is a single 12 volt connection- the housing itself must ground the clock when installed in the dash. Stamped on the rear housing are the words Borg Instruments, Delavan Wis. The housing is removed by bending the three sheet metal tabs that run the circumference of the clock. Inside is a delicious stack of gears and a solenoid which winds the clock. A coil spring serves as the mainspring in this clock and it holds just about two minutes of power in it. When the coil spring is completely relaxed the two electrical contact points come together and are energized via the 12v connection. This causes the solenoid to act snapping the contacts away from each other and putting energy back into the spring. This action repeats itself every two minutes until the car battery is dead. Judging from the YouTube videos I watched before tackling this project- the typical failure point is the electrical contacts which wear out over time and fail to connect when the mainspring winds down. This wasn't the problem in my father's clock though. Most of the bearings in his clock had worn pear shaped and needed to be replaced. I broke down the clock for a good cleaning before turning new bearing on the lathe. The movement only has two jewels (for the balance wheel) so it's not surprising that the bearings would give out eventually. Some of the pivots were worn too and needed cleaning up as well. One of the cool things about this clock is that adjusting the time also regulates the speed of the clock. The setting knob is geared to make adjustment to the regulator and in this way whenever you make an adjustment 9adding or removing time) you are also adjusting the speed of the escapement. Everything was giving a nice scrub before reassembly. I removed the balance wheel in order to clean the plates and the hairspring is attached using shellac. This worried me a little bit but I found a narrow tip on the soldering iron was just perfect for softening the shellac and re-securing the hairspring. In the end I think I replaced five bushings in all. My father and I tested the clock by attaching it to the battery and letting it run for twenty-four hours; we found it to be a couple minutes slow the next day. I made an adjustment to the regulator before final installation in the dash and it seemed to be a bit better. Time will tell if it was a proper repair though. It was a fun little side project. I always assumed those dashboard clocks were entirely electrical but never bothered to considered how they worked. Now I know. ?


 3 points
 -
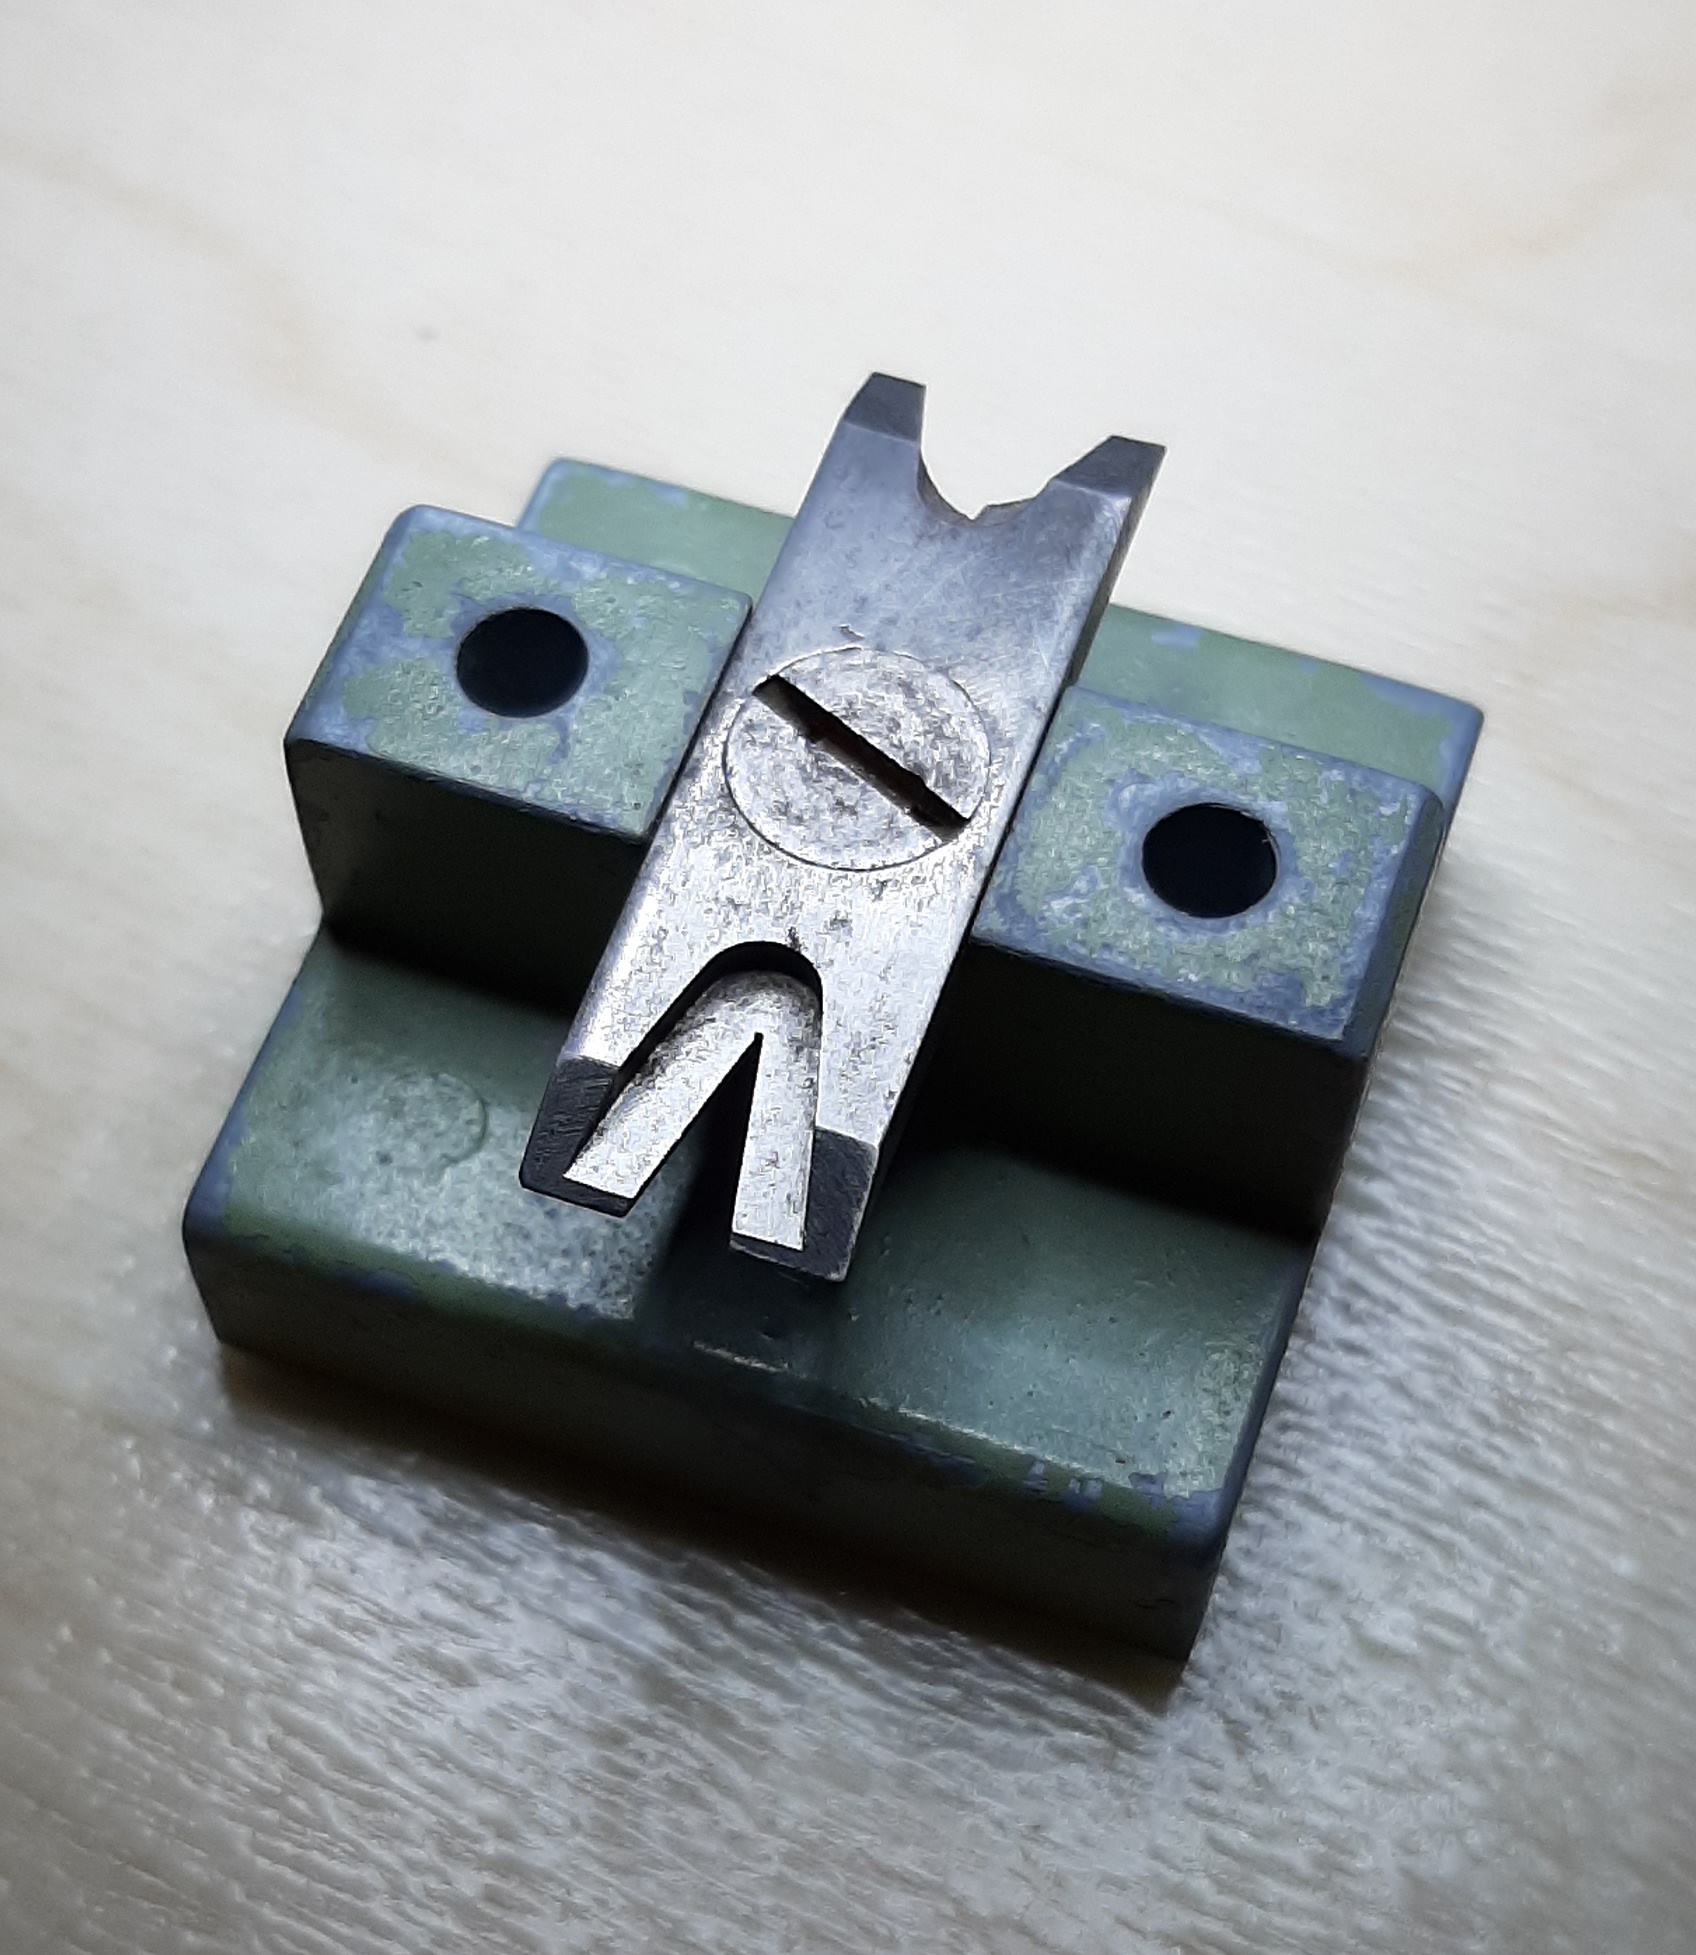
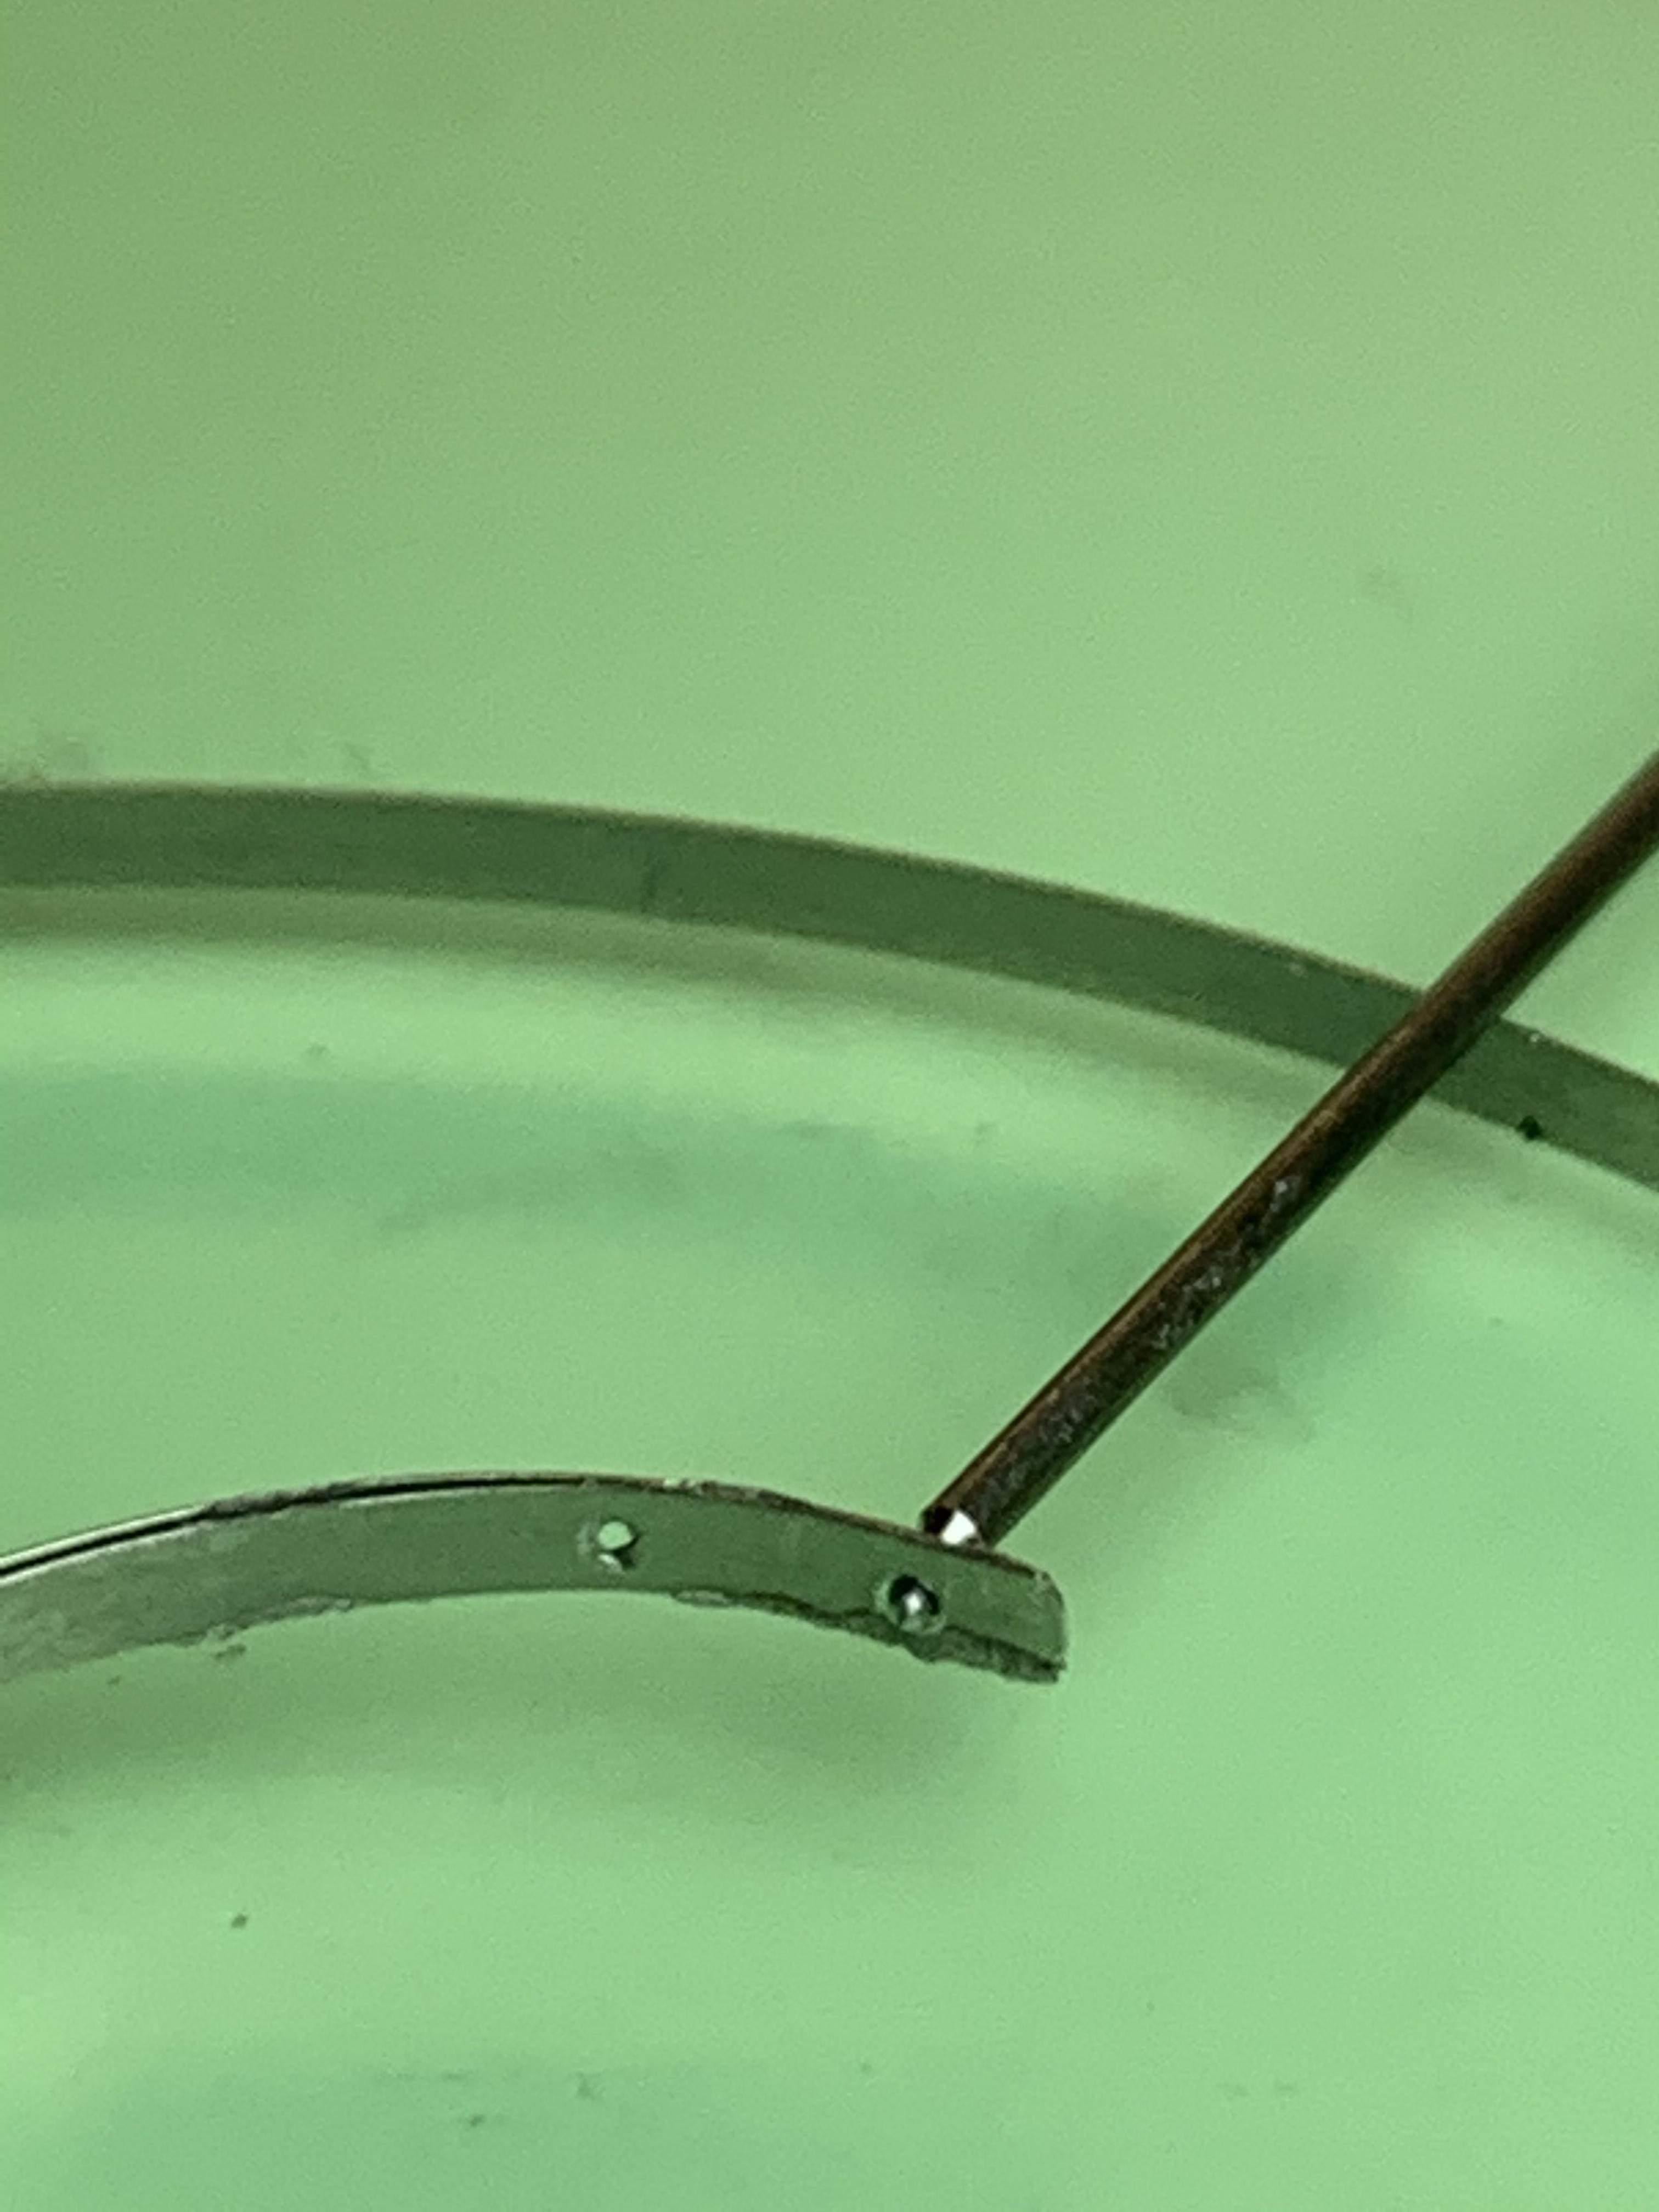
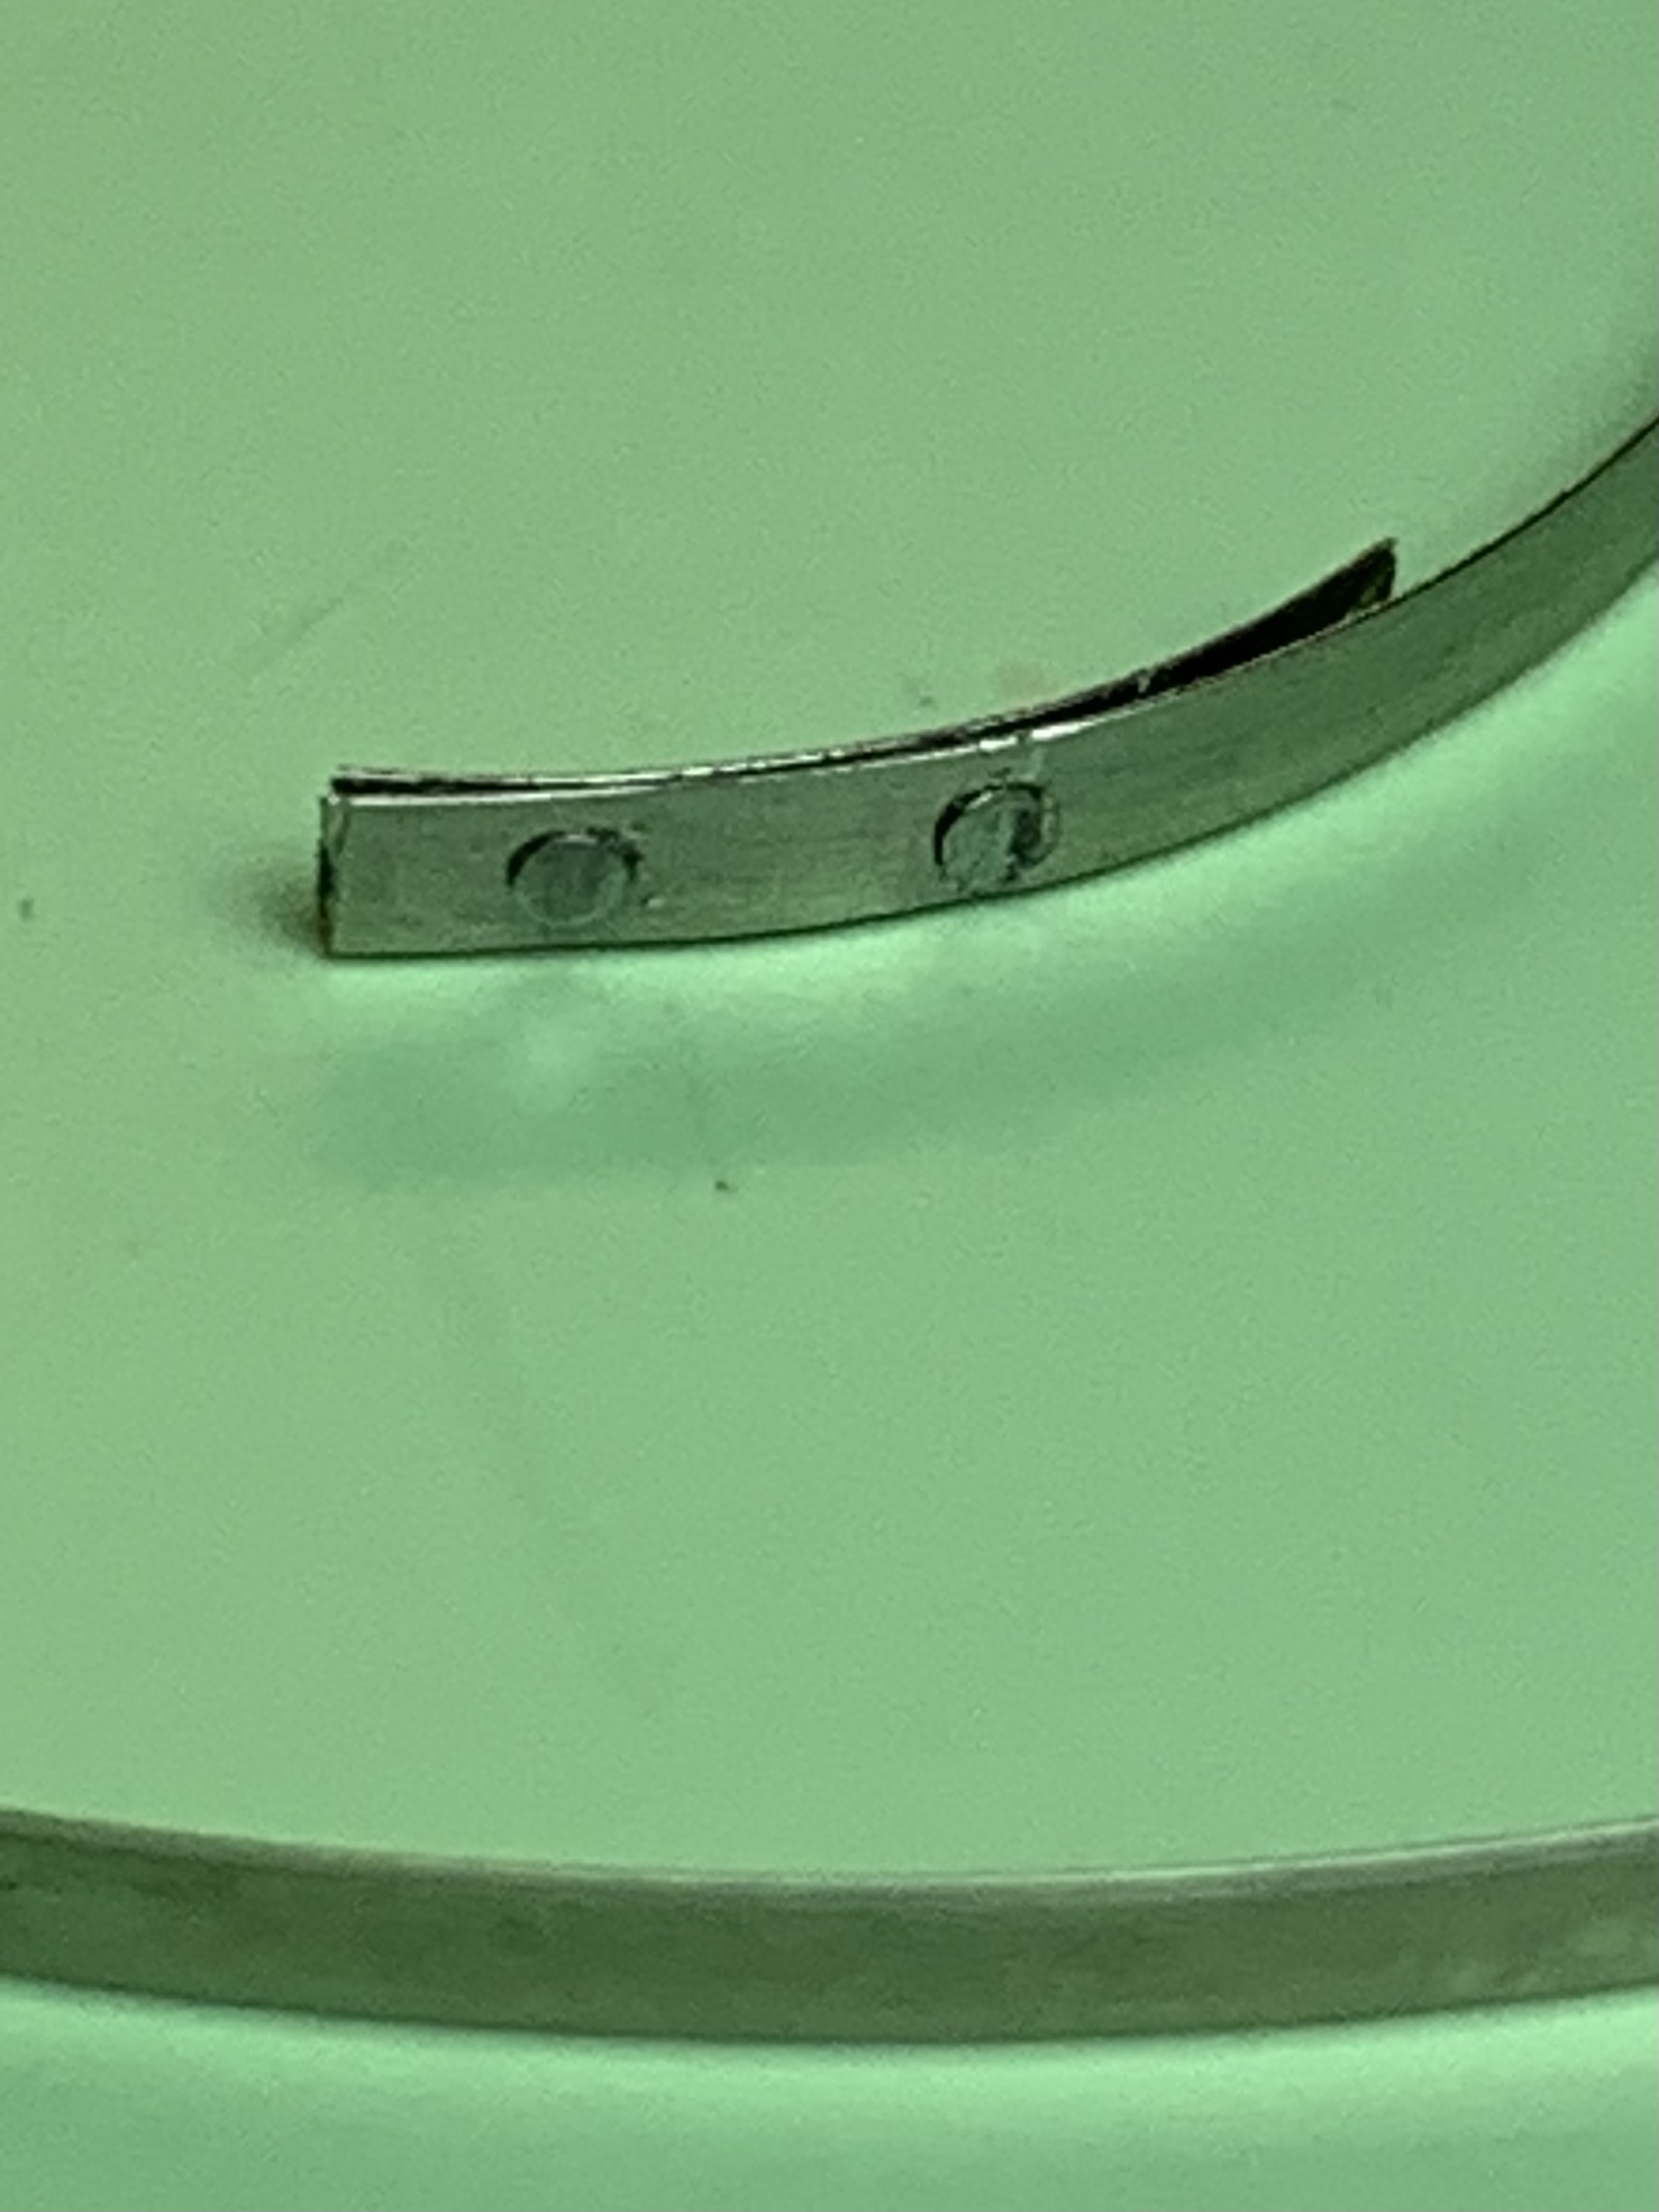
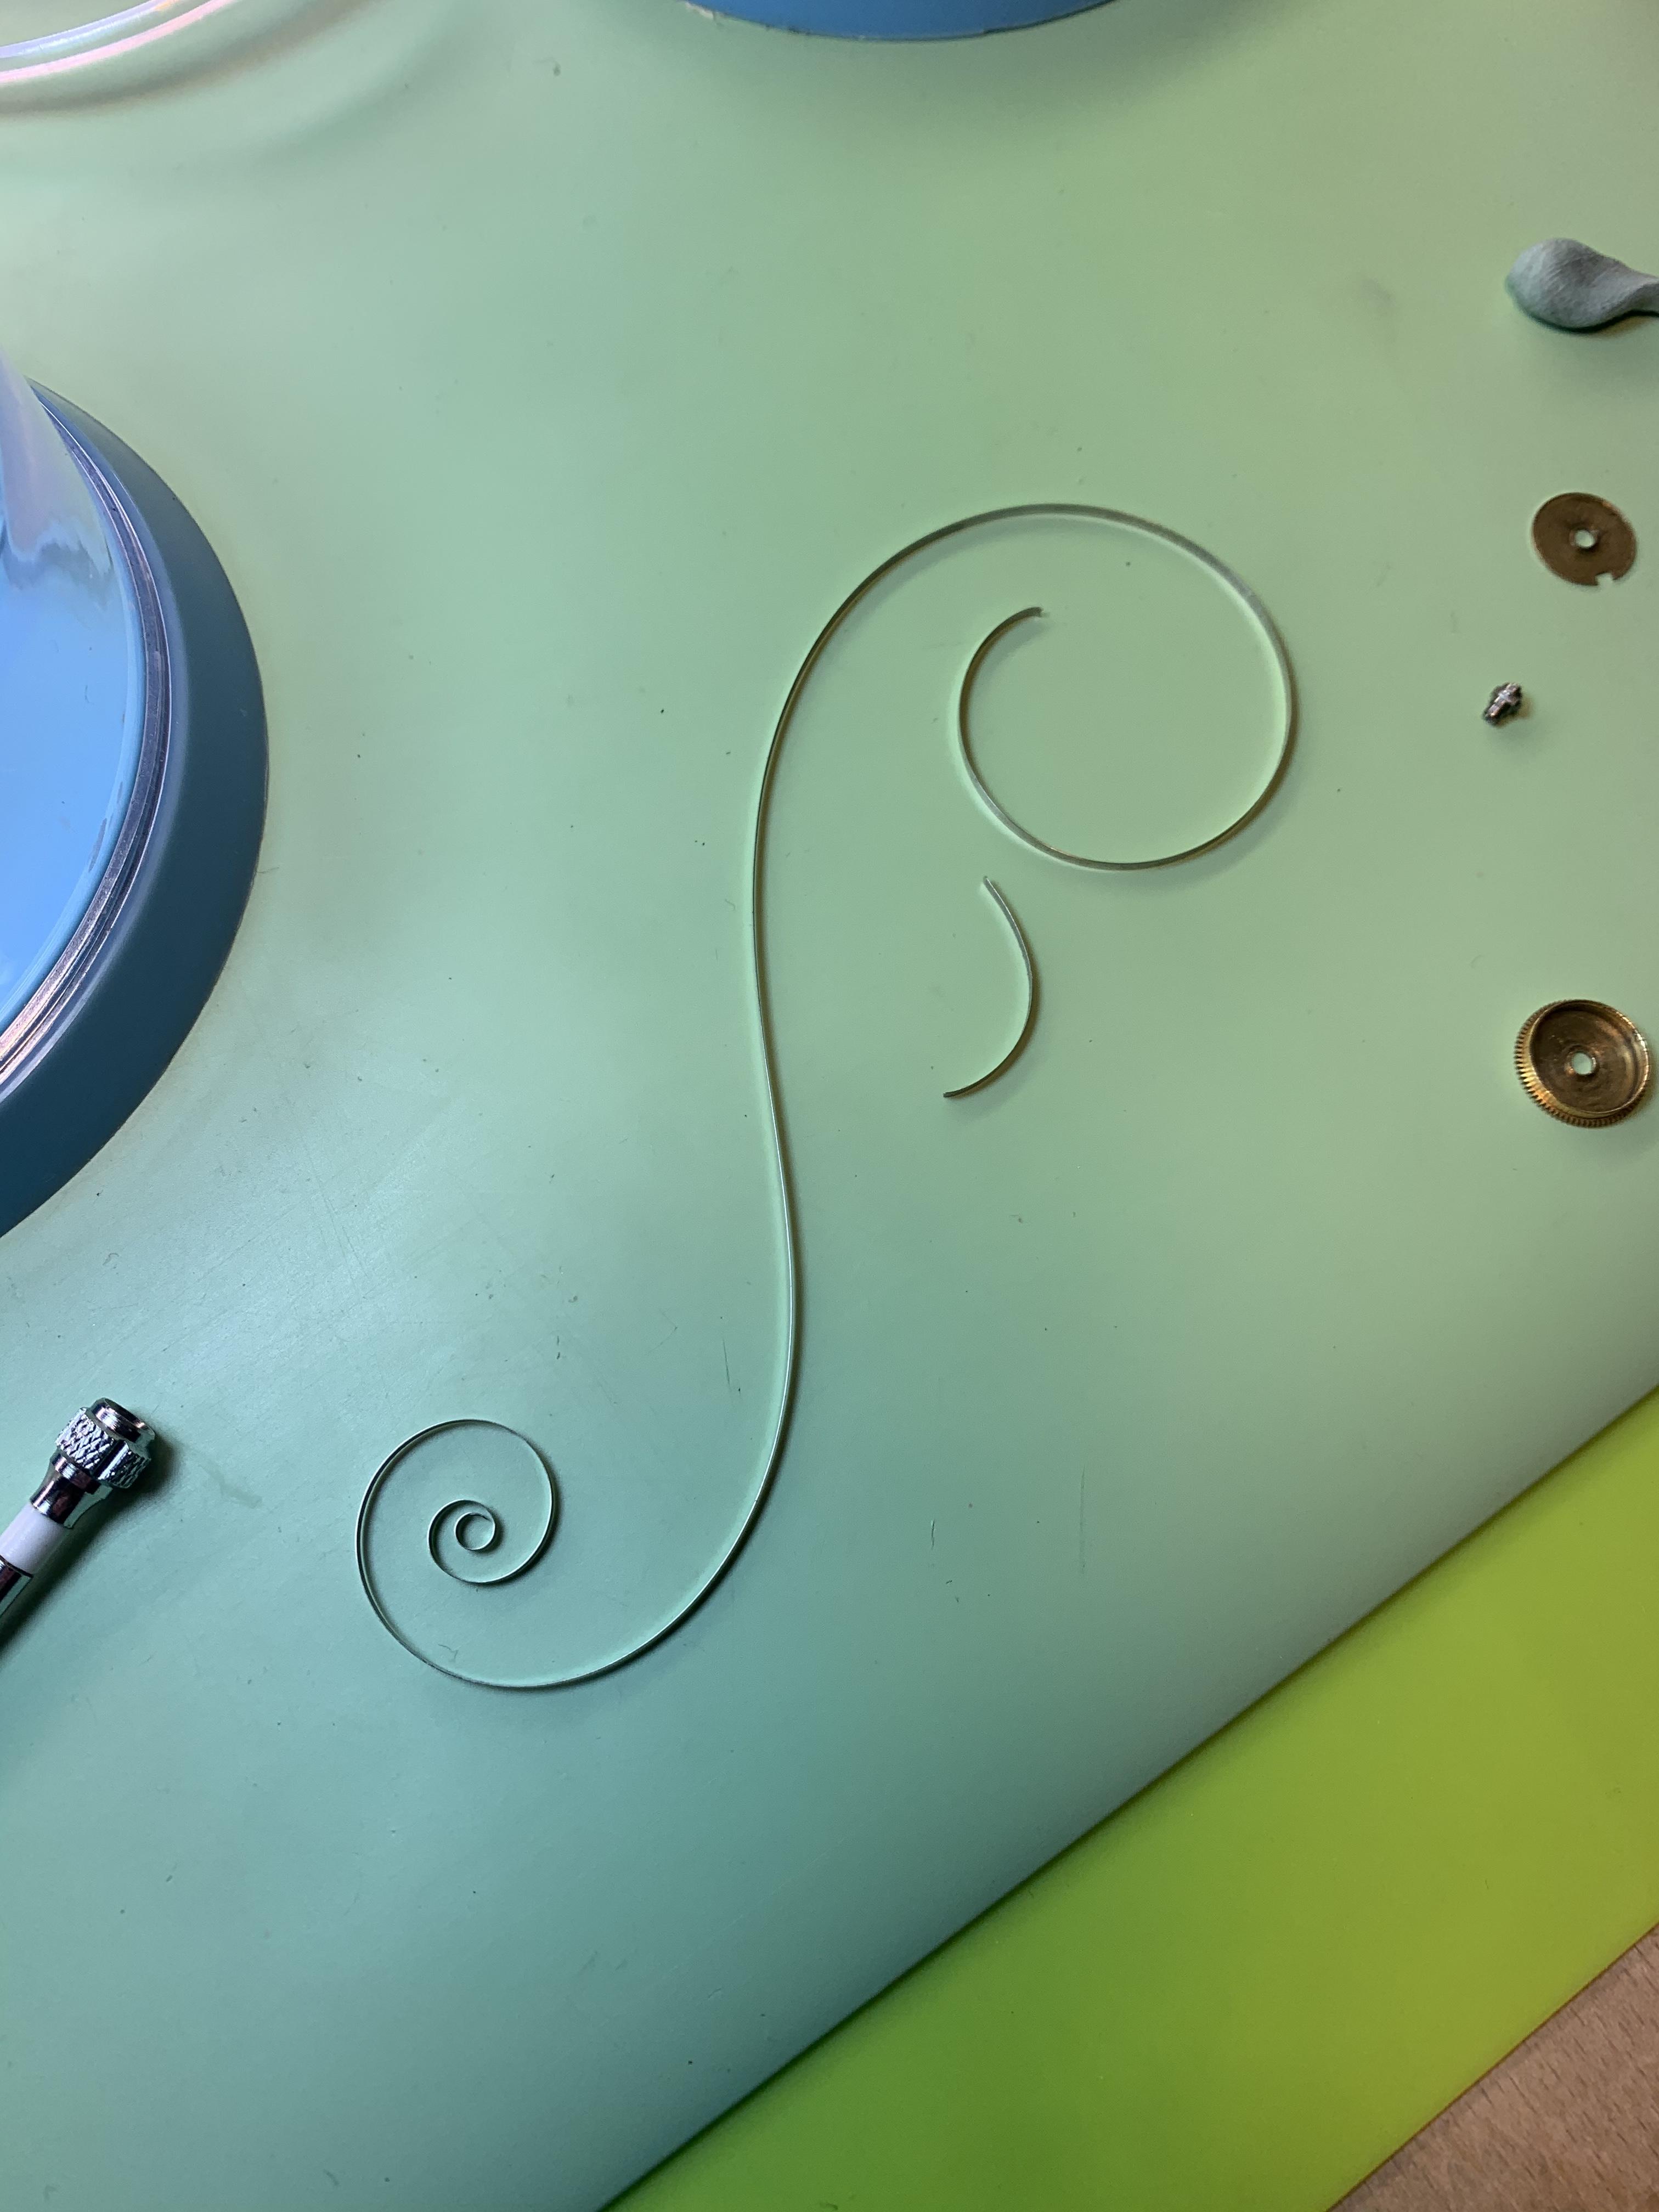
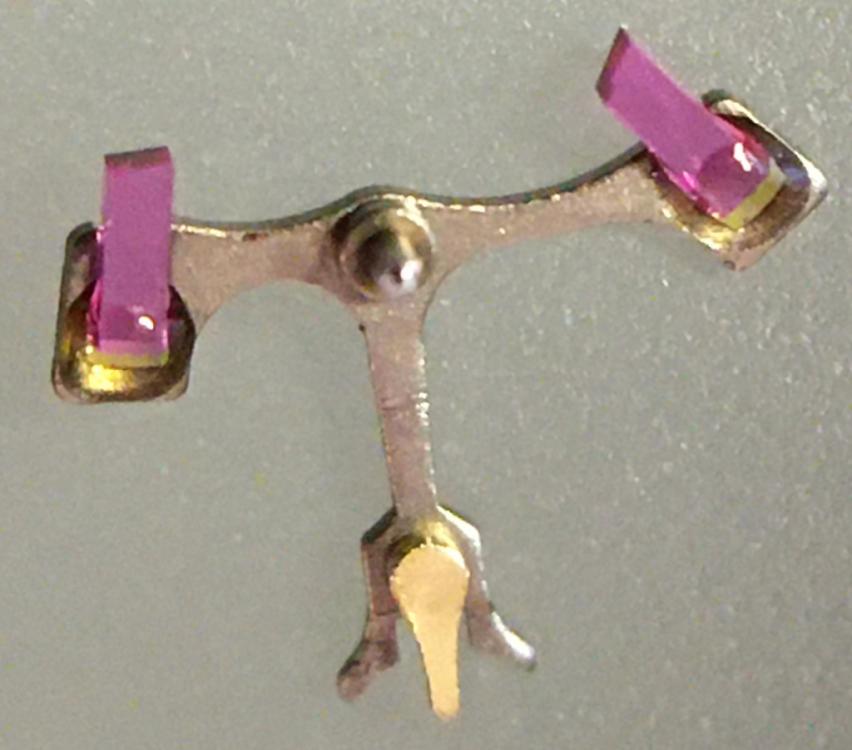
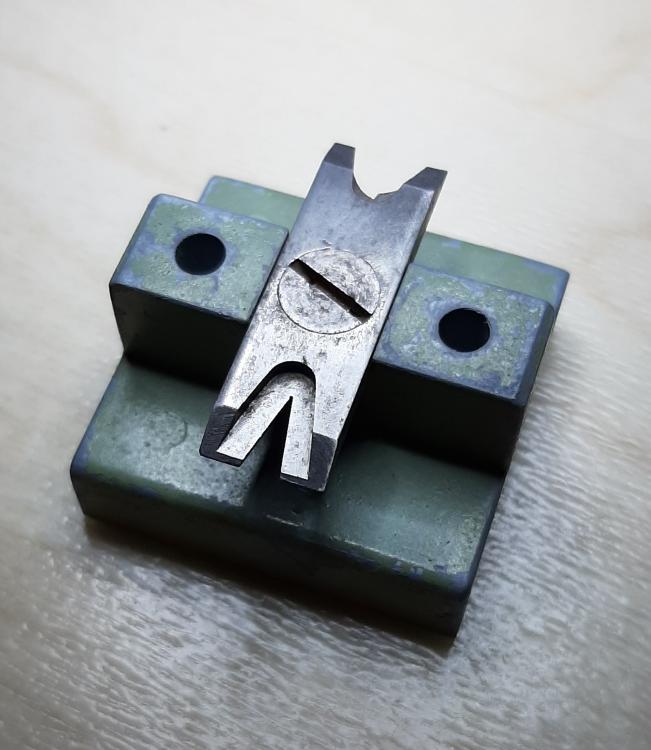
Hello everyone, isn't it a great skill in its own right to be able to make precision watchmaking tools. This little beauty is a balance poising tool with a sliding base and spring loaded vice to hold balance wheel in different position while you remove material from the balance wheel underside or rim side. The hand held cutter is sharpened by hand. I have used it on pocket watch and vintage wrist watch to make new balance out of scrap parts. But only once combined with hairsping vibrating tool for 18000 bph watches. A lot of fiddly work, but can be done VID_20201129_094512.mp43 points
-
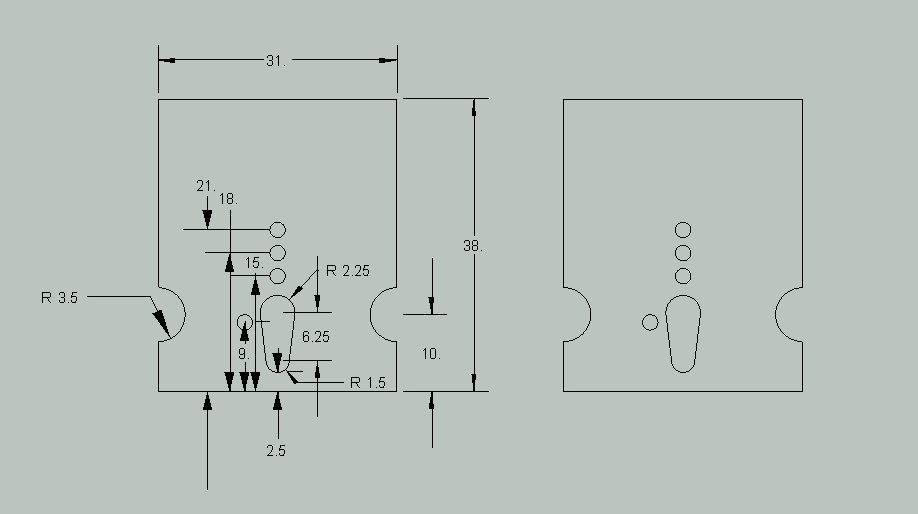
Ok I didn't make a 3D model or anything, but laid out the most important part, the plate. The back piece is 40mm x40mm, the arm can be anything hinged any way just so that it comes down over the balance rim. The support piece for the inside of the rim can also be anything, on the old tools they were V shaped and pressed into a hole, on my friends it's a simple pin that has a notch filed in it. The notch/V permits whatever bit of screw that is sticking out inside the rim to be unharmed when working on it. The threaded holes for the pins are a 2mm thread, but anything near that would be fine. You can see in the pics that there were different ways to hinge the arm, either with a hole drilled all the way through the 40mm back plate and the arm recessed in, or with pressed in hinges, both would have been a test of the student's patience, not becuase they are necessary. A simple hinge from a hobby store for dollhouse work or whatever is fine. I don't know what the pin sticking out the front of the tool is for. They all have it, but?
.thumb.jpg.c3bad07d9c07214b3feed6be57856513.jpg)
.thumb.jpg.512a98d2f31fb0e62815775a2dcfef58.jpg)
.thumb.jpg.c3c10347c22a8805d05894f6831ed4c4.jpg)
.thumb.jpg.64f89d53ec799cc12d889de0a1d95d60.jpg)
.thumb.jpg.0fa62ae5732188fdc470006e0d5eb56b.jpg)
.thumb.jpg.bb3d329de86f763d62b575af8b8fec9e.jpg)
.thumb.jpg.c9d0adac64760de6f05ee2ce12653f0f.jpg)
 3 points
 -
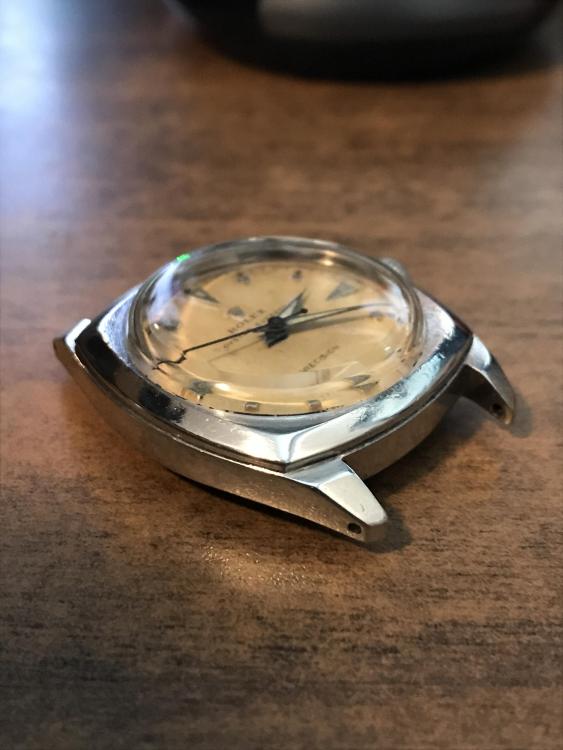
@Bradders recently posted, looking for information about the venerable Baumgartner BFG866, and as a result I had a trawl through my spares to see if I had the makings of a complete movement. I wasn't quite there, however today while tidying up and organising things I came across this Buler 17 jewel 866(CLD) sweep second, date version. It had a smashed crystal and the balance was loose, but surprisingly when I inspected it, far from being damaged, the only issue with the balance was a loose balance cock screw, and a slight kink in the hairspring, no doubt due to be balance rattling about loose over the years. So unable to resist a challenge I cleaned lubricated and polished the thing, and off it went. There is some obvious damage to the dial, and it originally had a Cyclops date magnifier crystal, which I didn't have, so I substituted a standard high dome. It is also sporting rather annoying 17mm lugs. I had 17mm pins, but the only strap I had that wasn't glaringly obviously the wrong size was this slightly scruffy looking number. It wont win any beauty contests, but it does have a certain late fifties looking charm.
 2 points
 -
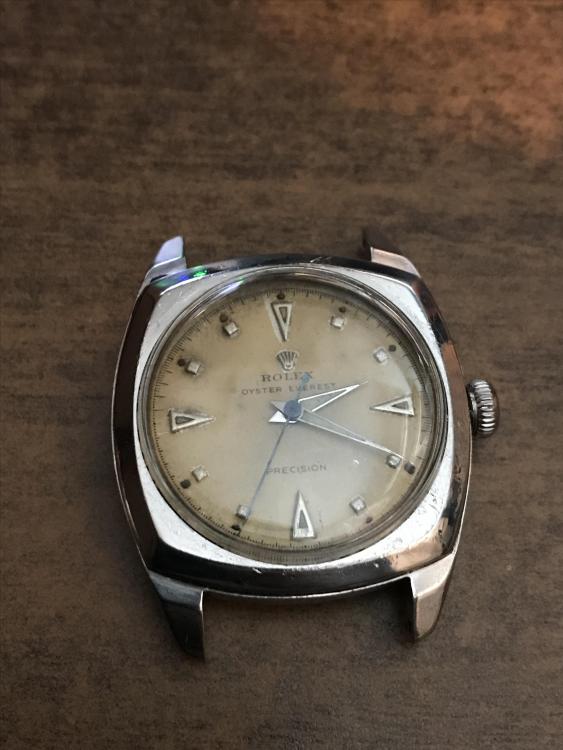
It is running like a dream. Cased it this morning and polished the case at the request of the owner. She is blown away, and now wants to get insurance on it. Here are my final pics. Will let it run overnight and then regulate it.
 2 points
 -
I believe this is your movement: http://www.ranfft.de/cgi-bin/bidfun-db.cgi?10&ranfft&&2uswk&Peseux_320 Hands 1.30 x 0.80 / 0.21mm2 points
-
Another great skill with massive time consumption. 25 grand to do a whole Rolex watch. Eichs!!!!


 1 point
 -
Looks ace!!1 point
-
Not really a question but hope it can help someone. Well I did a bit of dynamic poising of a Ricoh 61 and needed to know the lift angle. To cut a long story short, I couldn't find the information anywhere. Using some knowledge I found on this board I adjusted the mainspring so that the balance was moving 180 degrees and then adjusted the lift angle on the Timegrapher so that the amplitude was displayed as 180 degrees. The lift angle was determined to be 49 degrees. Hope it helps.1 point
-
typically they're not supposed to run fast if they run fast somebody didn't phase the watch correctly. Or they didn't phase the watch taking into account that there now using a silver cell with a higher voltage. perhaps today this is true because were all familiar with quartz watches. At the time in the tuning fork watch came out Bulova discovered the watchmakers were having issues. So they had a several day training program. Unlike the training programs or stuff the other watch companies were doing where you got a certificate just to be there this was different. Two days of intense training with a written and practical exam. Only those people that passed got the certificate and could call themselves a Certified Accutron Technician. as this is an electric watch the same test equipment you have for quartz watches will work fine. Variable voltage power supply with the ability to measure microamps. Unlike quartz watch repair a microscope is necessary to do the phasing. The index wheel and the jewels associated are really tiny and a microscope would be rather nice here. to get you started I have some light reading. The 214 service manual is really where it all get started so it explains about how it works phasing etc. Then there's a fact book that explains similar stuff. then the Omega tuning fork in this discussion wasn't really made by Omega. The Swiss needing their own tuning fork watch designed a new tuning fork watch and it was sold by a whole bunch a Swiss companies. I have the manual for that and this is interesting watch as it implemented all sorts of improvements to make it much easier to work on. then an interesting link. Notice they have a reference to how to phase the tuning fork watch to run at a higher voltage. These watches were designed specifically to run with Mercury batteries and were never meant to run on silver cells with the higher voltage. This requires a slightly different procedure for phasing which is why you require a variable voltage power supply. http://members.iinet.net.au/~fotoplot/acc.htm Accutron 214 ServiceManual.pdf Accutron Facts Booklet.pdf ESA 9162 Repair Manual Omega 1250.pdf1 point
-
Hi Keith Some pictures would help, maybe we can give you some tips on where to put the part. Next time you disassemble a movement, i would suggest you take some photos unless you know the movement by the back of the your hand! as for the schematic, caliber no alone is not going to help, what is the manufacturer. xxx cal 7115. Thanks J1 point
-
Glad to help! Your guess is absolutely correct: Hour, Minute & Seconds Hand pivot hole diameter. Here is just an example how you select correct hands for your movement or even for the actual Watch Case ID: https://www.cousinsuk.com/product/baton-pairs-straight As you can see, in addition to hole diameter you will need to know the Length of each hand.1 point
-
Hi Joe Never had one through my hands but as far as I have found out they are mostly based on the bulova movements and as such there are bits available some new some via the net. The documentation is a bit sketchy but ususly can be dug up some where. I would say they are no harder to repair than any other watch just need a different approach. The standard quartz we all know well enough ,its construction and operation, but the tuning fork is a different beast and the first thing to grasp is the operation principals ( how it works), and having worked that out the next best thing is to have a go, Document every stage and take notes. I think some of the earlier movements had trimmers for adjusting the frequency. I shall have to do some research and see where it leads me.1 point
-
I have one of those roller removers, and thought of using it, but the jaws are the wrong size. I also have another roller remover (which I had forgotten about, as it always seemed the wrong size) which might have worked. But as I mentioned, the cannon pinion is especially long and quite thin. I have no punches that will fit, only broaches and they tend to break
 1 point
 -
Hi, to see the 180 degrees amplitude is easy as the Ricoh 61 balance has two arms. As the arms reach the end of their travel, just before the motion reverses you will be able to see the arm on the rim of the balance momentarily stop. When you see a perfect overlap of the two arms at the end of their travel you will be at 180 degrees. It's very important with dynamic poising to know if you are above or below 220 degrees. If you are way off with the lift angle then you could believe you are below 220 when you are above or vice versa. You will end up removing weight from the wrong side of the balance. Don't ask me how I know that ?1 point
-
Any special trick to determine when the balance wheel is swinging 180 degrees? I would assume you measure from the point of impact of the impulse jewel, and that being a few degrees off would be OK? I guess making a small mark on the main plate of where a balance wheel spoke is on the point of impact could be a method? Any reason you needed to know the lift angle to perform the dynamic poising (which I haven't yet tried)? Perhaps the lift angle affects the reported rate of the timing machine? Thanks!1 point
-
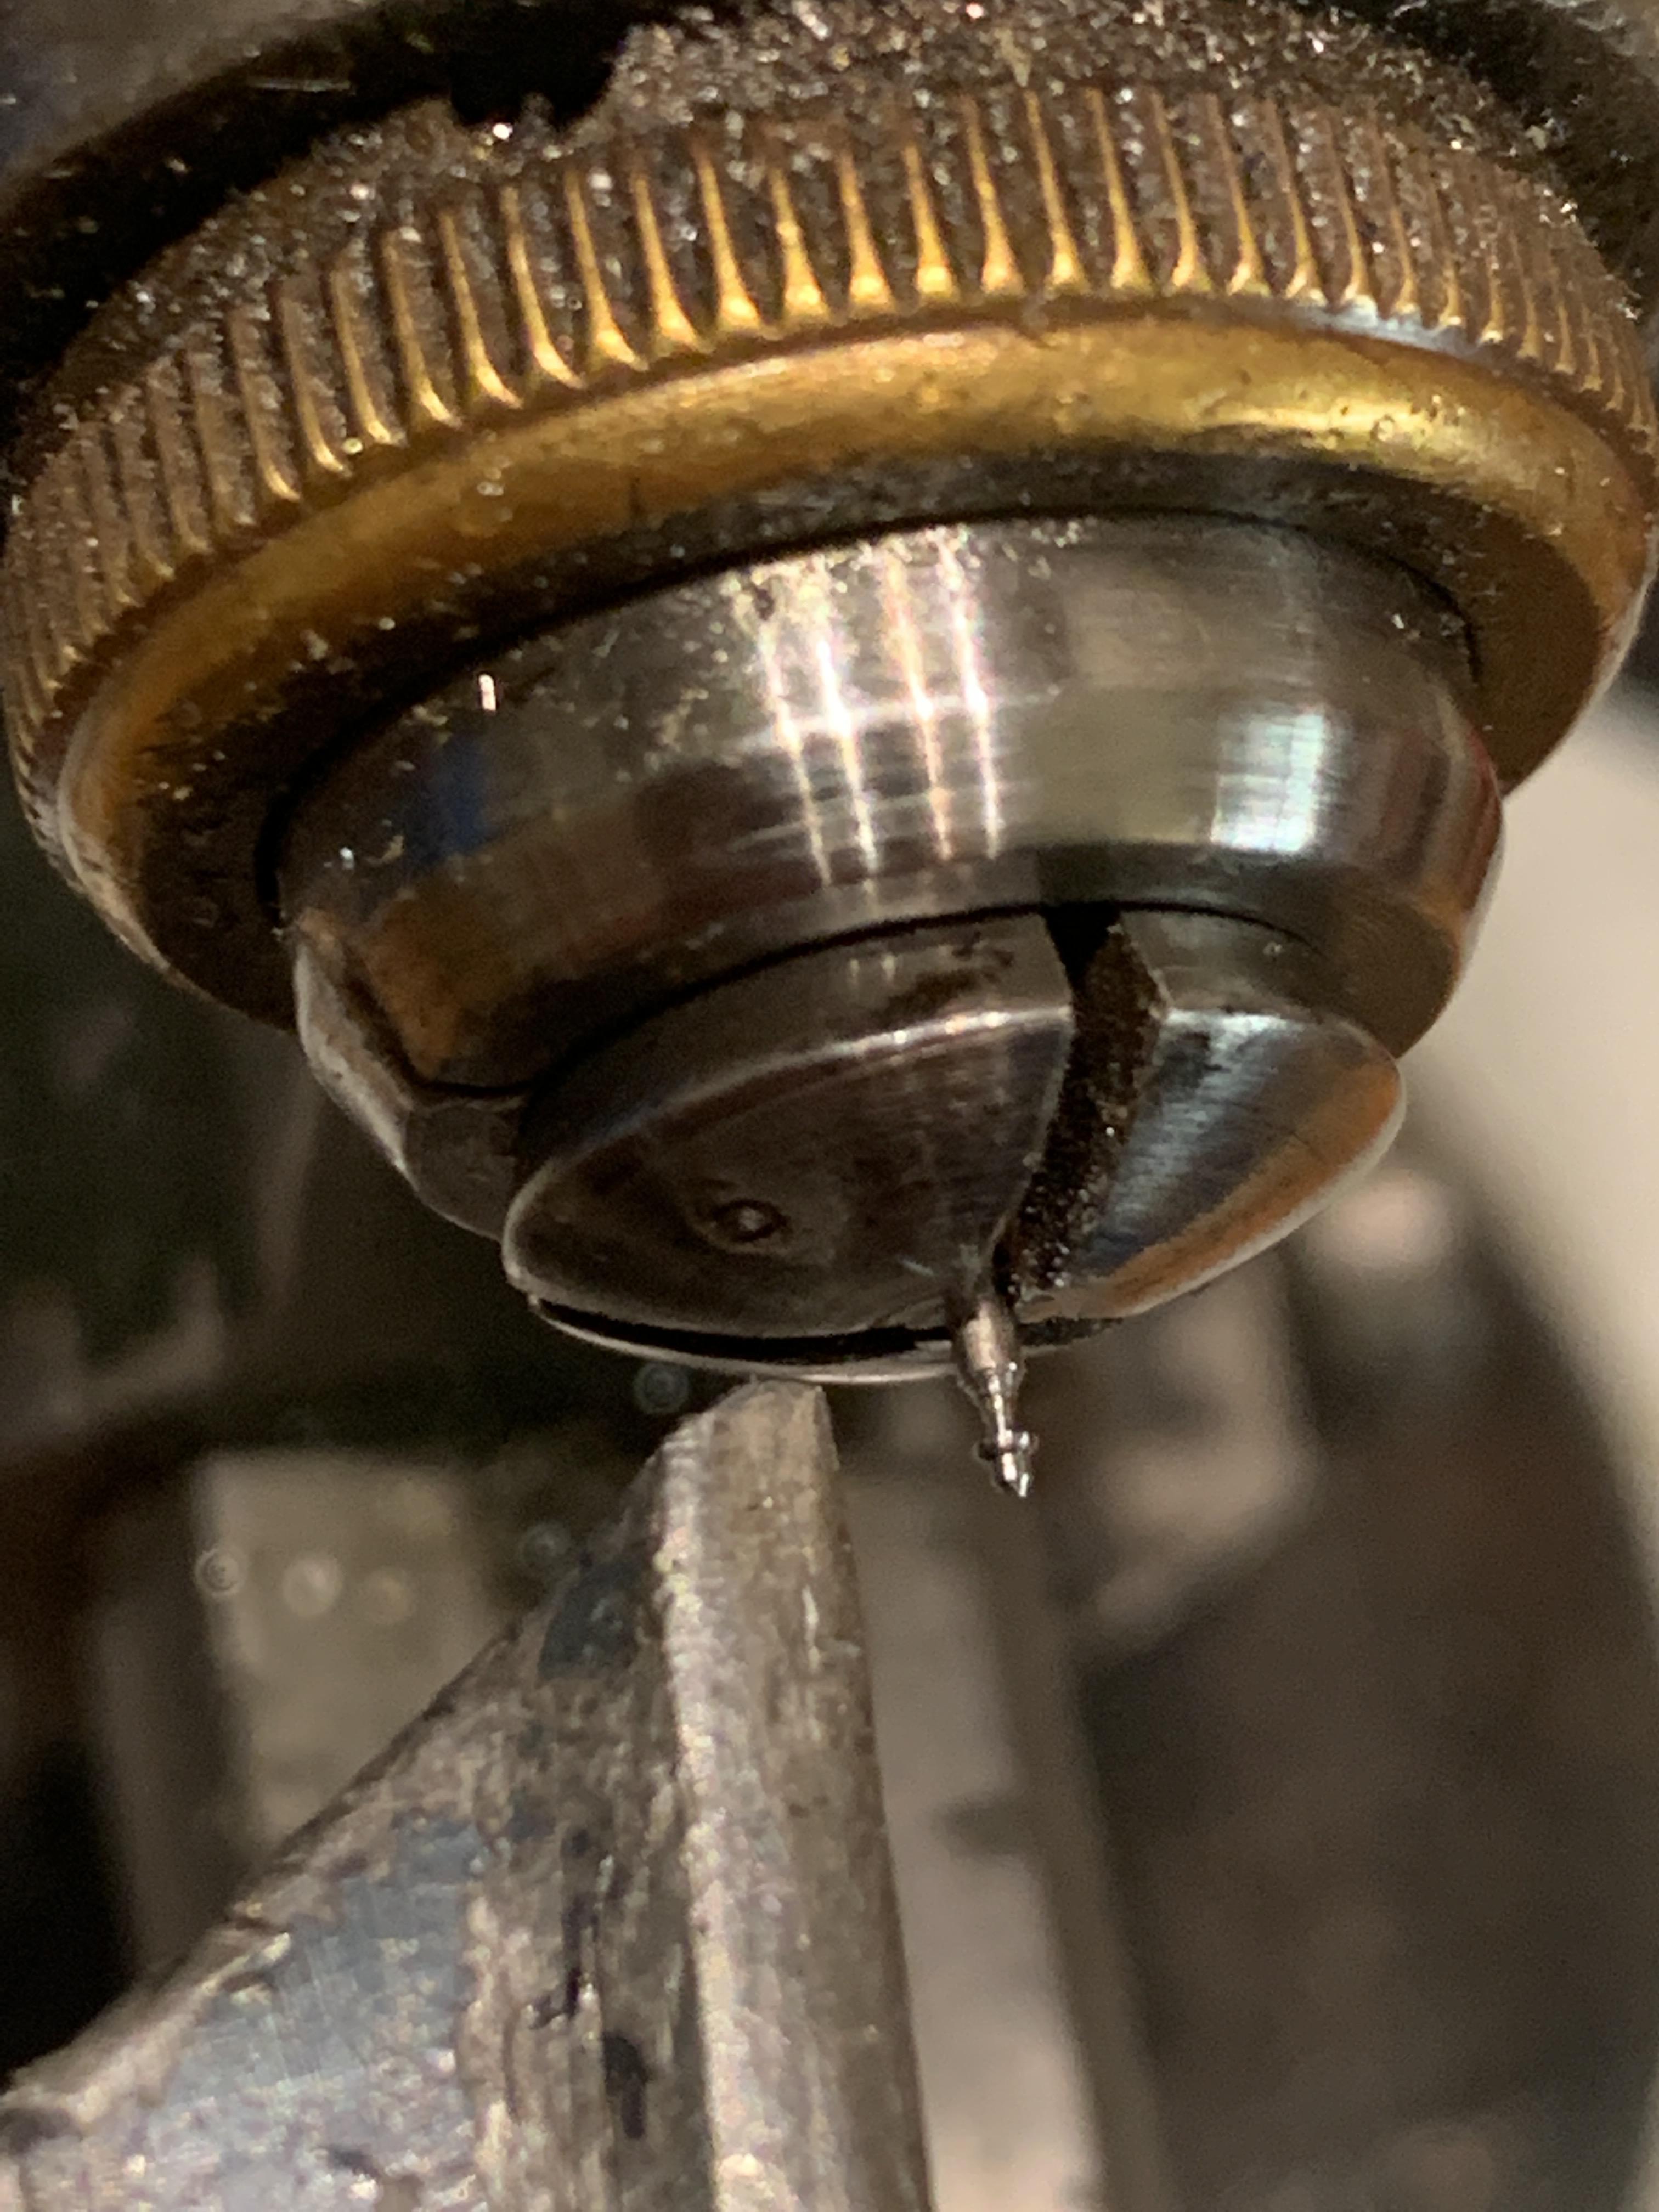
Congrats! Great tool. I used it today to replace a broken balance wheel staff on Illinois pocket watch. Nice & easy.1 point
-
There have been many discussions on this subject, help yourself with the search function for couple of loaded discussions and have a read. Strage as it might sound and it did to most of us when we heard it, Seiko used to oiled fork pivots to gain stability at the cost of loosing some amplitude, said master nickelsilver. Oiling fork pivots does not stop a watch, but does eat some amplitude. Jdm is very right, he usually is. Regs joe.1 point
-
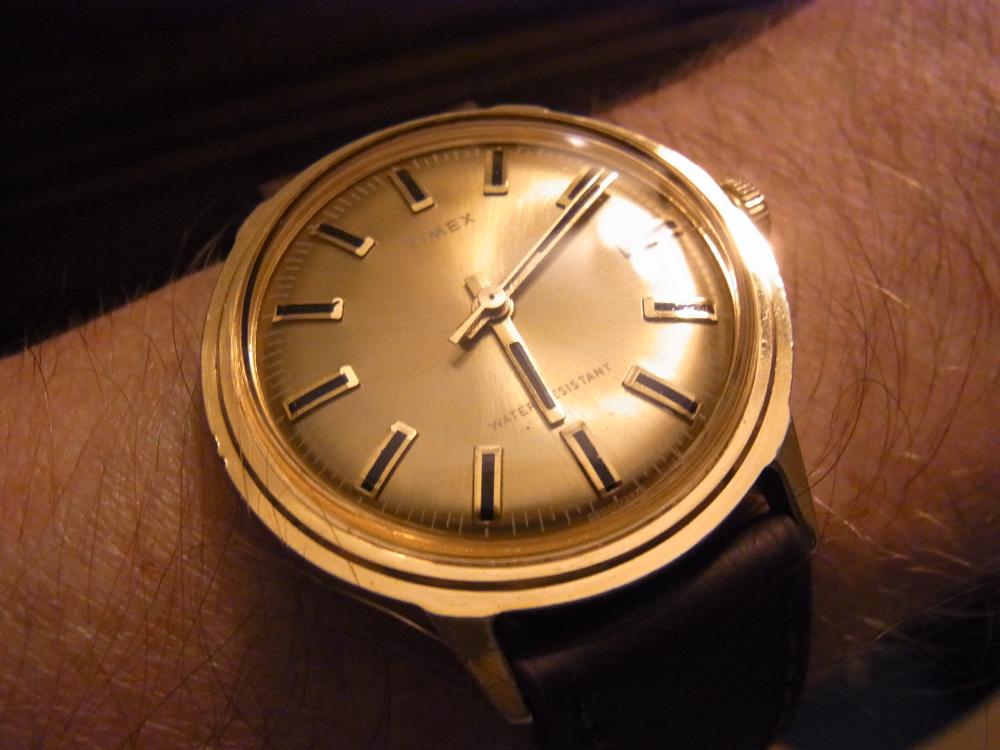
All this Timex talk inspired me to wear this 1976 Marlin today.
 1 point
 -
First of all the inner part of the bearing will be particularly hard steel, so drilling with anything other than carbide will be quite difficult. Then, is this a new bearing? Or new rotor? Did the nut not fit before? Easiest thing would be to modify the nut, but will need a lathe for that. If you really want to drill it, and have tools that will cut it, then fill the race with super glue. Drill. Soak in acetone to remove super glue (do one to remove, and then a clean soak to get any remaining residue).1 point
-
I wouldn’t re oil without first re cleaning the parts you intend to re oil. Otherwise you will have way too much oil, and it will be in all the wrong places.1 point
-
These blue boxes usually work fine, if the tweezers are still magnetized try again. Remember to put the tweezers over the tool and hold the red button pressed while you slowly move the tweezers away from the tool, at least one meter. Then you can release the button and test again if it worked.1 point
-
I don't know about this one you have. I had the same sort but not a Chinese one and it worked fine. Have you followed the instructions on how to use it. You know you can buy tweezers and screwdrivers that are anti magnetic. There are videos on Youtube about how to use that tool.1 point
-
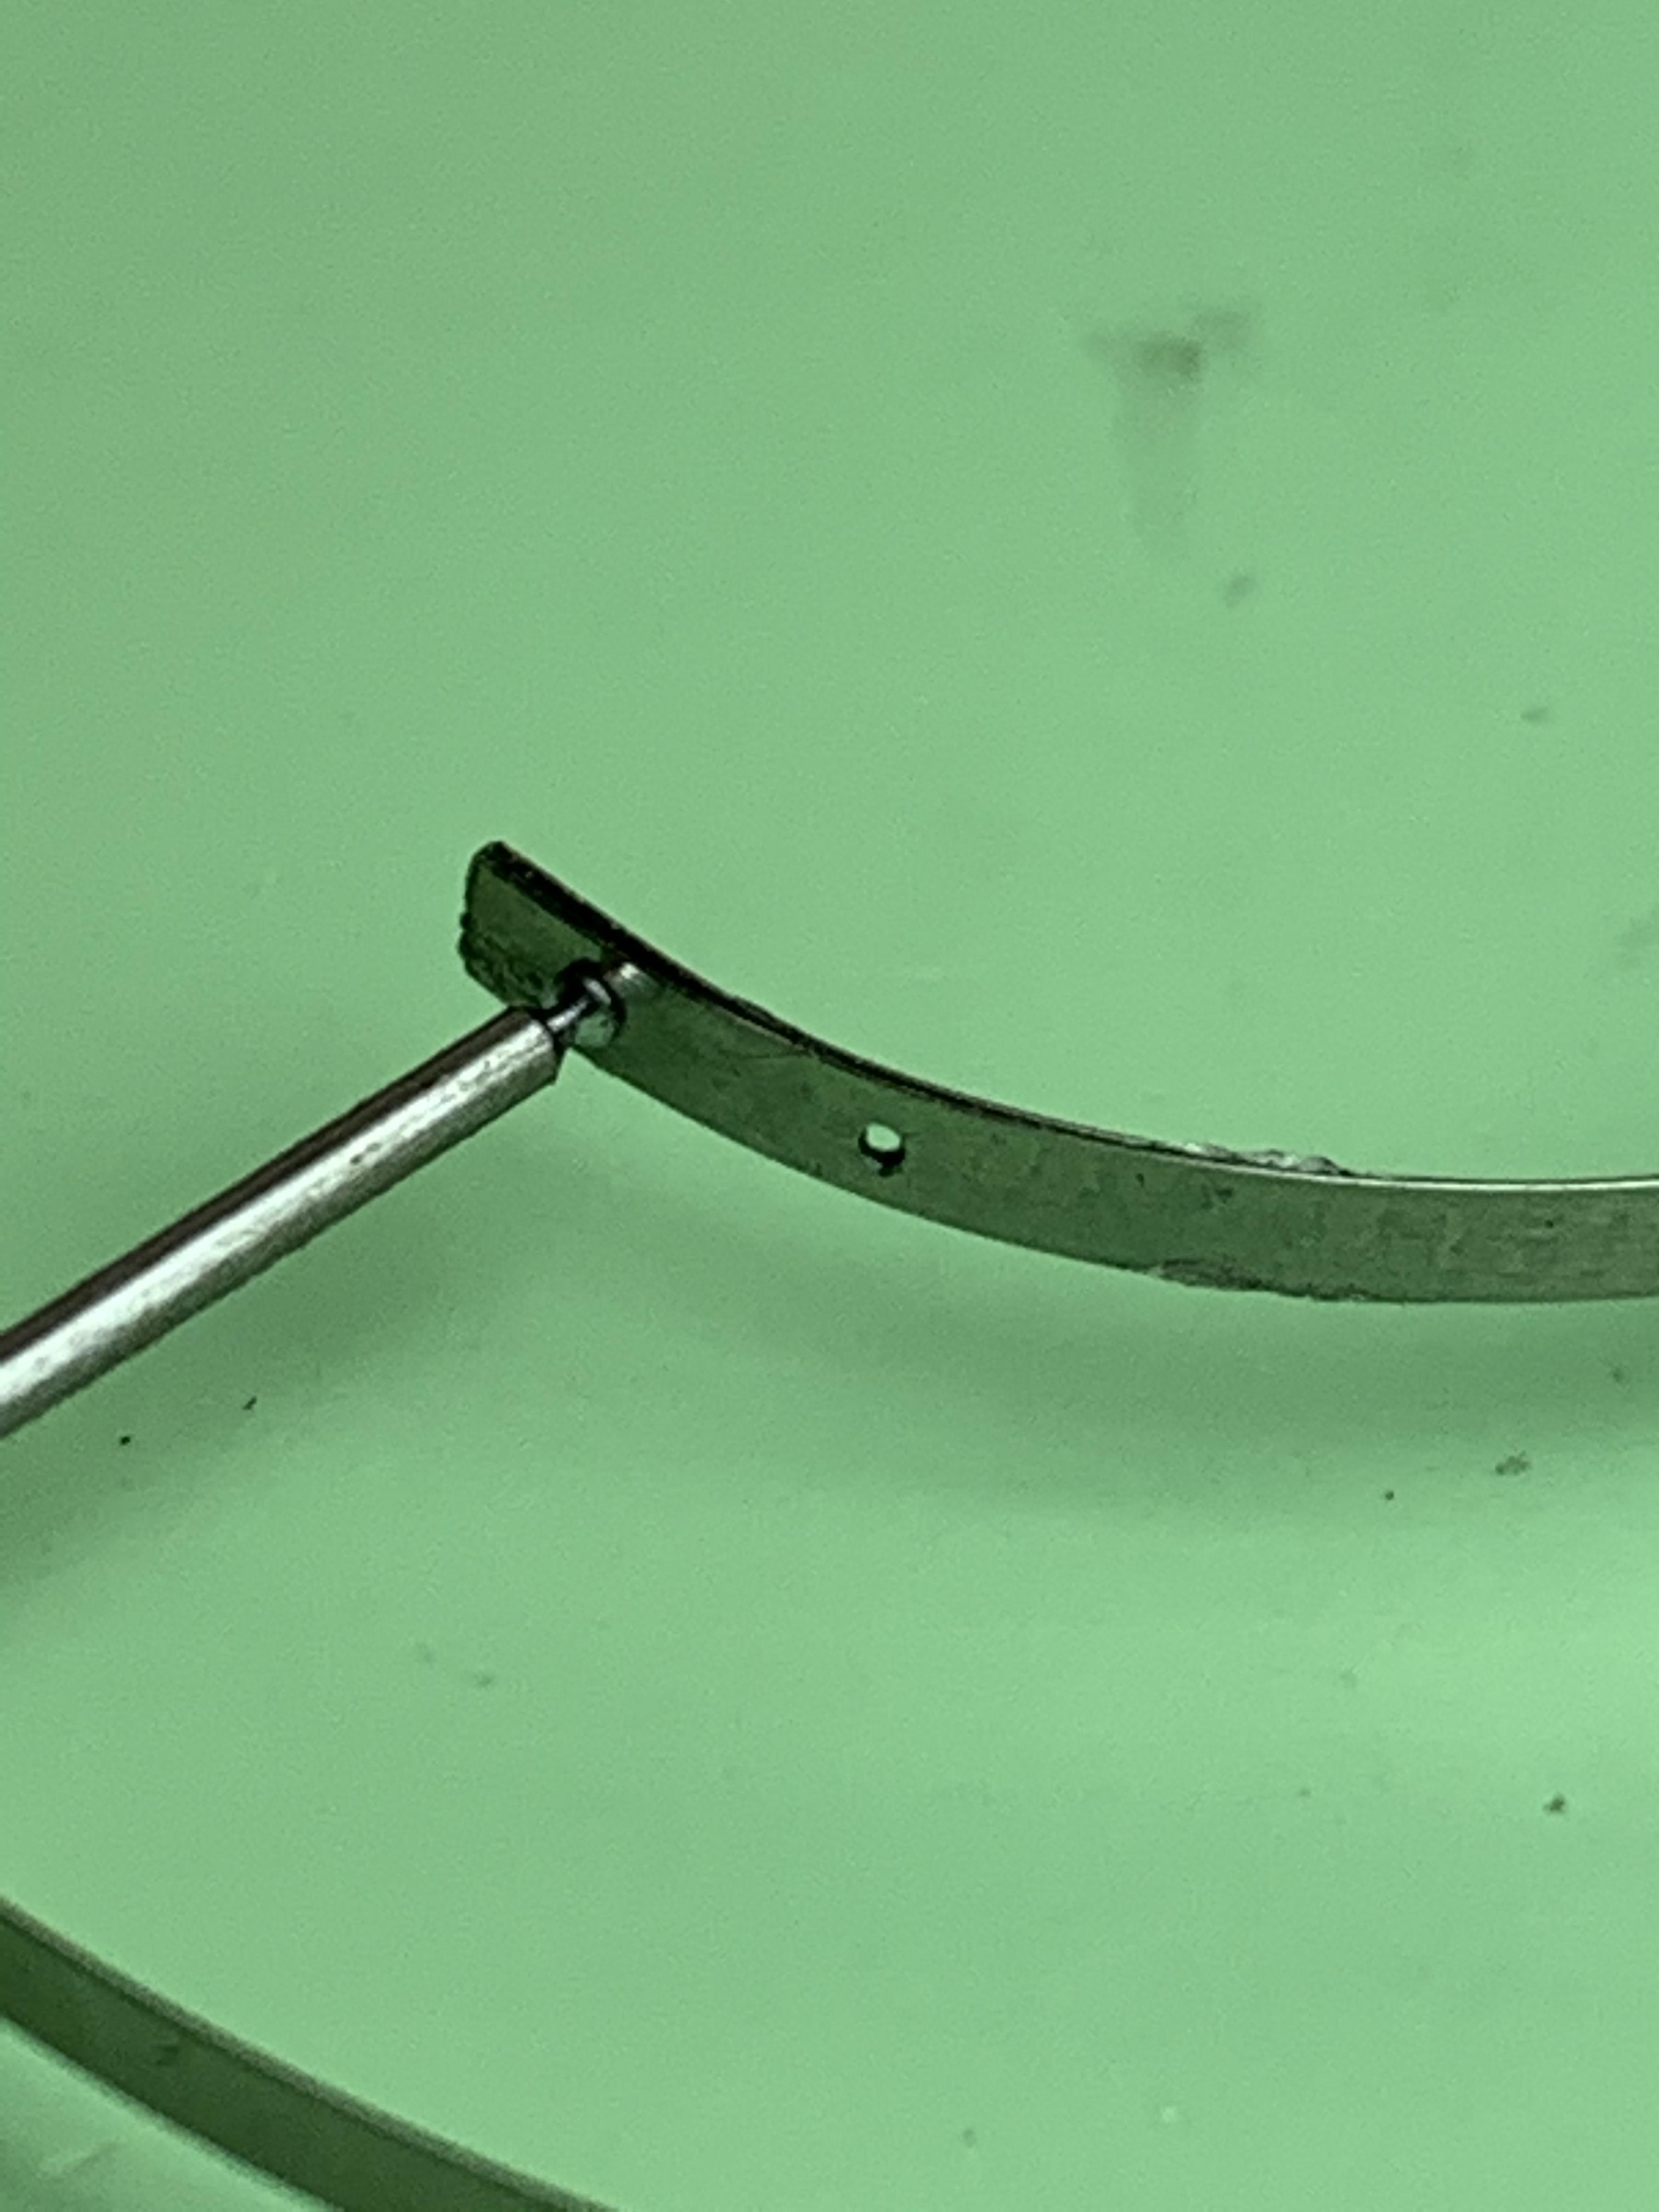
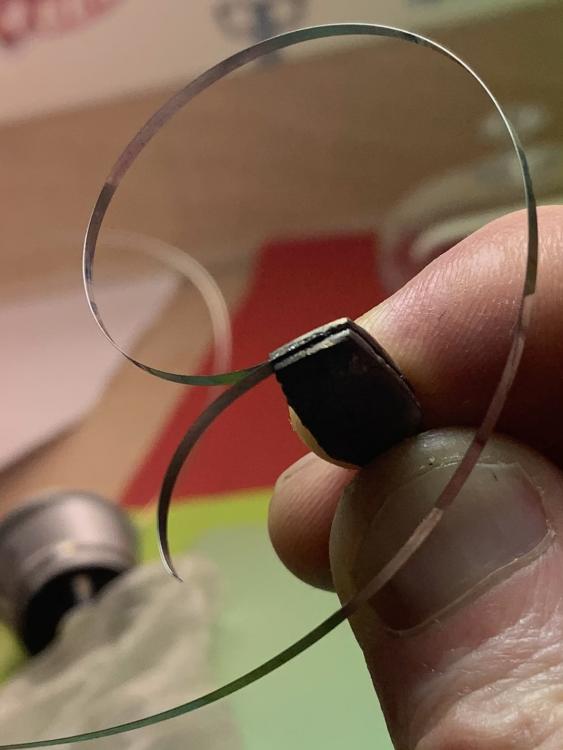
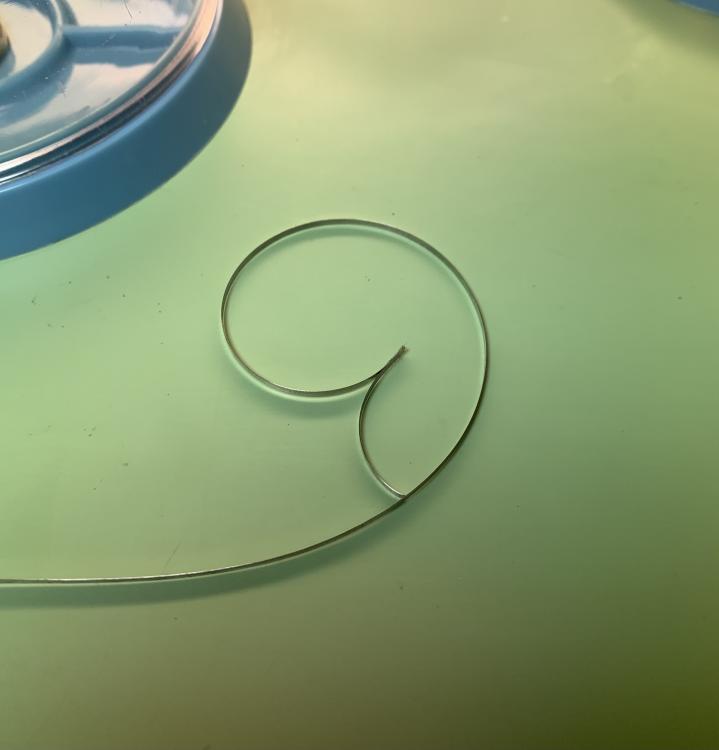
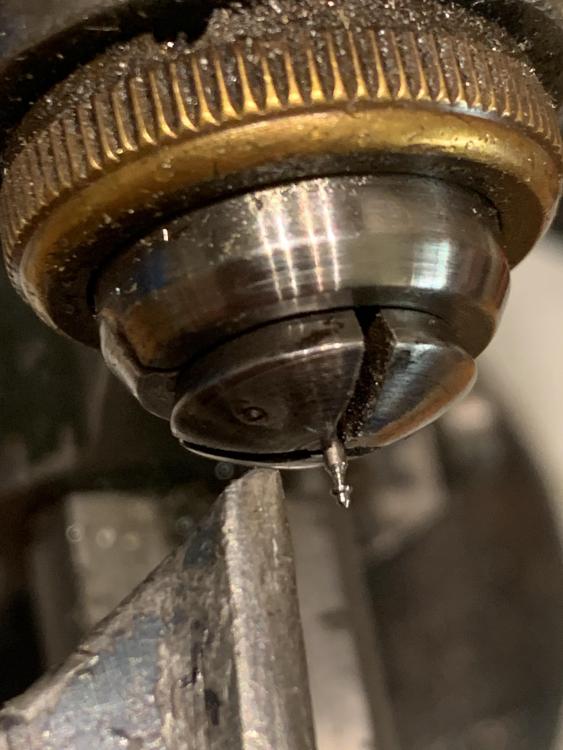
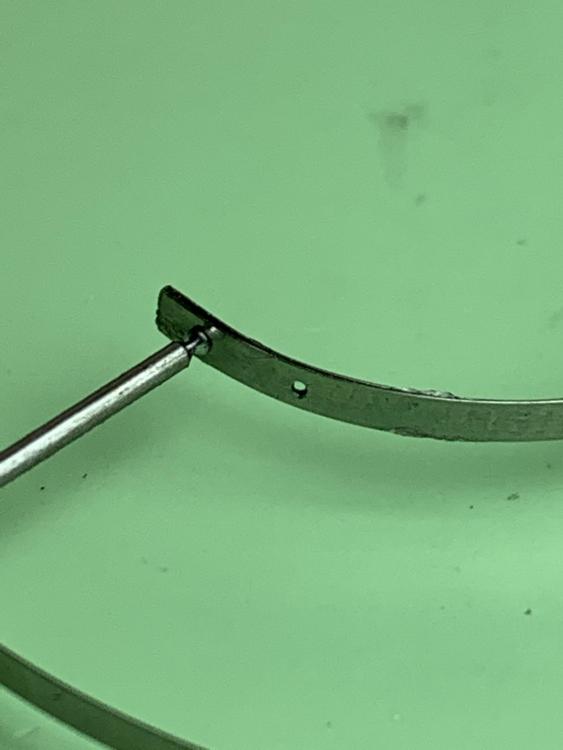
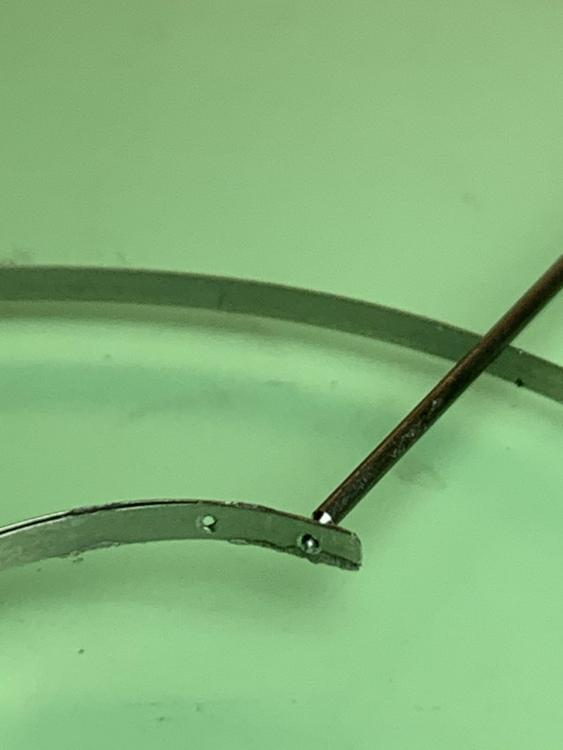
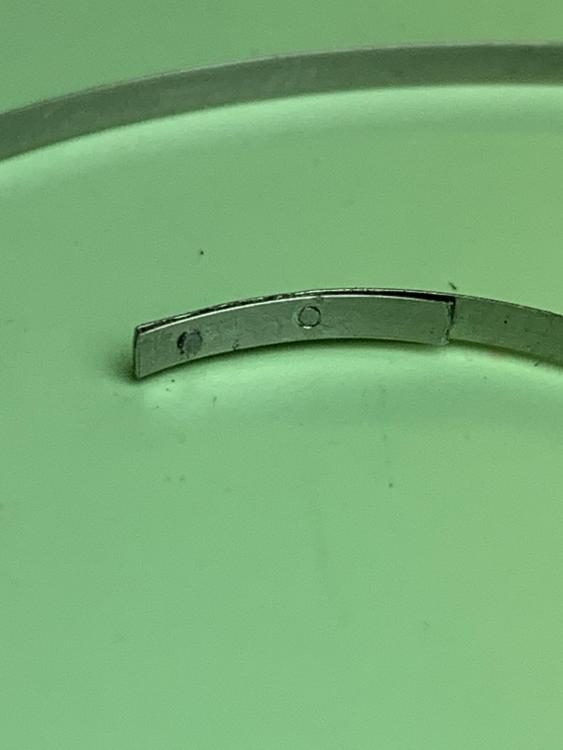
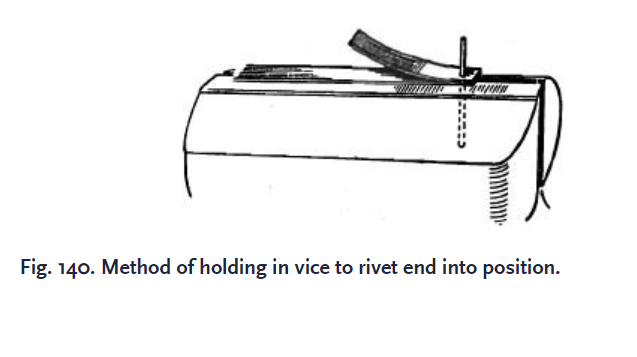
Purchased an automatic mainspring instead of a manual from Cousins. A bit pee’ed off at my mistake, so tried the repair. Any tips or advice from the experts will be gladly received on how to improve the process (if there will be a next time) The photos are pretty self explanatory to the process I tried. I used superglue to hold the 2 pieces in place before drilling and riveting, then will acetone it all away at the end. (For some reason the last photo should be the first photo)

 1 point
 -
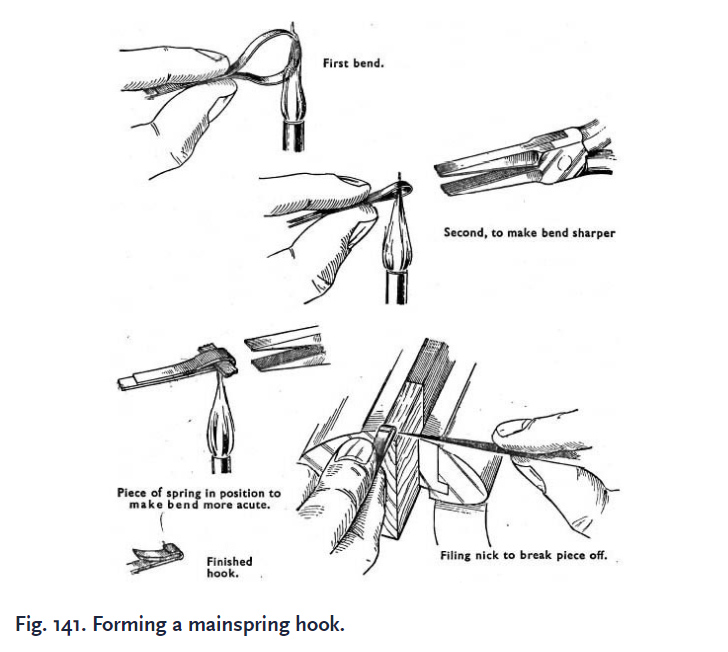
Think it is a good work put into that repair. Just as @HectorLooisaid there is an alternative method to do it, think it is Donald de Carles great books he thinks of, they are well worth investing in. Here is his riveting method. And the forming method.
 1 point
 -
Sorry for the delayed response. I have just (over the last week) been finishing off a couple of watches after a break of a couple of months while I was working on other things. Thank you very much for all of your help. In the end I bought a donor movement for the watch and replaced the jewel and shockspring. After a bit of regulating and experimenting with the tiny pieces of foil Reketa put under the balance bridge the watch now works within a few seconds per day.1 point
-
40$ .. Now you have negotiated away the shipping, just the import tax left. As my old gradfather said "He who collected most stuff when one die wins" , a motto I live by....1 point
-
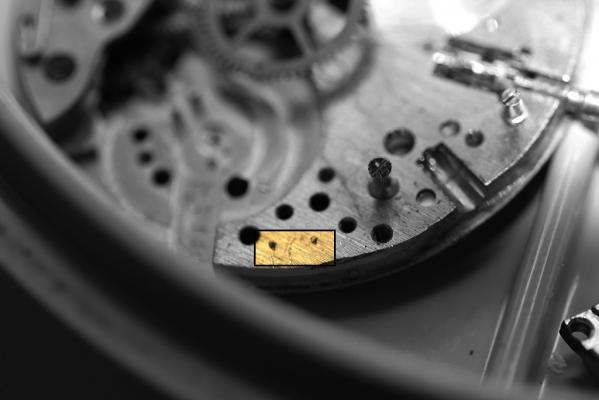
"That method" is not so uncommon with older movements. Just looked through three movements on my bench I am working on and the third one had this done in the past: You will notice in the hi-lighted portion that there are two dimples which have been created (using a graver or sharp screwdriver). If these are done behind the screw hole (as in the picture) then it will effectively reduce the endshake. And it would increase the endshake if it is done in front of the screw hole (closer to the balance wheel). I knew a watch repairer that would use paper to achieve the same result. Also you will find that some watch movements will have a metal shim between the cock and the mainplate - Sekonda used to do this.
 1 point


.jpg.99e8ef9e4ccbb88ec8508d970a788ae3.jpg)
.jpg.2fdb881139cea5b7a8e4c50b8b6fdc85.jpg)
.jpg.64053e1ce2001fbfbf15890bdd5b5b52.jpg)
.jpg.9004779c76c86609989109cfdd842141.jpg)
.jpg.63575efb294978d681f8526fc5a60872.jpg)
.jpg.baa489c244f9f5325c0d7d67c40493ab.jpg)
.jpg.626b2d20fe114768989ebaff1173d3c1.jpg)