Leaderboard


Popular Content
Showing content with the highest reputation on 12/18/20 in all areas
-
If you want to understand more about Seiko's timing specifications then the thing to do is to look at their OEM division. Normally in the standard Seiko documentation they don't usually specify timing. I have a link below to their OEM division where you can download the data sheets that have timing specifications. Unfortunately Cal. 7S26 Is equivalent to Time Module Inc. (TMI) as Cal. NH26 Which no longer appears on the list so let's see what can find its equivalent? Or I'll do a search on my computer and as I suspected I have the tech sheet. Then I'm going to snip out some relevant things see you can see the timing specification for this watch which as far as I can tell was probably discontinued. Then if you look at their website you find that they do have watches that have better timing specifications. Perhaps unfortunate problem is that Seiko made a very large quantity of these and they were made to be inexpensive. What I find interesting with the above quote is that it's only relevant if at the same time you purchase the Hamilton you saw that the Seiko was priced exactly the same. If there is a difference of time between purchasing the Hamilton and comparing it to the Seiko of five years later or something then you have to look at the pricing again the make sure they're actually the same price. I do find though pricing of watches interesting. More interesting though with quartz watches. The actual insides in quantity probably cost five dollars and yet there in a case that cost a couple hundred dollars. Because the consumer isn't paying for what's inside other than it keeps time they are paying for what's on the outside. Then just a warning for the future your Hamilton that's run 15 years have you ever had it serviced? I see this discussion on some of the collectors groups there very happy that they've never paid the greedy watchmaker to service their watch. Maybe minutes their inherited fathers watch it's never been serviced and then they get sticker shock when they go to have it serviced and discover that the gaskets didn't last for all those years. It's not just the lubrication in the watch itself is the gaskets that can fail with time and of moisture gets in your watch you'll keep beautiful time right up until it stops. So it's one of those sad realities of four people were on their watches literally into the ground and then be unhappy with the repair cost. Kinda like if you drove your car you never change the oil at some point time the engine disintegrates. Then as commented above it would be nice to know the model number of the movement in the Hamilton watch and then we can find timing specifications and you can compared to the Seiko. Seiko-7s2x nh25_26_TG.pdf2 points
-
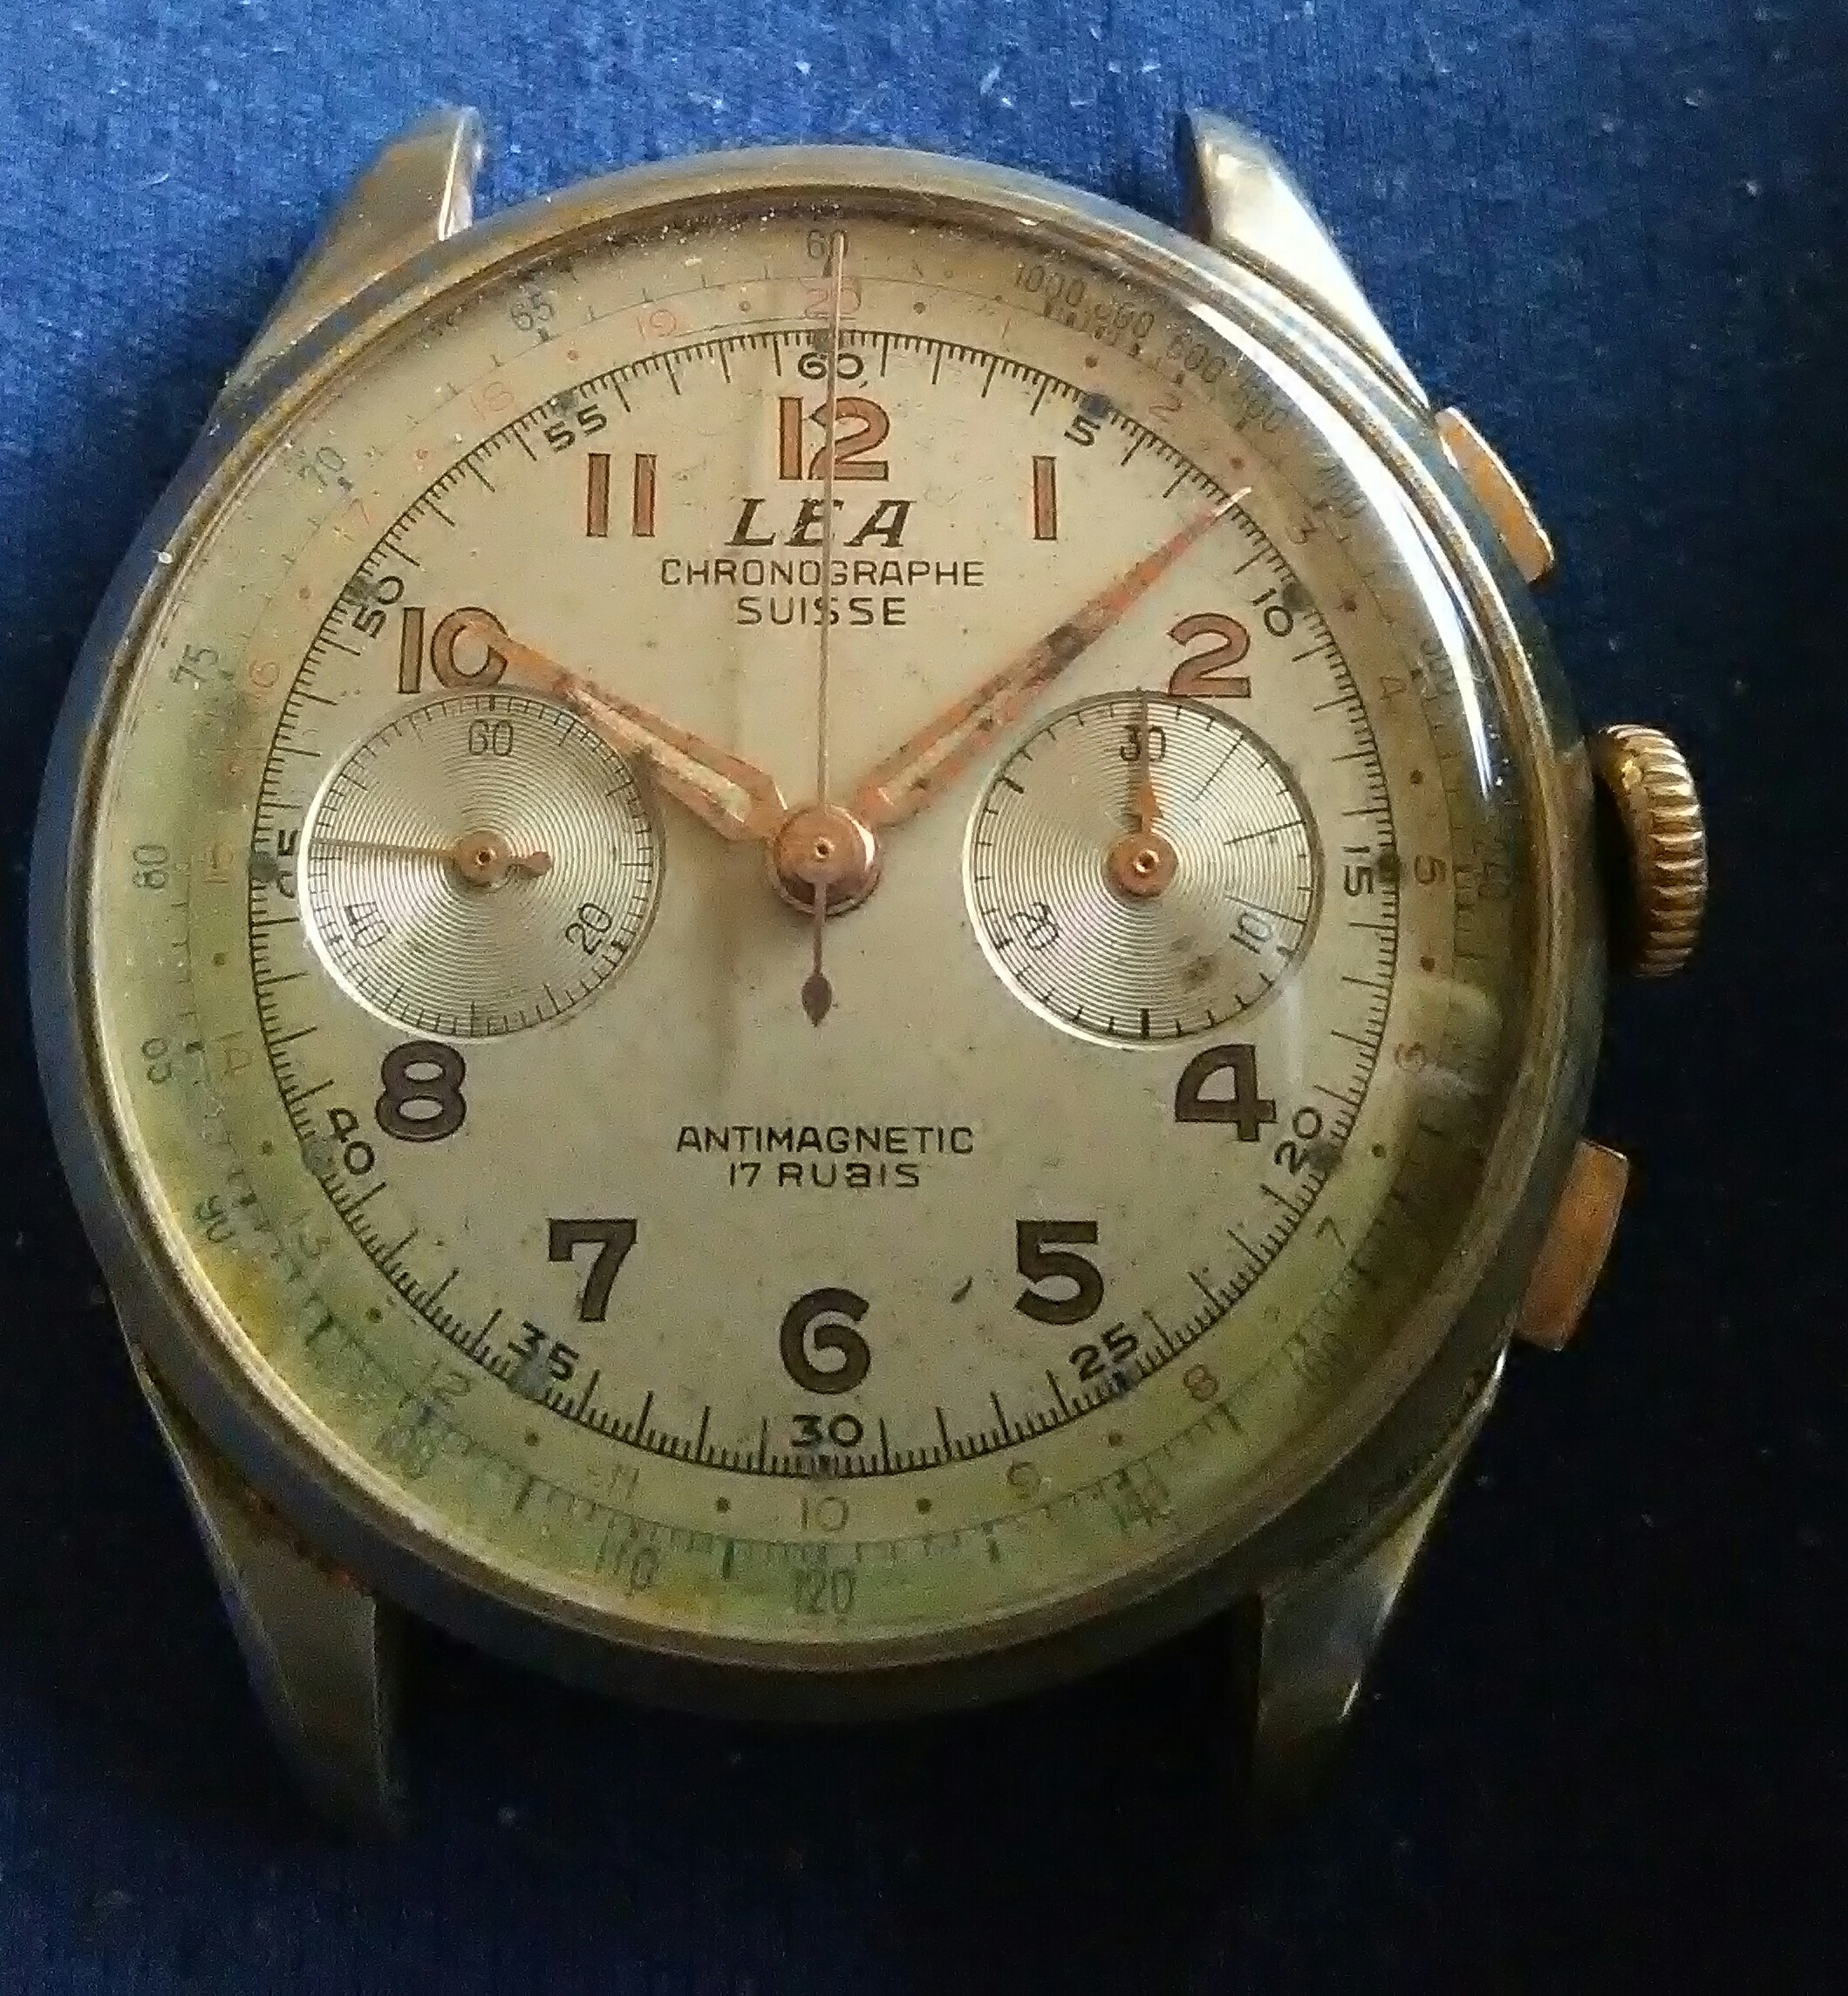
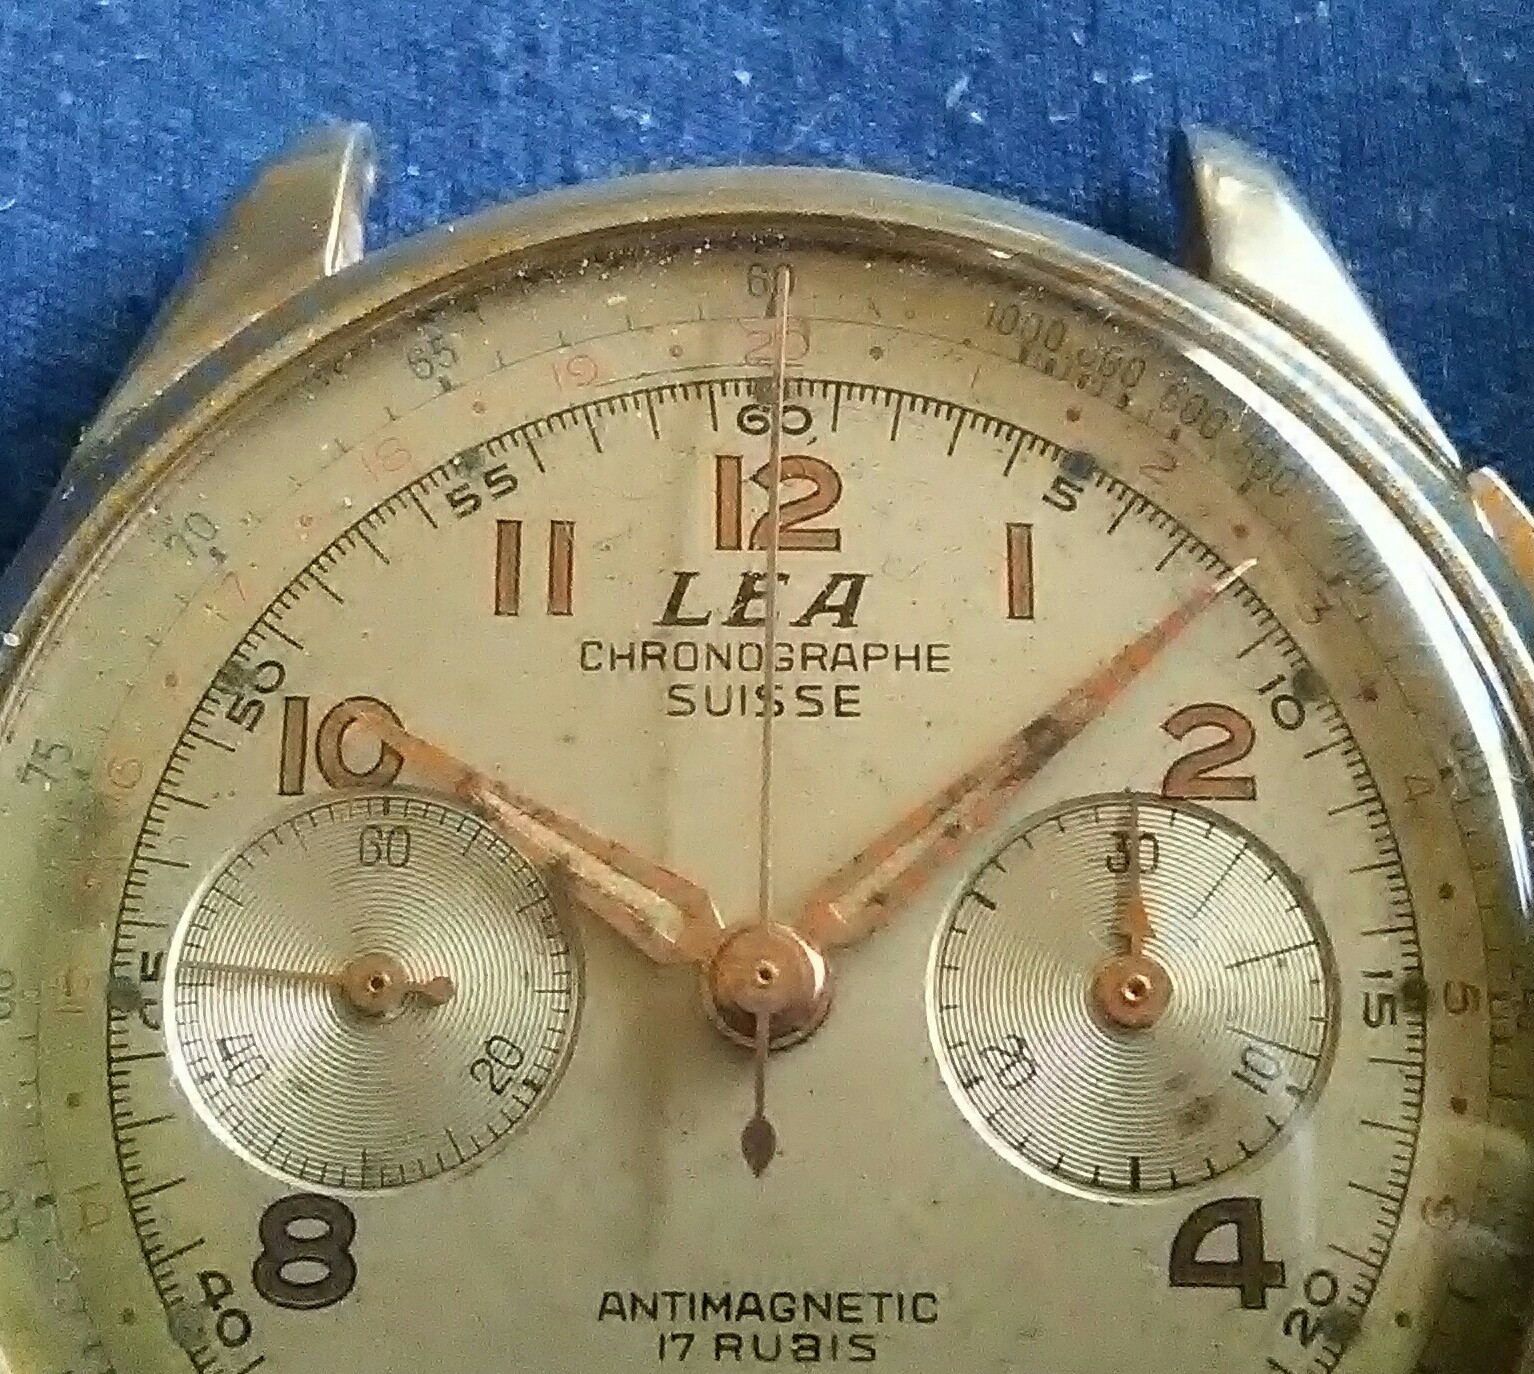
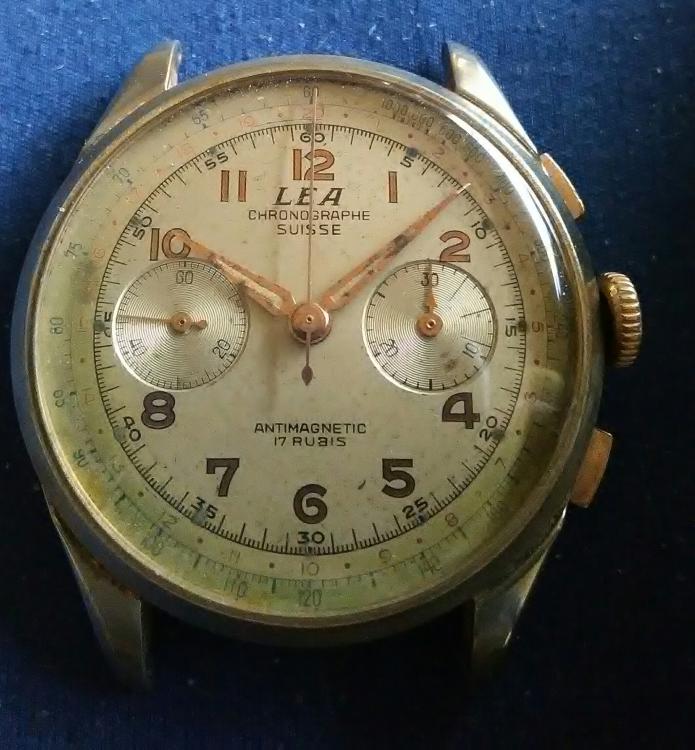
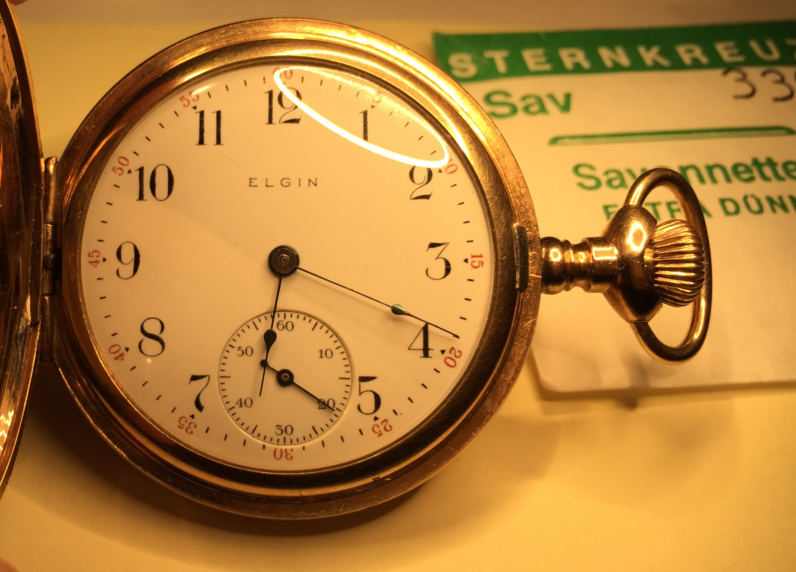
Oh ye of little faith?, original dial carefully cleaned with cotton buds, initially using saliva ? to disolve the main stain, then VERY carefully with mild soap and warm water to bring the less virulent discoloration off......I missed my vocation in life as an art restorer?. Soap and water treatment on the case finished with a coating of car polish......
 2 points
 -
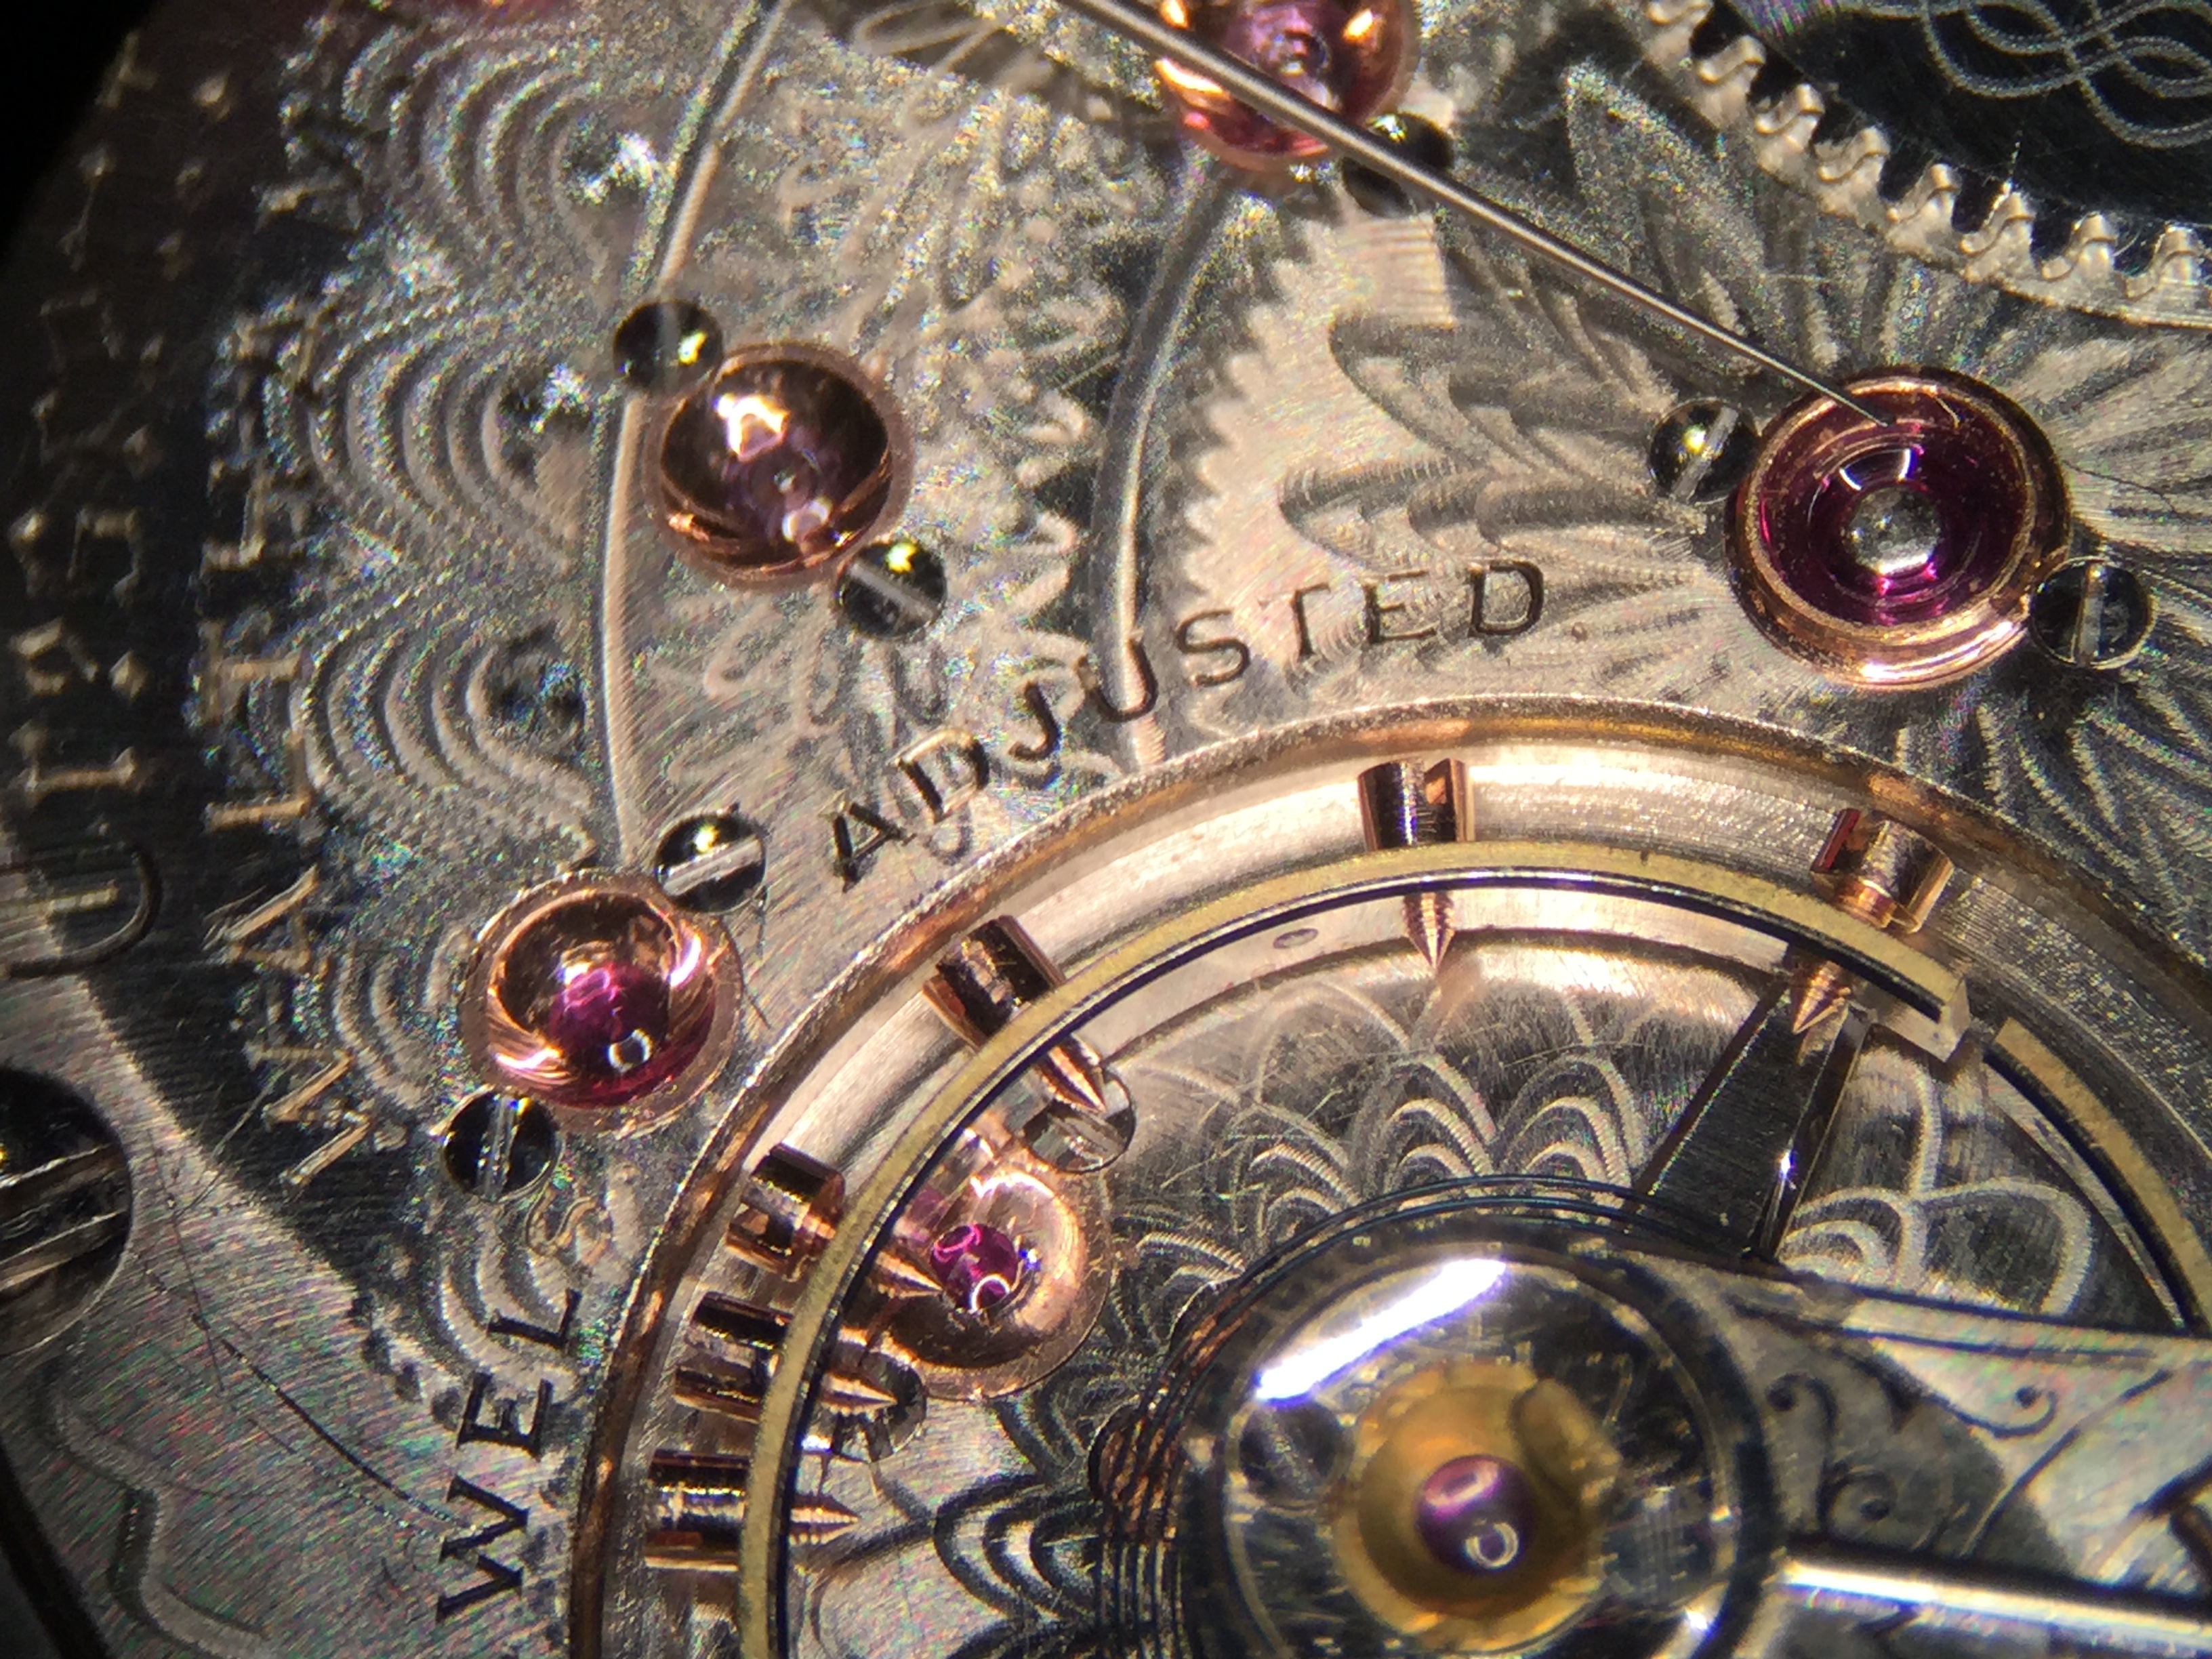
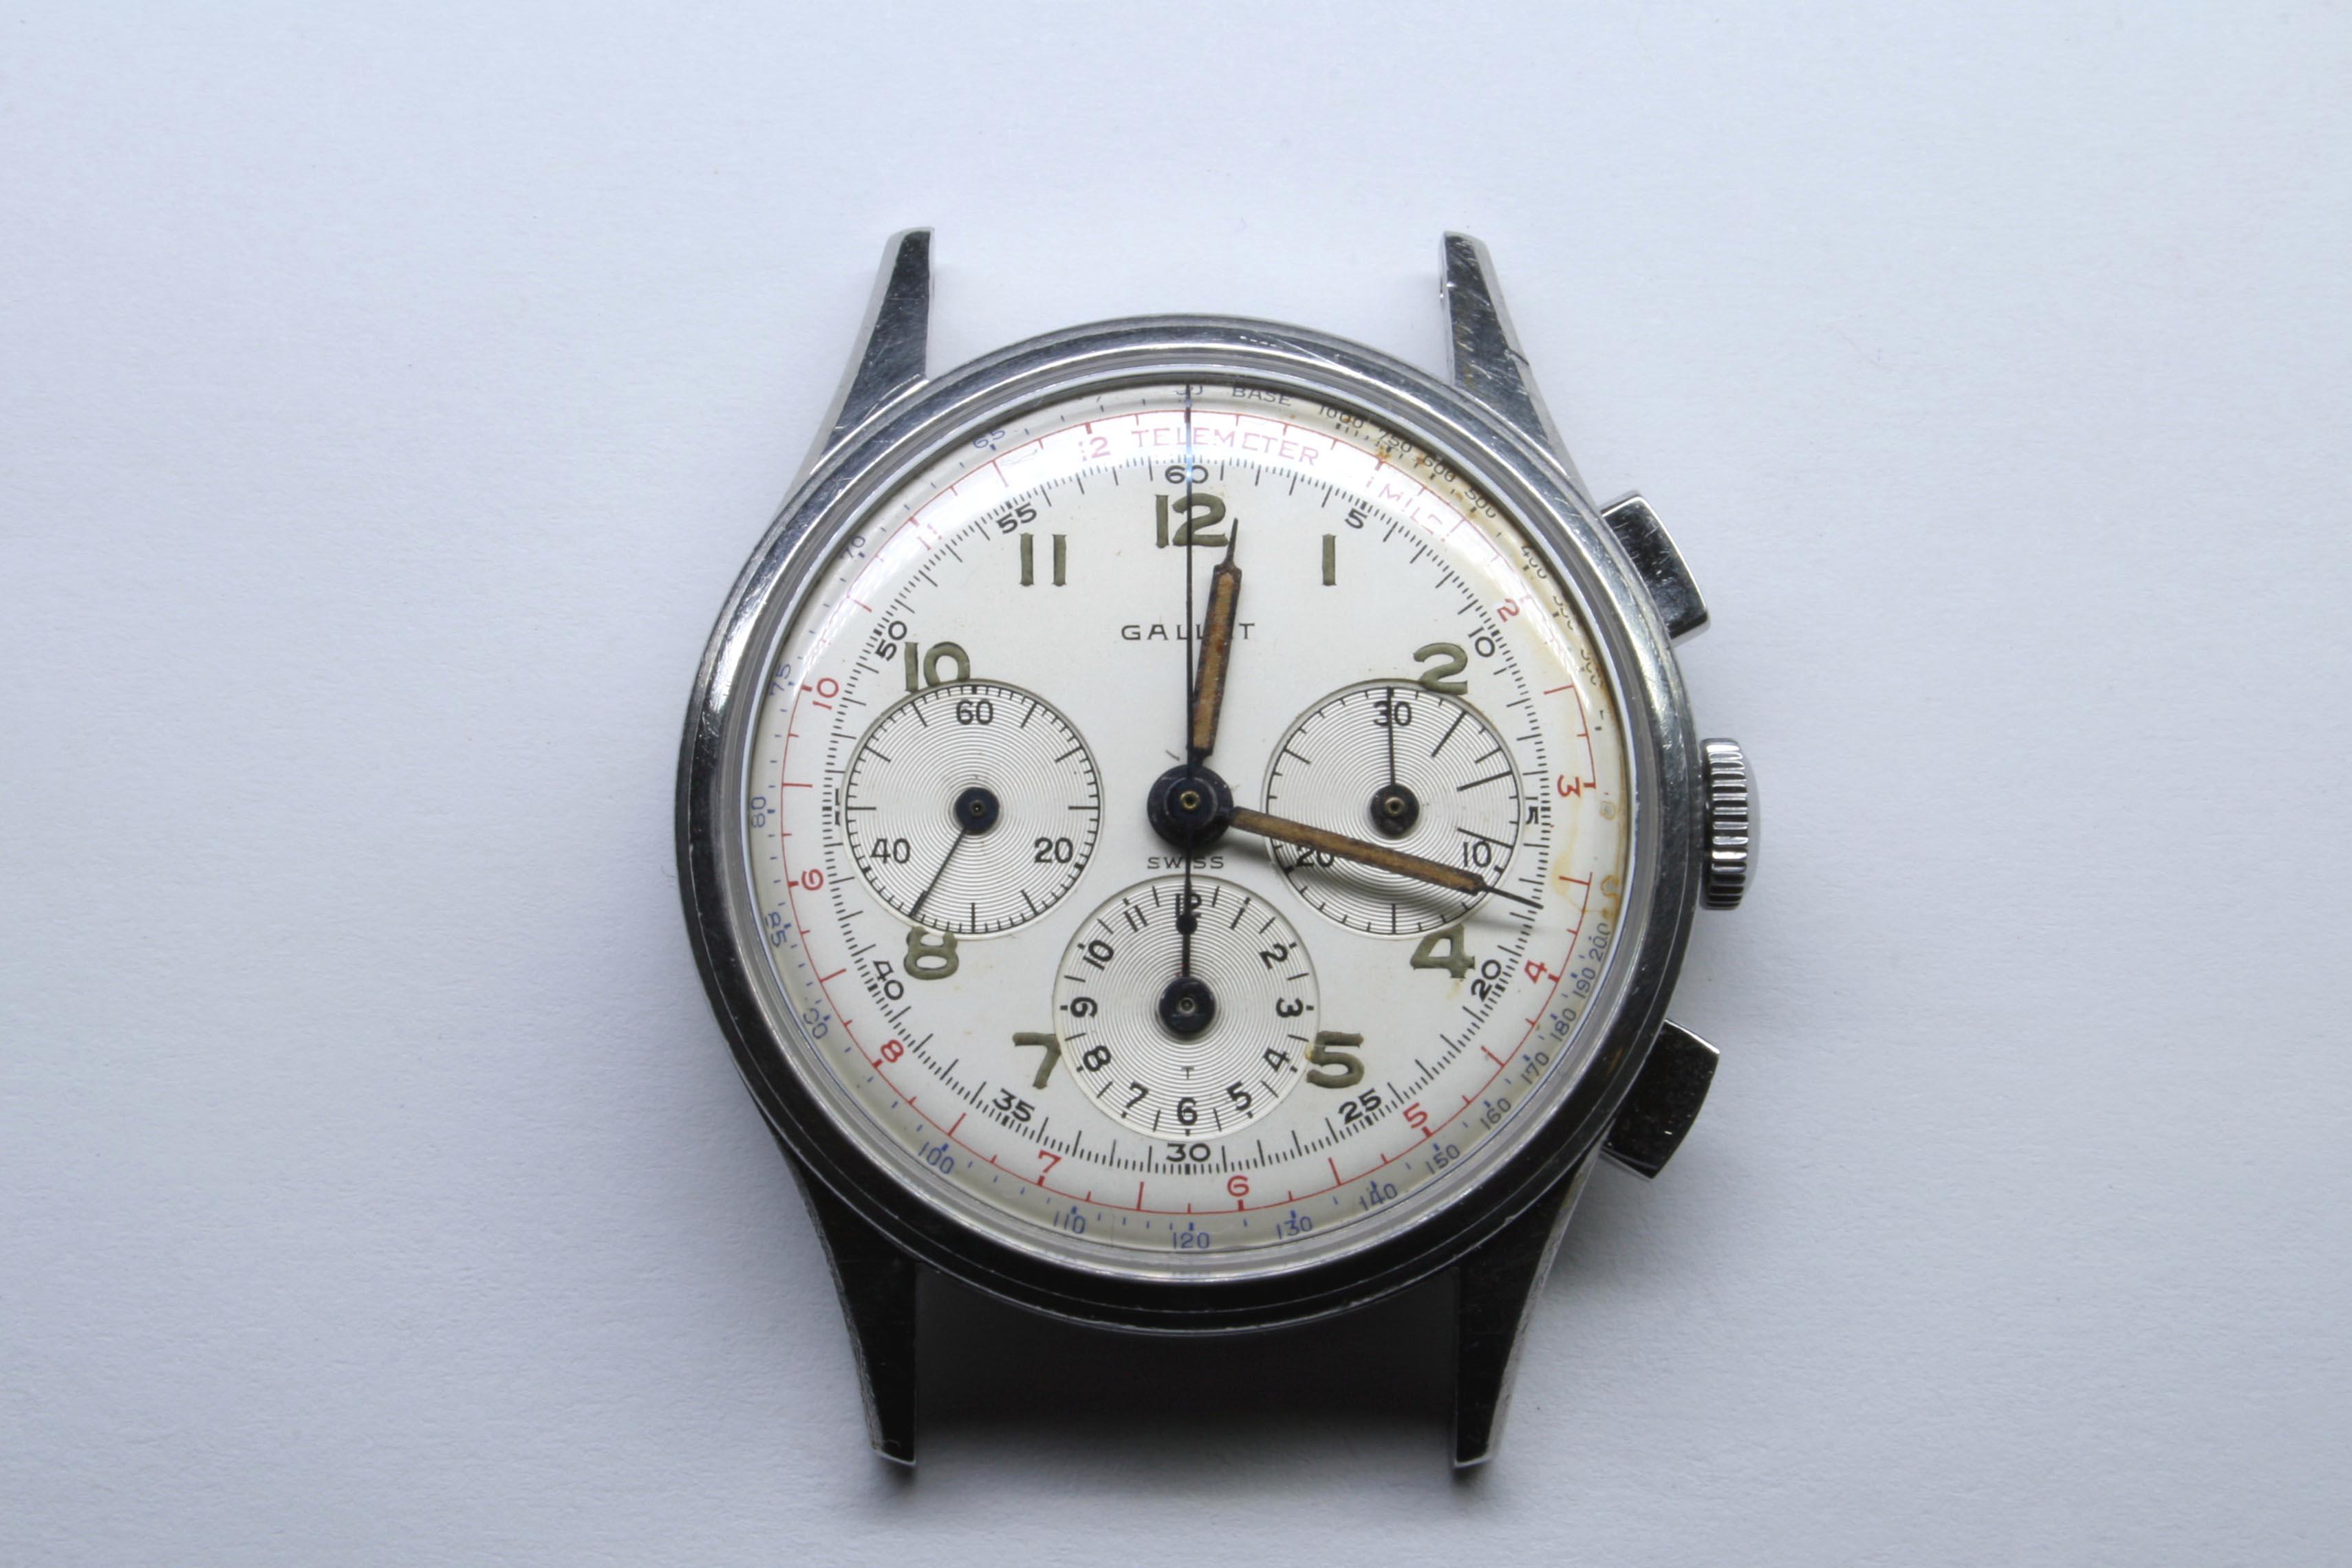
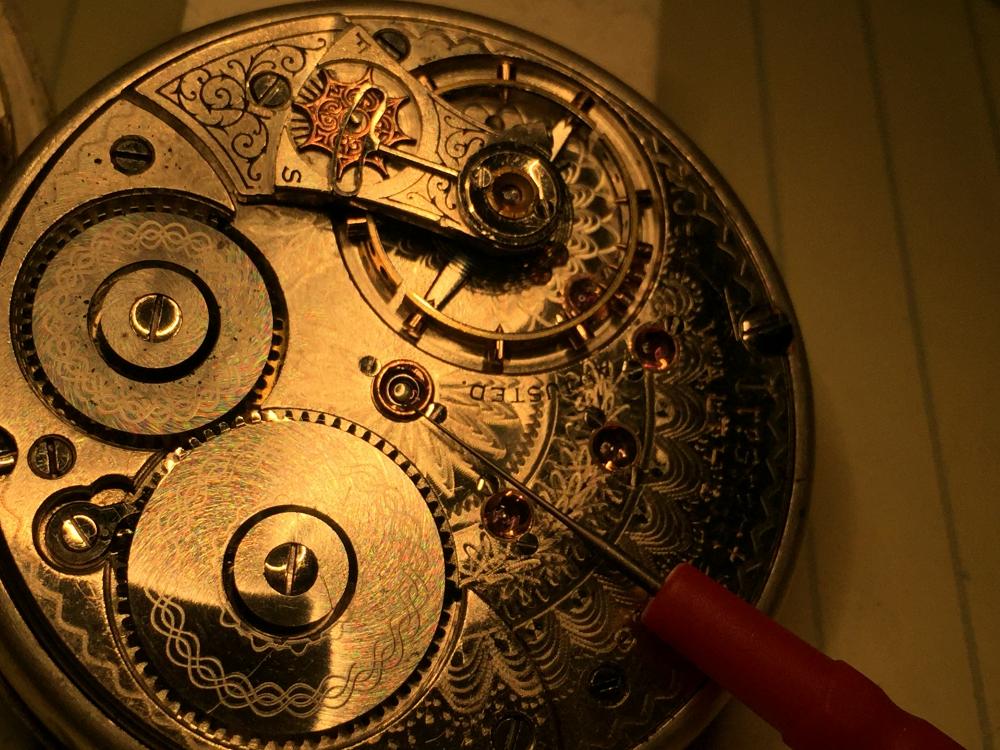
Seldom can I find elsewhere a more beautiful blending of art and science. These are the kinds of timepieces I could stare at all day.2 points
-
Now I have to clean this mess up in the living room...
 1 point
 -
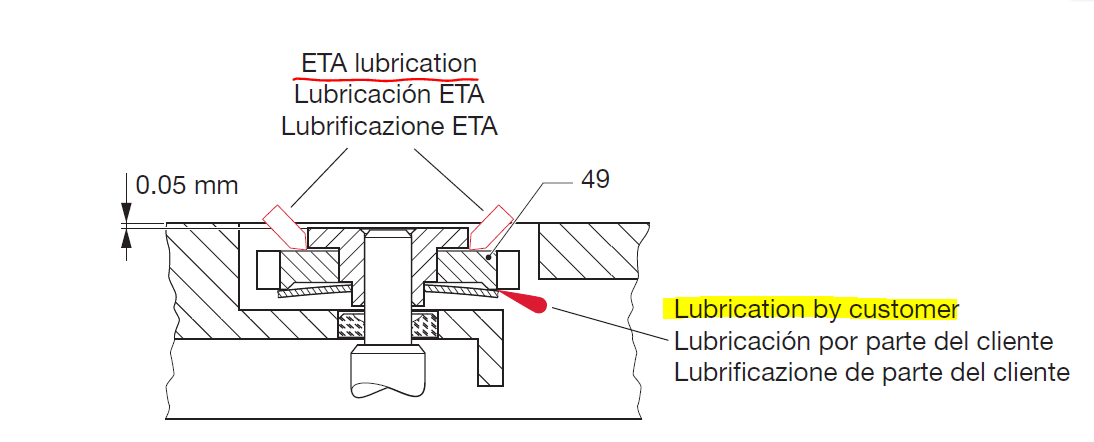
I hope your question was about ETA pre-lubricated areas. Right?
 1 point
 -
Yup I wondered if you would see this. You had mentioned on one of your vids you thought you might have one amongst your stuff. Its double-sided covering just about every size, ligne etc. I just took it a step further and milled out one side to accommodate PWs. No tipping, no wobble and no slippage or marks/scratches. You can chuck it up in a vise, or hold it by hand. Works great for casebacks and especially PWs. Adds a little flavor to my disaster area of a bench, too.1 point
-
Will do, sorry, first time using this site1 point
-
Hi Moose! I'm fairly certain your clock was made by Perivale. It looks like one of their earlier movements with the rear mounted hammers and pendulum. The later ones tended to have underslung gongs and platform escapements. The chime barrel is indeed a large barrel with the teeth on the front plate side rather than to the rear as on the striking and going barrels. The chime mainsprings are very large and stout, so wear heavy gloves and eye protection when taking out and reinstalling! eBay is probably the best place to pick up parts for these- sometimes complete clocks in cases go for very little money. Looking for "Perivale clock" will narrow down your search. John Glanville's "Clockmaking in England and Wales in the Twentieth Century" is a good resource for these movements- I think excerpts of the book are available to view online for free. Best of luck!1 point
-
I like to see a picture of what were talking about at the beginning of the discussion. Not everyone's familiar with every model watch. Would the watch found at the link below be your watch? Then as were talking about this watch what sort of timing variations are you seeing that may be bothering you? Also what sort a timing device are you using to measure your watch? Then one of the unfortunate problems of a lot of the watch companies is they typically do not publish timing specifications. Some companies have but others typically do not. the reason I bring this up because obviously the quality difference of the watch will determine how concerned we will be on timing specifications. if this was a Rolex we would be probably extremely concerned with a watch like this not as concerned. Then I'm attaching the parts list for your watch providing it is your watch. You'll notice that the upper and lower balance jewel assemblies are physically a different size. Usually the side you can see on the balance bridge will be bigger. Even though no one will ever see this movement they usually make the side you can see look nicer. So the jewel may be bigger and physical size like parts list for this watch. Other times because of the regulator and the thickness found here the entire jewel assembly will be thicker. Sometimes the settings will be identical size but the end stone will be thicker on the side you can see. So yes you cannot make the assumption that there are identical in size. This is where having a parts list helps or depending upon whose jewel assembly it is you might have a website for the company that makes the assembly and ill give you specifications. Then for specifications typically are not found in the spec sheets. Some companies will have separate documentation with timing specifications. Others seemingly have nothing at all. ETA unfortunately not for every watch has manufacturing information sheets. I'm attaching a couple of pages out of one of those. It's a watch kind of may be perhaps similar to yours. In any case we can use it for ideas to see what the watch company was thinking. So in the second PDF will notice that there are four different grades of watches. Then they specify what all the differences are but we only want to look at the timing. So typically on the lowest grade watches there only time in two positions. The better the quality the more positions they verify that the watch is indeed keeping time in those positions. Doesn't mean you can't regulate you're watching get at the keep better time just means the factory didn't worry about it. Then you'll notice that the timekeeping specification is for an average of the numbers positions they time the watch in. Which is not the same as the instantaneous rate that you're seeing on the machine. Then there is the maximum difference between the positions that it's time then. Notice that numbers bigger than the average or could be worse than the average. Then you will notice at all the specifications above are based on the watches fully wound up and then There is specification is between one and three hours after it's fully wound up. This will vary between the various watch companies and you will note they give specifications for how to set your timing machine like the averaging time and stabilization time in other words when you switch positions in youth to stabilize and the minimum measuring time. Some of these numbers come about because if you have lots of money to him by nifty Swiss machines with automatic microphones it will rotate all by themselves in need this for programming that. But it also means when you switch positions you needed to stabilize and then look at it for the time specified at least . Then we get isochronism that's the timing difference between the watch fully wound up and 24 hours later. Then amplitude is always interesting for the watch companies versus this discussion group. Because typically the only thing they worry about is yes they don't want it too much but there only worried about it at 24 hours. Then just because the factory only looks at the timing into positions doesn't mean you can't time it in more positions. Which is what I usually recommend for anyone repairing a watch anyway. The minimum of dial up or dial down and more than one a crown position would be.'s. Makes it easy to see that you're having a problem versus one position where you miss things. Then if you look through the questions of the discussion group all of this has been discussed before which is why I'm not going to go into incredible details. Simplistically if you want your watch to keep time it should be as close to perfect as possible. Then typically dial-up and dial down should be very close to the same. Then when you go to the crown/pendant positions you always lose amplitude because there's more friction resting on the sides of the pivots. Then you always or usually always see some timing difference here and this is where we could go into basically what's whole subject lots and lots and lots of paragraphs. So this should get you started and I think I asked some questions above and I'm sure you probably have some. You can also go through the discussion group either do a search or just start scrolling down and looking at the questions because these questions of all come up before and are lurking in this group some way. Or ever lucky someone will come along and answer your question in more detail and you won't have to go looking through the message board but you'll miss out as it has been a lot of really interesting discussions. http://www.ranfft.de/cgi-bin/bidfun-db.cgi?10&ranfft&0&2uswk&AS_1950 AS_AS 1940,1941,1950,1951.pdf ETA-2824-2-Manufacturing-Info-Fr-Gr-En page 6 and 7.pdf1 point
-
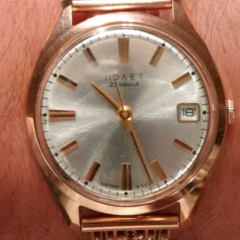
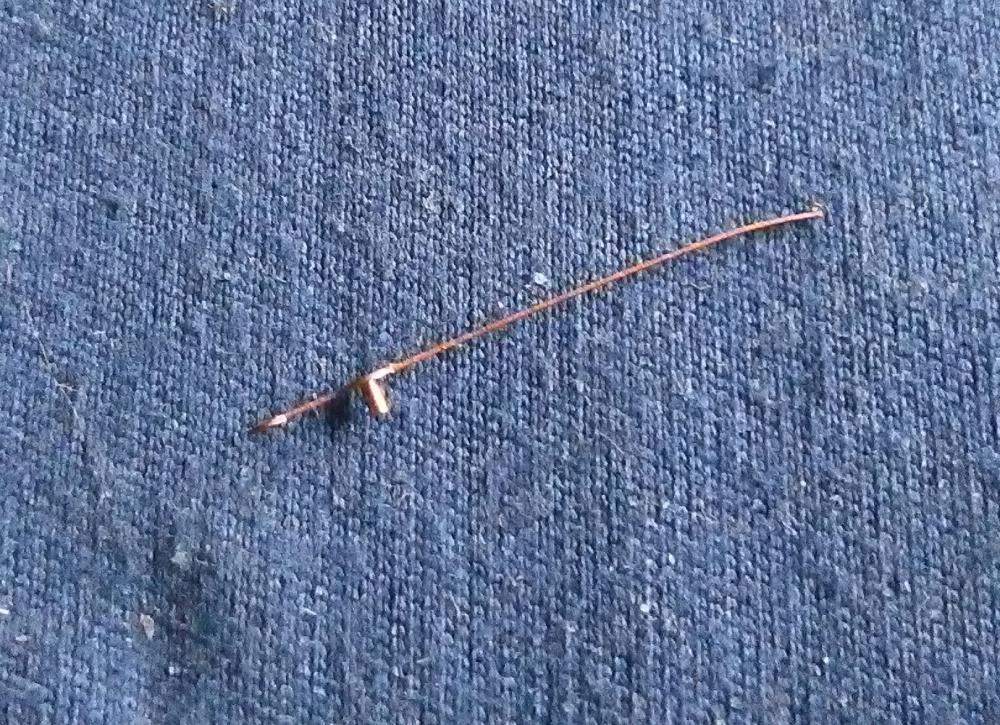
Some pics of the watch. Still don't know if I buy a new centre seconds hand from Cousins if the tube lengths are all the same. This one is 1mm long.

 1 point
 -
In Reply to OH's post above... Thanks for the tips, always appreciated. Here are my observations do far... Time Train. I wound the clock whilst still assembled and found it would not keep running. I did my (now usual) trick of listening to the sound of the beat and, finding it was well off, tilted up one side of the case to see if I could get a good beat. I could, with a tilt of about 1/4 inch, so well out! But after that determined that the clock was happy to keep running over at least a 24 hour period. So - it seems that once properly cleaned, re-aligned and re-bushed (where and if necessary) it should be a runner. Strike Train. I took the movement out of the case and mounted it on a block so as to facilitate testing on the remaining two trains under hand power. The spring barrels are easily removed on this movement, so out they came. This is a four hammer movement, with two of the hammers being lifted for the strike. At the moment, I am only getting single strikes on the half and full hours. Fault. From what I can see, the rack hook is not clearing the rack correctly, so not allowing the rack to drop onto the snail, so only allowing single strikes. I have not got any further with this just yet, except to say that if I drop the rack manually, it strikes correctly. More in the next post, in order to keep posts from getting too long. G.1 point
-
Indeed, not believable unless seen. With about 1.5 deg of amplitude per increasing lift angle deg it could be perhaps about 320, still very high. I think these are mostly academic exercises on a very vintage watch. If it runs well and keeps time that's all one really needs.1 point
-
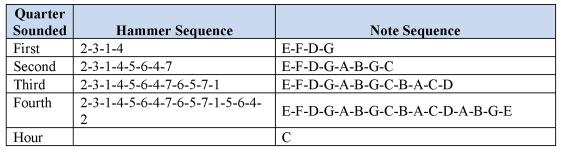
You are correct that isn’t the original movement for that case as it would have been seated on a seat board where the groves are in that case. Always check the winding to see how the springs are. Take note of any pivot holes that have vast amount of old black dirt in them that is normally a sign that the holes are worn and will need re-bushing. Check the condition of the suspension spring ( I always fitted a new one) If it comes with a key make sure it is a good fit if not replace it with new one. Don’t go buying second hand keys from ebay they are sure to be worn only buy new. As it is not the original movement check for room on the winding holes making sure a key can fit the arbors correctly also check the centre hole making sure it is free and isn’t rubbing the hour wheel pipe. It is possible the silent/chime lever might not be protruding enough so as to use it. When the movement is out check for any rubbing of parts as the distance between movement, case and dial need to be enough in order for everything to work. You are taking clock repairs in the right order by stepping up from strikes to chimes. Any other help needed just ask. Here is the hammer sequence for a Westminster chime.
 1 point
 -
@anilv Thanks, managed to get them done. It was one of those things that turned out not to be so bad. Don't think it's upped my amplitude by much but will see how it is in a few hours of running. Cheers.1 point
-
oops, sorry I misunderstood. Yes the capstones are fiddly but do-able, I usually use two pegwoods to manouver them as they grip better. You can also try trimming the pegwood to the circumference of the fitting and hollowing the end a bit to clear the dome of the jewel but I find using two pegwood works for me. Anilv1 point
-
Well to quote Winston Churchill, "It is not even the beginning of the end. but it is, perhaps, the end of the beginning." I have high hopes that the current vaccine rollouts will begin to have their intended effect by late spring/early summer in the US, UK, and Europe. Together, we will get through this.1 point
-
You are very welcome and good luck! You may want to take and share a good photo showing the bottom of the second hand tube and another one showing if pivot is worn.1 point
-
You maybe right as there are two possible scenarios in my opinion: a. tube ID is slightly larger than it used to be. In this case you can simply squeeze it a tiny bit (this would be a suitable tool for this task https://www.watchmaterial.com/bergeon-5679-pin-vice-stem-holder/ ) b. you did not push the Central Hand deep enough. Push it gently down right in the centre using proper tool or a sharp pegwood (do not use tweezers or you will leave scratches)1 point
-
So, after this conversation, I went ahead and purchased a Bergeon aplantic from ofrei, 4X at 2.5" and yes, there is noticeably less outer view distortion with it. not bad. not bad at all. I've swapped it out with a regular loupe and use it now with a holder ring and is in my regular rotation of loupes, cheaters with clip-ons, mag visors and my scope lol. I think I'll wind up being "that guy" with a huge collection of loupes all over the place, using one for this, one for that... one thing I do do though, is drill tiny holes all around the periphery. not many, just a few. it helps a great deal with relieving the fog build up I seem to get all the time. I have one that came with a large opening but I'm not a fan. it's distracting. but the tiny holes work for me. thanks for the aplantic tip. I might look into others.1 point
-
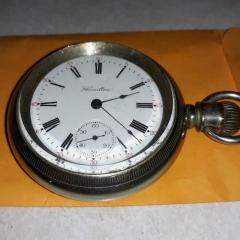
Waltham 18S 1892 Prettier than Rolex? You betcha!
 1 point
 -
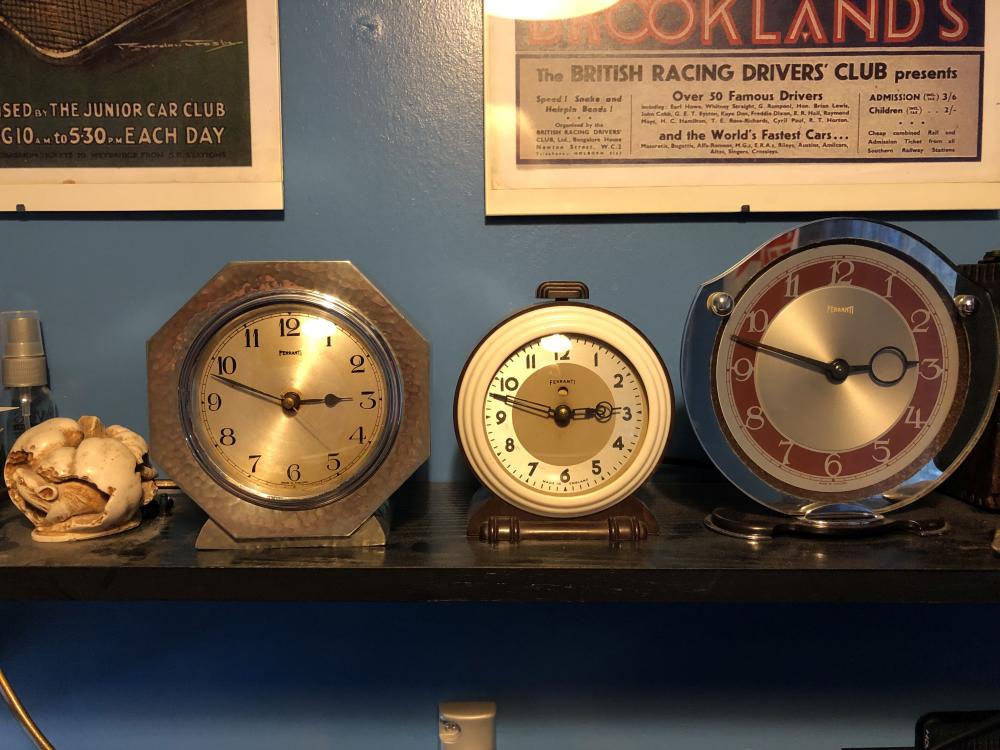
My interest in these started a few weeks ago when I won this Ferranti Art Deco style electric clock on eBay...... https://imgur.com/4Wh0OlR https://imgur.com/ojHknNv https://imgur.com/Npw4rYq I wasn't sure if I could restore it and get it going but for the princley sum of £14 I thought that it was worth a try.... Any way an hour or two of work saw this, all restored, re-wired and up and running:- https://imgur.com/SU3ga2R This started the fall into the abyss........? The next acquisition was this Ferranti bedside alarm clock....... https://imgur.com/pXh6leY https://imgur.com/GeNN3Hw Which also was an easy restoration...... Now there were two....... https://imgur.com/VTUVzhX At this point I realised that I needed more information on Ferranti synchronous clocks so bought a copy of this, the diffinitive work on the subject..... https://imgur.com/LolepmD Which told me that my two Ferranti clocks had both been made between 1947 and 1952, so not as early as I had originally thought... Two was obviously not enough.........? These things are adictive! I could not resist this period green offering from Smiths, again a bedside alarm from the late 1940's, early 1950's.... https://imgur.com/94e3sFx Now restored..... https://imgur.com/TFsLrQI I was less enamoured with the Smith's movement than the Ferranti ones and the next acquisition was this Ferranti Bakelite mantel clock, which my new book of knowledge informed me was one of the first from about 1933..... https://imgur.com/NkXzMtQ Again a fairly easy restoration....soon fully restored and running....A picture of the rewired movement here:- https://imgur.com/XMK4rrB At this point I started to feel like Alice falling down the rabbit hole.....? Another Ferranti Bakelite bedside alarm followed, this time one from the mid 1930's https://imgur.com/iAKYfF5 This one cleaned up well, and is now running, but the dial is a bit of a disaster and because of that I have yet another incomplete one the same type, but with a better dial, coming as donor....... Oh and I 'accidentally' bought a second round Bakelite alarm, identical to the first one..........seen here with the restored mantel clock... https://imgur.com/C7exLkq now fully restored, I shall have to sell one of these to help pay for my addiction......? Now at this point £14 was the most that I had paid for one of these, several being £10 or less but when I saw this hexagonal, pewter cased, one I had to have it and ended up paying almost twice what I paid for the first clock...... https://imgur.com/aOm7IAj https://imgur.com/KAHUrNW The dial appears to be a major problem but we shall see..... Well it arrived this morning, so I couldn't resist seeing what I could do with it..... I stripped it down, noting that whoever had previously been inside it had assembled it with the chapter ring the wrong side of the glass, causing the hub of the second hand to be firmly clamped by the glass.....perhaps that was why it was sold as 'not working'?? I determined that the coil was not short or open circuit and the resistance was correct, at between 4 and 5K ohms, so in for a penny, in for a pound, in true old master painting restoration style I started to attempt to clean up the dial using cotton buds, saliva and mild soap and water.....Much to my surprise, after an hour or so i had got it to a very acceptable level of appearance. All that was left to do was to clean up the case parts and glass, finally giving the pewter case a spot of car polish.....and reassemble it all, wiring it with a new flex.... Voila, the finished result ? https://imgur.com/ArXGRnN Watch this space, there are more on the way!? Can someone explain how I can get hosted pictures displaying instead of just the link?1 point
-
What Joe refers to is the balance cock( the part which holds the balance wheel), Just back off the screw a half turn and see if the balance starts up, Check the end shake of the balance wheel if it now runs shim the balance cock with a little aluminium foil (temporary )and re tighten the screw if it still runs then the problem is lack of end shake. If that is the case the balance jewels/settings may need adjusting.1 point
-
Lovely Tik-ing sound ?
 1 point
 -
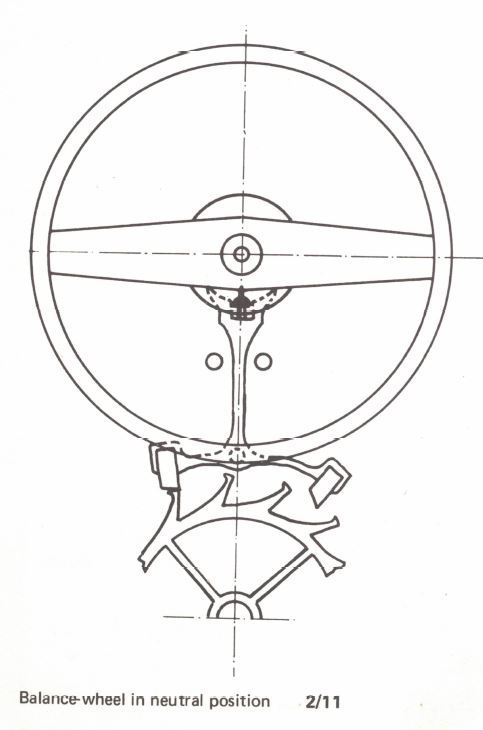
I'm attaching an image you don't actually need the banking pins to put the watch in beat. You're supposed to line the roller jewel up with that invisible center line that conveniently is easy to see if it was between the banking pins.
 1 point
 -
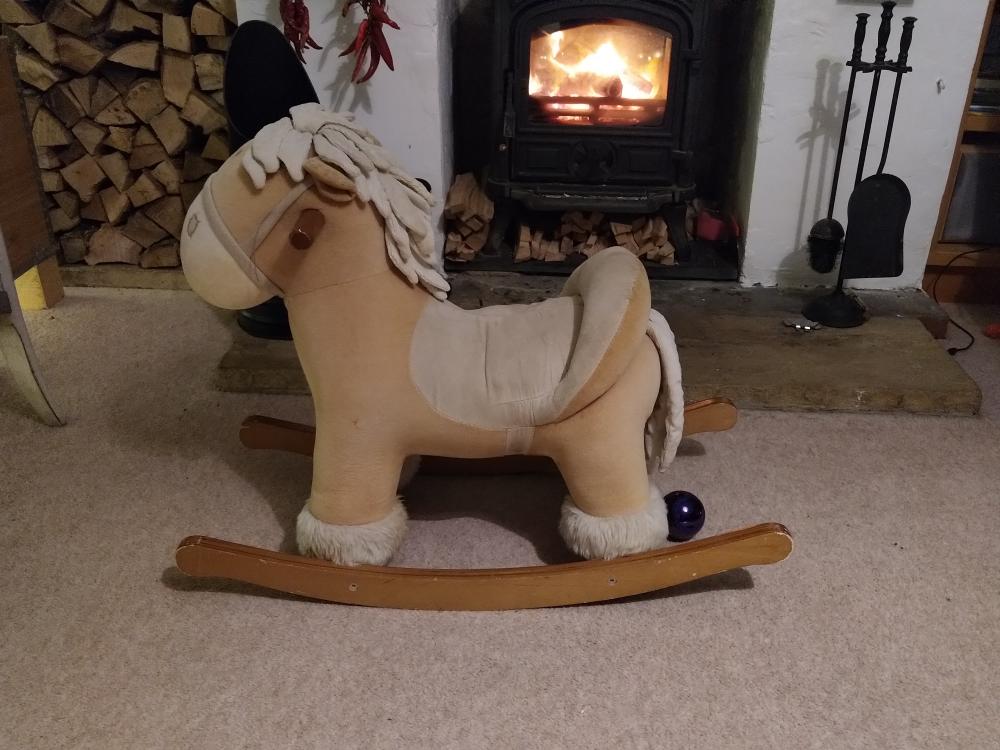
A little off topic, but in the egg chicks do have a little pointy projection on the end of their beak to help them break out of the shell. It falls off after the chick has hatched. I believe that it is referred to as an egg tooth, so "rare as hens teeth" is actually not very rare at all since every hen has had a tooth at one stage of its life. Yet the expression persists..... I have as yet to encounter any actual rocking horse poo yet though1 point
-
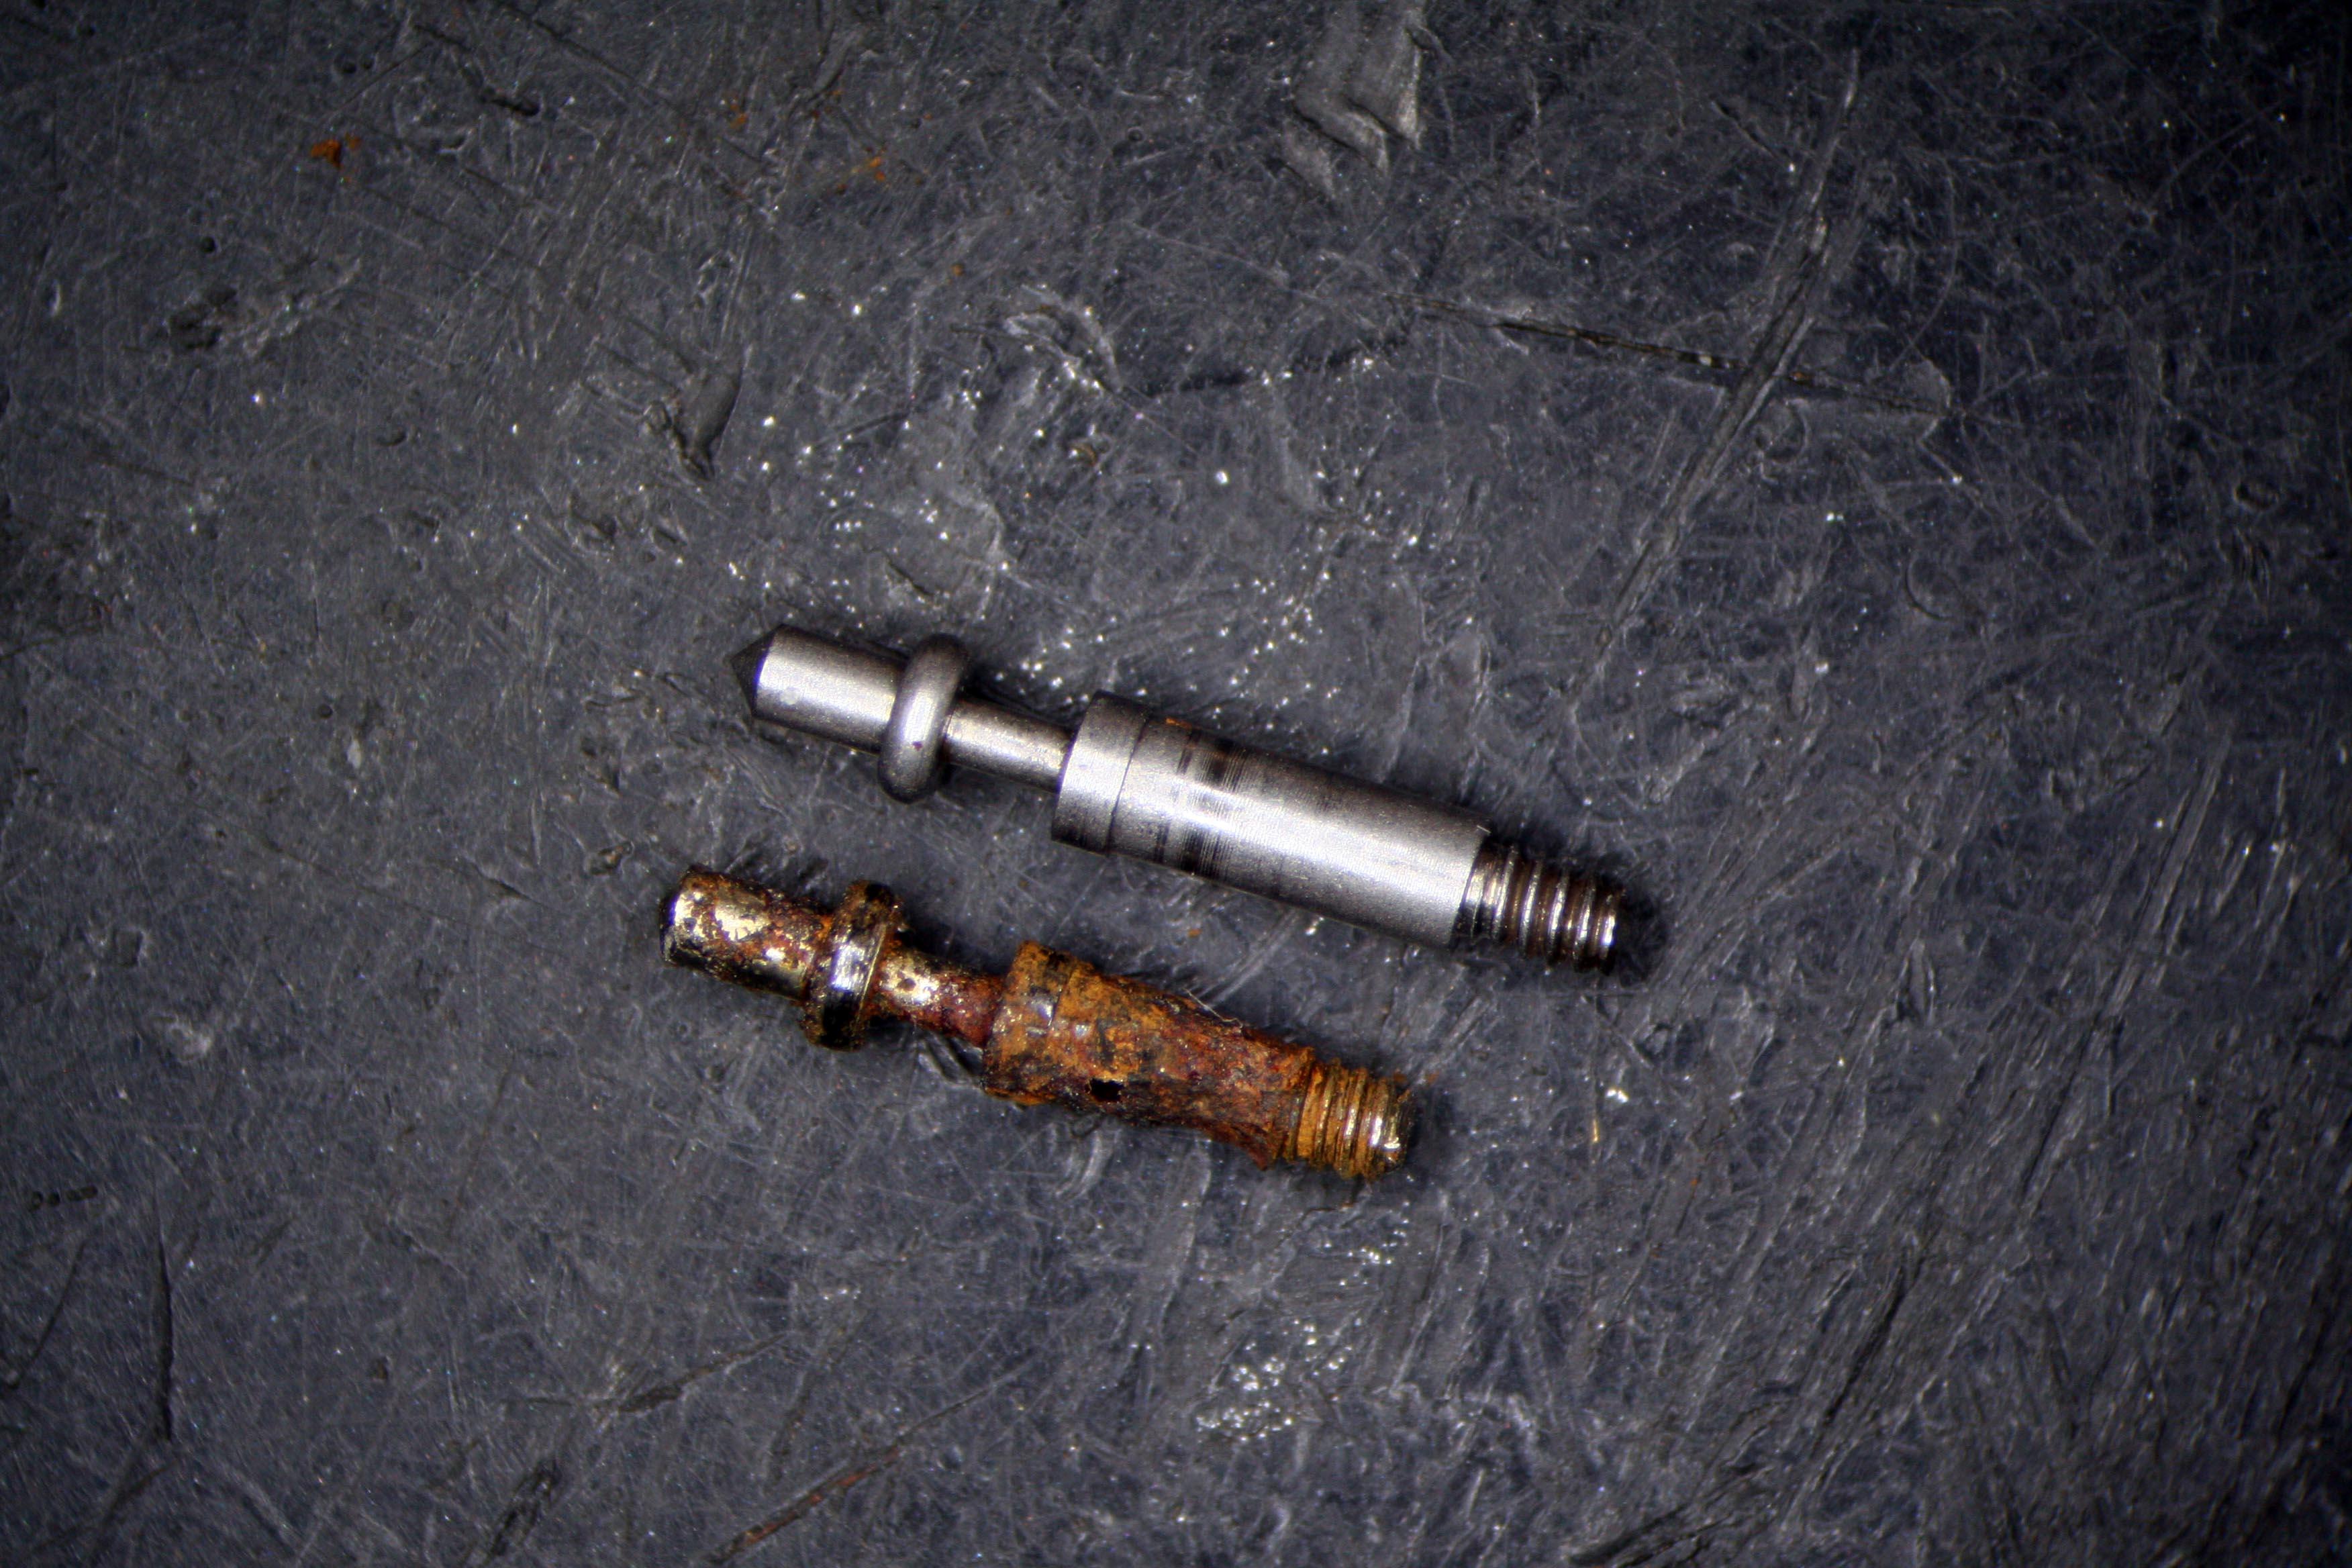
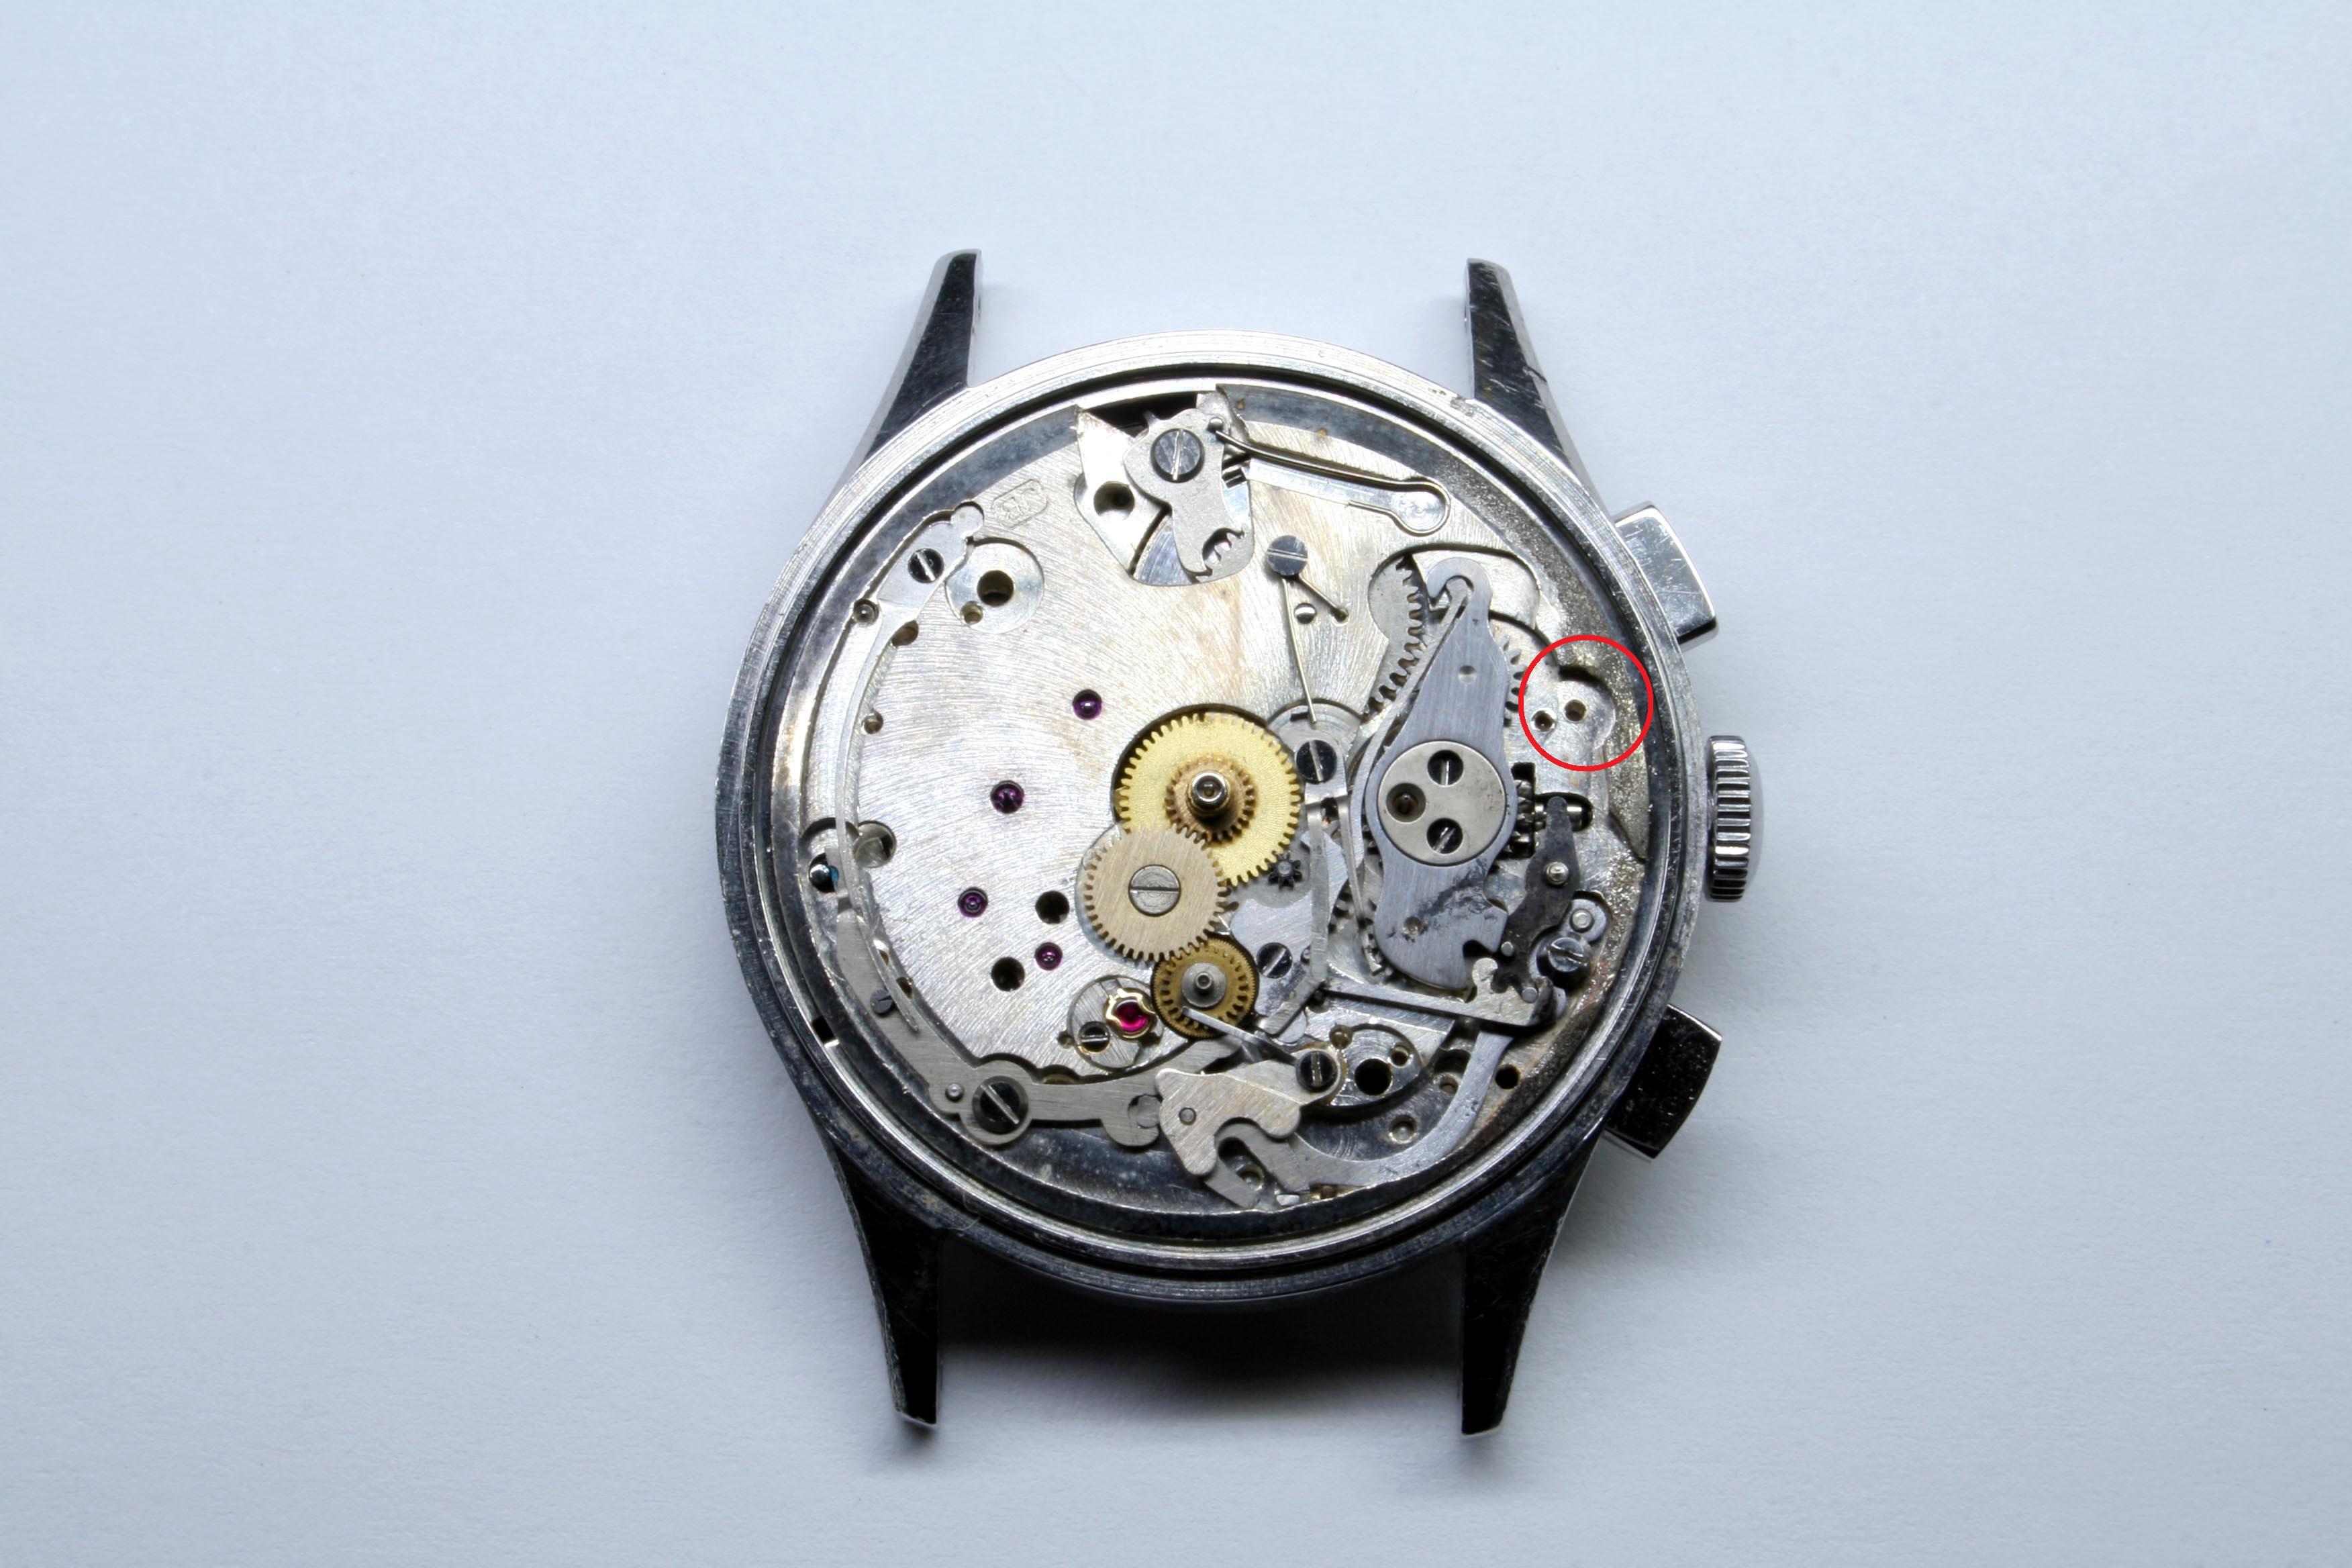
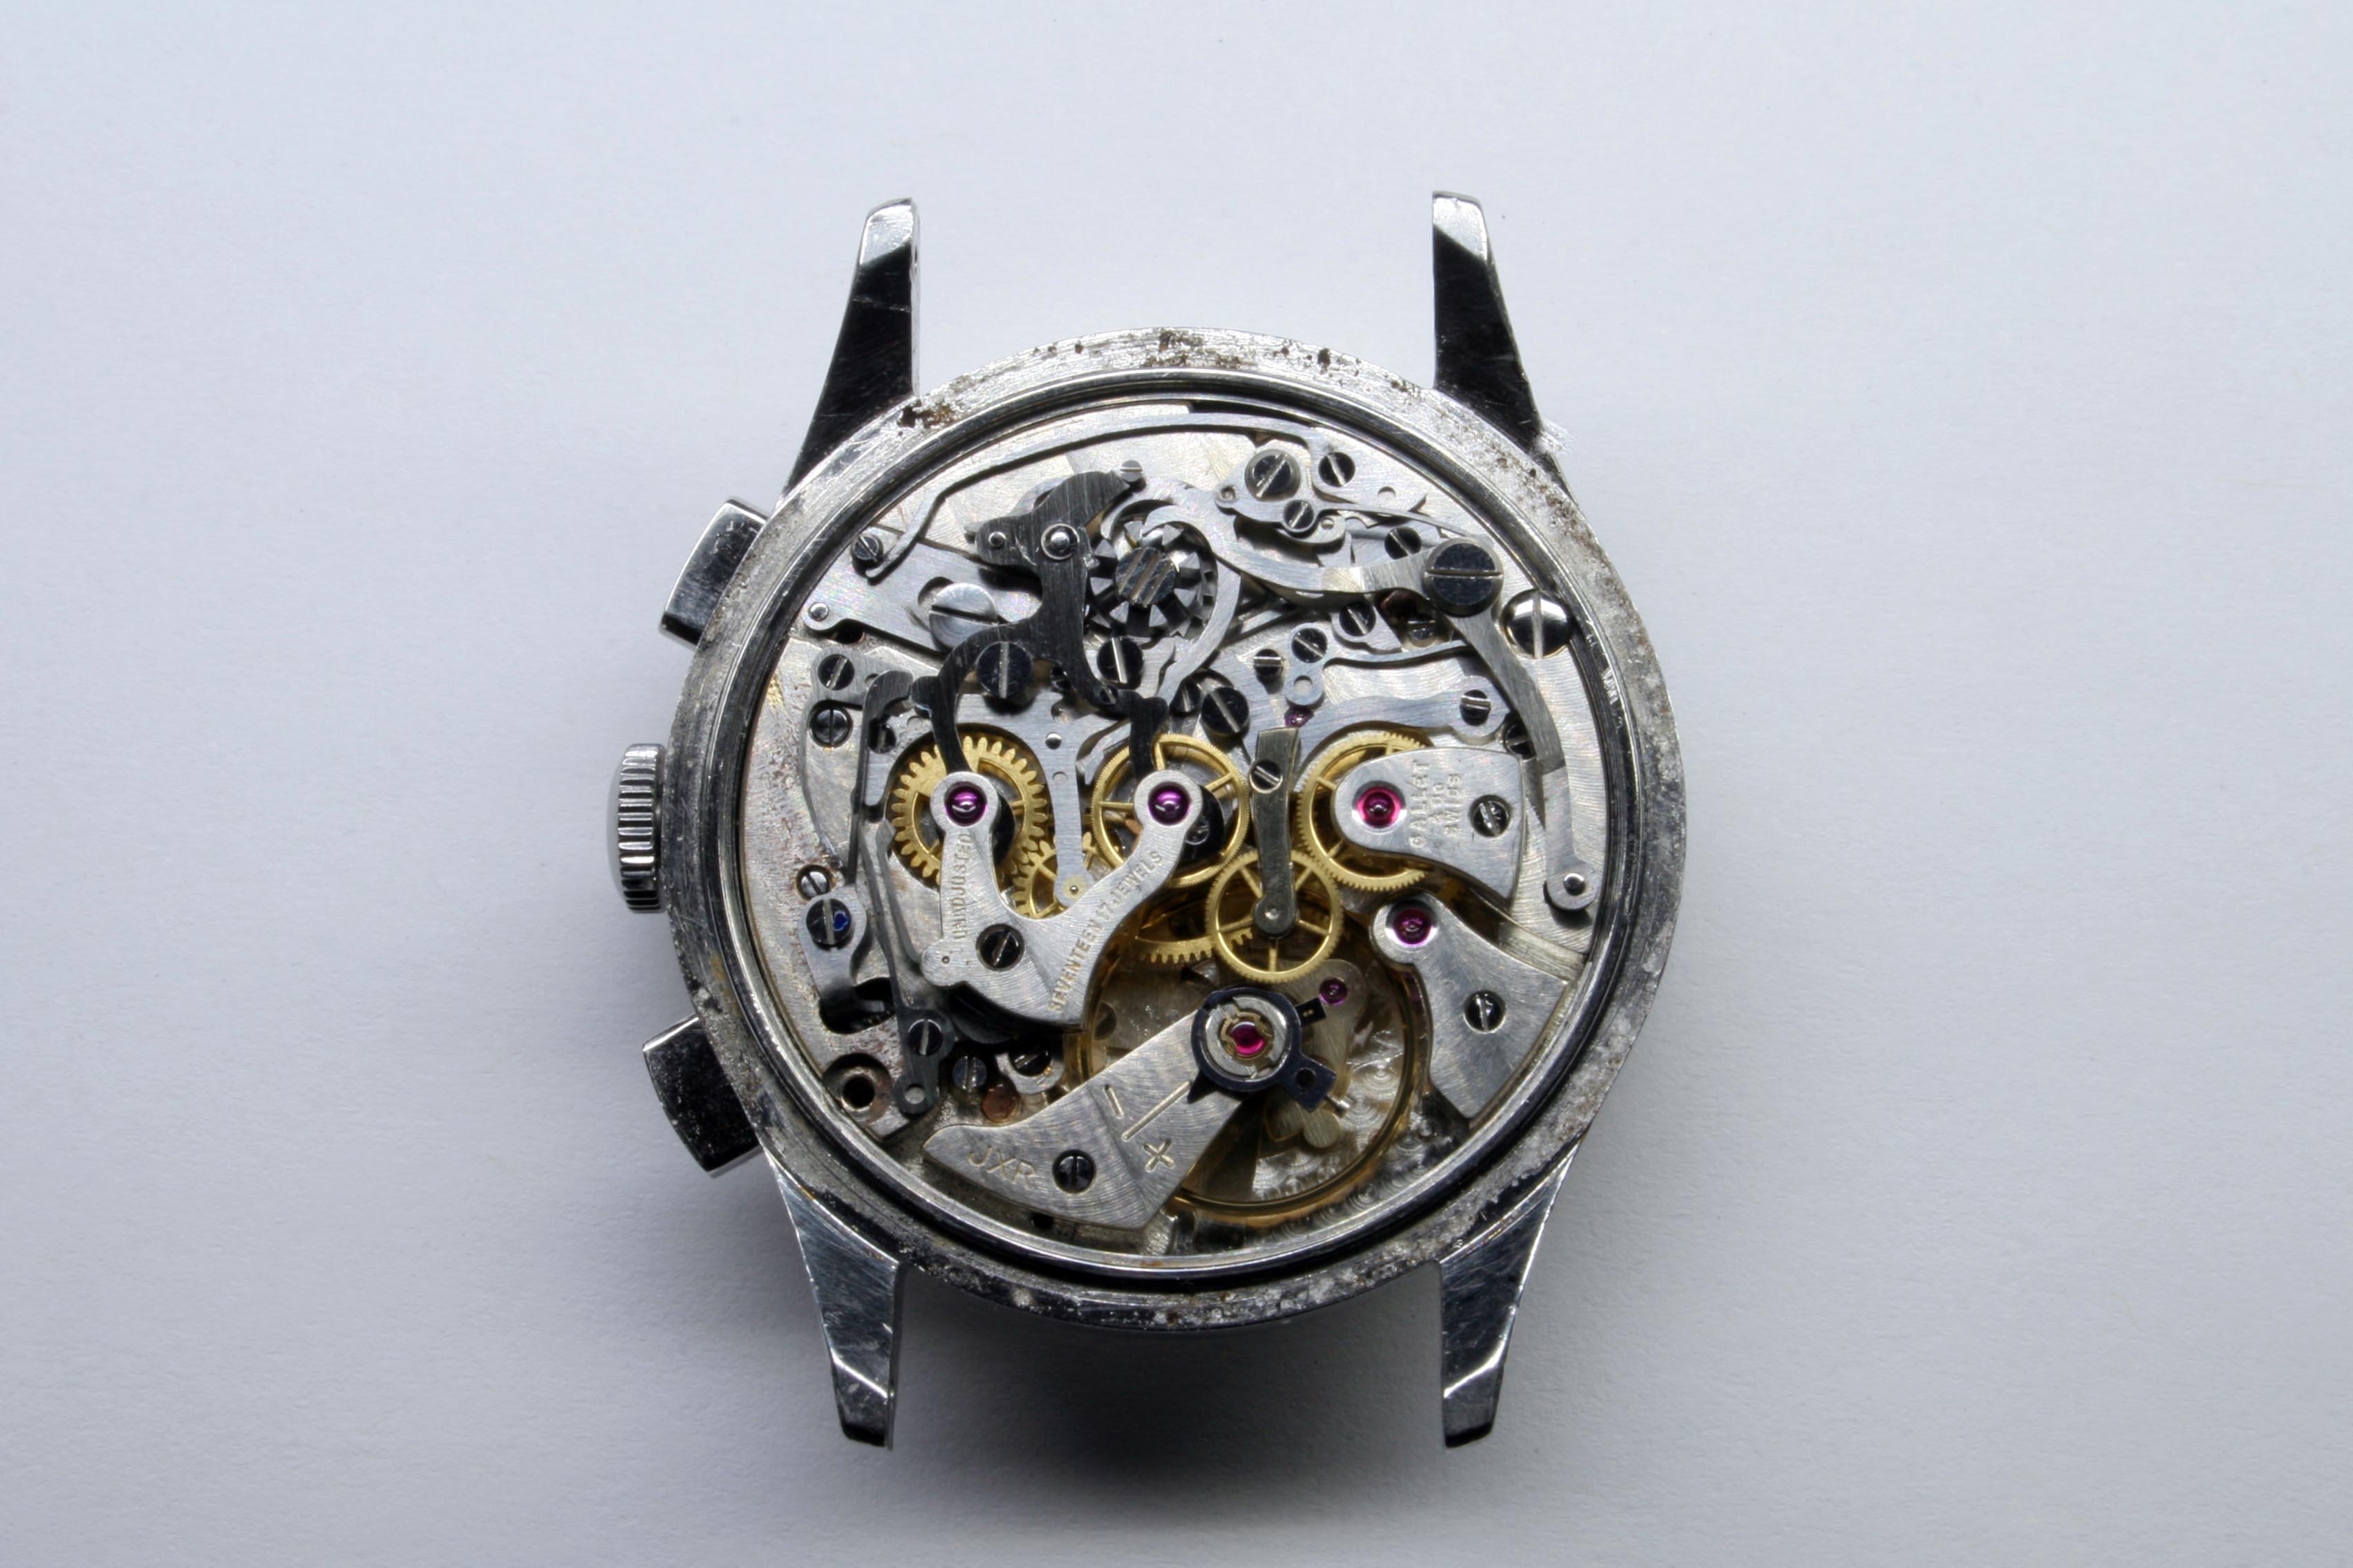
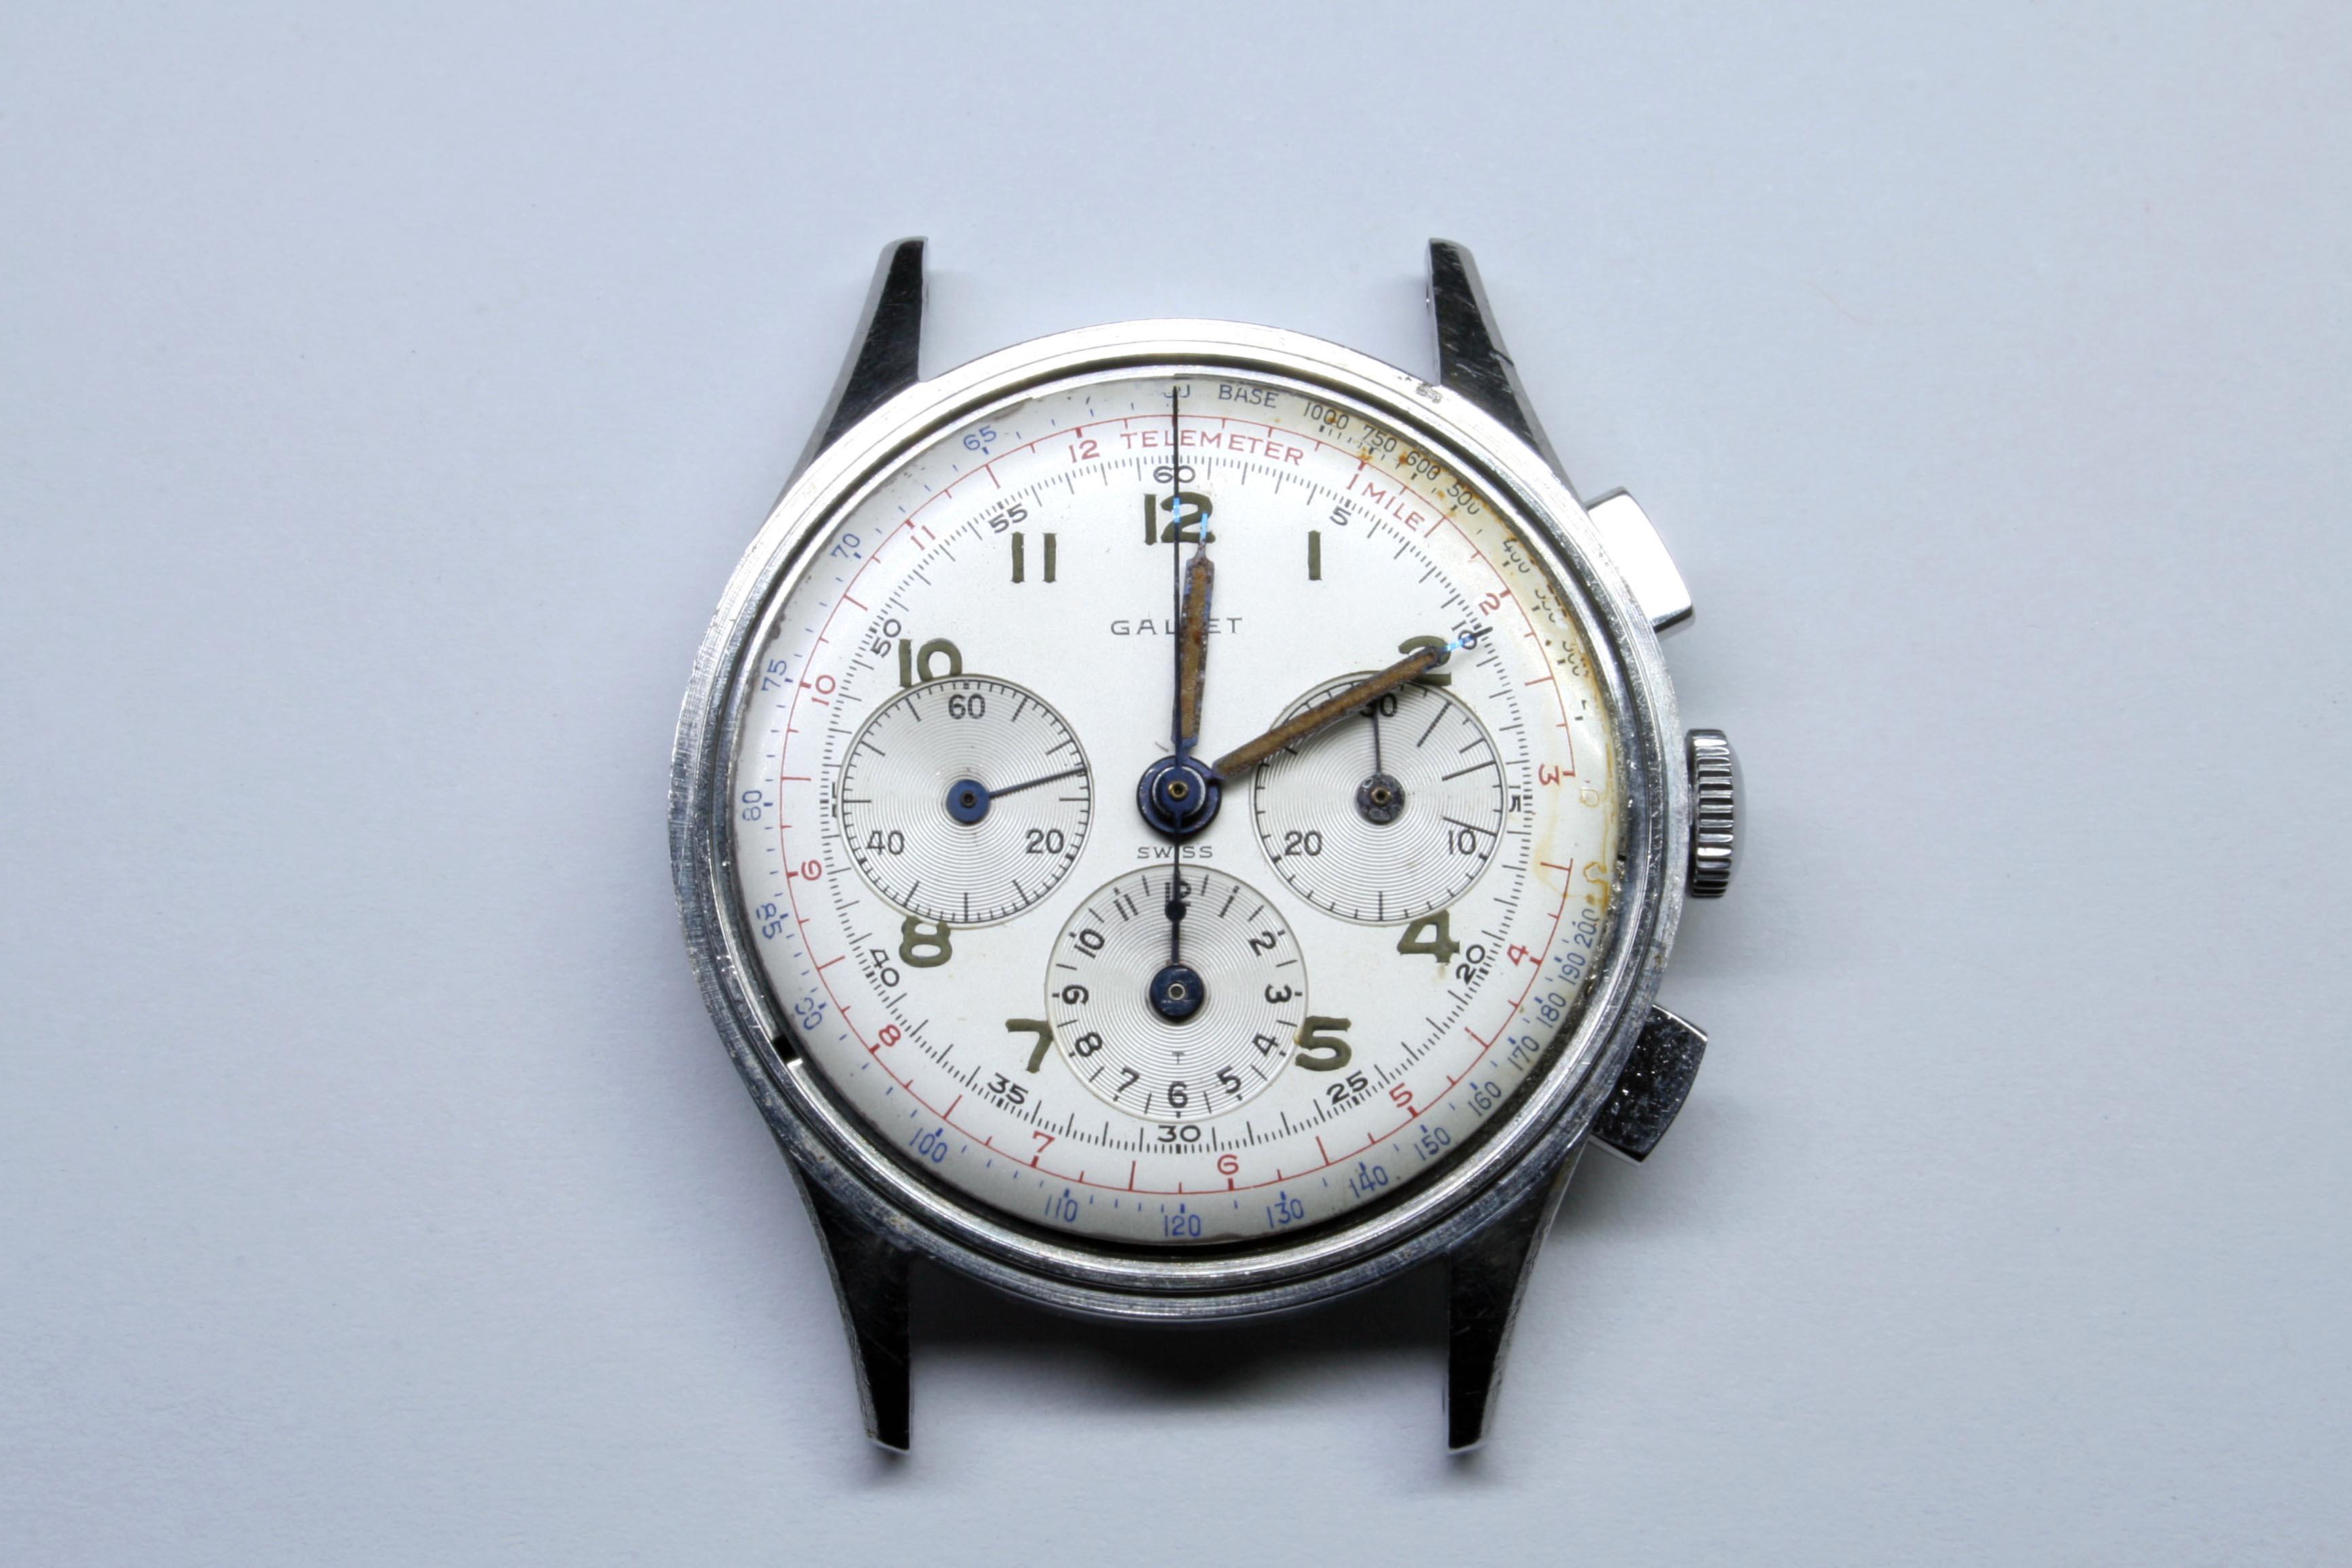
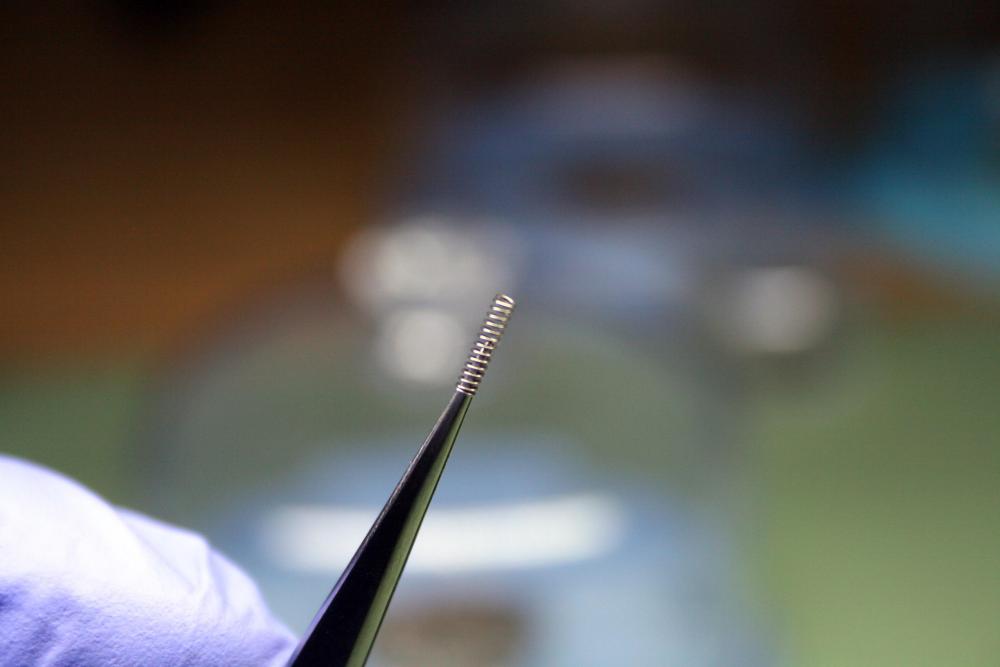
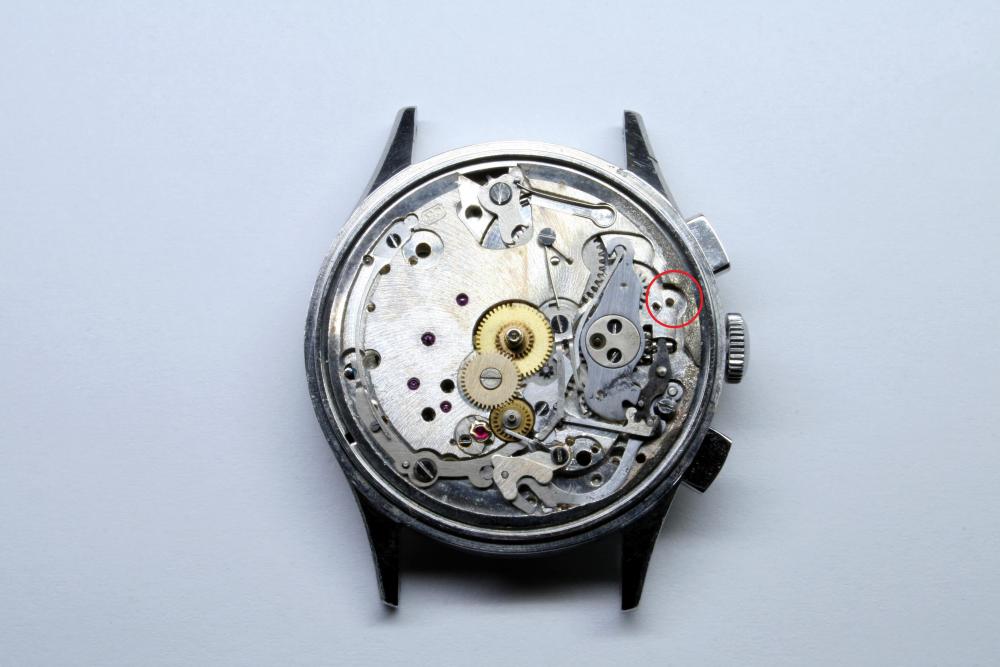
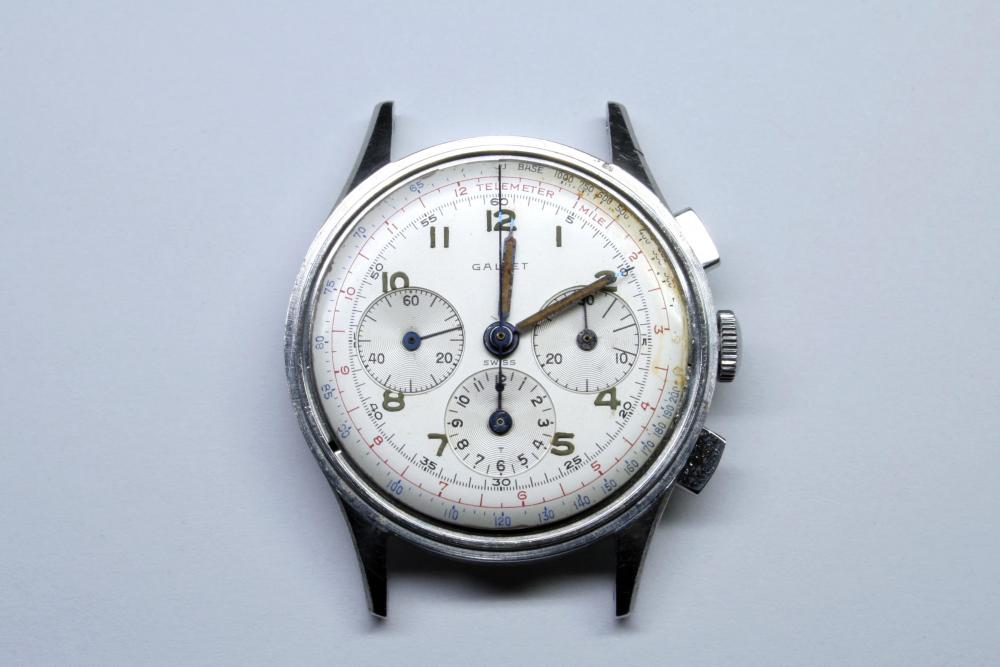
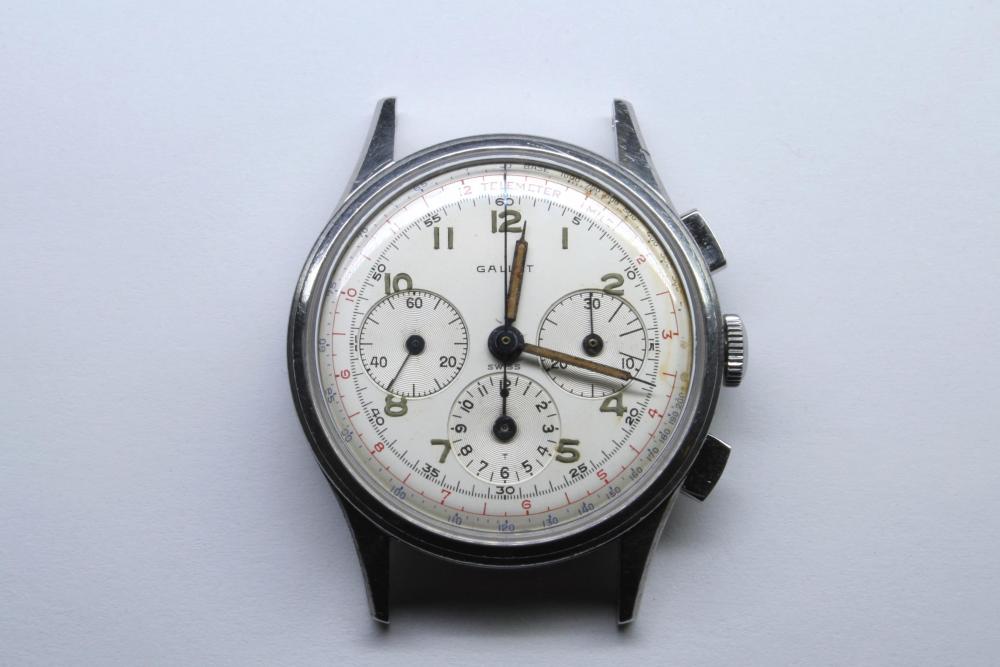
Well, I've pretty much wrapped up this project. The replacement chronograph pushers (buttons) arrived last week and needed a bit of adjustment before they could be installed. As you can see from the picture below, the shaft of the pusher which acts on the Flyback Lever was a bit long and needed to be turned down on the lathe then re-threaded. The lot of Excelsior Park parts which I purchased earlier included replacement coil springs for the pushers which was just perfect as the spring for the Flyback Lever was quite rusty. The replacement is pictured below. I found it was easiest to case the movement first, then install the pushers. While doing this I noticed there was a part missing from the keyless works. Worried that I had lost something irreplaceable, I went back over my images taken during disassembly and discovered the missing bit wasn't there when I started. The missing piece belongs to the setting lever assembly- although what exactly it's purpose is I'm not sure. Perhaps it provides stability when applying the clutch. I noted the keyless works seems to function properly without the part so maybe it's just the appendix of an EP40 movement. I've circled the area with the missing bit below and added a linked image from the Watchguy's image archive which shows exactly what is missing. If I ever do find the missing part, I'll probably have to give my right arm to purchase it. I replaced the Flyback Lever and Operating Lever, both of which secured the pushers to the movement. The Flyback Lever is secured with a left-hand thread shouldered screw. The original screw was destroyed by rust but I found a suitable replacement; it doesn't have the three slots cut into the head so I added a dab of blue paint to distinguish the screw. I still need to find a large case screw to replace the original which was also destroyed. I needed to adjust some of the eccentrics in order to get the chronograph working just right. It's a pity too because those eccentrics had perfect heads on them until they were galled by my screwdriver. That will serve as a reminder to review the section in George Daniel's book on screwdriver sharpening. I cleaned up the dial with a bit of water and a Q-Tip but as you can see I lost some of the tachymetre around 3 o'clock from my efforts. The text came away without effort so I stopped any further efforts to improve the dial. The Hour, Minute, and Minute Recording hands all had oxidation damage. I scrapped the rust away with an oiler and Rodico and applied a coat of varnish to the luminous paint to keep it from crumbling. I think I could have polished and re-blued the hands (which would have been the "correct" solution) but opted to keep the scarred look; it's a reminder of what this watch has been through. By the way- blued steel hands on a white dial is just a fantastic look. They look black against the dial when viewed straight on, but when the light hits them just right they shimmer with the deepest blue. I tried to catch an image of the effect with my camera but just couldn't do it justice. A high dome acrylic crystal completed the job. So far, so good. The movement has kept time for the past twenty-four hours without issue. Once I've found a strap for it, I'll take it out on the town and then make final adjustments if need be. I think I got lucky on this one as the water damage wasn't as great as it could have been and I was able to find all of the replacement parts at a reasonable cost. Only the pushers broke my budget but I'm happy with the new buttons. I still have some NOS parts left over which I can hold onto or flip later to offset the cost of repair.


 1 point