Leaderboard


Popular Content
Showing content with the highest reputation on 07/07/20 in Posts
-
I think that you may find it's 83 that are non-functional. It's an AS movement, probably a 1700 as these were a favourite for over-jewelling for marketing purposes. It has no more staffs, arbors and pallets than a 17 jewel AS1700. As you go over 17 jewels the justification (on the grounds of time keeping) for extra jewels becomes increasingly more difficult, and past about 21 almost impossible in a standard h:m:s type movement. That's not to say that additional jewels beyond 21 are completely pointless. Jewelled bearings throughout the auto-wind mechanism have a value in so much as they tend to have lower frictional losses compared to metal on metal bearings and so increase winding efficiency and prolong component life, but their contribution to more consistent time keeping can be a difficult point to argue. Once you have jewelled and end capped every single axial bearing in the watch though you are going to struggle to justify a single extra rock on the grounds of functionality, which means that even with the most complex auto-wind system you're going to top out somewhere between 35 and 40 functional jewels and that's probably being generous, beyond that is almost always nothing more than marketing hype. There's an interesting article on the subject here.2 points
-
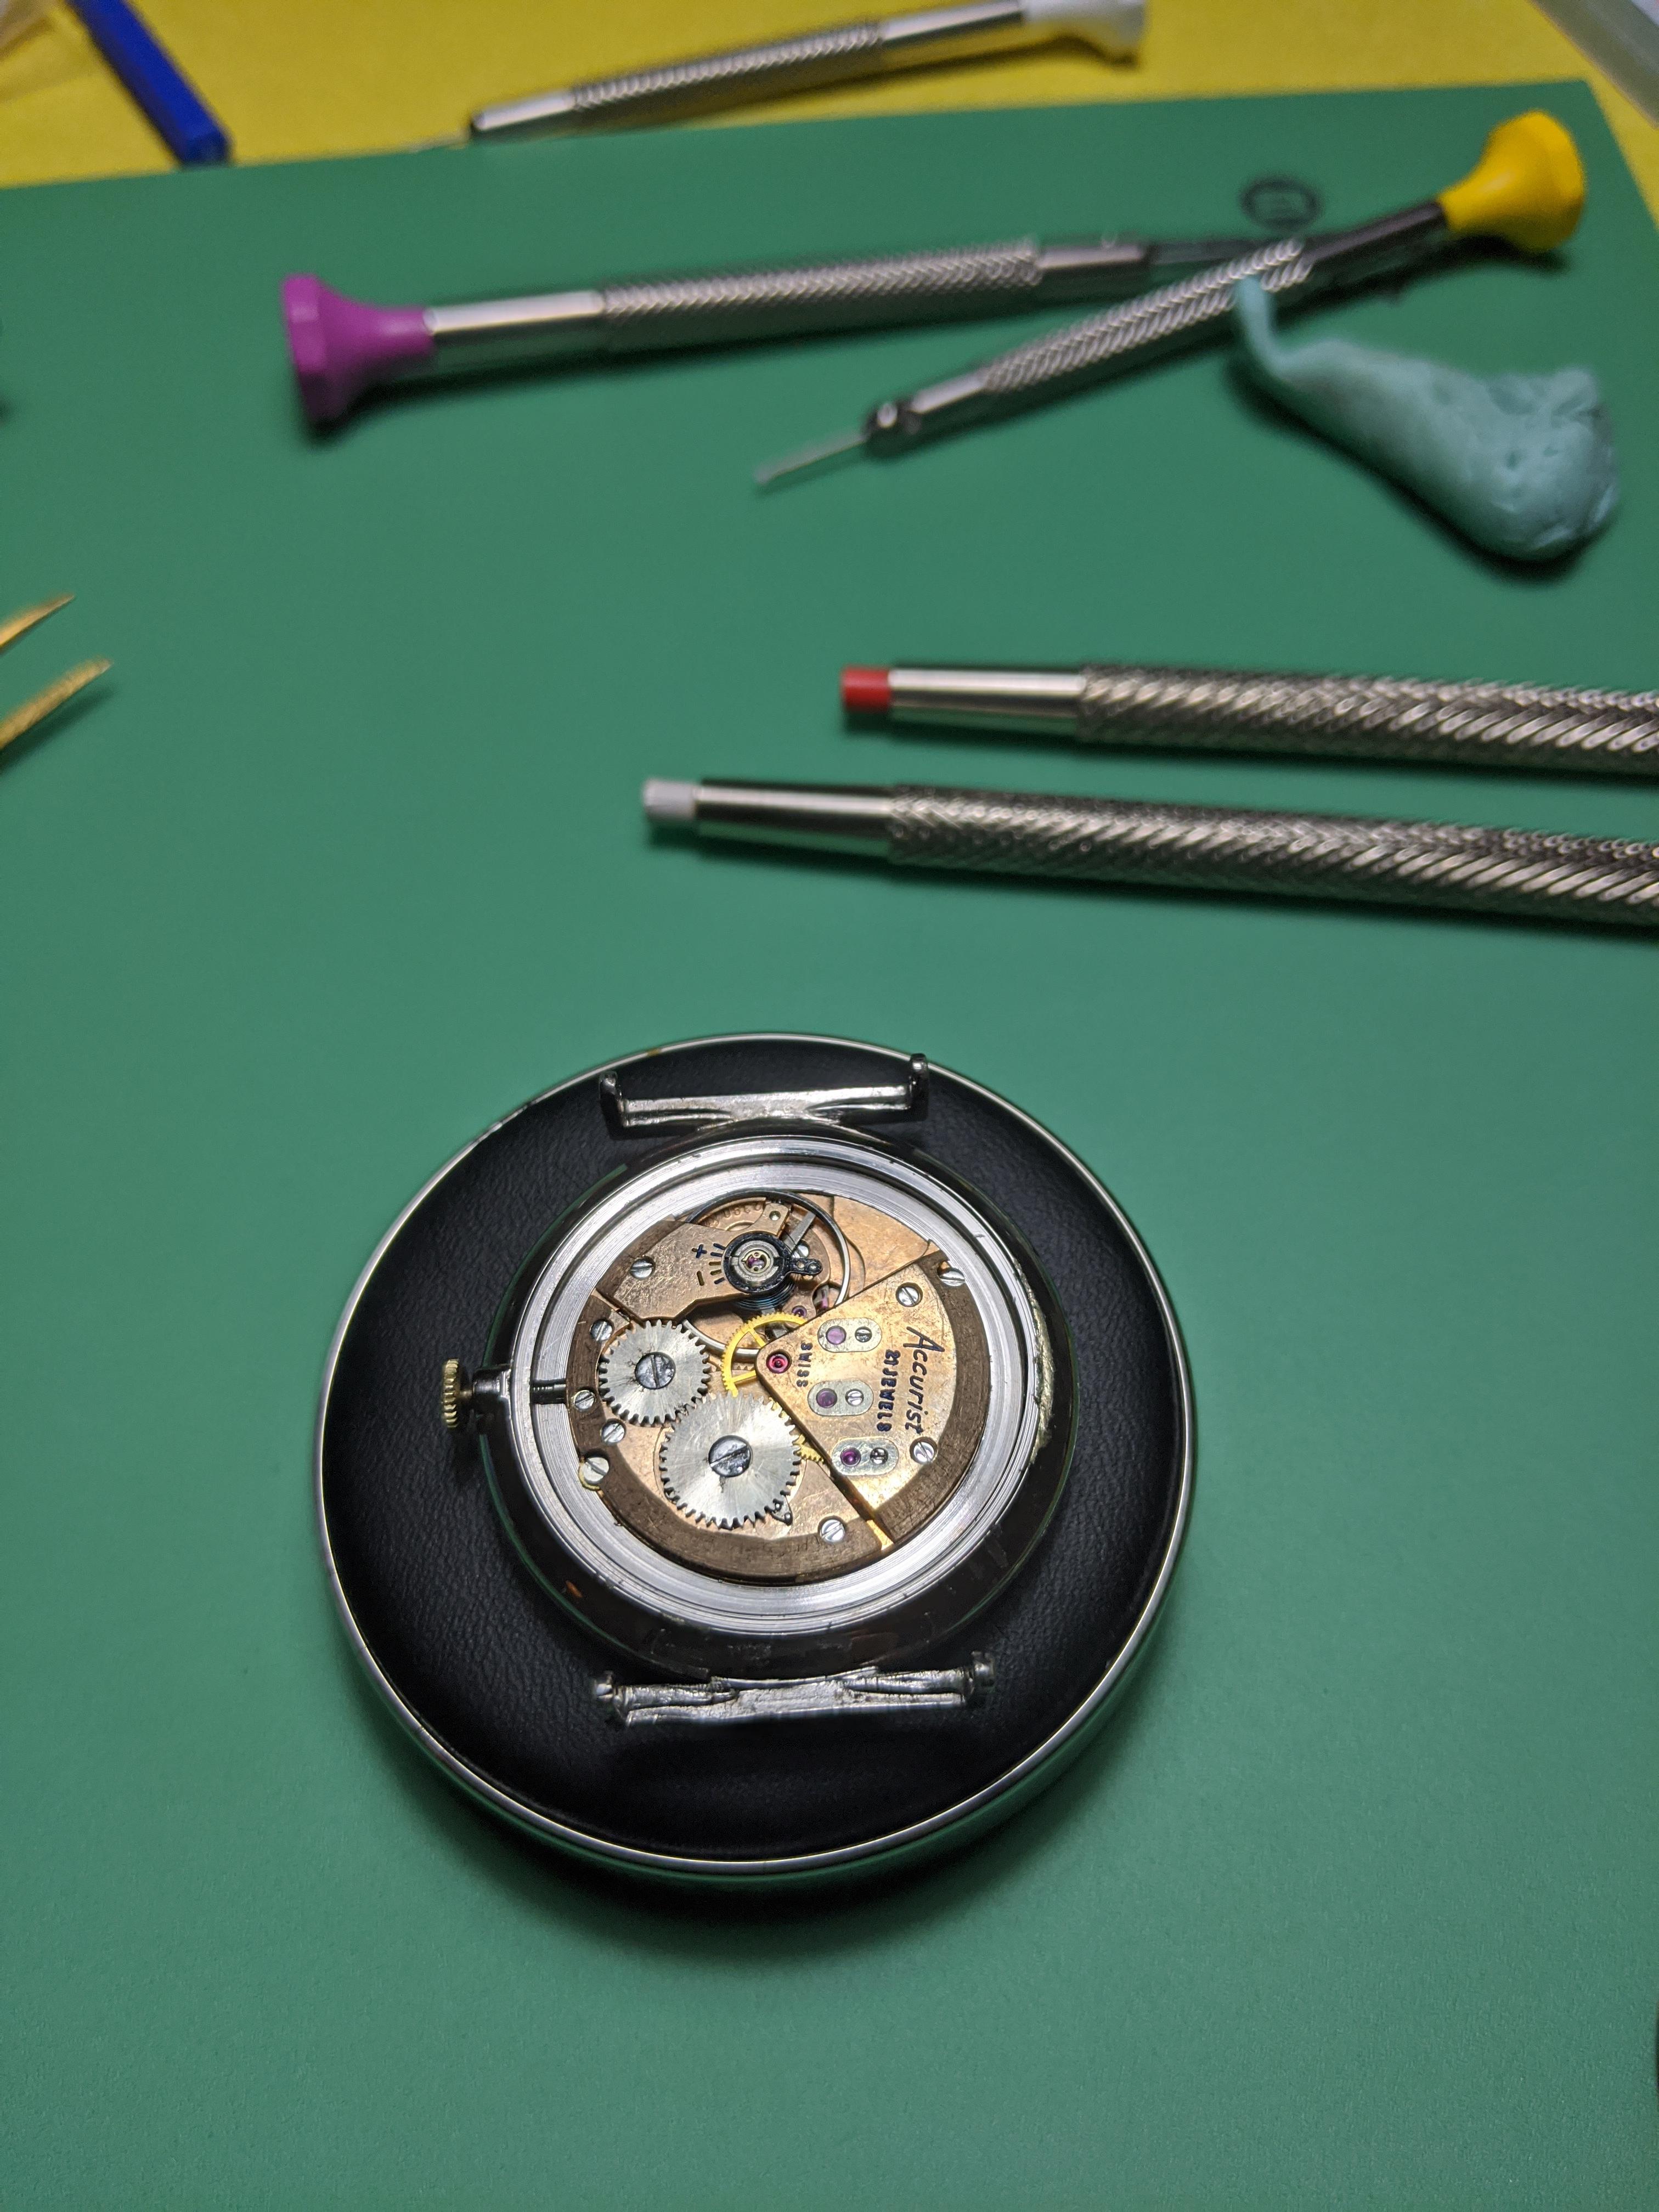
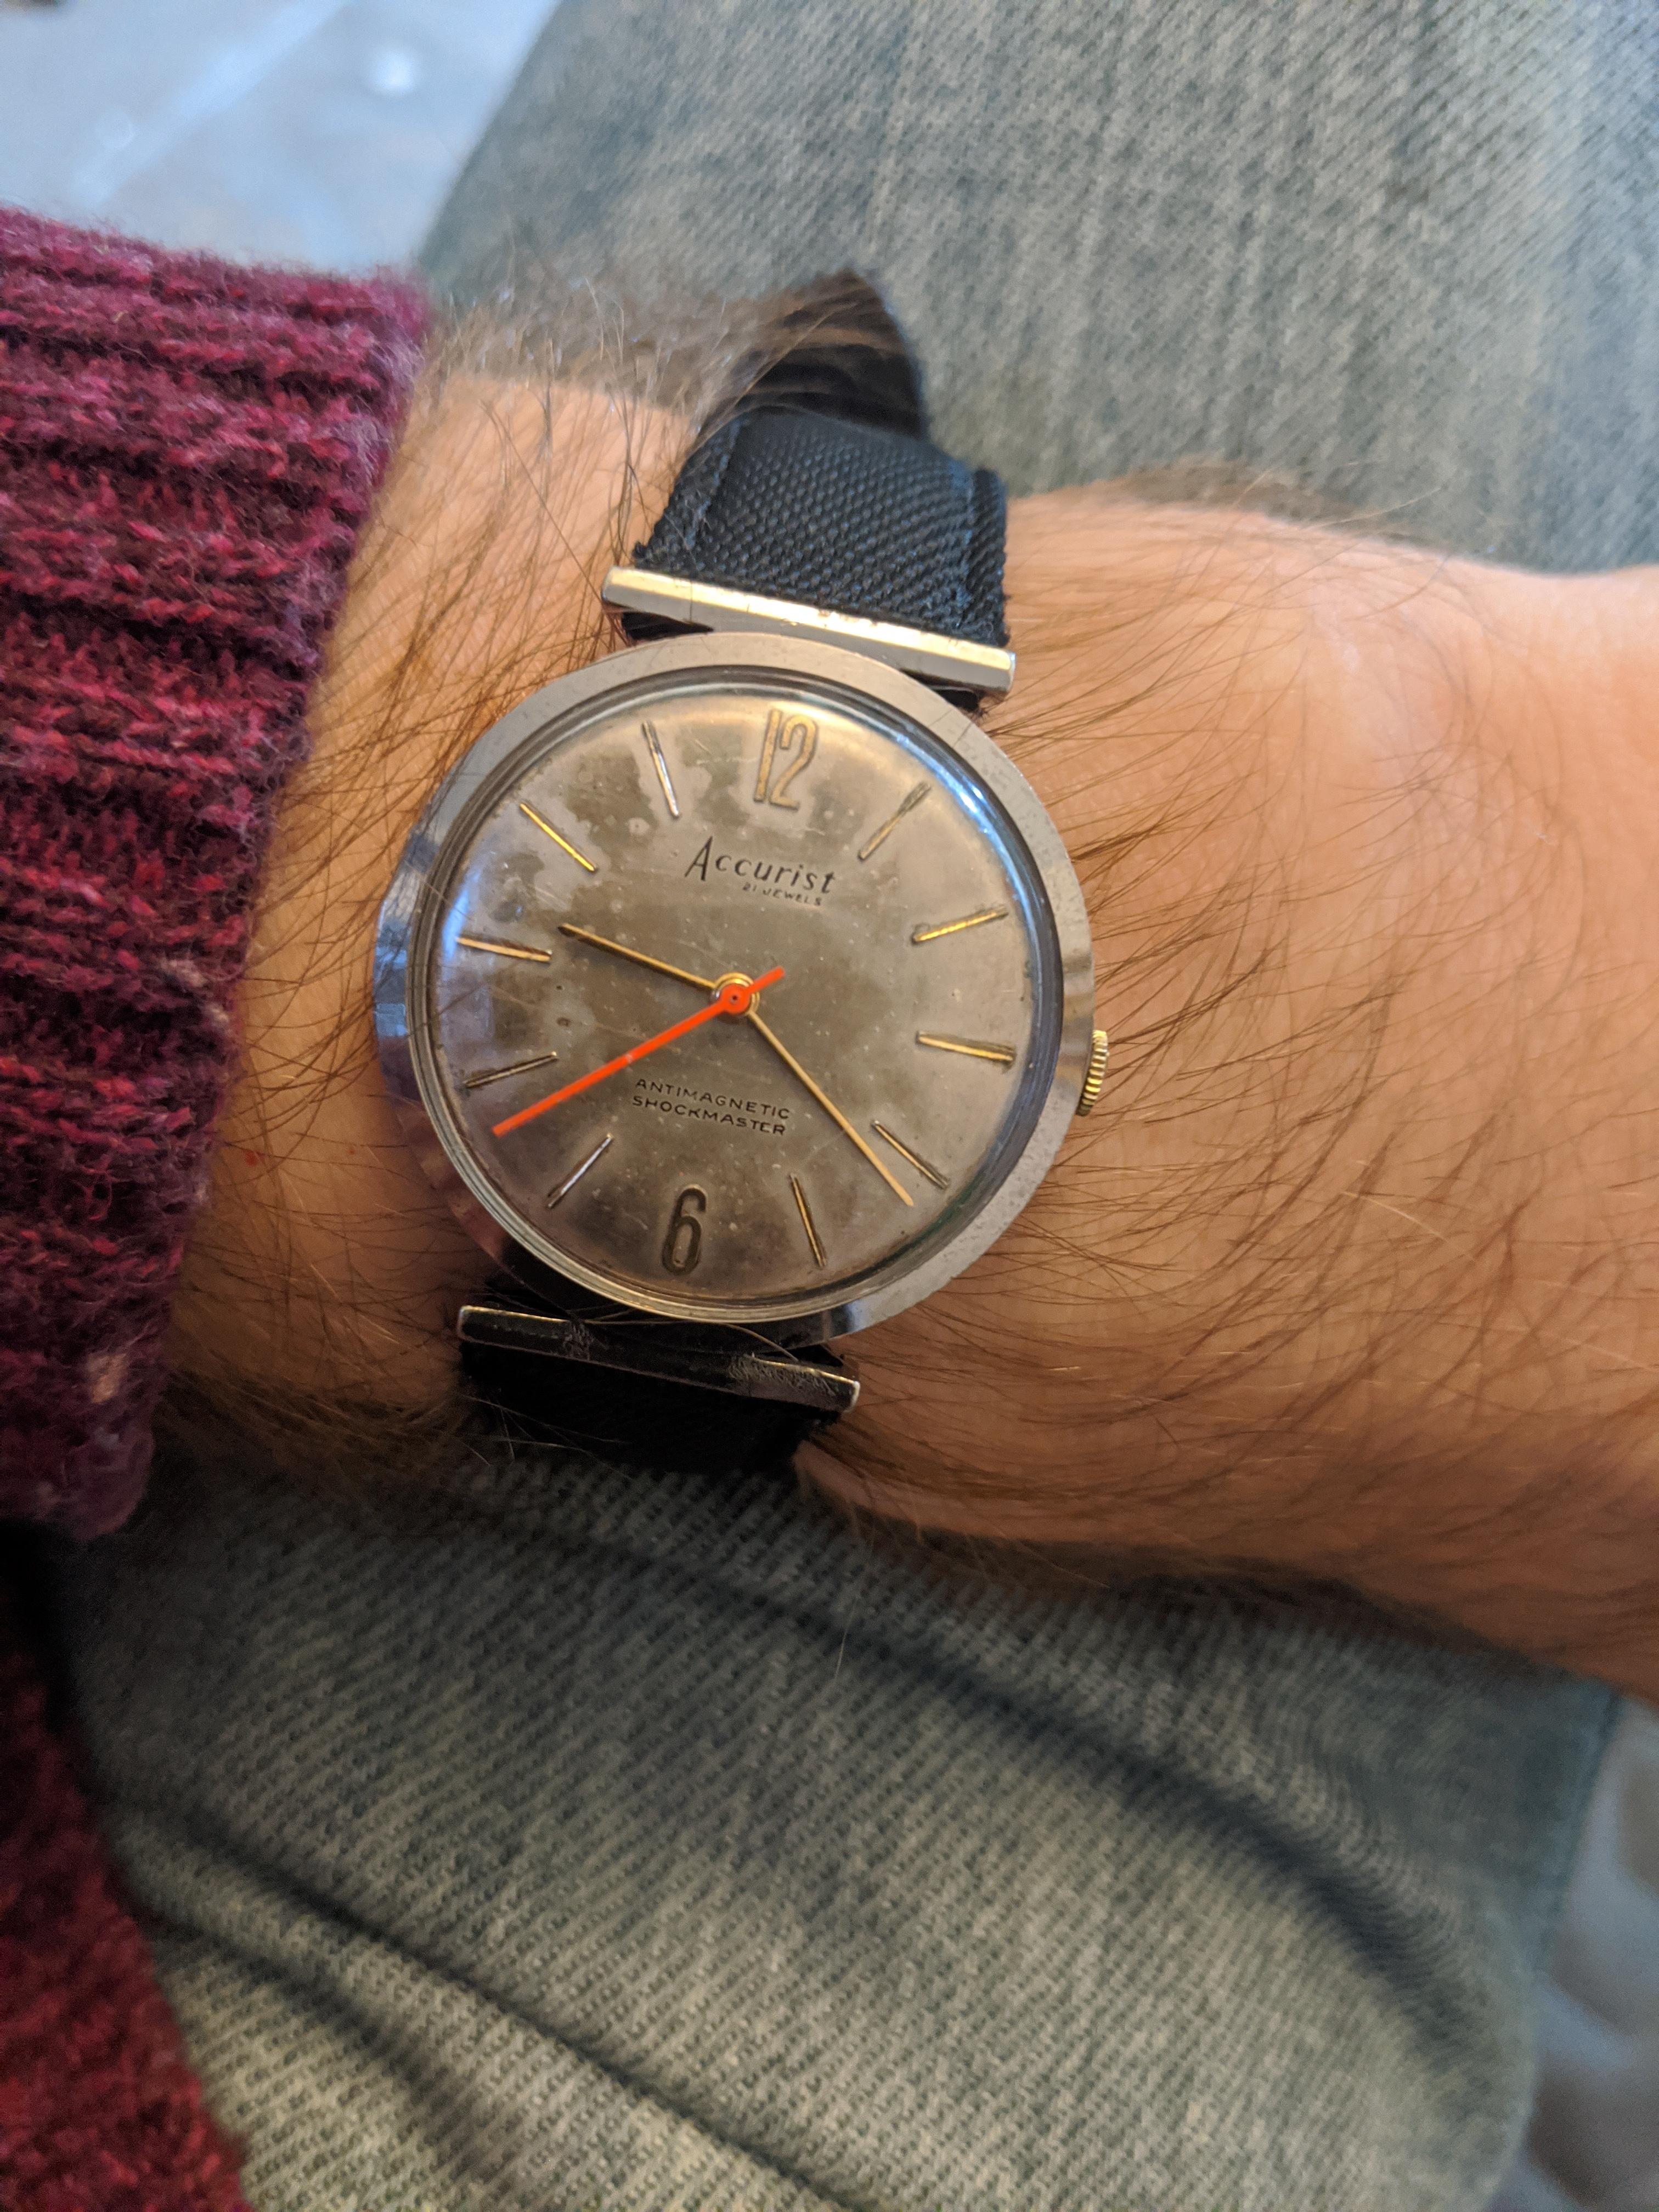
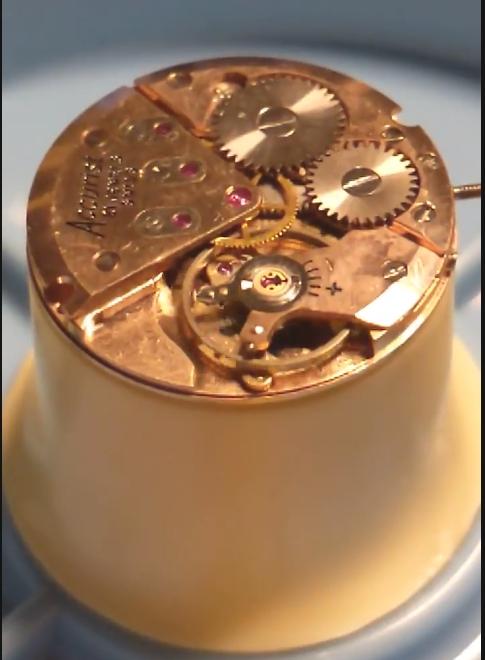
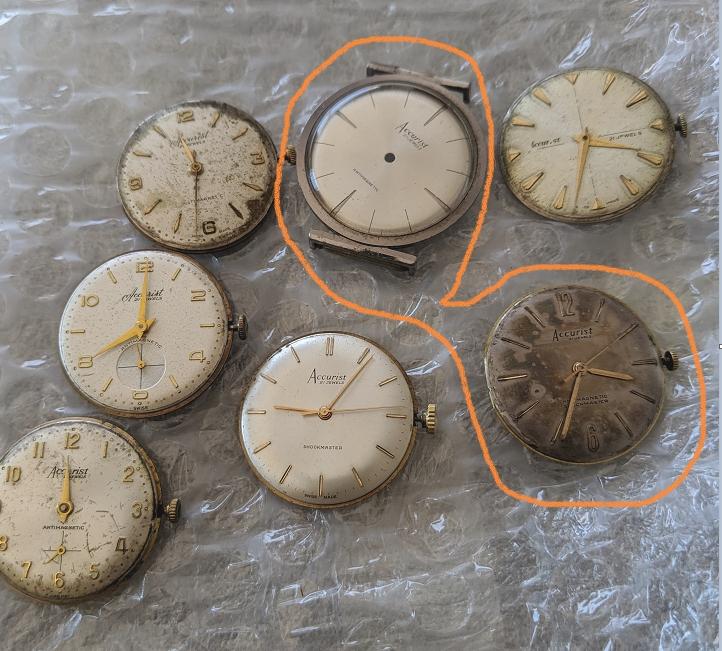
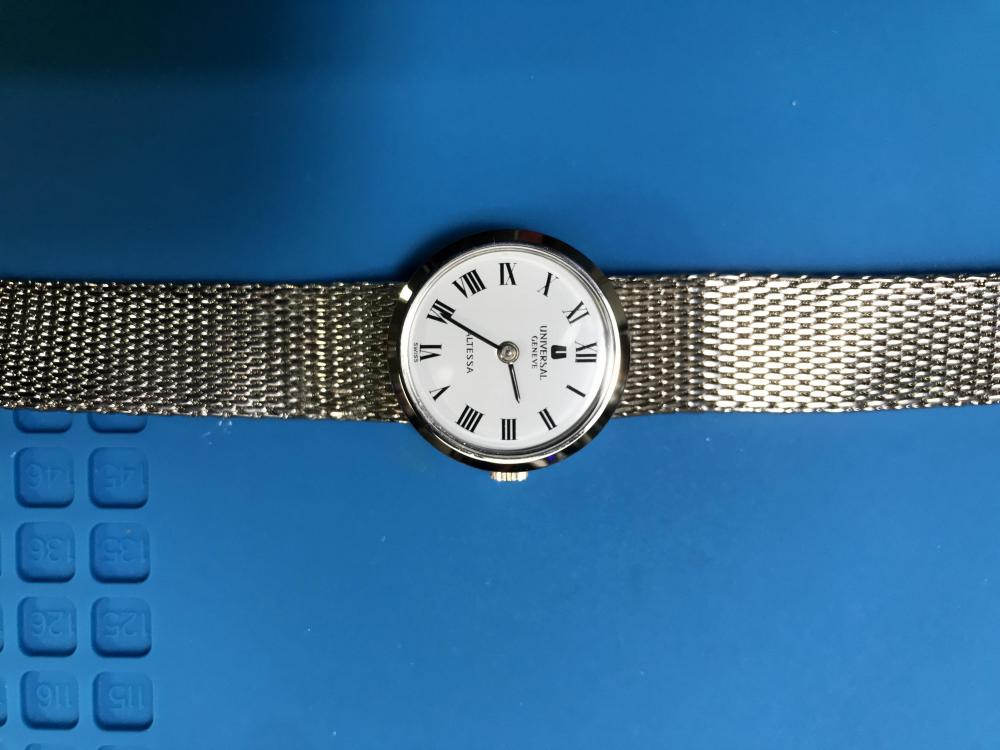
Think this should just about qualify?.. this job lot of 6 'dead' Accurist movements + 1 case was £12.85 including postage (so less than £4.04 with $10 postage for the whole 6), 4 of them were ETA 2390s, 3 of which I have killed now... but one I have got running well enough that I built it back into the case that was also in the lot and it has been running with reasonable accuracy (within +30s/day dial up, better than that if worn) for a couple of weeks now. I used the most patina'd of the dials as I kind of like it and jazzed it up with a bright orange second hand. Since it is my first 'saved' watch since starting this hobby I intend to keep it! I haven't done anything yet with the 2 other movements, but since I don't have another case it will be tough to rescue them fully!


 2 points
 -
Hi guys … I had promised that I would make a « custom decal dial tutorial » on another thread there So here we are … There are many variations of decal dials, the best IMHO being the « negative gilt » dials which gives the best results. The process I’m showing today is aabout how to make a dial with black printings on a one color background. I had a cheap quartz diver waiting in my drawers so I’ll make a Heuer diver hommage based on the 980.016 model (quartz one too). DAY 01 : It’s 4:30 AM (I’m an early bird) and I have 2 hours to kill before a business trip to Paris (I’m French) so I decide I have time enough to begin. The first part of the process is to prepare the dial plate : - stripped it, removing all the lumes bars and dots - soaked the dial for some minutes in acetone to remove the paint - filled the tiny holes where the bars and dots go with cyanolite glue - sand everything flat I sand with 800 and don’t try to get a smooth surface as I want the paint to adhere perfectly to thedial plate. Here is the result … Then I want to spray paint. I make a tube with some painter’s tape, from a « curve » with it and place it on a plastic bottle cap. I want it curved so that I can stick the dial on it without any risk of bstructing the center hole or the date window of the dial plate. So I stick the sanded dial plate on the tape tube. As you can guess from the pic below … that’s not the first time a make an orange dial. Then I place the bottle cap and dial plate on a paper sheet and spray paint in orange. I use street art spray paint as it is « water resistant ». As you can see on the next pic, I don’t try to get a smooth surface, or even to perfectly cover the dial plate at first. I will let this coat dry, sand it with 2000 grade, then spray 1 or 2 coats until I get a perfectly smooth orange dial plate, ready for receiving a decal. So I place the bottle cap and dial under a shooter glass and will let it dry for about 24 hours before sanding and spraying the second paint coat. The 24 hours drying time is really important (though it could depend on the paint you use). The paint I use looks perfectly dry after about 5 hours but if you spray the second coat without waiting enough, that coat won’t perfectly adhere to the first and you could get a granular surface like an orange peel. And here is the dial waiting under the shooter glass. On the right is a « negative gilt » dial (third and last matte varnish coat) On the background there are two Raketa 2609 movements from the 70ies, quietly (really loudly to be honest) ticking for test after I‘ve recently serviced them. Now it’s 5:45 AM so I will have a and go to the train station. I’ll sand the dial plate this evening and spray the second paint coat tomorrow morning. Then sand it in the evening and spray the third coat (if needed) the day after. DAY 02 - DAY 03 : So here's what you get after the first paint coat … doesn't look really good but no matter as there's still some work to do to get a better result. And here's what you get after 3 coats of paint, each one sanded with 2000 grade, to get a perfect finish, flat and smooth. Now the dial plate is eady to receive the decal. DAY 03 : I won’t explain anything about Photoshop and Illustrator here … I’ll only explain how I print my decals. One thing really important, from my own experience, is the definition of the design. I’ve tried several, from 1200ppp to 6000pp and the best results I’ve got on printing decal sheets were with a 4000ppp definition. So all my dial designs are done in 4000ppp. The result is really BIG files … for example an A6 template with 12 dial desings ready to print is about 800Mo. As that dial is black printing only I open it with Photoshop and let the softwre (so ont the printer) deal with the printing quality. My printer is an old Epson Picturemate with a 1200 maximum definition. As the good quality decal sheets are not cheap and as I’m a « skinflint» I often print on A7 sheets … 6 dial designs on one sheet. When printed you should let it dry for about 4 hours then spray 2 really thin coats of matte varnish, letting each coat dry for at least 12 hours (24 hours is better). DAY 04 - DAY 05 : 2 days of speed-hiking with my wife so I didn’t worked on that tuto. You can check on the net what speed-hiking is, but to summarize it’s hiking as fast as you can with really light backpacks, trying not to run (or only short runs). On a good day you can walk 5 to 6 miles/hour … when trained you can walk up to 6,5 miles/hour … and while I trained for my first 62 miles ultra I achieved to walk (no running) up to 6,85 miles/hour (11 km/heure). DAY 06 : Today is Monday 6:00 AM. It’s been 5 days since I begun that tutorial and … my legs ache and all my body is painful (see Day 04 - Day 05) The dial plate is ready and the decal sheet too. You can see that the decal sheet looks matte now. That is because I have sprayed 2 coats of matte varnish on it, to protect the inkjet ink while I’ll soak the decal in water. Of course if you print with a laser you won’t have to spray varnish as the laser inks are (almost) water resistant. First thing to do is to chose the best item on the decal sheet and cut it round. Then you are ready to go. On the next pic you can see all you need now : - dial plate … fixed on a foam board using the dial feets - decal dial … nicely cut round - tweezers - thin and smooth brush (mine’s a watercolor brush) - some « micro set » … or just vhite wine vinegar (it helps the decal to set on the dial plate) - cold water Now you put the decal in cold water and while it soaks you brush some micro-set (or white vinegar) on the dial plate. Then you put the decal on the dial plate. Here you can see why I prefer using clear decal sheets on coloured dial plates … because it’s much easier to « perfectly » positionate the decal, using the central hole and the date-window. When you’re happy with the position of your decal you use a paper tissue to absorb the excess of water. Do that carefully as you don’t want to move the decal on the plate. And here we are … everything worked fine while absorbing the water and the decal position is OK. I’ll let it dry for about 12 hours before I cut the central hole and the date window, before I proceed to the varnish finish. Still Day 06 but 7:00 PM The decal has dried for about 13 hours so now I can proceed on cutting the decal sheet That's what I do then I : - fix it back on the foam board - apply some « micro set » around the center hole, the date-window and the outer diameter - gently press with a paper tissue so that the decal is perfectly applied (no more «air bubbles) And I let dry for 3 hours more Evening … 10:00 PM Now the decal is « perfectly » applied and dried and ready for the finish Last pic for today is after spraying the first coat of glossy varnish I will let it dry for 12 hours, sand it with 2000 grade paper and apply the 2nd coat. DAY 07 : 20:00 AM … only 1 pic today just after finely sanding with 2000 grade the 2nd varnish coat I applied yesterday DAY 08 : Yesterday evening I applied the 3rd and final varnish coat after finelt sanding and cleaning And today I can show you the final result … and say I'm pretty happy That dial is so glossy it’not easy to get a good pic, even on close-up. May I say that me hpone is nit the best at shooting pics (just like me) and the actual dial is much much better that it looks on the pictures below. I hope that you liked that tutorial and that it could be helpfull to members who want to try to build their own watch dials. I’ll try to make better pics with a real camera and a better lens … next week of the week after, after luming the dial together with the hands. Then I will still have to get a case and rework it so that it could be a 980,016 lookalike. Some of you may wonder how much time did I spend to make that dial. It took 8 days to achieve the all process but I spent only 1 hour the first day then only from 15mnm to 5mn the days after. So, apart from the design work on Illustrator and Photoshop (which took me hours), I would say that the whole process is about 2 to 3 hours. I must say that it's not my first try at dial making and I've trained for 2 years now. So if you want to try you should consider spending a few more hours but it's really worth the time spent as at the end you get your unique DIY dial.1 point
-
Decided to have a go at a creative project today, was really pleased and frustrated Centered (in a wax chuck) and drilled a .3mm through hole through a Peseux 330 center wheel (from a parts watch) with a PBC drill.. felt it clearly go through, did a cheer, then decided to give it a bit more just in case.. at this point my drill jammed and snapped. Upon removal the drill was 1.5mm through and really didn't need all that extra - I've tried to remove it and broken a bit of the drill off. It's now in meths in case there's still some shellac in the hole. I'm not really concerned and it's not a repair, there are also a few spares if it doesn't work.. but it goes to show how quickly things can change (lacking sufficient emojis ).
 1 point
 -
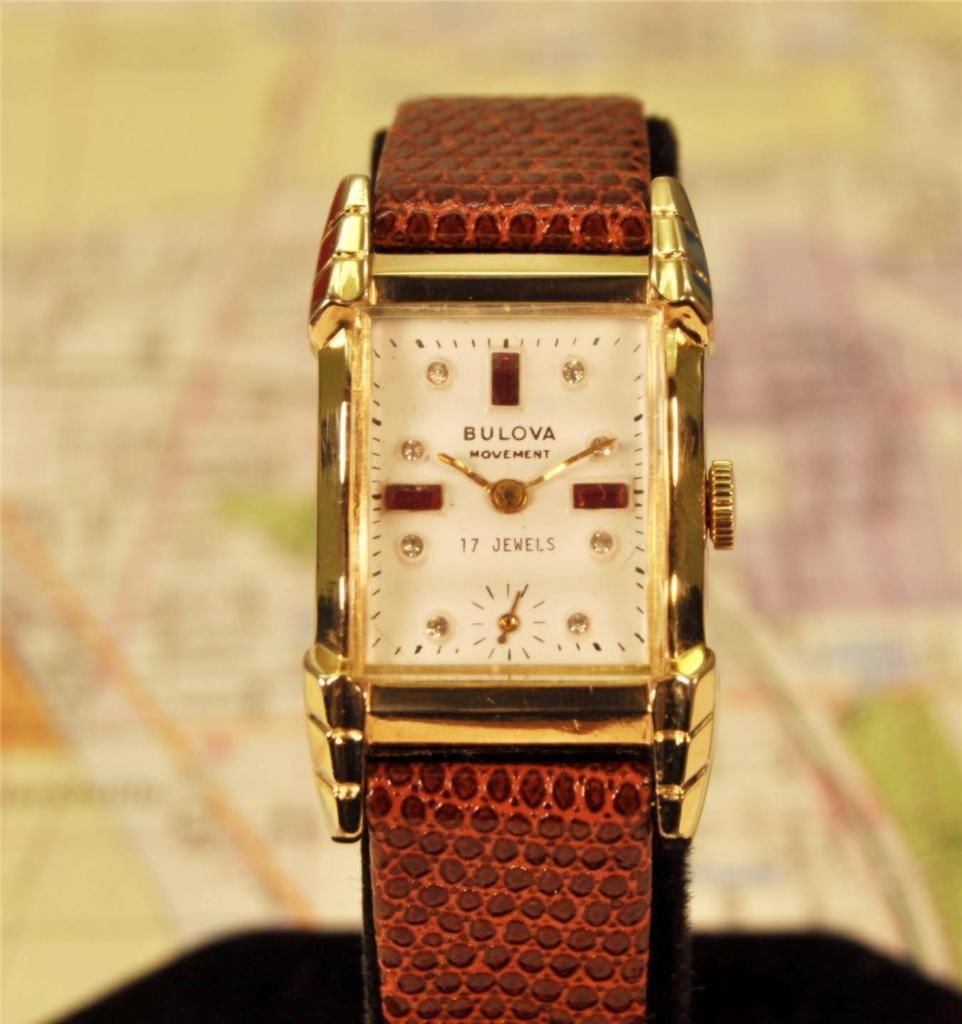
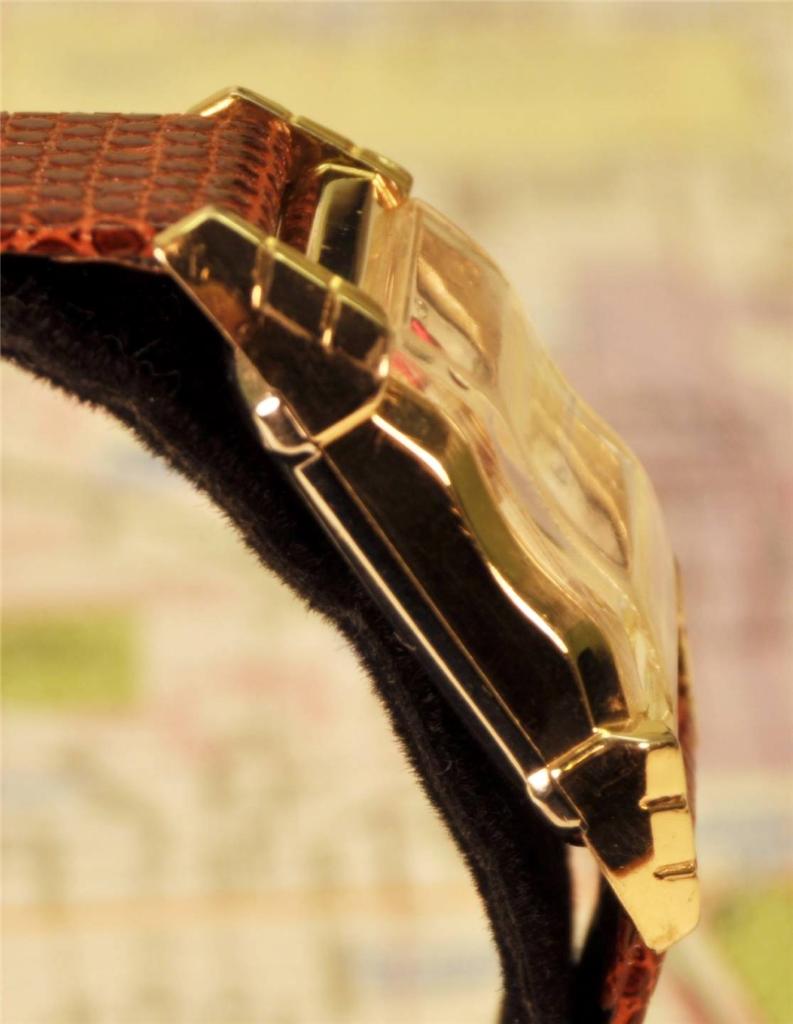
I have looked all over the internet and can't seem to find out which exact model of Bulova this is. Here's what I do know... Production year: 1937 Case: 10k YGF Movement: 17j, 7AP Dial: Original Diamond and Ruby (unrestored) Crystal: Original Wavy

 1 point
 -
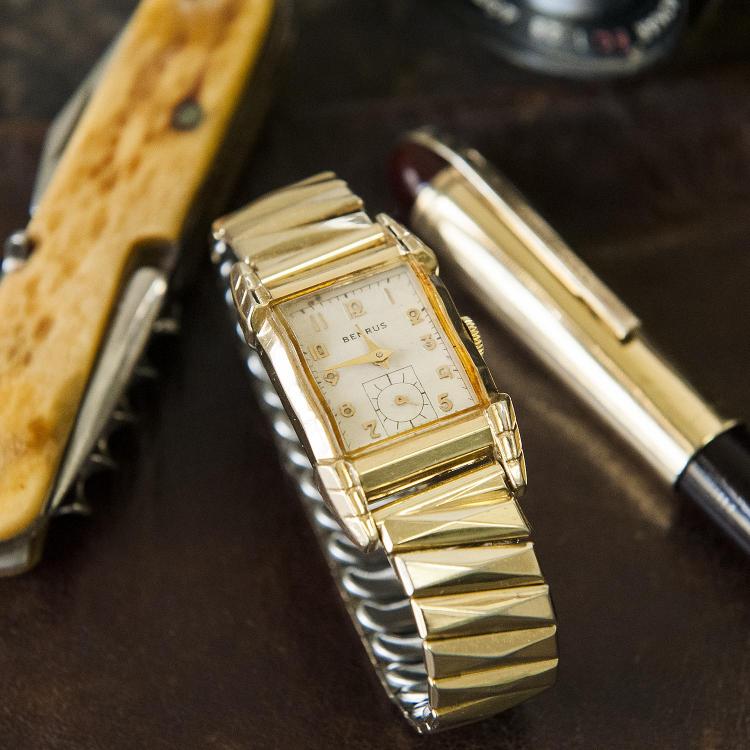
Interesting... I have a Benrus with this exact case design...
 1 point
 -
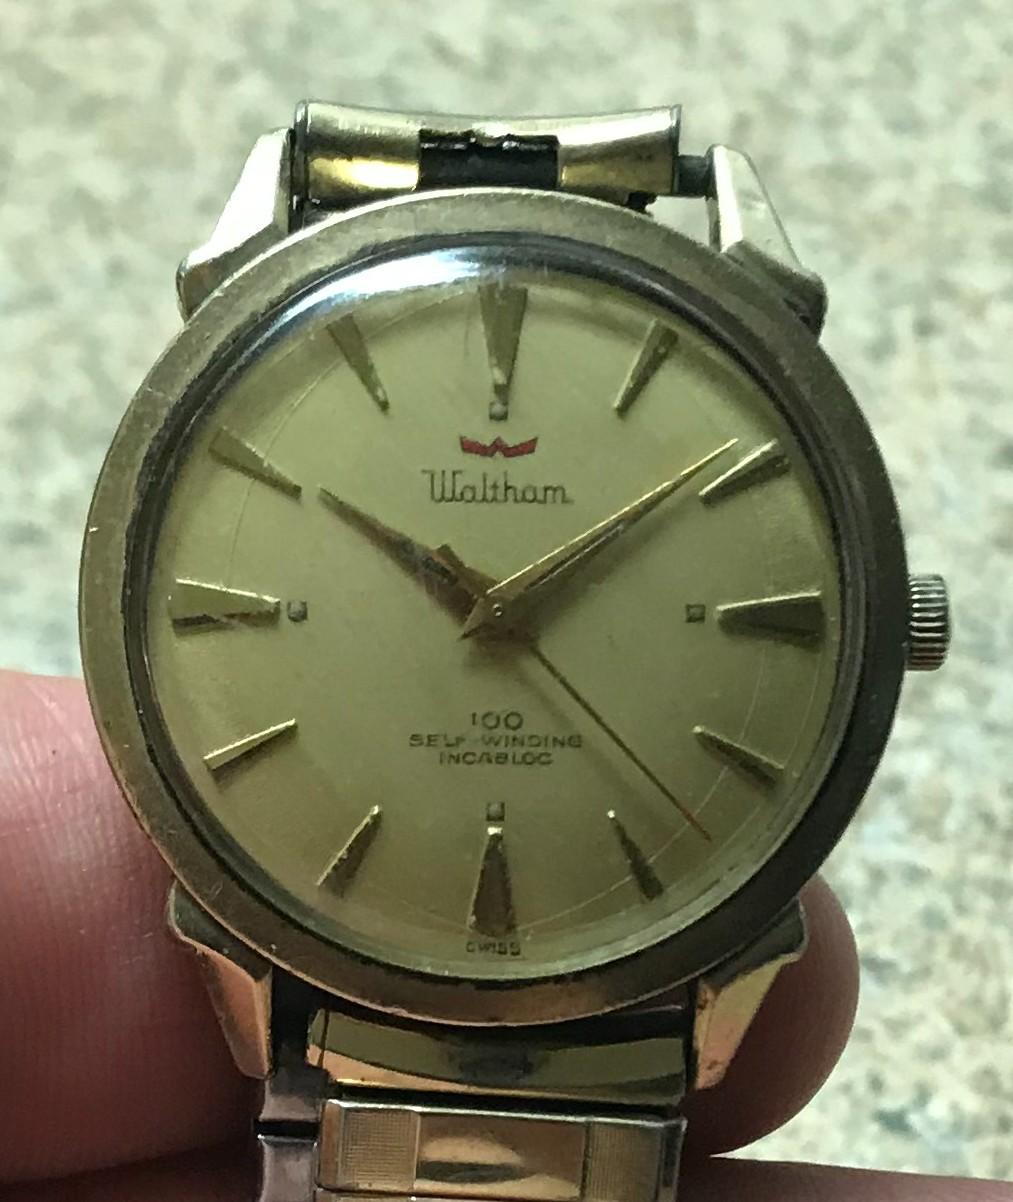
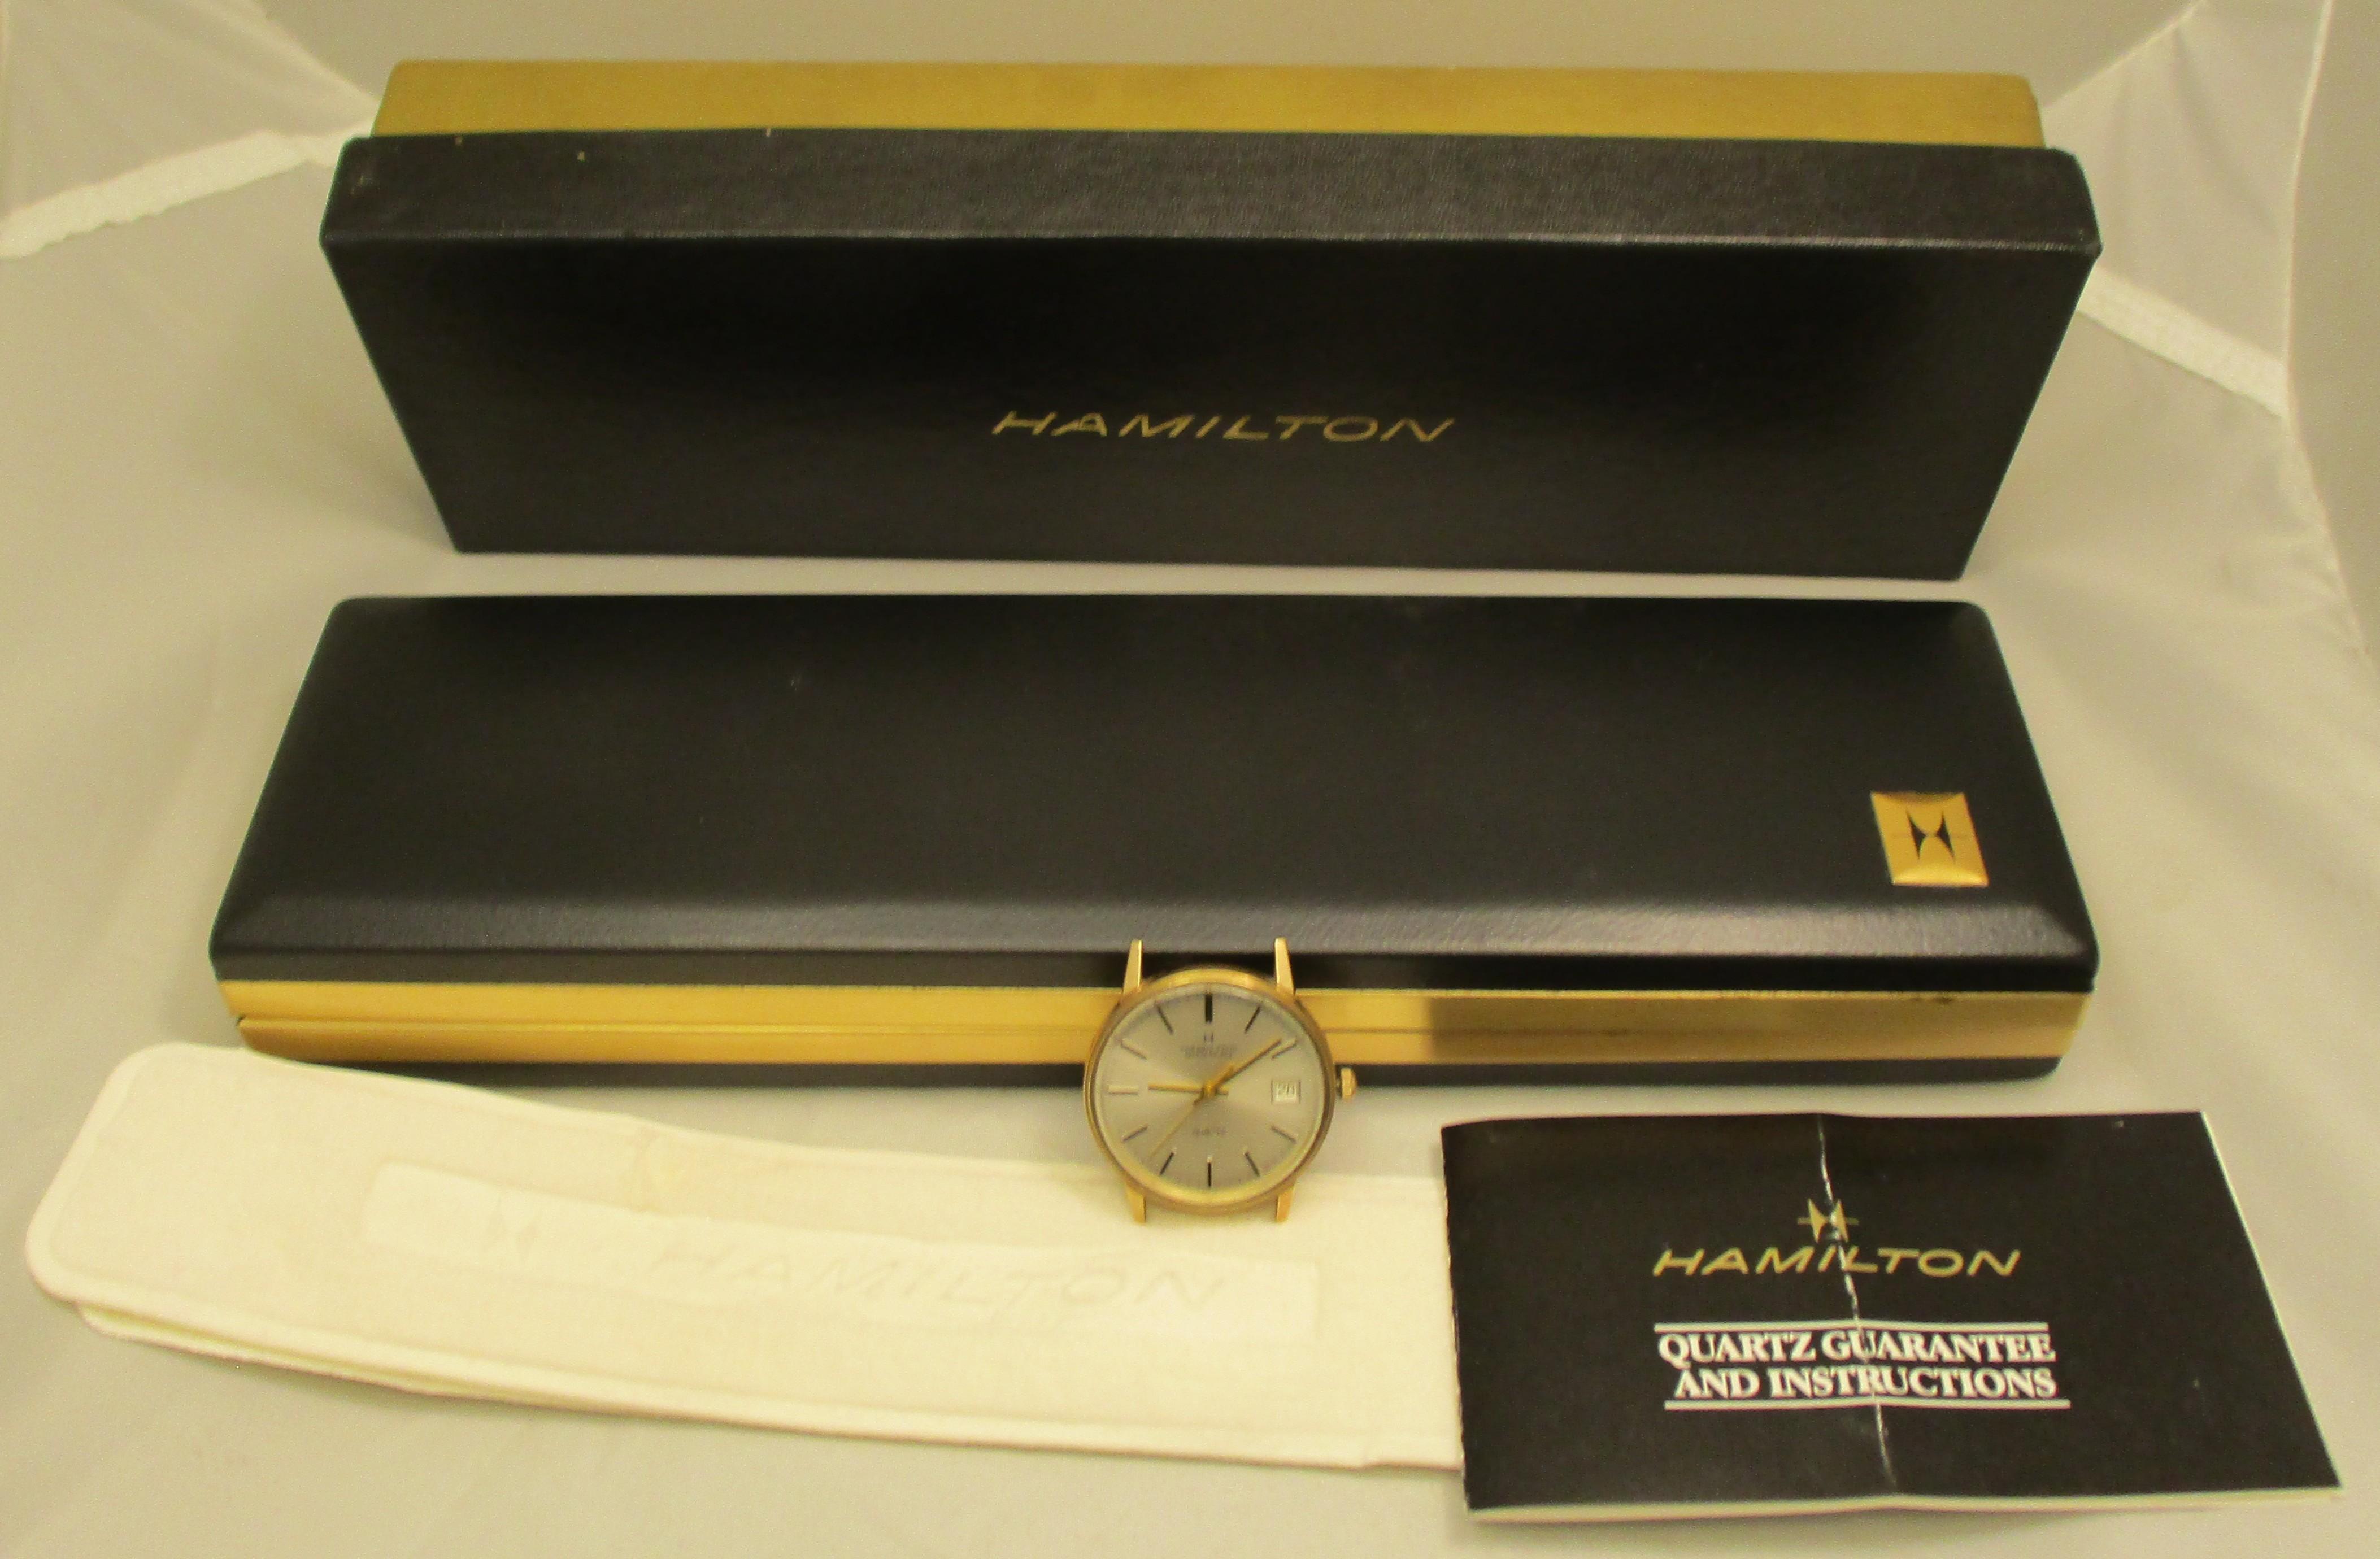
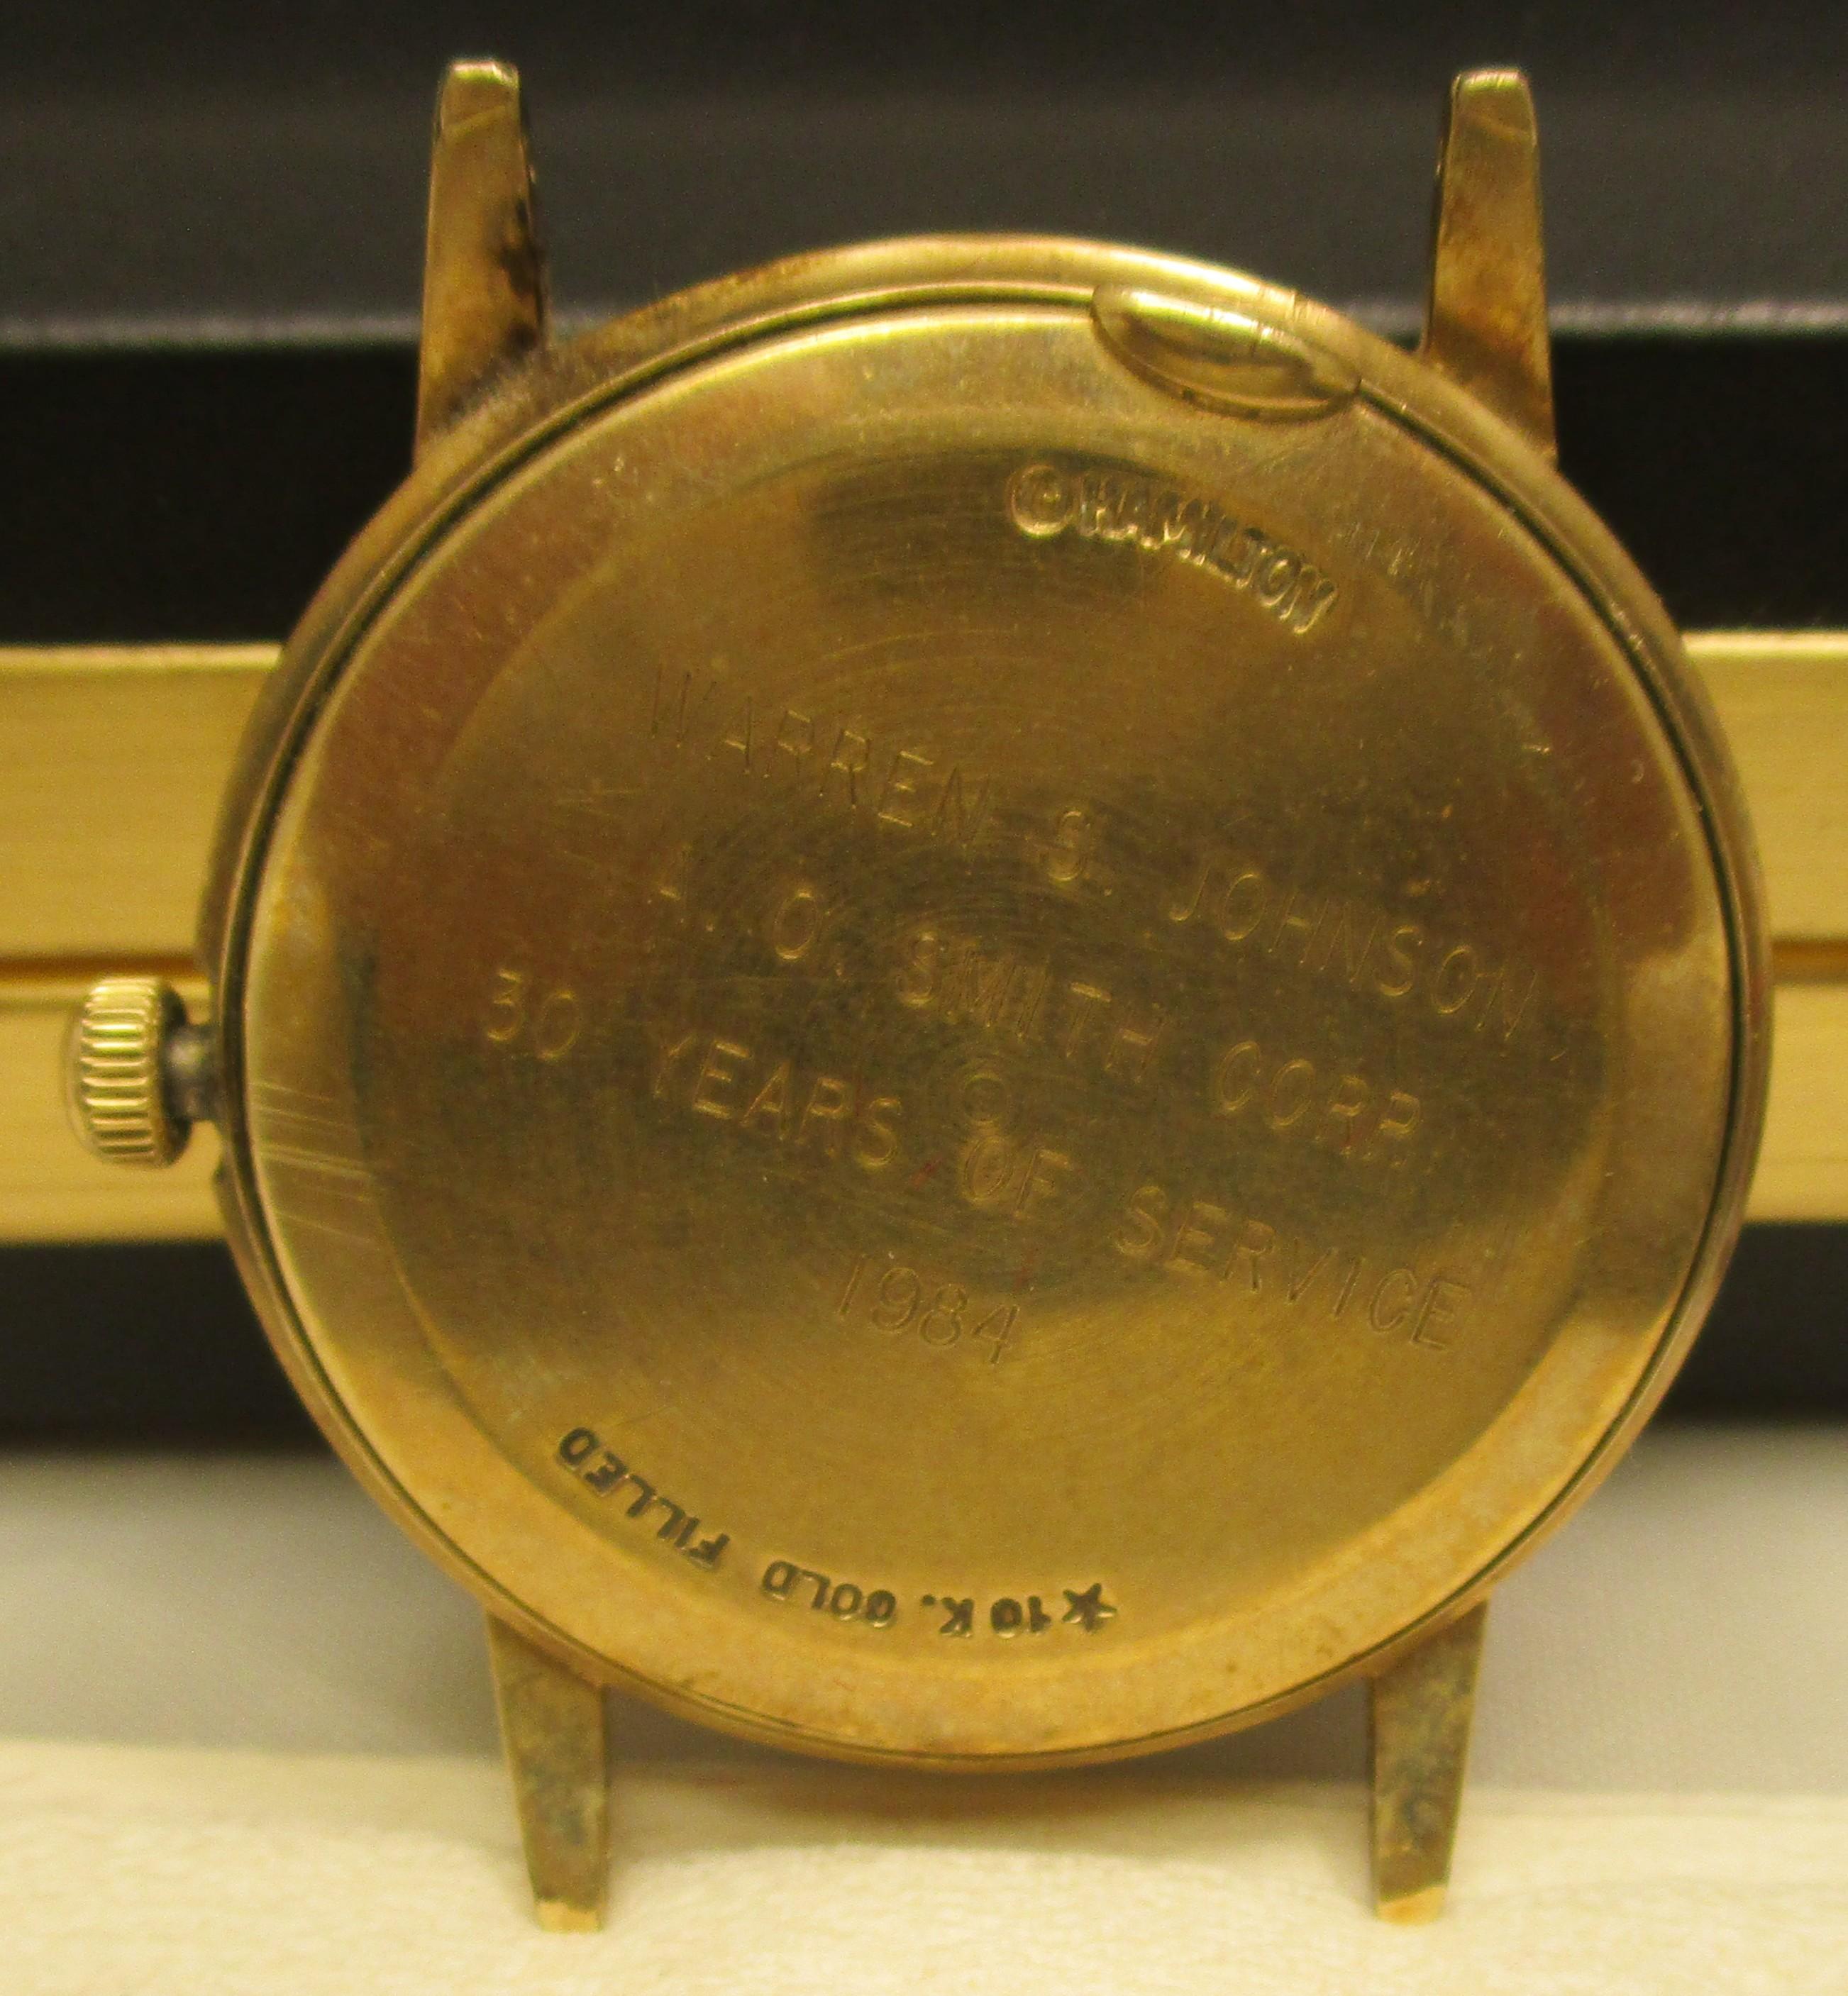
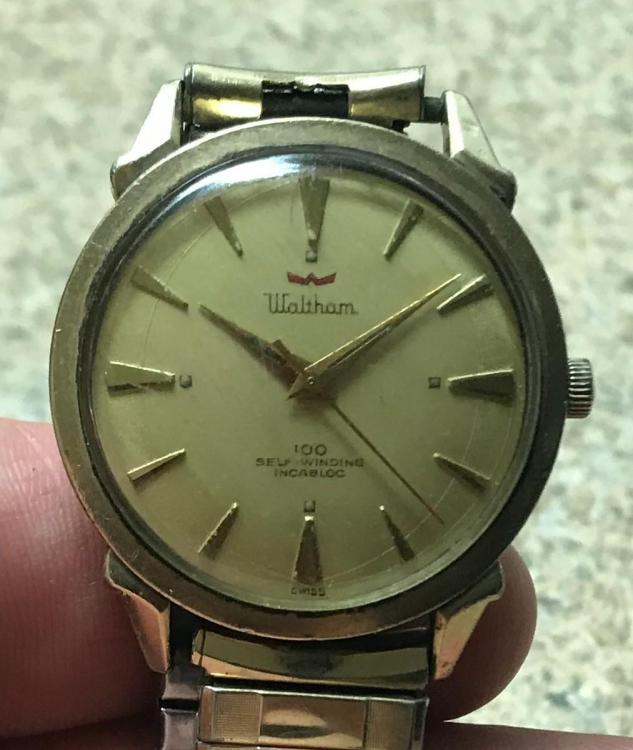
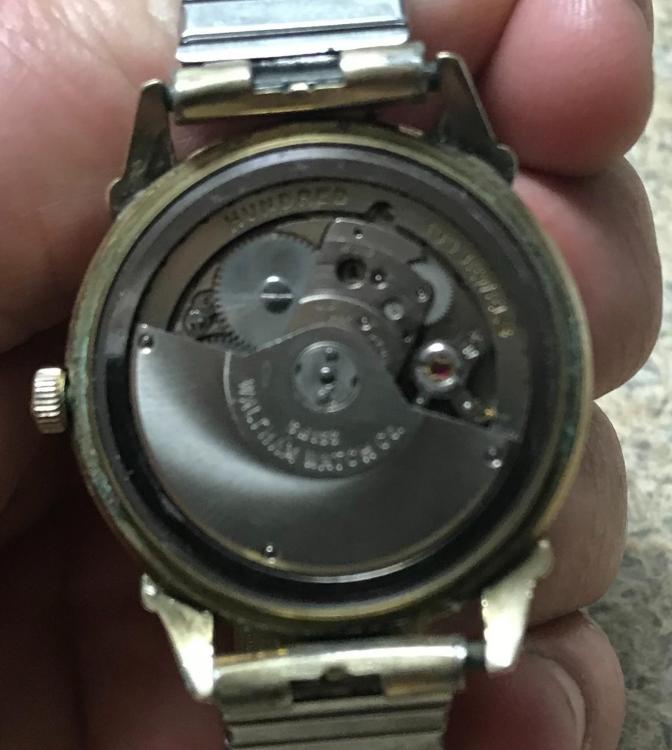
I was able to find quite a few watches yesterday at yard sales including 4 10k gold ones including this $5 Waltham 100 jewels. I thought I would be more impressed when I opened the back. I had to go through a box of trash to rescue a 10k Hamilton masterpiece that had its booklet case and outer box and just needed a battery. They threw it away because it had no strap. After finding it in the trash box they charged me $1 for it.
 1 point
 -
Swatch v Cousins in the Bern Court only slightly delayed due to Covid-19 Our fight with Swatch over the supply of parts has only been slightly delayed by the Covid-19 outbreak. Because the Swiss judicial system mainly relies on written submissions rather than Court appearances, the impact on our case has been less than might have been expected. The deadlines for submission of documents were extended for an extra four weeks by the Swiss Federal authorities, and an extra two weeks extension was granted by the Judge in Bern. All the formal submissions by both sides have now been completed. The remainder of the process consists of informal comments by both sides (Swatch are due to submit theirs in the next two weeks and we will reply after that), and then a hearing in the Bern Court. We would expect the written verdict from the Judge around two to four months after that. The date for the hearing has not yet been set. The summer recess for the Courts runs from mid-July to mid-August and we expect it will be some time after that. A lot will depend on travel restrictions and quarantine issues, but hopefully by the Autumn this will not be a factor. As we said in our last News update, we were happy that our first submission was a very robust defence. As before, we can’t go into detail, but we can say that we think our second submission is even stronger than the first, and are very confident that the judge will reach the right verdict. We will keep updating you as matters unfold by email and on our website news page. Sorry about previous post. Hopefully this is better1 point
-
Fine adjustment for "in beat" is doable by moving hairspring through stud hole, just unpin the HS , adjust and repin. Needless to say, no need to push the pin all the way home untill you are satisfied with the beat error and call the adjustment final.1 point
-
The pin is to stand perpendiculare to the flat side of screwdriver. Use of tweezers for pin reinsertion is seriously to be avoided, the pin may jump out. Good luck.1 point
-
To insert the pin back , I put the stud back in its holder tighten screw, put balance&cock back on the mainplate, run the hairspring through the studs hole, put a bit of grease or thick oil on falt side of a screwdriver( not Rodico), pick up the pin with it( pin stick to the grease) and get the pin to sit perpendicular to screwdriver, ready to aim for stud hole and push the pin home. Some grease gets on the pin, rinse it off in lighter fluid. I easily sharpen the tip of the pin if neccessary.1 point
-
Swatch v Cousins in the Bern Court only slightly delayed due to Covid-19 Our fight with Swatch over the supply of parts has only been slightly delayed by the Covid-19 outbreak. Because the Swiss judicial system mainly relies on written submissions rather than Court appearances, the impact on our case has been less than might have been expected. The deadlines for submission of documents were extended for an extra four weeks by the Swiss Federal authorities, and an extra two weeks extension was granted by the Judge in Bern. All the formal submissions by both sides have now been completed. The remainder of the process consists of informal comments by both sides (Swatch are due to submit theirs in the next two weeks and we will reply after that), and then a hearing in the Bern Court. We would expect the written verdict from the Judge around two to four months after that. The date for the hearing has not yet been set. The summer recess for the Courts runs from mid-July to mid-August and we expect it will be some time after that. A lot will depend on travel restrictions and quarantine issues, but hopefully by the Autumn this will not be a factor. As we said in our last News update, we were happy that our first submission was a very robust defence. As before, we can’t go into detail, but we can say that we think our second submission is even stronger than the first, and are very confident that the judge will reach the right verdict. We will keep updating you as matters unfold by email and on our website news page.1 point
-
You can get natural light LED bulbs and tubes which are very economical and practical to arrenge a working, studying or living area. It's just a mid range white temperature, nothing special about.1 point
-
Not OK for a piece which has to be used normally - that includes skipping a day and having it running. Factory specs are 42 hours, even if the last hours are of poor timekeeping.1 point
-
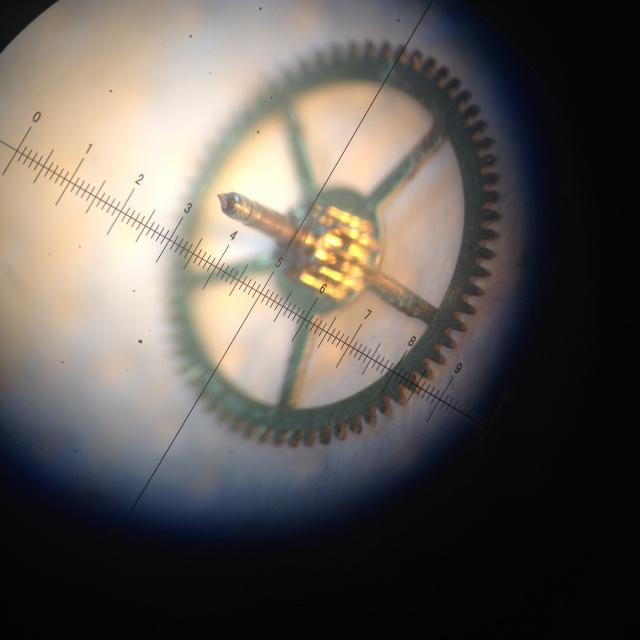
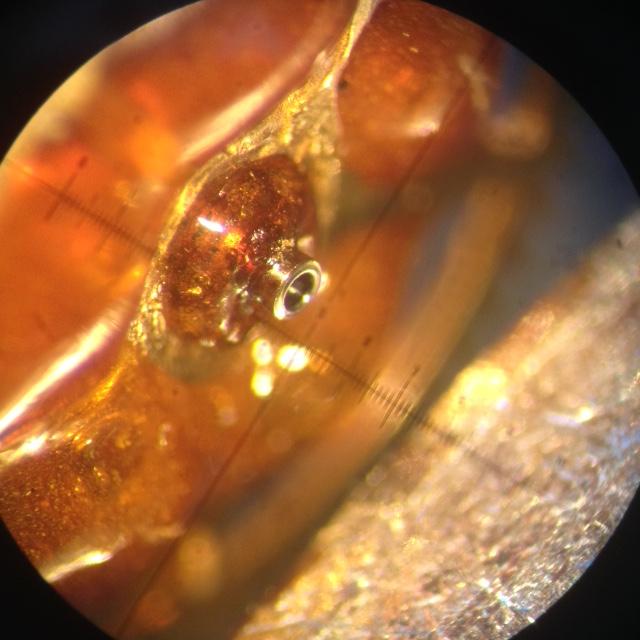
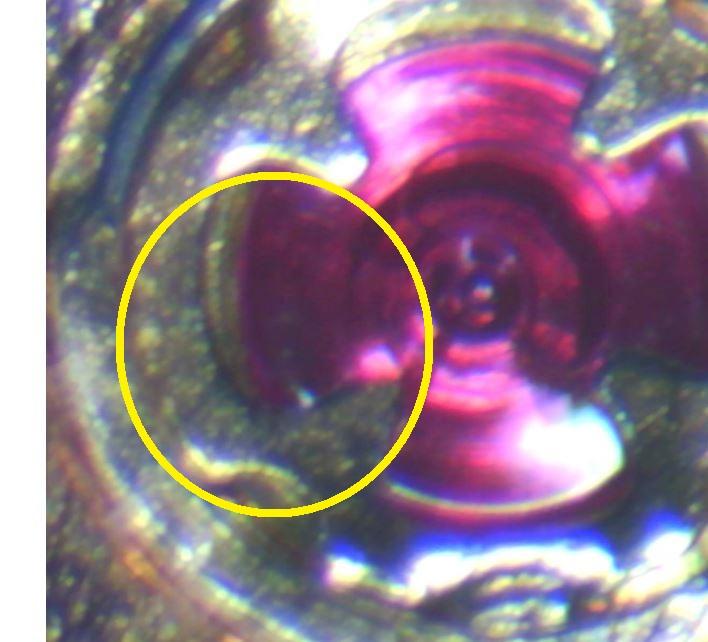
Taking a closer look at your picture it could be the jewel is not sitting right as there appears to be a gap between the jewel edge and the chaton in the upper left quadrant in the circle. So if the jewel is sitting high at the lower left position (of the jewel) this would mean a gap and the oil migration to the upper right.
 1 point
 -
Looks like too much clearance between the cap and hole jewel, I would check that the cap jewel sits inside the fitting, as Rodabod said above the edges may be pinched. Another possibility is the cap jewel may not be correct, if you don't have a spare use the one on the other side and see if that helps. Anilv1 point
-
You did say you wanted more.
 1 point
 -
Good job. Hairspring end got out of where ever it was tangled, easily didn't it? Imagine or try doing this with the stud attached. Where it still can use more sorting out is easier to identify from the picture, Picture of a new hairspring makes a good model. I would rest for a while, let your mind come back to this naturally, before your second attack, one or two more attempts and you are very likely to have a near perfect coil. Sort out as if you are sculpturing. Good luck.1 point
-
The obverse to this is that the balance is the most fragile part, and getting it out of the way and safely stored ASAP would be just as precautionary a maneuver. Just thought I'd stir the pot a bit! :-)1 point
-
Note, I feel I am still a bit of a novice at this. That said, just my two cents: since most of the antique pocket watches I have worked on either had balance and/or other escapement issues, or since they were going to need a complete strip and clean anyway, I got very good at letting down a mainspring gently. I seem to have made it a habit. I feel like everything is easier after that. I wouldn't call it *always* necessary. But in most cases I find it mitigates the harm you could do. It is the first thing I do, just because I can do it easily and have done it often. Kinda like removing a car's negative battery cable, even if you may not end up working on anything electrical. It becomes a kind of habit.1 point
-
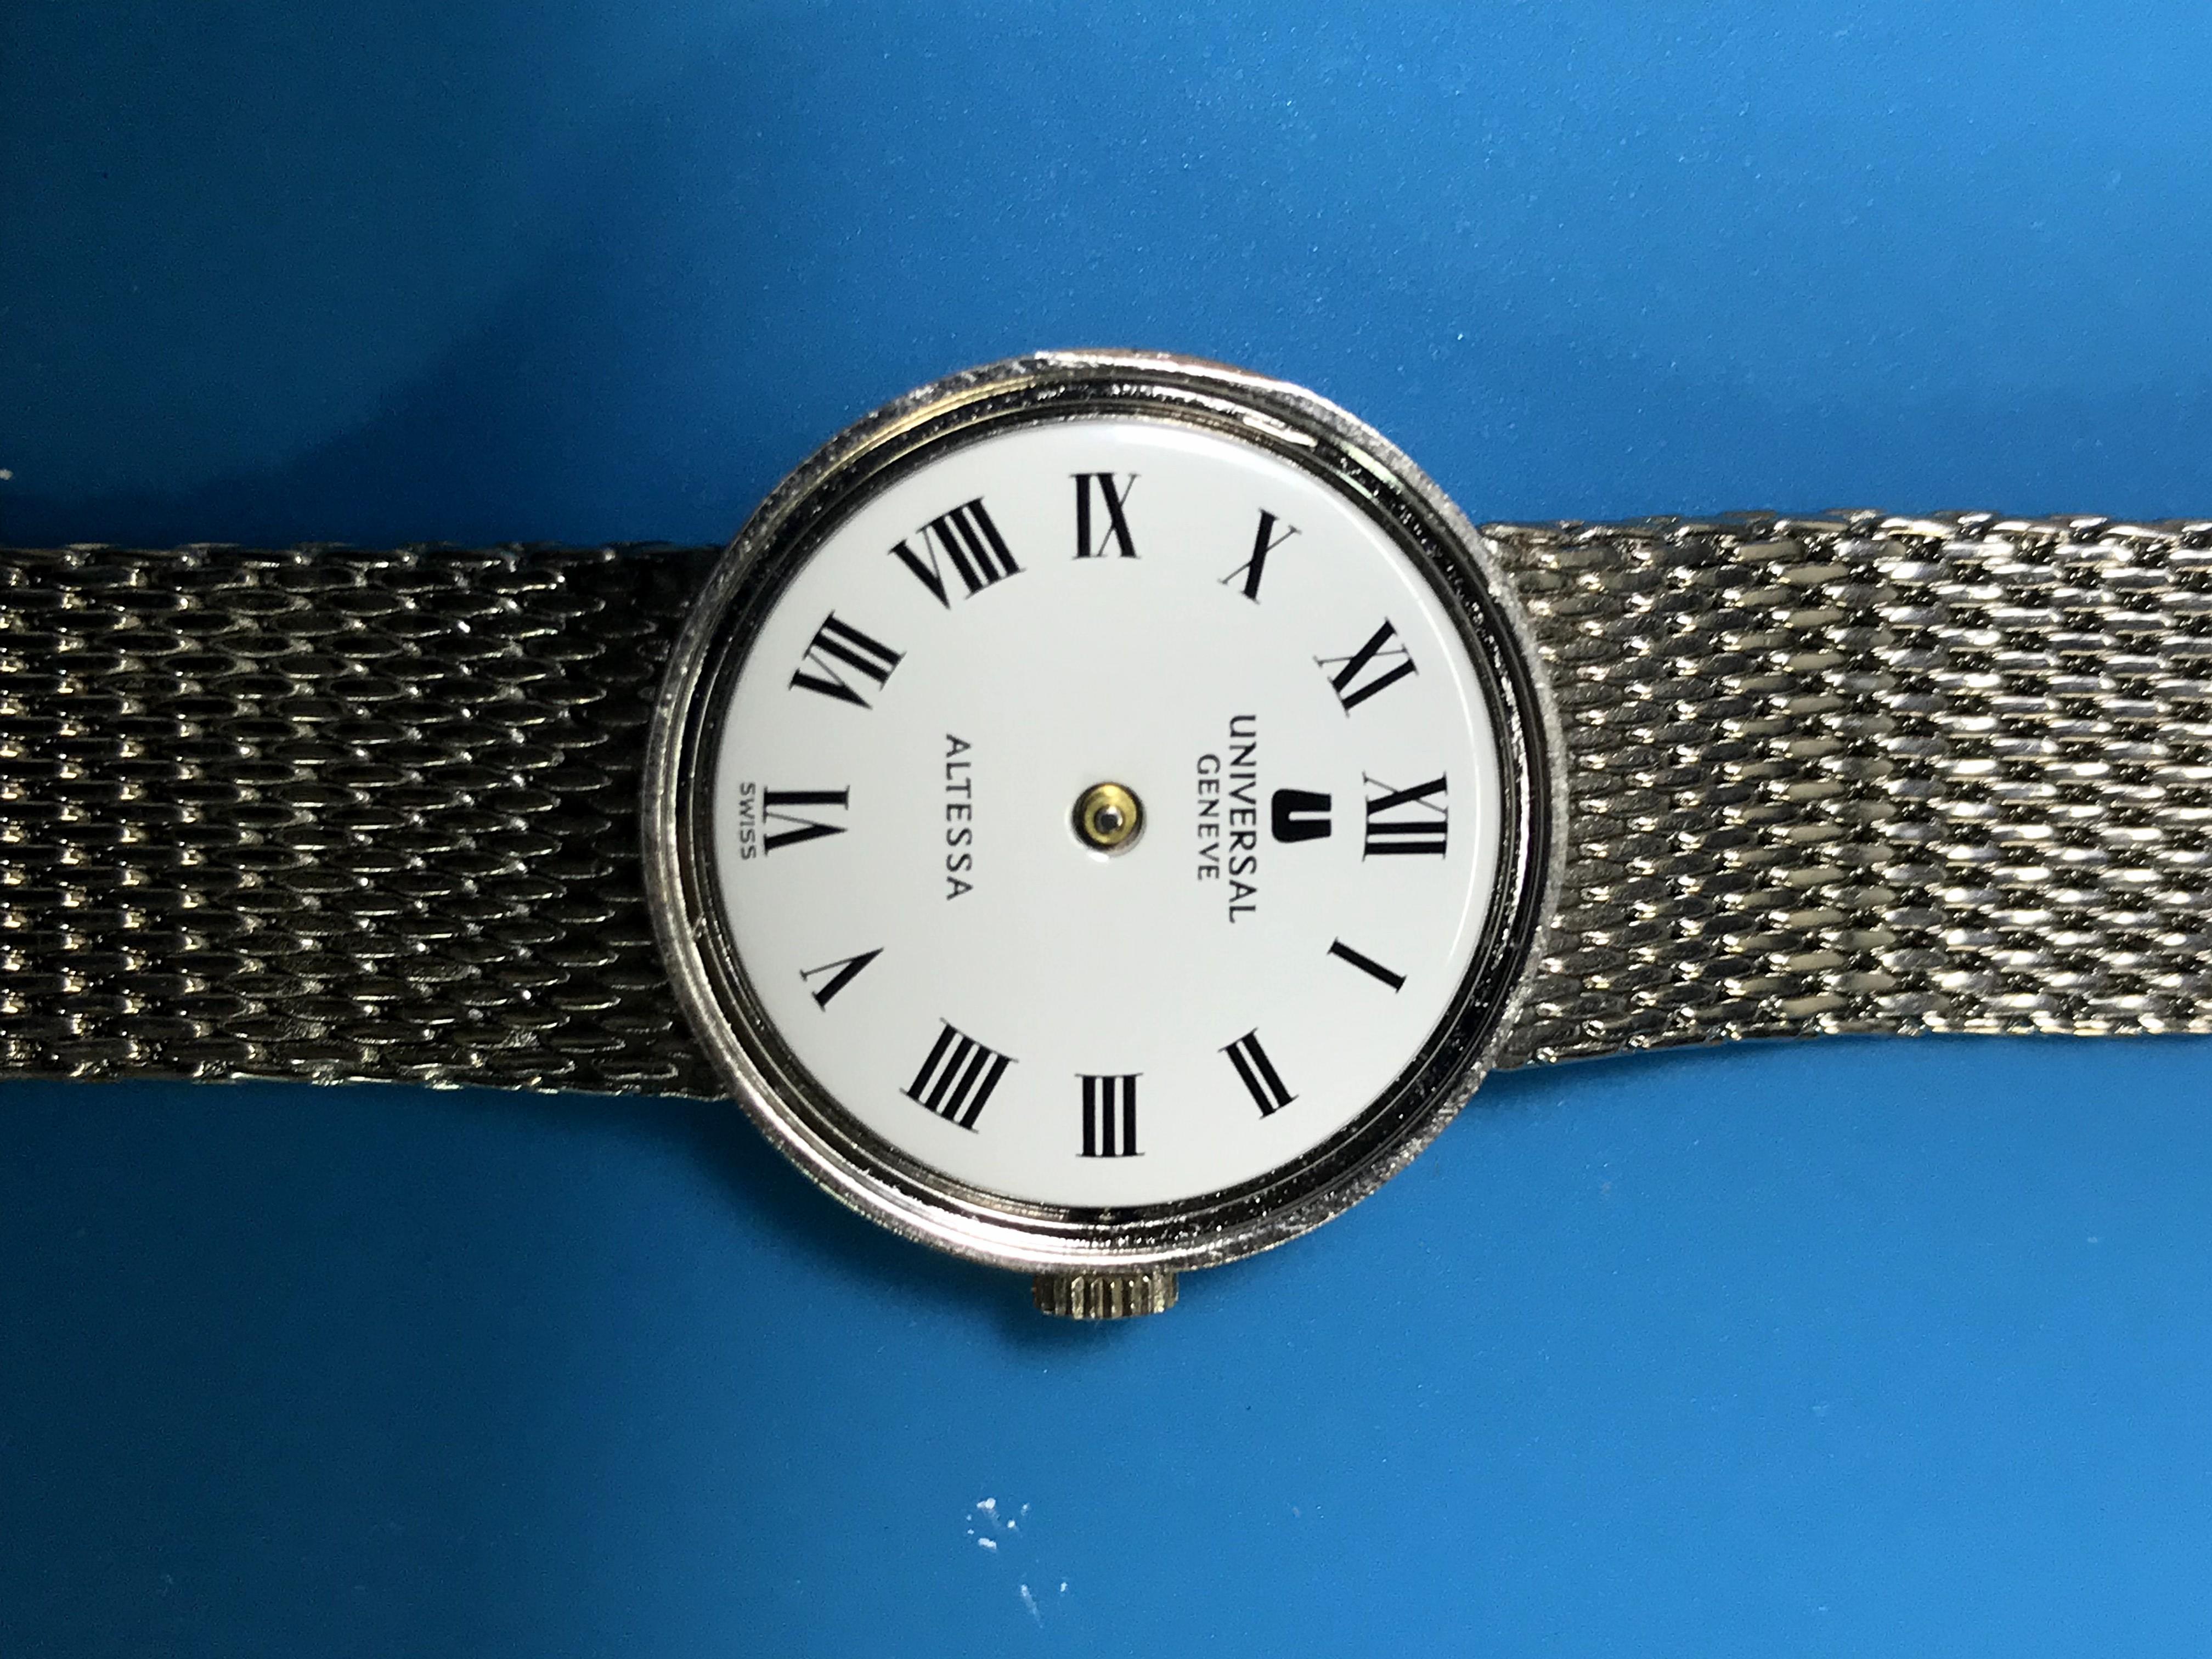
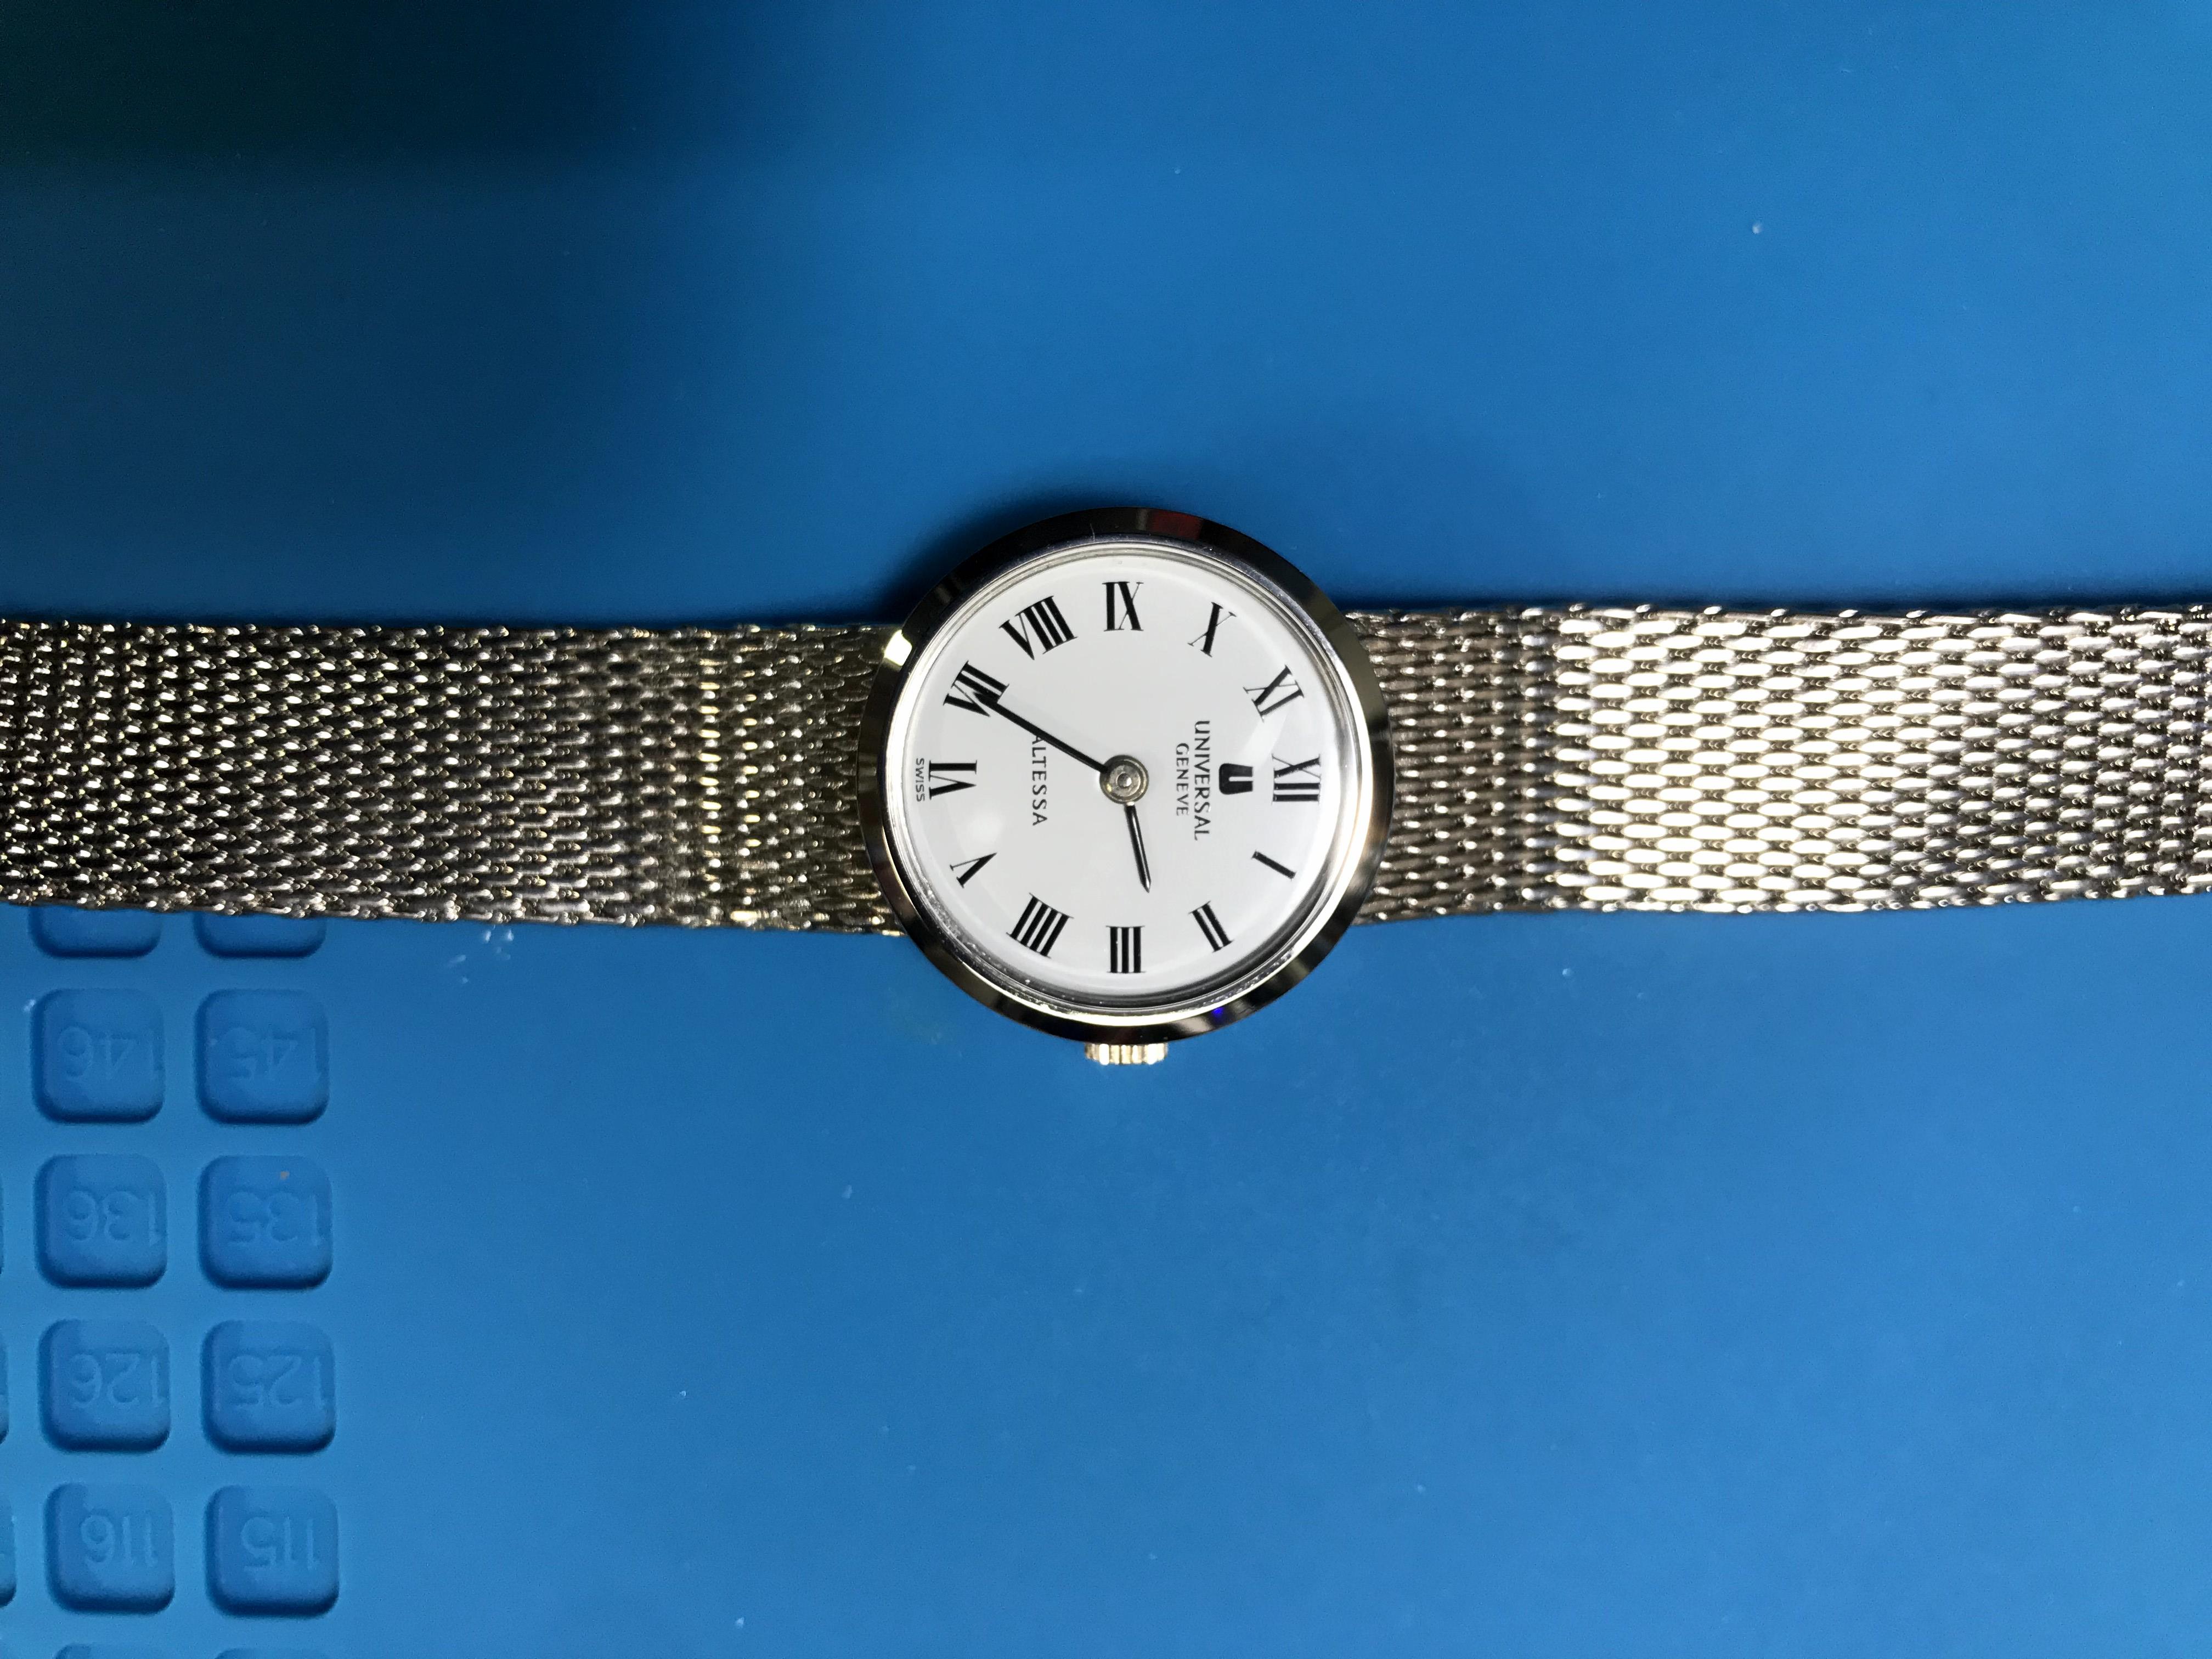
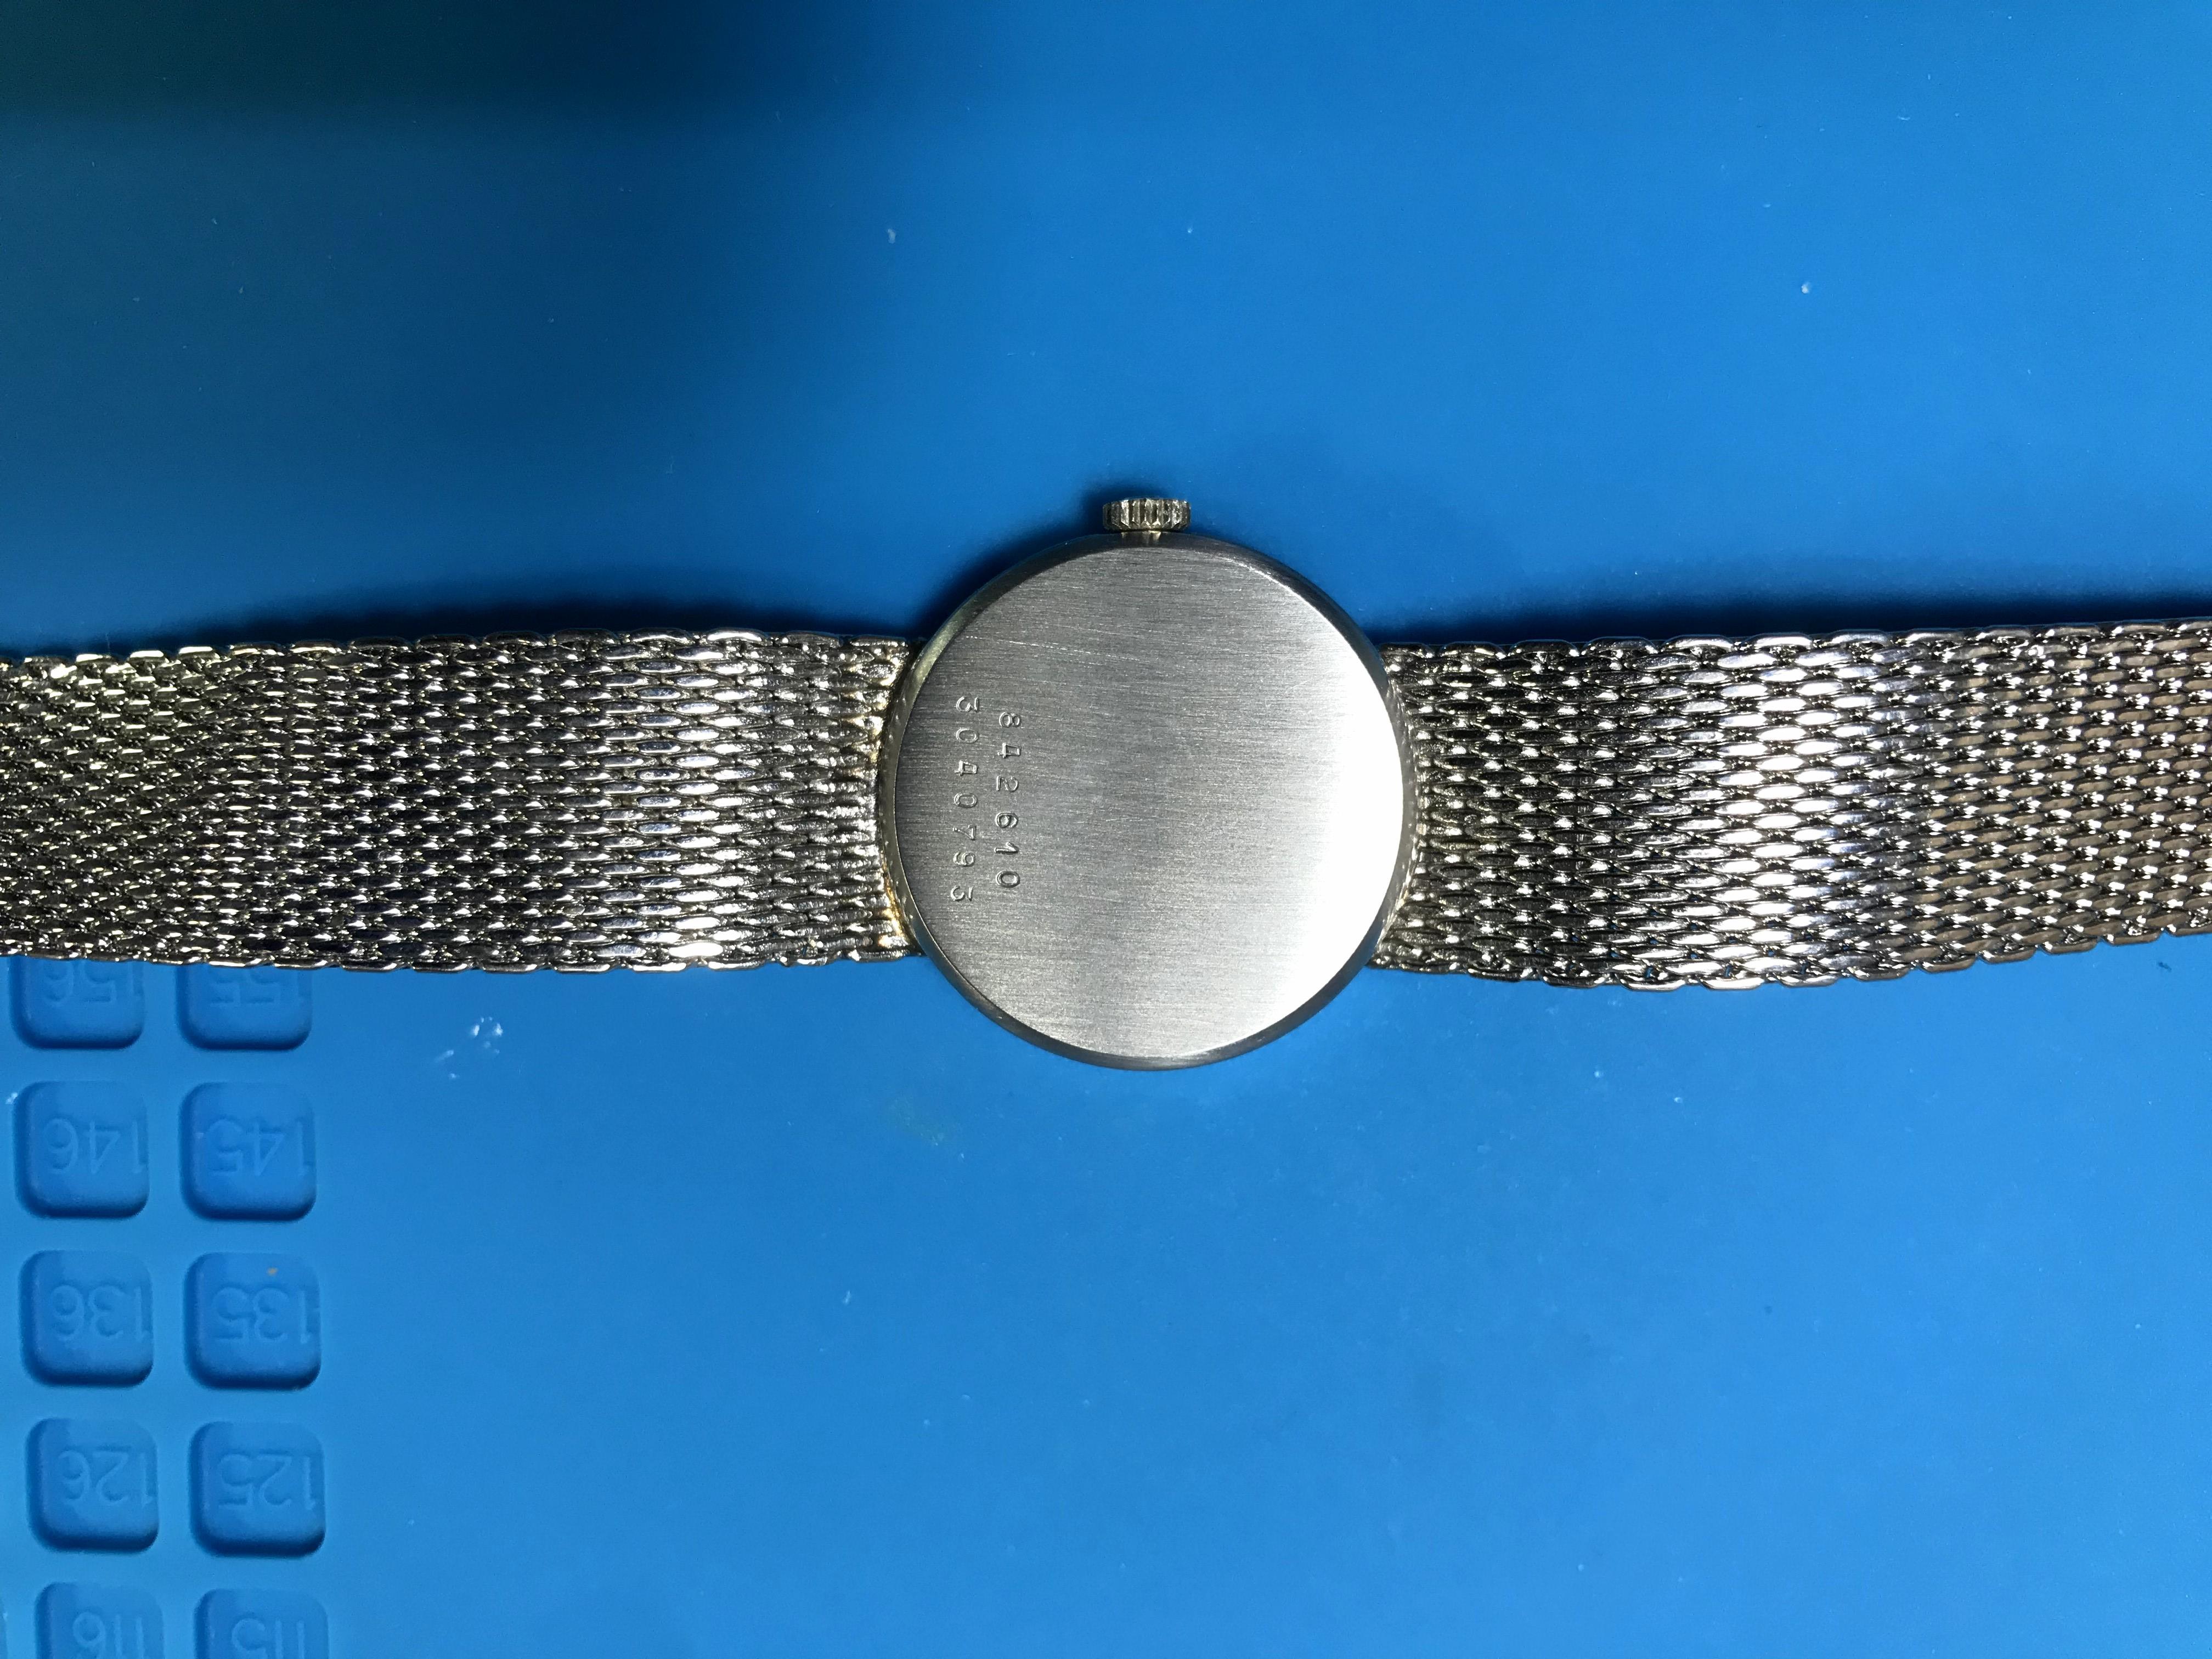
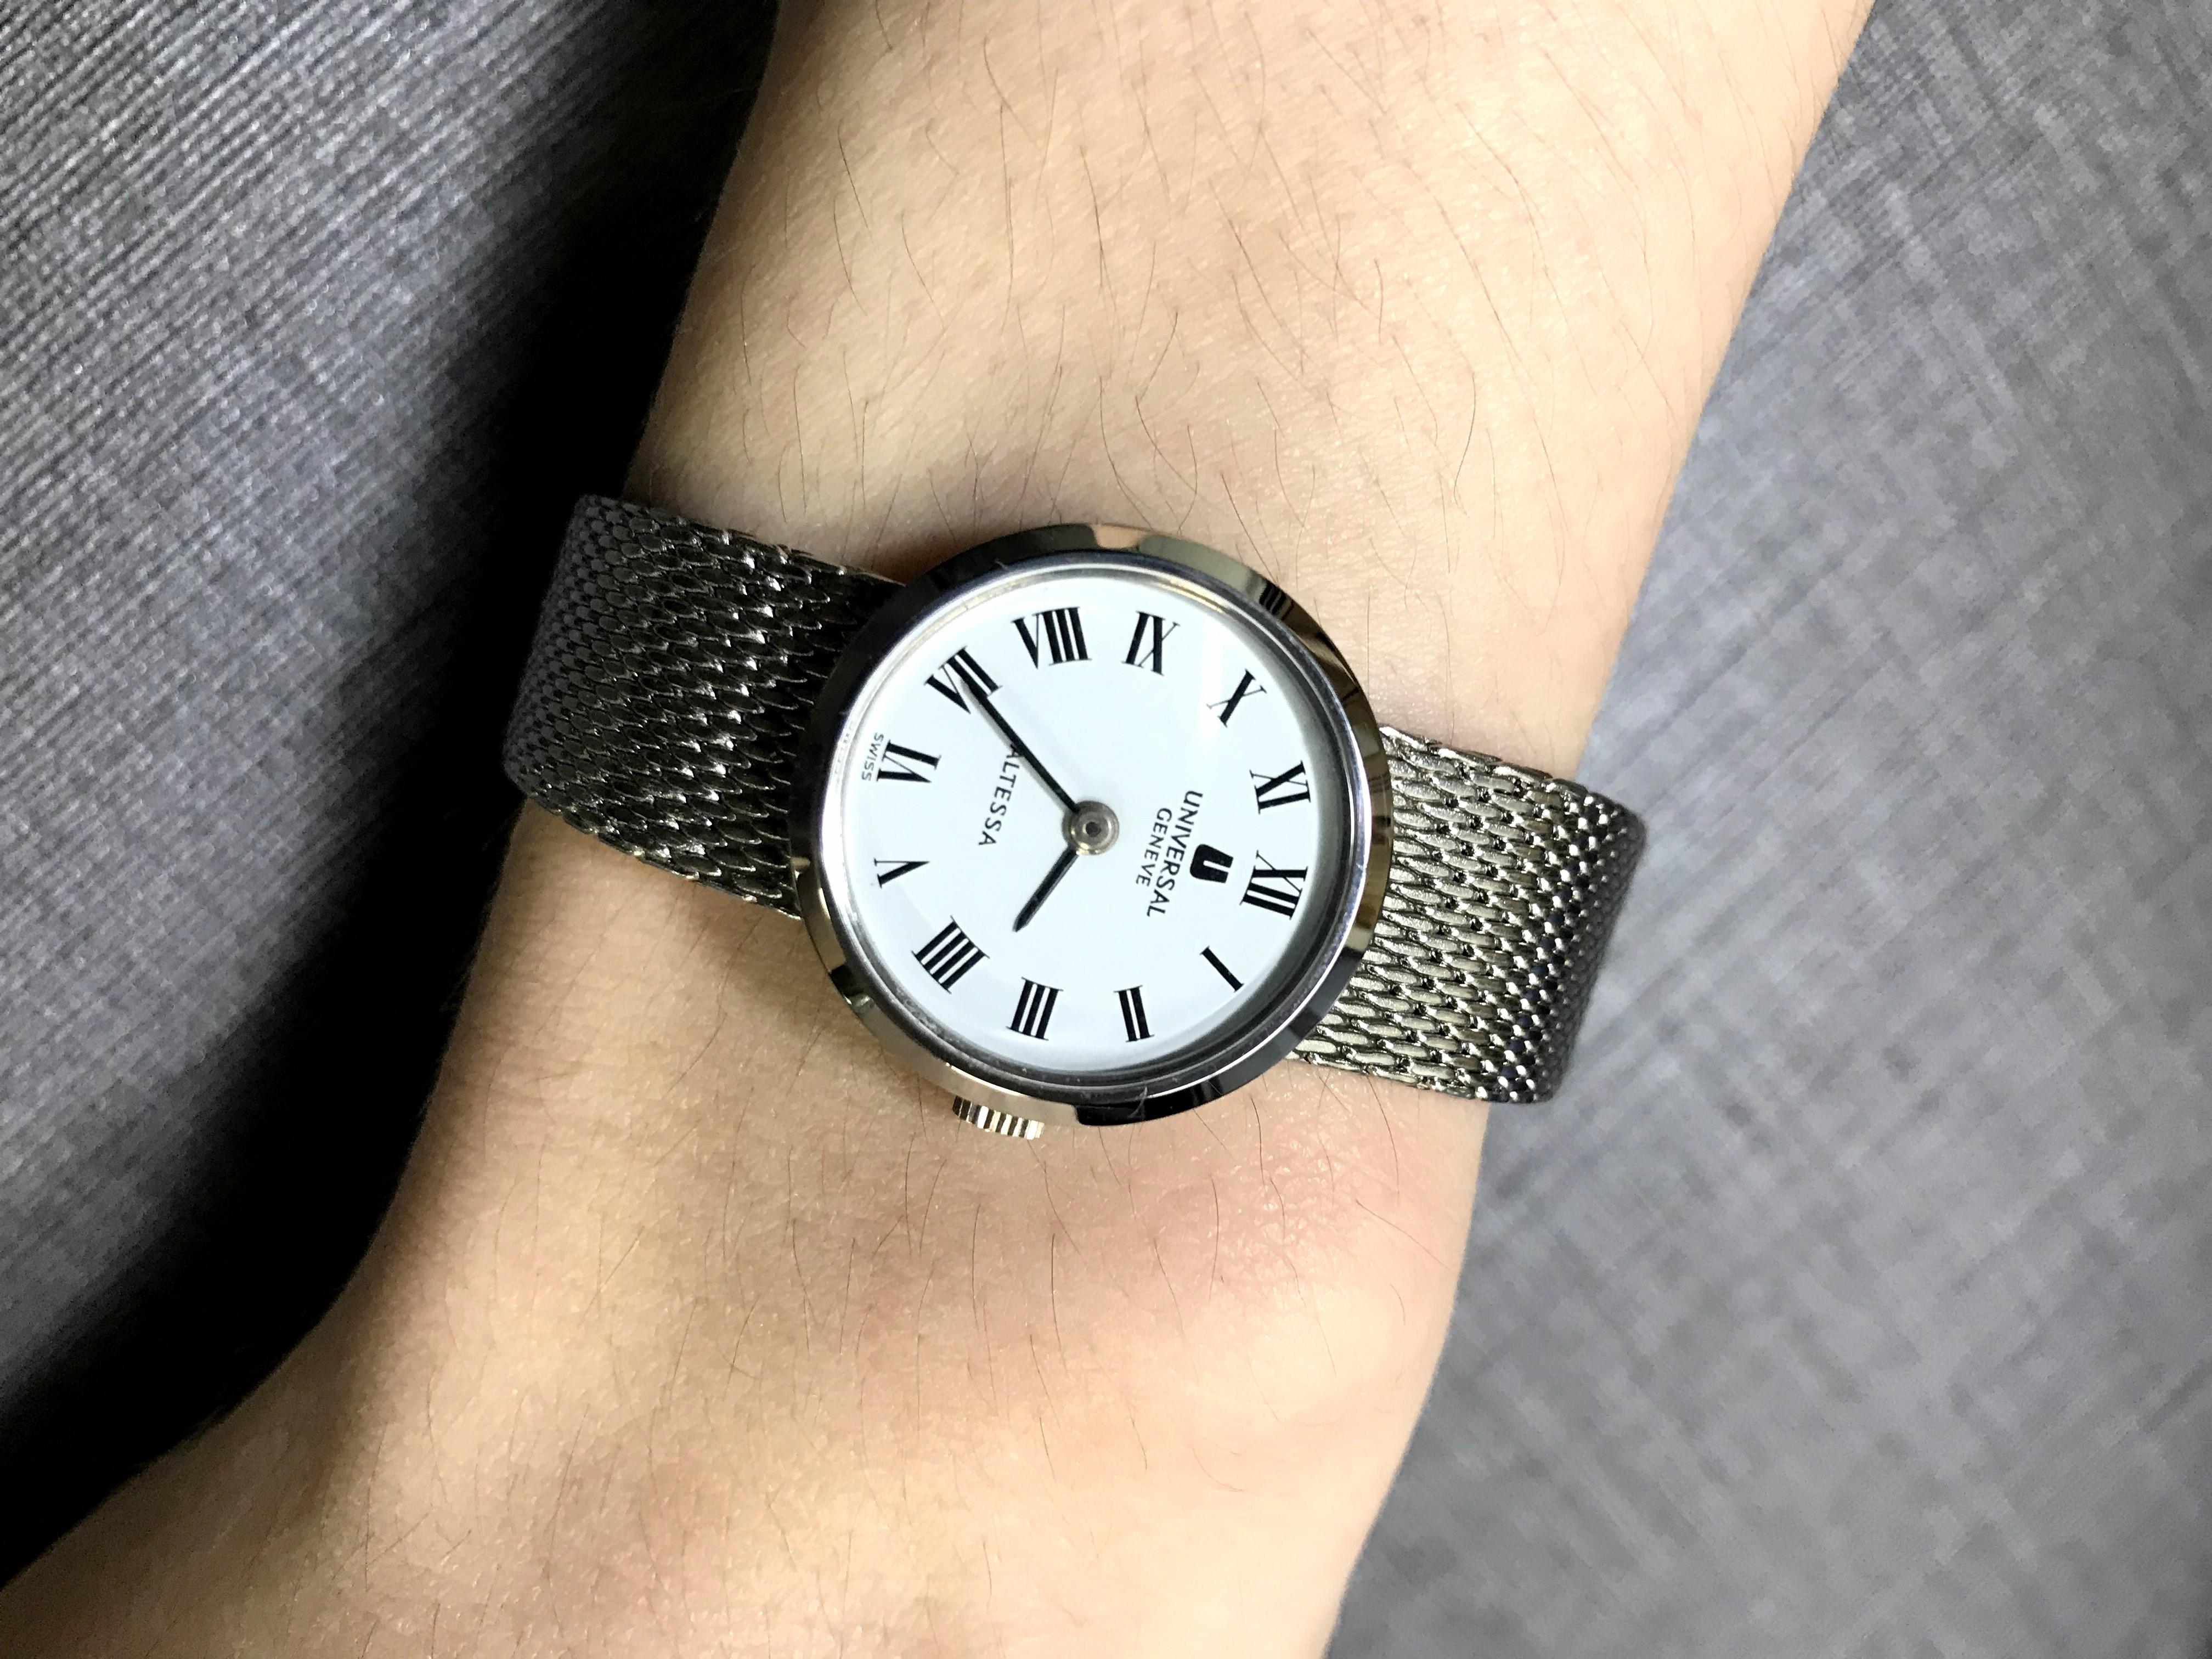
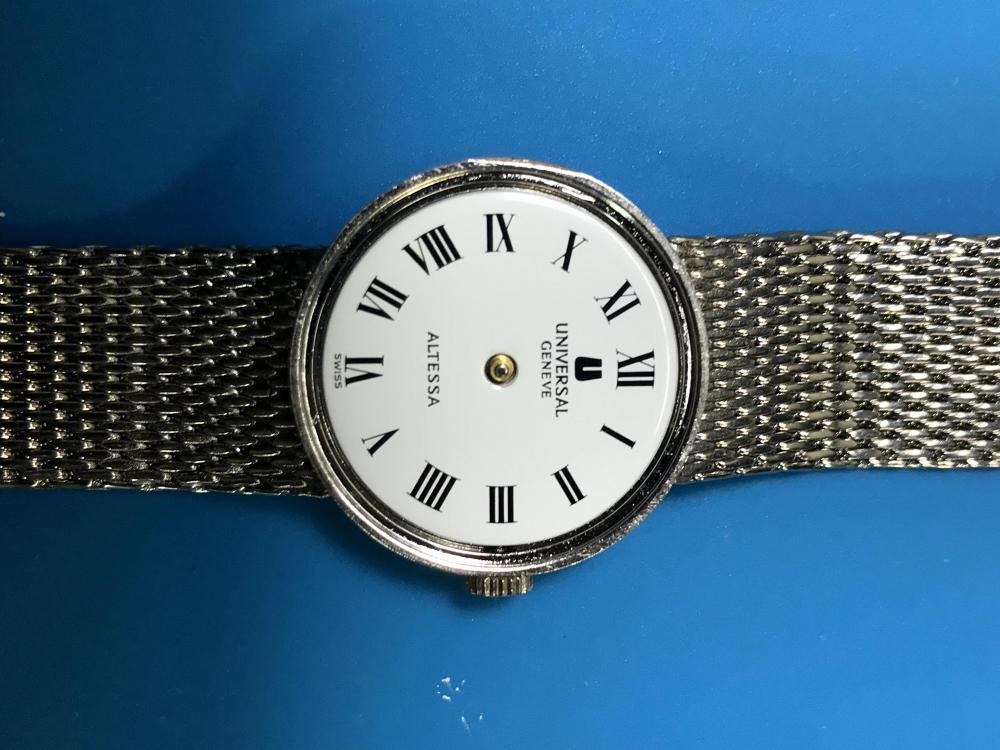
Final step fit the dial then put the movement back in case. Seal the case back Install hand and bezel, glass. A beautiful ladies watch. Finally, thank you for those had help me through this little probject! Also those who click in and read my stupid walkthrough. Enjoy your day.


 1 point
 -
Another possibility could be a slightly squint jewel hole. Seems unlikely though. And would also cause other issues.1 point
-
Hi User instructions attached. SEIKO_4F32_8F32_8F33.pdf1 point
-
And this the technical sheet in case one prefers written instructions. 4F32A_8F32A_33A_35A.pdf Incidentally, the question had been asked before already. Always a good idea to use the search box on the top right.1 point
-
Here is Marks video on replacing the battery and setting the time in a Seiko perpetual.1 point
-
This is the $1 Hamilton I pulled out of the trash box.


 1 point
 -
If the two parts your referring too are in the below image yes, it can be done with a staking set pretty easily. Just tested it now. And that’s coming from a guy who’s first post on here was about breaking something with the same tool!1 point
-
More tutorials to come Next one could be about "making a custom negative gilt dial" and "gold plating a handset" to make it match ... If I ever have the opportunity to redo something like what you can see on the pic below FYI it all started with this
 1 point
 -
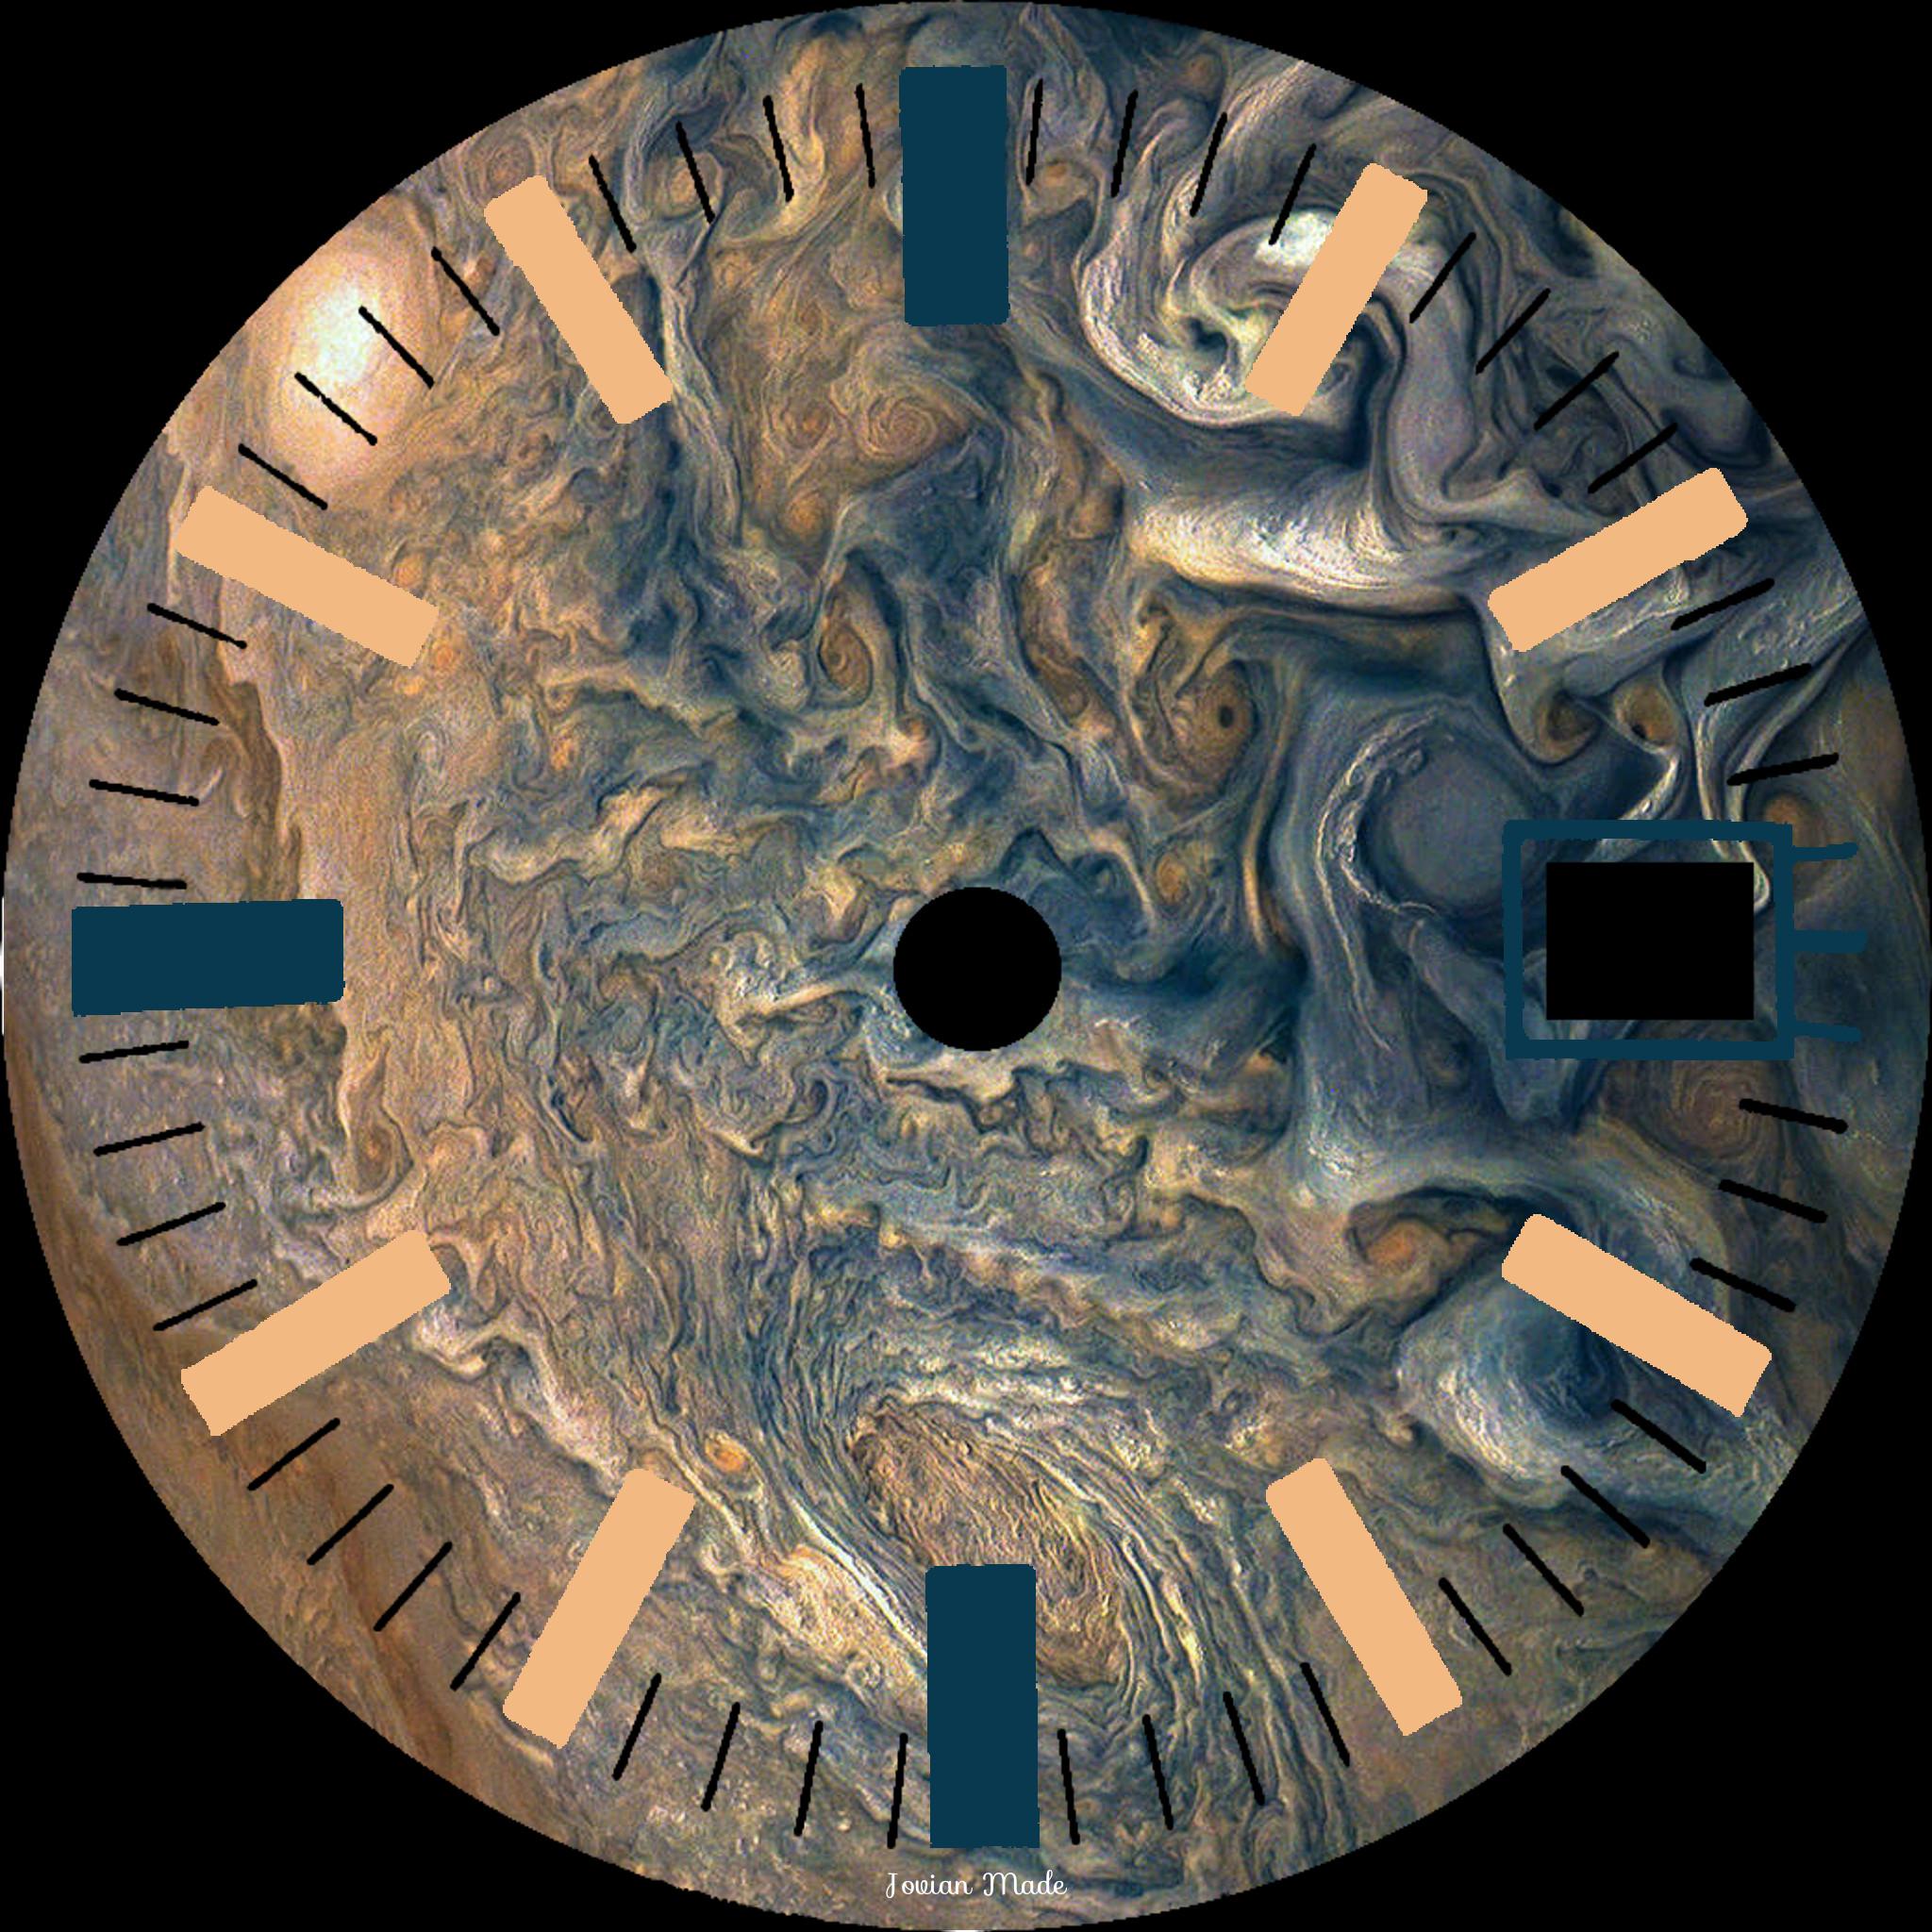
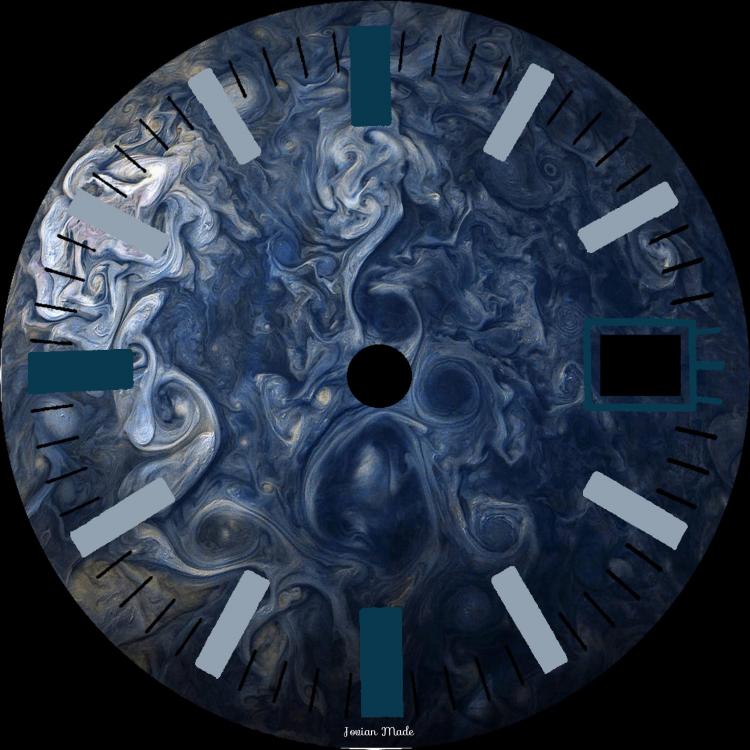
Just to show how simple it is to work with layers to quickly alter the image, here is the same set of dial markings on a vivid blue image in the same sequence. I only needed to alter one layer and pick a new colour to replace the sandy tone of markings of the original example.
 1 point
 -
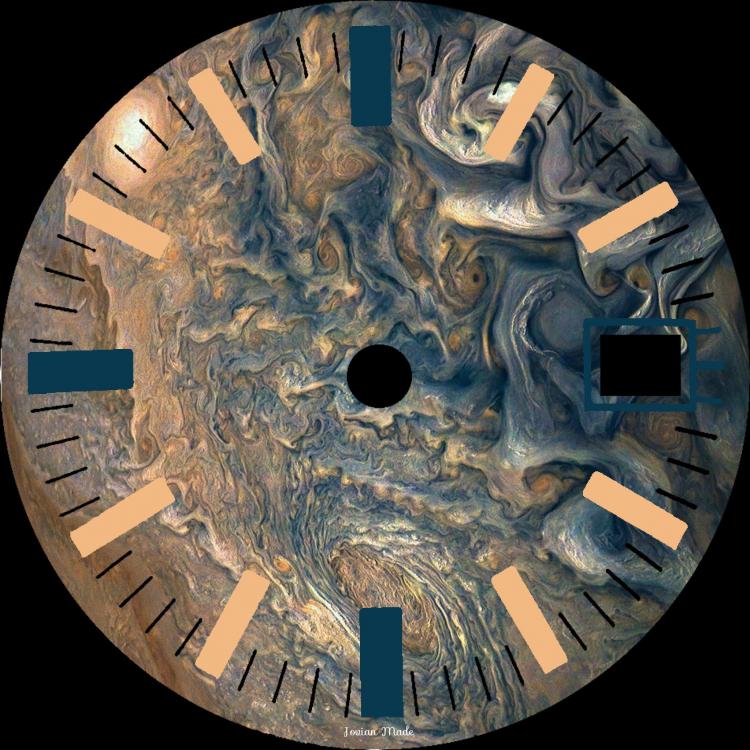
Inspired by a documentary I saw about the NASA Voyager missions (launched 42 years ago, in 1977), which I was watching on the flight home, I decided to see what I could come up with in a Jovian theme. The base image is actually from the Juno mission, but it is such a spectacularly colourful image I had so see what I could make from it. The dial marker positions are borrowed from a Certina 2000 dial, which had a suitably 1970s vibe to it. I can see I could have a lot of fun with this if I can get the technique mastered. The sky and your imagination is the limit. It needs a little more work, and I'm not sure I'm 100% happy with those hour markers, but the great thing about image editors is, if you don't like it you can change it.
 1 point