Leaderboard


Popular Content
Showing content with the highest reputation on 10/22/19 in all areas
-
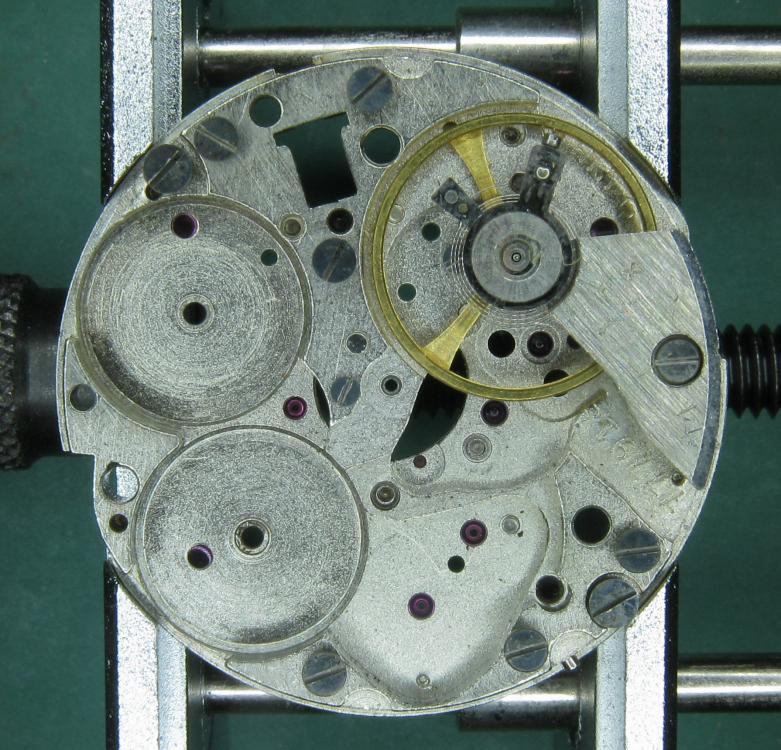
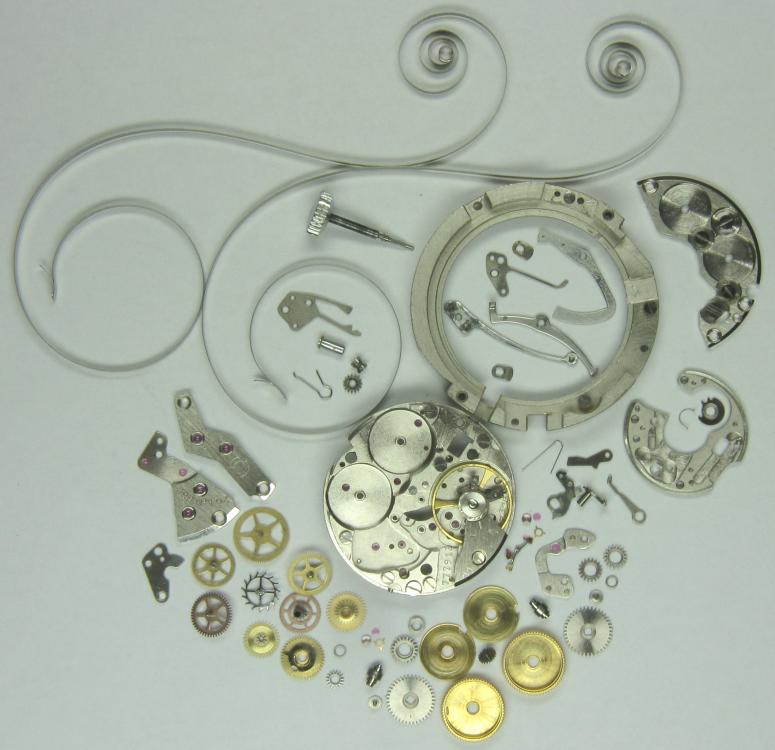
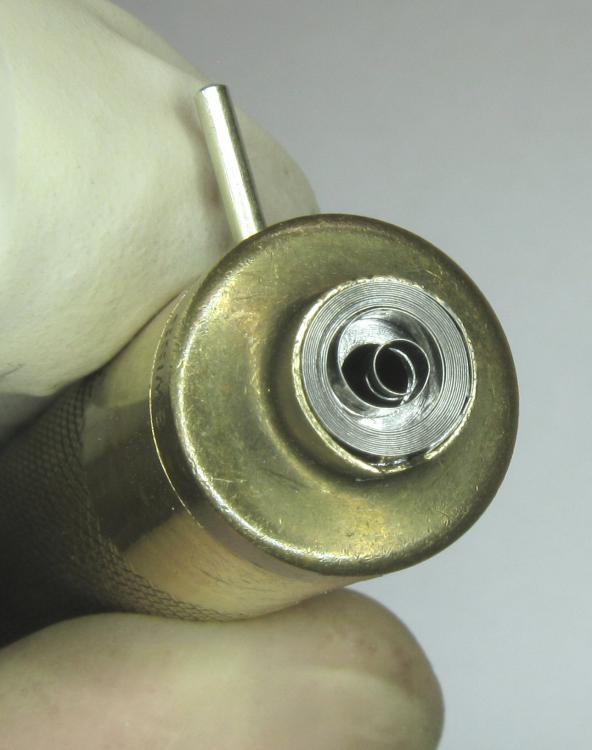
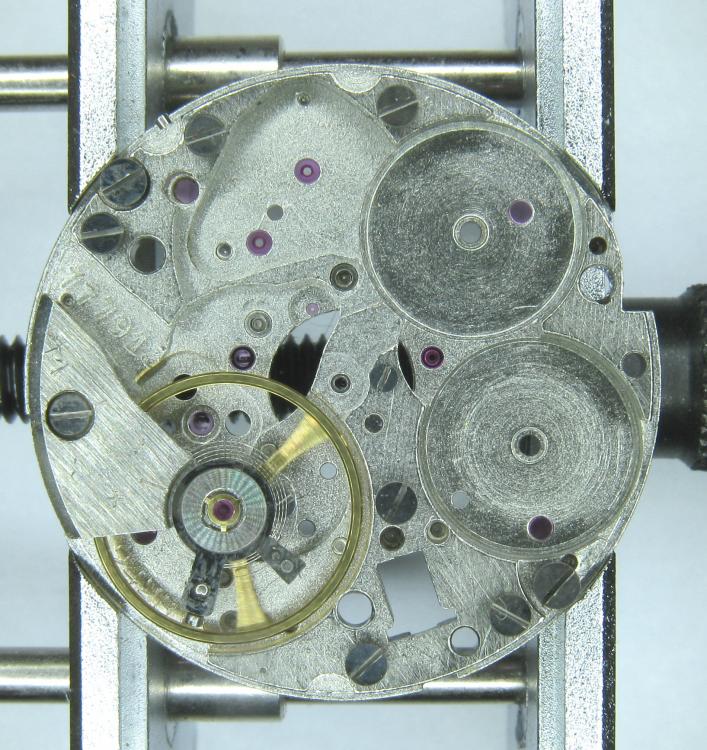
I have a nice little carriage clock in for service, very good shape, except for over 0.30mm sideshake of the barrel arbor in the barrel. Thought I would show how I bush these; it seems they often get overlooked or just skipped as they are a little more fussy than just bushing a plate. I measure everything up, then remove the boss in the barrel, and make a bushing that fits from the inside and is stepped, replacing the boss. This way it's captive, and doesn't require a big interference fit to get seated and stay. I turn up the bushing with a boring tool in the lathe, doing the outside as well (running in reverse of course), then do the barrel opening with the same tool. It's a pretty quick process once you have the moves down!
.thumb.jpg.cb8ef5963dc2c32068cb38eb1b0fb301.jpg)
.thumb.jpg.362ea1b8e48147d0abb1d1413fa0f340.jpg)
.thumb.jpg.fdfeb0a7c19e0bf17989b54e6e601146.jpg)
.thumb.jpg.75be807e243857607adb7f0f8a1d6780.jpg)
.thumb.jpg.b5937ec5bee779cabad721680f8b05d4.jpg)
.thumb.jpg.a1a89a2ade5d958da7ac13078333067f.jpg) 2 points
2 points -
So sorry for my lack of etiquette. Not the best with computers. My name is Ted I'm obviously a newbie. I love to tinker and repair watches and clocks. I really hate this disposable society that we have become. Thanks in advance for any help and conversation.2 points
-
On this model you have to open the watch. Remove the movement and dial. Press out the glass, then realign the bezel to the movement whilst the movement and dial are in the case. Then repress the glass and bezel in. Annoying I know.2 points
-
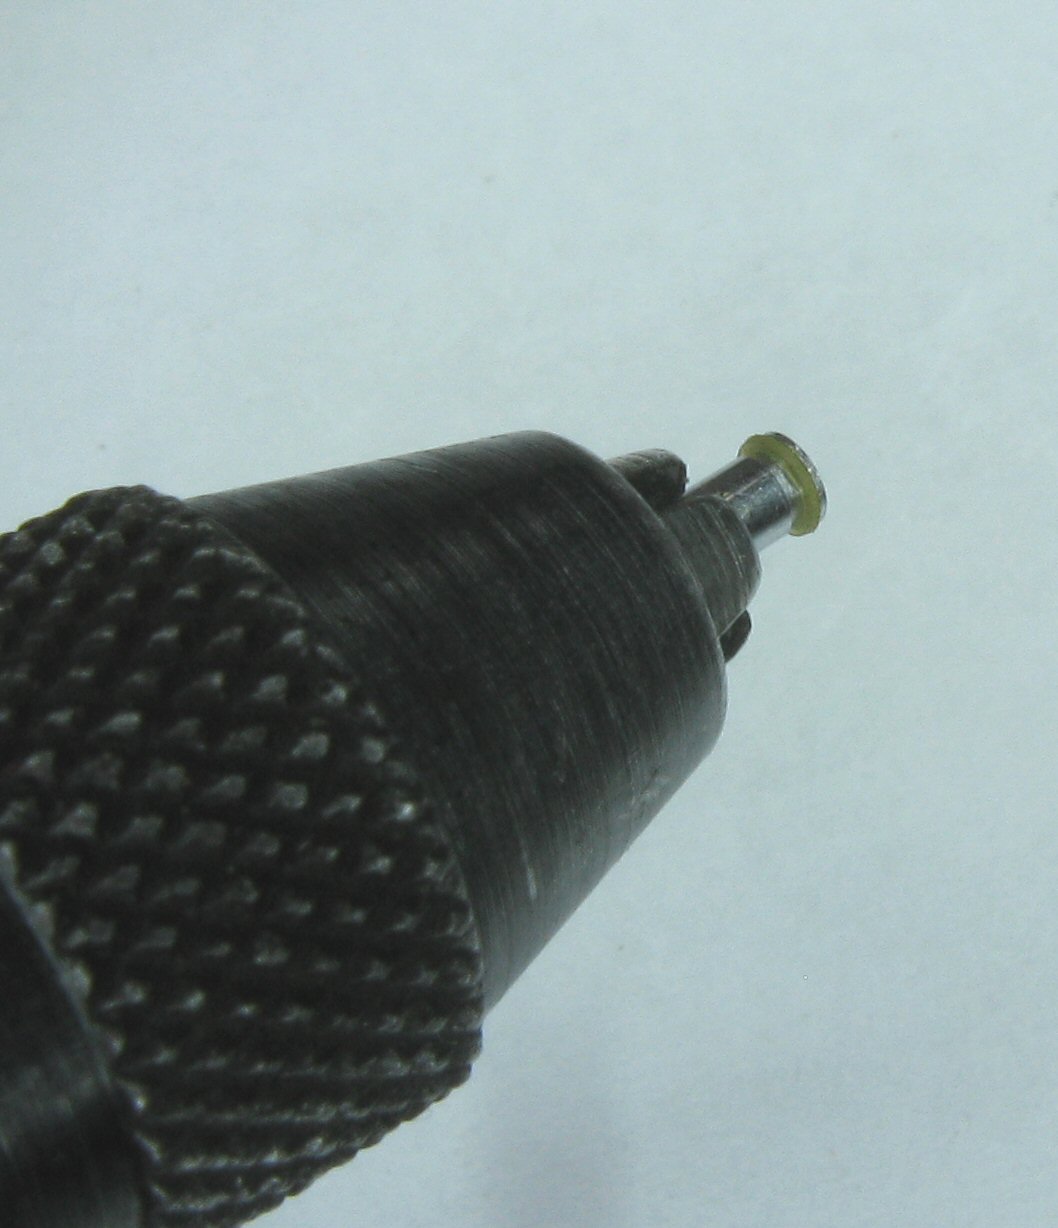
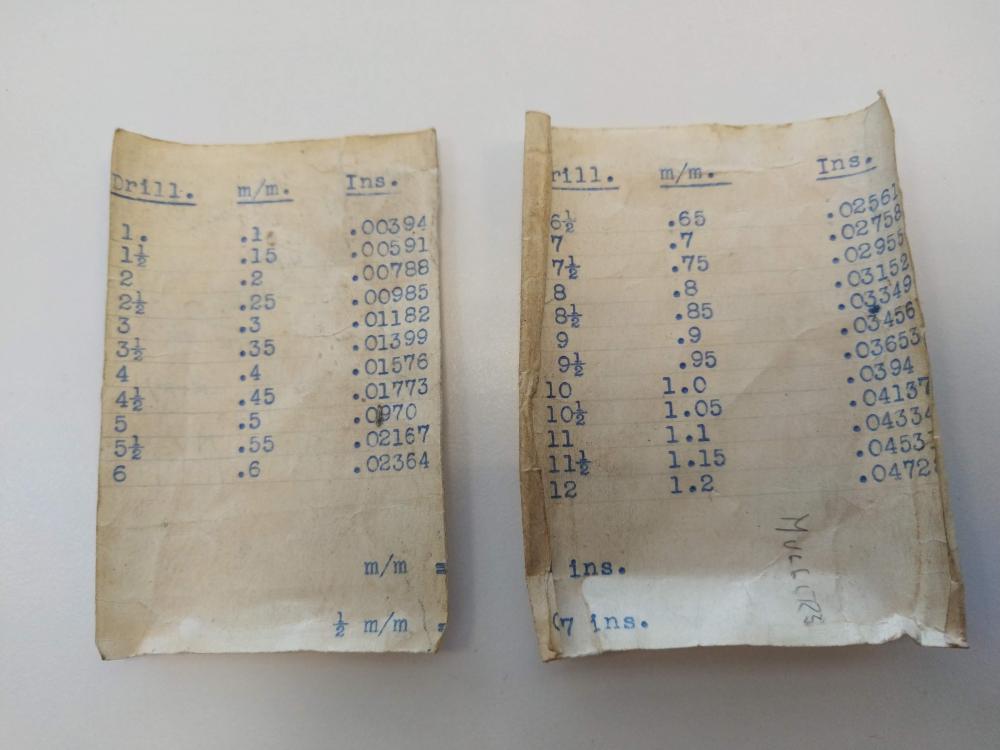
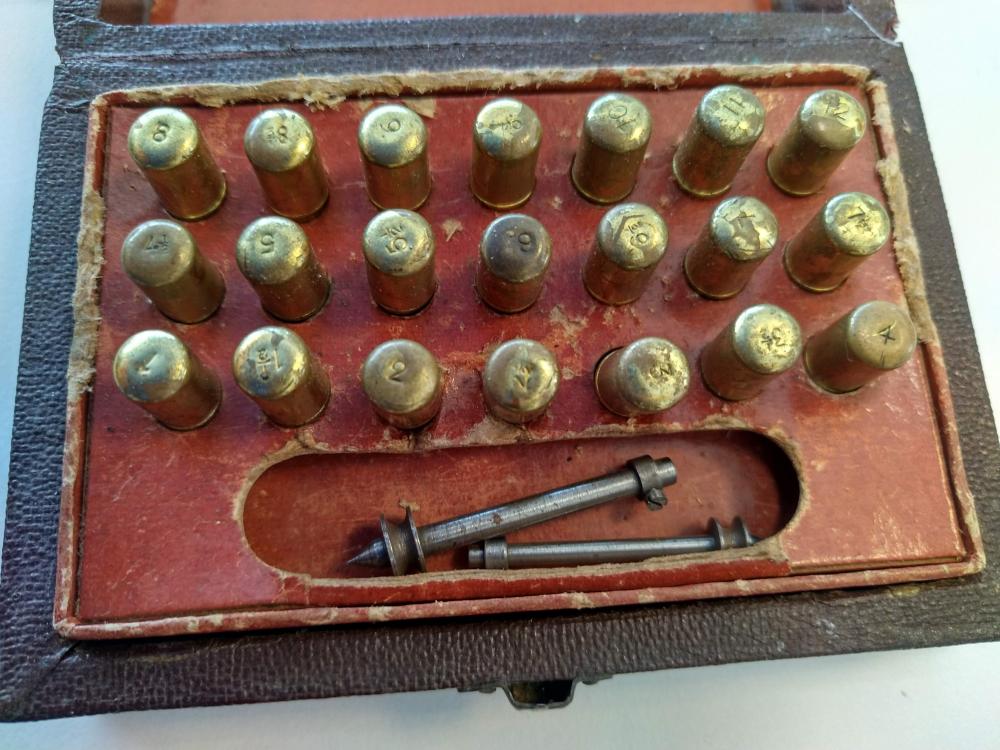
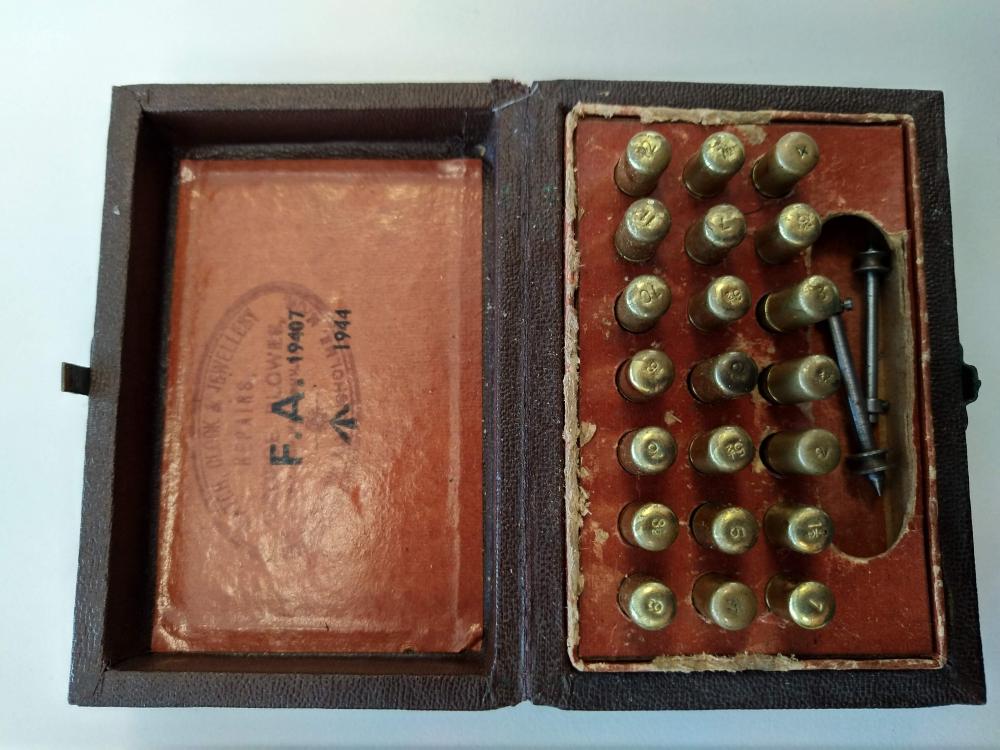
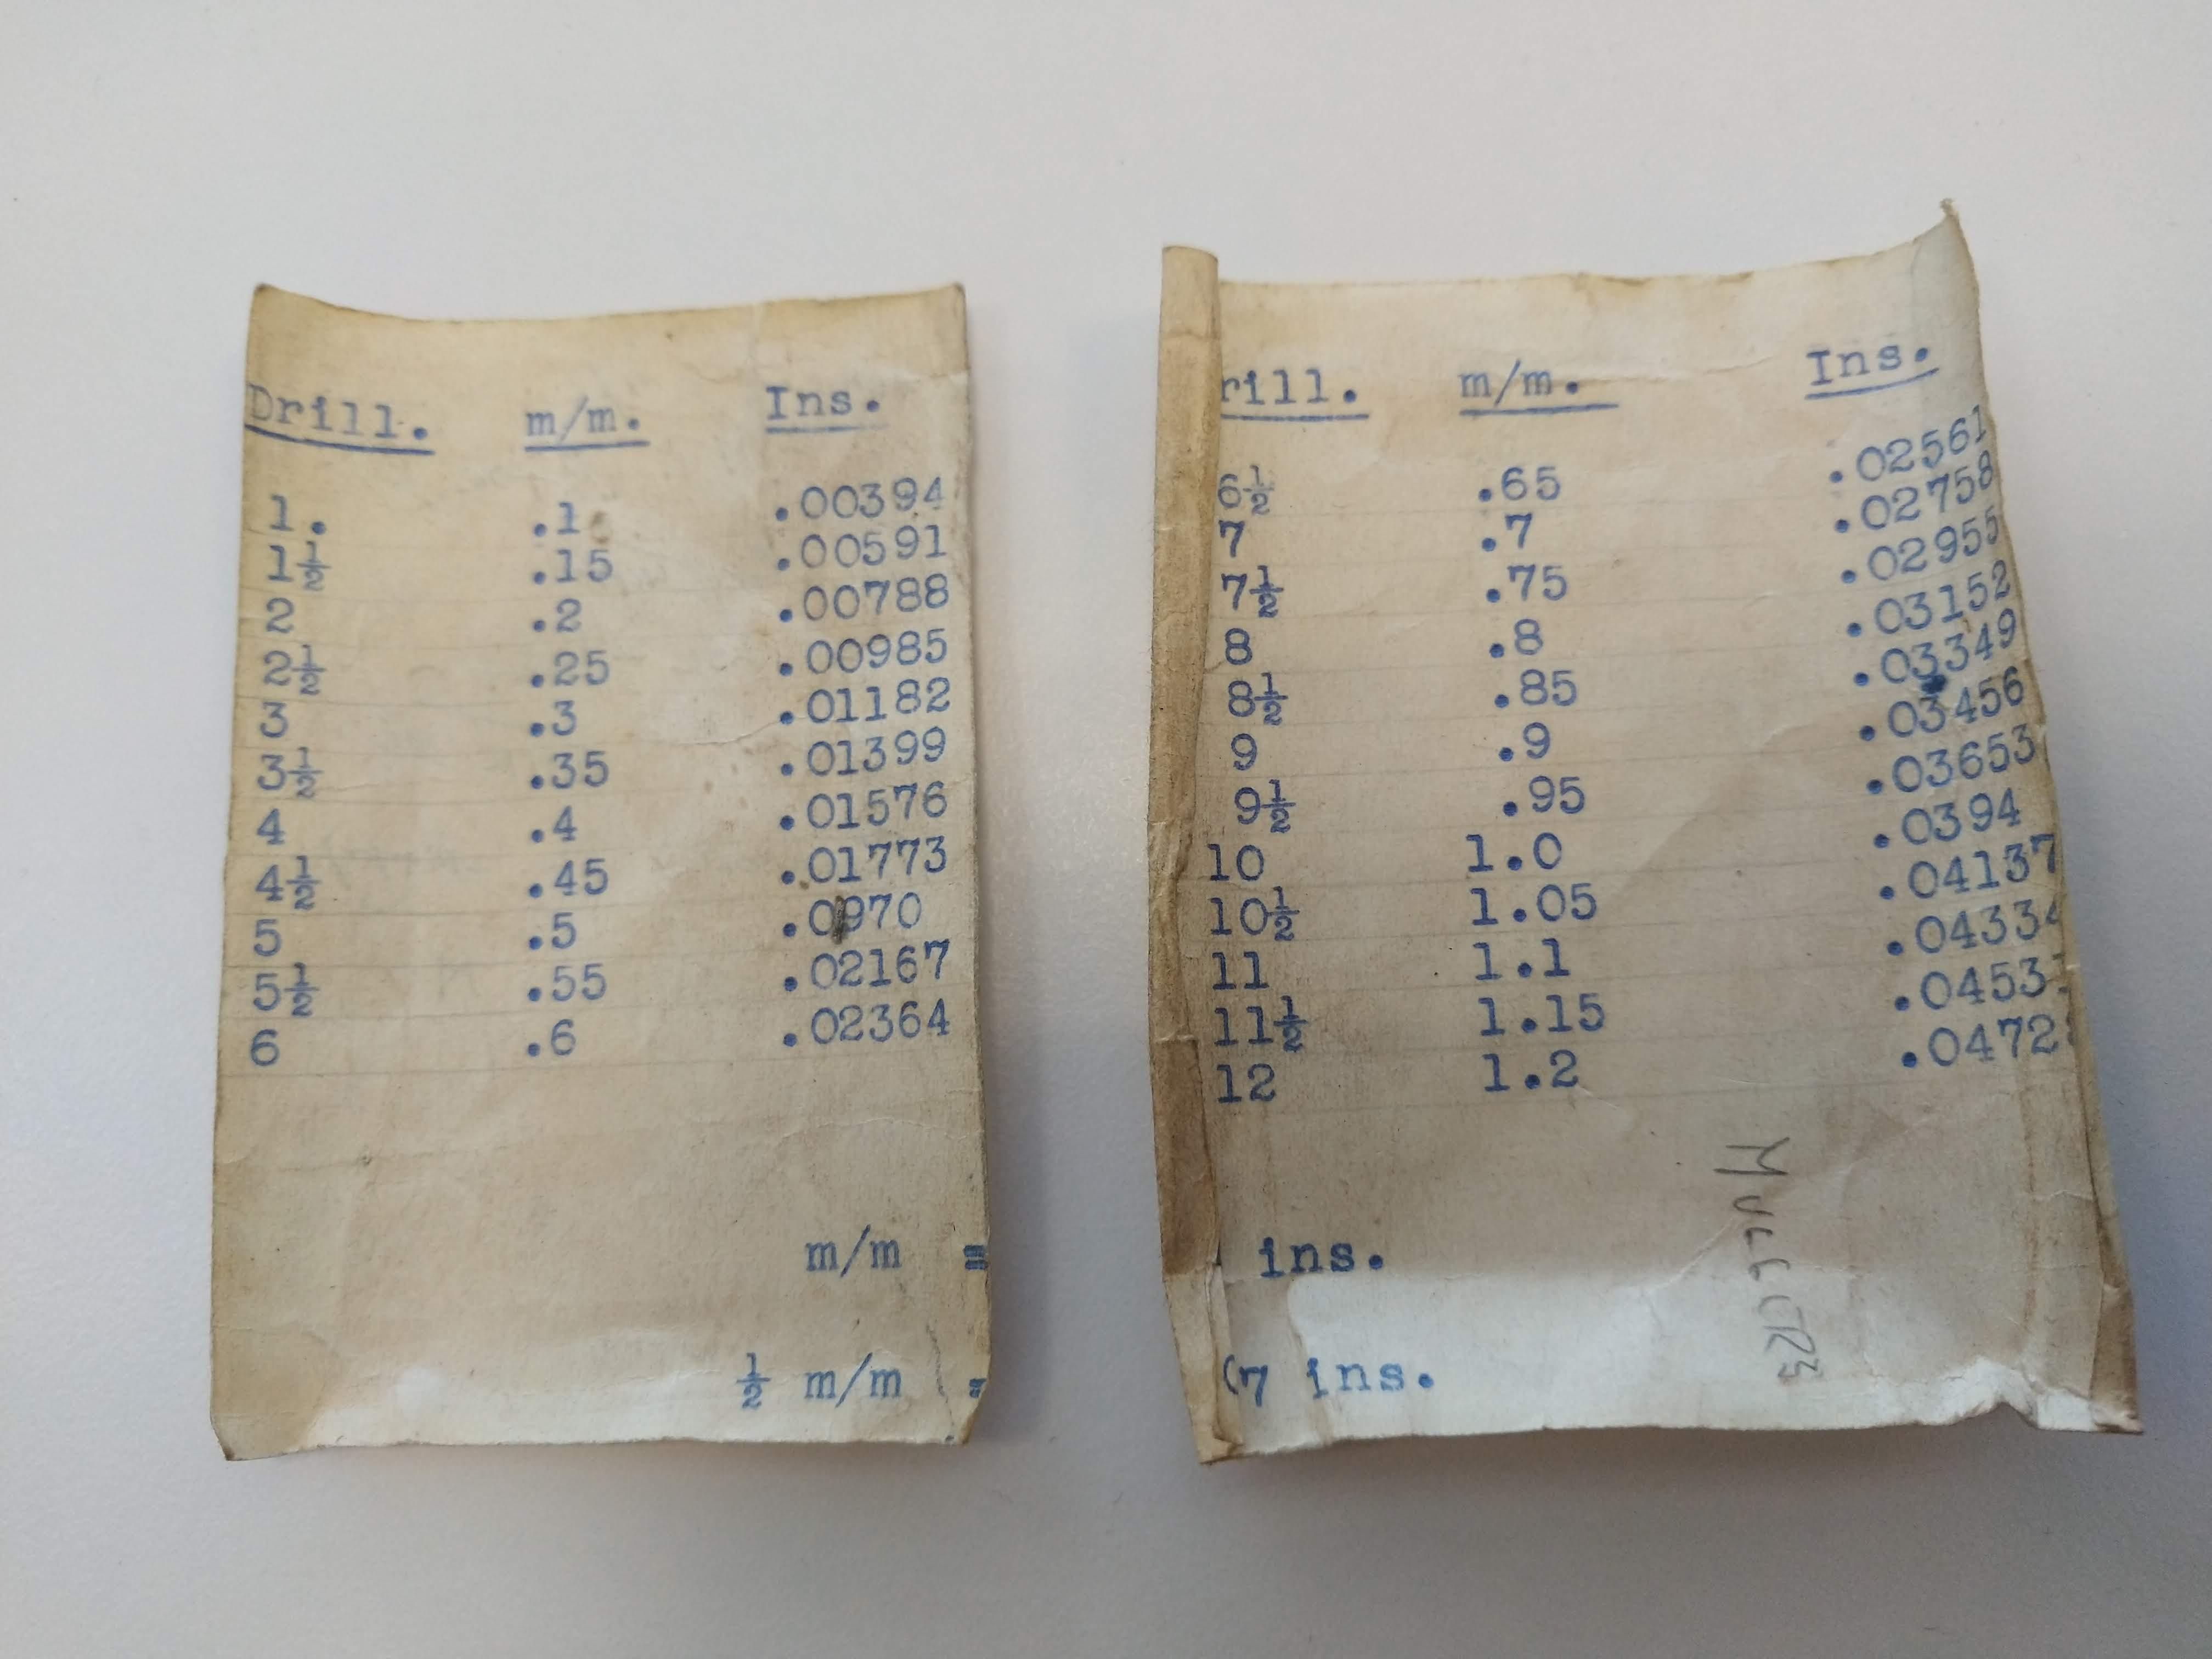
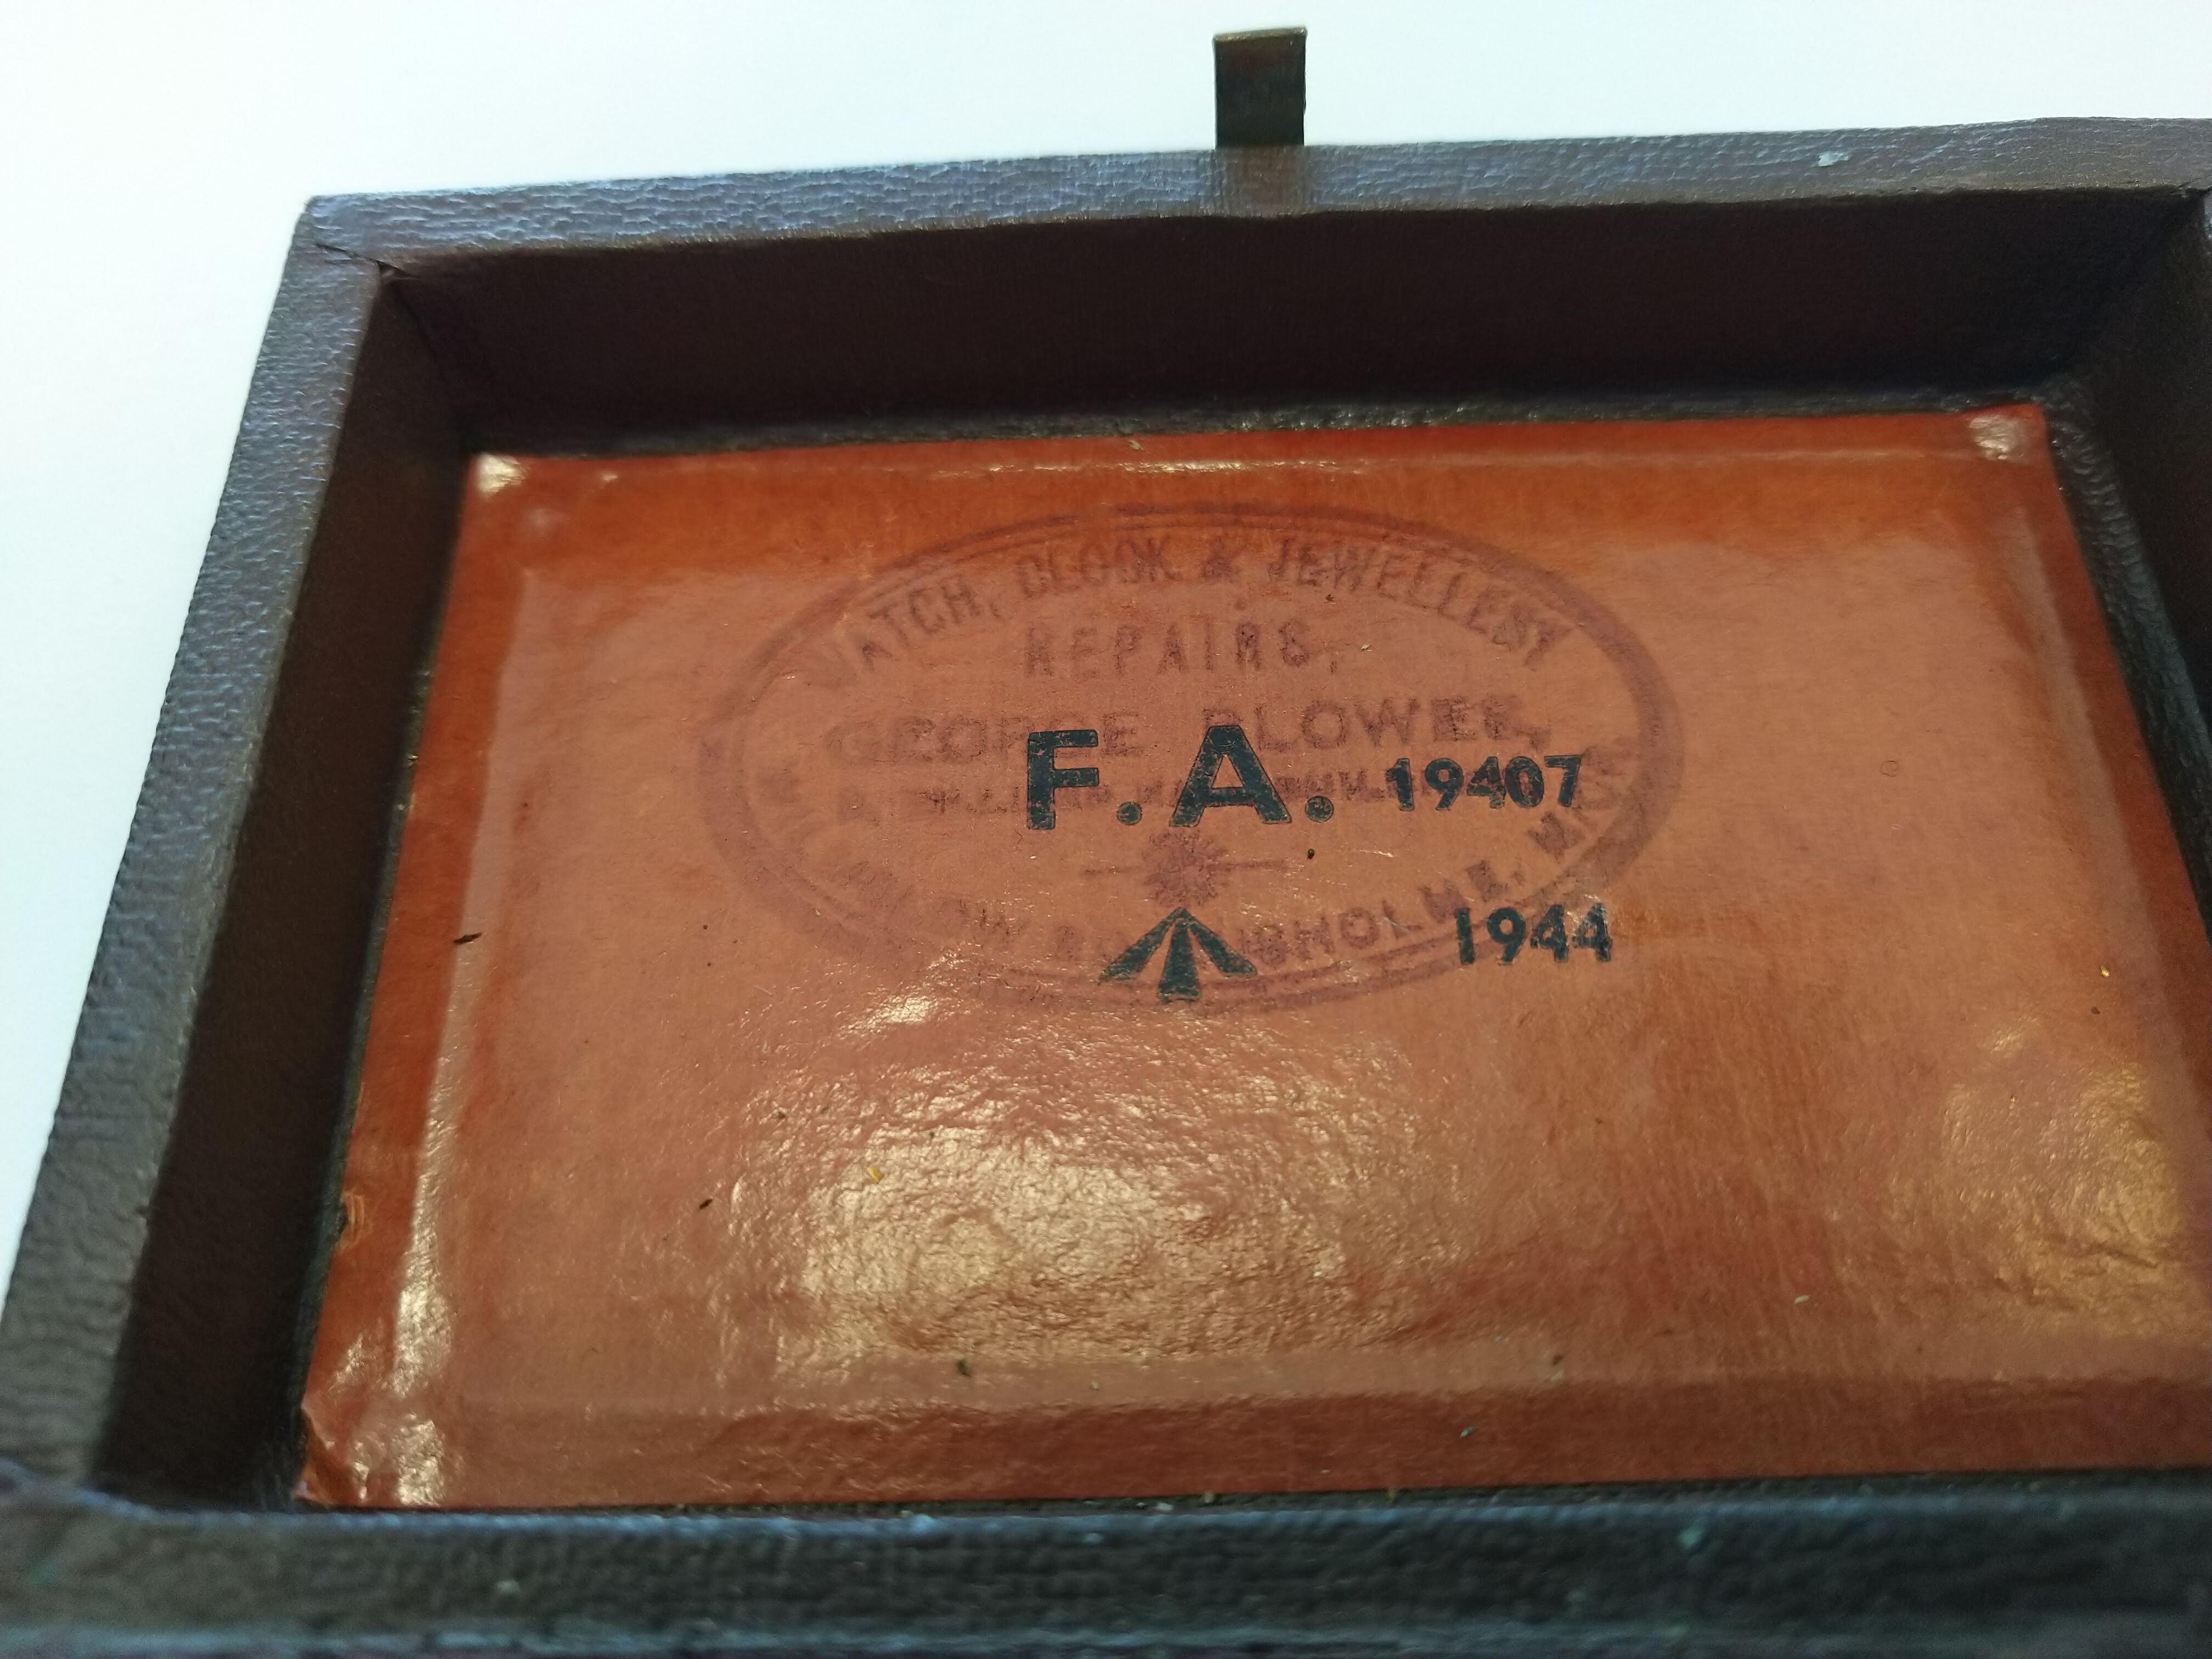
Hi *, Would anybody know any details about this drill bit set? What does the F.A. mean? As far as I can see it it belonged to MoD? Thanks in advance, lui

 1 point
 -
This is what AndyHull and JerseyMo helped me fix. Thank you guys! Very much appreciated!!! 1967 Timex Dot Dash 2017 2467.pdf1 point
-
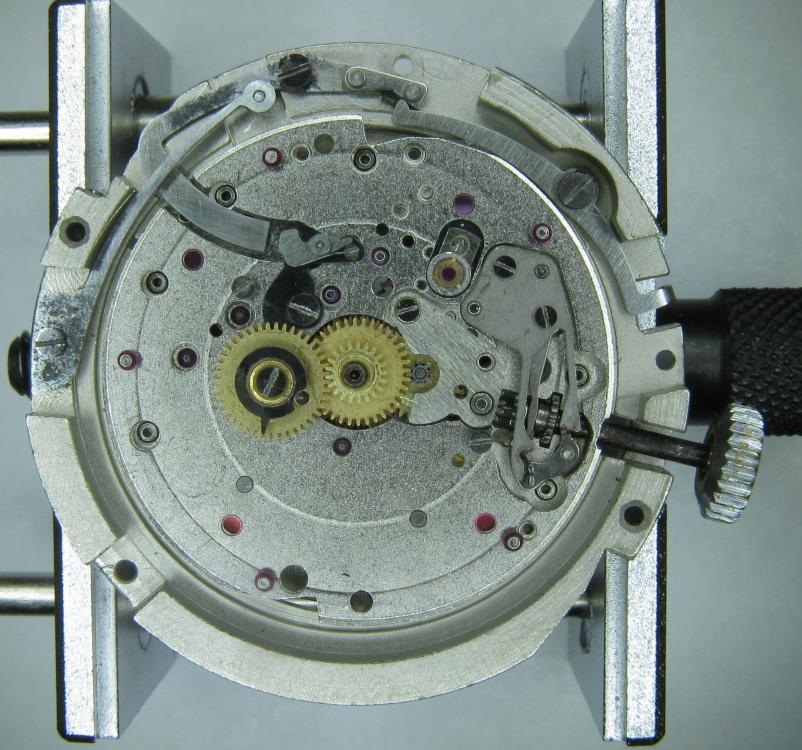
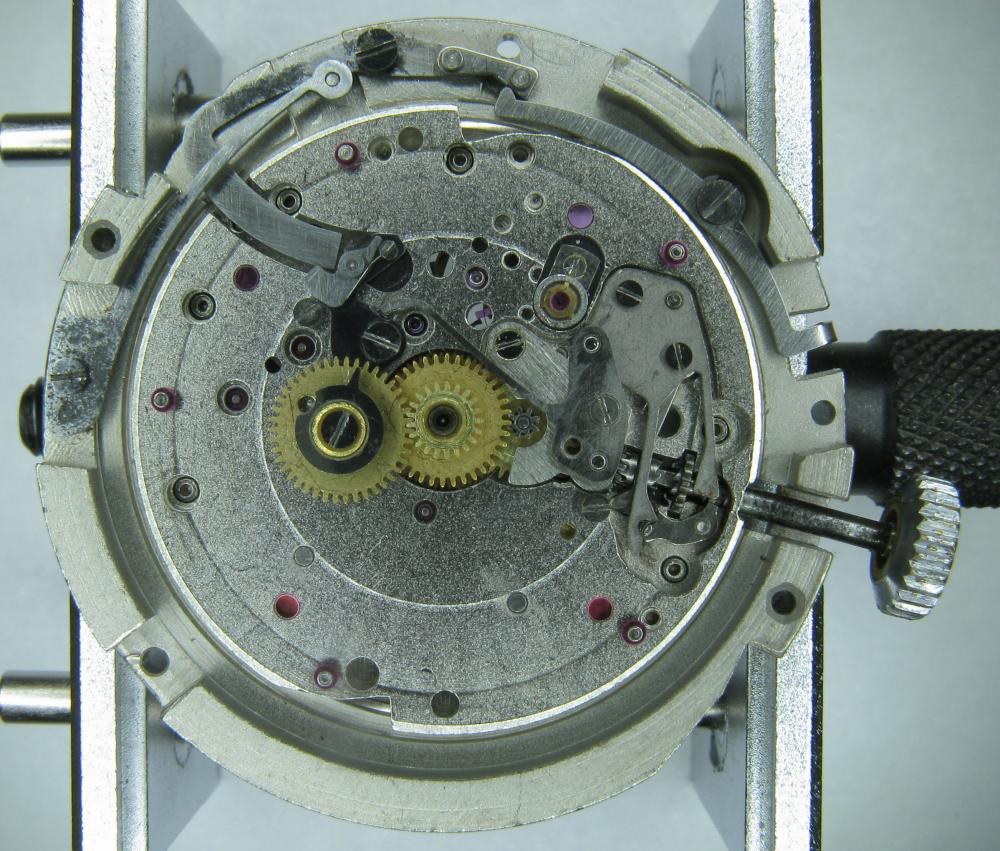
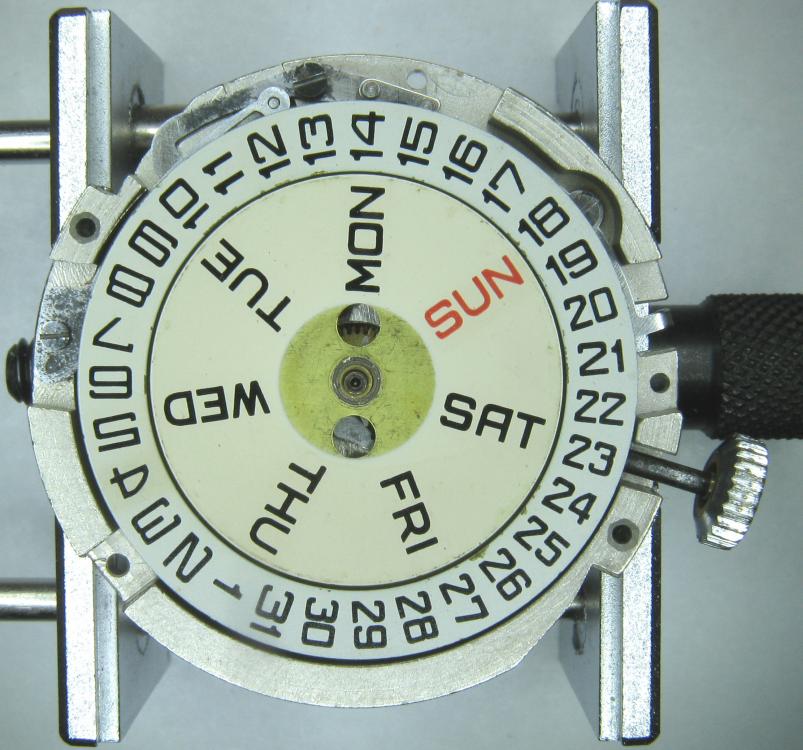
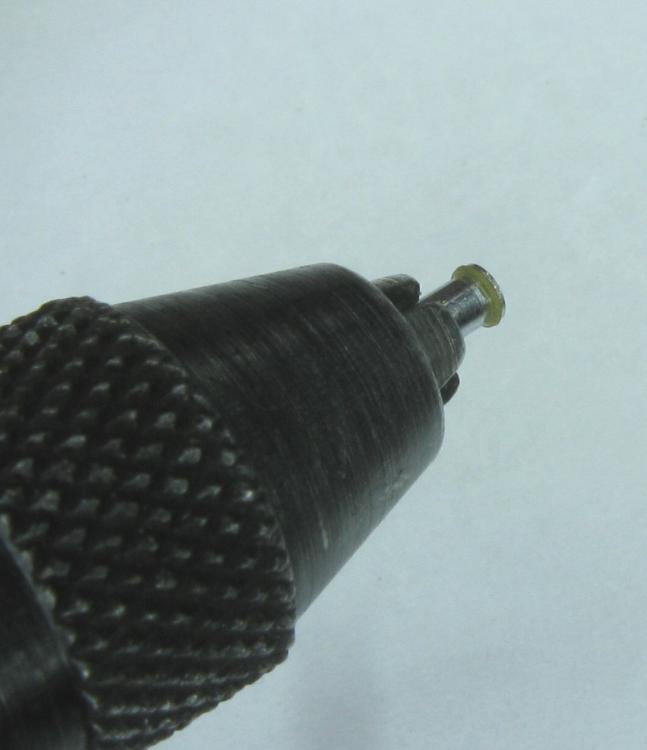
Thanks for talking through this with me. It’s funny I search ETA 2447 all over but it wasn’t until I search “ETA 2447 diameter” that info about the stem appeared. I’ve ordered a 2360 stem - hopefully problem solved.1 point
-
Well, I finally got around to trying to get the lume off and thankfully it came off without any issue.
 1 point
 -
Failure to do adequate cleaning between polishing stages will contaminate lower sized grits with courser ones and this will tend to lead to the sort of results you are seeing. The object needs to be completely clean and free of any grit/compound. A quick wipe is not enough to get good results. At each stage, you need to check carefully that you have a uniform satin or smokey finish. You need good lighting, and you need to inspect from multiple angles to observe this. If polishing by hand, I tend to polish in a figure of eight pattern, changing the axis of the figure of eight by 90 degrees each time I change grit. If machine polishing, then each grit should be polished at right angles to the previous courser one, to ensue that you bring down the previous troughs. If you always polish in the same direction, you will never completely remove the lines from the previous grit. Many years ago I used to have to terminate fiber optic cables by hand from time to time, and the figure of eight polishing technique was used to polish fiber ends. With a suitable jig and polishing compounds, and If done correctly the ends were typically optically smooth when inspected under a relatively powerful microscope, the process wasn't particularly elaborate or long winded, and from memory, only required three or four different grades of polishing compound.1 point
-
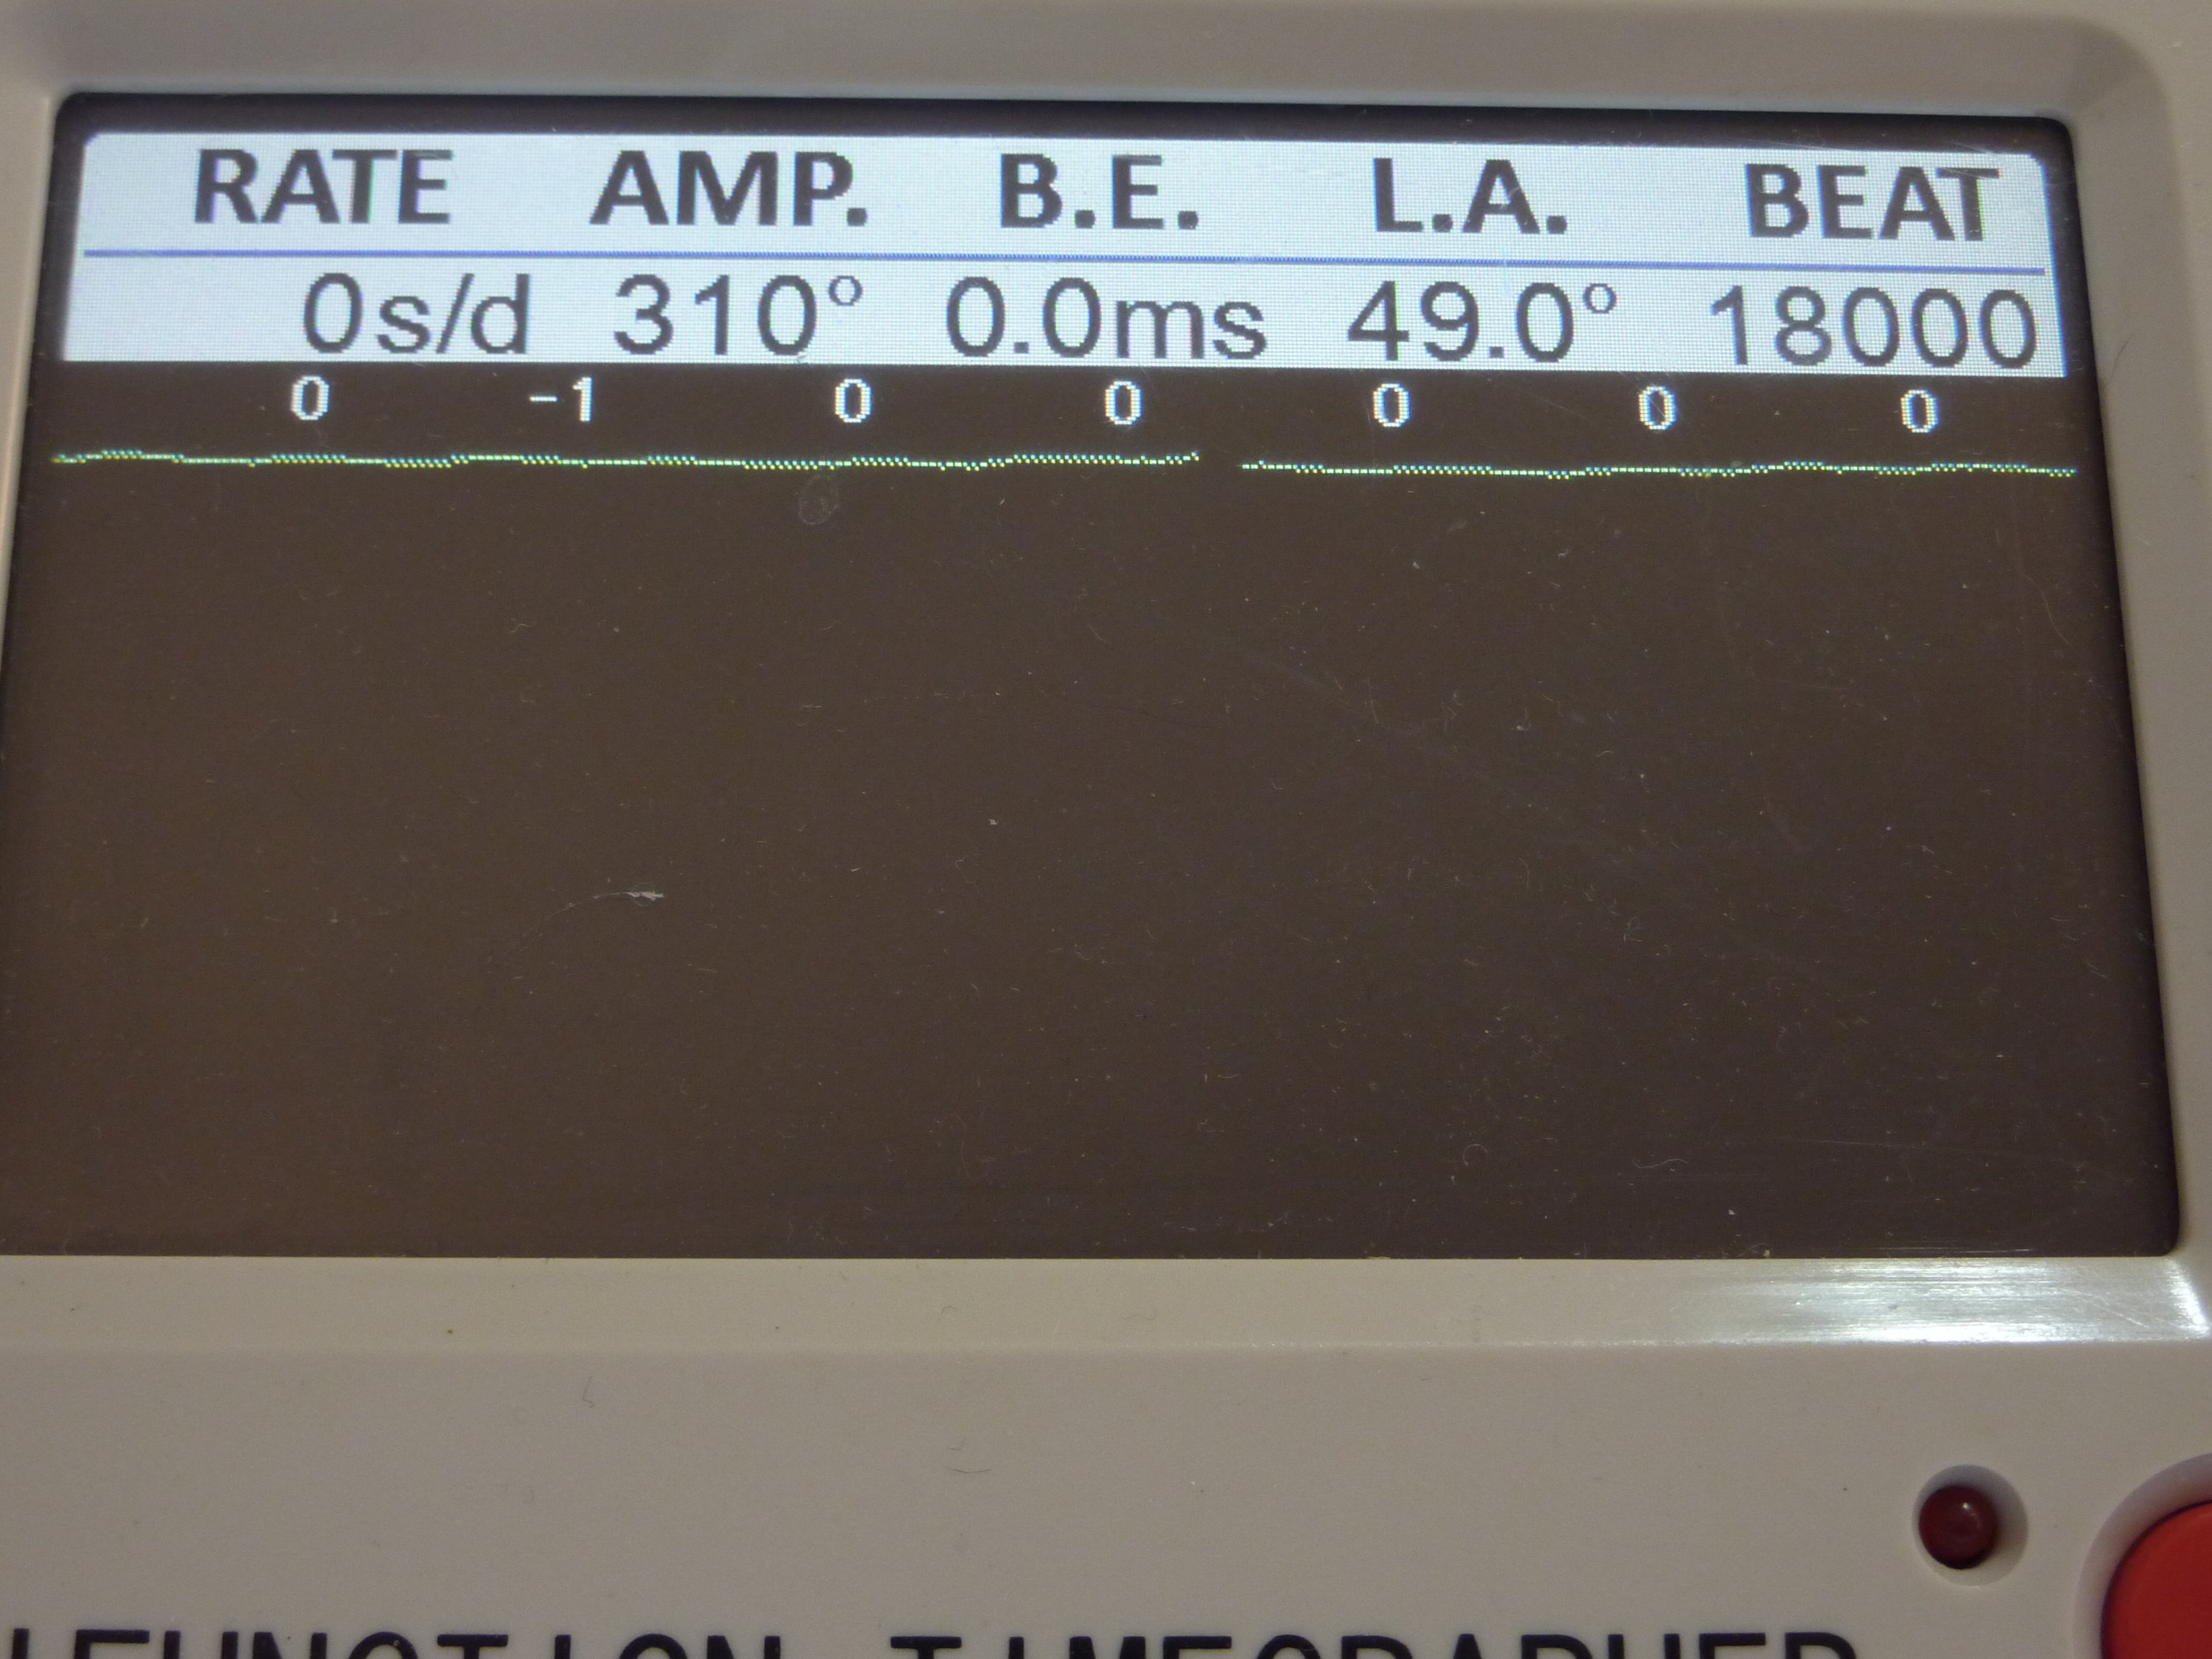
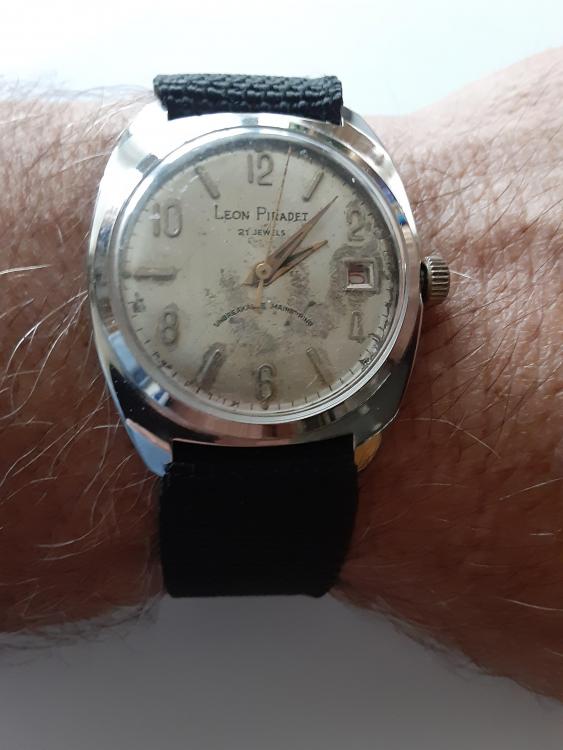
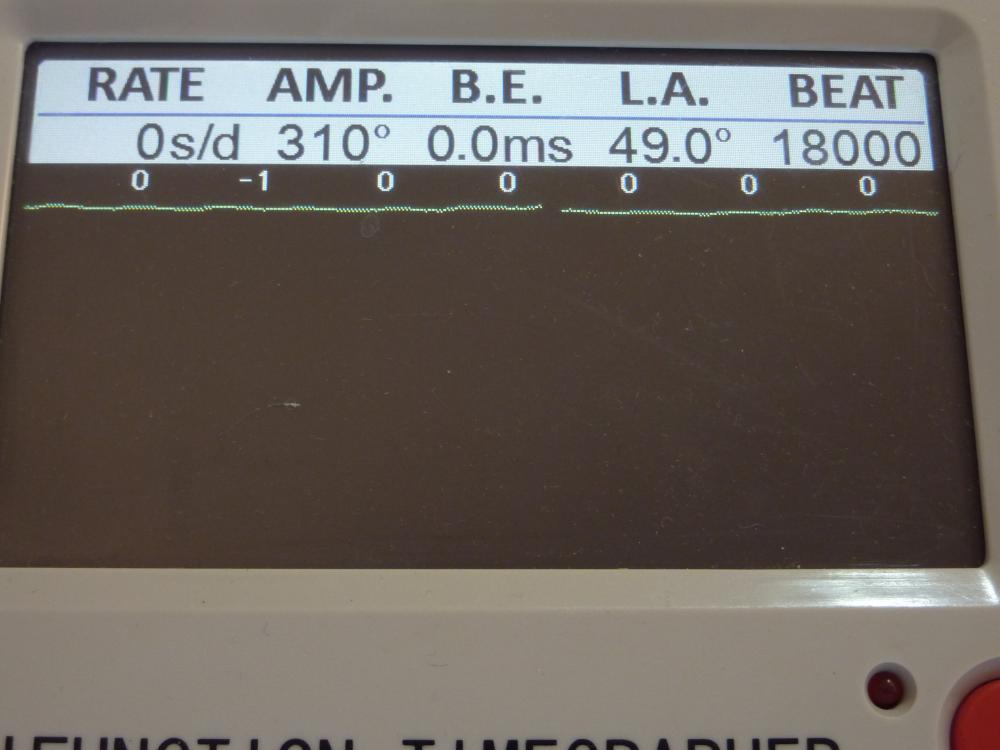
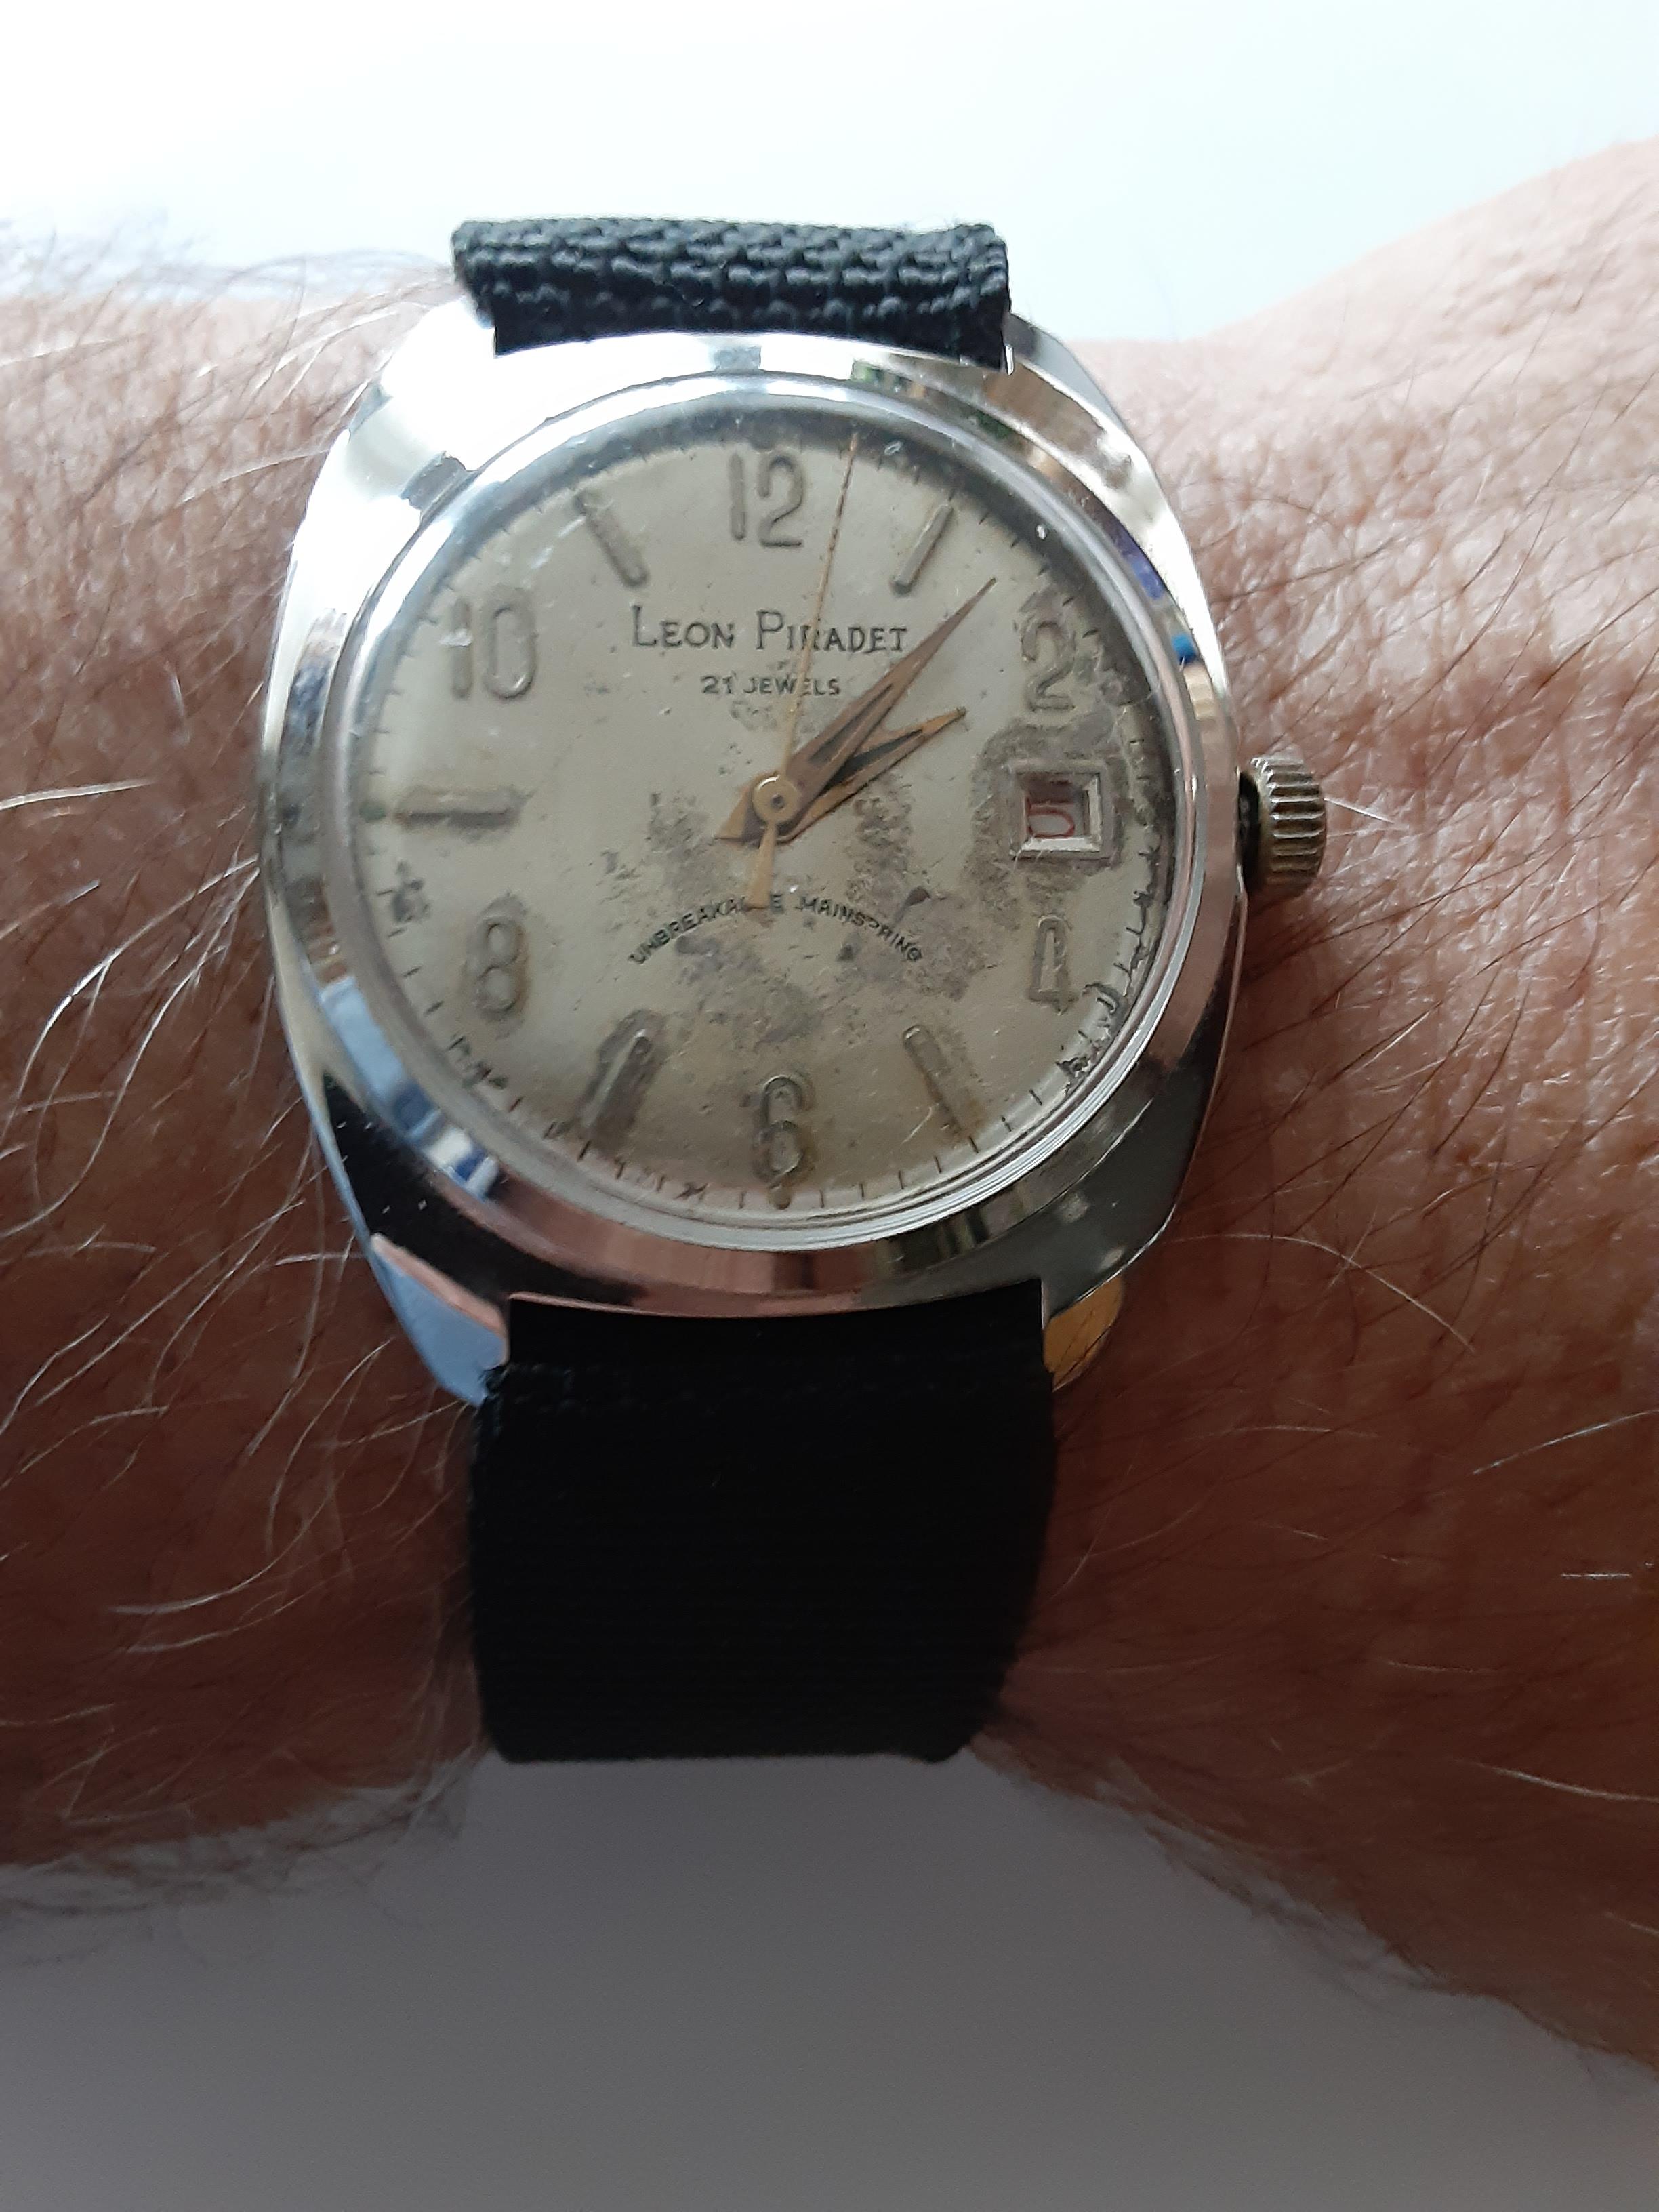
Slava powered leon piradet. About 15 seconds slow around 280 degrees and .1ms beat error.
 1 point
 -
If you can't easily find a replacement movement, then you might risk stripping off the dial and hands (assuming this is possible), and cleaning the mechanism in lighter fluid. This *might* get it going, however if the coil or the circuit is damaged, then your luck is out, and you will need to keep searching for a replacement.1 point
-
find a working timex with the same movement.swap it out.1 point
-
imo you're gone either too coarse to start with, or been too brief with a subsequent grit. The grit refers to the size of the abrasive particles. If a grit is say 400 in size, it will leave 400 sized scratches. If the next grit up is 600, the idea is use 600 until the 400 sized scratches are gone. If you leave 400 sized scratch, and keep going up, how are you going remove enough material to remove the scratch? Despite a few BS claims out there of moving material around, abrasives remove material, full stop. The only way to get rid of a scratch (with abrasives that is) is to remove enough material to bring all the surrounding material down to the level of the bottom of the scratch. The reason for the progressive grits is to speed up the process.....but you never want to start too coarse or you creating deeper scratches than were there1 point
-
Ha, wow from the click I was 99.999% sure it was Unitas, but it's Pierce. Looks like a caliber 160/22, 16 ligne.
.thumb.jpg.423cfe3271c79544af31c081b0206883.jpg) 1 point
1 point -
shelac ; the glue used on the pallet jewels for years. i never liked it because it can be easly desolved by most cleaning fluids. i learned the hard way to remove those parts before cleaning. vin1 point
-
Thank you for your introduction. My apologies, I must to correct myself, the lever tip has to be pushed like any other. See page 6 of the attached. v115a.pdf1 point
-
It it would suffice, you any many other collectors would have no issue, and would need not to apply the correct solution given above.1 point
-
So jdm if you want I can mail you the watch of your dreams.1 point
-
Thank you AndyHull and JerseyMo for responding with really helpful instructions! You guys rock! i have to get some rodic to help hold these two little mini-monsters in place. I was trying to use a small bit of sticky-tack but it didn't hold well enough. I would get the screw into position but it would fall over when the screwdriver touched the screw. For the 24 movement that still has the broken screw end in it, I will try to get that out after I get the lever and screw installed in my working 24. And yes, I will install the crown/stem AFTER I have the lever and screw in place on the plate. Again, thanks for your help- i really appreciate it!!! Will let you know when I get things back together.1 point
-
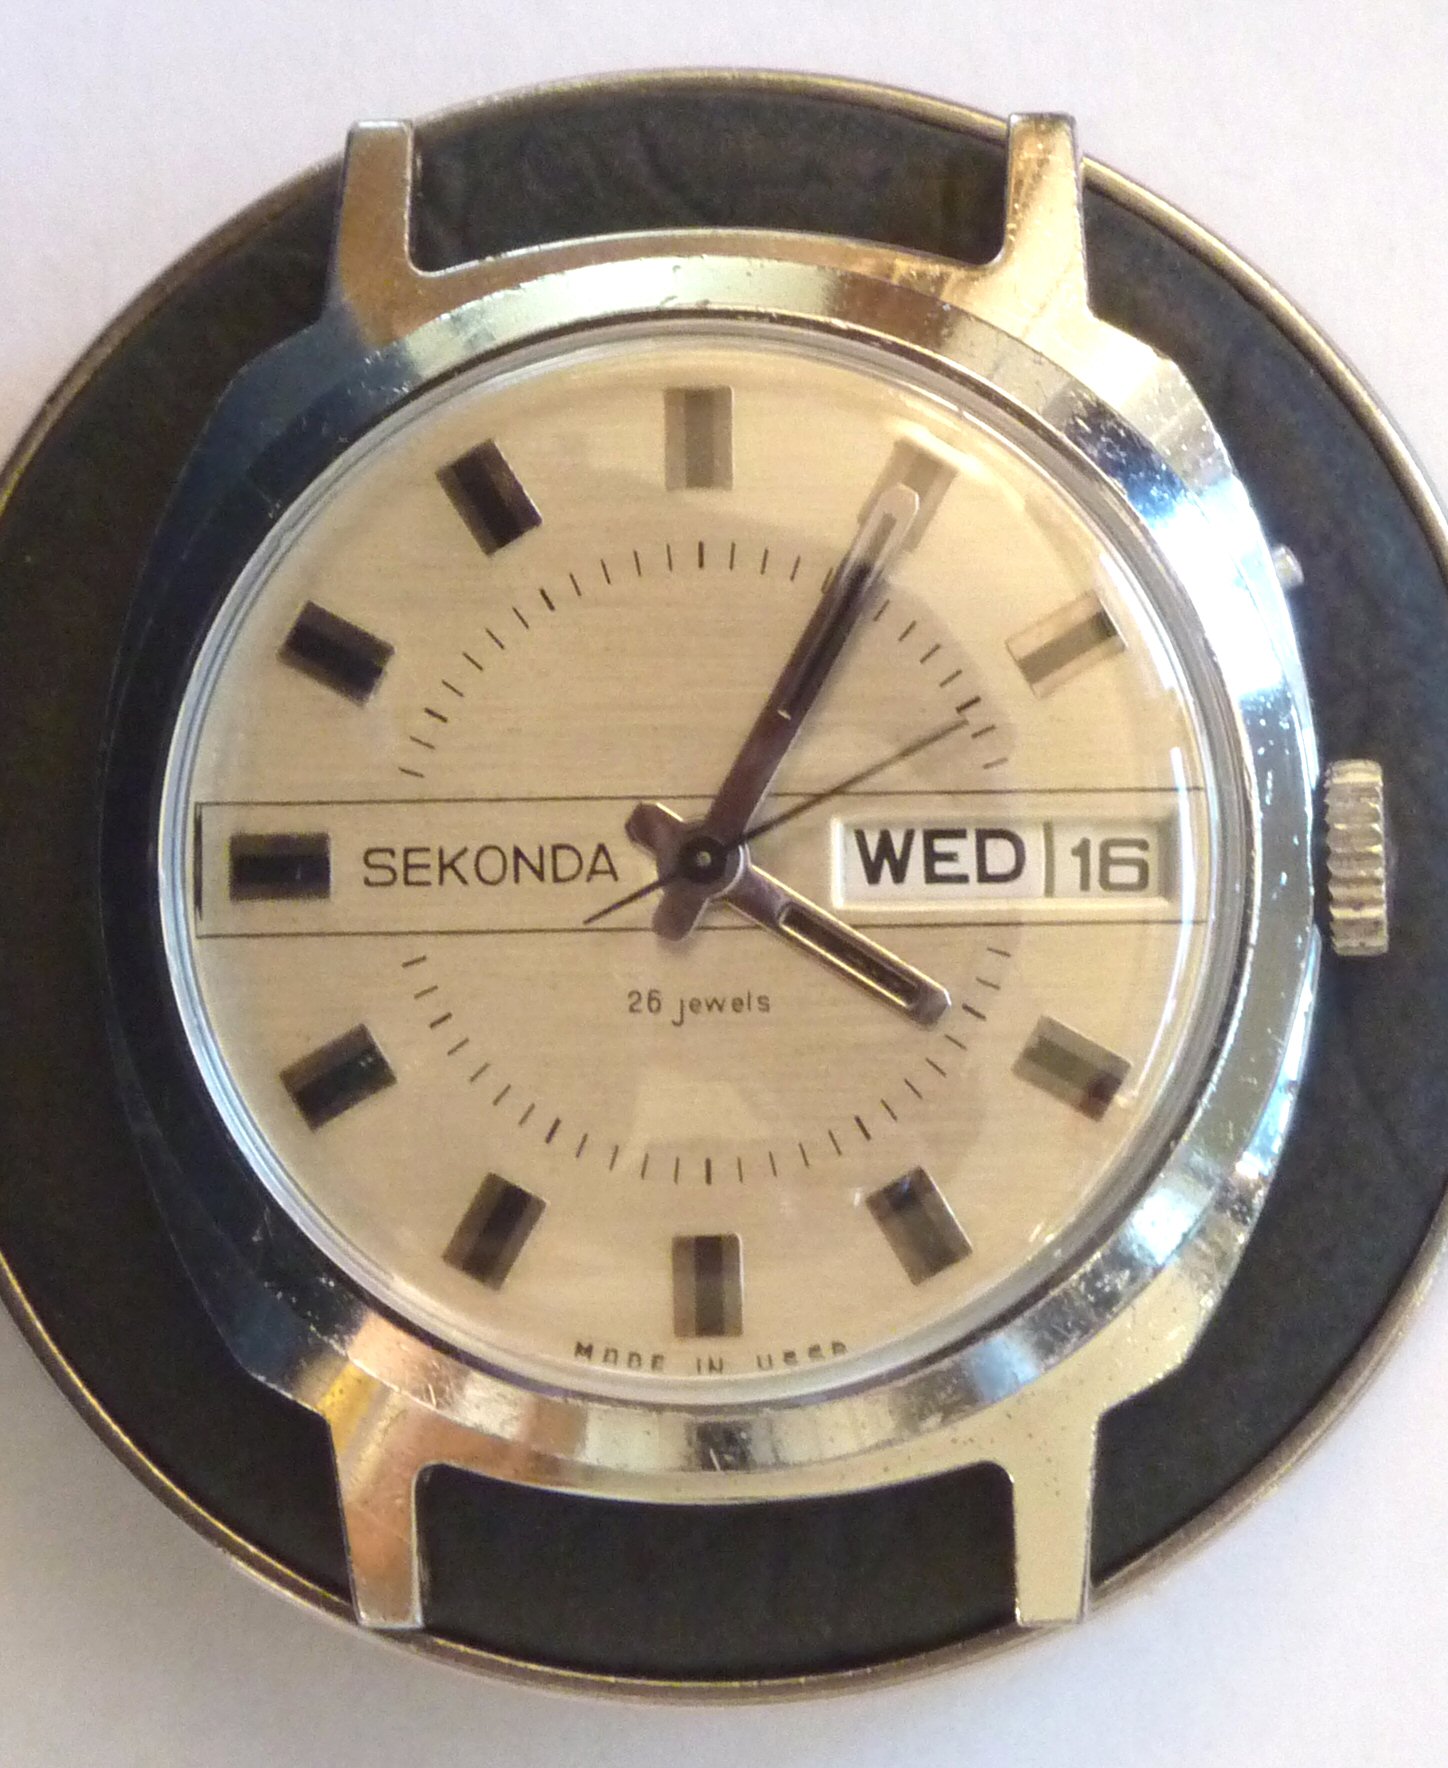
You may be interested in this one.... I believe it's the day/date version of the 2414. Great fun1 point
-
I use lighter fluid or 99% alcohol. But do not use these in a ultrasonic if you purchase one. Watch marks videos on dismantling and assembling. Obviously an ultrasonic and good cleaner for it, are better choices, but as you are learning, they do just a good job.1 point
-
most times the broken screw will be accessbile from the dial side of the movement. I use a pair of fine tipped diaginal cutters to grasp the screw and slowly turn it out of the hole. TIP - Apply some watch grease to the bottom of the set lever to hold it in place. Line up the holes and with tweezers, drop the set screw into place. The turn the screw about 2.5 turns.1 point
-
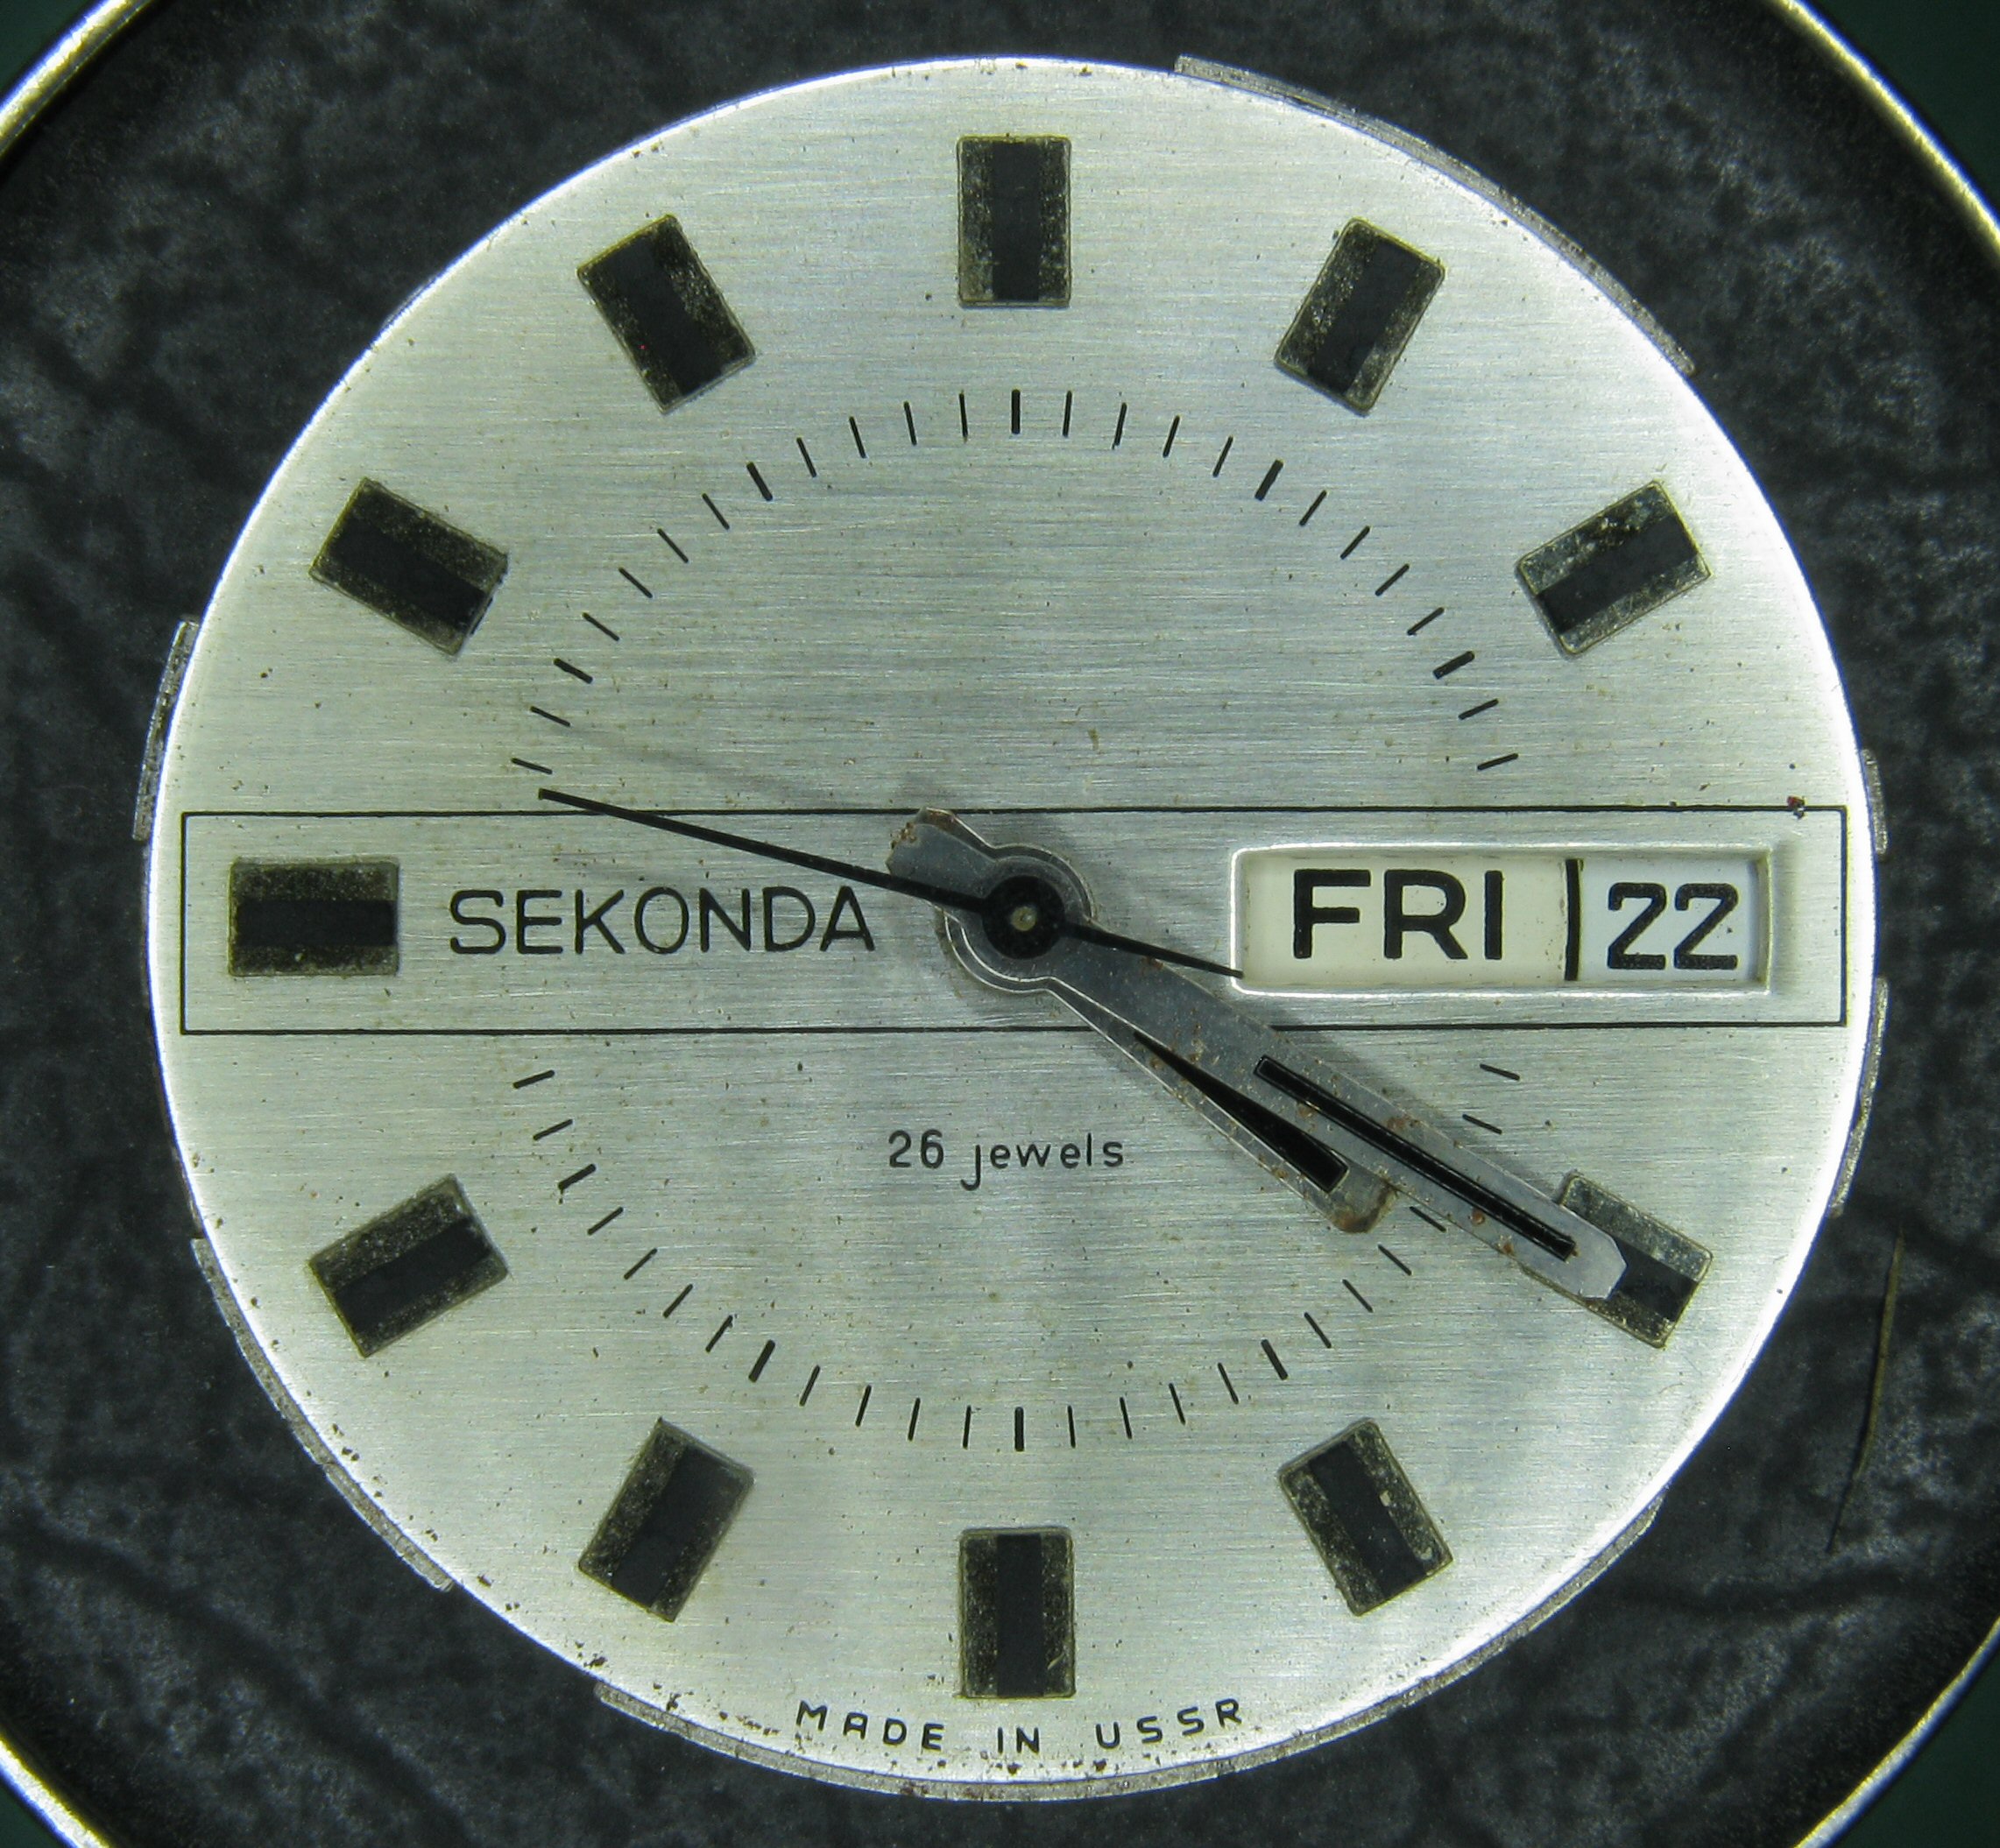
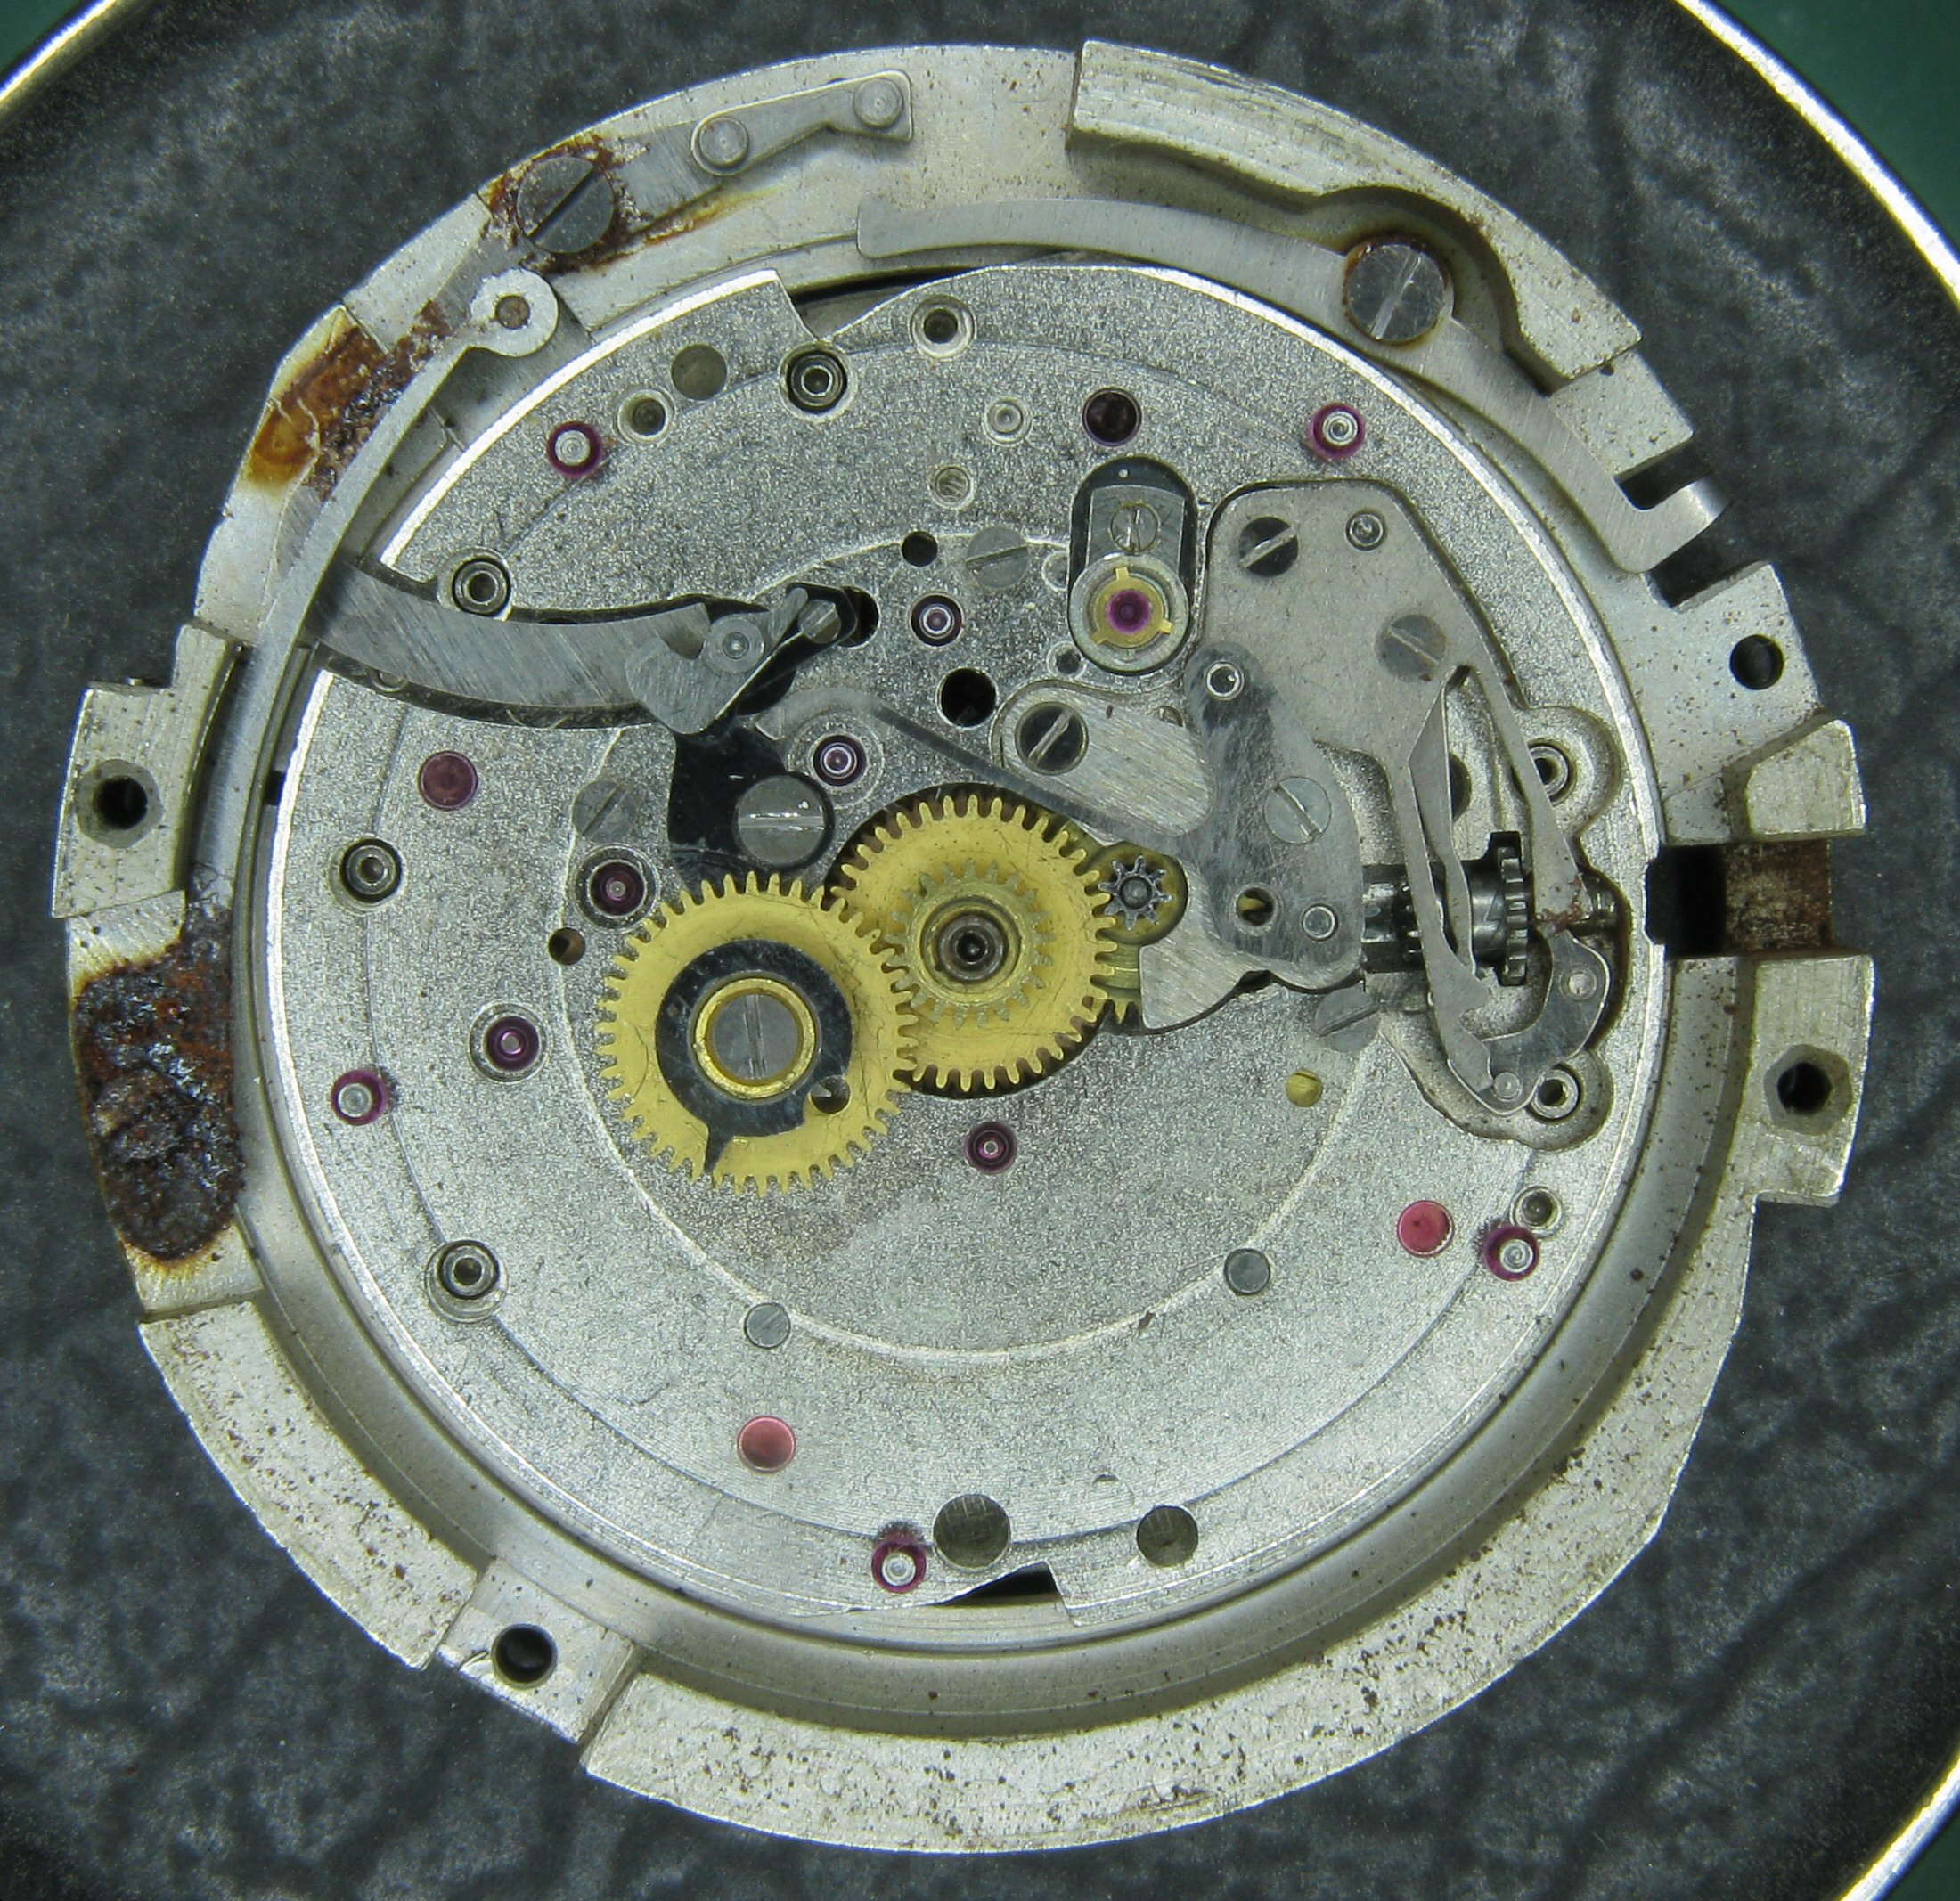
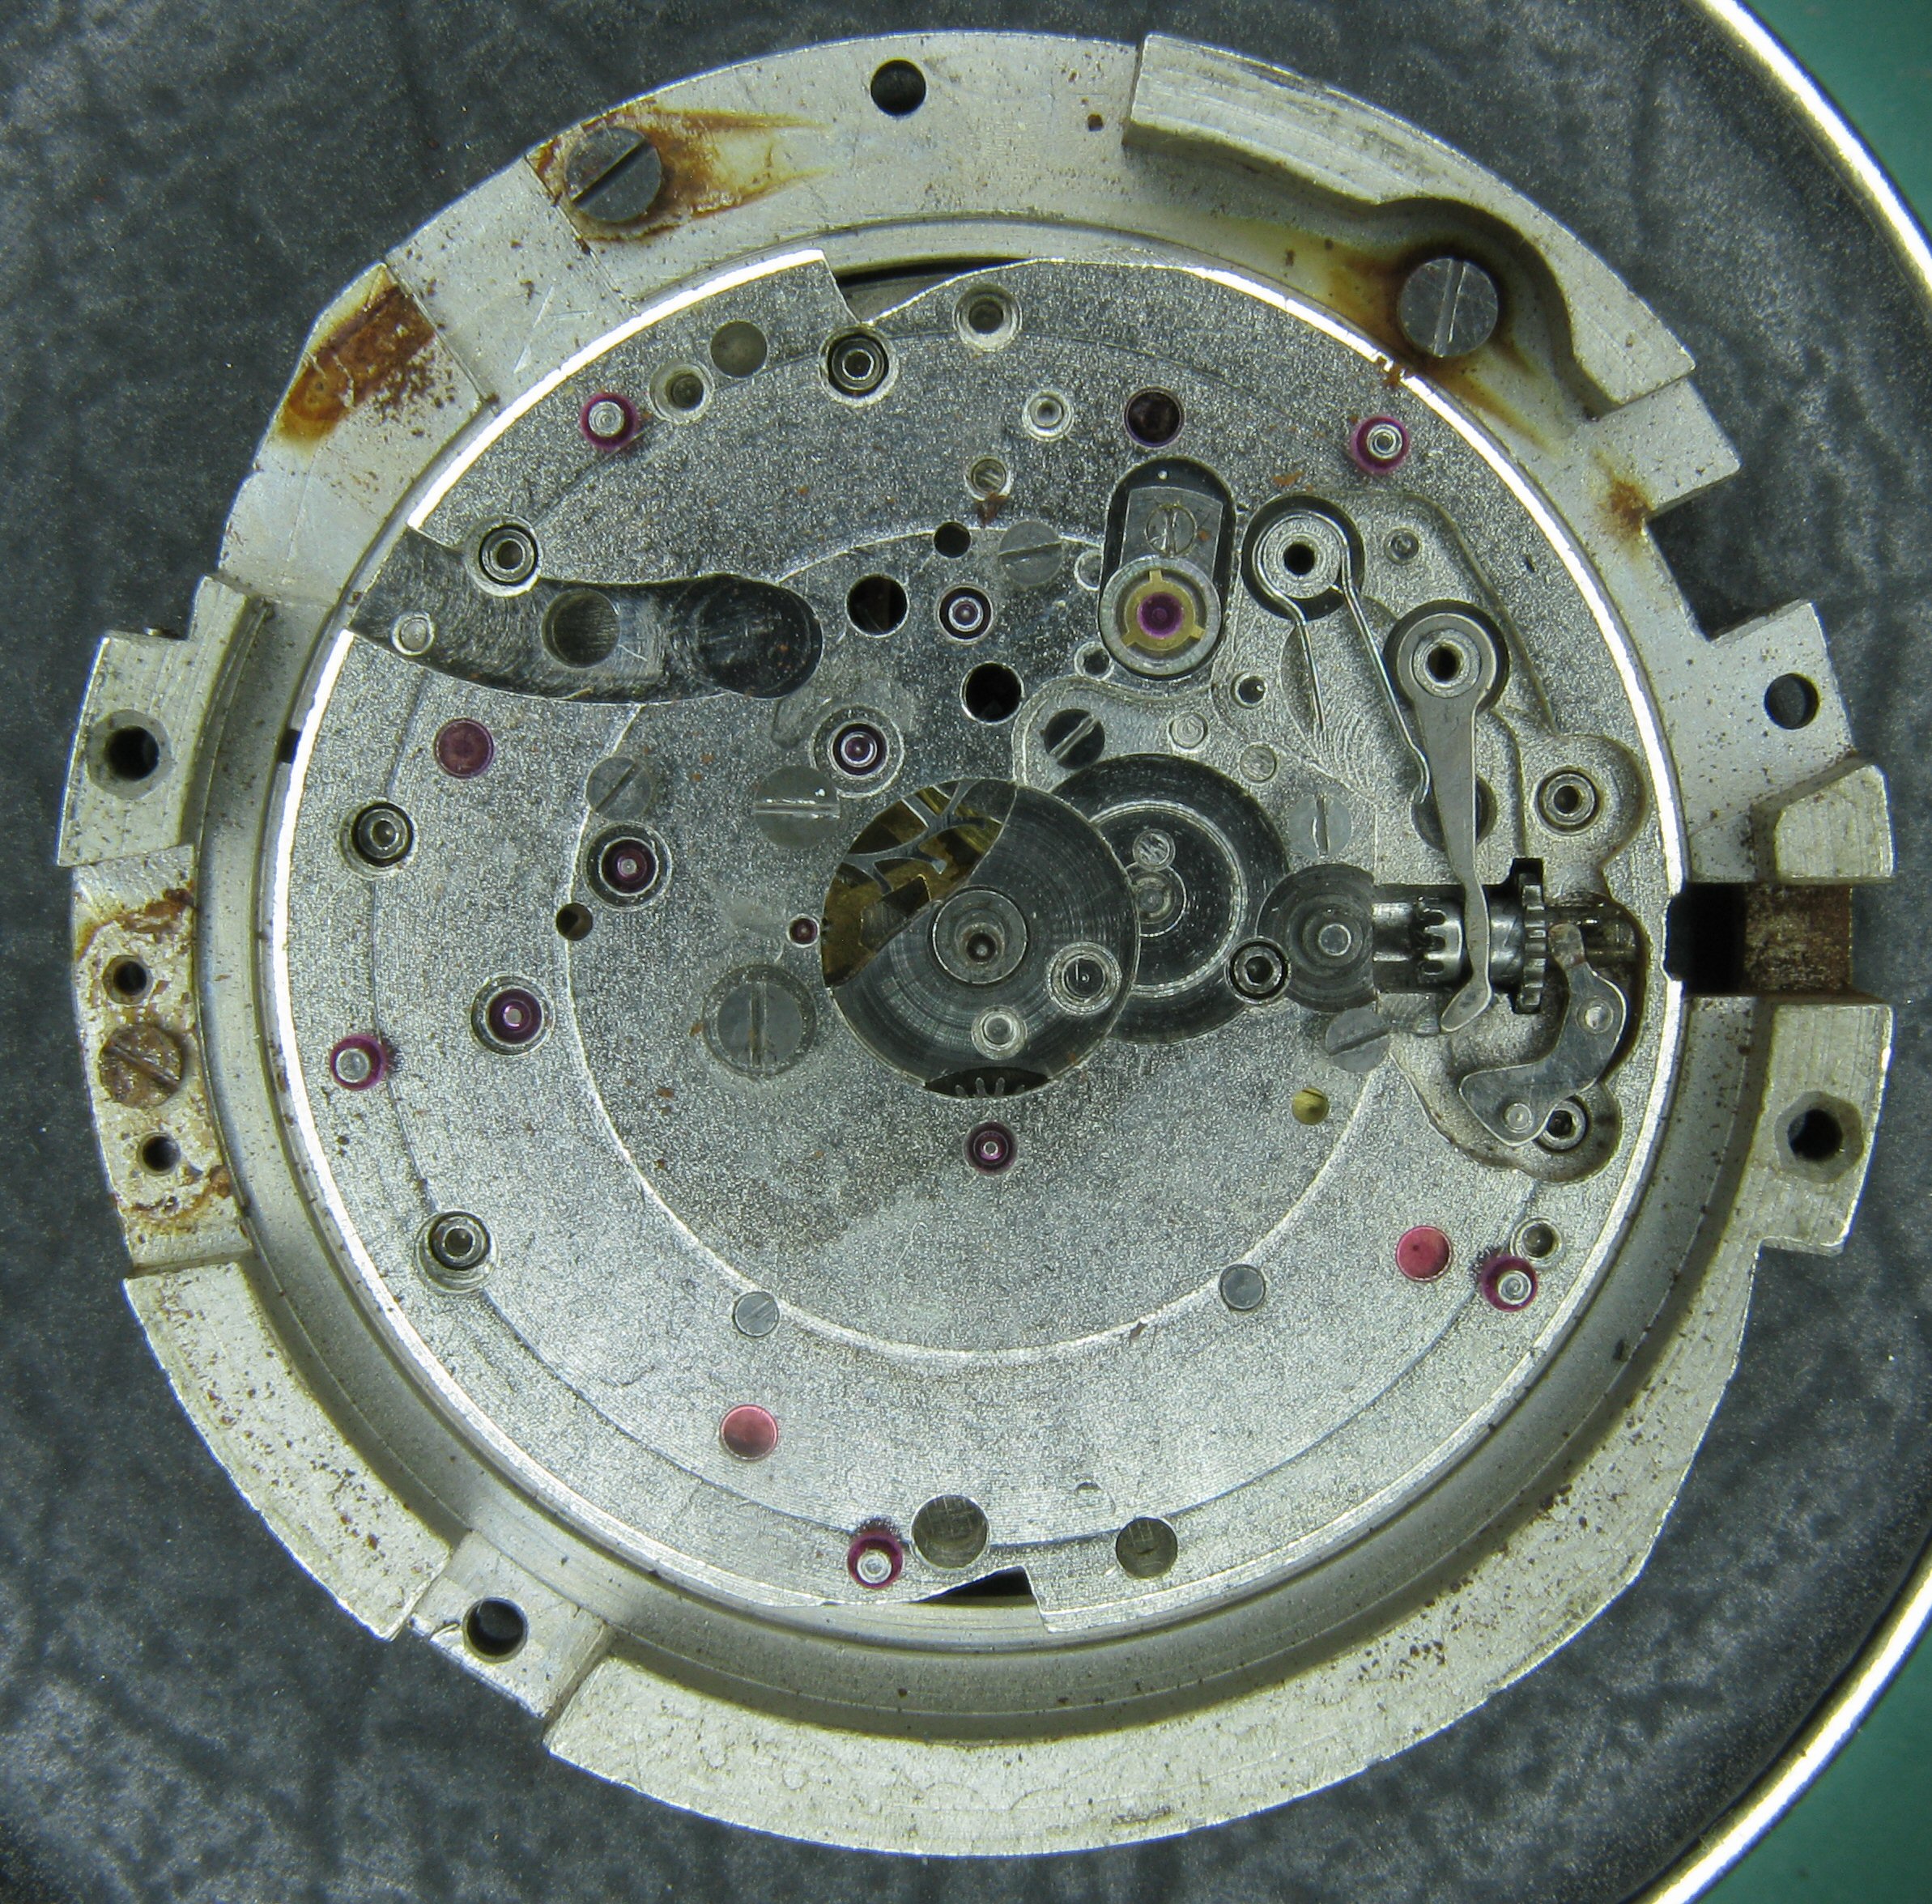
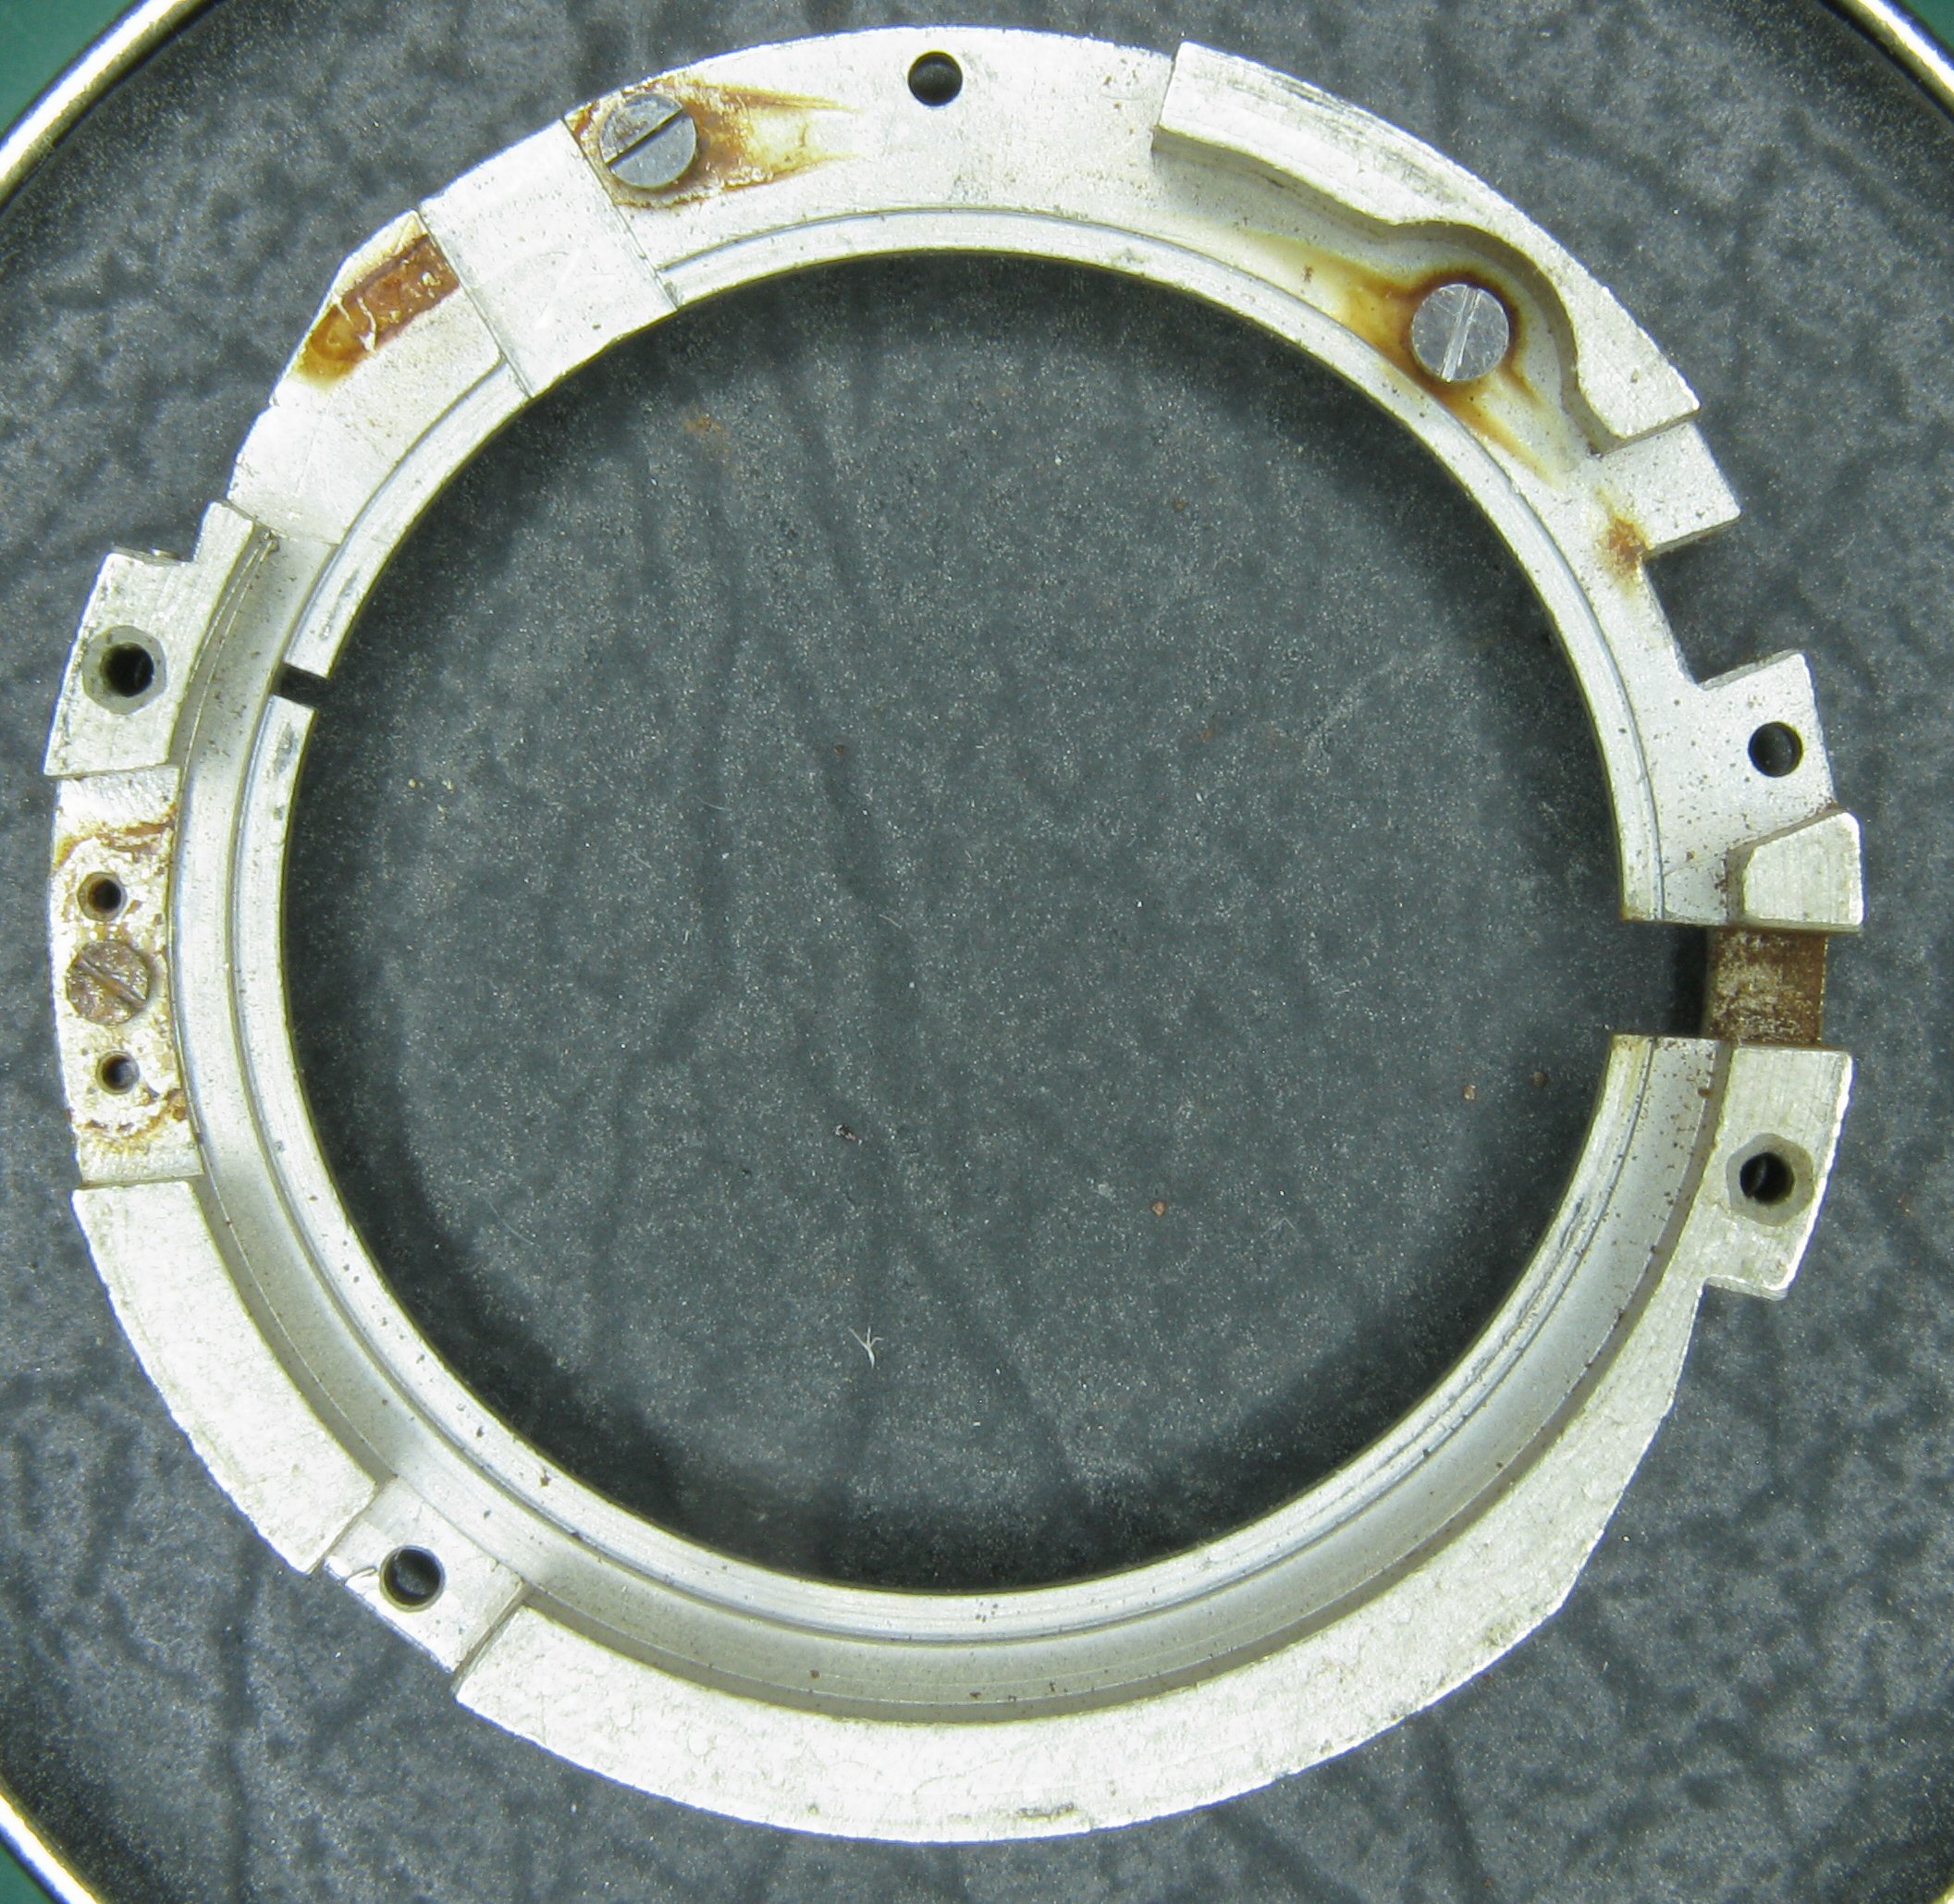
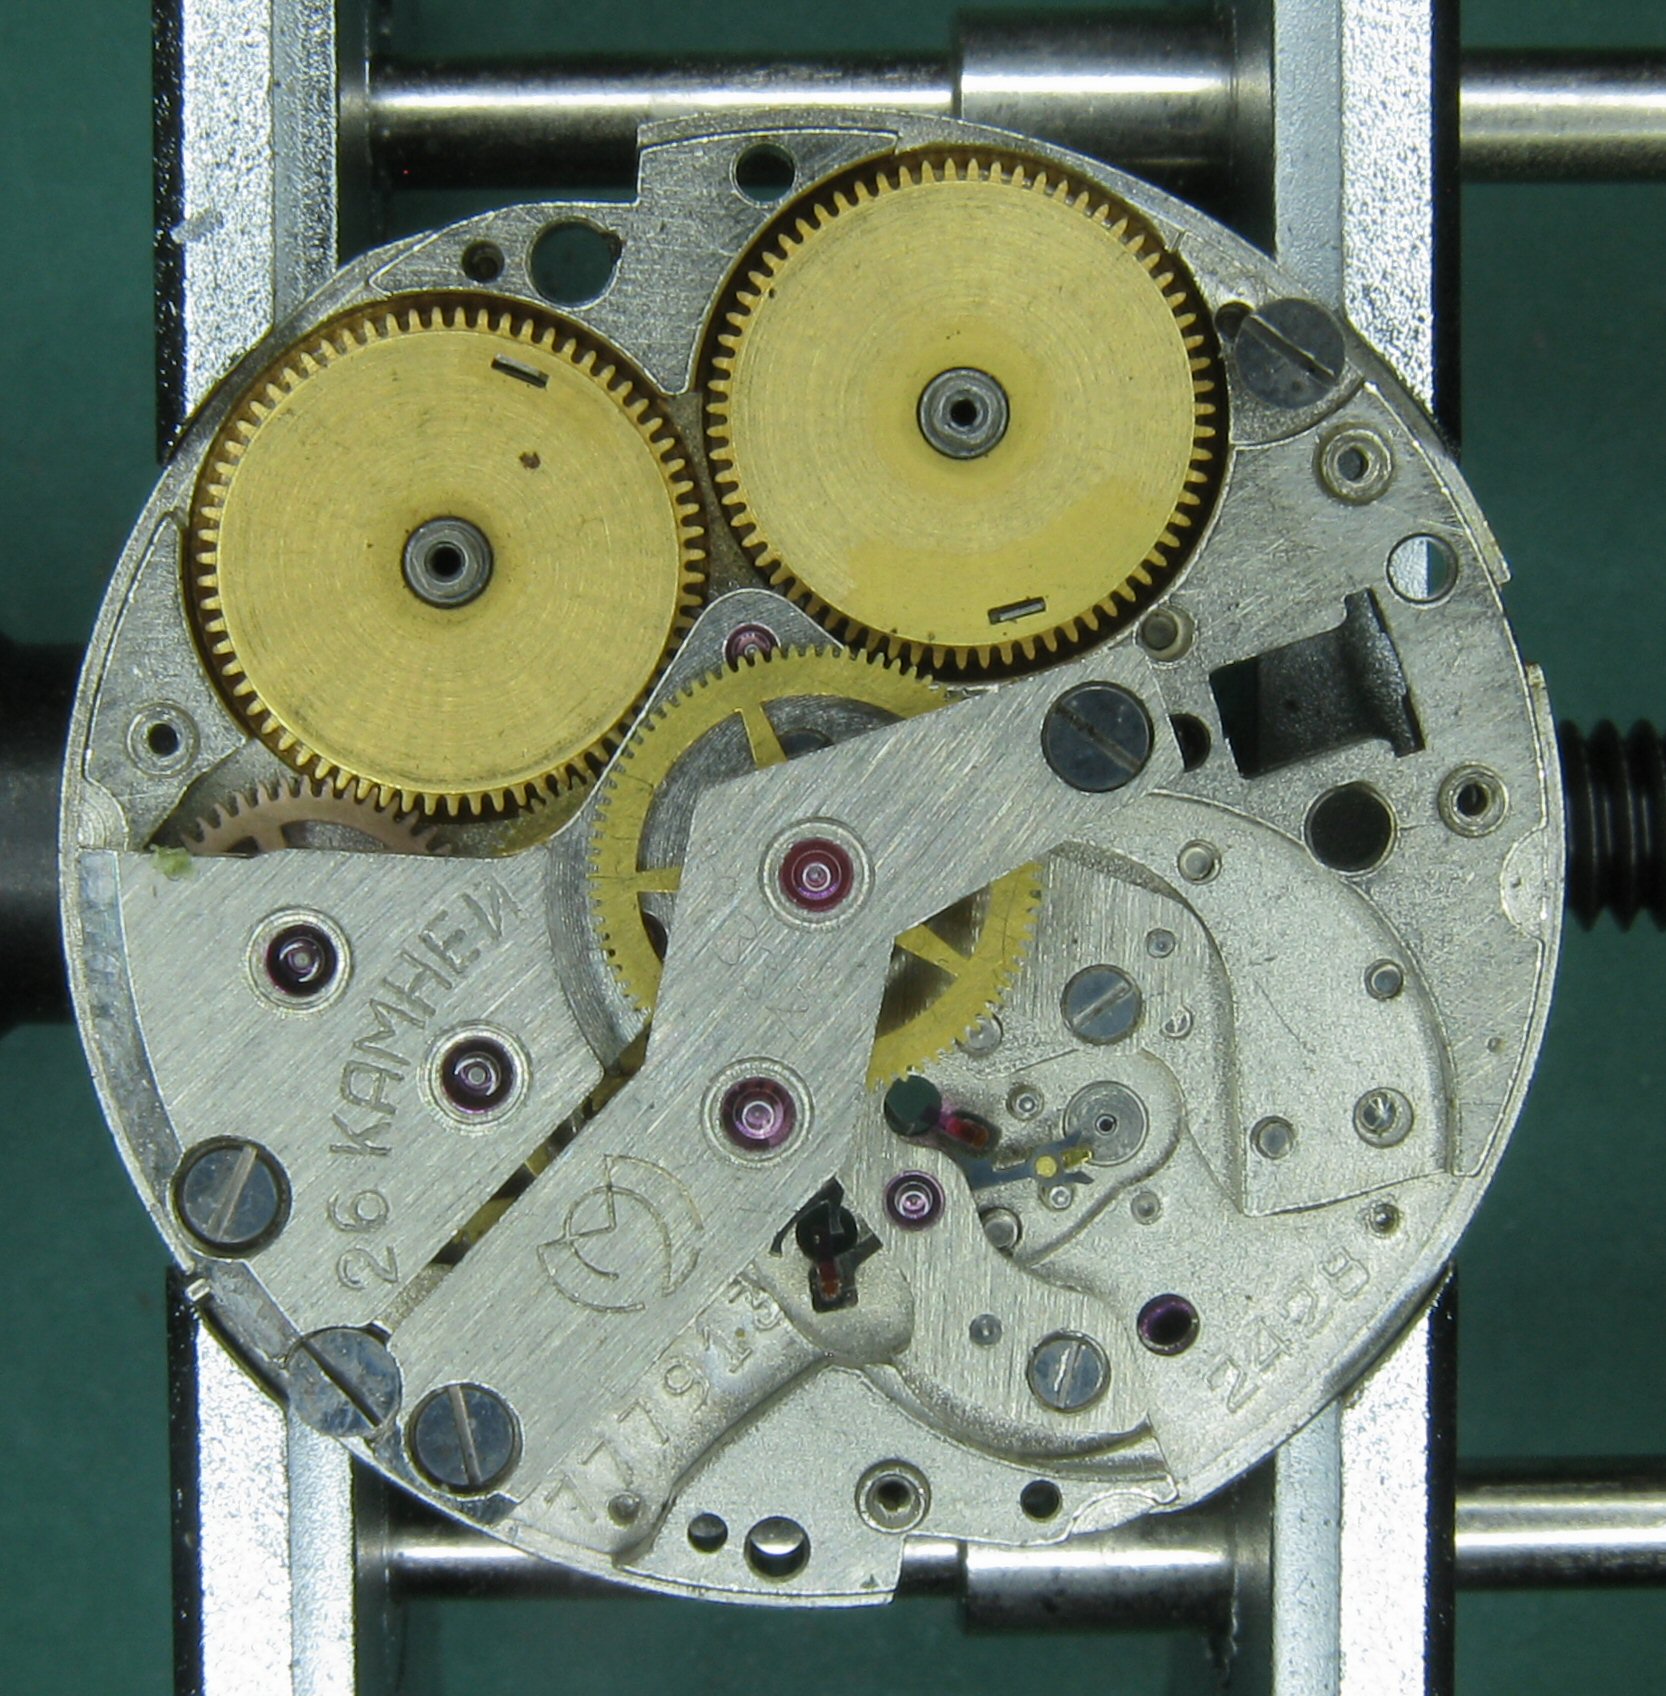
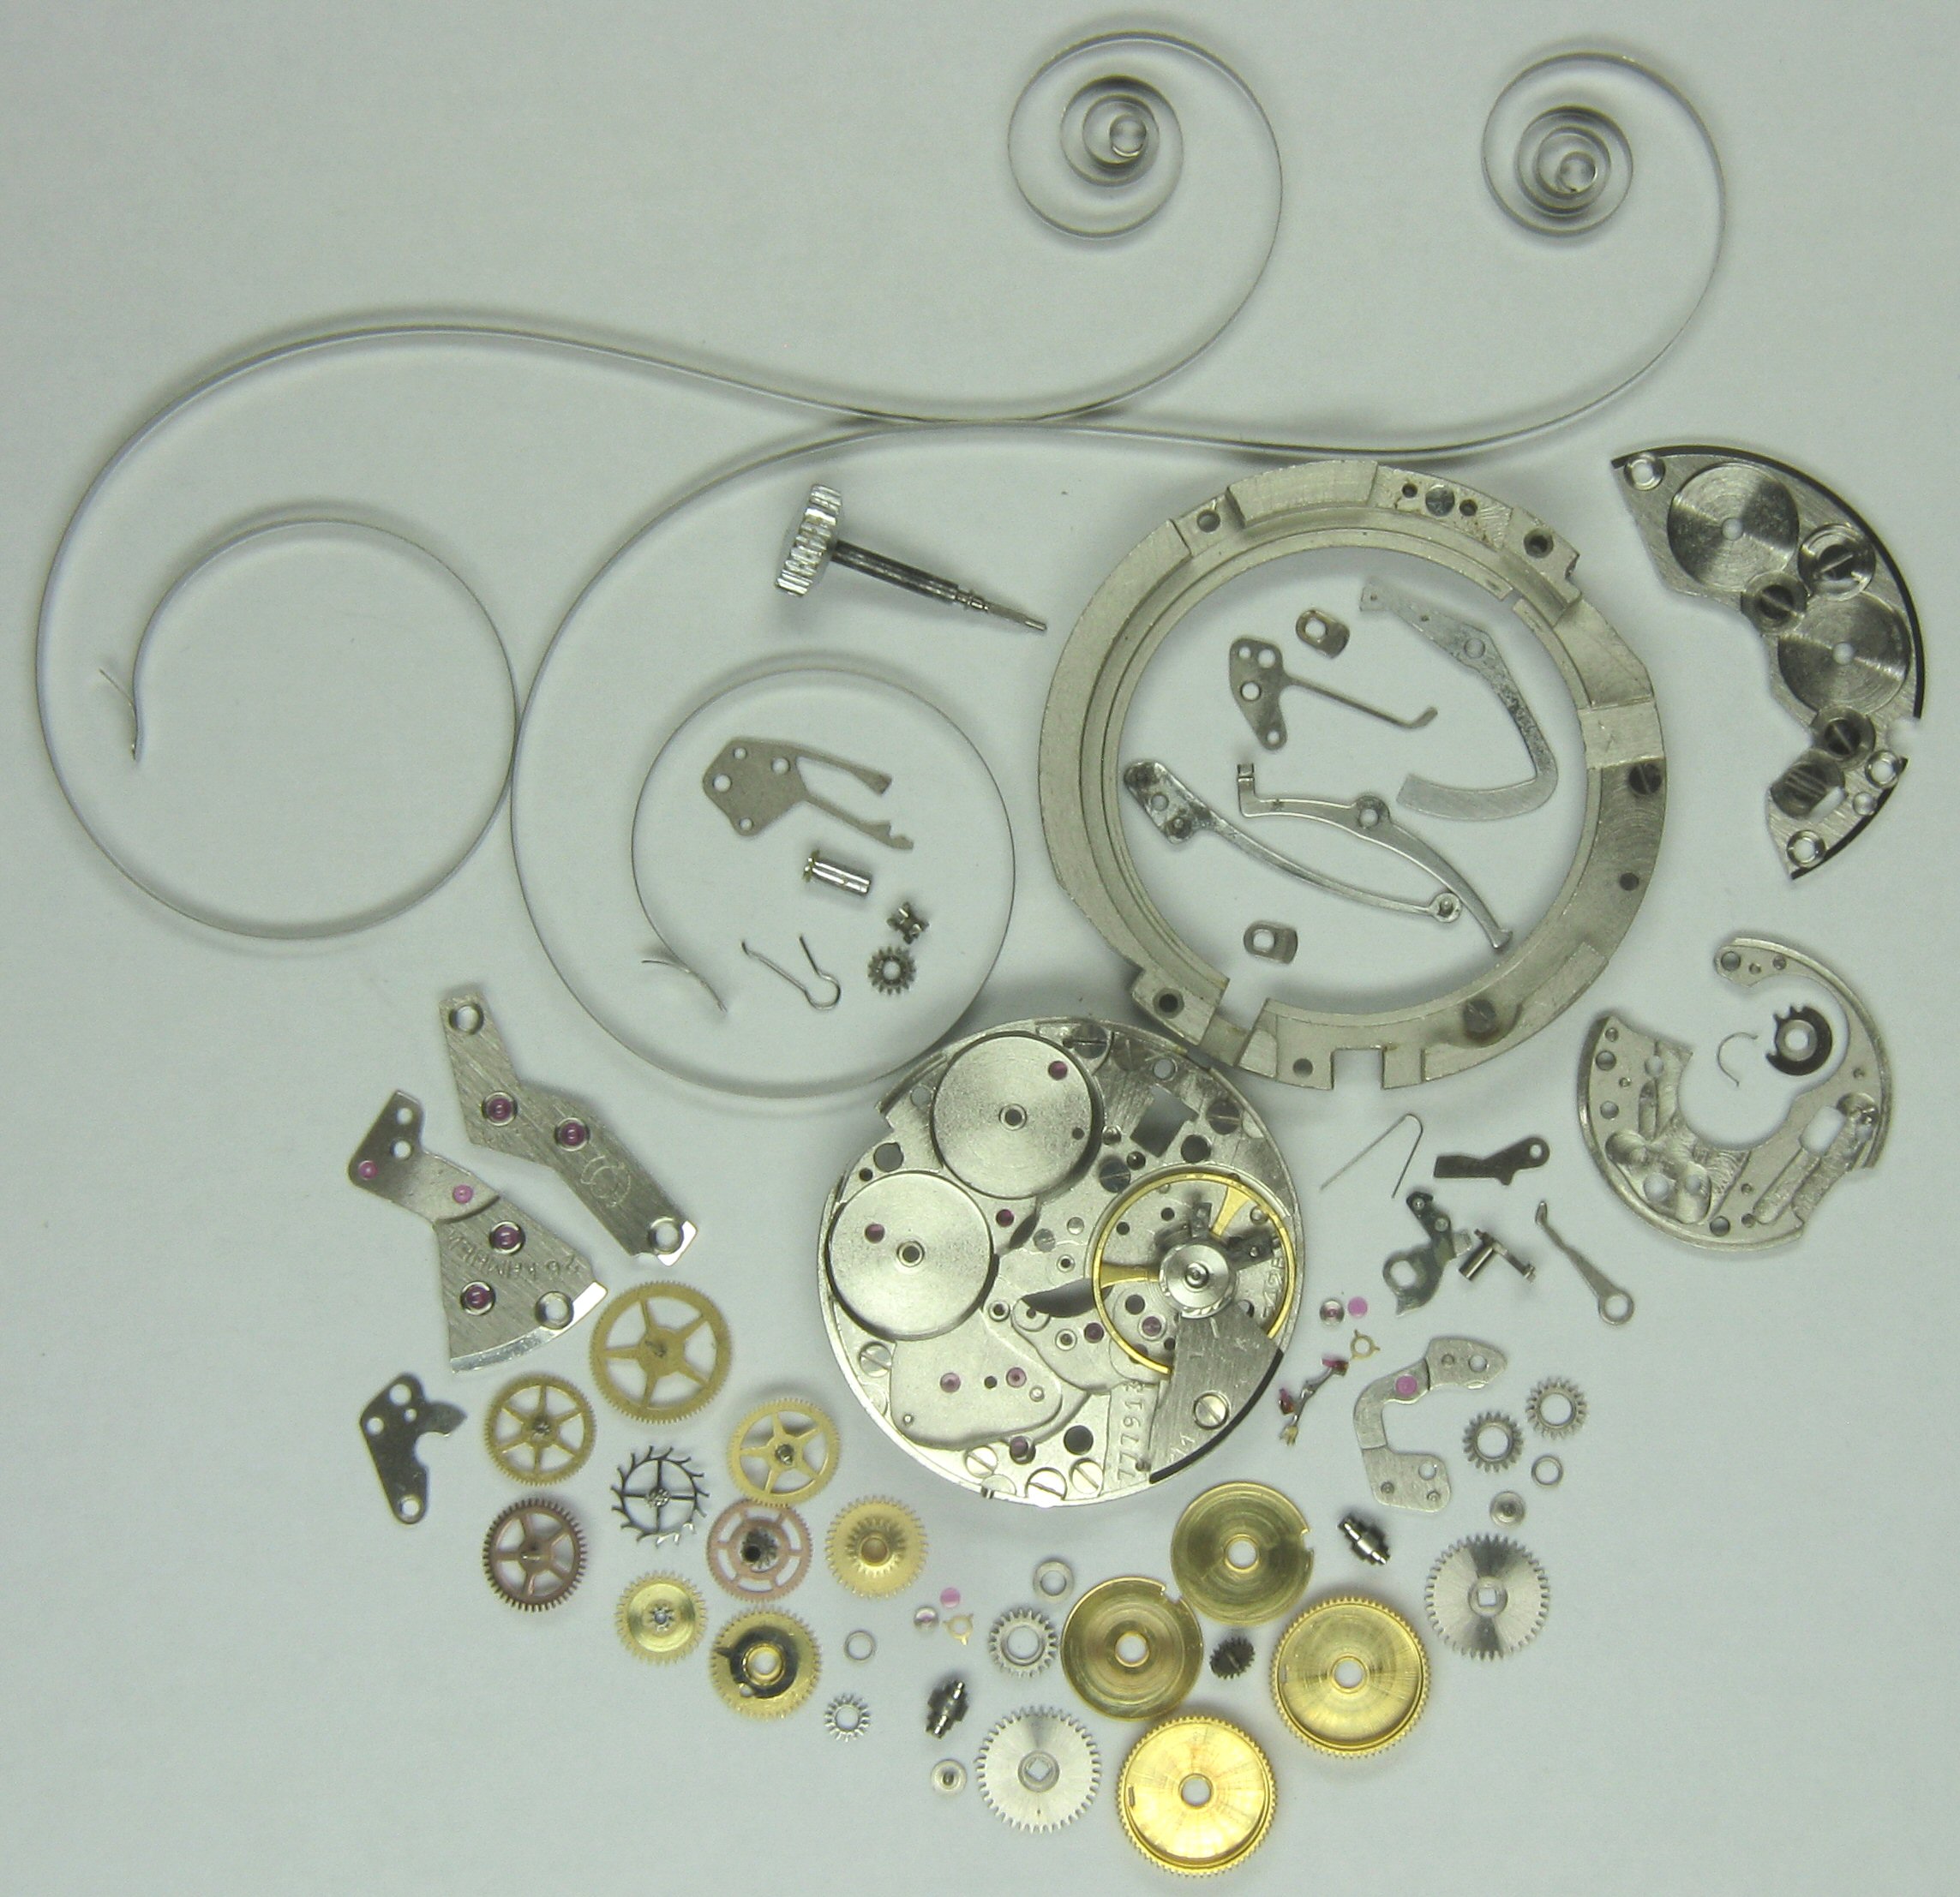
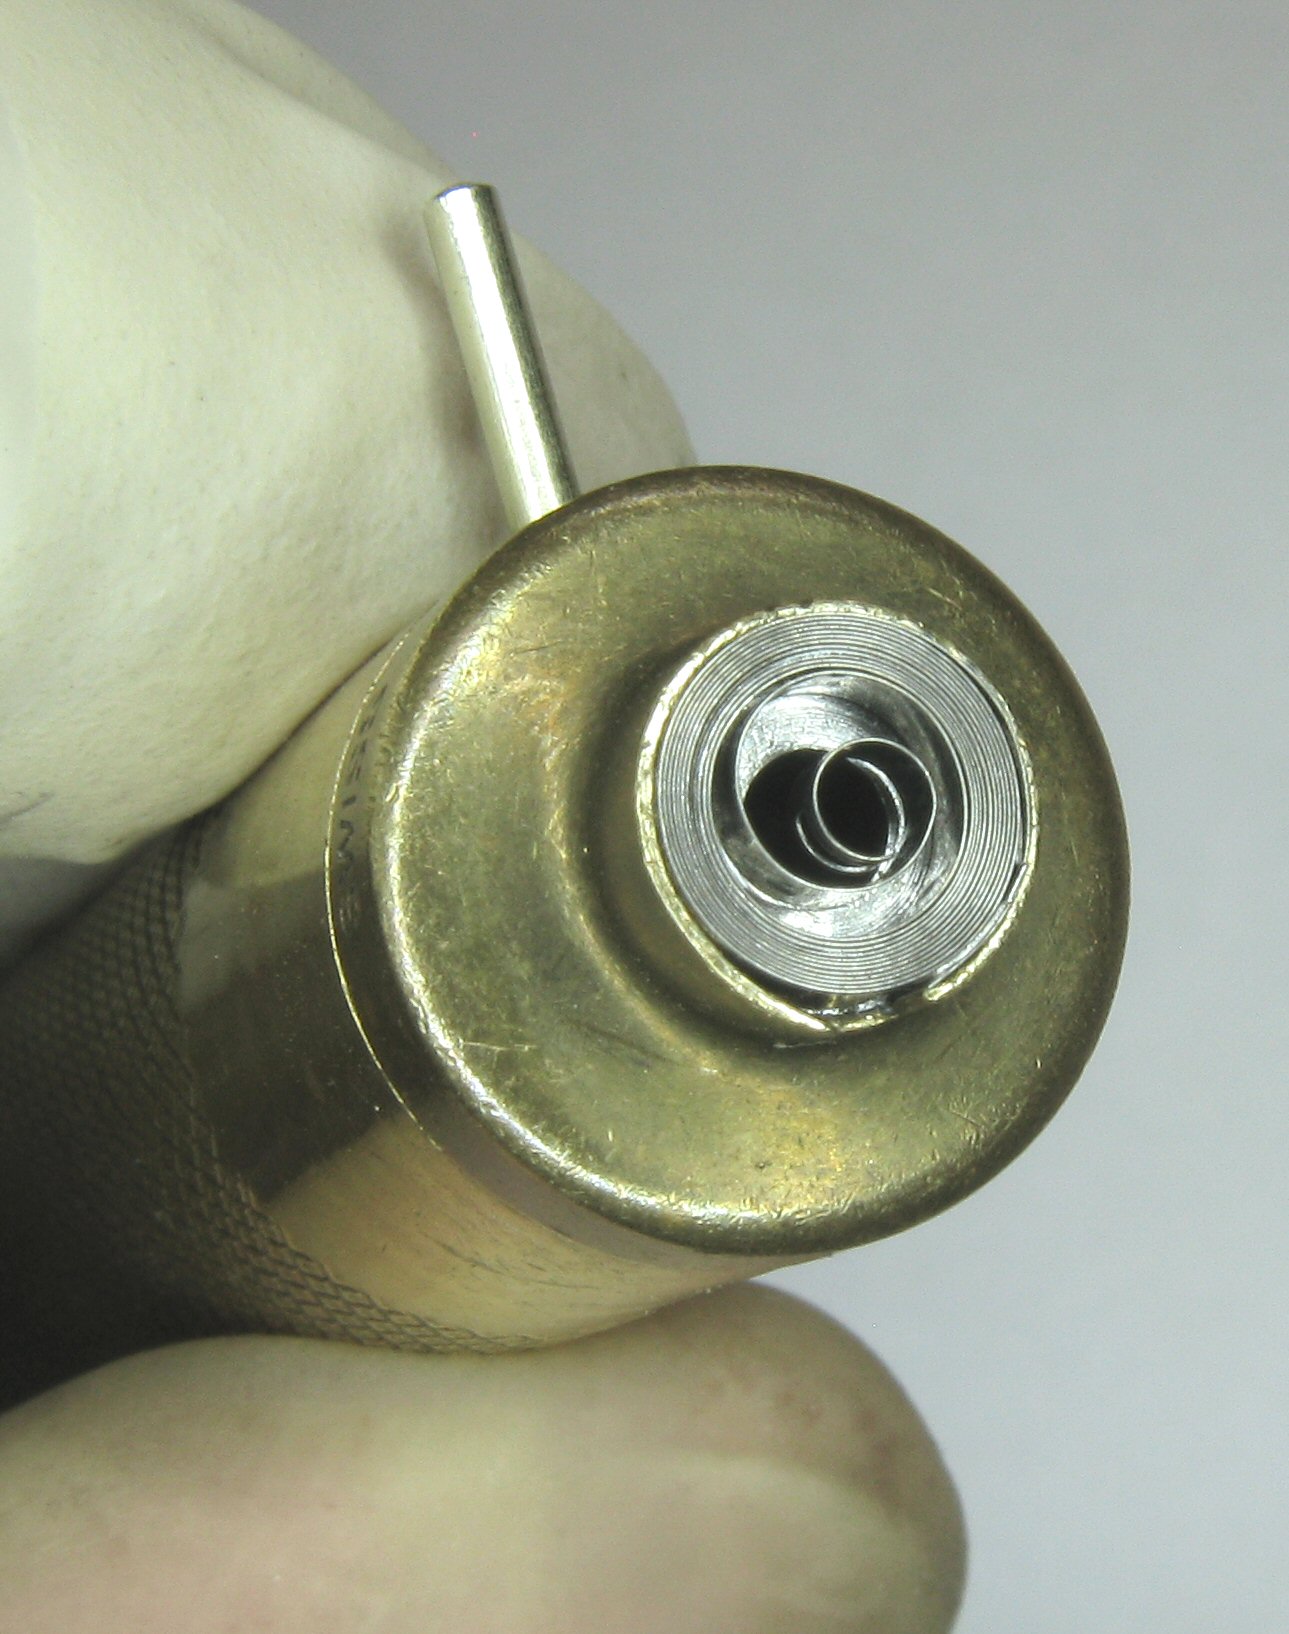
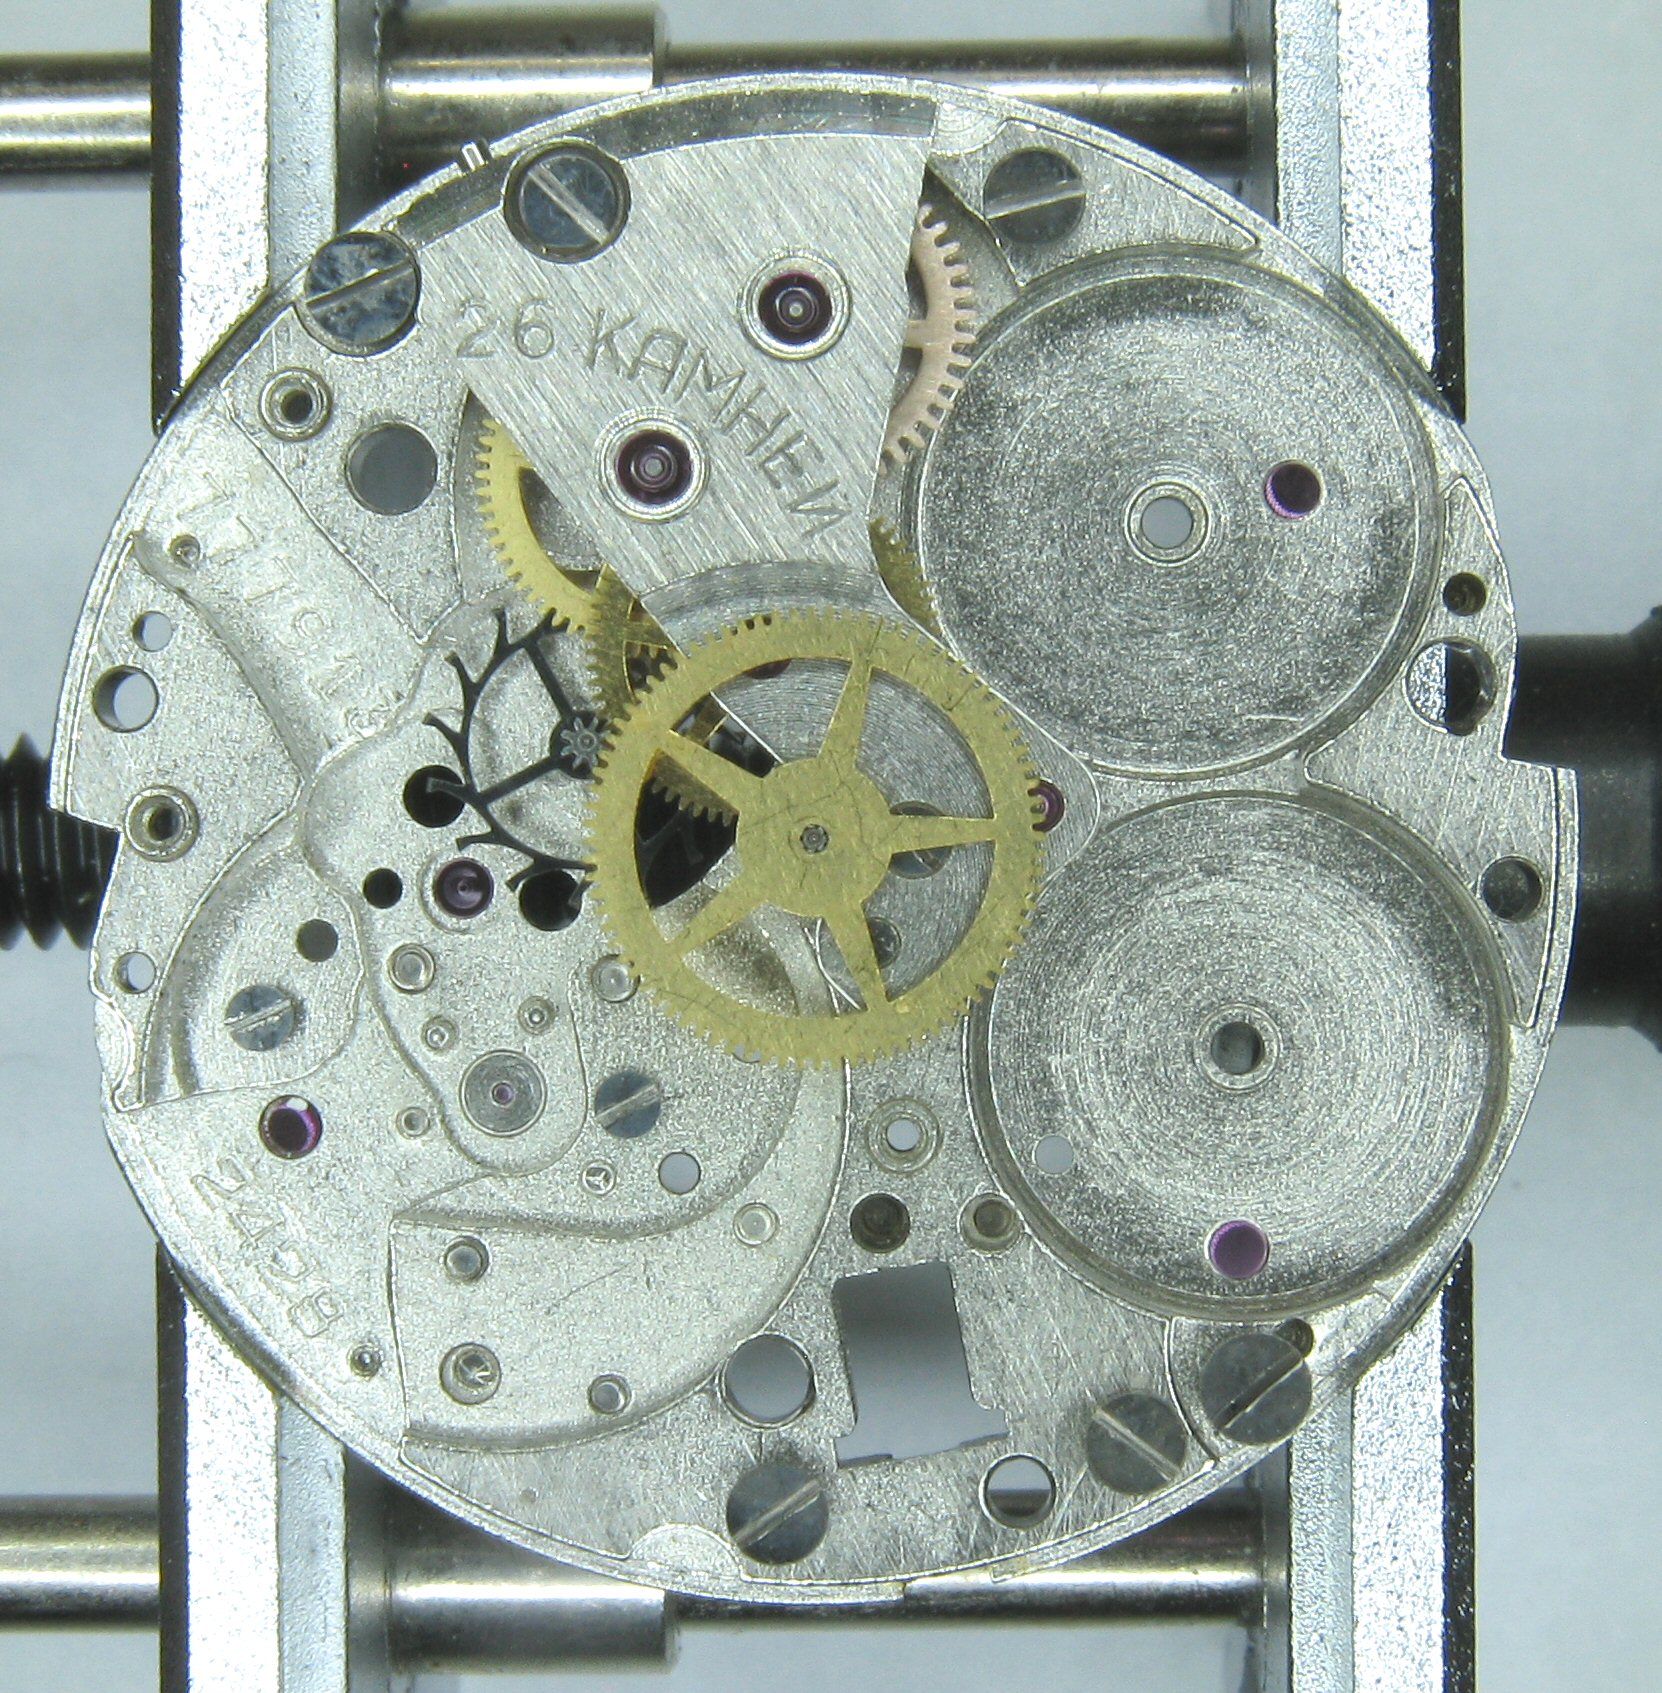
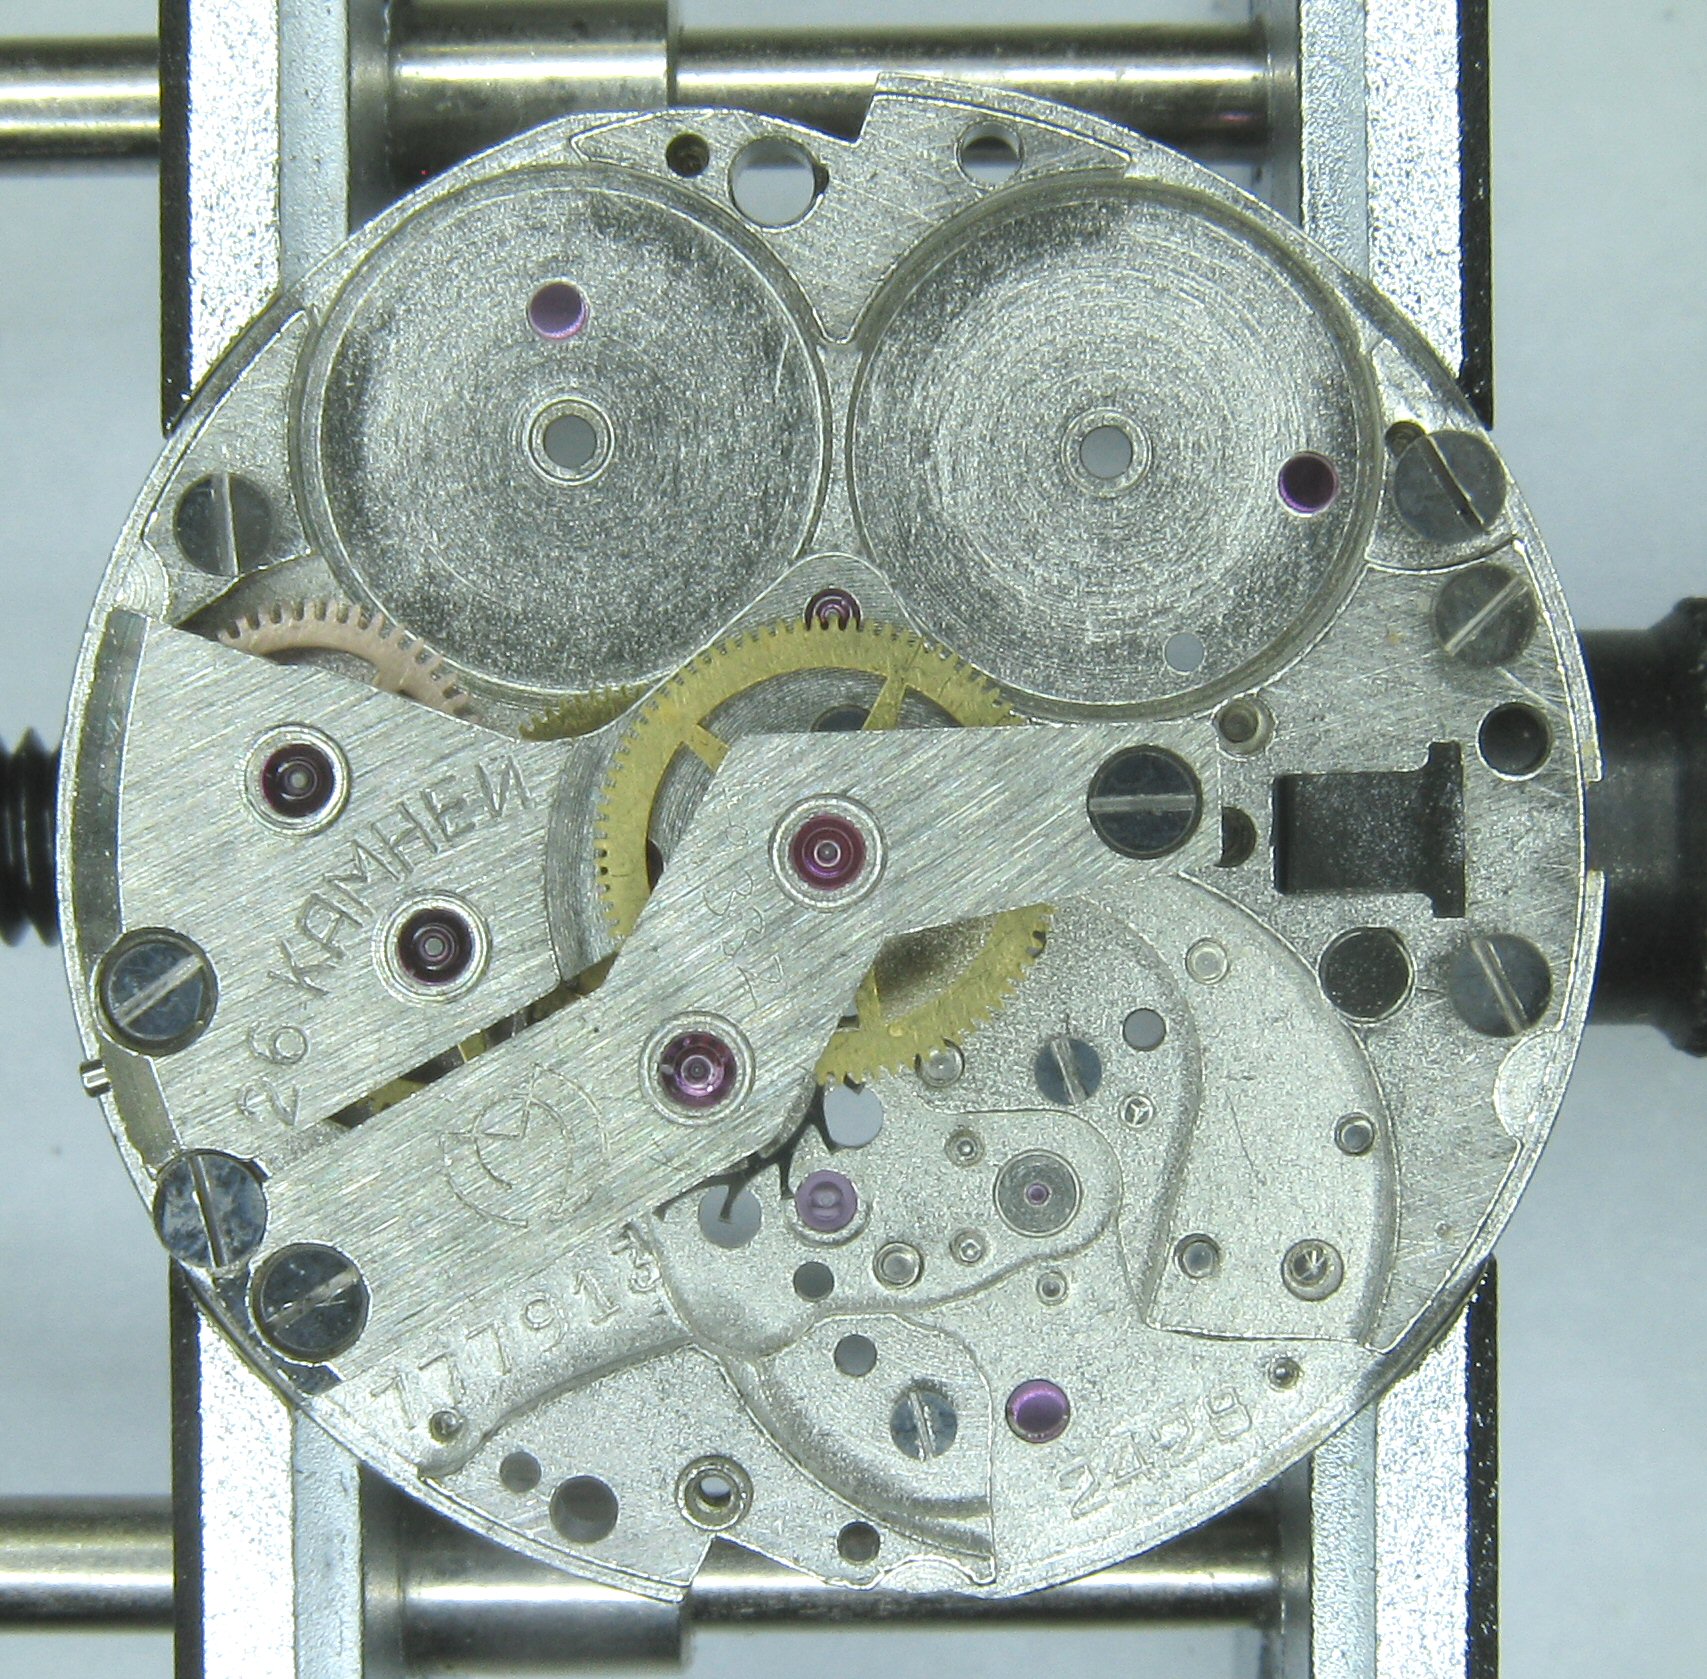
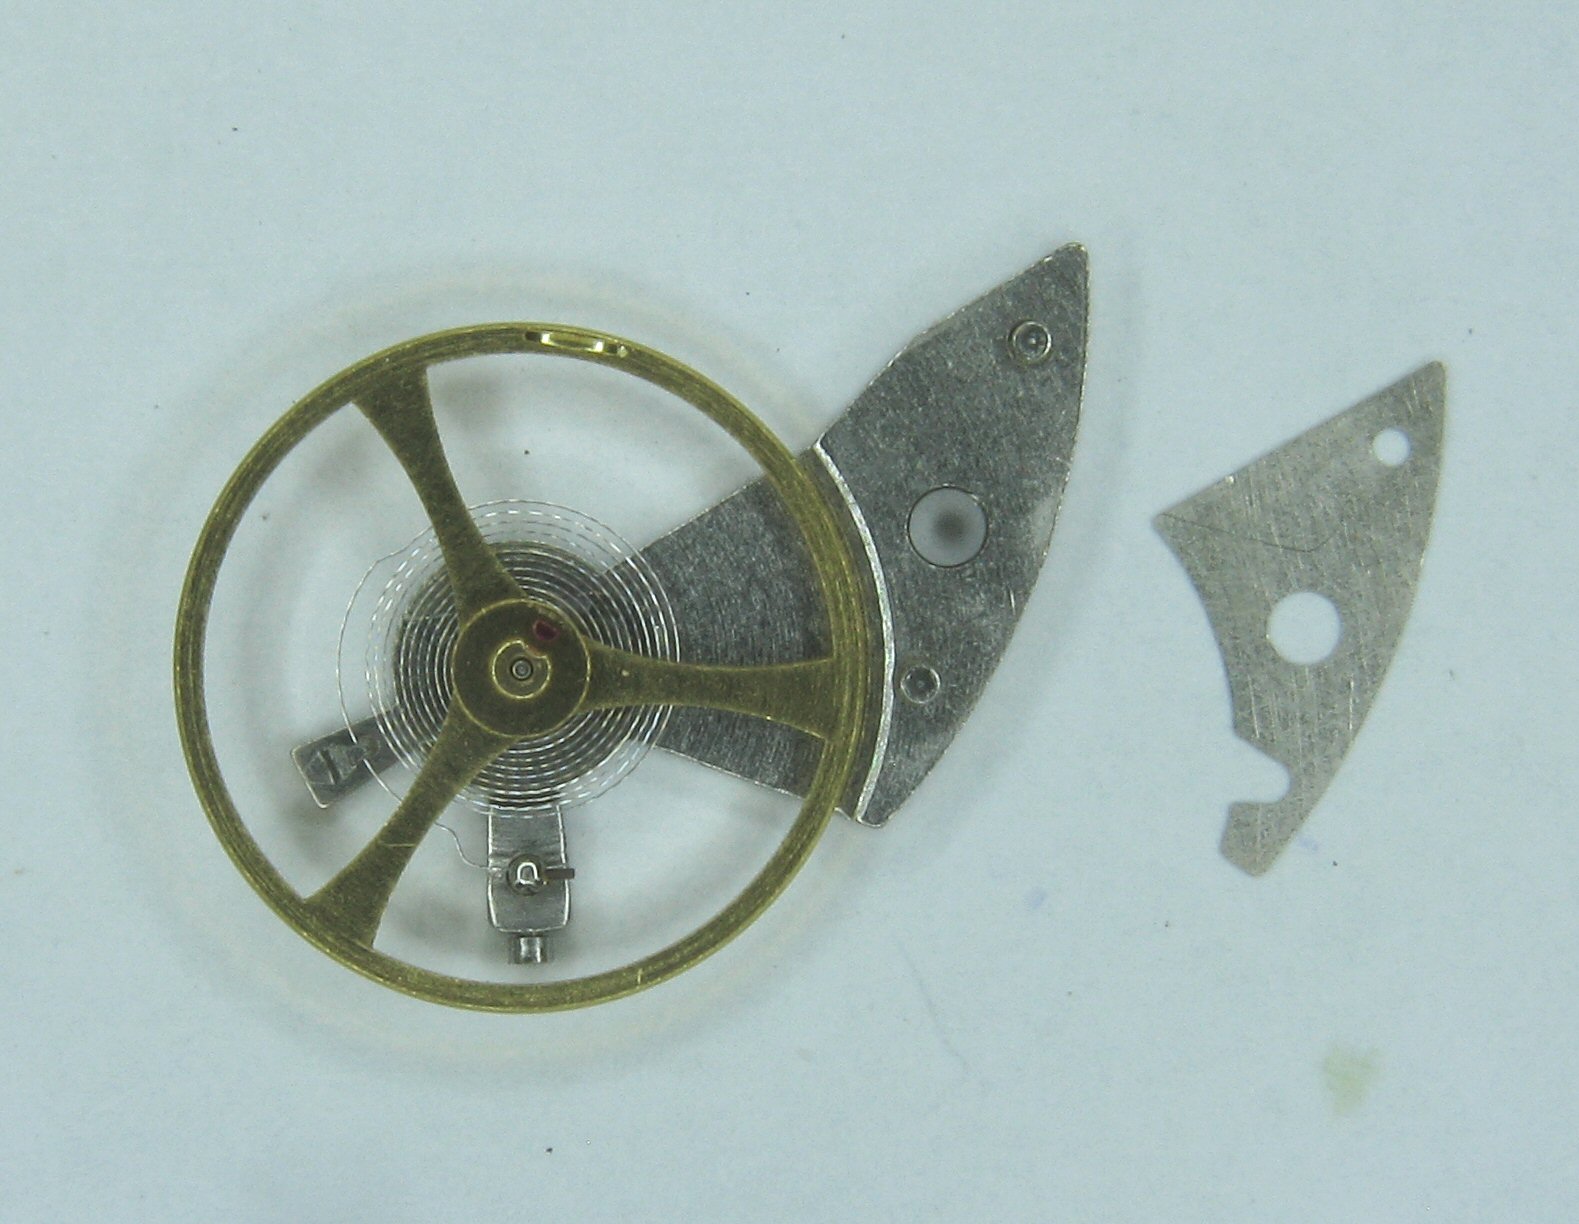
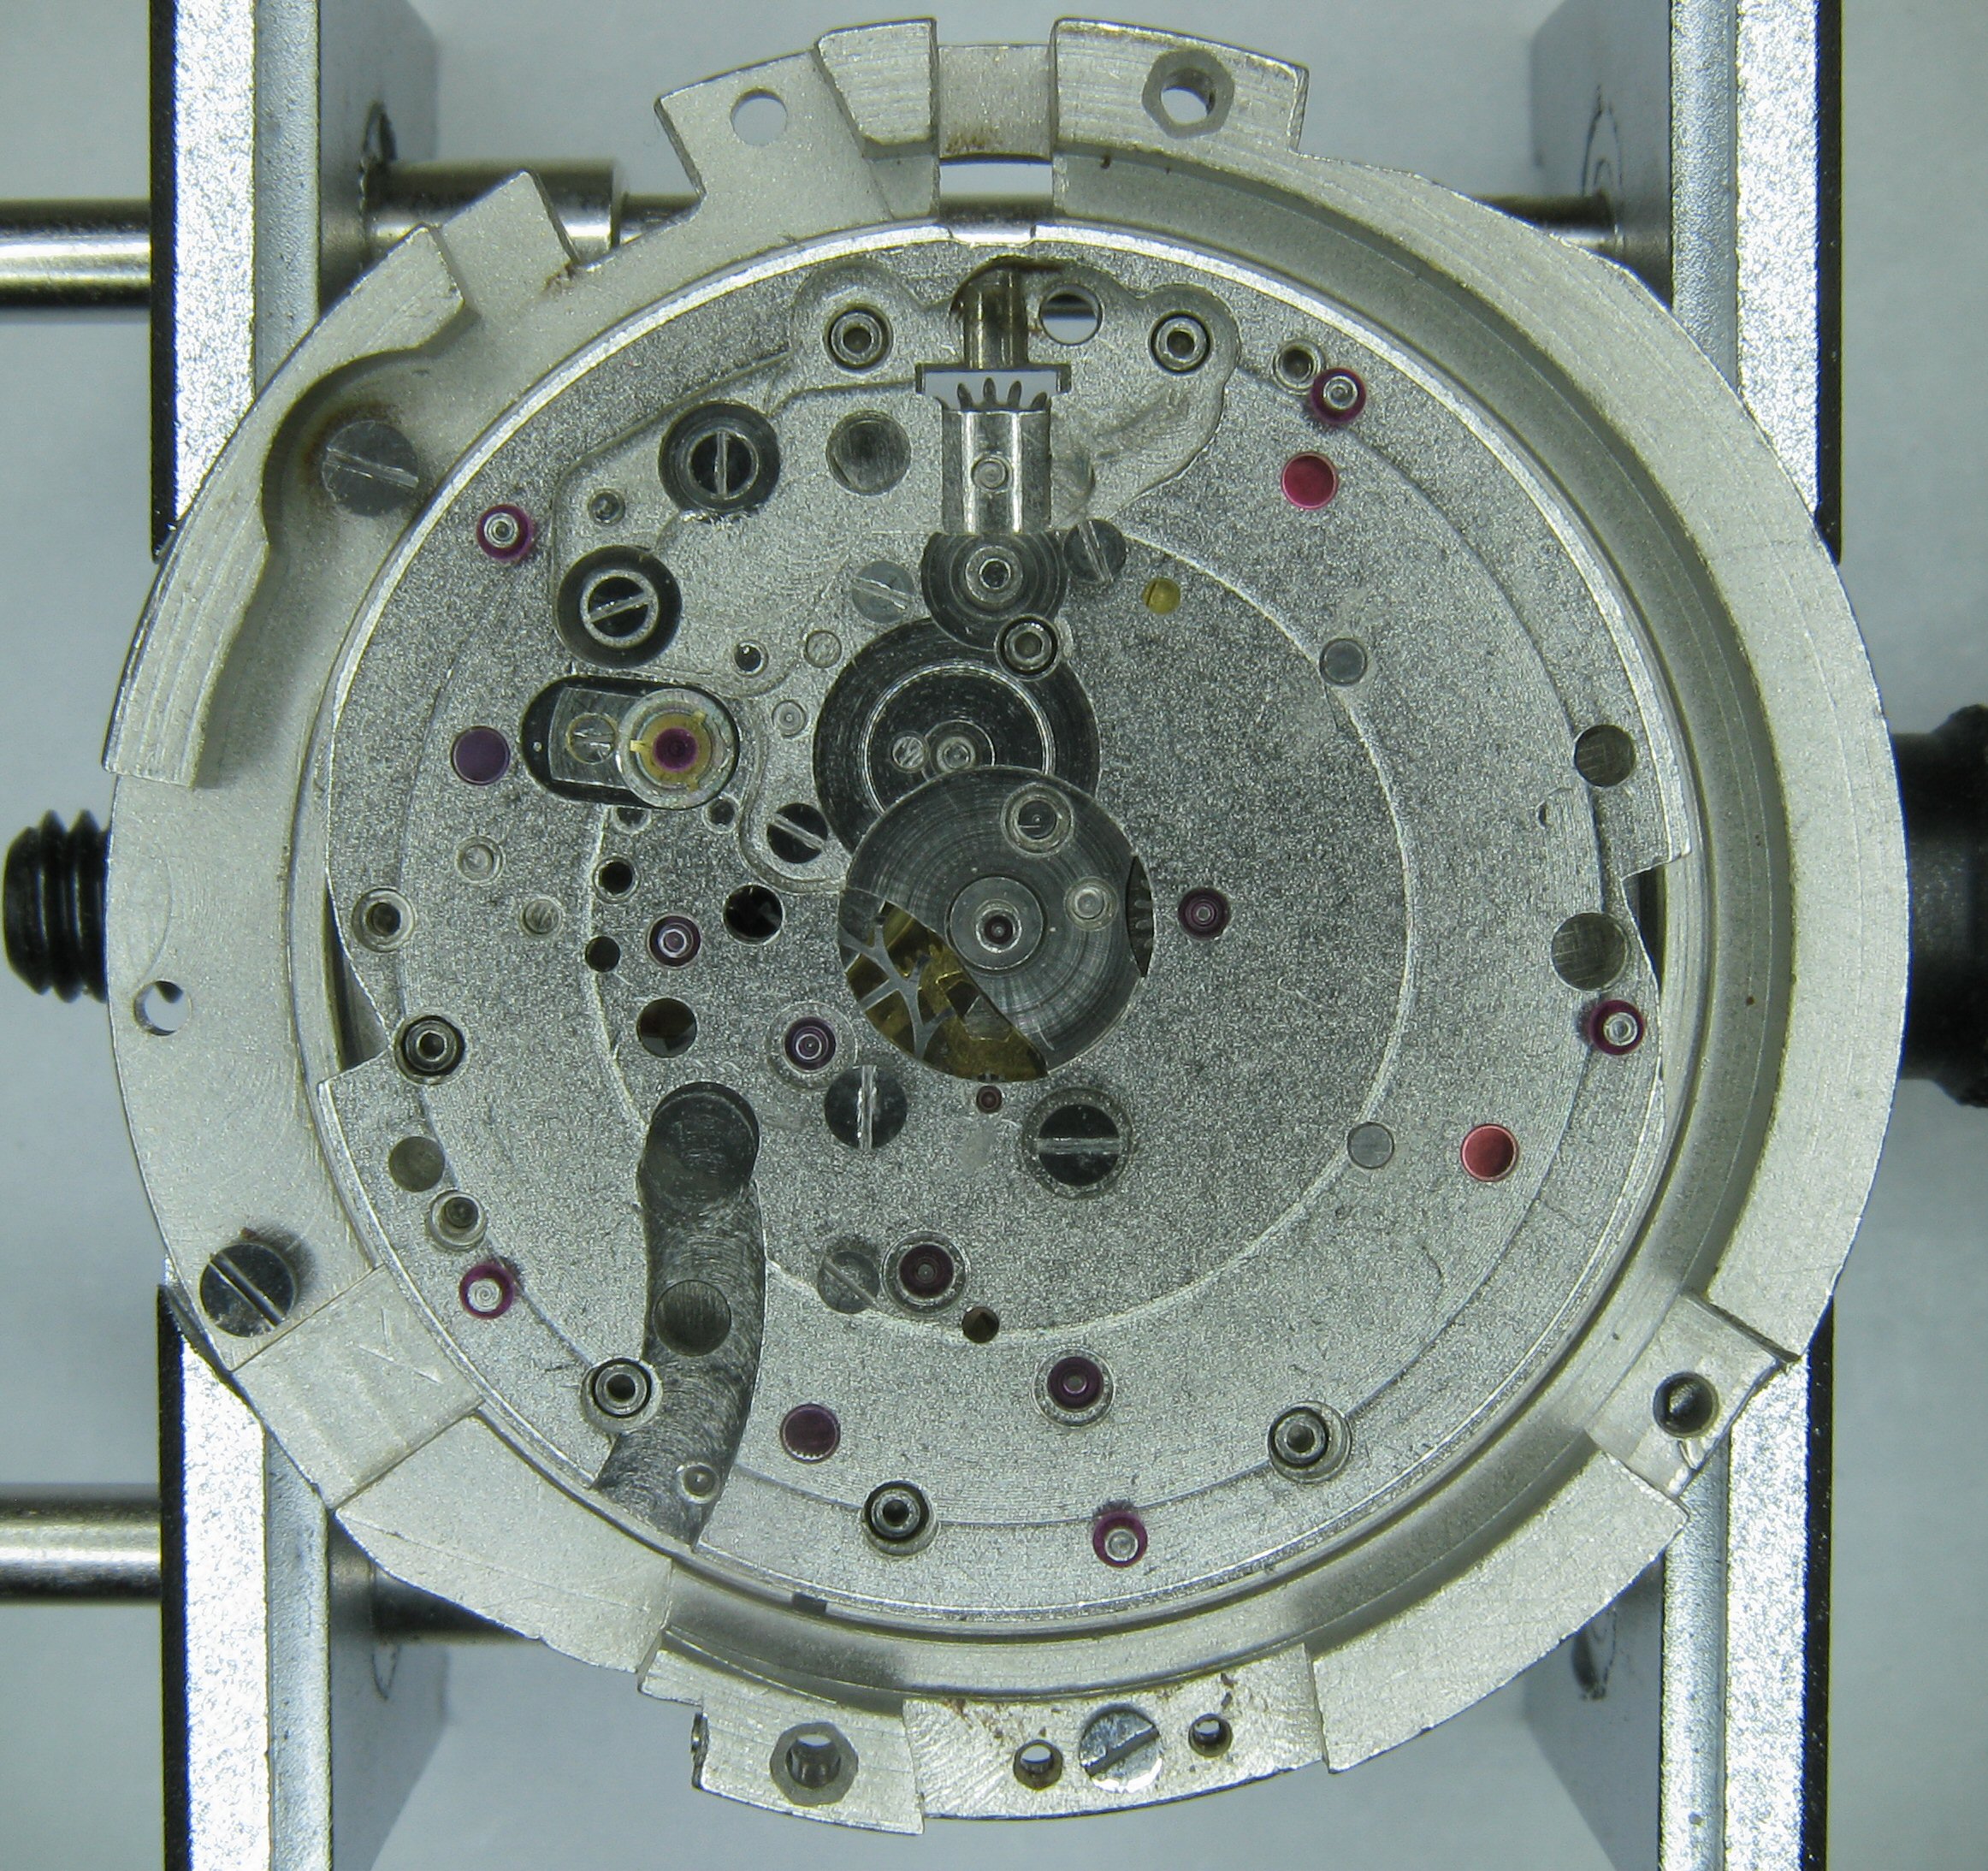
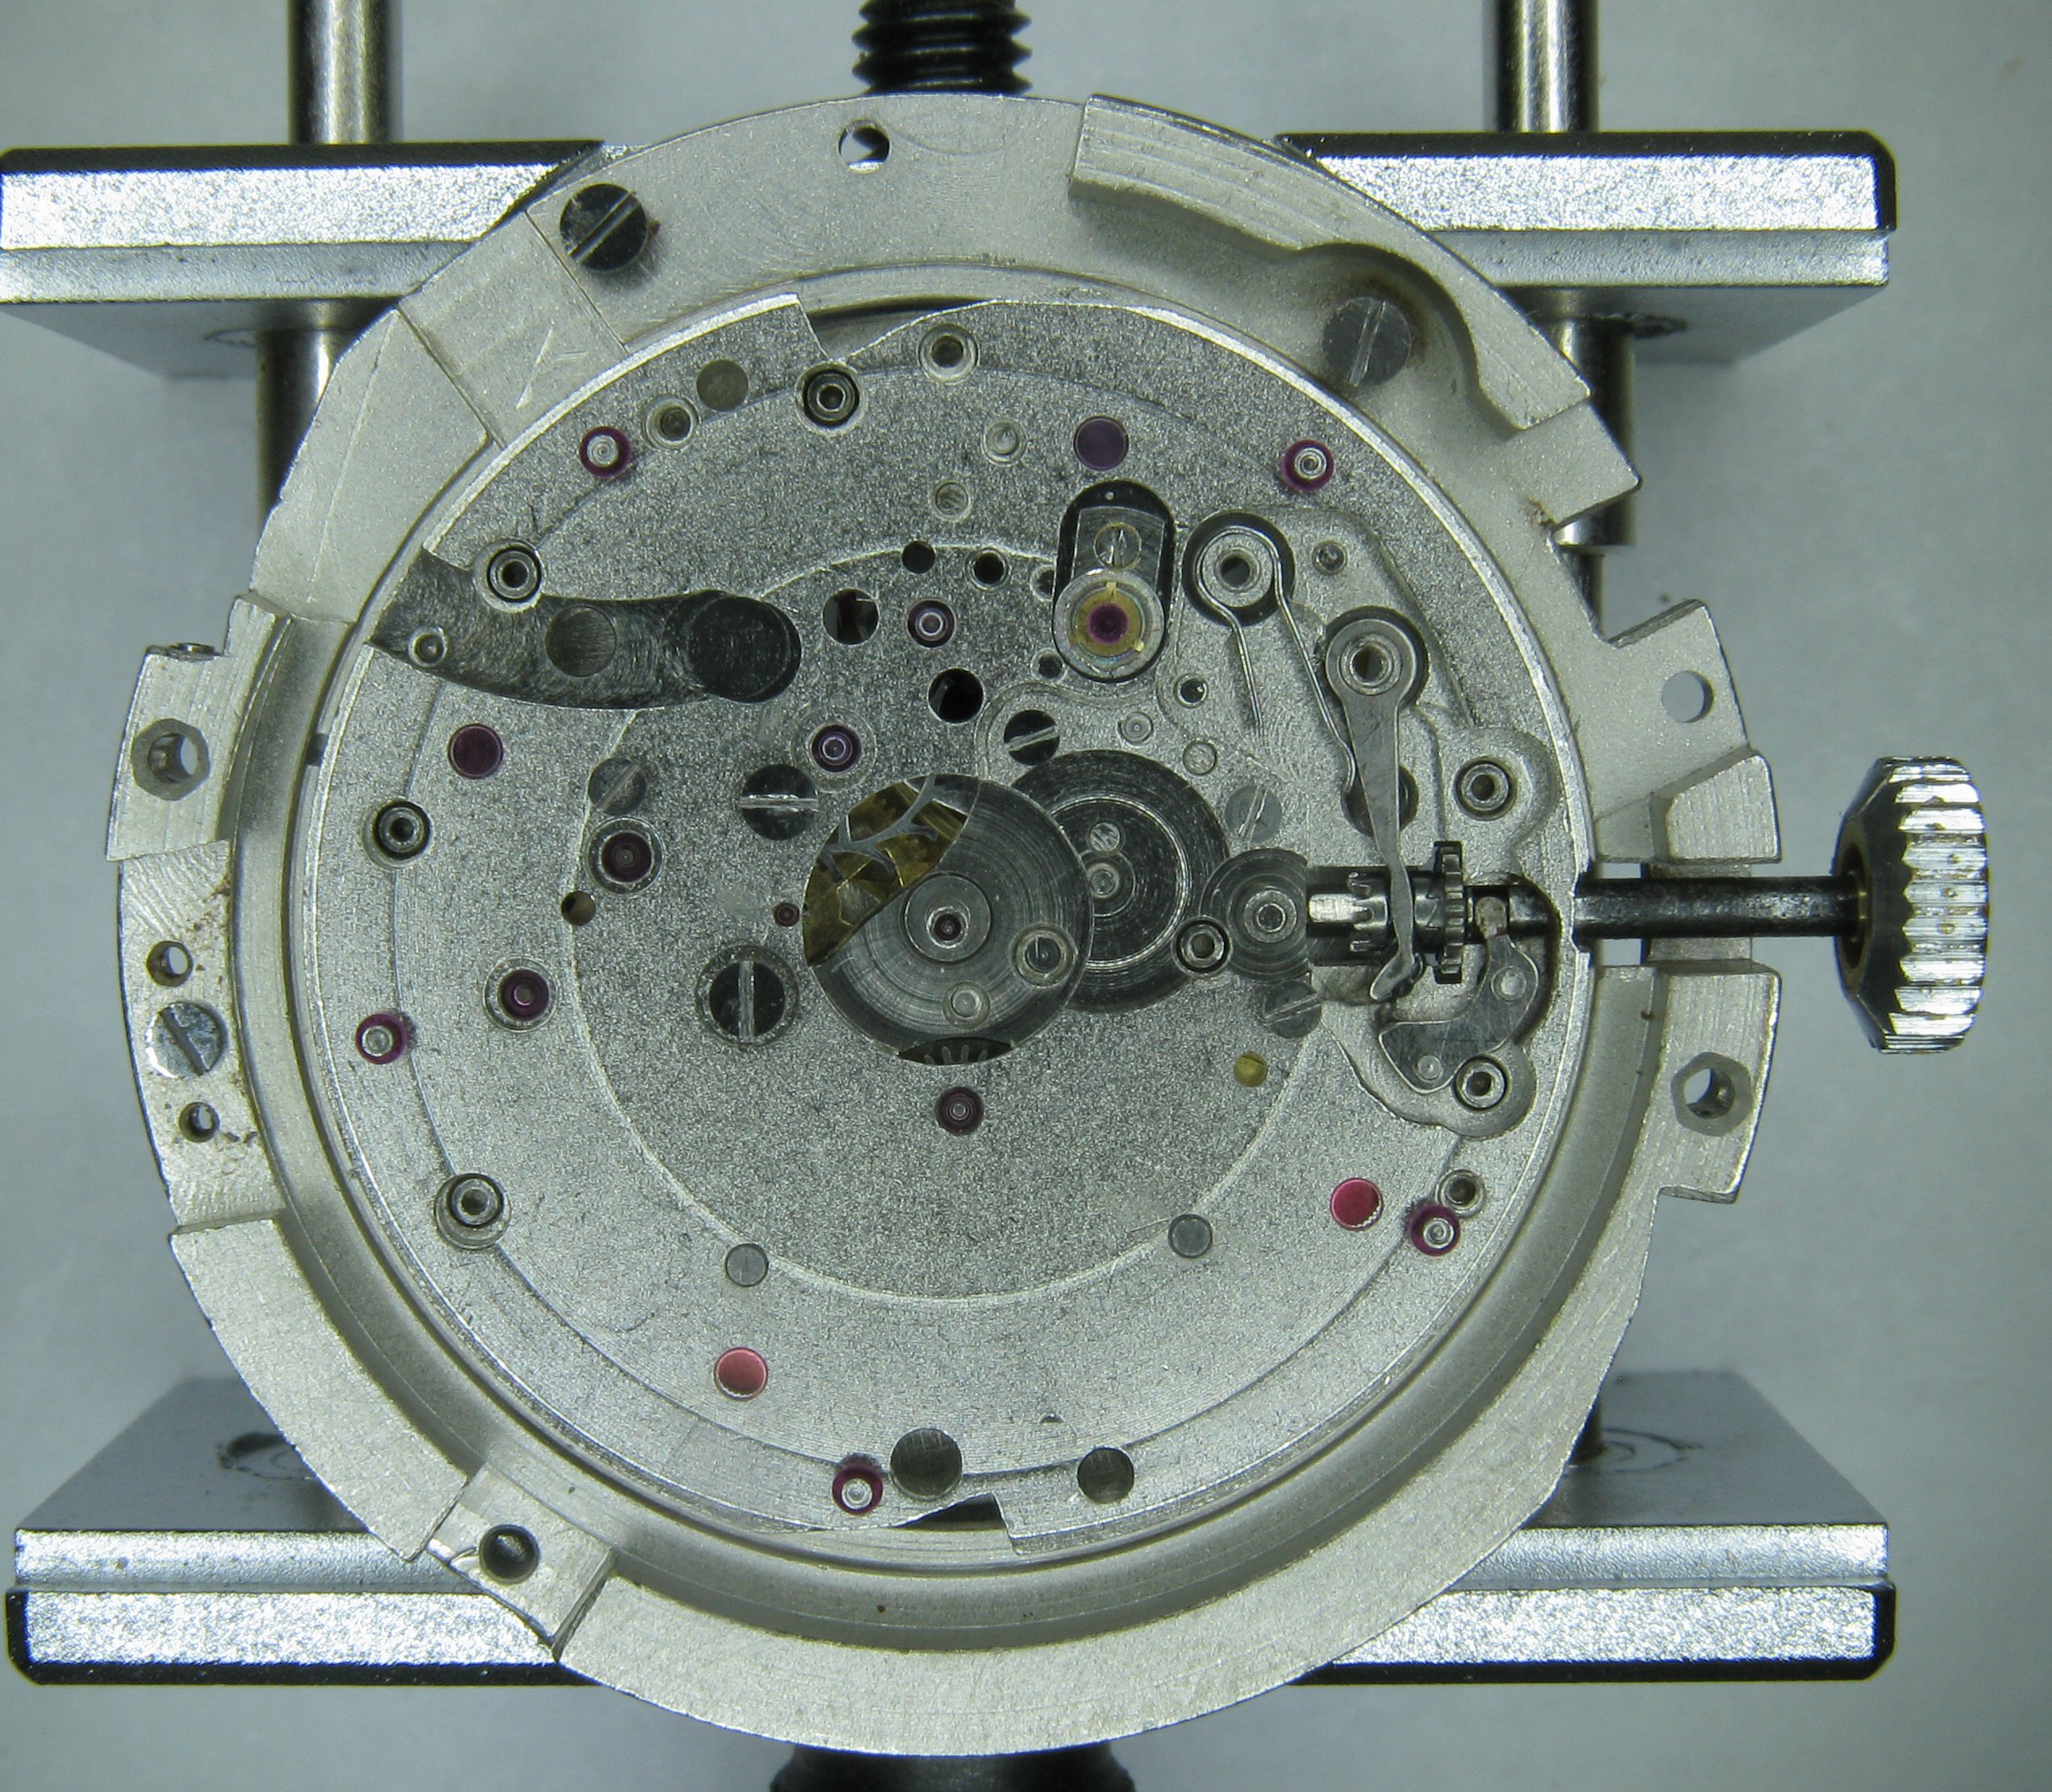
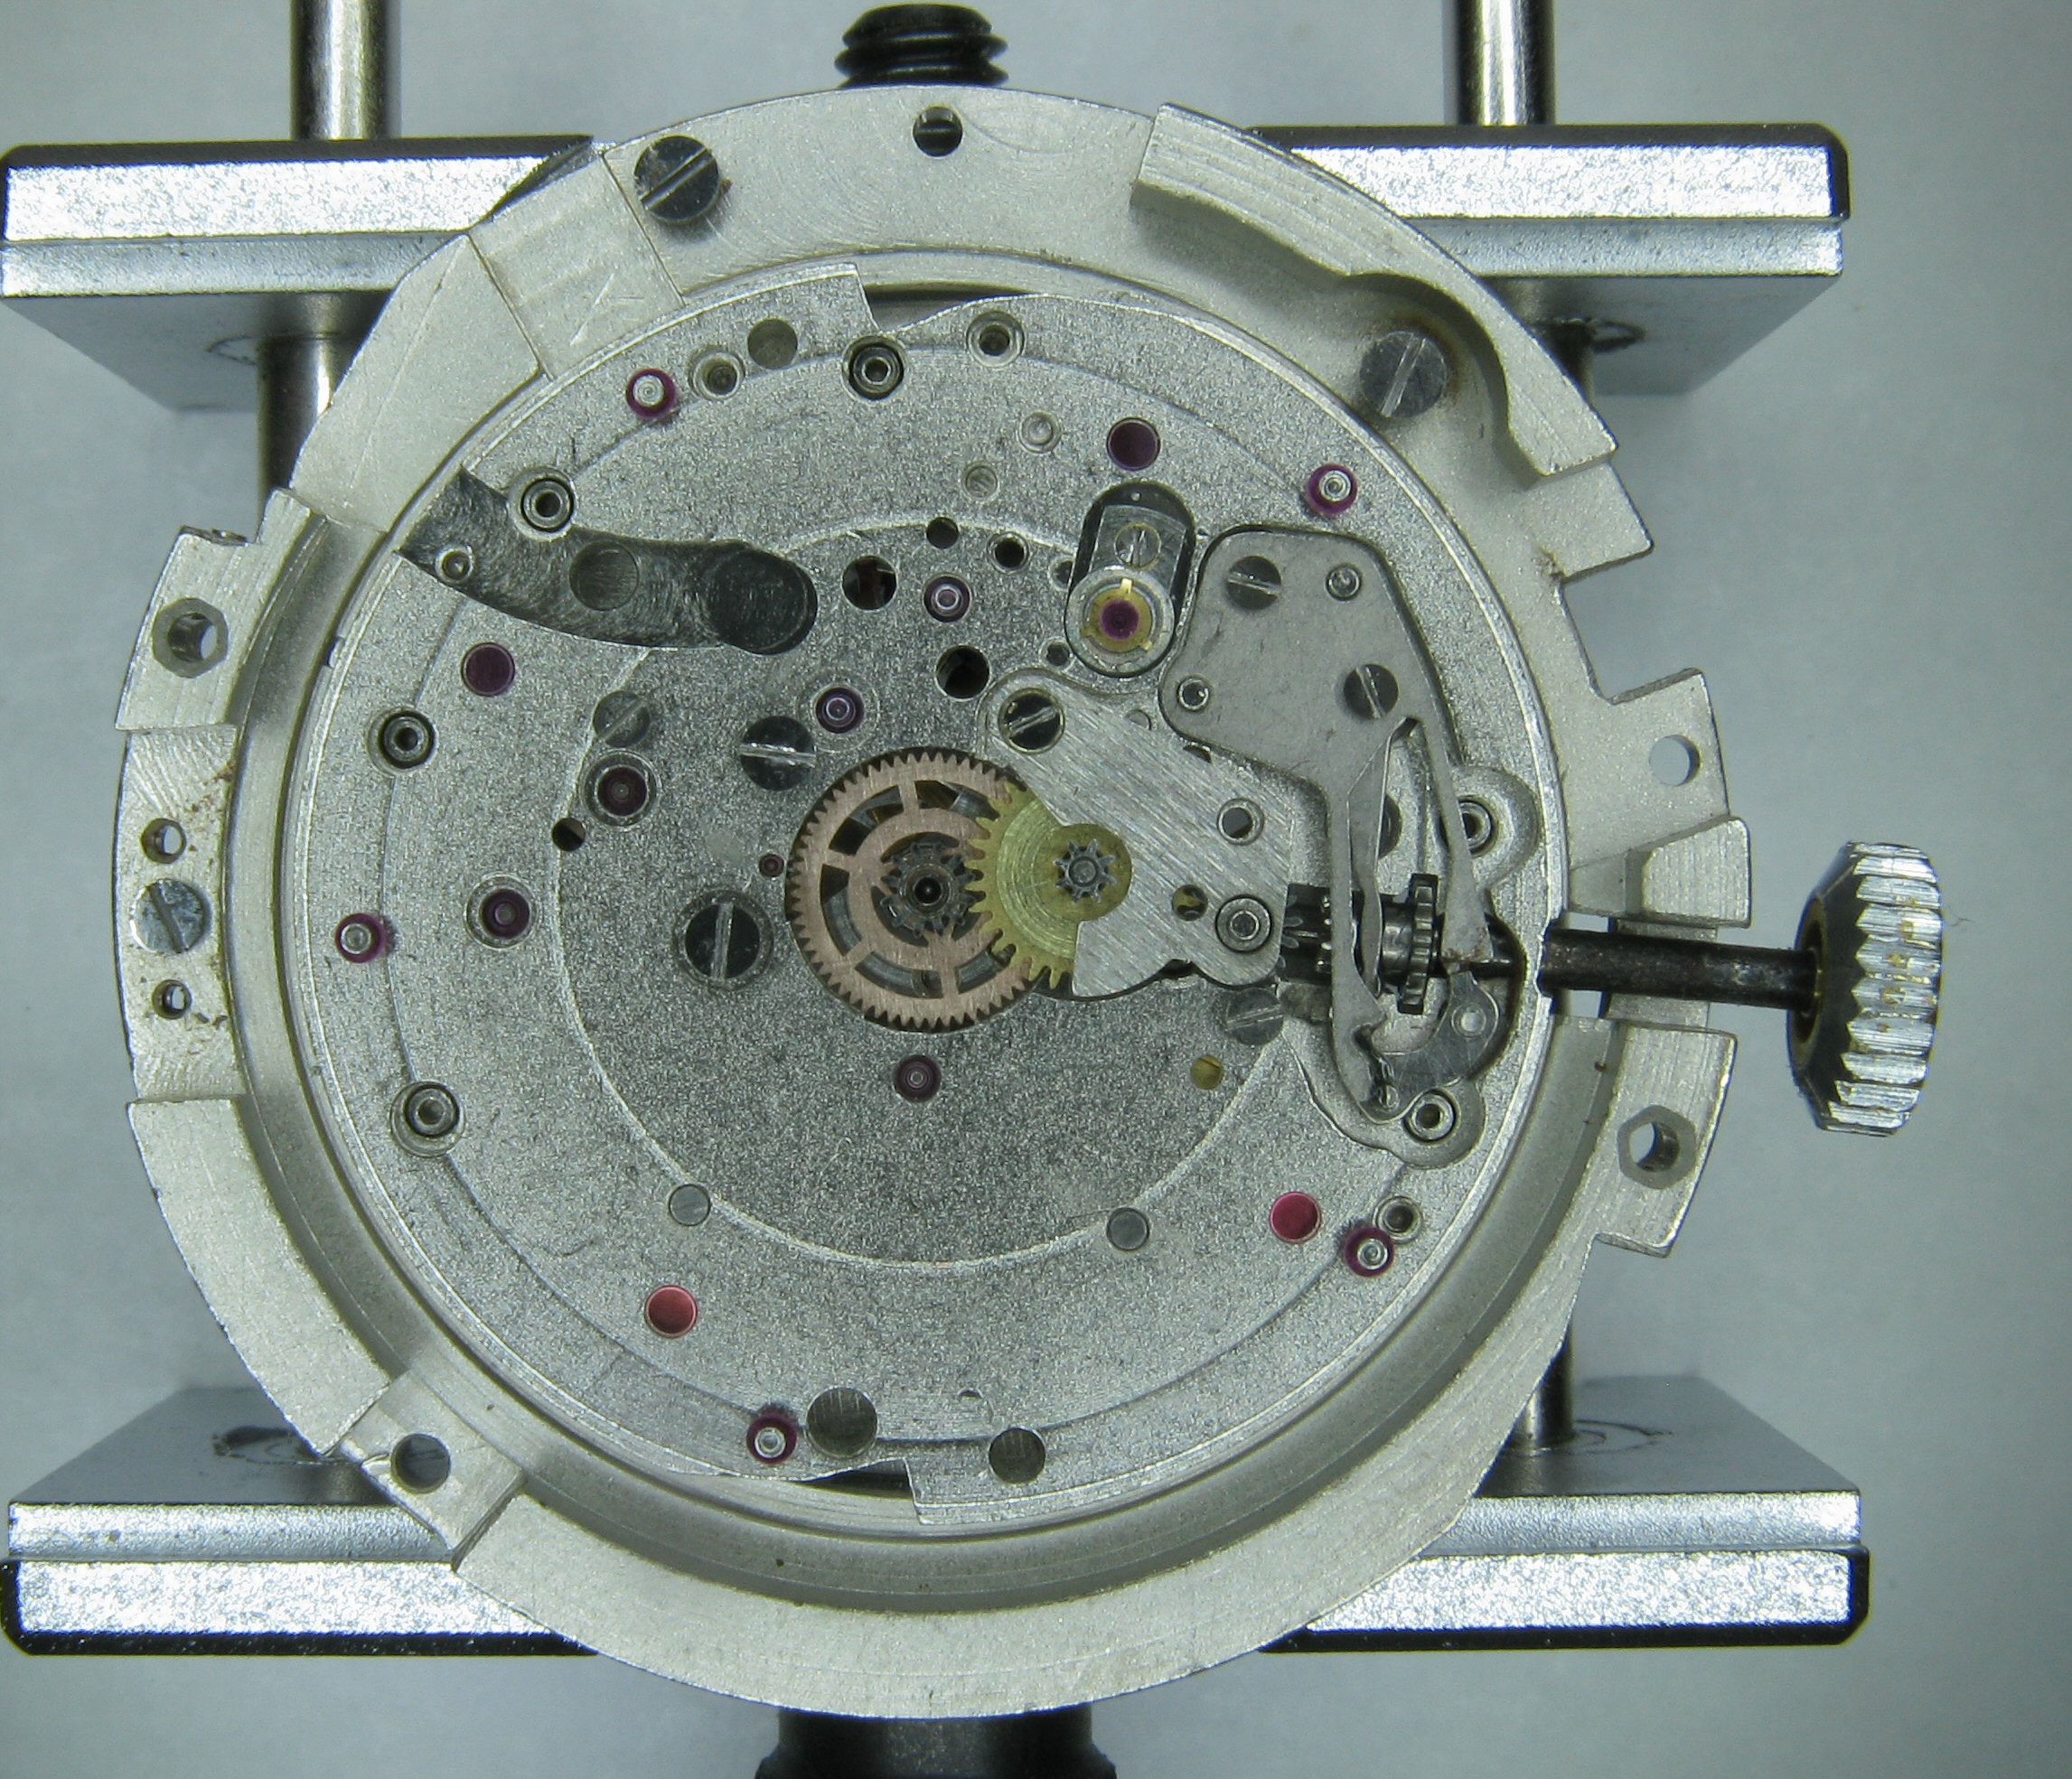
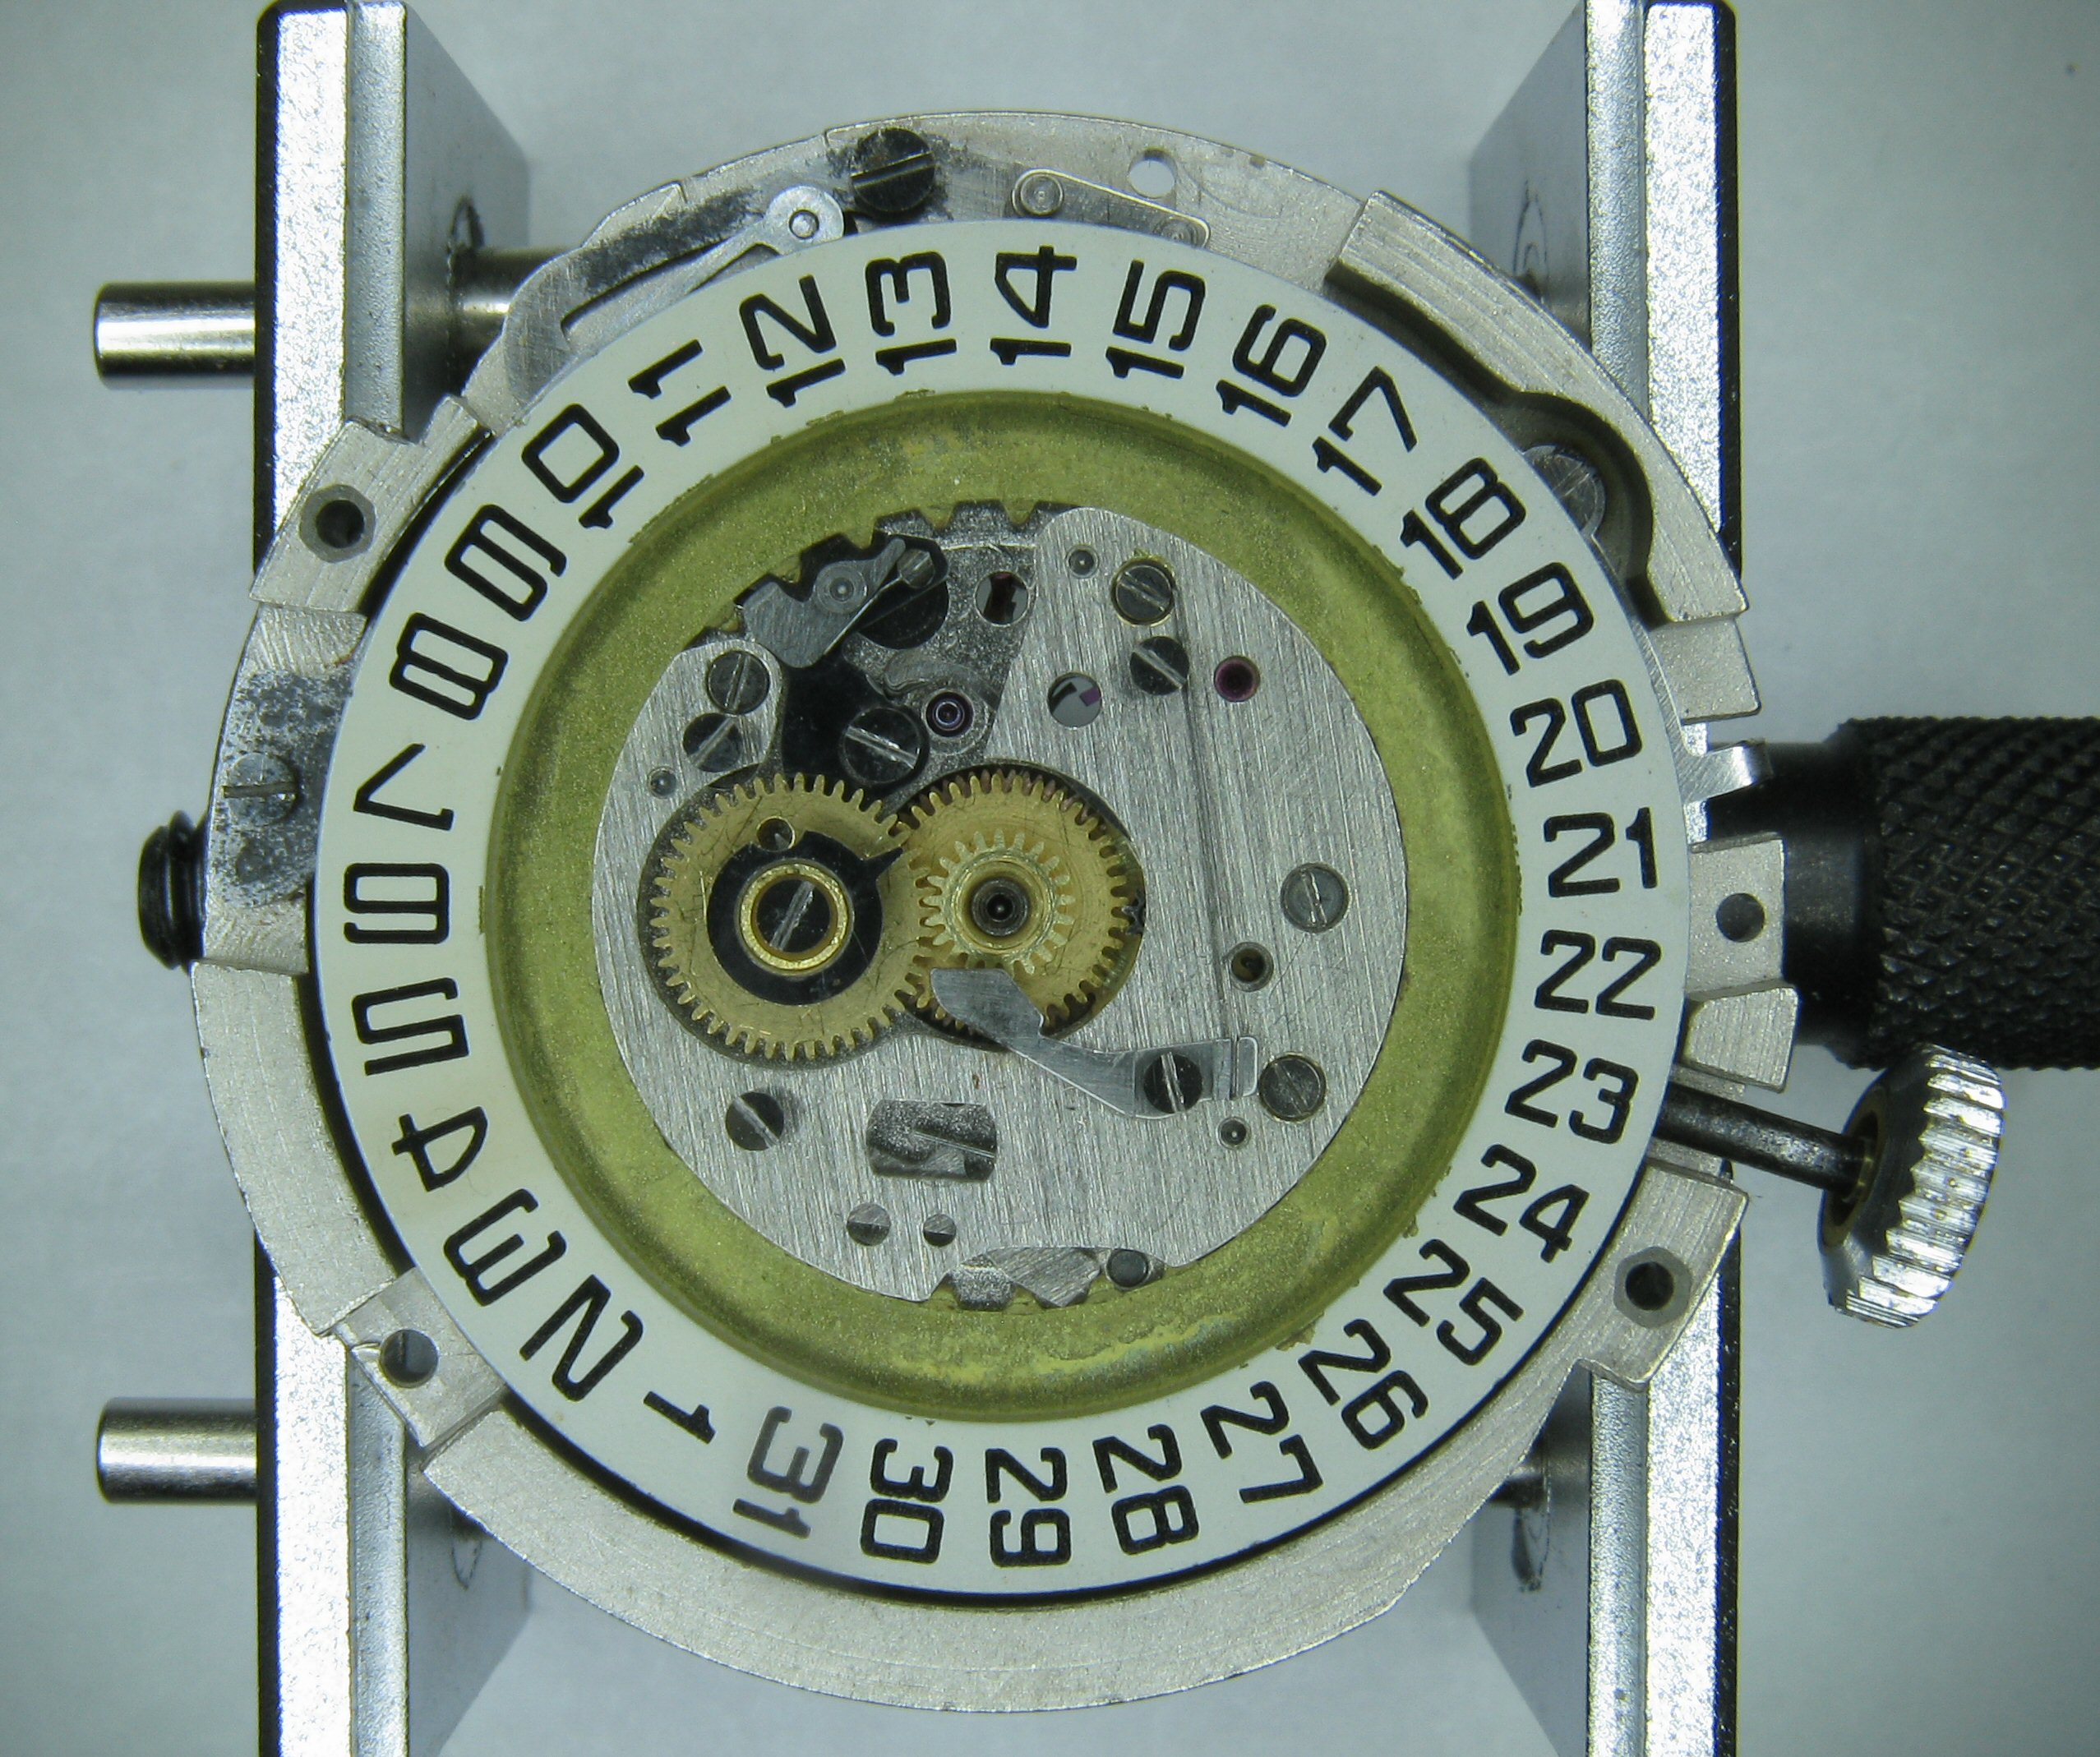
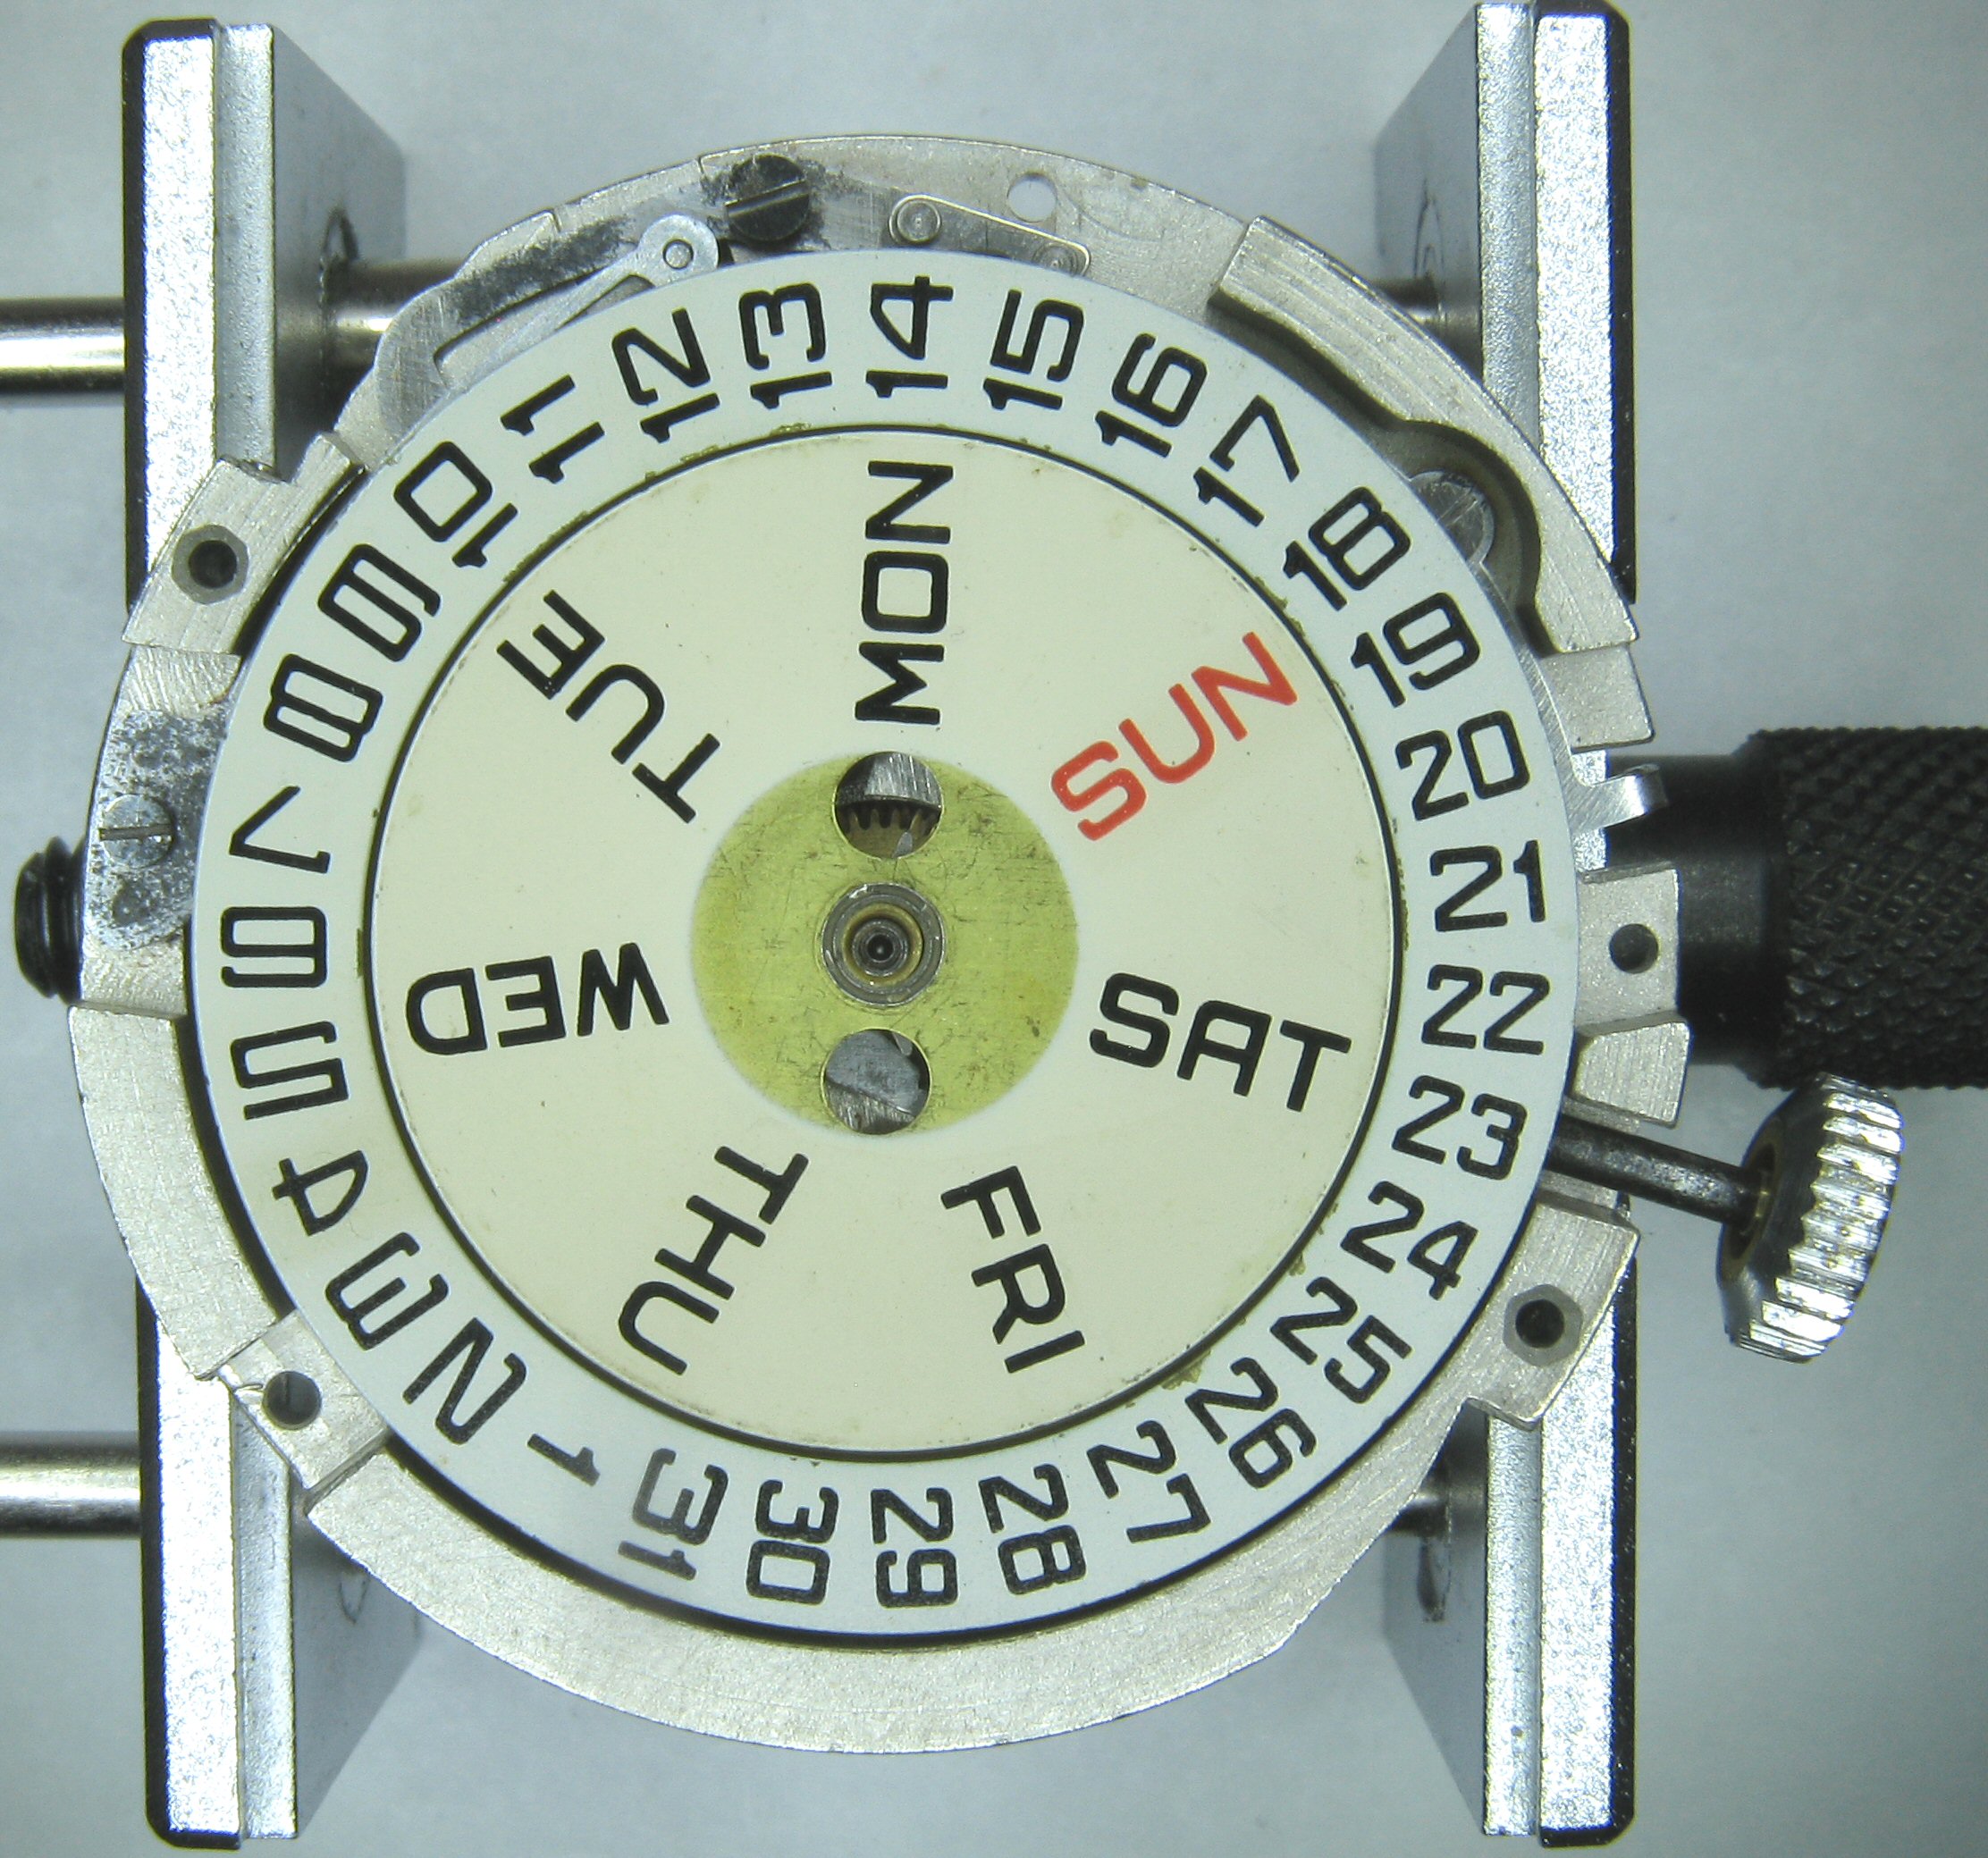
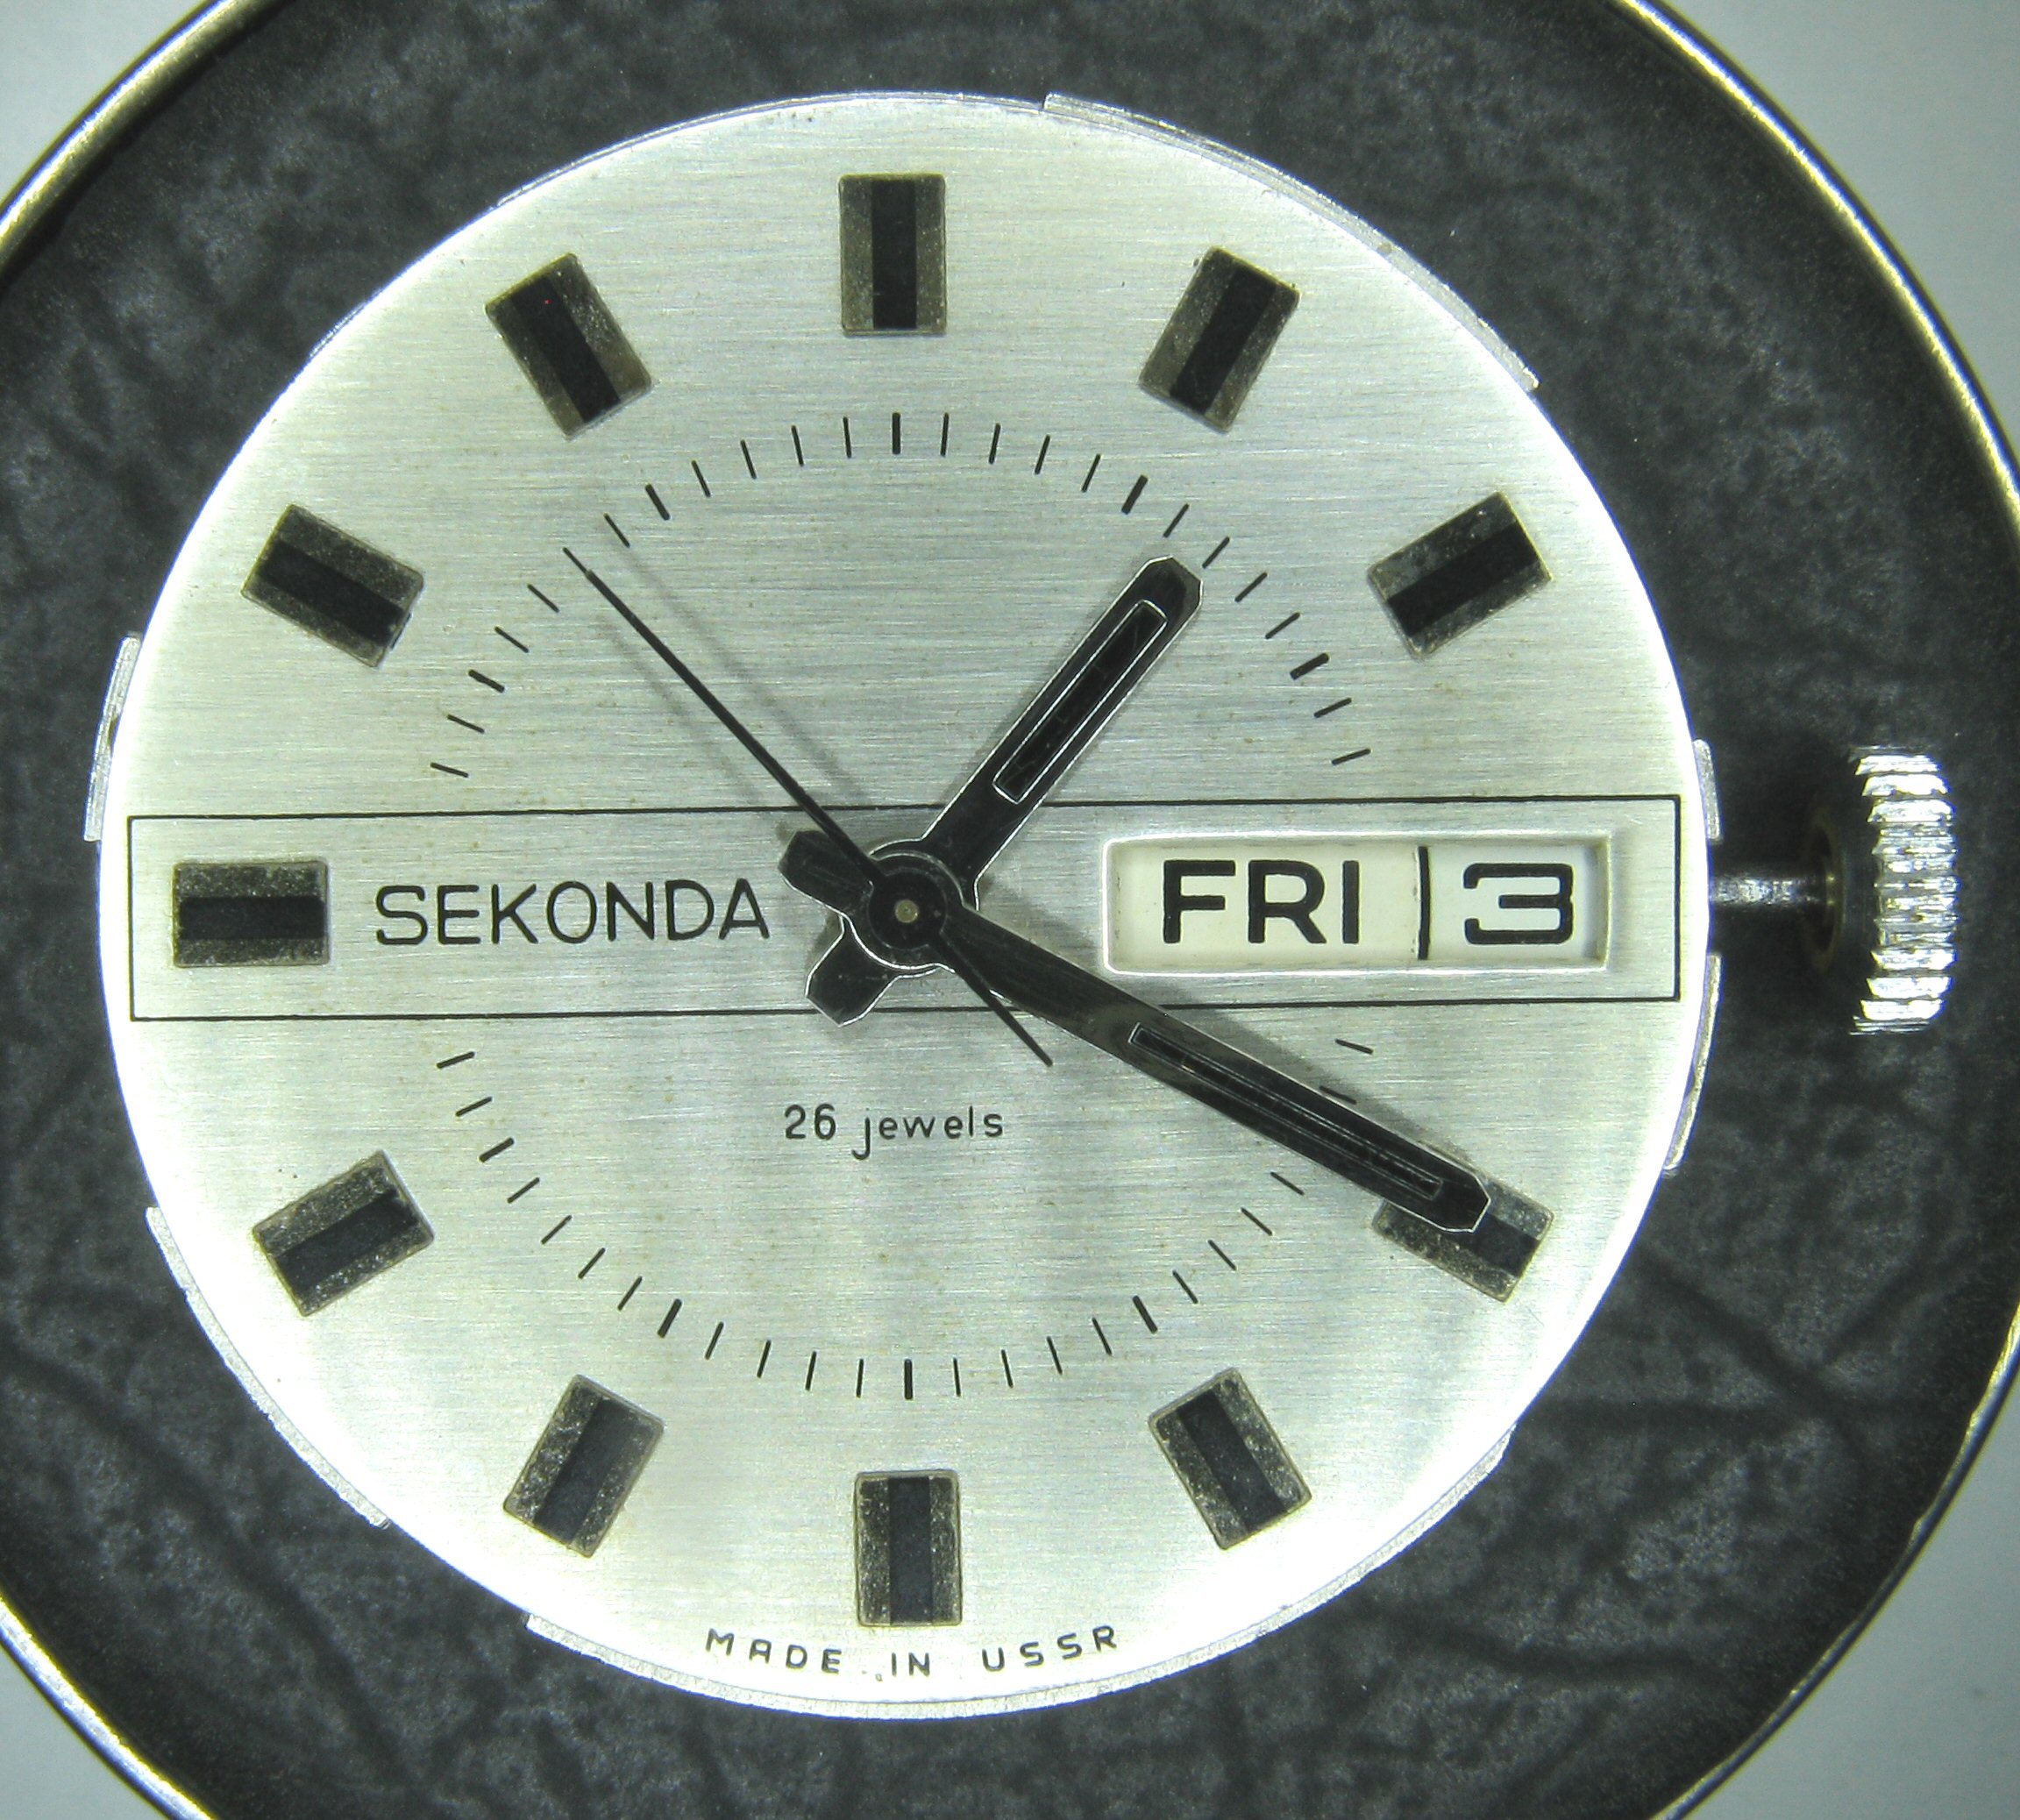
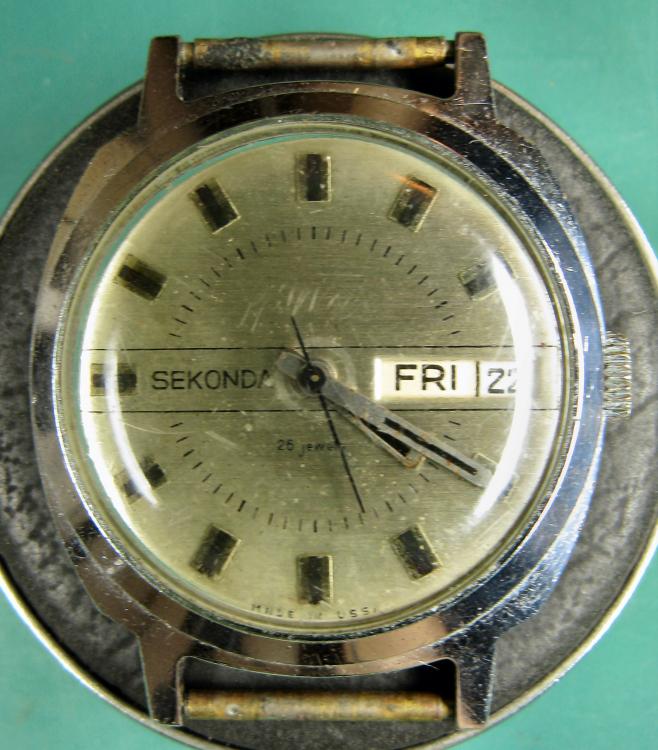
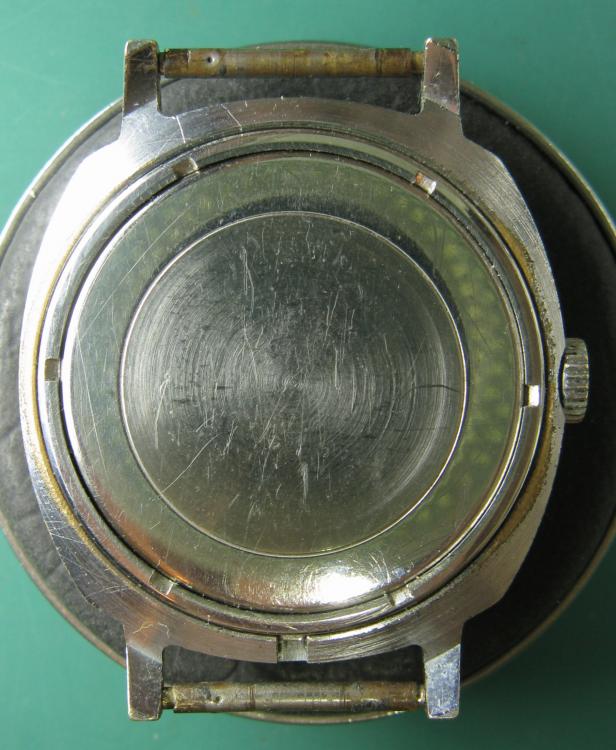
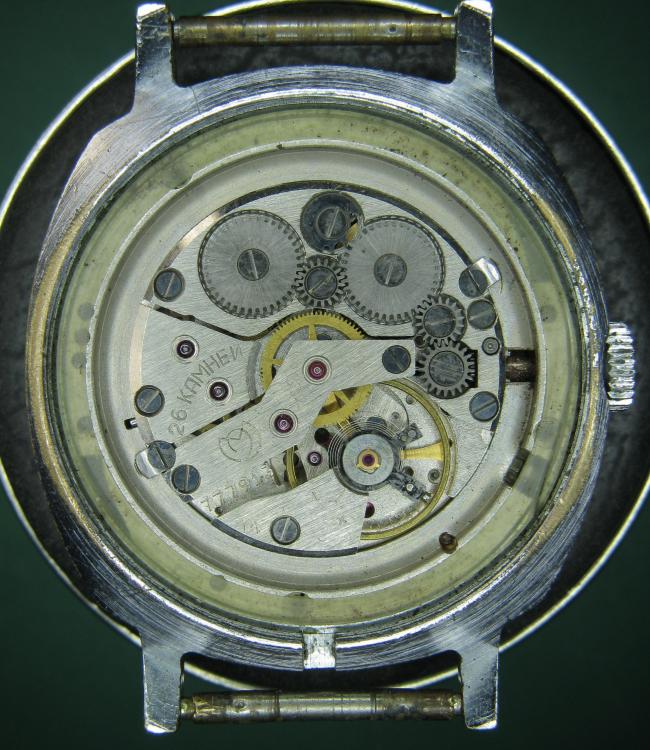
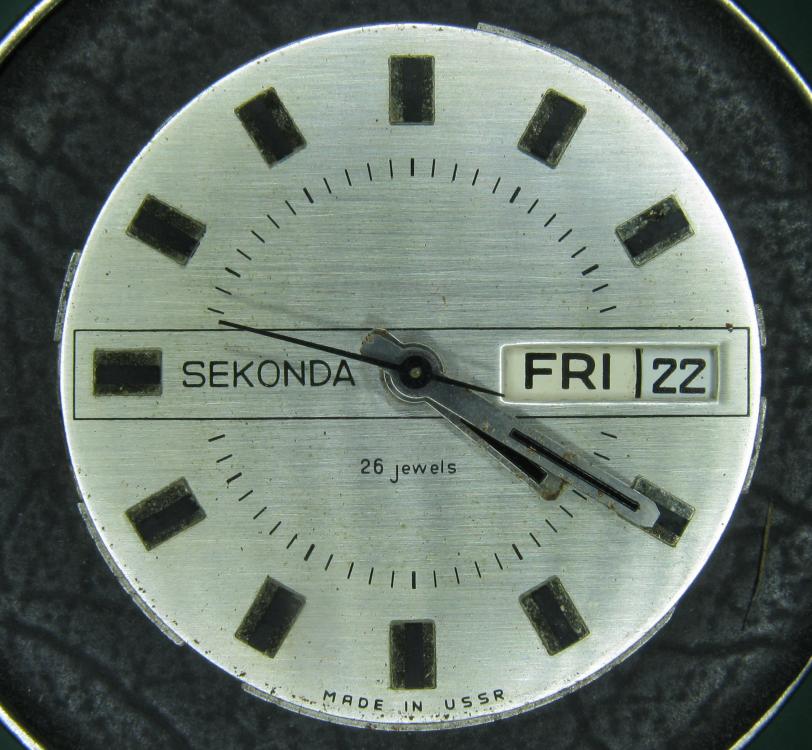
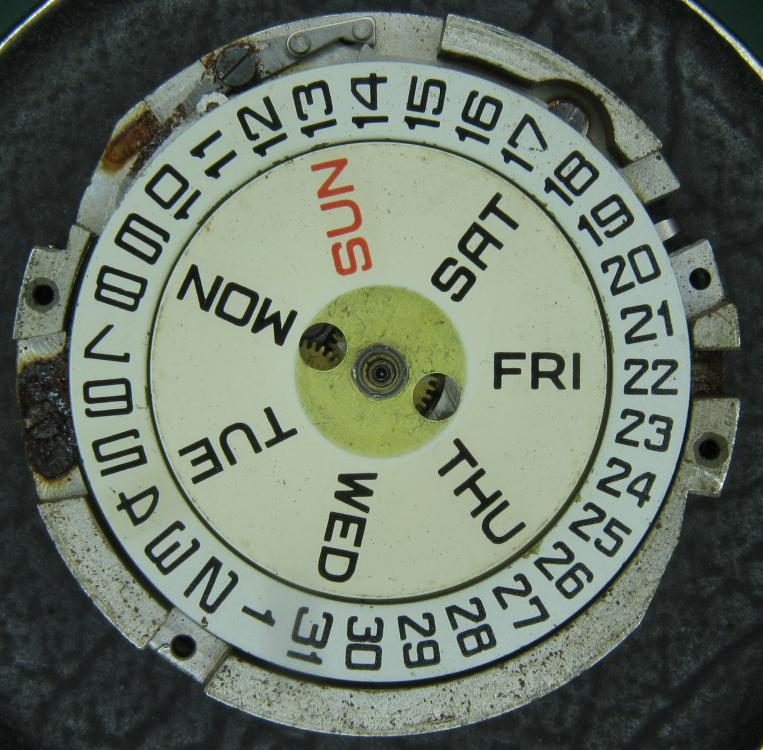
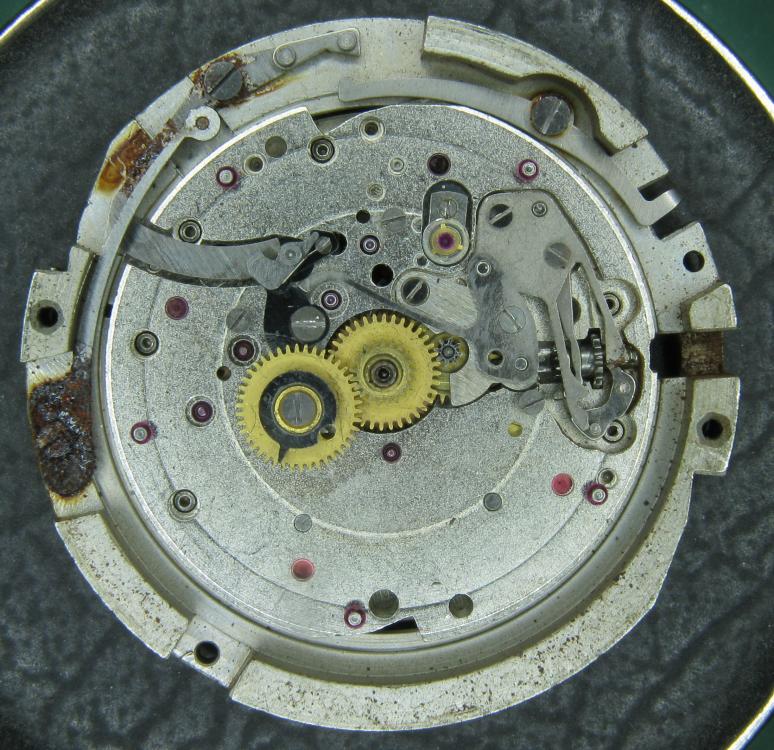
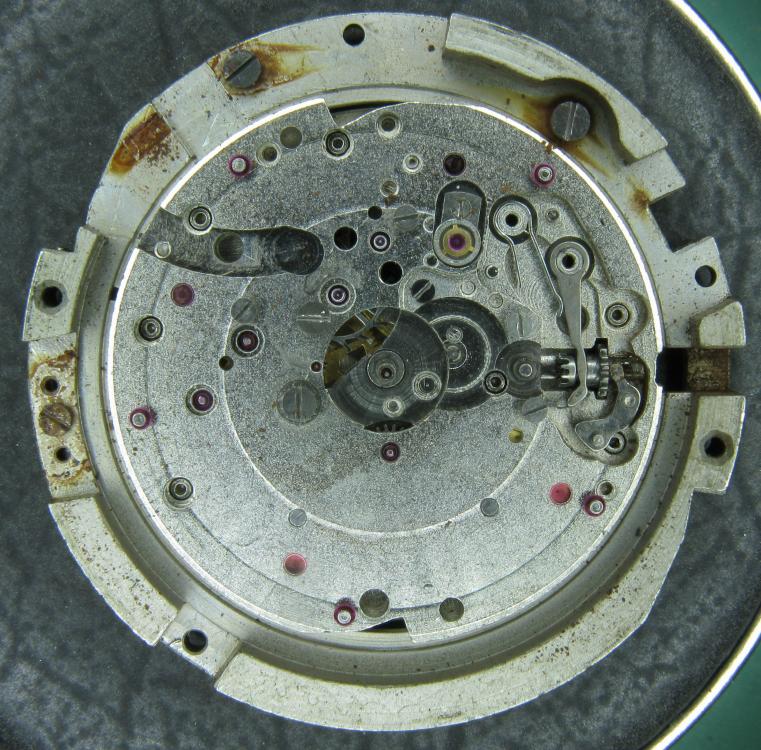
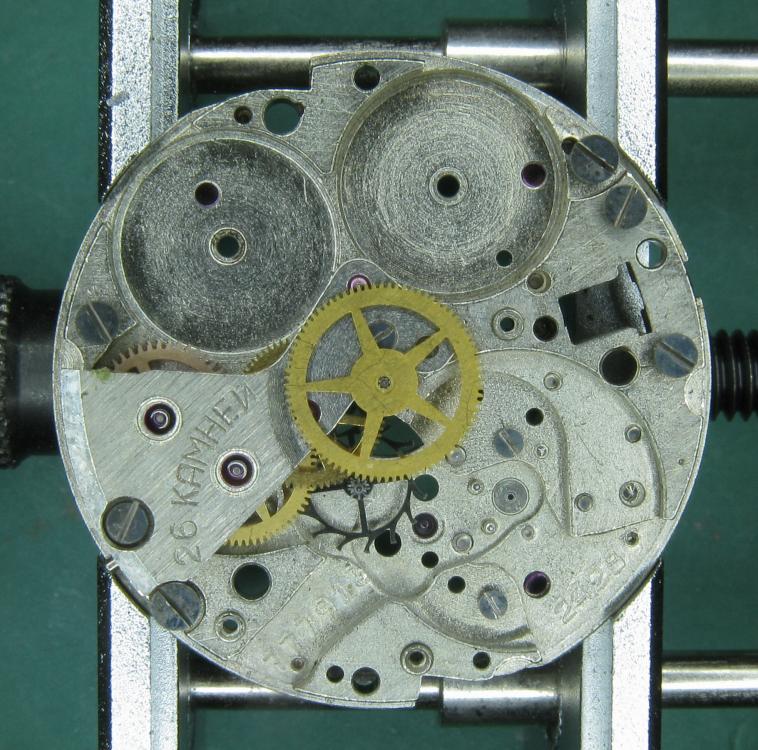
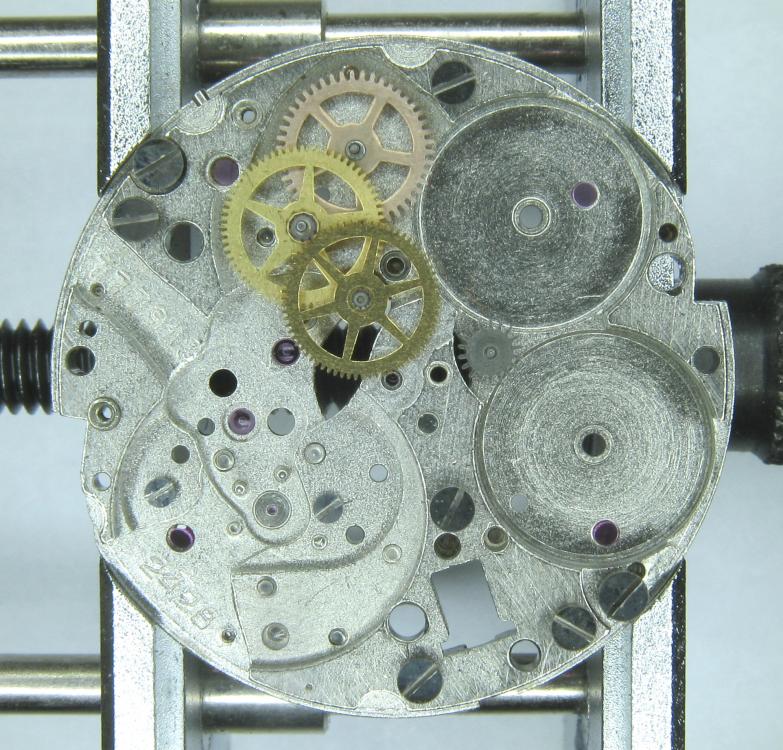
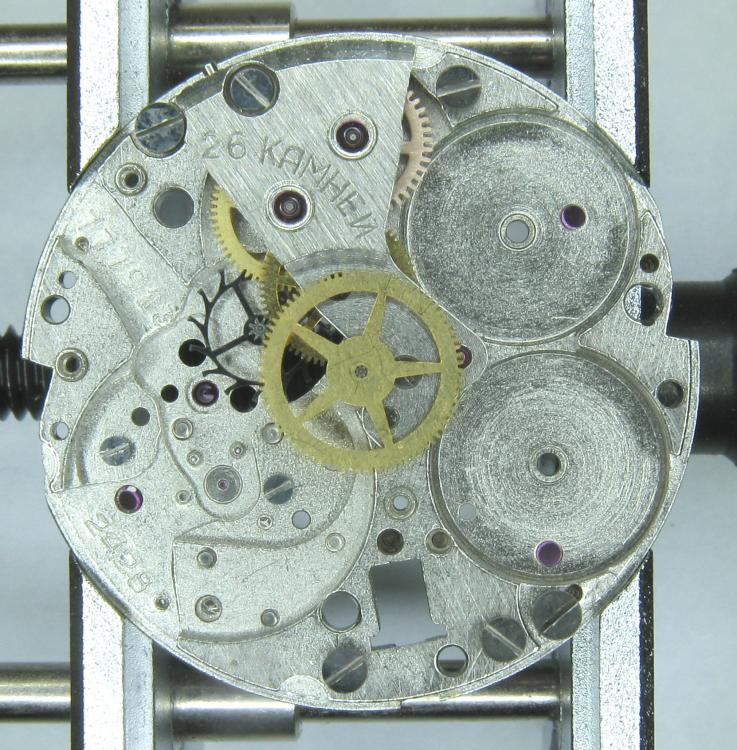
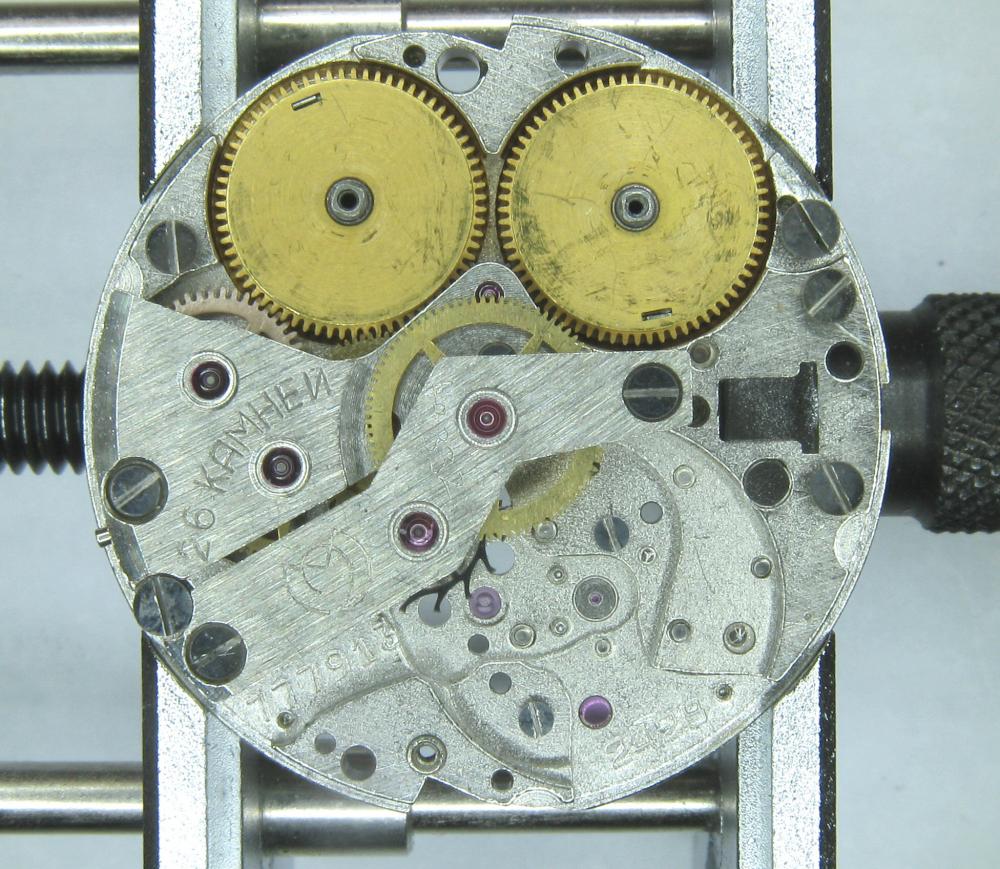
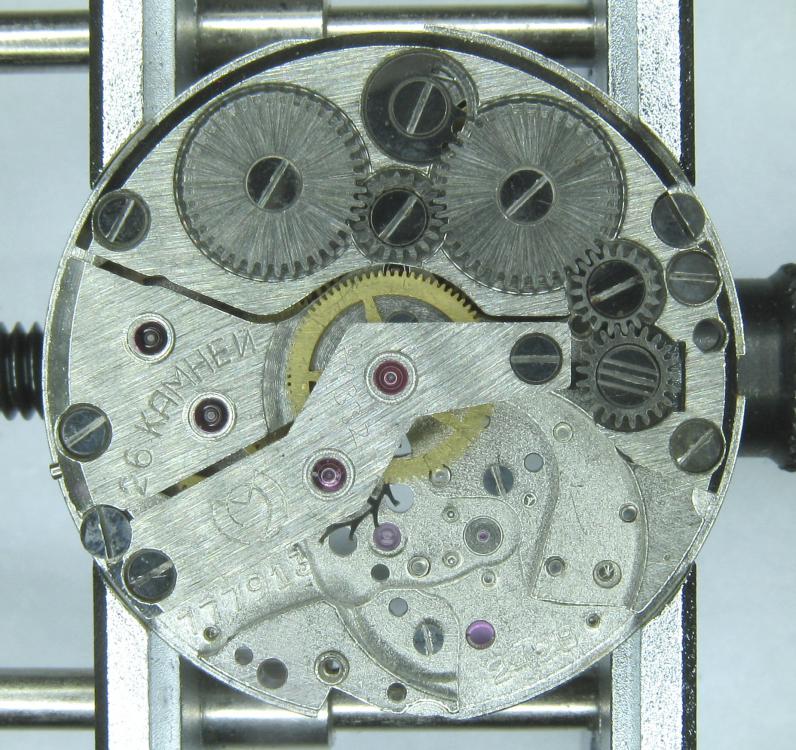
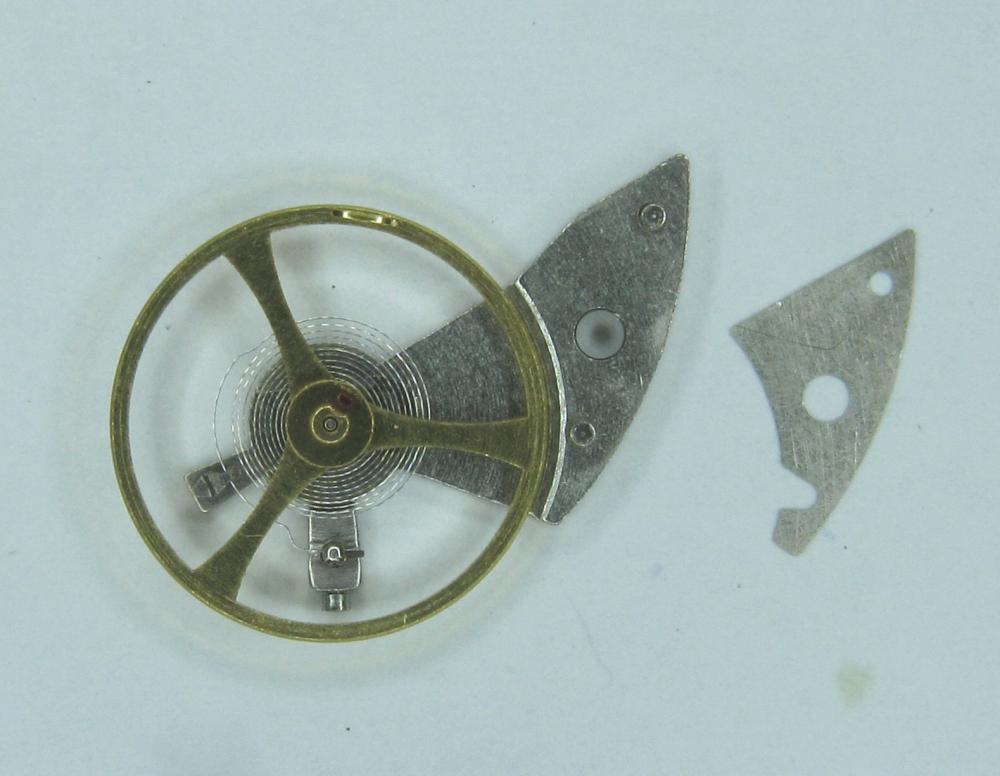
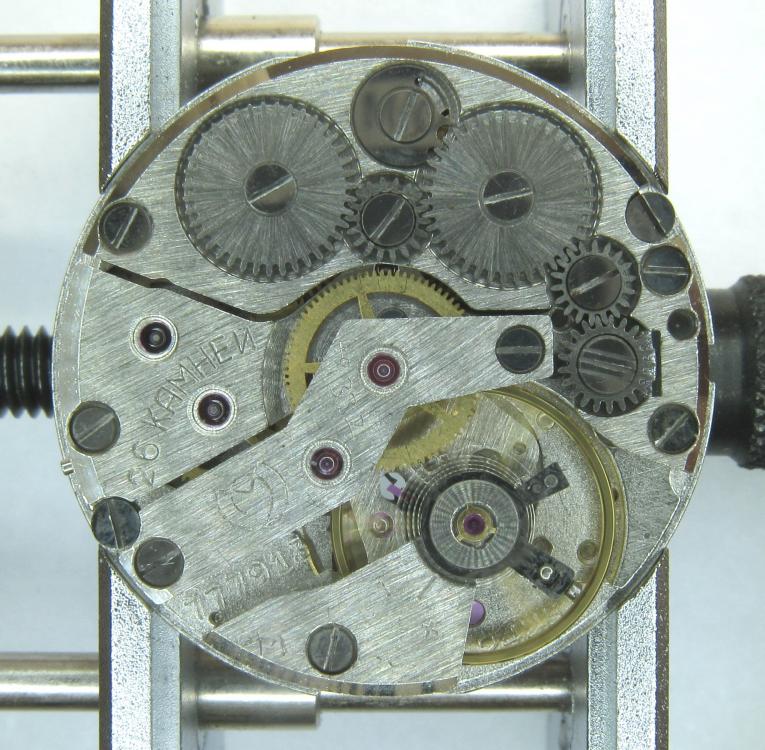
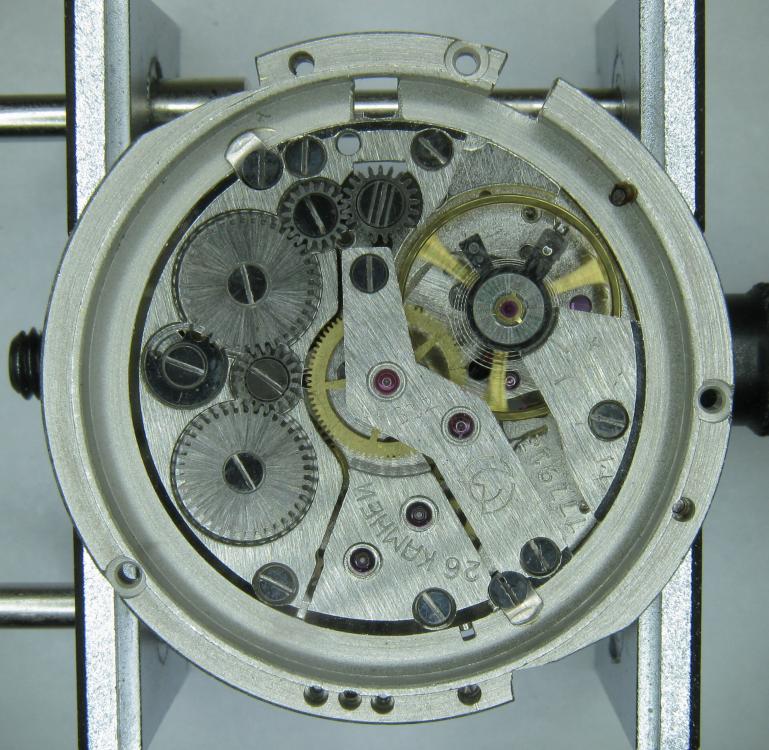
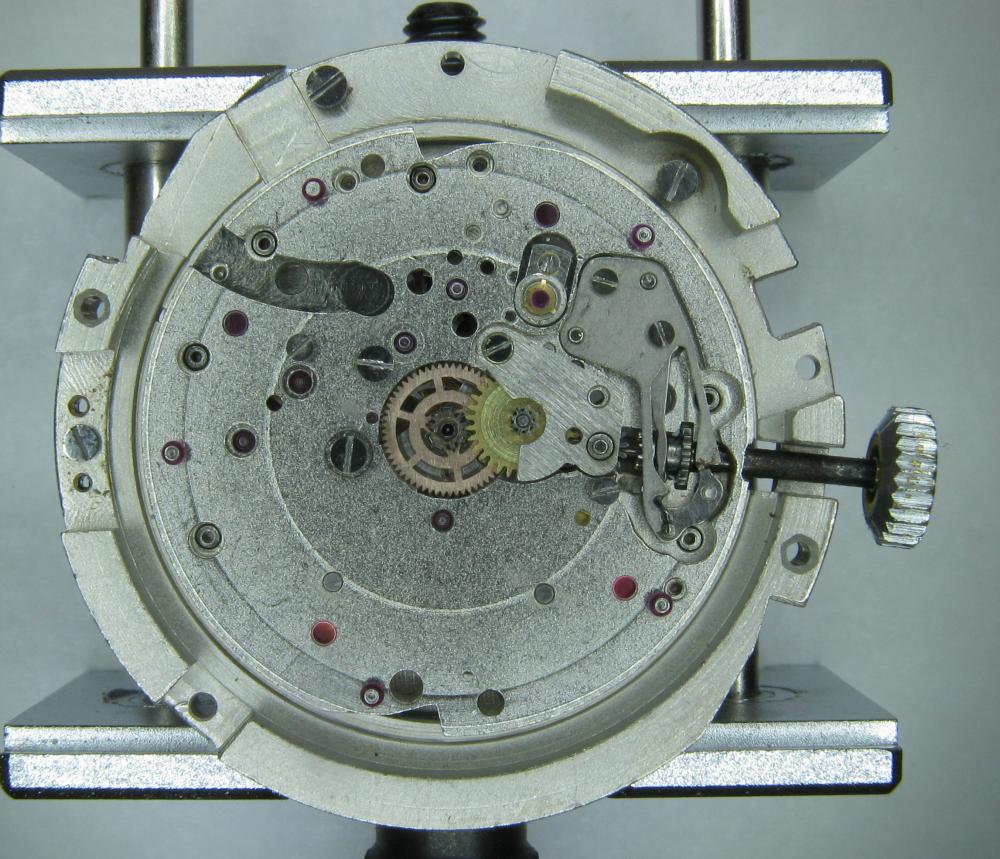
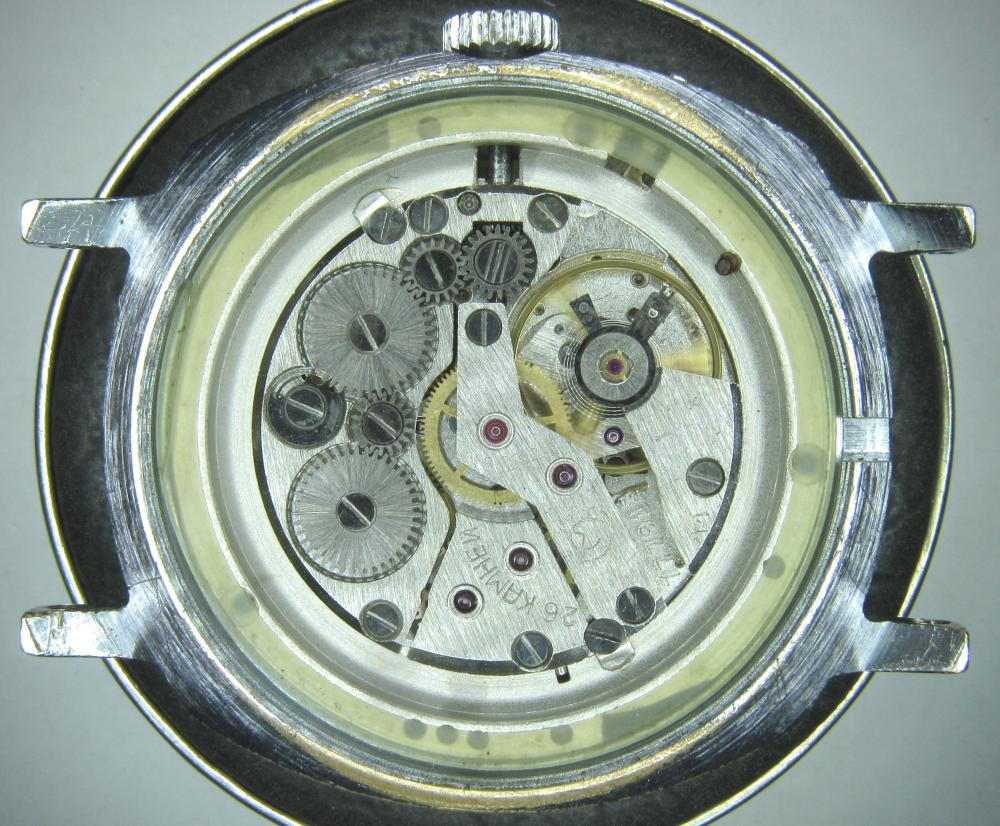
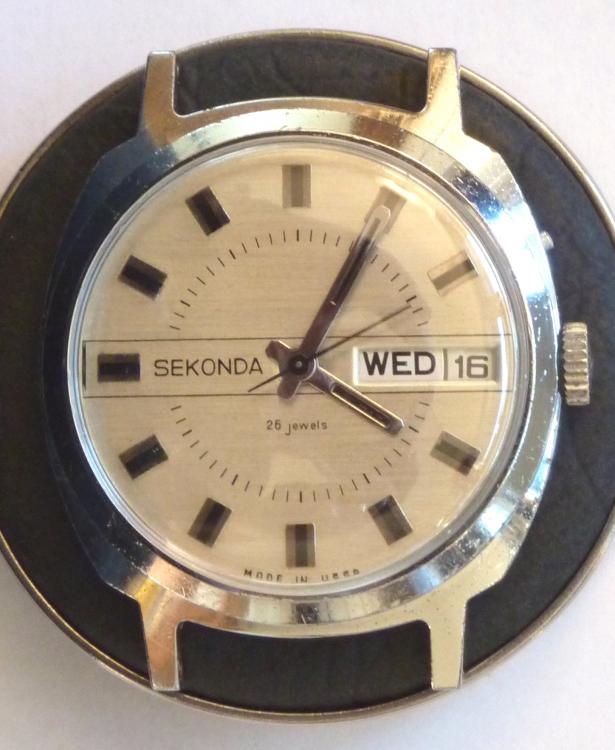
I haven't done one of these for a while and as this is my 1000th post I thought I would do something a little less ordinary. As the title says it's one of those crazy Russians, a USSR Sekonda from the 70's sporting a Slava 2428 in all its quirky glory. This one came to me as a non-runner and a preliminary investigation turned up a broken balance pivot so it went into the "to do" box until I could source a replacement, which it turned out I had all along from another watch previously scavenged for parts a while ago, as I discovered during a recent tidy up. So here goes...... Looking a bit sad, a grubby face and a bit of corrosion on the hands, and as already mentioned, not running. Also the date corrector pusher which is above the crown is jammed in. It's obviously seen a bit of wear in its time as the plating to the rear of the case has started to go through. Inside doesn't look too bad. Dirty and dry for sure but I've seen worse. The stem however suggests that things may not be so good further in. Uncased and the dial doesn't look so bad. The hands may need a bit of a spruce up. Oh dear... with the dial off the hint that the stem was giving earlier becomes a grim reality and the reason behind the frozen date corrector is clear. Heavy rust around parts of the date quick set mechanics has seized everything solid. With the day and date wheels out of the way and safely bagged the full extent of the problem can be seen, and maybe it's not quite so bad after all so long as none of the screws shear off as I try to undo them. Success.... all the screws out and nothing stripped. The rusty parts have been carefully rubbed down and are now enjoying a strong cup of tea.....to stabilise the remaining rust deposits. And here is the first quirky bit, all of the date quick set mechanics are mounted on the movement ring, not the movement itself. Strange but true! The movement now flipped, balance cock and barrel bridged removed, and the second and third deviations from the everyday run of the mill design philosophy become apparent; that curiously asymmetric pallet fork, and those tandem main spring barrels. The first of the going train bridges removed .... ... and with the second train bridge and wheels removed, the replacement balance is installed without jewels ready for a spin in the Elma. And here we have all the bits nice and shiny out of the cleaner, with as much of the rust issue dealt with as possible. Is it me or are there a hell of a lot of wheels in this little baby? Both main springs are in good shape so they are greased and rewound into their respective barrels. I don't know if it was strictly necessary but I did take the precaution of keeping the barrels, lids, and arbors together as sets during the cleaning process so that the same bits went back together as came apart. Balance jewels inspected, lubricated, and reinstalled. The hair spring is pleasingly flat, parallel to the balance, and concentric, and once set in motion the balance doesn't seem to want to stop. A good sign... In goes the first set of train wheels along with the idler that couples the twin barrels together. With the first train bridge in place the escape wheel and centre seconds wheel are installed. Second train bridge goes back on followed by the tandem barrels Barrel bridge with all of those amazing coupling wheels to keep everything turning the right way all the way back to the crown wheel and its clearly marked lefty screw. At this point all of the pivots have been oiled and a quick test of the free running of the train is done. A couple of clicks on the ratchet wheel and the escape wheel spins nicely down and then back with just a little recoil. After that the pallet fork goes back in and the pallet stones are lubricated. Typical of many Russian watch movements, the balance cock has a shim. Whether or not these were available in different thicknesses so that end shake could be adjusted I have no idea. I've never had a problem swapping them between watches though which suggests that they are all the same thickness. Balance back in and that lovely moment when it starts to beat again. And then back into its big metal spacer ring come date quick set extension. Time to rebuild the dial side. It's a bit cleaner now. Keyless works back in place. Motion works reinstalled. Incidentally, as can be seen here 5 of the 26 jewels are vertical rollers for the date wheel and 4 are set into the main plate for the date wheel to ride over. Cynical marketing ploy anyone?? The date corrector mechanics are reinstated into the movement ring, all now free running. Most of the rust damage cleaned up reasonably well but there is significant pitting at one end of the spring. If I ever find a donor I will replace the worst affected parts but for now they work and the rust has been stopped. Calender wheels back in place. Date wheel back in place and the day wheel jumper and spring installed. Day wheel drops into place. Dial and hand back on following a clean up and a little fresh black paint in the hands where it was beginning to crack. This is the date corrector pusher and is I suspect the origin for the water ingress that caused the rust damage. It has a little neoprene seal on its back face so that the spring tension should seal it against the inside of the case. It was bone dry and all it would have taken is a little dirt stopping the pusher from closing properly and its an open invite for any contamination that comes along. Now cleaned and re-lubricated with silicon grease it will hopefully keep the water out. Re-cased and ticking away nicely. With the exception of the date corrector pusher issue these are well designed cases. Although they make no claim to water resistance they do use a design similar to that used in the Vostok Amphibia cases, with a thick gasket, a steel back that drops into place, and a threaded clamping ring to hold it all together. Looking a lot happier than when this all started. You can now see the date corrector pusher protruding from the side of the case above the crown so it is definitely sealing against the inside of the case. A new crystal allows the cleaned up dial and hands to look their best. And there is something about the dial layout and hands that just seems so Russian to me. I really like it. And of course the proof of the pudding.... This is dial down. DU was almost the same, only difference was amplitude which fell to 298. The vertical positions showed a tiny bit of beat error, up to 0.4ms, amplitude down to around 275, and slight rate errors, coming in at -5 s/d at one extreme and +3 s/d at the other, quite a respectable result. Maybe those crazy Russians aren't quite so crazy as they first appear. The little design quirks here all add up to a nice piece of engineering. The train wheel layout, and the asymmetrical pallet fork allow for a comparatively large balance wheel for this size movement (thinking about it without the date quick set and the extension ring). The use of 2 main springs running in tandem allows for a more even torque delivery as the springs wind down which should help to reduce isochronism errors, while also making good use of the available space. It all actually makes quite good sense in a kind of lateral thinking sort of a way. If you should be tempted to go for one of these then I would suggest that the earlier USSR ones are the better ones to go for. The later "Made In Russia" versions at some point were updated to a 21600 train, but weren't so well finished, and that date corrector/spacer ring became plastic with the mechanics riveted on, presumably to reduce costs. Bit of a shame if you ask me. If you made it this far then I guess I haven't bored you to sleep. Thanks for reading.


 1 point
.jpg.a9ac90d23abc35764bda67fc425a25dd.jpg)
.jpg.df3849aeb51f108bfb7546bd9ded0bba.jpg)
.jpg.59860060dba331e18669b5520dab516d.jpg)
.jpg.d1b716decd331250a3e25fe6384ff145.jpg)
.jpg.bc7e349eec71a303670fe8506a981759.jpg)
.jpg.d7b29b866817f988776067e59097154d.jpg)


.jpg.ed09bd80abbf4daade43ee70bcf8df2c.jpg)