Leaderboard


Popular Content
Showing content with the highest reputation on 10/19/19 in all areas
-
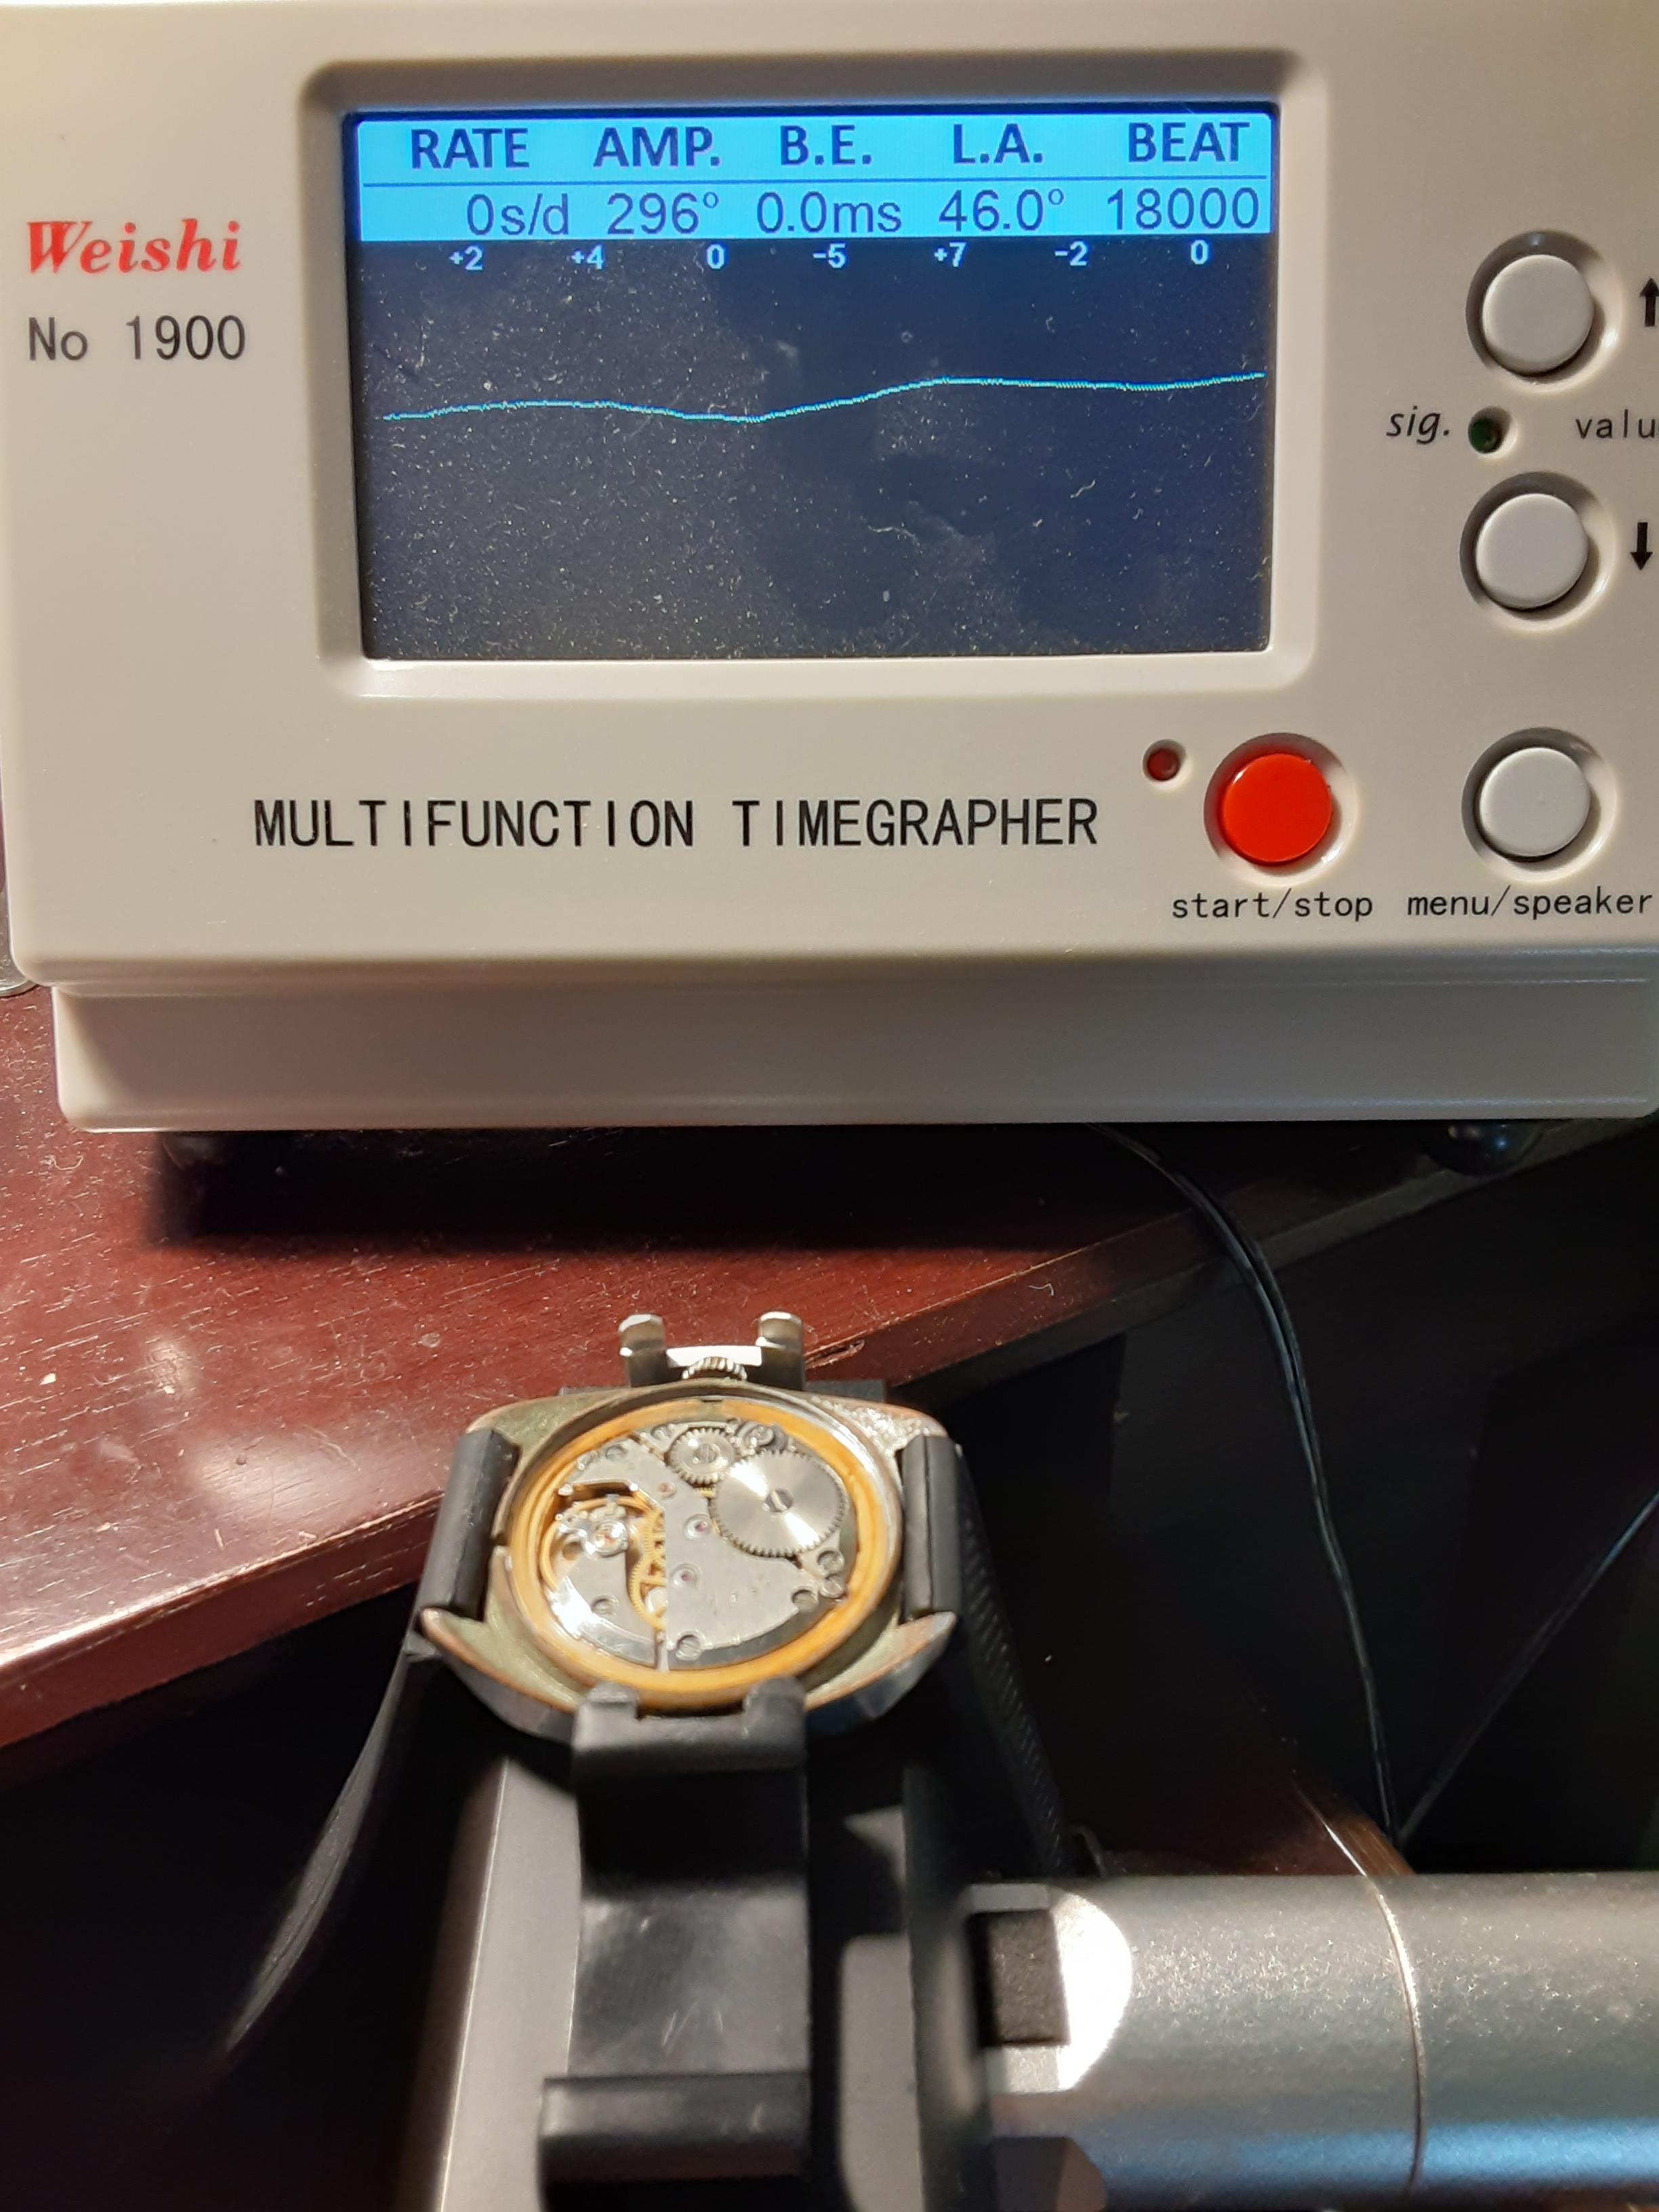
A couple of simple tests: can you grab the balance rim and lift and drop the wheel to see if the end shake appears excessive? Even if you don’t know what this should look like, start doing it now as it’s a common, trivial examination. Be careful when doing this with non-antishock balance jewel settings. Secondly, hold the watch in the questionable position, and under lots of light and magnification, observe the balance wheel and hairspring: does it rub anywhere?1 point
-
There's worse
 1 point
 -
This is very true, in the process of heating, as in when tempering, steel does go through different colors .I do not recall the exact temperatures however.But I do recall that blue is in the spectrum.However I would think that heating such a small piece of metal of an unspecified alloy to an exact temperature to obtain an exact color could require so much art and science as to border on magic.1 point
-
Its a Dutch Zaandam clock. They do have other names. The antique originals are nice. Reproduction movements normally 8 day made in there millions in the 60's & 70's. You see loads of them on ebay.1 point
-
I use a Gloster tools HSS graver which work well, and I use only around a 2.5mm with which speeds up sharpening. I'm led to believe that early Stubbs carbon steel gravers are some of the best, according to my old tutor.1 point
-
Regarding blued-steel, you more often hear this from the "clockies", but you can't match a real heat-treated blue by chemical blueing.1 point
-
I will look through my large selection of hands when I get time to do it.1 point
-
When the hand is made of steel, only heat is needed :-)1 point
-
To the OP: what country are you based in? Do you have the hole-to-tip dimension?1 point
-
I love those old Russian watches. Looks like you were lucky not to have hit that one with the shovel when you found it. lol1 point
-
Various threads about that. First, scratches are removed with wet paper, then polish with diamond paste. All that with a rotary tool or bench motor.1 point
-
Thanks for your kind words Mark. Perhaps I was a little sensitive, I have that problem. I try to control it but sometimes it get away from me. I guess I thought that since my posting was directed to a single individual its wouldn't be a problem. But it was in a public forum so I see the problem. I'll reread the forum rules again to refresh myself on what is and what isn't allowed. Thank You Michael1 point
-
Bluing can be tough..it is a chemical process involving nasty chemicals. I would advise against it.a blue black finish can be achieved pretty easily with different phosphate solutions that are available. Often advertised as rust converter. They change iron oxide into iron phosphate.1 point
-
Definitely agree. Pancit is my favourite Halo halo in the summer1 point
-
It's out of center, check pic for adjustment. The spring should be centered in the regulator when you're done, if it's not, push it right next to the stud to make it centered. The pins (pin and boot) should have a gap of about 1 hairspring thickness, and it should bounce from one to the other evenly when running.
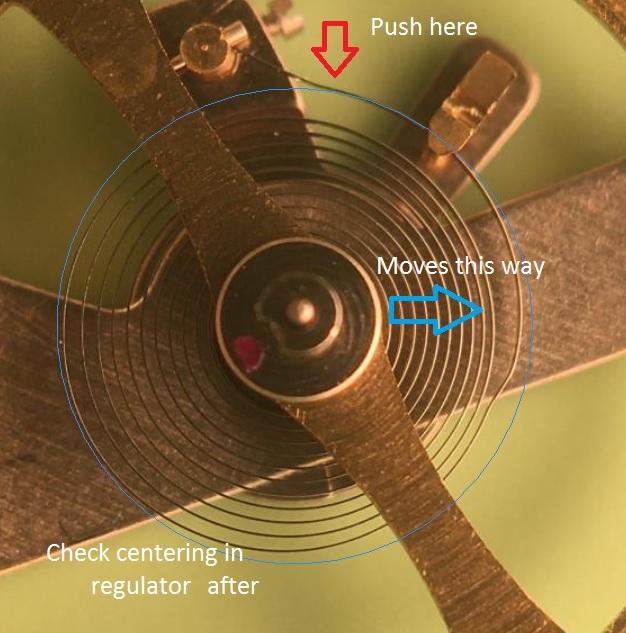 1 point
 -
As we appear to be somewhat going off subject I will continue with that. The jacot tool mentioned above is an interesting tool. As a young watch student one of the older watchmakers showed me how to use it. So this is what I got out of it to be good you need to practice every day. If you know how to use the tool like he did the polish produced is outstanding and that's a gross understatement. In the absence of that tool and the practice of every day a balloon Chuck works fine.1 point
-
In lieu of someone coming up with the hand you need, or a source to buy from, I've got something that probably fits into your category of an idea! You can pick up generic second hands relatively inexpensively from a source like Cousins: https://www.cousinsuk.com/product/centre-seconds-by-size; they do the 0.25mm you need. Now whilst it looks like the longest they do is only 15mm note this is from the centre hole to the end; not the entire length. How long is the entire hand? I'm not sure but if I take their scale diagram and do a very simplistic split-the-15mm-into-four I get 3.75mm per quarter. If I then transpose that quarter to the remaining length I can see the entire length will be over the 18.5mm you need: But you require a squared off end ... so you could carefully file to the length and profile you need. Bingo! Ah ... but it's not blue. Well that's now over to your requirements and skills. Painting (e.g. airbrushing) is straightforward or you could look at any of the helpful online resources videos on how to hot blue (stainless) steel.
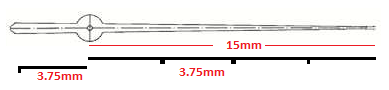 1 point
 -
I was complaining about the same thing to couple of watchmakers I know. One pointed out there be a big variance in the quality of the steel and temper so that might be part of it. I agree with nickelsilver, life is a lot easier using carbide cutters....but imo the easiest is to harden and temper the part after machining. Your HSS cutters will last a lot longer in annealed O1. Which ever route, sharpen a bunch at time, get them really really sharp, and grab a fresh one when it starts to feel dull1 point
-
That time is not out of the ordinary on blued steel. You get used to doing a quick touchup every few minutes on the arkansas. Before I switched to tungsten carbide gravers I would have several ready to go, rough, semi finish, finish, could make it through a staff or stem without sharpening usually. Then hit them all on the stone(s) after.1 point
-
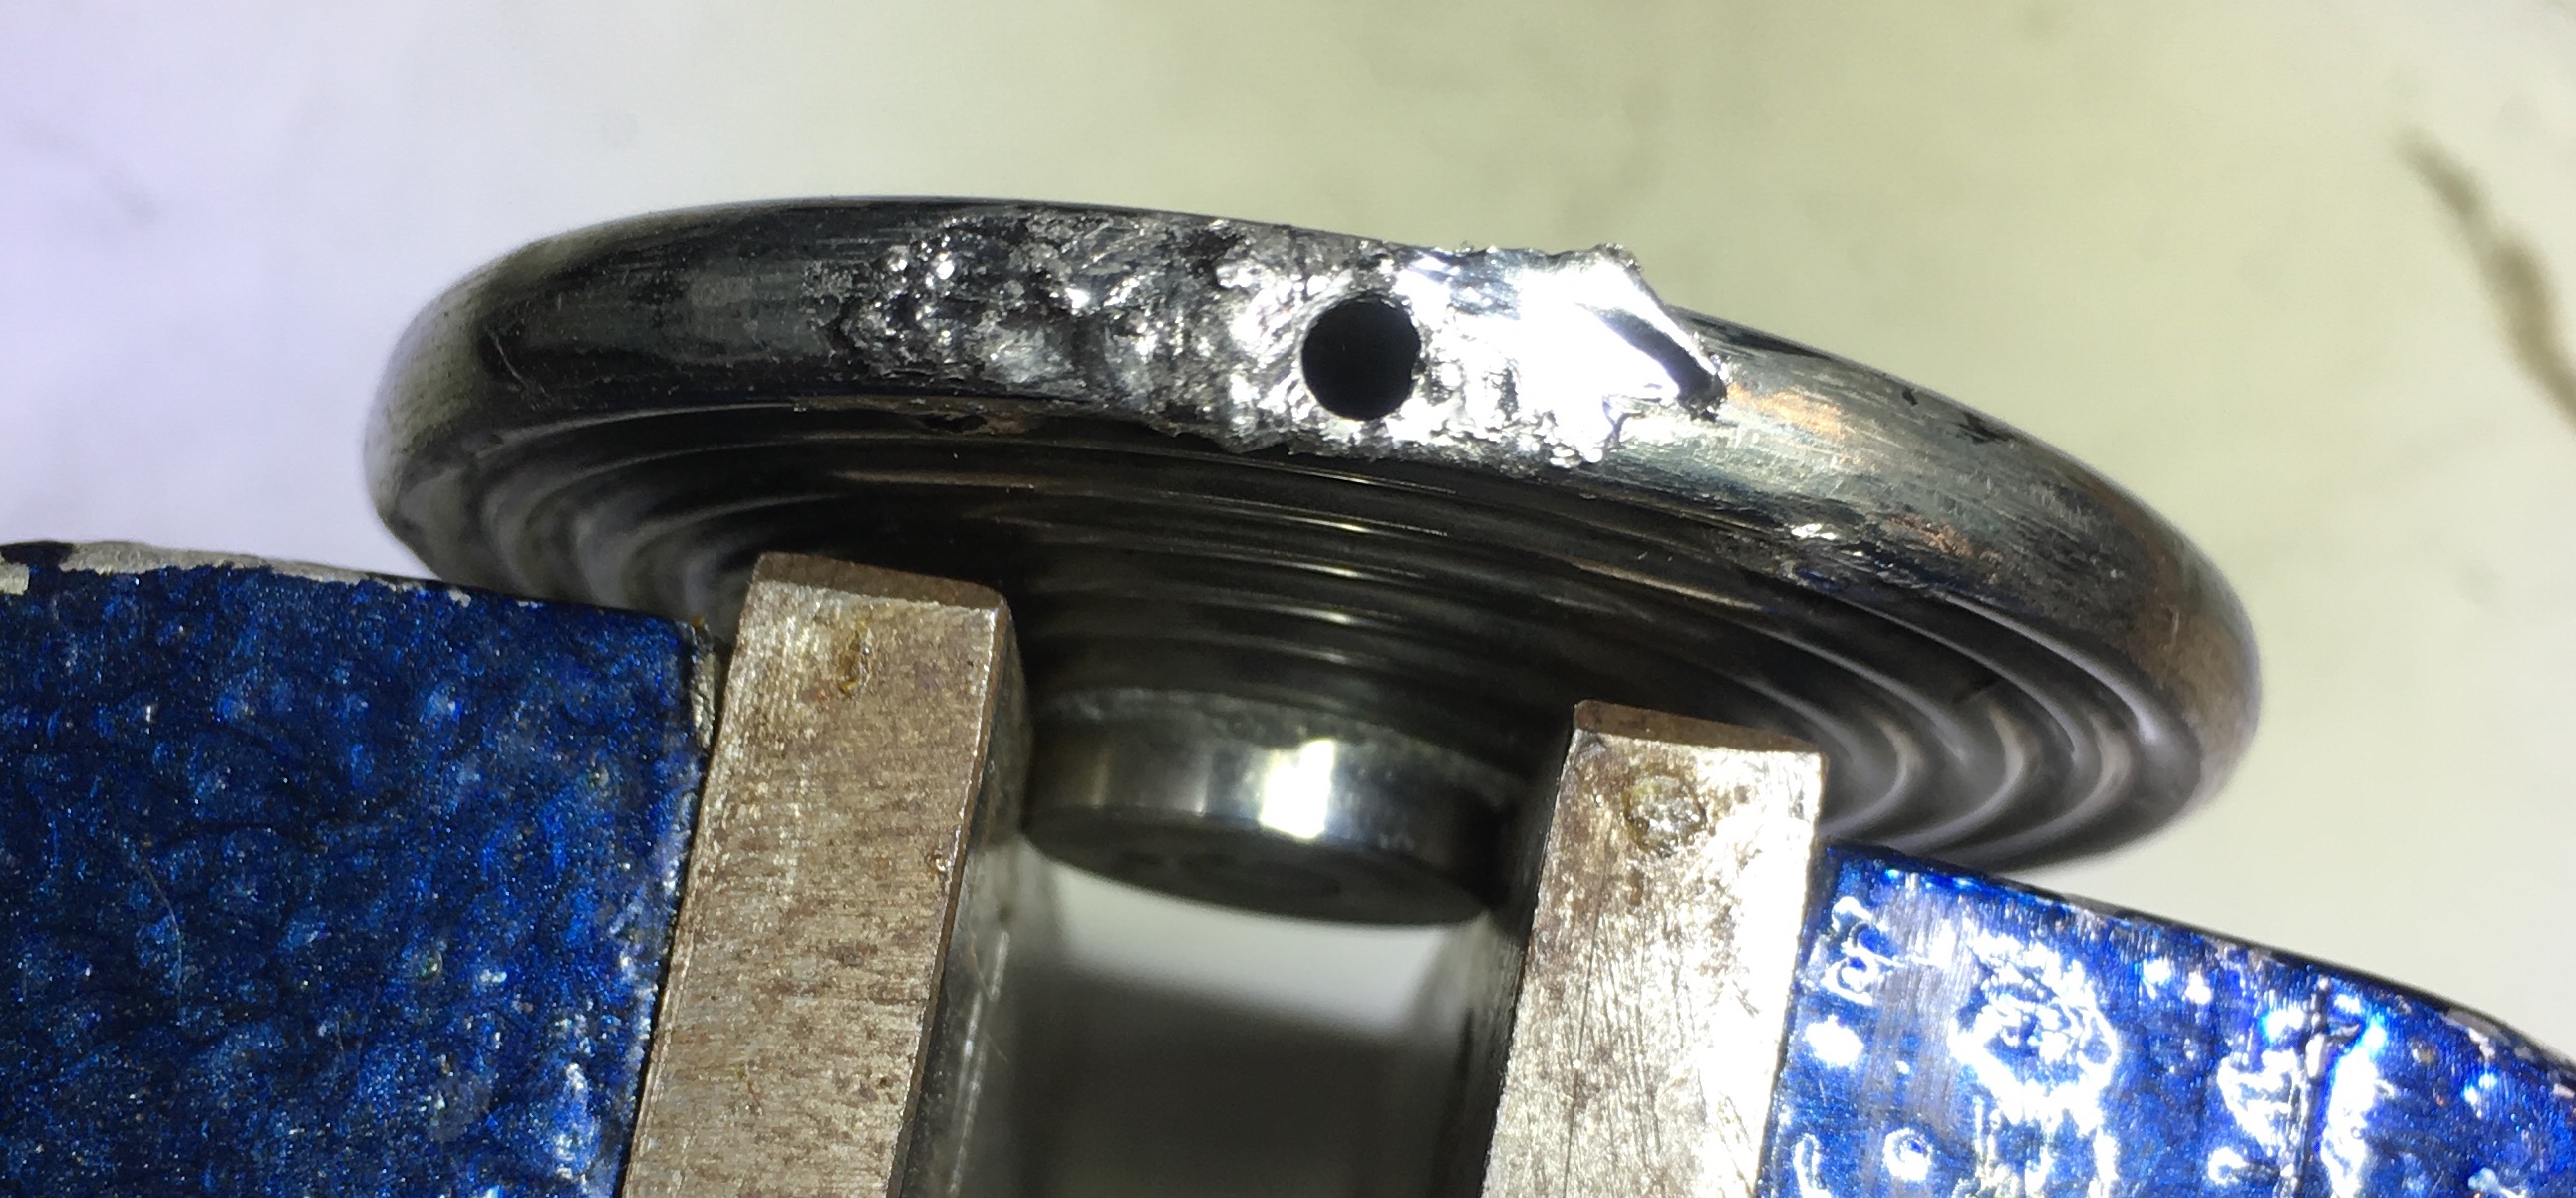
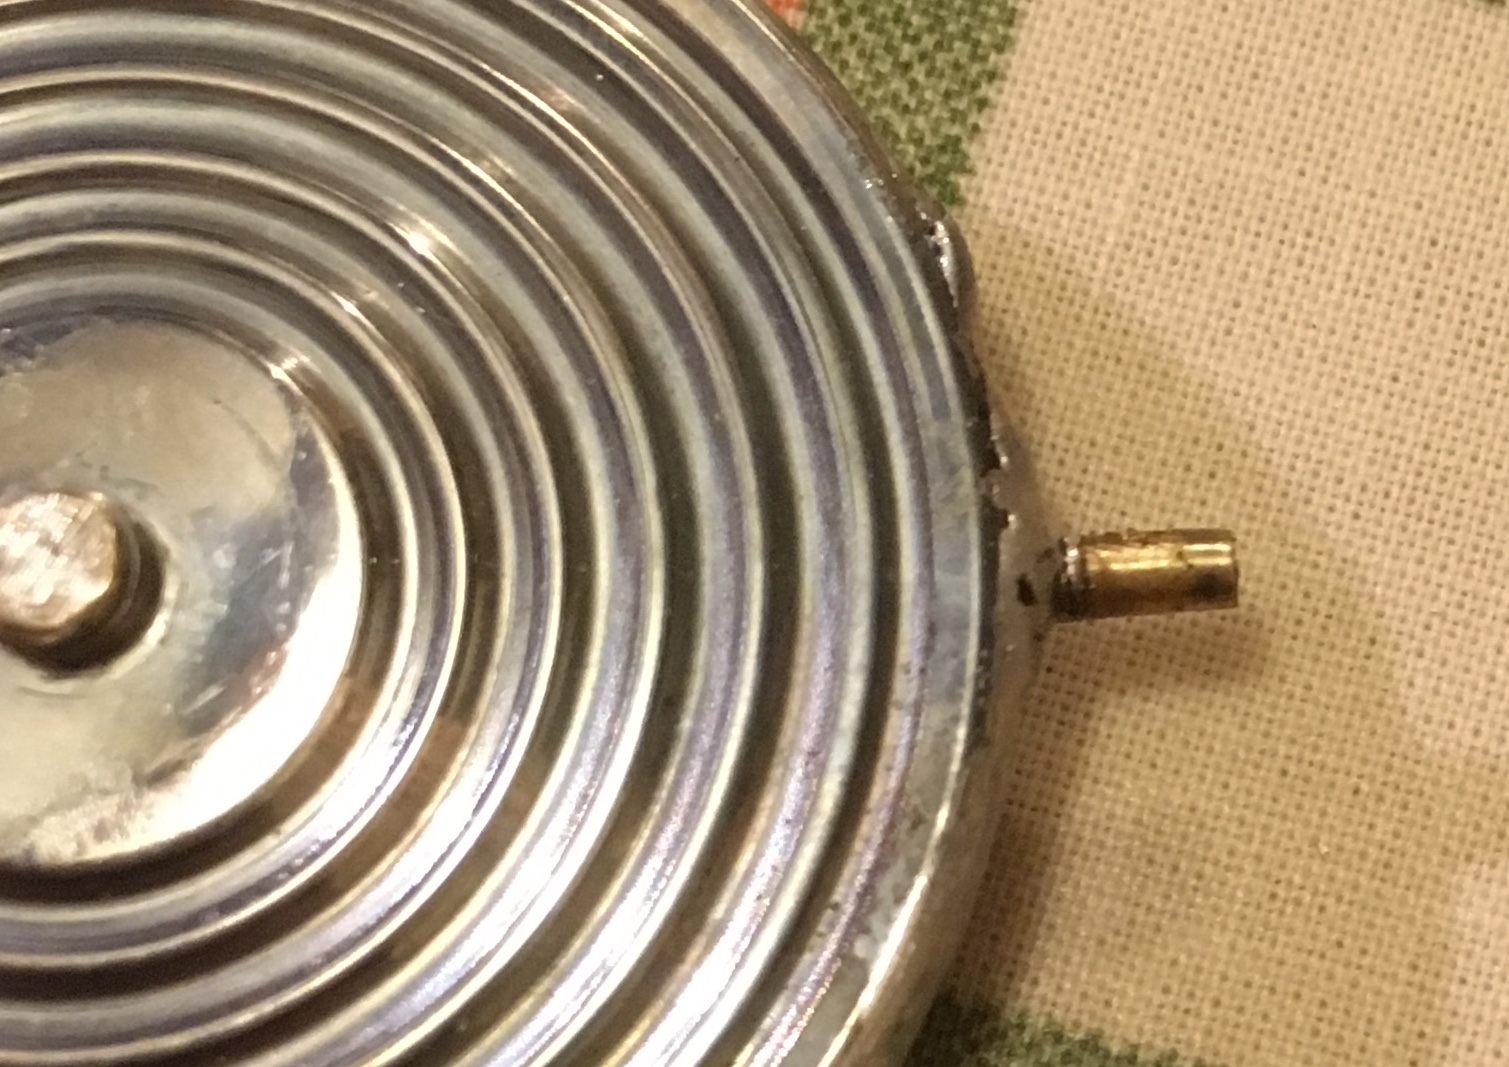
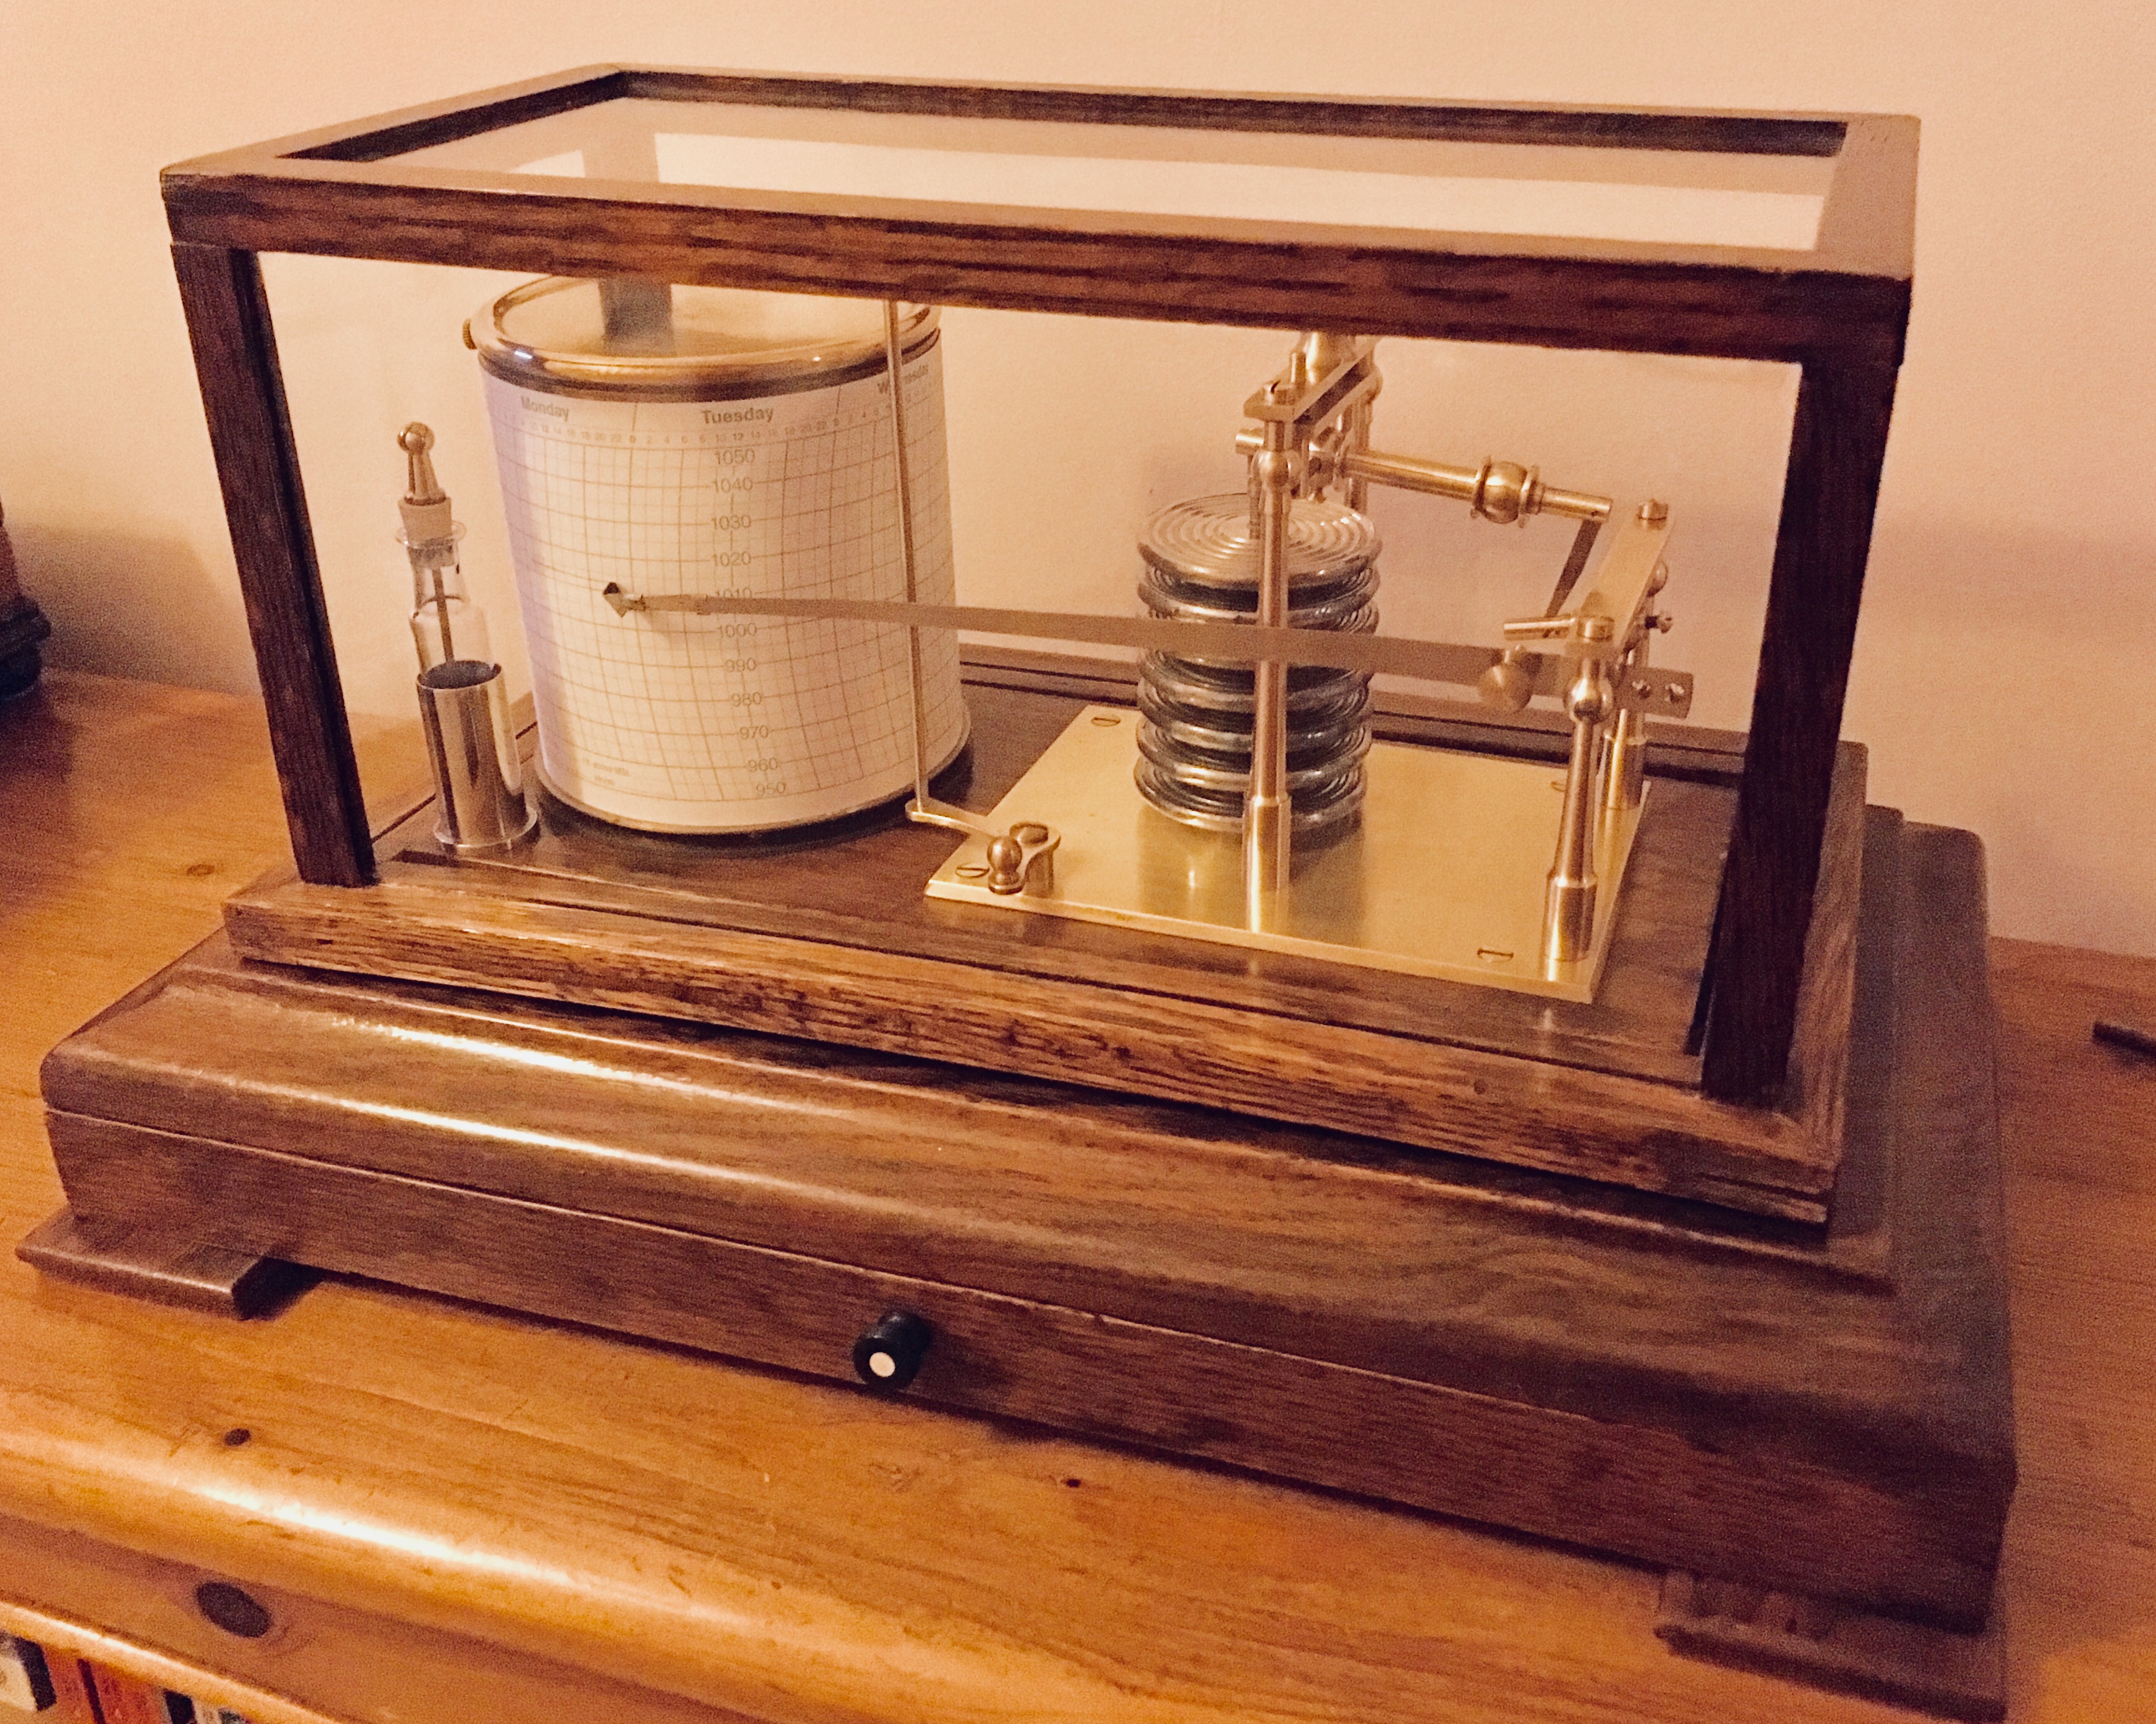
Time for an update on this... which appeared to have suffered a few challenges over the years. 1. Bellows Some research led me to discover that I needed about 1”Hg vacuum inside the leaky capsule. We still make some old bellows at work and have equipment which might have done this job... a vacuum bell jar with an inductive heating coil inside. Sadly I only had one part to practice on and I didn’t want to ruin it... nor break the equipment! So I found the original hole and made a new short piece of brass pipe and soldered it into the capsule in the same way as the others and made a vacuum pump from a syringe and bicycle tyre valves. This all worked well and whilst I couldn’t measure the vacuum, the capsule contracted down to the same height as the others with the best vacuum I could get. All was good until I tried to crimp the brass tube so I could cut it off and solder closed. I had hoped that it wouldn’t leak in this process, but sadly I was wrong. If I’d had plenty of brass tube then I could have had a few more attempts, but I’d had to make what I had from a brass bolt and didn’t fancy turning loads of them, even if I’d had any more suitable bolts. In the end I decided to do a temporary fix until I had more time to play, so I held the capsule compressed in a vice and soldered it shut. When released from the vice it retained about 50% of the compression. So it now has a little more air than it should do inside which will make it slightly temperature sensitive, but probably no other effects. The end piece of the bellows which connects to the lever arms was a home made replacement (possibly the bellows has been taken from another barograph), and the link pin hole was in the wrong place. I modified that today after the pictures below were taken. 2. Case I had to strip all this apart as it was warped and the joints were loose, plus the drawer didn’t fit properly. I managed to retain most of the original varnish then waxed with Liberon black bison paste 3. Lever mechanism I stripped all this down and cleaned the brass and polished all the pivots. Cleaned the dried up ink out of the nib and the bottle. All the brass had a grained finish so I refinished in the same way, without making it look brand new. I was going to use horological lacquer on the brass, but it didn’t seem to be finished that way in the first place so I opted for a coat of clockshine wax from Meadows and Passmore. I've never used that before so we’ll see how it goes. I can always strip it and lacquer later, but stripping off lacquer in the future would be a pain. Bought new charts and ink from Barometer world and voila... I still have to service the clock but since it is going I wanted to run it for a couple of weeks to see if it has any issues. I’ve had it running for a few days and made some calibration adjustments (there are a couple of option holes on the linkage); all seems good now but really need some bigger swings in atmospheric pressure to be sure. More to follow when I strip the clock down (one day)

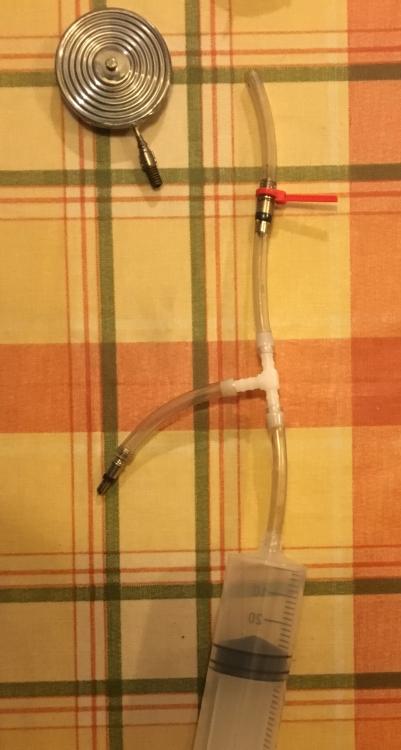
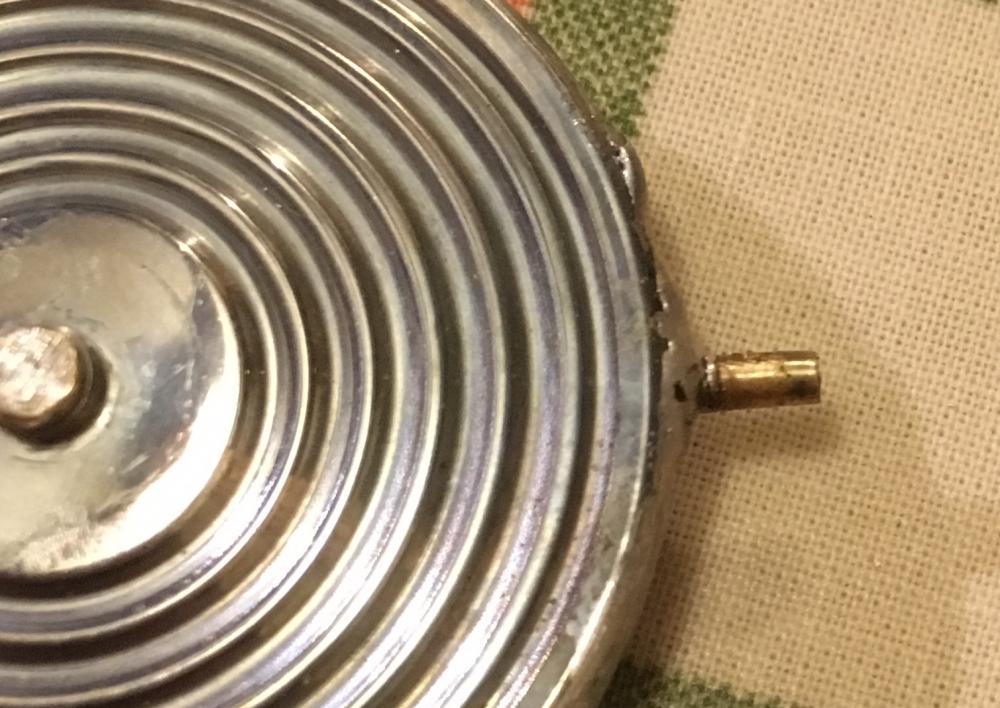
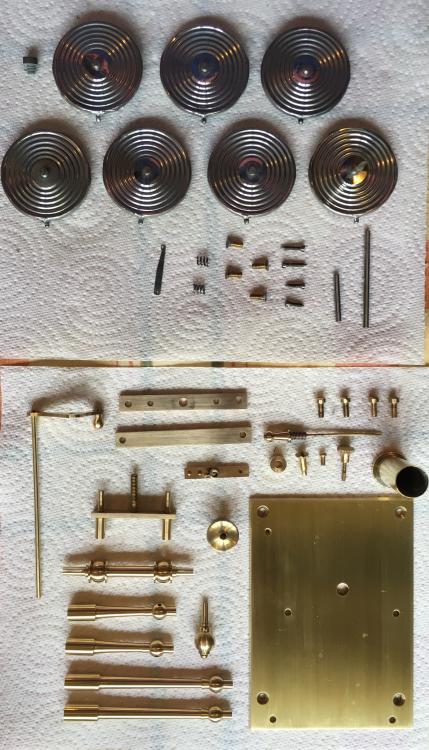
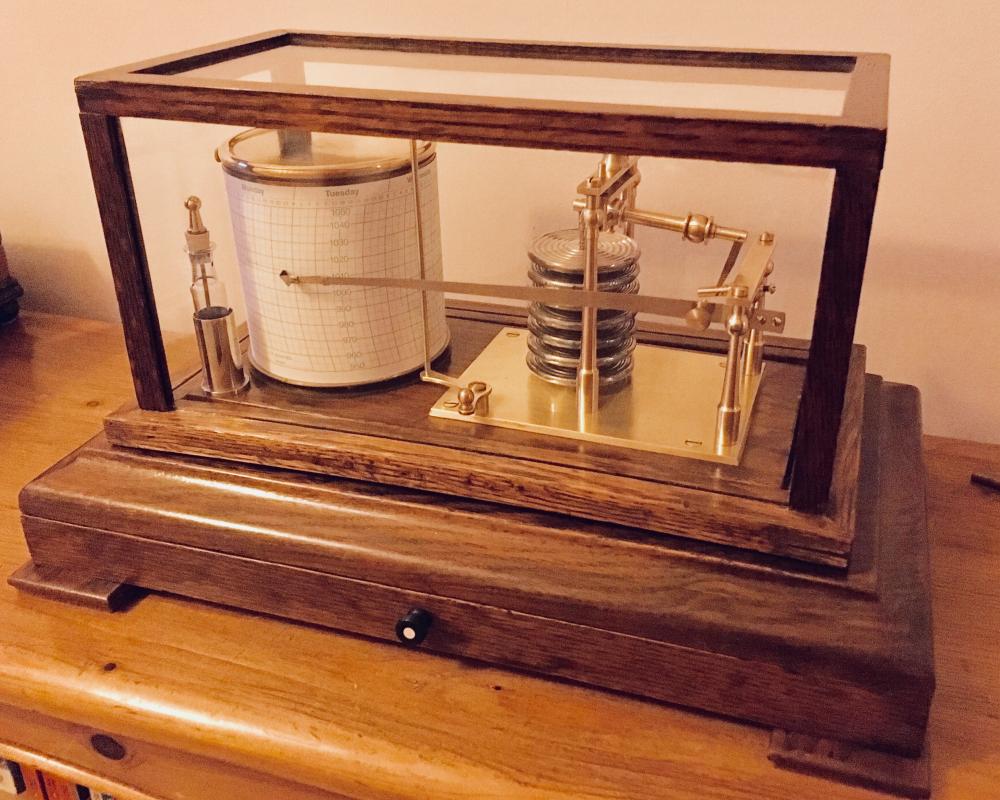 1 point