Leaderboard


Popular Content
Showing content with the highest reputation on 03/19/18 in all areas
-
2 points
-
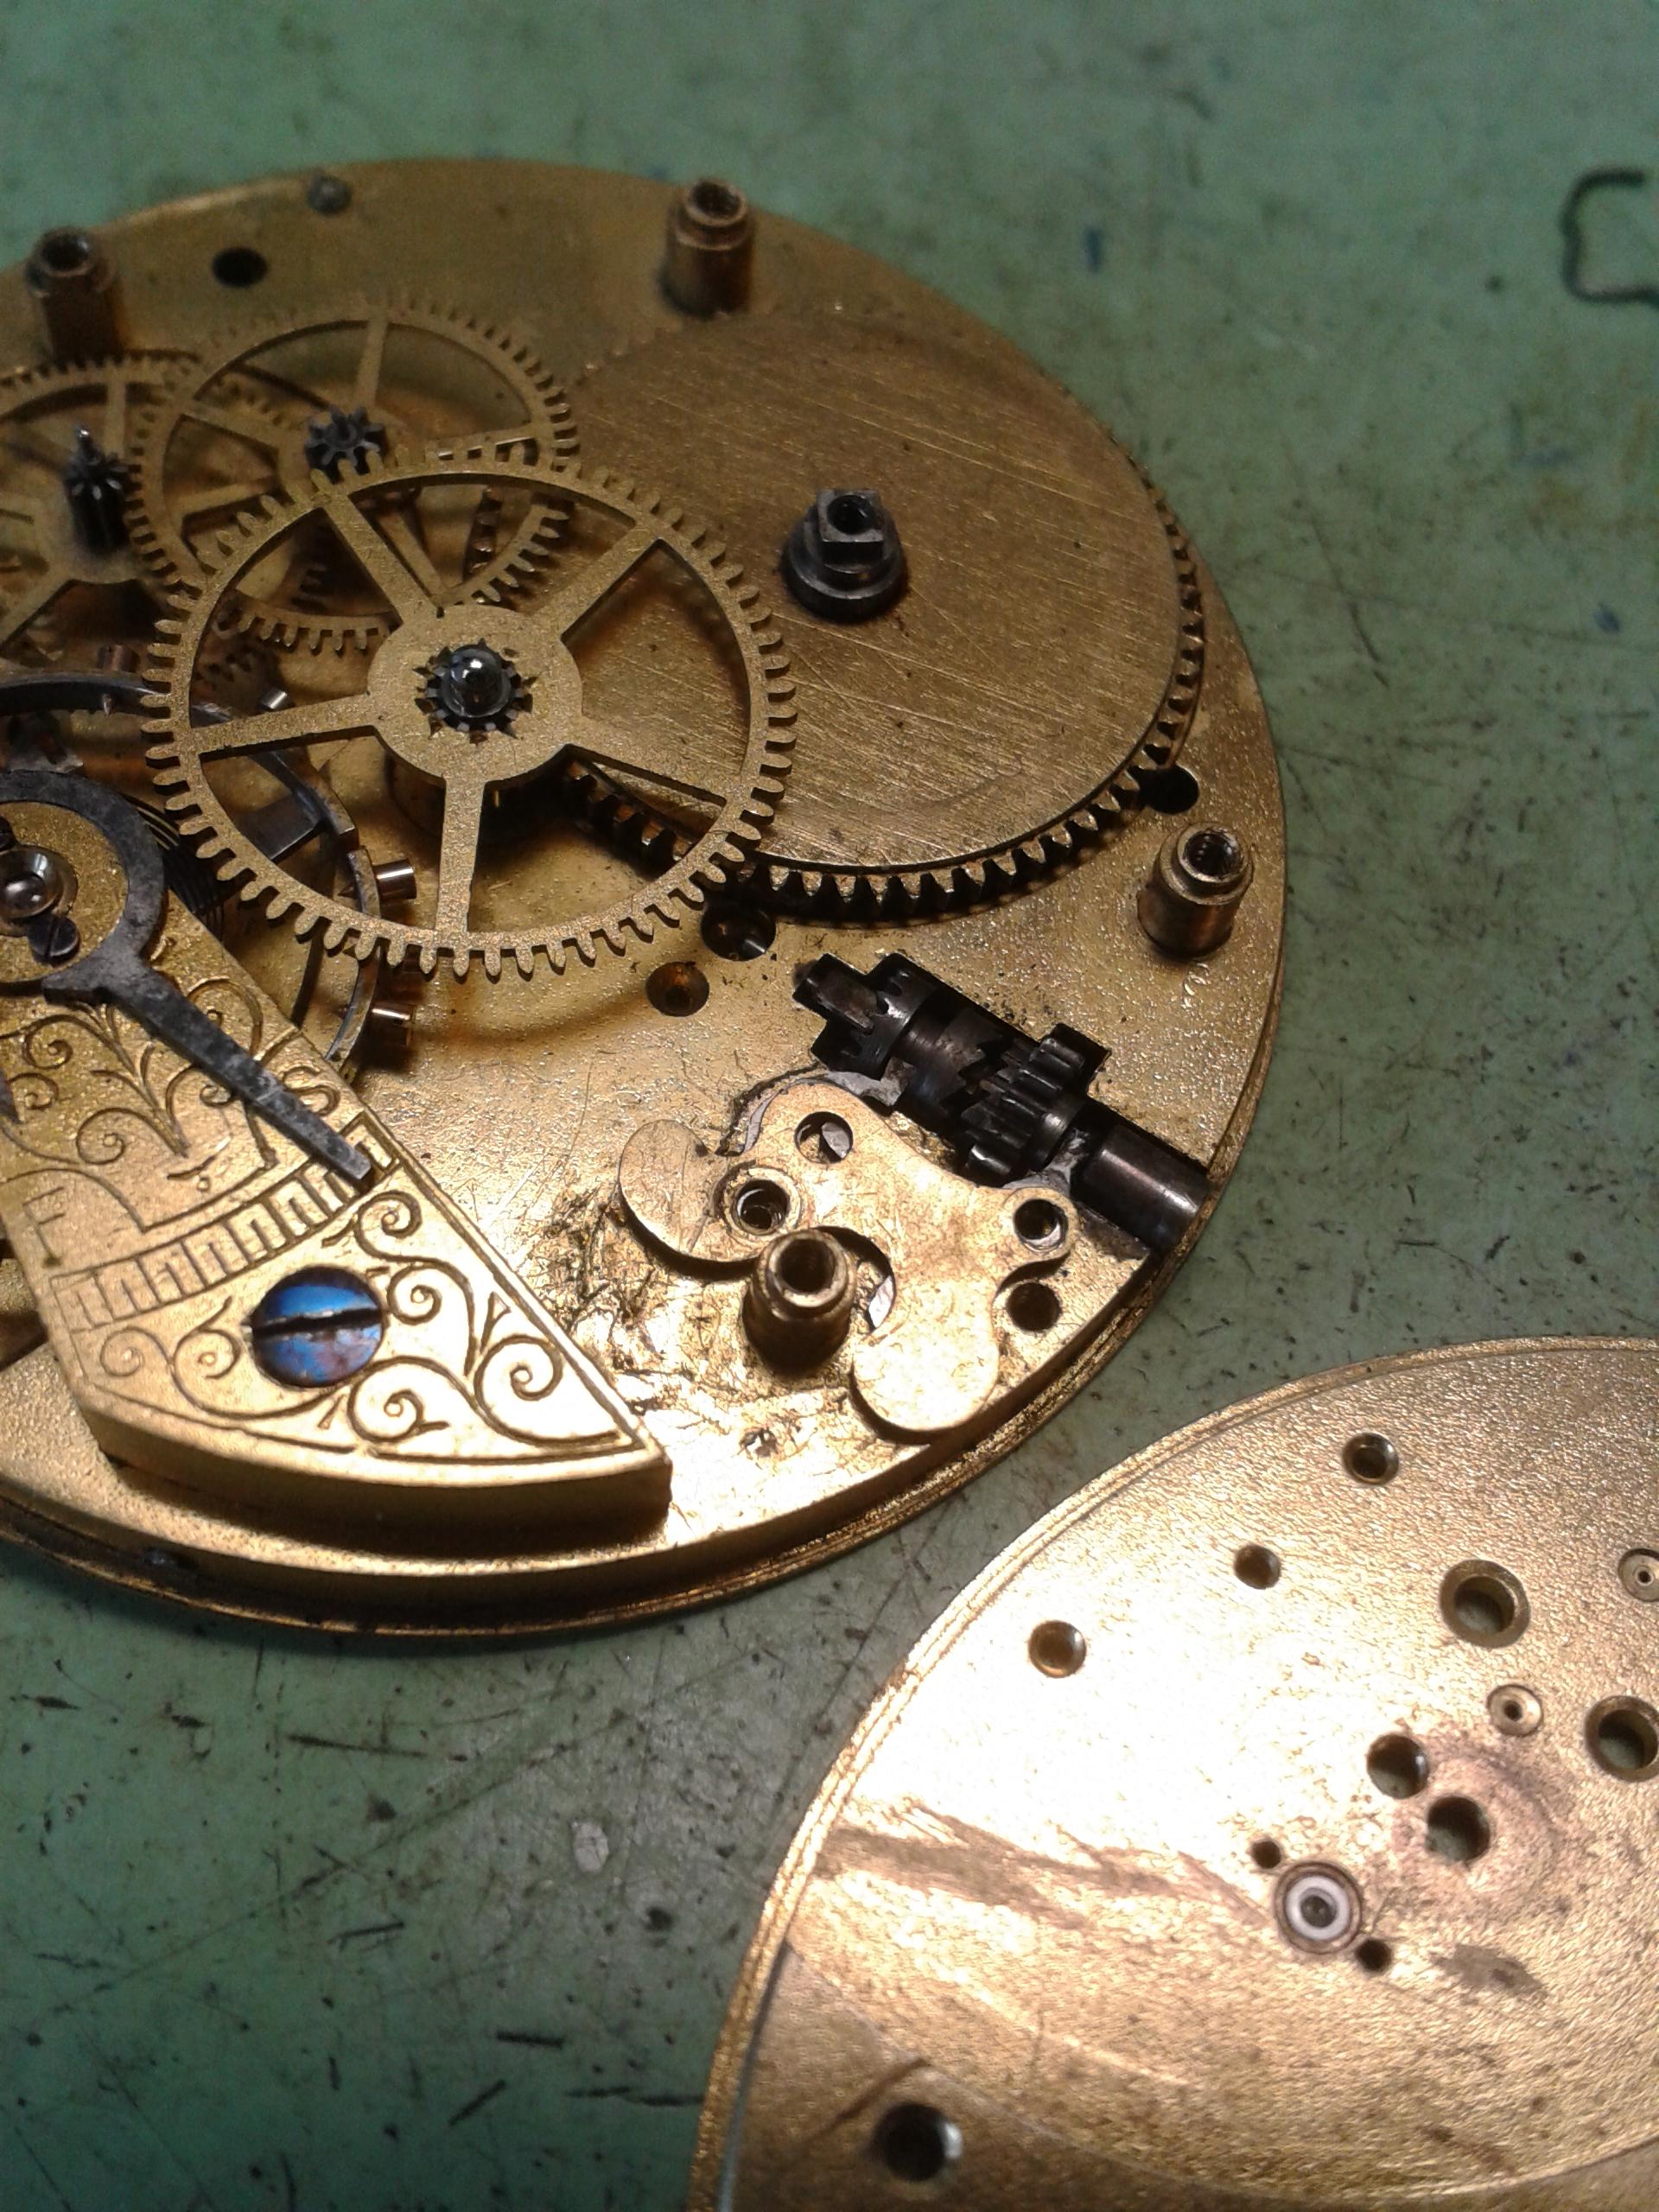
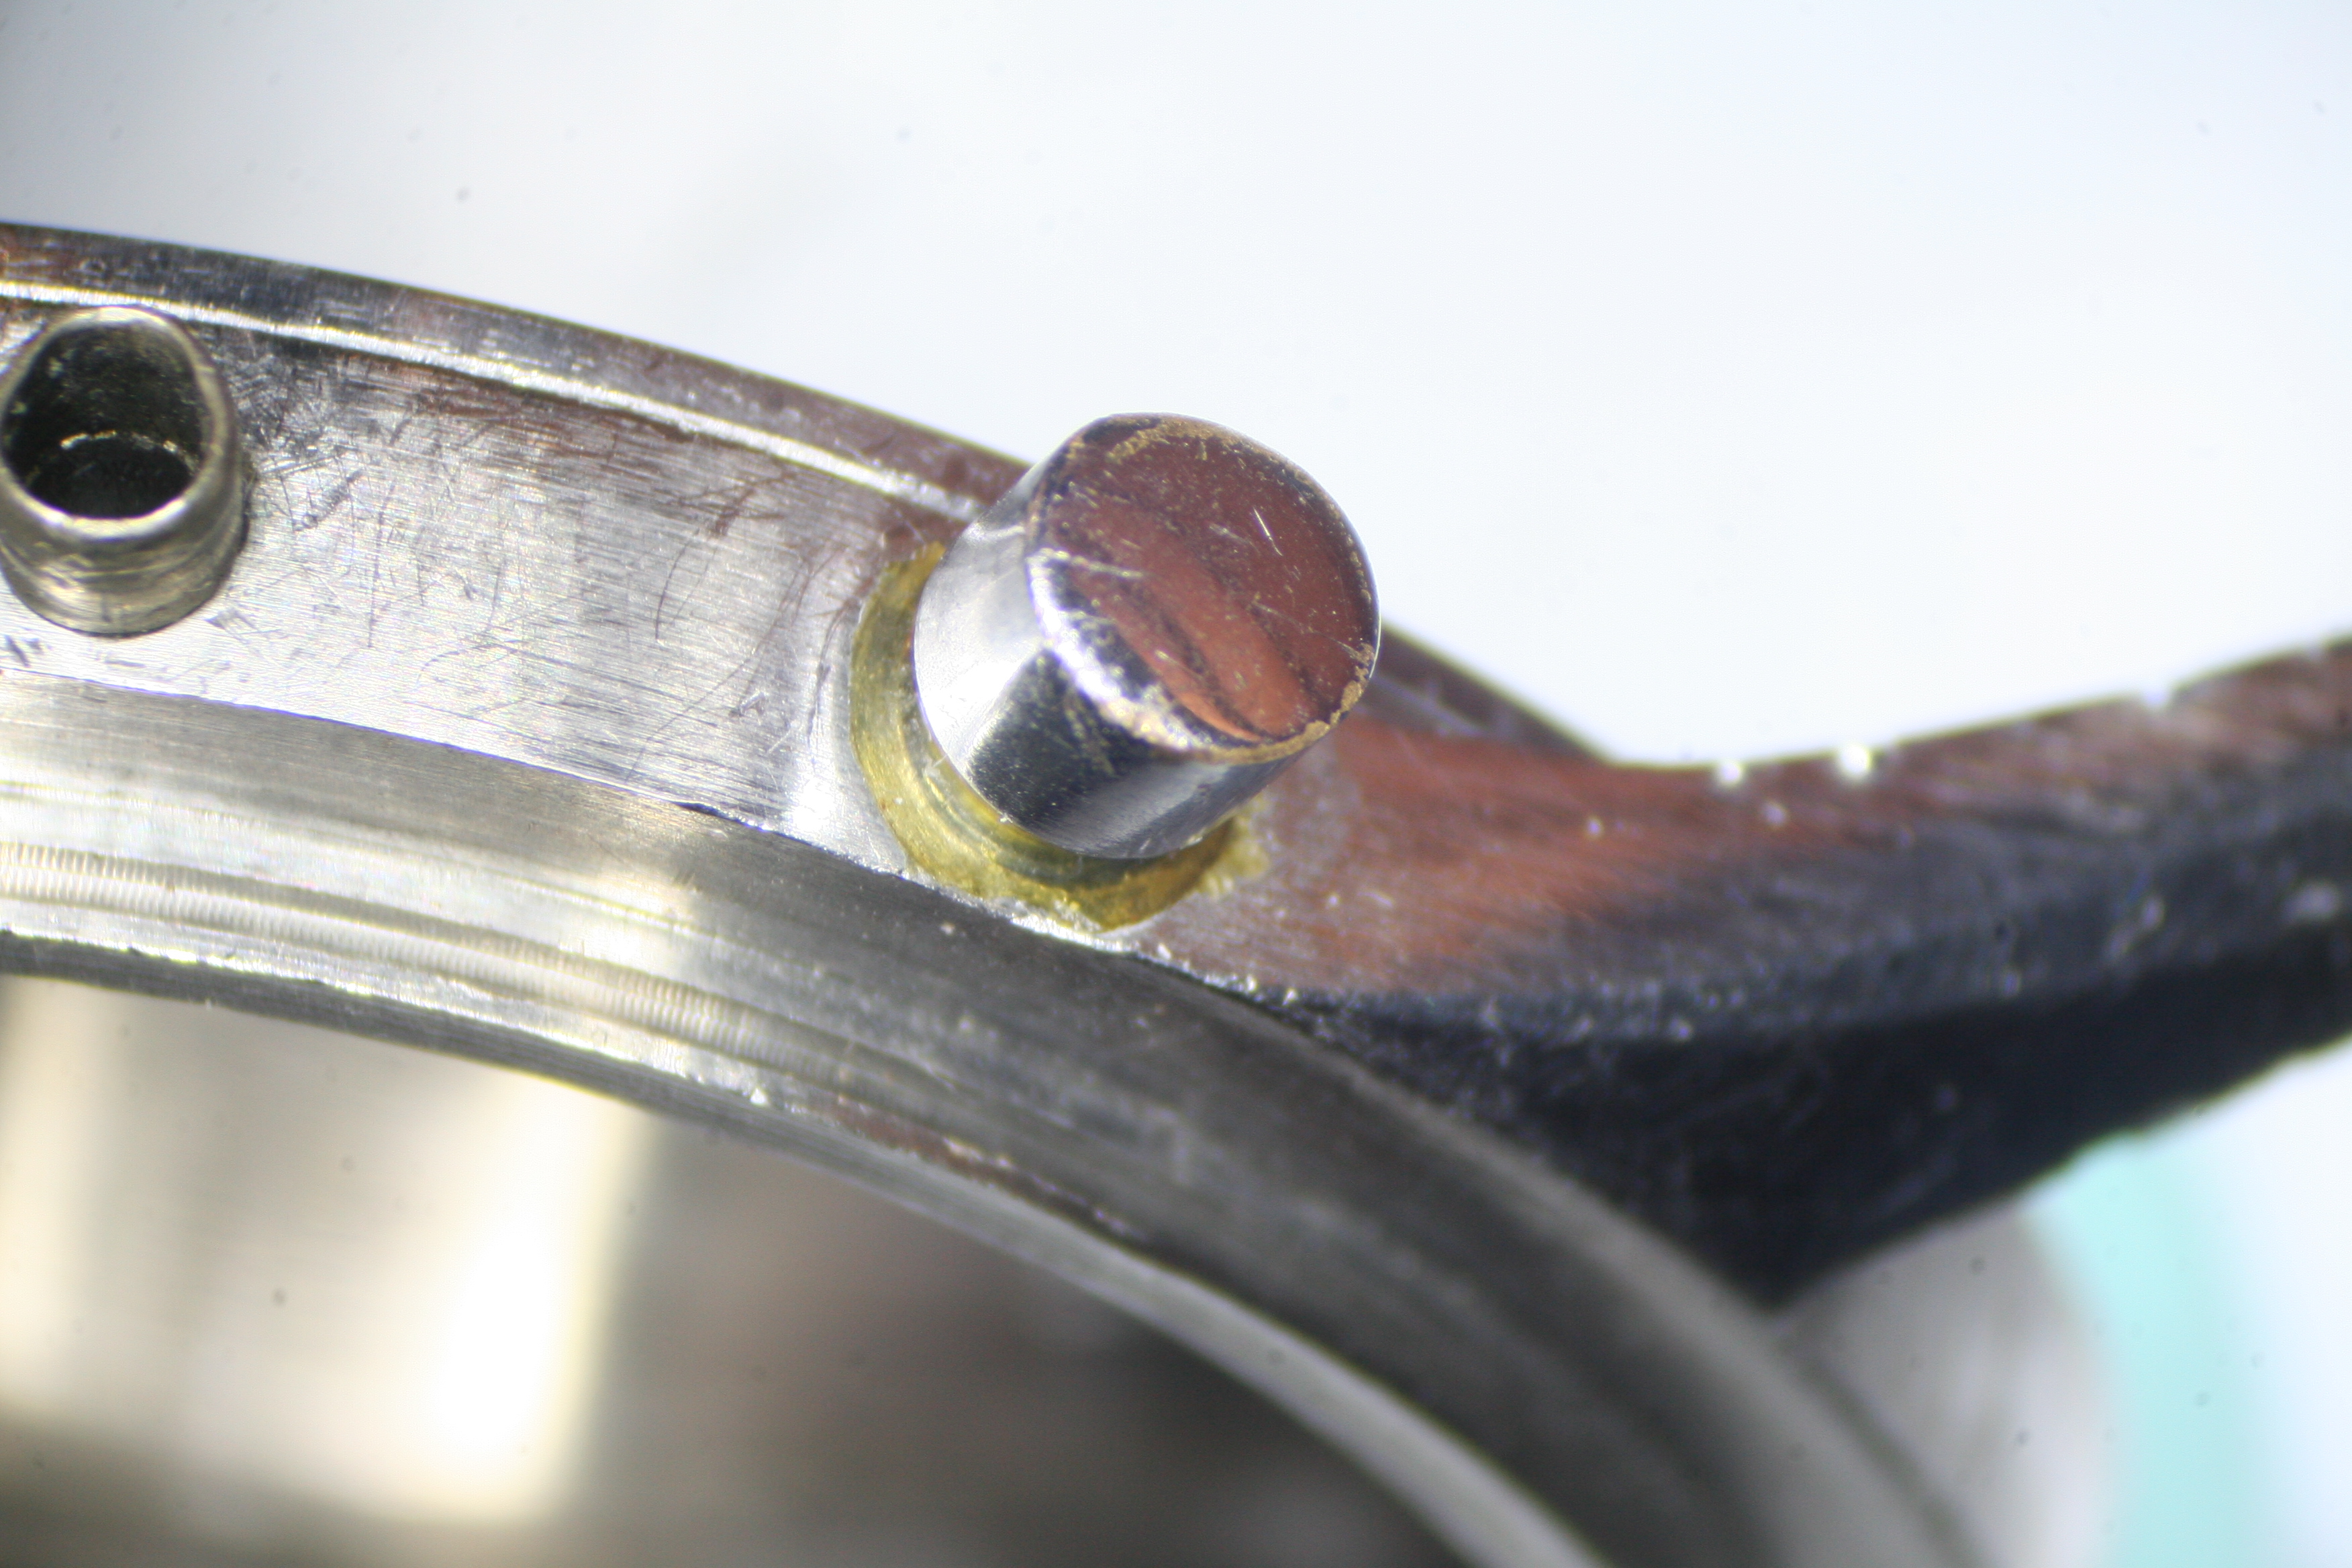
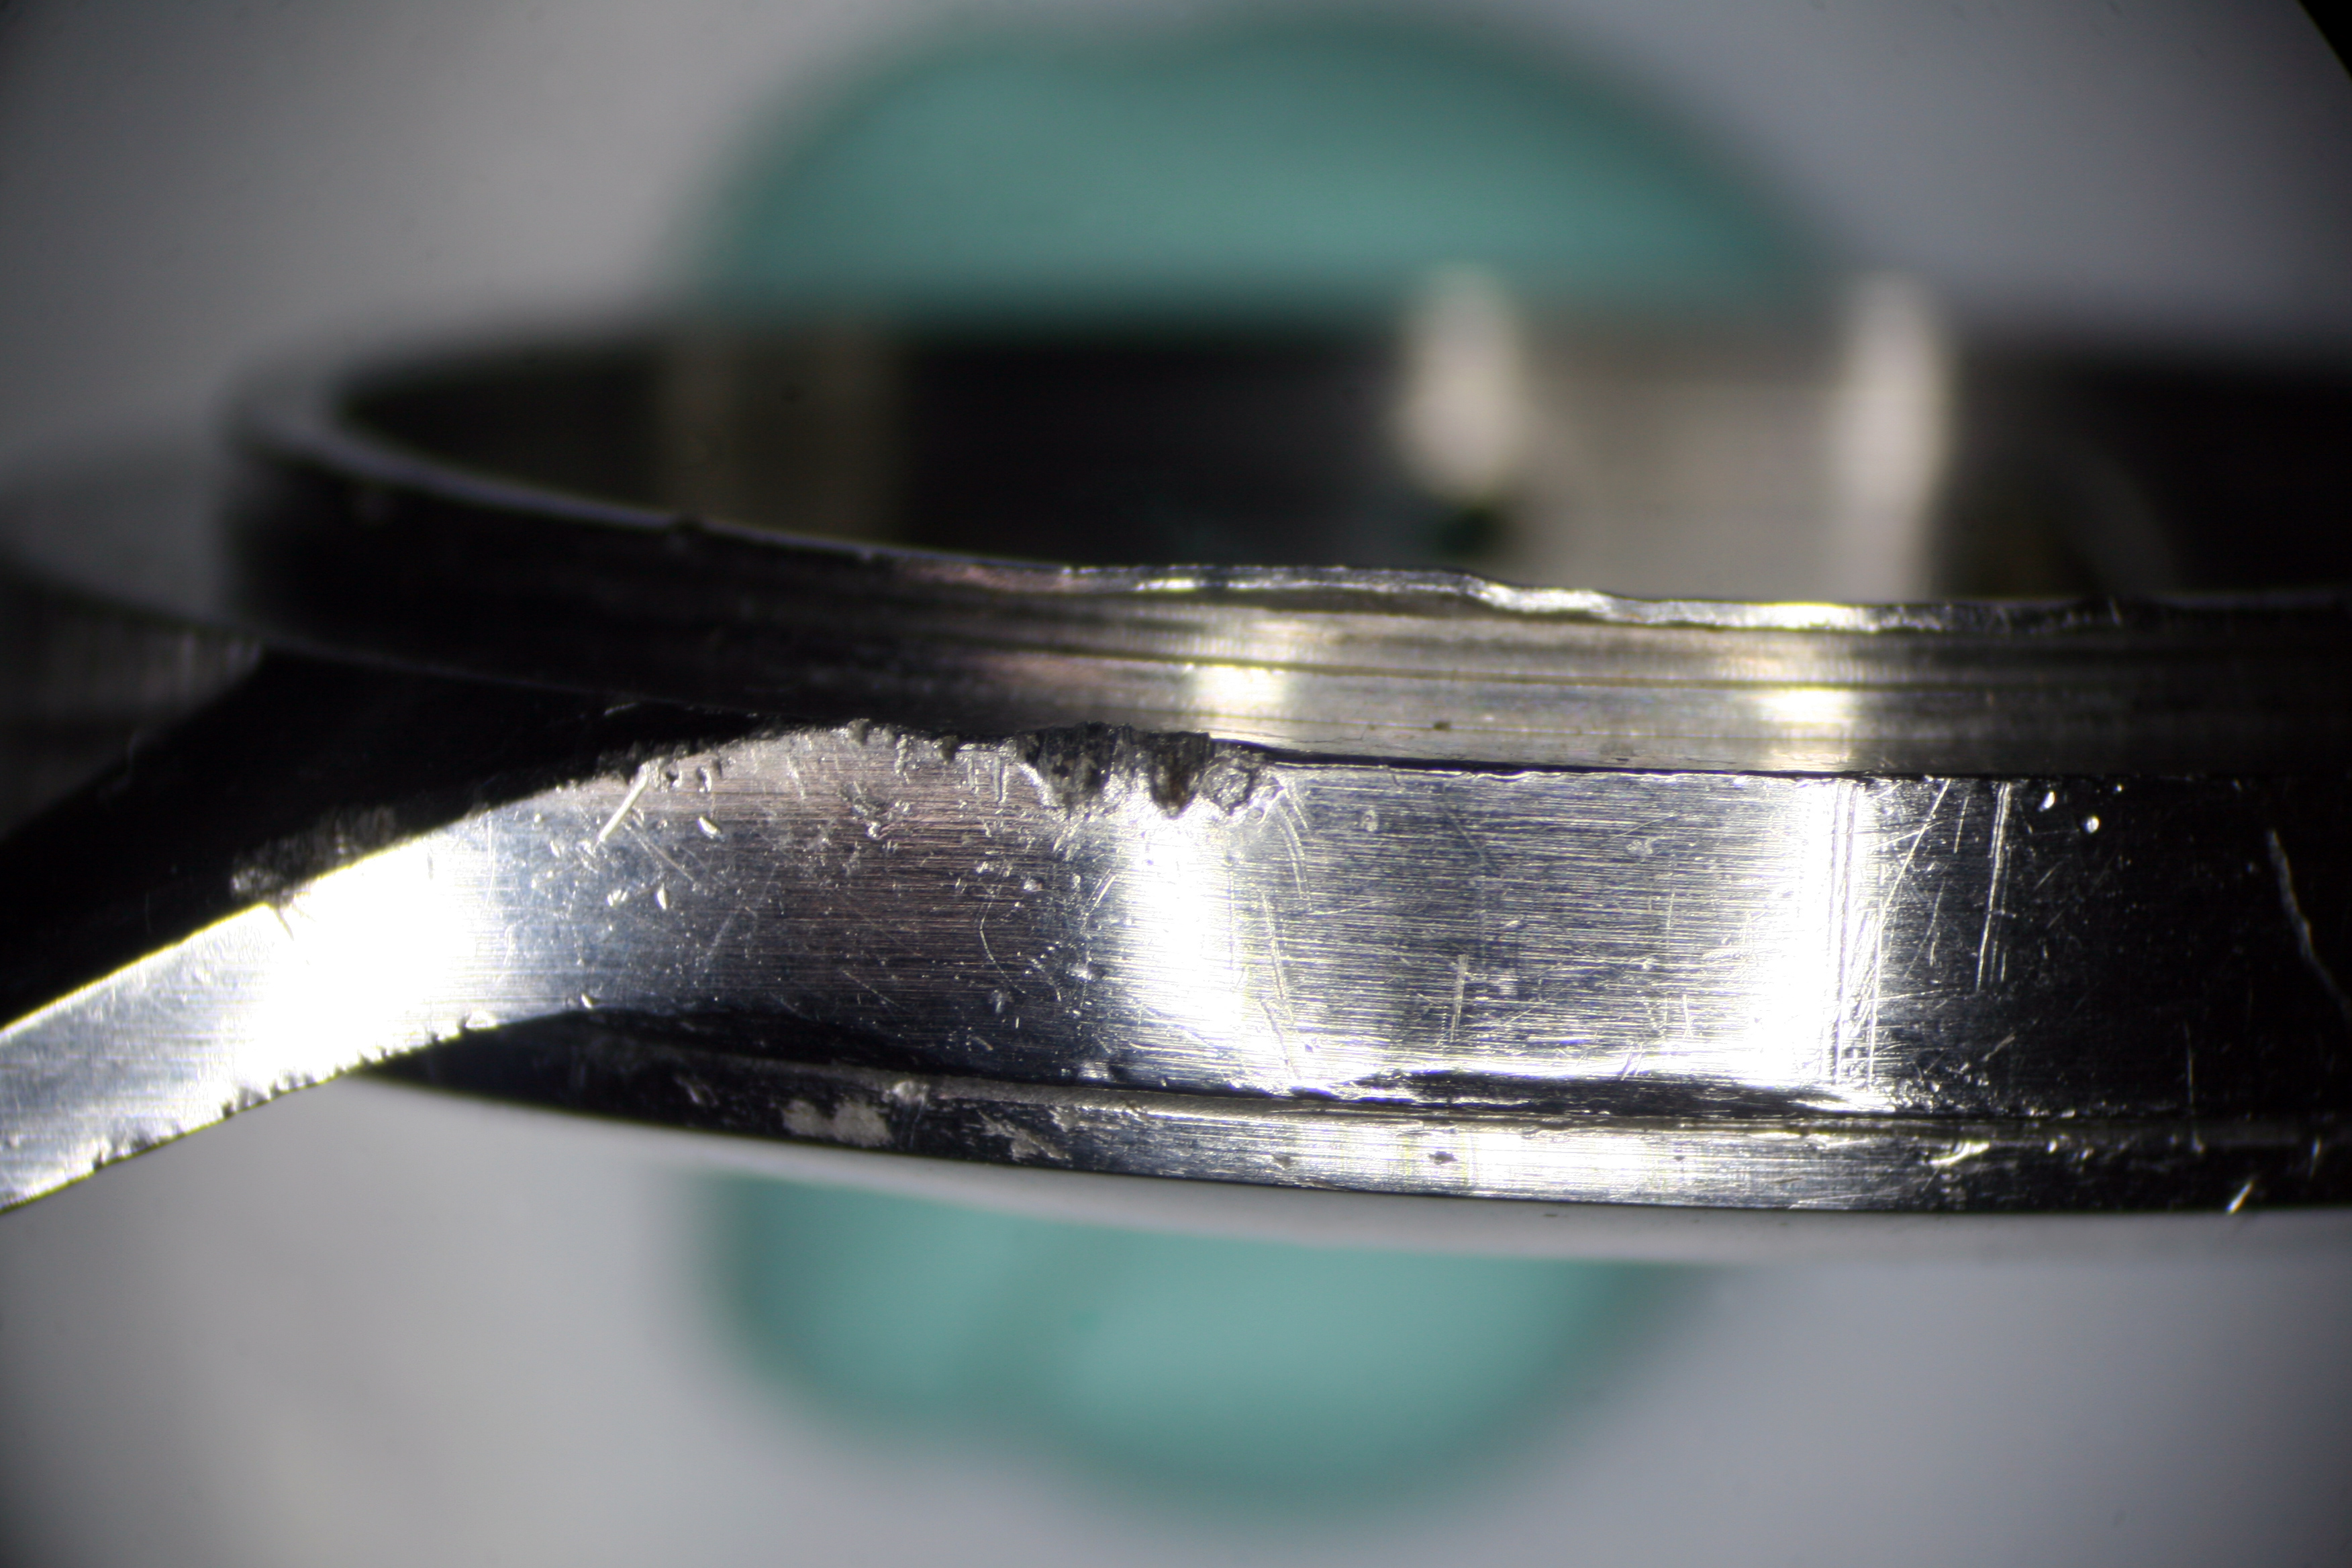
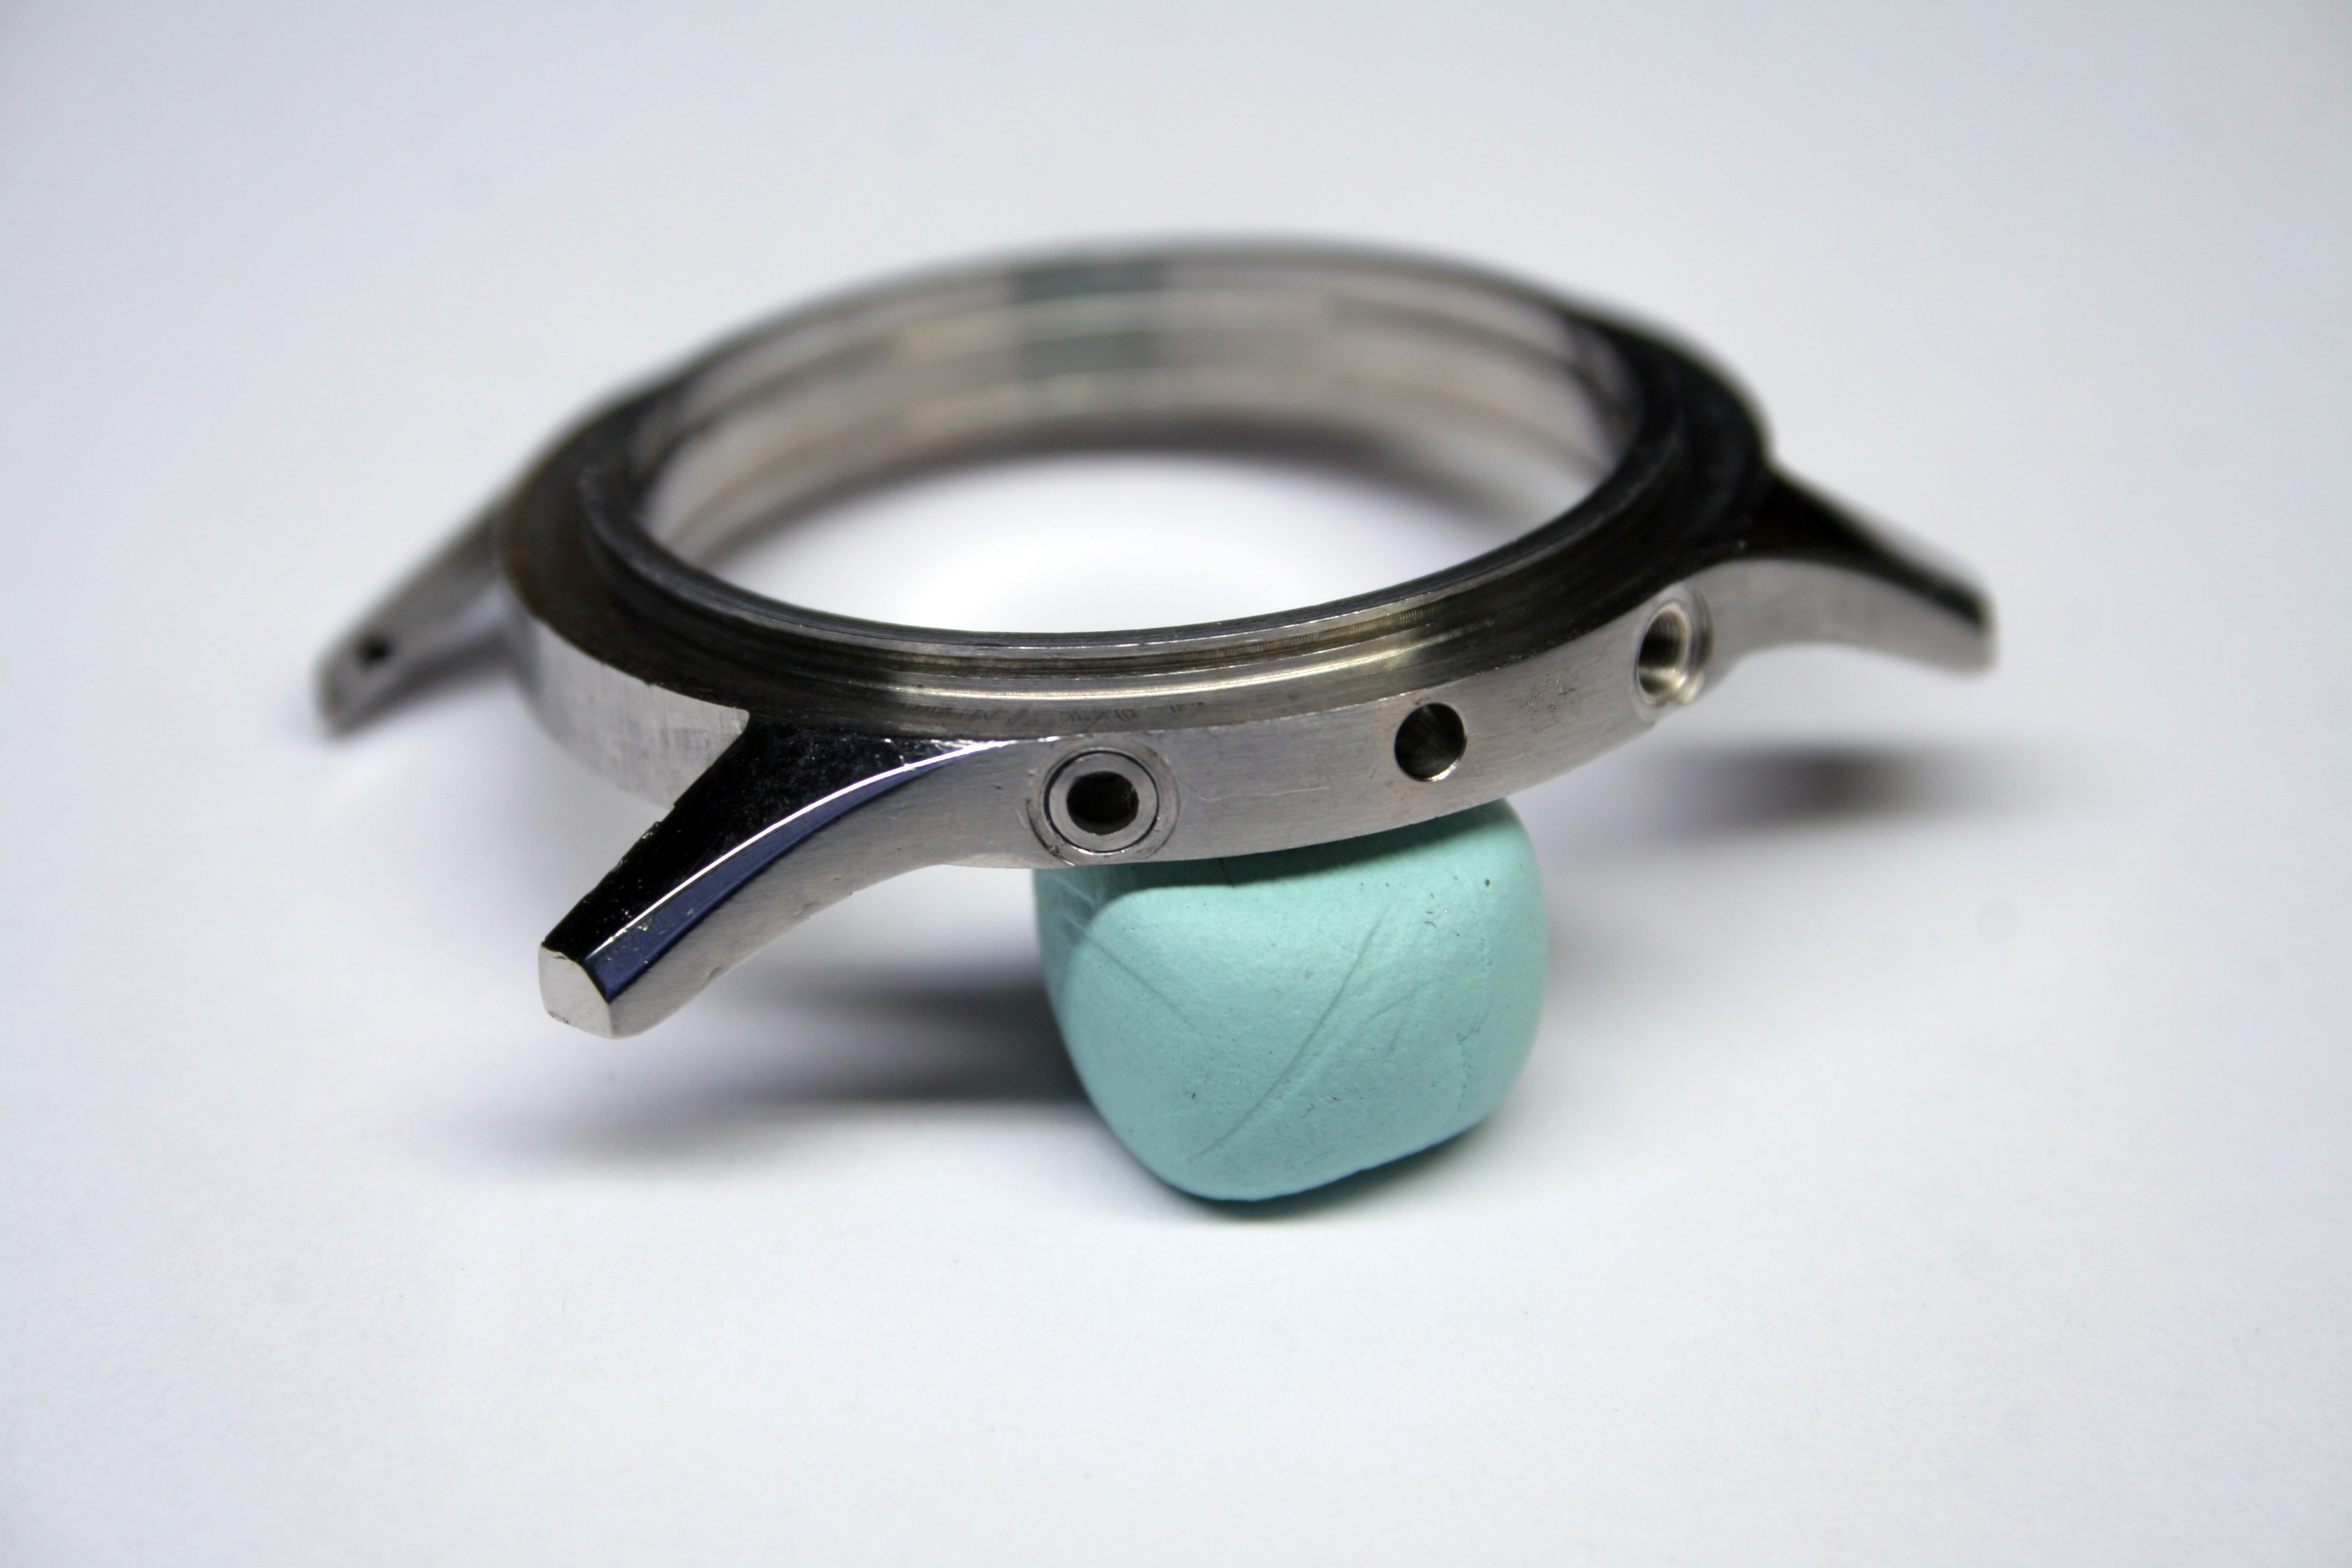
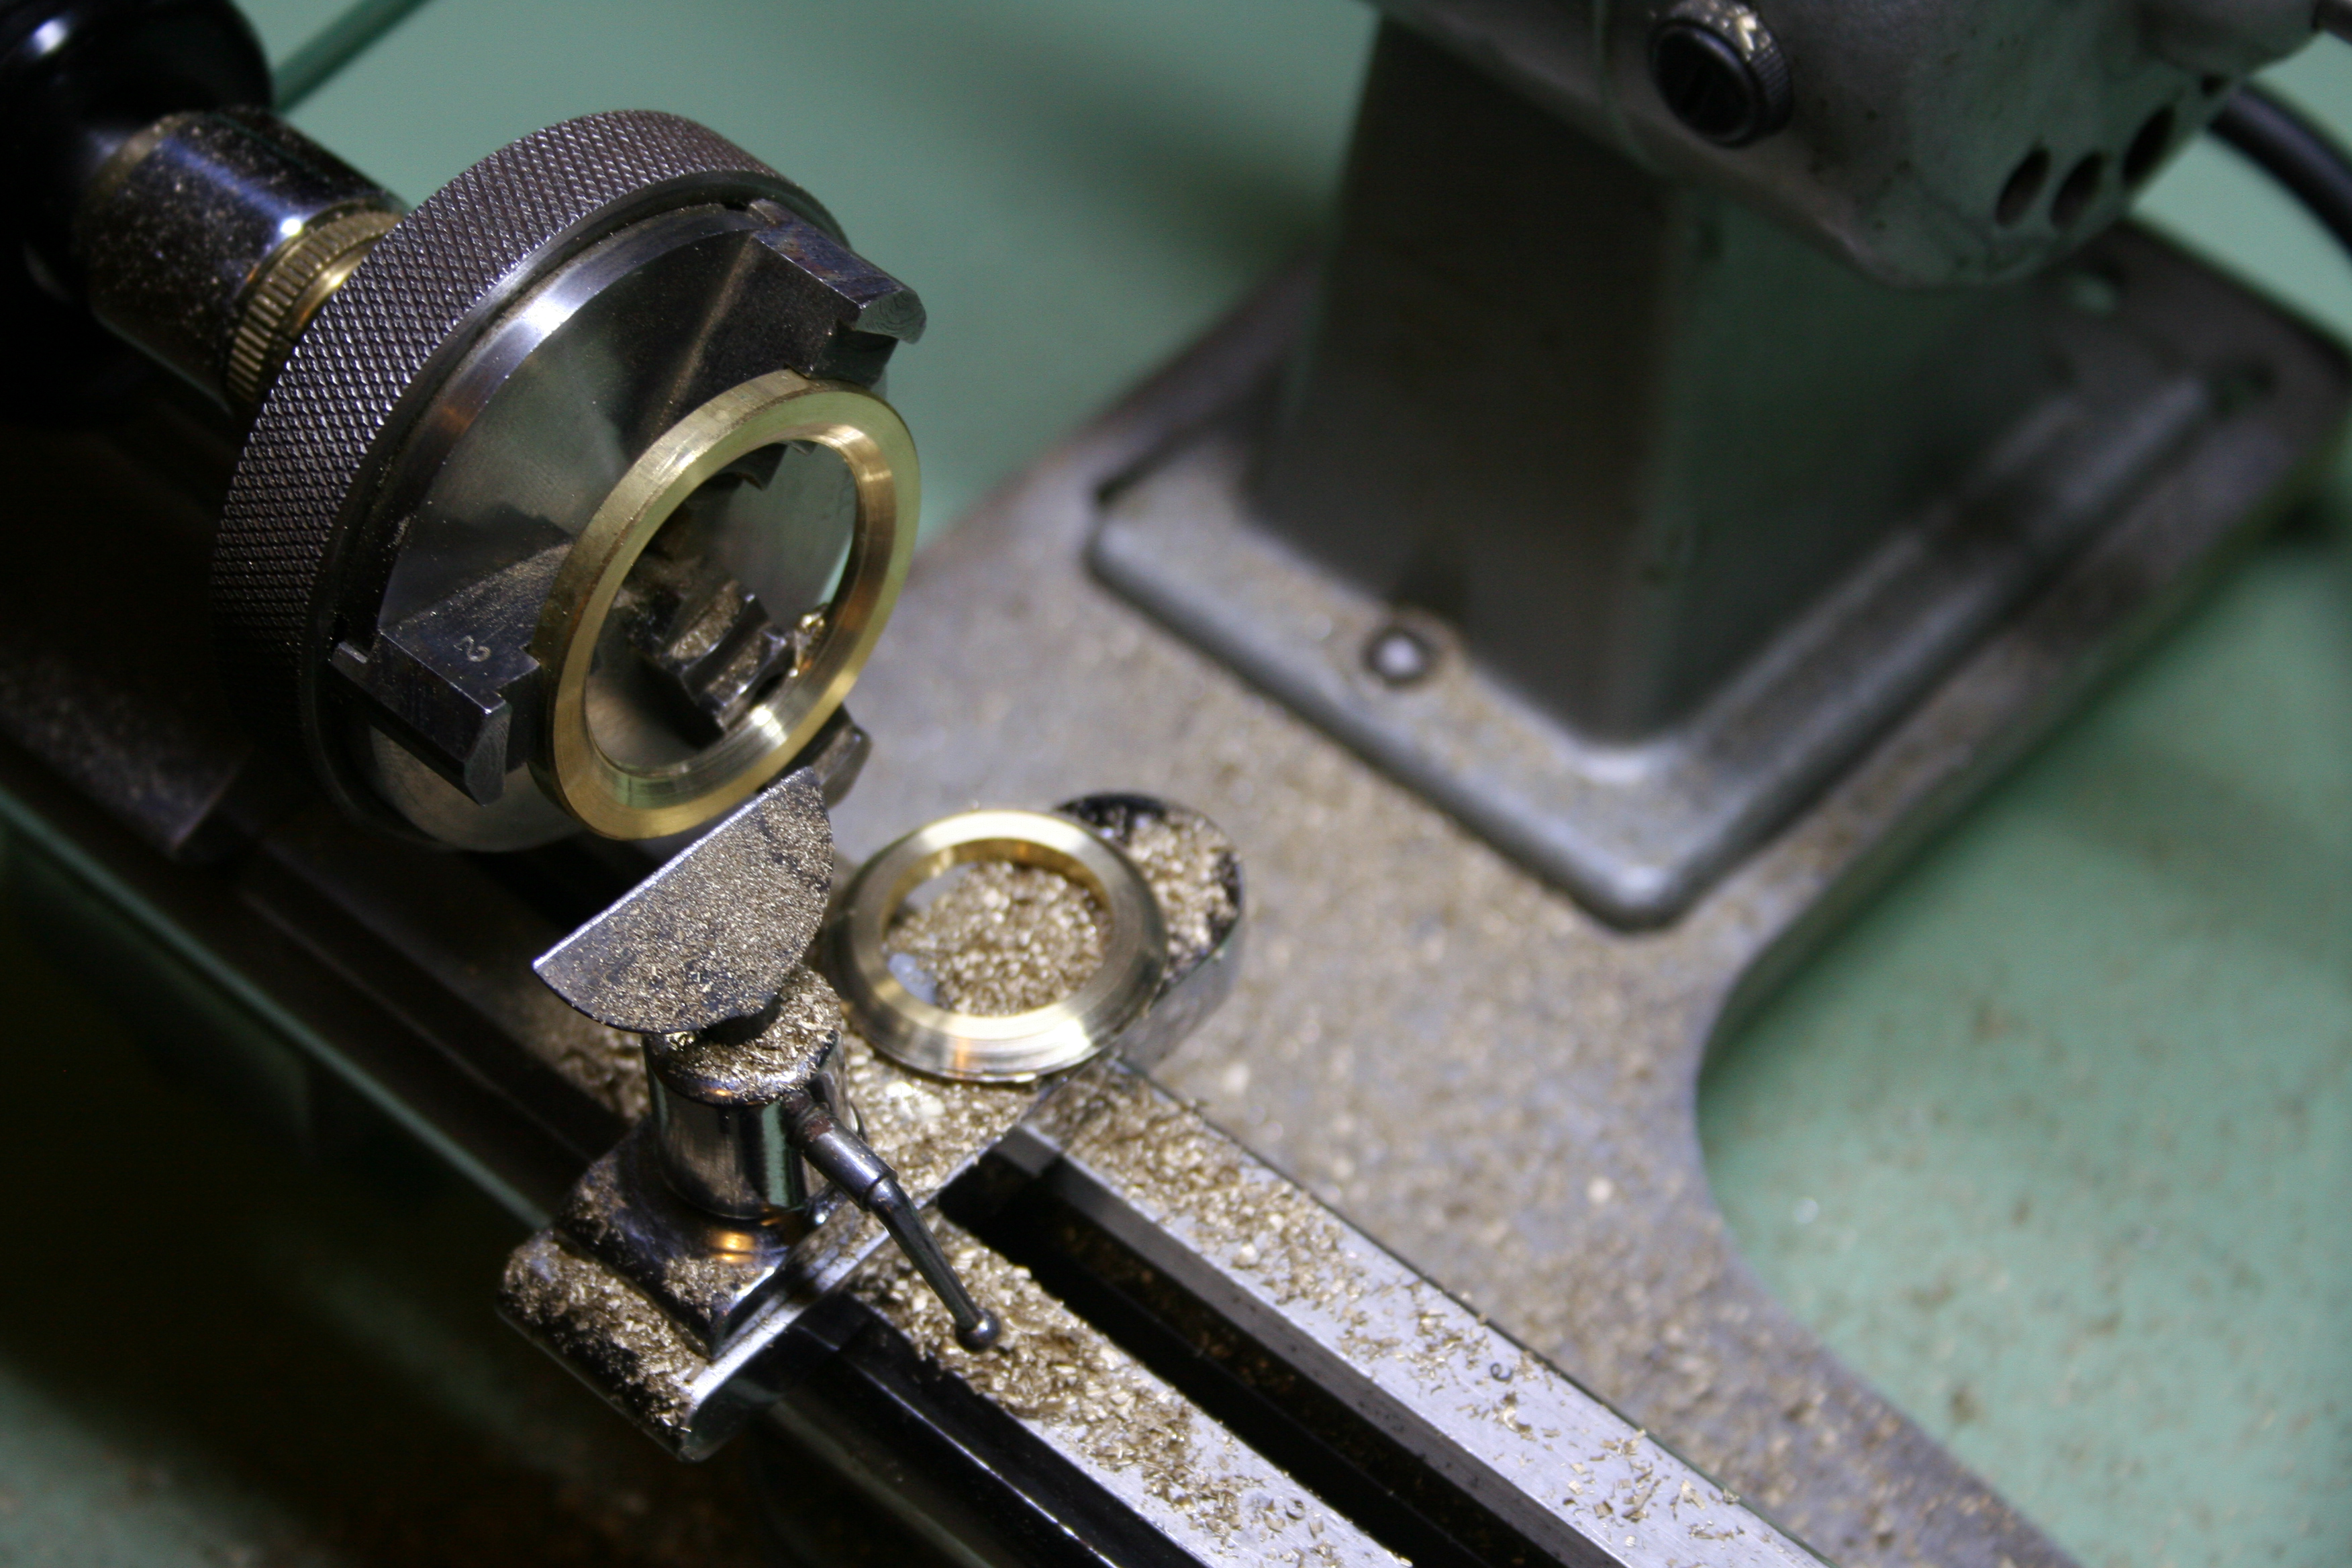
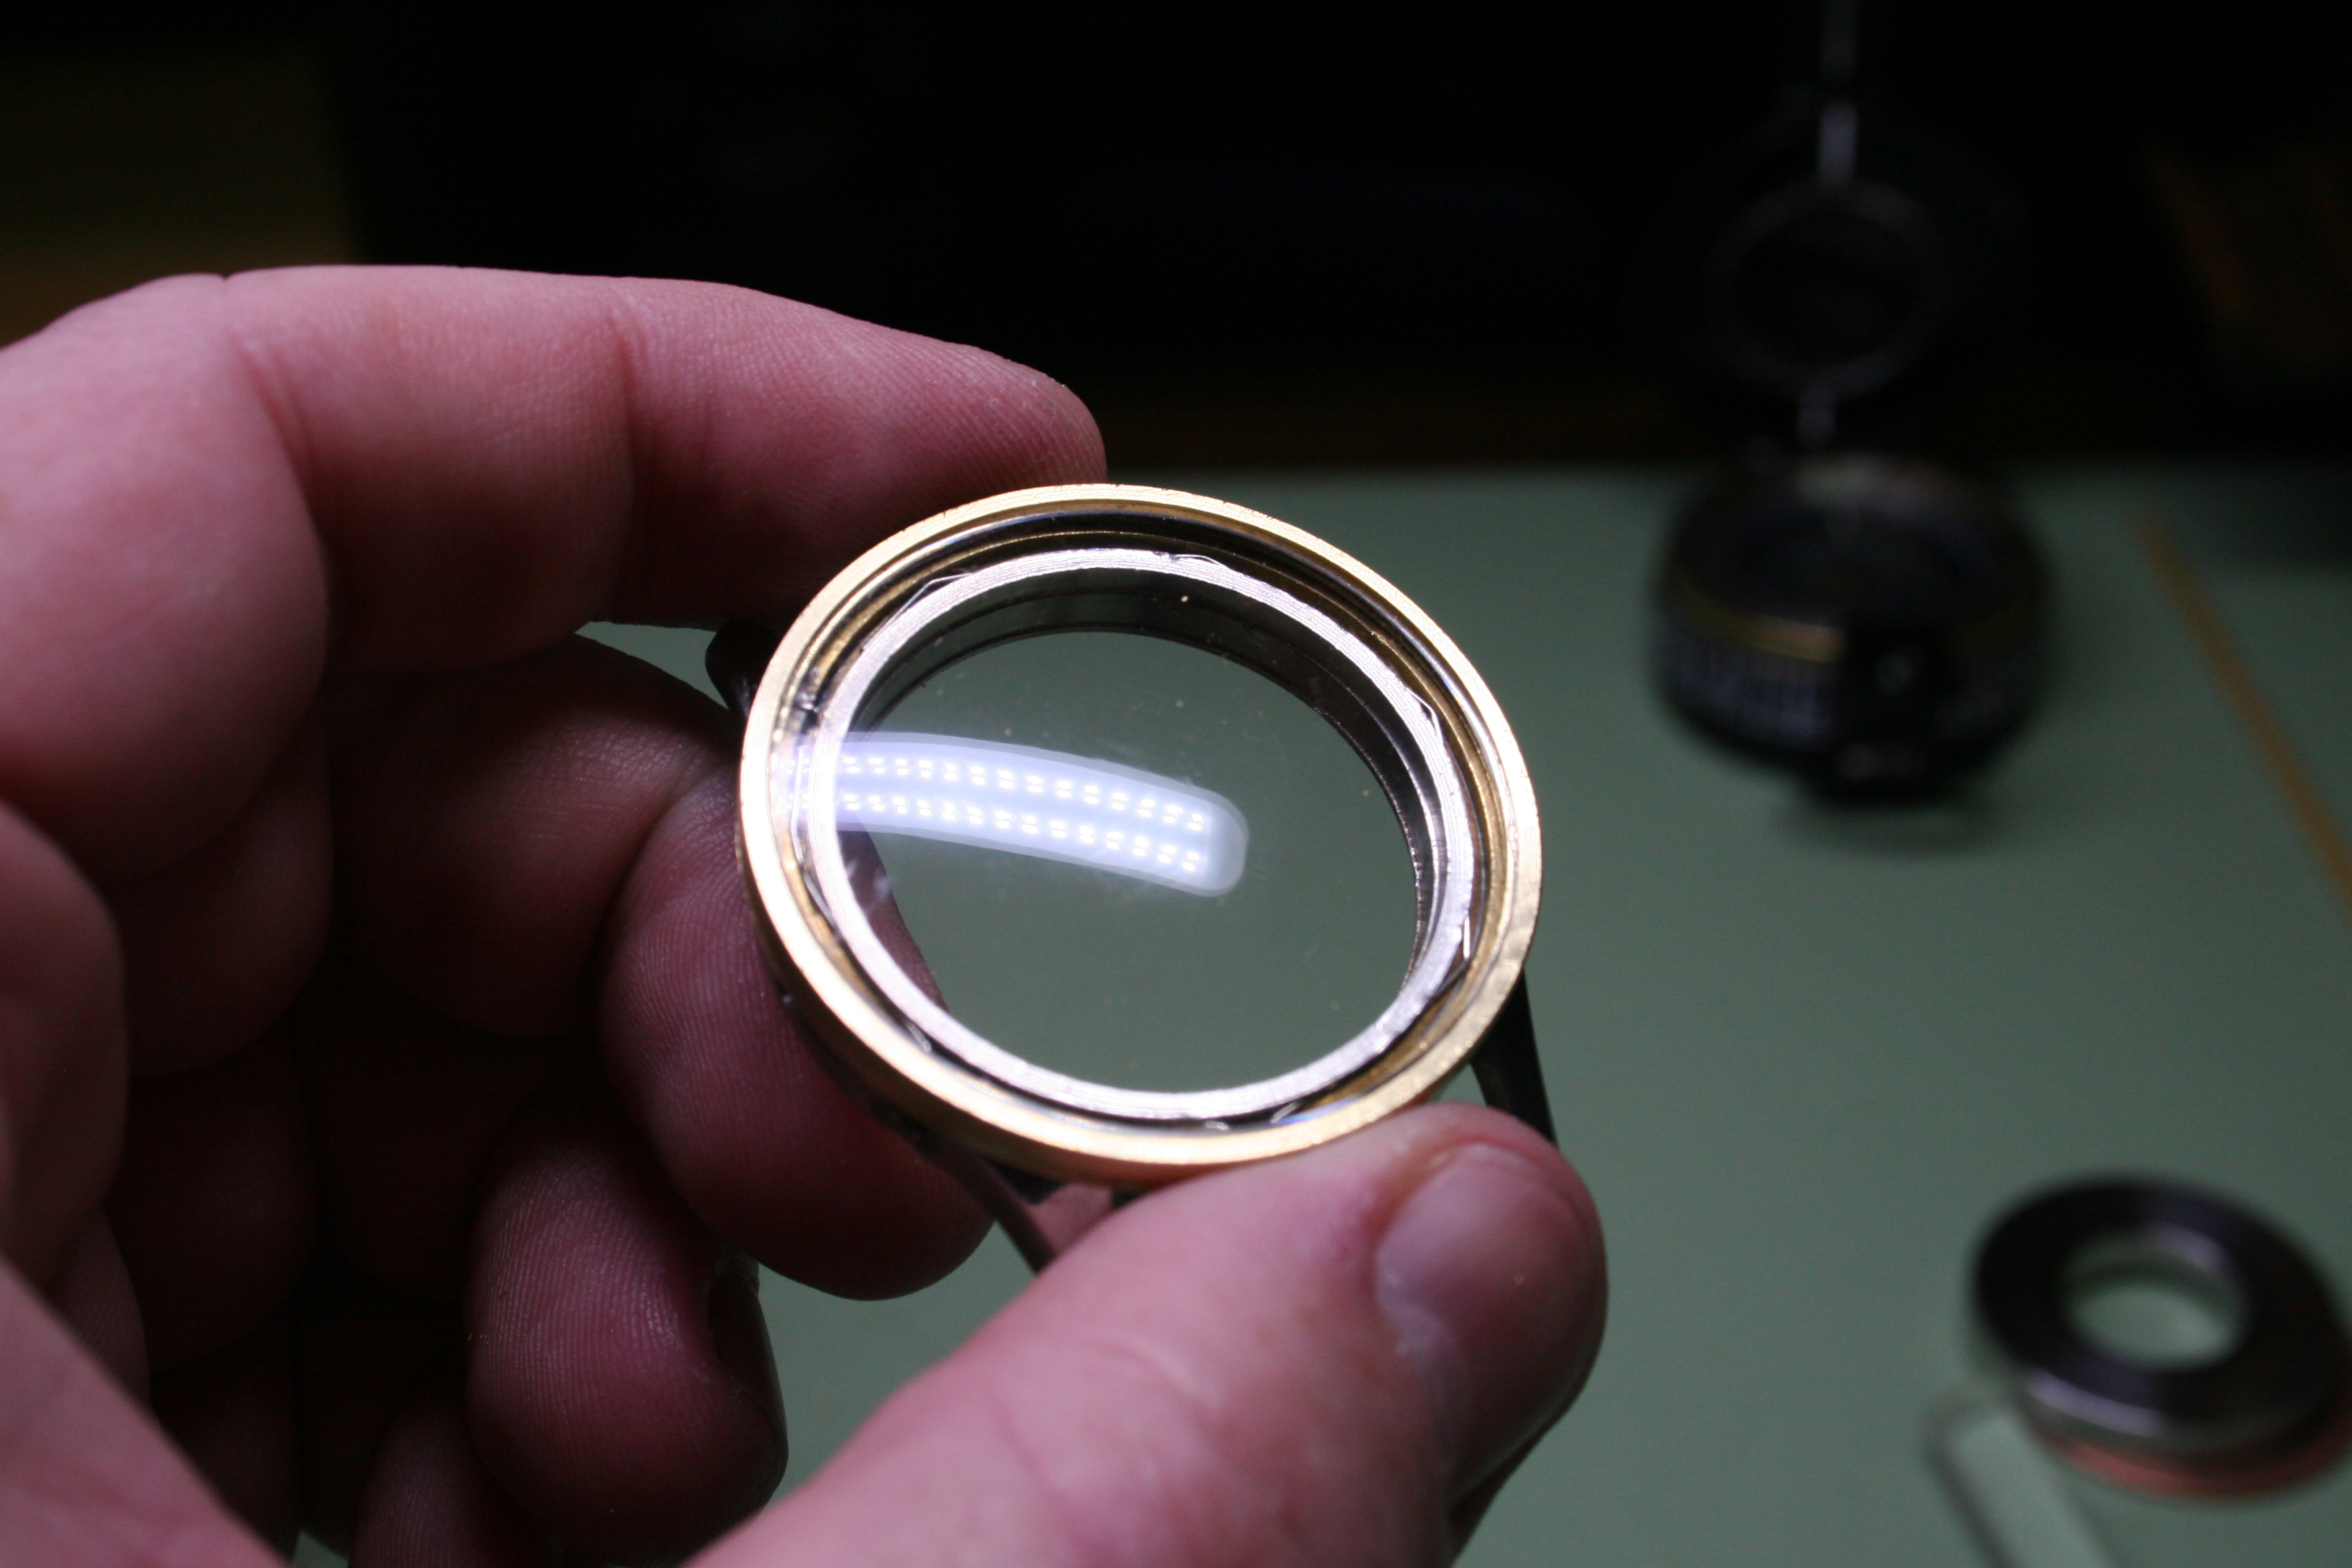
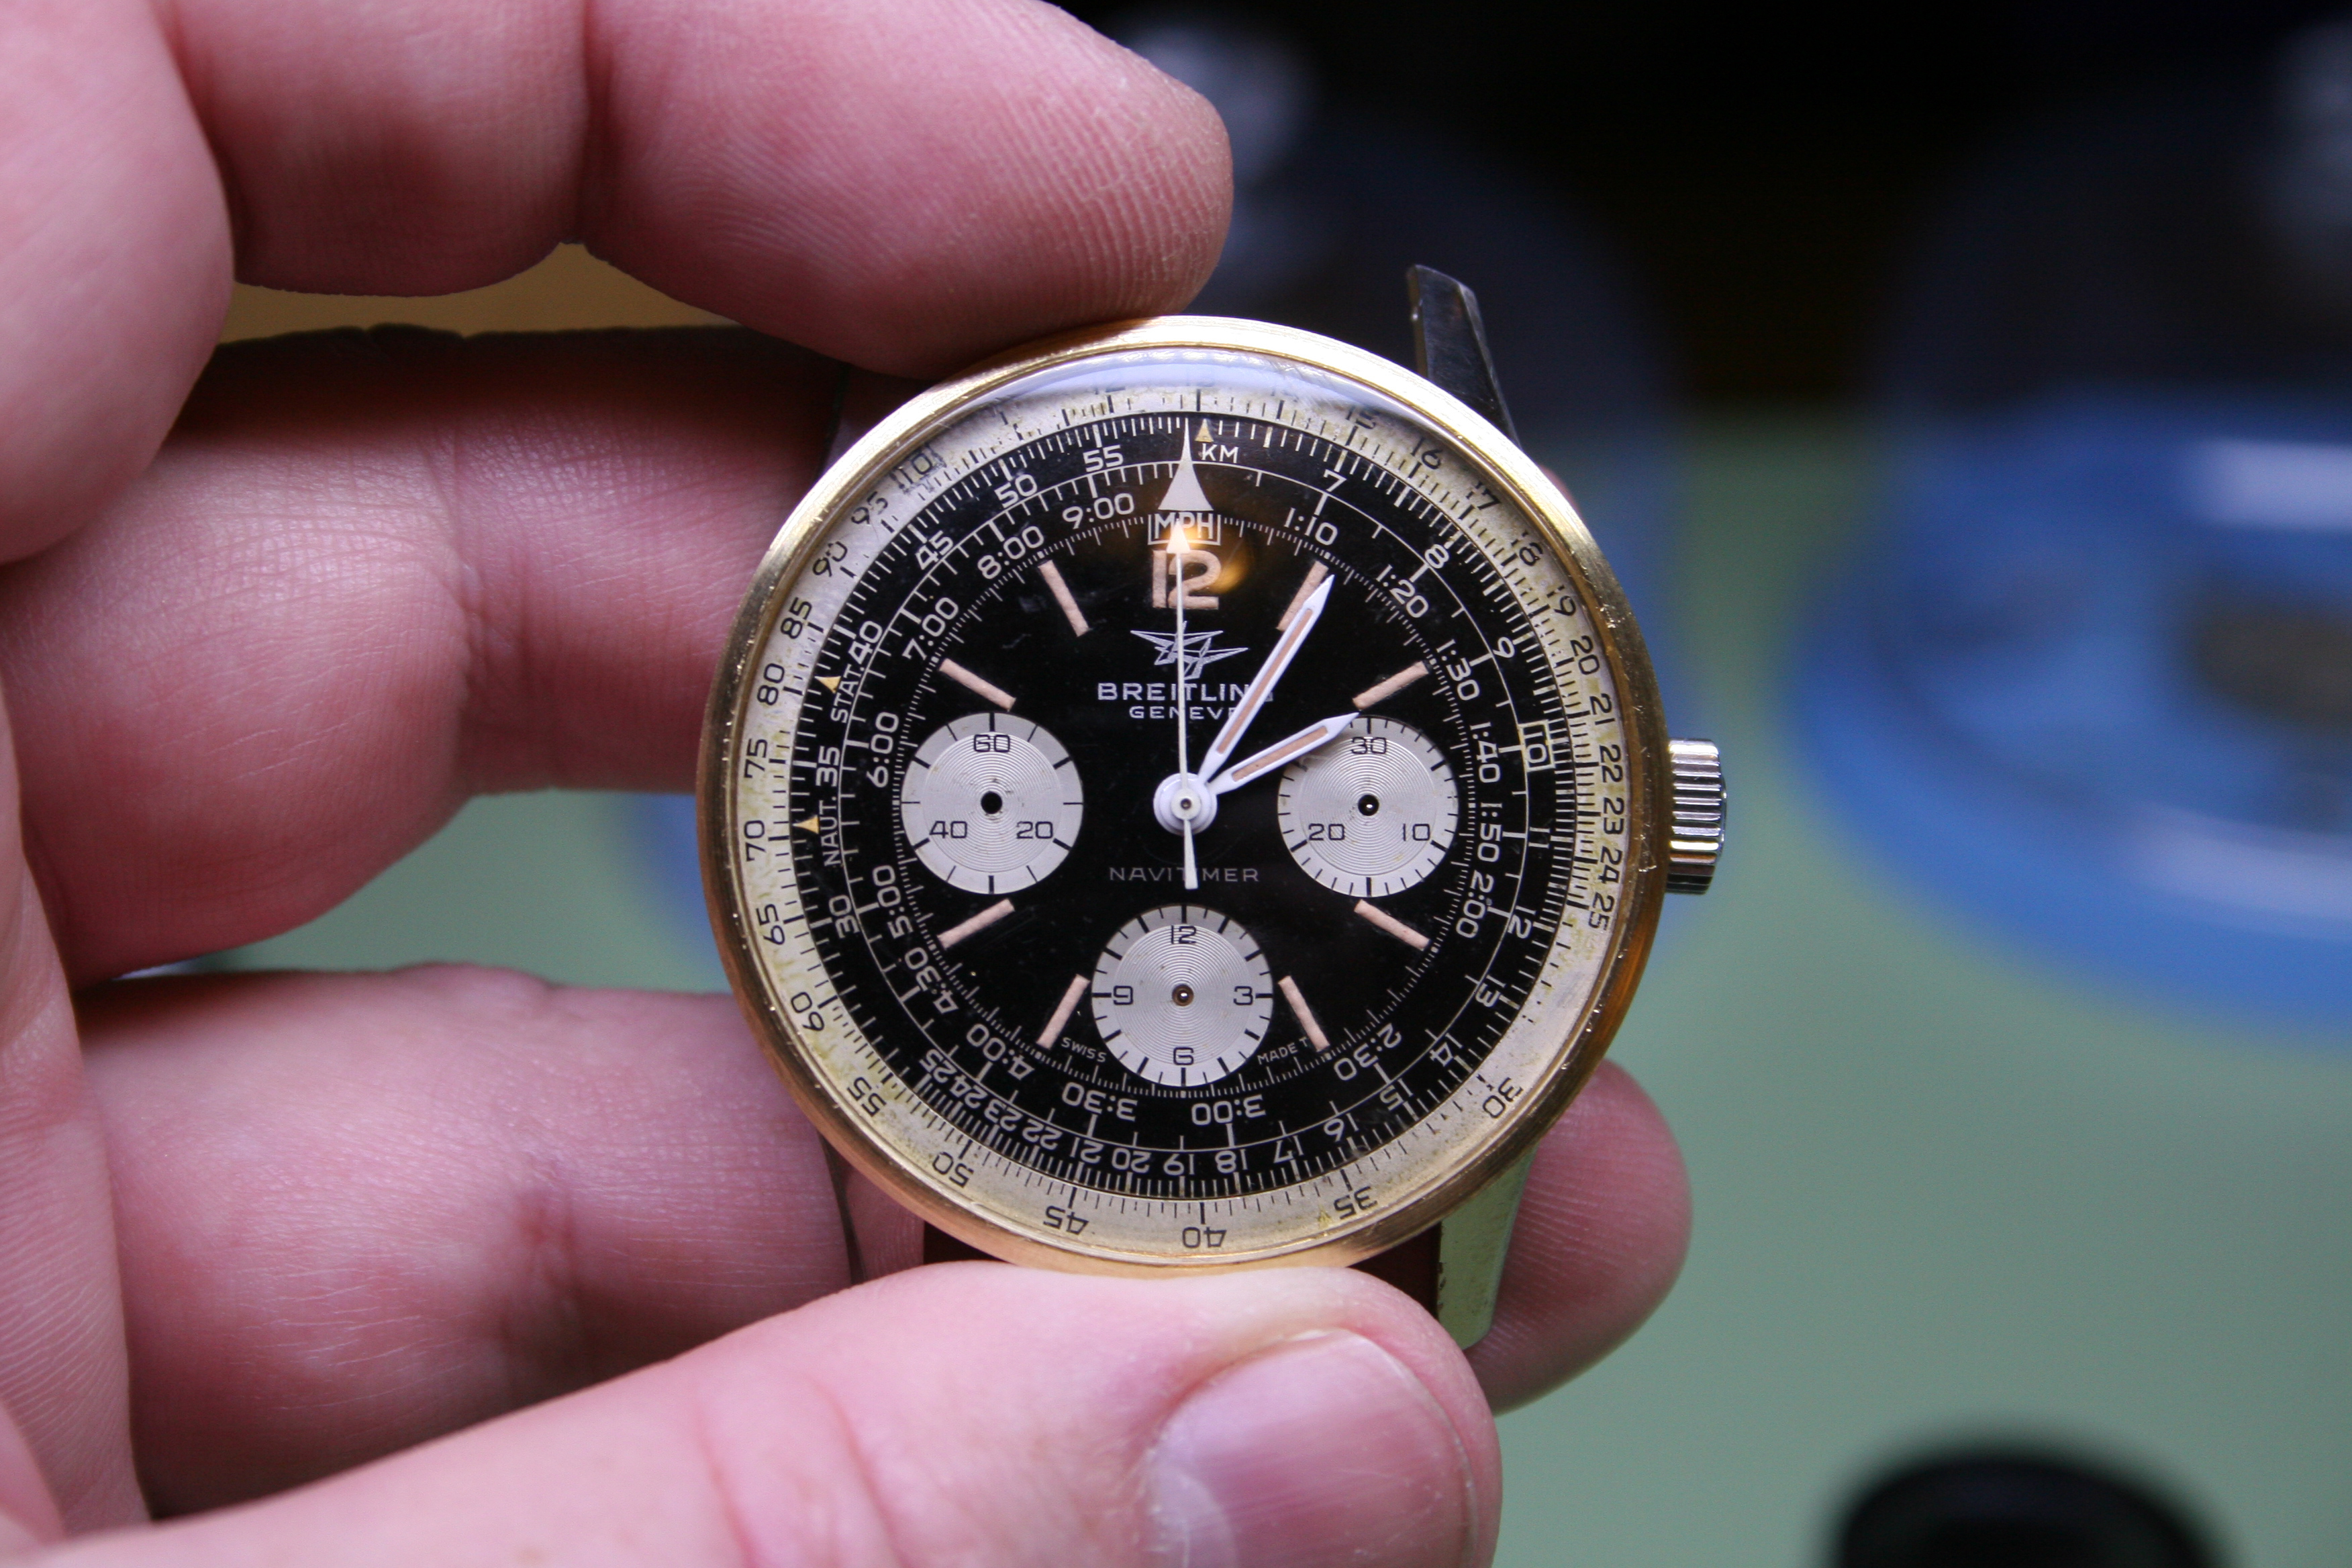
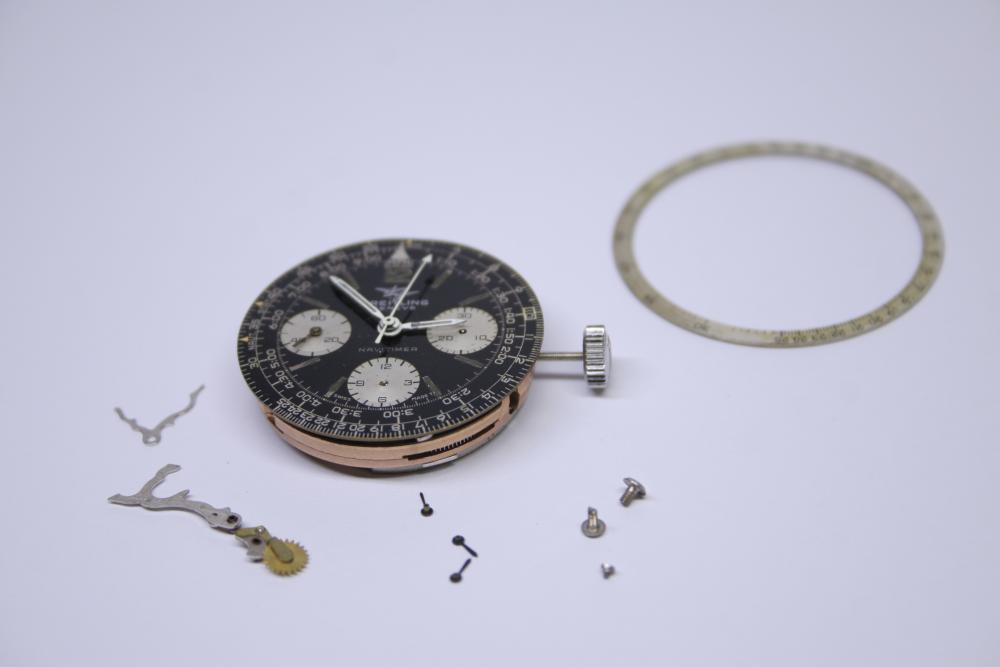
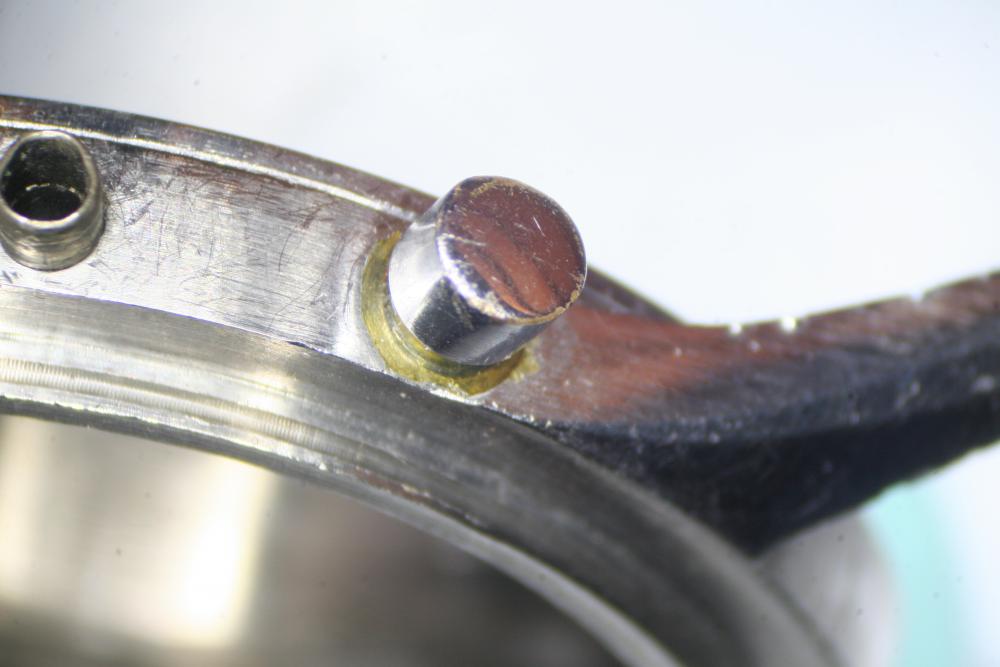
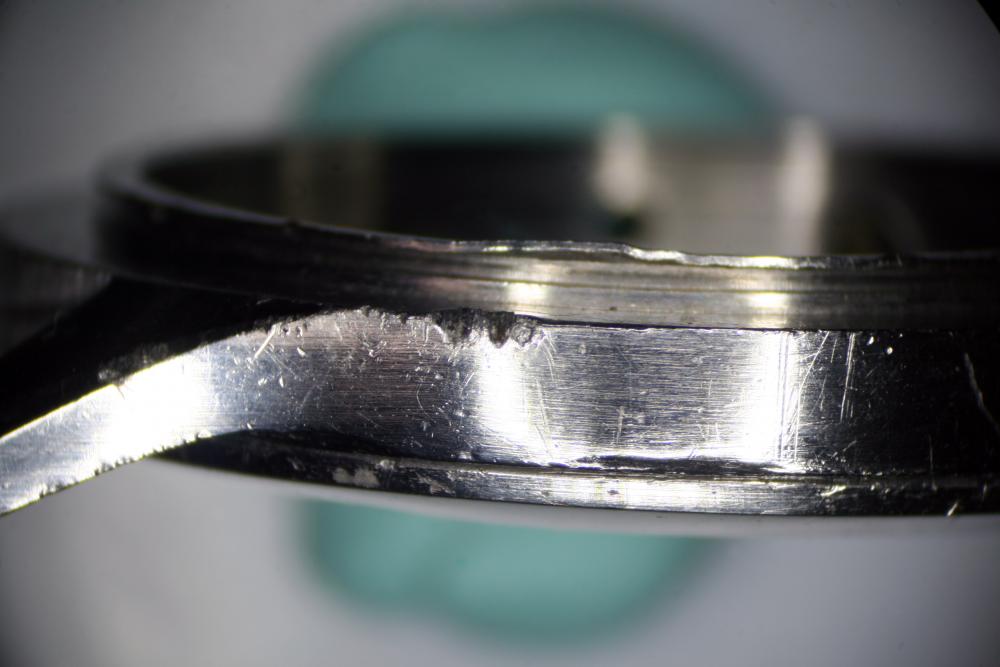
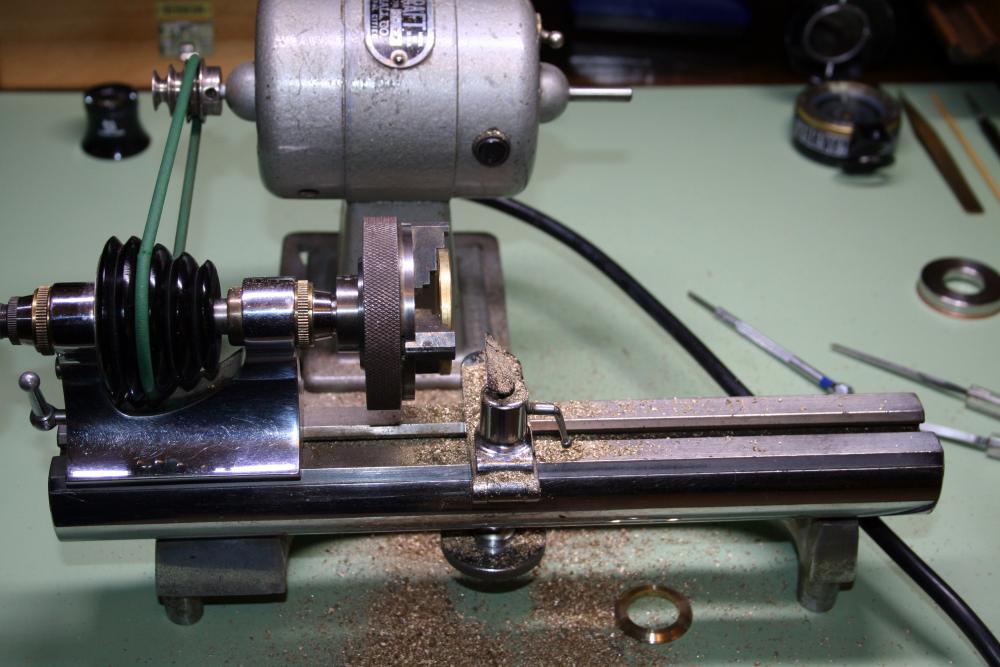
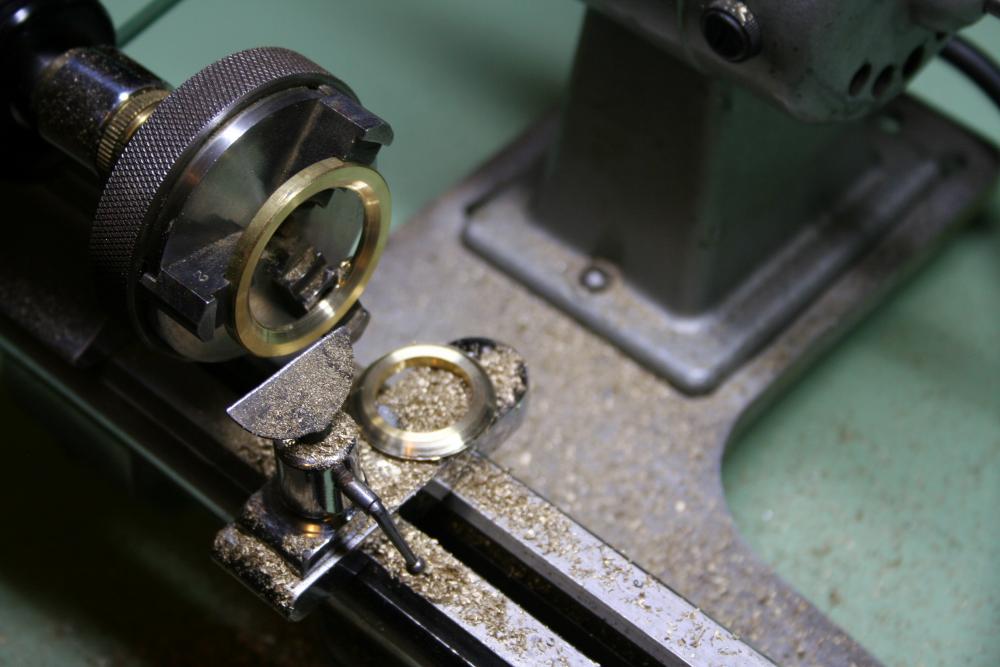
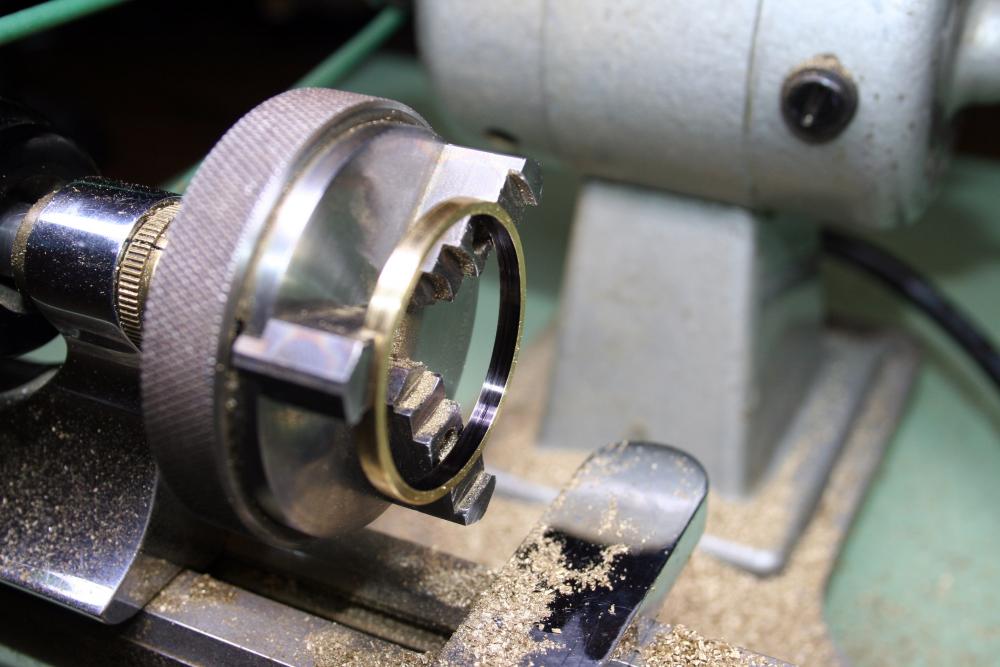
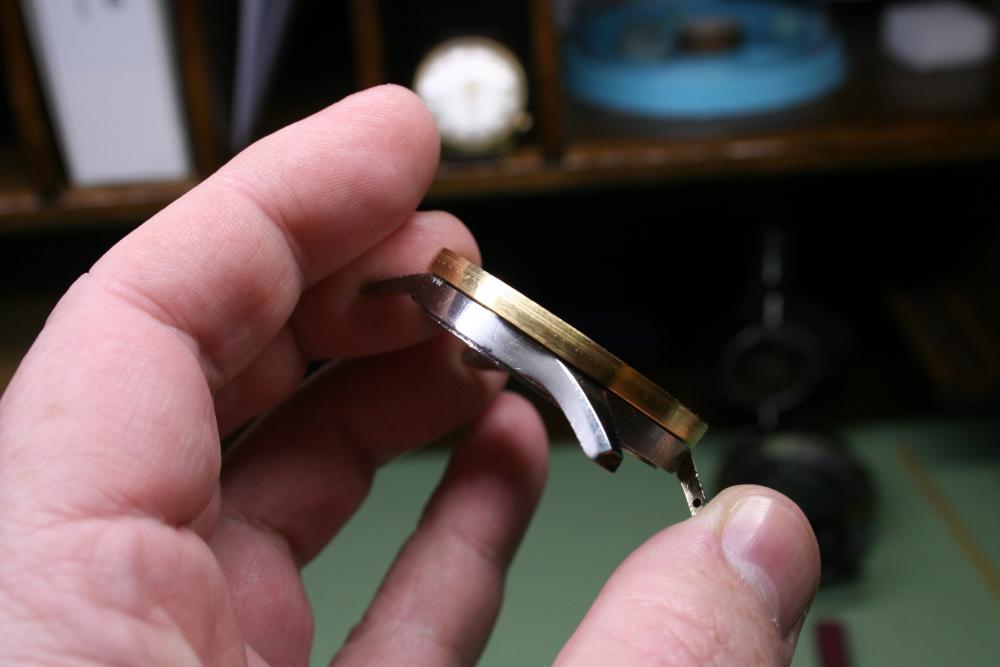
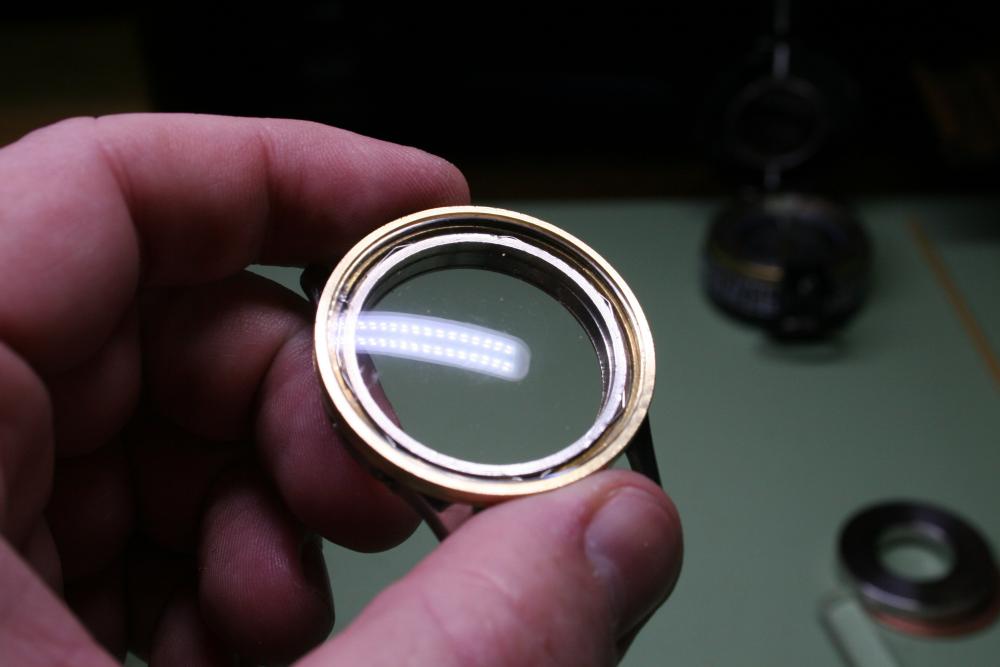
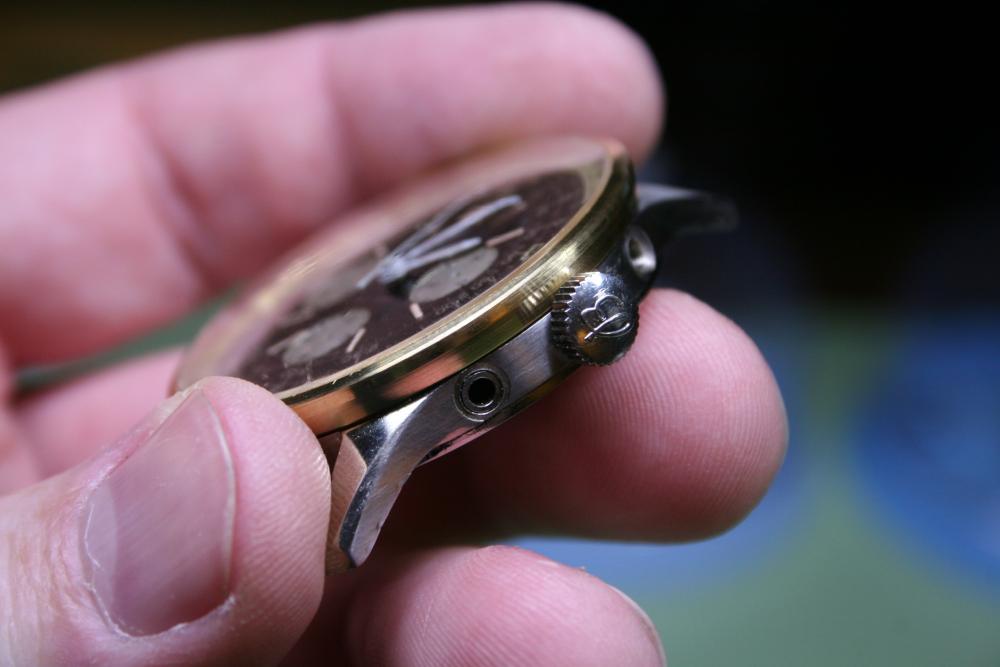
Well this isn't really a walkthrough because I'm learning on the fly but I felt it was worthy of sharing as the story will probably return some good advice. A bit over a year ago I picked up a Breitling Navitimer movement complete with crown, dial and slide rule. There were a few parts missing and a couple of broken pieces but I corrected those issues in short order and stored the movement away for that day when a case would come available. A few months later just such a case came up on eBay and I picked it up for a fair price even though the bezel was missing. The case has some issues- for example the threads for one of the chronograph pushers were stripped out (note the pusher held in with glue below) and it looks like the bezel was removed with a forklift. I widened the stripped out pusher hole and pushed in a stainless steel sleeve which will be tapped to accept the proper pusher (2.5mm tap, pitch 0.20mm). This work was completed some time ago then the project stalled out as replacement bezels are about as common as unicorns. Frustrated by this I decided to roll up my sleeves and turn a replacement. The correct bezel is approximately 3.25mm tall with a 41.0mm outside diameter, so I started with a 304 stainless steel ring which is 6.00mm tall and has an outside diameter of 41.0mm. I've not turned stainless steel on the lathe before and was hoping to start with a softer grade (say 400) but was limited by what would fit in my three jawed chuck. Now for anyone who is thinking, "you can't turn stainless like that on an 8mm lathe" you are of course correct (for the most part) but try I did and with a carbide graver I was able to make pretty quick work of the piece- chips were flying nicely but OH BOY DOES IT GET HOT! About twenty seconds of turning was all I could do before cooling the graver; this is of course why you always see stainless steel milled or cut under a stream of coolant. Since my workspace is limited and I don't want to make a big mess I moved on to Plan B (which was actually Plan A because I never figured I'd successfully turn a replacement stainless steel bezel on the lathe). Plan B was using brass, which meant I could put the carbide gravers away as they aggressively dig into brass like it's chocolate. This time I started with a thick brass washer and my usual HSS graver. Pretty soon I was knee deep in shavings (which are useful for bluing screws). I turned the washer to a ring with an inside diameter of 37.5mm. A recess was then cut 1.0mm deep to accept the crystal on one side and the inner bezel ring on the other. The inner bezel ring (on which the bezel is mounted) is about 1.8mm tall so the recess needed to be about 2.00 mm tall to accommodate the inner bezel ring and the slide rule. Getting the dimensions just right was achieved by using a black sharpie and a scribe (needle in a pin vice) to mark out the cuts then constantly checking and rechecking the fit. Once a proper fit to the case and crystal were achieved I proceeded to cut the exterior of the bezel. The cuts were done by eye then checked and rechecked for proper fit and finish. The outside diameter of the bezel where it meets the case tapers to 40.0mm and if I cut too much there's no way to add the material back. The current status is promising- below are the pictures as it stands today without notches. I'll be cutting the notches this weekend using a fine round escapement file. To ensure the notches are evenly spaced the plan is to remove a stainless steel bezel from another Navitimer I own and glue it to this one. The notches in the stainless bezel with then serve as pilot holes to guide my file. Once completed the plan is to have the bezel plated and the case professionally refinished (laser welded, etc.). Even though it's not correct for this watch, I'm thinking I'll probably have the bezel yellow gold plated as it will be easier to sell when and if a proper stainless steel bezel ever comes to replace it. A few things I've learned along the way that might be helpful- Don't get discouraged- I was 95% done two days ago when the bezel slipped off the chuck at speed and deformed- I had to start the whole thing over again. I did get to test my notch making skills on the bent piece though and that's worth something. A three jaw chuck isn't really the right tool for this job. There is a five or six jawed chuck for holding bezels, if you can find one, I'll bet it's a lot grippier. Turning large brass rounds on a lathe is great for your confidence. You'll think you're a master until it comes time for clean-up when you realize you really do need a proper machine shop (separate from your service workbench).


 1 point
 -
50 bucks plus shipping.. it's in mint condition. Also came with 12 extra reamers Sent from my SM-G955U1 using Tapatalk1 point
-
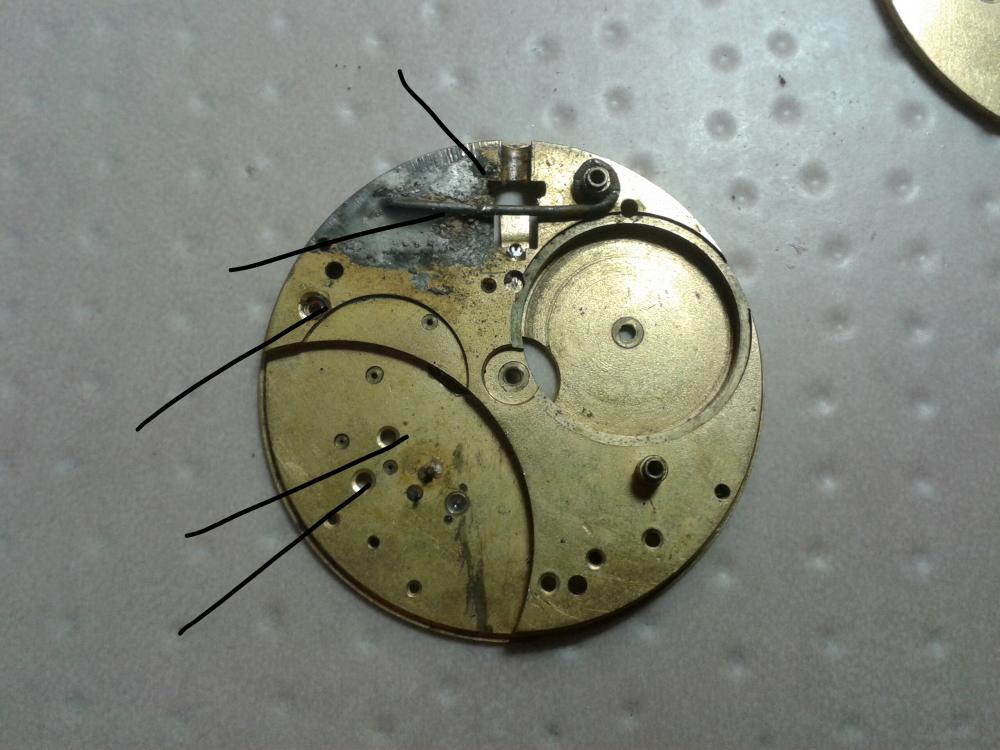
I measured the OD with digital calipers (too hard to hold in a micrometer) at 0.70 mm. From my mixed box of jewels I've found a suitable candidate - I've no means of measuring the hole, but it sits on the pivot with just a little bit of wobble. I have a jewel press, only used it a few times, and not on such a small jewel. I'll make sure I don't have too much coffee before trying1 point
-
A good digital caliper would be fine to measure the outside dimension, use the wheel arbor to confirm the hole size. A jewel press would be the best way to press out and install a new jewel, not a difficult job at all.1 point
-
Here you can have an idea. But Roger holds the one side by hand....1 point
-
That is the wrong jewel for that wheel, a little side shake is normal but that jewel looks almost twice as big as it should be. I recently replaced a fourth wheel lower jewel, the pivot measured 0.31mm, the proper jewel was 0.32mm. 1/100 of a mm is roughly 0.0004 inches. The pivot should be measured and a new correct jewel fitted. Looks like someone tried to "just get it running" with whatever was handy.1 point
-
an acme thread tap -- is available at a tool supply or borrow it from a machinist friend. vin1 point
-
it might be slightly different. GFI is ground fault interrupt, same idea as RCD. Essentially It trips if current on both wires is not the same - as you say, its looking for a leak. afaik in North America these are only required by code in specific circumstances - bathrooms for example. You'd not see them in typical outlets or workshops. Even in bathrooms, GFI requirements are usually handle at the outlet level - circuit itself is not GFI protected. While GFI/RCD might give some theoretical improved protection, it just doesn't seem to be a problem given the rest of the code; people are not dying and its not common or code to have to use GFI breakers (afaik) All circuits are protected by a breaker or fuse - that is code. This trips if too much current is going through the hot side. However it doesn't care where the current is going - so long as its not drawing more amps than its rating, it won't trip regardless if the current is safely flowing back neutral or flowing through your heart. This is not a safety issue outside say bathrooms where a hair dryer could get dropped in a sink as its almost impossible for a hot wire to touch a person without touch the frame. Since the frame is grounded (as per watchabit) if a hot wire does come loose and touch it, the breaker instantly goes as the current flows through the ground. It would be a major safety faux pas imo to think grounding the frame would only have a safety benefit if use a GFI/RCD. The problem of suggesting that, is if the party is in place that does not use GFI, they might interpret it as "no point in grounding since its not GFI/RCD". Not true. That ground does save lives/stop fires with a fuse/breaker as the instant a hot touches something it trips the breaker and stops current flow. GFI or not, you want the frame grounded imo.1 point
-
Sussed it out in the end. The fusee chain was a right *@#&&!! to get back on correct. The result:1 point
-
I used some inexpensive watch hand levers from Esslinger. They had pretty rough ends. I sanded them smooth until they looked OK under my dissection microscope. The ends were still blunt, and I wonder if I should have thinned them more because there is so little space under the second hand on this watch. Then I used Saran Wrap to protect the surface. Saran Wrap is pretty thin, and I figured that a thicker plastic sheet, like on the sandwich bags, would prevent the lever ends getting under the watch hand. The visible scuffs are out by the dial markings, which shows that I scratched the surface before I even got close to the hand. So, there was some clumsy technique that may be more of the issue. This was all new and different for me. I will probably be back asking advice on some other repairs. There are plenty of cheap watches in the house I would like to get working.1 point
-
That base actually holds the crystal in place and the metal sides space the compressor up slightly to leave enough plastic at the bottom of the crystal to insert into a case. Am I correct?1 point
-
6606B identical
 1 point
 -
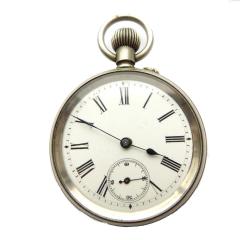
I put a post a while ago about this pocket watch I had got from Ebay, bought a a spares or repair, they should had simply said, " it's dead ,it's never going to go again", and I wouldn't have got it. But I did, it's one of the H.williamson English lever pocket watchs, so I liked it, as I said, I'd had a plan , I had another movement, I had another dial, I found in a box, one of the black military dials. Put it in the case, I was quite happy with it,,,,, but it just was not quite right, , the case numbers did not match up ' obviously ' with the dial. So I just had to have another look at the original movement. Just on the dial side plate everything was broken ,botched or missing, from the broken steel screws in the plate , broken pallet guard screws, end stone's, jewell holes, missing parts to the winding. Well a month and a half later, it's running, new pallets, balance wheel, escape wheel, new crown, new hands,,,,,OMG....
 1 point
 -
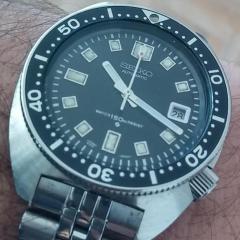
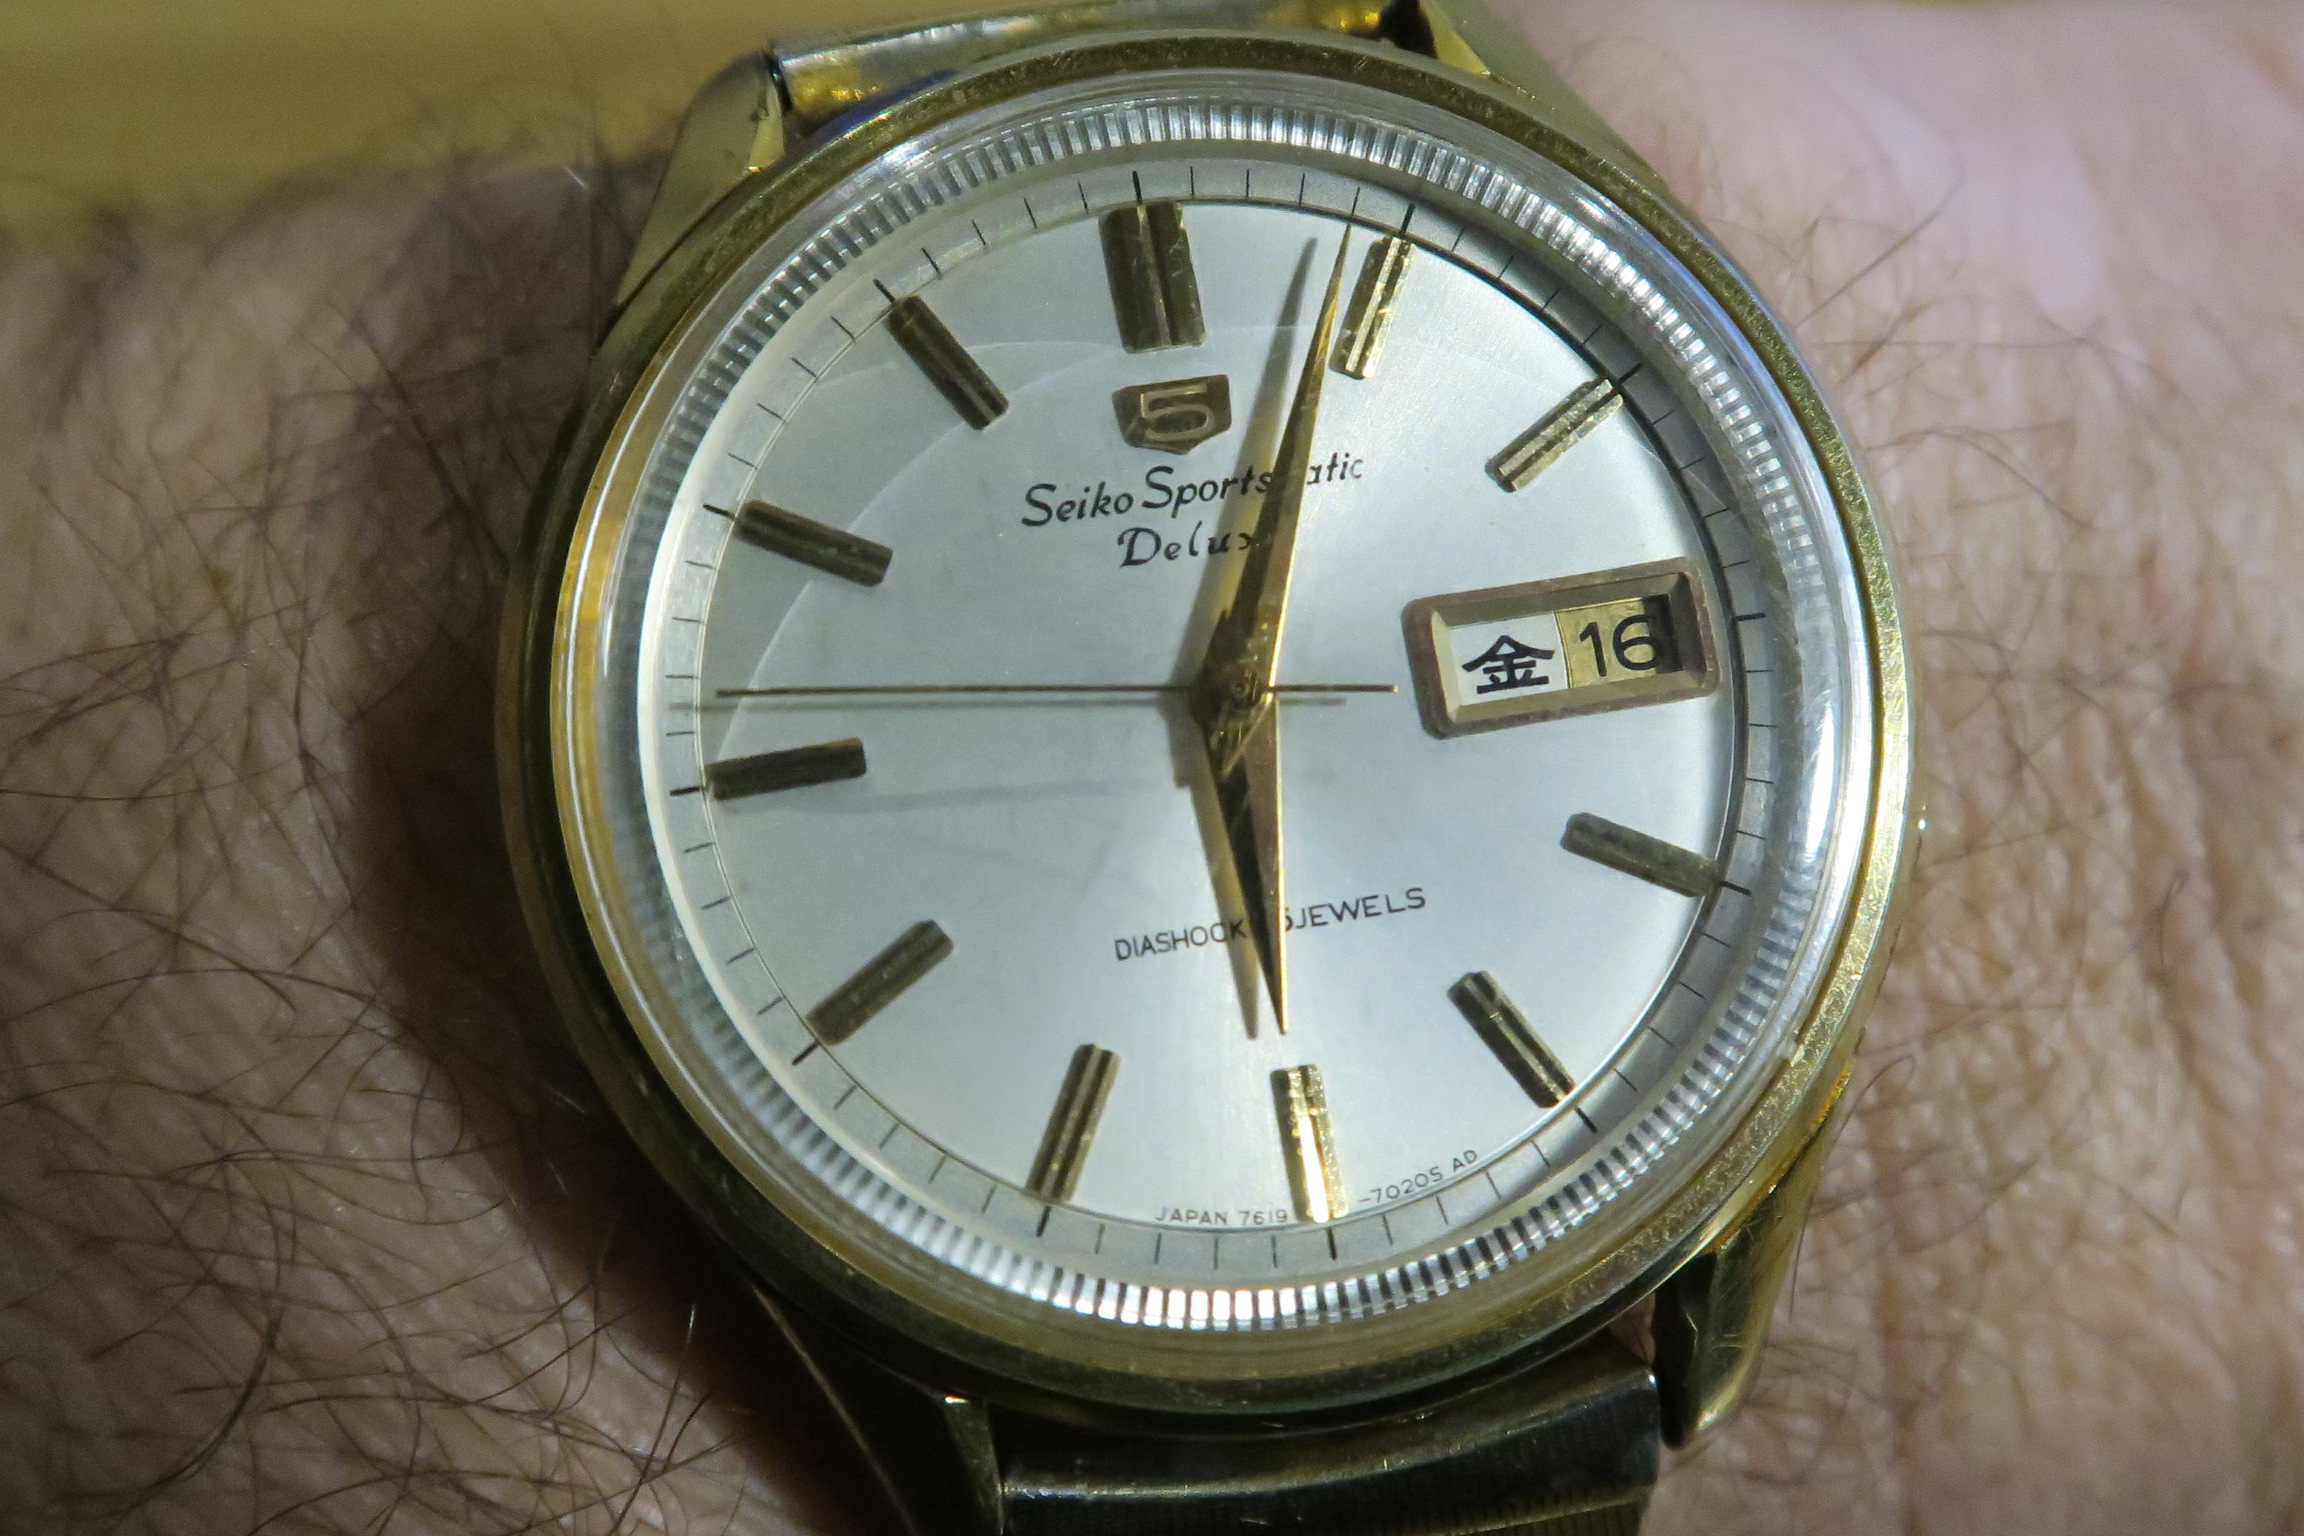
Seiko 7619 today
 1 point
 -
Need to show my wife this equipment so she sees how frugal I am Sent from my iPhone using Tapatalk Pro1 point
-
Yes. Ask for an electric guitar High E string.09 Sent from my iPhone using Tapatalk Pro1 point
-
What would I be asking for if I went to a music supplies shop... I seem to remember they were called by alphabets..eg e-string? Anilv1 point
-
machining, model engineering, some electronics, writing articles on the craft, some photography (most for articles). Been at if for close to 30 years, I sure didn't know I end up this deeply into it (nor did the wife!) Things I've made: https://imgur.com/a/d2Y3a My garage shop: https://imgur.com/a/g8aKm My basement shop: https://imgur.com/a/BHIf1 added the M1, an Aciera F1 and another Schaublin 70 since taking those. Am now truly out of space.1 point
-
I have used my ultrasonic carb cleaner at the shop to clean stubborn stainless cases, but I didn't want to tell anybody As long as its good stainless it doesnt hurt anything. Carb cleaner is pretty strong stuff. Have also used CLR in my jewelry ultrasonic for stubborn rust on stainless cases. Be careful though...1 point
-
I need to figure out how to cross guitar world with watch world...wait! I did use a .09 guitar string for a click spring and it worked great, duration to the springiness on the steel. Ta Da Sent from my GT-N5110 using Tapatalk1 point
-
Don't oil the pins. Some 9010 on three (evenly spaced out) of the escape wheel teeth faces should do the trick. Sent from my iPhone using Tapatalk1 point