Leaderboard


Popular Content
Showing content with the highest reputation on 03/17/22 in all areas
-
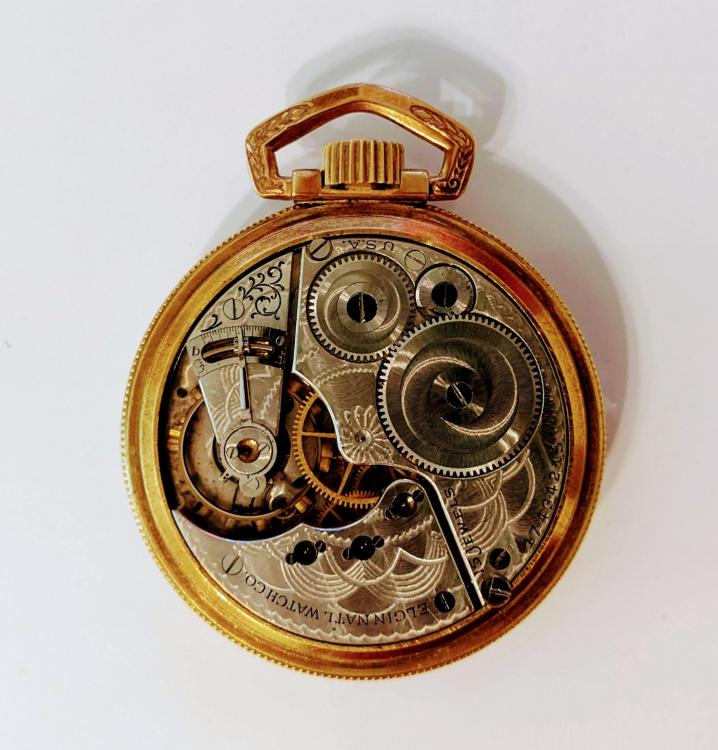
Me neither just order by size and strength. Whilst on strength I read somewhere if the barrel inside diameter is say 30mm then the spring strength required is 0.30 etc. I have checked this theory by measuring springs in clocks I have repaired and it seems correct certainly within +/- .5.2 points
-
Agree with klassiker, shouldn't touch the bakning pins, not yet anyway, you can easily create new problems .2 points
-
With you there! Did the balance spin freely for 20 sec. dial down and dial up? It sounds to me very much like an endshake / sideshake problem on the balance and / or fork pivots, and almost certainly not the banking pins.2 points
-
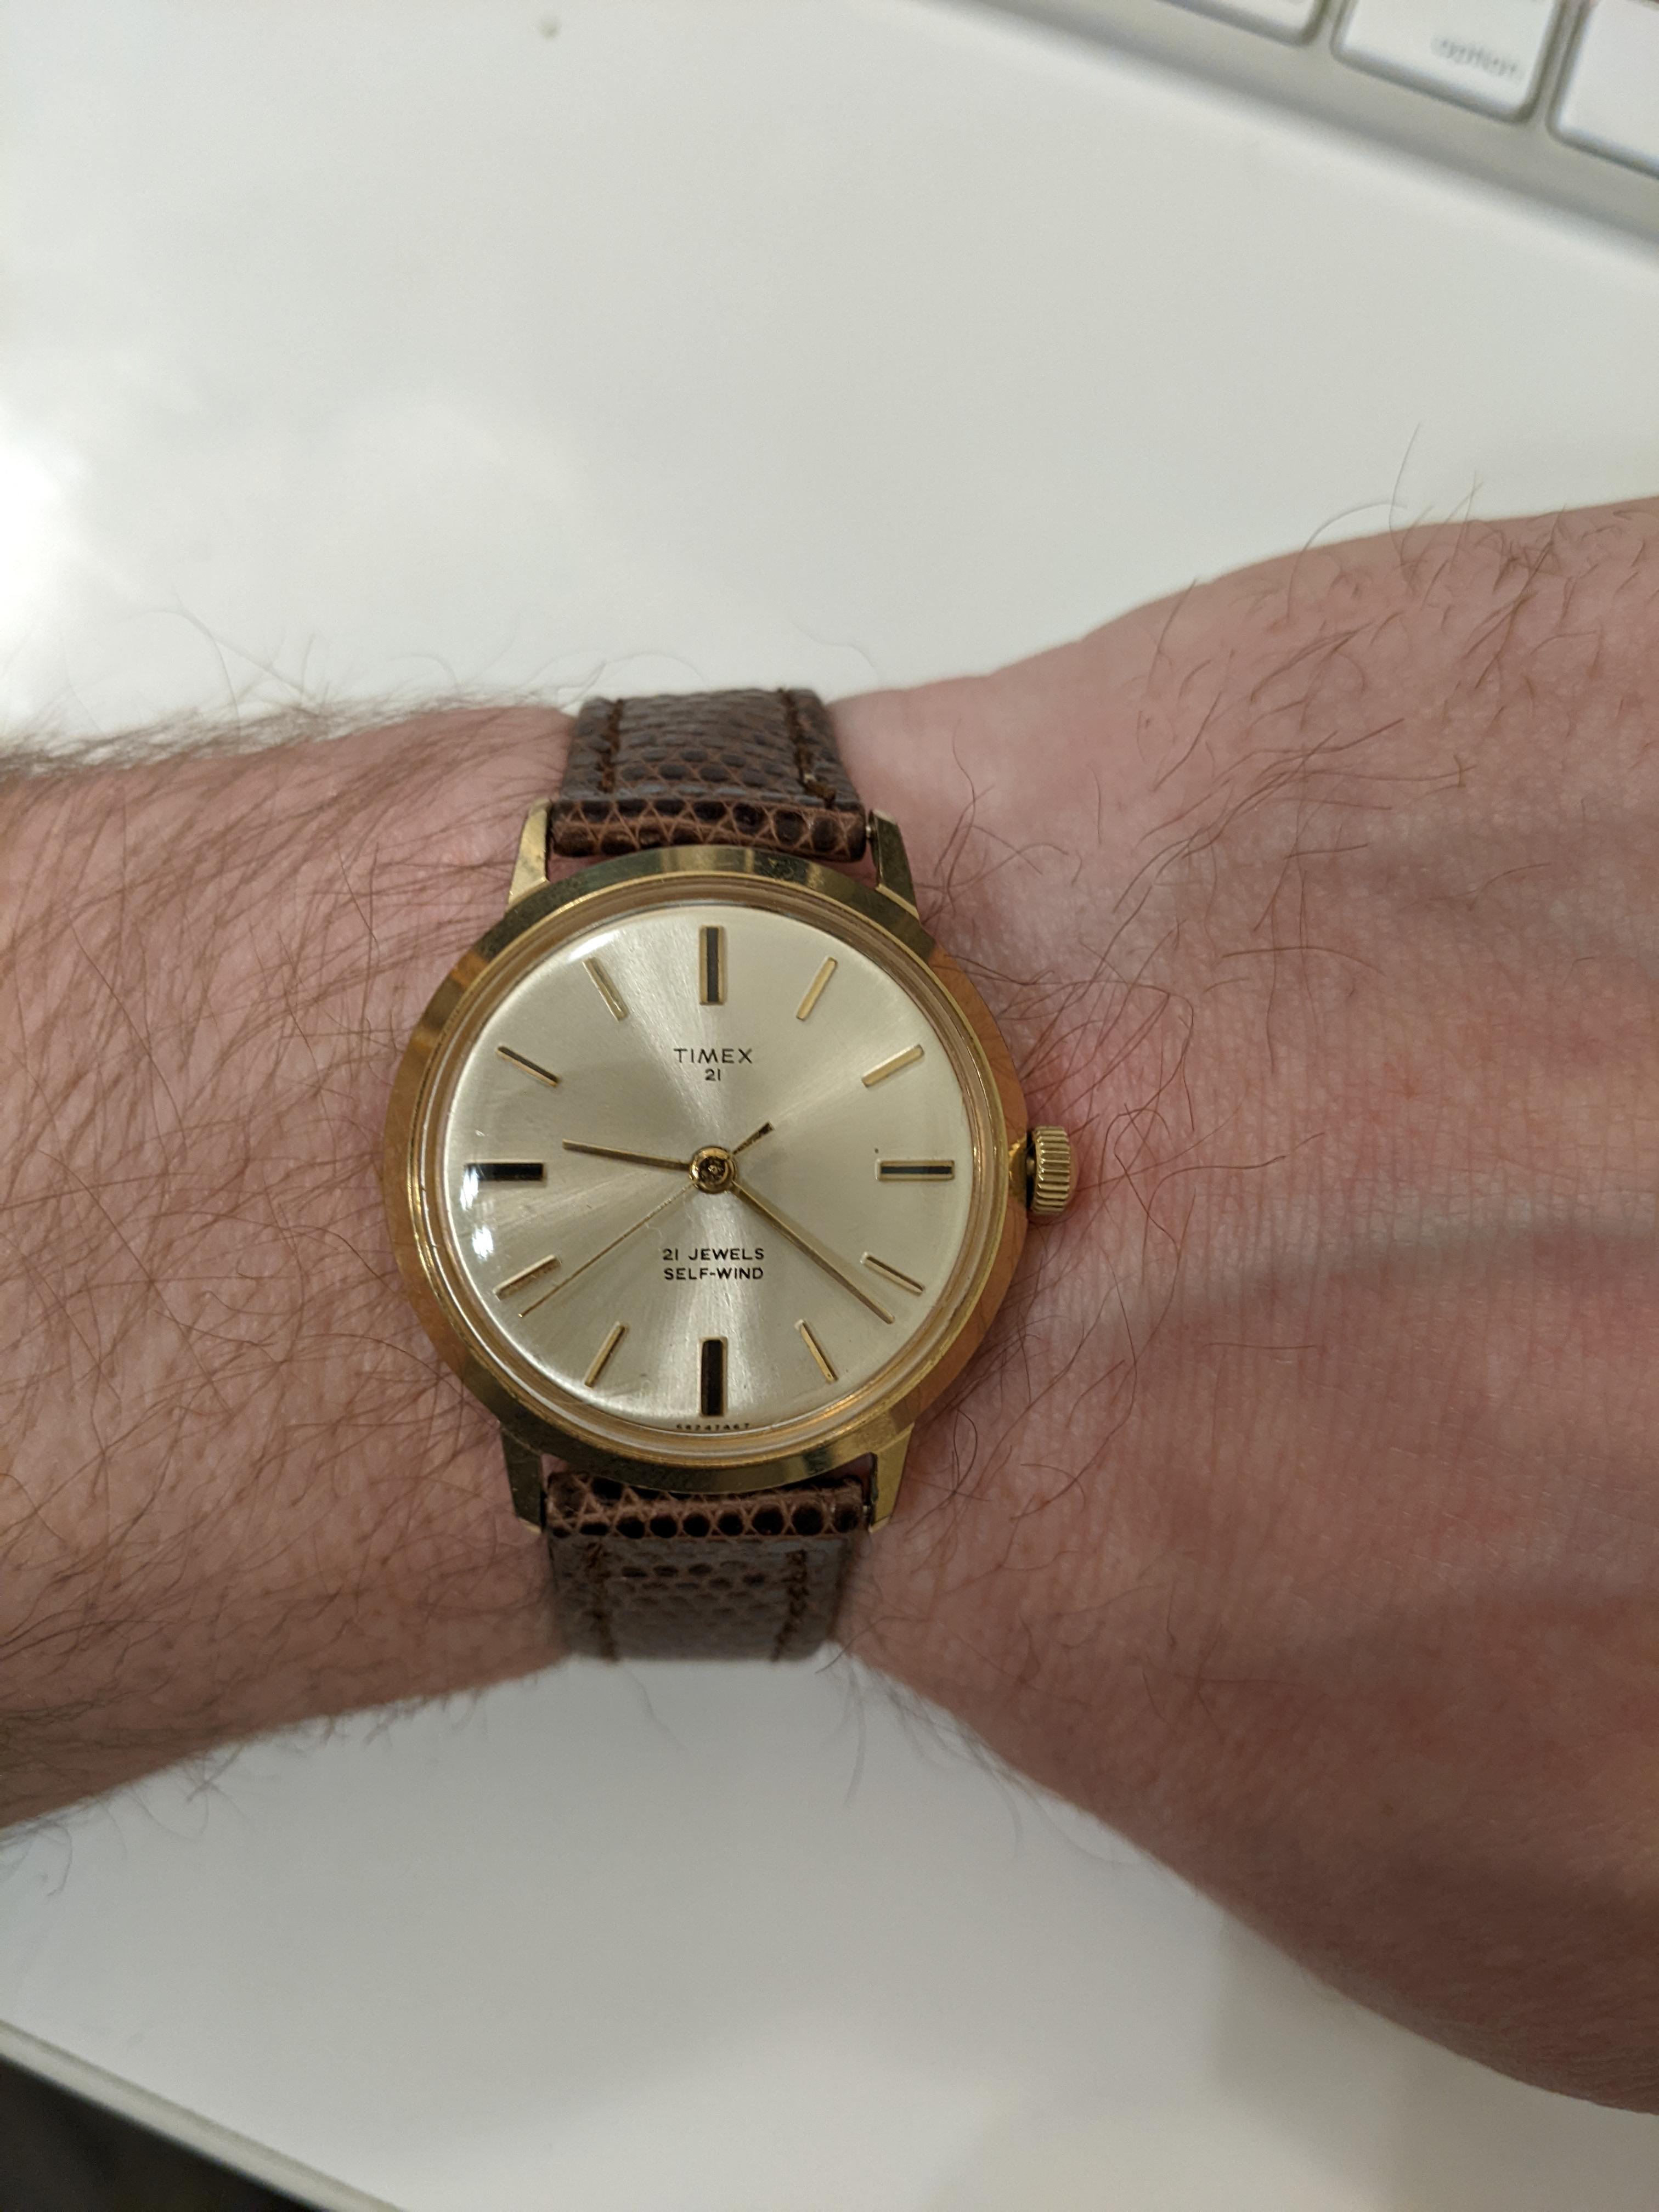
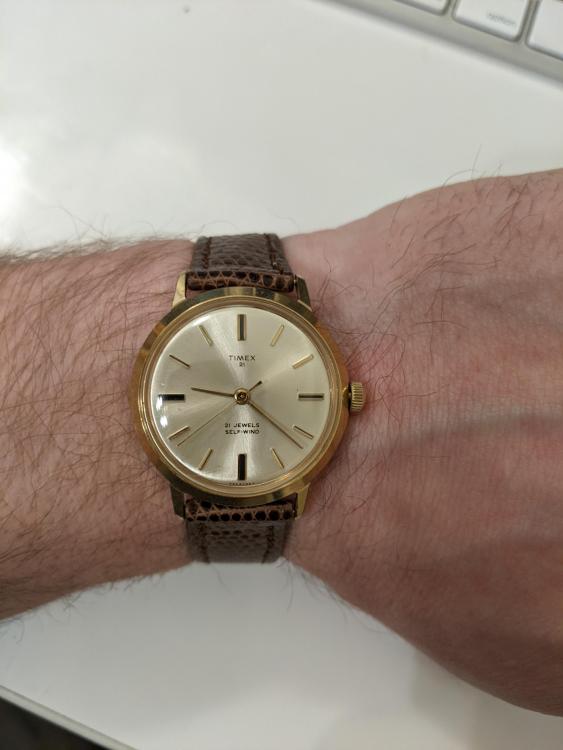
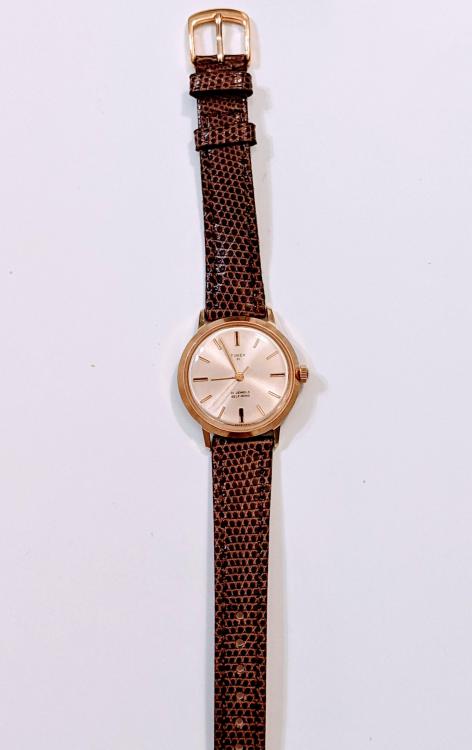
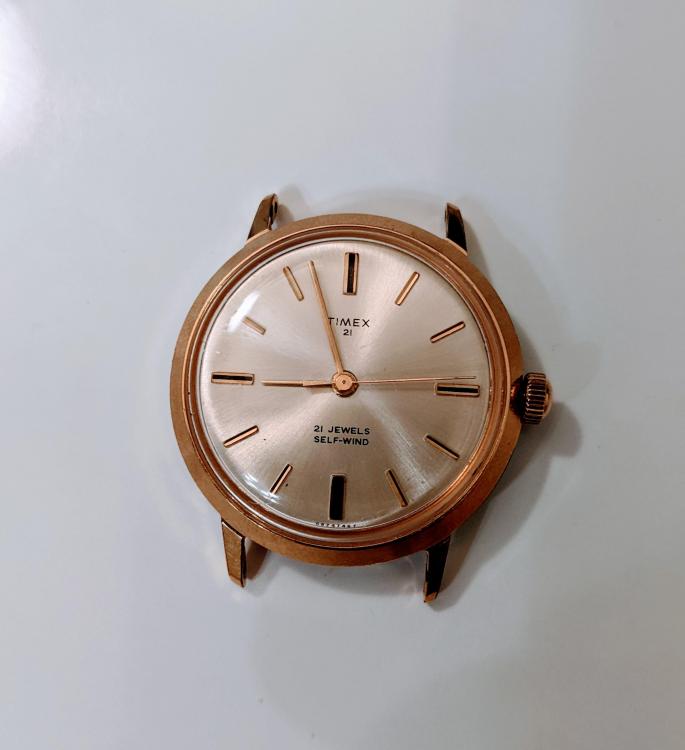
I use the term "restoration" lightly. I did a full service, cleaned the case in an ultrasonic, and replaced the crystal. When I got the watch, it wasn't running, and now it is, so I'll take what I can get.

 1 point
 -
I have got my hands on a Vulcain Wall World clock, which is to be hung up in the workshop. However, there are some challenges. More second hand are missing, so i have to find someone who can fit? I think the easiest thing is to change them all. Since the watch is from the USA it is 110v so I also have to convert from 230v to 110v! An alternative is to switch all drives to Quartz. What would you do?
 1 point
 -
Hi LWS the chine spring is always the stronger of the two , It has more work to do. when dismantling three train clocks always label the barrels, and if removing springs for cleaning do them one at a time and put them back in the barrel before moving on tho the nex one to avoid mixing springs and barrels. You will be the expert now.1 point
-
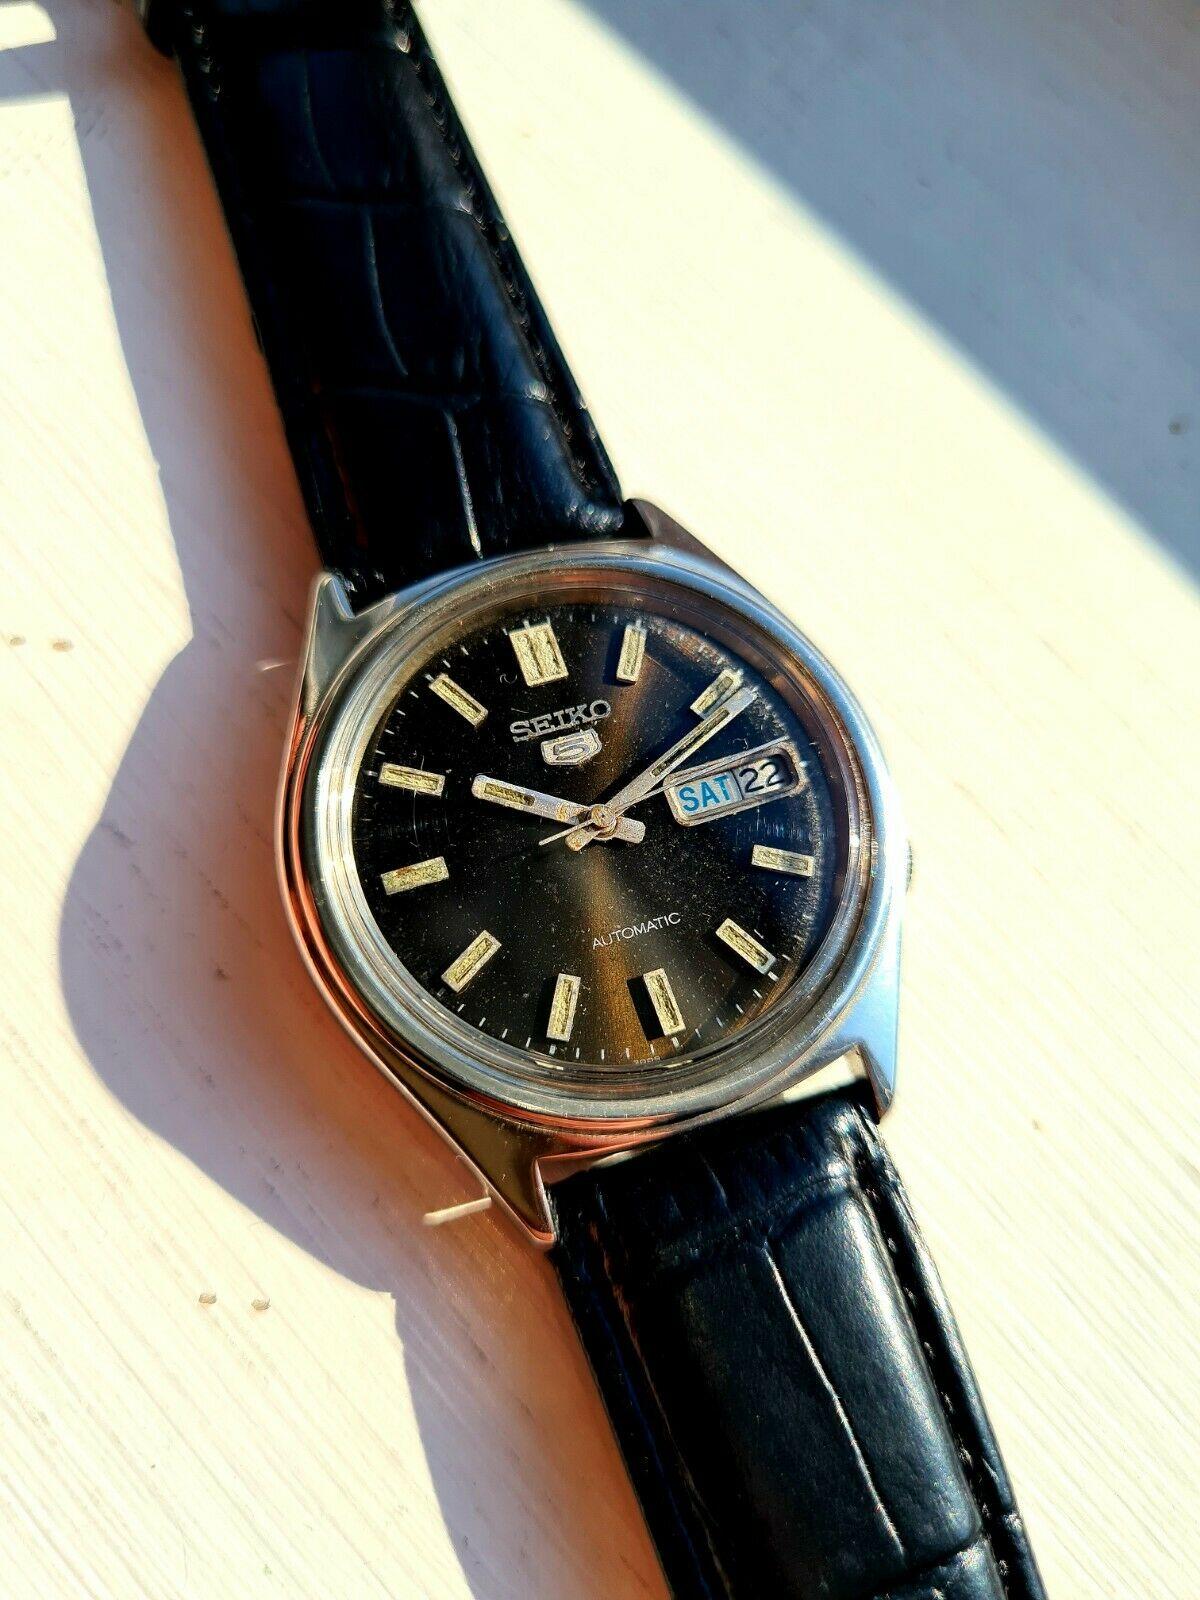
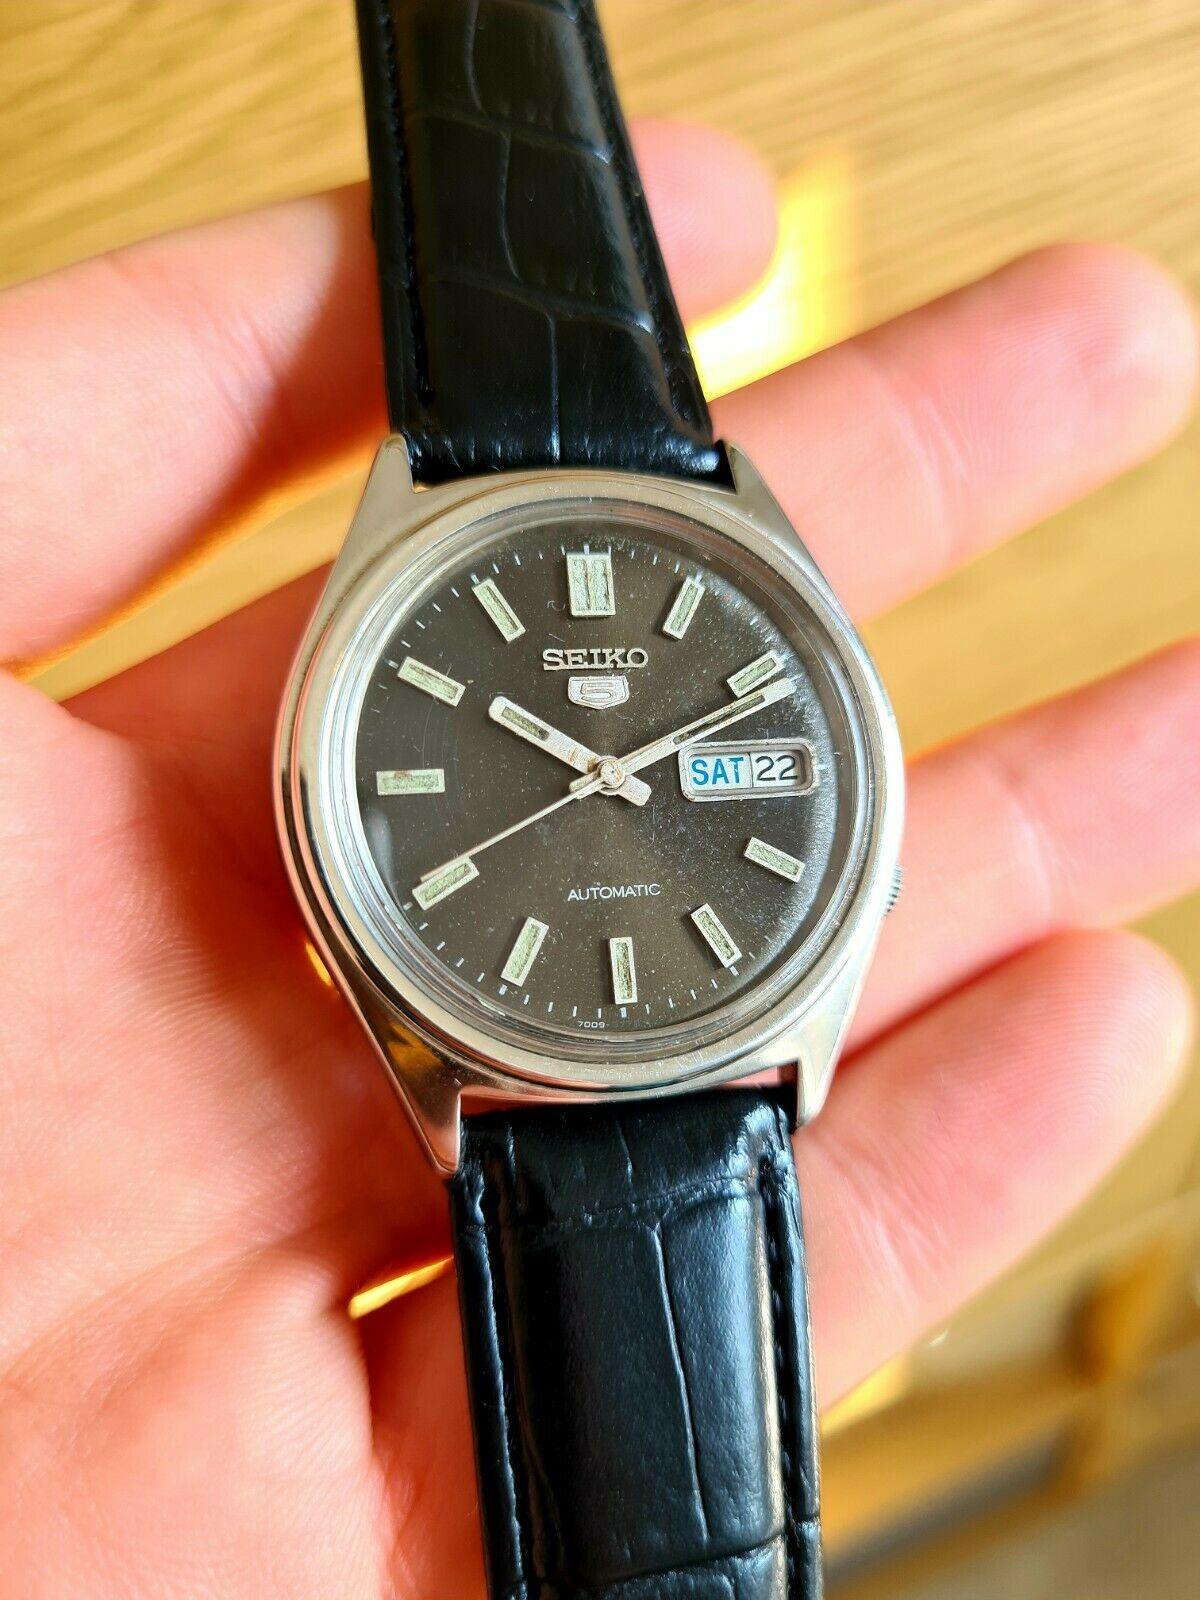
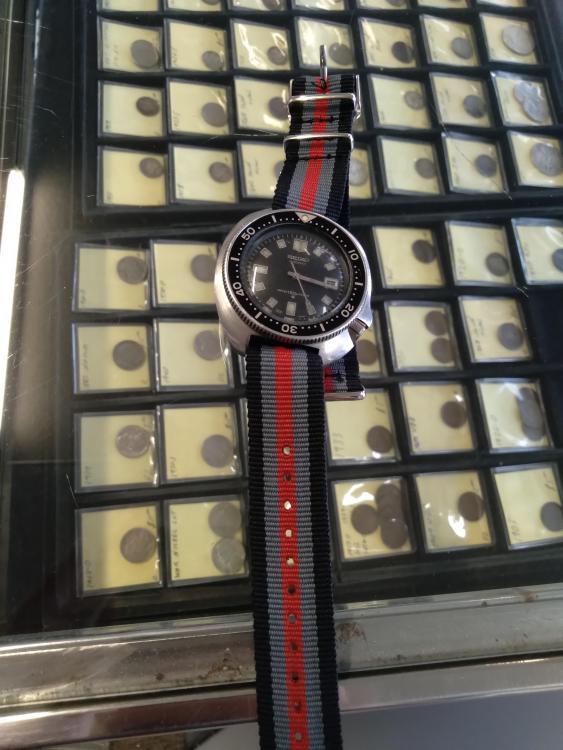
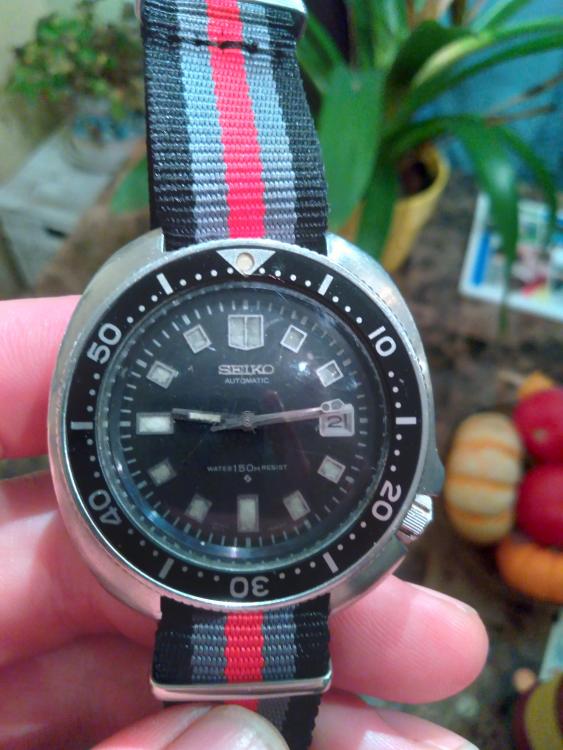
I got everything back together, polished the crystal a bit, and added a band. The winding rotor has a bit more side-to-side play than I would prefer, but it seems to work well, and makes a very satisfying sound. I have to agree with you that it looks good on the wrist. Here are a few photos that I took during disassembly and after cleaning/reassembling Reassembled:

 1 point
 -
Well, seems like all my Maxell LR44 are busted. The ones I tested with I measured at 1,346, and even the new ones won’t measure more than 1,41. I still can’t explain why these exact batteries worked with the other 3863 watch I have, but I haven’t let it work for more than 2 minutes so that would have probably stopped too if I let it long enough.1 point
-
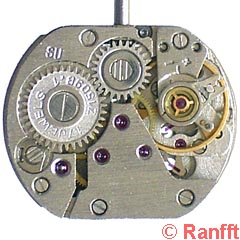
I think that is because it is Russian. It looks like a Zaria 1509B.1 - I've seen a number of those in Sekonda ladies watches. The shimming of the balance cock, and that shape of shock spring are very distinctly USSR/Russian. They seem to run quite well if you clean them carefully. http://www.ranfft.de/cgi-bin/bidfun-db.cgi?10&ranfft&&2uswk&Zaria_1509B_1
 1 point
 -
Show us an image of the back. Converting from 110 to 220 is a transformer...pretty simple. No, do not convert to quartz. By staying with the current movements, all of the second hands can be synchronized. Lastly. This is a whole lot of trouble to go through and there are better ways to spend your time. Just send the clock to me and work on more important projects1 point
-
Hi Frank there is chrono24 .co.uk Miillenary watches (high.co uk. end) https://r.search.yahoo.com/_ylt=AwrIS.YcJjNi.MgA4gJ3Bwx.;_ylu=Y29sbwMEcG9zAzEEdnRpZAMEc2VjA3Ny/RV=2/RE=1647548061/RO=10/RU=https%3a%2f%2fwww.chrono24.co.uk%2f/RK=2/RS=x2cLZWifg_yPL_CLCIGawZNIiDA- The link is for chrono241 point
-
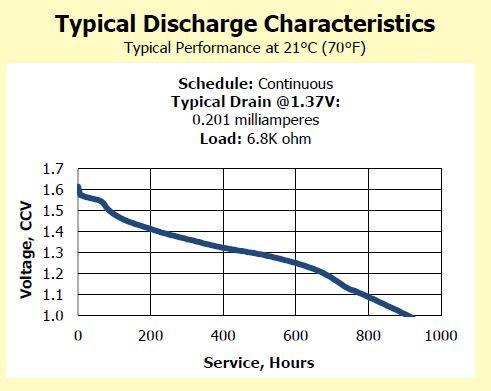
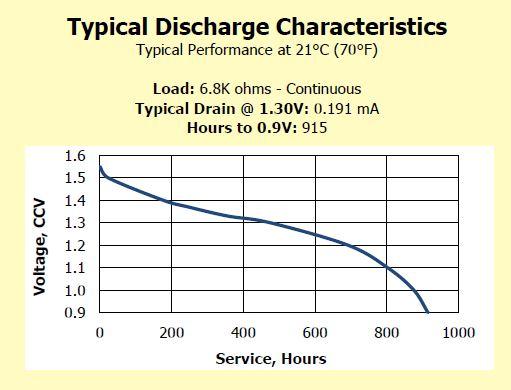
What will be interesting to see is how long the watch actually runs? Because without proper test equipment there is a certain mystery that we don't know about? One of the tests you're supposed to run normally would be the lower voltage limit test. This is where with a variable voltage power supply to drop the voltage until the watch stops. Depending upon the watch you can usually get down to around 1 V. Or even the basic tests like current consumption how much current is this watch consuming? But the low-voltage watch test that would be interesting? Normally like the quotes above say the battery chemistry and the voltages shouldn't of been a difference or a problem except? In the past I used to change way more batteries that I do. I'm not a fan of load testing so I tested the batteries with a digital volt meter which is basically no load testing. This is where for brand-new silver cells fresh out the package if they are good they're usually like 1.59 V. Which is slightly different than what the specifications says isn't it? Or is it? To understand this I've attaching some PDF tech sheets this is Eveready's equivalent for both the silver and the Alkaline battery. You'll notice their nominal voltages the silver cell is 1.55 the alkaline is 1.50. But I've also snipped out the discharge curve. Look at the very beginning of each discharge curve. This is where we get the interesting things like right at the very beginning silver cells can be over 1.6 V. Although I think I almost never saw any that fresh very seldom. Then it looks like the alkaline could be around 1.55 Volts. Basically when you look at the tech sheets the initial voltage difference is considerably higher than you think it is. They should settle down relatively fast to the nominal voltage and a be interesting to see if the watch still runs. Of course there could be some battery chemistry difference that we don't know about but hard to tell without running electrical test on the movement so this means the only test is let's see how long the watch runs before it stops. a76z- LR44.pdf 357-303z SR44.pdf
 1 point
 -
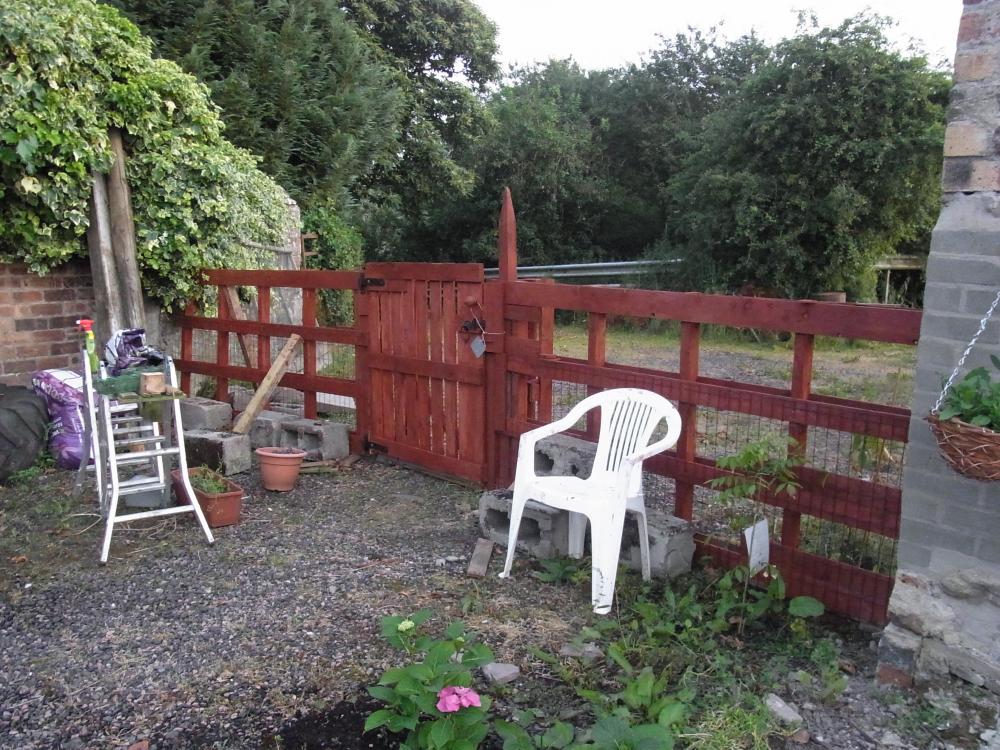
Most entertaining. I have a bunch of scrap pallet wood offcuts, but sadly it seems not enough imagination to make automata with them. I did build a bunch of fencing, and the gate does move if you push it, does that count?
 1 point
 -
Interesting site, I myself am not a collector as such I pick up interesting things. Mainly clocks, There are collectors on the site who if asked will share information. cheers1 point
-
I haven't come across EMO 60 so I would just order the spring the normal way.1 point
-
Fault at the roller, either the table is not at the height as WW said or even the guard pin as anvil says. Excessive end shake also allows the height of roller table vary enough in face up and face down positions to let the impulse jewel rub on fork.1 point
-
Check that the safety guard on the pallet fork (if it has one) is not touching the roller. Its the middle prong. Anilv1 point
-
Malfunction in the minute train, possibly due to dirty or broken spring, you should also adjust and grease the canon pinion. Will you show a image when you take the minute bridge off so these named parts can be shown to you. Good luck.1 point
-
We assume it been cleaned and oiled ? You have ckeckec the jewels for chip/cracks, the endshake on the pallet/fork and the balance. Is the roller at the right height and not touching the fork. One thing to try is removing the fork snd check the balance oscillates freely for a few seconds without sticking. Take the power off brfore removing it.1 point
-
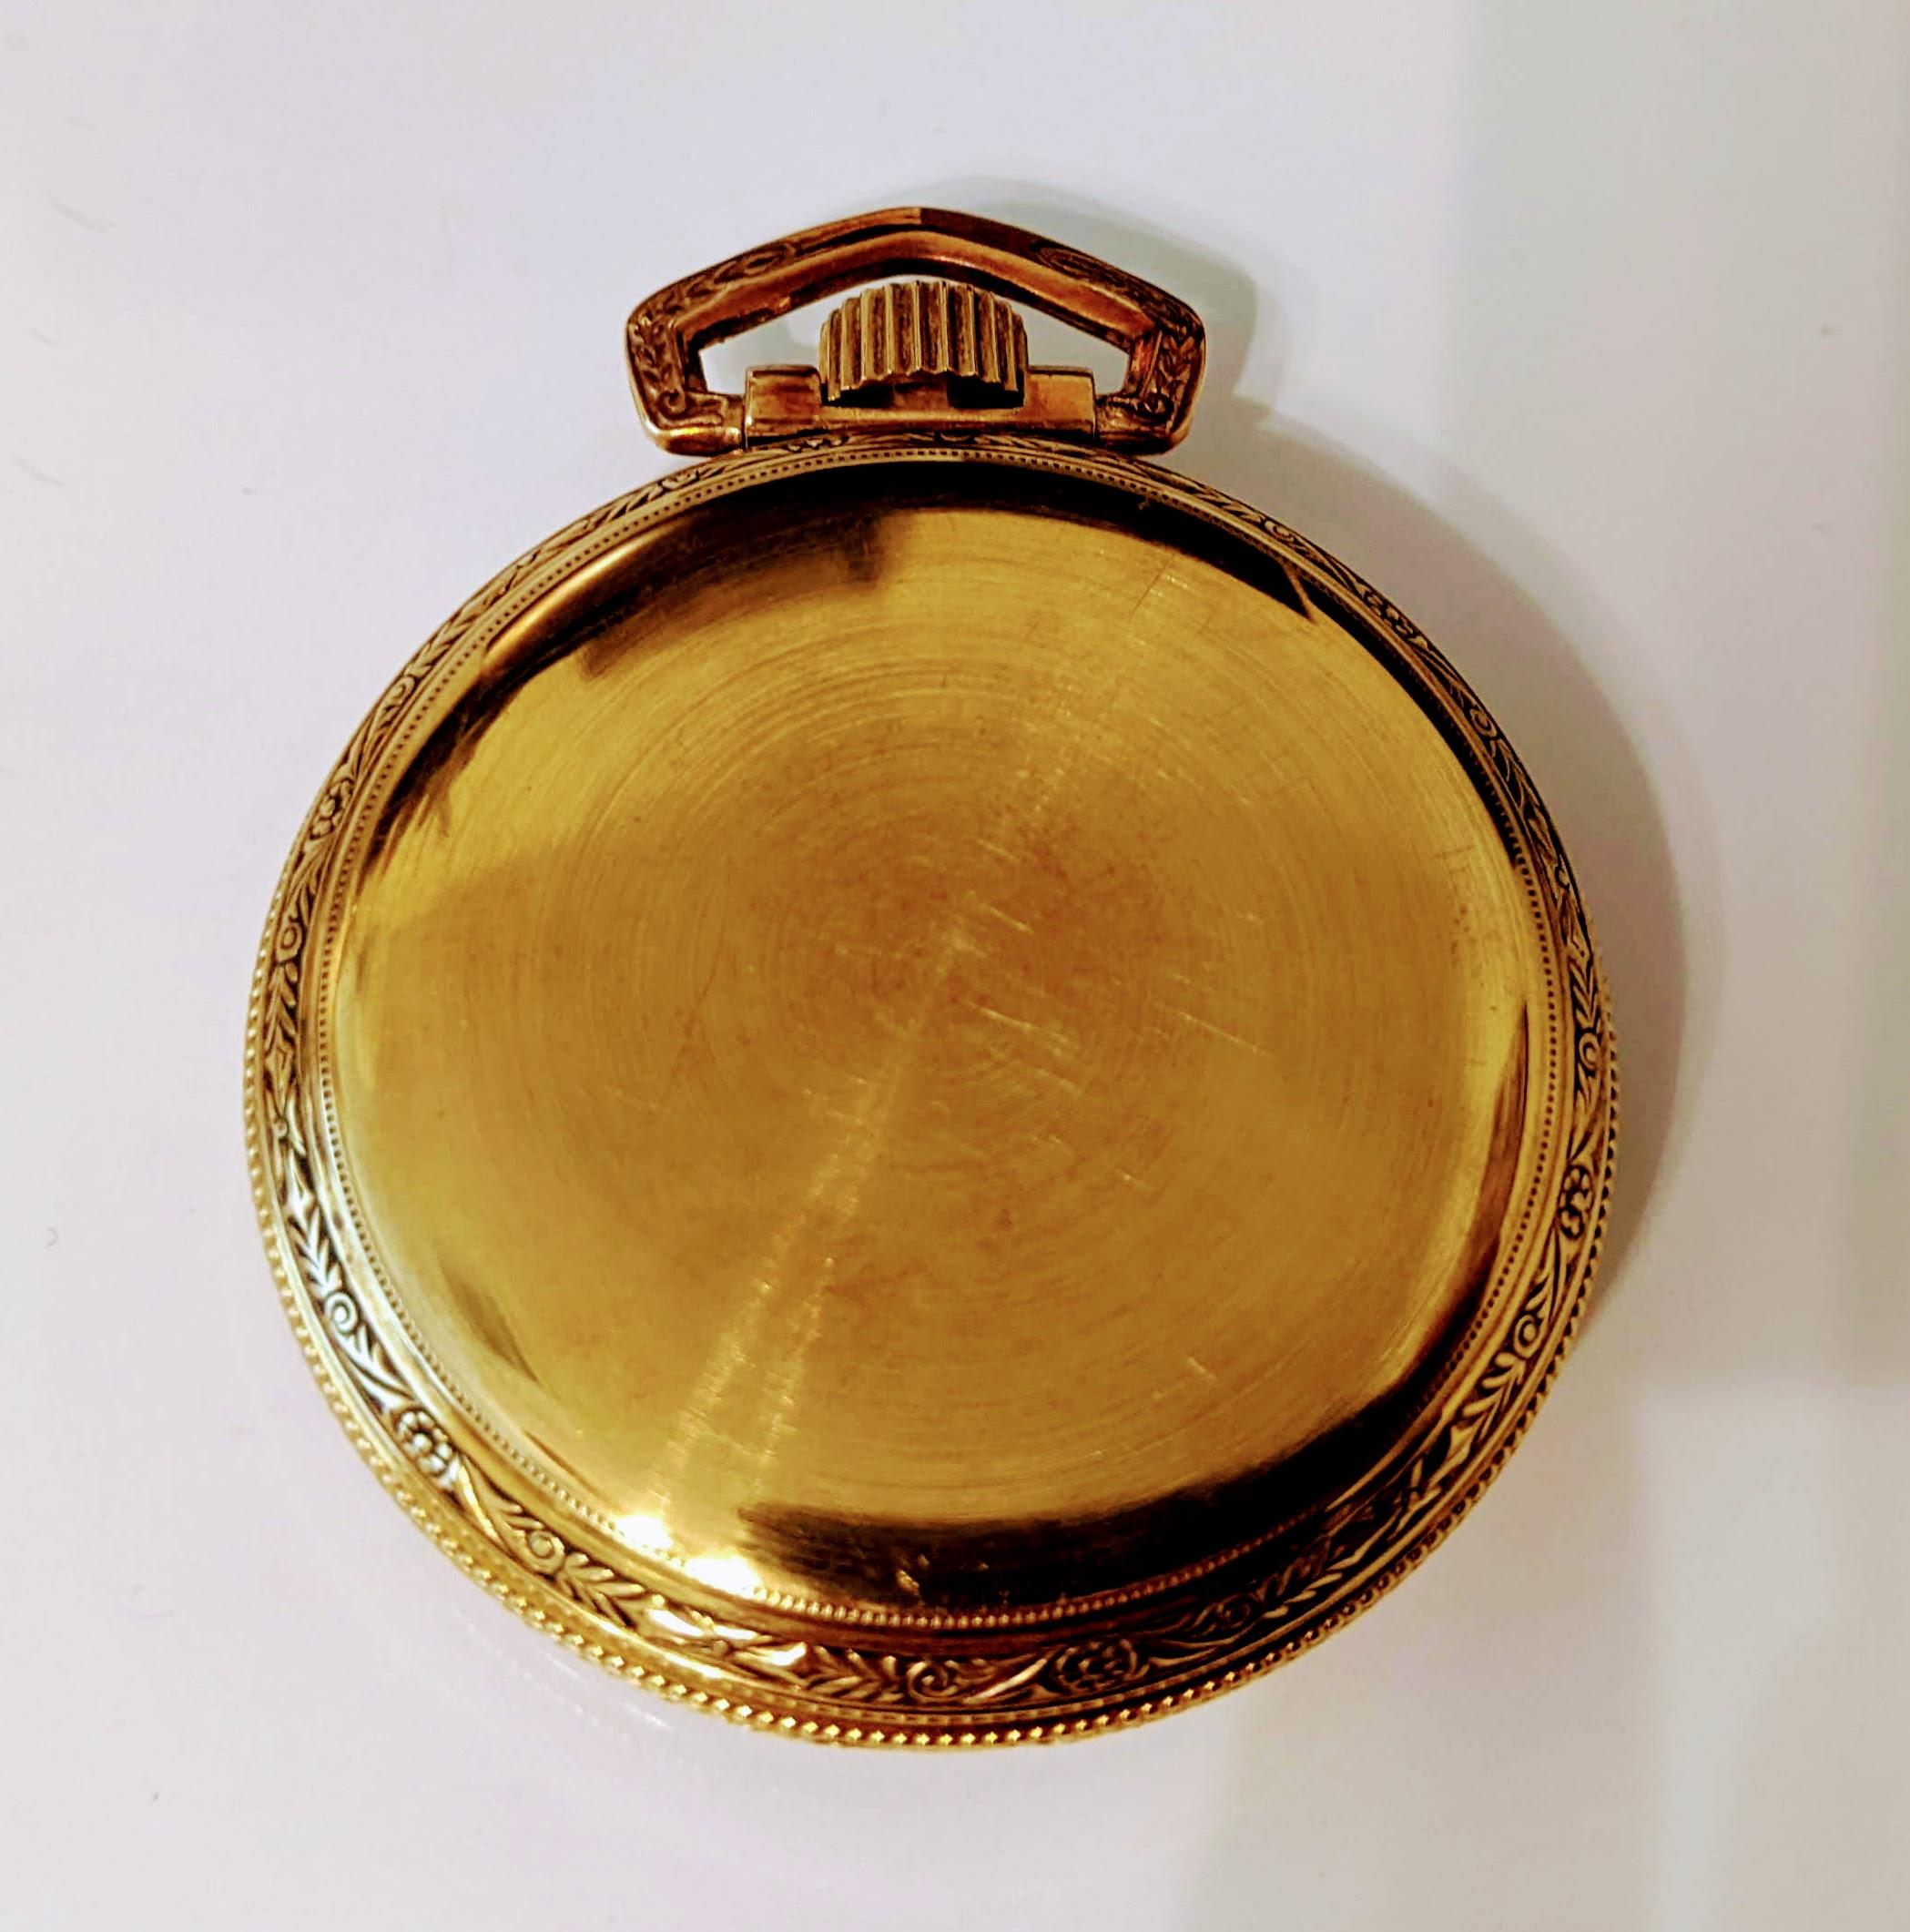
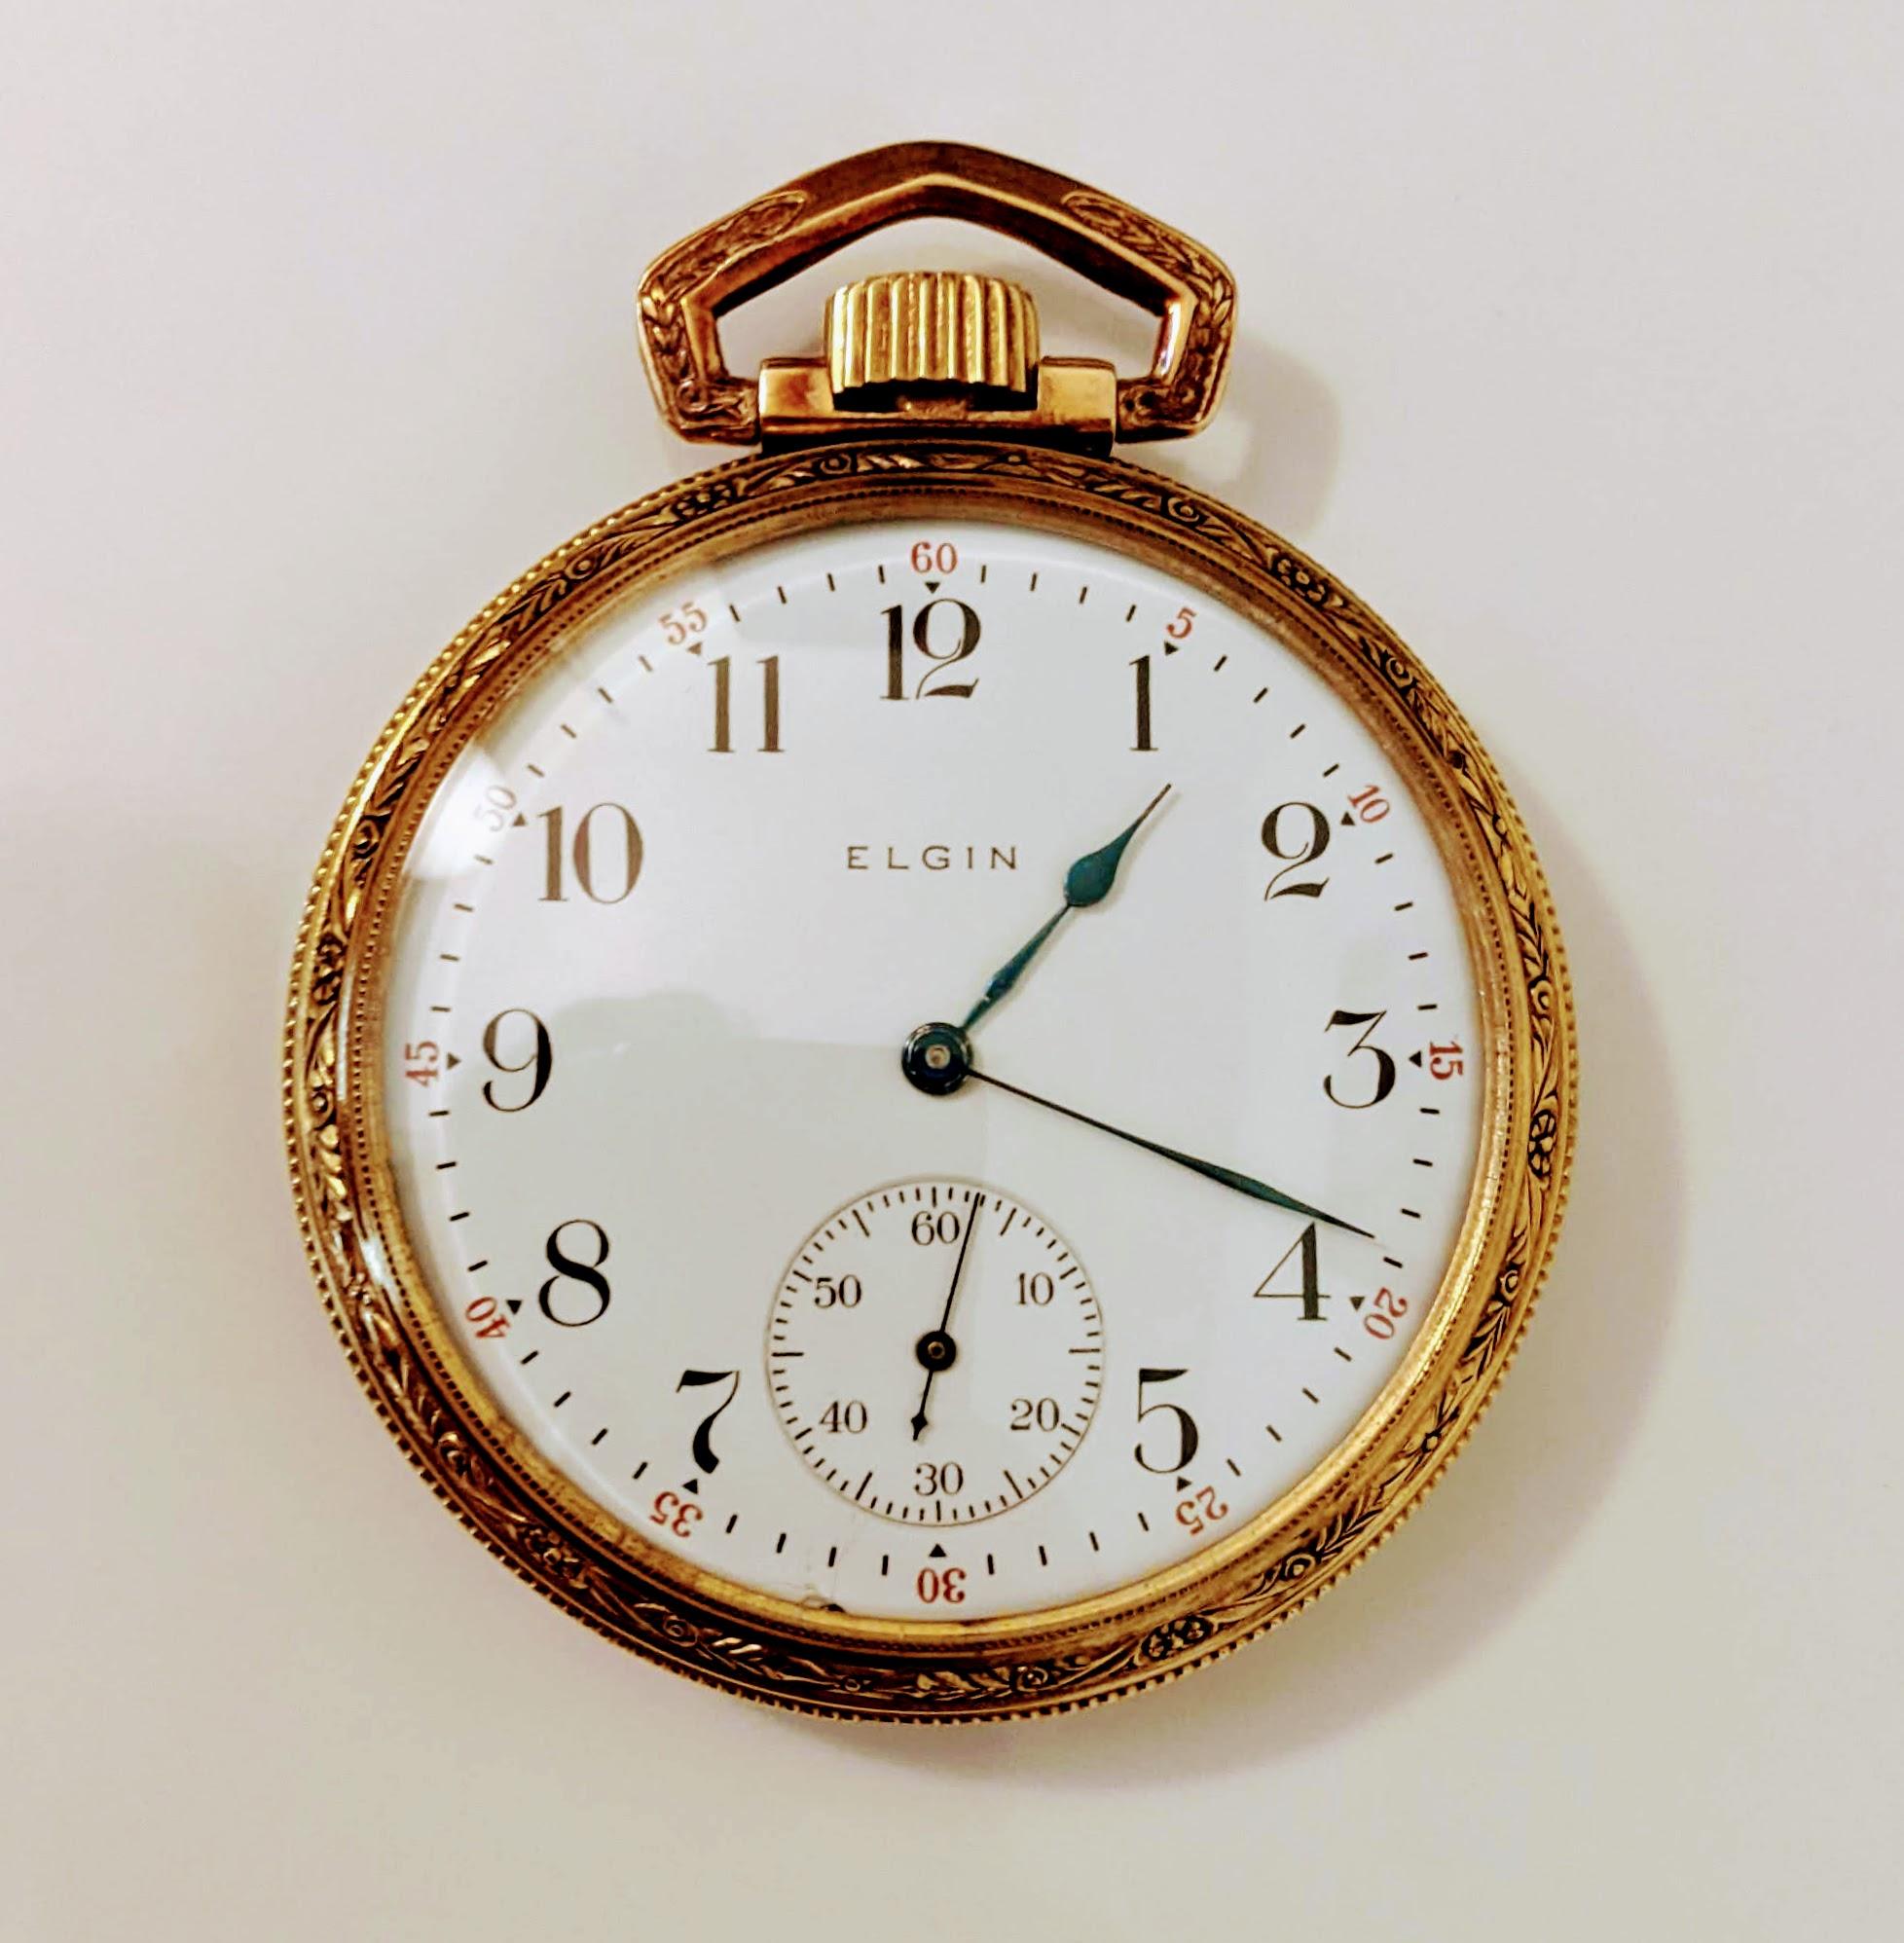
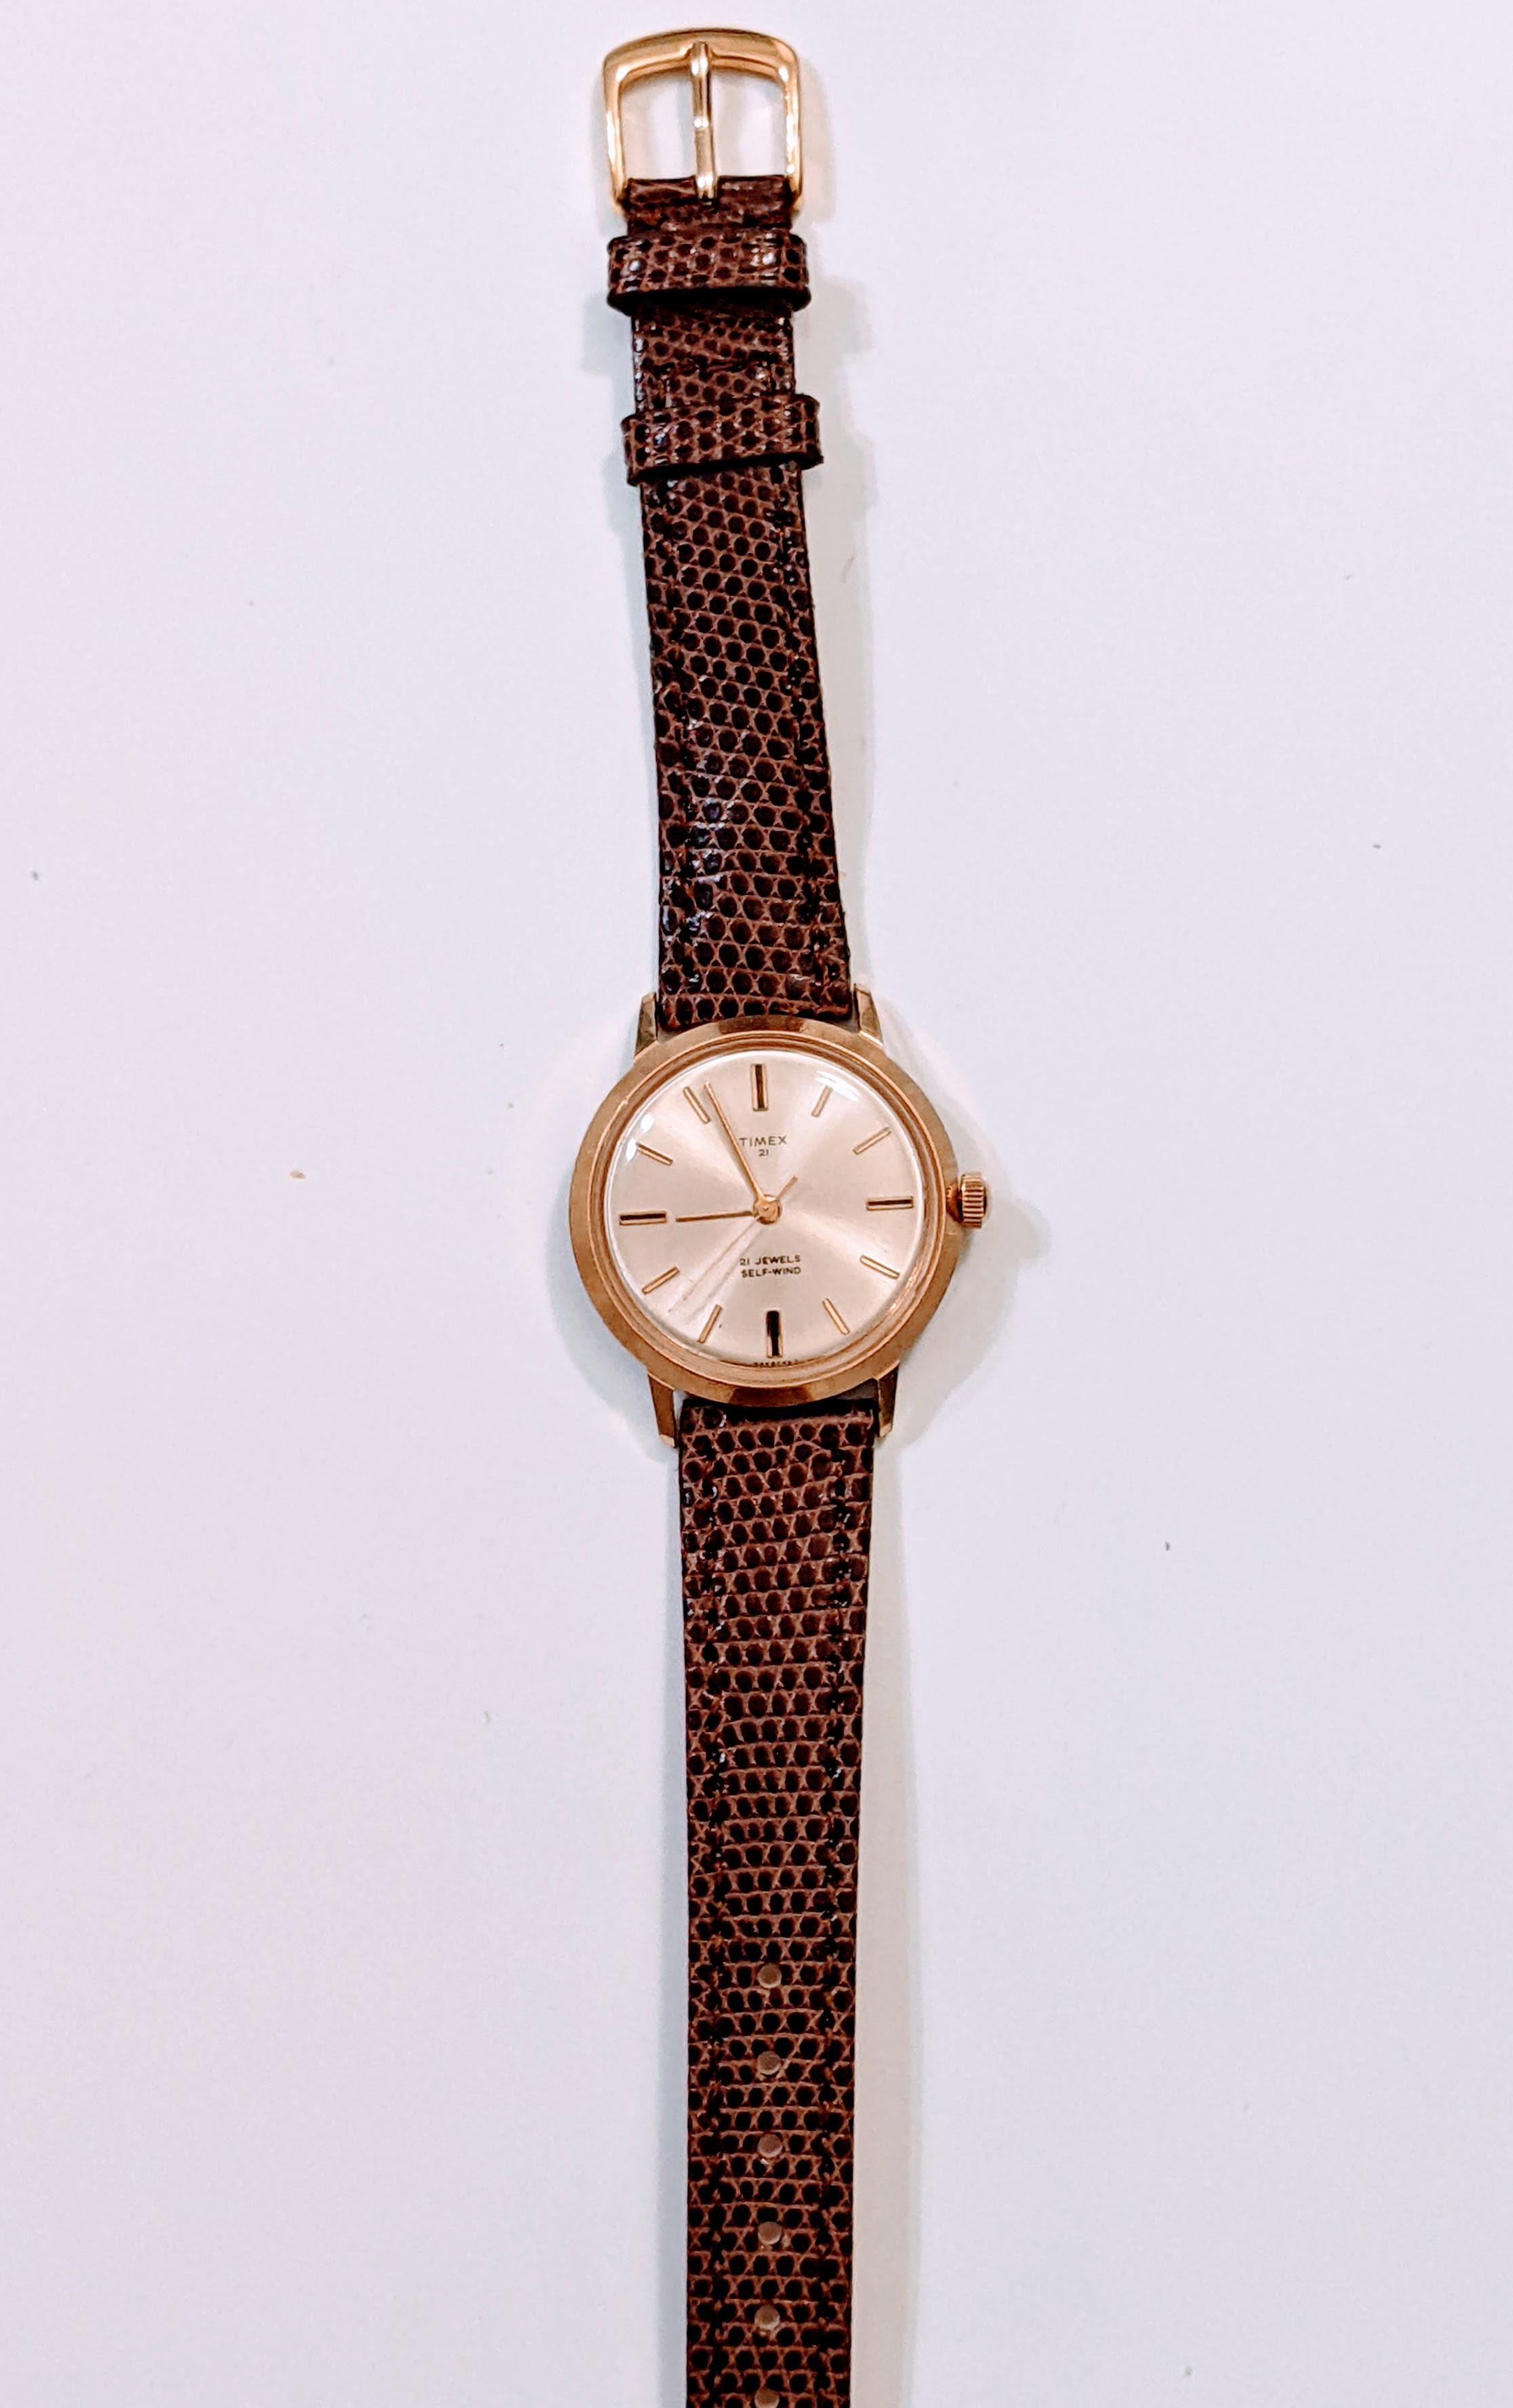
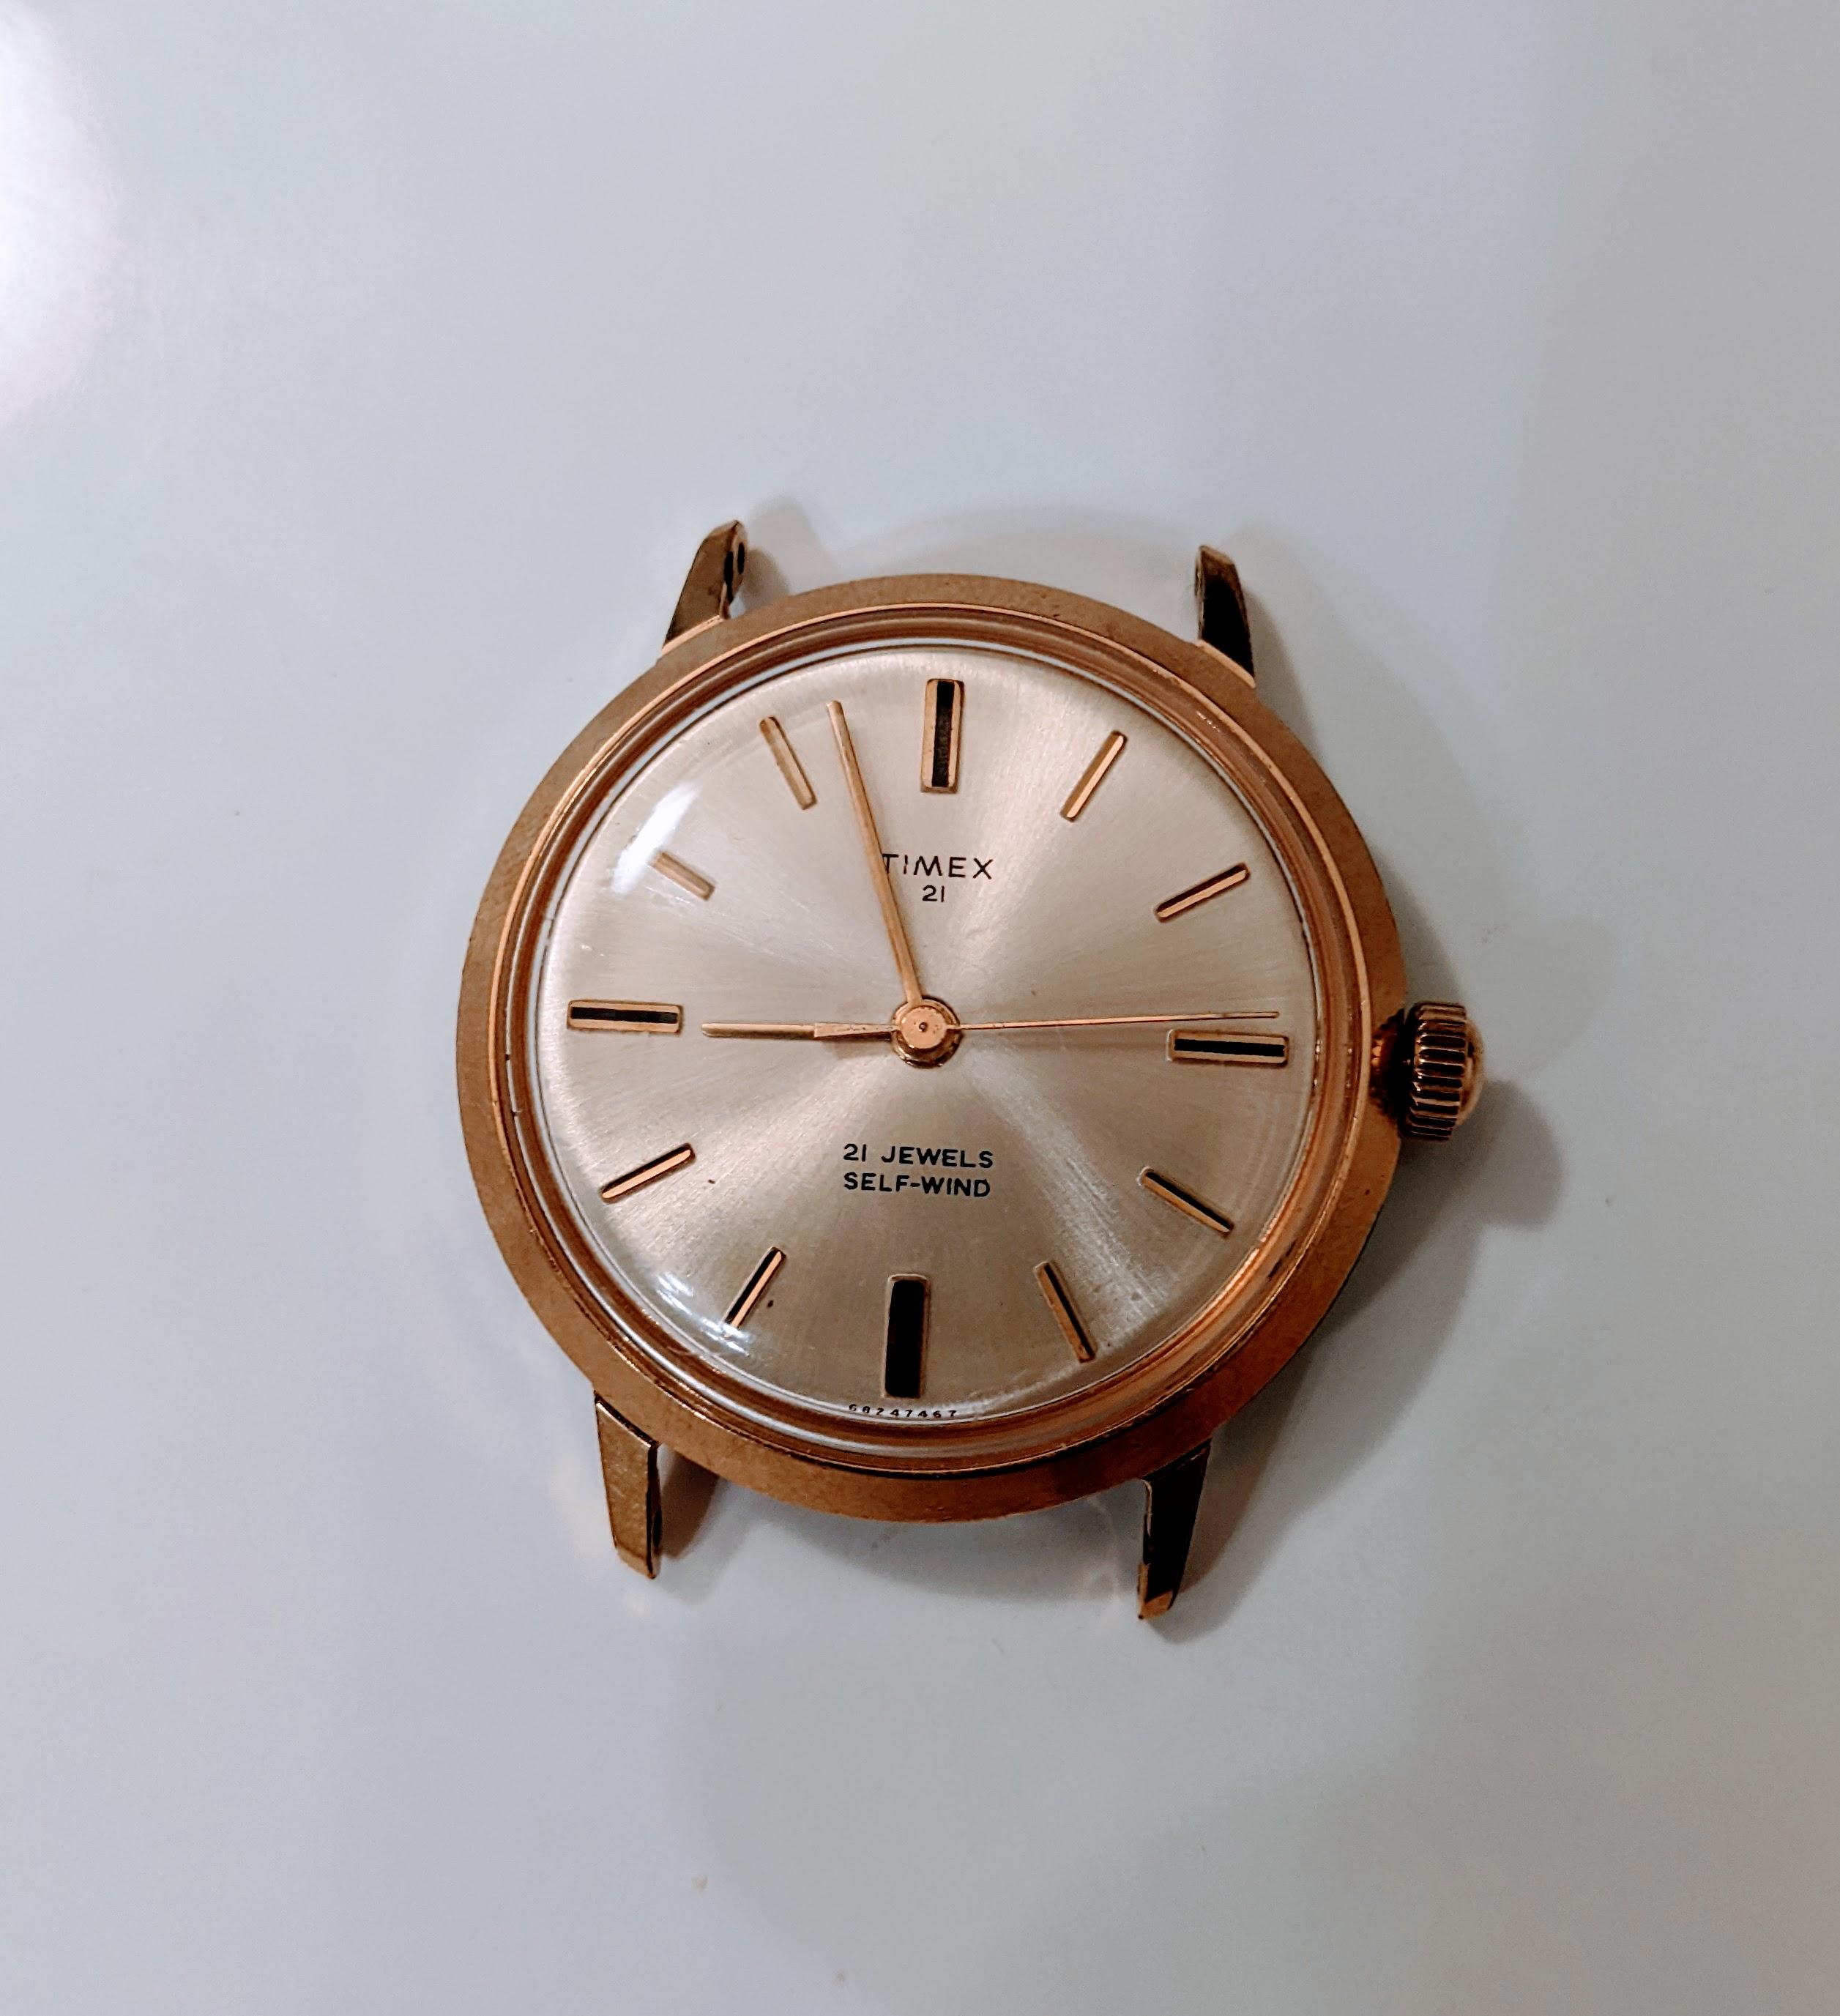
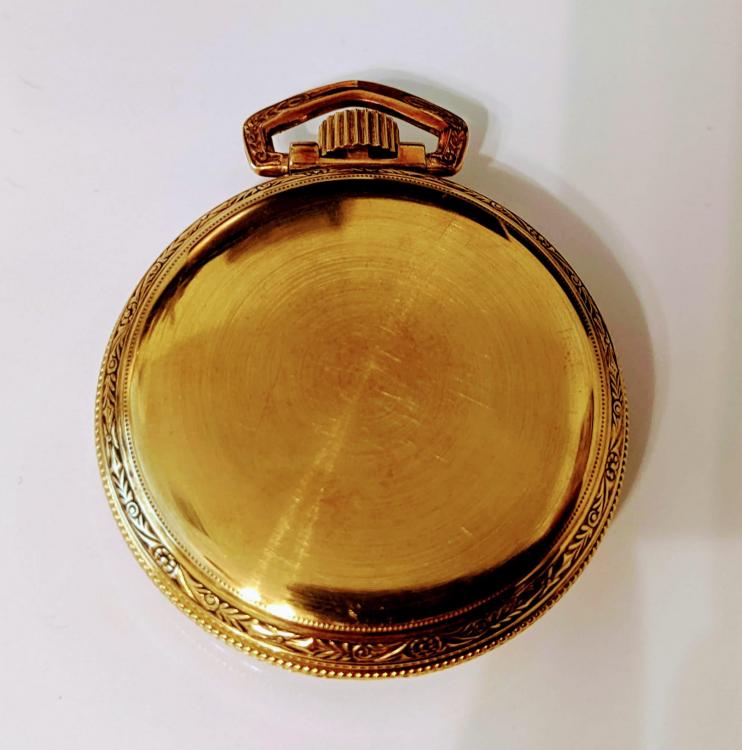
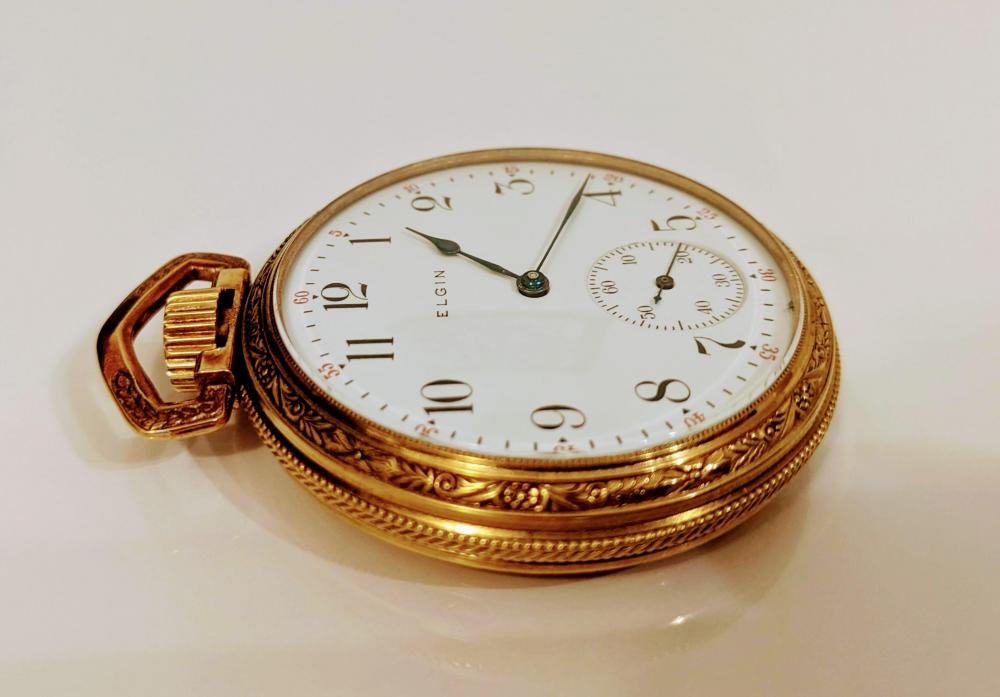
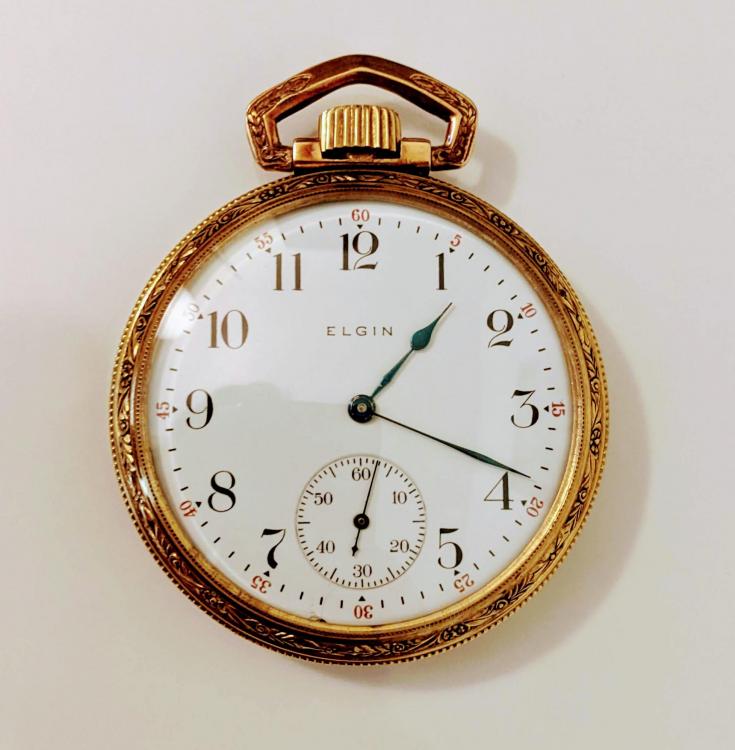
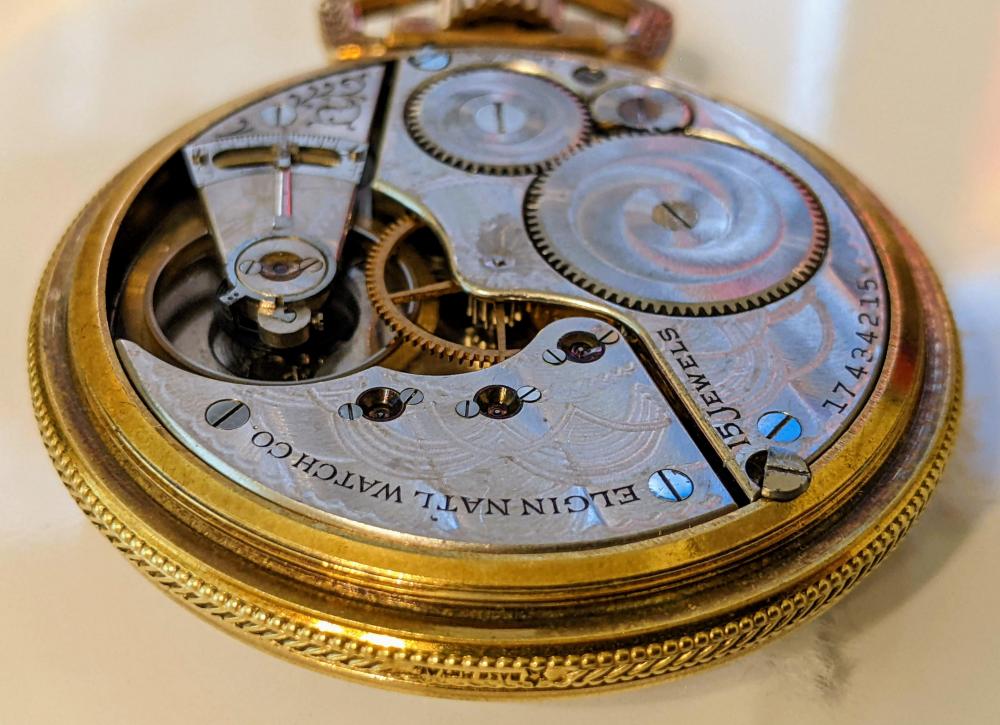
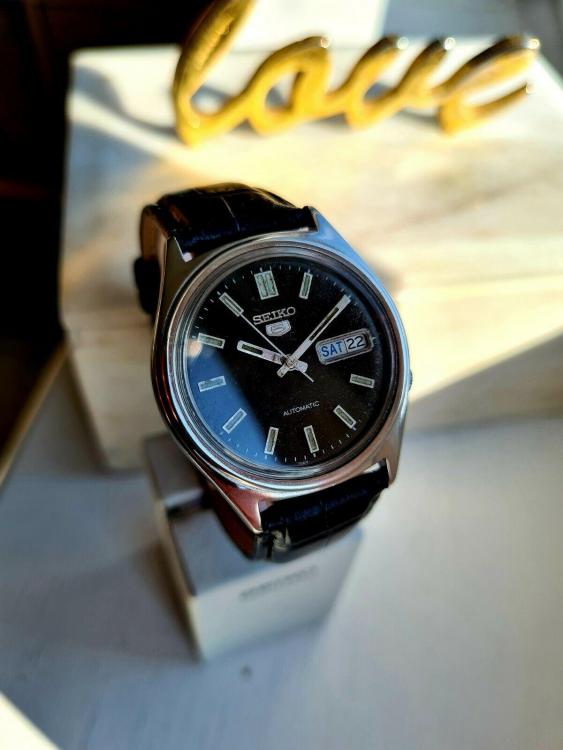
So guys, i just did my first ever ebay auction today. Won the auction and got this for £35.75 what you think?


 1 point
 -
KvK nailed it. Depends on what it is you're trying to avoid. There's an ass for every seat. I tend to avoid Japanese movements because they're typically very plainly finished, and I like the French/Swiss flair. I avoid Russian watches, because they're almost universally in plated cases. I also avoid anything with less than 15 jewels because it's more likely to have wear requiring the sourcing of parts that no one cared enough about to hold onto. Finally, I avoid anything too expensive (the current bar is $5). This is because I'm not trying to impress anyone (and trust me, it's working), I'm still learning, and this is not a job for me, it's a hobby. It's meant to be fun and relaxing. If my 2 year old runs in and bumps my elbow, and I manage to break something or cast it into the aether, it's not fun for anyone. If it's barely a fancy coffee to me, who cares? It goes into the parts pail, and I move on.1 point
-
Maybe you have some Swiss Thury ones. https://en.wikipedia.org/wiki/Thury_thread1 point
-
Hi Frank as far as I know there are no lists ony books on the subject of watch collecting. In the modern world there are many franken watches and fakes, Tribute, clones etc and some of them very good but detectable by the experts, some on here. So if you are unsure ask and you shall recieve much, hopefully un biased information. Even the humble Timex has its collectors, Jersey Mo , a member has amassed a collection of watches ,parts , information and knowledge. So its a case of make up yourmind what you want to collect or what range to collect and the depth of your pocket. What was it Del boy said " The world is your Mollusc"1 point
-
A sad tale indeed, but there is still hope! If you post good-quality close-ups of the back, from above and from the side, together with some measurements (glass diameter and thickness) I expect we can help. You will not find any spares from the manufacturer, but I expect the glass will be a simple standardised form and size, and fitting a new one should not be too difficult.1 point
-
They are all good advice. If you are totally new to watch repair, working on any watch will give you practice. Basic skills like tweezering, picking up small parts, flipping them over, rotating it in your hands and not dropping them or squeezing so hard that they ping away. Learning how to use screwdrivers without slipping and creating scratches. Learning to shape, dress and maintain your tools. Learning how to disassemble a watch. Learning how to clean by hand. Working with springy things. How to handle mainsprings and hairsprings. All the above skills can only be mastered by hours of practice. So start somewhere. Anywhere. As for the advice on getting a working watch is for a beginner to know the proper functioning of a watch. I've seen many non-working watches on eBay with unusual damage that was probably caused by a careless watchmaker. When you successfully take apart a watch, clean, oil and reassemble it, there is no better satisfaction than seeing the balance beating away.1 point
-
I always advise someone who is just starting, start on a pocket watch movement (not the fusee type) The movements are the same as as a basic watch, you don't need to bother getting it to work, it gives you good practice on how to hold tweezers, watchmakers screw drivers and using your eye glass.1 point
-
It's best to start with a movement that is functioning, so you know once you have it back together whether you have assembled it correctly. Mark's watch repair course uses a chinese ETA 6497/6498 clone, I believe1 point
-
Buy old working watches off eBay or ETSY. They usually come in batches and are cheap. Then use these to disassemble and reassemble. You can wind them with a screwdriver over the mainspring ratchet wheel. That way you will know if your reassembly worked. Take your time.1 point
-
Wanted to visit this museum in York, but sadly it was closed a while ago:1 point
-
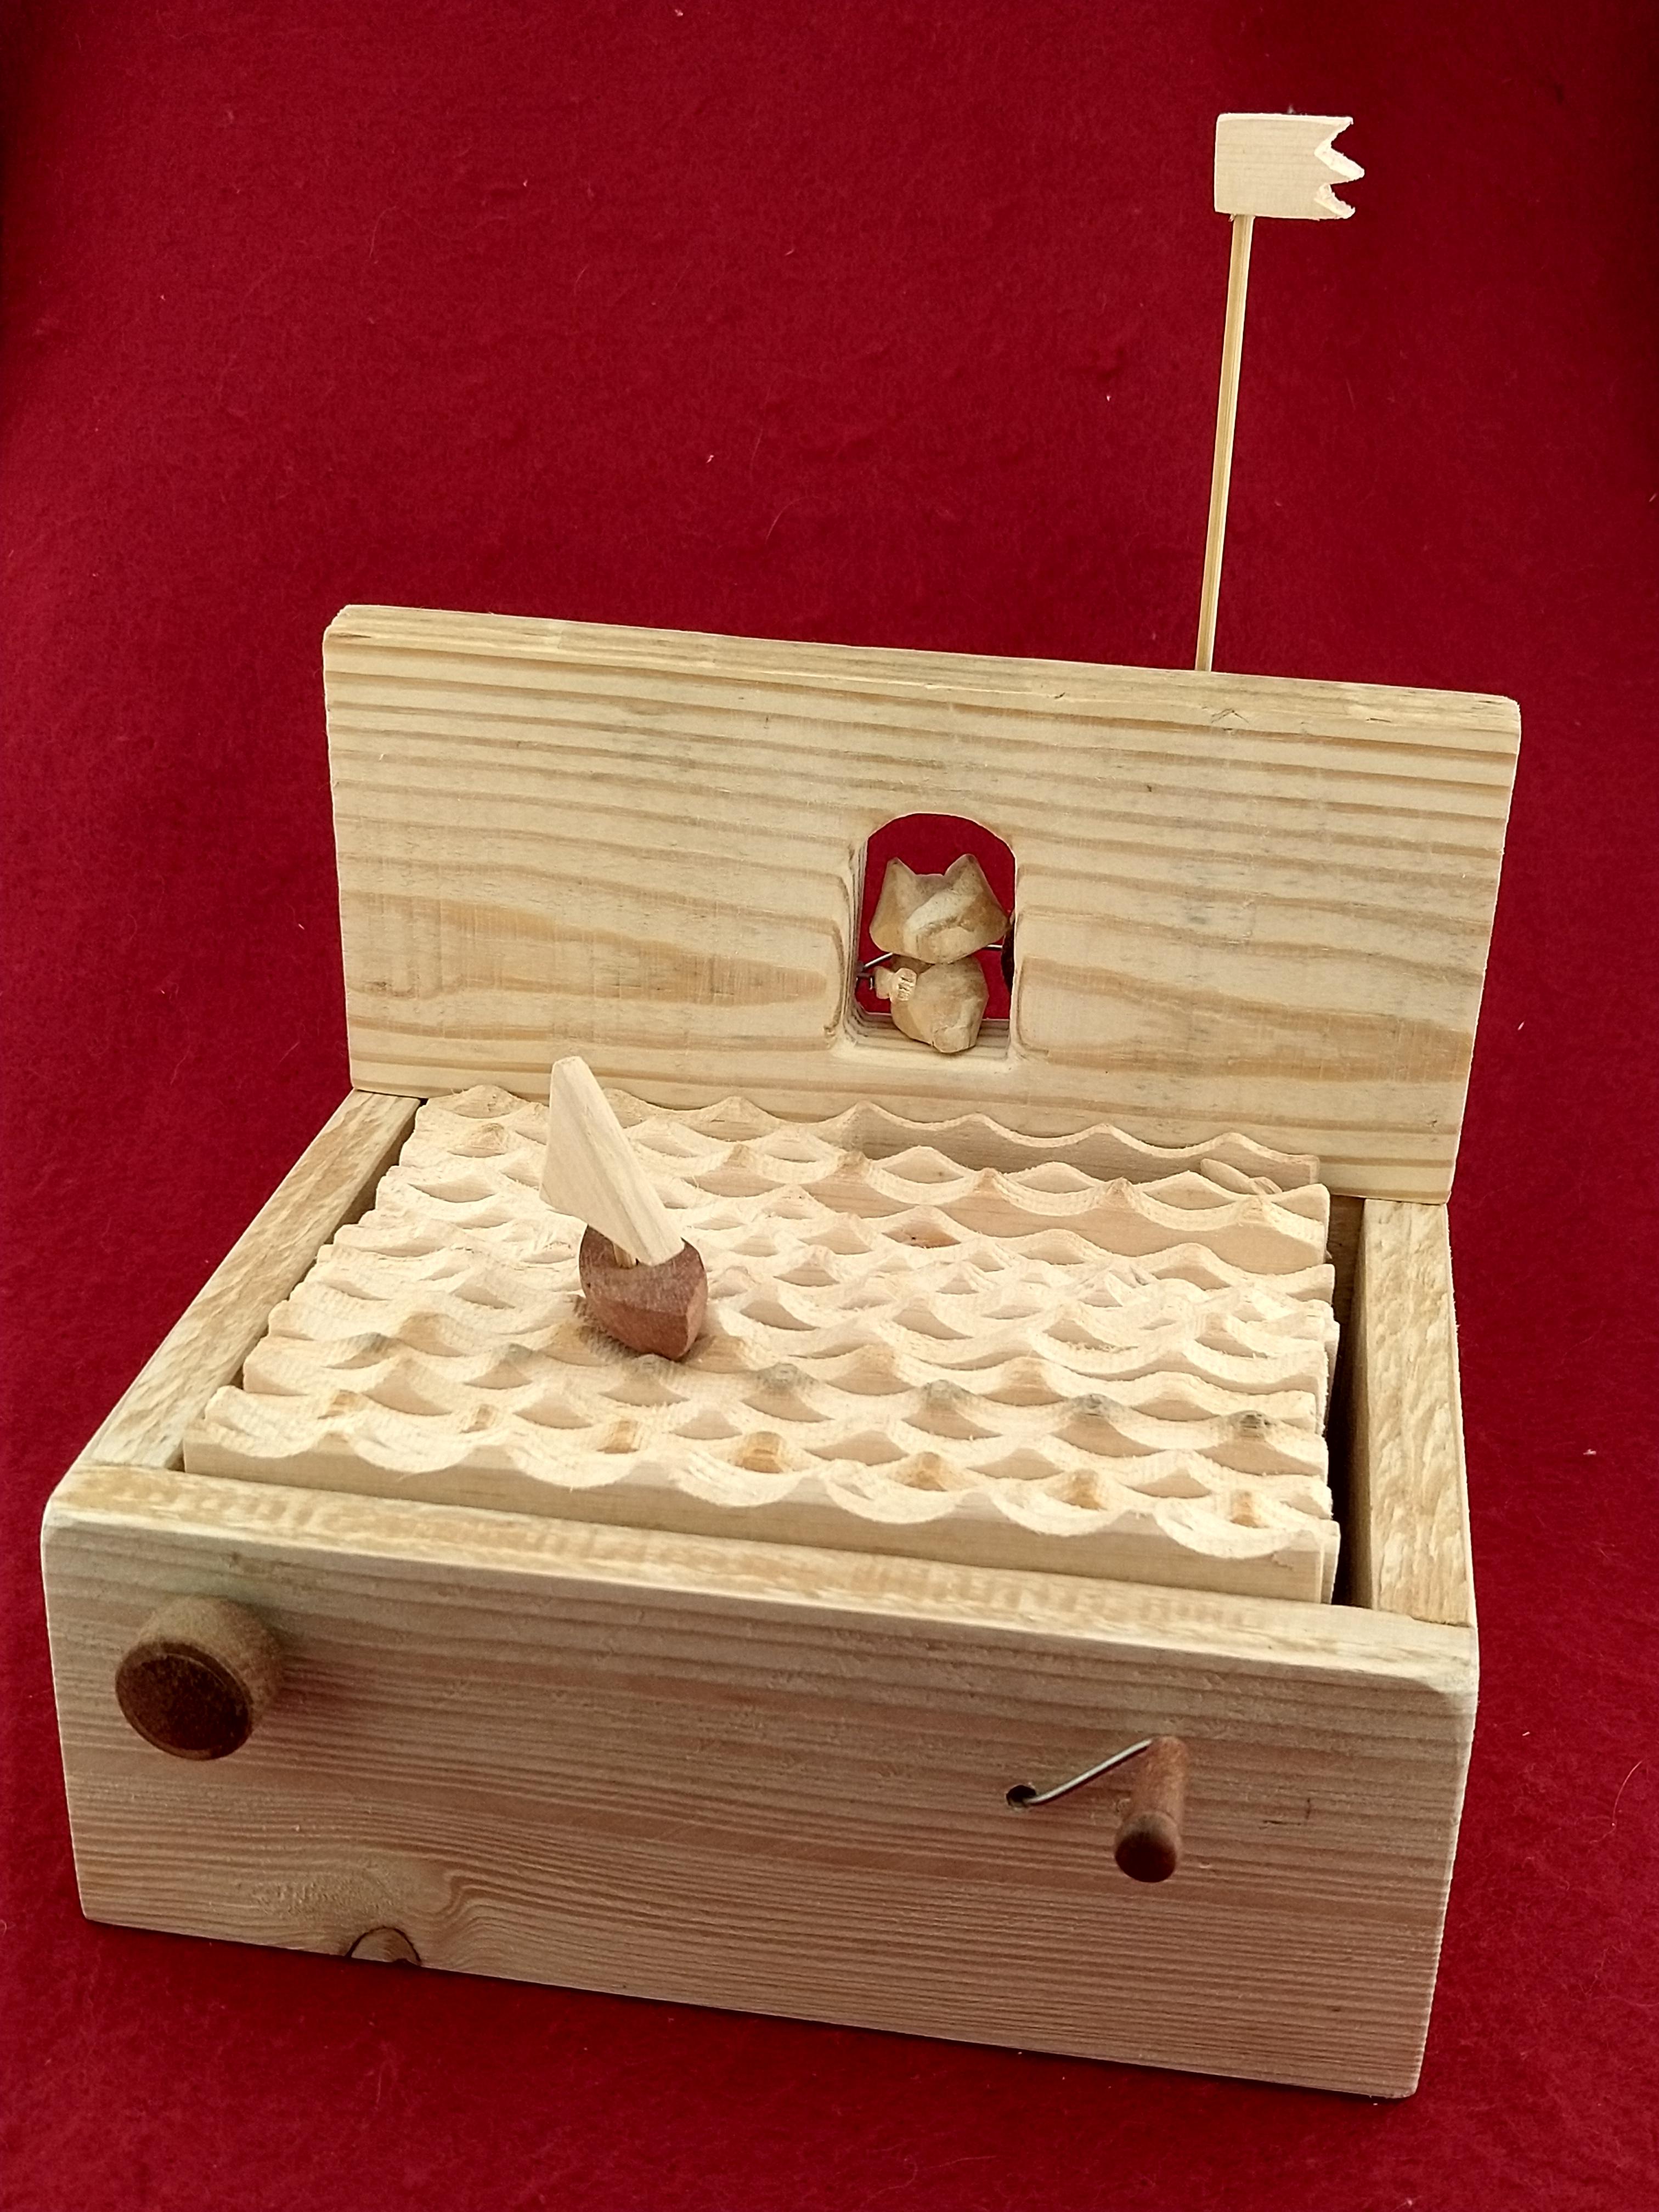
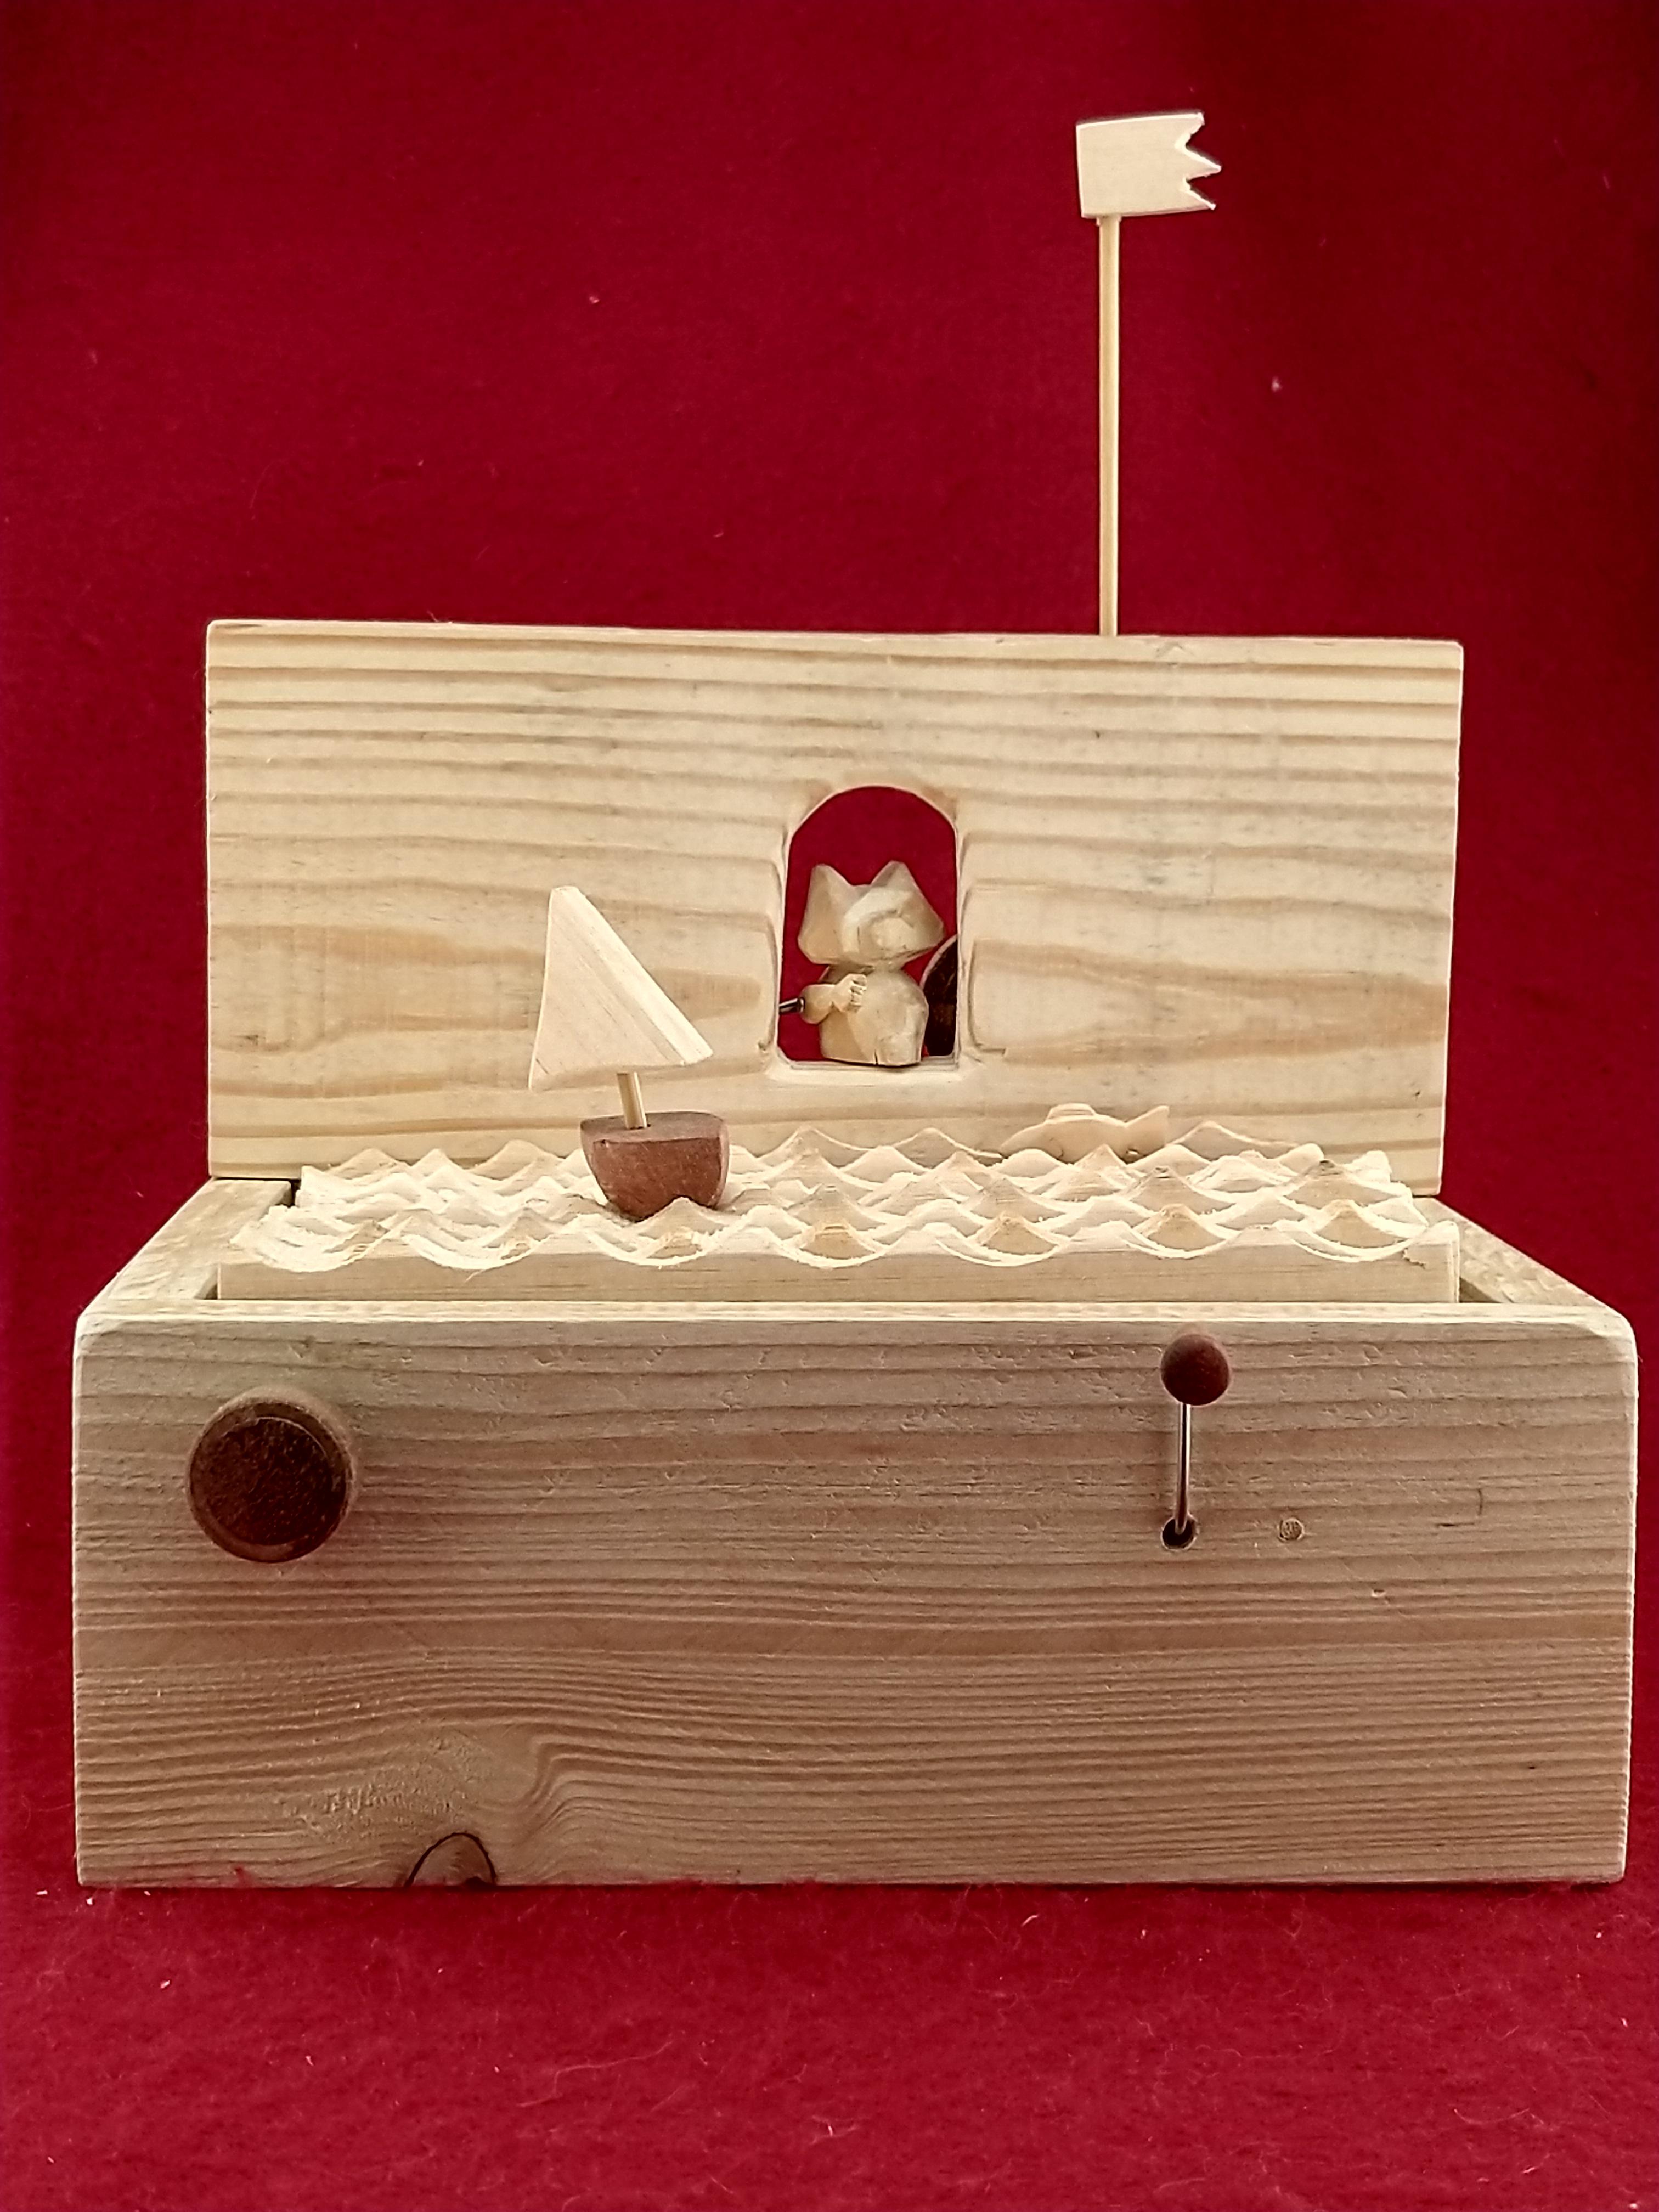
I have been busy with something else than watchmaking lately, family and automata. My final project of the online automata course I took. As always 100% pallet wood.

 1 point
 -
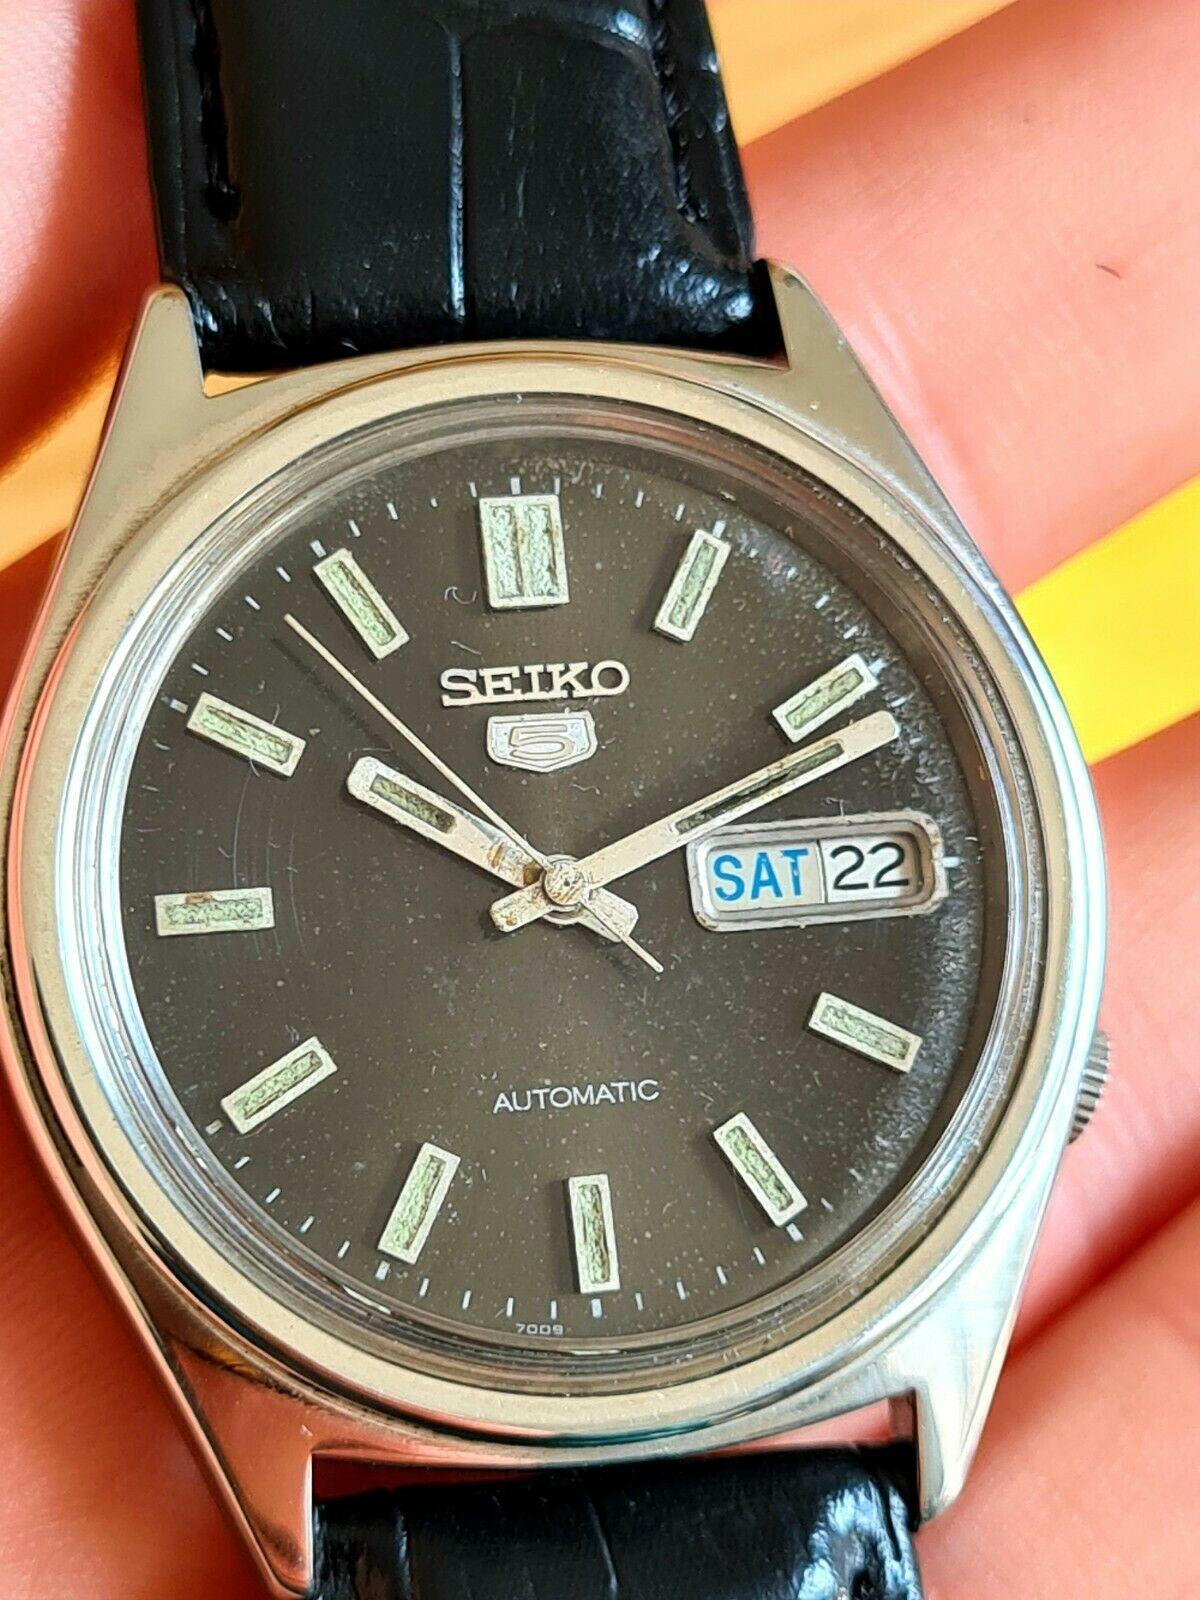
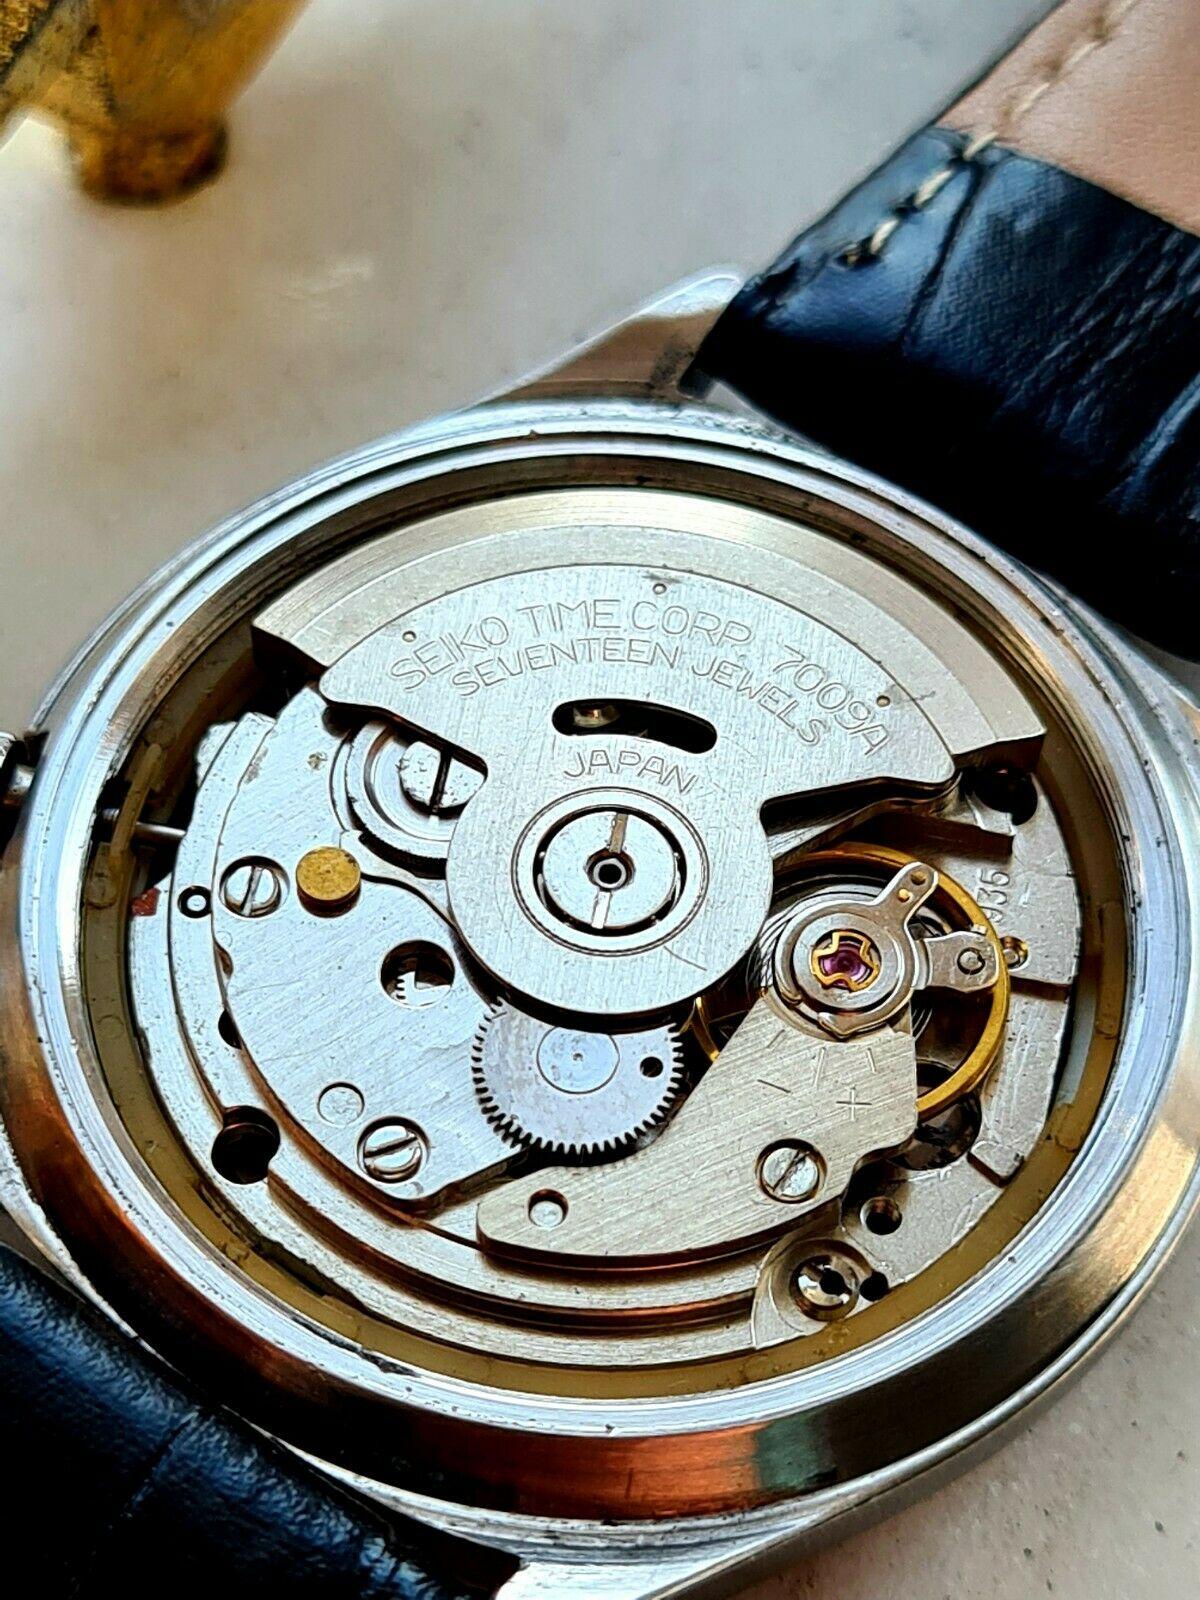
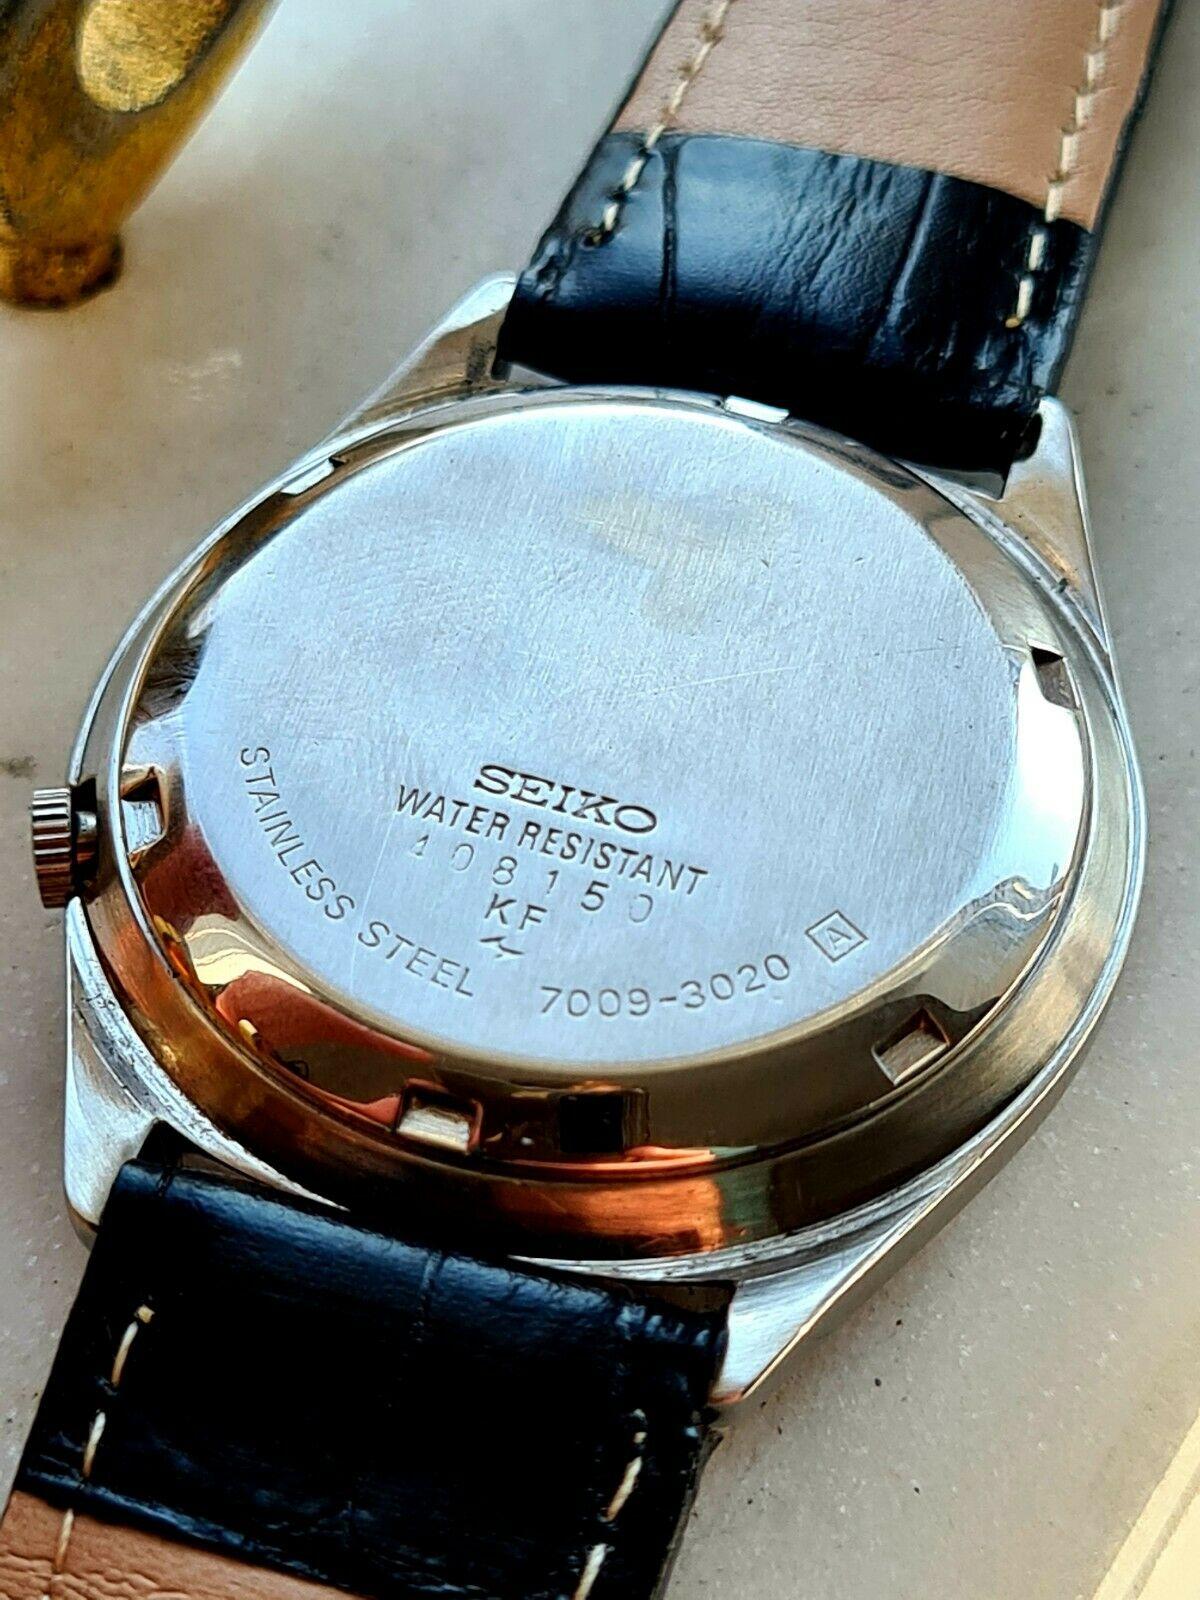
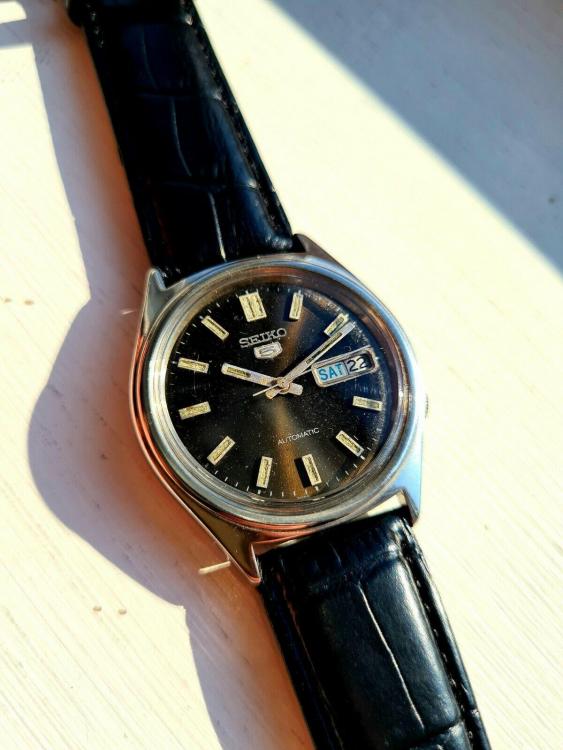
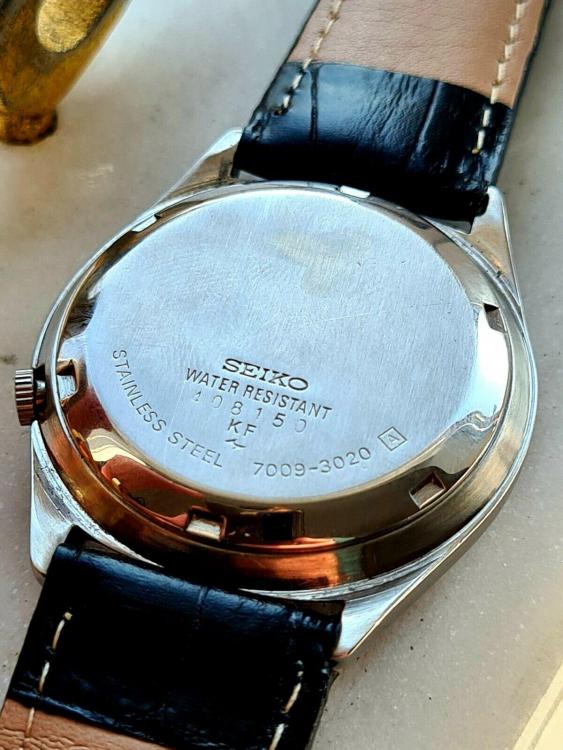
I own a little coin shop. One of my regulars knows I enjoy watches, especially seiko automatics. He finally brought in his watch that he bought new in 1977 (watch is dated early 1977) while he was in the coast guard. Moisture somehow got in the first year he owned it. He took it somewhere to fix the issue and he never wore it again. I think that's possibly why the lume is not great. When I got it, it was not running. He was about to throw it away but when he bought it he had a custom band made for it and he couldn't get it off. The inside of the case back has one marking on it from a service. Either way, it's neat to buy a 40 year old watch from the original owner, especially a watch I've been wanting to stumble upon for a while. The NATO strap on it was the nearest I had to me so just threw it on.
 1 point
 -
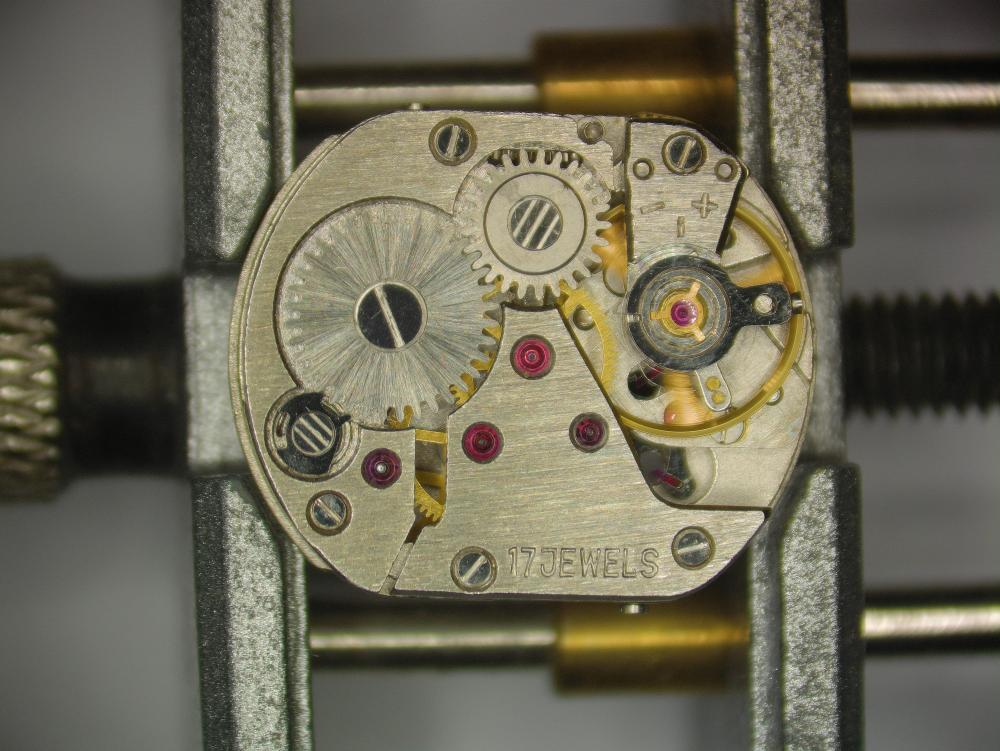
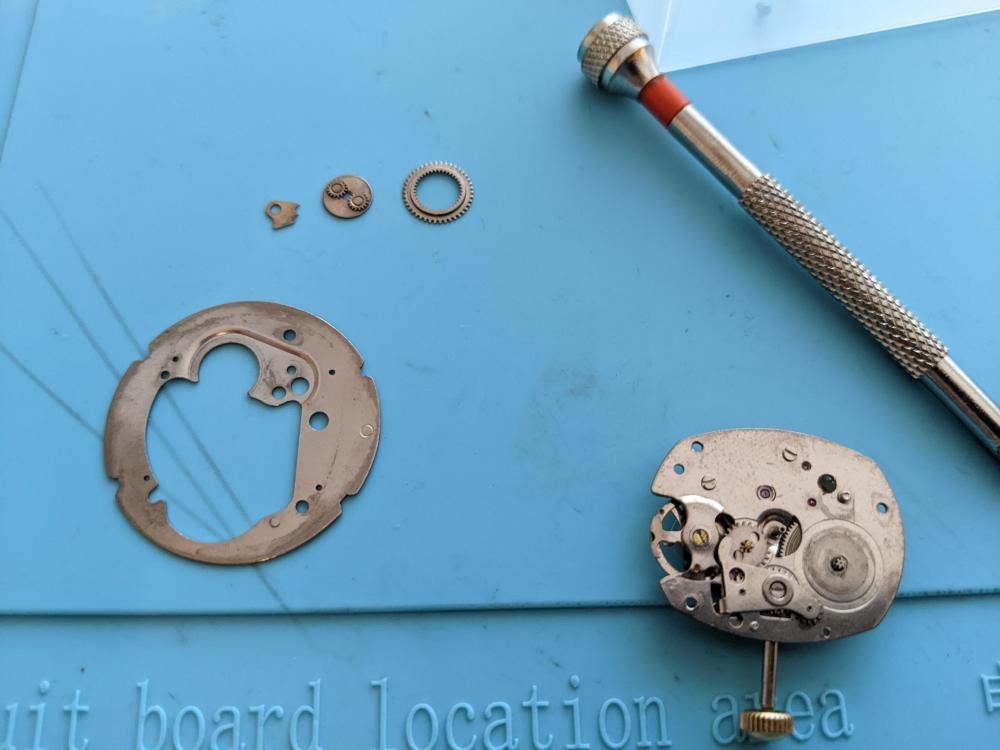
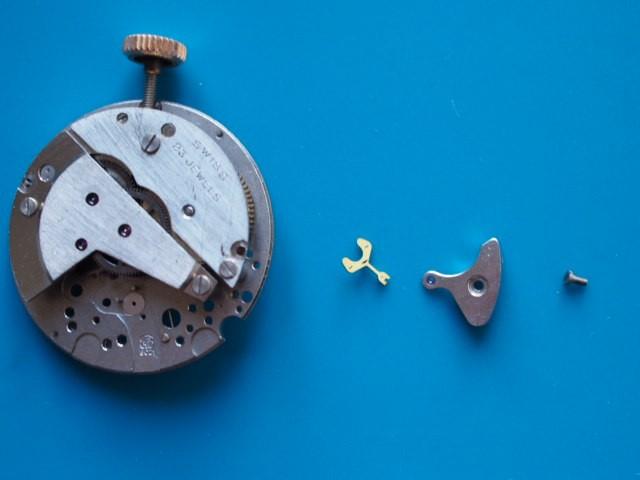
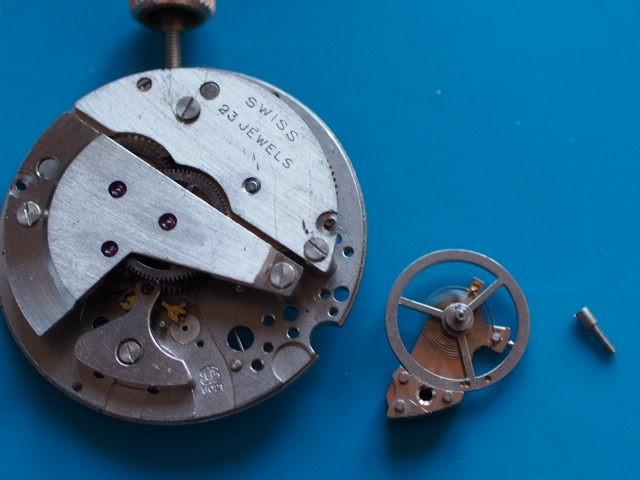
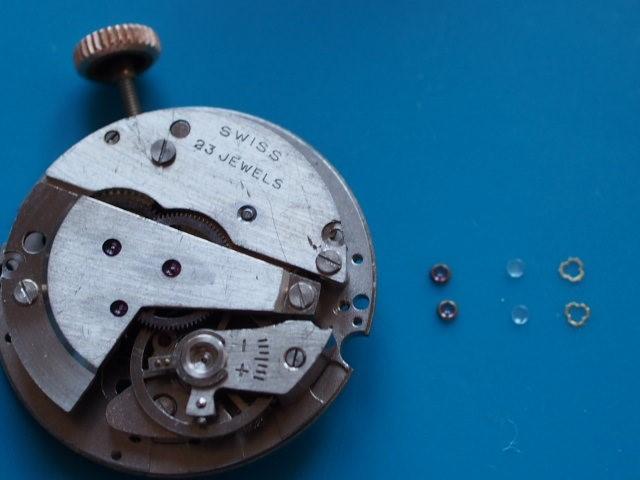
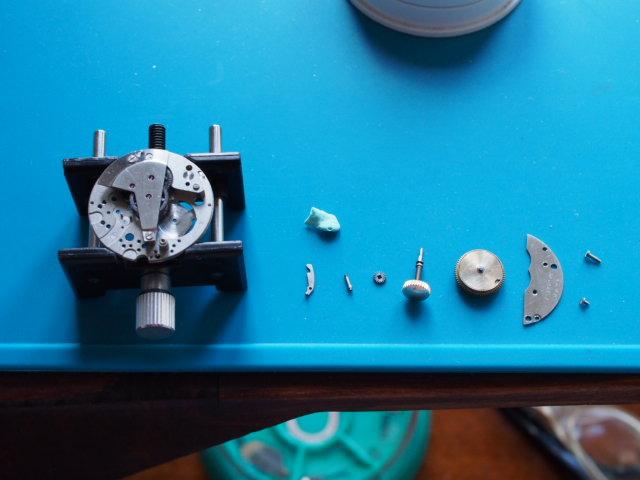
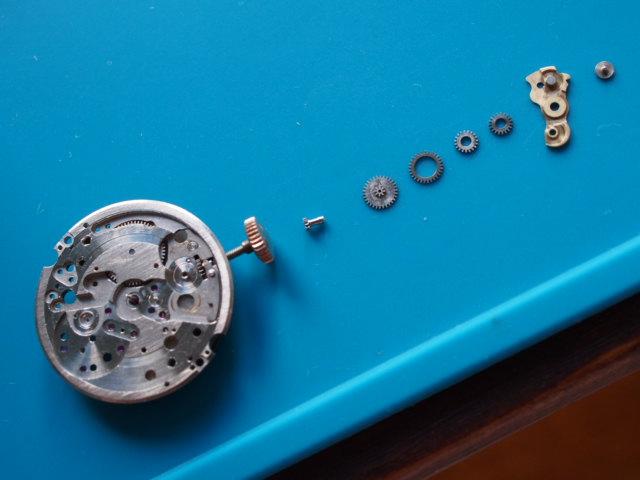
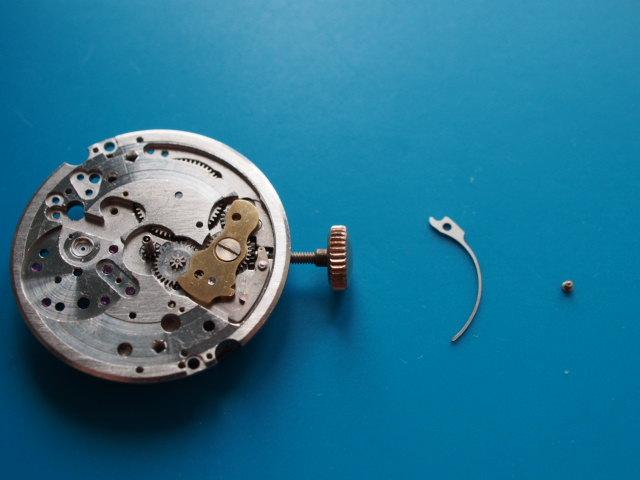
Last part of this walk-through. Pallet, pallet bridge, and screw make 3 parts. This is a replacement pallet, and it has a large end-shake. I did not investigated further at the moment, as I wanted to see if it runs reliably in first place. I touched two of escape teeth with 9010. Cap jewels plate and its screw, 2 more. Balance, cock and screw consist actually of at least 10 parts, even if I haven't take them all apart. Balance jewels, end stones and springs make 6 more parts. For the occasion I bough the KIF Trior tool (largest size) which made installation significantly easier and safer. Lubrication is just 9010 under the end stone. Time to check that is running strong in all positions before moving on. For the record I got about 180° amplitude with the default lift angle. Beat error was 2.5 ms, pattern barely acceptable, and large positional error. Last are the date wheel, hour wheel, inner plate, date jumper, date ring, outer plate and its two screws. The date finger spring can be inserted conveniently and safely from outside. 9 more parts. I used HP-1300 on all arbors and contact parts. There are actually 2 last parts to fit, that's the dial screws (not pictured). It's probably a bit easier to fit them them as the very first thing. I have been counting parts to get to a total is 67 or thereabout, or 90 if we count the jewels separately. Not a small number for an economical, unsophisticated mov't. I hope that this no-pretense document can be useful somehow, thank you for reading so far.
 1 point
 -
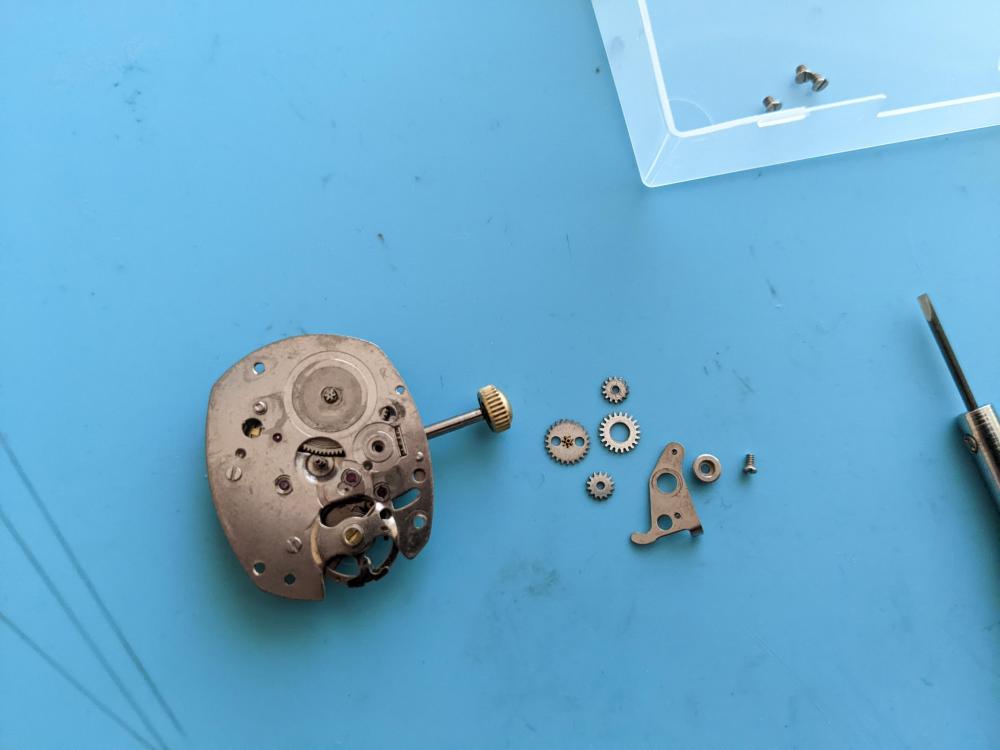
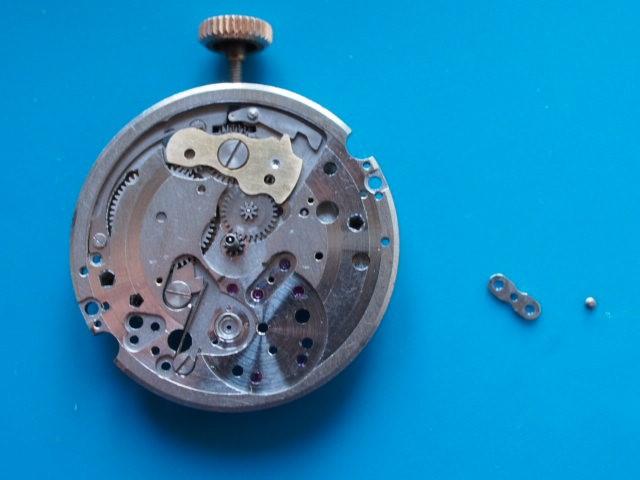
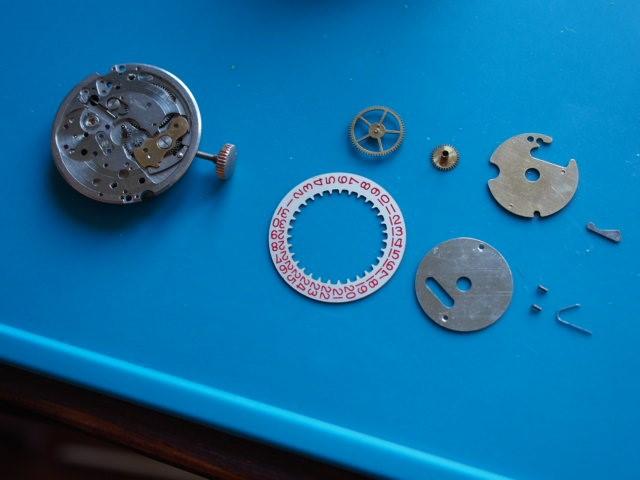
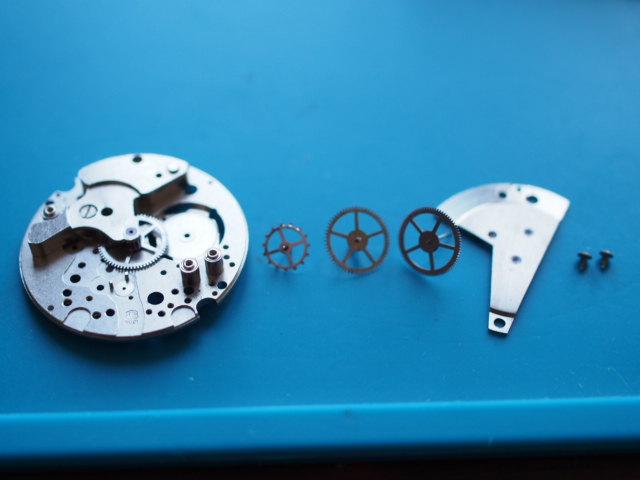
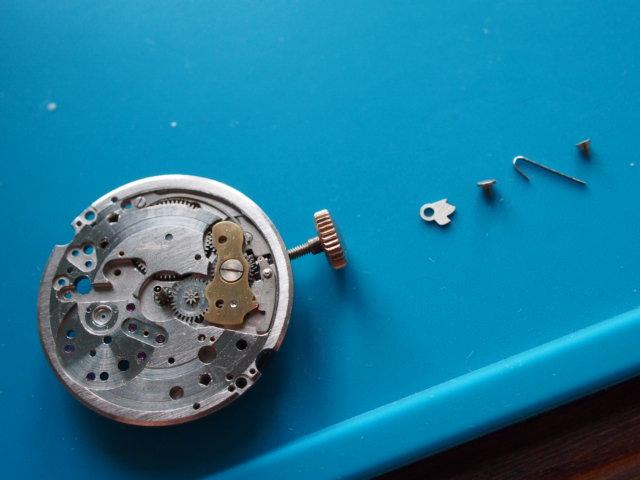
As the usual things are taking longer than expected so her's a 2nd part before concluding. First of all I need to correct two inaccuracies, the inactive jewels are in fact six, as there are also two under the setting wheel, that make the actual jewel count to be a very common 17. And I mentioned something like a "sliding wheel", when the correct name is setting pinion, because it does not slides in this mov't. Main plate ready to work on I found worth of note the interesting construction of the three large posts fitted into pentagonal broached holed holes of the main plate. With everything cleaned and inspected the first that we assemble is the center wheel on the main plate, with its bridge and screw. That is 4 parts to begin with. Lubrication is only HP-1300 on the pivots. Next is the train with the escape, third, seconds wheels, bridge and two same screws, 6 more parts. As the usual a bit of patience and attention is needed to line up the picots. Lubrication is 9501 on the pivots that can't be reached. otherwise it's placed on the concave jewels from the outside. Test that all spins free, I've got it running 4 seconds with a puff of air. We then reassemble the barrel (not pictured). To insert the barrel arbor I had to adapt a bit the hook and that was a bit difficult because I had transferred the mainspring already, so perhaps is better to do that with the mainspring still outside. For this section we need to install first the setting lever and its screw, stem pinion (which has no orientation), and stem. You can use a bit of rodico to hold the setting lever. Then the barrel, bridge, and the two screws pictured, that is 11 more parts. HP-1300 on where parts rotate or move. We continue with the cannon pinion, setting wheel, rocking bar complete with three pinions, and the screw, 7 more parts. The two smaller pinions are the same and there is no orientation to take care of. Once a bit of HP-1300 is place on contact area, the pinions should stay in place when you set the assembly. The setting spring and screw (2 parts) are not difficult, set the screw lose and leave the tip of the spring over the raised section, then position it and tighten the screw. Check that motion is transferred alternatively to barrel or setting wheel depending on the crown position. Follow with the click, its screw, spring, and screw, 4 more parts. I used keep the long leg of the spring secure with rodico before pushing in the short leg and fitting the screw. To be continued.


.JPG.2f3a105af7aa6dba05bec5645c2db3e9.JPG)
.JPG.d8d17dde58330b3e813a9c2723c6d3b1.JPG)
 1 point