Leaderboard


Popular Content
Showing content with the highest reputation on 10/21/16 in Posts
-
I had trouble loading a few pics ,...my bad... so here they are.
 2 points
 -
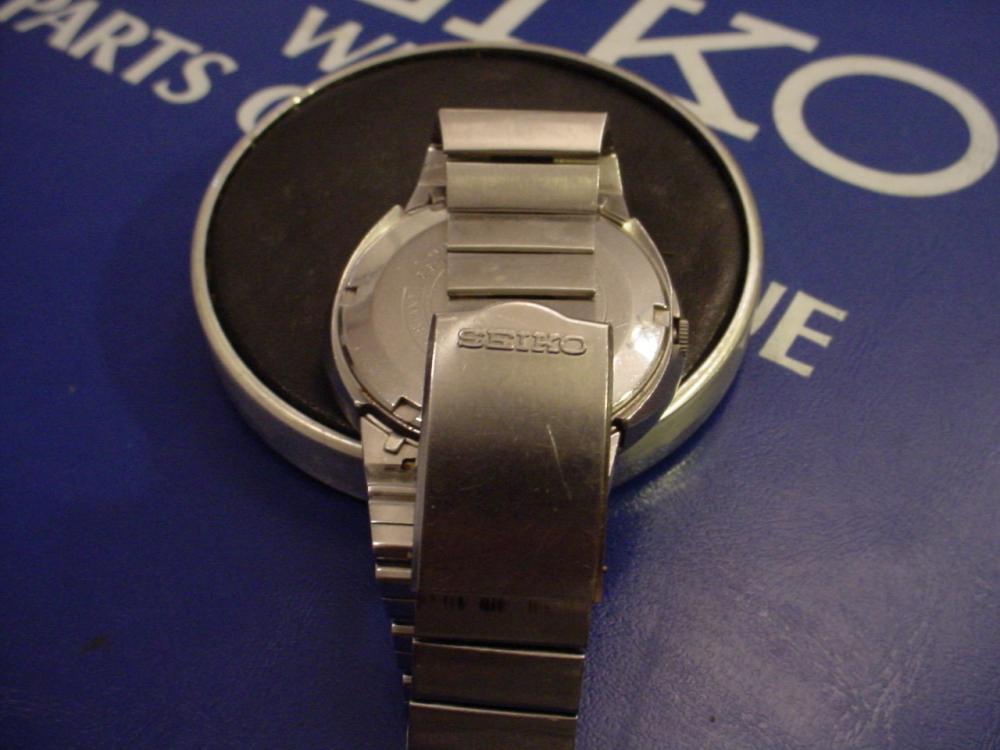
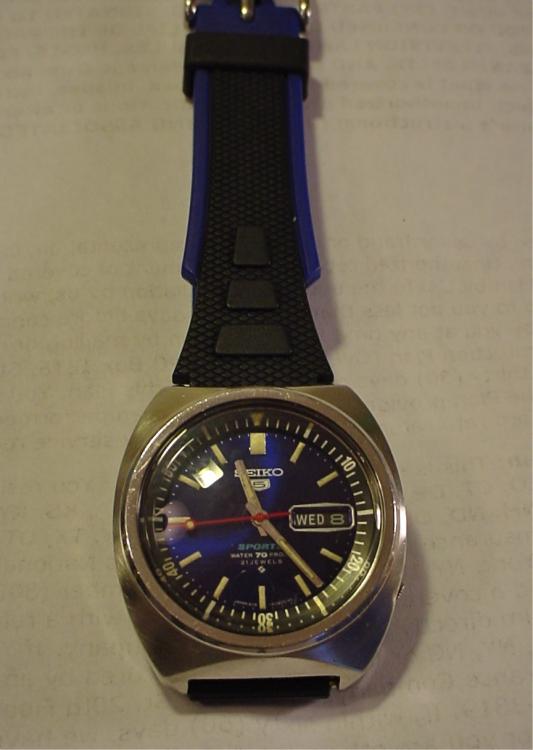
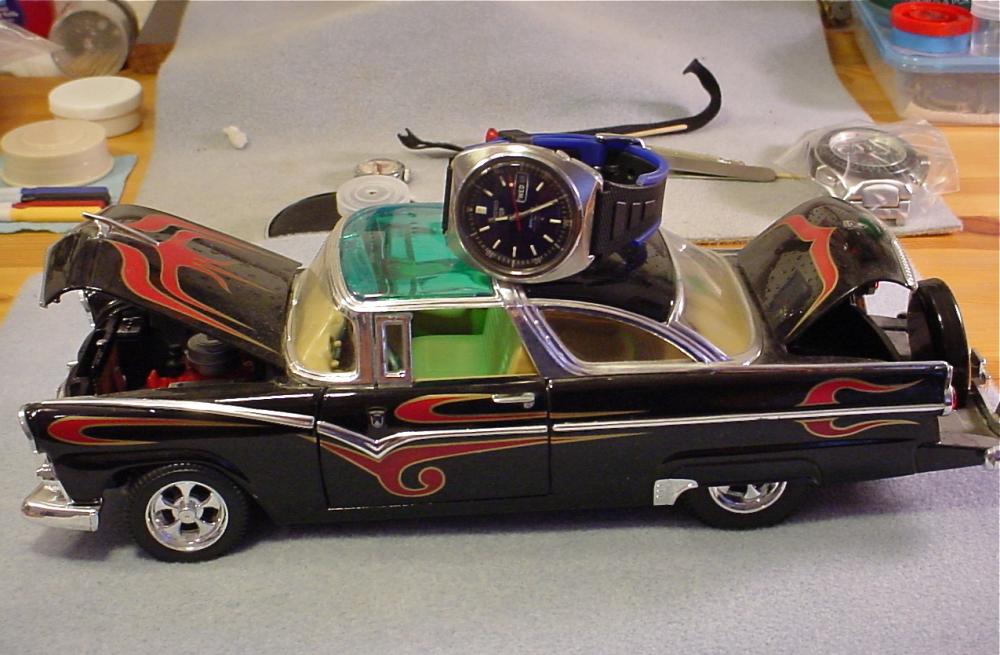
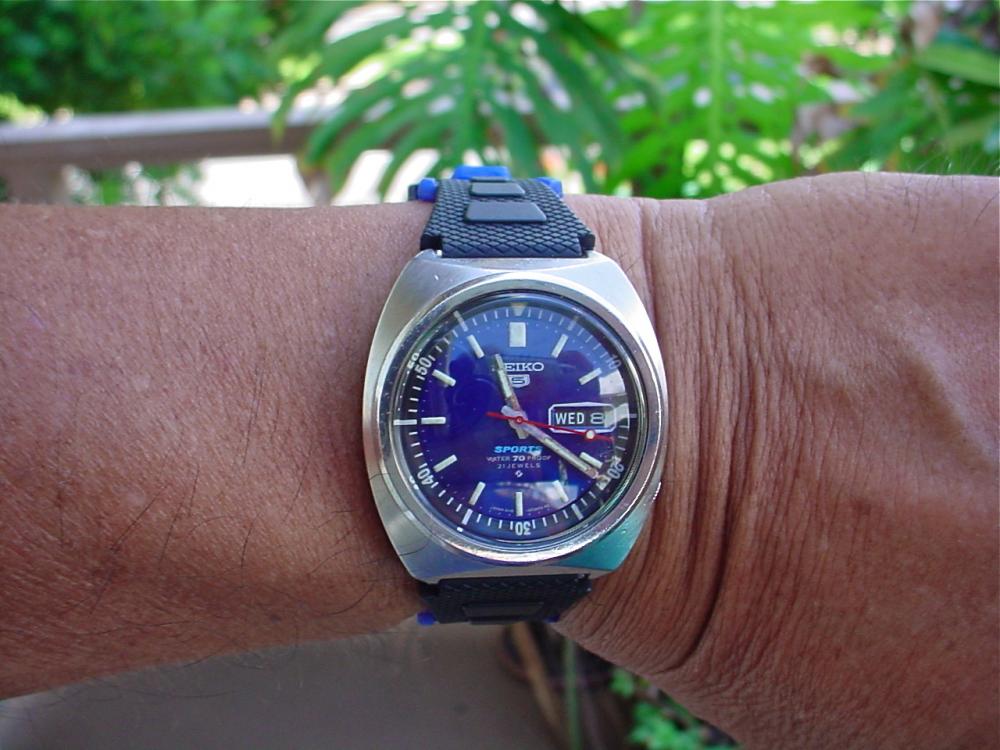
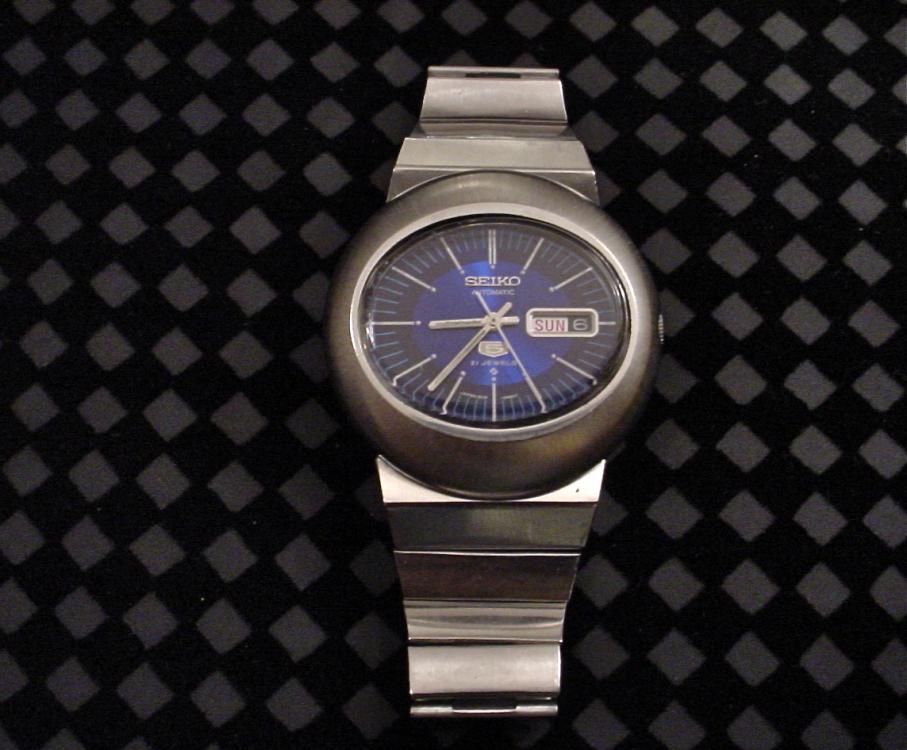
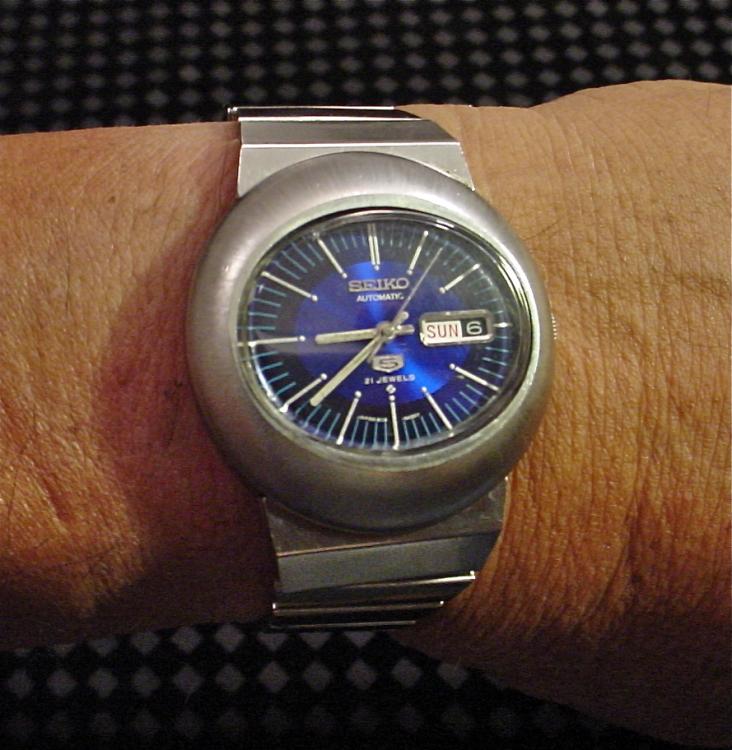
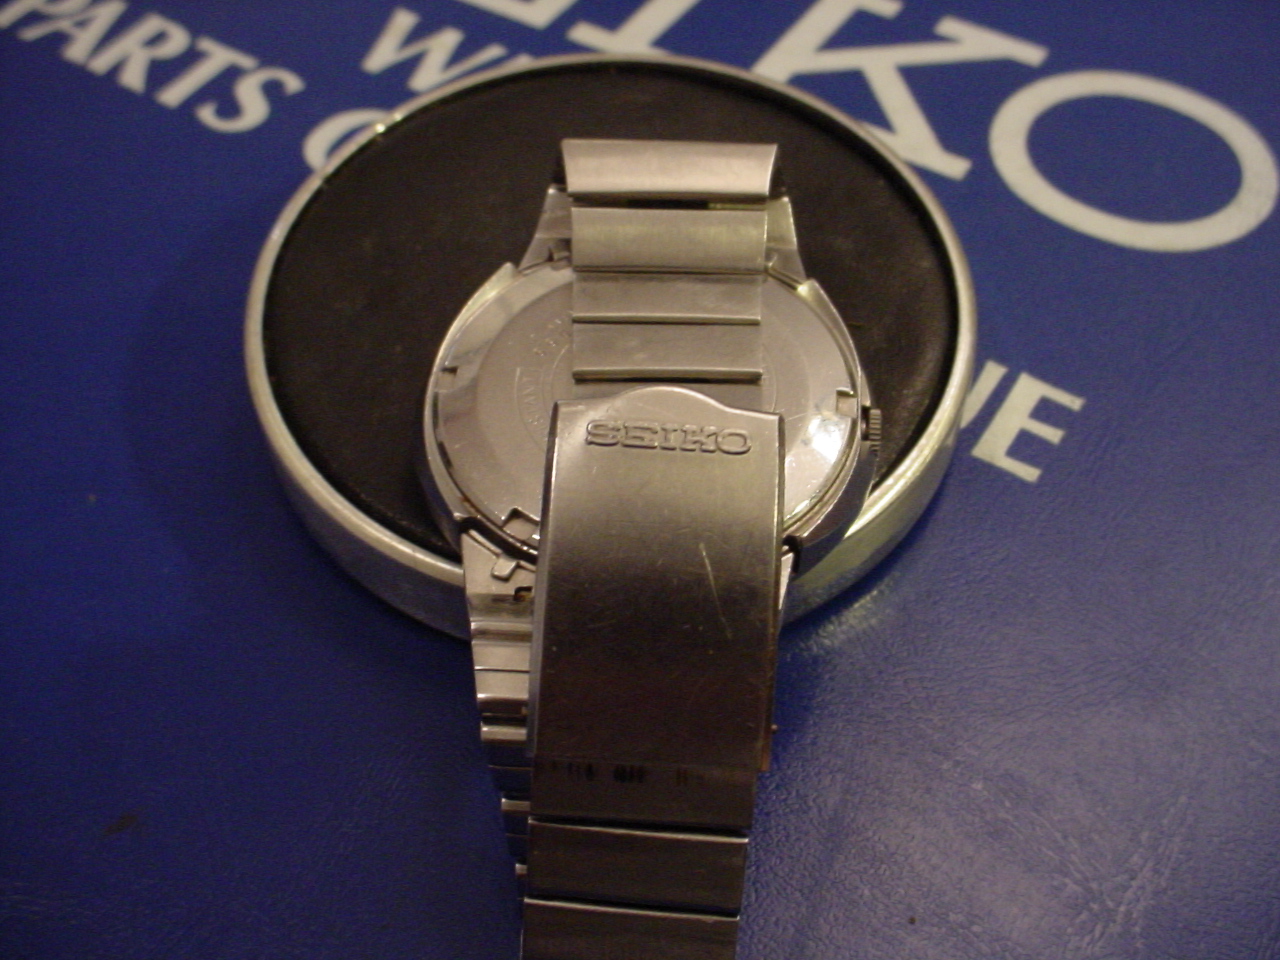
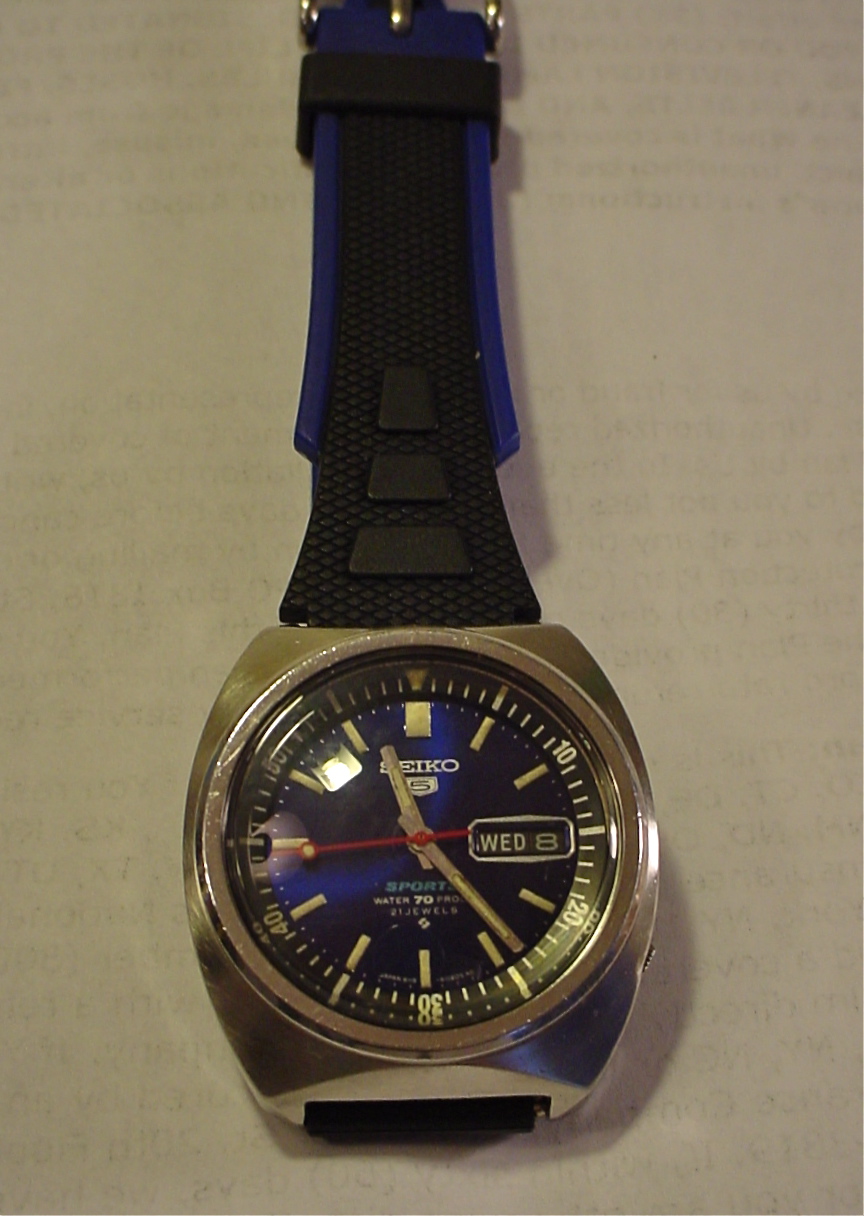
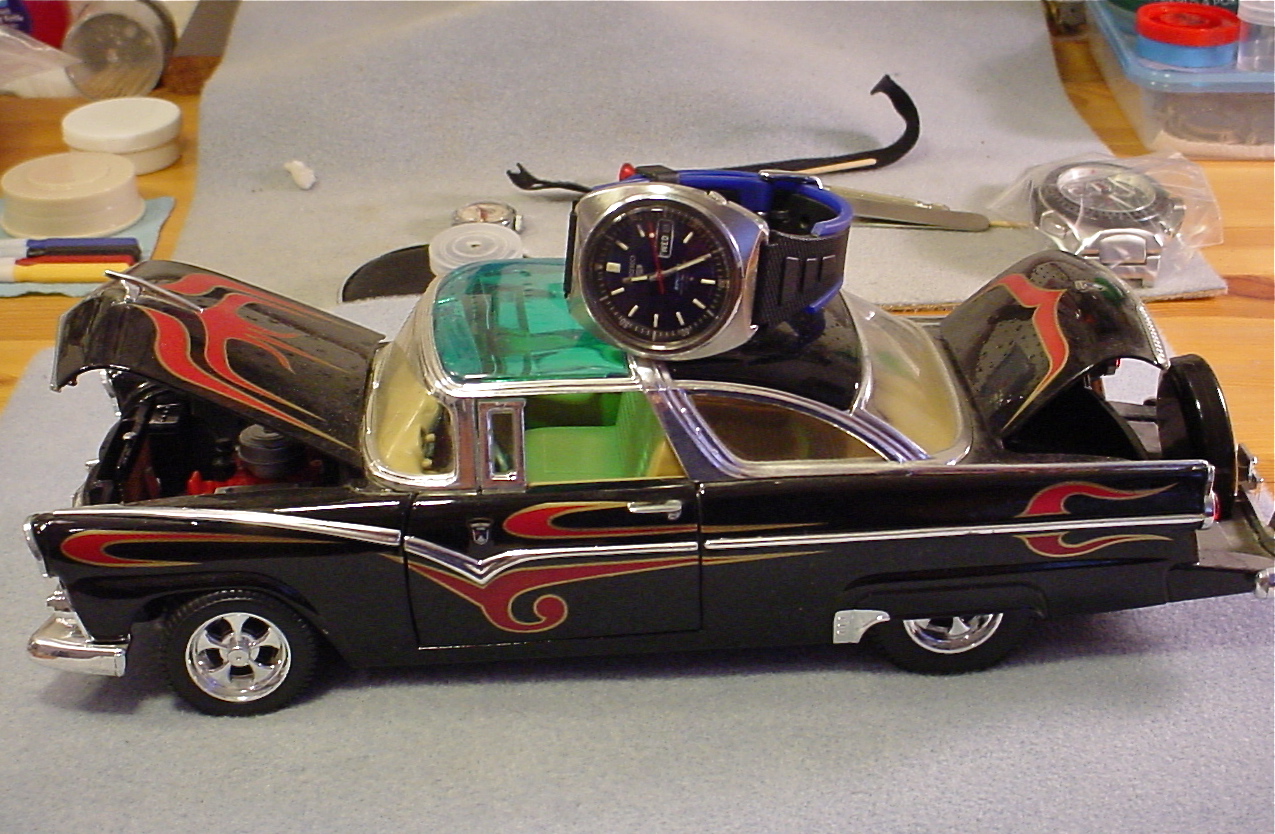
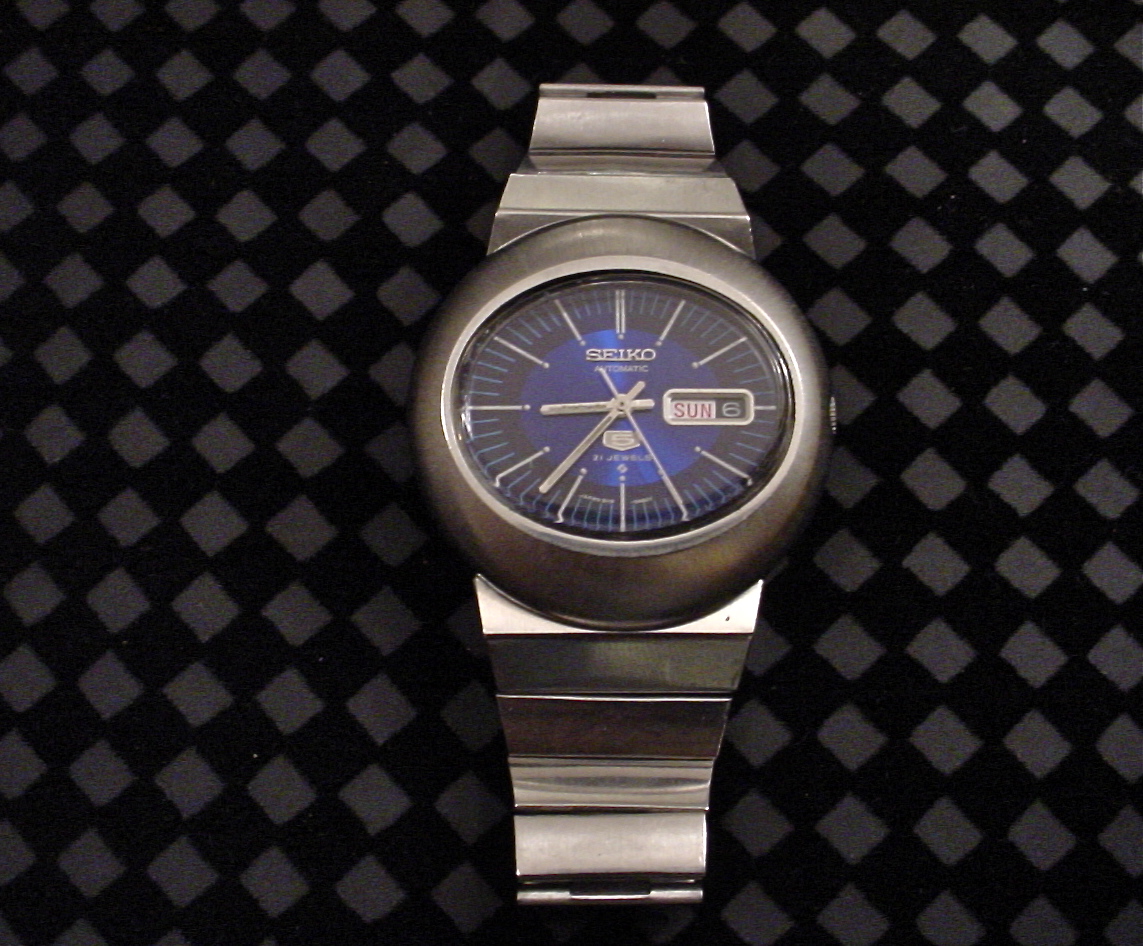
I'm feelin' Retro today... I think I'll do a Double Header.. Starting off with a snazzy blast from the past with this water resistant Seiko 5 automatic 6119 - 5411 , ser. # 223055. I must like this watch because I wear it a lot . Very comfortable on the wrist . It was pretty shabby looking when I first got it , so I serviced it , cleaned the case and bracelet , Re-finished the case and put a nice satin finish , extended the bracelet with a spring loaded expansion link , and installed a new Seiko crystal . For the second half of the Double Header , up to bat is this Seiko 5 automatic 6119 - 6023 , ser. # 022685 . This one is a Sports Water70 Proof model . It "Sports " an inner rotating bezel . I serviced it , polished the hardlex glass crystal , gave the case a light polish , and finished it off with a rubber two tone band . Black with a blue accent on the edges to compliment tne dial .2 points
-
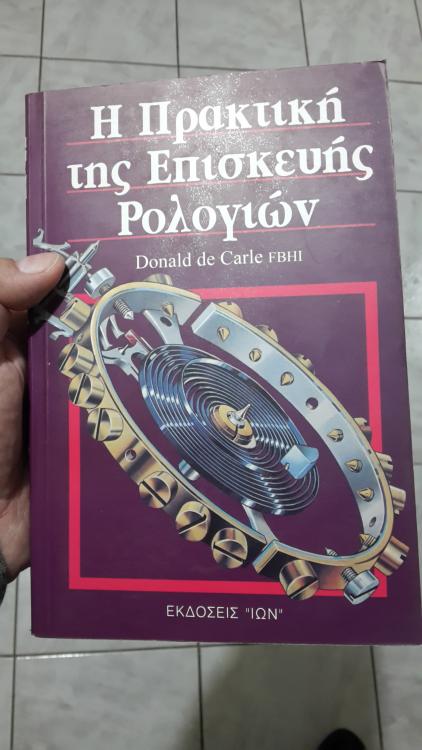
I was just going through a used bookstore this afternoon after I got off work and came across this. Decided to take it home! Sent from my iPhone using Tapatalk1 point
-
Hmm i was right , that book looked familiar to me , because i own allready a copy haha.
 1 point
 -
This should help you. There will be minor differences, but much in common http://shop.joseph-watches.com/joseph/members/FMPro?-db=joseph_archive.fp5&-lay=web&-format=esemblo_details.html&kategorie=esemblograf&-recid=12607829&-token=001&-find This page tells you the part interchangeability... just click on each part to see where else it is used http://cgi.julesborel.com/cgi-bin/matcgi2?ref=LAN_2481 point
-
A standard book on the topic - every repairer and tinkerer and lover of horology should read it. It's certainly not hard to find a s/h copy and, if I remember correctly, I have it on my Kindle as well.1 point
-
1269_Incabloc By Factory - Landeron, Lavina.pdf Assuming Incabloc the above should help with part numbers just leaving you a supplier to find. http://www.incabloc.ch/en/systeme_incabloc.php The link may also help with terminology.1 point
-
What kind of jewel setting is it? For instance Cousins list balances for ordinary (non shock protected), shock proof, and Super shock-resist. I'm guessing that it has some form of shock protection since the hole jewel is missing, so not a friction fit jewel, but this is a guess. If shock proof then the next question is which system (Incabloc, KIF, etc). A photograph of the setting that is complete may help to identify the type of setting that you need, which will considerably narrow down the search for the correct part.1 point
-
Parts list etc http://tech.gleaveandco.com/tech-sheets/landeron/Landeron%20187.pdf http://tech.gleaveandco.com/tech-sheets/landeron/Landeron%20187%20%282%29.pdf1 point
-
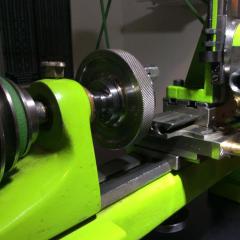
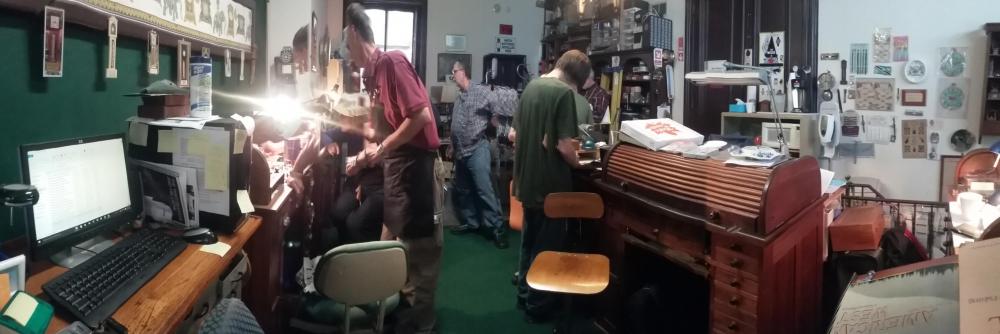
The days certainly fly! I've been in school for 13 months now, but there is still so much to learn. I wonder if I'll know enough by the time I graduate? Today was a big day, tool-wise. I got my new Lorch lathe (see box at far right next to bench with closed roll top). It's a beautiful set, probably from the 1970's. It's almost complete. This plus my 1920-vintage Boley allows me to do almost everything. I'm also working on a nice little Japanese wristwatch. It's not very expensive but it has some nice and fairly innovative features and, consequently, is of different design than I usually work on. It has a cracked jewel so, as an exercise using my new lathe, I'm going to make a brash bushing to replace the jewel. I wouldn't normally do this except for practice using my lathe. Also I recently re-jeweled a watch that had brass bushings; so there's a sort of symmetry between the two operations. Finally, we put in the finishing touches to a student workshop off-campus where we can work together practicing various skills. We will work, help and challenge each other and prepare questions to ask our instructor the next day.
 1 point
 -
Take the power off first you don't want to damage it any more then it is. Unscrew the balance cock and detach the balance complete for the cock. Now you can observe the hair spring and see what the problem is. Post a good close up photo so we can have a look.1 point
-
Nice find. Its really hard to find good technical books at second hand book stores where I live, but when I was in the UK in July I found several on a day trip to York which I was thrilled with. I've got that book on my shelf but haven't read it yet, but suspect I will get more into it over the next few months as my night course is starting to move back into watches from clocks.1 point
-
Nice score, never read but heard that this is one of the 'bibles' of repair.1 point
-
But a very tiny nose.1 point
-
Check boley for a part number and you will probably be able to find a generic on borel or ofrei. If that fails, contact them directly. They have custom and fitting crystal service (borel mainly: Rosemary (?) their glass person does that, she is there twice a week: Tue and Thurs (?) ).1 point
-
You use the numbers on the back of the case when ordering a new glass.1 point
-
Thanks to MilTimeCan for that link, always interesting to browse through the old books. And Tmuir, I understand your fascination. However if I start collecting anything else my wife will kick me out Cheers, Vic1 point
-
Not a pro for sure Just so excited while discovering this new watchmaking world. For an experienced watchmaker this is an every day job And i am sure i could make it better. For example if i had a glass fiber scratch brush, then the bluing would be better. Also i am not satisfied with the setting lever slot.The rectangular edges here are not perfect. I will have to grind a better graver to cut this type of slots. Made a video of this project, threading included.1 point
-
Hi Stephen, the eccentric screws are for the final adjustment of the chronograph, sure, you don't touch them during disassembly, they'll just go around and around anyway, only an offset screw, but you will adjust them once you have reassembled and lubricated the watch, used to adjust tooth depthing and correct minute recorder position etc. The fine adjustments of a chrono after service are almost as important as the service itself, incorrect toothdepthing will either not have the chrono run at all or stop the watch completely when it's switched on. Brian1 point
-
Yes I've seen the DVDs full of the old scanned books, very useful if all you want it for is for the research, but for me thats only part of what I'm interested in. I find most of these old books have a name and date written on the inside cover and usually notes in the back which gives the book a bit more life, plus its a bit about 'the chase' in finding a copy of the book in reasonable condition that doesn't break the bank. I should of added that the 18938 edition of my Britten's book belonged to my grandfather and has his name and the date 1944 written inside it, so that I would rate as my most precious book. Also my 1904 edition of the watch adjusters manual was my grandfathers, but this one he didn't write his name in, so I dont know if its just a book he picked up at some point, or even if it belonged to his father, my great grandfather. At any given time on ebay UK there is atleast one copy of Brittens Dictionary and guide as they have been printing it now for some 122 years so there are just a few copies out there.1 point
-
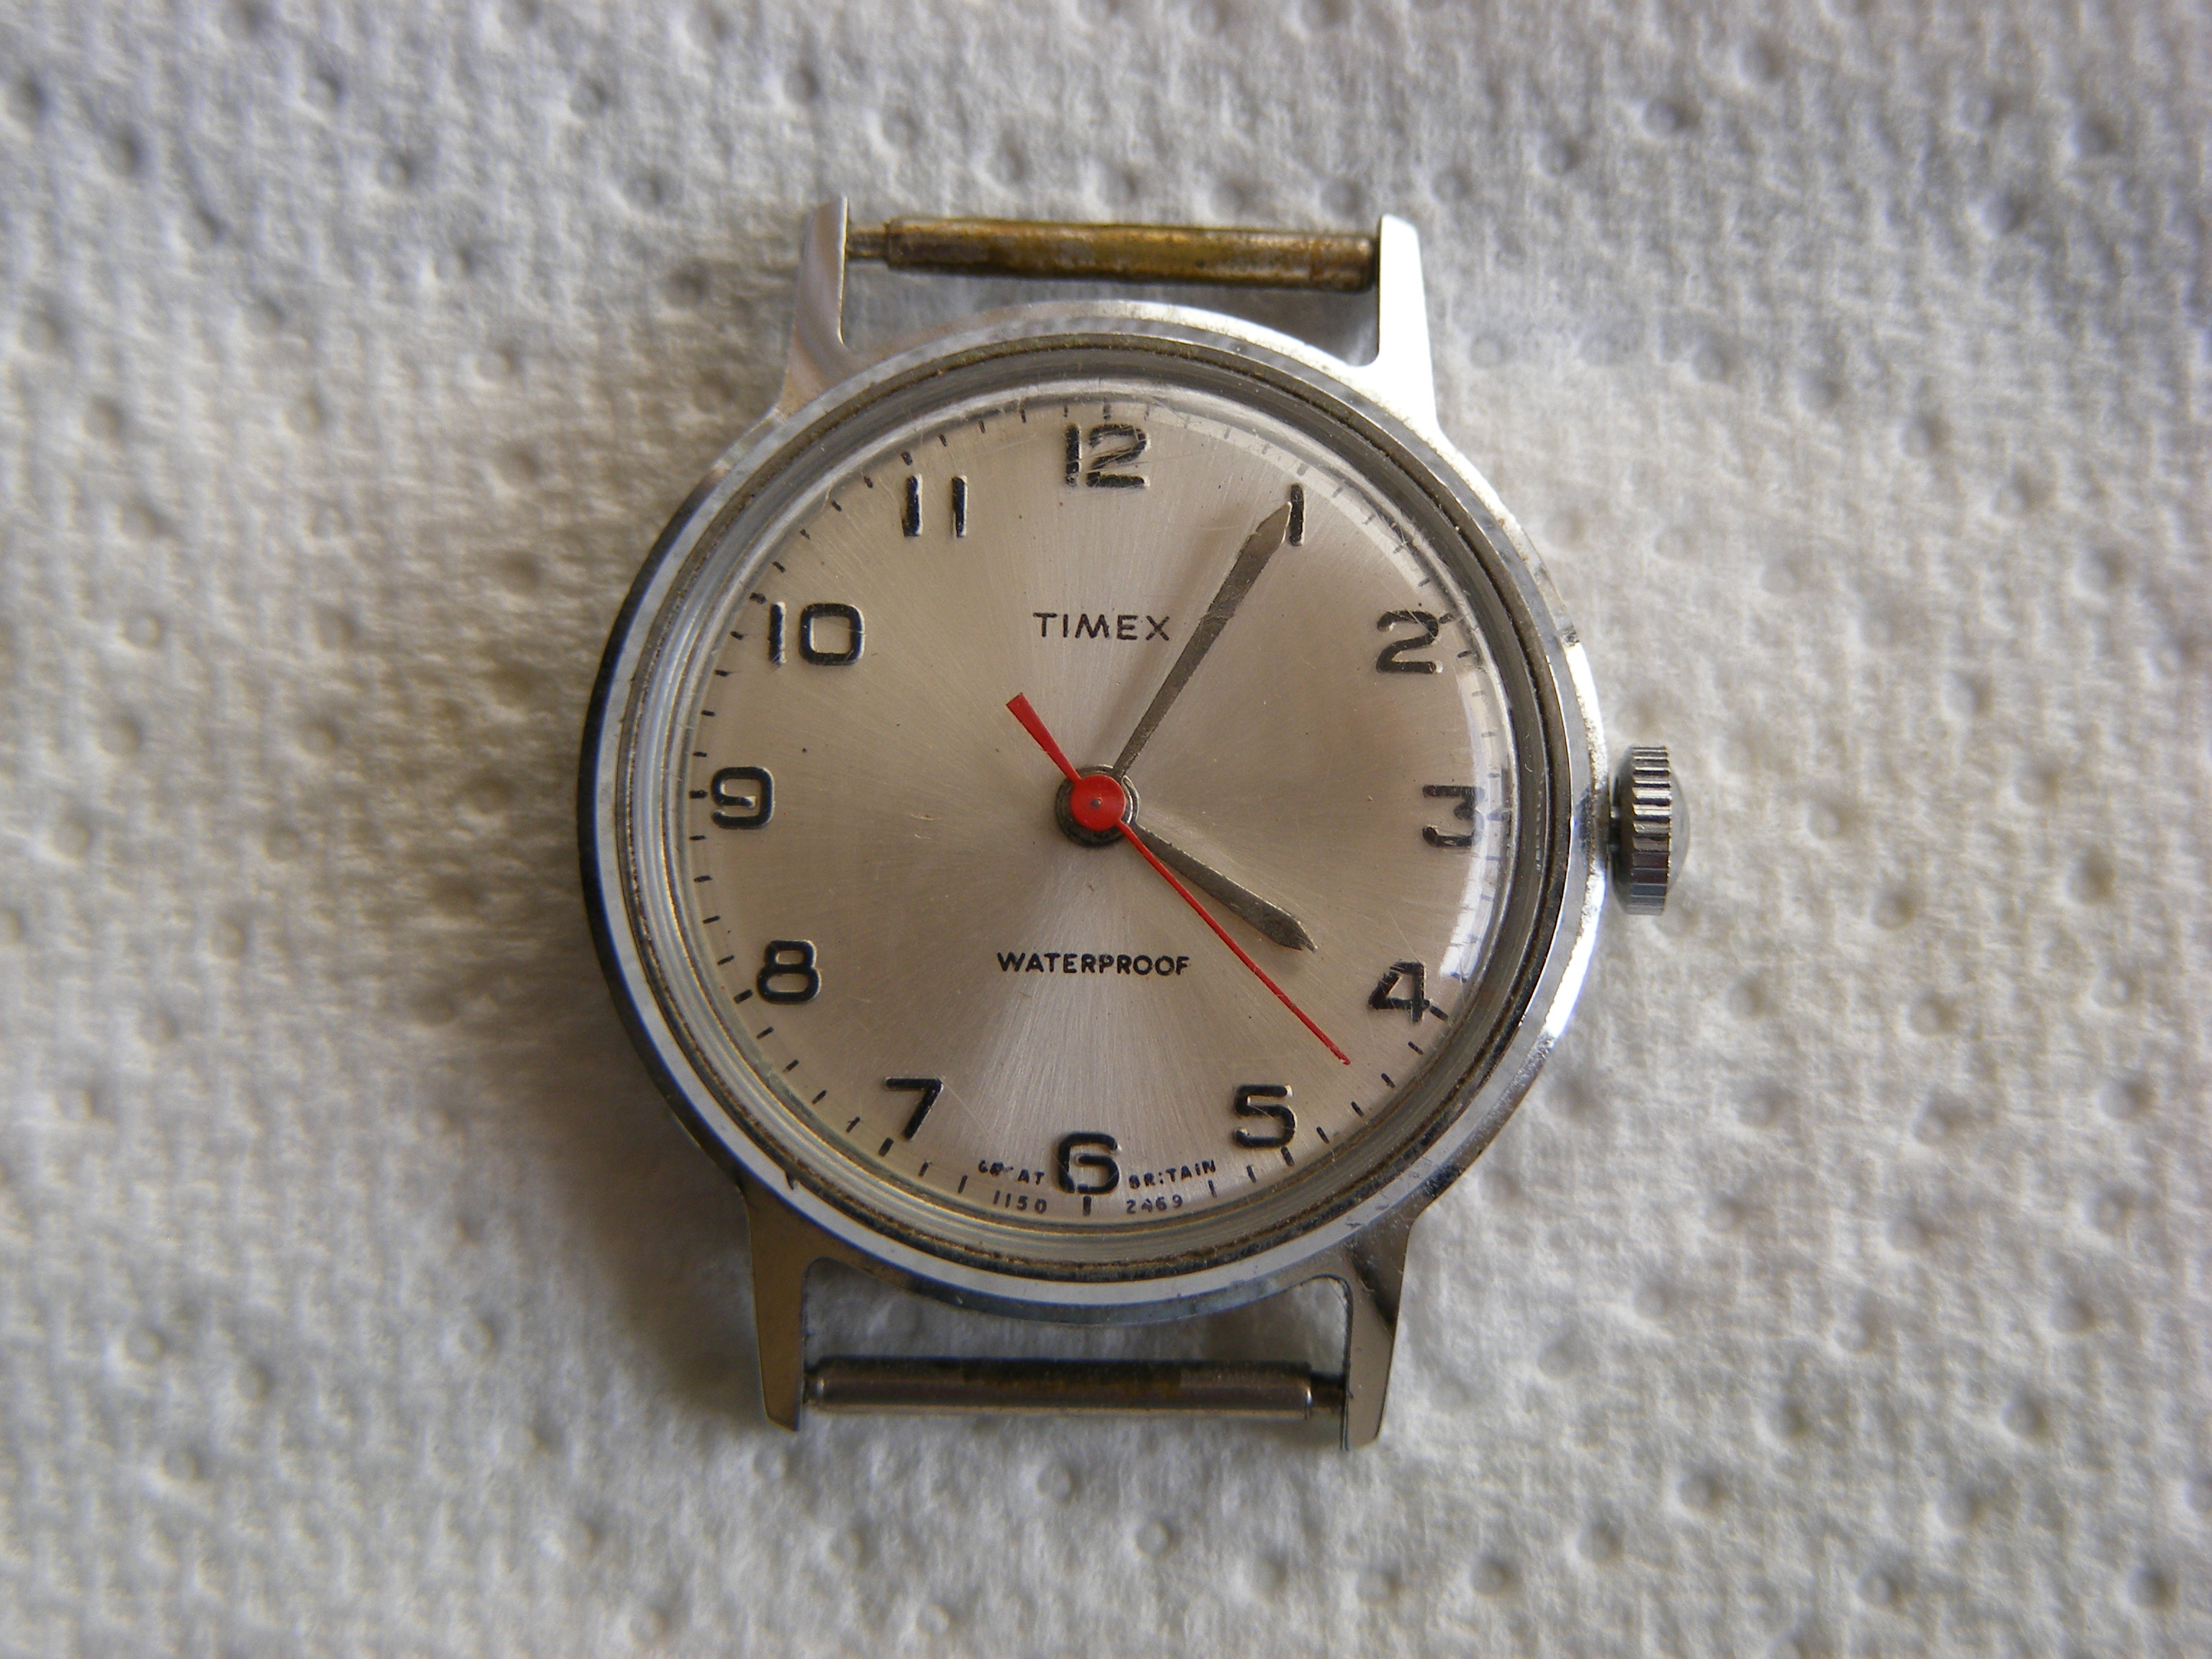
I was sorting through some old boxes in the garage the other day and came across this ! my mum bought it for me when I was about 11 or 12 years old, I gave it a few winds and it's still working so I thought I'd post it.
 1 point
 -
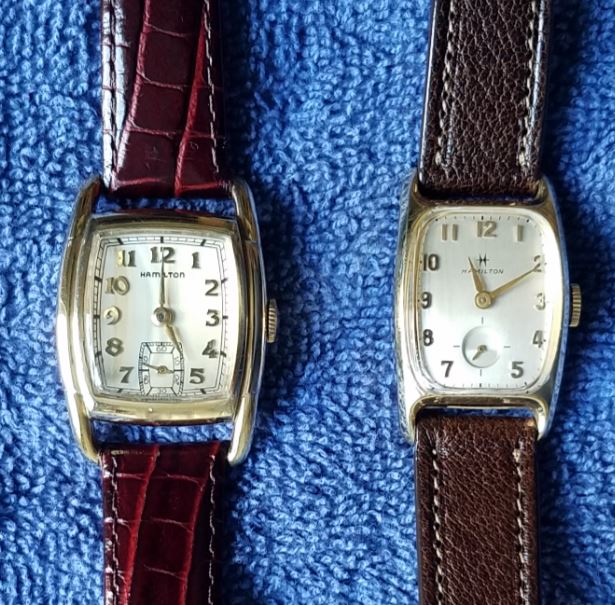
These are my only two wrist watches. Because My old fingers don't work with little tiny parts like the used to. The one on the left is my wife's granddads a 1938 Hamilton " Dodson" 17jewel 974a The one on the right is a 1960 Hamilton "Bolton ll" 22jewel 770 model. I wear them sometimes and the keep really great time. If you would like I will open them up and post photos of the movements
 1 point
 -
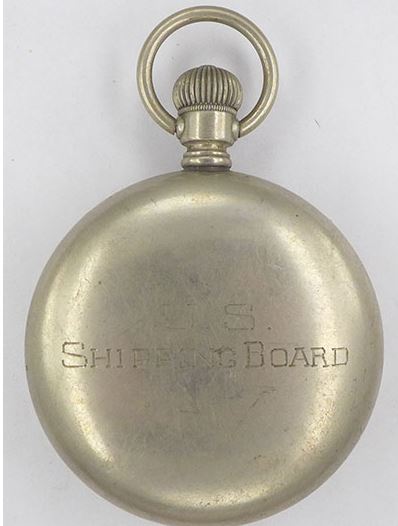
The other day I showed the screwdriver sharpening rig I made while the last coat of lacquer dried on my pocket watch & said I would showed you how it turned out. So here it is. The case is engraved with " U.S. Shipping Board" , which was formed before WW1 when it looked like the US would enter the war. We apparently had only a tiny merchant navy. It's job was to build ships & train crews to man them. You can Google it & find out more if your interested. The case is nickel & the before picture will show you how bad it was. I spent a long time polishing it & putting a movement, dial, ane crystal. It was still a bit dull so I used lacquer to fill in the letters. I think it will add a lot to my collection. What do you think
 1 point
 -
Very nice indeed, you did an awesome job on it. I just ordered an Elgin off ebay and hope to fix it up as well[emoji1303]1 point
-
Can't blame you. It's so nice to see a nice clear dial without all the bling they put in today's huge watches Some of the latest models look more like pinball machines than watches. Maybe I am getting tooo old....
 1 point
 -
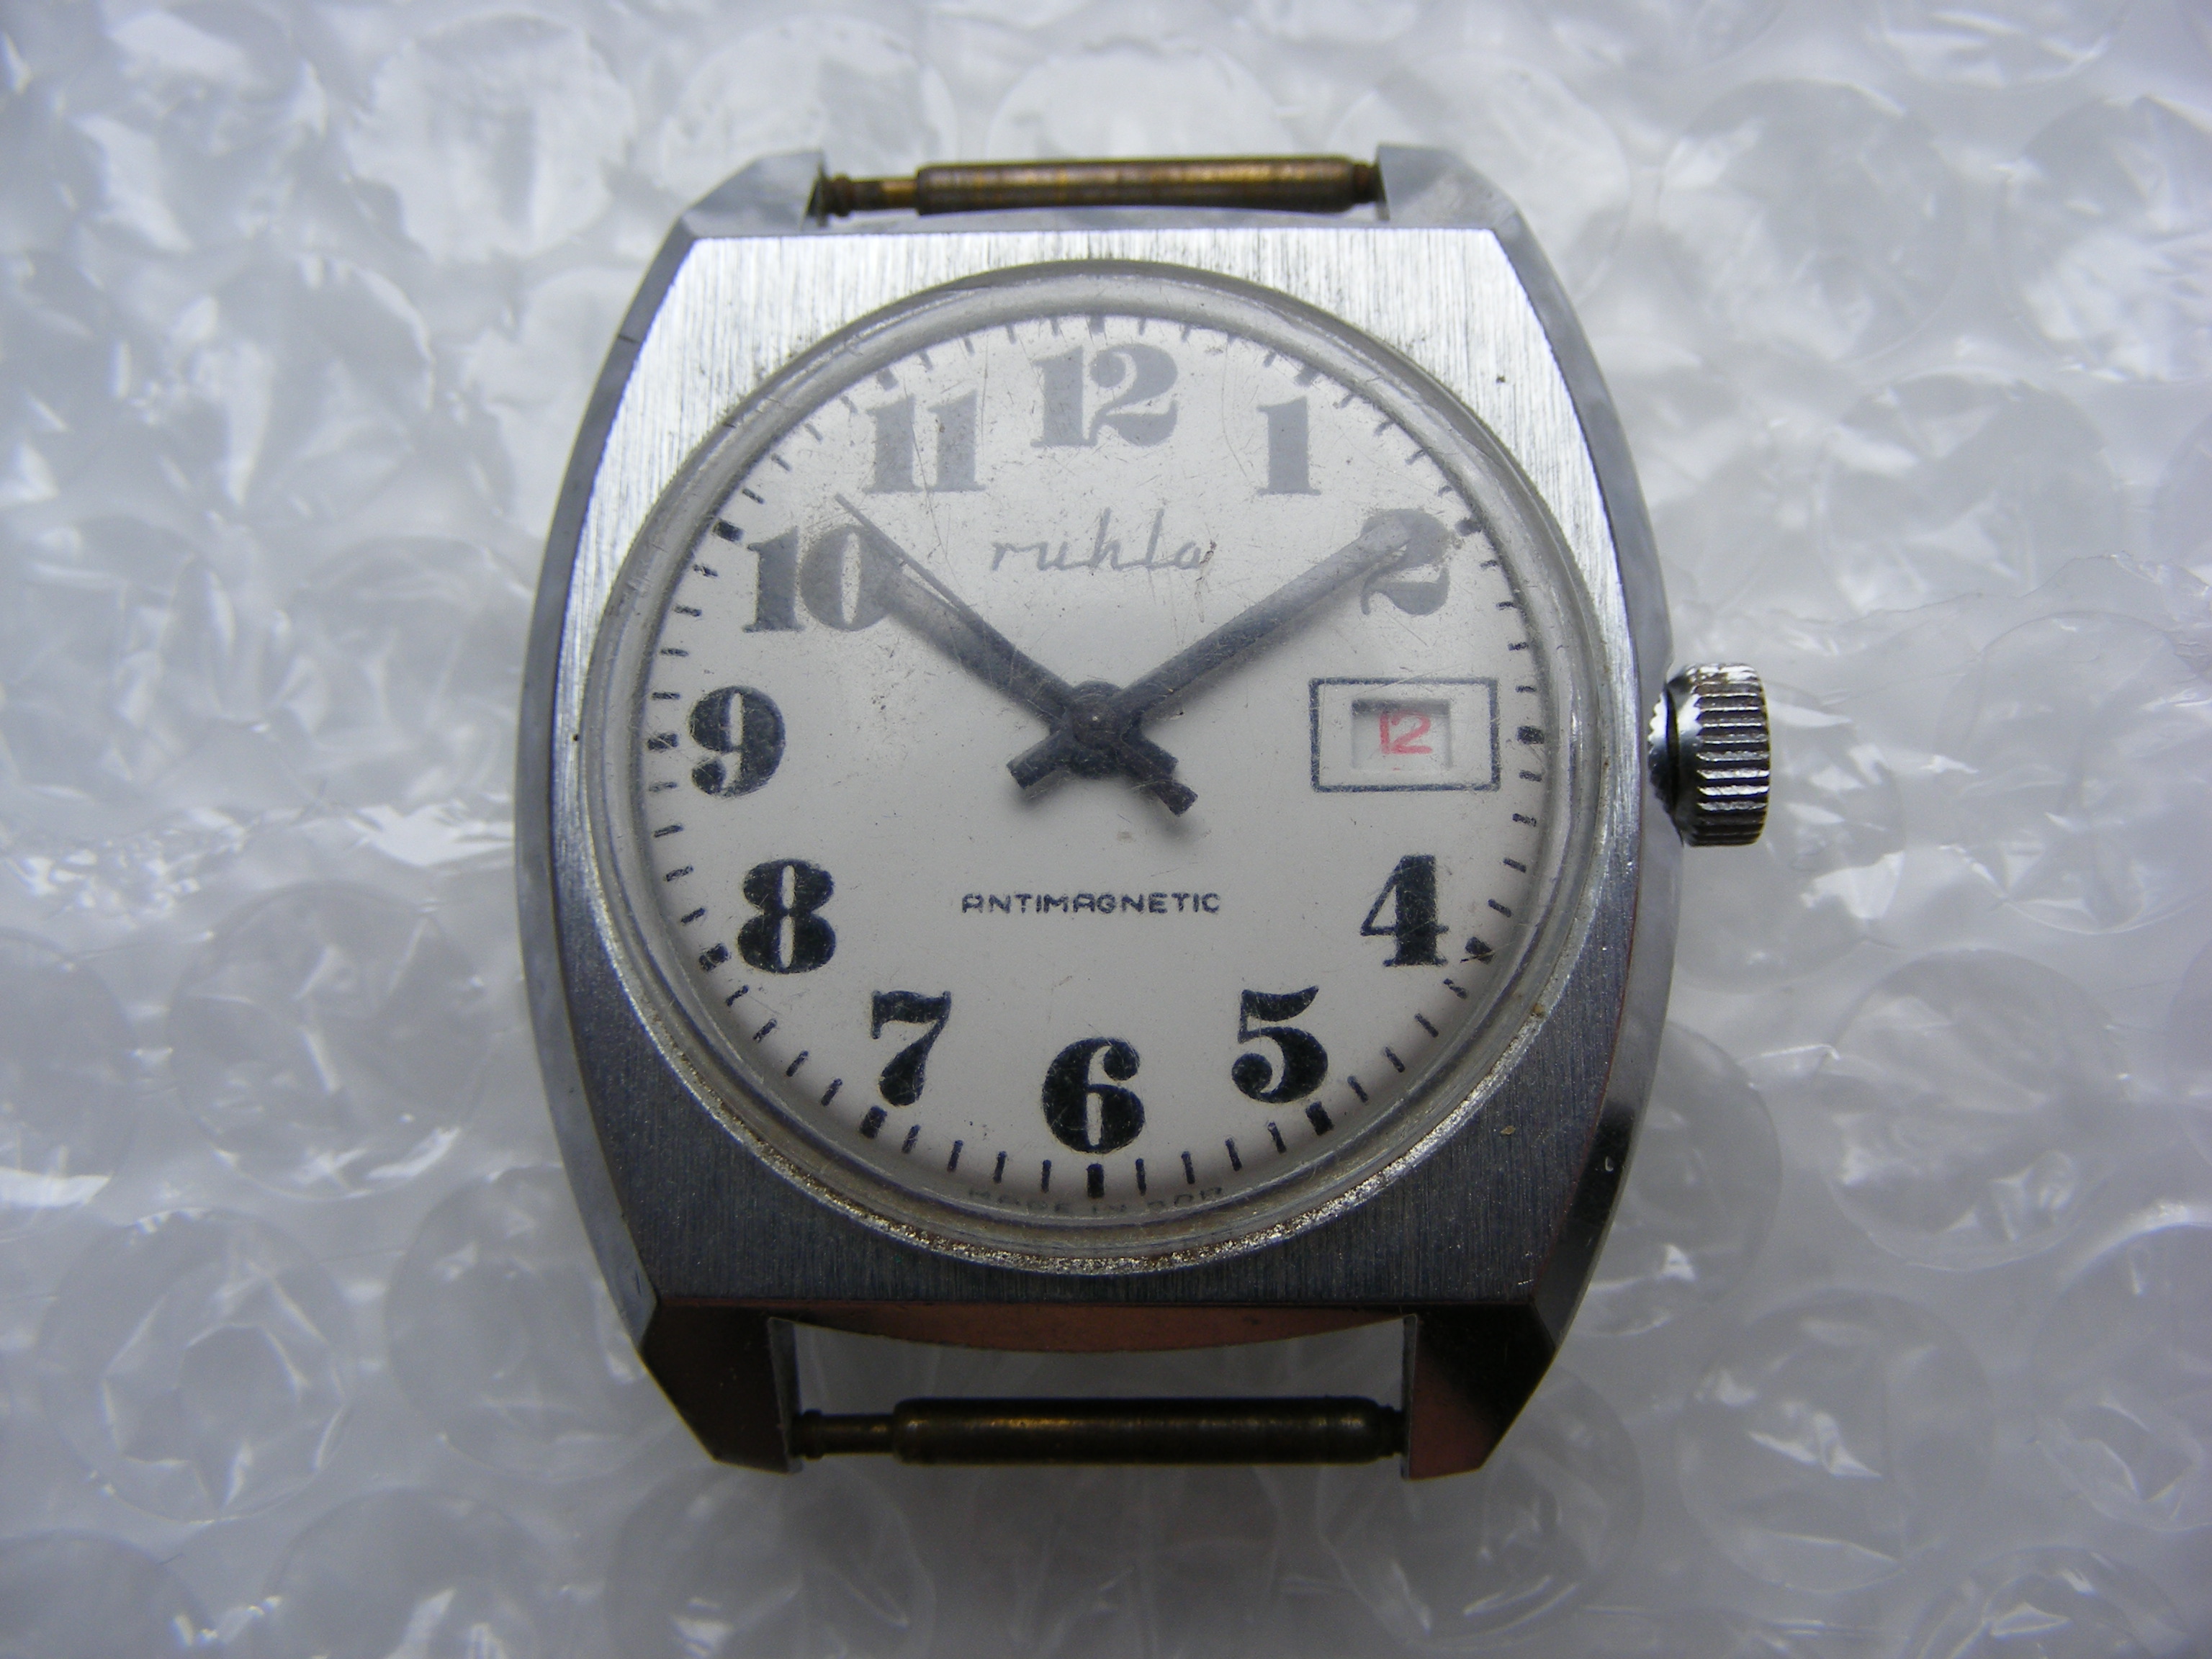
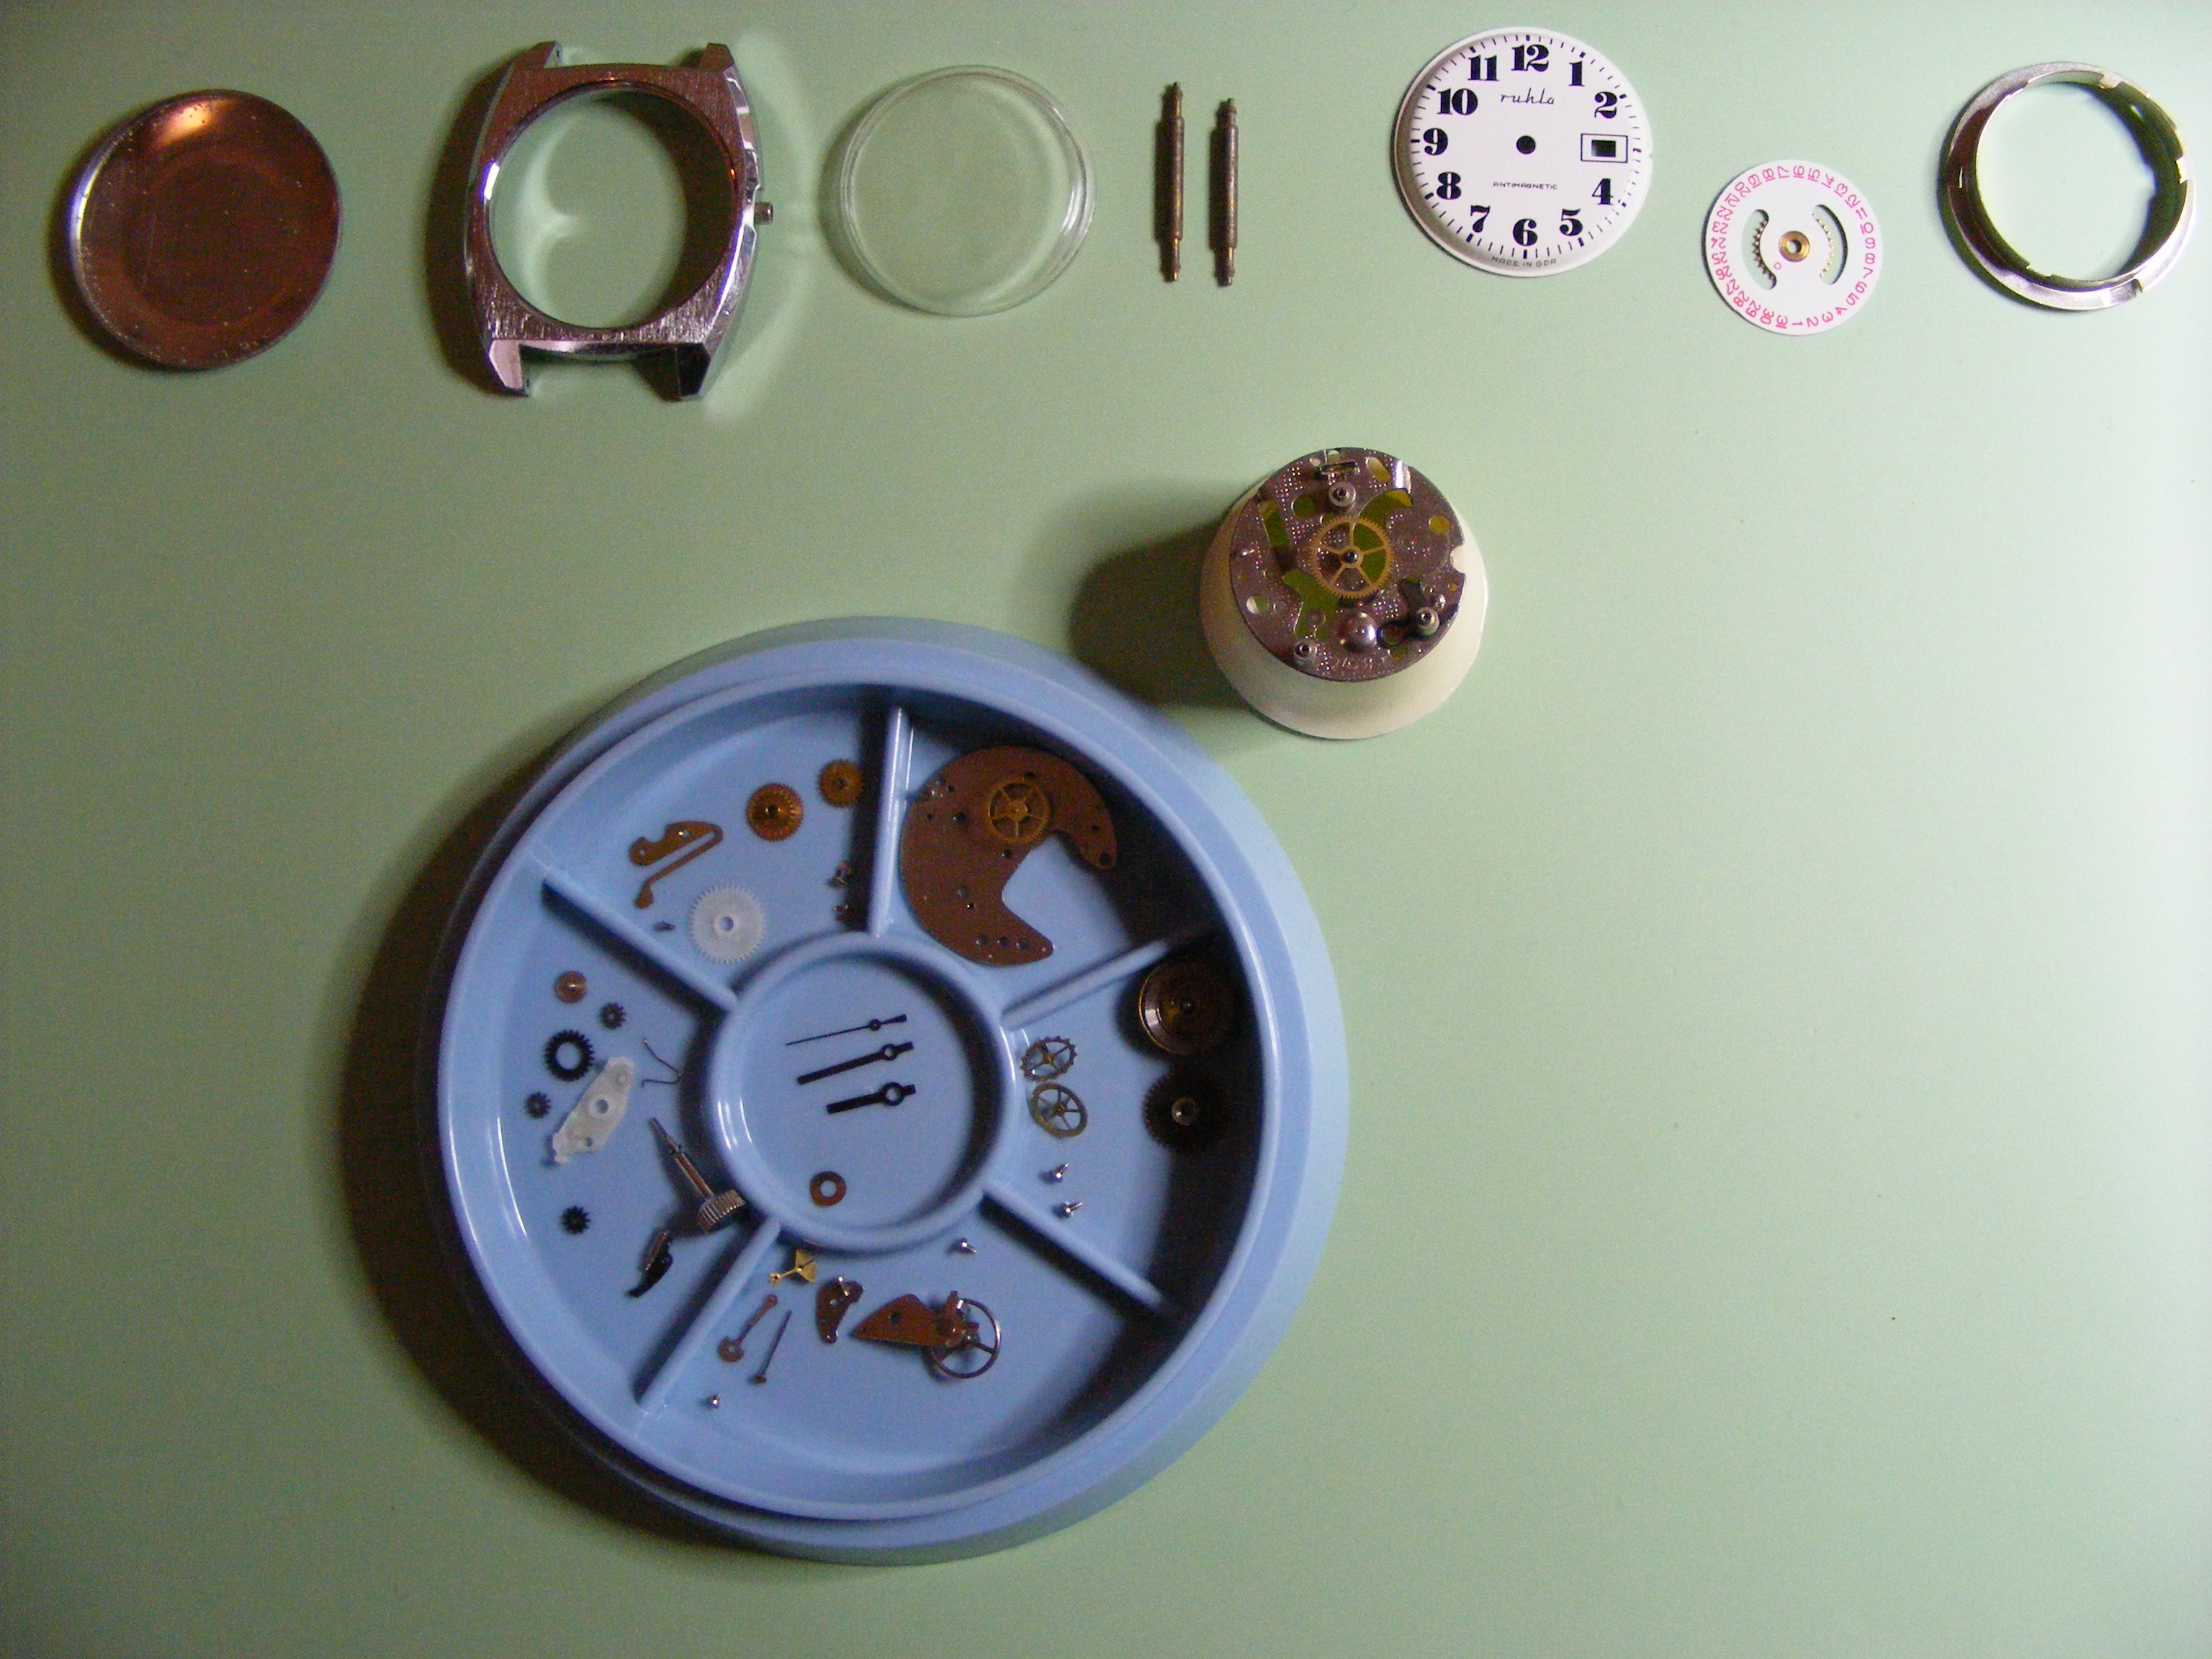
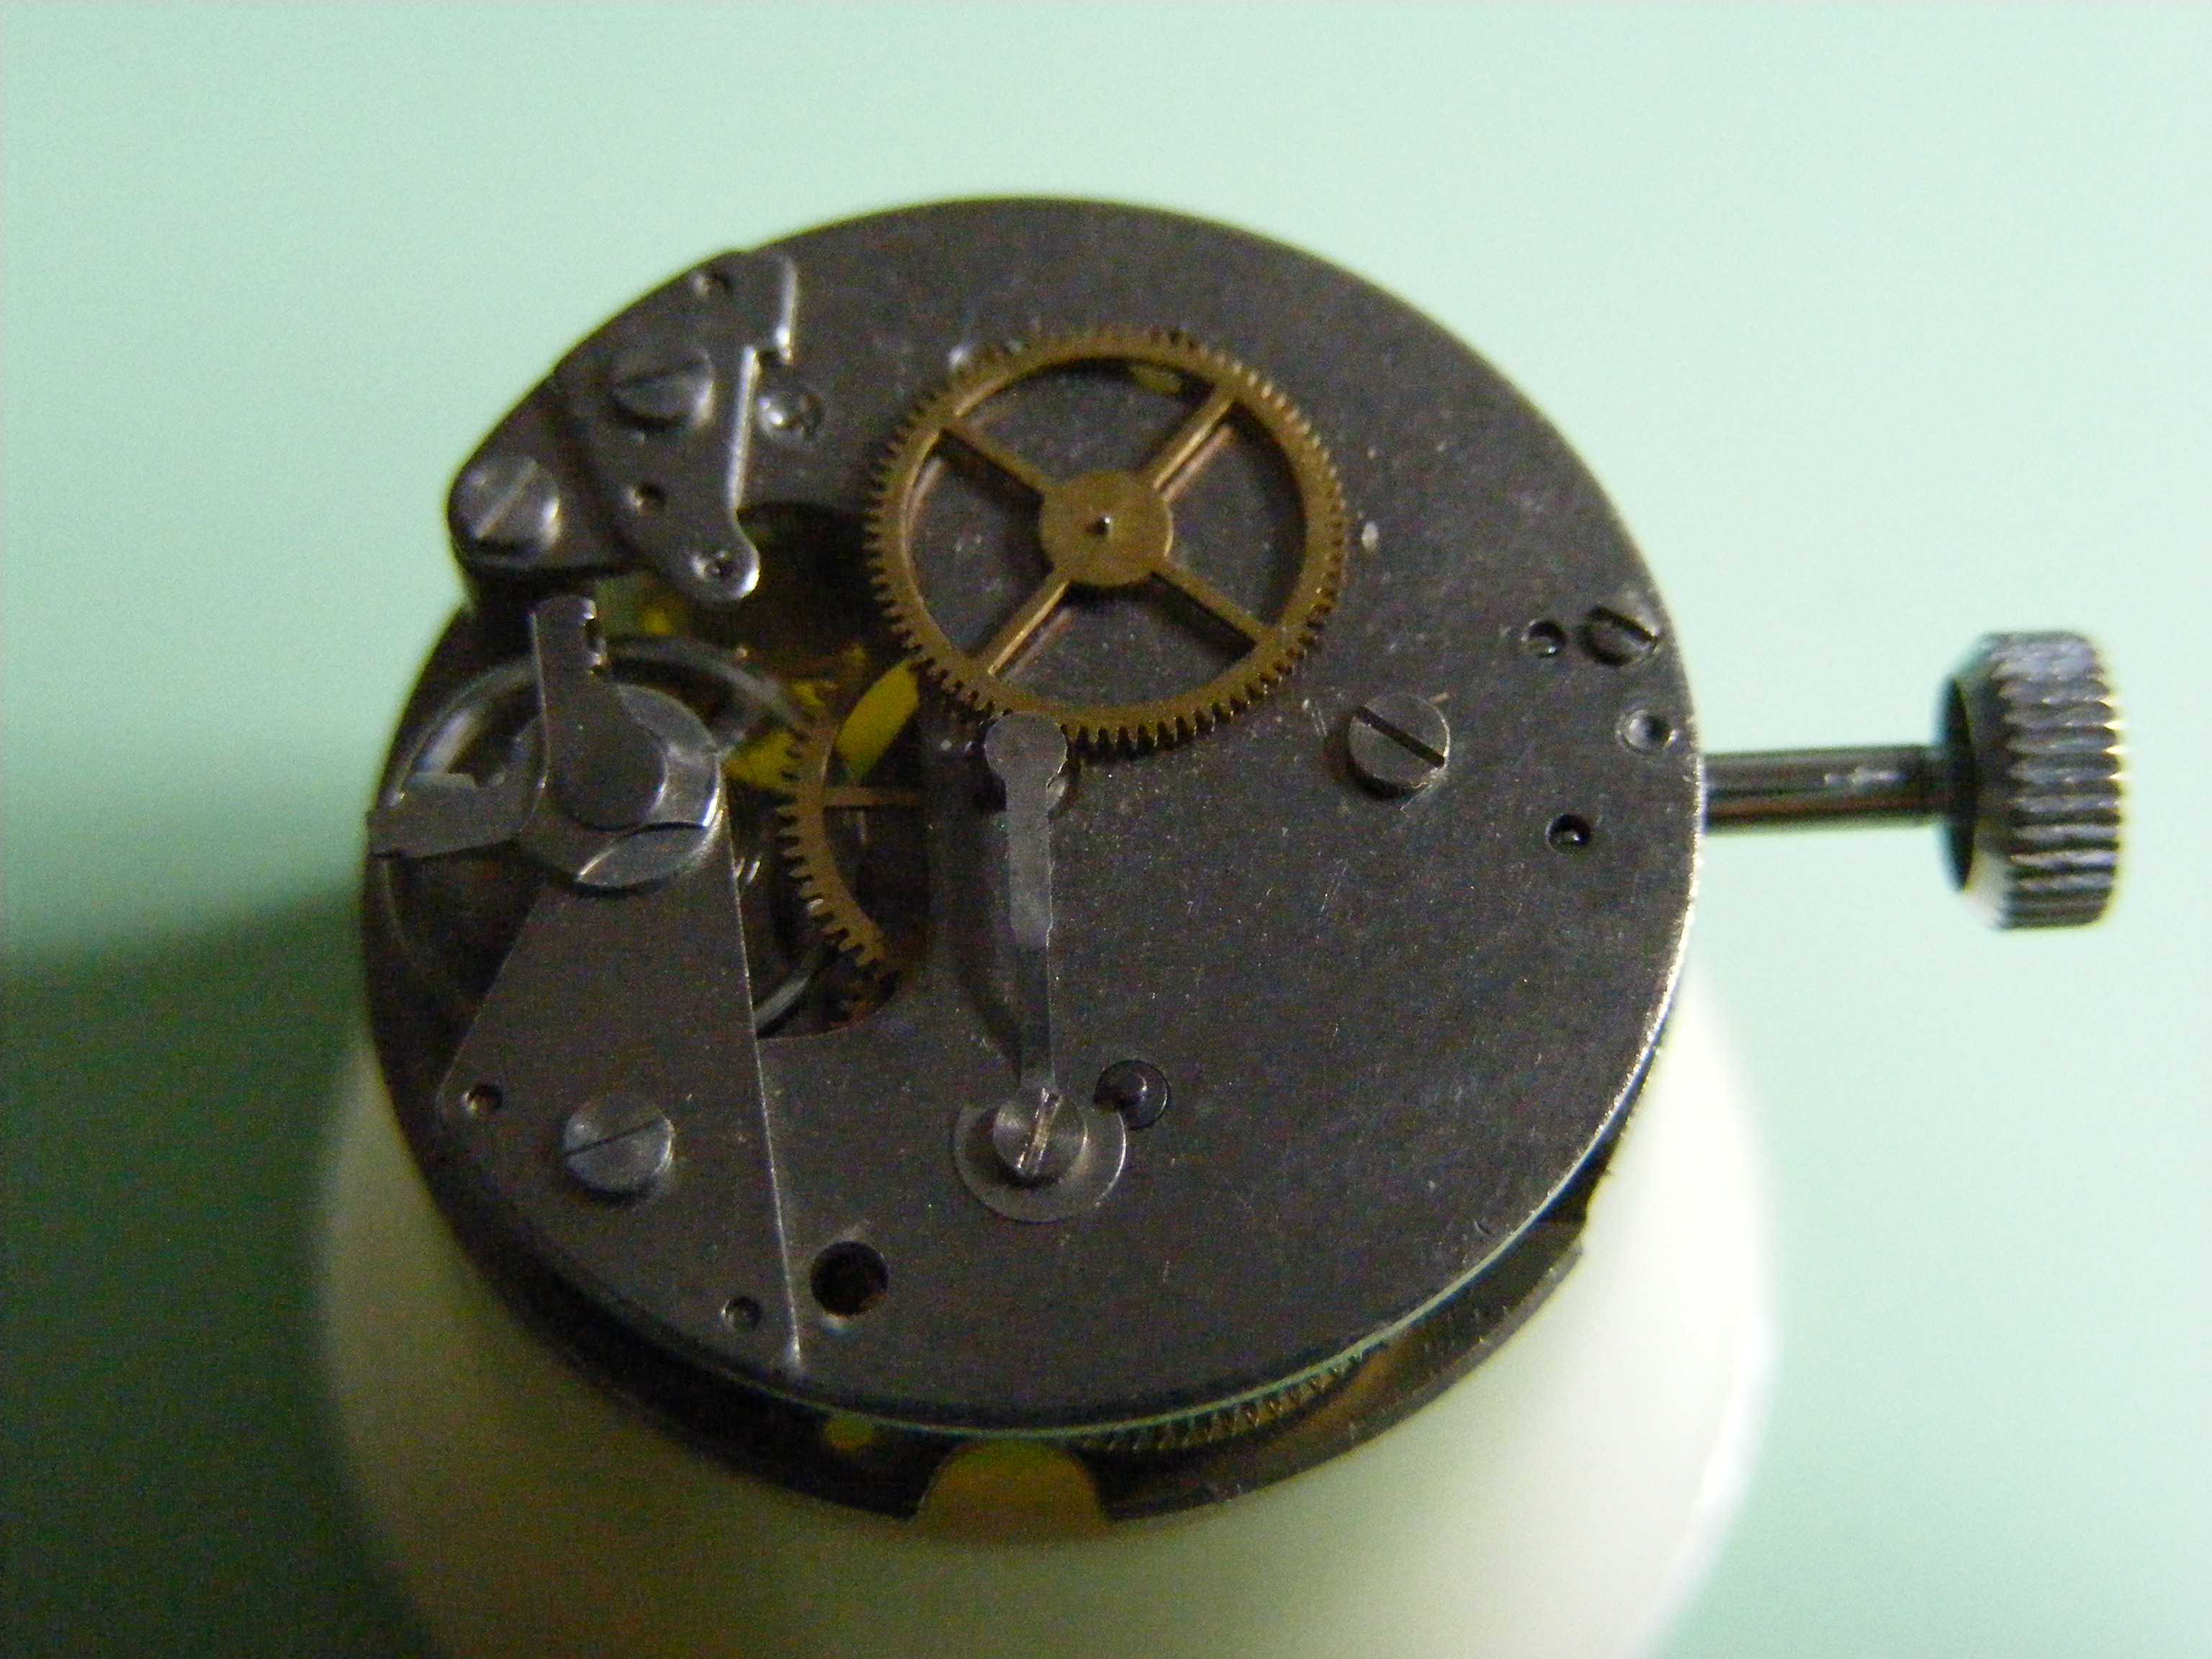
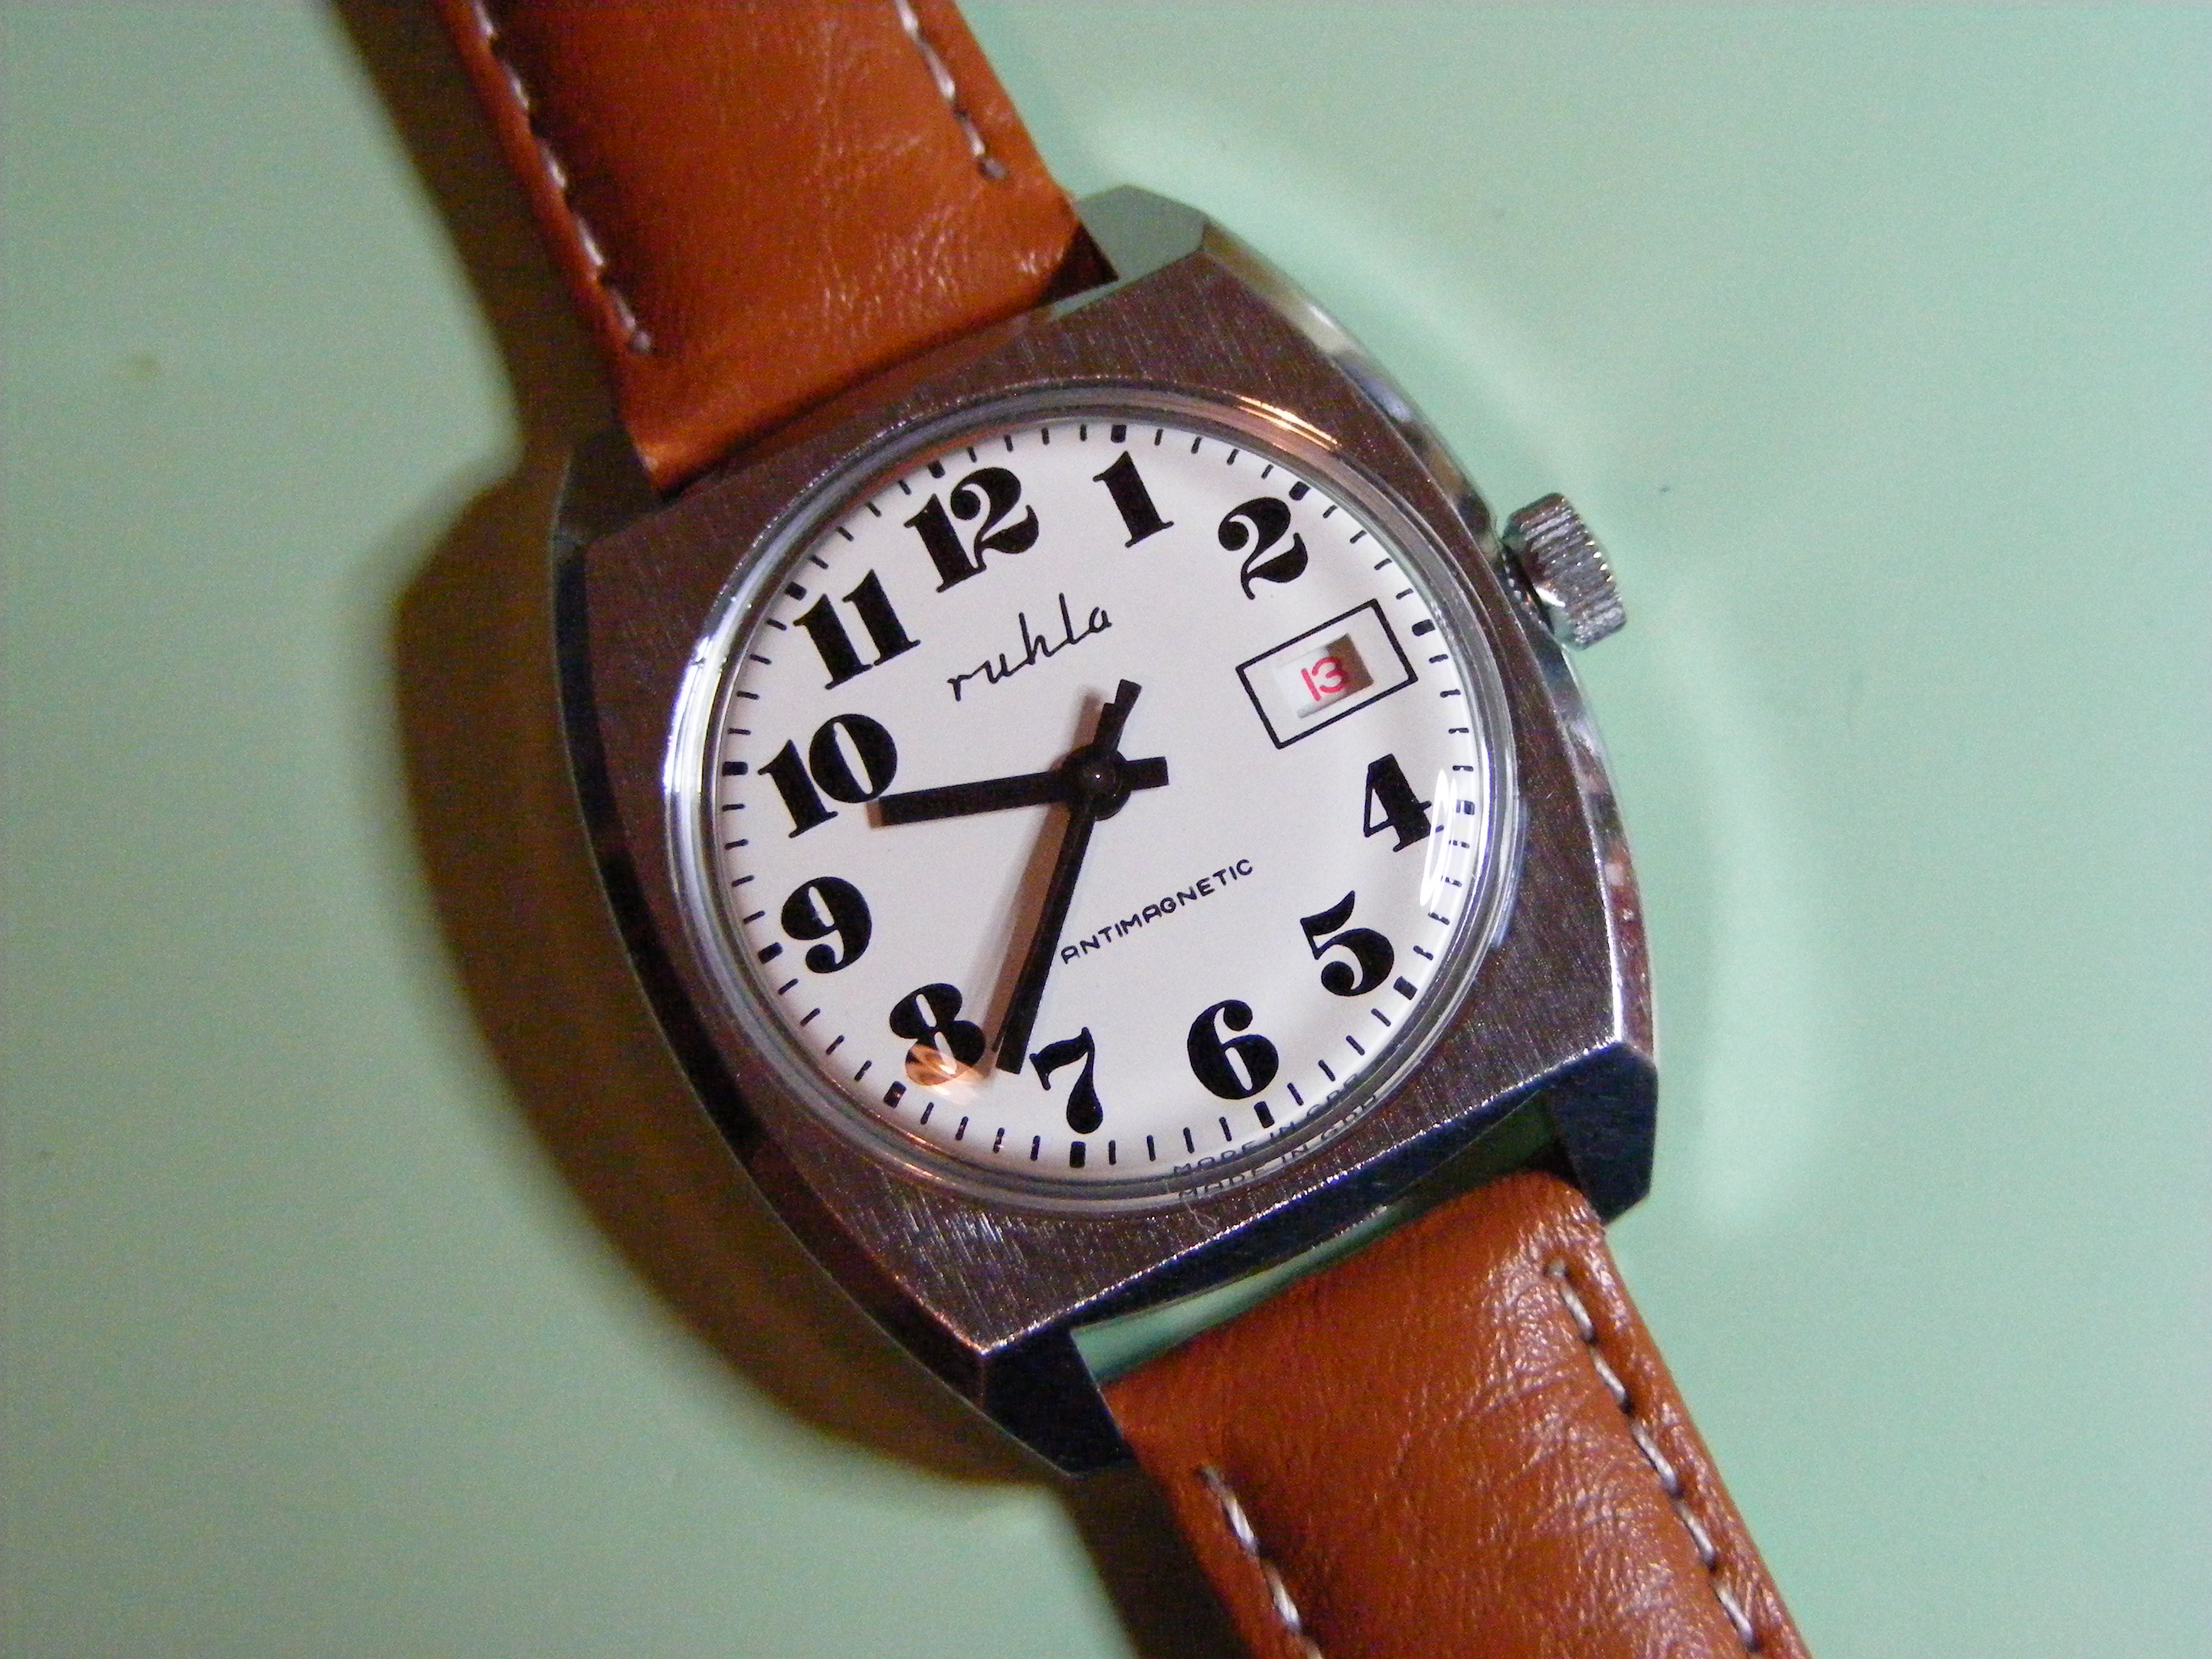
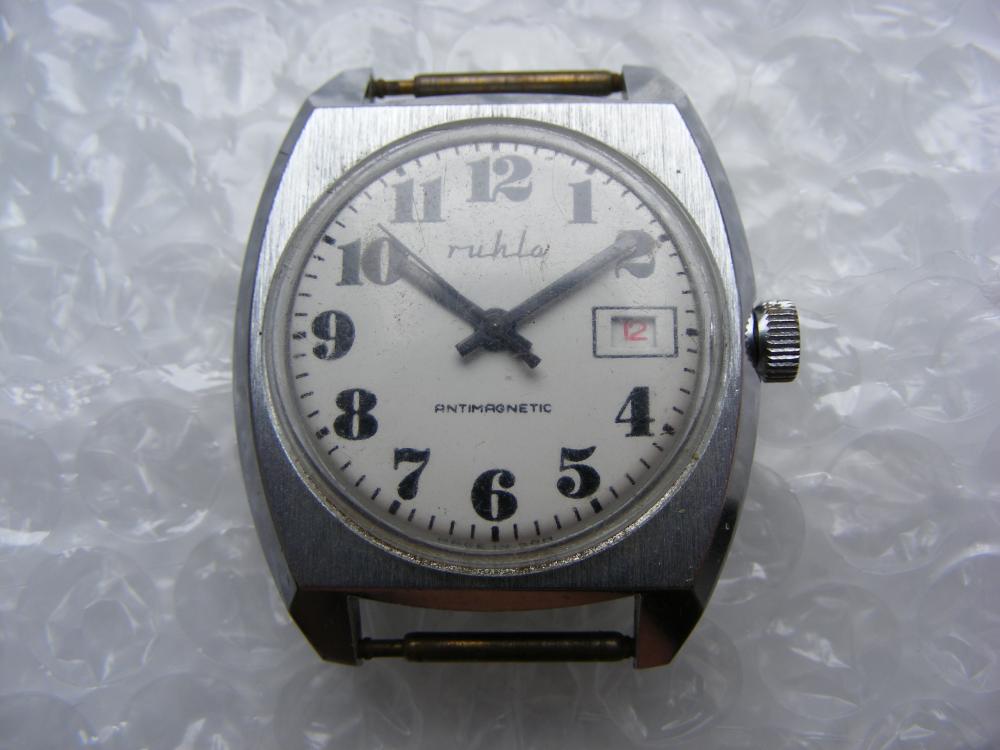
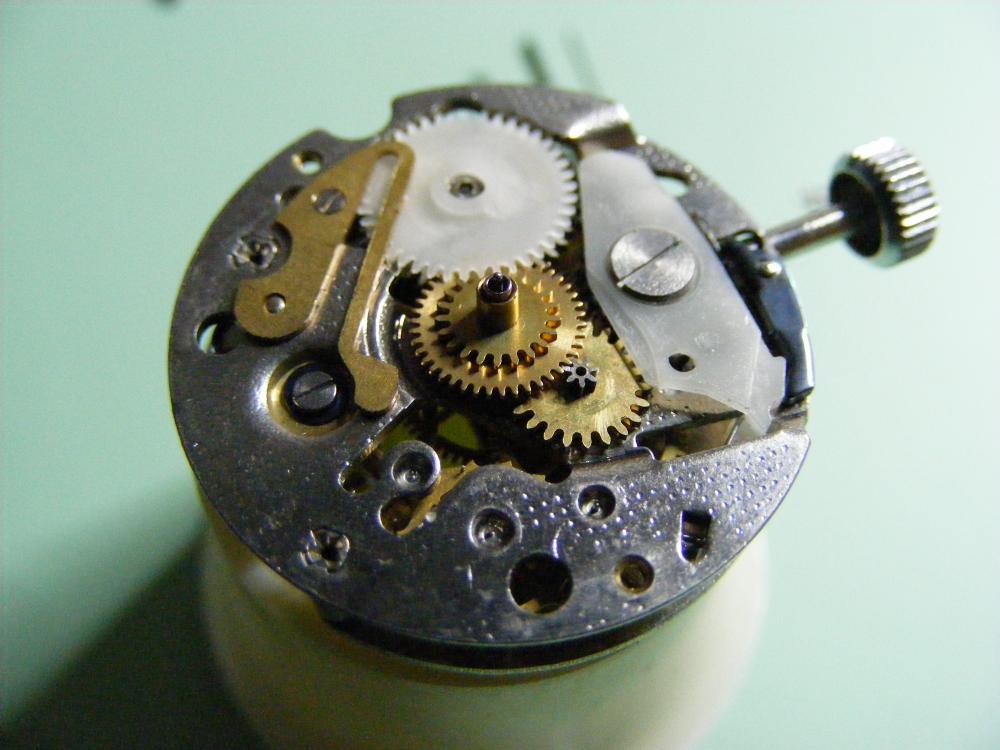
A couple of weeks ago I came across a Ruhla watch on ebay, never seen one before so I bought is as a curio in good working condition, made in GDR so I suppose if it were a car it would be a Trabant or a Wartburg !. Then I found another listed as '' not working spares or repairs '' £2.99 + postage it arrived a couple of days later. It was fully wound & solid, when I took the back off it was half full of sand ! , the seller being in Torquay it must have been on the beach. The movement is contained between two steel plates and after removing the balance & fork the whole thing comes apart in one go. The date change wheel & setting lever are nylon The seconds hand shaft is floating with a tension spring so needs to be supported when refitting the second hand After reassembly it came back to life with just a couple of clicks ! fully wound running about 40 hours. Thanks for reading. Phil.

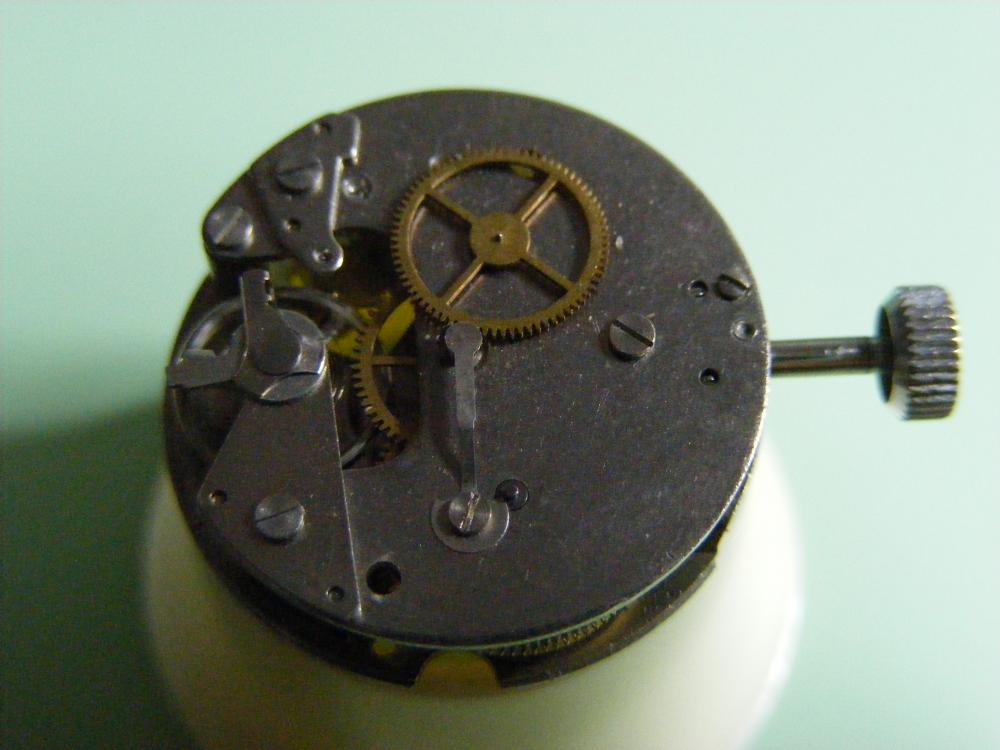
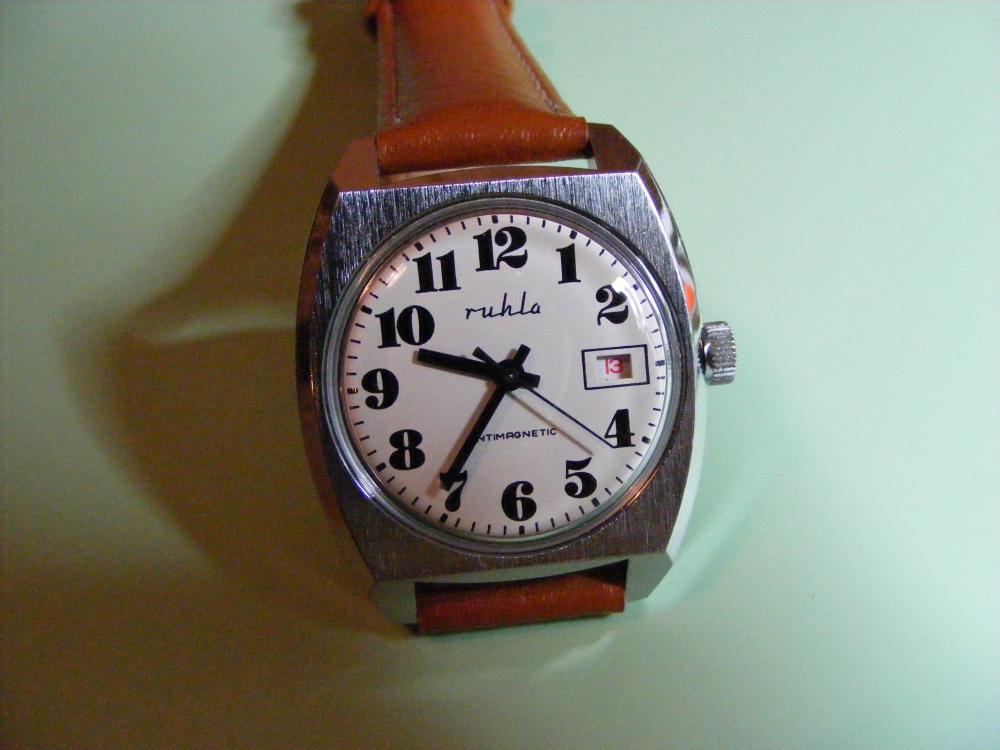
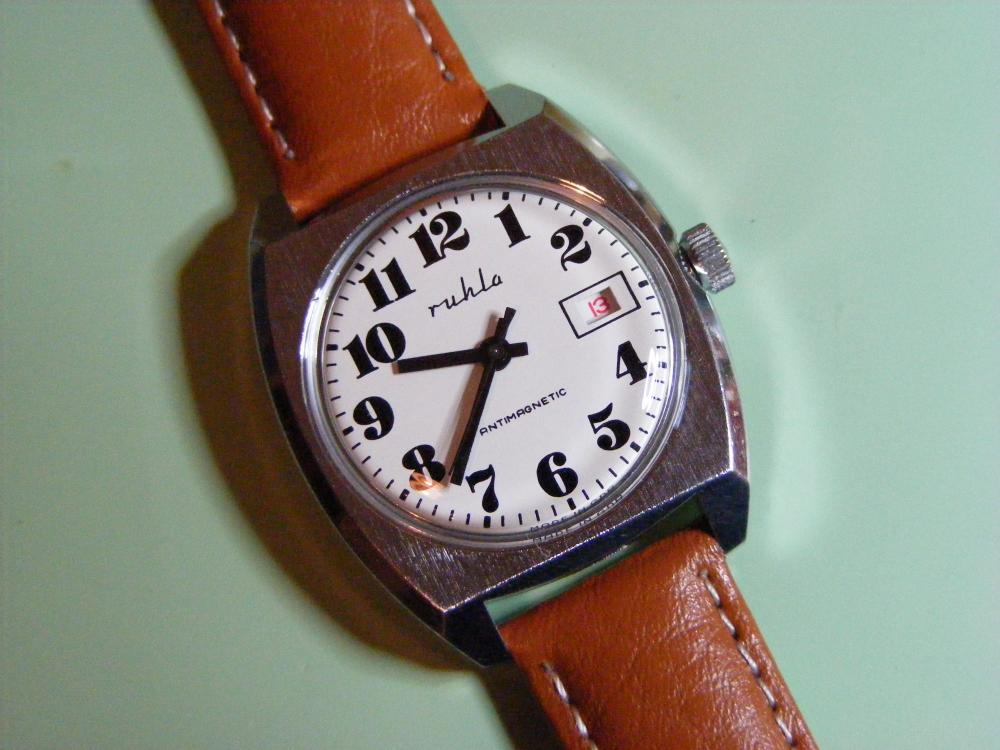 1 point
 -
Finally got around to doing the battery change. No reason that i should not attempt it, Especially when one hangs out on a learned forum such as this. Just that this is a little more involved than popping in a battery in the wife's cheap disposables. First thing to do was to get out the Jaxa wrench and loosen the case back and use a toothbrush to remove any debris that may be caught between the cover and the case. And loosened all the way Sure takes a lot of patience to set up the wrench. One must be very careful not to scratch the watch, especially since this is Titanium and is so easy to scratch. I would not want to take a a chance on a precious metal case. Especially if it was someone else's watch. Inside was the Ronda 715.5 Gold plated five jewel movement. Nice to see a bit of an upgrade from the standard movement. The 371 battery was easy to remove, being careful to not slip and damage the coil while prying back the battery retainer. It was decided to remove the movement from the case so a proper cleaning could be done. Out came the stem and the movement followed. The case, band, and back were treated to a good scrub in dish soap and hot water with a soft toothbrush. I hope the wife doesn't mind that I used her toothbrush... The gasket for the back looked in really great shape and as advised, I re greased it and the threads of the back with silicone grease. Also lubed the O ring in the stem tube and the gasket inside the crown. I took the measurements of the gaskets at the same time so I can order them when i service the watch movement at the next battery change. I do not have the proper oil yet. The hardest part was cleaning the inside of the watch crystal to perfection as well as removing all specks of dust from the dial face. Any issues here and I would be looking at them for the next couple of years. All assembled and ready for the band. The specks you see are on the outside. And of course the obligatory wrist shot. Love the look feel and warmth of the Titanium, but hate that it scratches so easy. Bit of a mess after an evenings work... Thanks to all for the help and advice for such a simple job...1 point
-
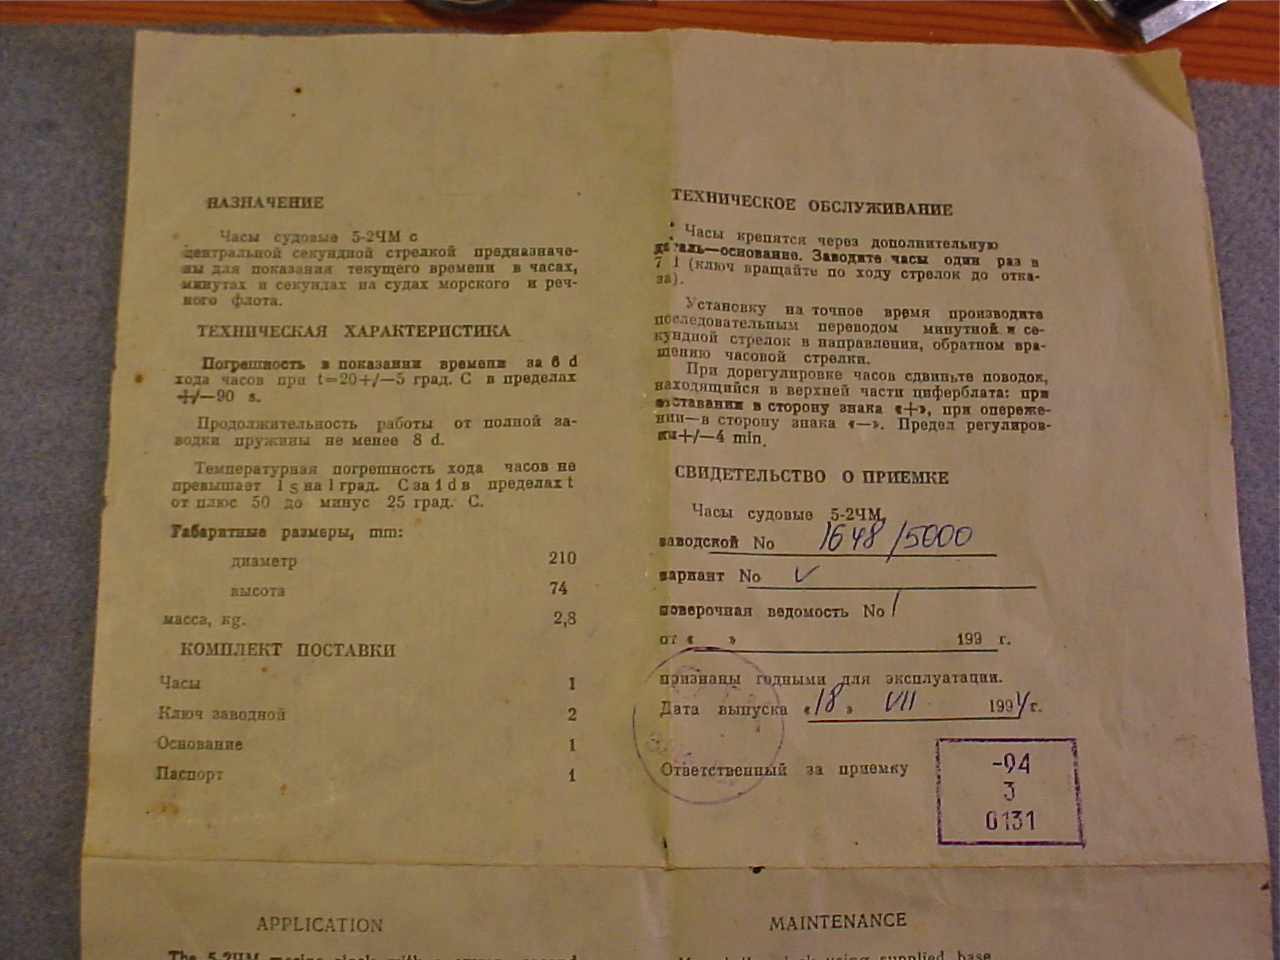
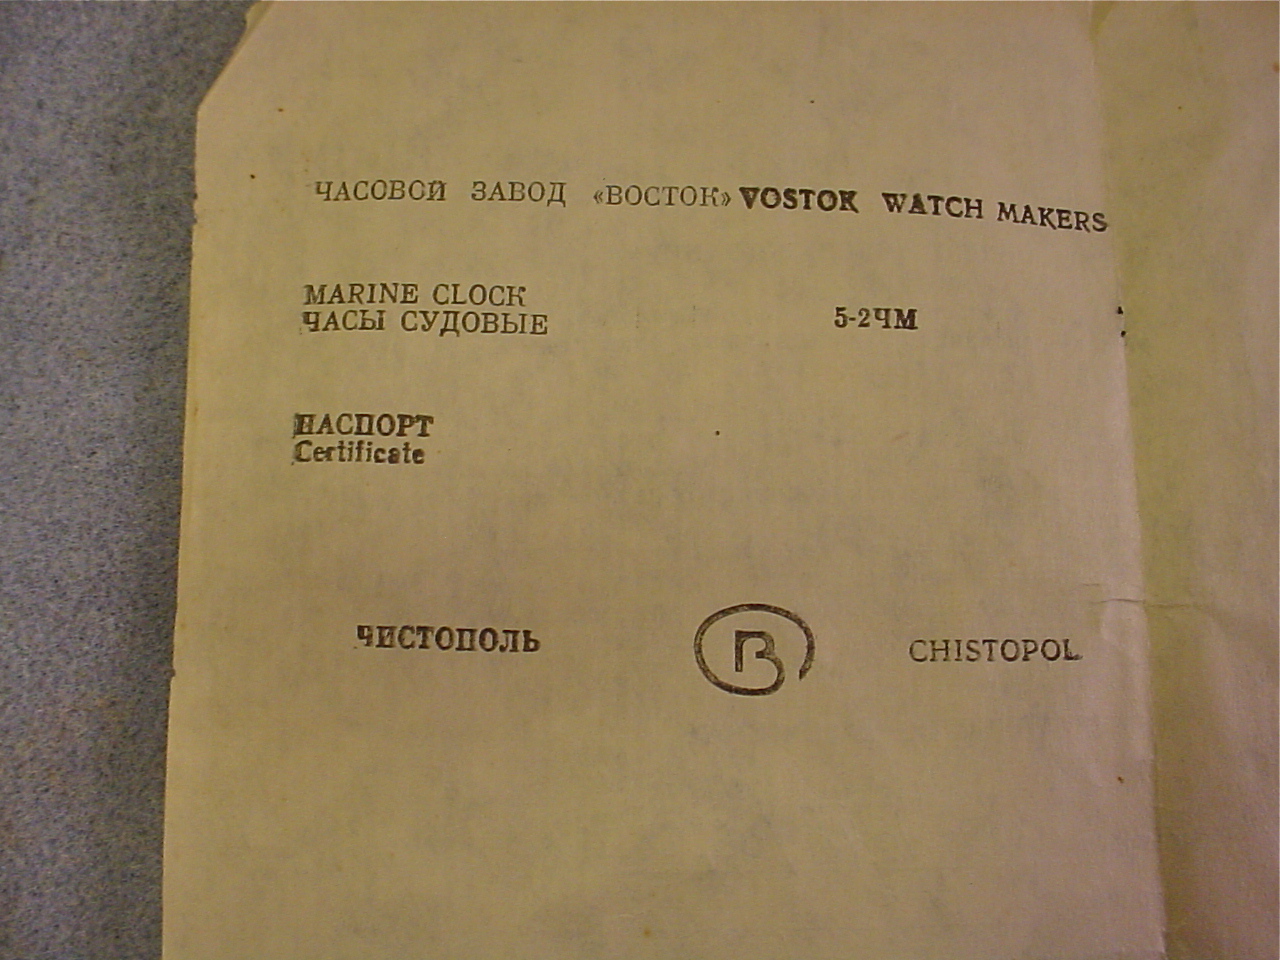
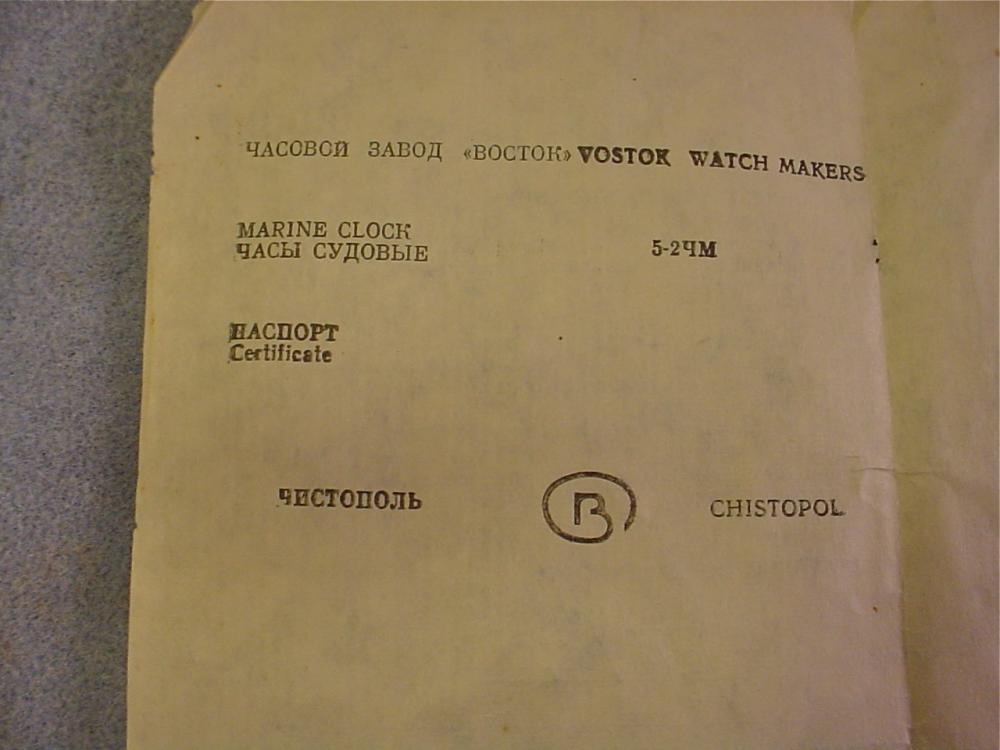
I picked it up at the swap meet for $75 . They were asking for more , but I had helped the seller out with some other of his watches in the past so he dropped the price . It's NOS , came in it's packing box from Russia . The key also locks the front glass panel for a water- tite seal and has an 8 day power reserve on a full wind . This bugger's heavy .
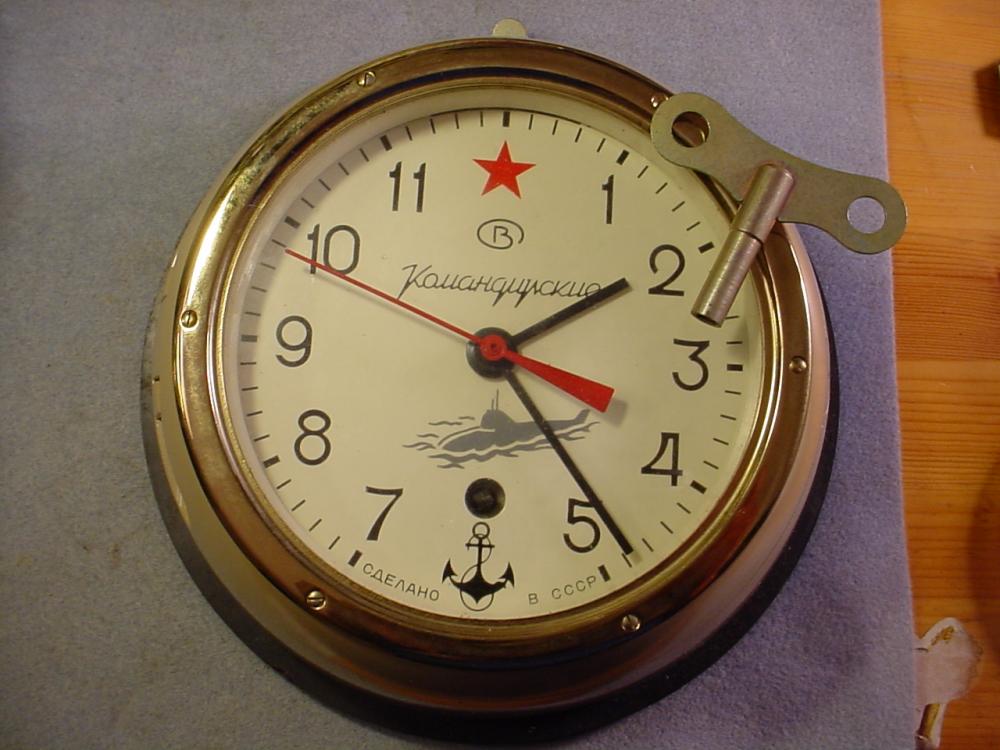

 1 point
 -
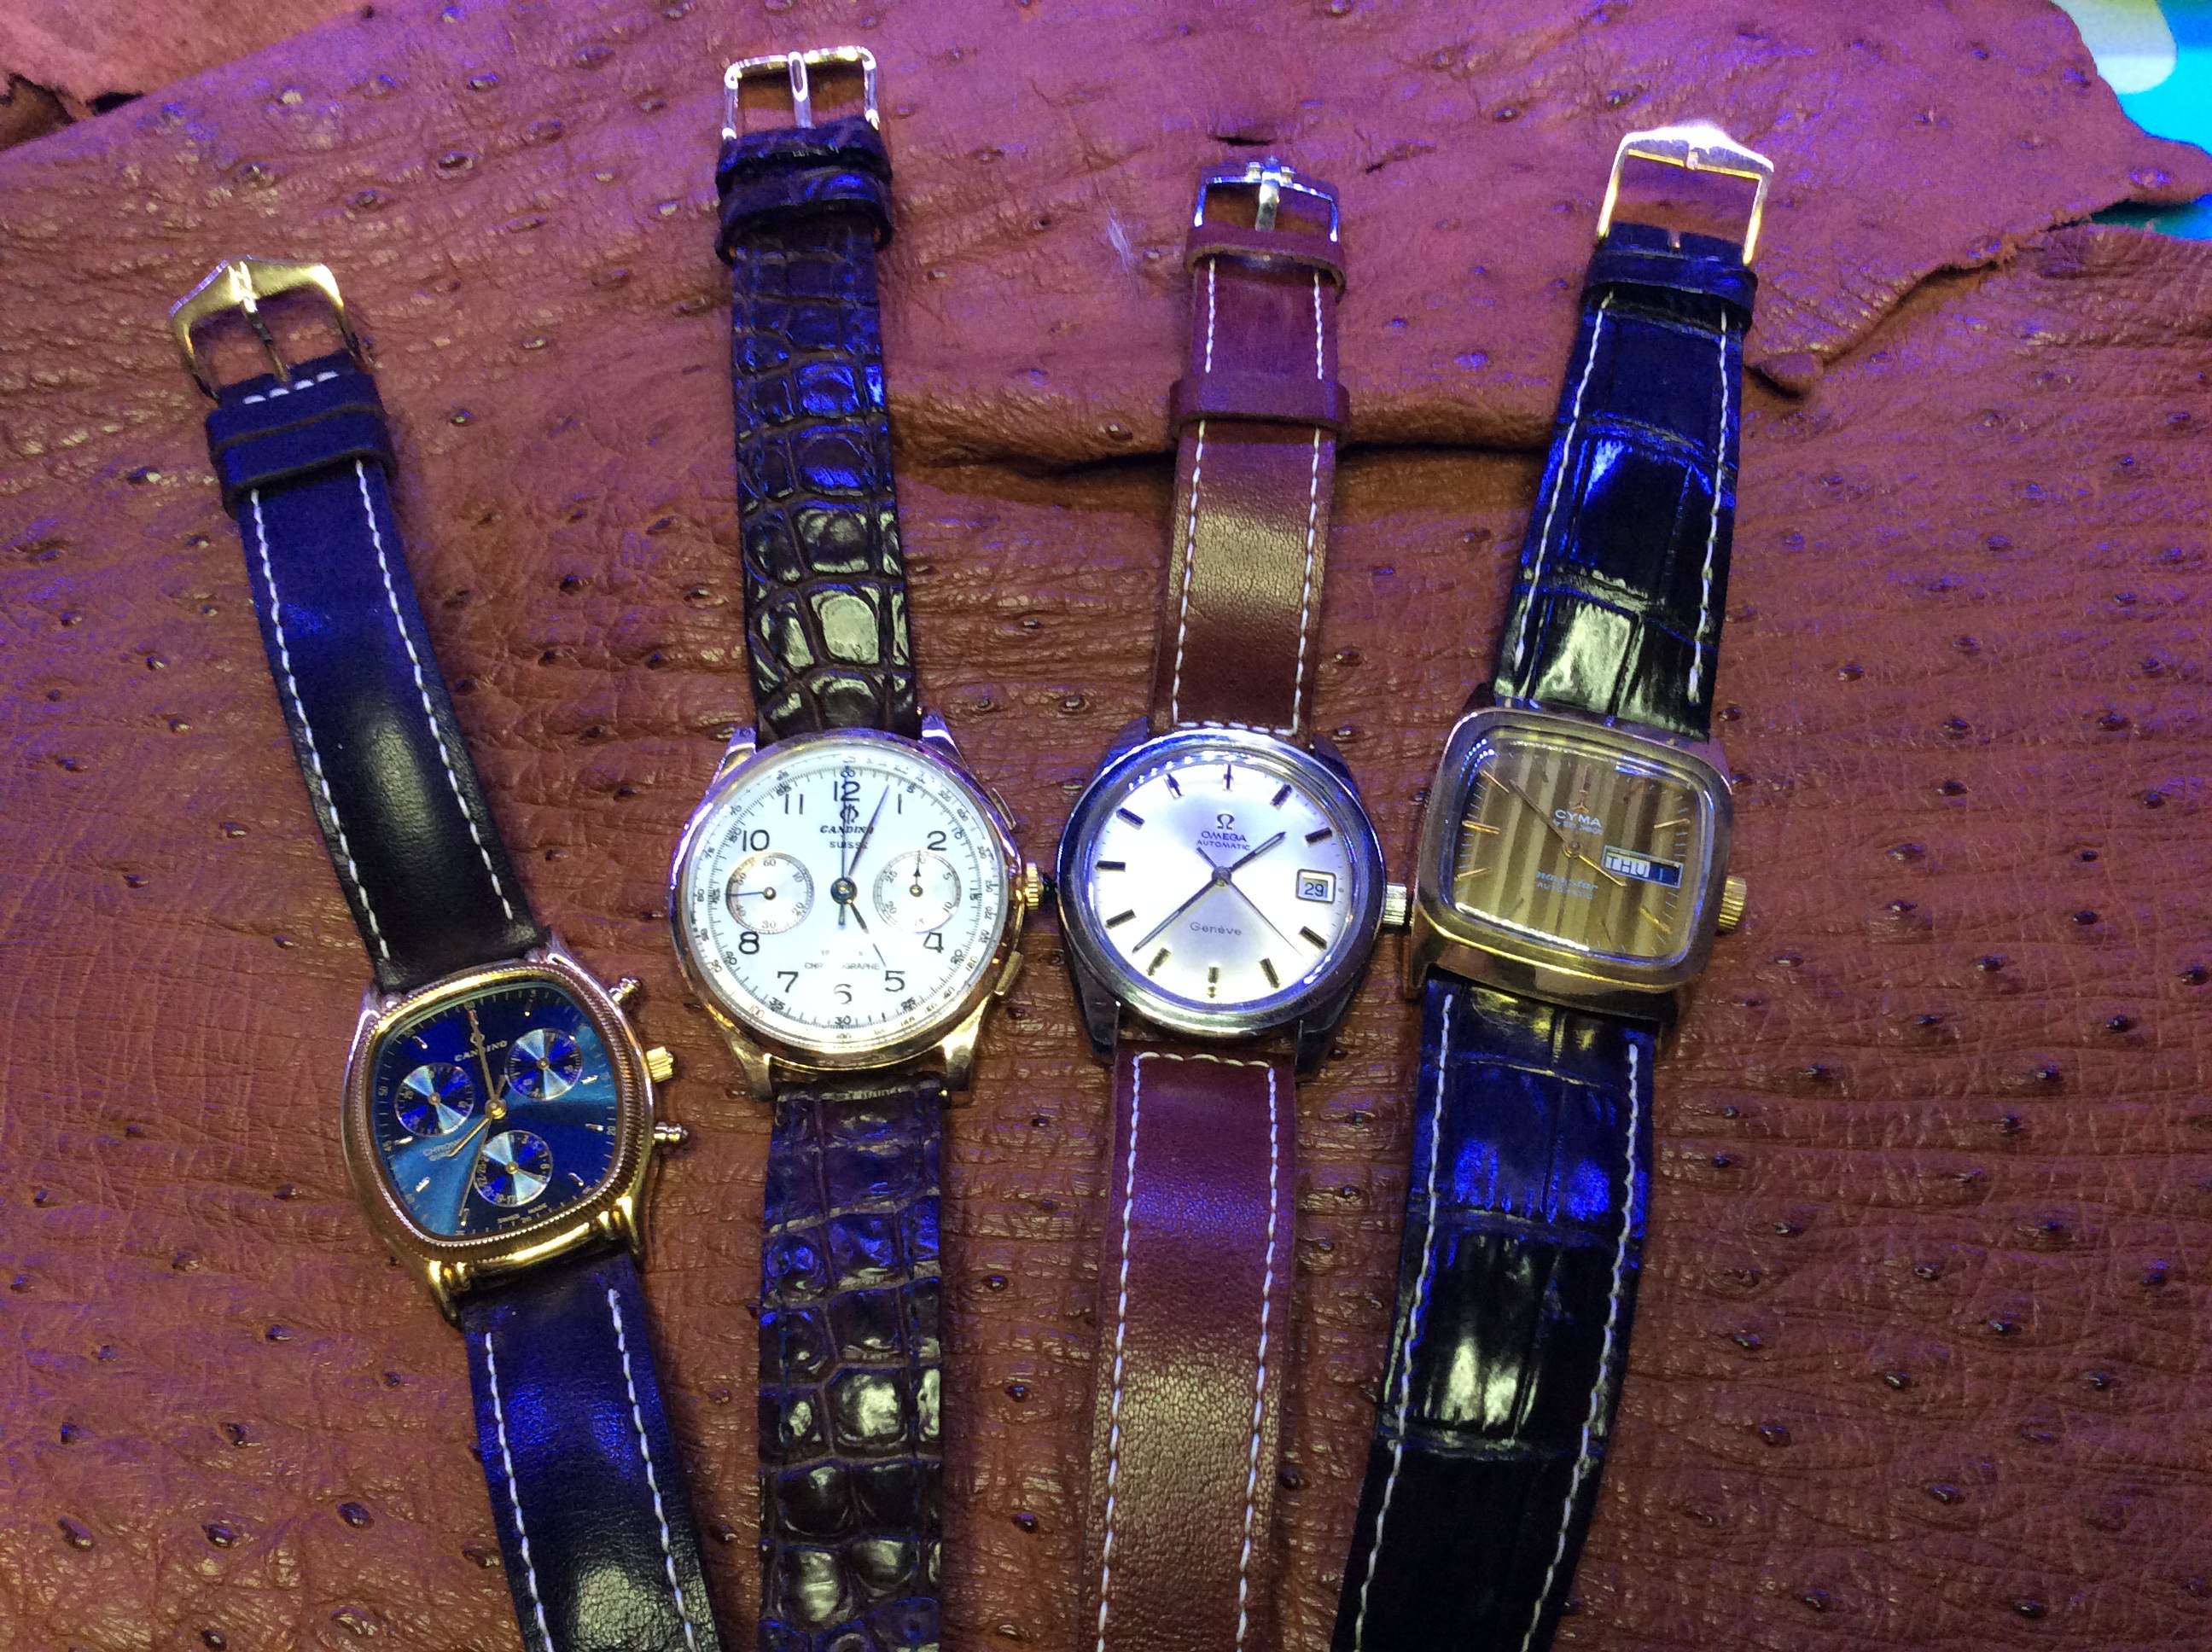
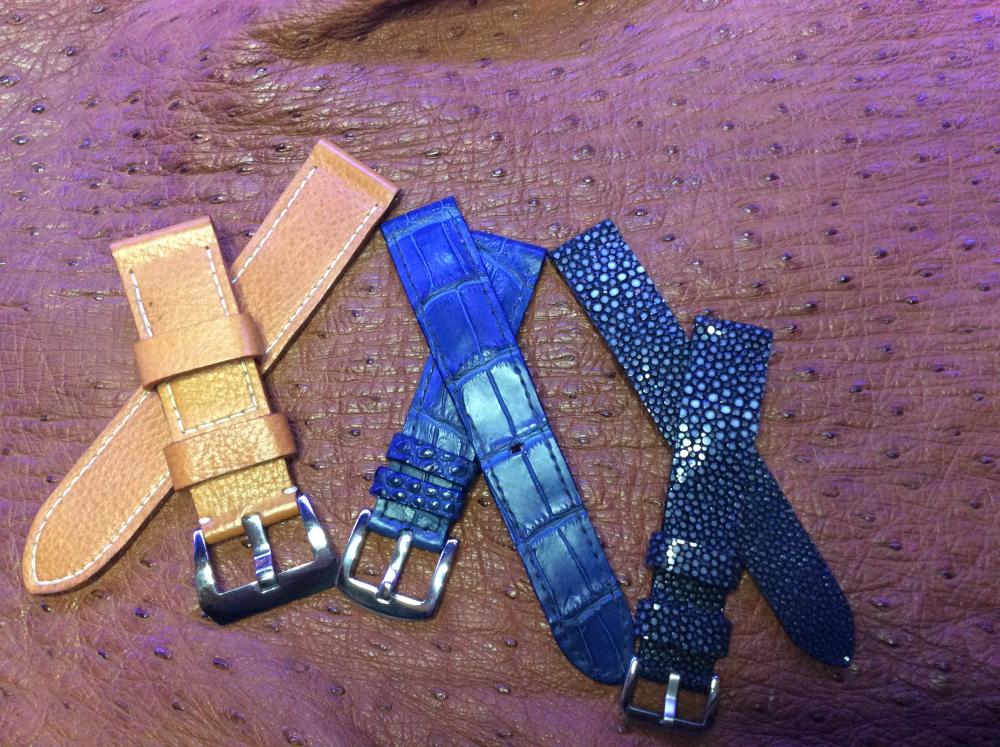
Hello everyone. I thought I would upload a few picks of some of the bands I have been making. This started a few years ago when I bought a couple of medium priced bands on line and was not too happy with them. I have been able to make and insert brass sleeves for additional durability and have sourced leather from lots of places. The easiest is to get old handbags, but in Japan there is a shop called Tokyu Hands and some of their cow leather is very fine grained. Overall though and by far and away the best leather to both work with and for feel is kangaroo which is easily available here and on line as well (they aren't endangered at all, poor skippy!). It is very close grained, almost no blemishes and is very strong. One of these will sure last a long time. I get the buckles from eBay and they are cheap and of good quality. From left to right is dark brown roo that is padded, next is crocodile (I like the chunky texture but not everyone's cup of tea), then light roo, not padded and finally crocodile that I stained myself. Japanese fine grained leather and to the right of that a nice blue croc one (scrap croc skins of good quality from Thailand that was cheap) and finally the hardest to make, sting ray, lots of learning making that, but it can be done. i will try to get the photos better next time

 1 point
 -
Skill and know how?
 1 point
 -
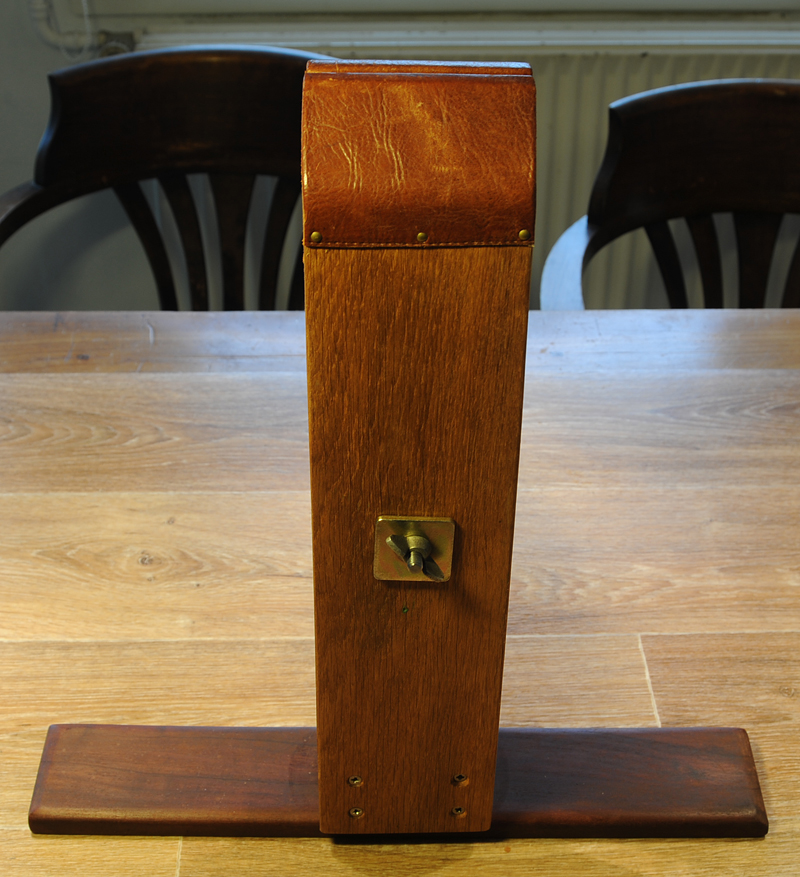
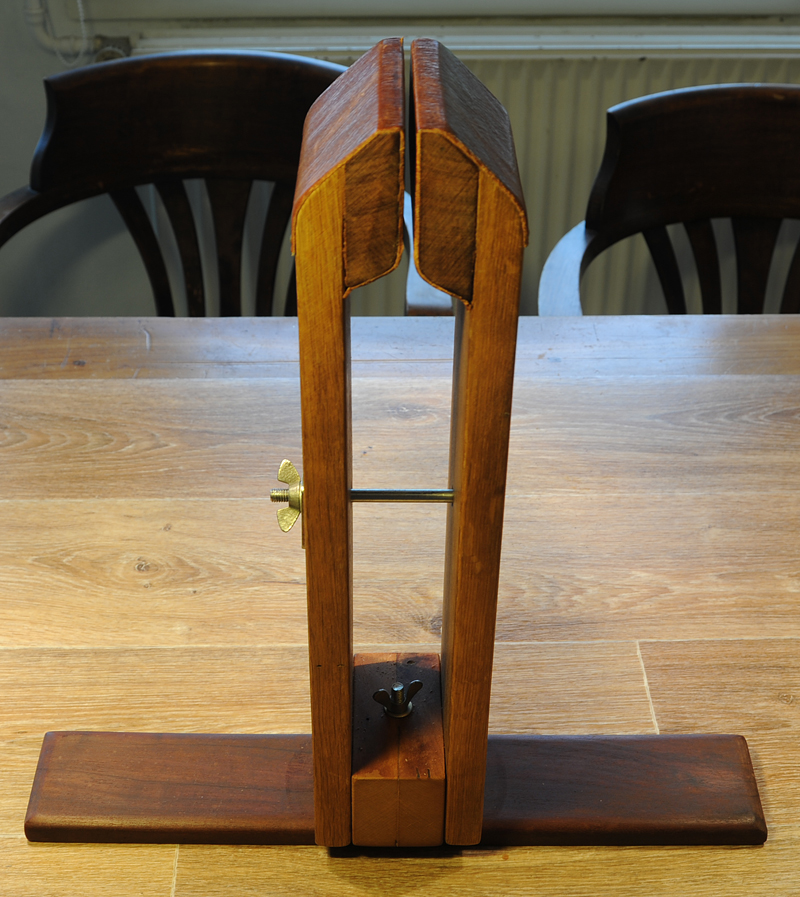
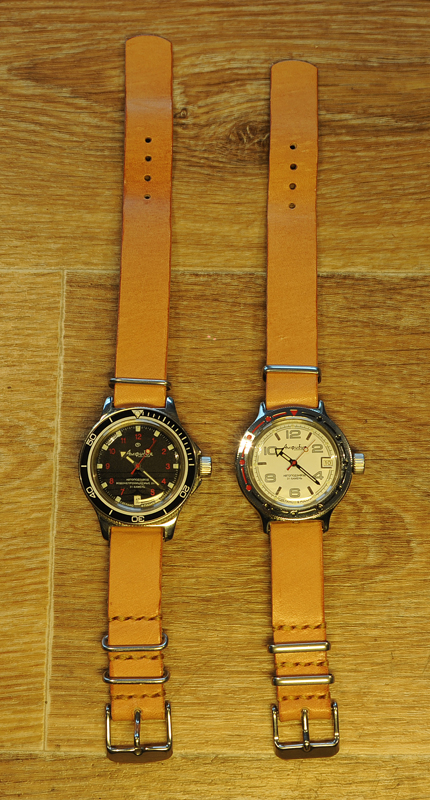
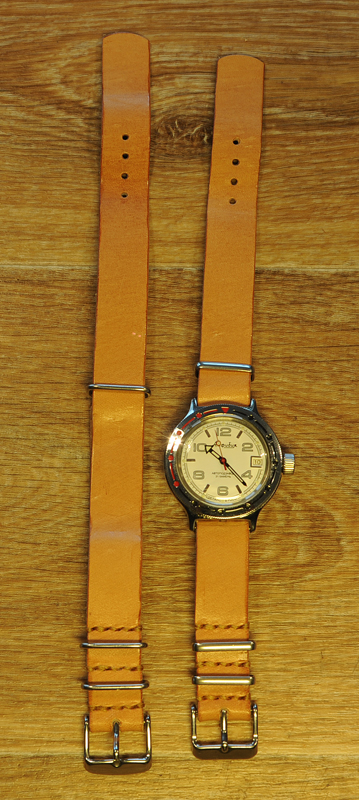
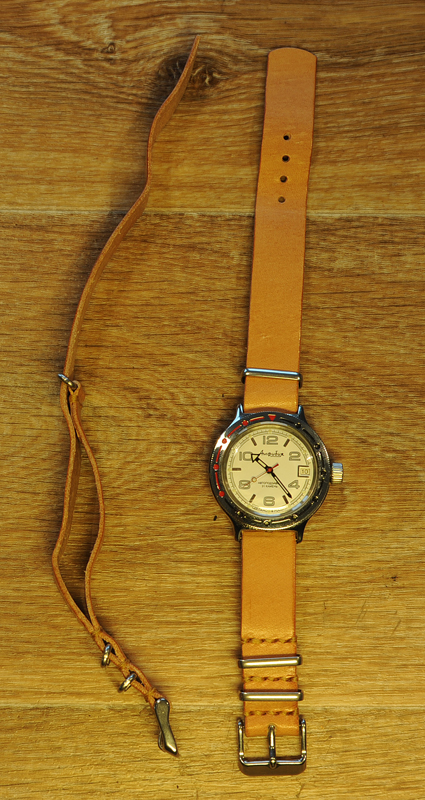
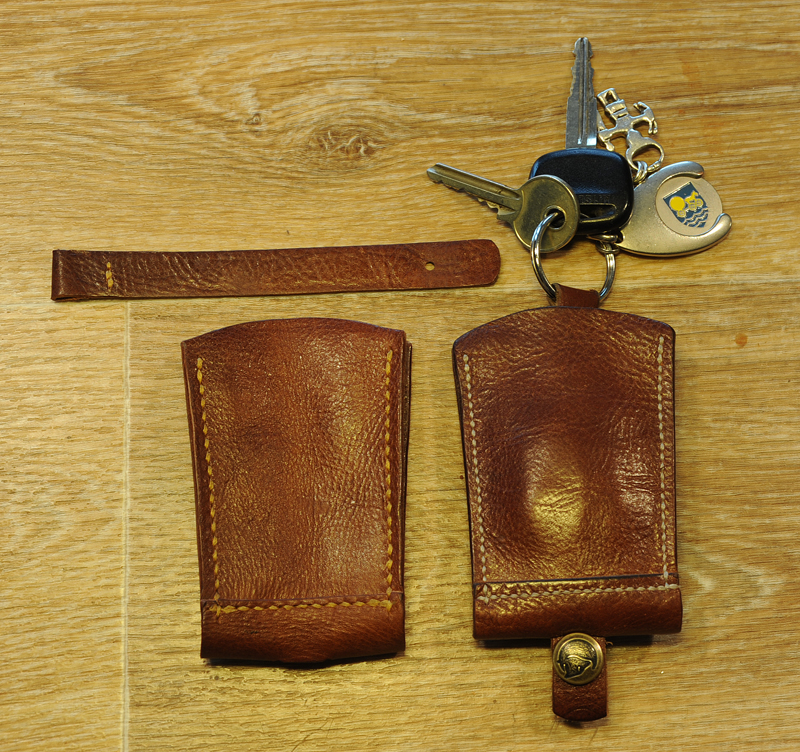
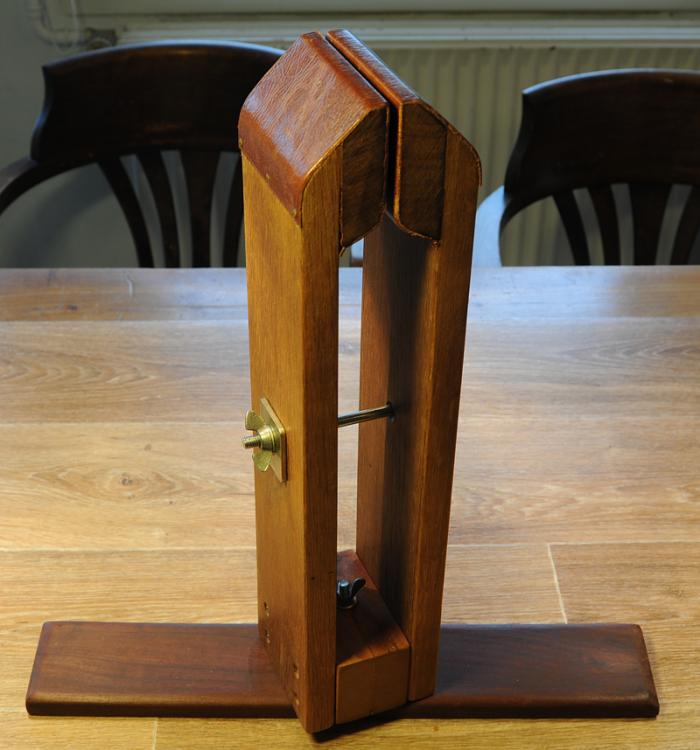
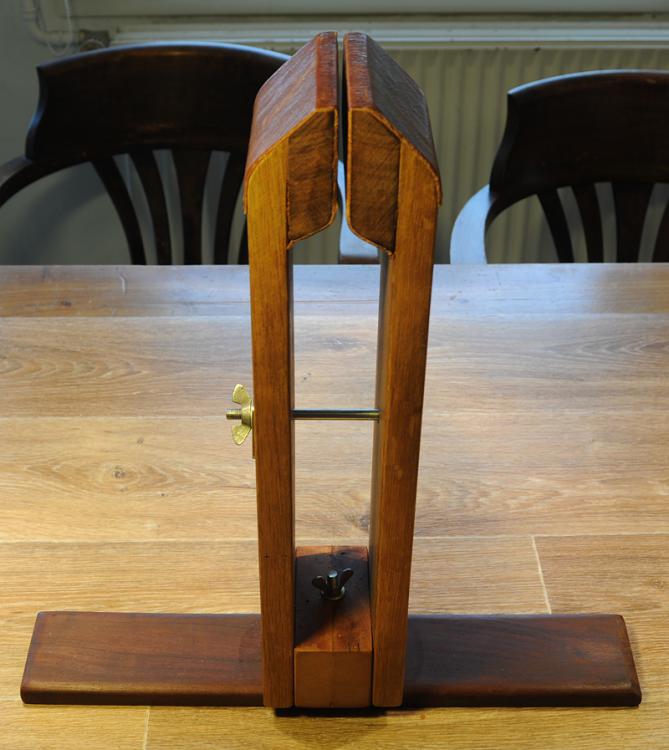
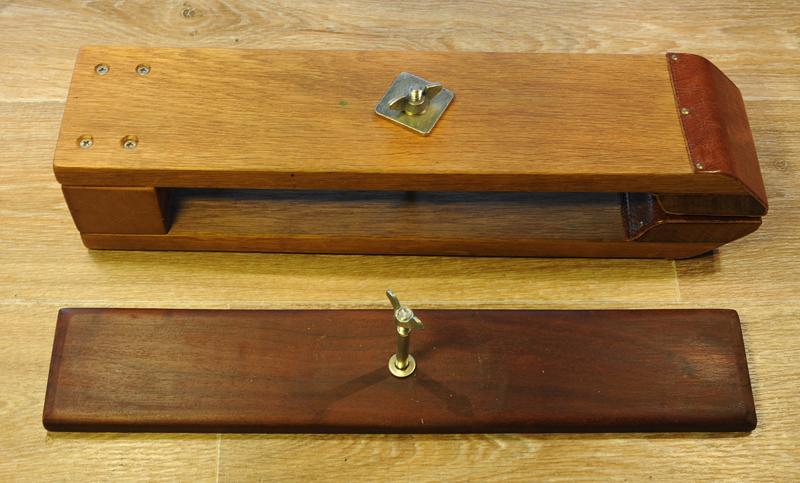
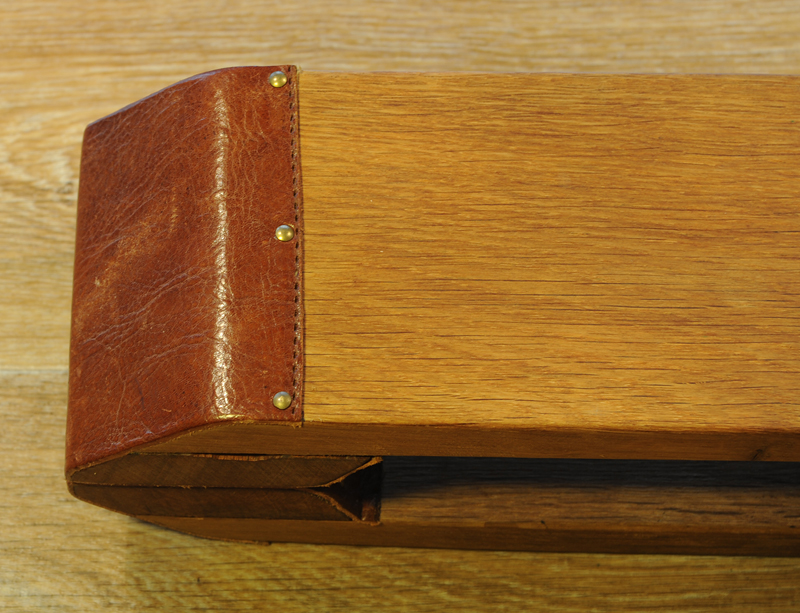
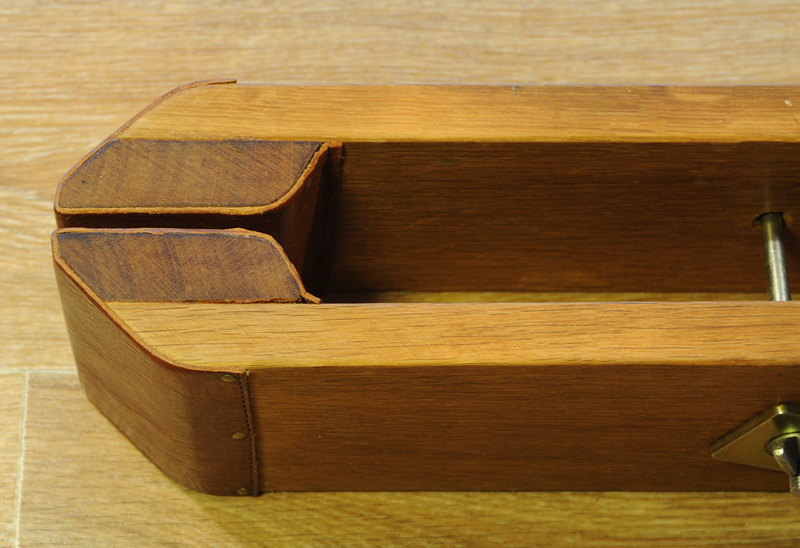
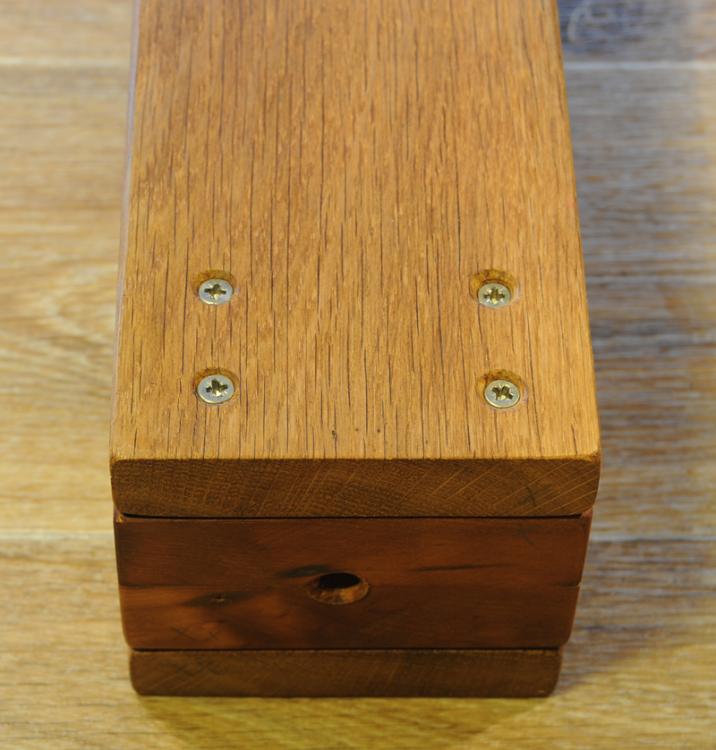
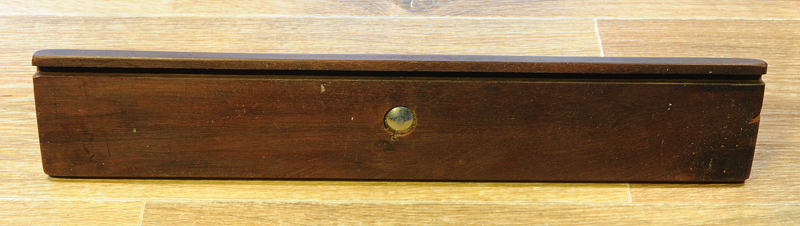
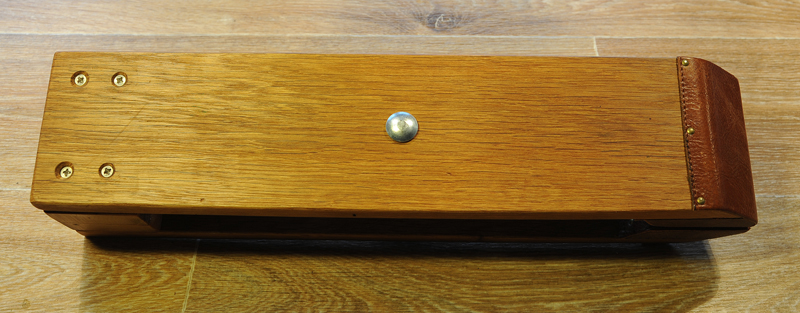
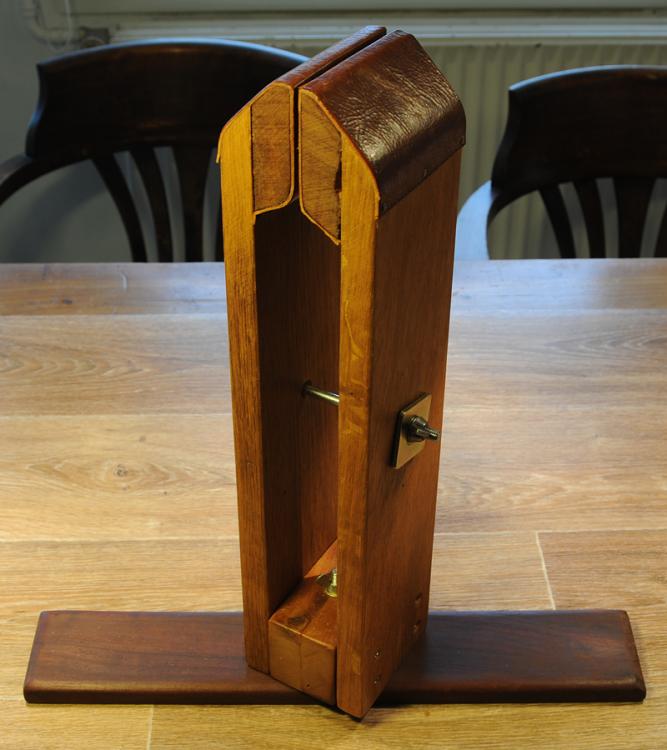
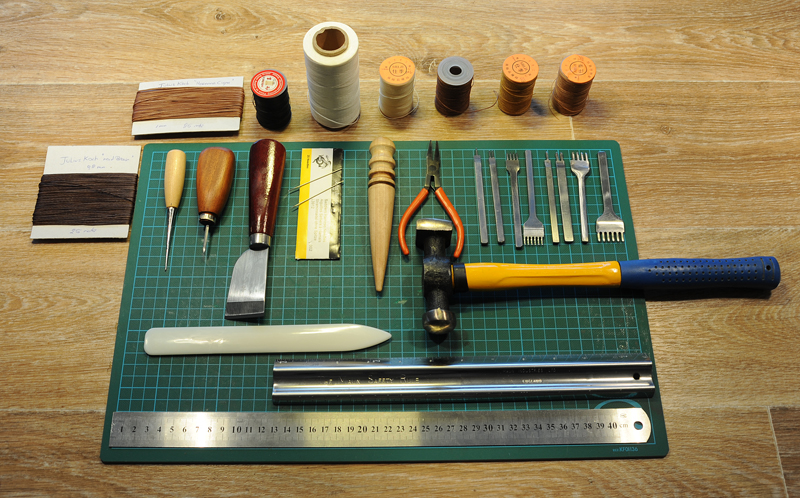
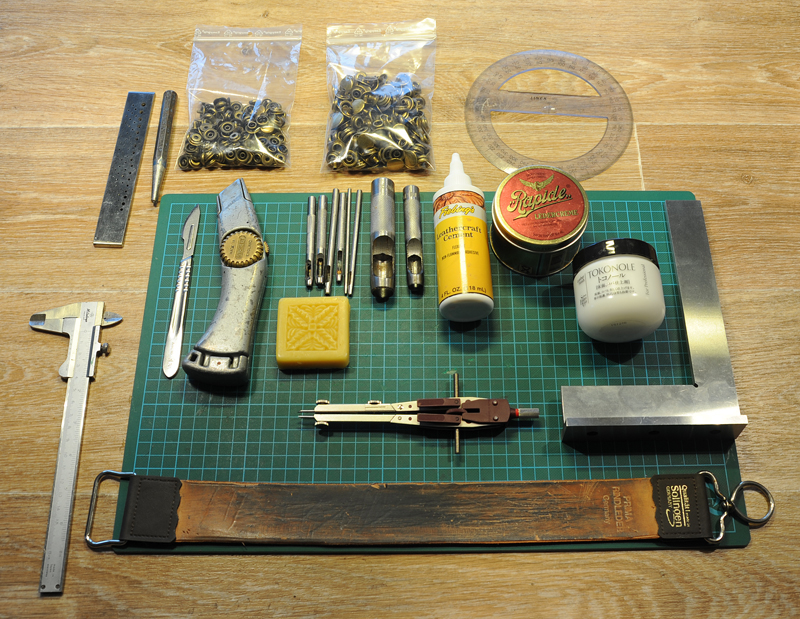
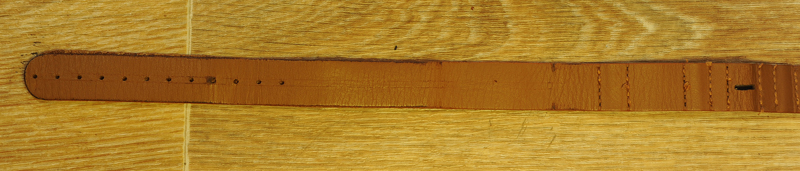
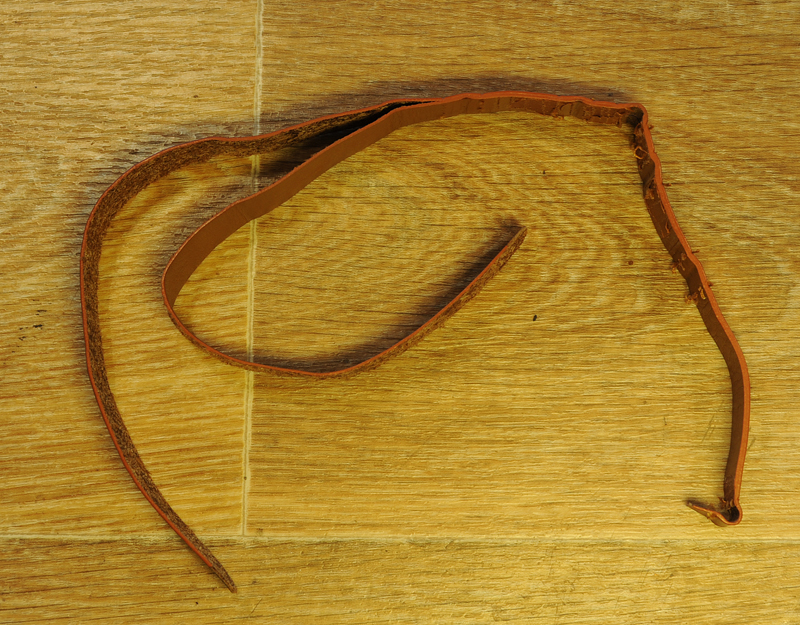
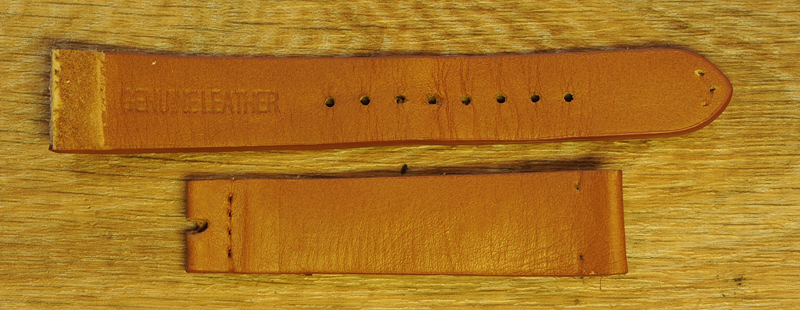
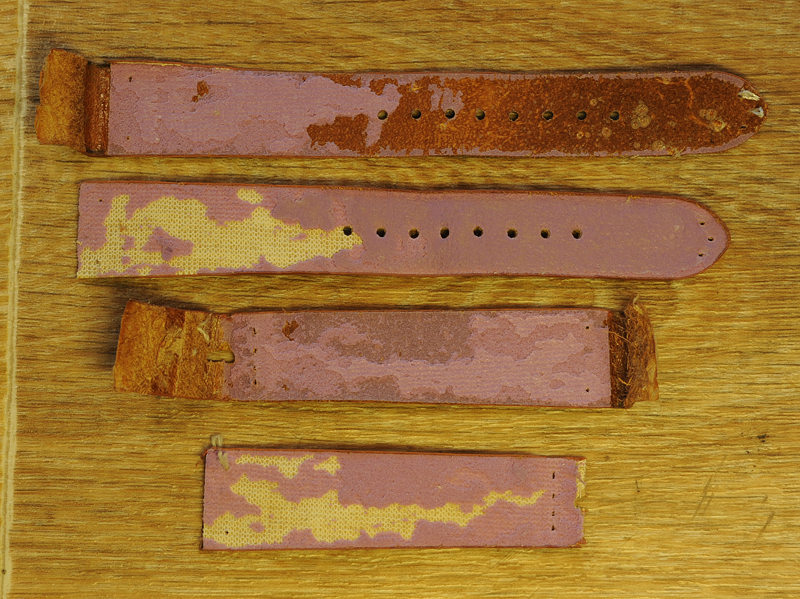
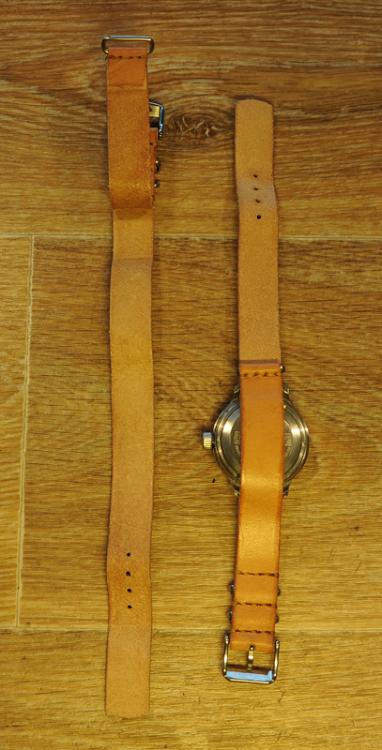
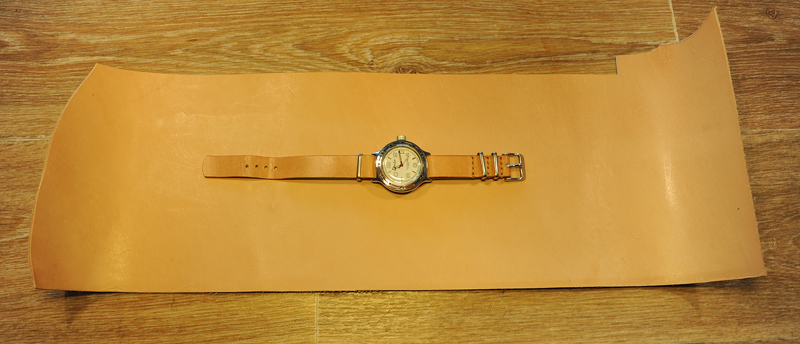
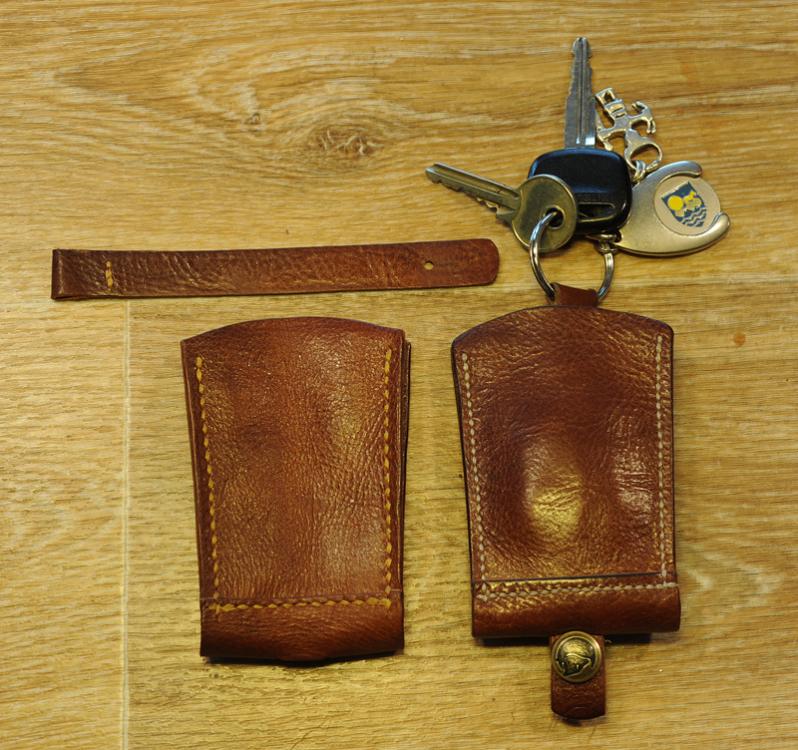
I like to continue to share my Leather "Endeavour" so far. One of the first tools required is a Stitching Pony. You get the drift what is meant with it in the video earlier in this thread. There are many differend designs and mine is an addition to those. It's made out of some oak planks and hard-wood from an old table (teak or mahogany??). The leather finish on top is from the (bottom) bag I found on the flee-market earlier. The clamp is made such that the "claws" are about 3-4mm open in "relaxed" position. The clamp can swivel on its base and is detachable. The bolts are M8 with wing-nuts. Here a close up of the claw with leather finish and copper-nails; When building, the top was square. It was later "tapered" and edges rounded off after the hardwood was glued and screwed to the oak stands / legs / supports. The leather is glued and copper-nails were used to additional secure it. Below a picture of the base; Here is the give-away: the base used to be the front-panel of a drawer You don't want the base to be too thick, but it has to be still strong enough. Also the edges on top have to be well rounded off for a smooth sit. The size here is: 45cm long, 8cm wide and 17mm thick. The height of the clamp is a bit arbitrary. It depends on at which height you prefer to work and how tall you are. I'm 1.86mtr tall, normal posture, and the total height of the clamp is about 46cm (including base). The clamp itself is about 44cm high, width is 10cm and the thickness of the "supports" is 21mm. If I ever would make another one, I would go for some thinner "supports". My clamp could use some more "flexiblity" and 15mm thick would still be ample. It's what I had laying in the garage and hindsight is a beautiful thing ....... Nevertheless, it works as a treat ! Next to that, some tools are required. I had tools of my own, but needed additional for leather-skills. The next picture shows what I'm using now. If I would persue this hobby, and start to do more sophisticated projects, more tools may be required ...... but I like to keep the machinery to a minimum and try as much as I can by hand. To start at the top; a selection of different colours of waxed nylon thread. For my small projects I used mostly 0.8mm thick and occasionally 1mm thick. On the left, wounded on a piece of cardboard is "Julius Koch" thread, apparent the best, but I have no complains at all about all the other much cheaper Chinese threads. Second row: two types of awls: the first one is just a sharp point (which I use for making "scrublines) and the scond one is a diamond-shape awl. These diamond shape awls don't come cheap, but I ordered just a blade (1-1/4" long) and made the handle myself (from the same table ). A skiver to trim the edges. Needles from John James; UK size 002 (in the States you get a different size if you order size 002. Be aware !). A wooden slicker to slick edges, a set of smooth-claw pliers (to pull "stuck" needles through) and 2 sets of Chinese stitching irons; 3mm and 4mm stitch length. Rounded hammer, bone folder, safety- and normal-rulers of steel, used for cutting. Below all of the tools, a cutting board. Next to that, I ordered 12mm and 15mm heavy duty leather snaps and made myself the setting tools. A round 360 degree drawing template, shown here as an example. You can use anything for drawing roundings or mark the leather. A scalpel and a Stanley knive; be aware that new blades aren't sharp enough, you have to sharpen them yourself till razor-sharp, hence to leather belt on the bottom (also the skiver needs sharpening). A collection of hole punches, Leather cement (glue), leather grease and if you want the "flesh-side" smooth; Tokonole. A square for making sure that the stitching scrubline is square to an edge, a divider with sharp steel tips for marking and an adjustable ruler. I would highly recommend to visit these two very educational web-sides of two highly skilled leathermakers; - https://www.youtube.com/c/nigelarmitage/videos - https://www.youtube.com/user/satansbarber/videos Before showing were I'm with my skills today, here are some "Genuine Leather" watch straps. First the Nato-strap featured on the top of this thread. The paint came off and I pulled the two layers apart; You can see the poor wear. The coloring came off at the edges and at the holes. The strap consisted of two thin layers of a kind of "leather"; "Genuine leather" strap #2: here a normal strap, sold a genuine leather, It is even stamped in it, so it must be true! I pulled it apart; A foam and textile core with a thin layer of leather on either side. Bit like chip-wood with a thin layer teak-veneer on top, sold als real teak........ yes, right ! To my mind all junk and a wast of money, hence I decided to make straps myself. As for watch-straps; at the moment I get good results with with Nato-straps out of veg. tanned cow-leather; Solid 1.5mm veg.tanned saddle leather. They have to be "broken in" and shape to the wrist. Also the patina has to come with time. These are custom made to my wrist and have therefore only 4 holes. Commercial straps require lots of holes to suite lots of diferent sizes. I made the "flesh-side" also nice smooth with the "Tokonole"; Here a picture of the cow-leather out of which these straps are made. You need at least 42cm for a Nato-strap. You can see the where cut-out stopped at the top of the leather. Als note the colour difference between the virgin leather and the greased watch-strap. My next aim is to make other types of straps, which required an expansion of my skills. If you are curious what happend to the bags which I bought on the flee-market? Well, I also made already a few key-pouches; The left one is nearly done, the right is mine and you can see the nice patina veg.tanned leather gives when it starts ageing. Also note, the right-hand one is the first one I ever made and has a 3mm stitch length and white thread. I wasn't too happy with the result and ordered 4mm pricking irons and more colours thread. I think, the saddle-stitch of the left pouch suites the leather and design better. I hope some people may get inspired to give it a try Roland.


 1 point
 -
The hard part is done.1 point
-
Something I always find useful when hunting for fliers on the carpet is a good bright LED torch, shone at a low angle across the top of the pile. The glint of light reflected off a polished surface will often stand out like a little beacon compared to direct illumination, and the whiter light from the LED seems to amplify the effect.1 point


.jpg.6225a64433578a11e0218b27c20b13f5.thumb.jpg.d82b0cd1e370f3a3a59a06afa957d184.jpg)