Leaderboard


Popular Content
Showing content with the highest reputation on 09/01/16 in all areas
-
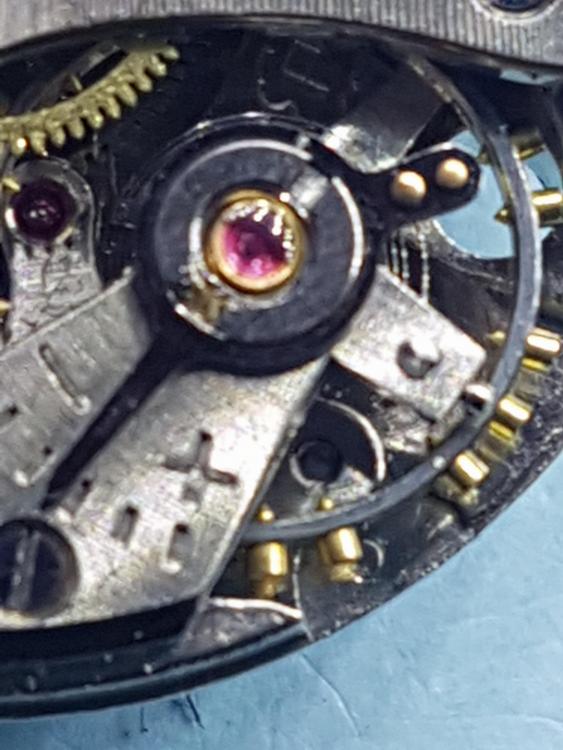
Stoo, have a close look at the hook on the main spring arbor using your loupe. That should give you all the information you need to determine the orientation of the spring in the barrel.2 points
-
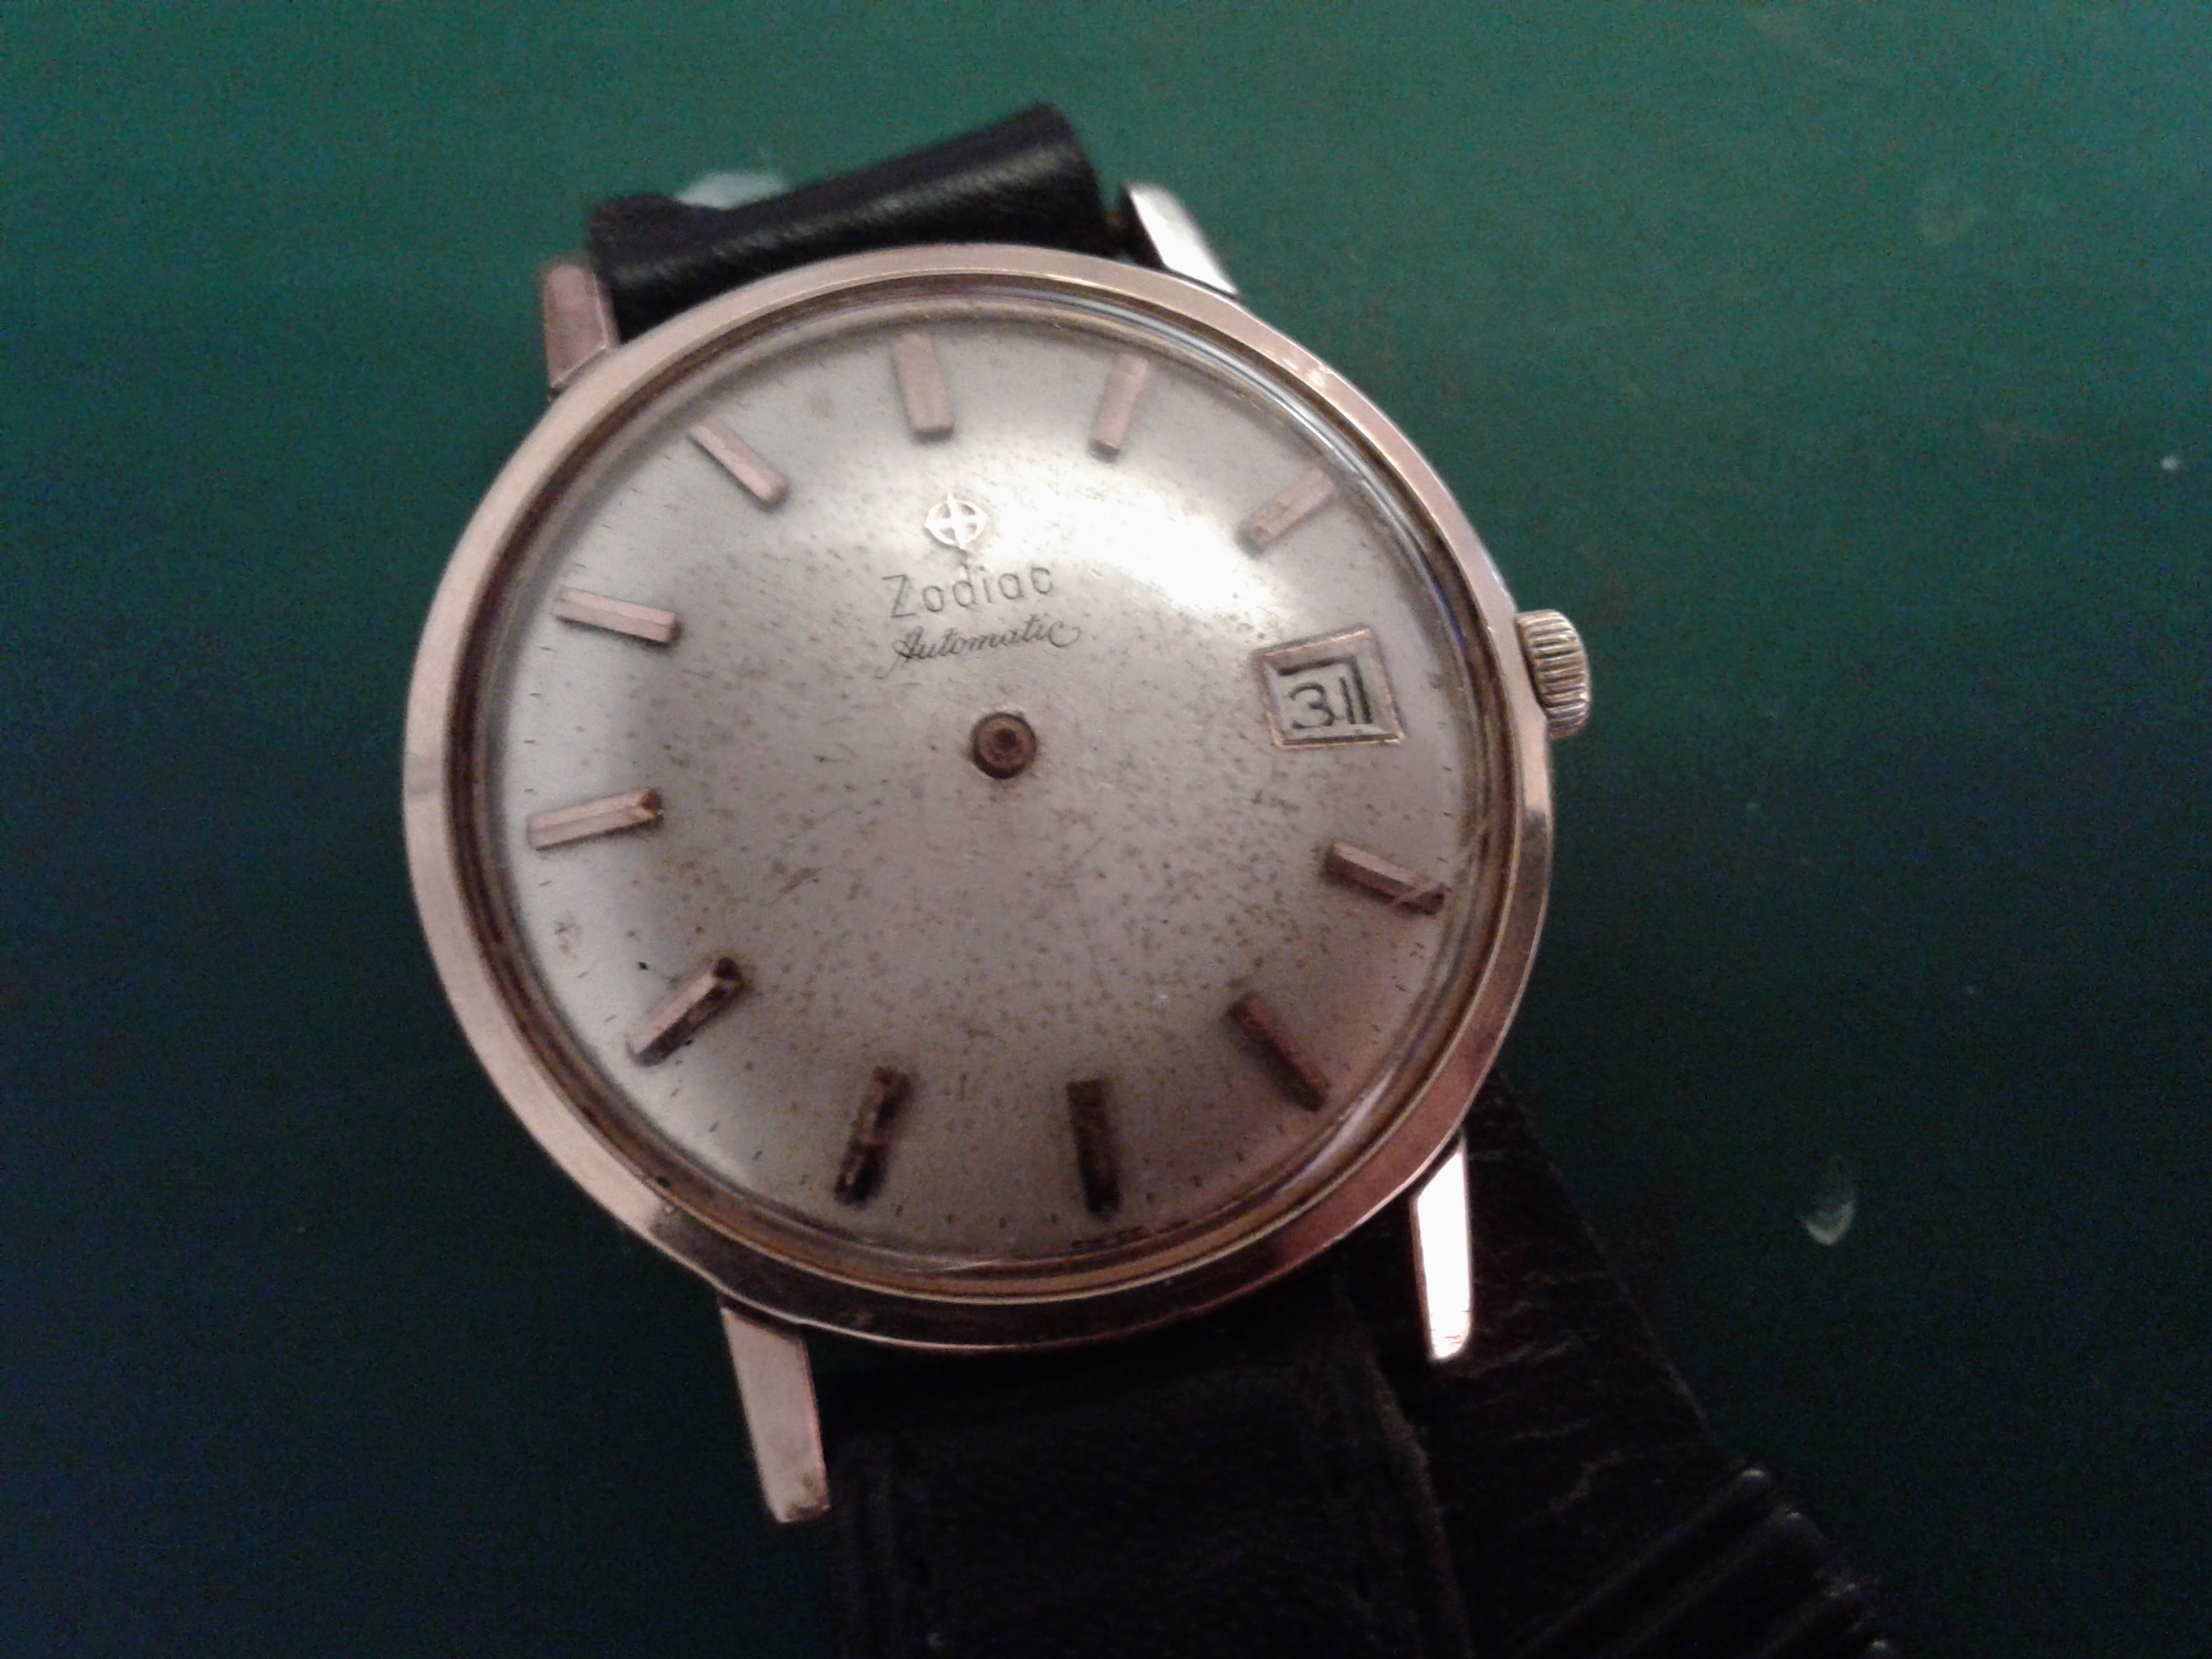
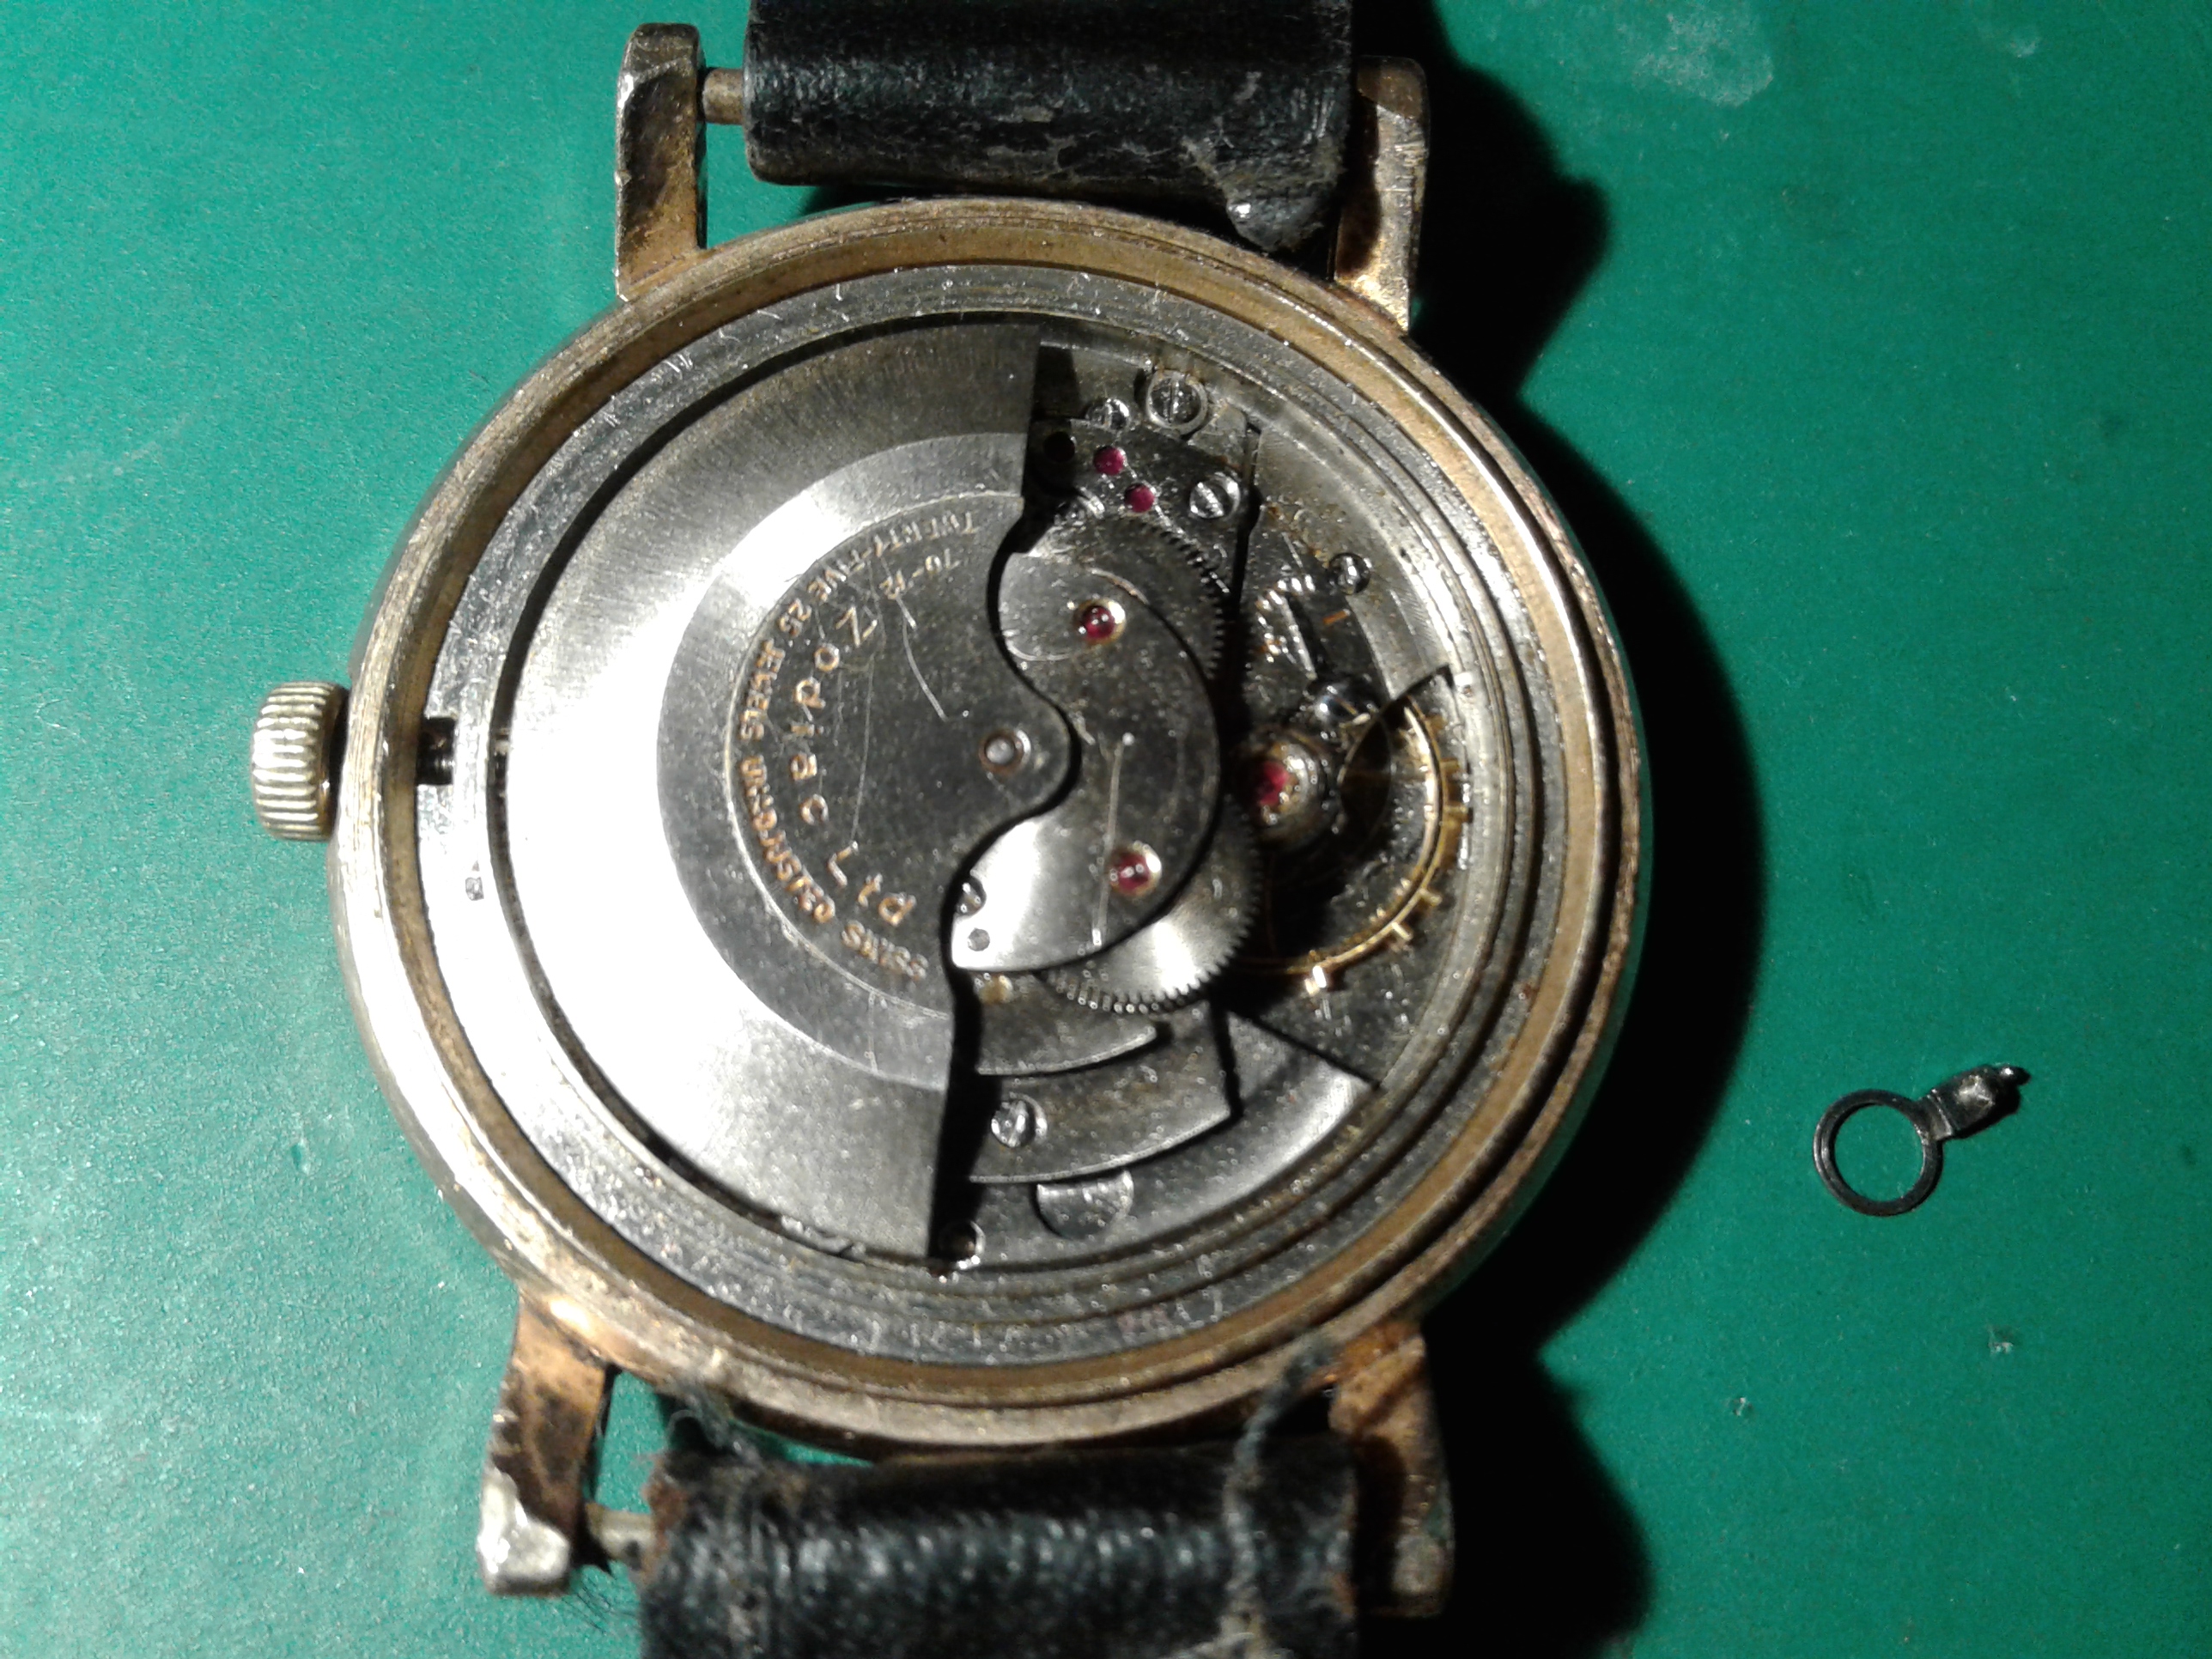
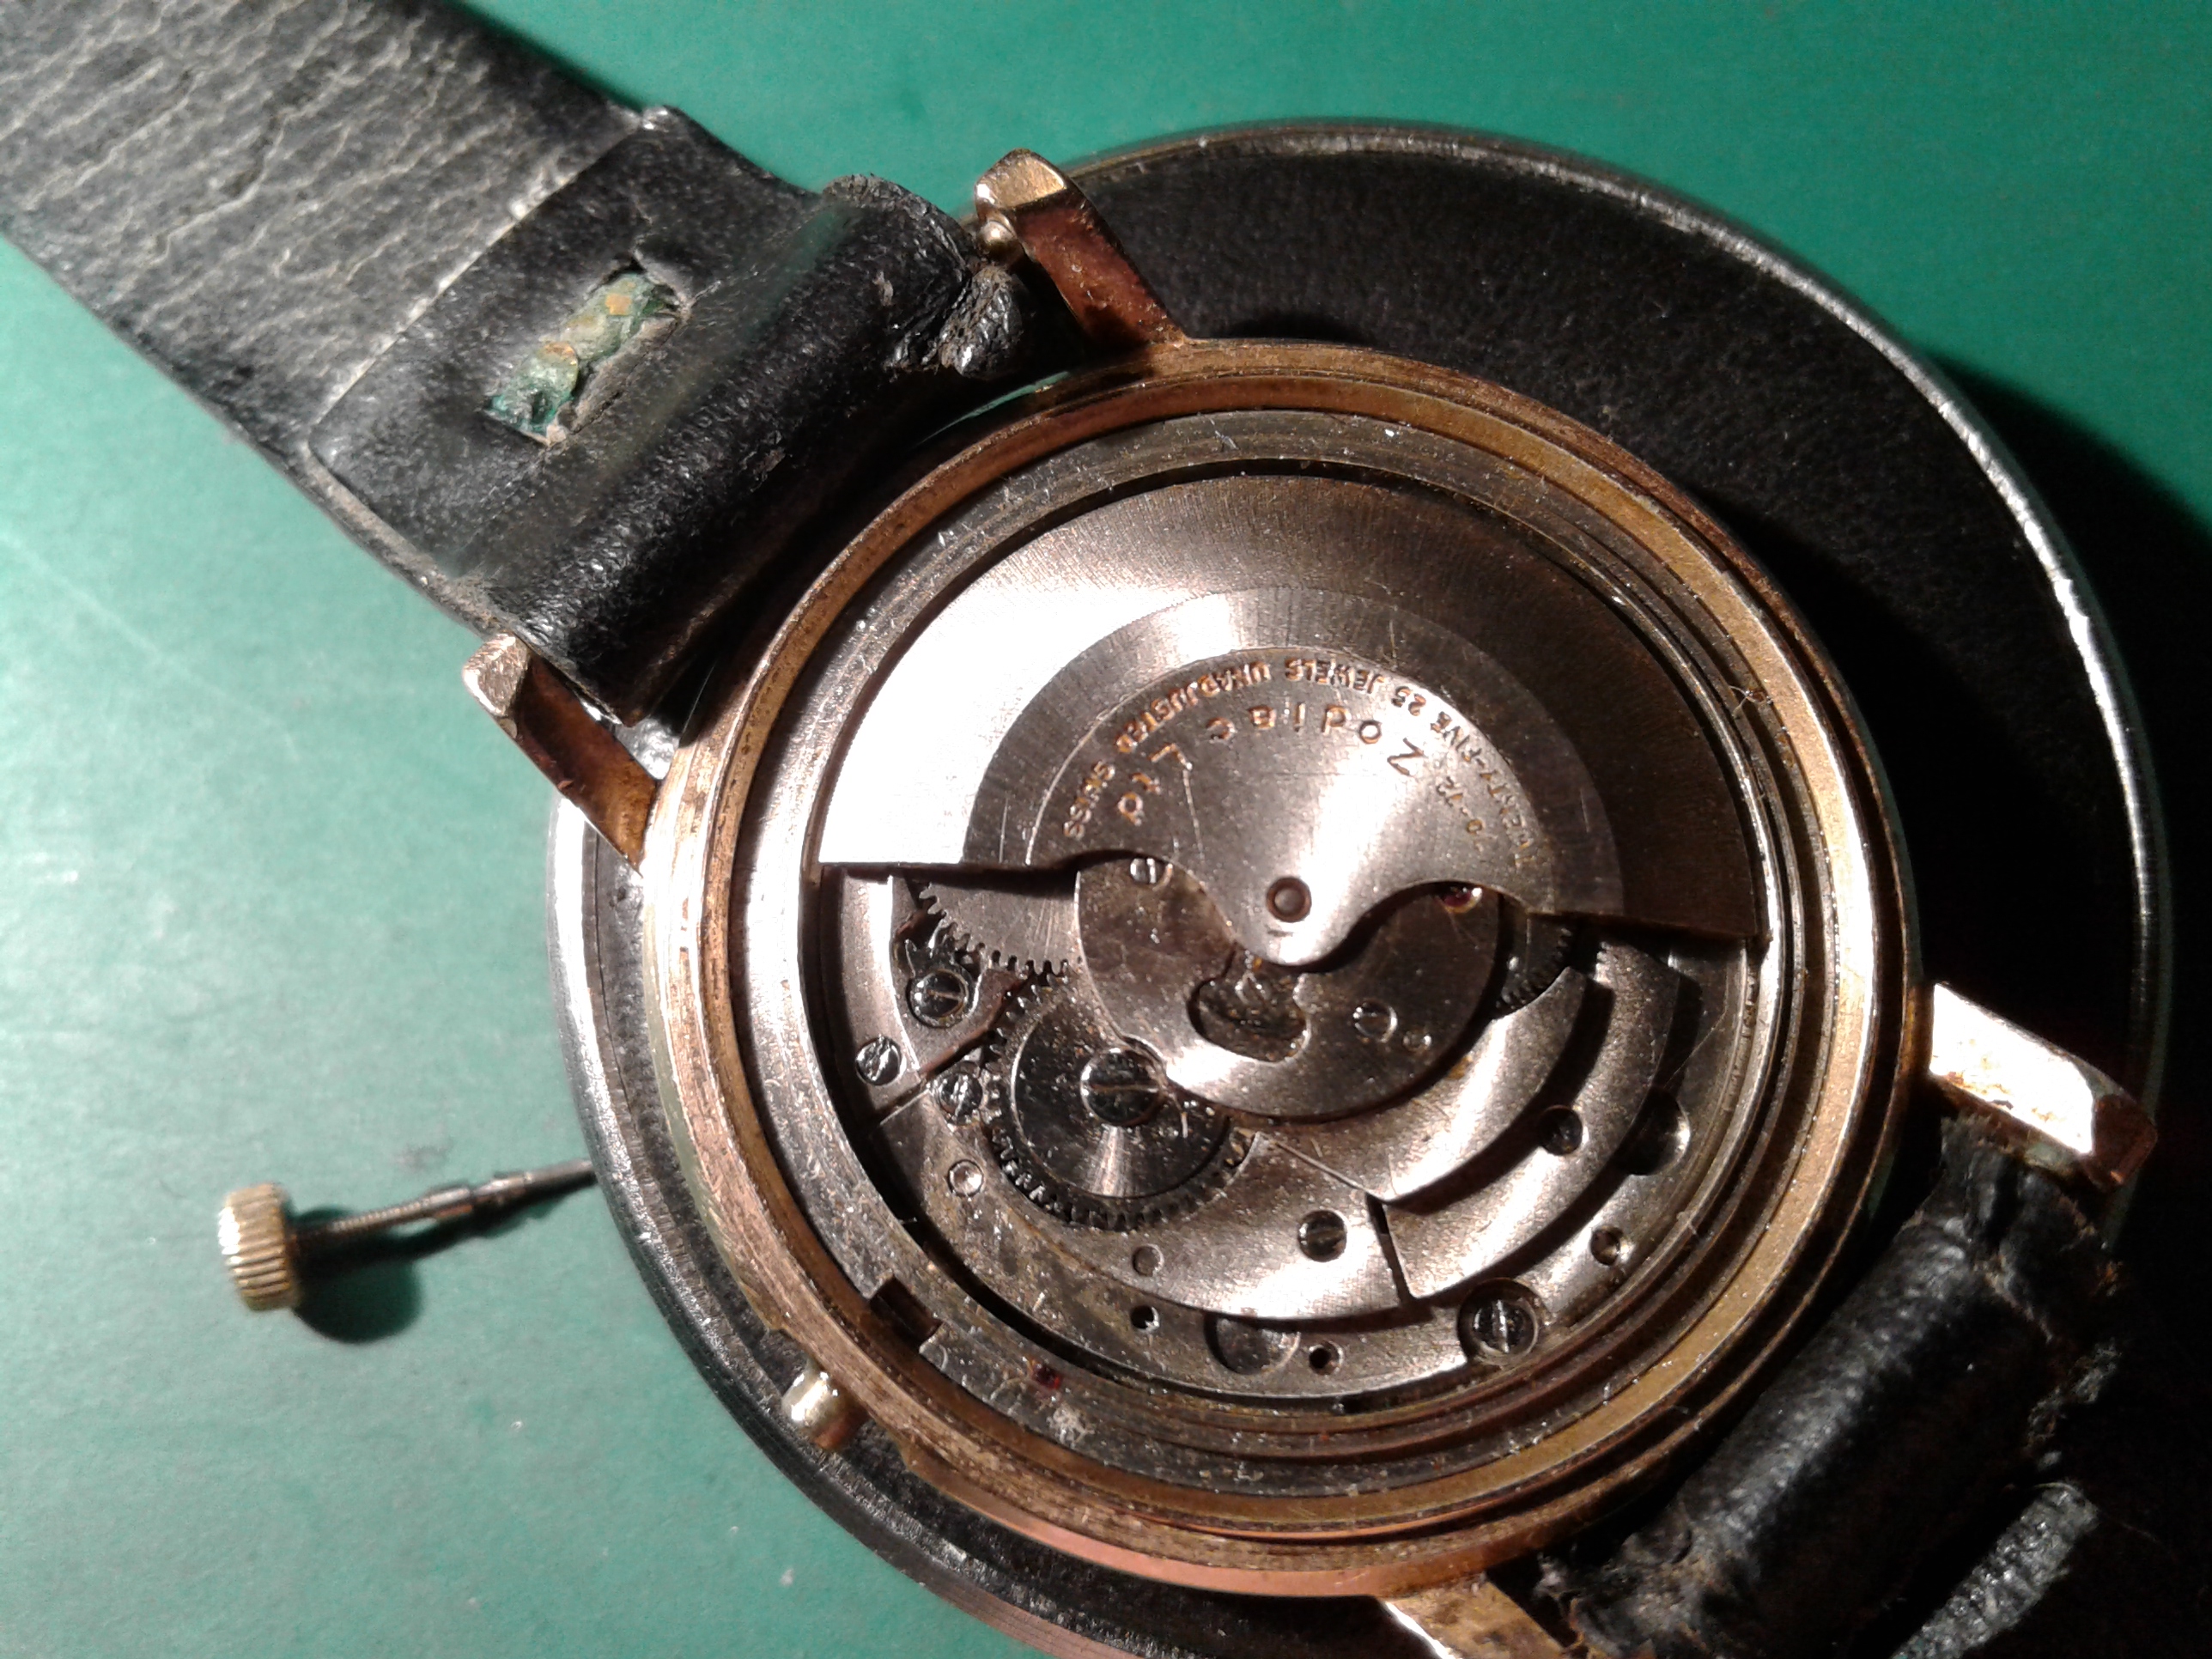
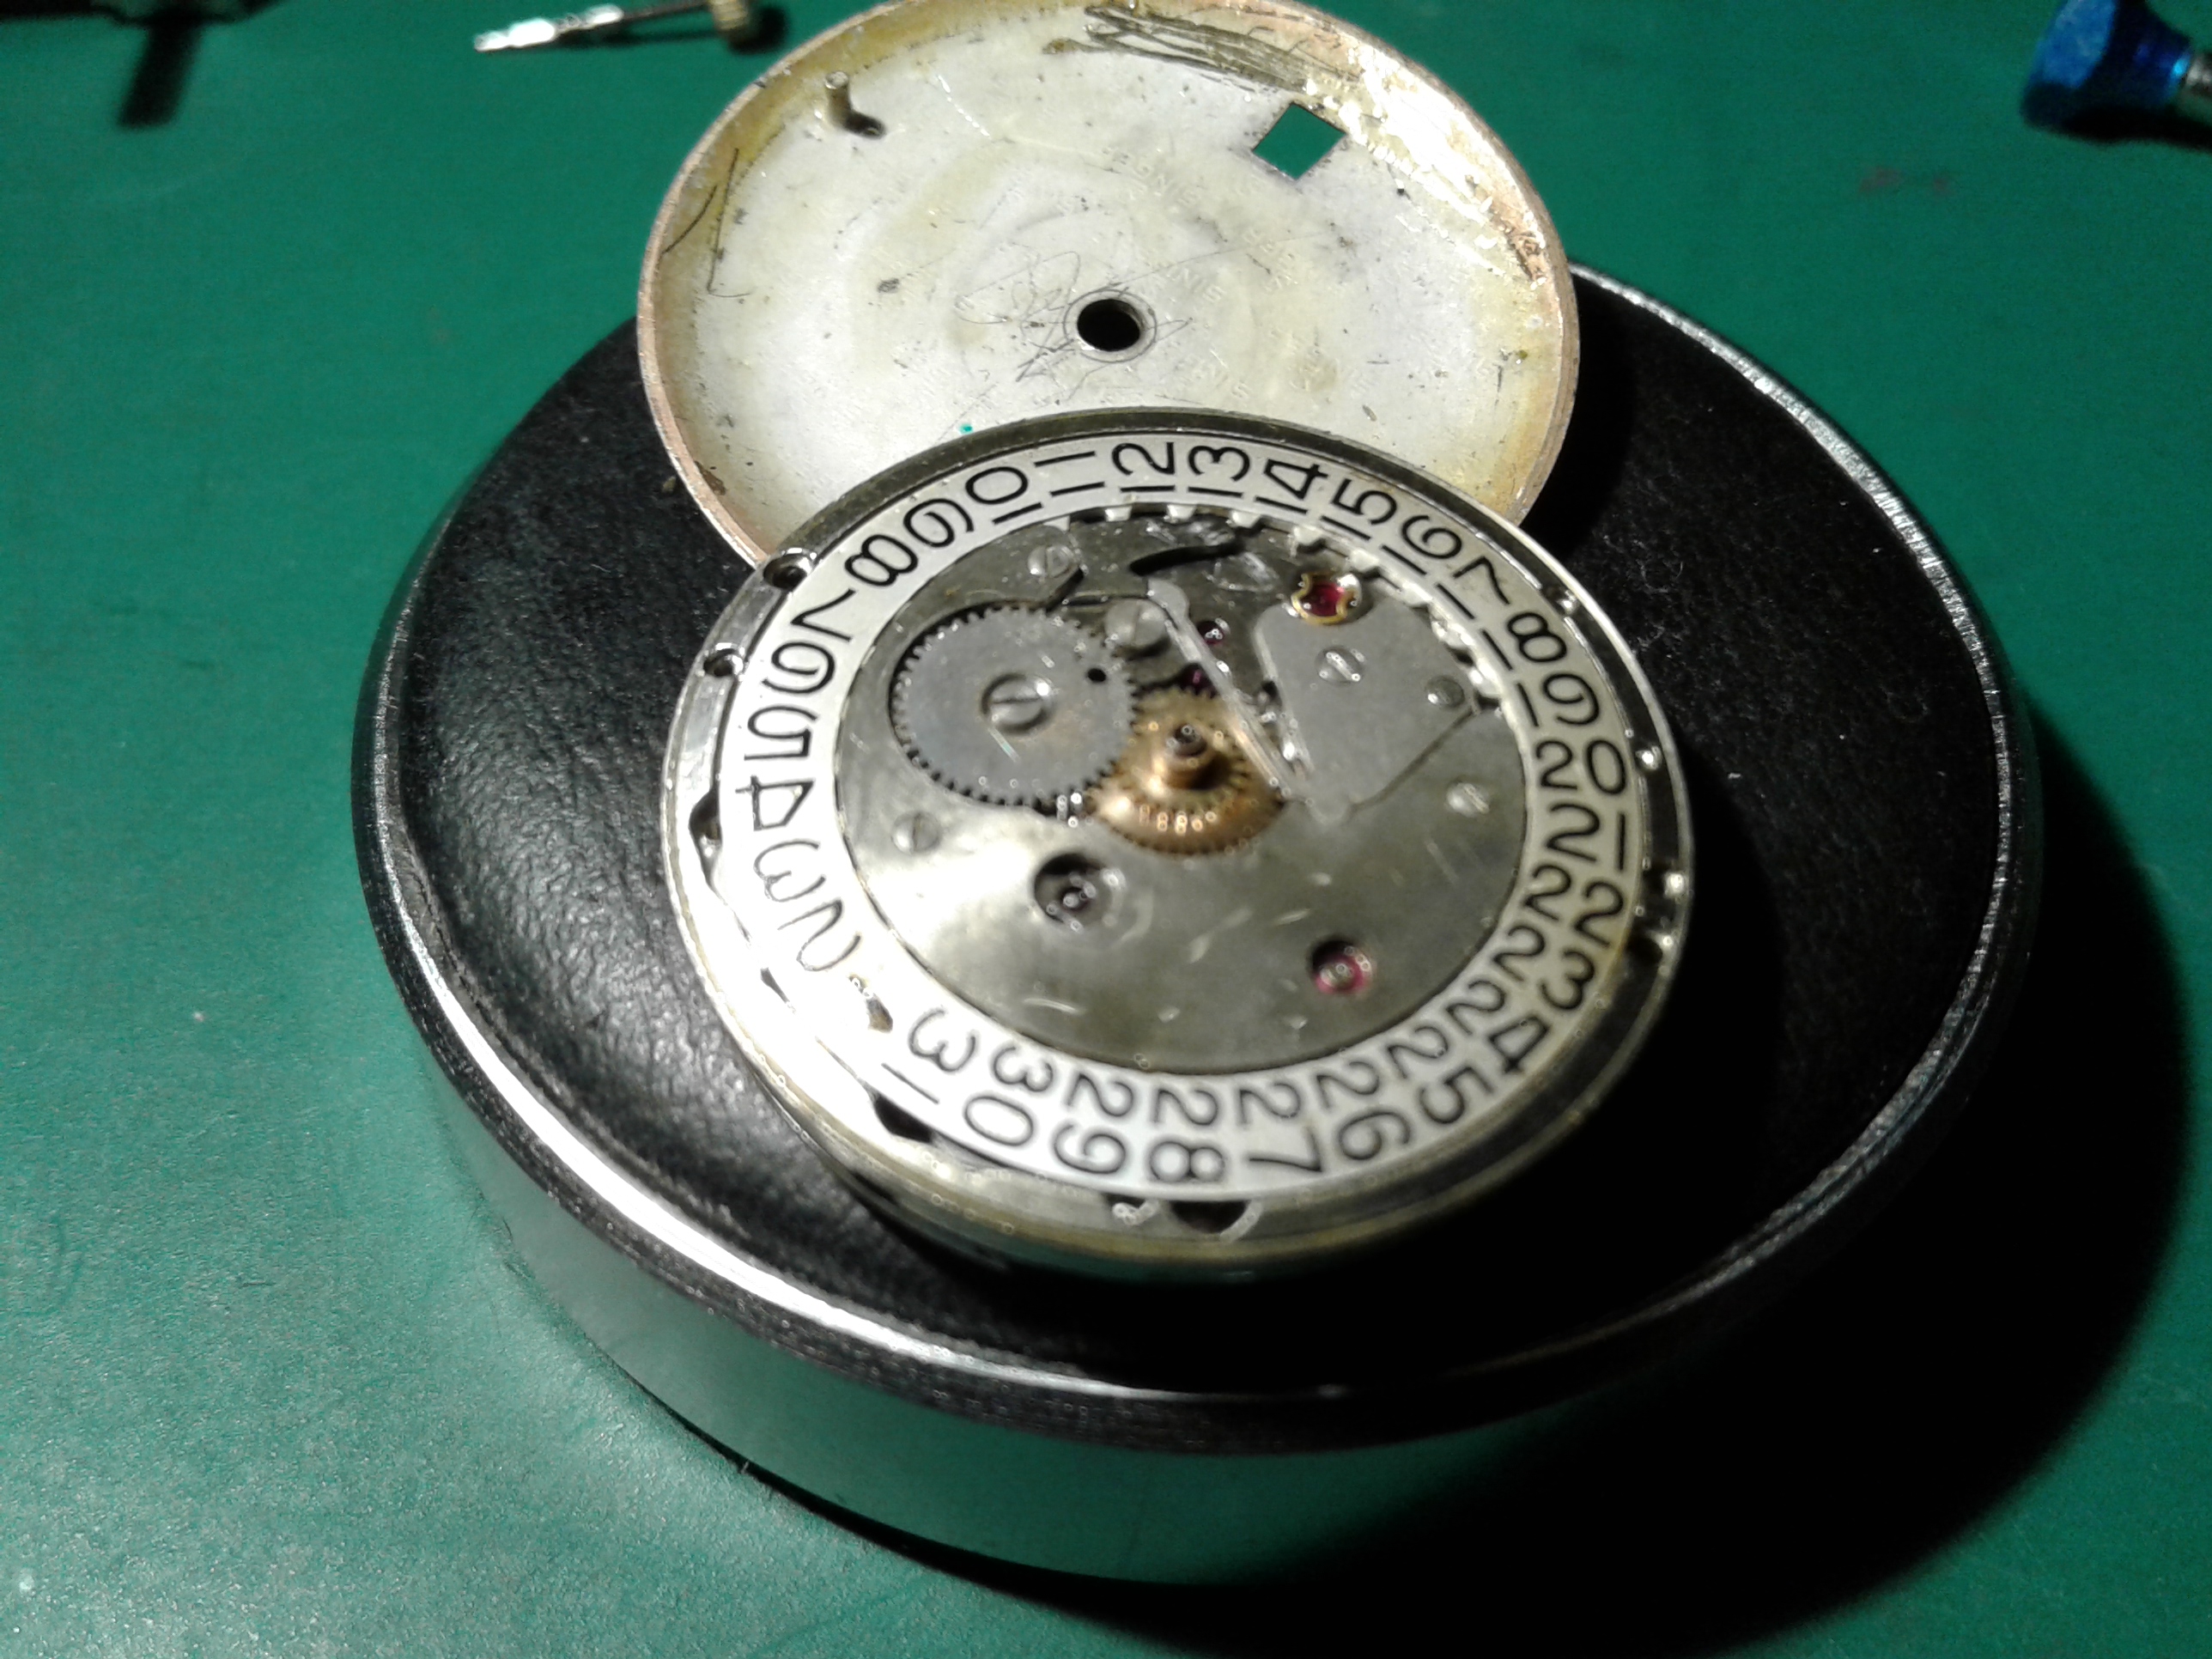
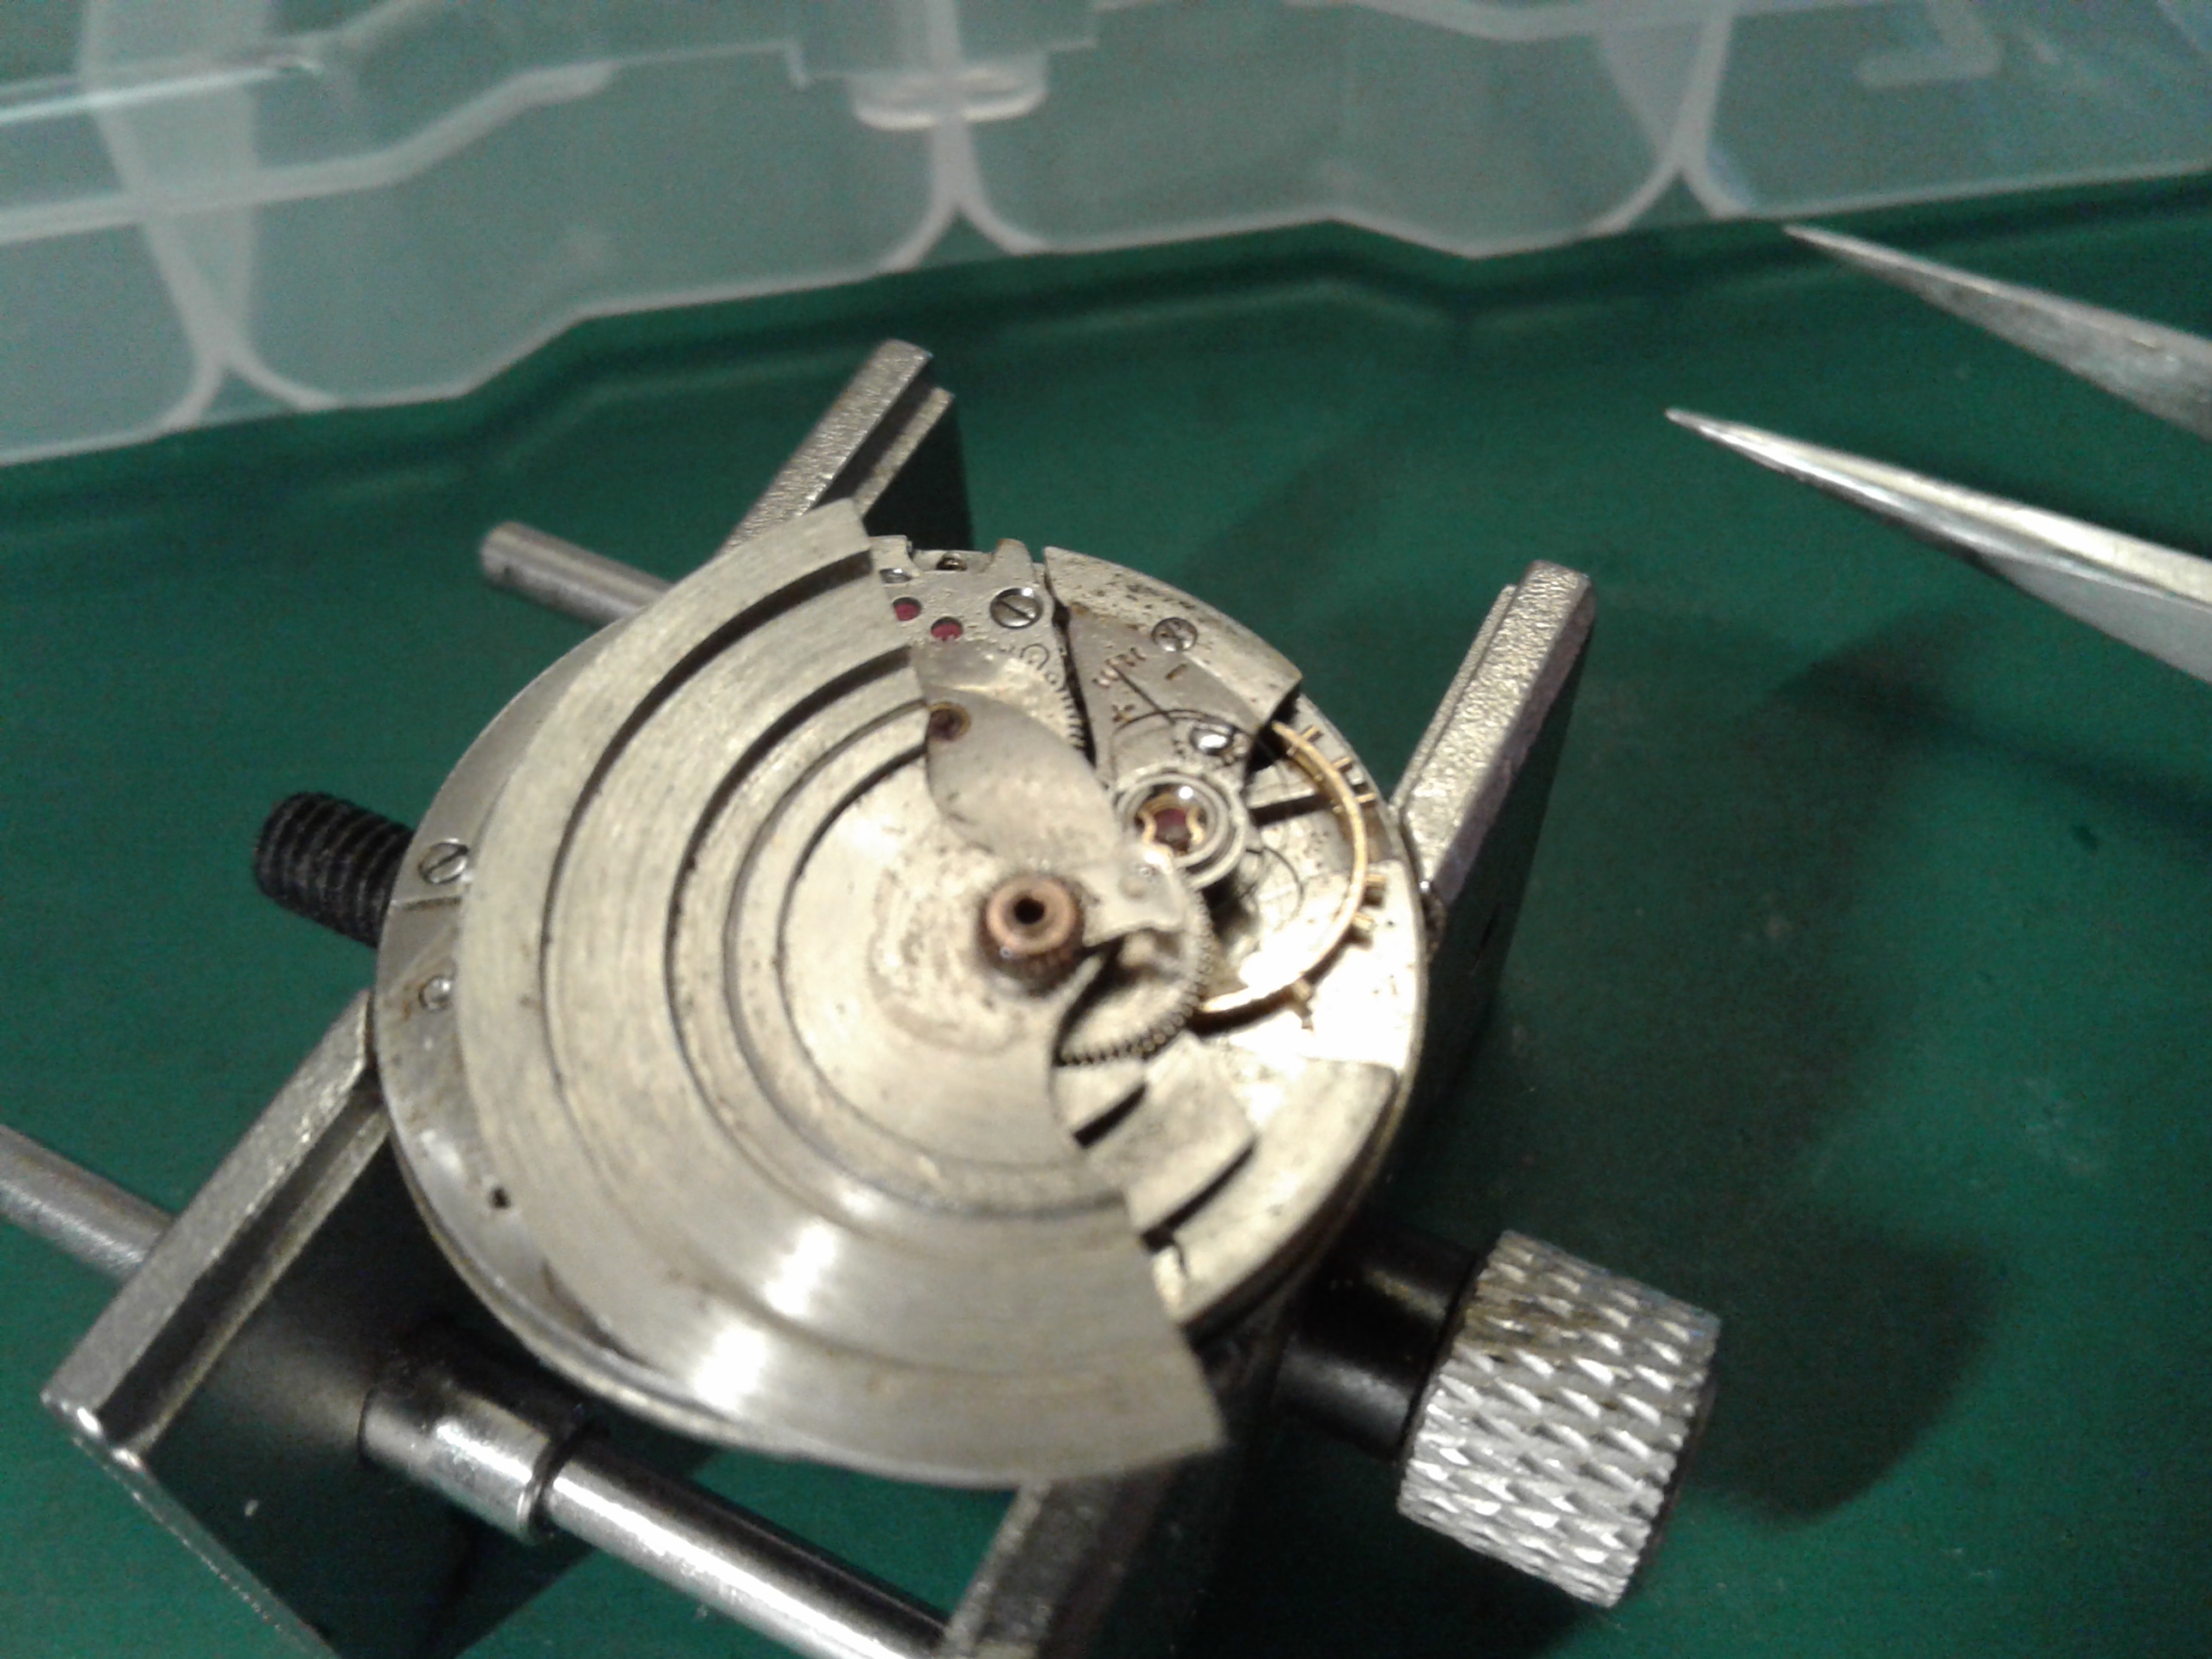
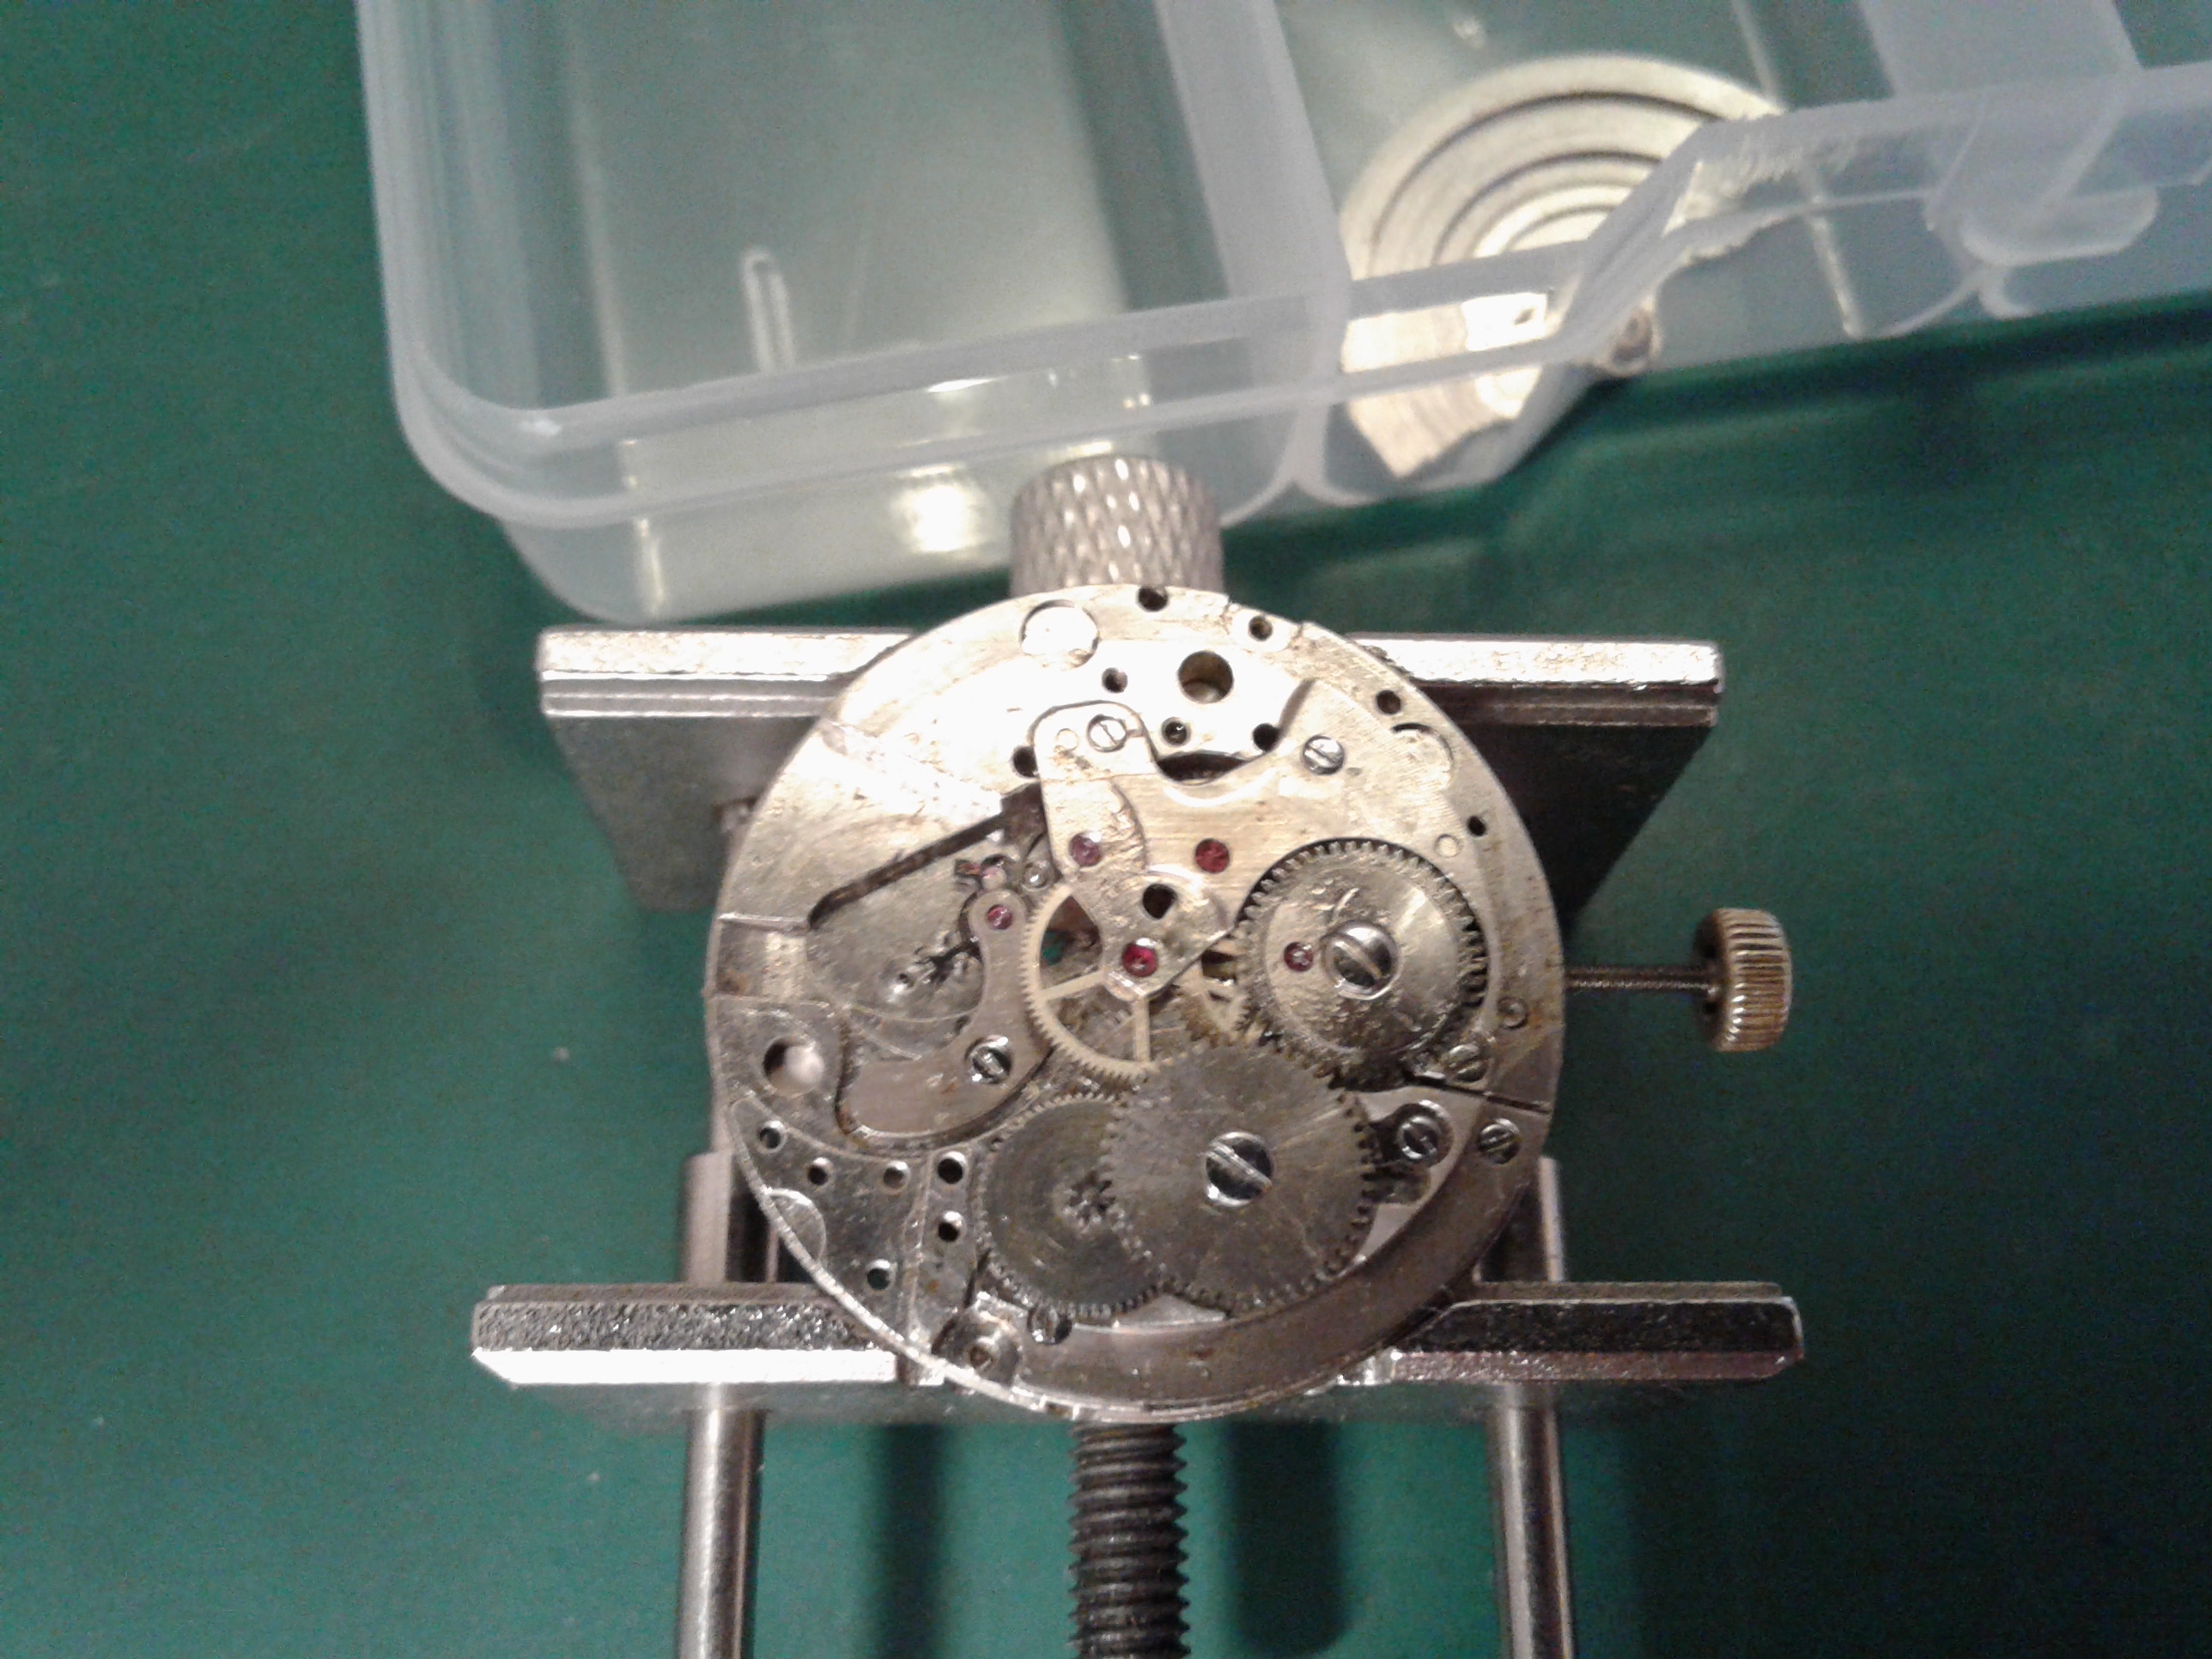
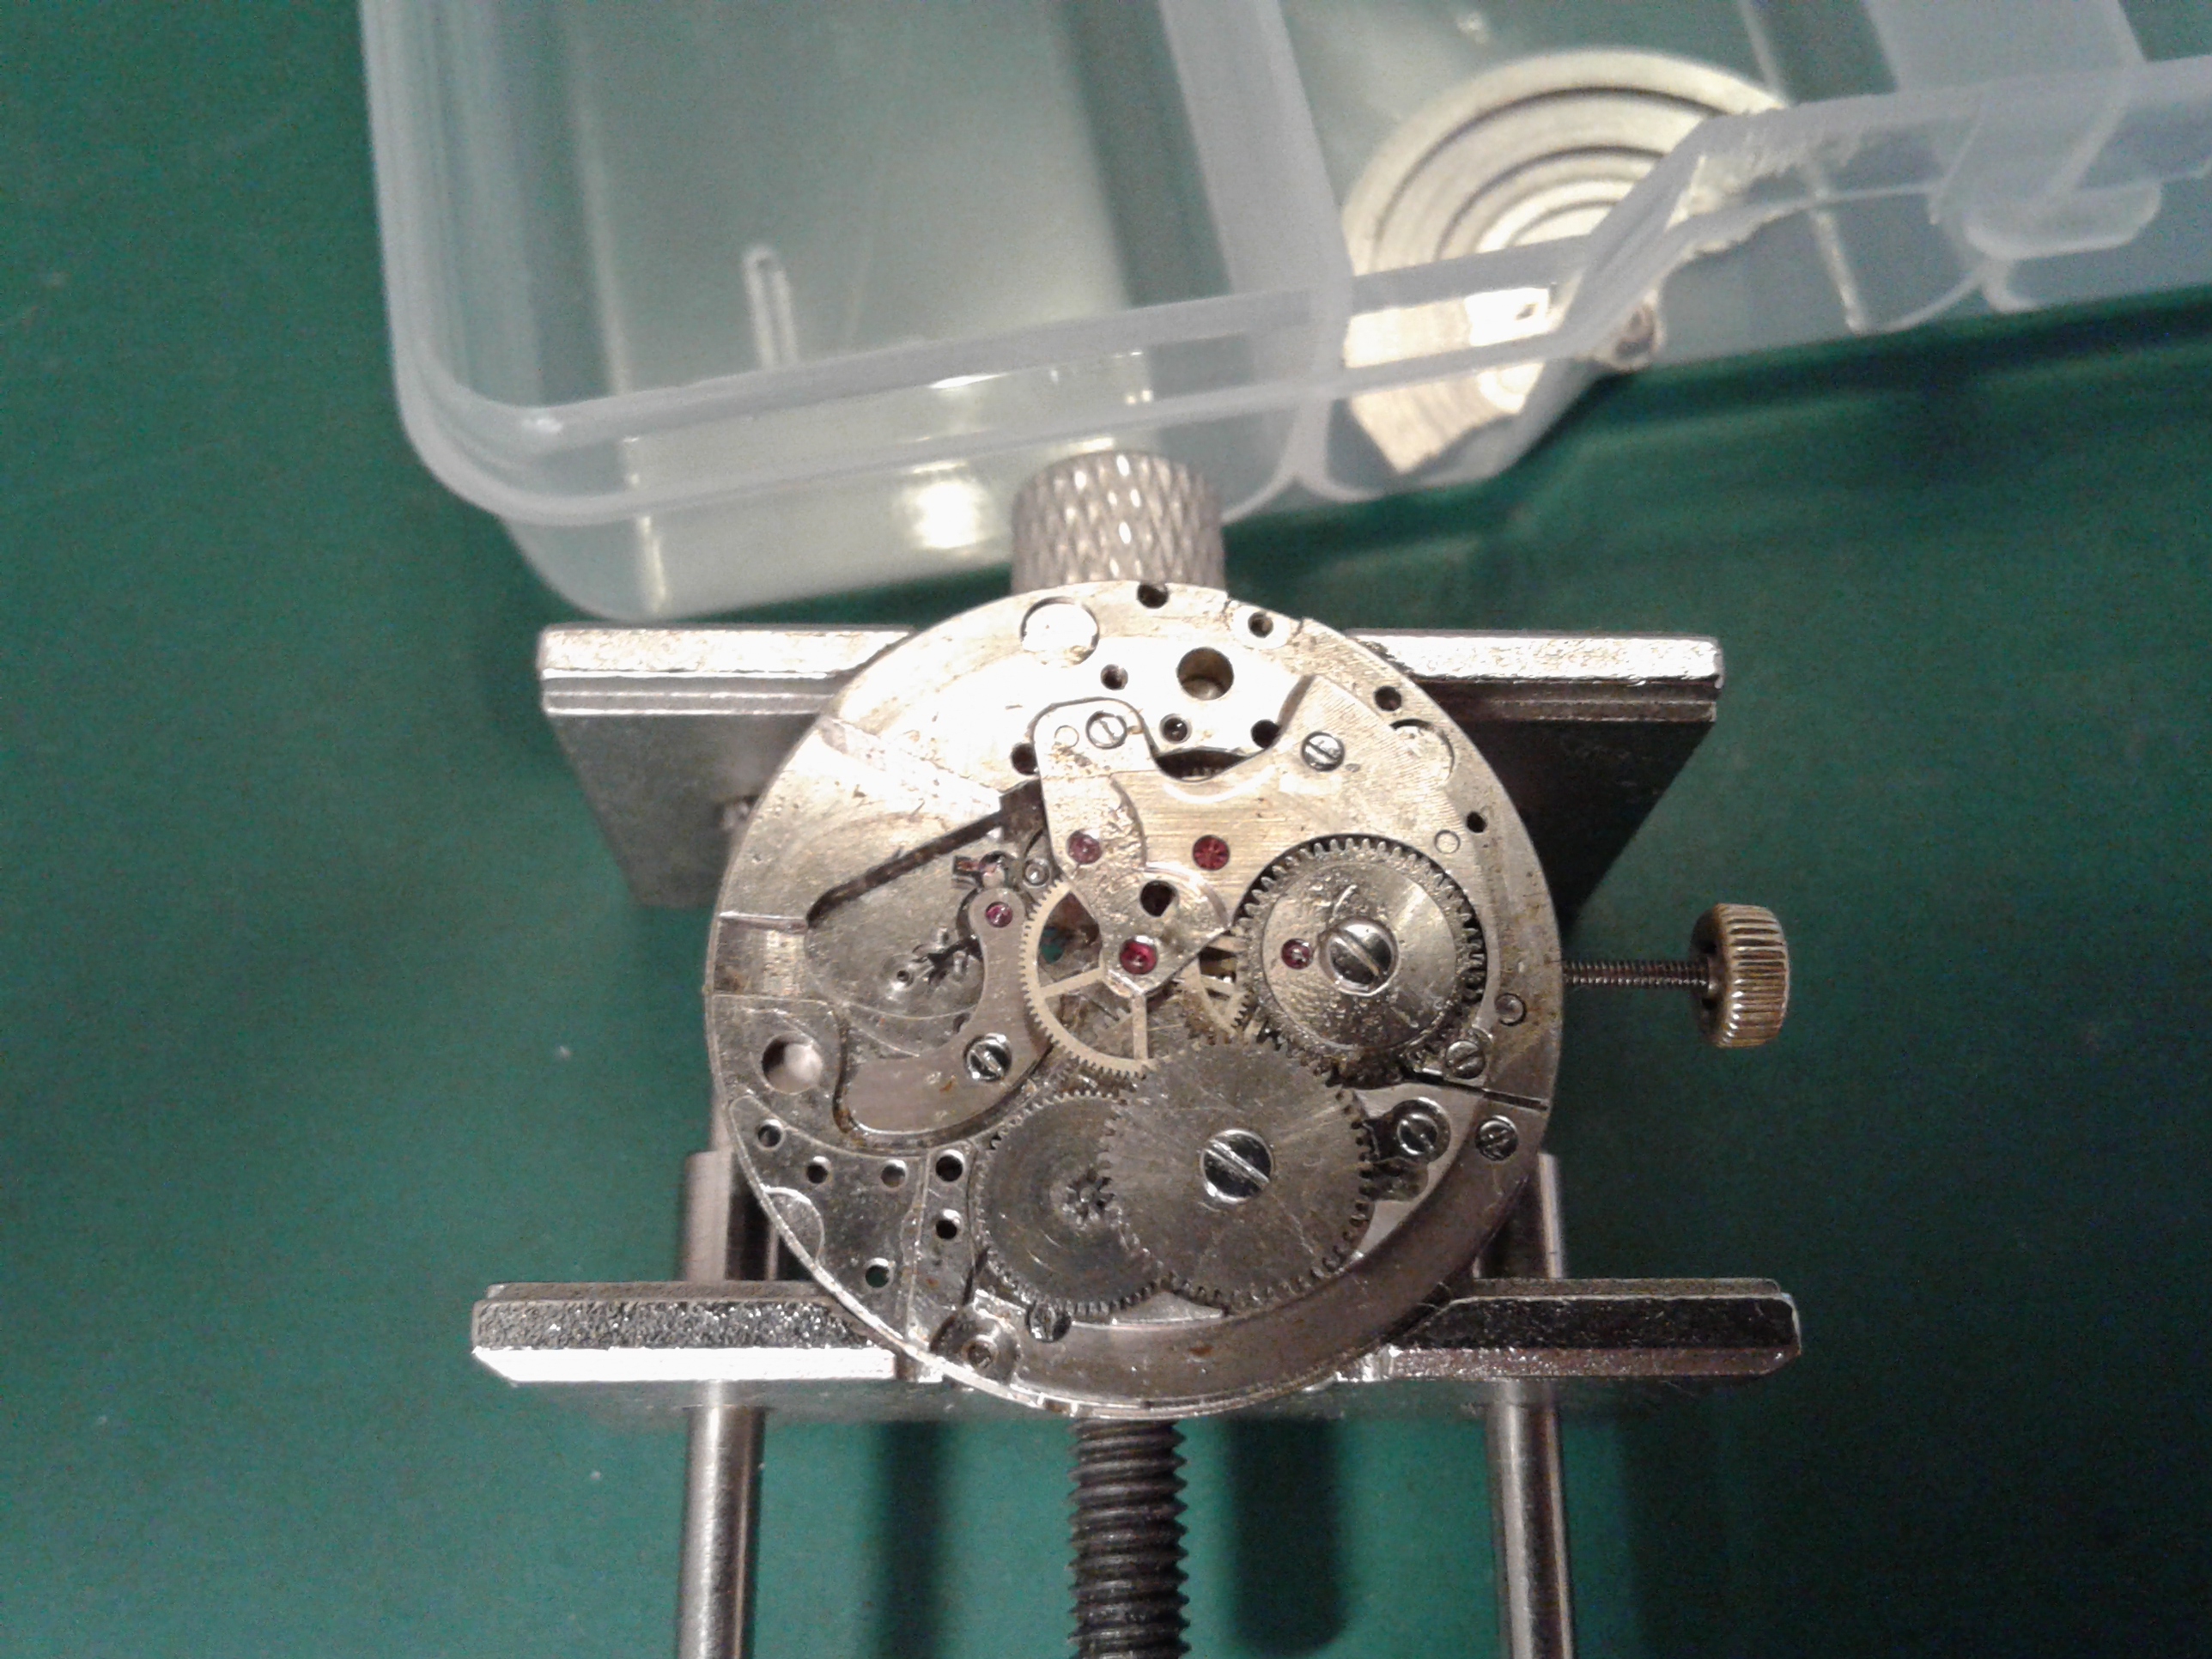
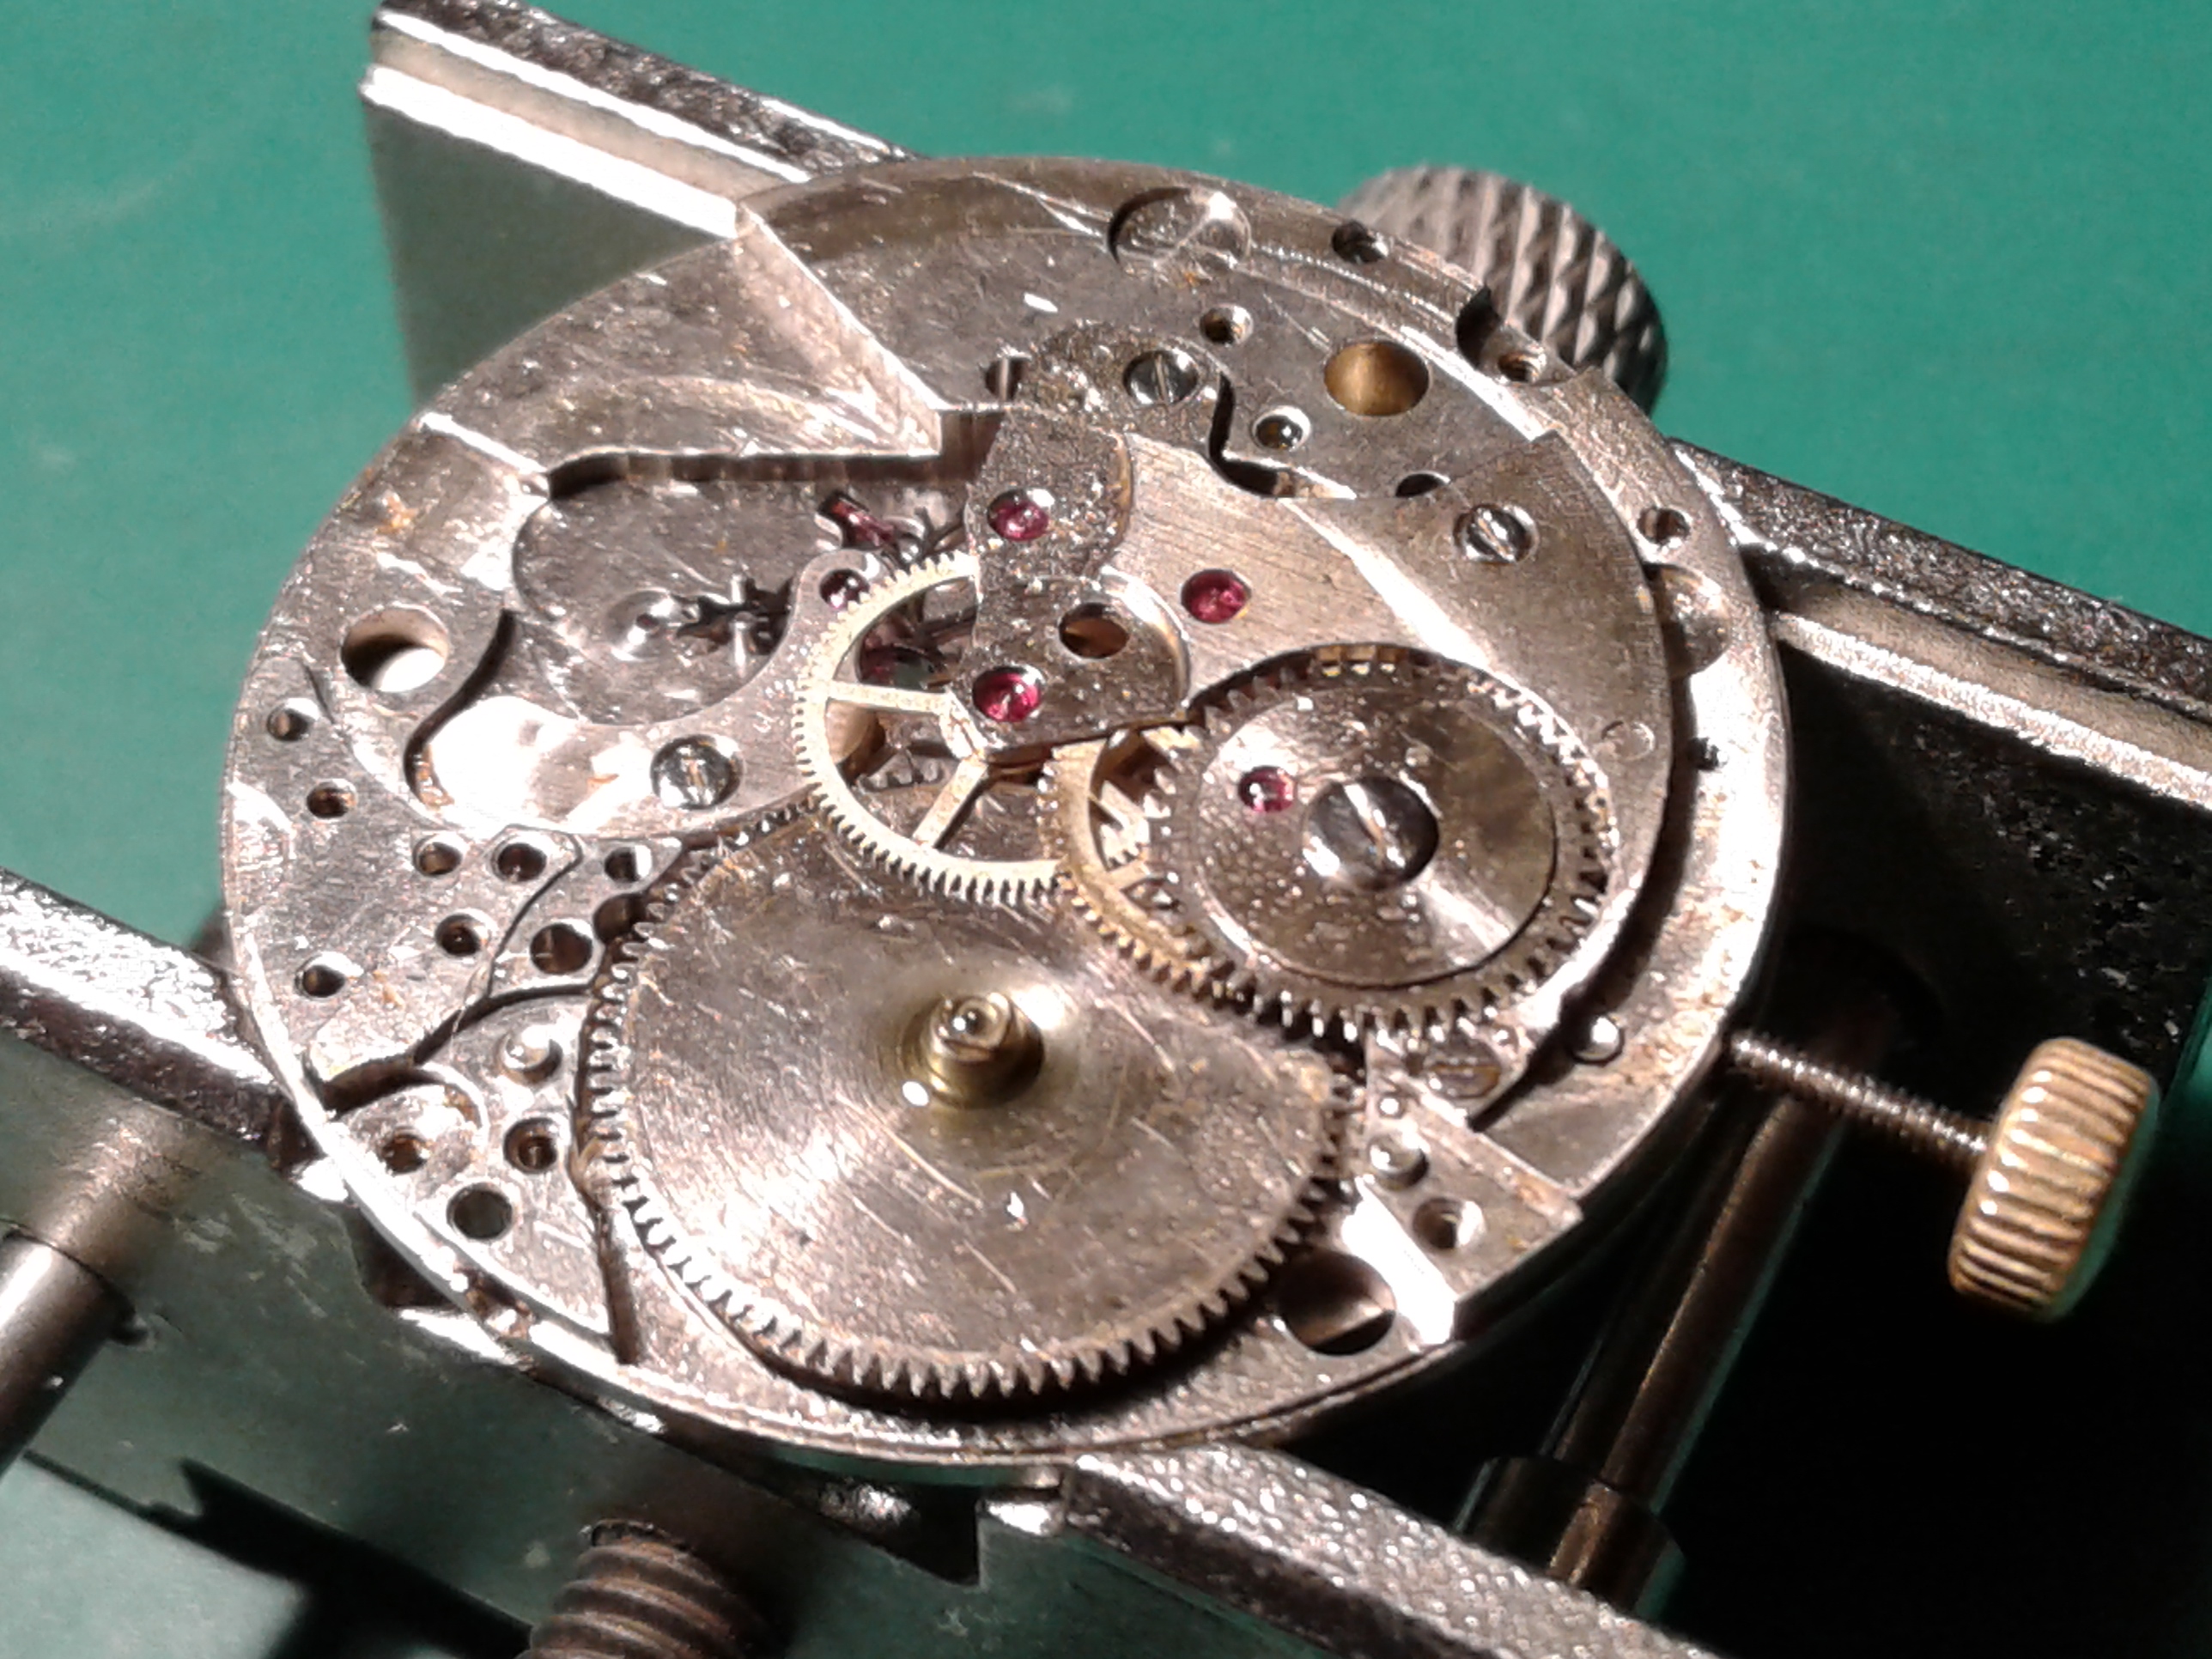
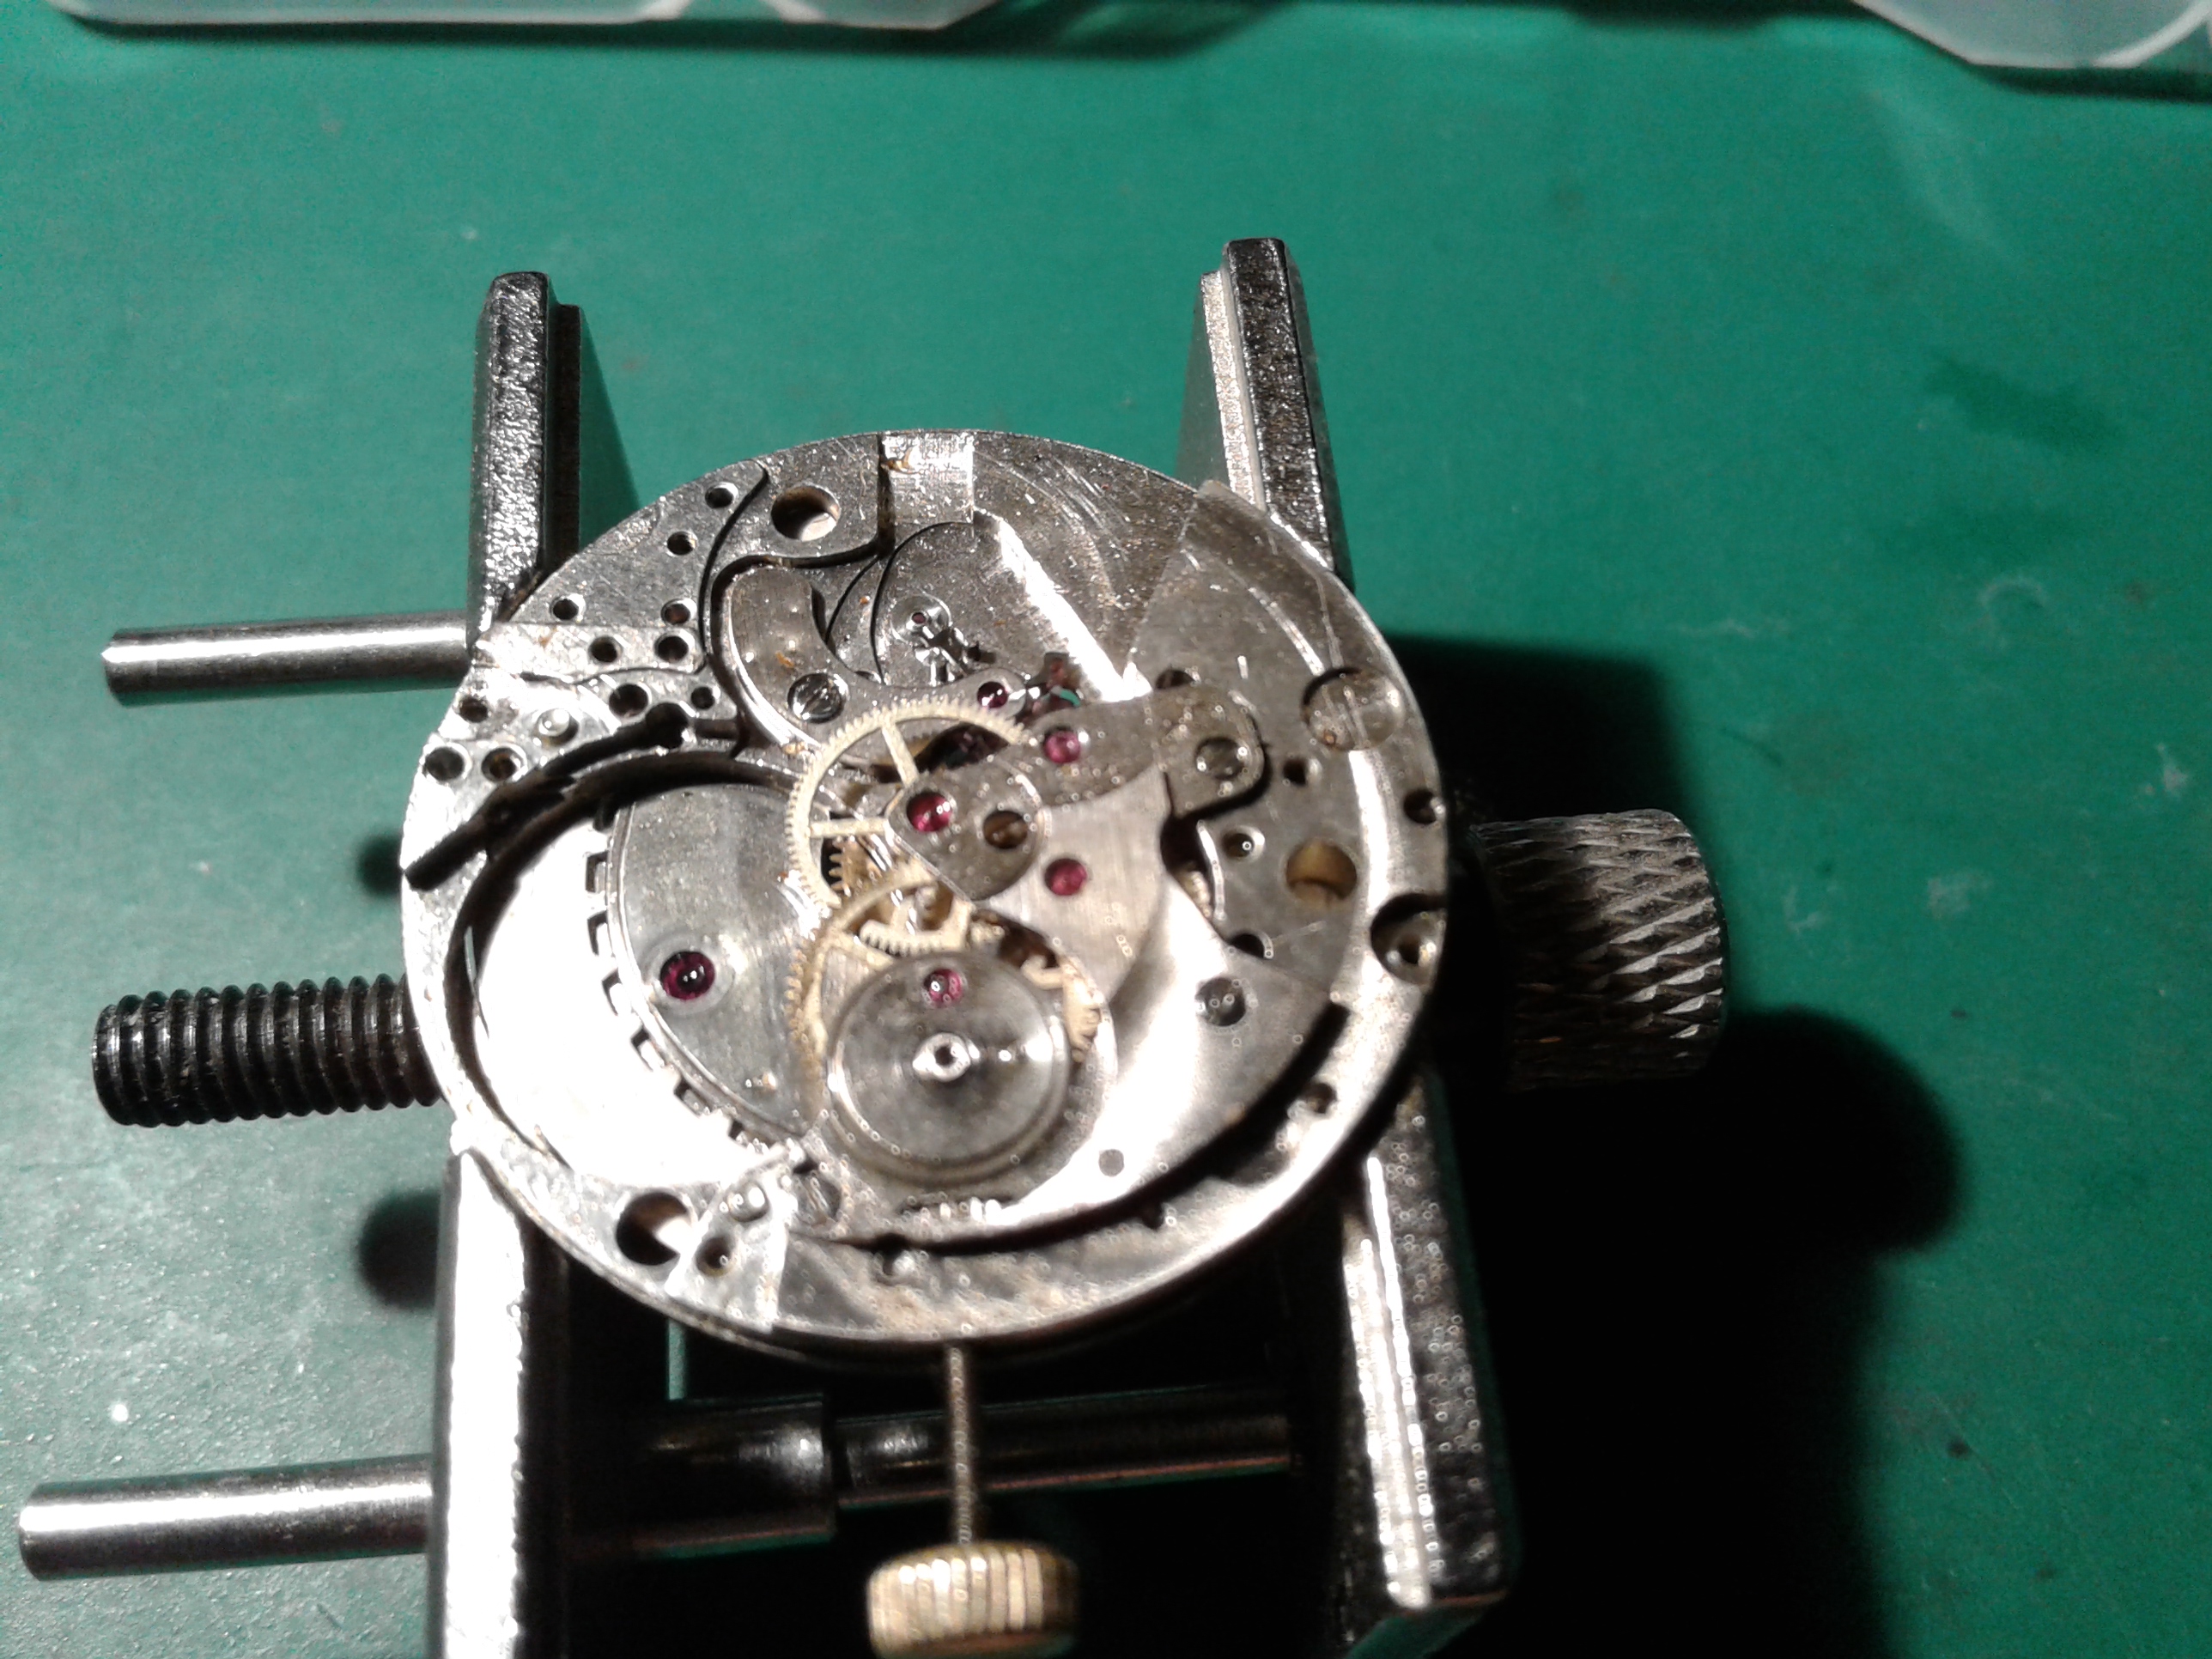
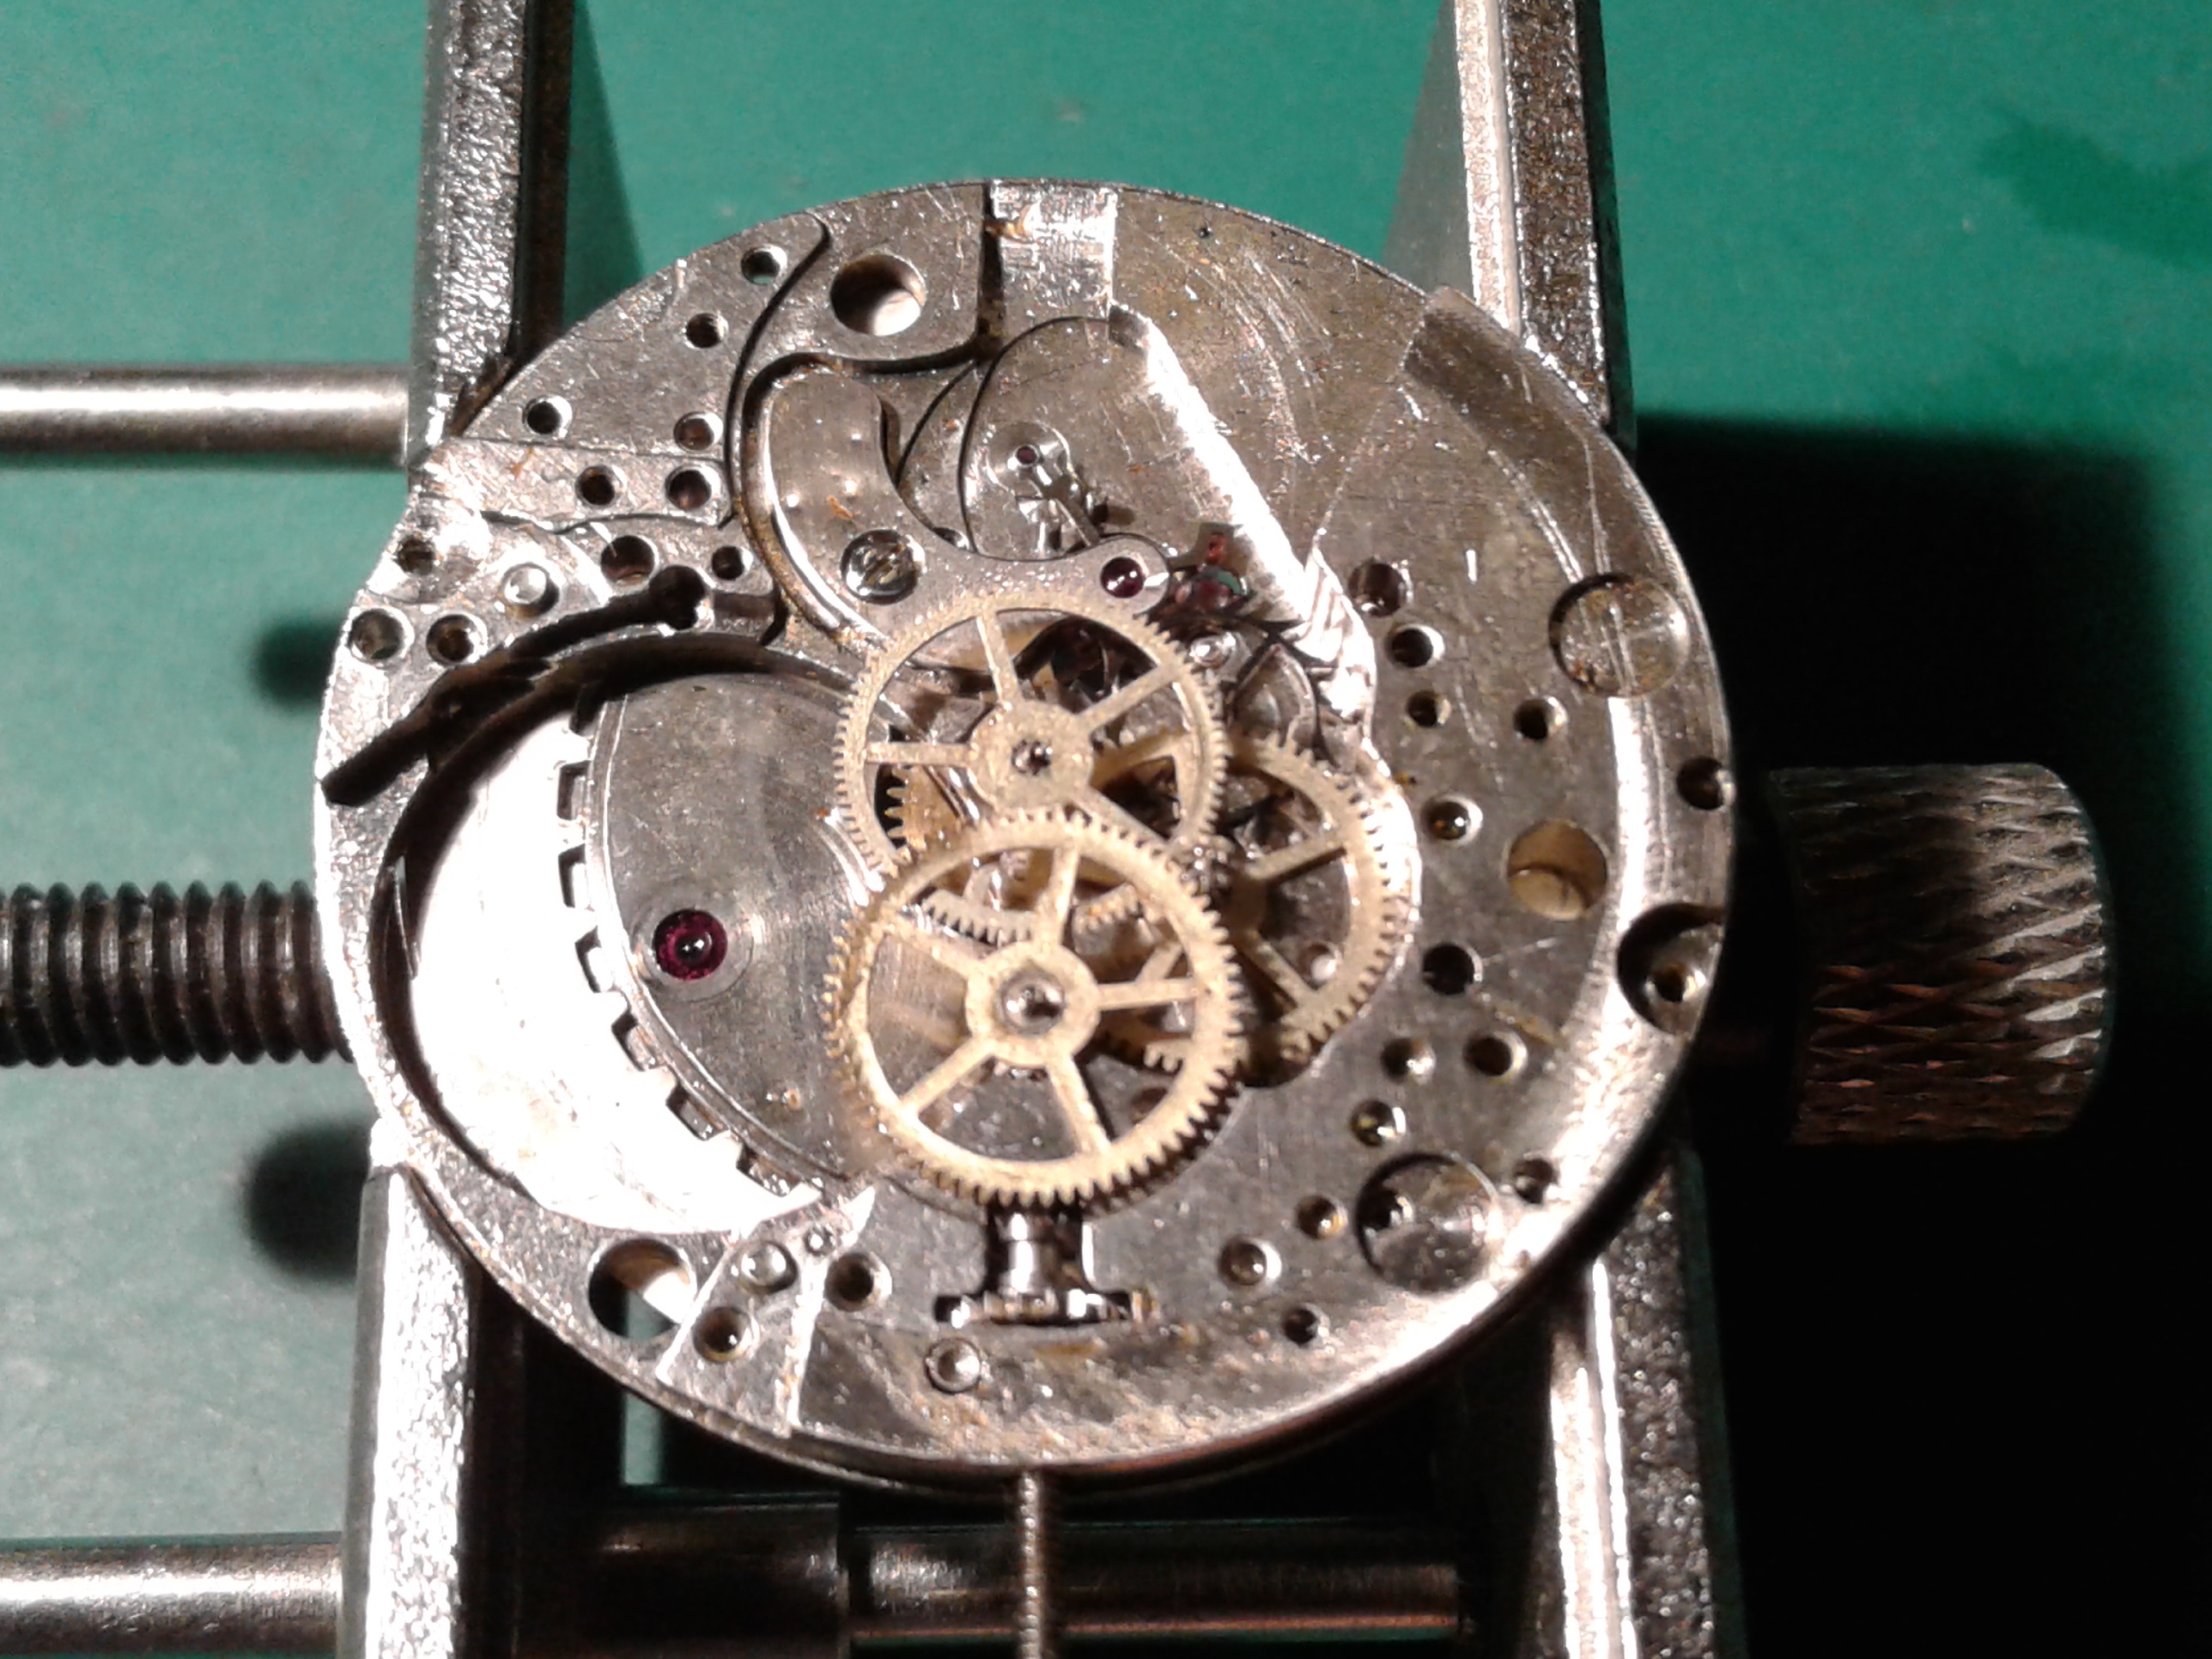
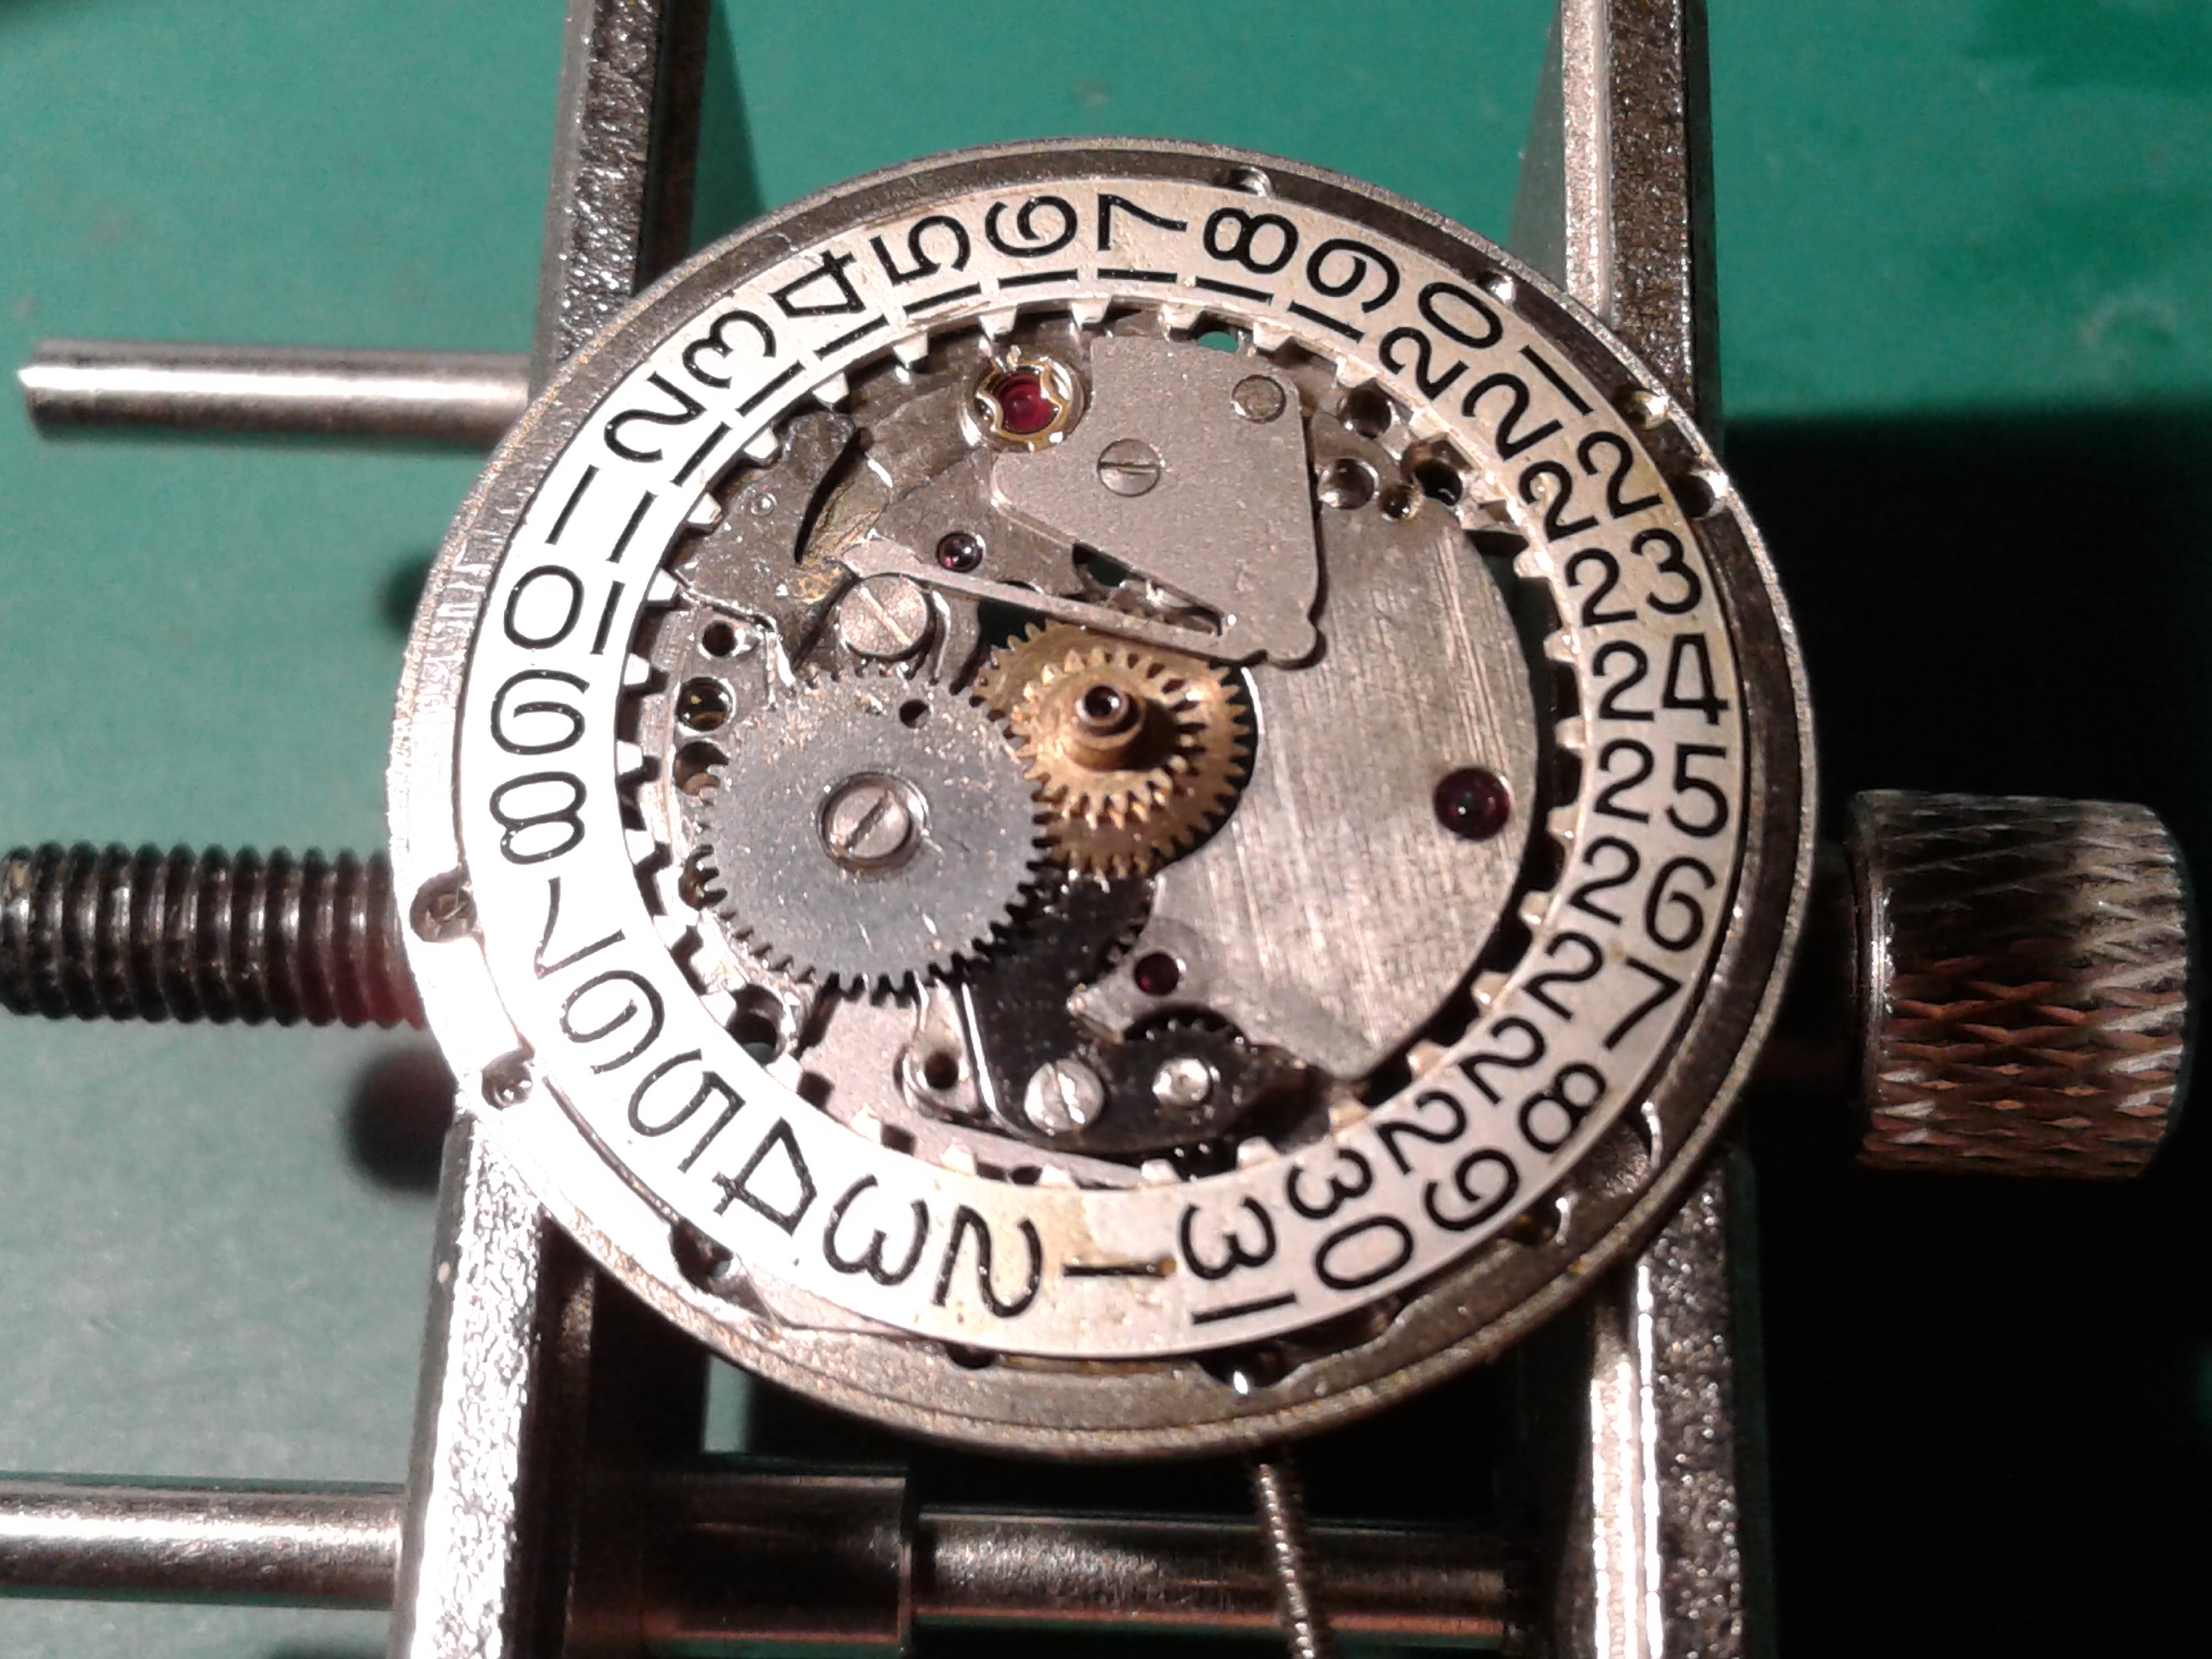
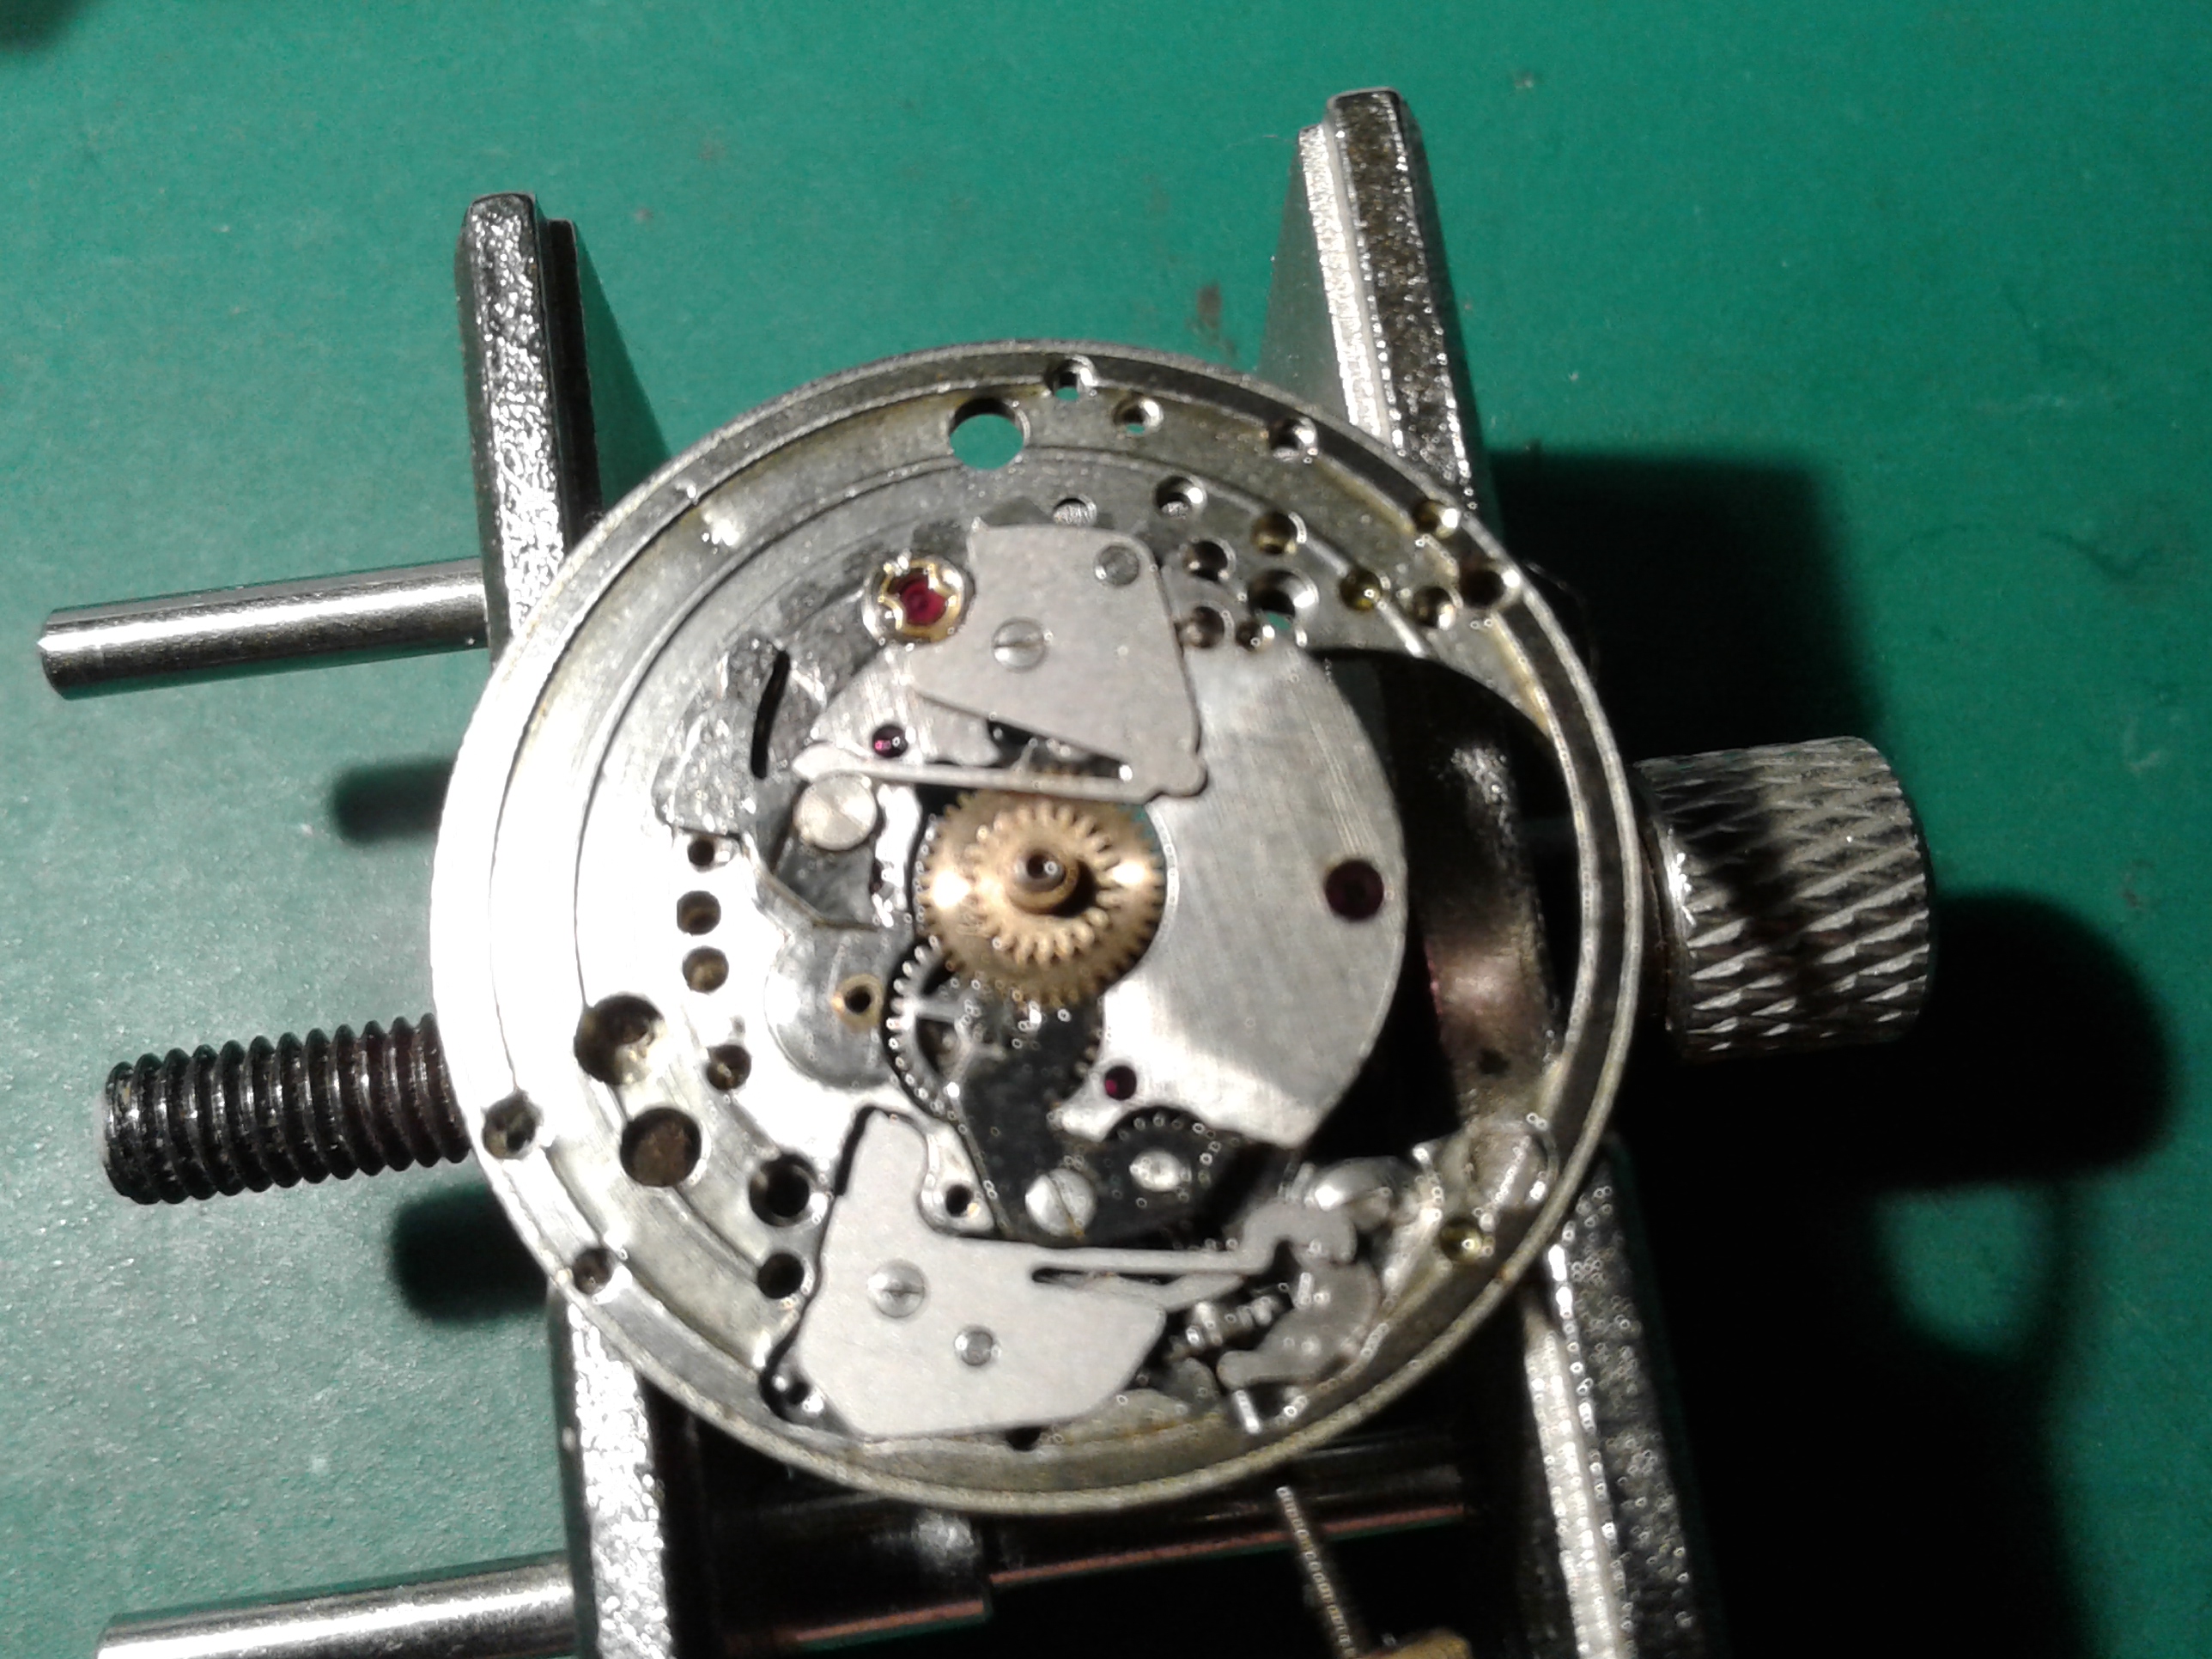
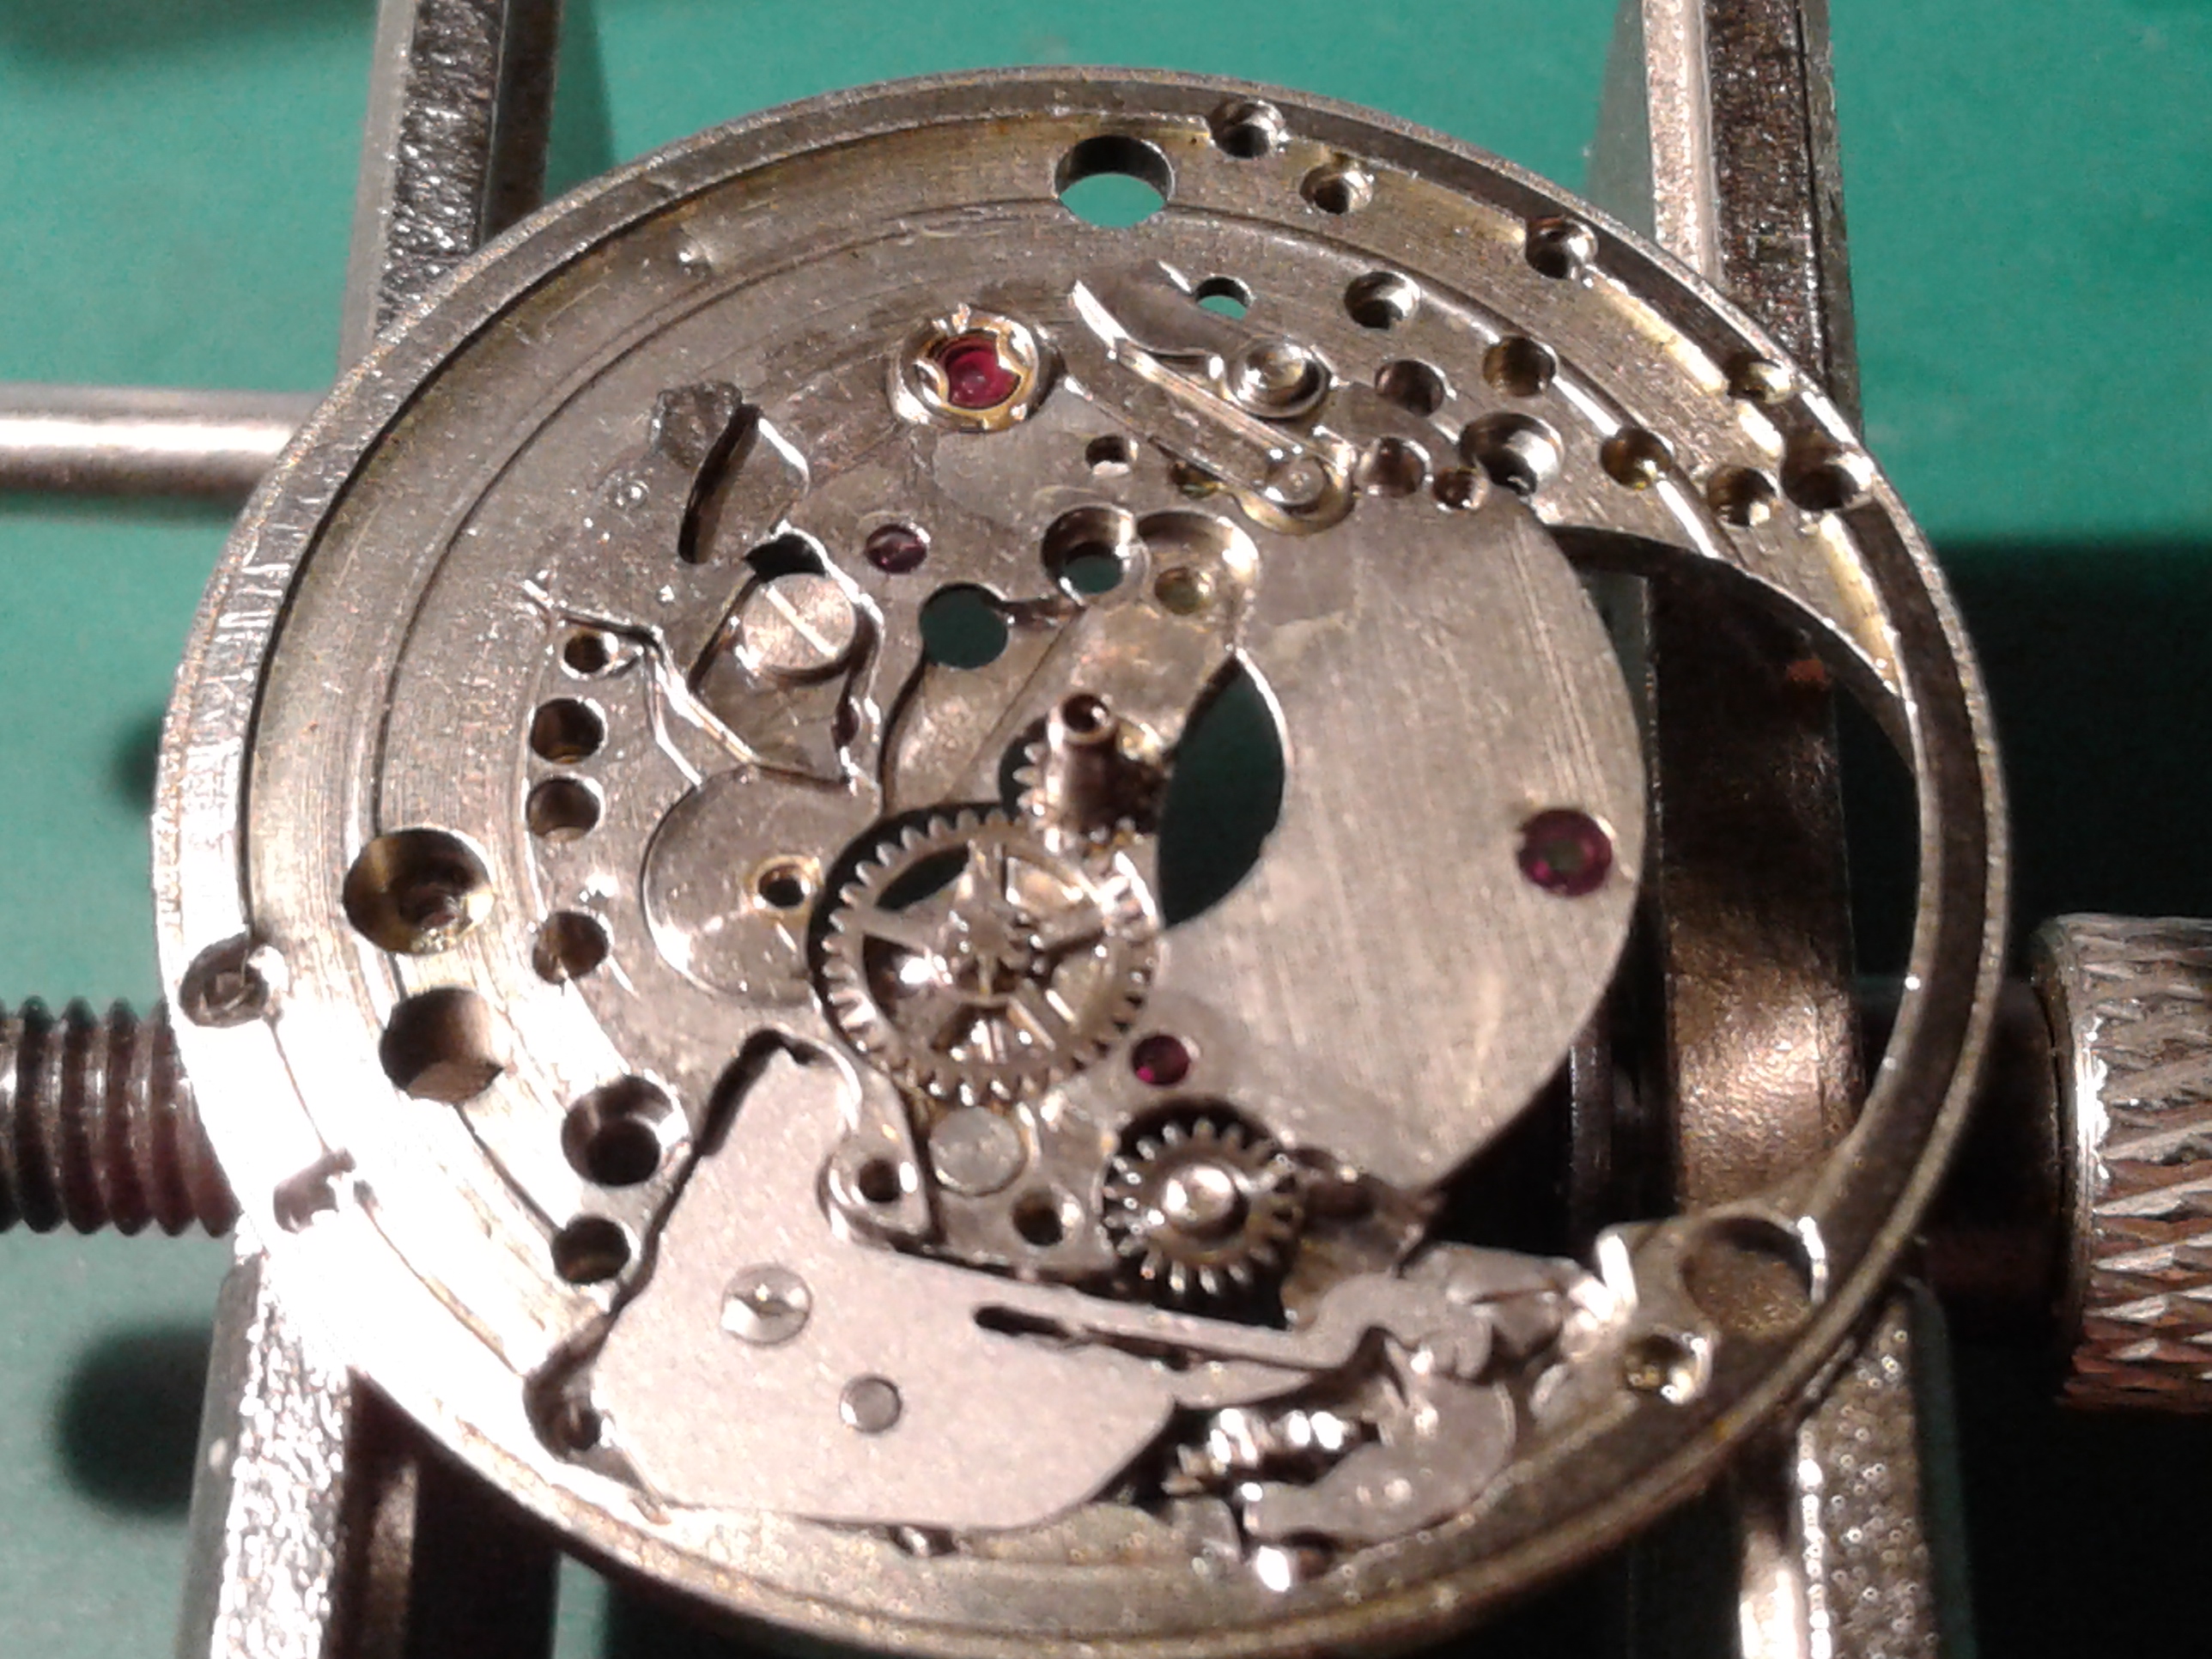
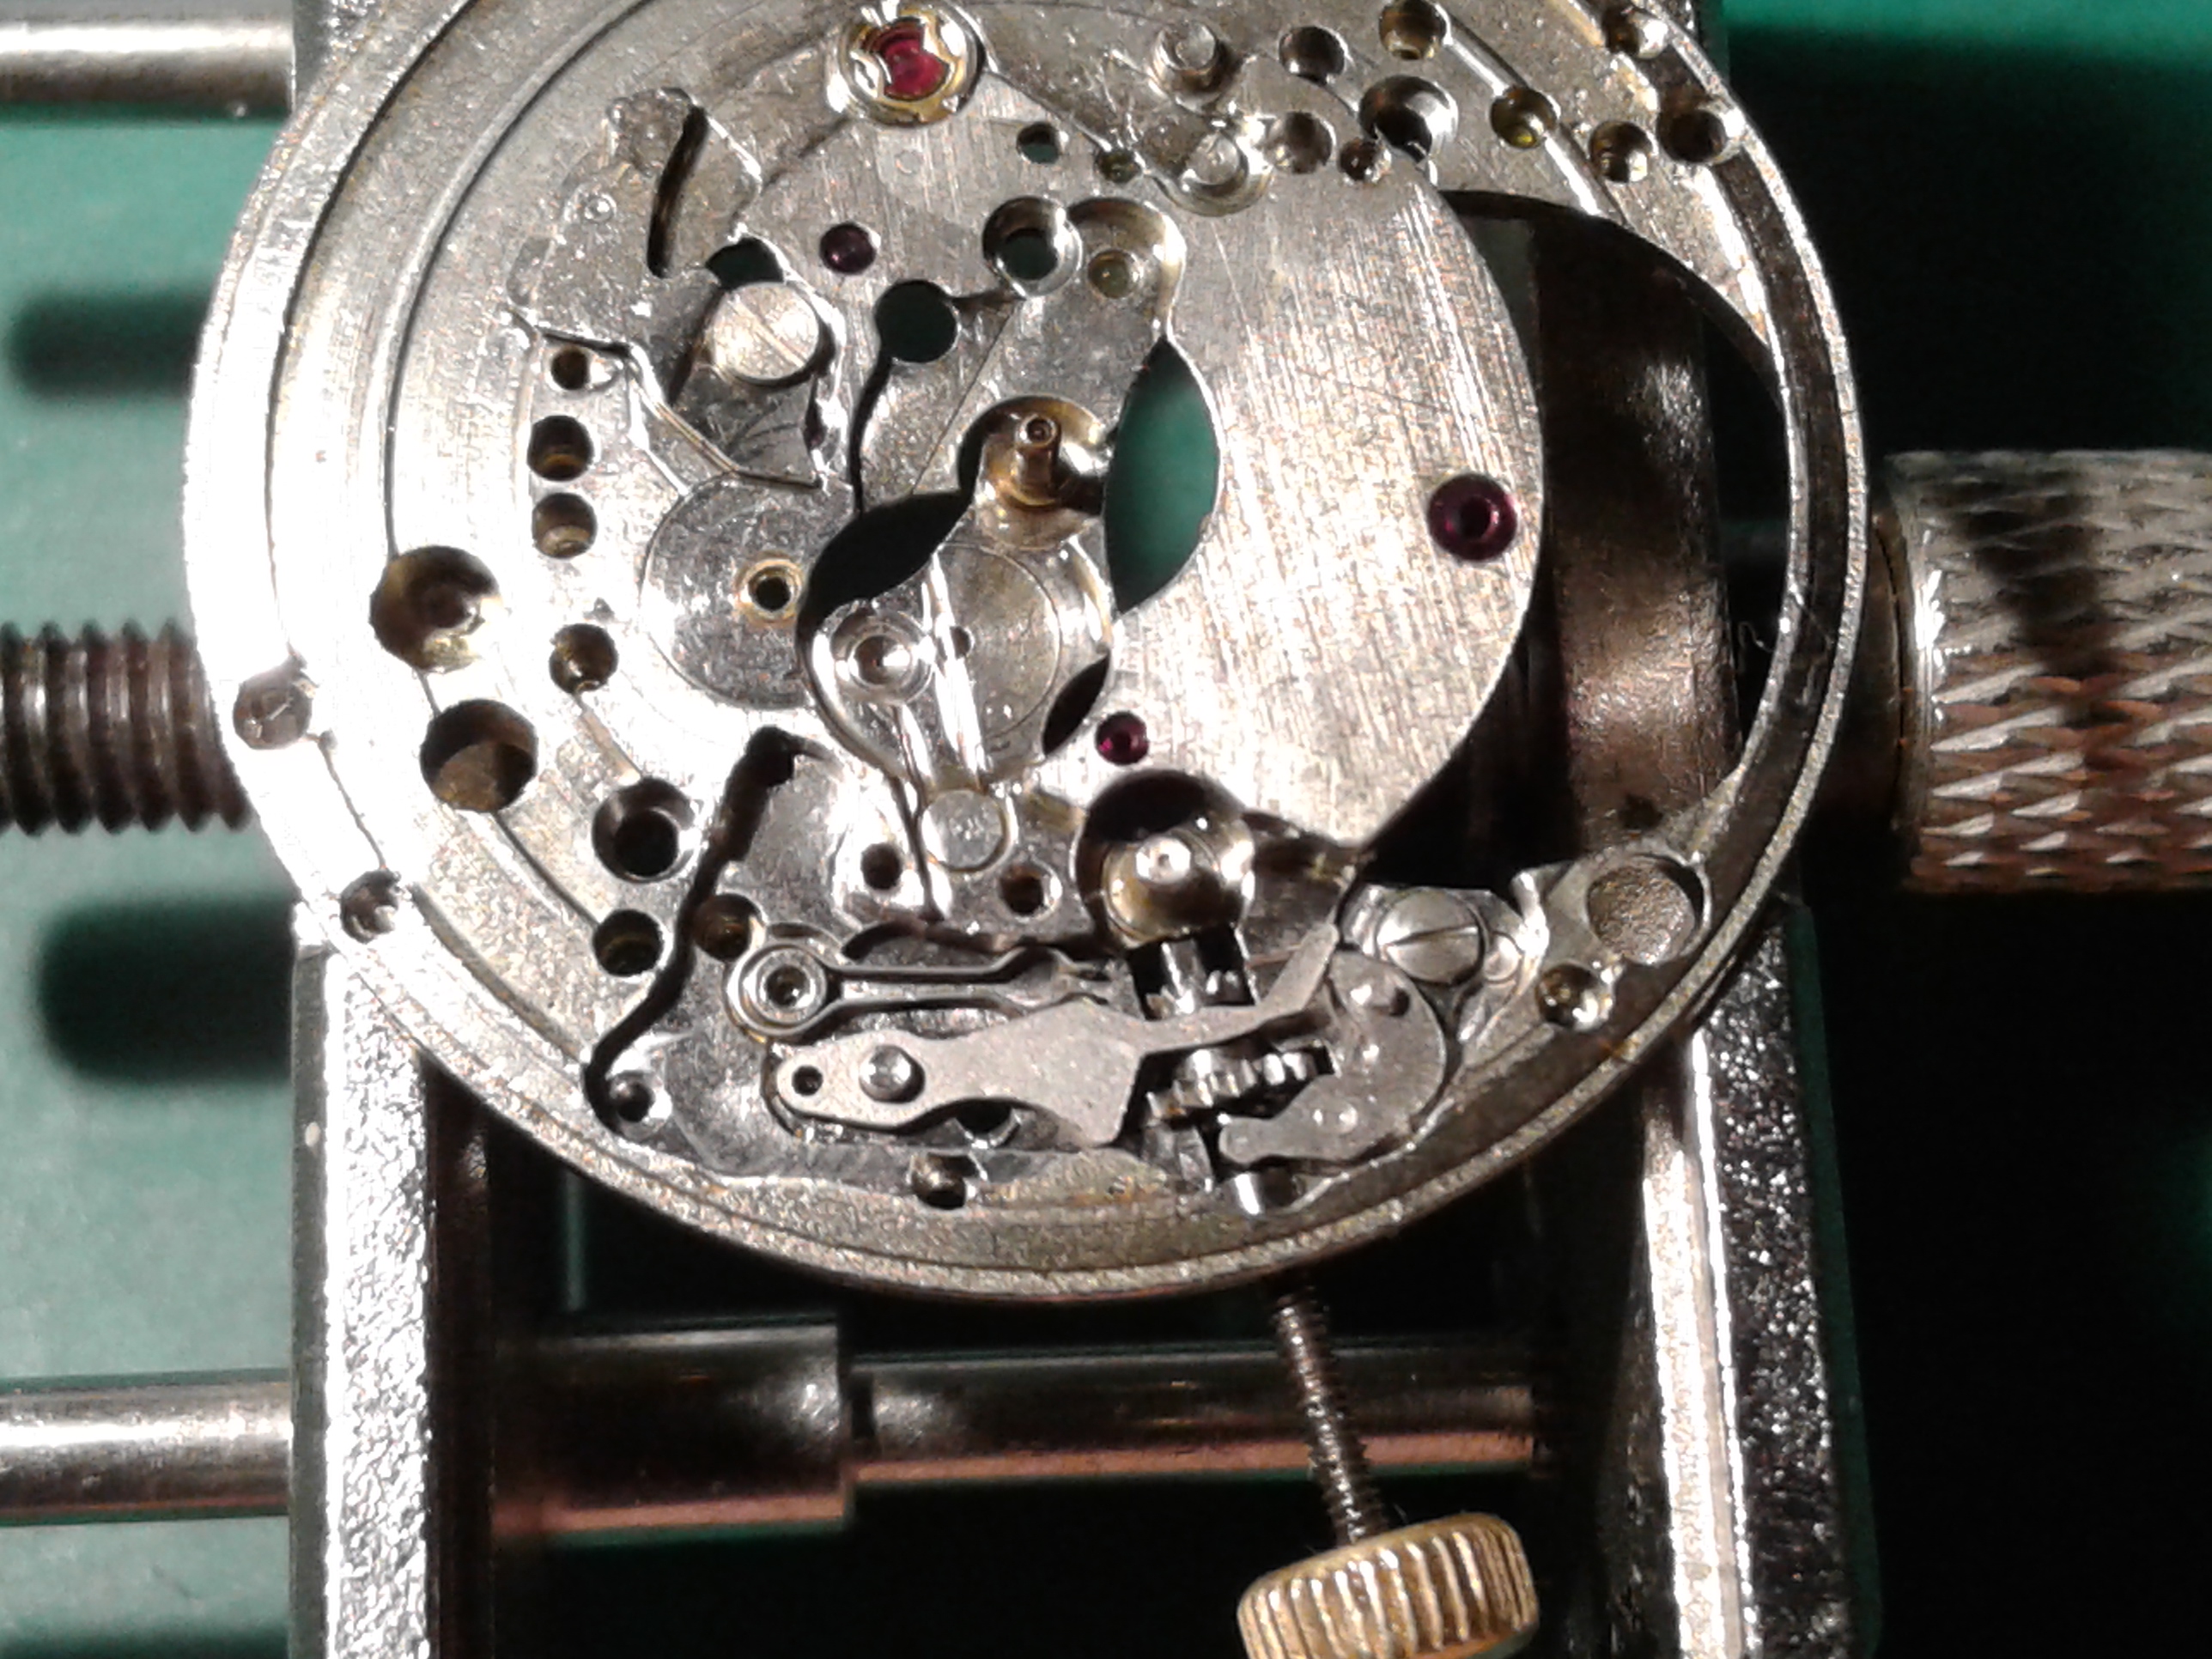
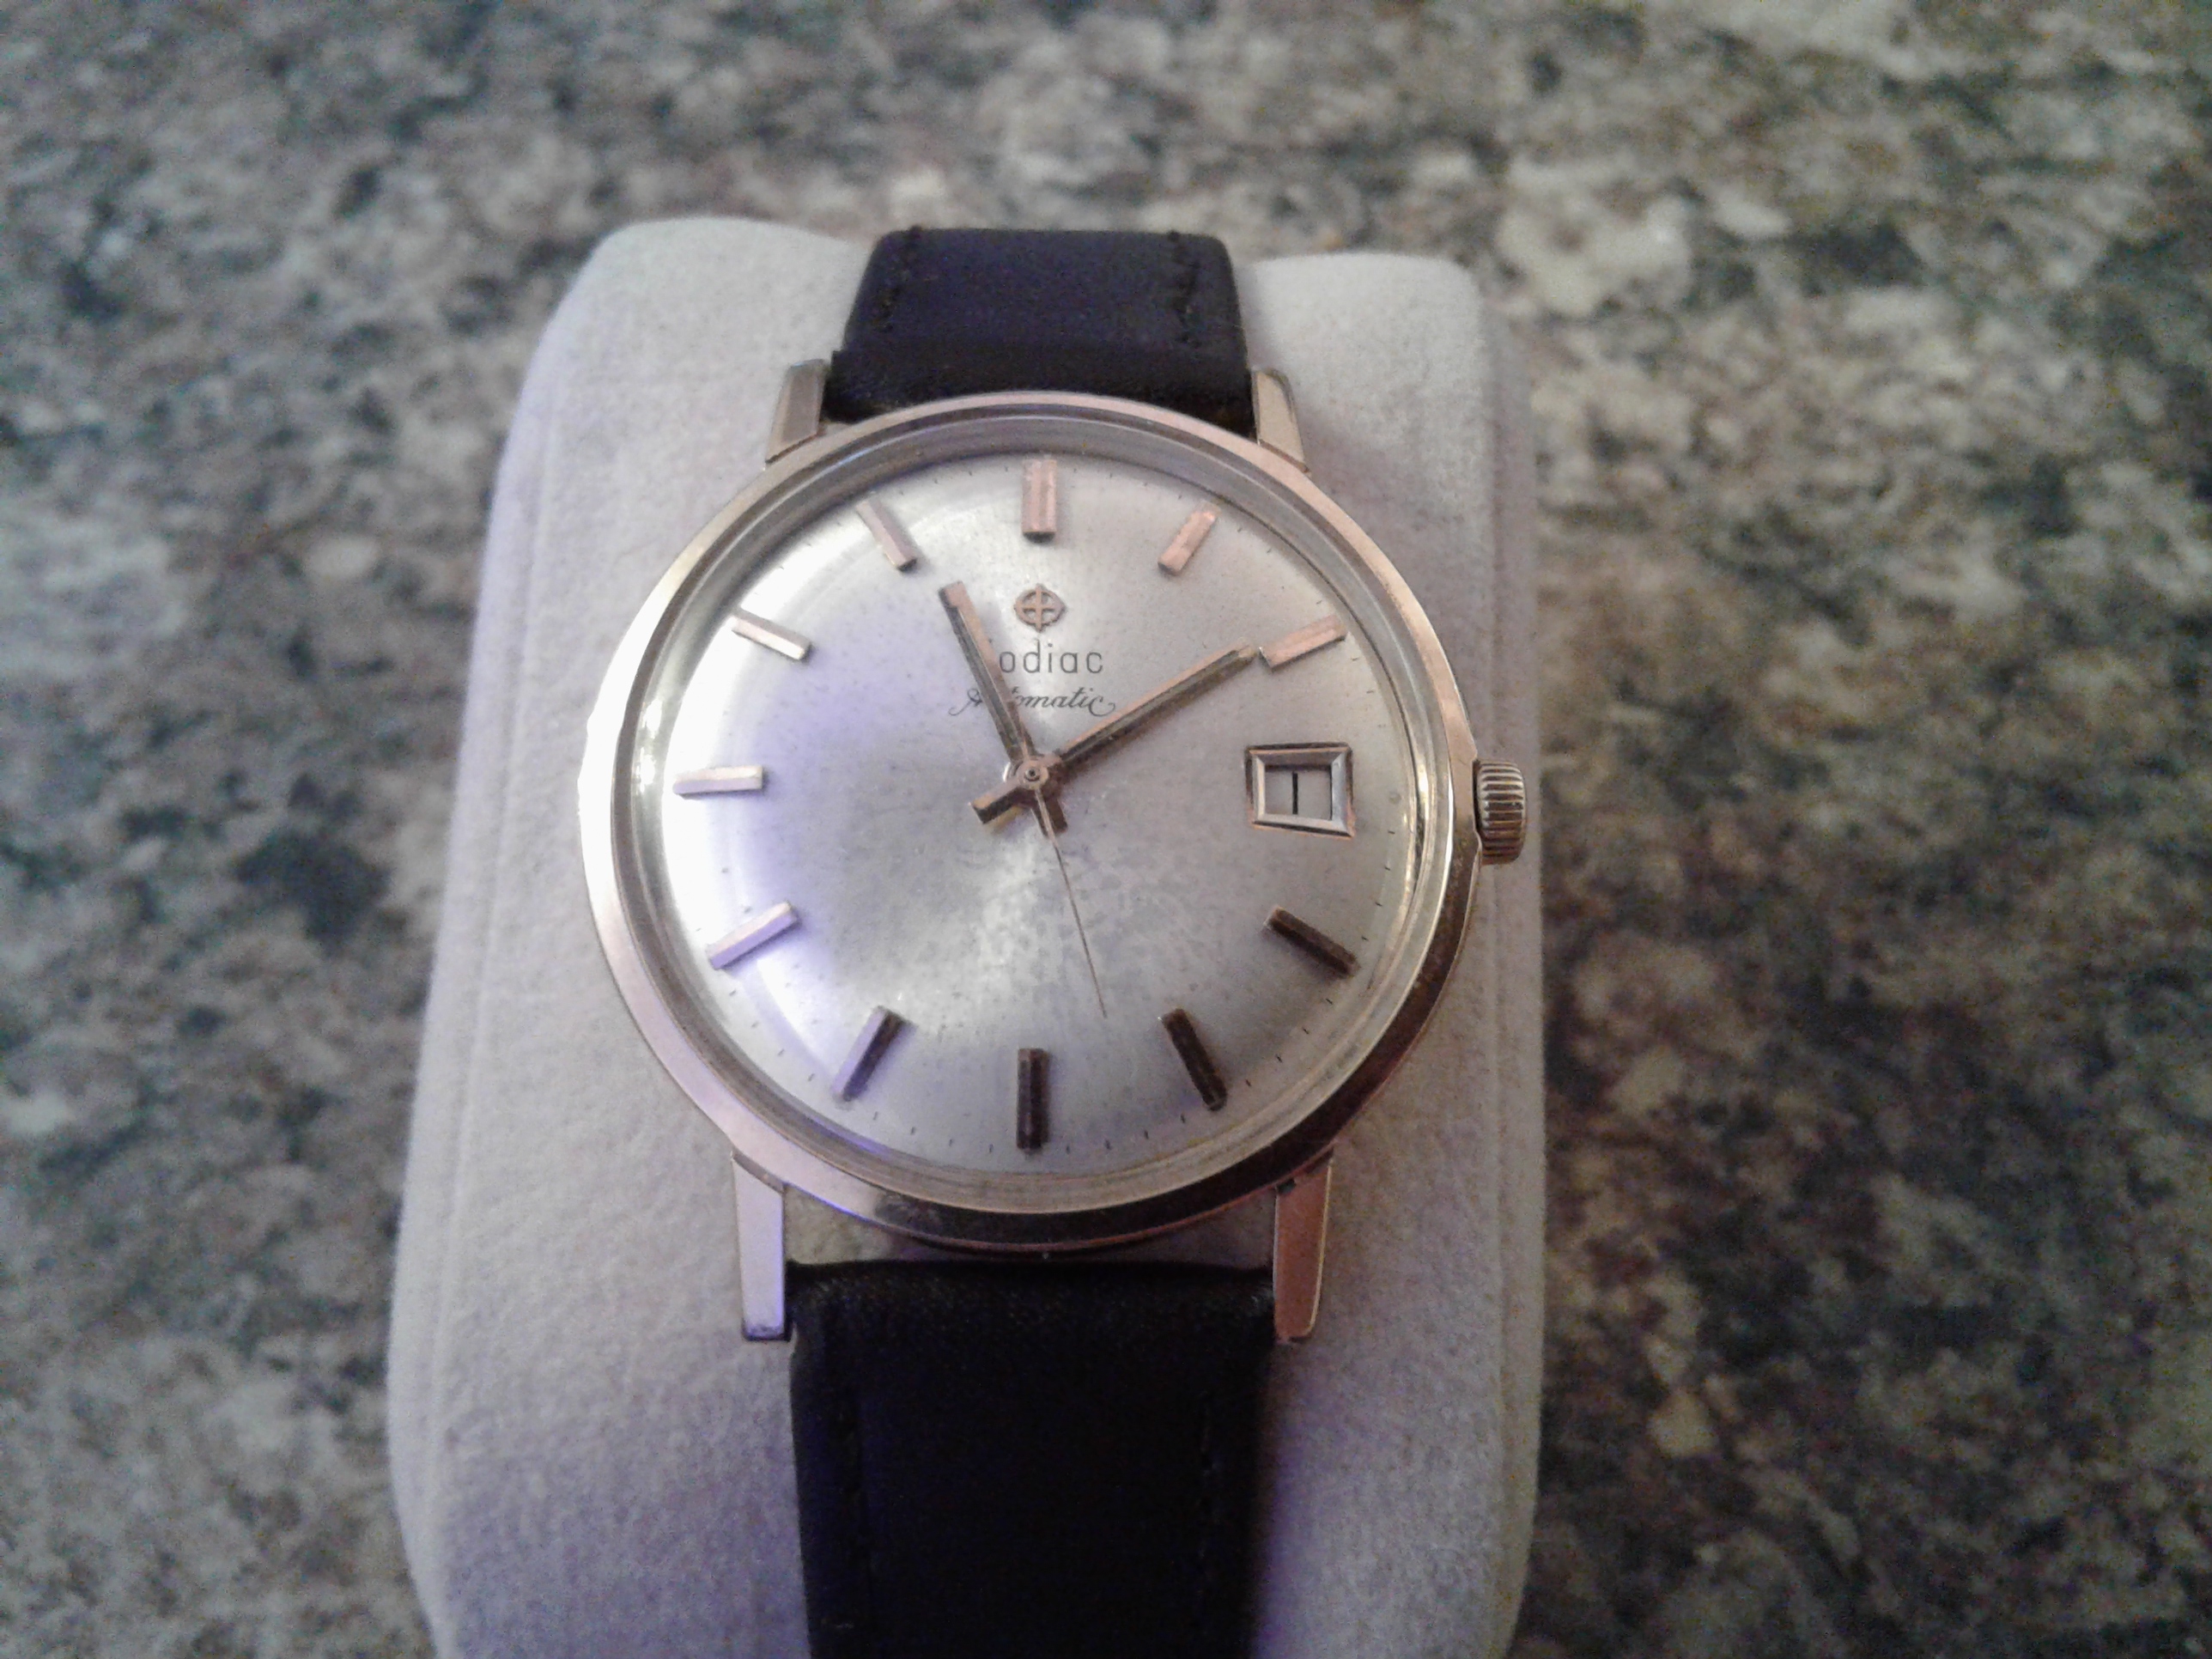
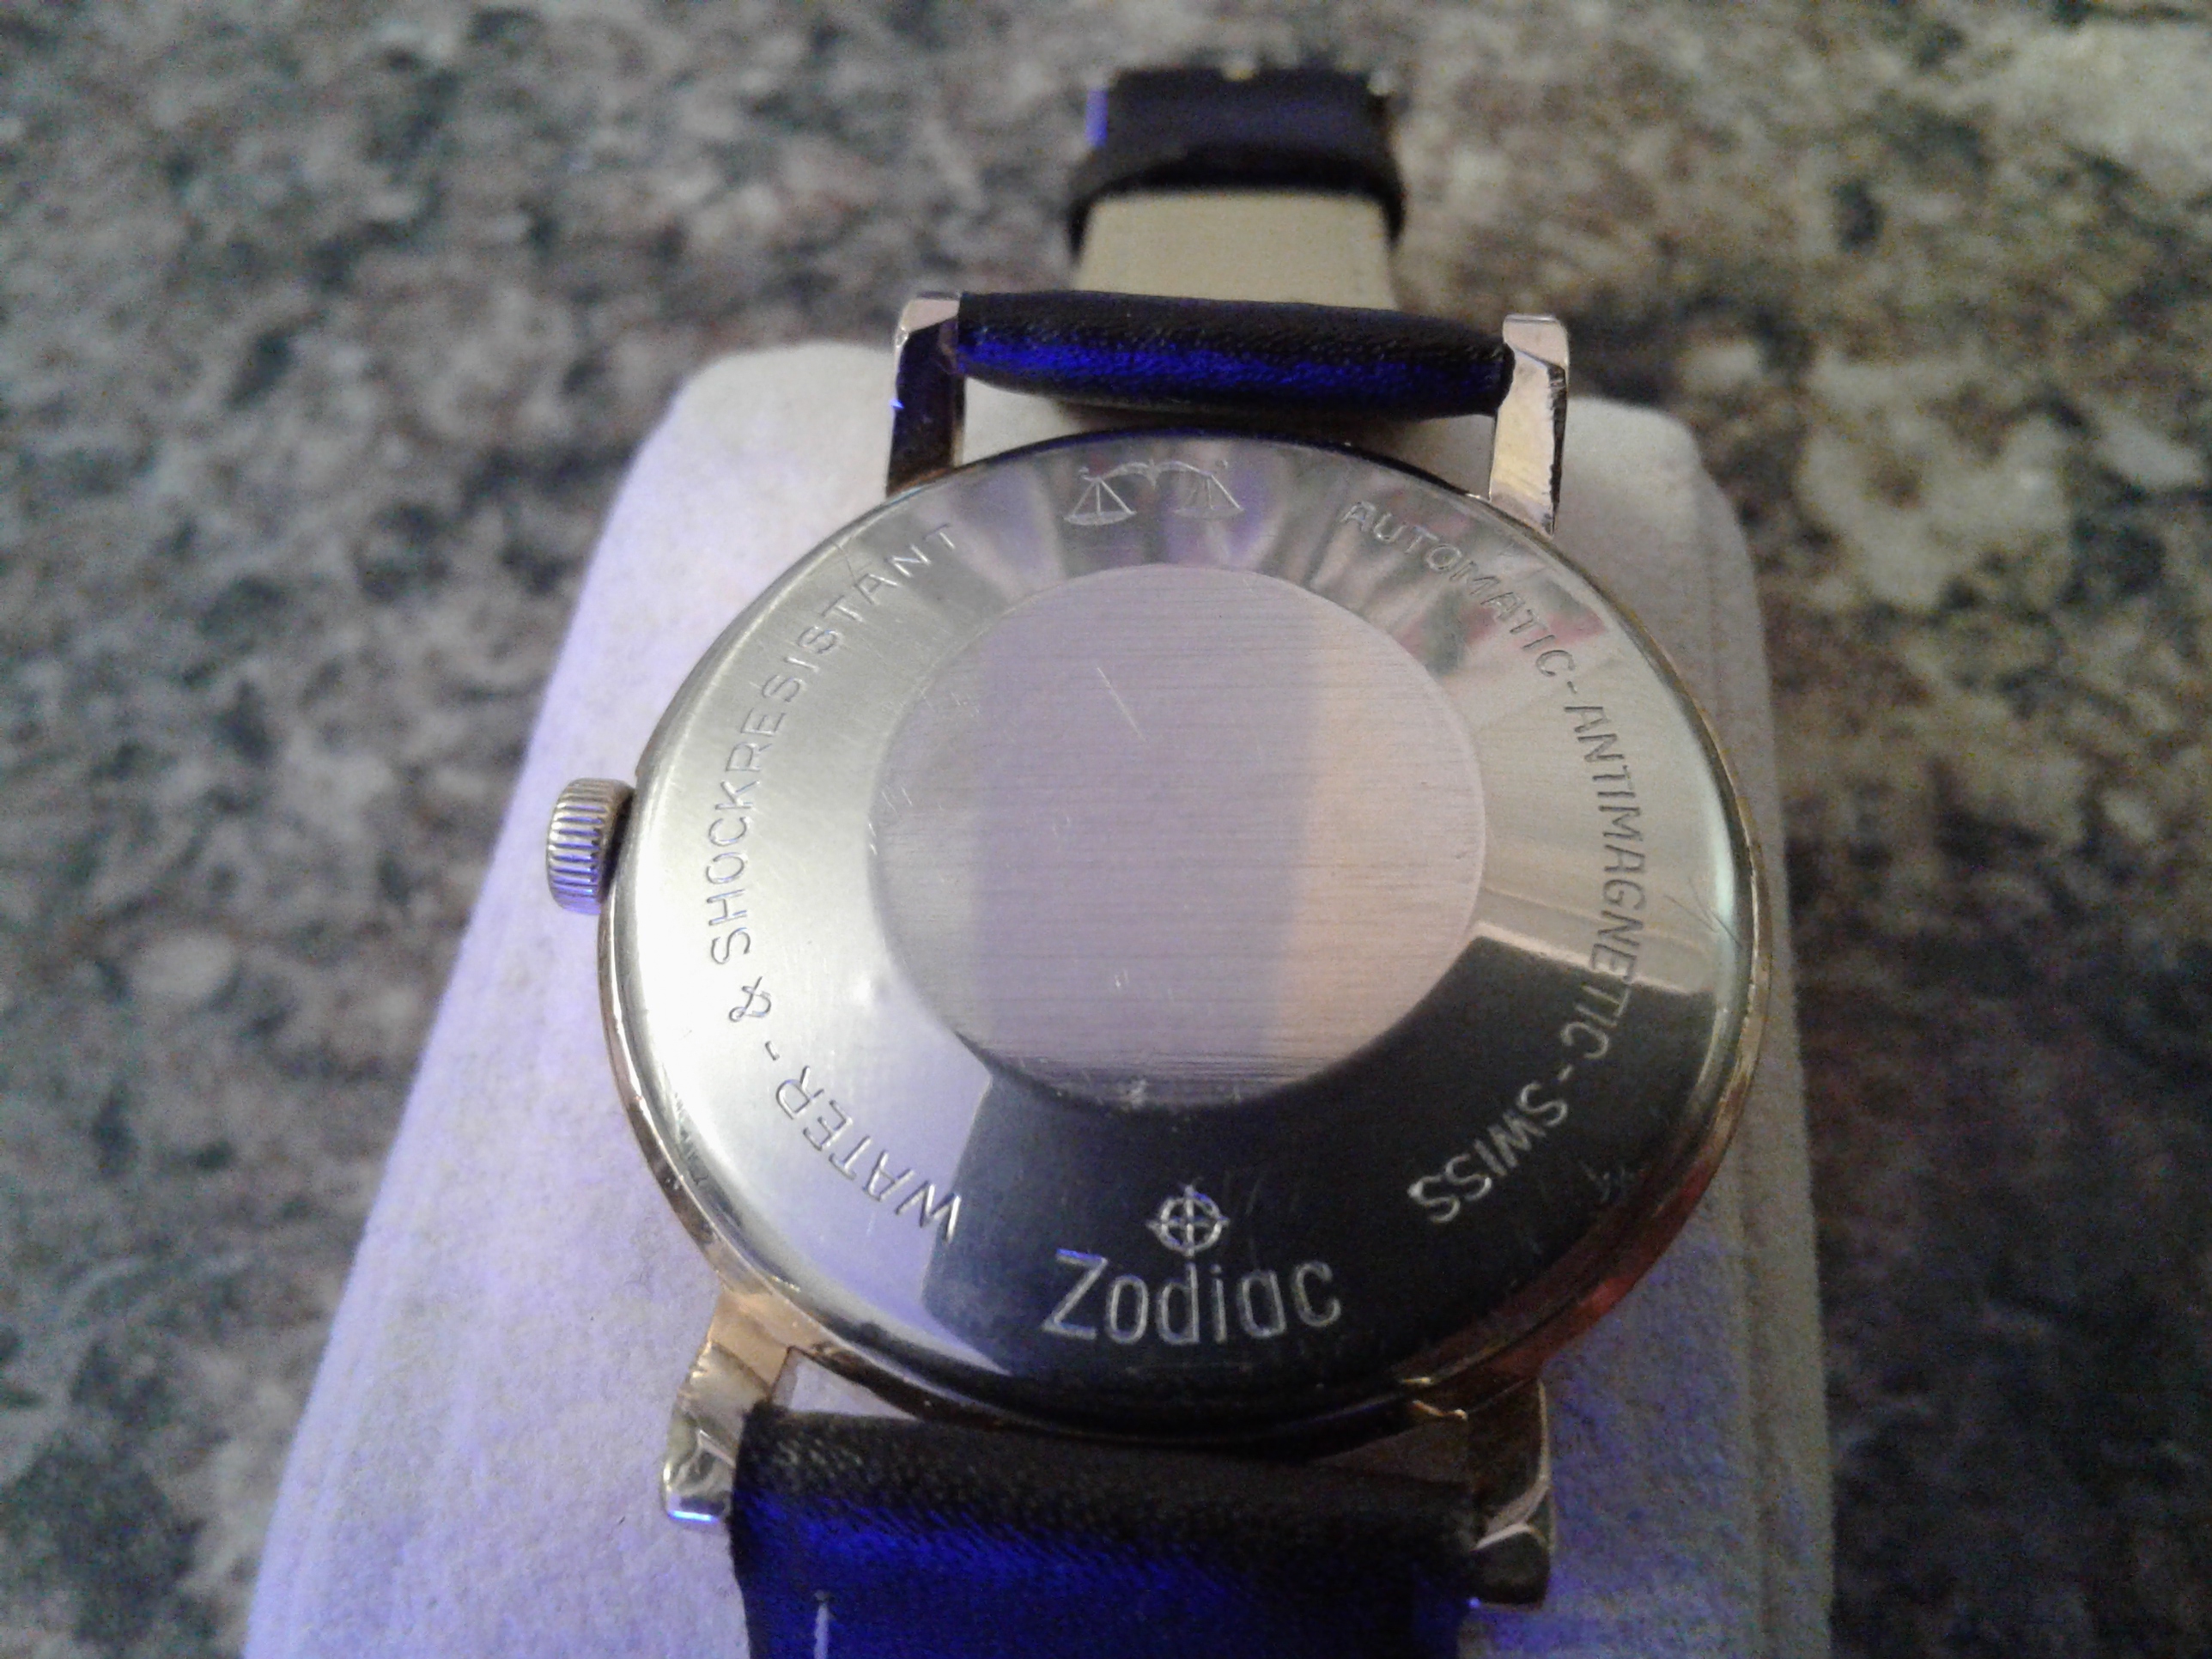
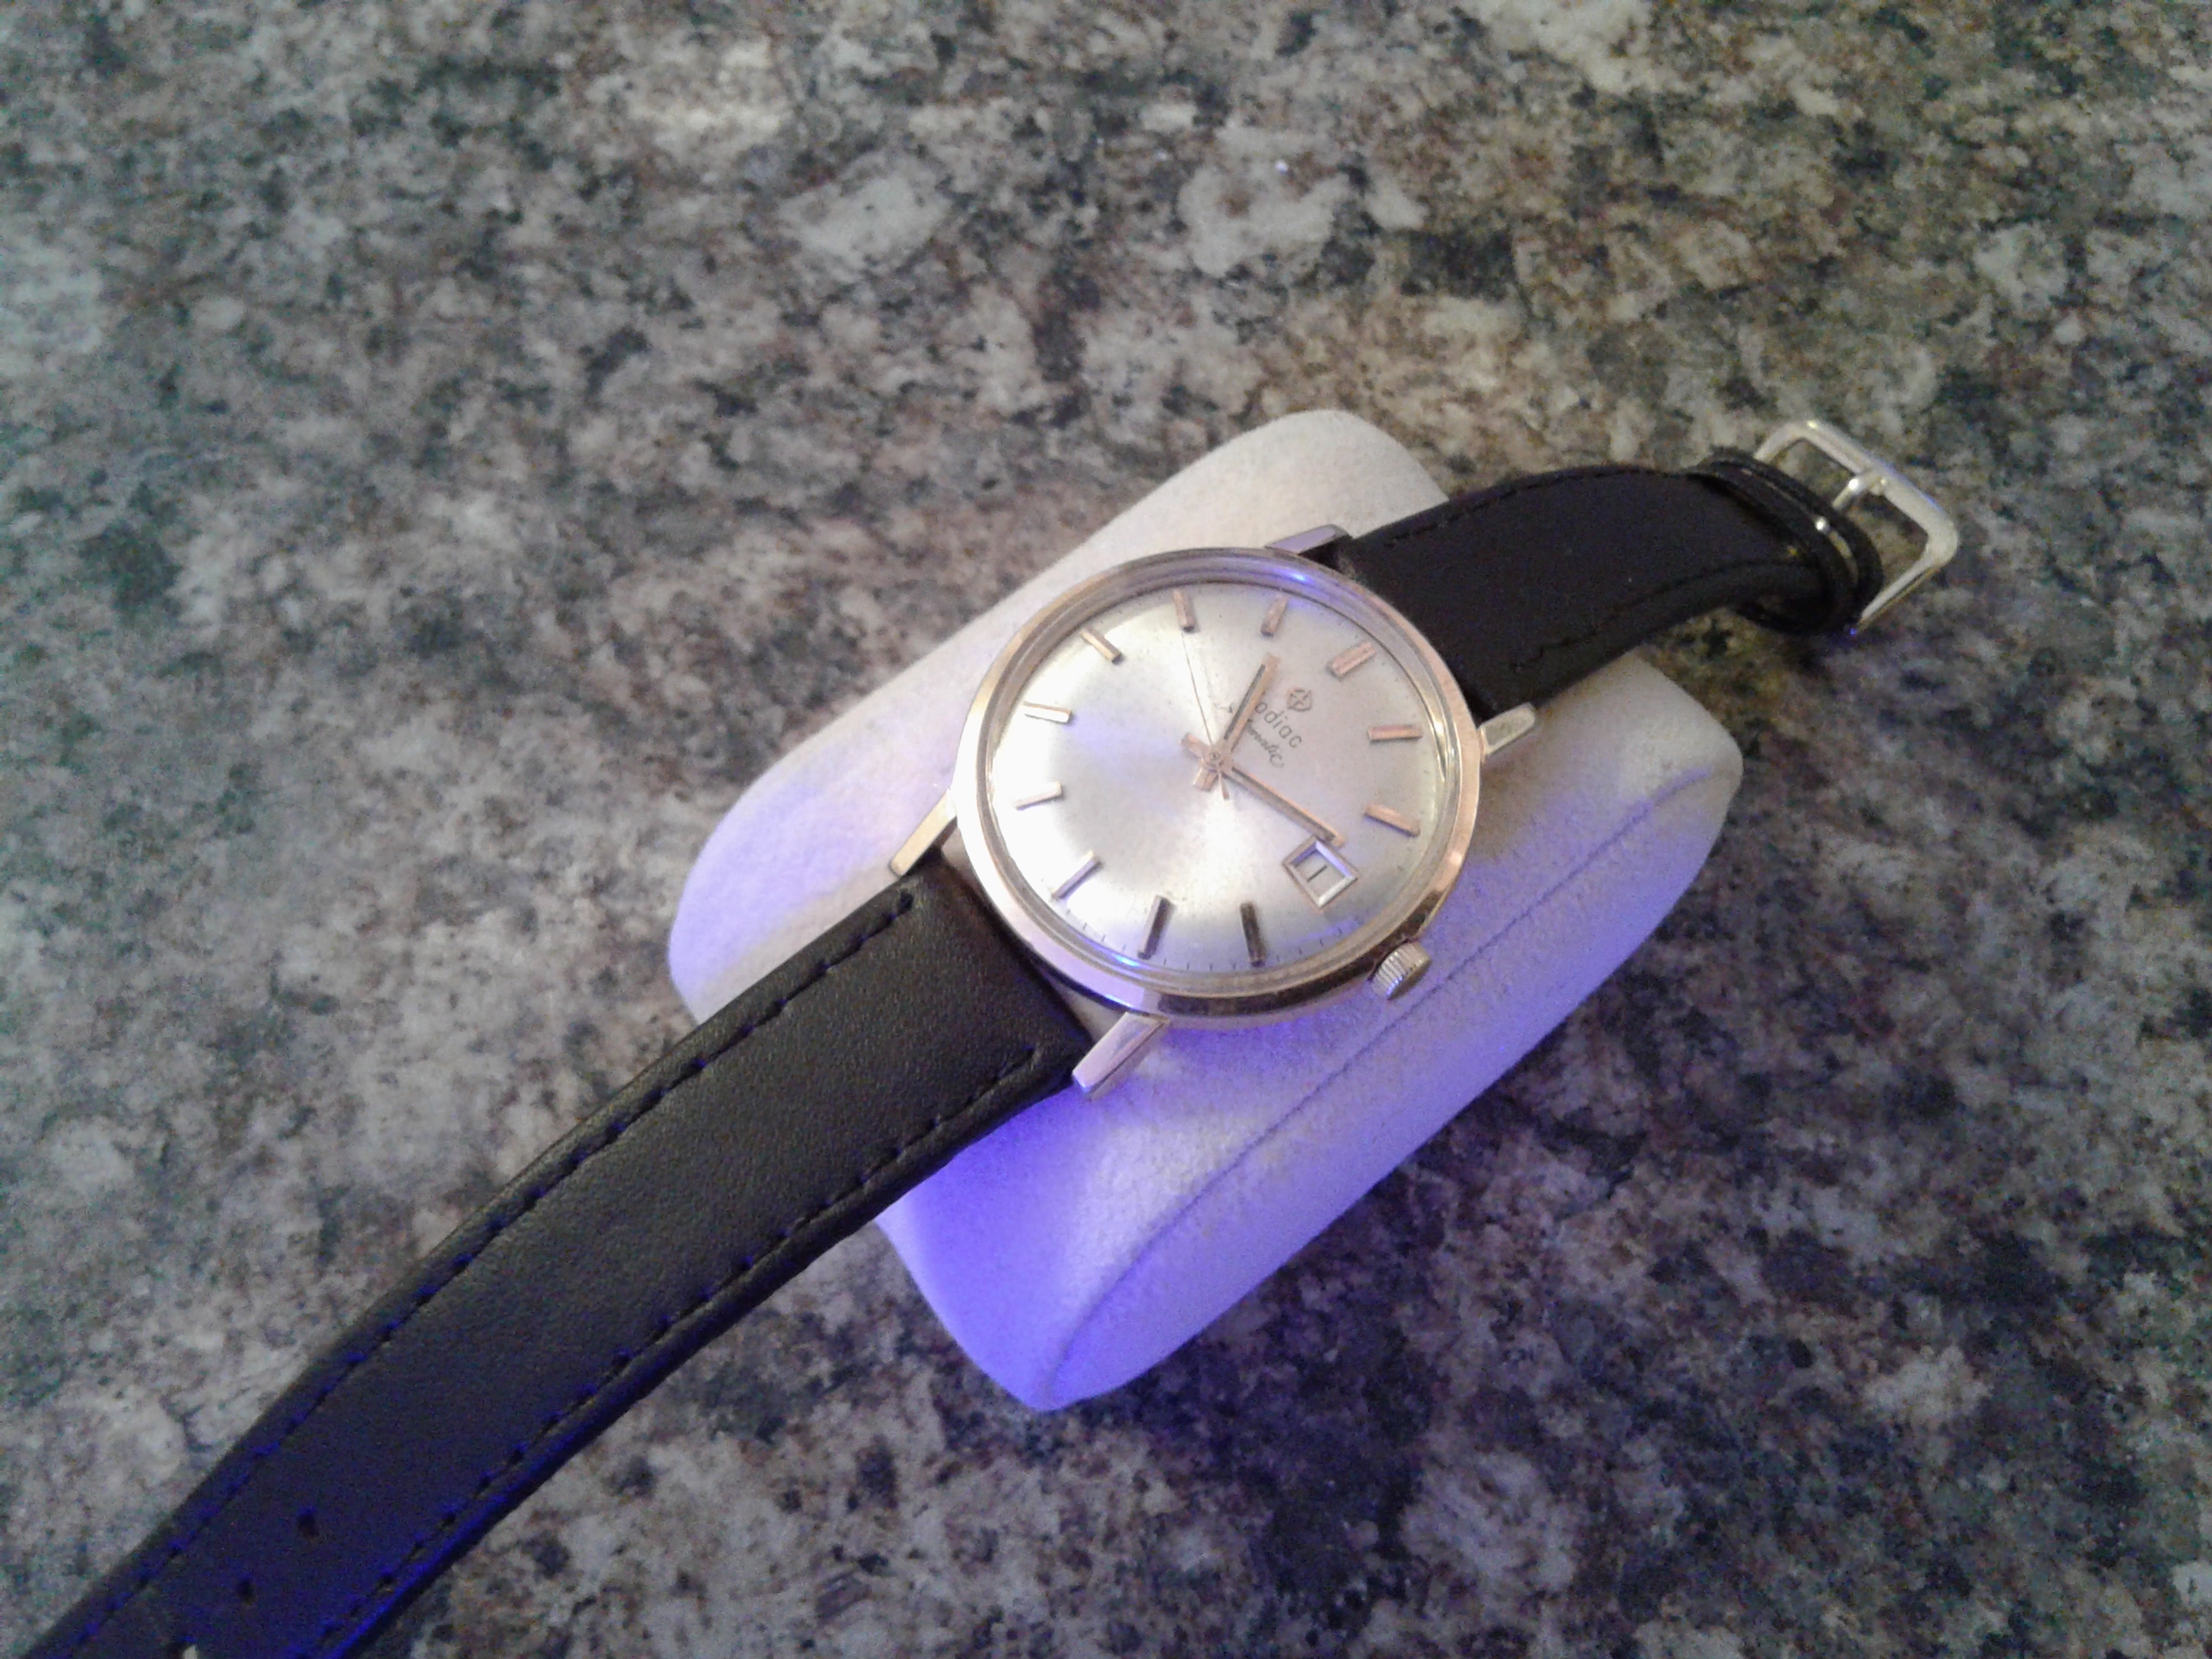
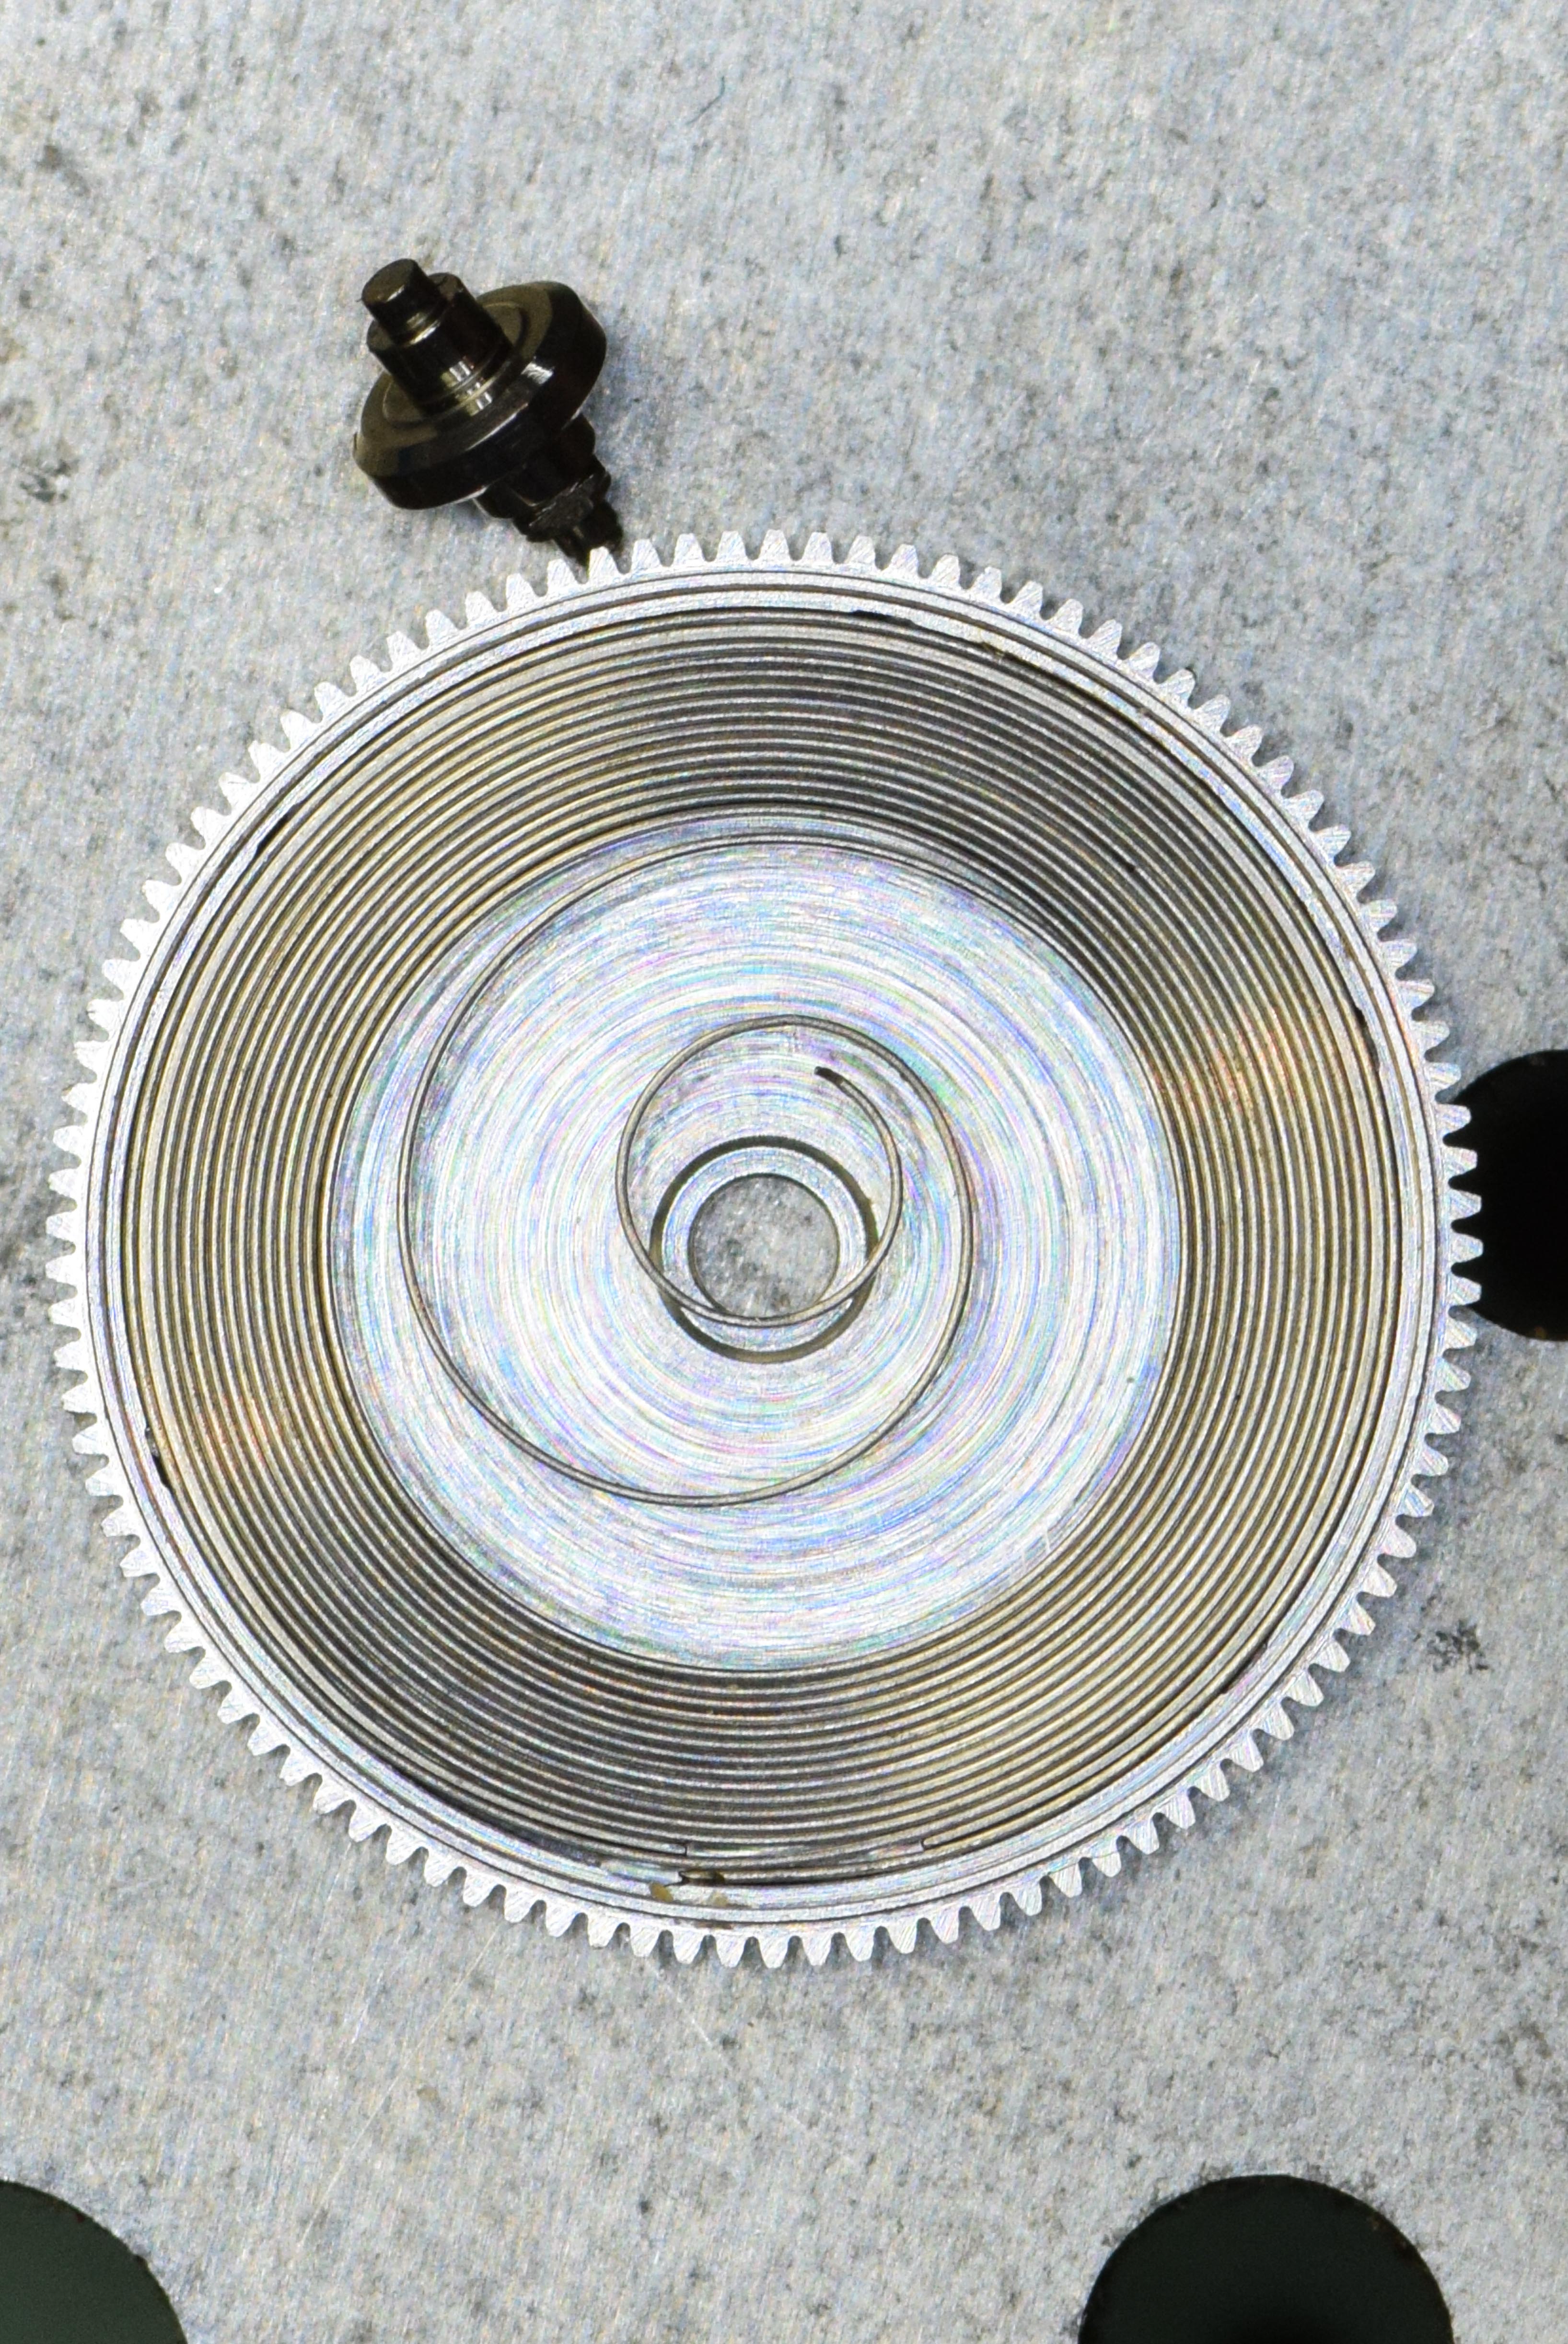
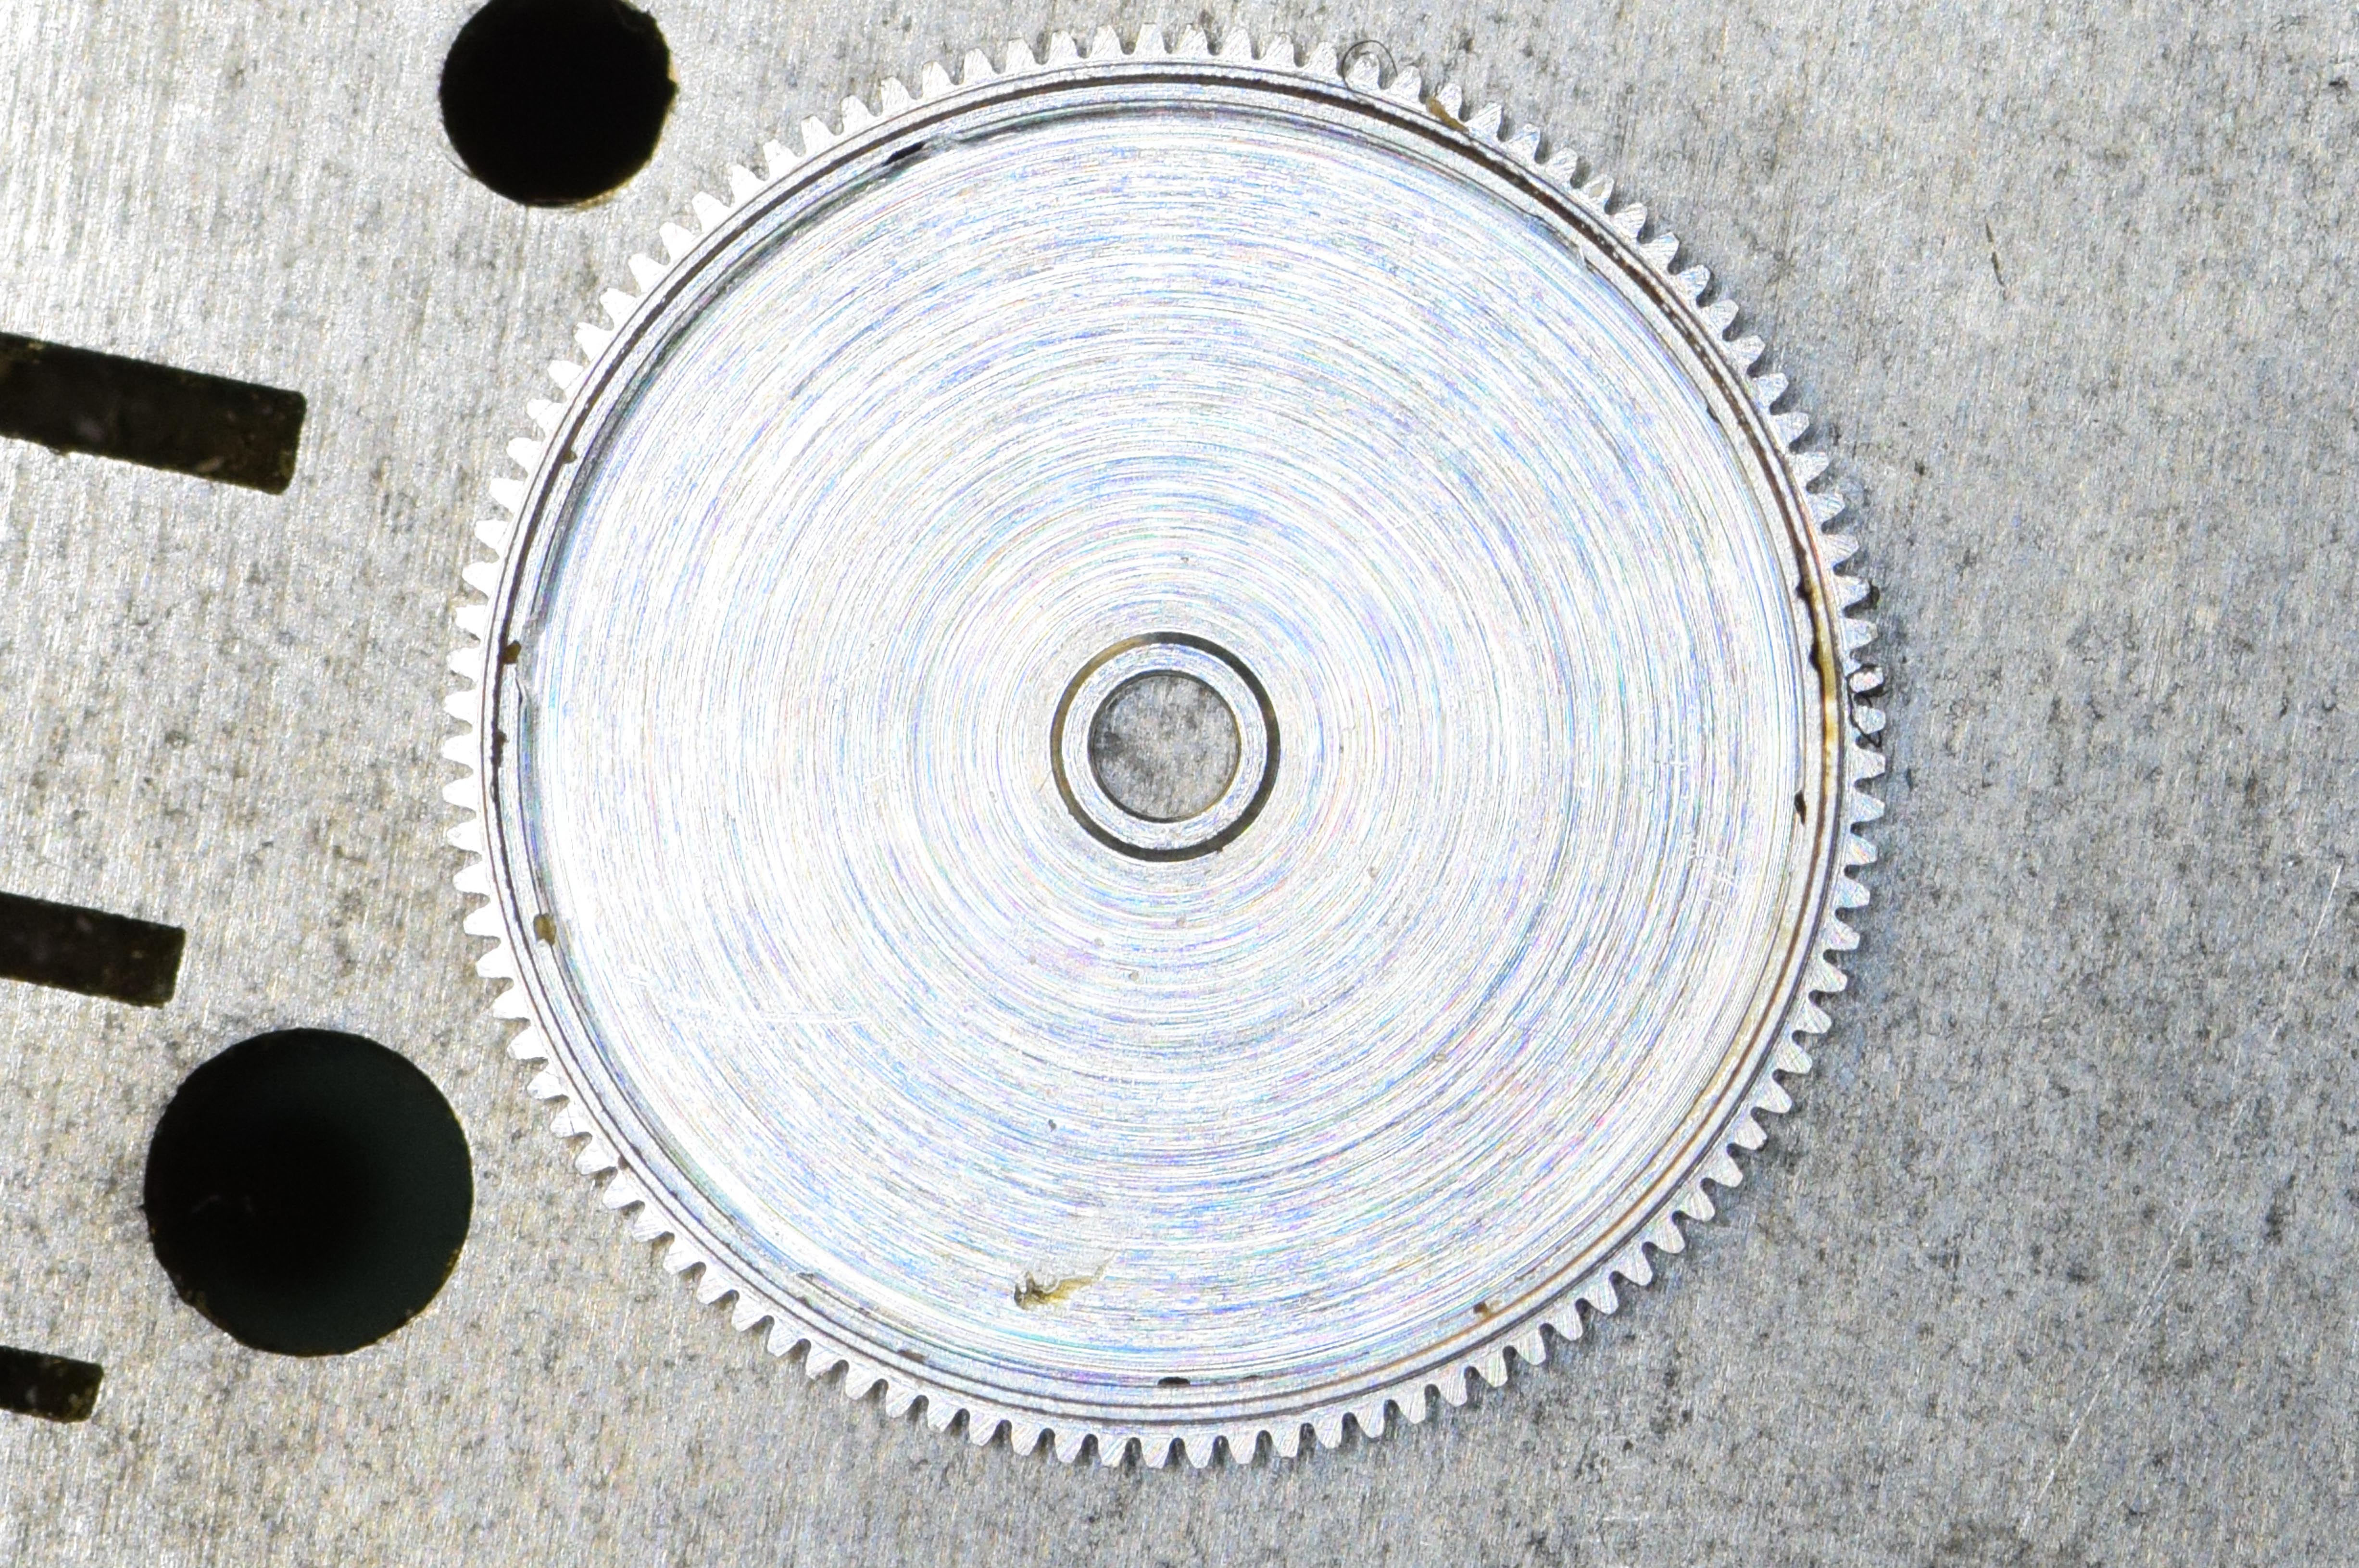
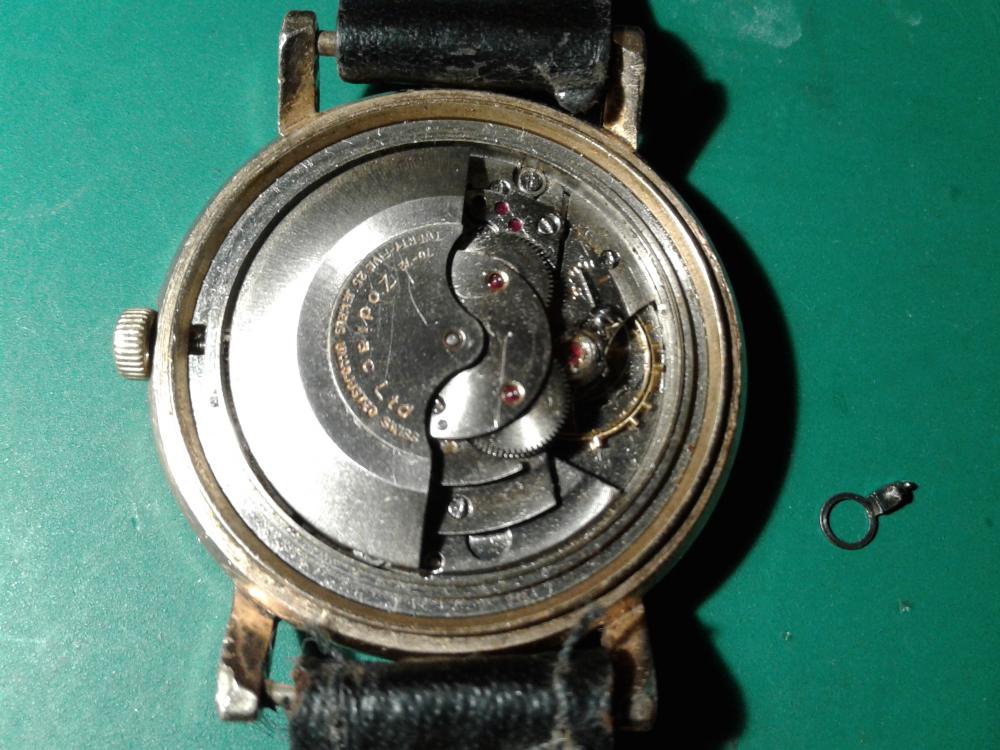
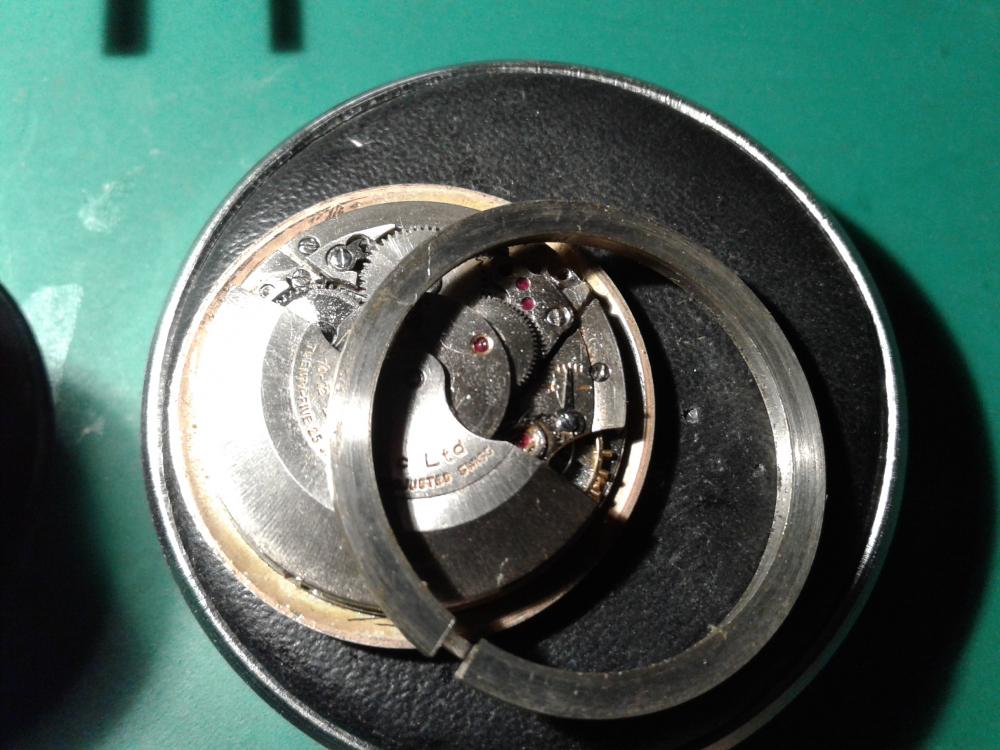
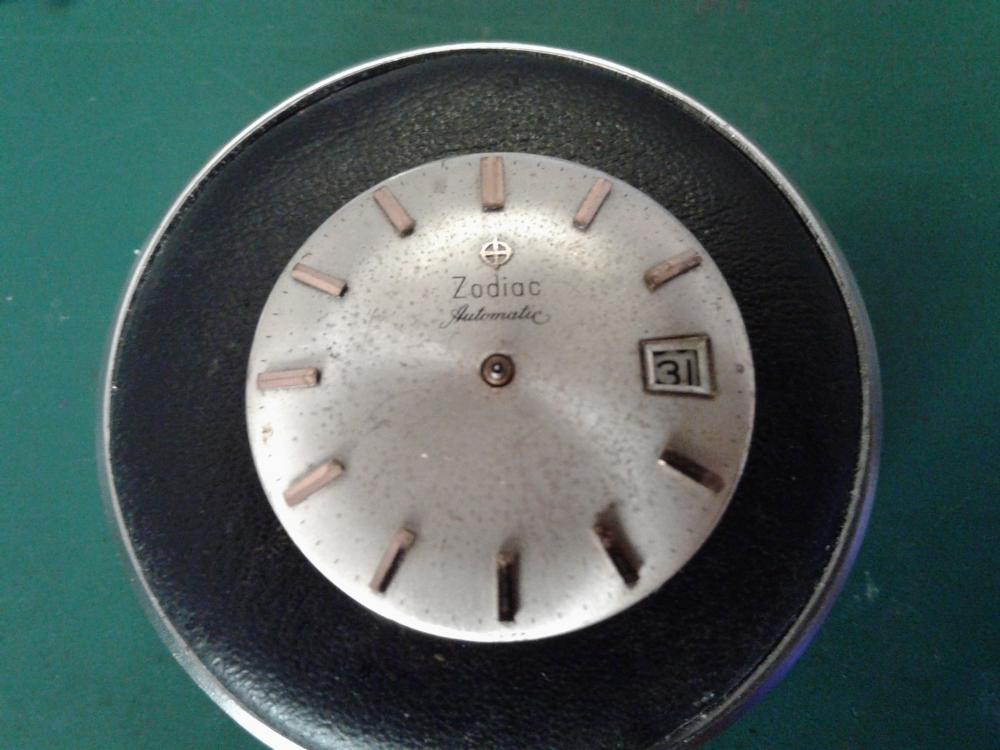
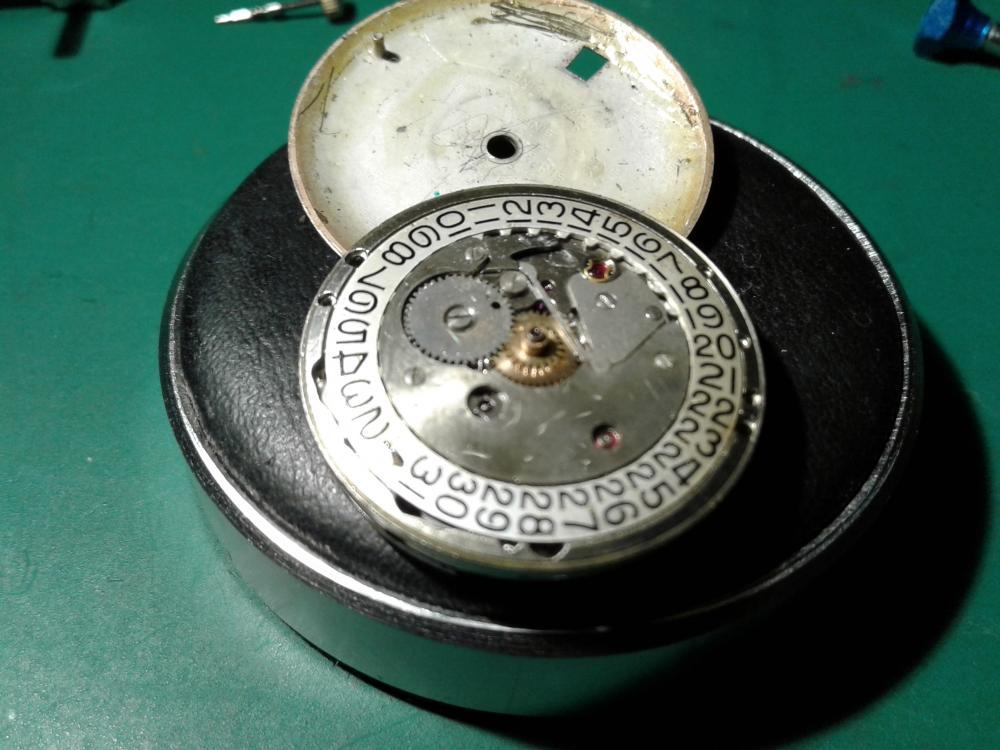
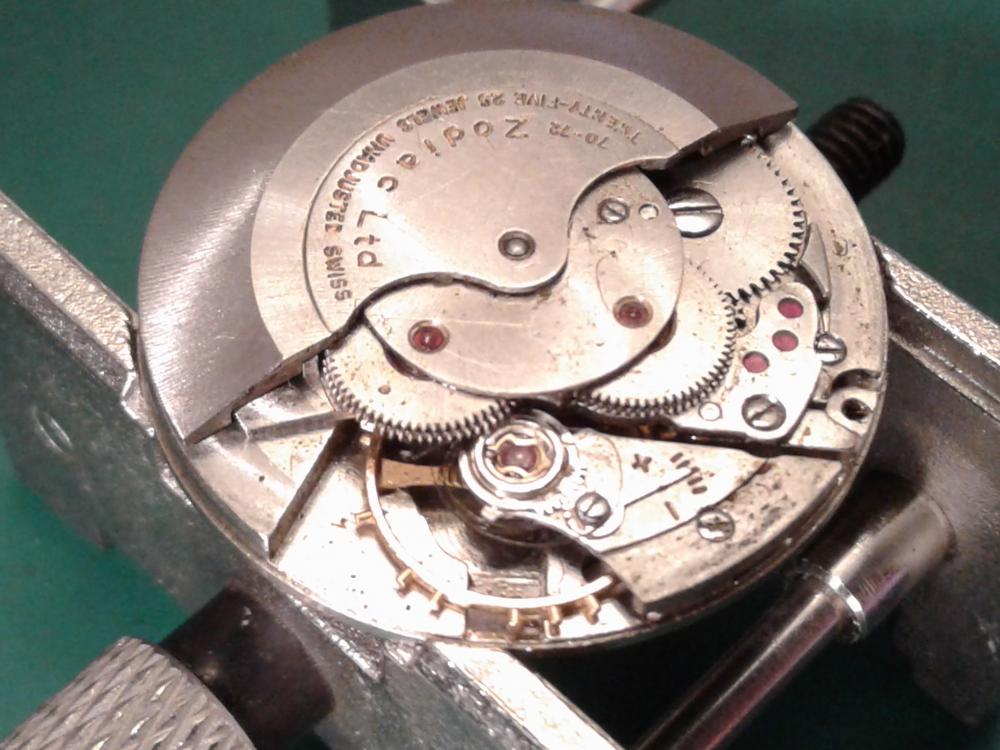
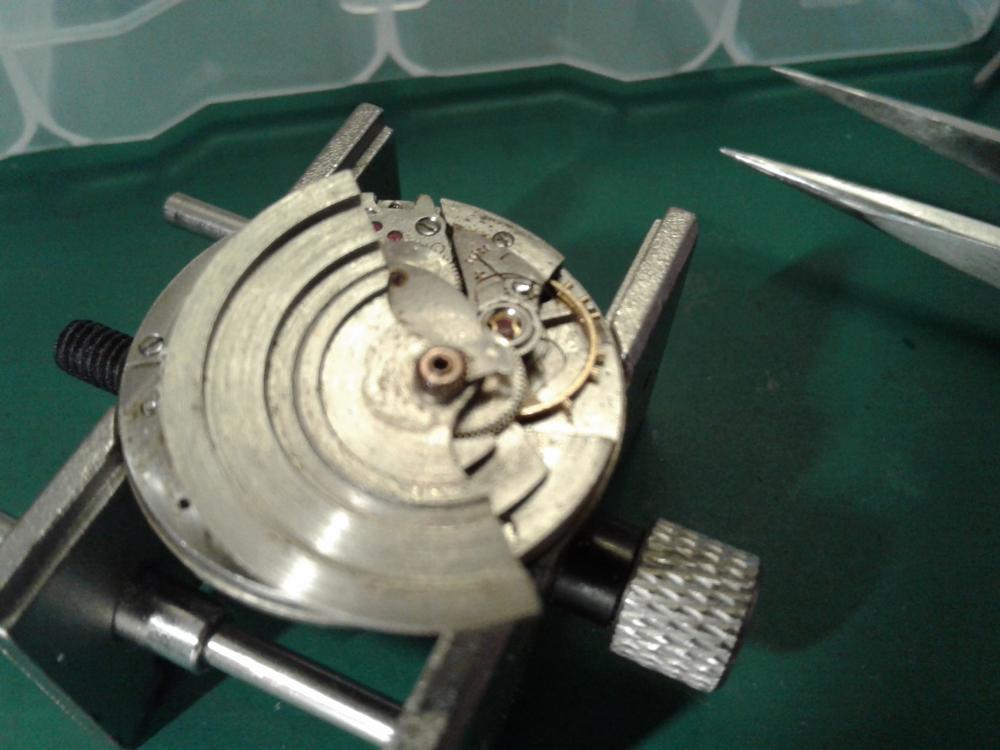
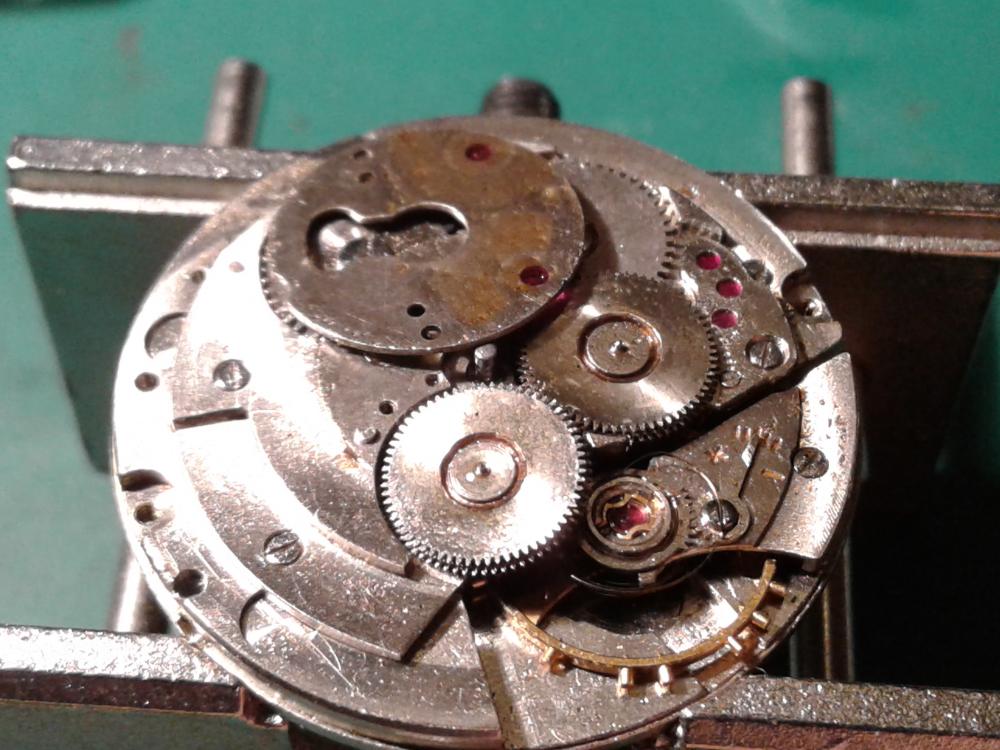
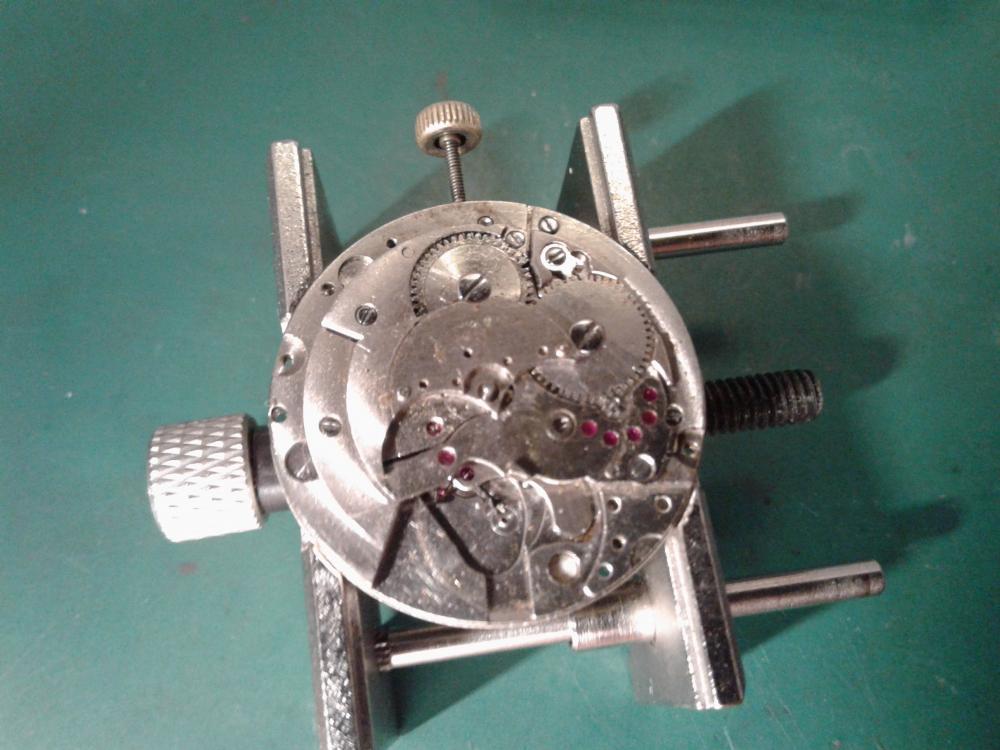
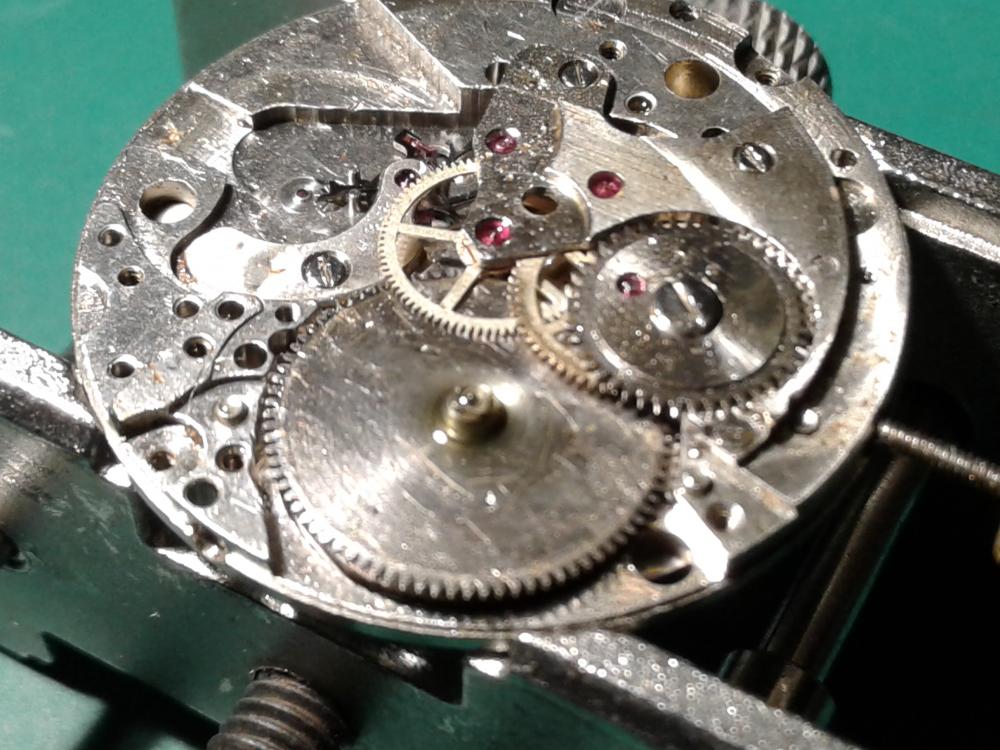
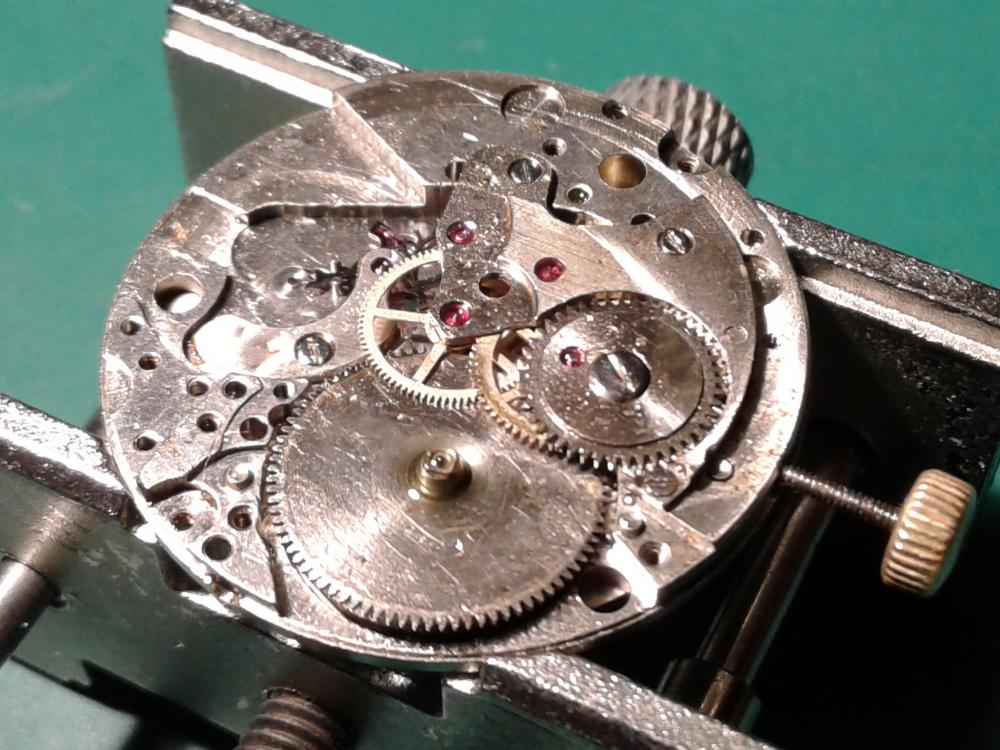
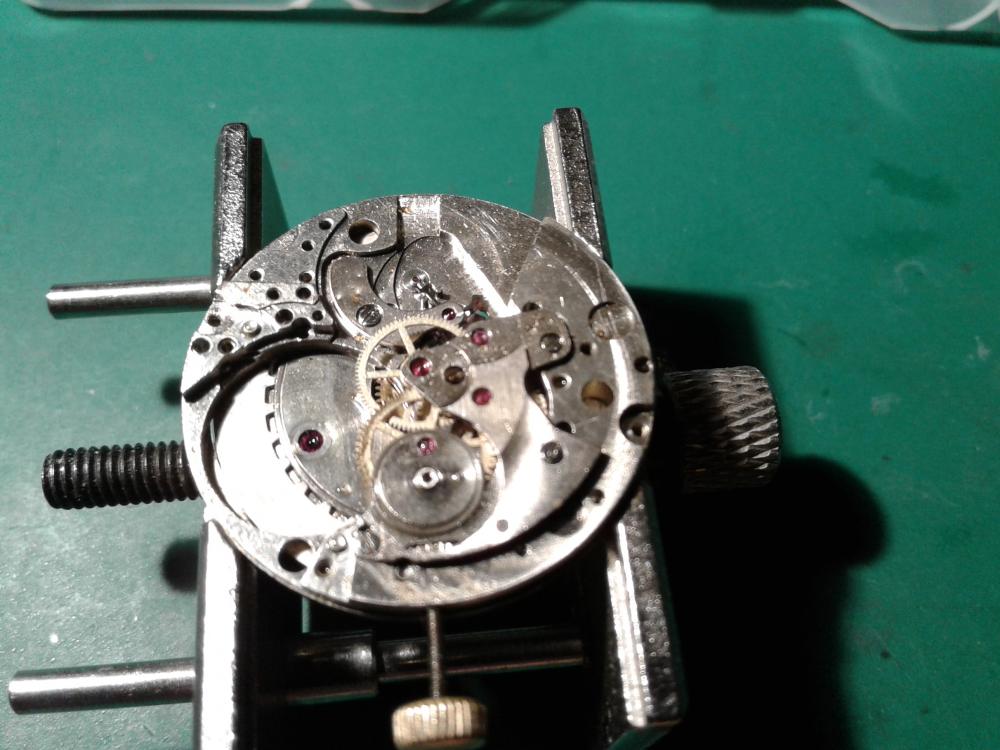
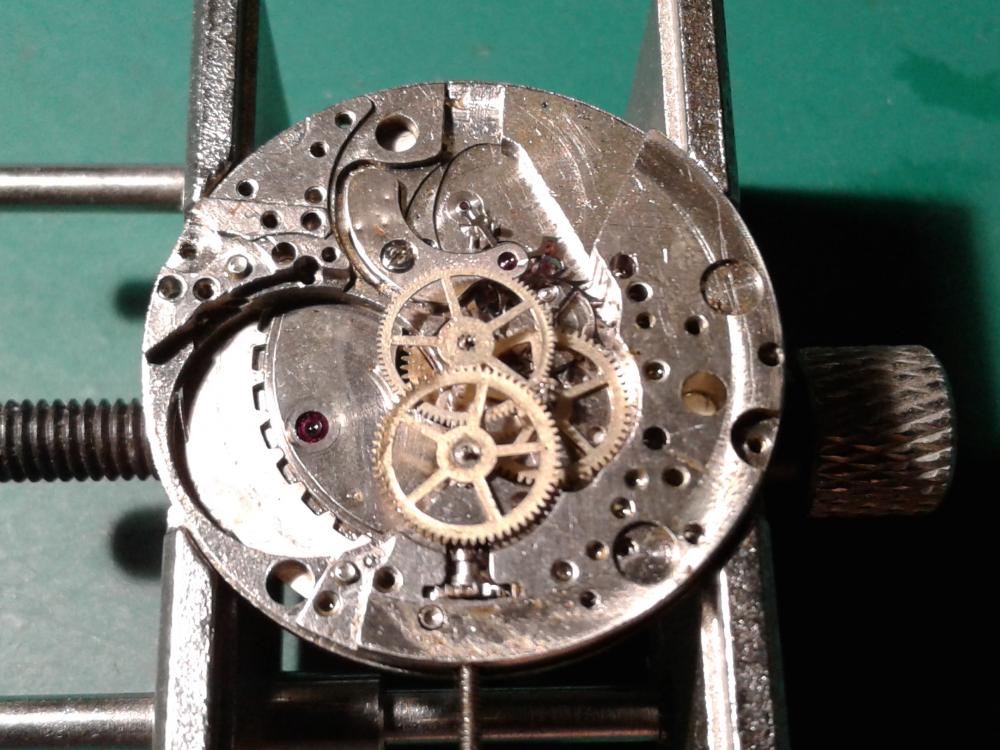
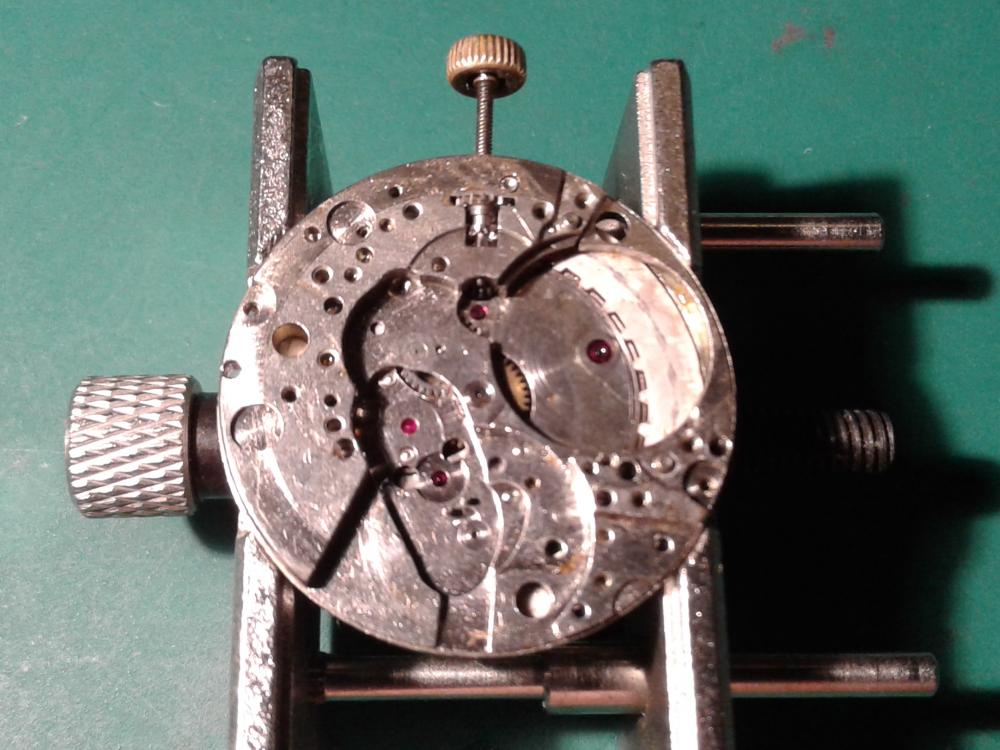
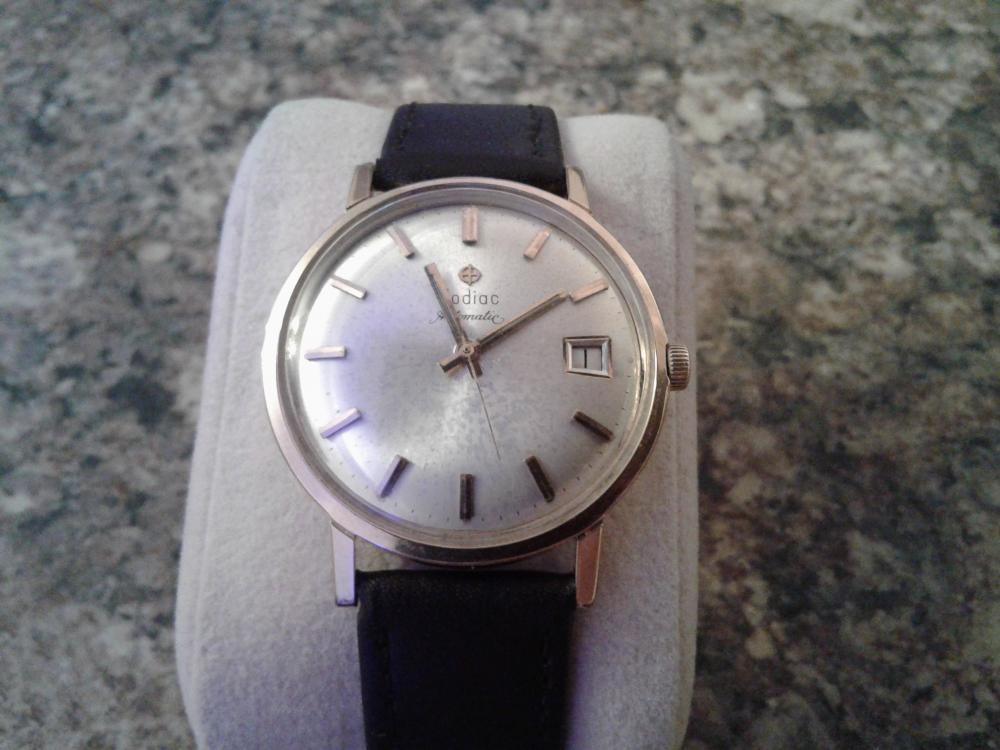
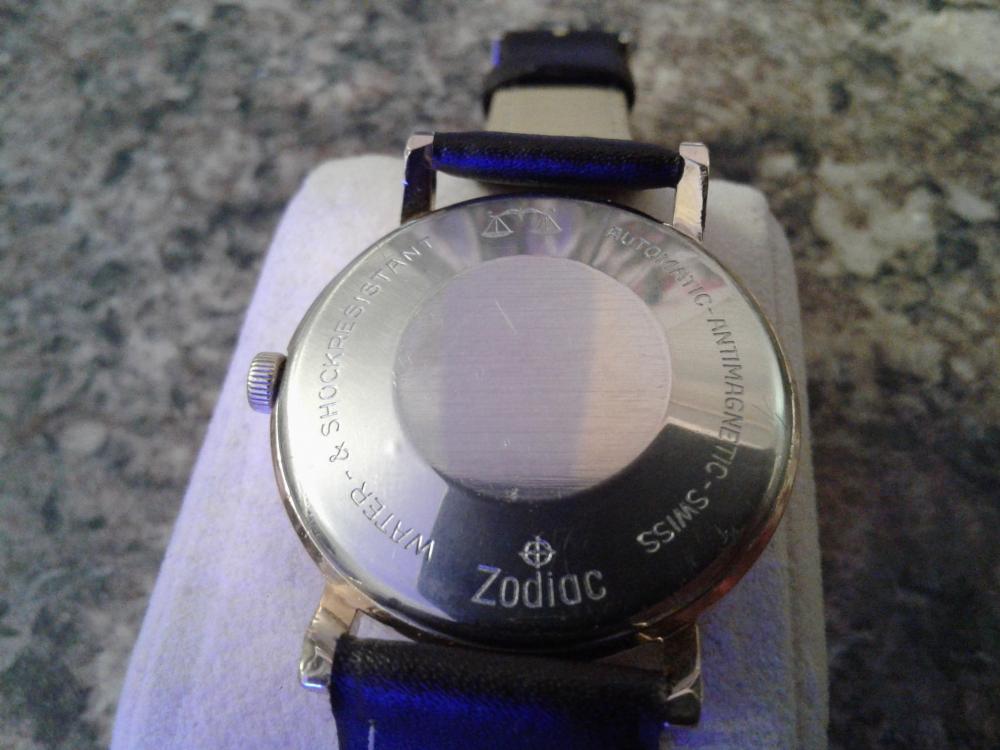
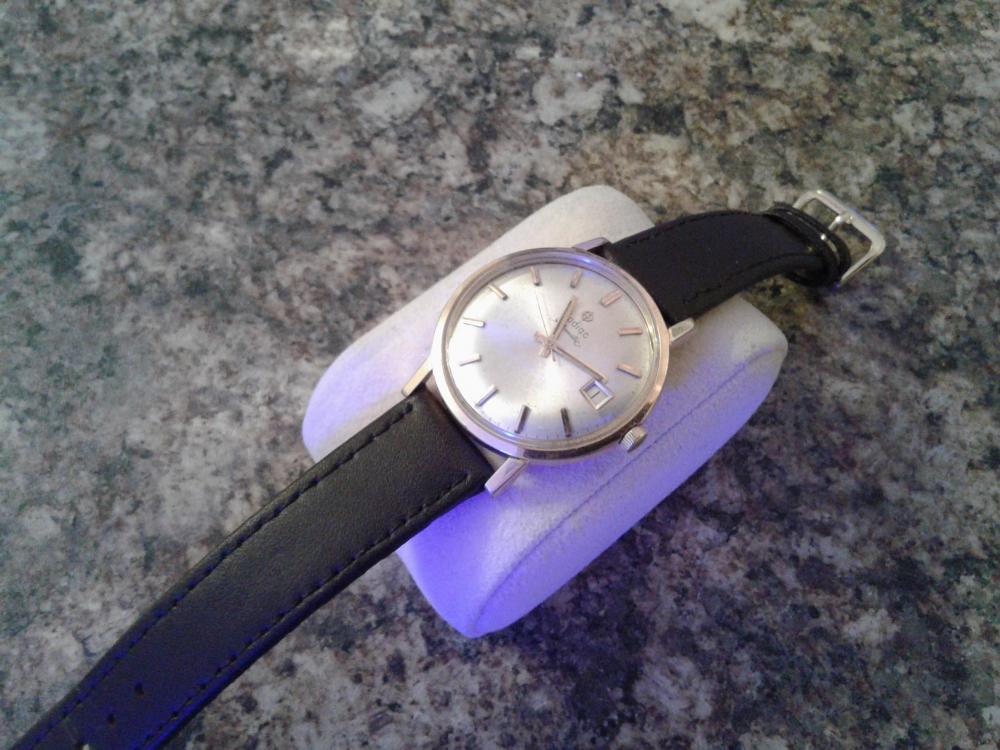
I was lucky enough to win on the bay a Zodiac 70/72 automatic at a reasonable price. I knew the hairspring was shot but wasn't expecting what I found. On receiving the watch and opening the bag I thought I know that smell "OIL" Looks ok dial needs a bit of a clean but the case is in good Nick. The back shows hardly any wear so a good polish should sort that out. So I open it up and once again the over powering smell of 3 in 1 hits me like a slap to the face. The stud holder has come off but luckily is in tact. I start to strip down the movement. Out of the case and case ring removed. Dial looks ok hopefully dust a light wash in soapy water will get rid of the oil and remove alot of the spotting. Dial removed and my first glimpse of oil. Flip it over and take a closer look it the movement the hair springs a mess and the balance is wobbling like a 16 year old on a night out. Rotor off. Reversing wheels a bit of staining and more oil. Auto wind wheels and balance removed now like a fool I forgot to take a photo of the spaghetti mess of the hairspring and the staff had a broken bottom pivot. I decide to drop John at obsolete watch parts an e-mail and luckily he has a complete balance at a very reasonable price and further more if I post the movement to him when I've cleaned it as we are unsure whether its the correct one for the movement as according to J boreal the base caliber was a AS 1649 he will try it before I buy bit now that's service for you . Look at the oil its dripping in the stuff. crown and ratchet wheels Now the barrel on this caliber is a sealed unit and has wrote on it very faintly do not open. But I'm not worried about it being oiled it has enough oil on it to last forever. Look at all that oil its been dipped I'm sure. Barrel out. Train bridge off. That side is stripped just alot of oil and a bit of staining. Dial side more oil date ring a bit stained. Oily That's It stripped down and ready for the ultrasonic. The cleaning went well and the assembly was just a reverse of the strip down. I then sent the movement of tho John and he fitted the balance and returned it all within 2 days the man's a star. On reassembly and leaving to run after I had adjusted it on the timing machine I noticed the hands were only moving 5 minutes in the hour. This was the culprit a slipping clutch wheel on the offset cannon pinion. Luckily Rogart69 heard my call for help and directed me in the right direction as to how to tighten it many thanks to him. So here it is running nice and looking good.


 1 point
 -
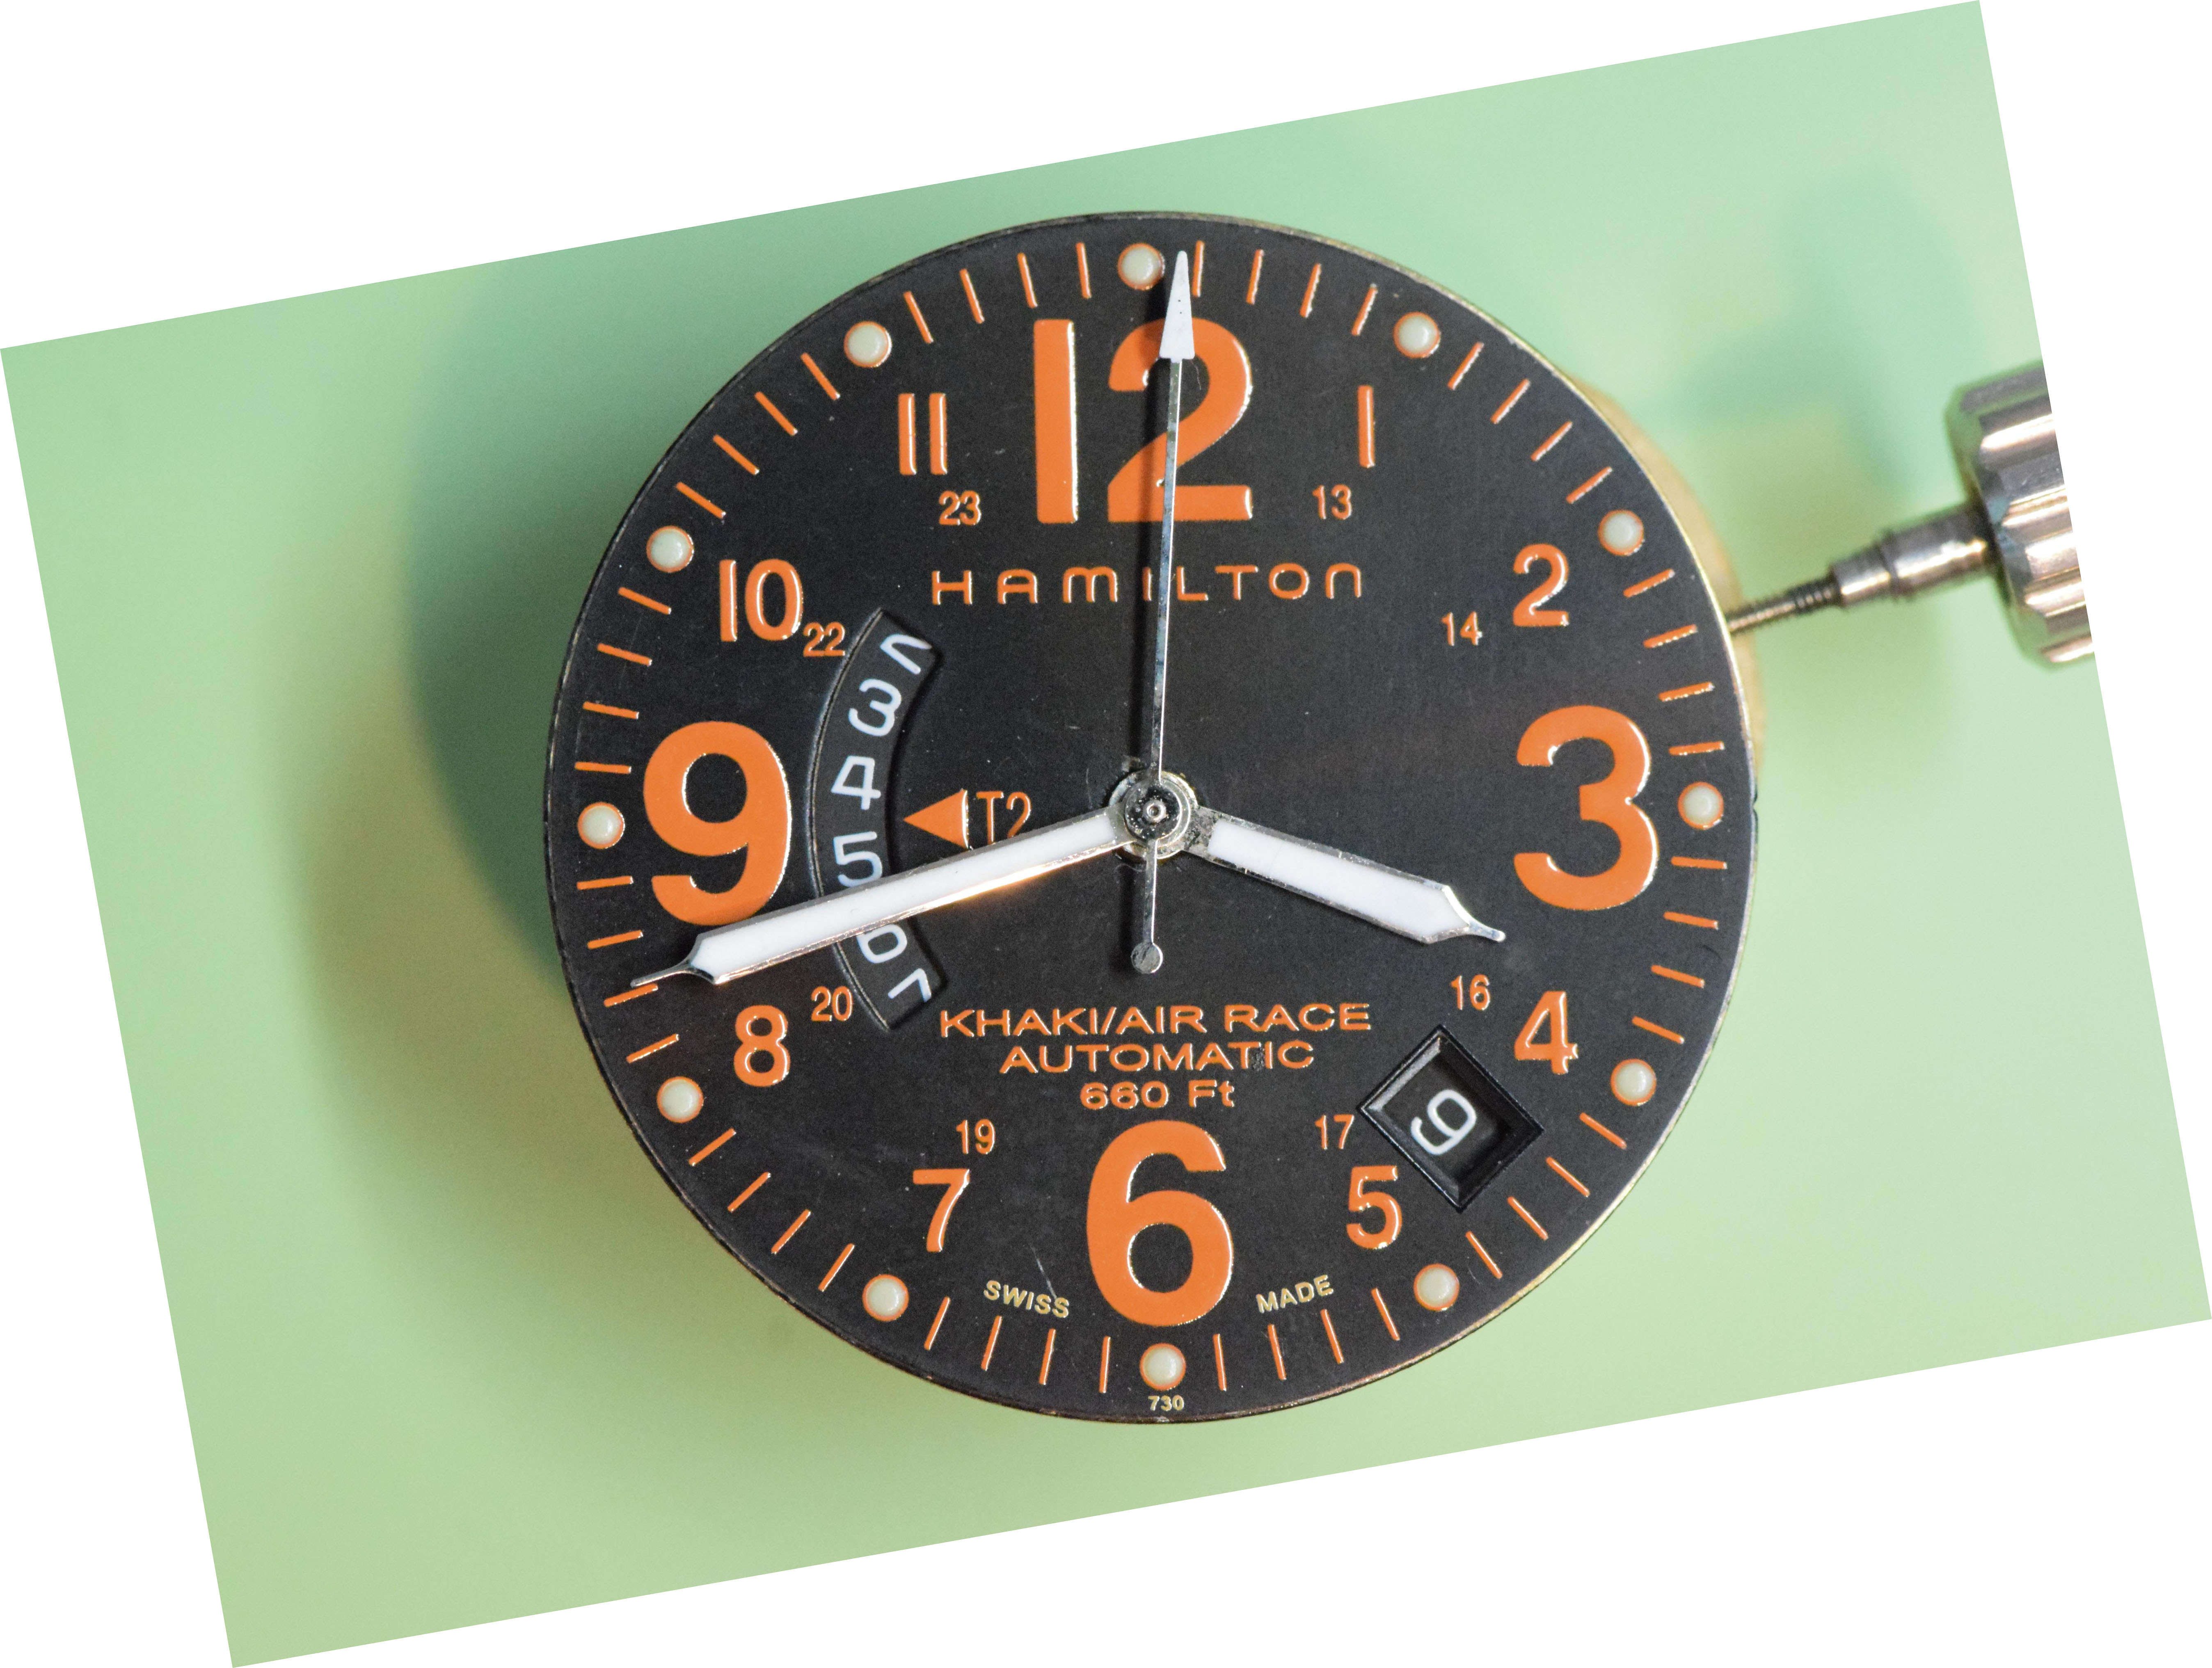
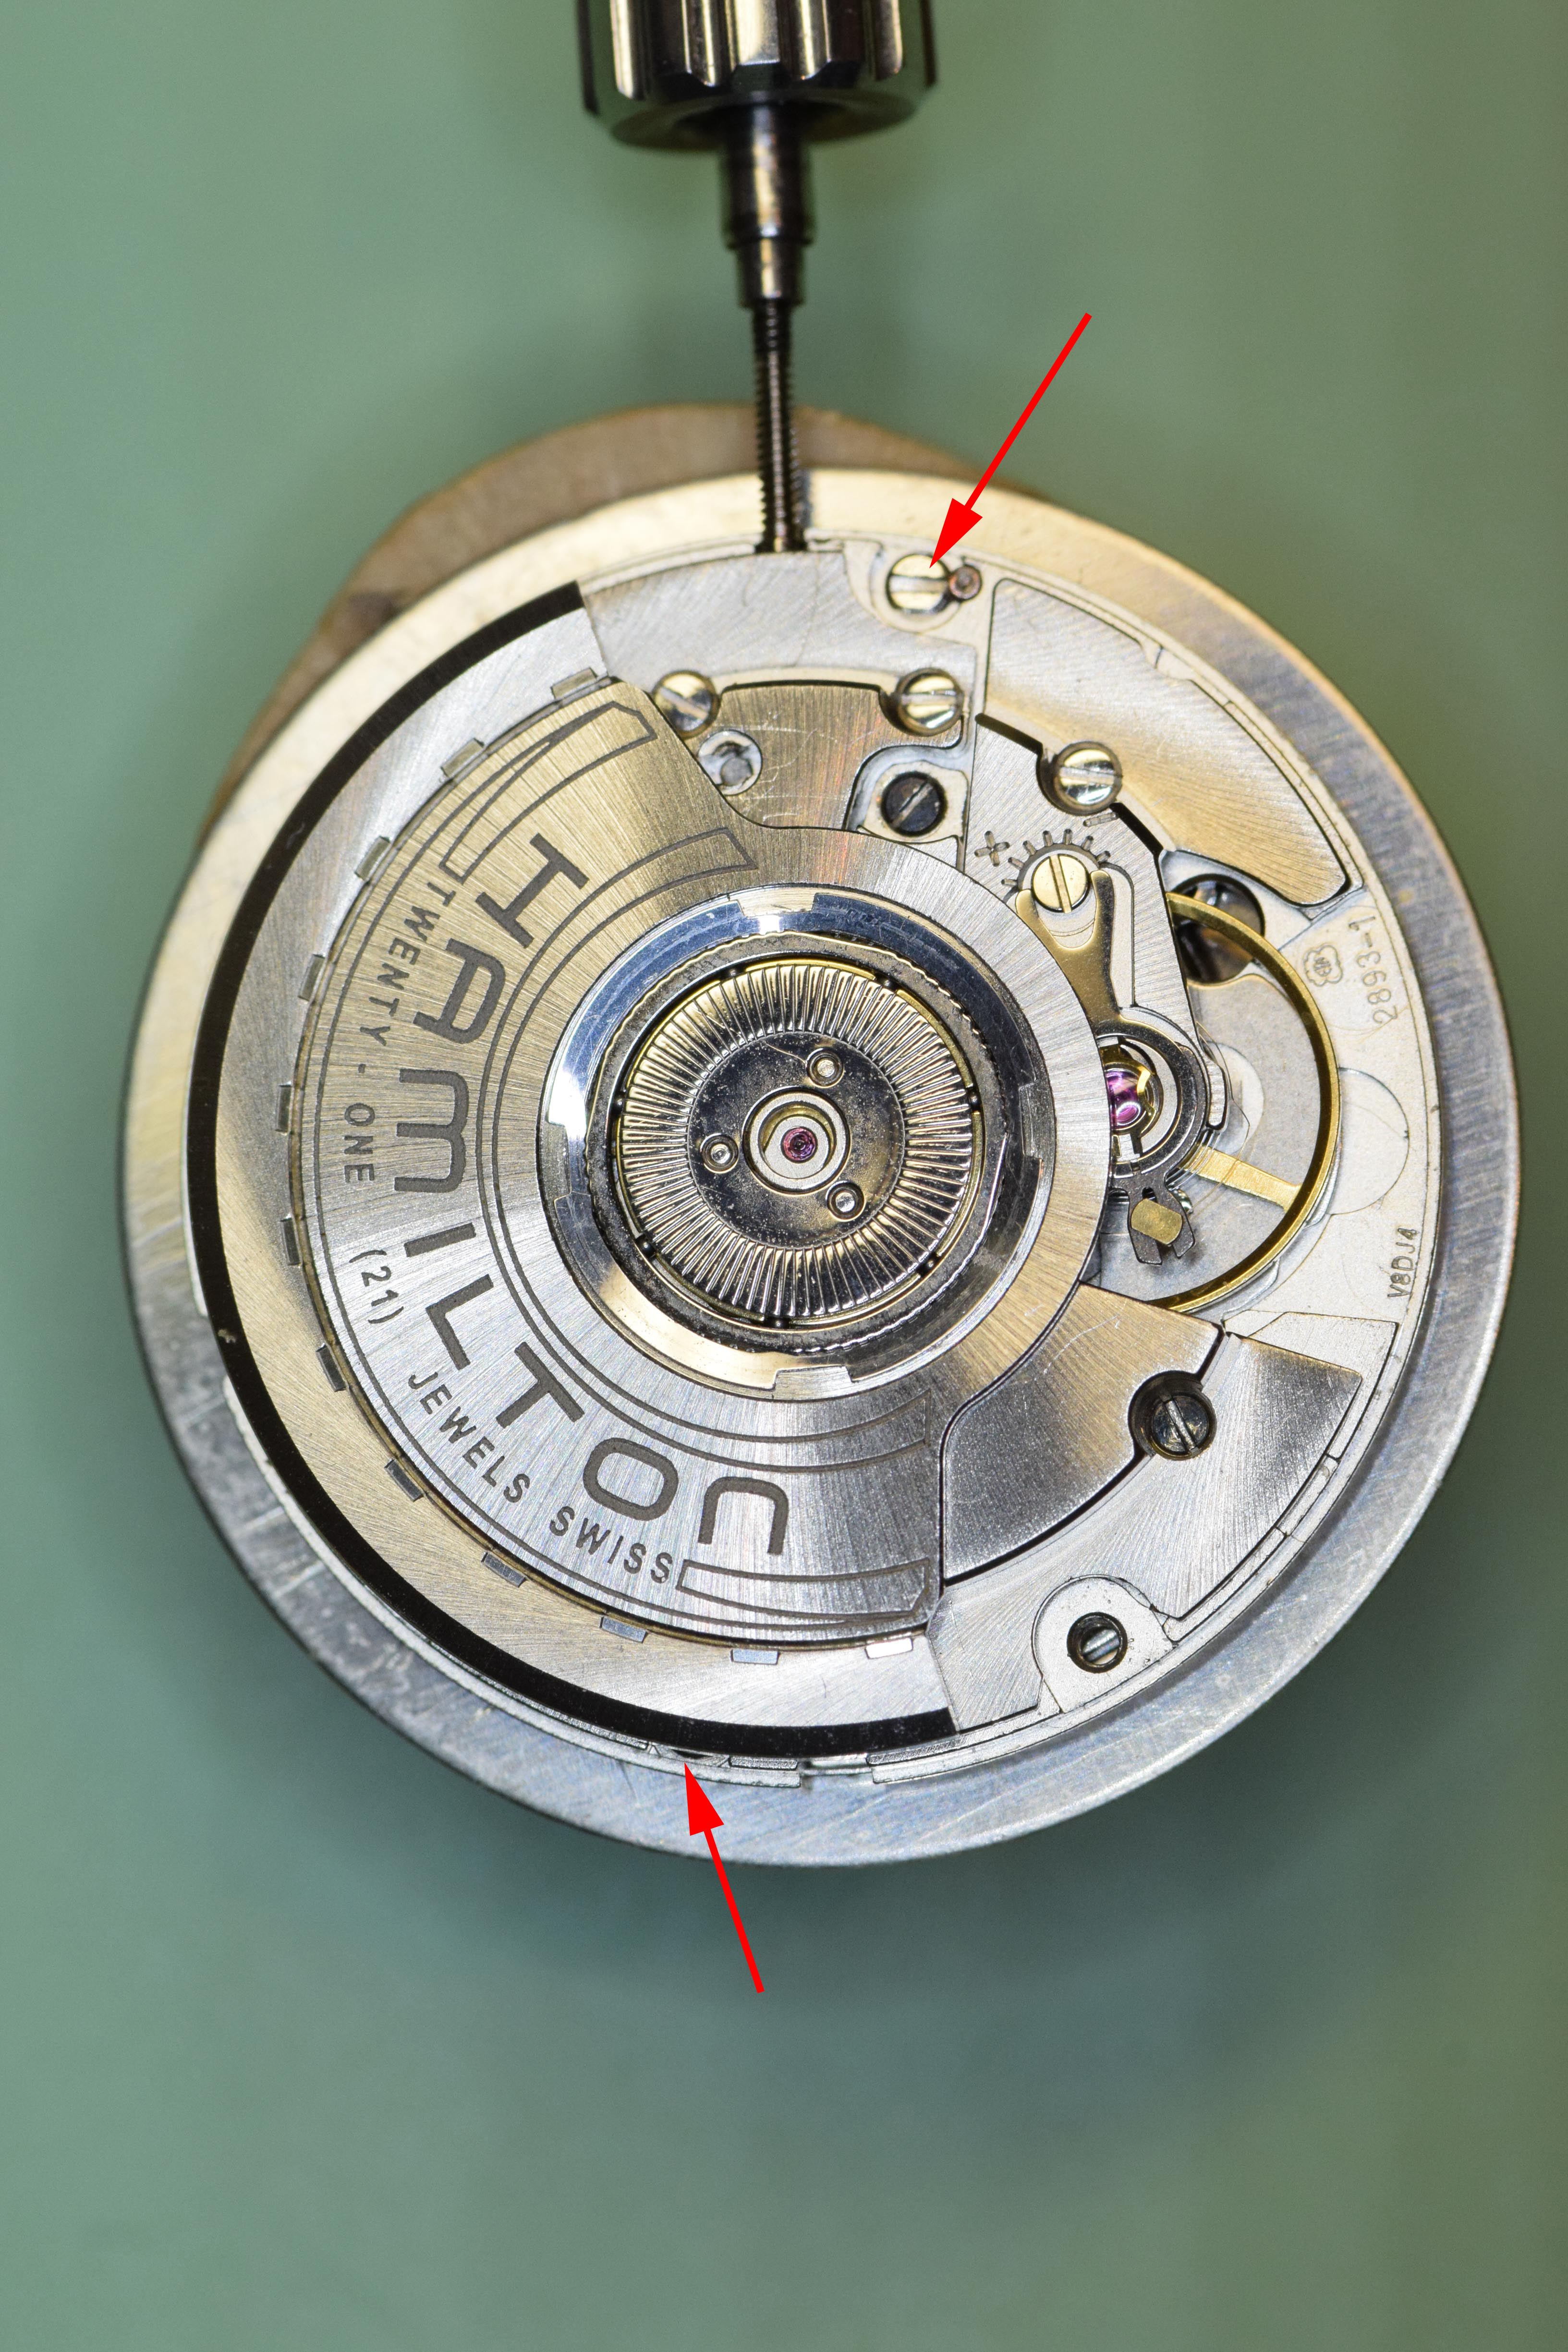
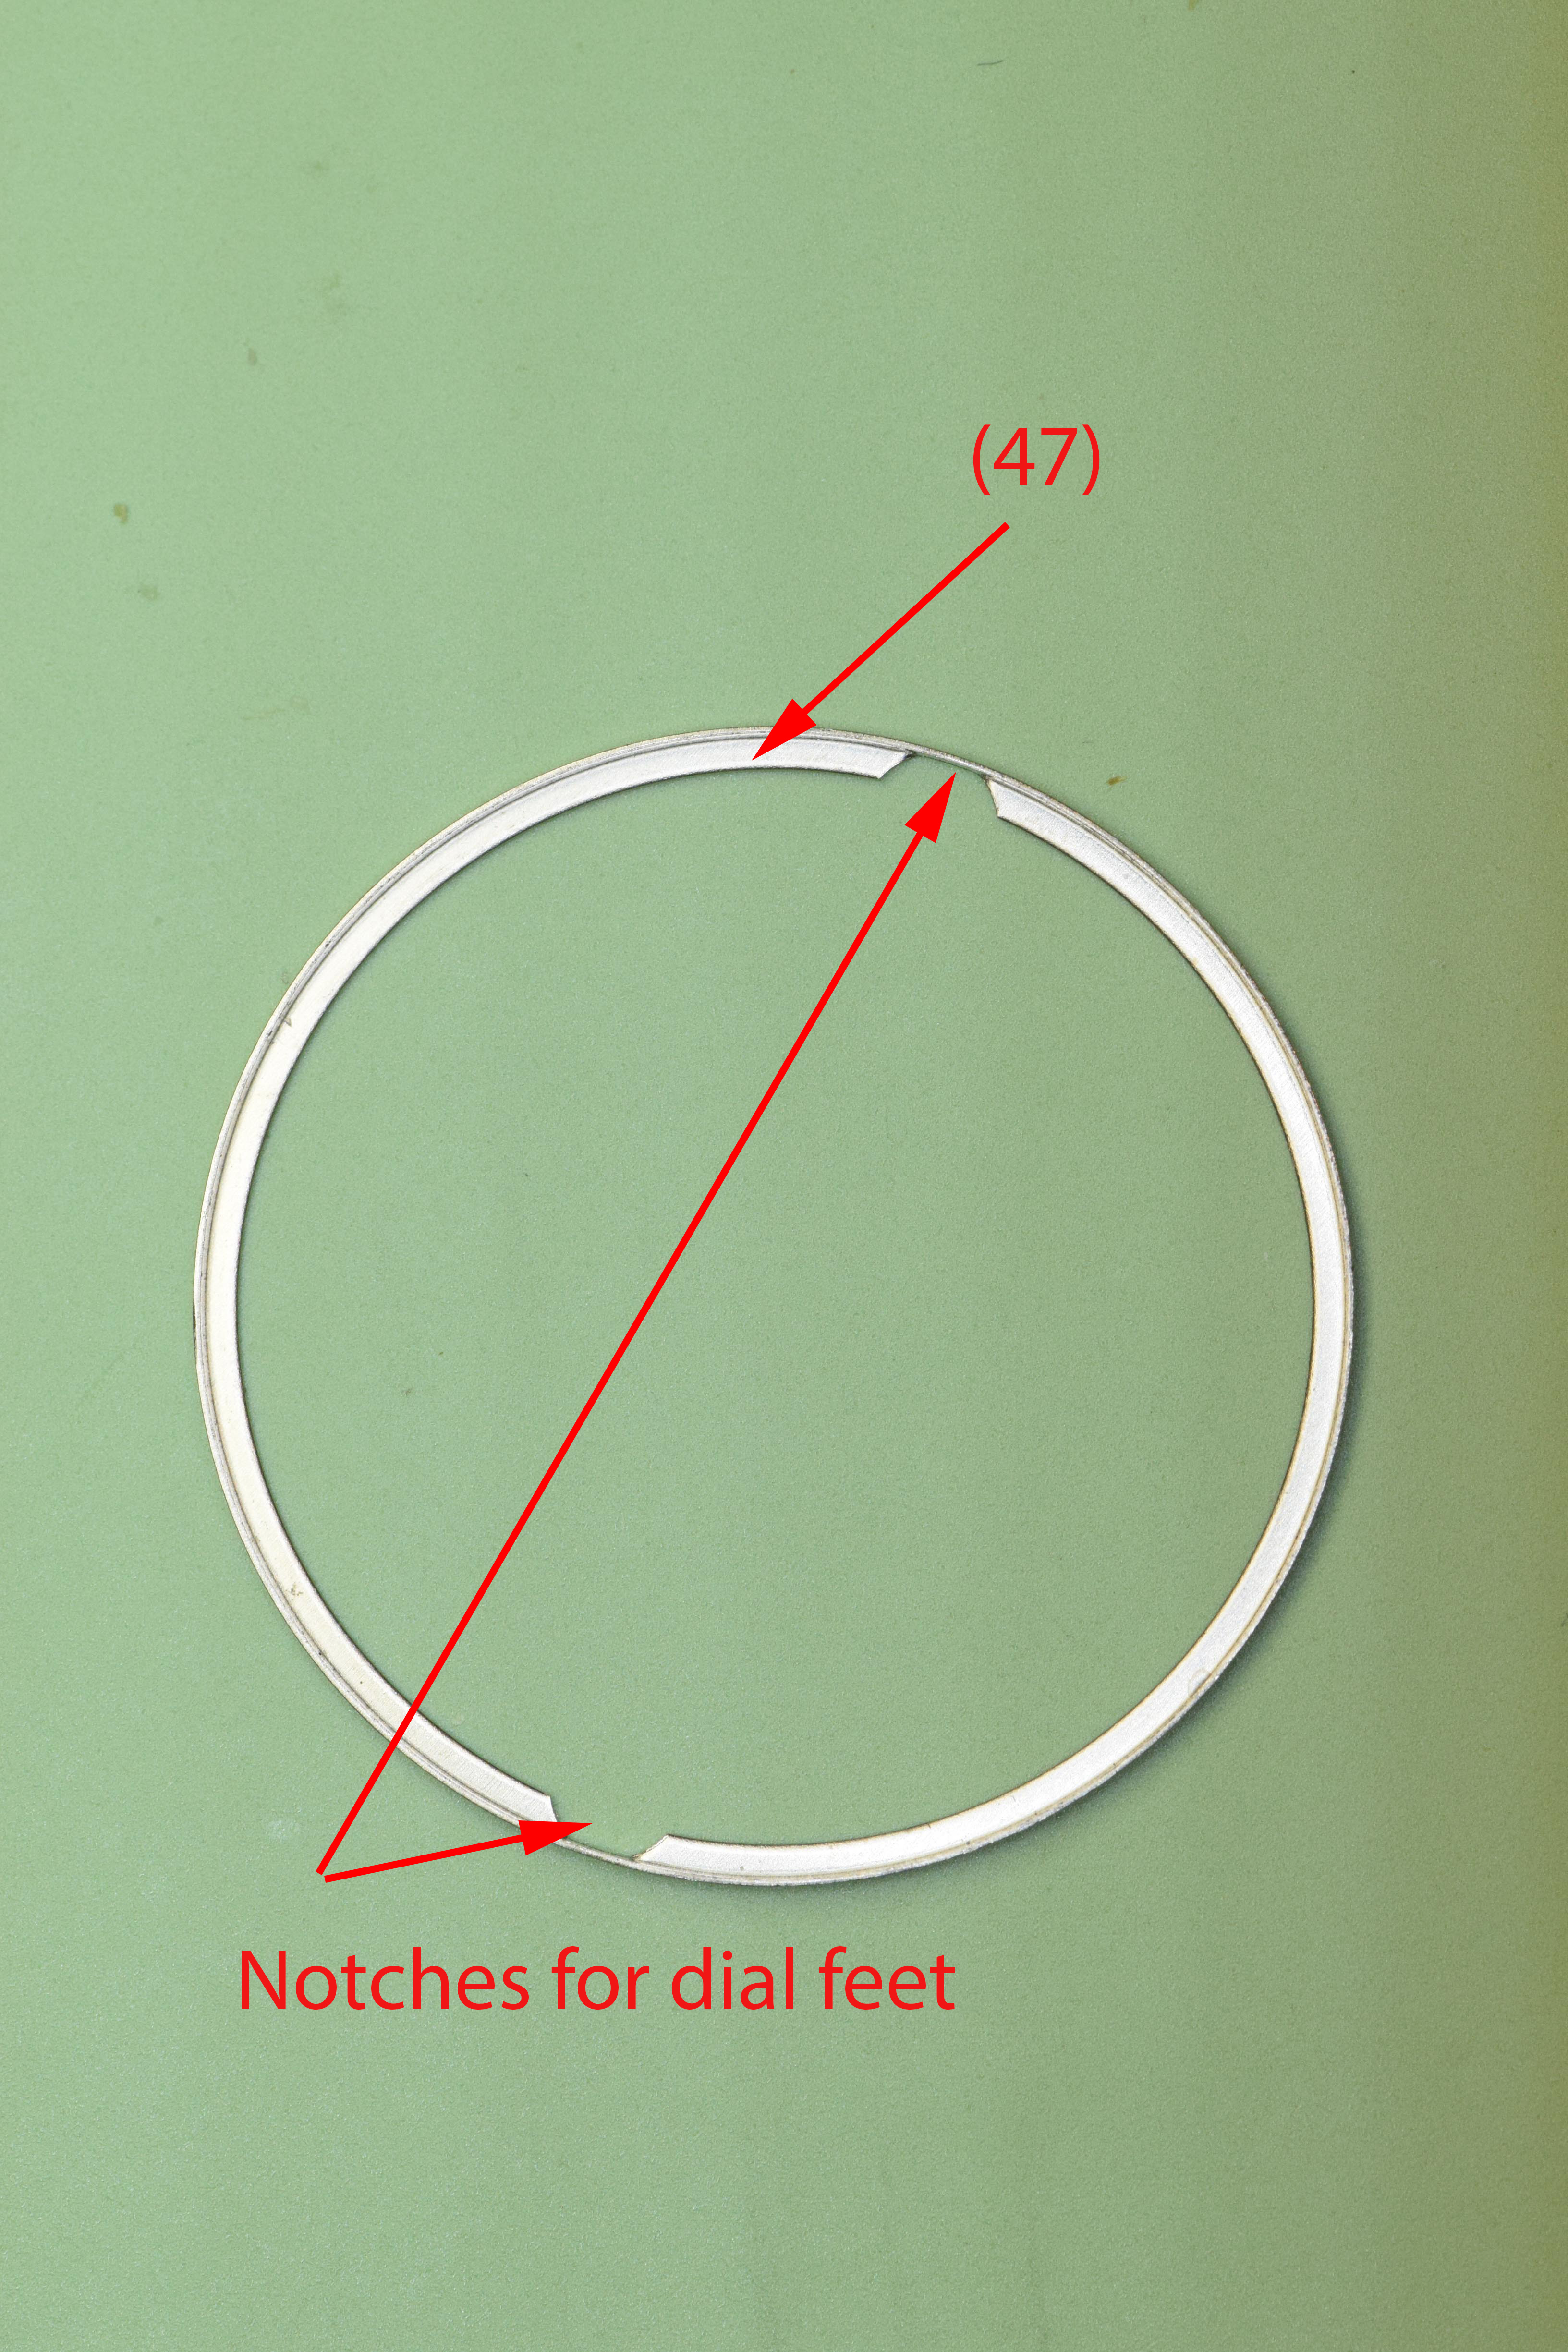
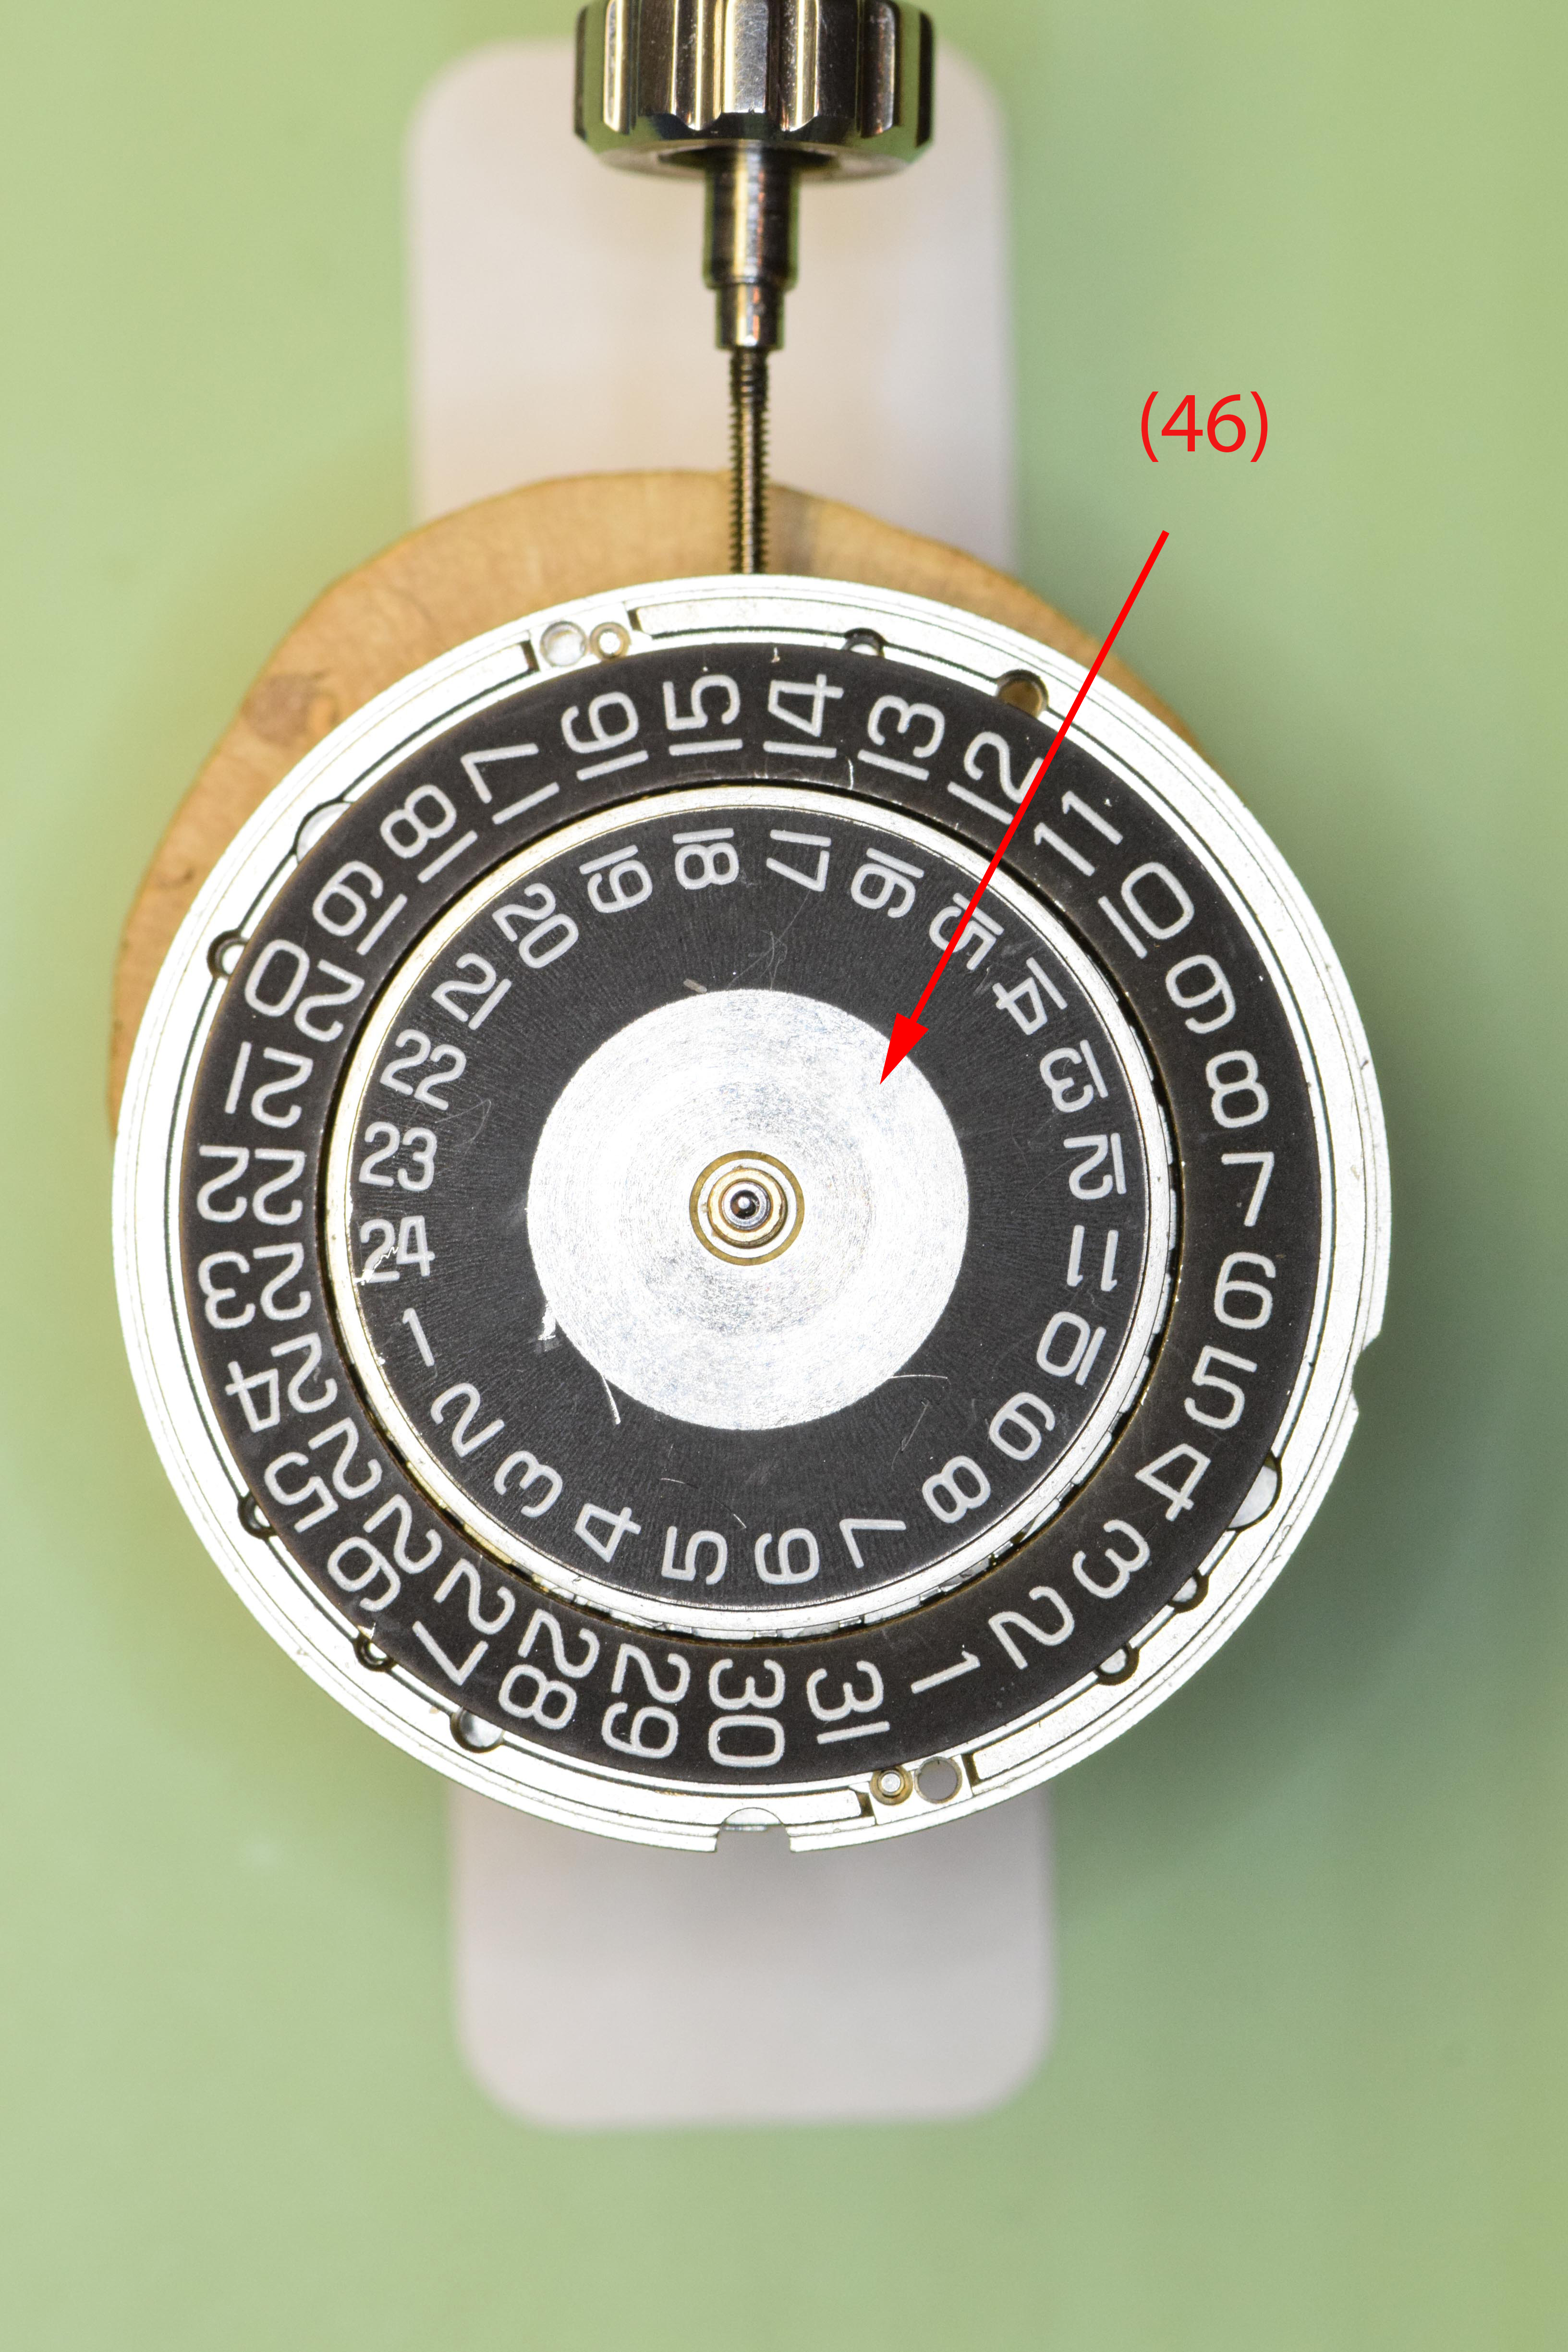
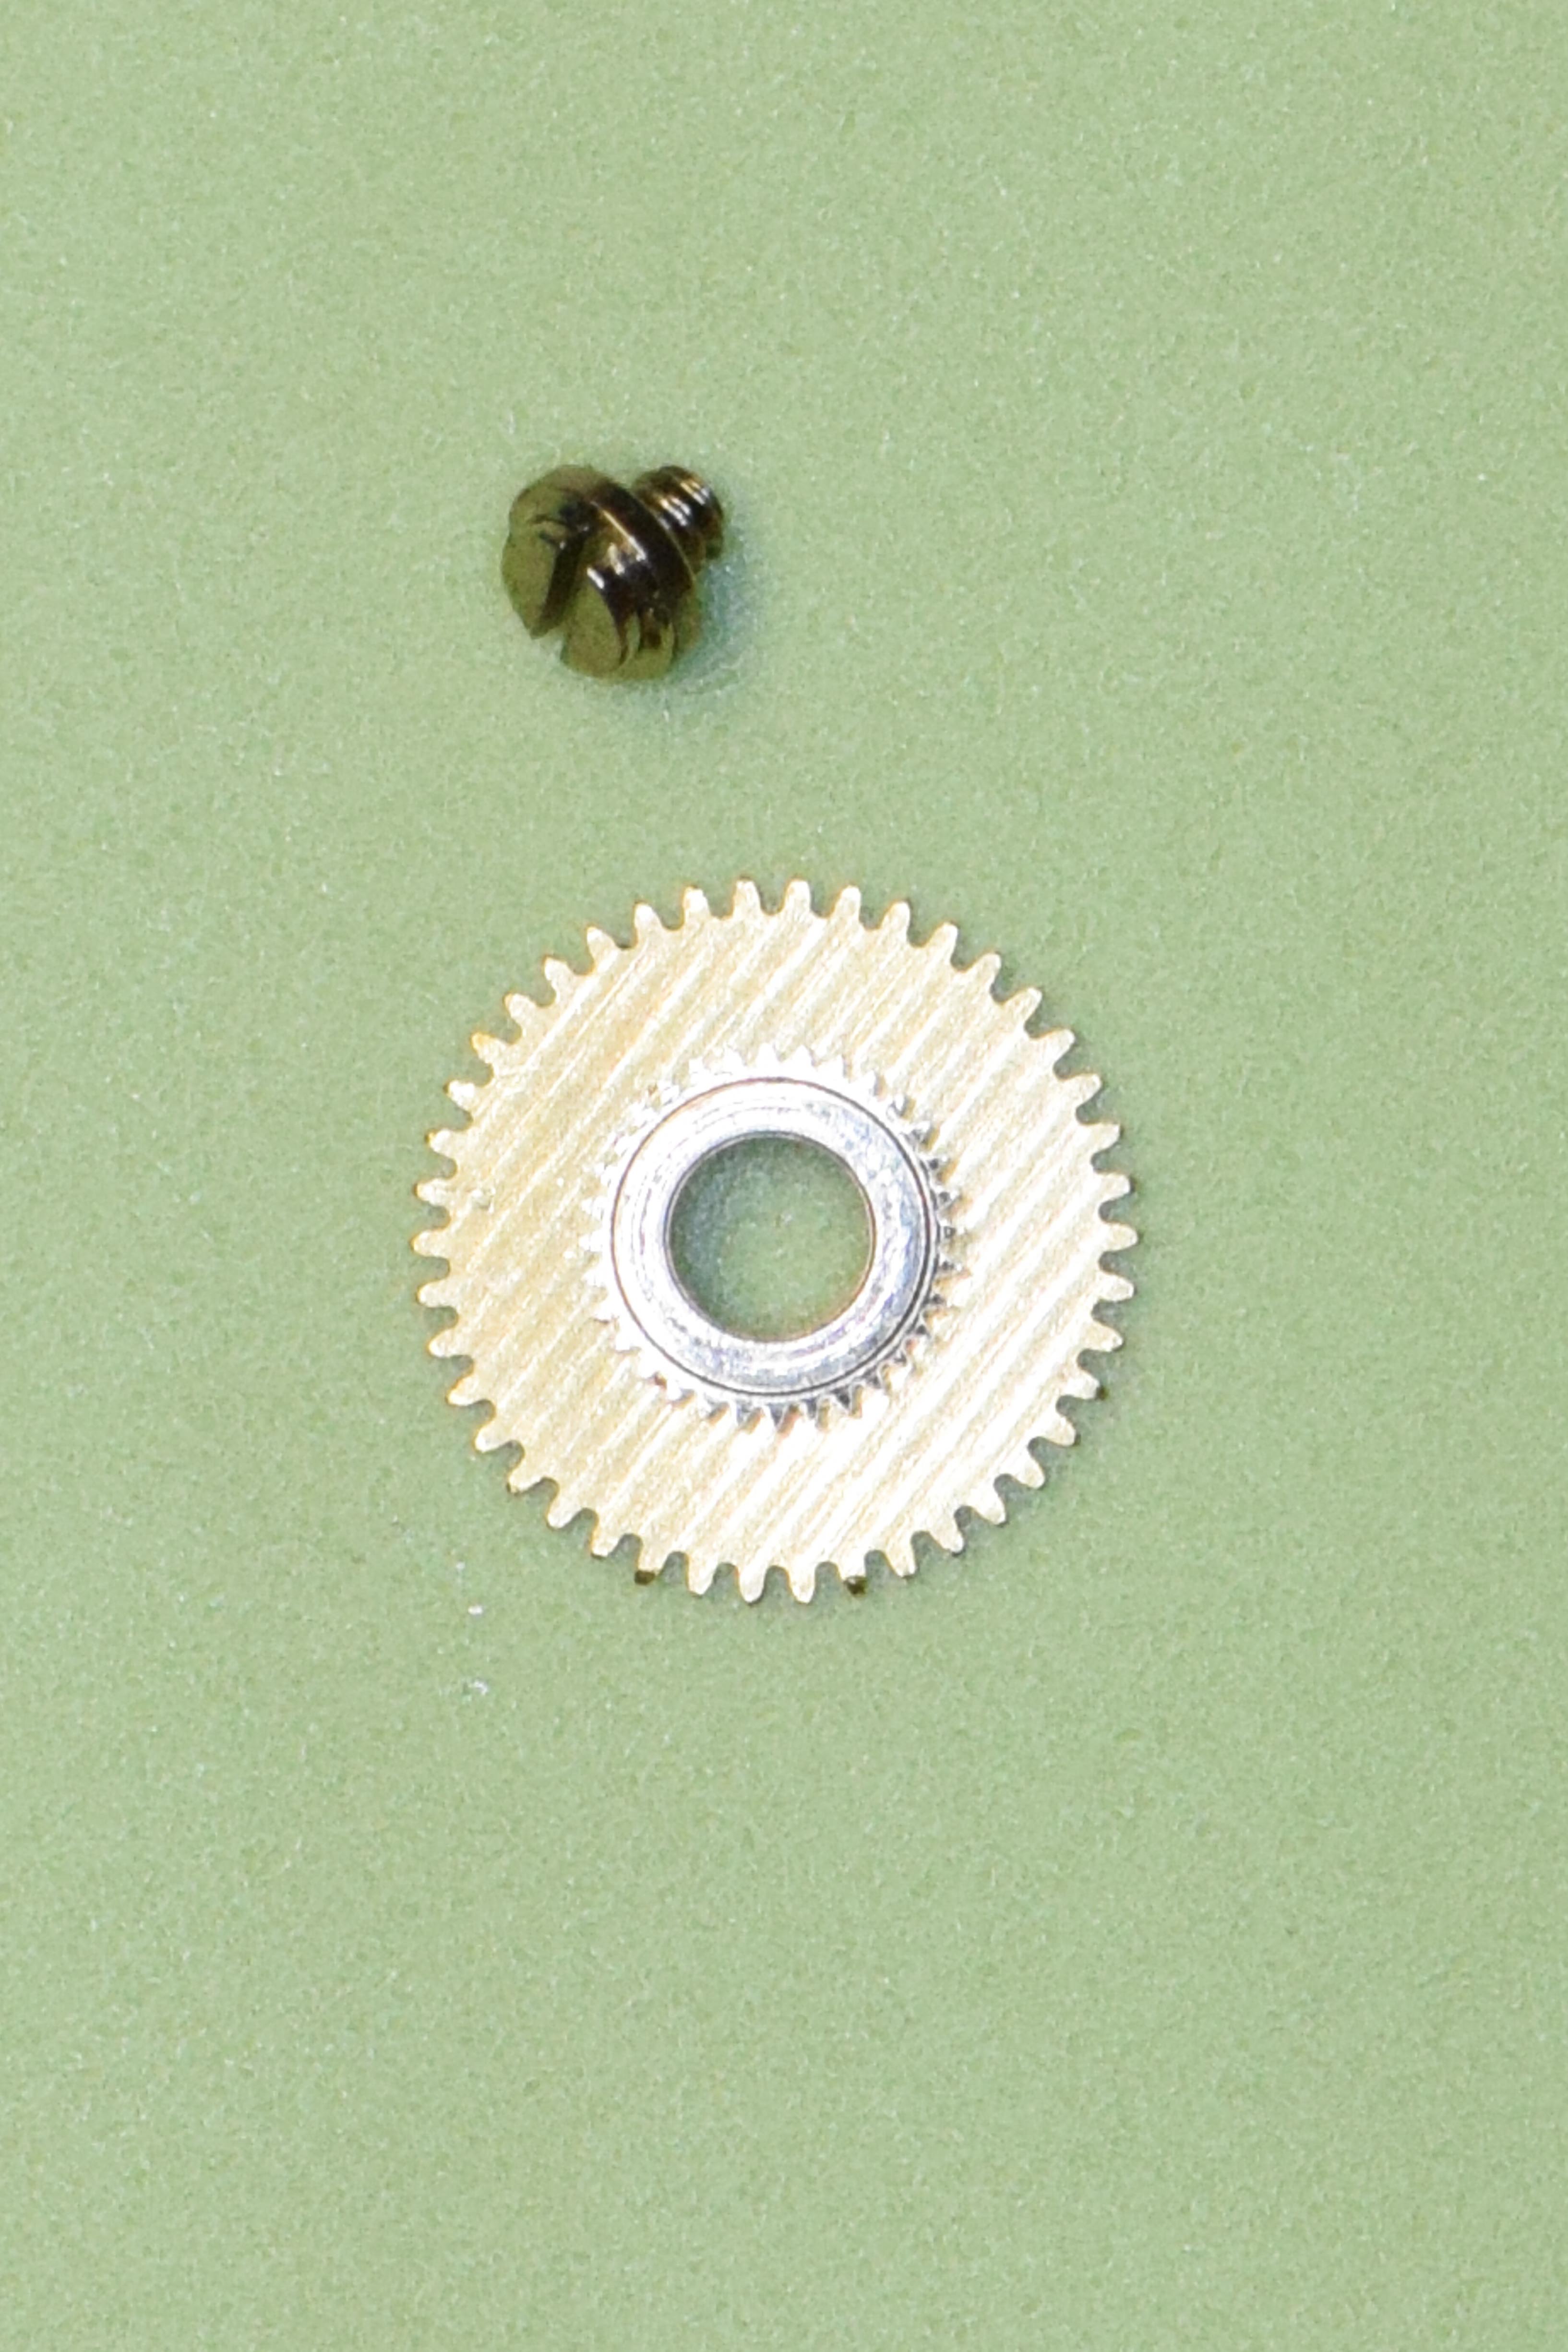
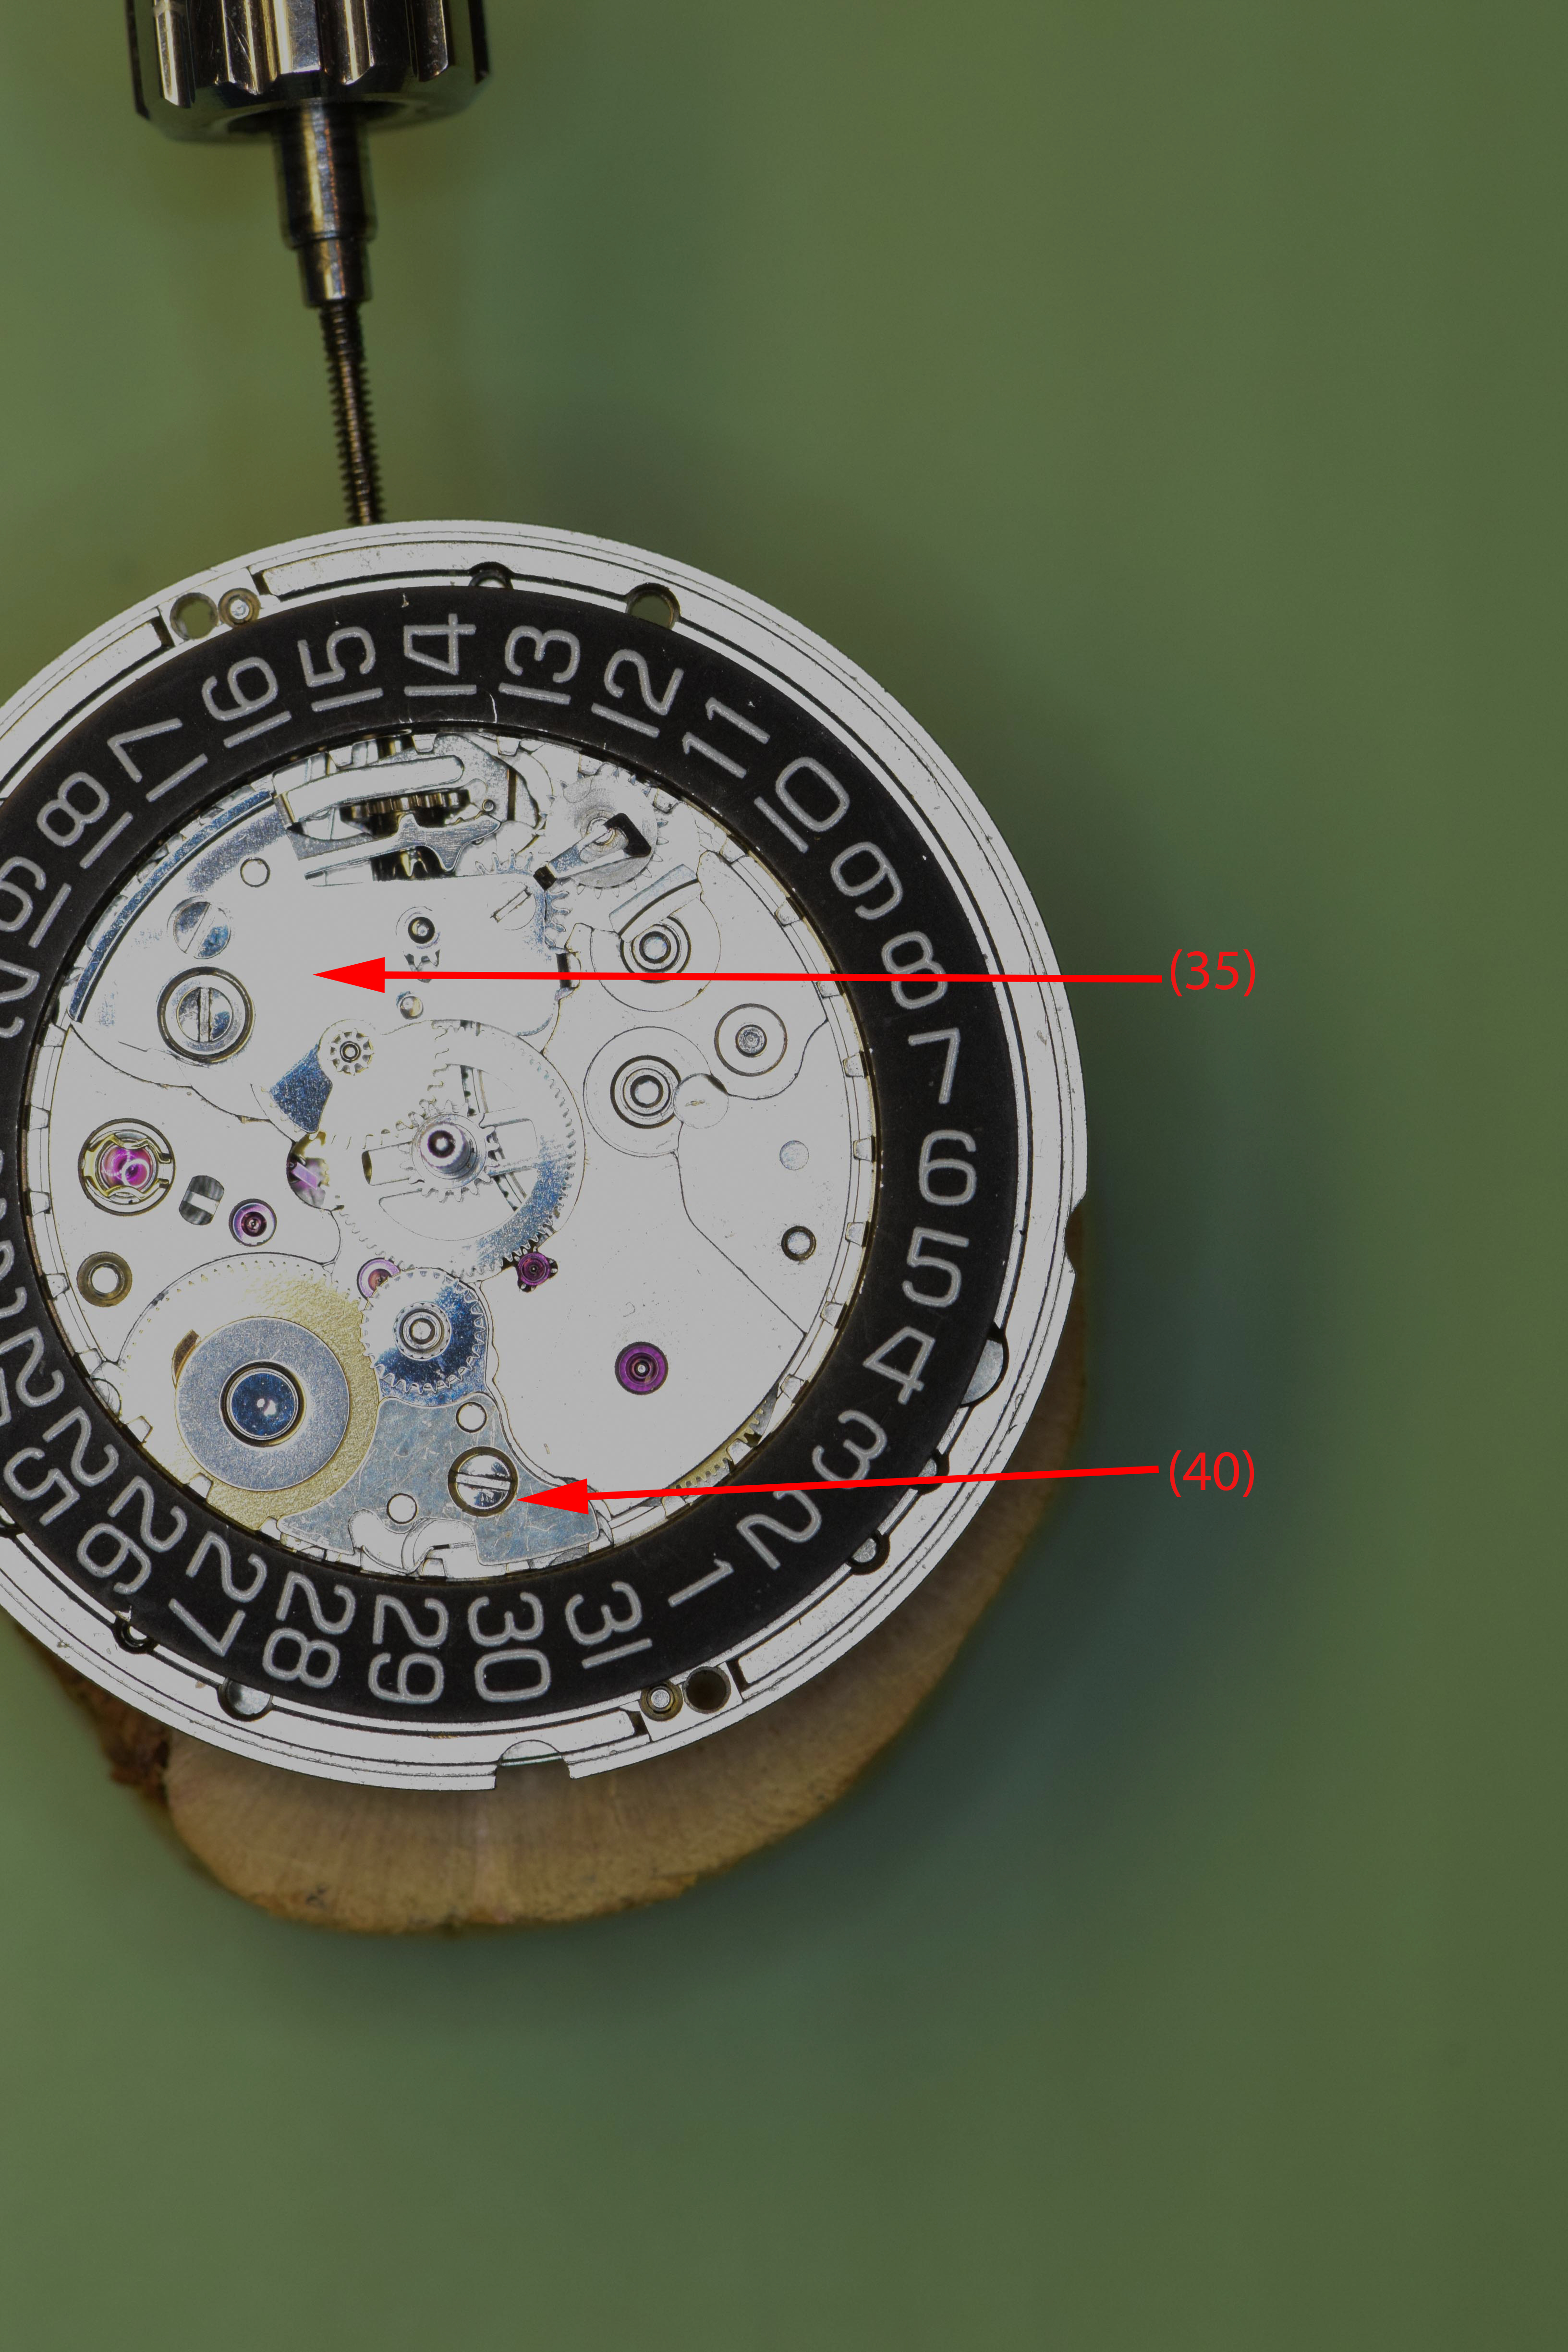
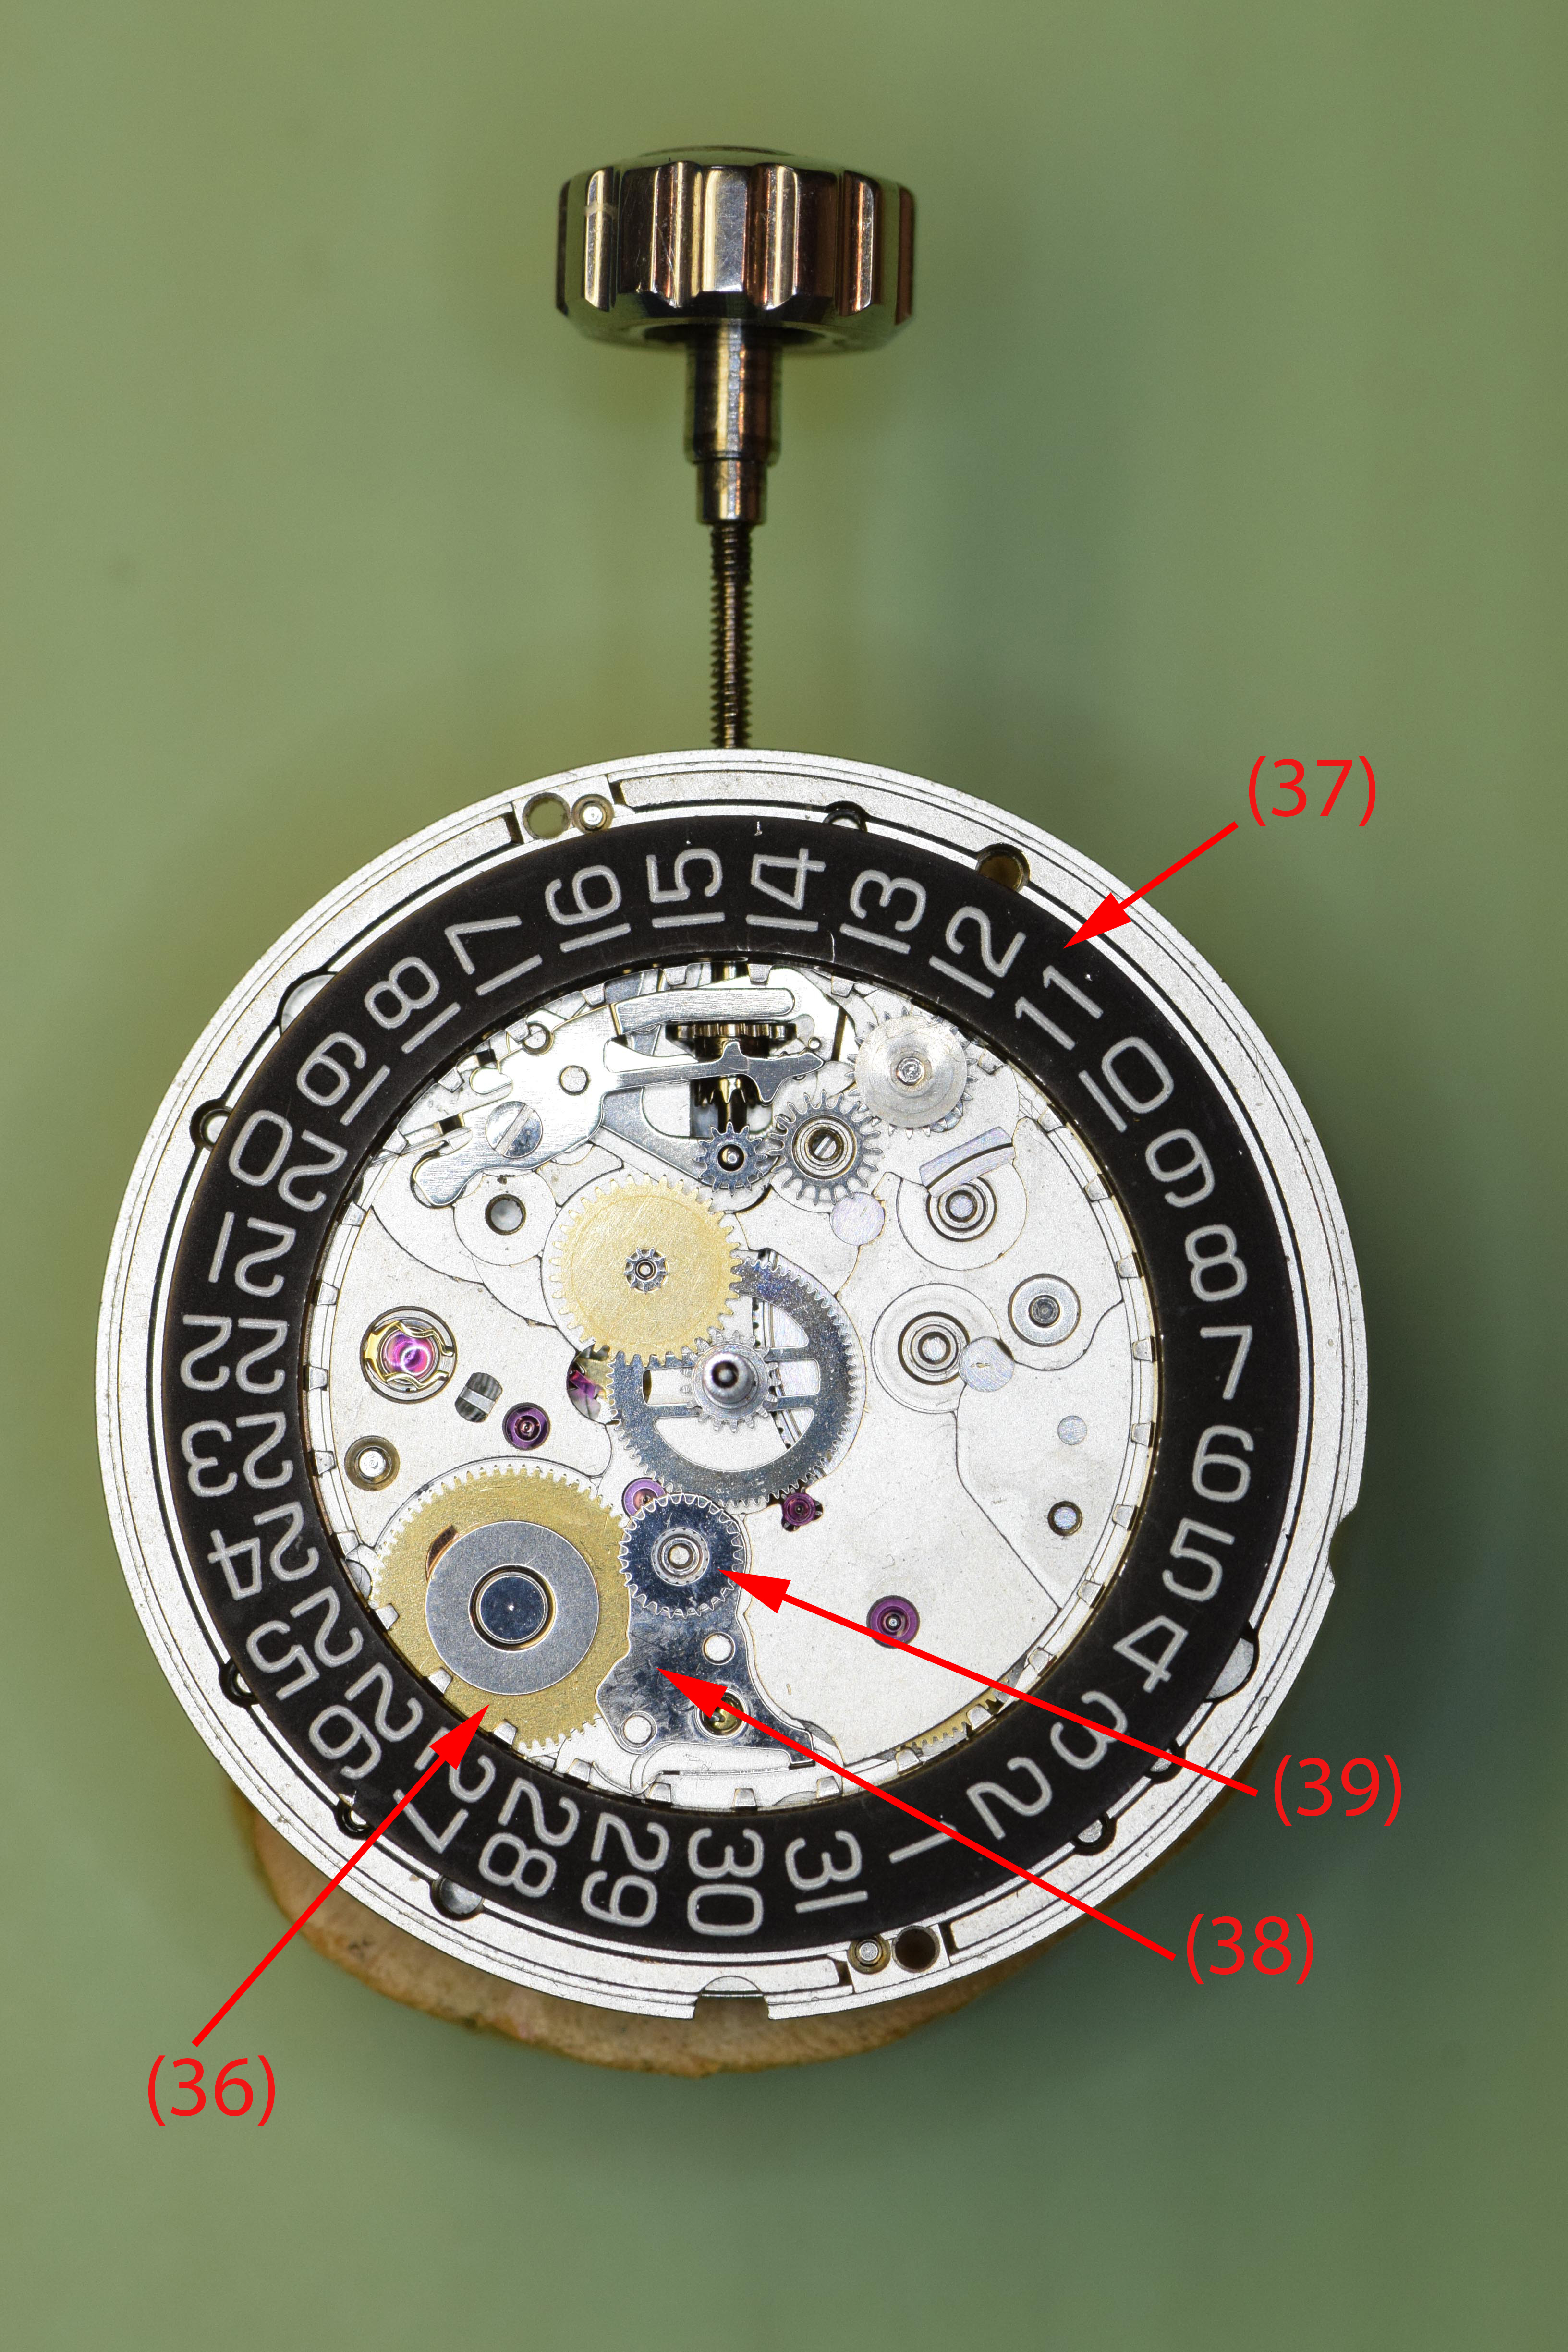
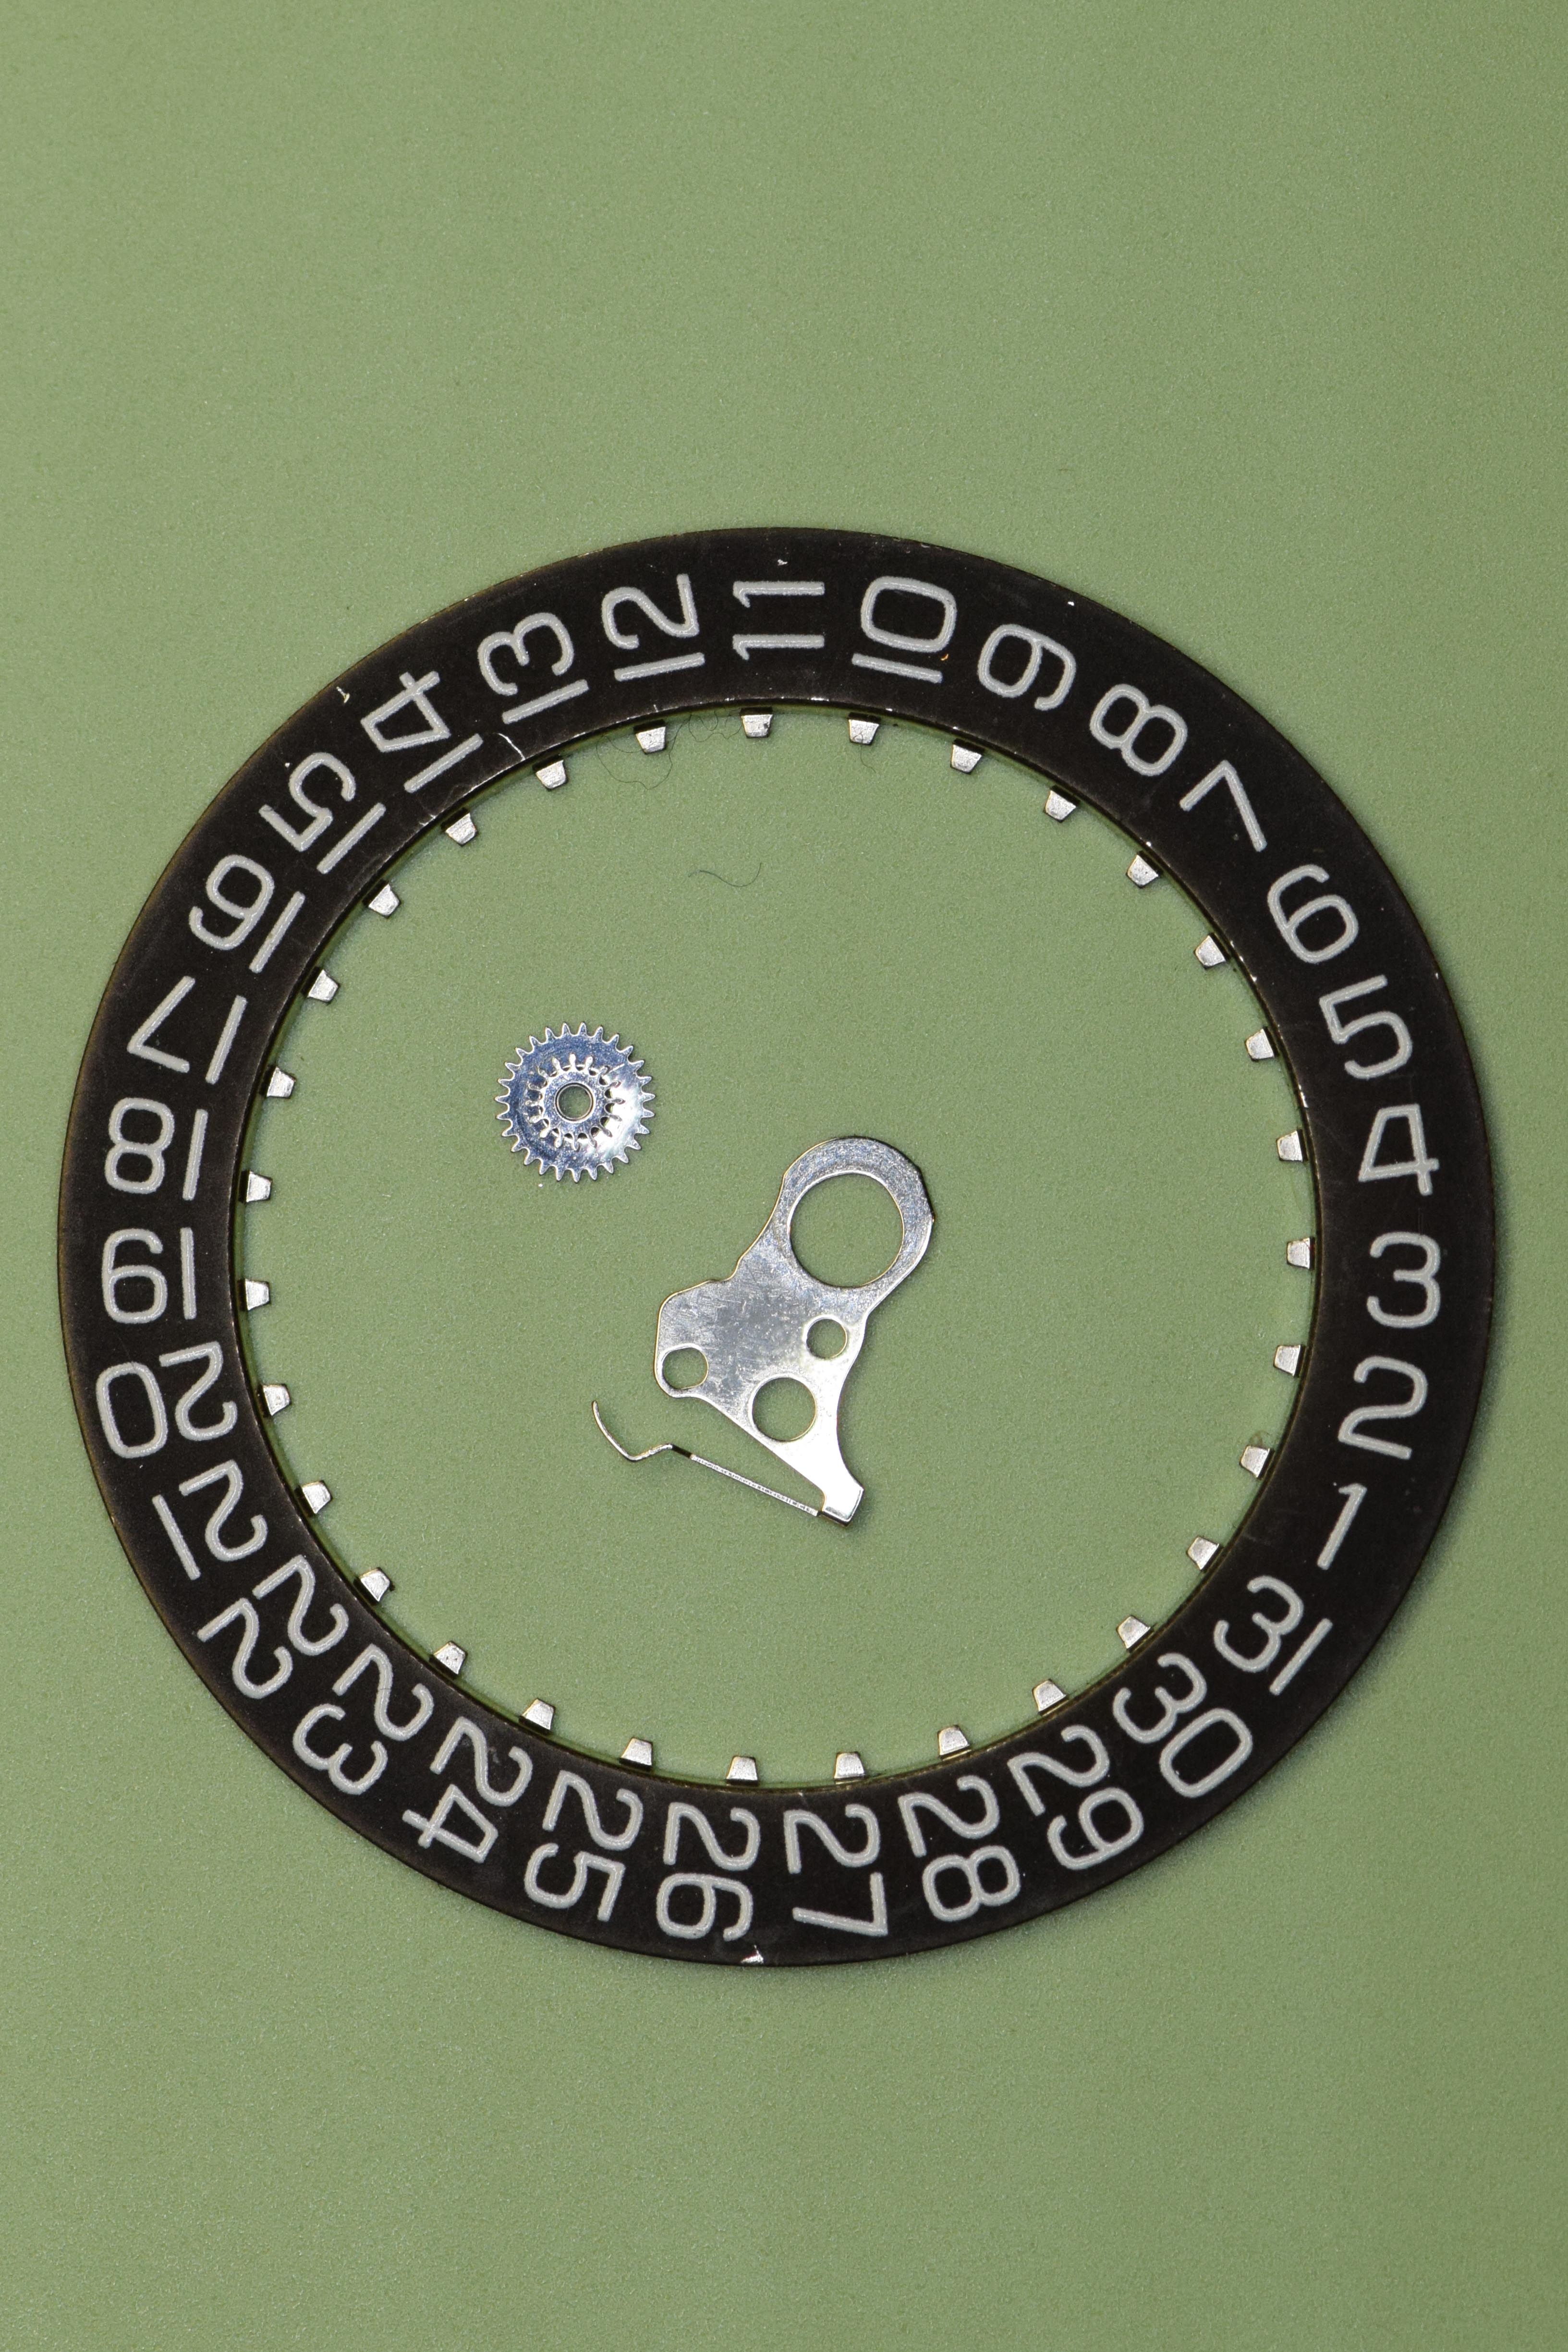
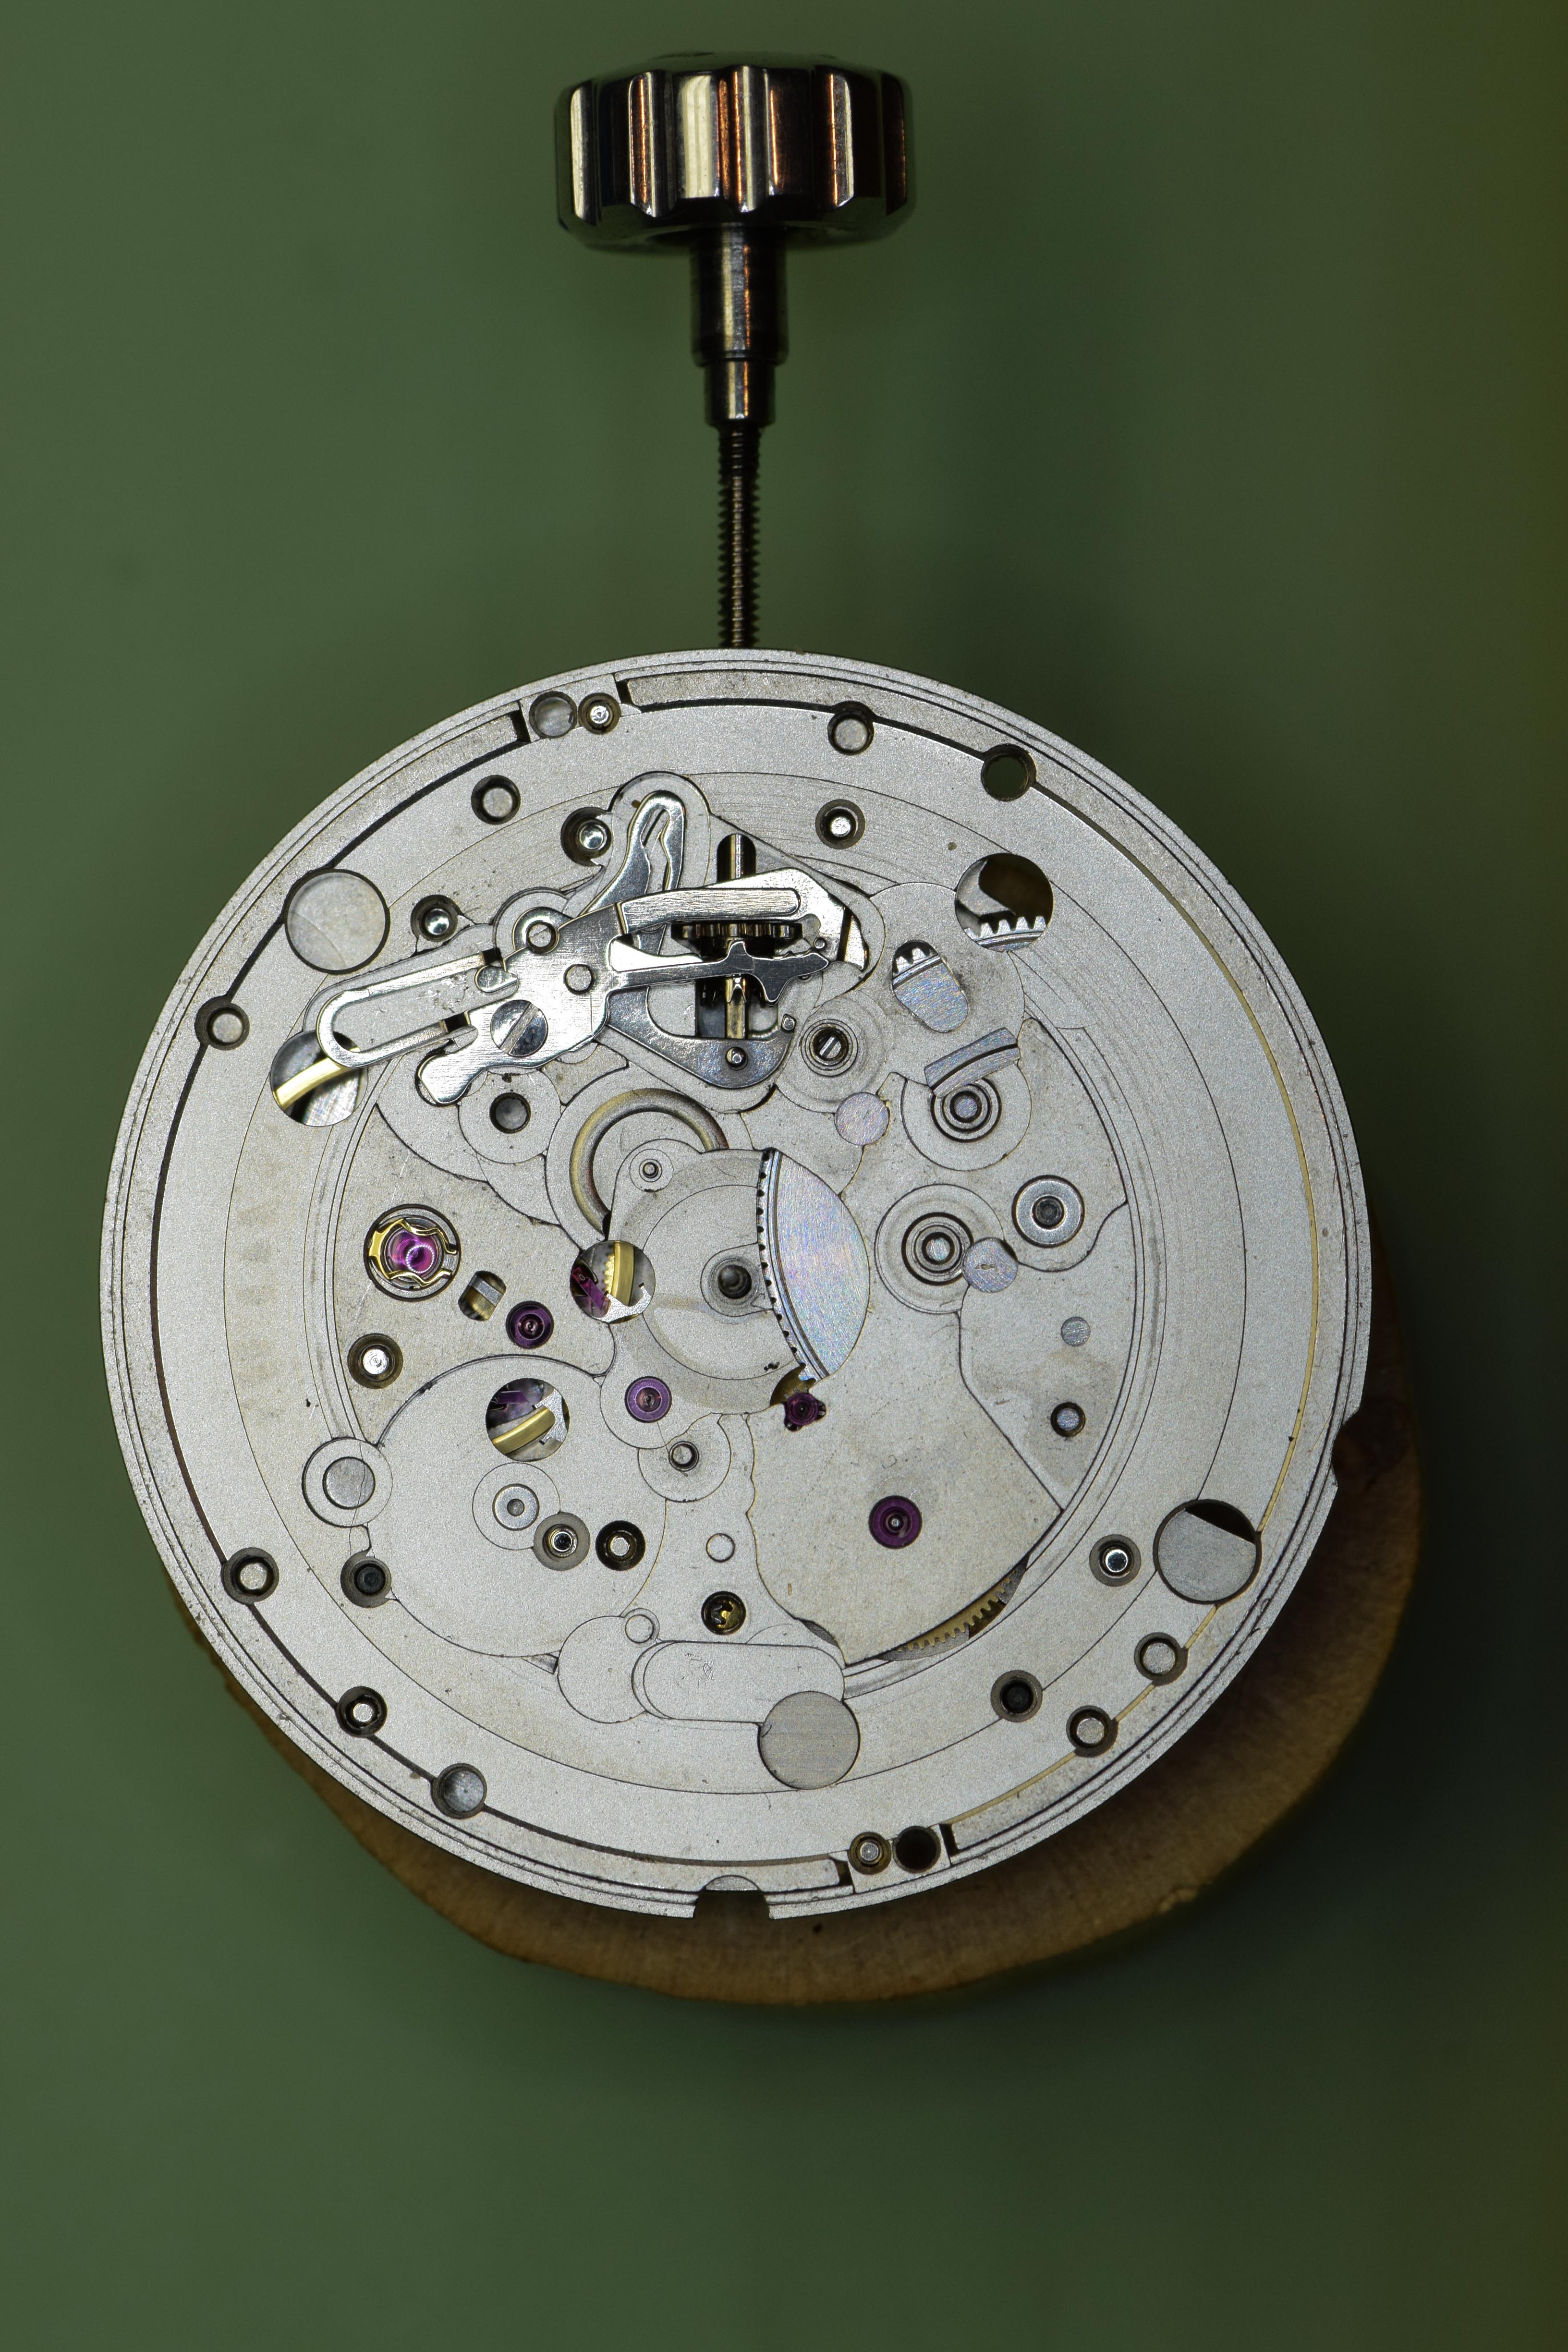
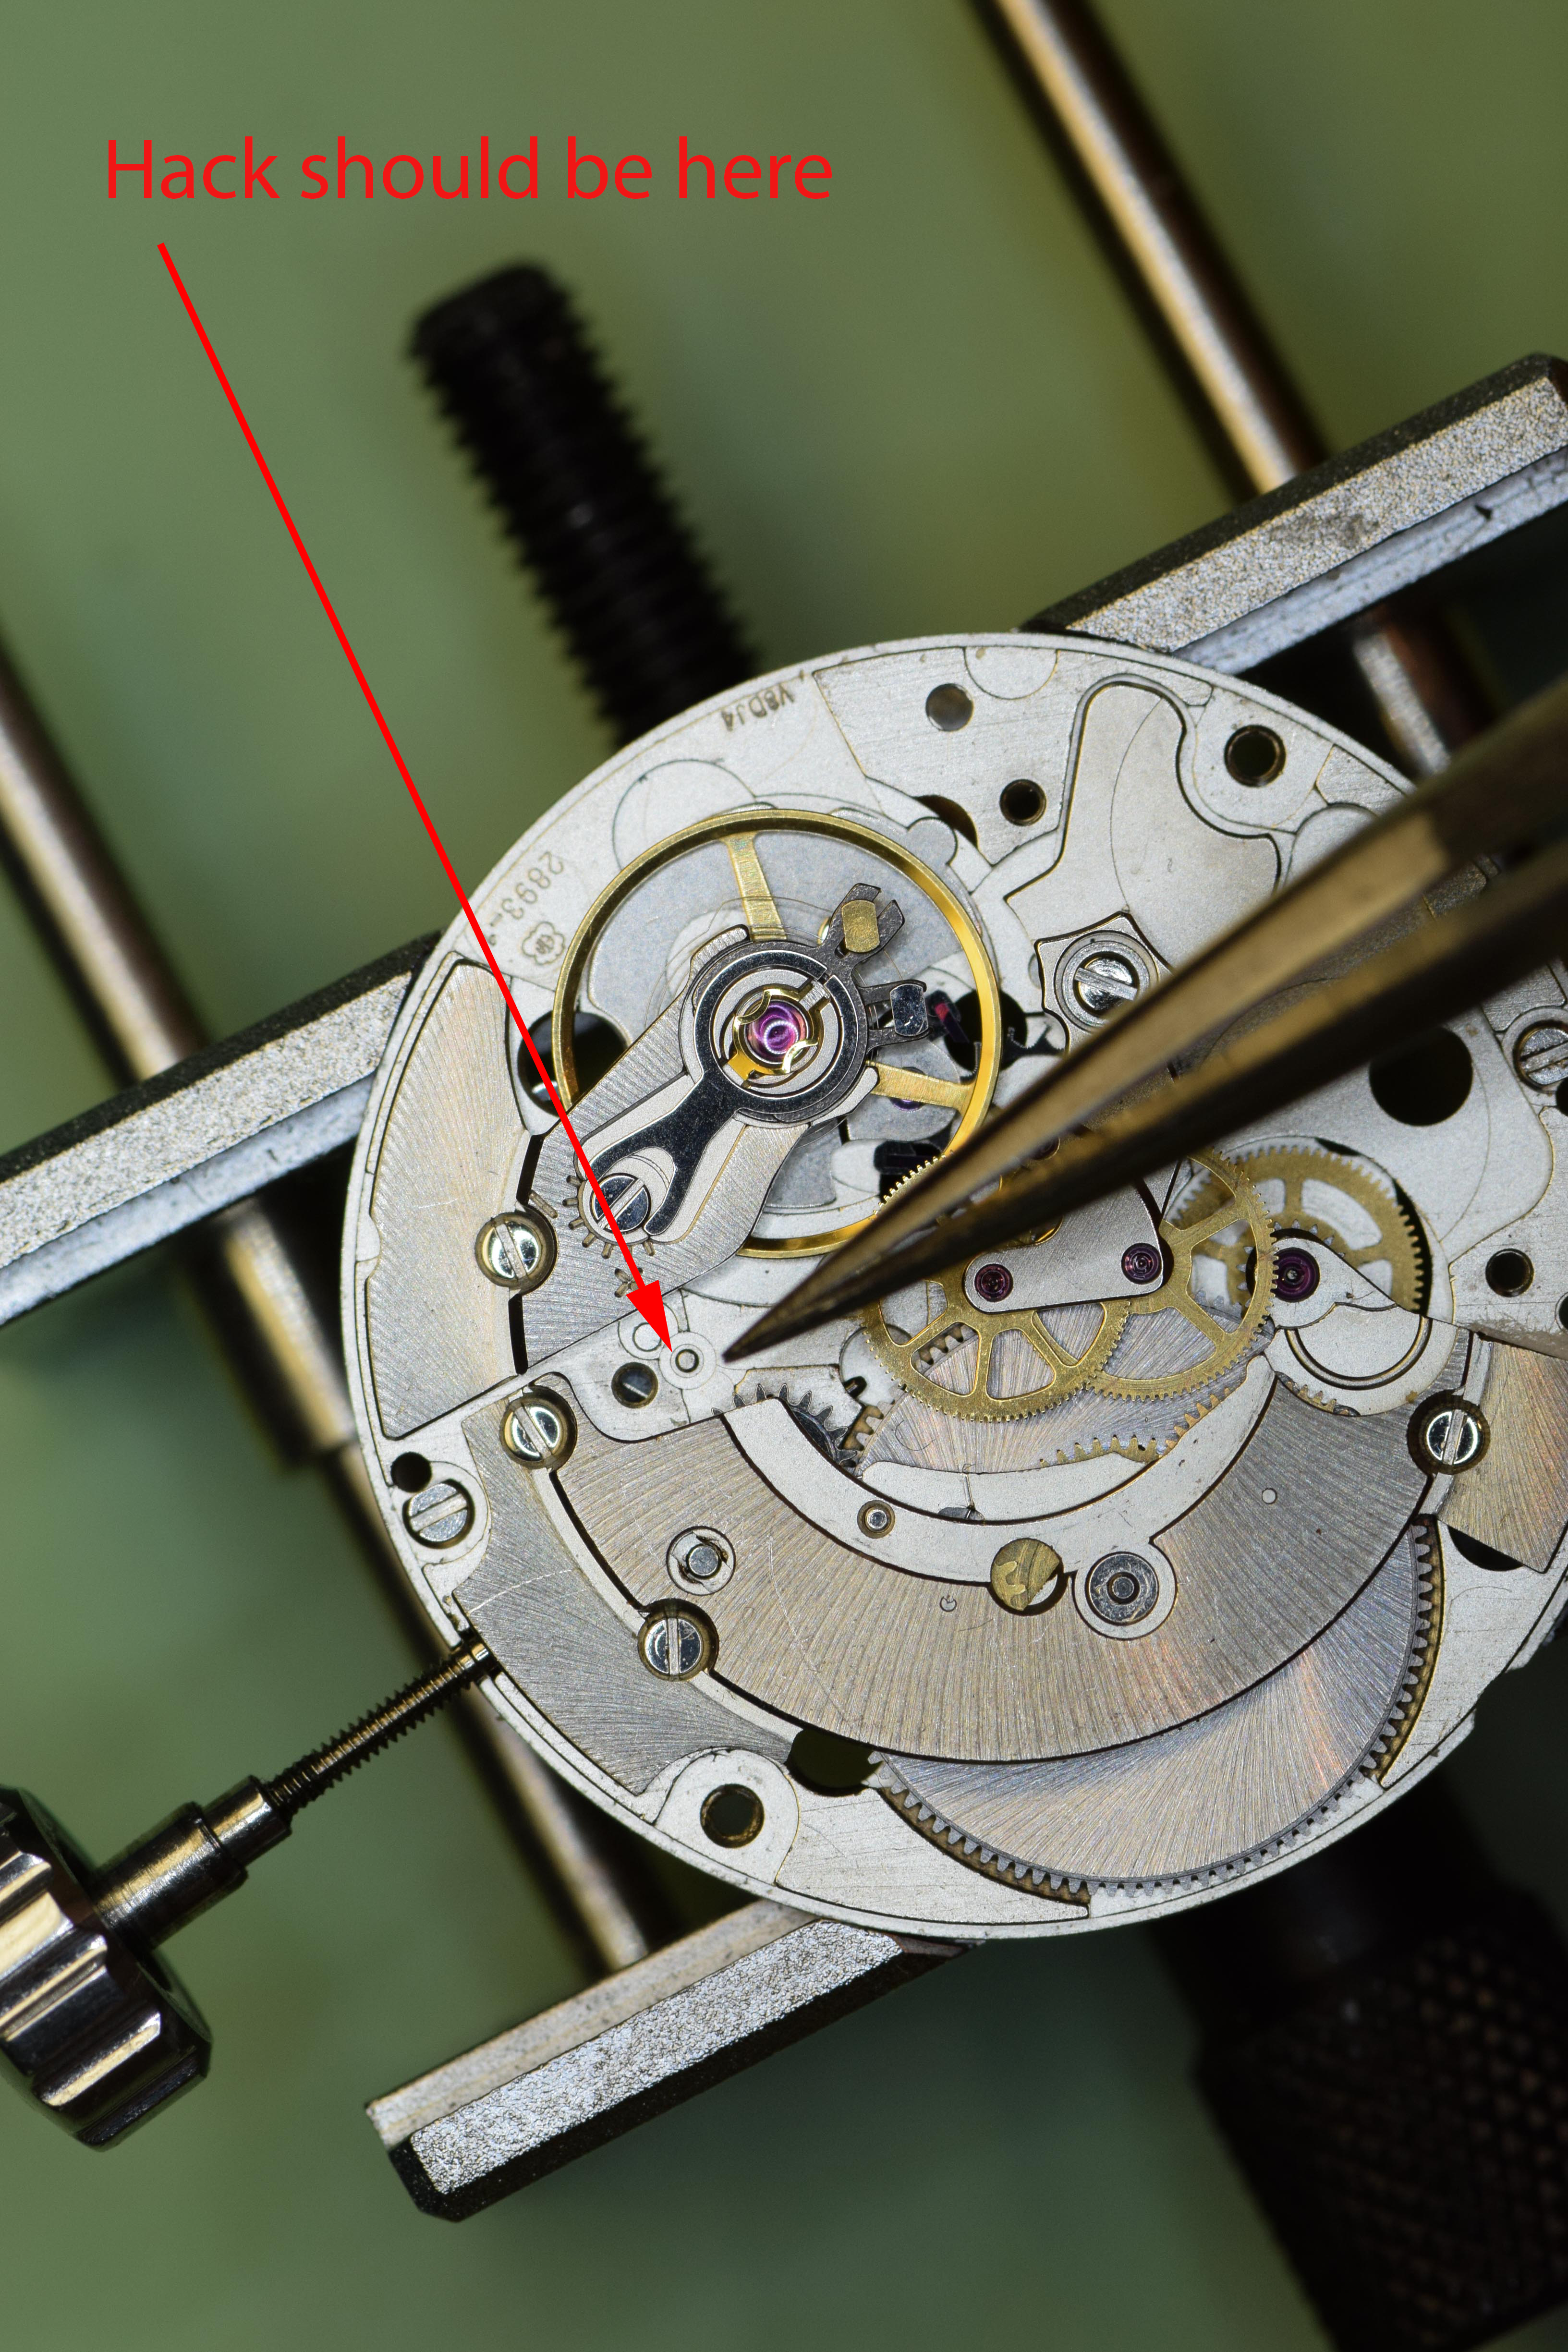
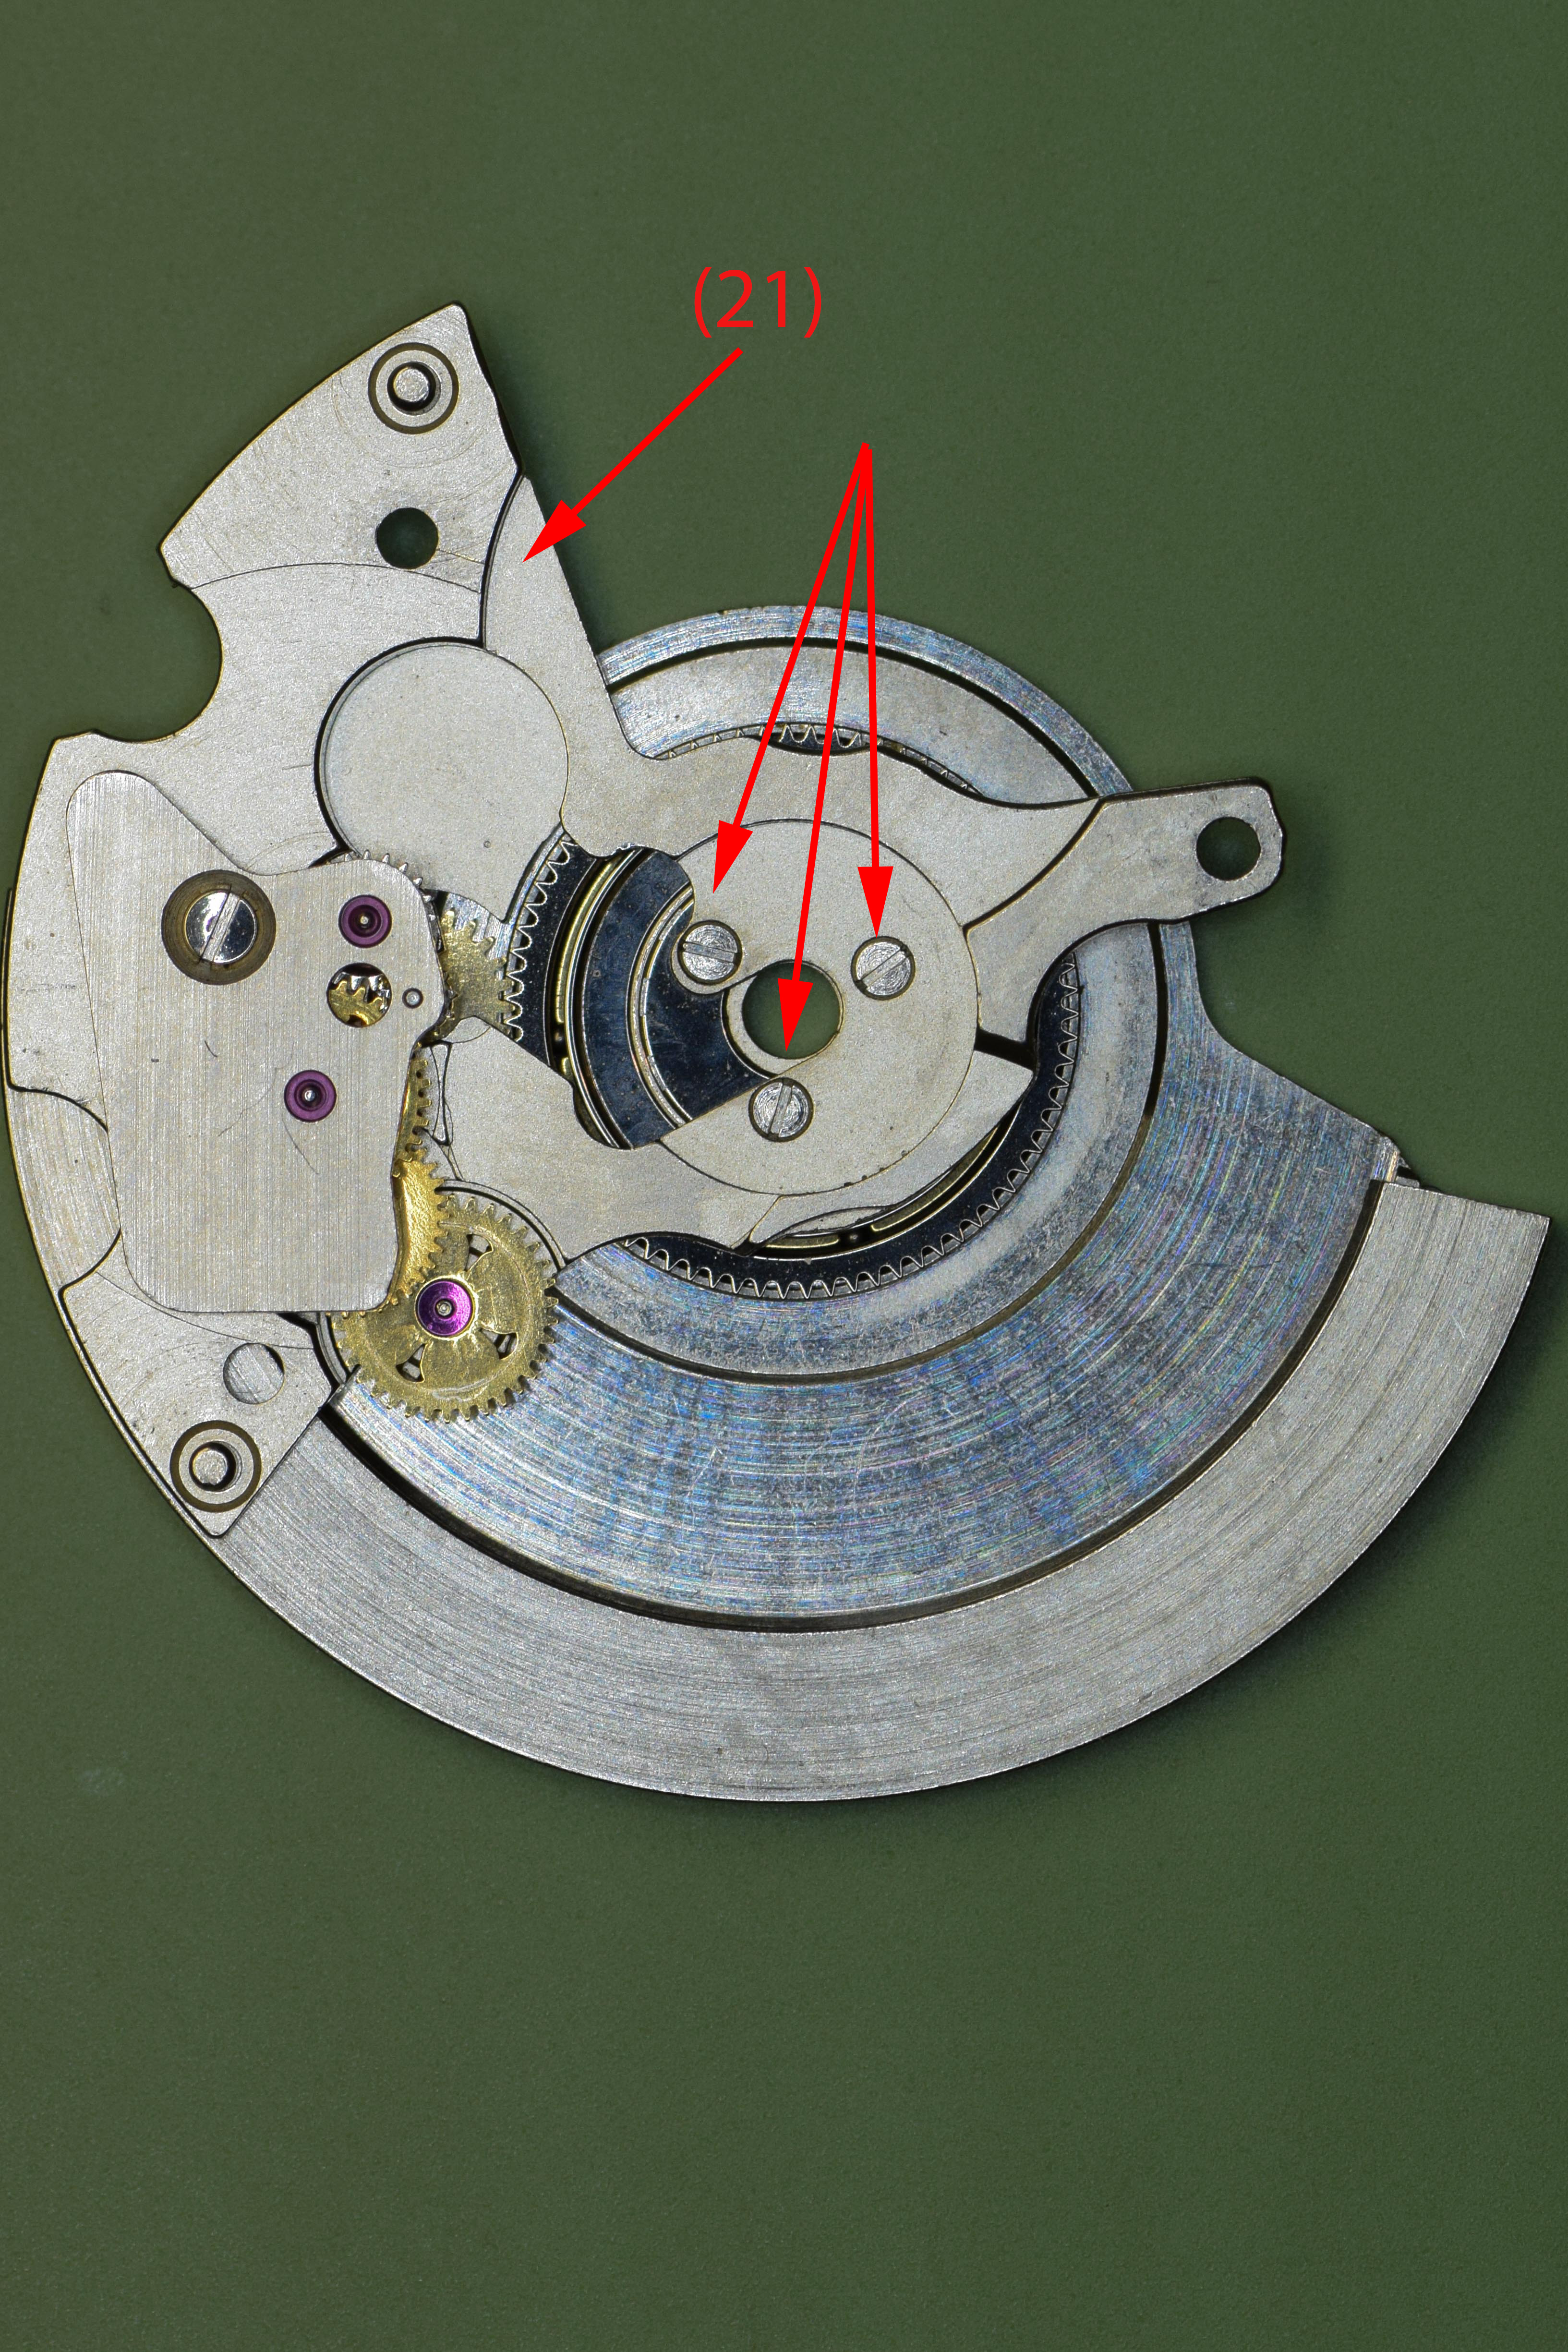
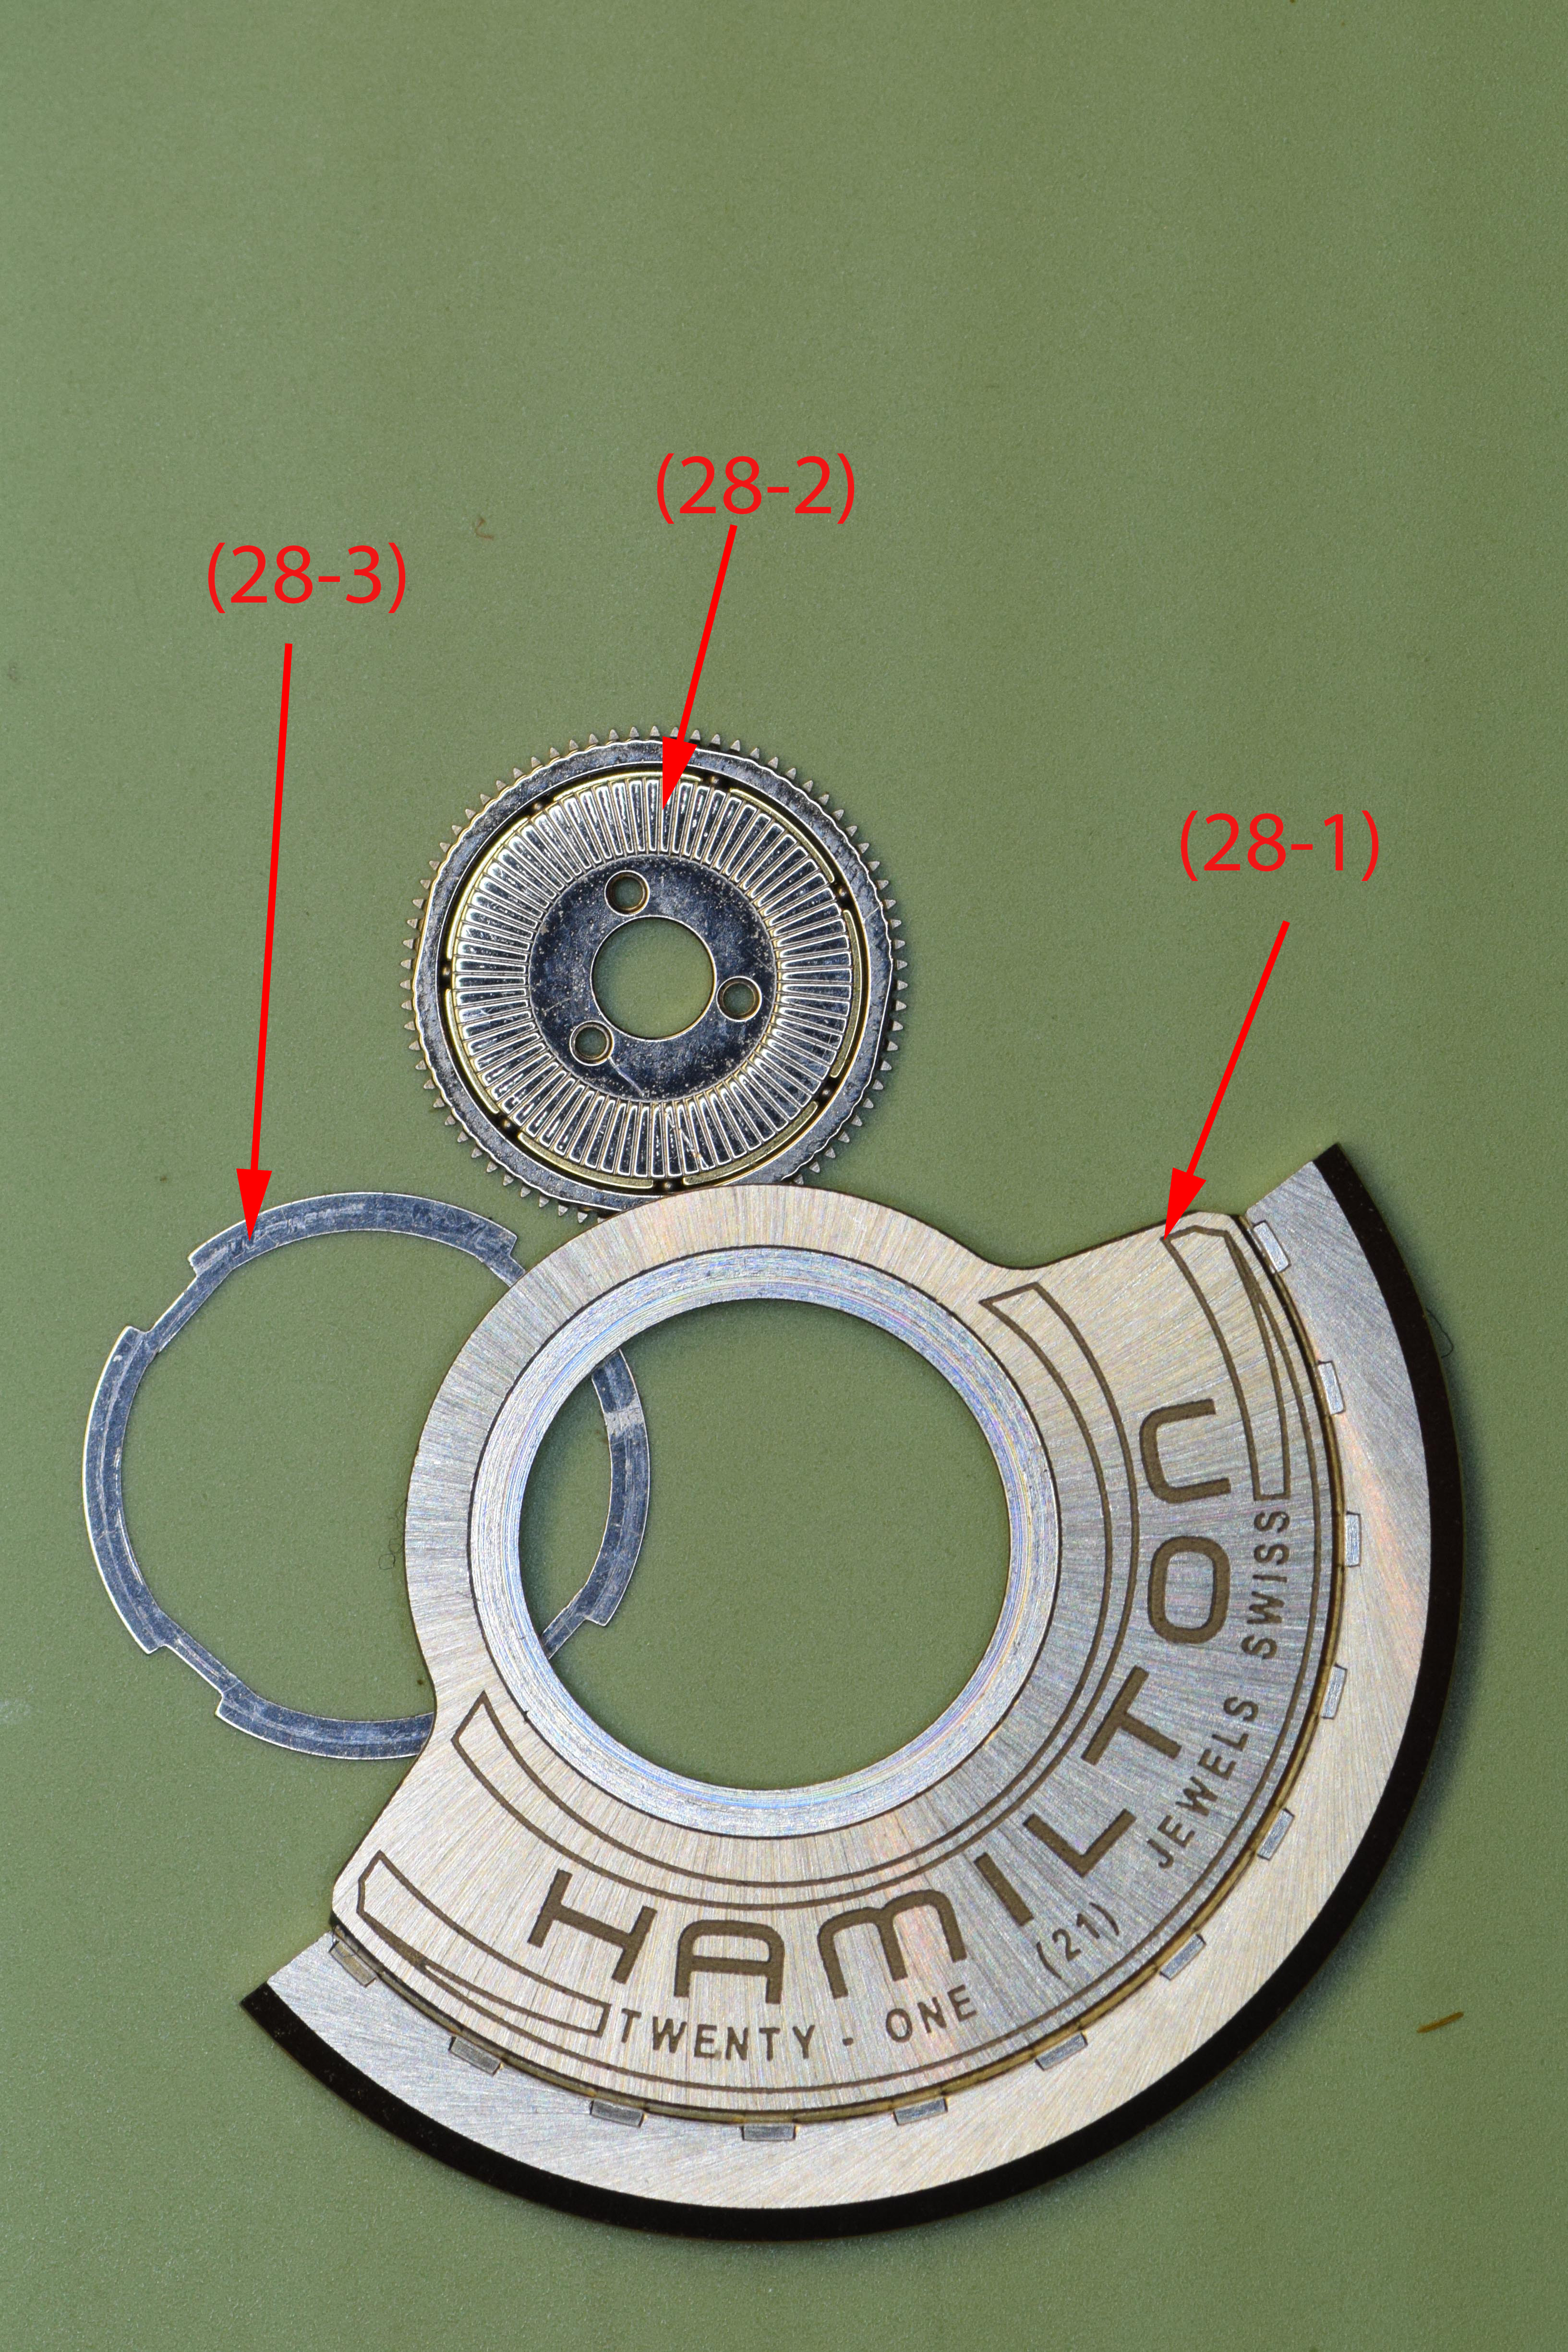
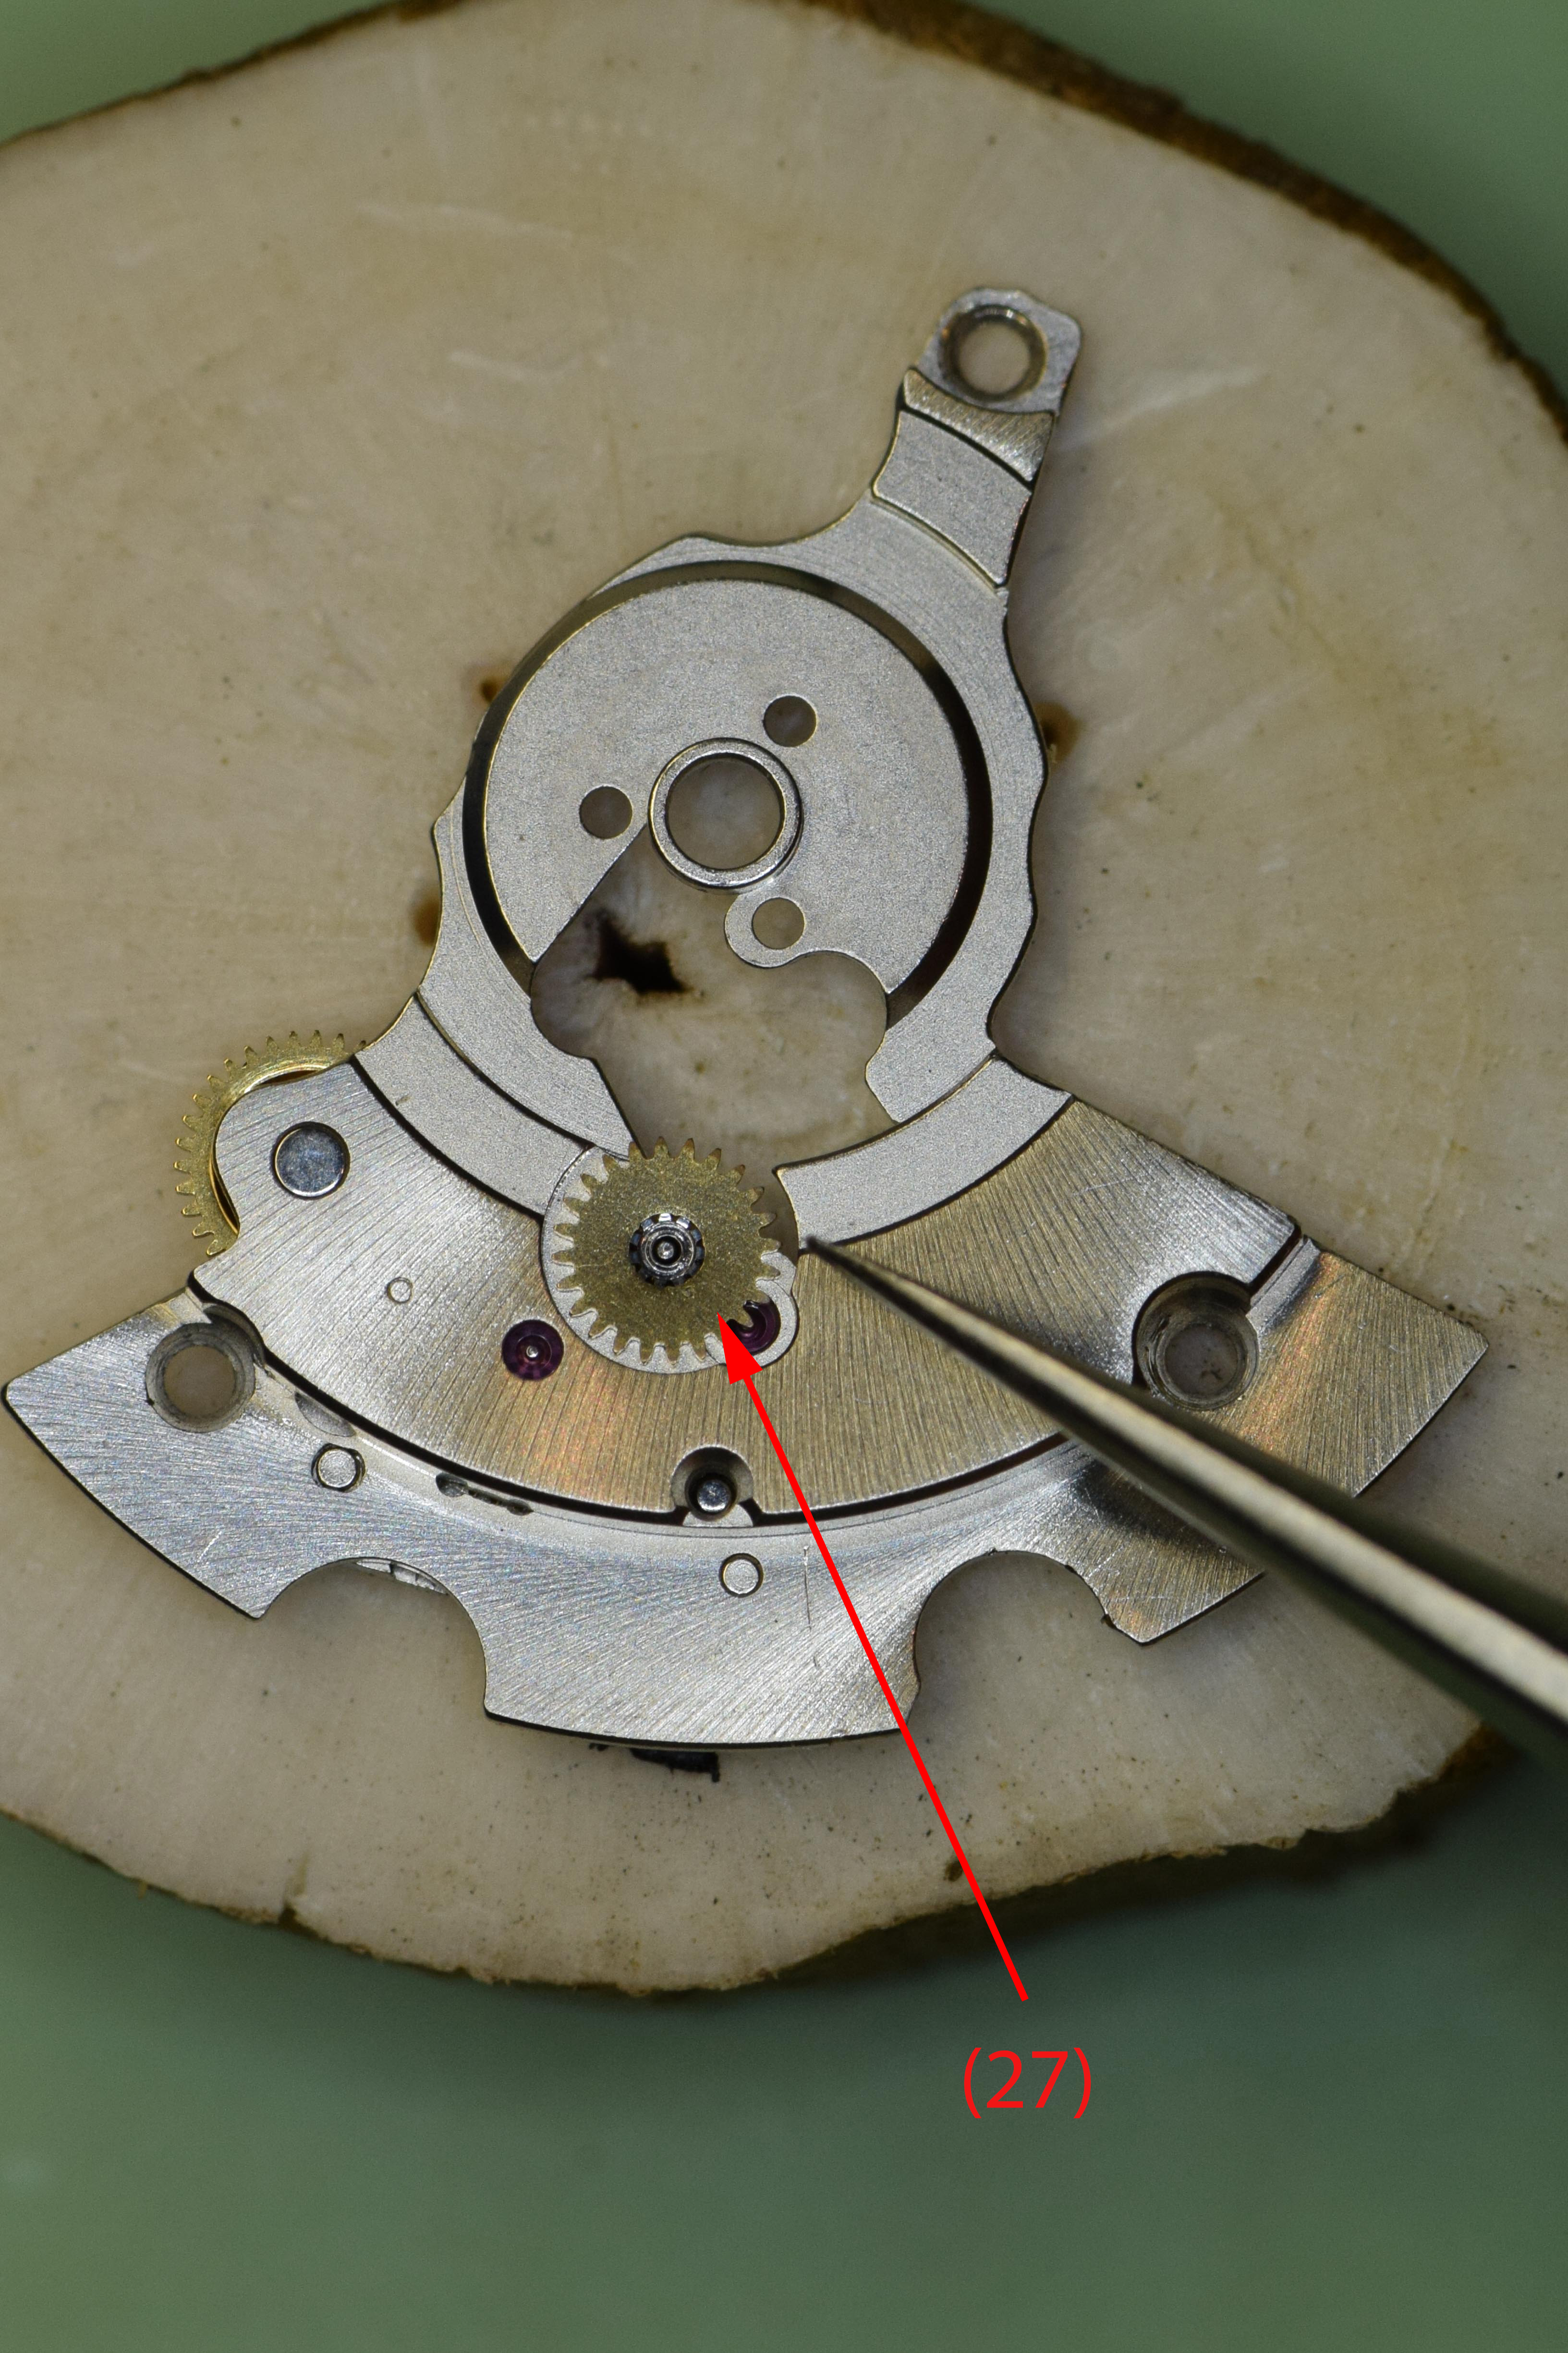
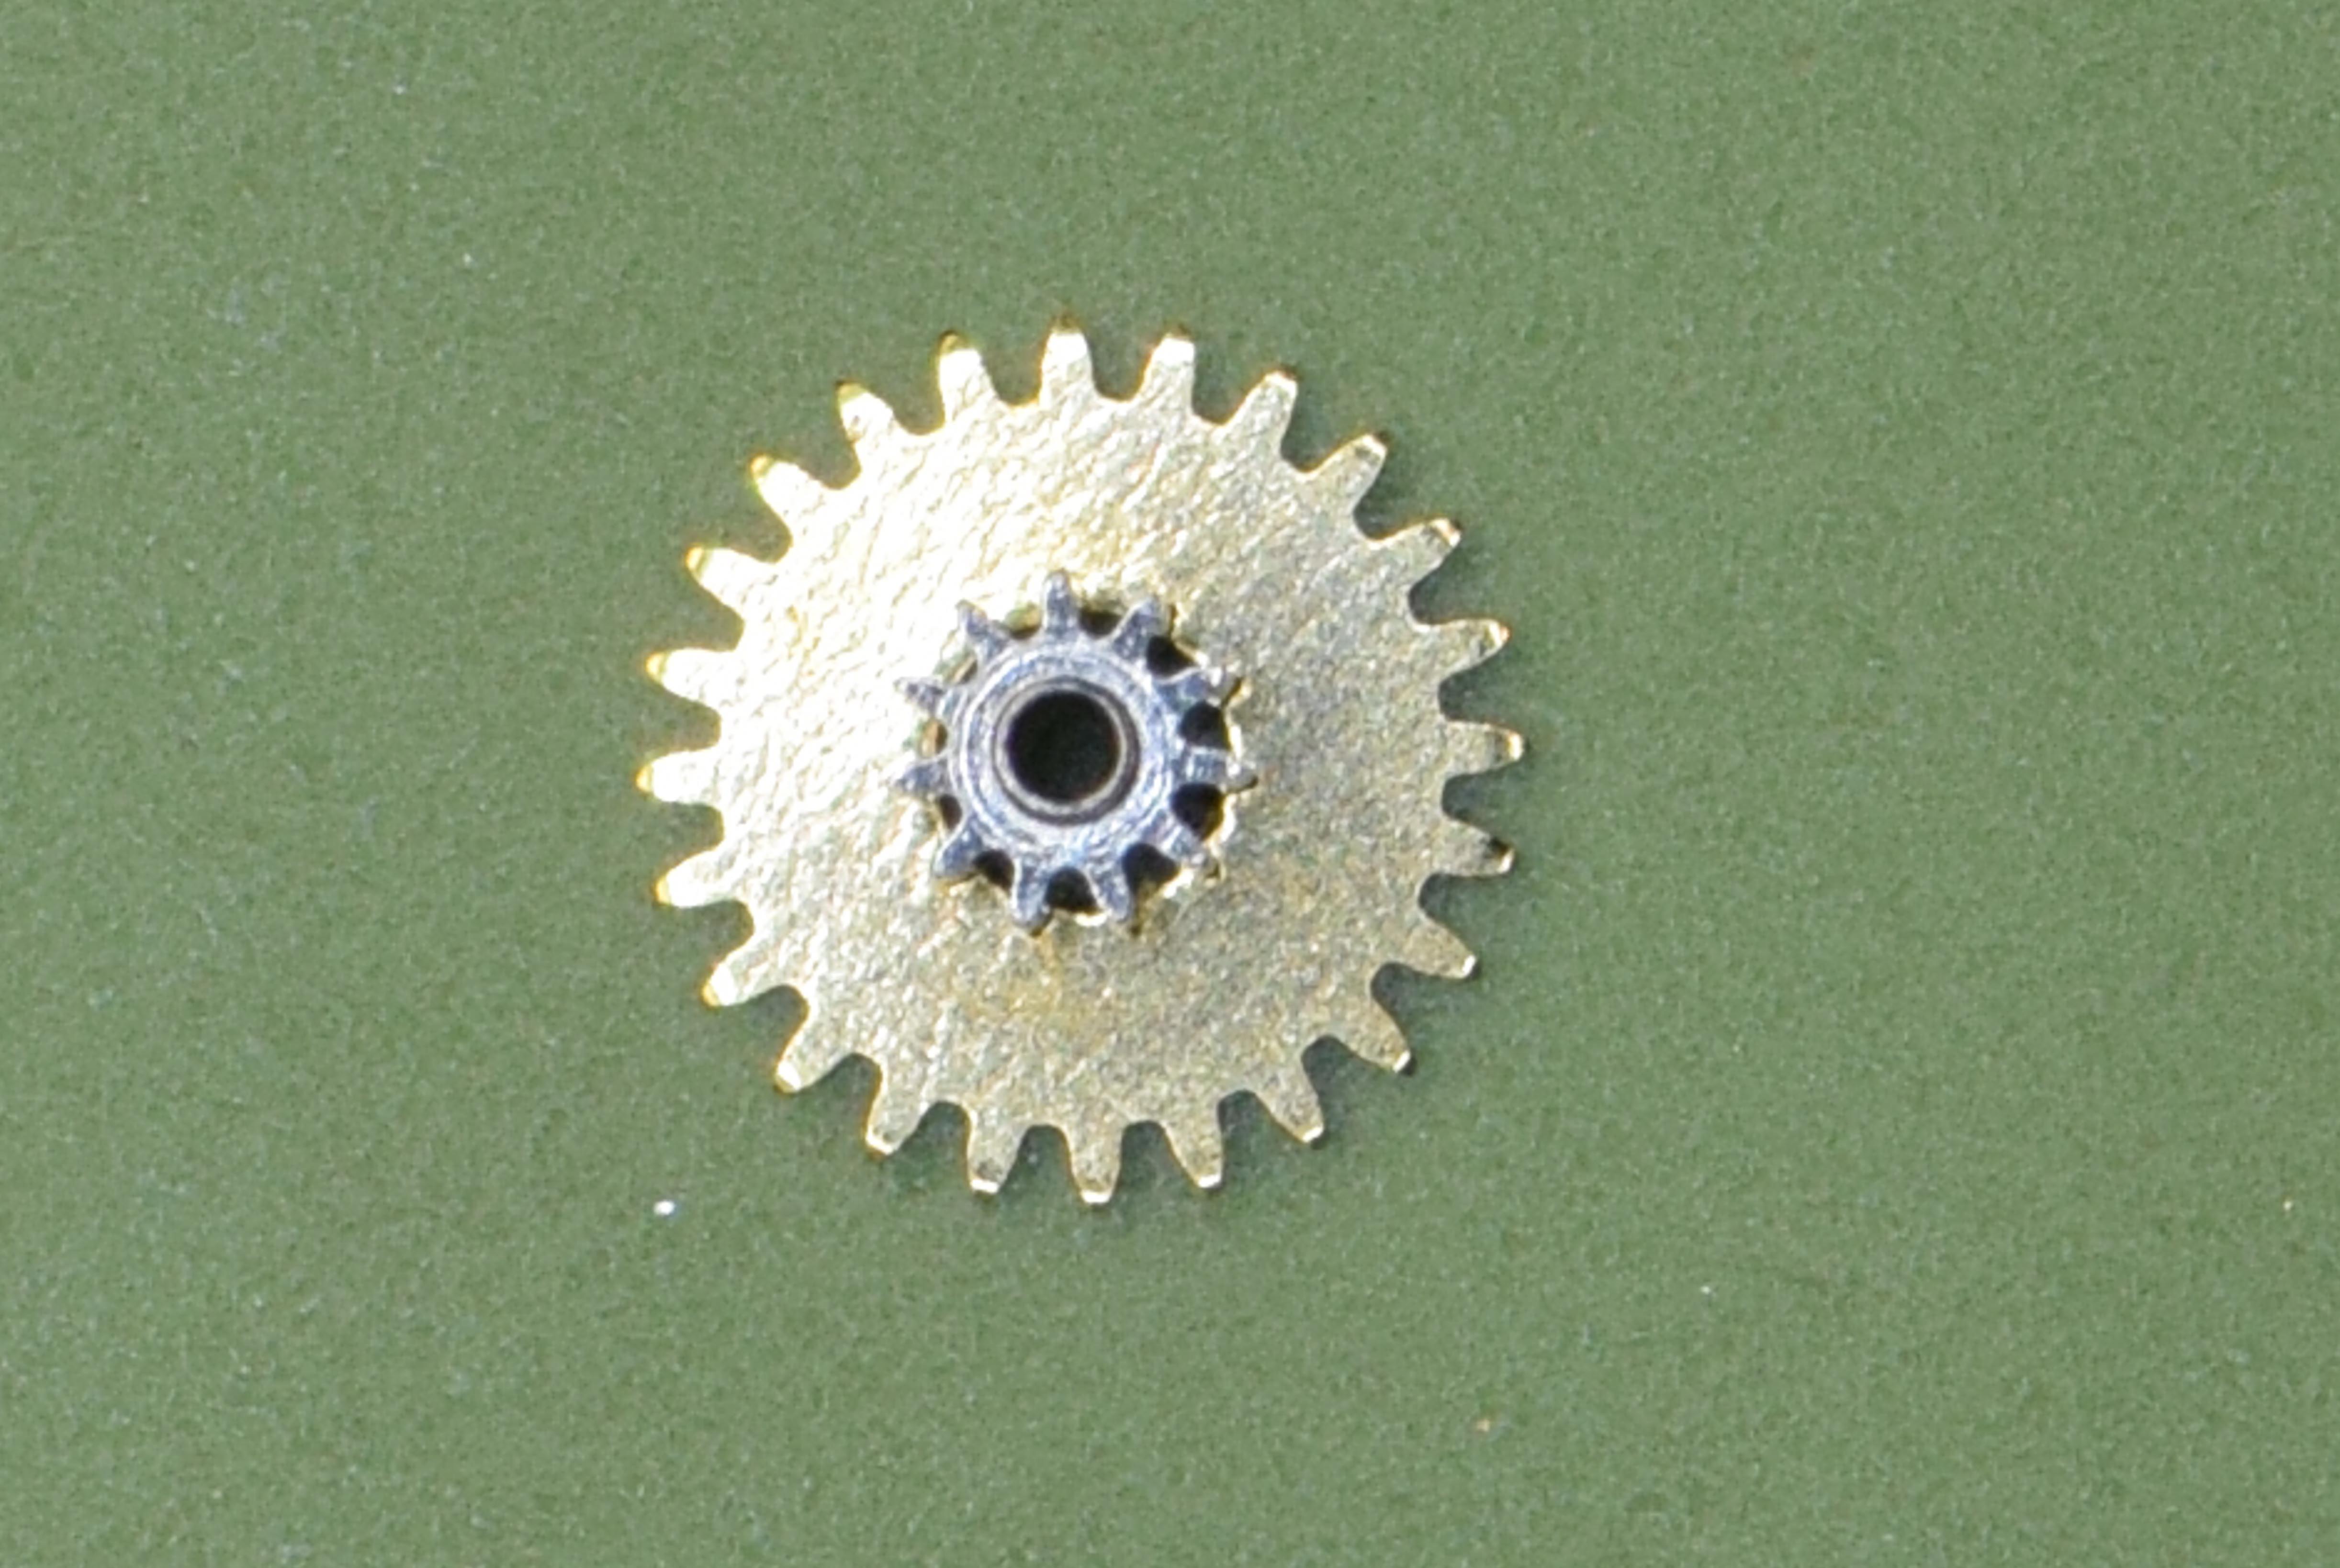
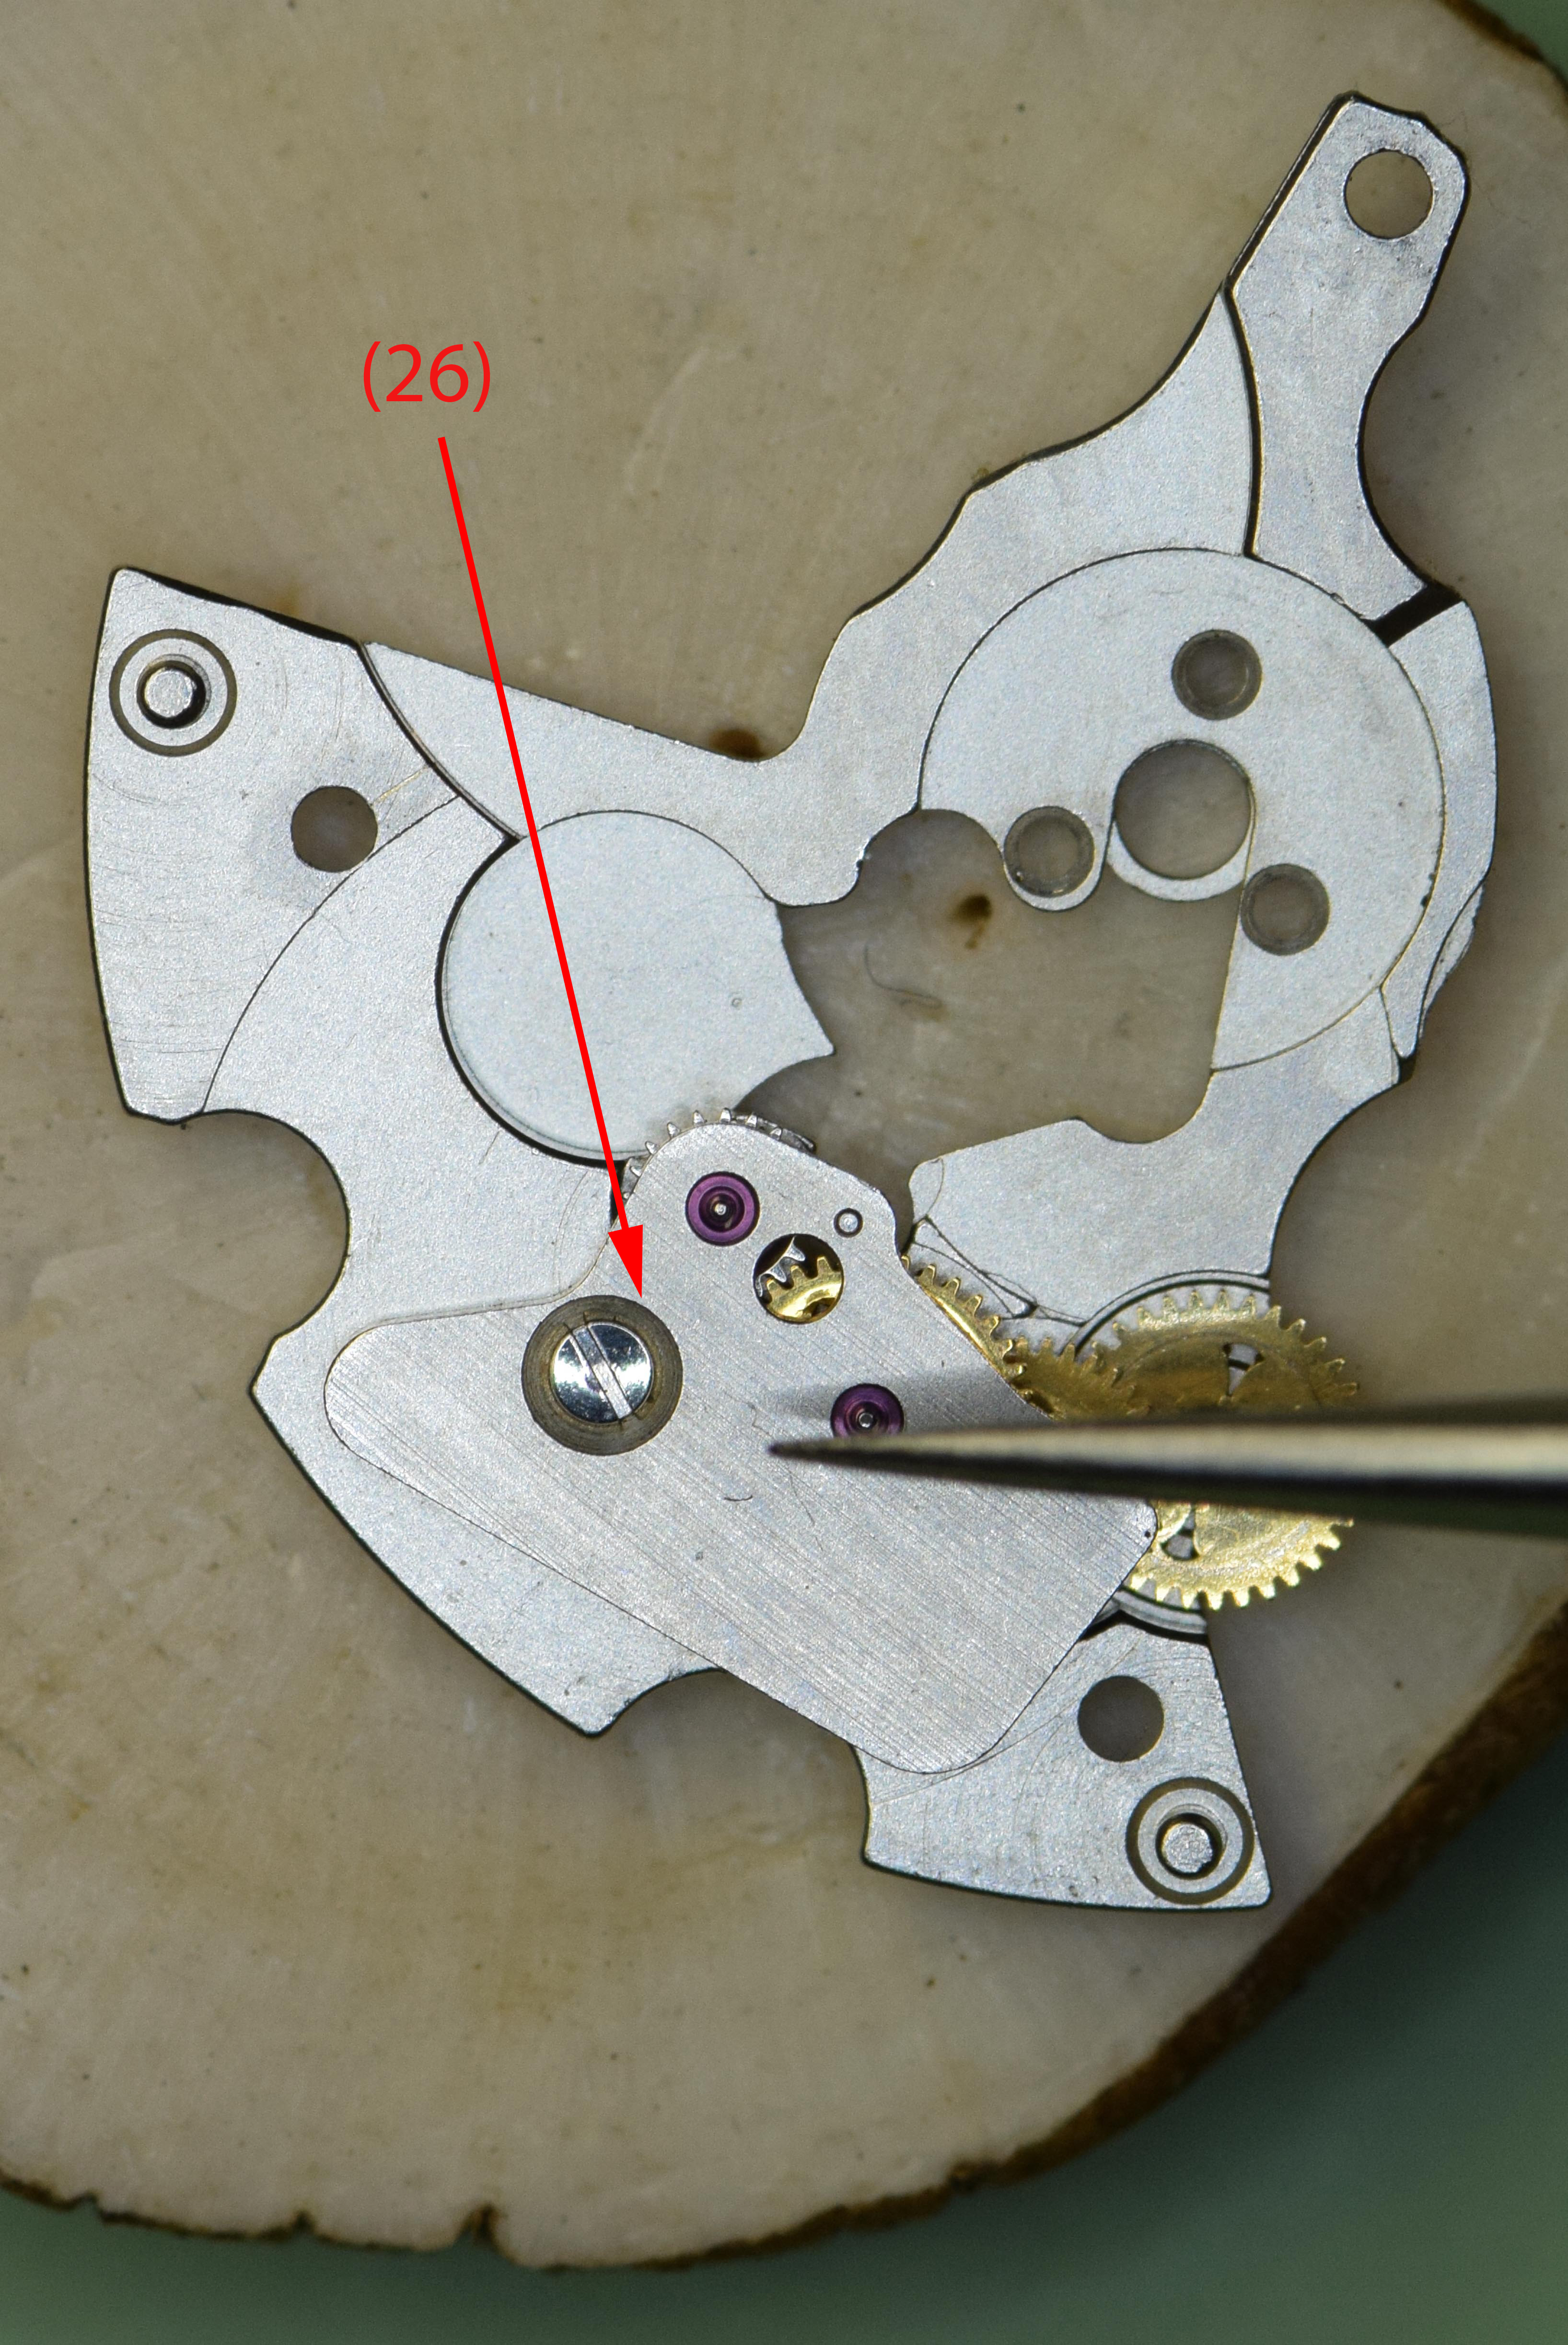
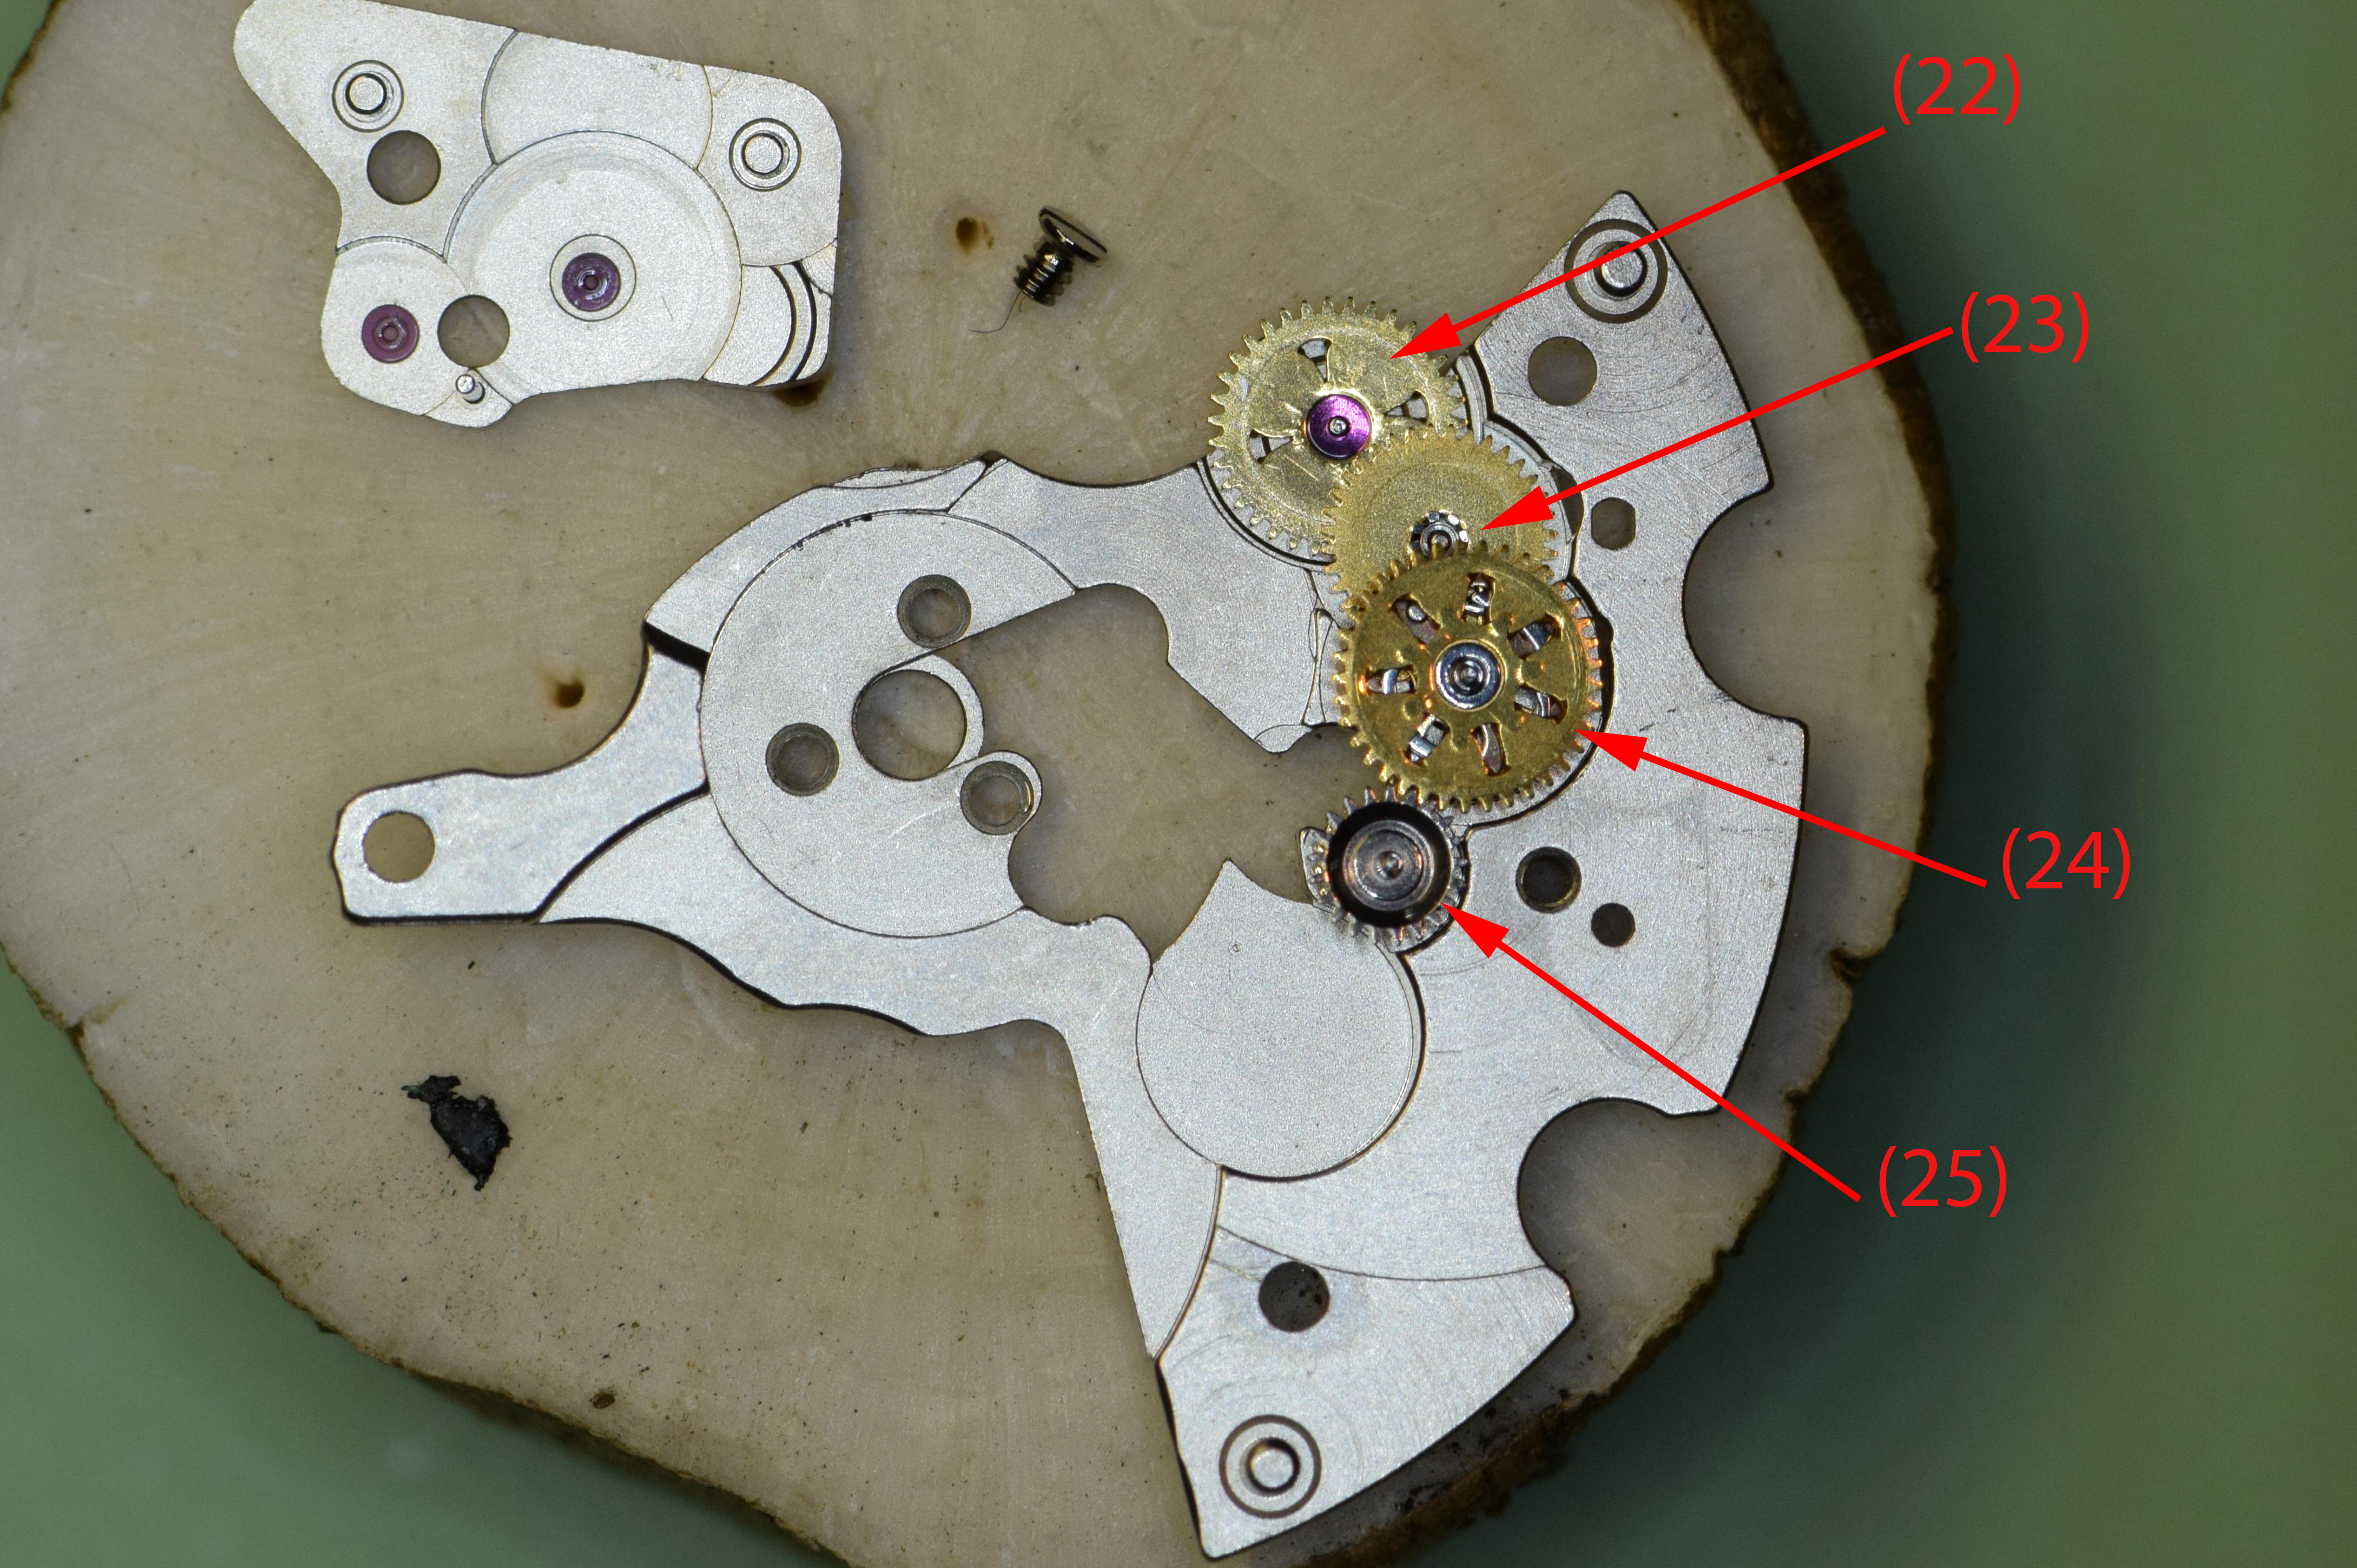
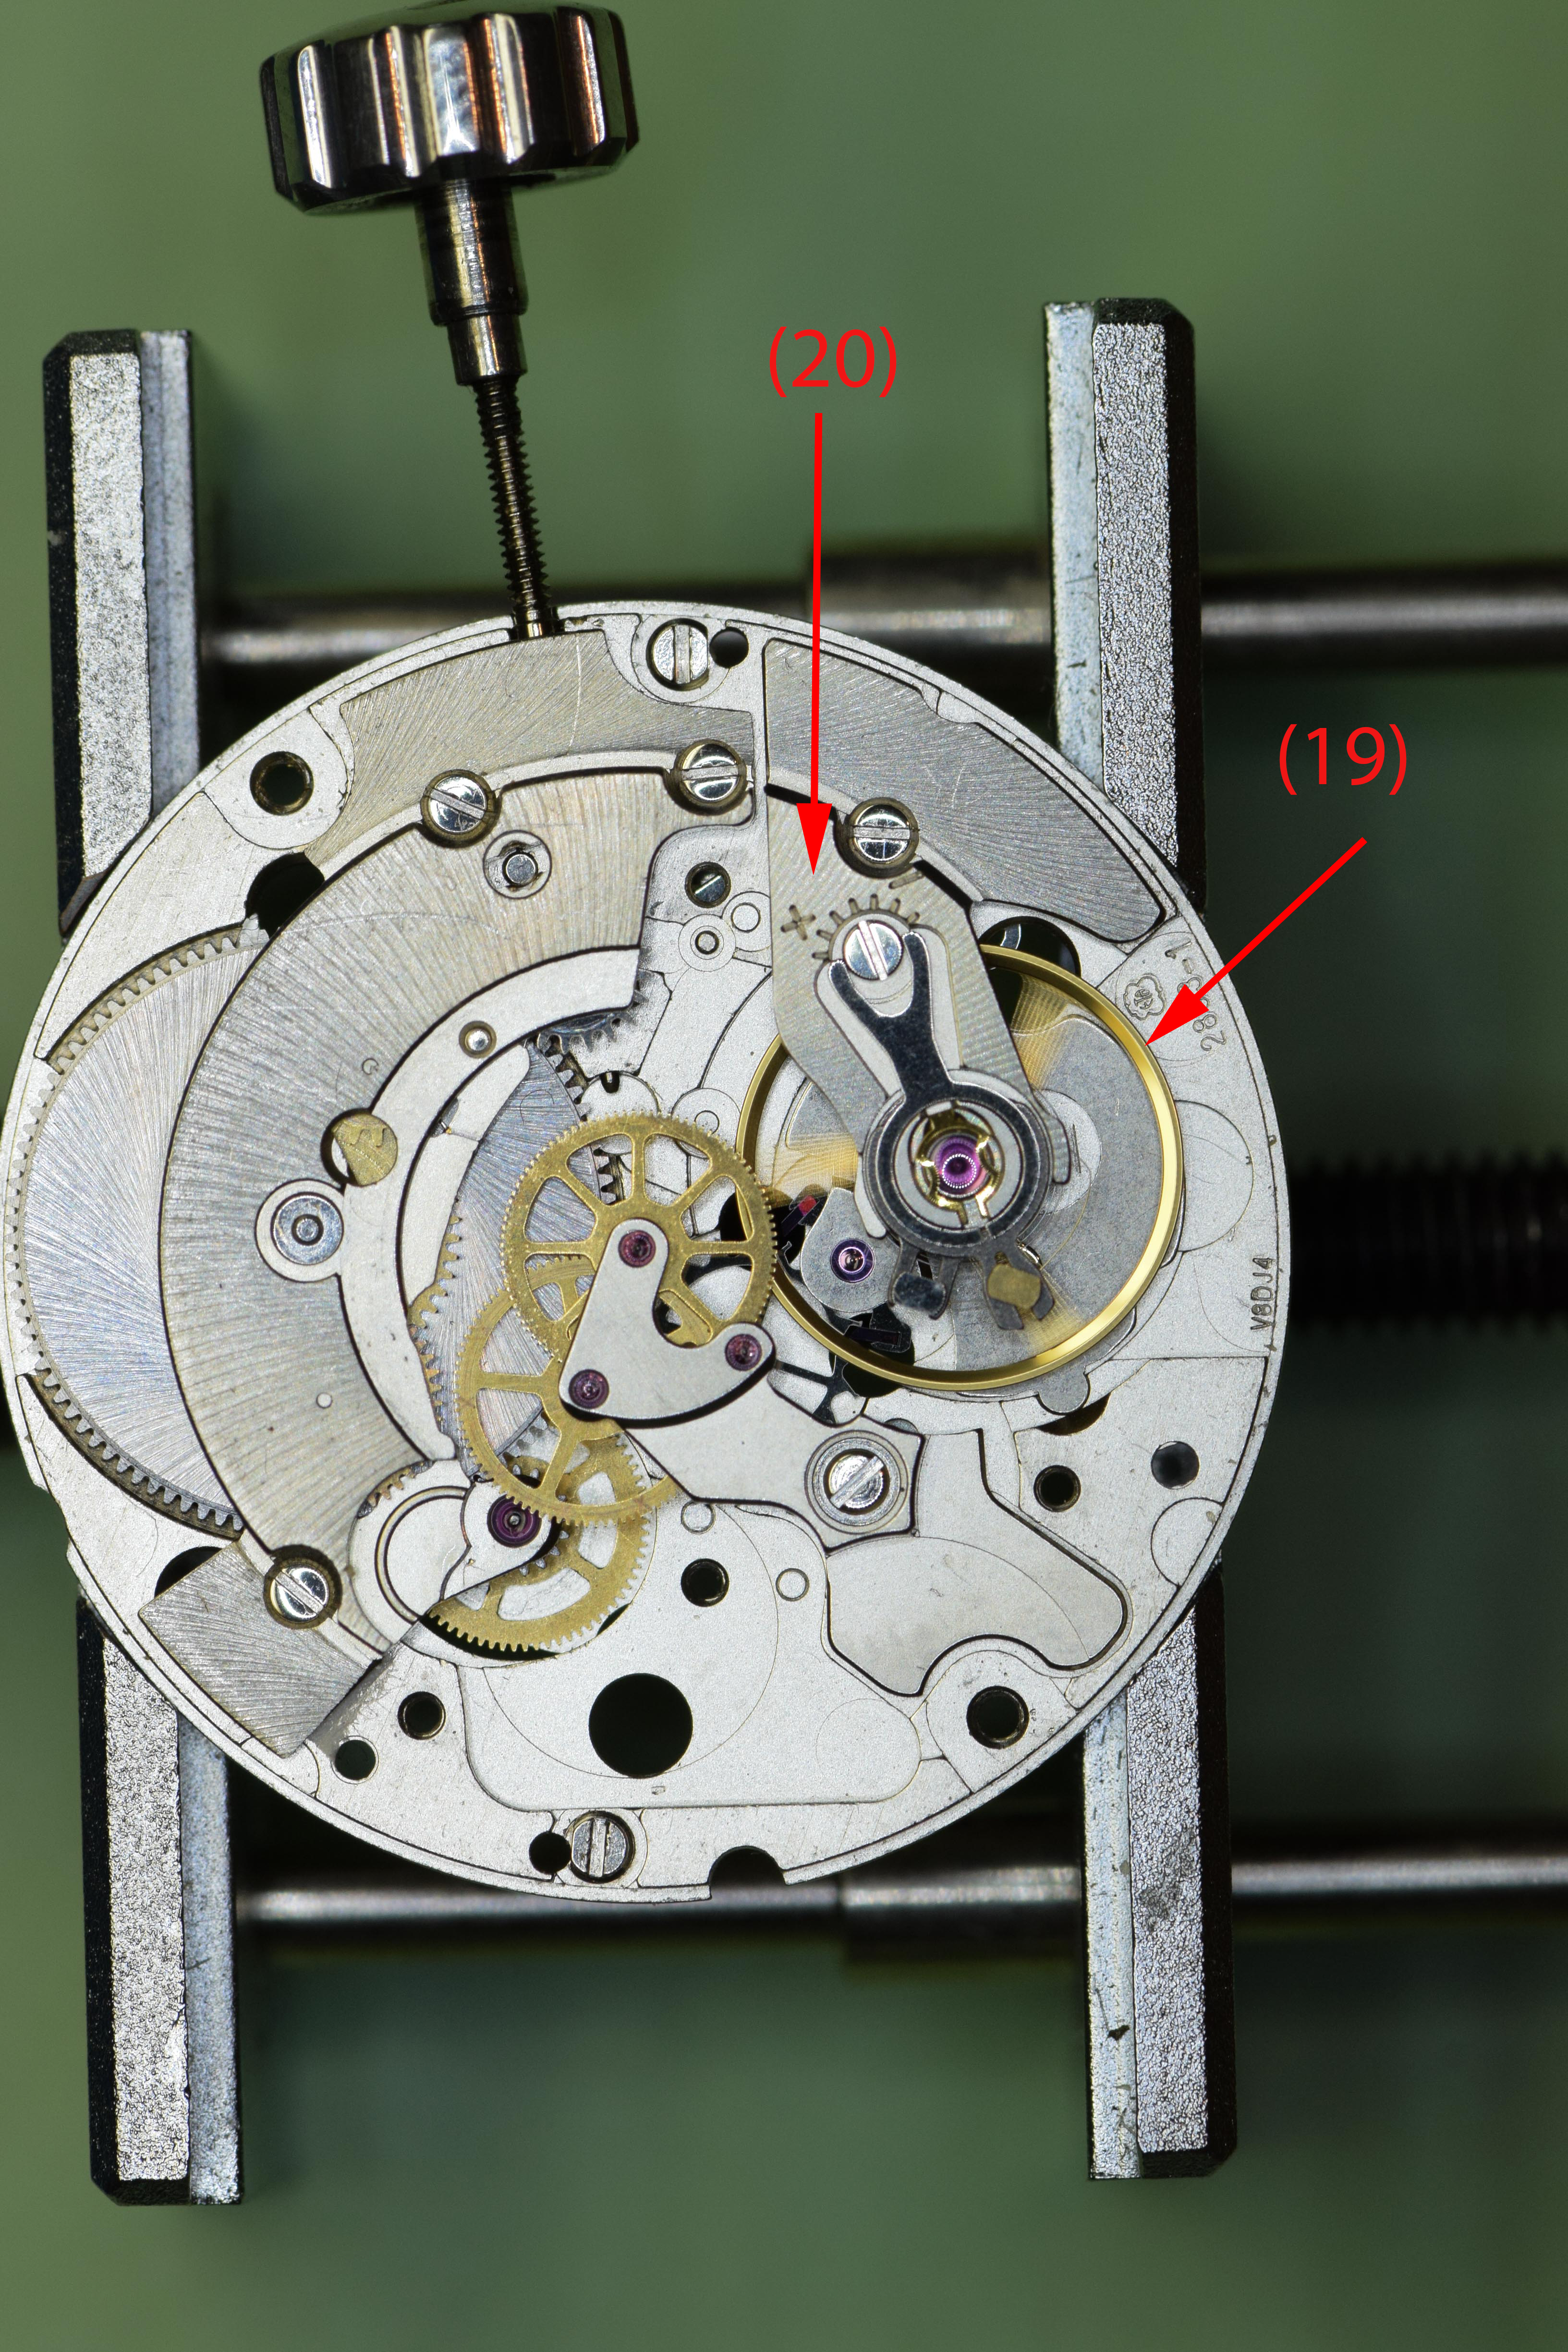
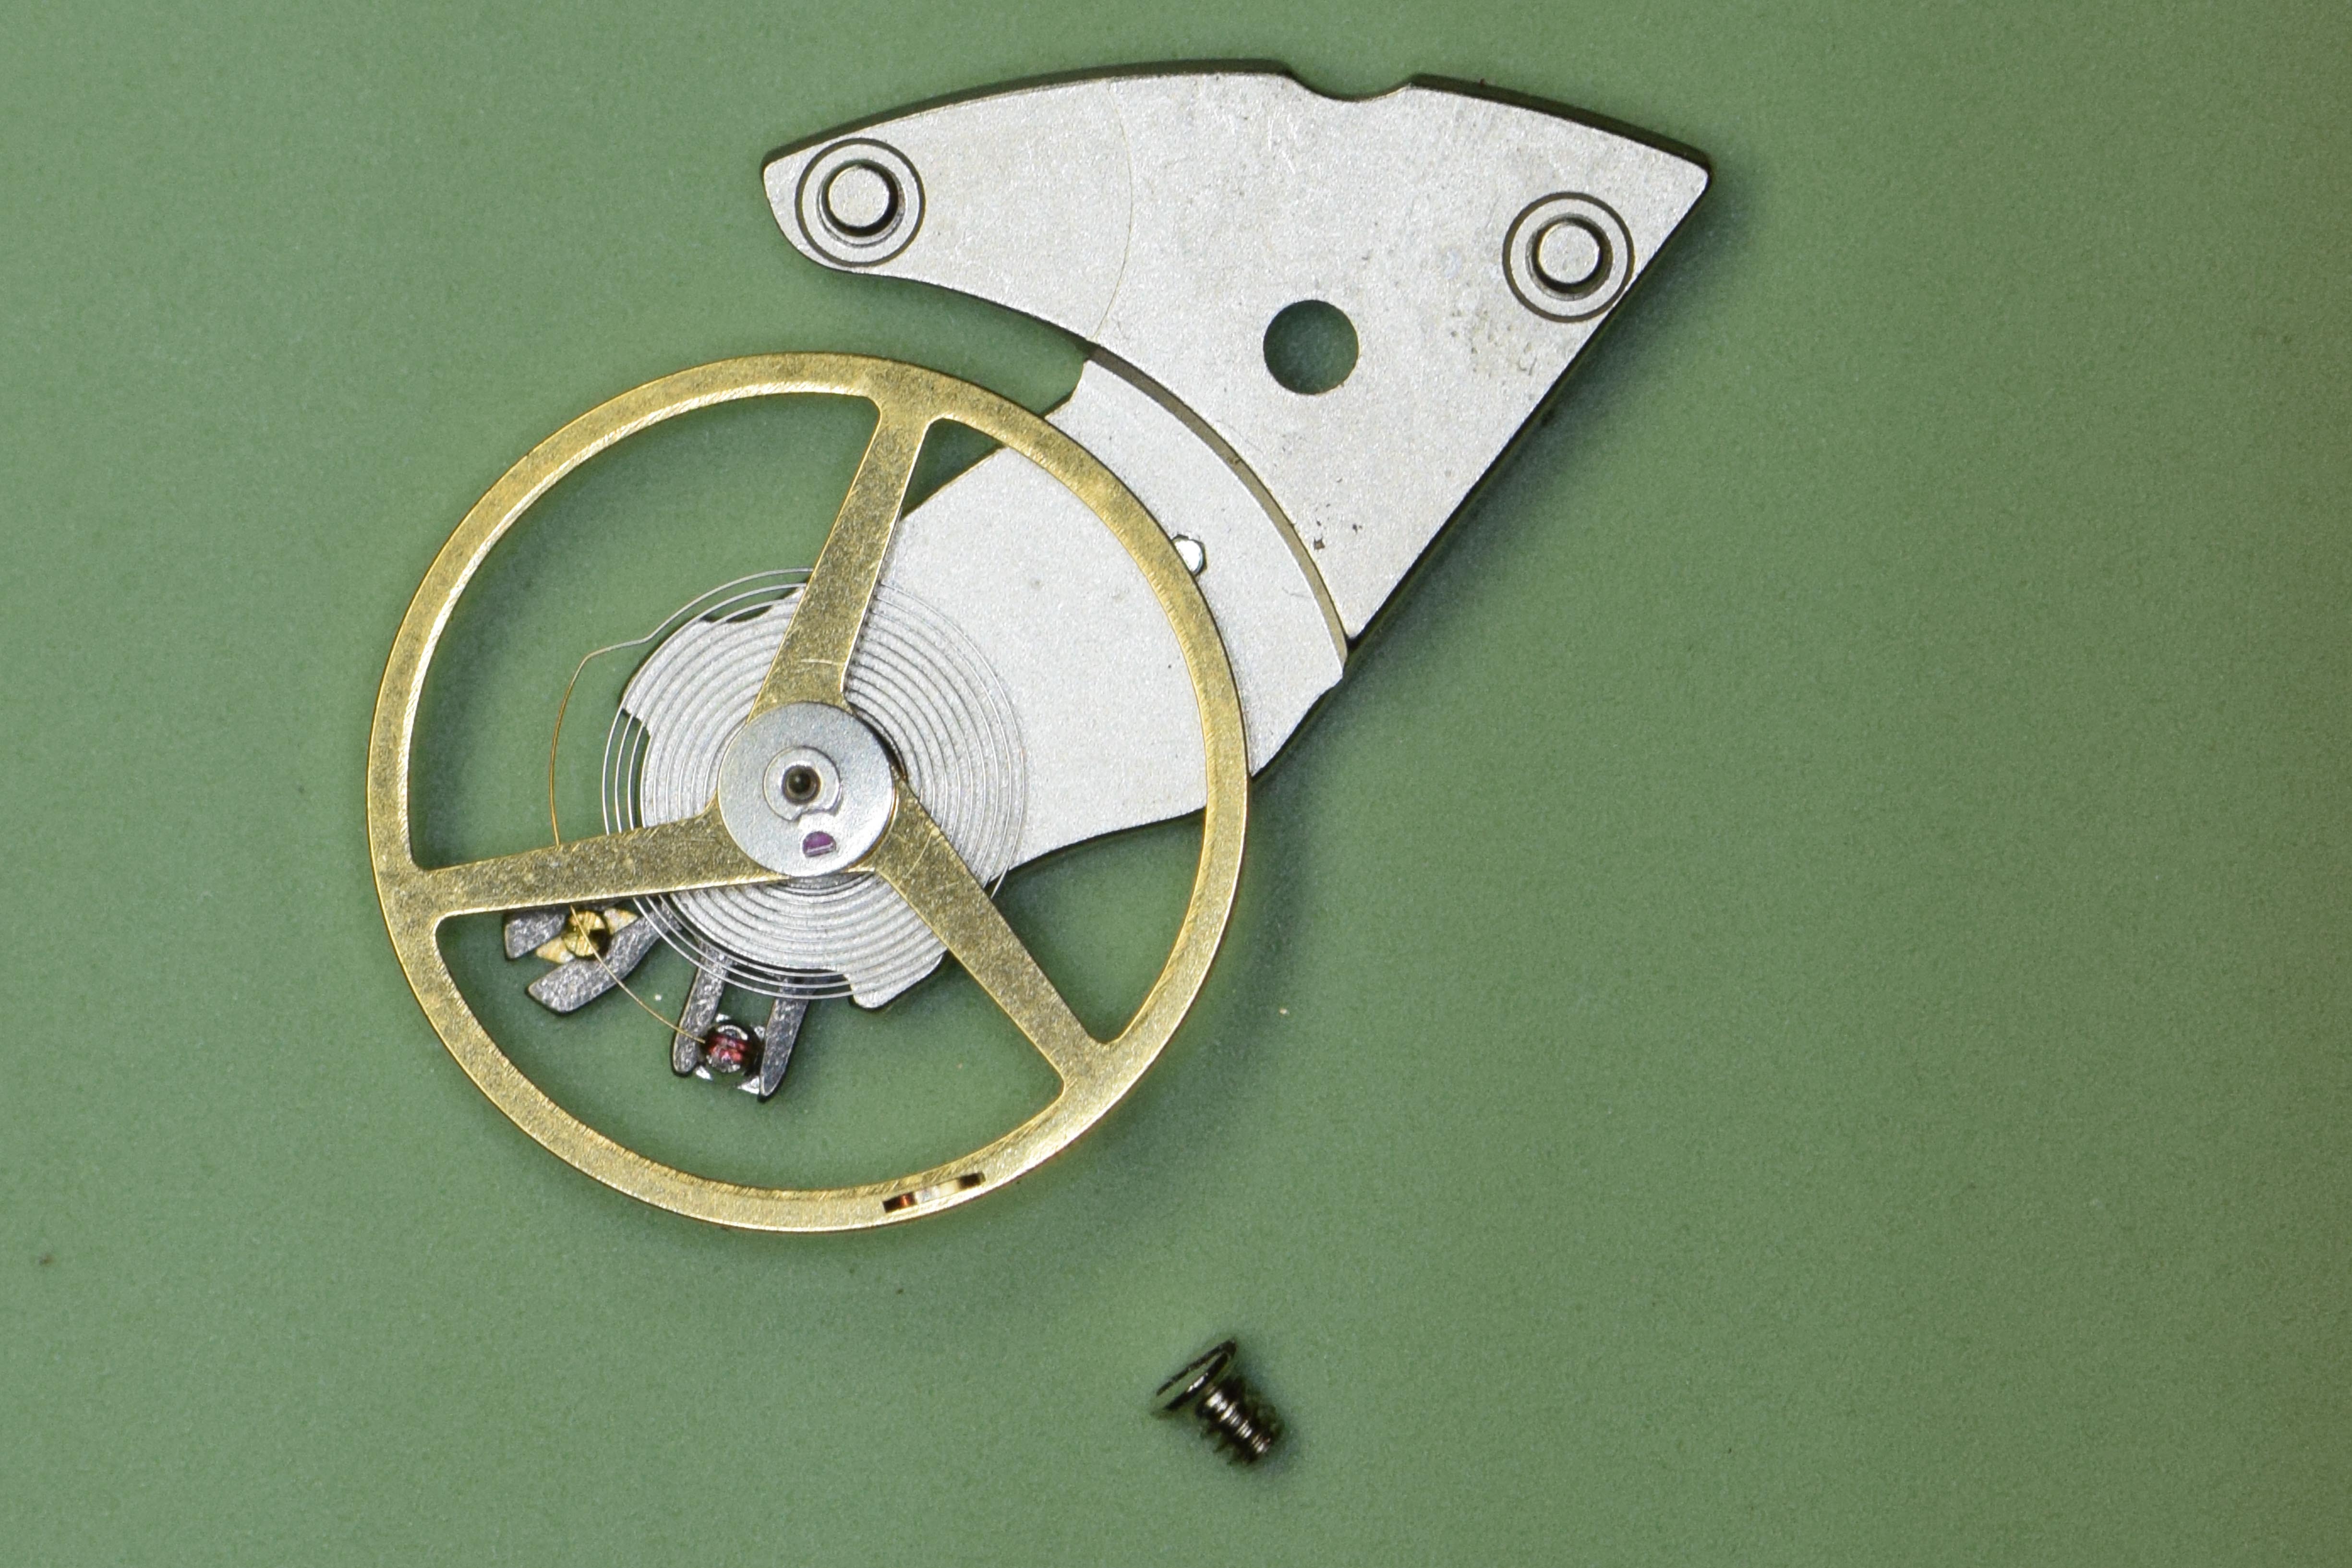
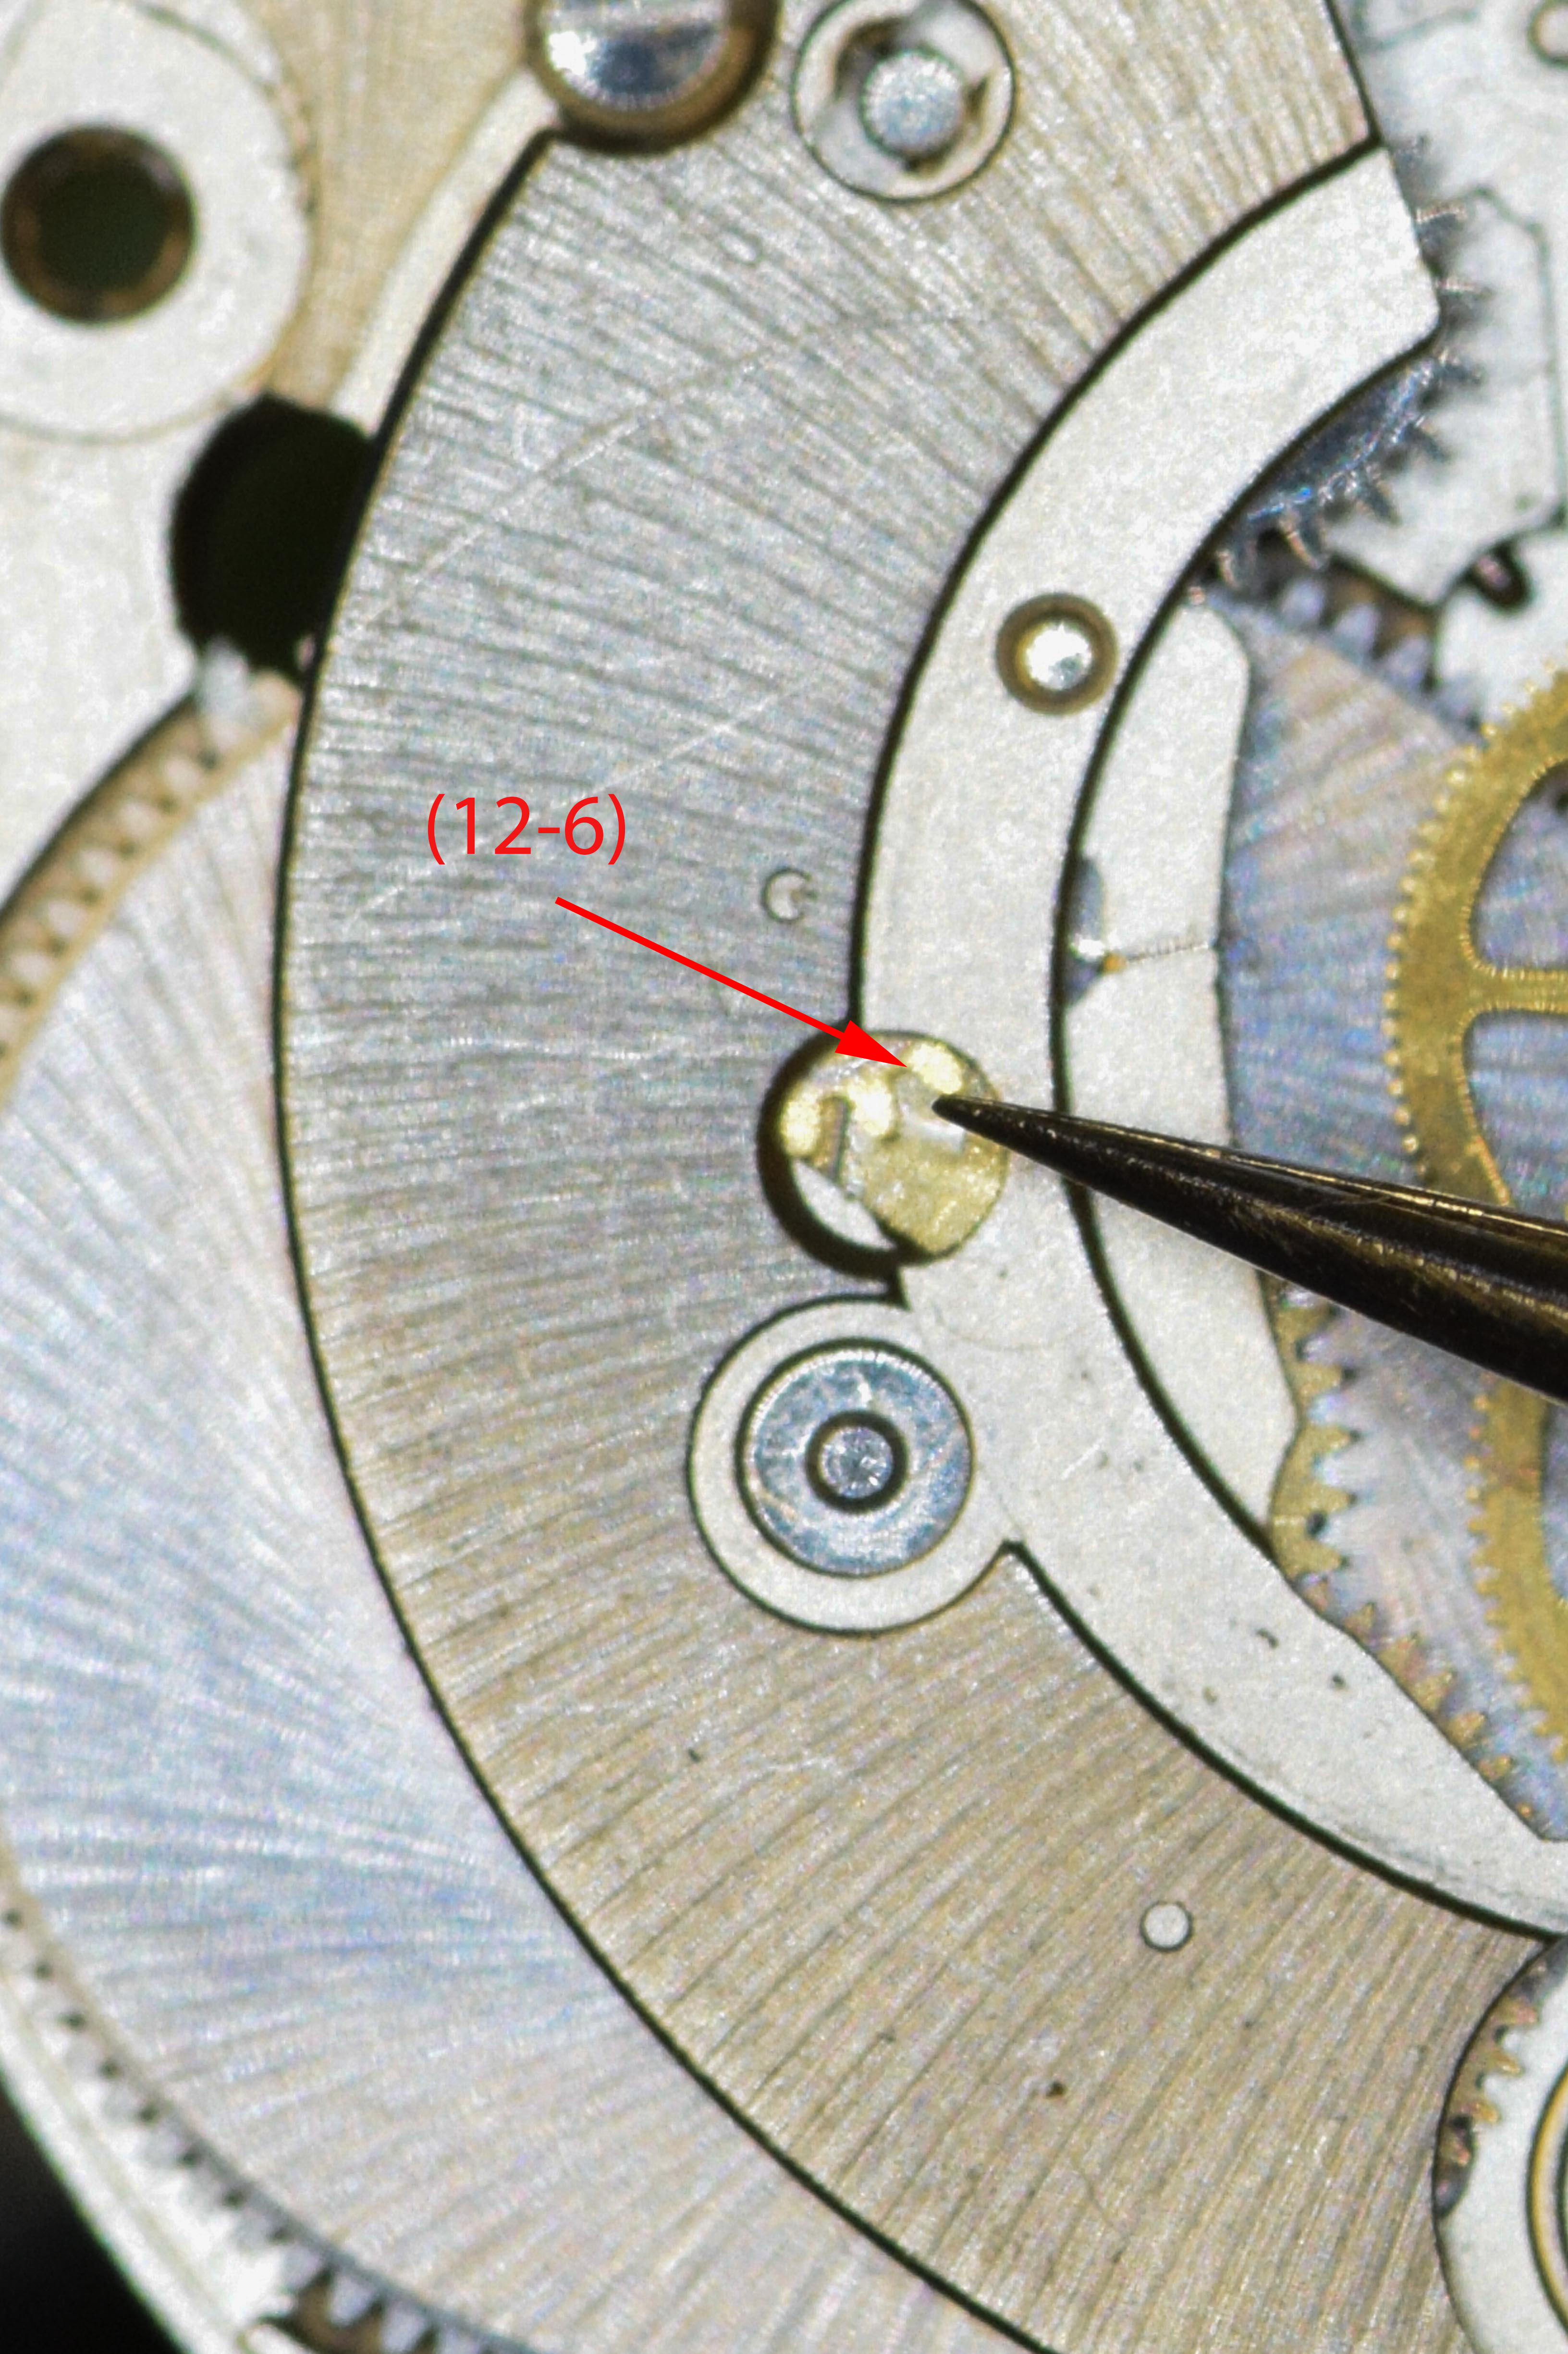
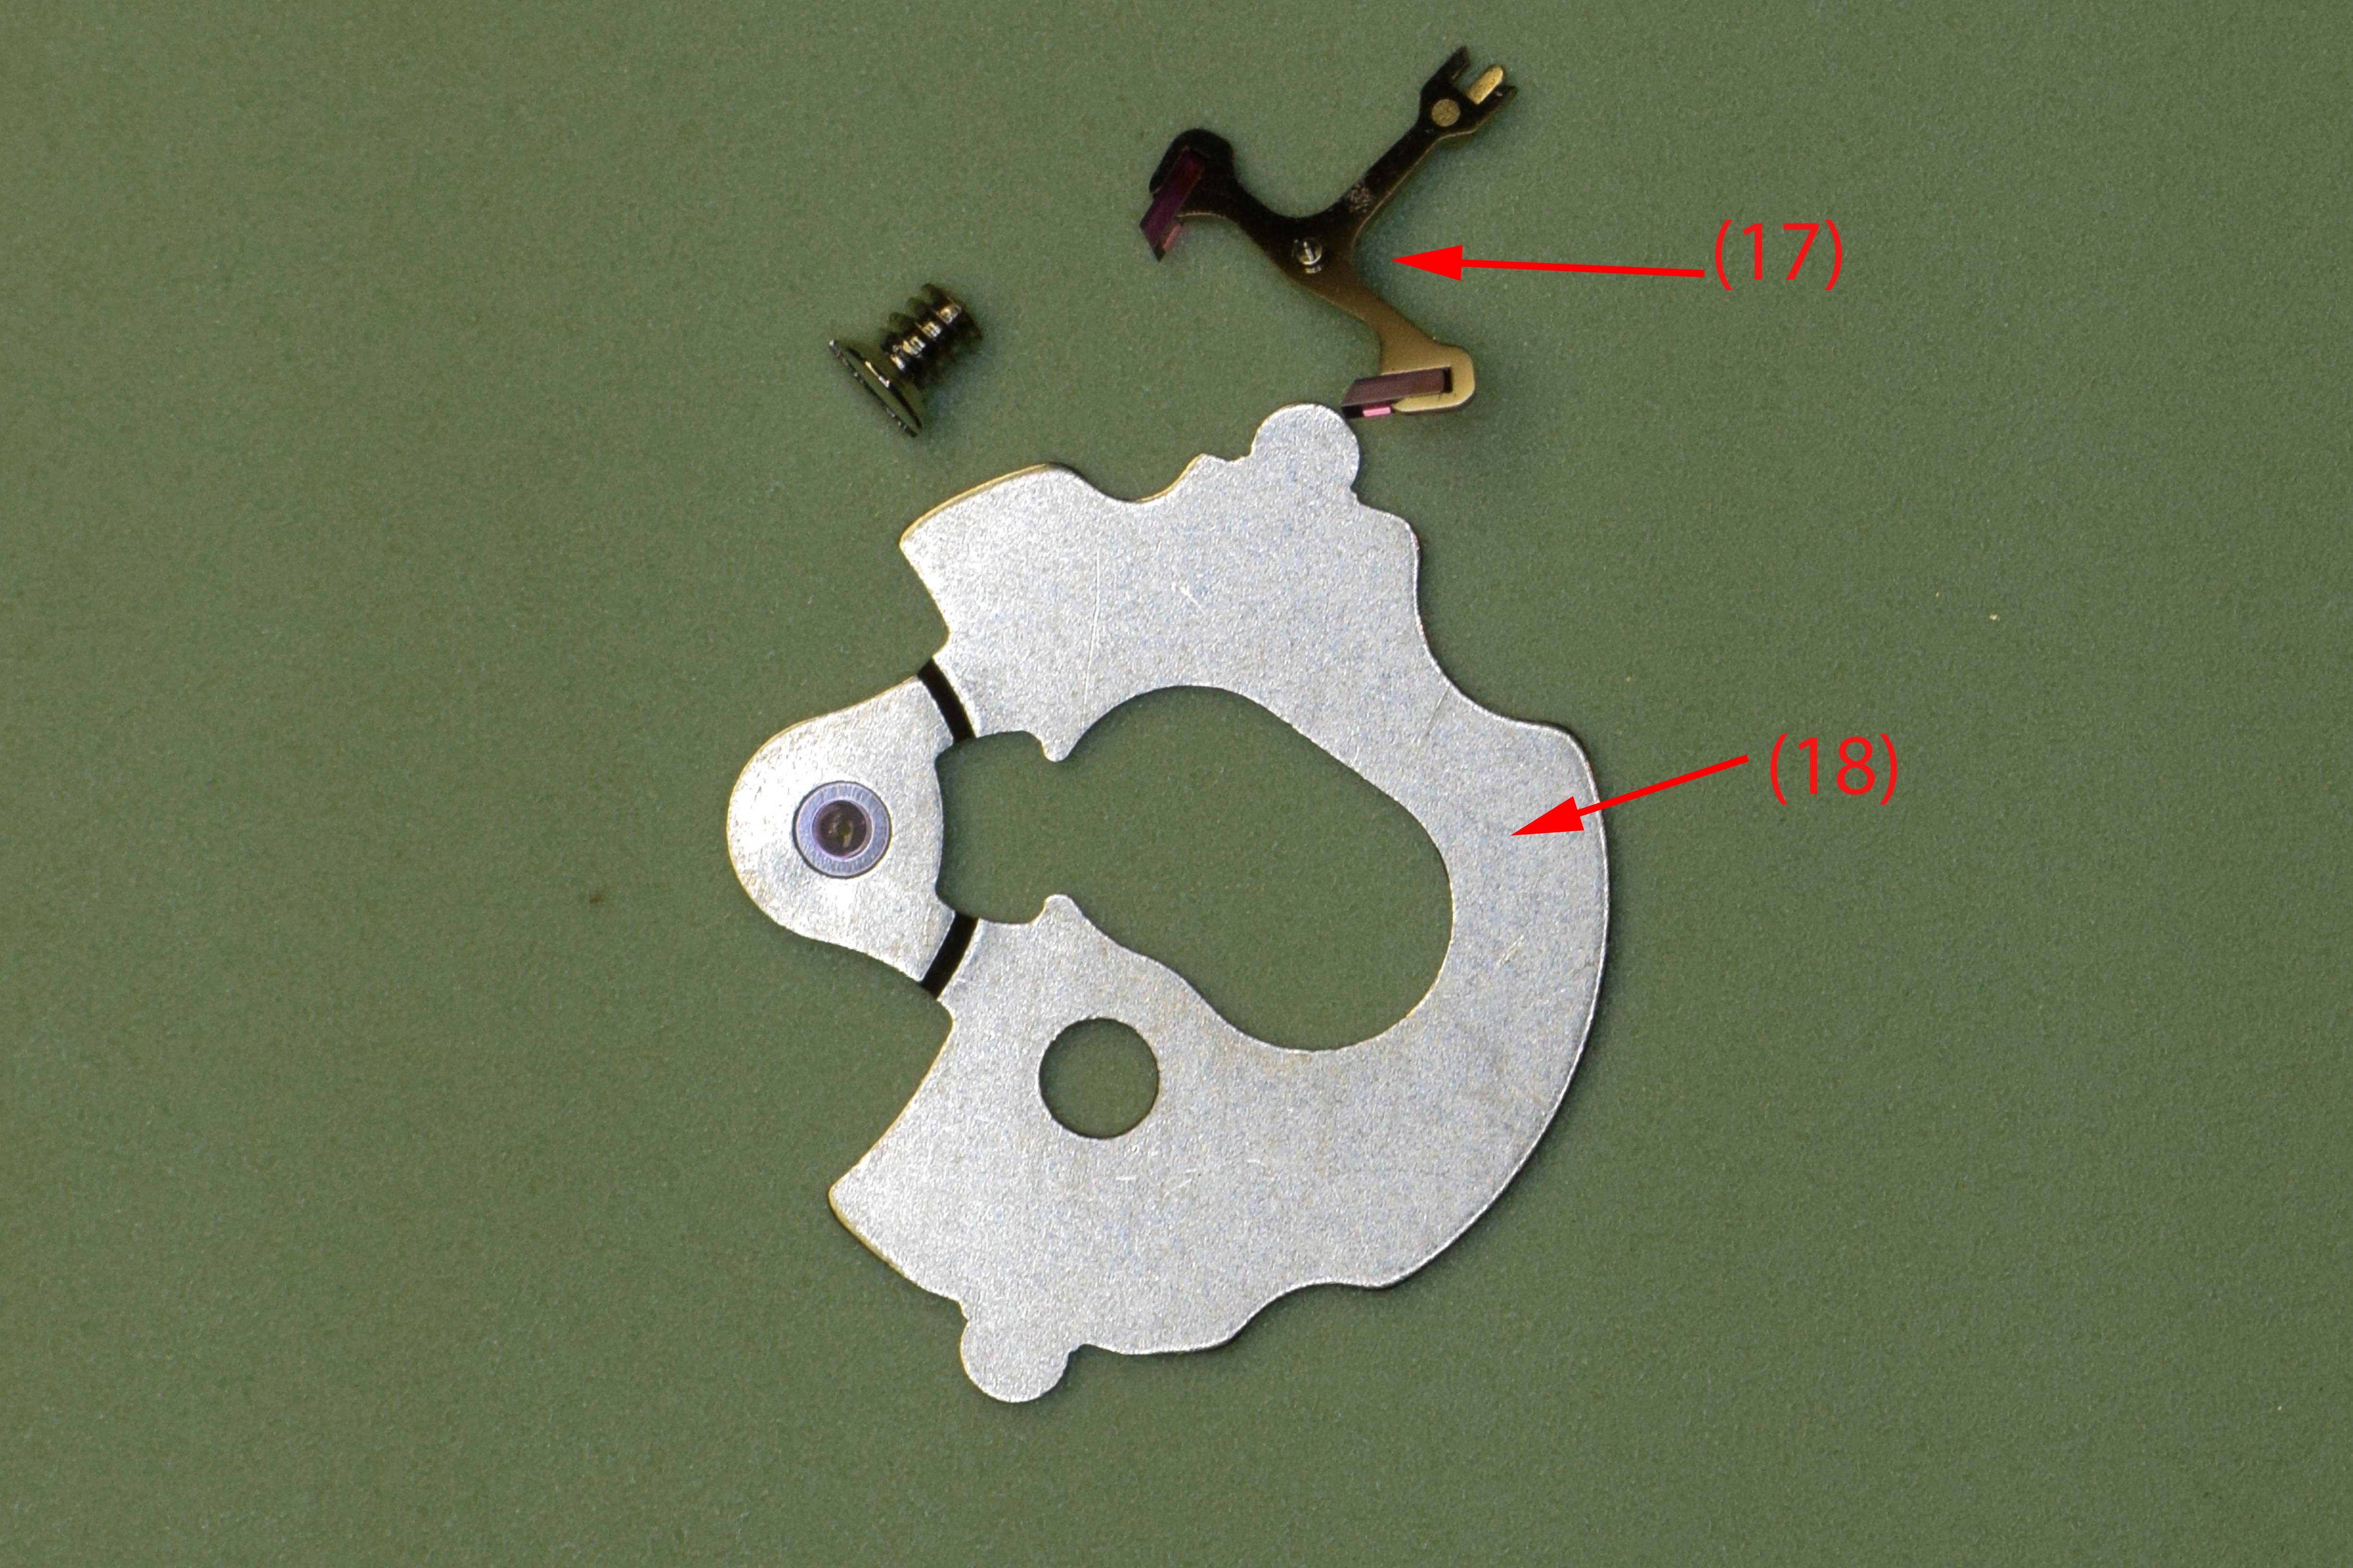
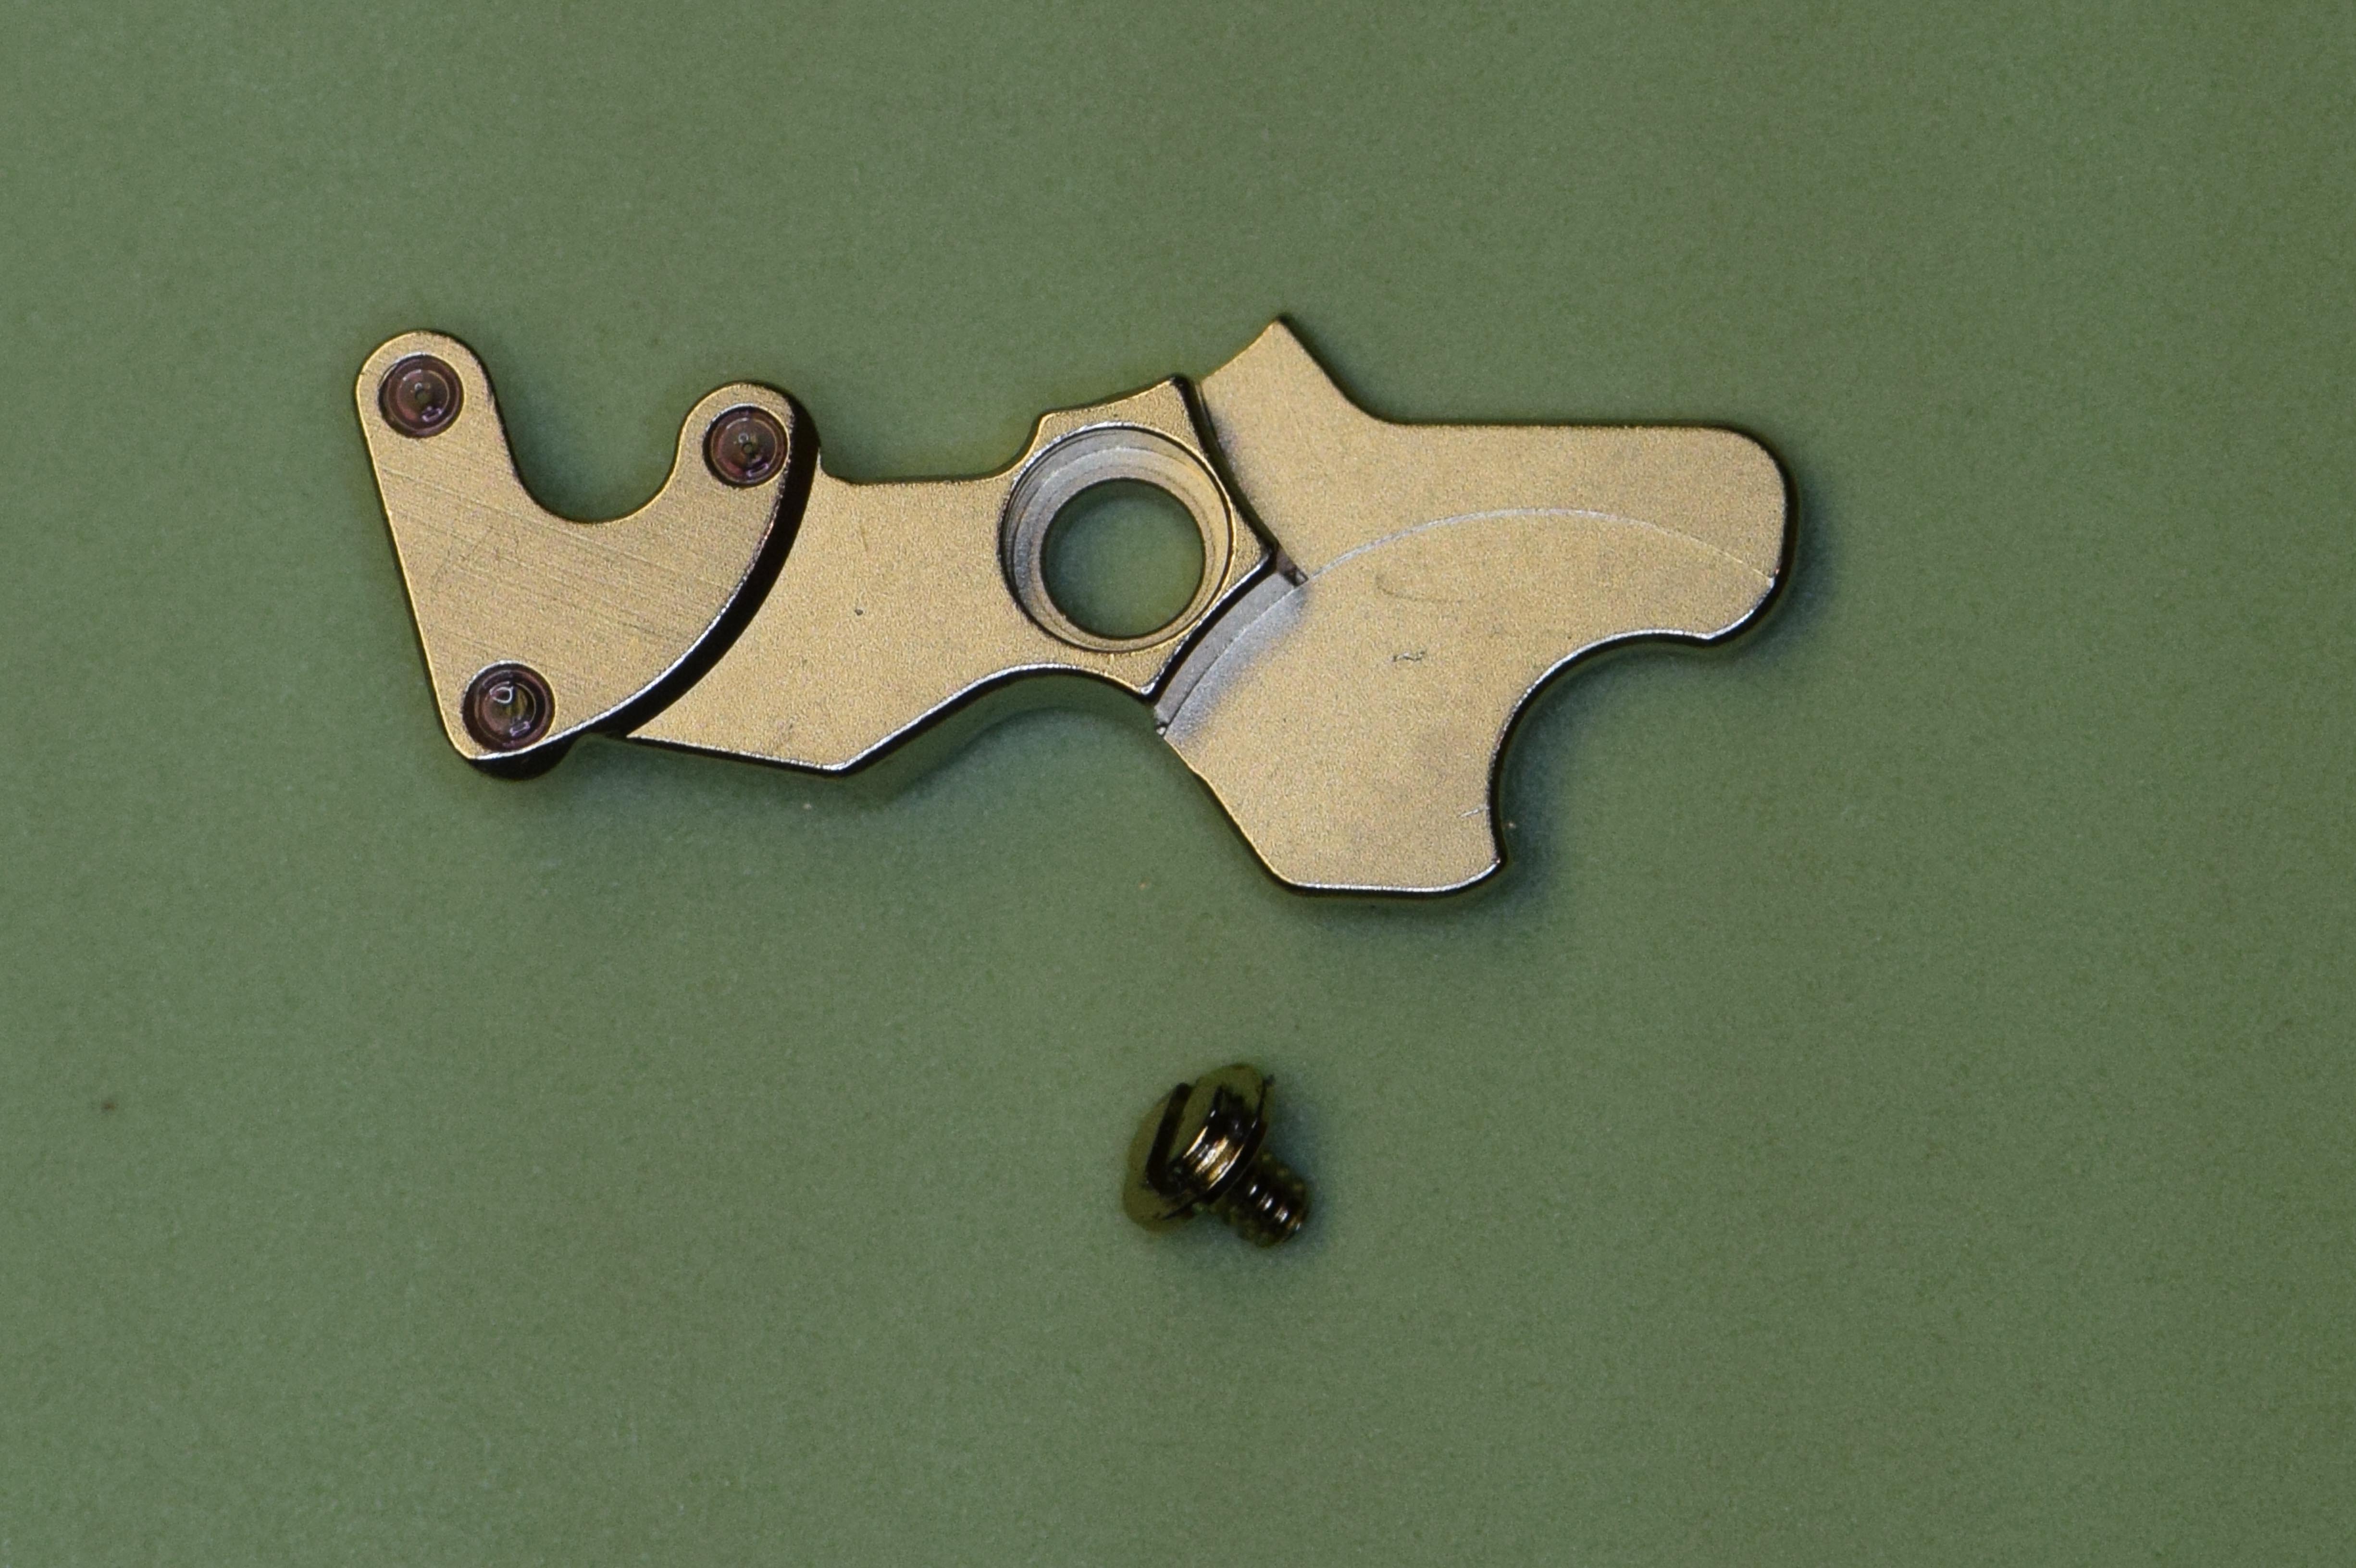
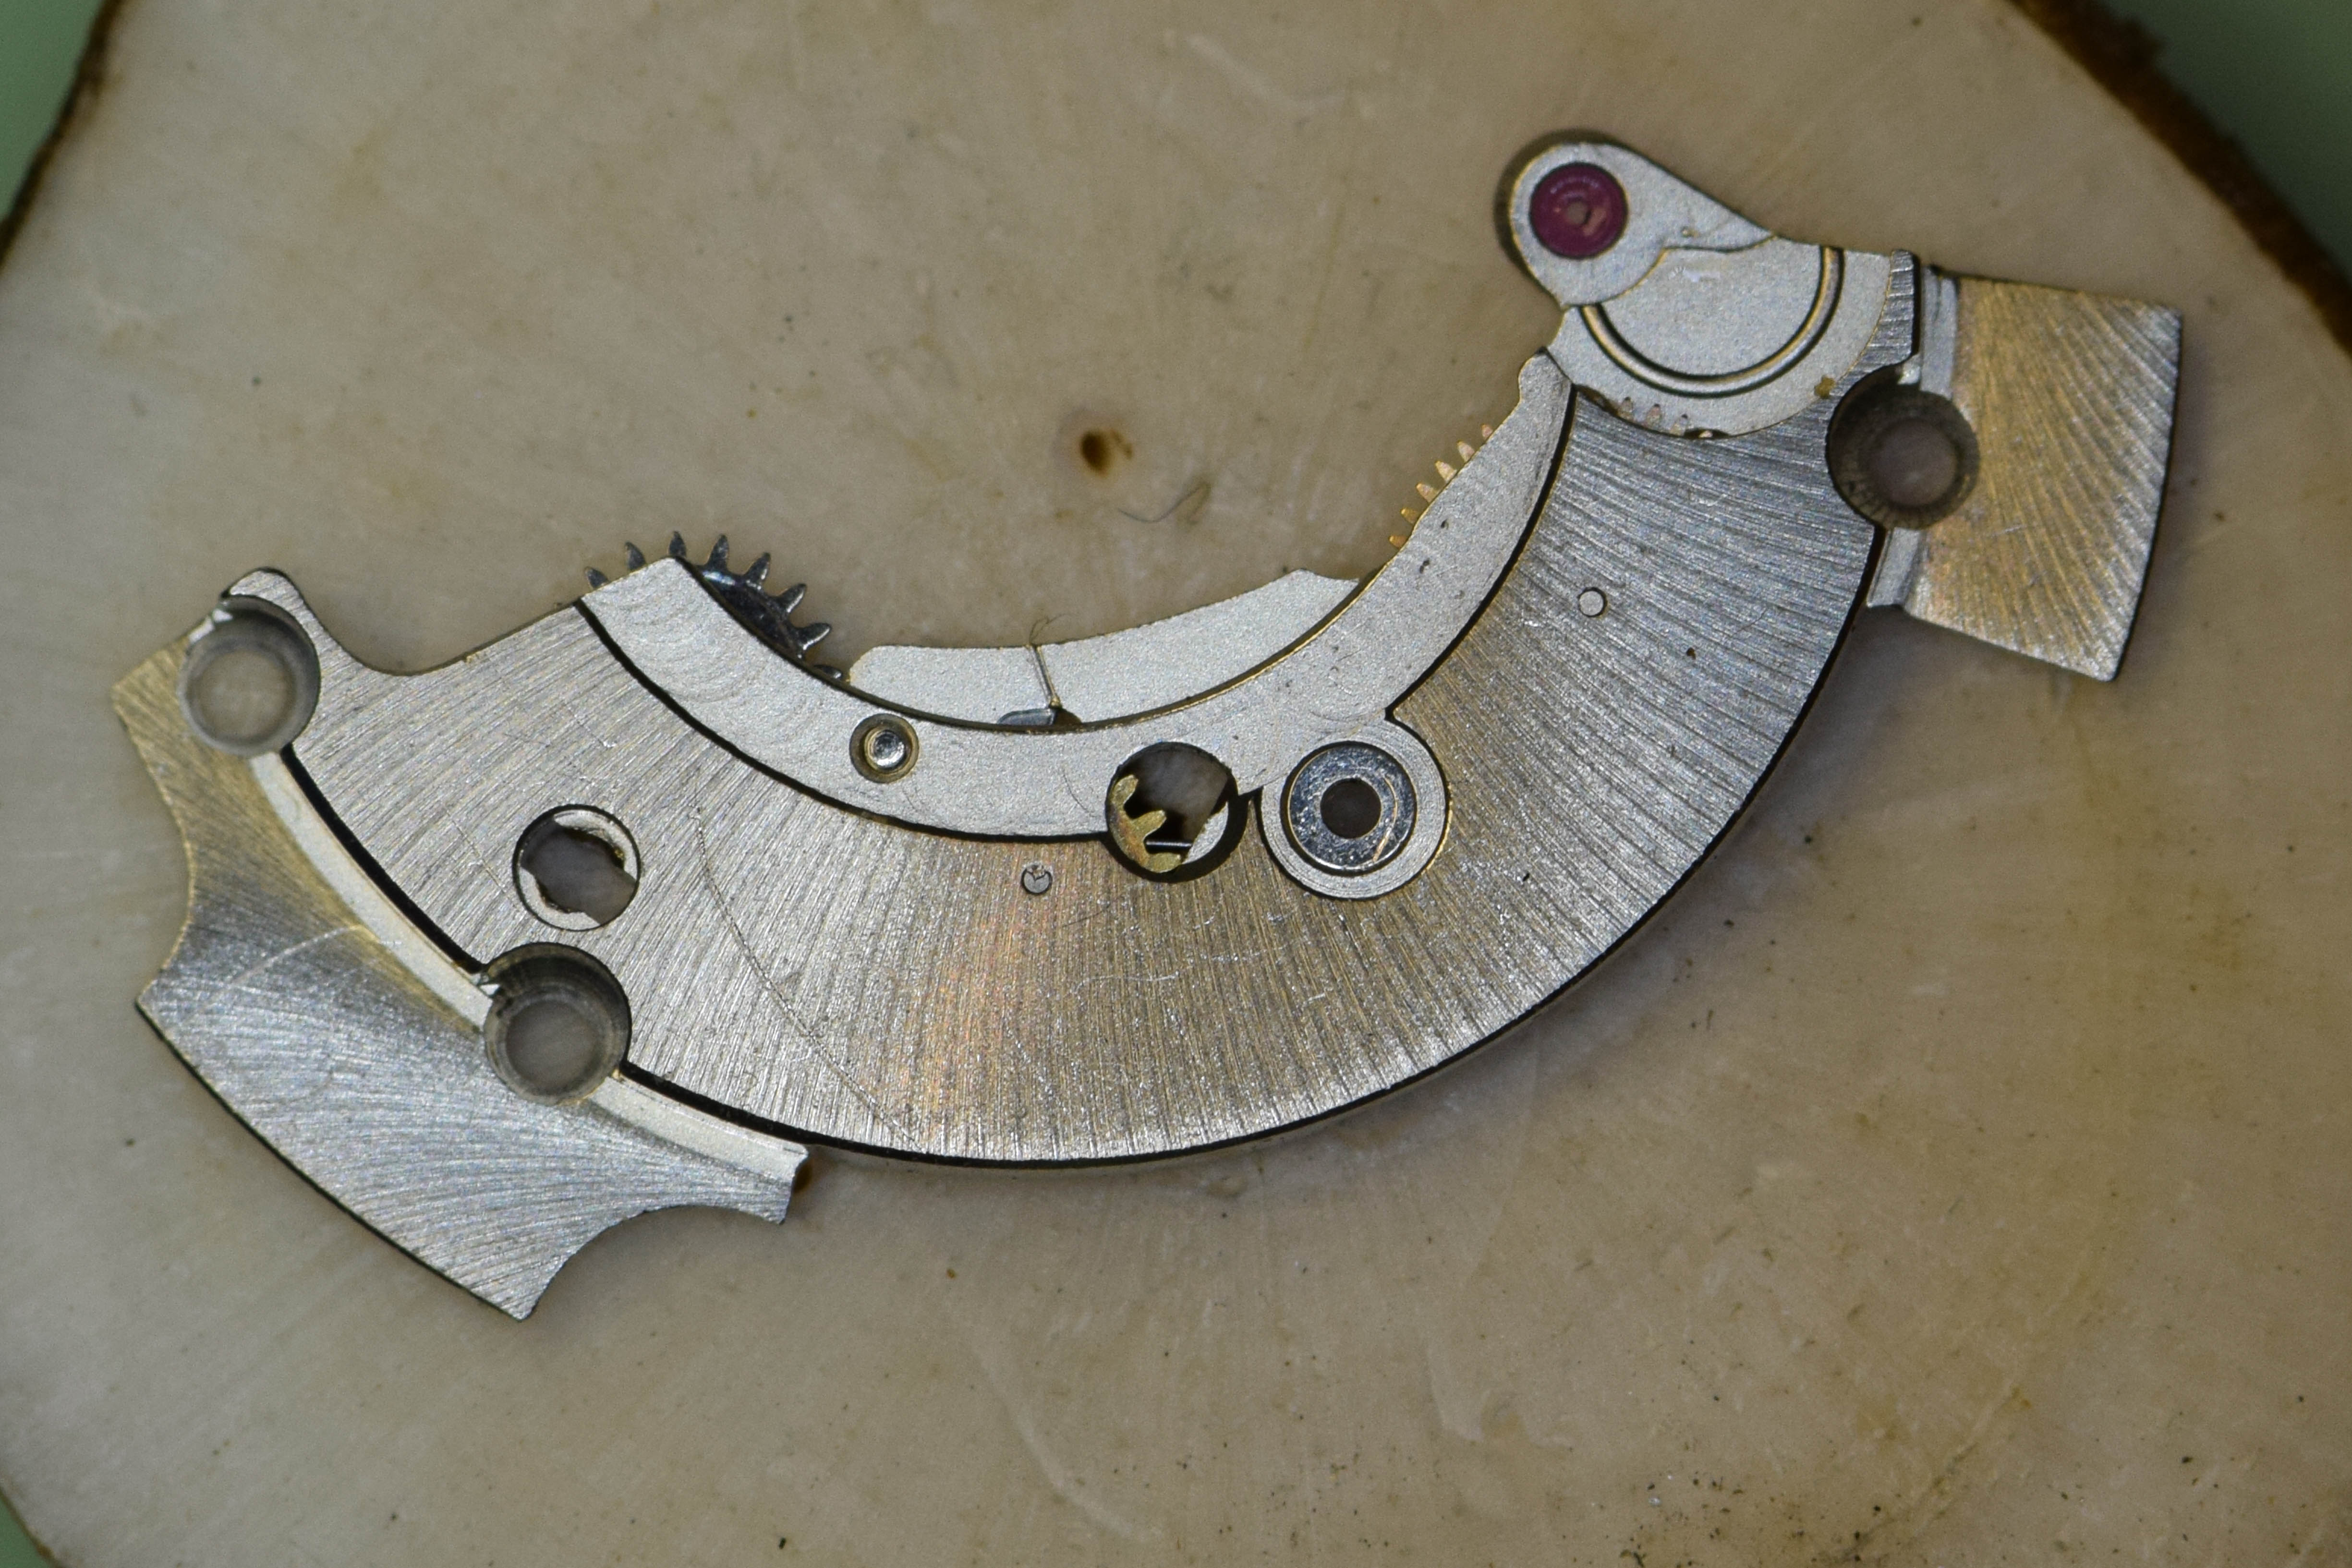
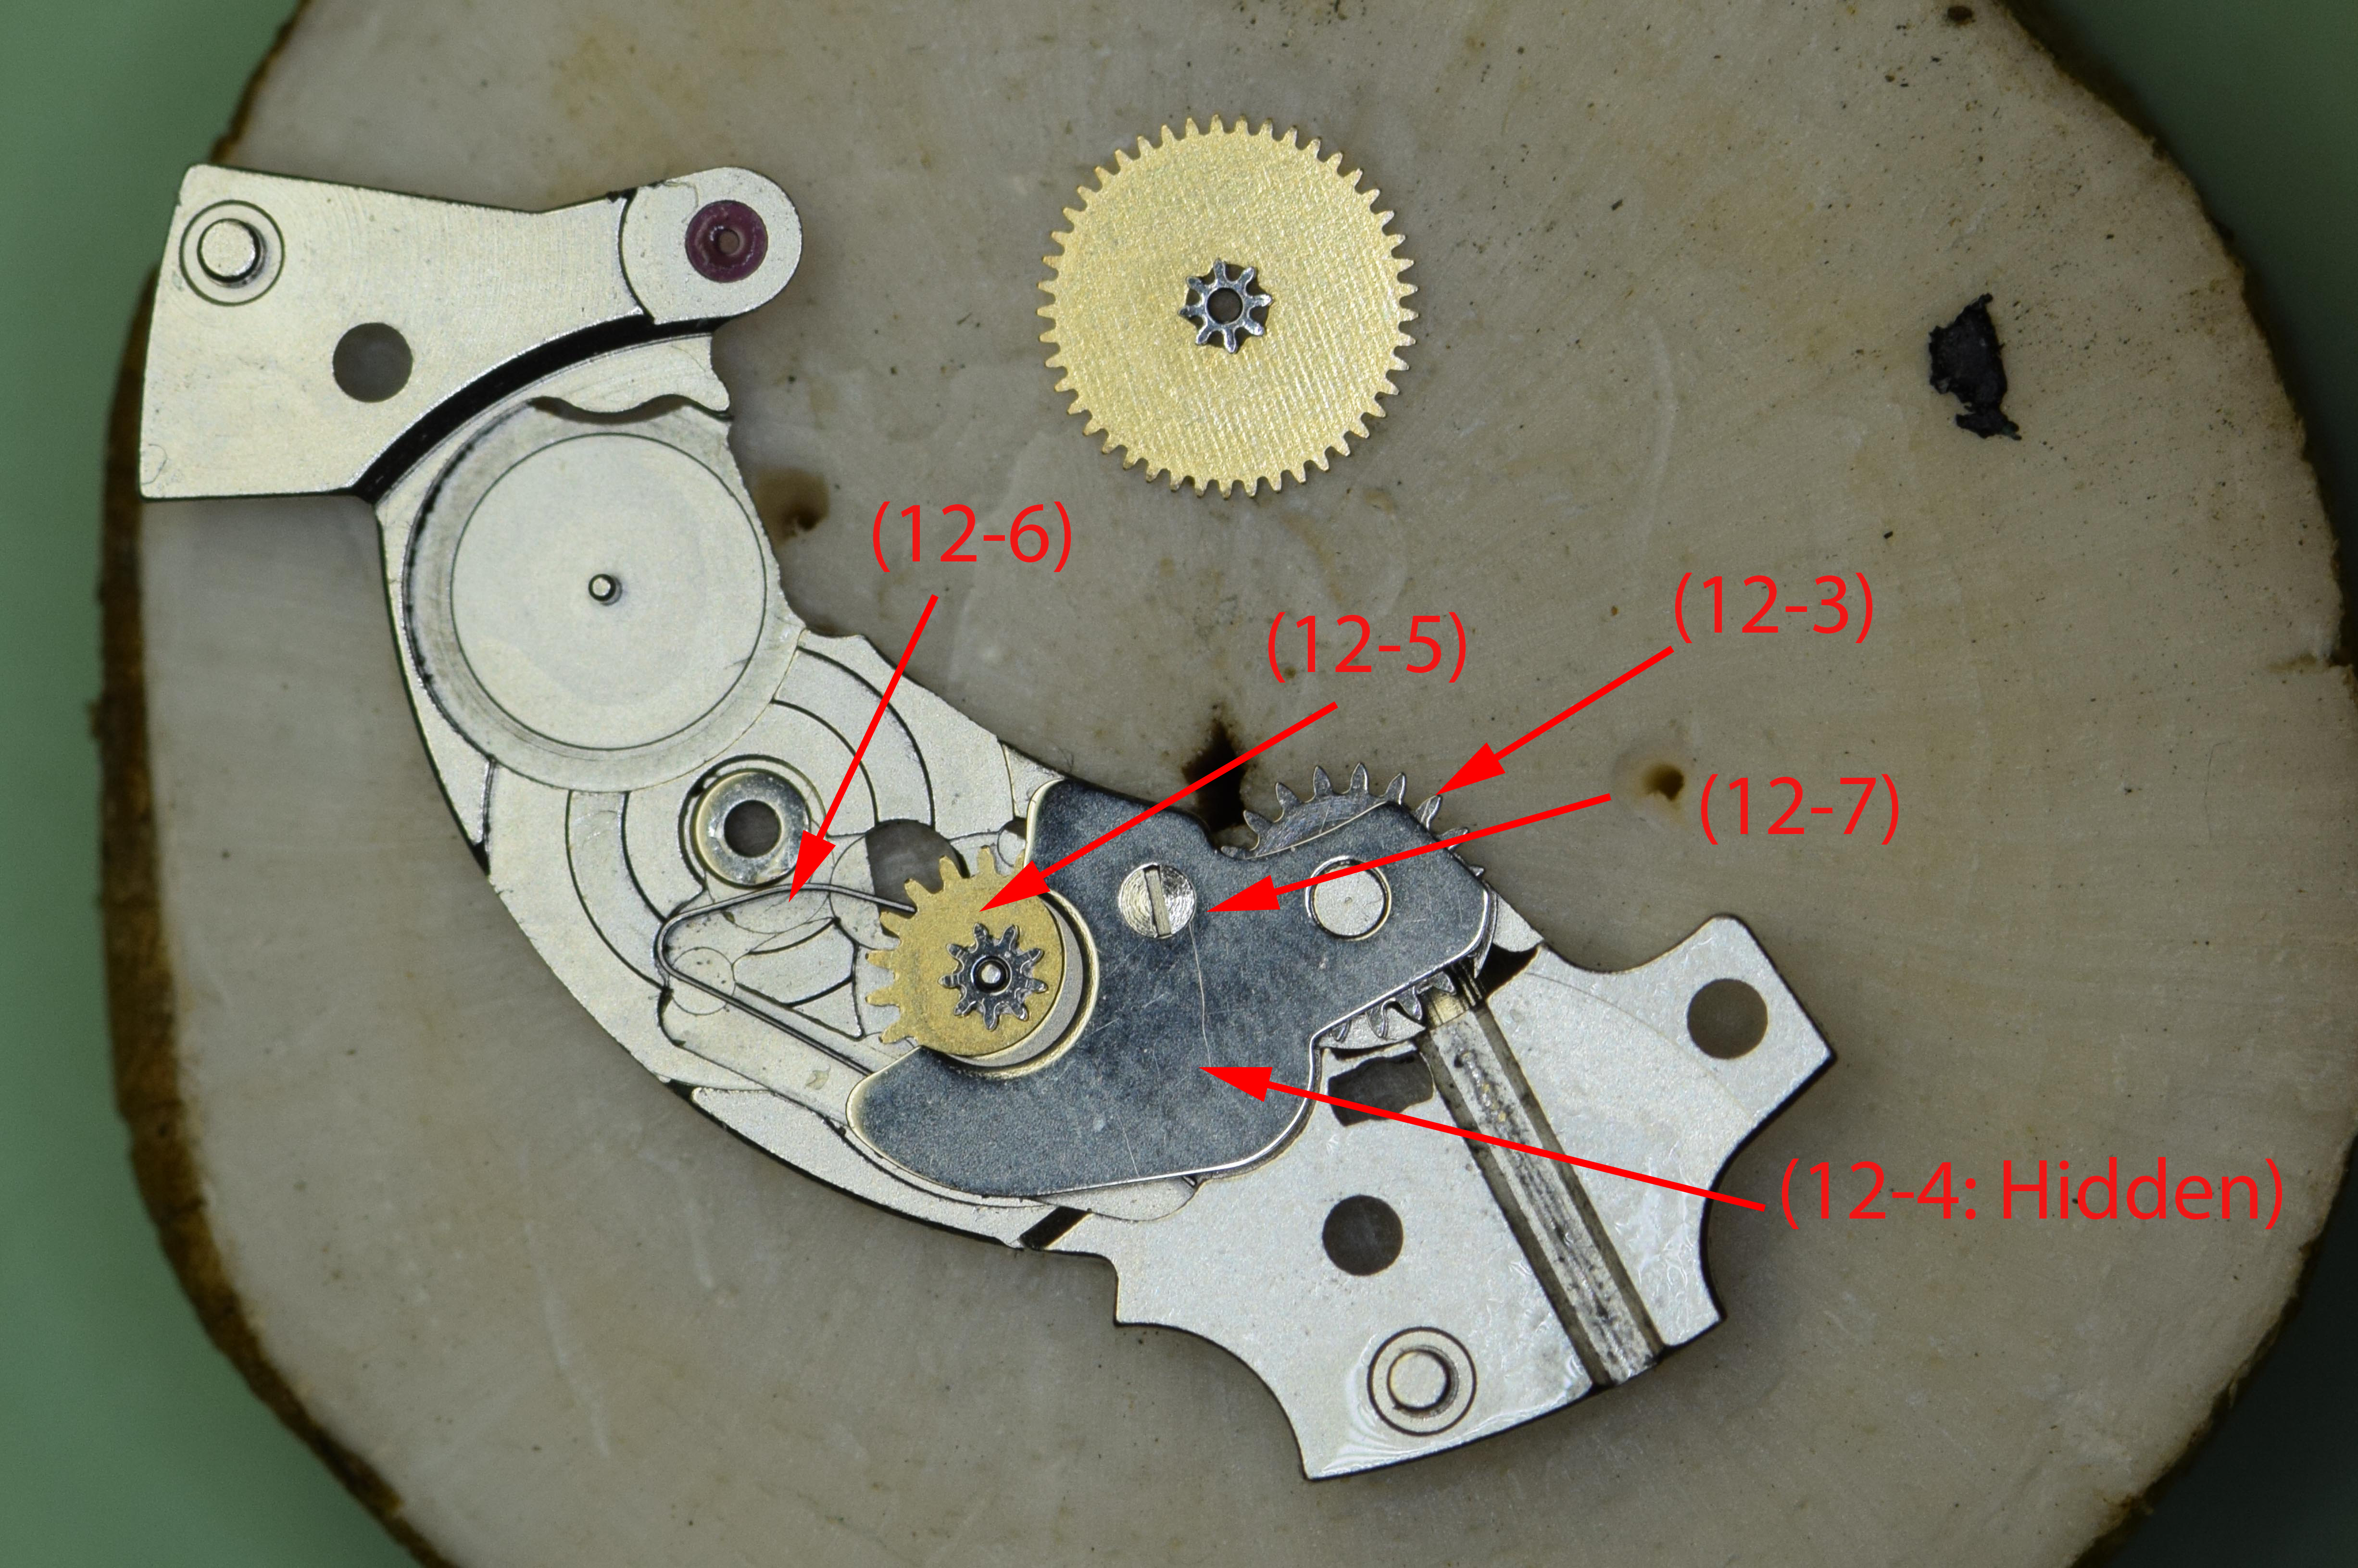
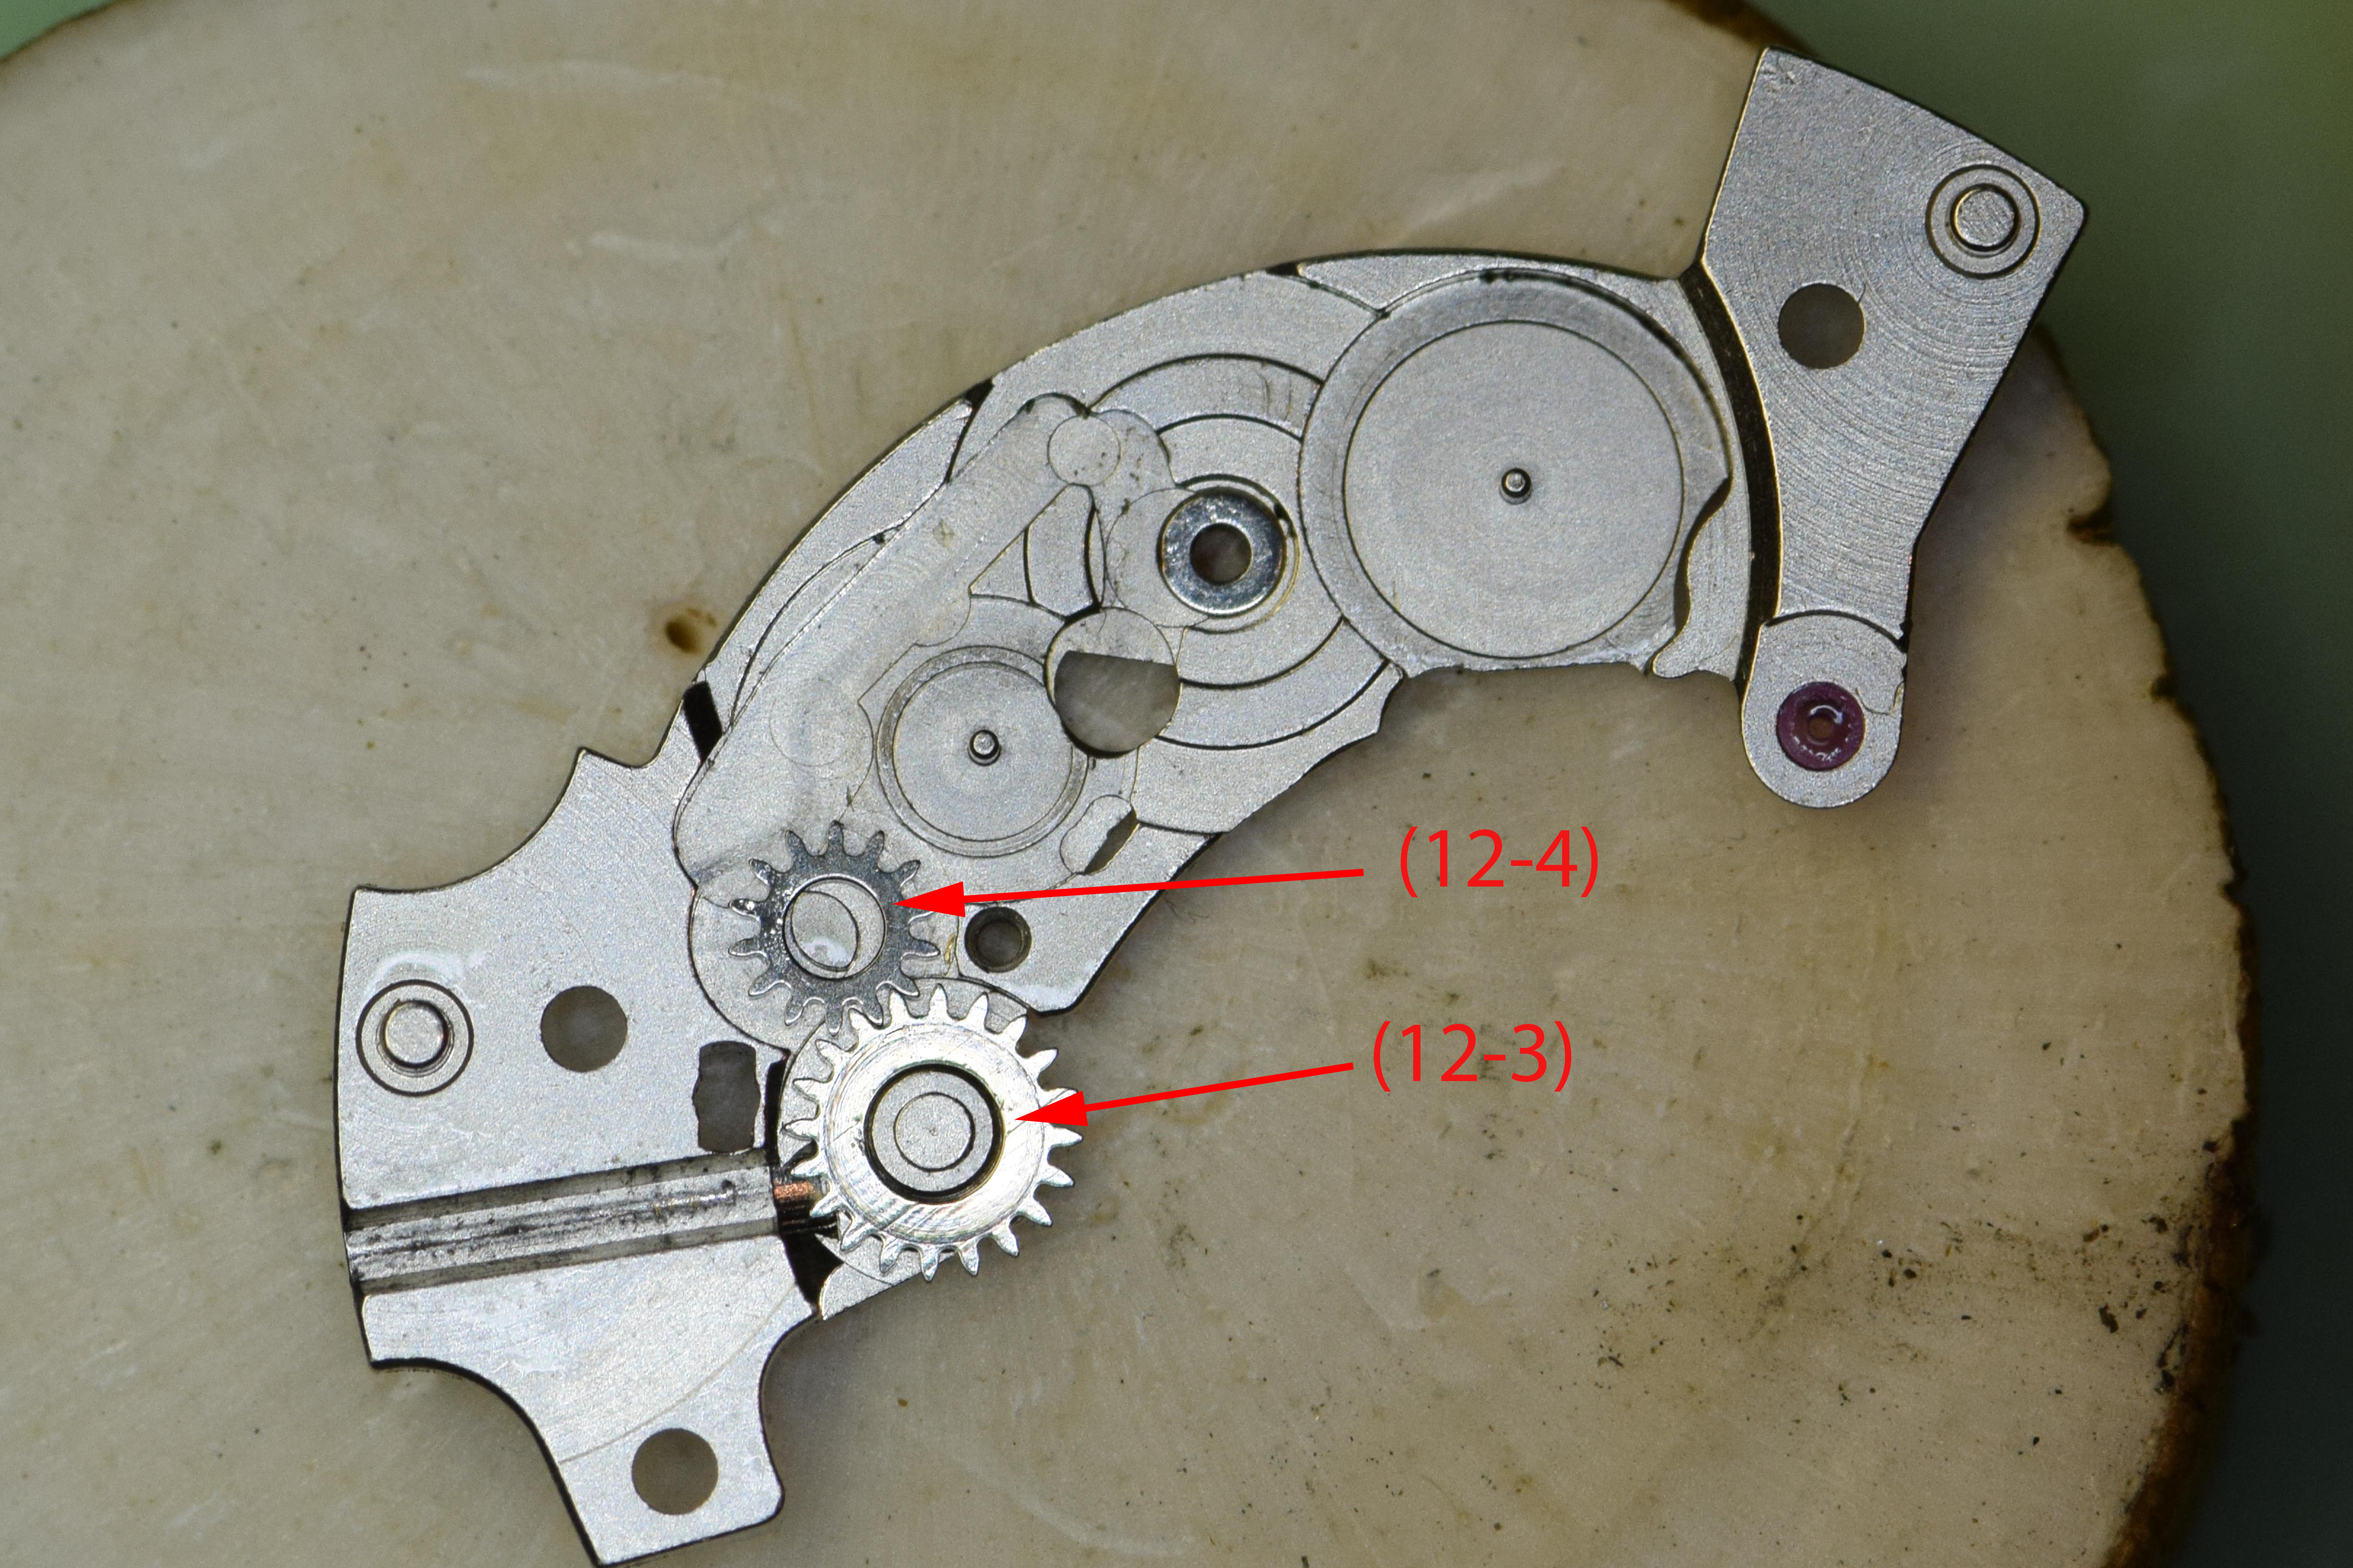
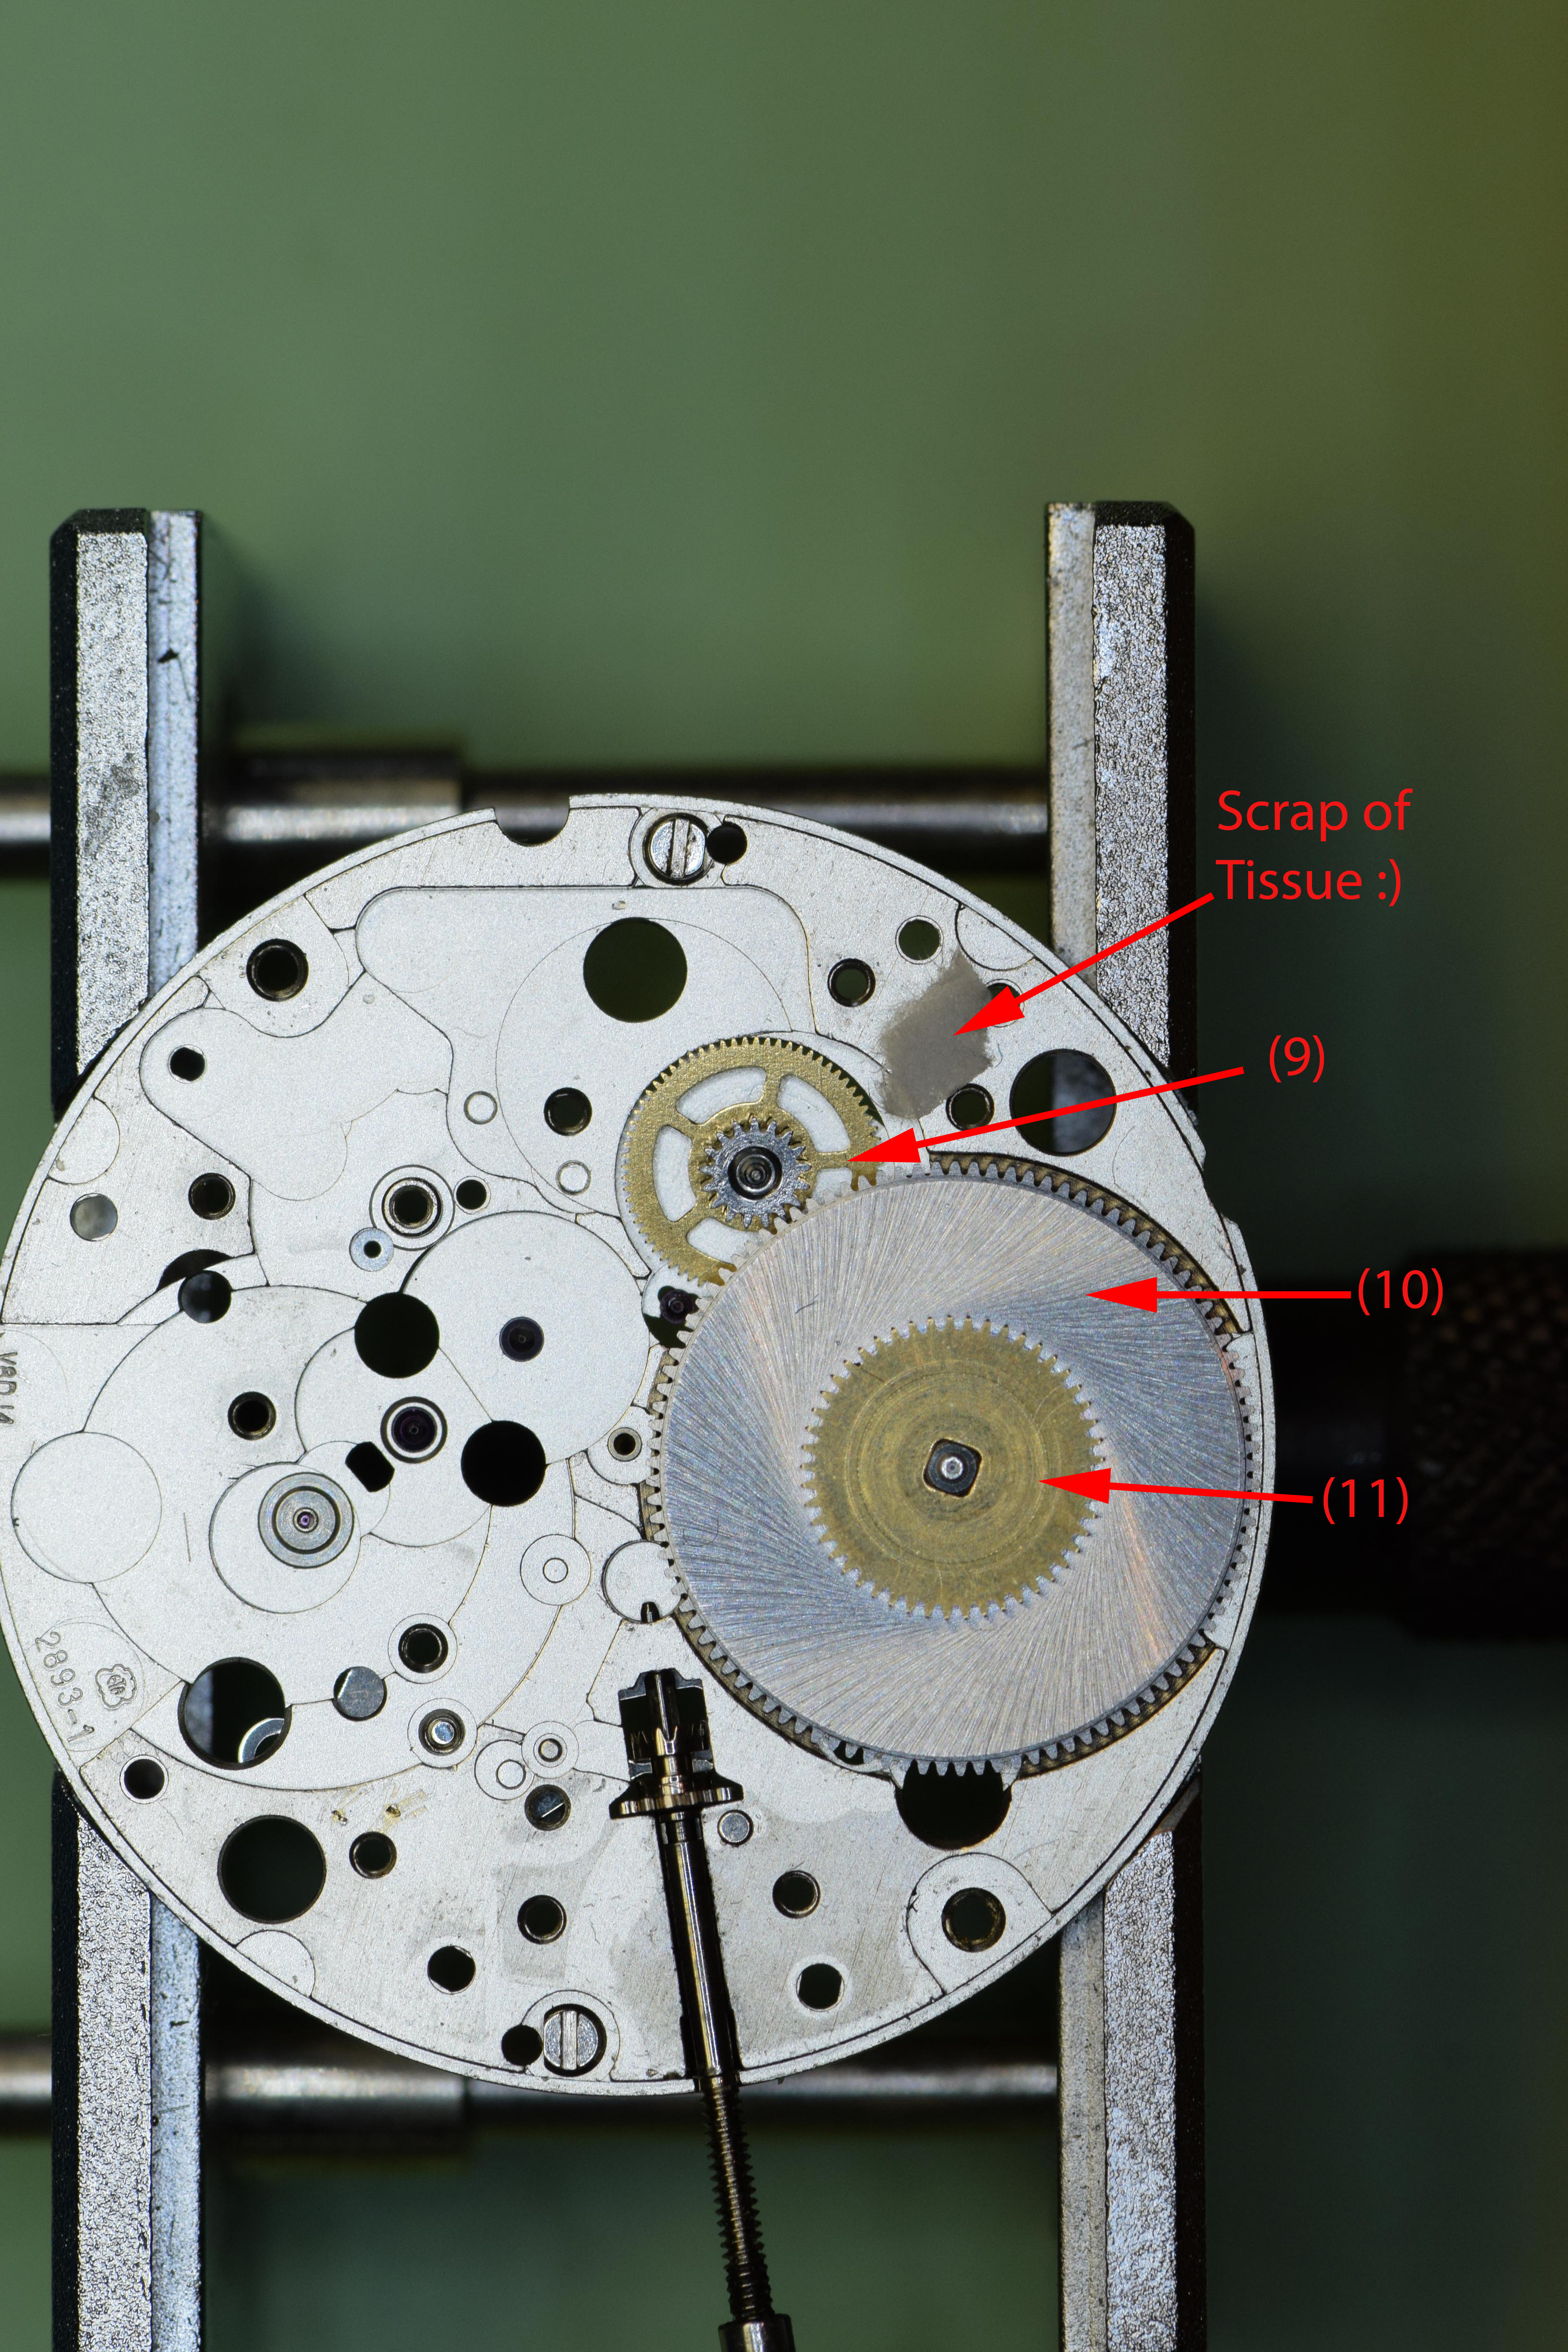
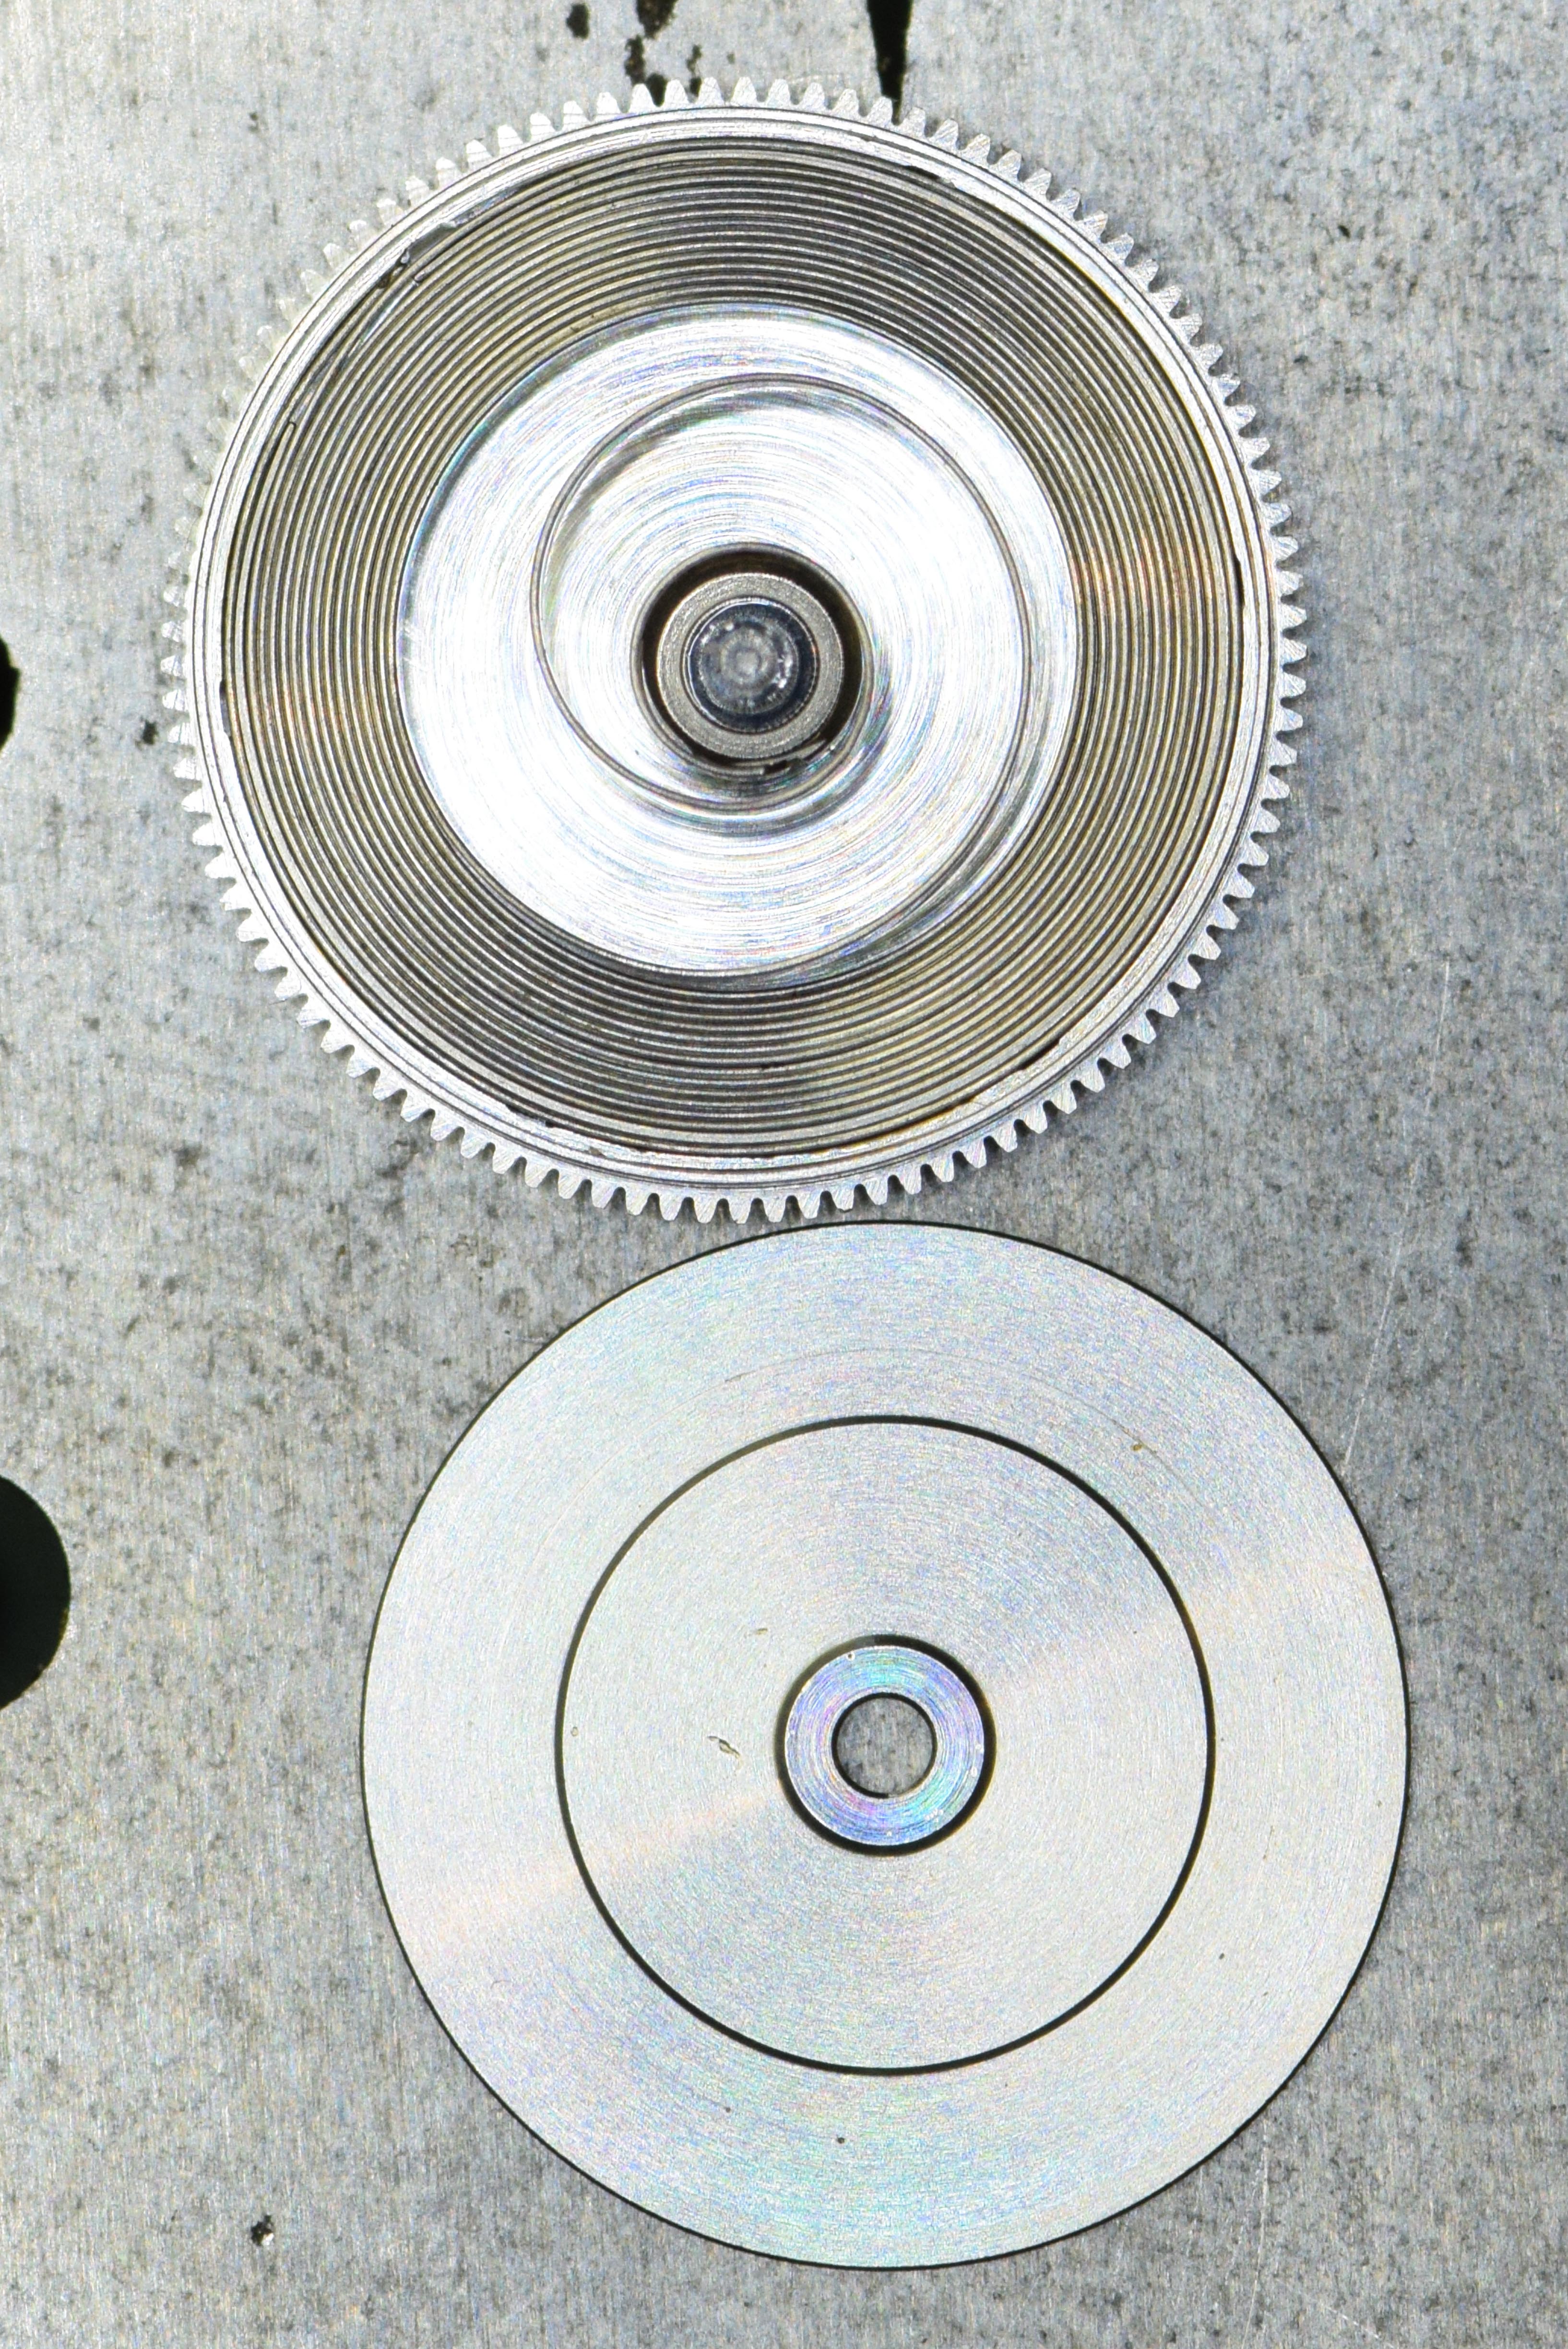
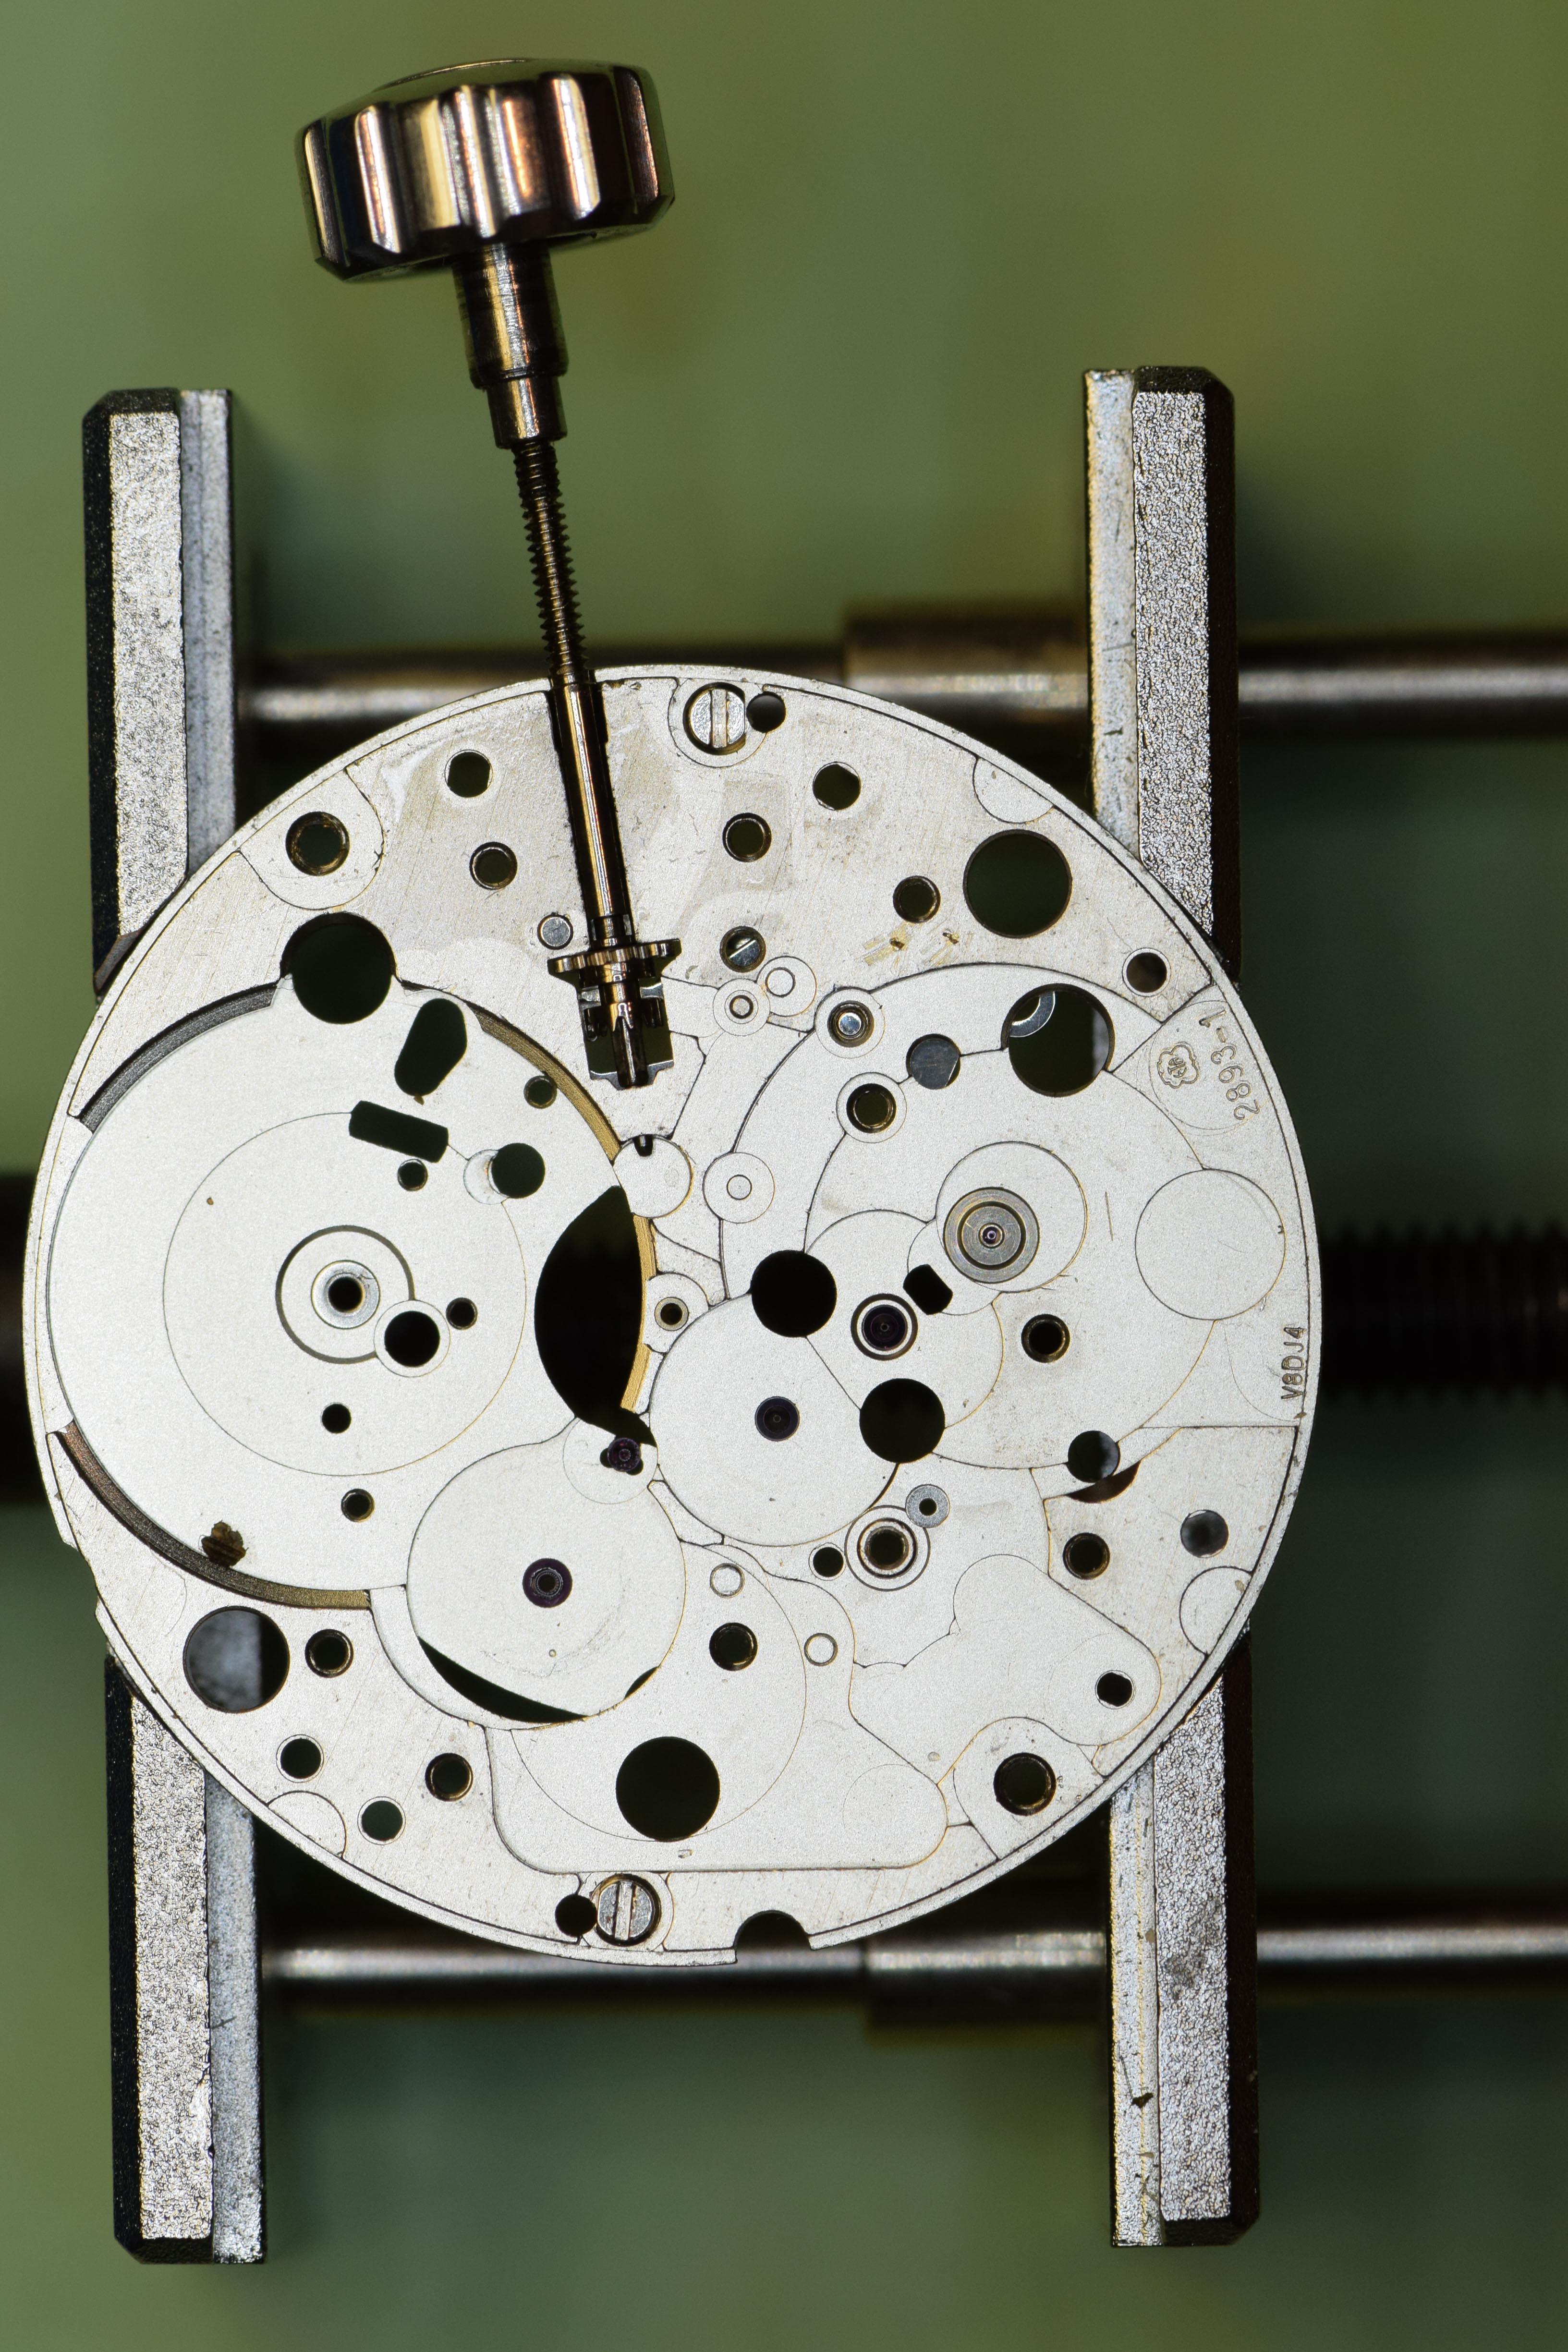
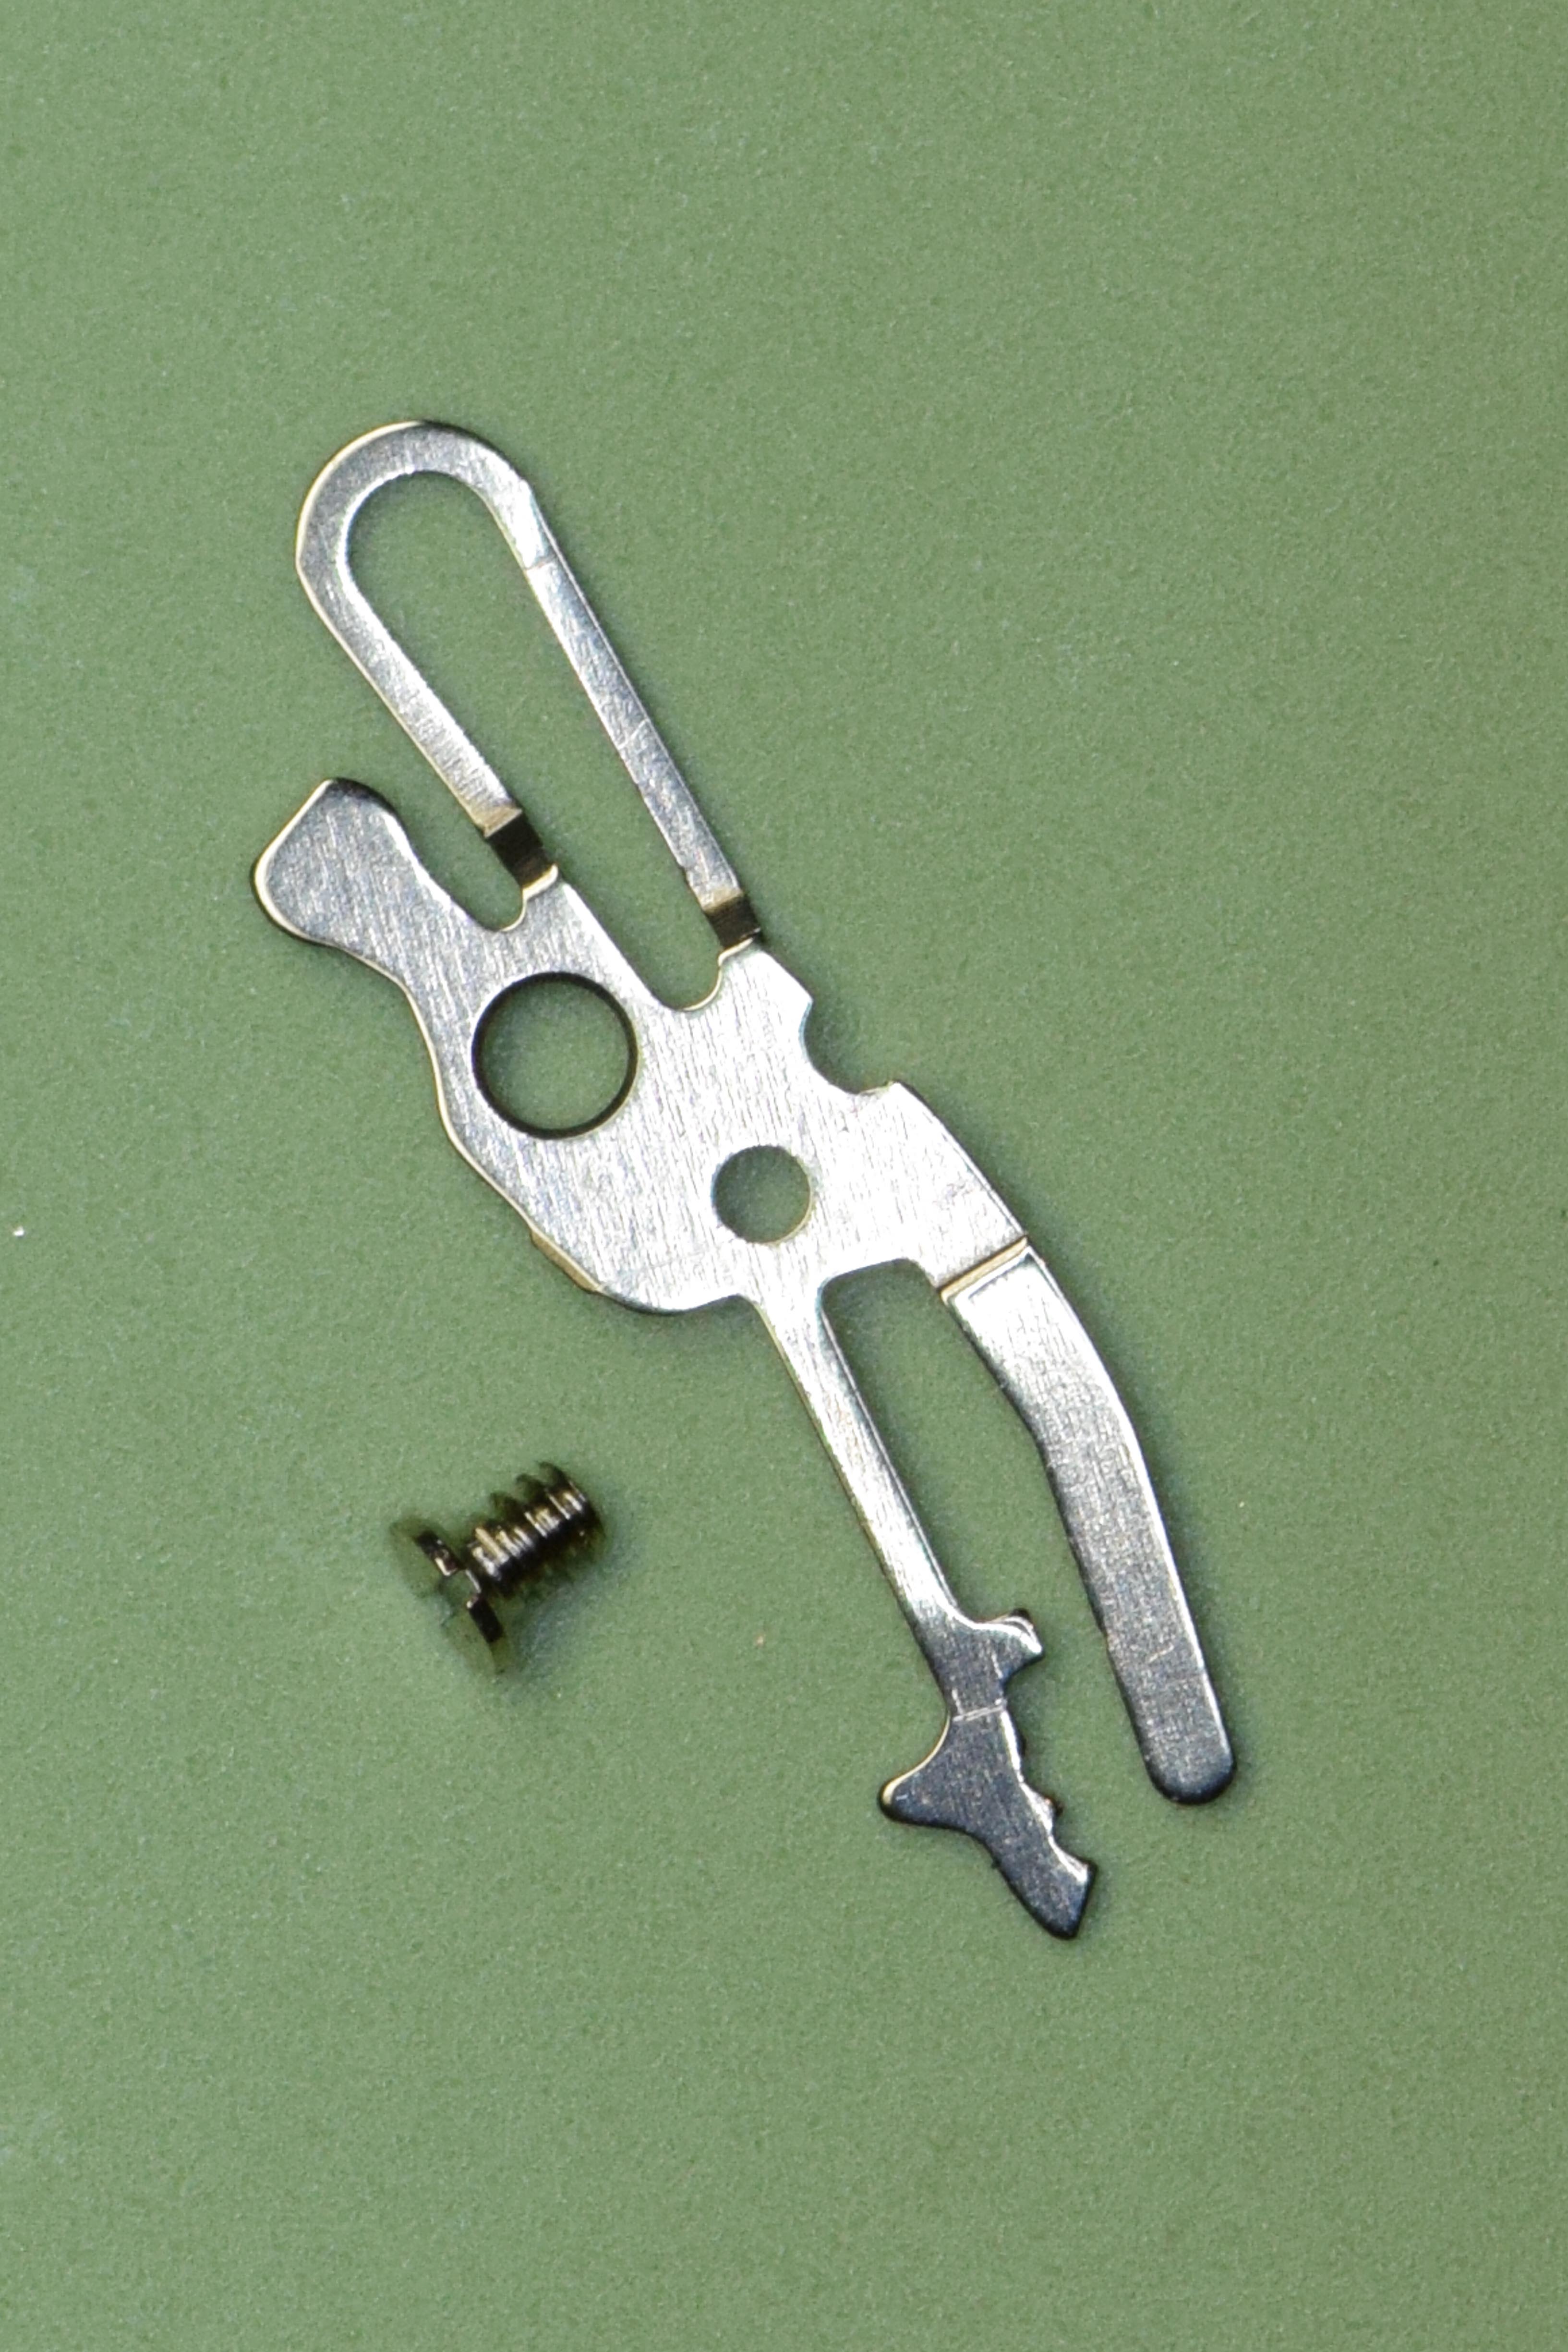
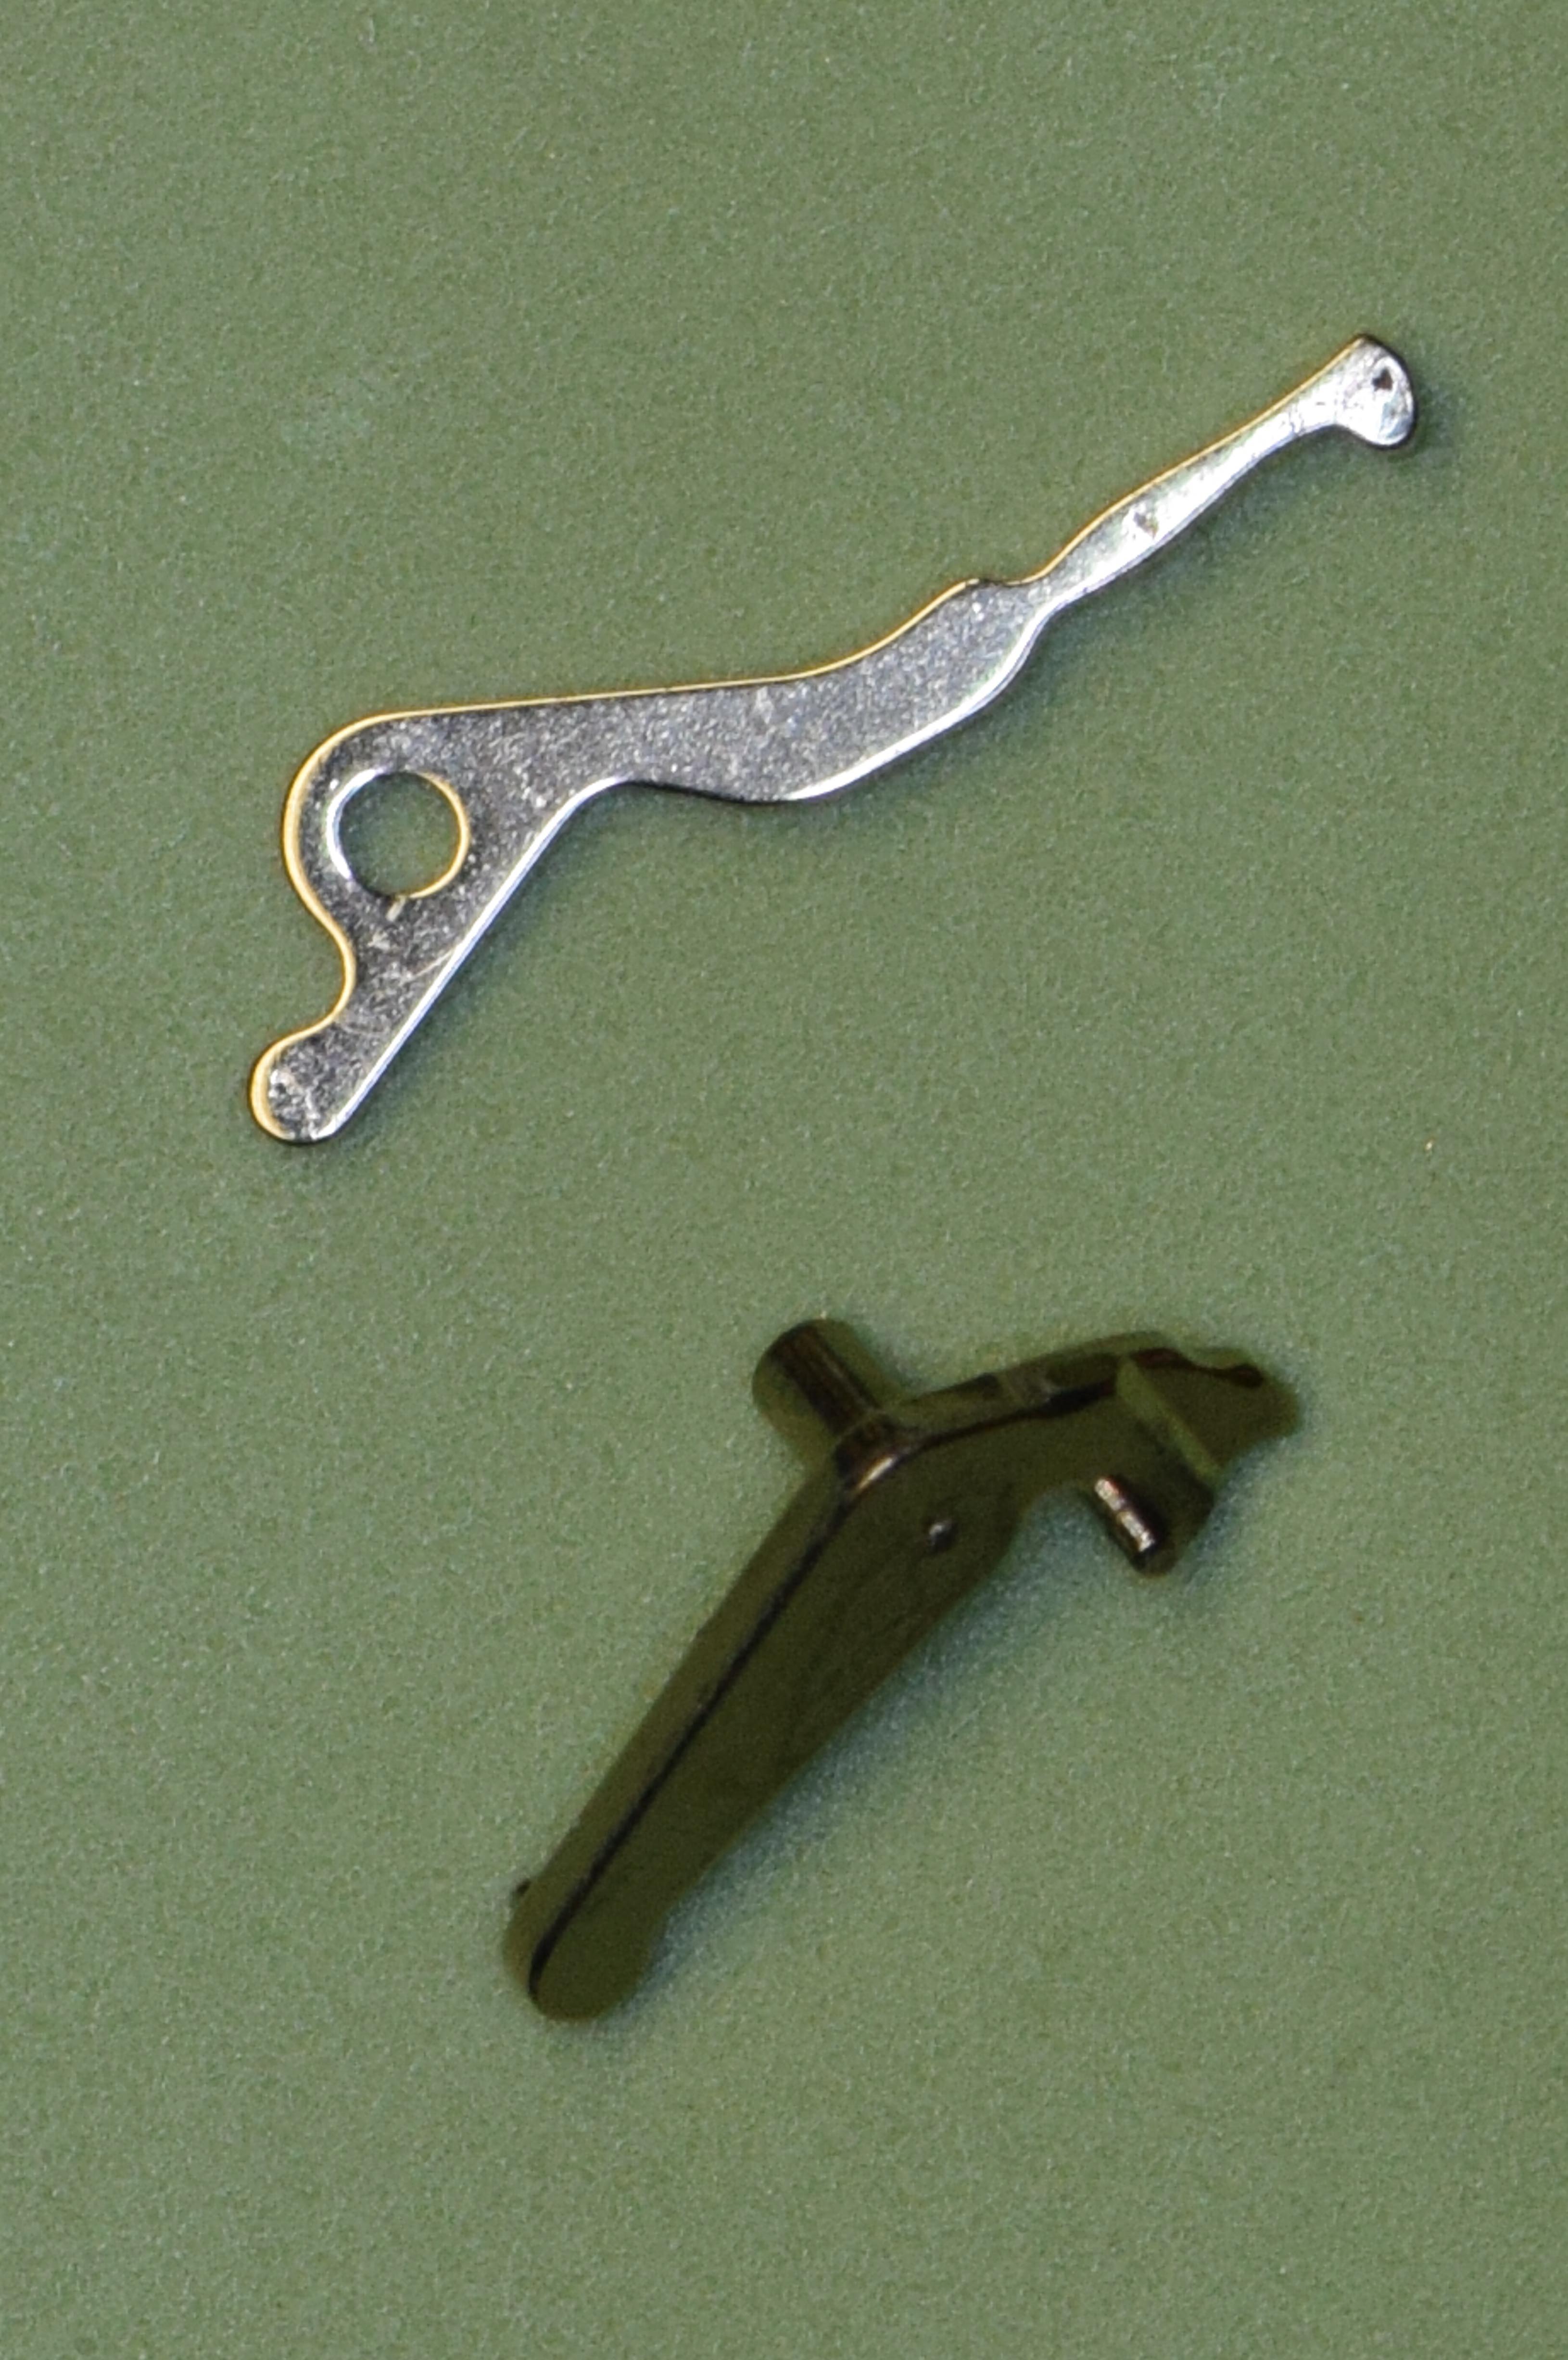
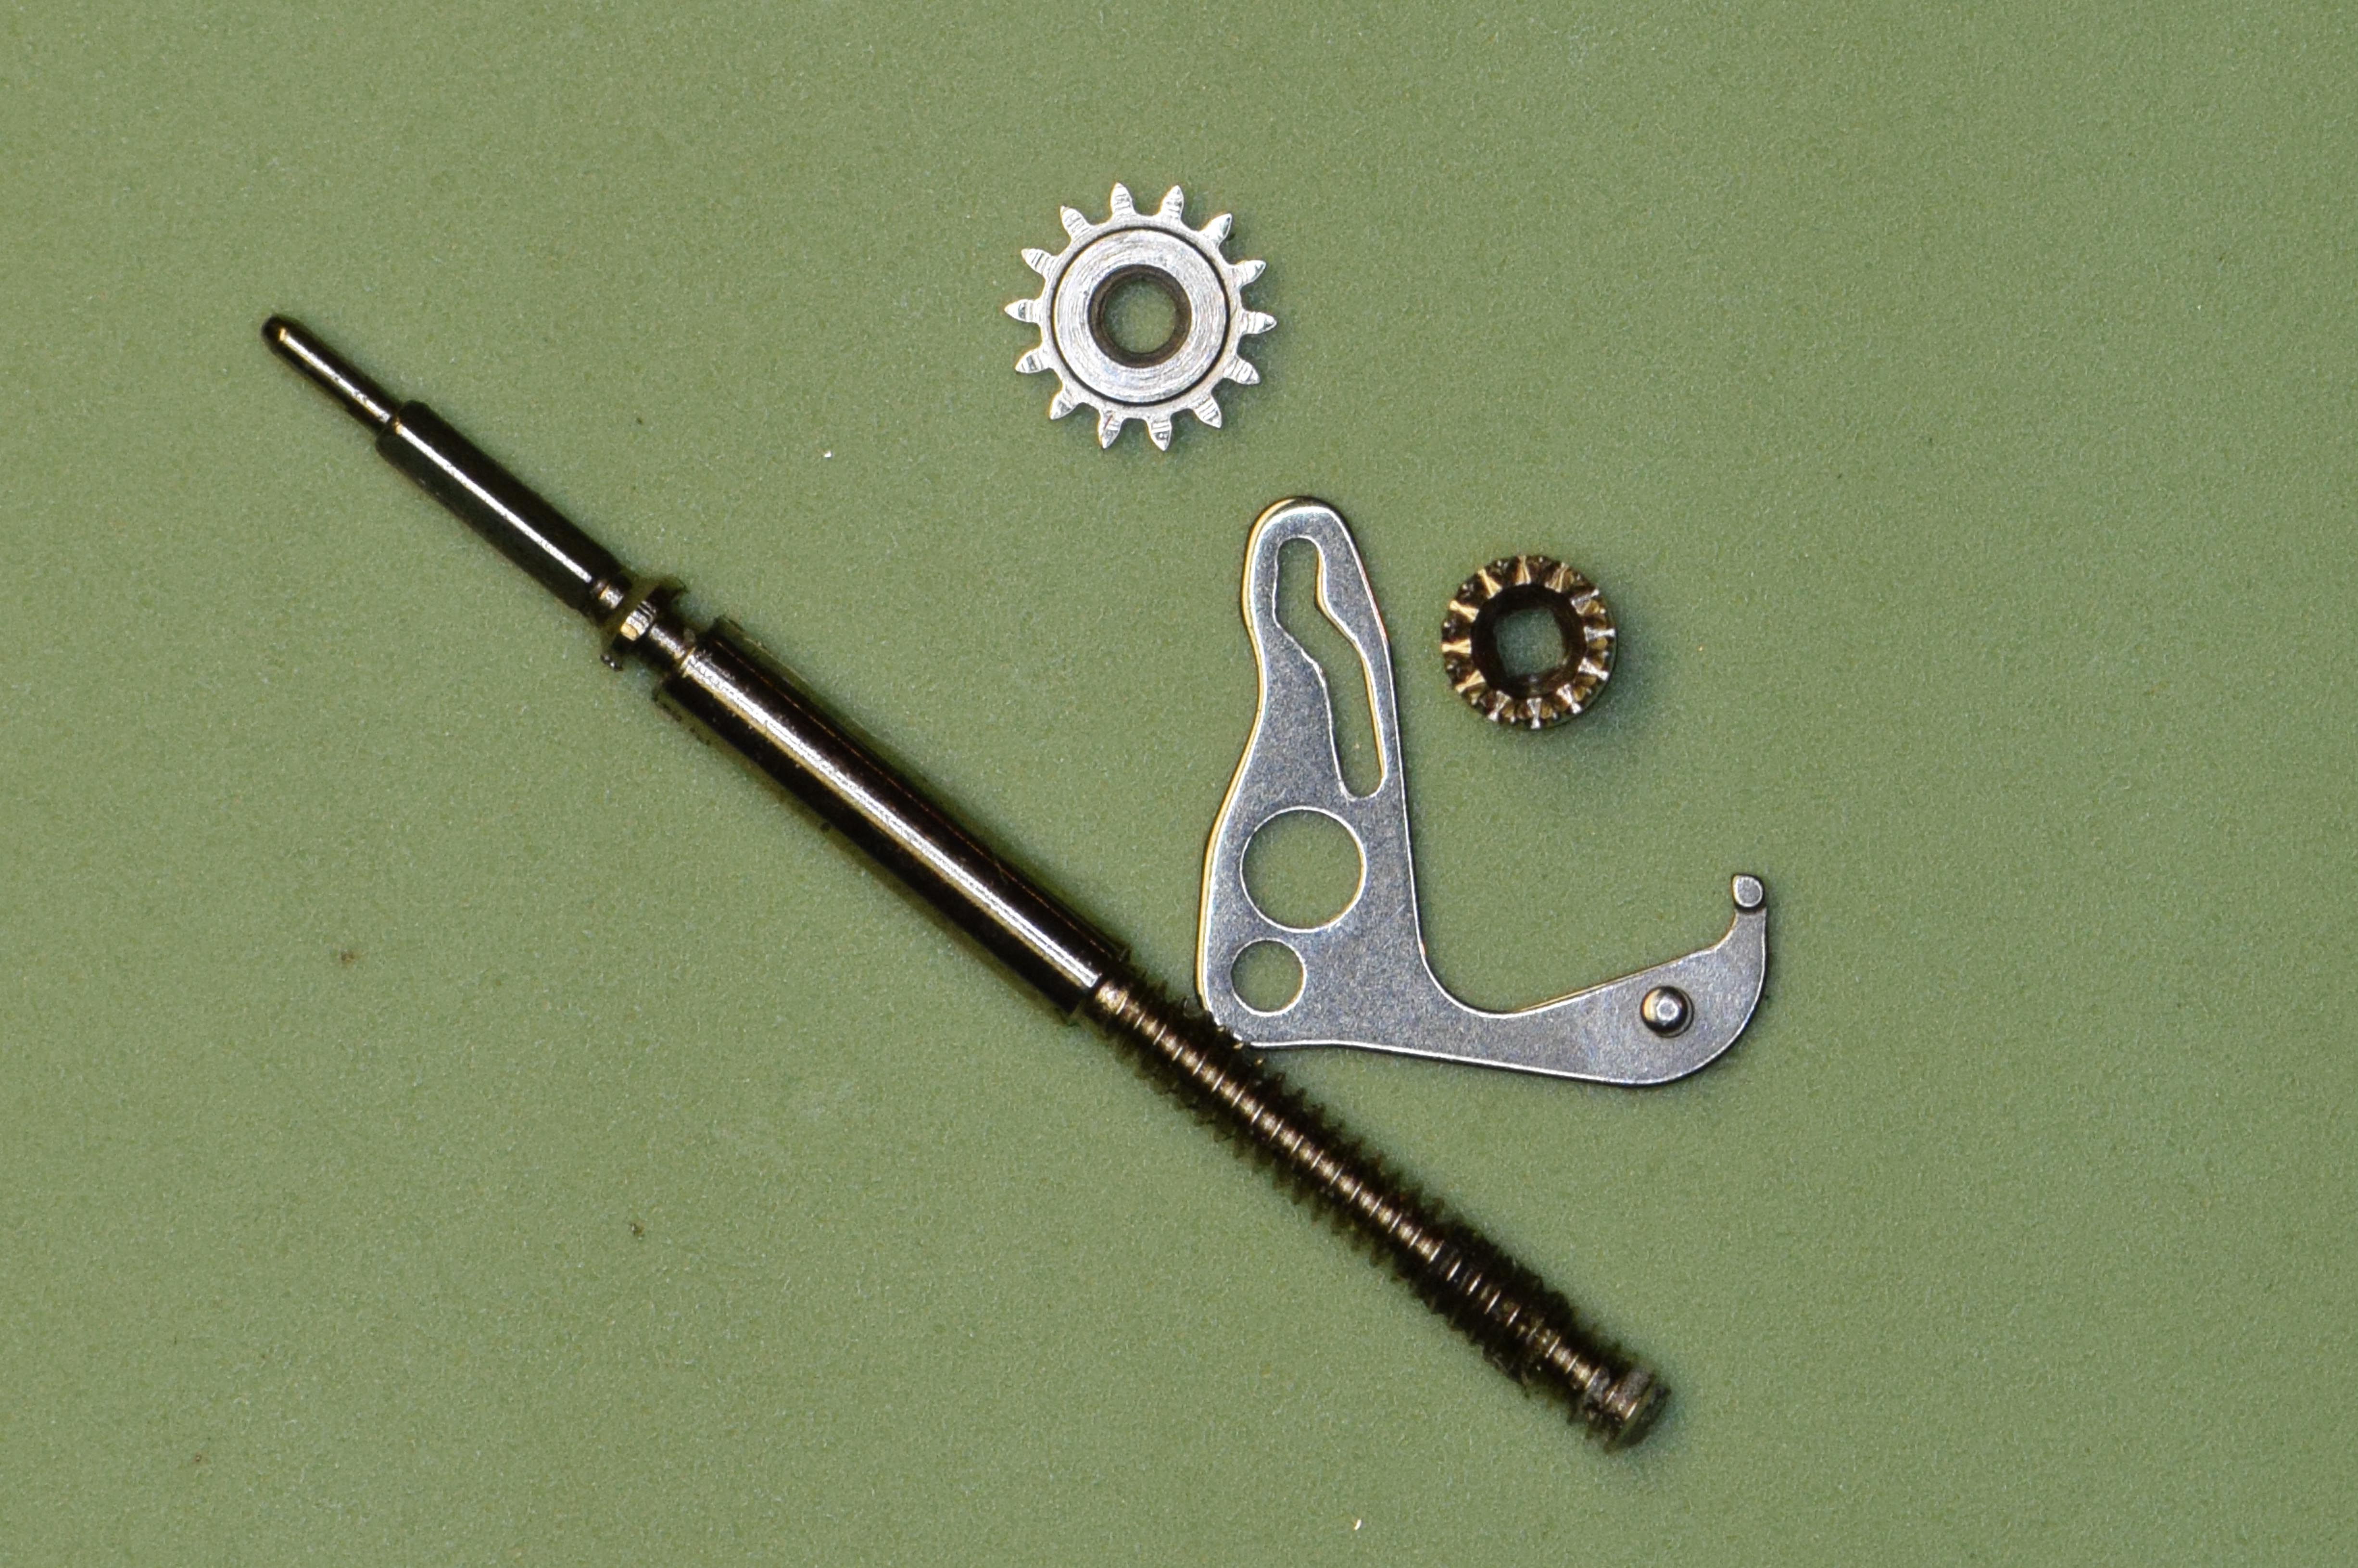
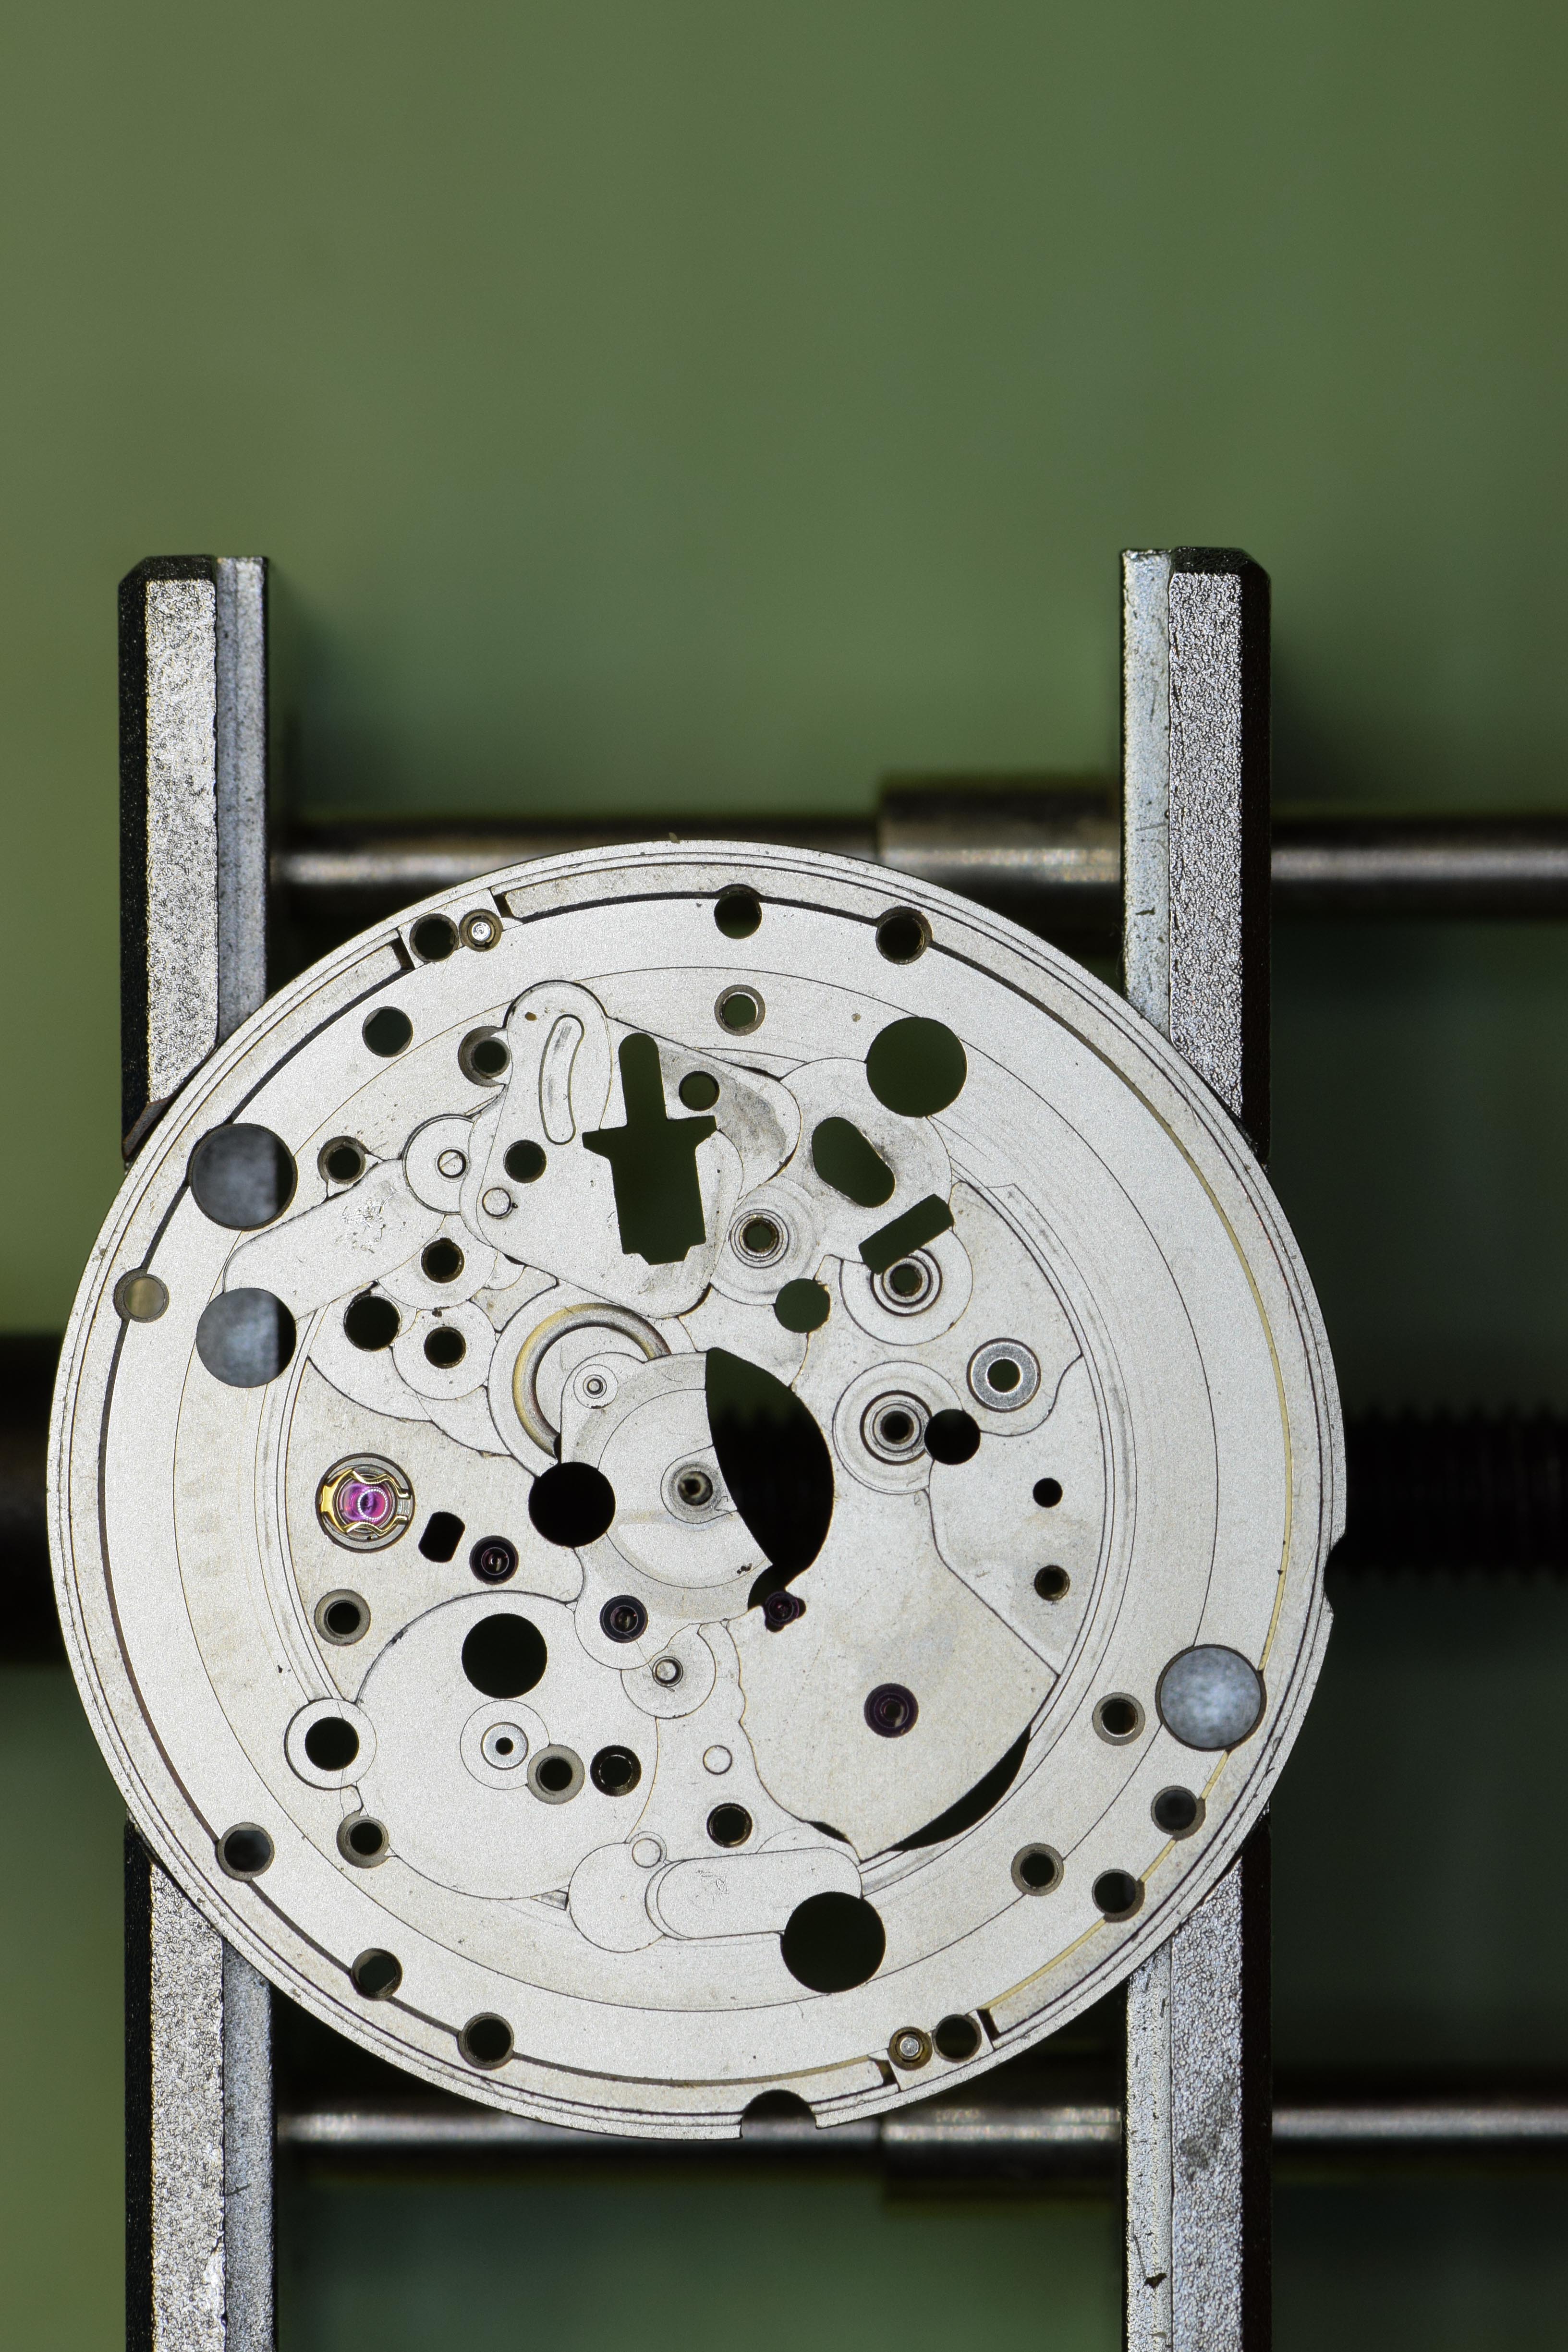
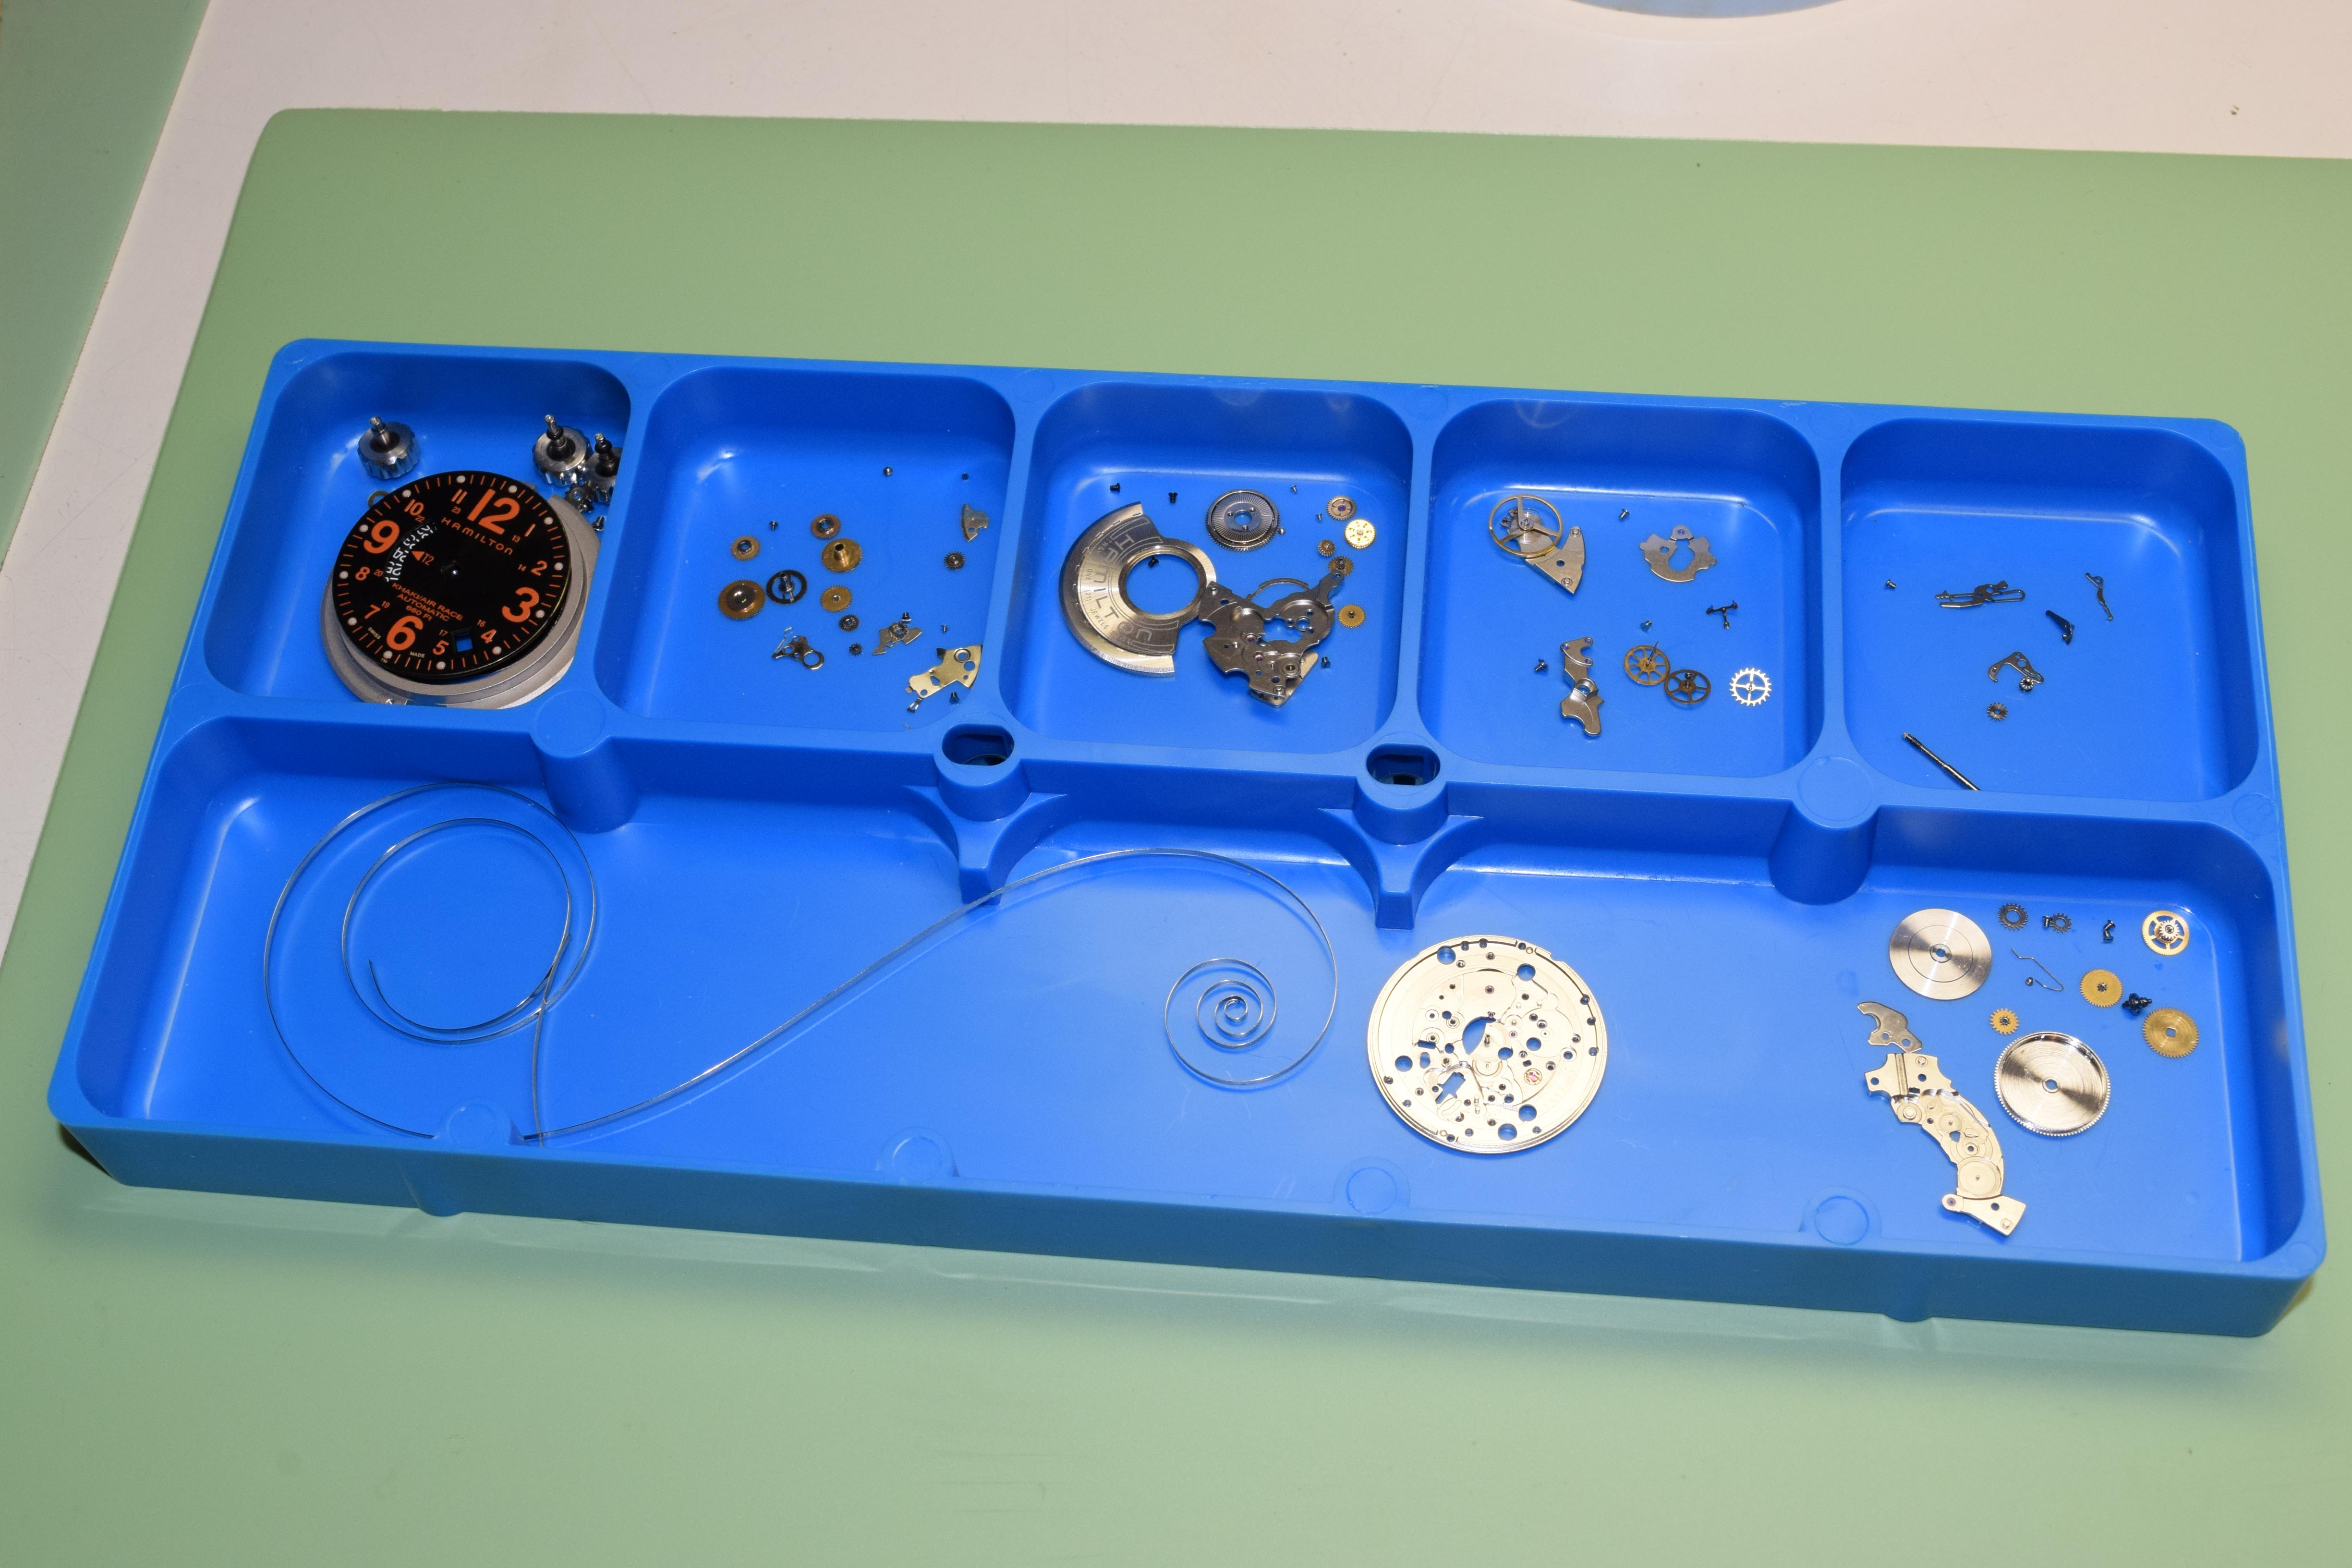
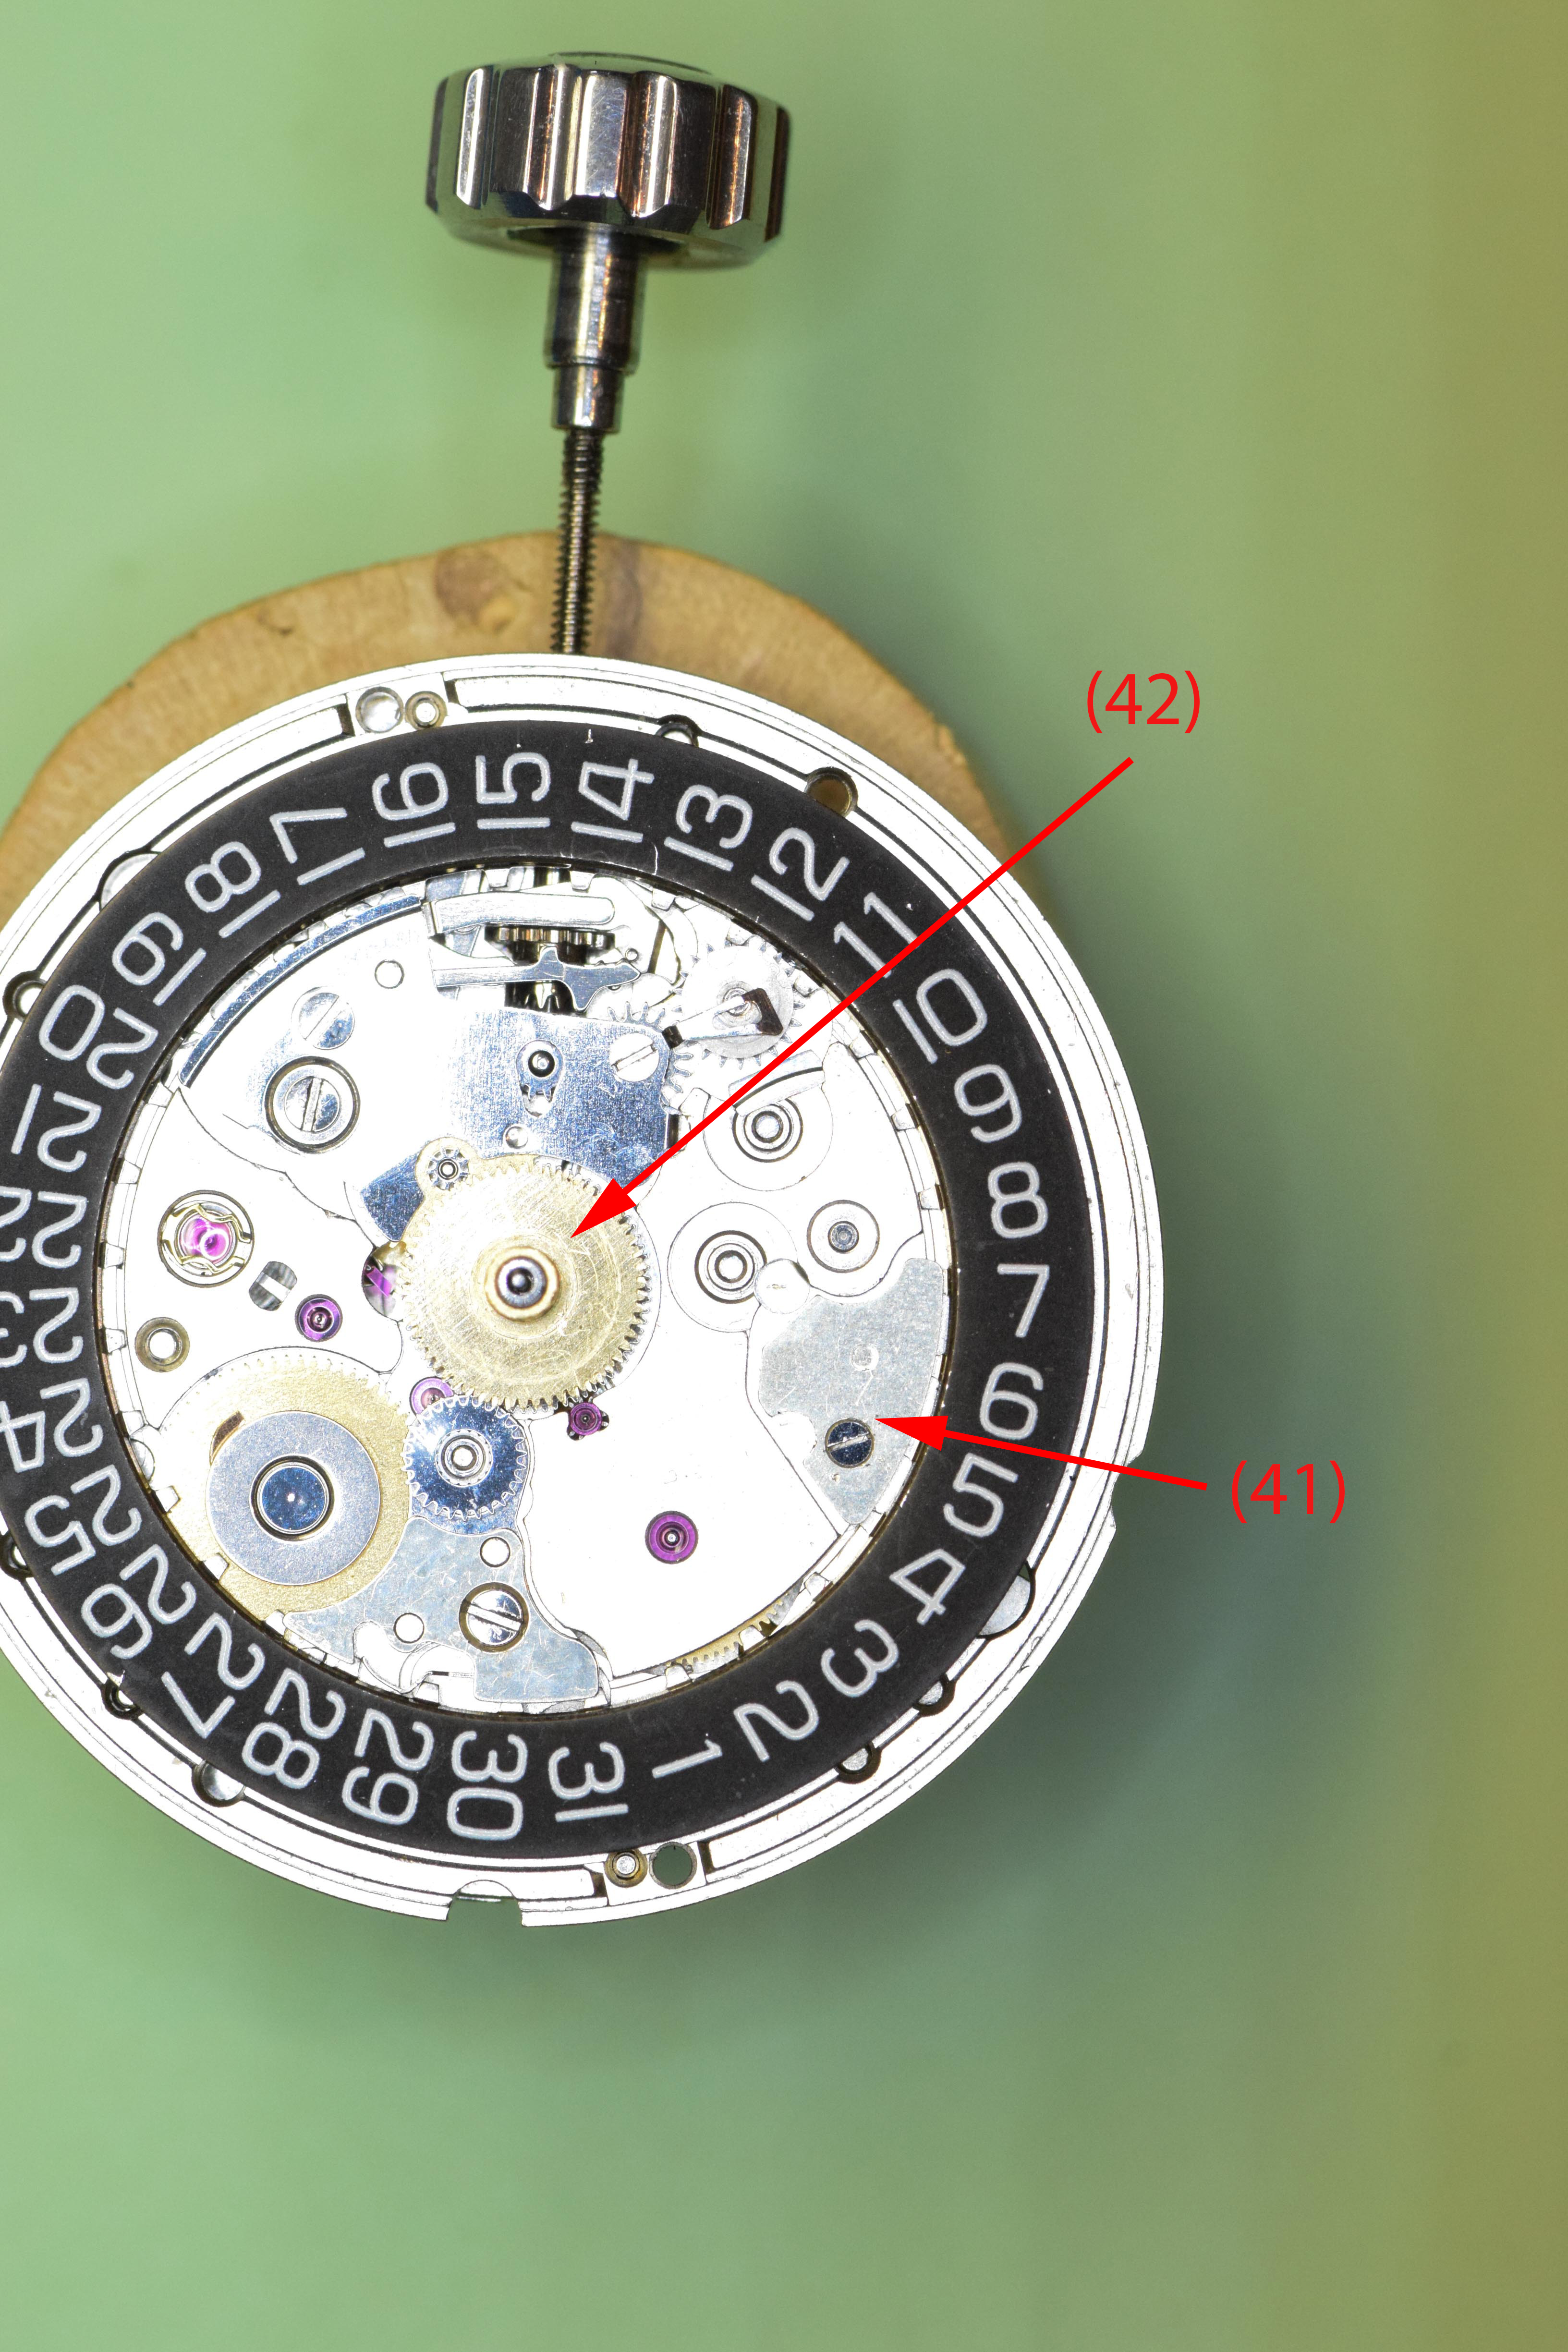
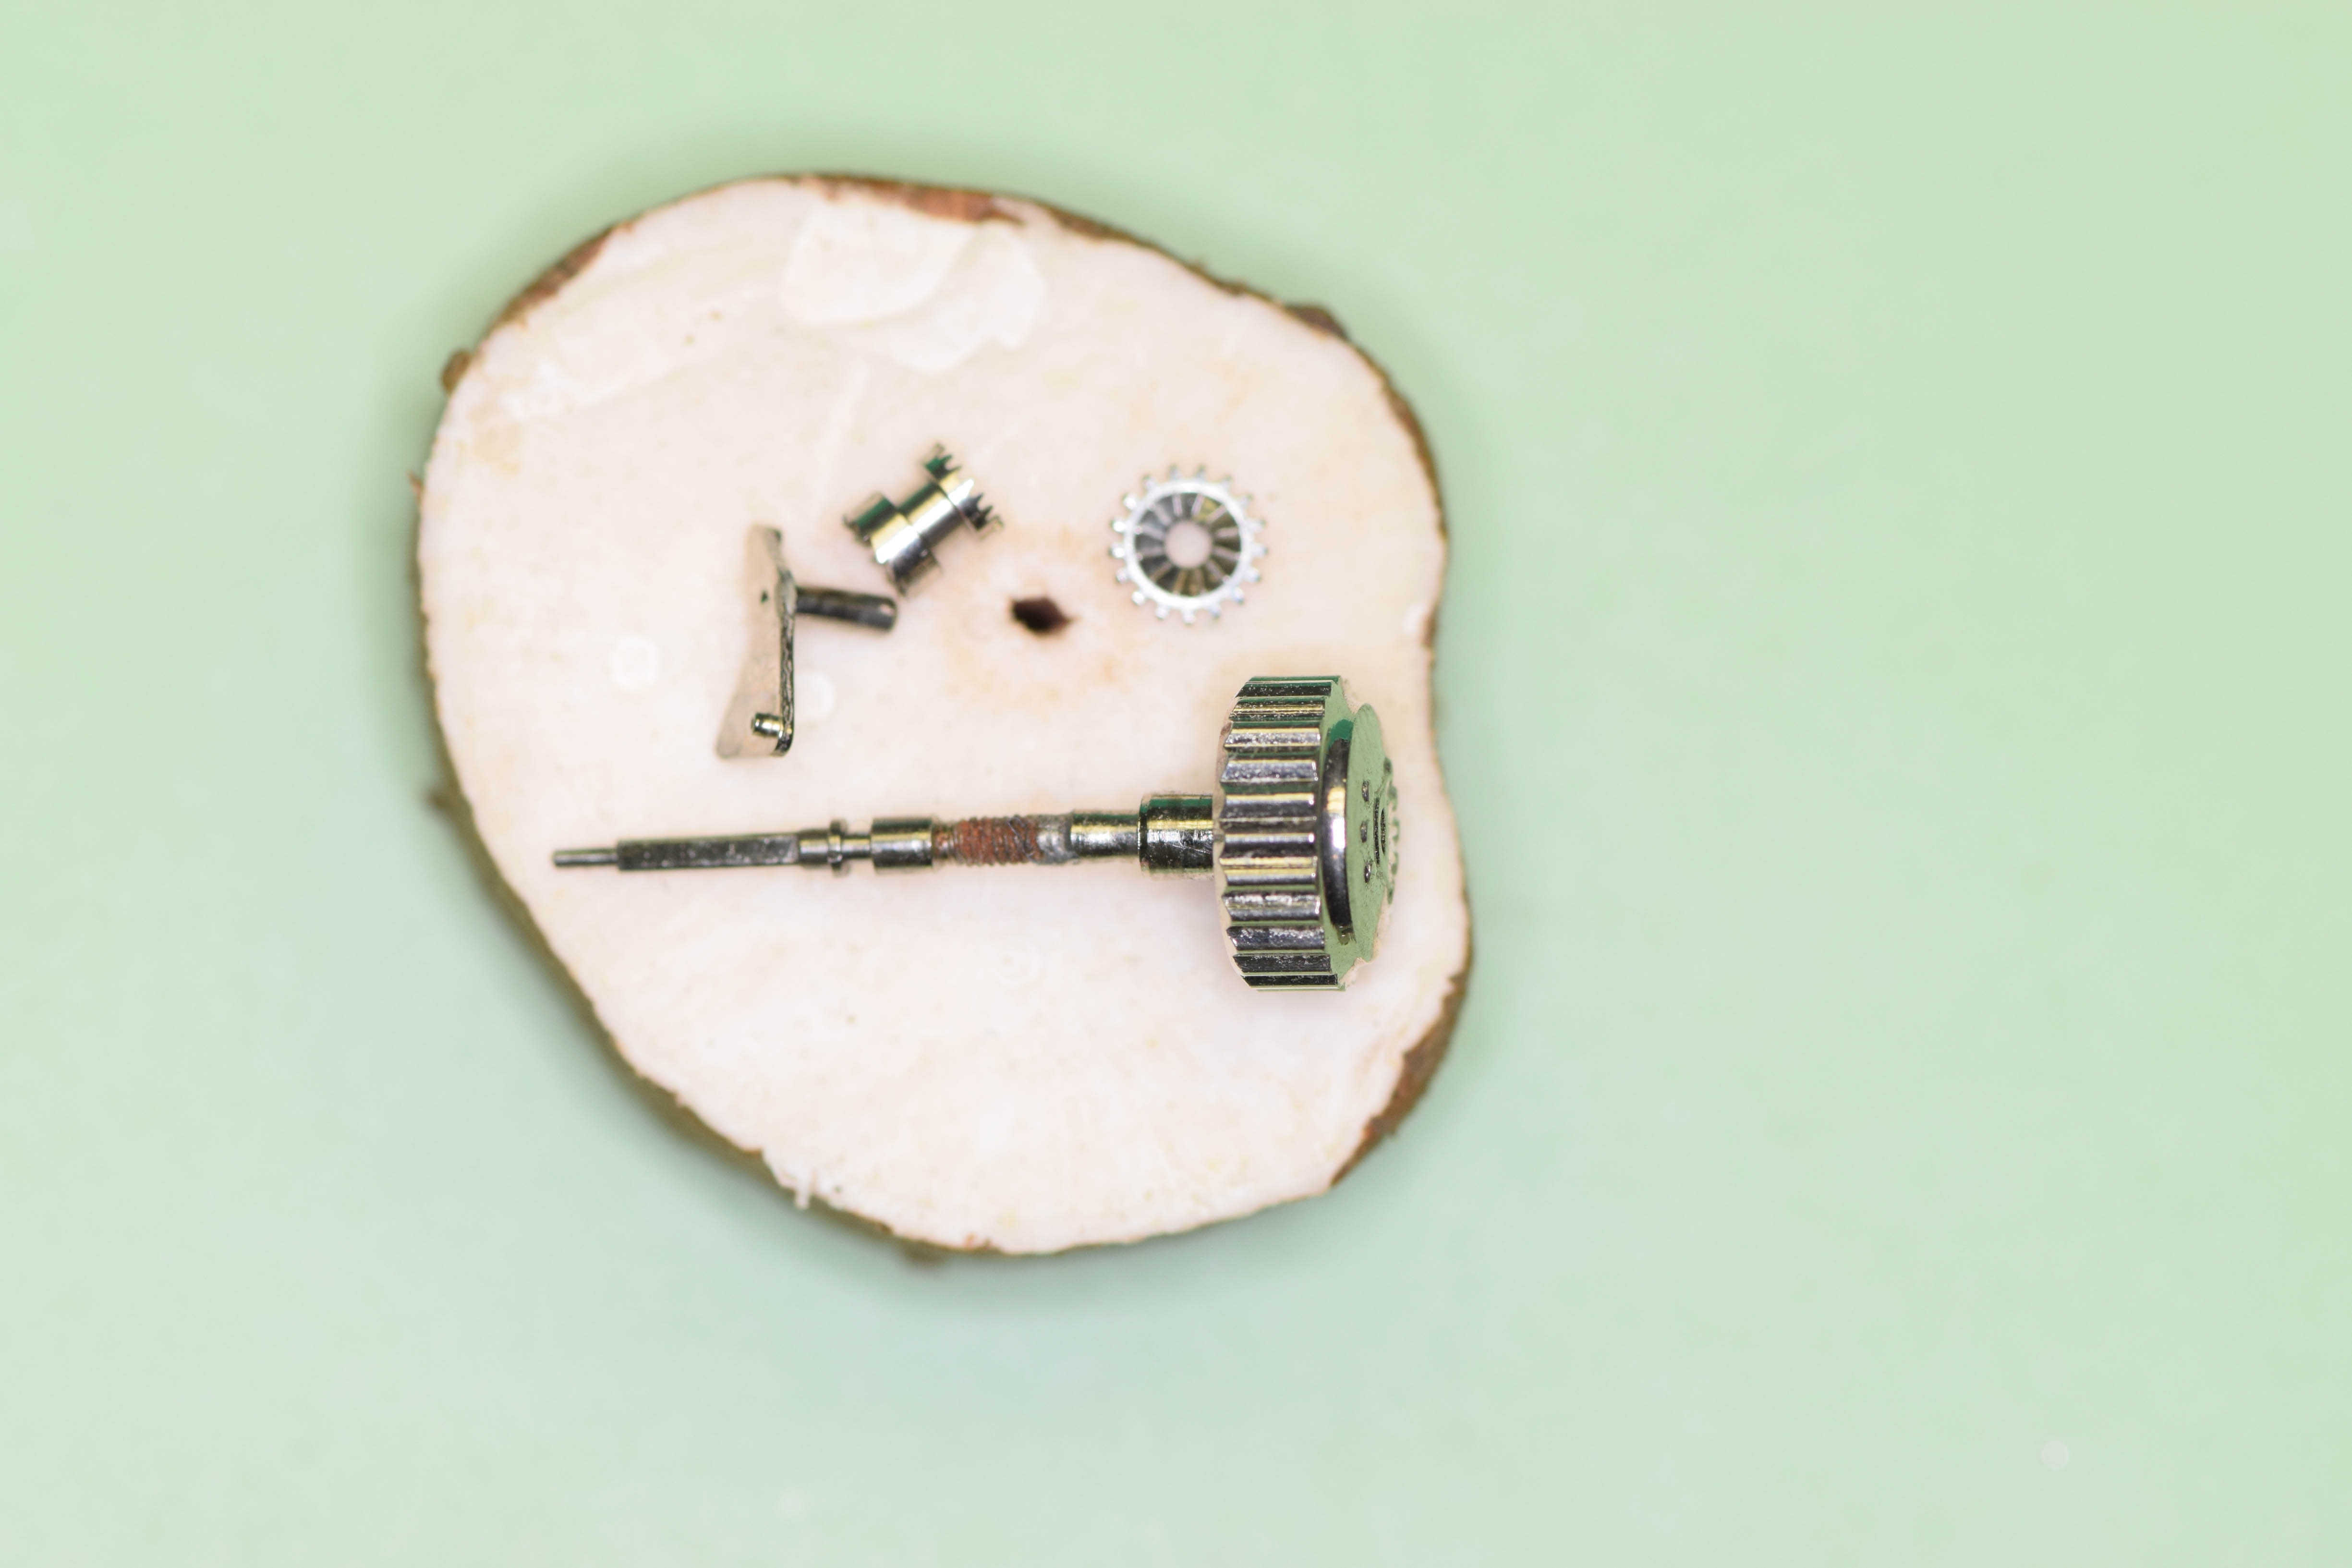
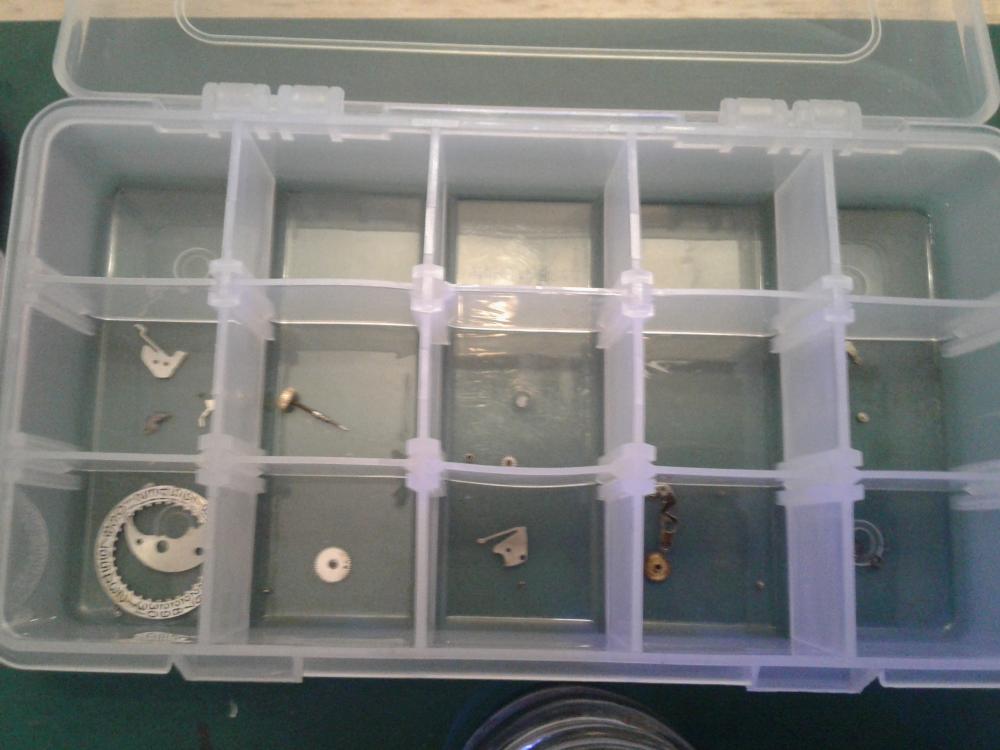
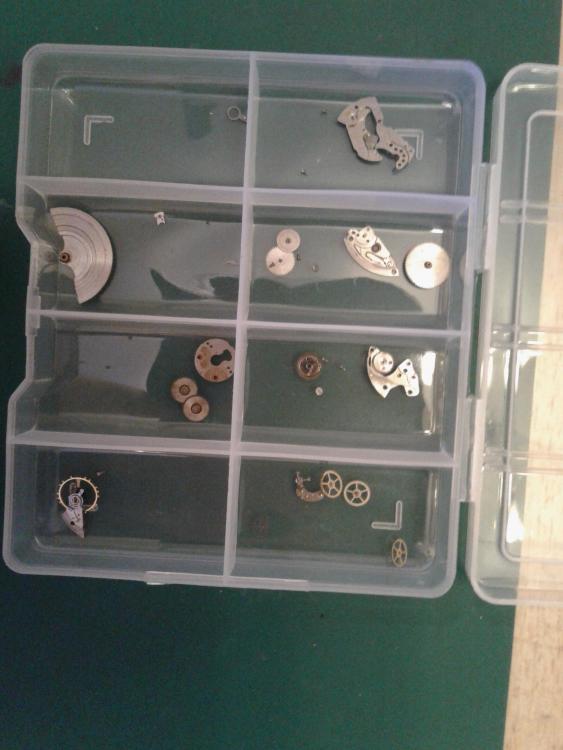
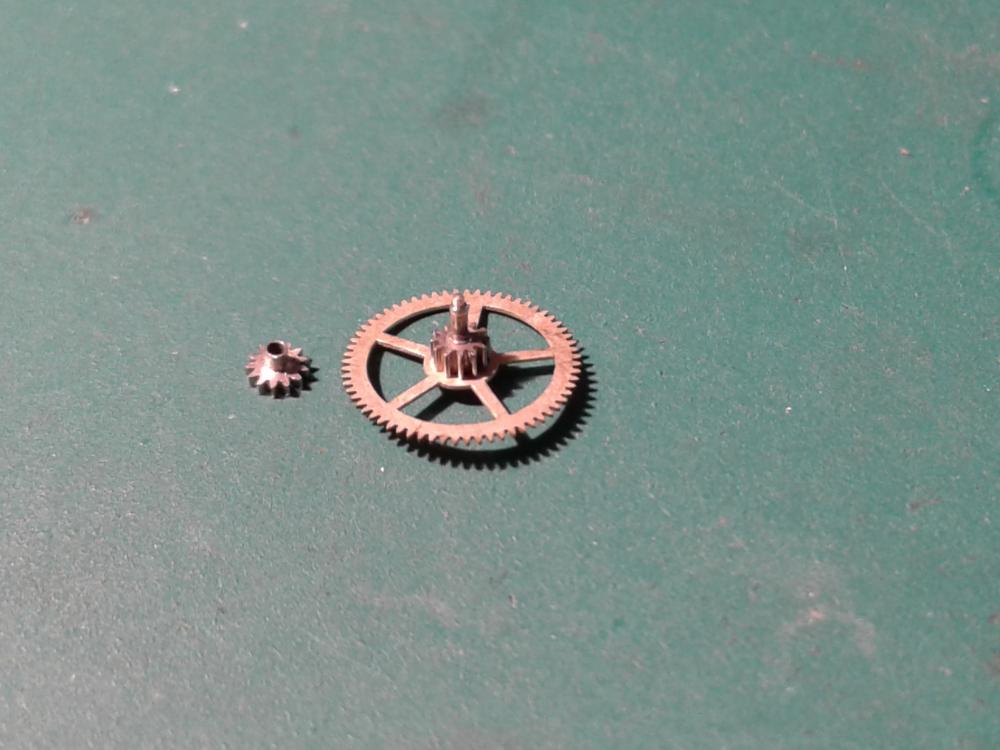
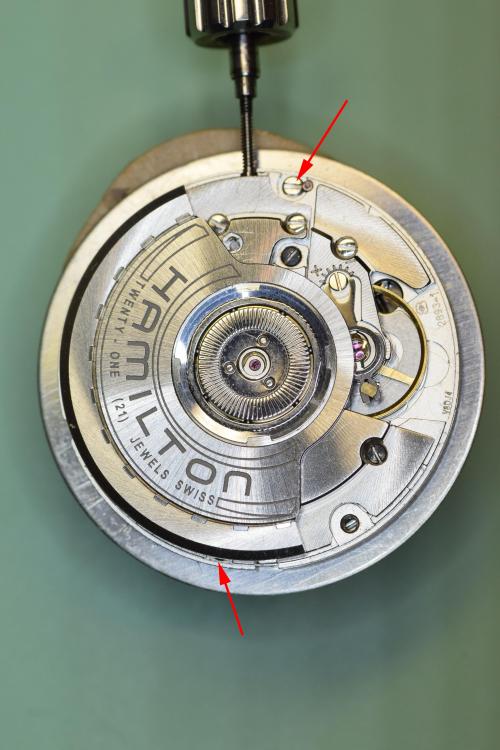
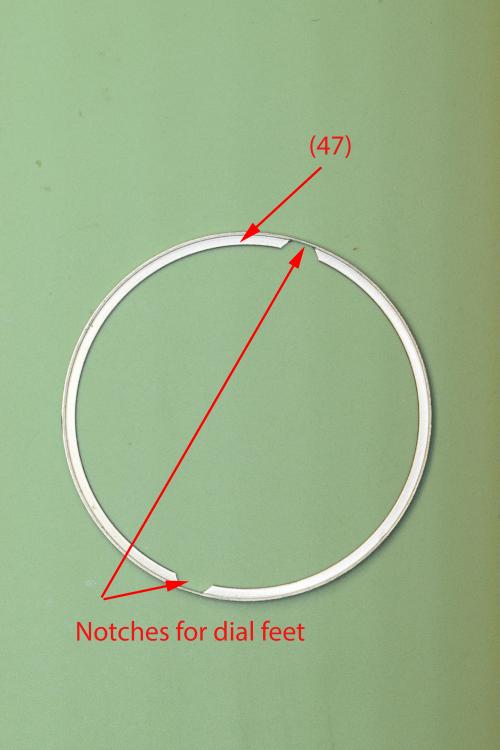
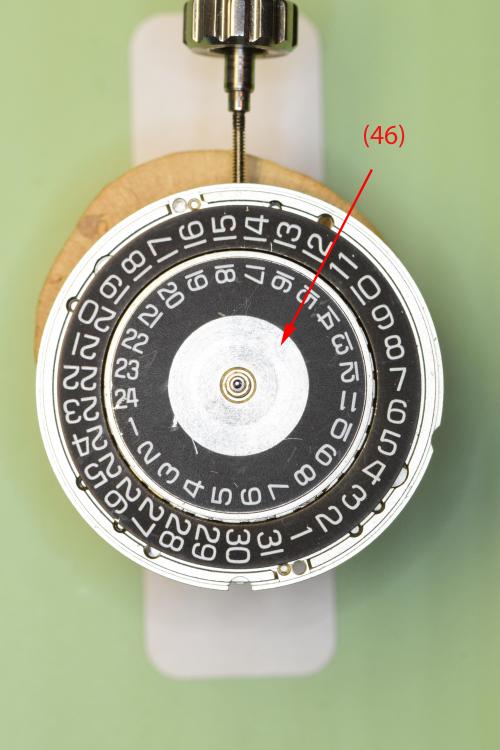
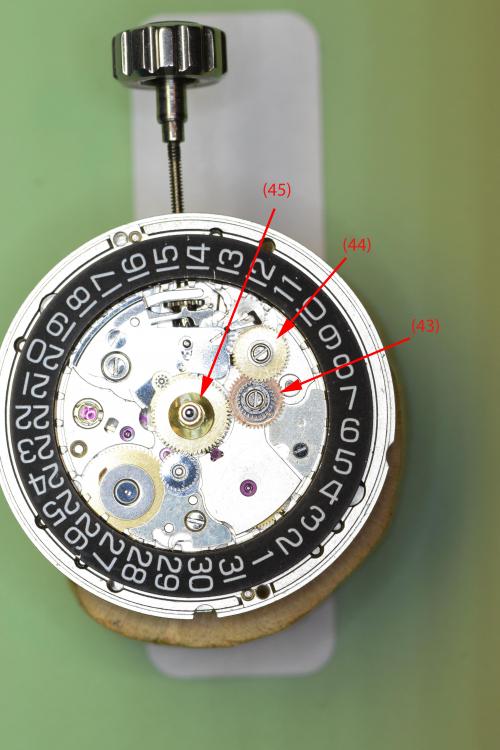
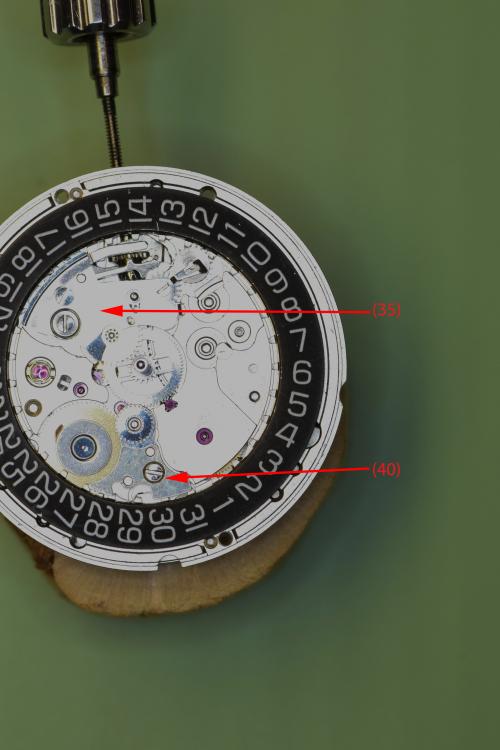
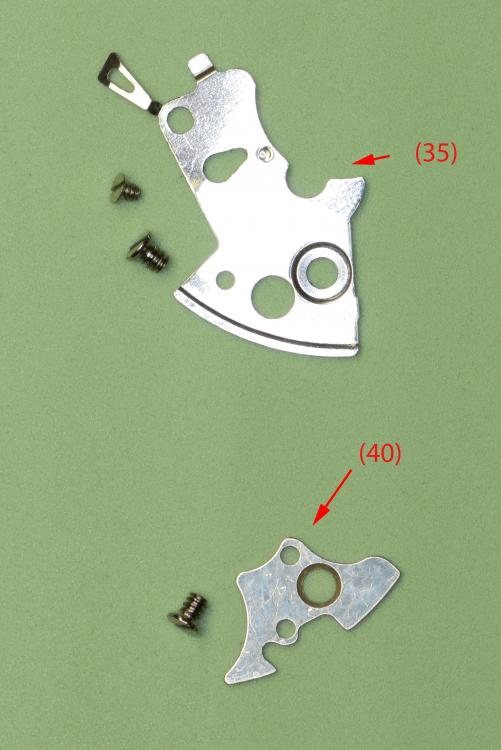
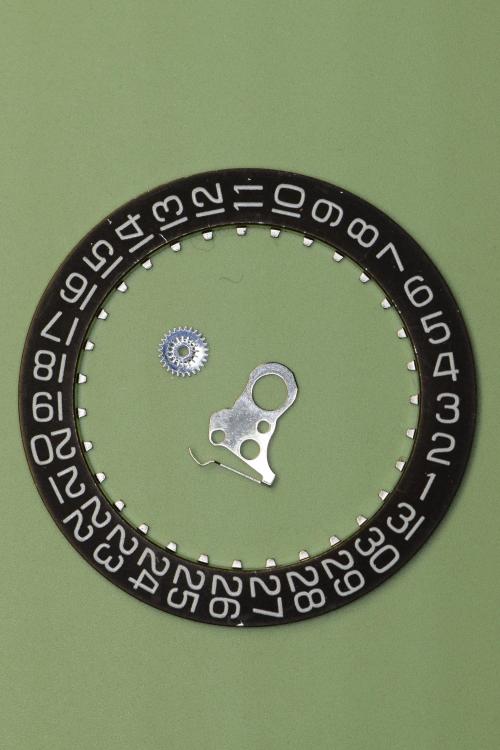
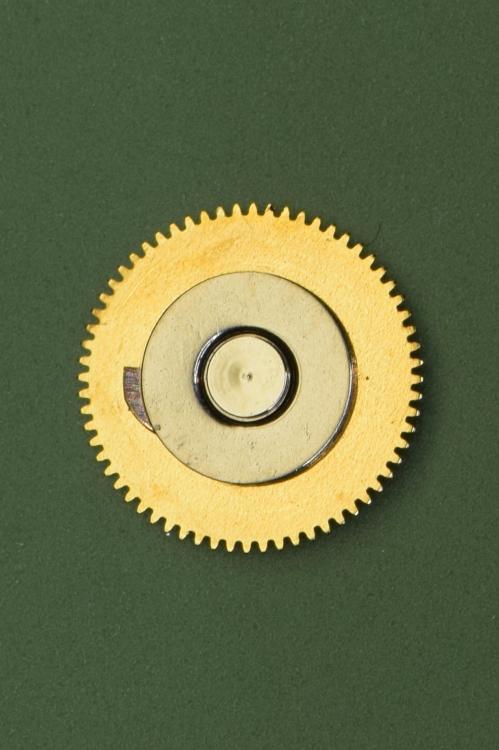
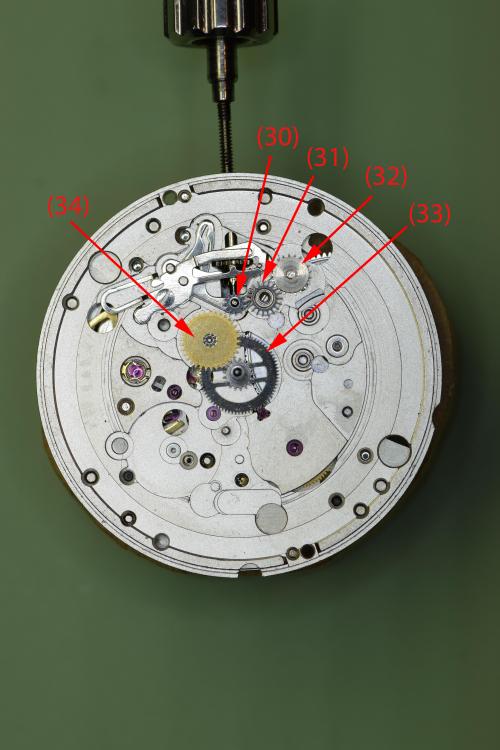
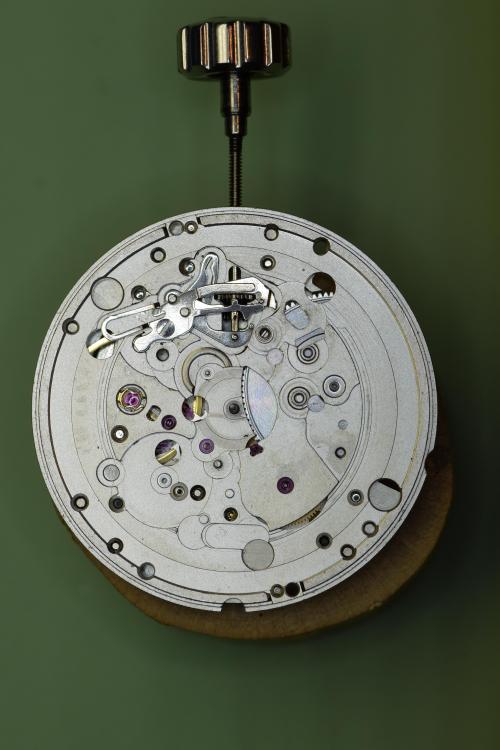
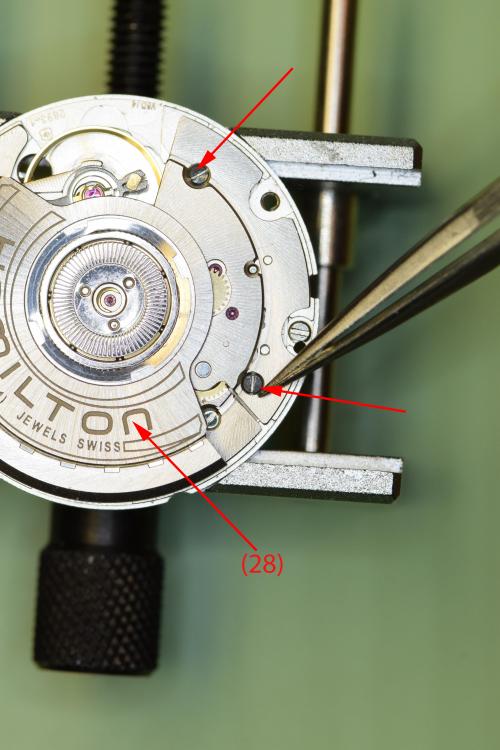
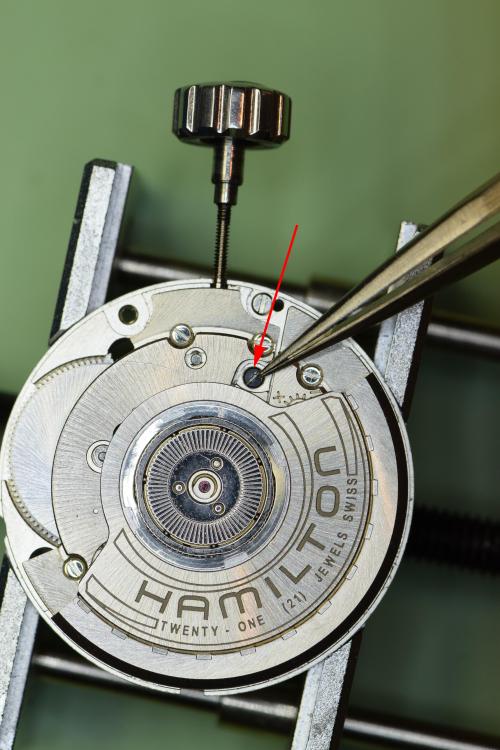
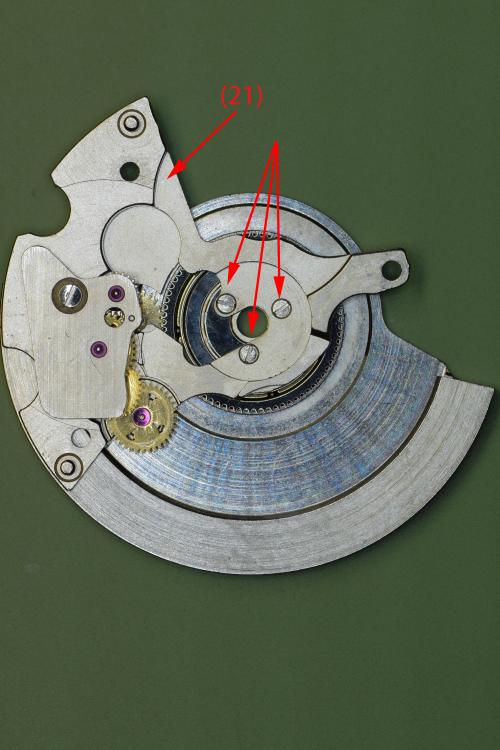
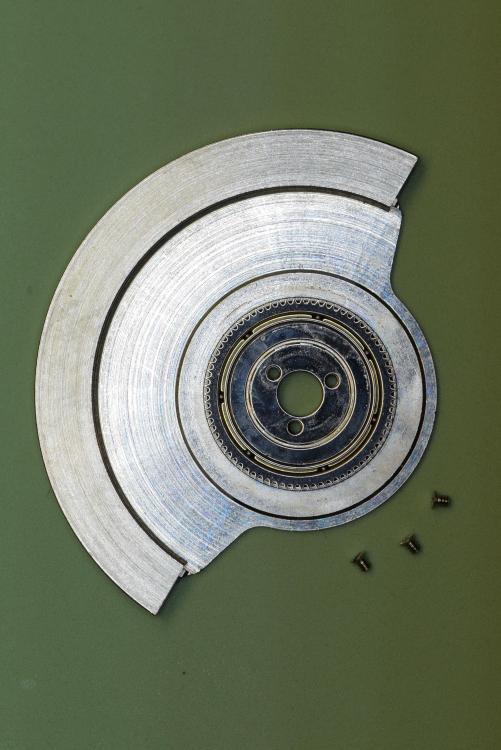
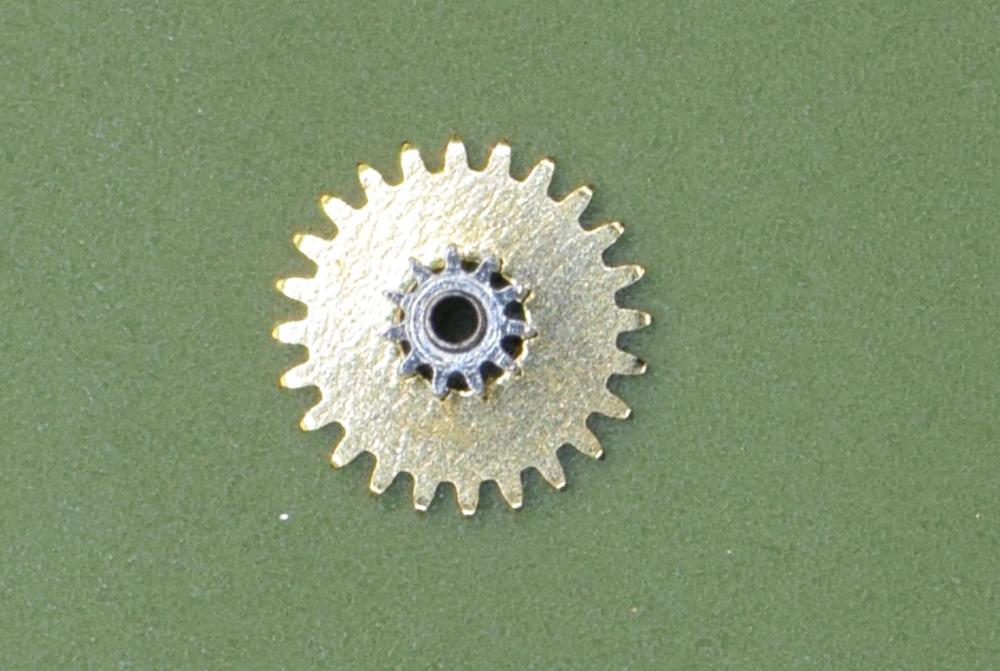
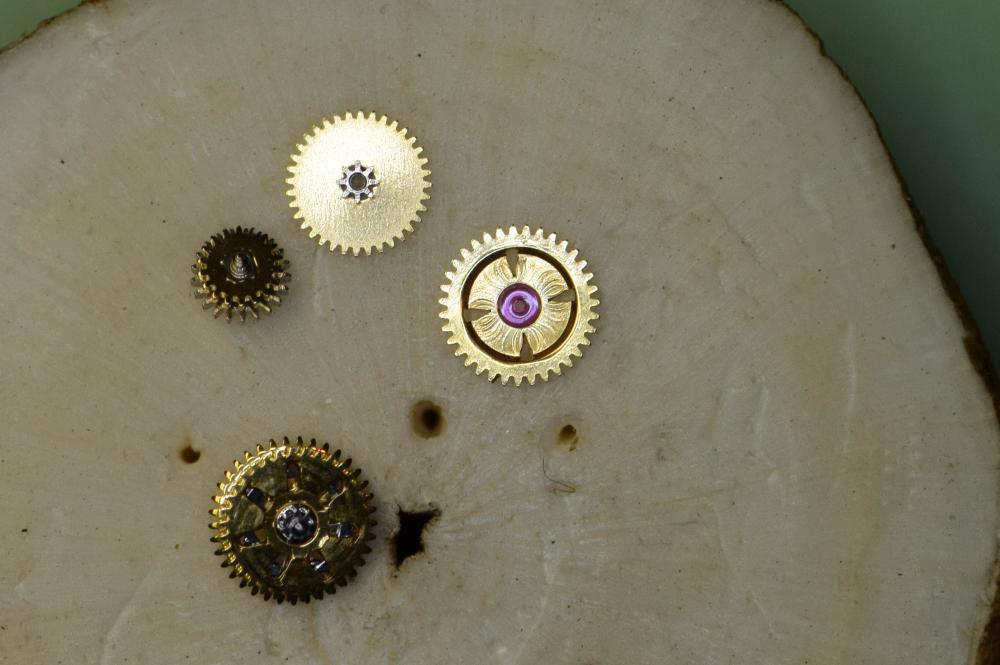
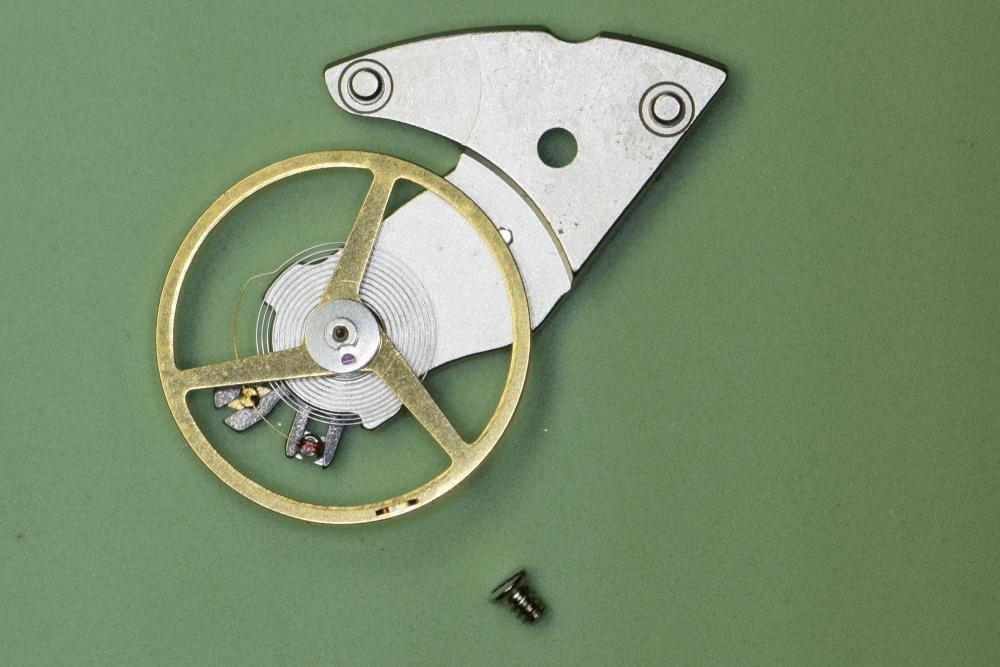
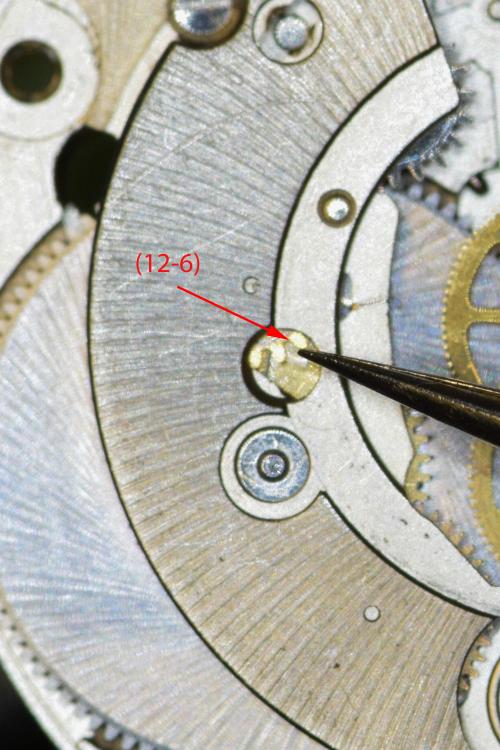
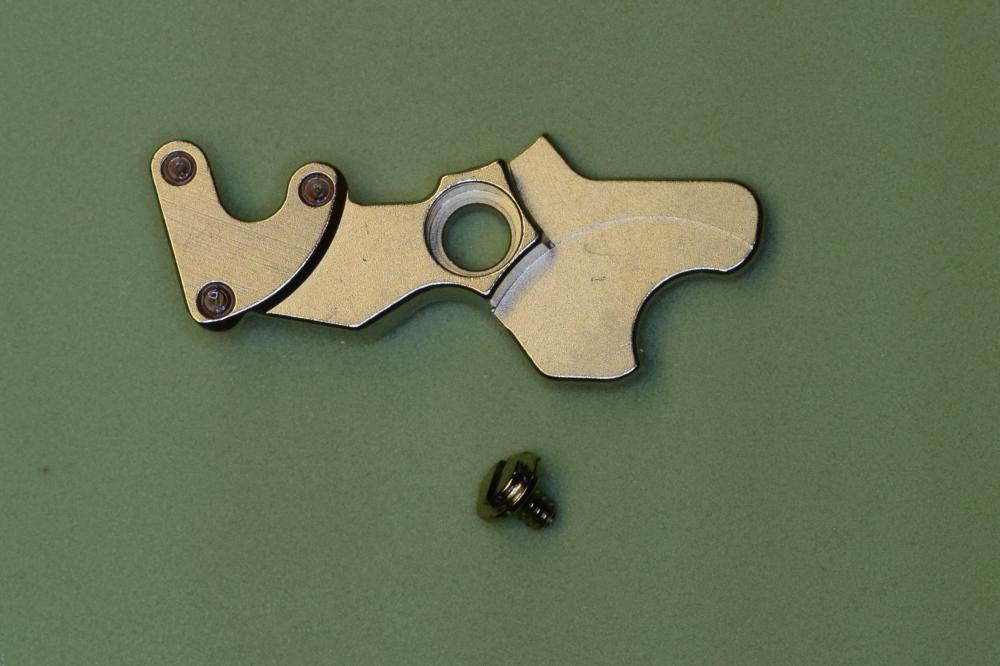
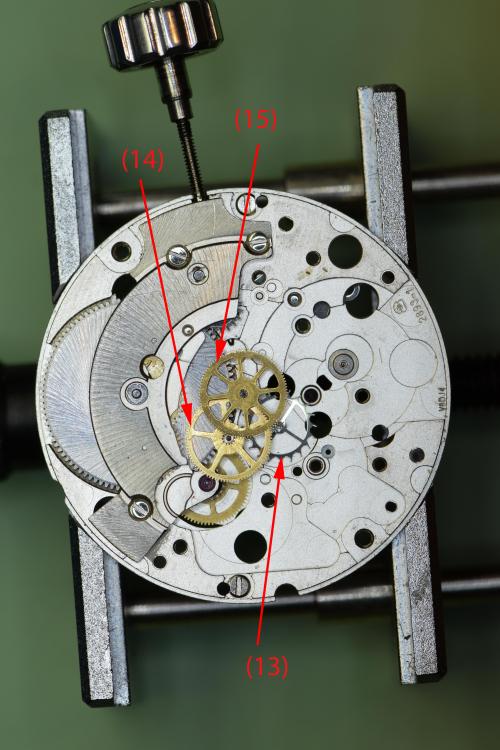
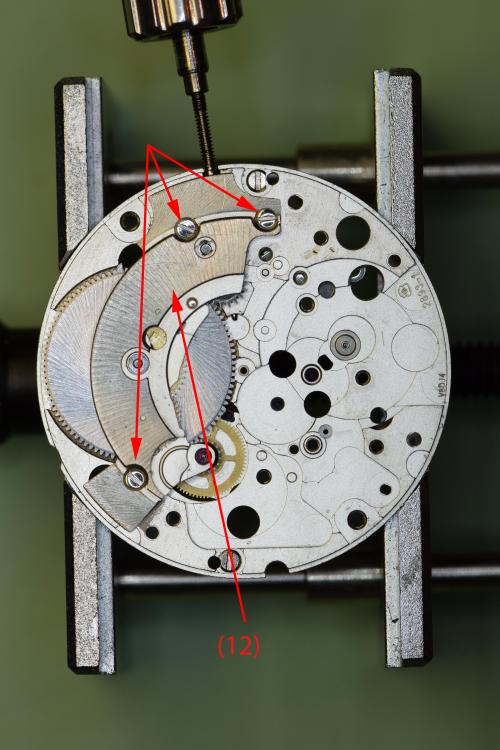
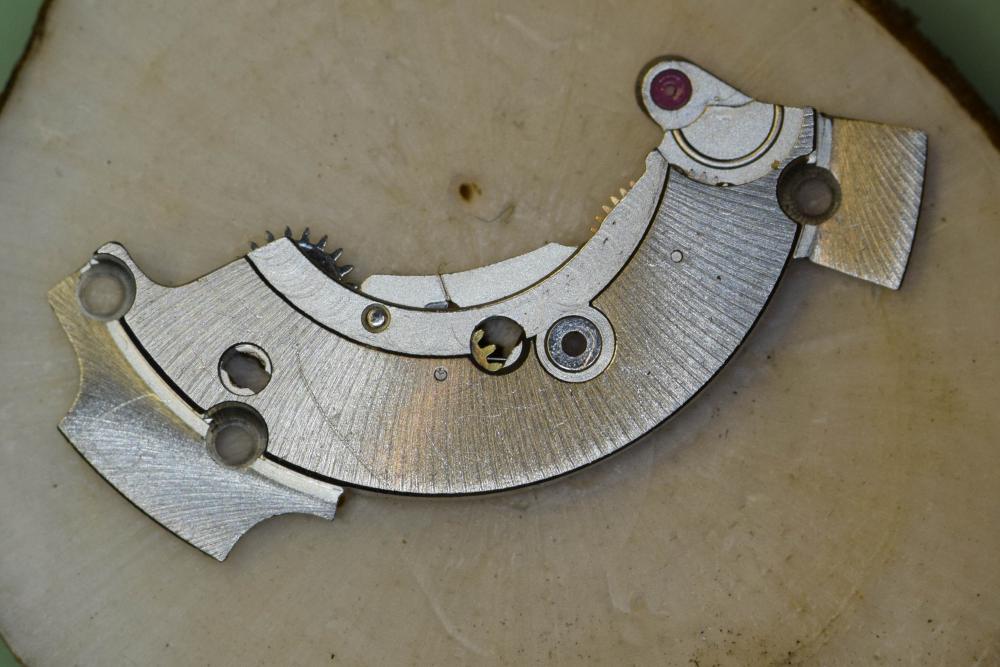
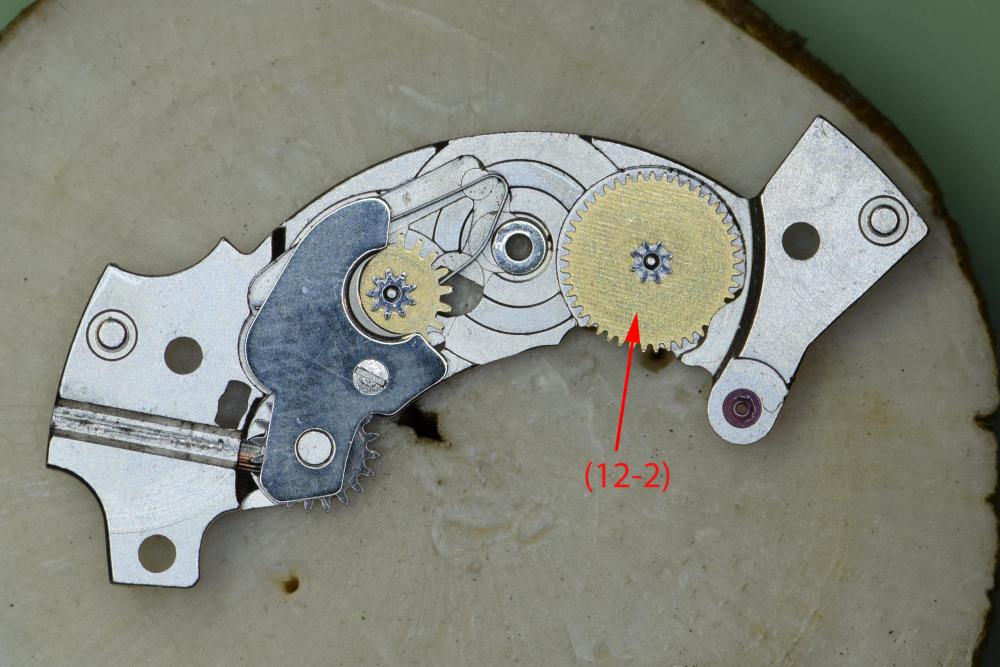
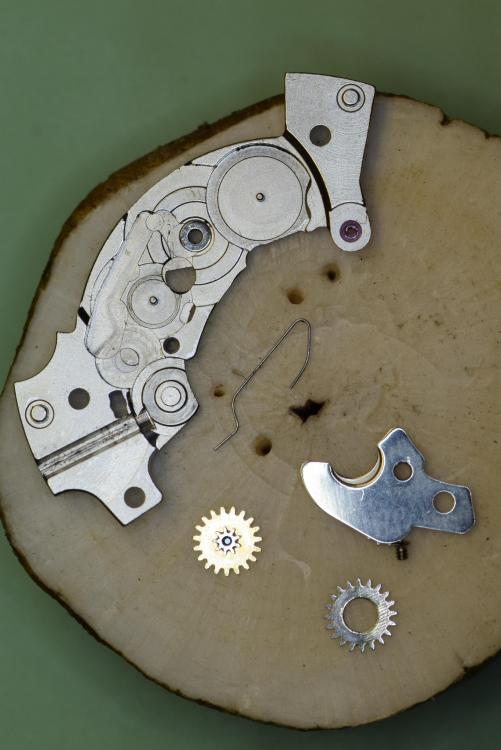
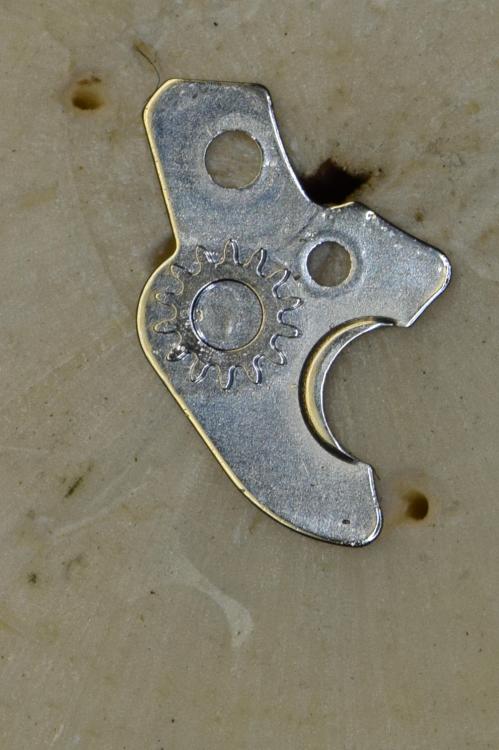
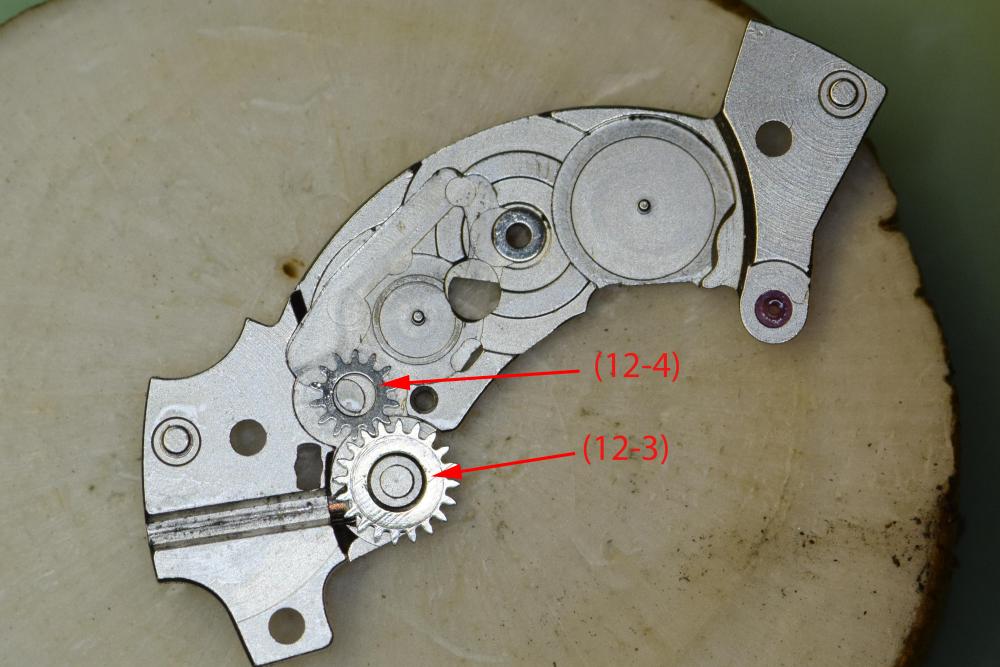
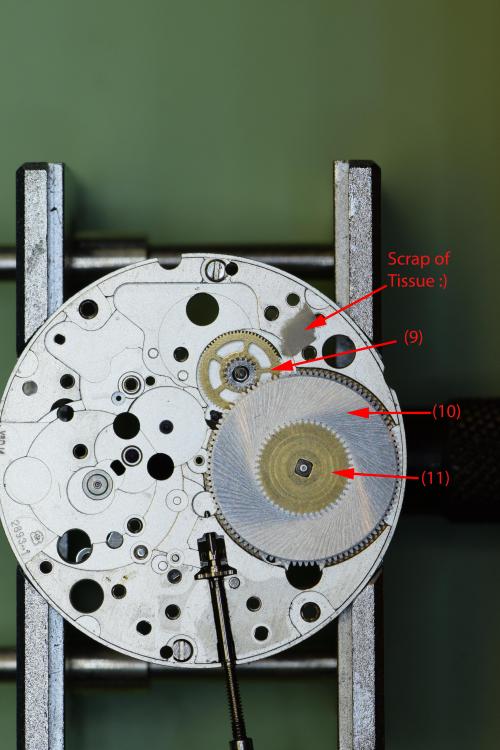
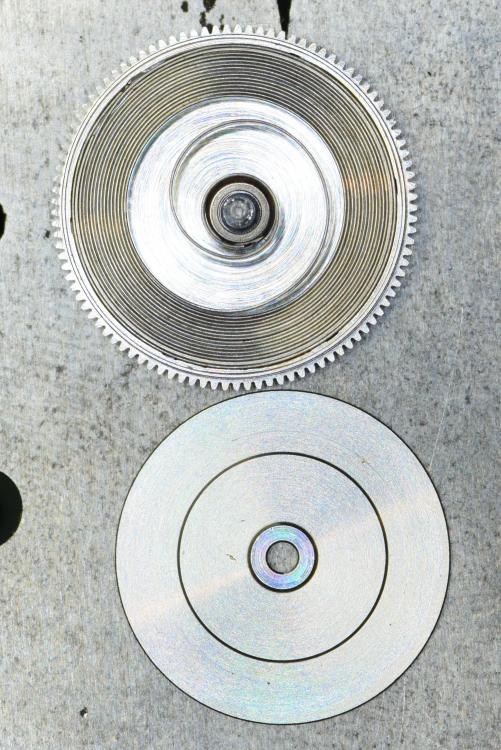
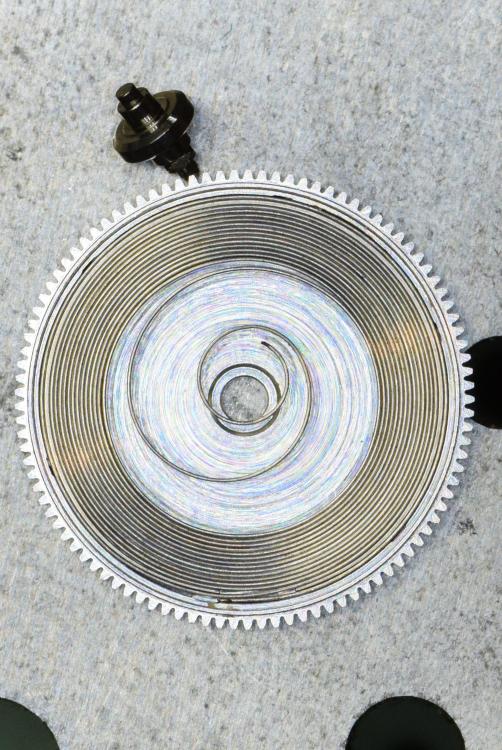
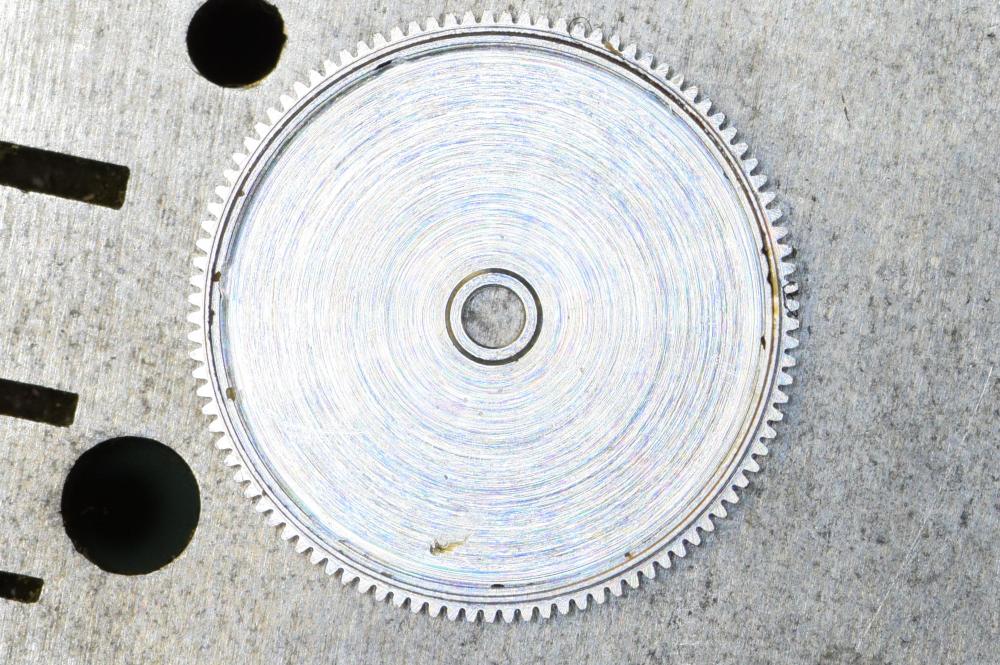
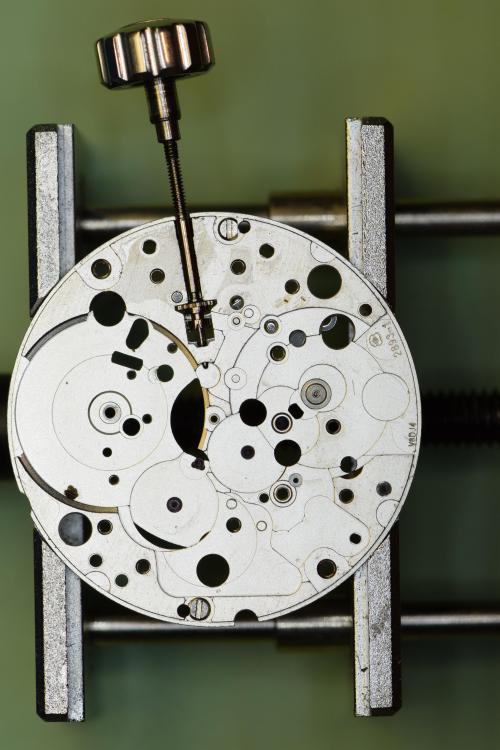
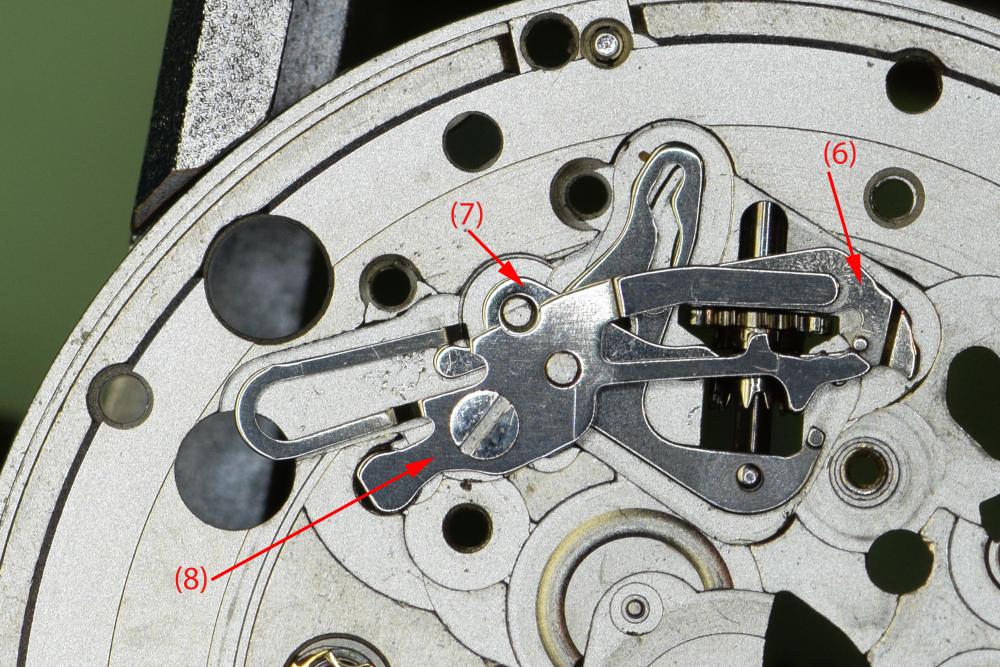
Service Walk Through – ETA 2893-1 / Hamilton Khaki: Part 1 - Disassembly This is part 1 of my service of a Hamilton Khaki – dual time zone automatic based on the ETA 2893-1 movement. I purchased the watch on eBay and it runs for a short time then stops. Looks like it could use a good cleaning. Note that the part numbers in the images and text are consistent with those found in the ETA technical document for this movement. Disassembly of this movement is quite straightforward. The only "special" tool you need would be an oscillating weight bolt tool - and you only need this if you intend to remove the ball bearing assembly from the oscillating weight, which really isn't required. In this tear down I do use the tool - only because I recently acquired it and wanted to see how it worked Off we go.... The dial shows evidence of some sloppy workmanship in the watch's past – several scratches from prior hand removal. Here you see the back of the 2893-1 with its automatic rotor - nicely signed Hamilton. The arrows indicate the location of the dial screws which secure the dial to the movement. These screws have a flat. Turn them just enough so the flat is facing the dial foot and the dial pops right off. Secure the screws so they don’t pop off during cleaning. Preparing to remove the hands – with a safety sheet in place. After removing the dial, remove the Dial Support Ring (47). This ring keeps the dial the proper distance from the second timezone disc. Without it, the disc will rub against the dial. Remove the second timezone disc, or what ETA calls the Universal Hour Indicator (46) from the center. This is a bit tricky as there’s no obvious place to grip it. I used two very small screwdrivers on each side to lift the indicator straight up. Be careful not to scratch it! With the disc removed, we can now remove the Dial Washer / Friction Spring (45), Corrector Setting Wheel (44) and Hour Indicator Driving Wheel (43). The Hour Wheel (42) can now be lifted off, followed by the Additional Indicator Maintaining Plate (41). Next components to remove are the Date Indicator Maintaining Plate (40) and the Minute Train Bridge (35). We move on to remove the Intermediate Date Wheel (39). The Date Jumper (38) has also been exposed when we removed the maintaining plate, so we remove it. Finally, we remove the Date Indicator (37) and the Date Indicator Driving Wheel (36). Now on to some of the motion and keyless work. We remove the Minute Wheel (34), Cannon Pinion with Driving Wheel (33), Double Corrector (32), Date Corrector Intermediate Setting Wheel (31) and Setting Wheel (30). This side is almost complete. We leave the setting components in place. Removing them now would be problematic as we have yet to release tension from the mainspring. Flip the movement over and remove the automatic work. After removing the 3 blue screws (seen in the previous 2 pics) we lift the entire unit up gently by the Oscillating Weight (28). With the automatic work out of the way – I notice that the Stop Lever (Hack) is missing! Will try and source one. Back to the automatic work. Removing these 3 small screws will allow the oscillating weight to come off the Automatic Framework (21). This is a special tool designed to release the Oscillating Weight Bolt I remove the Oscillating Weight Bolt (28-3) and free the Ball Bearing (28-2) from the Oscillating Weight (28-1). There was no compelling reason to disassemble this portion of the movement, but the tool worked as expected! With the Oscillating Weight out of the way, remove the Auxiliary Reverser (27). Flip the unit over once again and remove the screw and Automatic Device Lower Bridge (26). Remove the Reverser (25), Reverser Wheel (24), Reduction Wheel (23) and Intermediate Reduction Wheel (22). A view of the underside of these components – handy when trying to remember which way to reassemble. Remove the single screw and gently lift off the Balance Assembly (20) with the Balance Complete (19). Carefully let the power down by releasing the Click (12-6) and slowly letting the crown wind down. Remove the Pallet Bridge (18) and Pallets (17). Remove the Train Wheel Bridge (16). It is secured with a hefty screw! Remove the Fourth Wheel (15), Third Wheel (14) and Escape Wheel (13). Remove the 3 screws and the Barrel Bridge (12) Flip the bridge over and lift off the Ratchet Wheel Driving Wheel (12-2) Remove the screw and the Click Plate (12-7), followed by the Click (12-6), Intermediate Ratchet Wheel (12-5), Intermediate Crown Wheel (12-4) and Crown Wheel (12-3). Note that the Intermediate Crown Wheel is under the Click Plate. When I removed the plate, the wheel was stuck to it due to some old oil. Here you can see the Intermediate Crown Wheel as it was stuck. This shows the proper placement of the wheels. Remove the Ratchet Wheel (11), the Mainspring Barrel (10) and Intermediate Wheel (9). Note the scrap of tissue that found its way onto the movement. I was so focused on taking pics that I didn’t notice. Pop the lid off the Barrel Remove the mainspring arbor And finally, remove the mainspring, leaving the empty barrel The movement side is now completely bare. Let’s flip it over and finish off the keyless work. Unscrew and remove the Setting Lever Jumper (8), Yoke (7) and the Setting Lever (6) Remove the Date Corrector Operating Lever (5), Winding Stem (4), Winding Pinion (3) and the Sliding Pinion (2) All stripped down Ready for the Ultrasonic!!! Hope you enjoyed this. In case you are interested, photo equipment used was: Camera: Nikon D5300 DSLR Lens: Nikon AF-S VR Micro-NIKKOR 105mm f/2.8G IF-ED, Shutter Release: Nikon ML-L3 Remote Shutter Release (wireless) Lighting: Polaroid Macro LED Ring Flash Tripod: Vanguard Alta Pro 263AB 100


 1 point
 -
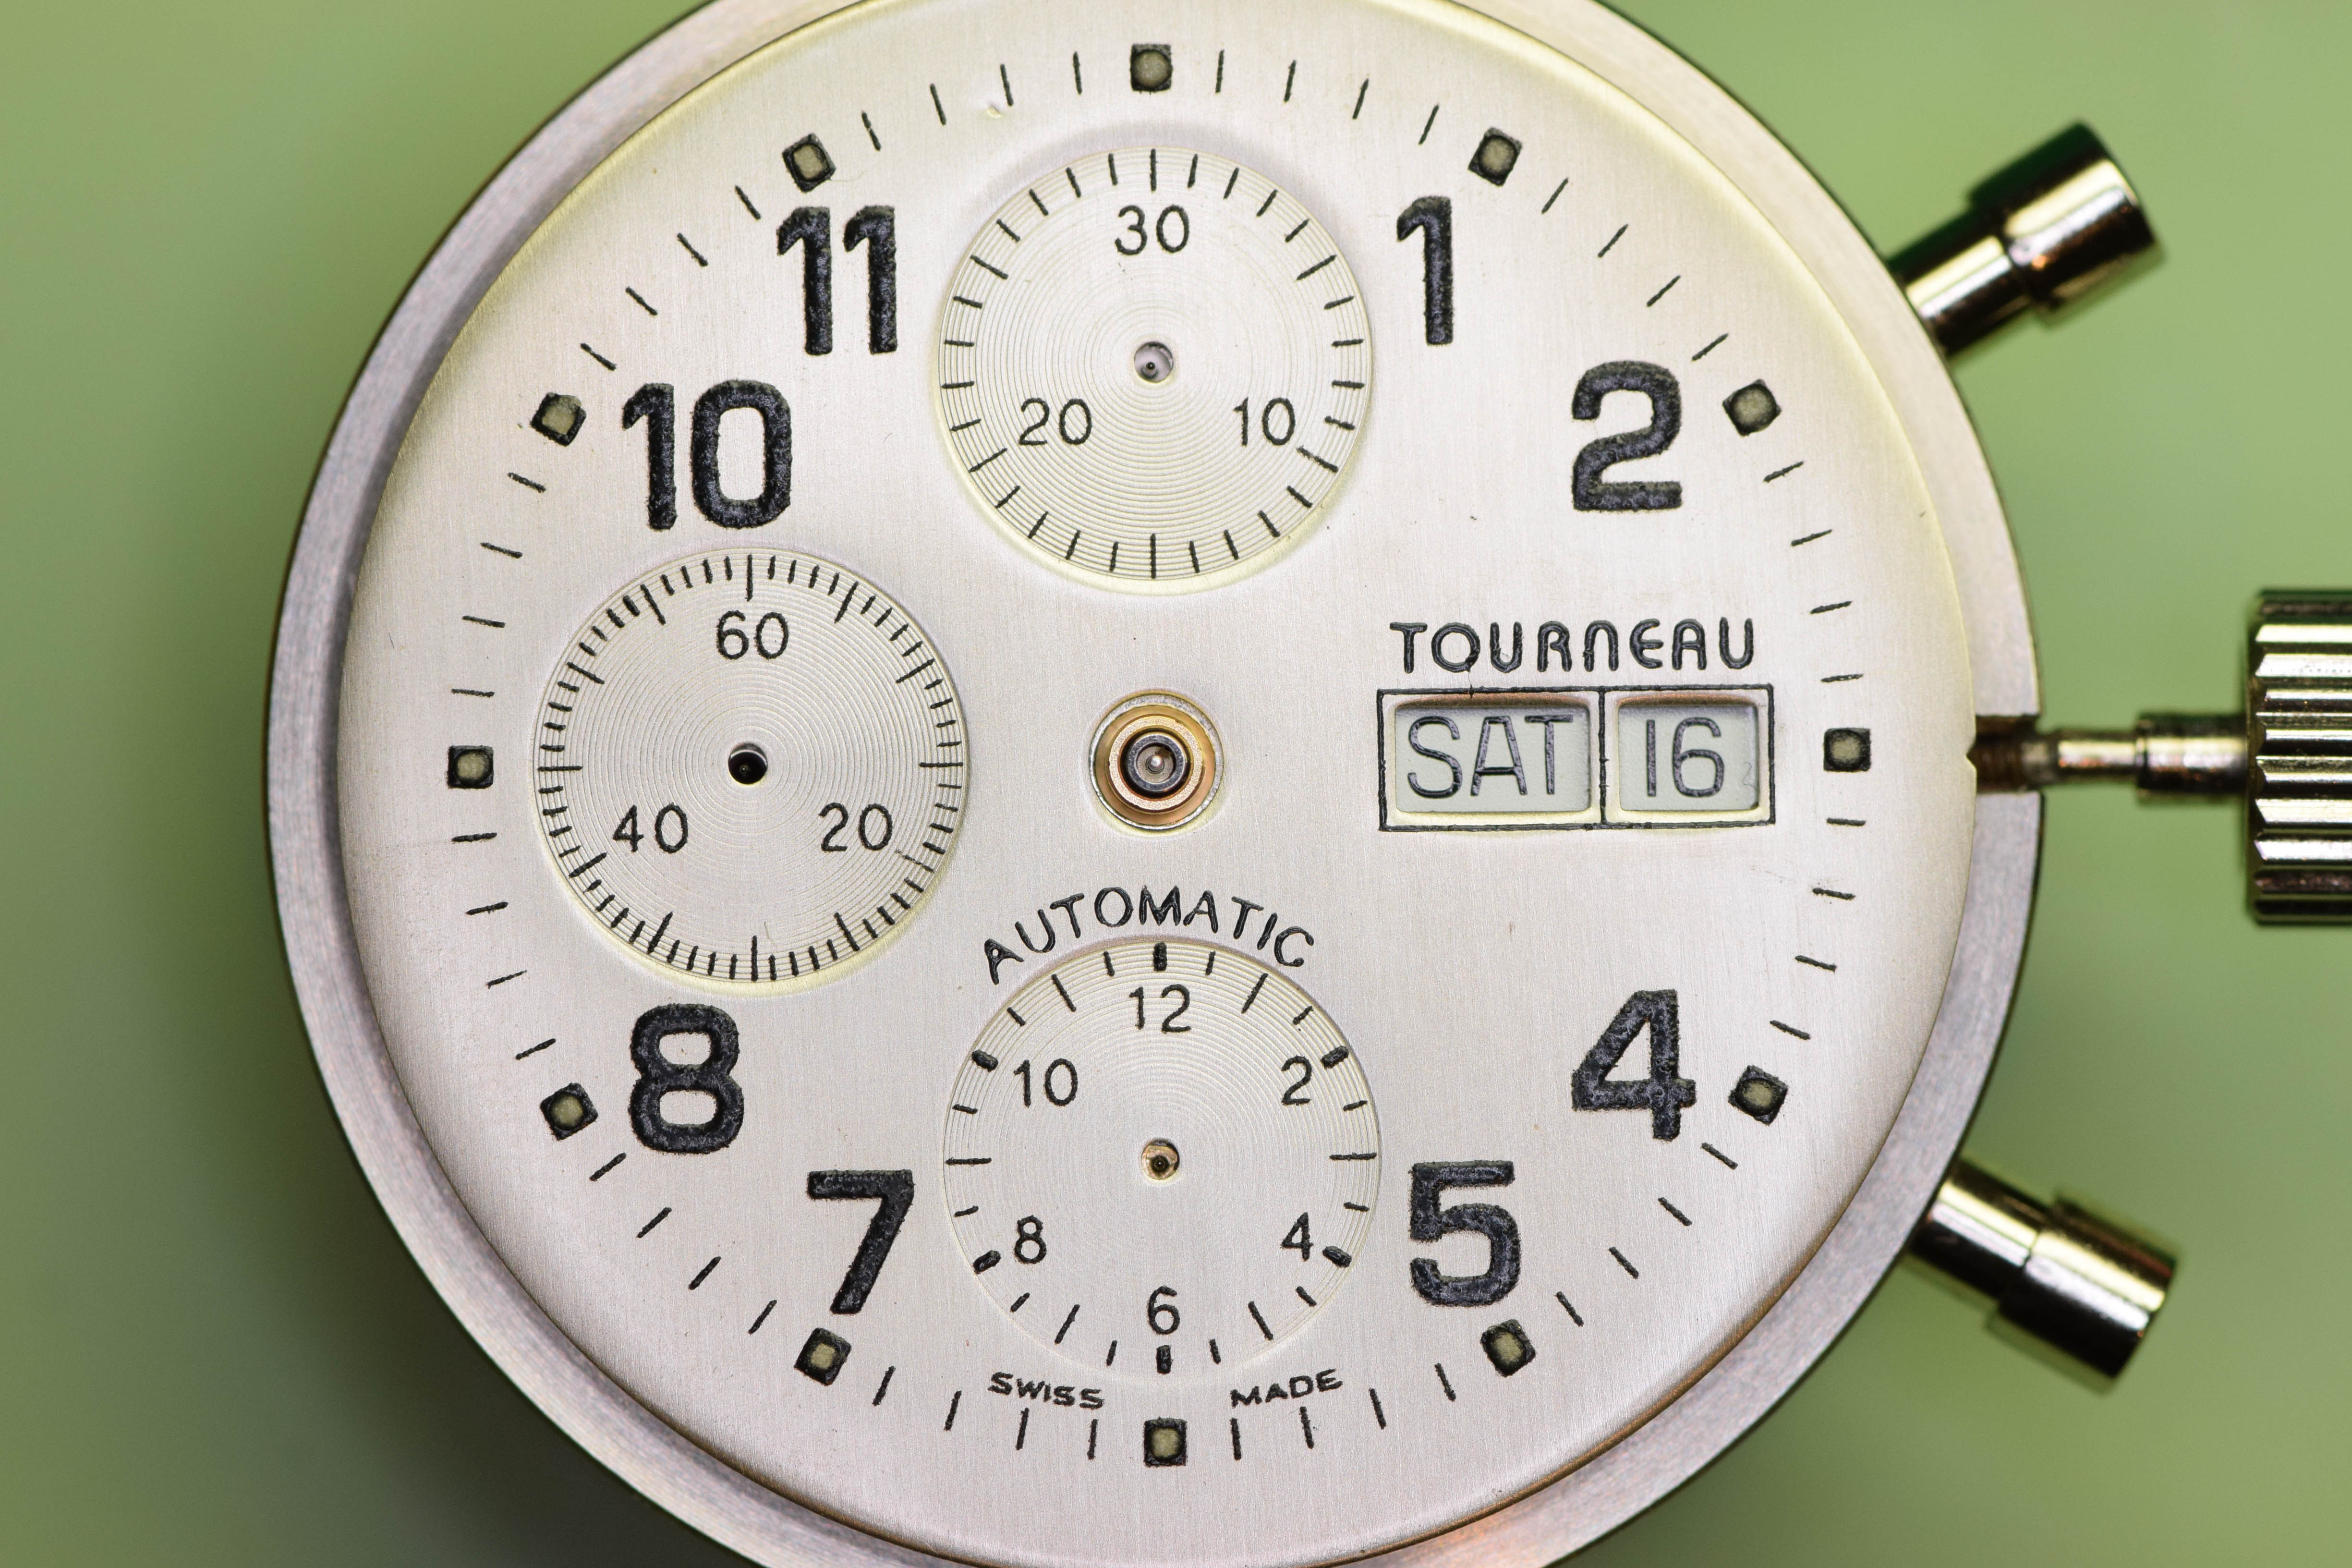
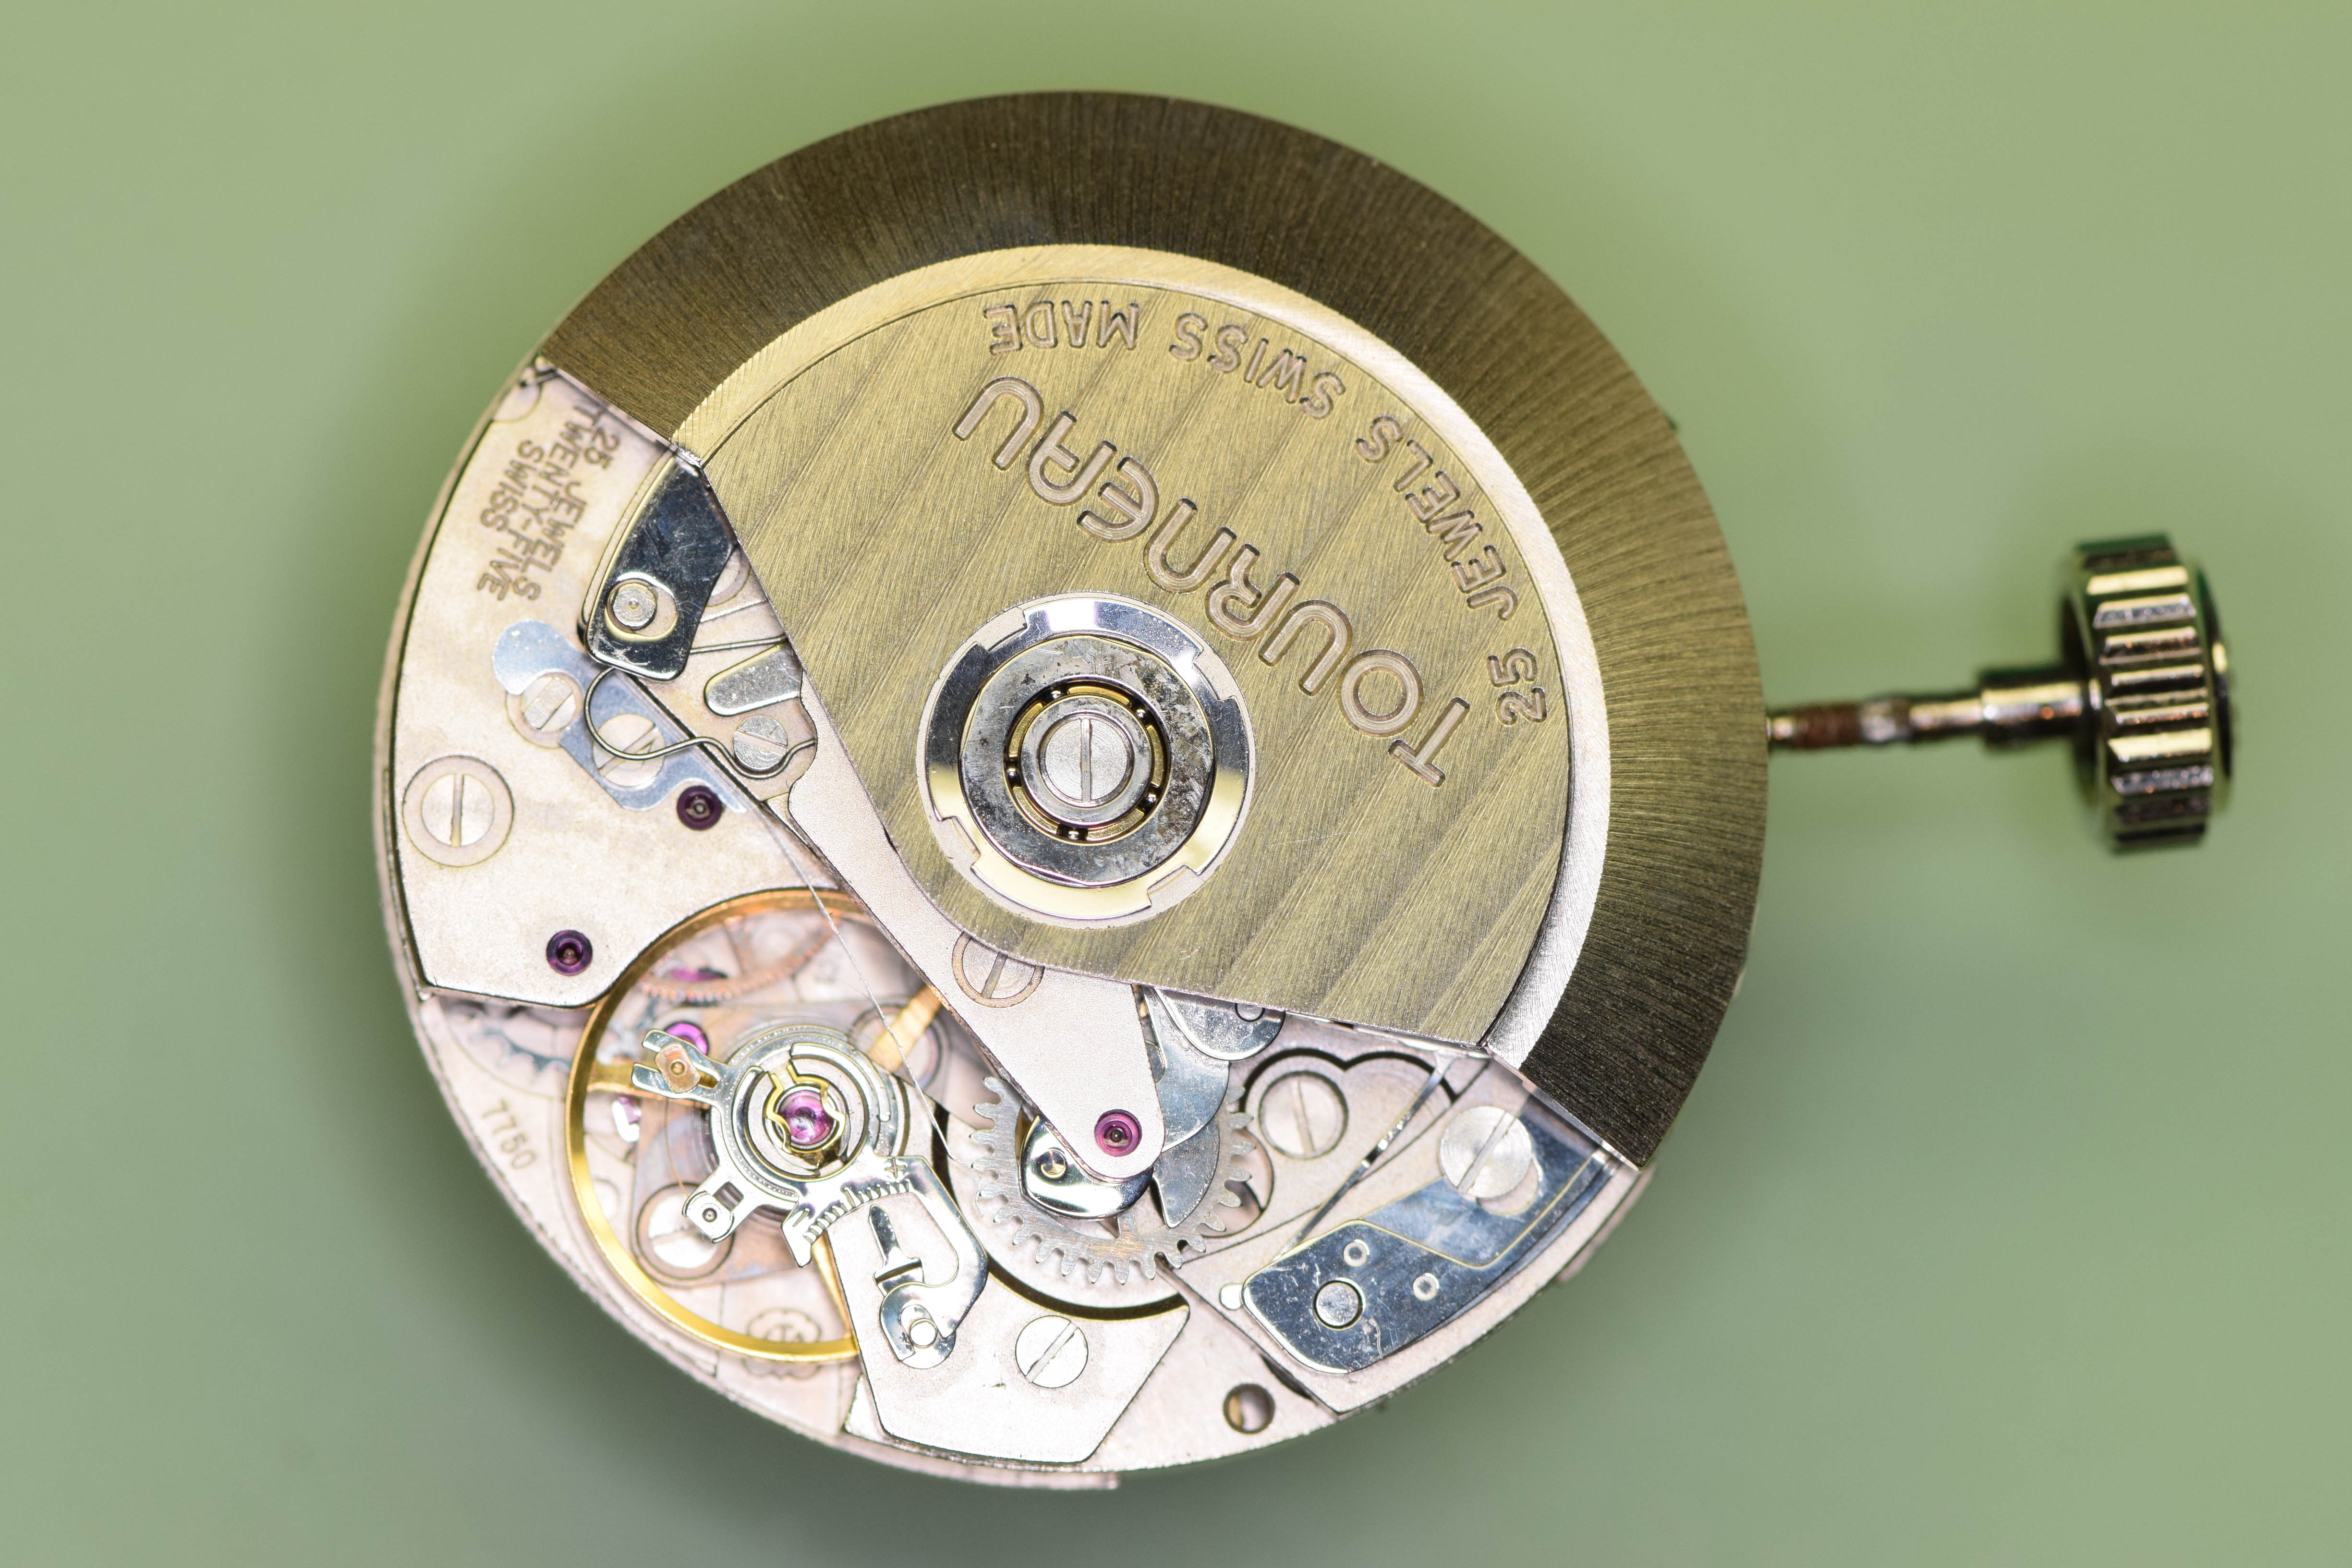
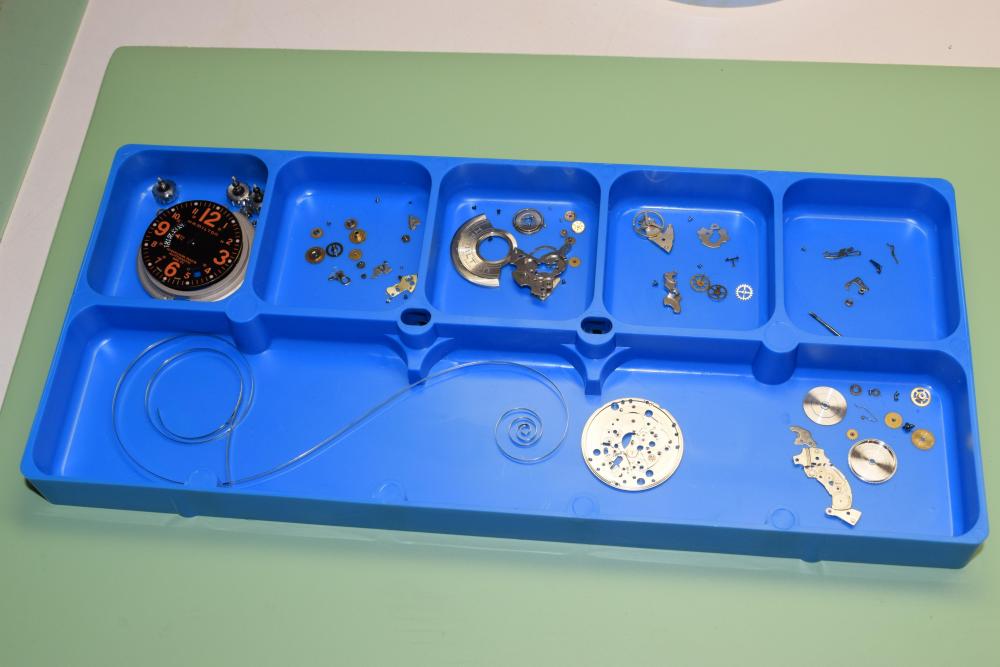
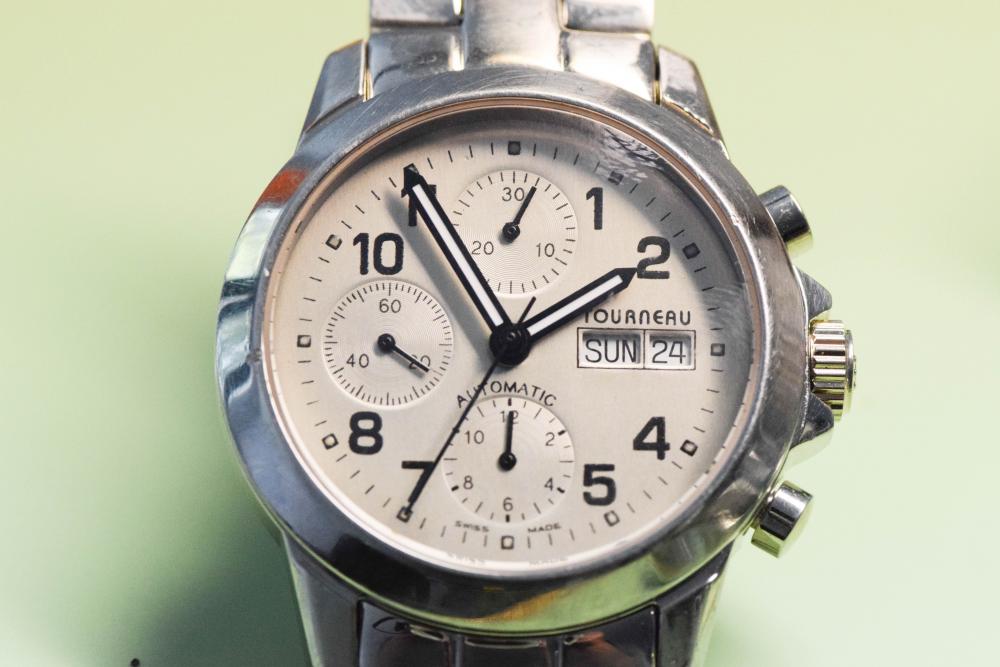
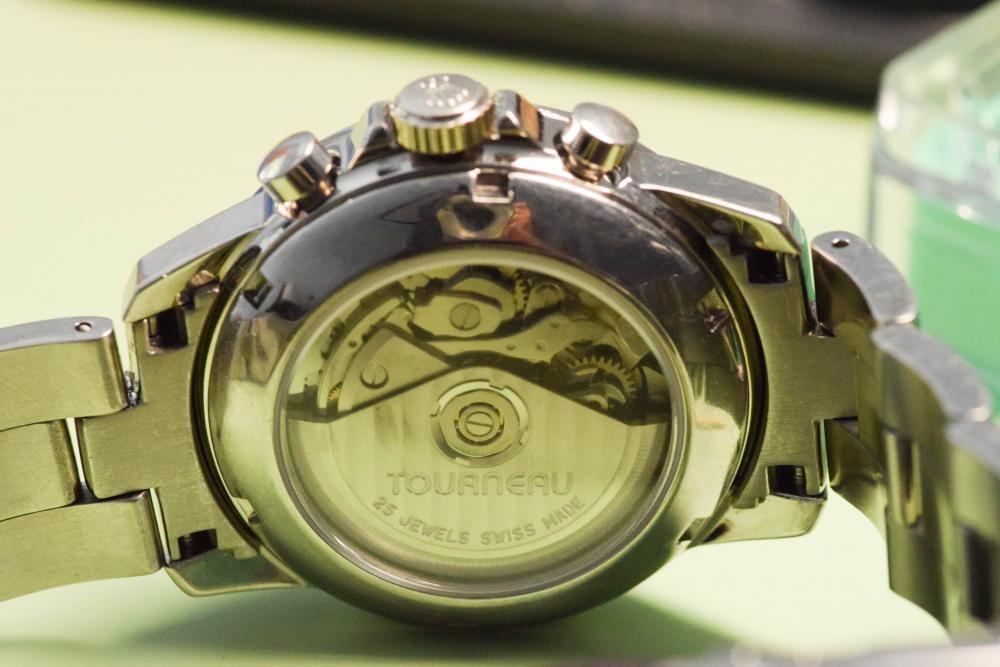
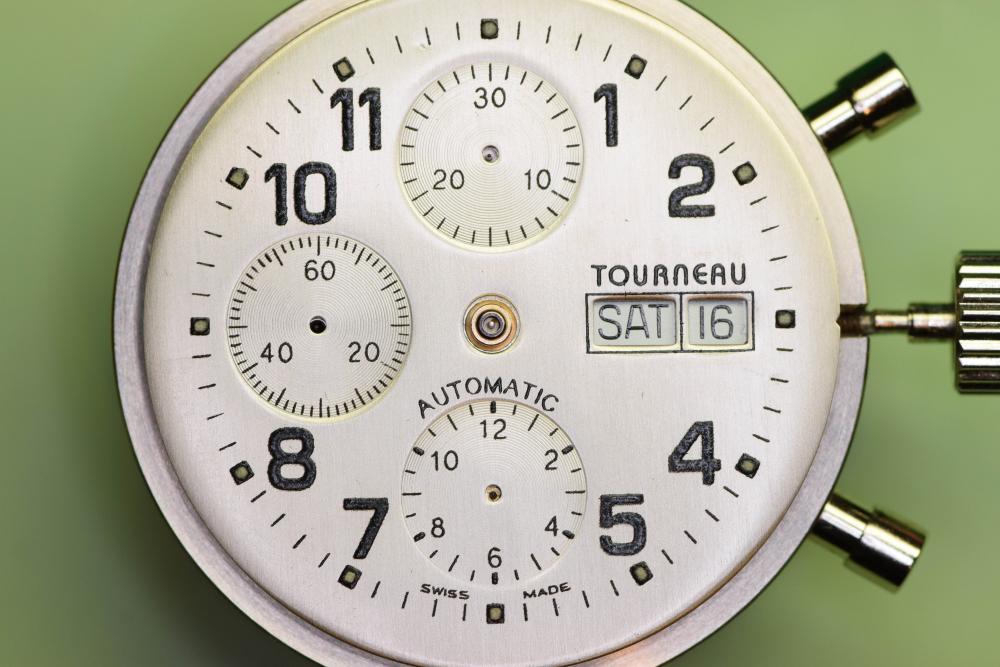
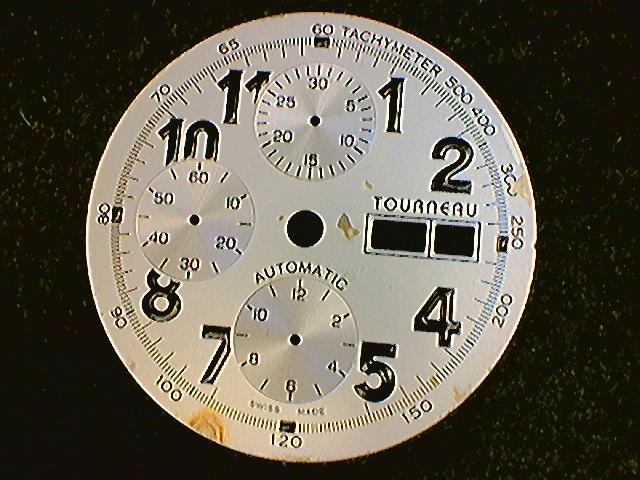
I purchased a Tourneau 7750 a while back on eBay. The watch was a mess. For one thing, the dial was glued to the main plate - missing the dial feet and it has some discoloration. Here's how it started. I finally got around to having the dial restored by International Dial. They didn't have the exact die, but they did find a suitable substitute. While they could have created a die to match the original I didn't want to incur the expense. Some pics of the dirty movement... The watch also had a Rolex crown (I think it's a fake) and the stem was soldered to the crown. You can see it in the following pic: Here it is on reassembly - preparing to attach the hands in my Bergeon movement holder: And the finished product - note I have a new crown on order - so the fake Rolex is still on there for the time being. This watch is a gift for my son.

 1 point
 -
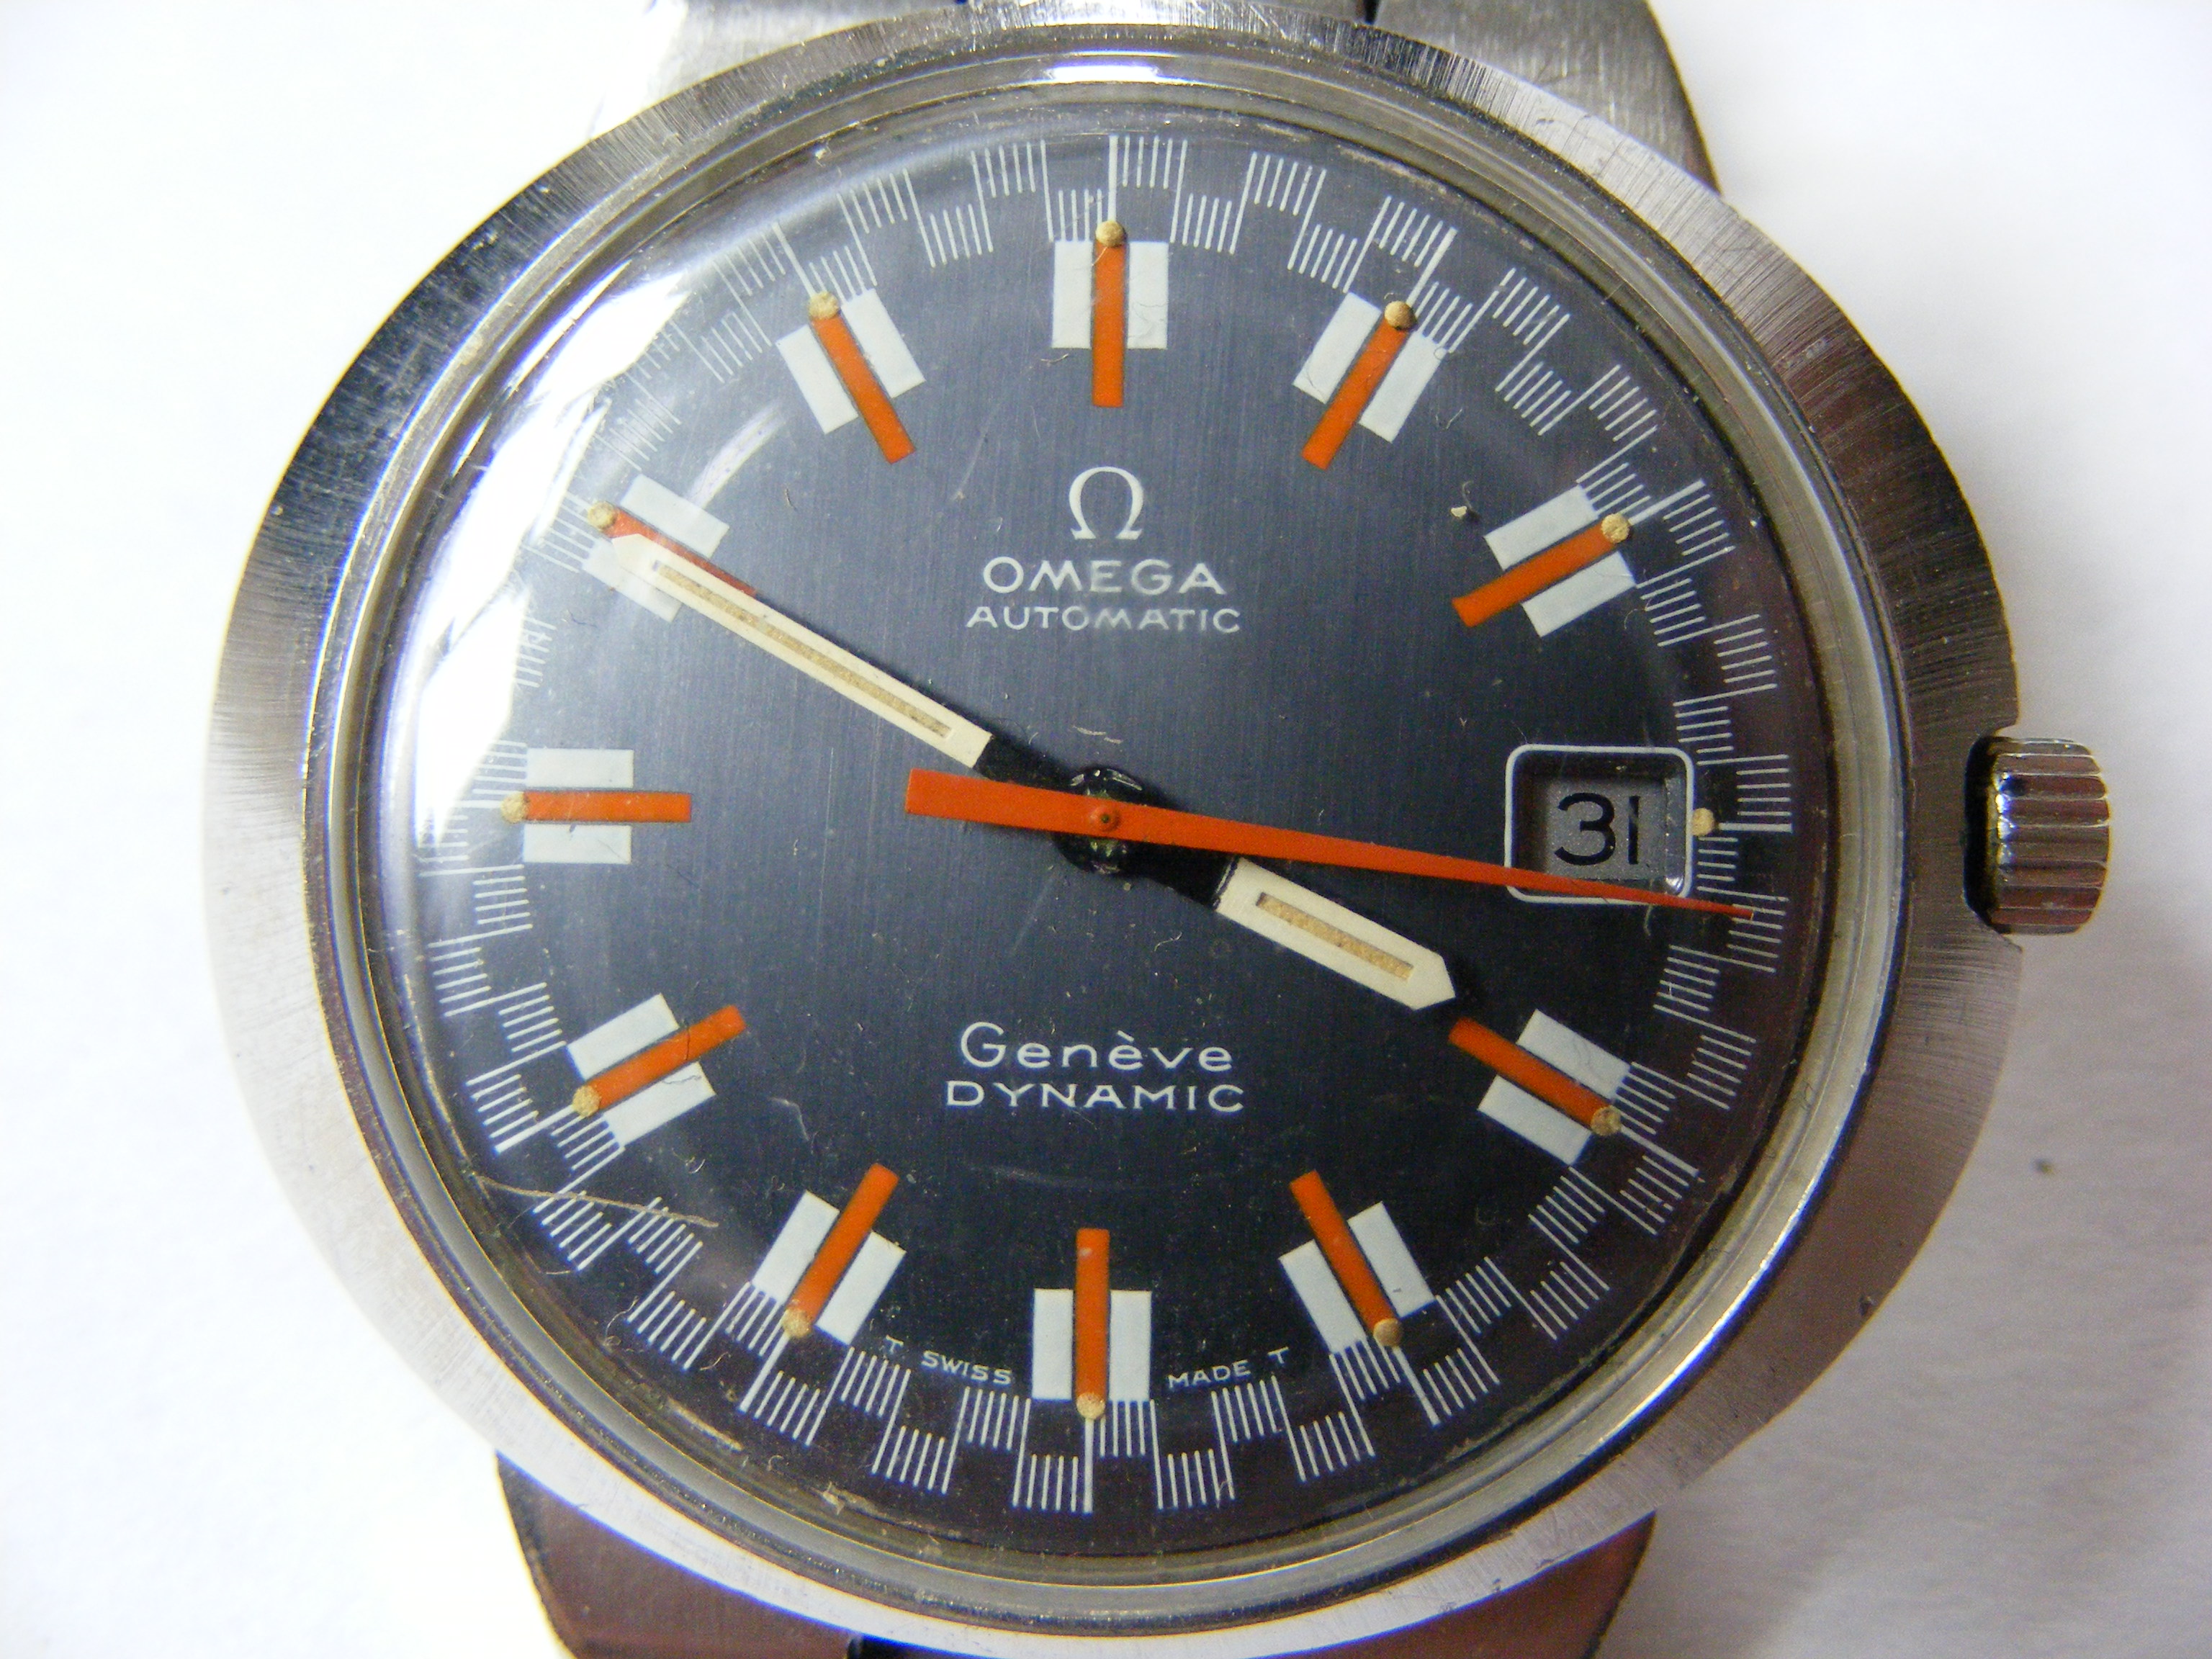
Hi all, A neighbour of mine brought this Omega to me to look at, he's worn it for work and it looks like it's suffered some heavy shocks. On first examination it looks like the stem is bent as when you turn the crown the whole movement waves backwards and forwards in the case, also the minute hand has moved up the shaft and is fouling the second hand stopping the watch, it will restart if you move the hand out of the way, I also noticed some of the luminous markers are flaking away and lying around on the dial. As it is marked '' Swiss T '' I'm assuming this is tritium and my question is ; will this be a hazard if I open the watch & are there special procedures for cleaning it up ? many thanks, Phil.
 1 point
 -
I'm partial to the light green that some of the old Star and Boley sets are painted. But black enamel would look very nice too.1 point
-
Love this style of chronograph. [emoji108]1 point
-
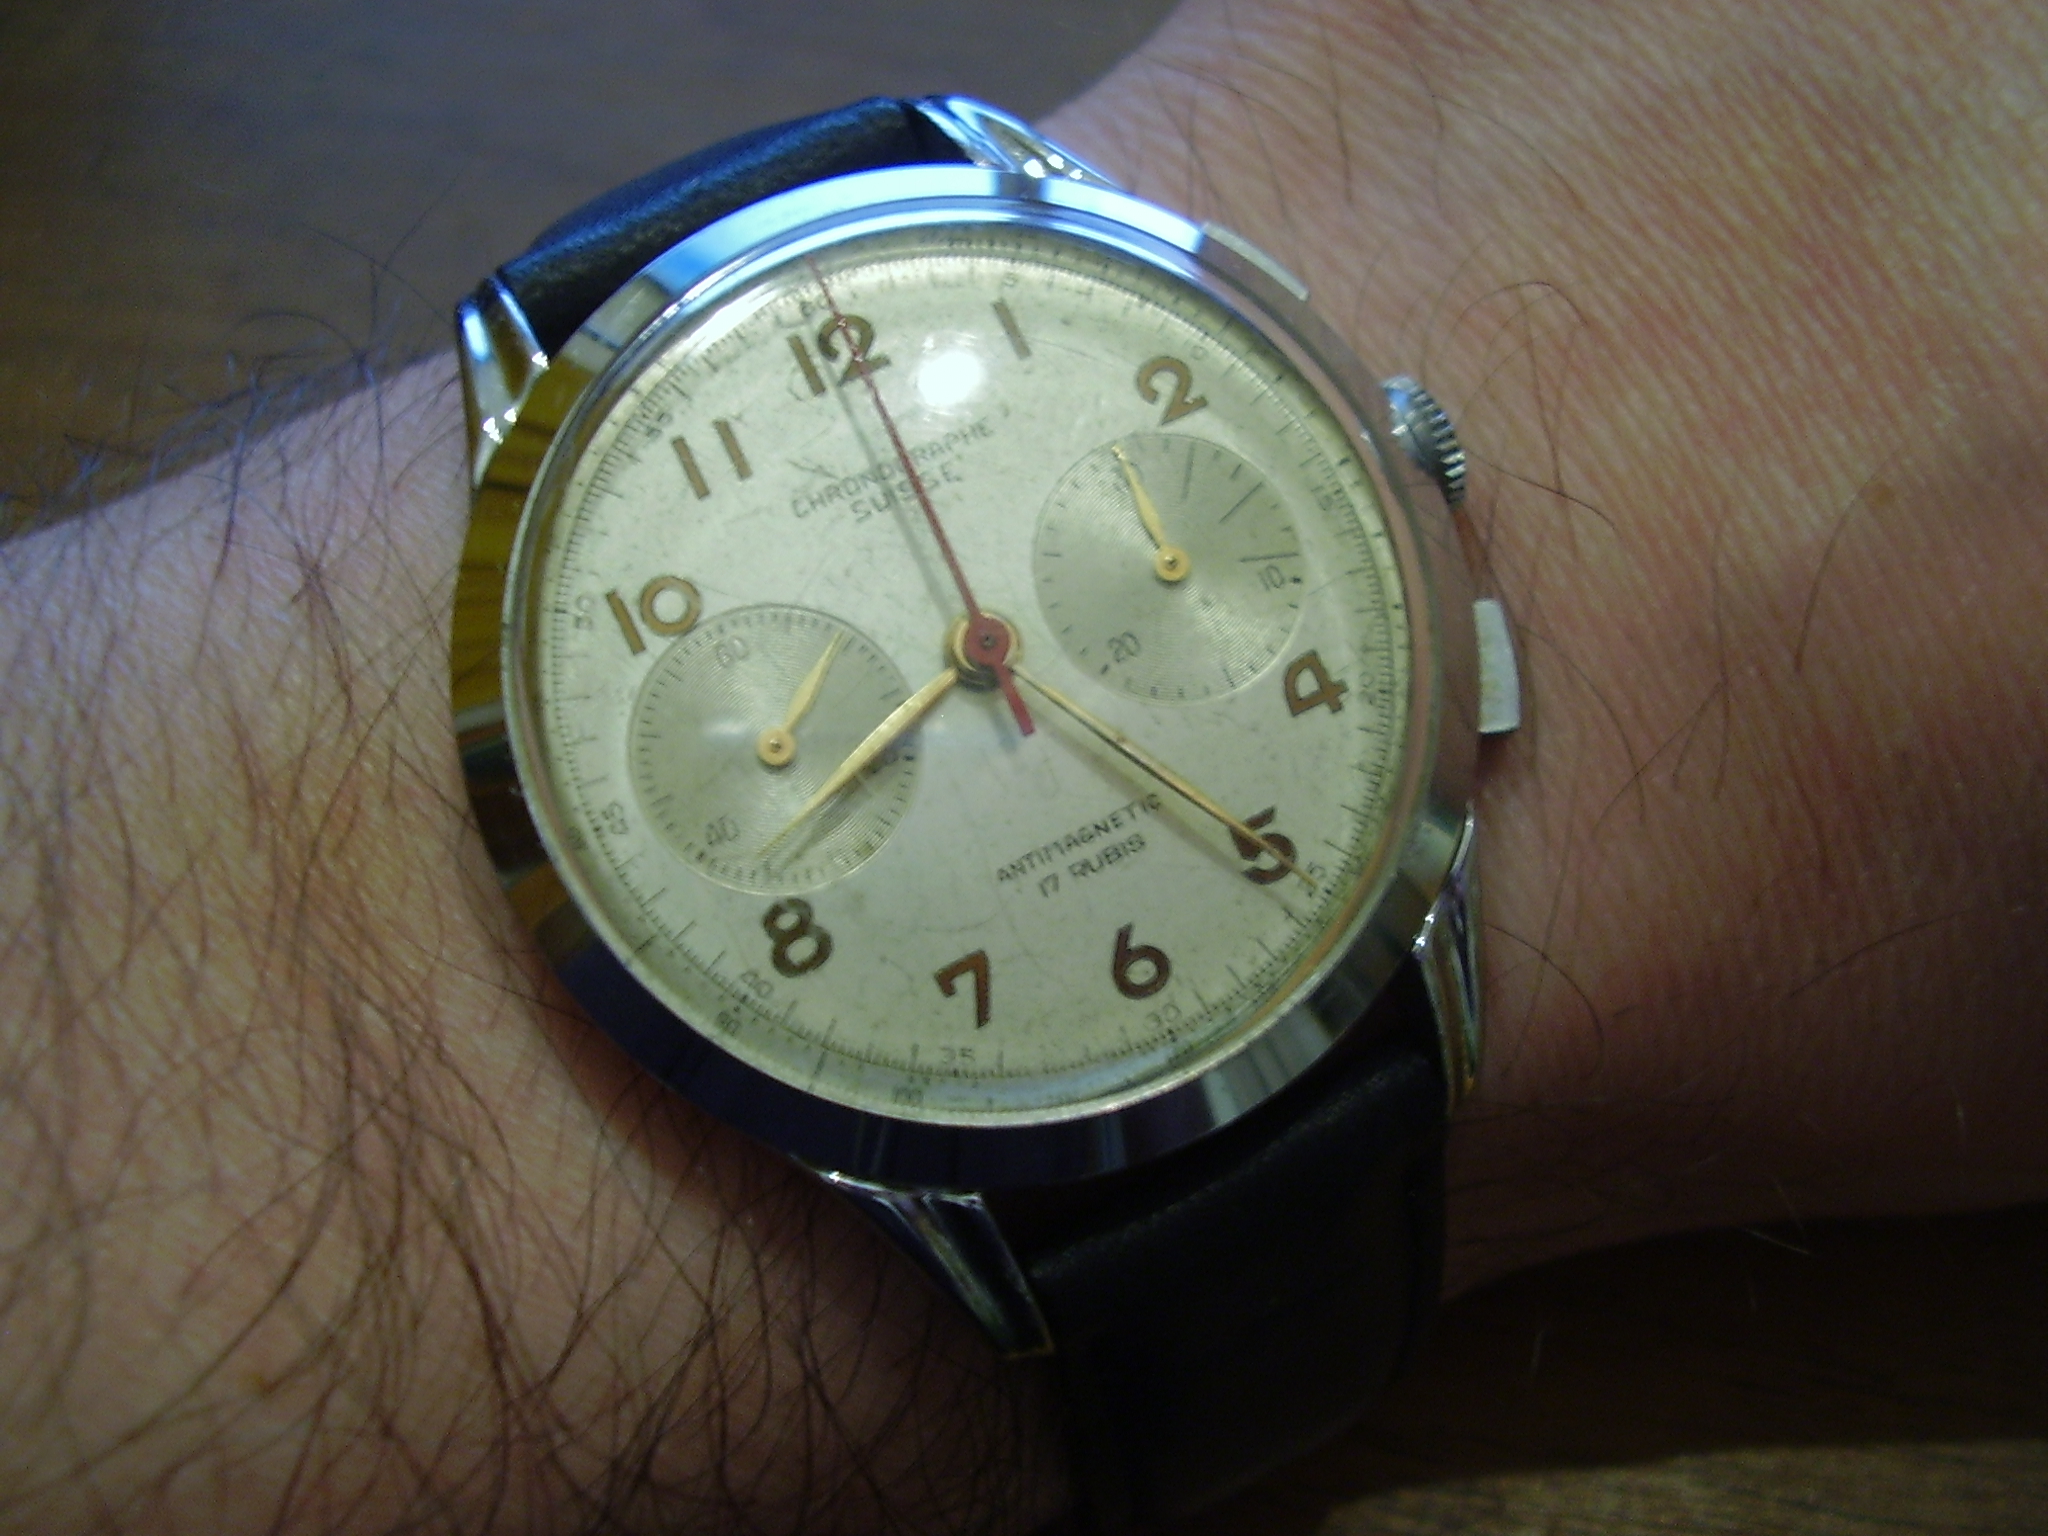
Tonight I am wearingmy latest Landeron 48 Chronograph Suisse... Sorry for the bad lit picture...
 1 point
 -
There are many others indeed, I think something like 36 in total. I do not know what the link sharing policy here is, but if you Google for "chicago school of watchmaking iso", you should find a download link to a copy of the original CD fairly easily. Not sure however if there may be copyright issues, but I understand that the lessons date from the 50's 60's.1 point
-
I will make a video about my heretic pivot shaping method, stay tuned!1 point
-
Don't worry you won't glow in the dark.1 point
-
Hi Swordfish, I do not know anything about truing calipers, but have the attached document on their use, so maybe you can find something useful in there. Good luck, Olivier chicago lesson 16.PDF1 point
-
Hi Swordfish , I respect and admire your perseverance with this project and have no doubt that you will prevail . I have seen truing calipers for sale many times but don't know the first thing about how they are used . I'll be watching with a keen eye on the proper use of this contraption . Good luck , Louis1 point
-
A jacot tool is only used to burnish pivots. For the work you want to carry out you need a watchmakers lathe.1 point
-
Here goes Ro63rto, back on track! Sorry mate! The seconds hand (@ 6 o'clock) had to be "rebuilt" by recovering the bottom part from the post and riveting it back on the hand proper since there is no original replacement. I used my staking tools for the job. Fairy juice for the dial and Rodico for the hands. New gaskets for pushers and back and new crystal. This is a OS10 movement now working after servicing, all parts are original from the watch...one of Ramon's specials! The bracelet is a barely refurbished Citizen brand from Ramon stock too.
 1 point
 -
sorry, got carried away...1 point
-
Everything in the watch affects timekeeping.. Gross oversimplification but everything does.. I should probably read the article first but the number one thing that affects timekeeping is the escapement. The escapement supplies energy to the balance wheel but it also interferes with the timekeeping.. It's why the escapement has to be adjusted properly which is overlooked by most hobbyists.. Like if the depth the locking is too deep all that time spent unlocking his loss of energy but it slows the balance wheel swing down.. So escapement is a necessary evil supplying energy to the Balance wheel. If you look at the typical lift angle of 52° This corresponds to the time that the balance wheel is engaging with the escapement.. So if you have a bad pivot bad are timing dial-up and dial down and see a dramatic drop in amplitude you will see a change in timekeeping.. If you're lucky you can just clean up the pivots they both have to be the same and strangely enough the end of the pivots have to be flat or slightly domed not dramatically rounded because they actually have to have friction. You're trying to get the ends of the pivots to have as much contact area the same as the sides so the friction is the same everywhere the amplitude is the same in all positions then the effect of the escapement will be the same otherwise you get goofy timekeeping. Then if you get dramatically enthusiastic rounding the pivots the roller jewel will crash into the other side of the fork making a really interesting sound that's very bad.1 point
-
please read the article I posted above. Raul explains how the amplitude affects timing and how centering the hs in-between the regulator pins is so vital.1 point
-
Handy chart for checking different Seiko movement coils? https://www.seikoserviceusa.com/img/pdf/battery-no-cross-reference-chart.pdf1 point
-
That's just because they bought an American factory in consignment conditions that happened to make watches like that. If they were making e.g. pin pallets movement then the entire Russian population would have been kept awake by their lovely noise for some 60 years [emoji4]1 point
-
Thought you guys may be interested in my latest project. full write up on my blog, but a few pics below Started from this.. to this.....1 point
-
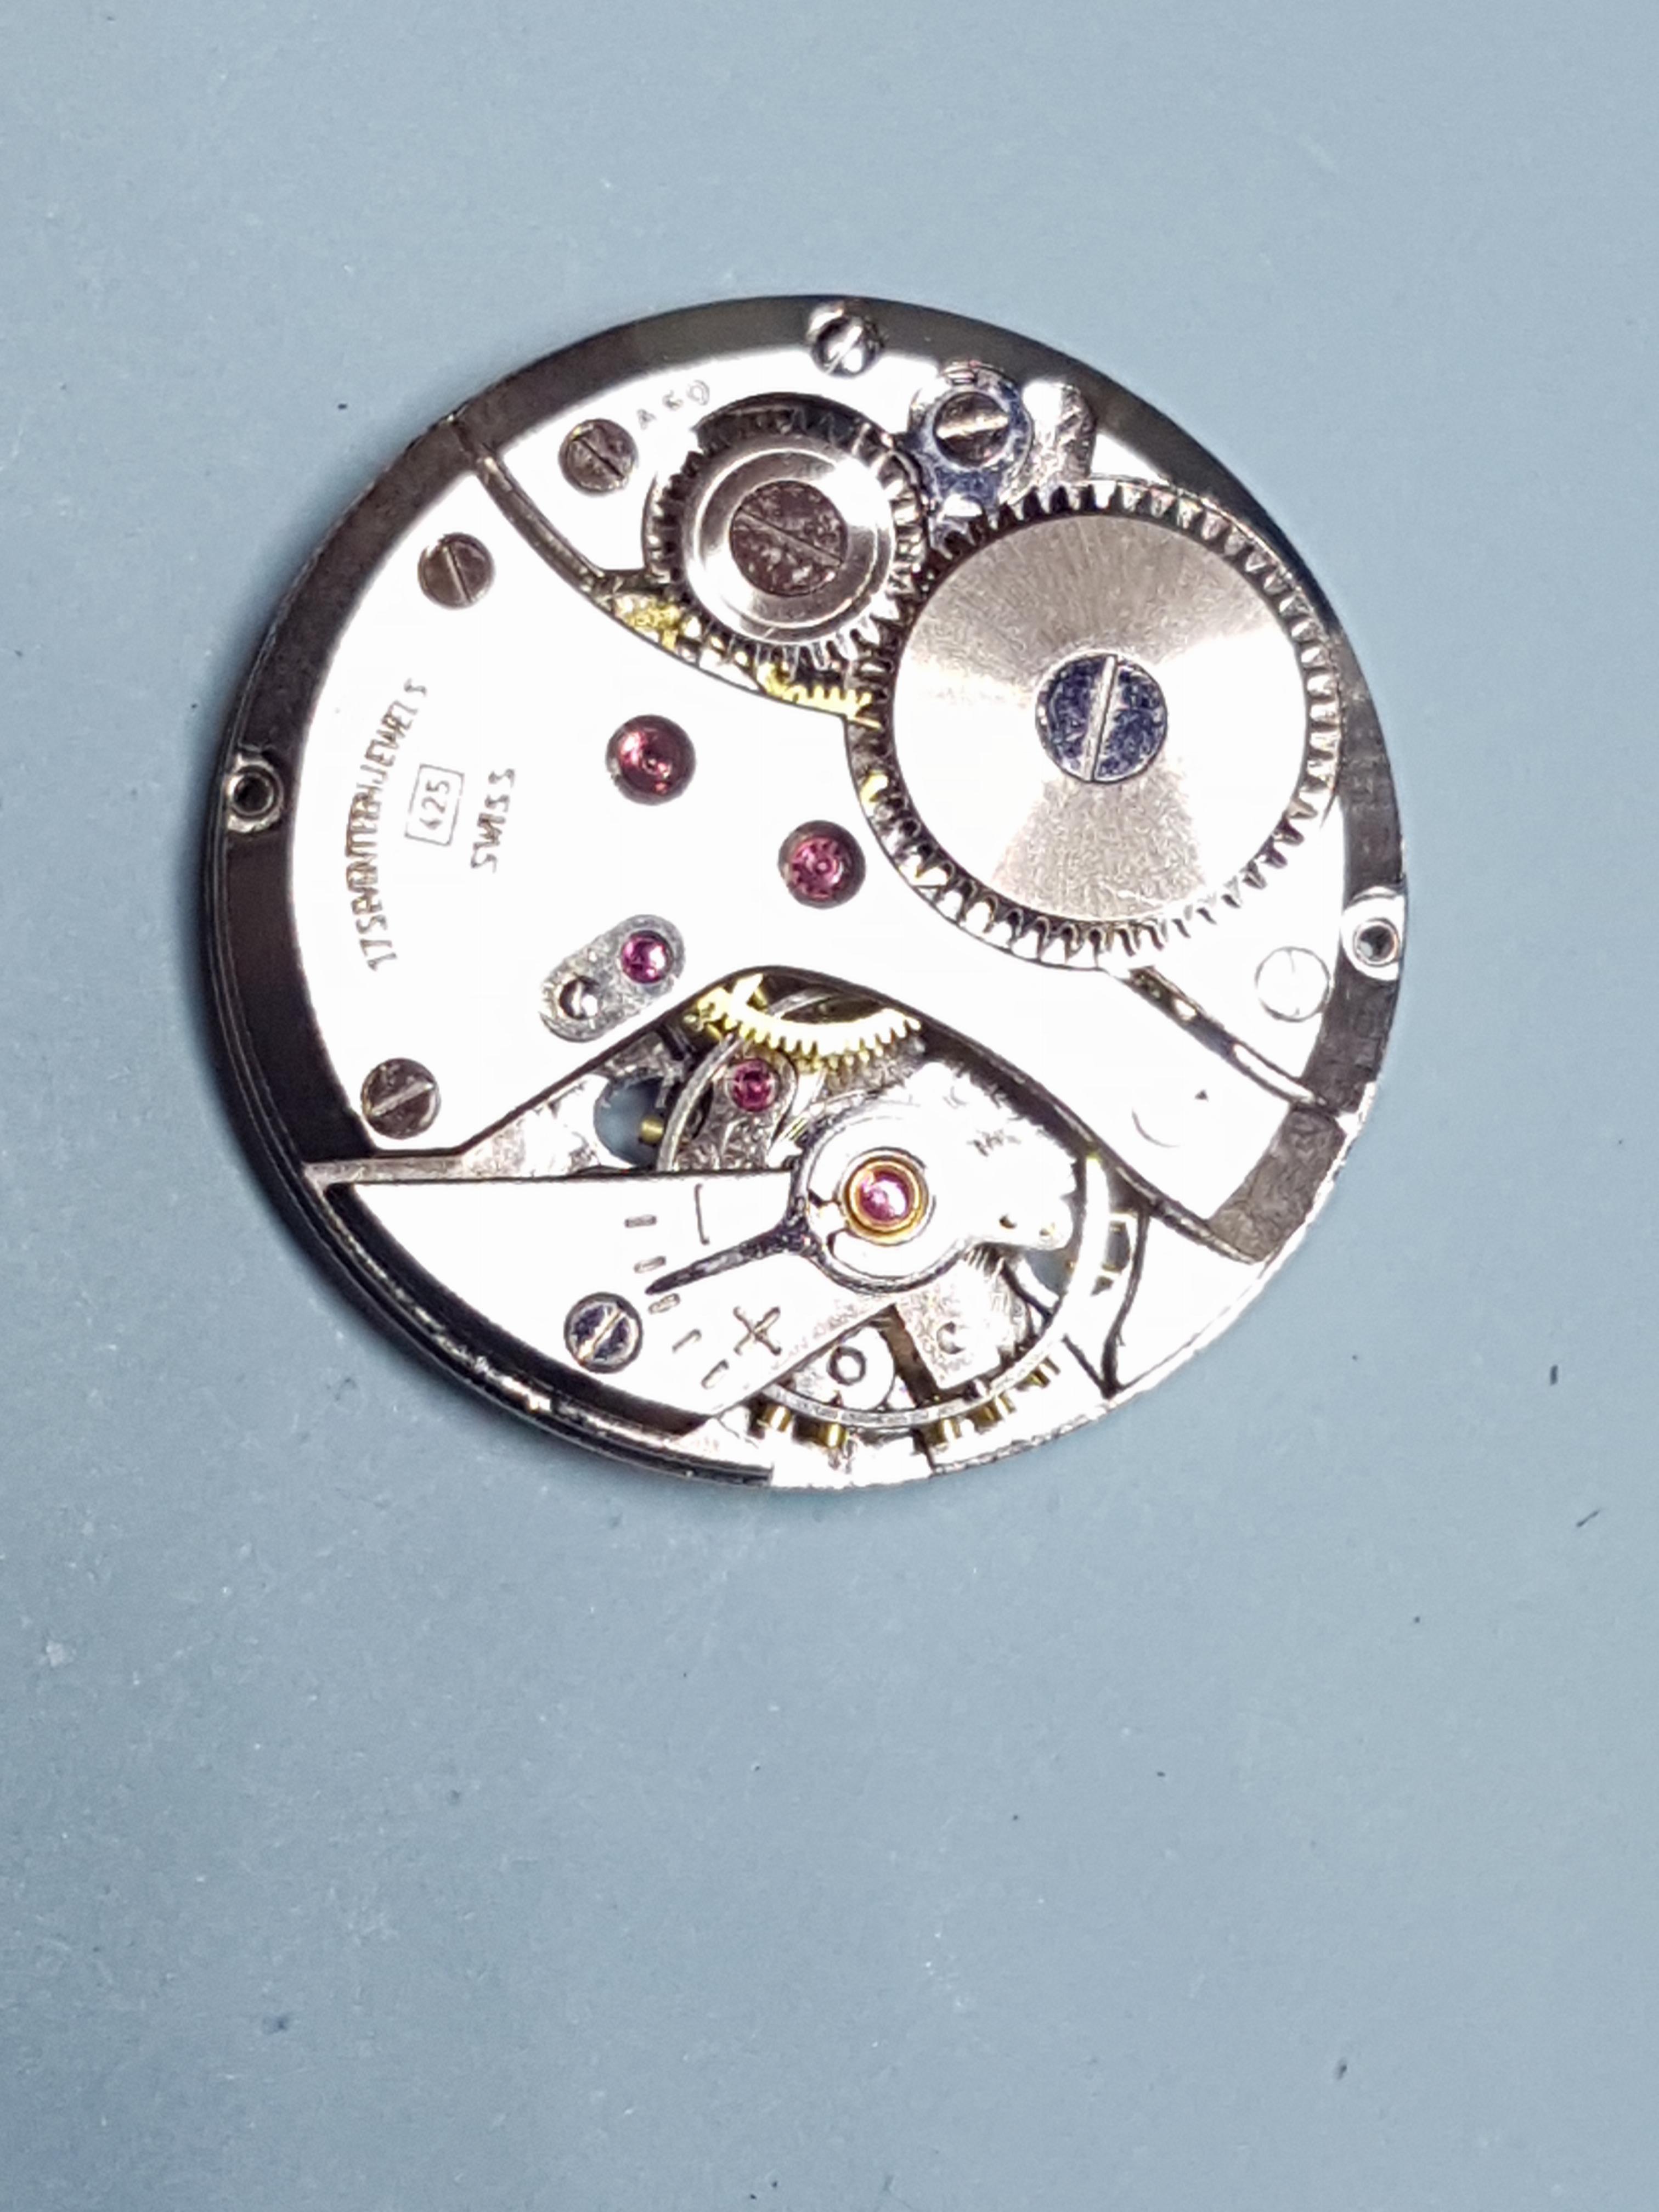
Thank you for your prompt replay. The watch is rotary 17 jewels incablock. The movement is Mark as A60 425. There is also a picture of the dial side which shows the normal no broken spring. The spring is that type that opens like a door. I apologise for my poor vocabulary of watch parts.

 1 point
 -
Hey Folks, thank you so much for really warm welcome. I'm blown away! Forgive for the generic reply as been swamped with work crap. I may have to retire to just keep up with the talk. Ha! Vich, loved your comments on retirement. LOL! Yeah, I think some people in my company think I've stopped working already too. I too have a 'knackered' knee but I try to pound out 40 minutes of walkin' in the hot California sun. Ugh. It would be nice if I could retro the guts of my Fitbit into an old vintage watch. I'd much rather wear something that had some class. dadistic, yeah, I'm finding it hard to retire. Workin' seems to give me some purpose. Though I can't fix pocket watches worth a **BLEEP** now, I can fix customer's e-mail problems and stuff so there's some reward in that. vinn3, LOL! Yeah, I marvel at Mark workin' on somebody's watch that's worth thousands of dollars. I can't imagine it. Love the gold pocket watches too but I can buy so much more junk if I buy the cheap stuff. Ha. Geo, is that a picture of your plane? My boss has a 1947 Luscombe. bobm12, Thanks! Yes, I'm queuing up on the watch projects. Ha! Watched Mark replace a jewel... he makes everything so damn easy looking. The first one I try has the broken off pivot in it. Grrr.... Cad101, for sure, for sure I believe you're spot on with the bottomless pit. "Just one more...", that's what I keep saying. Of course everyone is project. oldhippy, LOL! I have another friend that tells everybody that too. He's into trains. clockboy, thanks a million for the welcome. Yeah, I got a ton of questions. Takes time to get them all documented and then of course checking to see if one is repeating a question answered. RyMoeller, thanks for shout! You're just down the road from me. That's kinda cool! So with all that, I'm goin' to leave you guys with this fortune that came up one of my Linux machines. ---- Everthing is farther away than it used to be. It is even twice as far to the corner and they have added a hill. I have given up running for the bus; it leaves earlier than it used to. It seems to me they are making the stairs steeper than in the old days. And have you noticed the smaller print they use in the newspapers? There is no sense in asking anyone to read aloud anymore, as everbody speaks in such a low voice I can hardly hear them. The material in dresses is so skimpy now, especially around the hips and waist, that it is almost impossible to reach one's shoelaces. And the sizes don't run the way they used to. The 12's and 14's are so much smaller. Even people are changing. They are so much younger than they used to be when I was their age. On the other hand people my age are so much older than I am. I ran into an old classmate the other day and she has aged so much that she didn't recognize me. I got to thinking about the poor dear while I was combing my hair this morning and in so doing I glanced at my own reflection. Really now, they don't even make good mirrors like they used to. Sandy Frazier, "I Have Noticed"1 point