Leaderboard


Popular Content
Showing content with the highest reputation on 07/14/16 in all areas
-
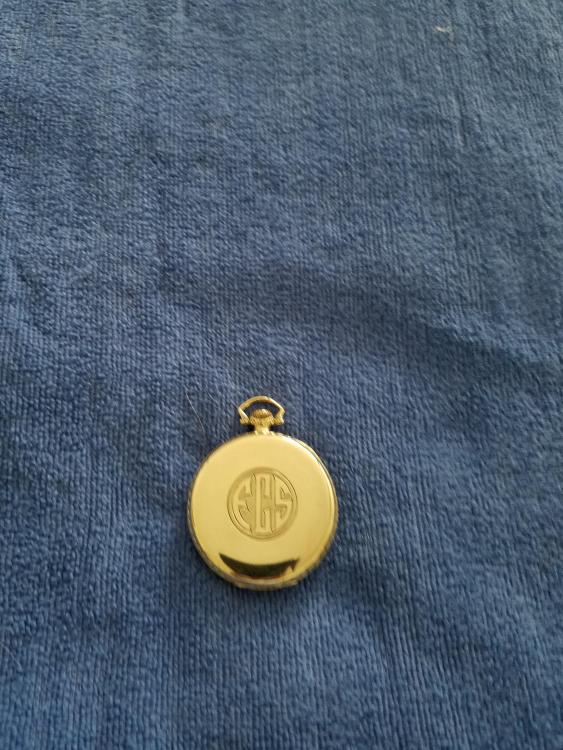
LoL.. it is worth $7 wholesale but he is a customer and he wants it repaired! I am charging him a hefty price for the repair, but he is willing to pay so what ever the customer wants, we all have rent and bills to pay[emoji6]3 points
-
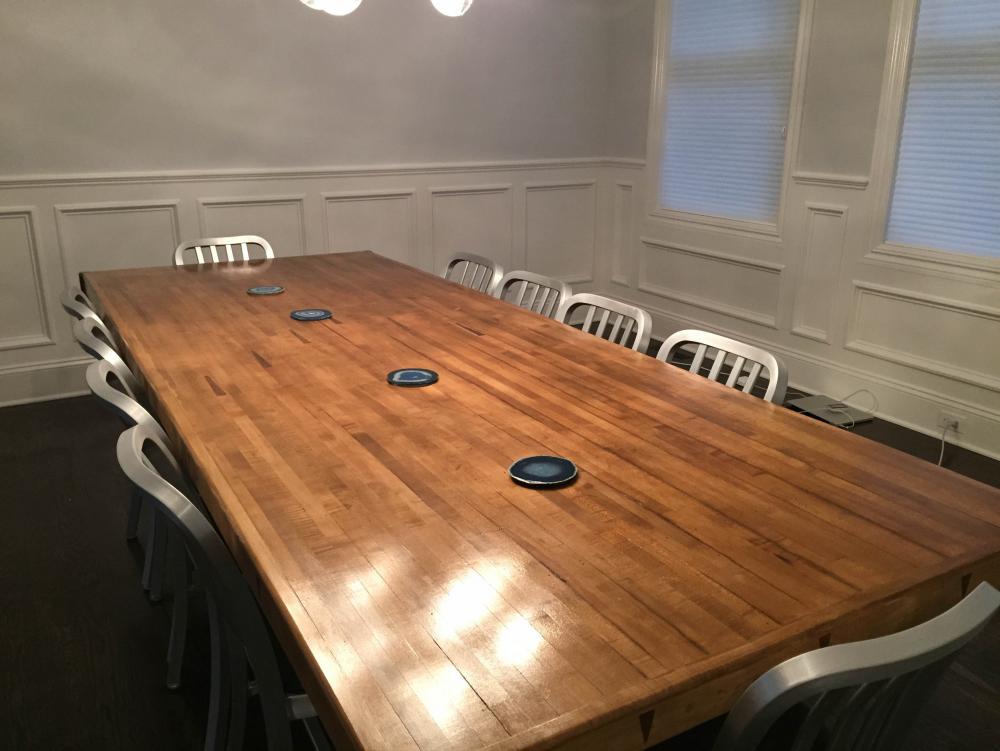
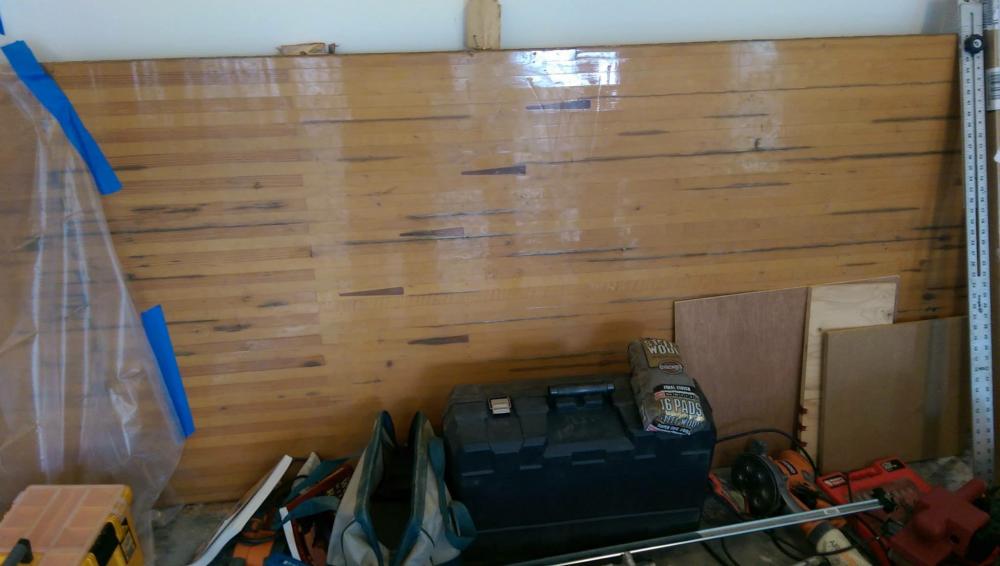
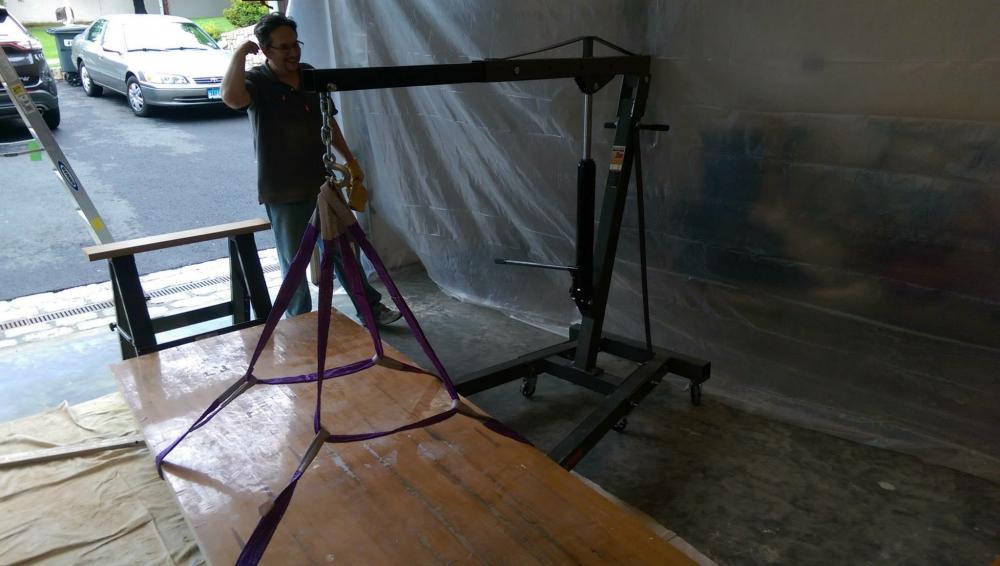
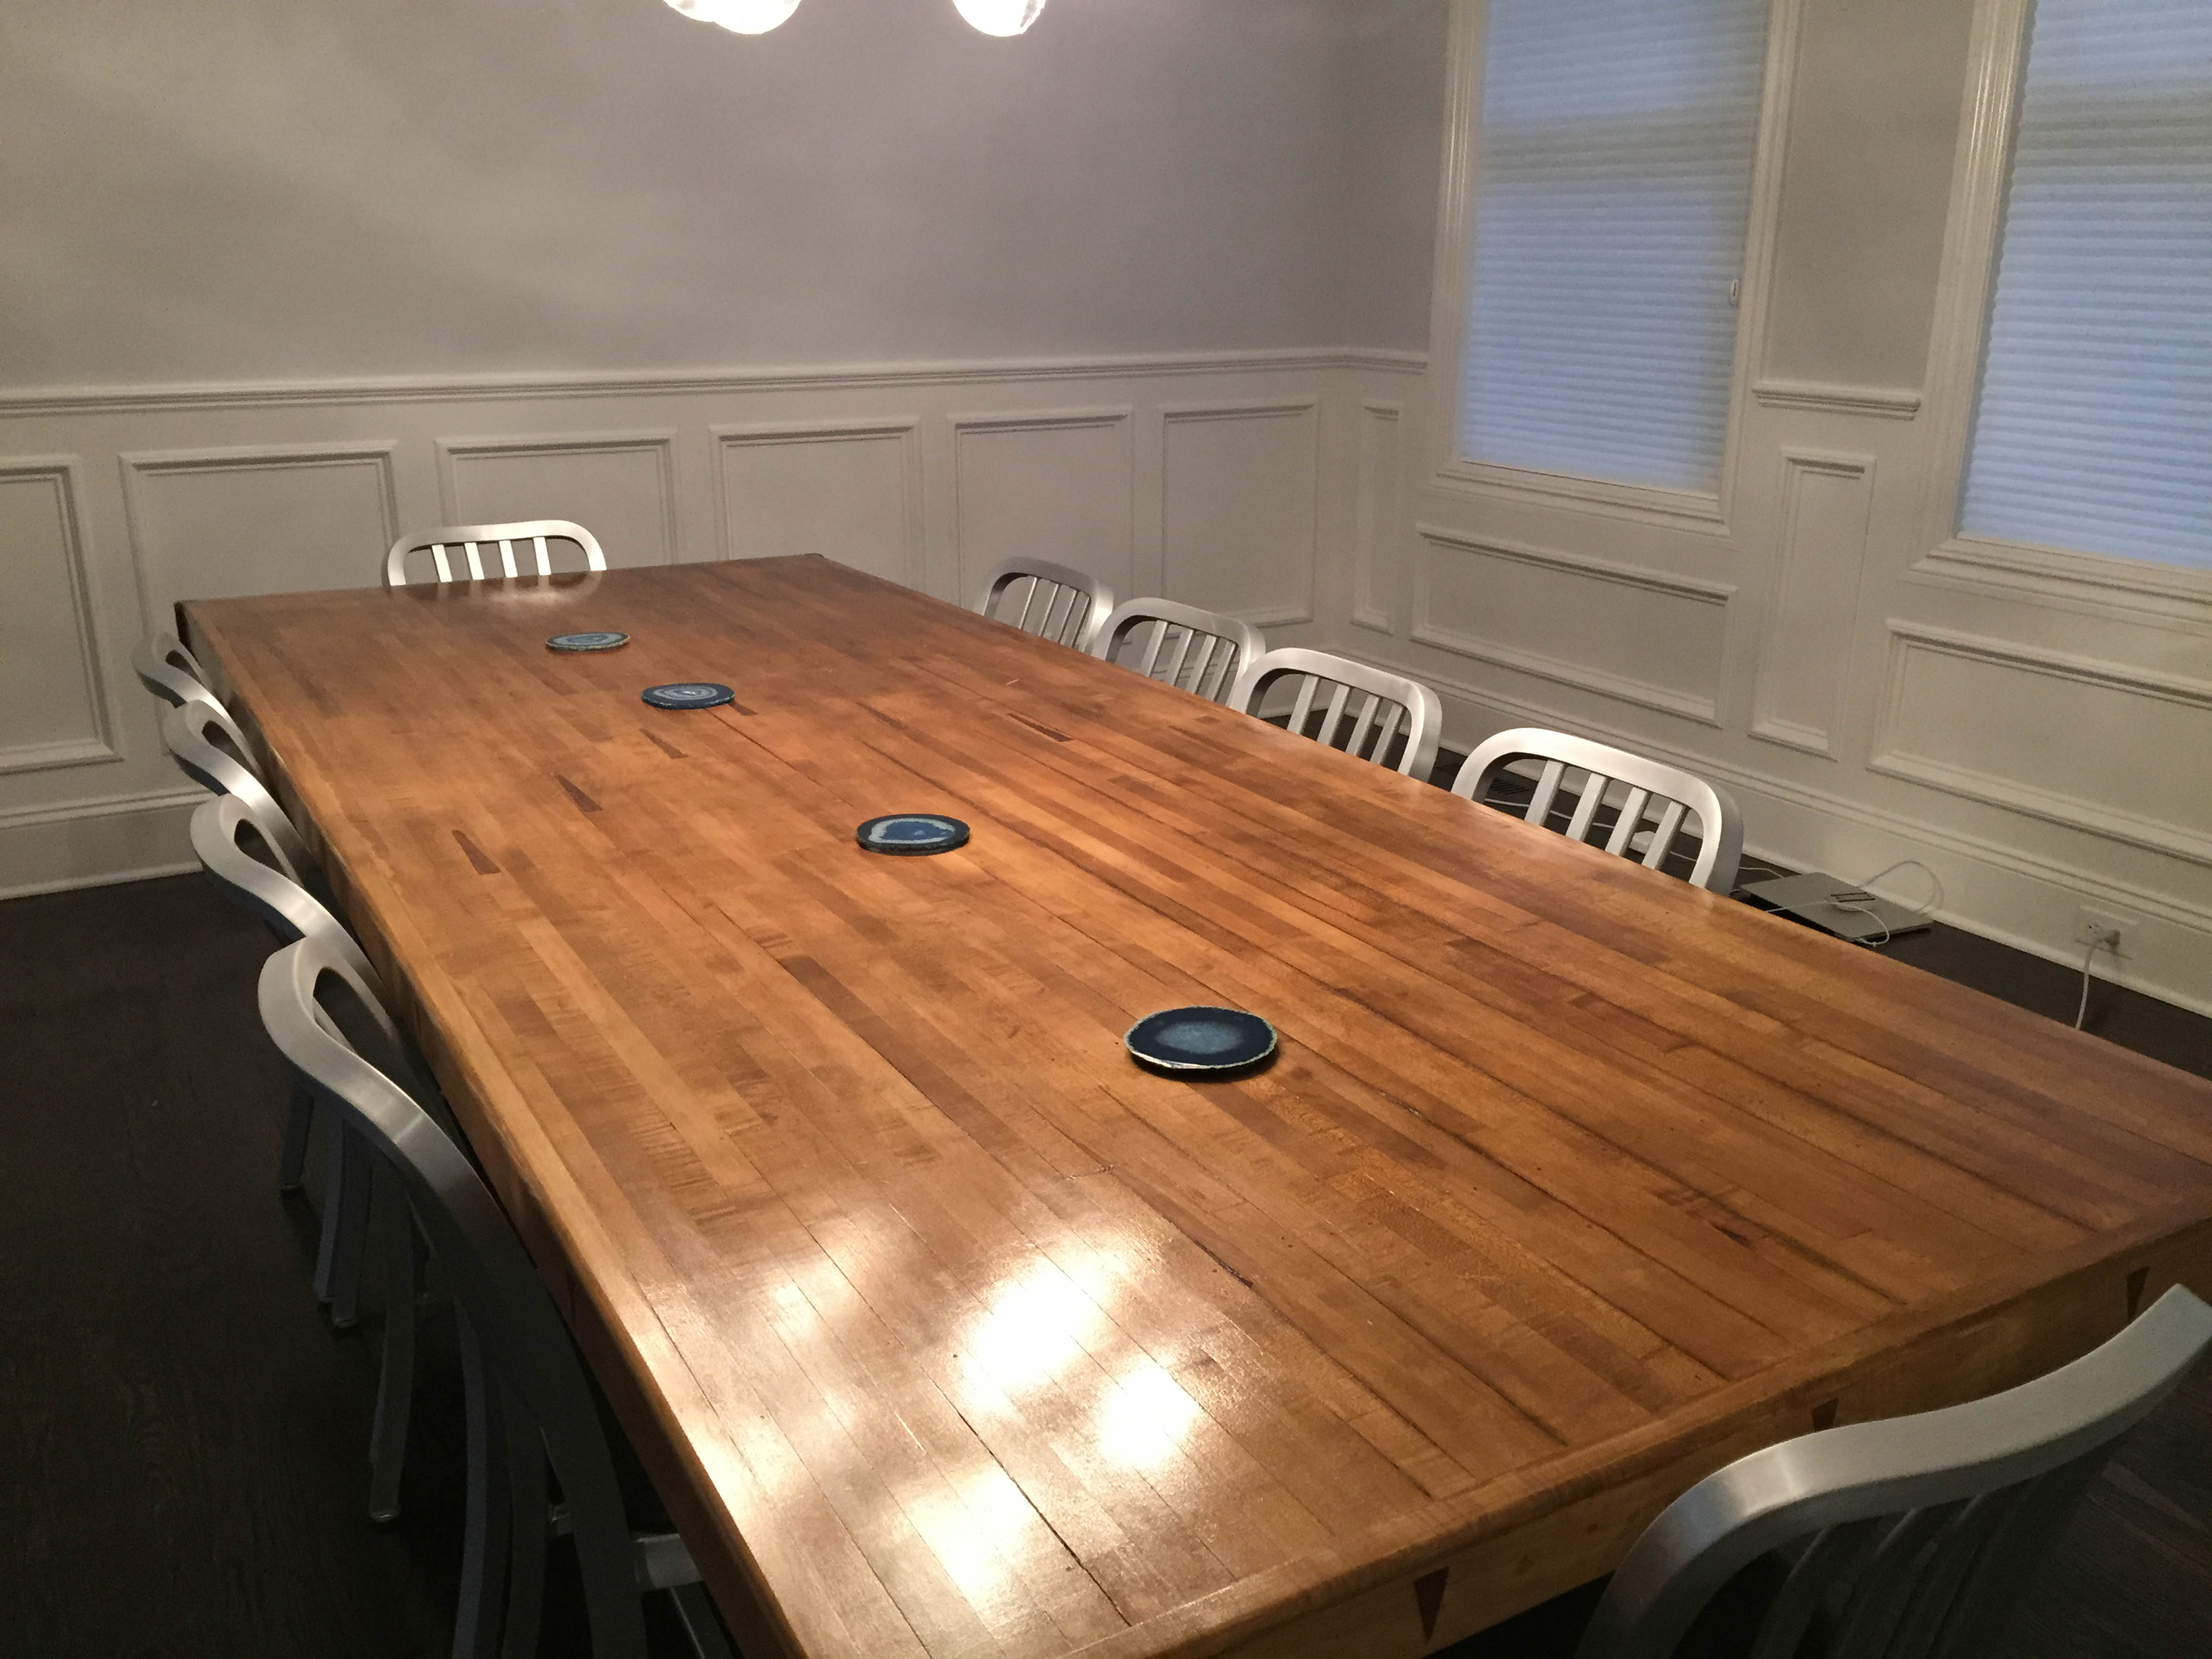
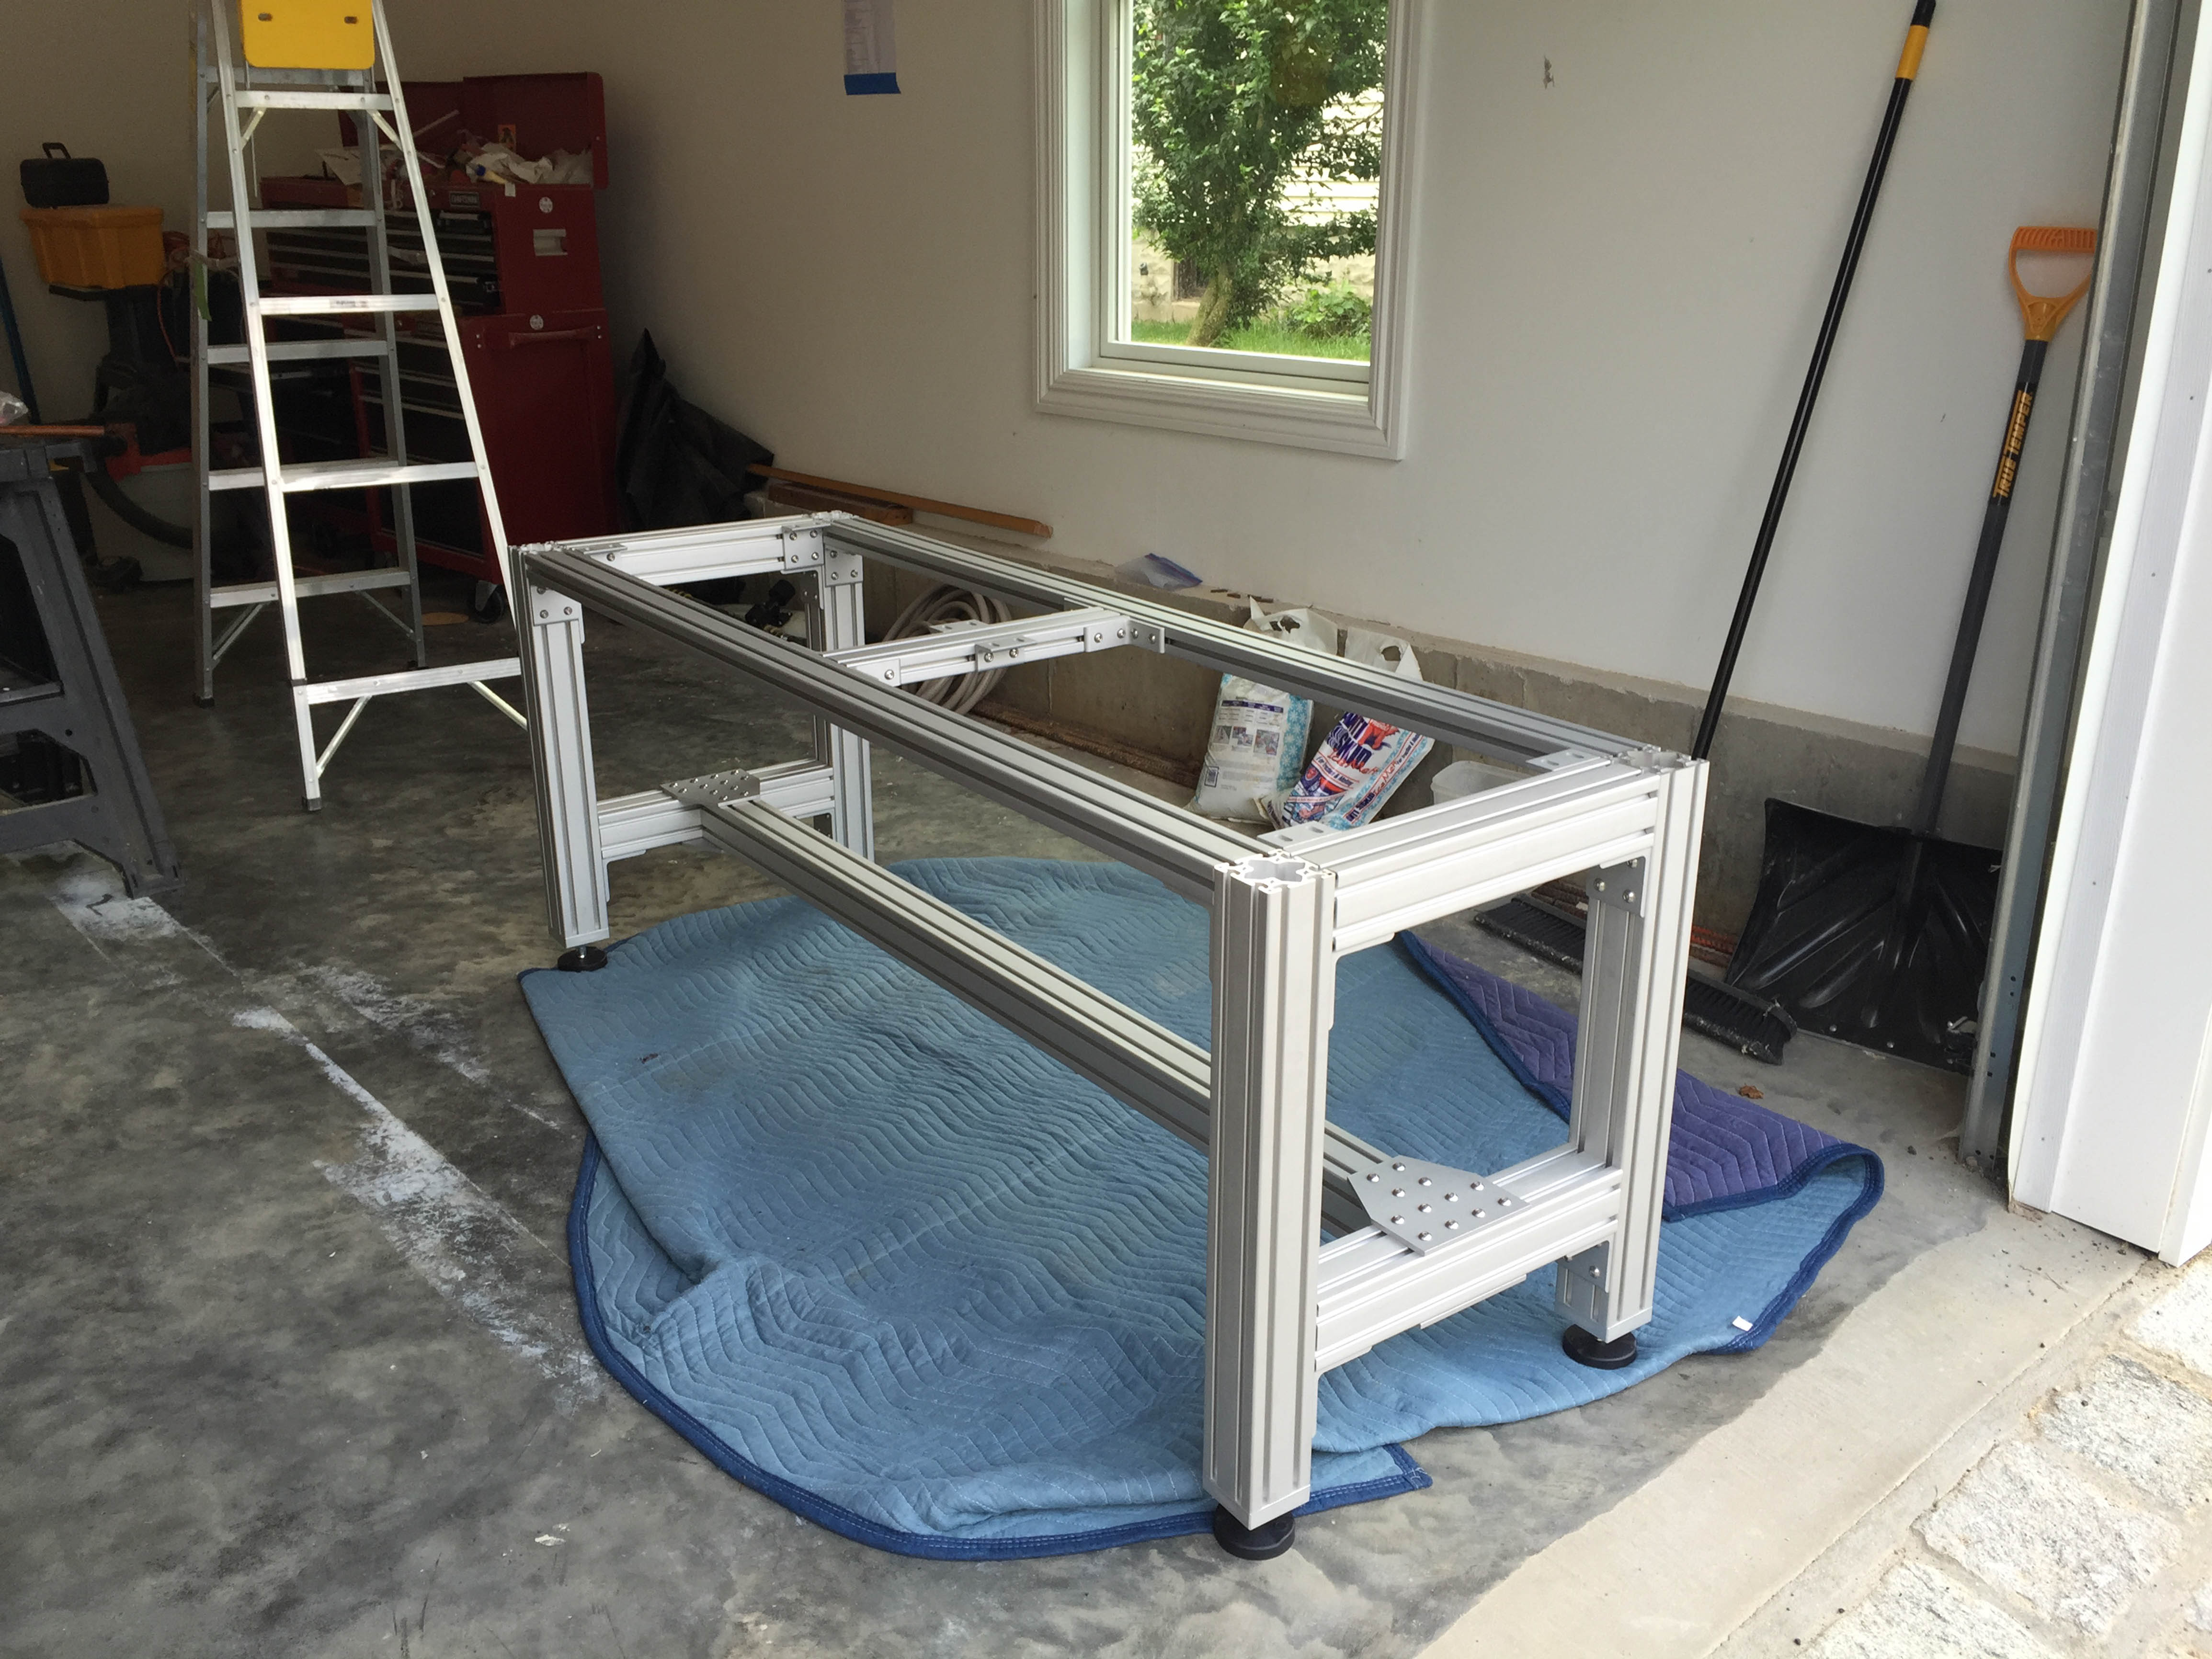
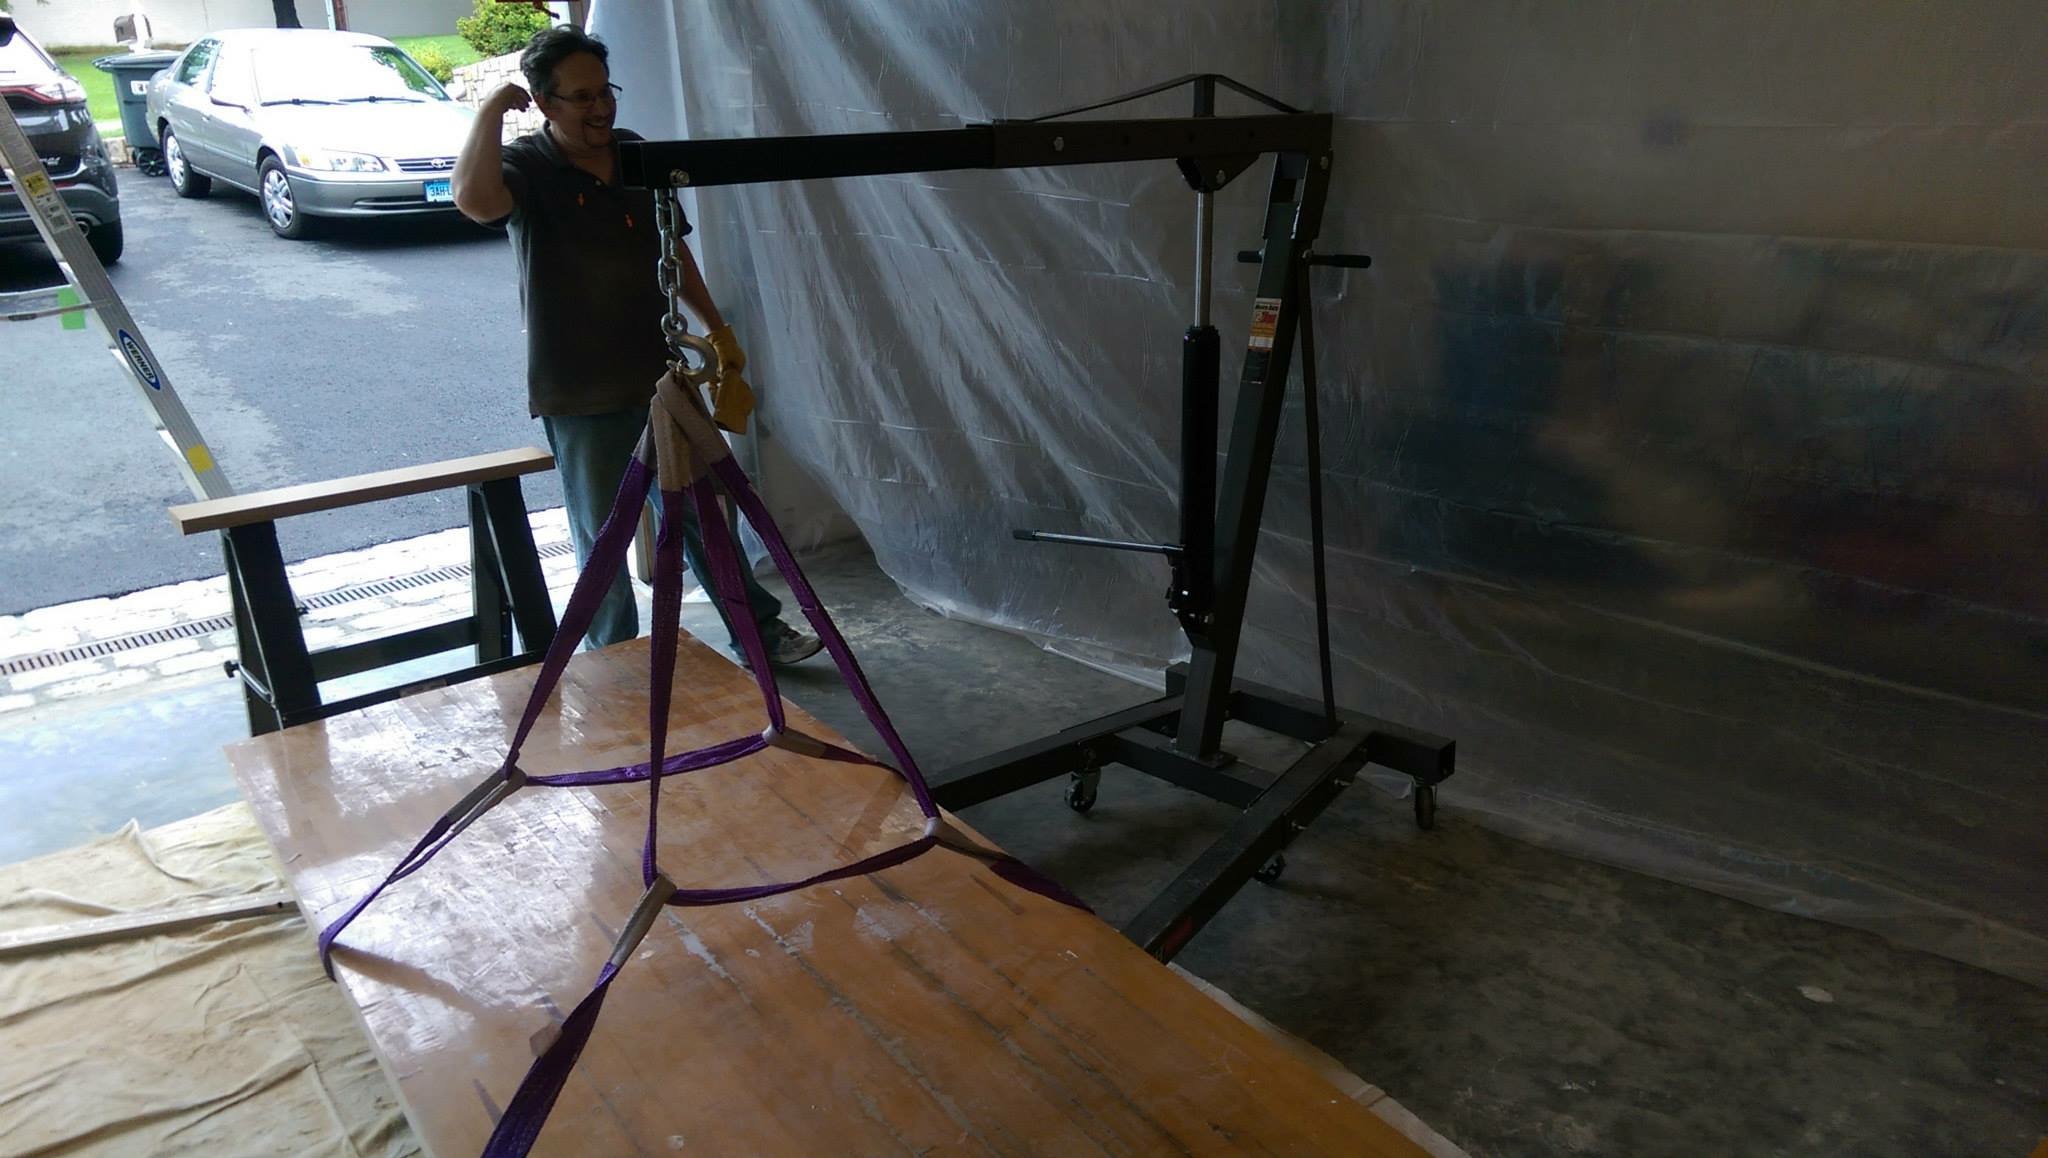
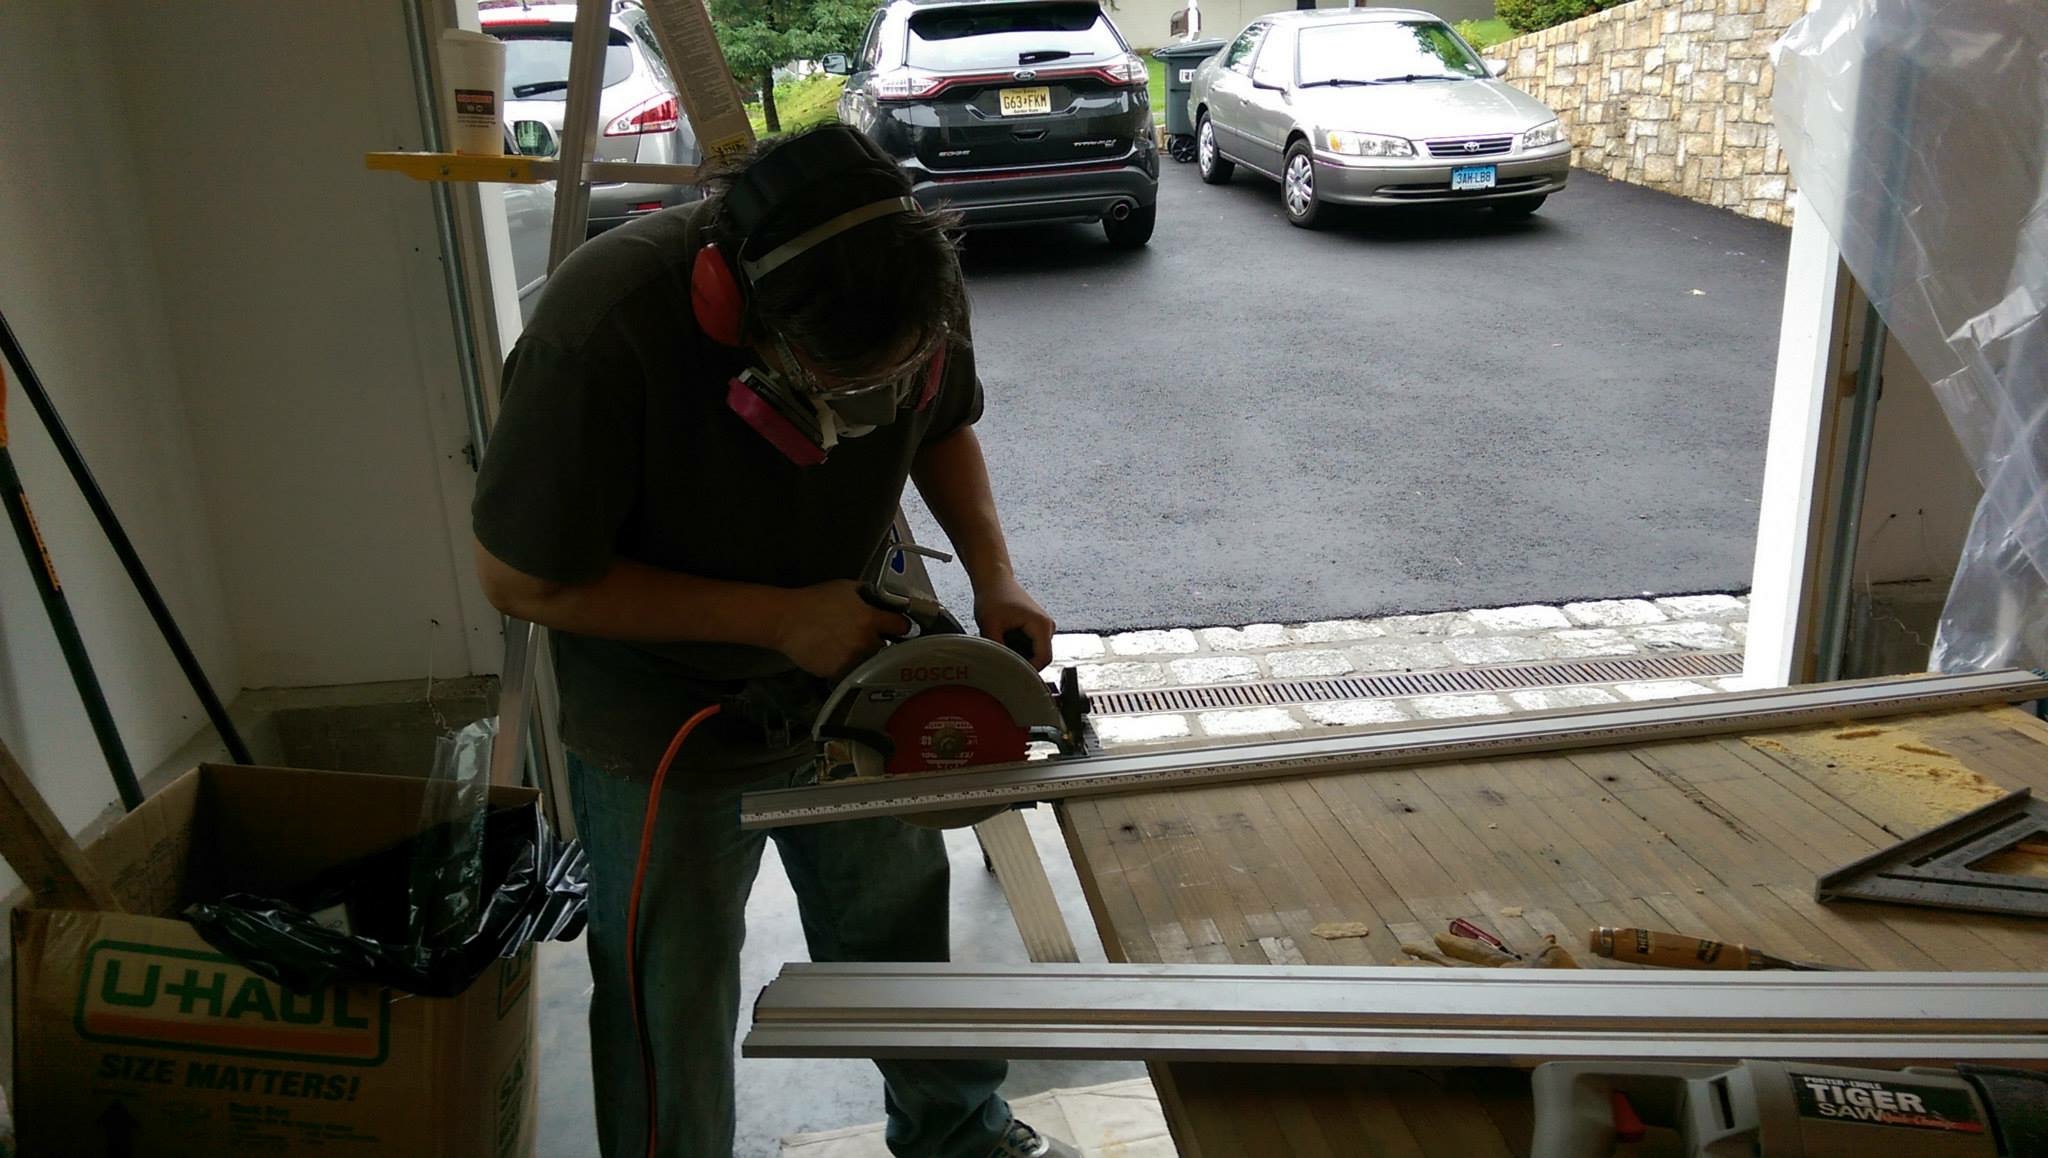
A little off topic, but since you mentioned dining tables - here are a few shots of mine - which I crafted from this reclaimed 9 foot section of bowling lane. 2.5 inches of solid maples for the first 7 feet. On the left you can see the "splice" where it transitions to pine. The arrows are inlaid walnut. The engine crane I needed to lift this -- the wood weights about 350 pounds. Lots of sanding and finishing: The extruded aluminum base - weights 120 pounds And the finished product:

 2 points
 -
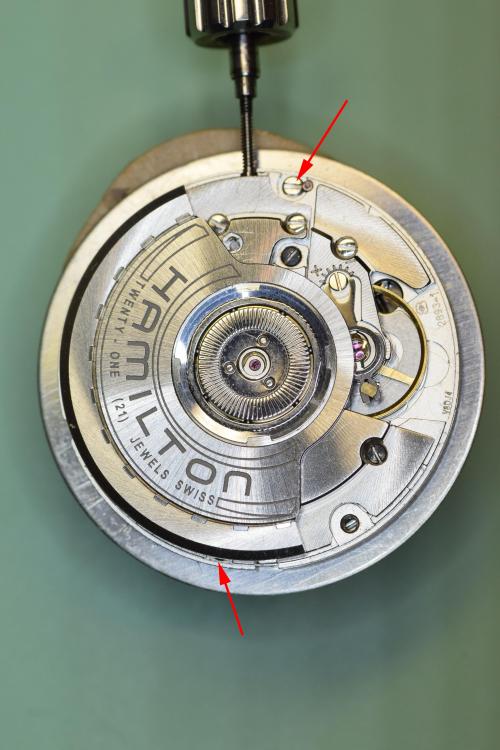
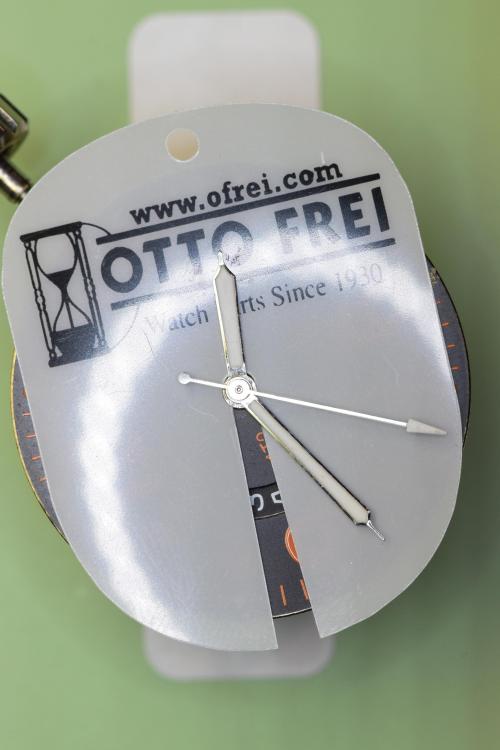
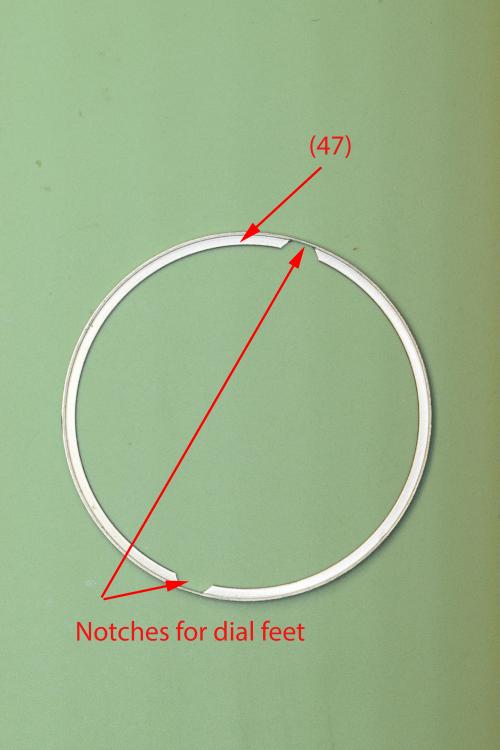
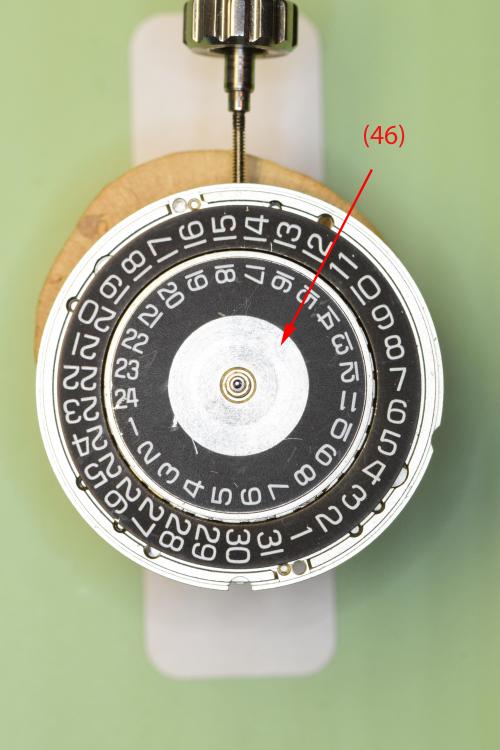
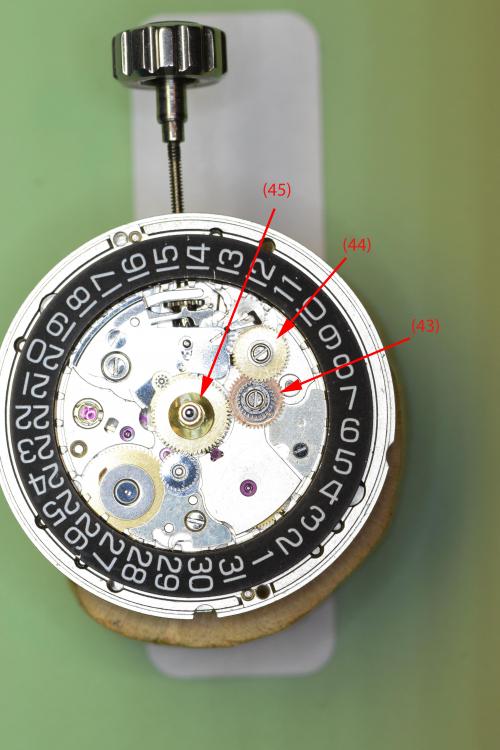
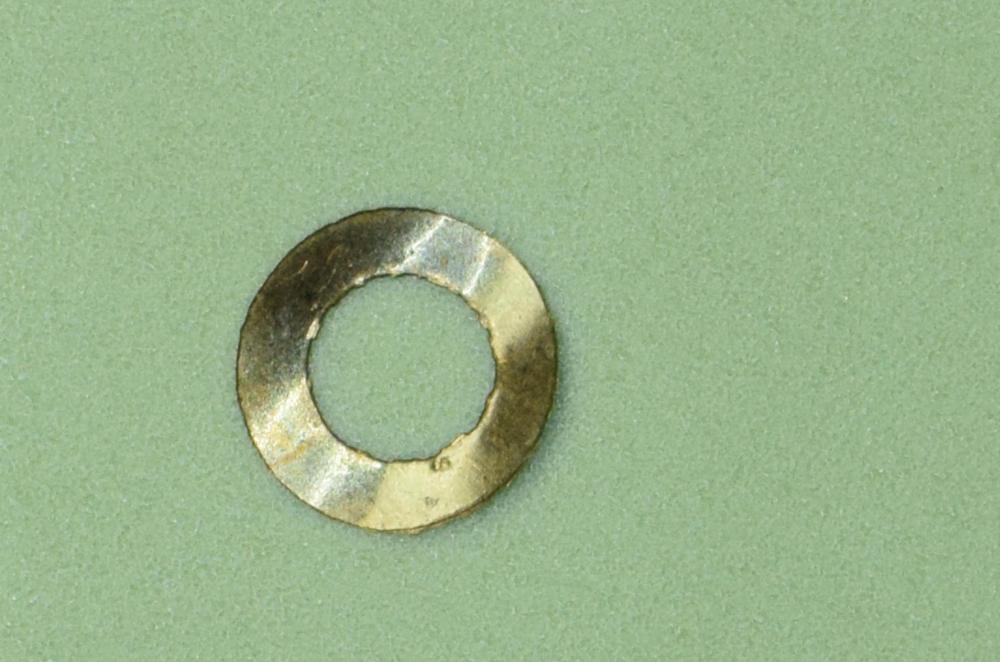
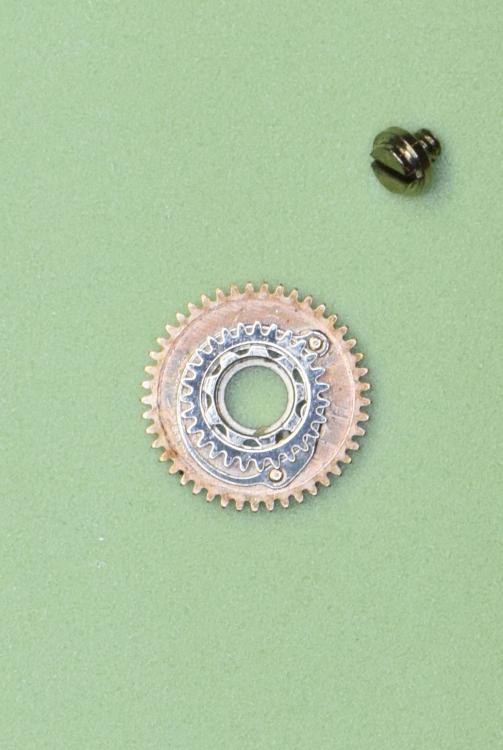
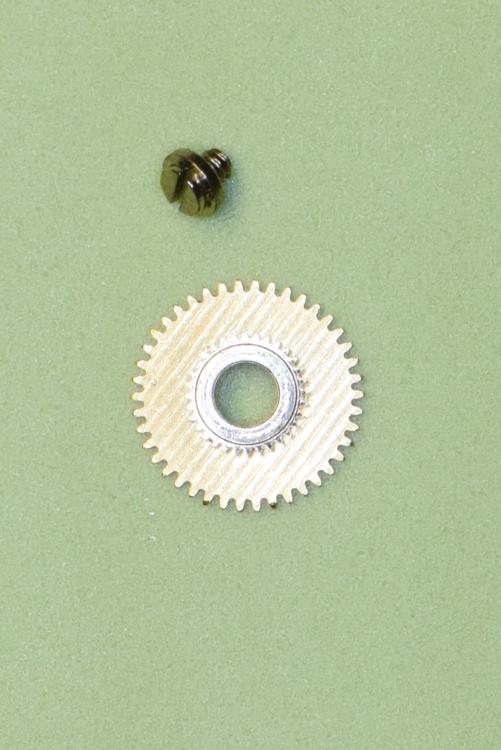
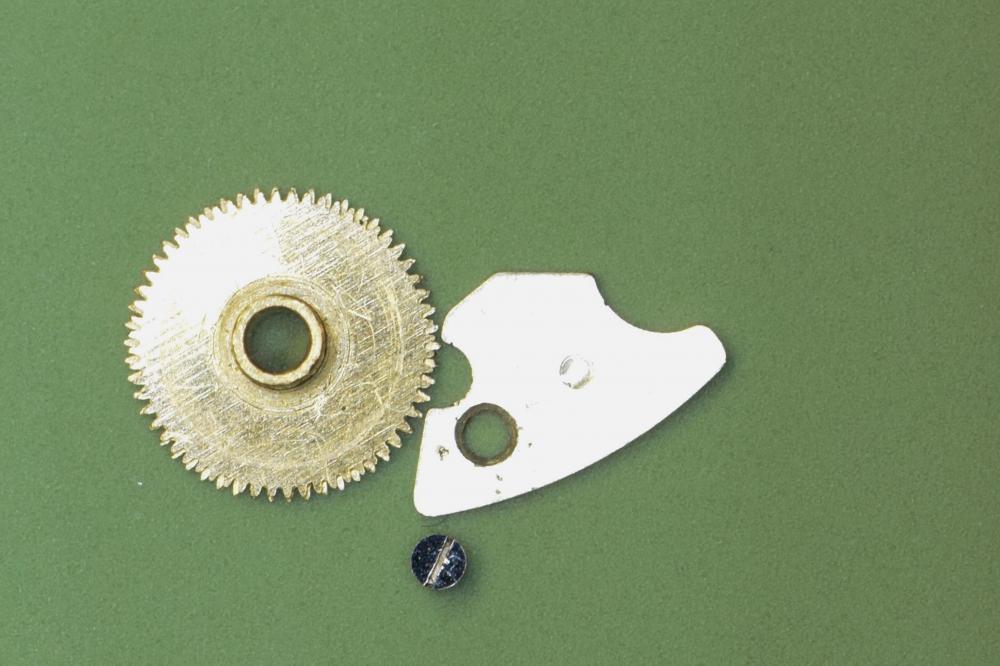
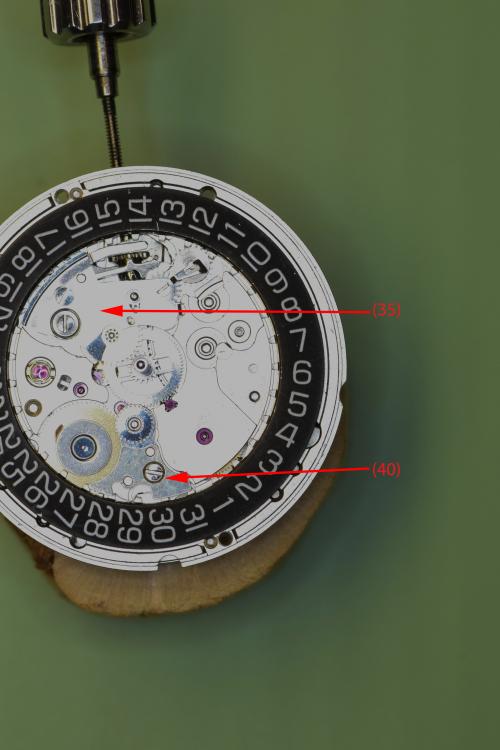
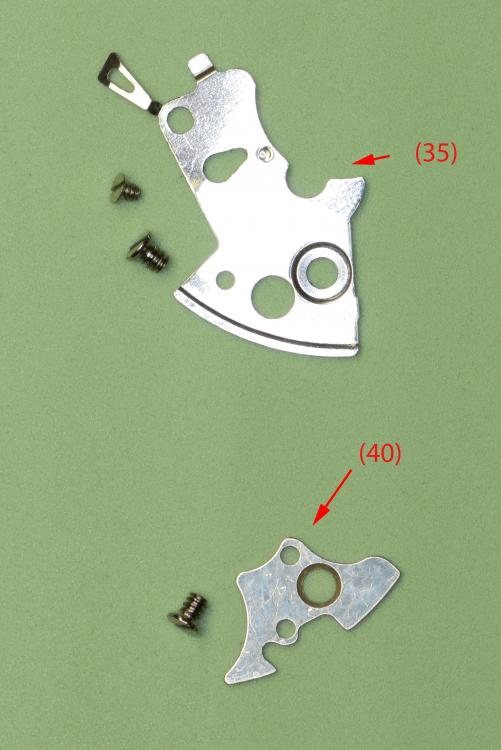
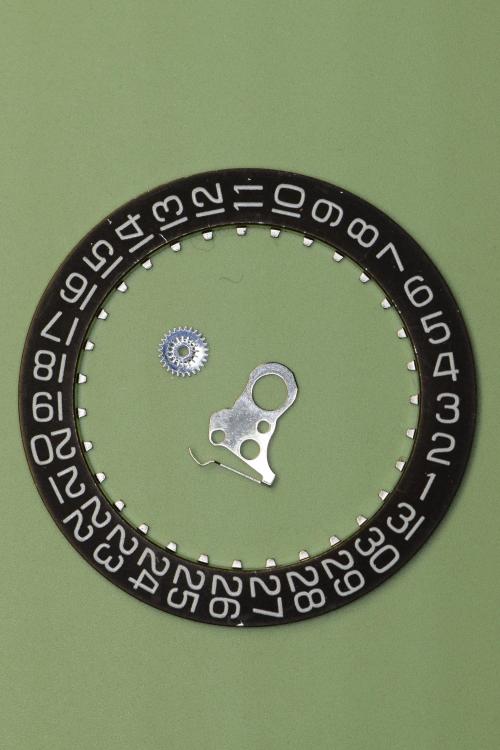
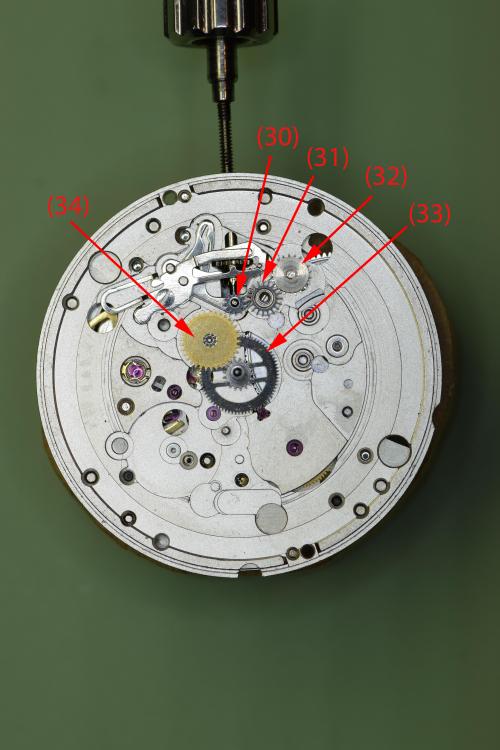
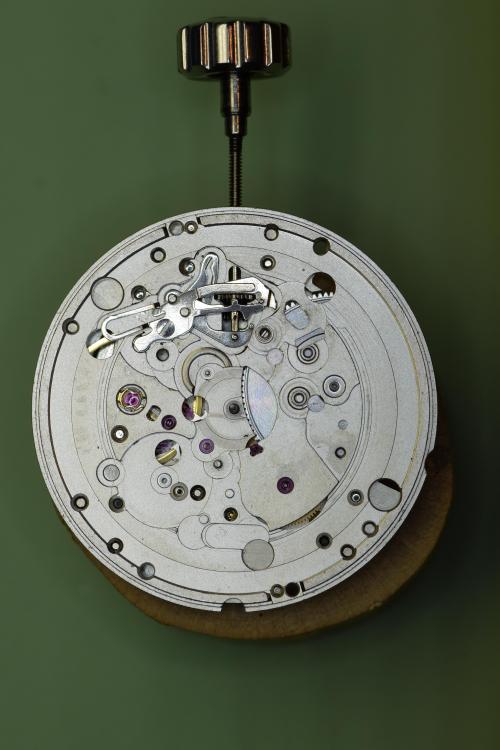
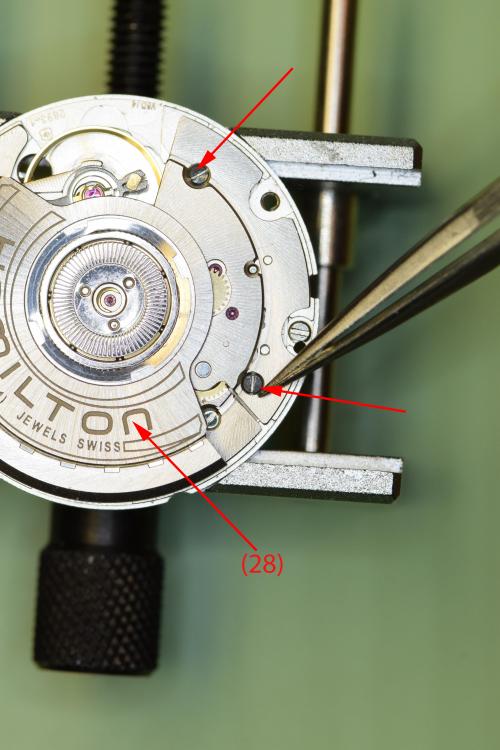
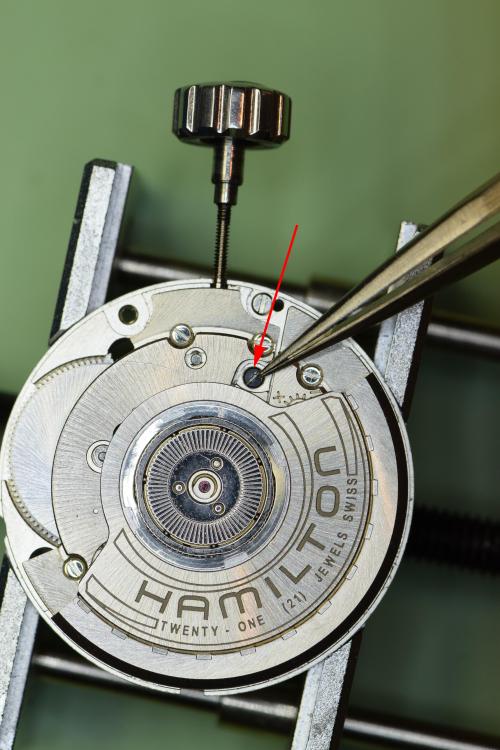
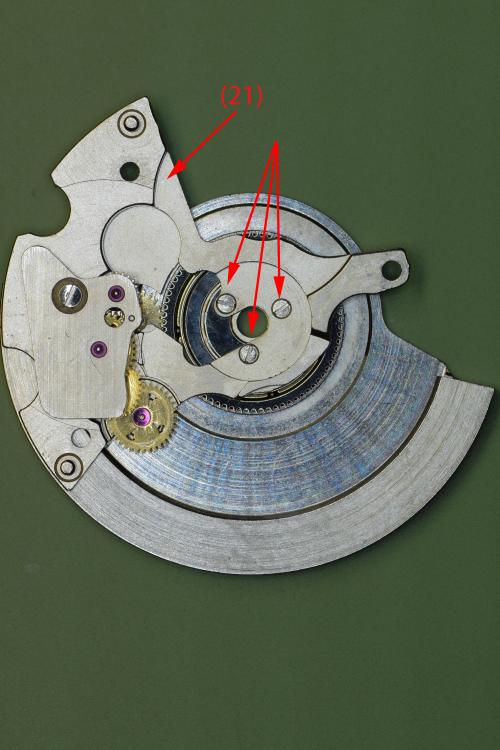
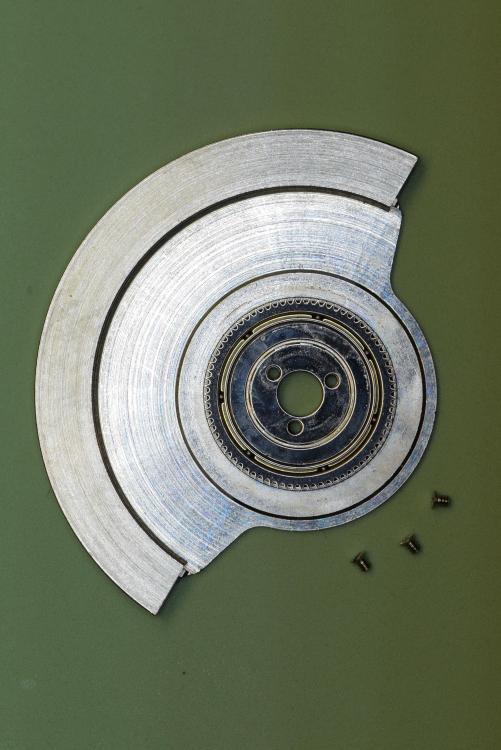
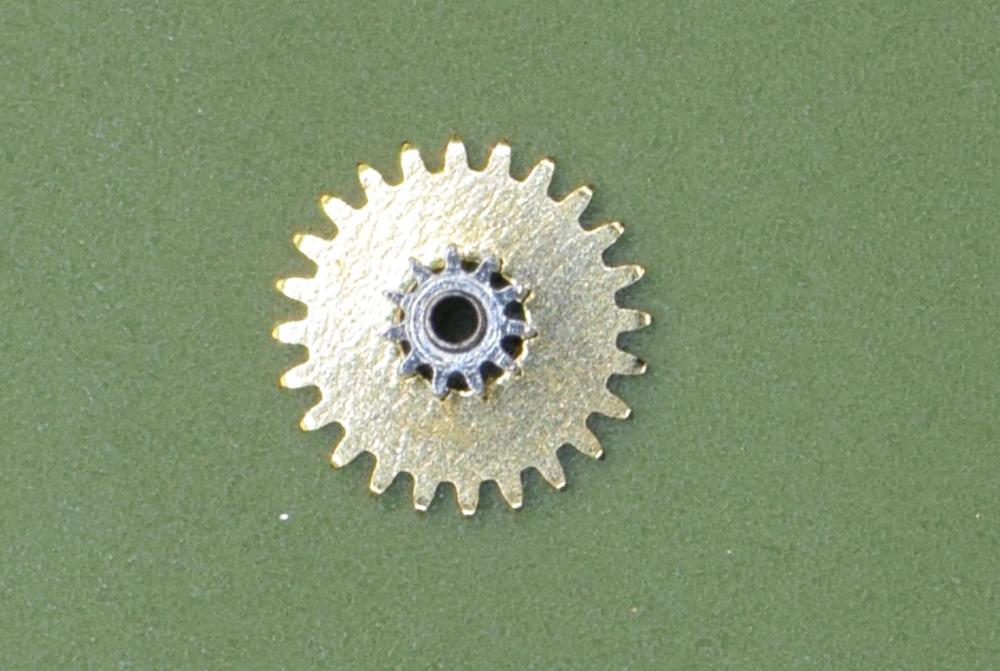
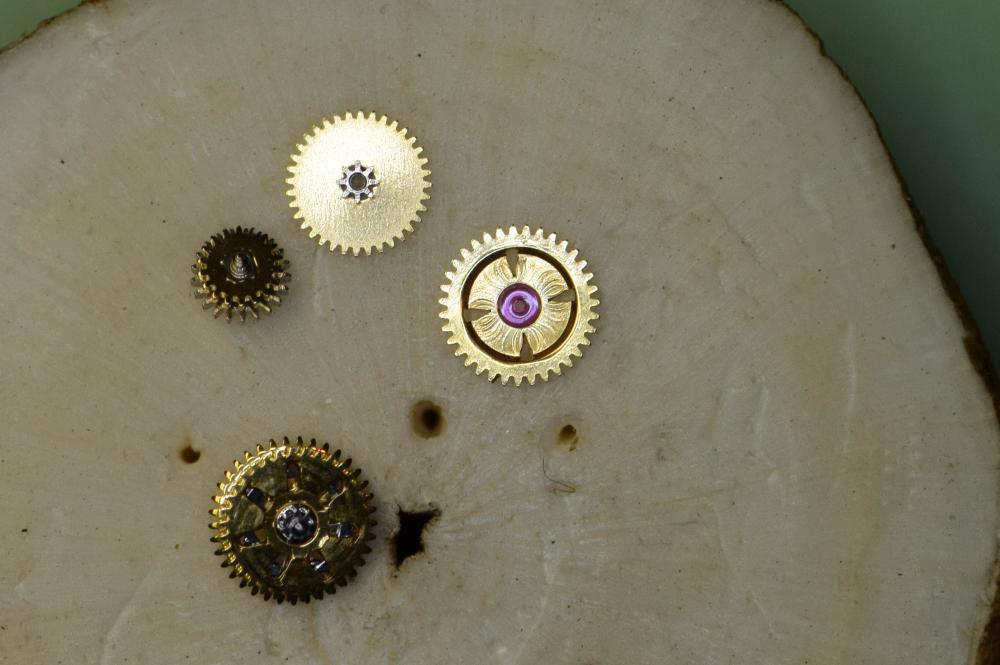
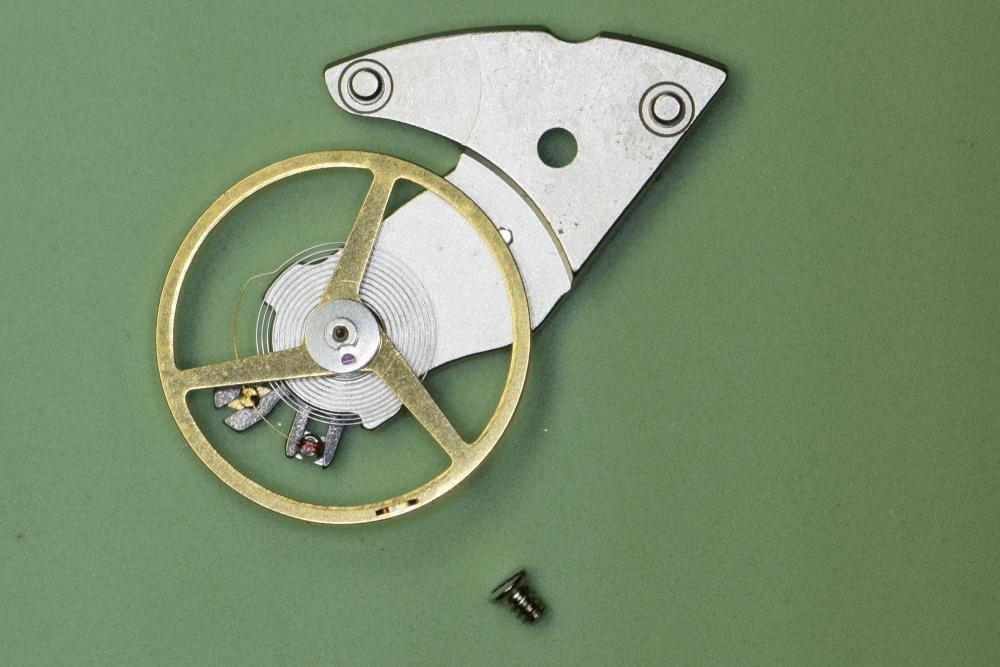
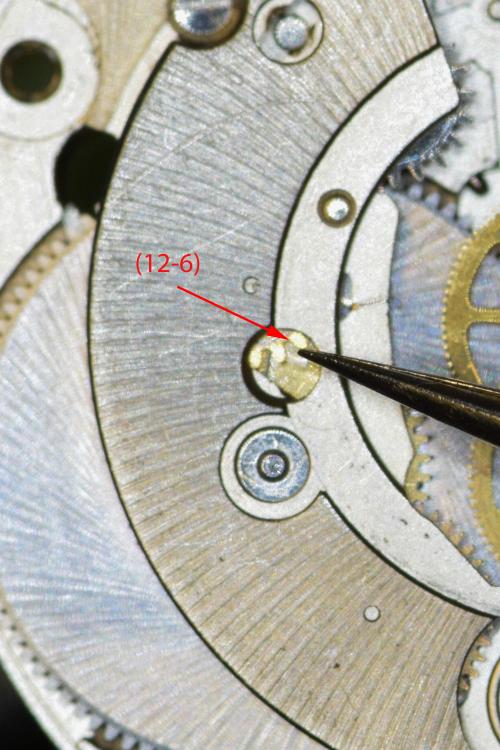
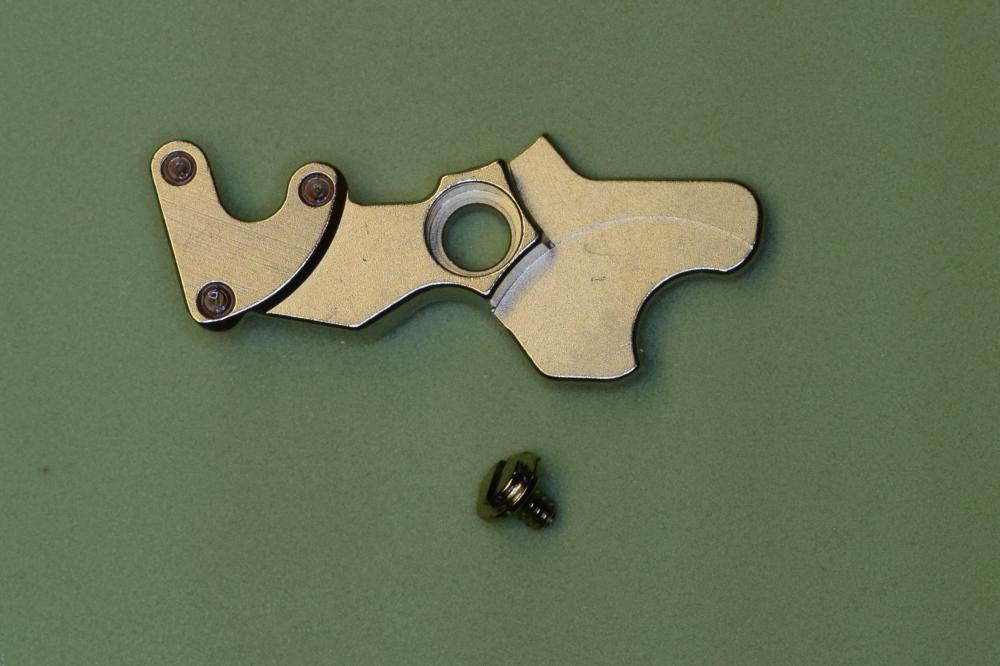
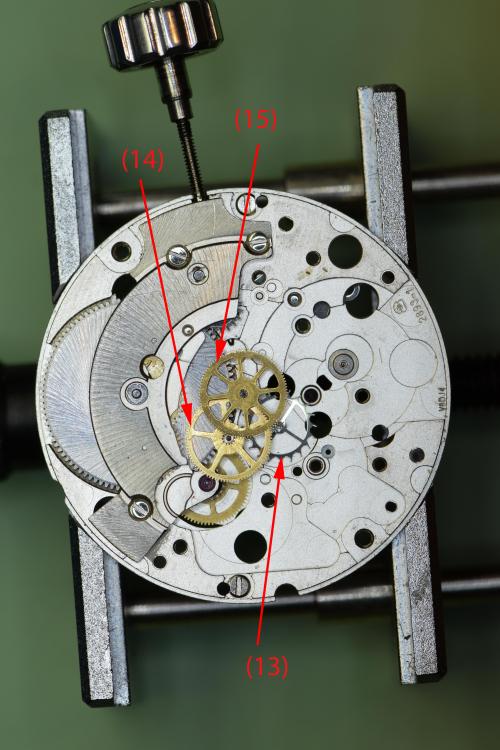
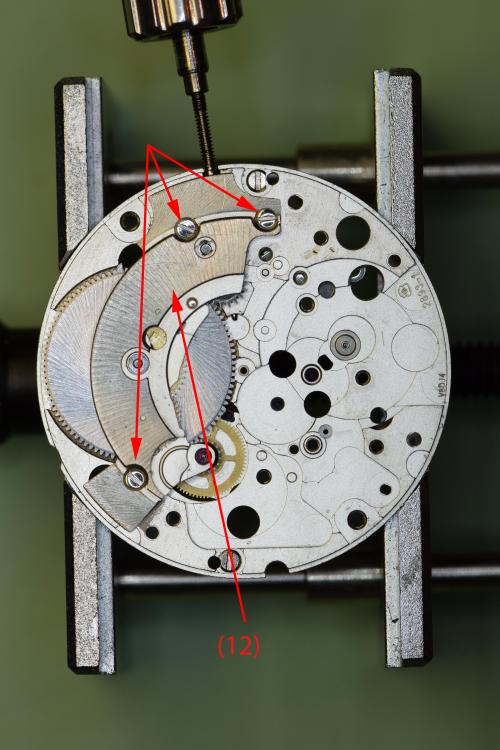
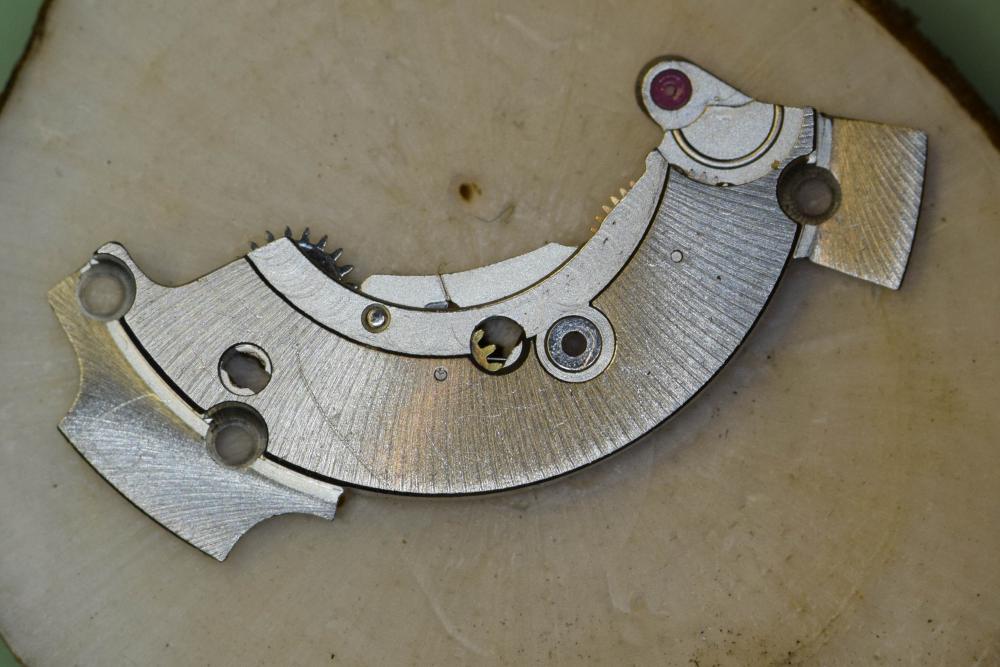
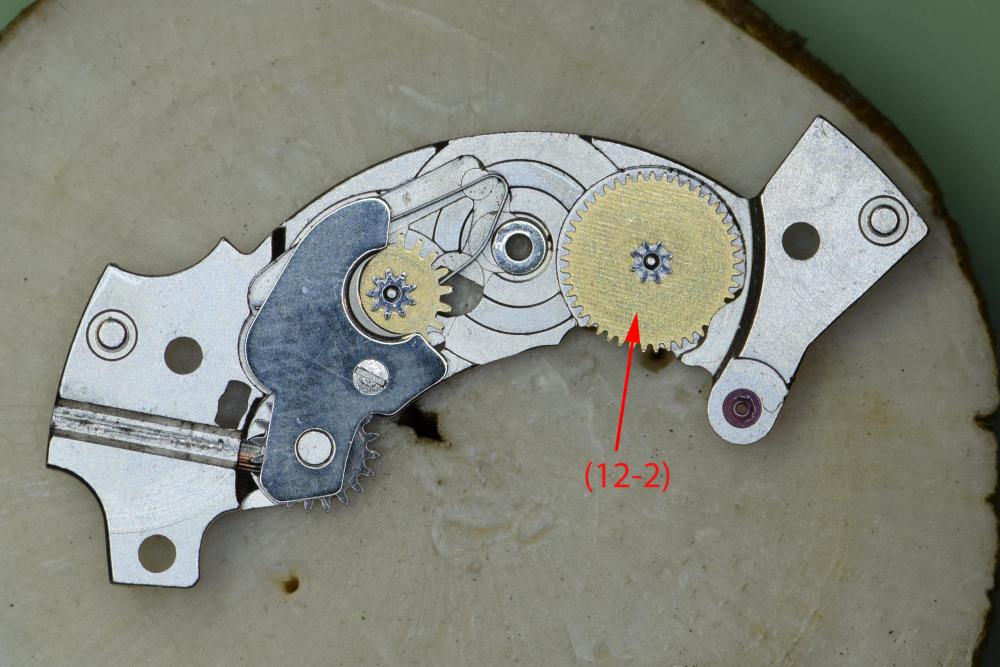
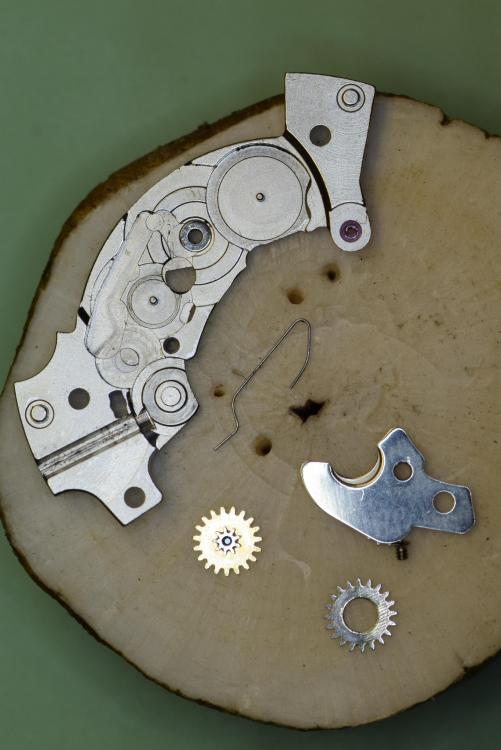
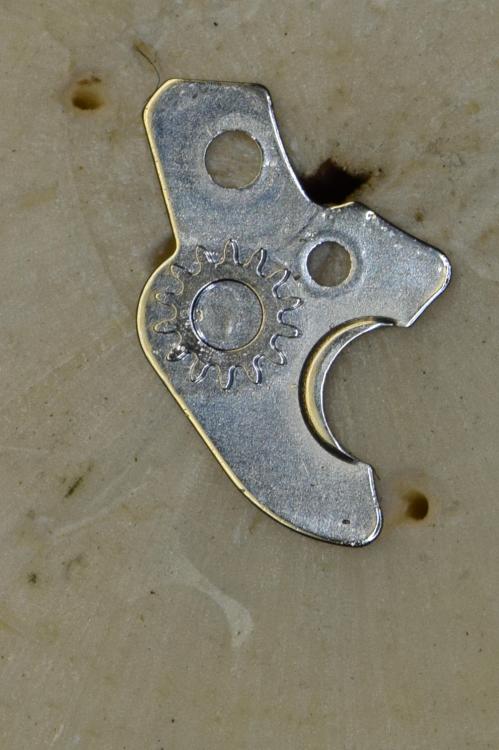
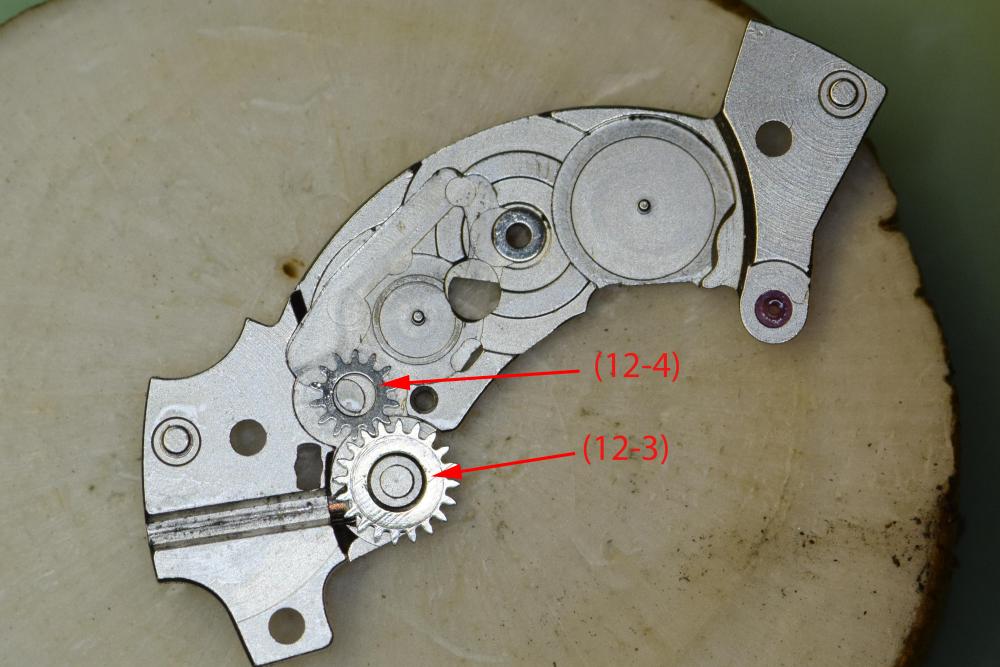
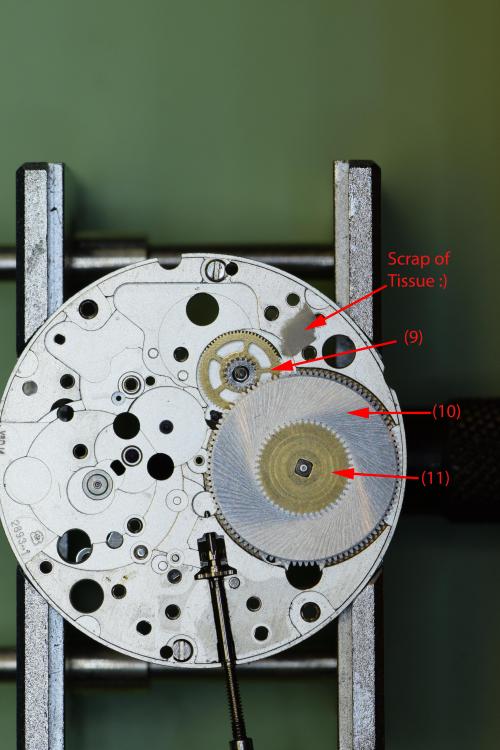
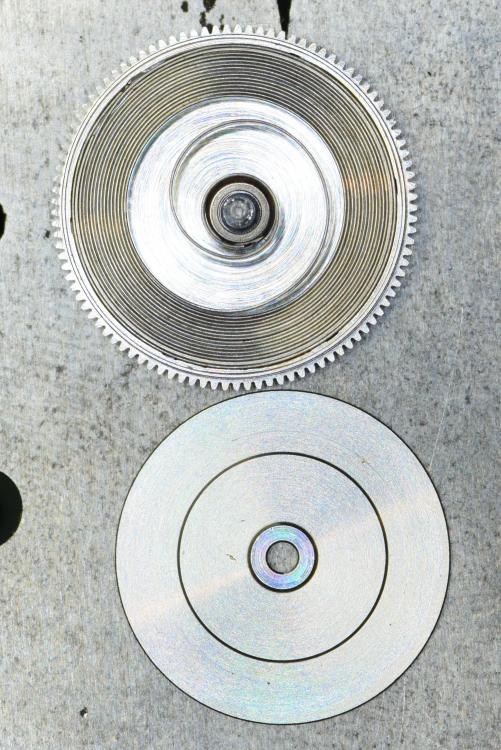
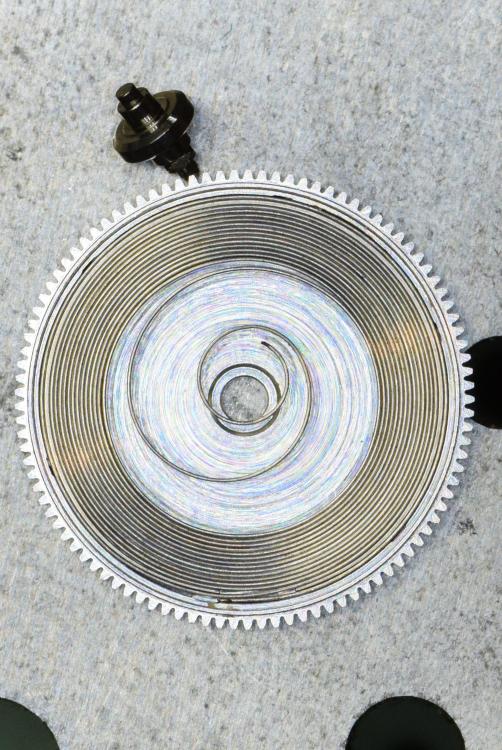
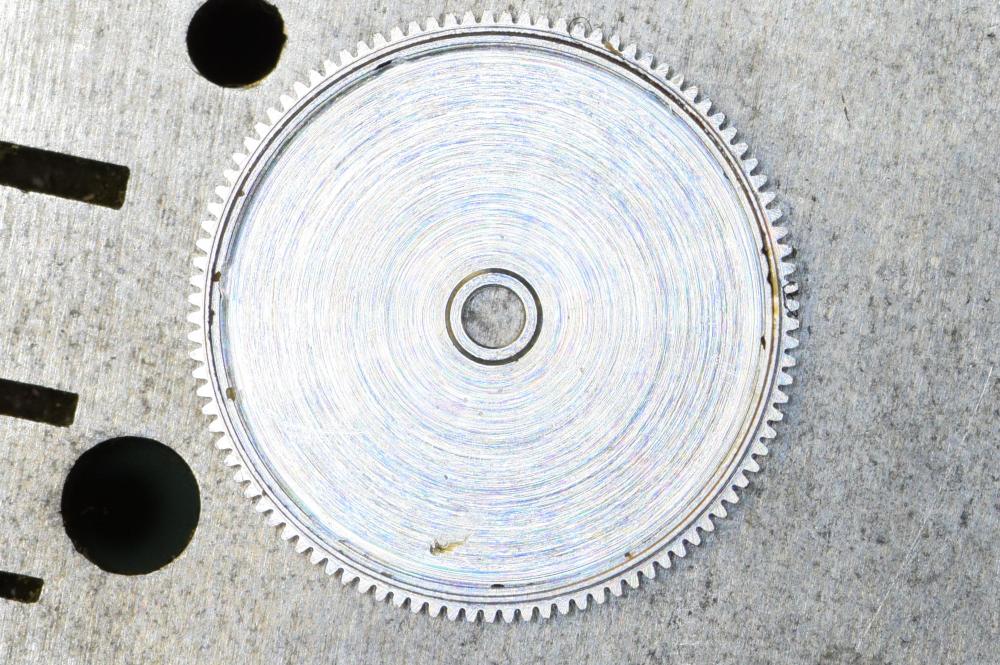
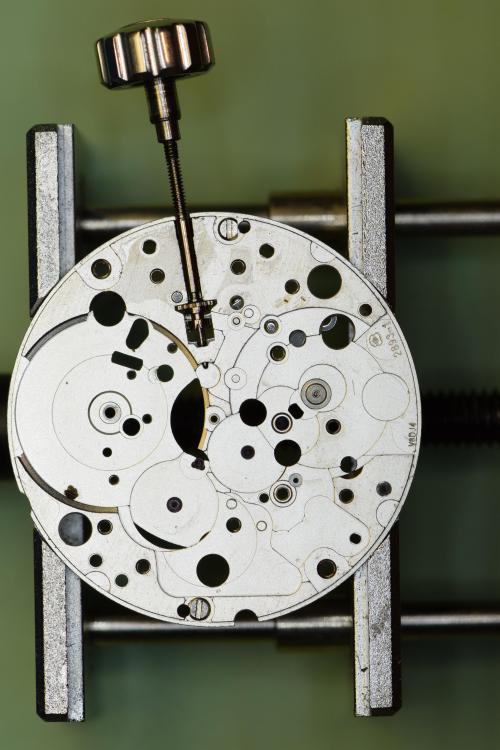
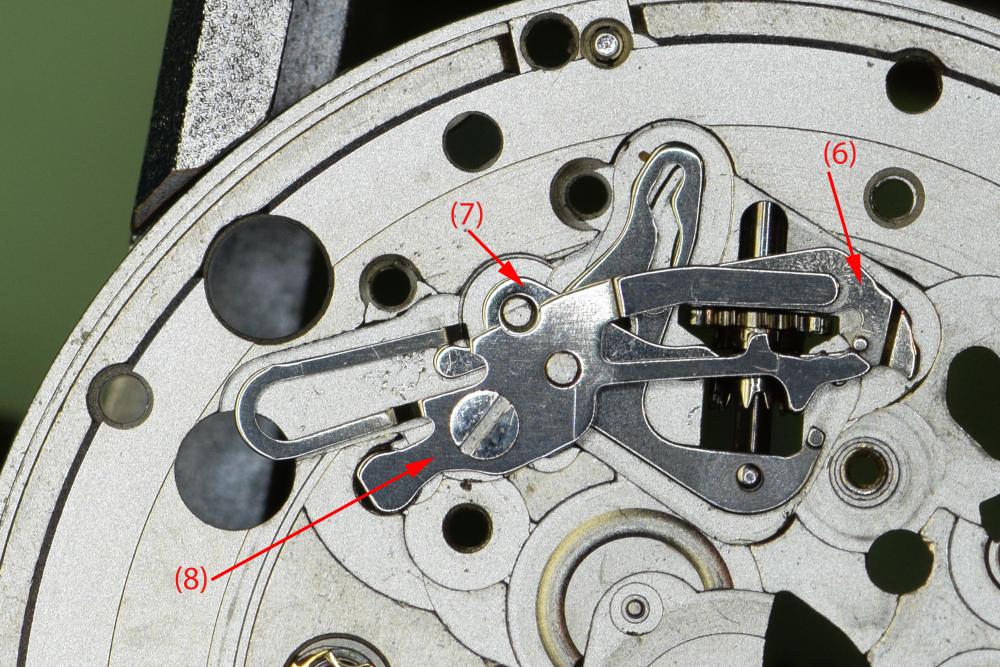
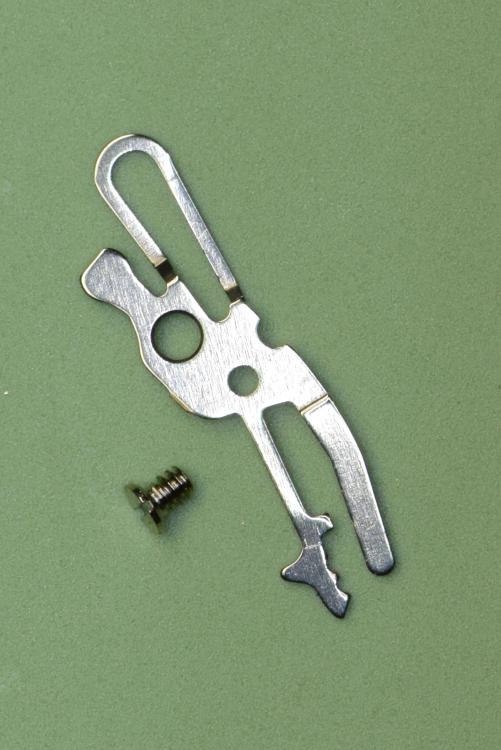
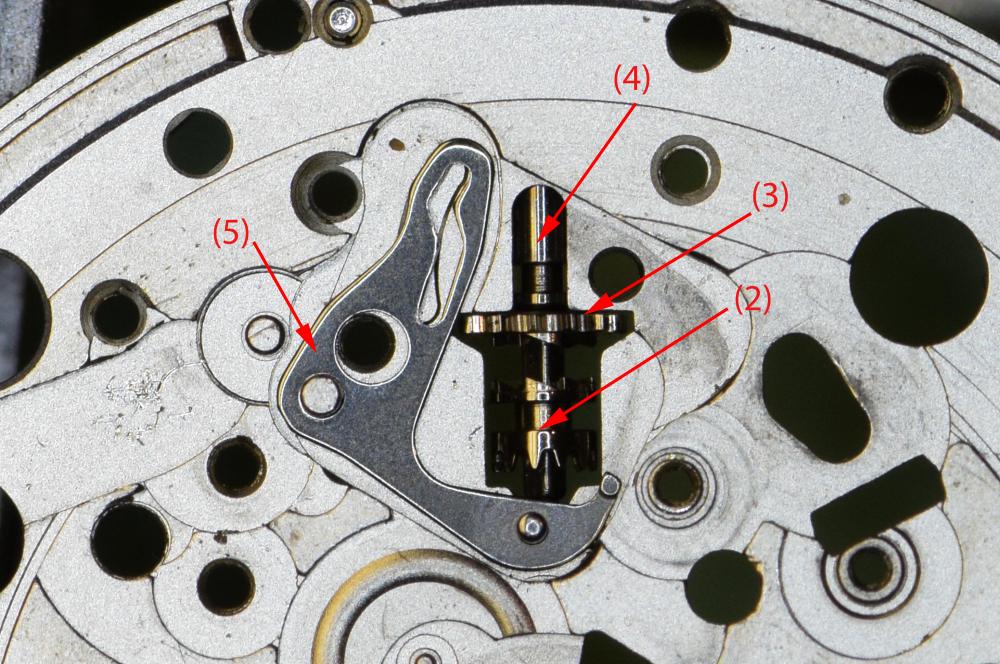
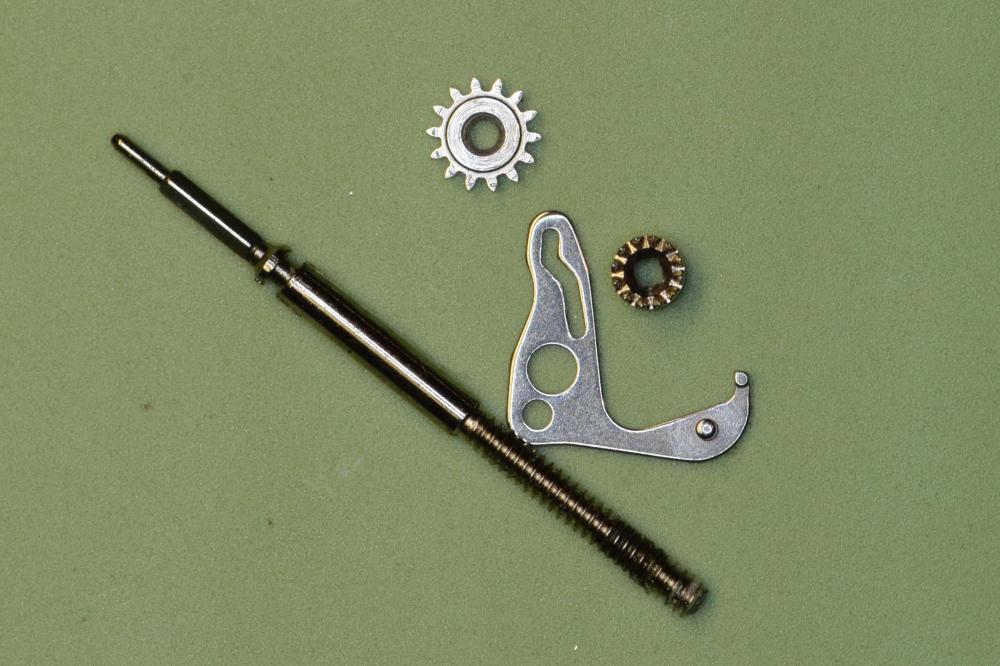
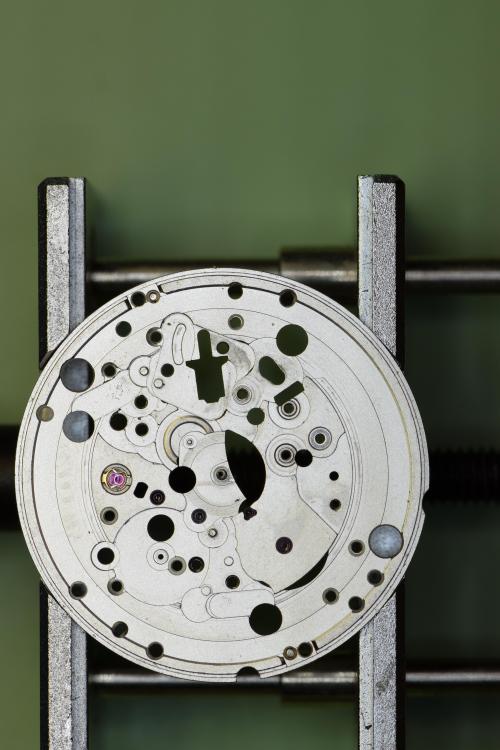
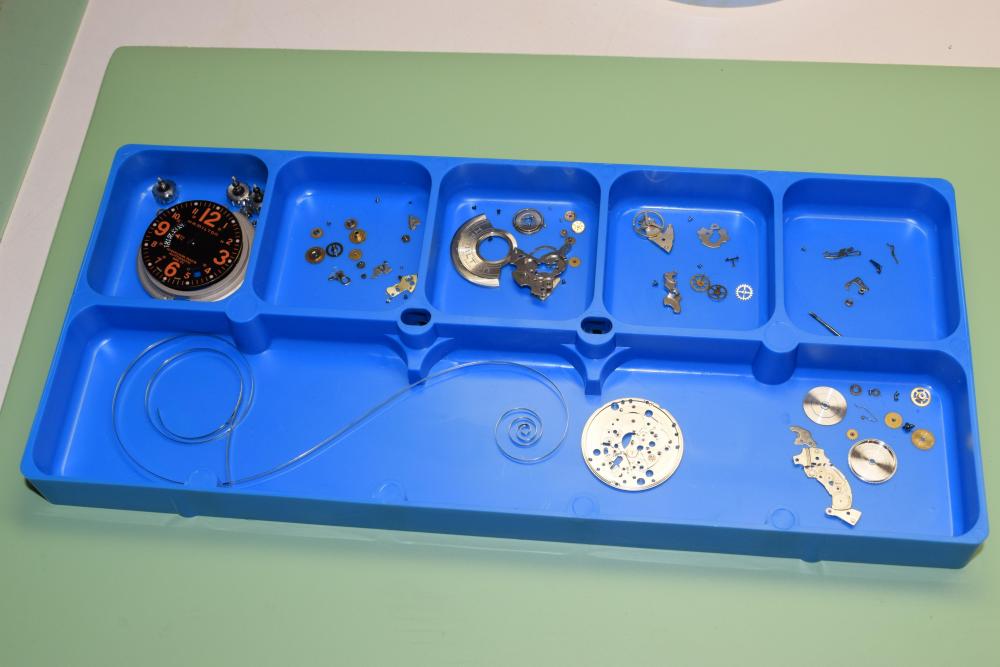
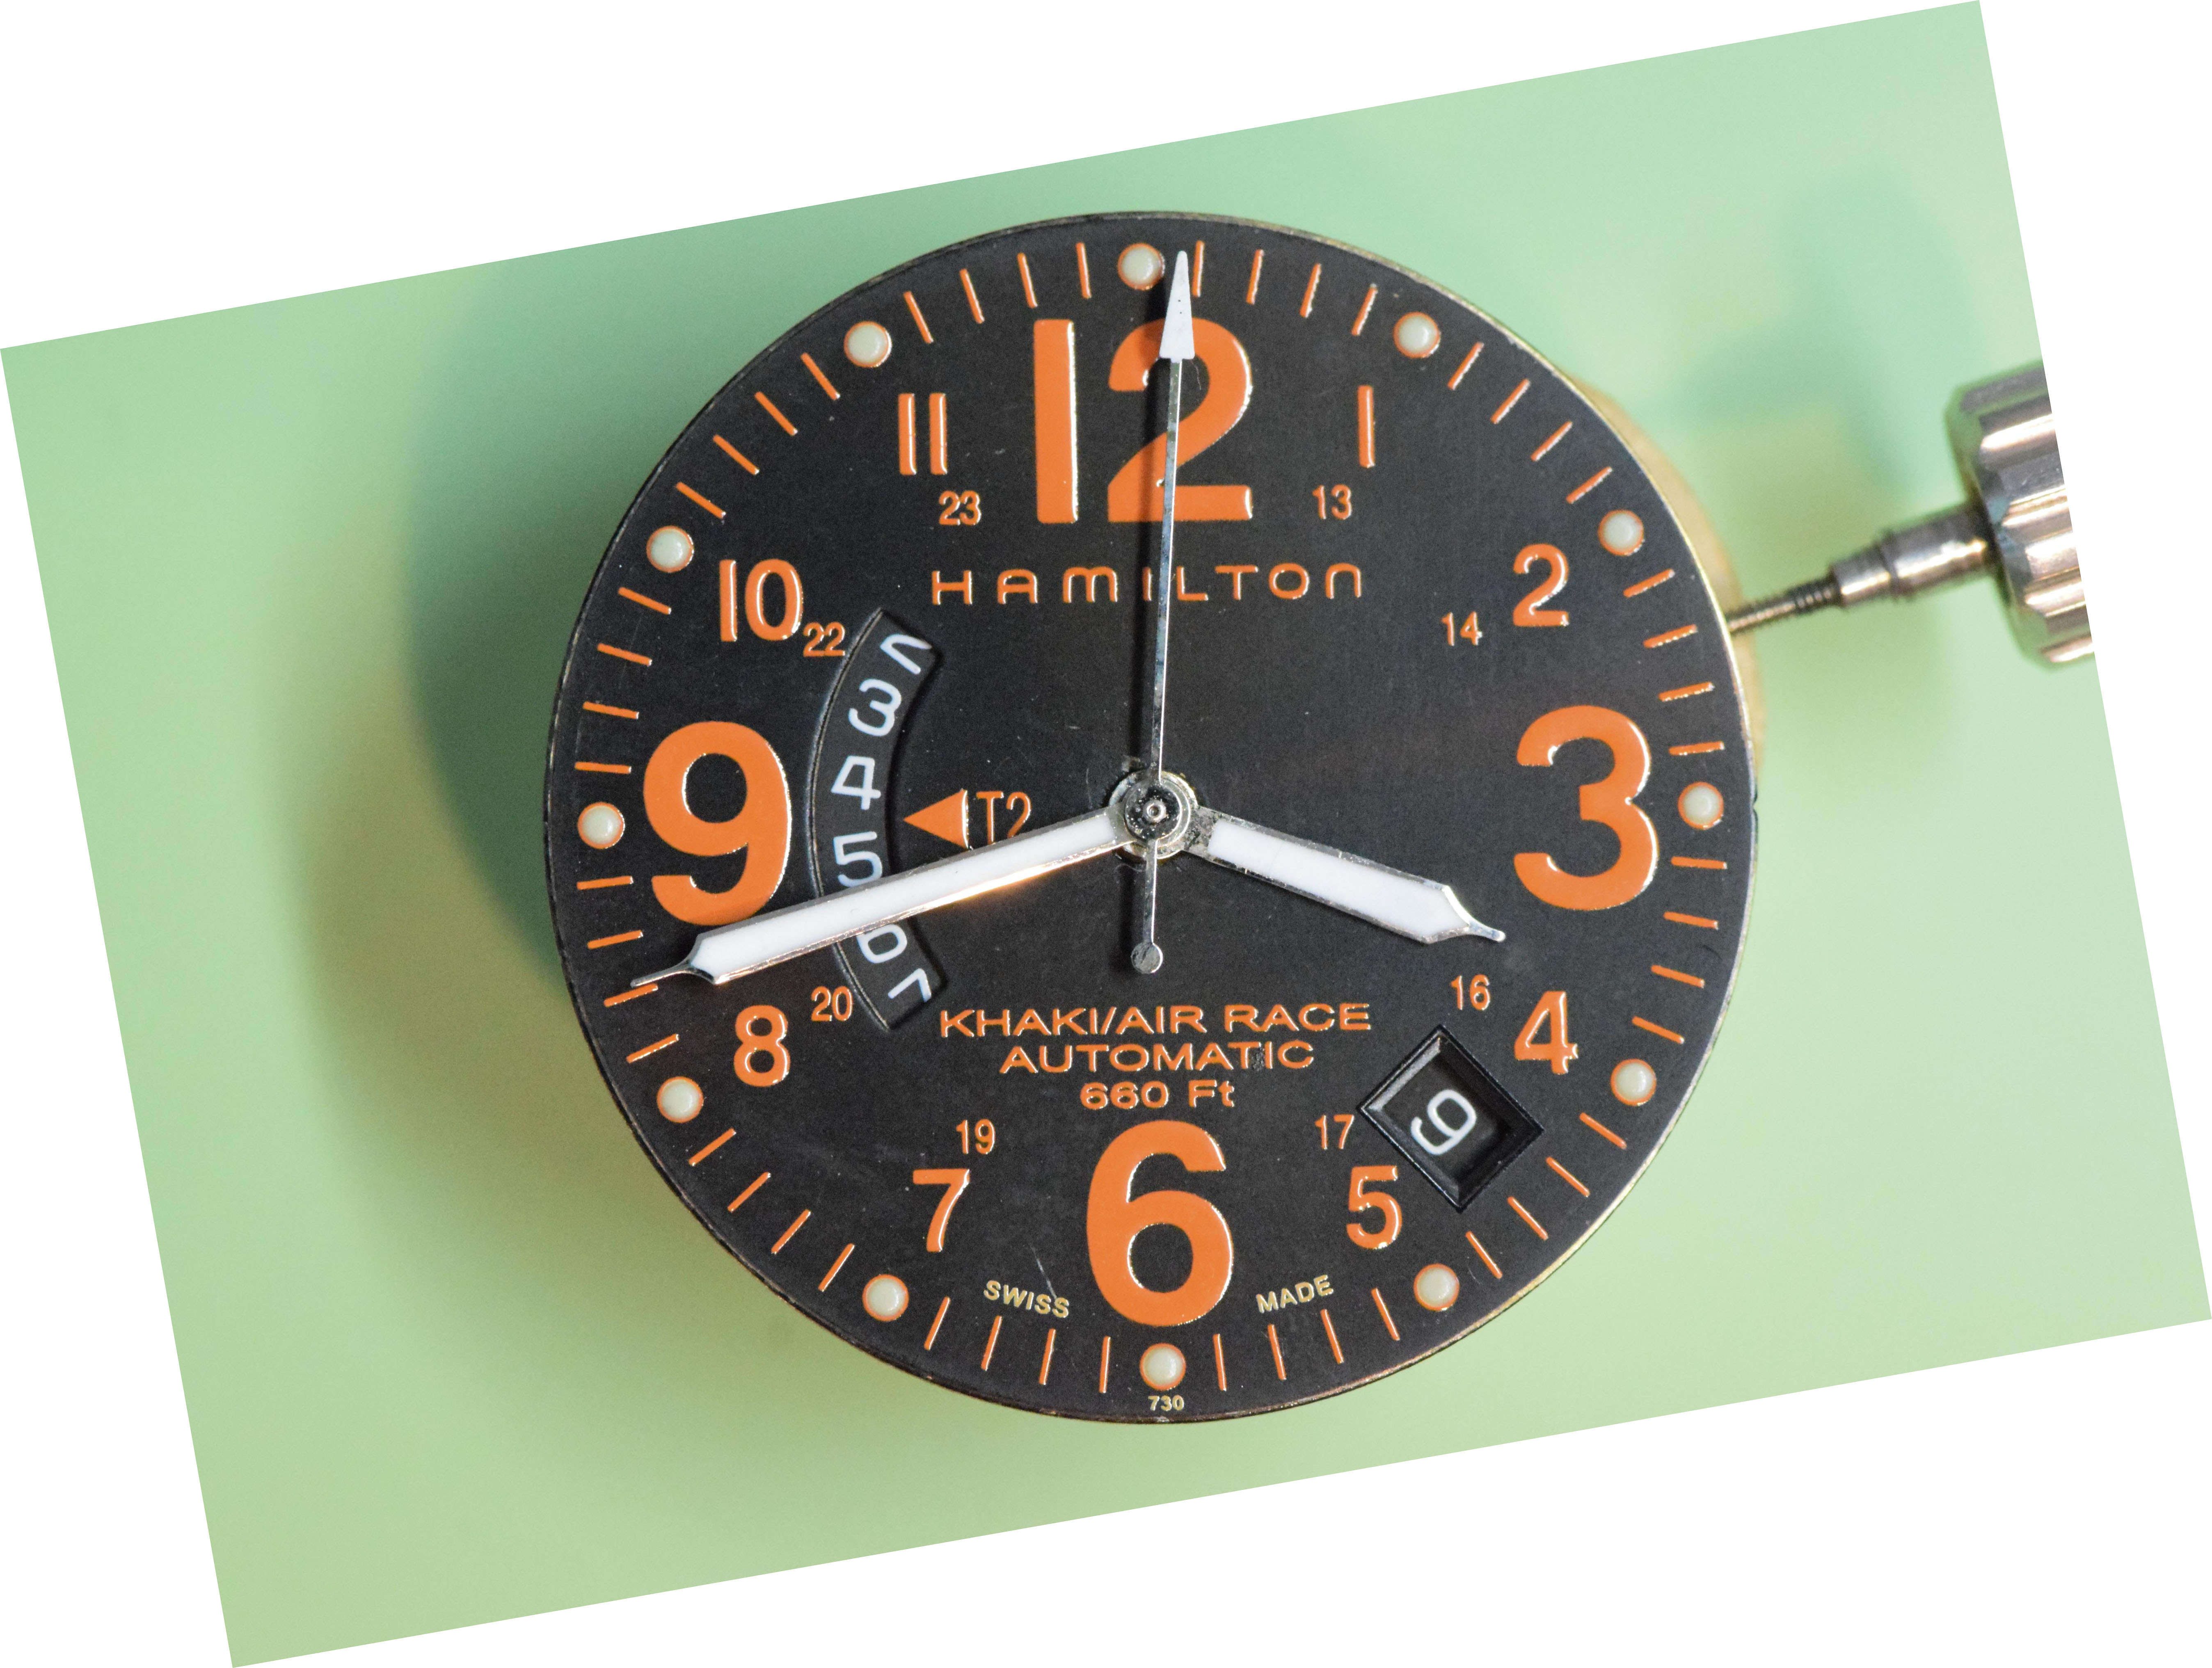
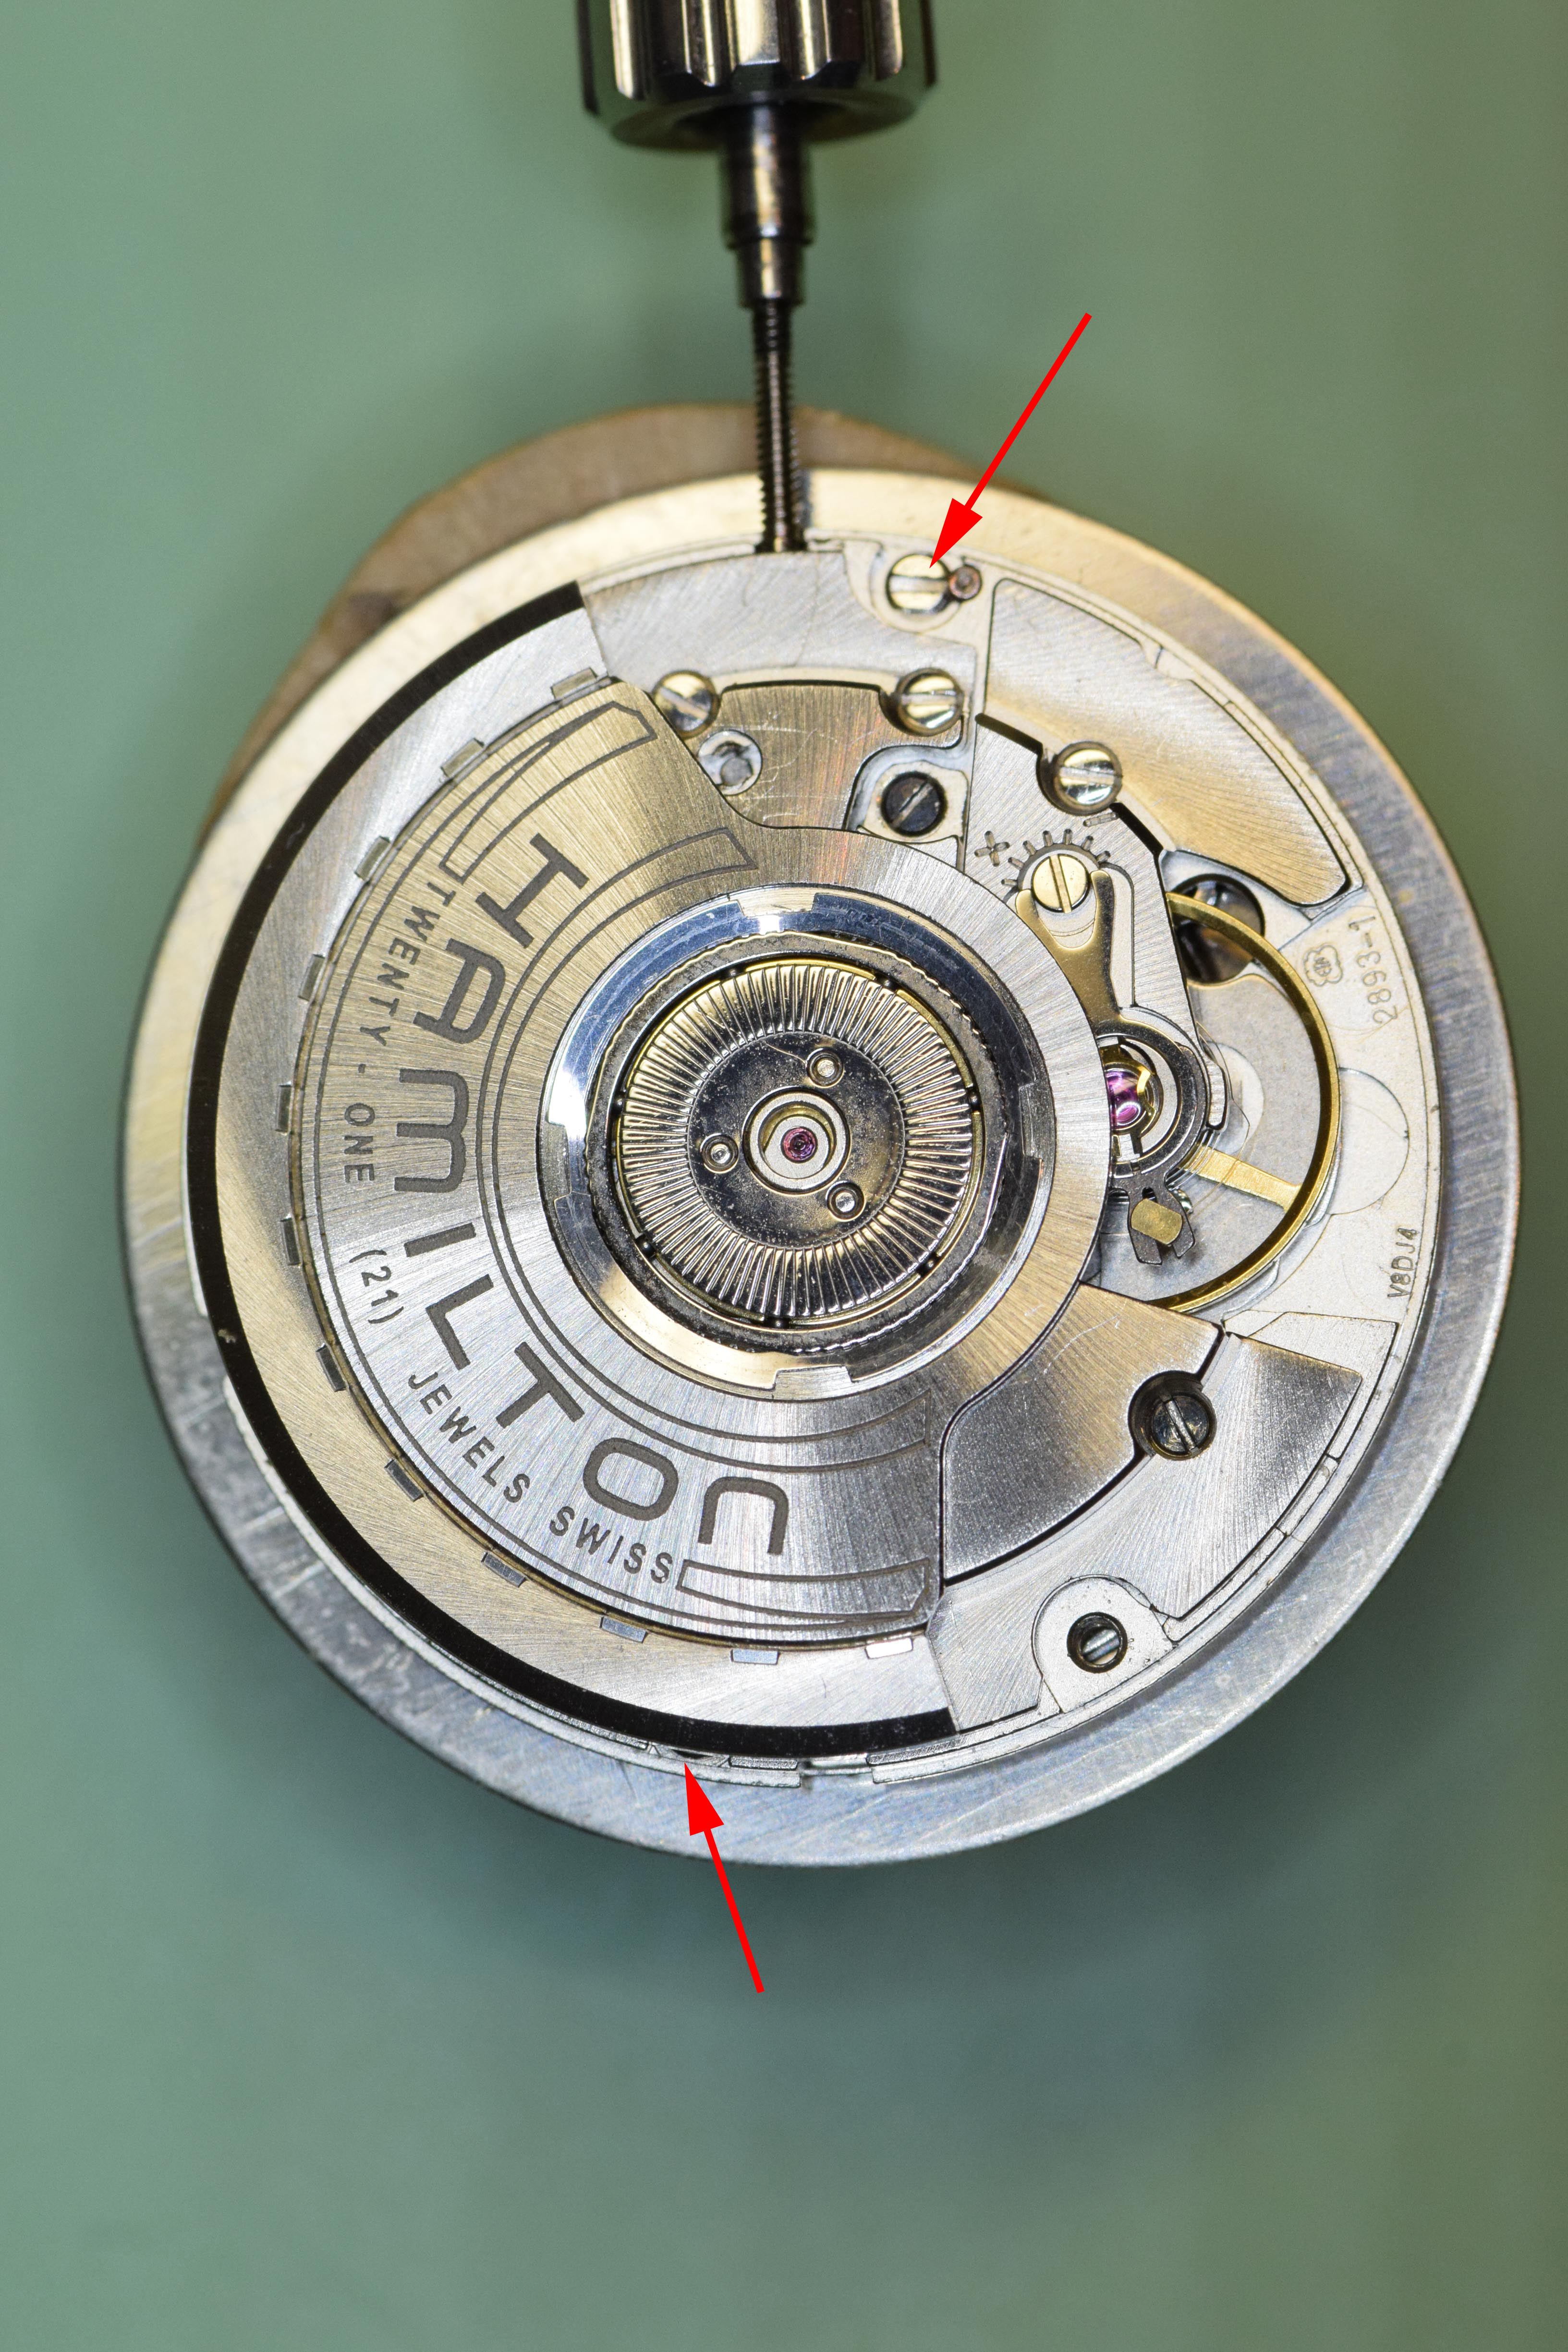
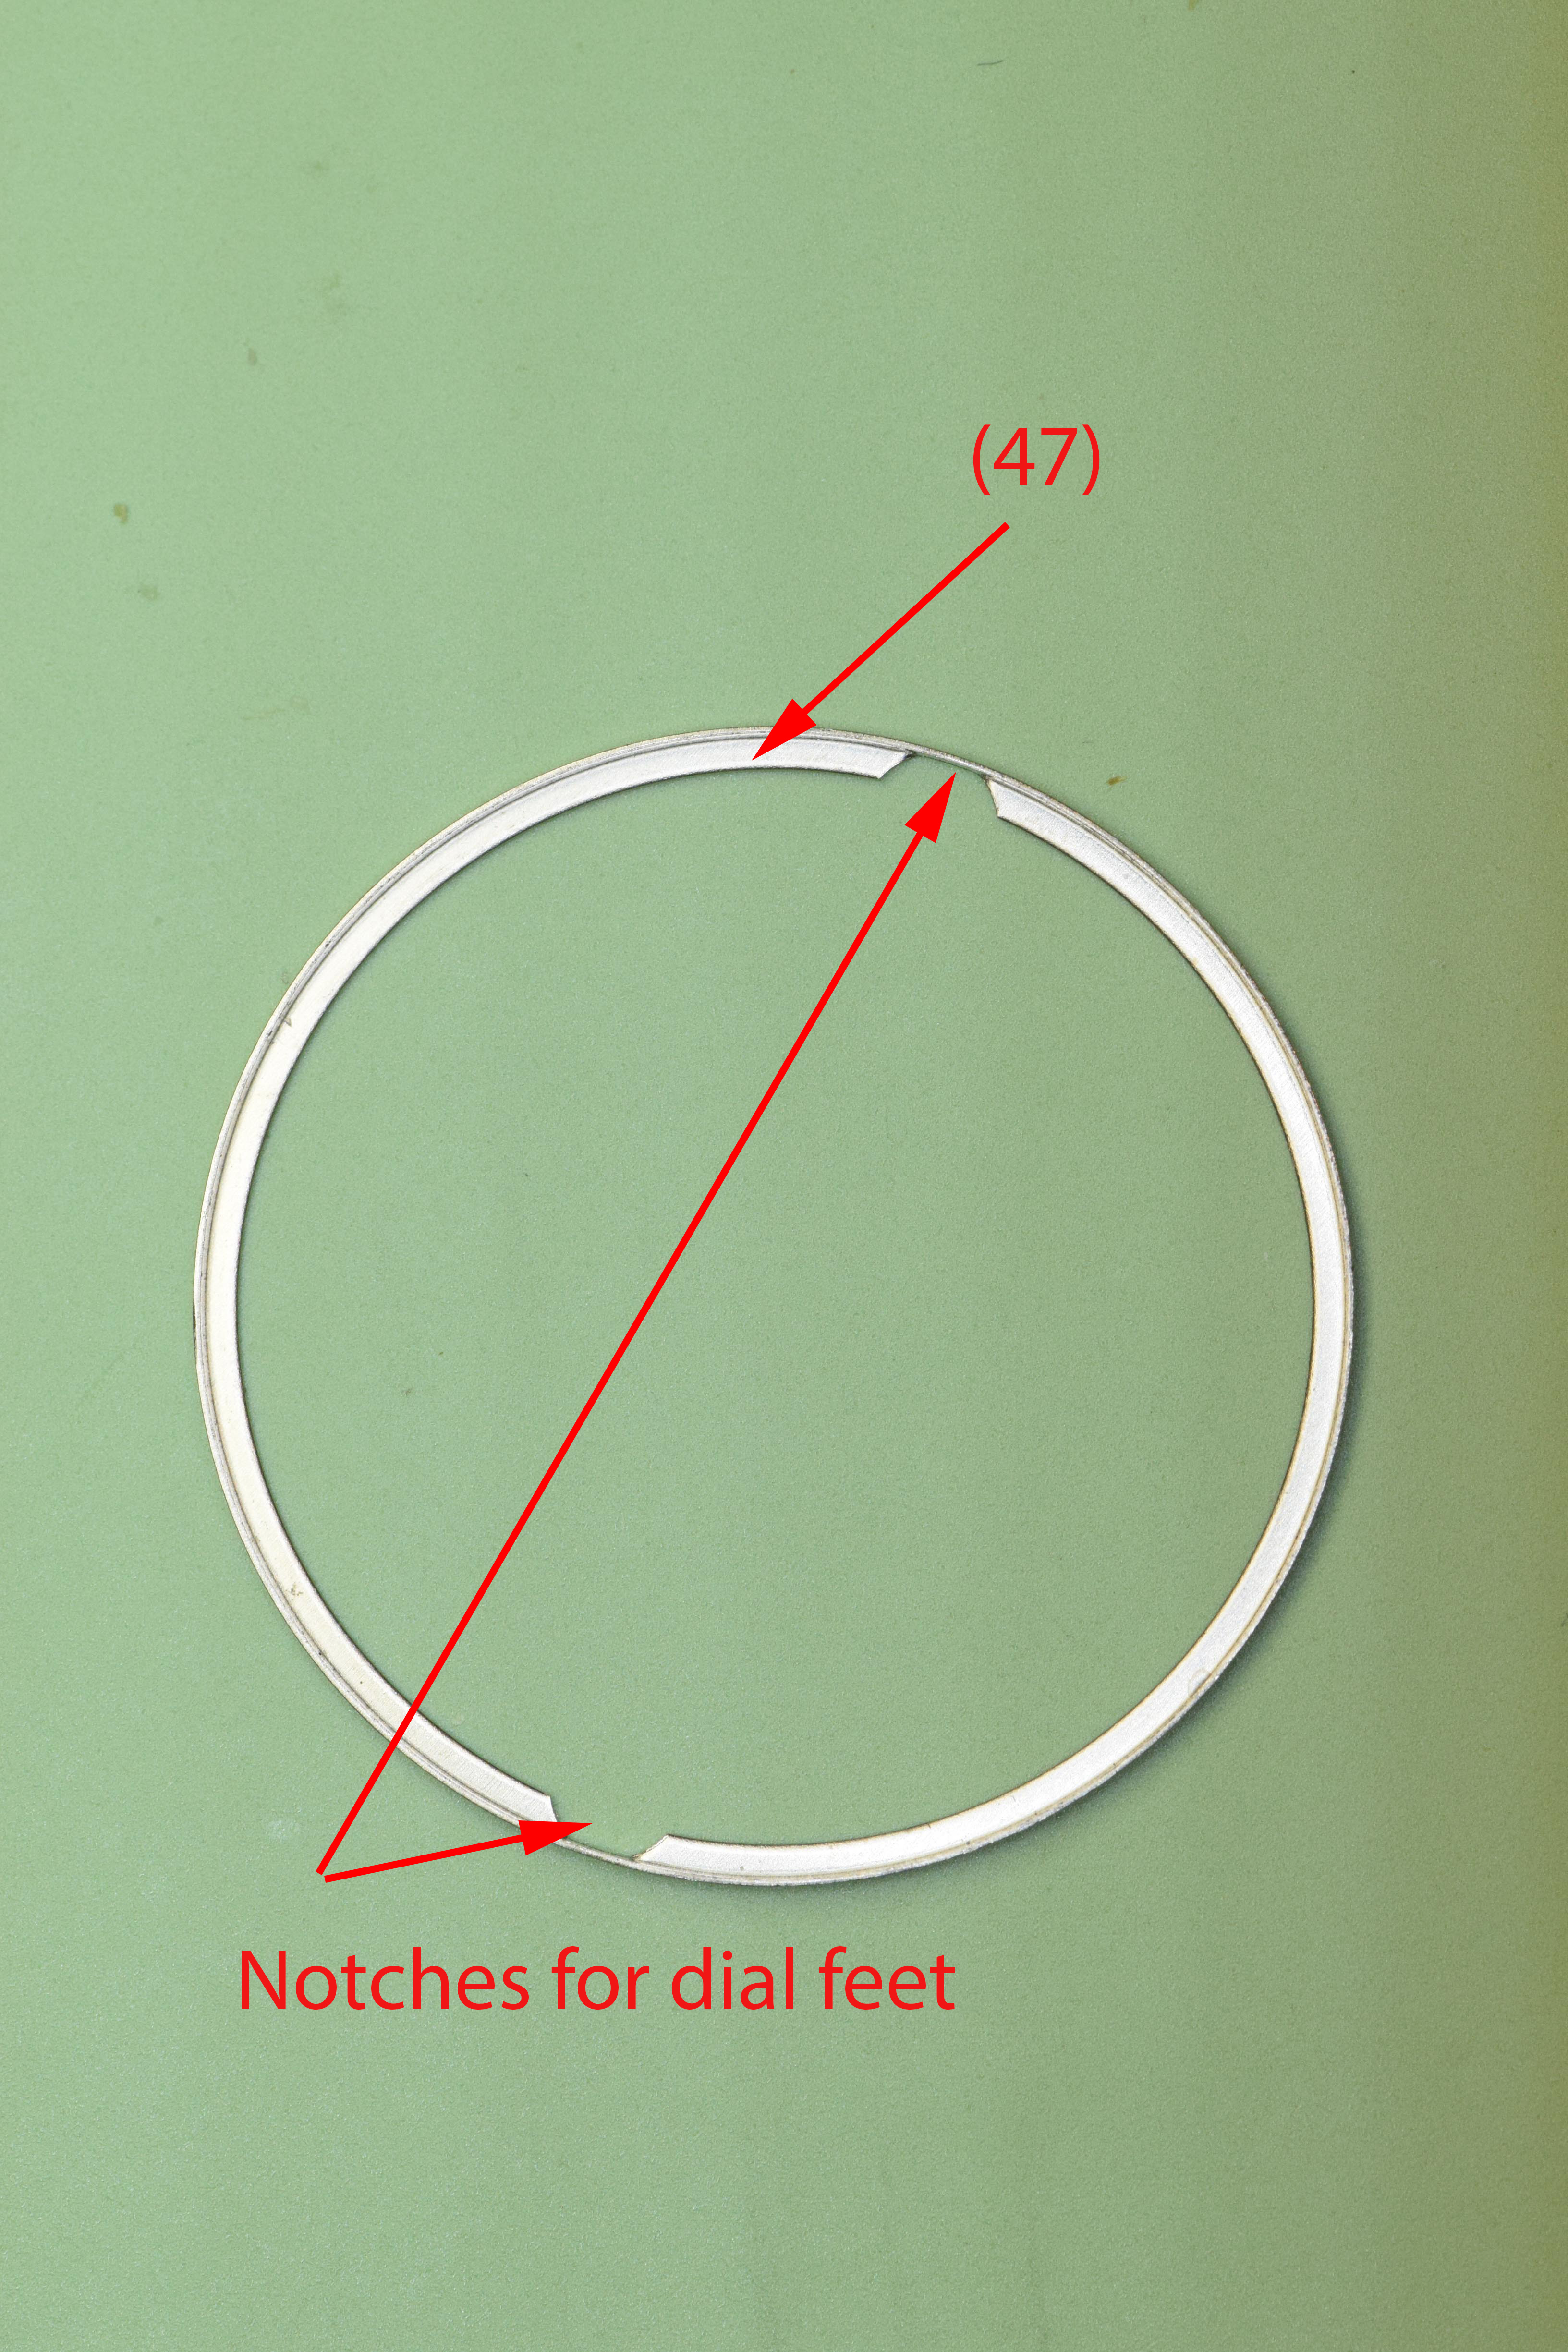
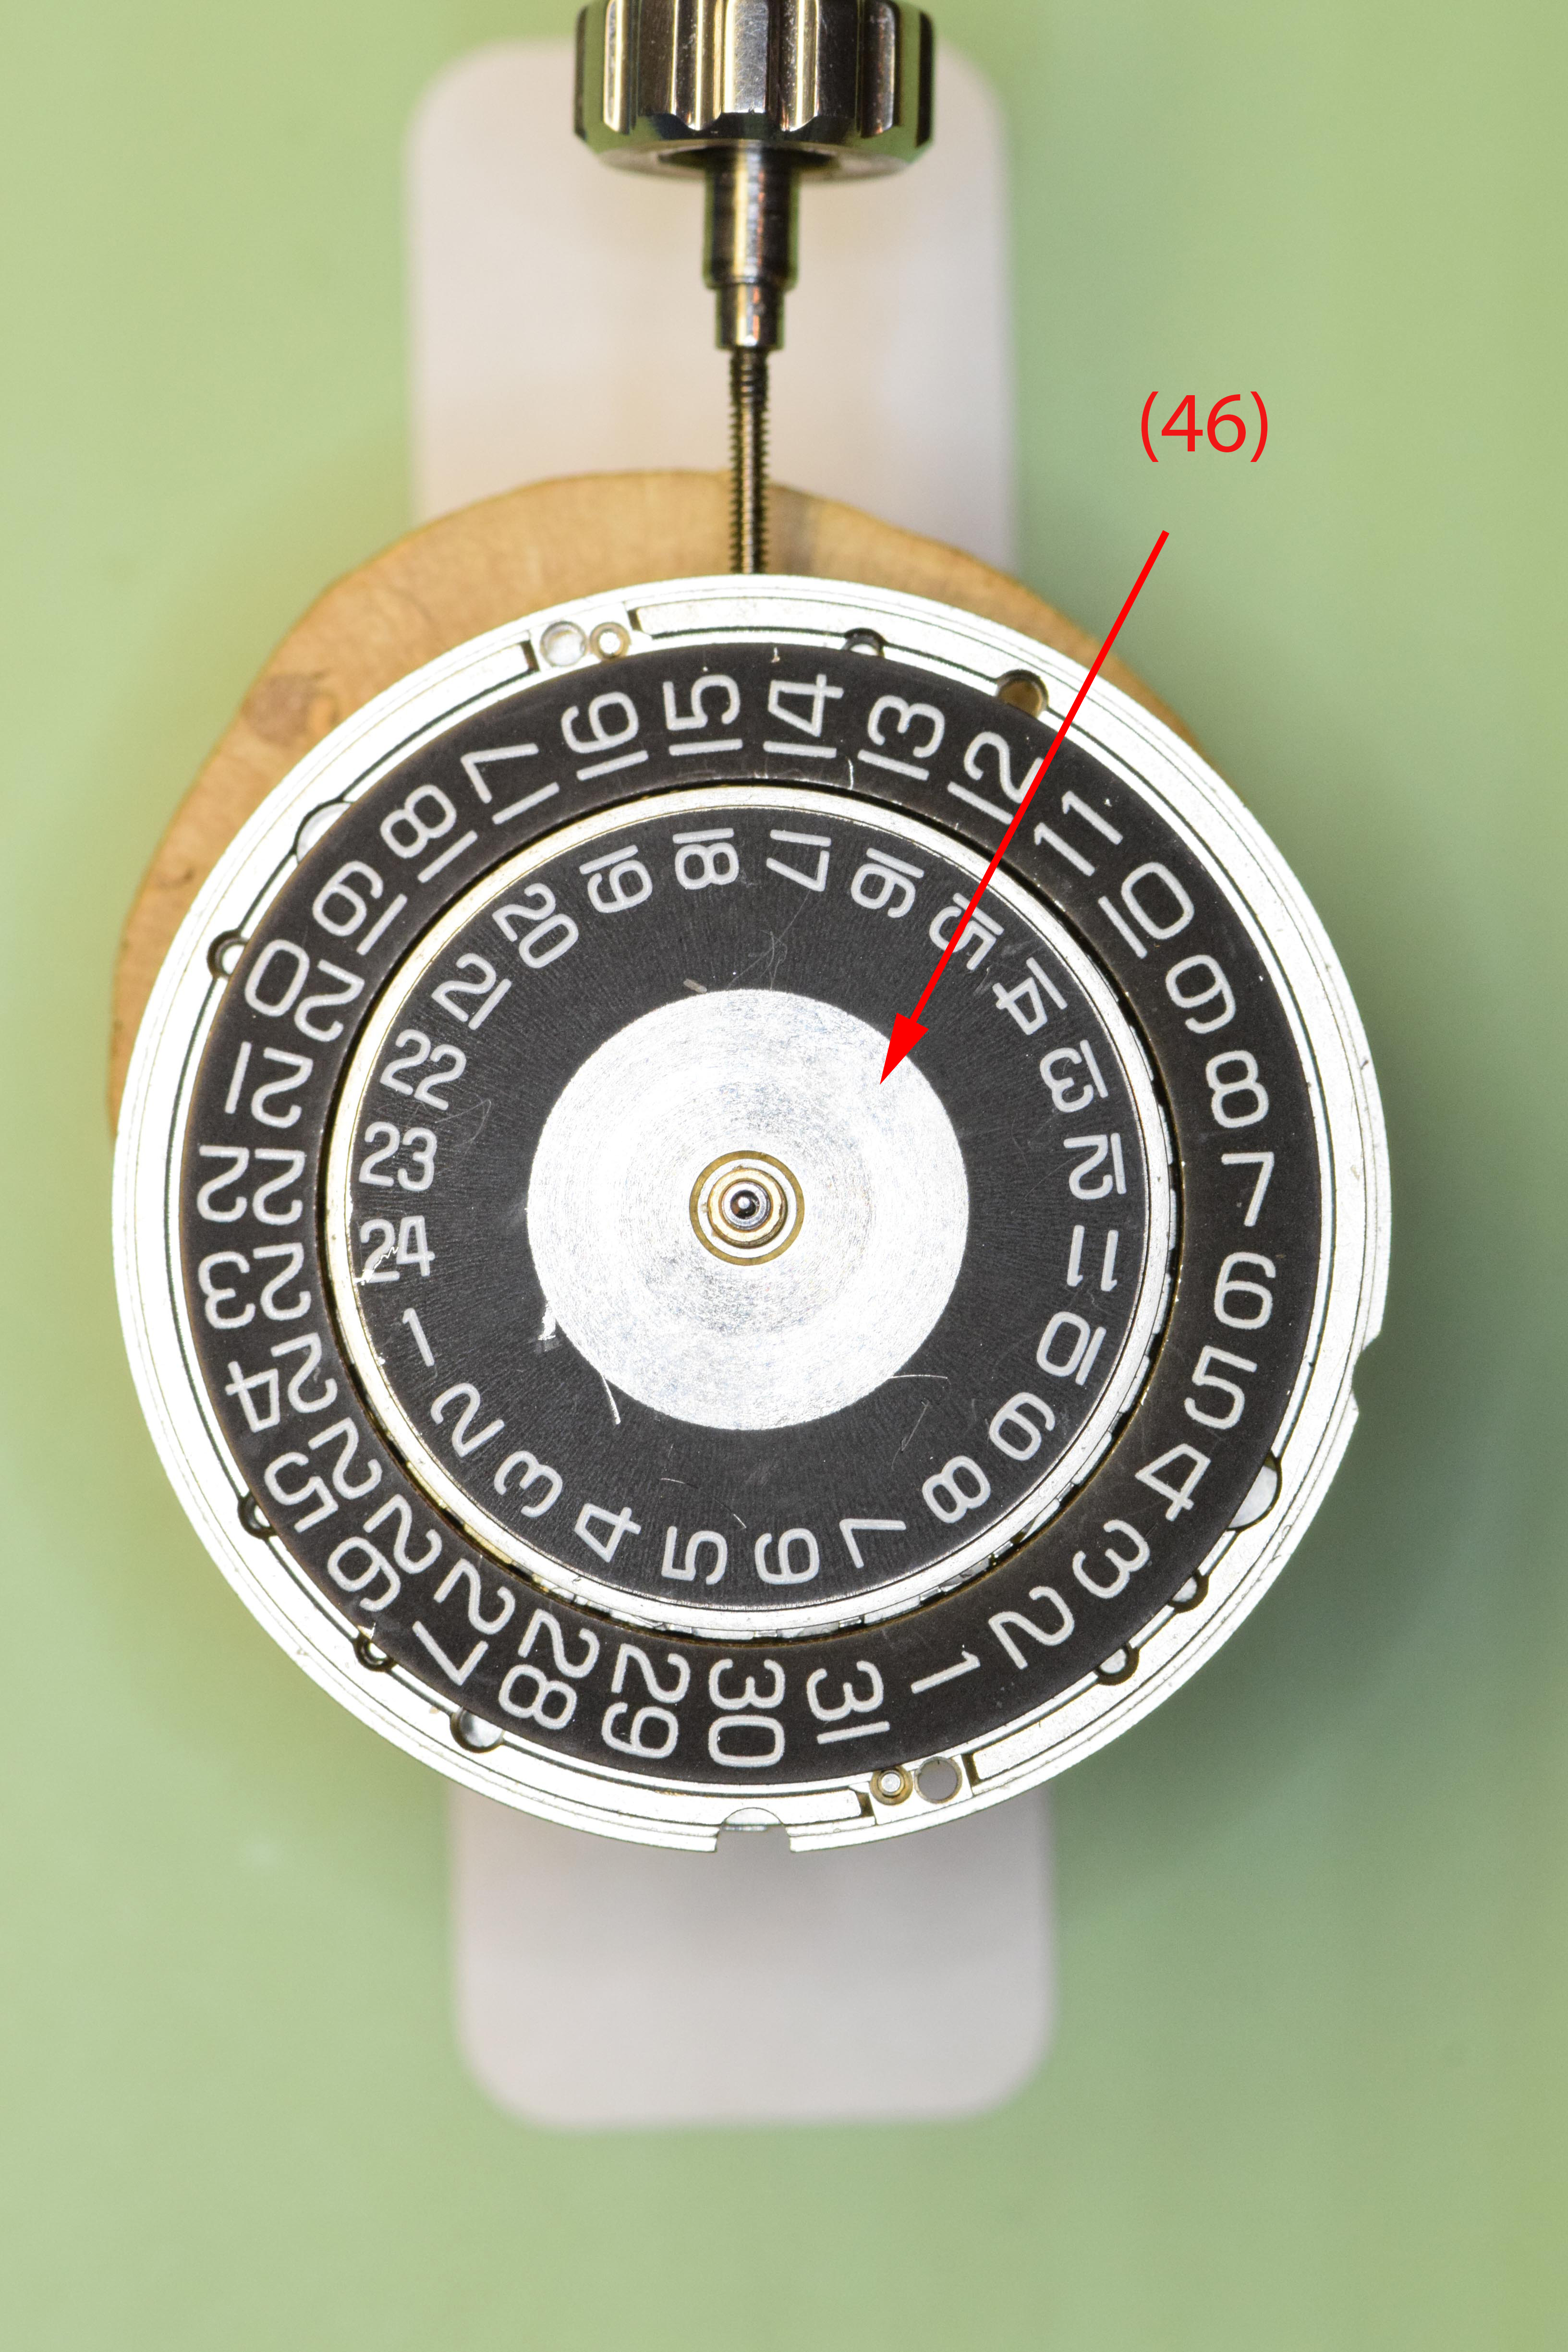
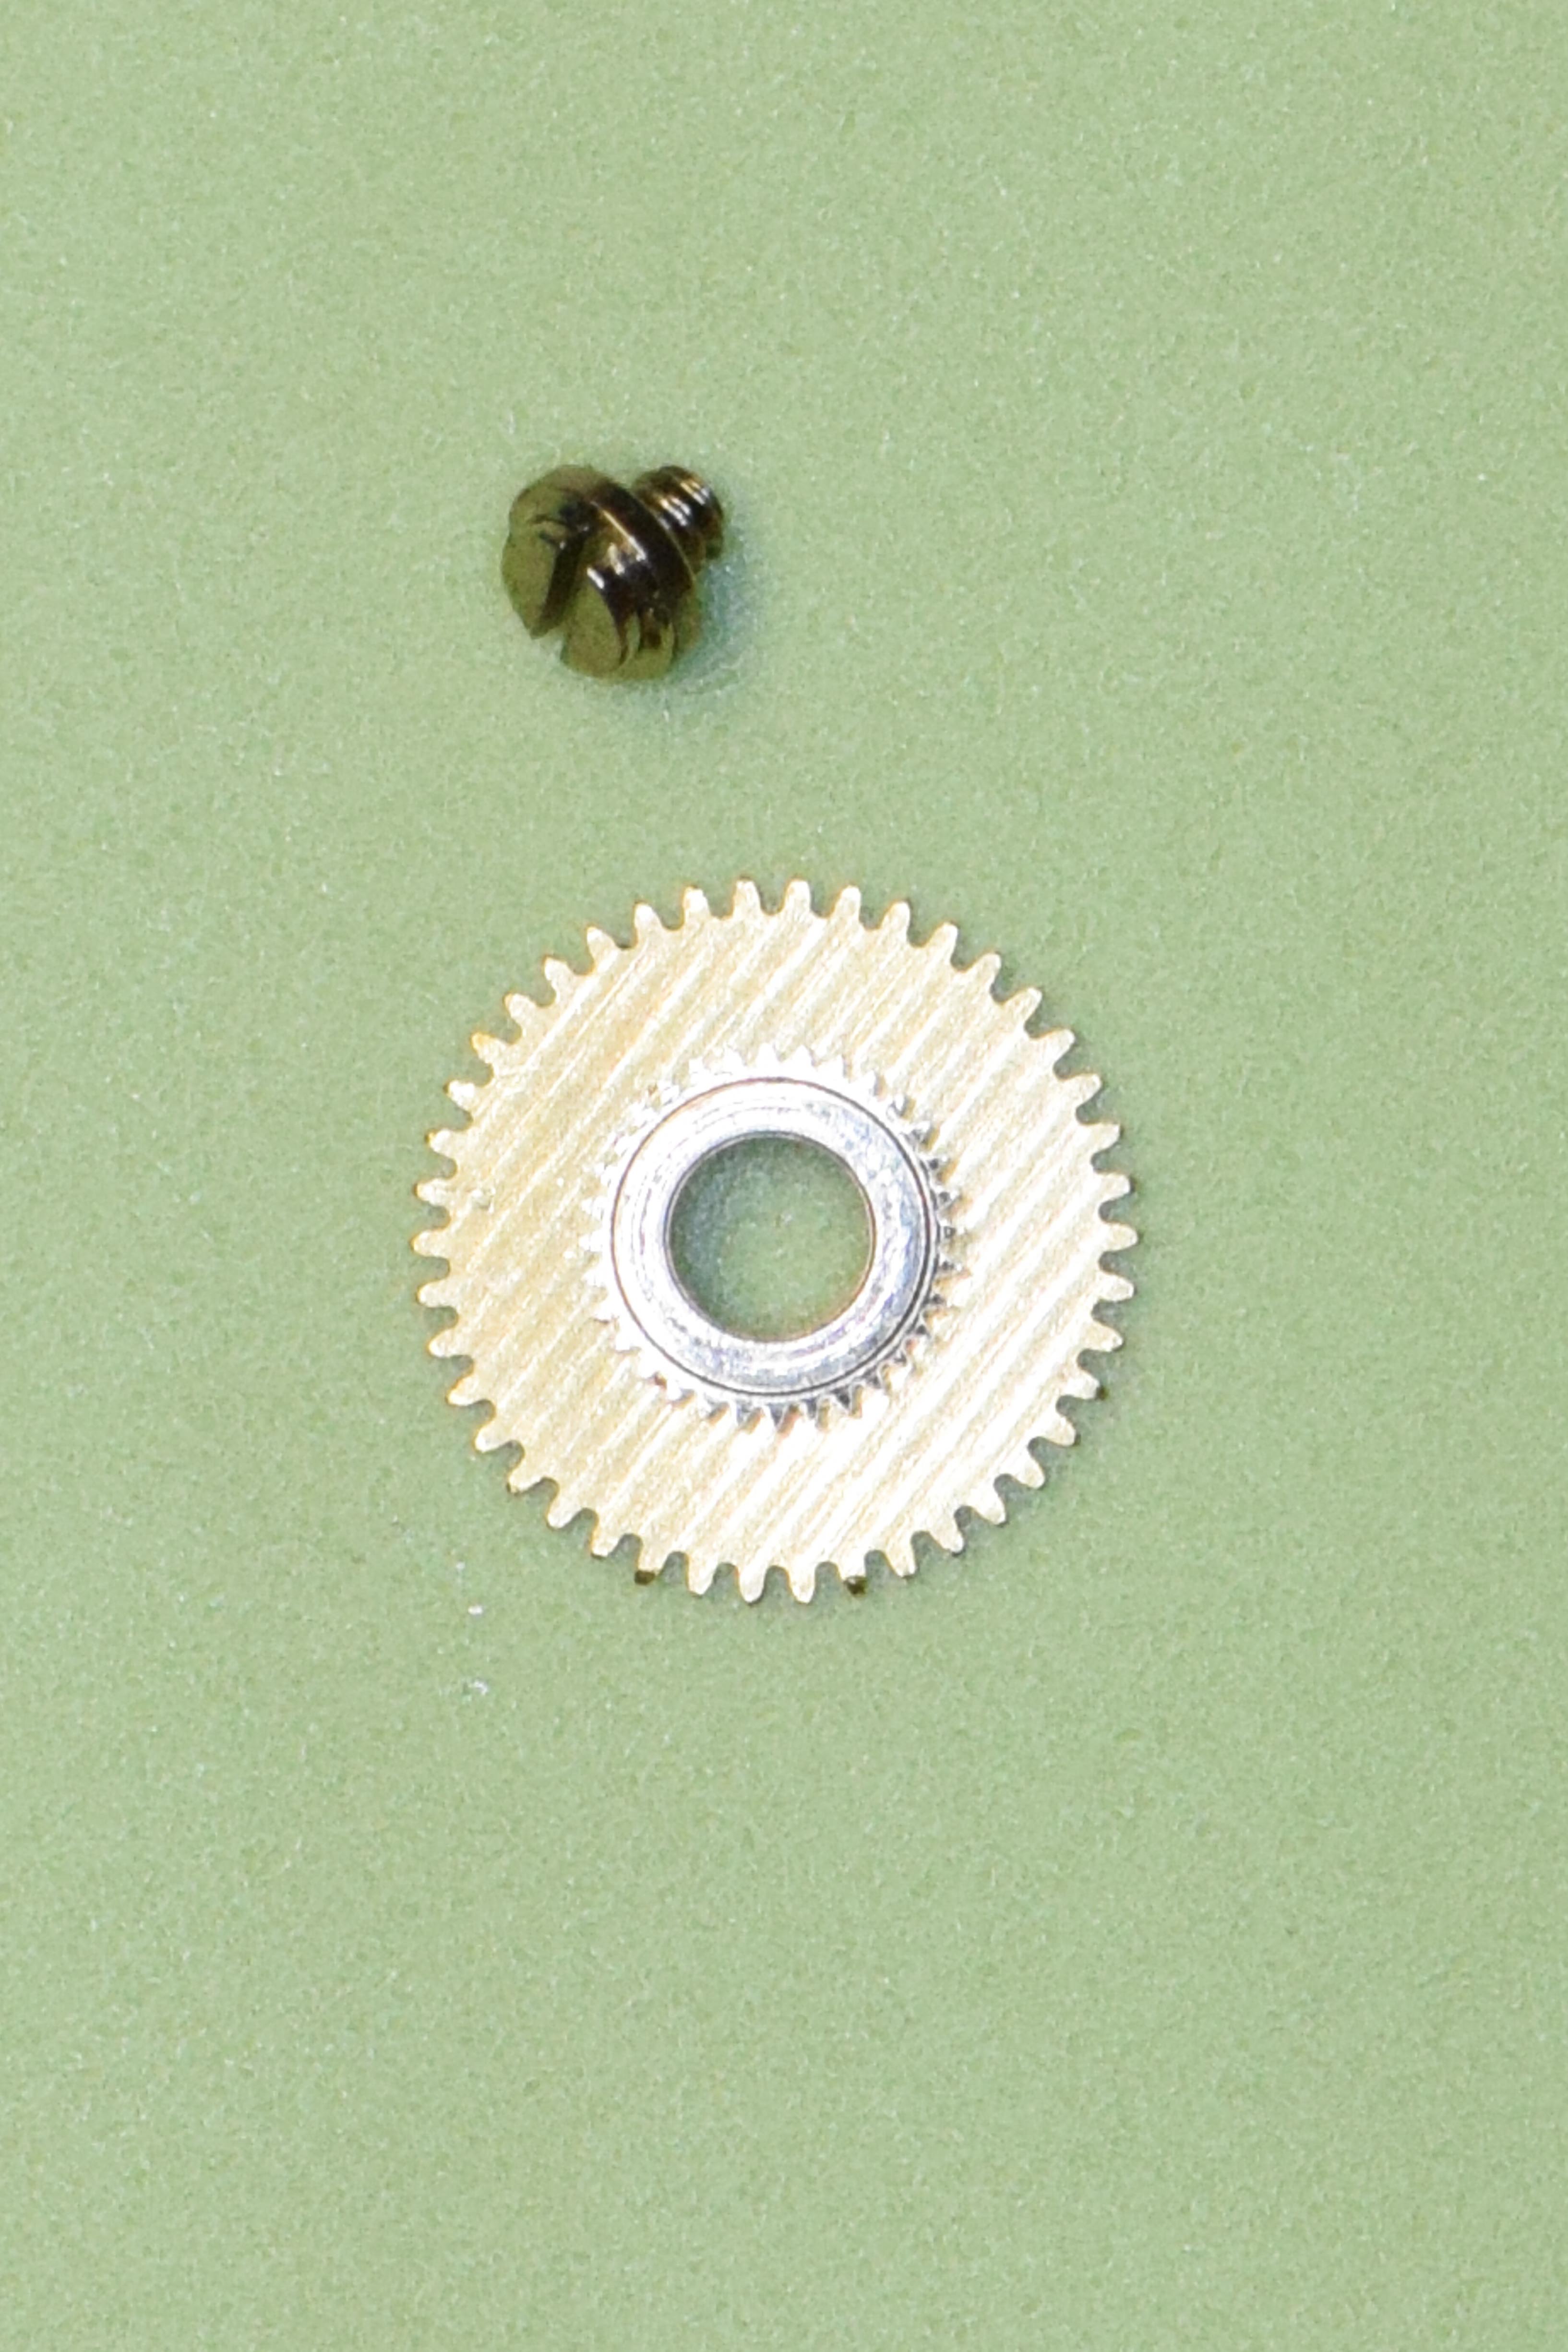
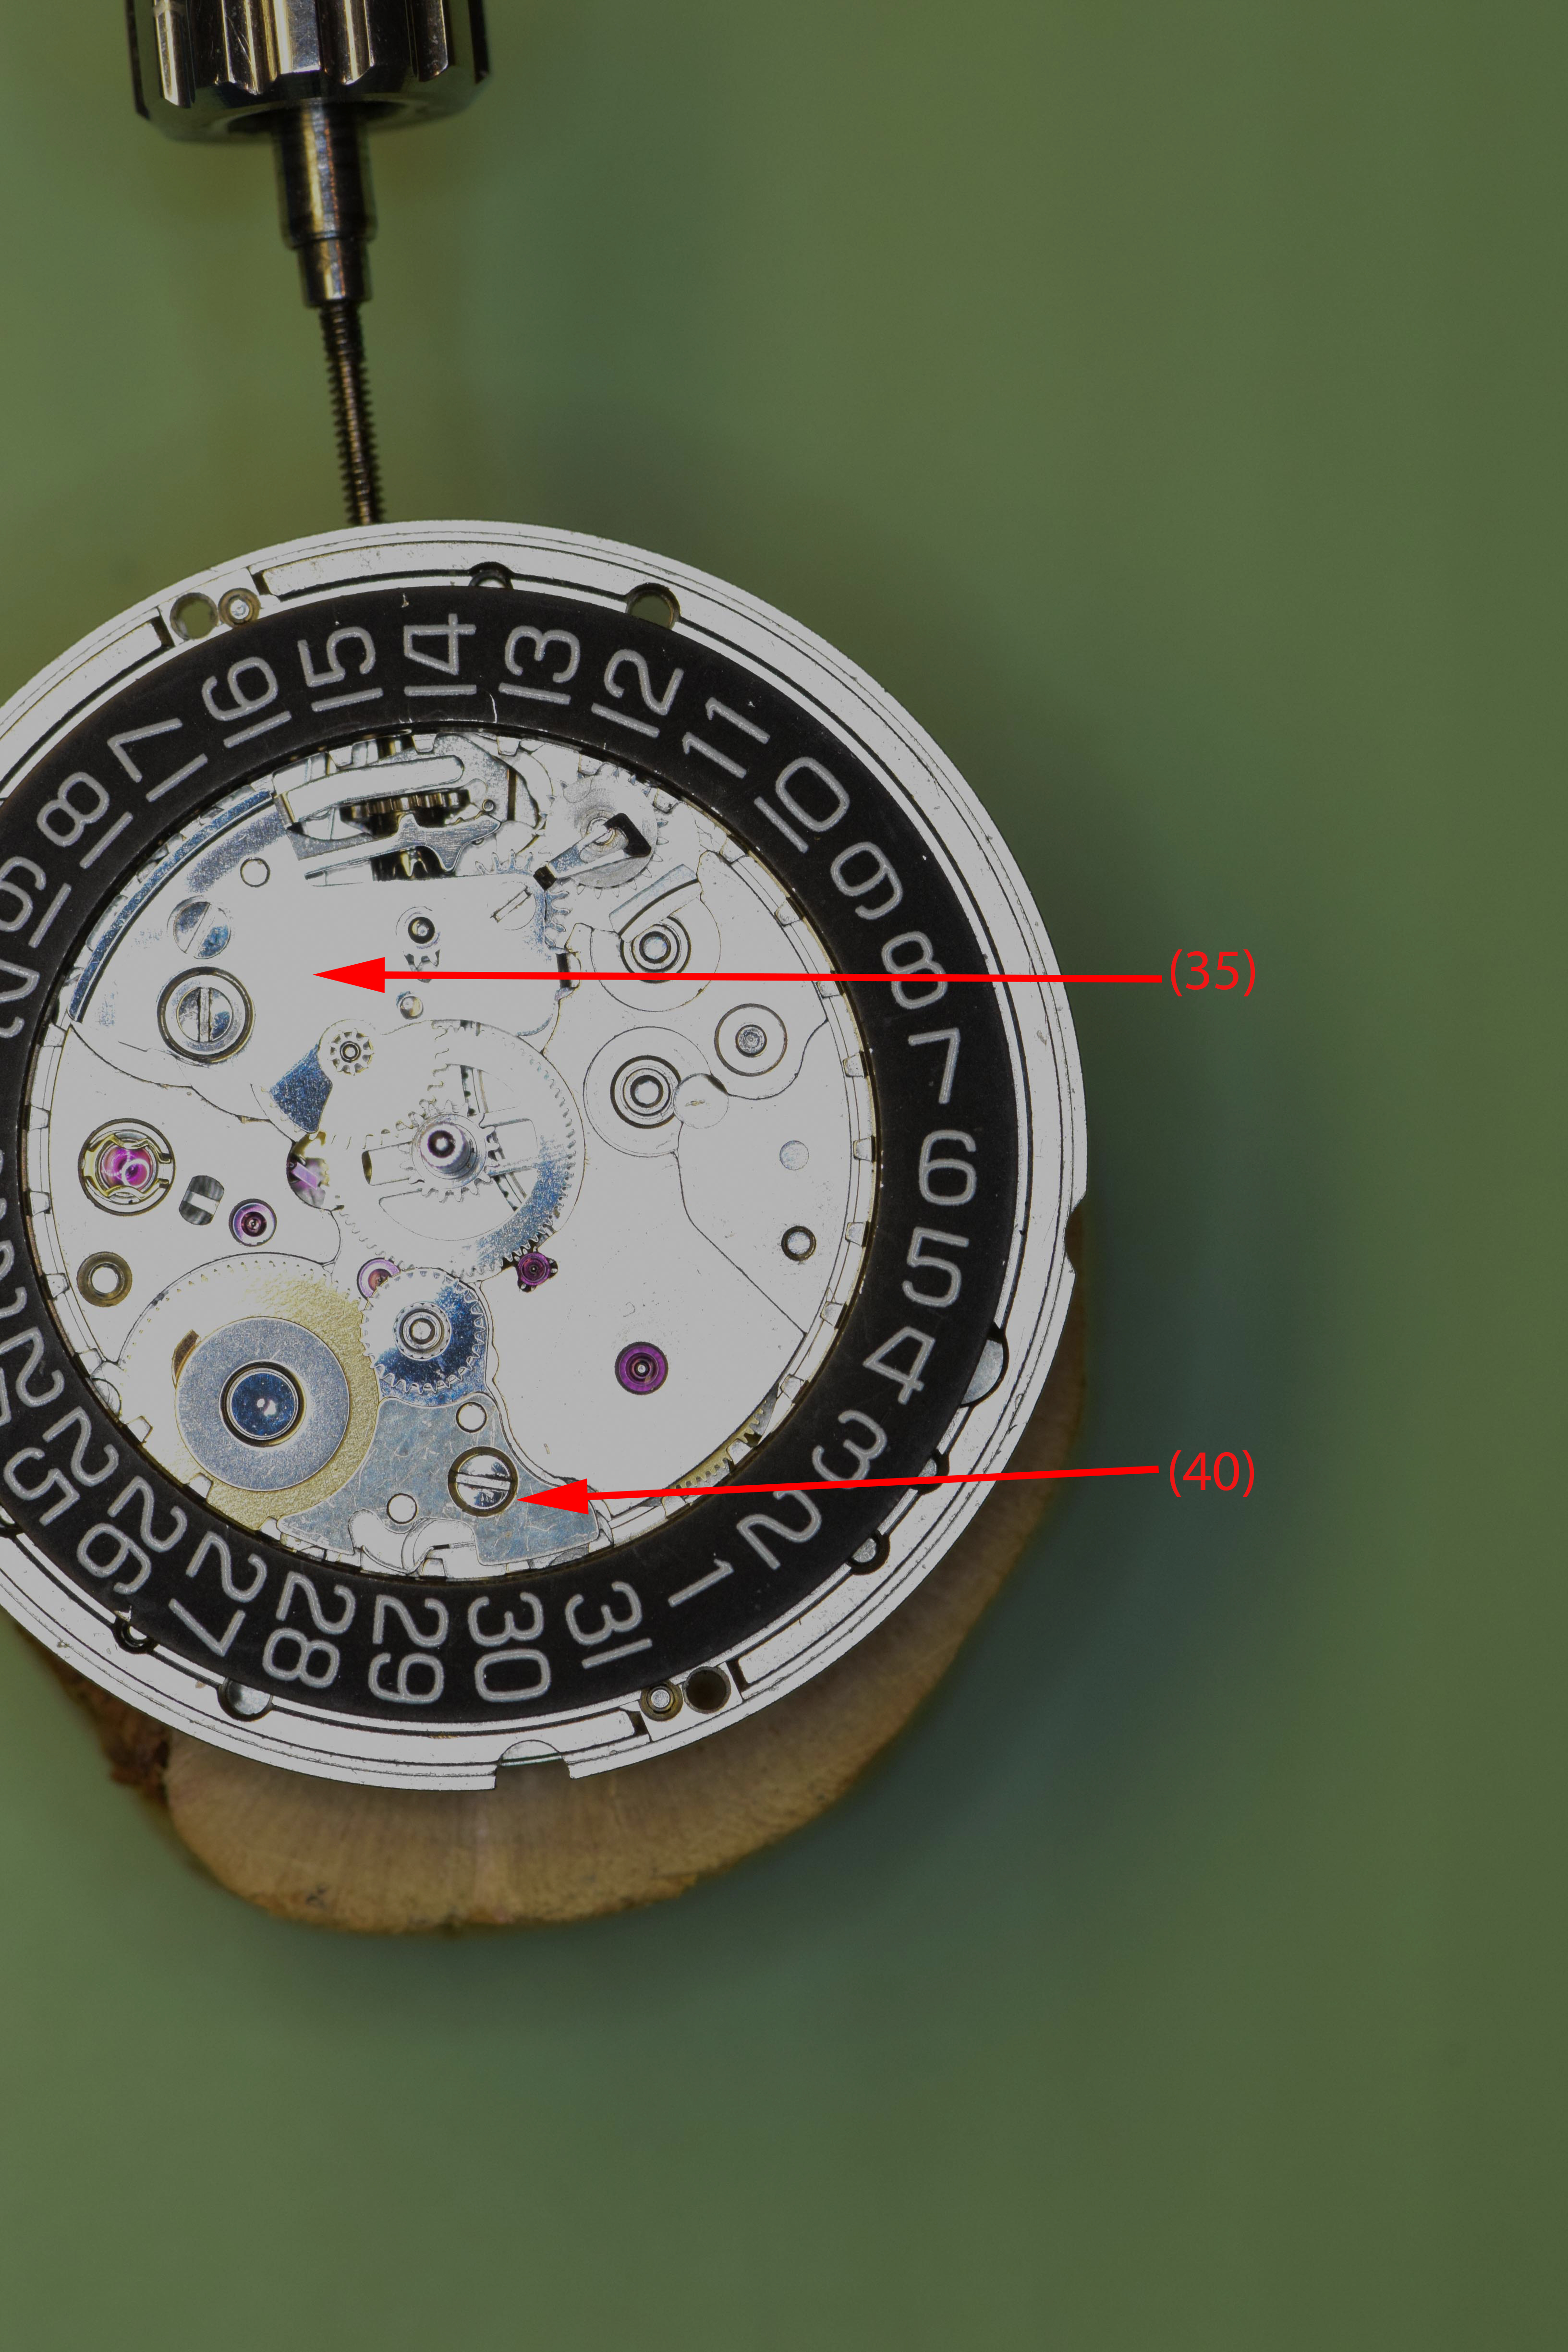
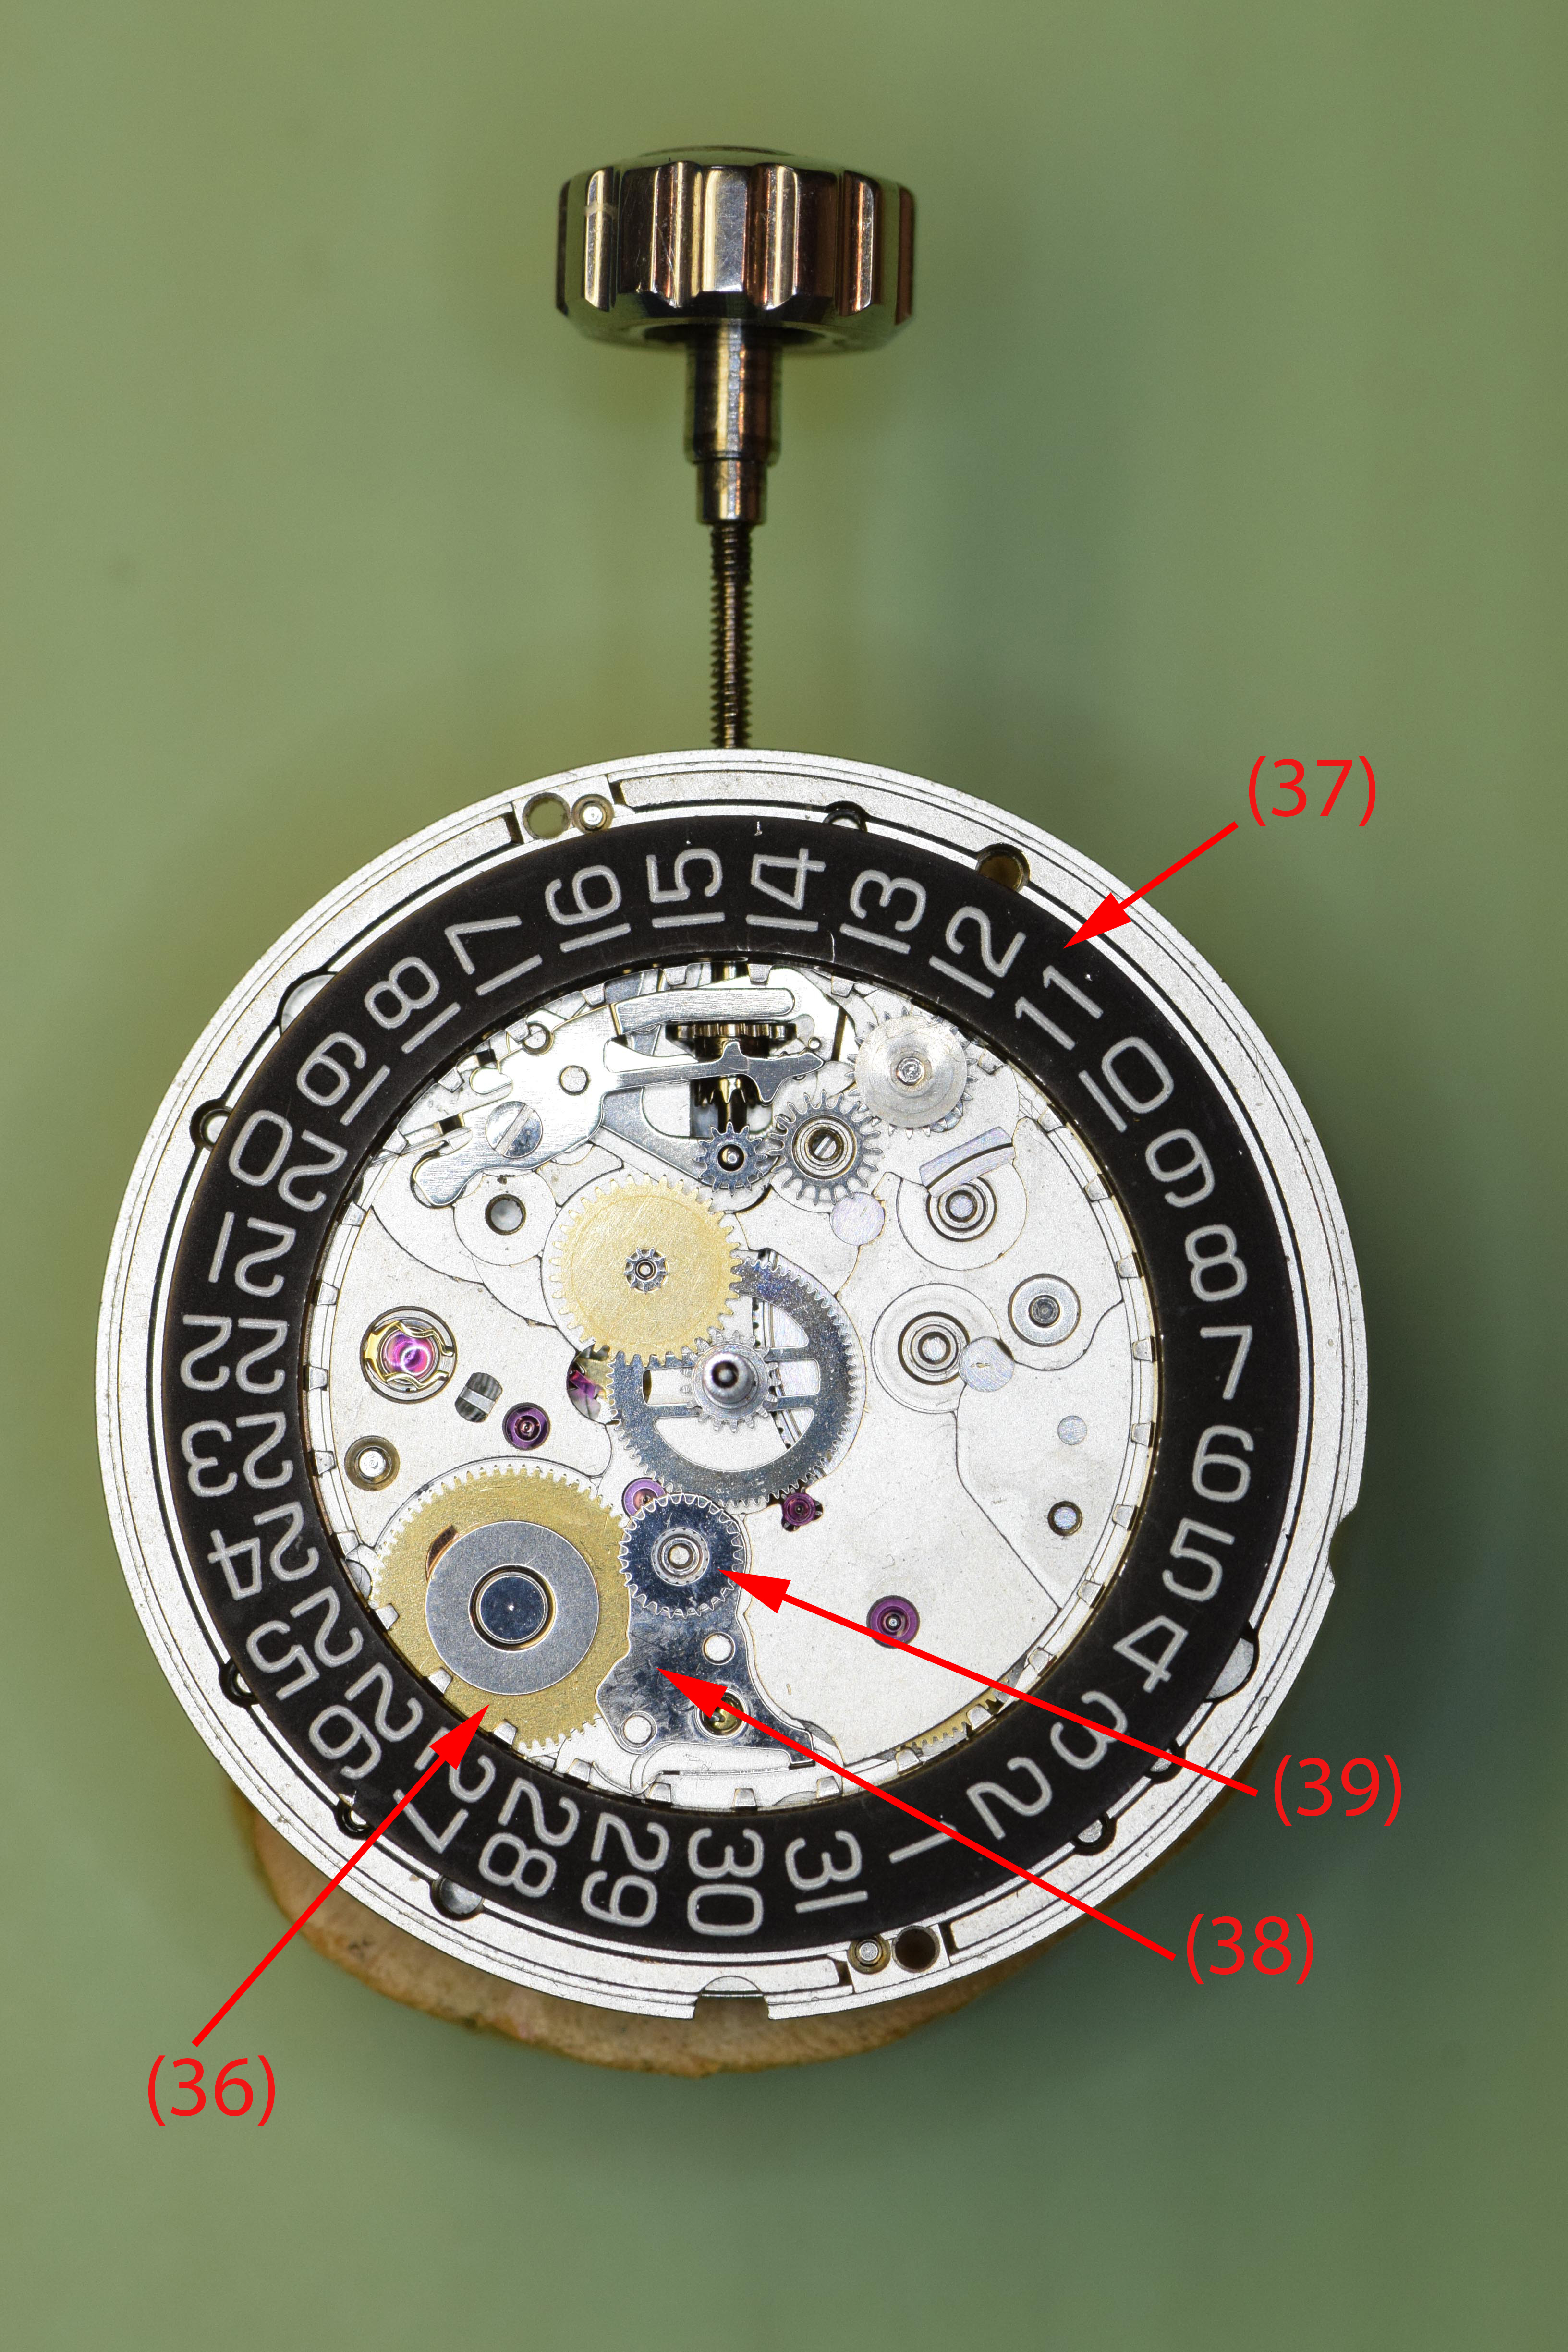
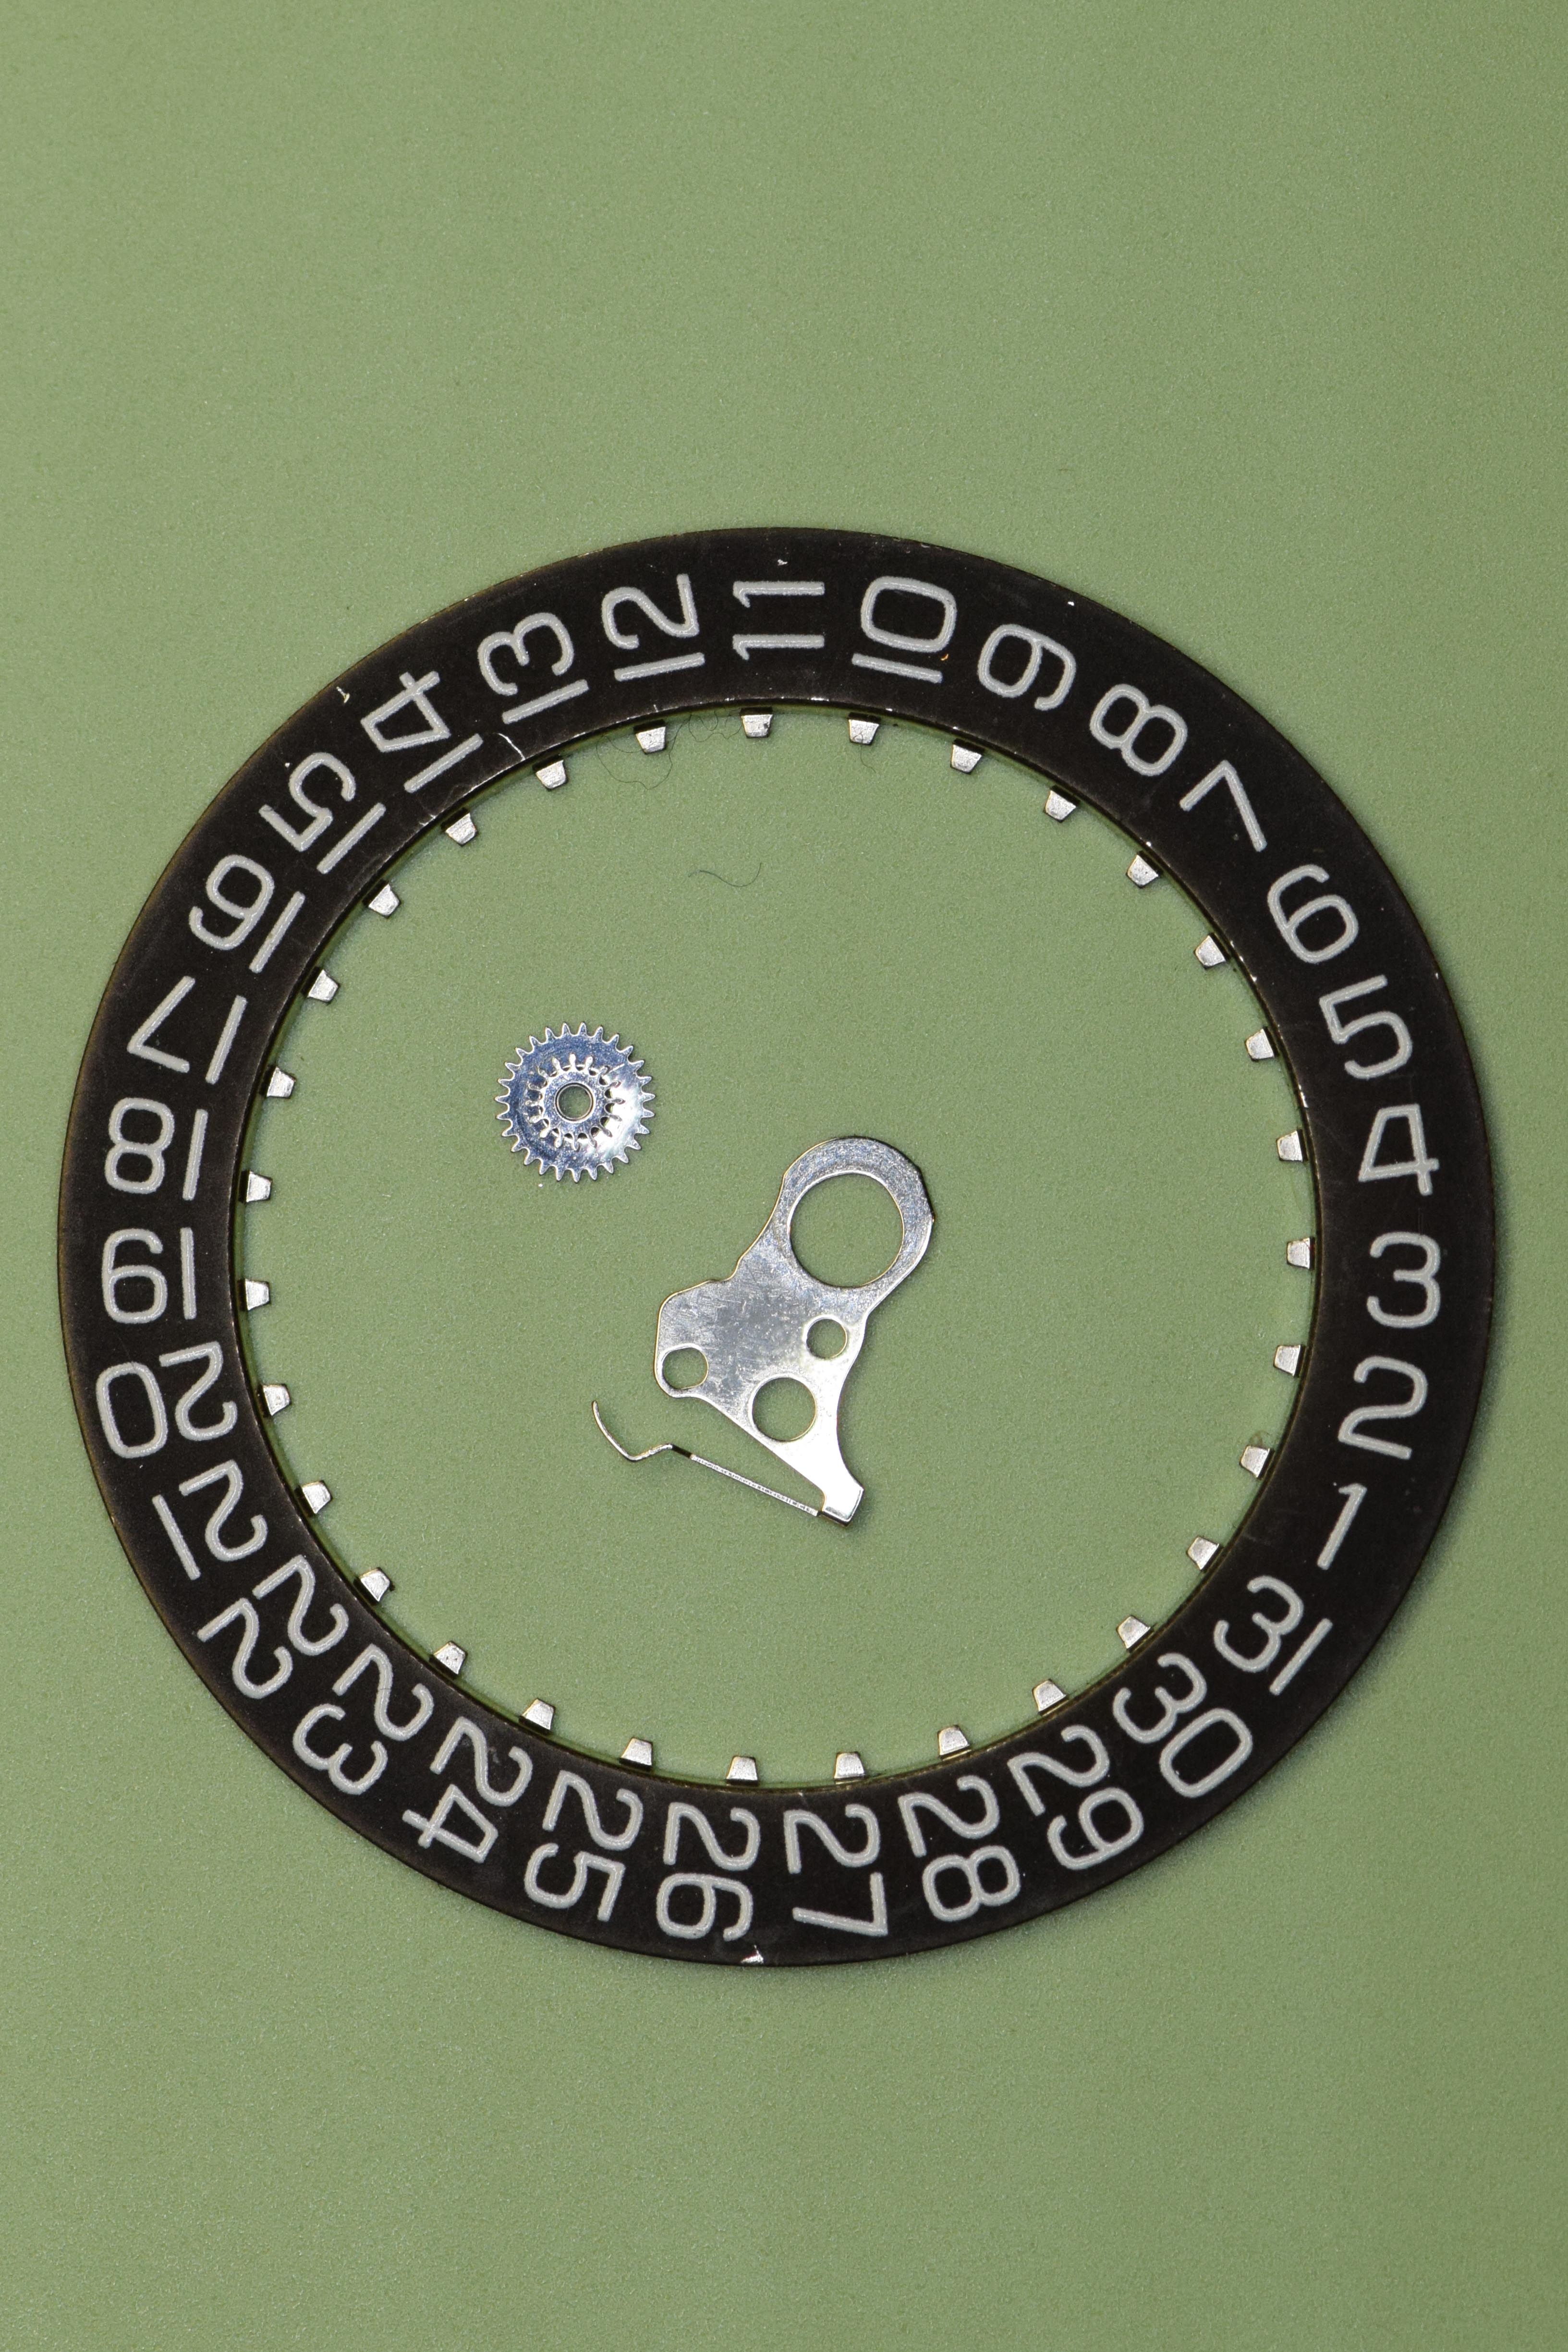
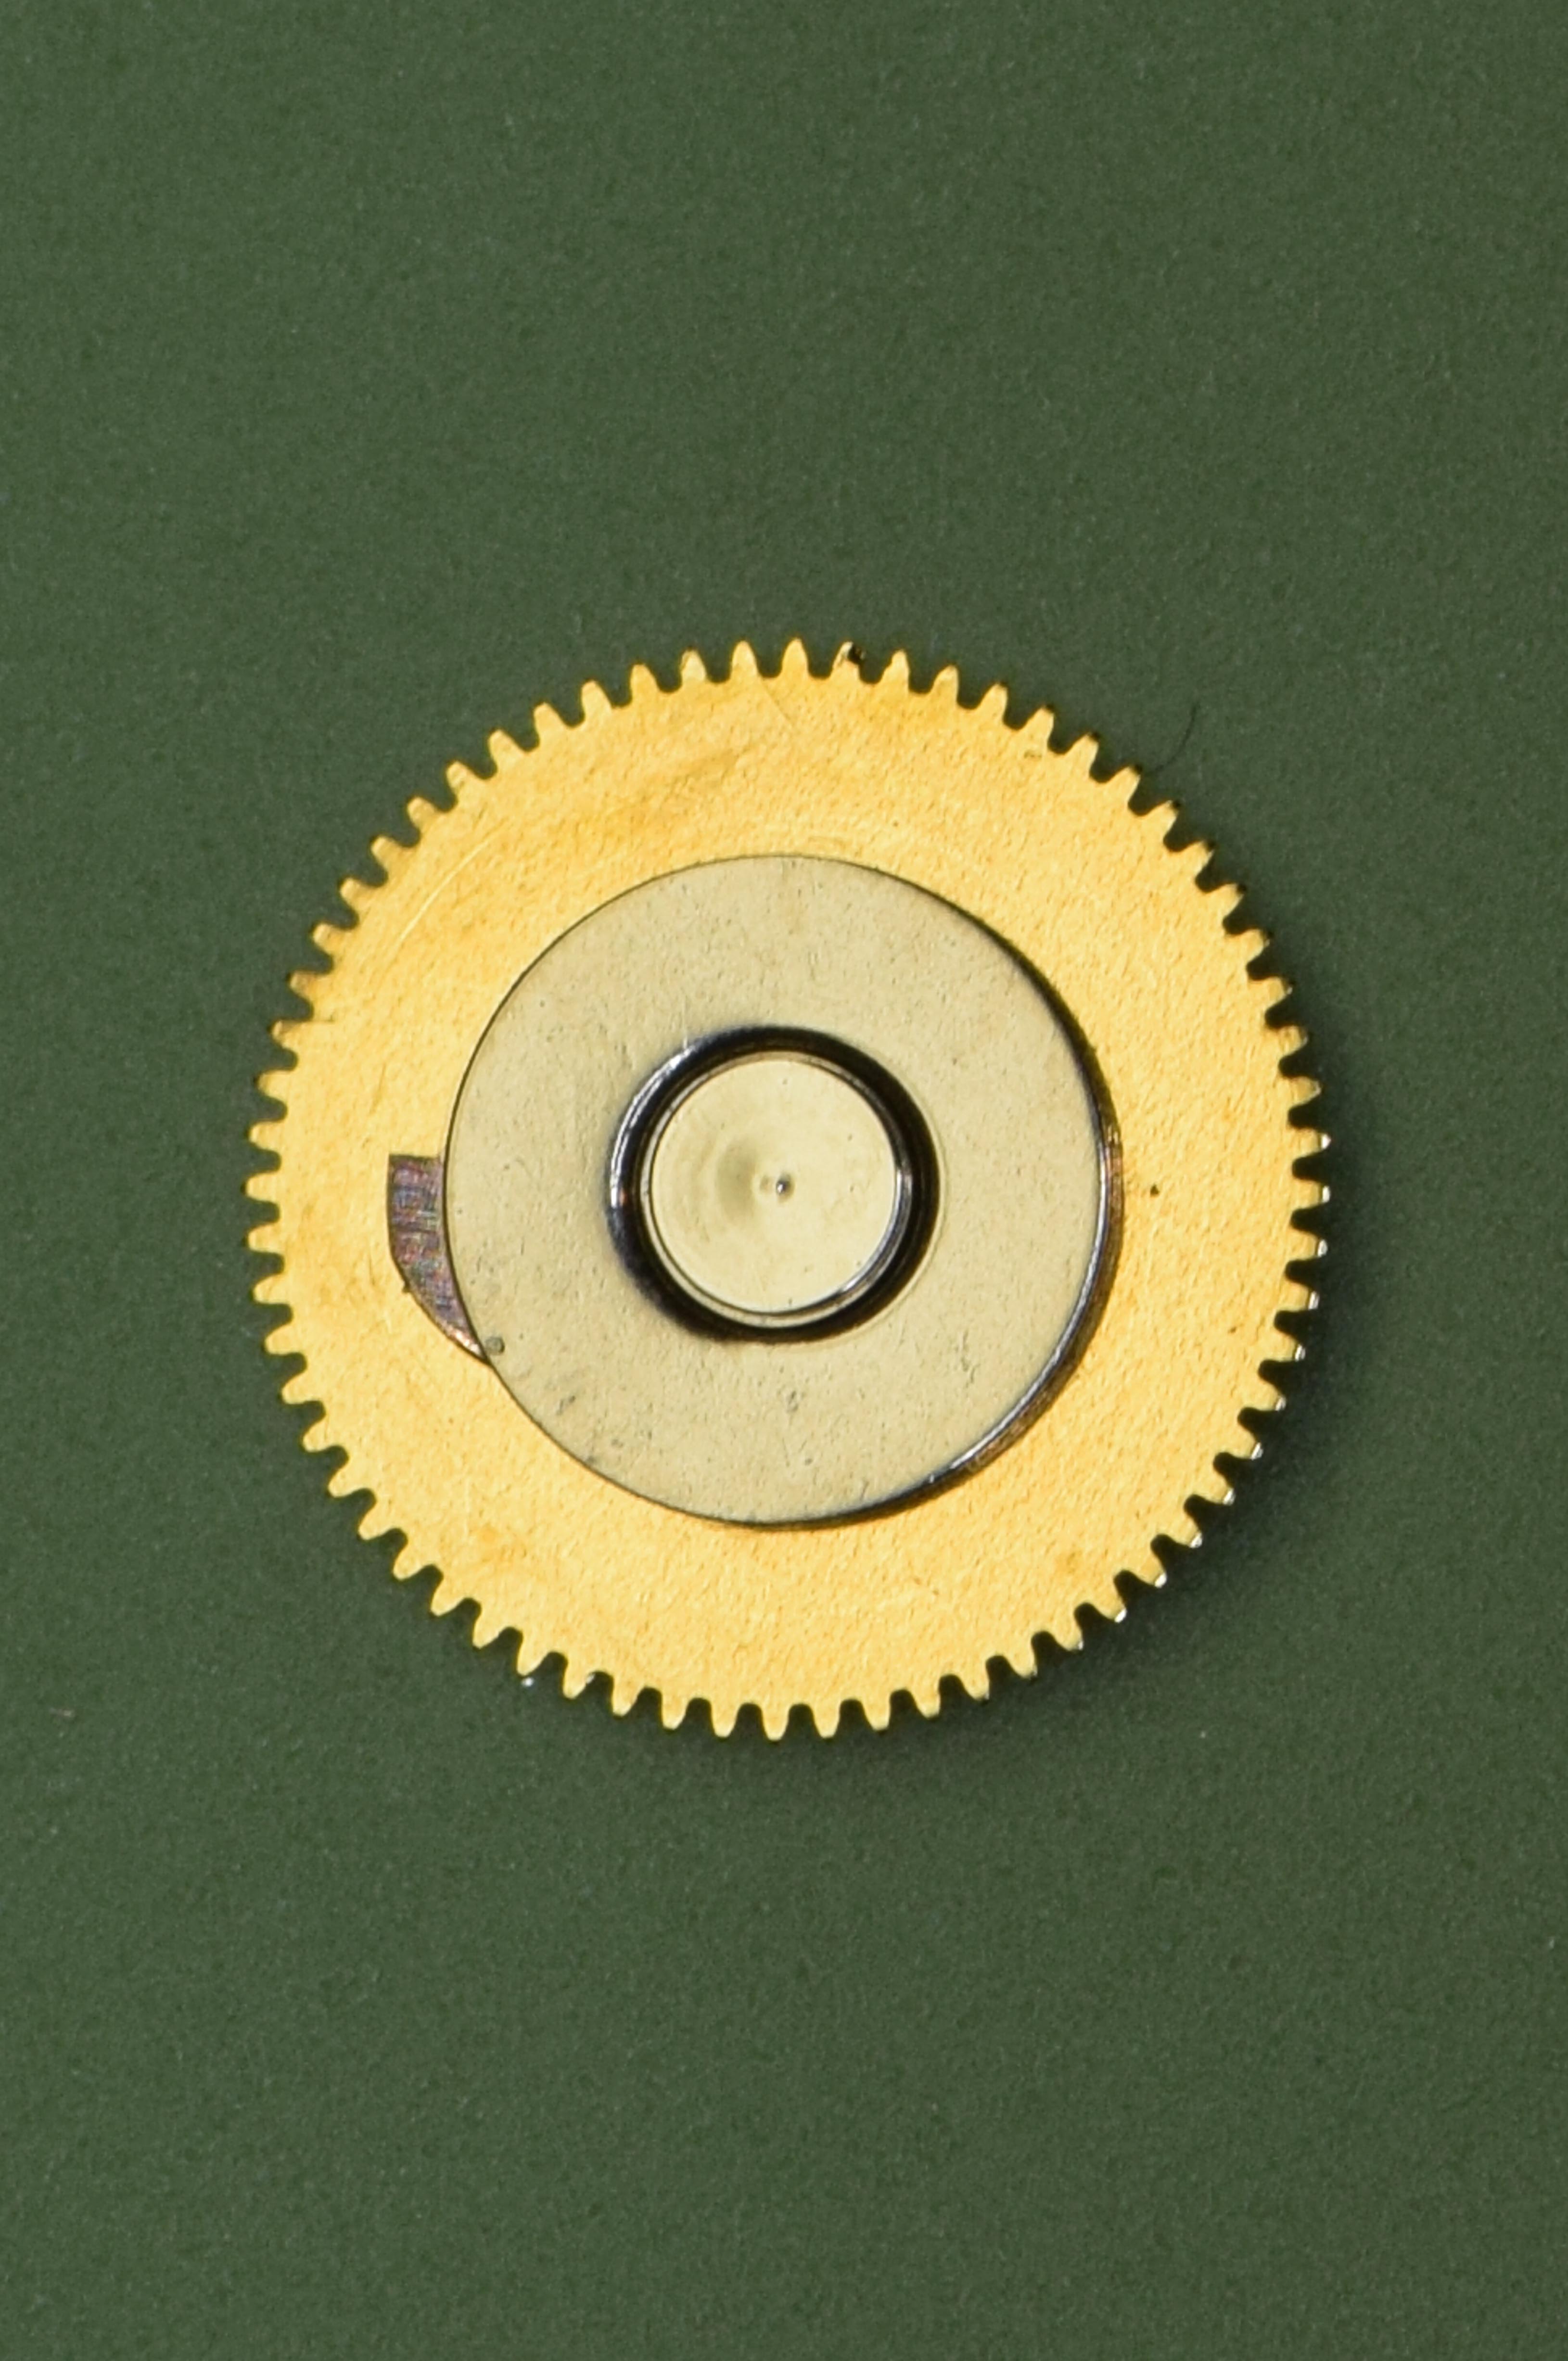
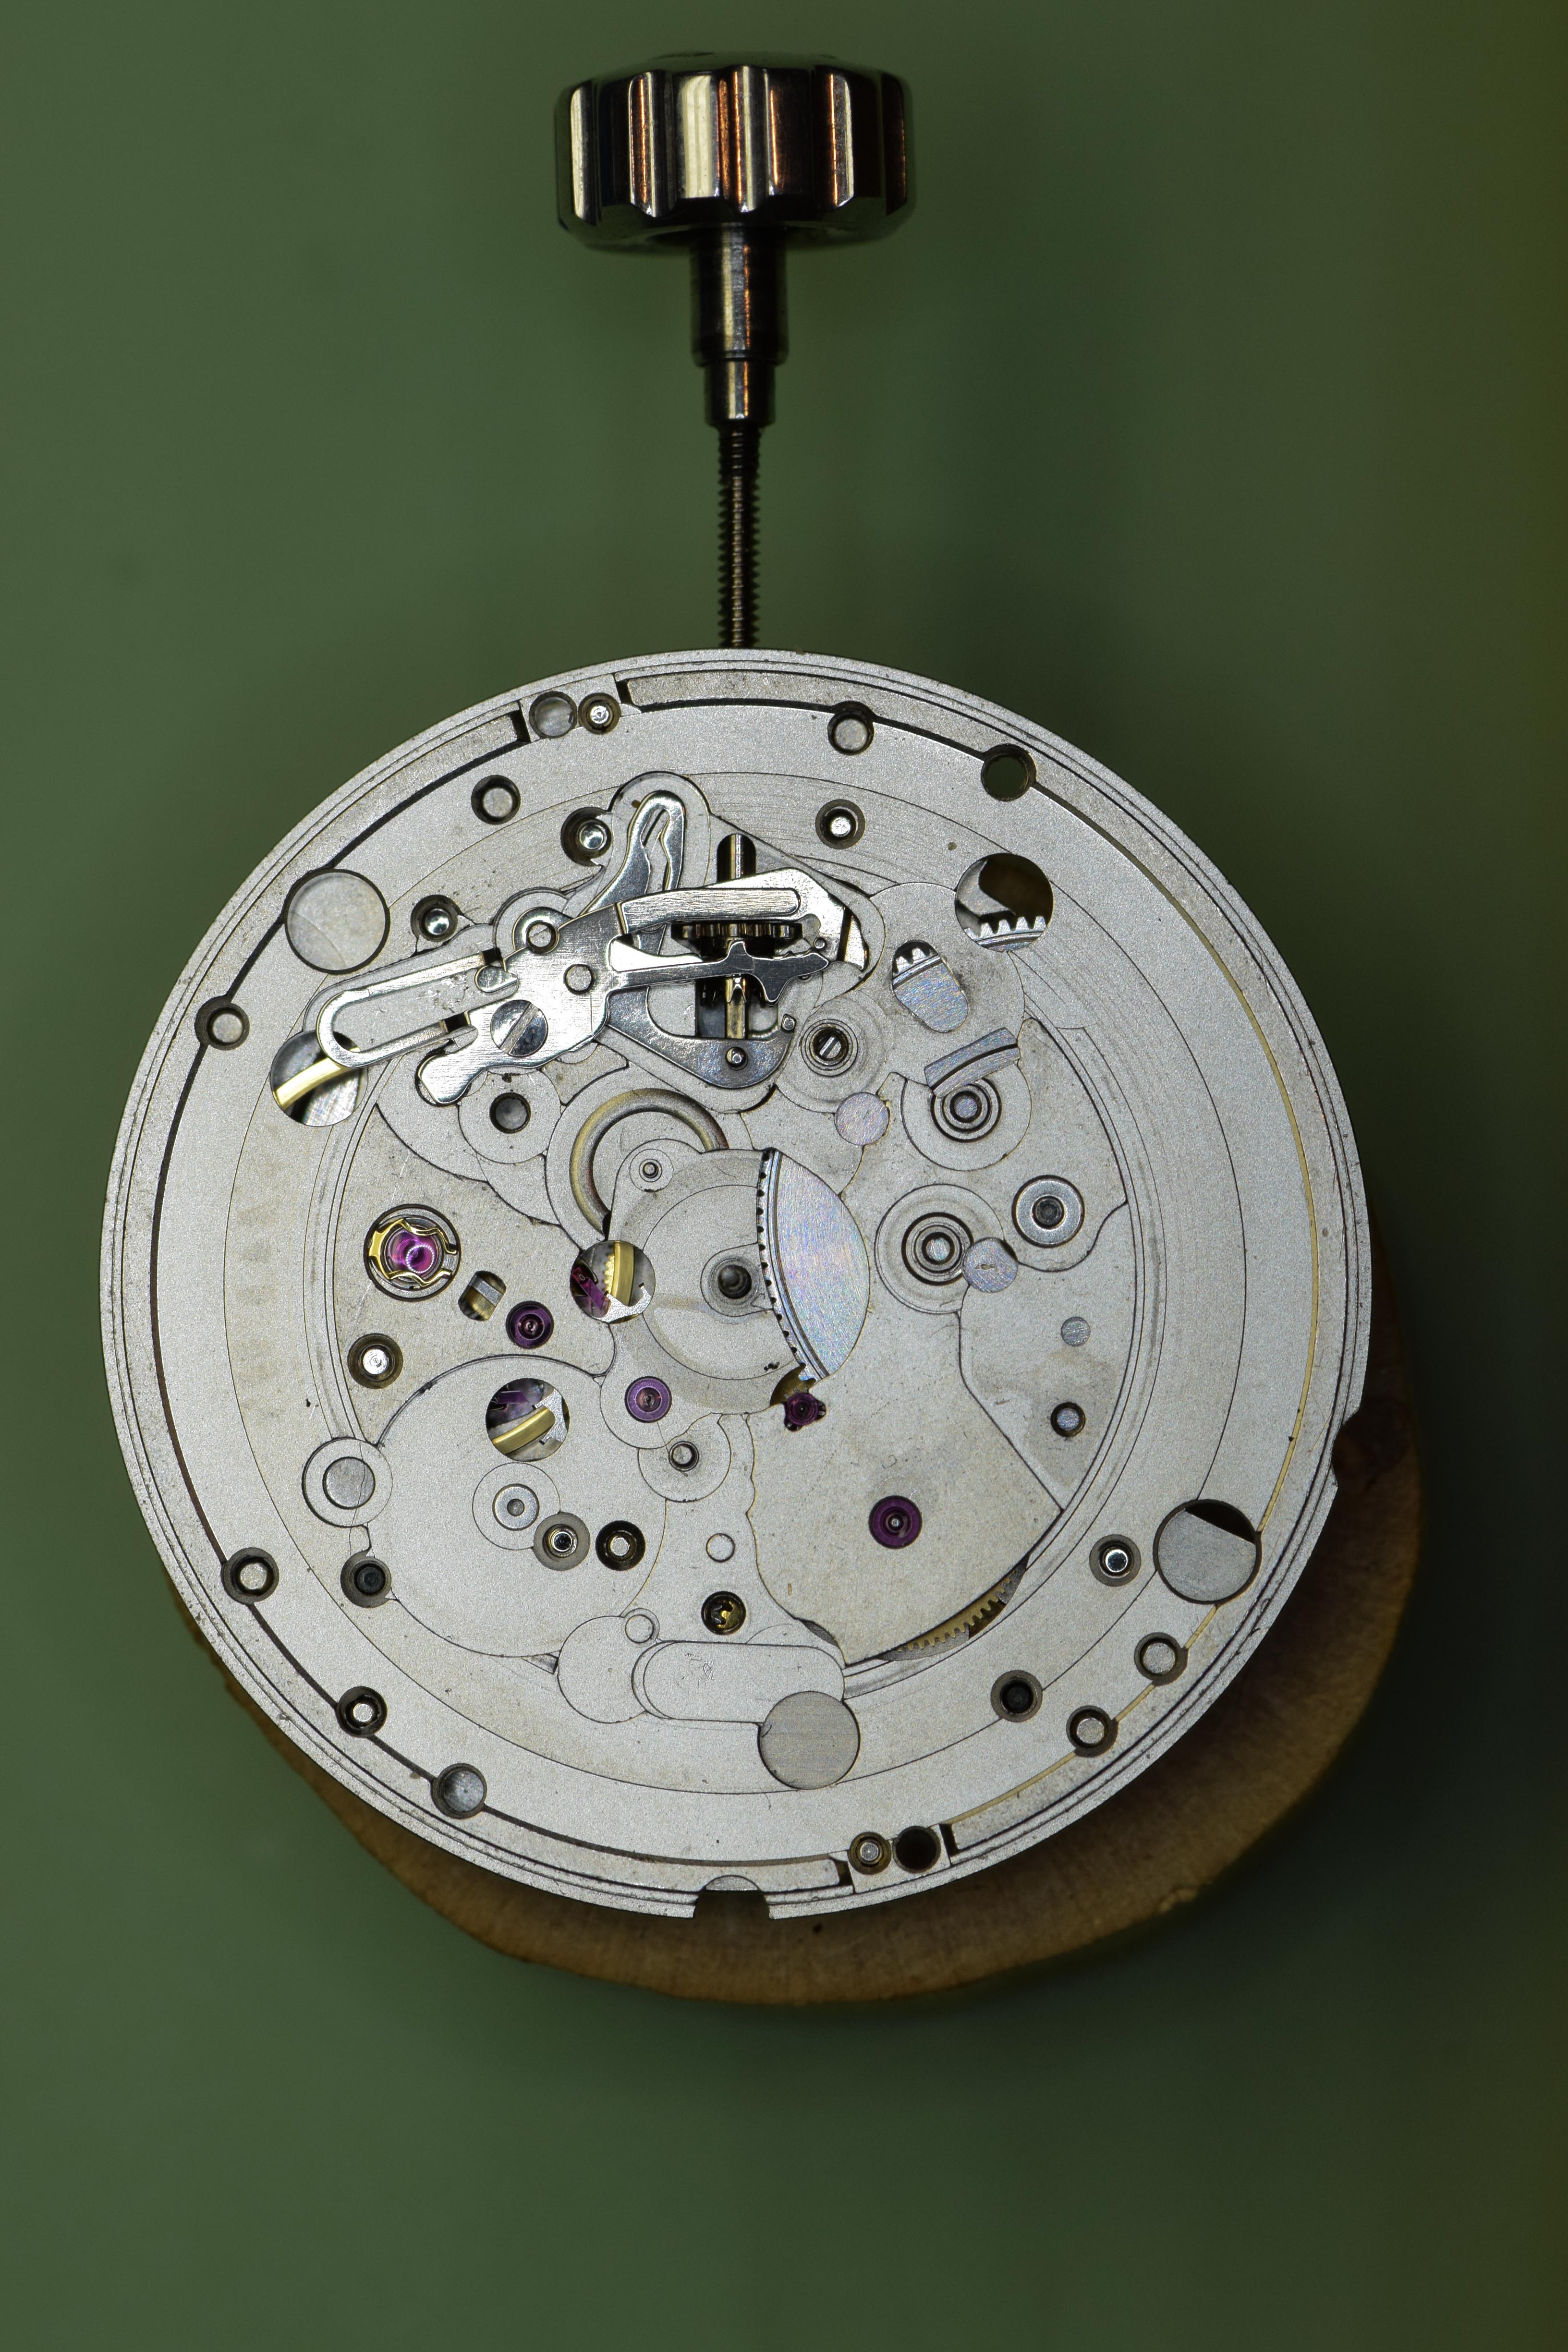
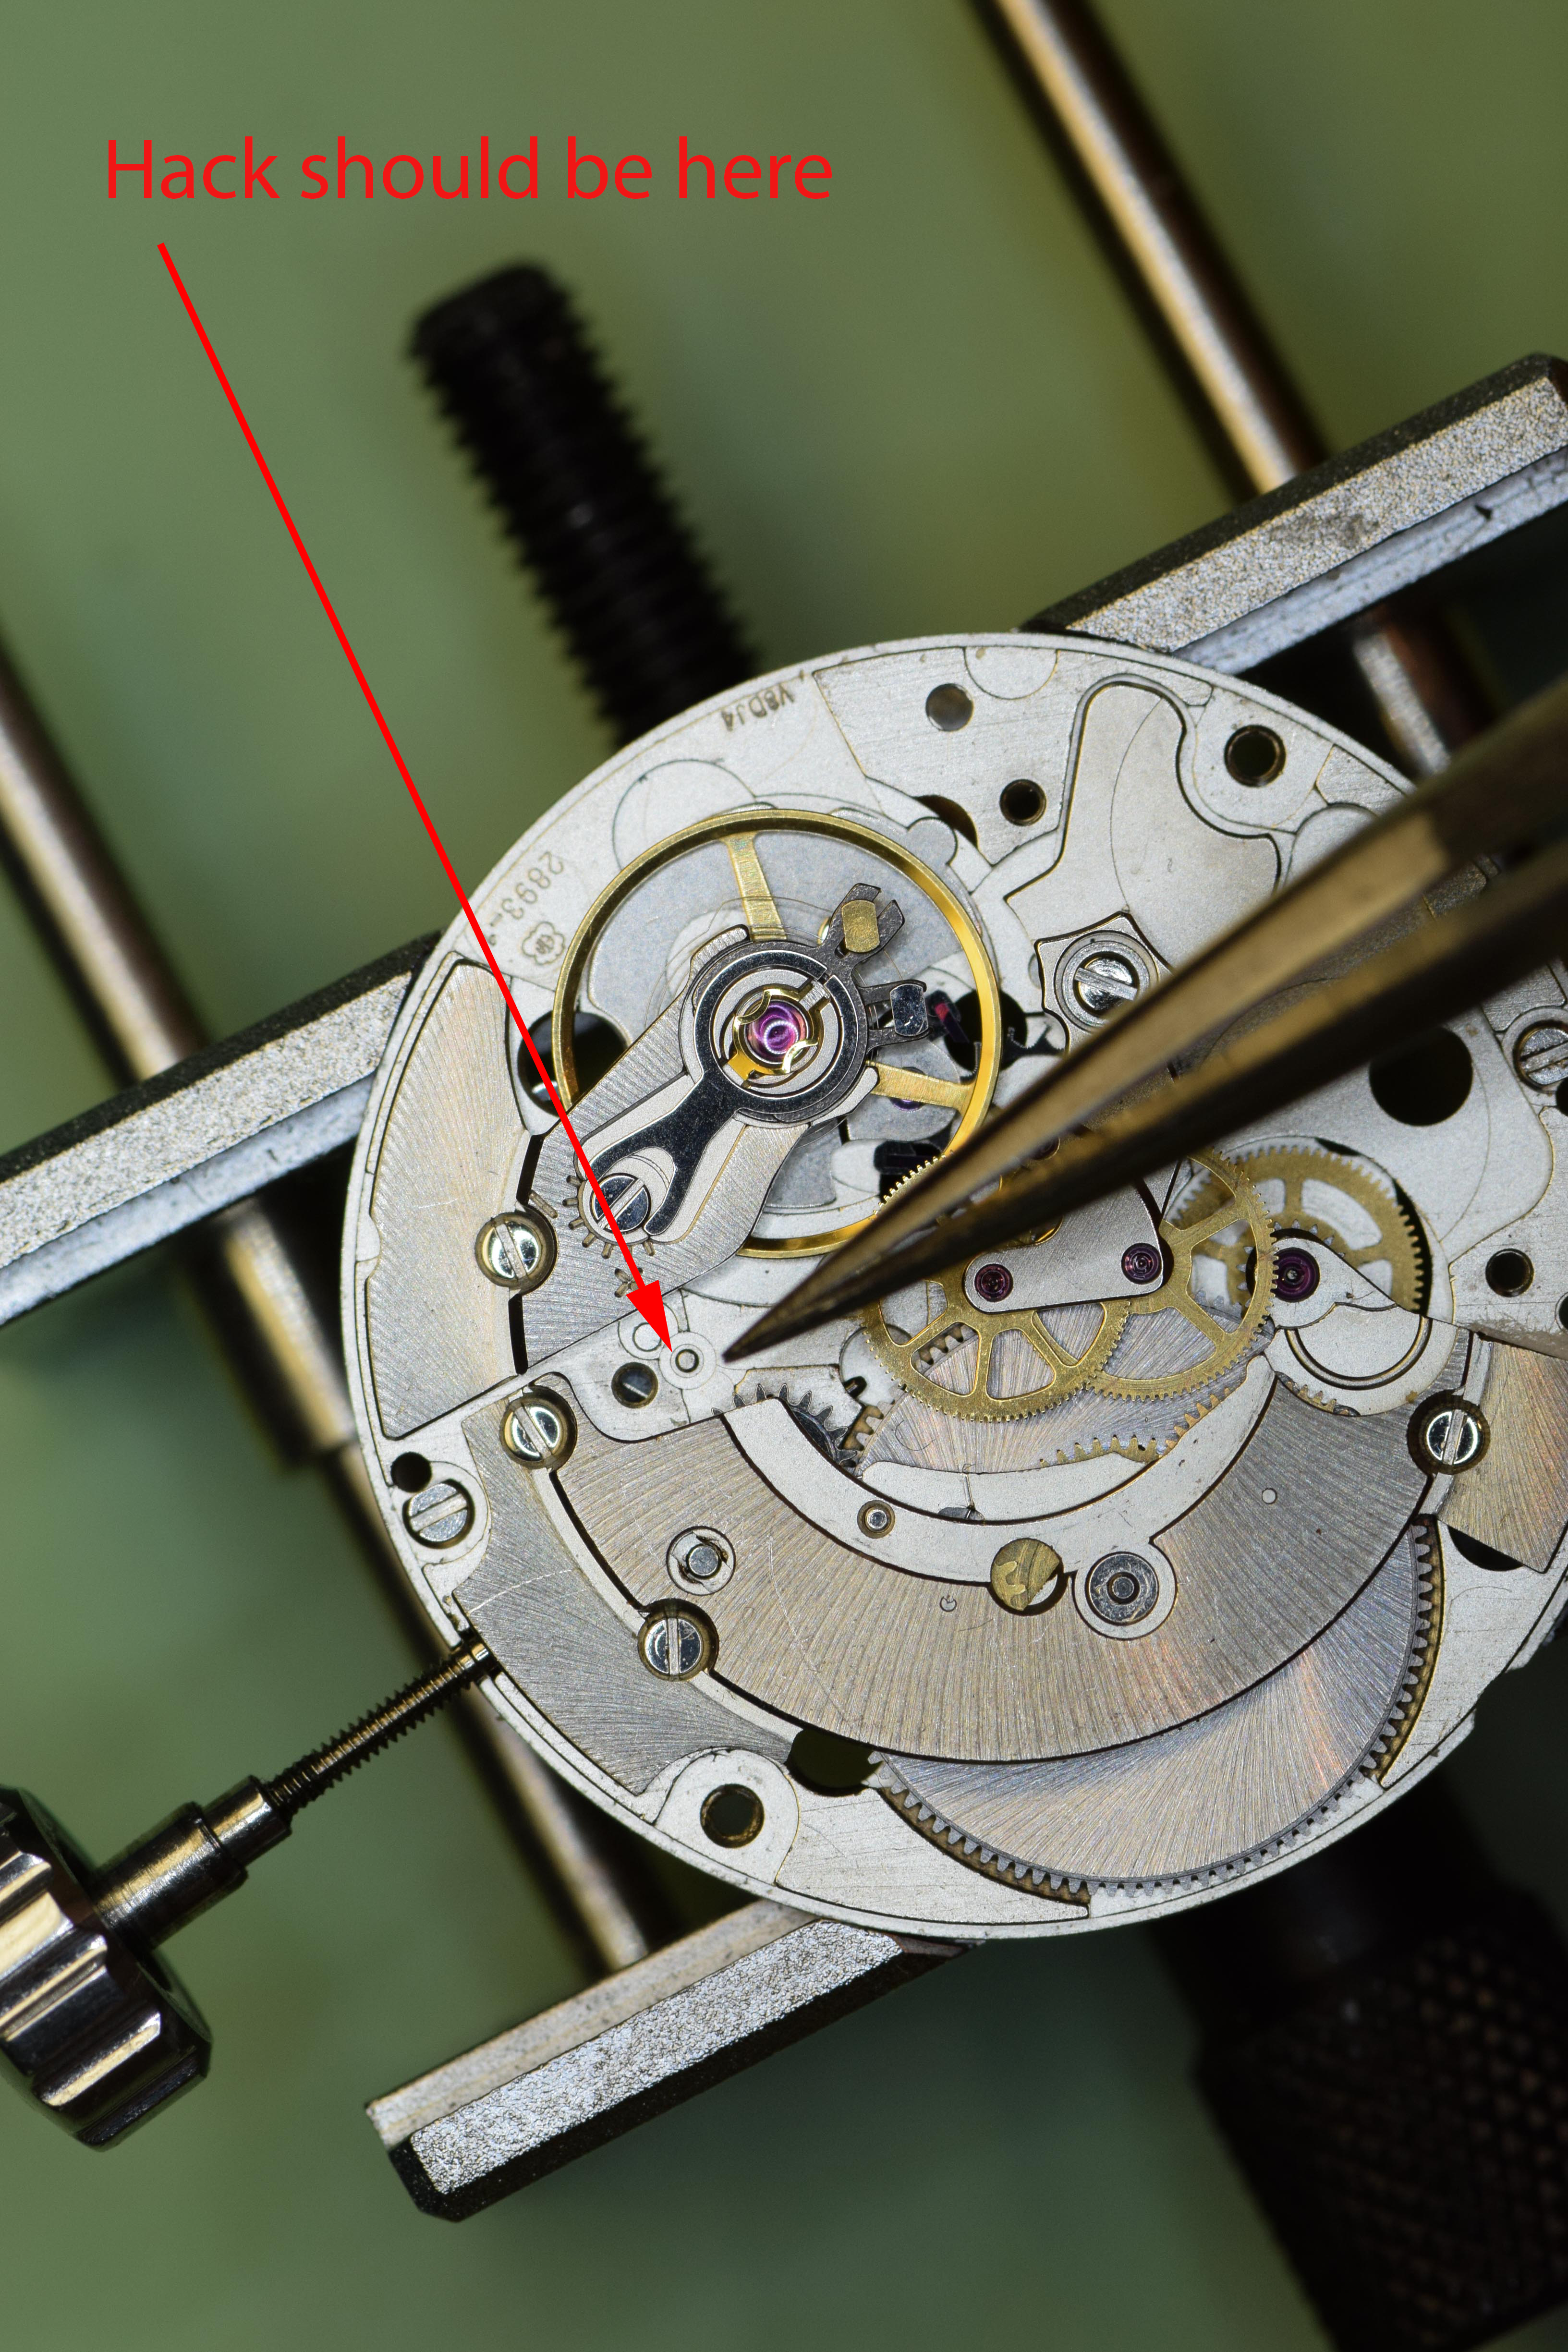
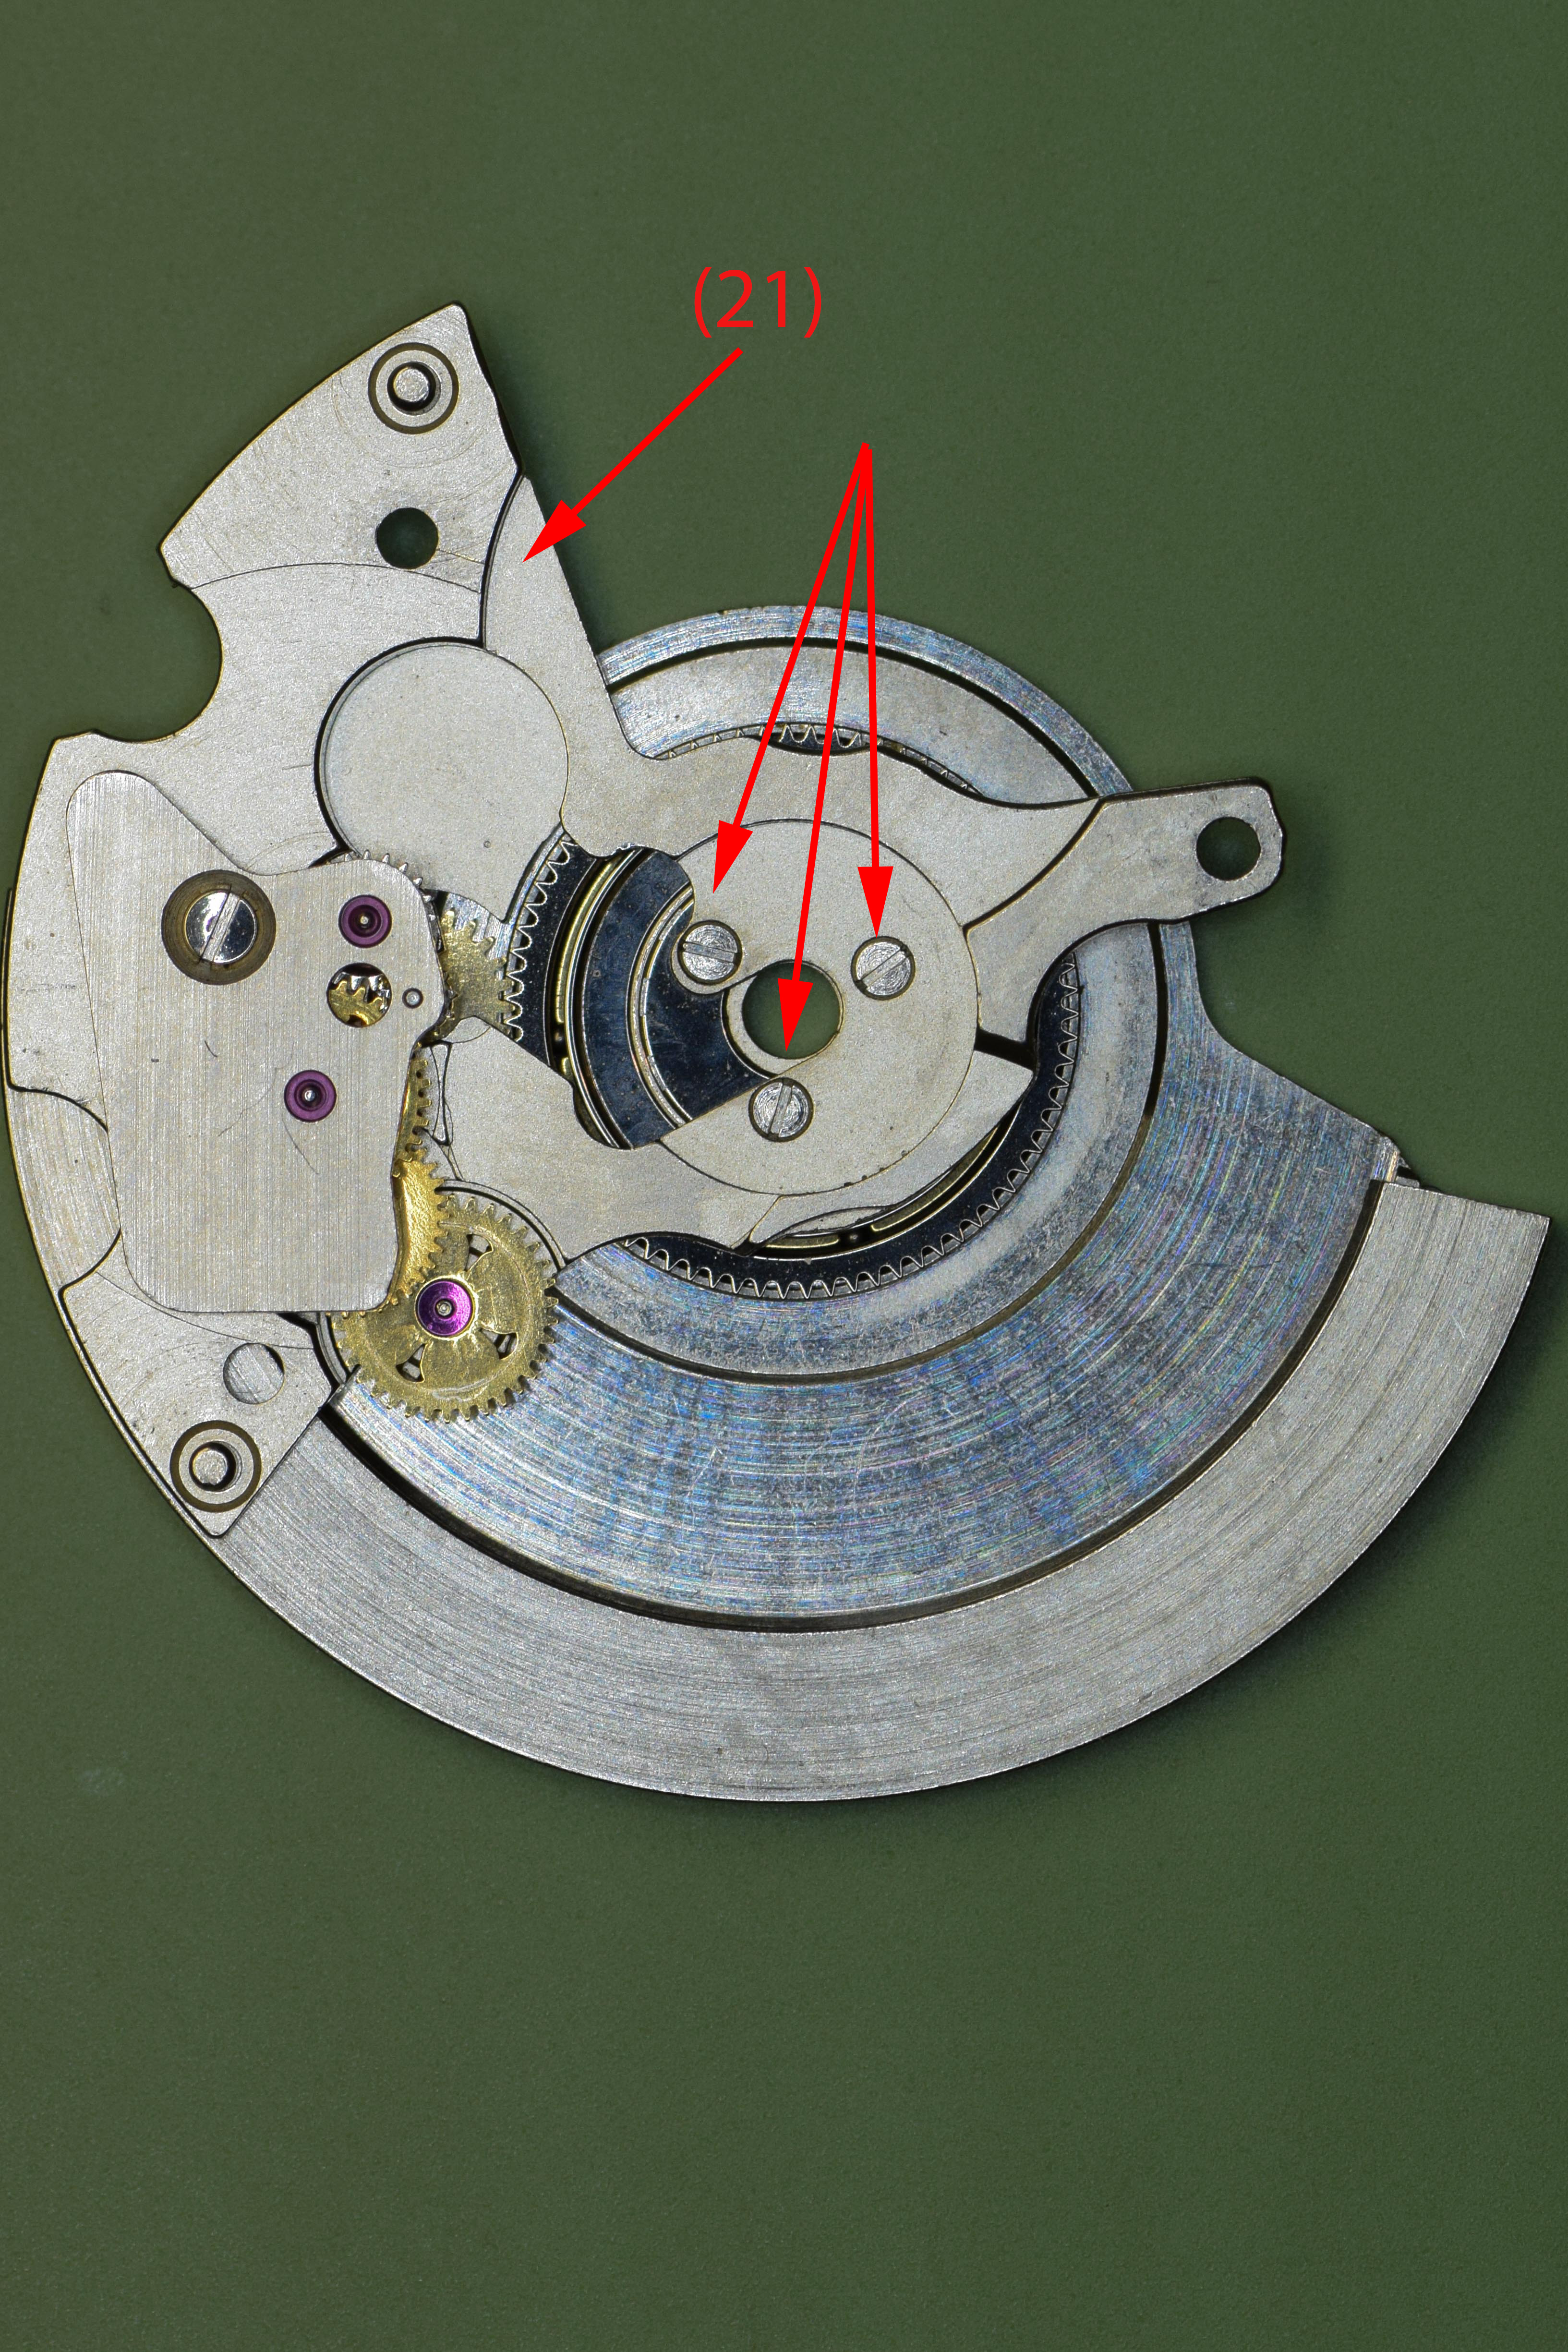
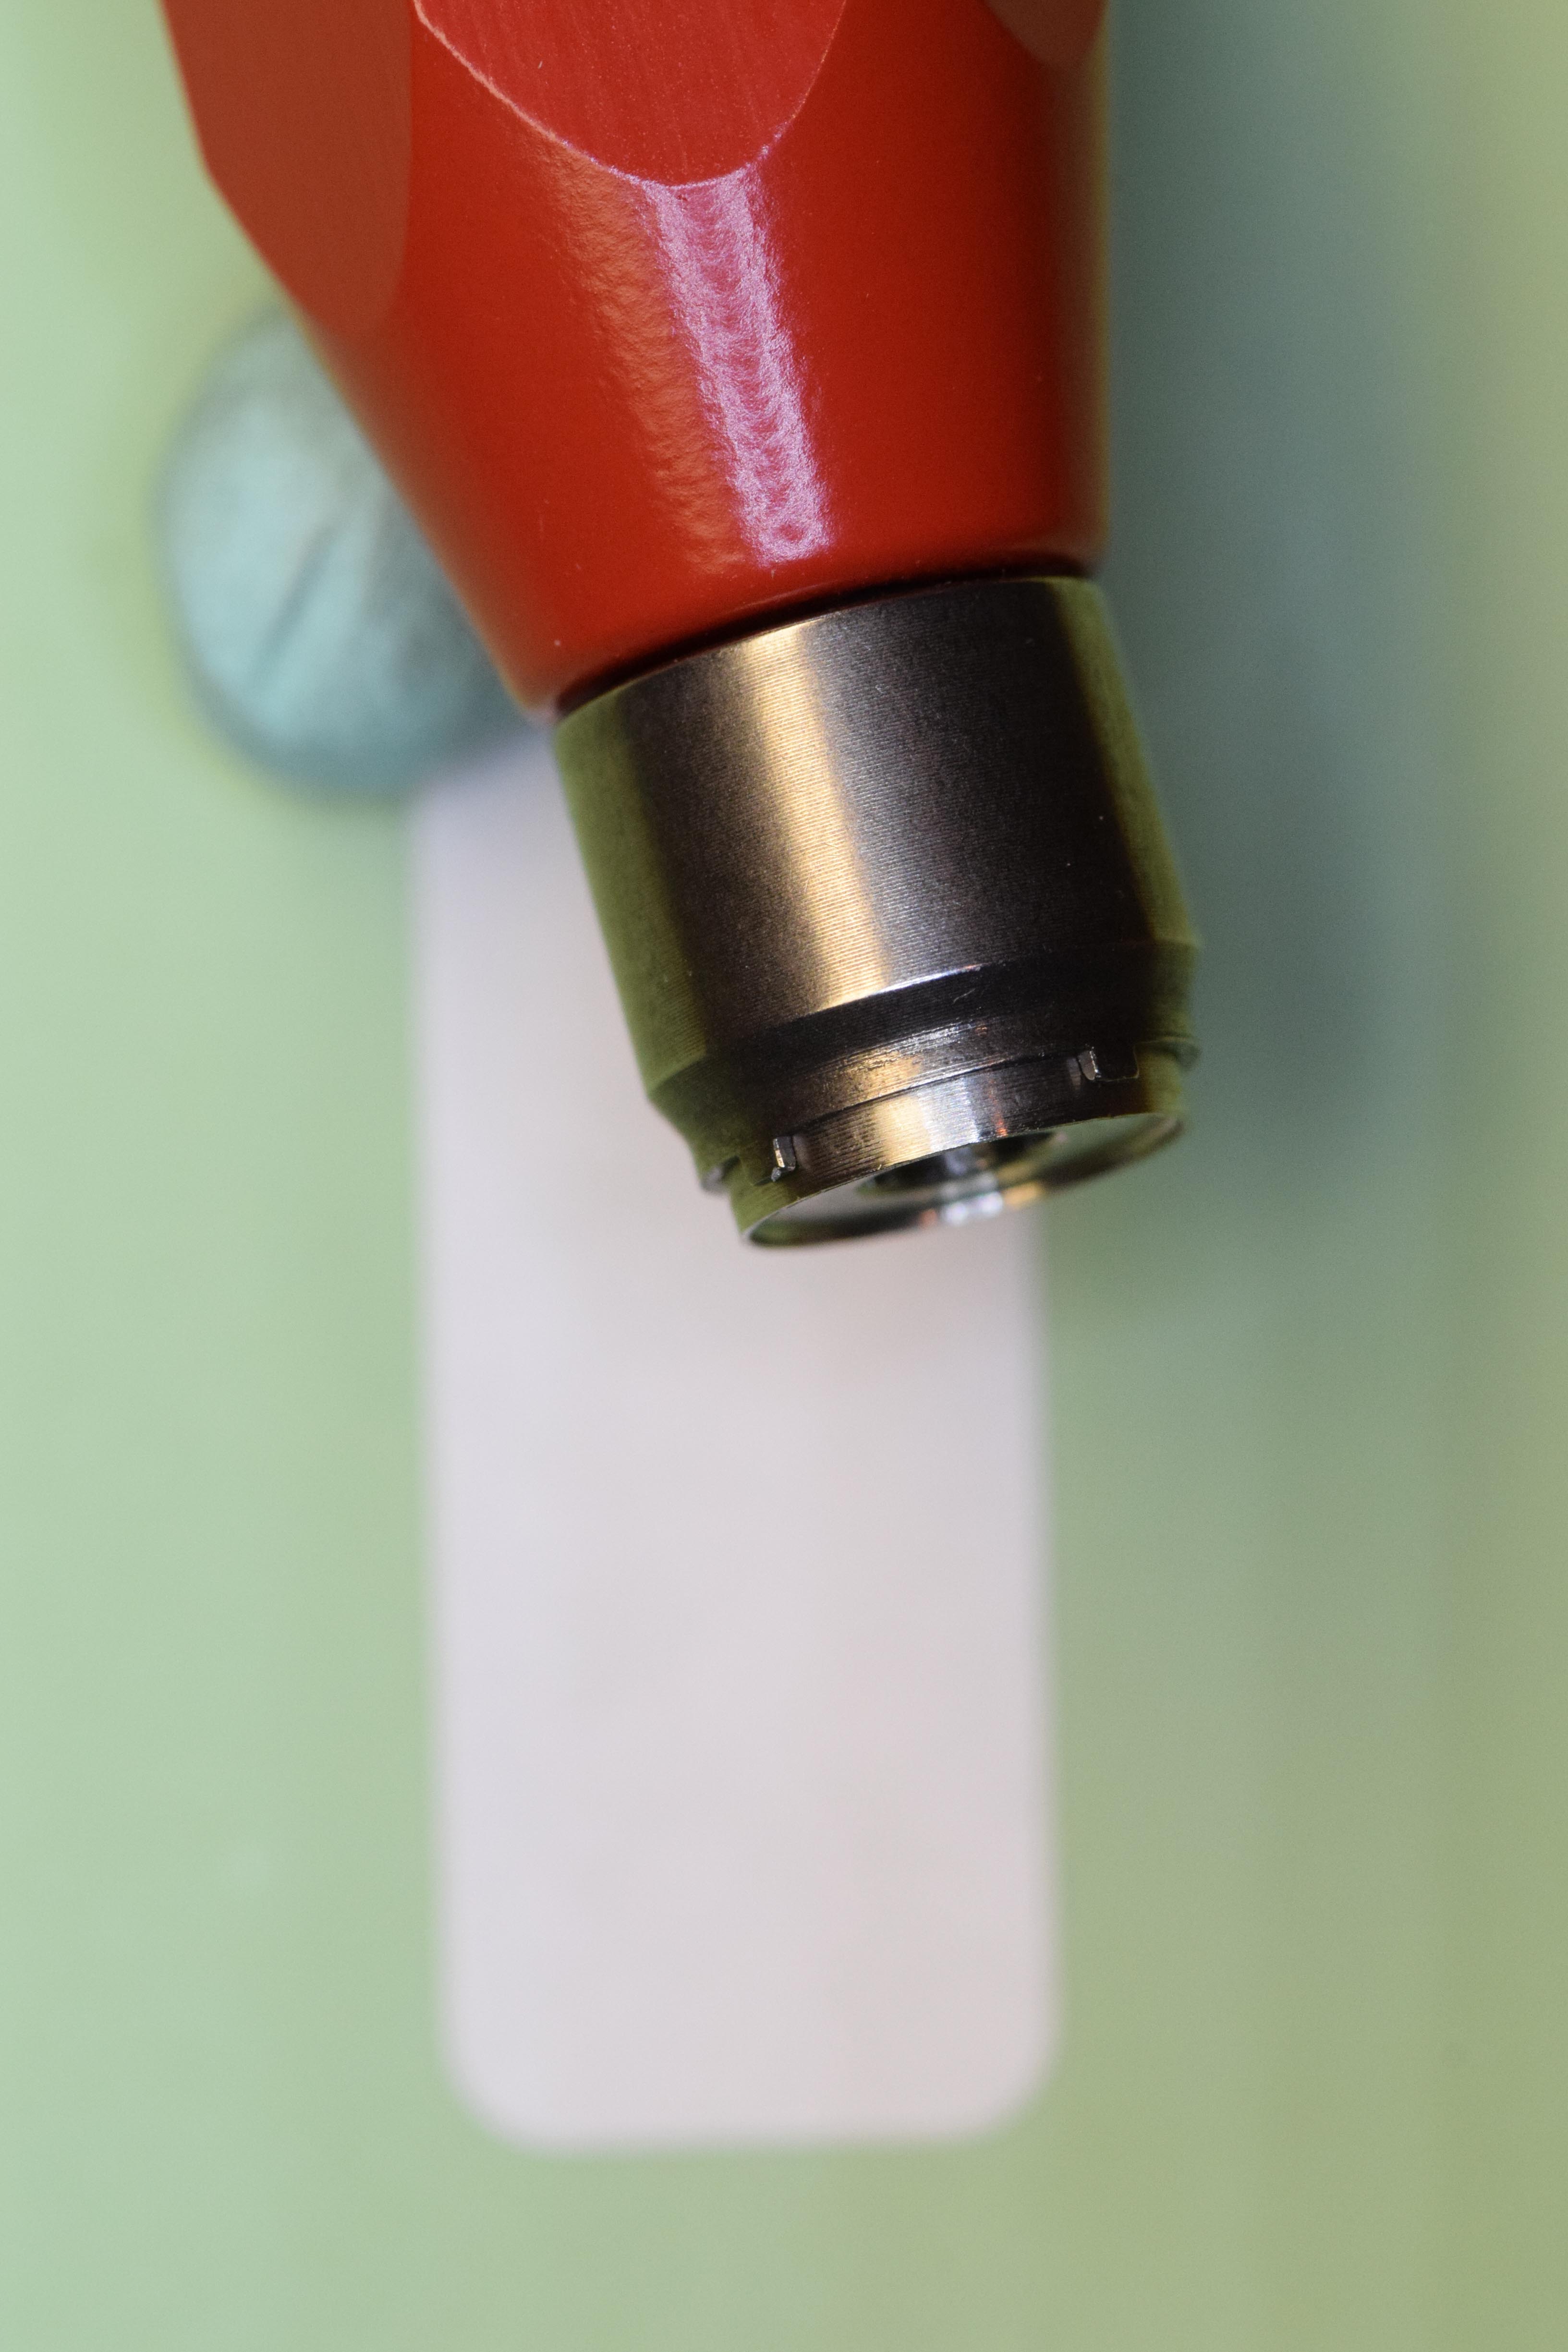
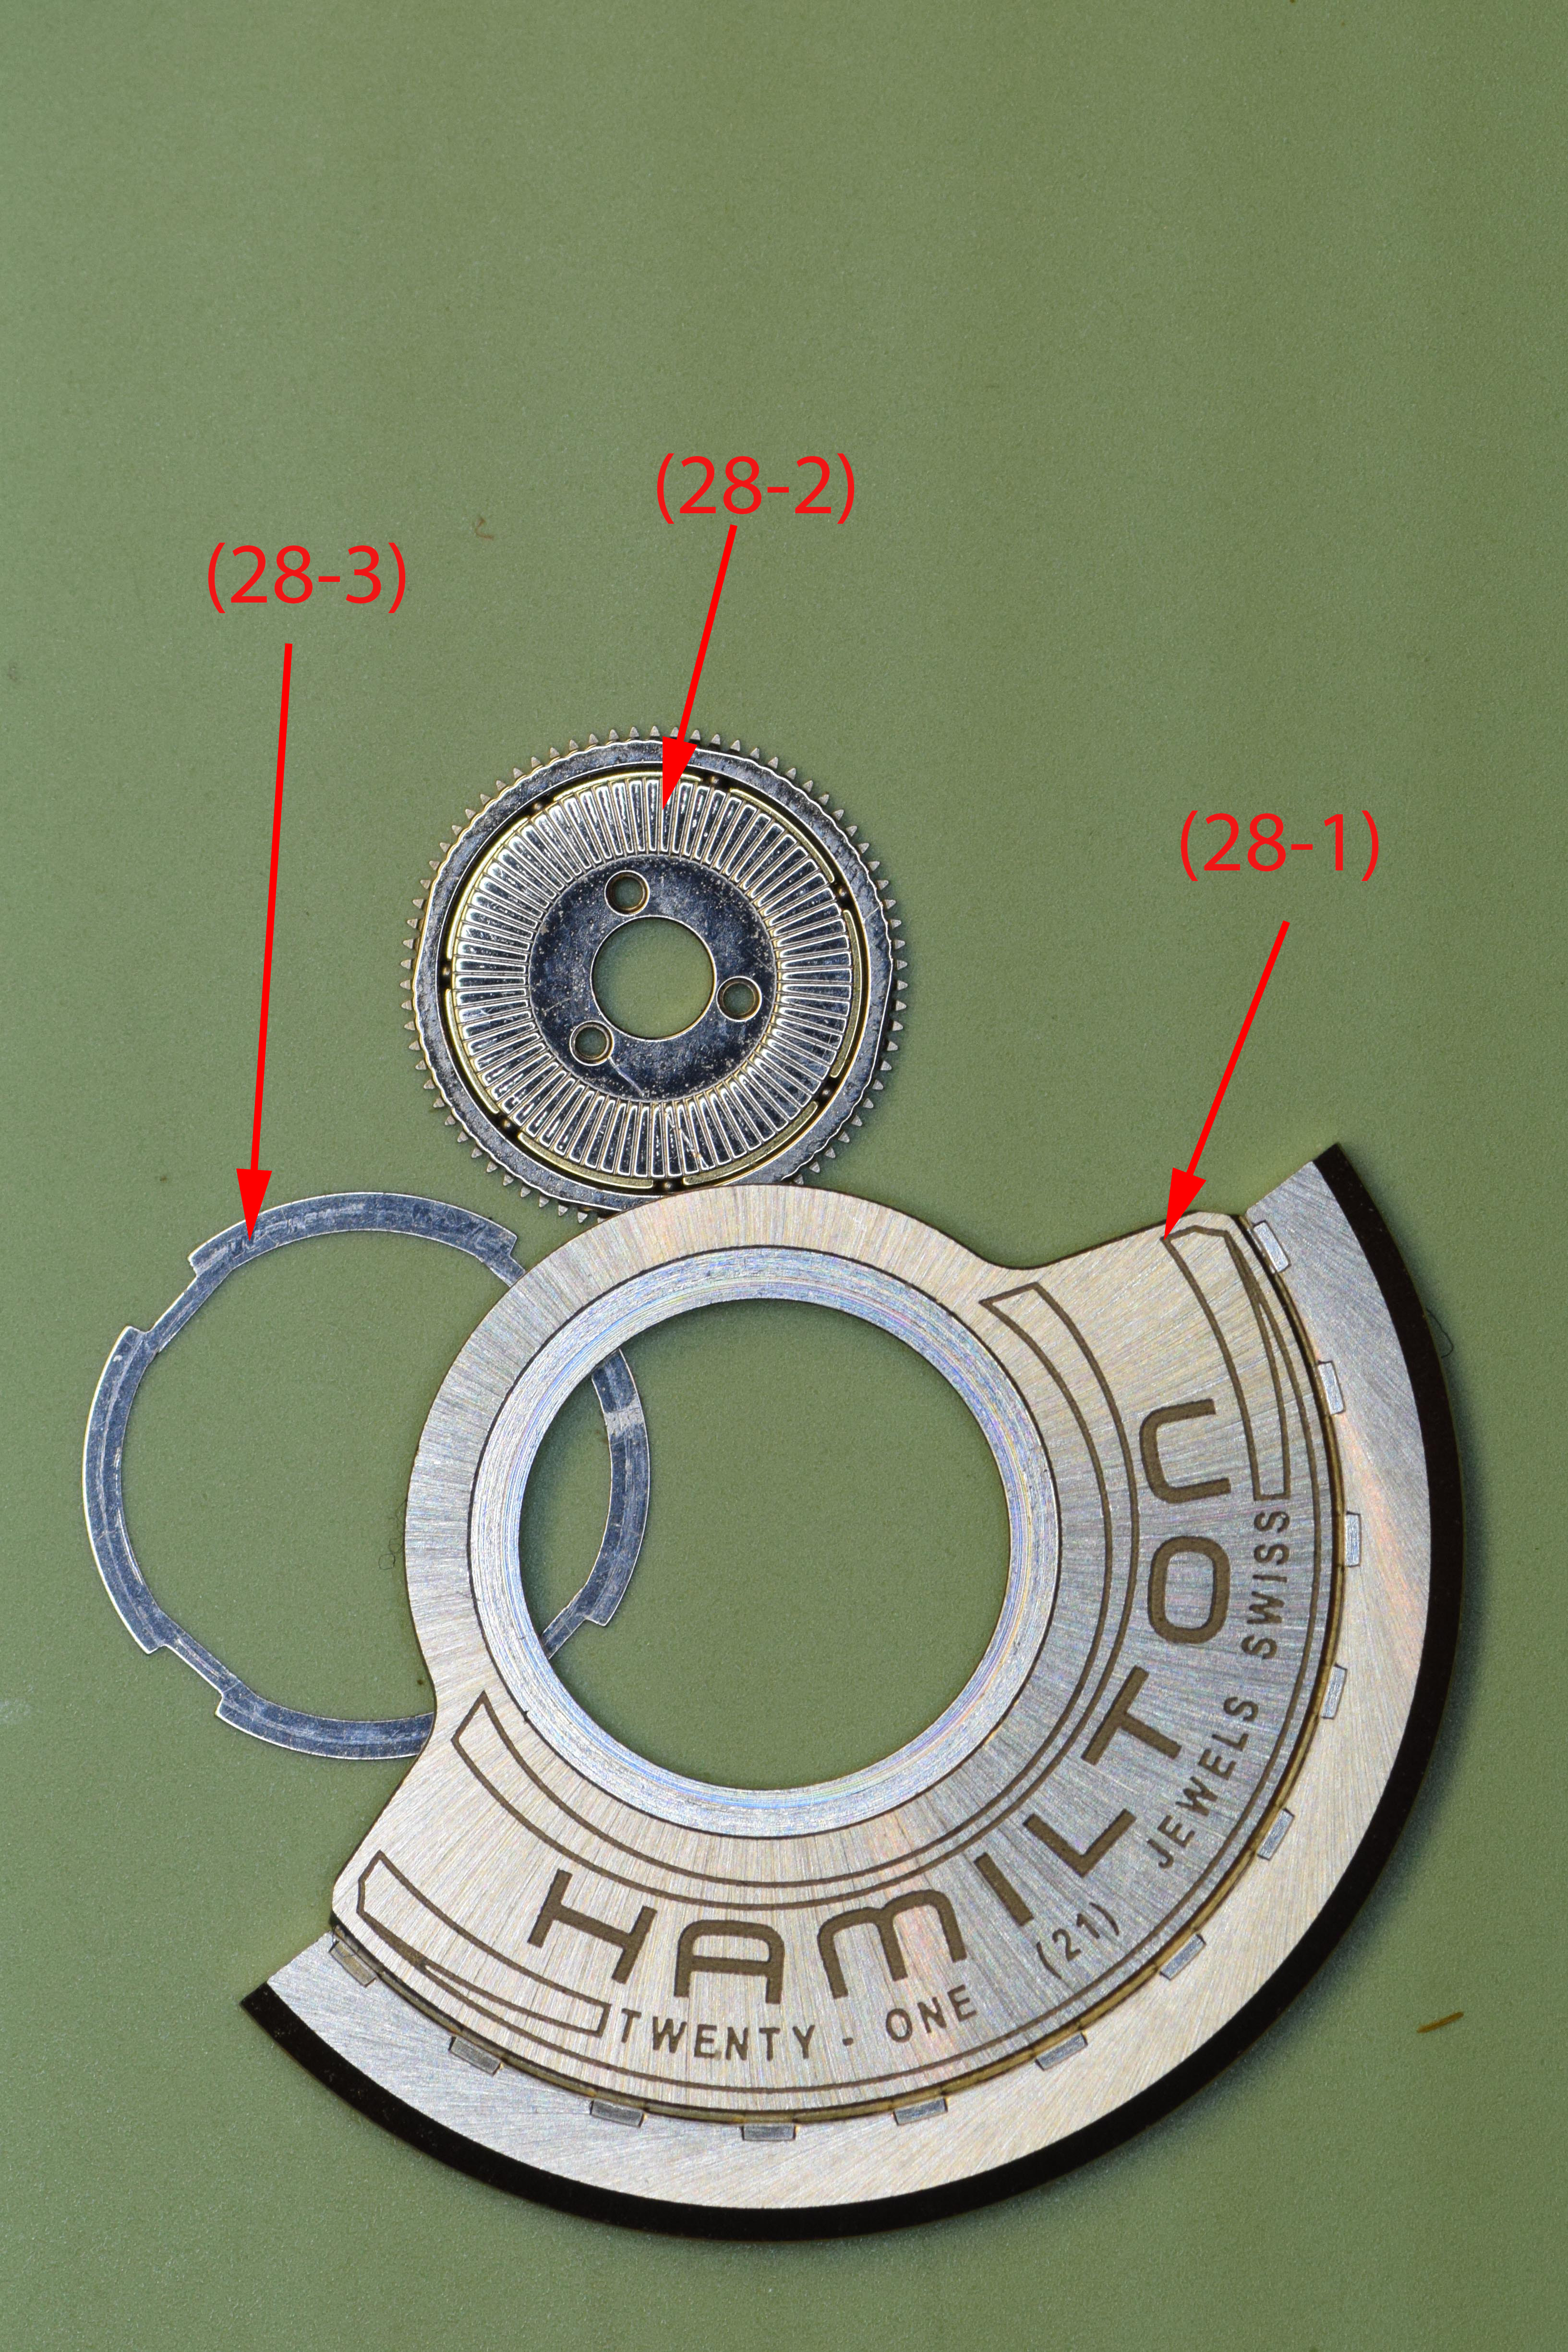
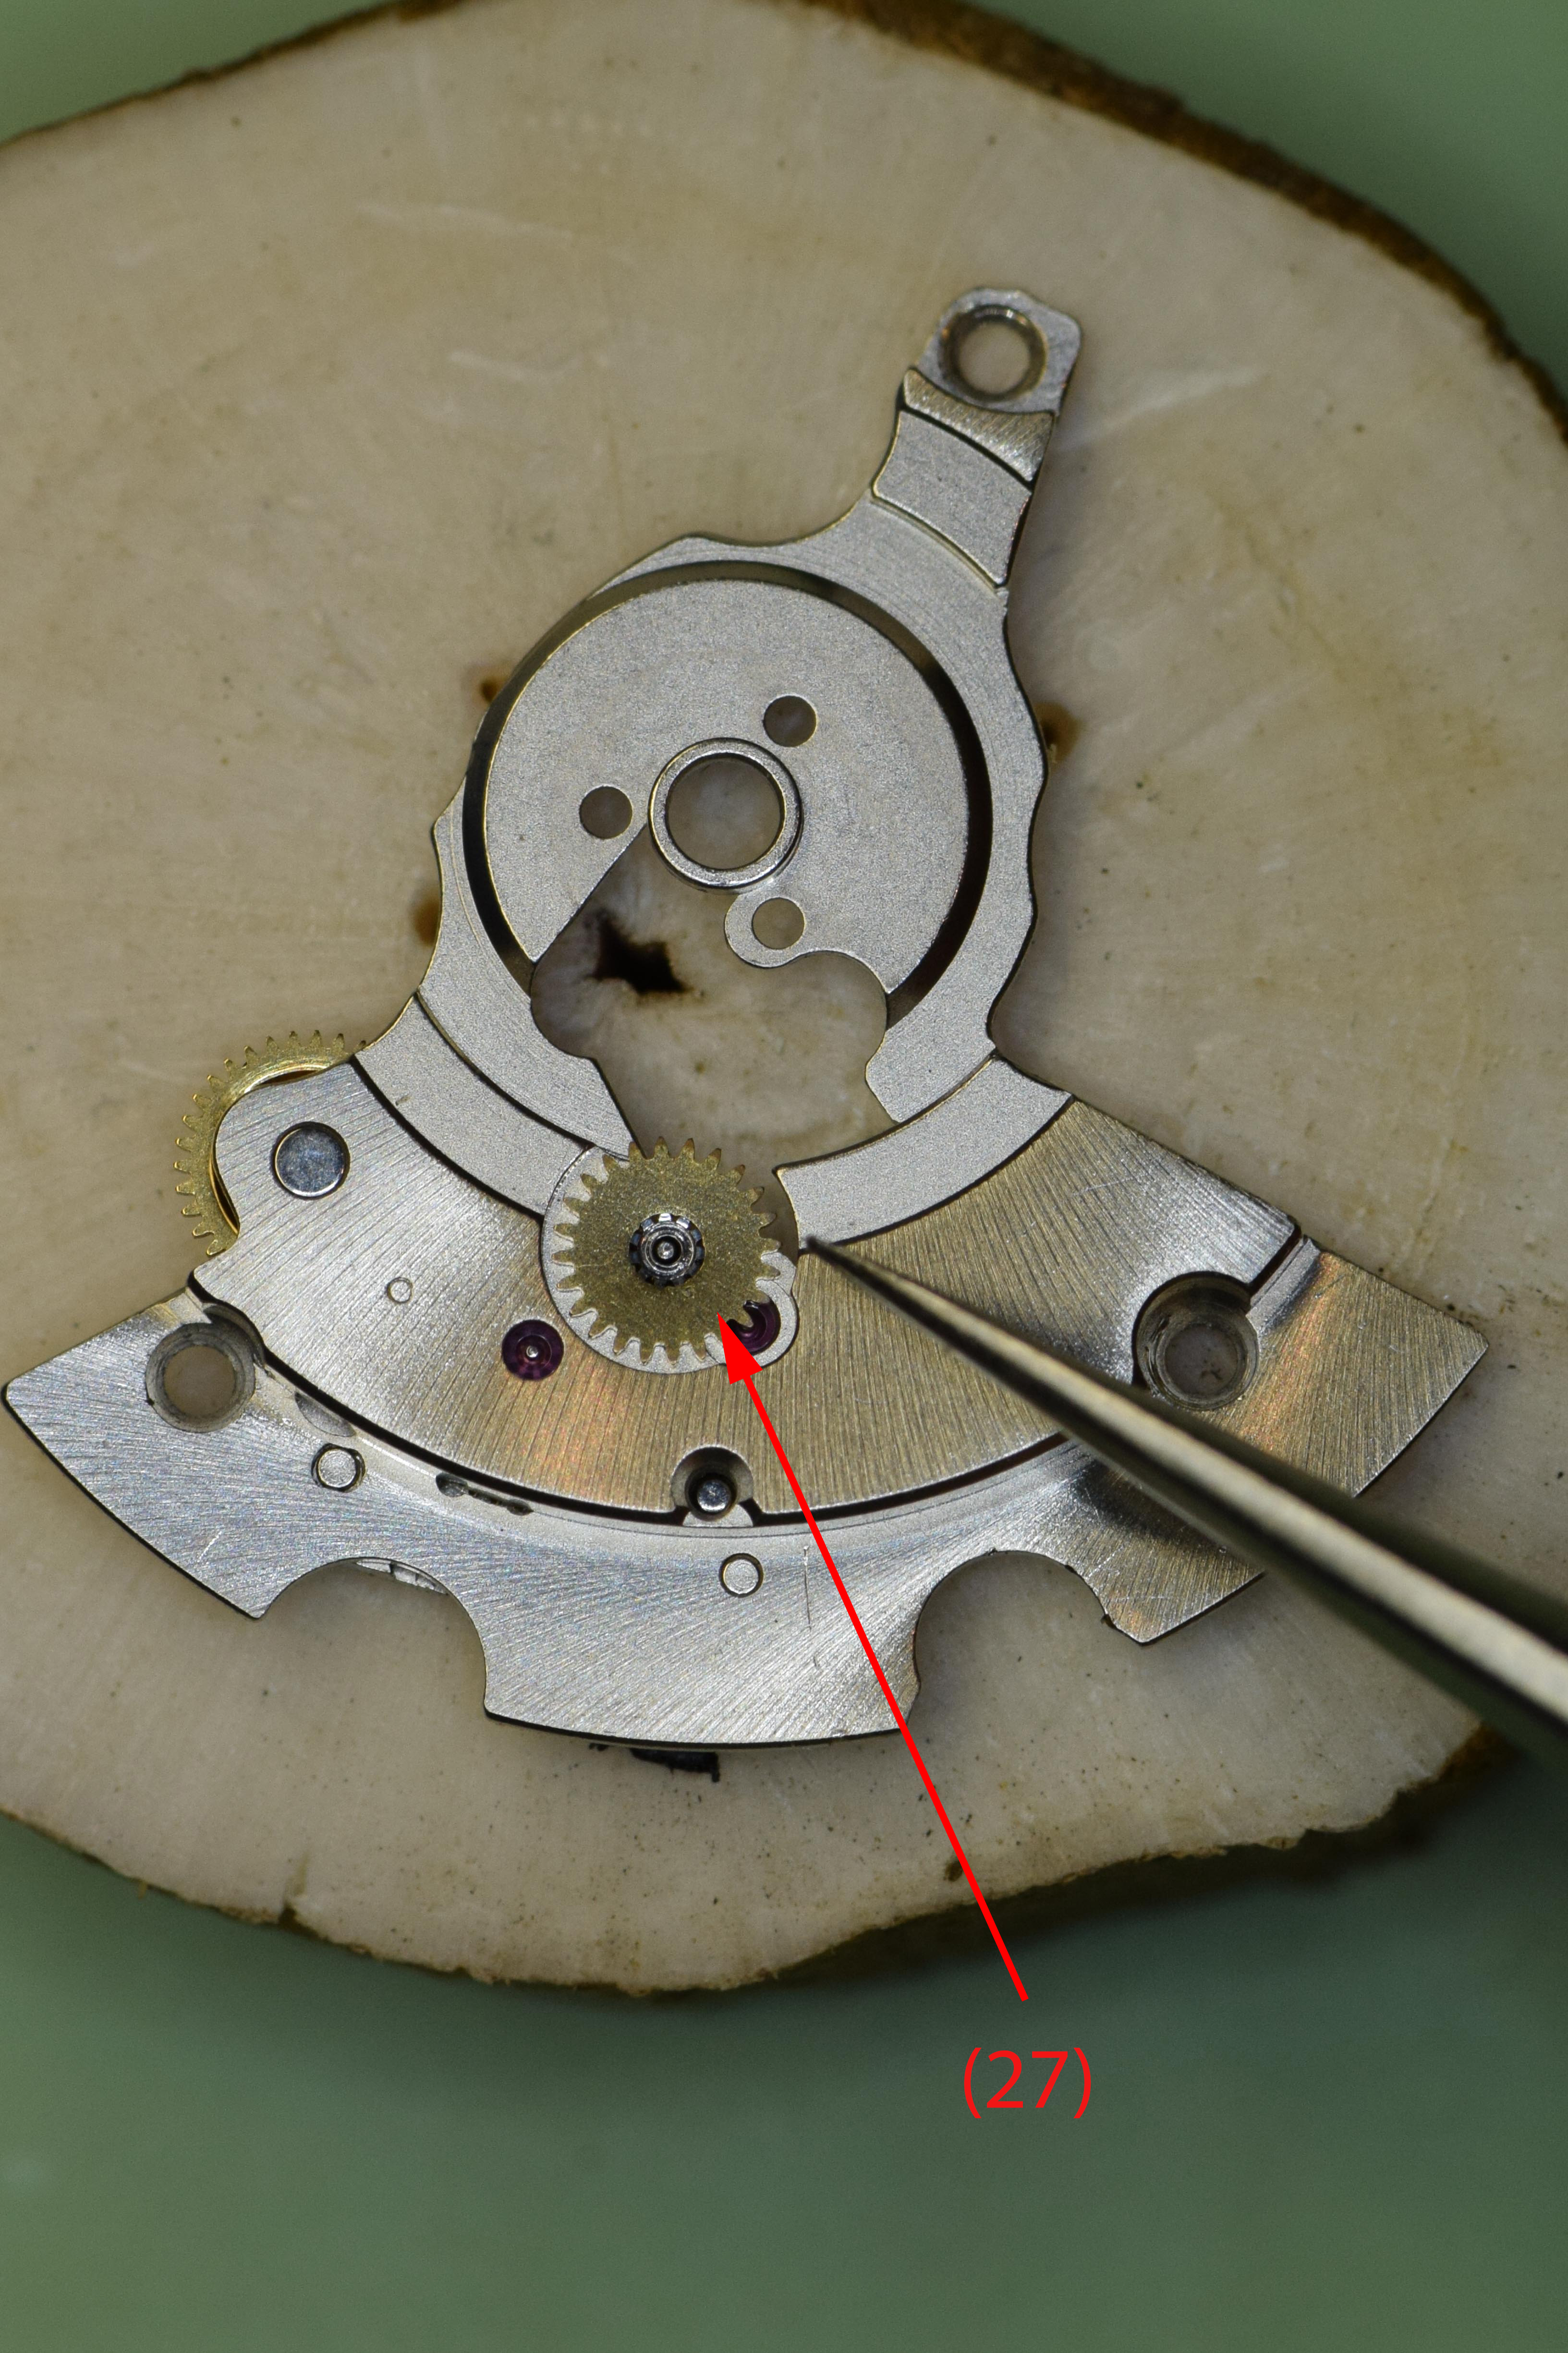
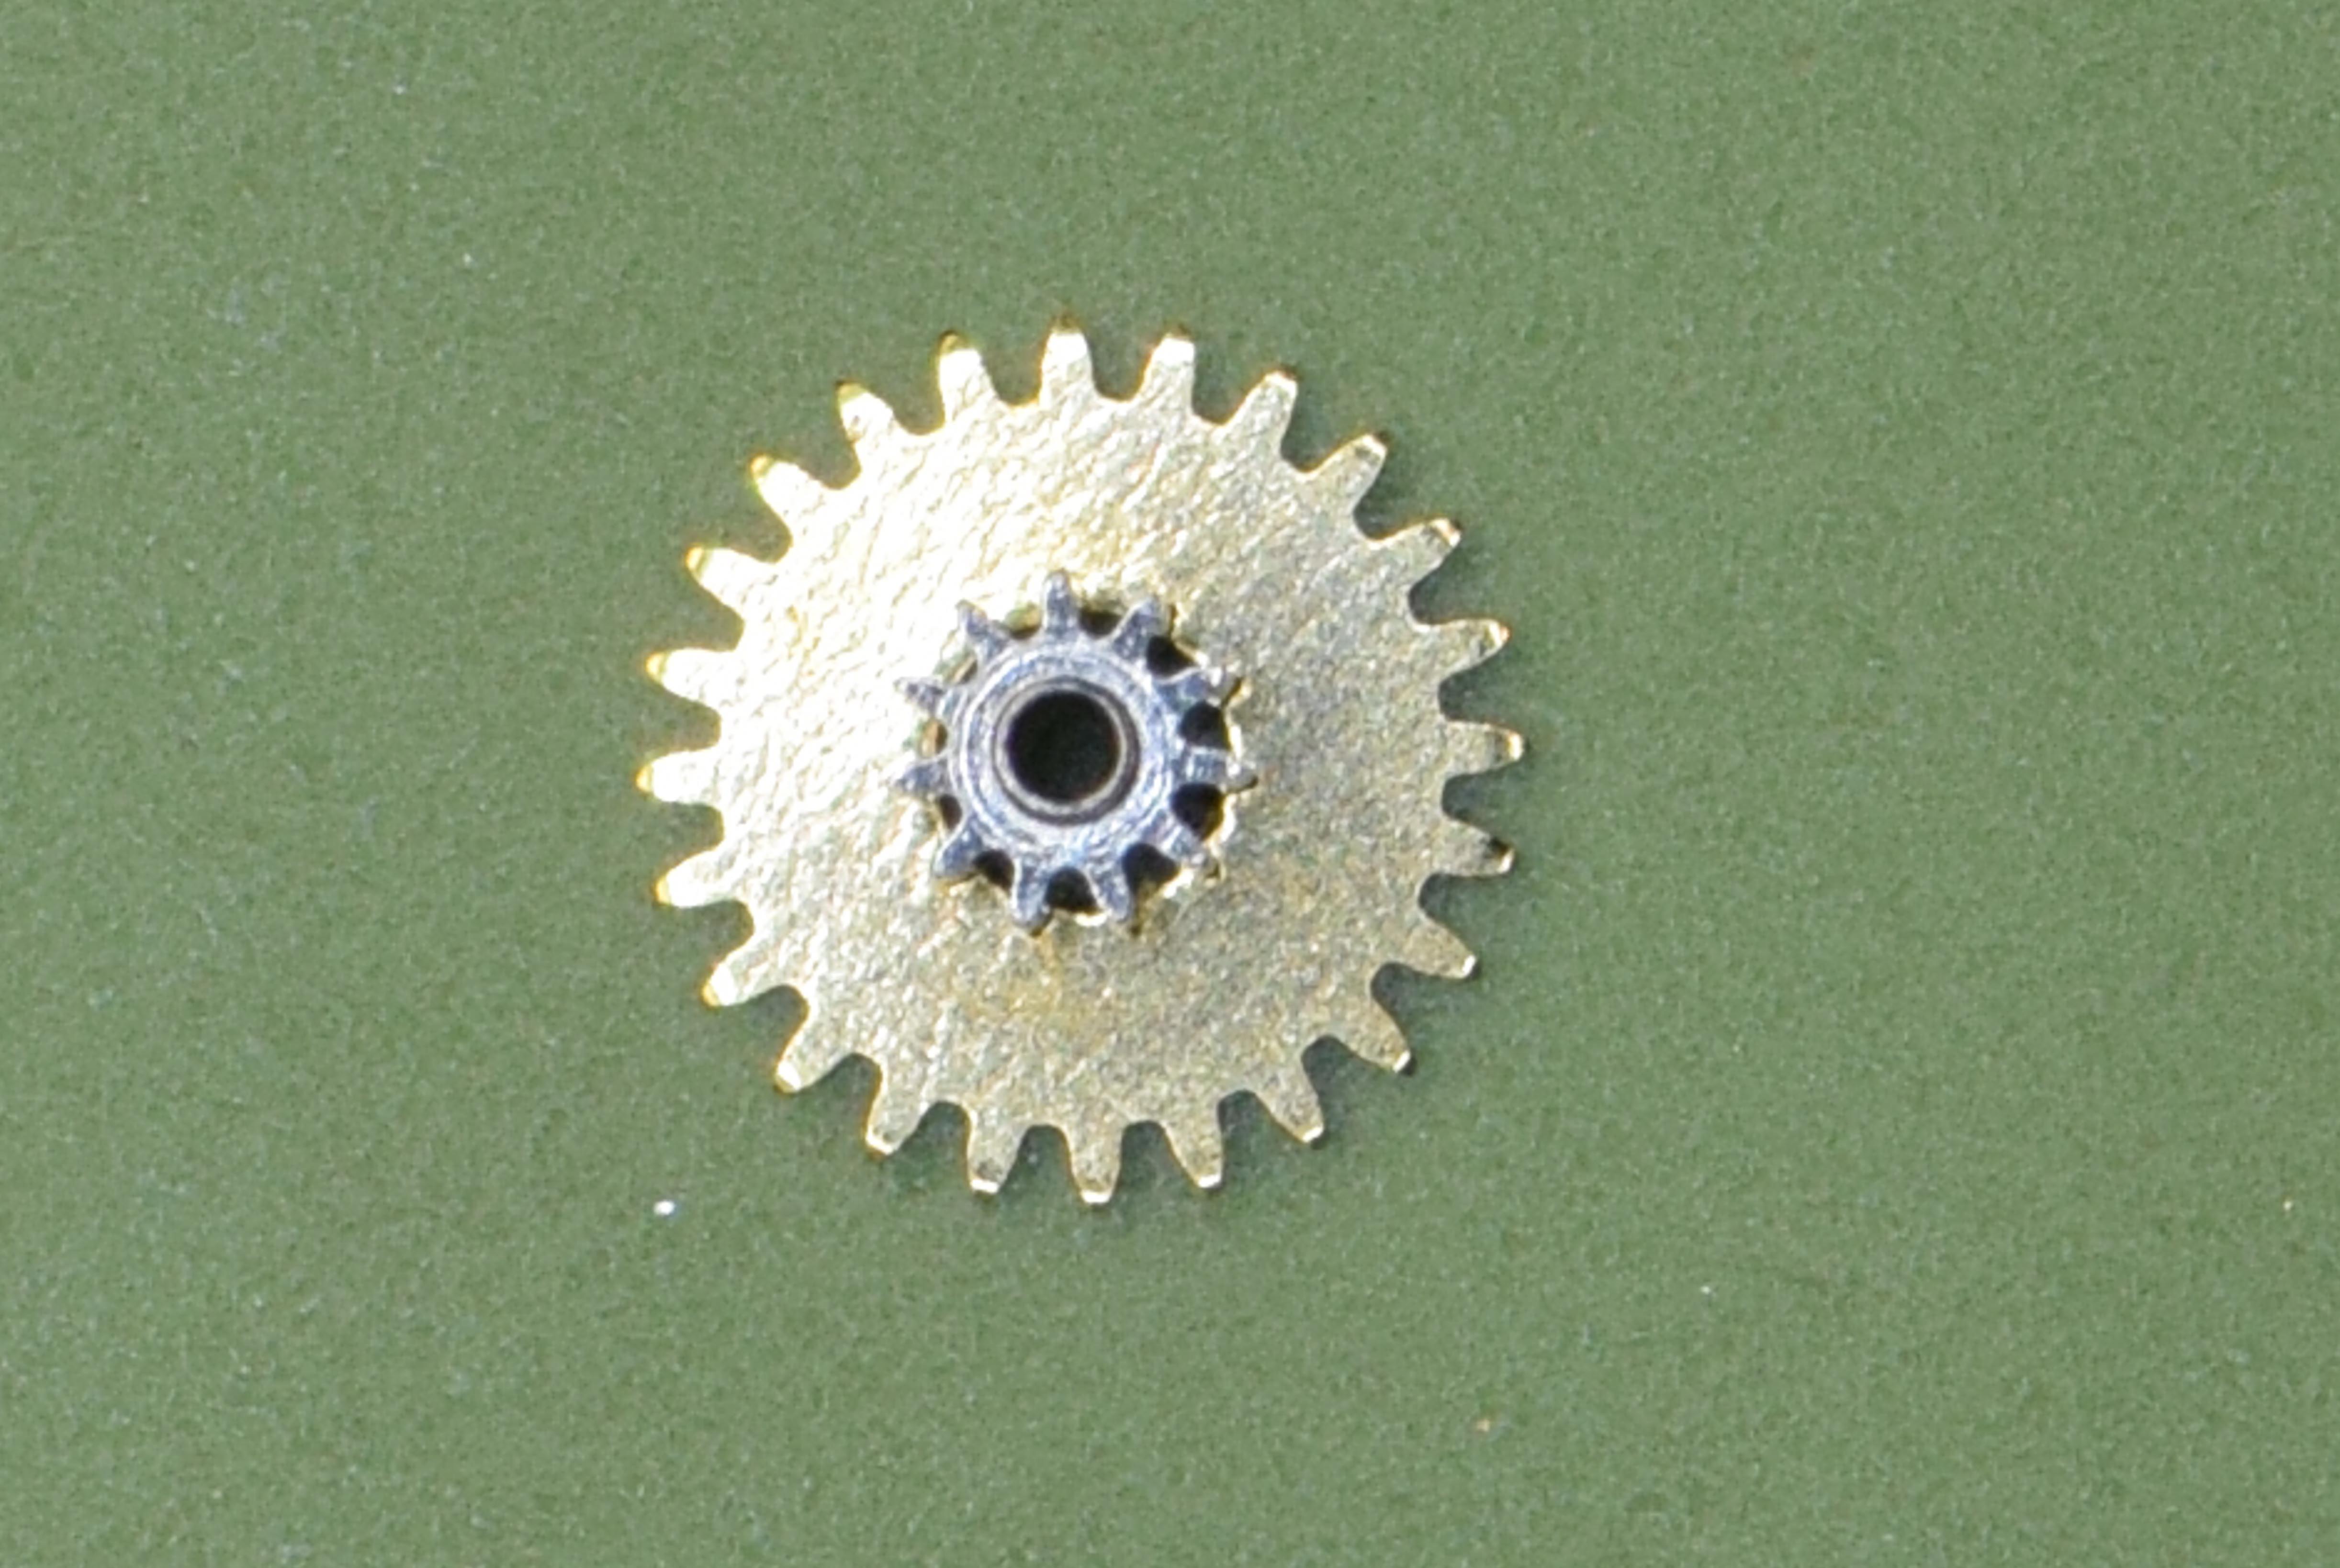
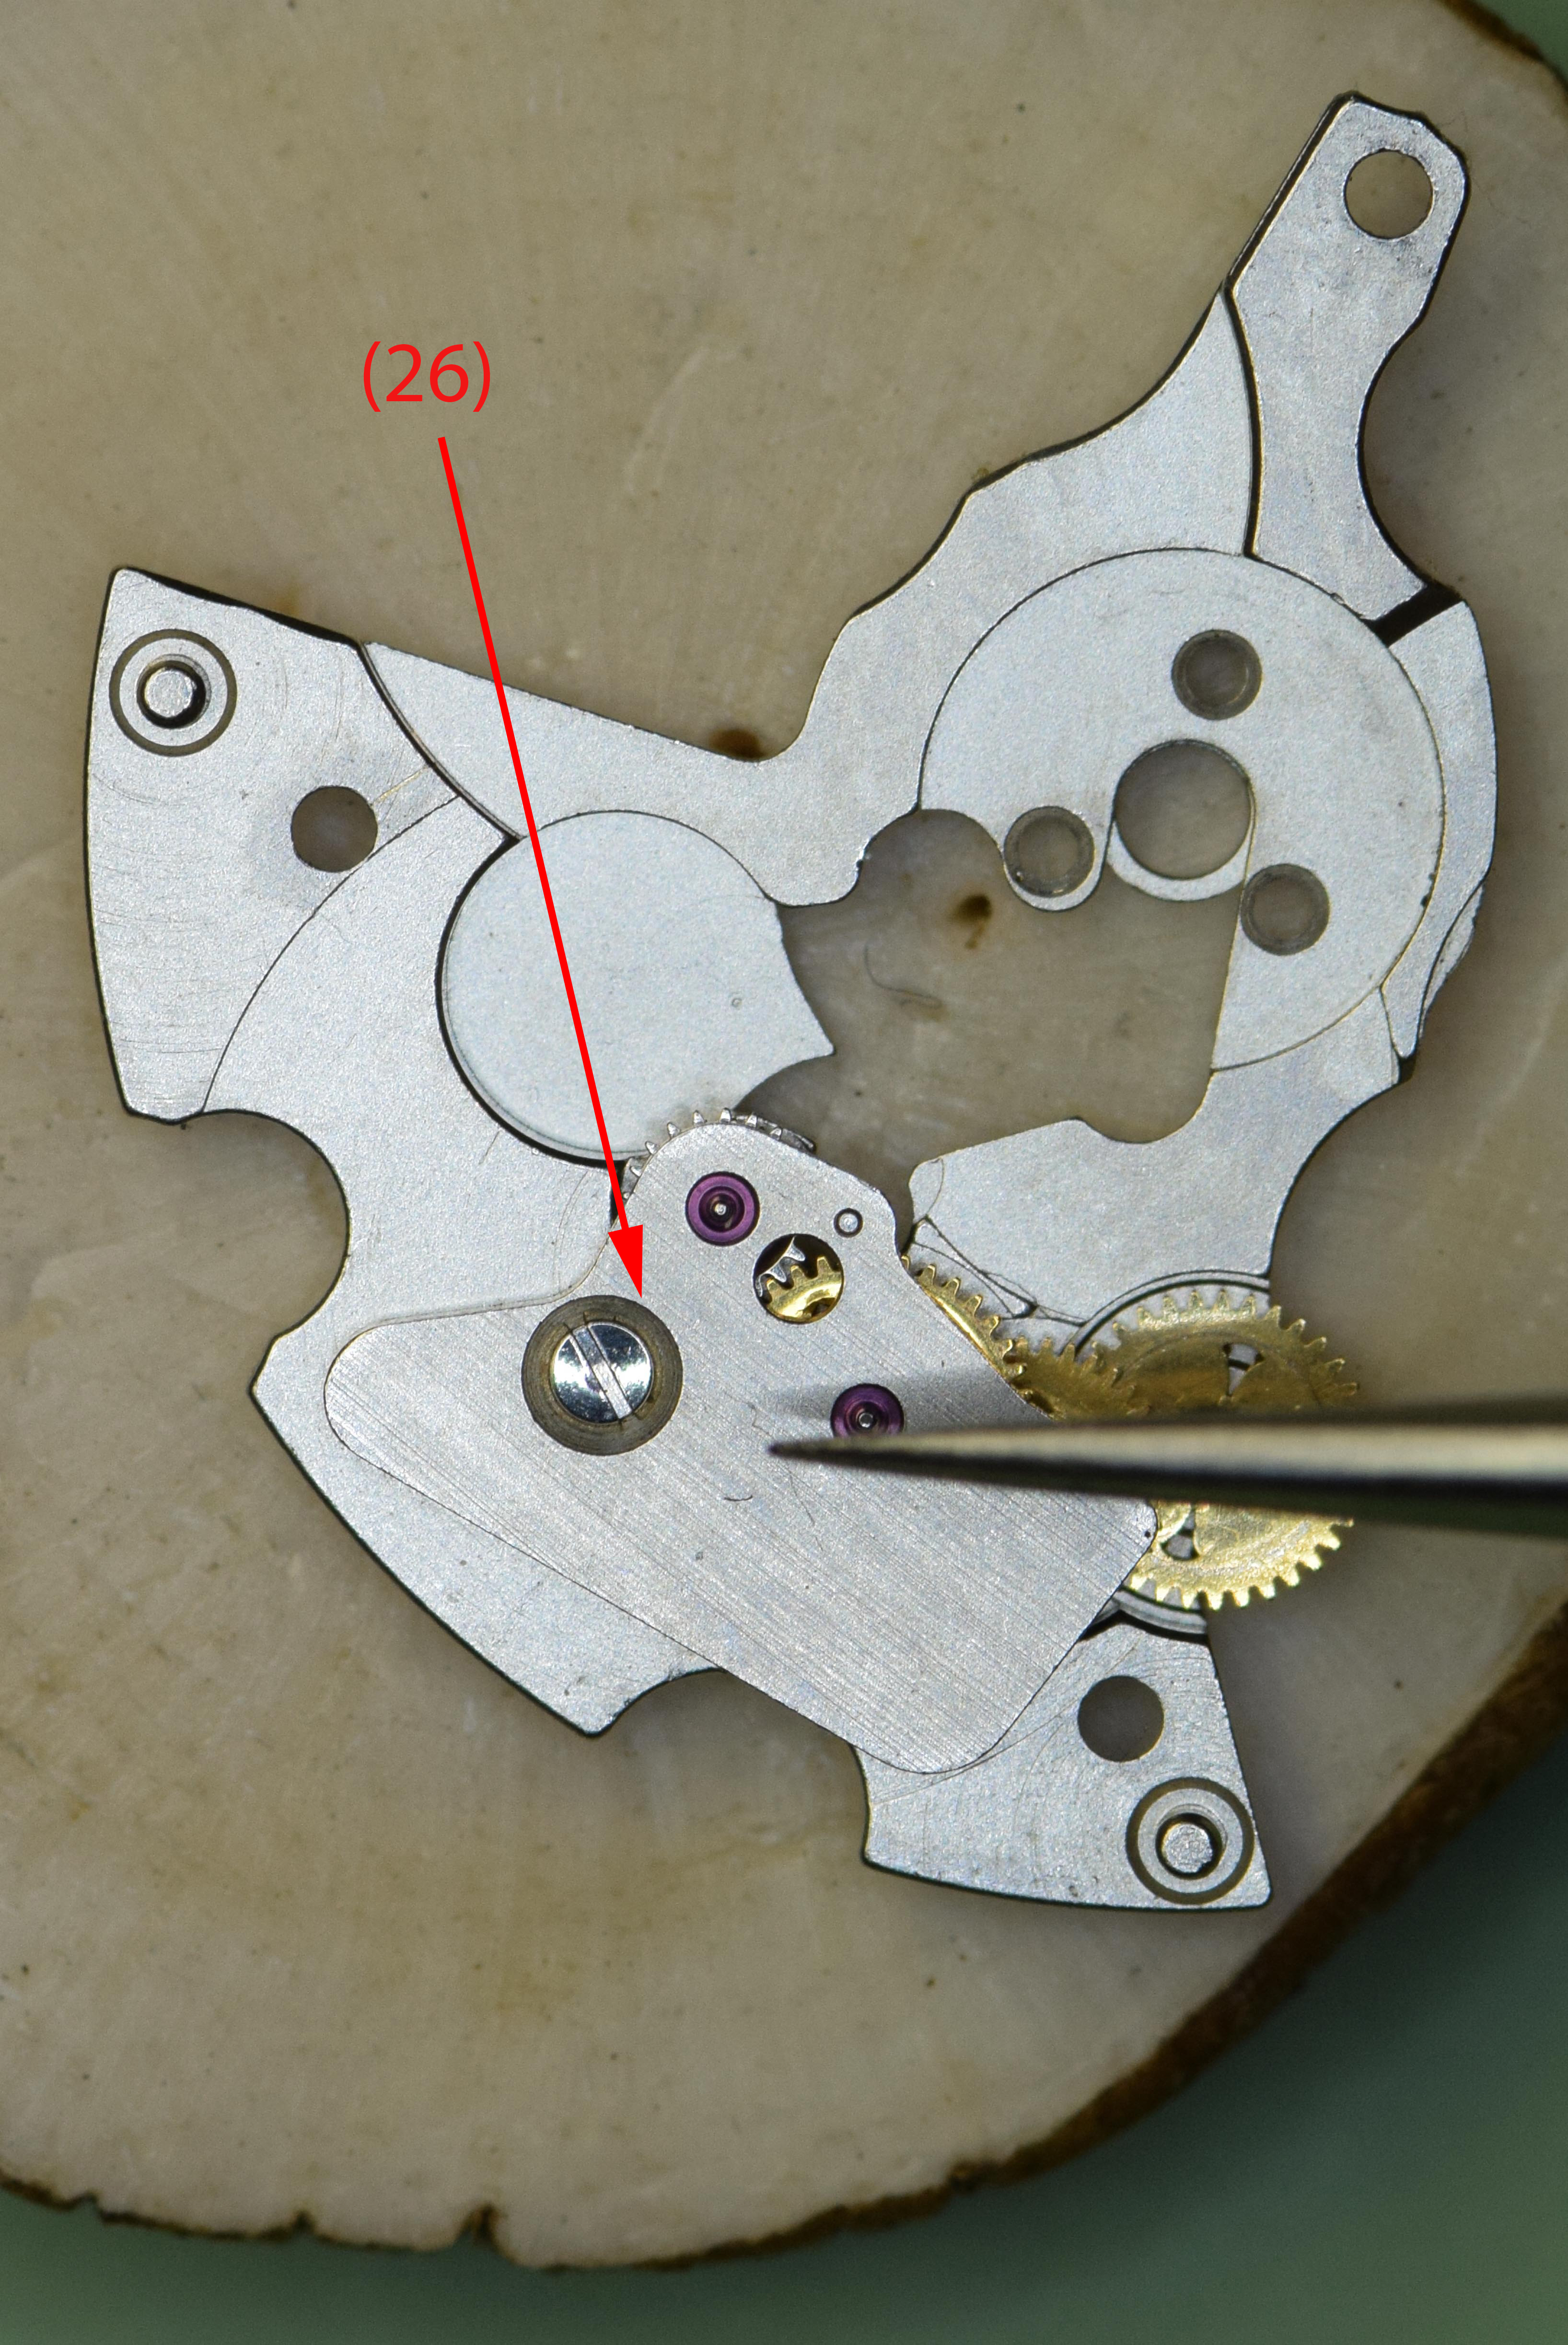
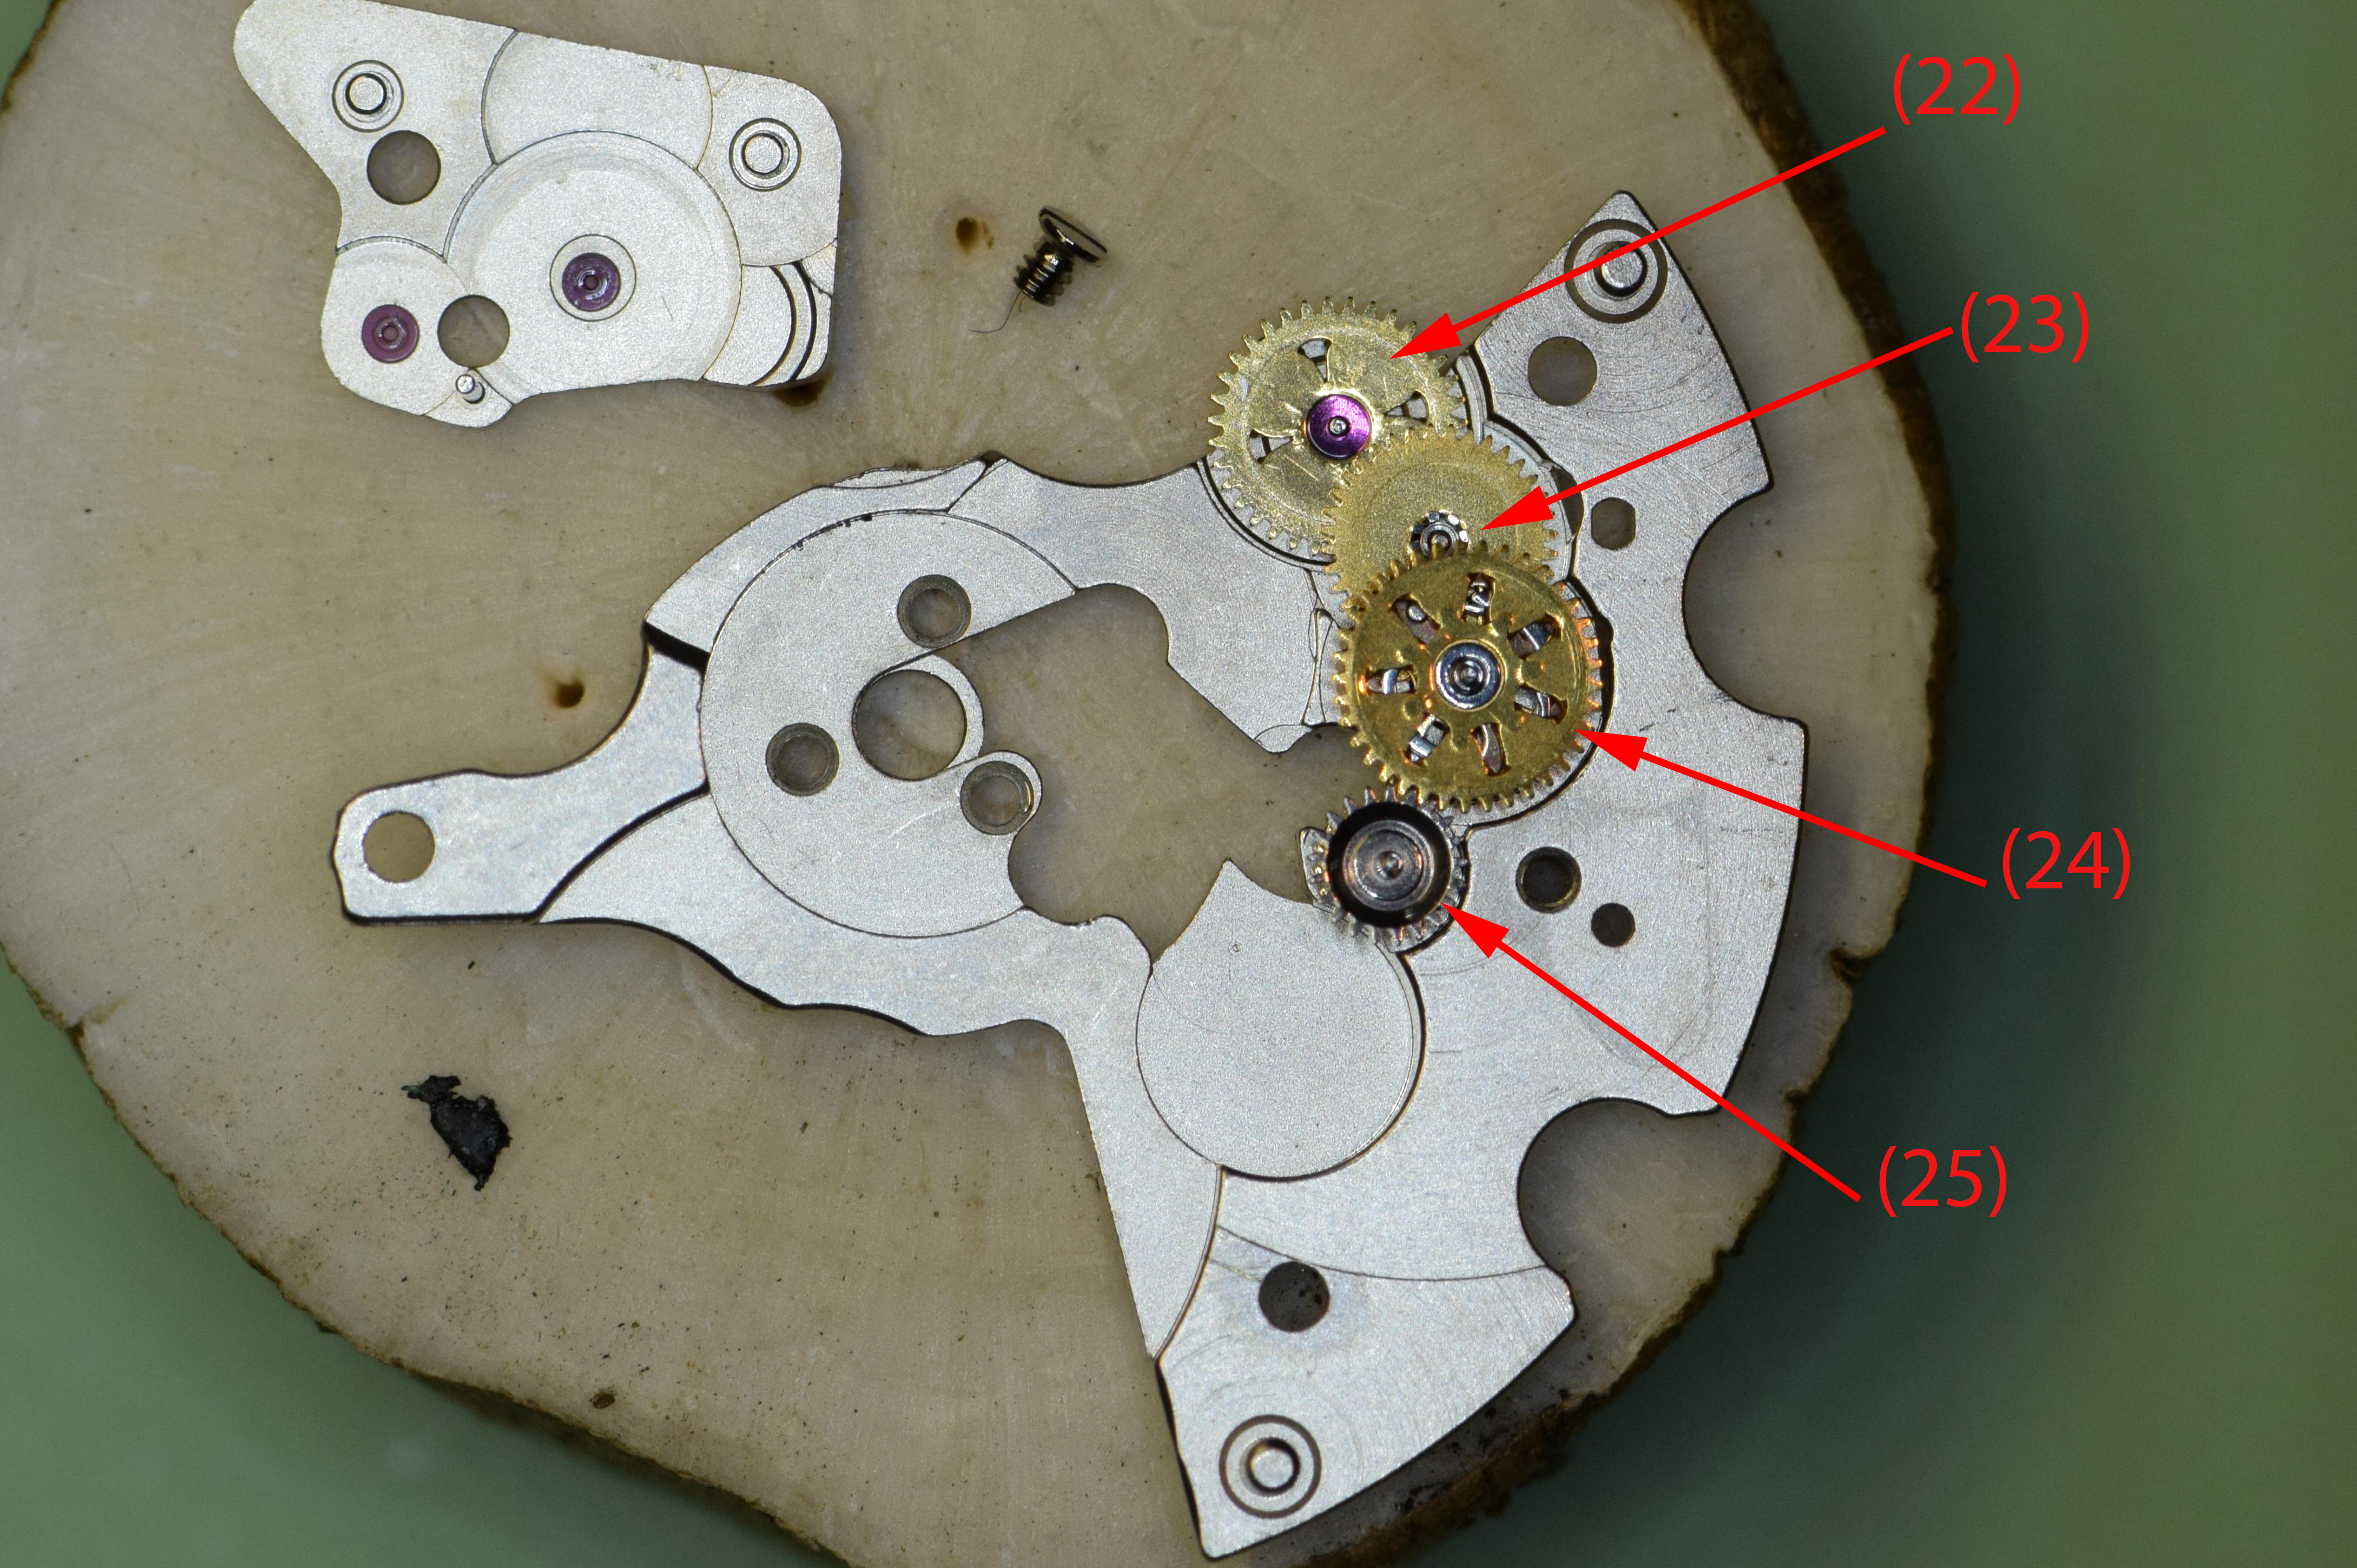
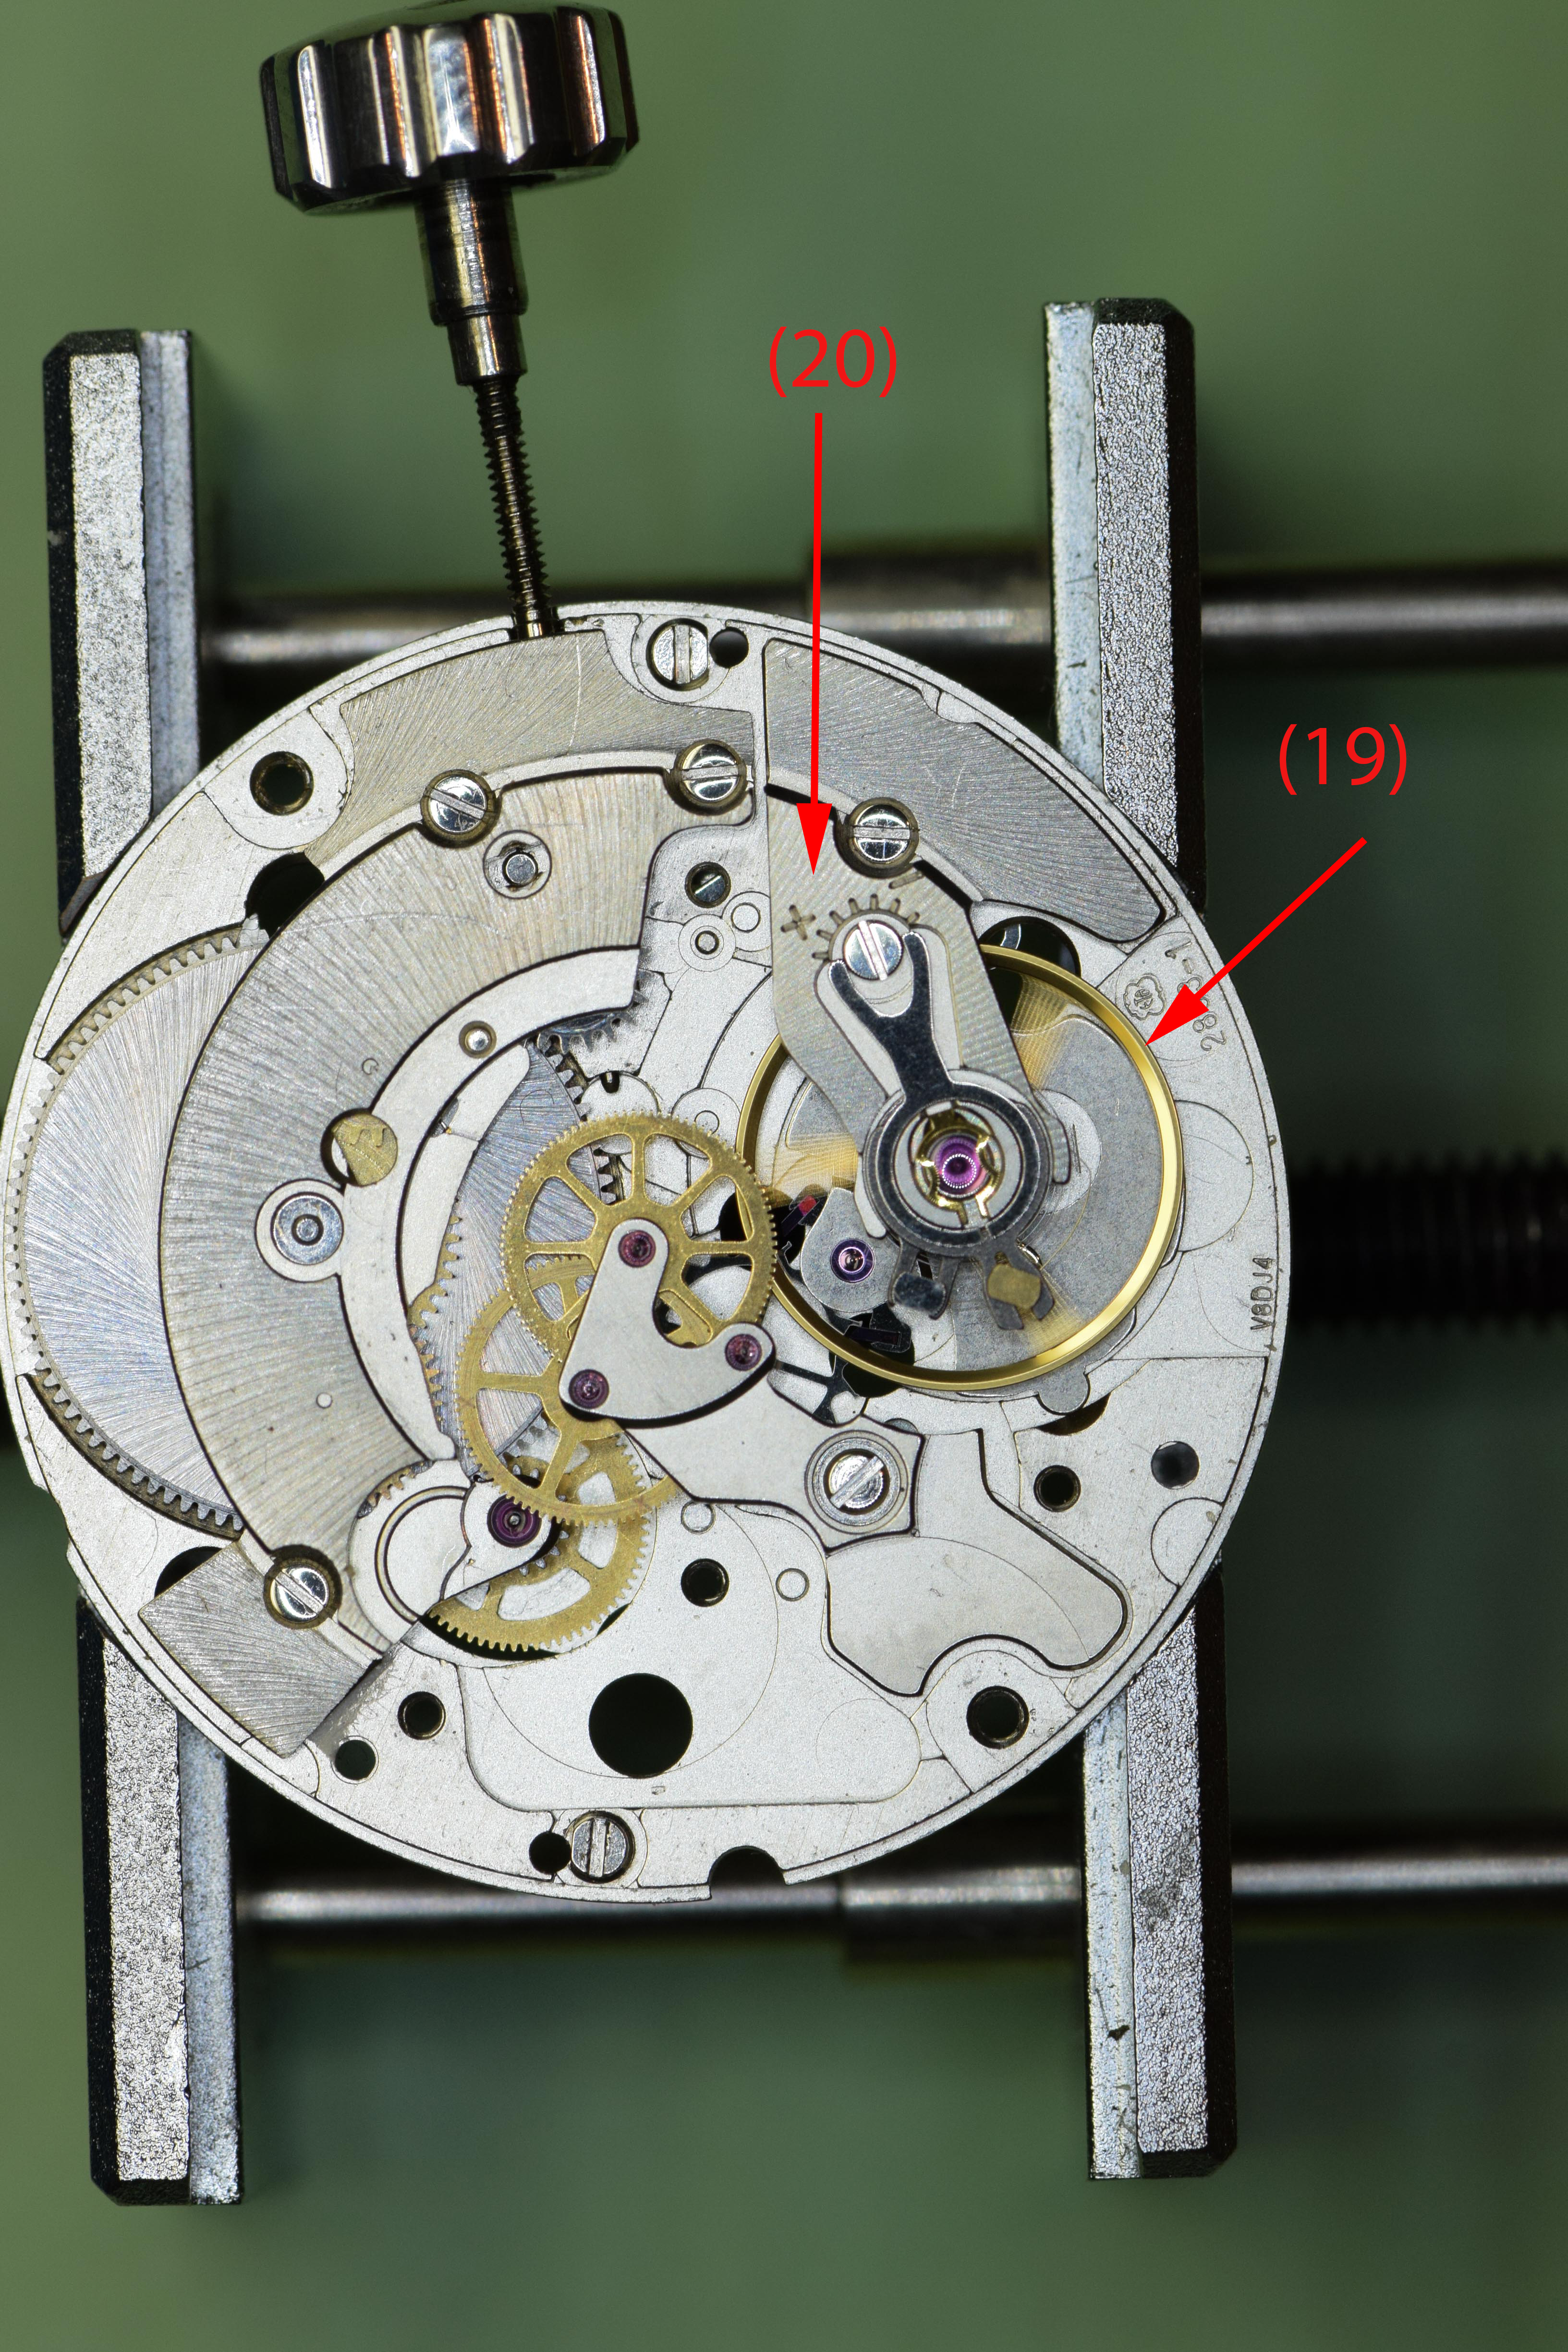
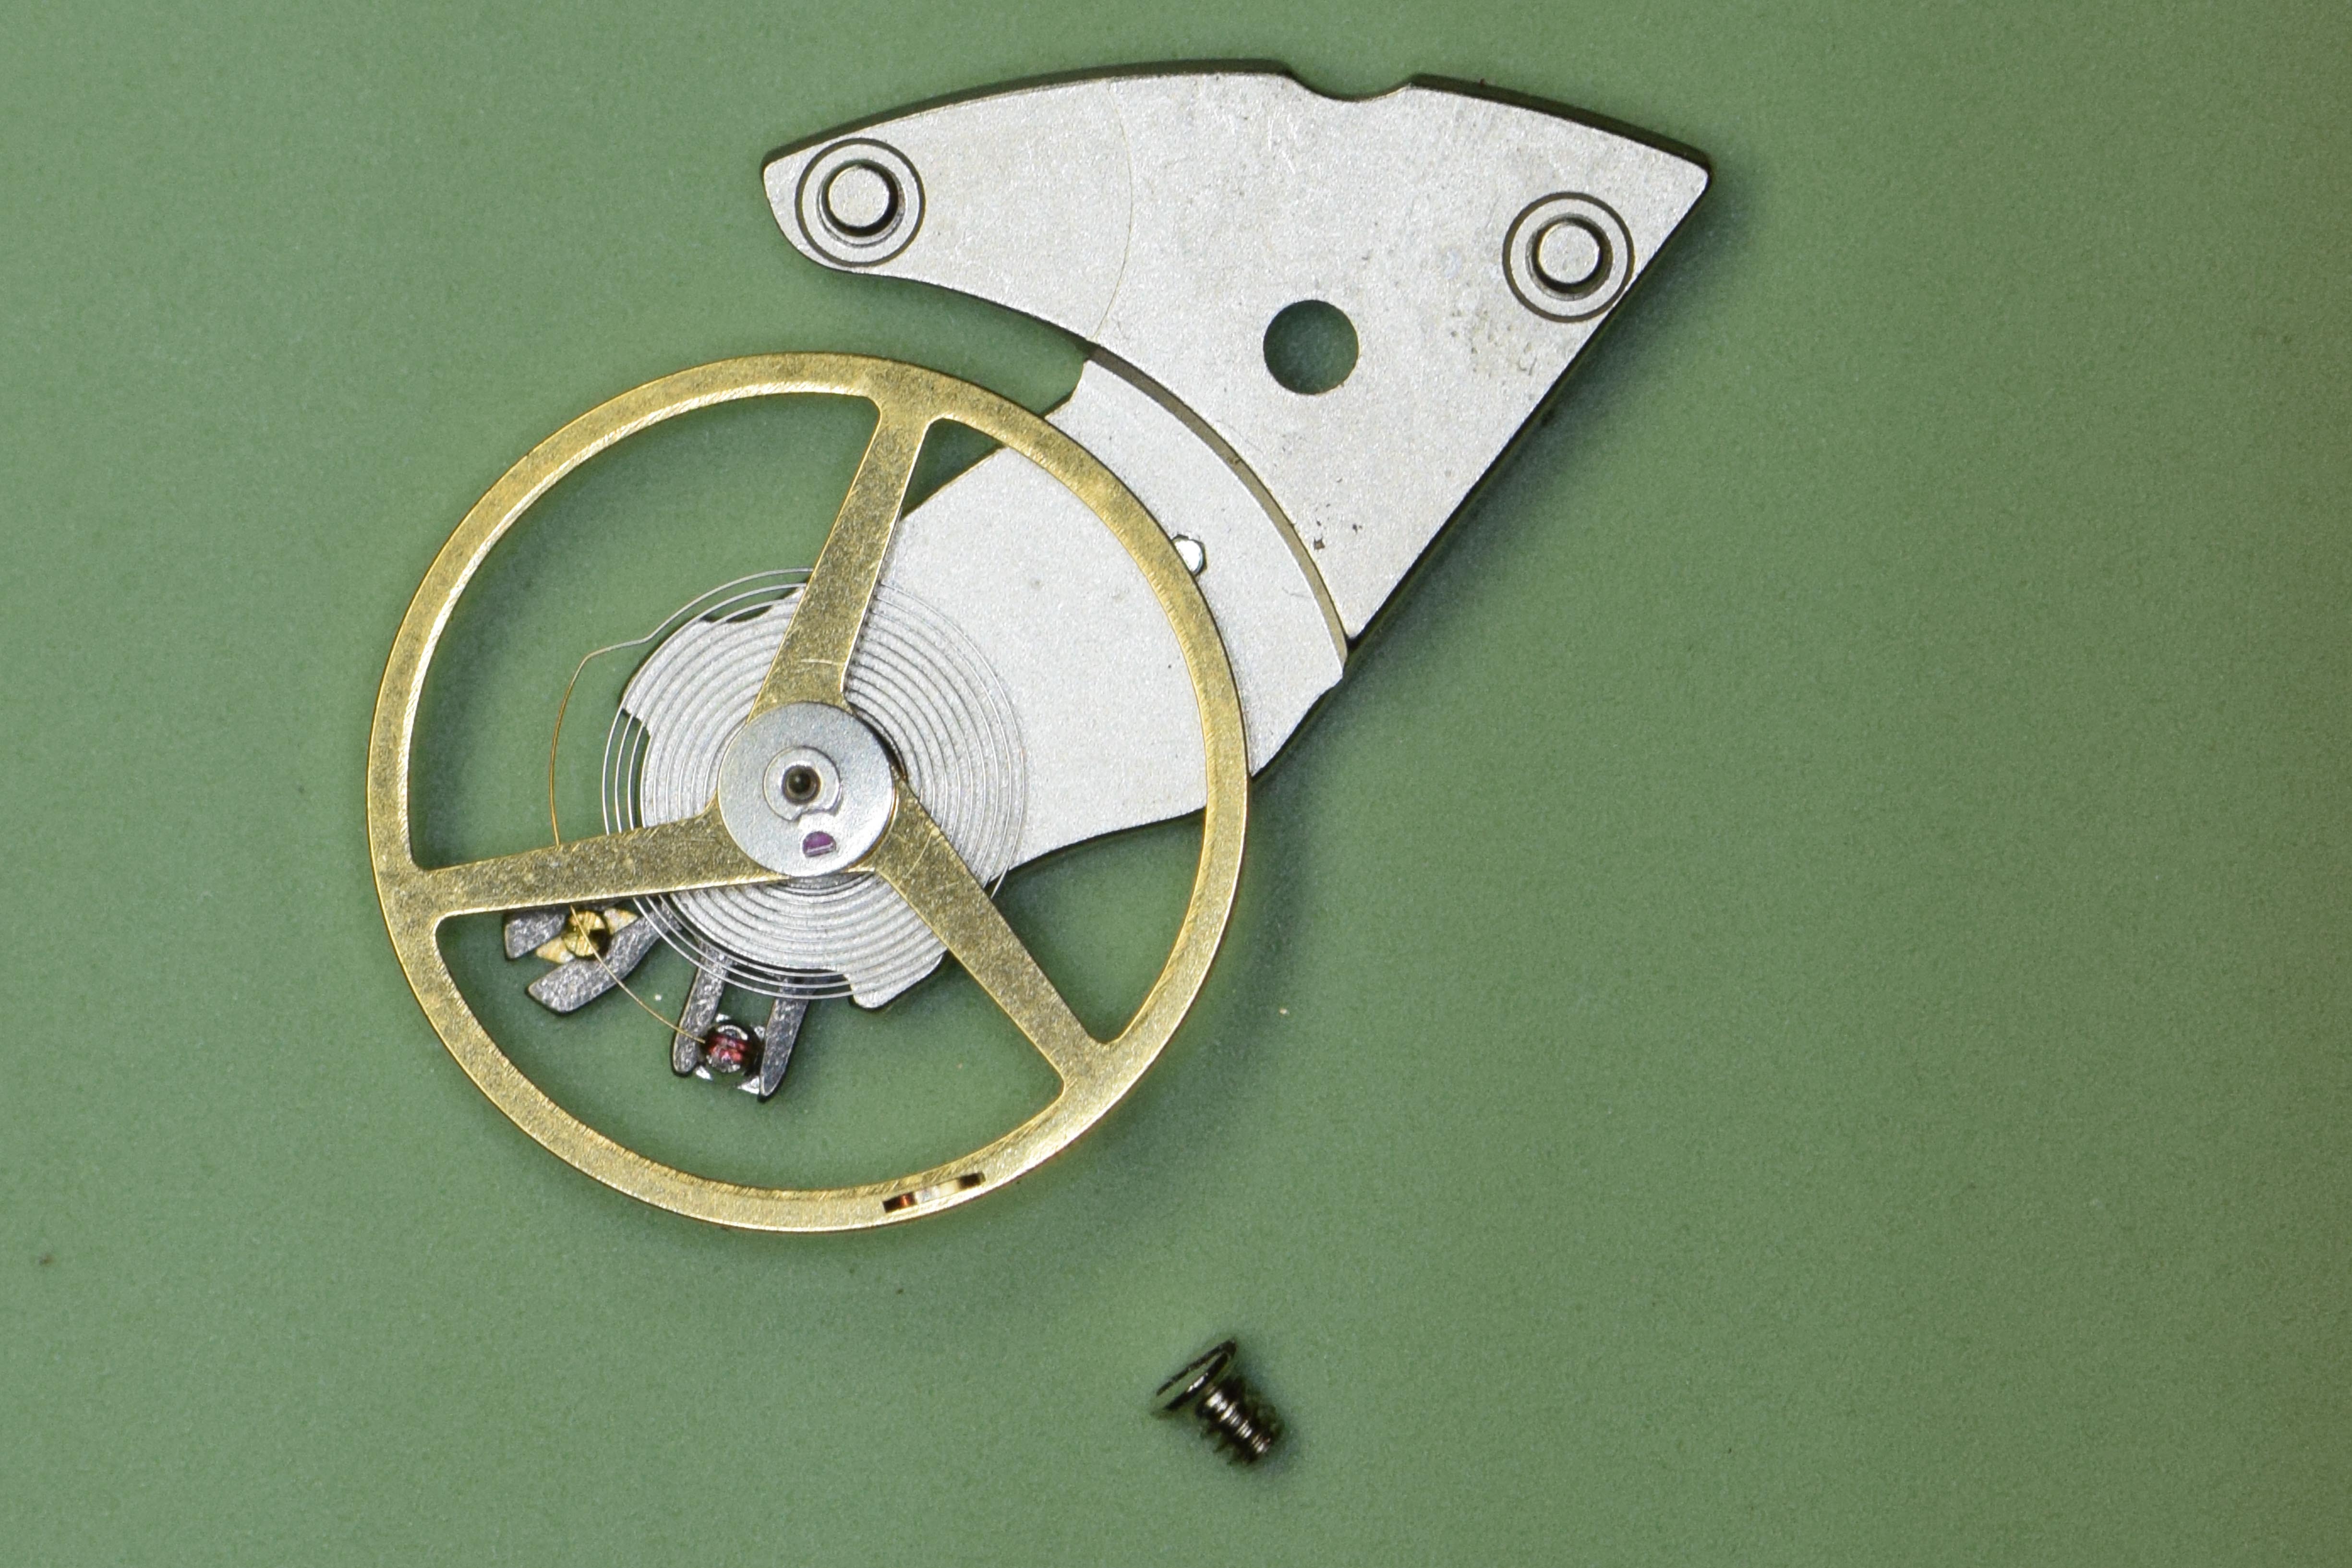
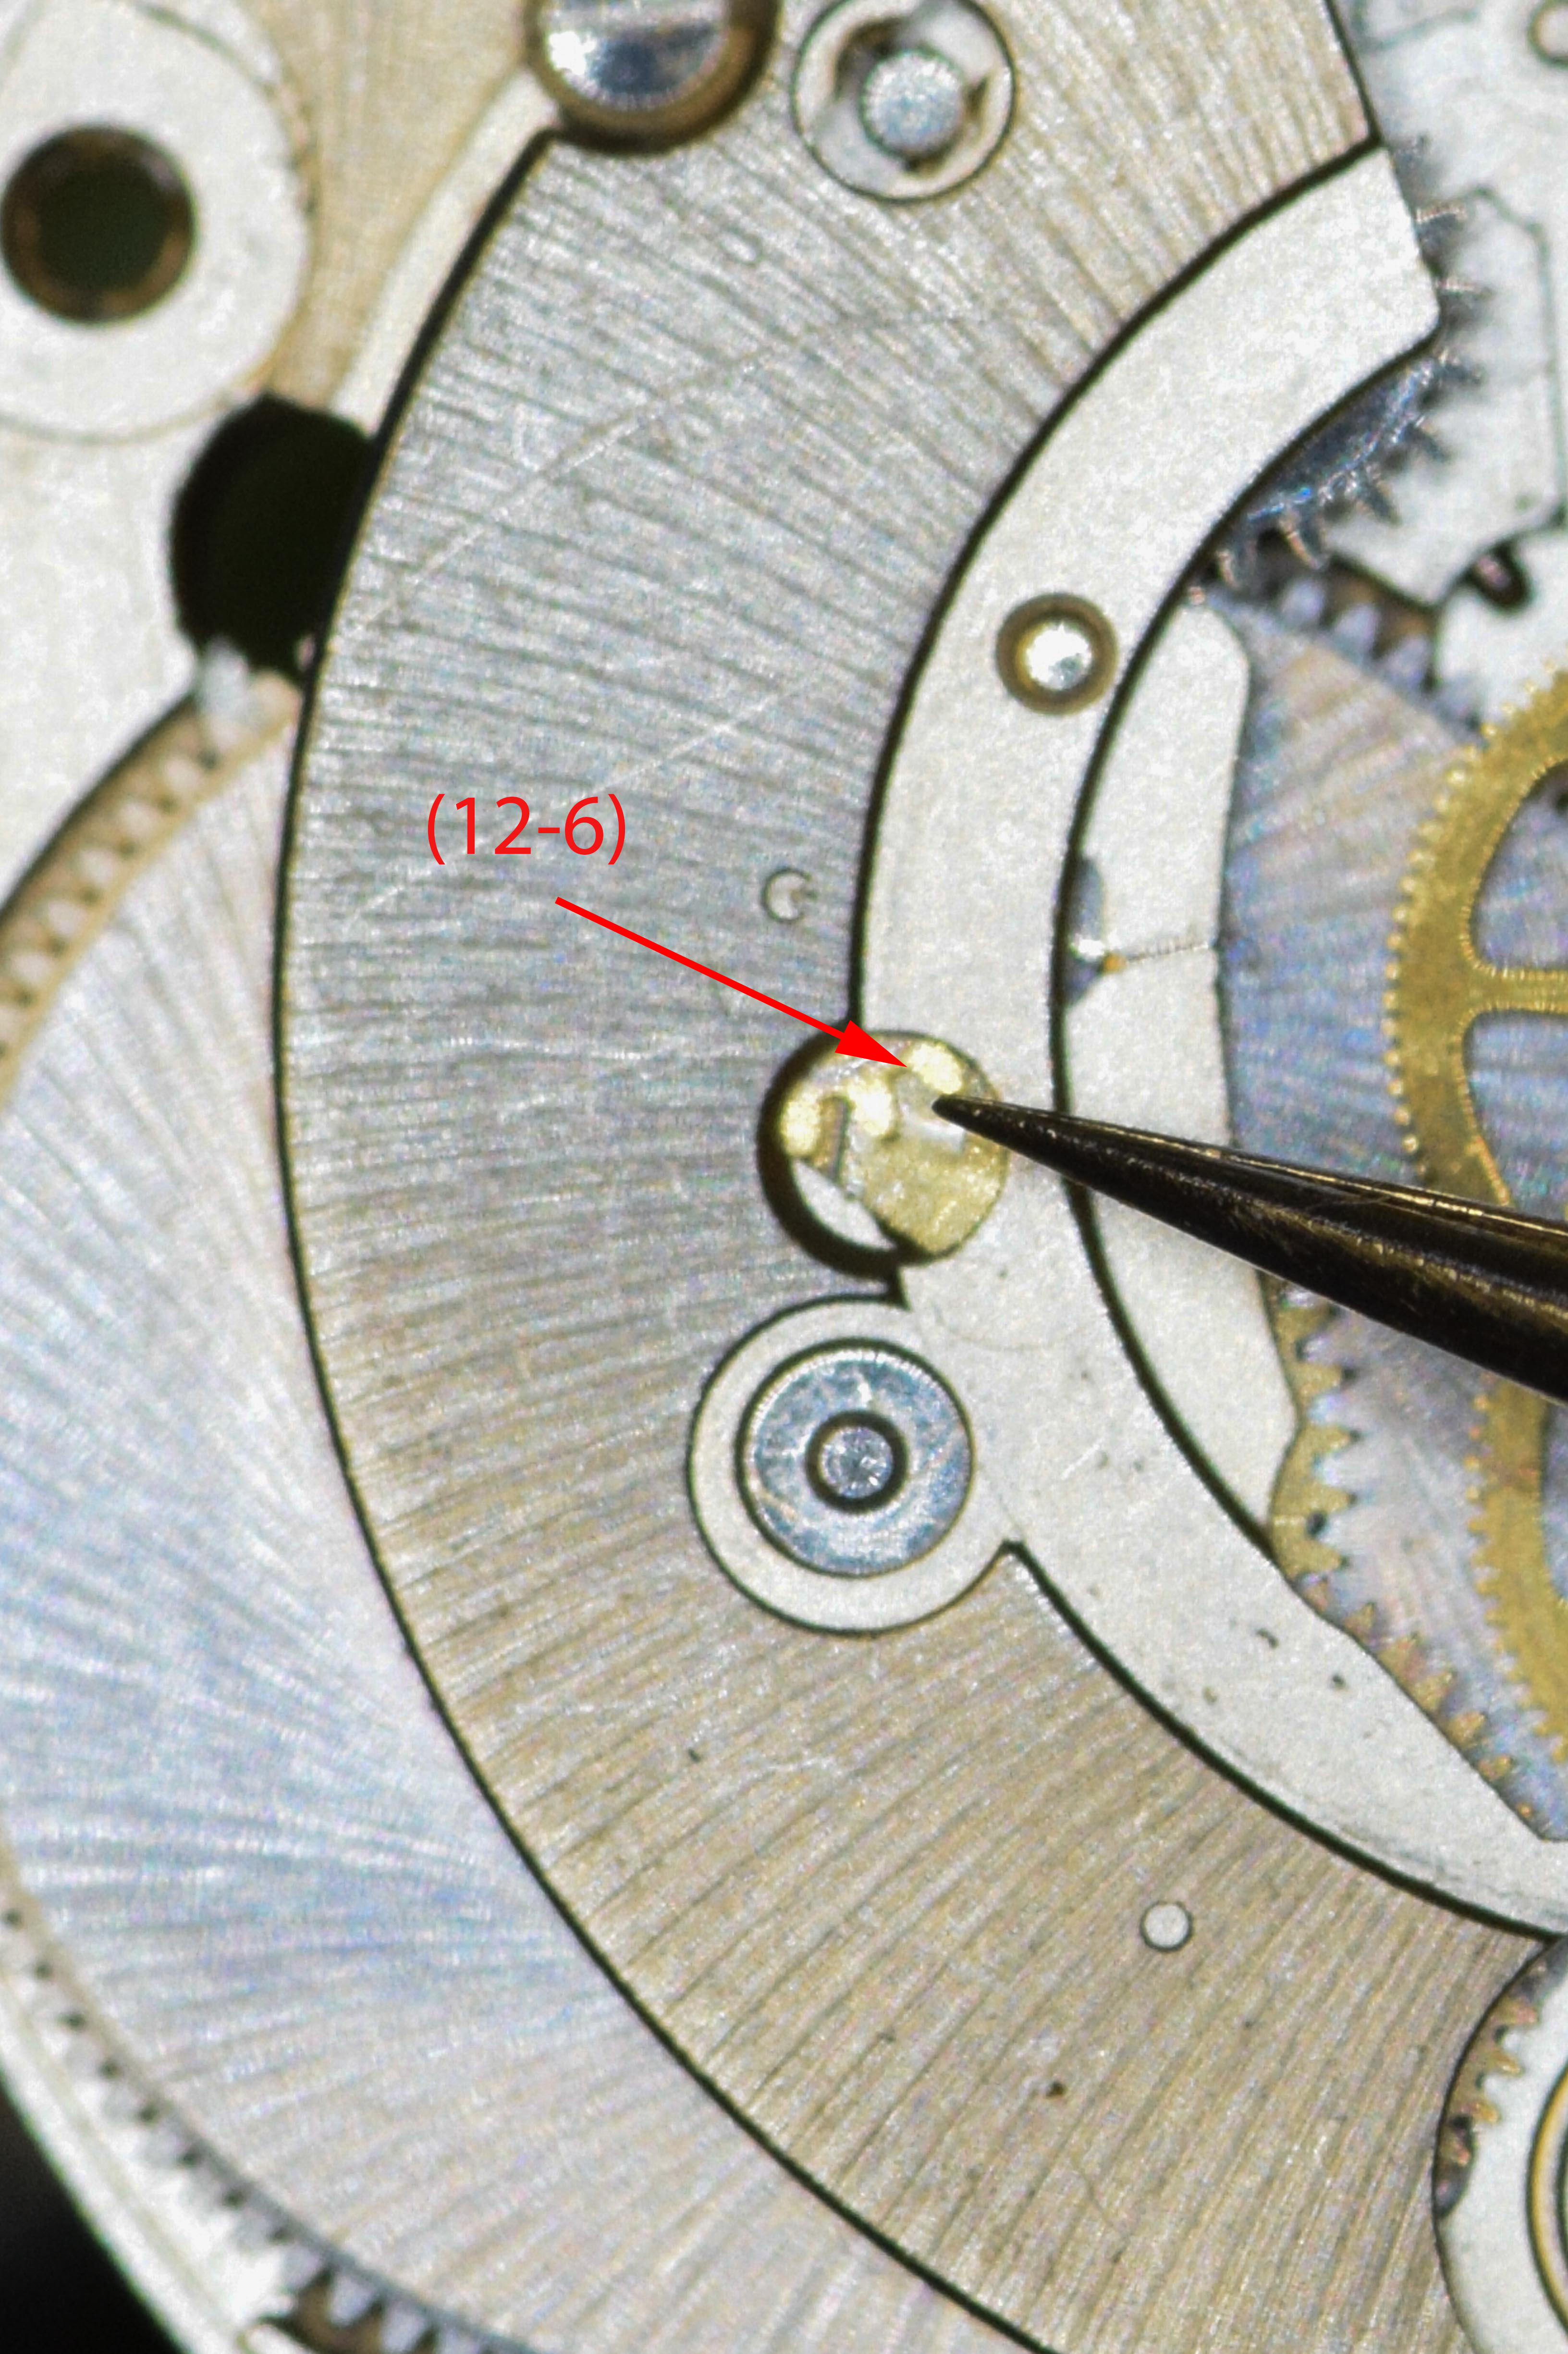
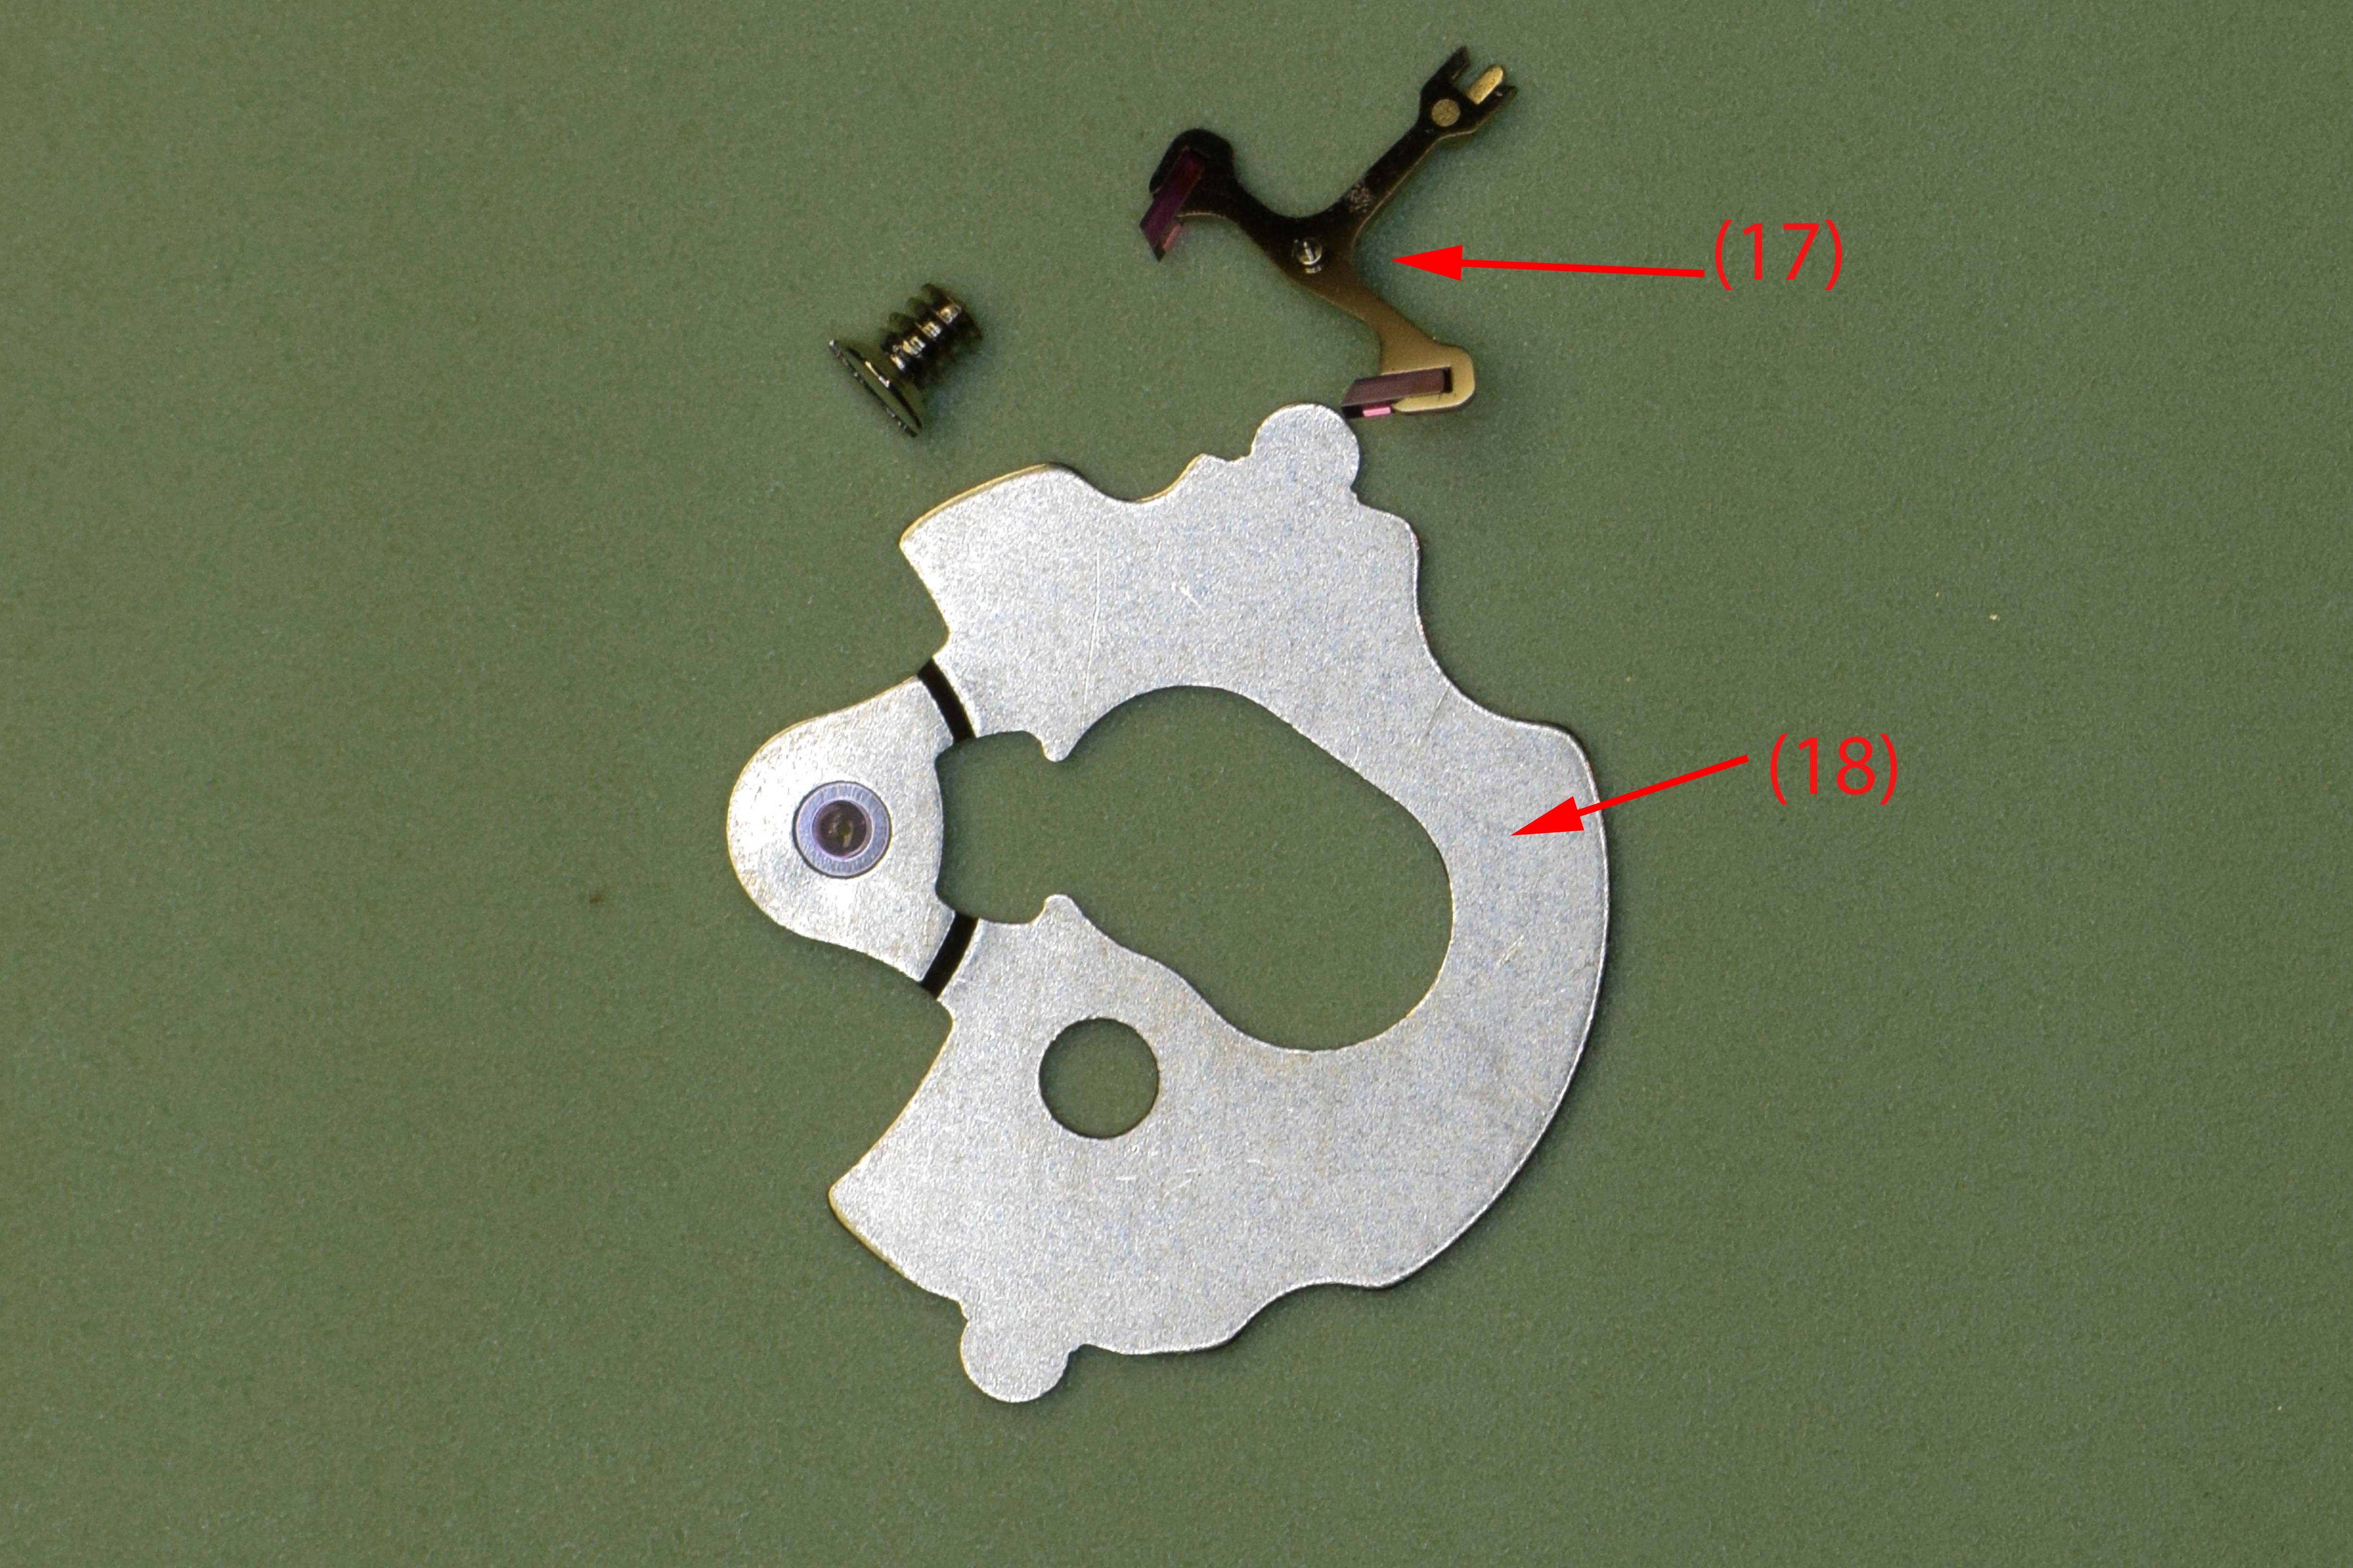
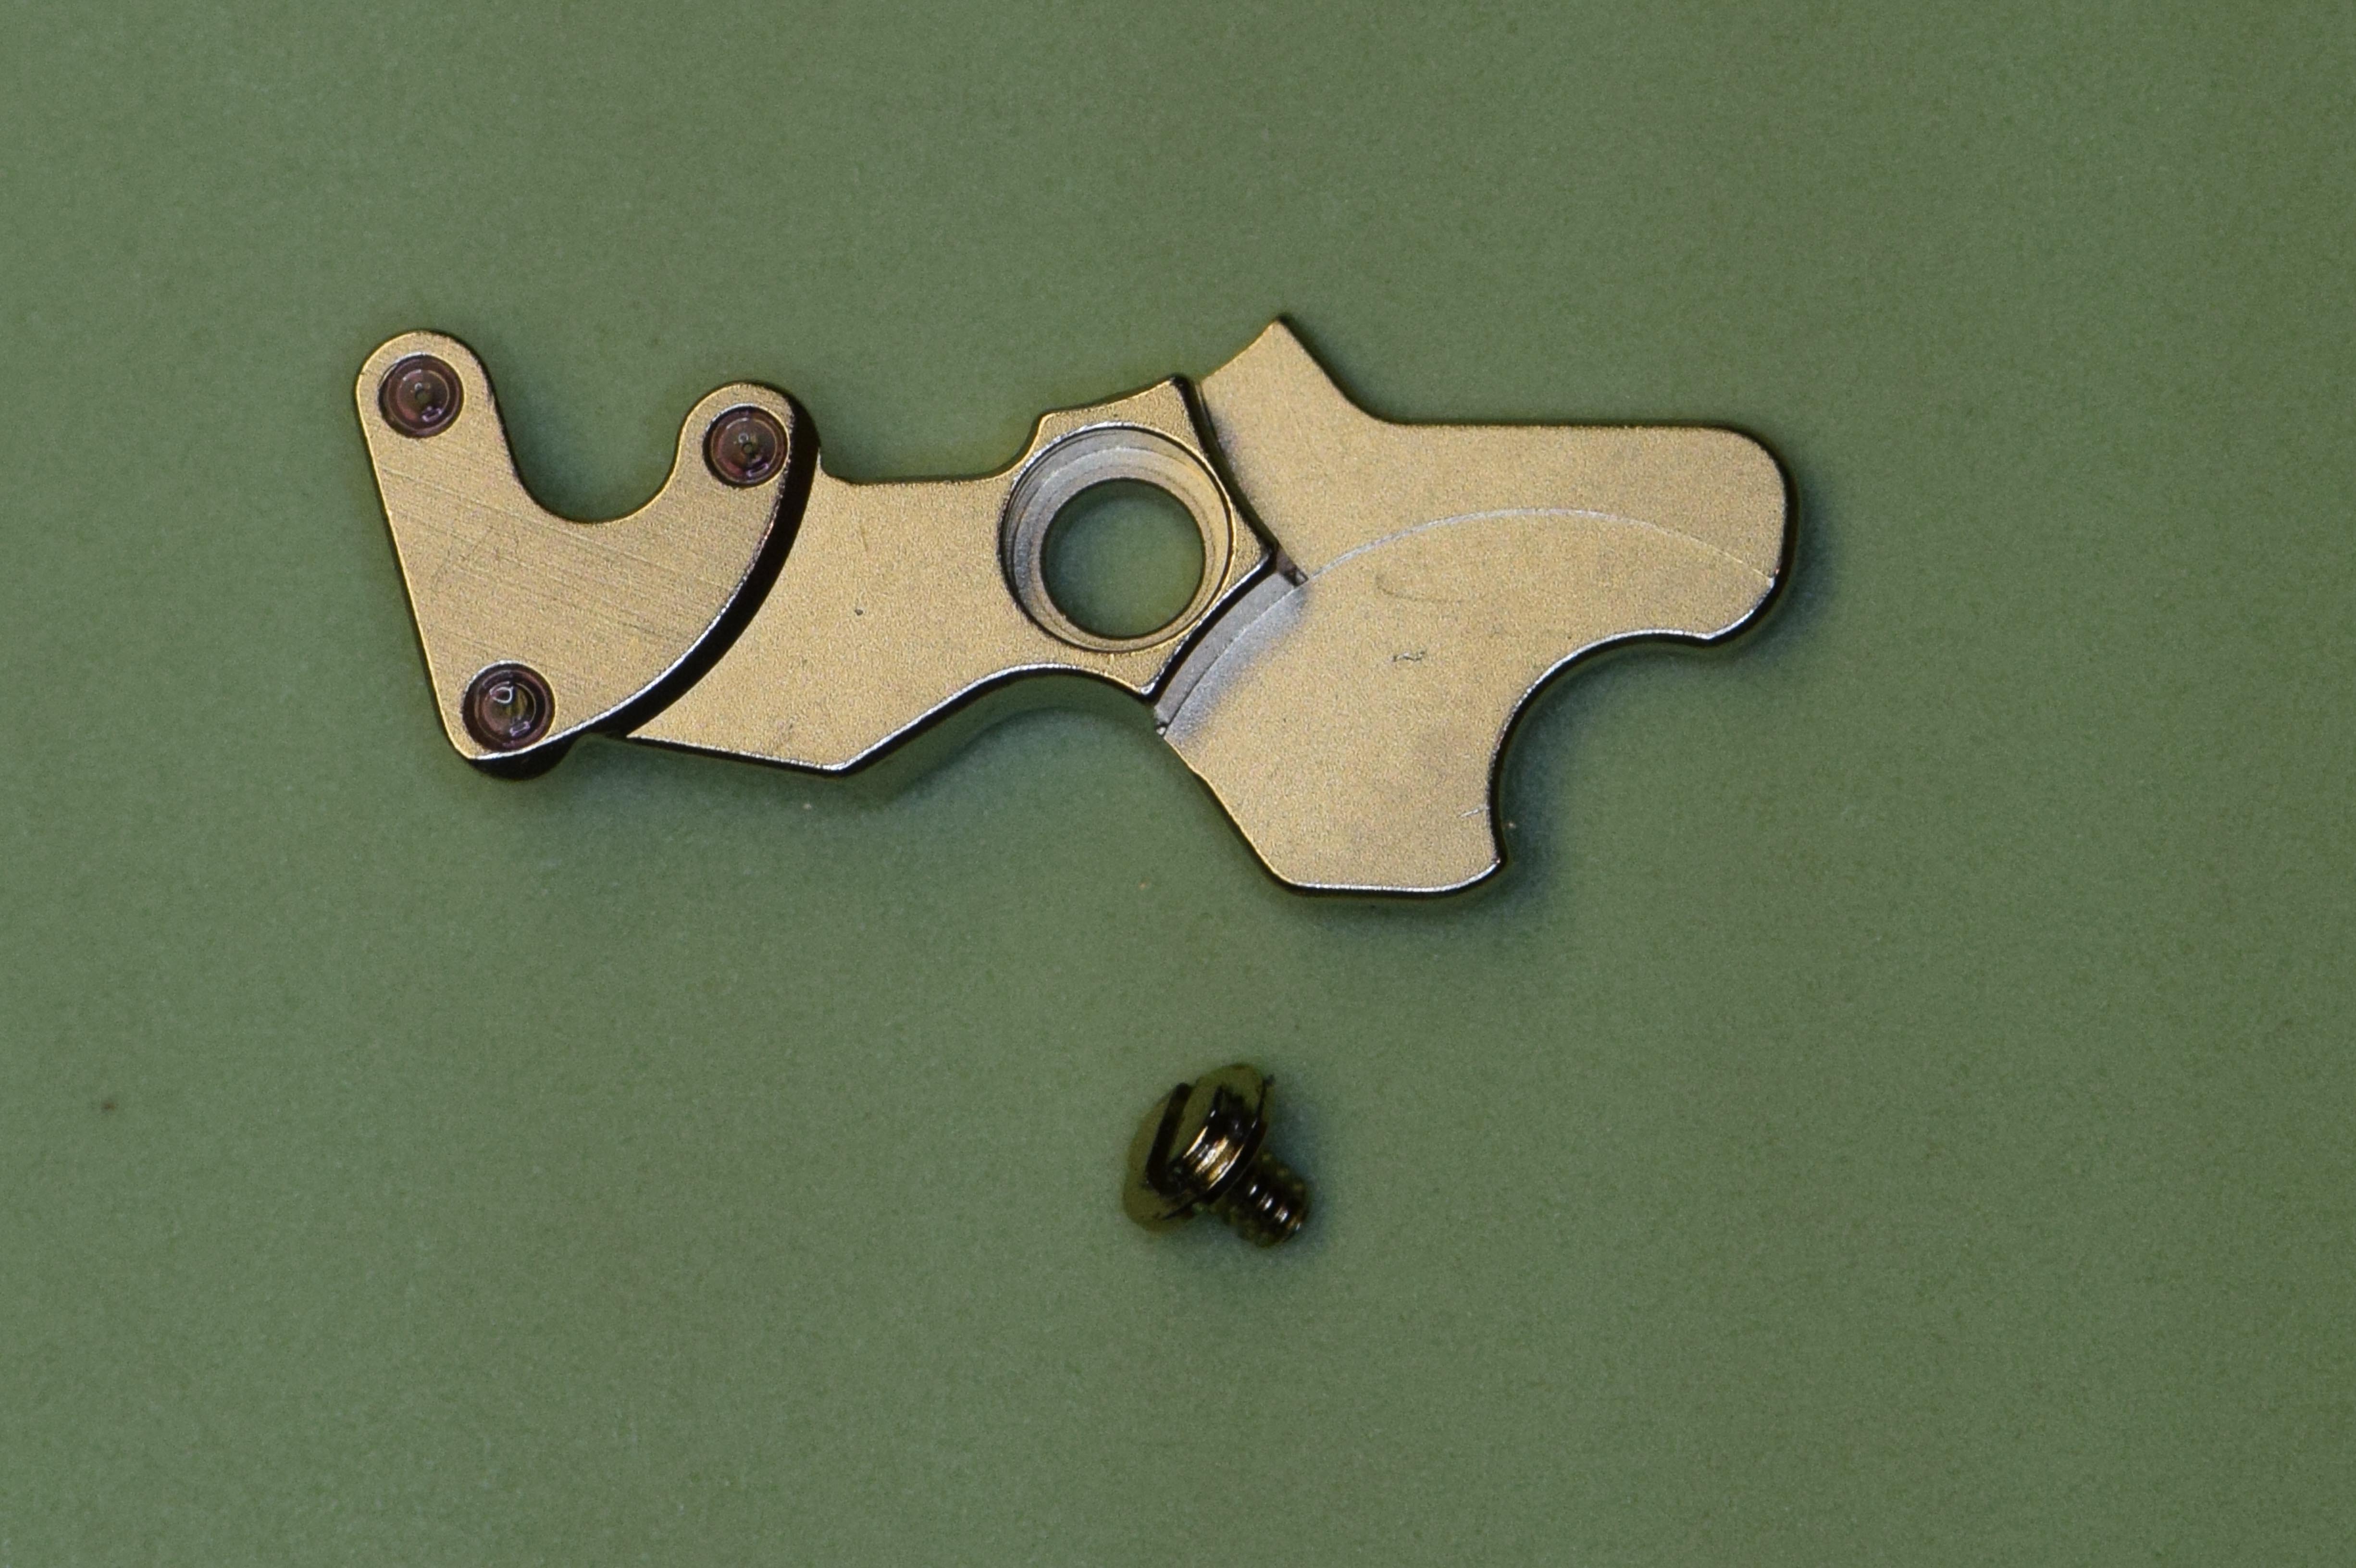
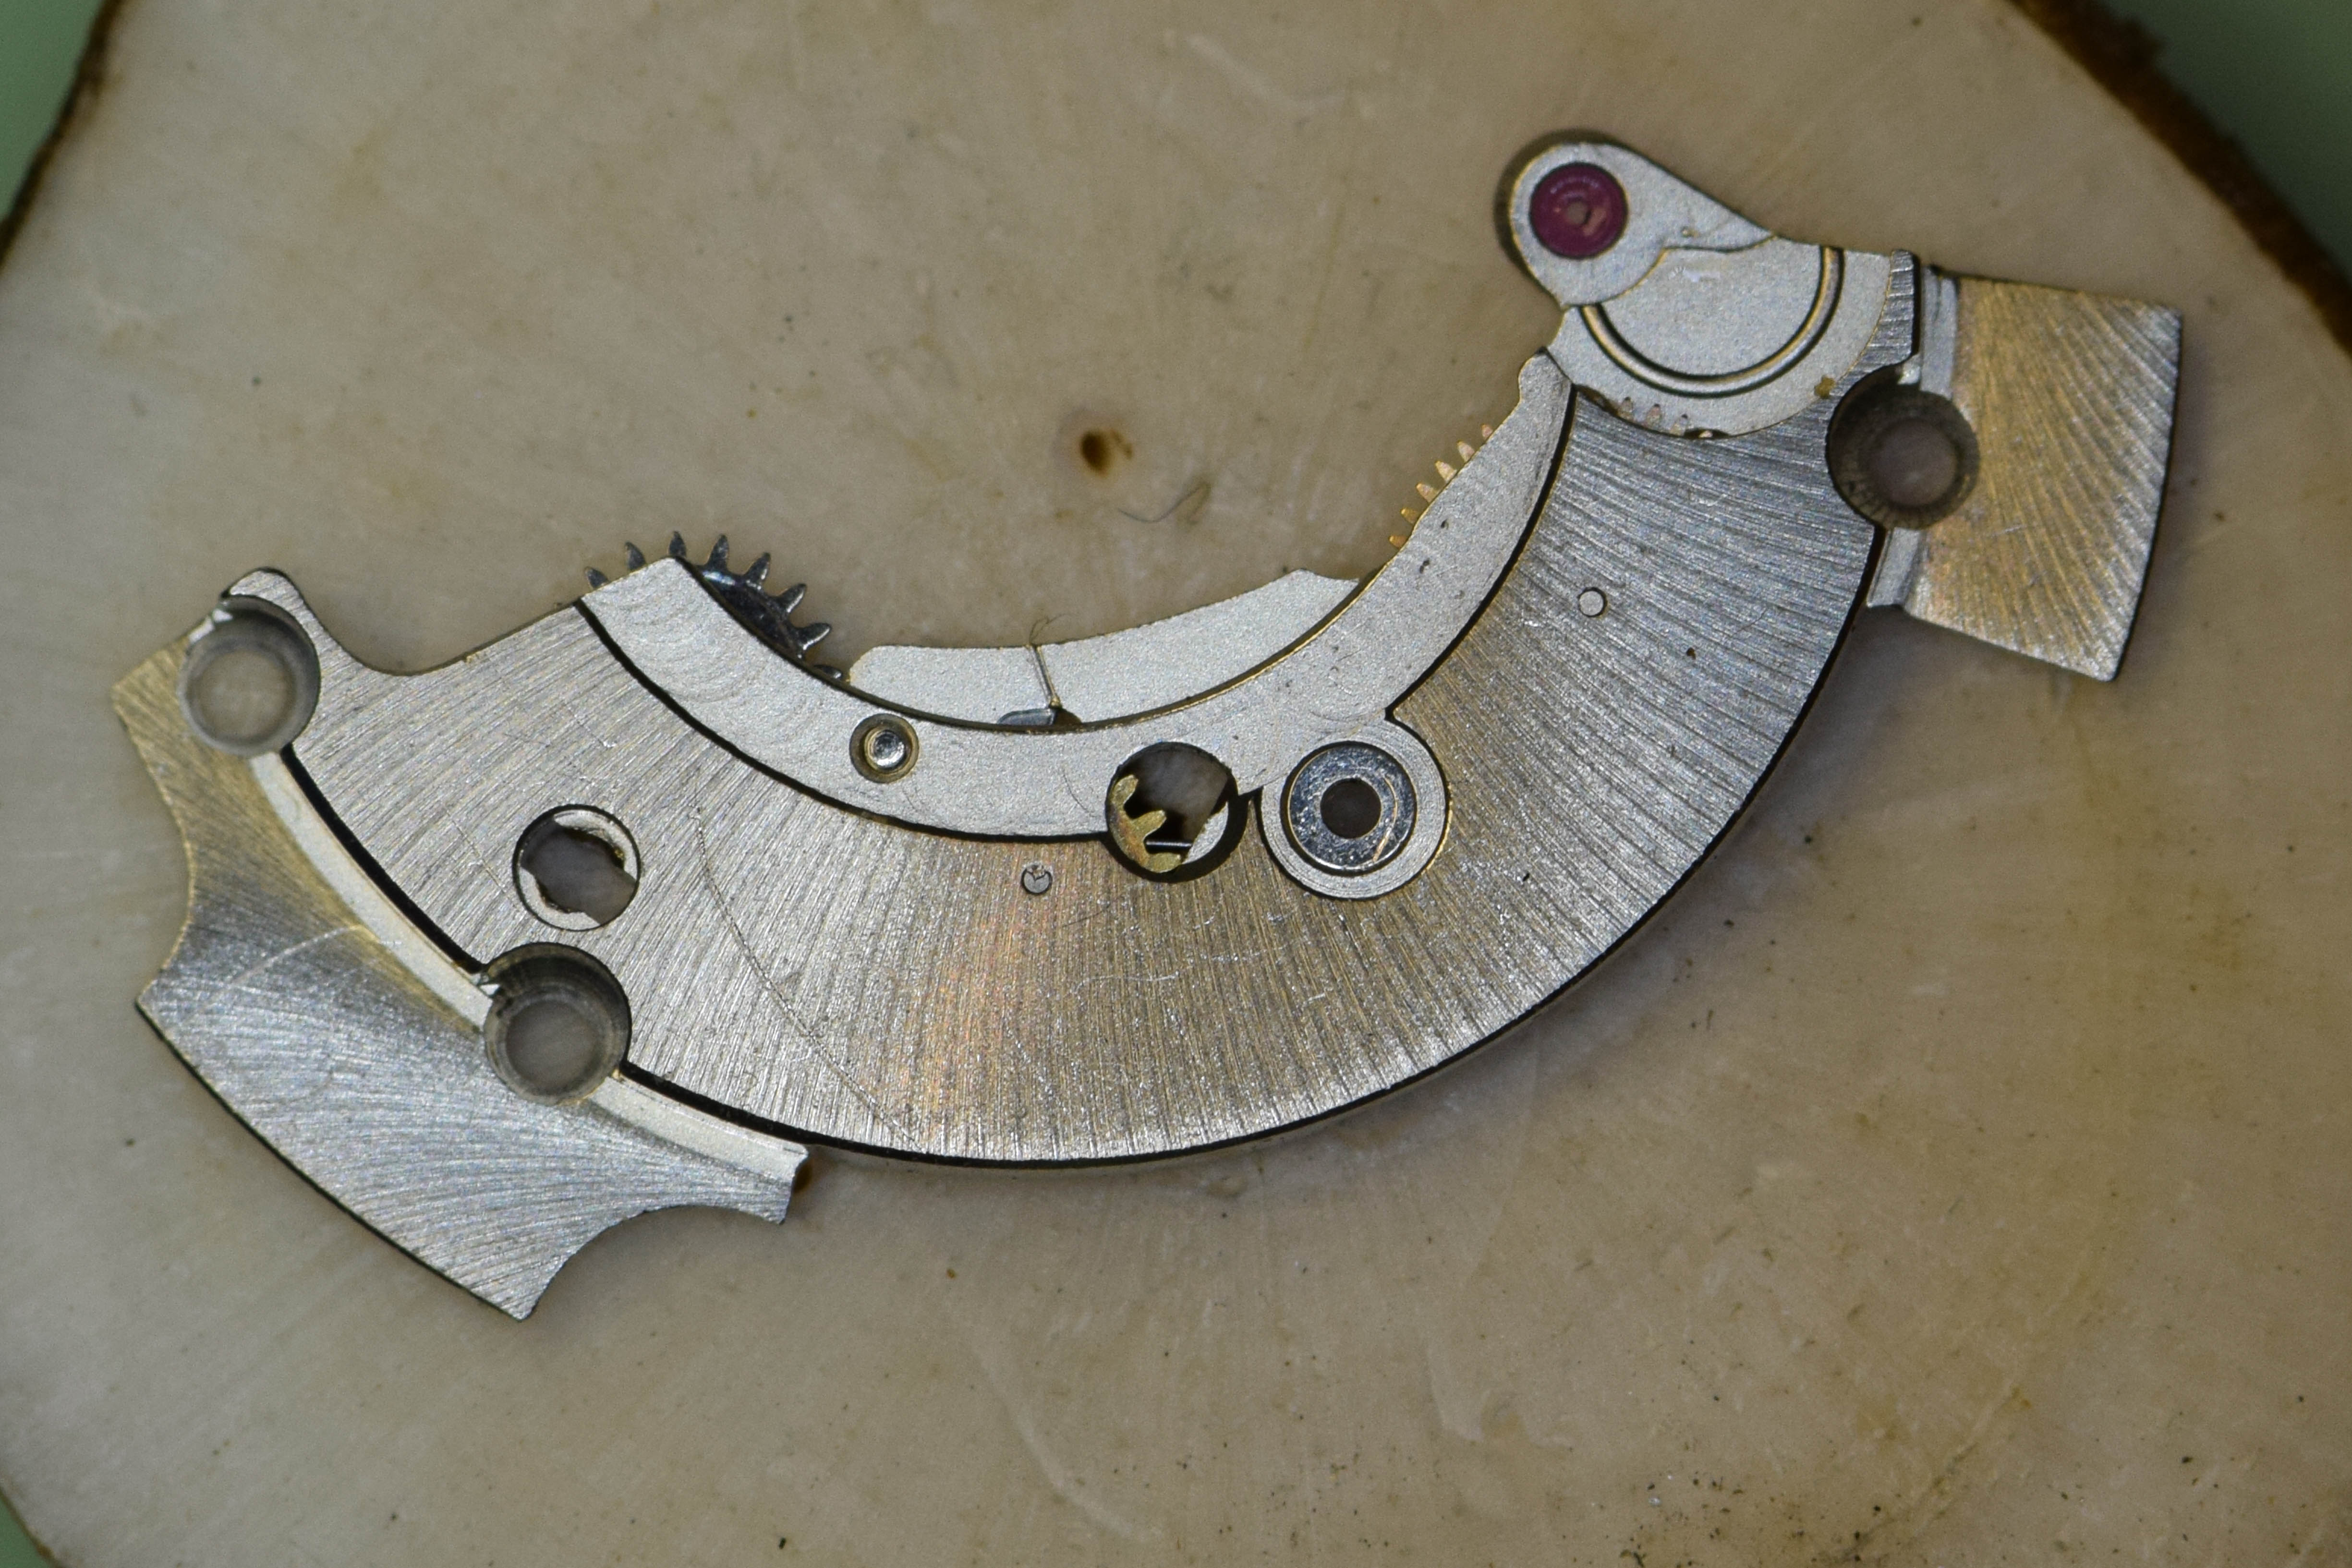
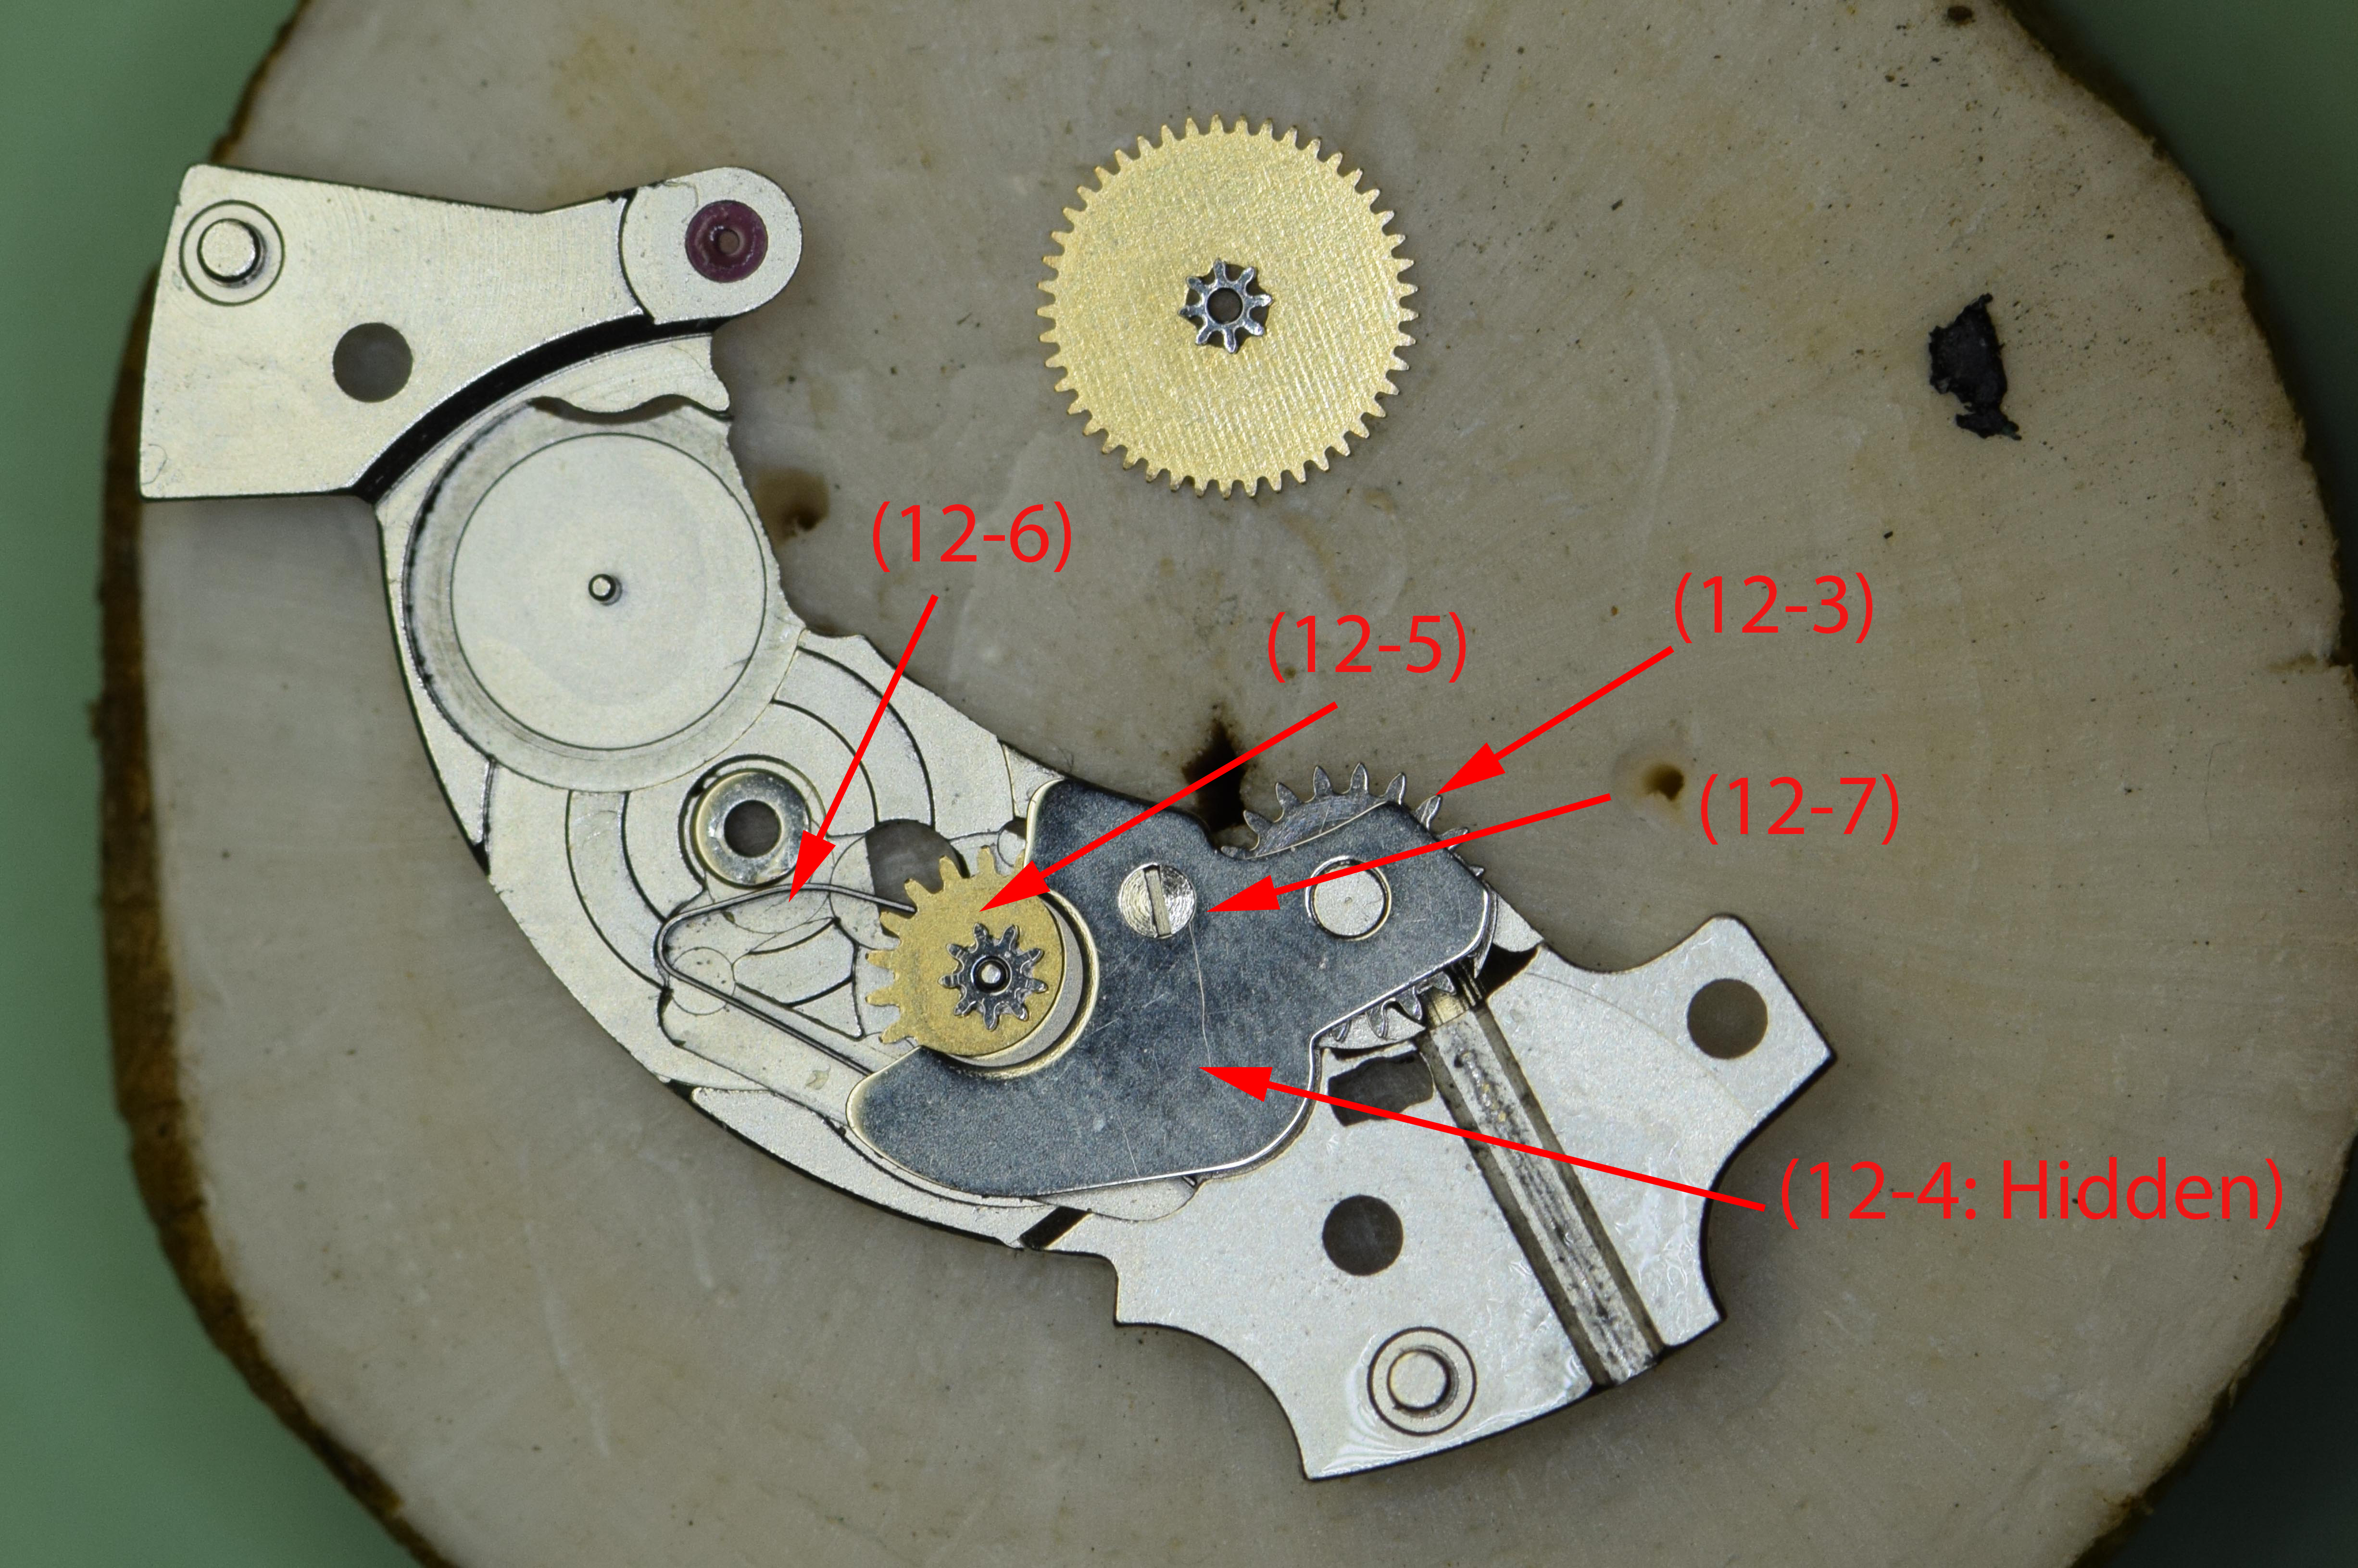
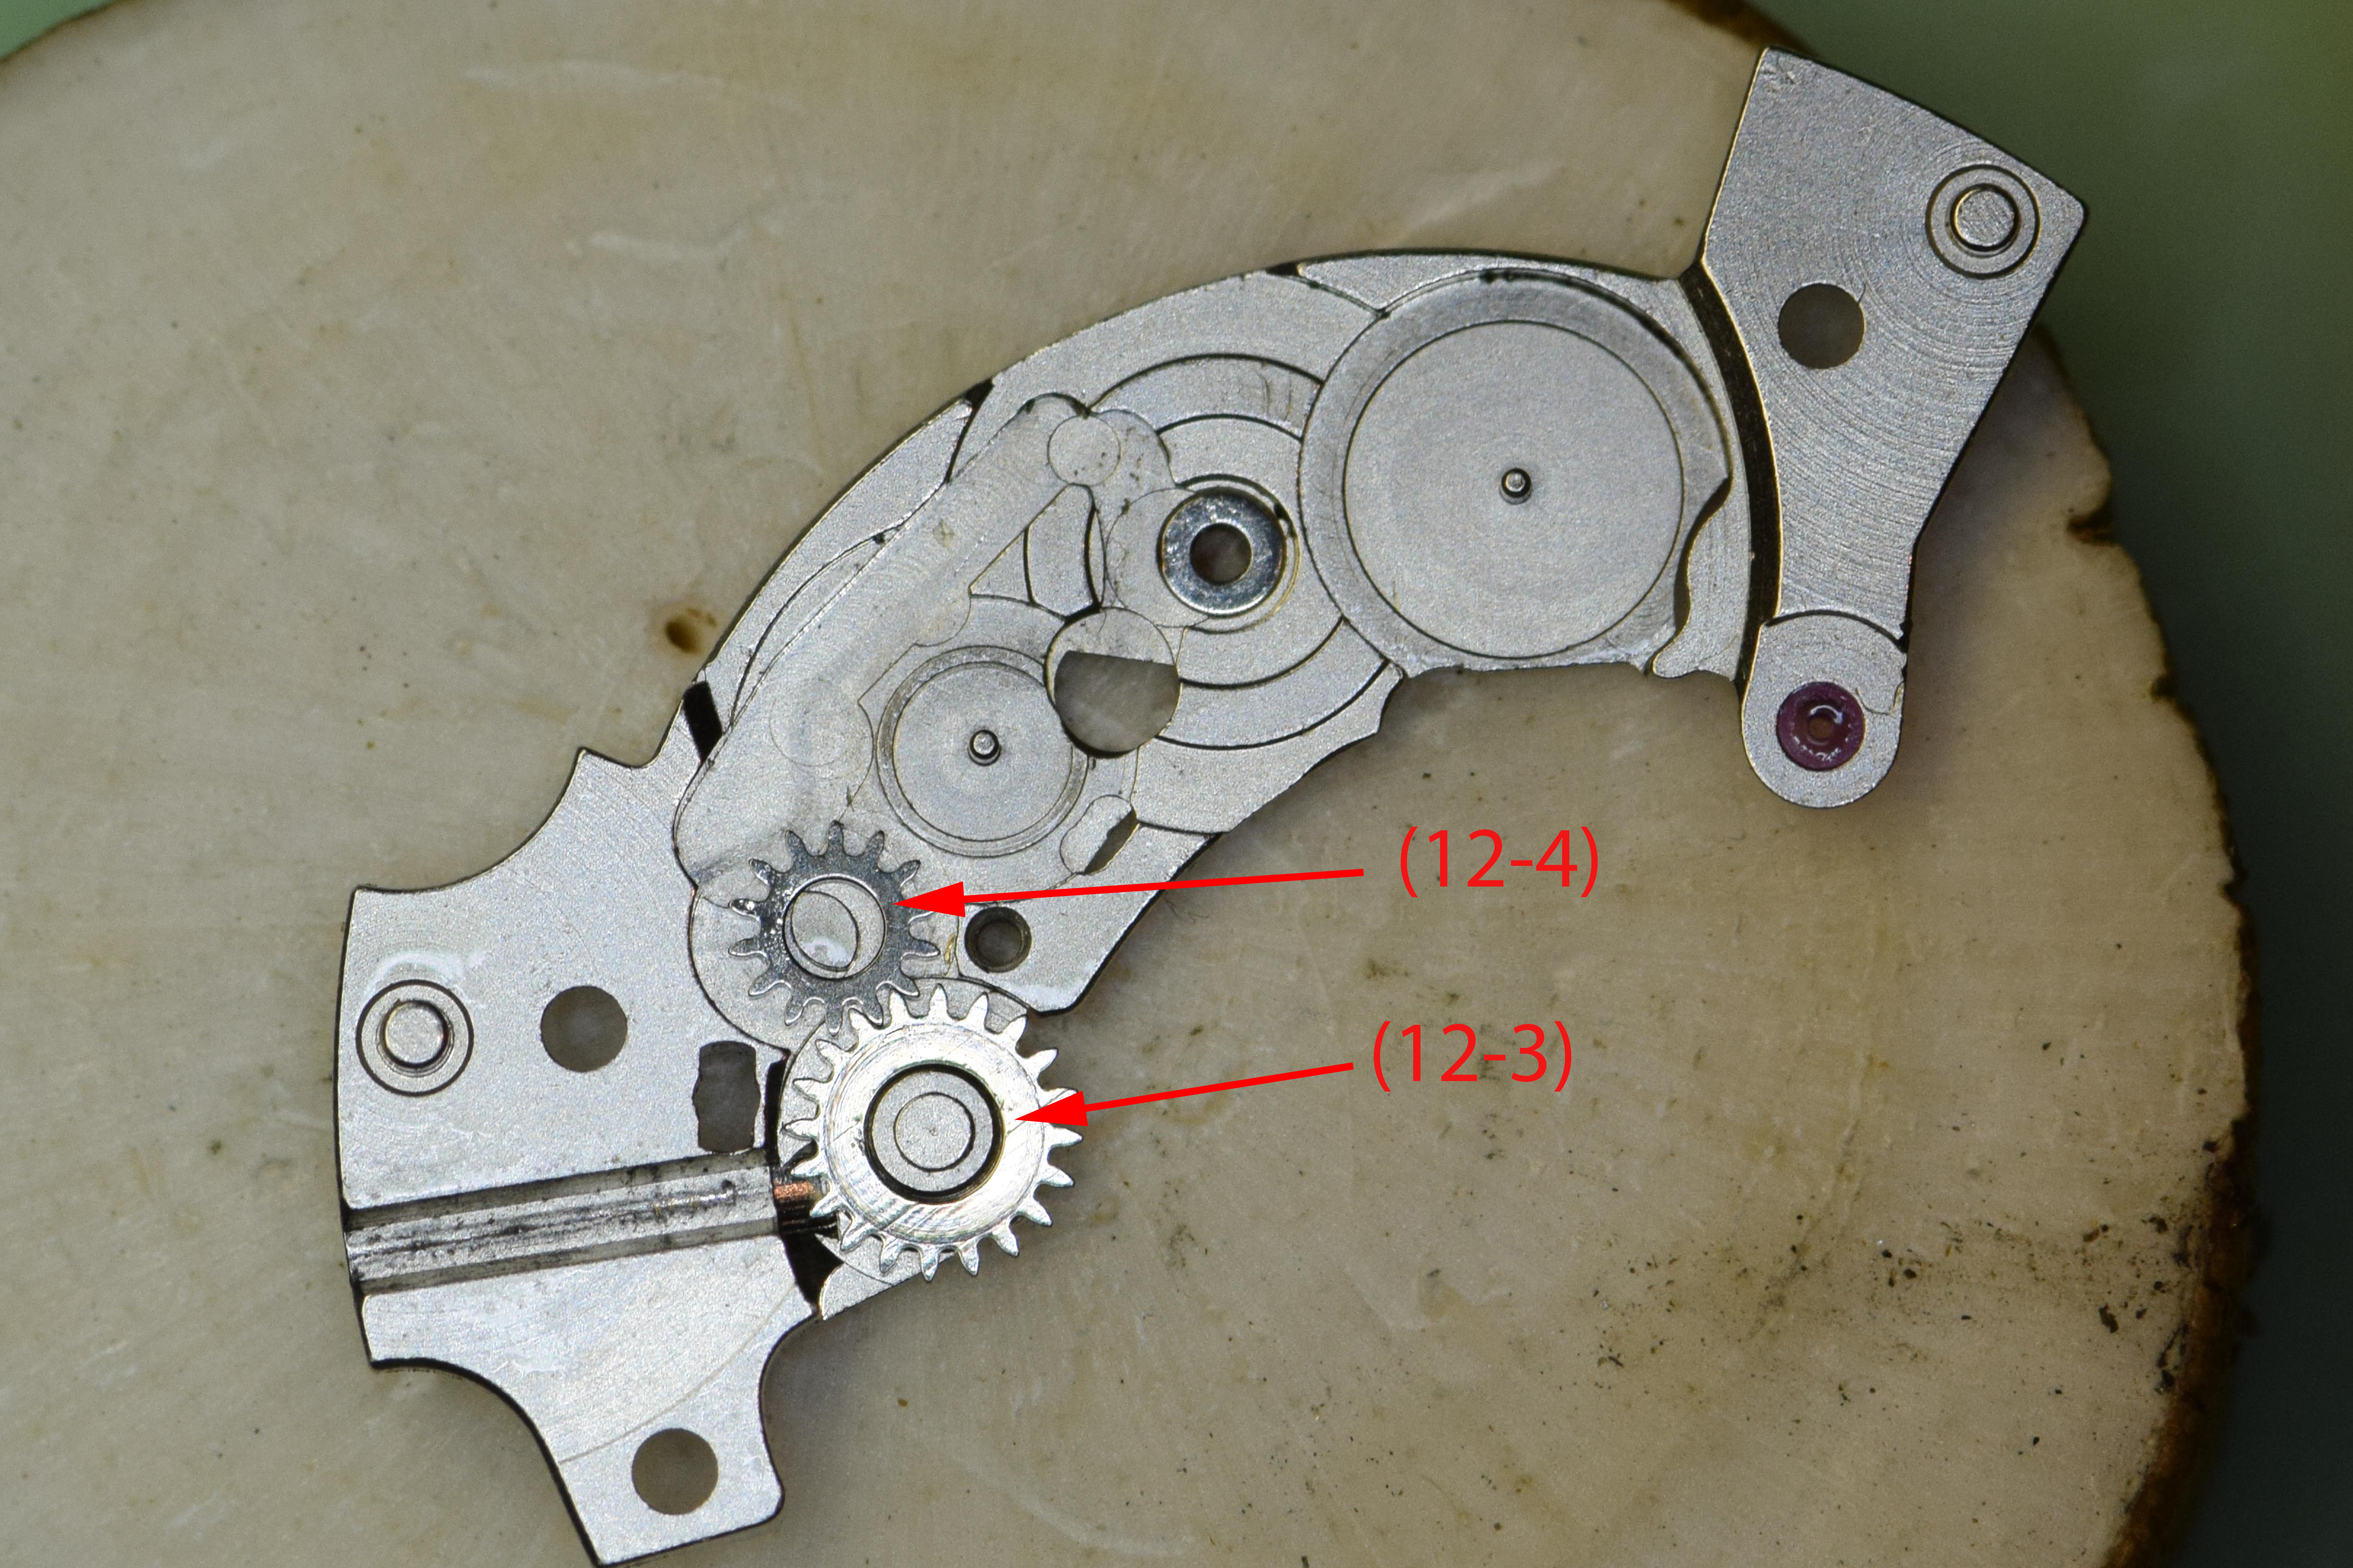
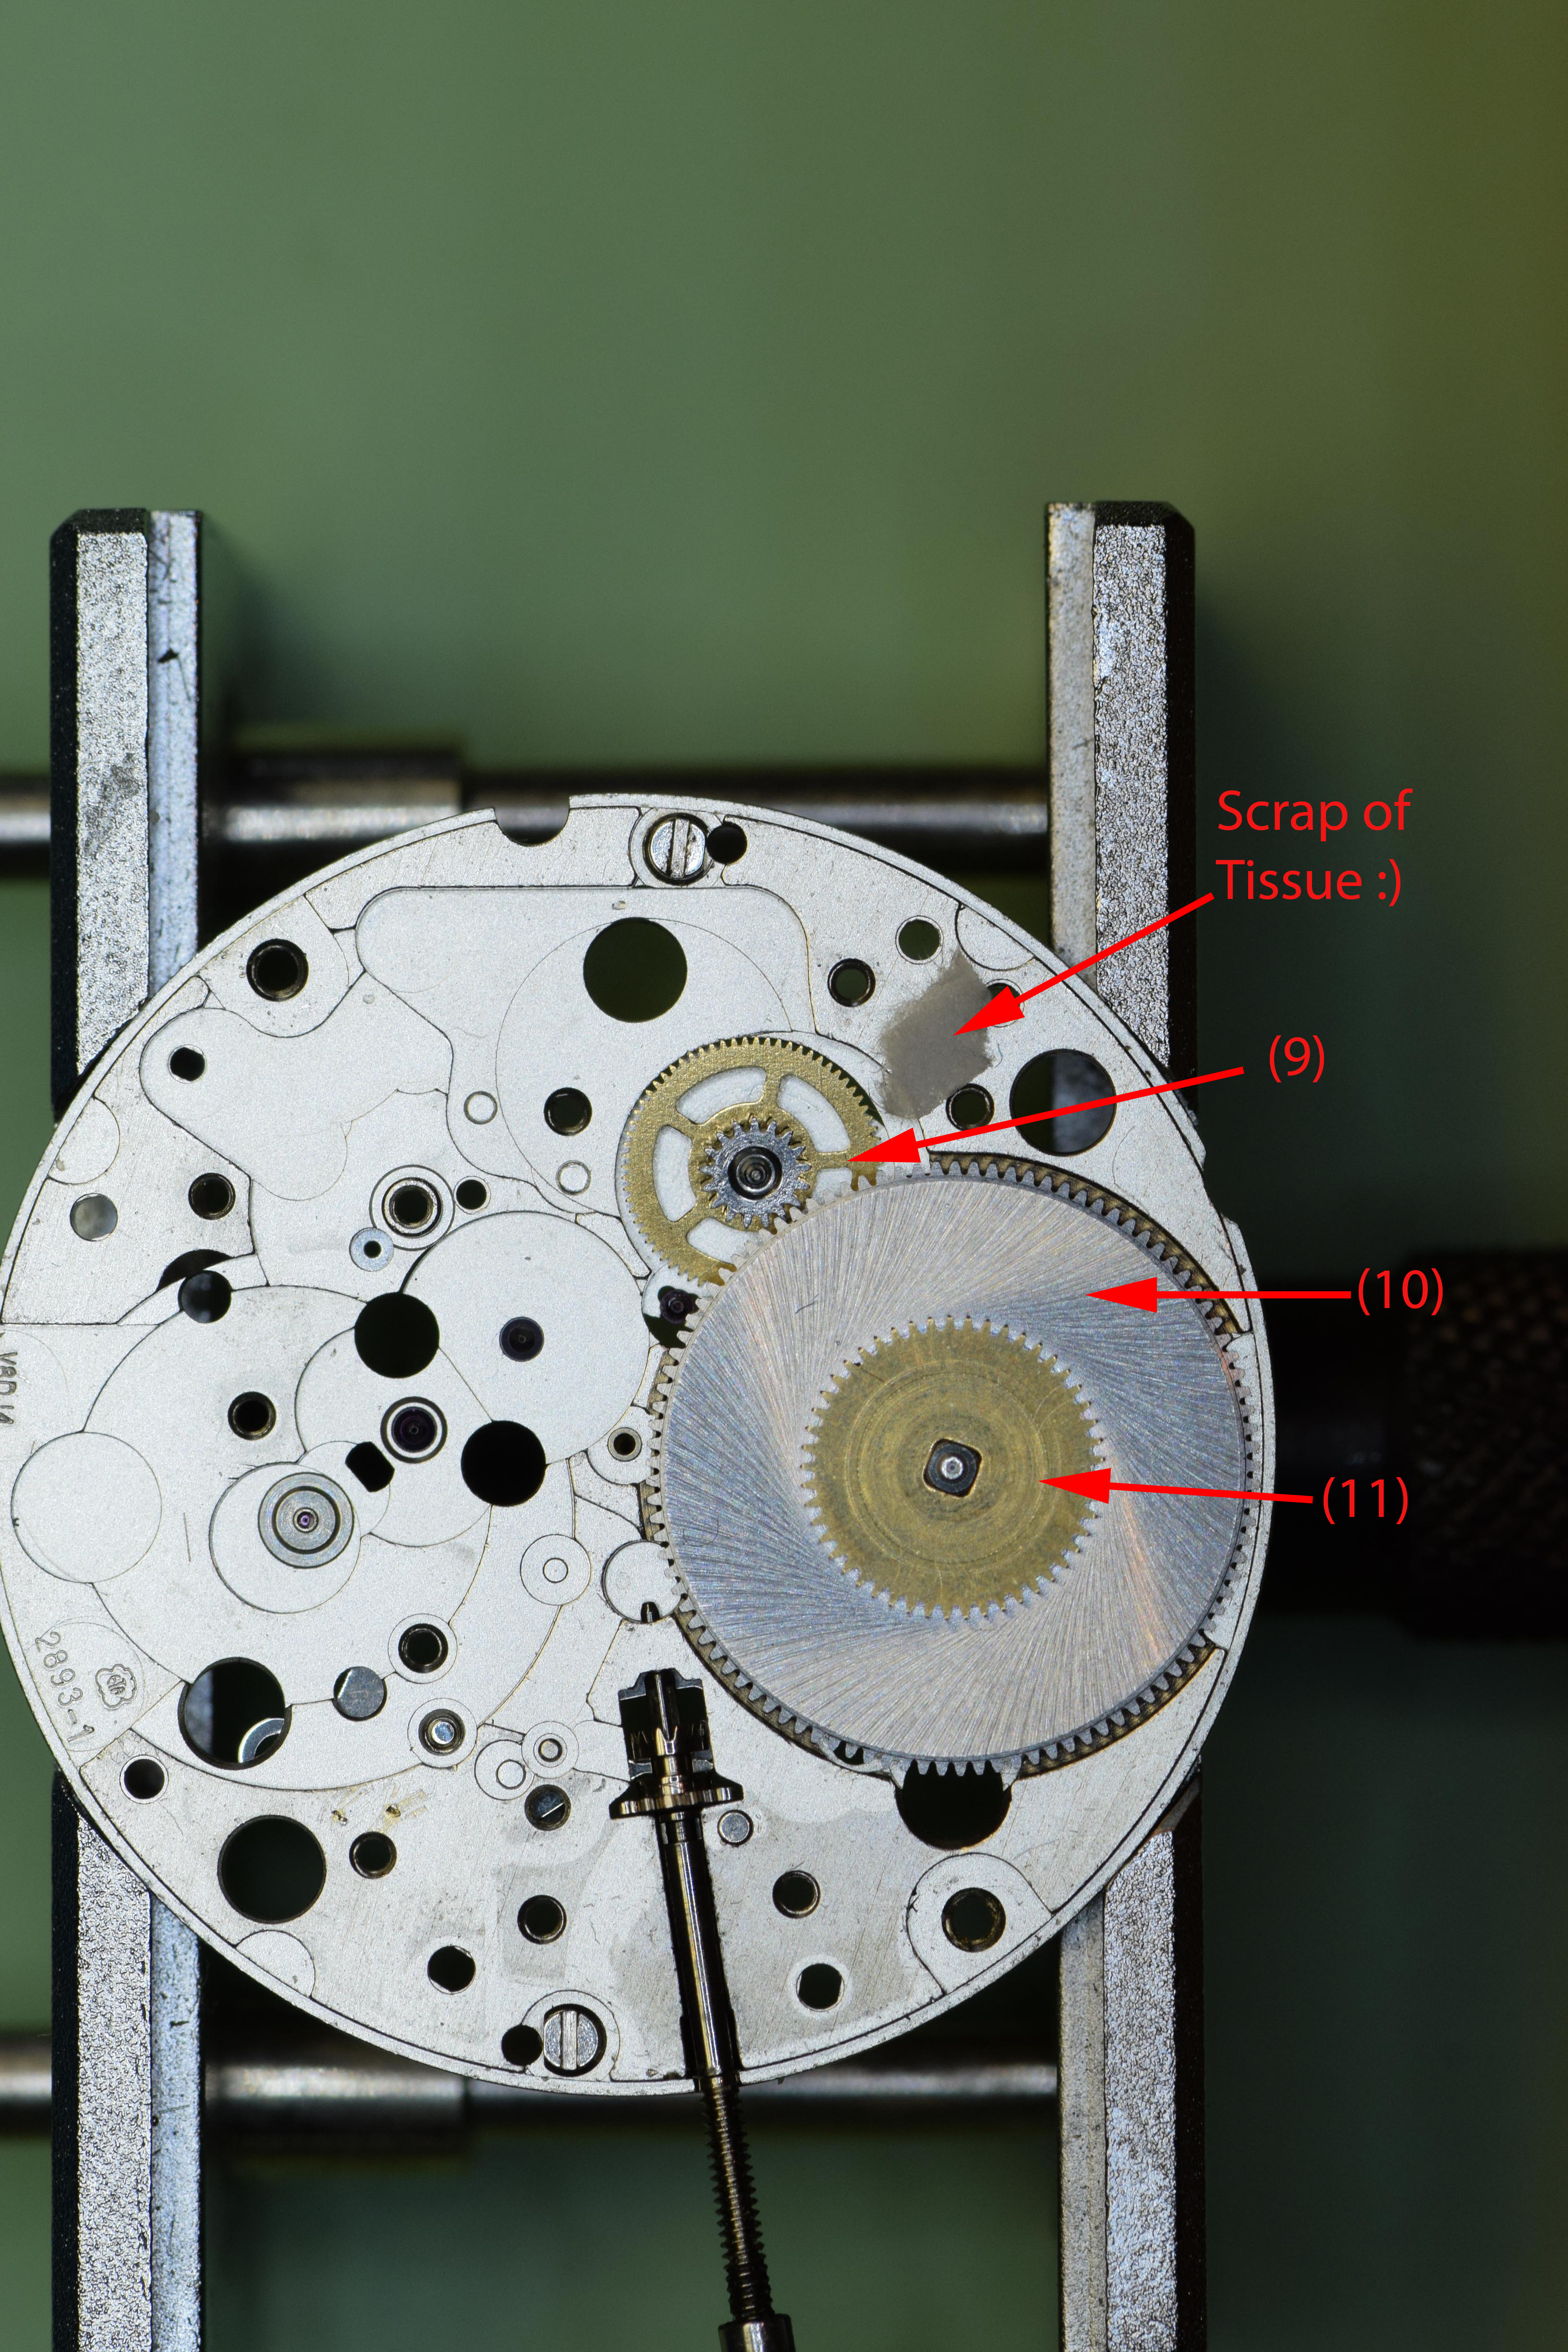
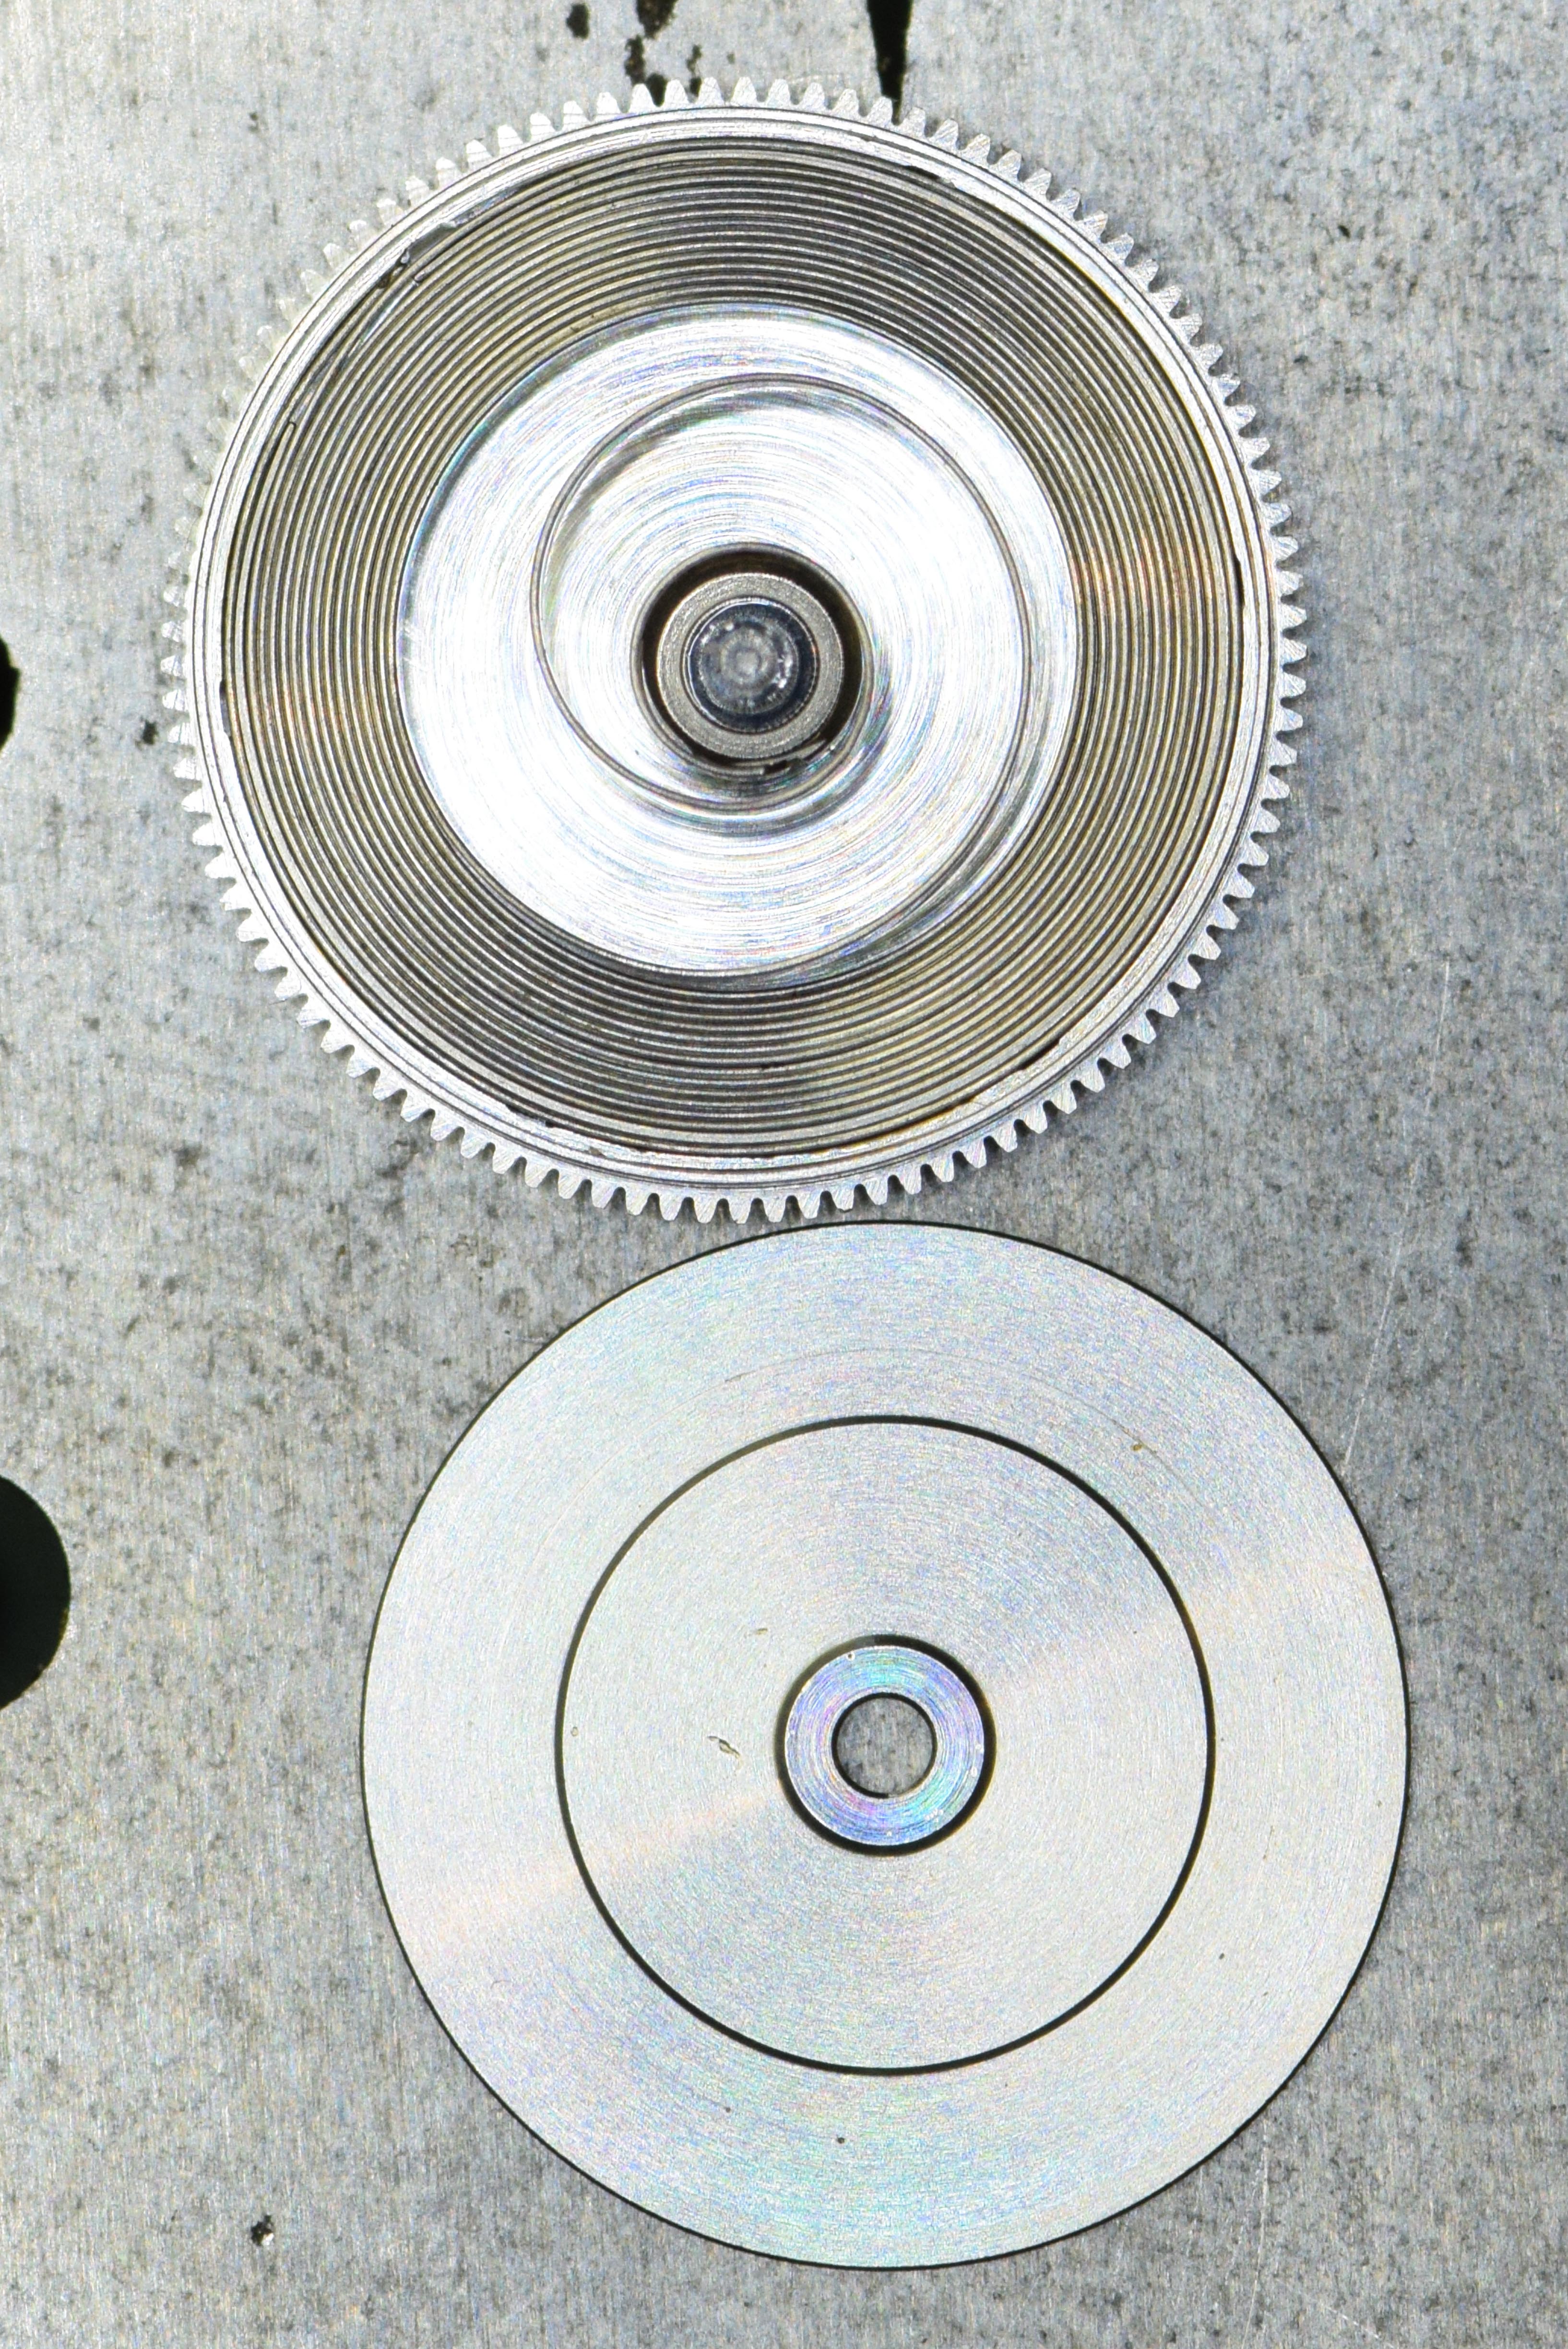
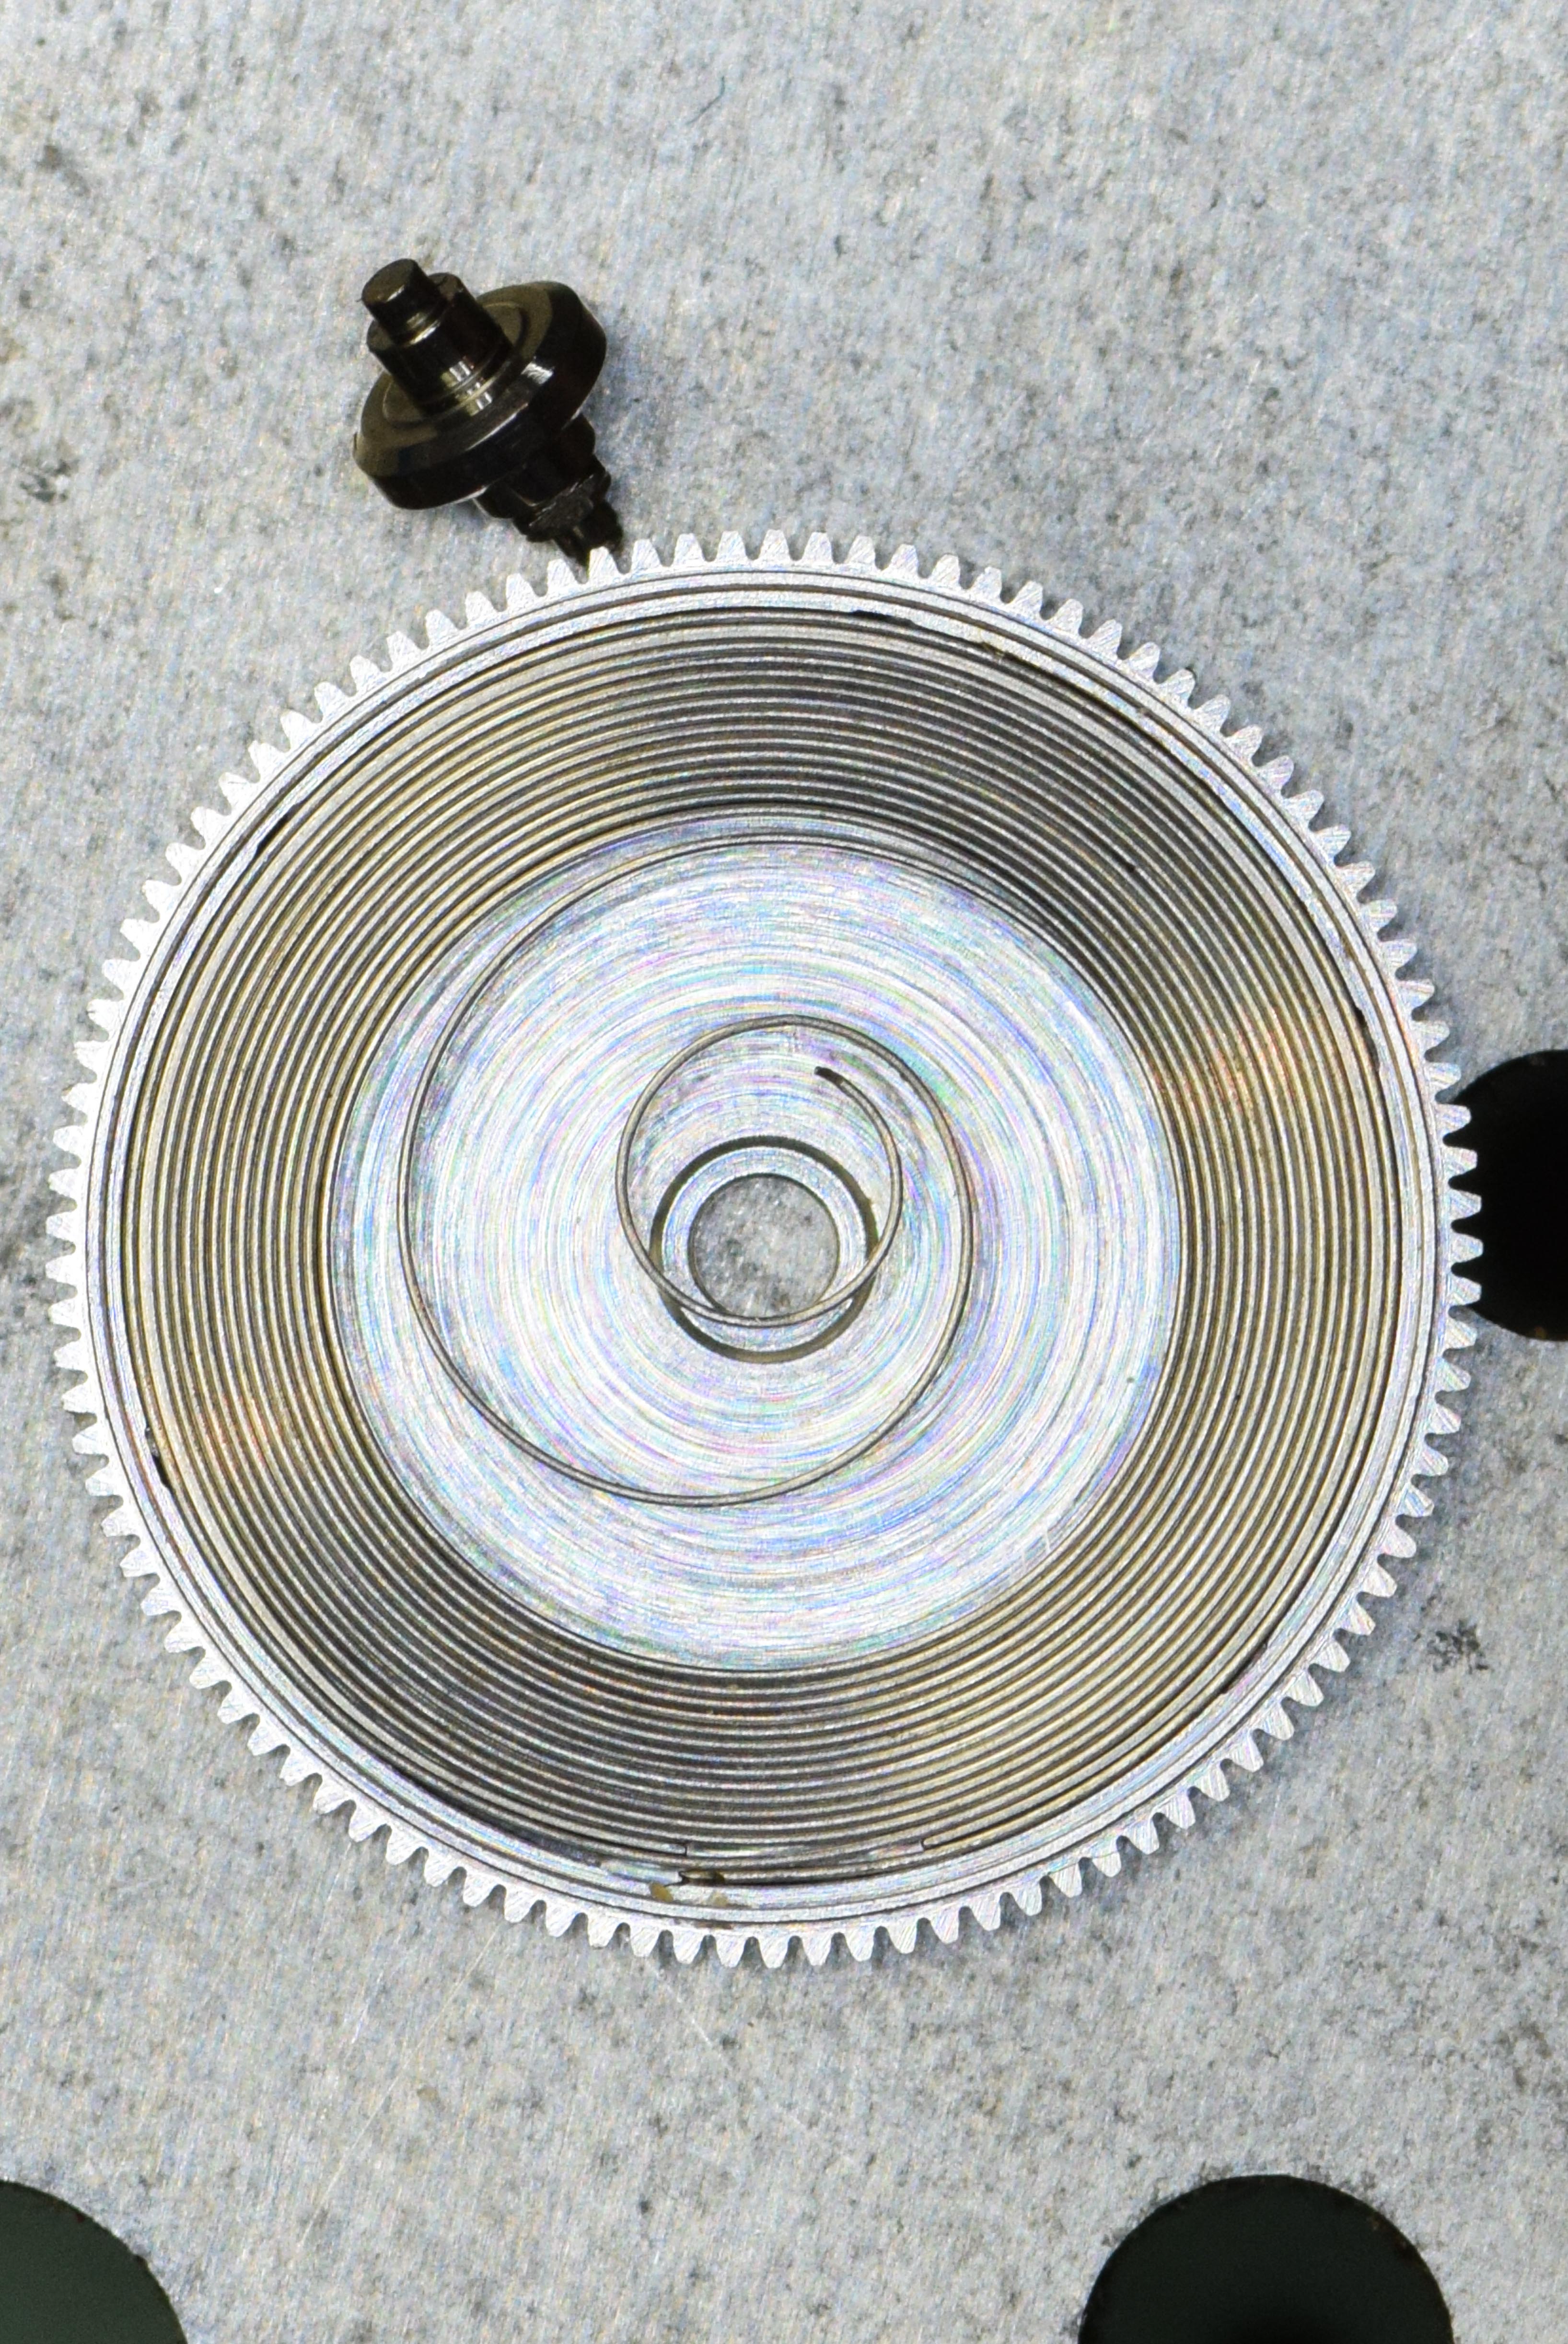
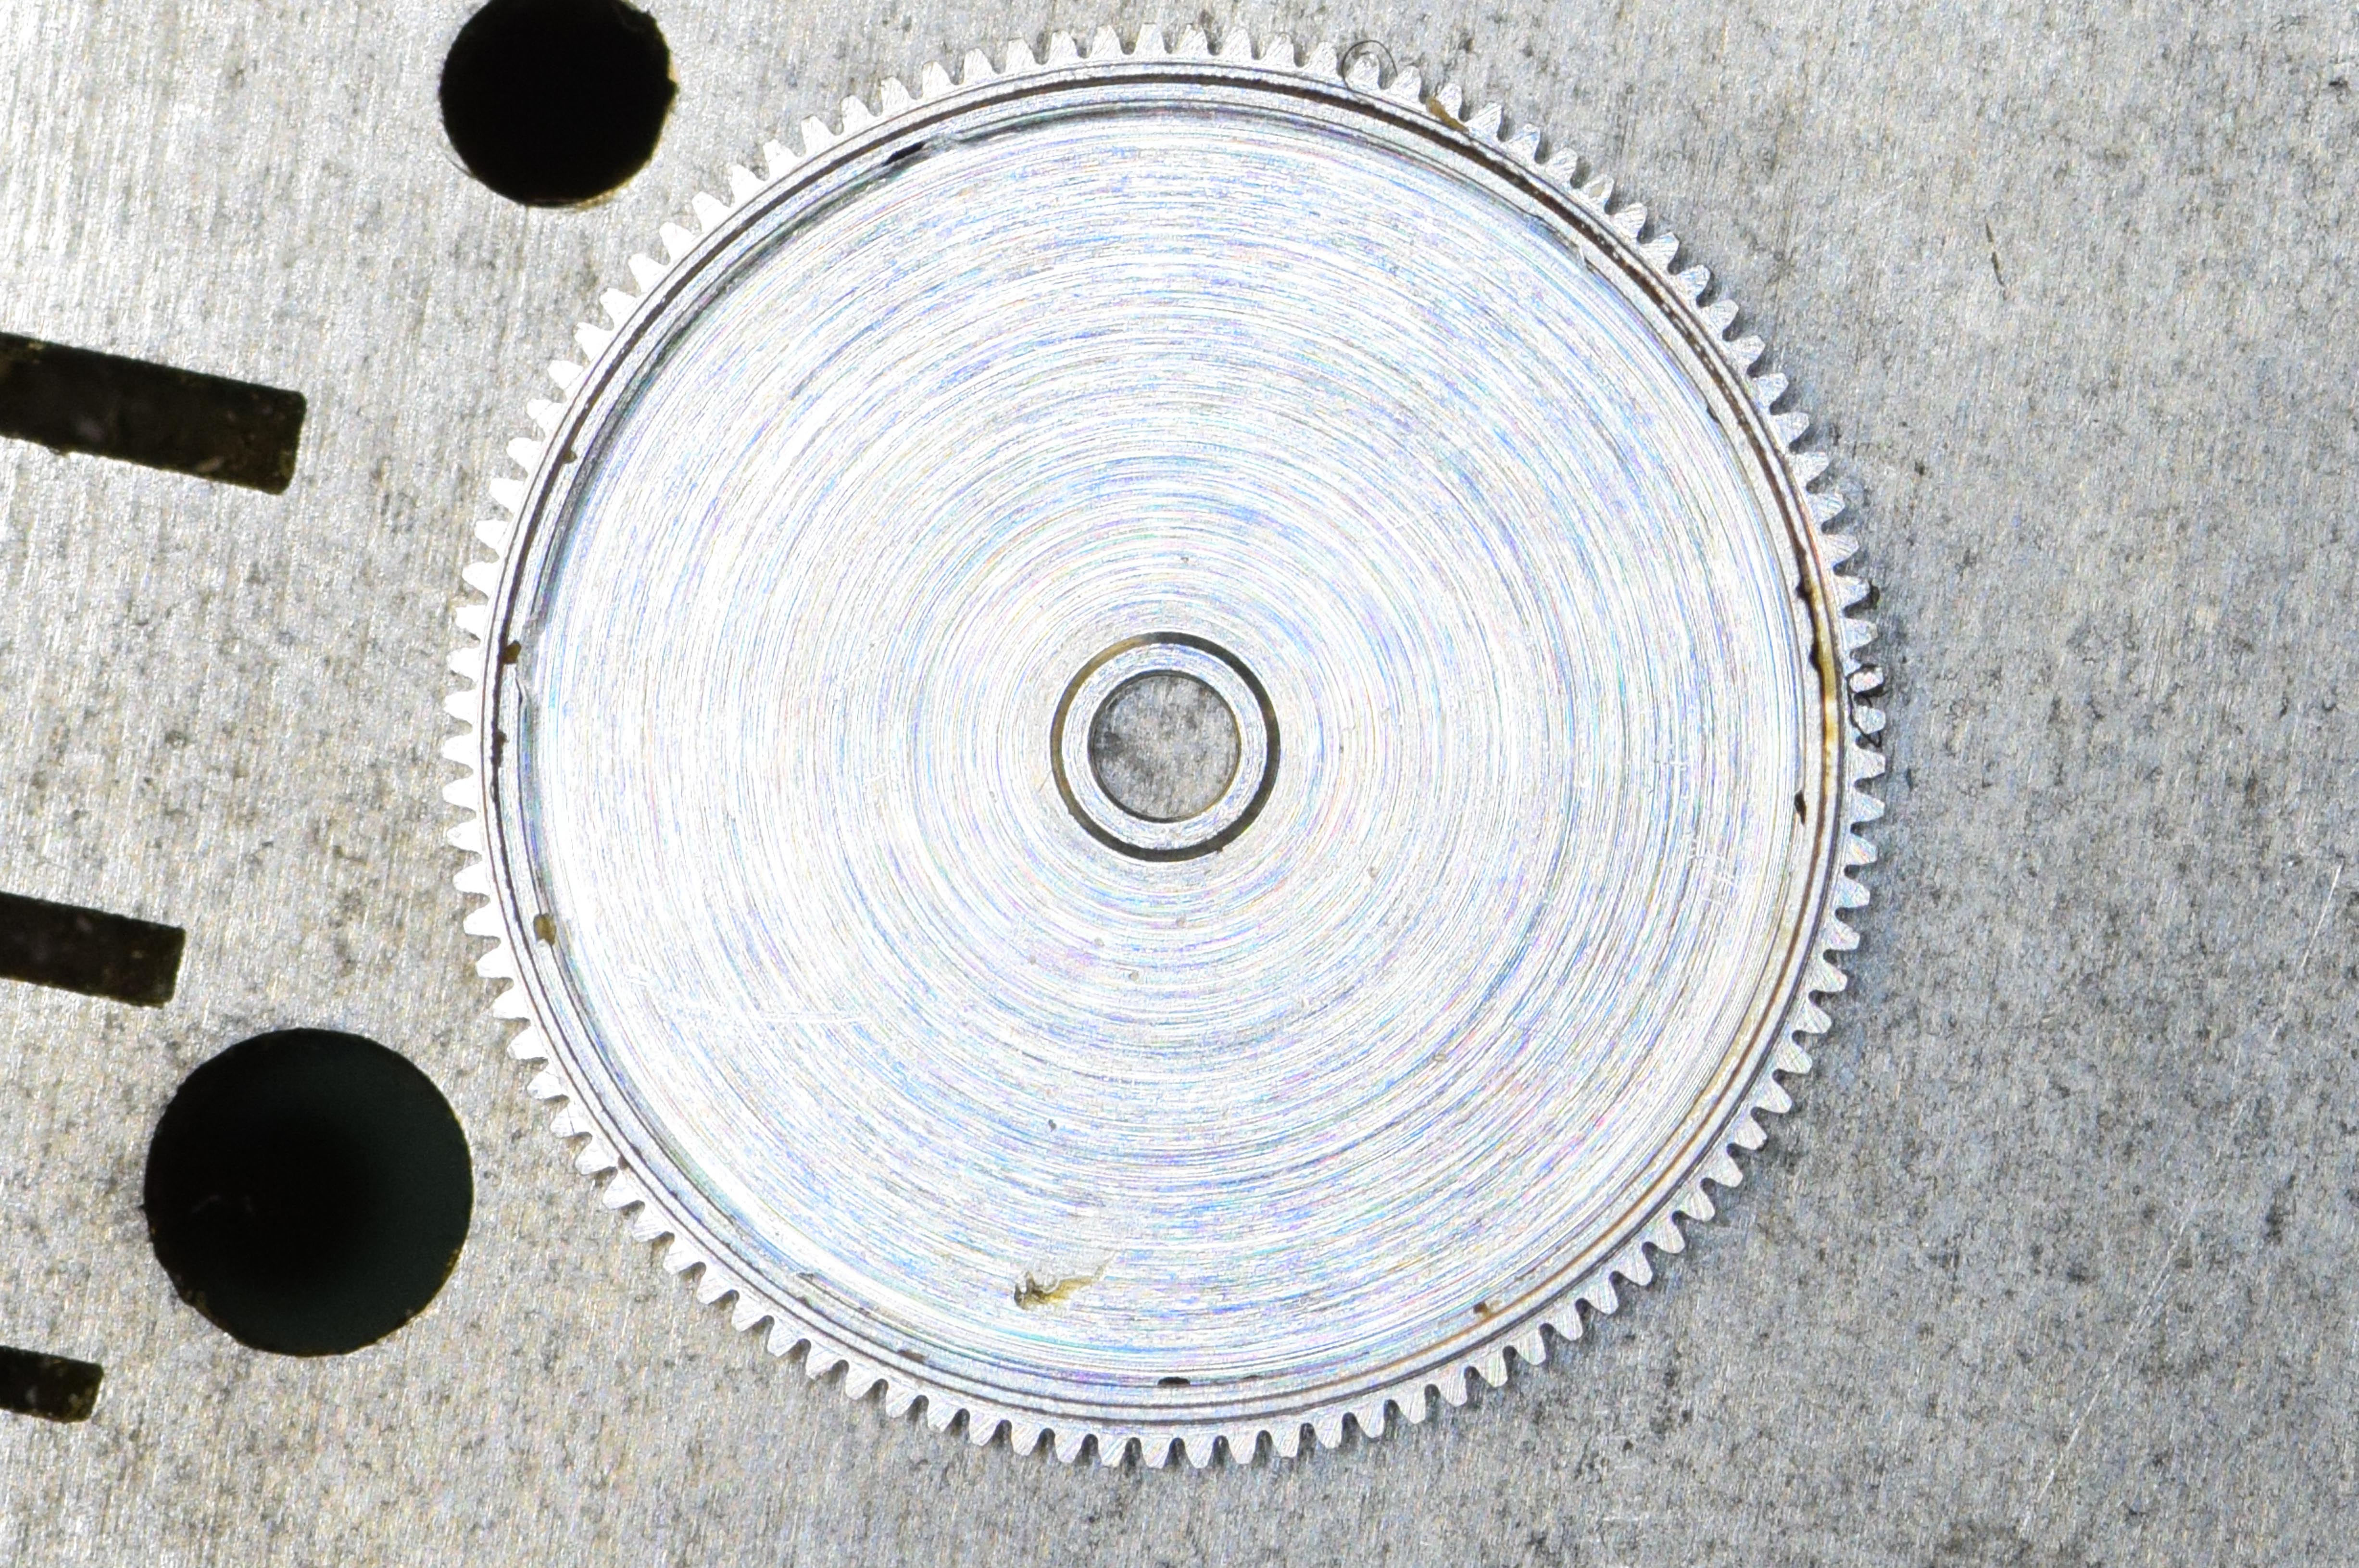
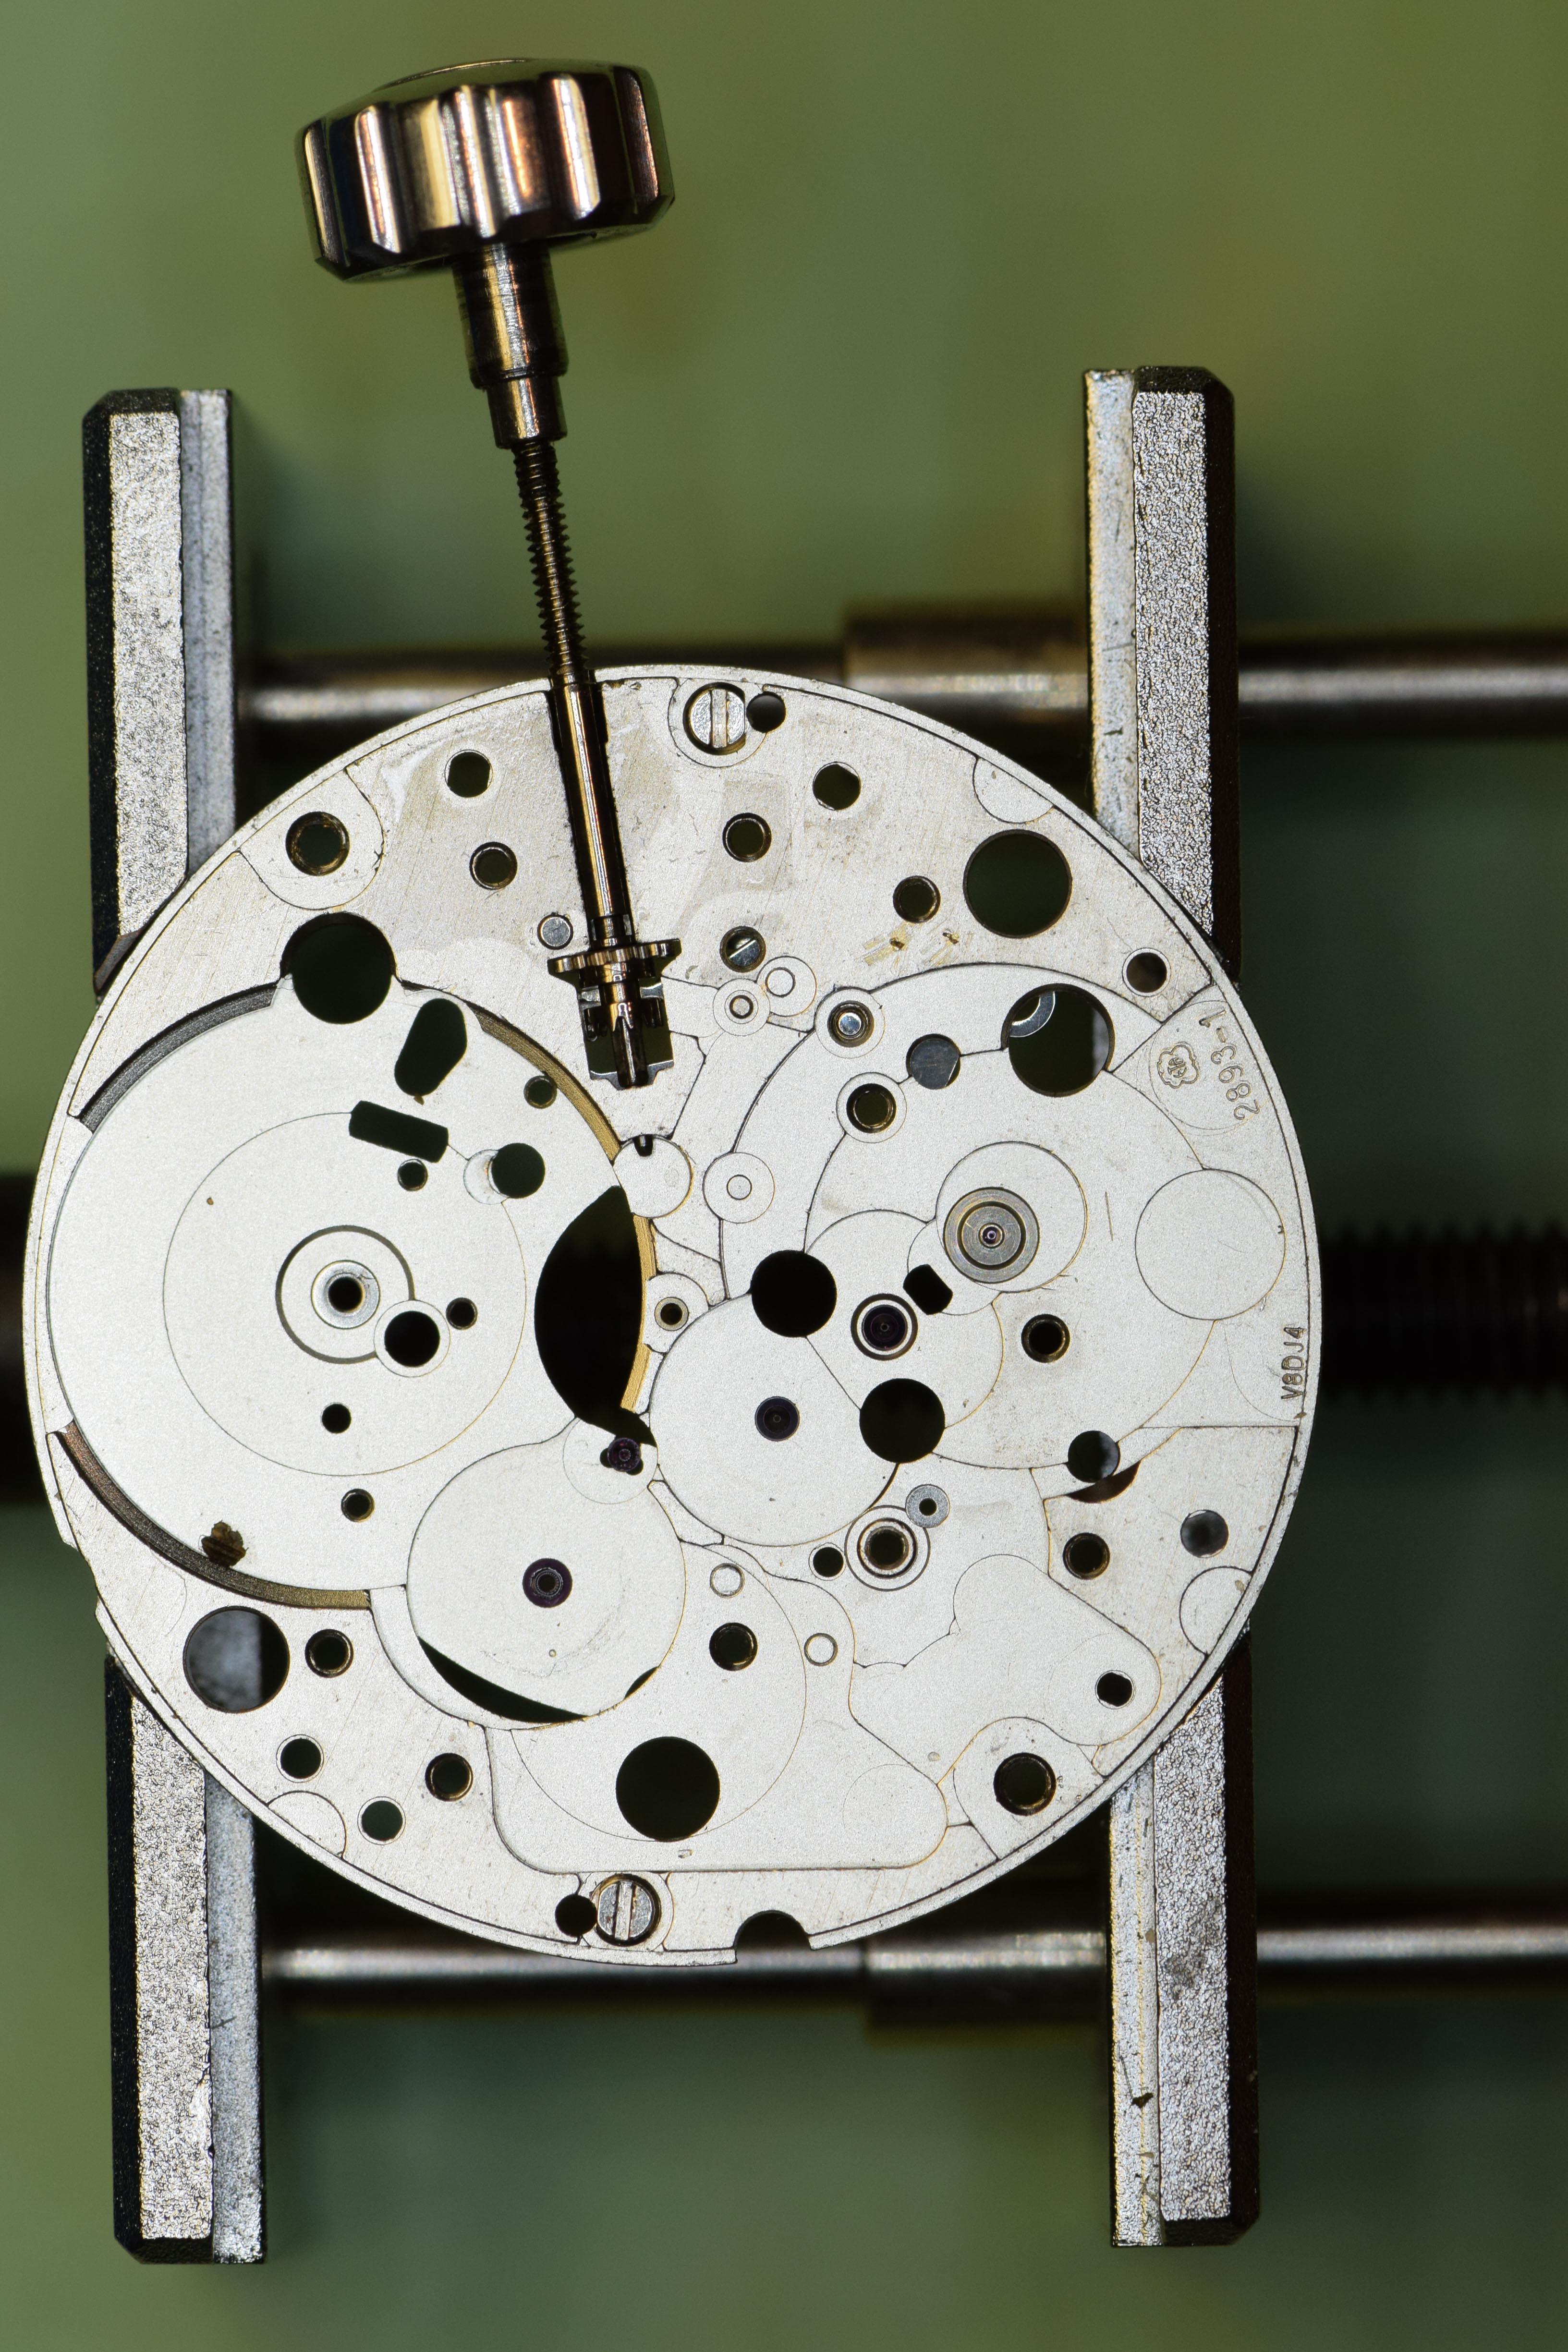
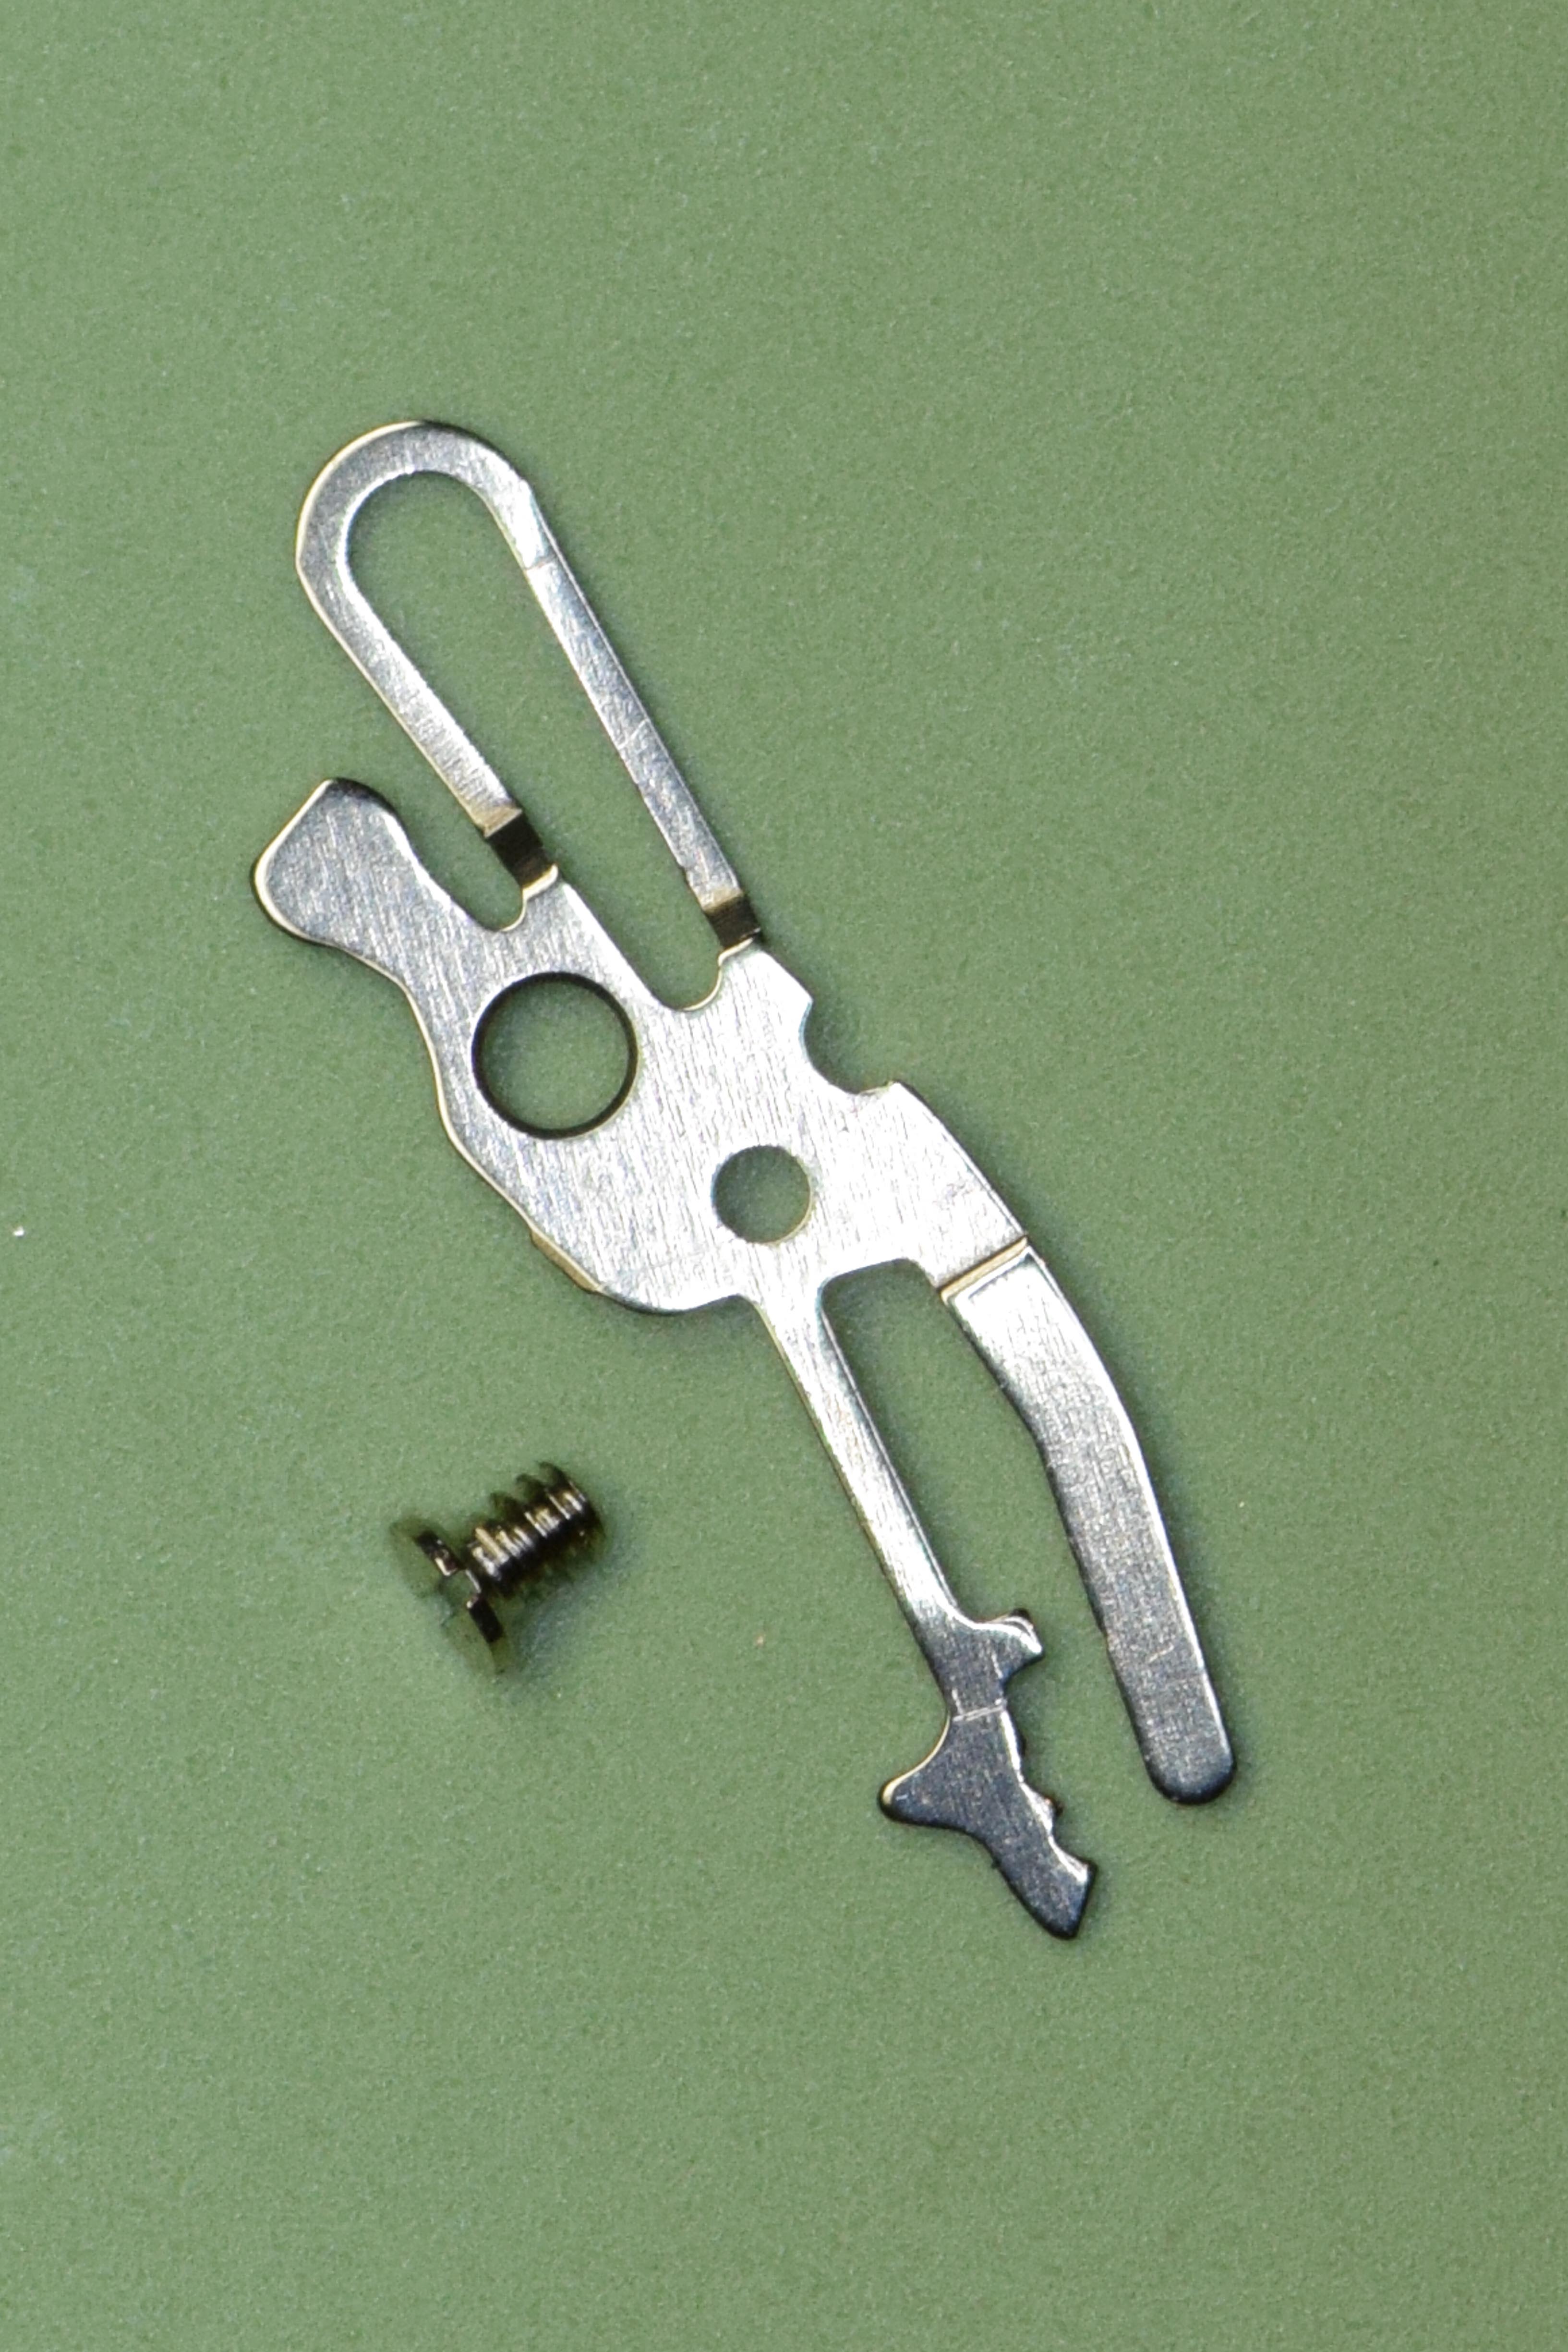
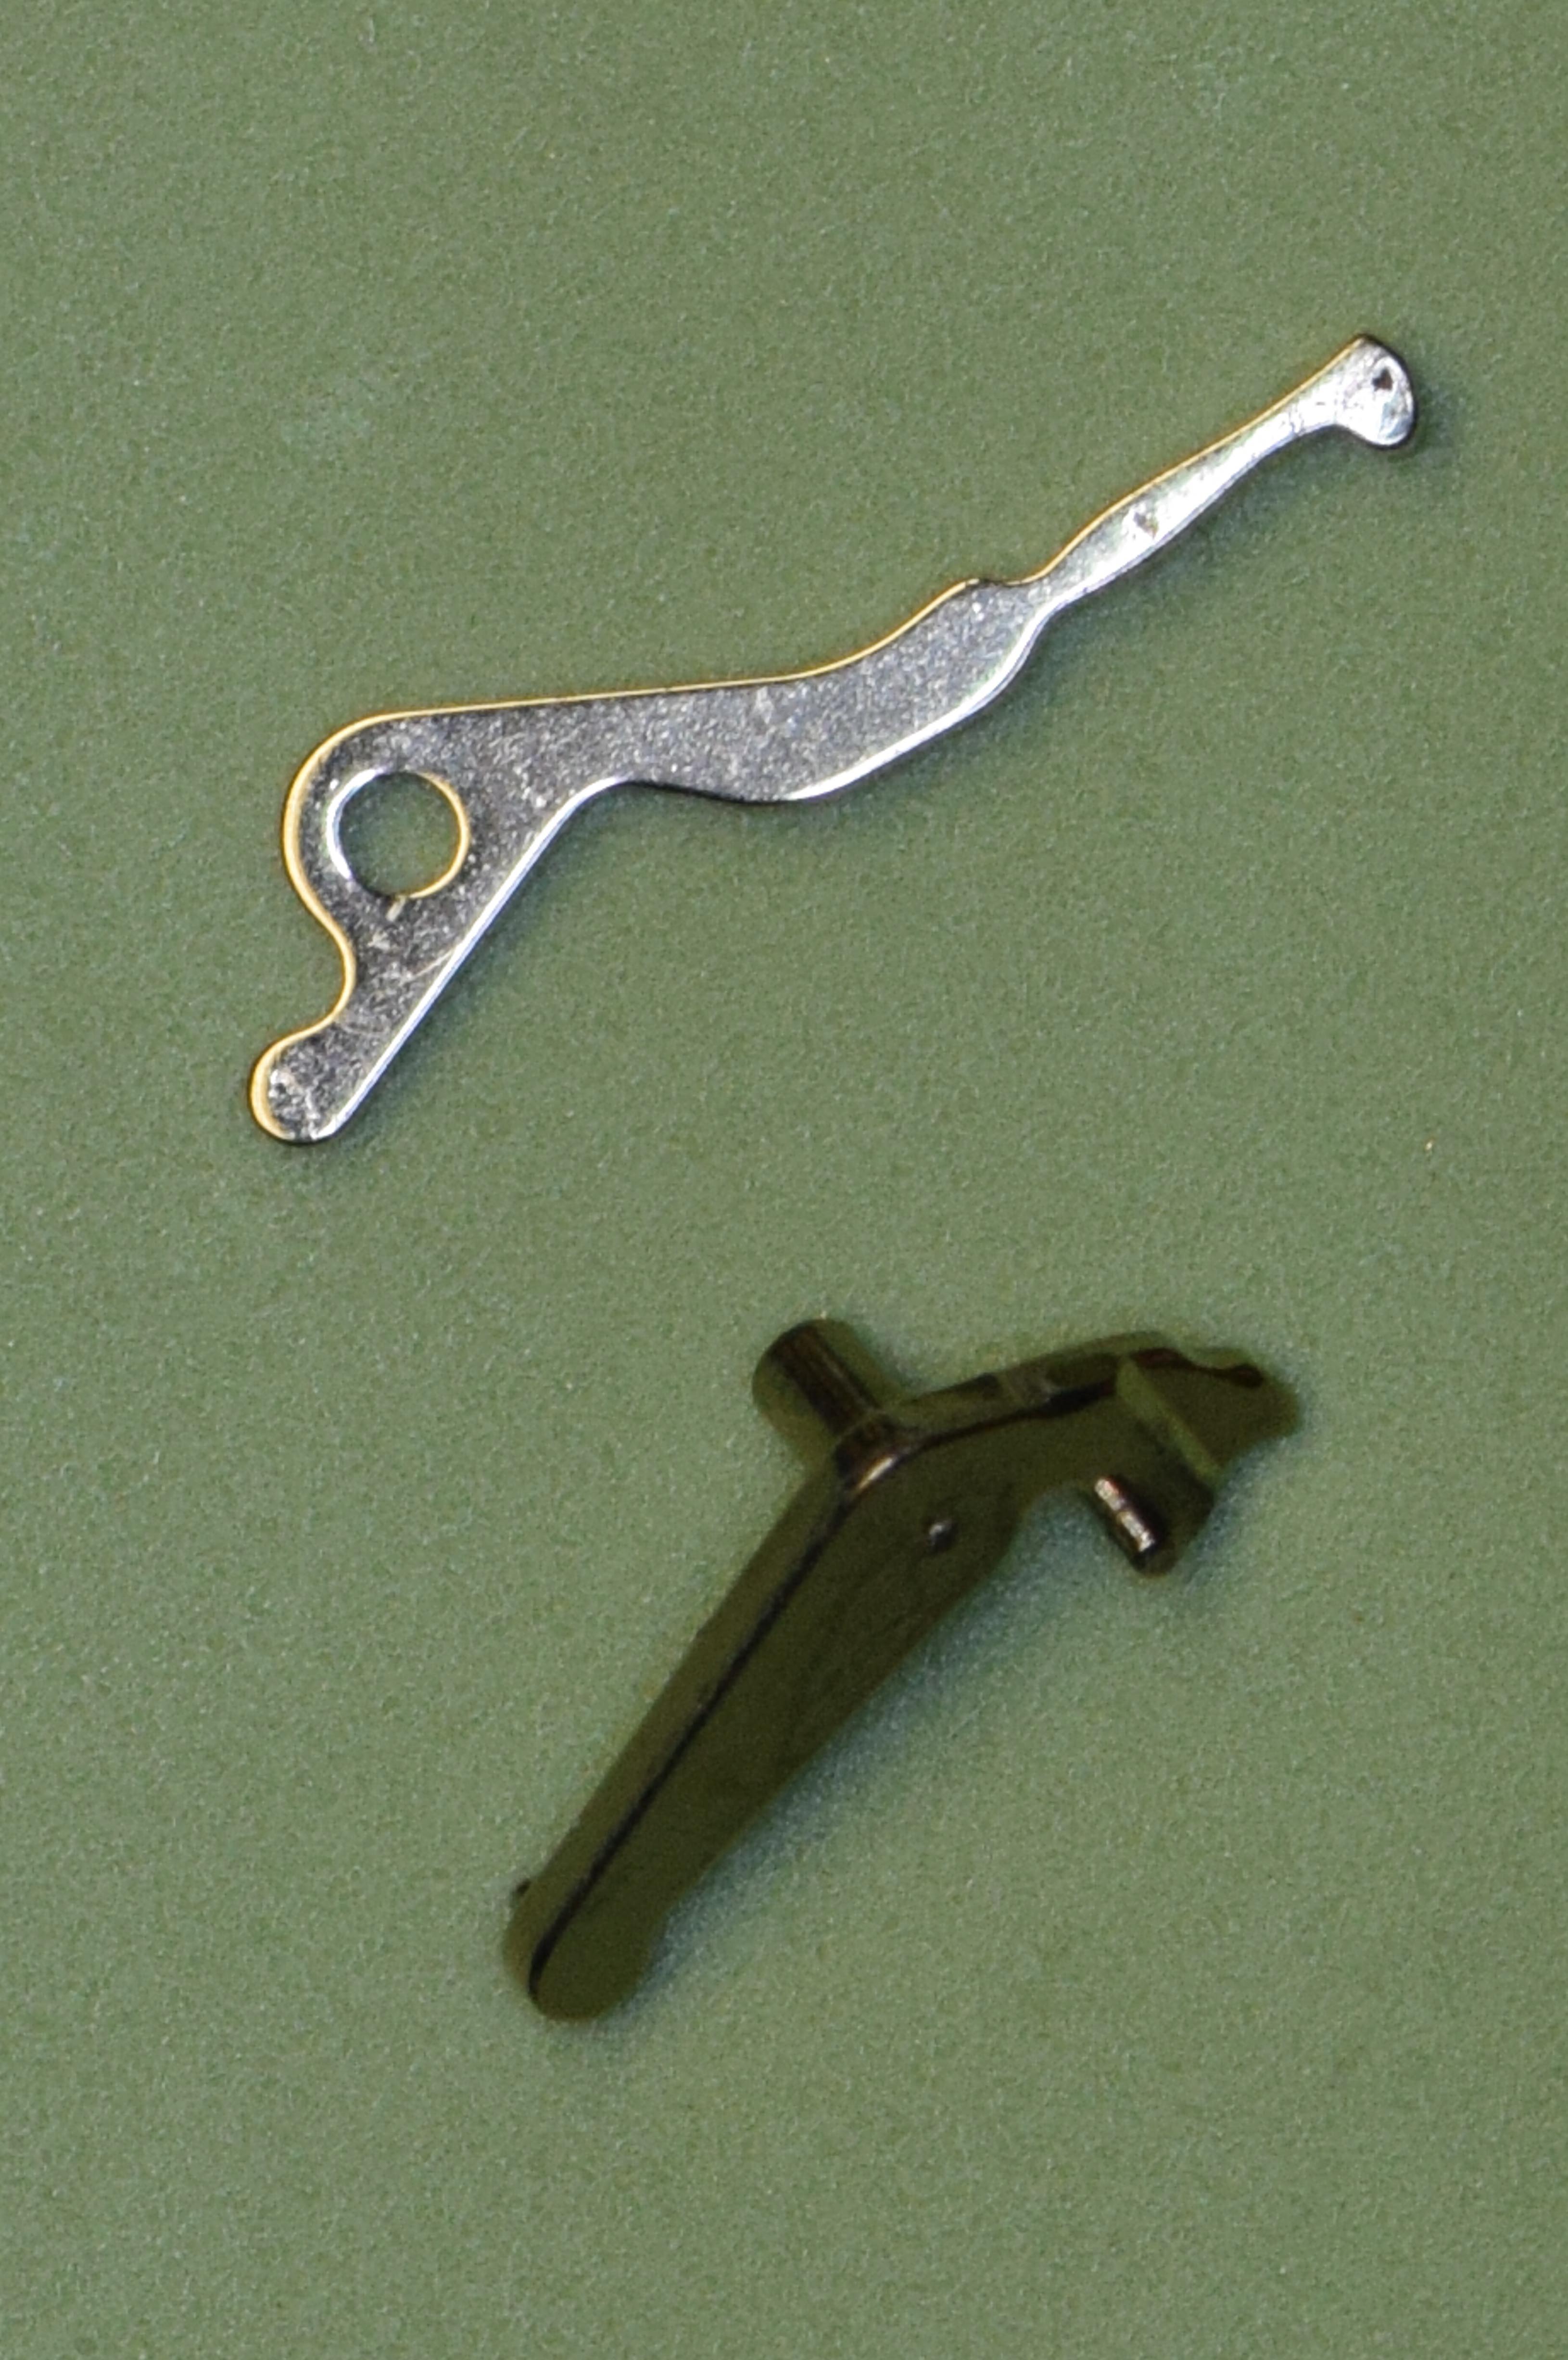
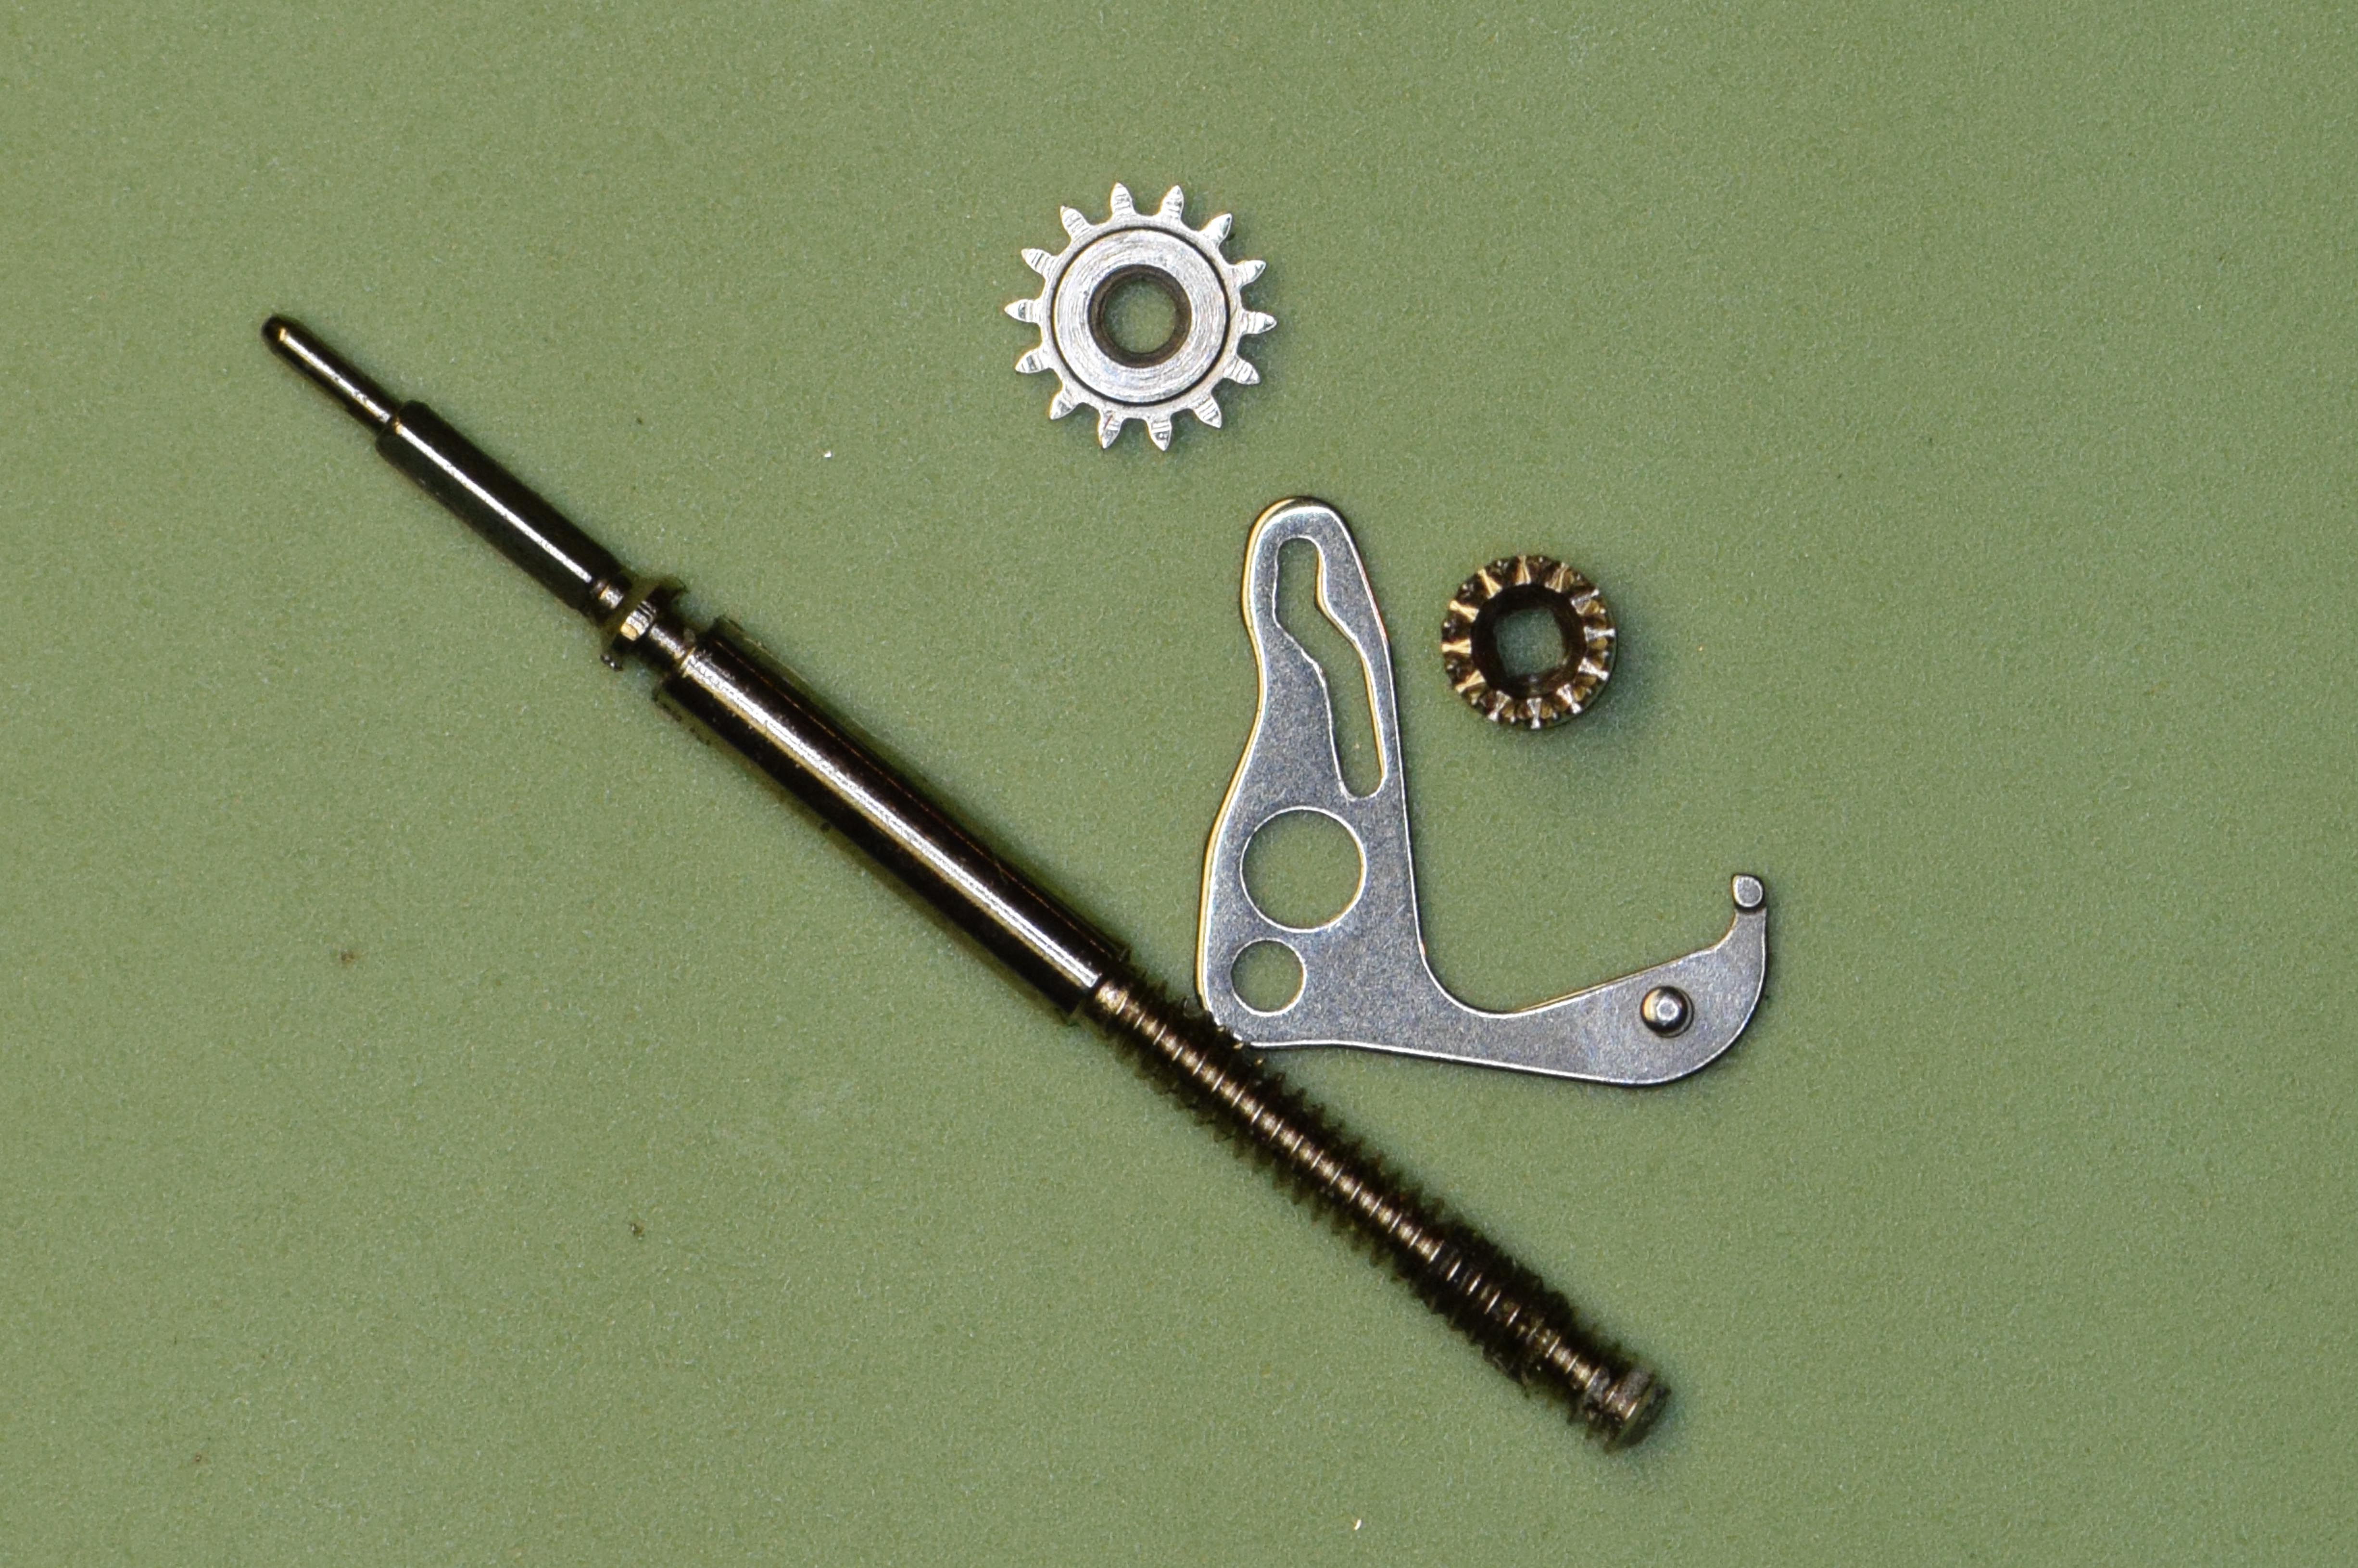
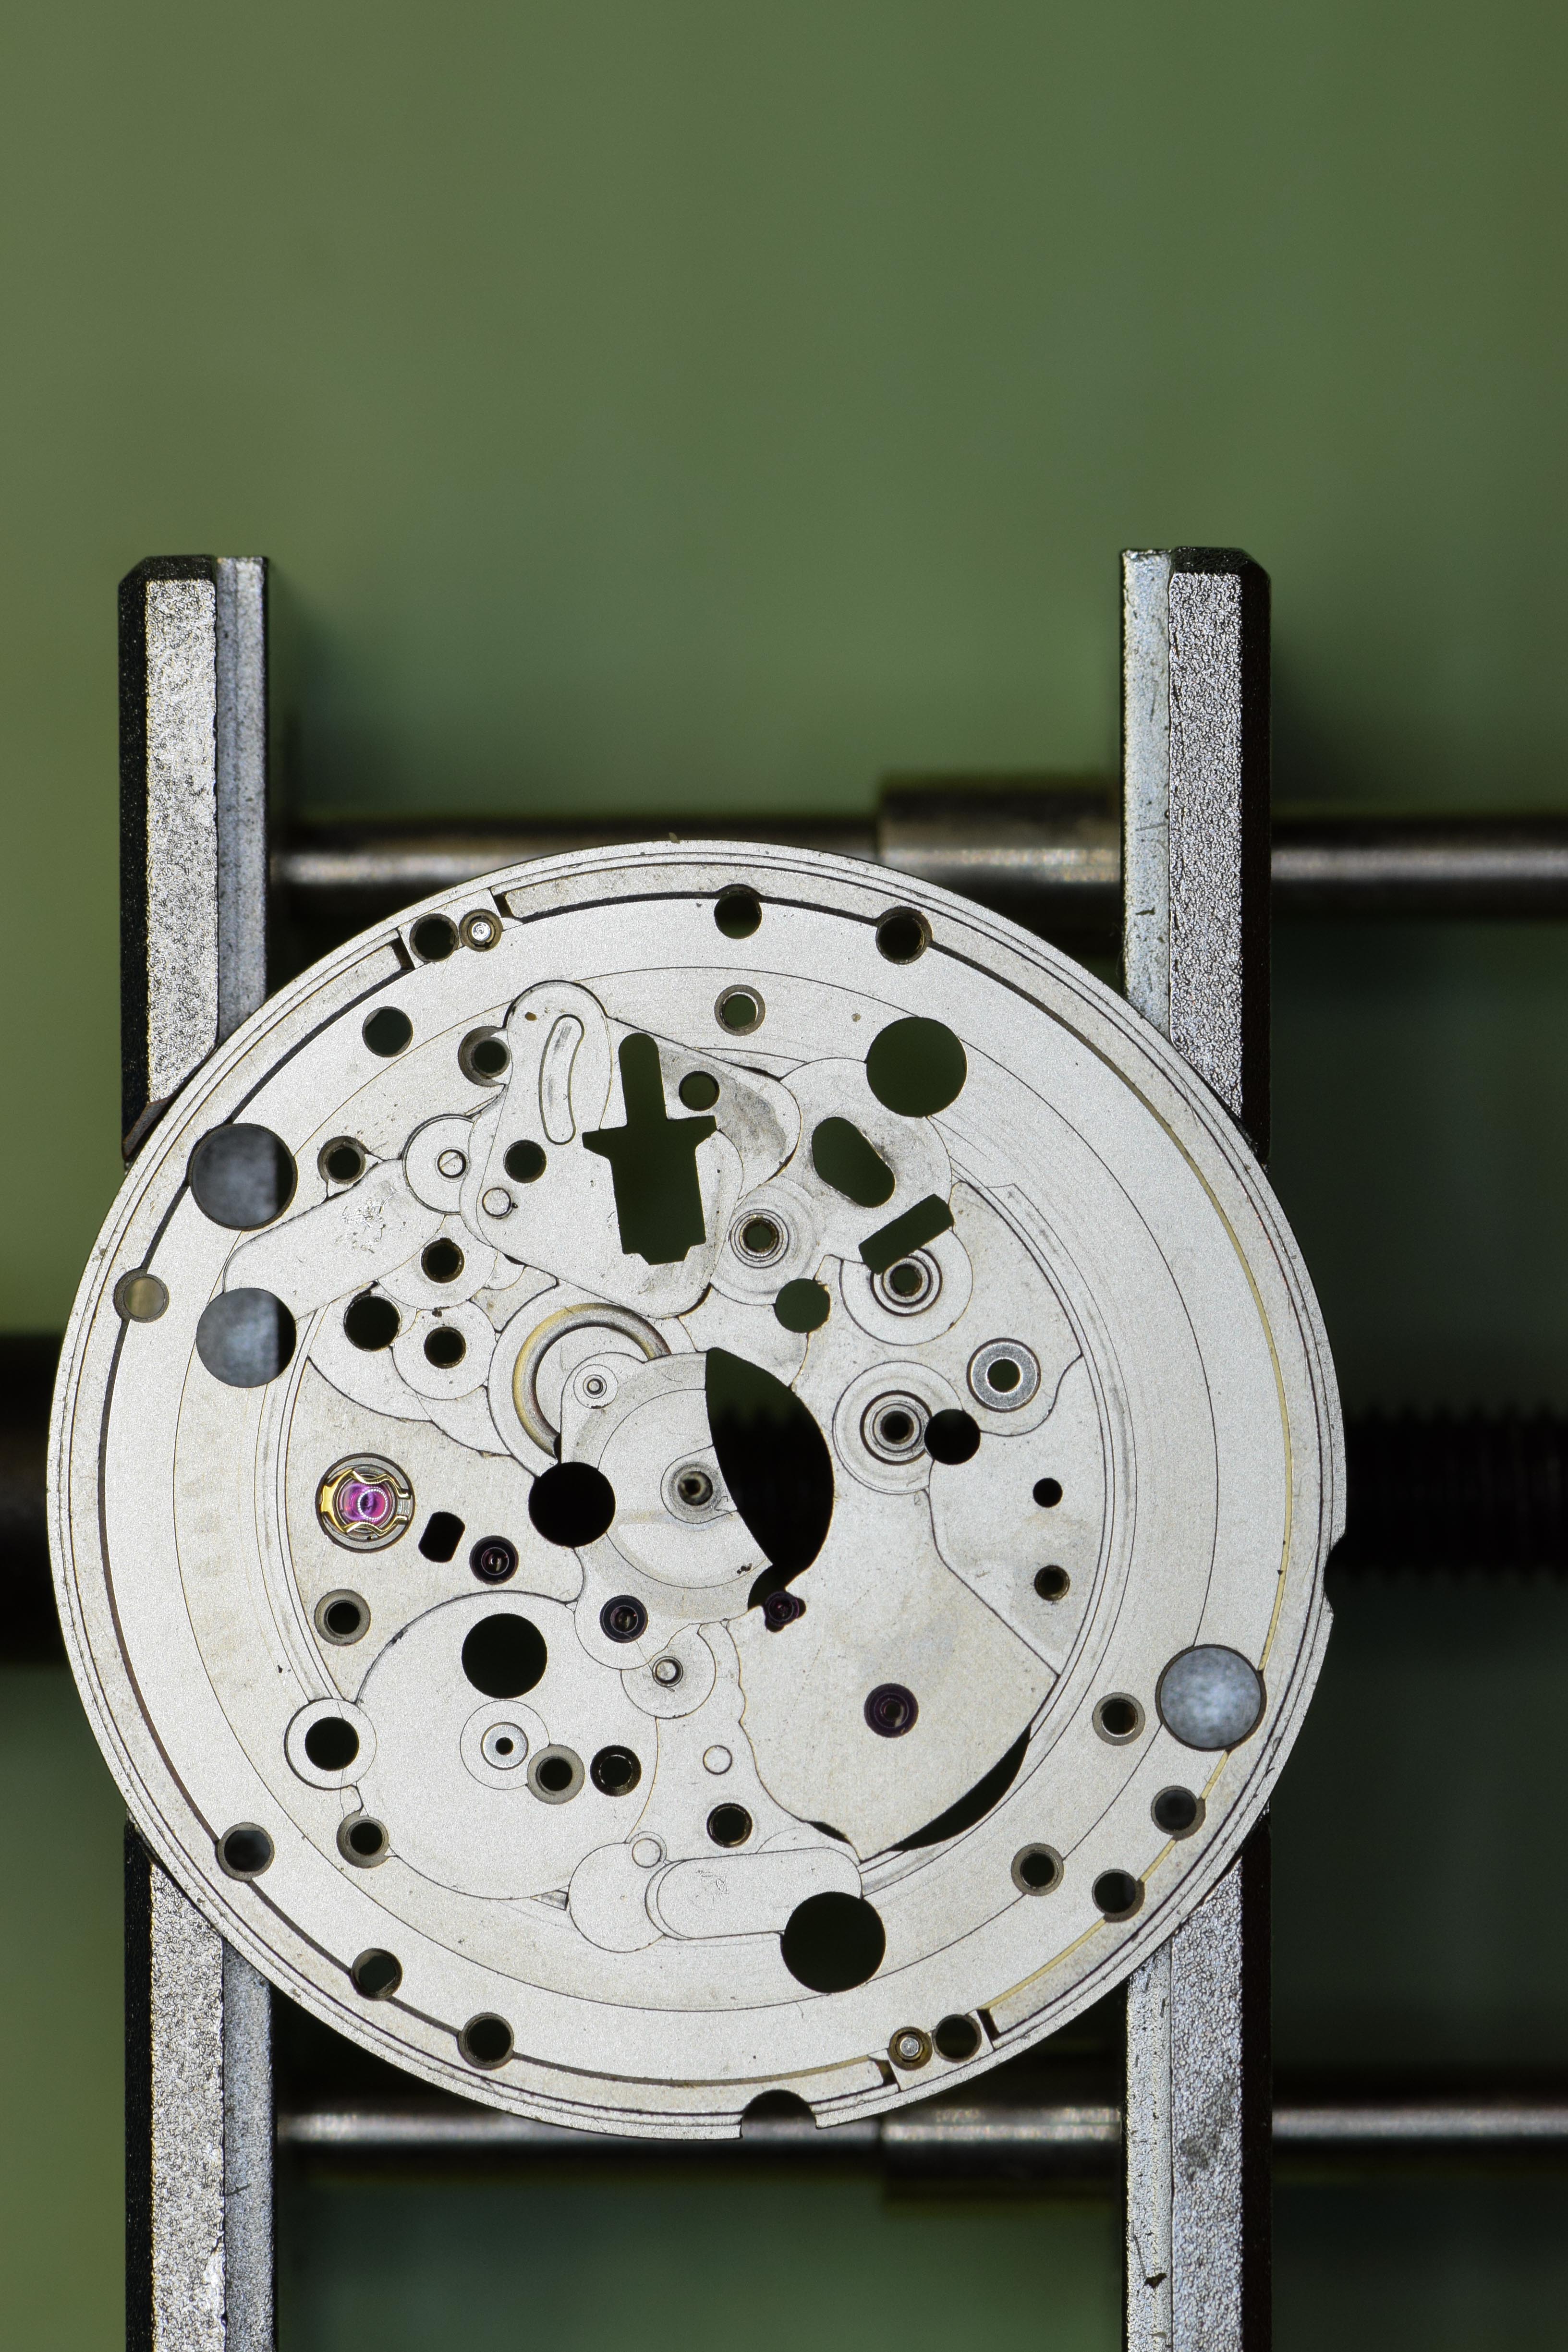
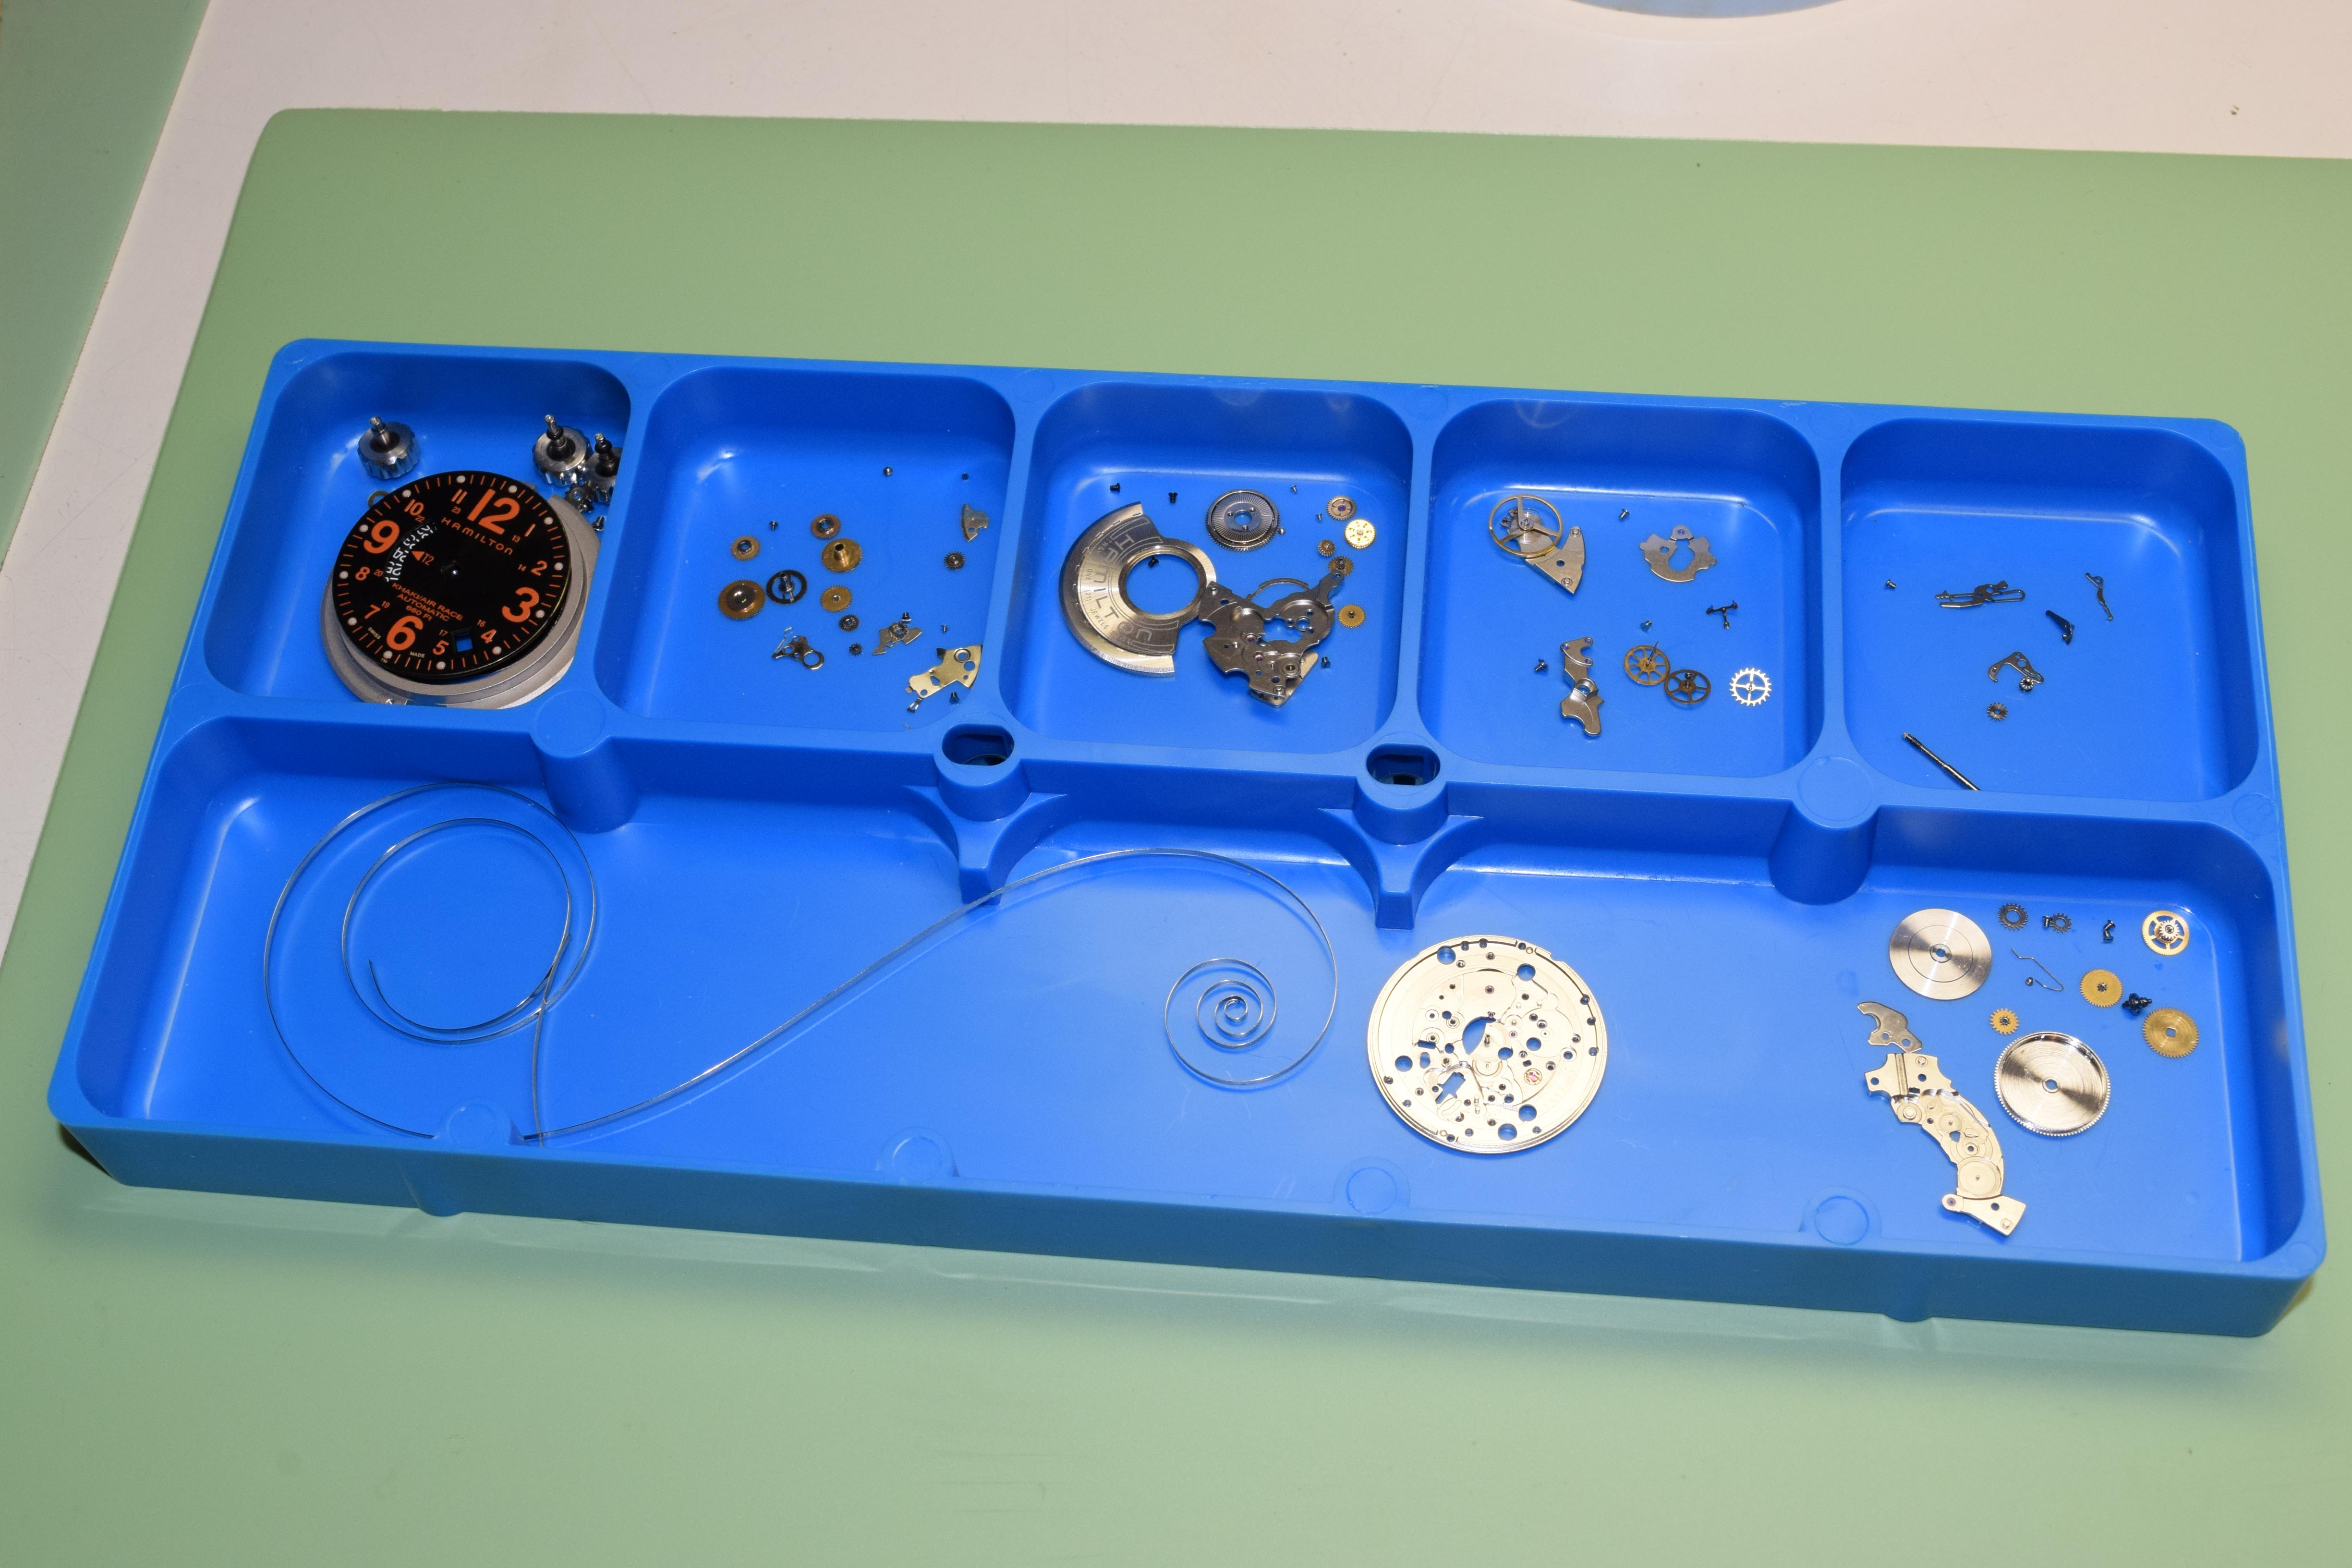
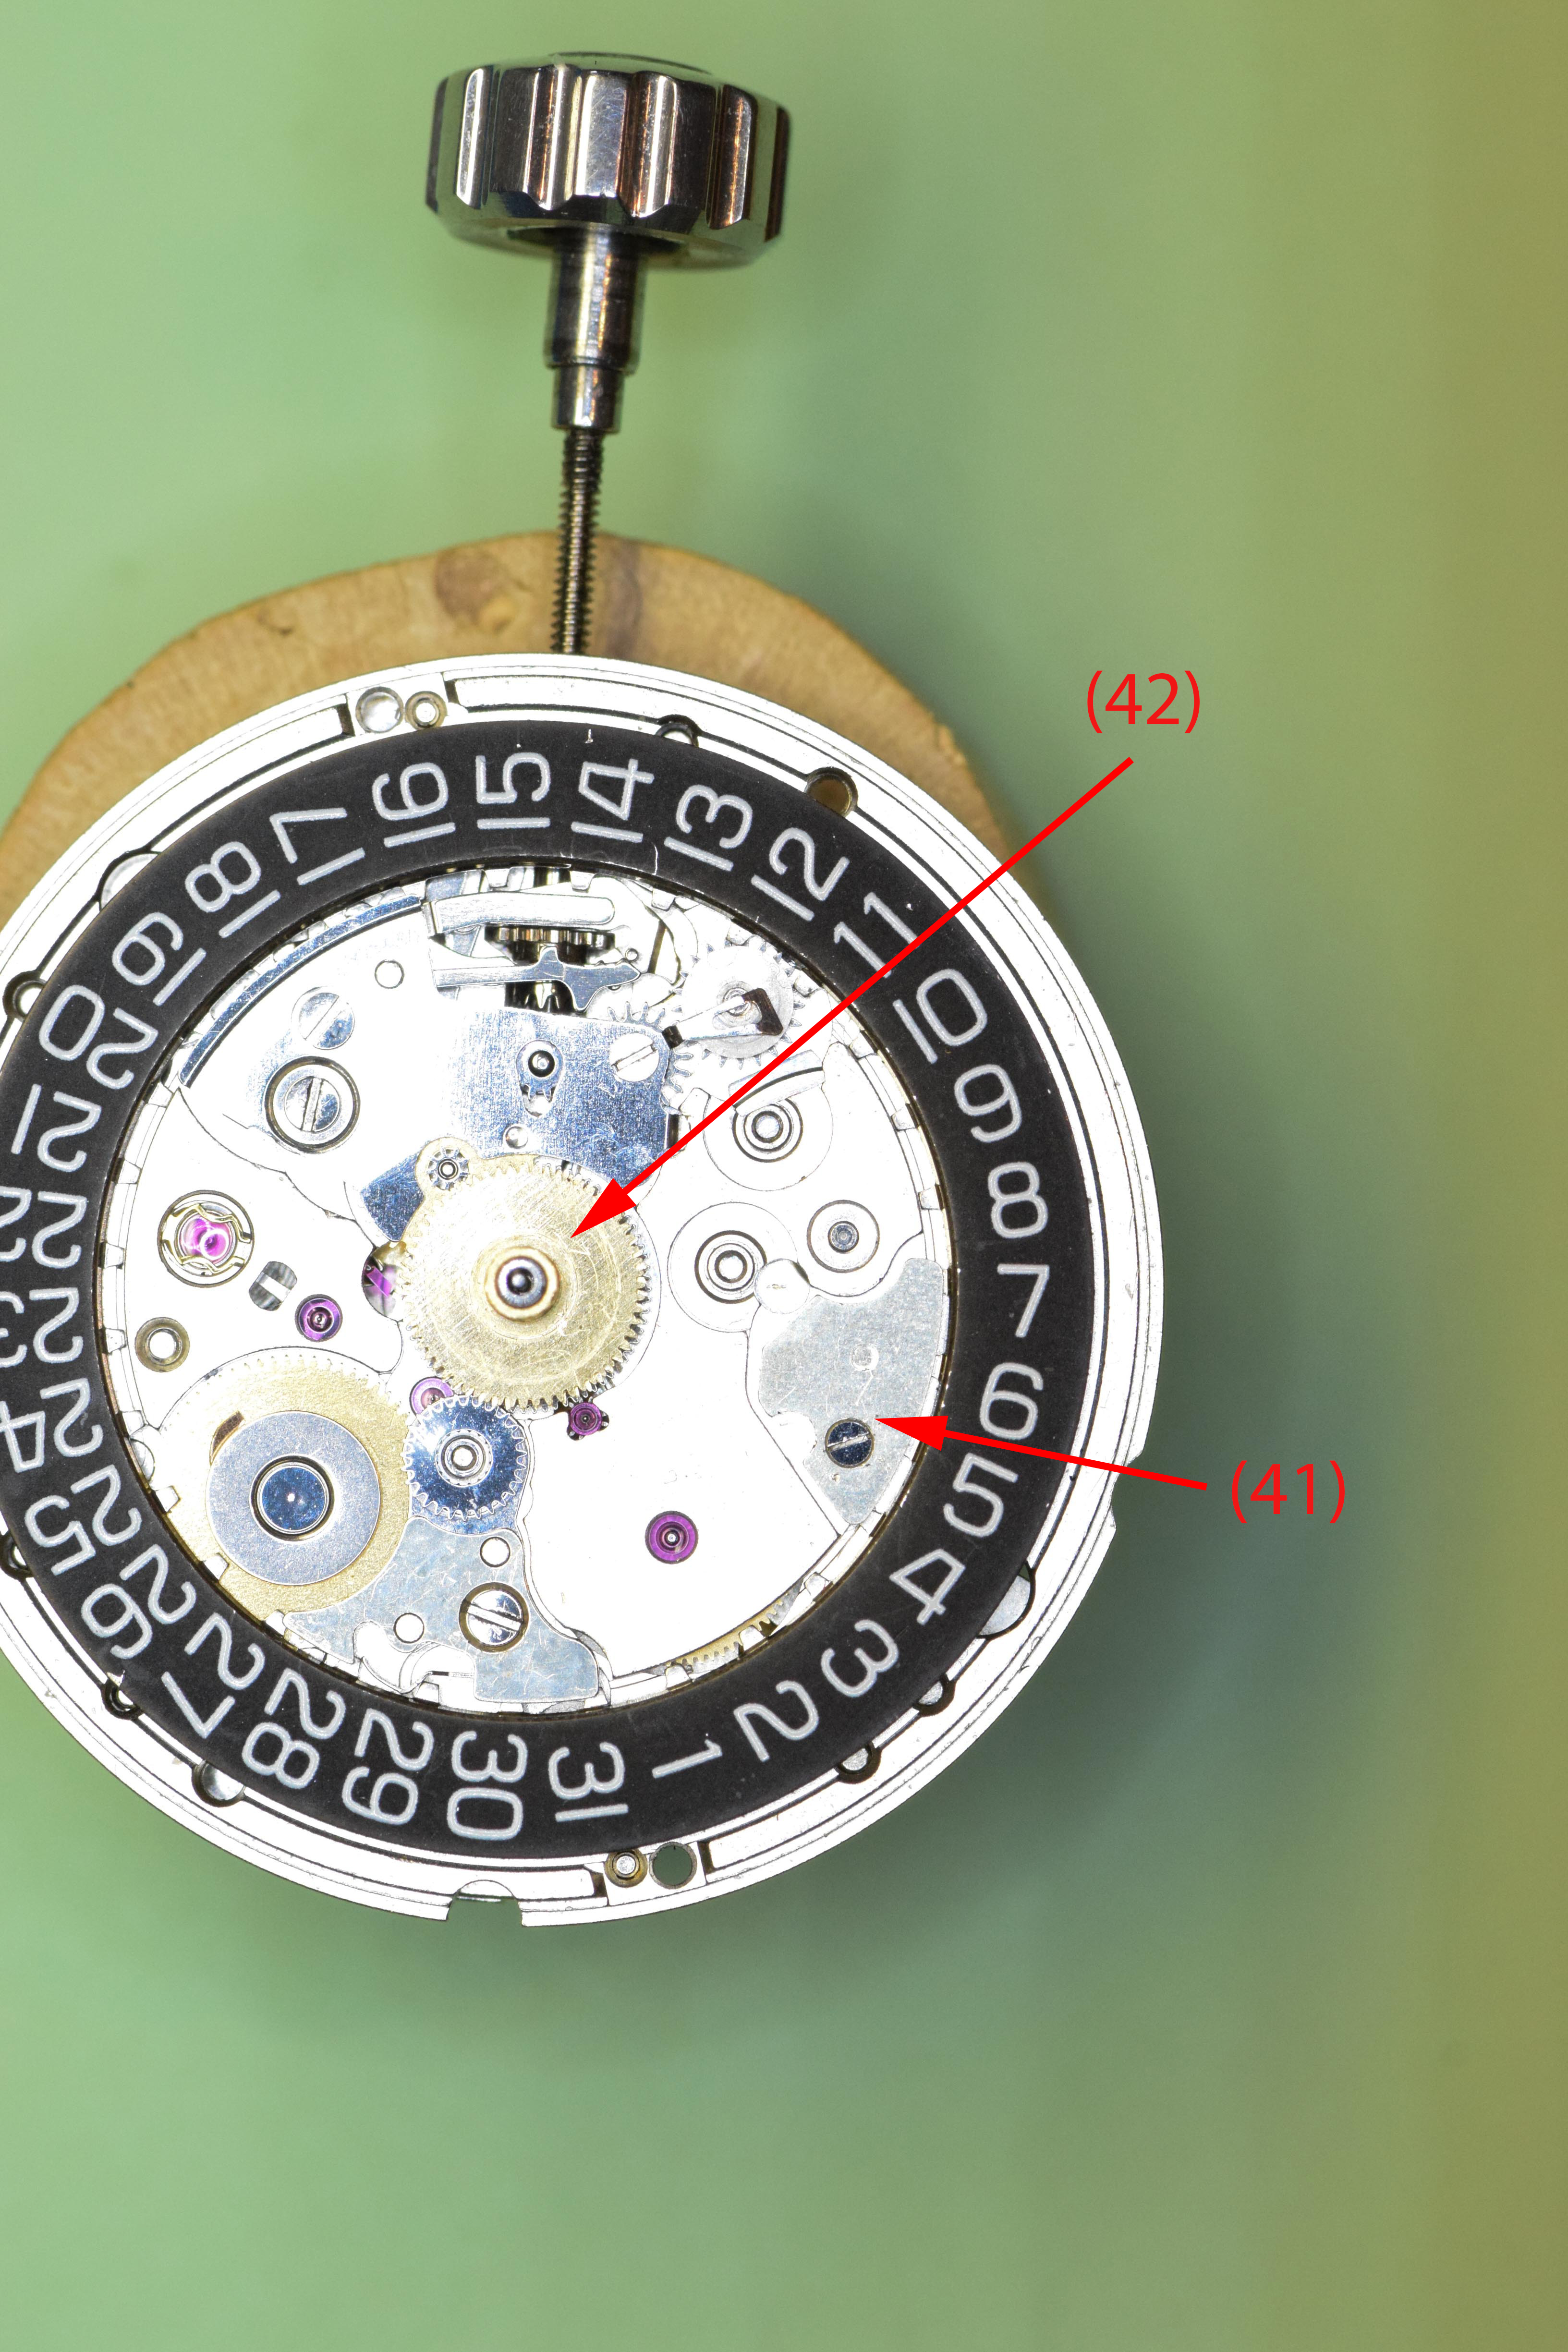
Service Walk Through – ETA 2893-1 / Hamilton Khaki: Part 1 - Disassembly This is part 1 of my service of a Hamilton Khaki – dual time zone automatic based on the ETA 2893-1 movement. I purchased the watch on eBay and it runs for a short time then stops. Looks like it could use a good cleaning. Note that the part numbers in the images and text are consistent with those found in the ETA technical document for this movement. Disassembly of this movement is quite straightforward. The only "special" tool you need would be an oscillating weight bolt tool - and you only need this if you intend to remove the ball bearing assembly from the oscillating weight, which really isn't required. In this tear down I do use the tool - only because I recently acquired it and wanted to see how it worked Off we go.... The dial shows evidence of some sloppy workmanship in the watch's past – several scratches from prior hand removal. Here you see the back of the 2893-1 with its automatic rotor - nicely signed Hamilton. The arrows indicate the location of the dial screws which secure the dial to the movement. These screws have a flat. Turn them just enough so the flat is facing the dial foot and the dial pops right off. Secure the screws so they don’t pop off during cleaning. Preparing to remove the hands – with a safety sheet in place. After removing the dial, remove the Dial Support Ring (47). This ring keeps the dial the proper distance from the second timezone disc. Without it, the disc will rub against the dial. Remove the second timezone disc, or what ETA calls the Universal Hour Indicator (46) from the center. This is a bit tricky as there’s no obvious place to grip it. I used two very small screwdrivers on each side to lift the indicator straight up. Be careful not to scratch it! With the disc removed, we can now remove the Dial Washer / Friction Spring (45), Corrector Setting Wheel (44) and Hour Indicator Driving Wheel (43). The Hour Wheel (42) can now be lifted off, followed by the Additional Indicator Maintaining Plate (41). Next components to remove are the Date Indicator Maintaining Plate (40) and the Minute Train Bridge (35). We move on to remove the Intermediate Date Wheel (39). The Date Jumper (38) has also been exposed when we removed the maintaining plate, so we remove it. Finally, we remove the Date Indicator (37) and the Date Indicator Driving Wheel (36). Now on to some of the motion and keyless work. We remove the Minute Wheel (34), Cannon Pinion with Driving Wheel (33), Double Corrector (32), Date Corrector Intermediate Setting Wheel (31) and Setting Wheel (30). This side is almost complete. We leave the setting components in place. Removing them now would be problematic as we have yet to release tension from the mainspring. Flip the movement over and remove the automatic work. After removing the 3 blue screws (seen in the previous 2 pics) we lift the entire unit up gently by the Oscillating Weight (28). With the automatic work out of the way – I notice that the Stop Lever (Hack) is missing! Will try and source one. Back to the automatic work. Removing these 3 small screws will allow the oscillating weight to come off the Automatic Framework (21). This is a special tool designed to release the Oscillating Weight Bolt I remove the Oscillating Weight Bolt (28-3) and free the Ball Bearing (28-2) from the Oscillating Weight (28-1). There was no compelling reason to disassemble this portion of the movement, but the tool worked as expected! With the Oscillating Weight out of the way, remove the Auxiliary Reverser (27). Flip the unit over once again and remove the screw and Automatic Device Lower Bridge (26). Remove the Reverser (25), Reverser Wheel (24), Reduction Wheel (23) and Intermediate Reduction Wheel (22). A view of the underside of these components – handy when trying to remember which way to reassemble. Remove the single screw and gently lift off the Balance Assembly (20) with the Balance Complete (19). Carefully let the power down by releasing the Click (12-6) and slowly letting the crown wind down. Remove the Pallet Bridge (18) and Pallets (17). Remove the Train Wheel Bridge (16). It is secured with a hefty screw! Remove the Fourth Wheel (15), Third Wheel (14) and Escape Wheel (13). Remove the 3 screws and the Barrel Bridge (12) Flip the bridge over and lift off the Ratchet Wheel Driving Wheel (12-2) Remove the screw and the Click Plate (12-7), followed by the Click (12-6), Intermediate Ratchet Wheel (12-5), Intermediate Crown Wheel (12-4) and Crown Wheel (12-3). Note that the Intermediate Crown Wheel is under the Click Plate. When I removed the plate, the wheel was stuck to it due to some old oil. Here you can see the Intermediate Crown Wheel as it was stuck. This shows the proper placement of the wheels. Remove the Ratchet Wheel (11), the Mainspring Barrel (10) and Intermediate Wheel (9). Note the scrap of tissue that found its way onto the movement. I was so focused on taking pics that I didn’t notice. Pop the lid off the Barrel Remove the mainspring arbor And finally, remove the mainspring, leaving the empty barrel The movement side is now completely bare. Let’s flip it over and finish off the keyless work. Unscrew and remove the Setting Lever Jumper (8), Yoke (7) and the Setting Lever (6) Remove the Date Corrector Operating Lever (5), Winding Stem (4), Winding Pinion (3) and the Sliding Pinion (2) All stripped down Ready for the Ultrasonic!!! Hope you enjoyed this. In case you are interested, photo equipment used was: Camera: Nikon D5300 DSLR Lens: Nikon AF-S VR Micro-NIKKOR 105mm f/2.8G IF-ED, Shutter Release: Nikon ML-L3 Remote Shutter Release (wireless) Lighting: Polaroid Macro LED Ring Flash Tripod: Vanguard Alta Pro 263AB 100


 1 point
 -
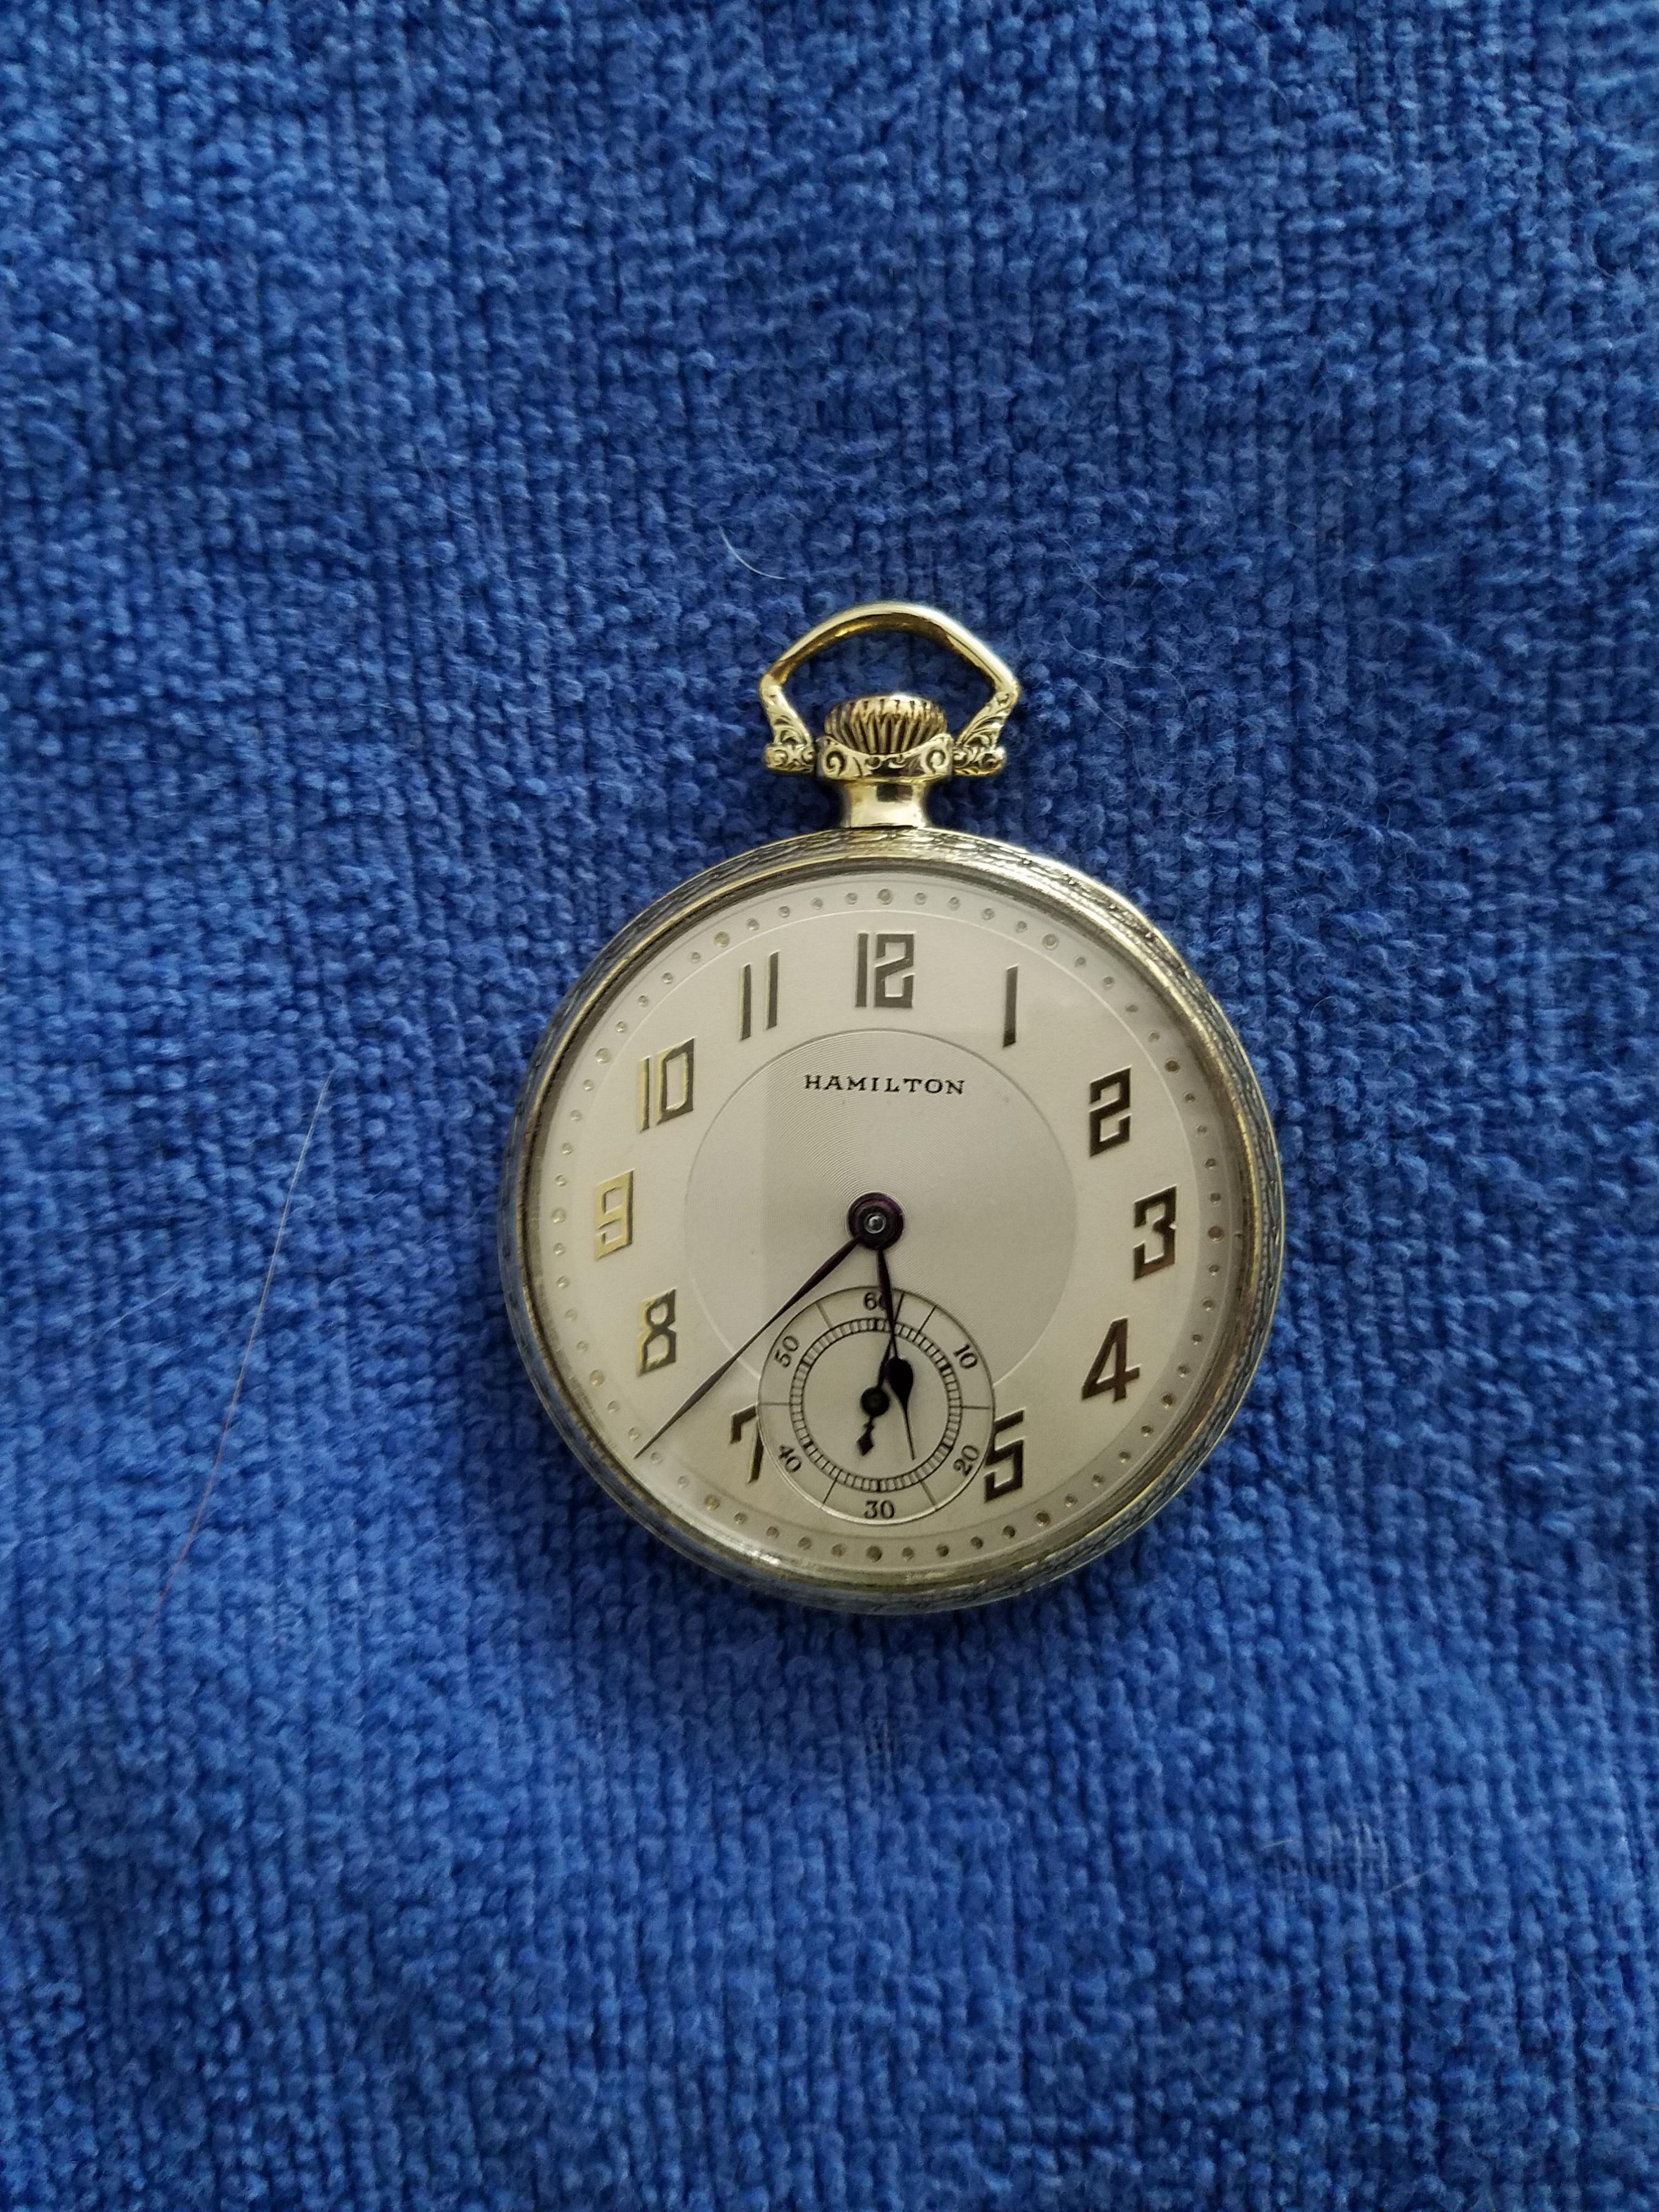
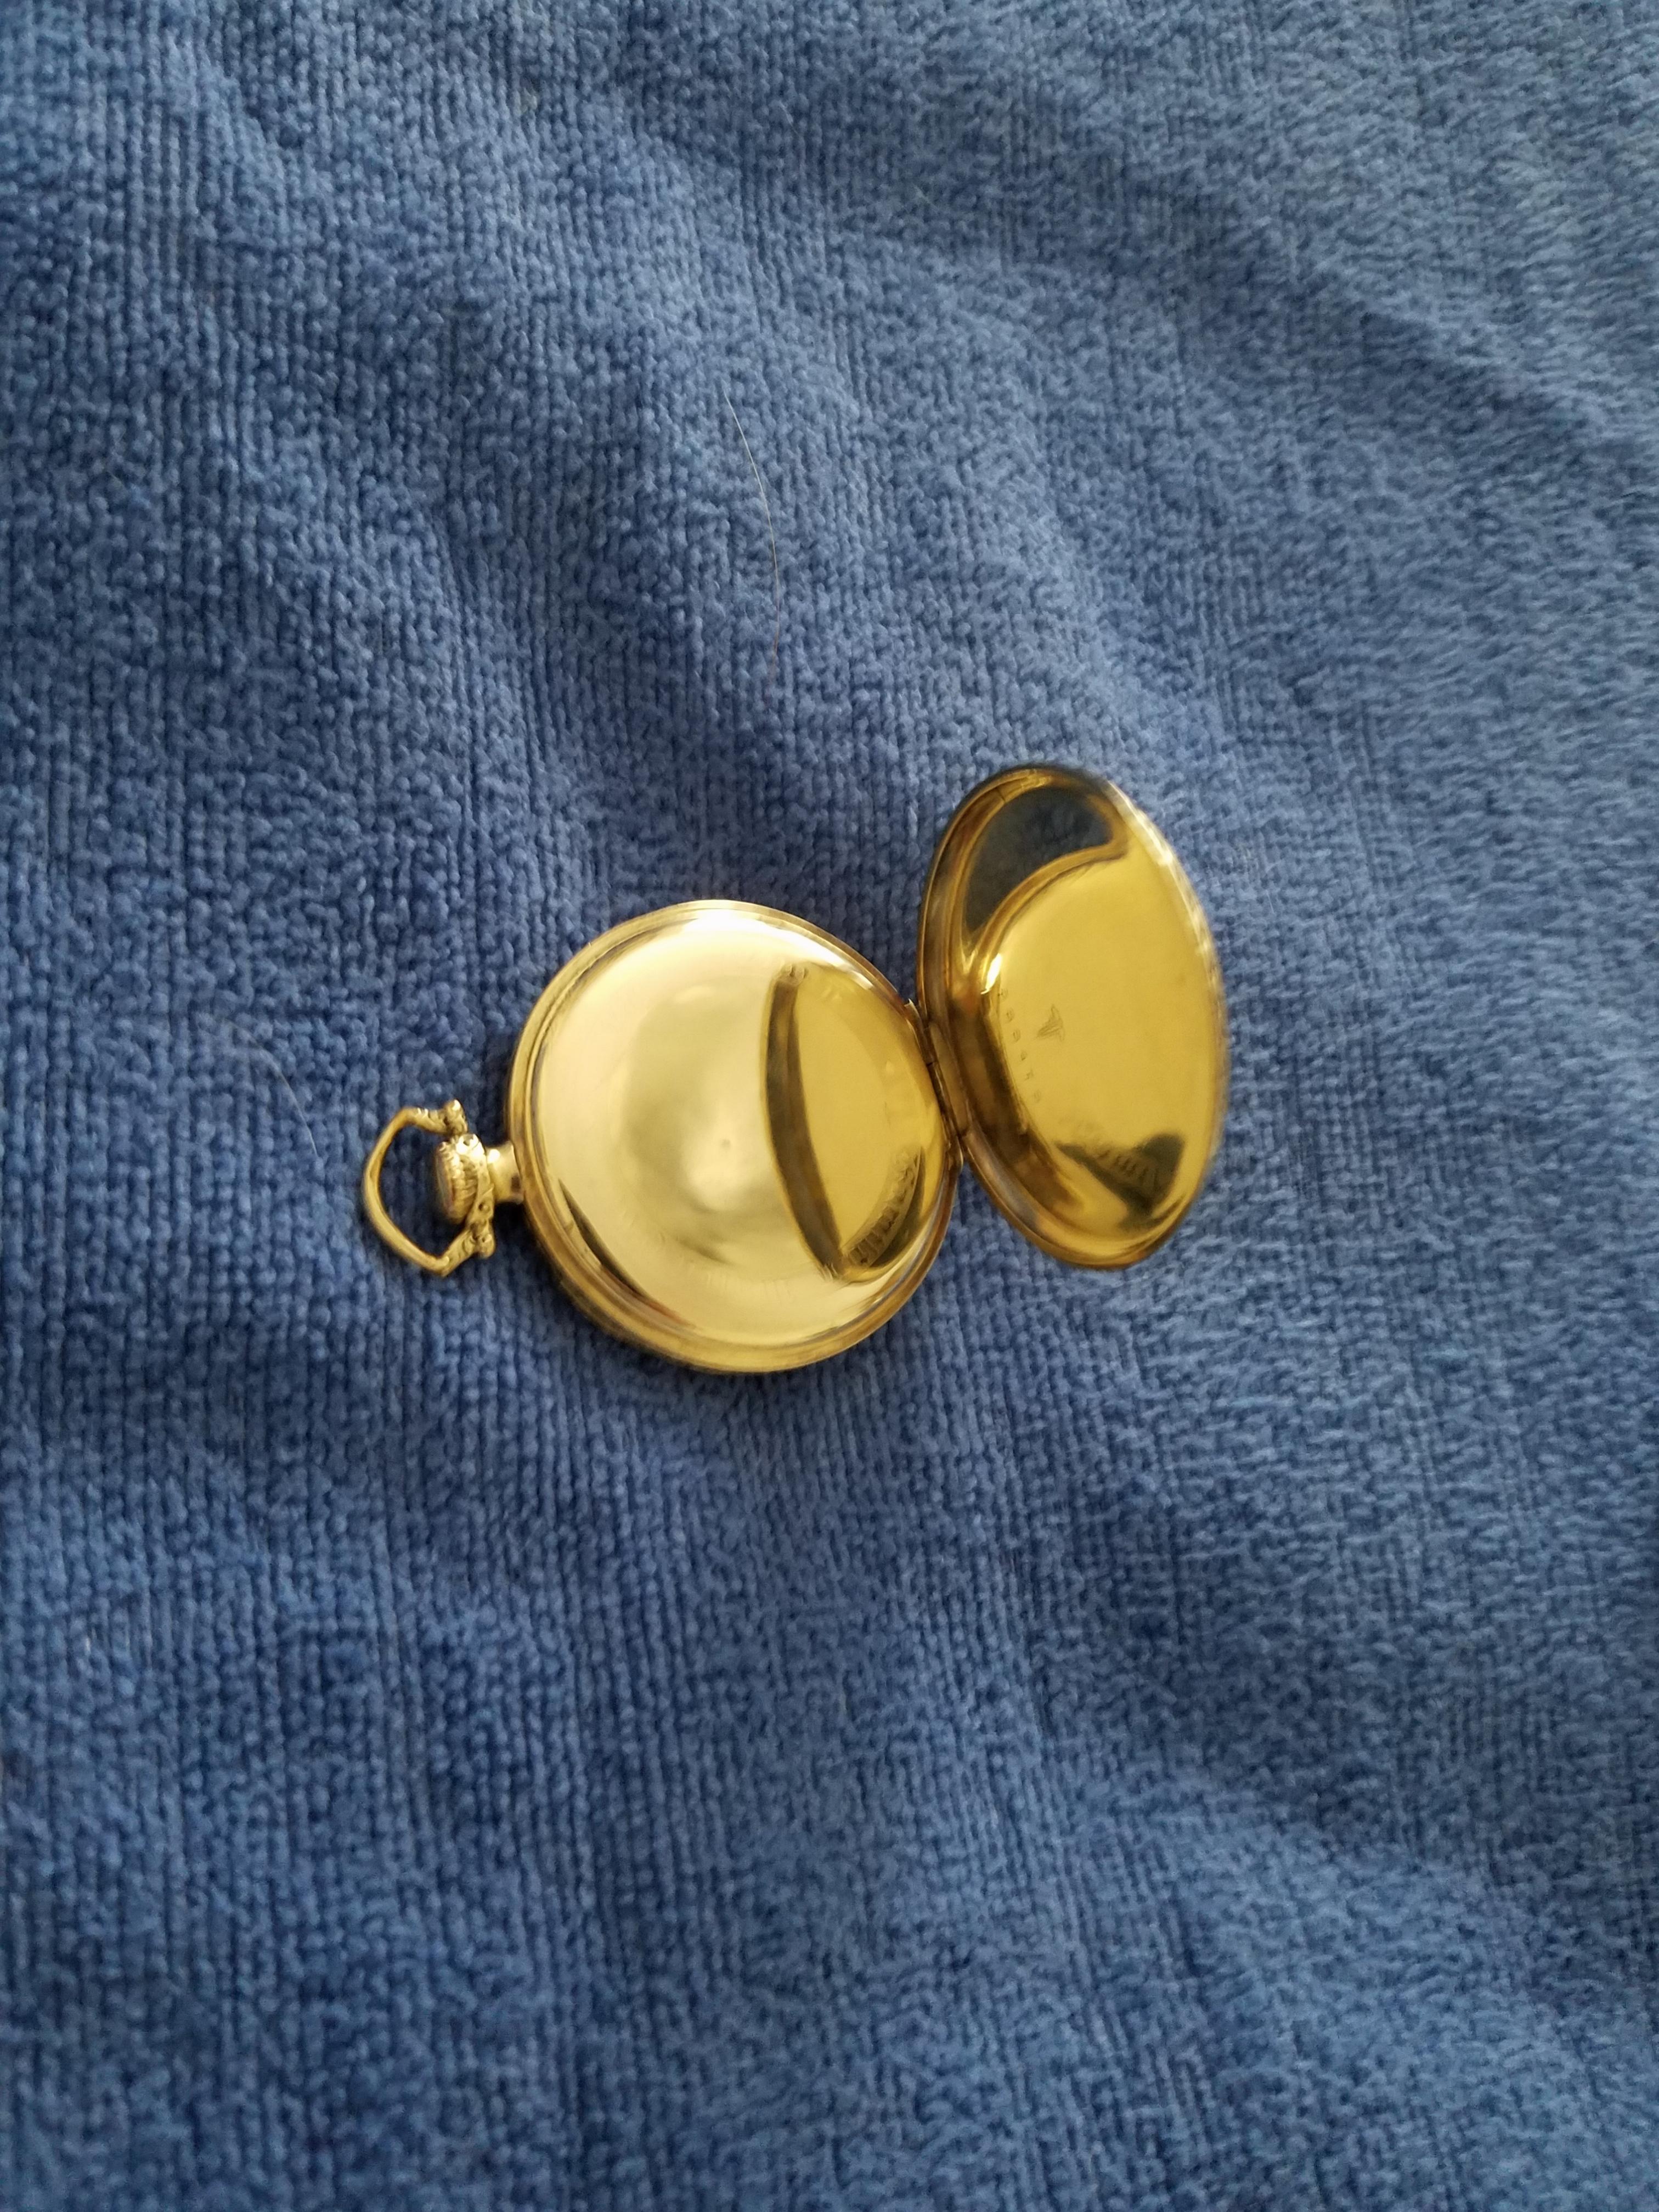
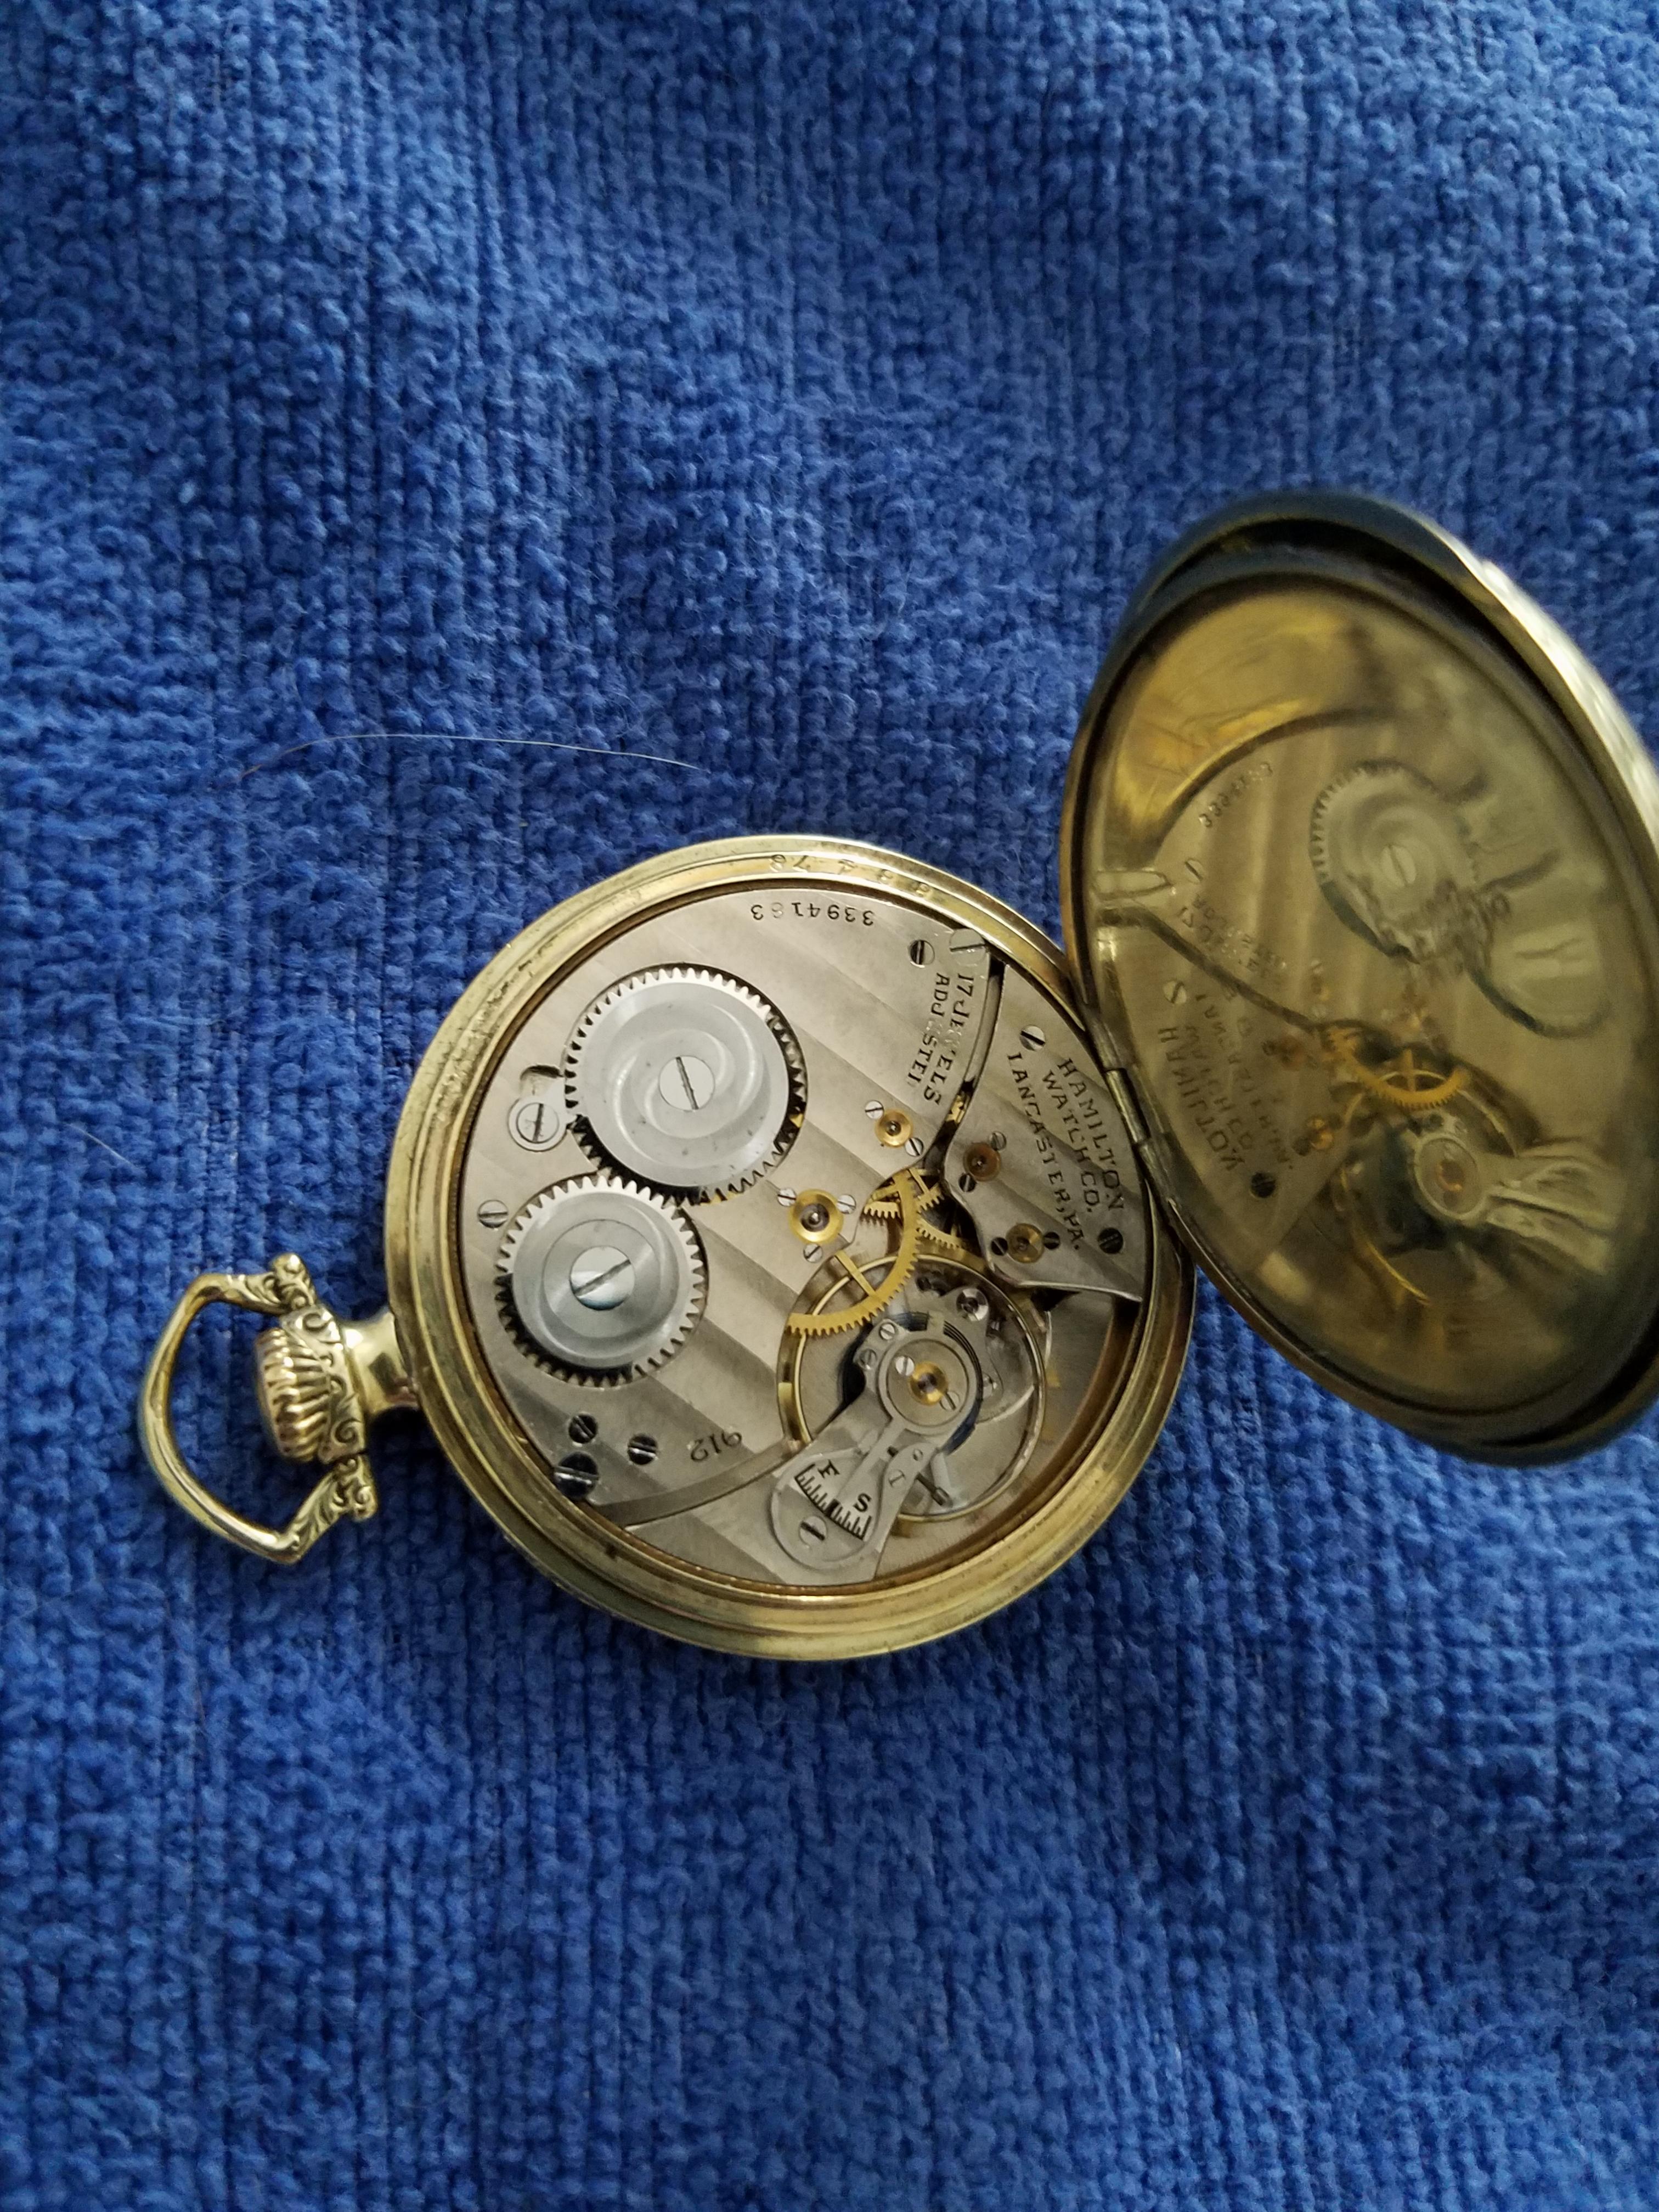
This Hamilton 912 is project I recently completed in May. The movement just needed a good cleaning. The dial was a mess & the case had a lot of dents to remove on the back.I broke out the Dremel to remove the many small scratches . The crystal was badly scratched and plastic, installed a new glass nos crystal.

 1 point
 -
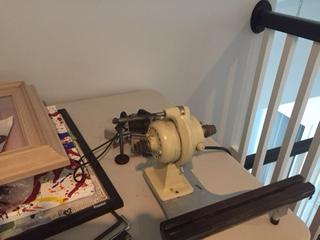
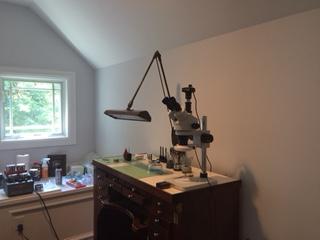
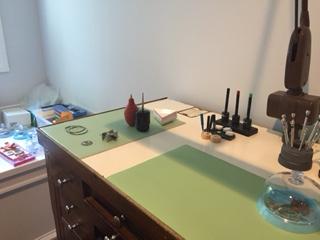
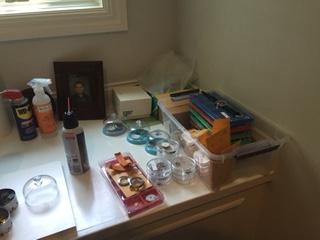
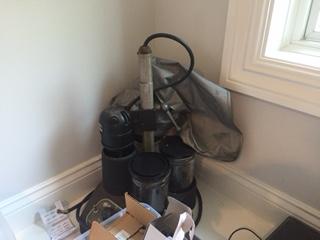
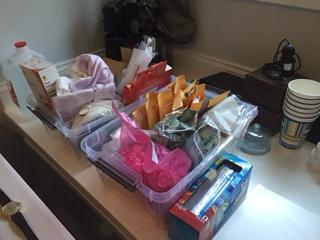
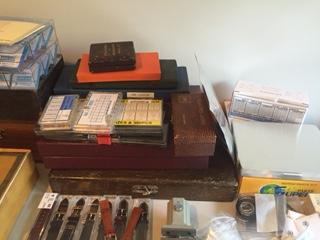
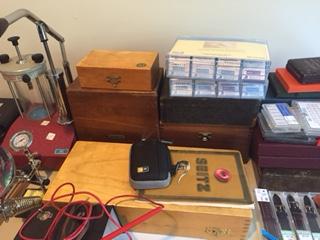
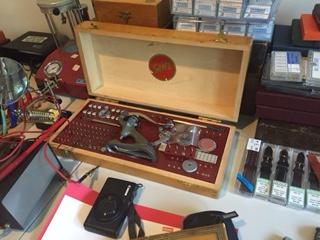
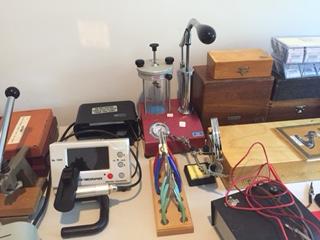
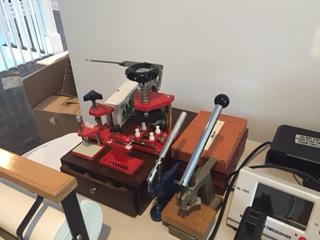
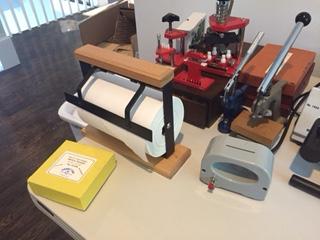
Vintage Cherry bench from the Joseph Bulova School of Watchmaking in Woodside, New York My Bulova Watchmaster ultrasonic and an older L&R cleaner Work in progress: Parts and supplies: Larger tools and more supplies: Various Horotec presses - Crystal, case, hands, crown/pusher tube press. Some other crystal presses including a BB. Timing machine is on the right. Ultrasonic and steamer Lathe - in parts awaiting cleaning.... Waiting their turn:

 1 point
 -
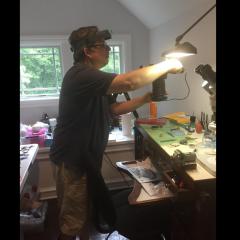
Here's a picture of me at my school bench. It's crowded. We have, right now, 5 students. We work in a close environment and are constantly engaged in each other's work. Our hallmark is the apron because making parts by hand is often dirty work. I apologize for my less than distinguished pose! (Why can't my pictures be "slimming"!)
 1 point
 -
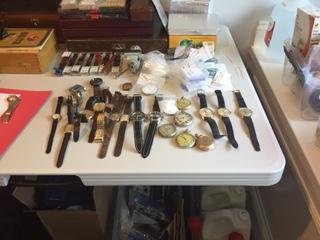
Hello I'm Phil from Manchester England, I have loved collecting for years this is what I have up to now Plus a black Seiko Pulsation and a silver resist Pogue. I can service my 7a's and my Ball and really need to learn how to service my 6139's and my Breitlings1 point
-
This is a REAL long shot.... The 2836 has a setting wheel that is part of the keyless work. This wheel has a very small bevel on one side and this must be inserted bevel up. If not, I believe there will be an added amount of friction that the gear train needs to pull along. I'm not certain about this as I'm going from memory, but I think I had a similar issue in the past. It's at least worth checking out..... You may also note a not-so-smooth feeling when setting the hands if this wheel is not inserted correctly1 point
-
Id bet it's something in the train or the fourth wheel. You didn't say that when it stops the second time around that it stops in the same exact spot. That would indicate a damaged 4th wheel or its pivot Sent from my iPhone using Tapatalk1 point
-
Looking at your readings I would have to agree with you . There's noticeably no difference. Sent from my SM-G920F using Tapatalk1 point
-
I don't even turn it off mate. Mrs jdm does, however1 point
-
No, lift angle set on the timegrapher does not affect beat error reading at all. One can test that easily by varying the angle and observing. See pictures for the two extreme values of range available on my machine. Only amplitude reading is marginally affected.
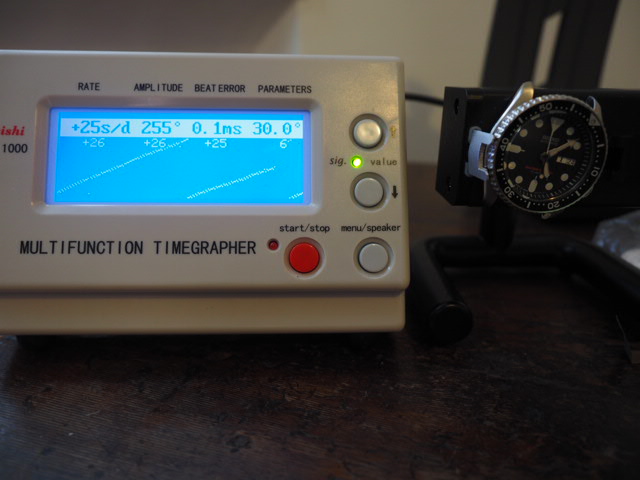
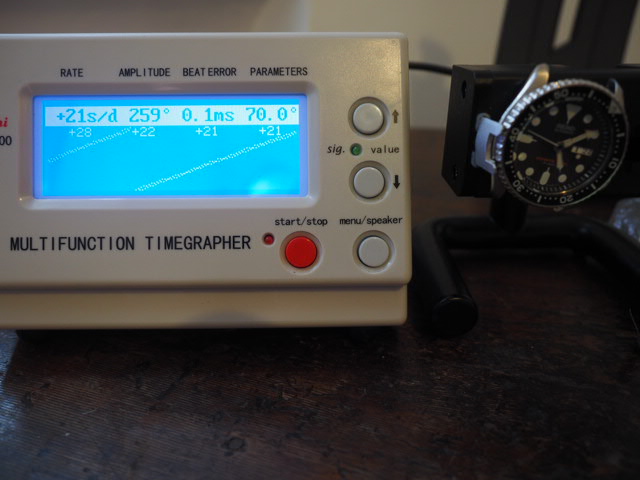 1 point
 -
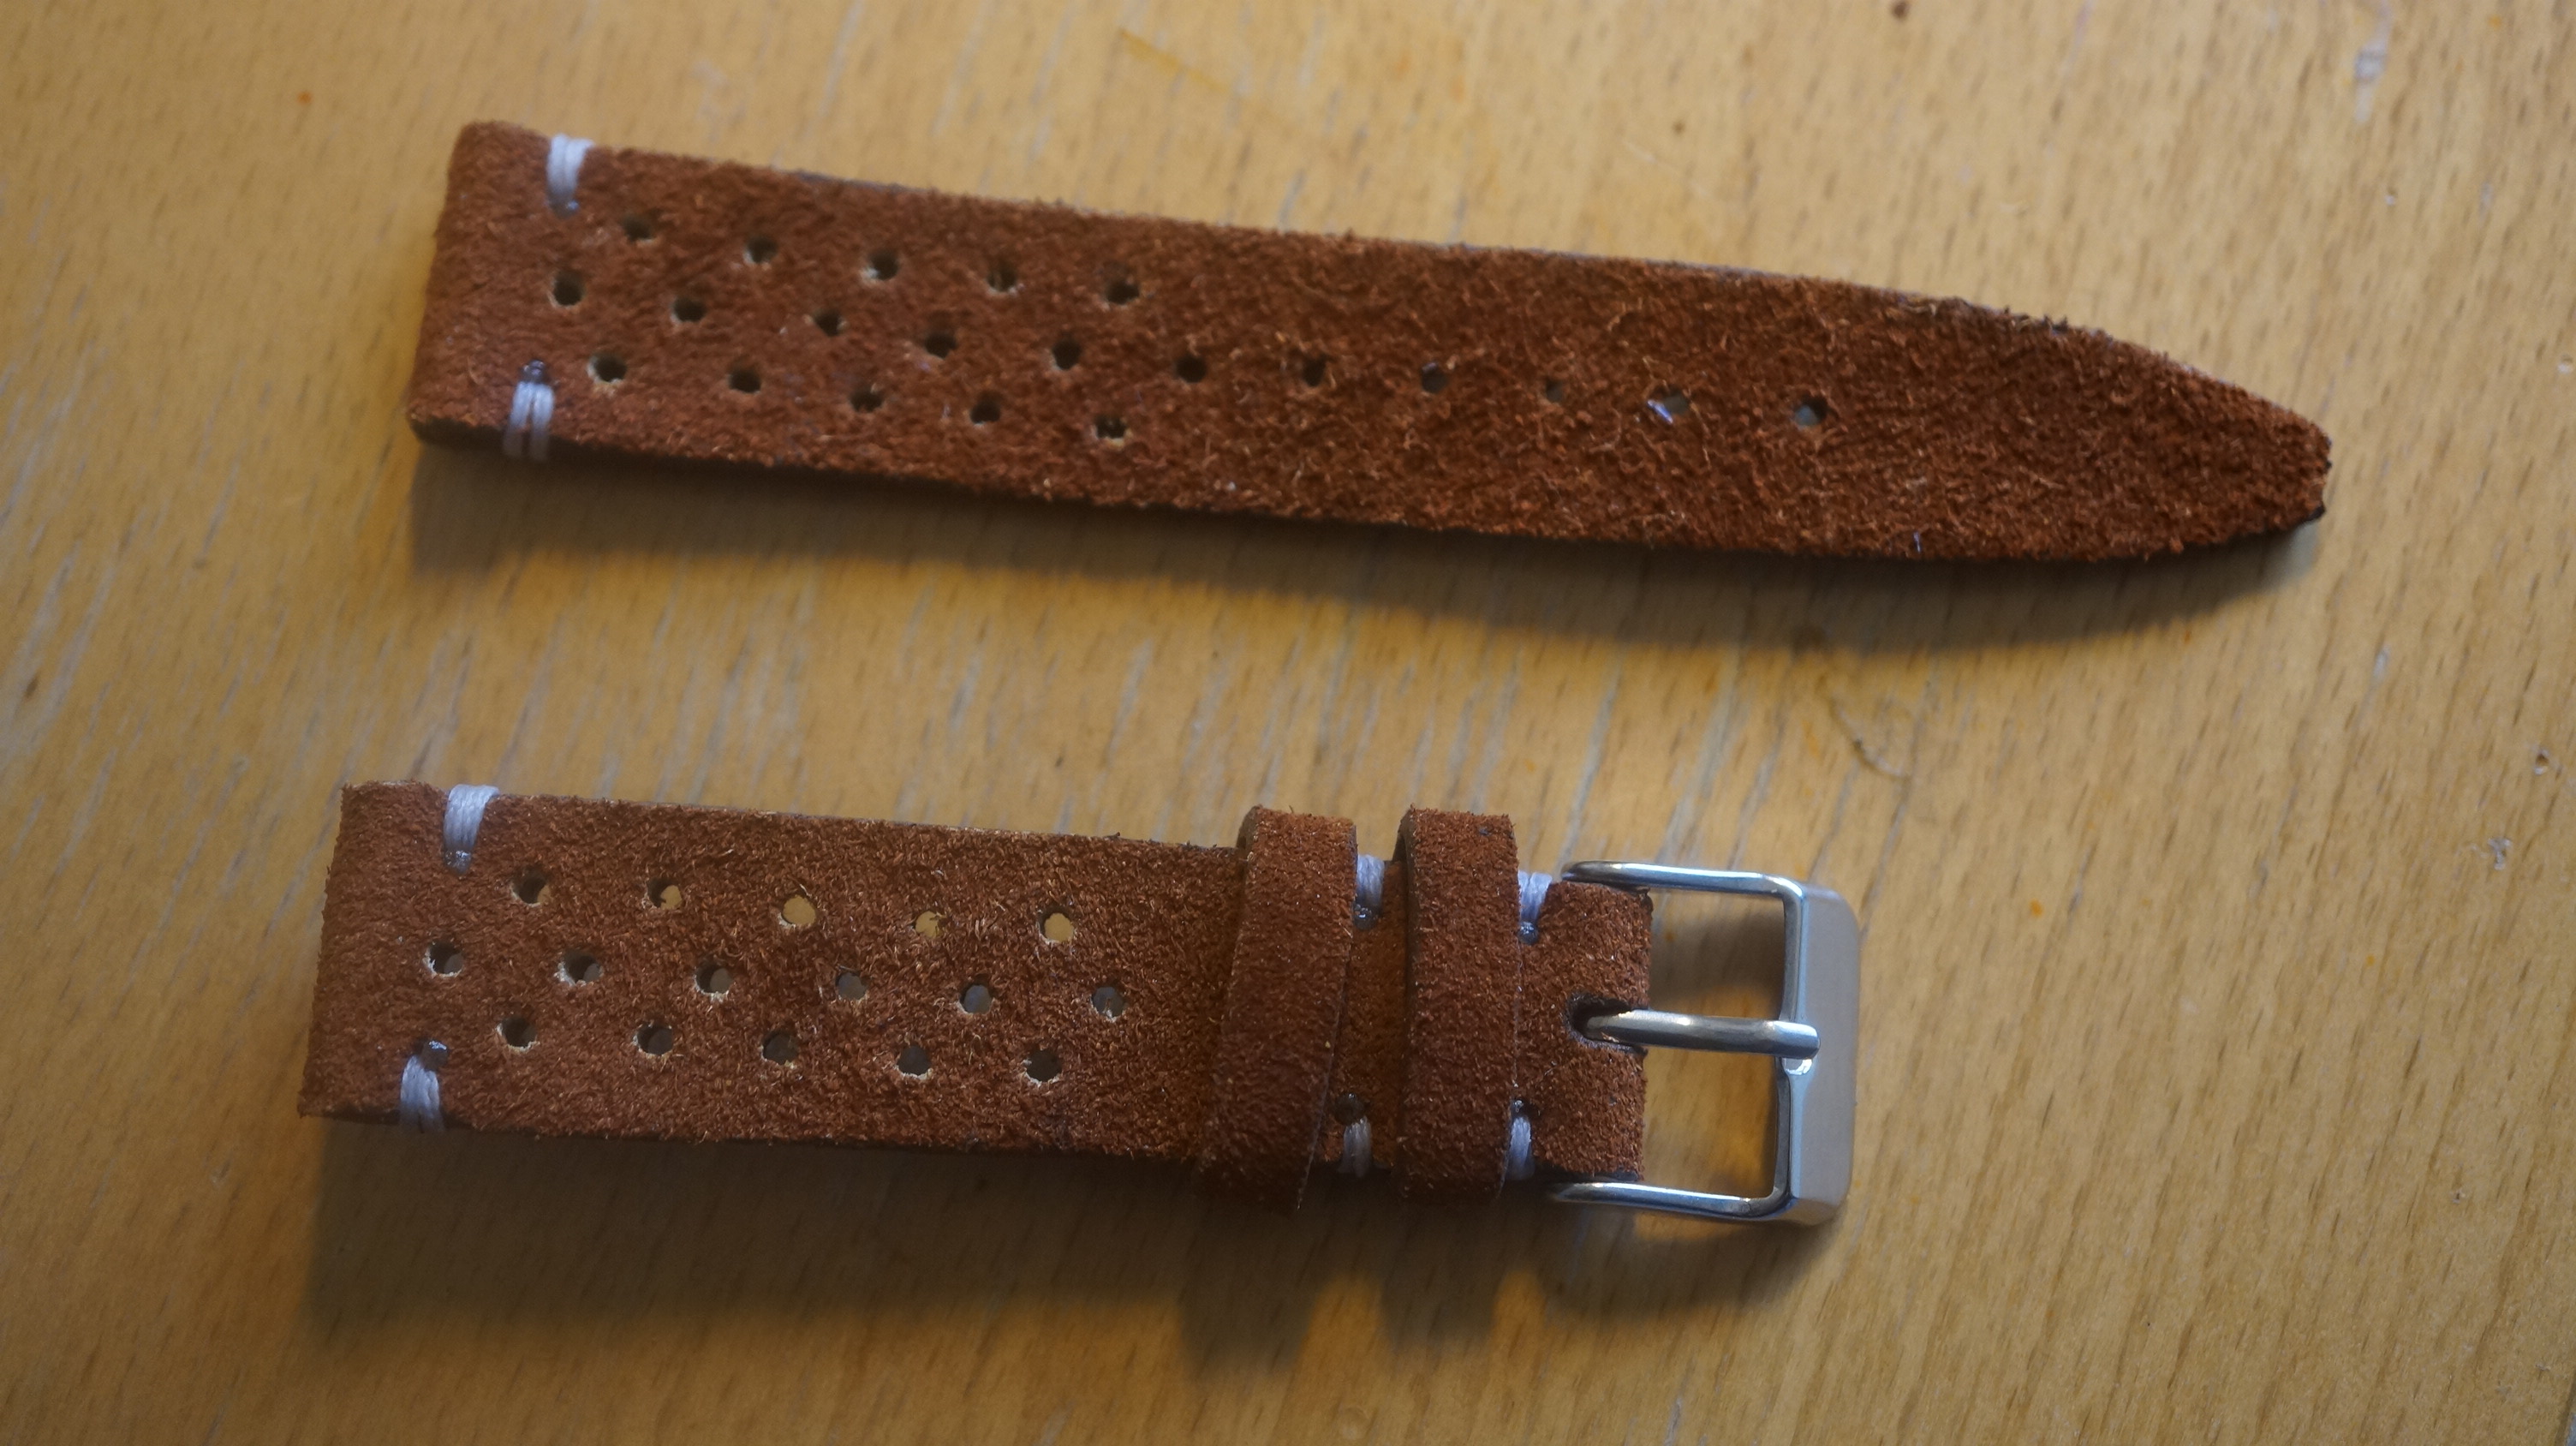
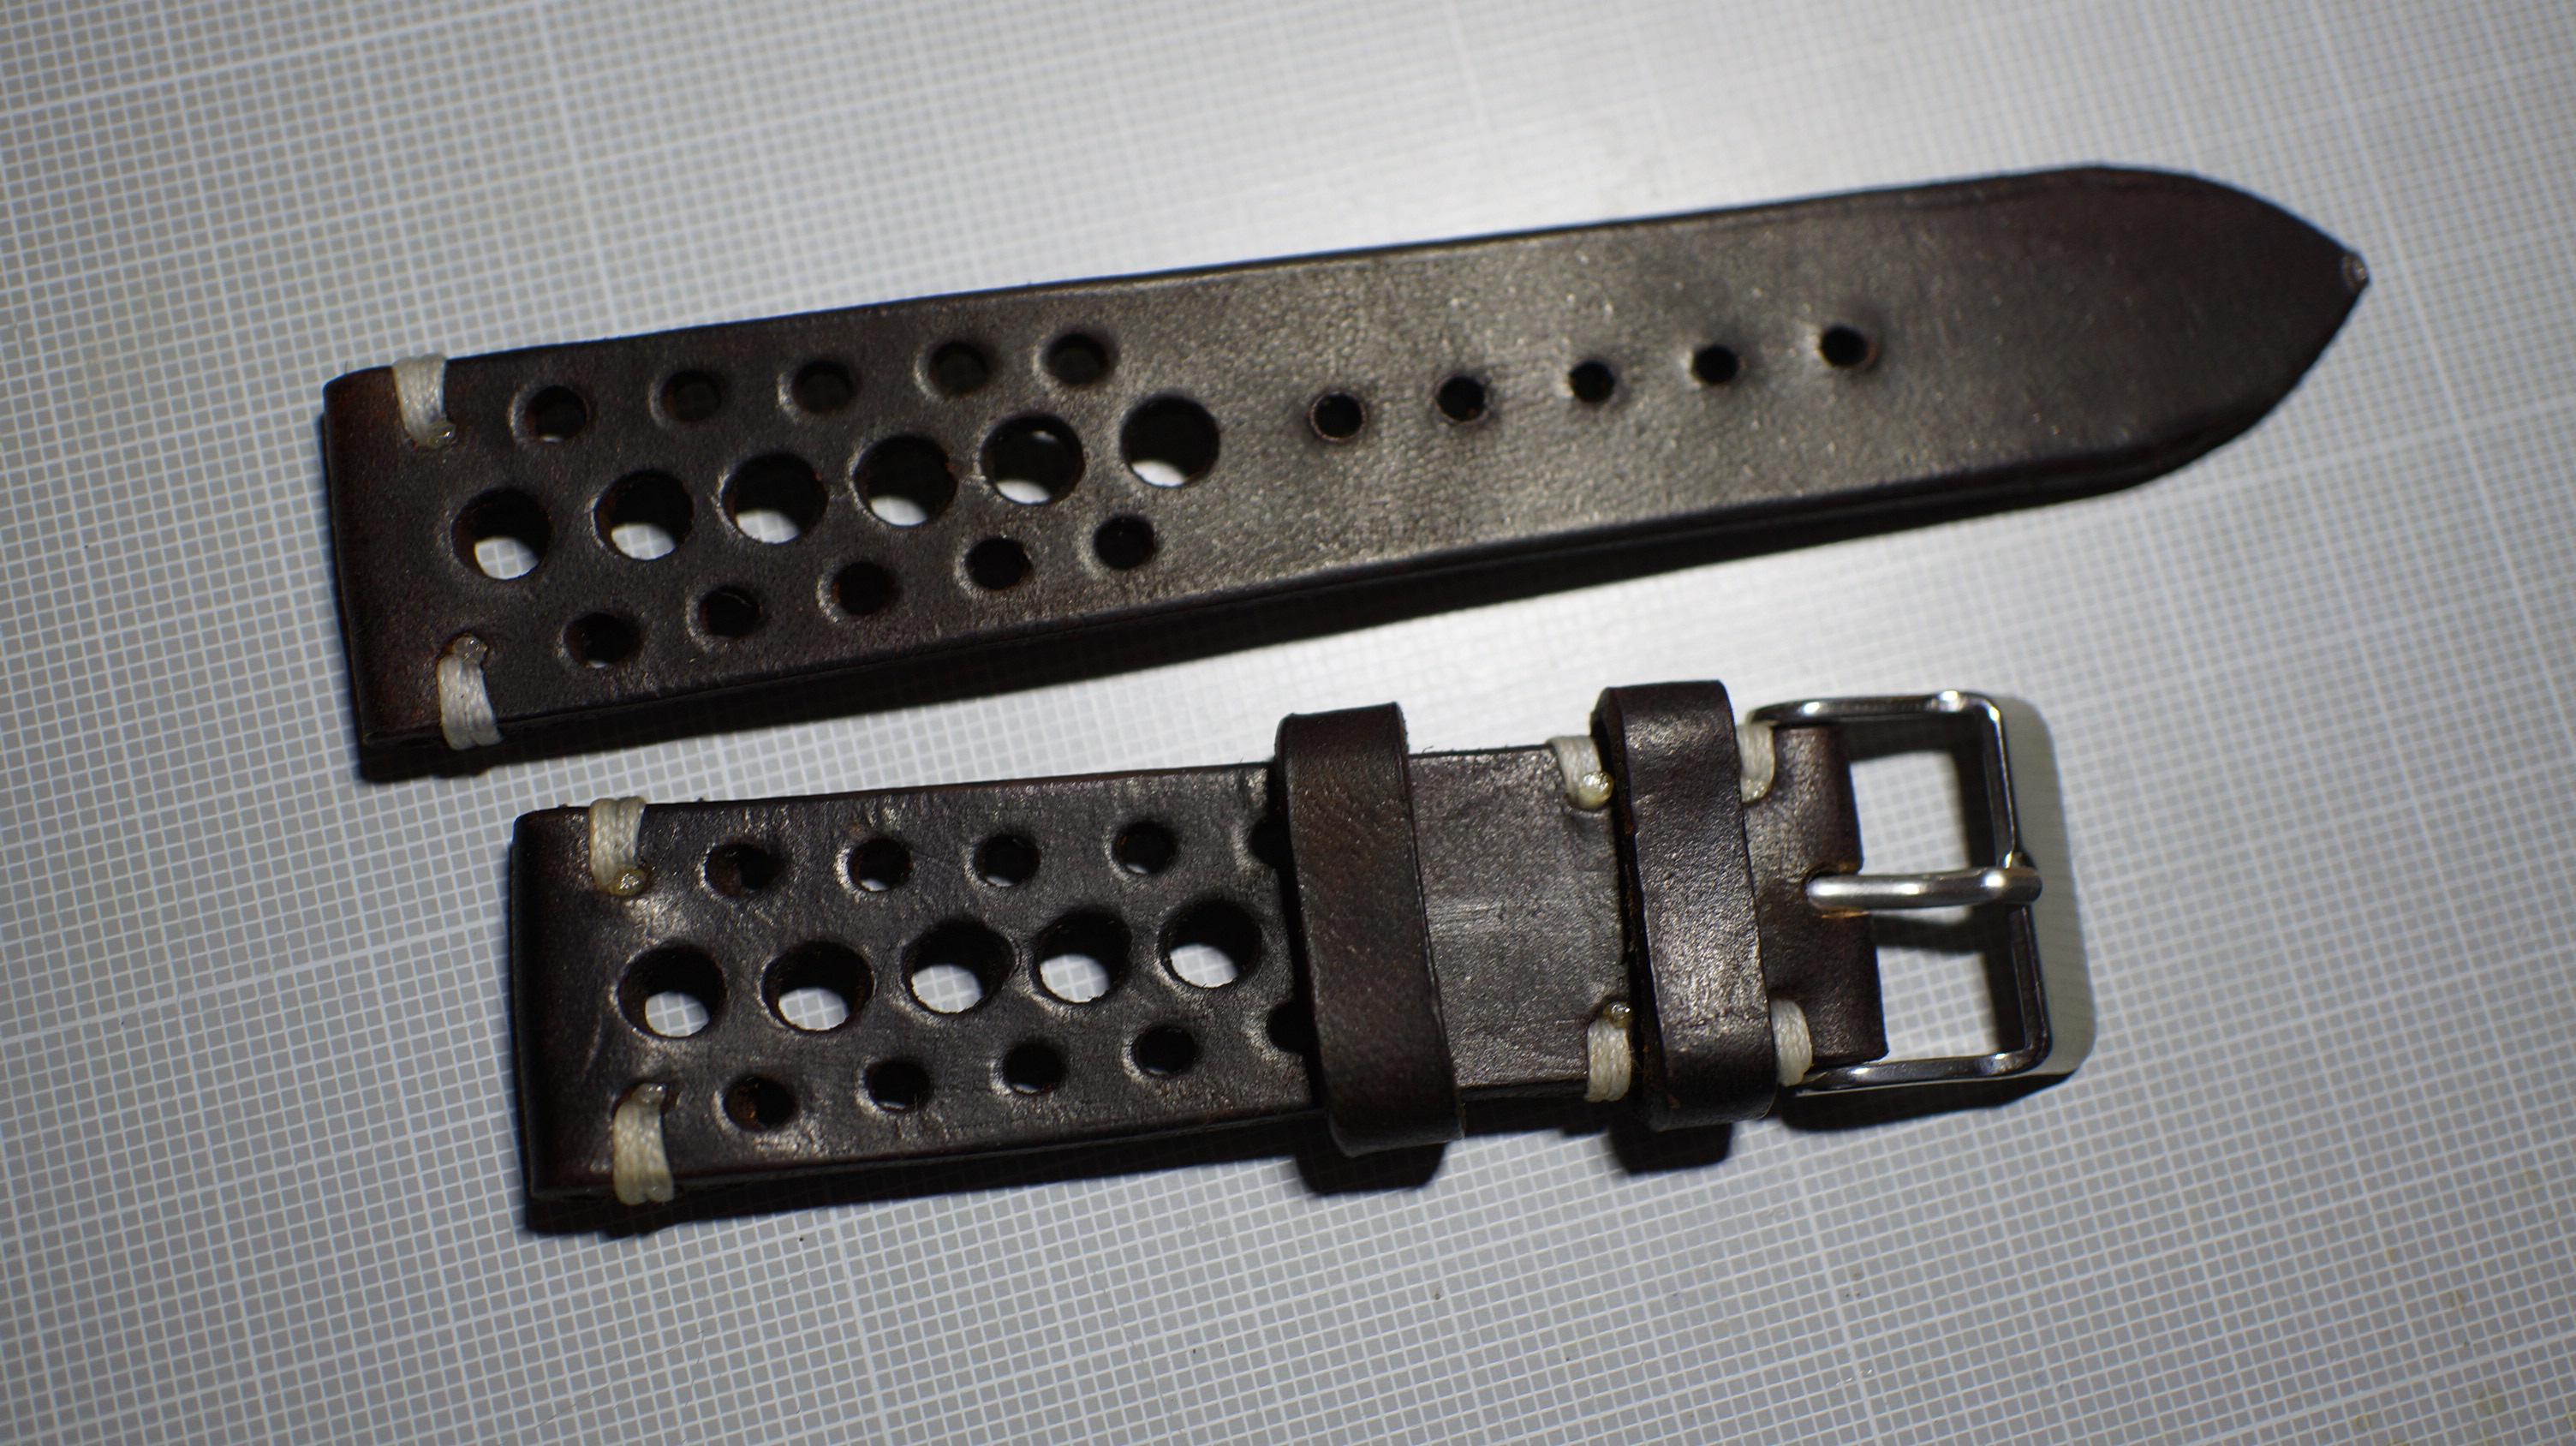
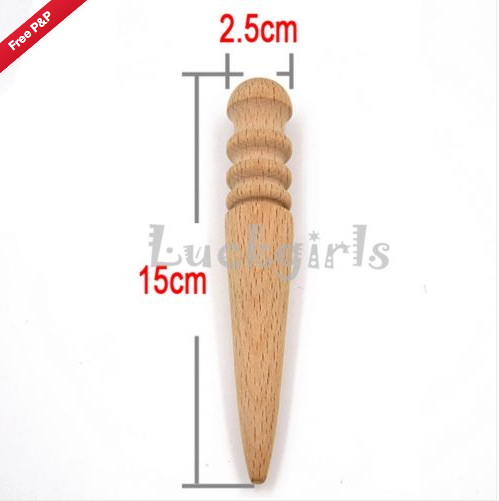
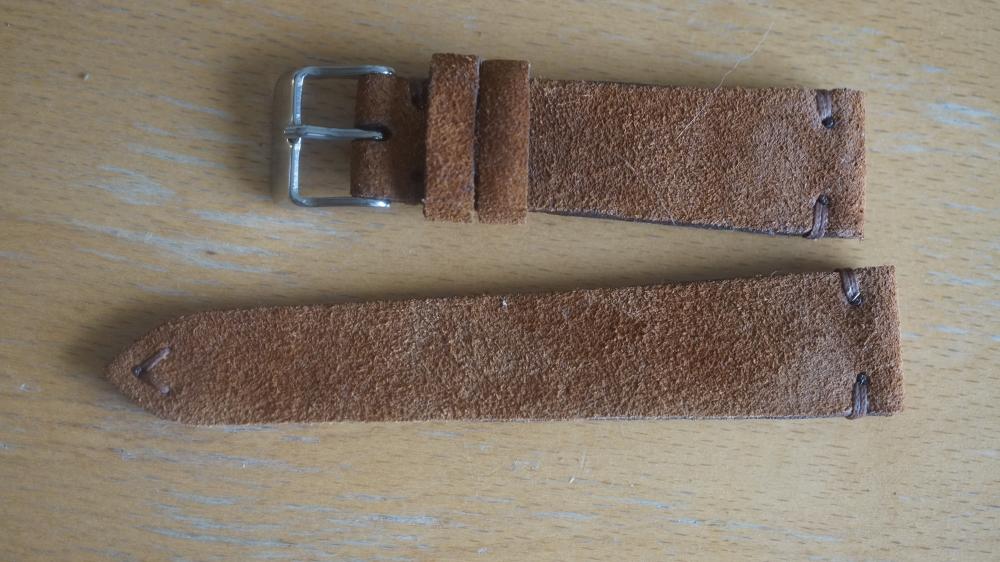
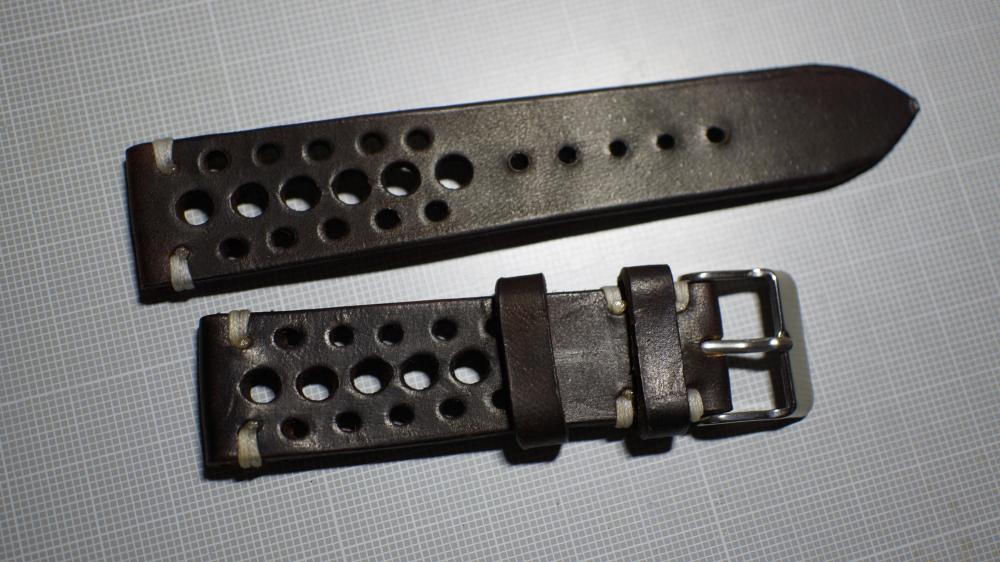
Very nice straps you made ! If the leather strips I bought aren't long enough for a Nato strap, I'm sure I can make some straps as you did. The light brown strap you made would suite me very fine, and it has already the nice patina I'm after. I guess that is cow butt saddle leather in natural tan? Instead of dying the edges, I would like to "burn" them with a wooden slicker tool and bee-wax....... see how that works Many tools, be it entry level quality, can be cheaply obtained from our Chinese eBay friends. For example a round slicker tool for £0.99 including postage. Equally, there are many more handy leather-tools (like adjustable edge creaser, hole punches, skiving knifes, edge bevellers, needles, an awl, stitching hole punches, waxed flat thread, leather "cement" etc) for nearly no money. If I ever get "hooked", and "master" the hand-craft skills (probably the hardest part), I can always upgrade the tools. Yes, Roger, your results are where I'm after and perhaps with some additional saddle-stitching around the edges Very curious once I received the tools and leather........ I'll order some 0.8mm waxed flat thread too.......
 1 point
 -
Greetings! There is always more to learn. I'll stop learning when I shuffle off this mortal coil1 point
-
To be honest, that dial seemed just fine without any need for cleaning. And why experimenting when there is a forum or twenty to ask beforehand.1 point
-
1 mm could work? Ususally i use 0,8 mm thread and flat . Like the Ritza thread. been a while since i did some straps. These are few of those i made. the brown leather is double layer and the others have a 1,5 mm inner leather with mocca on top and a liner on the back. This is horse butt leather. Very hard to work on but is very nice when finished. I u like i have a supplier of this leather. One layer and folded double at the top. and then dyed dark brown .

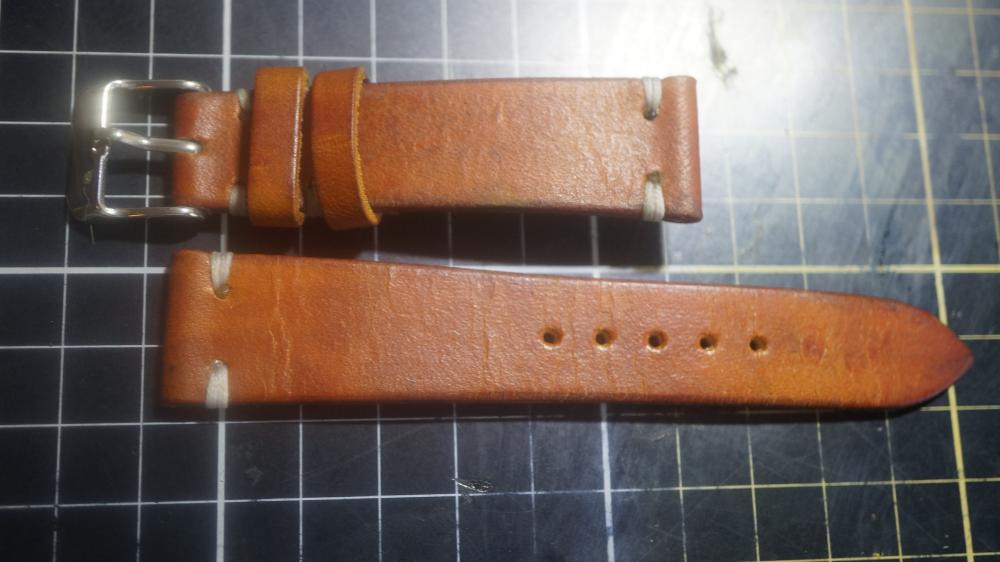
 1 point
 -
The Polydent technique is a good one which works well but only for enamelled dials. Yours is a printed dial which is much more fragile. You could try water slide transfer paper for your printer and print a new seconds register, or have the dial professionally reprinted. Otherwise look out for a replacement1 point
-
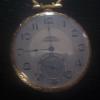
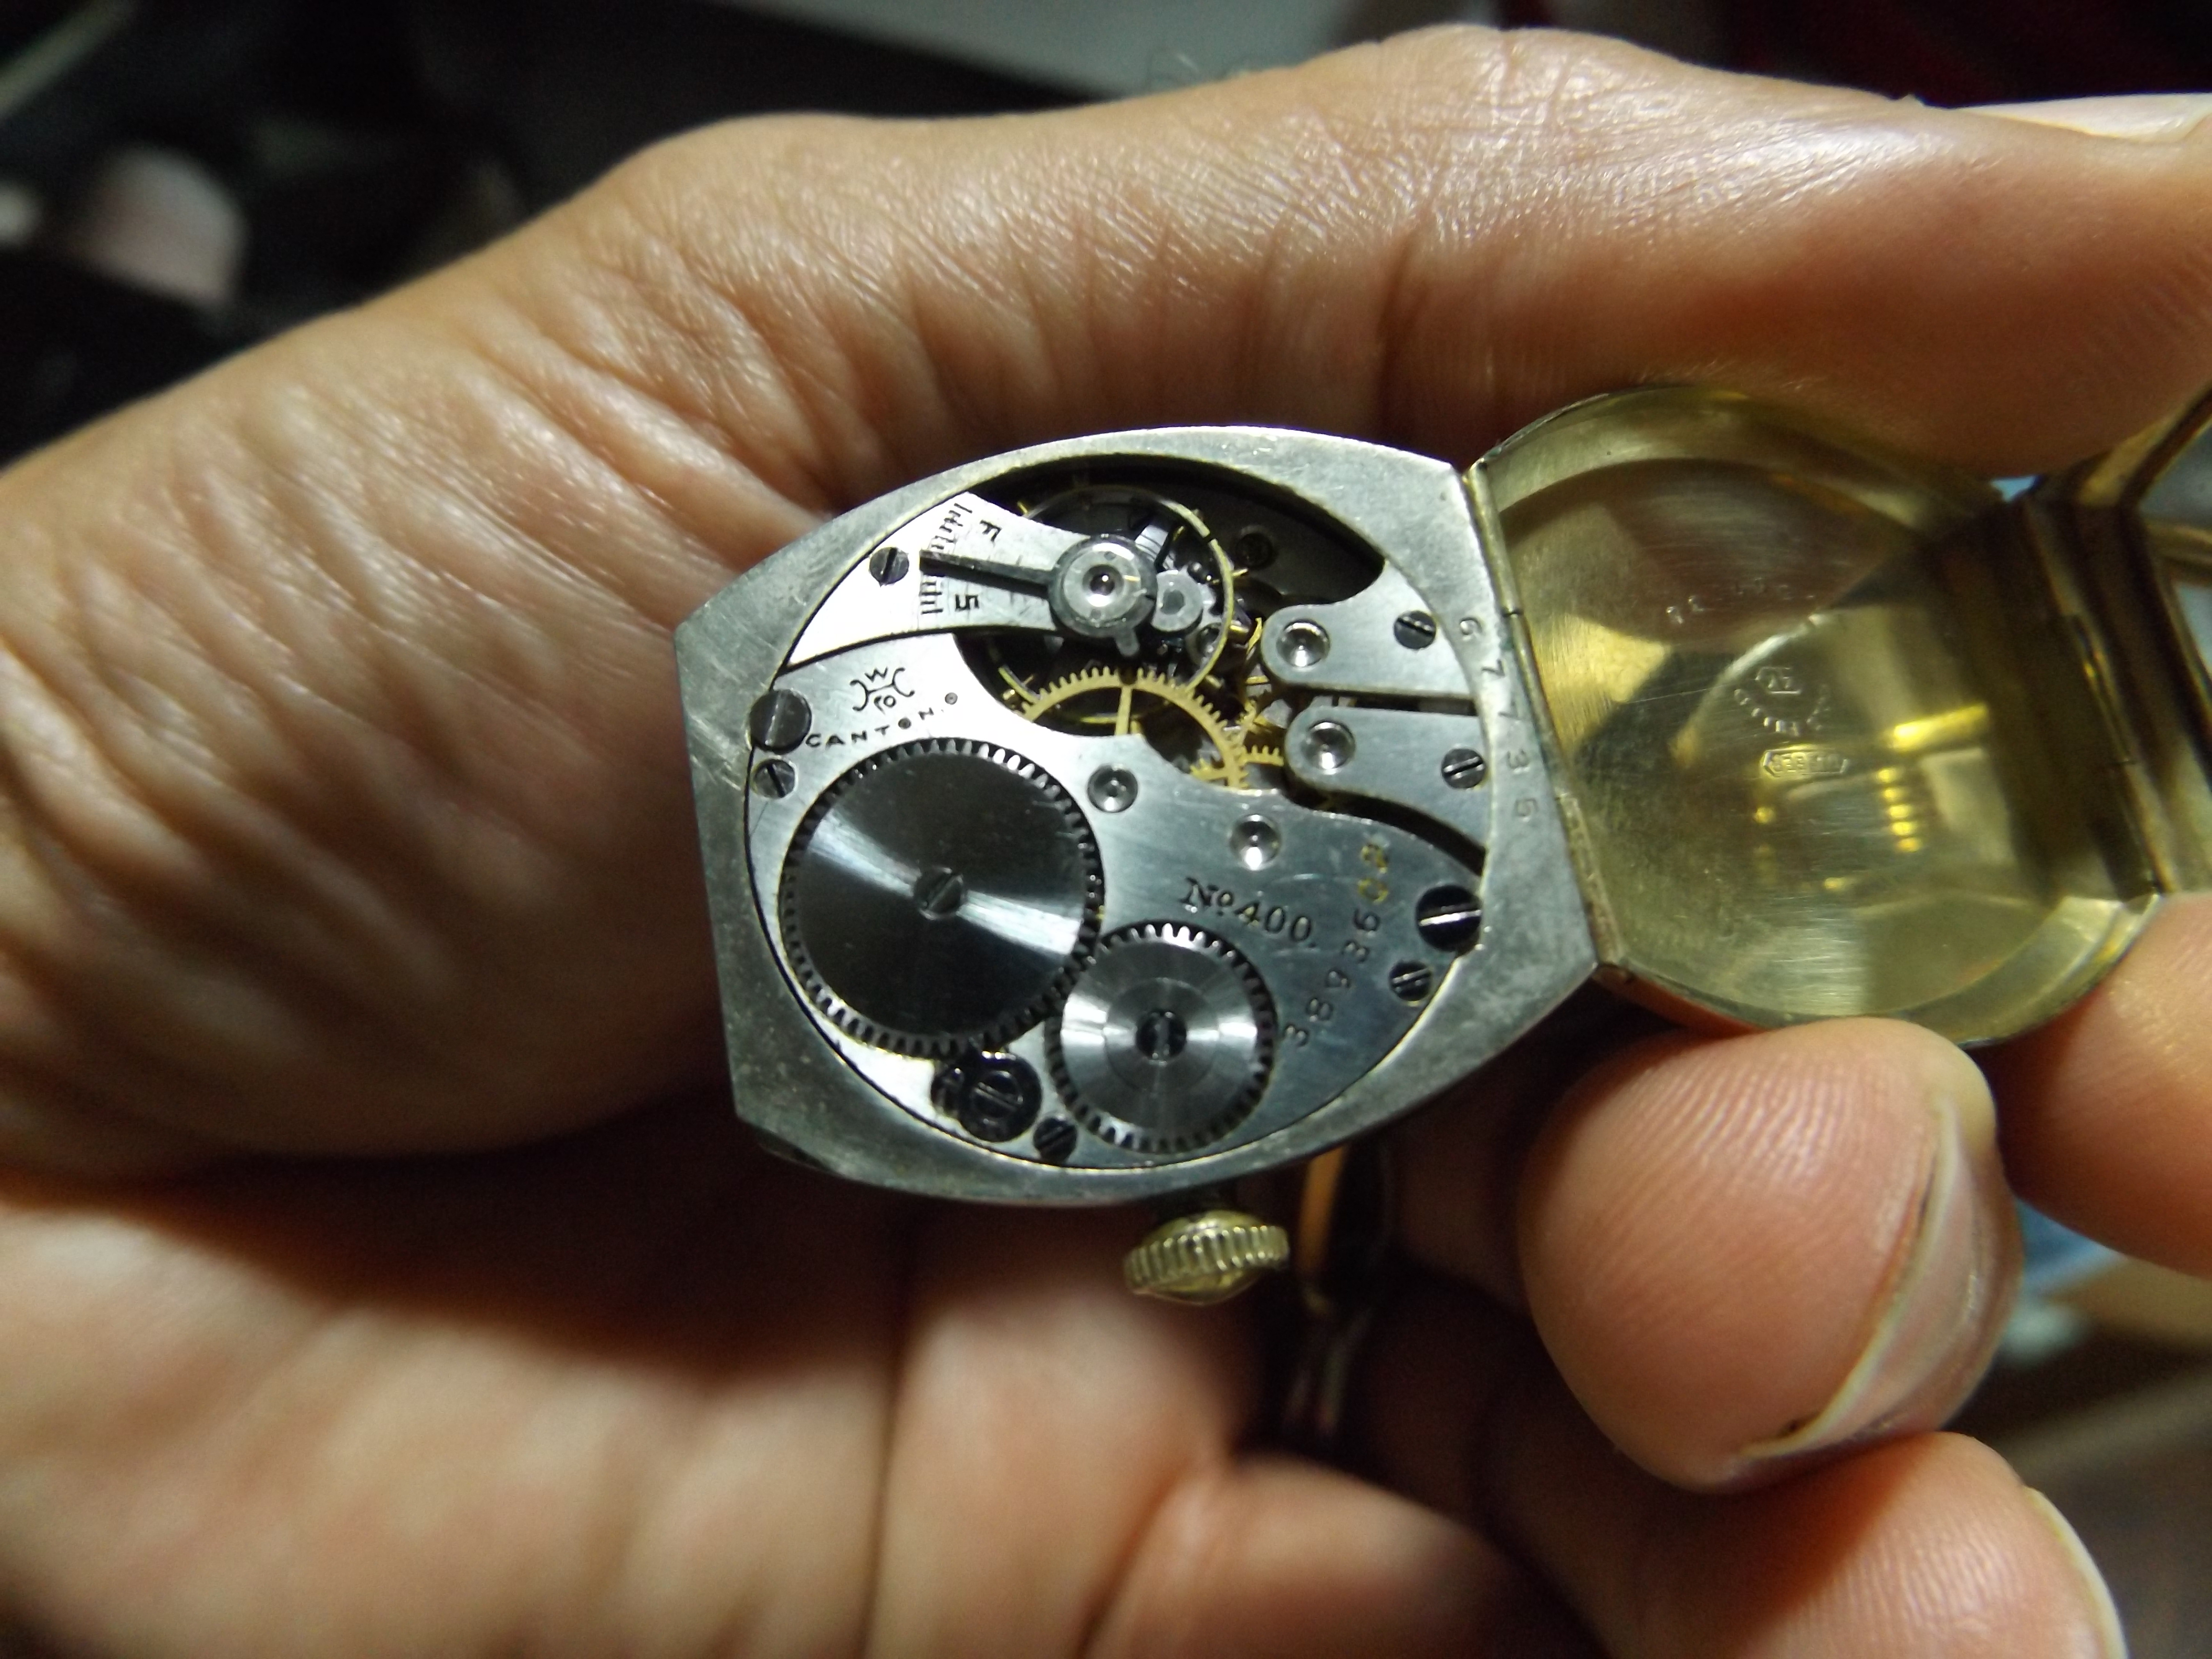
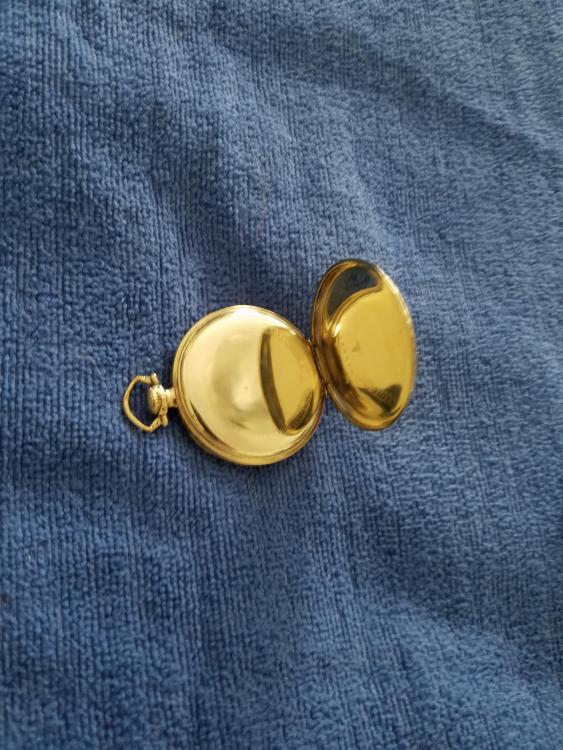
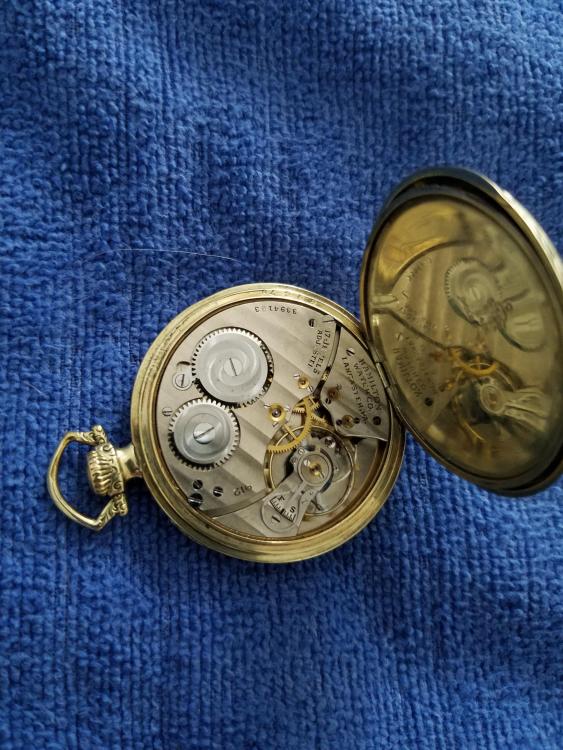
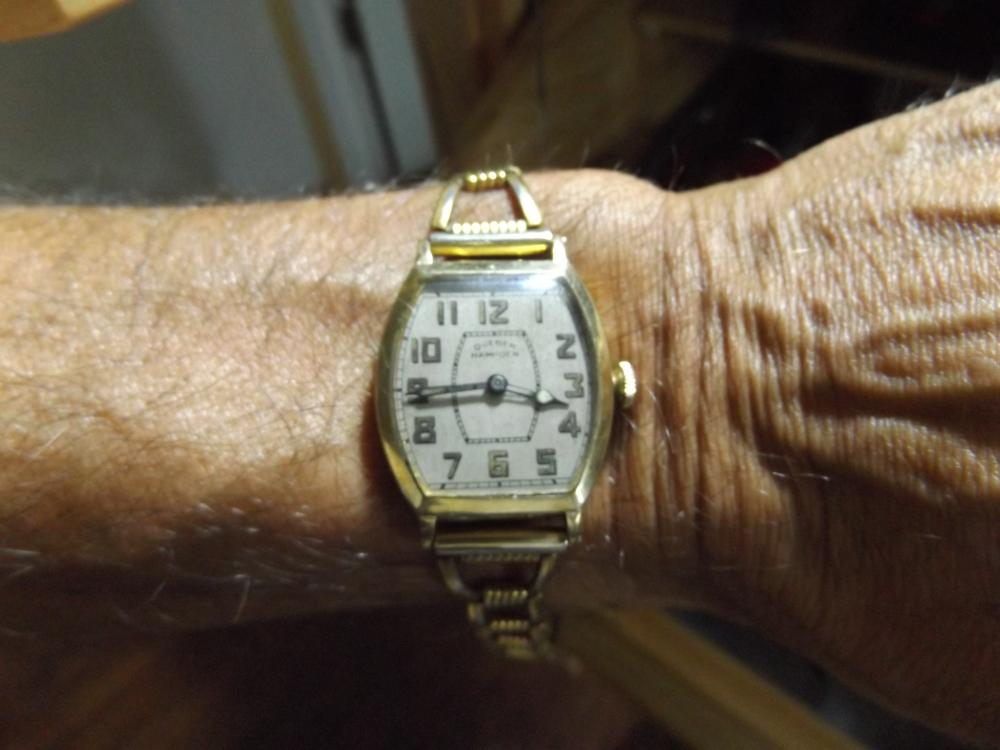
Feeling nostalgic today, oldie but a goodie, Hampden model 400 circa 1925 or so, in a Dueber gf hinged case, one of my nicest 'old' winder watches. Gotta get this one a leather strap, bracelet is a bit flimsy.

 1 point
 -
On a side note, the movement and case are getting a correct and "vintage" dial, so I will be showing the new watch soon...1 point
-
Hi RyMoeller and thanks for the congrats on my fatherhood, I still cannot wrap my head around it.... As per the thoughts behind a dodgy work like the one done on my watch, I honestly believe that it was a matter of laziness after all. The guy probably had a movement, a case and a dial, wanted to "bake" himself a working watch (probably to sell for a small profit on eBay - which he did btw) and didn't care if the pieces all fit properly together... He probably hoped the new owner didn't know/care/notice the incongruence. We both got what we wanted, though: he got a bit of money, I got a working movement, a case and a dial to remind me how things "should not be done". I bought this watch actually for the spares.... so no real harm.1 point
-
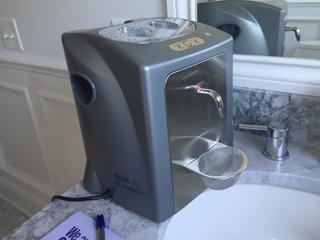
I have used this type of cleaner for a long time now without problems. I use the small jam jars like the ones you get in hotels and restaurants set into tap water with the lids back on. I bought some small wire ball cages for really small bits. For general cleaning And first wash I use lighter fluid but only the sort that is pure Naptha as some fluids have other ingredients - the side of the can should advise. My rinse is pure Isapropanol as this leaves next to no residues. Check your fluids by putting a few drops on a small mirror and allow them to evaporate. If there is a residue this will be left on the glass use a dark cloth to wipe it to see. I should mention that I do not use professional kit as I only ever clean in small amounts being a tinkerer/ hobbyist rather than a pro. Buying gallons of wash and rinse along with a full machine would be pointless for me. Also this topic is well covered in the forum if you want to do a trace. Also well covered are the warnings about not ultrasonic cleaning pallet forks with jewels attached by shellac in solvent cleaners. Cheers, Vic1 point
-
Here is my contribution to fake watches and what should happen to them.
 1 point
 -
I also use naphta and alcohool. But imho this ultrasonic cleaning should be done as a final stage. The thick gummy oil and dirt should be addressed with a brush and pegwood (under naphta).1 point
-
I have a very similar one that I got on the bay used for 15$ US. I use tap water in the cleaner, and then put movement parts in a beaker with cleaning solution and then set the beaker in the water. I usually run two cycles, for a total of six minutes or so, seems to do the job. Cheers!1 point


.jpg.6225a64433578a11e0218b27c20b13f5.thumb.jpg.d82b0cd1e370f3a3a59a06afa957d184.jpg)