Leaderboard


Popular Content
Showing content with the highest reputation on 02/01/16 in all areas
-
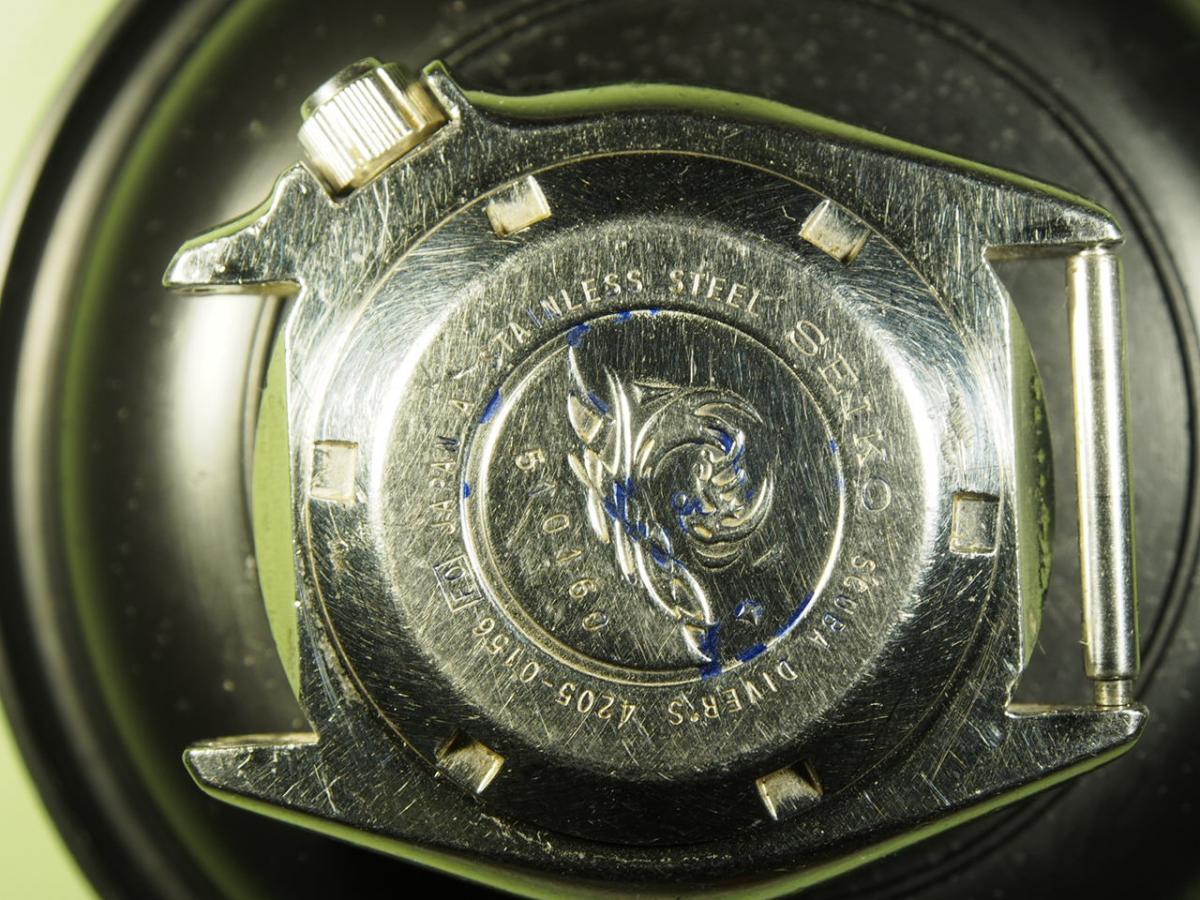
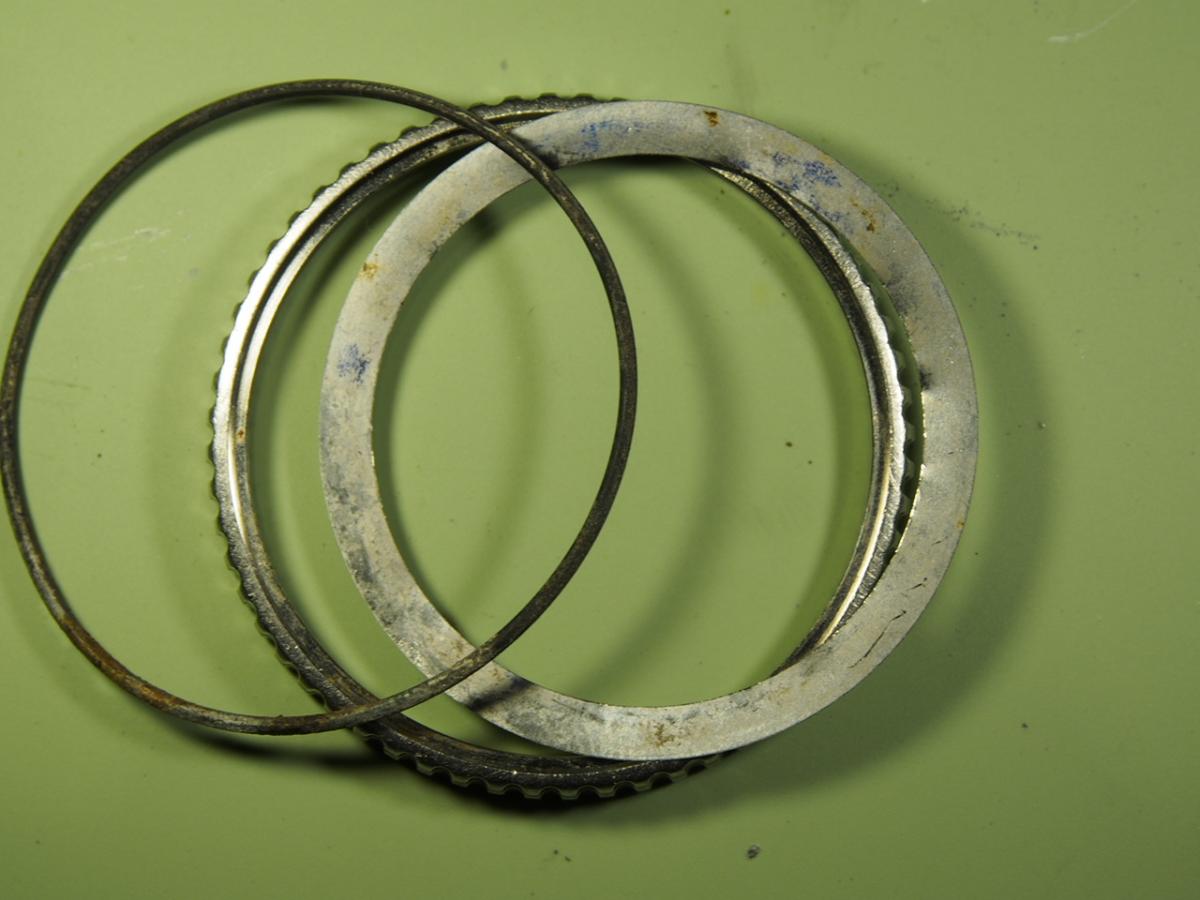
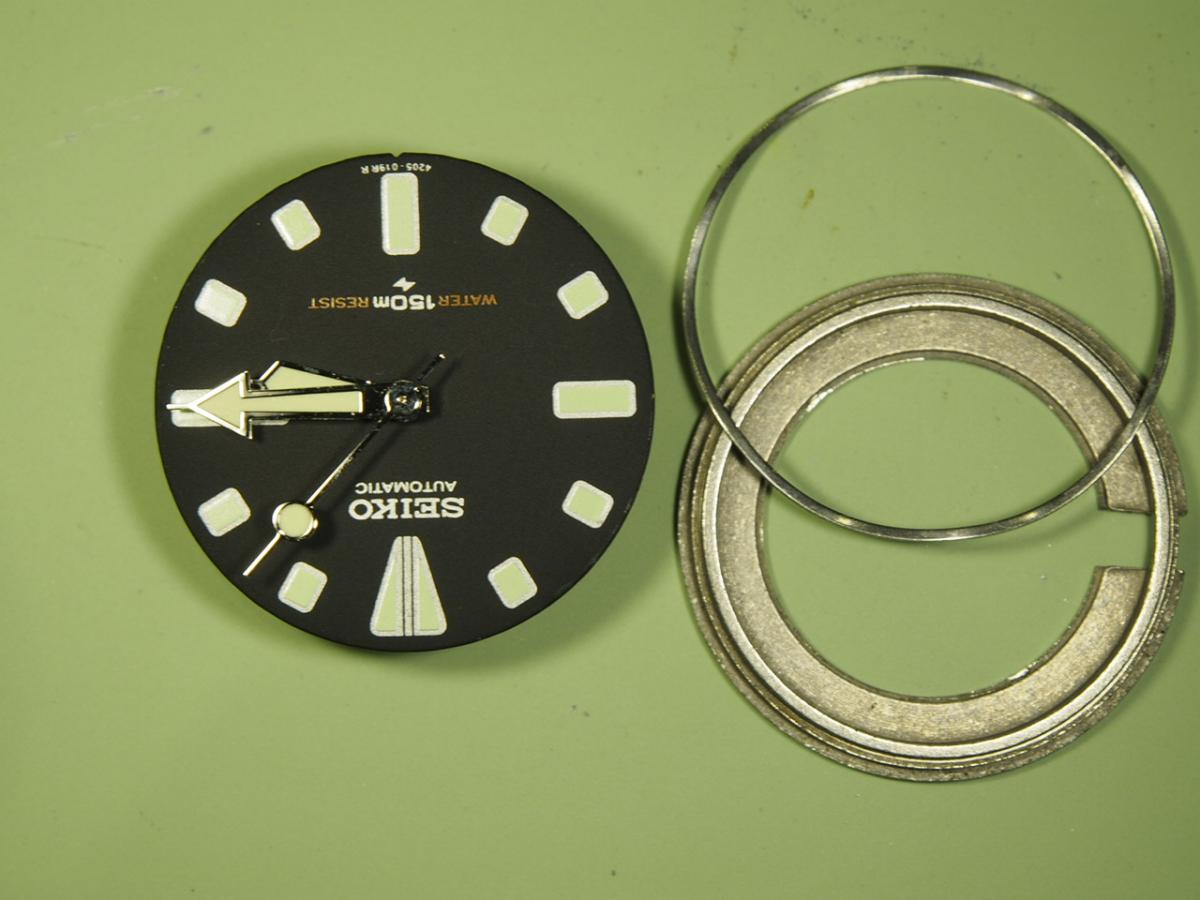
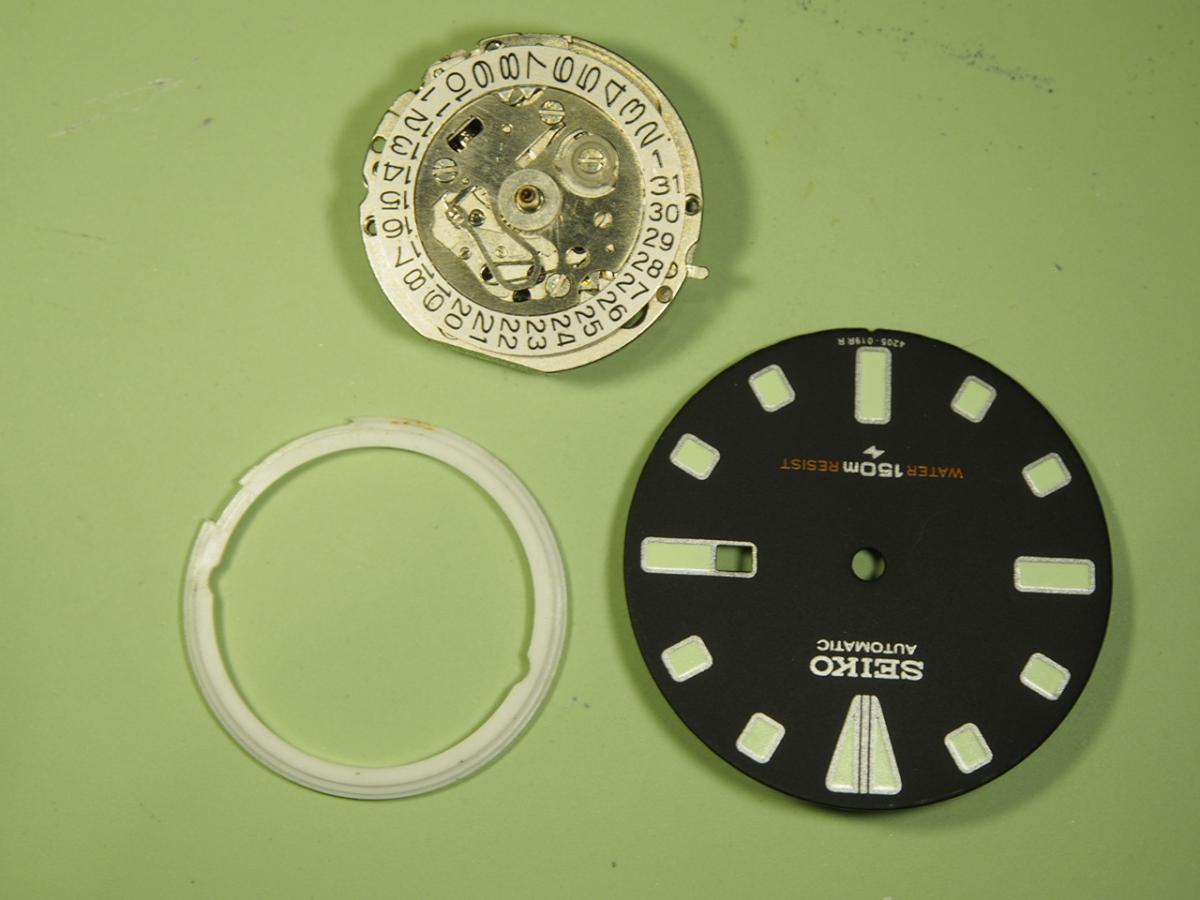
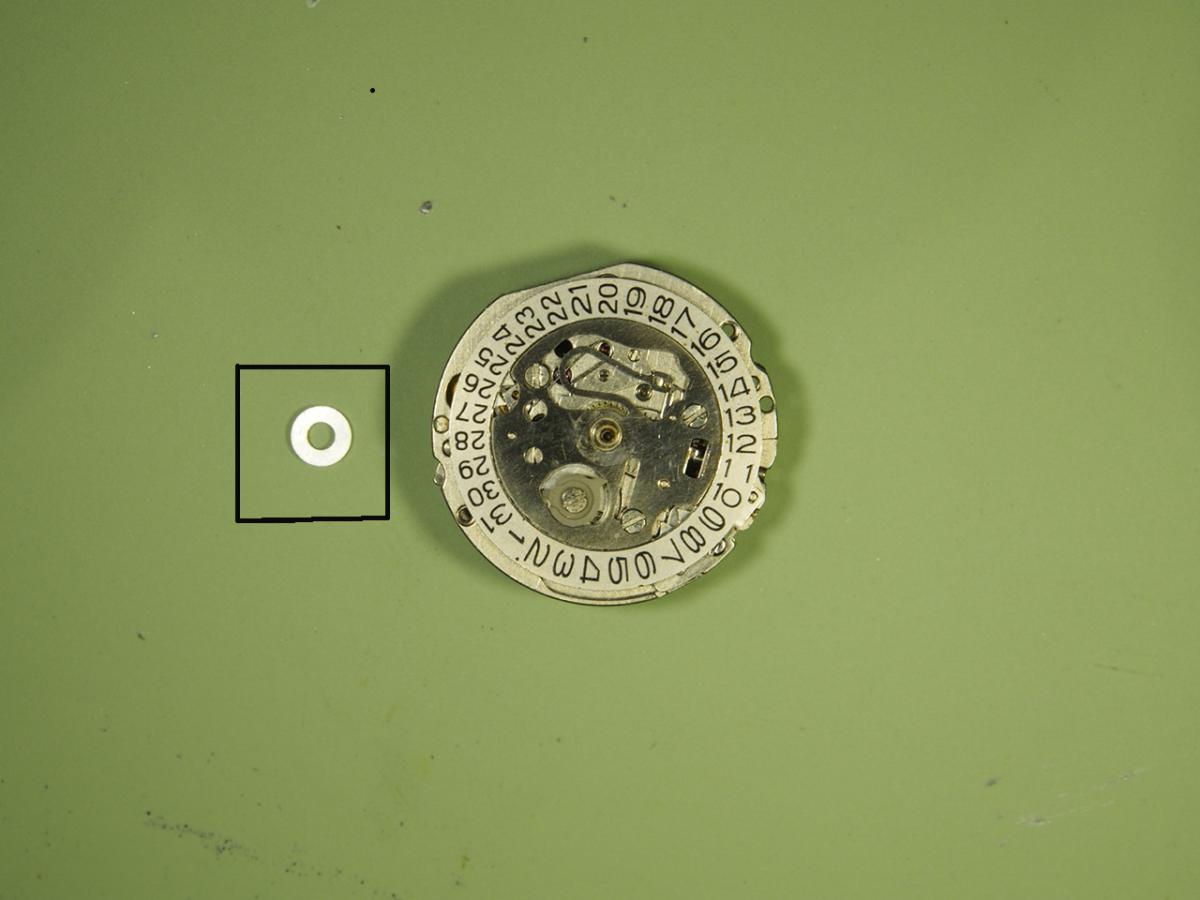
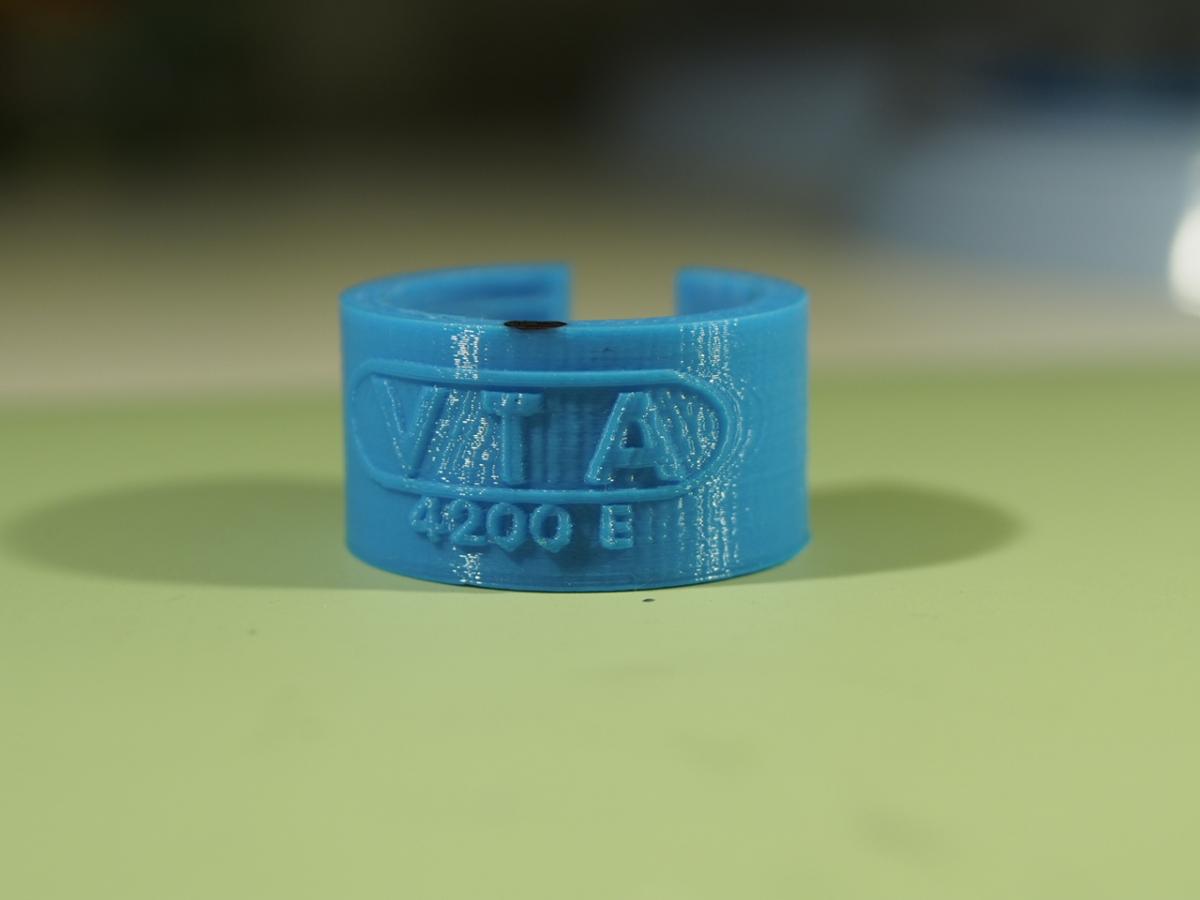
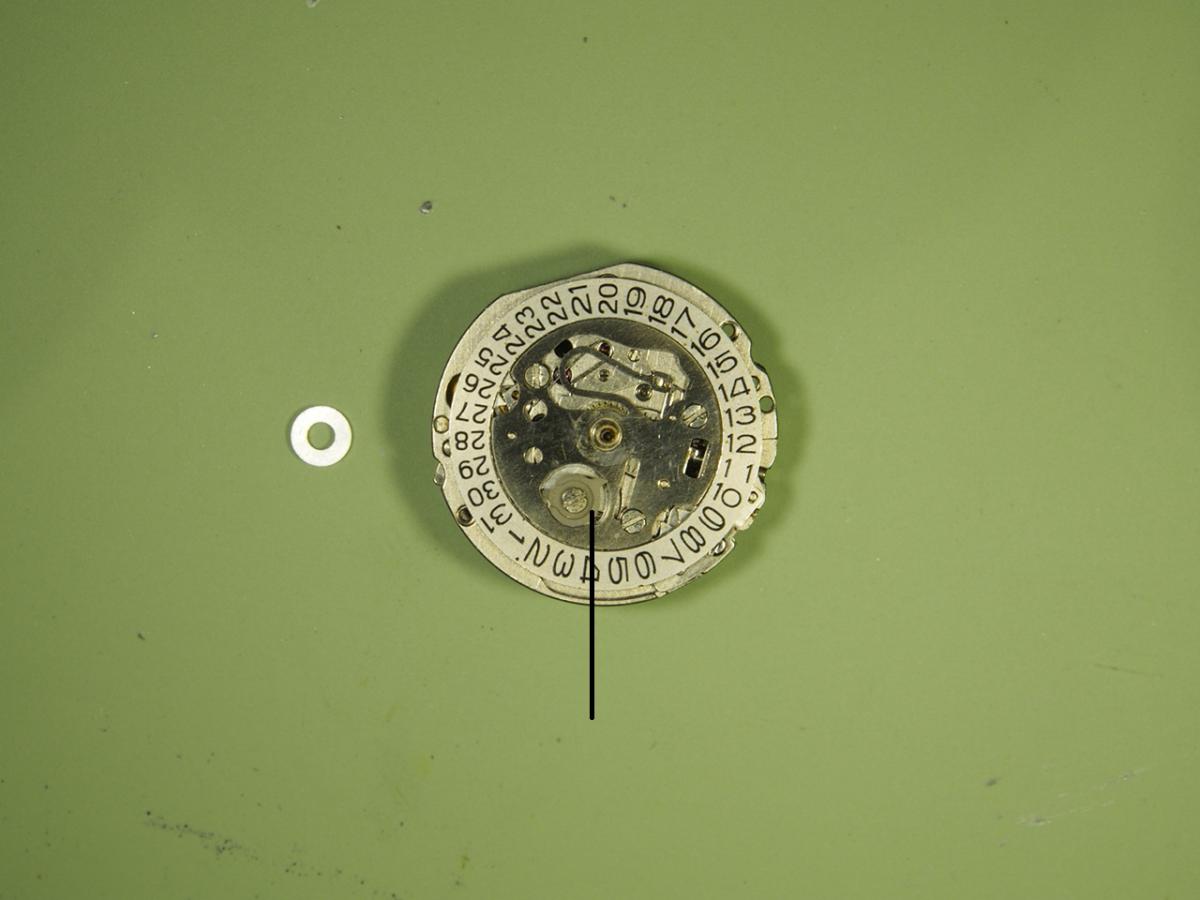
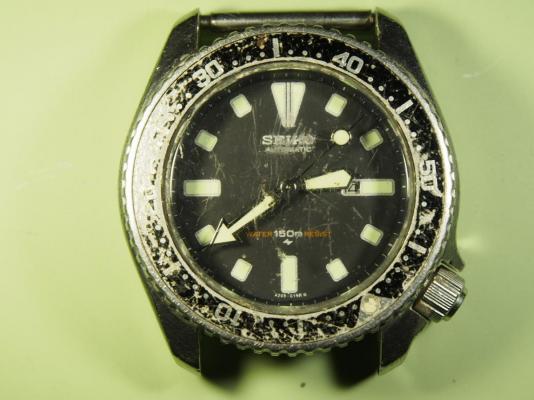
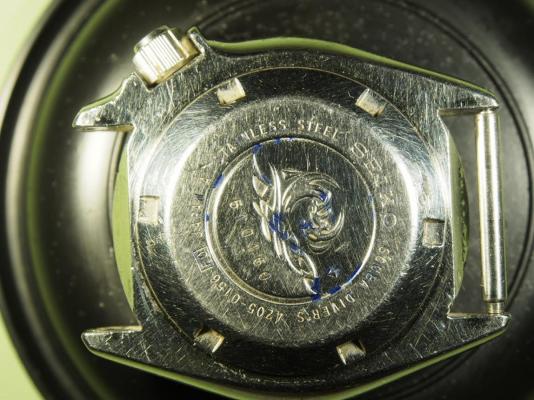
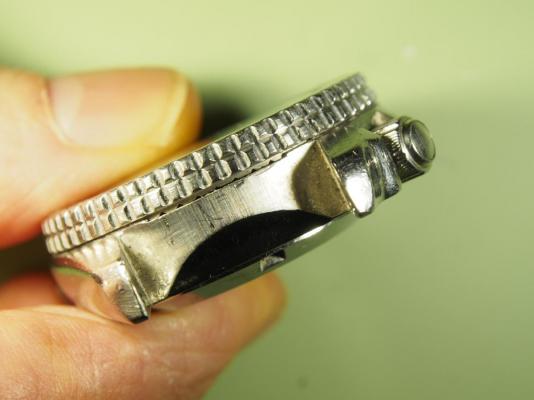
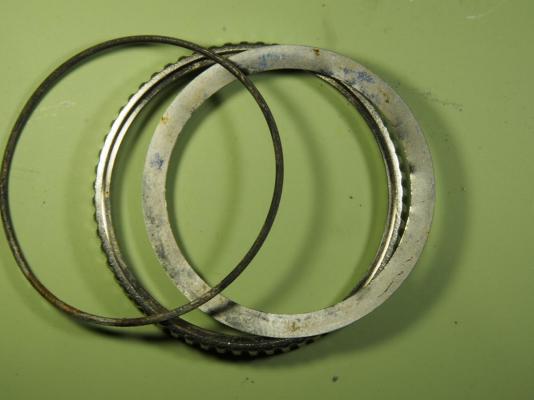
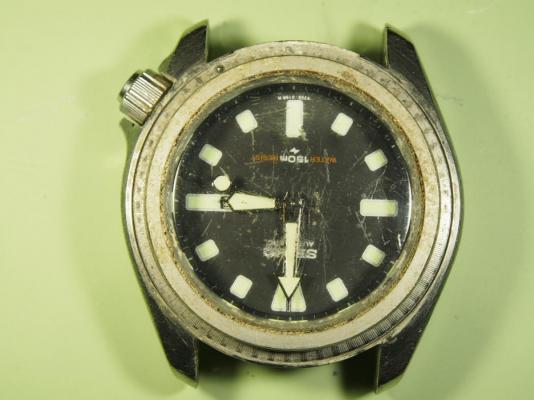
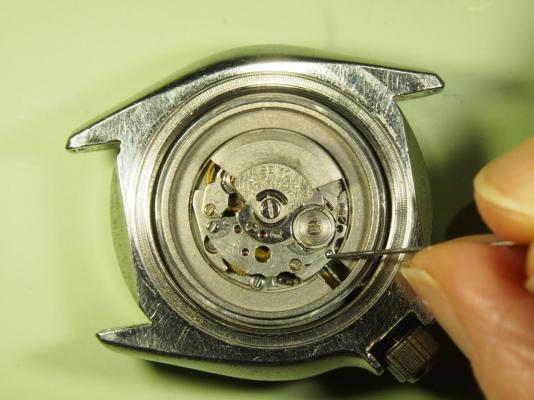
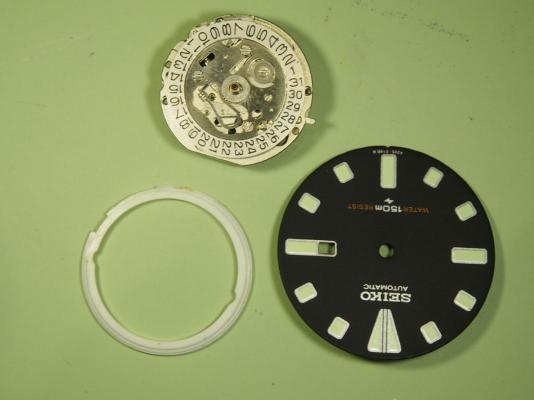
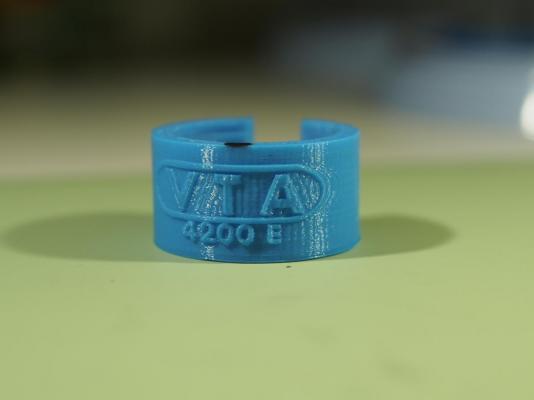
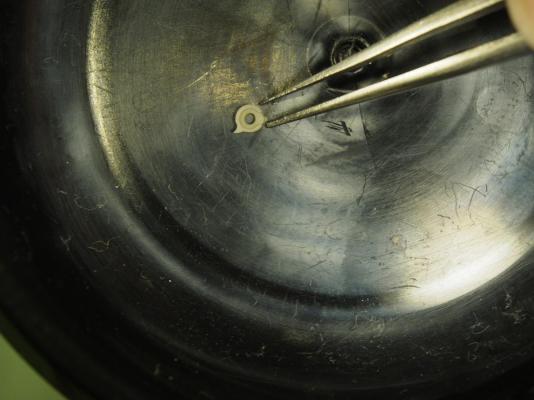
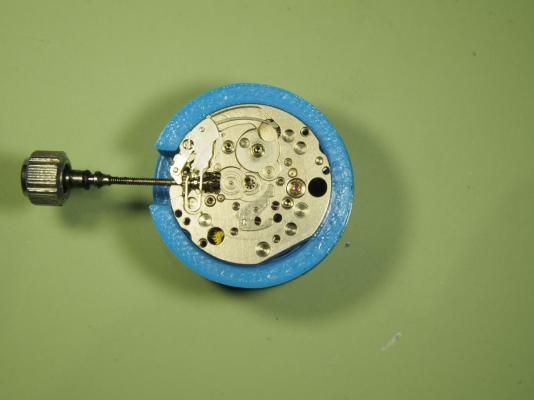
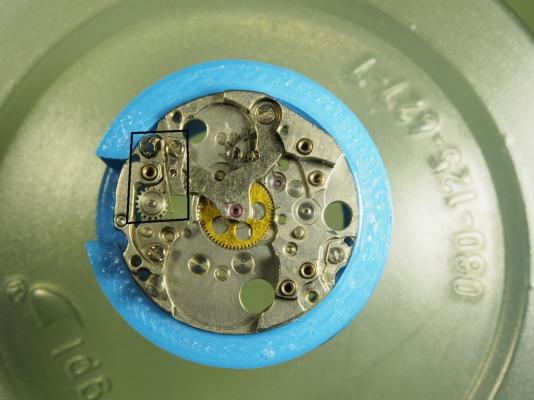
I have done a few of these 4205's now and although I am by no means an expert, I have learned a few things about them that might be helpful should anyone fancy having a go. This is my first walk through and guide, some of the photos are not as good as I would have liked. I have bought a mini tripod which has helped a lot but the lighting is not the best, something to look into for the future. I will try and explain things as clearly as I can as we go along, if anything is unclear please just ask. So, here is the little devil. No guesses as to where it came from. It is a bit tatty but they do scrub up well. This one is actually trying to run so hopefully all it will need is a clean and service. Keeping my fingers crossed as you never know what you might find once you begin. Before I start taking it apart I now check that everything works as it should. It’s good practice I know, but the first couple I did I was a bit lax and I had to strip the whole thing down again when “faults” appeared. In particular, make sure that the winding mechanism feels ok, they have a habit of skipping when trying to wind it up, you might feel it wind for a turn or two and then will just turn freely without resistance. Next, make sure the date rolls over around midnight and the quickset works ok. Never had a problem with the quickset yet but sometimes depending on the version of the movement the date change can be problematic. I will make a point of mentioning these problems and what goes wrong as we proceed. This watch is a 4205-0156 and is fitted with the earlier 4205A movement. The 4205B is slightly different. I tell them apart by the fact that the A has two retaining screws in the balance cock whereas the B is single screw. Now, I can’t swear that there might be versions of the A that have single screw balance cocks or vise versa, sometimes things are never that straightforward it seems. The bezel on this one is free so it will come off no problem. I have freed stuck bezels by simply dropping out the movement and dumping the whole case in some releasing oil for a day or so. Then I dry it a bit and lay it bezel side down onto a nice piece of “grippy rubber that I have, lay some weight on it through the heel of your hand and twist it in jerking movements to and fro. The lugs are quite sharp so protect your hand with a glove or something Really stubborn ones can be a pain but you just have to be a bit more brutal in your method. There is a notch in the case to allow you to prise the bezel off. With the bezel off you can remove the bezel insert, shim and o ring. Hard to tell through the scratches but the dial might be ok. Unless the crystal is cracked I would leave it in the case as there is a dial retaining ring that holds the glass in and they can be awkward to refit and do sometimes crack. Try as I might I couldn’t get the picture the right way round for some reason. Depress the little button and remove the stem. There might be screws holding the movement ring but usually they are missing. Looks as if someone has fitted a new dial and hands which is a bonus. One of the dial feet is a screwhead that needs to be turned until it is clear and the other is a small lever that needs to be swung out. You can see it sticking out near the 28 on the date wheel. Take care not to lose the washer that sits behind the dial. Some of the ones I have done , there was no washer. So either someone before me lost it or it was not necessary. All seemed well when there was no washer fitted so I didn’t worry about it. Well worth getting is a holder like this. I had difficulty securing the movement in my holder. I was recommended to use these as made by Halo8. He is on the bay and made one specially to fit the 4205 when I asked him about it. I bought a few more of the most popular sizes while I was at it and they are great.

 3 points
 -
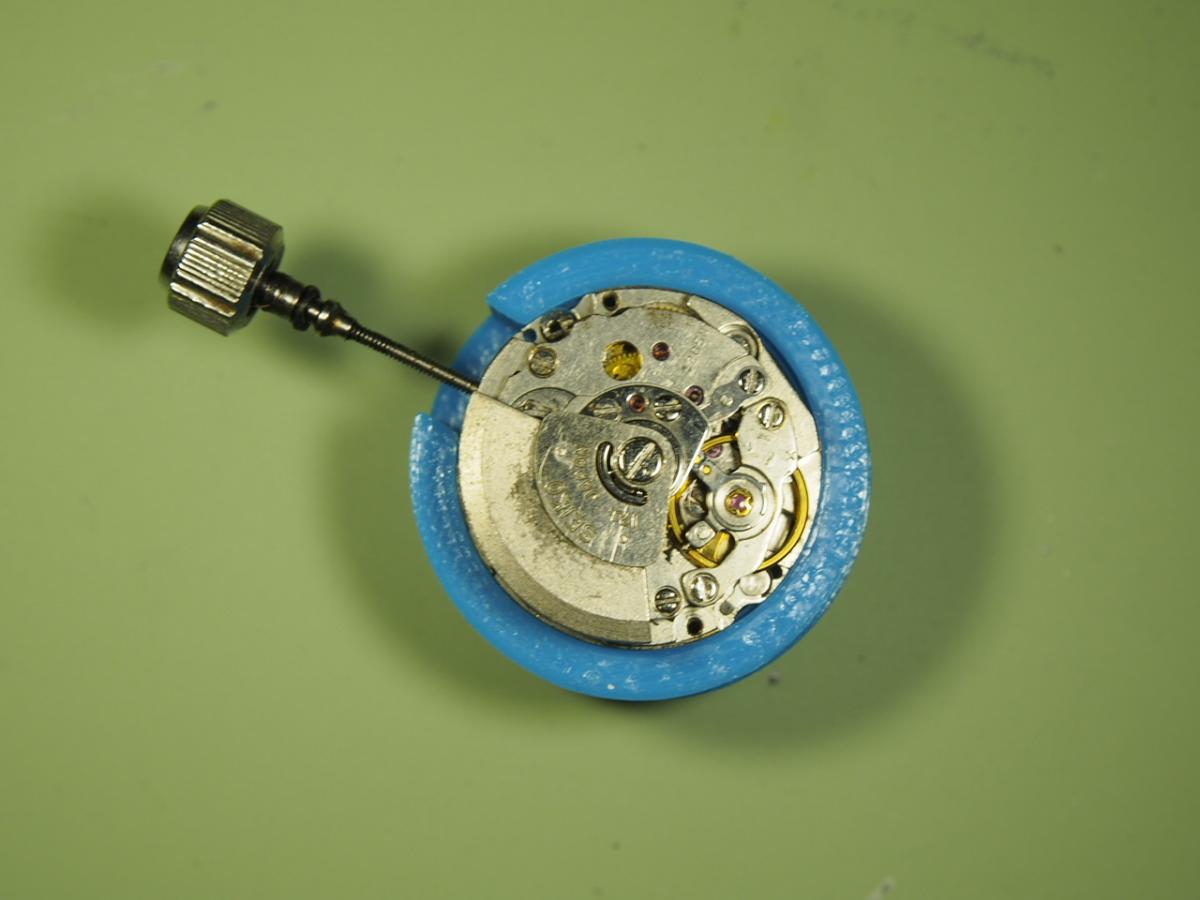
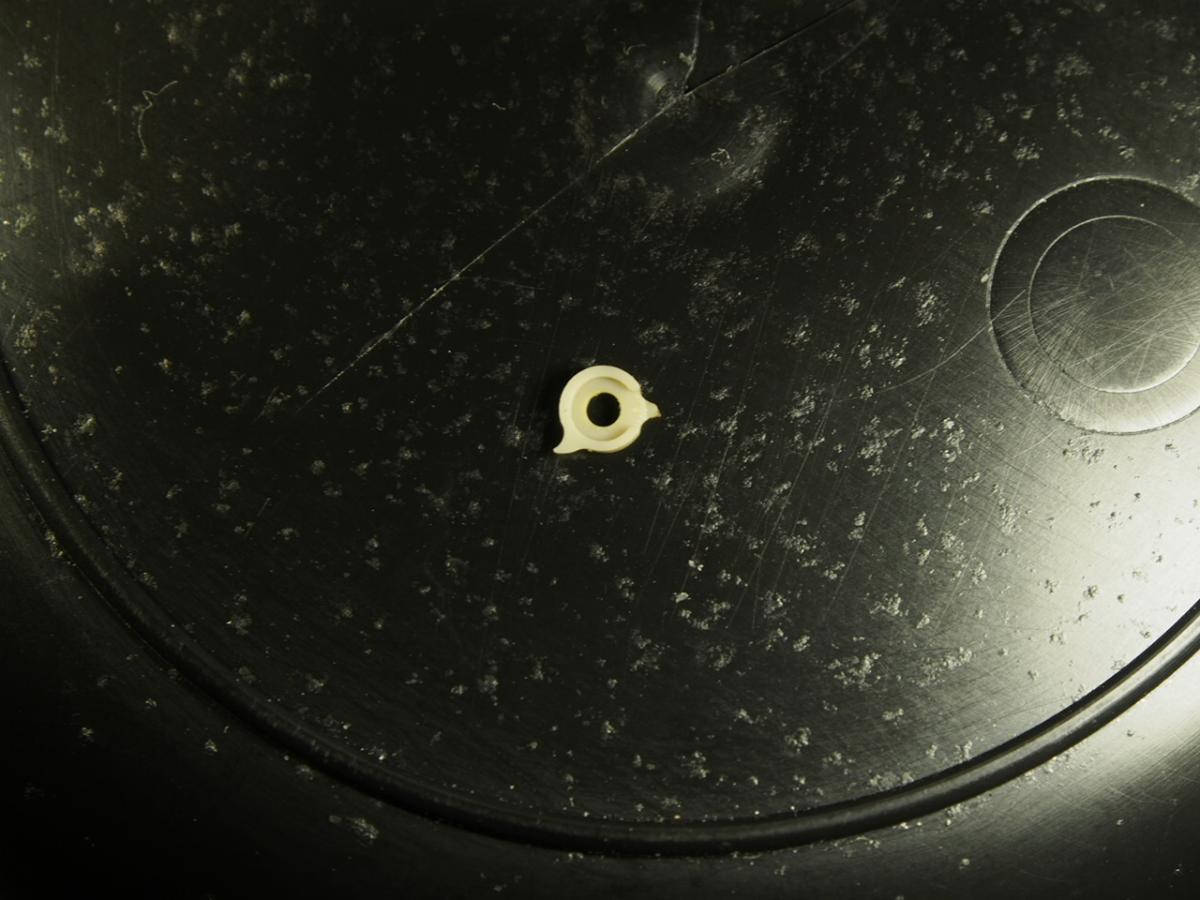
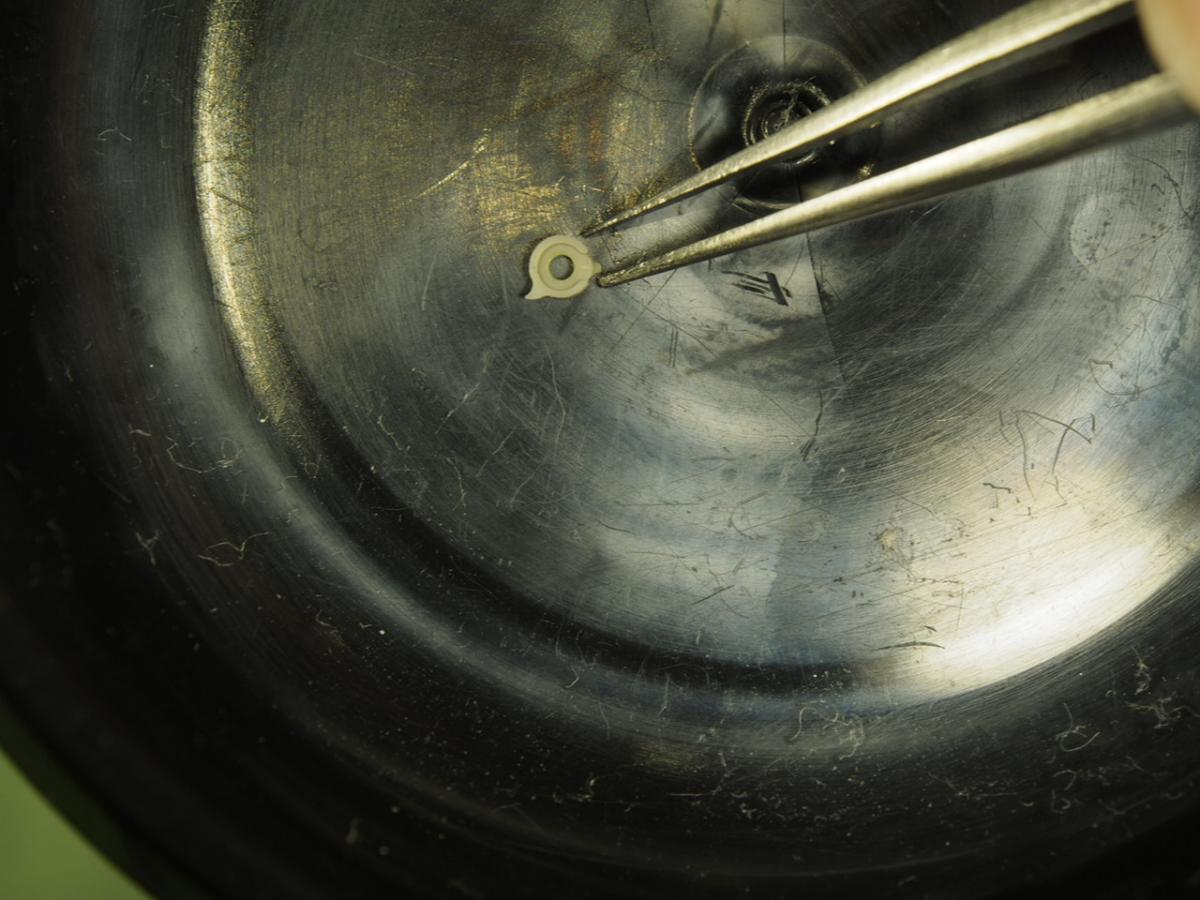
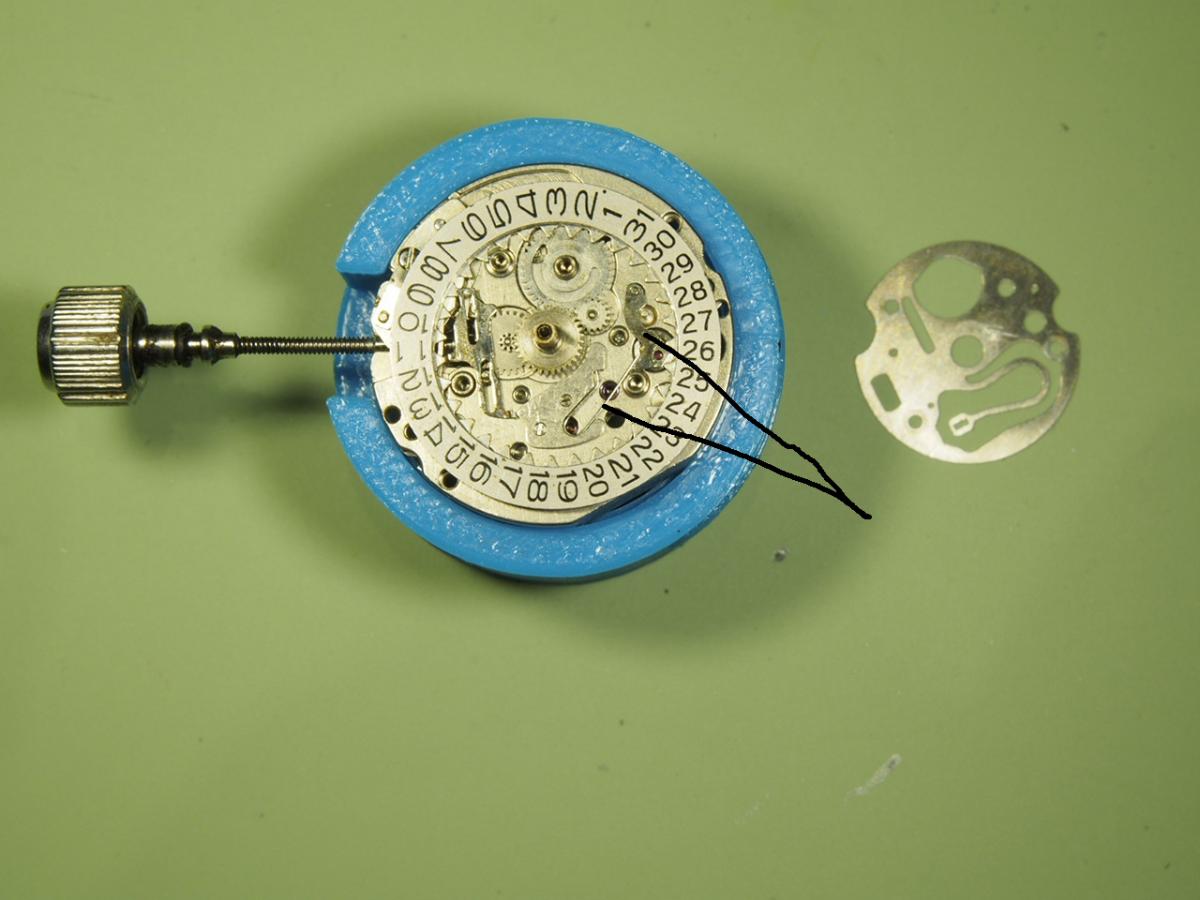
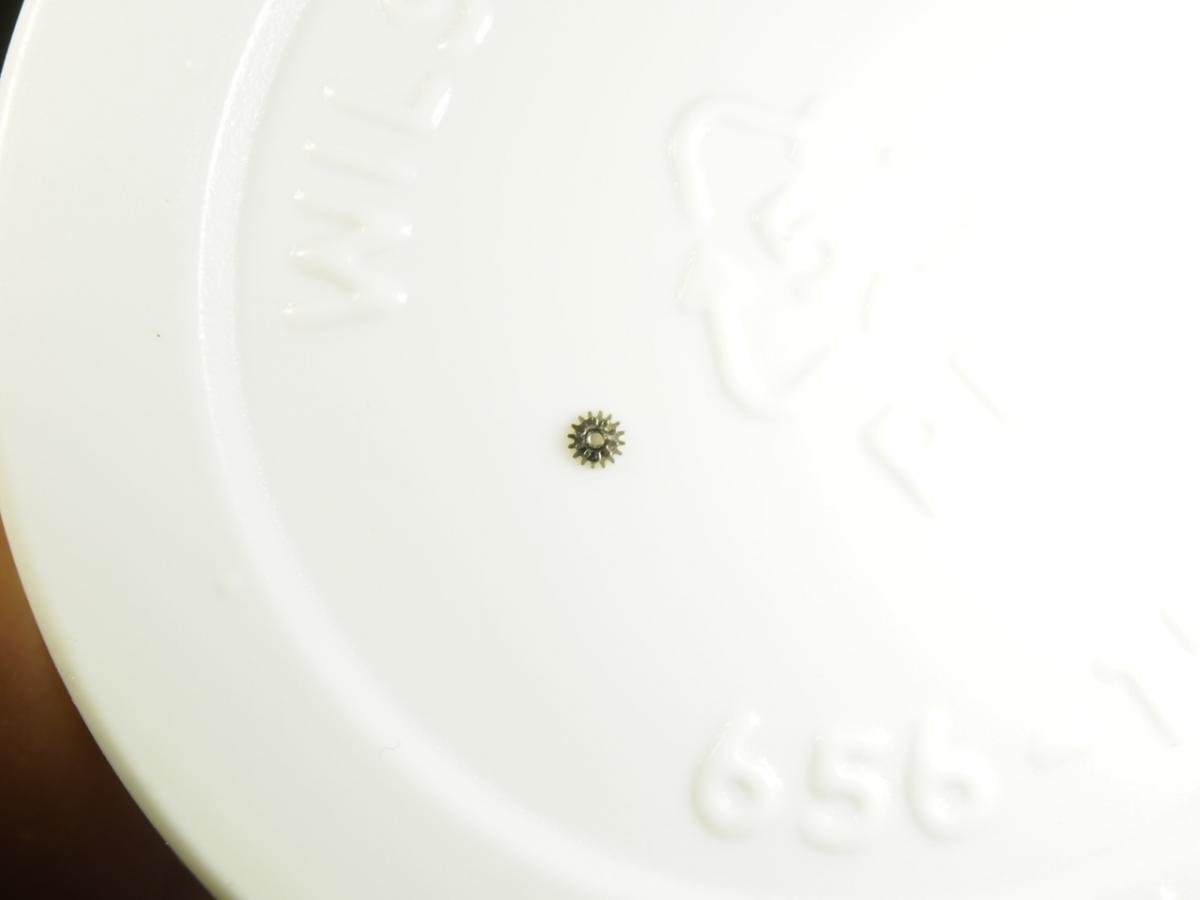
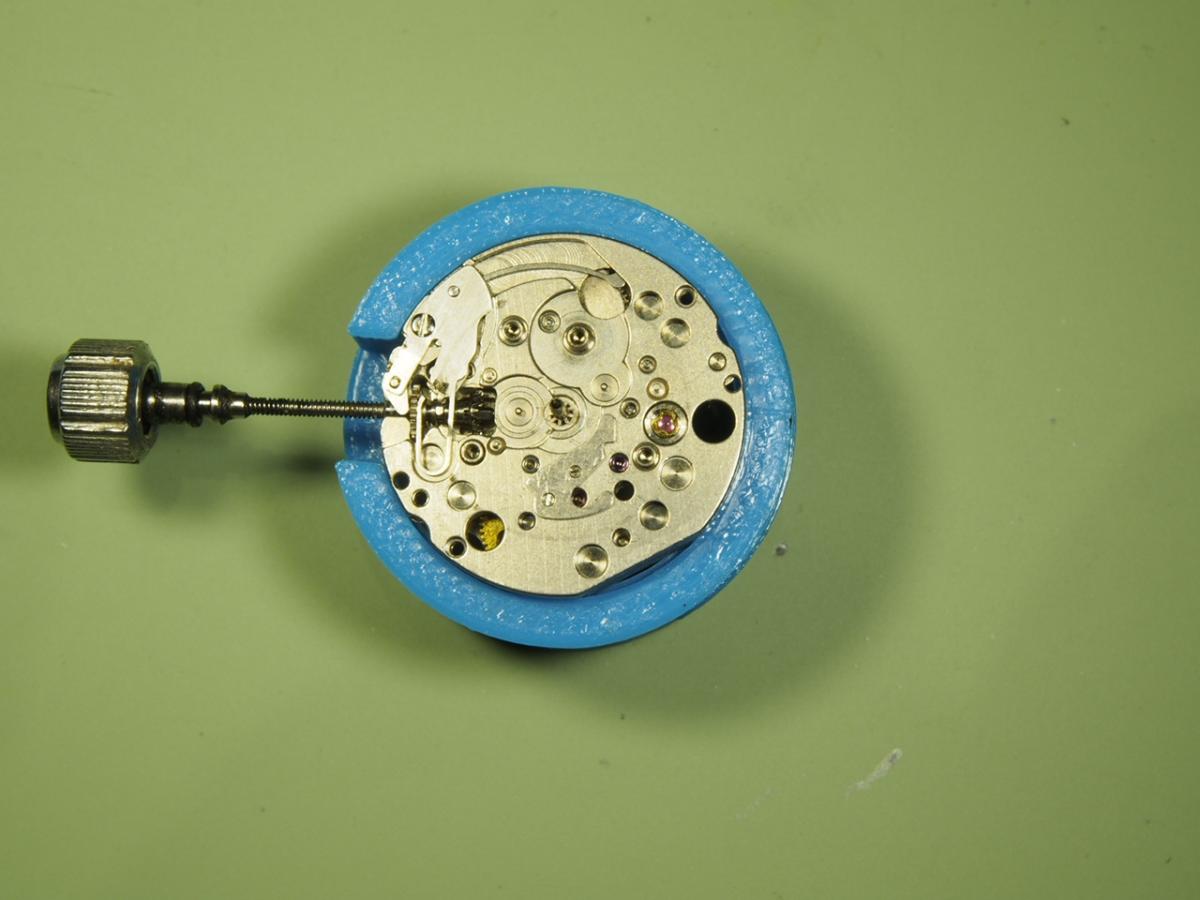
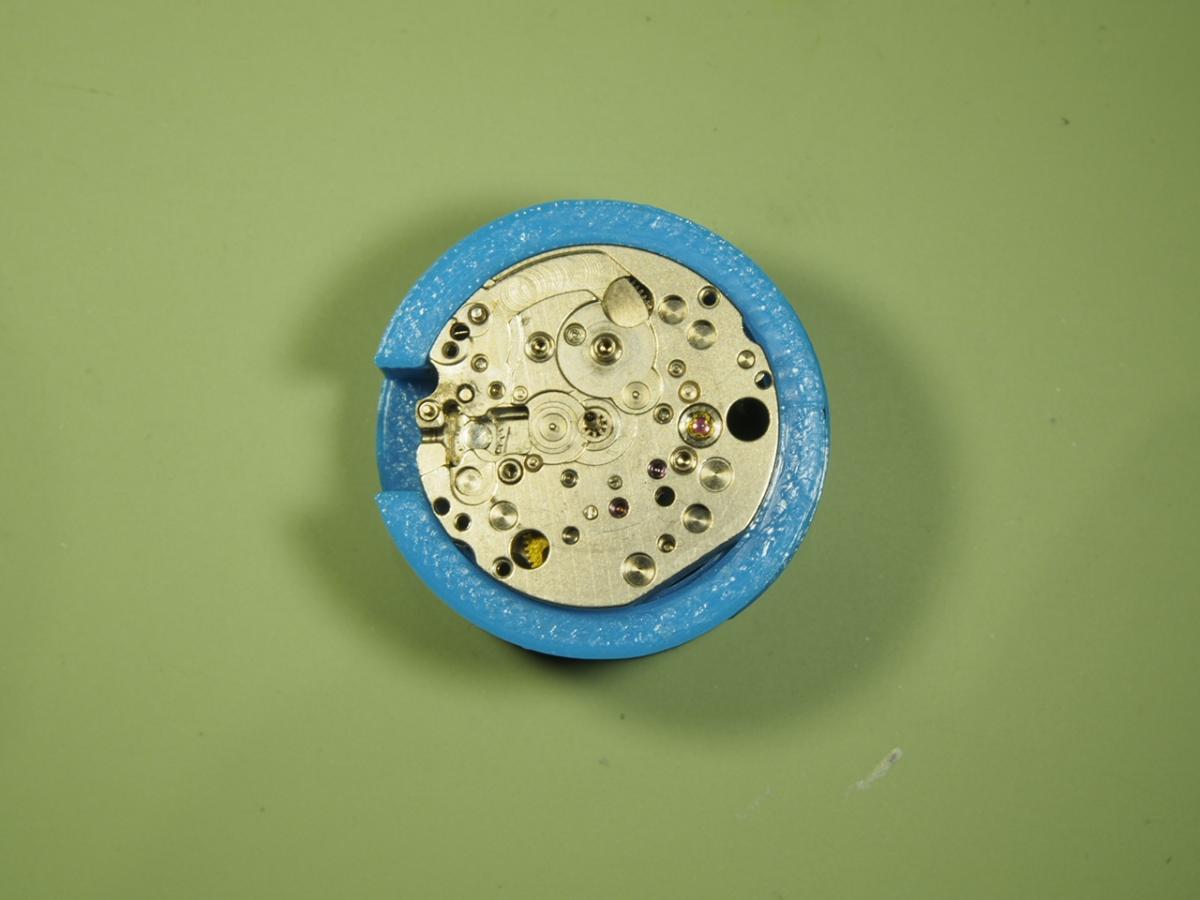
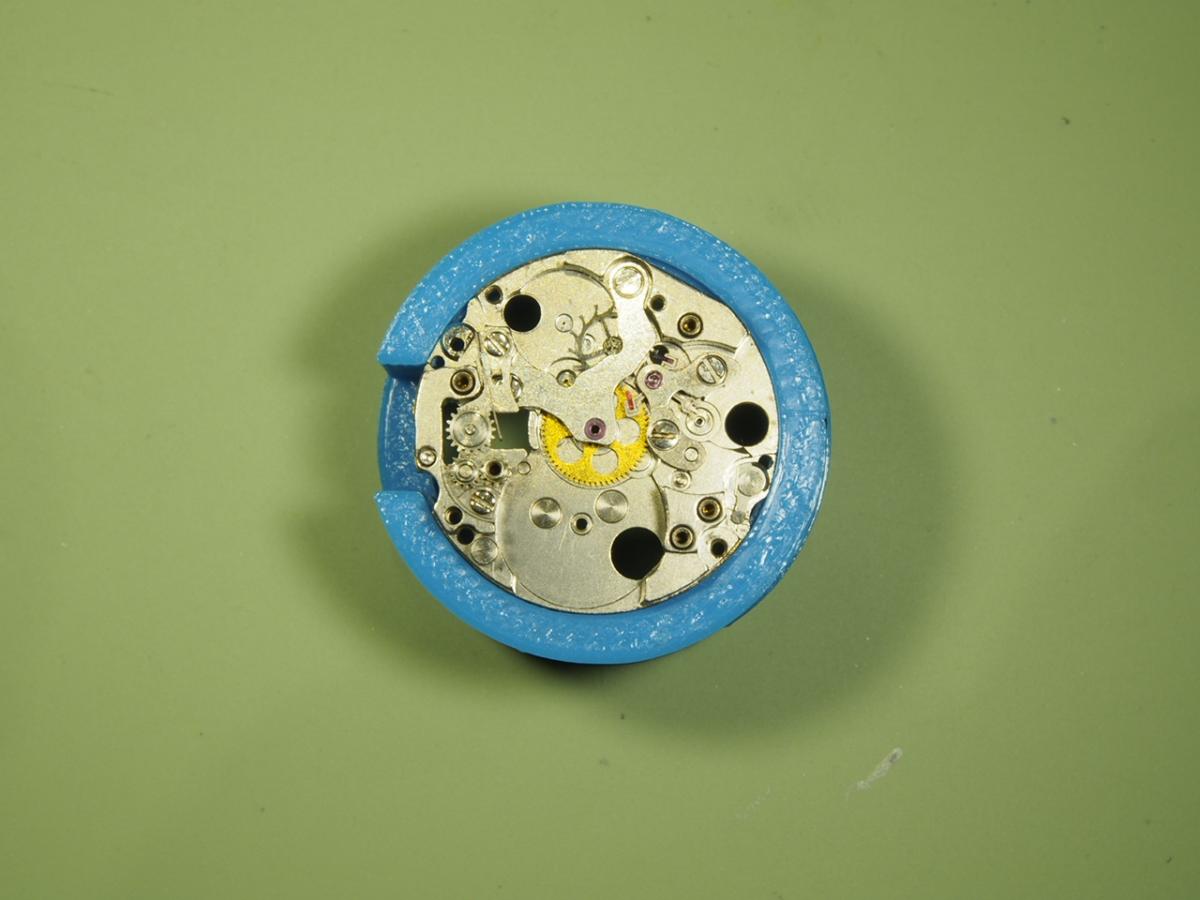
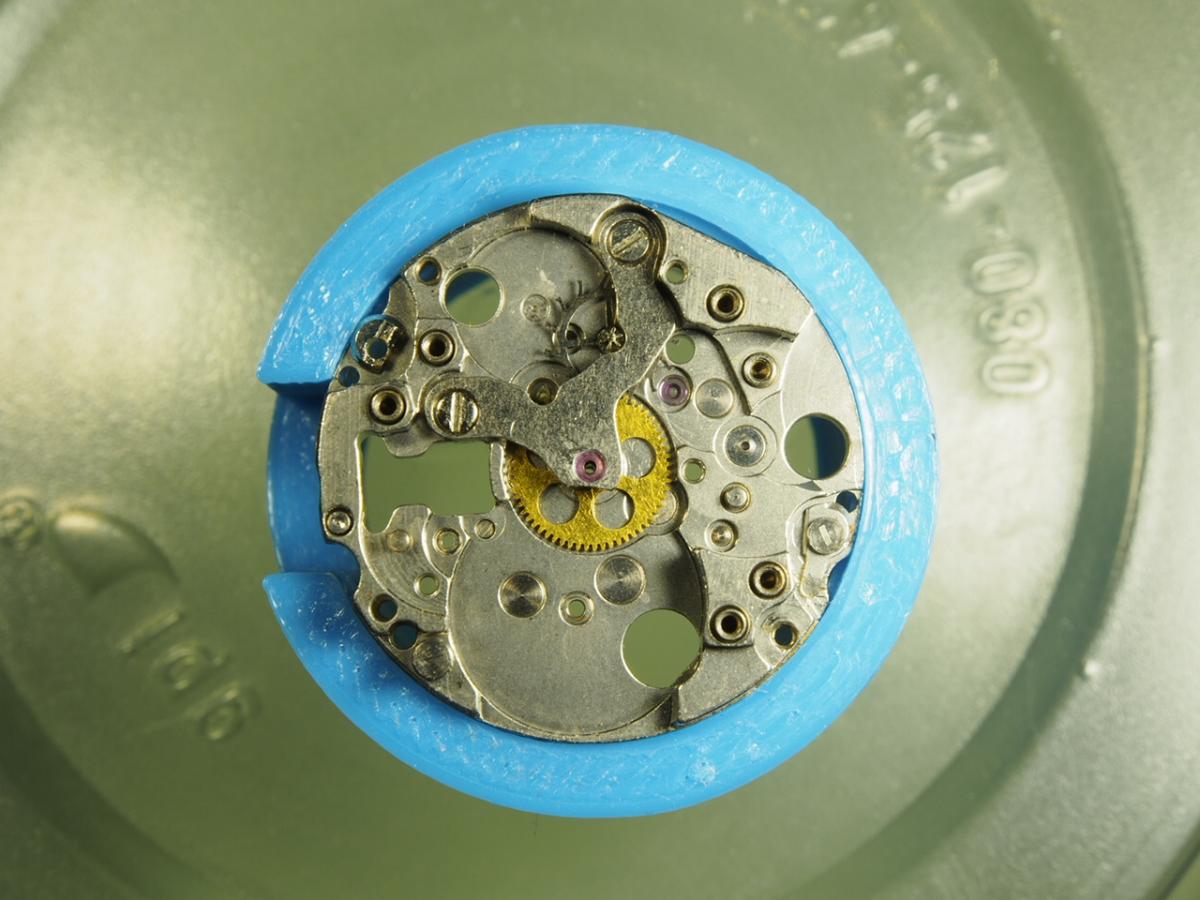
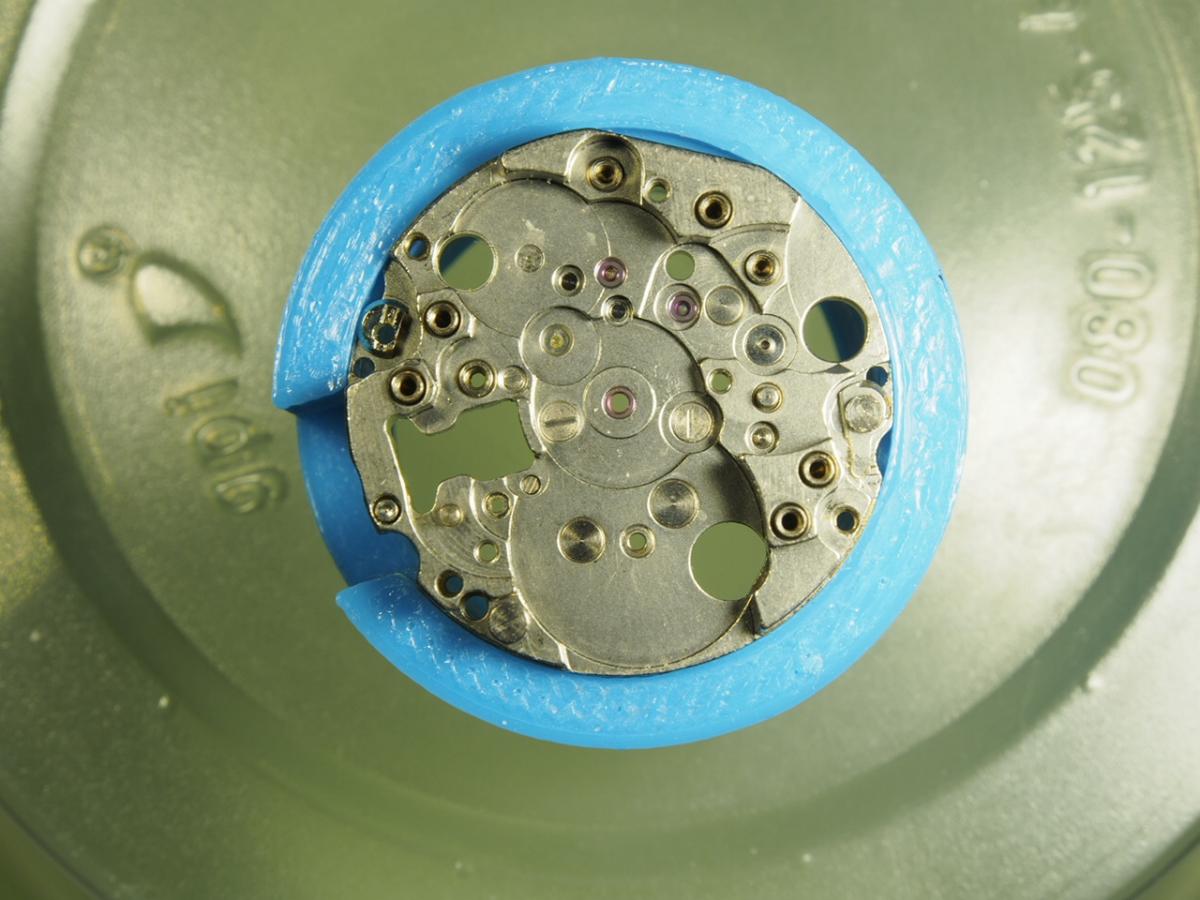
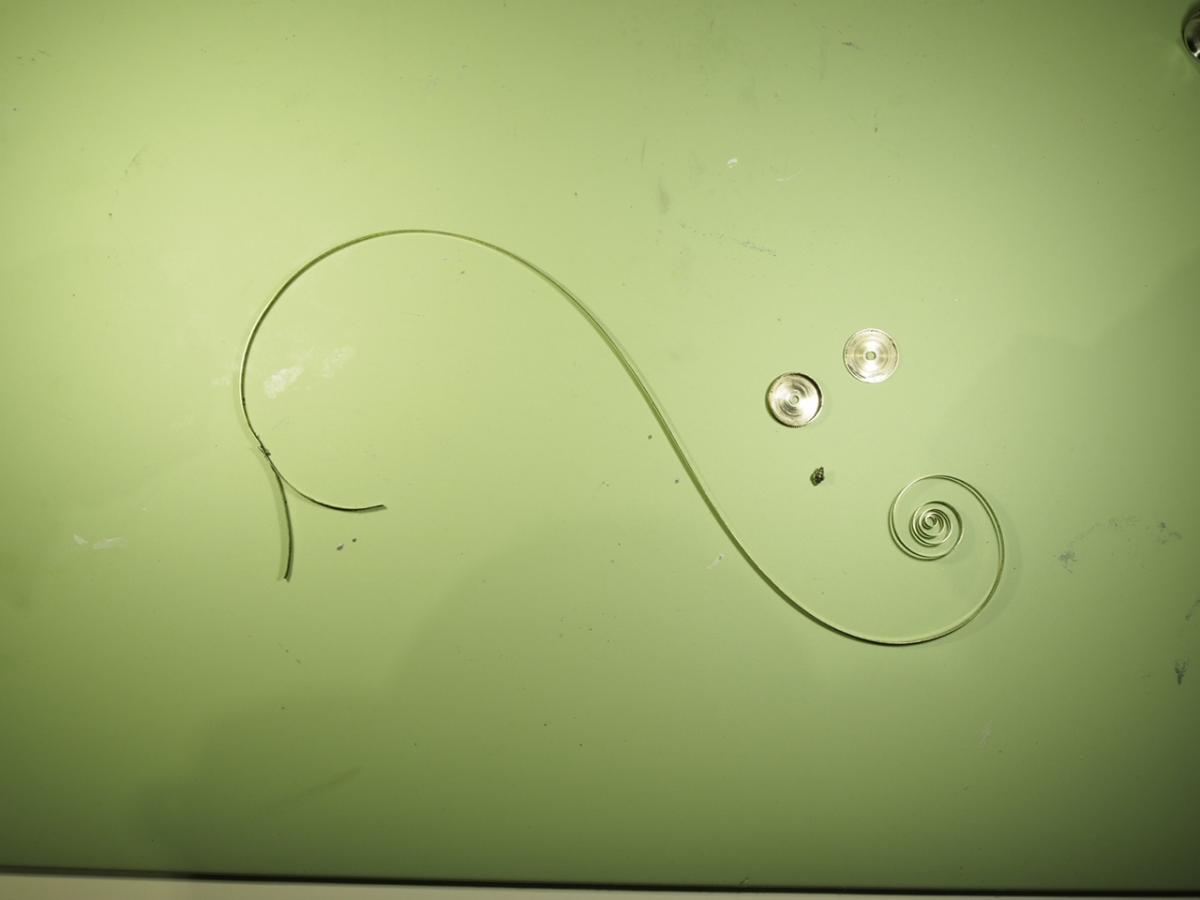
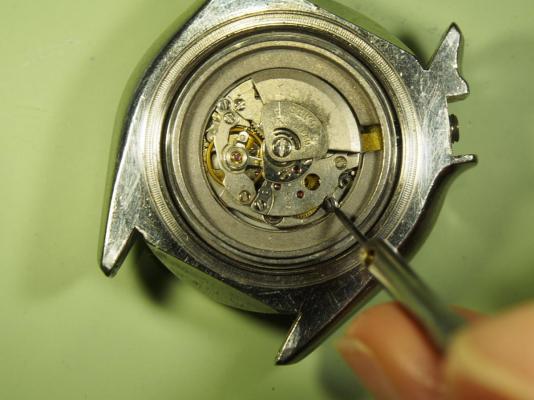
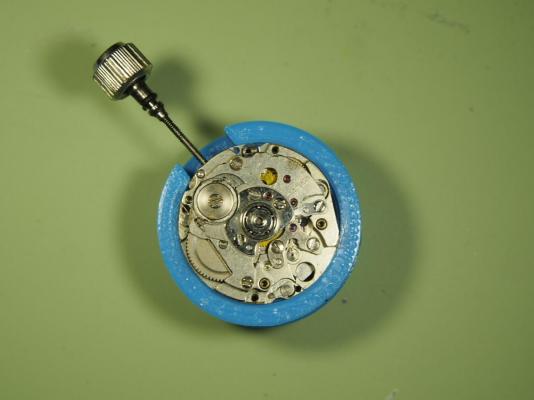
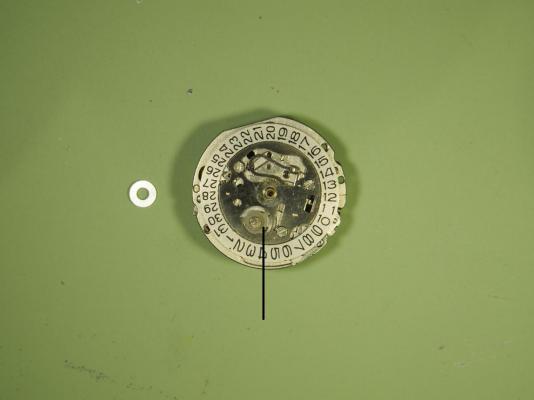
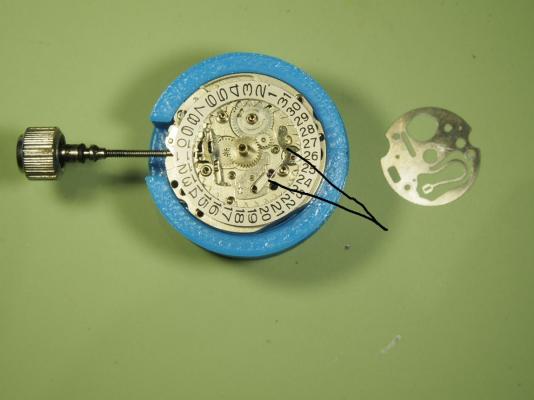
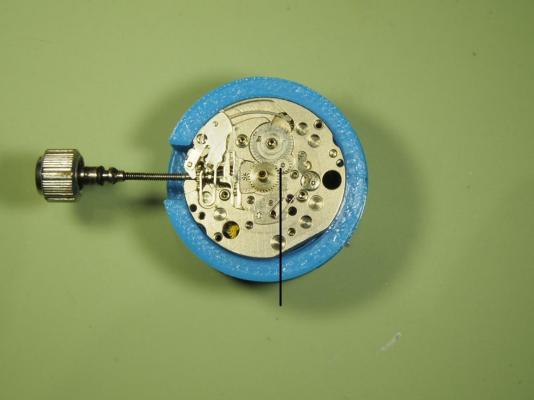
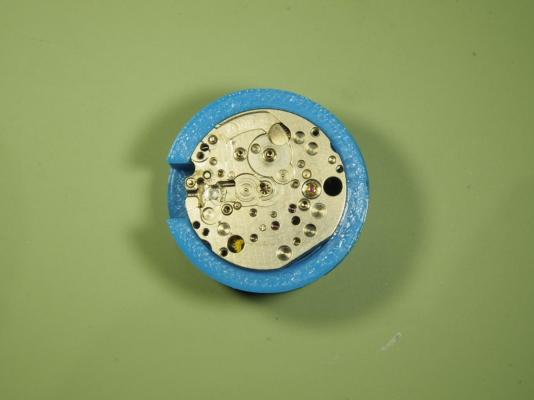
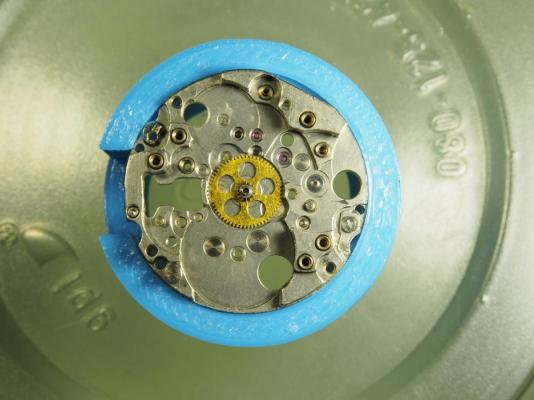
Here it is in the holder, it does make a big difference. I like to leave the stem in place to check things as it comes apart. The first thing I take out of harms way is the balance, just one of the lessons I learned the hard way. It is worth checking that the autowind works ok before taking off the rotor, I just spin it around a few times with a cocktail stick and make sure the ratchet wheel is turning. Do take the balance out first, as if you do slip while turning the rotor you can bet the first thing that get’s it is the balance. So better safe than sorry. In order to let the mainspring down you need to remove the three small screws that secure the rotor bearing assembly, keep an eye on the pawl lever as you lift things away as they can spring off. The pawl lever grips the transmission wheel and you can’t let the spring down until it is removed. The screw that hold the transmission wheel is left hand thread. The mainspring can now be let down. I gently ease the ratchet wheel back slightly with my finger and then carefully hold the click out with my trusty needle and slowly allow the spring to unwind. I am pointing out the date wheel finger. If you find that the date will not change as you wind the hands through past midnight this finger can be the culprit. If you see the date wheel trying to move but not quite making it, you might find that this is worn. The little finger on the right wears and is then not quite long enough to flick the date ring around. It’s a poor idea if you ask me, there is not much of it to start with. What I decided to do was just to try and nip the end with a pair of strongish tweezers and tease a bit more length out of the plastic. It did work, but obviously it will fail again sometime. But unless you have the luxury of a spare movement there is little else you can do. Remove the screws that hold the date wheel retaining plate and carefully lift it off. Have a good look where it sits and where the locating points are. With that out of the way I have highlighted two potential flyers, the tiny date jumper and spring. Be ever so careful as you remove the date ring so as not to disturb them. I am pointing out the intermediate date wheel and pinion here. I have found that the 4205A has a metal one which is good, the B has a plastic one which is not so good. The teeth are very very tiny on the plastic ones and I have come across some that have been crushed. This is another reason for your datewheel not turning. This has nothing to do with the quickset by the way. Now, maybe I have just got the patience of a saint or something, but I have rescued a couple of these poor crushed wheels by carefully opening up each and every tooth with the tip of a scalpel. It’s not a lot of fun as you can imagine but again, if you don’t have a replacement what are you going to do. I did once bite the bullet and ordered another similar movement from Ramon, but guess what? Yep, that one was exactly the same! Deary me, said I on discovering that. Here is the metalwheel removed. The minute wheel, hour wheel and date indicator driving wheel are and date corrector finger have been removed. Notice the small plate still attached just below the cannon pinion, there is nothing holding it on other than being a tight fit on the locating pins. Never had one drop off but I prise it off anyway just in case. Next is the setting lever, spring and yoke and the dial side is stripped.


 3 points
 -
I thought this might help all you budding Watch Repairers and Hobbyists. http://www.obsoletewatchandclockparts.com/bestfitpages.htm2 points
-
Disassembly done I have the full disassembly on my facebook site Sent from my iPhone using Tapatalk2 points
-
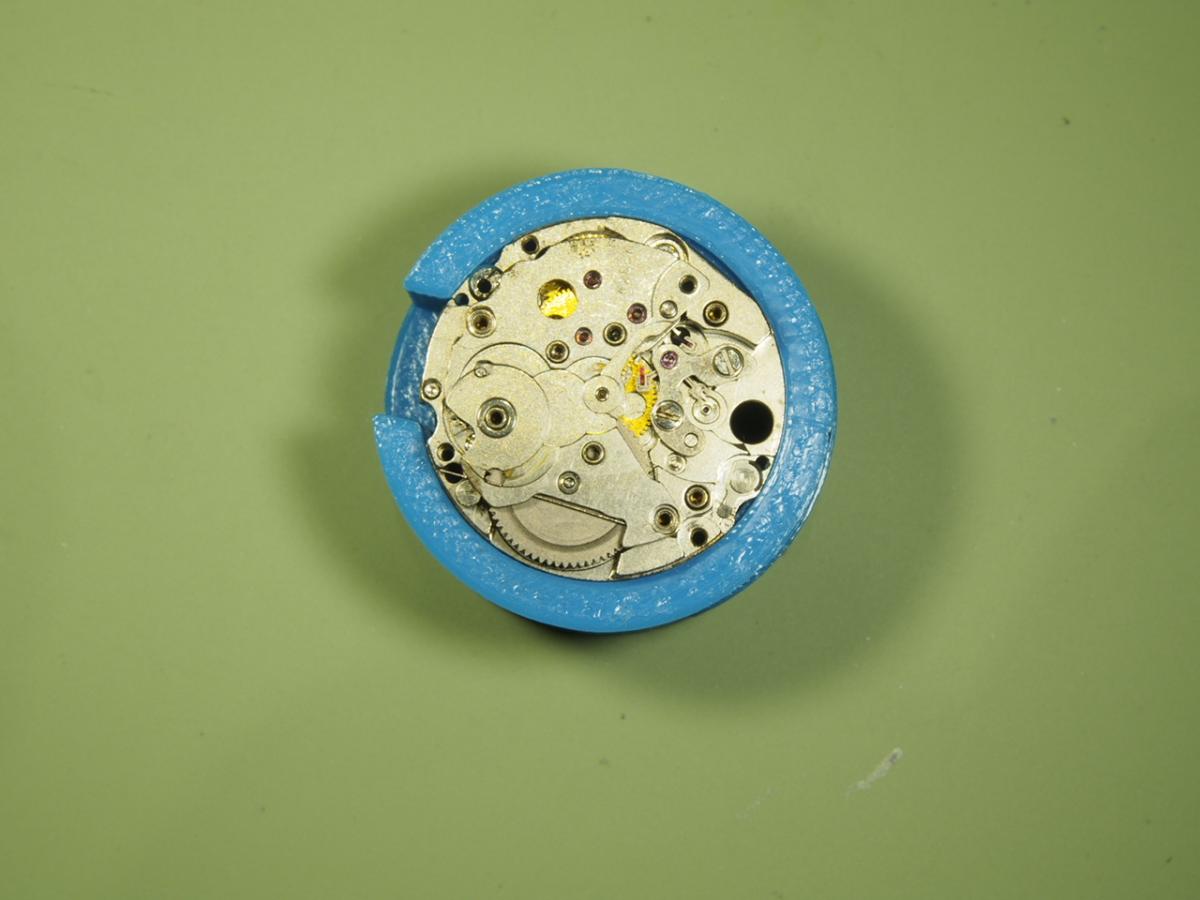
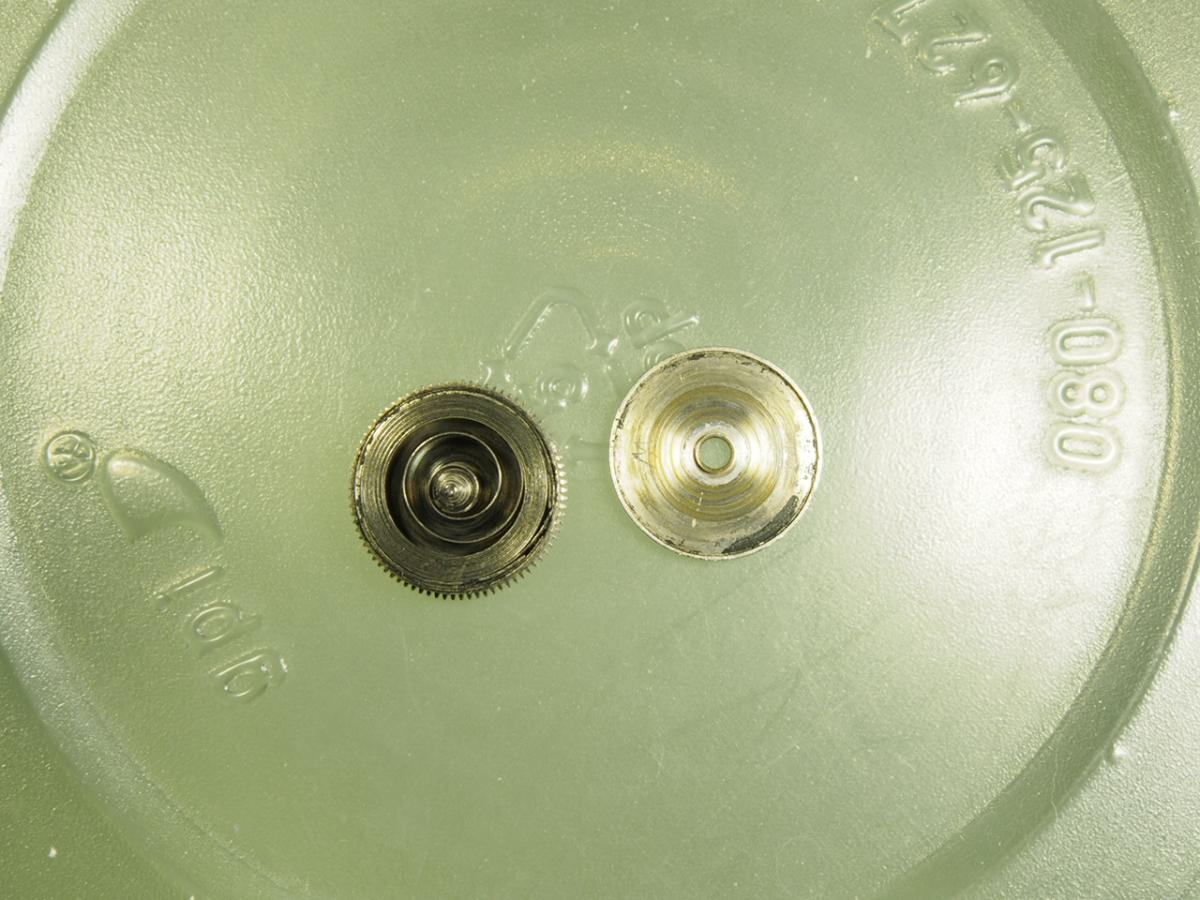
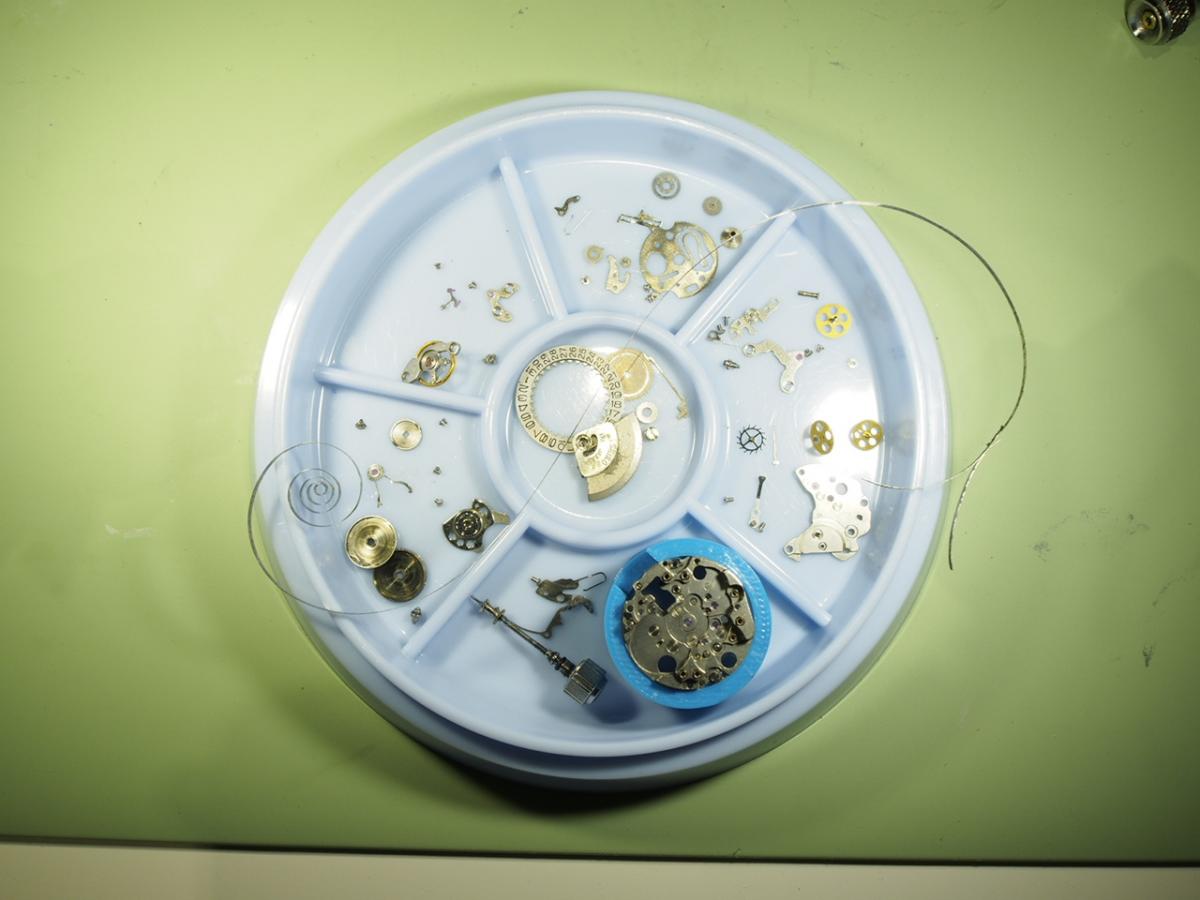
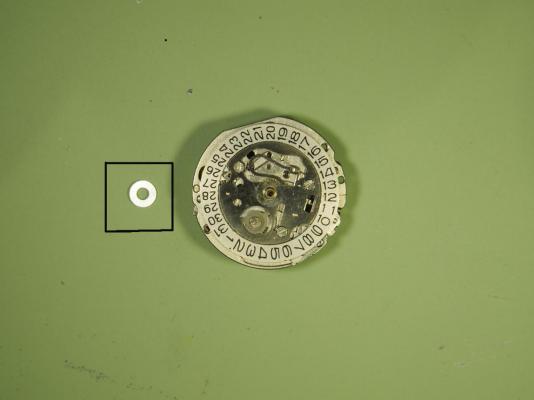
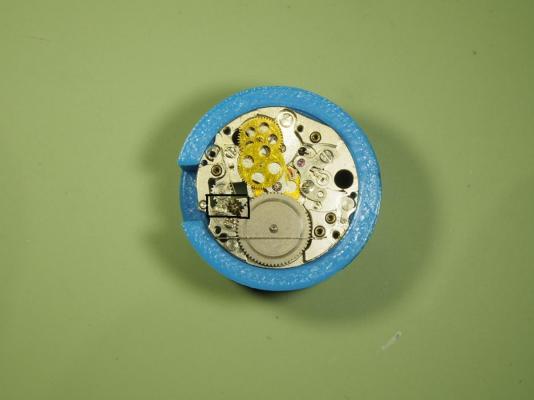
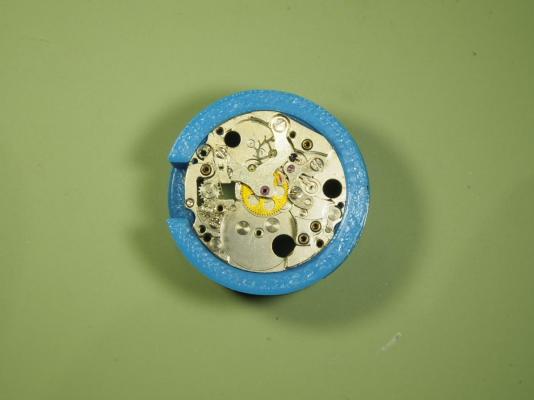
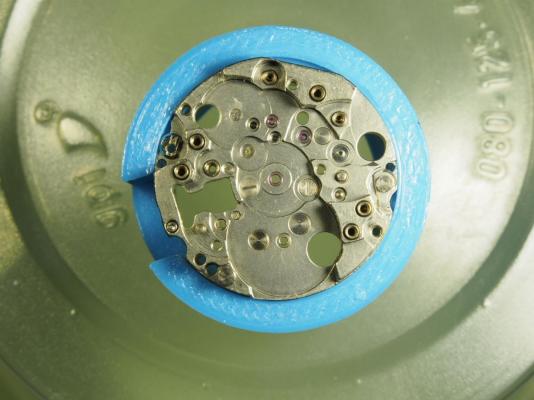
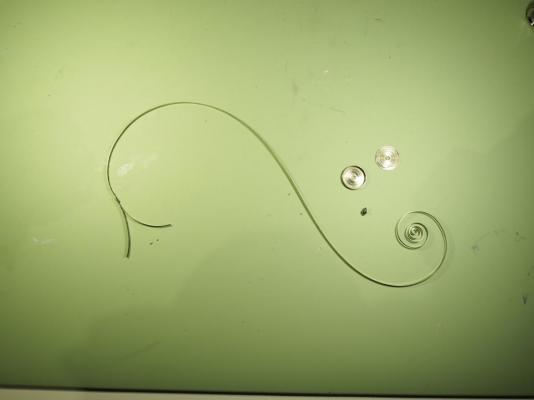
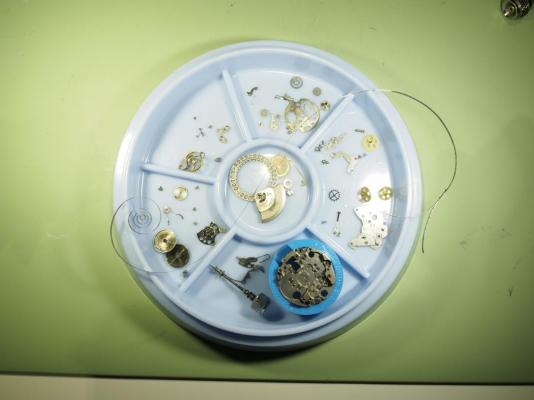
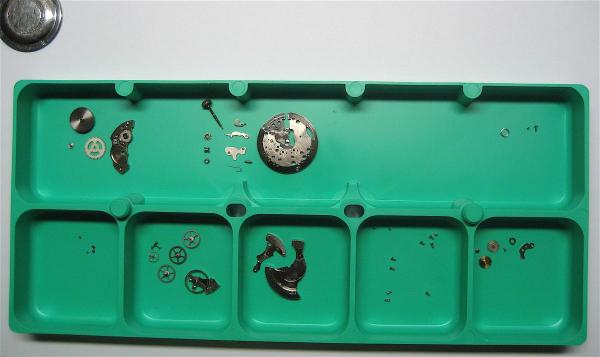
Flipping it over and the three train bridge retaining screws are removed. One of them holds a small friction spring in contact with the centre seconds pinion, meant to show that sorry. Lift the bridge clear but watch out for the transmission wheel pinion that is left behind. It can stick to the underside of the bridge and drop out when you aren’t looking, the small intermediate wheel next to it in the black box is also free to fall off. I am beginning to think that instead of removing the left handed screw and removing the transmission wheel you could leave it attached and then there would be no danger of losing the pinion below it. Removing the pawl lever as described above would still allow the mainspring to be wound down. In 4205B movements this is one unit anyway so not to worry. Barrel,train wheels and the centre seconds pinion are next. Then the pallet bridge and fork. At the beginning I mentioned that sometimes the winding mechanism might not feel right, you might get a few turns of the crown and then it goes loose then winds again. Given the age of these things by now there must be considerable wear and some of the gears in the winding mechanism are well worn I found that the winding pinion on the stem was not contacting the sliding crown on the winding bridge very well, it was tending to lie to one side and flop about. So what I did was to bend the spring that you can see inside the black box so that it puts more tension on the sliding crown and it seemed to keep things engaged a bit more positively. It’s easier to do this once spring has been removed. Take off the winding bridge and it’s almost there. Remove the centre wheel bridge and take out the escape wheel. Pull off the cannon pinion and remove the centre wheel. The barrel and spring. And the spring is removed. All the parts ready for cleaning. And that's it. Once everything is cleaned and ready, reassembly is just the reverse procedure. I will be quite happy to post the pictures of it going back together if you wish. Either way I hope it has been of help and that I have made things easy to understand. It’s difficult to know exactly how much detail to include or omit. If anything is unclear or just plain wrong please let me know and I will try to explain things or make some edits to the post.


 1 point
 -
Have bought a couple of NOS parts from this chap. Very helpful and a useful source of spares.1 point
-
You can get them from Walmart BUT make sure they are the powder free ones.Otherwise, medical suppliers...... e g http://www.firstaidcanada.com/latex-finger-cots-powder-free-144-box.html1 point
-
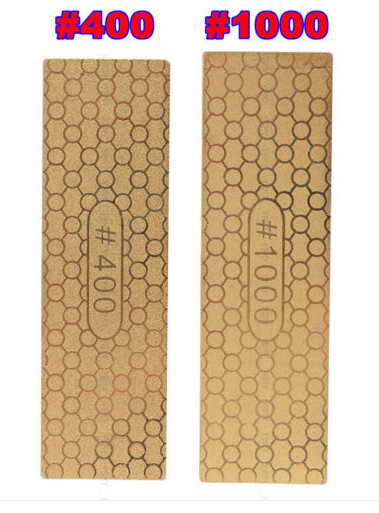
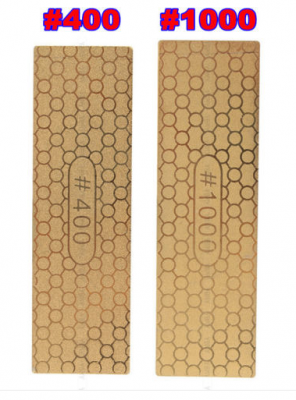
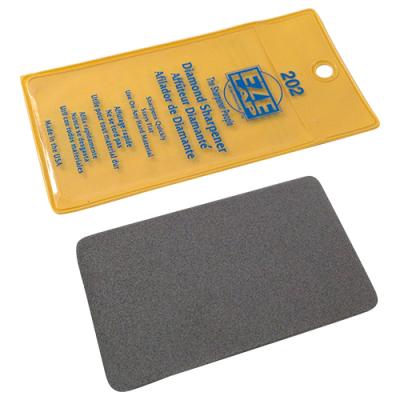
A follow up on the Chinese eBay #400 / #1000 grit sharpening "stone", which I received today, 16 days after ordering. It's a solid rigid metal plate (1.5mm thick) with diamond coating on either side, #400 grit and #1000 grit. Did some tweezers and it went fast! I guess the diamonds are sharp....... The size (3cm x 10cm) is very nice for in your hand palm and gives good control over delicate work. The #1000 grit gives a nice smooth finish, but if you wish for a mirror finish, a finer grit is required. I haven't found these "stones" in a finer (> #1000) grit yet. Endurance....... time will tell, but price / quality (£3.30 incl. postage) seems very good to me, ideal for tweezers maintenance. Regards: Roland.
 1 point
 -
I never understood those soft screw driver blades, from my perspective, they're more likely to cause damage, imagine trying to undo a screw somewhere on a movement then the screw driver deforms, slips out of the screw slot and slides into the hairspring. A decent steel screw driver blade + control is all I've ever needed. The geometry of the blade is designed not to scratch, so scratching screws should be a very rare occurrence, better to have a screw driver that will hold its form. But to answer your question, I can't think why other brands of blades shouldn't fit the horotec screw drivers, they use the same size increments? .60 .80 1.00? unless the blades are wider or smaller at the screwdriver slot for some reason. (not accounting for the flat section that's filled away for the grub screw to tighten down on.)1 point
-
Lol. I just put a small droplet on top of the canon pinion to loosen the rust. No spray. Forcing a rusted part would just result in snapping parts.1 point
-
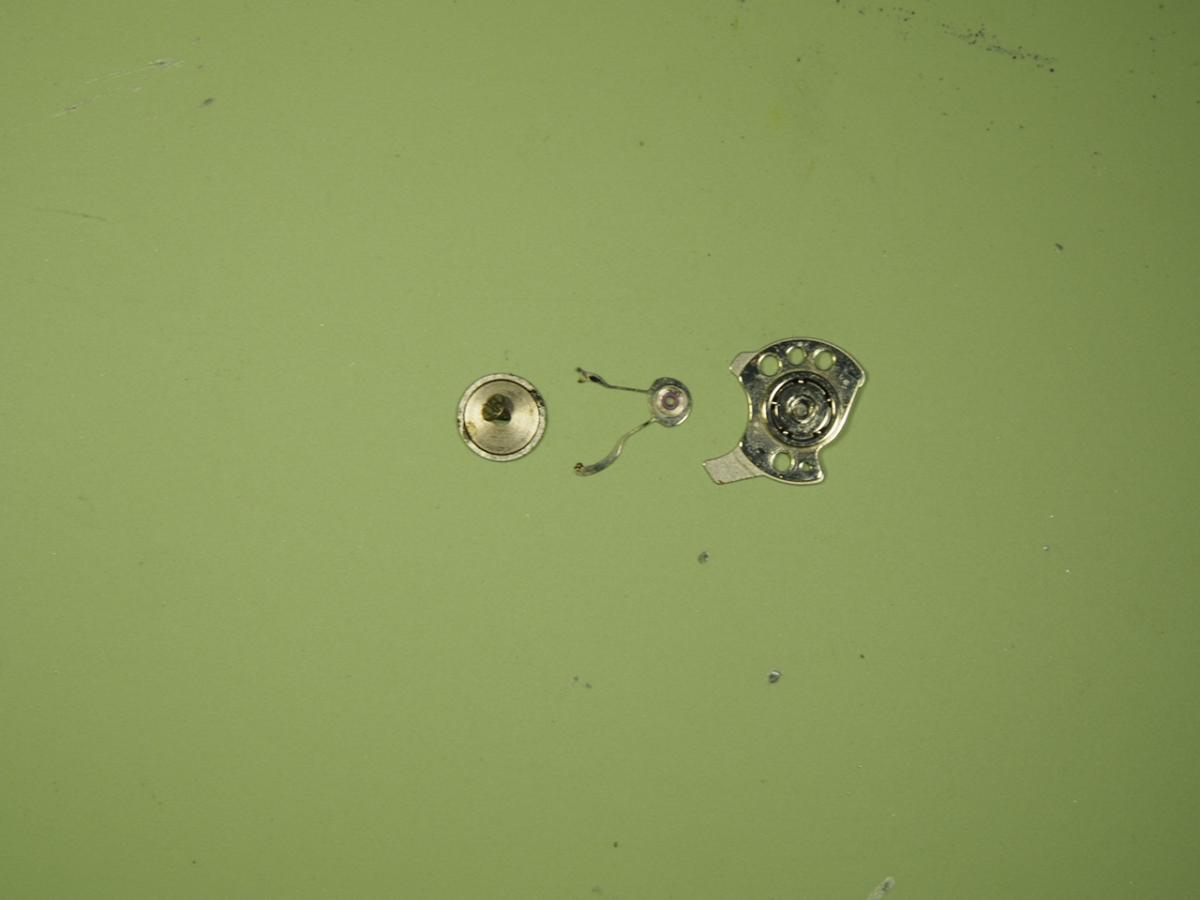
Looks like the détente has broken off the set bridge/cover plate for the keyless works.1 point
-
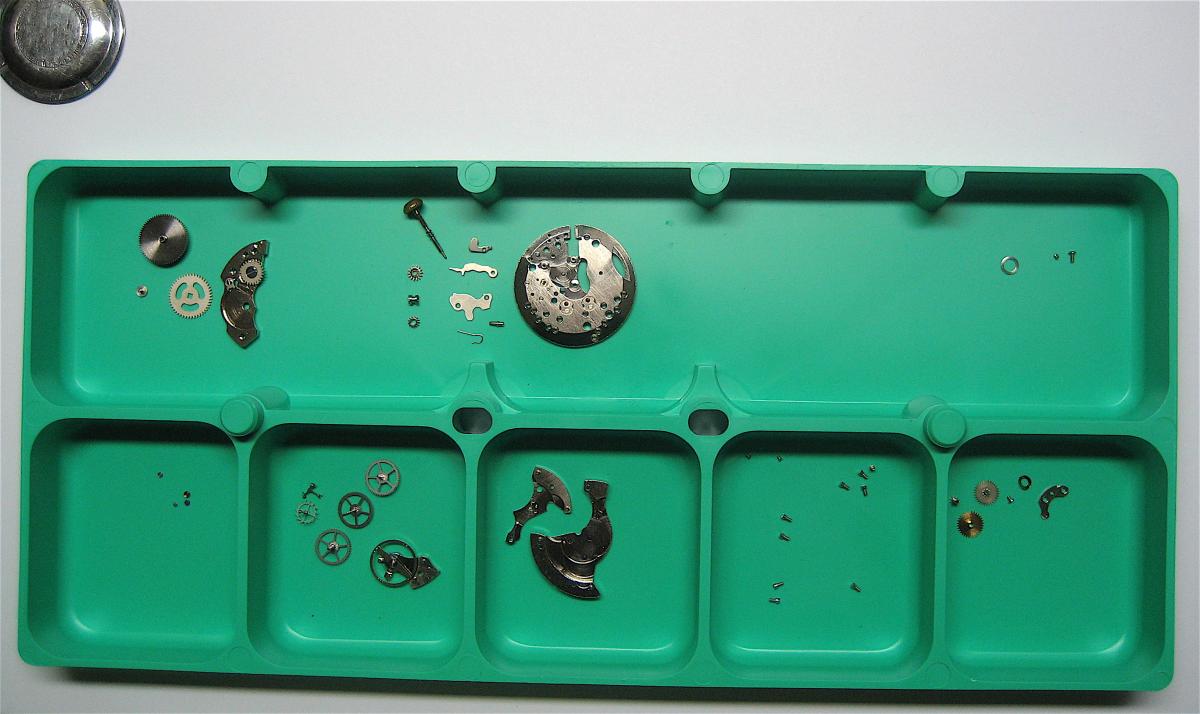
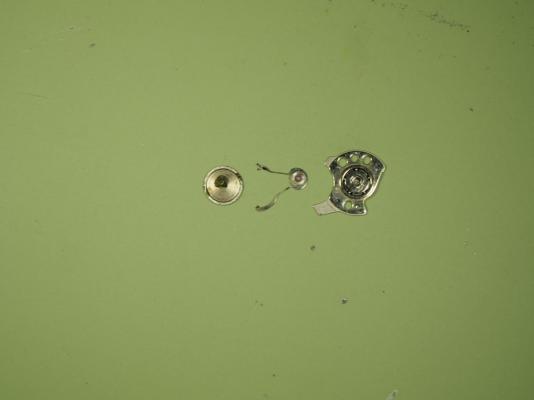
So I have a little AS1686. The previous owner mentioned that he had trouble winding and setting the time. All of the parts are shown below. What is your diagnosis?
 1 point
 -
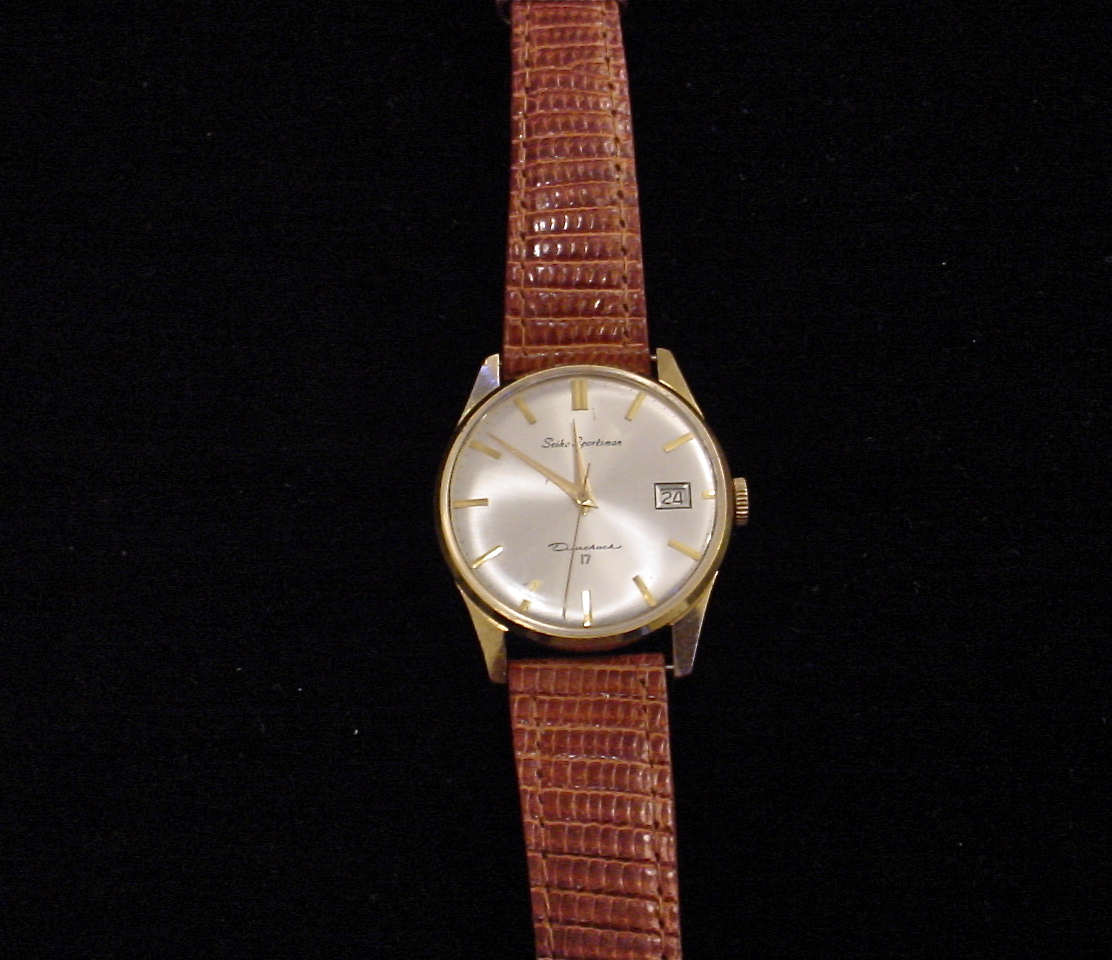
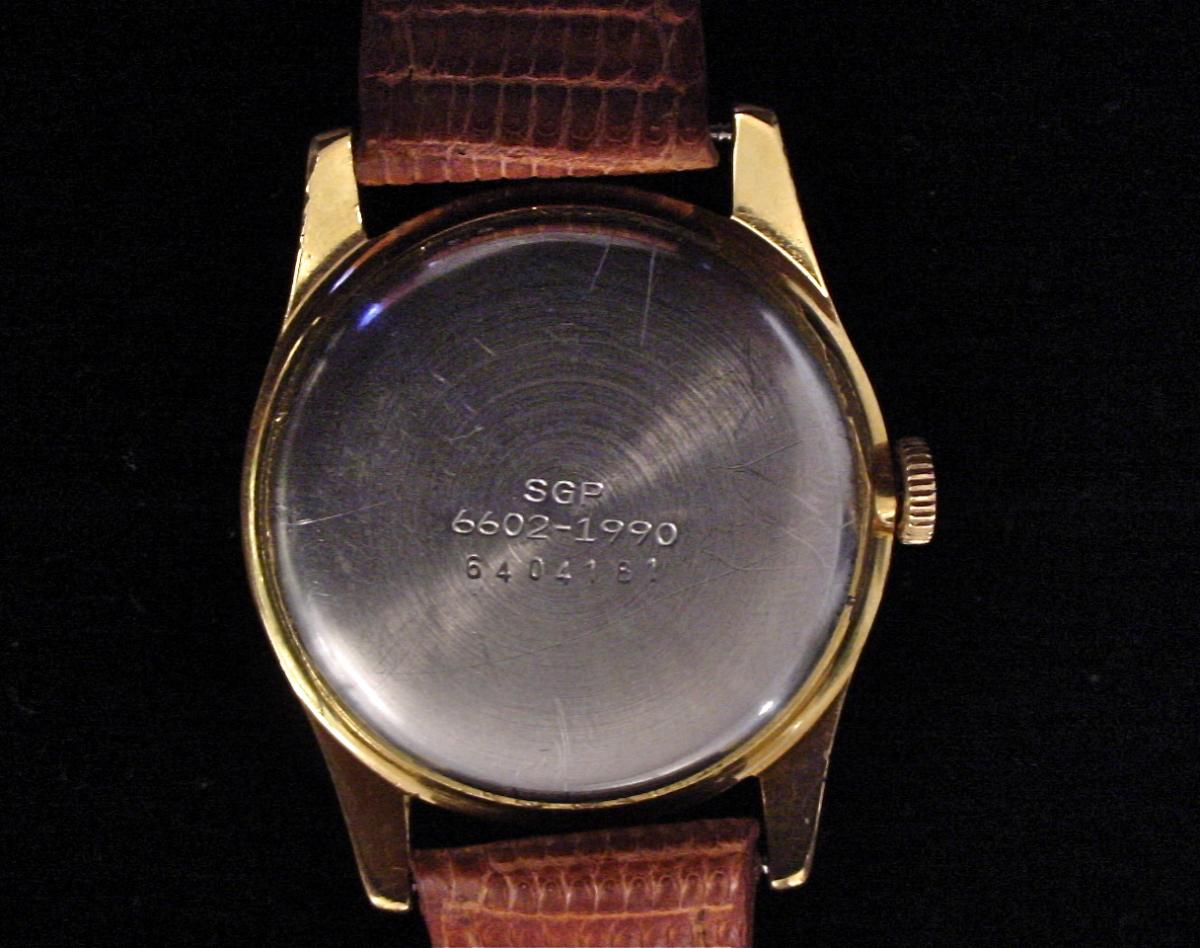
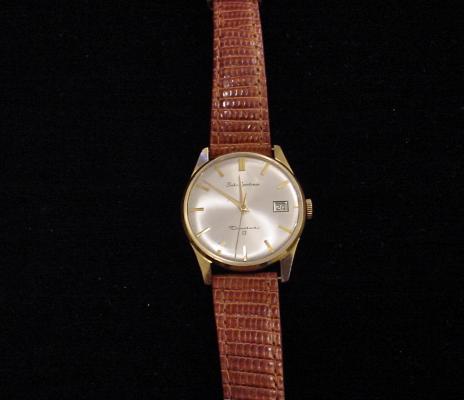
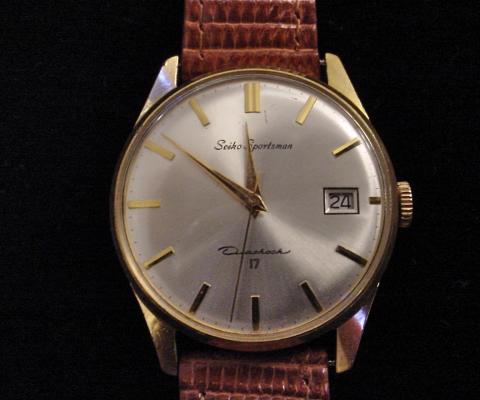
Thanks Timothy , About 3 weeks ago this same swap meet vender pulled a baggie out of a bag he had and showed me 3 watches and 1 pocket-watch he had . He quoted $120 for all four . The pocket-watch was beat-up and I don't collect them any way , one watch looked OK , but it was a quartz and I wasn't interested . I asked how much for the other 2 . One was an accutron 218 not running and one was a Vintage Seiko Sportsman . Running , but dirty , the case and crystal were scratched , the stem and crown came out and the crown was so worn you couldn't use it to wind the watch anyway . I picked up the 2 watches for $40 . The accutron will need some work so I put it away for later . I took the Seiko apart and cleaned and serviced it . The yoke had come off of the clutch so you couldn't get the stem in properly . I polished the crystal and lightly polished the case and case back . I have an assortment of vintage crowns so I got one that fit the stem and had to file down a tube on the case and a bit of the bottom of the crown to make it fit and work . I installed a nice NOS Lizard Leather watchband I got a few weeks ago . I went back to the swap meet a week later and showed the vender the watch . He couldn't believe it was the same watch . especially the new crown . He said he was glad that someone could bring it back to life again and make it look good .
 1 point
 -
1 point
-
Try wearing it on you other arm. It might resolve the upside down issue.[emoji12] Sent from my iPad using Tapatalk1 point
-
Tools for trimmer pots are often plastic or have plastic handles so you don't effect the circuit when you touch it with the tool. A metal hex wrench could drive you crazy as you try to adjust :-)1 point
-
+1 for diamond sharpening plates. I have a couple and they are indispensable. They will not give you a polished mirror finish but to be fair you do not need this with your tweezers IMO. When polishing you should make sure the edges of the tweezers are square and not curved inwards as this will increase the chances of parts flying away from you. The diamond plates make this task very simple. http://www.eternaltools.com/stones-sharpeners/eze-lap-diamond-credit-card-sharpeners
 1 point