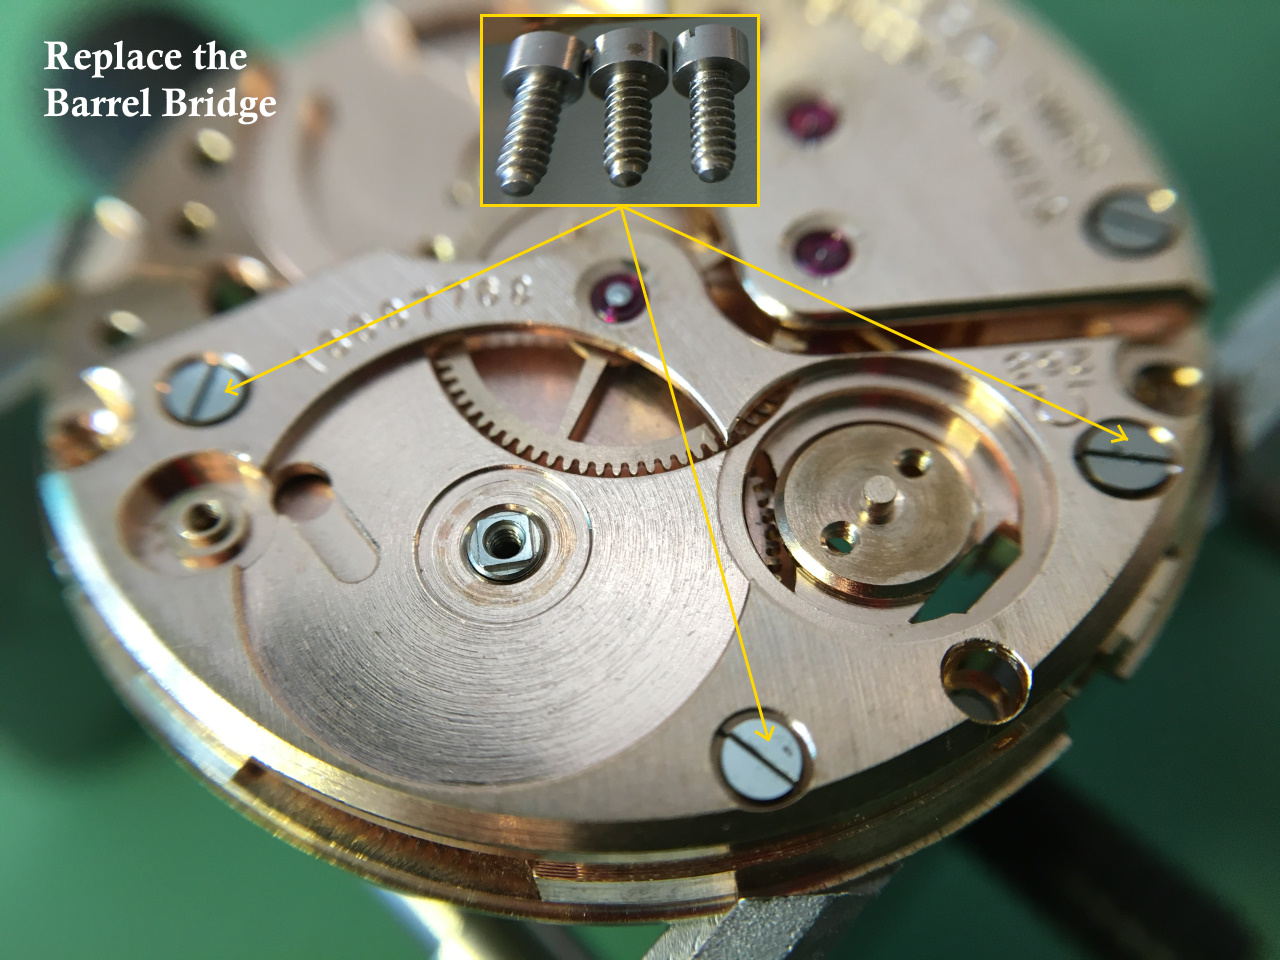
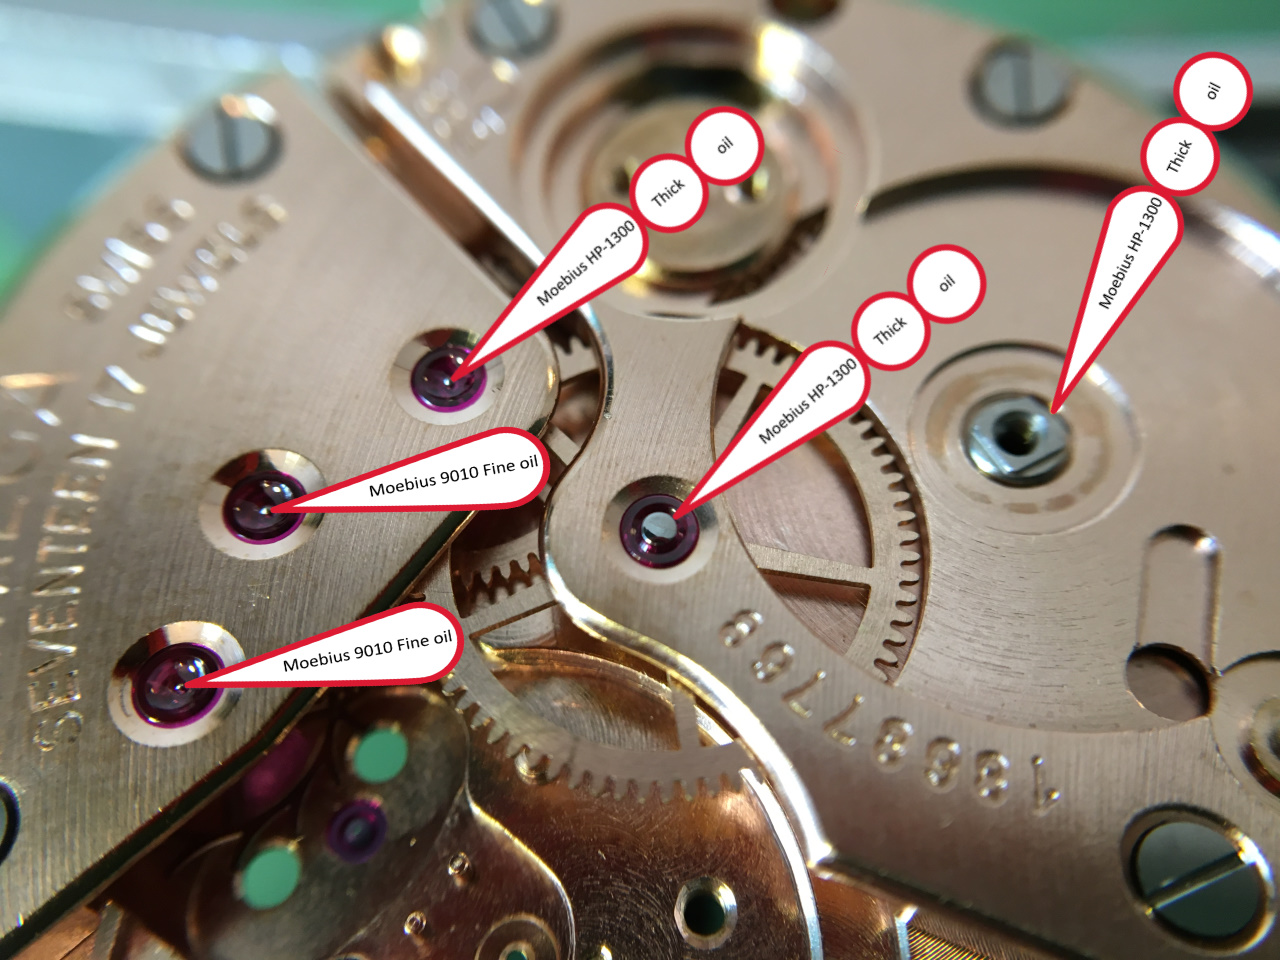
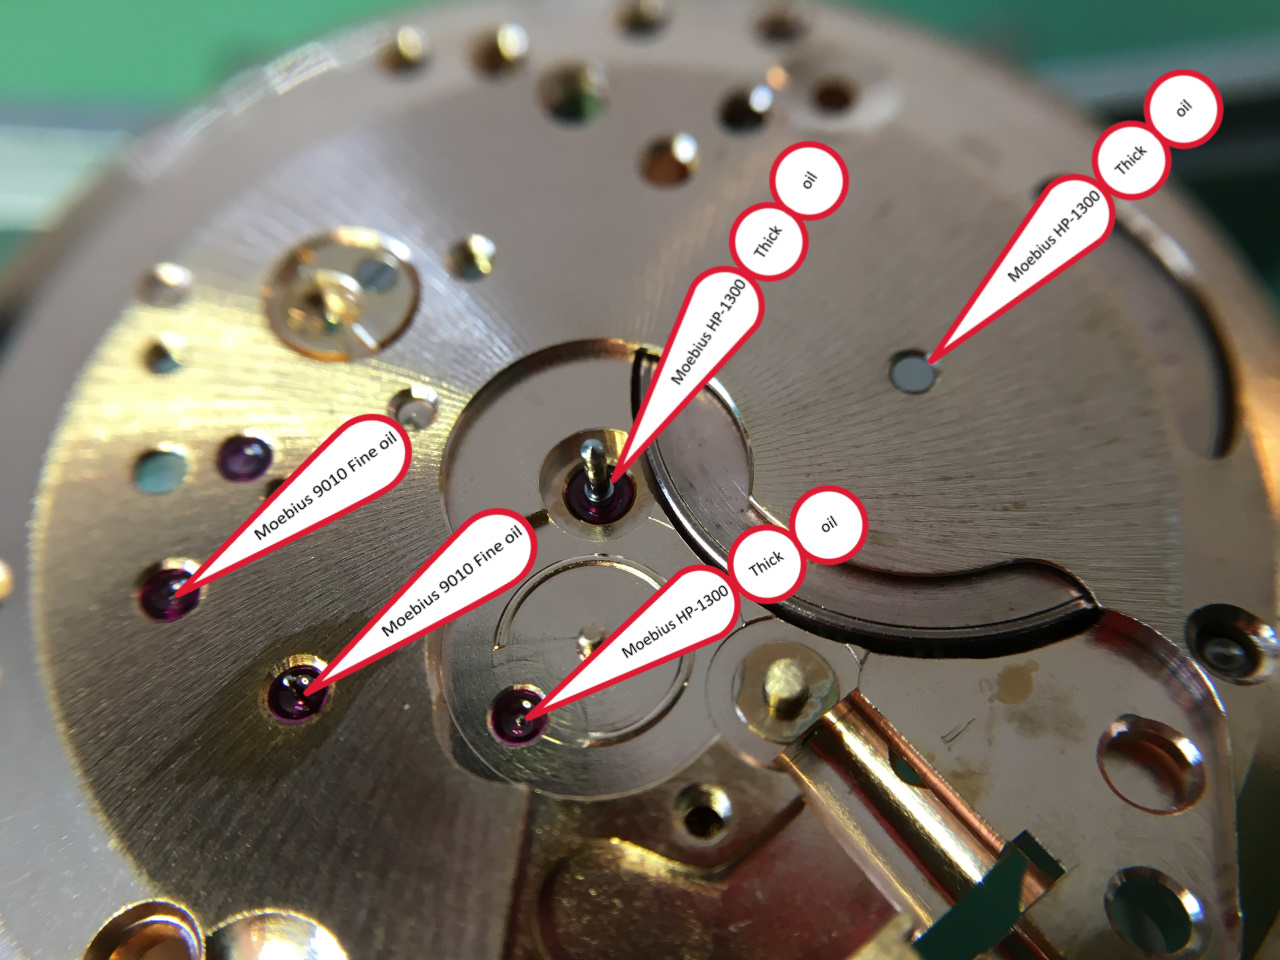
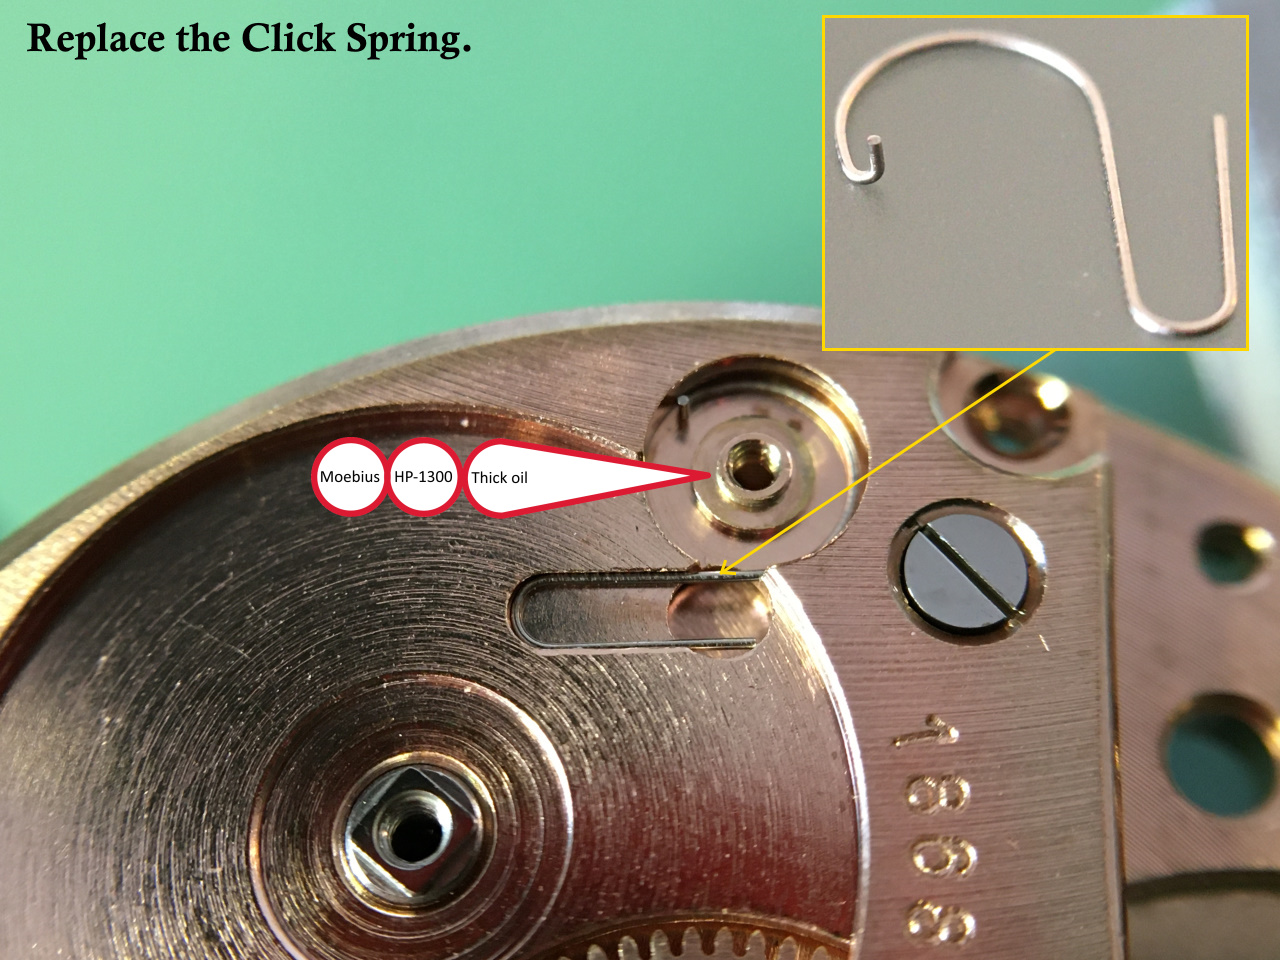
Leaderboard


Popular Content
Showing content with the highest reputation on 11/17/20 in Posts
-
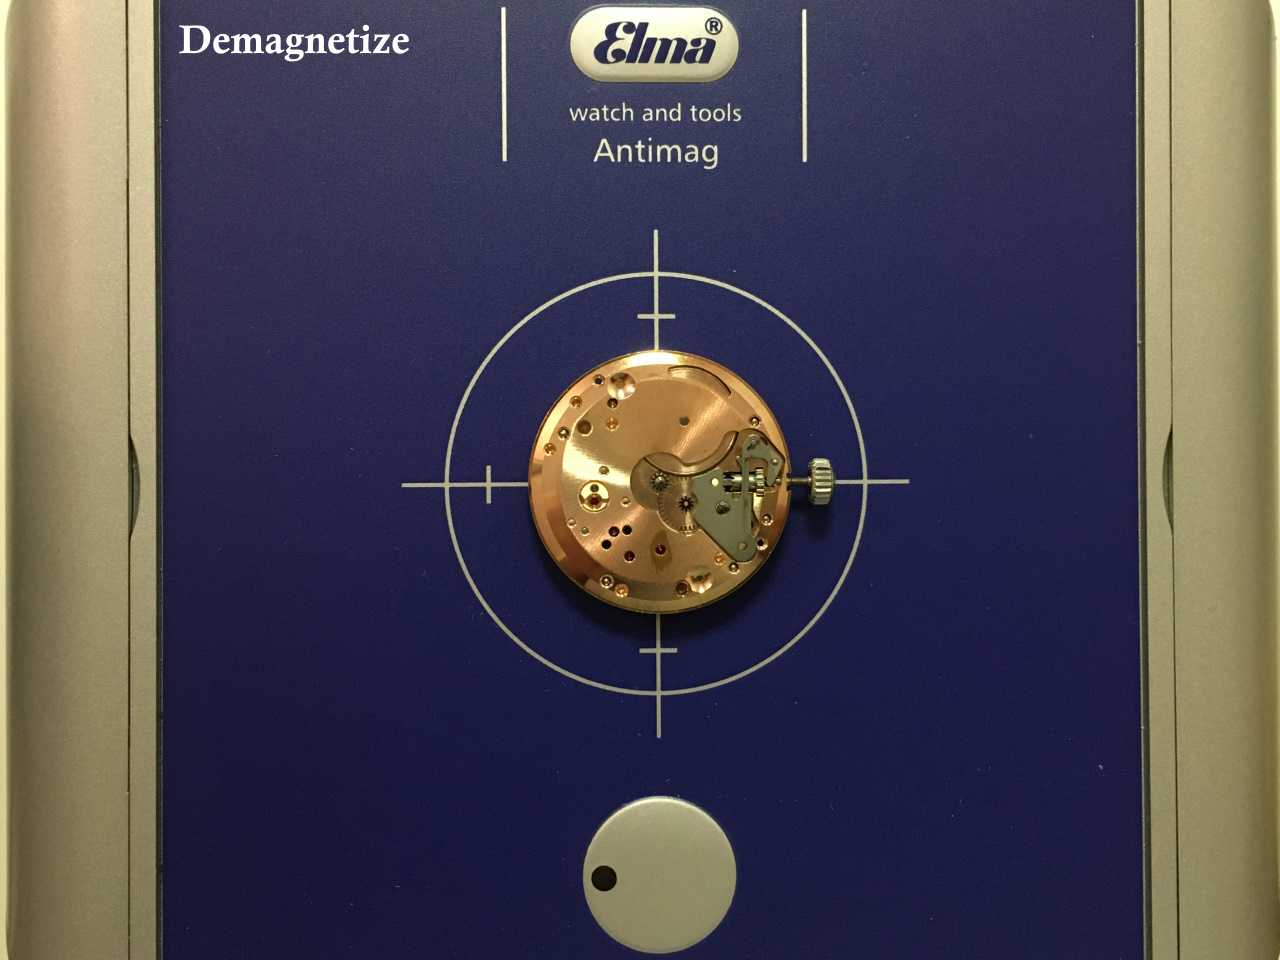
Introducing anything magnetic into the work space when repairing watches is a no no I cannot see where it would be useful to have such a mat in watch repair. The only magnet I have is for those unfortunate times when a part does ping off into the distance I do a sweep of the floor with a magnet finds the part 99% of the time. Now if your a big tea drinker I have a Chocolate teapot for sale somewhere.4 points
-
When you put it all back together, wind some power on the spring before putting the center stop piece in, then put it in the "stop" position (stop for unwinding). 1/2 turn is a general rule; what you really want to do is wind the spring fully without the stopworks to see how many turns of wind the spring develops. Typically this is about 6 or 7, but some clocks can be more or less. Very old clocks I see here often develop about 5 turns, and have stopworks that permit about 3-1/2, some modern ones from this area (Le Castel for example) do about 15 full turns of wind. You want to set up the stopworks so that you are using the middle part of the spring, so if you get 8 turns with that stopwork, and the spring develops 9 turns without, 1/2 turn of pre-wind is good, actually slightly less than more if you see things don't want to line up at 1/2. Stopworks help use the most even part of the mainspring's power, but also keep a lot of stress off of the hook and end of spring where it attaches to the barrel.2 points
-
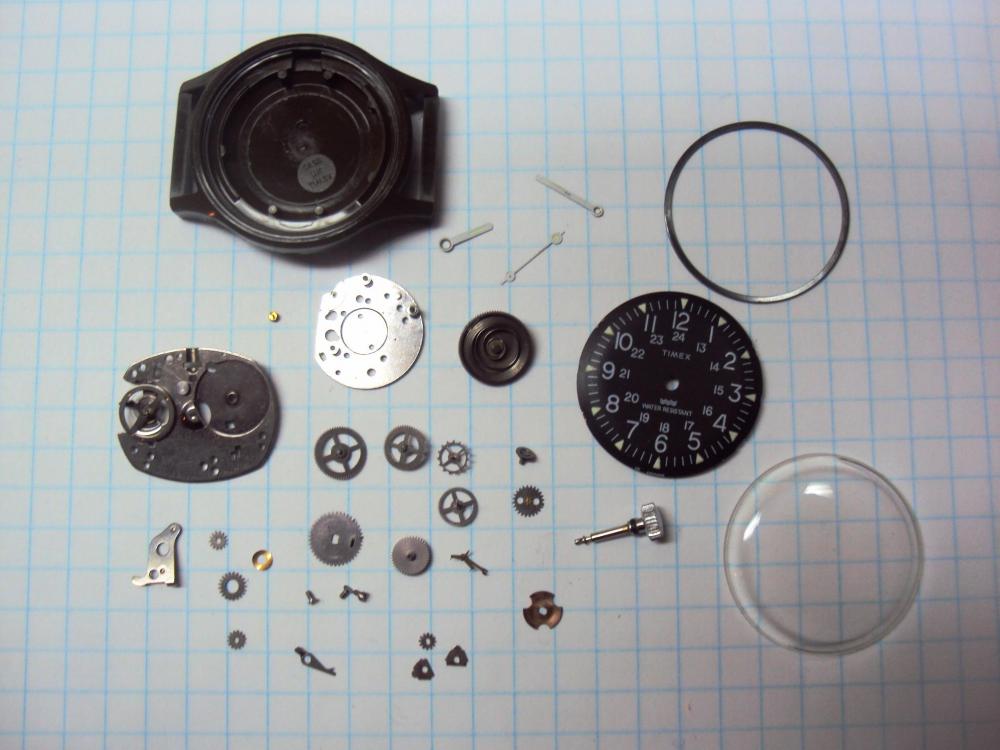
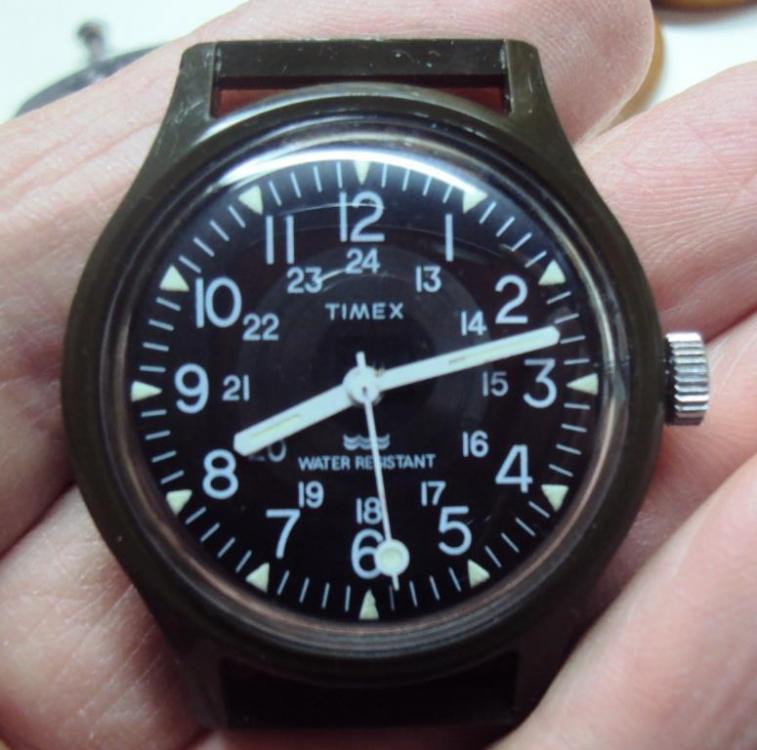
Here we have a mechanical wind Timex Camper that has a broken mainspring. Over the next few days I will post pictures of its progress. So here we go -
 1 point
 -
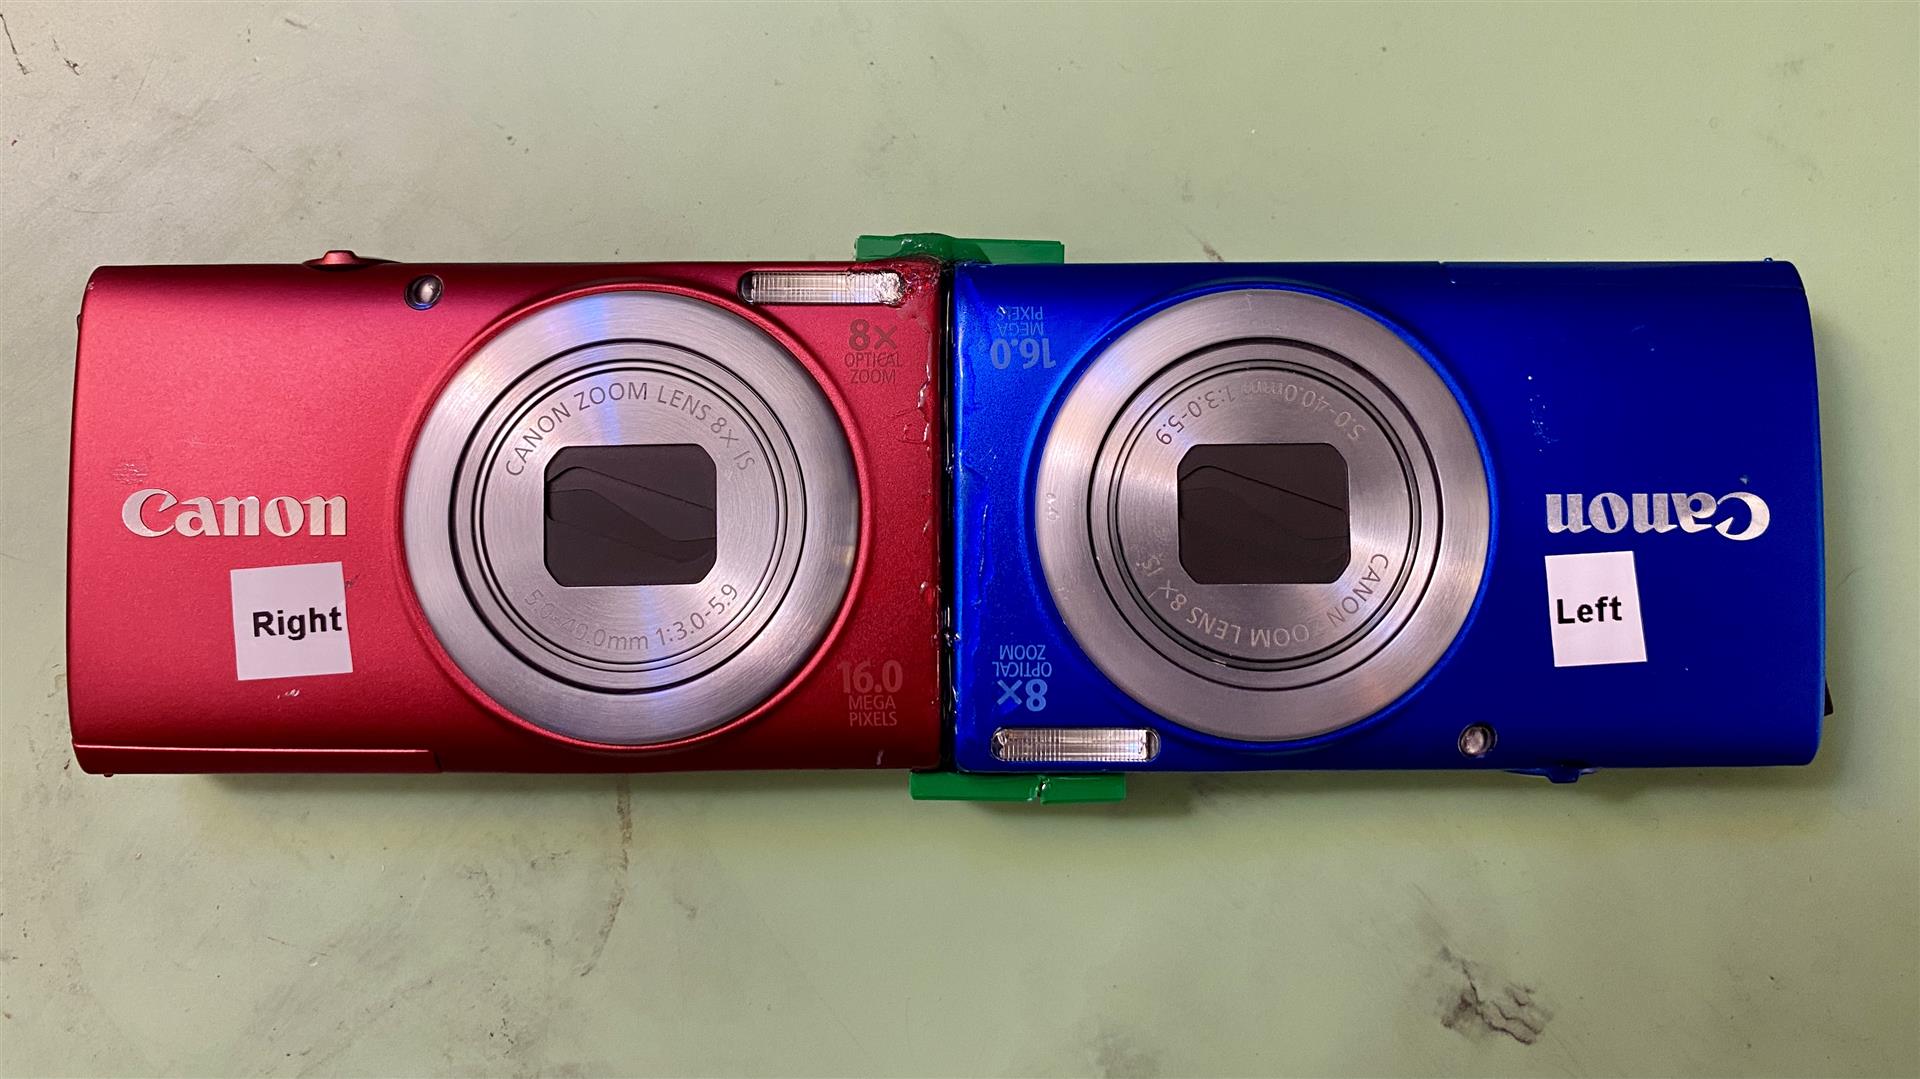
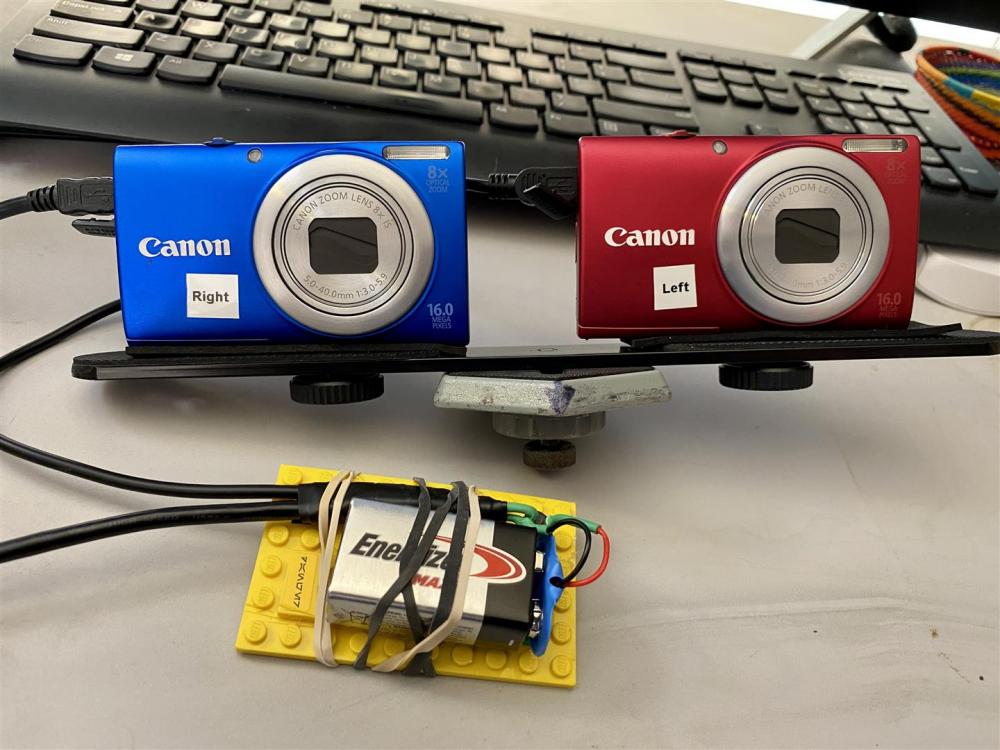
Hey everyone, here's a fun and affordable 3D photography side project. I really owe Andy Hull for giving me the inspiration and information I needed to pull this off! In addition to horology, I'm an avid photographer. I've been studying and practicing photography seriously for 20 years now, having bought my first real camera in 2000. If anyone is curious, the camera was a Canon Canonet QL17 GIII. Some of my work has been in galleries, and I'm a couple of classes away from completing a photography degree. When I became fascinated by photography, I wanted but couldn't afford a digital camera. I could afford a film camera, however, and I had free access to a nice darkroom between my law school classes at UC Davis. I learned how to process film and make silver-gelatin prints. Over the years, I've become a film snob. I embraced digital for macrophotography, but insisted on using real film when shooting people. Thanks to Andy, I've now embraced digital photography for 3D. For several years, I had been fascinated by 3D photography. I hadn't experimented with 3D photography much myself, because high quality 3D film cameras are expensive, require expensive slide film, and require a huge time investment to mount properly for viewing. I've shot a couple of rolls through Stereo Realist, ViewMaster, and Nishika cameras, but the cost and hassle were too much for me to fully embrace. Enter @AndyHull, who mentioned the "Canon Hack Development Kit" (CHDK) project to me. This is a super cool open source effort to significantly expand the capabilities of Canon point and shoot cameras. By using the CHDK, one can force old point and shoot cameras to shoot RAW files, show real-time over- and under-exposure, and execute scripts allowing for the cameras to take pictures on a programmed schedule or only after they detect movement, etc. I've barely scratched the surface of what CHDK can do -- It provides an incredible amount of power and flexibility. I purchased two new-old-stock Canon Powershot A4000IS cameras for $25/each from eBay. These cameras were released in 2012, but they work really well. Through the magic of CHDK, one can use a USB cable and a 5v power supply as a remote shutter release. In under 15 minutes, I used some LEGO bricks, a simple push button electrical switch, a couple of old USB-mini cables, and a battery to build a twin USB shutter release. CHDK does some additional magic to ensure that both cameras fire in a completely synchronized manner, within 1/1000s of each other. Here's my original rig. Please note that a 9V battery wasn't an ideal choice, and I've switched to a 5V battery. I mounted my two Powershot A4000IS cameras close to each other on a "stereo bar," but I got even better results by using epoxy to glue these two cameras together. Here's v2 of my rig. It produces better results, although I do need to rotate all of the left shots 180 degrees while processing. Combined with Adobe Lightroom and some really powerful free software called "Stereo Photo Maker" (SDM), it's trivially easy to produce 3D stereo pairs that look great. It's possible to see the 3D effect in these stereo pairs with one's naked eyes through the "crosseyed" or "parallel" viewing techniques. These methods give me a headache and are really hard to teach others to do, but the good news is that there are inexpensive and effective 3D viewers available. I'm using the "OWL" and "Lite OWL" designed by Brian May. My wife was really blown away by the 3D effect. My total cost was well under $100 and a couple of hours of time to build a super high quality 3D stereophotography rig: Canon A4000IS #1: $25 Canon A4000IS #2: $25 Battery, USB cables, and electronic switch: ~$10 OWL Viewer: $20 CHDK and Stereo Photo Maker: $0 Total: ~$80 I shot a model last Friday, and am really happy with how well my 3D rig performed! Thanks @AndyHull! First good stereo pair (Parallel Eye). I've since improved my processing technique to ensure that the colors match better. Here's a Parallel-Eye shot from my recent photoshoot. I'm really happy with these results! If anyone would like to see the full (uncensored) photoshoot, please send me a DM and I'll send the link.


 1 point
 -
I think those plastic dies are the answer, unless you make a perfect fitting one of aluminum or something. Be sure there is no pressure (such as from the brass threaded insert coming out) on the center of the crystal. You may have to go down one size on the die to be sure. Also, leave the bottom die off the press and use a block of hard wood, such as oak, to support the back side. With two dies, you get double the deflection. Of course, make sure the bezel and case are both sterile clean where they come together.1 point
-
Never seen one of these in the metal, but the squiggly brass bit appears to be the central seconds pinion pressure spring to me. I can imagine where some of the other bits go as well, for the day and date wheels. Personally, I'd trial and error it and eventually figure it out, as I imagine you have at this point now.1 point
-
Hi Yasser, I've been looking through my image files, but there are so many. I still have not come across a BFG 866 with day/date, but I've definitely done a few. Where are you in the assembly? If all the parts are OK,I am sure we can figure out how put it back together. I also have many BFG 866 new old stock parts. send pic of where you stopped and what parts you have left. I didn't see any PM in my inbox. Not sure where you are but there may be a time difference live in Brooklyn, NY. J1 point
-
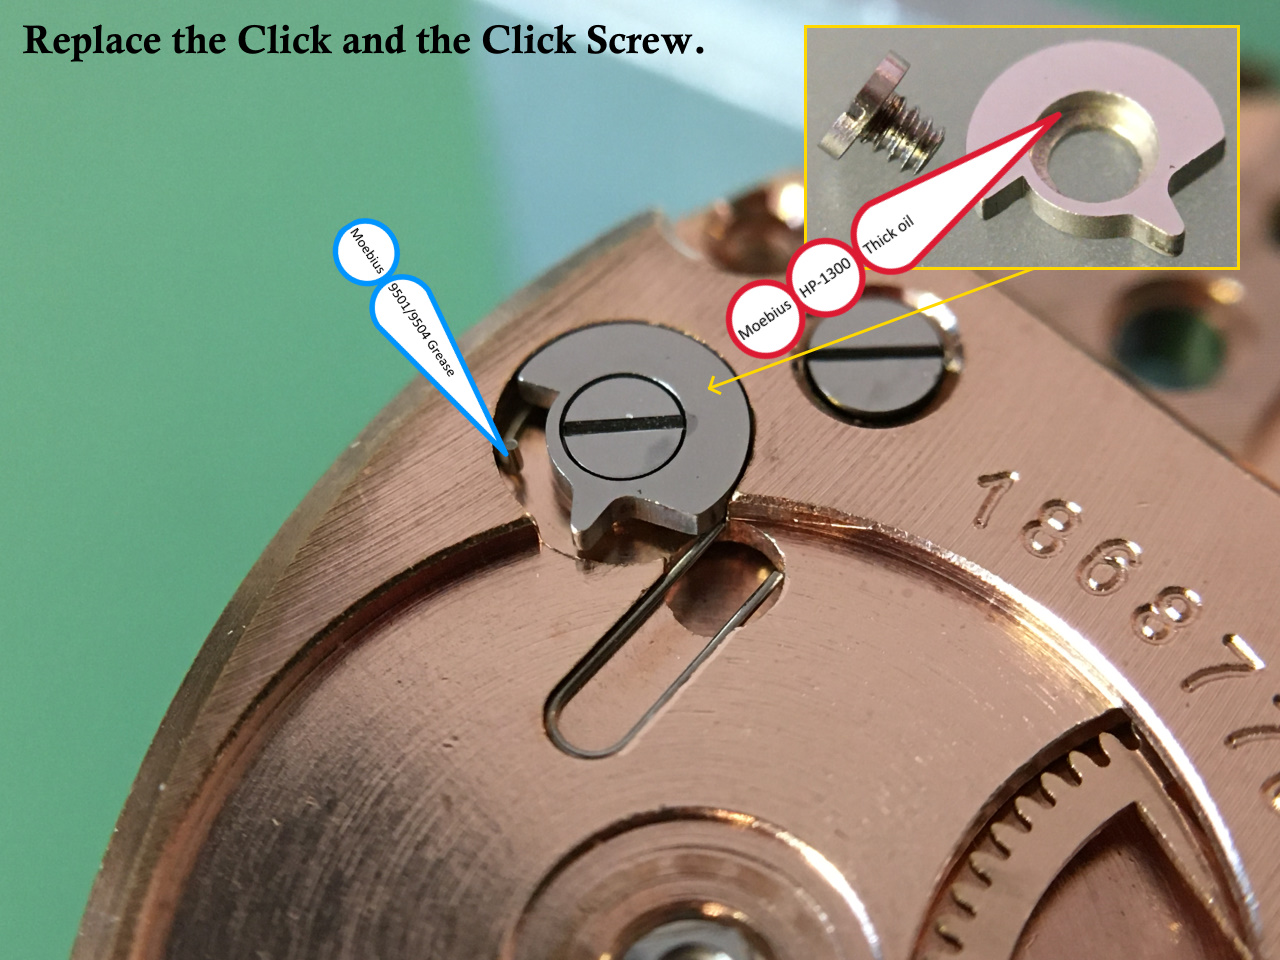
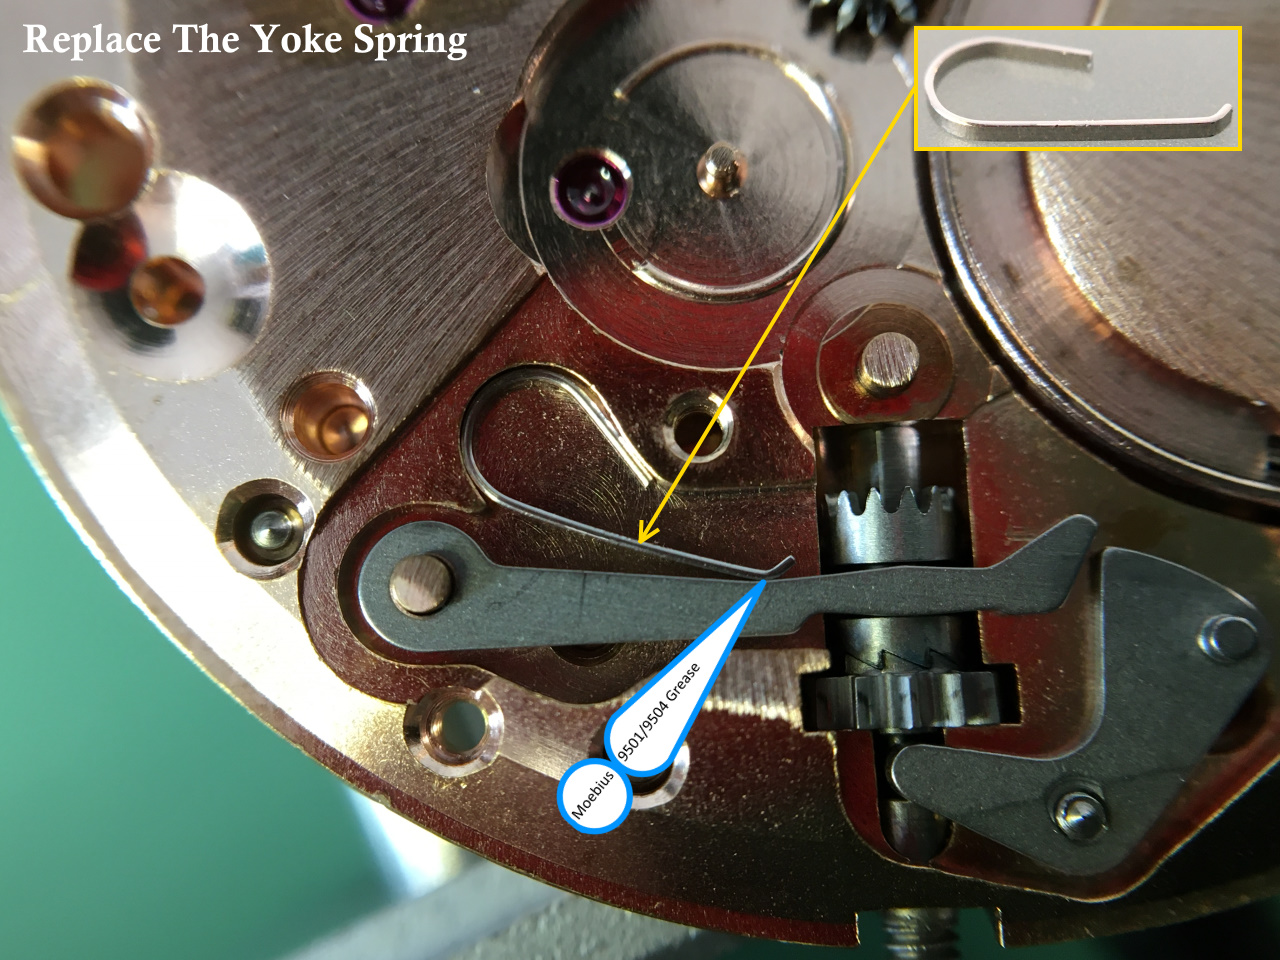
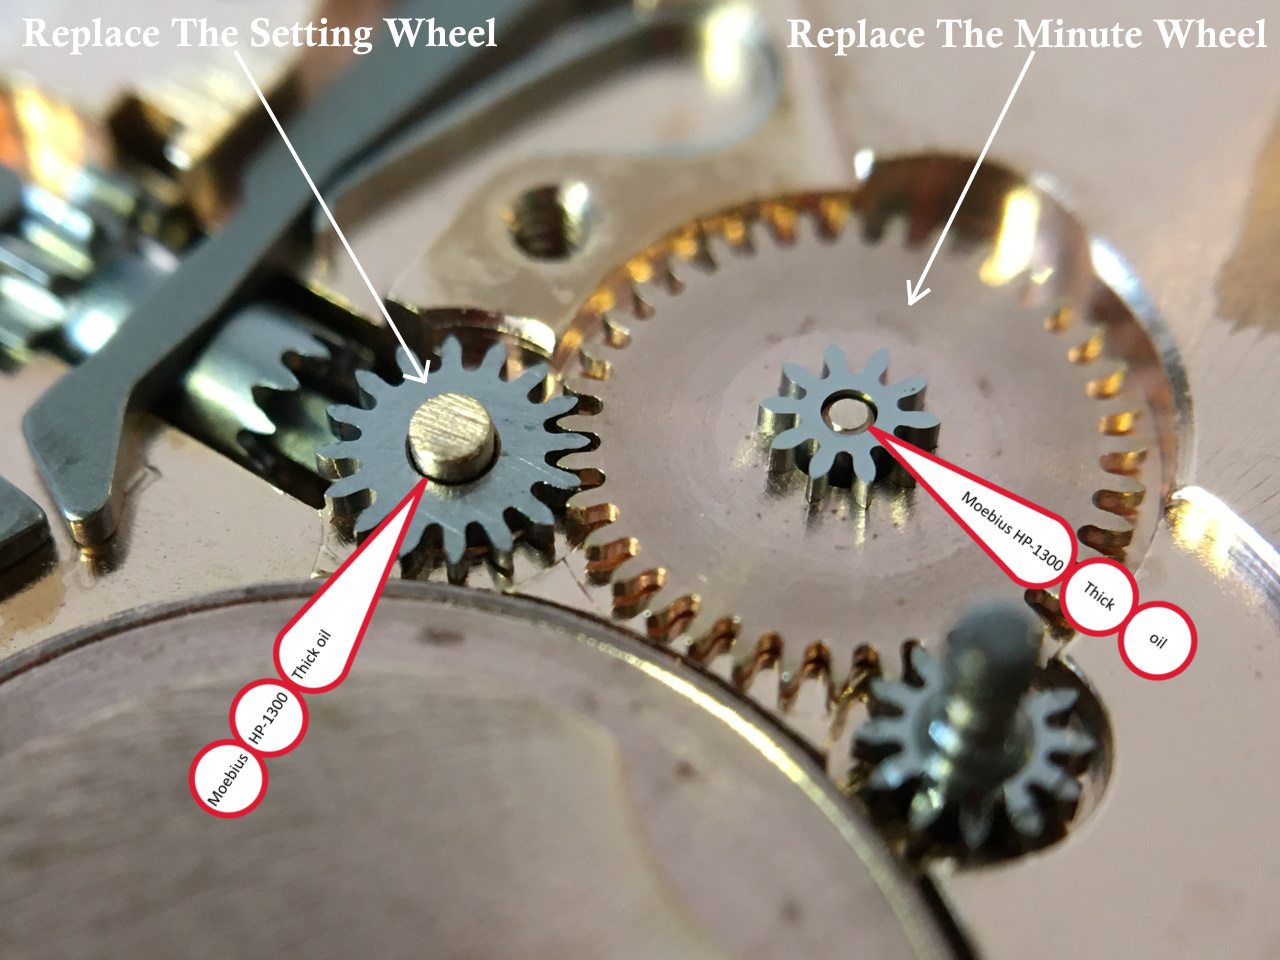
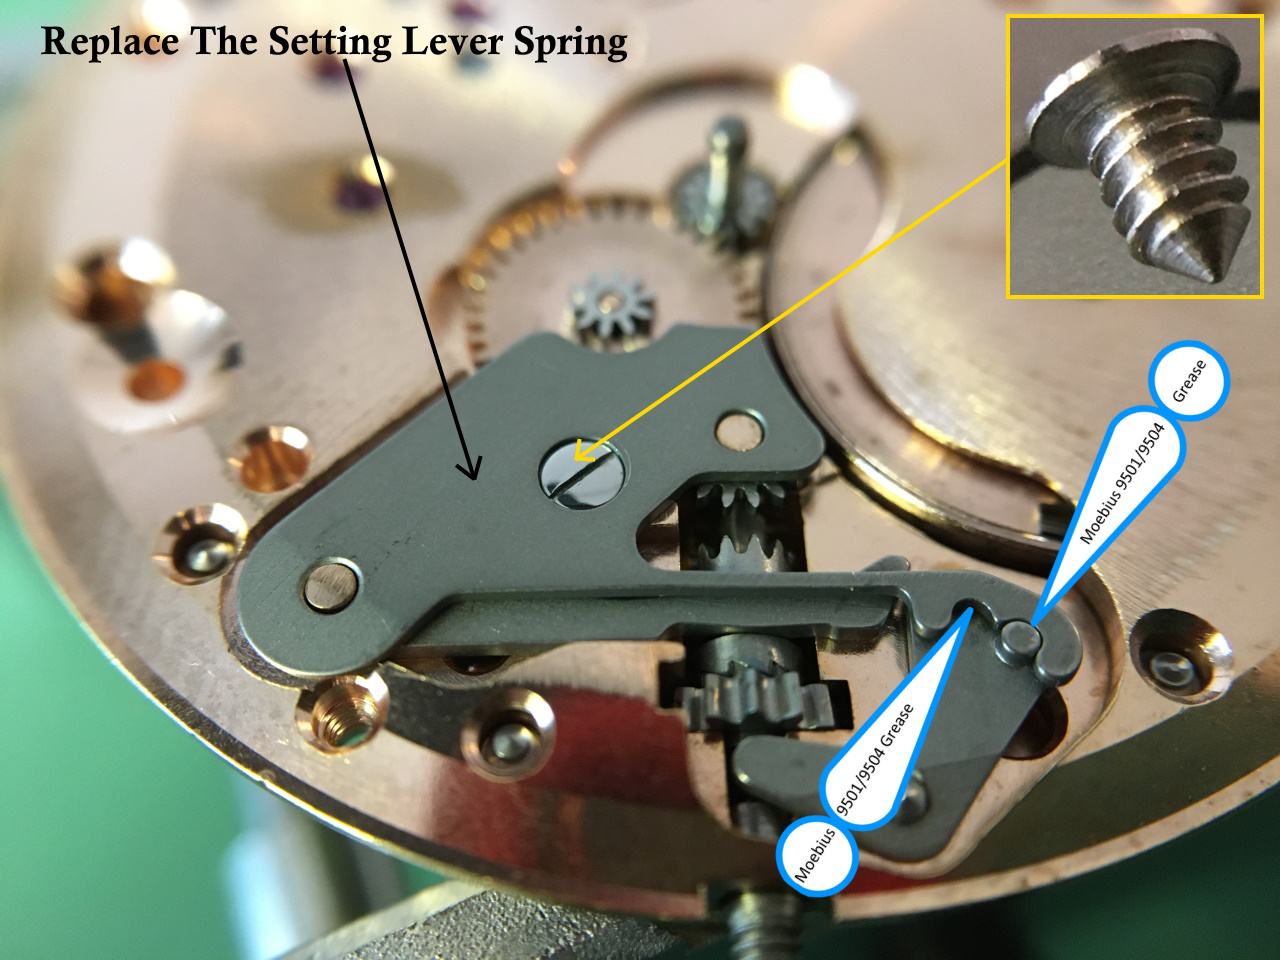
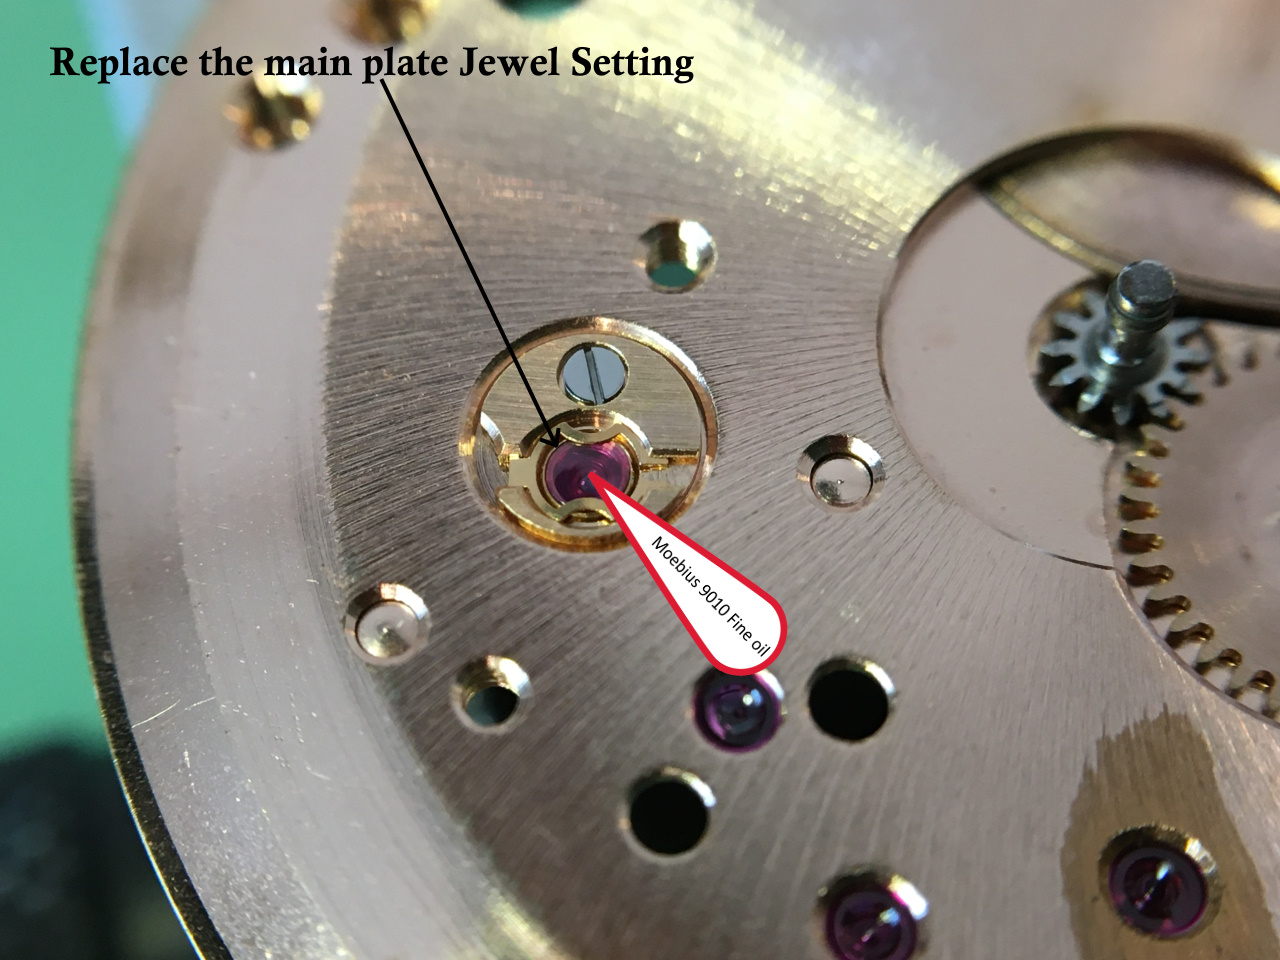
A little grease will do fine1 point
-
Hi there I hope you are keeping safe and well,I have just received 2 pots of Porcelaine Paint one Red and one Black but as all the info on the pots are in French I have contacted the company to ask what I use to wash brushes out with and does it need stirring before use.I have managed to find out that it needs to be left to air dry for 24 hrs then baked in an oven at 130 degrees for 30 mins MAX!!!! Then you end up with a very hard enamel finish that is dishwasher and microwave oven safe.So I think that it should be goo enough for a watch bezel.Will kee you posted.Regards,Seth.1 point
-
You want to give a quick smart tap right on the tip above the canon pinion, where the hand fits. This will knock the center pin through the canon pinion and start it out the back of the center wheel; this is usually enough to loosen the canon pinion and get it off, then the pin is a light friction fit in the center wheel. Usually on a watch like this you can do it without supporting the bridge side, but it's good practice to set it on a bench block or use a staking tool with a hole that will pass the square end of the pin. As crown setting became more common this old system developed into the modern canon pinion everyone knows, but you will run into this system from the in-between time where there is no square and it's not immediately evident that it's a pin-through-center wheel arrangement. In cases where the center wheel is jeweled, invariably the bridge side of the pin will pass through the jewel, so you can remove the bridge. Do this, then support the center wheel on its pinion before knocking out the pin. The jewel will crack otherwise. Most of the time they are unjeweled though.1 point
-
Never be afraid to recommend using a hammer we all use them.1 point
-
That’s what I have done but was afraid to recommend that:) I did it on three Henry Peck pocket watches I have.1 point
-
It needs to be knocked out with a small hammer.1 point
-
That’s cool but a blue seconds hand would be over the top on that one!1 point
-
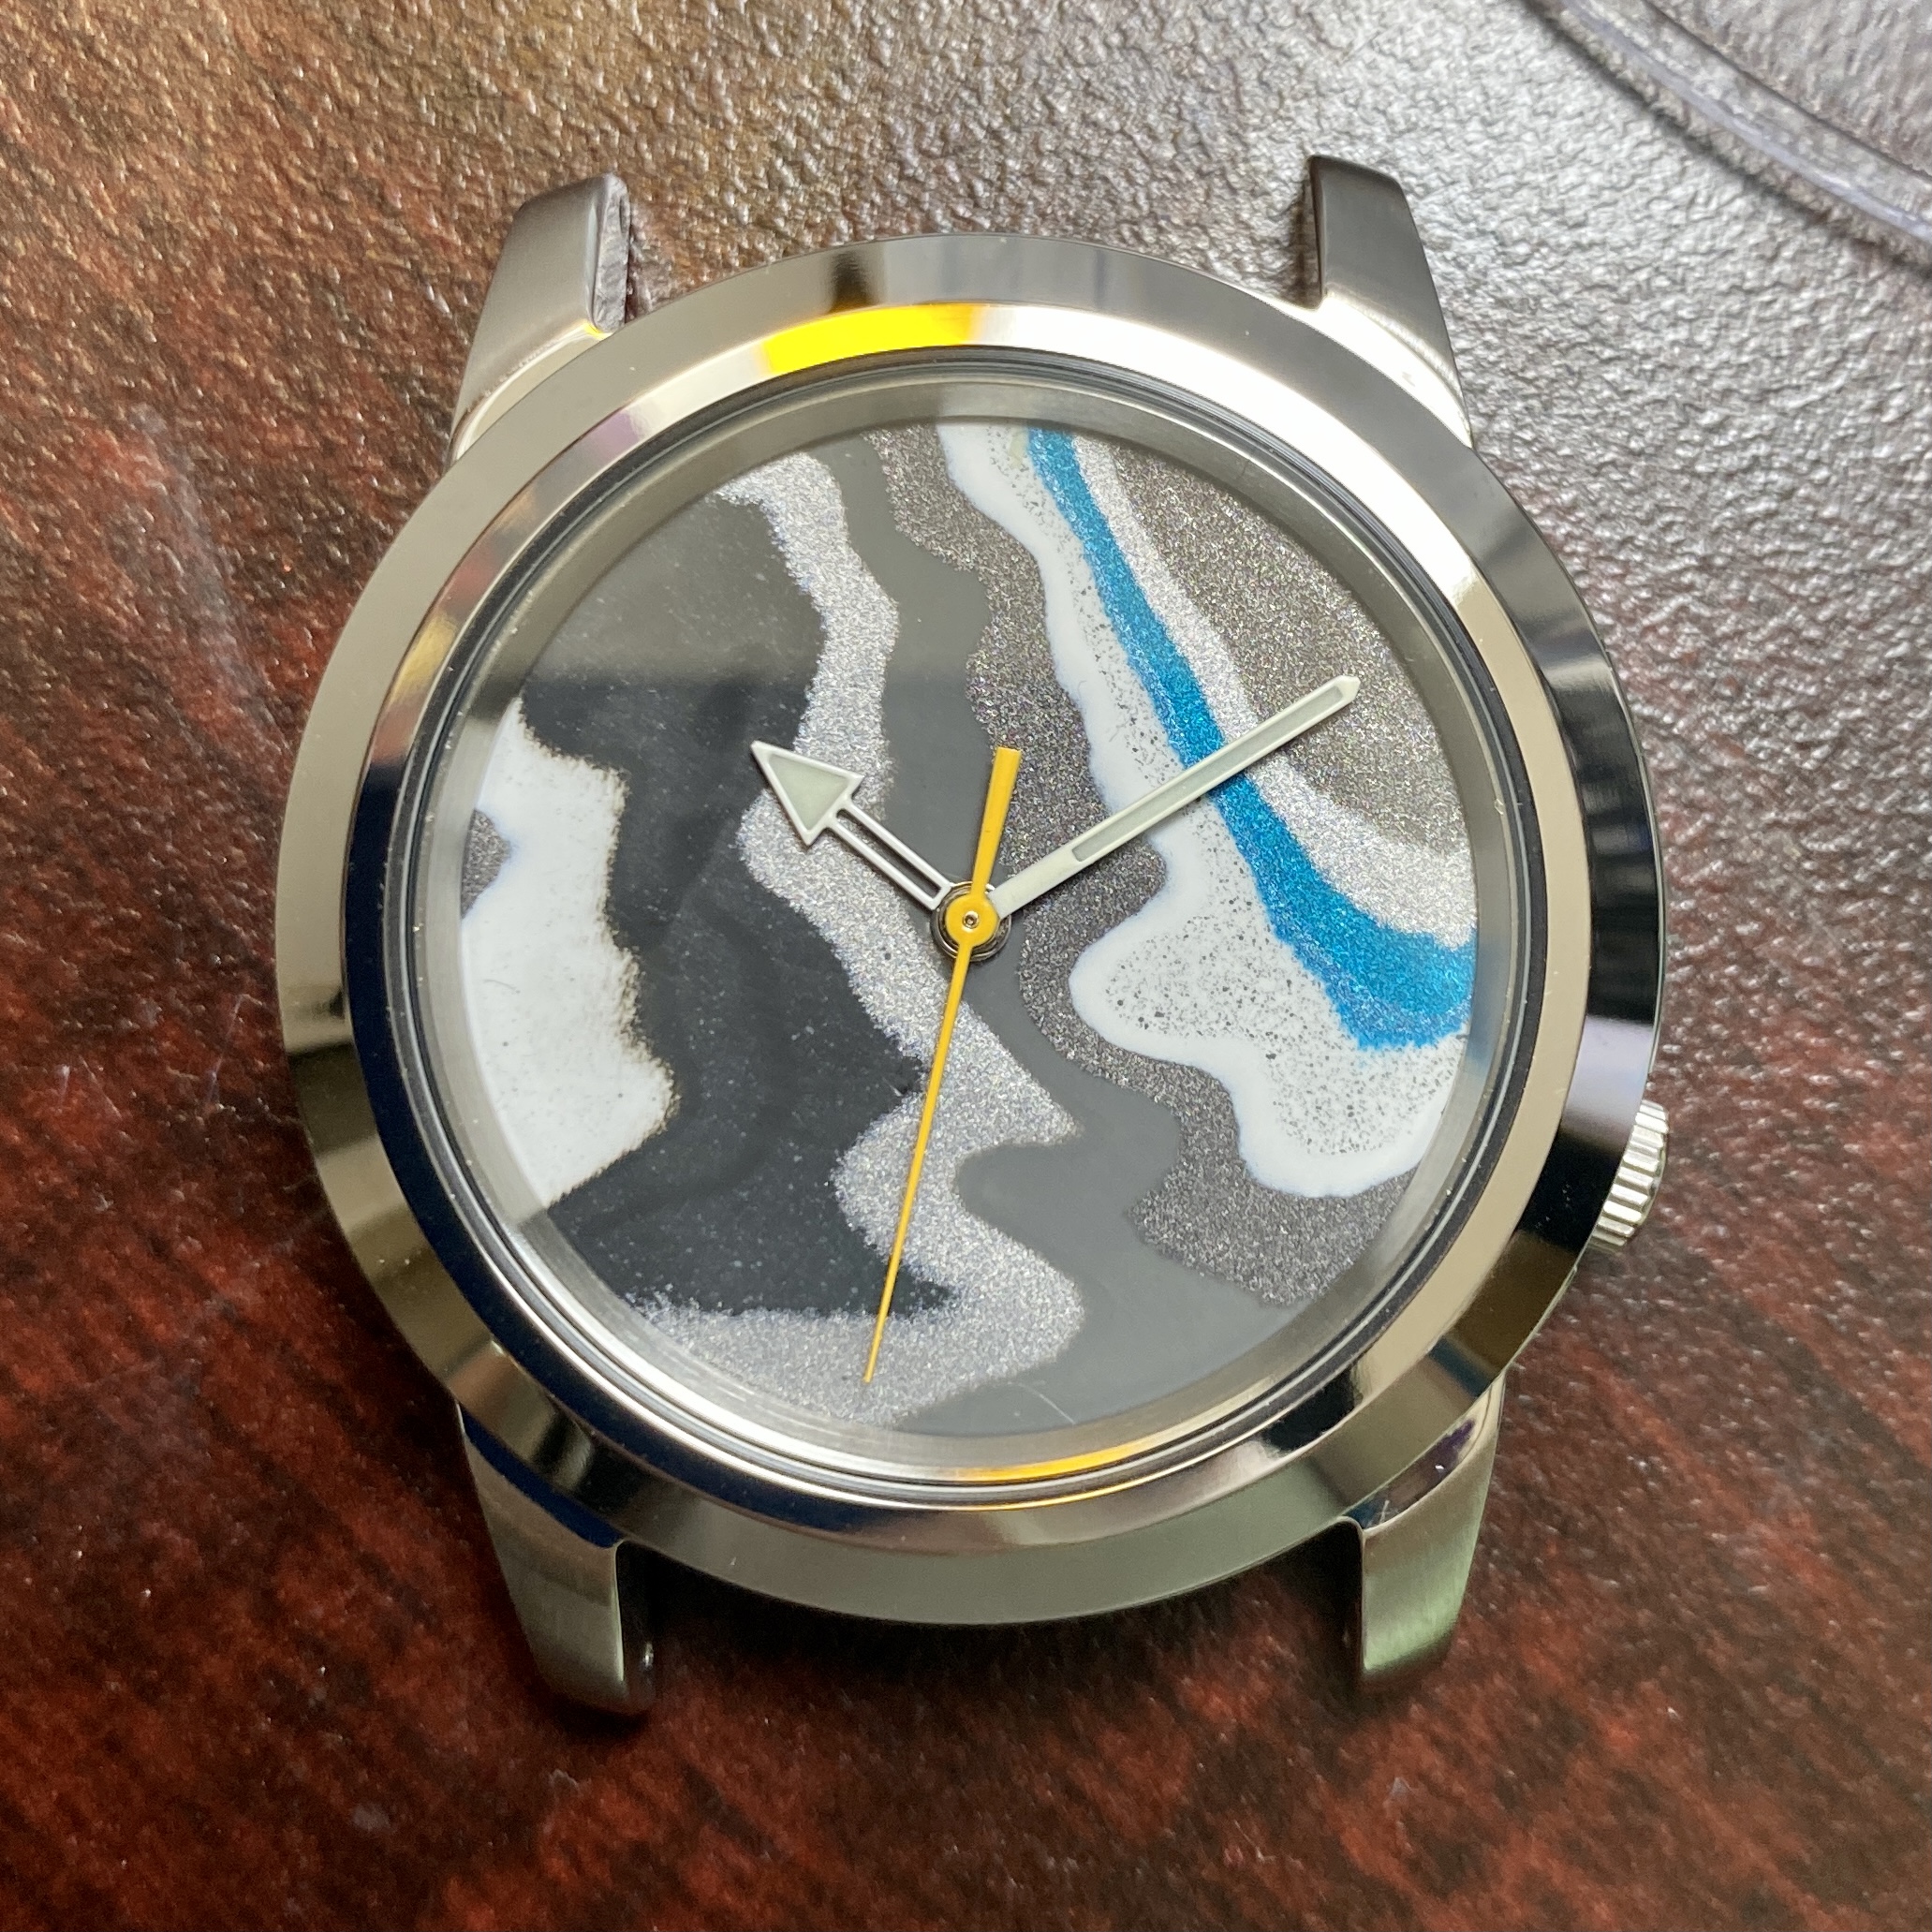
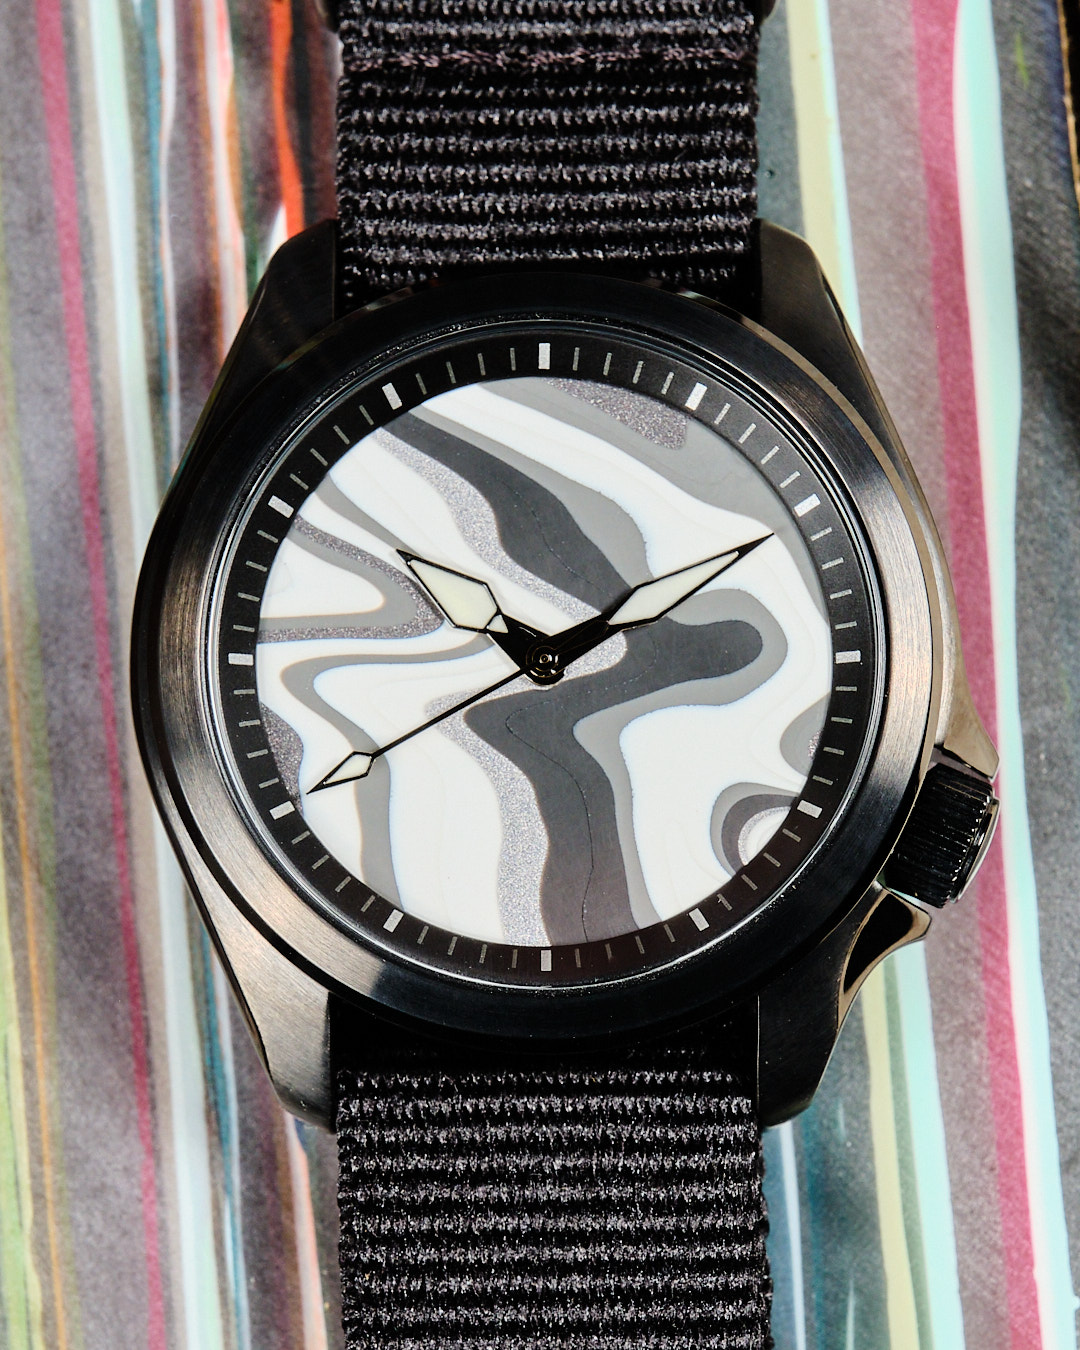
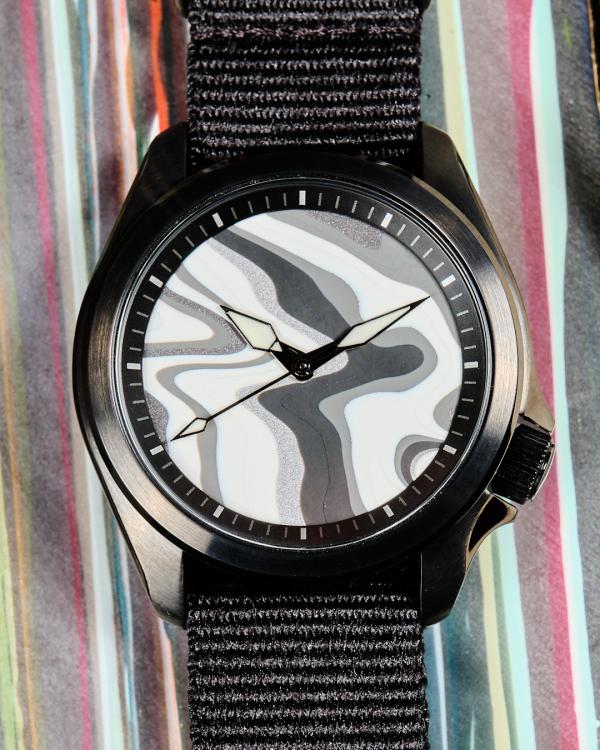
Quick shot of my 3rd finished fordite-dialed Seiko. I'm making a push to get my first production run of 10 out, and then I'll be focusing on adding the chapter rings and making some ETA 6498-compatible fordite dials.
 1 point
 -
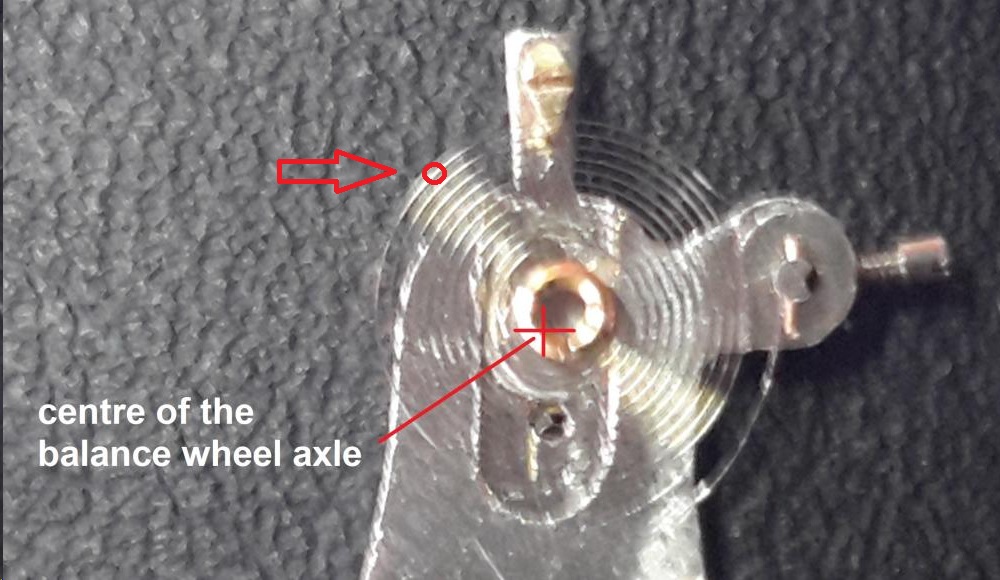
Hi, you can do as proposed by AshF, but a slight bend at the marked spot will center your hairspring: It will move the collet at right angle to the line spot - hs center. Why do you suppose an original non-shock? How does the jewel in the plate look like? Frank
 1 point
 -
@MechanicMike: Right now, I'm using a propane camp stove with a 6" x 6" x 1" block of aluminum to help with heat evenness. Another shot: I'm working on improving my watch photography too!
 1 point
 -
I found it. A piece of dust filament fouling the impulse jewel. I need some type of air filter in my workspace (office). Thanks for all the help!1 point
-
Its a great time to try CHDK. The Canon point and shoot cameras that it runs on are cheap as chips on ebay. If you are willing to risk a "fixer upper", they have reached the point where you can pick them up for the same kind of money as the 404 club watches. For example I picked up an A2200 a while back to use for scanning negatives. This cost a couple of quid, and had a lens fault, which I fixed, so I thought I'd see if I could find a matching one. A few days later and this showed up on ebay. No charger and untested, but I already have a bunch of canon chargers including one for an A2200 so what is the risk? 0.99p plus shipping. It arrived, in barely used condition, with a good working battery and functions perfectly. Bear in mind this is a 14.1 megapixel that originally retailed at $325.00 USD, a price which eventually dropped to around $139.99 USD in 2011, so it is not a bang up to date model. However it has a real lens (of sorts) and a reasonable sized sensor (when compared to a phone camera). It takes excellent macro shots, and of course most importantly for this thread, it runs CHDK. It seems that the phone camera has pretty much killed the higher end consumable point and shoot camera market, and furthermore nobody fixes anything any more, so there are real bargains to be had. Even if you don't want to risk a potentially faulty camera, there are plenty of models around for around the $50 or less mark, like the 16.1 Megapixel A4000 IS that @dpn is using. The IS models even have the excellent Canon image stabilisation lenses, to help eliminate camera shake.
 1 point
 -
No no no no no no no no....... I dont want these posts!!! Now I want to do it too!!! ? I must look silly staring at my finger, i must admit I could not see a thing. ?1 point
-
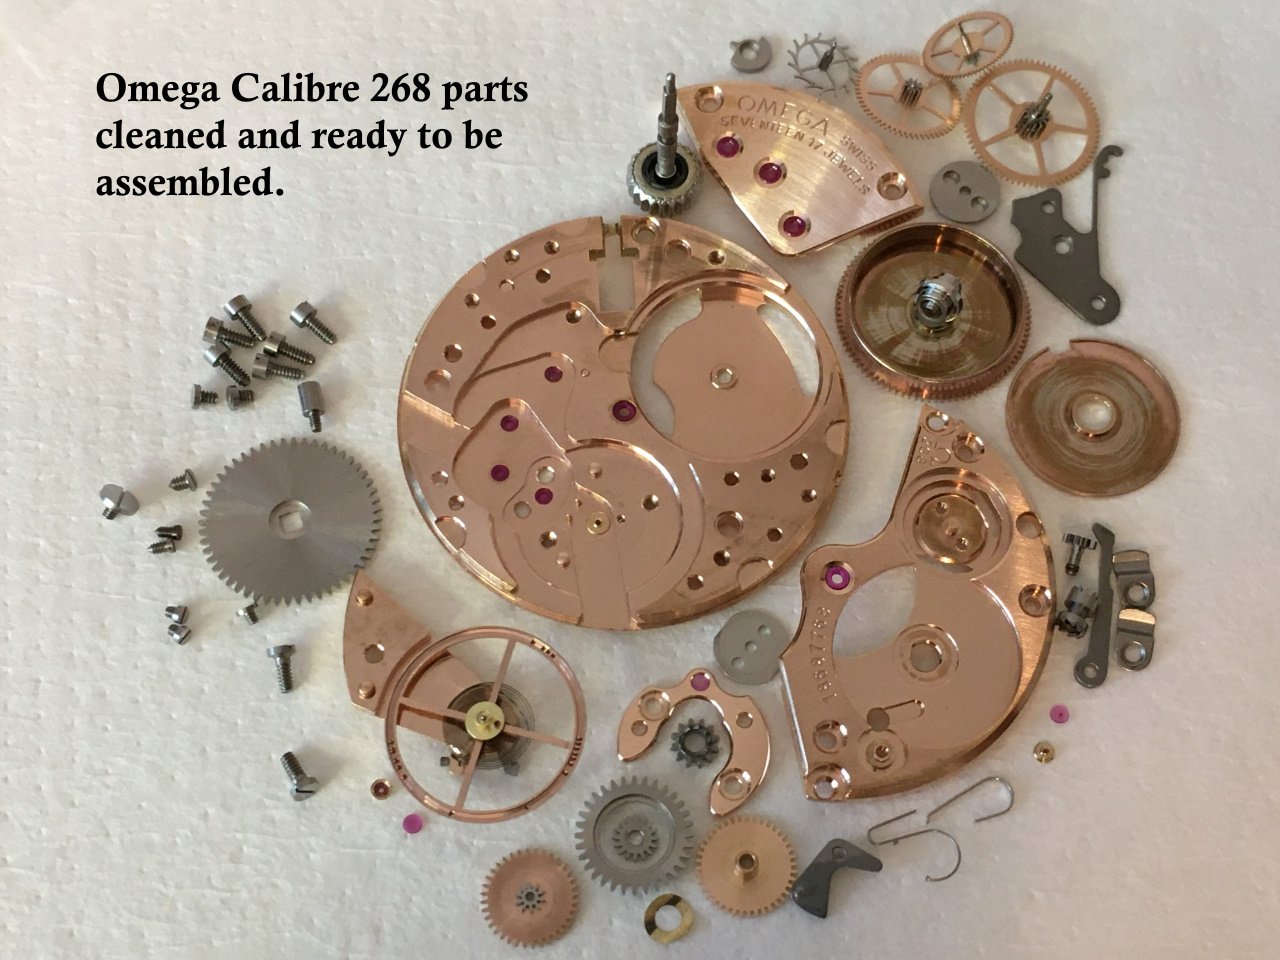
Well technically I used a steel flange nut. After spending 2 hours cleaning jewels under my 1970's microscope and 10x loupe, I serviced it and reassembled it without the mainspring. It's coming in a couple of days. The last person to service this tightened down every screw overly tight. They lost one of the case mouning screws and the bridge over the minute wheel as seen in the thrid pic has two cross threaded screws that destroyed the treading. Right now they only have friction holding them in place. I have no way to re-thread them right now. Here are your pics
 1 point
 -
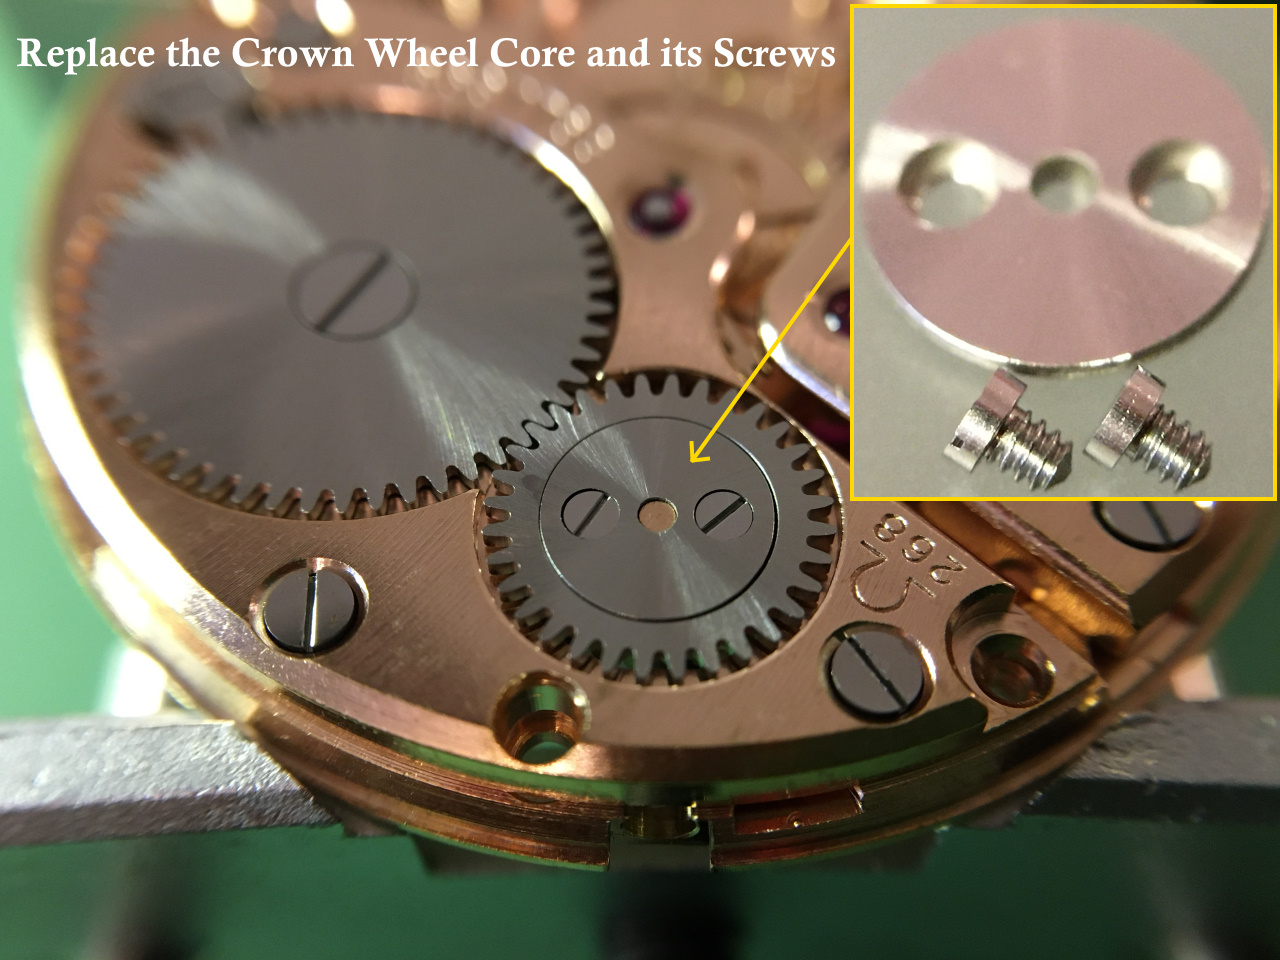
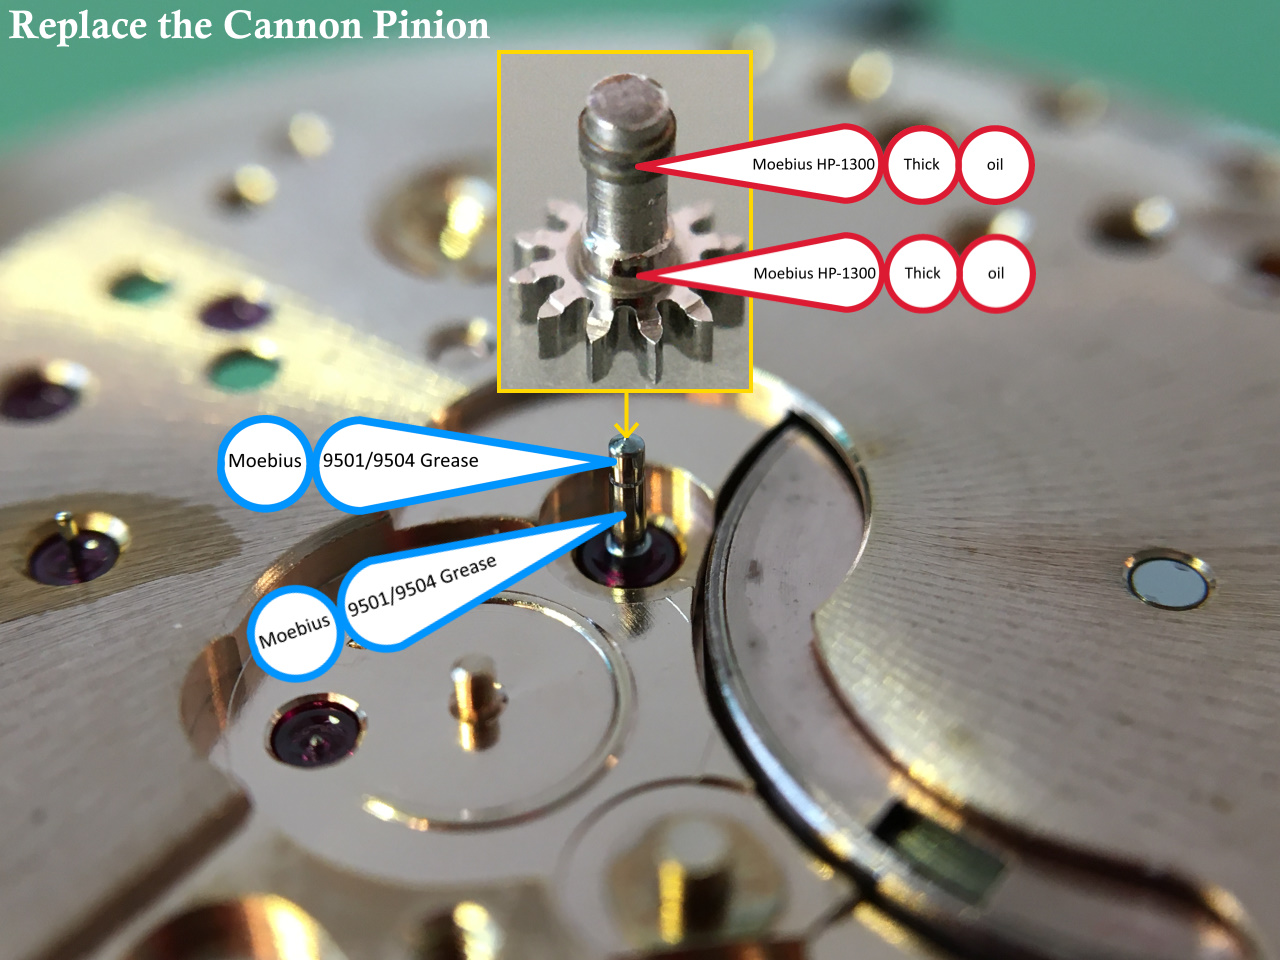
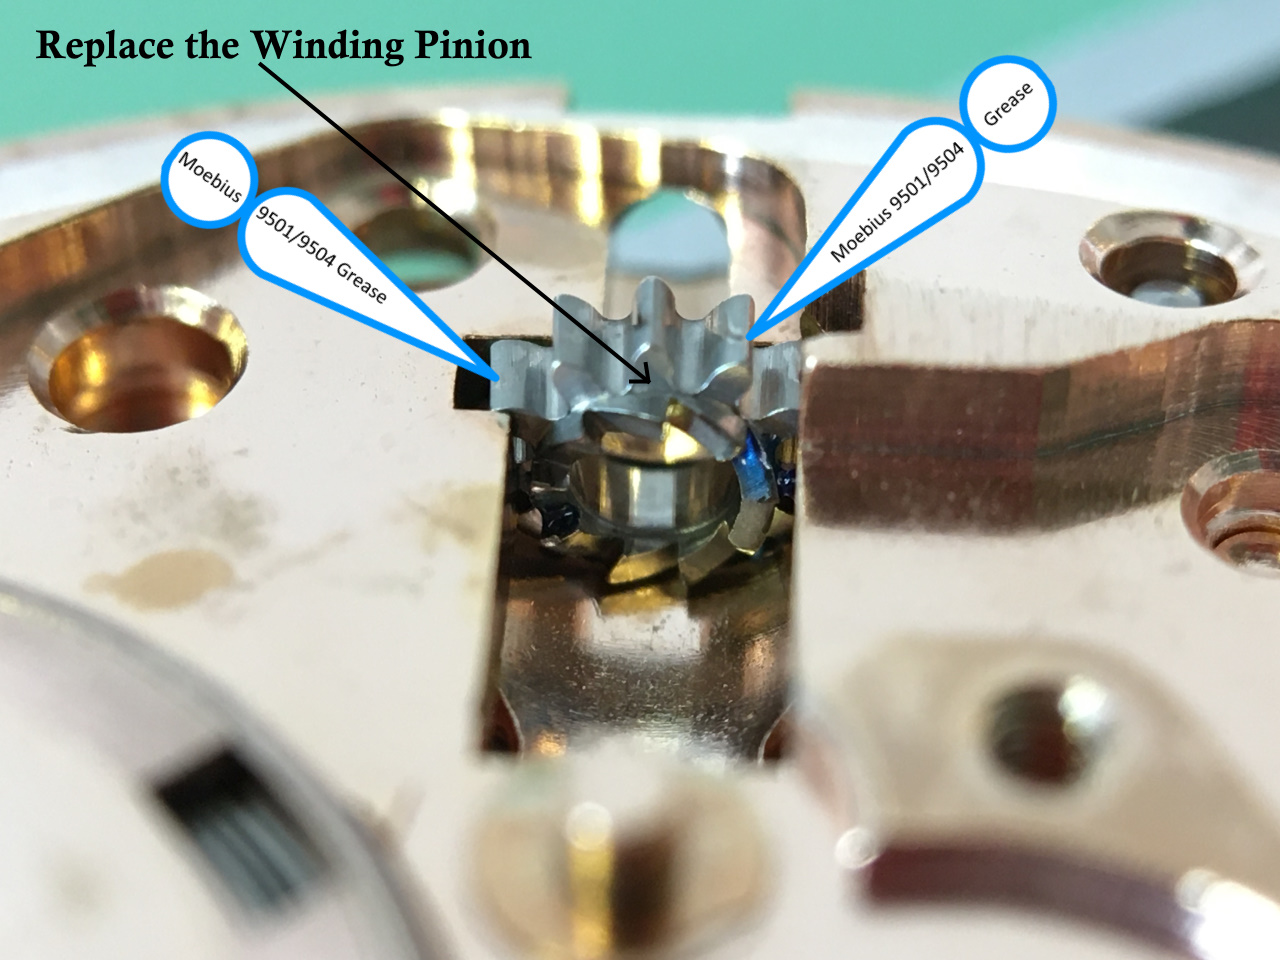
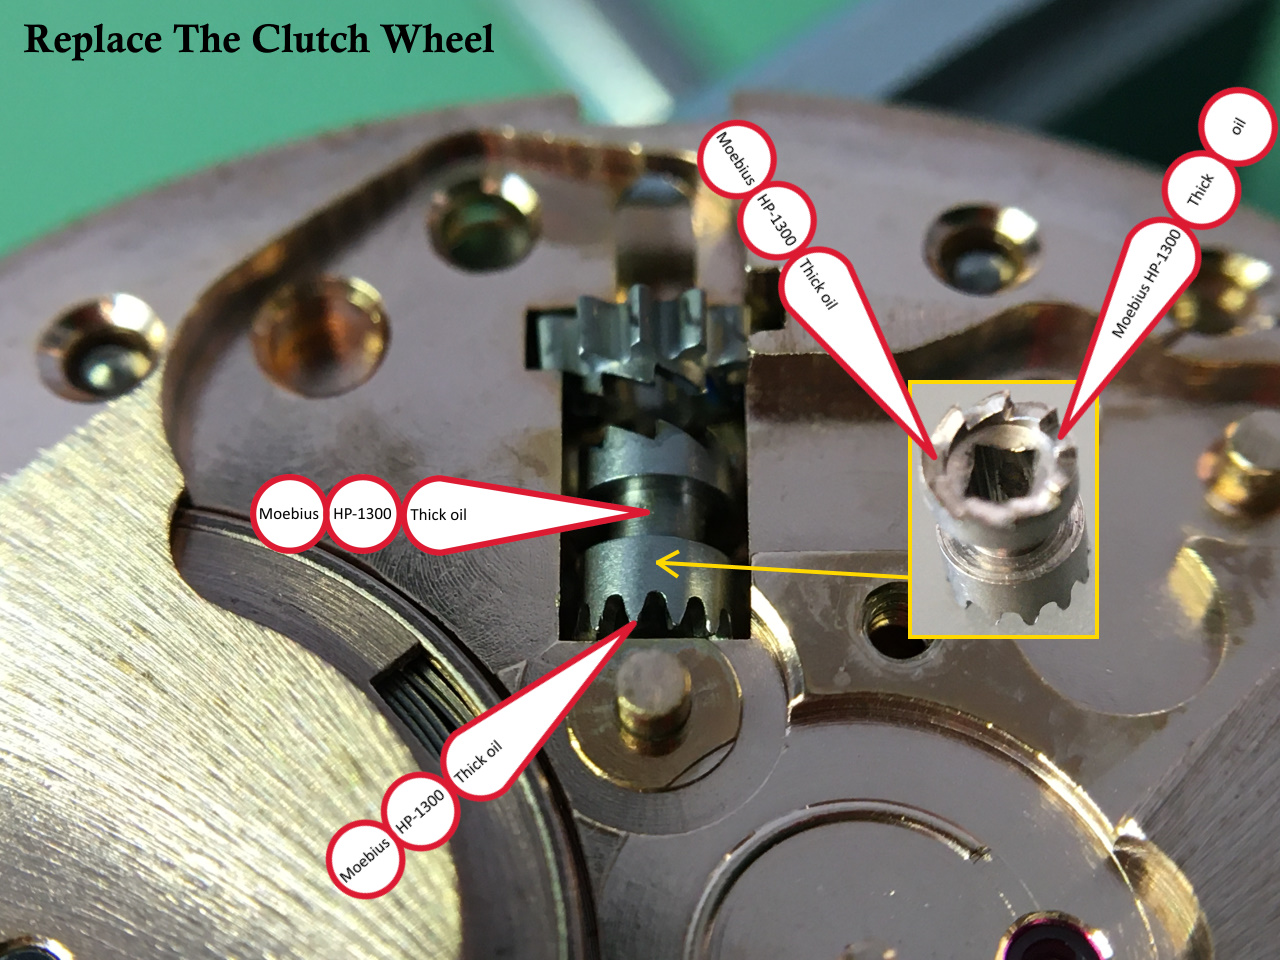
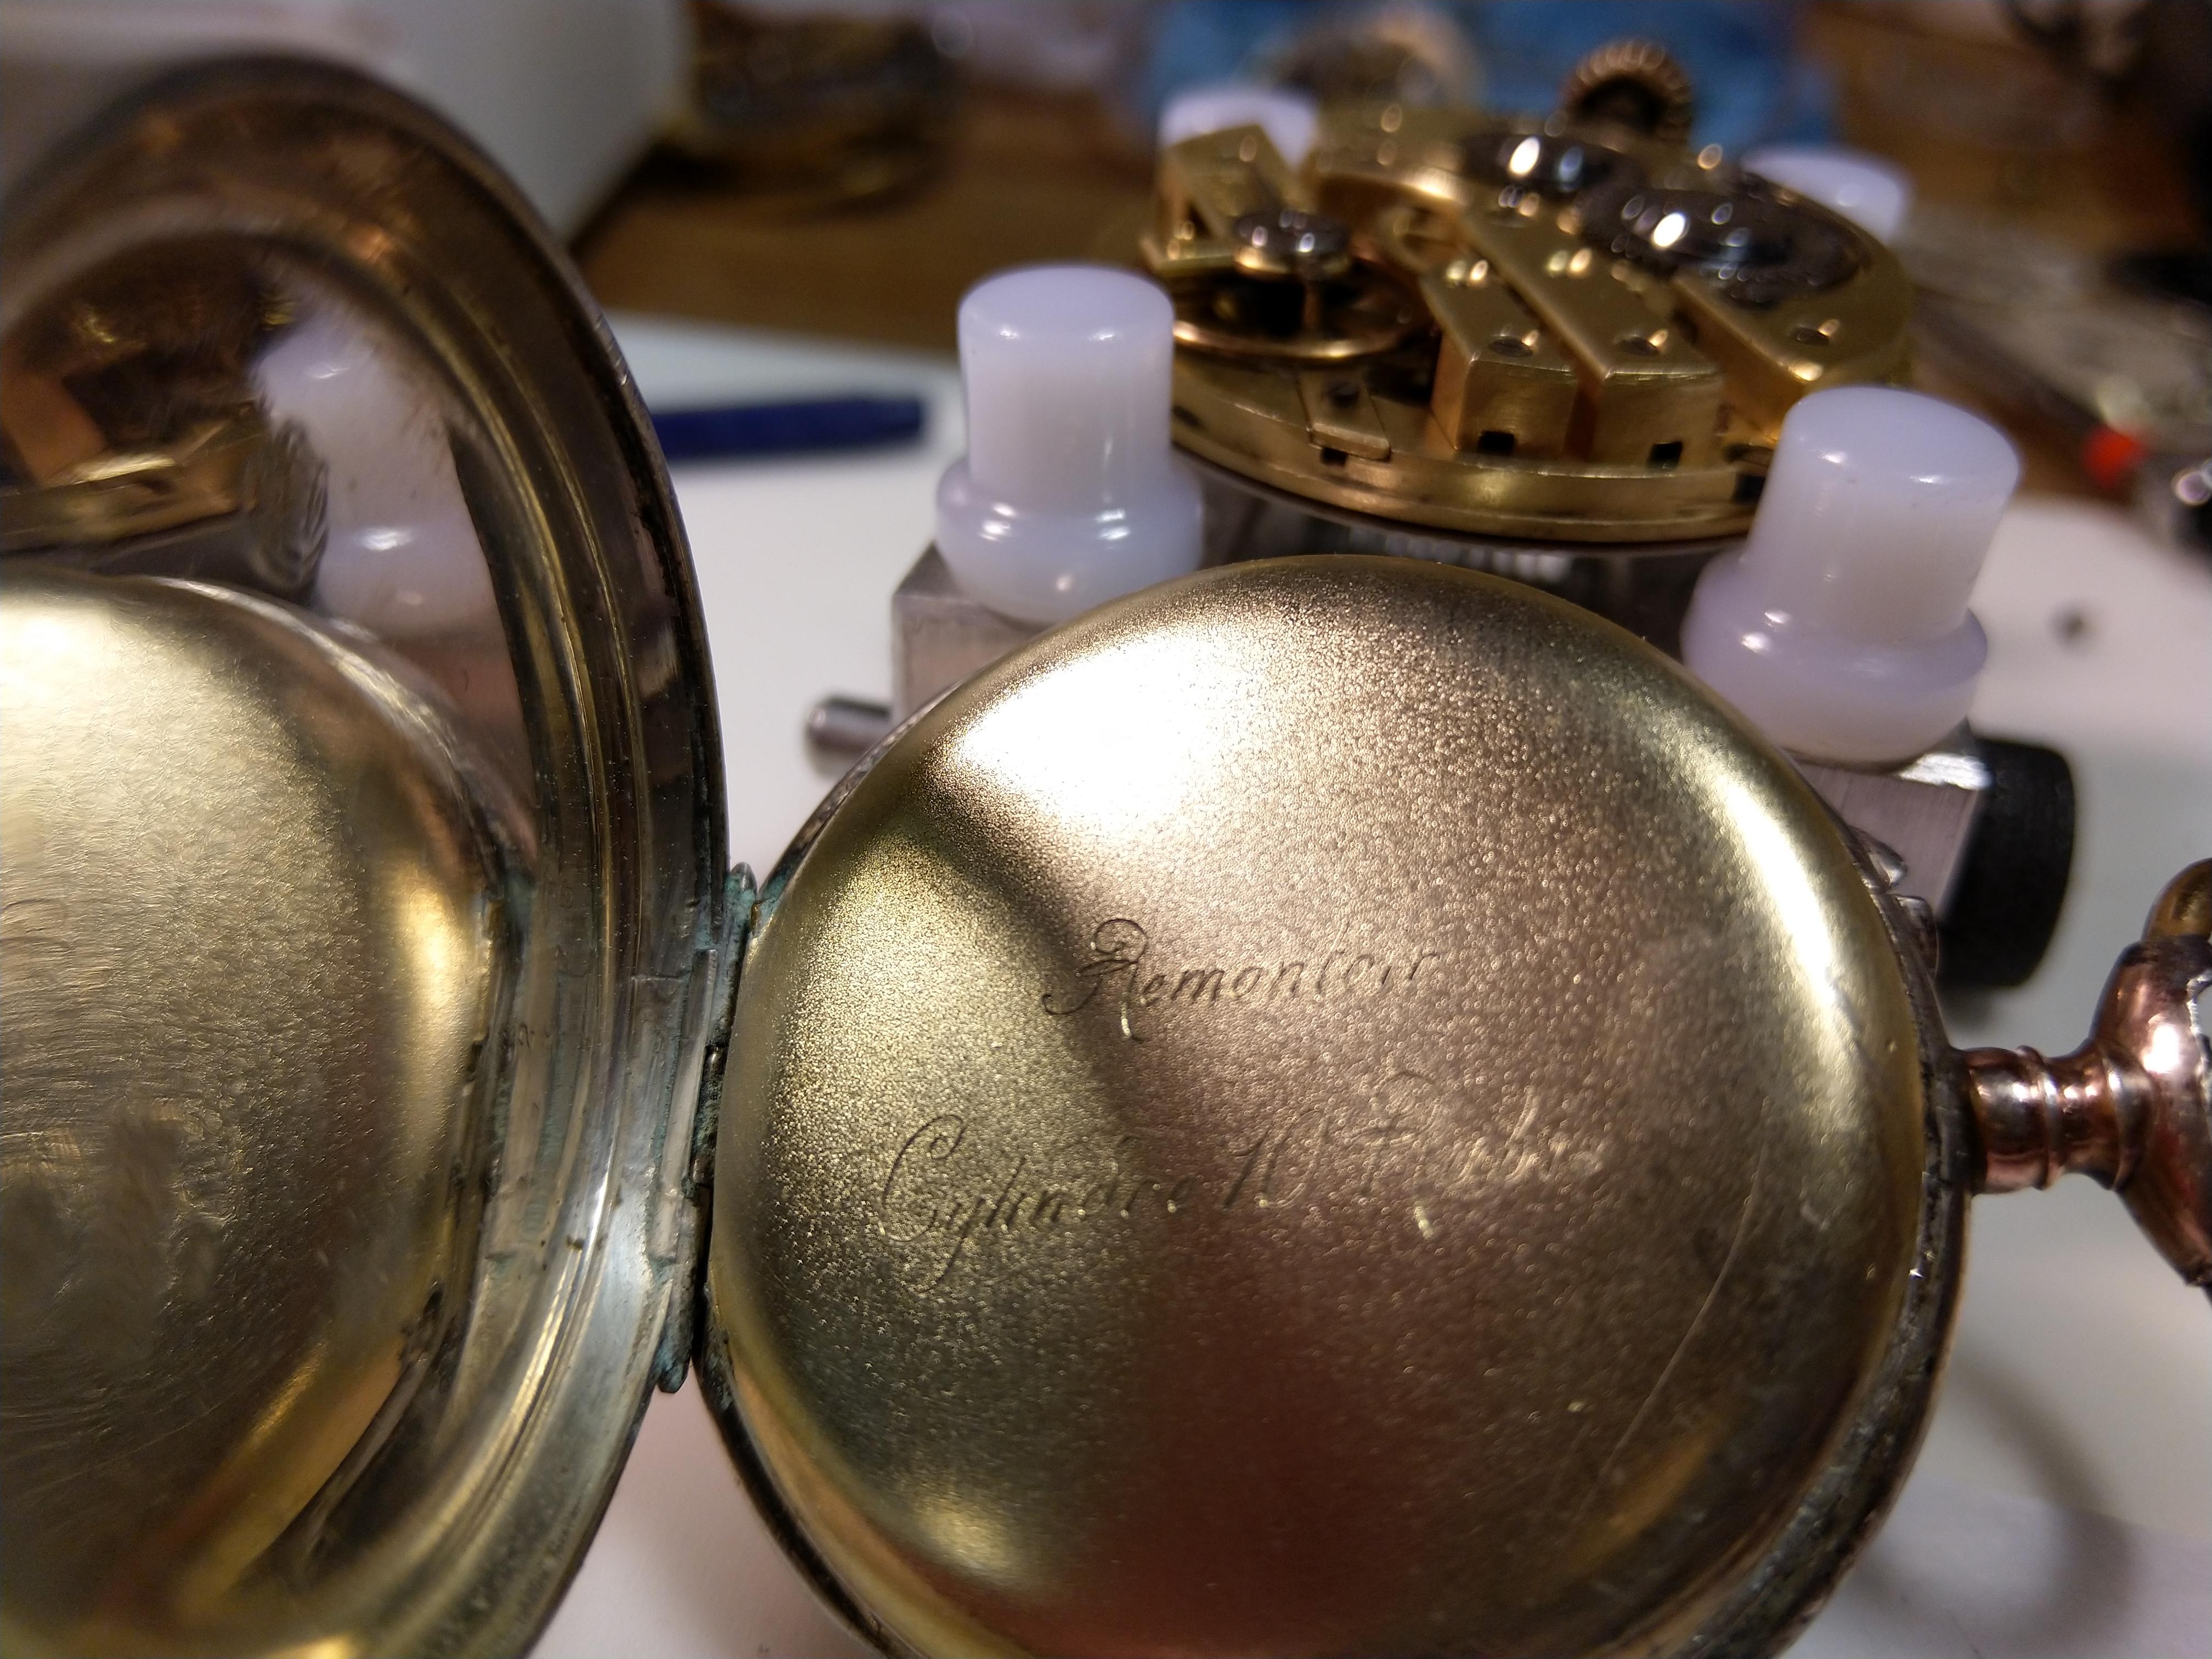
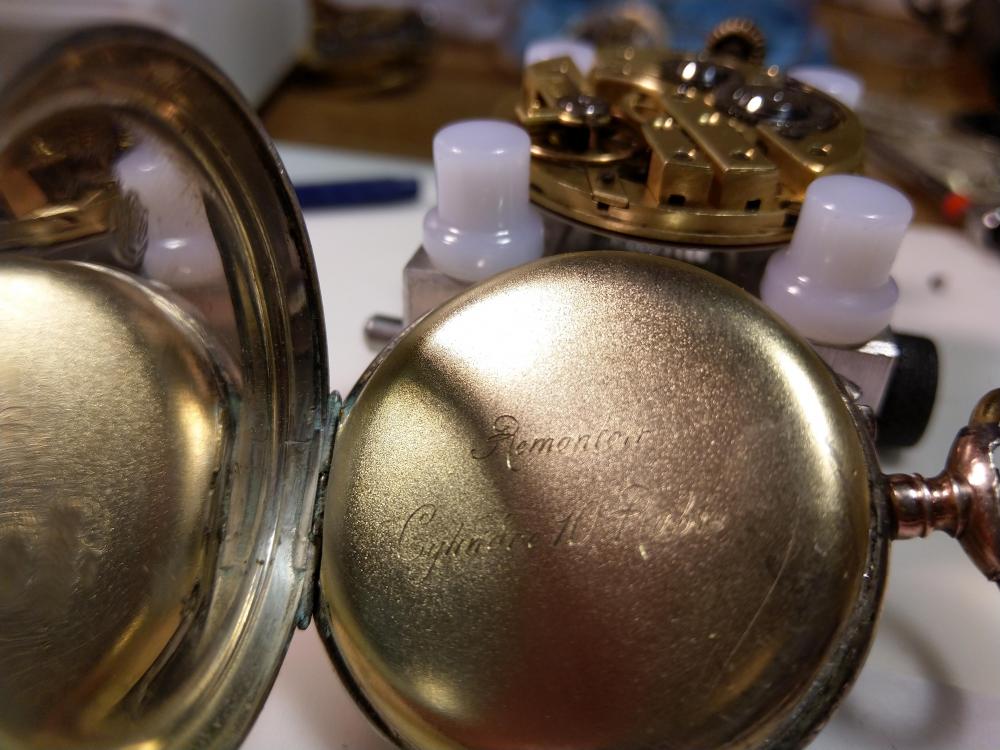
Today I was following the thread with a question about a locking nut for the crown wheel, since I already popped out the movement from the case I decided to take some shots of the adventure when servicing it and make my usual PDF.. Remontoir Cylindre 10 Rubis.pdf
 1 point
 -
One other caveat...beware of the JESUS spring..small little springs in the works that fly off to only God knows where..when working on or around them I like to put the watch inside a gallon sized plastic bag..I work on top of a sheet of copier paper.. the springs get contained and you can spot them easily against the white paper.1 point
-
that is very true.... but I did finally get this one going again by swapping out the pallet fork.
 1 point
 -
Hello oldhipply...happy to contribute if I can. For those unfamiliar with a cylinder escapement there is no pallet fork controlling the interface between the balance and the escape wheel...the escape wheel meshes directly with (if that is the correct term) or passes through, the balance wheel staff by means of an undercut hollow slot formed in the staff itself. This configuration is a form of 'dead beat' escapement known as a 'frictional rest'...as I understand it there is always a tooth in contact with the staff at any and all times. The problem I had was - as there is always a tooth in contact with the staff, I had to marry up the position of the tooth with the correct position it should be at during its cycle as it passes through the lips of the hollow - if not correctly aligned then the balance wont be able to transfer an impulse to the next tooth as it isn't releasing the tooth it's currently in contact with. An added problem is that since there isn't a pallet fork there is nothing to hold the normal turn and a half of the button to charge up the main spring to set the escapement on it's merry way - all power escapes immediately without the staff/cylinder in place. The solution was found in Fletcher: Watch Repairing as a Hobby: p57 of the 2012 edition...and was actually pretty simple once explained (thank goodness). I had to look for a marked slot on the rim of the balance, and then line this up with the middle dot of three set in the pillar plate. By good fortune all marks were present, and, as I was working on a movement that I knew had a perfect balance set up before I removed the cock, as soon as I set everything up and provided a half turn of power...off went the balance...! Learned something new...but if there is another way I'd appreciate the knowledge, as this movement is one of a job-lot of nine I've just picked up on ebay and the marks may not be present on those. Here's an image of the movement (sorry about the quality...using an old camera in poor light).
 1 point