Leaderboard


Popular Content
Showing content with the highest reputation on 09/03/16 in all areas
-
Welcome Consuelo! Luckily watchmaking doesn't require much space...it is in itself a "minimalistic" hobby....until you start wanting more tools and more watches both to fix and to have...a trailer comes to mind...one of those UHAUL things you can tow with your motor home....OK, you are not there yet and let's cross our fingers that you'll never get there! I warn you, there is no known medication for watchitis, a common bug among a lot of people in this site. Cheers, Bob PS. Remember that if you spend money in cheap tools you will spend twice the money! I did that and ended up buying same again but quality stuff of which I'm now very satisfied I did. You, your hobby and your watches will thank you for it.2 points
-
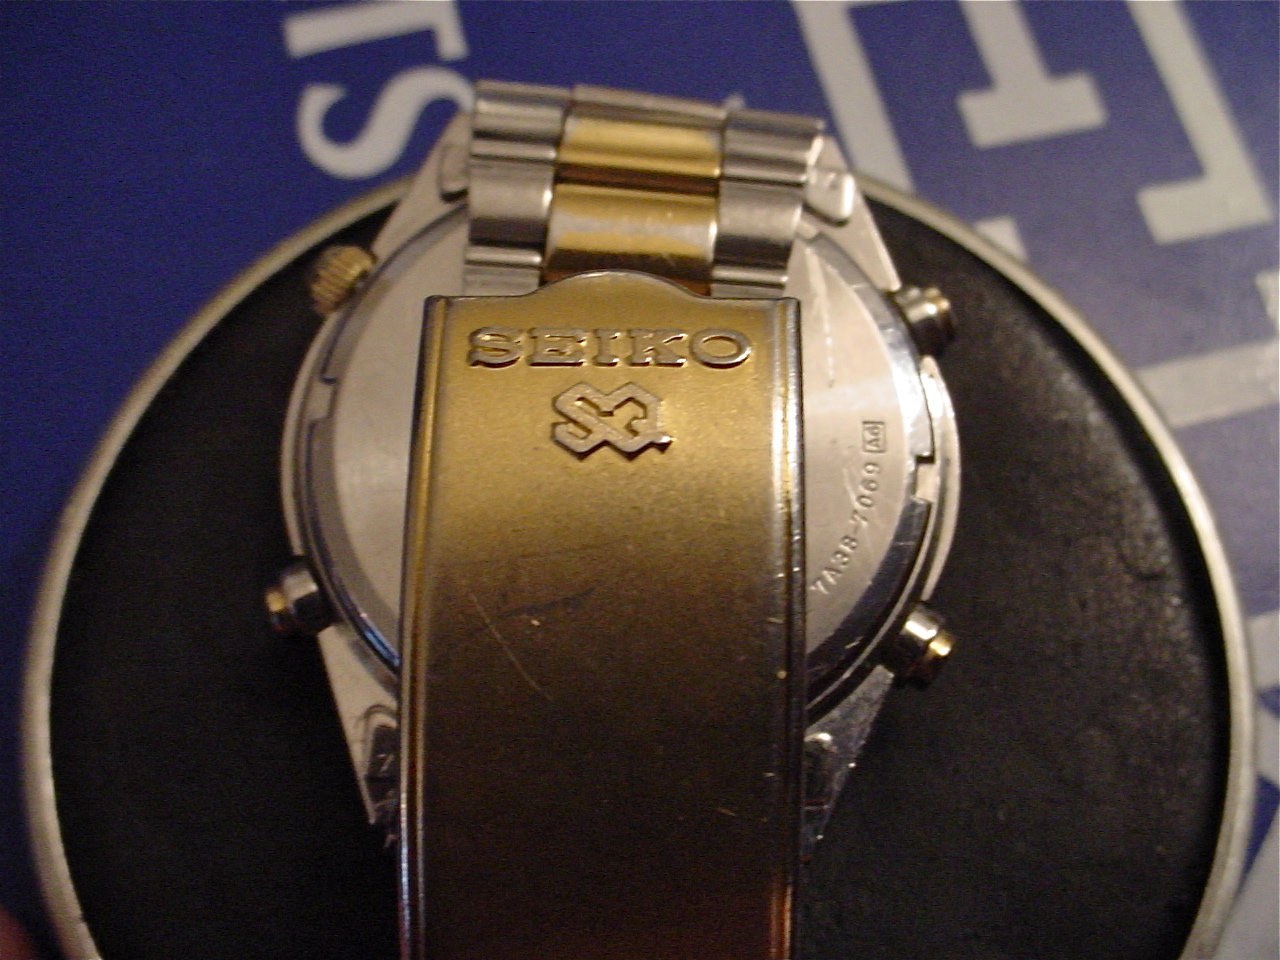
I'll keep the Seiko Chronographs going.... Today it's a 7A38 on a Seiko SQ strap...
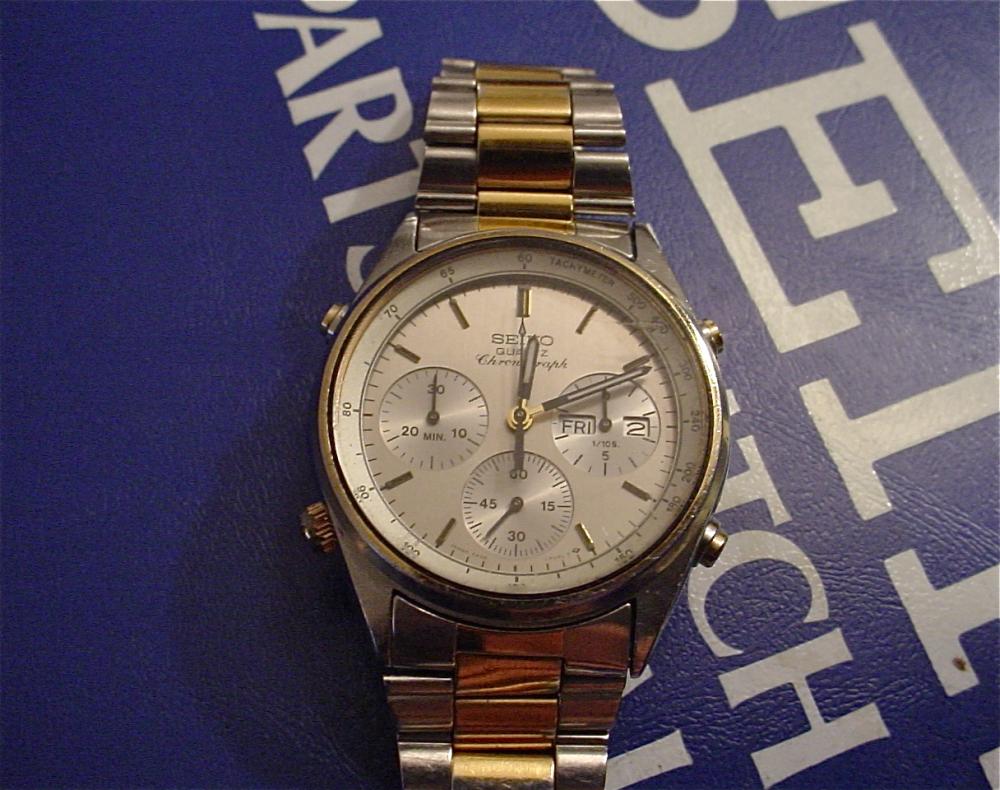
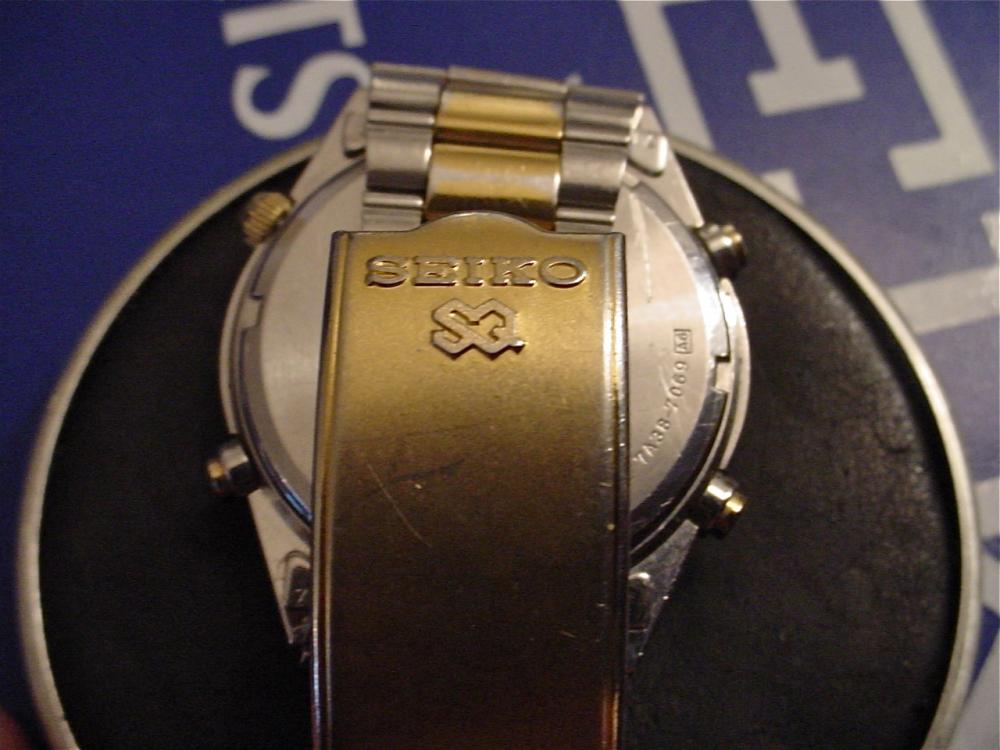 2 points
 -
The next time you're at the pharmacy ask what the health differences between the exposure to benzine or benzene? Noticed two different spellings there actually two different substances. Both are used as solvents one of them as extremely bad health consequences on exposure to. Just make sure the version you're using doesn't have the same bad health consequences One of the problems with hobbyists for cleaning fluid is it may be hard to get. The problem becomes the variety of solvents art always a good substitute for the commercial cleaning fluids and the wrong choice could have consequences. Then cleaning and rinse isn't exactly technically correct. The entire process is cleaning. The cleaning fluids have a variety of chemicals to dissolve the lubrication brighten the plates hopefully put everything in the solution so it comes off the parts. The rinse is actually a continuation of the cleaning process just a diluting the concentration of the chemicals found in the cleaner. So at the very end of your cleaning process all the bad stuff is hopefully been removed everything is clean.2 points
-
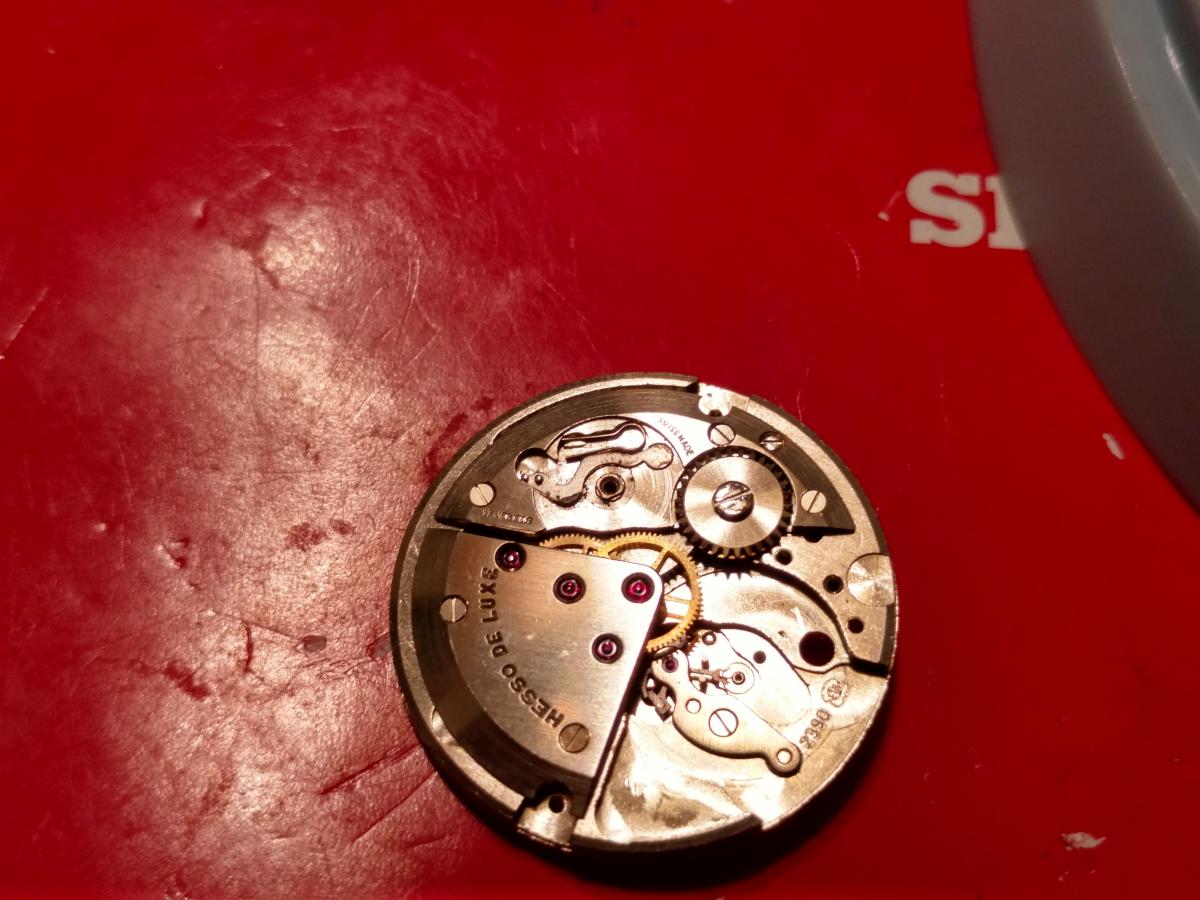
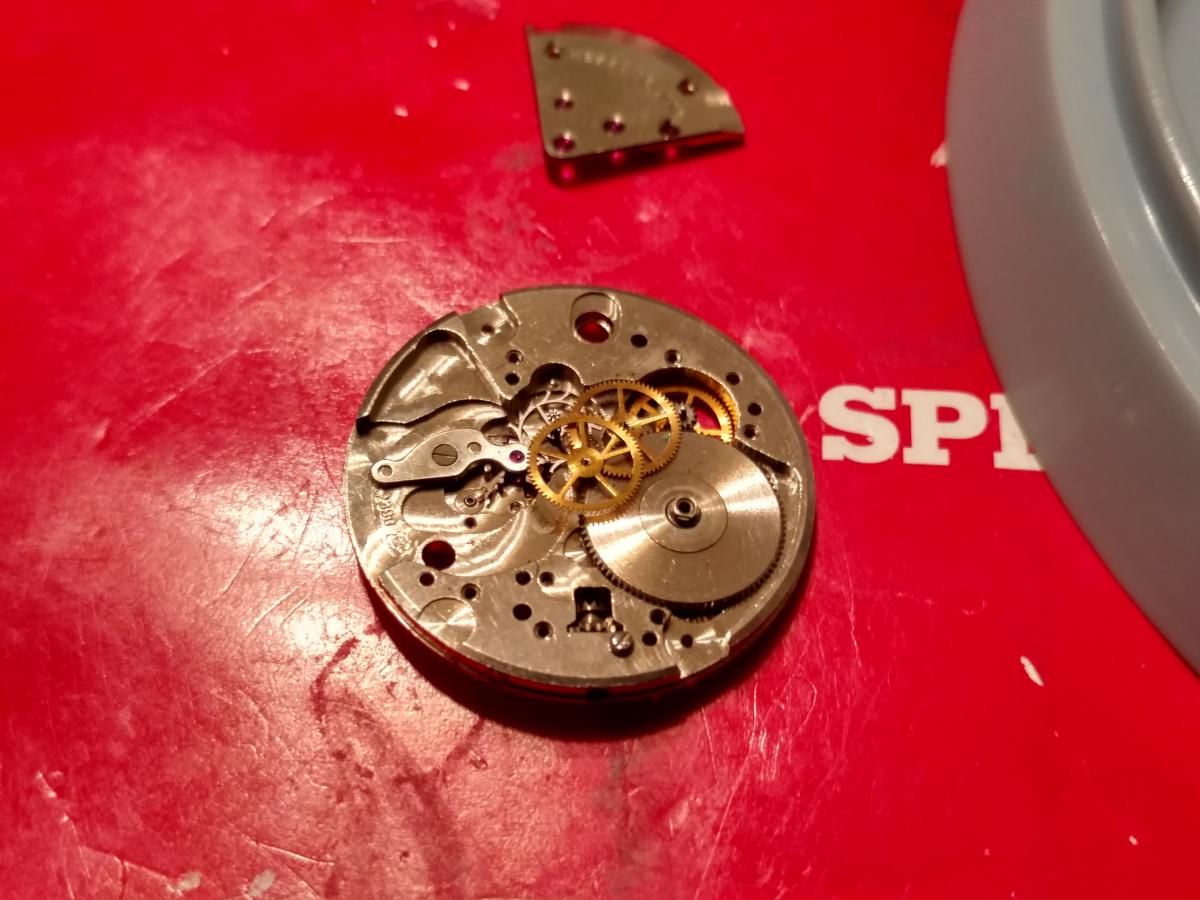
First off, I apologize for the lack of pics here. I didn't realize members are doing walkthroughs on this forum until recently so I neglected to take "progress pics" for you all. I am a beginner watchmaker in my 7th month. I've broken quite a few movements so now it's time to get serious now that I am BEYOND experienced in breaking them:( Yes, I have restored about a dozen but have also broken several dozen movements trying to understand everything. After reading and breaking (then repeating over and over), I'm proud to introduce a real "beater watch" that I could save from the scrap pile/junkyard. Again, I apologize for the lack of before and after pictures but I can tell you that this thing was nasty on the inside and out let alone not working at all. Now, she not only looks decent but is ticking away happily with a BE of 0.8 (I know, not great) and amplitude is back up to 271! It is truly exciting to be on a forum where we can share these types of things, I'm hoping to learn a lot from you guys and will also help as much as I can too:D Thanks for reading! The first two pictures below were "reference" points during disassembly just in case I needed to figure out how to get it back together, lol. (didn't need them after all) The last picture is the final product:) There is supposed to be a second hand but A) it was totaled to begin with (snapped in half when I bought it) and B: I like this particular watch better without one;)

 1 point
 -
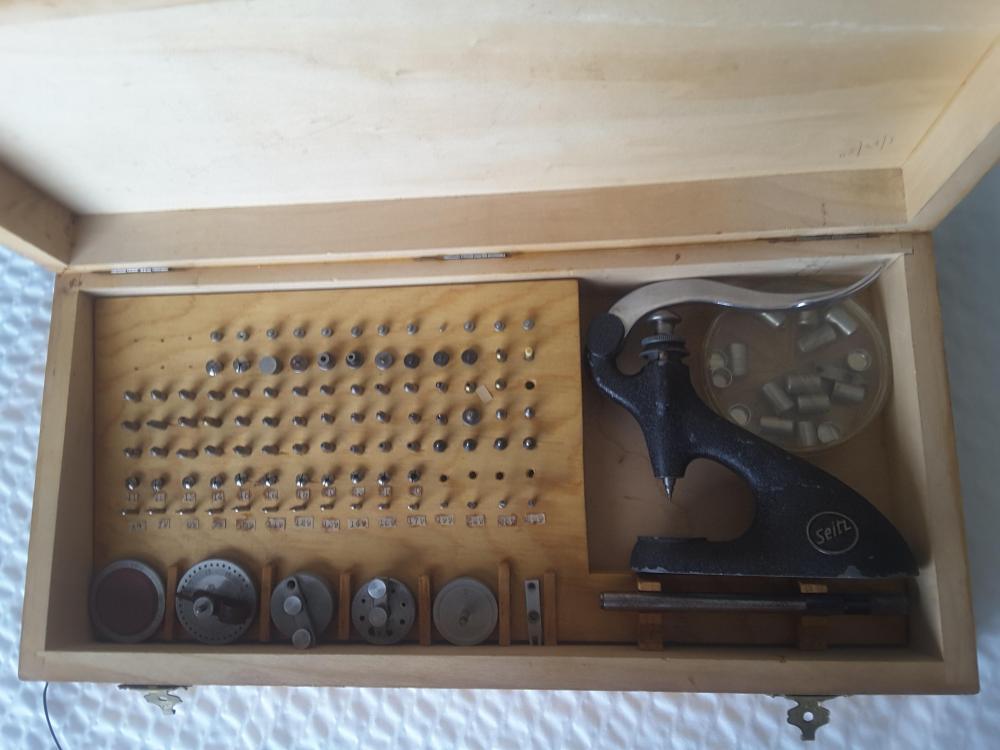
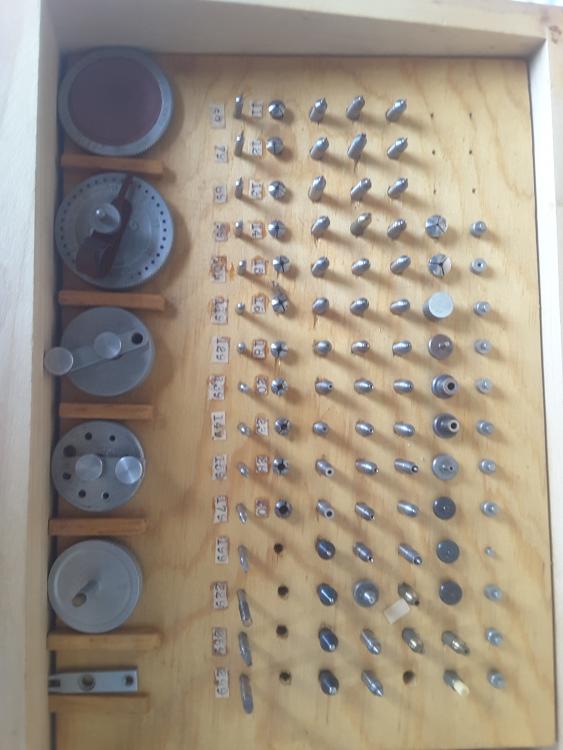
Hi I am new to this hobby and just picked up the L&R watch cleaner that I asked advise about. While there the guy gave me what looks like a mini staking set. Not really sure of its use but it's in real nice shape with a micrometer adjustment on the pressure lever. Made by Seitz. Any info on the application for this tool is appreciated. Pictures attatched. Thank you Tom
 1 point
 -
Hi everybody, I have been browsing this forum for a few months, I suppose just to keep up with the trade, anyway I have found it very interesting I didn't realise there were so many amateurs with such a great span of knowledge. I left the trade in the 80's when quartz watches were destroying the repair trade, I never considered returning to it as I was settled doing other things, I never lost my love of watches. I once worked for the firm that imported "Sicura" watches in Clerkenwell as a "Trade" worker repairing guarantee watches at home, this entailed finding out what was wrong and putting it right, it could be a broken balance staff, button and stem or glass anything in fact. I would be given huge parcels of spare parts and told to get on with it. I used to repair about 200 watches a week for which I received 33p per watch, it was a good living in those days but came to an end during the postal strike in the 70's. When I stopped trade work I was charging £1.80 for a COH (clean and overhaul) for a normal jewelled lever or pin pallet and £2.50 for an automatic, competition was fierce in those days and you had to keep your prices low. A few years ago I was offered £25.00 a watch for a COH but it meant setting up a workshop again, so I didn't bother, I even threw away my old cleaning machine when I moved to France (which I regret now). Now I've bored everyone to death I'll finish and just to say If I can ever help anybody I would only be too pleased. Thanks to Mark for this site and the brilliant videos which I have enjoyed immensely.1 point
-
Hello Consuelo and a big hello to you.1 point
-
Welcome Yorkist, wow, 200 watches a week! That's amazing! Well, I think you should get back into the business. LOL! Thanks for the great intro. I enjoyed the read. Take care.1 point
-
Welcome Consuelo, I totally get the "minimalist" approach. I don't live in an RV but my house is full. My biggest complaint is trying to clean really dirty watches without equipment. The Ultrasonic stuff seems promising but one still has to deal with cleaners. Anyway, welcome and enjoy!1 point
-
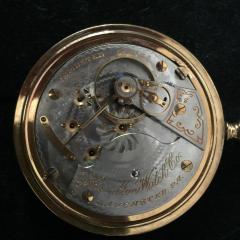
Seems to me like a Unitas 6498. I can imagine that they use the same sized ratchet wheel screw and arbor. Try to save the arbor and then YOu need only a replacement screw. The winding wheel is usually the one closer to the crown, hence called crown wheel. The one with the barrel arbor is called the ratchet wheel. Make sure which one, since those have different way threads.1 point
-
I'm very new here as well, welcome , everyone's very friendly & helpful!!1 point
-
Hello and welcome Yorkist. I'm sure your expertise will come in very usrful here. Now Yorkist is that because you like Yorkie chocolate bars you come from York your second names York or you play cricket sorry its one of my pet games trying to work out why people call themselves what they do.1 point
-
Found this article while browsing the internet yesterday, I hope I get to do a quarter as much as this guy in my watch life time. http://mashable.com/2015/07/05/watchmaker-new-york-city/#It0QJxlBgkq9 Den1 point
-
Welcome to the forum, Yorkist! Glad we have you and your expertise with us! Cheers, Bob1 point
-
Hello! Watchmaking is perfect for a full time RV'er. You get to hit every flea market and antique mart there is looking for those old watches to fix up! Have fun1 point
-
Greetings and Salutations! In trying to figure how long you might spend on each watch, I'm coming up with 15 minutes! Is that even close? Blindingly fast for a cleaning and overhaul! Glad to see you here.1 point
-
Hello and welcome. A very interesting introduction. When I started back in the 70's we charged £2. 50 for a clean and £5.00 for an auto. I've been retired for years my eyes aren't very good thanks to diabetes.1 point
-
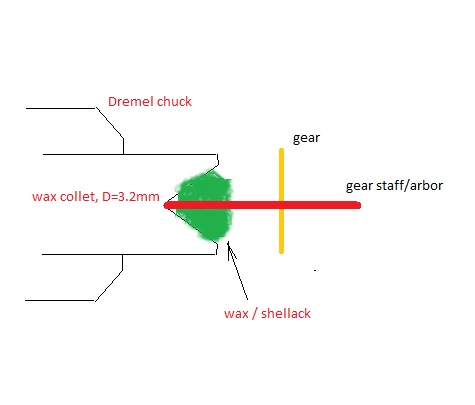
Well, You need at least a wax chuck and mount the gear in wax/shellack and make it centered while the glue is soft. It wont be concentric if mounted directly in the Dremel. I would do it like this. Take a 3.2mm diameter possibly brass rod and find its center in the Dremel. Turn a cone in the end. This will be concentric. Now add wax or shellack in the cone and while hot put the gear arbor in it. Then turn the Dremel slowly and with a toothpick align the other end of the arbor centered. I am using an AC speed regulator for my Dremel, or using the low speed stage. Try it first with a piece of steel not with the gear you want to reduce the pivot Important, dont take out the wax chuck before the job is done. You wont be able to mount it concentric again.
 1 point
 -
welcome to the forum. i started out with a cigar box containing tools and watches. a bit of mechanical experience and some very good watch tools, you will do just fine. vinn1 point
-
Welcome !!!1 point
-
Hello, you've come to the right place, plenty on here for you to find out about. We all love helping out too.1 point
-
Welcome Consuelo, Enjoy the forum1 point
-
My method is relatively simple and need not much experience. Can be used with a new staff turned with rough pivots and then finished like in the video. It is safe, since nothing bad happens if your hand slips. The pivot will be absolutely concentric since it is turned between centers. With those different polishing paste grades one does not need many files just a flat steel piece. The "stregth" of the file depends on the paste used. Oe can relatively fast go down from 0.3mm (roughly turned pivot in the lathe for example) to the desired 0.1mm pivot. The pivots i made are going into holed jewels with 0.11mm and 0.13mm holes. Ususally i try the plate (hole jewel) on the pivot while it is in the tool and if the tip fits, then i change to a finer paste, grind it slower and do inspections more often. After the shaping of the pivot one can polish the pivot ends and sides as well without mounting in another tool. The drawback is that burnishing cant be done in this tool, since one cant push on the pice hard sideways. I will make close-up pictures of the finished pivots i grinded.1 point
-
JDRICHARD, That question is a most important one in watch part making (not to be confused with watch repairing). A few years ago when I started looking into watch repair as a hobby, I watched every repair video I could get my hands on. Every video that dealt with a watchmaker lathe would begin with a statement that they were NOT going to show how to make a watch pivot. This would be followed by statements that a skilled person could make a pivot that is .1mm or .004" in diameter using only a graver and a T-Rest on a watchmaker lathe. Some claims were made on a previous forum that they could make a staff in less than 10 minutes using only a graver and a T-Rest completely by eye without measuring anything. I have yet to see anybody do this but I have heard a lot of claims that it could be done. I know that I can not do that. I have seen two Youtube videos showing pivots turned in this manner but they were obviously well over the .1mm in diameter. The two videos that showed success turning a precision .1mm pivot were made by Steffen Pahlow (TURNING A GLASUTTE BALANCE STAFF) and the old videos of the American Watch Factories (Elgin, Hamilton etc.). Neither of these videos showed the staffs and pivots being made using the graver and T-Rest. In both videos the staffs and pivots were made using special runners and fixtures. Colin from THE GREAT BRITISH WATCH COMPANY who completed both the BHI and WOOSTEP programs said that it took him six months of intensive practice to make a correct and concentric pivot. He also stated that it takes him about 8 hours to make one this way. Something that looks like a pivot can be made by turning the end down to about .010" and grinding it in on the Jacot Drum down to .004" with a slip, but in my opinion the way to get something close to factory standards is the way Steffen Pahlow does it. The equipment he is using is not cheap but he figured out the process. david1 point
-
There's plenty of info about this on the internet. My personal feeling is you would have to clean the parts hundreds of times under the same conditions using the identical way to cause any fatigue. The modern watches of today are more likely to wear out before anything like that would happen.1 point
-
Hi Hzaidi3, welcome on board. Is this the first watch movement that you have taken apart? The reason I ask is that it's not one that I would recommend as a starter as they can be particularly fiddly. However, it is perfectly doable. To answer your questions; 1. For general oiling you need oiling pins like https://www.cousinsuk.com/product/oilers-3-in-1-af-swiss I would use either the extra fine (red) or the super fine (black) for most of the oiling on a 5M42. You will also need a good loupe so that you can properly see what you are doing. One of the most common mistakes with oiling is to use too much oil and being able to see what you are using helps to avoid that. 2. The pivots n quartz movements particularly can be very difficult to align and really all you can do is to keep trying, gently nudging each wheel until everything is in place. An oiler (clean) is actually quite a good tool with which to gently coax things into position, and again, a good loupe will help you to see if the pivots are seated or not. Only tighten the train bridge screws up once you are sure that the pivots are correctly aligned else you run the risk of breaking the pivots. There is a trick to getting the rotor to behave. Place a screw against the rotor pivot on the opposite side of the main plate to the side the rotor installs so that the magnetic rotor holds the screw in place. In so doing the screw also helps to hold the rotor in place. 3. When it comes to syncing the hands to the date change, without the hands installed rotate the crown (in time setting position) until the date just changes, then install the hands pointing to midnight.1 point


.jpg.6225a64433578a11e0218b27c20b13f5.thumb.jpg.d82b0cd1e370f3a3a59a06afa957d184.jpg)