Leaderboard


Popular Content
Showing content with the highest reputation on 08/09/16 in all areas
-
I would be interested to hear how the dial cleaning went..for me it usually starts with some light soap and a fine brush and ends with sandpaper before hitting the internet for a replacement. Anil2 points
-
Turtle on me. Let's be serious, it's unwearable. However I don't even like it And with that I've exhausted my quota of wrist shots this year. Not my style either.
 1 point
 -
Used to have one of these SKX013. Flipped it a few years ago and since then my largest watch is now my 6105-8110 which, although large, feels really comfortable (probably down to the practically lugless design). I guess I just got used to a bigger size. Can't really go larger than 48/49mm lug-to-lug though. Tried on a Tudor Black bay at 50mm lug-to-lug recently and on the bracelet it looked too chunky, but on the strap it looked okay - just. You and I are cursed my friend :-(1 point
-
Hello Chris your addiction will only get worse I'm afraid once that first repair springs to life your hooked. Have fun ask questions if you don't ask you don't learn and post pics to help the lovely people here help you with your problems. Mick1 point
-
If the hairspring itself is distorted to a cone, repair is nearly impossible, all coils are deformed then. You can try to deform the other way (pull the collet) to get a flat plane again - success is uncertain. What can be done with a deformed hairspring (only limited locations of bending): Regards, Frank

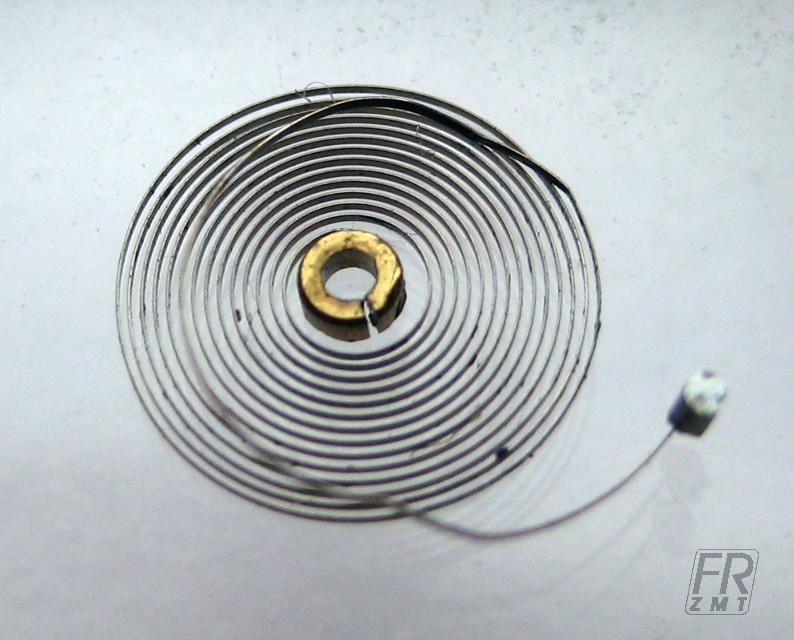
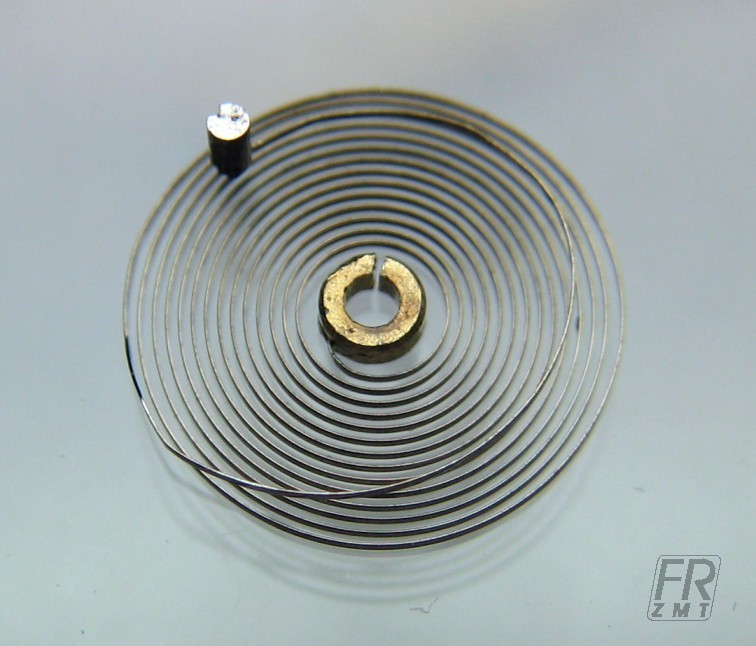
 1 point
 -
Ha. Yes exactly. I was hoping to get SEIKO 6R15-0020 DIVER'S 200M and maybe 'sapphire ceramic or something like that. I'm not concerned about the originality. Until recently my seiko Skx007 was my go-to watch and perfect for my 6.5" wrist but I wanted something a little more refined. It seems that Seiko aren't in too much of a hurry to update this line and I think the new turtles are nice but a different line altogether.1 point
-
Just weak soapy Luke warm water and a very soft size 6 artists paint brush dial was left to soak for a while then gently brushed you don't want water too hot it strips the old varnish.1 point
-
Some are not lubed see tech sheet below. ETA 2824-2 - Technical Communication.pdf1 point
-
That one classy watch cool real cool1 point
-
It would be easier to source a replacement caseback and machine it out to take a crystal! Keep your original to preserve the serial number etc. Anil1 point
-
If you really want nice engraving on your back find somebody who does laser engraving. I've seen the results of laser engraving on the back of watch cases it's turned out very very nice. Produces very sharp detailed lettering unfortunately it's very expensive. The machine I'm thinking about cost roughly $100,000 and the starting price for anything basic is a little over $100. Unfortunately from your description is not in the budget. Otherwise diamond tipped engraving but it's not going to look as nice.1 point
-
That's a good looking mod [emoji106] Are the markers and hands luminous? Where did you get the parts from?1 point
-
Have you used a Philippines or Seiko stem/crown?1 point
-
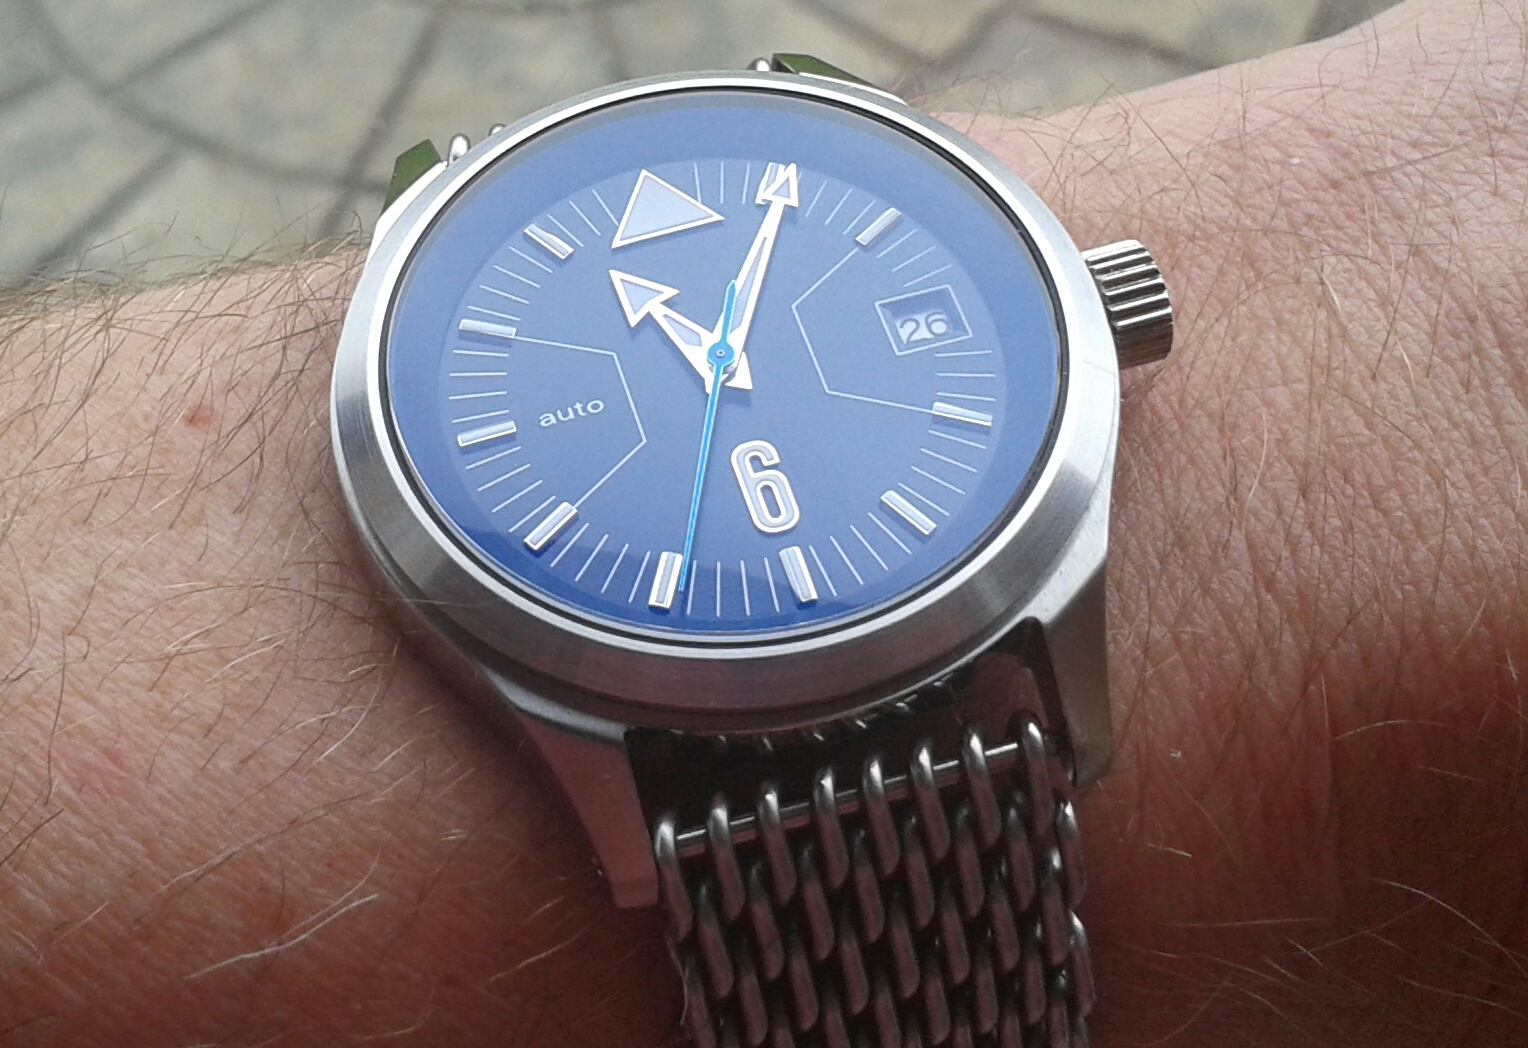
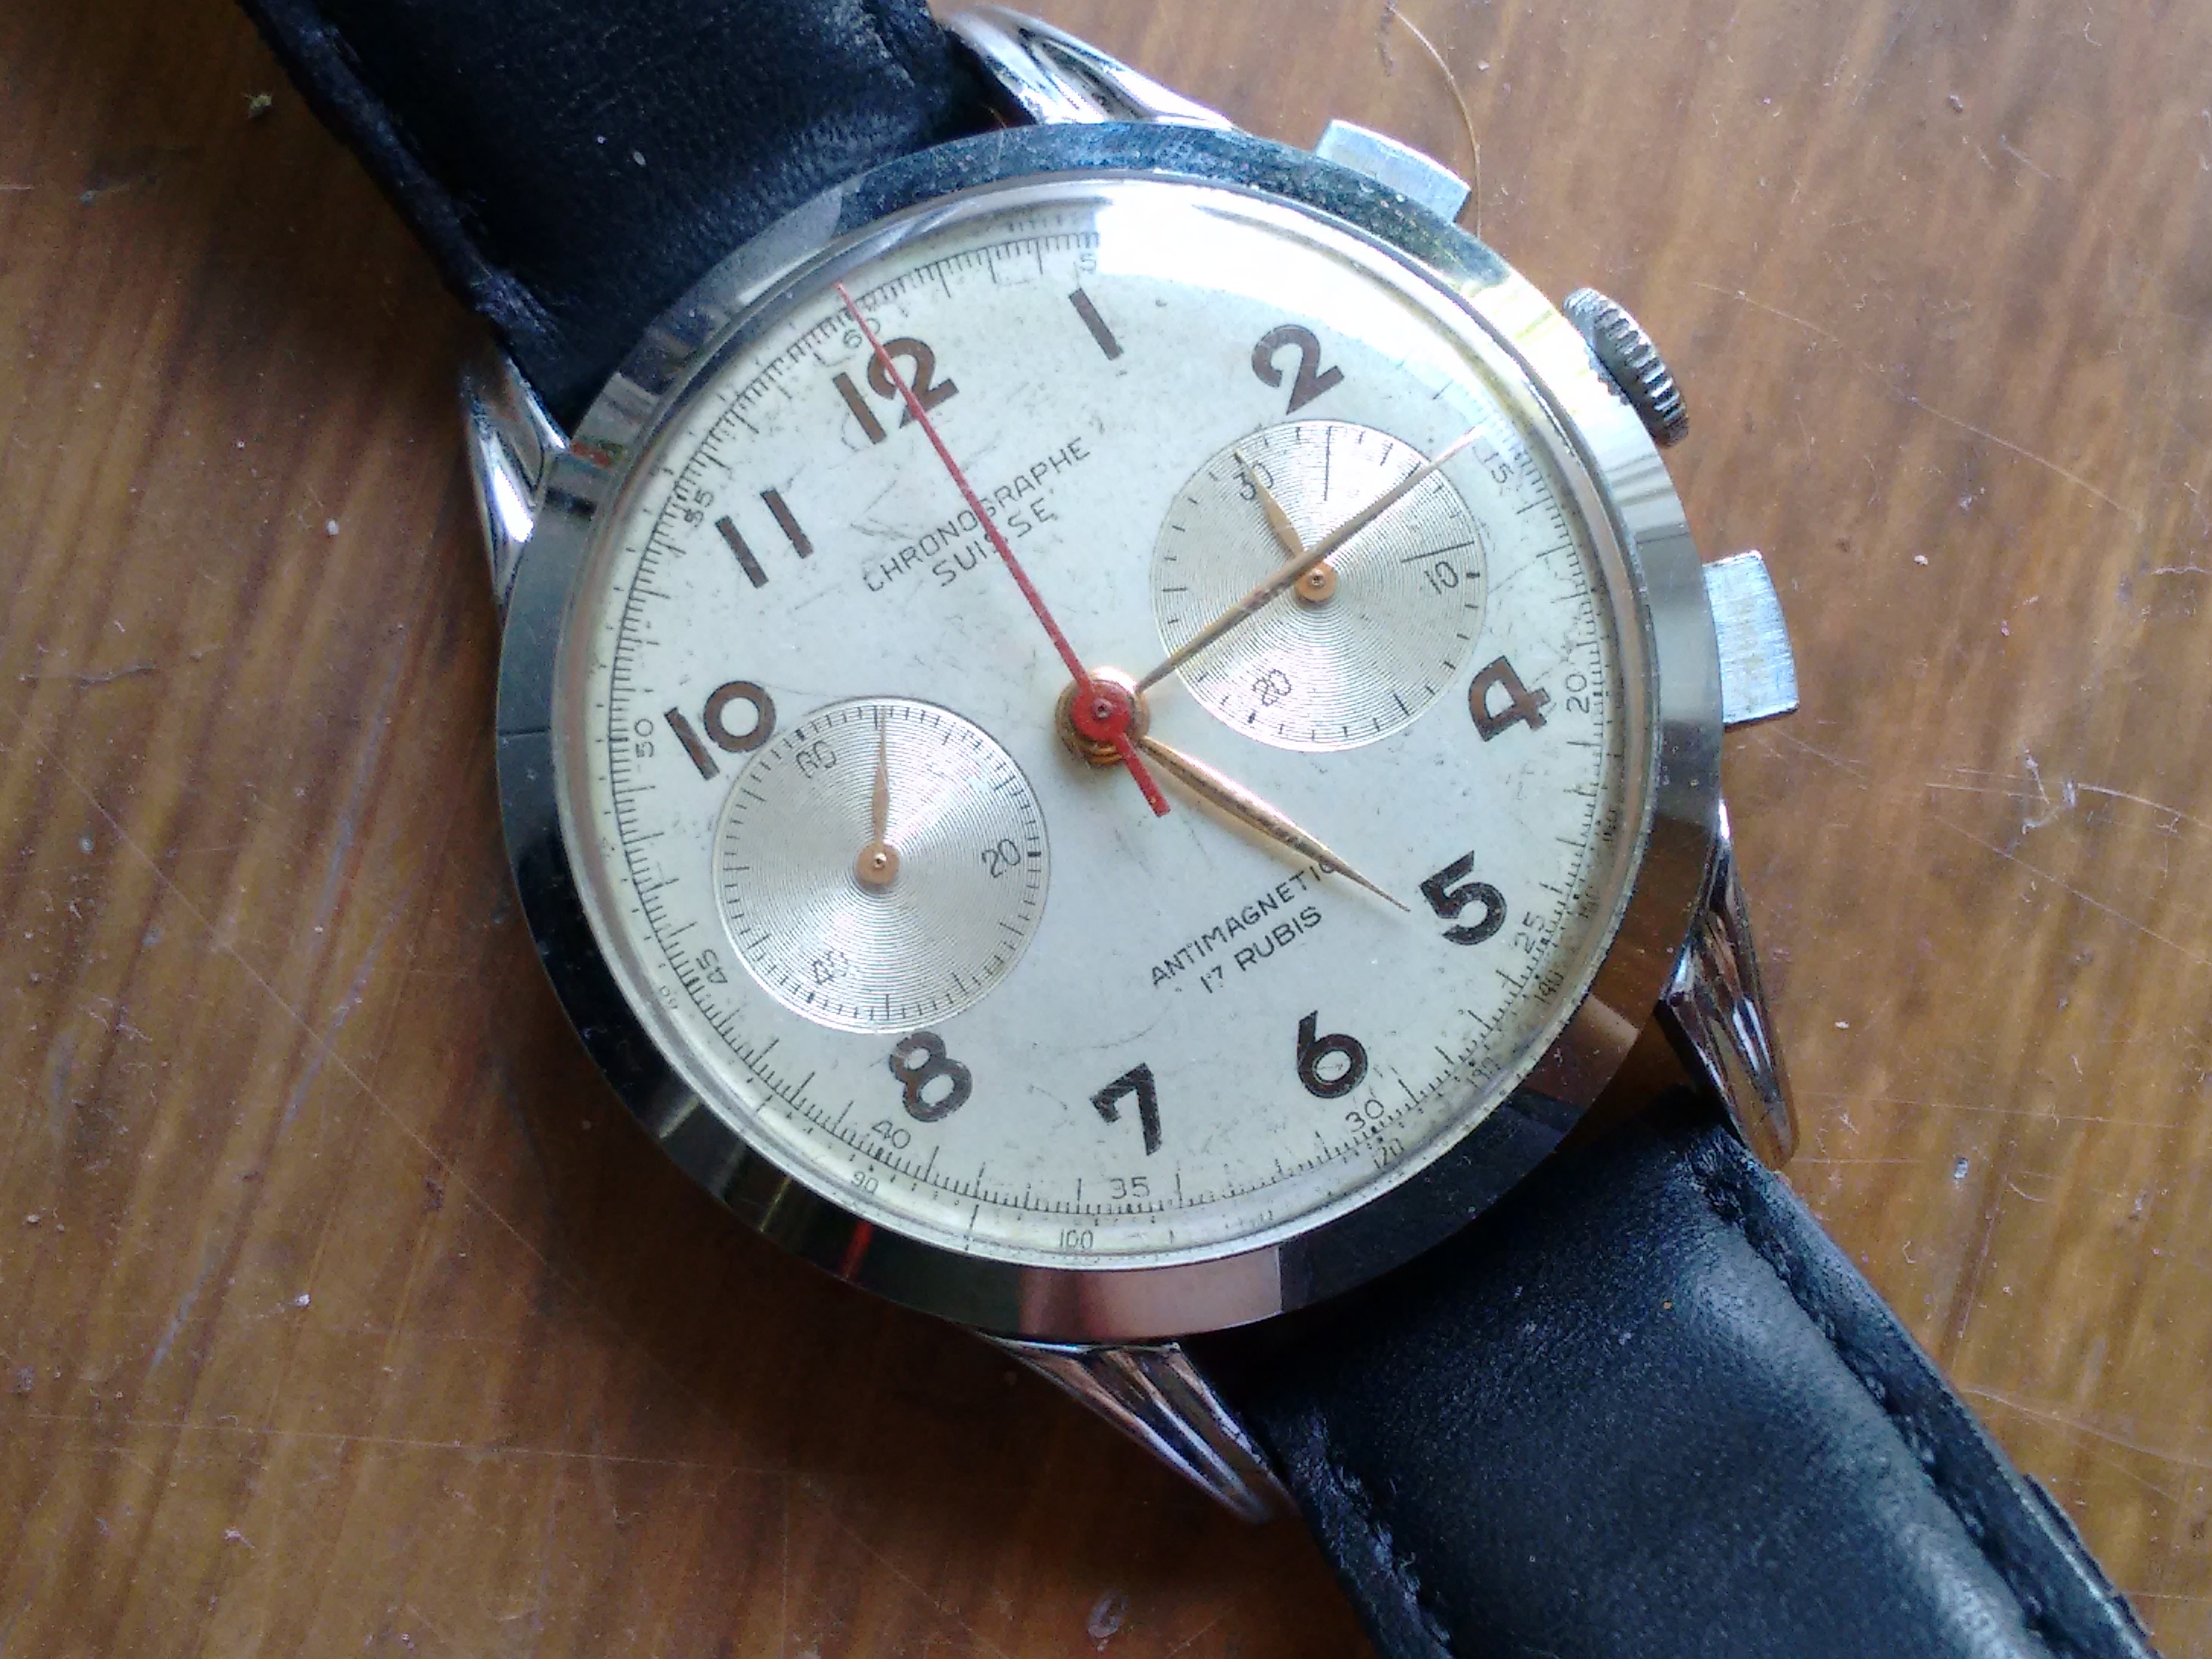
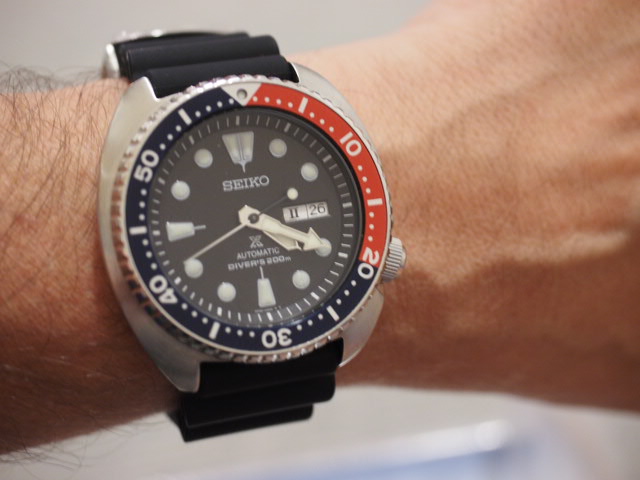
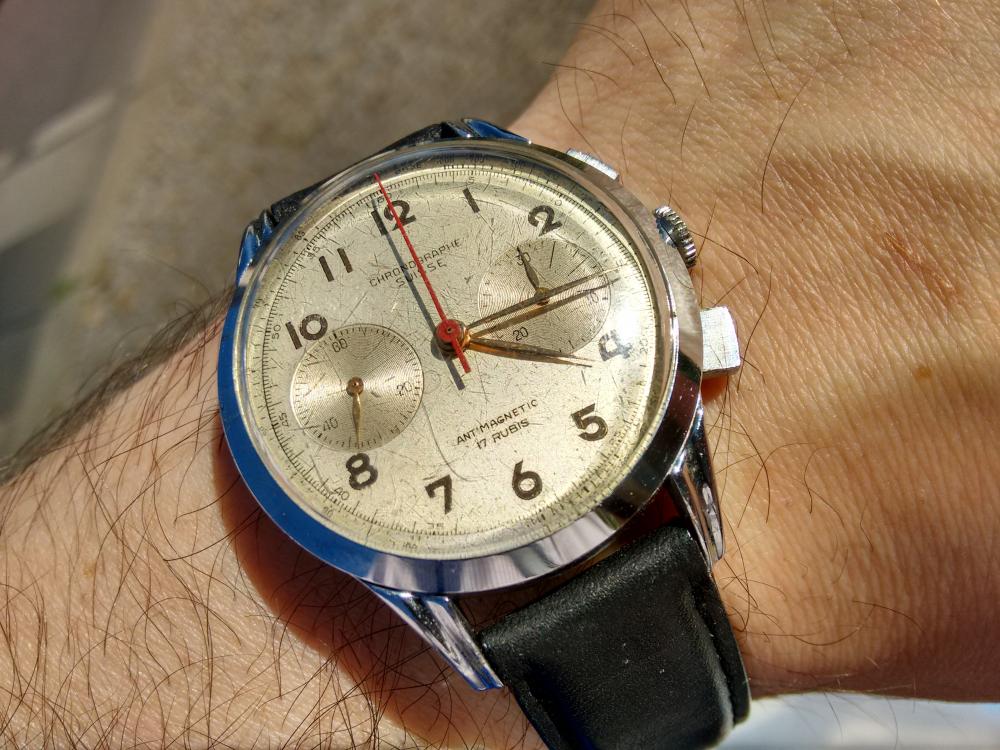
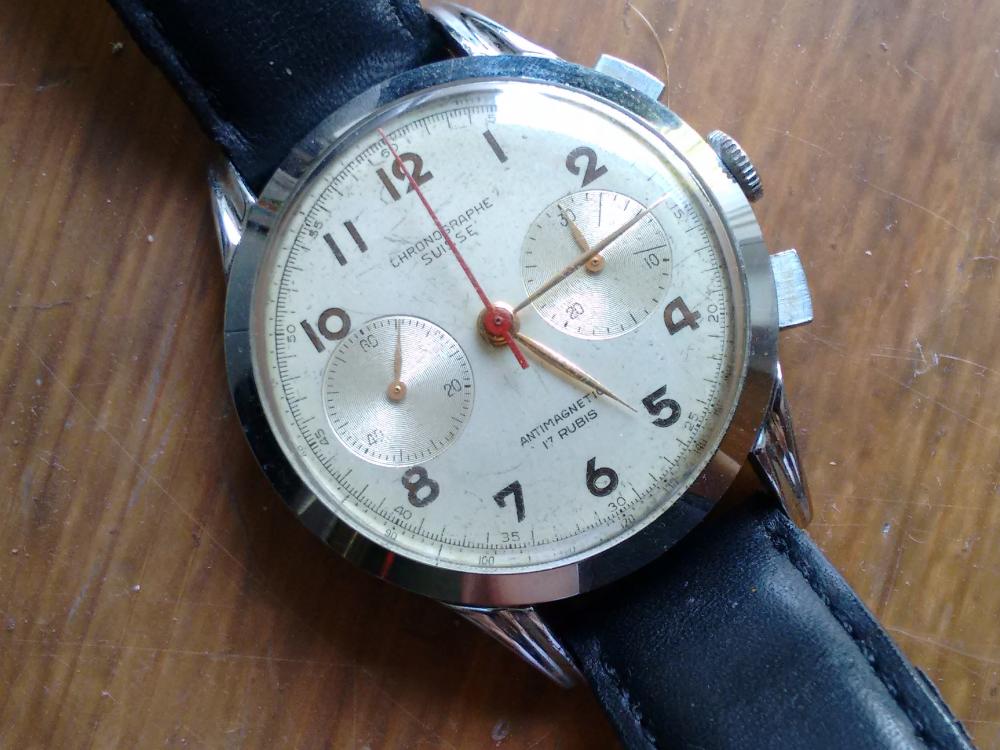
Seiko SRP275 with new dial, hands and chapter ring. Been wearing this one all week.
 1 point
 -
Looks as though the square ones are a little rare... The one above now has new hands fitted, those originals had really faded and discoloured--not so easy to see in that picture so have been replaced--exactly the same type--but nice bright and clean with fresh lume. The faded day-glo almost yellow seconds-hand is now replaced by nice new bright orange one. Only the case and crystal left to sort out......Then I'll have to stop wearing it every day for fear of damage--No free lunch!1 point
-
Only thing I can find other than the std parts list is this.... http://www.awci.com/wp-content/uploads/watch-tech-guides/A-Schild/2060.pdf1 point
-
Thanks Anil, thats is exactly the insight I've been looking for & many thanks to all for your kind words of support. Sent from my SM-G920F using Tapatalk1 point
-
This is an excellent resource and is what I use as a reference. I thing I've had to learn is how to grab the correct amount of oil on my oilers. A lot of that is down to how fast you pull away the oiler from the oil pot. When oiling jewels I inspect the oiler tip using a loupe to check that roughly the right amount is present.1 point
-
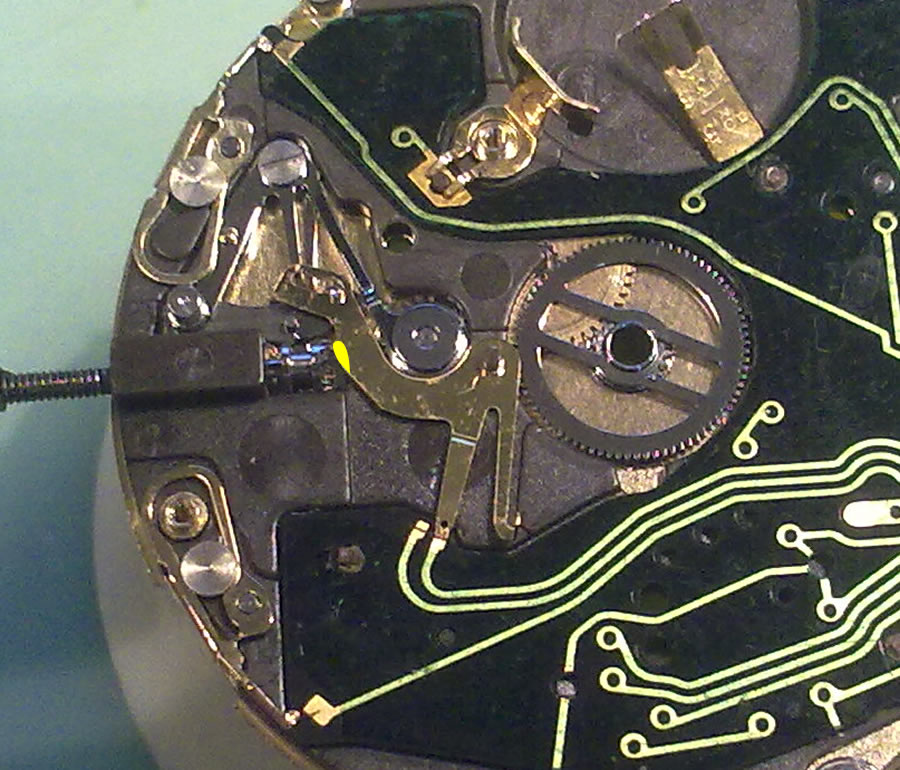
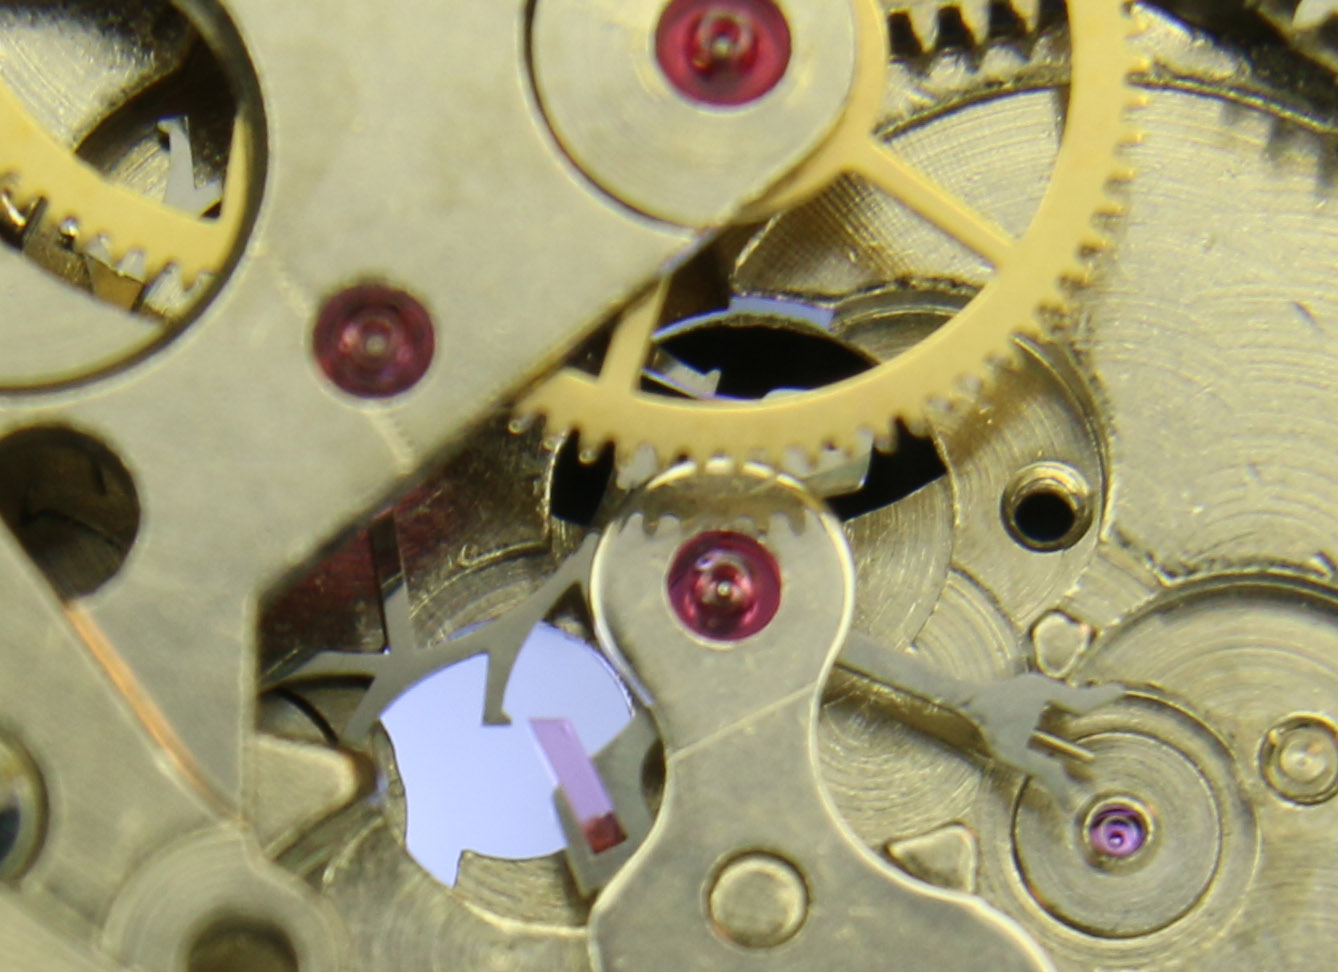
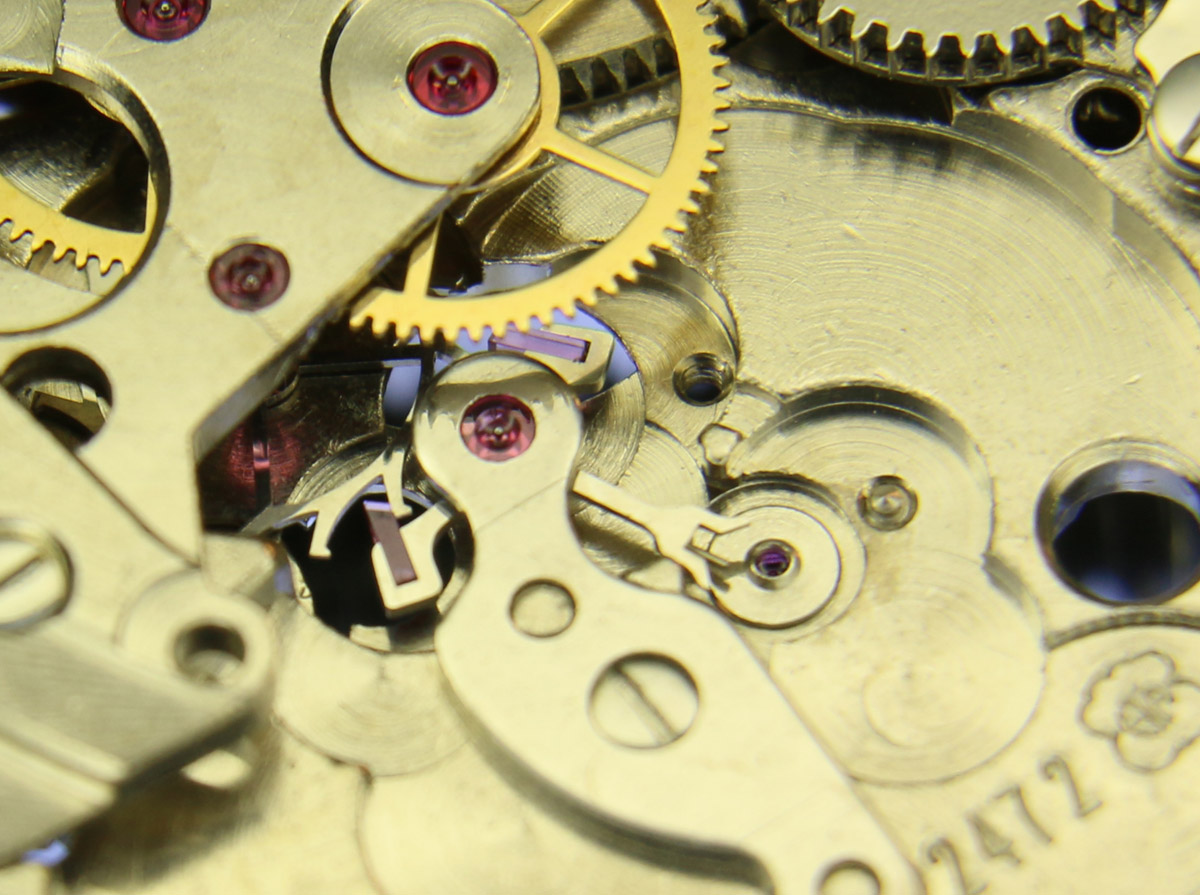
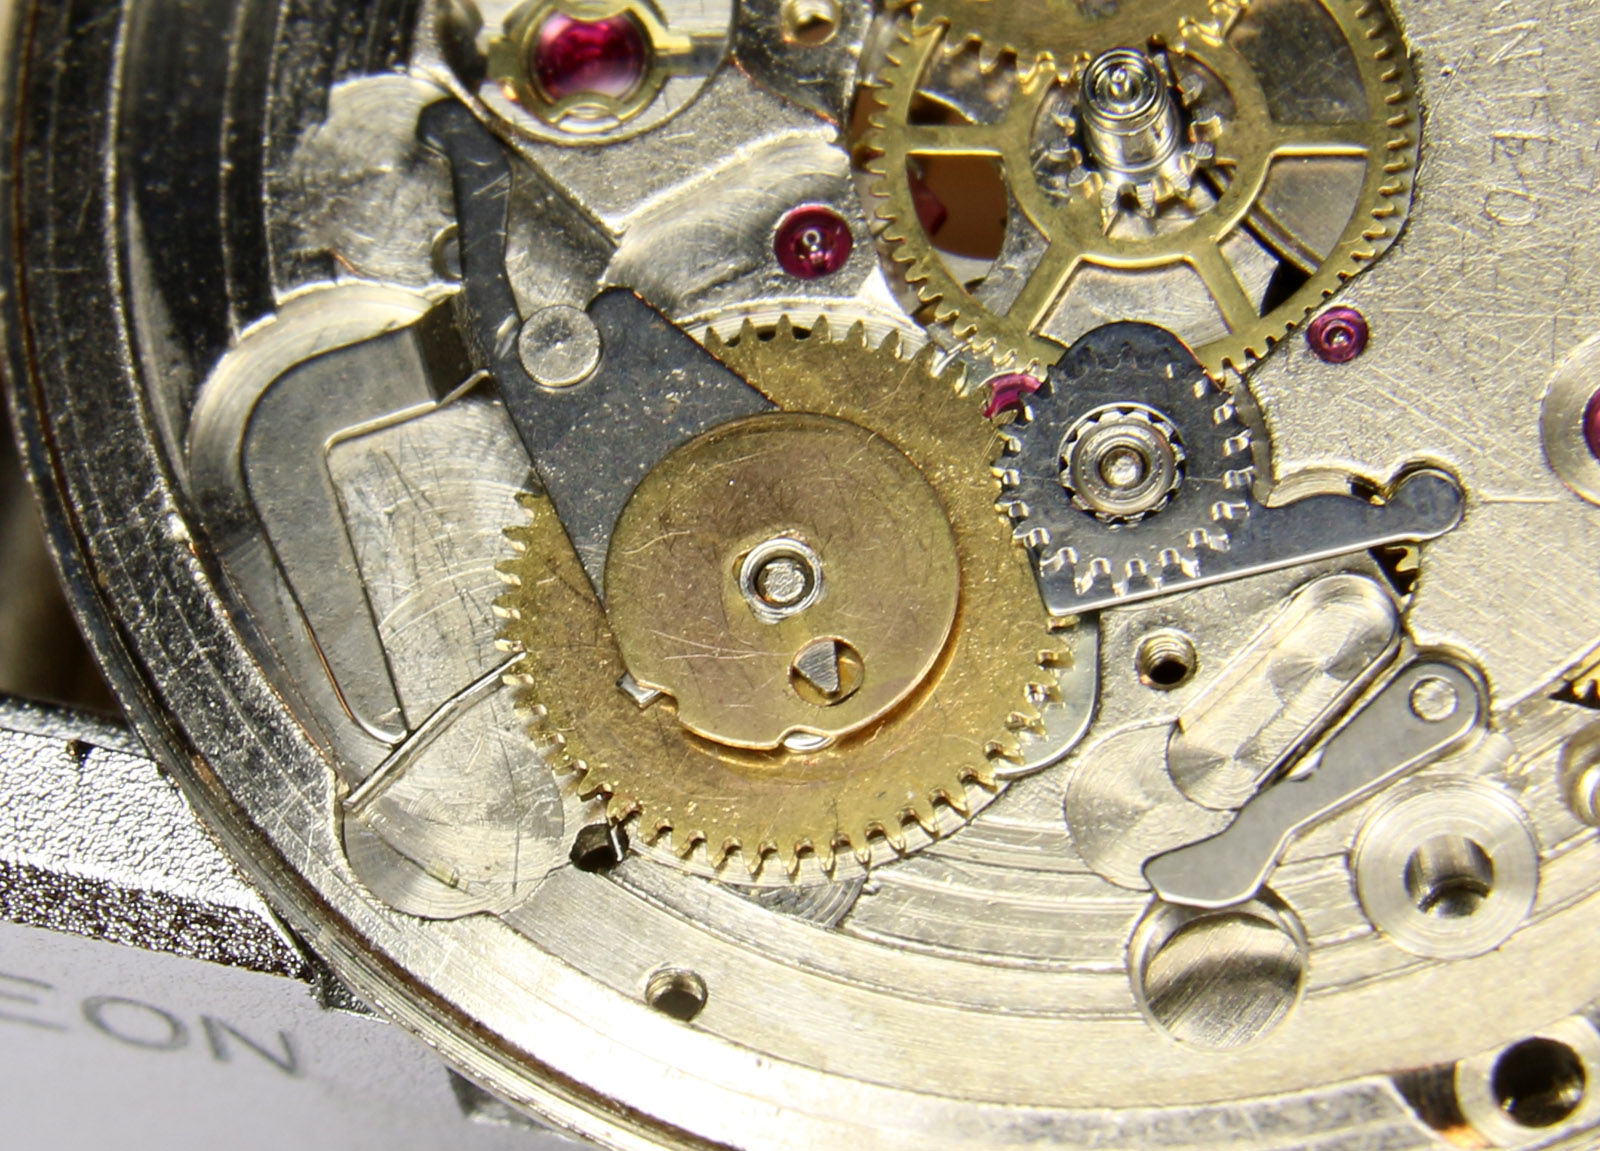
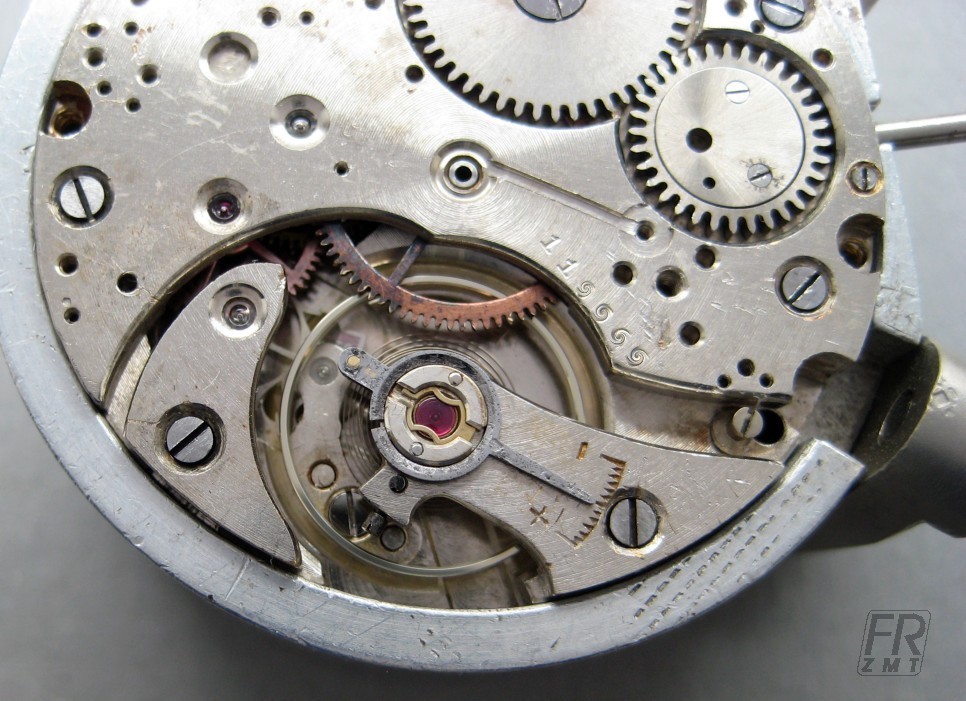
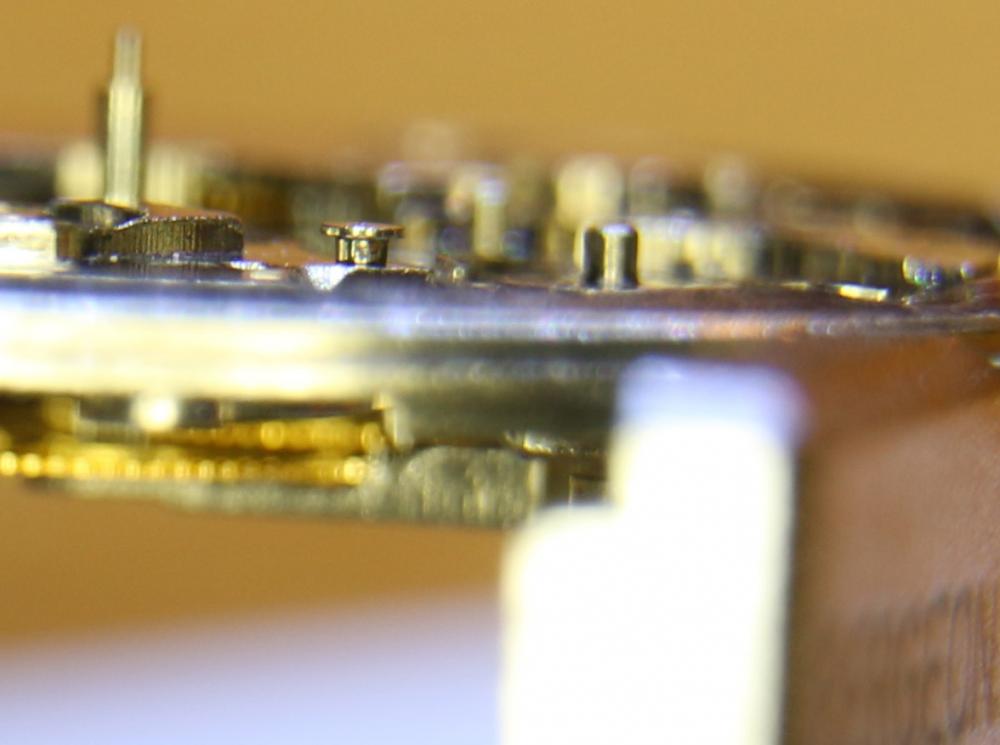
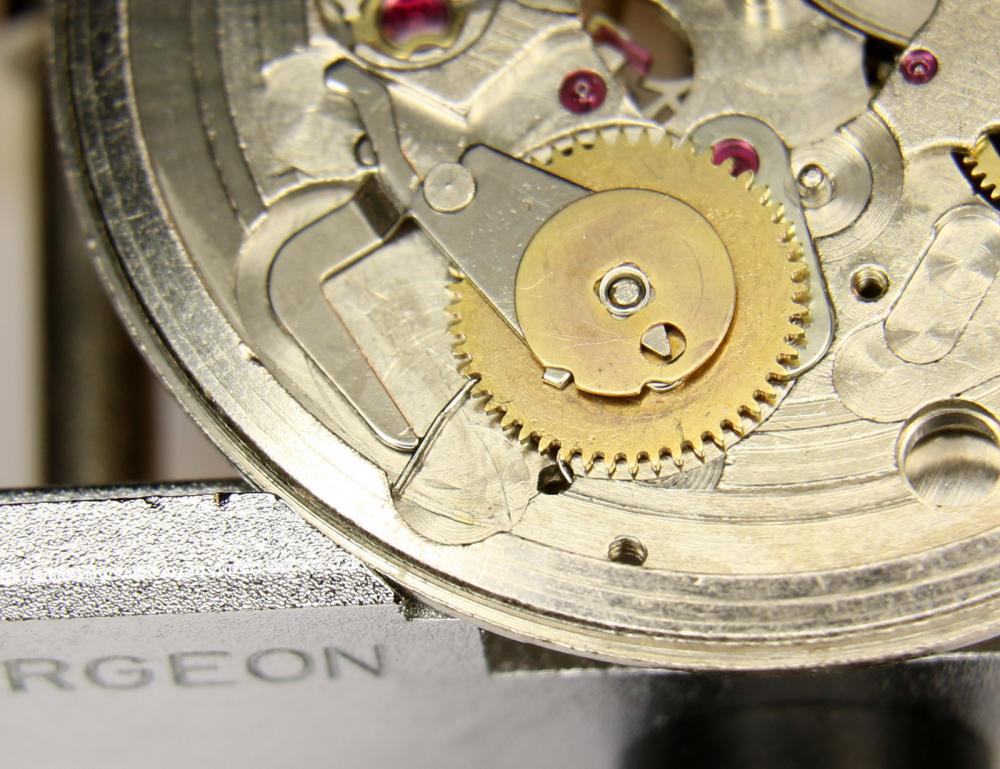
I've just serviced and refurbished a Tissot P372/472-1 chronograph, this has the ETA 251.272 movement. There was a problem with the keyless works. After reassembly and setting the stem to normal position, then second and third position and repeating this a few times, the centre second stop lever which is also a switch, 'C' in the photo, tended to jump off of the setting lever stud, 'A' in the photo. On close inspection of the lever, I could see that the tip of stem while set to normal position was jamming underneath the stop lever at 'B' in the photo and lifted the lever off the the setting lever stud. The solution was to remove part of the stop lever, indicated in yellow, at the point of interfearence as shown in the second photo. It seams that over time, the tip of the stem had worn away an area of the electronic module, thus allowing too much travel of the stem. Finaly, the finished Tissot P372/472-1 with ETA 251.272 movement. I love it.
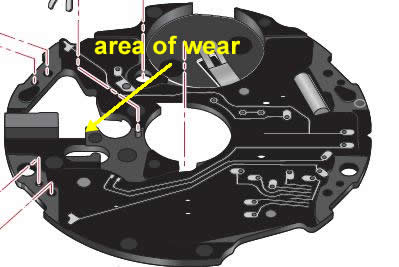

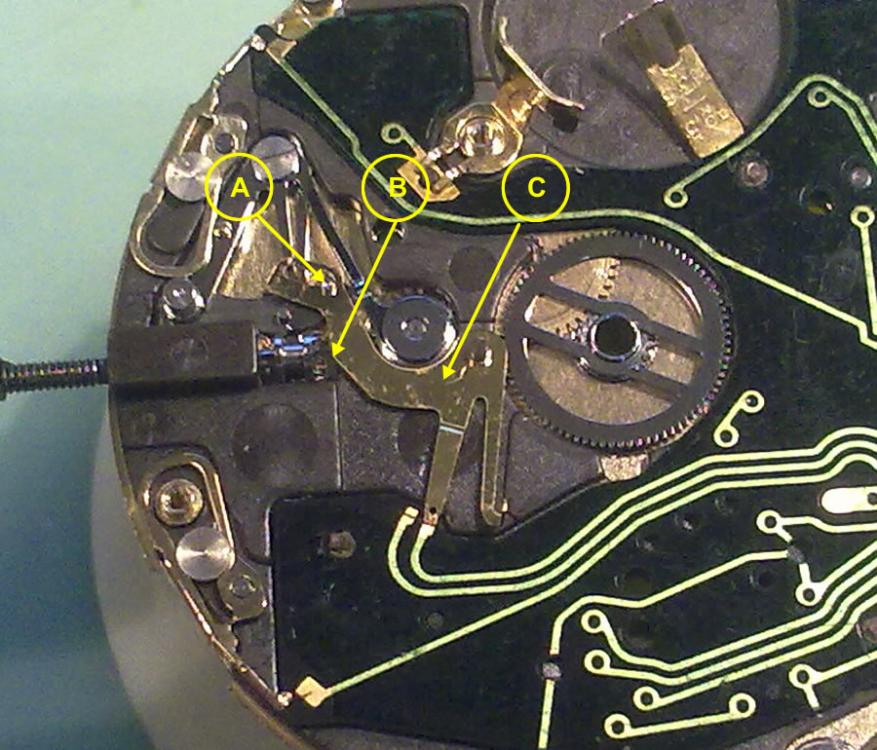

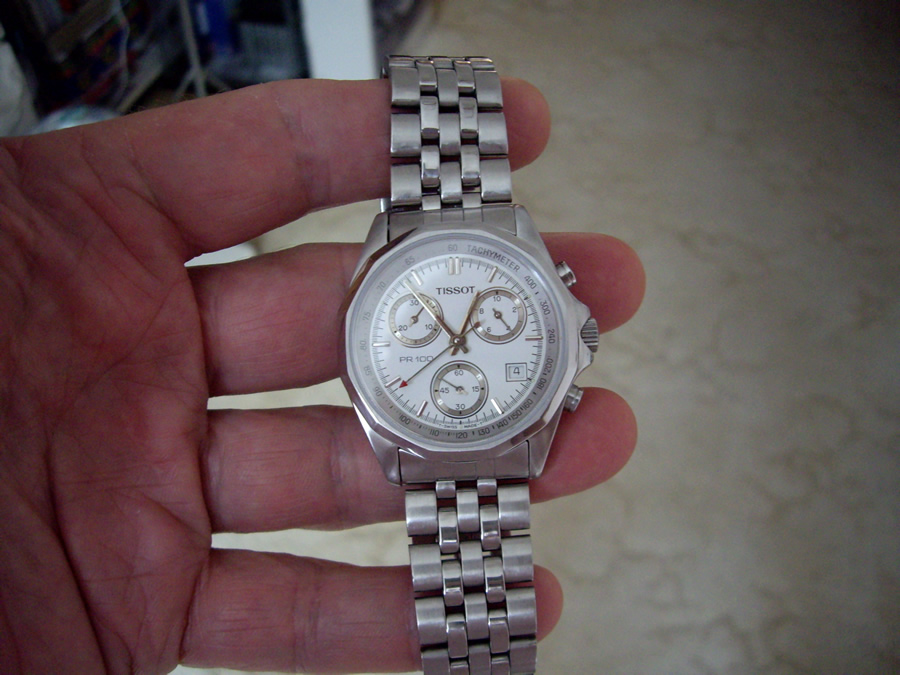 1 point
 -
Sunny day here in Berlin... A perfect weather to show off my pick for today...
 1 point
 -
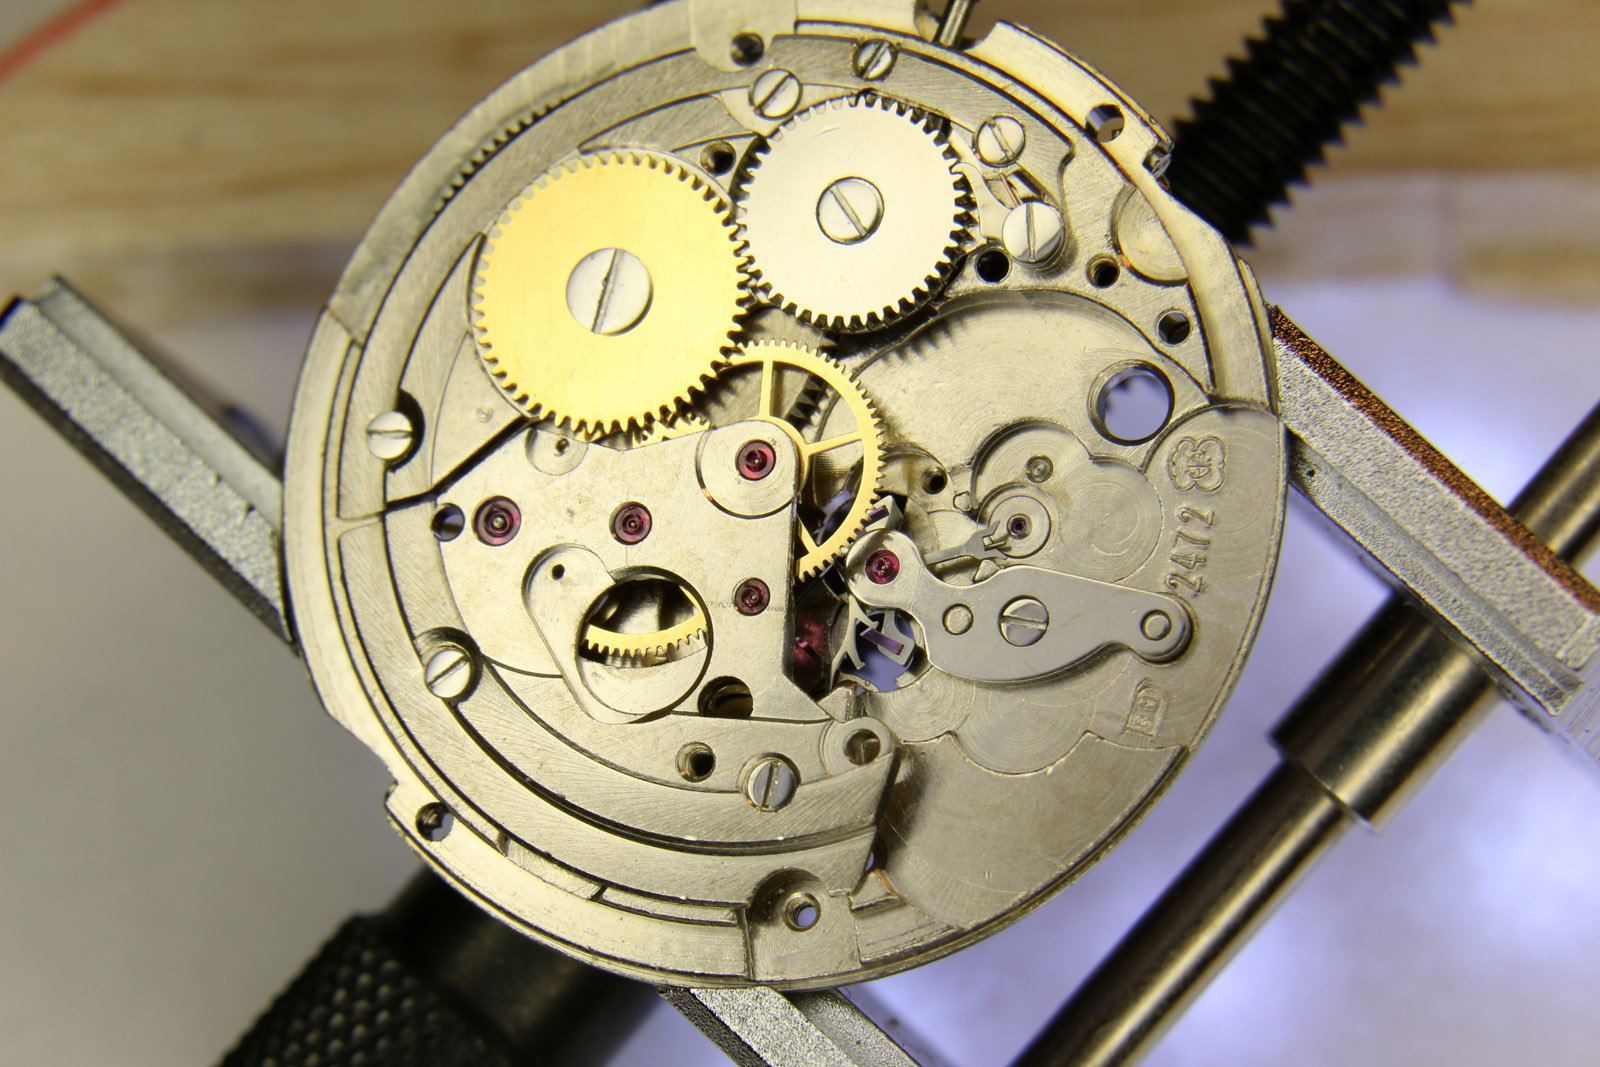
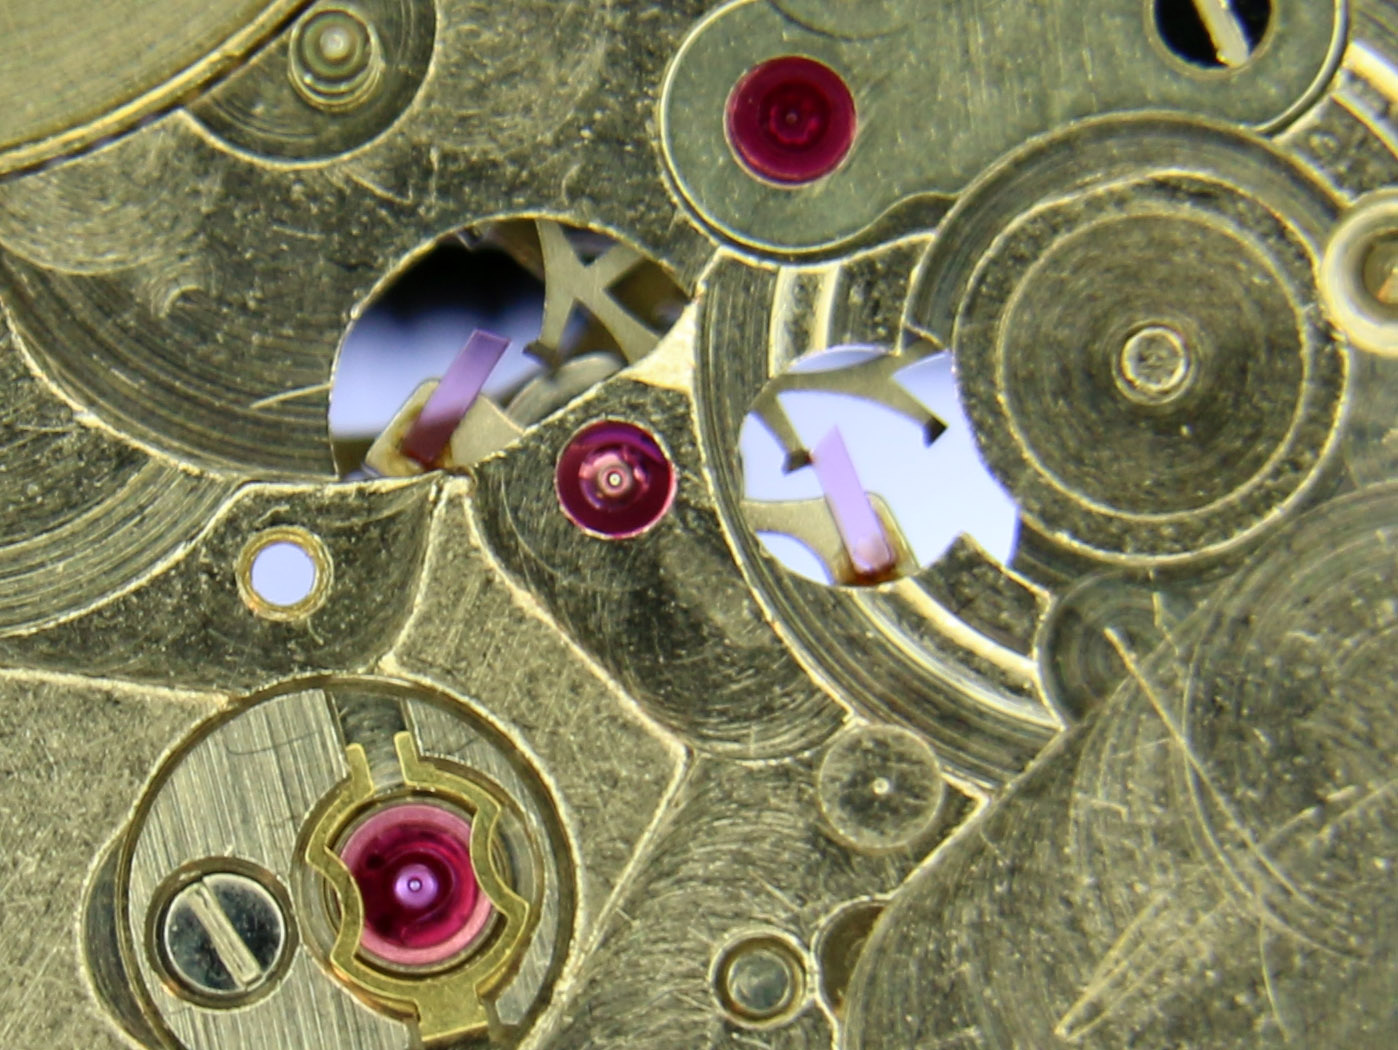
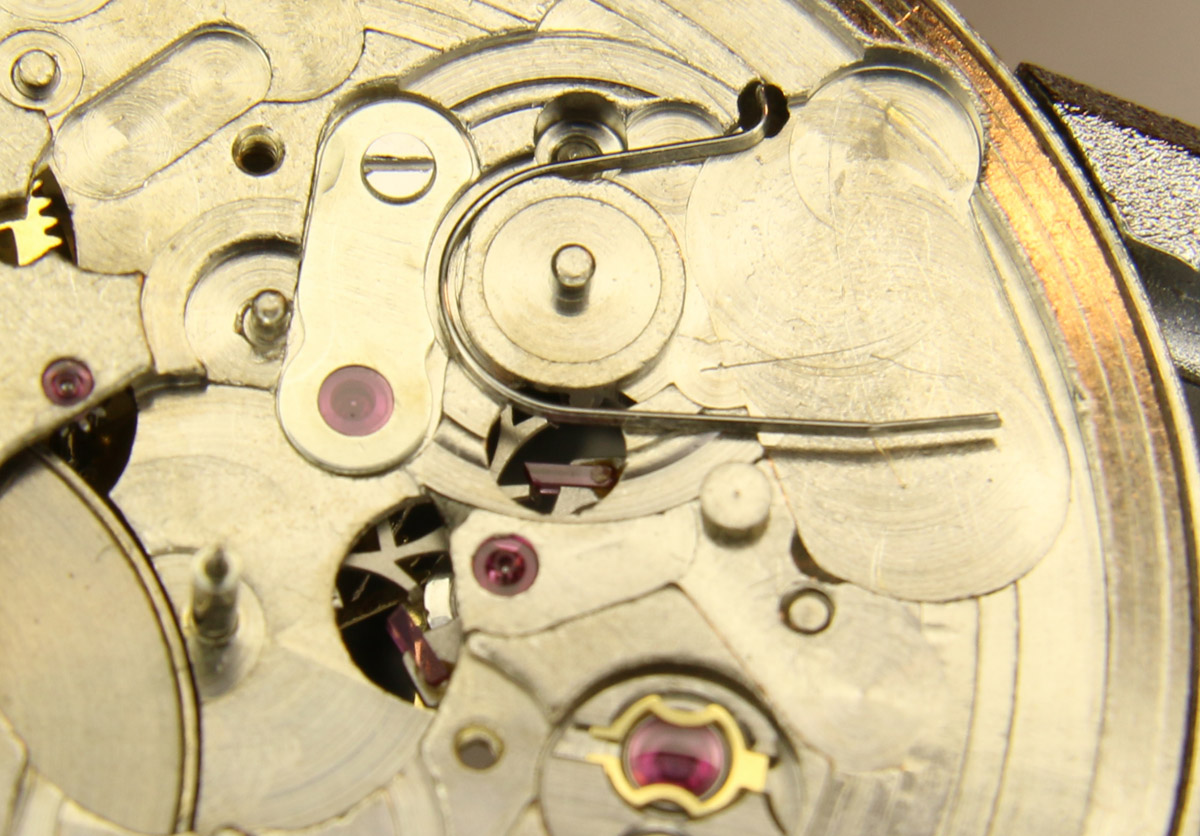
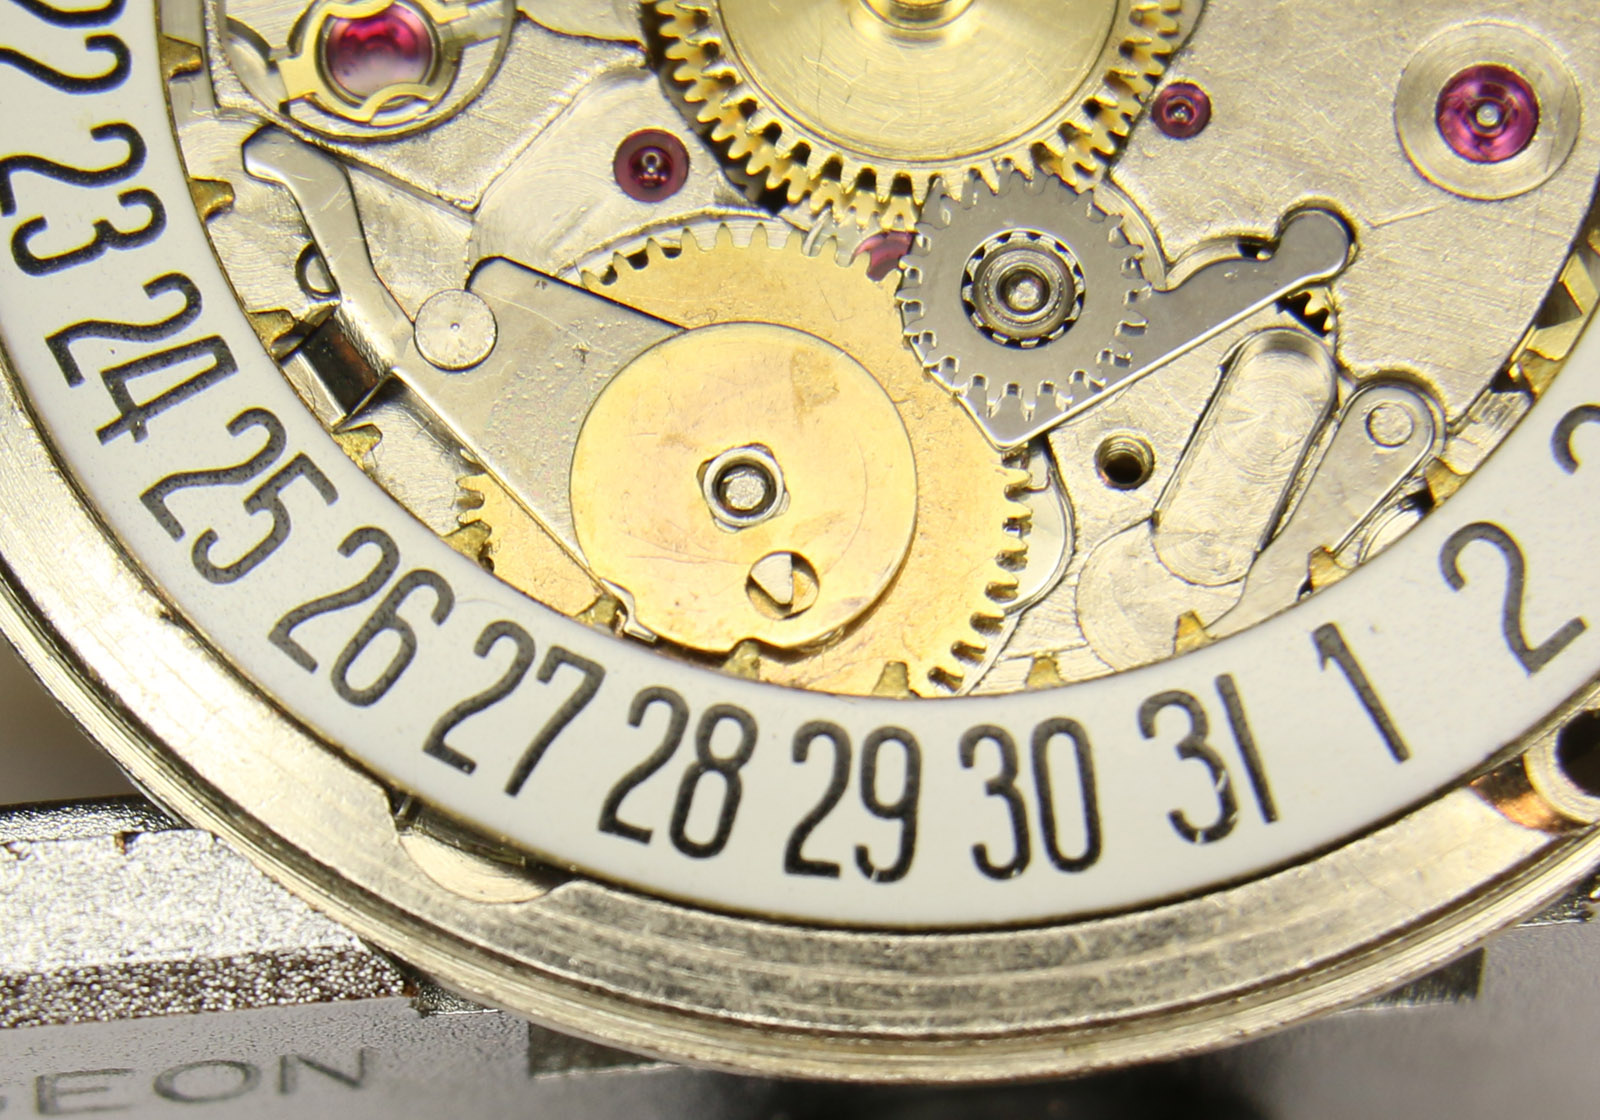
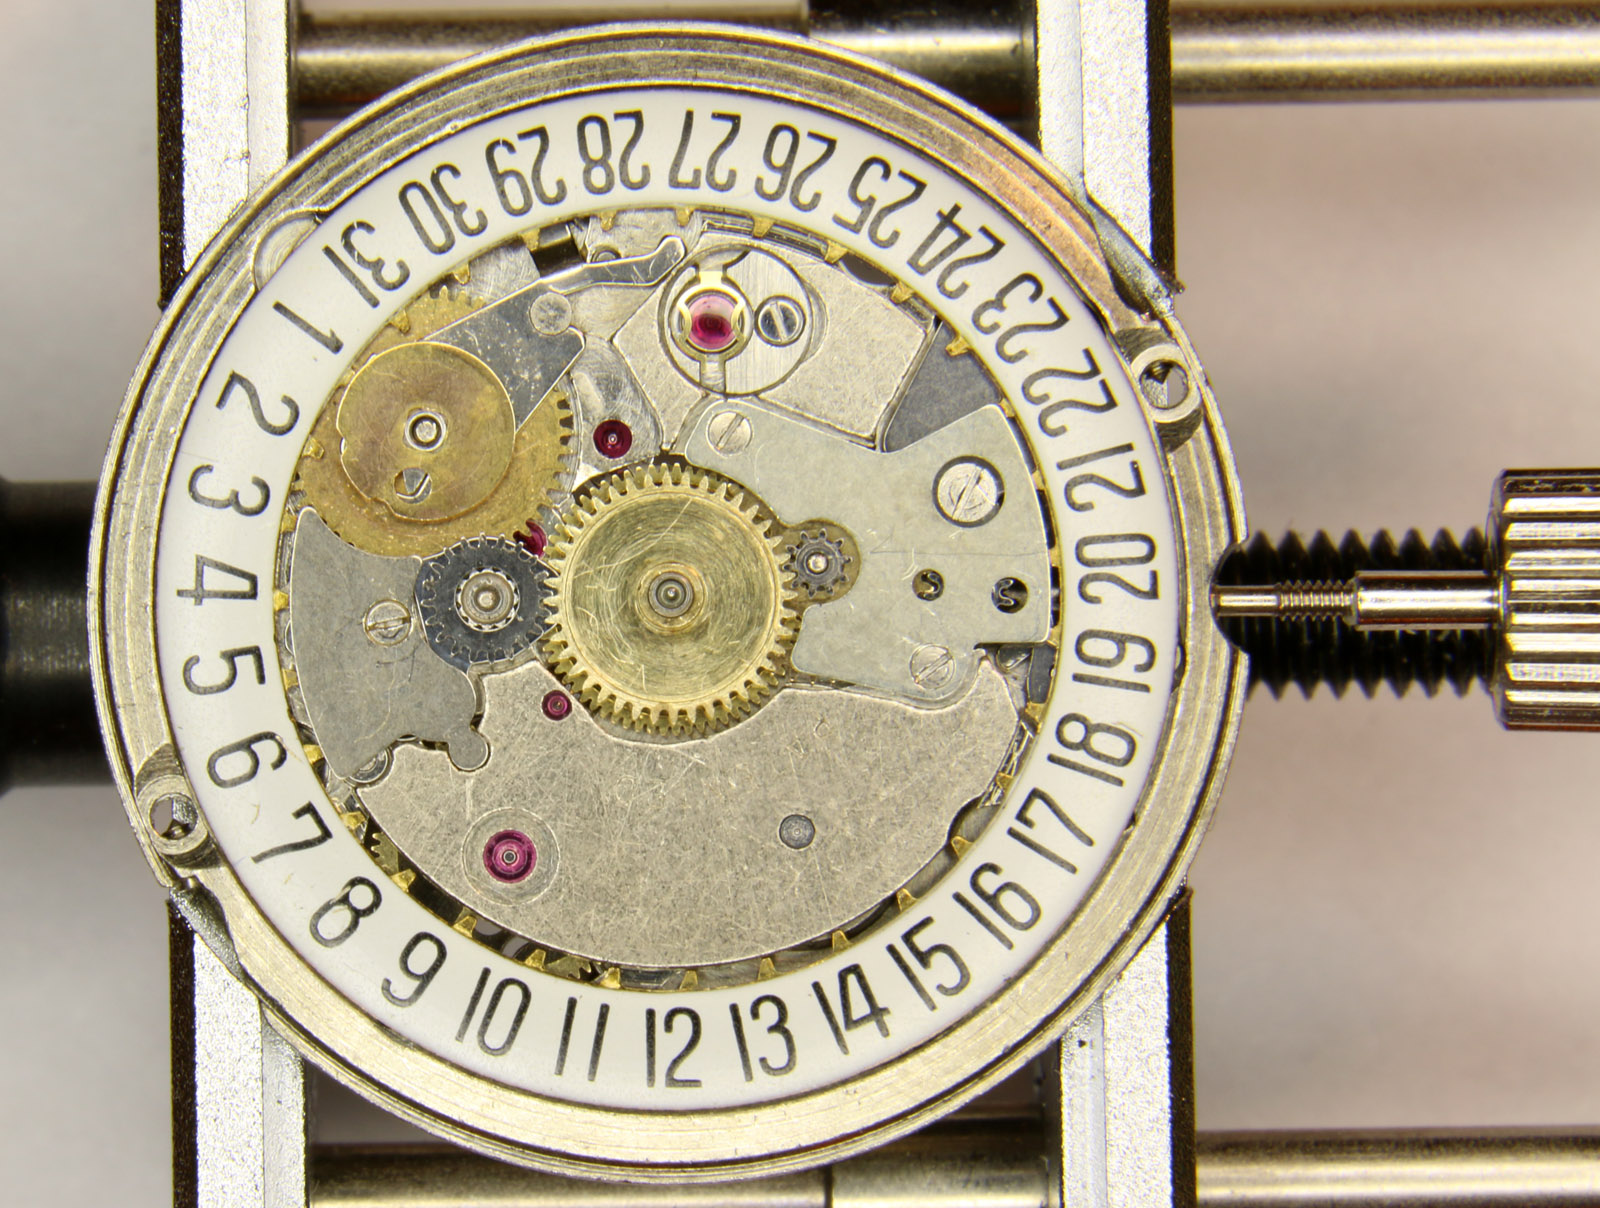
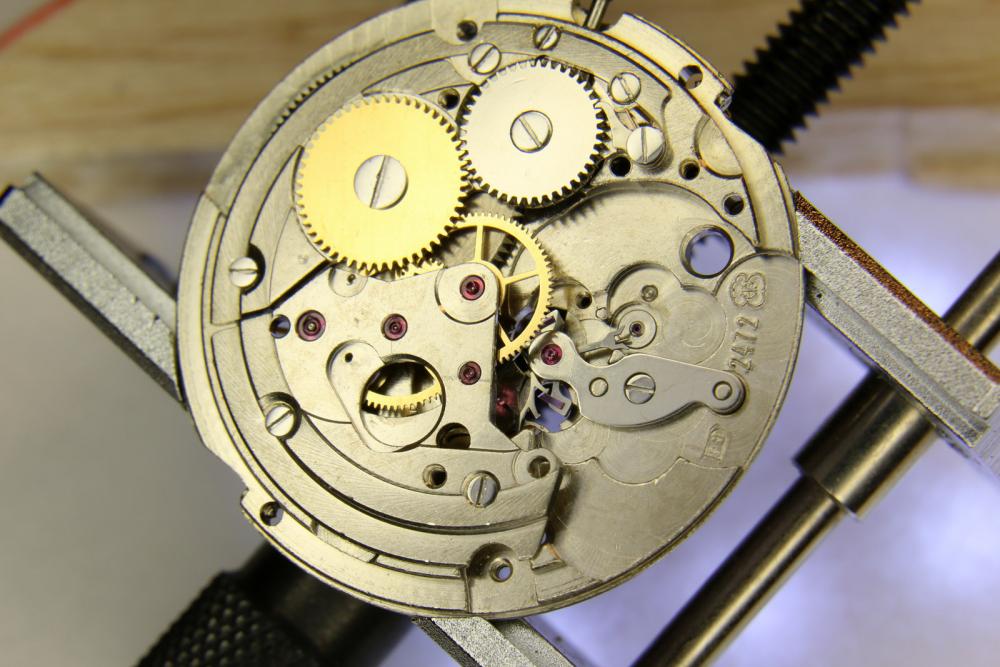
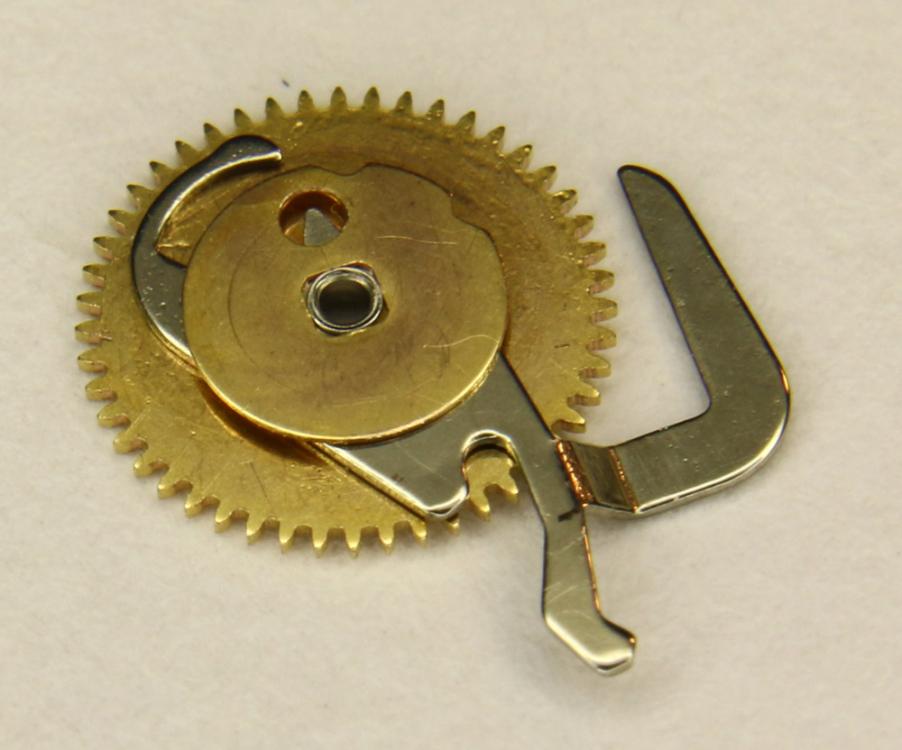
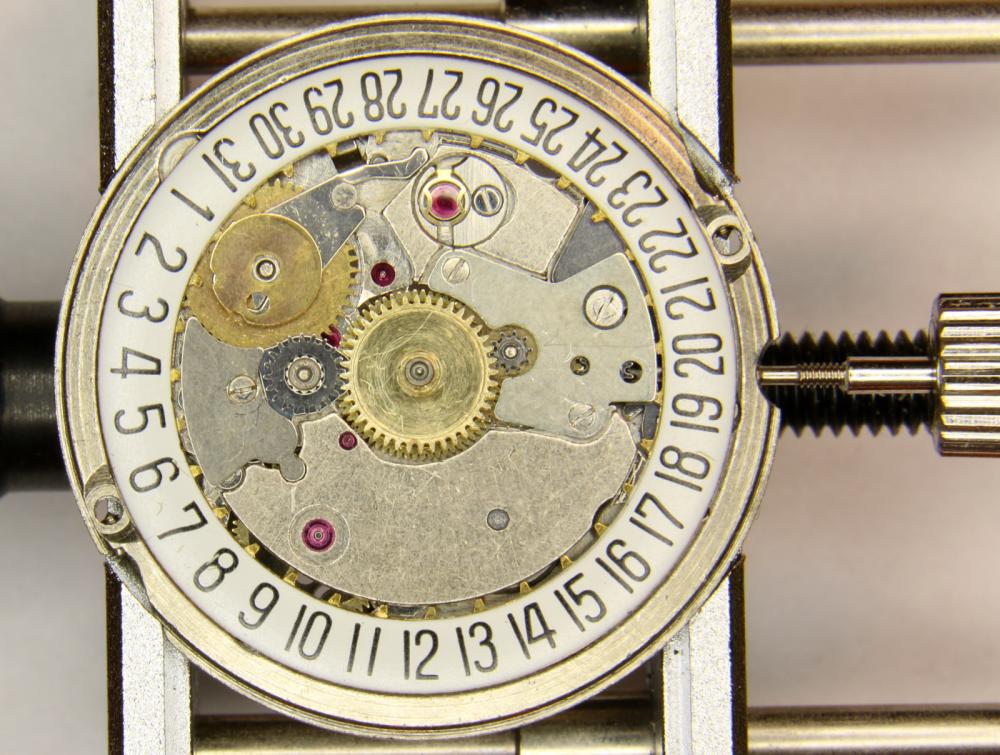
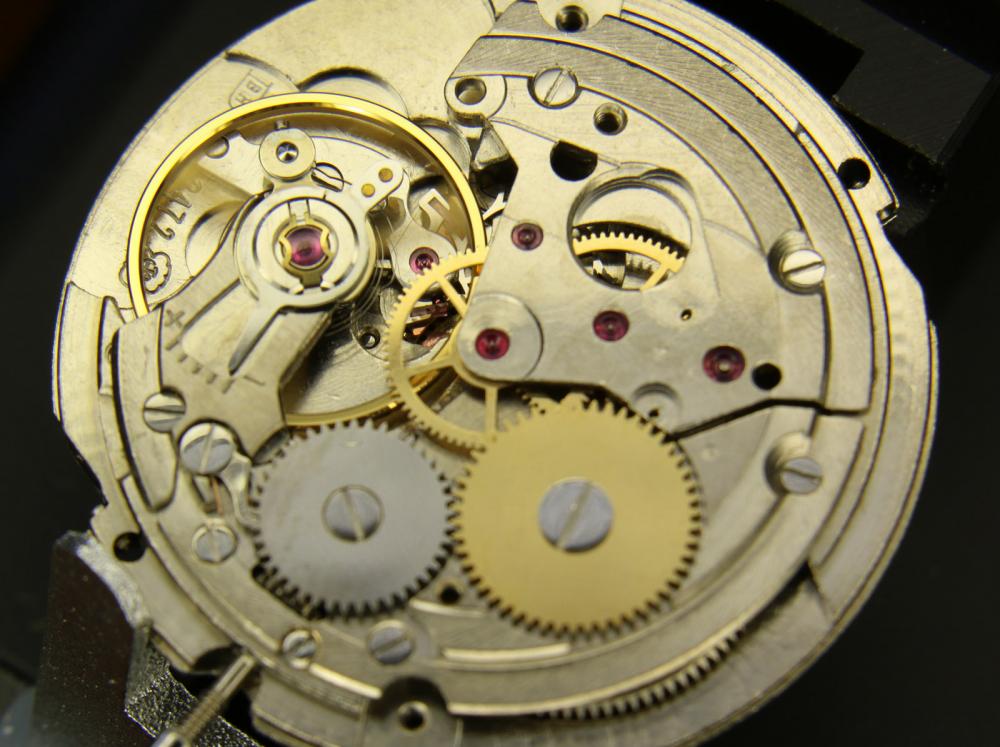
I just finished working on the 2472. Everything is in place and it's running fine. Here are a couple of pictures. Some are just for the sake of having them. Not necessary to assemble the movement but nice. Assembly of the date mechanism proved a challenge for someone inexperienced, like me. Mounting this part took me quite a while to figure out. Usually the silverish part sticks out further and cannot be inserted. This is how the part should look like prior to assembly: The spring proved to be another challenge. During assembly of the driving wheel / lever slide the spring has to be pulled back. This is the situation where the lever slide has to be slided under this guide post: After 30 minutes of trying to figure out how to assemble it, I eventually succeeded. You can see the the lever has been slid unter the guide post and that the spring is nicely in place. I first assembled the date jumper and date jumper spring but it turned out that when mounting the date indicator, I cloudn't get it done. So assemble the date jumper AFTER the date indicator is on place. The driving wheel has to be positioned so that the notches of the date indicator fit through. The date jumper is not properly in place in this picture. Done! Yet another picture of the other side with the movement in motion on the timegrapher.


 1 point