Leaderboard


Popular Content
Showing content with the highest reputation on 10/09/22 in all areas
-
I found this article interesting and inspiring and thought I'd share it. https://www.reasonforbeing.com.au/home/northeast-ya8rg-fbxmh-6st9k-5ylyf9 points
-
Hi all, this is just a heads up for those who do not know… if you spot spam in the forum please do not respond with a post reply - it would be really helpful if you could click the ellipsis within that post and then choose “report” from the menu. Or in other words - report that post for spam. Now - the forum software we use automatically hides the post if just two members report that post, this is especially useful when I or other moderators are offline bearing in mind we’re all in different time zones. it will be impossible to eliminate spam but this is one tool we can all use to minimise it. BTW - Most spammers cannot even join as they’re already on a blacklist which I subscribe too. thanks for your help.5 points
-
Oil or grease where two parts rub, I always used grease on the ratchet. You attach the line to the pin. Use Synthetic gut that you can buy from any good clock suppliers. Yo must make sure you get the correct length right if not the clock will not work its full time which is 8 days, and the line most not wind over the groves on the barrel. Windles clock oil is the one I recommend.3 points
-
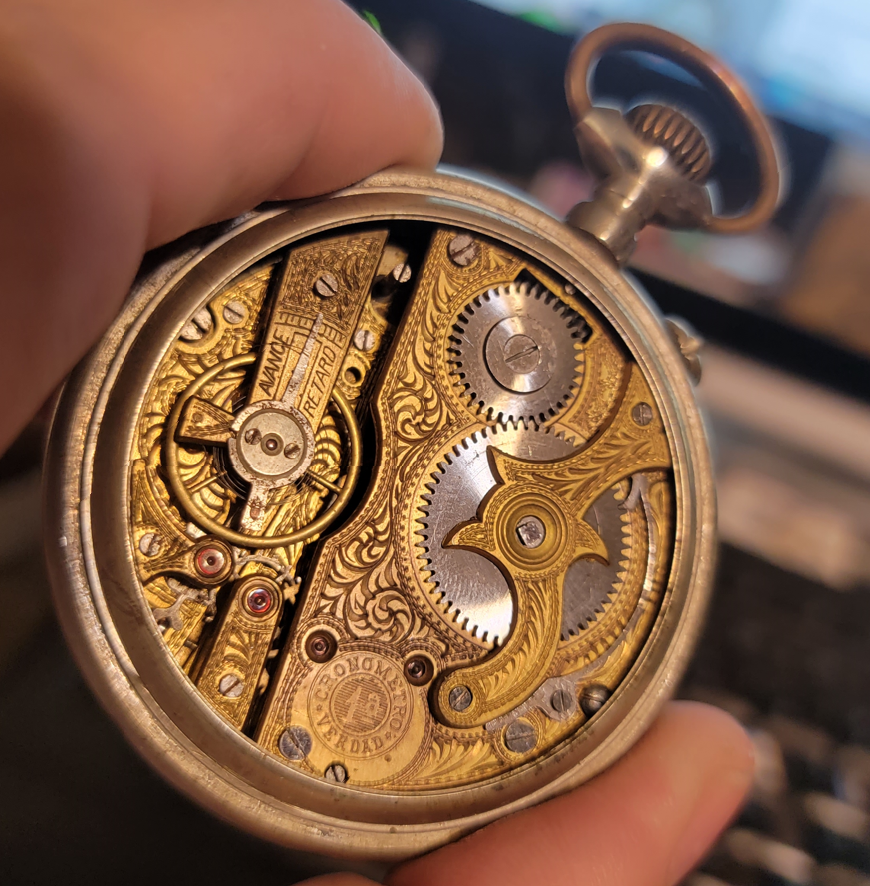
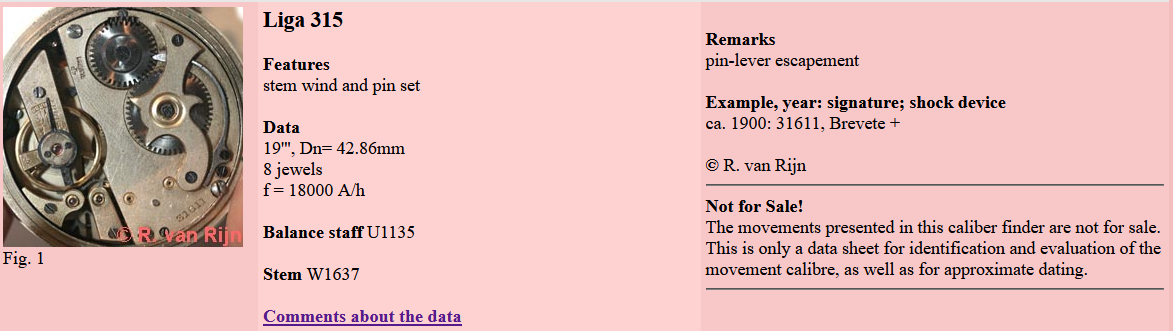
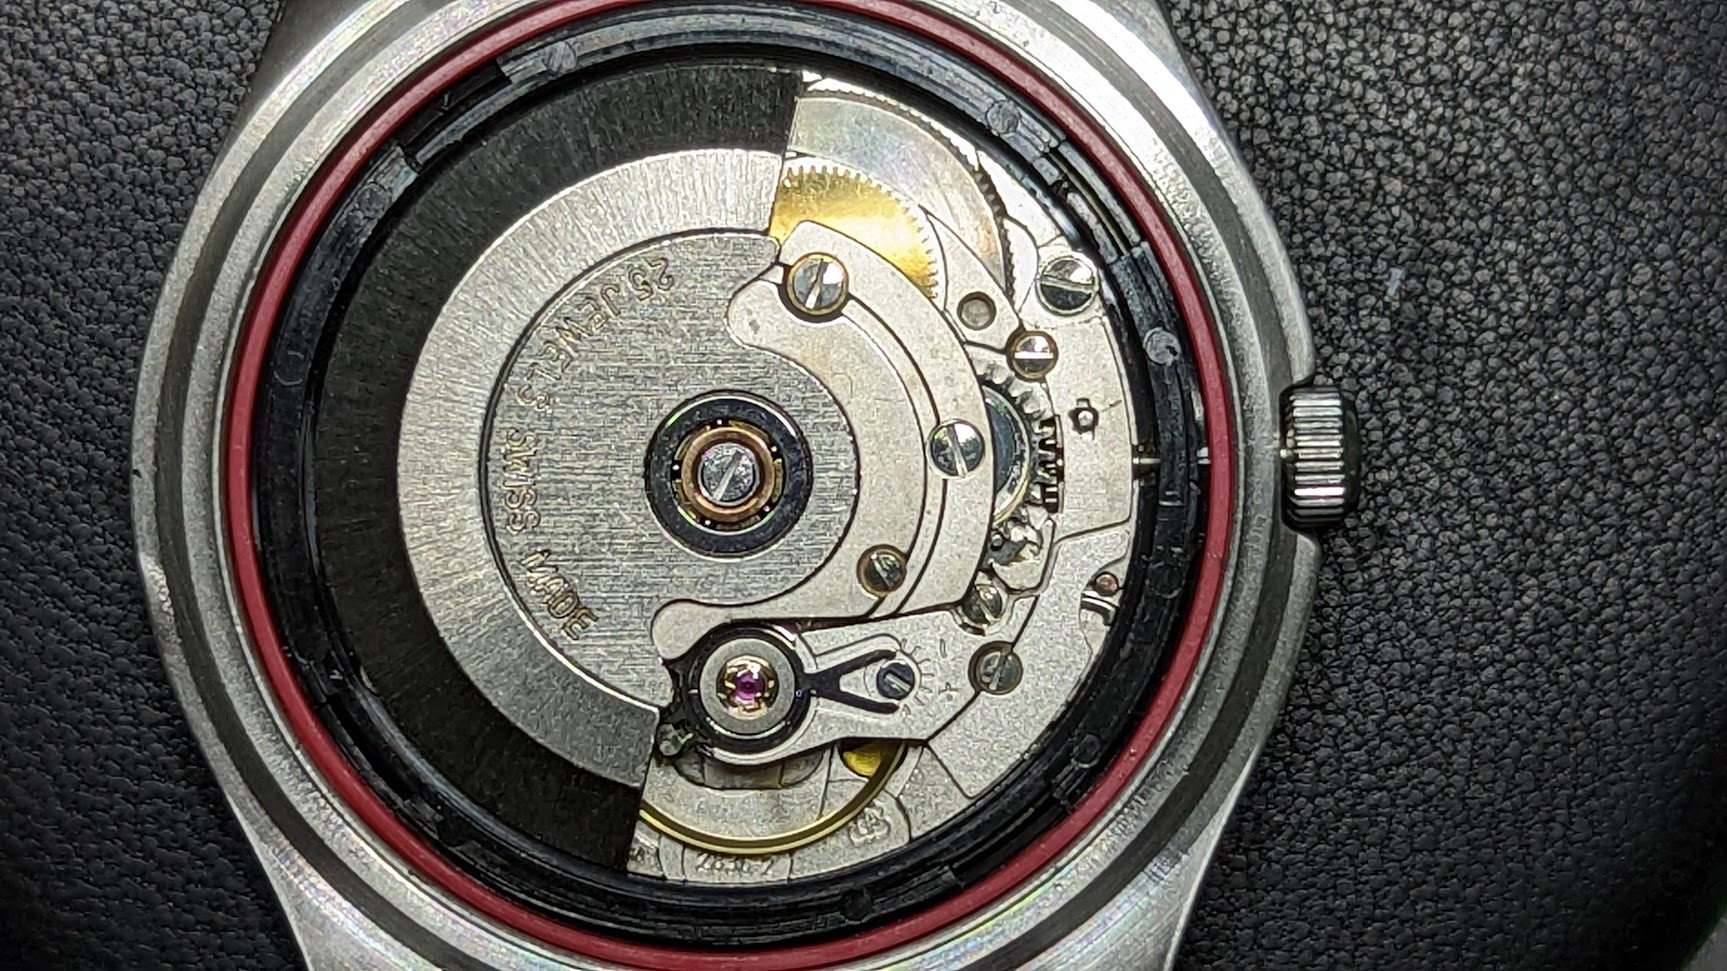
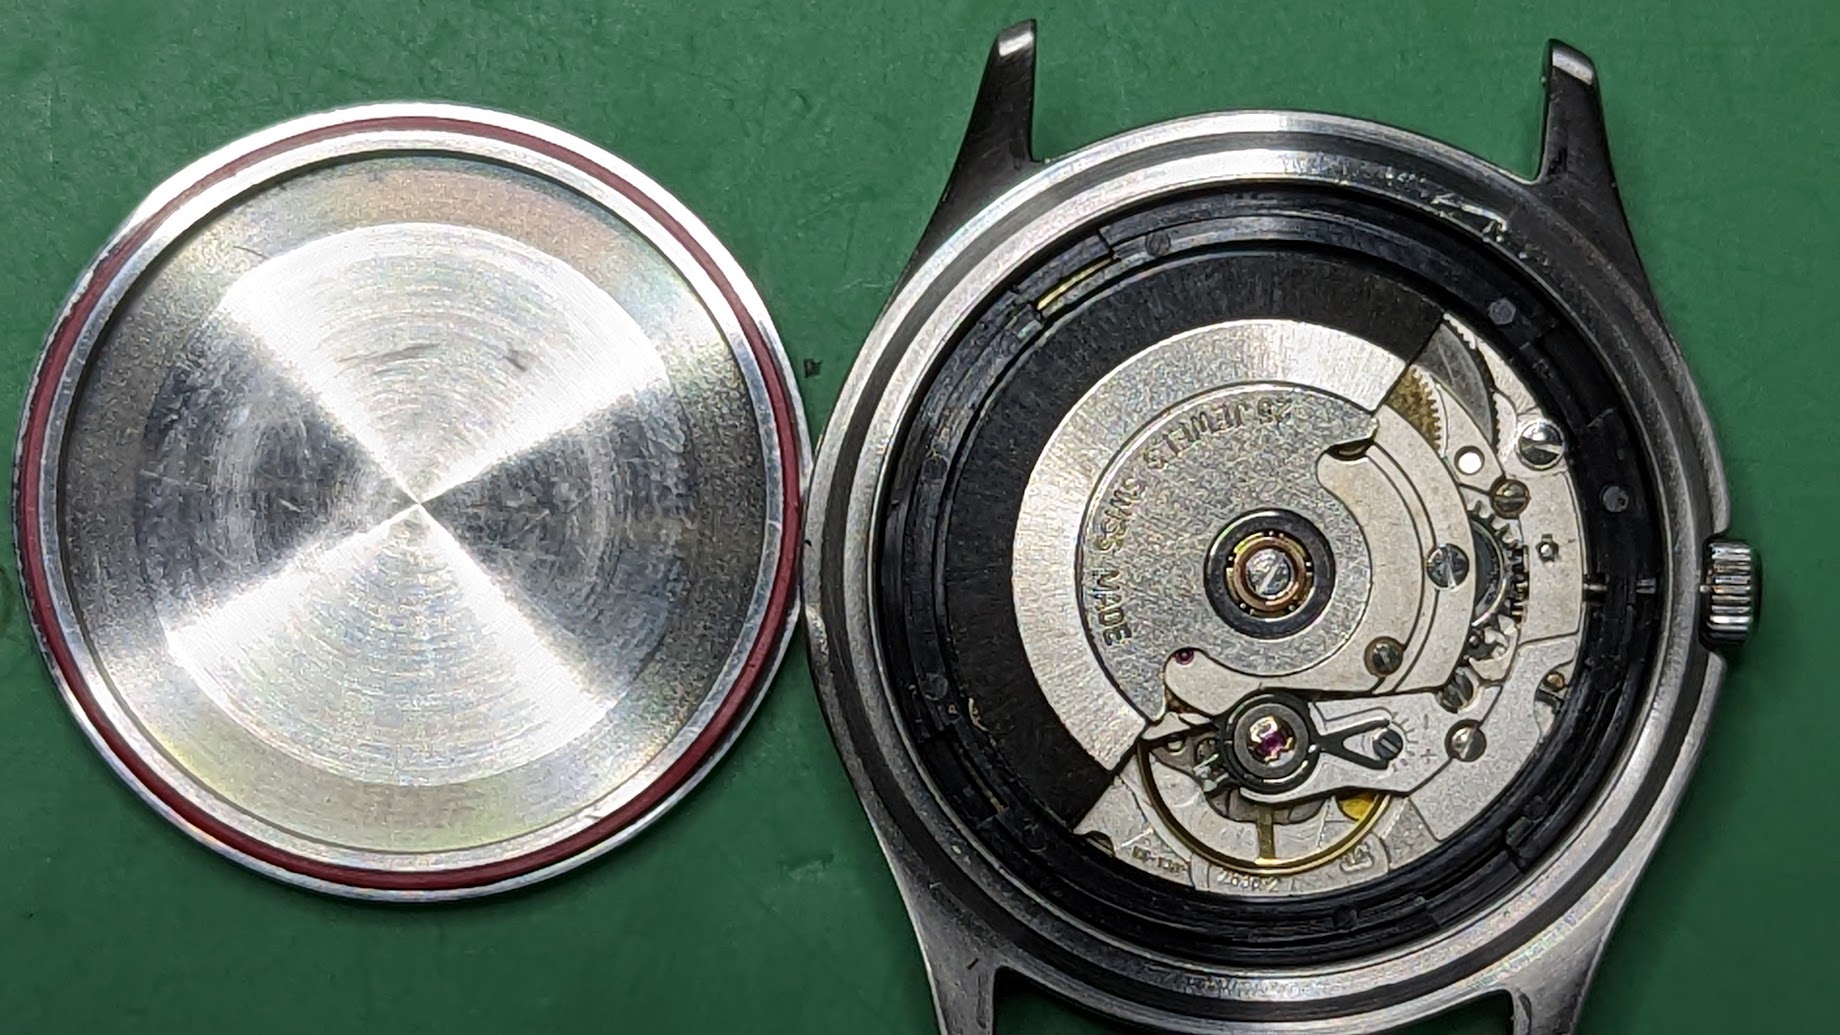
Probably not worth more than that. Appears to be a late 1800s. A pin-lever design. Maybe Roskopft lineage? Good balance, so I will try to get it running. Something goofy with the hairspring though.
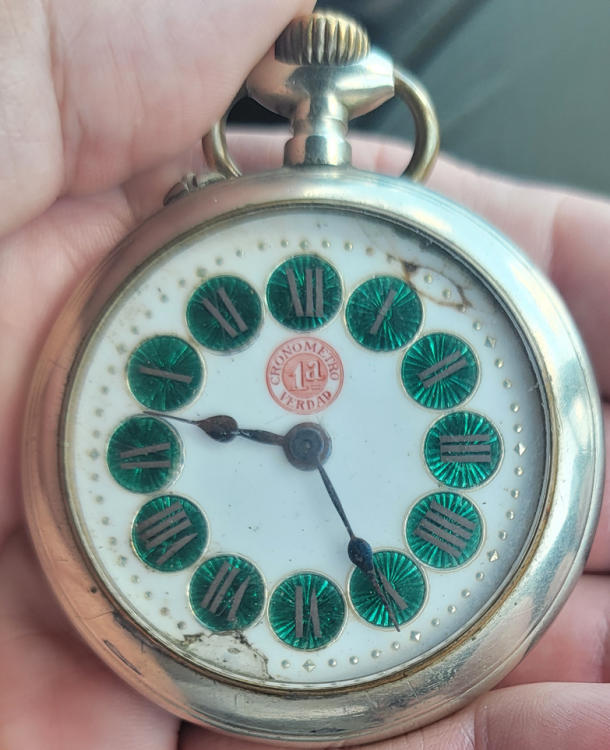

 2 points
 -
I just made me a little piece of thick white paper (1.5cm x 3cm) and fix that with photo stickers over the LED lamp of my iphone ( if it blinds you can reduce light power or use a second paper layer). This gives me a bright surface. With this setup I can exactly see what I m doing without irritating shadows.2 points
-
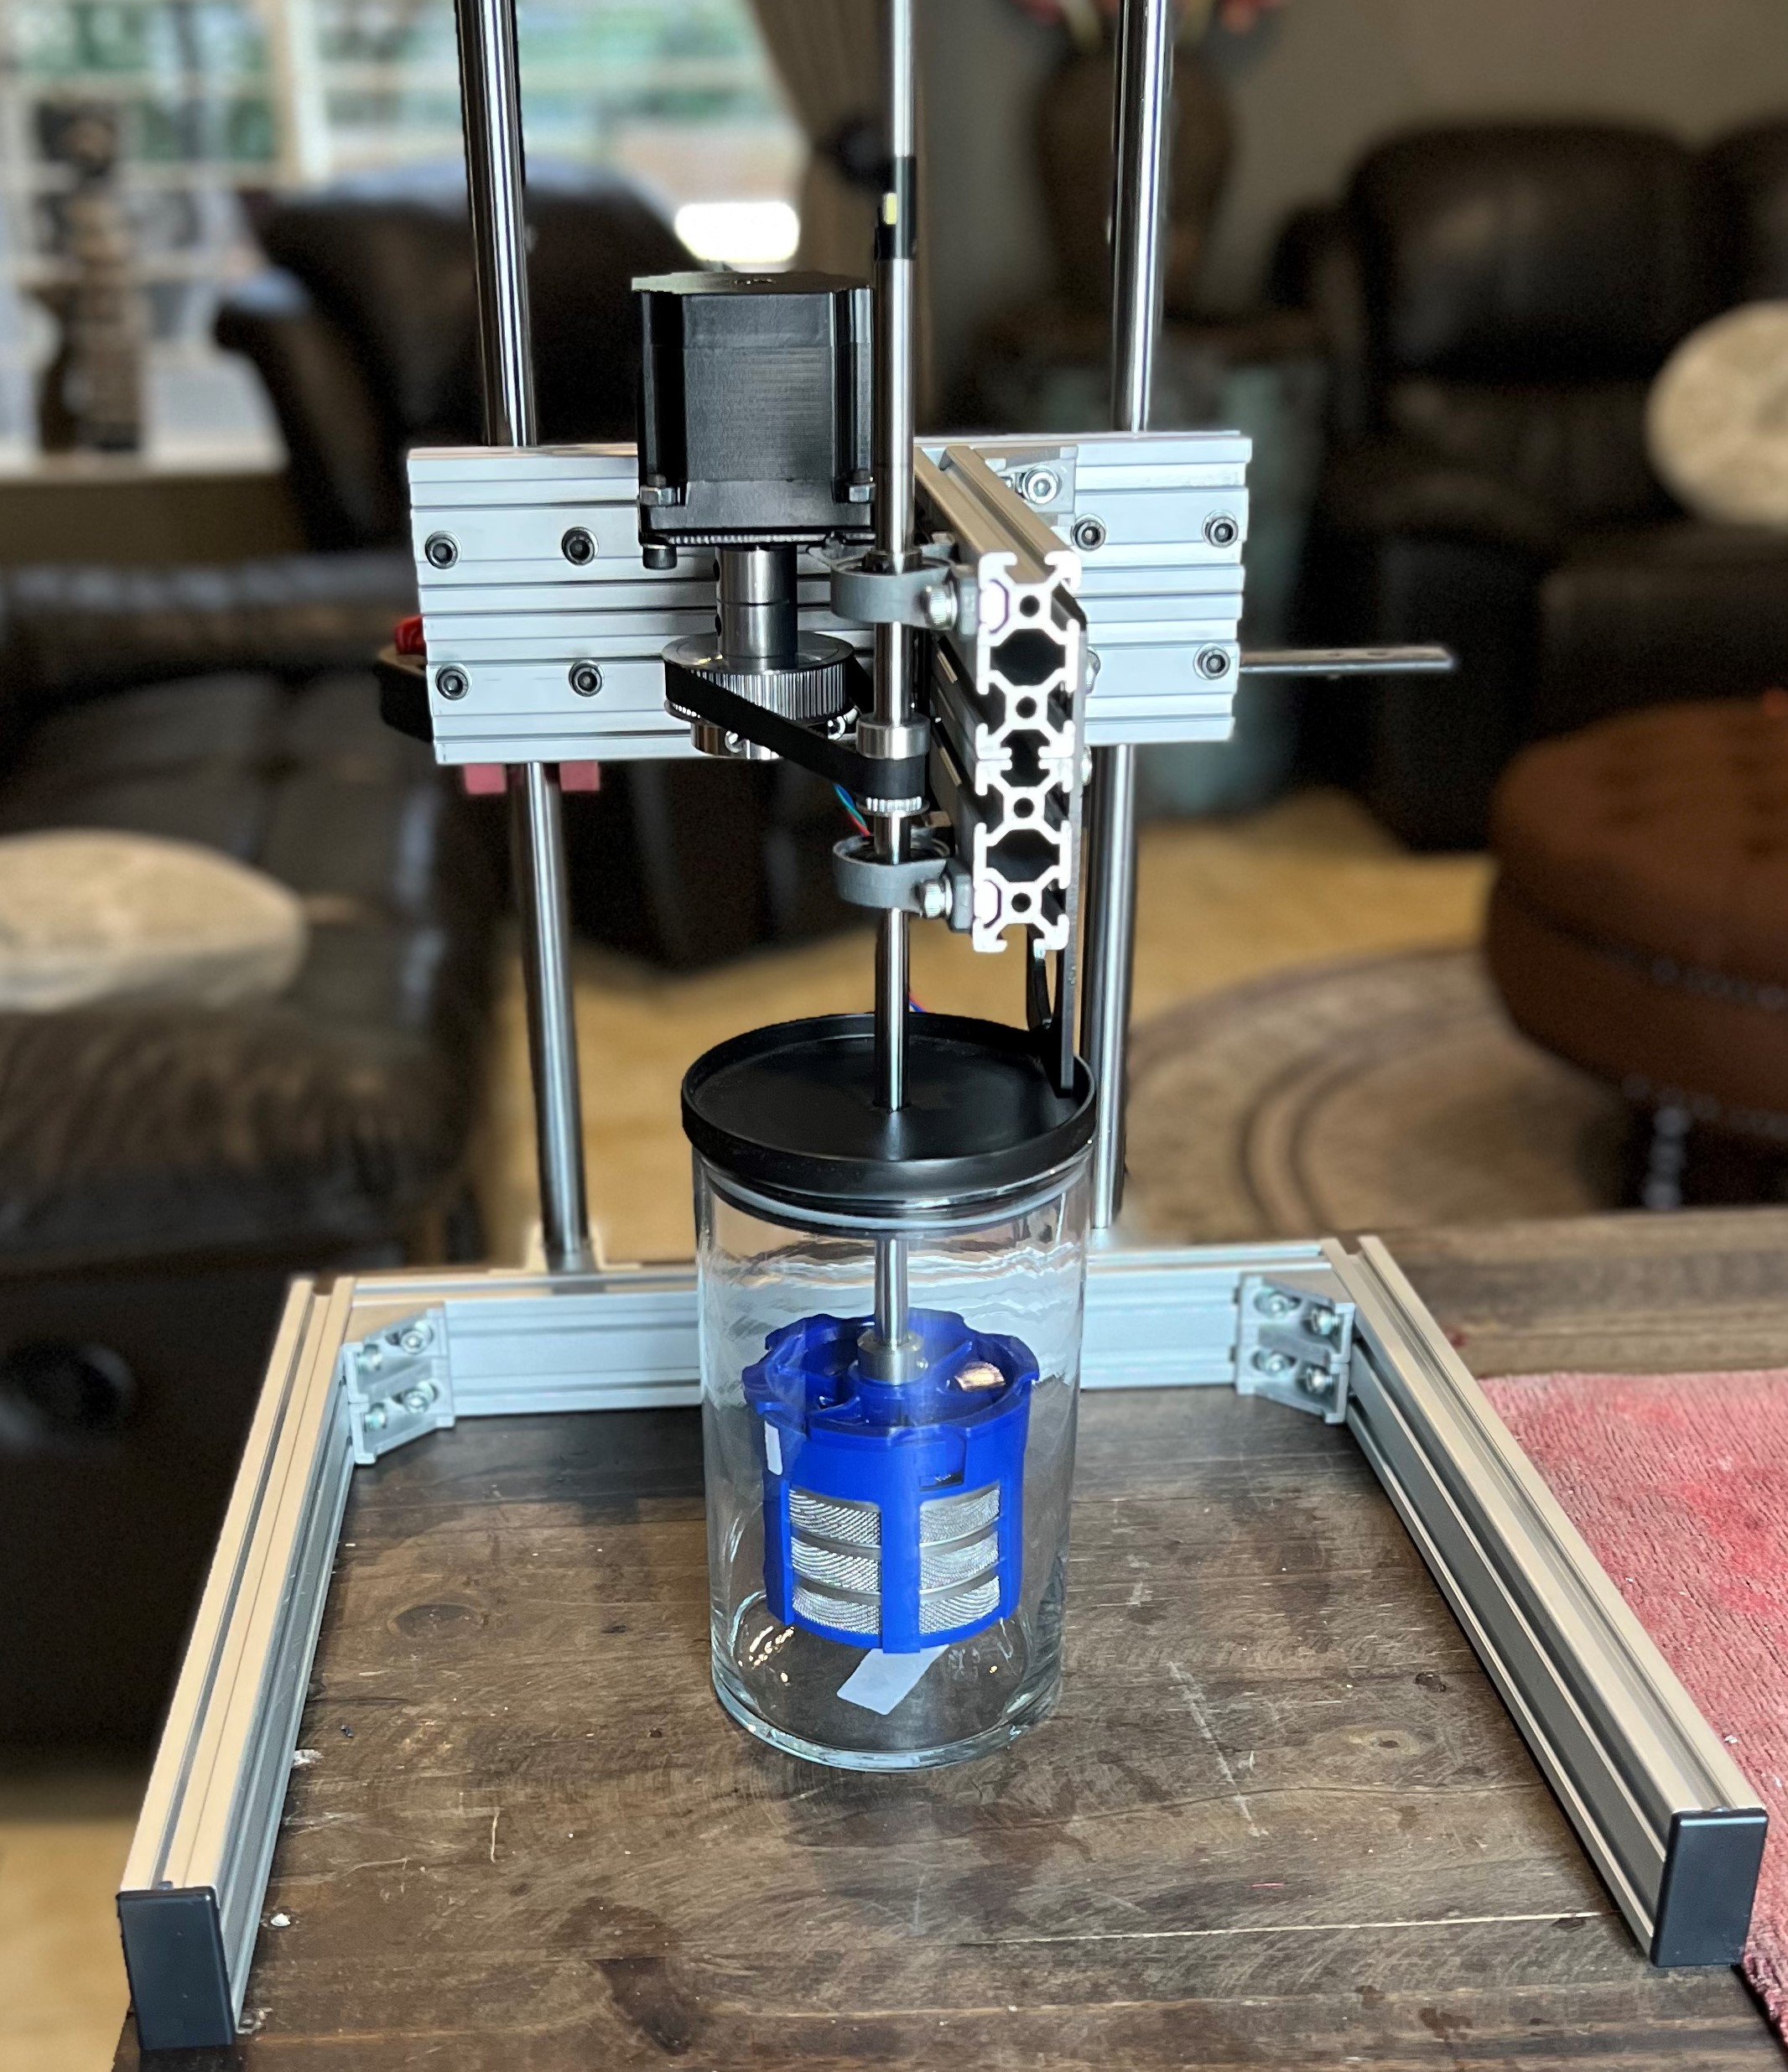
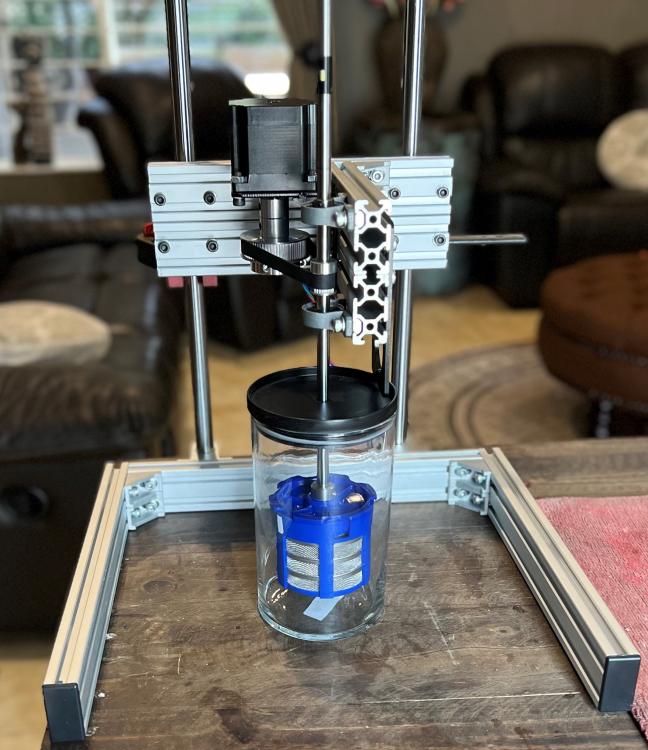
Rome? Geesh you're a baller - lucky man! And congrats in advance of your anniversary!! How long have you guys been married now? Well, this is how far I got the weekend. Still much to do as I'm designing it as I'm going (yeah, not a bright idea). I was going to sorta stop there, but then I realized that I'm going to need a 2nd gantry to make it more rigid. At 300 rpm (wash cycle) it's ok, but when I go to 1k rpm (drying spin cycle) then things come a little unglued. Why did I pick those numbers you may ask? Well that's how the modern Elma machines work (according to their spec sheets) so I figured I'd copy that. Then I figured, while I'm making another gantry, why not give it a z axis so it can lift itself out of the solution and then ramp up to the spin cycle. Automagically. Then all I need to do is push a button and it takes care of washing and spinning, then I change the jar to a rinsing solution and repeat. I hate that "while you're in there" thoughts... I also need to give some thought to what I'm going to do for wavebreakers. When it spins up even at low speeds the solution tends towards the outside of the jar, leaving the inner part of the basket with little solution. It may or may not be an issue though as I'm changing direction every 2 seconds in the wash cycle. On the older L&R machines there's a little 'star' bent plate that sits at the bottom, on the Elma machines it looks like they used a stretched weaved mesh that lines the inner walls of the jar. I'll have to experiment to see what works when I get to that point. I'm also going to have to give it some sort of heavy base to keep it stable and to centre the jar properly. The obvious choice would be a thick slab of steel but getting that machined is out of my wheelhouse, so I'll have to think up something else. Maybe thick perspex sheet with lead weights. I dunno...
 2 points
 -
No. I’ve set it so it will hide the post and an admin can review it later in case of mistake. Why it’s a bad idea for members to respond? Well I think it’s a bad idea because it lets the spammer know that their acts have been successful. Nope - just ANY advertising or self promotion done without permission of the site admin (me). The rules are very clear on our Rules page and Terms displayed when signing up. it’s worrying that you have to ask. If anyone has been involved with the internet for any small amount of time they simply must know what spam is, I shouldn’t have to explain it. However, in case of any confusion, a quick google search on the meaning of SPAM should clear any confusion. https://www.merriam-webster.com/dictionary/spam And to be clear, we are not talking about a heavily processed tin of dubious meat2 points
-
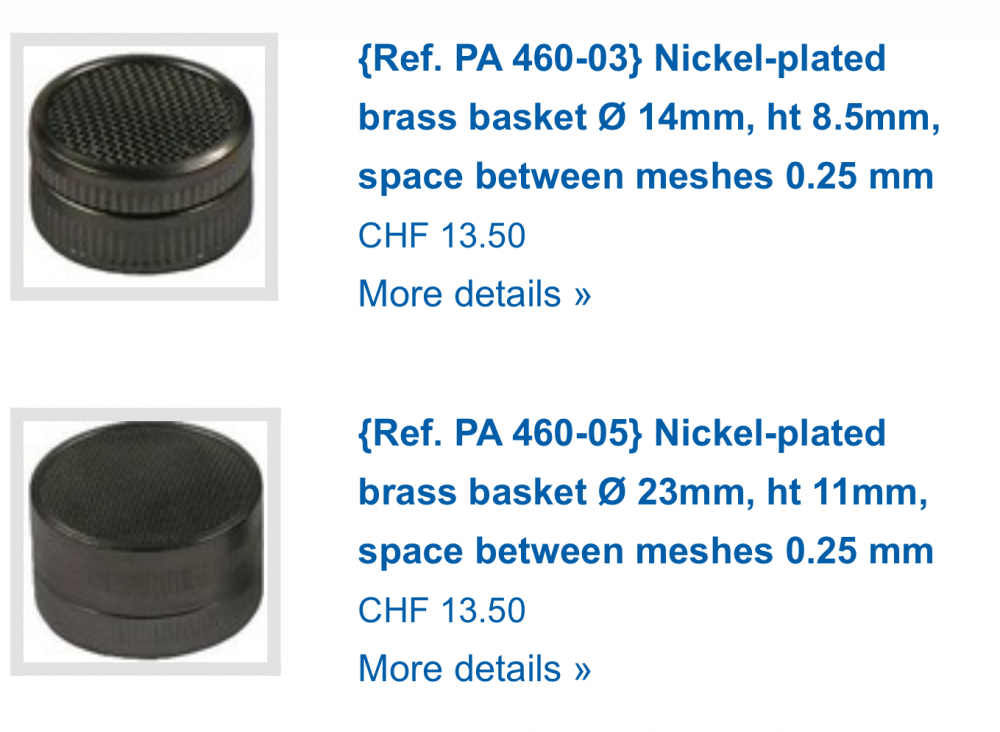
I’m very impressed with all the self made cleaners you guys have shown here. However, for the mesh baskets, I was wondering if it would be a better idea to use a proper watchmakers one, to avoid small components slipping through the gaps, or pivots getting stuck in the mesh. So far, the mesh baskets I have found that are reasonably priced but still extremely high quality are actually found on the Horia website. It costs about half the price of the Bergeon. Take a look at this: They come in a variety of sizes, and are available as nickel plated brass (cheaper), or stainless steel (slightly more expensive). https://www.horia.ch/en/Products/Baskets/Baskets/Brass-basket.html https://www.horia.ch/en/Products/Baskets/Baskets/Stainless-steel-basket.html
 2 points
 -
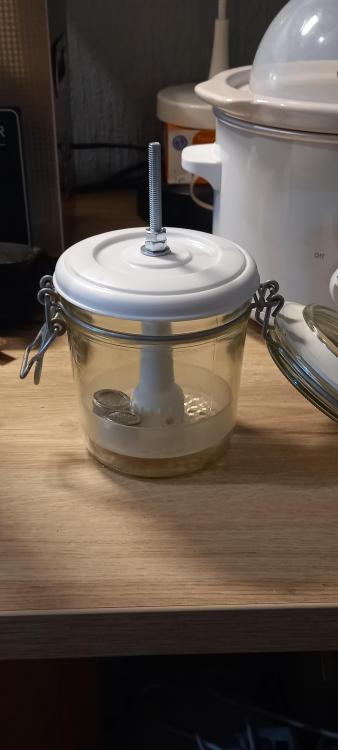
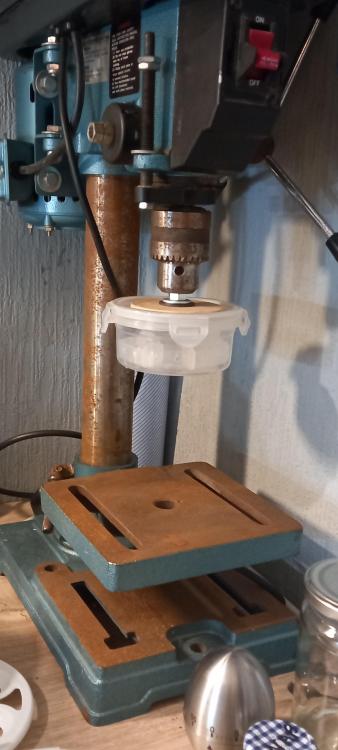
Eyup everyone, hows you all doin ? This is an update on a diy cleaning machine i made a while ago. Been using it a couple of months now and its ok and it cleans well, but i was bored this evening and decided to make up something cheaper still and that could be a useful little gadget when you want a quick hassle free clean and maybe something beginners on a budget could try. Its a little adaptation to # Its about f--king time's # little invention he made at the same time i made the big one. I was going to go the same route but then decided to go big. And our Gerty ( soz matey lol, love you loads of course you know that ) directed and inspired me to have another little play. Here are some photos, and a bit of info as to what i used. The first is a pillar drill, this only spins one way and rotates the basket along with the fluid so not loads of agitation created, but the insert for the tray does stir things up quite well. And then this evenings, made up of some kitchen and shed bits. 1 glass jar with rubber sealed locking lid to prevent evaporation when not in use. 1 agitation mixer insert from a protein shaker. 1. Plastic lid from a tuperwear tub to prevent any splashing. 1 mastic tube nozzel . And 1 . 6x150mm bolt with washers and nut. Total cost about 4 quid. Pros over the pillar drill, small and neat so good space saver, rotates both directions when used with a cordless drill and the basket spins independently of the fluid so much more agition created. Cons you do have to stay with it and operate it manually unless you wanted to rig up a frame to hold the cordless drill. Obviously other cost incured is the cordless drill, but everyone has a cordless drill right ? Even my kids have one, i had 47 of them at the last count. . My recommendation would be to let the watch parts soak for ten mins first to loosen up the tenacious mank then give them a good swish around backwards and forwards for a few mins. Repeat if necessary. Enjoy playing and inventing. I'd love to hear about any other ideas .


 1 point
 -
I would like to share a check list made up by a master watchmaker. I take no credit for it, only think it would be helpful for us hobbyists. Here it is! CHECK LIST I decided to write up what is called a 16 point check that is meant to be a guide to steps required to service a watch this is slightly bias towards a wrist watch but very relevant to pocket watches also: This is a guide and not the definitive answer after going through it a few times add you own additional tests and observations. This is of course for a basic time only non-automatic or any with additional features, I also leave out things like demagnetizing, actual cleaning procedures, a good chunk of common sense needs to be applied also as I say its meant as a good starting point to a correct disciplined procedure, This is version 1 may add or edit/delete later. Check number 1 a Check the winding to see if the mainspring is broken. b Check to see if the setting bridge or sleeve is broken by pulling the stem out and testing the proper snap of stem. A broken setting bridge/sleeve is easily detected c. The balance wheel should be oscillated to see that it is true and the balance pivots should be checked by looking through the upper jewel to see that there is not a flash on the pivot. d. The hairspring should be checked to see that it is not damaged. e Check setting of hands f. The watch should be looked over in every respect, paying particular attention to any rust spots that may appear on any part of the movement. When rust is evident around the stem or setting mechanism, it is most important to remove the dial and hands in order to check this mechanism to see if the rust is very extensive. Check Number 2 a. Examine each part as it is being removed from the movement. b. Check for rust on every part. c. Check every pivot to see that it is not damaged or bent. d. Check the jewels in the watch, to see that there are no cracked jewels. e. Check pallet stones to see that they are not chipped or damaged. f. When removing barrel cap, make sure that it snaps off only after sufficient pressure has been applied to it. g. In the examination of each part, a close check is not made at this time as many of the parts will not be clean enough for that purpose. a much closer check will be made on the parts as each part is handled in the assembly of the watch Check Number 3 a. Upon completion of cleaning and parts removed from the basket into the assembly tray, each part should be checked over with the use of a watchmaker’s loupe special attention should be paid to the jewels, because if there is gum oil still remaining on the jewels, the cleaning job was not done satisfactory . It is also worthwhile at this time to examine the pivots. If the jewels are clean, and the pinion leaves are clean, it is almost certain that the cleaning operation was performed effectively. Check Number 4 a. Examine the condition of the mainspring. b. Check the width, strength and length of the mainspring. c.. If correct, replace mainspring using correct mainspring winding tool, not by hand d. Check the lubrication of the mainspring if required e. Check the fit of the mainspring around barrel arbor. f. check the mainspring end for proper shape to catch in barrel. g. Check the snap of the cap on barrel and replace in correct position h. Check the end shake and side shake of barrel arbor is it also sometime recommended to do this without mainspring fitted to test for free run and end shake i. Check the cleanliness of the barrel and barrel teeth. j. Check the oiling of the barrel arbor after the cap is on. k. Check the condition of the barrel teeth to see if they are bent or worn. Check Number 5 a. Jewel holes must be cleaned with peg wood if necessary. b. Jewels must be checked for chips or cracks. c. Check the train wheel pivots for rust, polish, cuts and straightness. d. Check the pinions for rust’, pits and polish. e. Check the pivots for pitting check that clean pith wood is being used. f. Check plates for tarnish, fingerprints, and polish jewel settings. g. Assemble time train and check end shake and side shake. h. Check wheels for trueness arid upright. i. Lift each wheel with tweezers to check for end shake and to see if each wheel is free enough to fall back to its original position. j. Spin train to see that is spins freely, in dial up, dial down and a vertical position. Check Number 6 a. Replace barrel and barrel bridge and check the oiling of the barrel arbor upper and lower bearing. b. Check oiling of crown wheel. c. Replace ratchet wheel. d. Note: do not oil remainder of movement until after kick-back is checked or cap jewels are present oil those now e. Wind watch slightly to check kick-back and recoil. This check should be made in dial up and dial down positions. If the watch does not have kick¬back, this indicates that the train is not as free as it should be. First, however, before checking into the train itself to determine if there is some frictional error, it would be worthwhile to examine the mainspring around the barrel arbor. Many times the loose fit of the mainspring around the arbor will prevent kick-back from occurring within the train. In such instances, the arbor is simply slipped in the mainspring instead of the train receiving the reversal torque, that normally occurs. If the barrel is found to be satisfactory, then the train. should be checked to see if the trouble can be located. first, the train should be examined carefully to see if each wheel is free, and if no trouble can be found, then it is advisable to remove the train wheels from the watch and replace each wheel in the watch individually and to check the spin of each wheel. If each wheel spins freely, this indicates that the pivots and the jewels are in good condition and that one need not look further for defects or faults in those areas. Next, place two wheels at a time in the watch and check the spin of the wheels. Thus, any error of improper depthing or a badly formed tooth on a wheel or pinion will be detected. It is simply a process of elimination in order to locate the particular trouble, and of course, proper corrective measures must be taken to correct an error when one is found. Check Number 7 a. Oil all the train jewels in the watch, and at this point it is advisable to oil also the balance jewels. b. Check to see that there is a ring of oil around each train pivot and that the jewels are not over-oiled or under-oiled. c. Check the jewels that have caps to see that the globule of oil has been formed properly between the flat cap and curved hole jewel and no keyhole shape if so remove re clean jewels and check seating the re oil and repeat check for perfect ring. Check Number 8 a. Oil stem properly. b. Oil friction parts of setting. c. Oil wolf teeth of clutch wheel and winding pinion. d. Oil clutch wheel groove. e. Oil points on setting lever that contact the setting bridge or the clutch lever. f. Never oil dial train. Note: ‘dial train means all wheels following center wheel staff. g. Seek expert advice on some types of intermediate wheels connecting clutch at setting positions that require oil. Check Number 9 a. Check condition of pallet arbor pivots. b. Check for chipped or loose stones, shellac or gummed oil on pallet stones. c. Check guard pin for straightness and proper shape. d. Check polish of pallet arbor, pivots and fork slot. e. Check end shake of pallet fork. f. Check height of pallet stones in conjunction with escape wheel teeth. g. Check matching stones. h Check drop lock i. Inside and outside drop. j. Draw. k. Hang-up of stones on escape wheel teeth. Check Number 10 a. Check tightness of roller jewel in roller table - uprightness of roller jewel. b. Check the height of the balance wheel in conjunction with the fork bridge and the center wheel. c. Check the clearances. d. Check the height of the guard pin in relation to safety roller. e. Check the proper length of roller jewel and fit of roller jewel to fork slot. f. Check the guard clearance. g. Check the corner clearance. h. Check the jewel pin shake. i. Check the guard test, j. Check the corner test. Check Number 11. a. Check the hairspring in-the-flat. b. Check the hairspring in-the-round. c. Check the quadrant of the hairspring to see that it is formed properly between the regulator pins and stud d. Check for beat of the watch by equalizing the force to receiving and discharge pallets. e. Check for the collet wobble. f. Check for trueness of the balance wheel, and for the flash of the balance pivots g. Check for trueness of roller table. Check Number 12 a. Place the watch on the timing machine and take a rate in the dial down position, then turn the movement over to dial up position and take a rate. There are three things that should be observed from the rate that was taken: 1. Dial up should indicate the same time as dial down. 2. Observe the closeness of the lines to determine if the watch is in perfect beat. 3. Observe how the watch is running in reference to the time error over a 24-hour period. b. Adjust the mean time rate of the watch so that the dial up and dial down positions will record on time. Do not move the regulator more than one degree in adjusting the mean time rate. Any other alteration must be made by adjusting mean time screws or by adding or removing weight from the balance wheel in such a manner as not to affect poise, static or dynamic,. c. If the rates in dial up arid dial down are found to be different from one another, then this indicates a mechanical error in the watch which must be traced out before proceeding. d. If the watch is found to be out-of-beat, then of course, it should be put r in proper beat at this time. We might emphasize that if the watch was put in proper beat in accordance with the proper procedure at the bench, then an out-of-beat condition or minimal amount would not be indicated on the timing machine. e. When the above conditions have been satisfied, the next step would be to take a rate in positions and errors corrected. If everything has proved to be satisfactory, the watch should be tested for isochronal test be made on the timing machine, which consists of re-testing at different winding levels and rate in the dial up position. Check Number 13 a. Check for proper lubrication of cannon pinion on center post. b. When replacing the cannon pinion, be sure that the leaves of the cannon pinion do not come down on top of the minute wheel teeth so as to bend the teeth of the minute wheel. c. Check tightness of. cannon pinion d. Check to see that cannon pinion does not ride up when watch is being set. and smooth consistent operation. Check Number 14 a Make sure that the hands are fitted securely to the parts to which they are attached b. Make sure that the hands are adjusted so that there is equal space between the hands and the hands are set as close to the dial as possible. c. Check to be sure that the hands are shaped to the contour of the dial. d. Check to see that\ the hands are positioned so that they are synchronized with one another. Check Number 15 a. If there is no case for the movement, simply disregard this check and proceed with the next check, number 16. b. Check for proper snap/screw back of the case. c. Check for the clearance of the hands under the crystal. d. Check the crystal to see that it is securely fitted into the case. e. Check to see that the crown is next to the stem and reasonably close to the case. f. Check for tightness of movement in case. g. Check the spring bars to see that proper spring bars are used for the particular type of case so that the band is held securely to the case. h. Check the lug holes to see that they have not been worn badly by the spring bars to a point where the hole may break through and allow the spring bar to come out of place. Check Number 16 a. Set the watch on time with a master clock. b. Let the watch run for a period of 24 hours and check the error in the time repeat in several positions. c. Allow the watch to run until it completely runs down and check the length of run. The watch should run a minimum of 30 hours, preferably 40 hours, if it is in “A. I have no answers to any of the steps since I didn't make this up. Maybe Mark might.1 point
-
Hi, my name is Don and I live in Georgia. I have been interested in vintage wristwatches for several years. I thought that if I joined this site I could benefit from others which have much more knowledge than myself and would help me in collecting and restoring vintage wristwatches. I would like to thank you for allowing me to be a part of your group.1 point
-
Hello all, I finished reading , as a Romanian and to read in an English technical manual it's really hard to understand properly . I do not have an old balance to practice , but I'll figure out something until I will be prepared I will do not touch that . But what you offered , book and video , photos and Knowledge is amazing , that's why I love this hobby , nobody keeps that info for them , they want to spread it . SO thank you all and I will keep you posted. Thank you all and BR Tibi V sr1 point
-
I am considering that £72 for a bit of plastic with a hole in is ridiculous! You could drill a hole in a bit of acrylic to do the job. I usually work on my mat (a piece of vinyl flooring) - it has a little "give" in the surface allowing the tweezer tips to dig in a bit. Like @gbyleveldt, I also work on my staking block. I read a recommendation to use some frosted glass, but I find it too hard - it means that you are working at the very tips of the tweezers, and if they aren't perfect it doesn't work. Being I home hobbyist, I haven't shelled out on 2 pairs of Bergeon/Dumont tweezers just for hairspring work. I have some cheaper Vetus, which do the job OK.1 point
-
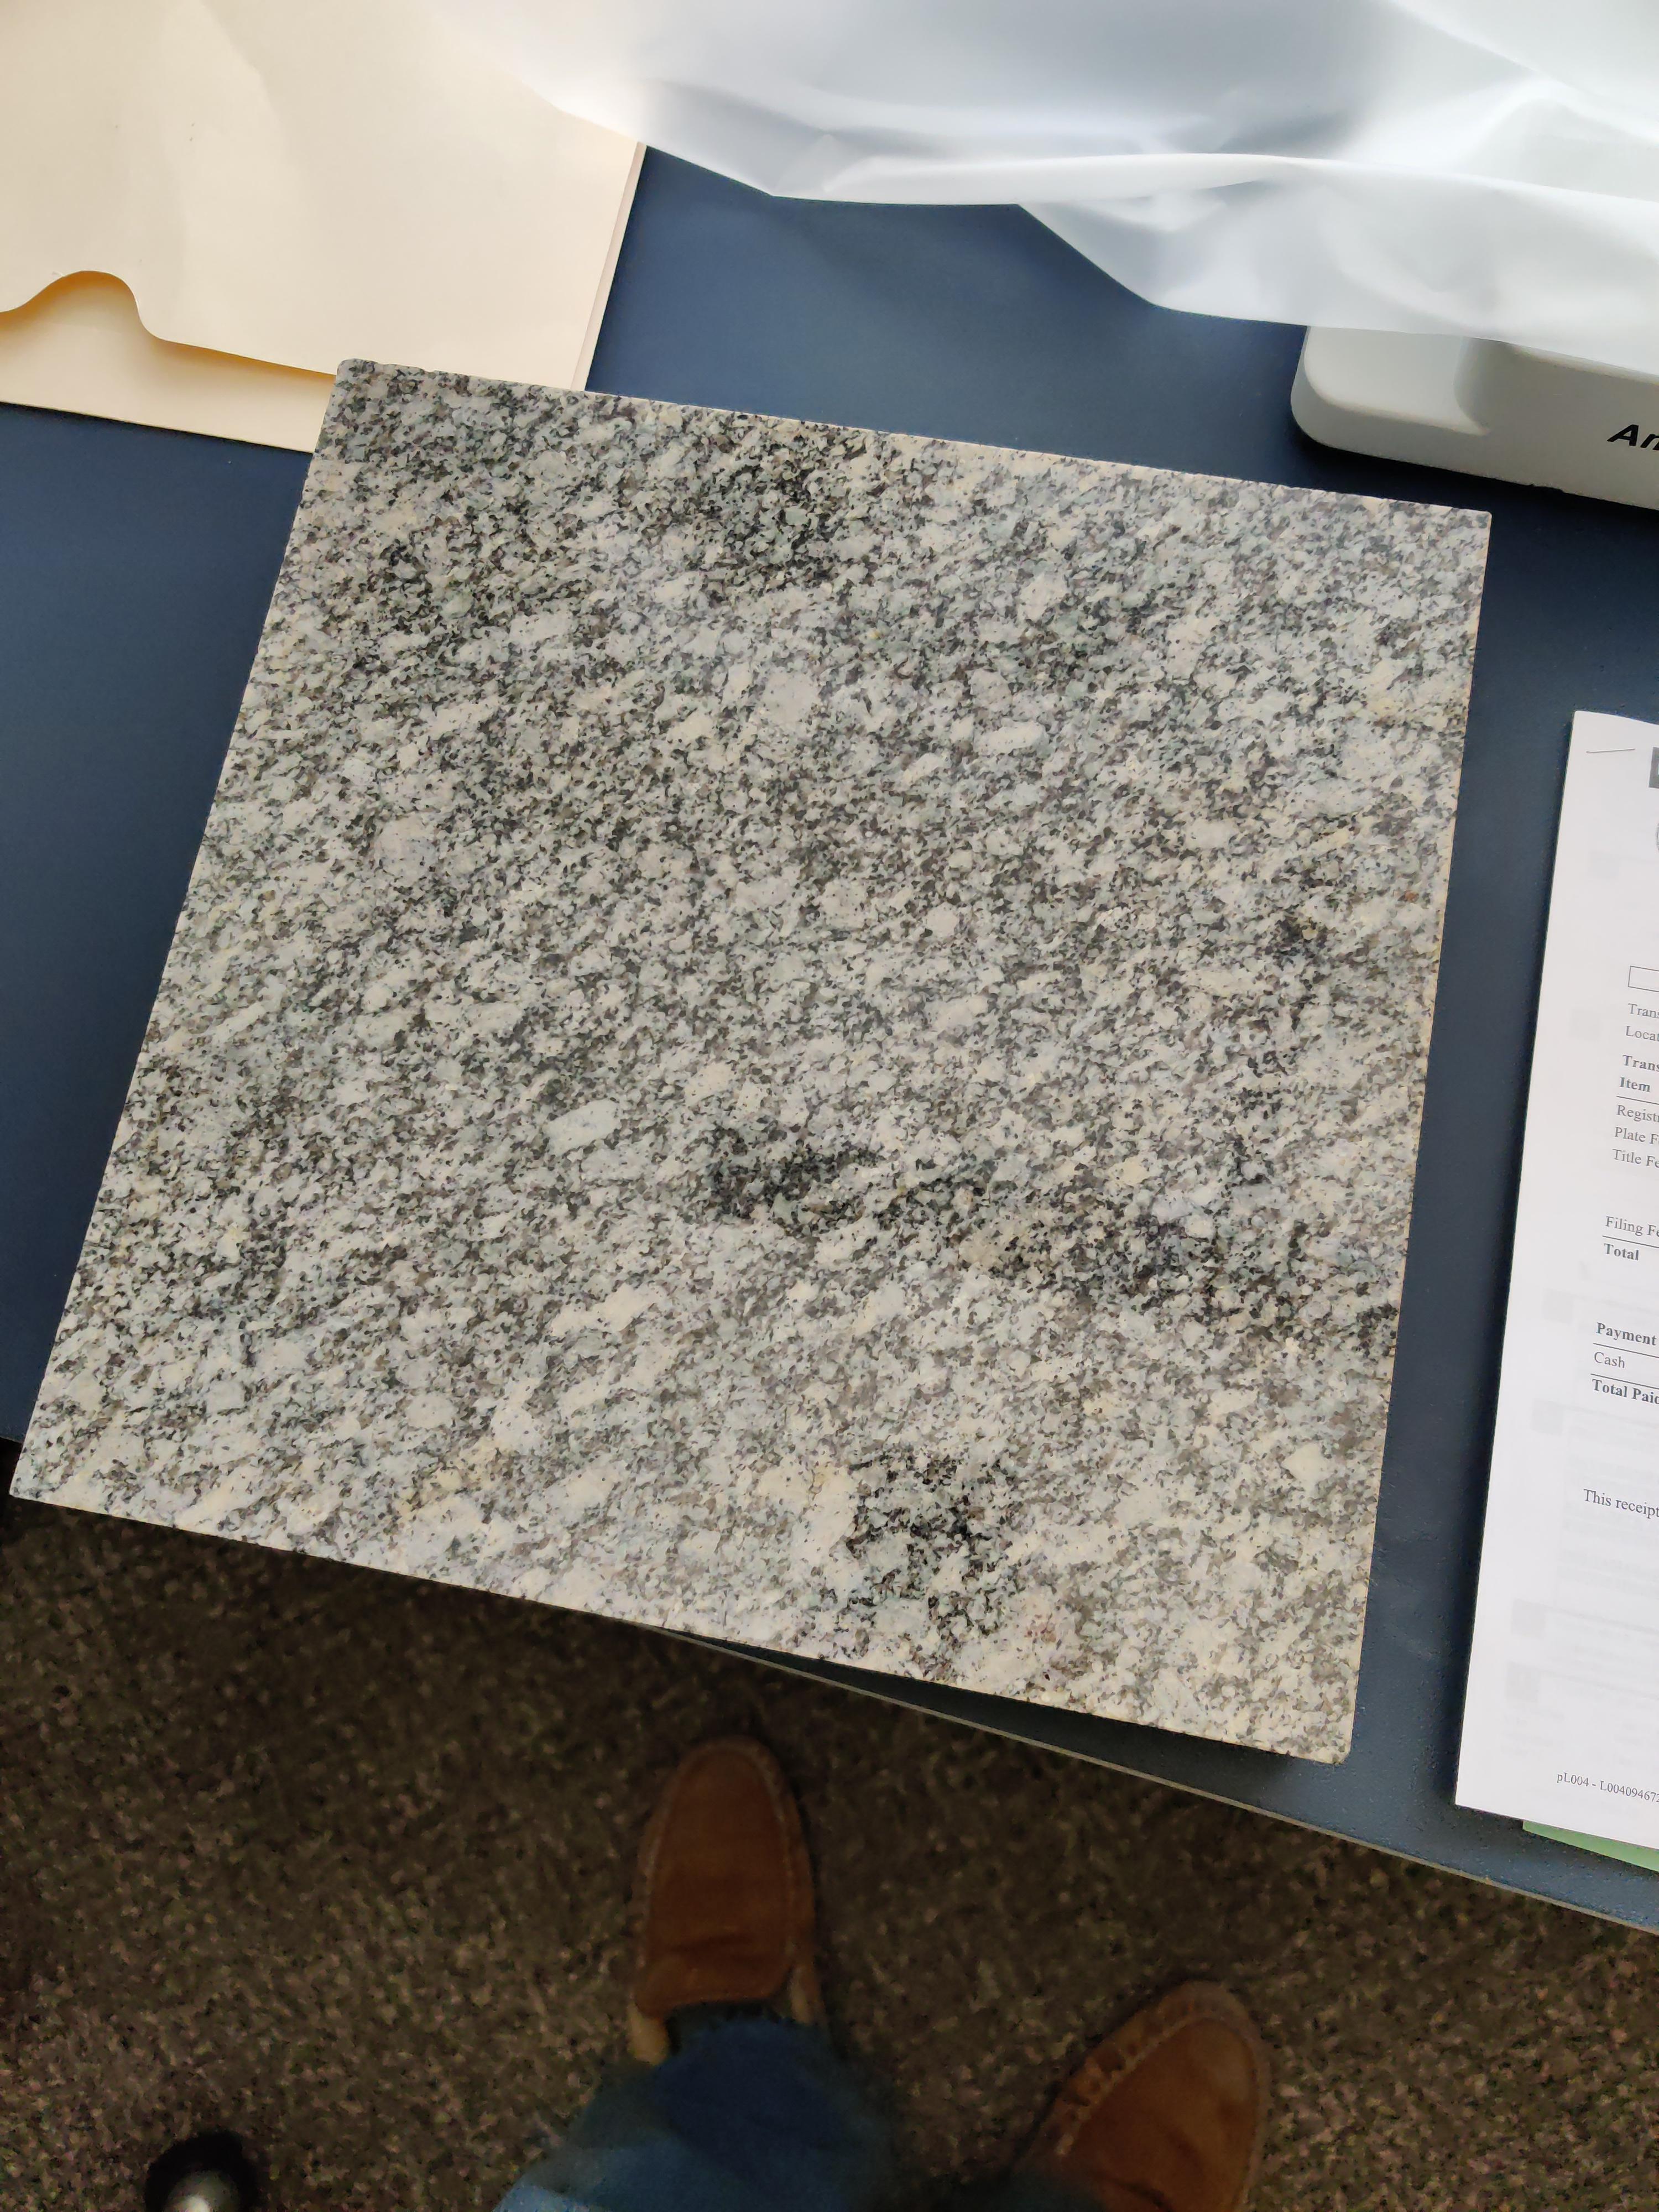
I bought this piece to use as a base for leather work. About 30cm square, 4 cm thick. Got it from a leather working tool supplier of all places. I used to have a thinner piece that was meant to be used as a 3D printer platform, and it had holes drilled in it, so I know it is possible to do. Unfortunately, I dropped it and broke it. Oh well.
 1 point
 -
Granite? I've never tried to drill holes in granite myself, but I think it's possible with the right bits.1 point
-
No. Its if two members report a post. Naturally A moderator does not need to report a post because a moderator has the ability to flag a member as being a spammer directly and ban them, and this will inherently hide their rubbish it’s one of the jobs moderators volunteer to do. Most recent spam actions have been executed by myself or Paolo or members reporting of which there are two members in particular who have gotten very good at spotting the spam (you know who you are and I thank you ). Perhaps it’s a time zone thing, we just happen to be getting in there quite quickly1 point
-
Excellent work @Kalanag!! Lenz's law! This is the second one of these I have touched. The first one I repaired. When I saw the copper discs, I knew immediately what was happening. Seth Thomas was too clever by half on this idea. Yeah, it works, but back in the day, magnets were not so good and they lost their magnetism over time. On the one I fixed, I had to add two additional neodymium magnets in order to get the chimes and strikes to regulate. Then I nudged them around to get the right regulation. The air-resistance fly is better IMHO.1 point
-
Hidden posts are not seen by anyone except mods or admin until un-hidden. This forum software is most likely not anywhere near as sophisticated as FB and doesn’t even try to be thank goodness1 point
-
Can I see that my post has been hidden/marked as spam? I believe some social media platforms hide messages they wish to censor. That is, they can make the poster believe the message is public when in fact no one can read it. I certainly don't expect or suspect that happening on WRT. I was merely curious to know what it would look like from the spammer's perspective. Decisive and excellent! No room for interpretation! No, you are not! I feel most welcome at WRT, and if I may say so, it appears to me that many of my posts are appreciated As I said, I'm just being curious. Never, and I don't expect it either. The exception of course is @gbyleveldtand @Neverenoughwatches which can't be trusted but now that they are fully aware of the consequences I think and hope they will refrain from marking my posts as spam1 point
-
Instead of air brakes you see two eddy current brakes (with magnets). Wikipedia: Eddy Current Brake1 point
-
Hi as a base you could try a block of Mahogany say 3" thick. by 18" square. A hole machined out for the jar and fit a 1/4" plate under the wood for added weight. That would give it stability and somewhere to slot the Gantry posts. just thinking and pitching ideas into the field.1 point
-
I can't imagine either @Neverenoughwatches or me playing a prank on you. Nope. Never crossed my mind. Till you planted that gem now of course.1 point
-
As mentioned above, the post would be hidden for admin appraisal- not deleted. If I found out anybody did as you suggest (two parties would need to be complicit) I would simply ban them from the site. I could not imagine why anyone would want to do something so childish to you @VWatchie, am I missing something? Have you seen this kind of behaviour before here?1 point
-
To get the right length you could wind it round the barrel if it helps you. Don't forget when you have decided you have the correct length to put the pulley wheel on, which I failed to do the first time I serviced a Vienna1 point
-
Heh, I ended up buying the Elma basket complete that came with everything. Expensive, but everything fits well and it’s compact. I’m slowly but surely putting my DIY cleaner together and it’s coming along nicely. I’ll post pics here once complete as I work out the bugs. So far I have the gantry working that has the stepper motor, gearing and shaft that attaches to the basket all working (getting up to 1000rpm on spin/dry cycle). I’ve also got the oscillating wash cycle working. I’m going to see if I can at least get the gantry mounted on the base today - I think here I’m going to have to redo some work I’ve already done to make the setup more sturdy - I’ll have to see when I get there.1 point
-
Thats definitely the way in Gary. A sharp case knife tight against that notch, i usually lever back to click it off. Did about 4 of these same ones for my sis a while back. They all clicked of nicely as long as the knife was in fully and kept tight up to the notch. In the UK we say buggering about, a different connatation. Not picking one's nose, more a case of poking something else in somewhere that its not supposed to go.1 point
-
I used to use a knife like that shown above. But lately, my preference is for a Seiko style knife, which is cradled in the palm and pushed instead. It gives much more force to wedge the blade under a tight snap on back. The key word "wedge". Most beginners tend to use a case knife by levering, like a teaspoon is used to open a tin. But that tends to slip off and scratch the case. There is another thread for caseback opening tools. Have a read of that. There were a lot of good advice given there.1 point
-
one of things we all have to member in watch repair is this is watch repair? What do I mean by that well somebody ask a question and it leads to jump on personal experience answers but many times are answers could be wrong and someone else could be right or a combination of both or even neither. If for some reason the cannon pinion is super tight or possibly rust the which would make it super tight or some other unknown factor. this is why it's really important on incoming watches to do proper evaluations. Visually look at everything checked the winding check the setting. Often times these steps can get skipped and later on your wondering why there's a problem1 point
-
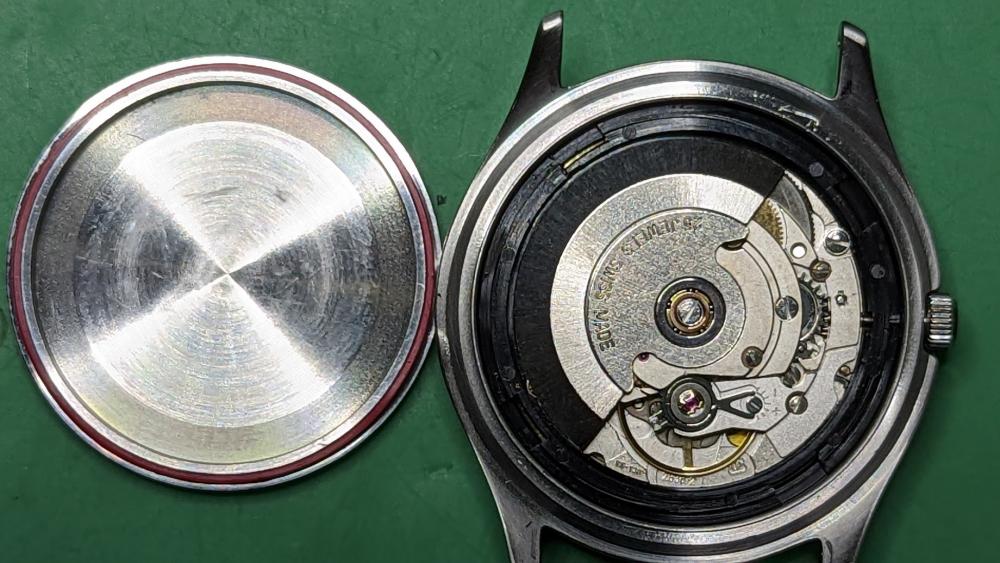
The jewels look fine. It looks like someone has wiped the movement with Rodico (or BluTac ?) and some has remained on the jewels. What ever was used it was very dirty - look at the smears on the bridges. Apart from all the dirt, it looks to be in good condition. Good luck with the service.1 point
-
Good luck Mike. Can we have a skeg of E ? ( that's look in Hullian)1 point
-
you never want to start on your grandfathers or any other families watch until you understand how to repair watches. Otherwise you might end up with a broken watch. I don't suppose you've figured out how to take the back off yet they typically unscrew. That's because there is more than one type of movement that could be a railroad special. So be nice to see what you have in the case. then where do you live what country it helps when making recommendations for whereby things1 point
-
Hard to say. You could just buy some scrap movements to practice taking them apart, cleaning and putting them back together. Anything cheap with 7 jewels is OK to play around with, but if you want something that will be easier to get running well, and keep better time, go for at least 15 jewels. I just did a search on ebay for "15 jewel pocket watch" and auctions beginning for a couple of ££. I don't know what they're finally selling for. Watch a few auctions and see. I imagine you should be able to get a working watch+case for <($)£30. Get something cheap but running to practice on. If you want something better, the American pocket watches are good - better than most of the Swiss. Waltham, Elgin, Hamilton etc.1 point
-
Sorry I'm late to the party. I was able to order all of the specified gaskets (didn't mess with the stem gasket(s) though) for a 7S26 Seiko a while back. "Seiko modding" is a thing, so they're out there. I believe got a dial, crystal and gaskets from here when I put together my "shop watch"; a frankenstein watch made of various parts from a few Seikos I had lying around. Digging around though, I don't see them listed currently... Might be worth an email.1 point
-
Hey Jack - thanks for the original Reddit post. Best diy I had found. I haven’t checked back there yet, but are the 3d print files linked there? Or could you tell me where to find otherwise? I ordered one of the small task baskets like yours but I have not incorporated it yet.1 point
-
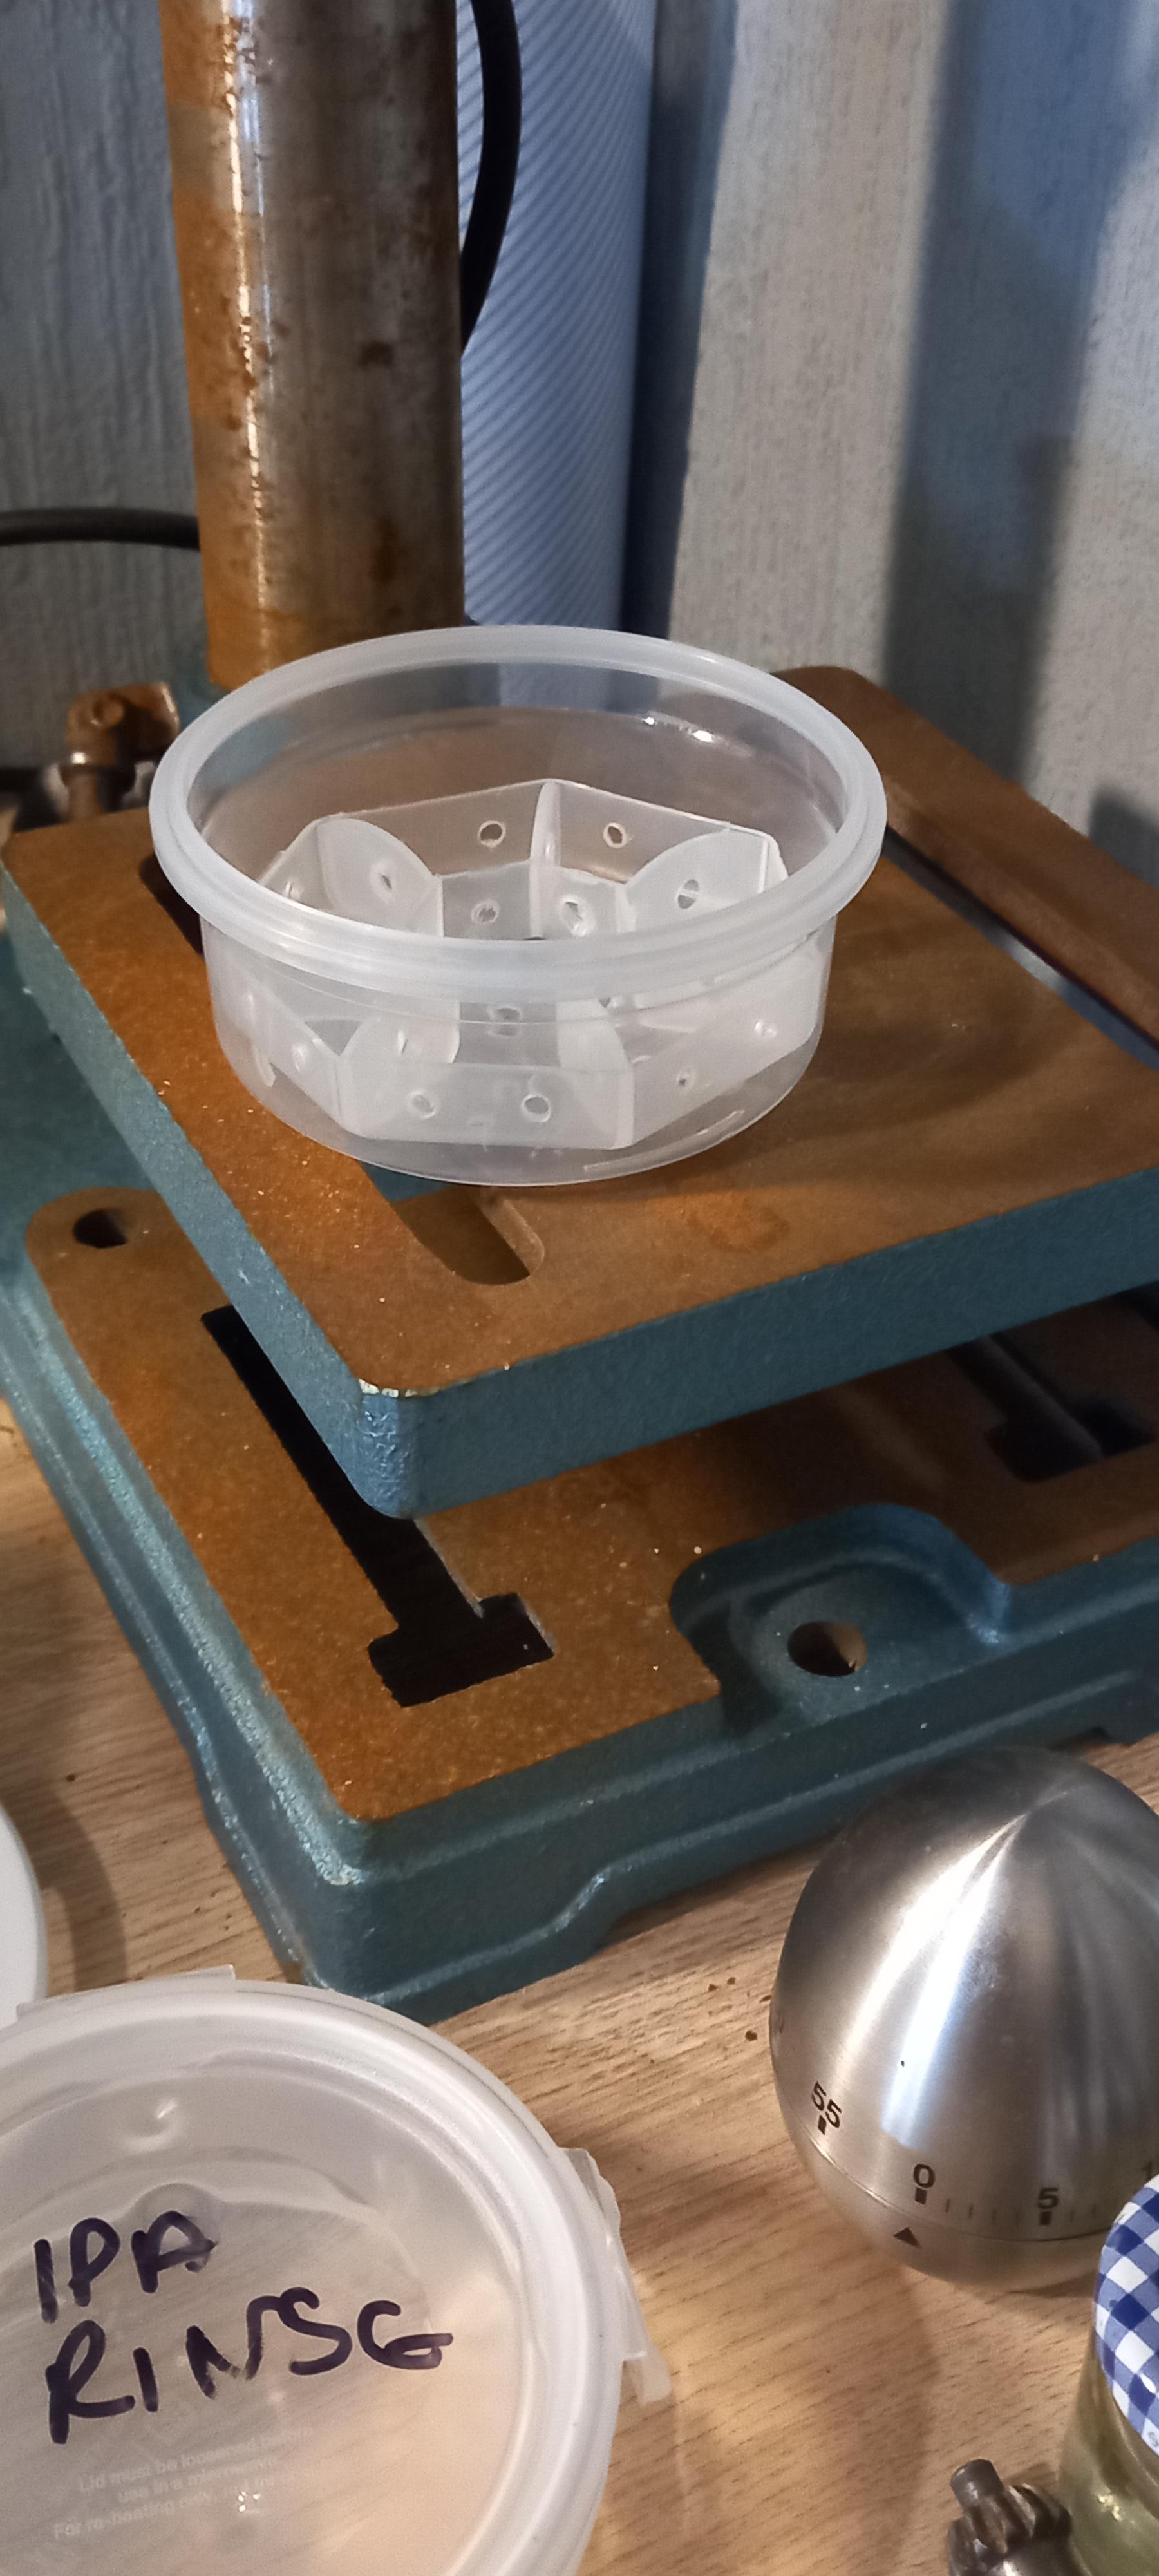
^^^ that looks great! I was also tempted to 3d print baskets but was worried how the chemicals would affect them. I folded and ordered the Elma baskets and holders this morning. I’m hoping to use a stepper motor to drive the lot with - it should have enough torque and would allow me to have it work bi-directional. We will see if my idea pans out.1 point
-
Hi I've worked on a tissot seastar and I get it close of course. Now I'm trying to close the back but I can't I cannot explain why just that it seems there is no room I join pictures Thanks for any advise I answer my own question I've inversed the movement ring so I came back to the picture and figured out. My advise for the beginner : take picture of the case and the rings before disassembling to avoid this experience it as much as important as the movement itself Thanks

 1 point
 -
I’d love to give a comprehensive reply bit I’m a little hung over. But I might just play with something like this for sheets and giggles1 point
-
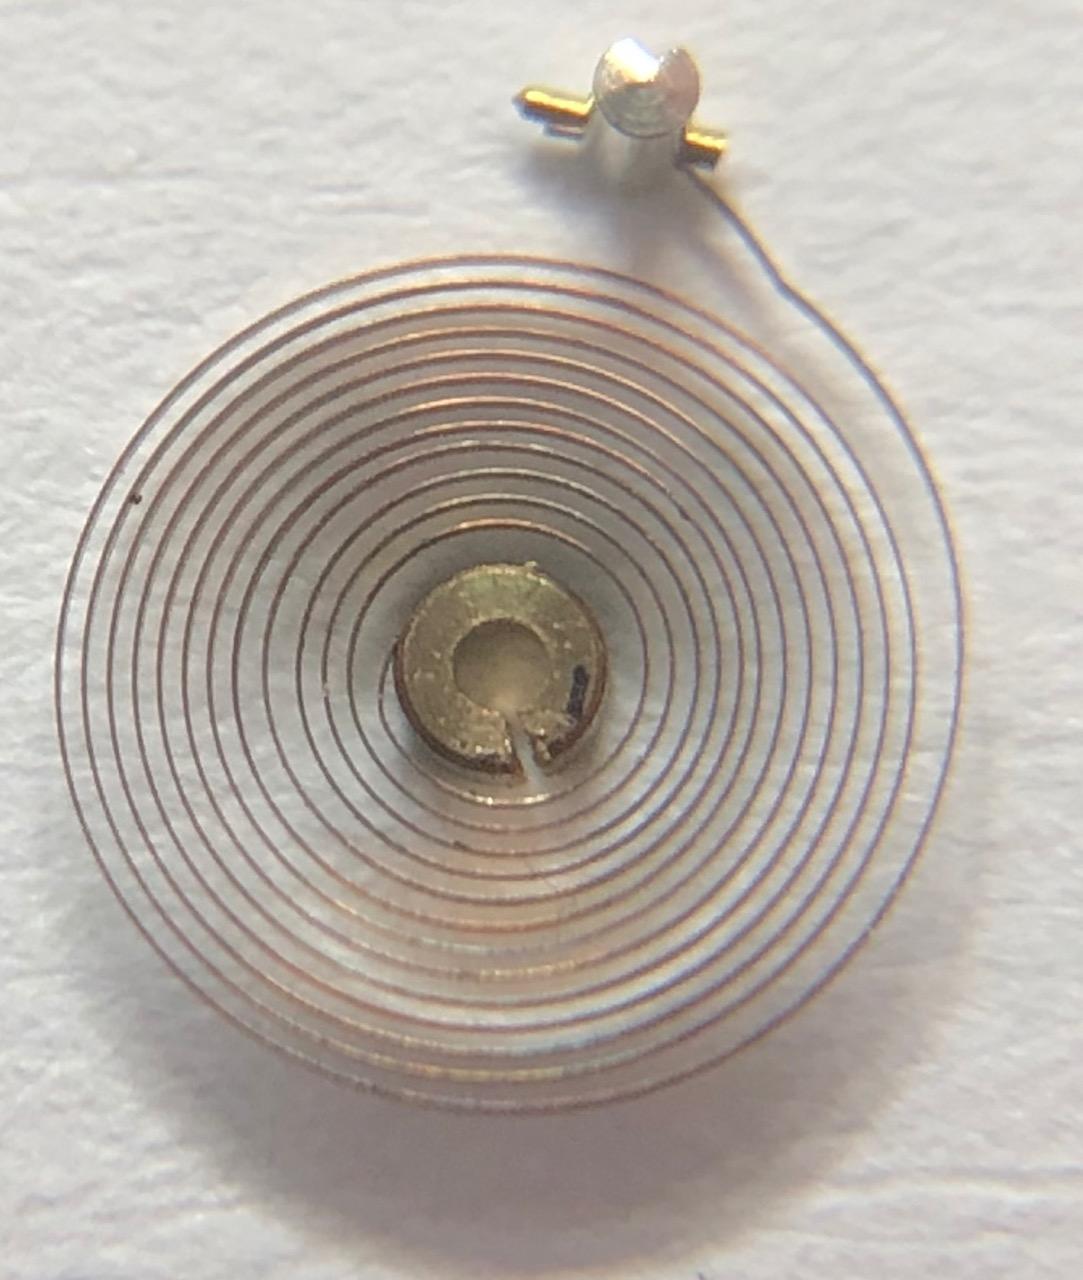
I just thought I'd share this as it may be useful for another learner. By far the most difficult thing I've come across starting out in watch repair has been correcting bends in hairsprings. I've got the right tools, the right light, a powerful eye glass and a pile of scrap watches I've been practicing on. But I found time after time I was just making the hairsprings worse. I think part of my problem is that I'm slightly dyslexic and I find looking at the spiral really confusing sometimes. But I had a bit of break through last weekend which has dramatically improved my technique. Quite simply, I hold my eye glass up to my iPhone lens and take a close up picture of the hair spring. I then make a cup of tea and sit and look at the photo, zoom right the way in and really think about what I'm going to do. This is so much more effective than hunching over the hairspring and straining my eyes for long periods and losing patience. Once I've really thought about what I'm going to do, I go back to the hairspring with a clear strategy, ie, slight bend in, fourth from the centre at 3 o'clock. I apply the bend, take another picture and repeat. I know it sounds simple, but it's been a huge help to me and I'm finally having success
 1 point