Leaderboard


Popular Content
Showing content with the highest reputation on 10/03/20 in Posts
-
I beg to differ !!! ???3 points
-
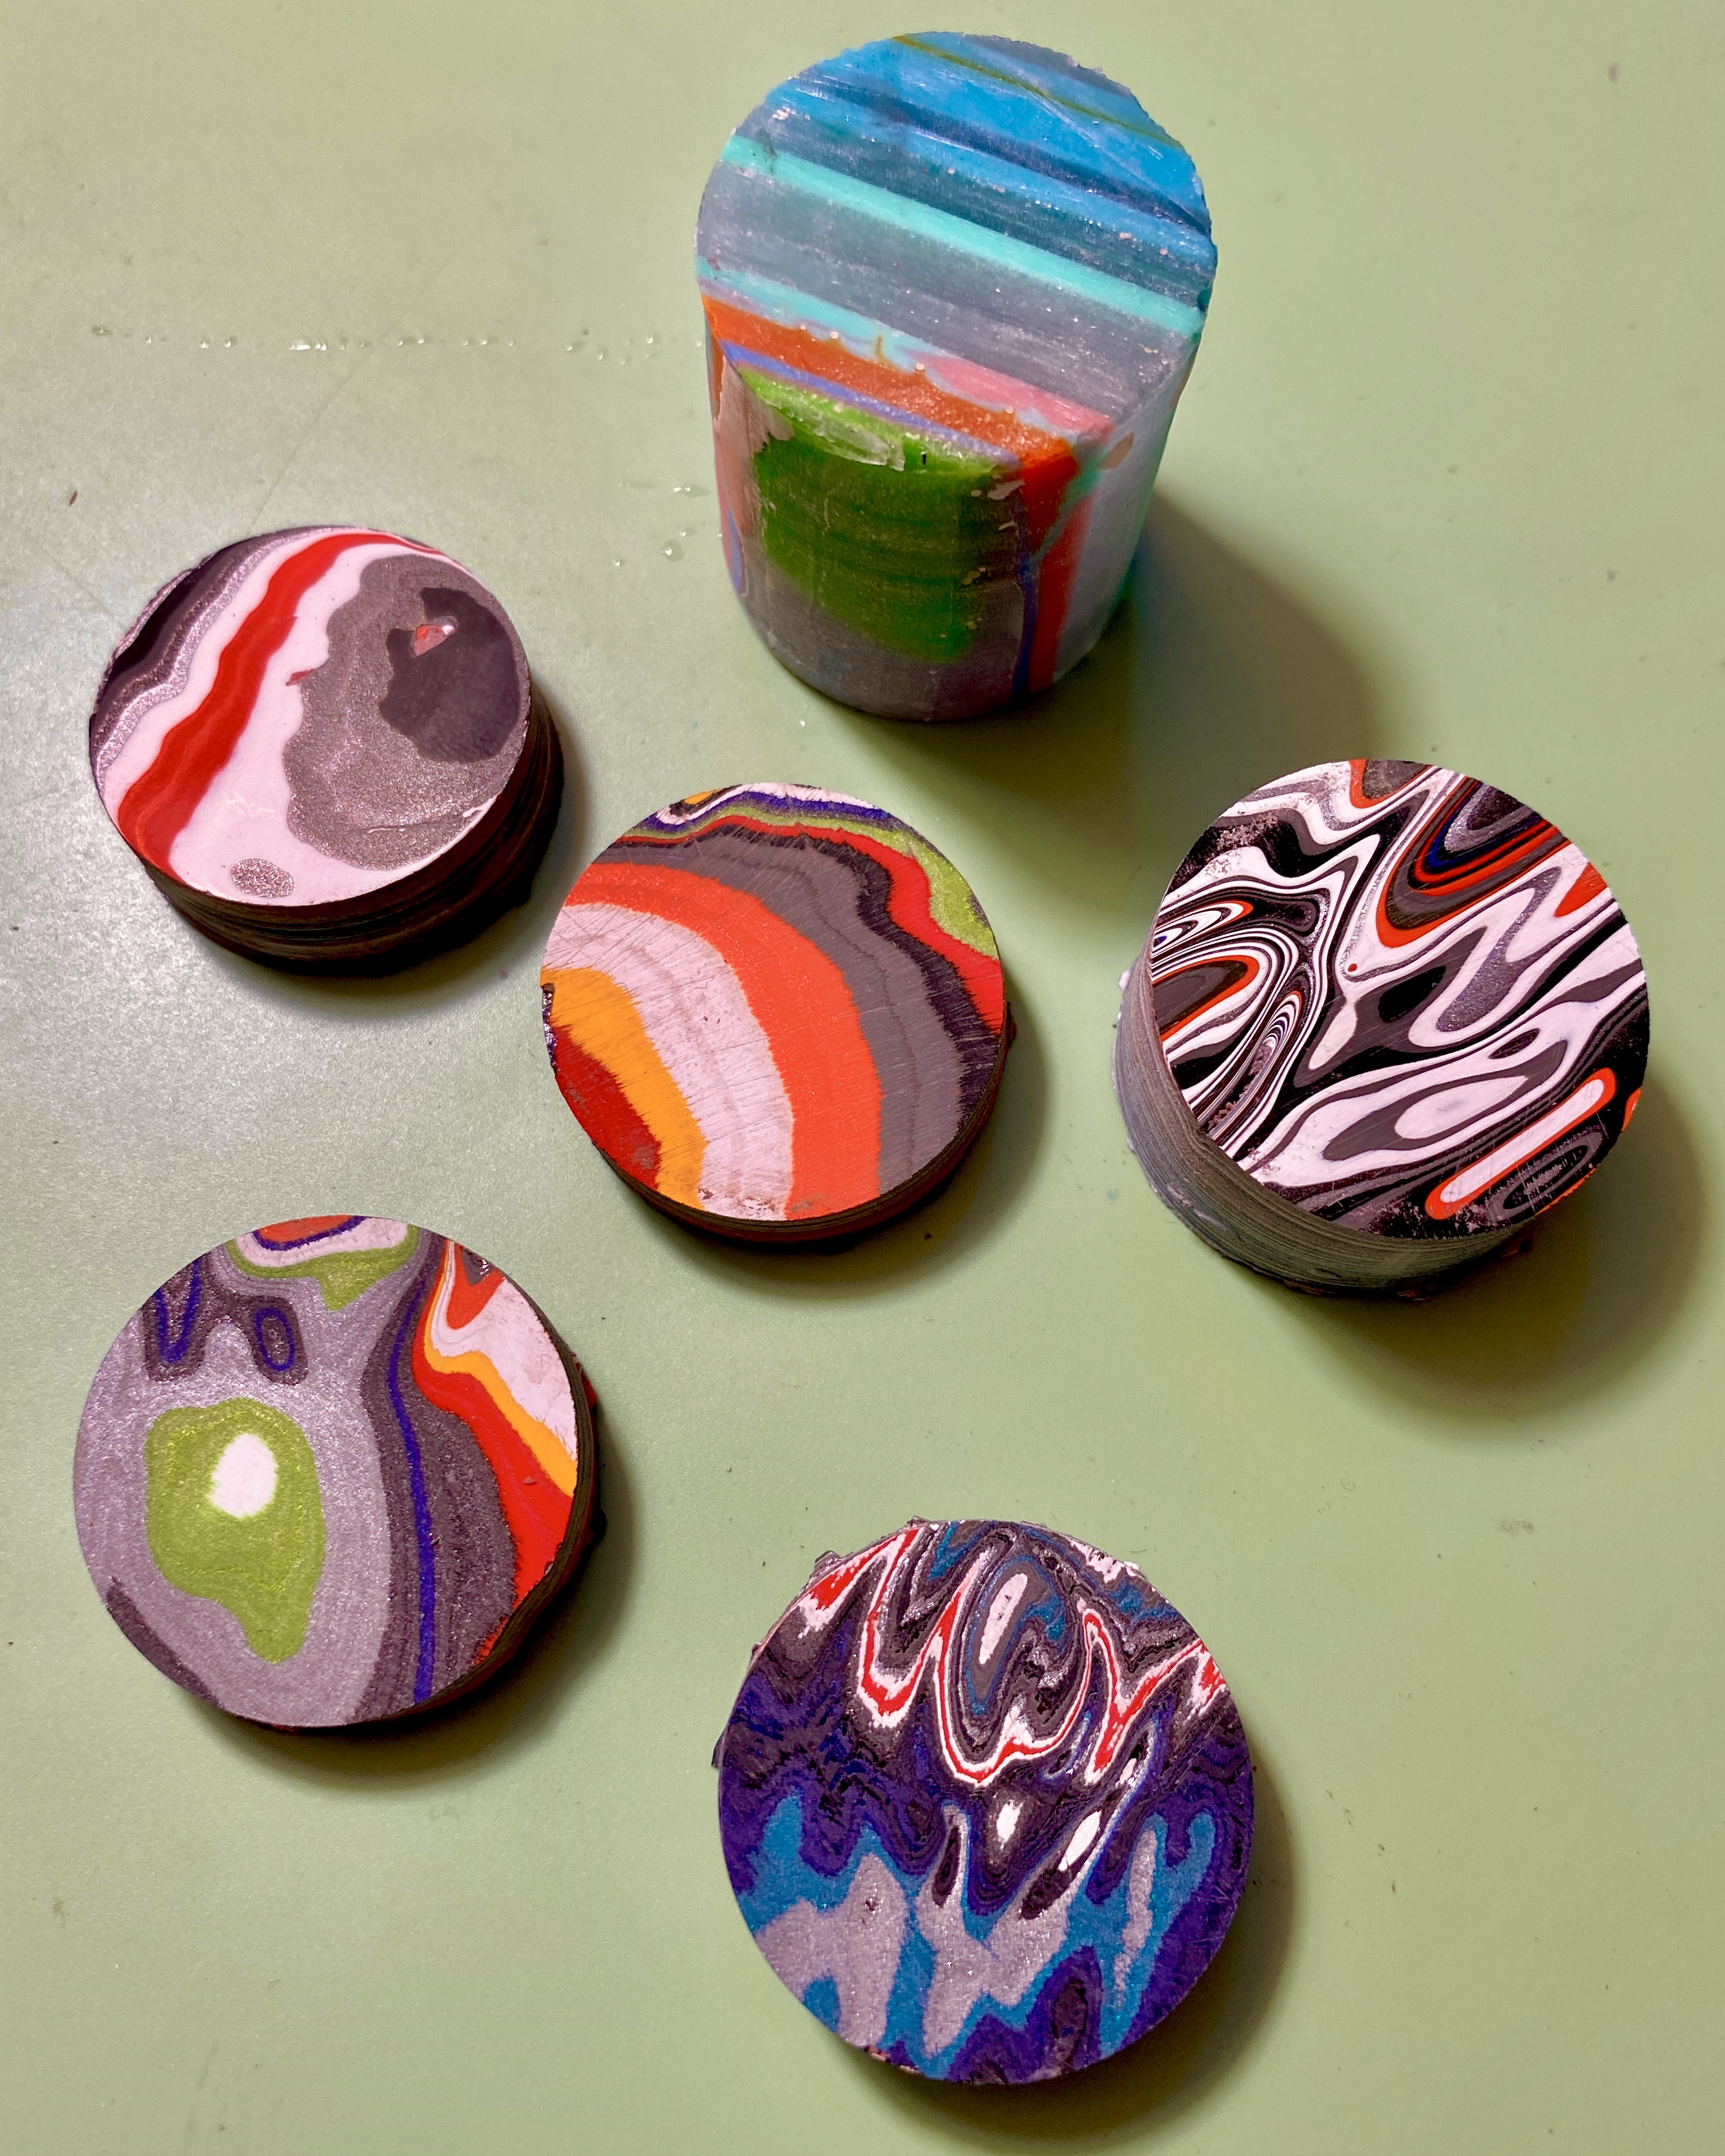
So, here's where I am to date on this project. I've scheduled as much time over the weekend with the Buehler precision cutter as I can get, so hopefully I'll have some additional progress photos and maybe a completed dial ready to show in the next few days! Again, I'm more than happy to answer any questions or talk about any part of this project/process. I'm committed to seeing it through -- maybe I won't be able to ramp up to a large production run, but I'm confident that, at a minimum, I'll be able to build a small number of fordite-dialed Seiko watches. [Update: I see that this thread was moved to the Walkthroughs and Techniques forum. I read that forum description as requiring a finished step-by-step process. As my work here is still in process and subject to change, I didn't think it appropriate to post in that forum. I will say that my commitment to open source information and collaboration is genuine. As I complete my first run of dials and get my manufacturing process dialed in, I'll do my best to post an updated & concise process that other folks are welcome to use. Even if my dial project is a complete failure, I've really enjoyed this research and the work I've done so far. If my work makes it easier for someone to take on a similar project, I'd be absolutely delighted. I'm hoping to be able to sell enough dials to cover my costs, not develop a proprietary process and be the *only* source of fordite-dialed watches. If someone can take my process and figure out how to do it more cheaply, I'll be happy for them and consider my work successful.] Cheers, Dan3 points
-
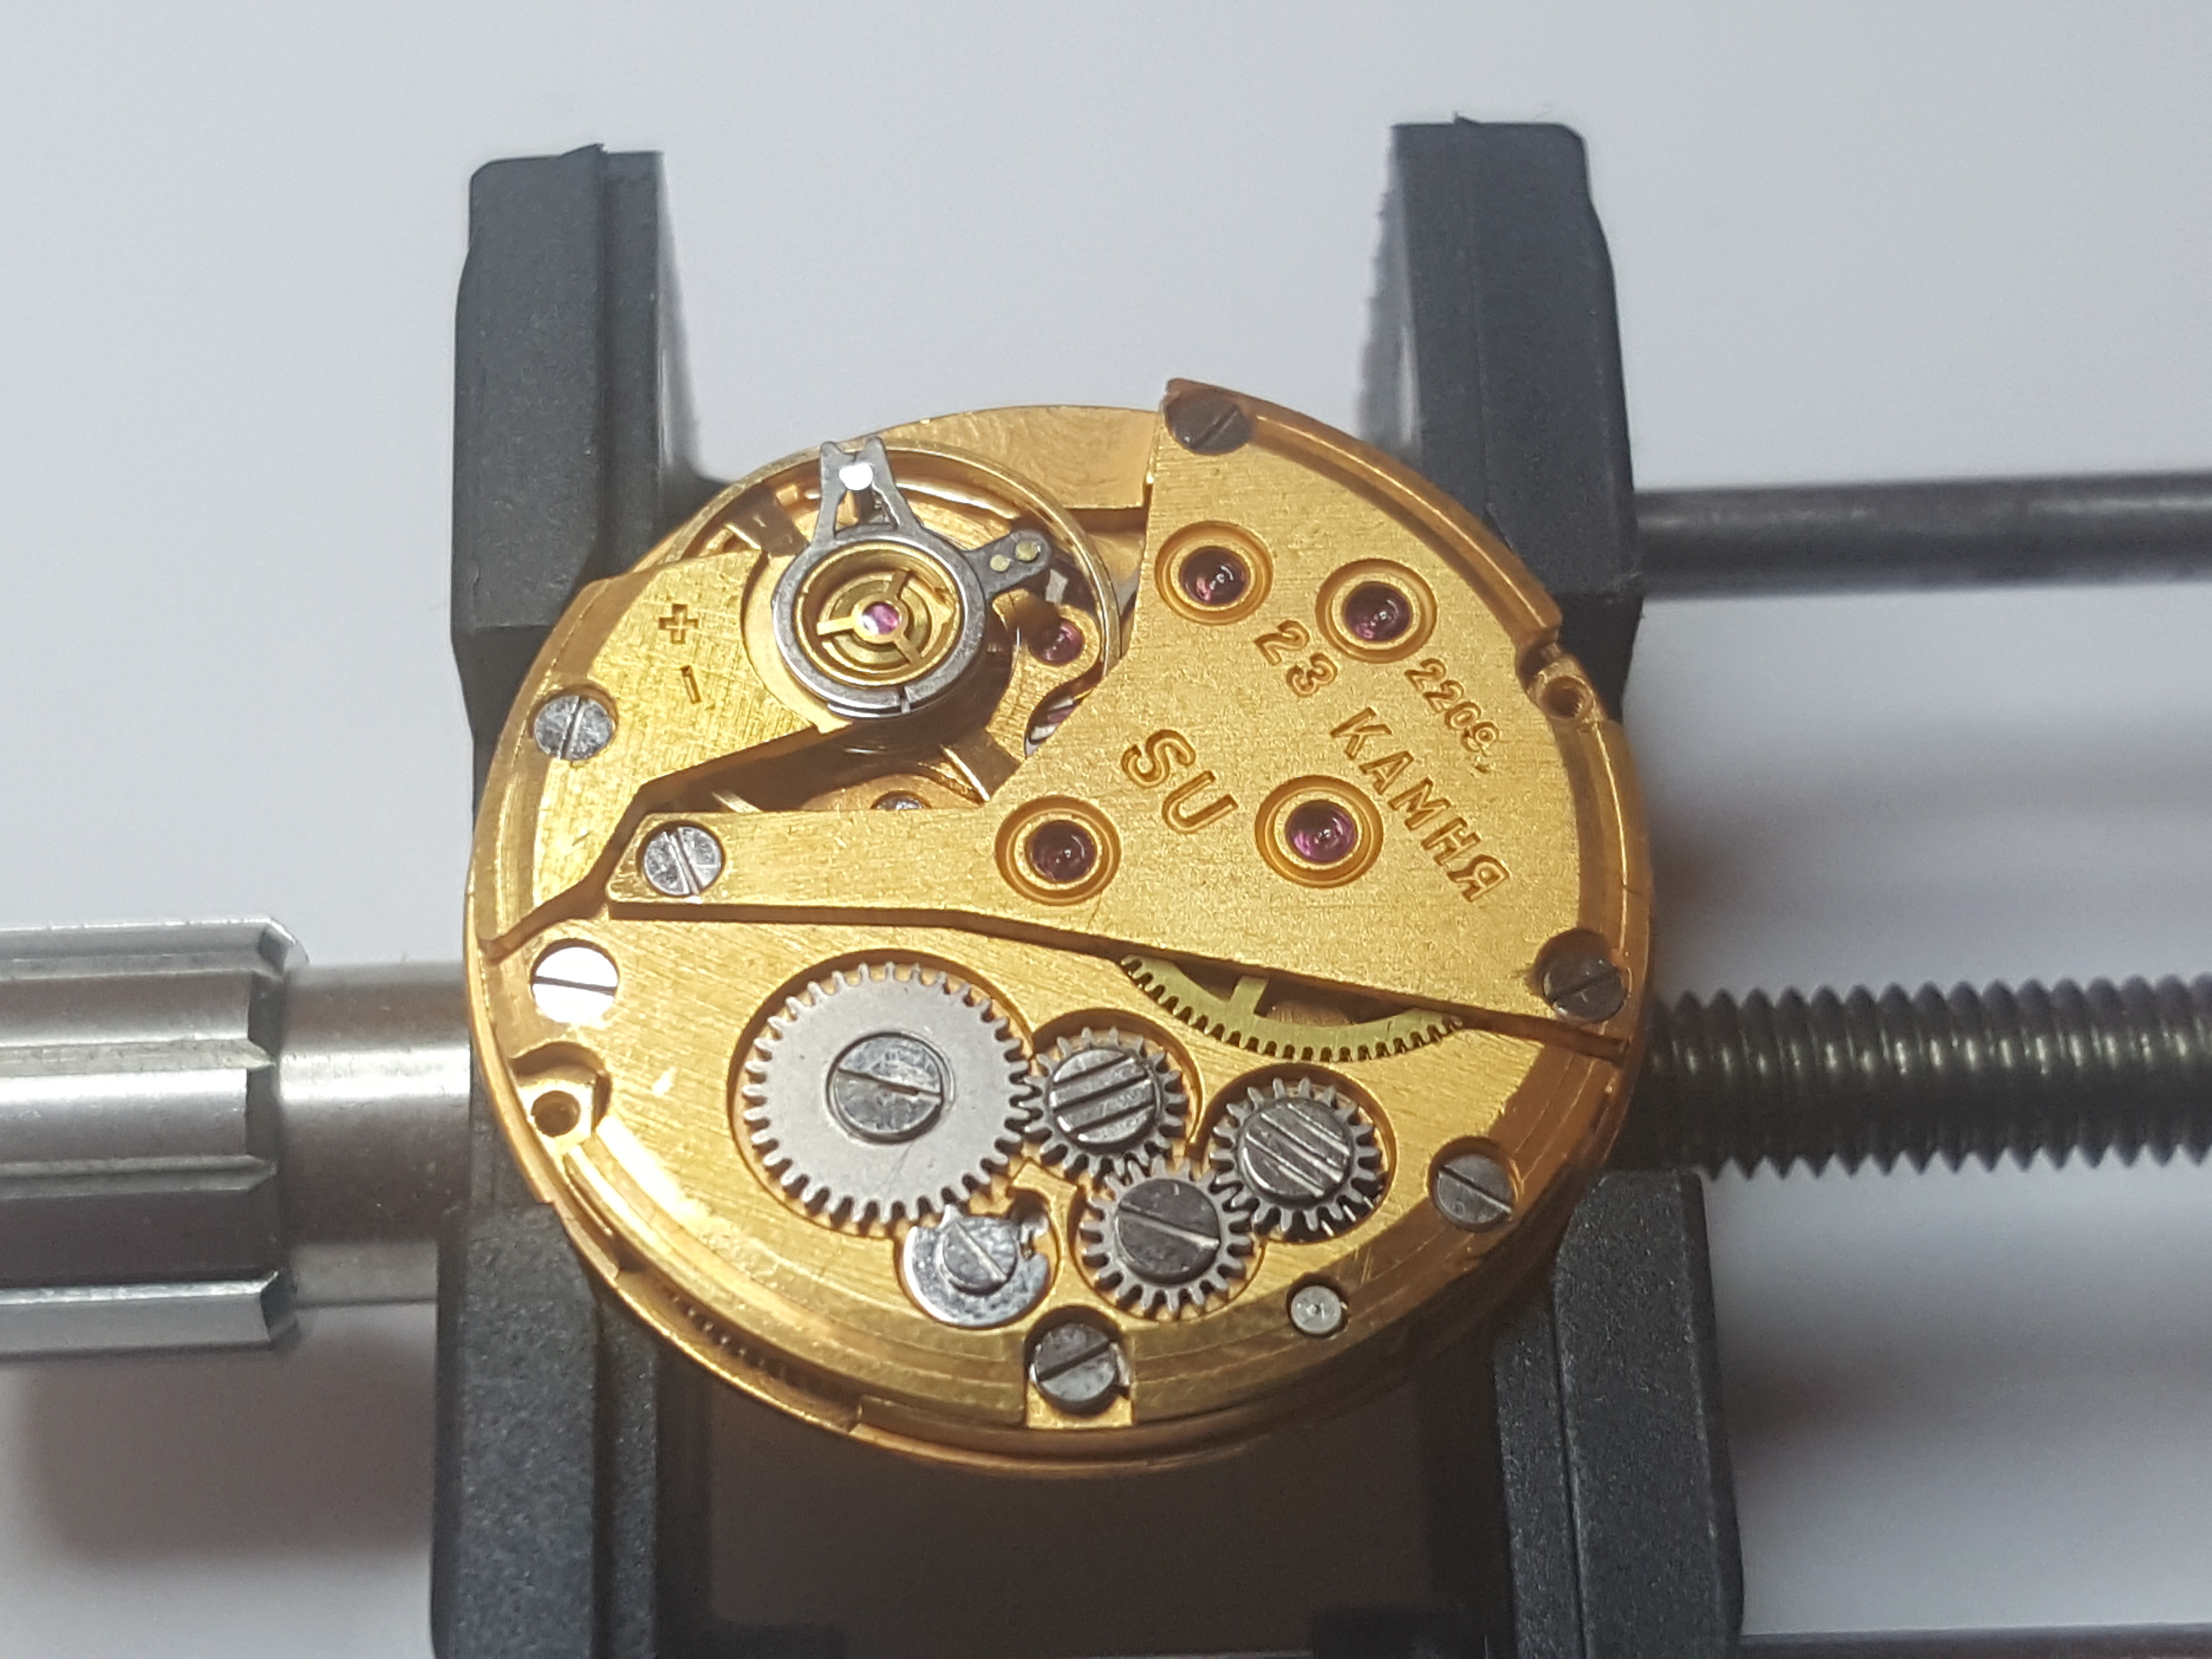
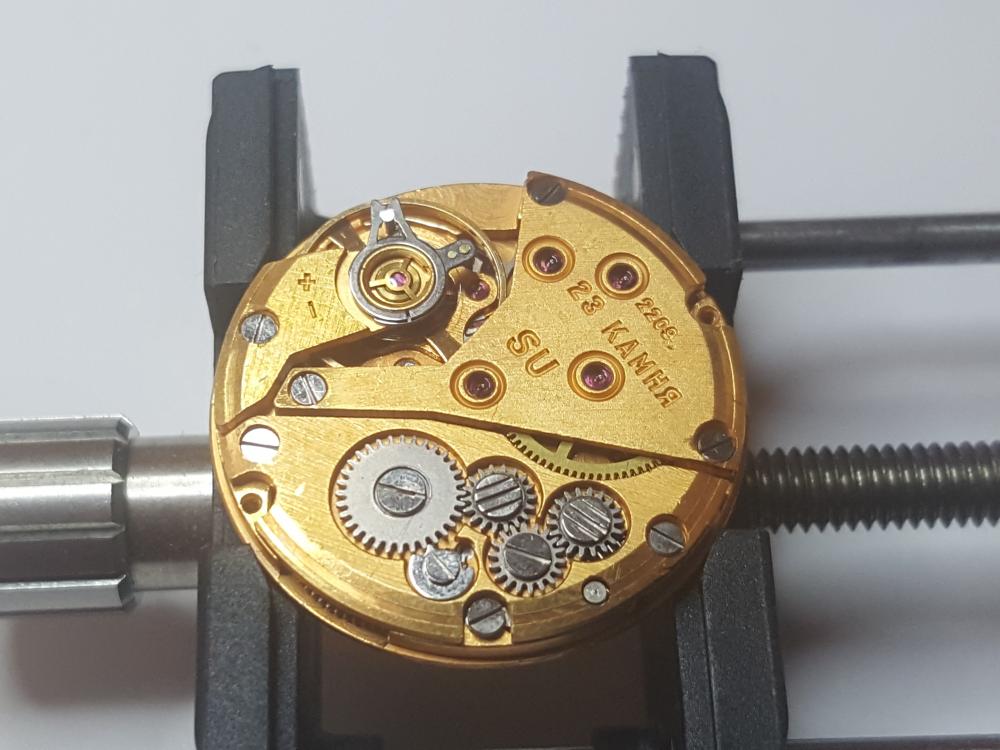
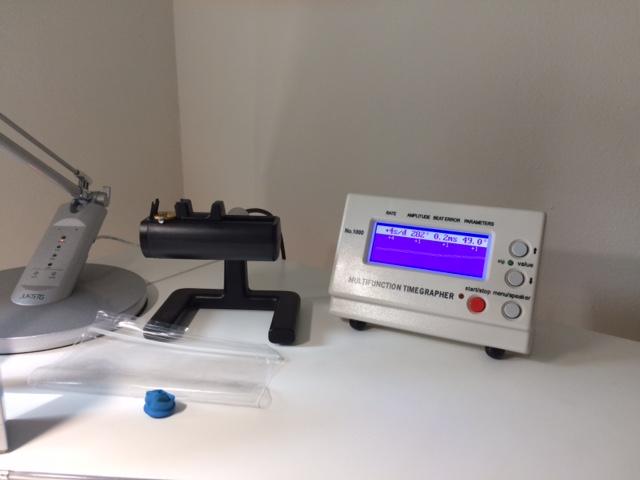
Here's a shot of one I recently worked on with my students. Not a bad trace on the timegrapher. I think the trick is to really get the pegwood and some autosol in the pinion leaves to polish. Same with the pivots. Some of these movements are really tarnished and need the extra attention, but it also depends on how much abuse the watch has taken. You can't polish a turd! It's a great watch to learn about indirectly driven centre seconds, that doesn't use a brake spring because of the double third wheel arrangement.

 2 points
 -
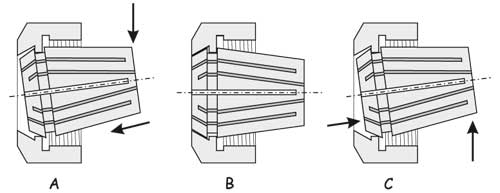
Sorted, operator error. I suspected the flange was interfering with the clamping. The ER nut features an eccentric flange to keep the collet with the nut: Image from arceurotrade.co.uk My mistake was to use a collet where the work size was the same as the collet. That causes the flange to get in the way of clamping. One must always use the biggest collet that can clamp. BTW, I checked the chuck taper (used a regular dial indicator, but I've got the other type on order anyway) and it is spot on. I have now 0.002mm TIR on the bar ?
 2 points
 -
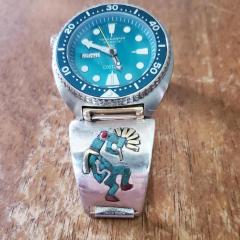
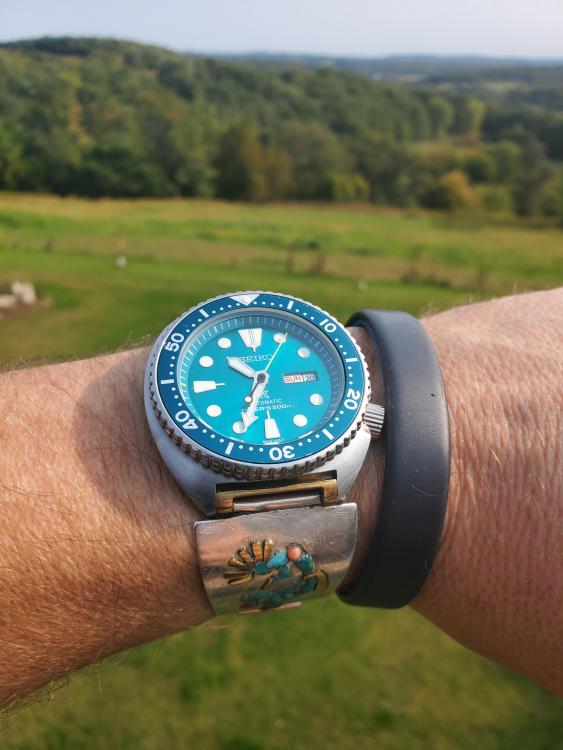
My only watch, not a real seiko, I bought it specifically for the brilliant "turquoise" color to go with the inlay I did on the watch tips in the band.
 2 points
 -
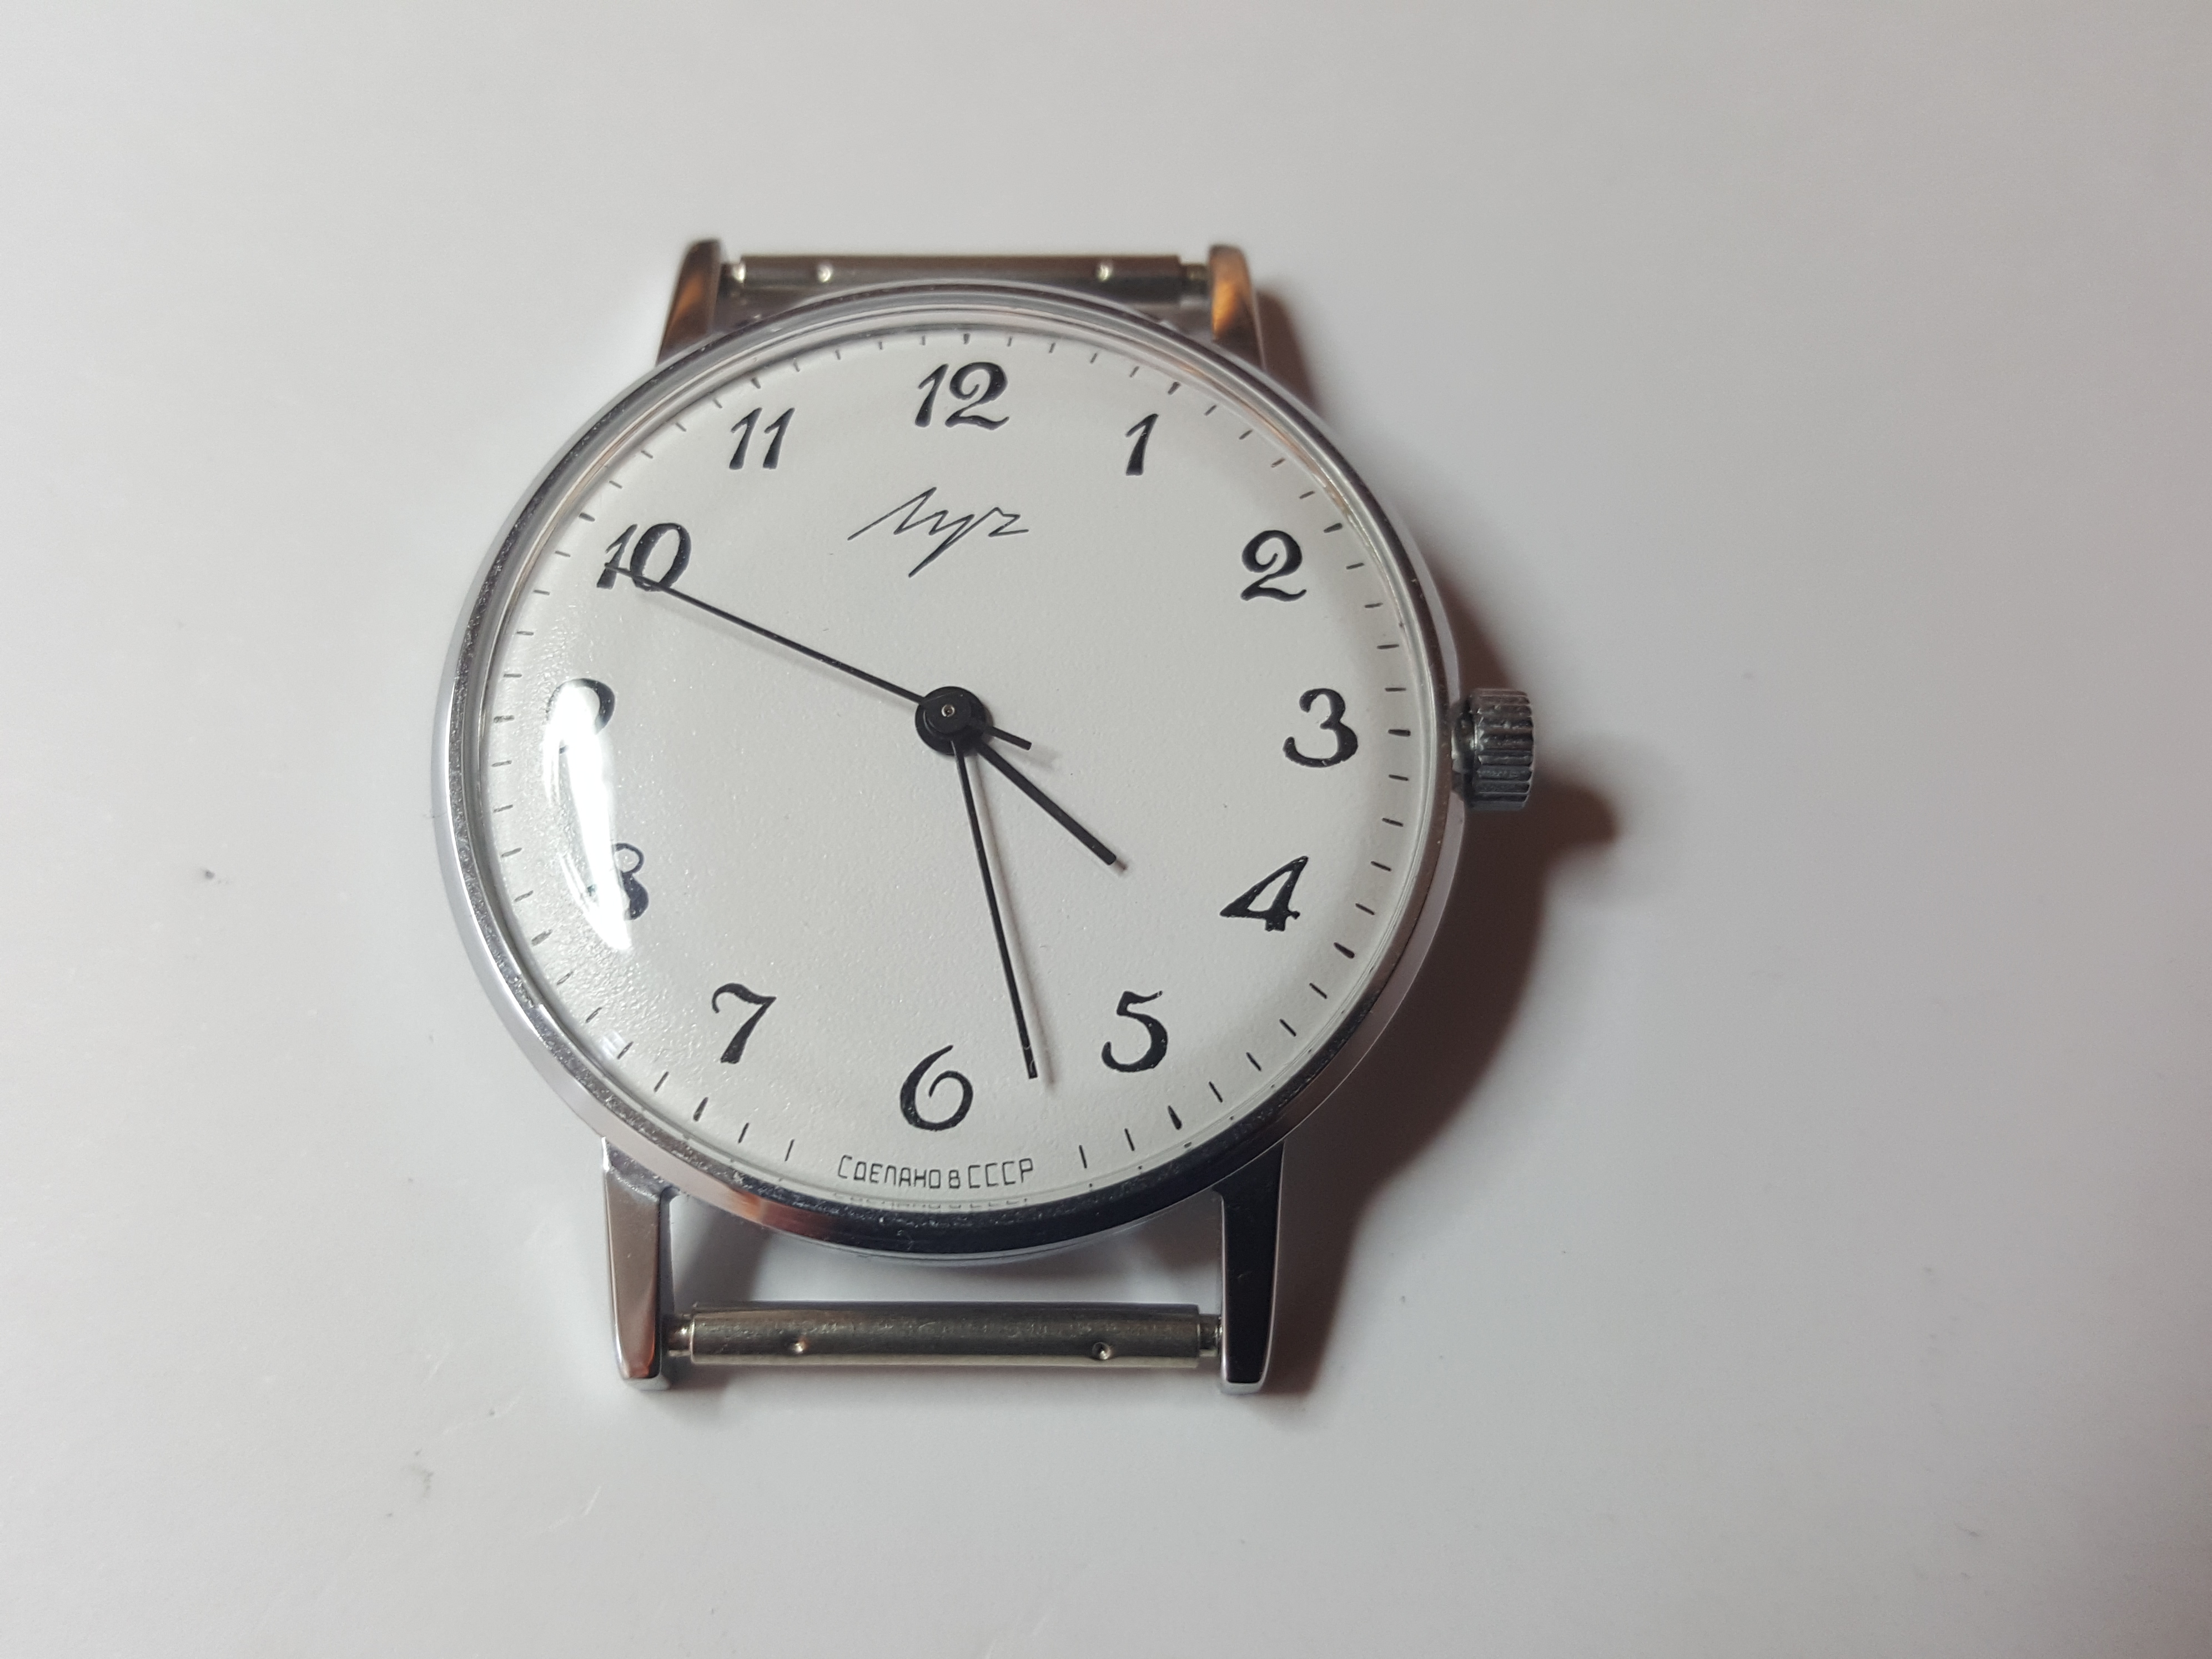
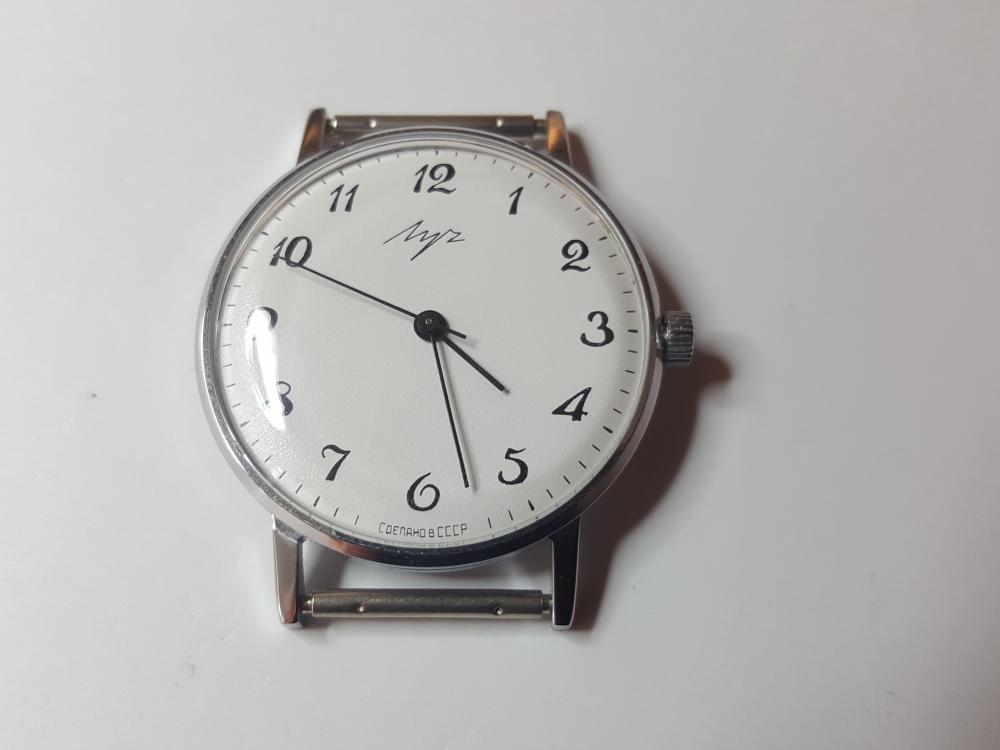
Part 3 is a sort of redemption, or at least some lessons learned. The donor arrived about six weeks later (thank you Covid) and I quickly transferred the balance complete. The wavy traces quickly returned. So I stripped the movement again, paying close attention to the barrel arbor bearings. Looking closely, I could see that the barrel had actually been scraping the bottom of the barrel bridge. Manipulating the barrel with the bridge on and the train removed, I could also see that, under torque, the barrel would foul both the bridge and possibly the mainplate. Swapping in the donor movement bridge, the wavy traces continued. The free running of the train was okay with the pallets removed, but, turning my attention to the mainplate barrel arbor bushing, I could see this was slightly out of round. Under torque, the barrel would still hit the bridge. So that was it. I could not close the barrel arbor bearing hole, so after repeated reassemblies and inspections, I became convinced that the original movement was a goner. Thankfully, I had the donor, which I decided to service and install in the watch. In truth, the donor looked to have very little wear - I am unsure what kielbosched it in the first place. I serviced the donor and prepared to install the balance complete. Here tragedy struck again, as it appears that one of the problems in the donor was that the regulator arm was improperly seated in the balance cock, or the pins were just too short. Closing the regulator pins, the hairspring caught the closing arm and became kinked in the terminal curve. Here I finally did Mark's video justice, carefully massaging the hairspring until it was again smooth throughout the curve. A final hurdle: the balance on the donor movement had no endshake - none at all. Having watched Mark's video on unexpected endshake problems, I looked for a shim under the balance cock. Sure enough, Minsk Watch Factory had indeed made a shim under the cock, near the screw, which I had flattened as I had rubbed the tarnished mainplate with pegwood. So I got my screwdriver, and made a painful jab into my newly-cleaned donor movement. Reinstalling the cock, it ran strongly! Hurrah. Here are the results, positive and negative. On the positive, the watch runs strongly and relatively straight in all positions. There is also relatively little positional error (maybe 5-10 seconds a day, but I can live with that). But here's the heartbreaking thing. This donor, this seemingly babied donor with no major signs of wear, has exactly the same problem of wavy traces and variable amplitude as the original movement! It's less pronounced, sure, but it's there - a 15-20 degree variability in amplitude at seemingly random intervals, with the associated wavy lines. A reflection on that below. Battle-ready once again, but not without difficulty. Another charm(?) of the Luch is that the dial does not sit flush with the movement, so you need to be extremely careful when seating the hands to make sure they won't hit the dial. And back on my wrist, at long last. So, a summary. Why should you, an absolute beginner, try to diagnose and fix a battered Russian watch that hasn't been opened since Gorbachev? Well, first, you won't break the bank. These are plentiful, and if you get a plain dial they are cheap as chips. Second, you will use a lot of Mark's lessons. Not just chapter 2, but 3 as well. I watched every single video repeatedly, and tried to apply them all. If not for his video on barrel arbor bearing wear, I would never have found the problem. Last, I practiced a lot - a lot - of skills. I'm still bad, but getting this Luch back on my wrist has made me feel like I'm on the road to being a real watchmaker, whatever that means. And why should you avoid articles like this? One reason: poor, inconsistent build quality. From the shim, to the regulator pins of incorrect length, to the badly-seated dial, it doesn't take a George Daniels to see that these things were absolutely slapped together. This makes them hard to work on and diagnose. And even when you find a good donor that was seemingly retired after only a few years in service, you may find that it has the same fundamental problems as the donor you thought was deeply, unusually defective. So just live with it, and know when good is good enough. Don't make perfect the enemy of the acceptable, because they sure didn't when they built these things in the first place. So that's it. If you're exceptionally patient or you didn't have anything better to do tonight, thanks for reading this far. And thanks to the people on this forum for helping me out with this project - I am very glad I joined. Cheers!
 2 points
 -
Good morning all, As many on here, I am joining the community in the hopes of improving my watch repair/service skills. I've jumped straight in a year or so ago, taking apart an Oris diver, on the basis of "what could possibly go wrong?". Armed with the ETA technical data and some basic tools, I set about it. I have to say, it was an eye opener, but I did manage to get it back together and working, but what a learning curve! So far, I'm self taught and learning is slow due to my ability to give this hobby the time it requires, but I'm getting there slowly. I have taken a recent liking to some Russian watches and currently have a few vintage Vostoks to service and refurbish, so these will provide some practice on less expensive timepieces. I will not yet be able to offer much in the form of contributions and will most likely be asking rather more questions that giving answers, but hope that I will be able to once my experience and skills develop.1 point
-
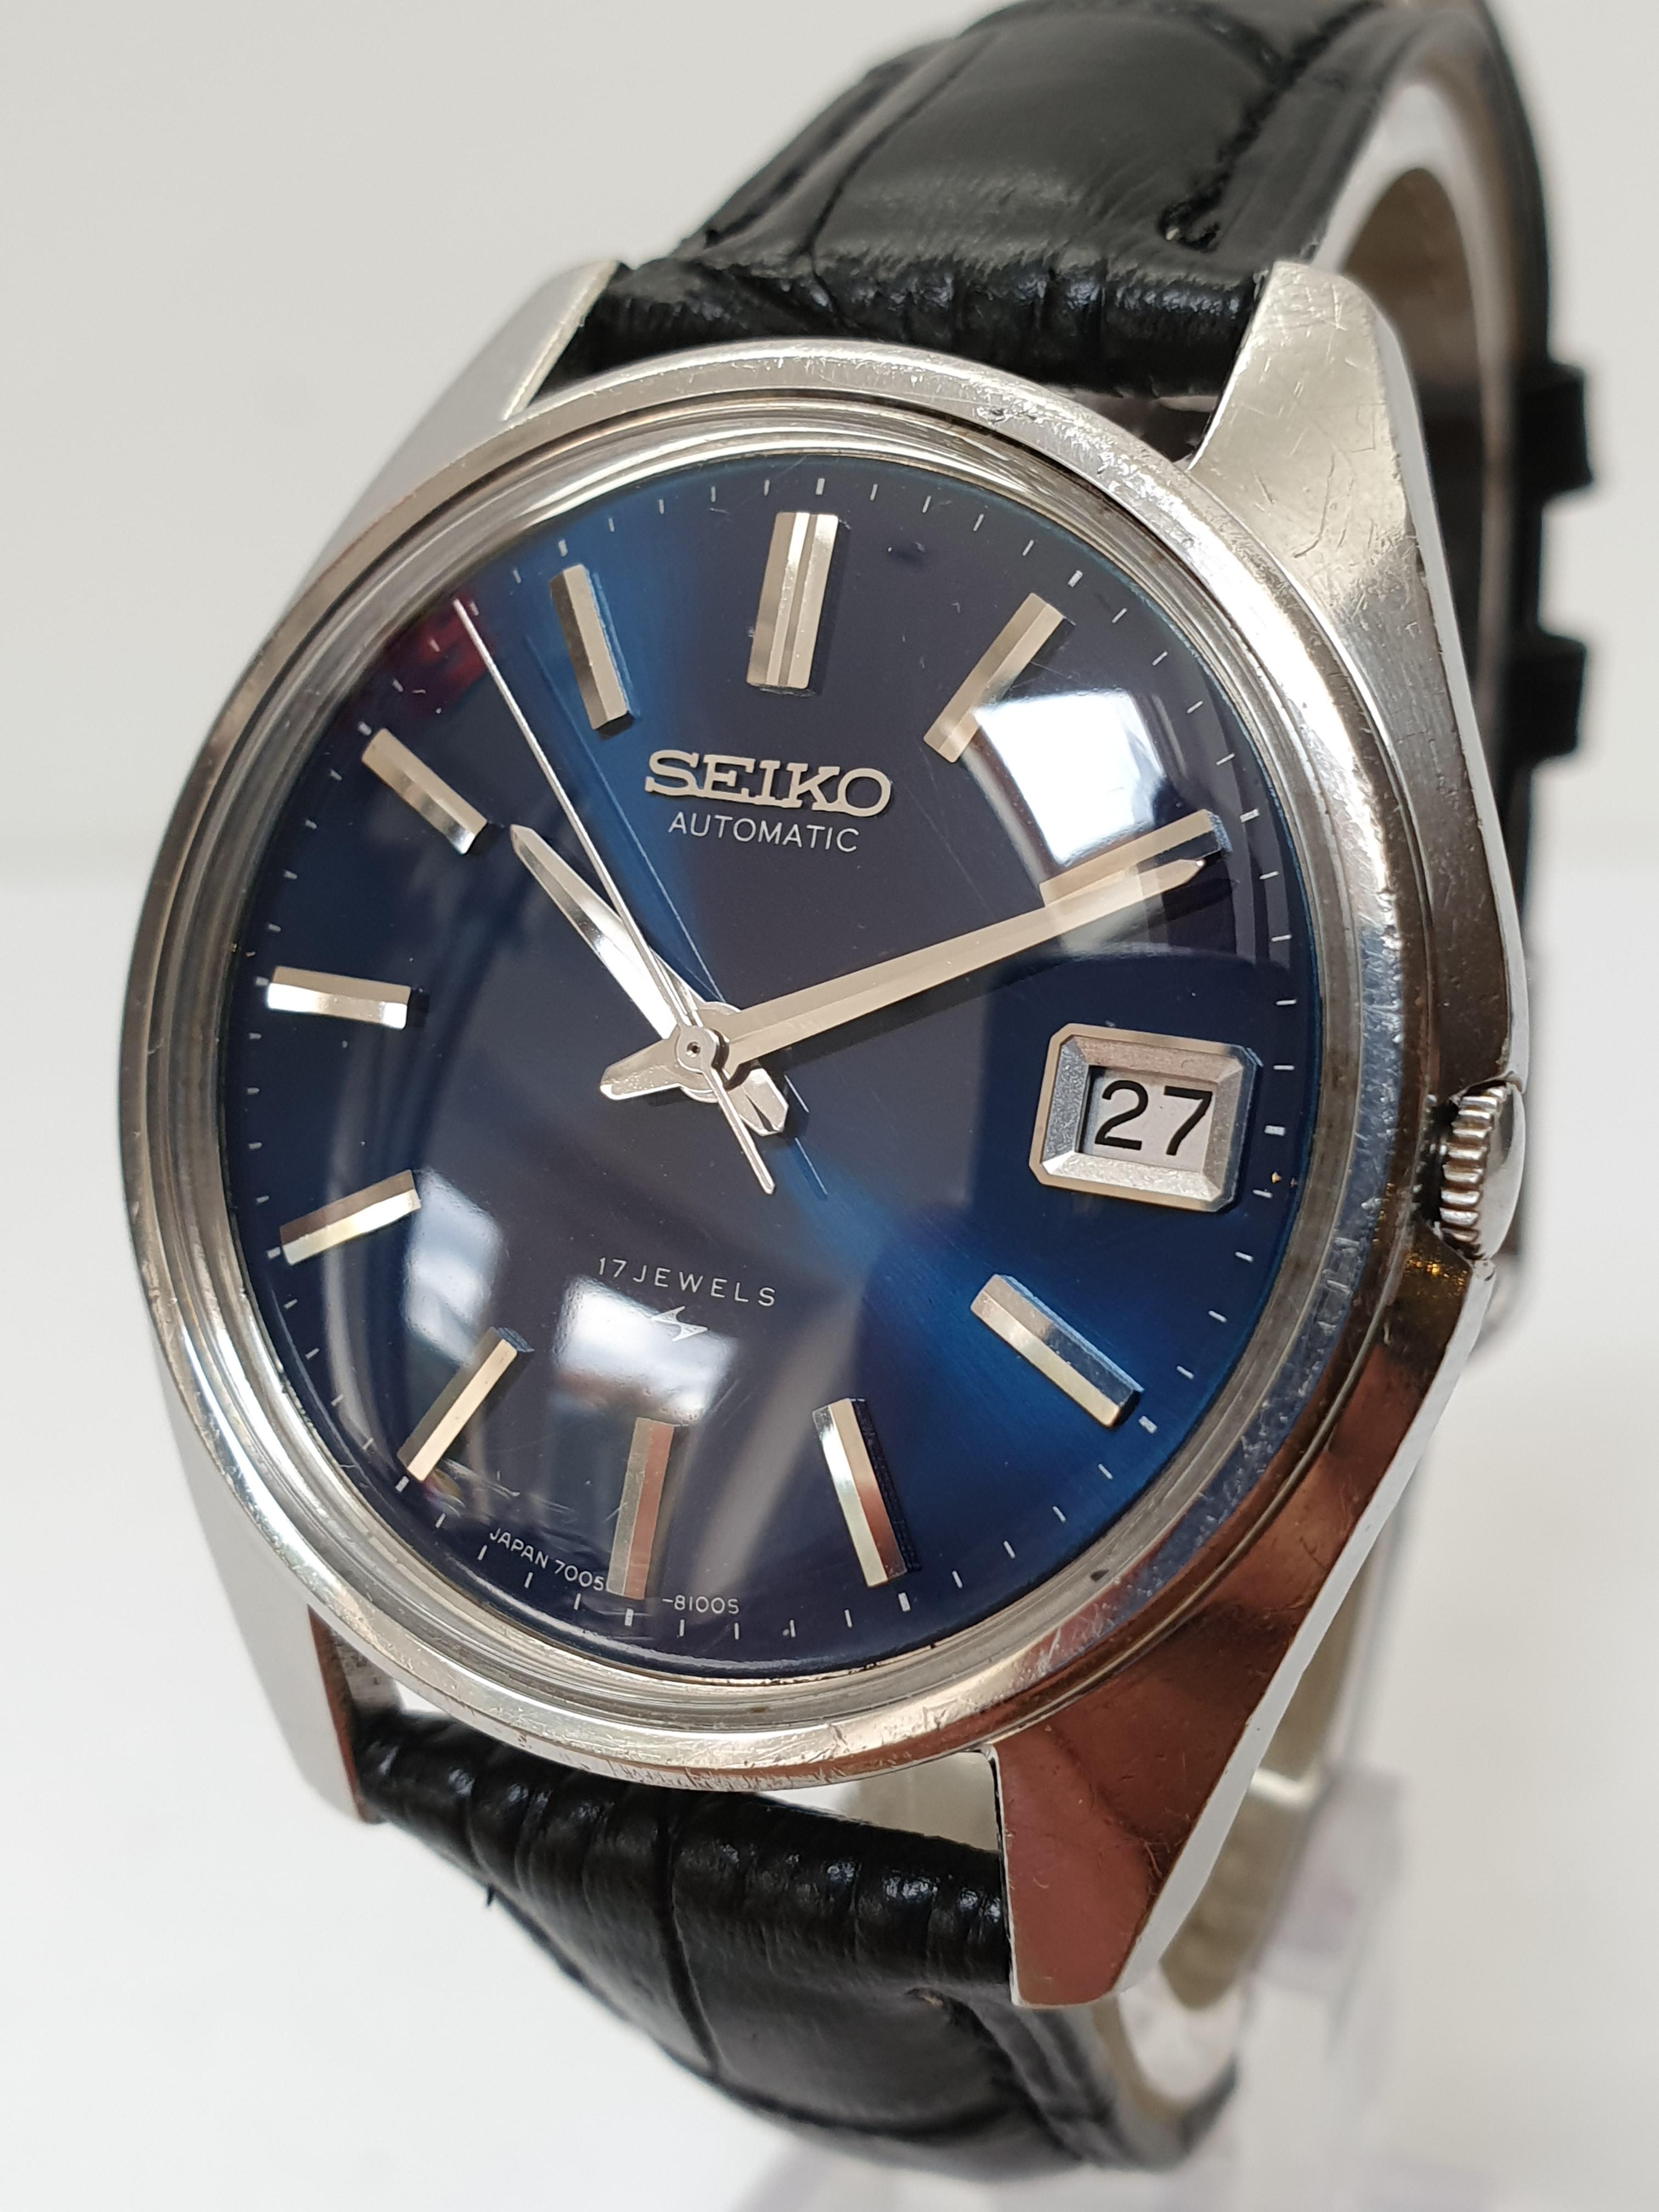
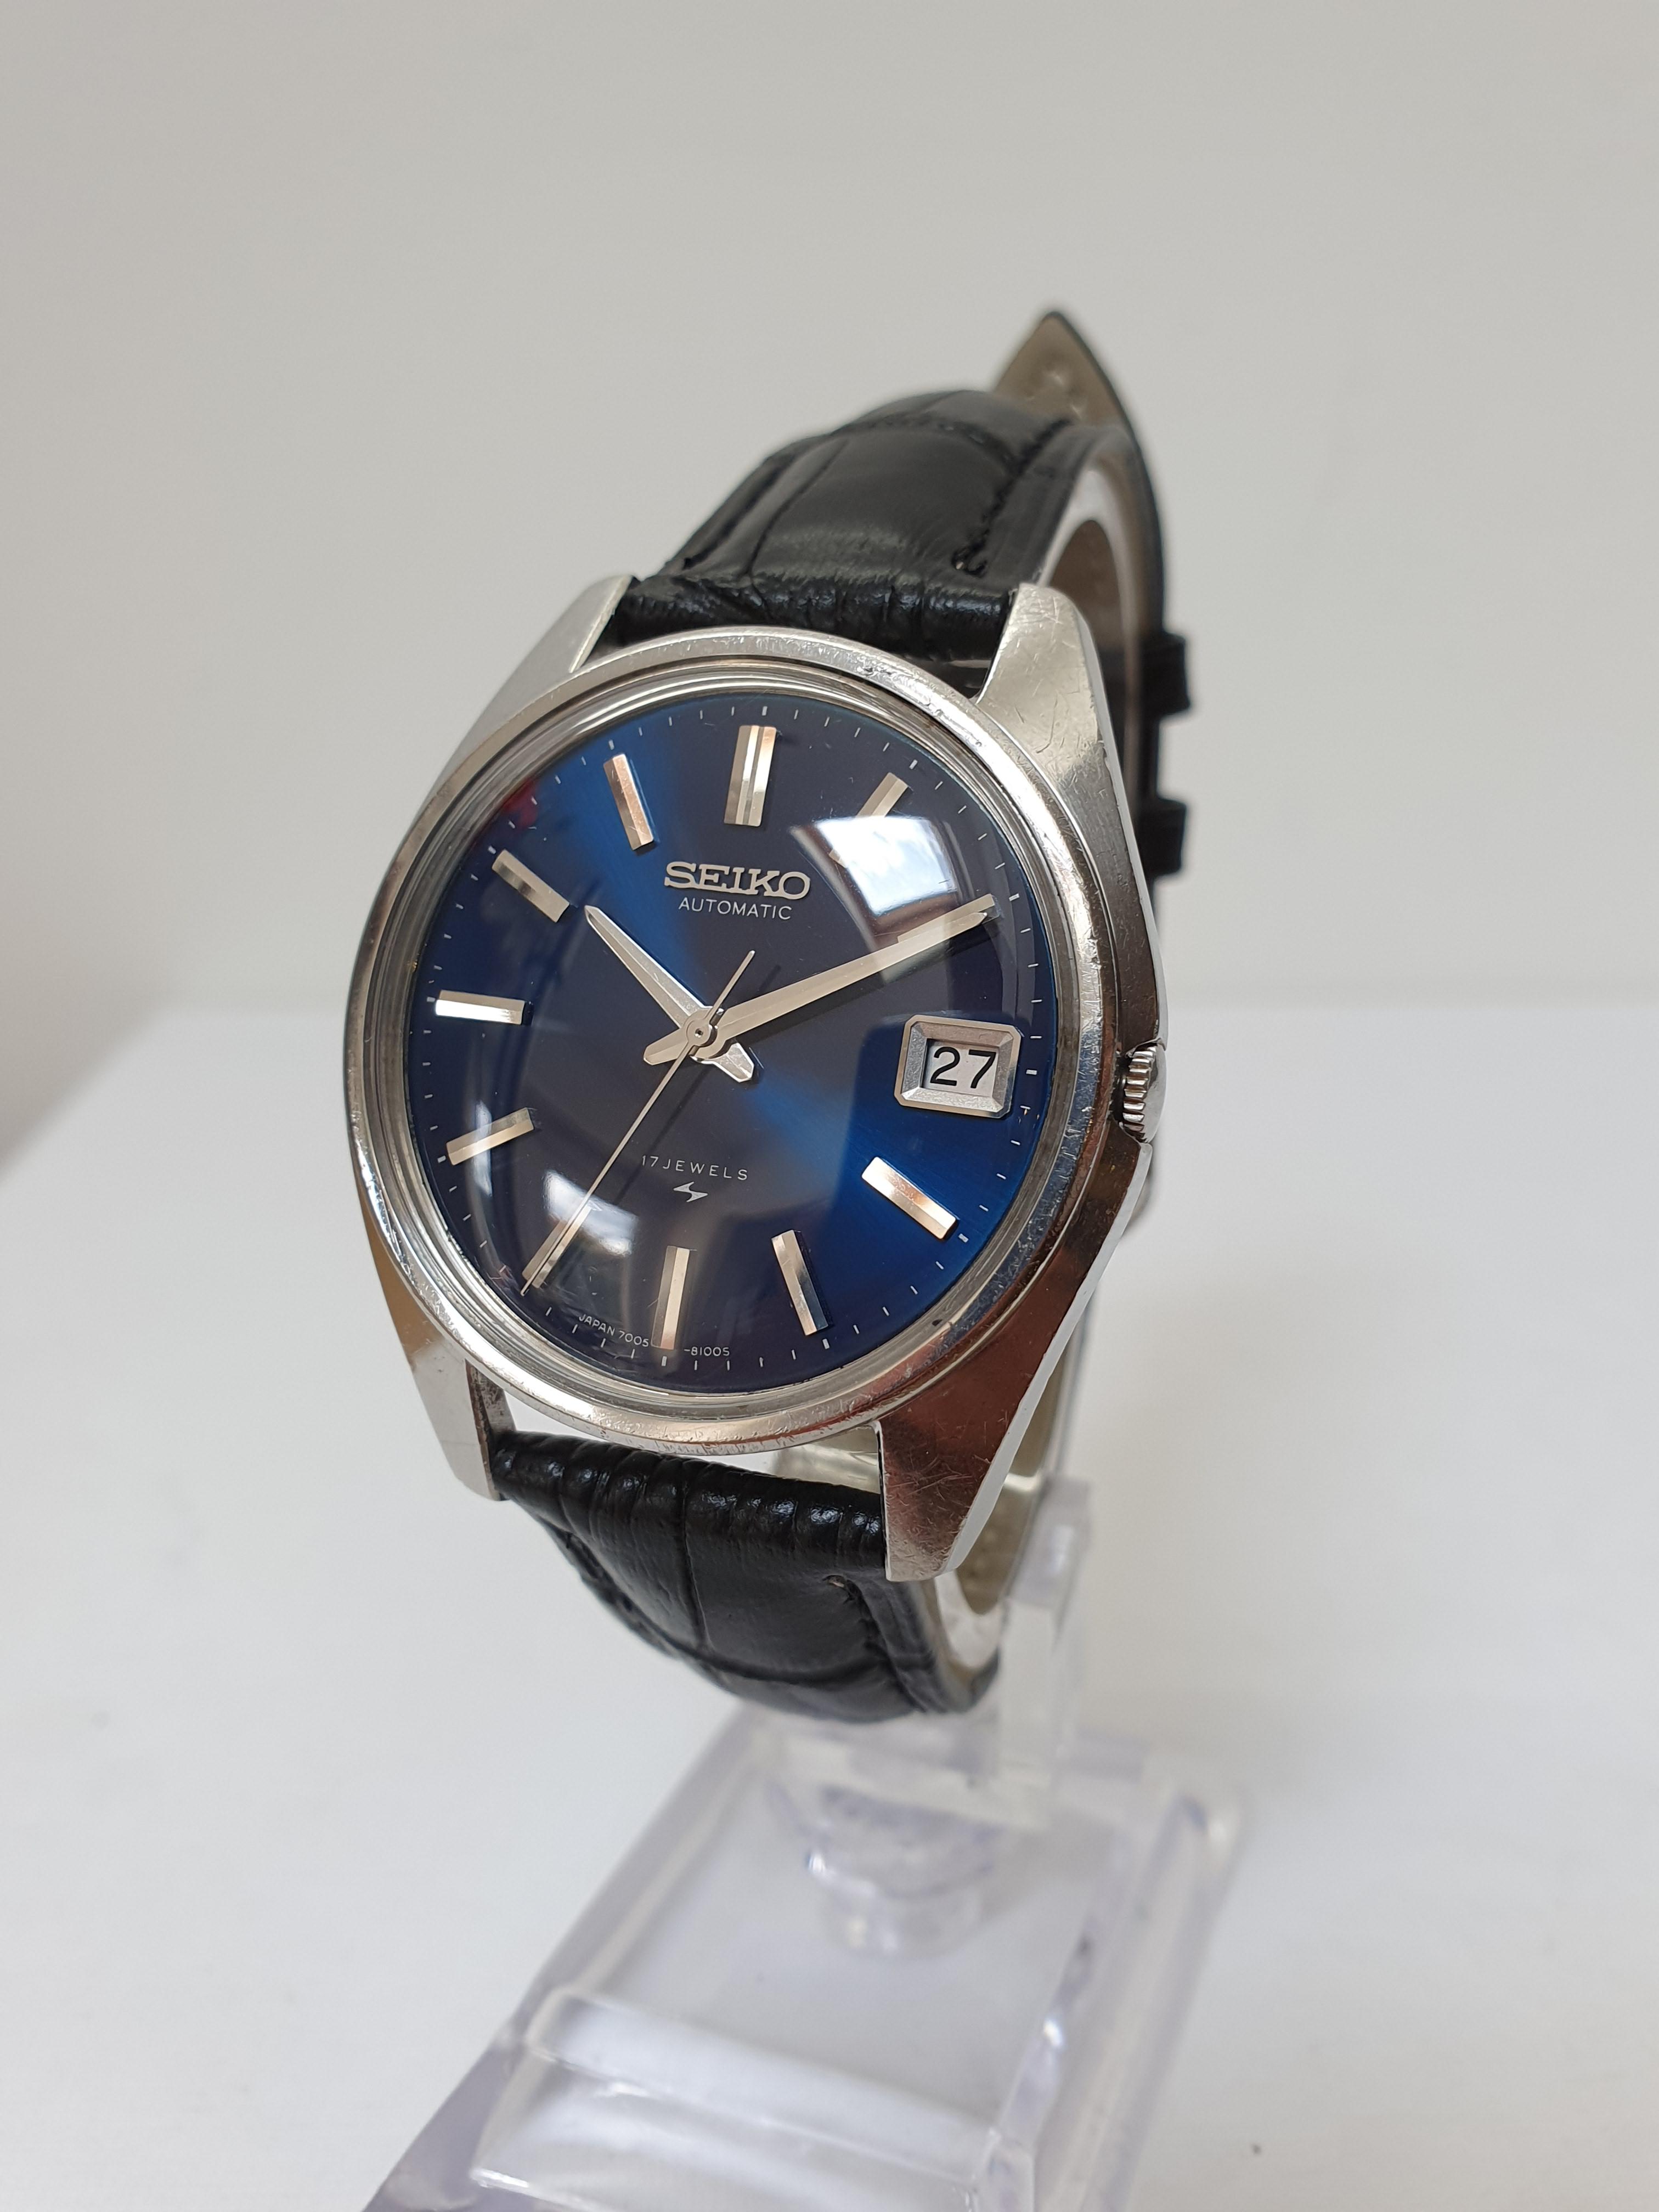
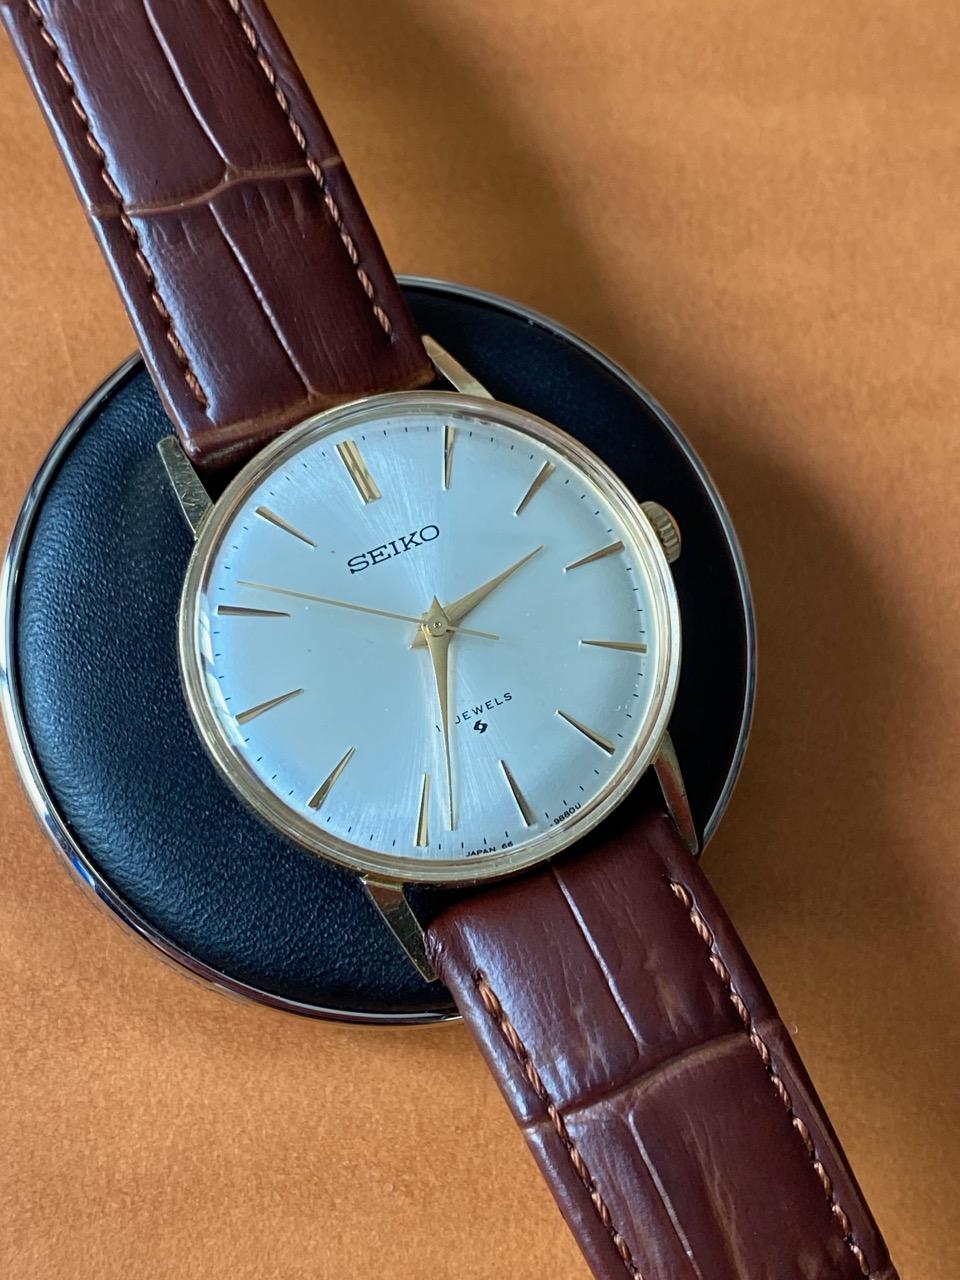
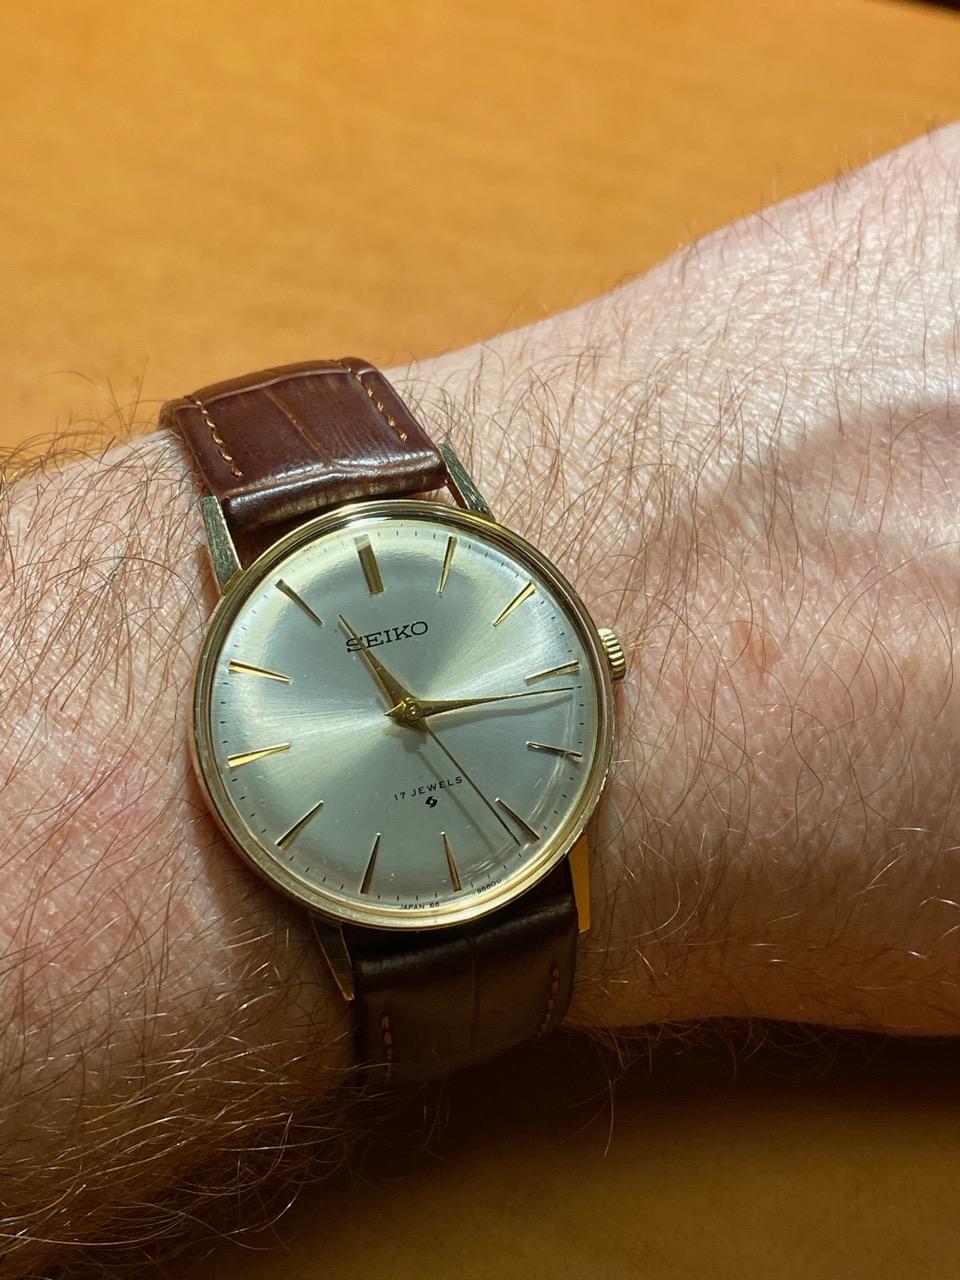
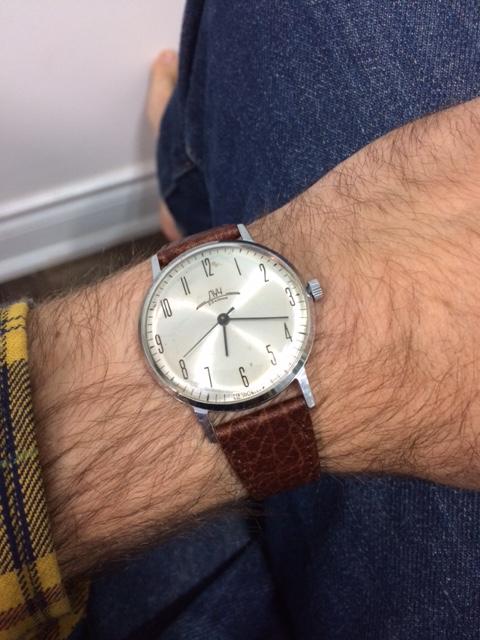
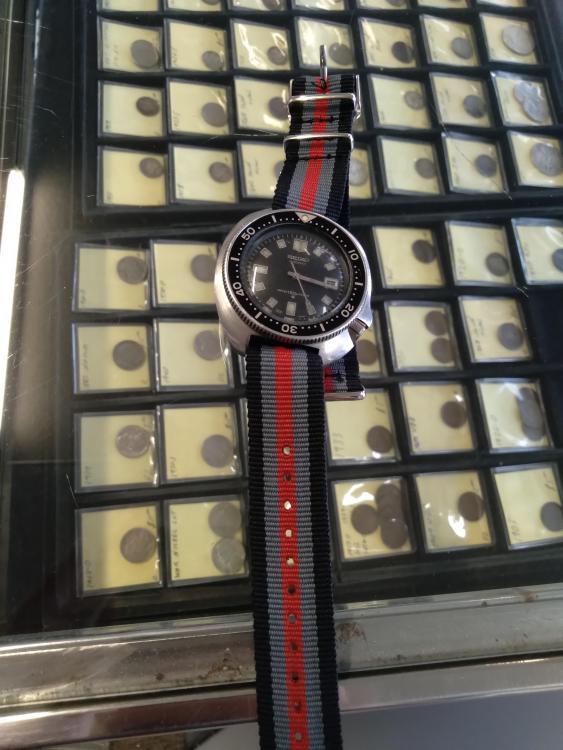
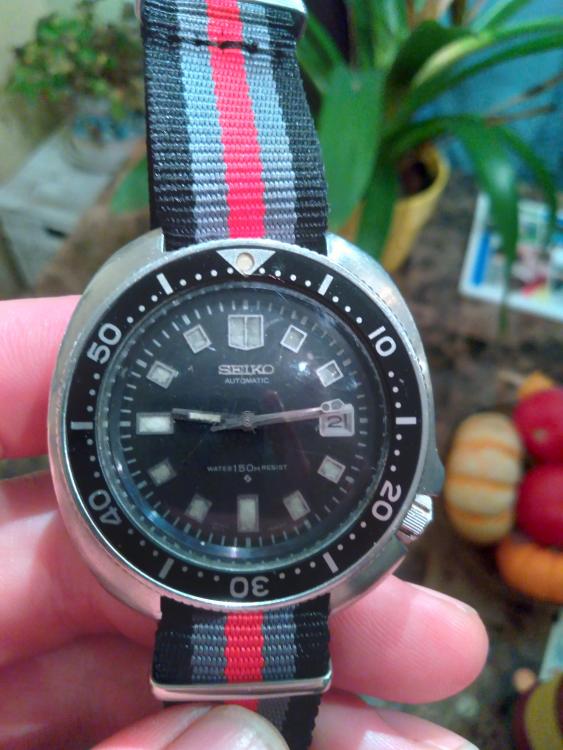
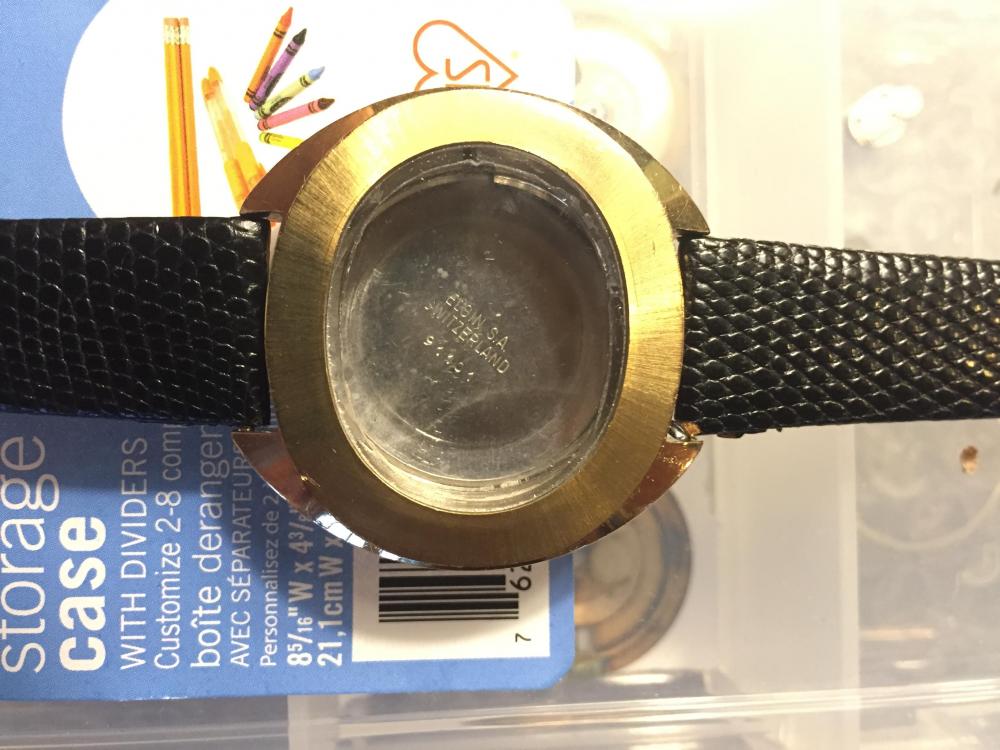
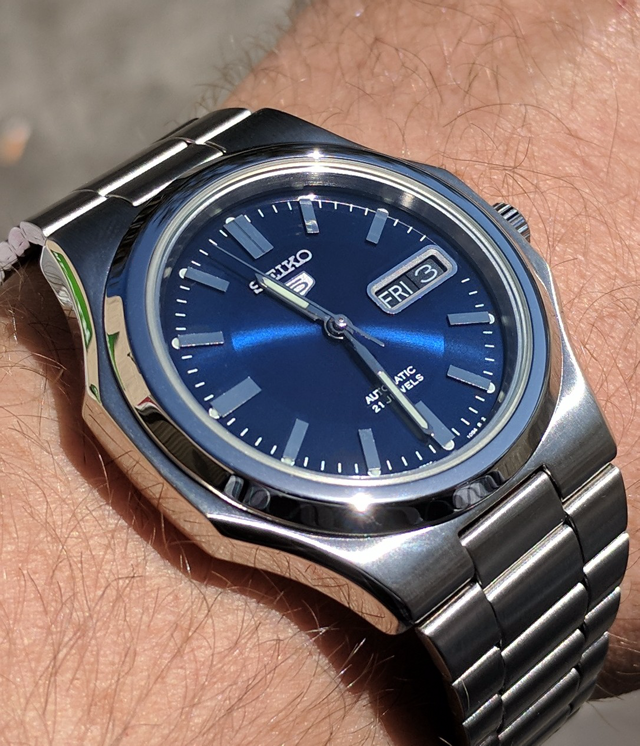
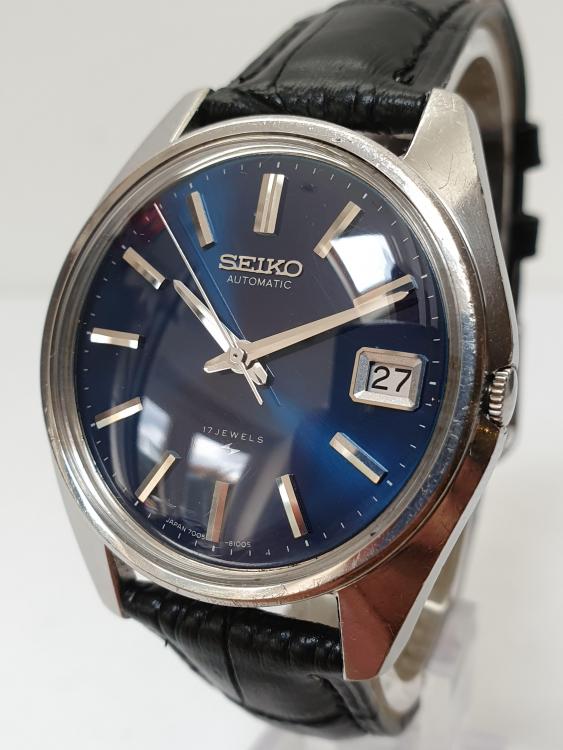
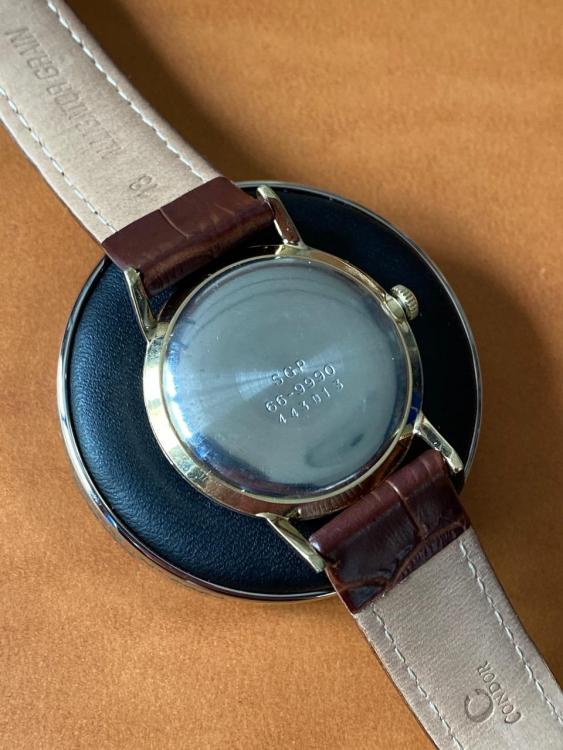
I own a little coin shop. One of my regulars knows I enjoy watches, especially seiko automatics. He finally brought in his watch that he bought new in 1977 (watch is dated early 1977) while he was in the coast guard. Moisture somehow got in the first year he owned it. He took it somewhere to fix the issue and he never wore it again. I think that's possibly why the lume is not great. When I got it, it was not running. He was about to throw it away but when he bought it he had a custom band made for it and he couldn't get it off. The inside of the case back has one marking on it from a service. Either way, it's neat to buy a 40 year old watch from the original owner, especially a watch I've been wanting to stumble upon for a while. The NATO strap on it was the nearest I had to me so just threw it on.
 1 point
 -
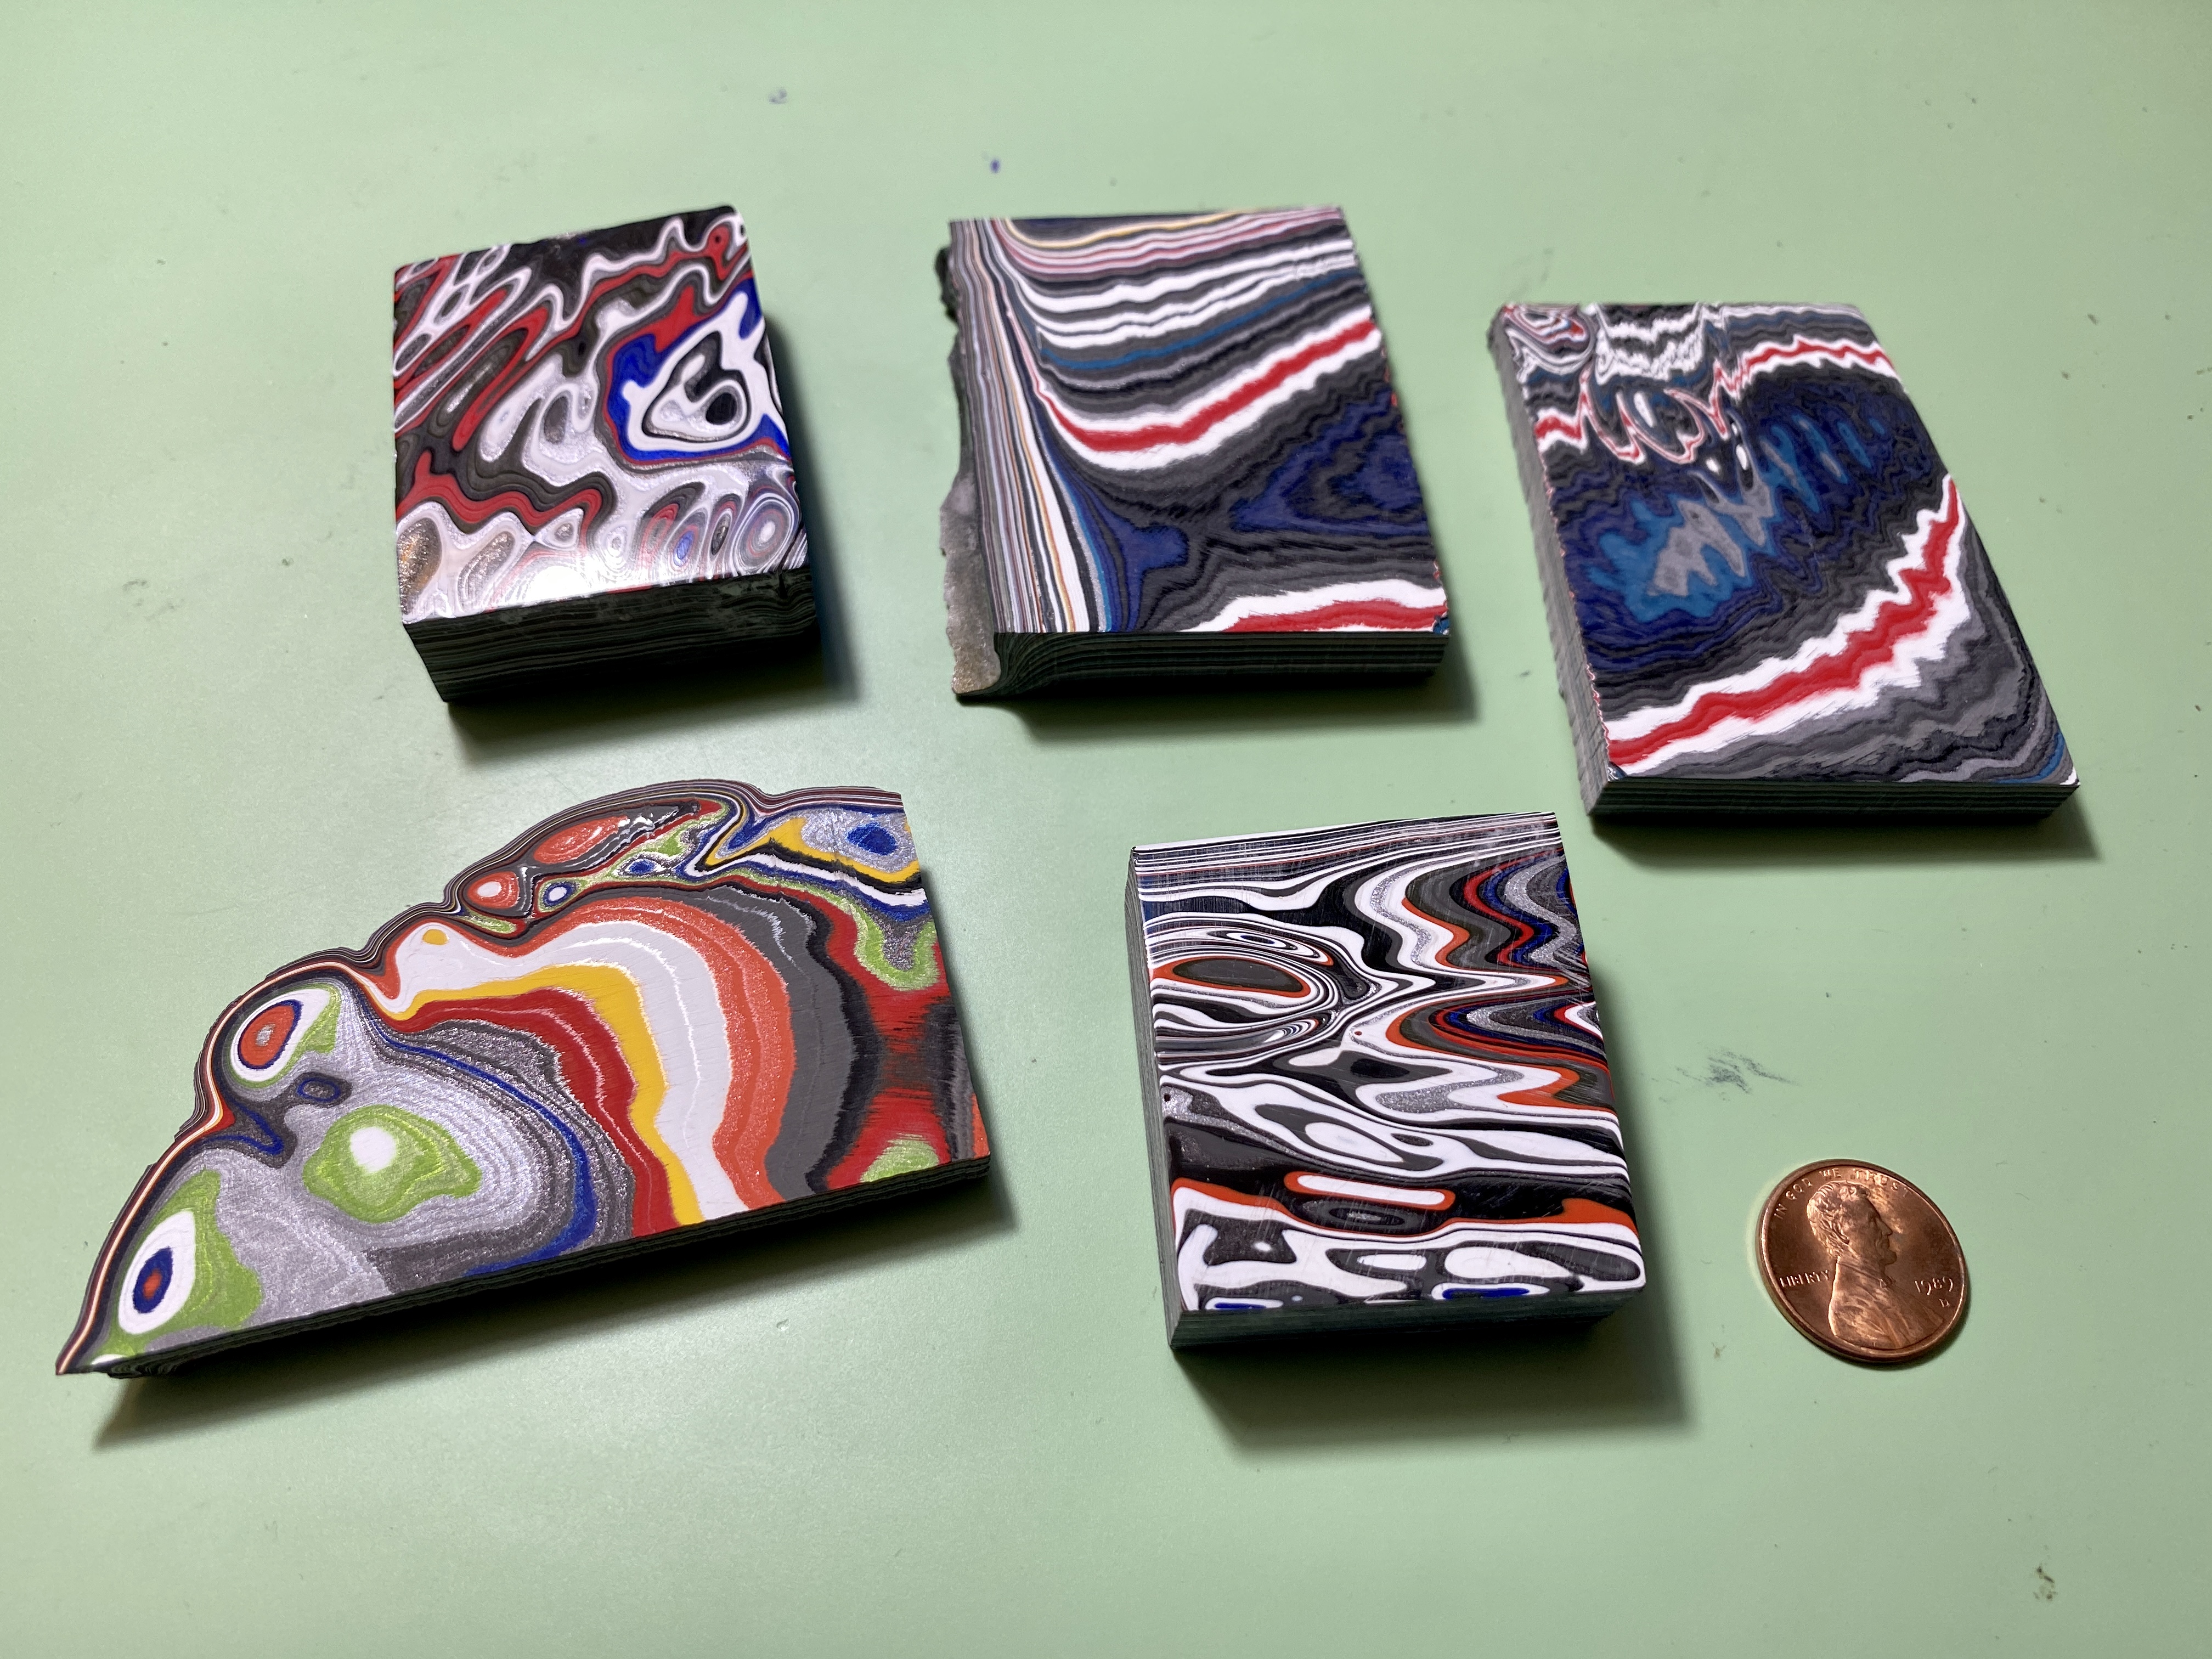
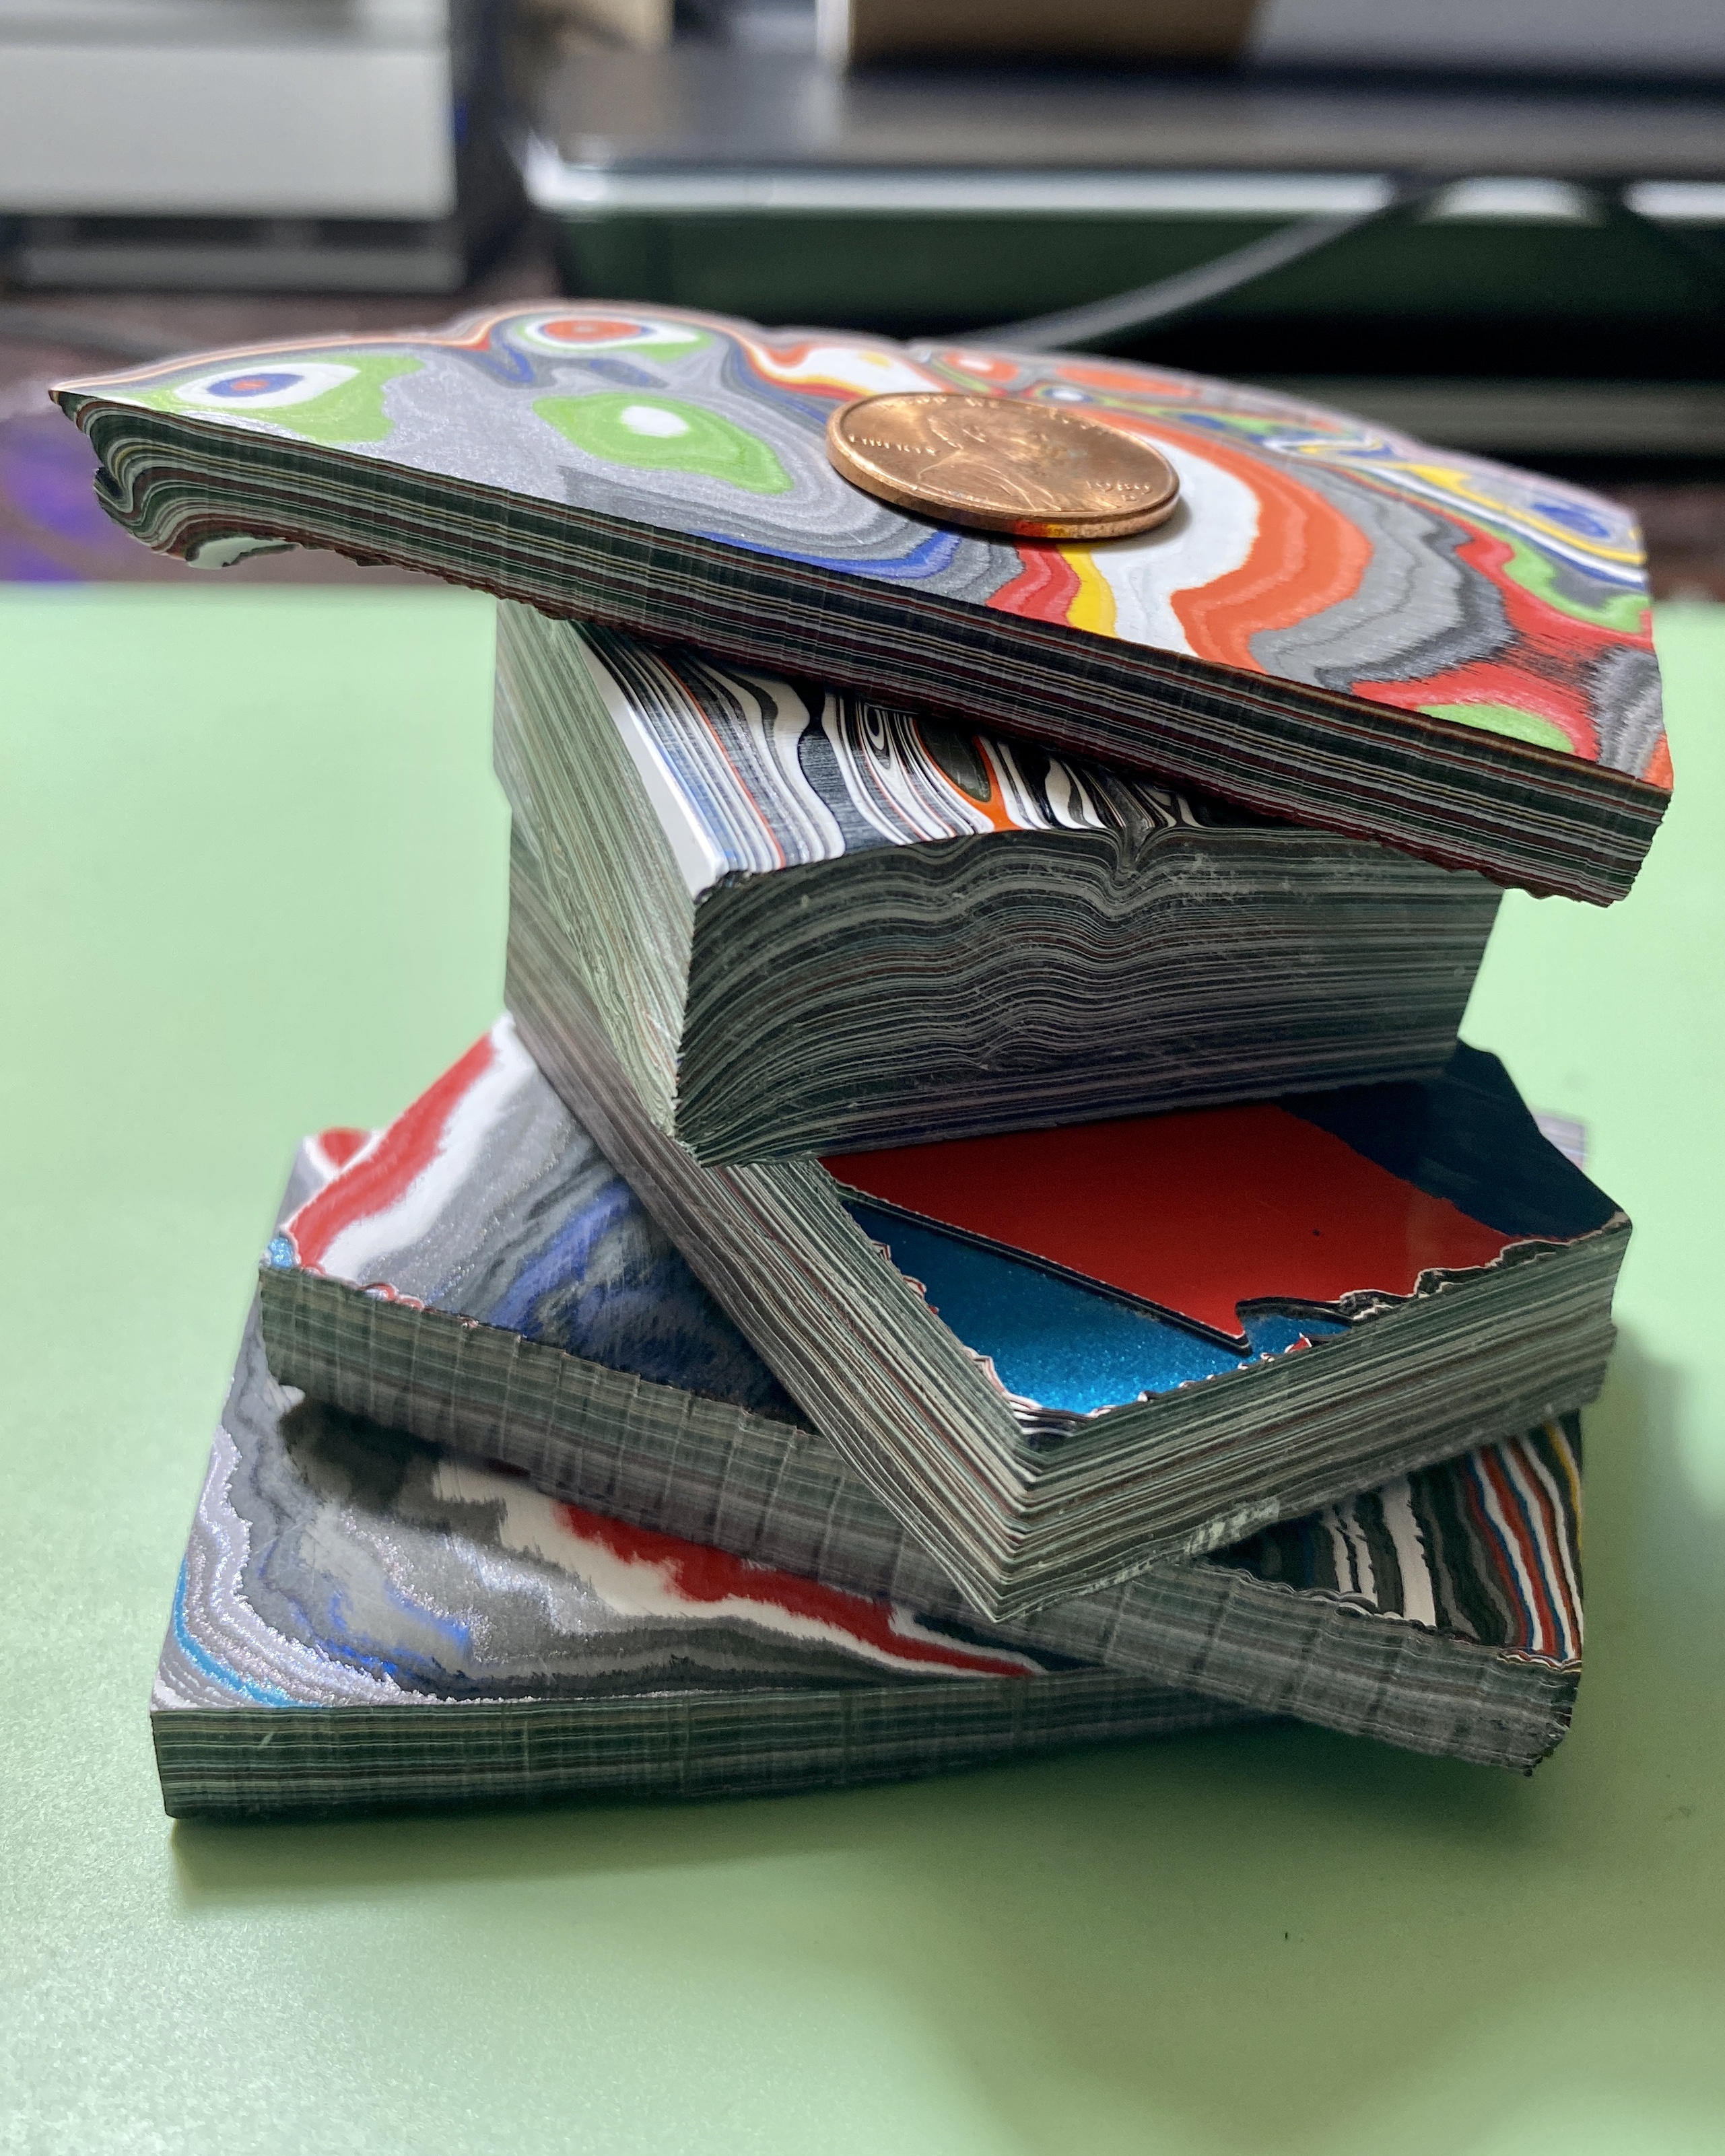
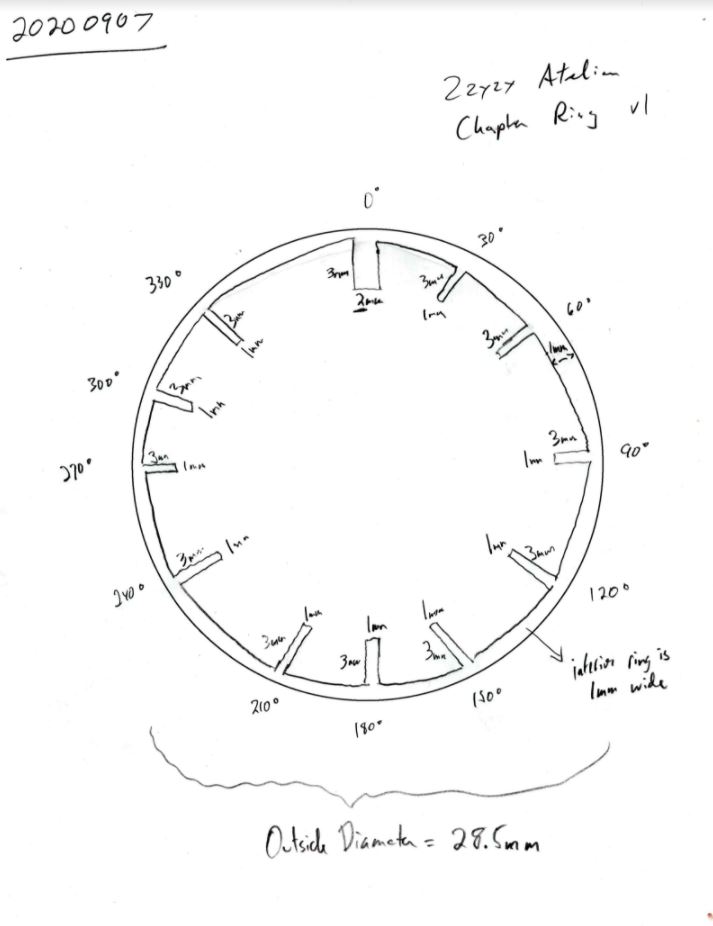
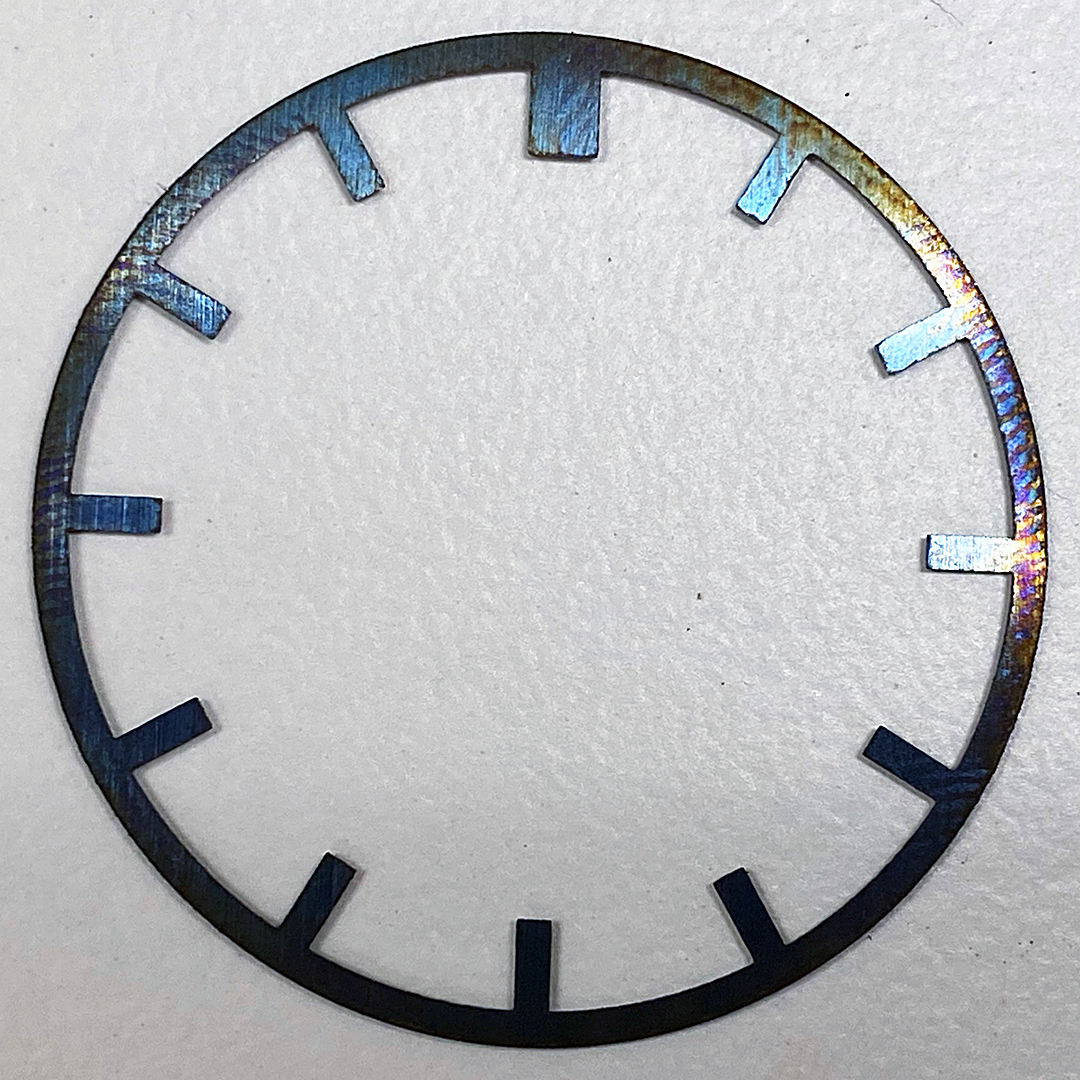
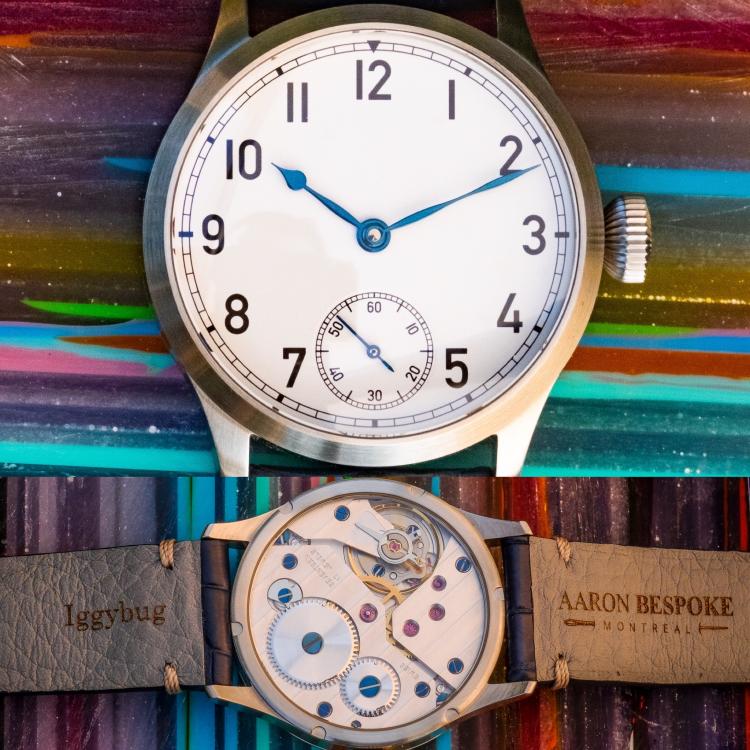
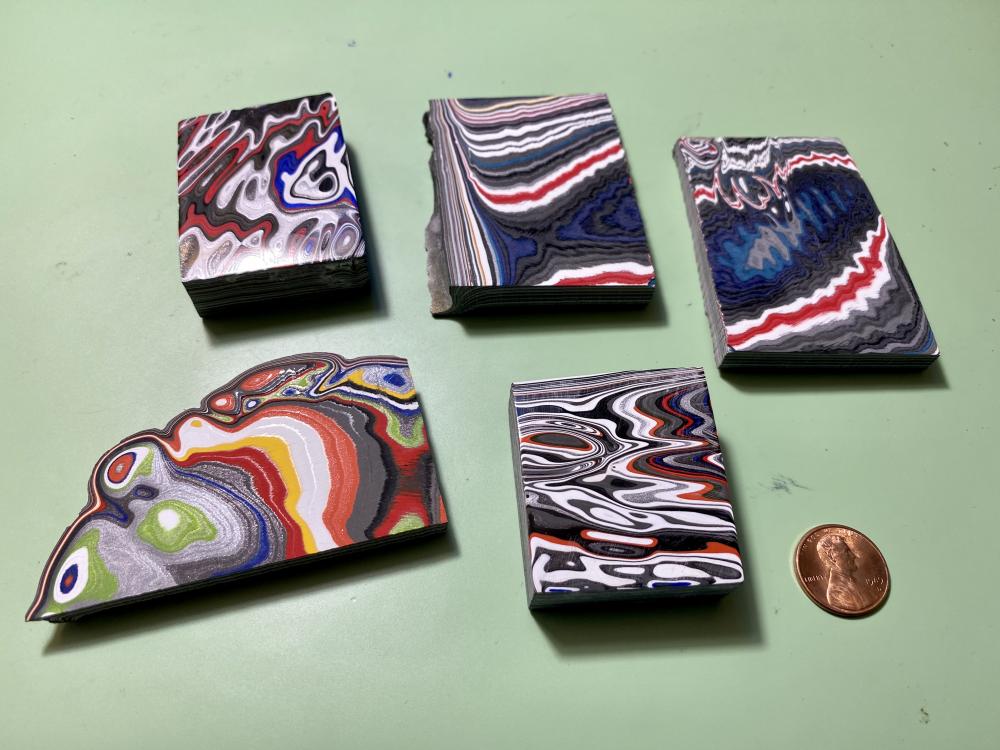
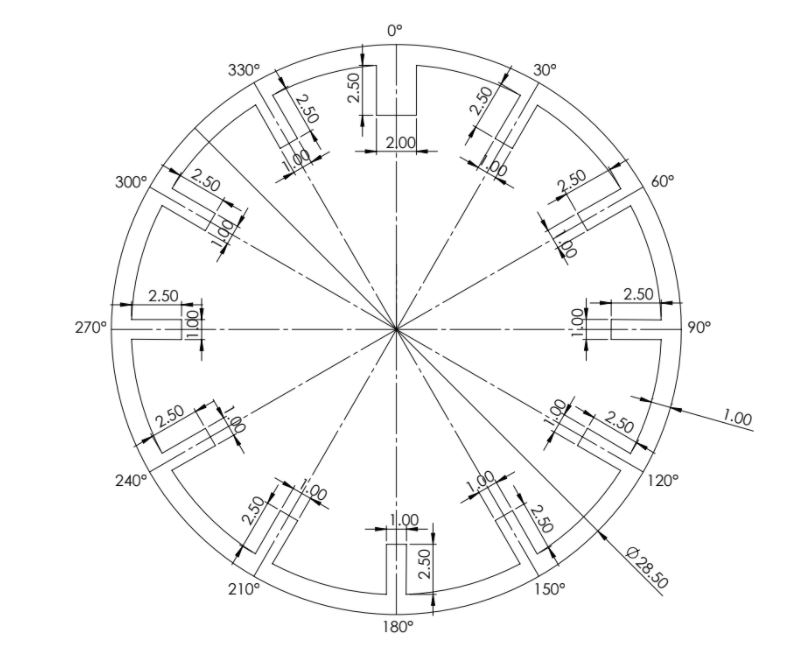
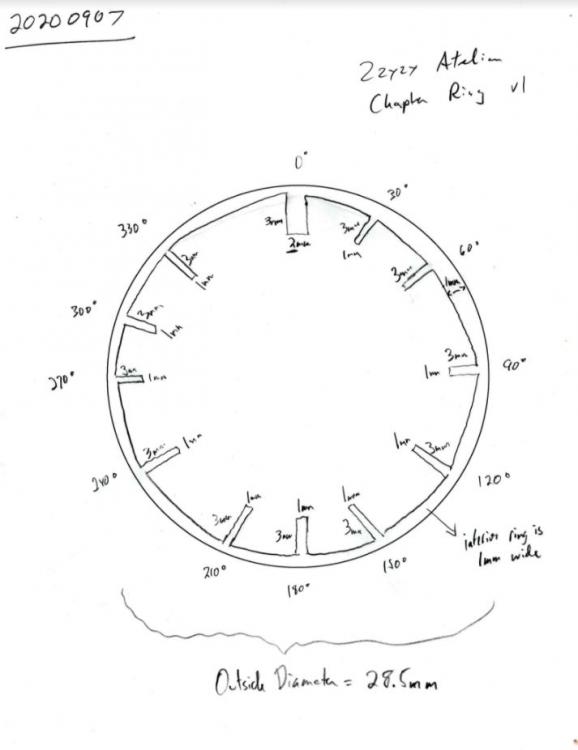
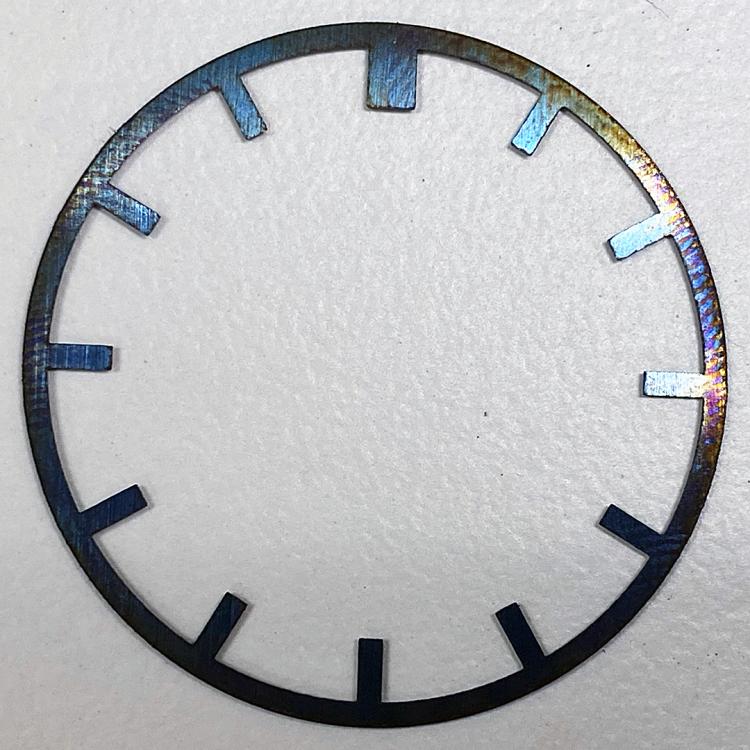
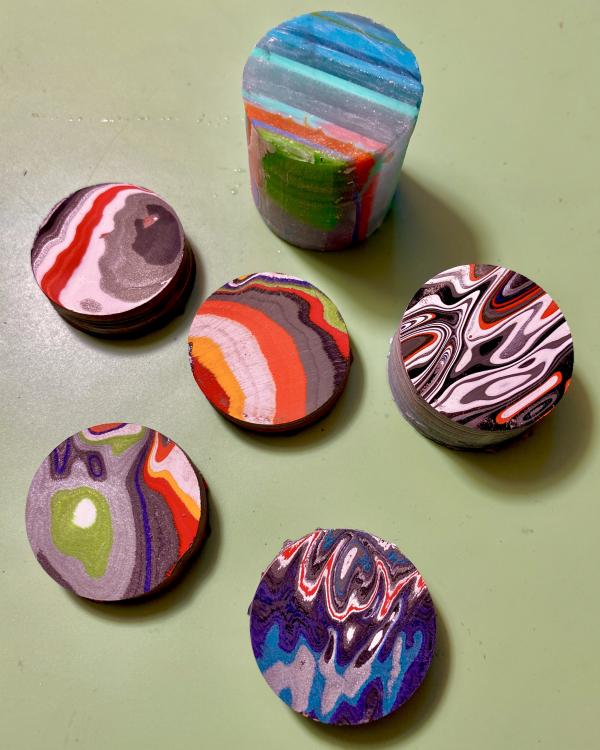
For the past few months, I’ve been working on a custom dial project. I’m still not ready to show my first production examples, but the project has gotten to the point where I’m comfortable sharing my progress. I’ve been documenting this process, and am committed to sharing my process notes. I believe in open source information, and I’ve benefited immensely in watches (and in life generally) from the wisdom and experience of other people who have been willing to share what they know with me. My hope is that by sharing my process notes, I might be able to encourage other folks to take a risk and try to make something cool. I’ve never attempted anything like this, and even if this project is ultimately unsuccessful it has been a ton of fun. I'm sharing my progress and process notes on this forum because folks here have been incredibly friendly and patient with me. If you have any questions about my notes, please feel free to let me know and I'll try to explain things better. I'm happy to answer any questions, and I'll be sharing more photos as I can. I've received a number of comments from people I've been corresponding with that essentially conclude that "this is too hard to pull off". Bur for the serendipity of finding a source of half-height Seiko dials and having free access to an incredibly expensive precision saw, I would have agreed. If anyone has suggestions or concerns that I'm missing something key, please let me know. Background: Seiko & ETA 6498 Custom Watches My project started with customizing my own Seiko watches, and with assembling several custom ETA 6498 watches using available parts from Chinese sellers on eBay. I greatly enjoyed manufacturing my own ETA 6498-1 based “marine watch” using high quality components, and produced a watch that is nearly equal to the Stowa Marine Original I wanted but couldn’t afford. I could have saved more money using lower-quality components, but instead assembled a watch using high quality components (heat-blued hands, an especially nice 41mm case with a sapphire crystal, an elabore-grade ETA 6498-1, etc.) to build a final product that was high quality but still significantly less expensive than the Stowa. Here's my 6498-based "Marine Watch" On the Seiko side of the house, I’ve built a couple of custom Seiko watches using some of the really amazing dial and hand combinations available from lots of internet sellers. (My favorite seller is called Lucius Atelier.) In browsing the offerings of several different Seiko part dealers, I saw that some suppliers sold higher-end dials made out of meteorite, damascus steel, carbon fiber, and other neat things. Knowing how much I enjoyed building my ETA 6498 watch, knowing how many people enjoy modifying their Seiko watches, and being generally fascinated by exotic dial materials, I realized that it might be possible to design my own watch dials. I enjoyed reading many articles on restoring dials using decals, and thought a lot about using electrolytic-etching or laser-cutting to customize brass dials. It was at this point that I stumbled across fordite and fell in love ... Fordite Several months ago, I ran across a limited series of very expensive TAG Heuer watches that featured unique dials made out of “fordite”. There's no way I'll ever be able to afford once of those £5,500.00 watches, but I couldn't get the idea of working with fordite out of my head. (Here are some quick shots of my first fordite samples, to give folks an idea of what it looks like in unpolished slab form.) Fordite is also known as “Detroit Agate,” and it’s actual industrial waste. Back when car manufacturers used to spray paint cars by hand, they generated a lot of overspray. This overspray accumulated over the years, and hundreds of layers of overspray built up into large chunks of waste material. This stuff was repeatedly heat cured at the same time the painted cars were heat cured, and the resulting chunks of waste are durable and nice to work with. I don’t know the first time it was discovered that cutting open the waste chunks revealed beautiful and psychedelic patterns of paint, but for some years jewelers have been using lapidary techniques to create bizarre and fun jewelry with fordite. One of the things that I find particularly fascinating about this material is that it’s possible to source fordite from specific assembly lines. Consequently, one can obtain fordite in Jeep, Corvette, Cadillac, Peterbilt, and other colors. I’ve even obtained some fordite from the “Cadillac Ranch” in the Mojave Desert. It’s much softer and more fragile than “normal” fordite, but it also has a wider variety of colors and textures. In order to work with this specific soft fordite, I'm going to need to stabilize it using some cool lapidary techniques. Heat-Blued Steel I have been enchanted by heat-blued steel watch components for a really long time. I started researching how I might myself heat-blue steel with an eye towards designing and selling heat-blued steel watch hands compatible with Seikos and other watches. For quite a few reasons, this isn’t feasible (yet?), but I’ve enjoyed polishing and bluing steel pocket watch hands. As my dial project progressed, I realized that it wasn’t practical for me to add applied hour indices, and there are some significant obstacles to using film-free decals on the dials I'm making. I realized that some manufacturers of exotic-dialed watches got around the problem by attaching a short chapter ring directly to the watch dial. This solution really appealed to me, so I set about designing a chapter ring that could be cut out of very thin (0.01” or 0.254 mm) high carbon steel, polished, and then glued to the dial face without risk of fouling any of the watch hands. I worked with an engineer on Fiverr, who converted my really rough sketch of a chapter ring design into a DXF file. My first 20 carbon steel chapter rings are currently in production at a laser-cutting facility. I don't need to share photos of the steel I've heat blued here to prove that it's a work in progress. Temperature control is critical, and I'm going to be switching from a propane camp stove to a precision digitally-controlled laboratory grade Cole-Parmer StableTemp hot plate to get consistent, high-quality results. I know that large manufacturers, including Glashütte Original, are doing essentially the same thing: In this Glashütte Original watch assembly video, one can see them using a $50 digital soldering-station with a brass attachment to blue screws. I'd go that route myself, but my chapter rings are a lot larger and so I want a larger heating area with better temperature control. I'll specifically be using a 1" thick 4" x 4" block of aluminum mounted on the hot plate's ceramic heating element to ensure uniform heat distribution. Chapter ring, from concept sketch to technical drawing to first prototype. Obviously, I'm going to need to do a lot of polishing before I re-blue these for installation! [Continued ...]

 1 point
 -
Available on the bay for around £180. From Germany. There you go Moose saved a few quid there.

 1 point
 -
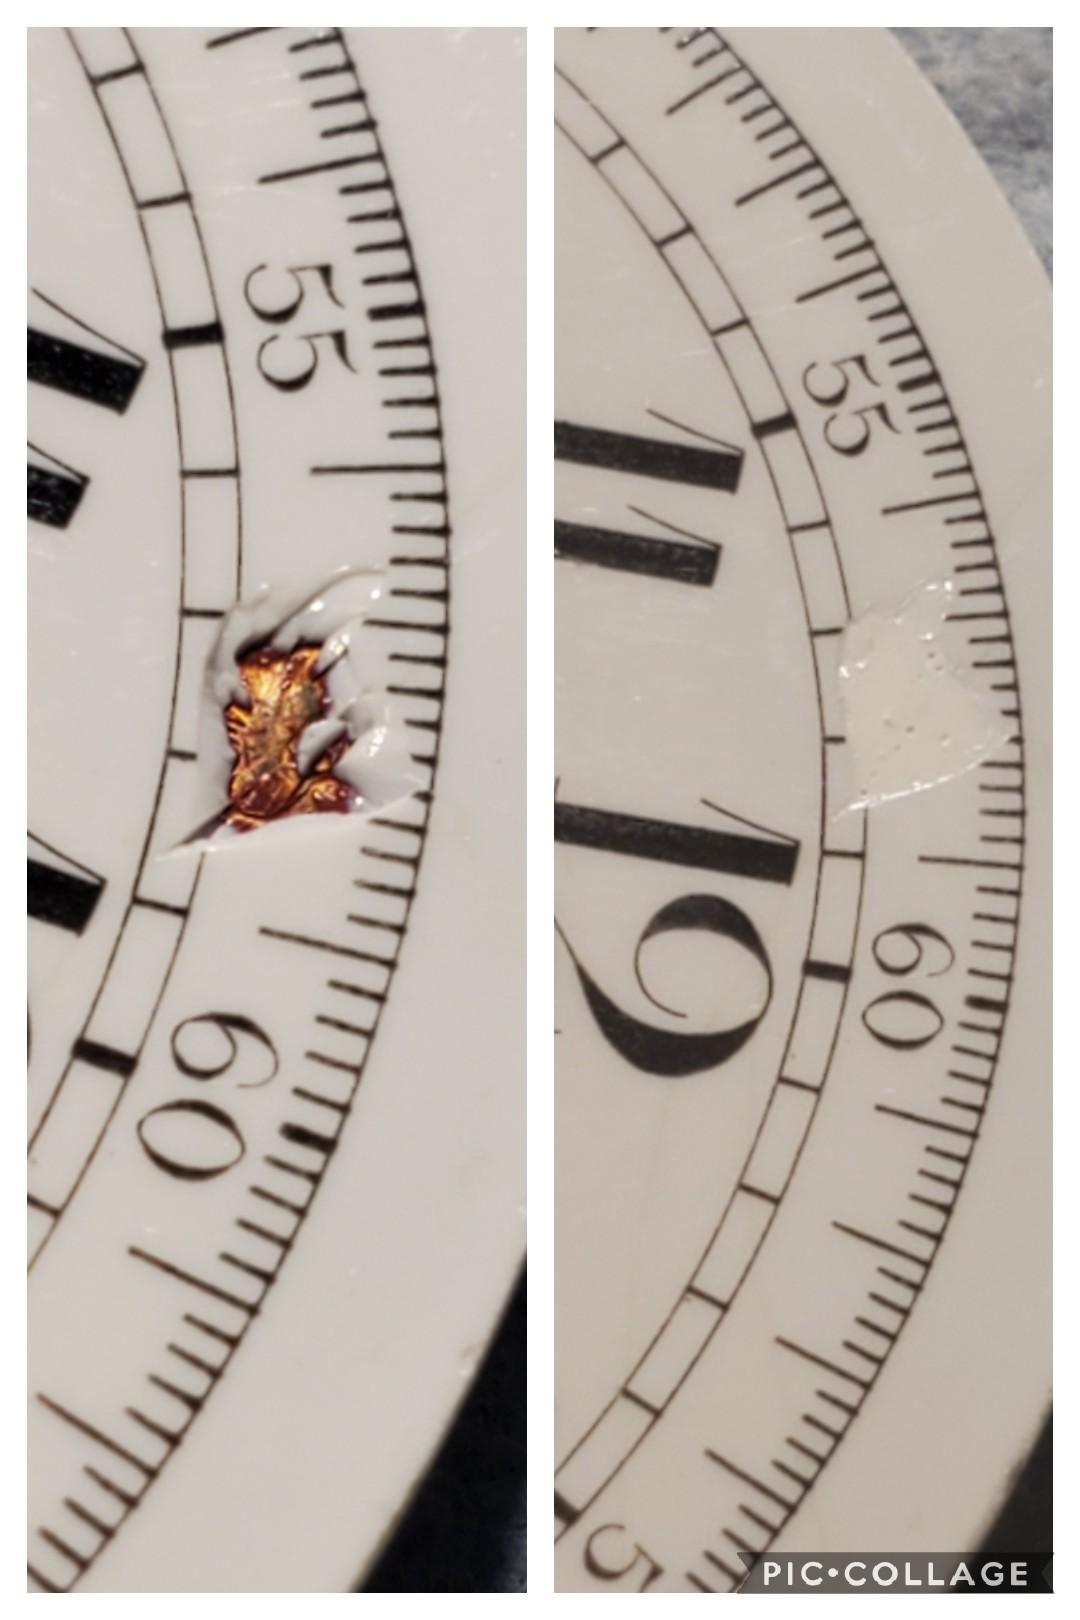
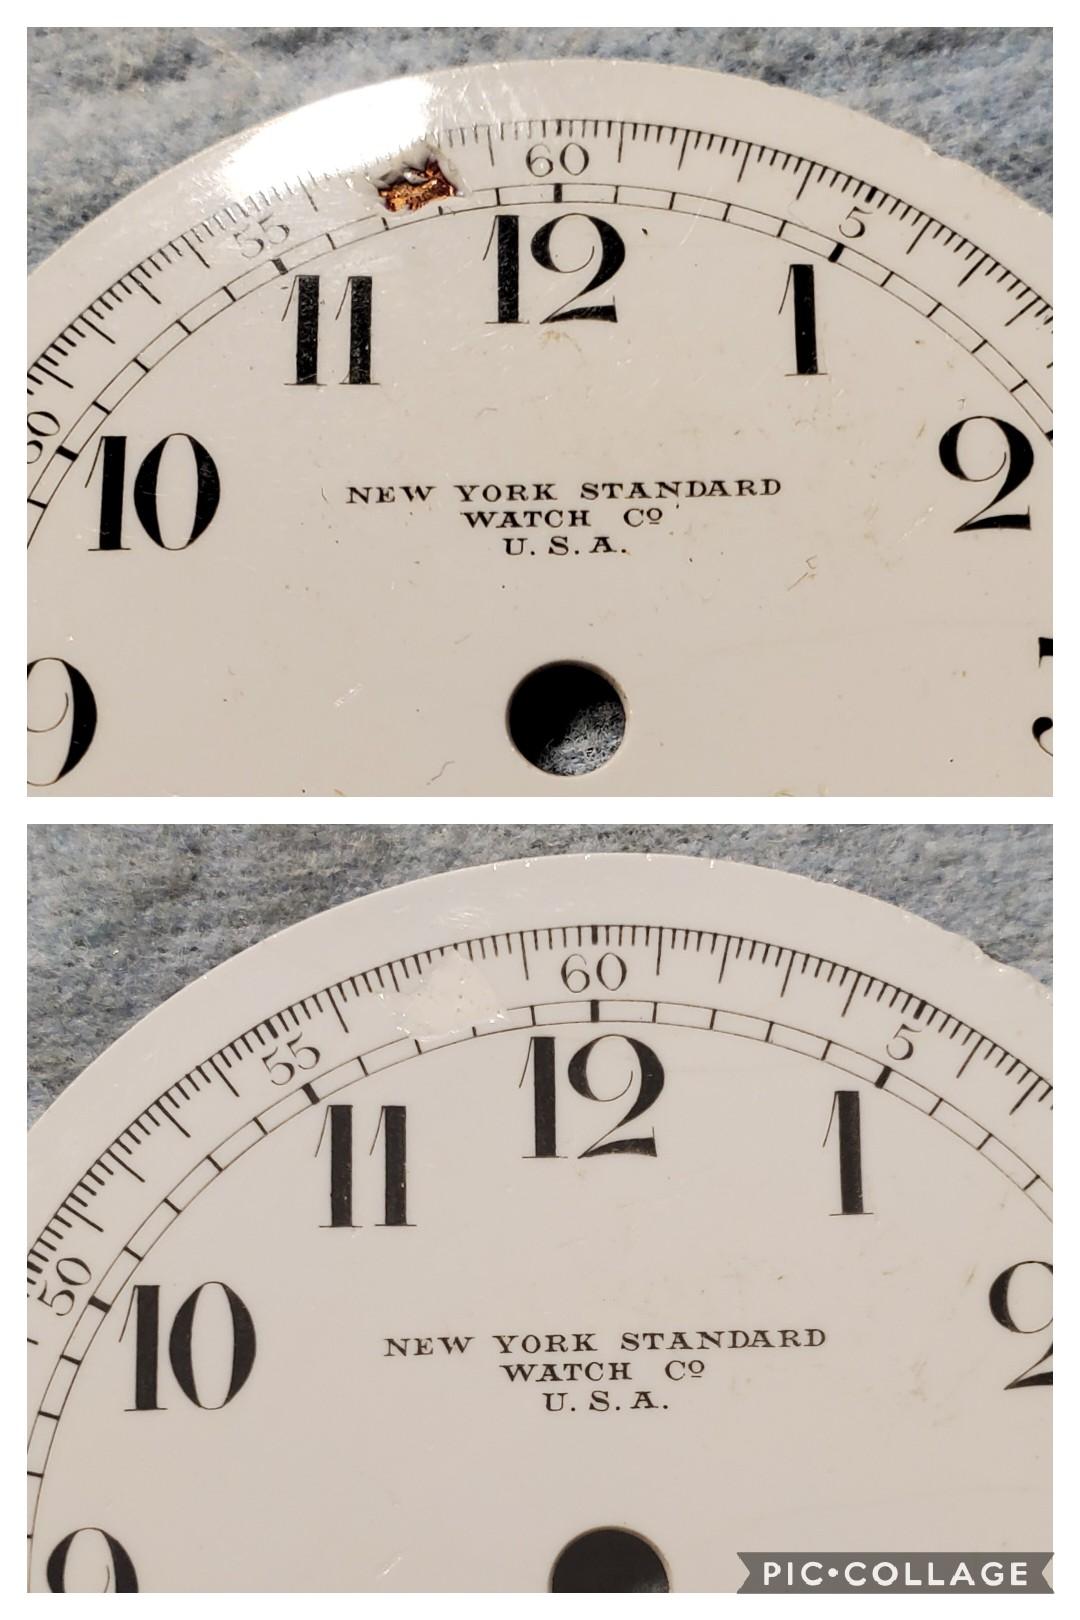
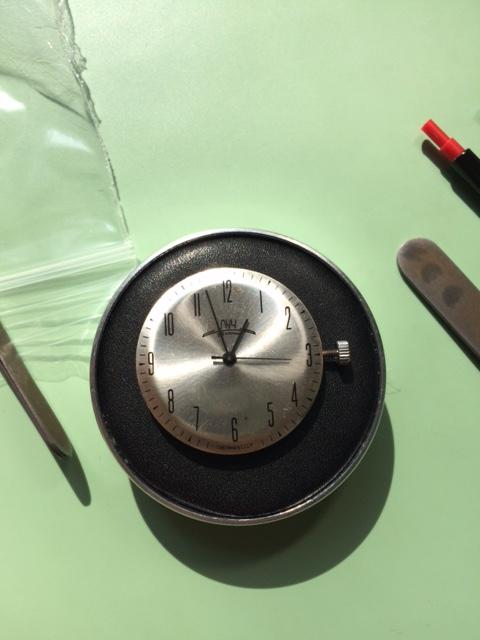
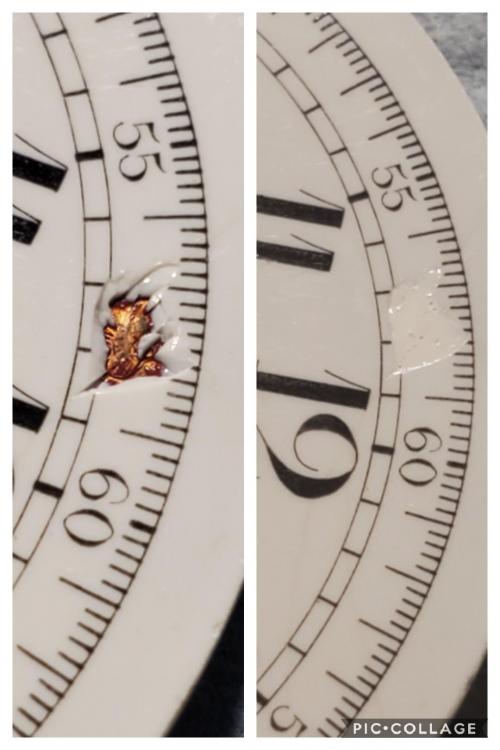
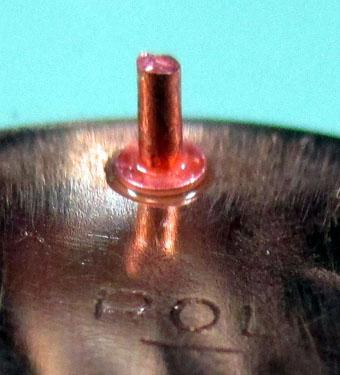
Recently purchased a pocket watch with a chipped dial. You can see the copper substrate. This is unsightly and distracting. As an experiment i dug out a damaged old dial I had and a small bottle of white nail polish. After about 3 coats I gave it a light wipe with a shop towel wetted with acetone. It only took a couple very light swipes to achieve the look I wanted. All in all it looks pretty good. Yes there are a couple bubbles close up but it's nearly impossible to see from a normal viewing distance. My next goal is to see if I can find a black pen with a fine enough point to attempt to restore the black minute index lines. I consider this an open experiment, I want to try other dials with other colors of enamel besides white.
 1 point
 -
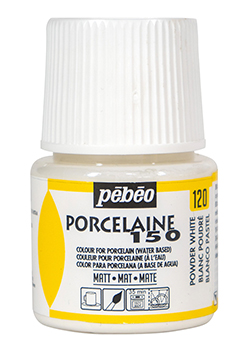
Pebeo 150 porcelain paint is better than varnish
 1 point
 -
i think that these "good quality", expensive fakes are the worse ever in the counterfeiting industry, and should be fought with full energy. The reason is that they can easily be the enabler of actual scamming, where a victim that honestly doesn't know better is had for thousands of dollars. These are not just the cheesy fetish of poseurs that find smart to spend more on a fake than on a bespoken genuine piece.1 point
-
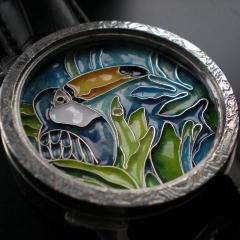
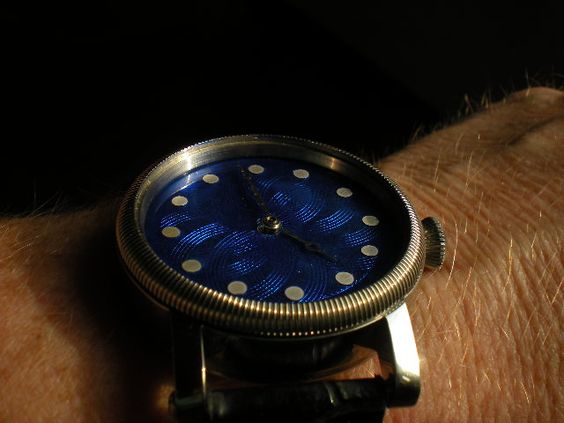
My Parnis. Guilloche enamel dial .
 1 point
 -
We all try our best.1 point
-
Actually since I started doing watch repair I have had family and friends throwing watches of all descriptions at me (including an Omega auto that is well above my pay grade). I don’t charge per se but people have a nice habit of buying me gift cards and that sort of thing. Perhaps since you are still at the very beginning, as I am, you should try not to look at it as an all or nothing thing. You start by taking one small cheap course. You take on a few simple repairs. You take a bigger course. Take on more complex jobs. Etc etc. In any case, I think it’s too early to prejudge whether you will have success as a small business. Just parenthetically, there are jobs out there if you want to work for someone else. I know several trained watchmakers and they inform me that pretty well everyone they went to school with has work. It’s harder to be an independent repairer, but you can count on service centres and jewellery stores always needing qualified people.1 point
-
Well, I’m glad it worked out!1 point
-
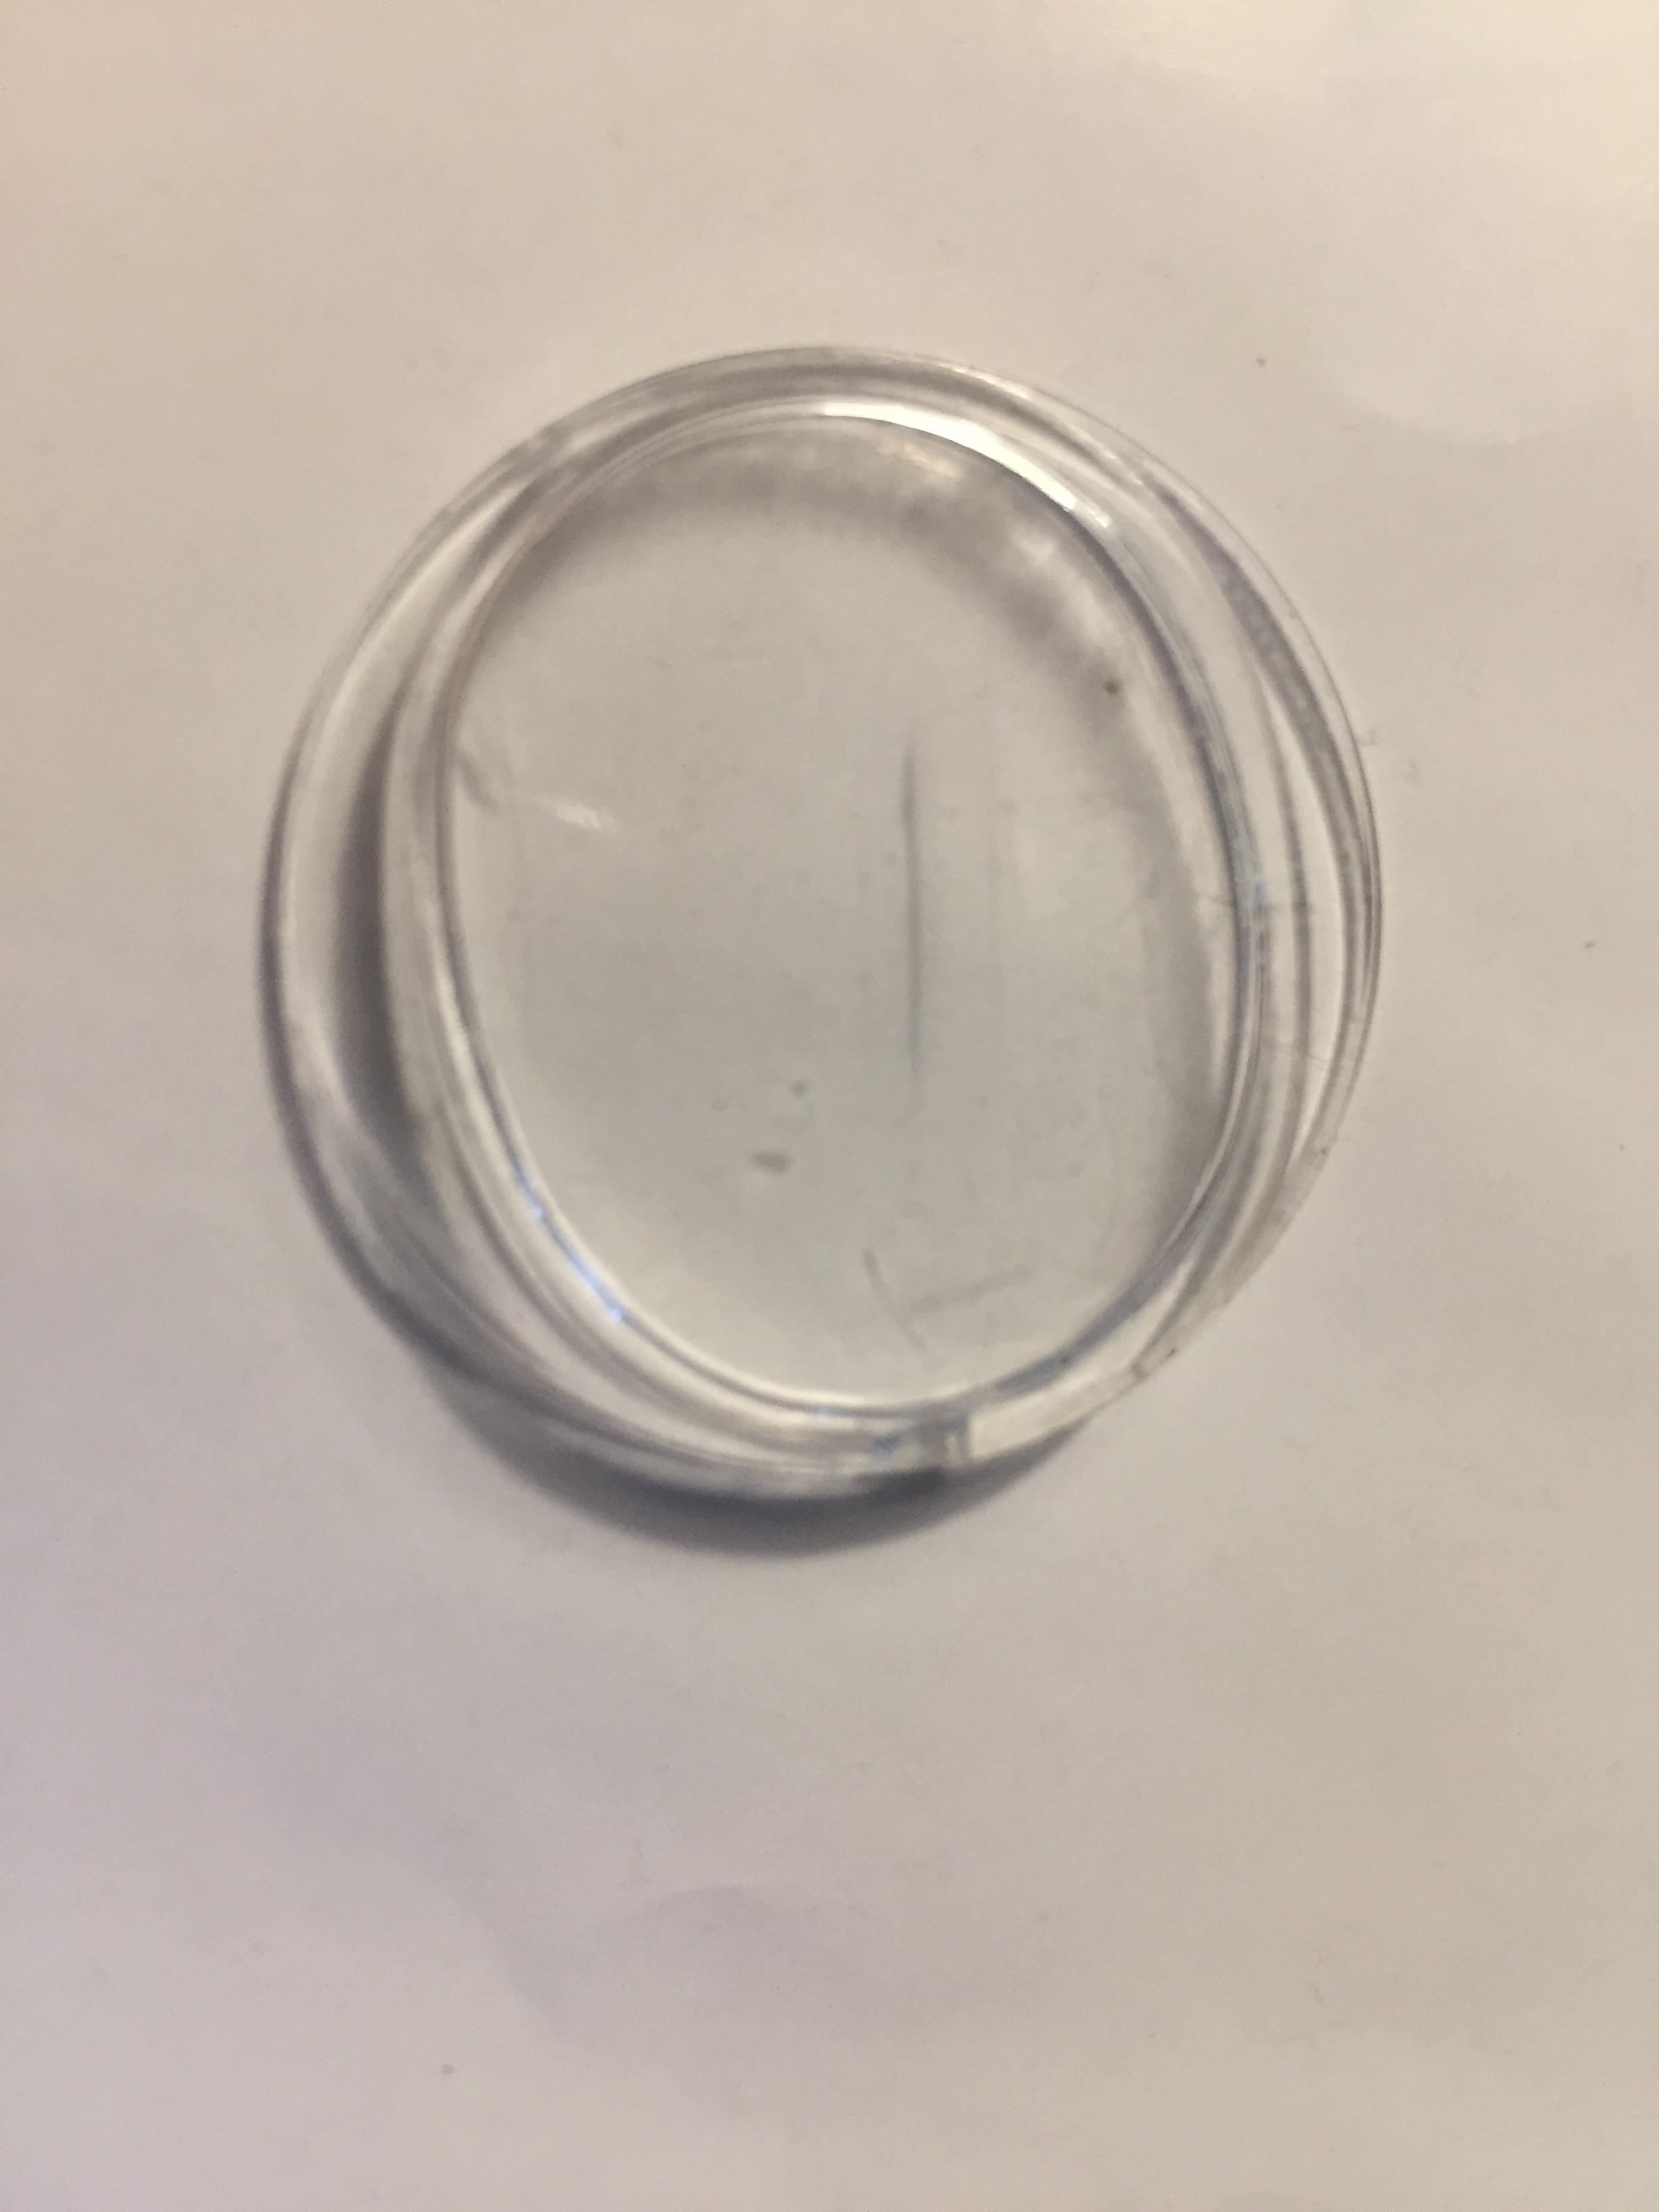
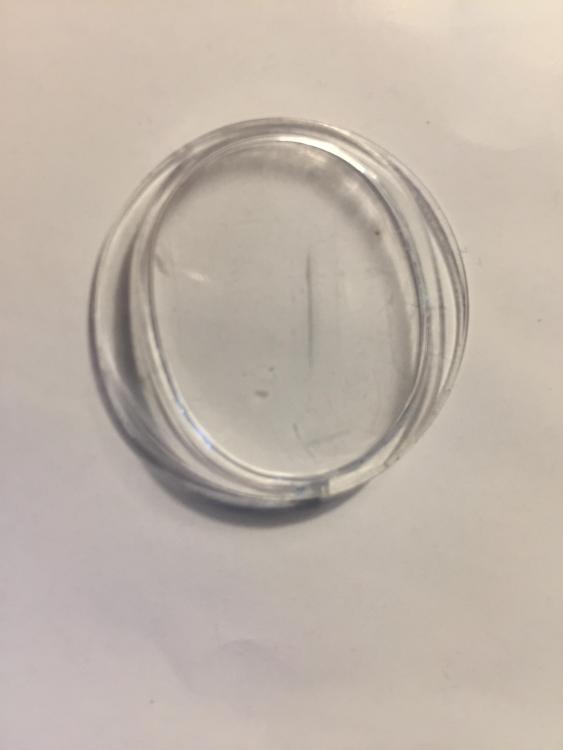
I have been cleaning an Elgin watch that needed a new crystal. It had a plastic crystal and was not a common shape, at least not one I could locate a replacement for. The old crystal was pretty scratched, but bigger problem was it was a cracked in the center - not something that will polish out. I decided to see if I could reuse part if it, and went about by drilling out the top and cutting a new one. I made it from a flat glass blank to give it better scratch resistance than acrylic. The end result after glueing the pieces together looked pretty good. The case is now ready for the movement, which I am servicing at the moment.
 1 point
 -
Well, I meant a hand held one. Use the rotary tool like a lathe to spin the part and bring the file into the rotating insert, to remove equal material all around. Only a quarter millimeter per side so it shouldn’t take long. Maybe fill the insert recesses with lume, seal with clear epoxy and then polish the top surface flush...1 point
-
Diamond files. Jig up the insert so you can spin it smoothly and press the file against the spinning insert. Measure often...1 point
-
I would think between 1920-1930 .1 point
-
1930's1 point
-
Mauthe:
 1 point
 -
Hairsping work, or manipulation is the nightmare of any beginner and even quite advanced repairers. You can't expect, and it would not be right, that here on the occasion of your problem, (which is identical to the one that most others, including myself, have had various times), the best guide will appear. At most, you will get some incomplete advice, empaty, links, etc. Please do what everyone should, search in the box top right for "hairspring manipulation", start reading, watch the linked videos and search for more, and why not, buy some books. Just don't spend too much time on that because you will need it, and lot of, to practice. We're talking about many hours of stressing work. Sorry to be blunt, if you want the best chances for that watch to run decently again, start looking for a new balance complete1 point
-
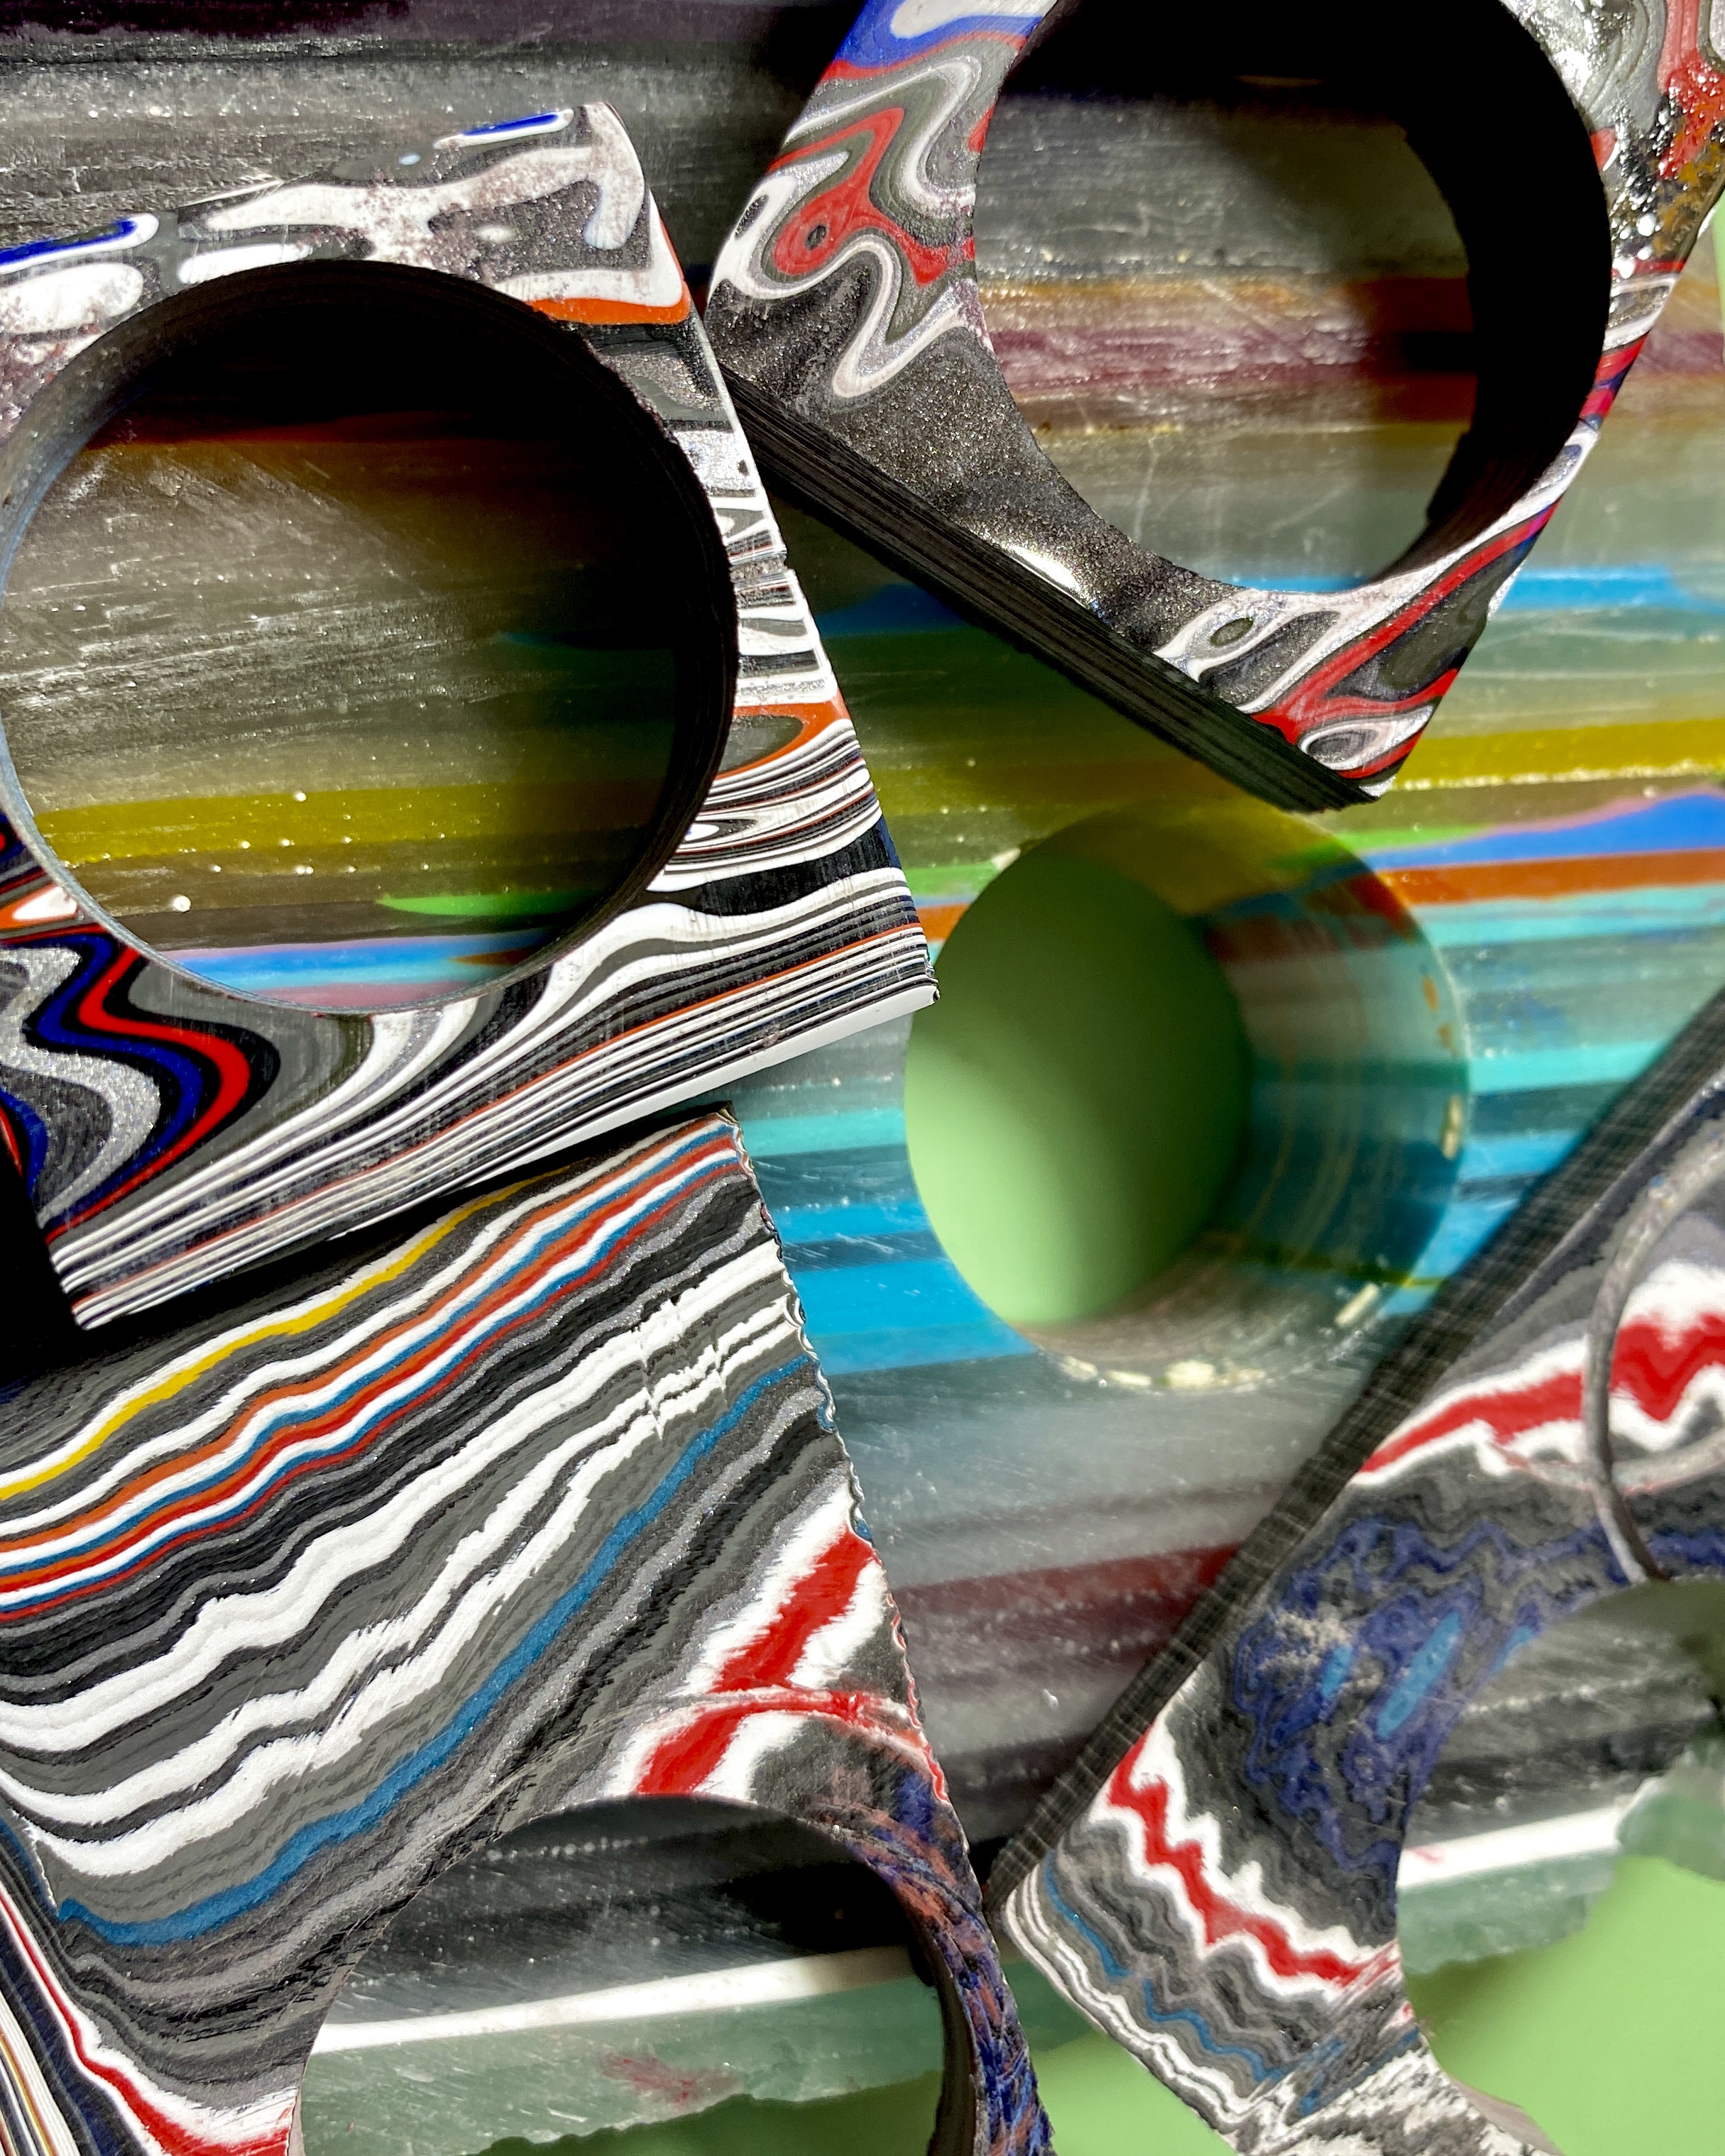
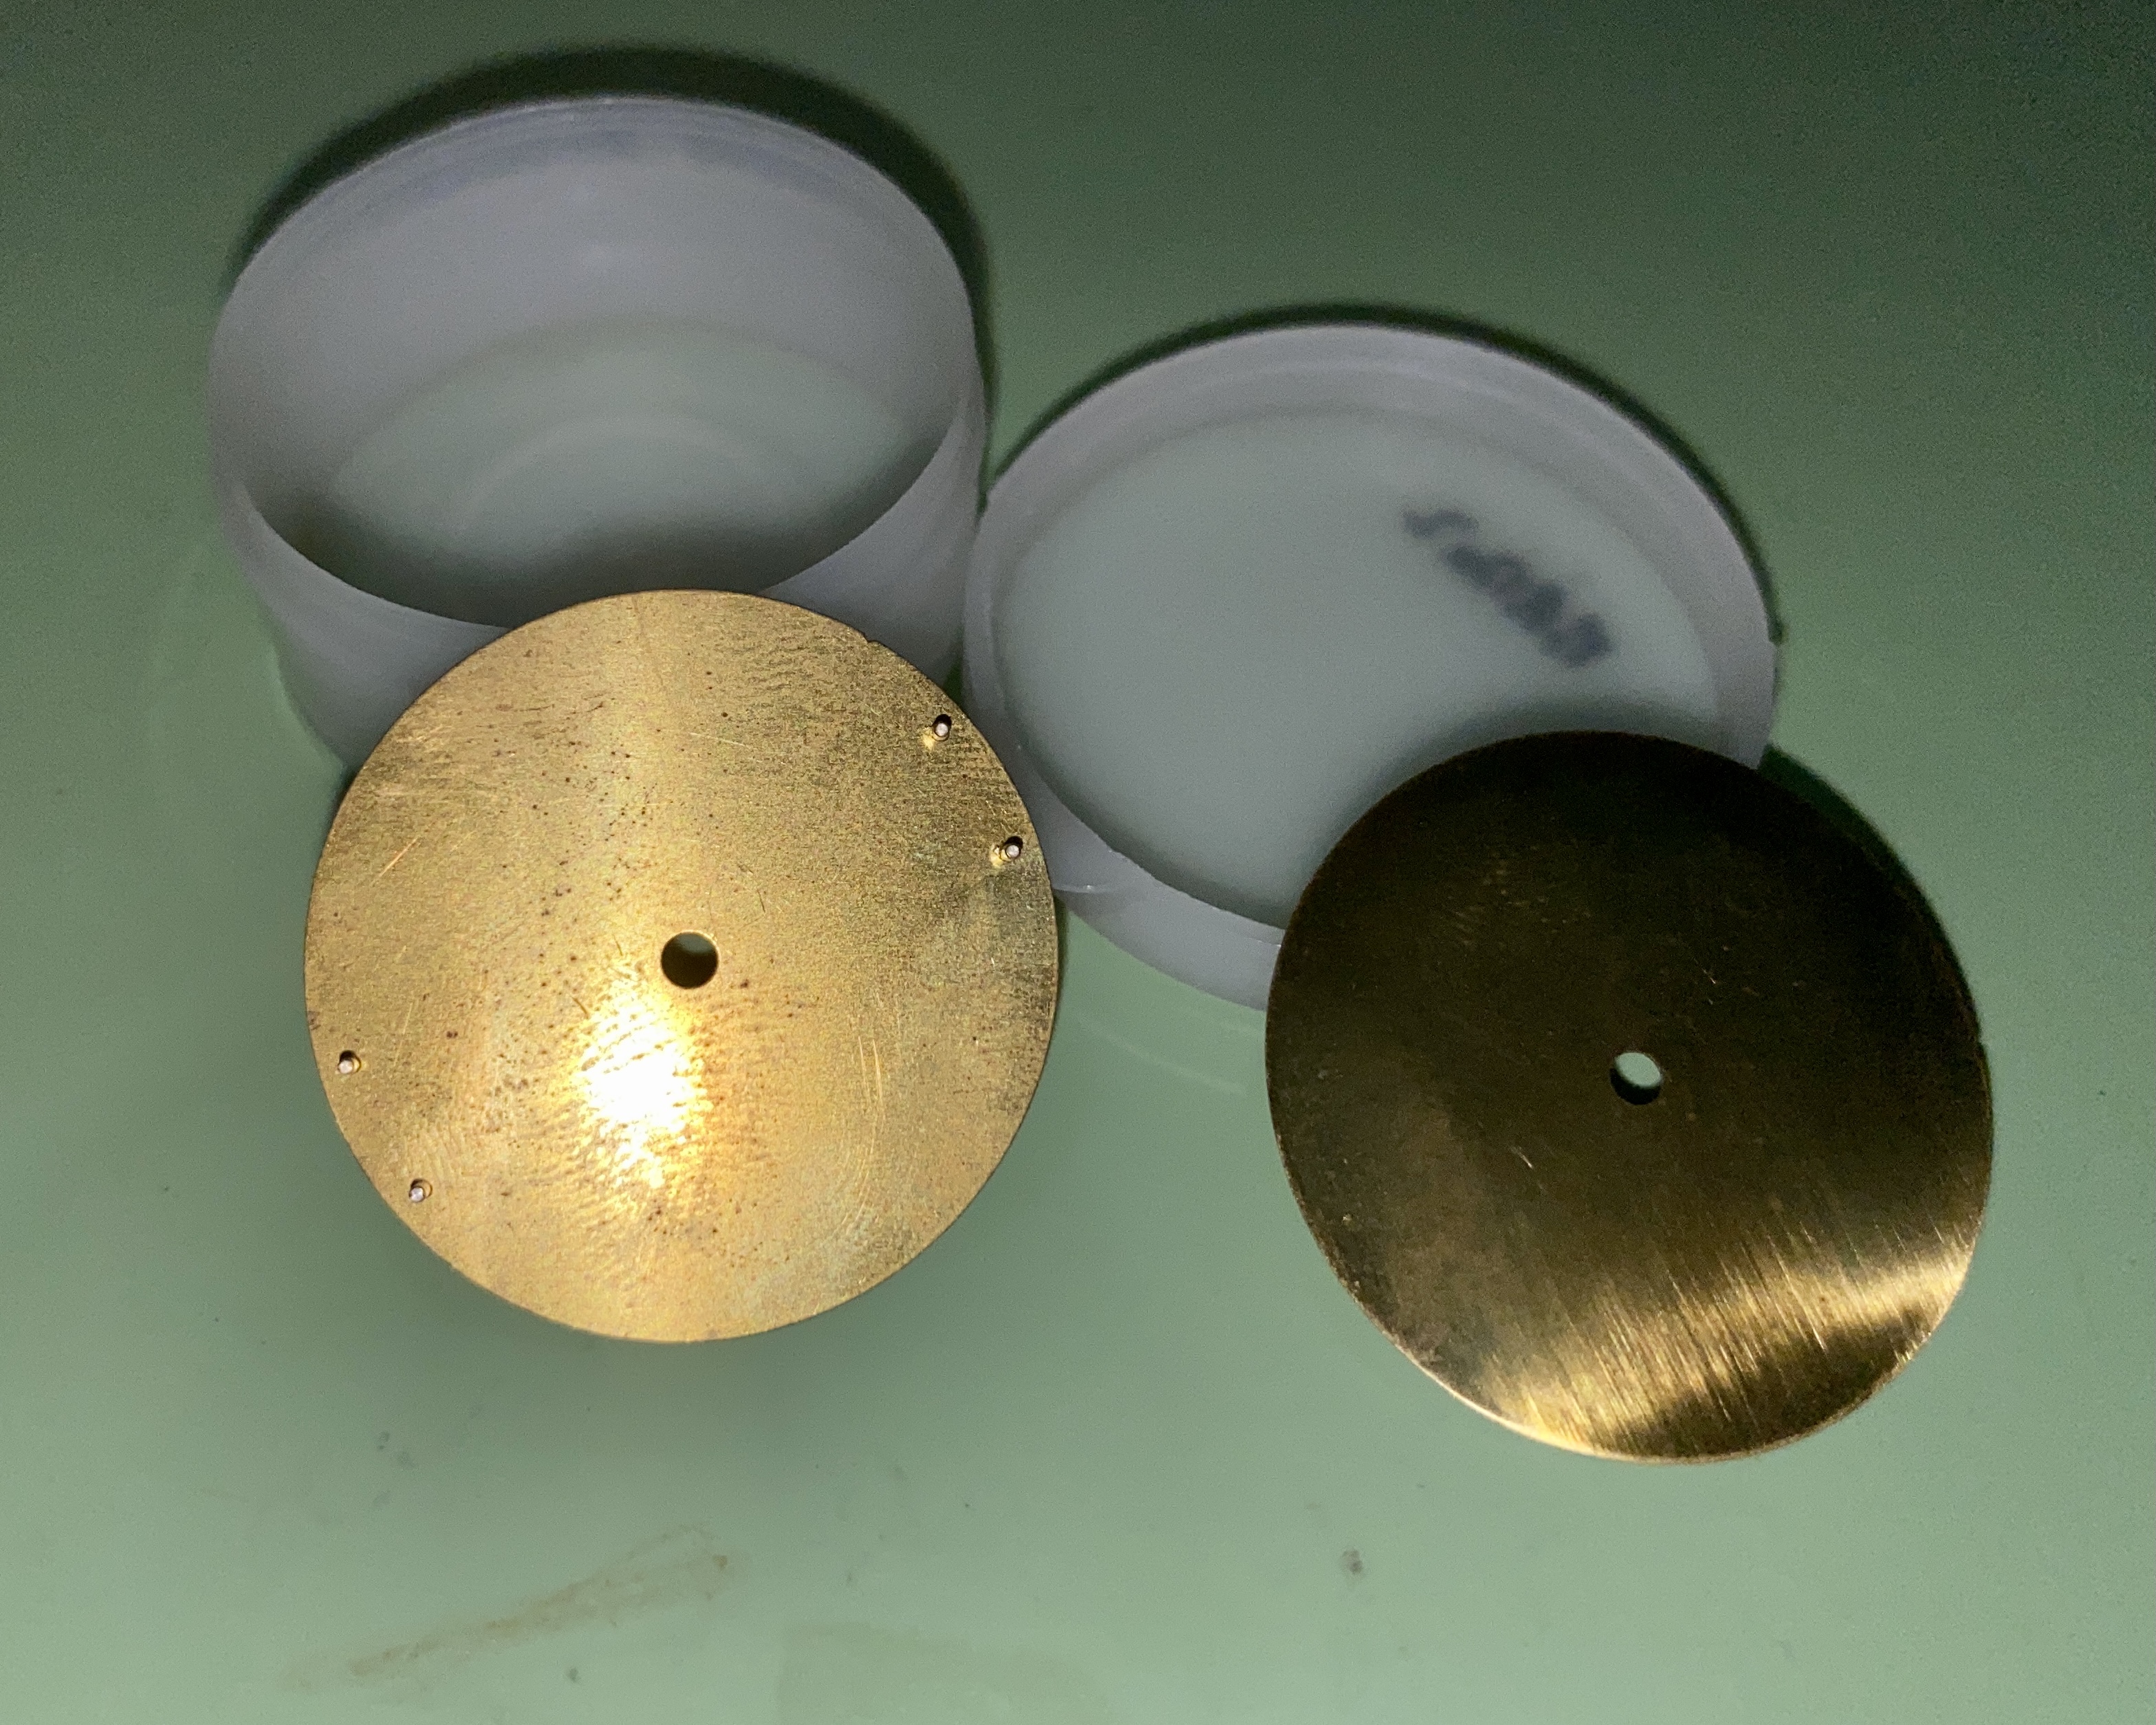
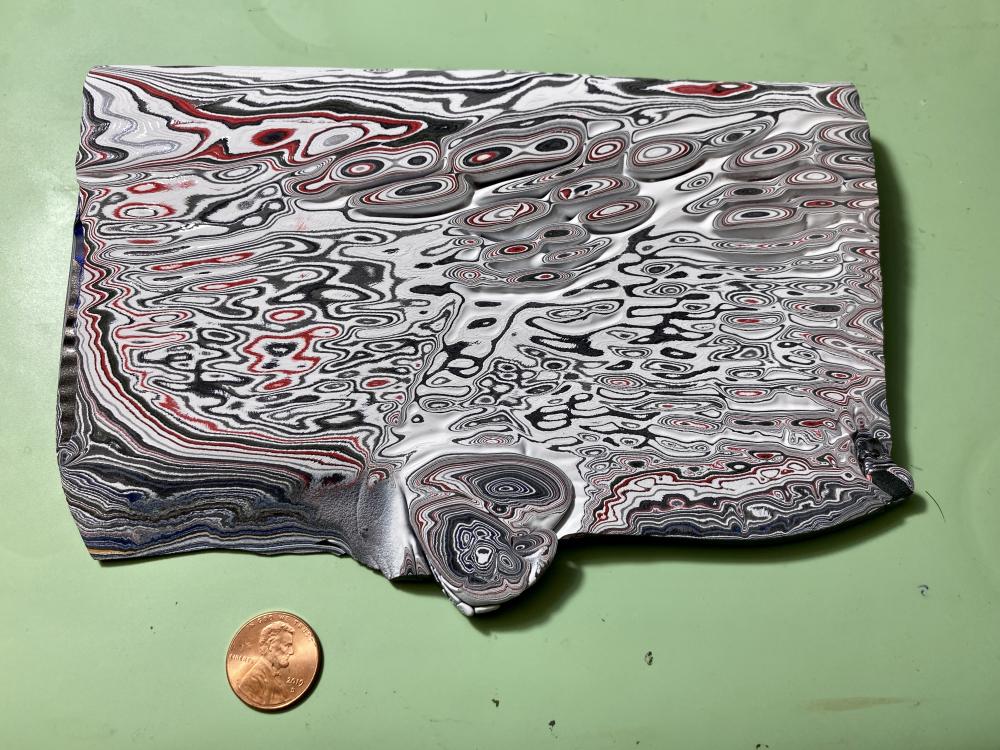
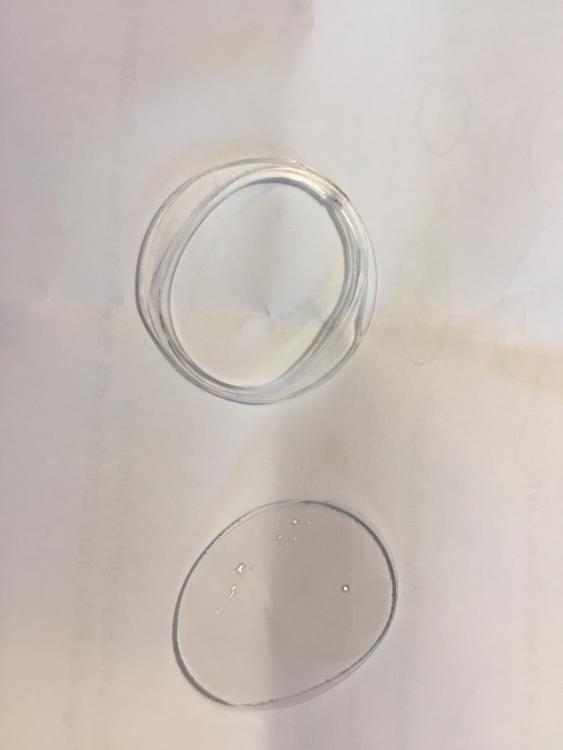
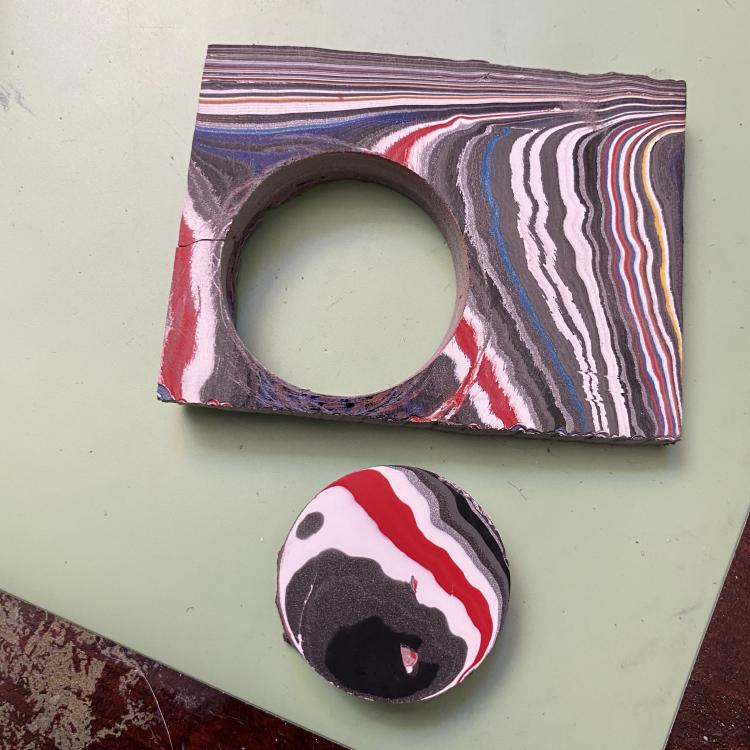
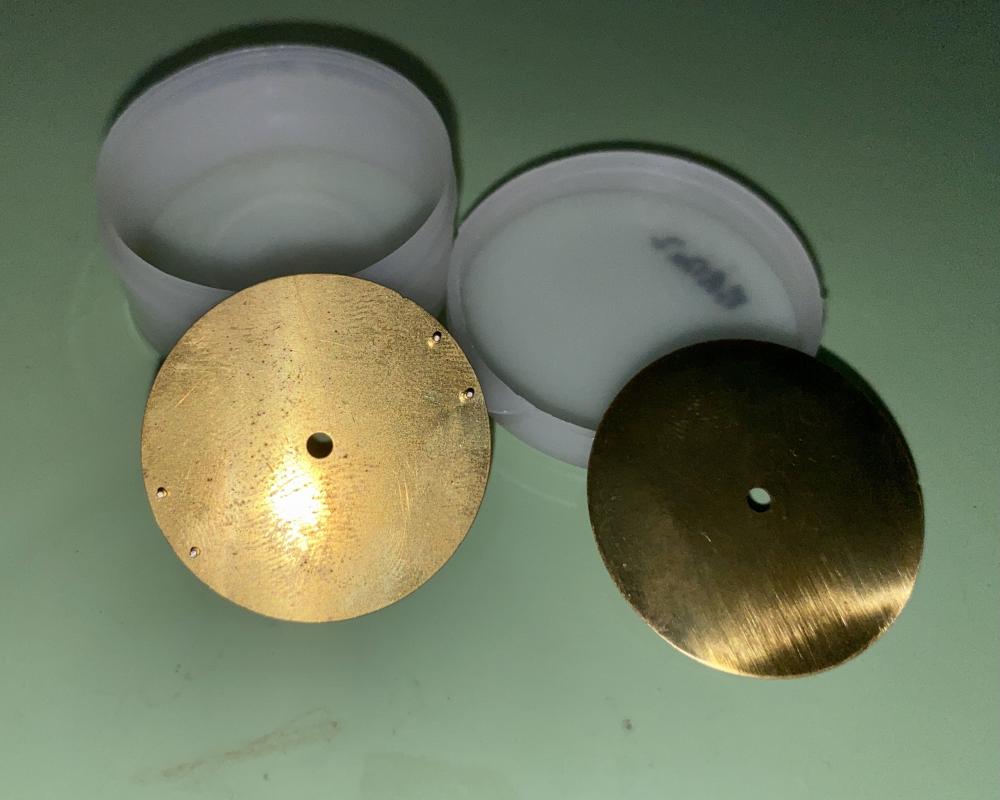
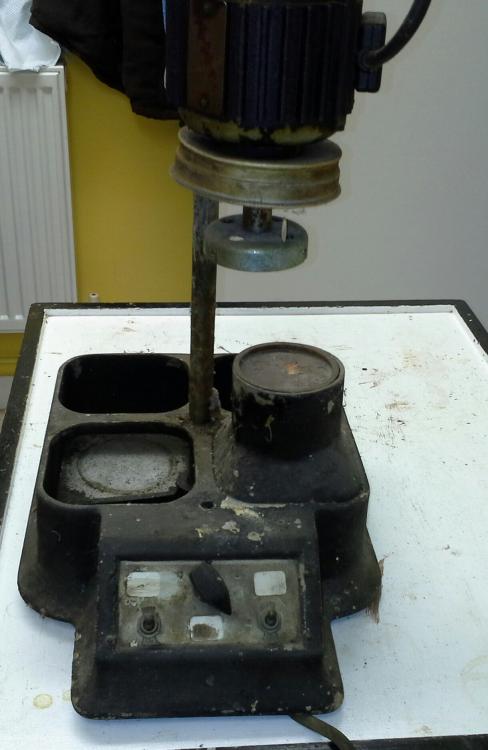
Initial Approaches Fundamentally, I had to figure out a way of cutting fordite into very thin discs that could be mounted onto brass dial blanks. I did quite a lot of research into how stone-dialed watches are manufactured, and spent a lot of time browsing the stone watch dials that are available from Chinese manufacturers on Alibaba]. I believe that the most common way that stone dialed watches are manufactured sidesteps the problem as much as possible; they don’t aim for a total dial height of 0.4mm, the normal Seiko and ETA 6498 standard, but instead cut thicker (but still quite thin) stone dials and achieve a final height greater than 0.4mm. The large manufacturers are able to do this because they can use movements with higher-than-normal hand pinions, in cases that may be deeper than normal, with hands that have longer pipes than normal ("long post" or "long tube" watch hands), under crystals that are taller than normal. It is possible, if expensive, to find hour wheel-cannon pinion sets for ETA movements that accommodate thicker dials. But finding a case and crystal combination that could accommodate this thicker dial and higher hands was going to be challenging. And there are no similar Seiko options that I'm aware of. After a great deal of thought, and teaching myself some basic lapidary skills, I realized that it might be possible to cut a thin fordite veneer and mount it on a brass dial blank. I then planned on soldering the dial feet onto the dial one-by-one. The first process I was going to try to use was broken down as follows: Cut rough fordite into roughly-round chunks. Use a lathe and turn those chunks into cylinders with precise diameters. Cut thin (but still relatively thick) discs out of those cylinders, and mount them on a precisely-cut brass dial template. Use a lapping machine to polish/grind the fordite down to the final required height. Hand-drill the center hole, using the brass dial template as a guide. This would require laser-cutting a thin brass sheet to the correct diameter and adding the necessary central hole. Solder dial feet onto the fordite/brass dial sandwich. Final polish and assembly. At this point, this project was still a pipe dream. I had some fordite samples, but was still researching the lathe and lapping machines that would be necessary to do this work. I had some key breakthroughs, that significantly decreased the level of effort necessary to make these dials. Process Improvement Serendipity A jeweler I know was happy to lend me an Austrian "Unimat", but he suggested that I skip the lathe step entirely and use a hole saw of the correct diameter instead. This was a great suggestion, as the fordite is tough enough to tolerate working, but still soft enough to cut with common tools. I bought an inexpensive bench-mounted drill press and a diamond-bladed hole saw and went to town. In short order, I cut several 29.5mm diameter cylindrical cores of fordite. These are great; they were easy to cut, they’re nicely straight, and the core diameter is really close to my final diameter of 28.5mm (for Seiko-compatible dials). Cored fordite (and surfite) ready for the next steps ... Around this time, I found a supplier of half-height (0.2mm high) Seiko-compatible blank brass dials. These already have dial feet soldered on, compatible with both 3 o’clock and 4 o’clock Seiko dials. I bought 10 of these dials, enough to complete my first run of dials. Half-Height (0.2mm) 28.5mm Blank Brass Seiko-Compatible Dials Most importantly, I was talking about this project with an archaeologist friend of mine. He mentioned that he had a very special saw, a Buehler IsoMet 1000 Precision Cutter, which he uses to cut 0.1mm (and thinner) slices of fragile bone and teeth for microscopic analysis. This machine is specifically intended to cut extremely thin sections of delicate materials without causing fractures or deformation; it’s very low-rpm, has a constant water feed, and is gravity fed. It does take a long time to cut, but it should have a very high success rate with fordite. This saw isn't cheap -- a Buehler IsoMet 1000 is $8,900 new, and each 5" blade is $438. If I didn't have a friend with a lot of experience with this saw, I wouldn't have thought it possible to reliably cut thin fordite sections. And if my buddy wasn't interested in this project and willing to let me use his saw, then this project would have stalled out completely. With these process improvements, my manufacturing process becomes much simpler: Use a drill press and a hole saw to cut a 30mm core of fordite; Use the Buehler to cut a 0.3mm thick disk of the fordite; Use adhesive (thinned jeweler’s epoxy) to glue the fordite to the 0.2mm half-height brass dial blank; Drill a central hole using a pin vise and the dial template’s hole to guide me; and, Final polish of the fordite to remove any “overhang” over the edges of the dial blank, and to get the final total height to the required 0.4mm. [Continued ...]

 1 point
 -
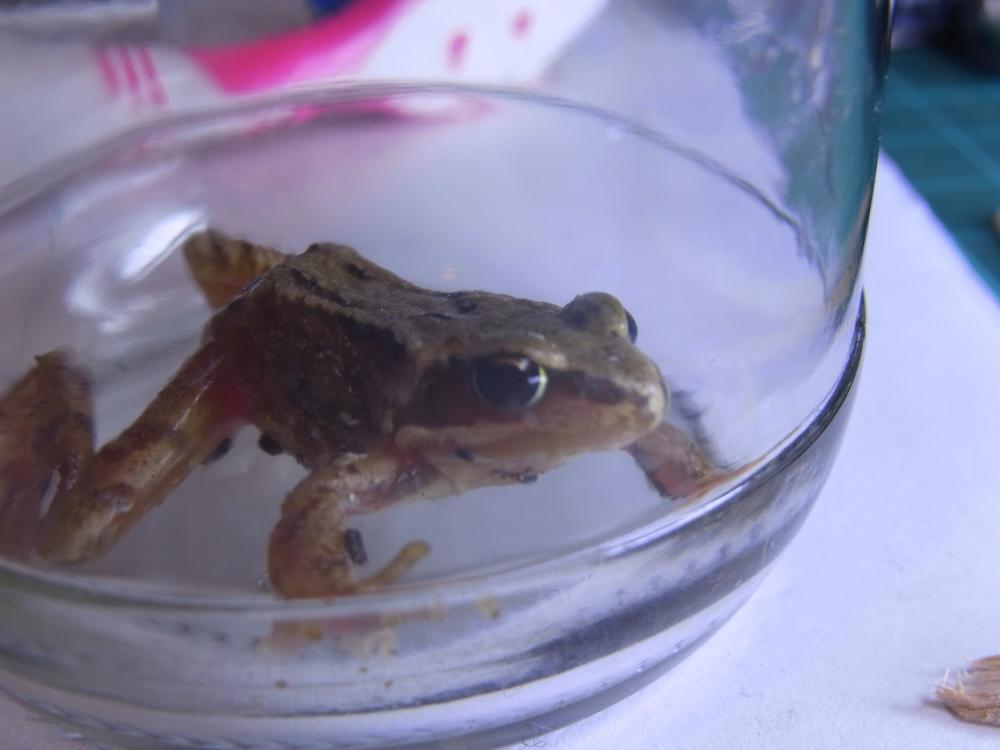
We just came back from the supermarket and while putting the groceries away I spotted this little creature sitting in the middle of the kitchen floor. I presume it must have either hopped in through the kitchen door, or hitched a ride on one of the grocery bags. Just in case you are wondering, it is a European common frog (Rana temporaria). This year seems to have been particularly good for frogs, as the garden was full of them earlier in the year. I'm not sure if this was down to the lockdown, which may have allowed a lot more of them to escape being squished on the busy main road nearby, or maybe there was less farm activity, less bug spraying perhaps when they were maturing.
 1 point
 -
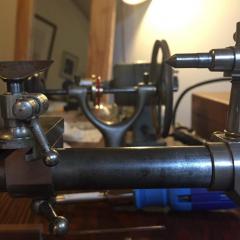
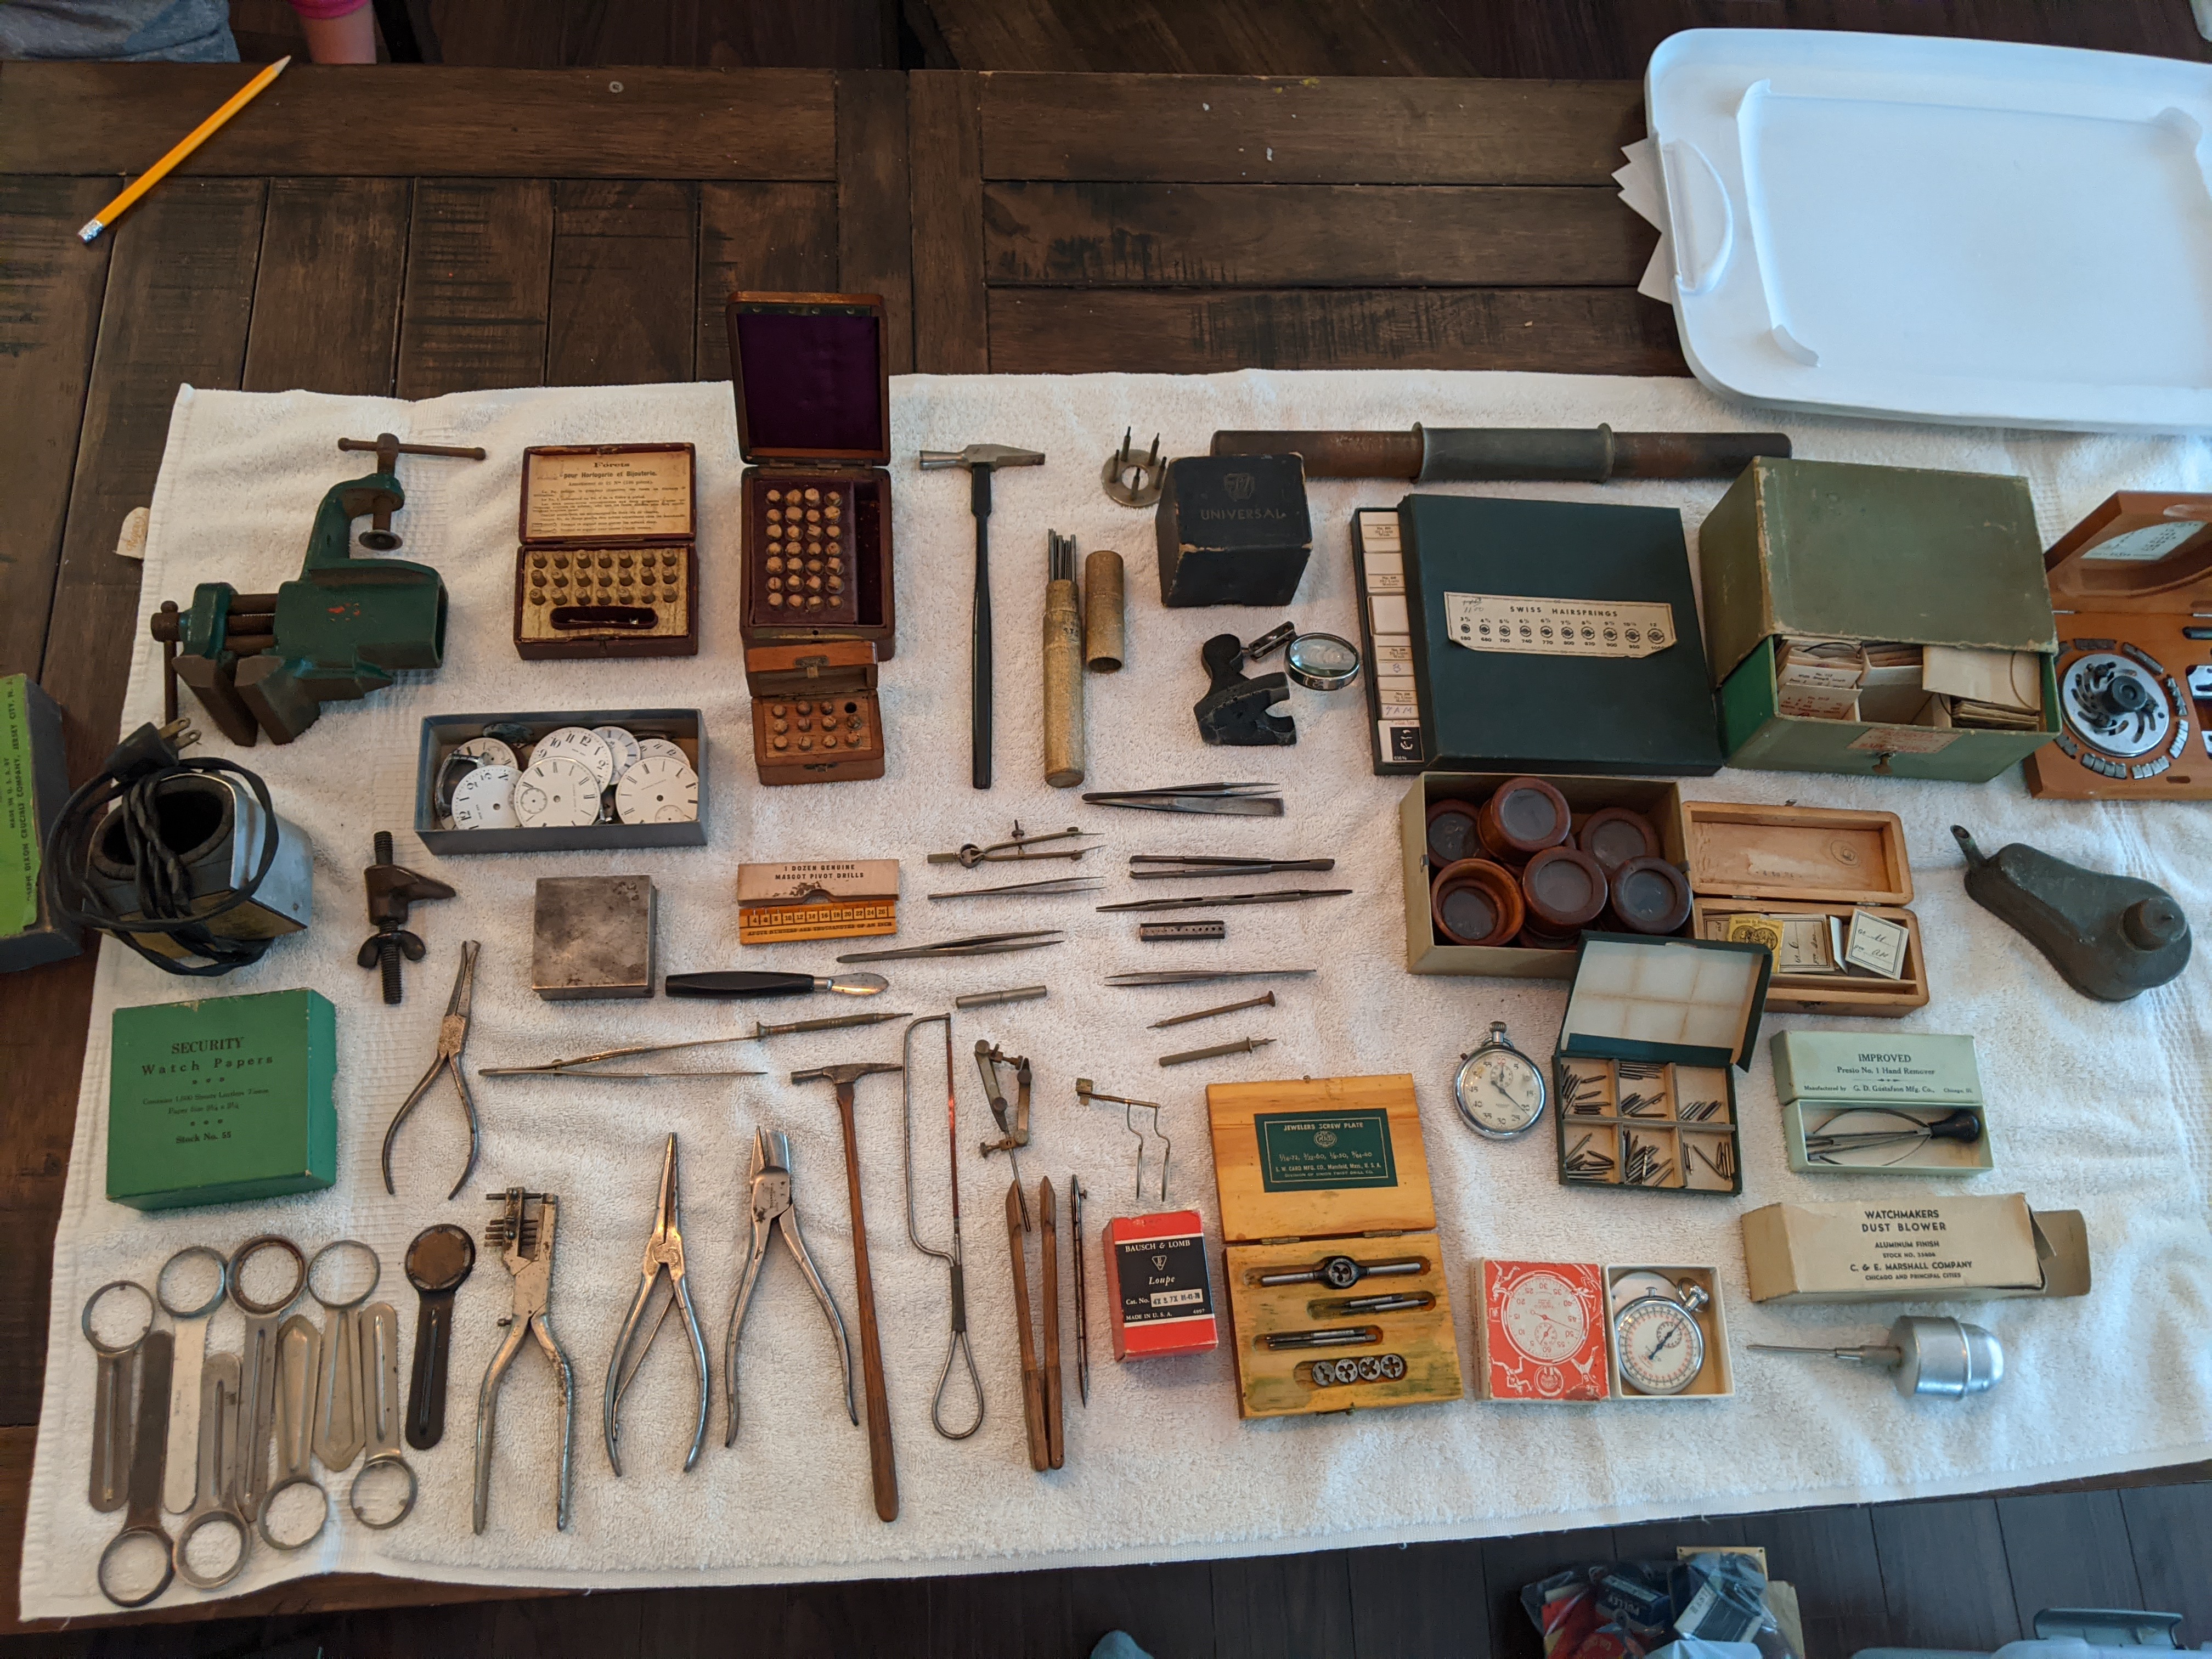
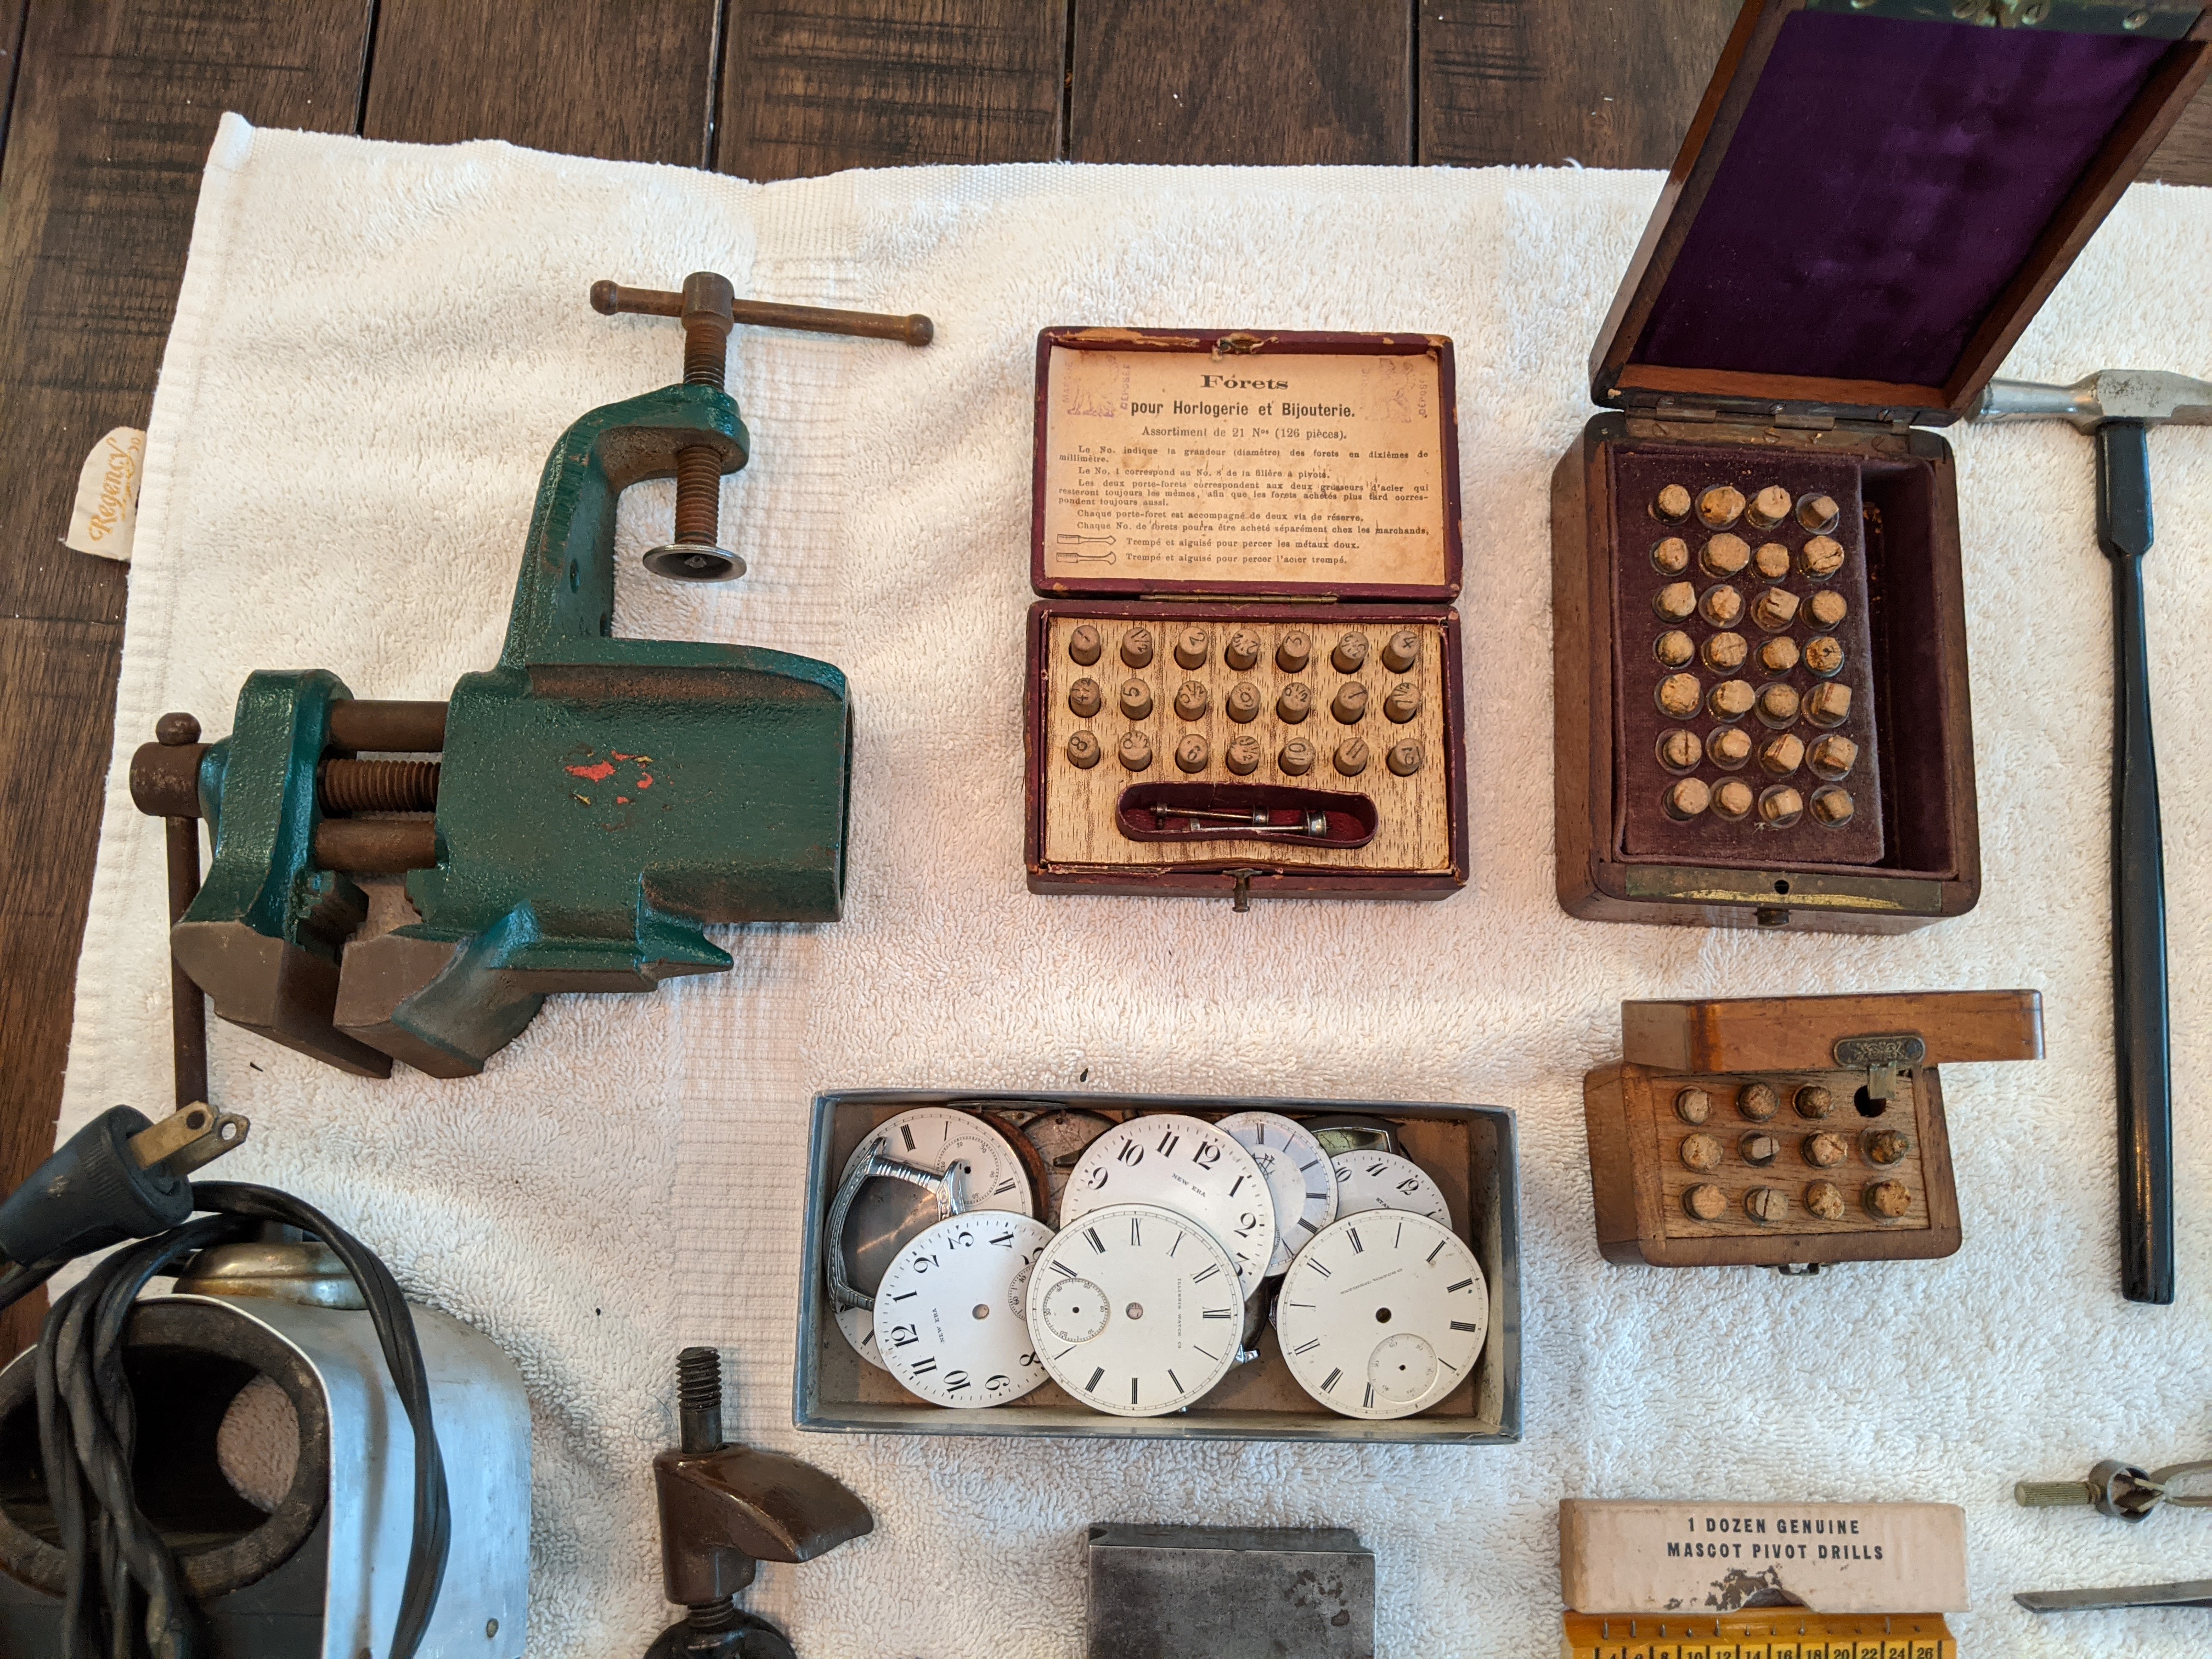
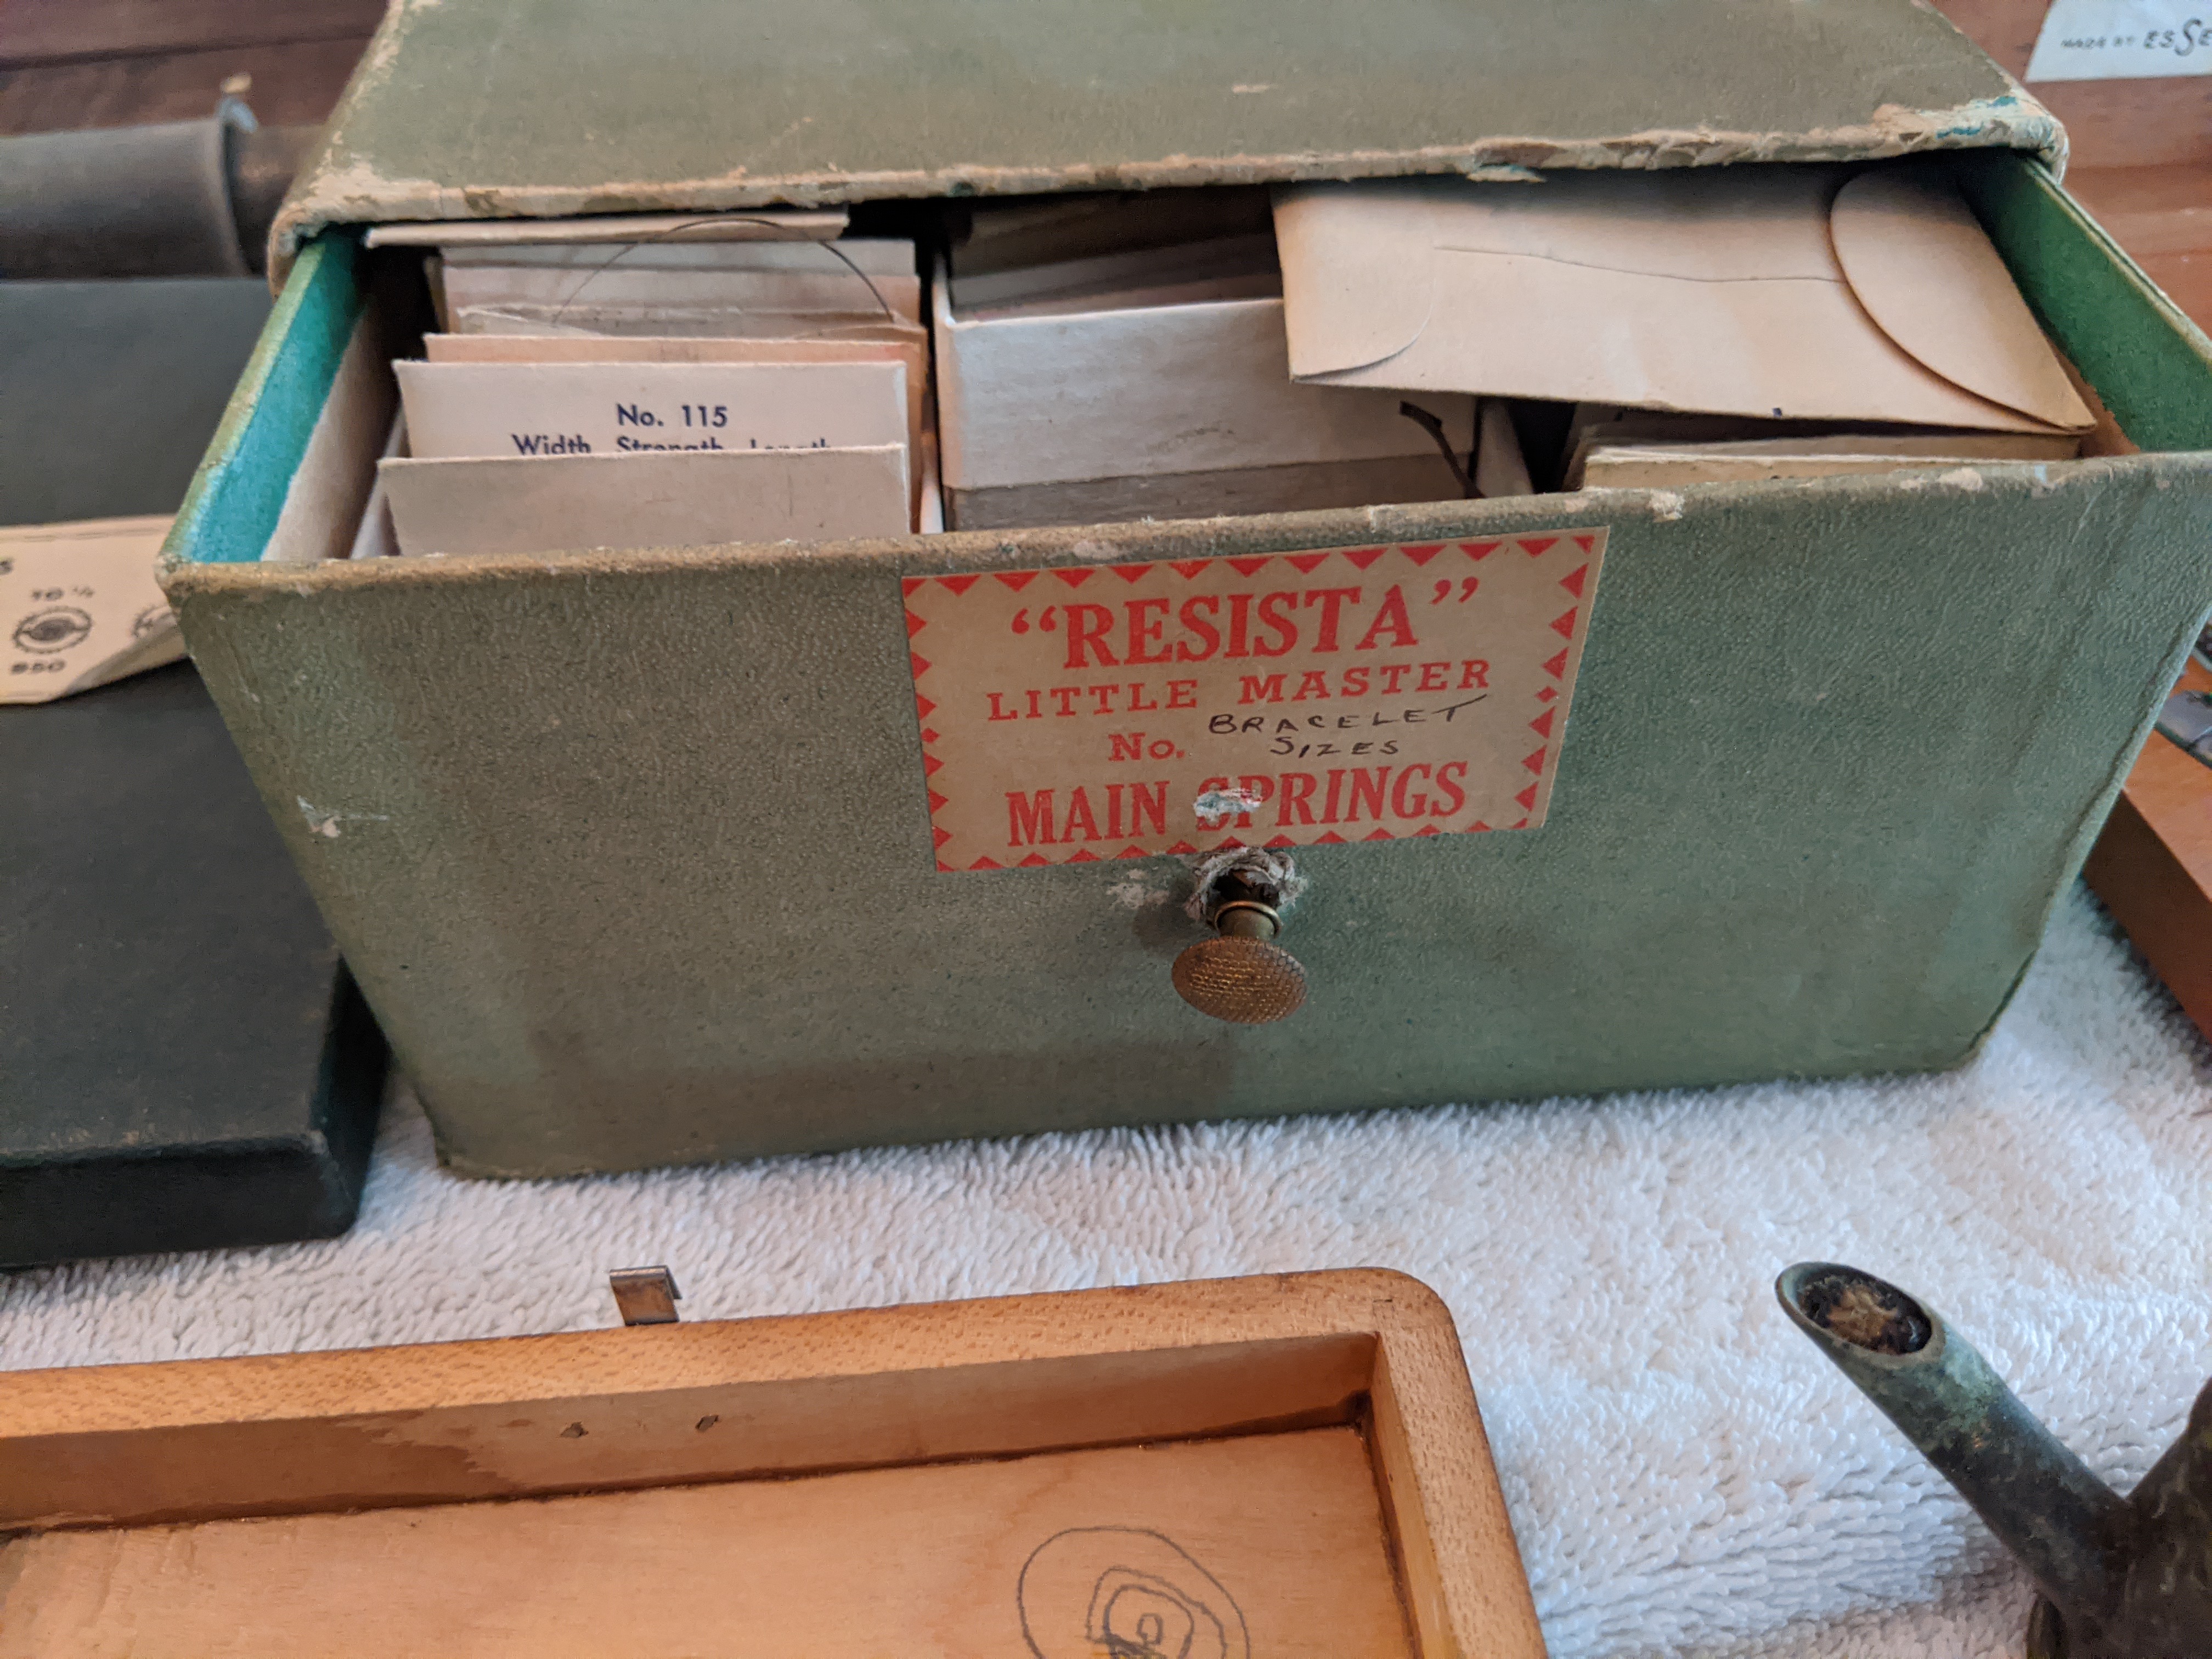
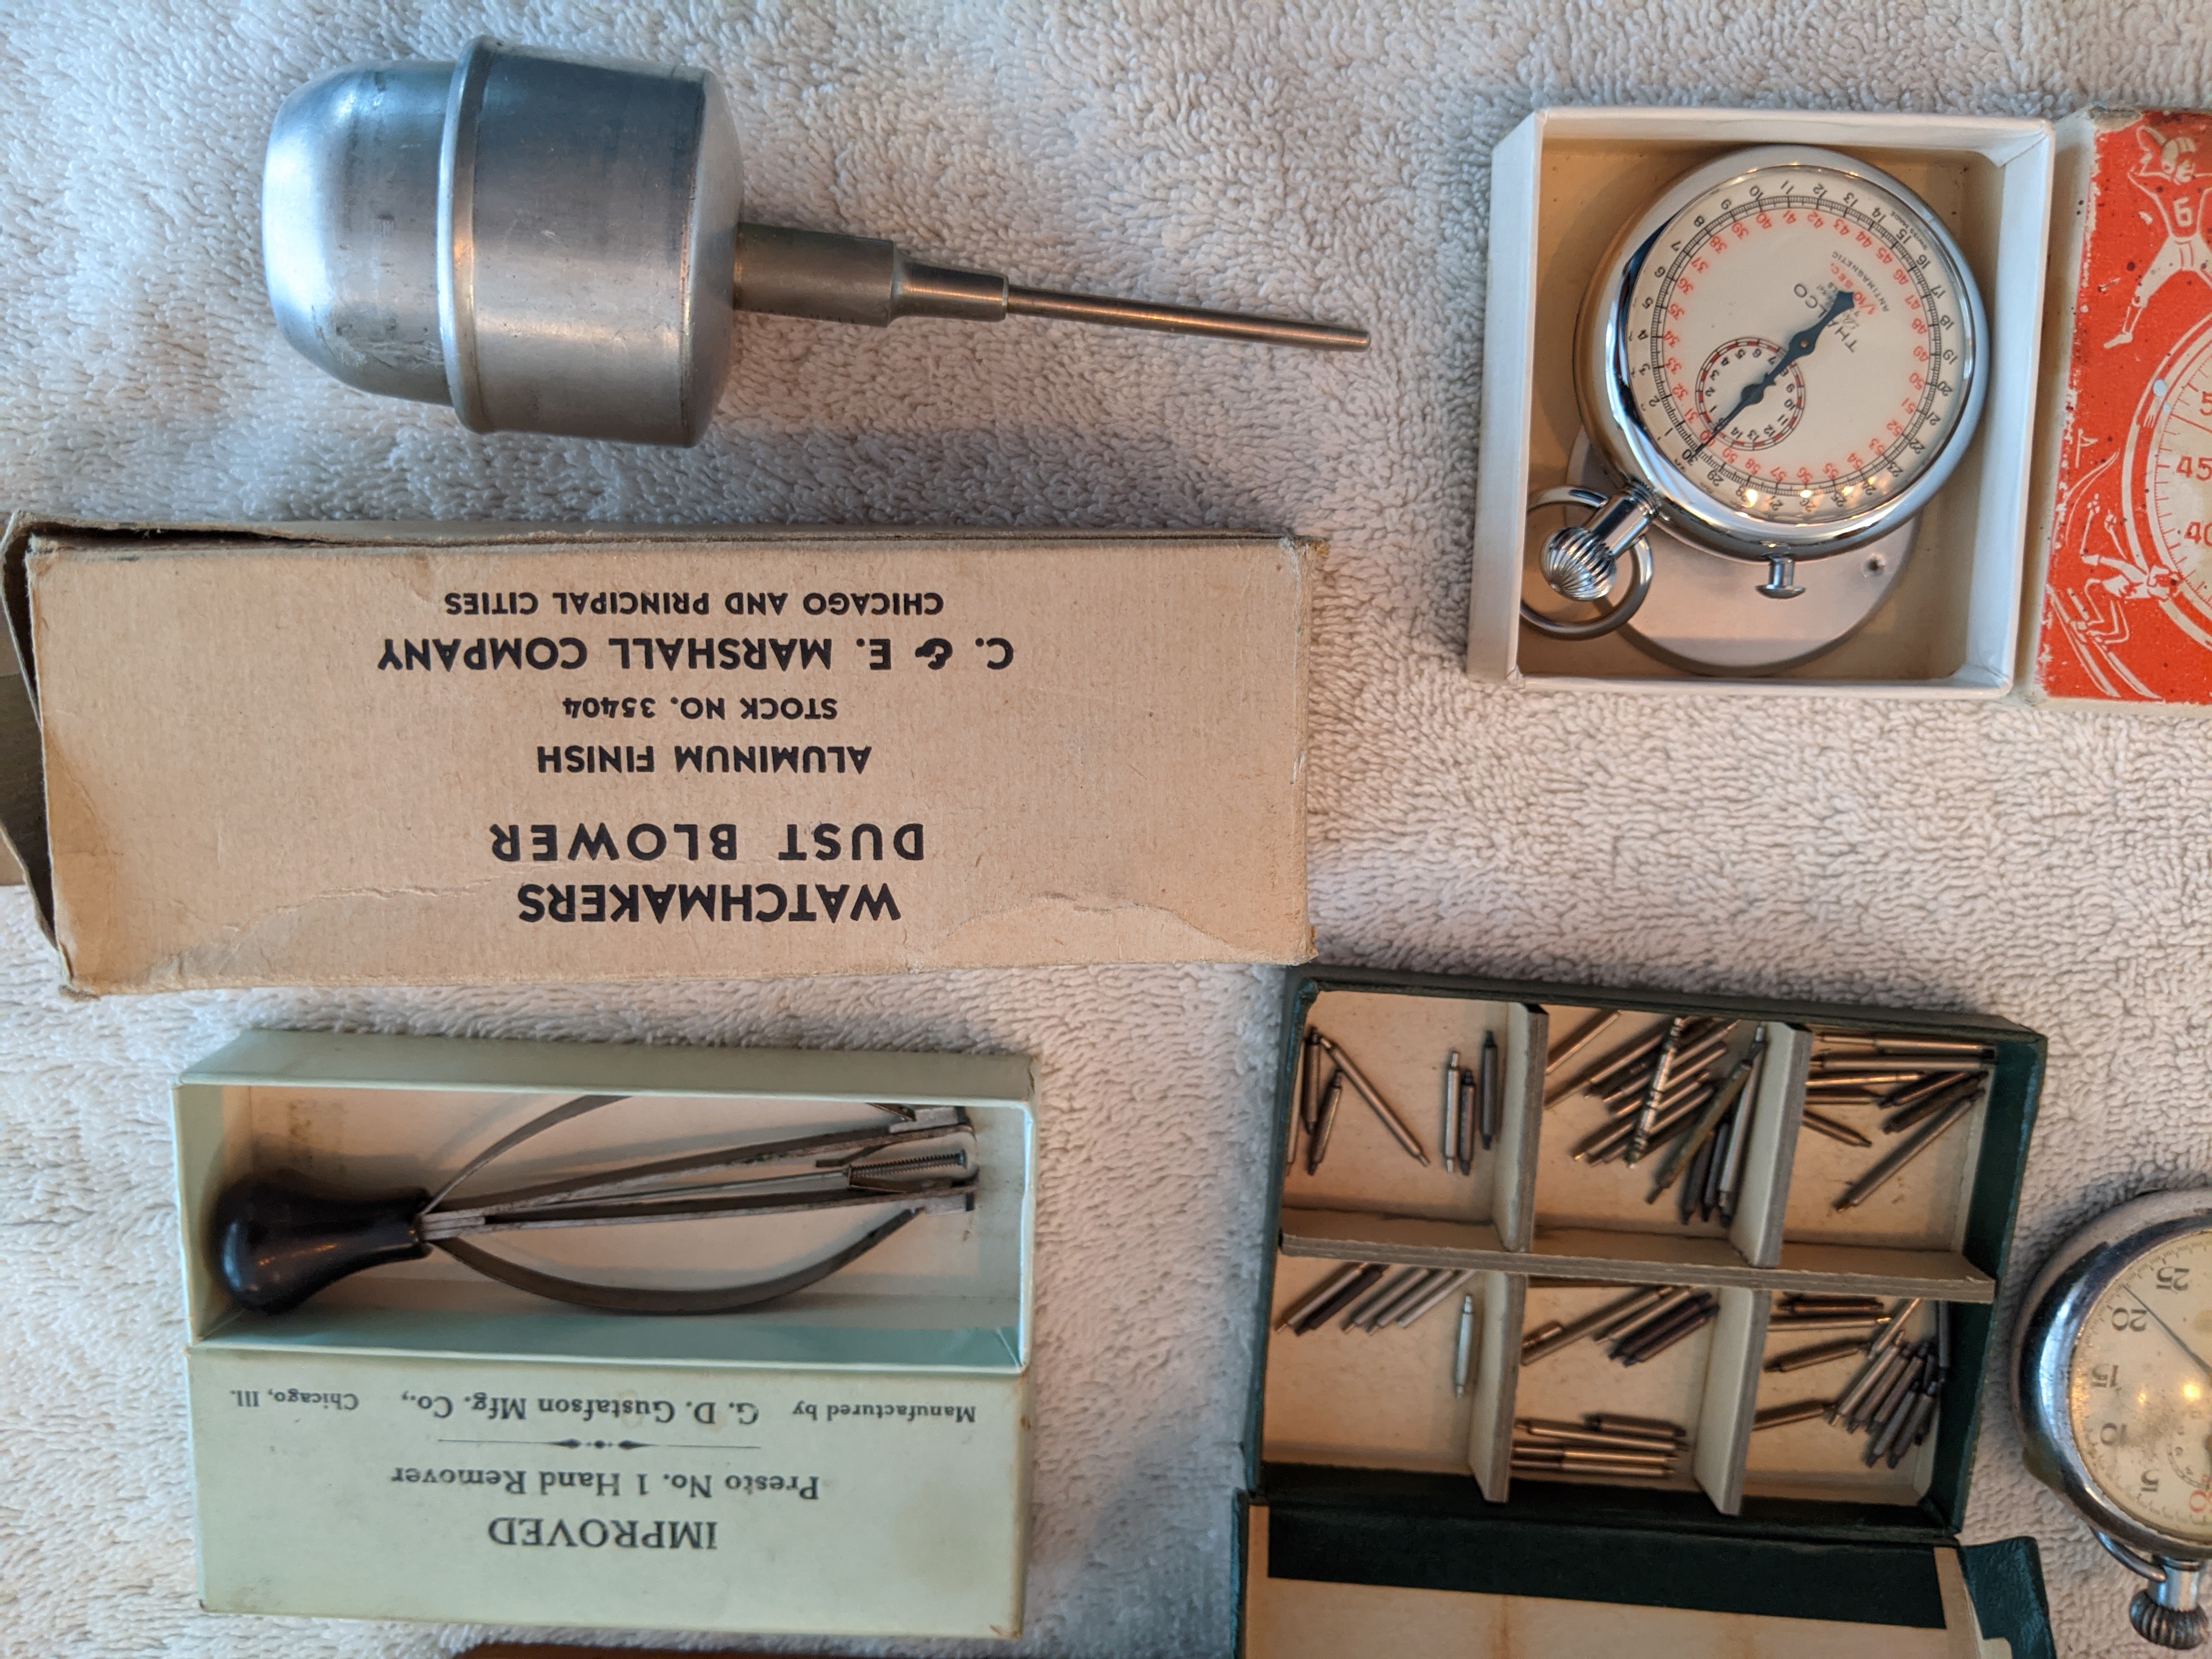
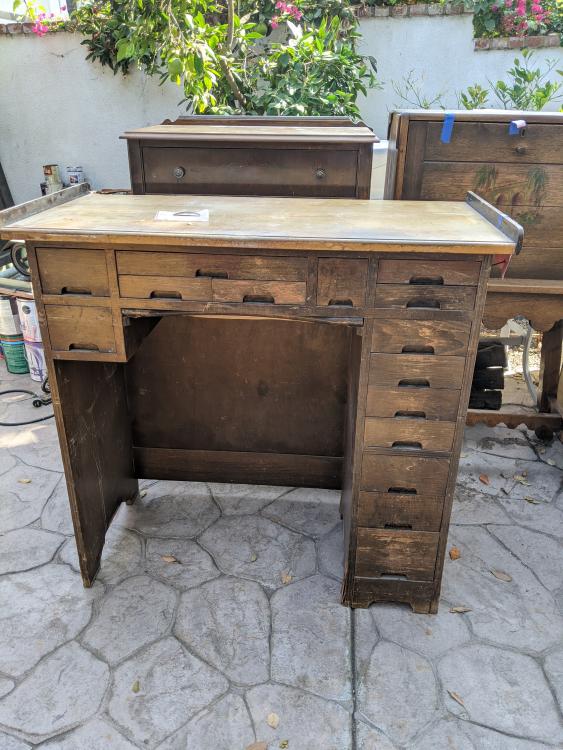
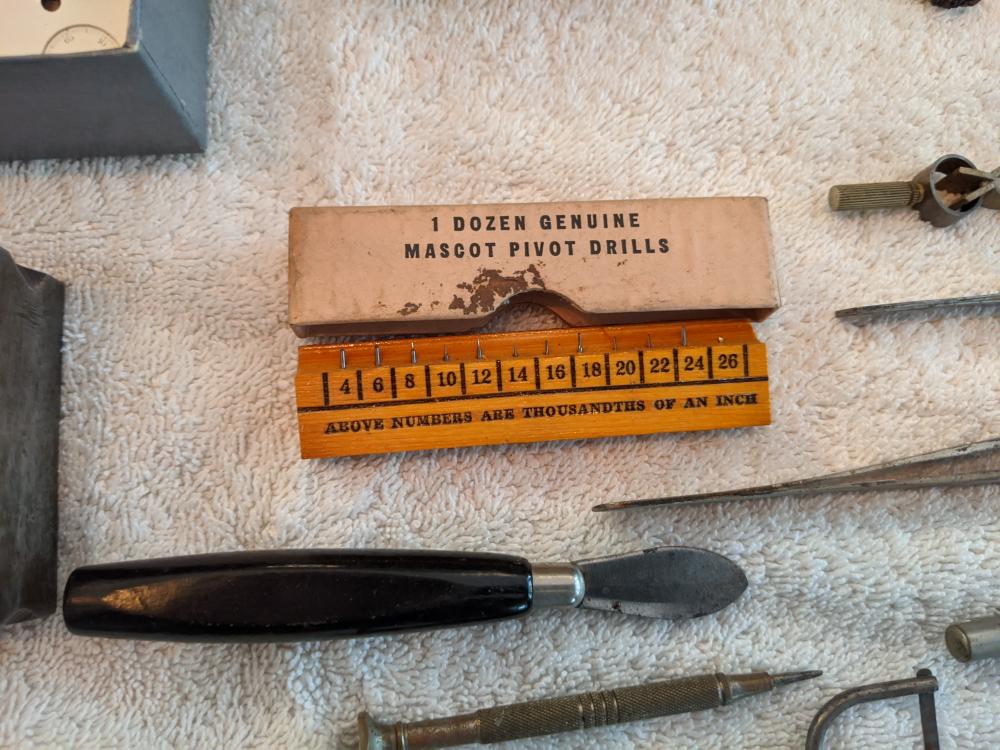
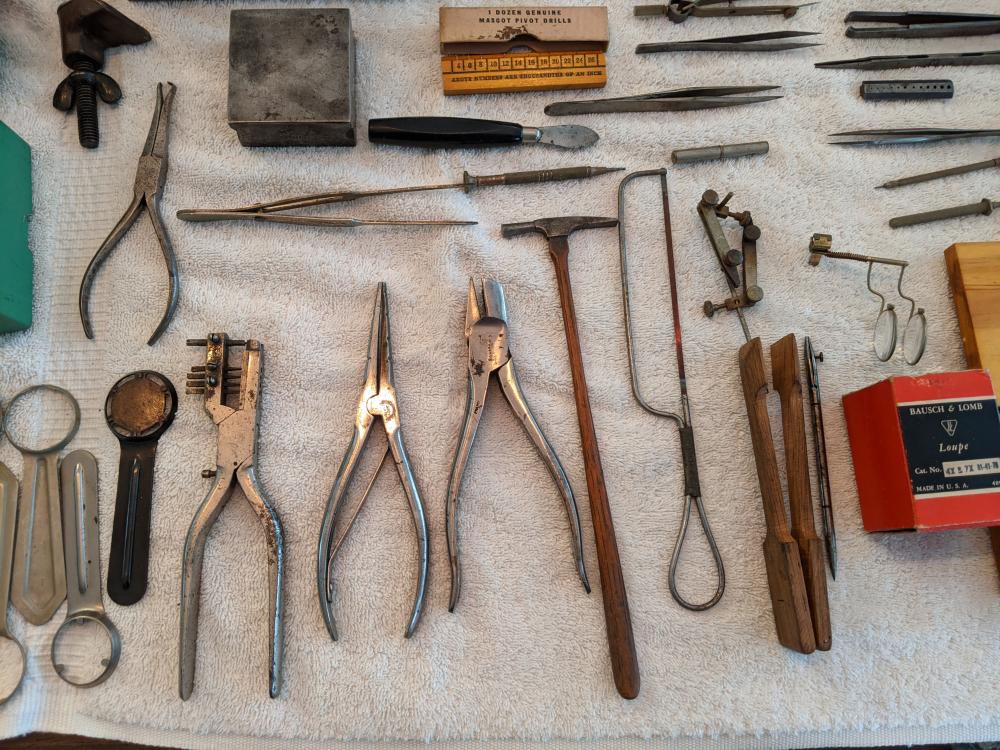
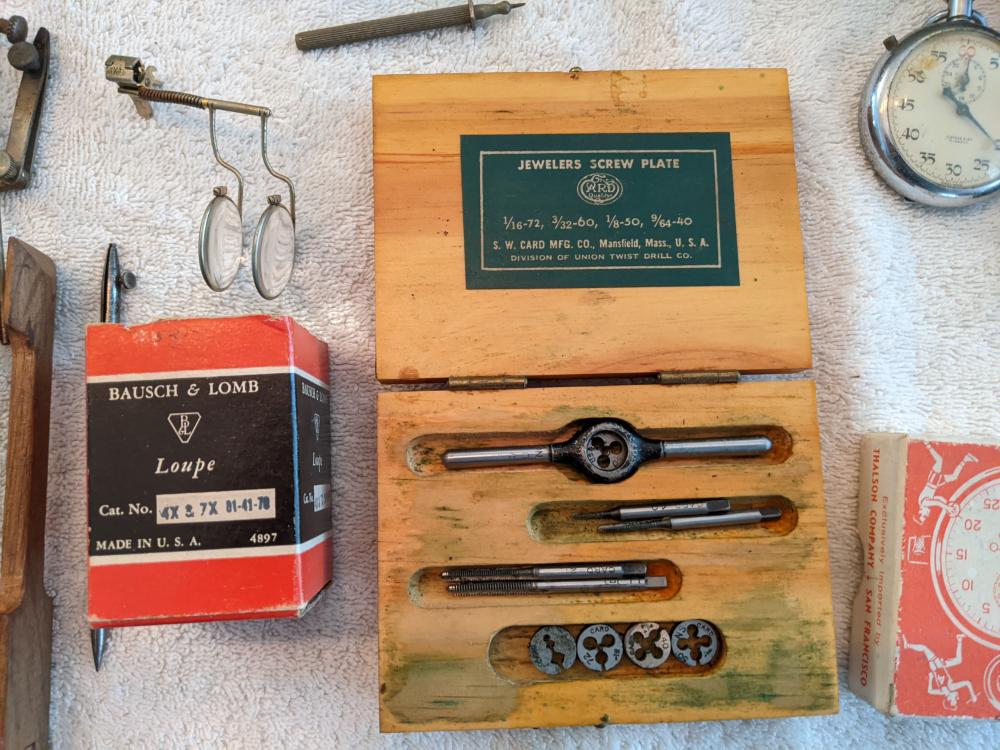
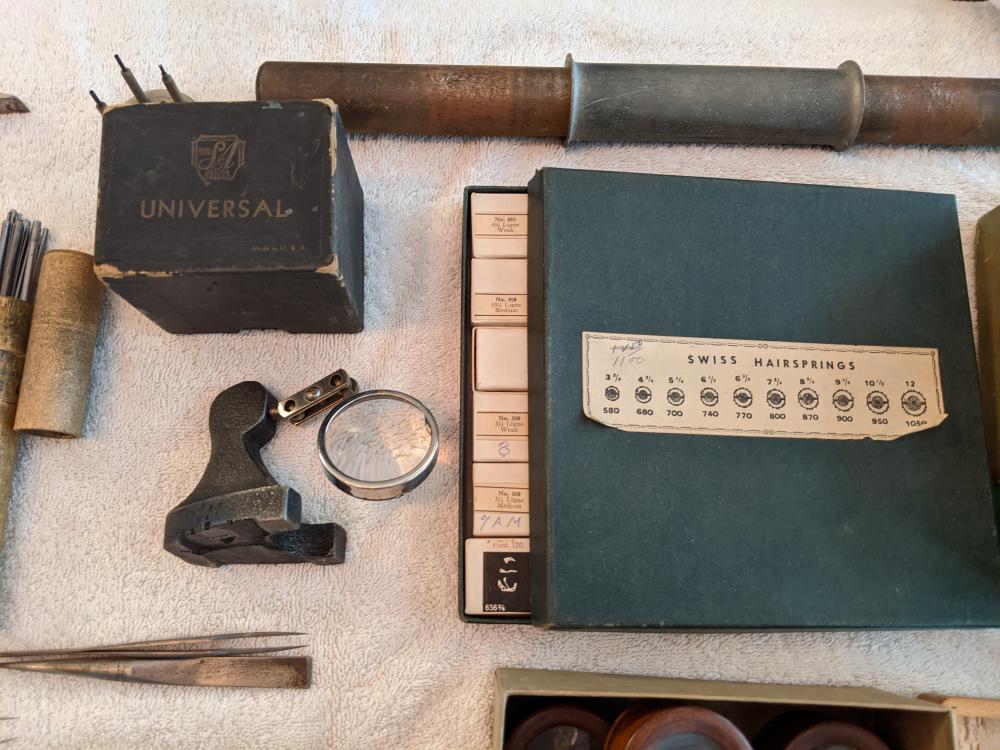
Hi All- I just rescued a lot of old watch making tools and supplies. I don't know how old they are, but I'm guessing pre 1960 based on some box dates I found. My mom was friends with an old guy that passed away. His children had a garage sale and sold a lot of his stuff. For some reason no one touched his watch making desk and tools. They were going to throw it away, but my mom asked if I wanted it. YES!!! I don't have an interest in watchmaking, but I do have huge respect for the types of trades that are slowing leaving us as these craftsman pass away. I also love old tools in general. I'd like to post up pictures here to get an understanding of what some of these tools are. Sadly, I have no room for his old desk. Here are some of the tools, I have lots more. Thanks, Chris


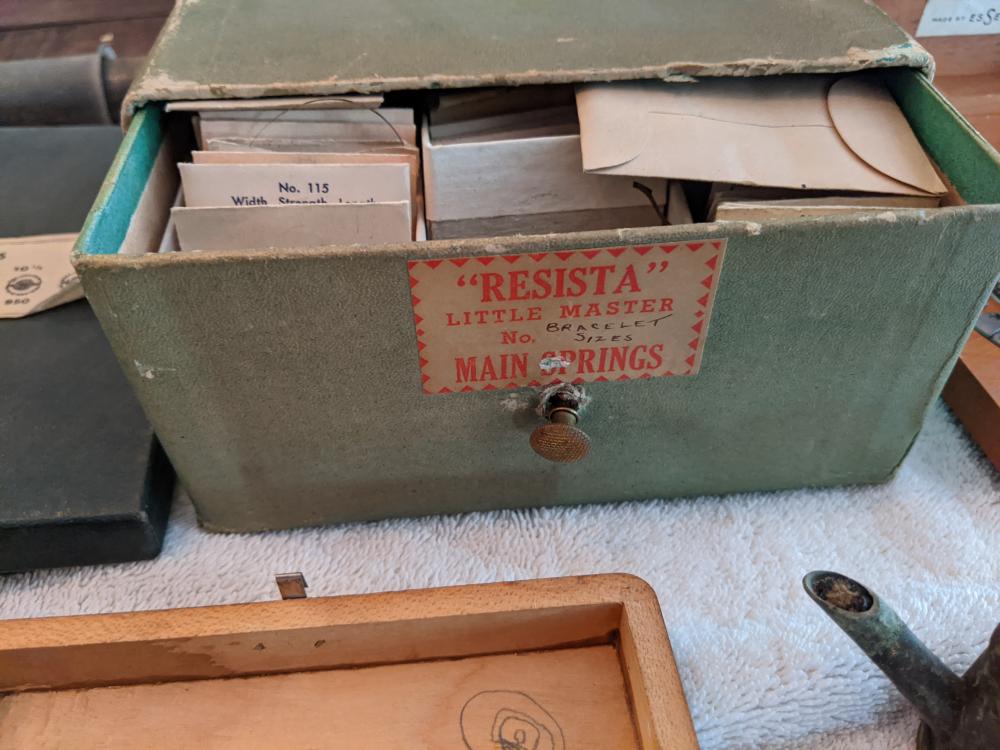
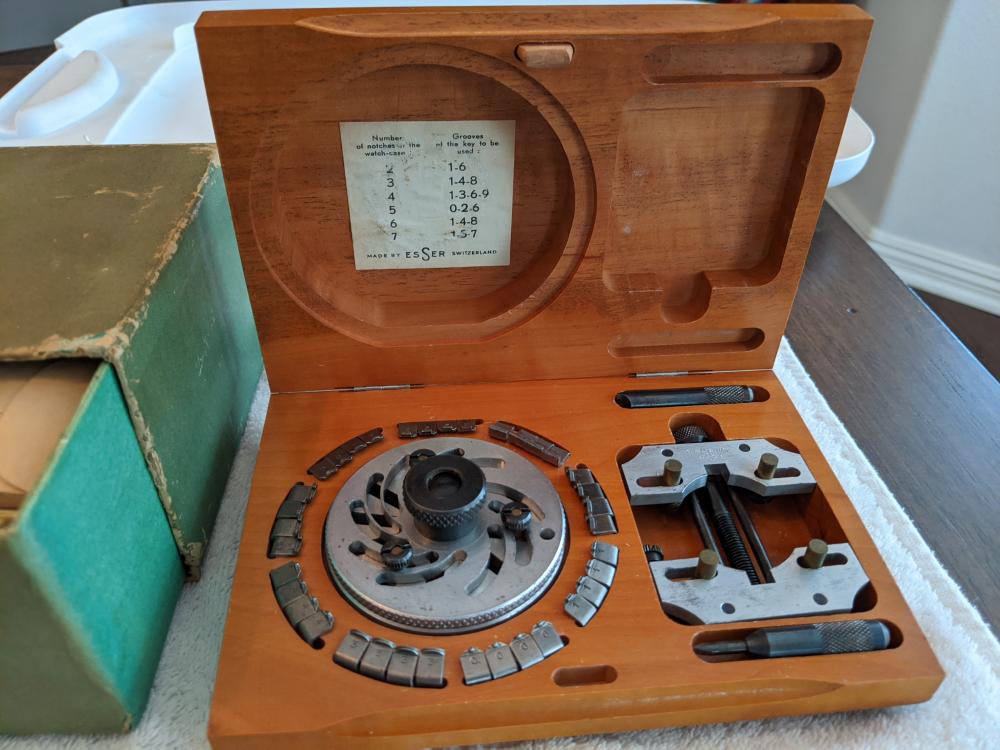
 1 point
 -
great collection...I hope your son enjoys the bench, that is a very nice find1 point
-
Nice job! Saving old equipment is rewarding and often less than buying new (Noy to mention better quality).1 point
-
Wow looks like new. Happy watch cleaning.1 point
-
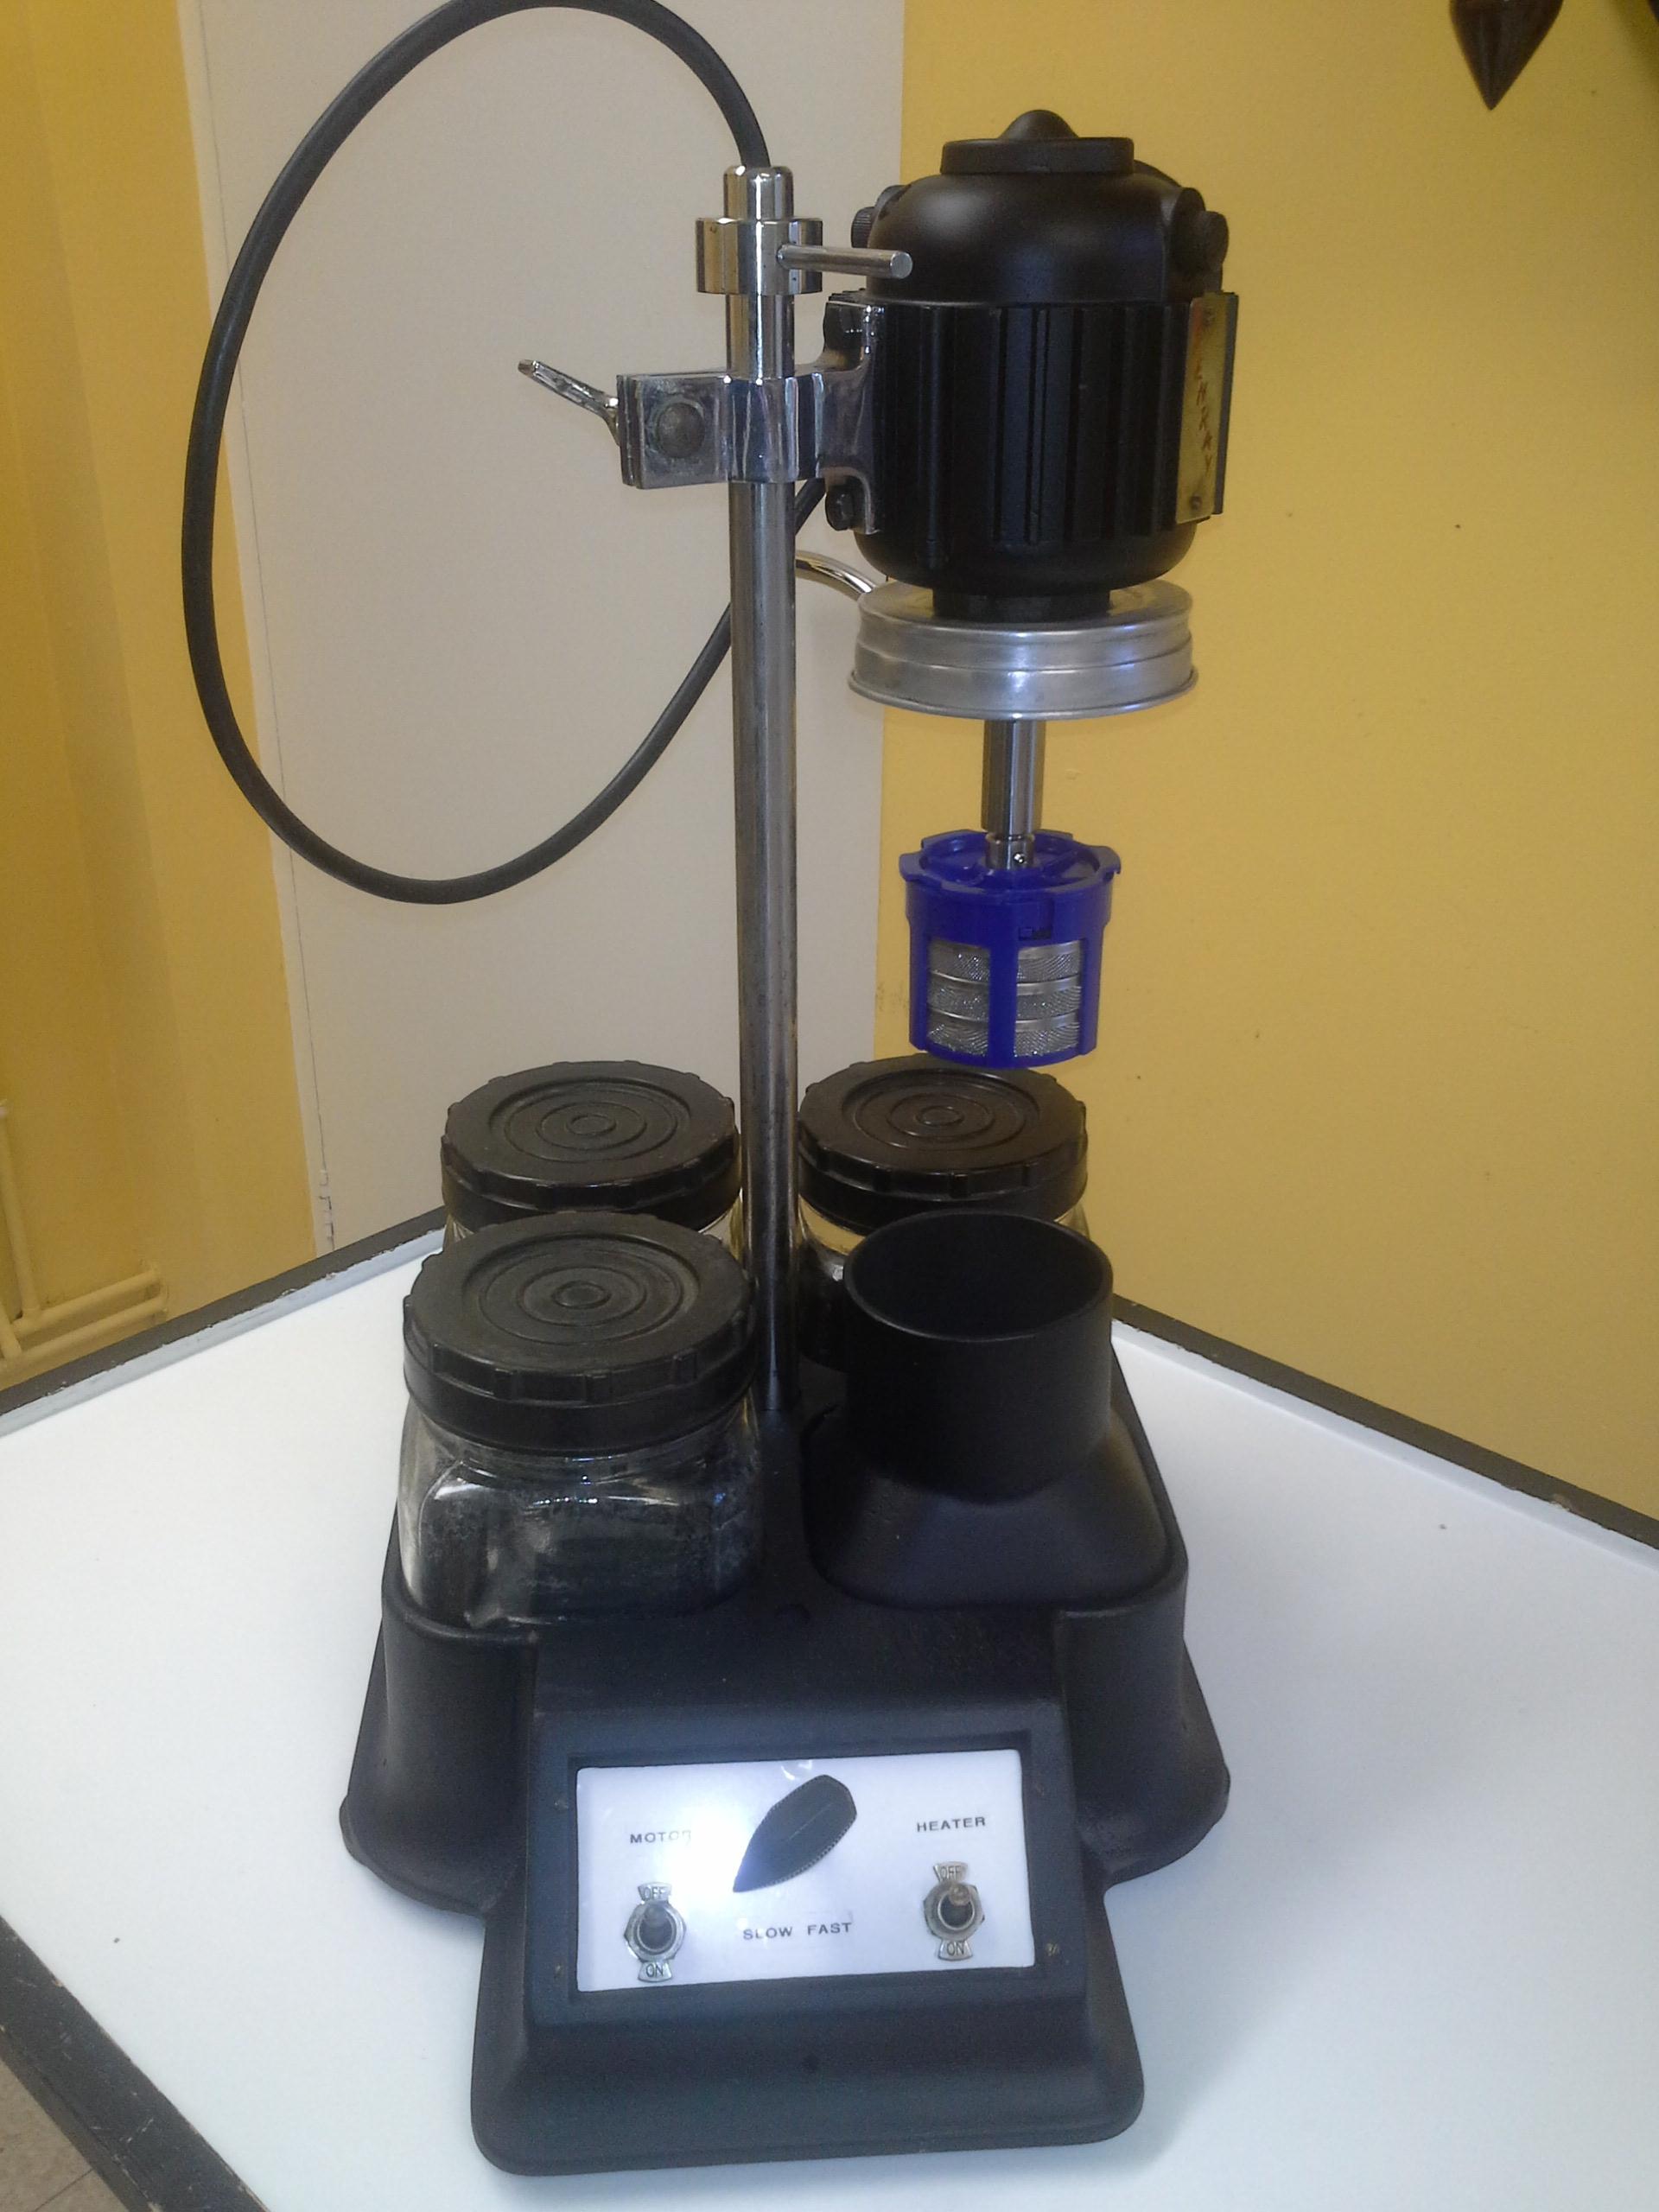
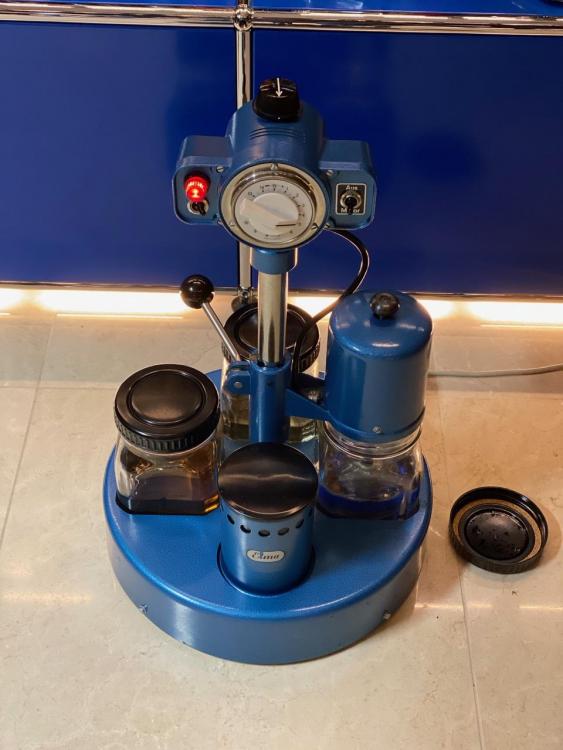
Thought i would just post a before and after pic of my brenray restoration, its been re-sprayed, had new wiring and i made an attachment so it can take an elma basket. Lovely old machine.
 1 point
 -
She cancelled the order. I'm going to make room for it in my garage. It will be my son's work bench. He appreciates the history and will take care of it. He's always out on my bench making something, or taking things apart. I'm not sure what I'm going to do with the tools yet. Some of them I can use, others are a little too specialized. Would anyone here have a use for all those old main springs and hairsprings?1 point
-
According to Wikipedia, alum (potassium aluminium sulphate) does not affect aluminium.1 point
-
Hmmm... Besides the coating, we don't really know what the crown itself is made of either. In you position, I'd source a generic "gold" crown for it, and either run with that, or wait until that is in hand before experimenting with the original crown. Is it a screw-down crown, with a spring loaded "clutch" mechanism inside, or just a tapped solid? If it is a complex assembly, it might not be a good idea to introduce chemicals that could effect the other components of the assembly. I think if you used an oiler, to place the solution precisely, you might be OK working on a solid. But, I'd still want a "fall back" plan on hand, in case things went wrong. I have seen Burgeon has a dissolving solution, but I know nothing about it beyond it's existence. It's pre-mixed and probably far over-priced, but might be worth looking into.1 point
-
Hi in order to eliminate what could be two problems, remove the Min wheel and canon pinnion and try the winding and hand set motion again if its still tight look further into the keyless mechanism.. Regarding the second wheel side play in the plate, if as you say its excessive its more likley that the plate has worn and will require a new plate or a bush but in either case both the wheel and plate will require attention, Tech sheet attached 1876_Eta 1120.pdf1 point
-
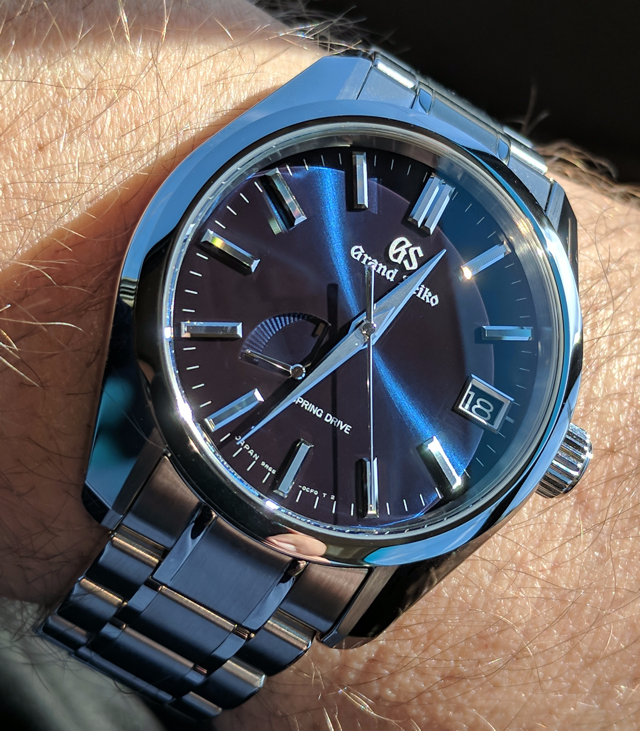
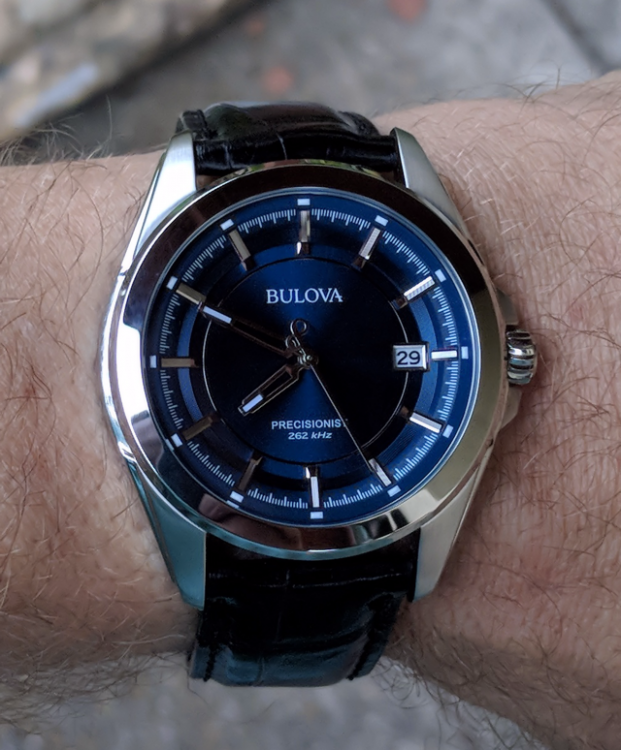
I'm so glad this topic popped back up. I'm new here and hadn't seen it. Blue is probably my favorite dial color, in contention with champagne. Even so, looking through my collection I appear to only have 4 watches with blue dials. Then again, my collection seems like it's probably puny compared to some of you here. In order of acquisition: Seiko SNKK45 ("Seikonaut"): Seiko SNZH53: Grand Seiko SBGA375 (it's hard to coax the blue out of this one - it looks black most of the time - had to get in bright sunlight for this picture): Bulova Precisionist 96B257:

 1 point
 -
I just recently sold this aaaabsolute stunner!
 1 point
 -
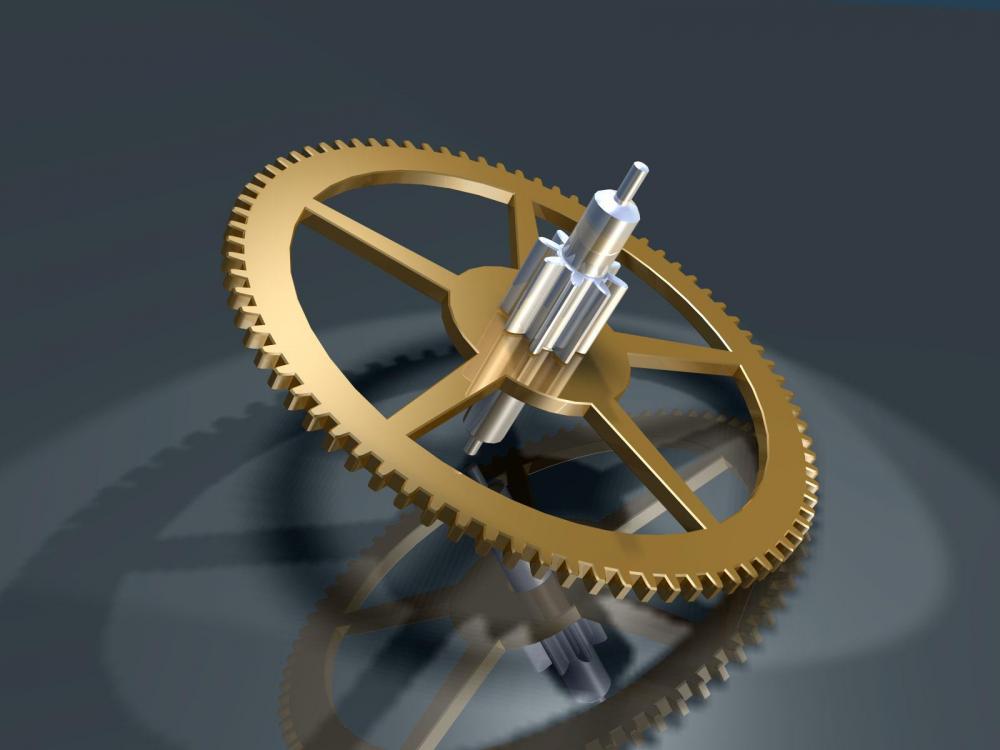
I've seen a lot of old and deteriorated drawings for movements and some rather unsuccessful attempts to either recreate the drawing or draw the part from scratch. I've also see a good number of CAD drawings for current movements and wondered how hard it would be to take a part, without any drawing and draw it based only on measurements. And then I thought why stop at a flat drawing and model it in 3D. And then I got distracted by a squirrel. Finally I decided to give one part a whirl. One wheel, about three hours, but that last hour was playing with the lighting and surfaces. I'd hate to do a complete 3D rendering of a moonphase chrono.
 1 point
 -
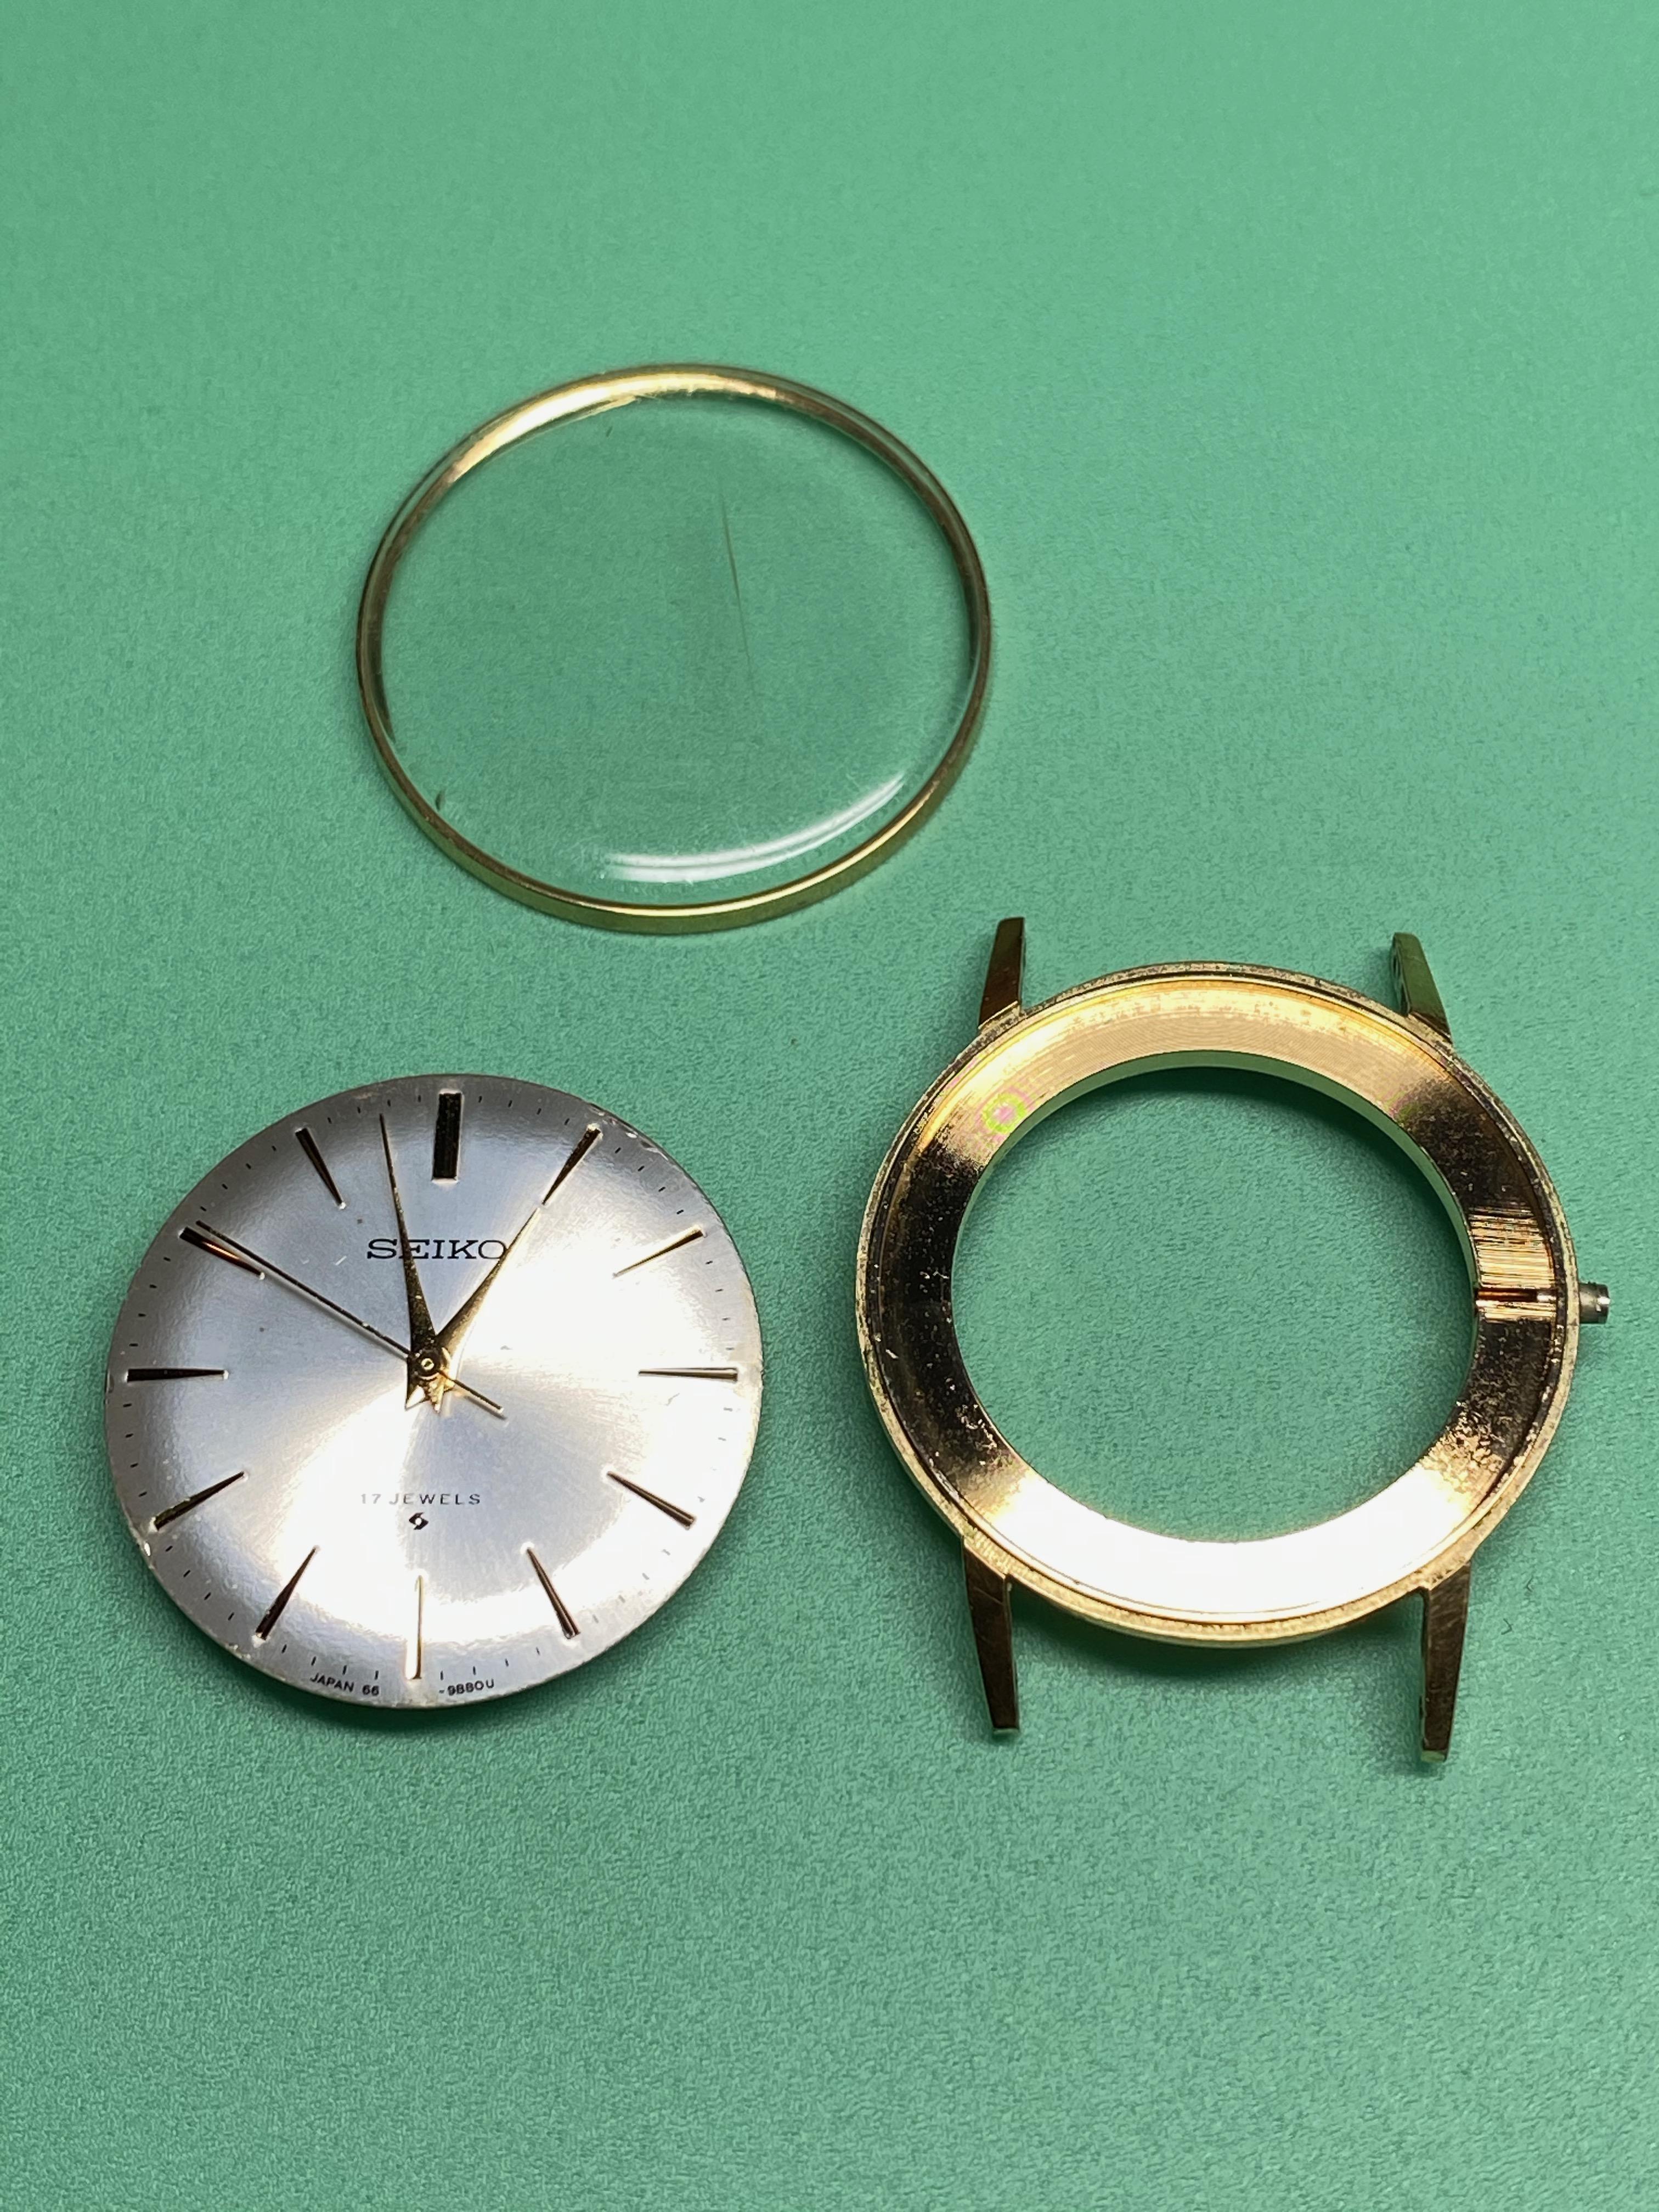
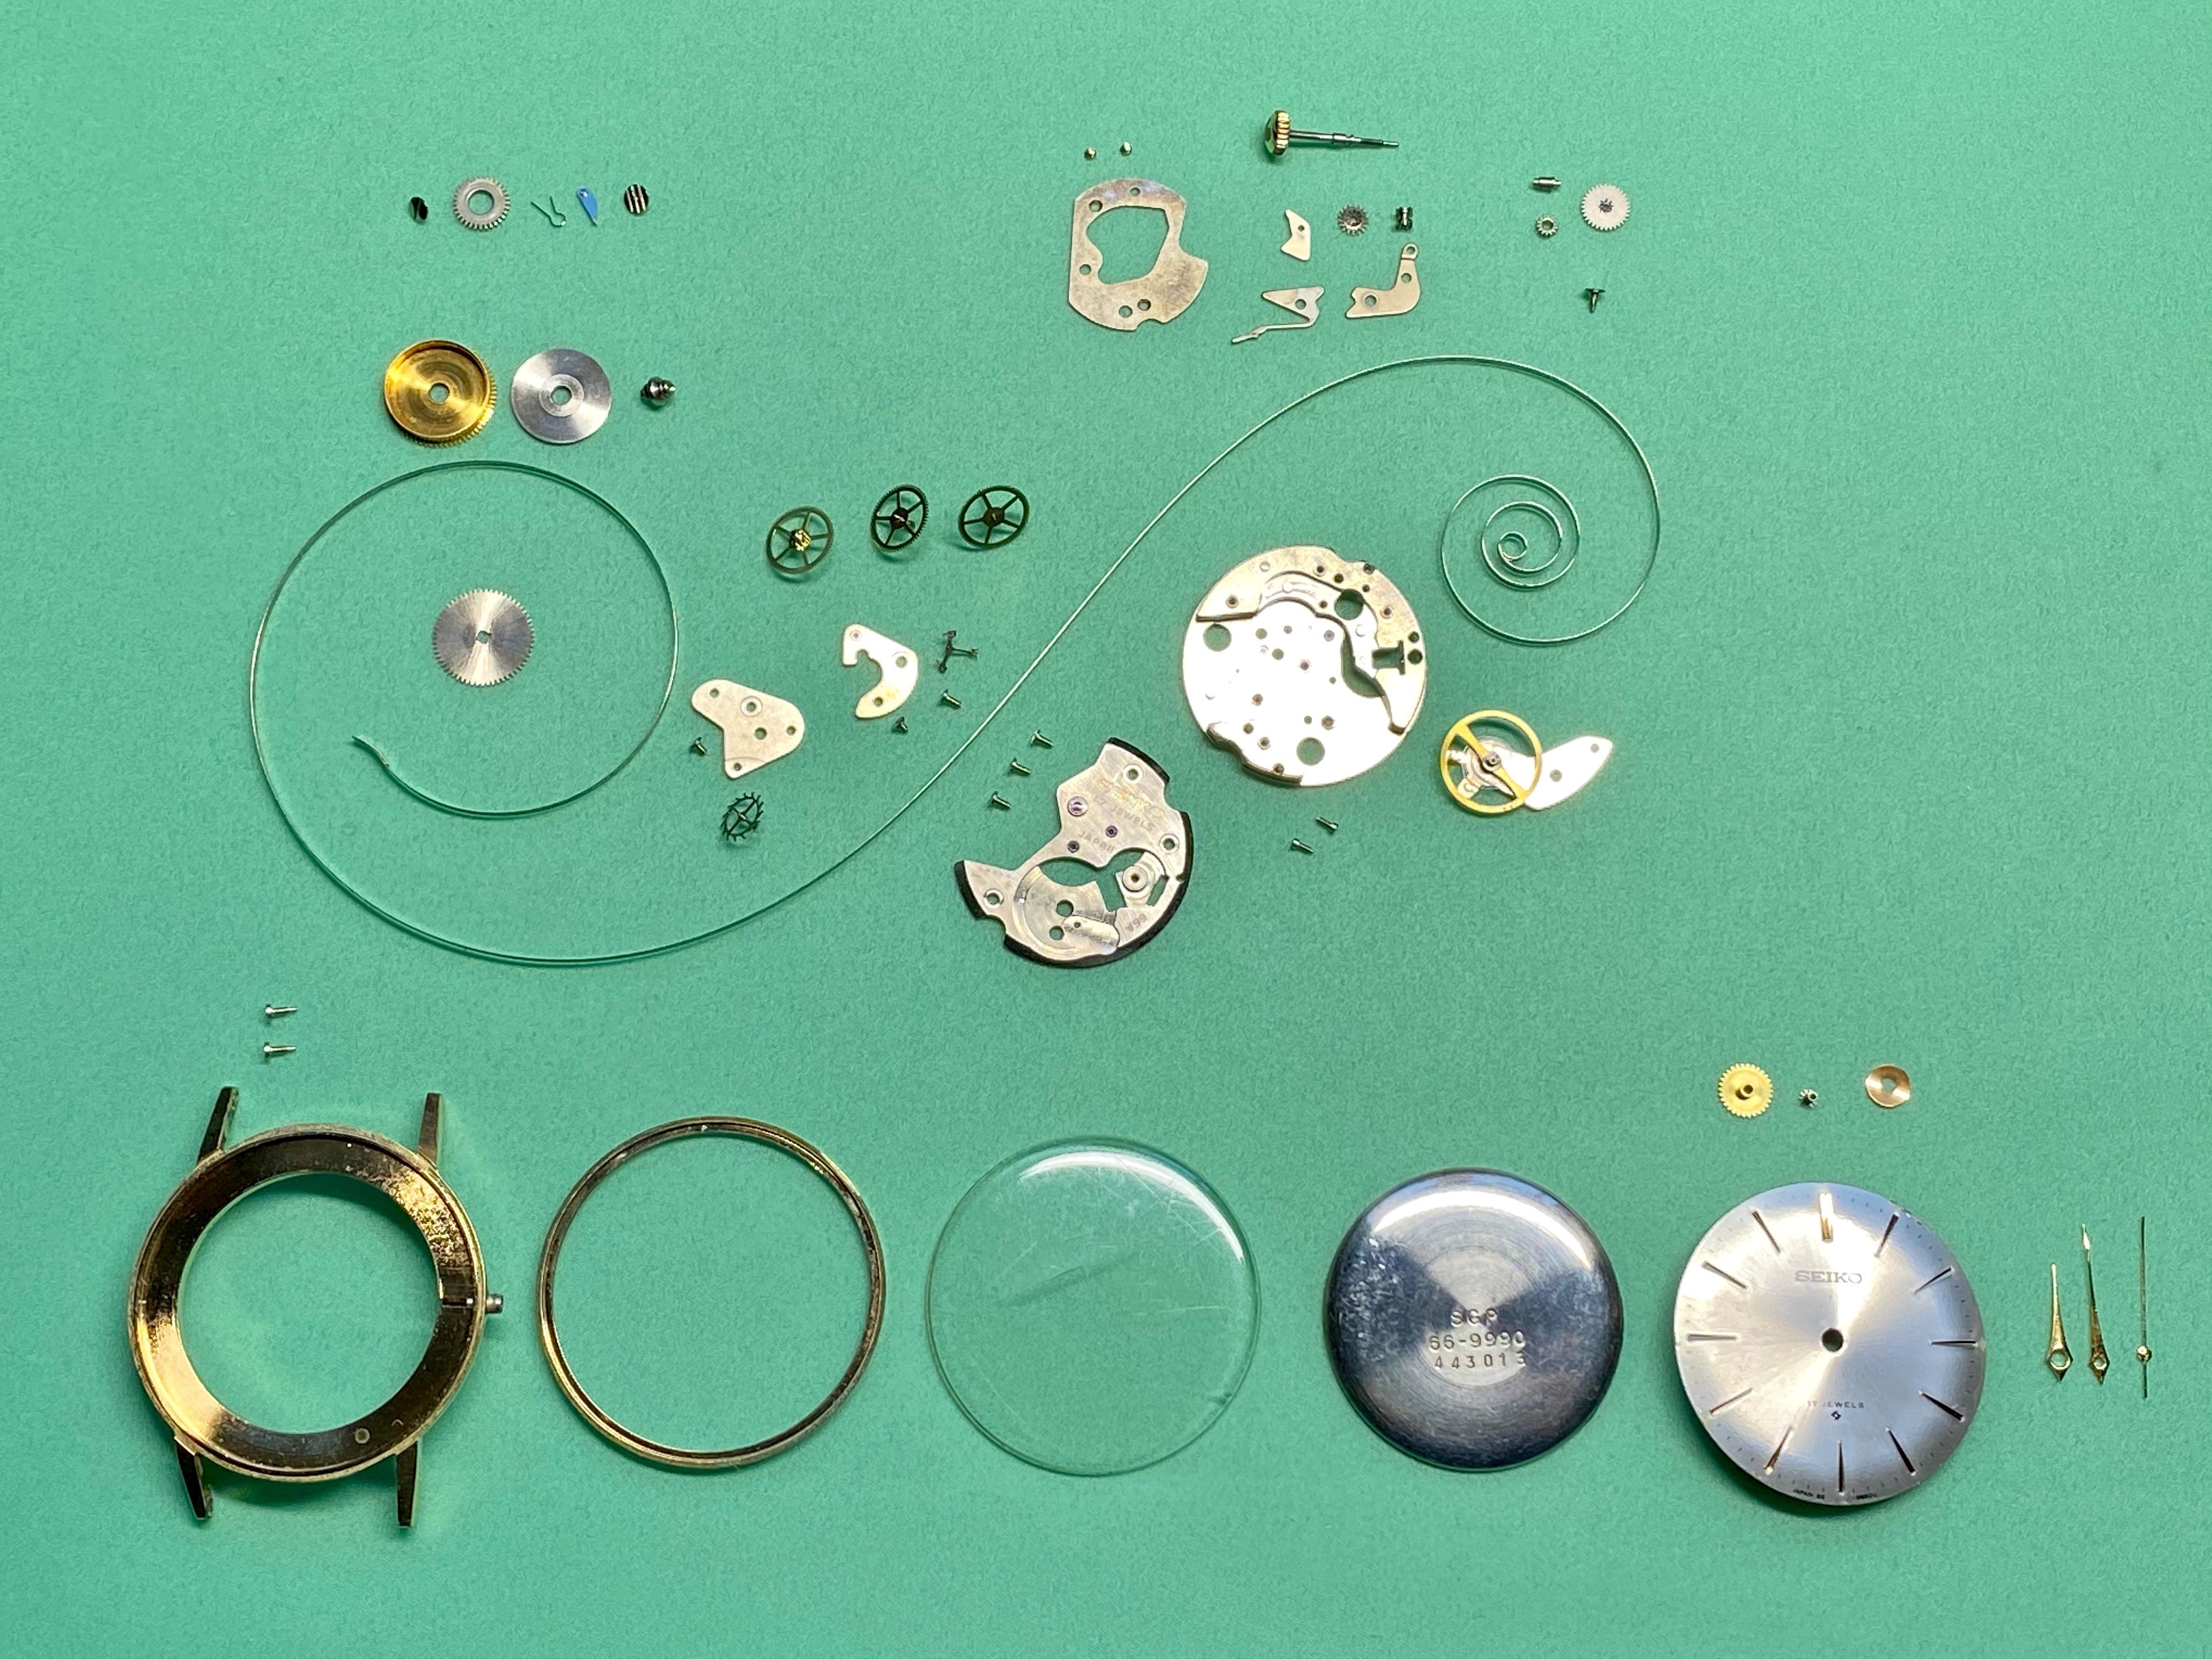
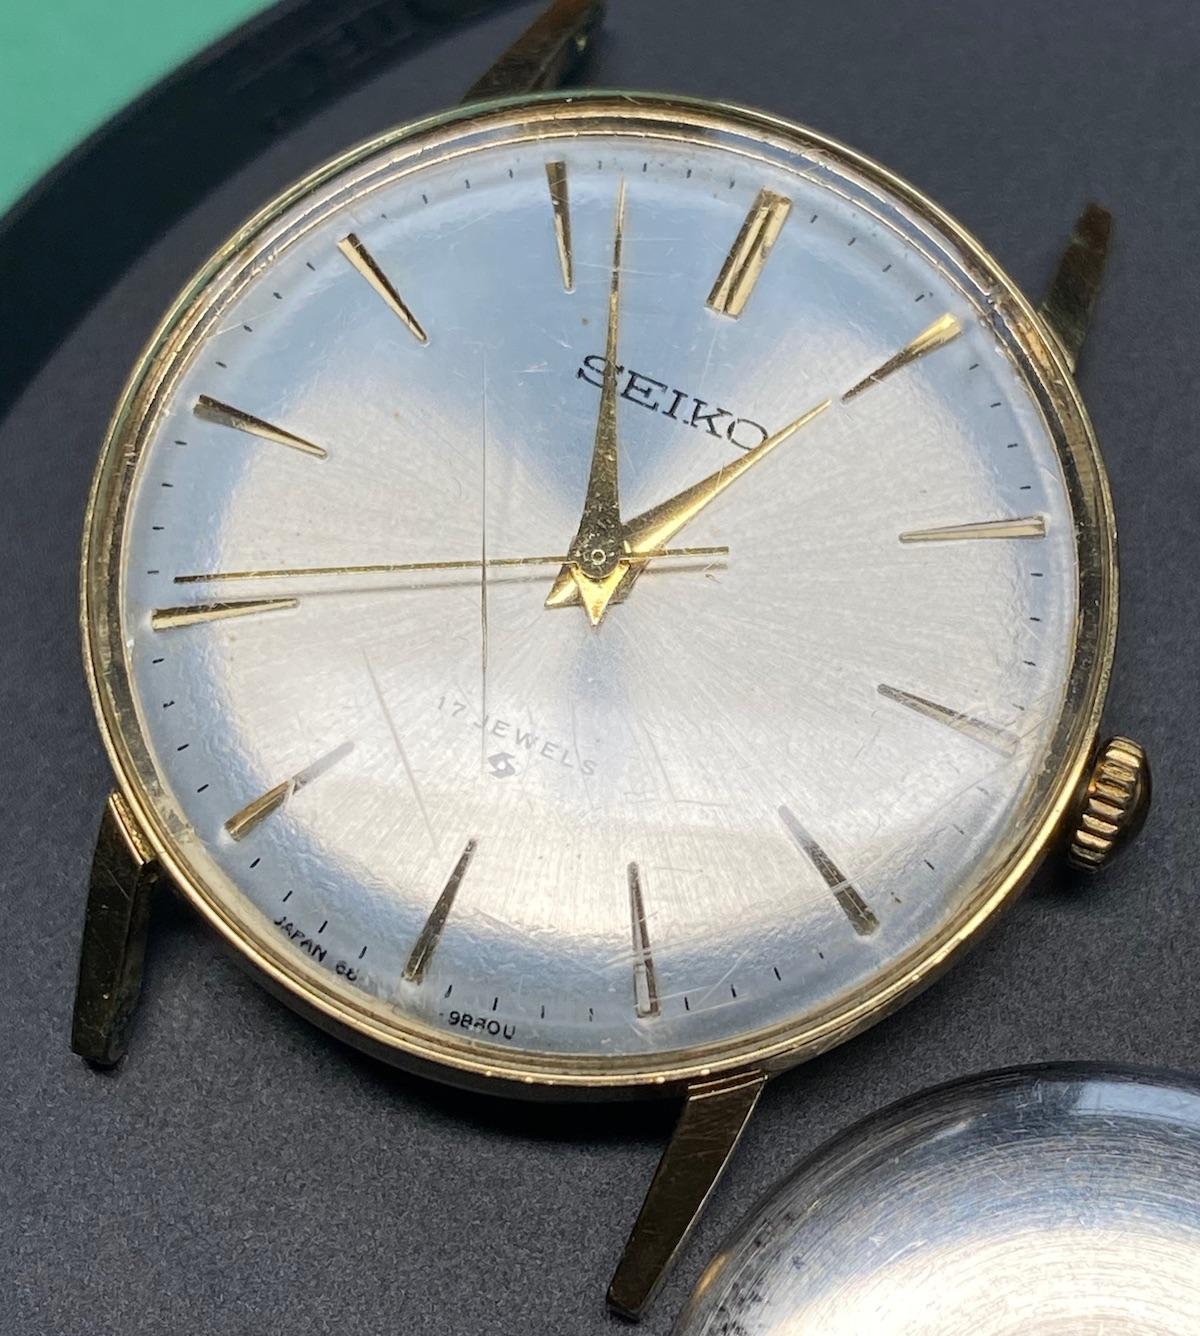
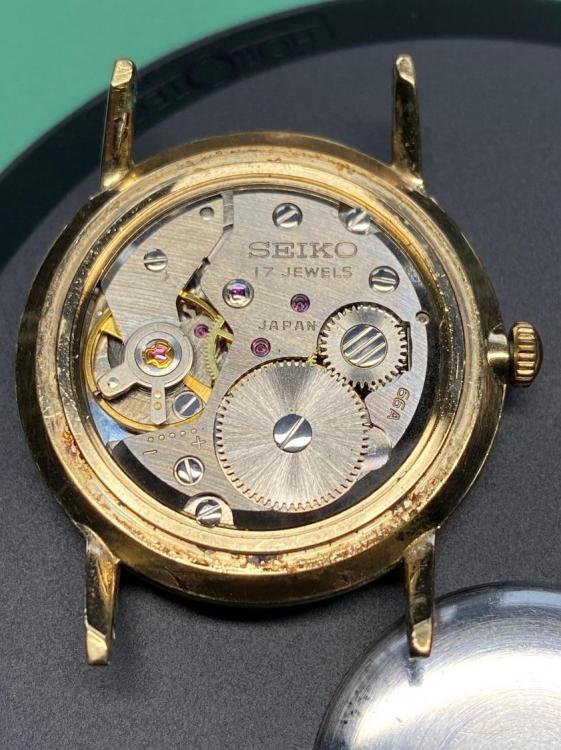
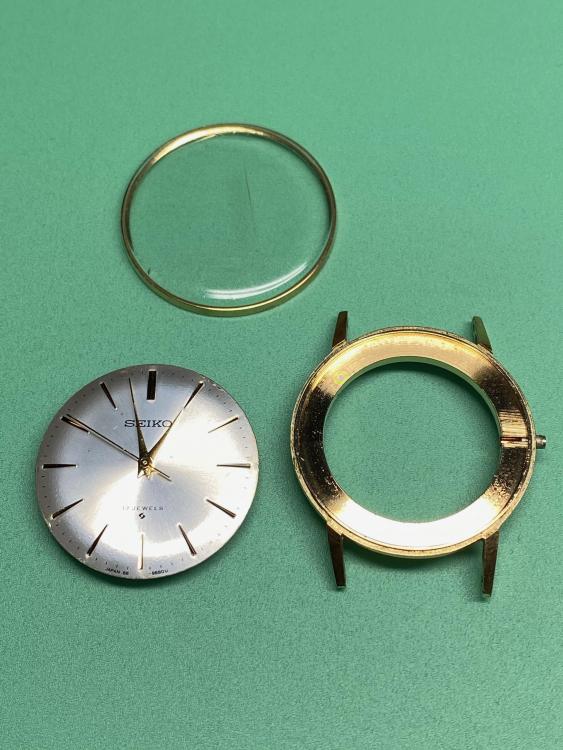
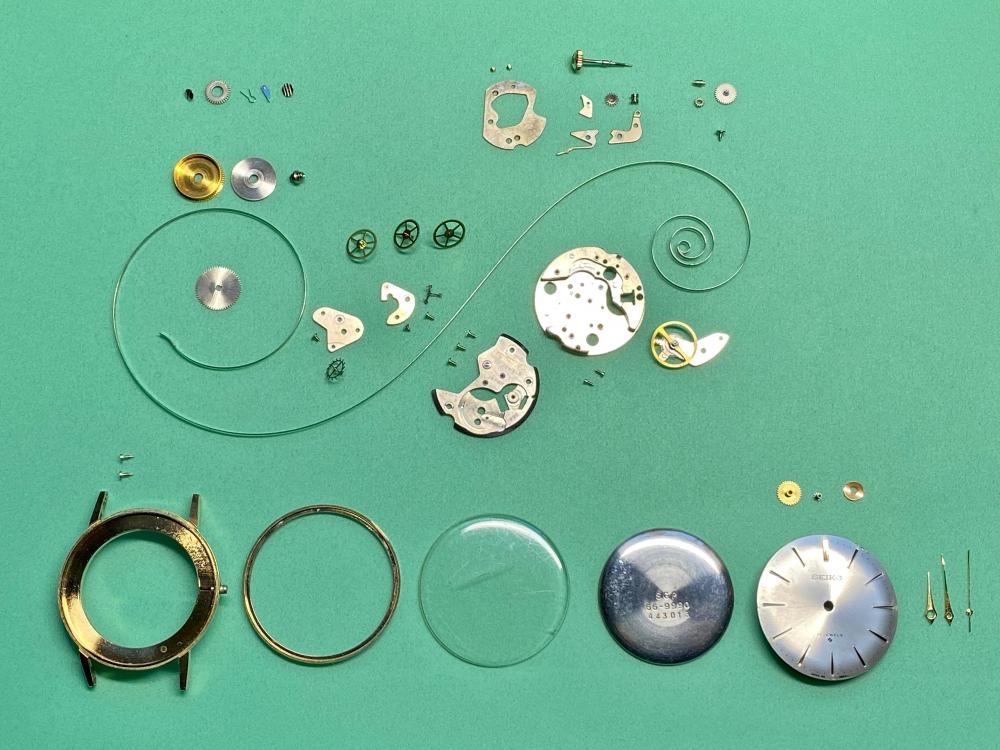
Hello Forum I would like to share with you my first "real" project and also wanted to say a Big Thank You to those who answered my questions and helped me achieve it - until now I had only disassembled and reassembled basic Unitas and ETA 2801 movements and this was my first attempt at repairing and restoring a complete watch. The watch is a Seiko 66-9990 which belonged to my father who gave it to me in the seventies - I don't remind ever using it for the past 30+ years during which it has been sitting in different drawers. The watch: Case back opened: Thanks to advice from the forum I could extract the movement and dial from the front: And completely disassembled the movement (following Mark's online lessons ): Then cleaned all the parts: And oiled (not very good at that, fell I still need a LOT of practice ... ) and reassembled the movement back into the cleaned case (and crystal replaced): And proudly on my wrist : Thank you again for your great help, time to move on to a new project (and ask you many more questions )


 1 point
 -
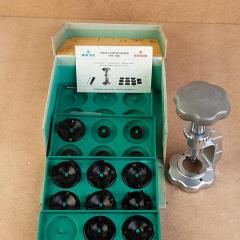
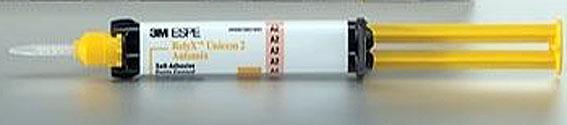
There has been some discussion in the past regarding the possibility of glueing dial feet. No really good glue was reported. However, my dentist suggested the use of 3M dental cement. She uses it for pemanent gluing of crowns etc. The strongest for metal cementing is 3M ESPE RELYX UNICEM 2. It is expensive but available on eBay with some limitations according to country. Here is an example of a test on a scrap dial. 6 mintes working time and after setting at room temperature for one hour I was able to lift, with the dial foot held by pliers, a 500g weight placed on the dial. Good enough as an alternative emergency repair when soldering could harm the dial finish.
 1 point
 -
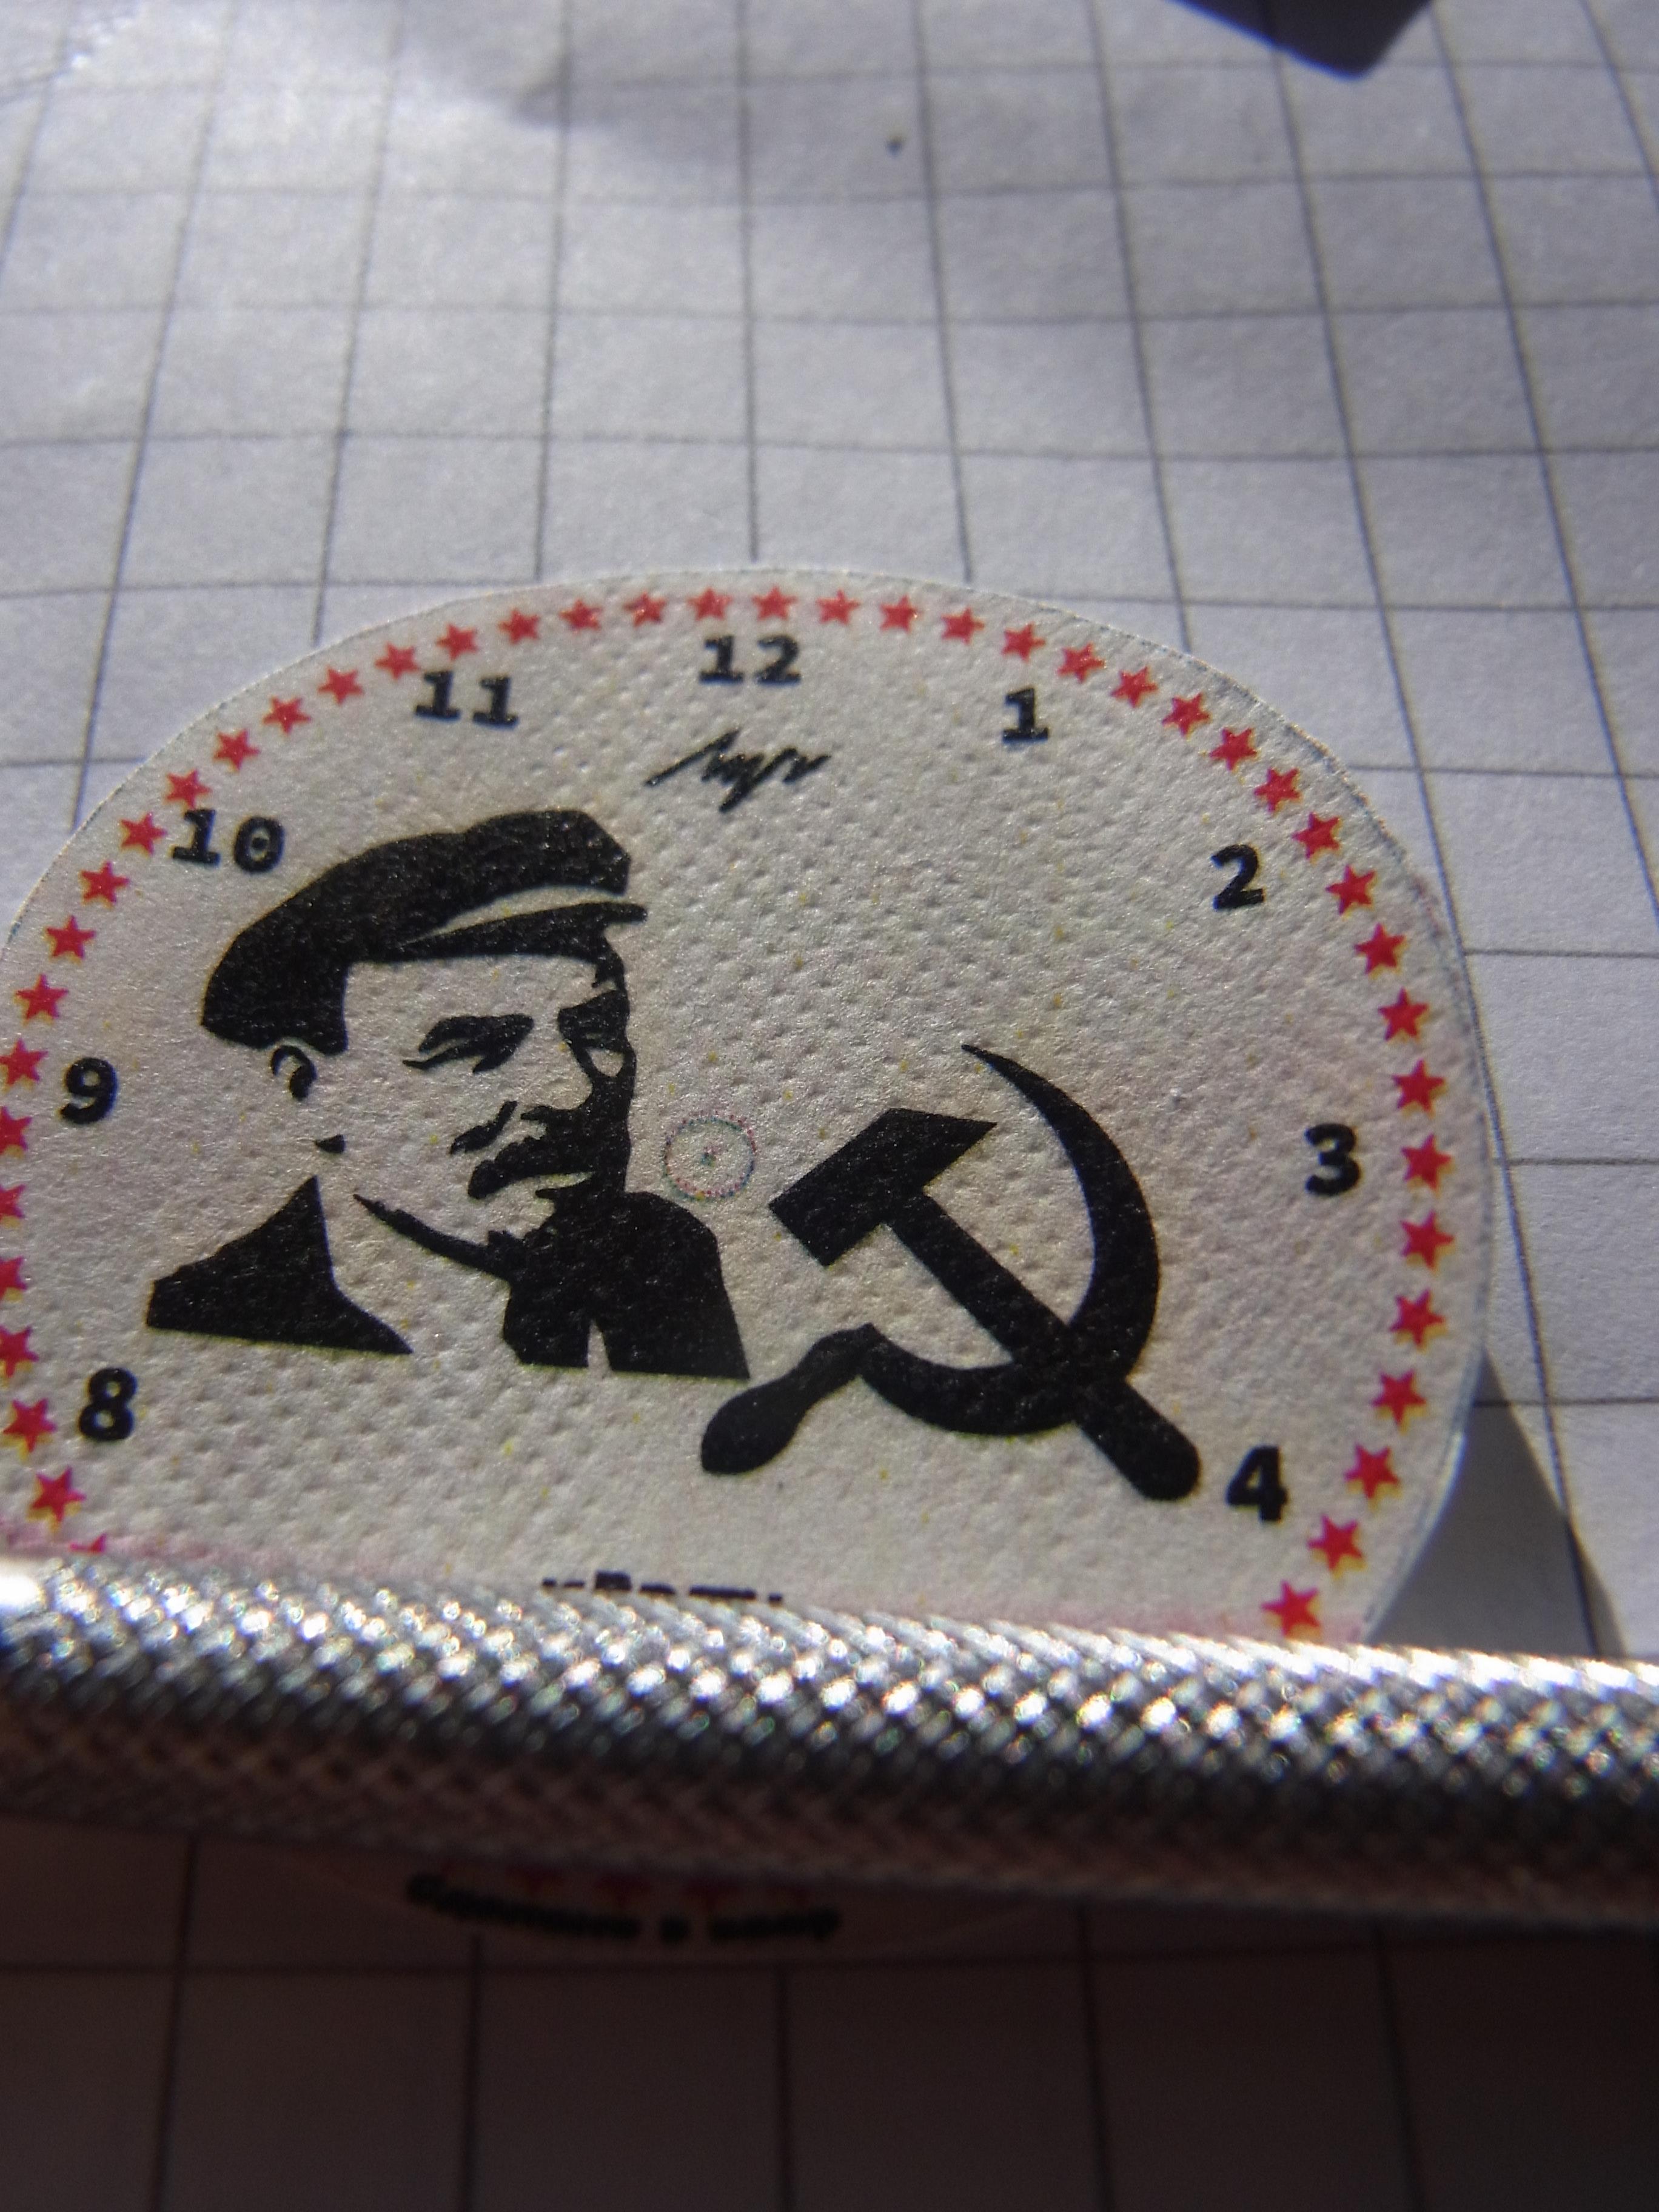
On initial reflection, it seems likely that paper might make a poor dial substrate. It is thick, at around 0.1mm, compared with a a paint layer, which may be as little as 0.02 mm. The water slide transfer by comparison looks to be around 0.05mm from the limited information I can find online. Paper does have some useful properties however. For example it can be textured easily, simply by passing it through a suitably pattered roller. It can also, easily be made waterproof as I have just shown. So I decided to try texturing one of the paper dials to see how simply that could be done. I had all sorts of smart ideas, involving 3d printed rollers and etched plates, but then I noticed I had the perfect experimental roller sitting on the work bench, so rather than spend ages drafting something in FreeCAD, I simply rolled the handle of my screwdriver over the paper. The effect is far from perfect, but it does suggest this is an avenue worth exploring. I may even try it on the waterslide transfer, after clear coating it, but before removing it from the backing sheet and applying it. The paper I have used is pretty crude, cheap supermarket brand printer paper, but high quality bright gloss finish paper would probably be more suitable for experiments with textures. I was thinking of something along the lines of a 0.3mm brass sheet sunstrate, plated with nickel and then covered with a textured linen paper dial and sealed with a hard acrylic finish.
 1 point
 -
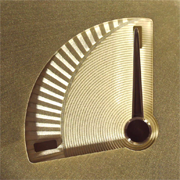
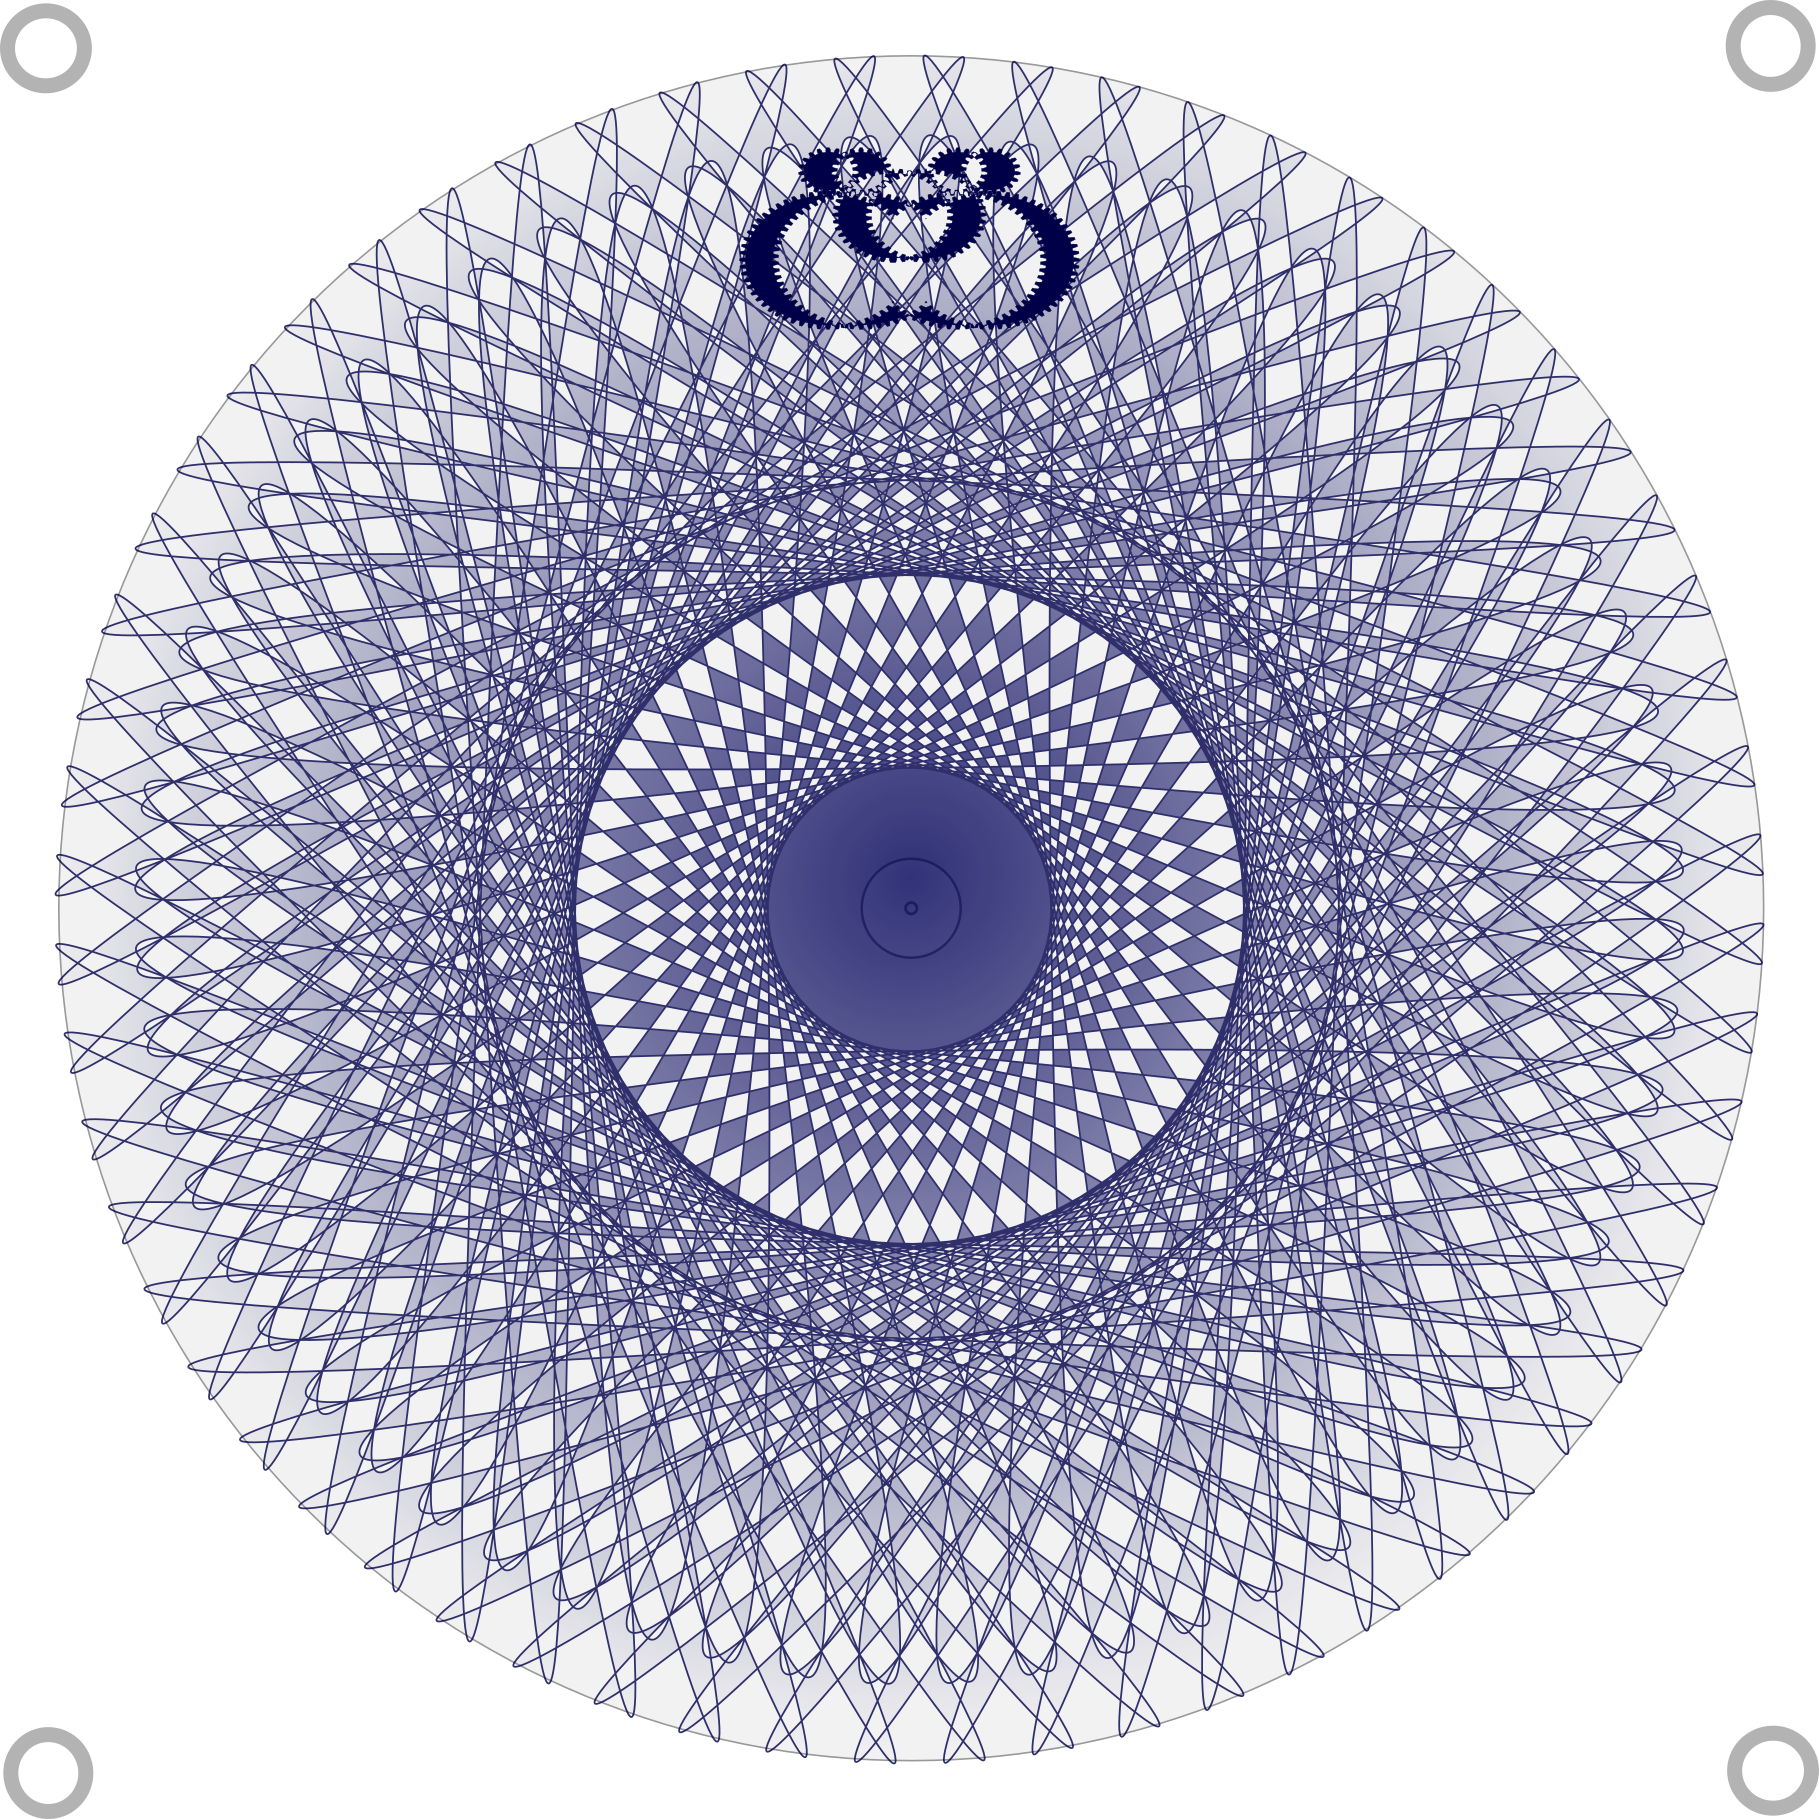
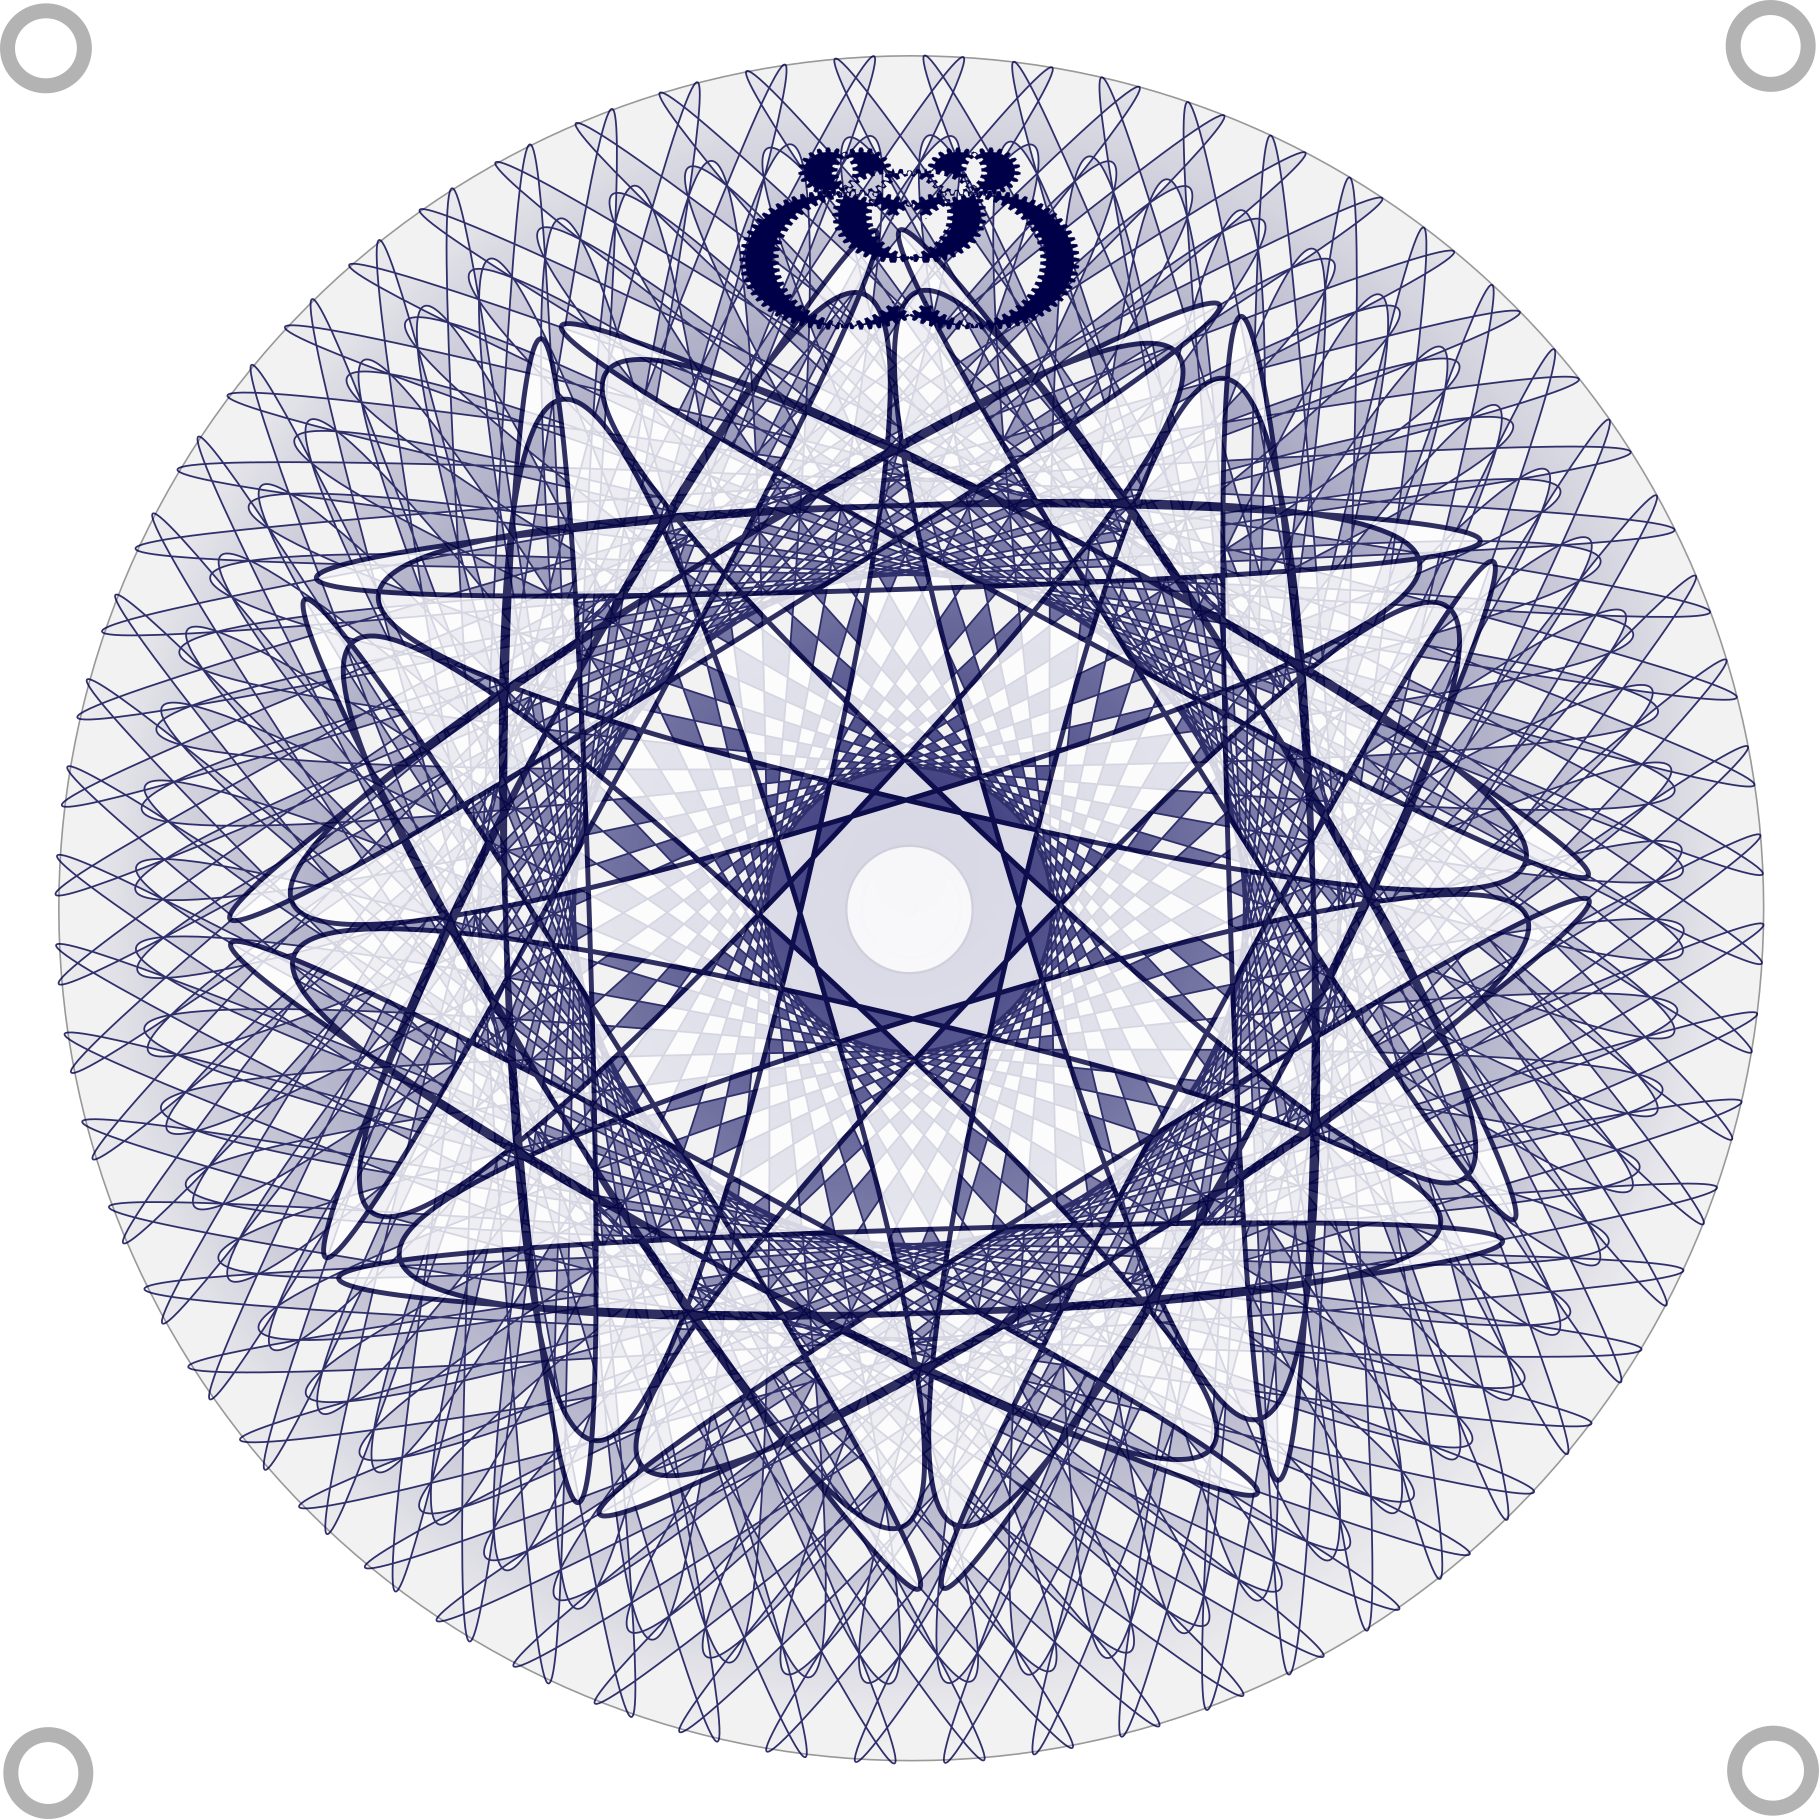
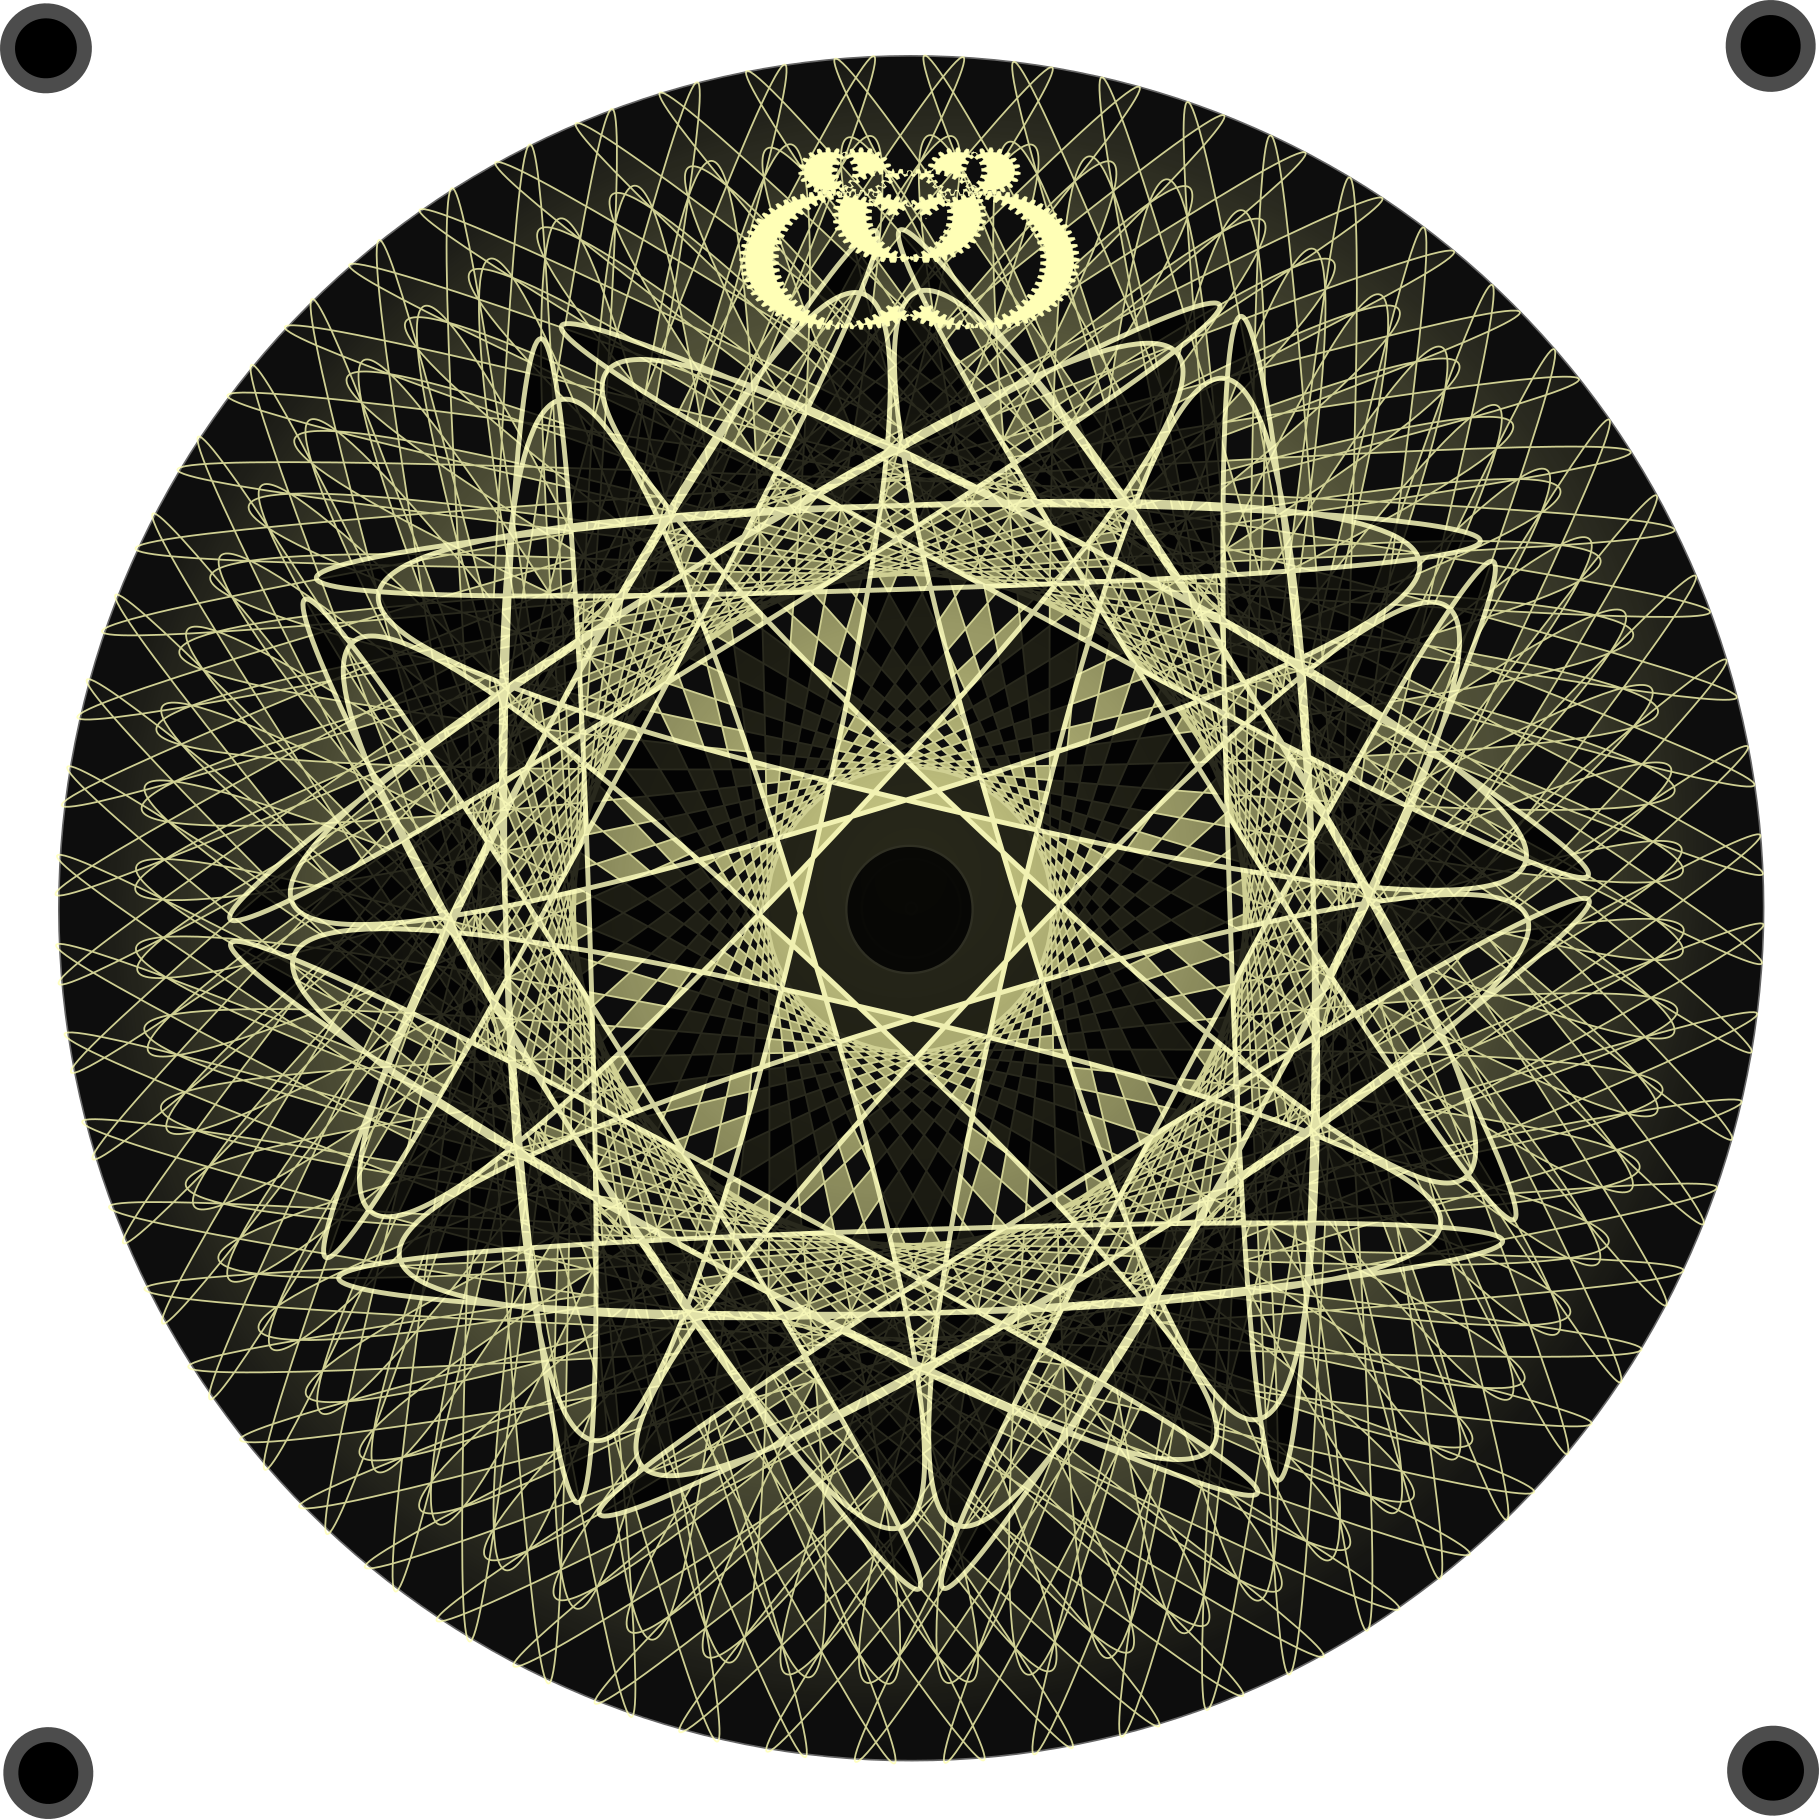
You can of course layer these designs too. So starting with a 60 spoke design, we can add a 12 spoke one. We end up with a complex design with no numbers on, in a kind of Delftware blue style, arranged such that you could actually tell the time to the second using the "points" of the two rosettes. Here is the same design in "gold" on a dark ground. If you zoom on on the "crown" logo at the top, you will find it is actually made from gears, (using the path effects tool). Attribution-ShareAlike CC BY-SA GuillocheBlue30.100Centre1.79Round20%Grey.svg
 1 point
 -
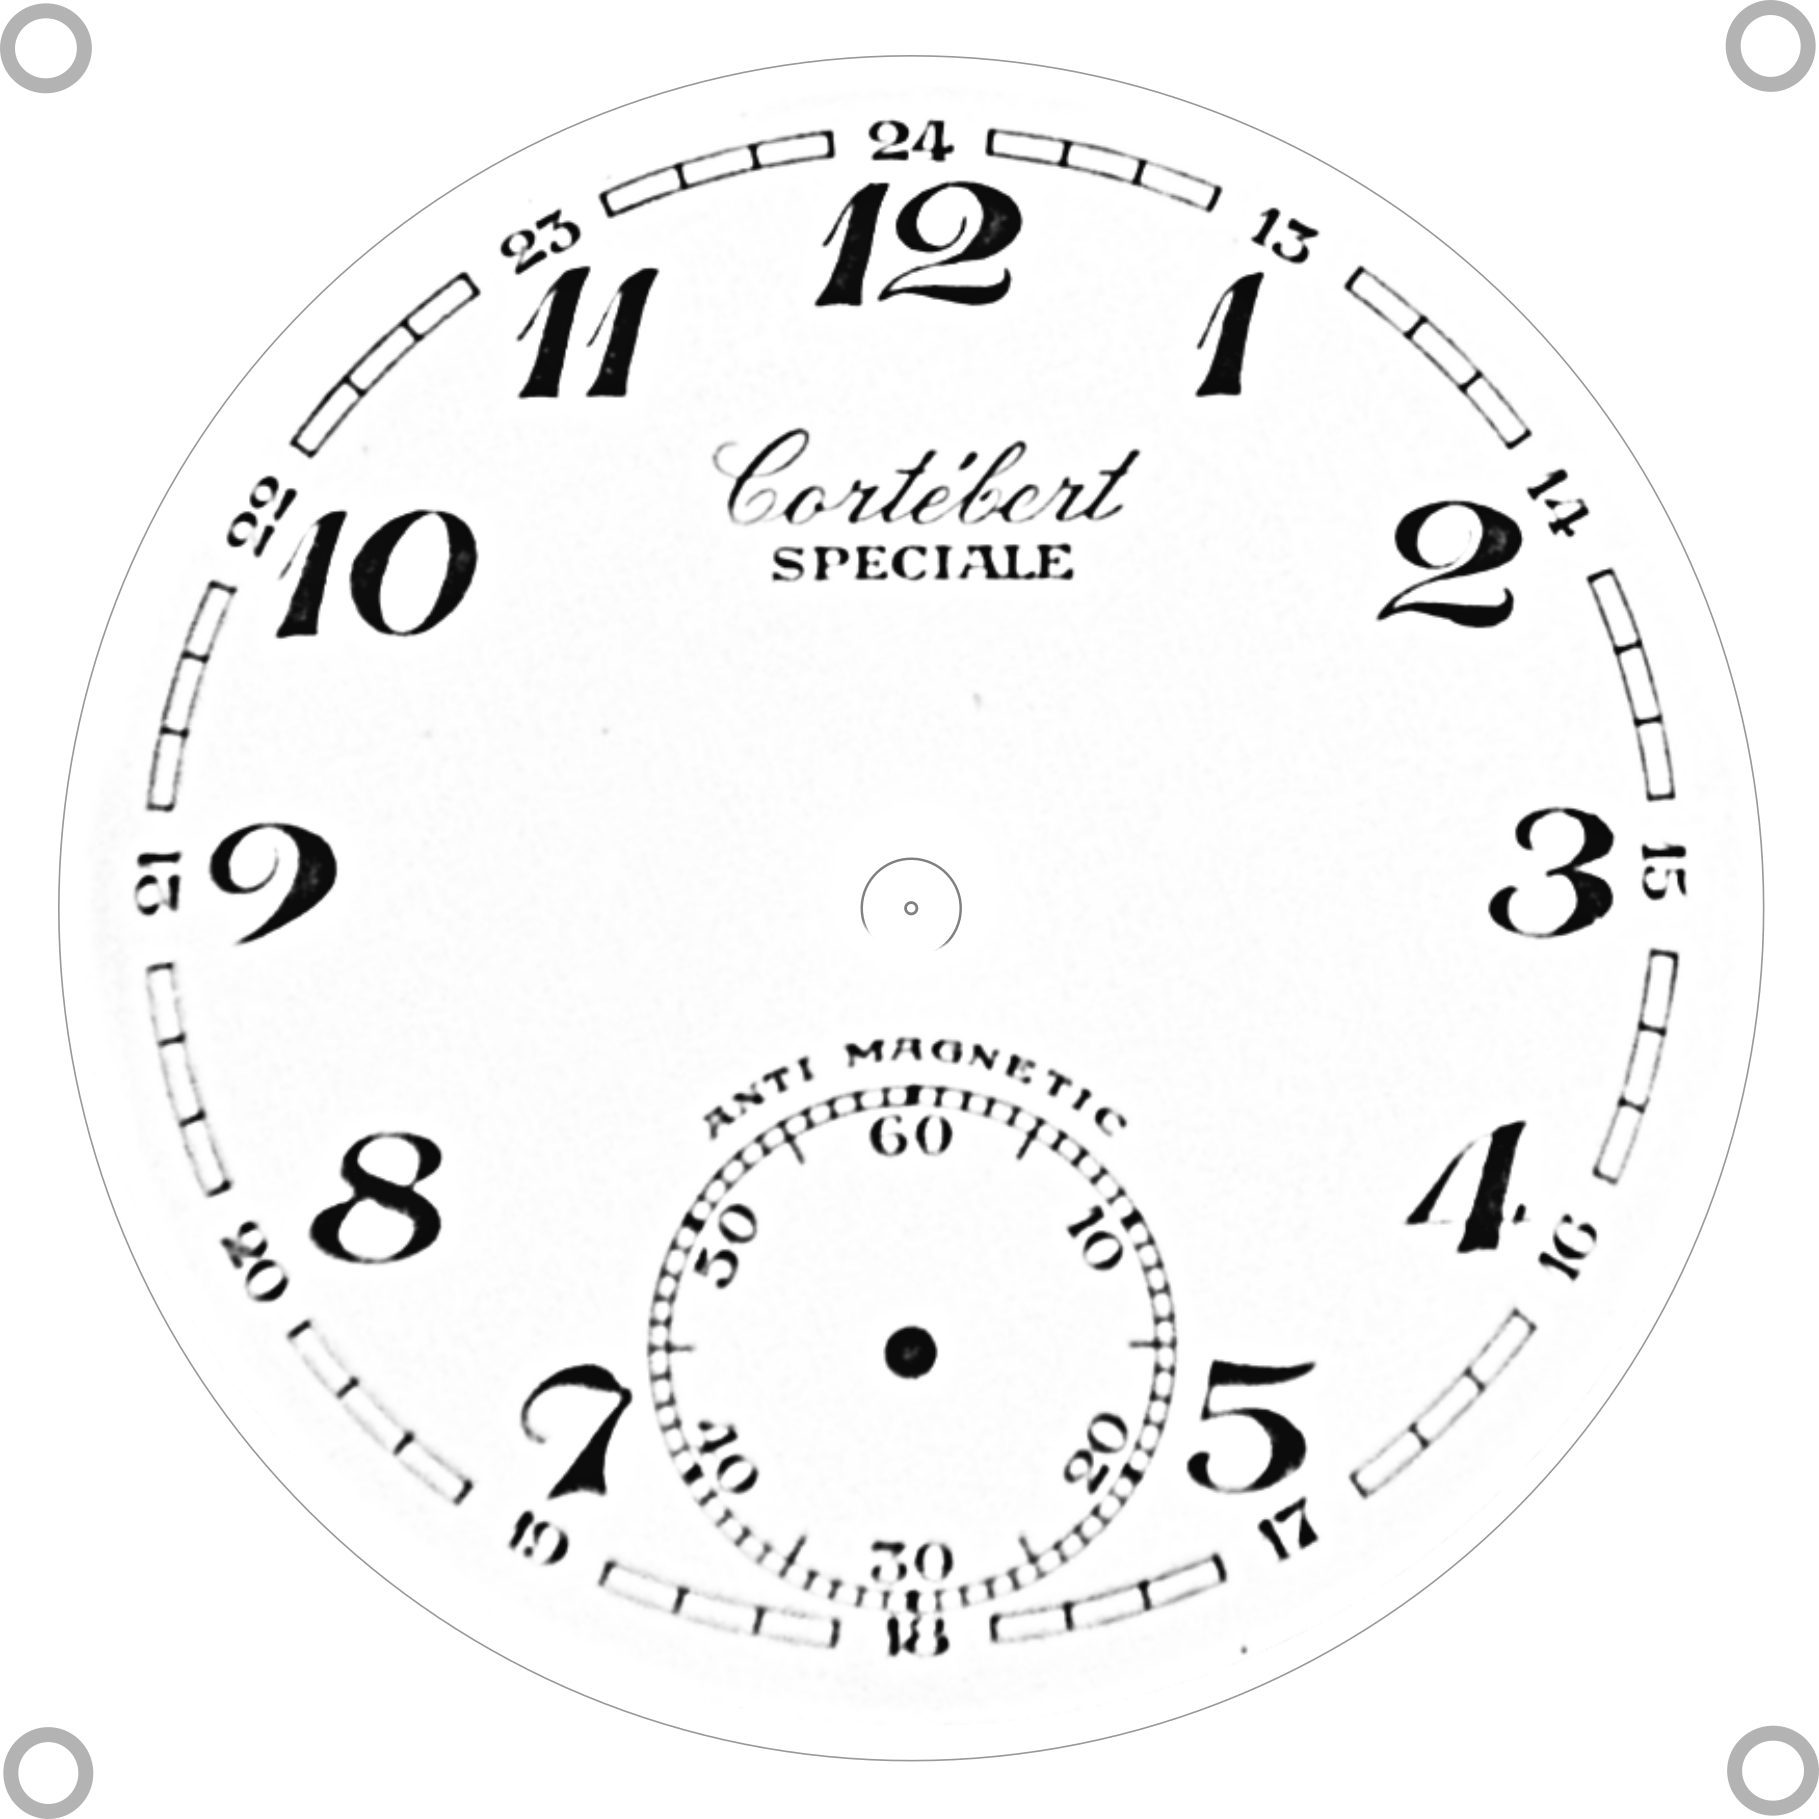
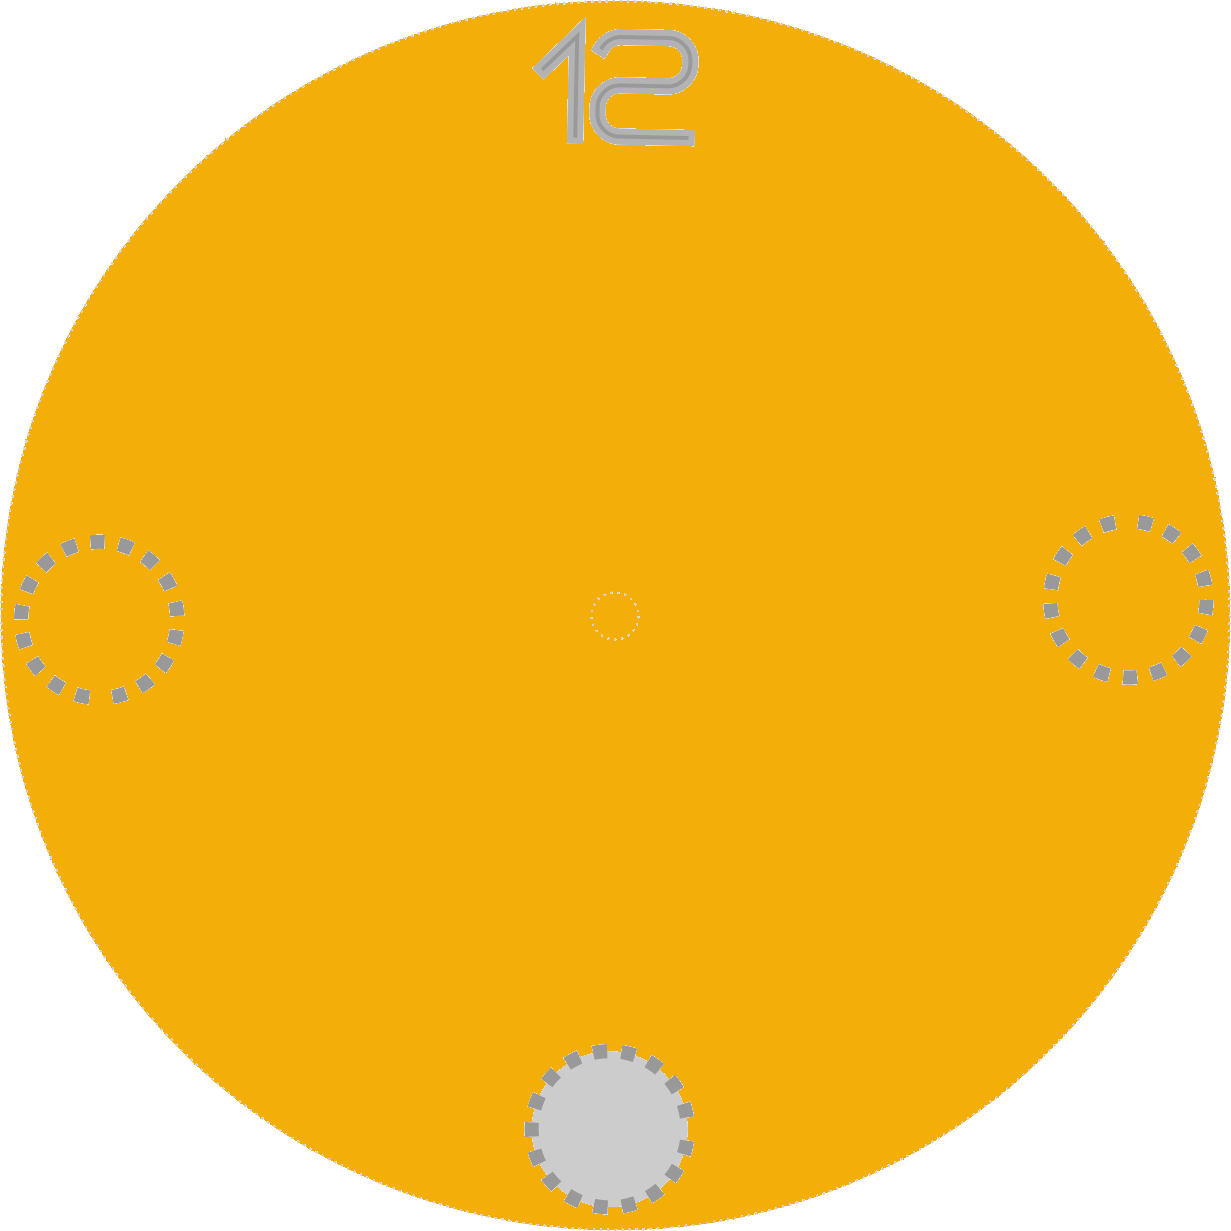
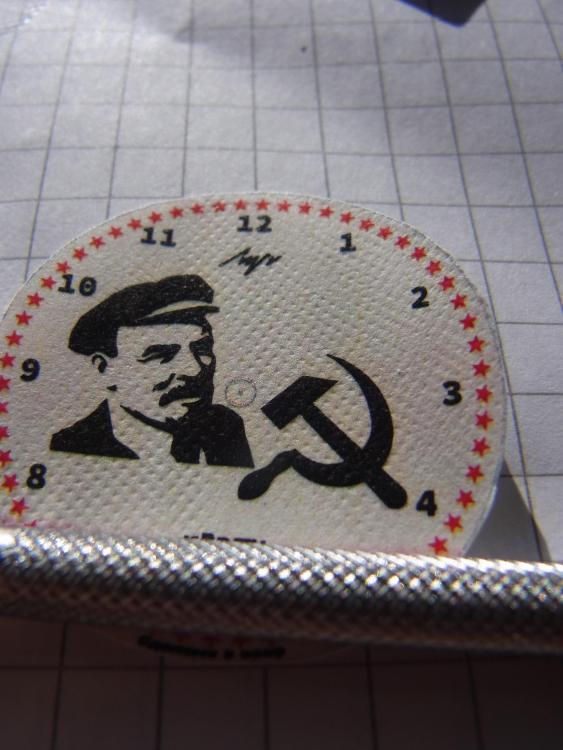
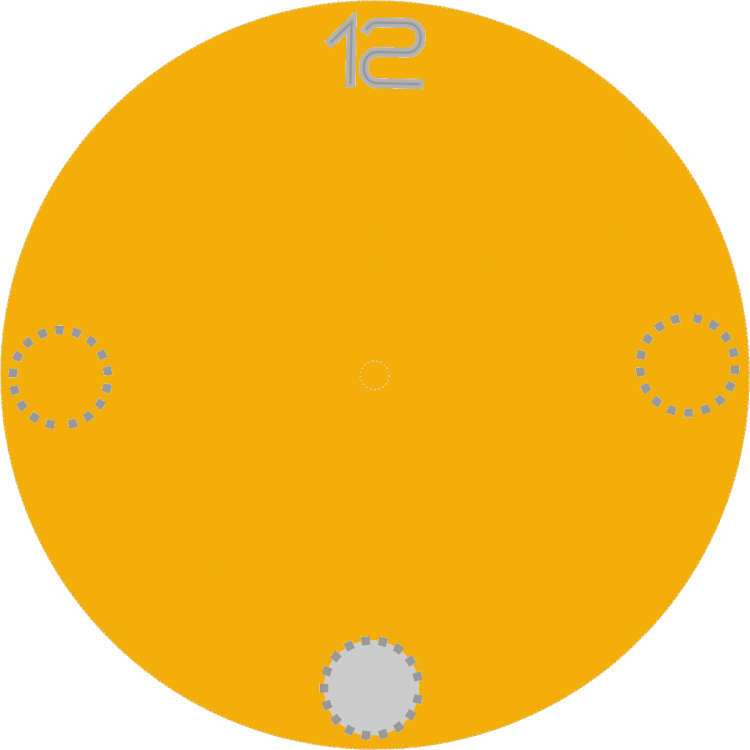
One other option is to take an existing dial and convert that to an SVG. There are a couple of tricks to this, but the basic idea is to get as clean an original image as possible, then clean it up further before importing it as a bitmap to Inkscape, then use the Trace Batmap feature to convert to vectors. Try to minimize the loss of detail, and preserve the sharpness and resolution of the original image as much as possible. A single colour image like this would probably lend itself very well to pad printing. CortebertSpecialeV1.0-30.100Centre1.79Round.svg
 1 point
 -
Ive just spent an amusing couple of hours replaying that Inkscape youtube video, and playing with the various options. I've just about got the hang of distributing cloned elements around the center of the object to create various effects. I must admit it was great fun, and a nice way to while away a little time while a monstrous thunderstorm blew through. Here is the latest bizarre creation. Maybe I'll have a crack at a Max Bill clone next, or maybe a dial with dials as numerals.
 1 point
 -
I have Inkscape but never found the time to use it. I used paint dot net years ago but never for dials Sent from my iPad using Tapatalk Pro1 point
-
Are there any identifying makers marks on the case? It may require a special glass, which you may find in here http://www.fourniture.dk/lindholts_download/Sternkreuz_Gesamtkatalog_G22.pdf There are some other dimensions in this catalogue, but I always find it lacking in info for standard crystals1 point
-
1. You can leave everything in naptha / lighter fluid / alcohol for as long as you like, except for the pallet fork and balance. In both cases the jewels are retained with shellac. I have seen various tests done on shellac to see how quickly it will soften in different chemicals, but the basic conclusion is that it's unpredictable. 2. How long you need to leave parts to soak depends on how grubby they are. A rinse in naptha or alcohol will remove fresh oil, but old oil can be very stubborn. I would leave for at least 10 minutes before attempting to clean mechanically. 3. If you have a dirty watch, use 3 jars - 2 with naptha and 1 with alcohol. Start by cleaning the cleanest parts first. Soak in first jar, clean by hand, rinse in 2nd jar then finally in alcohol which should remove traces of any residues. 4. For cleaning you will need at least a 10x loupe, a brush, some pith wood and some sharpened pegwood. Use the pegwood to clean any caked on debris from jewels and pinion leaves, the pith to clean pivots, and the brush for everything else. If the parts start to dry out while you're cleaning them you may need to dip them back in the naptha. Use the loupe to check for cleanliness and for damage / wear. 5. If you don't like wearing rubber gloves, get some finger cots - you don't need to put them on every finger! 6. After the final rinse in alcohol the parts should air dry quite quickly. 7. When I work like this I cover the jars with a double layer of cling film to stop the chemicals evaporating and only open as required. 8. As you clean and dry each set of parts, move them to a clean covered parts container to keep them safe and clean. In my case that's an old ice cube tray... again with cling film over it. I like to keep parts in groups to make reassembly easier. Did I miss anything important anyone?1 point