Leaderboard


Popular Content
Showing content with the highest reputation on 02/05/17 in Posts
-
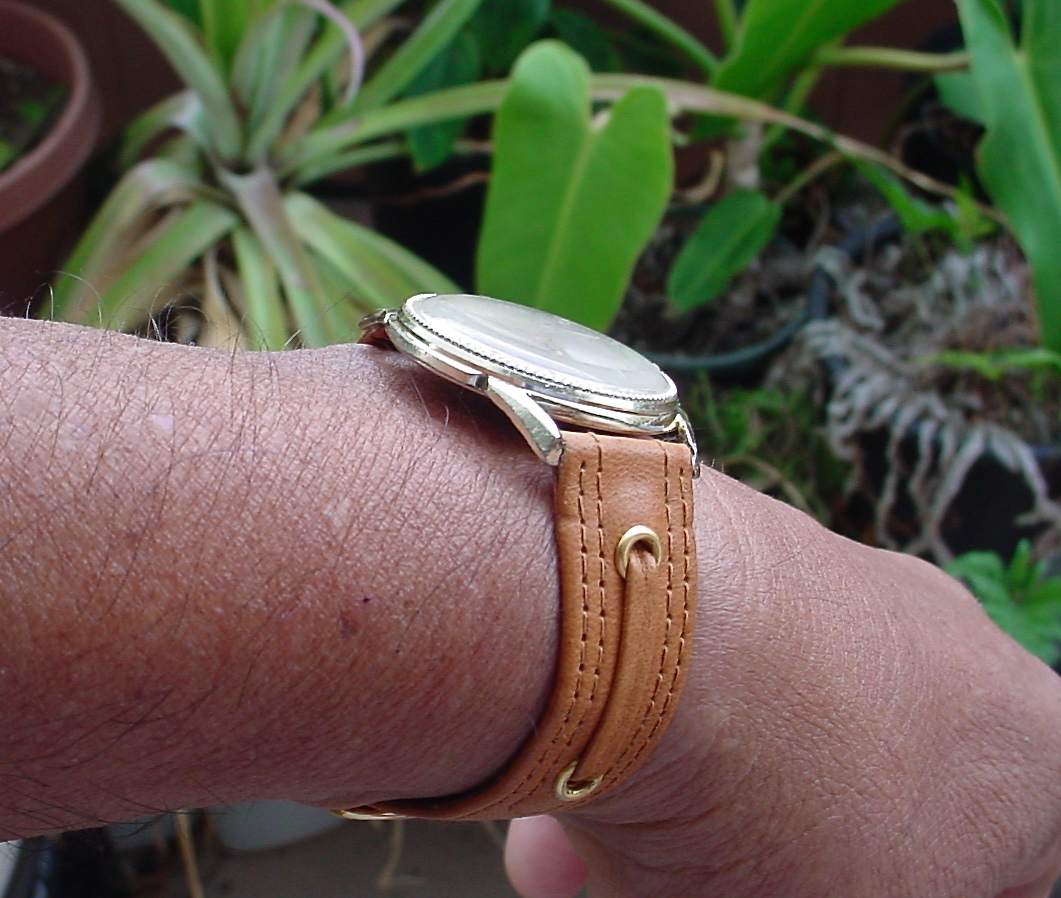
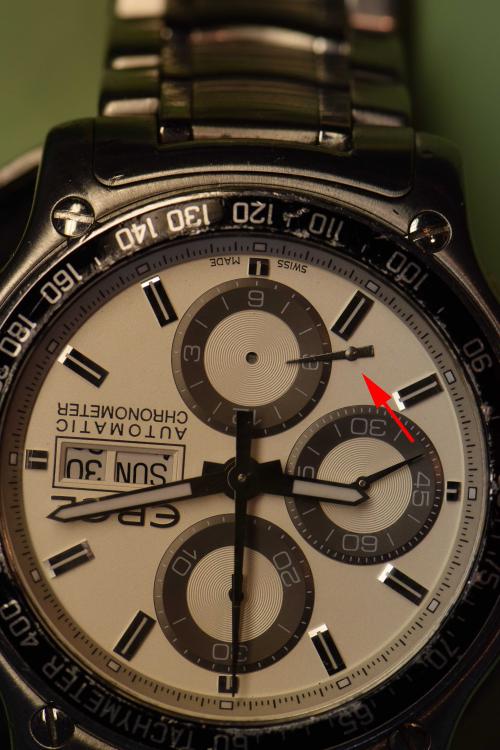
Greetings all! My first post here so I'll try to start with a good one... I've been fixing and servicing watches full time for a few years now but this one that came in recently is probably one of my biggest saves. It belongs to a guy called Paul who's a pretty serious Seiko collector and sends me a couple of watches each month for servicing. He spotted this 6105-8000 on ebay which appeared to be in good cosmetic condition but was listed as non-running / needs a service - There was no picture of the movement with the seller saying the back was too tight and he didn't have a case back tool. Paul took a chance on it but when it arrived the case back was only hand tight and this is what he was greeted with - Now obviously Paul wasn't happy with what he'd bought and was going to raise a case with ebay, but in the end he decided to keep it and send it to me to see if it could be saved. Now I mentioned that Paul is into his Seiko's but he's also a great customer. When he sends a watch that needs a new crystal for example he sources it first before he sends it to me which then saves me having a partially finished watch on the bench while I search for a crystal and then wait for it to be delivered. Most customers won't even think about this but if you fix watches or cars or whatever for a living and a customer comes in with all the parts needed it saves you so much time and hassle. With this one he had a good stash of 6105 parts so they were sent with the watch - So onto the strip down... The dial side wasn't too bad but pretty much all of the screws on the train side were rusted in place, so the movement was placed in a tub of penetrating oil and the tub was placed in the ultrasonic cleaner to agitate the oil. It spent about an hour in the cleaner like this and soaked in the oil for 24h - So after soaking for 24h it was time to start the strip down. The auto winding bridge came off easily enough but the train wheel bridge screws were very tight and I couldn't get enough grip on my Bergeon screwdriver, so I used an electricians terminal screwdriver and ground the tip down to size on an oil stone for a bit more torque on those stubborn screws - The click spring had dissolved with rust and turning the screw on the ratchet wheel only turned the mainspring so it was out with the Dremmel - The strip down wasn't totally straightforward as the heads on two of the screws had corroded away. One of the screws was on the train bridge but there's still two other screws holding it in place so not a problem and the other one was the dial foot screw, again not something that is critical to how the movement performs. The main thing was that the main plate could be salvaged as this is the one movement part that isn't readily available. With everything stripped it was back into the cleaner again and then inspection. Obviously a lot of parts would be replaced but it wasn't as bad as I'd initially anticipated. The parts above the mainspring in this next picture are all reused and below it are the scrap parts - From the state of the movement I suspect it had suffered a crown gasket failure, taken some water on board and was then left dial-up for the movement to soak for a few years, as evidenced by the back of the movement being a rusty mess and yet the front and dial were pretty much unscathed. The state of the train wheels would back this up with the top pivots being corroded yet the bottom ones were fine. The balance was the same and I thought I might at least be able to save the hairspring but there was some rust or rust residue on it and it was beyond mine and my cleaning machines ability to remove it. Not a problem I thought as Paul had supplied a complete nos balance but it wasn't going to be so easy - I tried straightening it out and got it looking like this - Not bad but far from perfect but when viewed from a different angle it looked like this - I've fixed a few bent hairsprings before but twisted ones are beyond my ability, so it was into my own spares stash to harvest a hairspring from a 6139. The only thing left to do now was to put it all back together - The movement scrubbed up pretty well cosmetically but the amplitude was only 200 degrees dial up and there was around 30s variation over four positions. I tried a different barrel and mainspring from a 6309 that was previously putting out around 230 but it made zero difference. I then went about pressing out the fourth wheel and barrel arbour bushings from the train bridge and replacing them with the bushings from the 6309 movement, and the third wheel bushing was replaced with one from a 6139 (the 3rd wheel bushing from the 6309 was a smaller o/d so not interchangable) but still no difference. At this stage I was getting kind of tired with it - I could have bought a new mainspring and/or complete balance in an attempt to improve the amplitude but it was running again and keeping reasonable time for a 47 year old watch, plus I'd already spent around 4x the time on it than I would on a regular 6105 service, so all that was left was to relume the hands and bezel pip (the dial lume was in good condition so wasn't touched), fit the new crystal and get it cased up. I also fitted the nos crown that was supplied and was glad to see it passed a 60m pressure test - If you know your 6105's you'll notice that the hour and minute hands aren't correct and are the same as what you'd find on a 6139-6002, but it appears that Seiko fitted these hands to 6105's when they came in for service. I know that Paul is currently trying to source the correct original hands and when he does then I'm sure I'll see this watch again for them to be fitted, but I'm pretty happy to see how it's turned out regardless. If you've got this far then thanks for reading! David.7 points
-
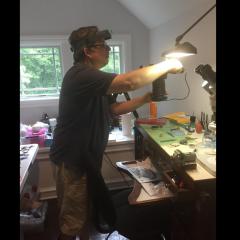
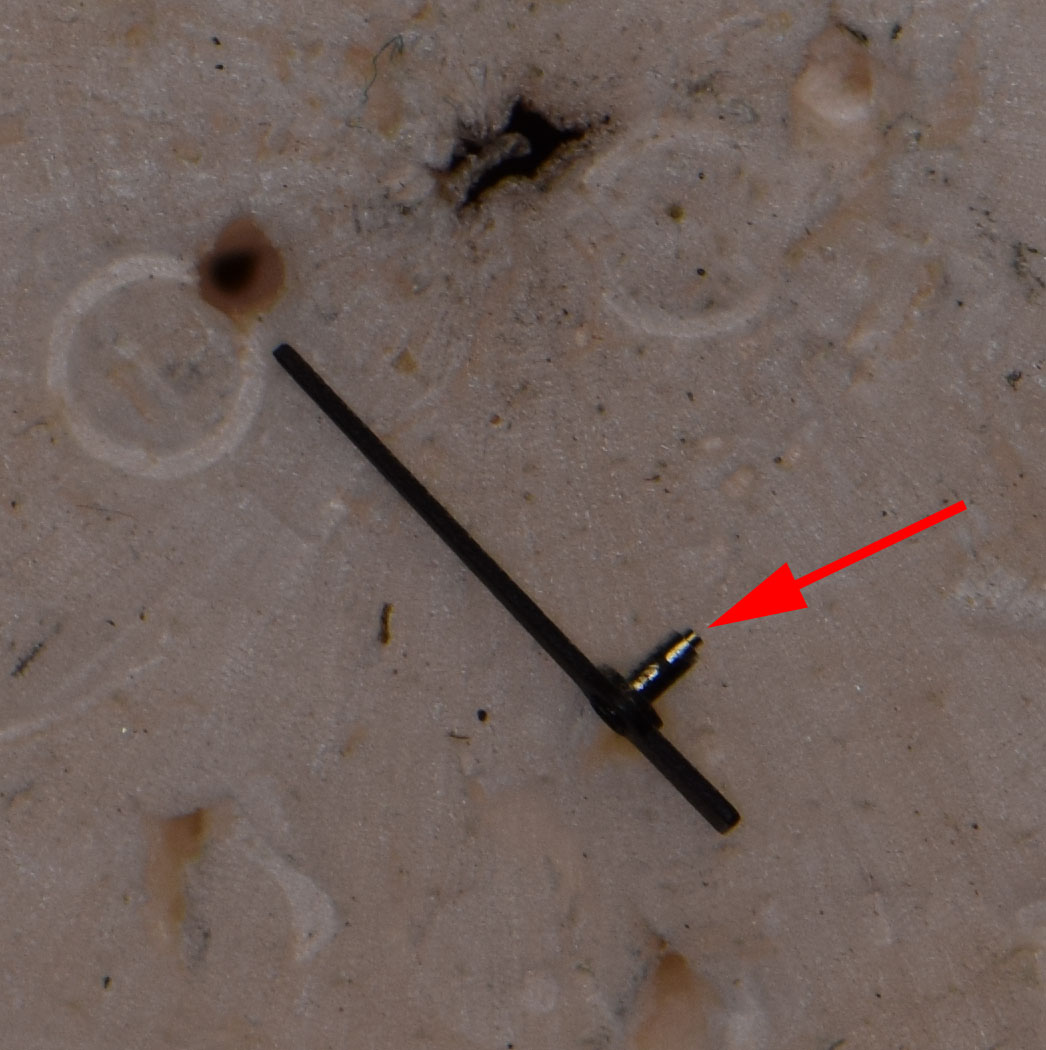
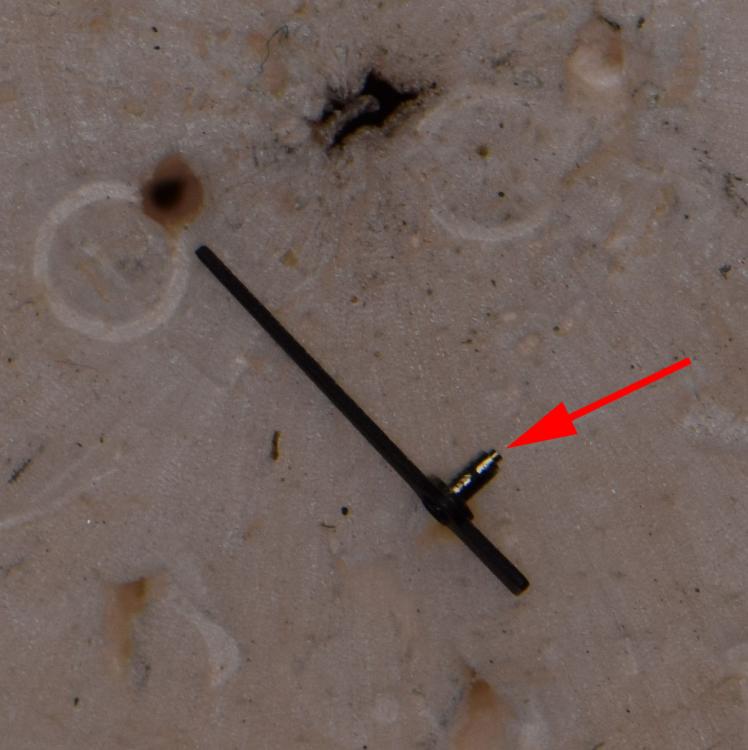
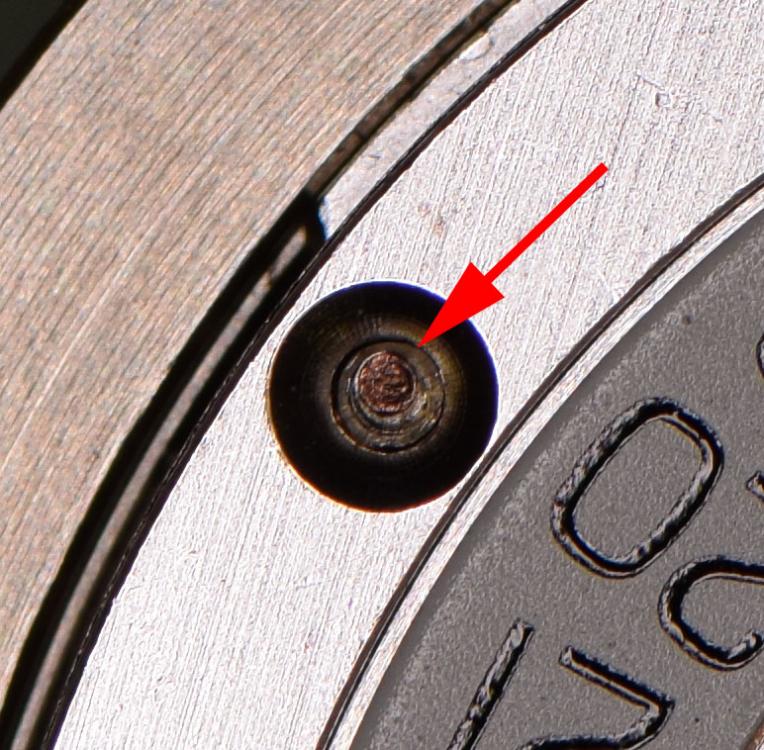
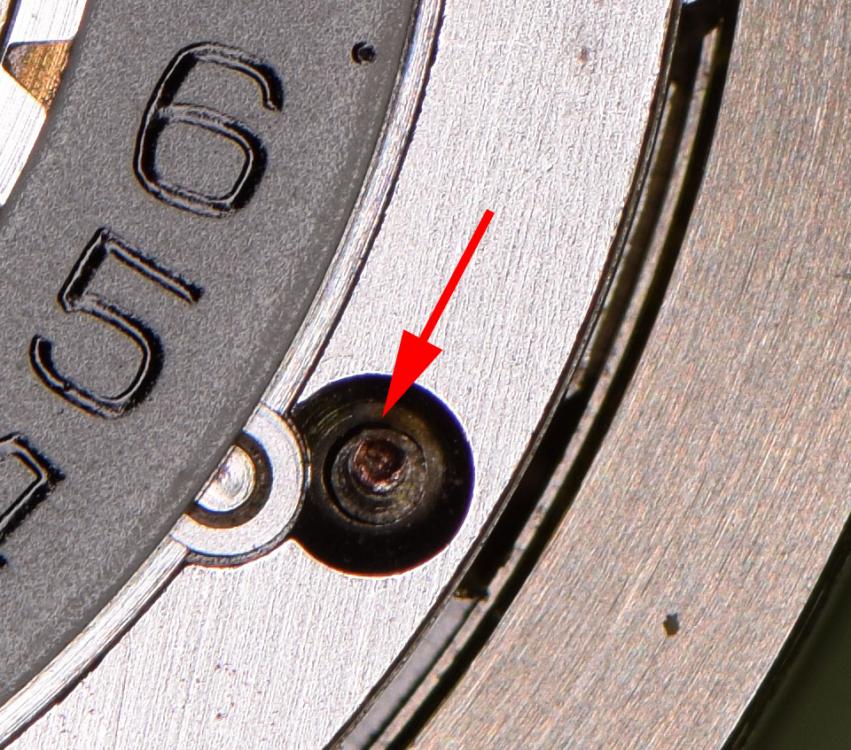
A work colleague asked me to have a look at his Ebel 1911 Discovery (ETA 7750). The hour counting hand was floating around in the case. Loupe inspection showed that the post was broken off in the hand - so before starting I ordered a replacement hour counting wheel. When I opened the case I found the dial was not attached - it was sliding around under the hands. Removal showed that both dial feet were broken off. Time to break out my dial foot soldering machine. Here's a video showing the technique. Enjoy!
 4 points
 -
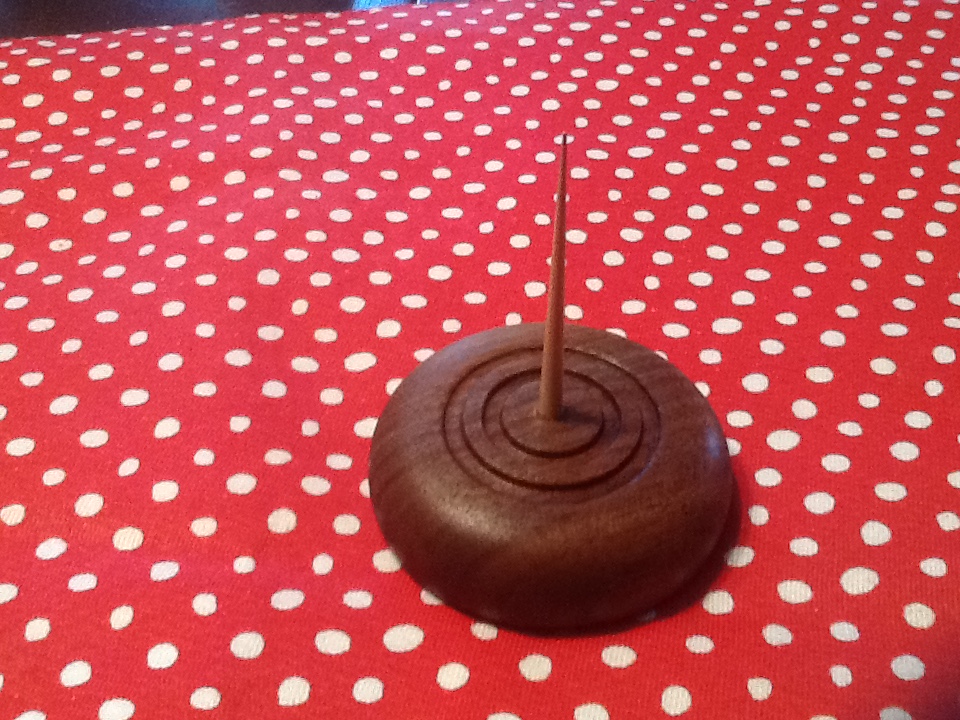
I did not have a balance tool and can't really afford to get one at the moment, so I decided to make me one. Made it out of walnut and some brass stock. What do you guys think?
 3 points
 -
I have not used a Roxer but I have used both the Bergeon and Calypso wet testers. The wet testers will push compressed air into the watch case IF there is a leak. Only when the air is compressed do you plunge the watch into the water. If there is a leak then the watch case will be filled with compressed air and water cannot enter the leak. Then with the watch still in the water, you slowly allow the air to de-compress. Any air in the watch will want to escape the case and it will do so through the leak. Because air is escaping, water cannot enter. You will see air escaping because bubbles will shoot out. If you see air escaping then you know there is a leak and the location of that leak. So - if the above is all done correctly then the test is safe and you should not get water in the watch as a result. You can then dry off the case and deal with the problem and try again. If you suspect there is a leak before hand and you just want to know the location, you can do all of the above with the movement removed. This is easier if you have a screw-down crown, but if not then place the crown and stem in the case and secure it with a little tape - then perform the test. The Dry testers (Elma, Witshi) are safe tests as they obviously do not involve water at all. It is not a good idea to use the term "Water Proof" as no watch is water proof. We should describe it as "Water Resistance". Here is some further information: Water Resistance Classification The "Water Resistant" mark has come to replace "Water Proof" and is now described by the following ISO-Standard 2281: Declaration on dial or back: NO DECLARATION This model is NOT water resistant. Any water contact should be avoided. WATER RESIST This model is resistant to minor and Accidental Splashes. Greater water contact should be avoided WATER RESISTANT 30M (3 ATM / 100 Feet) * Protected in everyday life, bathing, accidental splashes, short swimming or car washing - it is resistant against perspiration, water vapor, rain drops. It is tested for water resistance up to 3 ATM, and must be able to survive 30 minutes under water at a depth of 1 m (3 feet) followed by 90 seconds under a pressure corresponding to 30 meters WATER RESISTANT 50M (5 ATM / 160 Feet) * Protected in everyday life, bathing, accidental splashes, short swimming, car washing, parachuting, hang gliding and skiing - it is resistant against perspiration, water vapor, rain drops. It is tested for water resistance up to 5 ATM corresponding to 50 meters WATER RESISTANT 100M (10 ATM / 300 Feet) * Protected in everyday life, swimming, snorkeling, mountain climbing, parachuting, hang gliding, skiing and all kinds of sports challenges It is tested for water resistance up to 10 ATM corresponding to 100 m WATER RESISTANT 200M (20 ATM / 660 Feet) * Protected in everyday life, free diving without scuba gear, and all kinds of water sports. It is tested for water resistance up to 20 ATM corresponding to 200 m WATER RESISTANT 300M (30 ATM / 1000 Feet) * Protected for scuba diving to a depth of 30 meters, for 2 hours. It is tested for water resistance up to 30 ATM corresponding to 300 m WATER RESISTANT 500M (50 ATM / 1650 Feet) * Protected for scuba diving to a depth of 50 meters, for 2 hours. It is tested for water resistance up to 50 ATM corresponding to 500 m * The metres value does not relate to a diving depth but to the air pressure used in the course of the water resistance test. (DIN 8310, ISO 2281, NIHS 91-10)3 points
-
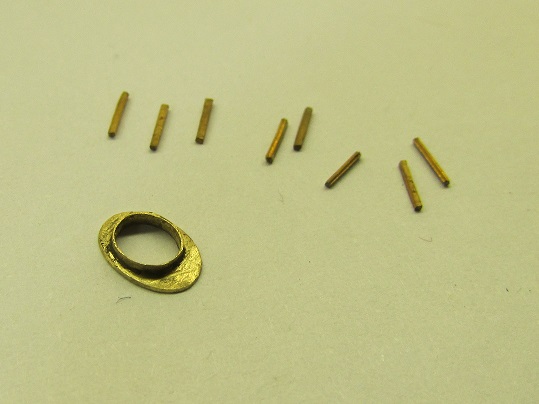
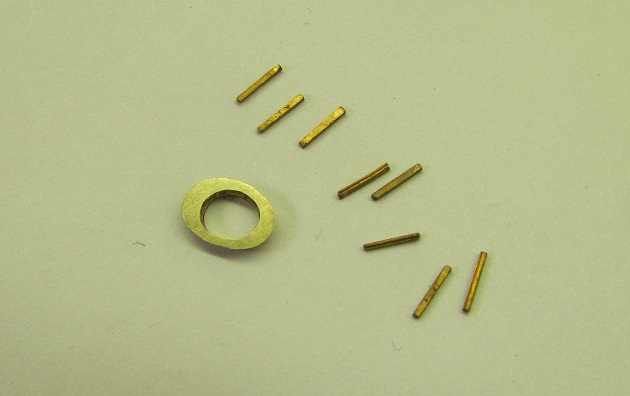
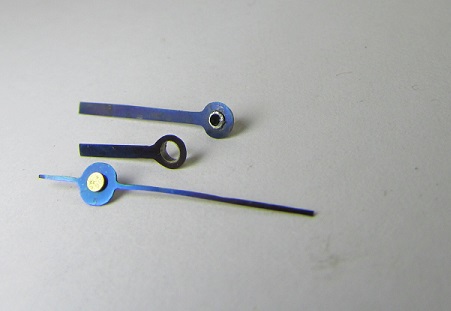
Hands completed and date viewer / hour markers made. Also did a layout to start seeing things coming together

 2 points
 -
One of the countries I used to travel to in a previous job was Italy. I used to design automated machinery most of which was for the production of electric motors. I visited many production facilities in Italy and was very impressed with the level of technology in their factories. Actually seeing what was going on in that country quickly dispelled many of the bad jokes about Italian products that I had heard throughout the years. They did first rate work that was on a par with any other country. Their food was also the best I had anywhere else in the world. The borders of Italy and Switzerland join at the Alps mountains and it is possible (but challenging) to walk from Italy to Switzerland. david2 points
-
As a reminder your timing machine is very very old. Even the transistorized versions are very old. The electrolytic capacitors used in the power supply and sometimes in the circuitry are well past their rated life. Then the microphone has a crystal that's moisture sensitive they can disintegrate with time. Then I have another link for someone who repairs timing machines notice from the price it be cheaper to buy one of the modern Chinese versions. http://www.delphelectronics.co.uk/services.html2 points
-
Hey All, I've been on here a few times looking for help on a few watches and now that I have a decent startup tool kit I'm hoping to learn some more about horology. I'm mostly interested in the old mechanical watches. I'm always looking for a hobby to keep busy Cody Stout1 point
-
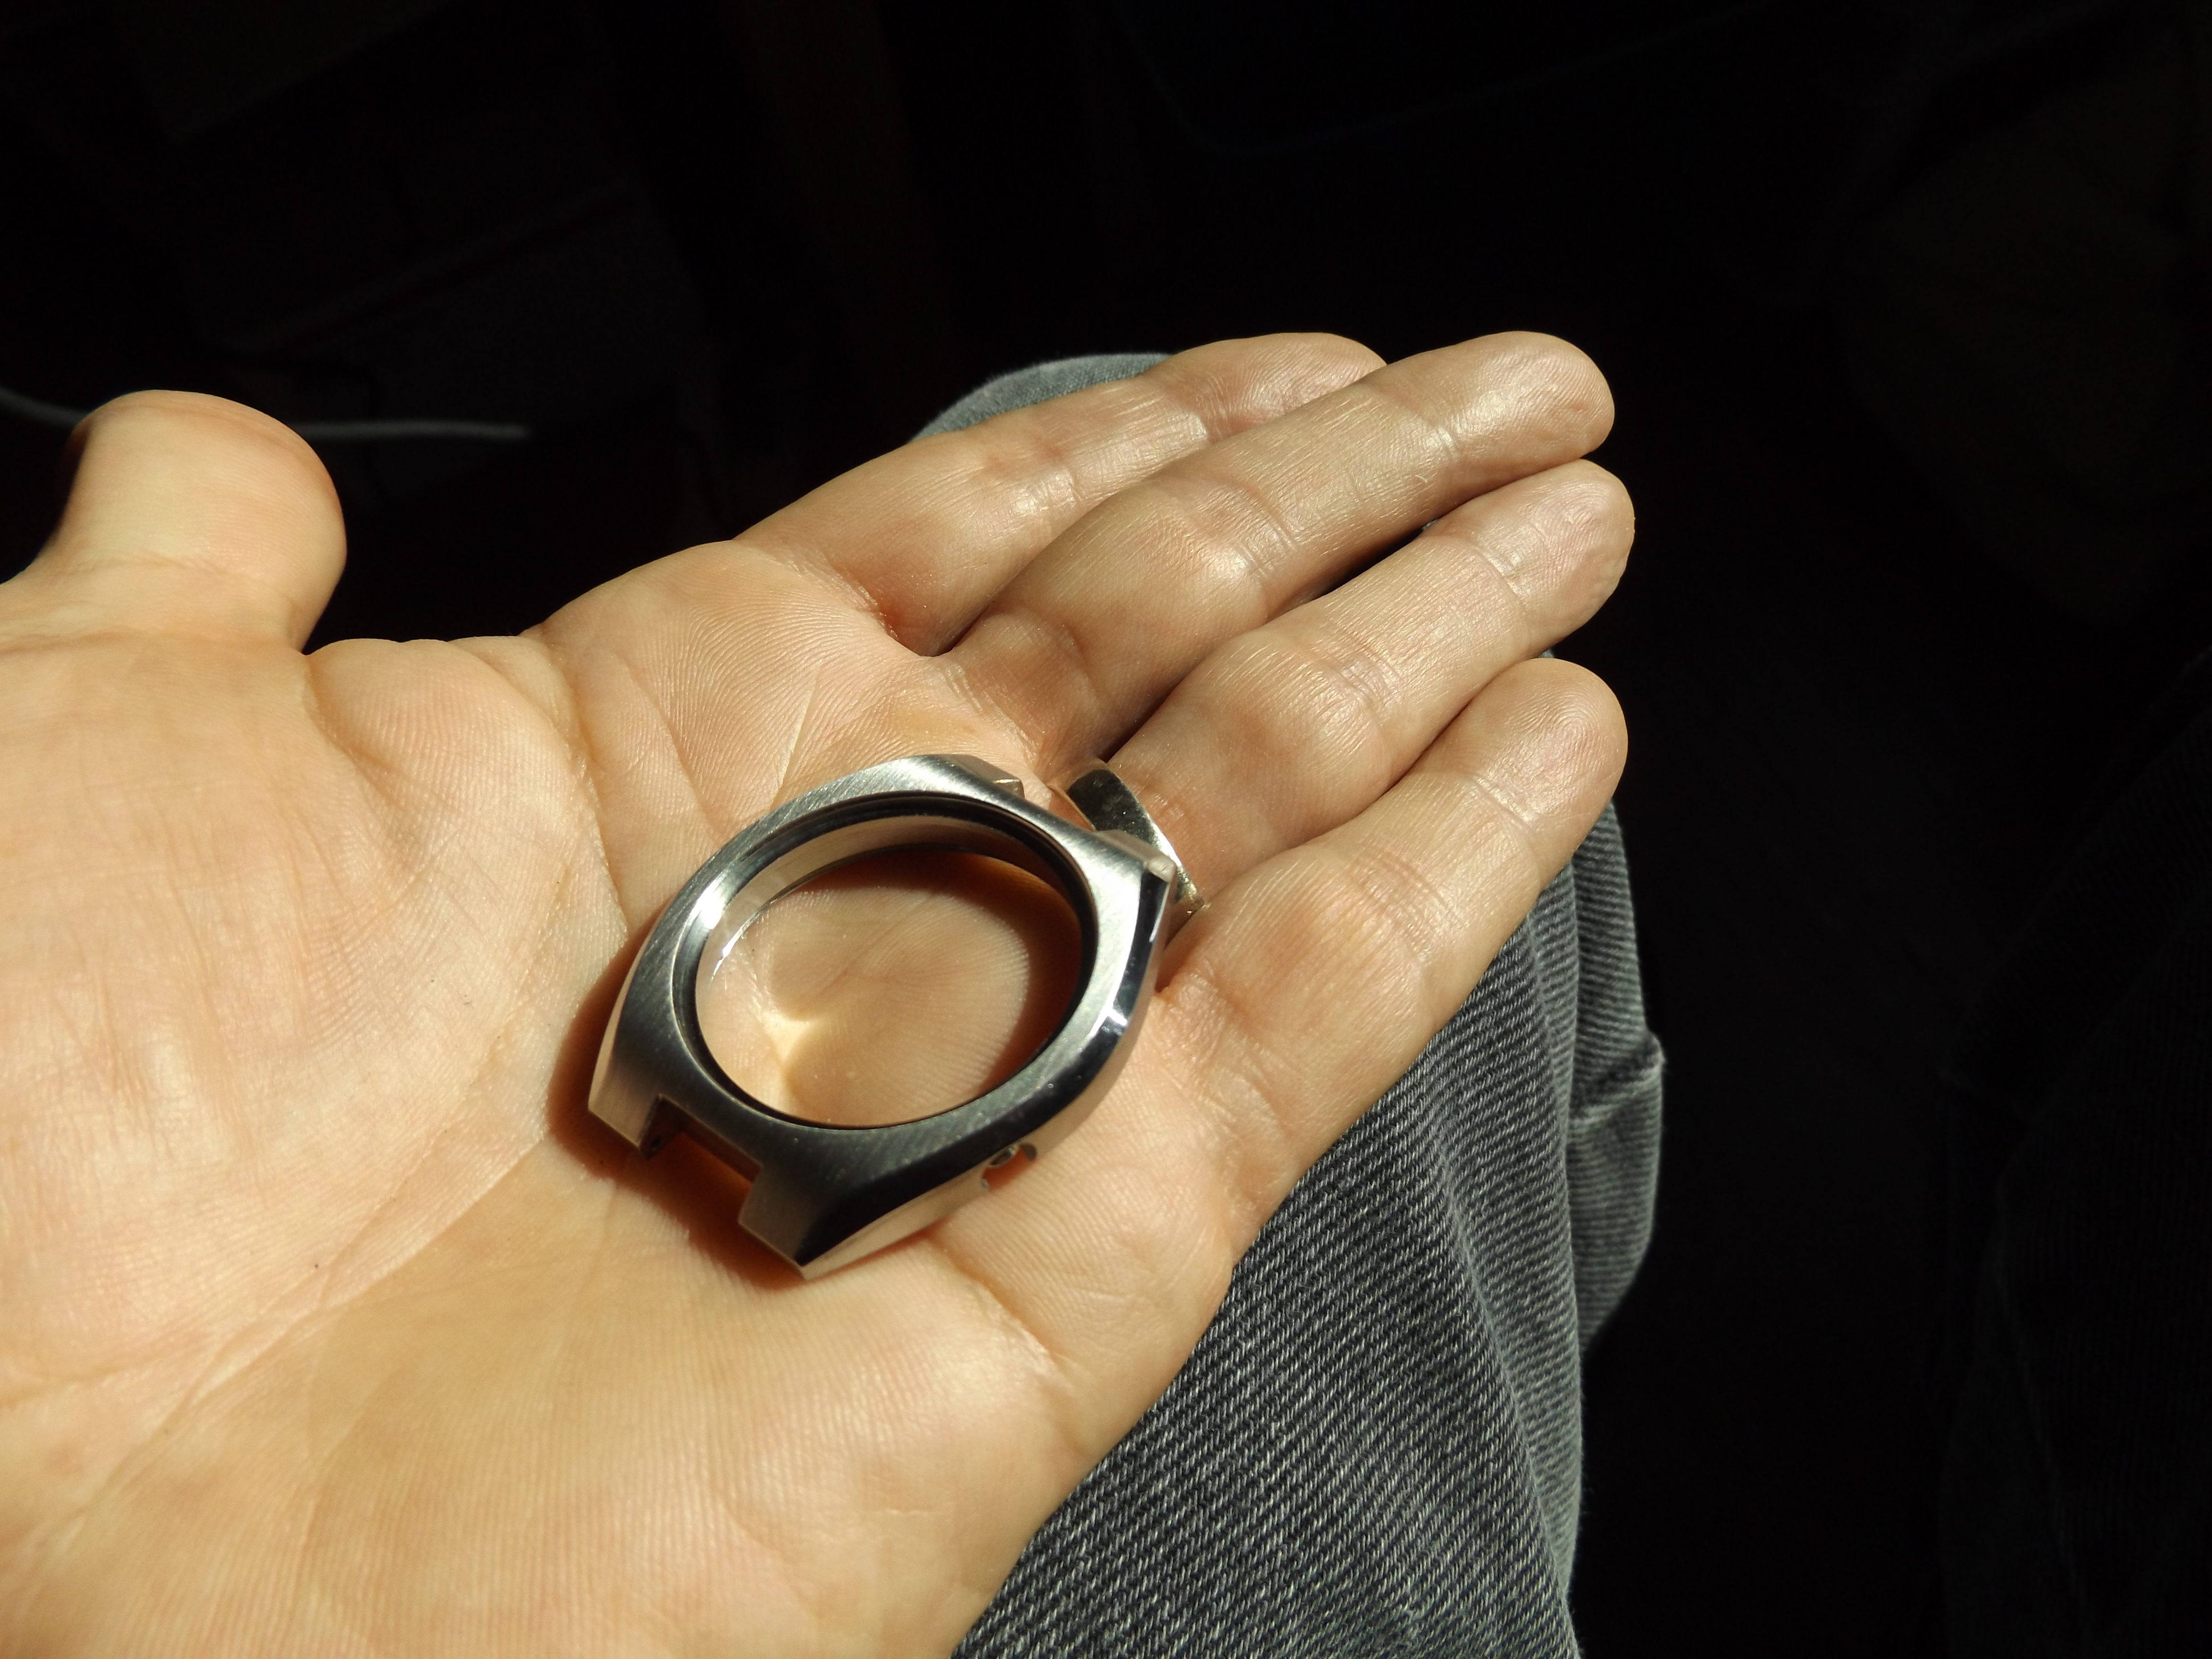
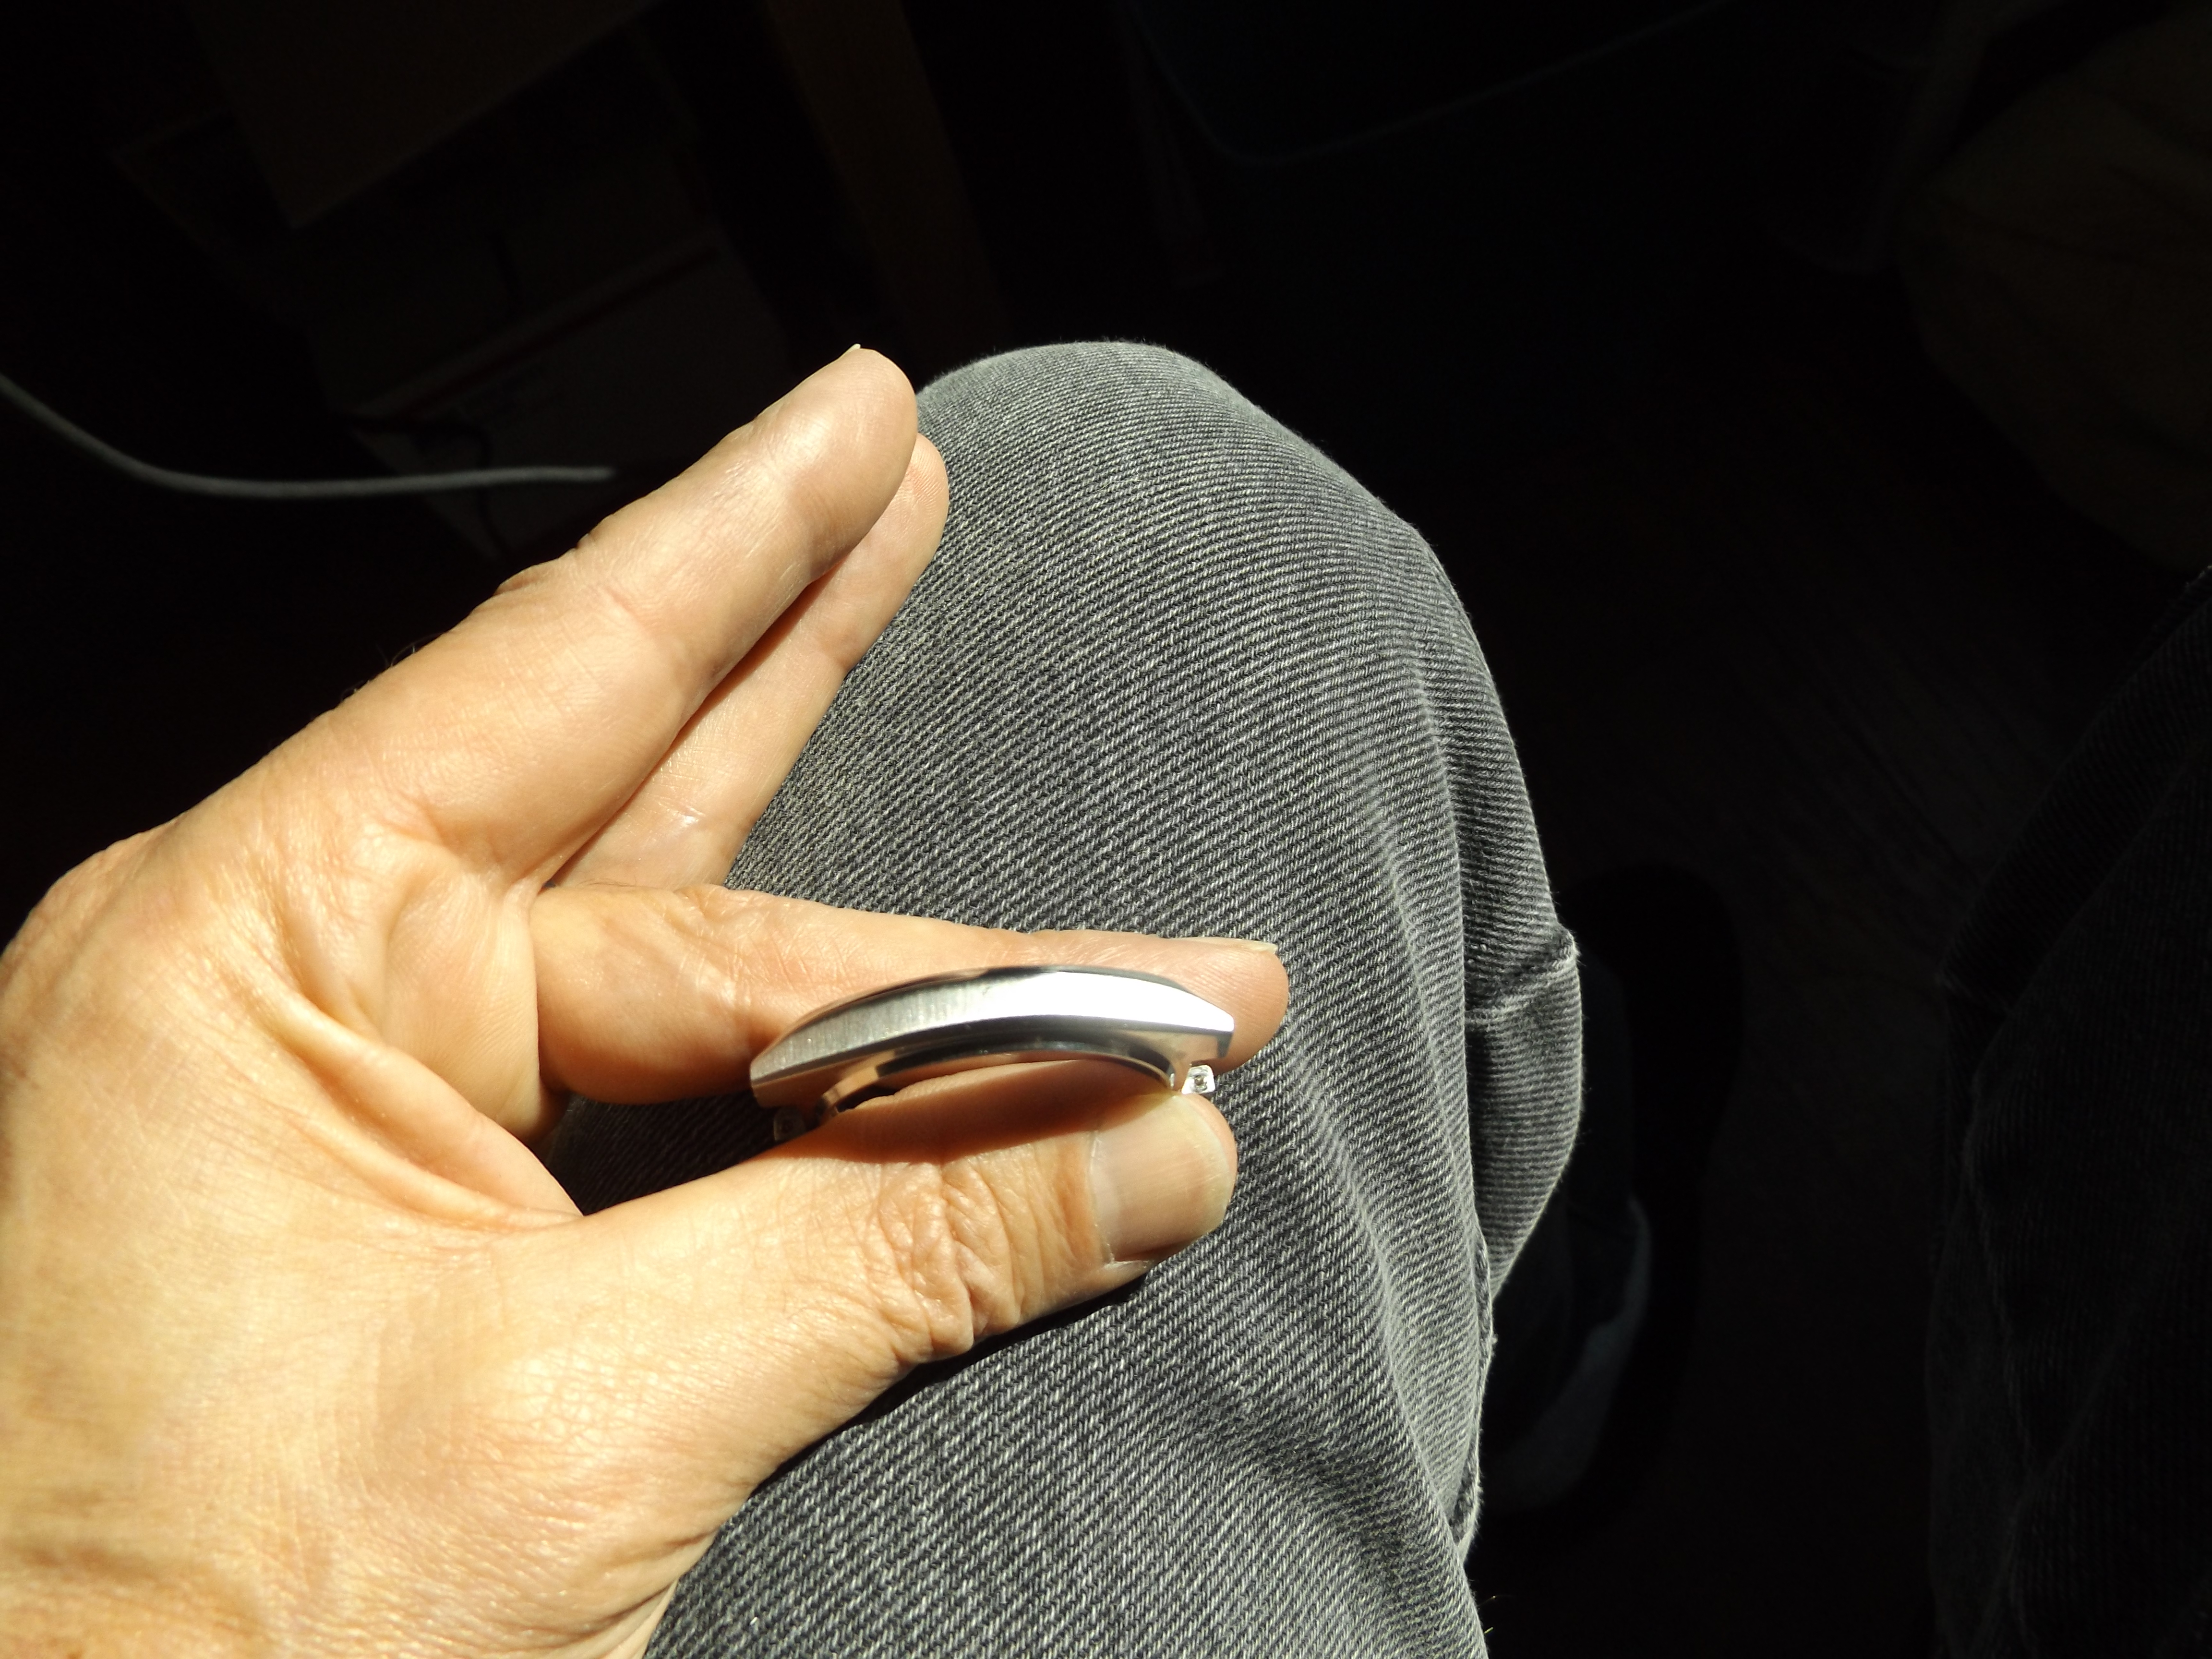
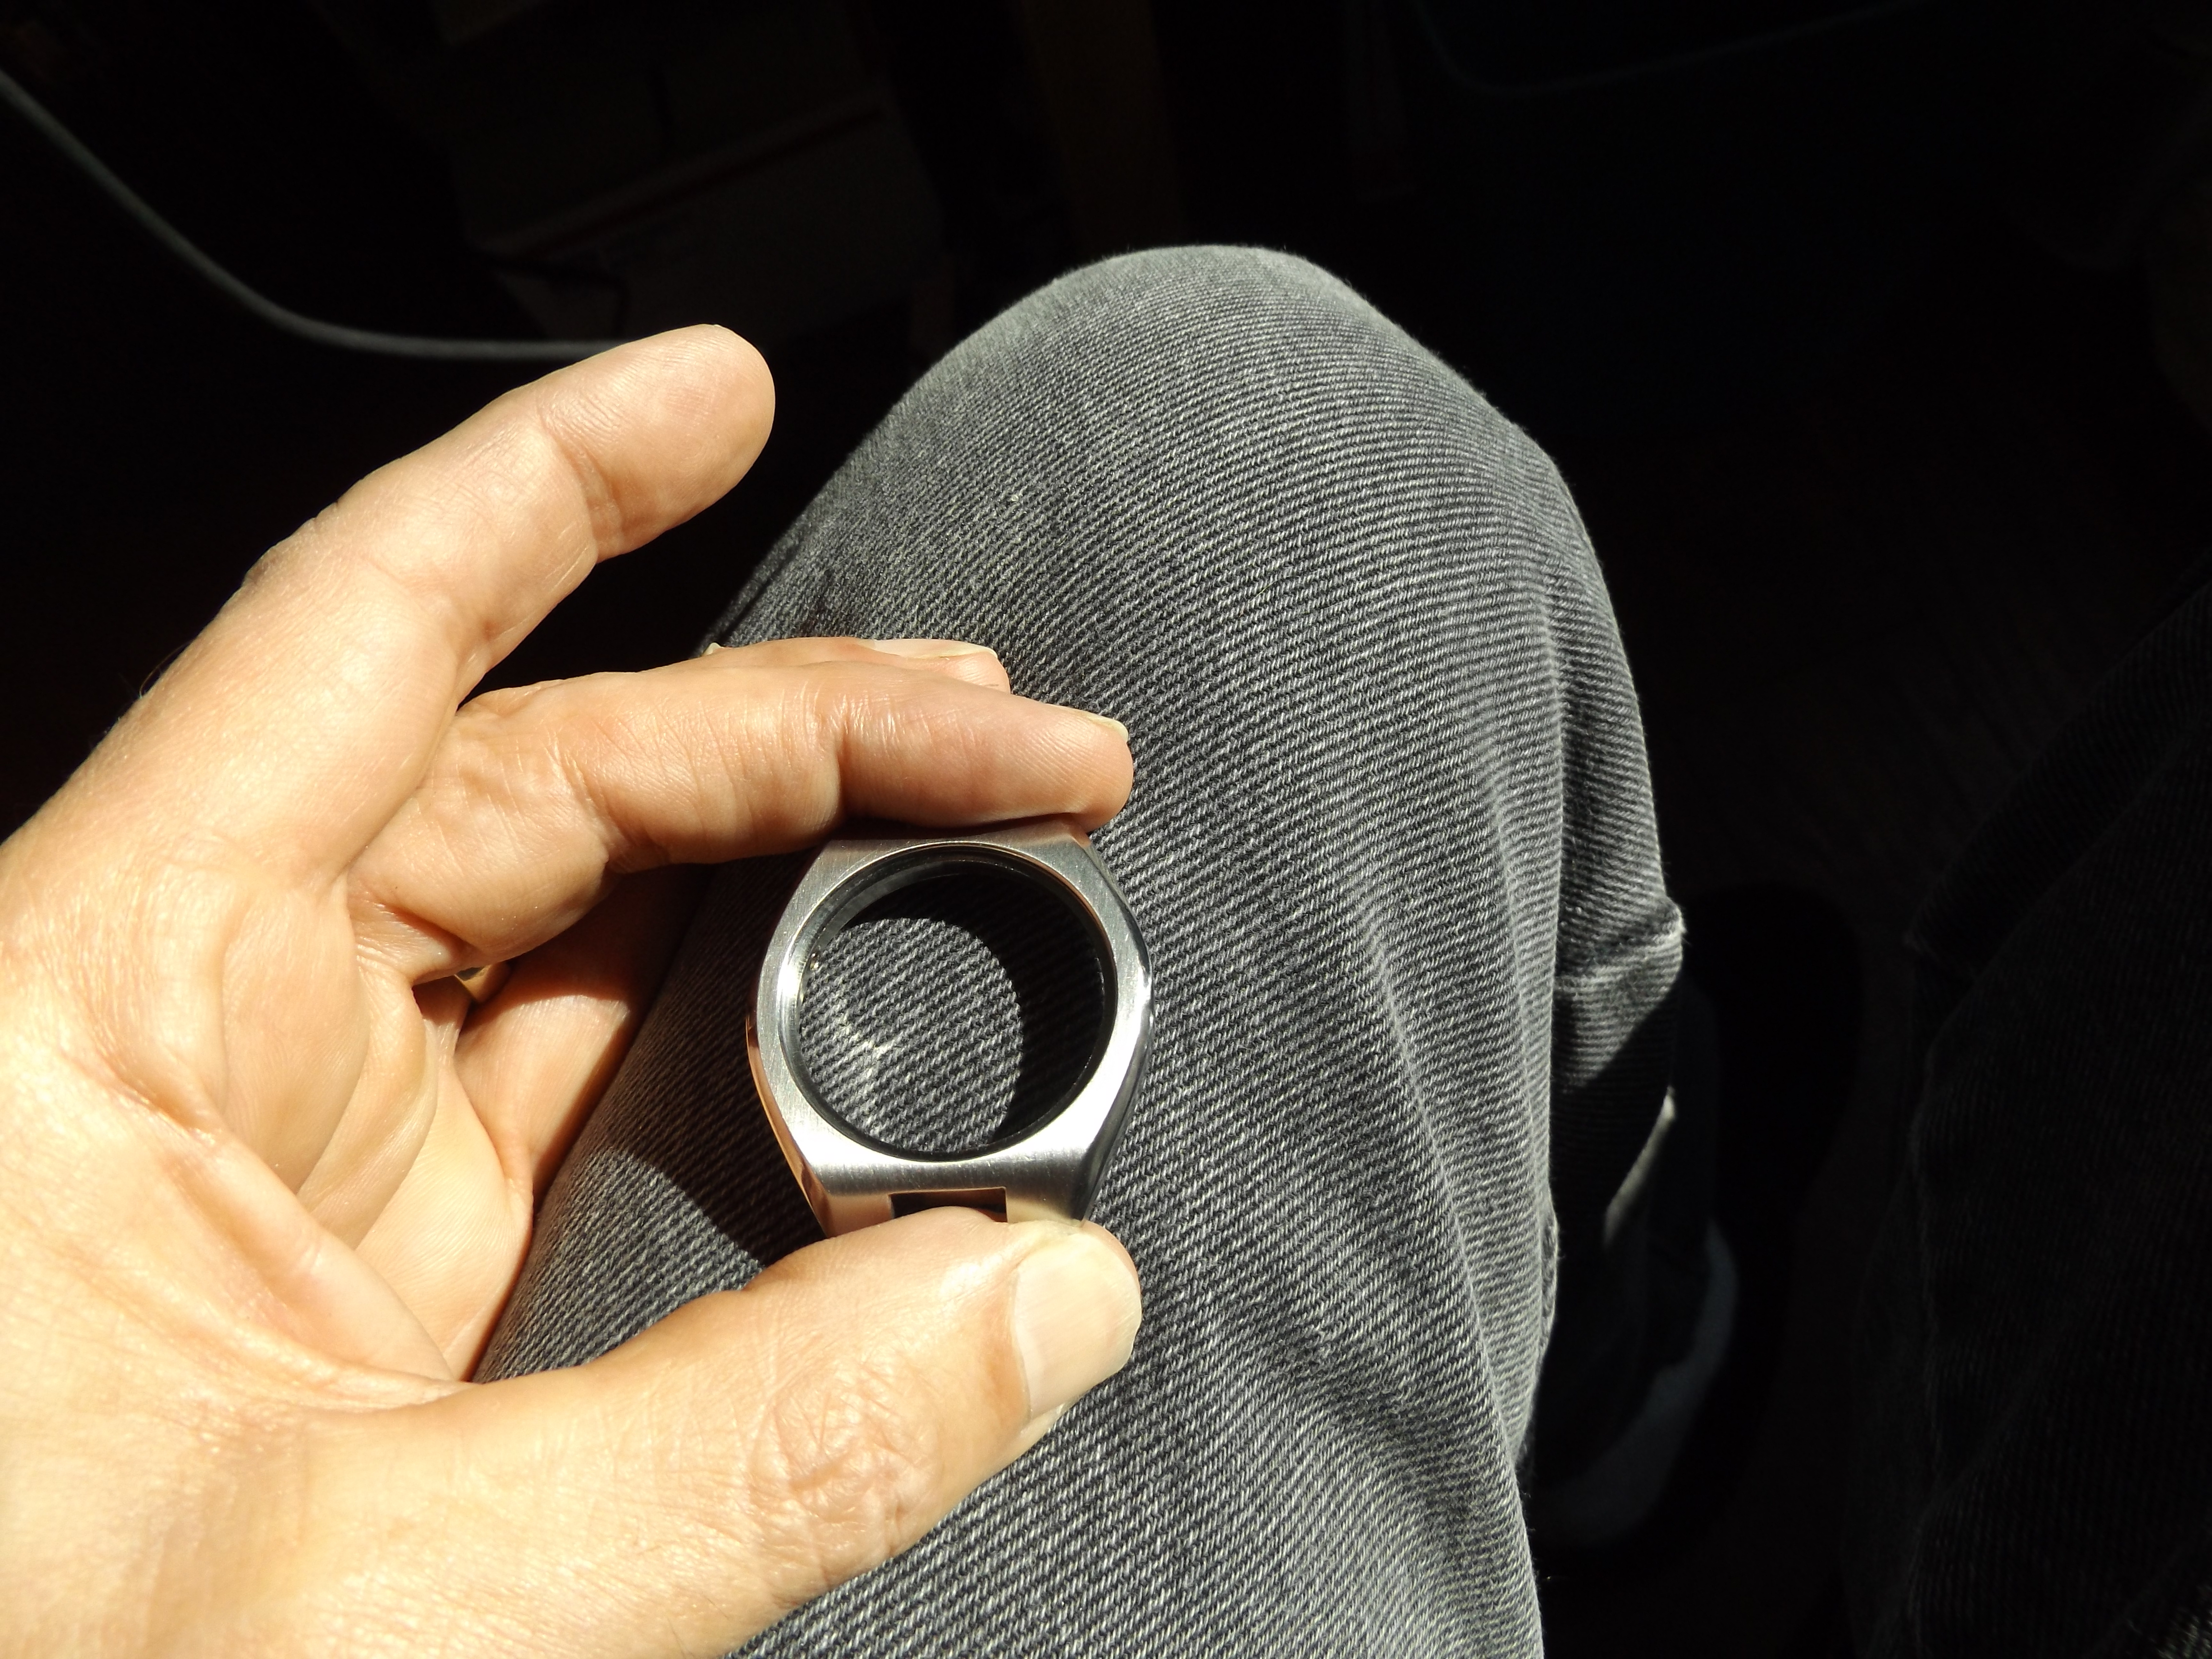
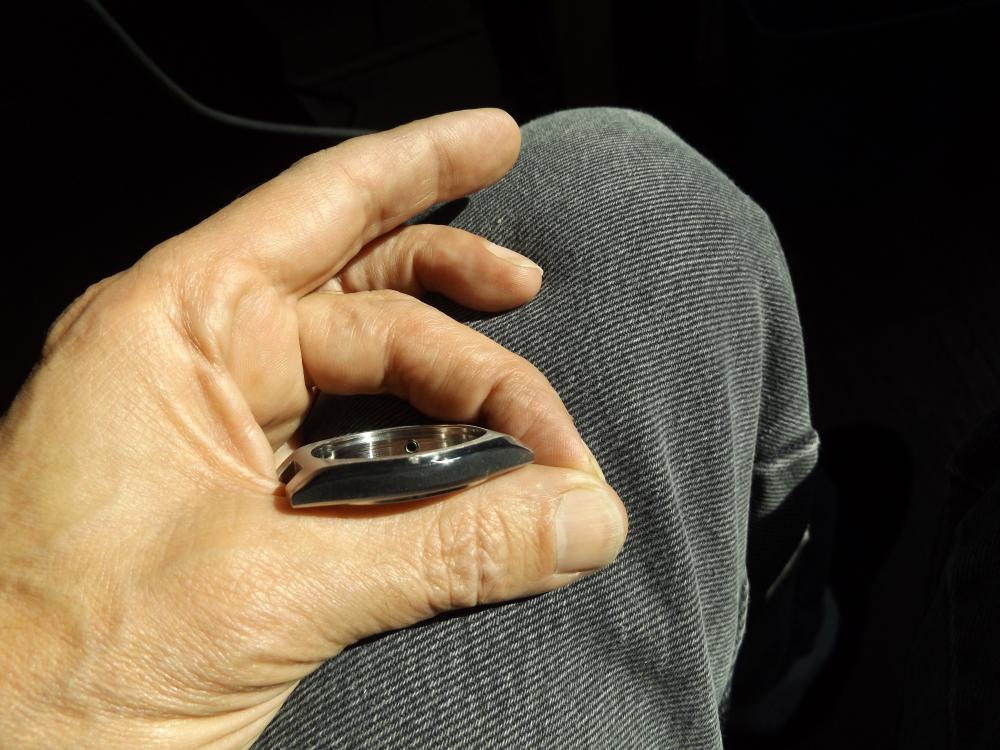
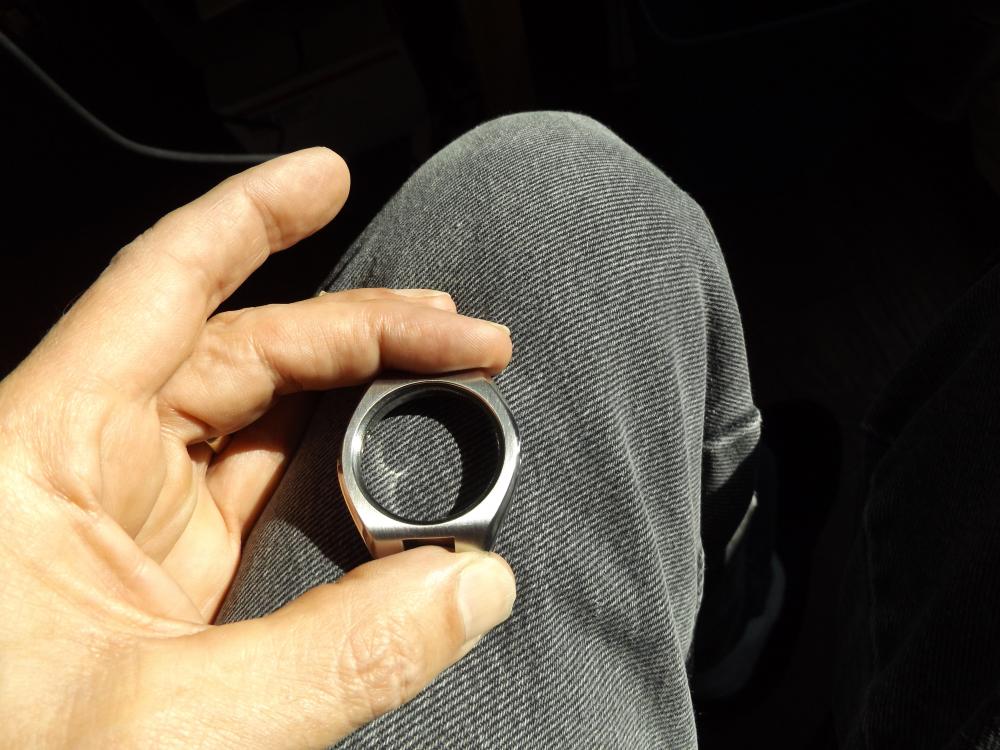
Had some spare time today and case to mess around with, took me a few hours to get this looking sorta new, satin finish achieved with simple scrub pad, then high buff, (by hand with foredom) around the bevel. Much finer than machine finish, took away most scratches and dings with 600 paper first. What do you think? Remember, I don't have a day job to quit!


 1 point
 -
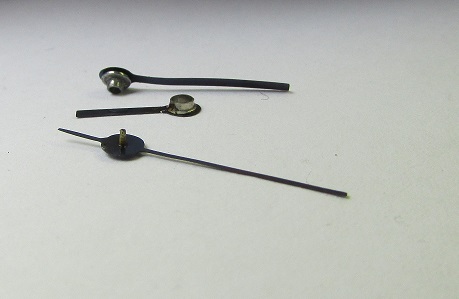
I keep knocking the spade ends off mine, of course I should probably only use them as oilers instead of poking around with them. Cheers, Vic1 point
-
Looks good as well as being functional, go into mass production (for forum members only - at a reasonable price of course [emoji6]) Cheers, Vic1 point
-
Excellent work Douglas!1 point
-
Nice work. Measured a Bergeon black oiler and it was approx 6 mm and 50 mm long. The oiler was 1,5 mm and 0,18 mm in the tip. That you have to buy i think? But they could be bought as spare parts.1 point
-
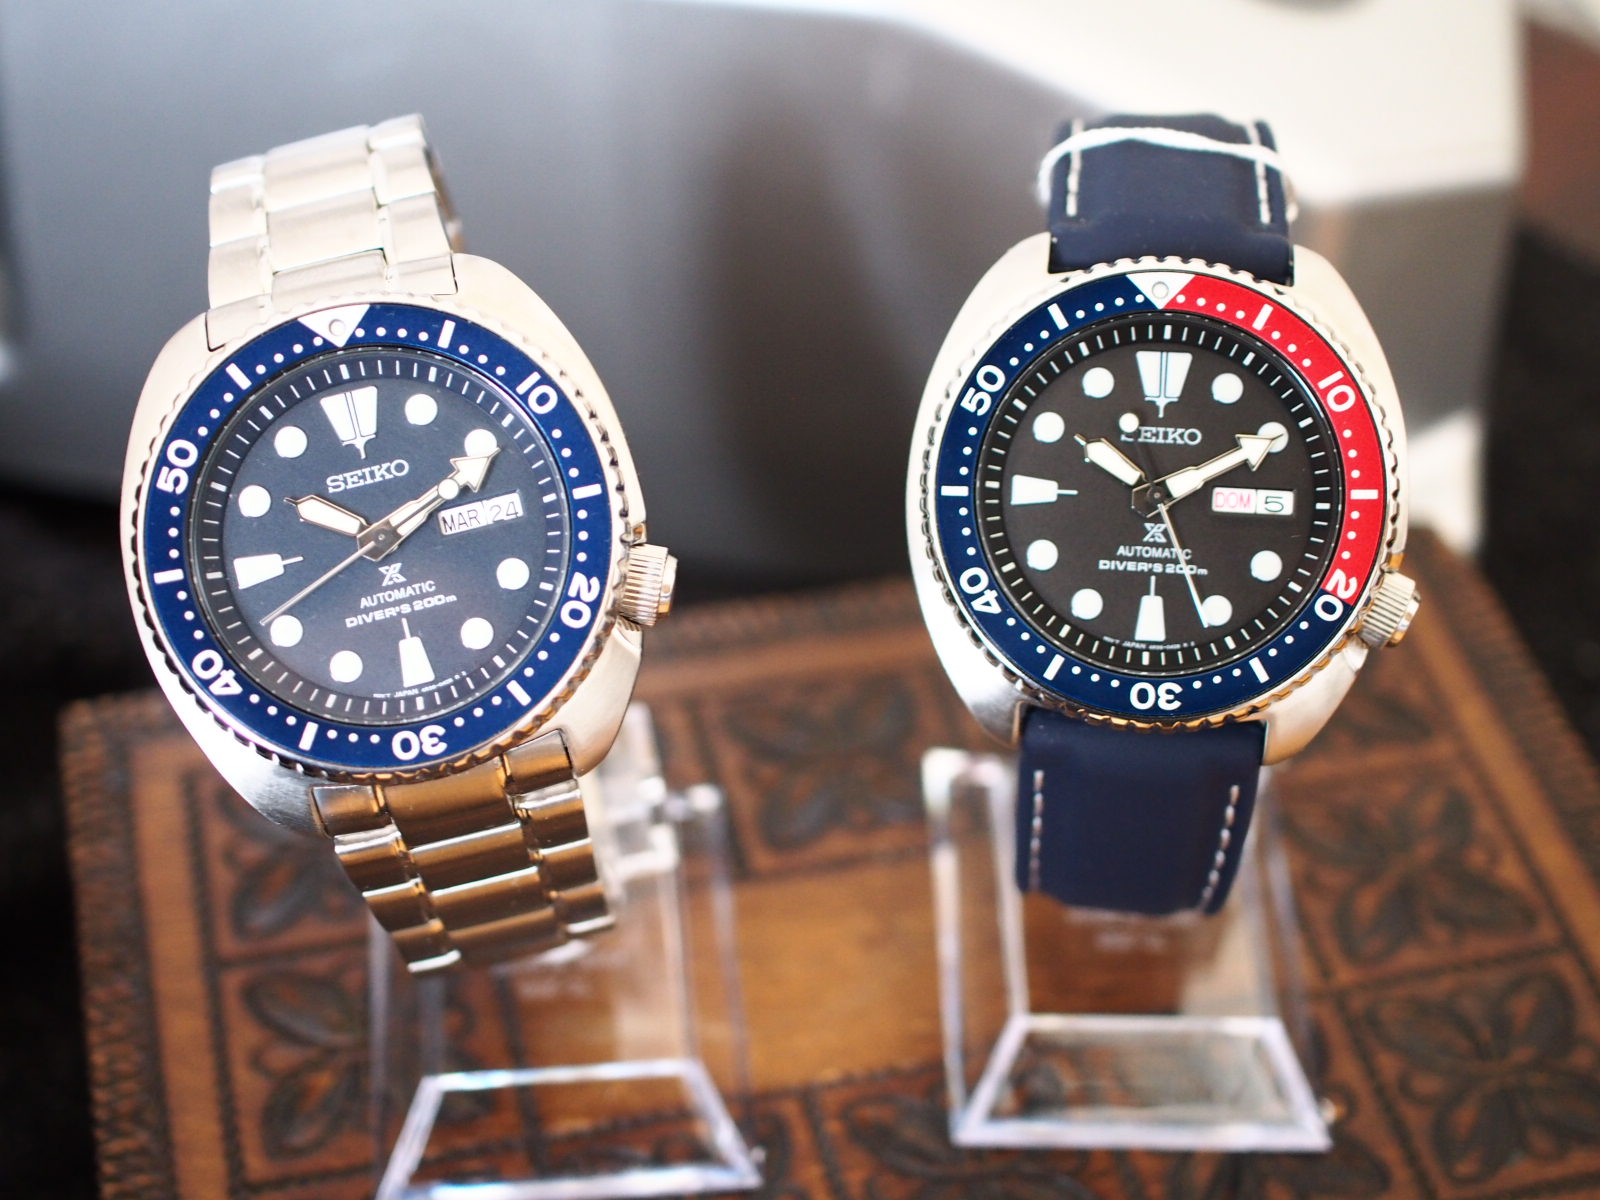
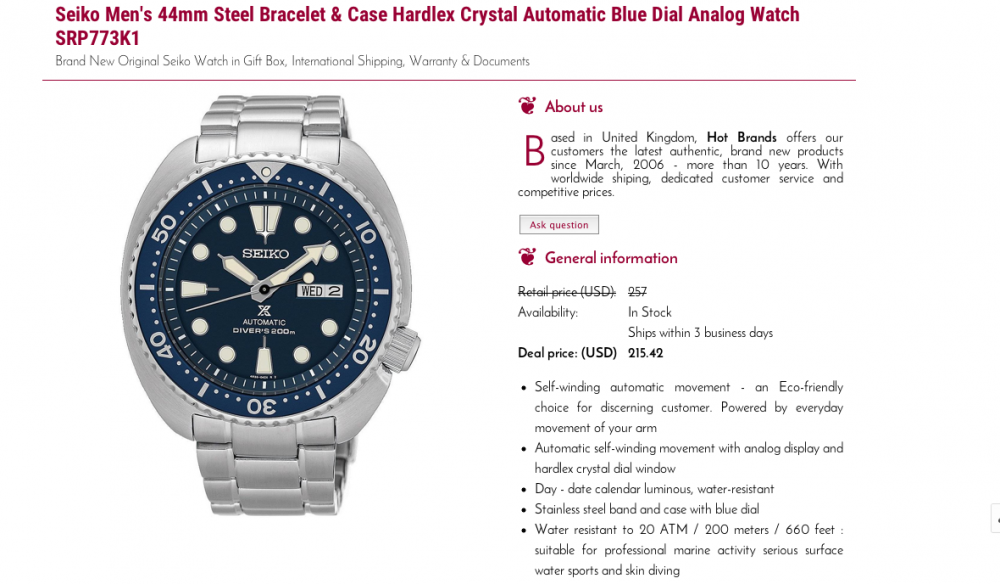
Price for these dropped considerably since introduction, which is just right since they were overpriced to begin with. And don't get me started on about the LE / PADI ones which have so many drooling for. Well done Seiko for pulling a profit with few touches of color and a nice box. Mine say hi
 1 point
 -
I'm with Marc on this, what an excellent first post. I appreciate both the time and effort that has gone into repairing the watch and compiling the post. Hopefully you can find the time to submit more of this quality in the future, the forum needs it. PS I really like a challenge too, but I think that movement would have been added to the horological debris in my bin, well done for saving it!1 point
-
I would suggest that the starting point for this should be a full movement service. The trouble is that the symptoms you describe can result from anything that can sap energy from the system from bent pivots to cracked jewels to dried or gummy oil to dust in the movement, and yes a tired main spring, or indeed all of the above. A full movement service requires that the movement is fully stripped down, cleaned, inspected and any damaged or excessively worn parts repaired or replaced, and then reassembled with fresh lubrication and adjustment along the way. There is very rarely any short cut or quick fix. I'm guessing from your post that this is not something that you have a lot of experience with; my apologies if my assumption is incorrect, no offence intended. It could well cost more than your estimate of the watch value to have someone else do the work for you but if you are looking to learn how to do the work yourself then you have come to the right place. You are still going to need to spend a bit of money though as you will need (at the very least) appropriate screw drivers, tweezers, movement holder, cleaning materials,oil, and magnification, and I'm sure that others will add to the list. If this is the only watch that you're likely to work on then it may be better to have the work done for you, however if you're interested in pursuing the hobby then the cost of tools can be quite reasonable. I would strongly recommend though that you start with a couple of cheaper, lower grade movements to get the hang of handling the very small parts and to gain an understanding of how things work and how to tackle the servicing as it will make working on this watch much more enjoyable and much more likely to be successful.1 point
-
Mispelling aside, that's kind of a condescending statement toward Italian products. I use a 6 bar Chinese machine that works perfectly and cost less than $200.1 point
-
Adiorio, It isn't so much that the Sherline can't do it, the problem is that the machine was designed and built for a market with applications that have nothing to do with micro machining extremely tiny high precision watch parts. The Sherline lathe was initially designed to provide an improved alternative the the Unimat 200 which was a desk top hobby lathe. It succeeded in that goal and after a short period of time Emco stopped producing the Unimat 200. This is not necessarily a reflection on the quality of the machine but has more to do with the operator being able to get physically closer to the part that is being machined. The traditional way to operate an instrument lathe or engine lathe is for the operator to position themselves away from the cutter and part. The machining process is executed by turning hand wheels that move and position the cutter. The traditional way to operate a watchmaker lathe is to have the watchmaker's face inches away from the part removing metal with a handheld graver and watching the operation through an eye loupe. A certain part of the process has to do with feel. Since the cutter is held in the operators hand and not in a mechanical fixture, vibrations and pressure from the cutter can be felt. The watchmaker lathe lends itself to this technique by design. Trying to work around the larger lathe bed and cross slide mechanisms can become extra burdens if trying to use a T-rest and graver. This video should give you an idea of the process: https://www.youtube.com/watch?v=M6svZzTBIeM&t=5s david1 point
-
I have no preference. They both do the same job. I had the calypso for 15 to 20 years (can't remember) and it's still doing the job just fine. Sent from my iPhone using Tapatalk1 point
-
Don't oil the pins. Some 9010 on three (evenly spaced out) of the escape wheel teeth faces should do the trick. Sent from my iPhone using Tapatalk1 point
-
I didn't think to look at case, it's a 7009 Seiko, (got in a lot of misc parts w/o movement) probably have one I could stick in there. I have seen the 'lapping' technique on a wheel with compounds, you are correct, I was careful not to over abrate surfaces. I have seen 'pitting' on ssteel and once you start it doesn't matter, you'll usually not be able to get desired result, in fact you may make it look worse. Years ago when I worked in jewelry store, it was my job to do all the polishing, mostly repairs, rings and such, so I am familiar with a benchtop polishing setup/techniques. Just never did watches. I found a bracelet that will fit case and began to use same technique on that with similar results, I'll post a pic soon. Thanks for all the support, your opinions matter and are encouraging to me. Dave1 point
-
No problem, considering the movement is a clone, how the watch looks like?1 point
-
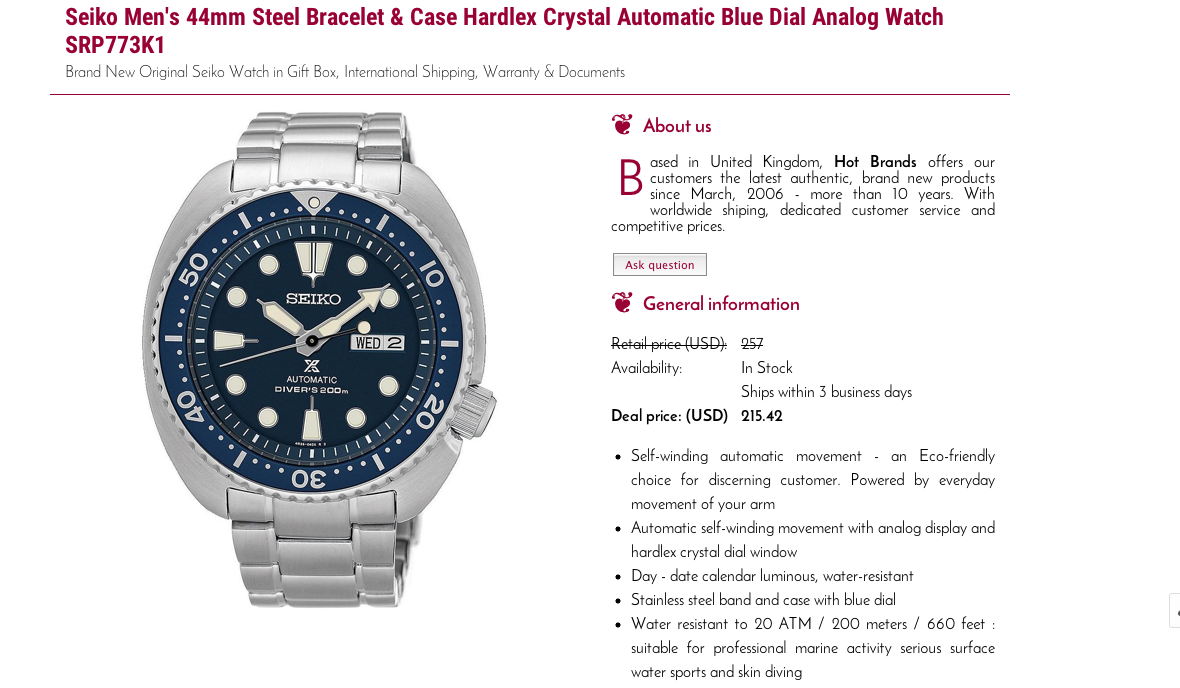
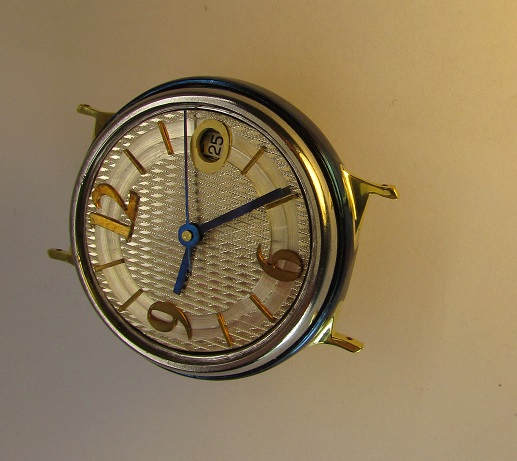
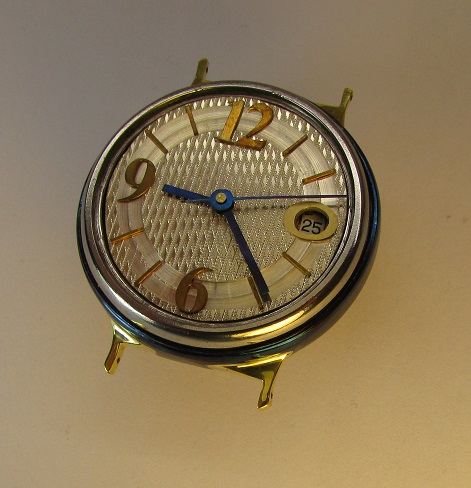
I just picked up this SEIKO MEN'S 44MM STEEL BRACELET & CASE AUTOMATIC BLUE DIAL WATCH SRP773K1 . Having paid $300 for the Black and gold model , I couldn't pass the deal on this blue model . The actual price was $214 .42 .
 1 point
 -
Push crown all in and check below:1 point
-
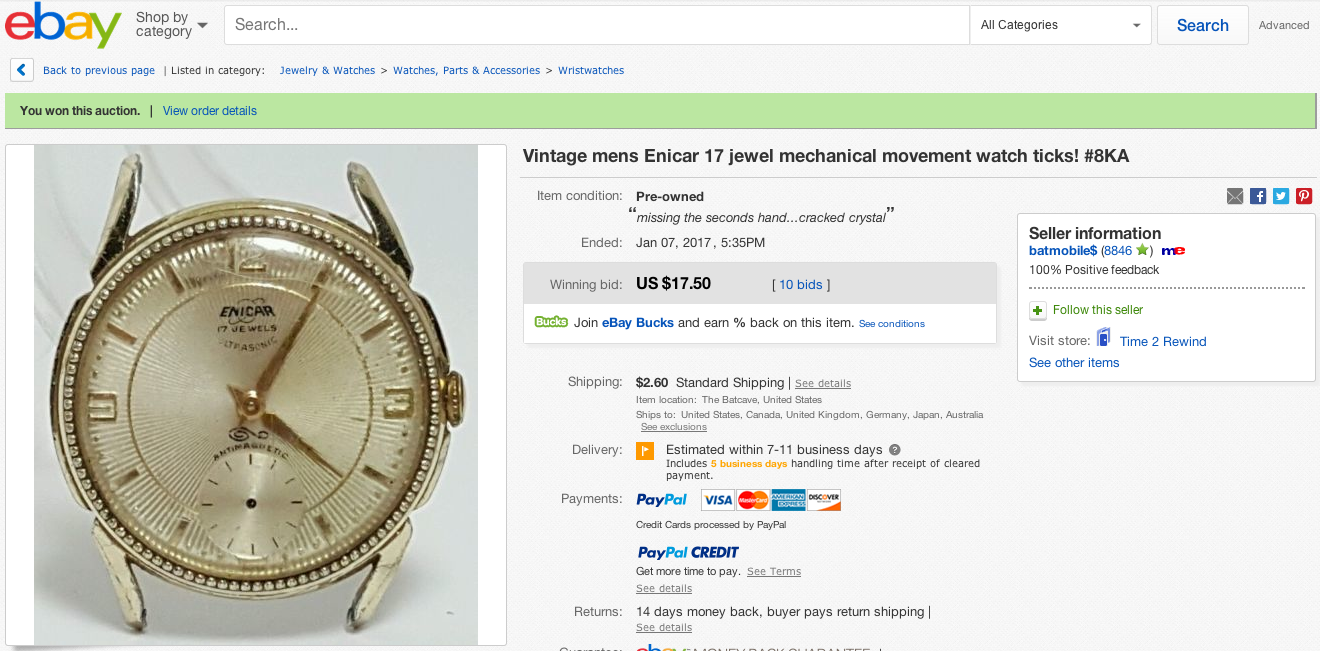
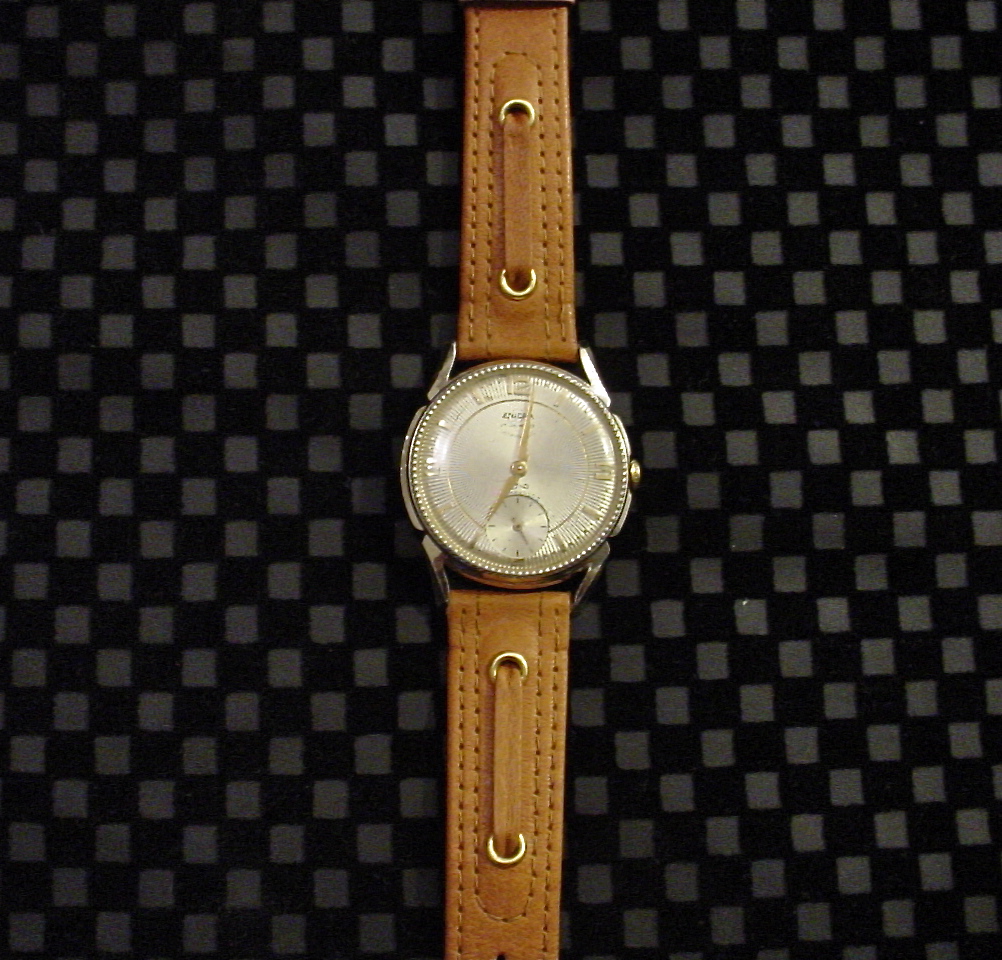
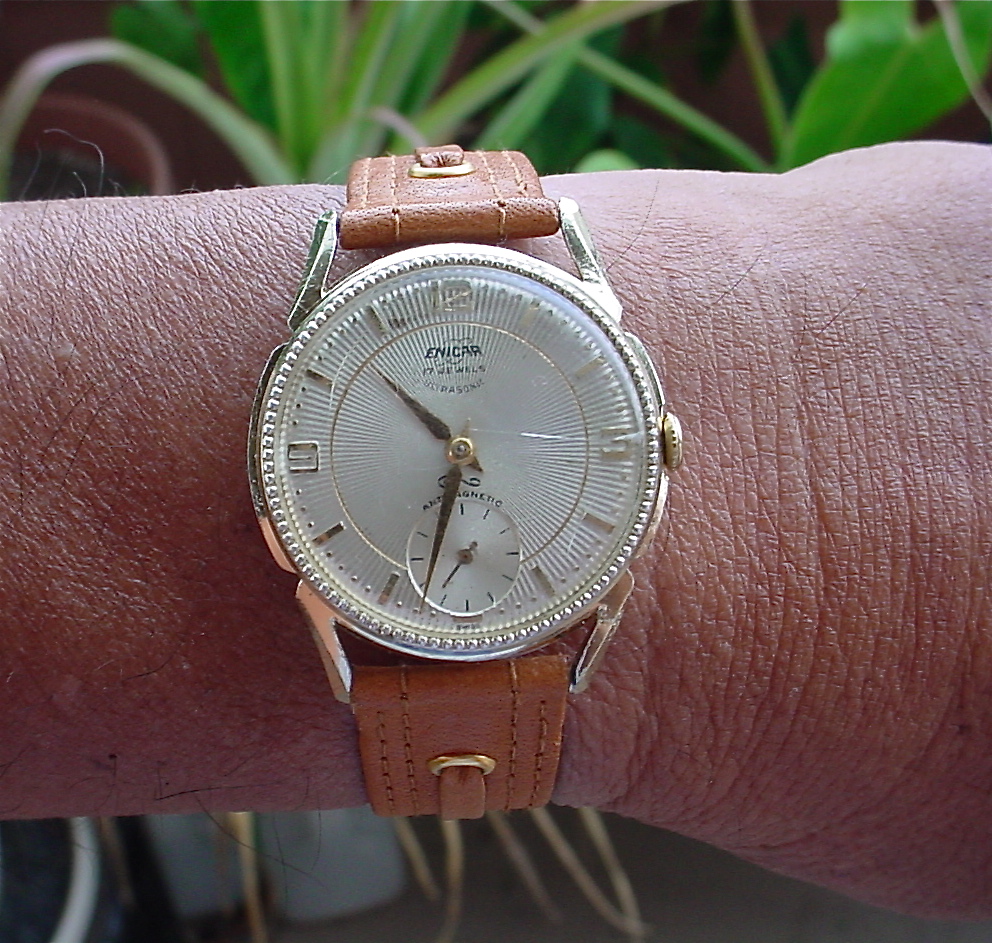
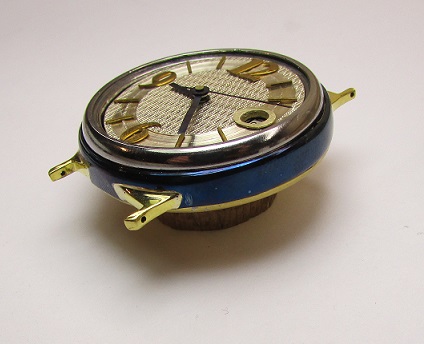
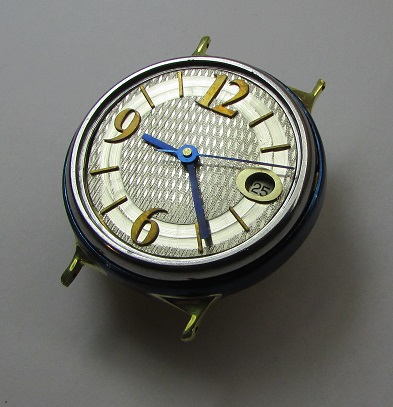
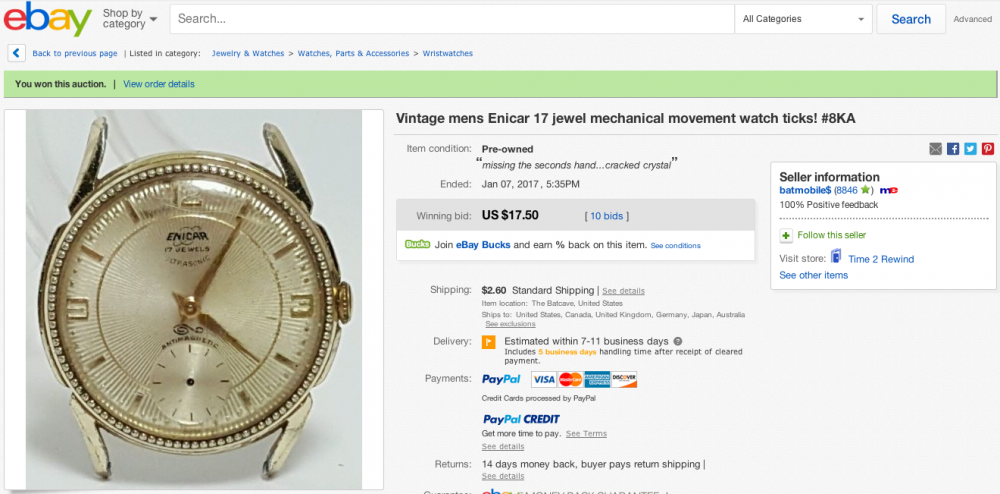
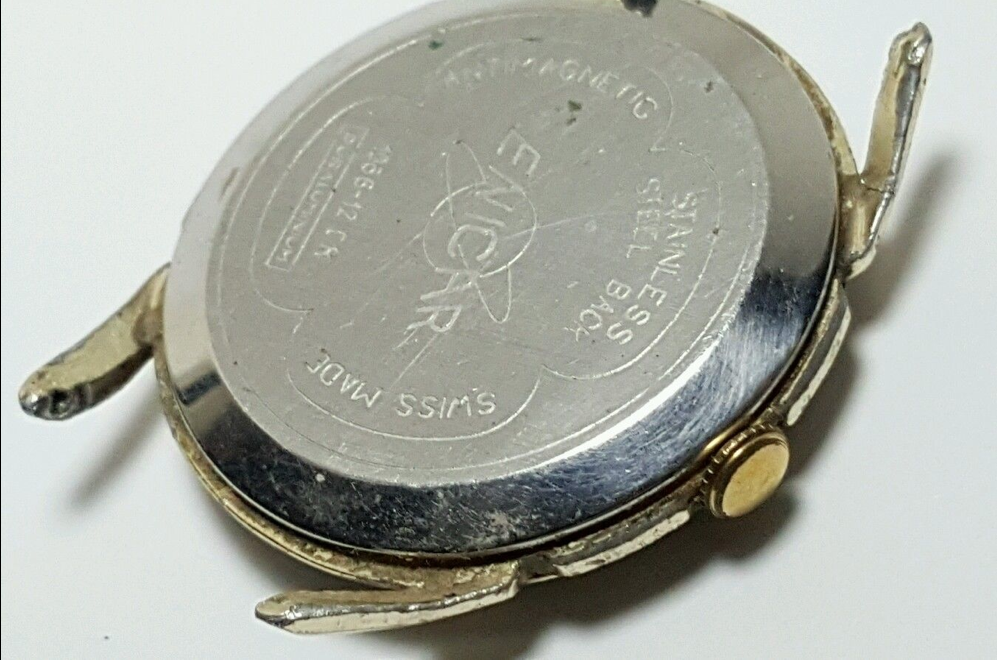
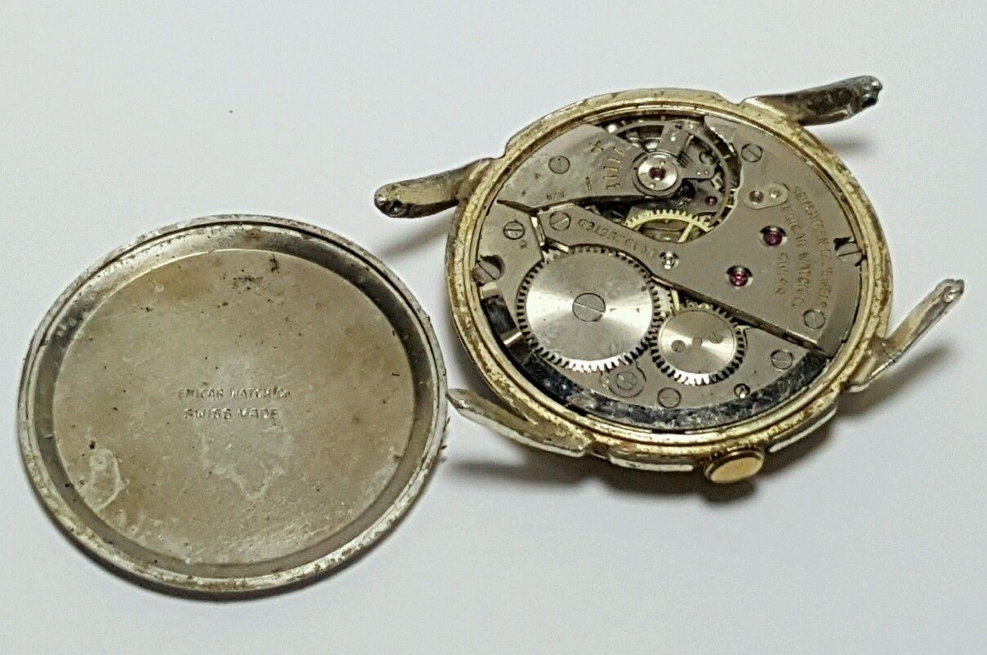
Today I'm wearing my , " nobody likes this watch but me " watch . I've shown the sellers pics to a few people with less then enthusiastic responses . Oh well ,...I like it . I cleaned the case , serviced the movement , and installed a new and very comfortable watch band yesterday . Here's my kinda thin vintage Enicar handwind......


 1 point
 -
I swear I saw those pants running laps around a London Police Station about 25 years ago.1 point
-
Obviously Bay City Rollers Fan [emoji6]1 point
-
Well done Dave, I too prefer hand refinishing, it gives you much more control, yes, granted it takes longer, but its worth it.1 point
-
Excellent result Dave! I too prefer to refinish cases by hand.1 point
-
I found a video on YouTube by Perplxr on removing and installing a KIF spring: Shock Absorber Springs - Opening, Closing, Removal, Installation1 point
-
Today I went back to my Seikos... and in particular this 7T32-6M00 from September 2000
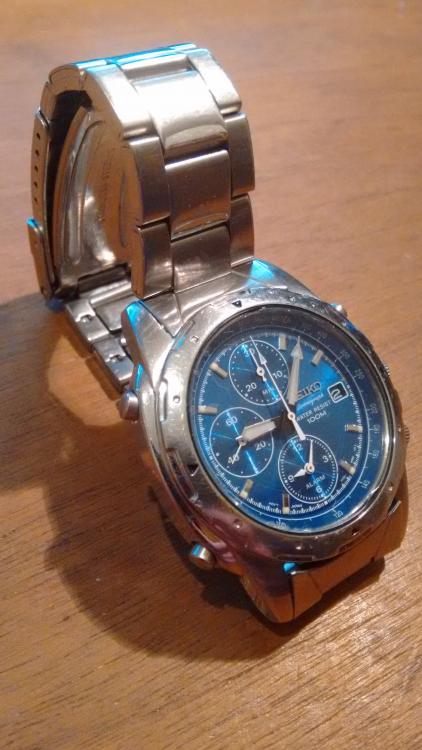 1 point
 -
I my early days of watch repair I did purchase two of these cheap Chinese tools. The Crystal lift tool & the hand press tool. The crystal lift tool would not grip the crystal & I had to dress the claws but it was never that good. The hand press tool the plunger would stick when pressed & I had to burnish the shaft for it to work. Since then I have purchased a Bergeon crystal lift tool & a Horotec hand press tool and they worked perfectly from the start. Conclusion cheap tools are expensive in the long run.1 point