Leaderboard


Popular Content
Showing content with the highest reputation on 04/22/16 in all areas
-
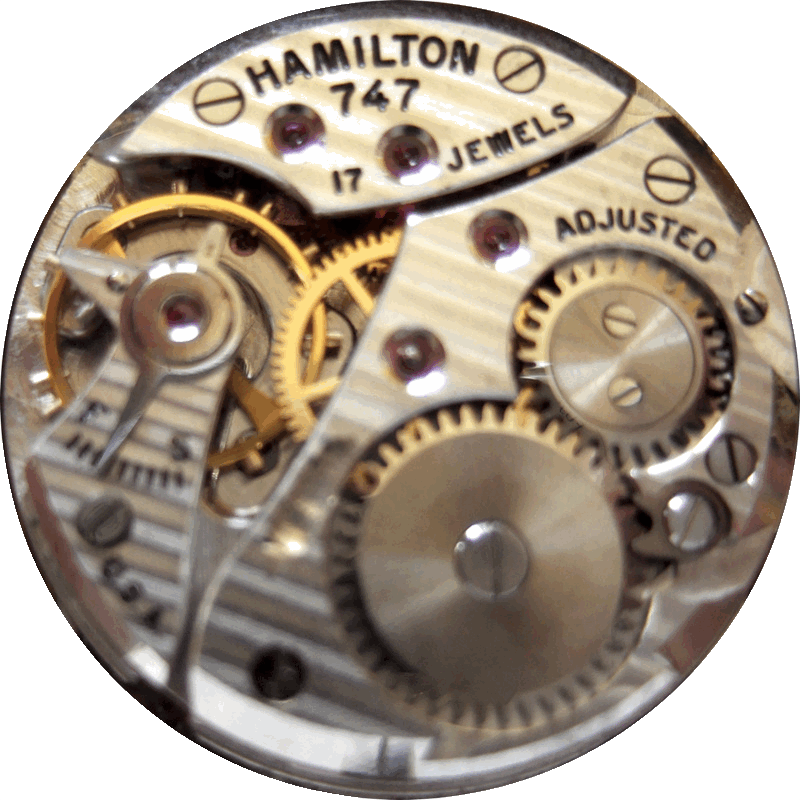
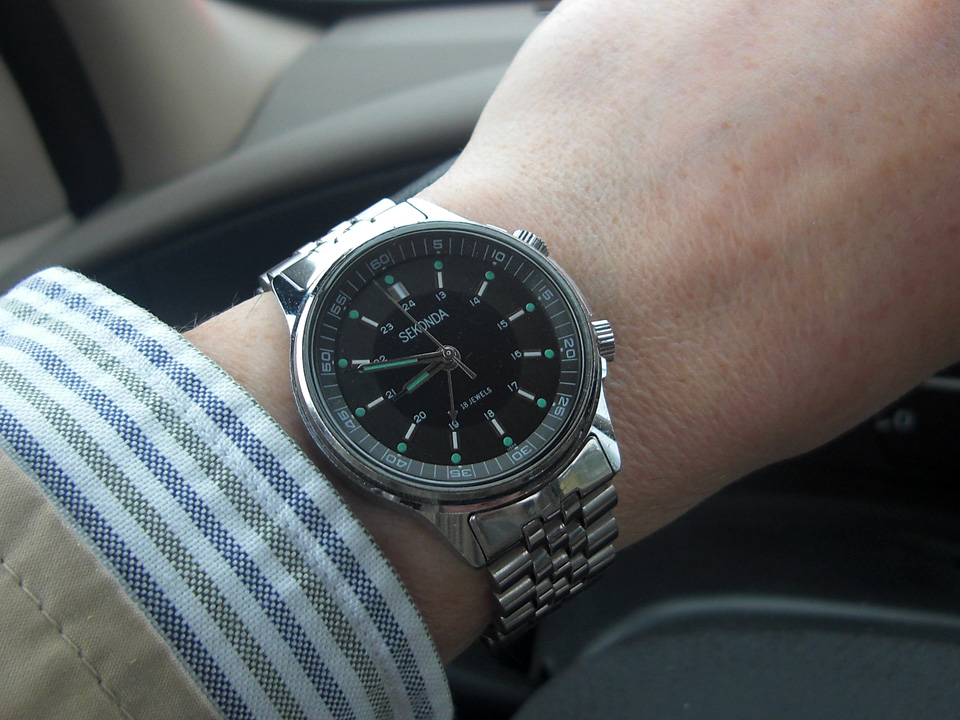
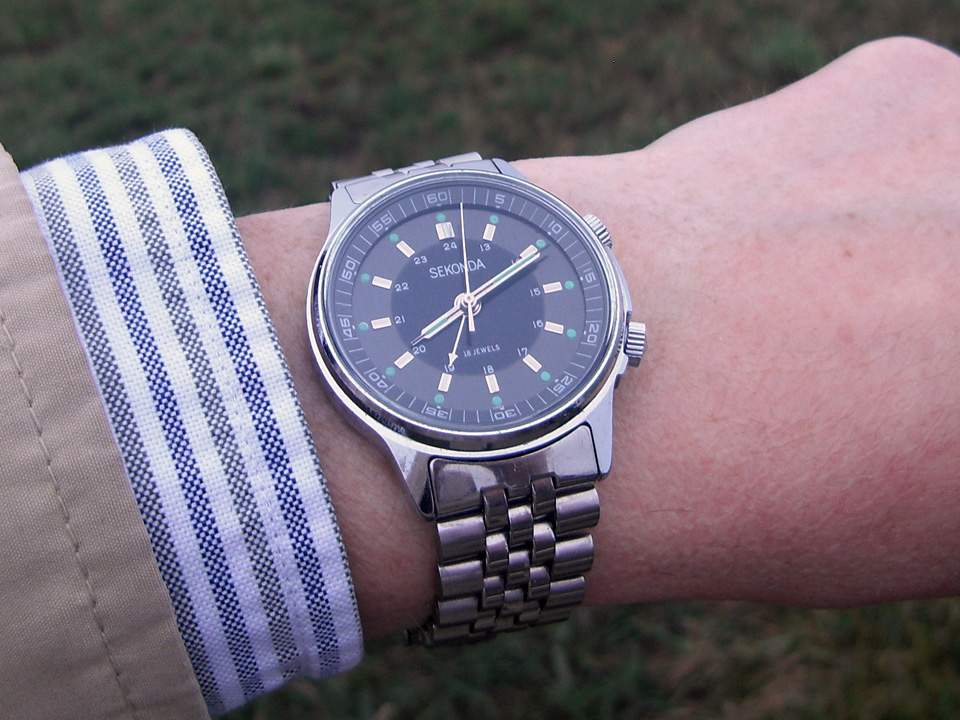
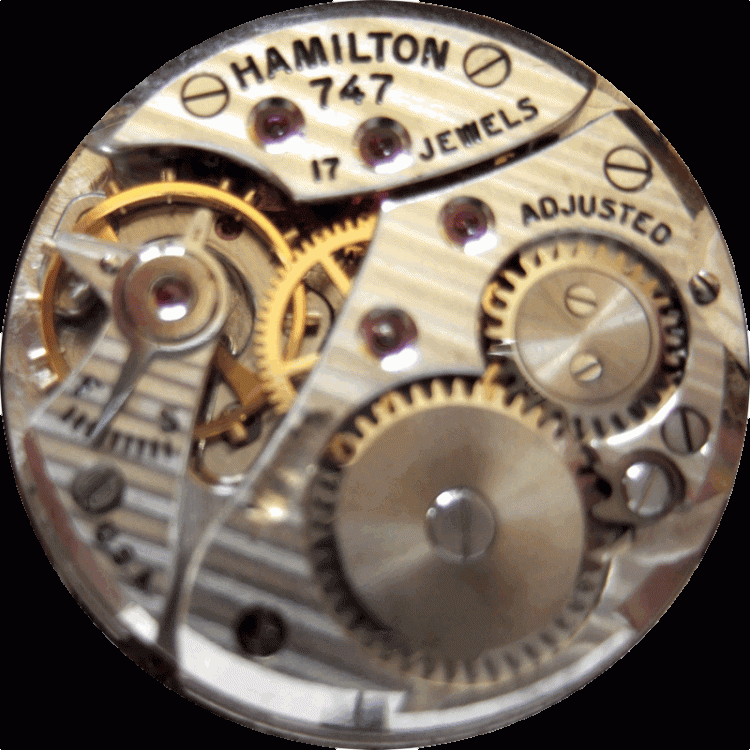
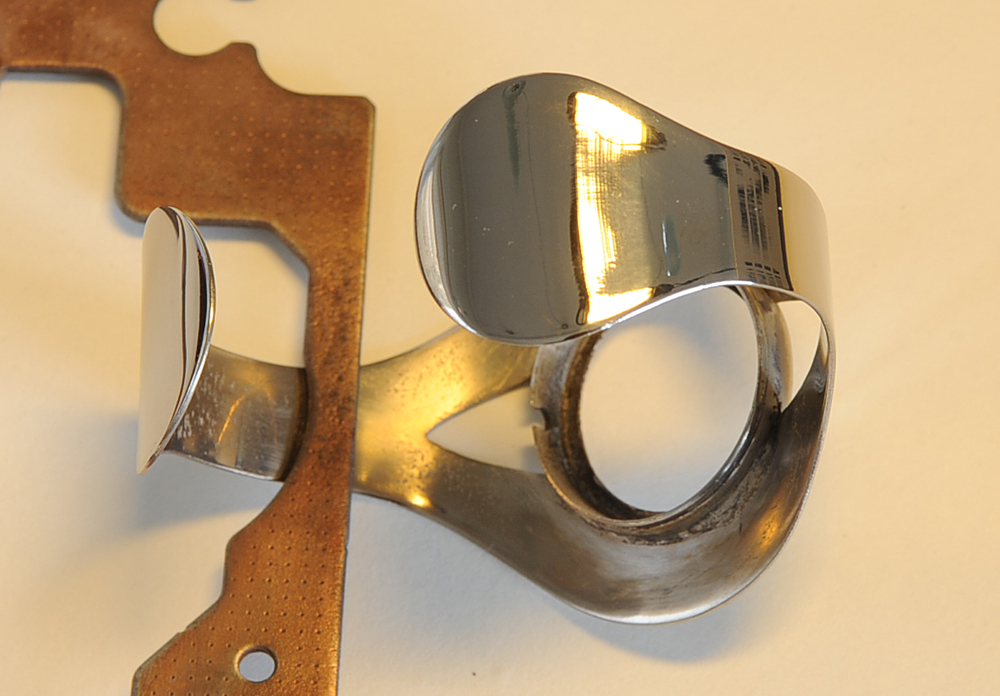
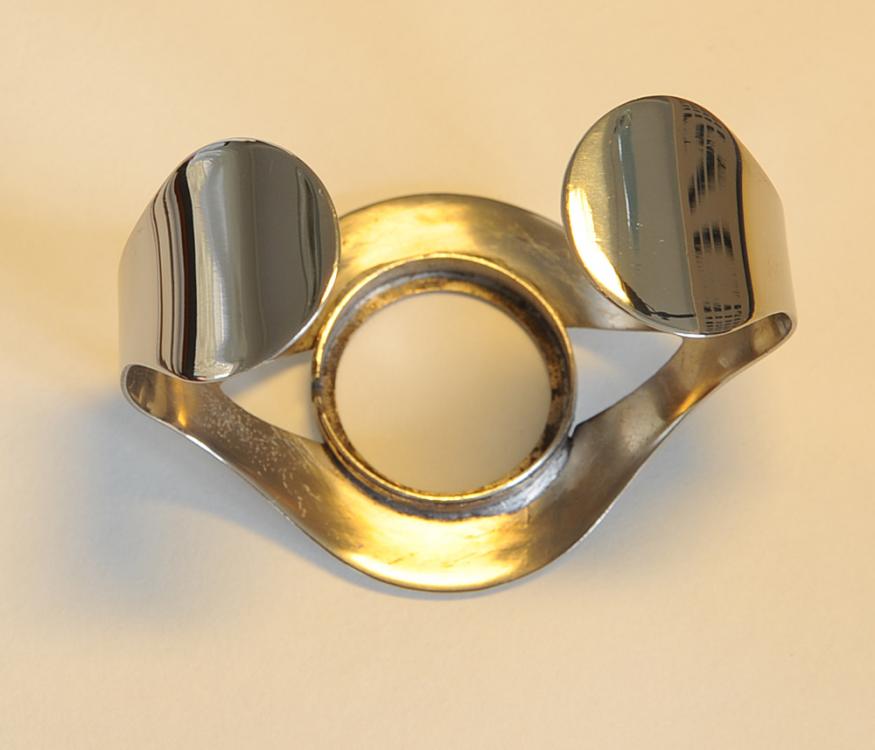
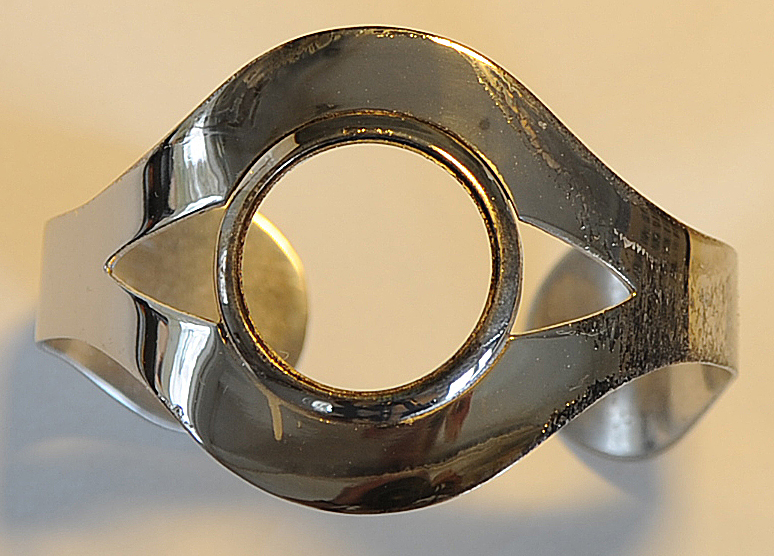
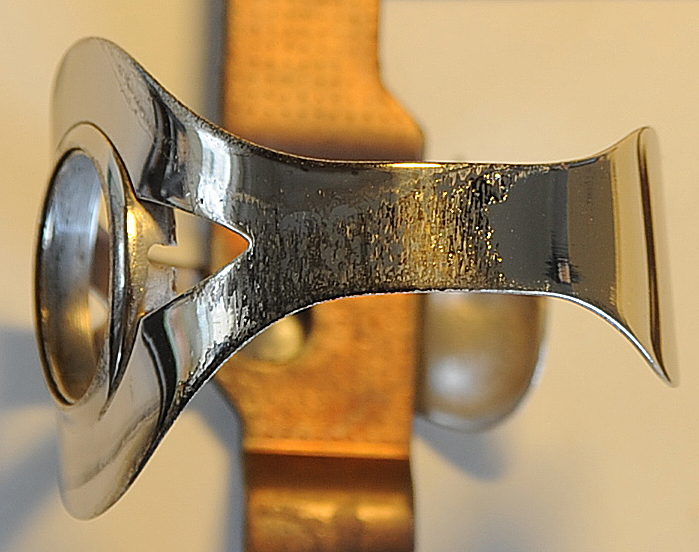
My Sekonda today, with Poljot 2612.1 alarm movement. This was the first watch I ever serviced. When I received it, was running 28 minutes per day slow, amplitude was 86°, and beat error was 10ms. The acrylic crystal was also really badly scratched up. Now it's running +/-5s/d, amplitude is around 280°, and beat error around 0.5ms, and I've polished the crystal. I also recently overhauled the very stretched folded-link jubilee bracelet. I did a write-up of the service here, http://www.stefanv.com/watches/restoring-a-russian-alarm-watch.html, and the crystal polishing here, http://www.stefanv.com/watches/polishing-an-acrylic-watch-crystal.html.
 4 points
 -
As I disassemble the movement I simply screw the screw back into the hole it came out of once the bit it was securing has been removed before moving on to the next part. Disadvantages; it adds a little time to the dismantling process. Advantages; the screws never get mixed up, and there is much less risk of them going missing during the cleaning process. If you look over any of my walk throughs you will see the screws have been replaced at each step.2 points
-
Some of you may have seen it when it was up on Ebay. The dial is basically blank. More to follow once i get round to it
 1 point
 -
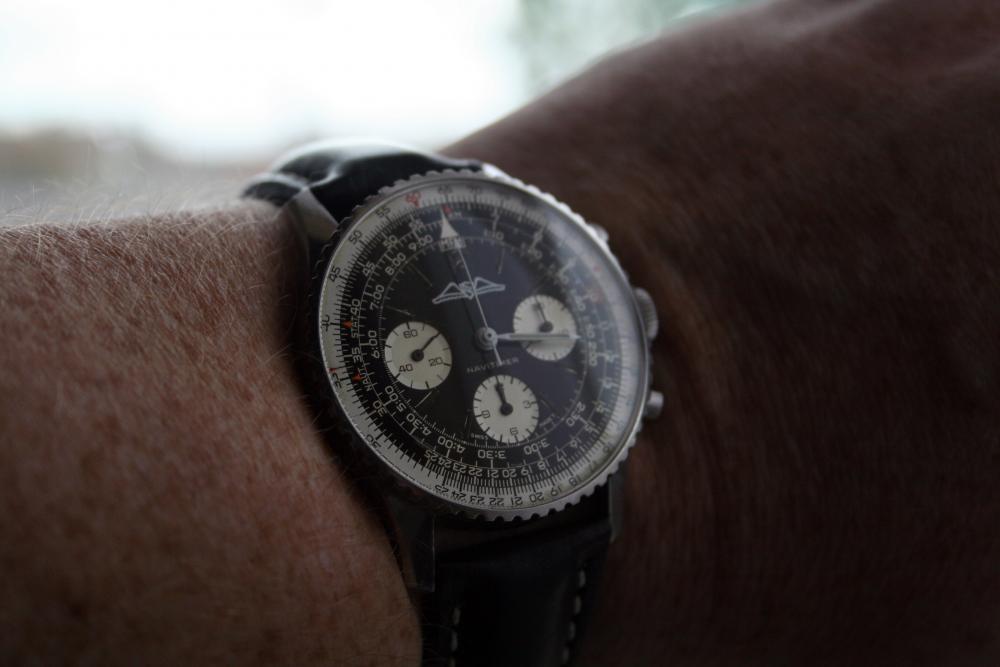
Vintage Navitimer. Wear it seven days a week. At least until I can nab a vintage Jardur.
 1 point
 -
We all have our different ways Mark. I think that is one reason why seiko barrels are different and can be hard to open. I look forward to the video, for me its nice seeing other watchmakers working and how the go about their work.1 point
-
Mark I don't know if you are aware back in 70's and 80's Seiko advised repairs if the the watch was 5 to 10 years old you should replace the whole barrel and not to open it to clean. Up to 5 years there is no need to do anything apart from cleaning the arbor.1 point
-
@Bill3 have a read of this thread regarding movement holders.1 point
-
I have an idea, Jeff, you could sell the parts on ebay as charms for women to collect and use...you know, those things that hang from their bracelets...1 point
-
That's a good one jdm.1 point
-
Label the tray, and keep screws segregated there, no need to wash them. Note this is my just opinion. I do not want to get into another debate on the benefits of washing and moving around screws or parts that are clean and do not carry friction.1 point
-
Good find oldhippy! From the description : YOU ARE BUYING ASSSES1 point
-
Today one of my many Helvetia's don't know why I have a softspot for them I think its the movements I like.
 1 point
 -
Yes they make up prices.1 point
-
Ok so that suggests that the crown gasket is unlikely to be the problem. Oldhippy's suggestion would be my next move. Remove the auto wind module (not just the rotor) and see if the watch hand winds any easier. If so then you will need to focus on the auto mechanism, going through it systematically checking pivots, jewels, reversers, etc. If the problem still persists with the A/W removed then you need to look at the keyless works, crown and ratchet wheels, and through to the barrel. Either way I would be inclined to think that the problem may well be indicative of the general state of the movement and would carry out a full strip down, clean, and service. The movement does look to be very clean in your photo, which could well mean that the watch back has never been off since it left the factory. That would also mean that it has never been serviced and all of the original lube will have deteriorated. It could well be that it is just gummed up with gluey oils.1 point
-
Aloha JDRichard , did you pick this beauty up at a pawn shop ?1 point
-
Interesting. A quick check on Ranfft shows that they certainly did do their own in house movements, as well as buying in from other manufacturers. Slightly less than half of the GP calibres listed on Ranfft are not attributed to other suppliers so I presume are in house, with the balance made up of adopted calibres from AS, ETA, Felsa, Peseux, and FHF. I shall have to keep my eyes open for the in-house ones in the flesh.1 point
-
Not sure i'd advocate that (at least until you know it is the fault), but you do bring up a good point, the issue may exist in the crown and its interaction with the pendant (case) tube. At the very least it's worth de-casing the watch and testing the winding action out of case/ see how freely the crown turns in the case without the movement, should be pretty quick to rule that out.1 point
-
True - but it's still possible to alternate - say - text with pictures and set the alignment. It's also possible to edit the picture immediately after creating it - by double-clicking it - and change the size and alignment of both text and pictures. Here's a picture: This was originally 750x750 px when I inserted it into the post - I double-clicked and changed the aspect to 75x75. Here's the pic again: resized and then centered. All images in the post are the same picture from "choose files" option... Hope this helps! Cheers, Will
 1 point
 -
Started in the family printing business in Central London 40 years ago eventually owning & running it. Unfortunately it began to own & run me more, so I sold it 8 years ago. Since then I have worked as a self employed Handyman, with a continuously full order book of varied work mostly on period properties.1 point
-
I don't think the empty screw hole is particularly unusual - I've seen that on a number of movements when in situ. Much depends on the case style being used for the movement. On the other hand...1 point
-
Ah, so no silicon then? Was wondering... I know nought about Russian watches except that a woman I met who was from Russia had been saving for a car and because of the devaluation of the Rouble she was only able to buy a Russian-made watch.1 point
-
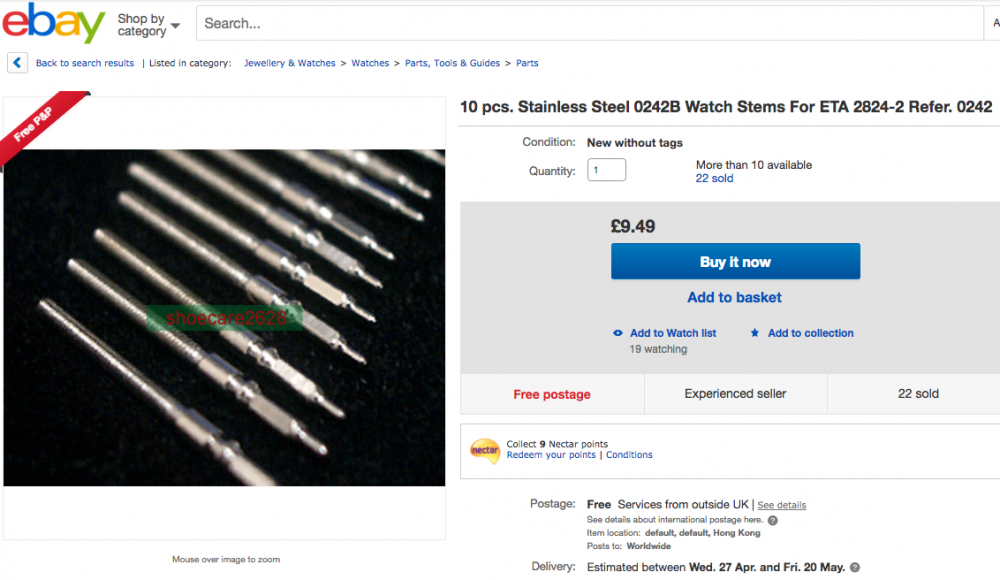
And - it starts..... http://www.ebay.co.uk/itm/10-pcs-Stainless-Steel-0242B-Watch-Stems-For-ETA-2824-2-Refer-0242-/271482876699?hash=item3f35a3f31b:g:ERMAAMXQDnpTbLUd
 1 point
 -
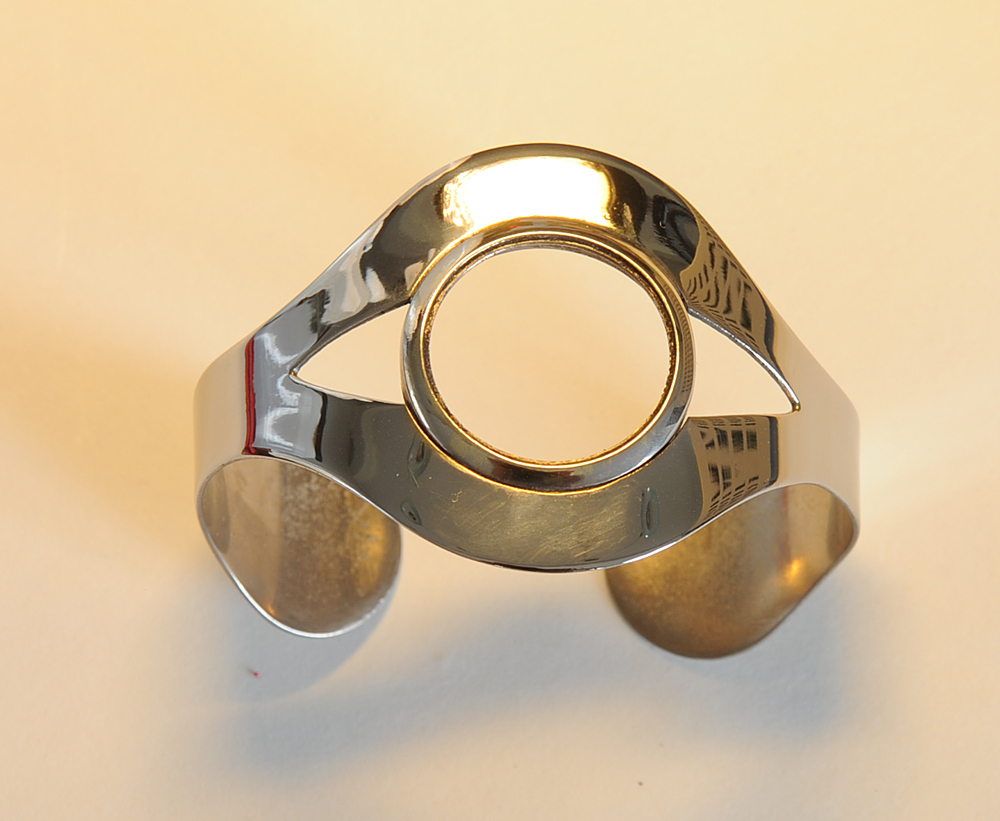
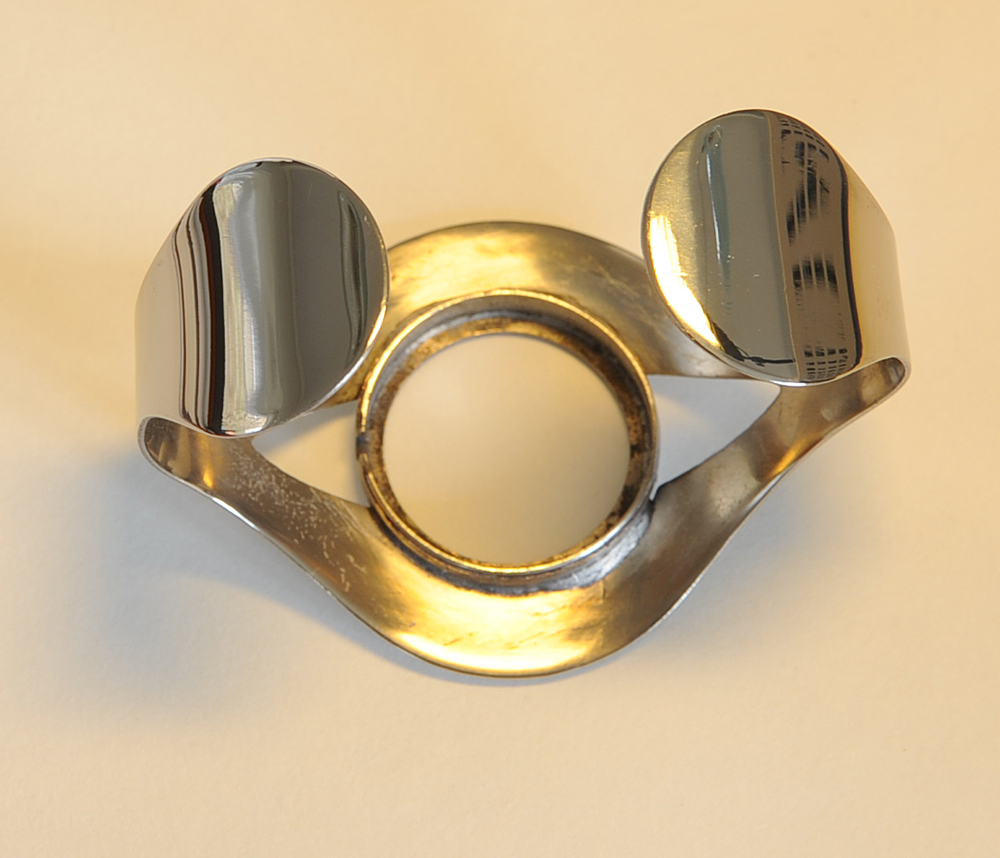
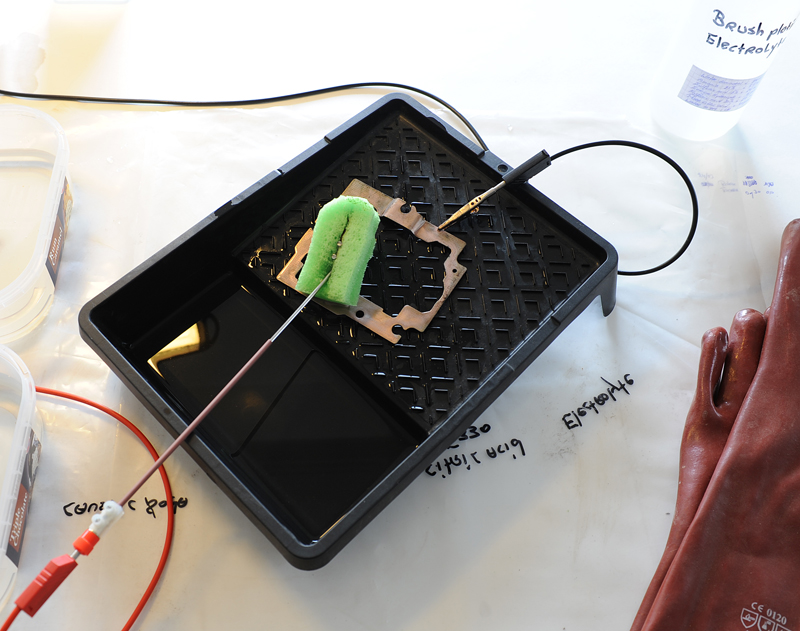
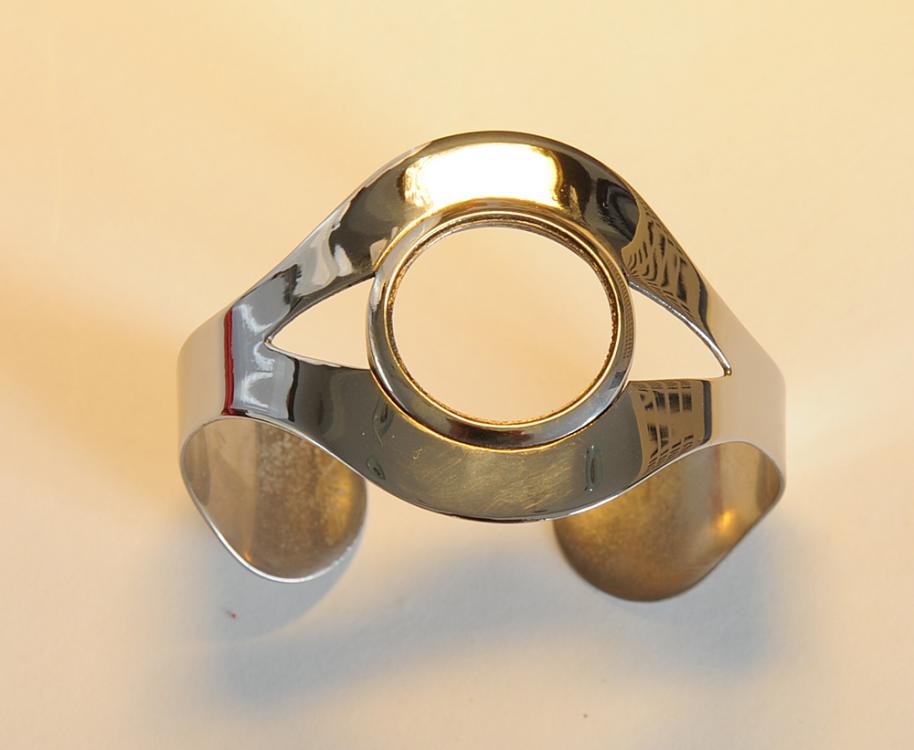
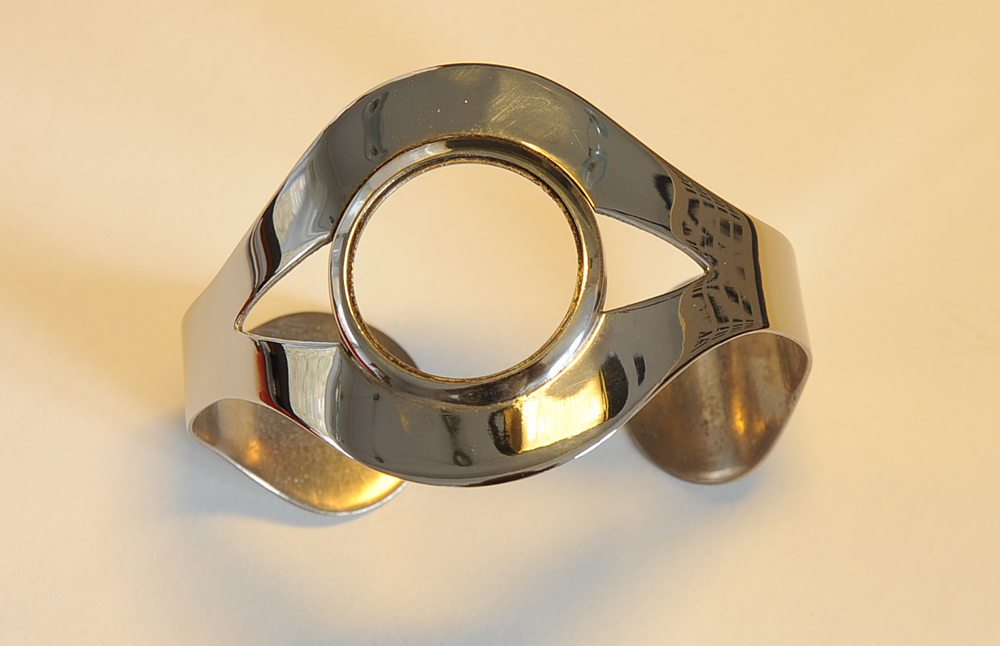
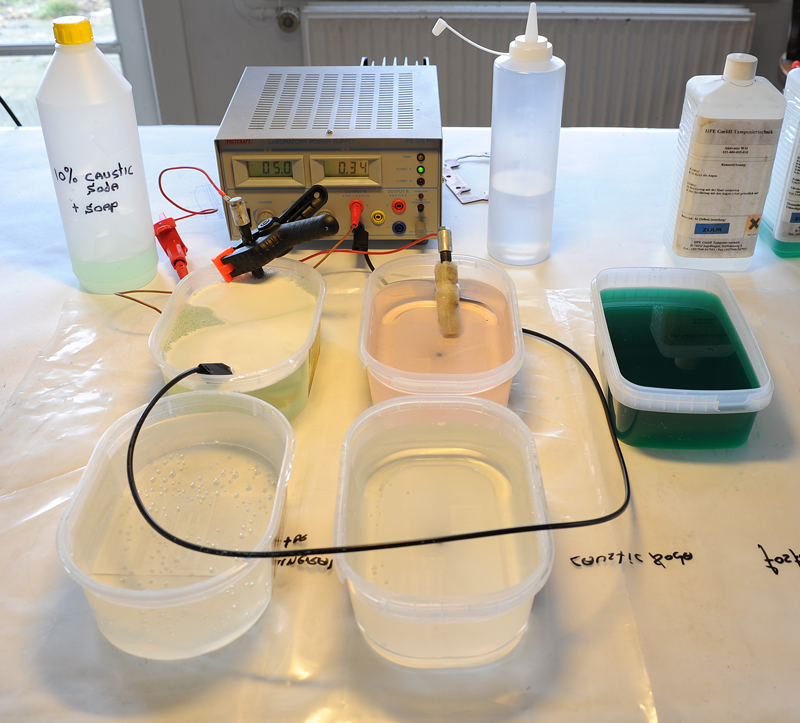
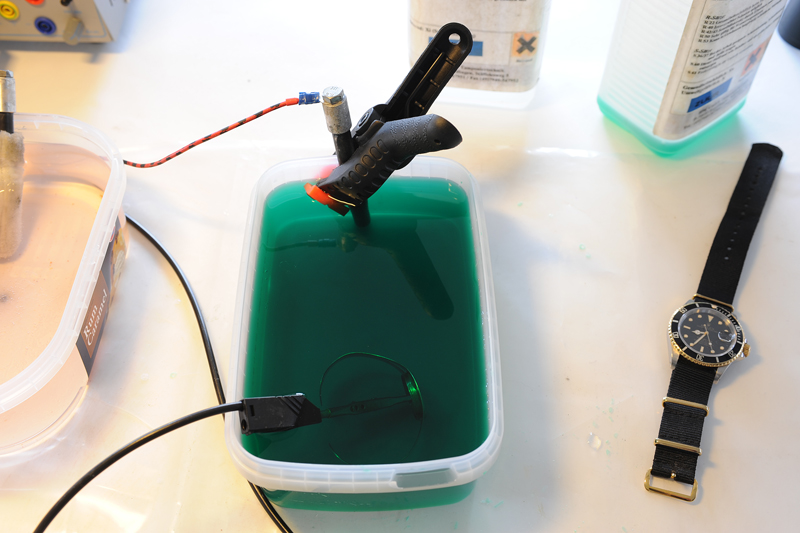
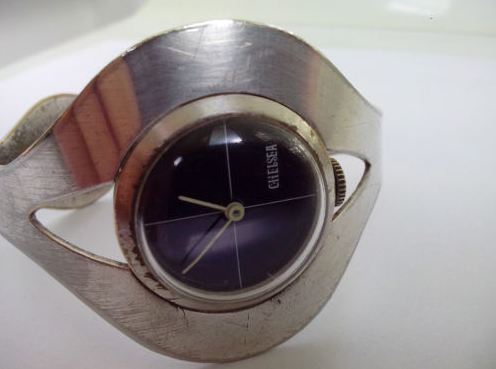
For all the Die-hards who have been following me so far, I have the pleasure to announce that today this thread will be concluded....... (at least I hope ) Attempting the CD-player iron-frame first turned out to be a very valuable lesson about brush-plating. I spent about 10 minutes on each side, shifting the sponge step by step over the frame. I took about 6 steps to complete the rectangular shape. In average the metal gets a total plating-time of 10 / 6 = a bit more than 1-1/2 minute per step. Two sides took in total about 20 minutes.......with the overall surface now being plated for only 1-1/2 minute on average. One has to bear in mind, that only where the sponge is, the plating happens. Everywhere else, nothing happens. Assume I want the a 10minute thick plating-time/layer, this would take me for both sides 6 x 20minutes = 2 hrs dipping around with the brush anode. And the CD-frame was an easy shape, the bracelet was going to be much more cumbersome. By Submerged-plating, once the object is submerged and the current is switched on, all surfaces are getting actively* plated (note the little * Asterisk here !). Since I received my friends chemicals for it, I decided that submerged plating was a better choice/option for the bracelet. My first submerged-plating attempt failed horribly According to my friend, his plating nickel-acid required 9V, slowly increasing to 12V and leave the bracelet in the bath for 5 minutes. However, check regular if things go fine. Black edges indicate too much current and this creates burning spots. Only 1-1/2 minute in the process and I noticed weird spots and black edges. Stopped the process and evaluated problem. As you can see, the metal has burned severely and the nickle has started to come off again. The voltage chosen was far too high. My friend deals with basins which contain 10m3 (10.000 ltr) of plating fluids, which is only "slightly" different with my 1 ltr plastic ice-tray. Also, predominantly one side of the bracelet was effected, the side facing the anode. The side closest to the anode gets the most current, hence the most plating and chances of getting burned. Referring to the little * asterisk above; yes all surfaces are getting actively plated, by the surface closest to the anode gets the most, whereas to side furthest away gets the least. The object has to be kept as far as possible away from the anode to avoid local burns and to be kept in rotation. In a 1 ltr plastic ice-try, easier said than done. Polished the whole nickel layer off and attempted again, but.......another failure This time I used only 3.5V, as most YouTube plating video's are suggesting, but this time the nickel-plating didn't seem to attache to some places on the bracelet. After 10 minutes the bracelet was totally covered, but the places which where covered later in the process, were visible. In an attempt to polish these spots away, the whole plating came off. Poor bounding, most likely not clean- or activated-enough. It was getting late and dark yesterday, so no pictures......sorry! Below a picture of the setup; each "bath" has now its own passive graphite-anode. Top left the 10% caustic/soap solution, in the middle the activation-fluid and the green to the right is the Nickel-acid. Below are two freshwater baths for rinsing (Yes, I know, a lot of ice-cream ;)) Again I had to polish the whole nickel layer off. Unavoidable was that the softer tin in the crack wore faster off than the surrounding copper, causing an unequal surface and making the crack more visible.... Also, when the above picture was taken, the bracelet was getting cleaned in the first cleaning caustic/soap-bath. The anode is clipped to the opposite side of the bath and you can see the foam/bubbles on the surface. Also here, the object side facing the anode, gets the best cleaning. While you rotate the bracelet for all-round cleaning, you can very nicely observe the bracelet cleaning-activity closer to the anode and further away from it. This gives you an excellent opportunity to learn about the current-behavior of the object you are about to plate. The same current-behavior happens in the Nickel-acid bath as well, be then it won't be visible....... no bubbles! I left the bracelet for 10minutes in the caustic/soap solution @ 5Volt, drawing 0.36 Amps. Next up was the activating fluid @ 5V. One has to wait for a color-change to occur which, according to the information I have been given, should happen within seconds. However, during my first two attempts, leaving the bracelet in for up to 15 seconds, I didn't see any color-change. This time I left the bracelet @ 5V for about 3-4 minutes, but no significant color-change was observed......maybe slightly lighter of color. But I figured that in 3 - 4 minutes in the activation-fluid, the surface should be well activated. Also here I kept the bracelet rotating. Third plating attempt; again, as in the second attempt, with 3.5V, drawing 0.03 Ampere (30 mA). Every minute I completed a full turn with the bracelet, performed regular checks and since things were looking good, I went on for a full 1/2hr. Here are the end results.........you decide whether it's good enough for your goals..... Before; After; The crack is still visible, but one has to hold it in the light, as I've done here while taking the pictures. Just on somebodies wrist, it looks very slick and hardly, if at all, noticeable. (You need to know kind of thing). Also, in reality the bracelet looks better than under the scrutinizing light and some shades appear as scratches, but there are none. Having had to remove the nickel-plating layer twice, didn't improve the surface smoothness and made some slight roughness, kind of "pitting". To me, it is not 100% perfect, but for what it is, the treatments that the bracelet has gone through and considering this is my first attempt ever......... I'm very happy The plating is smooth, appears equal and could stand already some light polishing. Thoughts on brush-plating / submerged-plating: As soon as I get an object which would fit entirely under the sponge, bush-plating will be very usable. For bigger objects, like this bracelet, submerged plating is, I think, the preferred method by far. The ready-to-go fluids required for submerged plating are far more expensive, but when good handling and when contamination is avoided (use of passive graphite-anodes), they will last a long time. However, there is a 3rd methode, and that's submerged-plating with an active anode (anode made from the material you like to plate with), using the DIY electrolyte solution described above. This is obviously cheaper than the complete ready-to-go plating fluids I've used here. I haven't got any gold-fluids, so if I want to do some gold-plating, I will give this method a try. I'm sure my wife doesn't mind if I borrow her gold-ring Main-lessons learned; - Both DIY fluids; the caustic/soap and the electrolyte, work. Lacking is the composition of the activator-fluid. - Preparation is the key. Endless polishing, in this case down till 6000 grit. Also long/thoroughly electrolytic cleaning and good activation before plating. - Brush-plating works for small objects, submerge-plating for bigger or odd shape (more effective/efficient and better equal finish). For both methods; when commonsense and protective equipment is used, I don't consider them a dangerous, toxic or hazards operation. - Distance of the object to the anode has to be carefully observed, plating-voltage about 3.5V. Perform regular checks and keep object rotating (compared to the anode) to ensure equal coverage. I hope somebody may have some benefit out of my experiment/project. If I get another plating-object, which calls for either brush-plating or submerged-plating with an active anode, I'll try to report that event too (unless the whole forum unanimous says; thanks, but no thanks ) Anyway, now the bracelet is done, all the chemicals back in the bottle, I can concentrate on the movement. There is a big chance however, that I will search for an alternative modern quartz-movement. I was thinking of giving the watch away to a young person who may appreciate a 1970's look watch, but most likely that person has never worn a daily winding watch and is used to the modern-comforts. Therefore, I'm afraid that a mechanical (inaccurate) daily-winder may end up in a drawer quickly. For me, the watch was more for the plating experiences..... and since I'm happy with the end result, it calls for more
 1 point
 -
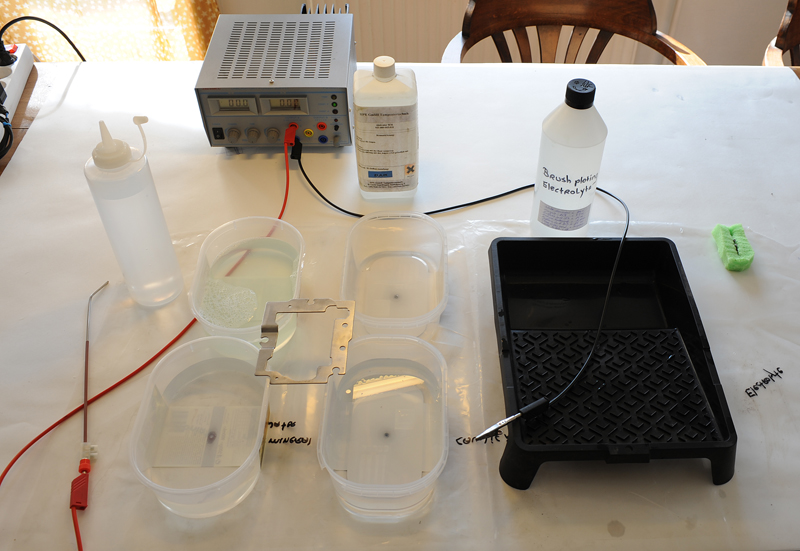
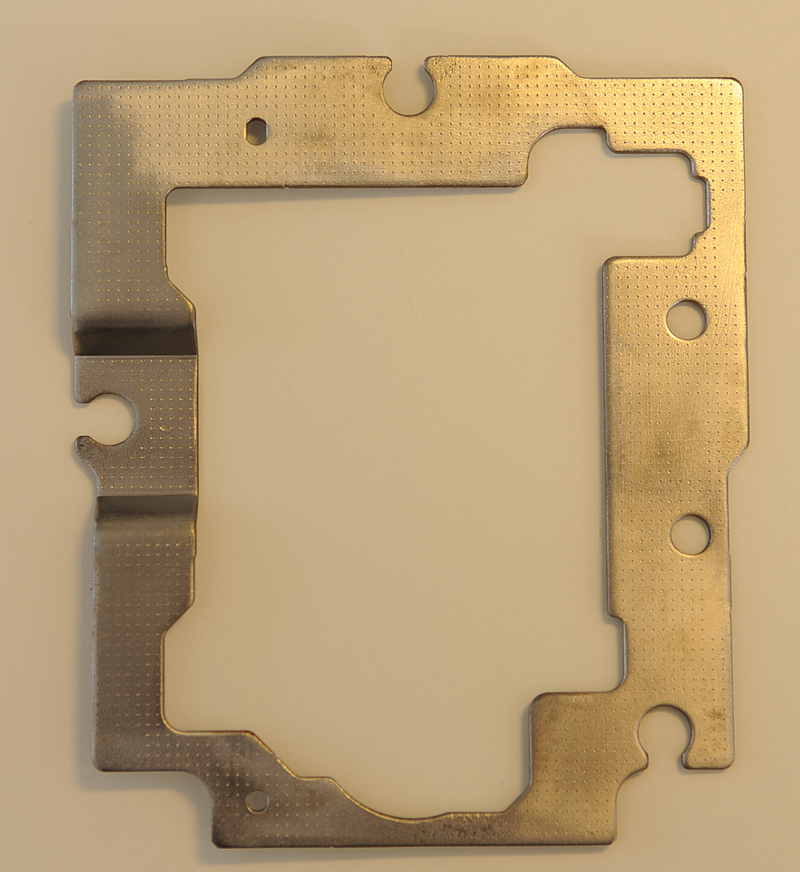
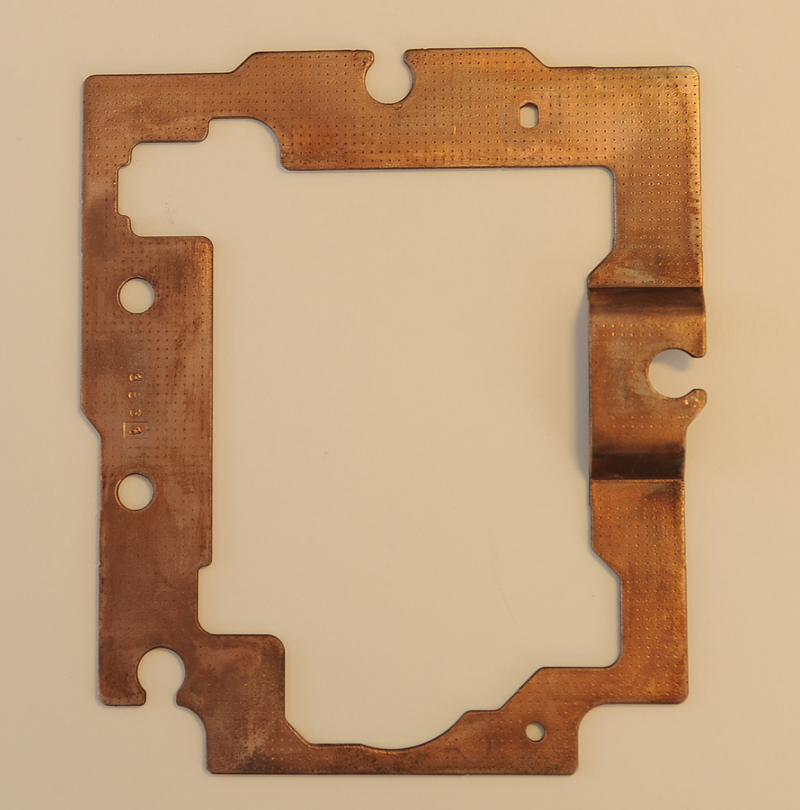
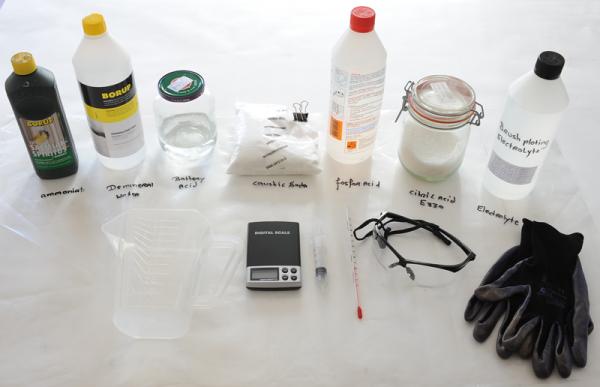
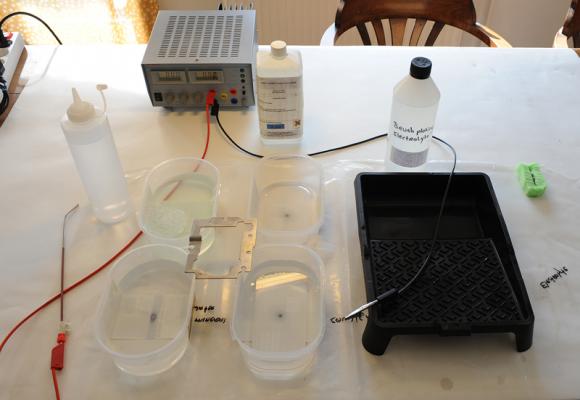
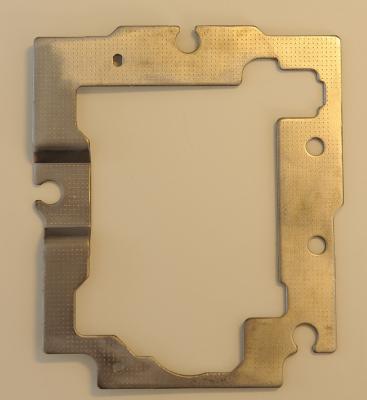
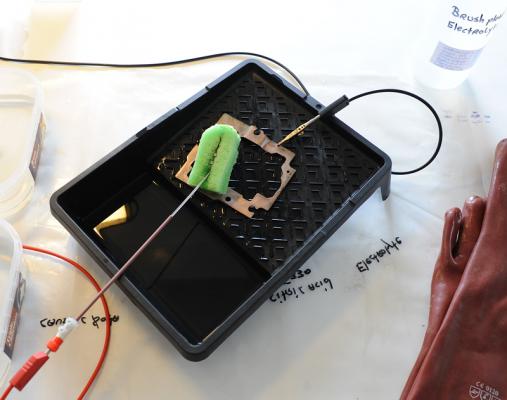
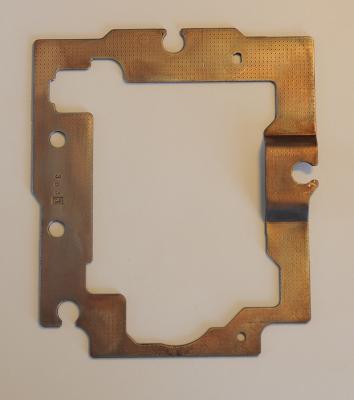
Did today my first plating, be it on a piece of iron. Before this stage, it was the mixing of the electrolyte, as per Robert Murray-smith video. I mixed the equivalent of: - Ammonia 9.5% by weight = 15 ml. - 200 ml demineralized water. - Sulfuric Acid, 95% by weight = 4ml. (car batteries or "Toilet & drain" cleaner) - Sodium Hydroxide (caustic Soda), 98% = 7 gram - Fosforic Acid, 20% by weight = 26 grams (limescale remover) - Citric Acid monohydrite 15% by weight = 250ml (E330 food additive) After all this is mixed in the above sequence, add demineralized water to total the amount to 1 ltr. The chemicals I obtained from several shops were of different in composition, so to give you an idea of my mix; - Ammonia 25% by weight = 5.5ml - Water 200 ml - Sulfuric Acid out of an old empty car-battery, 16% by weight = 26ml. (a full healthy battery should have about 32-34% by weight) - Sodium hydroxyde (caustic Soda), 98% = 7 gram. - Fosforic Acid 20% = 26ml - Citric Acid, 98% = 40 gram. As for the Sulfuric acid out of your car-battery; the get an idea of how much acid is in it, you have to determine the specific-gratify of the acid mix. Once you know that, this table will give you the percentage of Sulfuric acid: Conversion_Table.pdf Of course, wear goggles and safety gloves and all I'm giving is what I've done, not what you should do! The usual CYA warning ;) Next was the plating-setup. Top left "bath" is the cleaning agent, a mix of 10% Caustic Soda, some dish wash detergent and the rest demineralized water. Below is just demineralized water to clean the object after it has been in the cleaning-agent. The next raw is the Activator fluid. I cheated here a bit, as I don't have the DIY composition from activator-fluid yet. I received a lot of chemicals from my friend, and it included a finished Activation fluid (bottle standing above). If somebody finds the composition of the nickel-activation fluid, please let me know. Below the activation fluid, another demineralized water bath to rinse and clean the object. Next, to the right, is the bath for brush-plating for the Brush-plating electrolyte. On top, the black lead, is the cathode with a crocodile-clip. Complete top right is the (green) sponge with the copper donor-material inside, made to suite the wand. Completely left, the tall spray bottle, is pure demineralized water to spray/clean the object before it goes into the next "bath", avoiding contamination of the baths. The object to be plated, in the middle is the steel frame from an old discarded CD player, just cleaned with a rotating steel wire brush/disc. Here is the frame before plating; While plating; After plating; Then I did some polishing with Brasso-polish to see how "good" the layer was, but as you can see, namely on the right hand side, I went through the plating . Contacted my friend, and he concluded that only about 10 minutes of plating, 14 Volt, 0.3 Amps yields only a very thin layer of copper, maybe 1 or 2 (at the most) microns (0.001 - 0.002 mm). Brasso polish, being quite aggressive, rubs through it fast. Apart from that, all looks fine. The point of this exercise was to see if the setup and the DIY electrolyte / wands works at all. As said, if somebody can find the composition of the nickel activator, I will mix it and give that a try....... (I think some mix with HCL and/or Sodium Hydroxide) I'm still awaiting the nickel and pure copper donor metals out of China. Meanwhile, I'll do some more (longer) test to see if a better / thicker layer can be obtained and at which Voltages / Amps to play. Hope people haven't fallen asleep by this long thread? If you did, cheer up, there more to come when I receive the donor-materials....... ;) Happy Easter......... :) Roland.

 1 point