Jump to content

Custom Build using Venus 170


Recommended Posts

11 minutes ago, bjd1020 said:

when was the subject part produced???

I really can't remember exactly when that testversion was printed maybe one year ago or so maybe longer.
Found it lying around in the corner of my projects box when looking for the name of the plating kit.

21 minutes ago, bjd1020 said:

I have the glass and mic'd the dias and even at the highest resolution it still has a hard time holding tolerance.

Yes you will Always have to tweek the version you 3D print since the material as you for sure know (PLA and ABS) is a bit runy since it is melted in the extruder. One gets the feeling for the settings you apply in your printing software contra the performance in your printer . Every printer has a slight variation. The most printers have a deviation of +0.2 to +0.4mm just because of the material properties.
 

Link to comment
Share on other sites

How *NOT* to gold plate. (From the little I have learned, I suspect plating on to chrome is a non starter, but maybe there is something else going wrong here).

Caution: Contains ridiculously poor safety standards, (yellow marigold gloves as protection from potassium cyanide for example), so do not attempt any of this at home, or don't come crying to me if you do, and inadvertently poison yourself in the process. :unsure: 


Caution 2: If you haven't seen any of Cody's stuff before, you may well waste most of the rest of your day watching some of the other stuff he does. Everything from inhaling all (most) of the noble gasses to floating an anvil in mercury.


Link to comment
Share on other sites

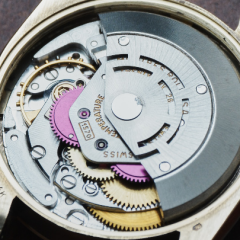
I have a heartbeat. Im not celebrating just yet however. One thing I learned, I think I know where the gritty feeling is coming from. I noticed when putting together the rocking bar, several gears on that assembly are toast. A few of the teeth are worn pointed. I tried to take the best gears from all the spares and it seemed to help a bit. Im also not completely sold on the balance. I ordered two complete balance assemblies including the bridges. My aim was to avoid having to put these together as its a bit challenging, however when I unpacked the order the balance wheels were not attached to the bridges. I attempted one assembly and when installed the hairspring it doesn't seem symmetrical. I think I may have something here not correct. Im going to have to do some research to make sure im doing that part correctly. The mechanism used to engage the hairspring to the regulator is different on both bridges I have, one seems stright forward the other not so much. Anyhow I dare not put it on the time graph as I dont want to take the wind out of my sails just yet. One thing, I am pleased with the plating and finished look. fae6d4559c1d057b77ac332aa4ee17d8.jpga32d7982a3a9c3239edccaa3514288d3.jpg

Sent from my SM-G950U using Tapatalk

  • Like 1
Link to comment
Share on other sites

Ok. If anybody is out there.......i put the watch on the time graph and its pretty ugly. The time graph keeps reseting trying to autodetect beat rate. Im not even sure what to set the rate or angle to. I am planning to go through all the verification checks in the manual and will also be installing hands and doing a check with that as well. Any advice on the time graph would be helpful. As for the balance assemblies. I have included a photo of the regulator boot, if anybody has a tutorial on how to install the wheel with this type of boot it would be appreciated. You can also see the way the hairspring sits, im not sure if this is normal. 3fc504b16050c74b3dc0f6b3c2fa70fc.jpg9dafe05193f233c728afad3a31149990.jpg

Sent from my SM-G950U using Tapatalk

Link to comment
Share on other sites

  • 2 weeks later...

Dial has finally arrived. Its been a couple of weeks since I have been able to work on the build however I have some information regarding balance and will be back on it next week. 66b770f78d26543983d8fc75eeb621bb.jpg

Sent from my SM-G950U using Tapatalk

  • Like 1
Link to comment
Share on other sites

  • 1 year later...
On 2/4/2019 at 7:26 PM, bjd1020 said:

Ok. If anybody is out there.......i put the watch on the time graph and its pretty ugly. The time graph keeps reseting trying to autodetect beat rate. Im not even sure what to set the rate or angle to. I am planning to go through all the verification checks in the manual and will also be installing hands and doing a check with that as well. Any advice on the time graph would be helpful. As for the balance assemblies. I have included a photo of the regulator boot, if anybody has a tutorial on how to install the wheel with this type of boot it would be appreciated. You can also see the way the hairspring sits, im not sure if this is normal. 3fc504b16050c74b3dc0f6b3c2fa70fc.jpg9dafe05193f233c728afad3a31149990.jpg

Sent from my SM-G950U using Tapatalk
 

If you put hairspring into regulator pin, it will probably center around the jewel and will be fine. To insert into regulator pin, put the balance cock upside down on table and with screwdriver turn the small brass part as a screw (it has some ingress for screwdriver's tip). By turning it will free the small pin and you will be able to put hairspring between pin and brass part, turn it again to close it. Make sure you are doing it steady, very easy to mingle hairspring if screwdriver slips, as it requires some pressure.

Link to comment
Share on other sites

  • 3 weeks later...
On 2/17/2019 at 12:55 PM, bjd1020 said:

Dial has finally arrived. Its been a couple of weeks since I have been able to work on the build however I have some information regarding balance and will be back on it next week. https://uploads.tapatalk-cdn.com/20190217/66b770f78d26543983d8fc75eeb621bb.jpg

Sent from my SM-G950U using Tapatalk
 

Nice dial @bjd1020! Is this your design? How was it made? How's progress on this project?

Link to comment
Share on other sites


  • Similar Content

  • Recently Browsing

    • No registered users viewing this page.
  • Topics

  • Posts

    • This makes much more sense now, the oil is withdrawing itself to make as little contact with the epilame as possible. Same principle as wax on a car creates a hyrophobic surface that makes the cohesive properties of water molecules pull together.  The water beads run off only when under the influence of gravity but still remain cohesively beaded up. And as mentioned earlier a pivot would keep the oil in place on a cap jewel.  Epilame on an escapement would be a different scenario, there is nothing to hold the oil in position if gravity tugs at the bead to move, plus the escape teeth pull the oil about Maybe this is why its suggested to run the watch for a short while to remove the epilame to make two oleophobic surfaces either side of the oil, creating a ring of fire 🔥 around it 😅
    • As with every skill it watchmaking, it takes practice. Notice at the top of the document it says, "Practical work - 40 hours".  I can get the balance wheels 'close enough' to flat, but never seem to get them perfect. Same with gear wheels. Guess I need more practice.
    • Has it got a beat adjustment on the platform or is it a fixed hairspring? in short what you are looking at to get it just about in beat is to get the roller jewel sitting dead centre between the banking pins. So remove the platform and take of the pallet fork and escape wheel to give you clear line of site, sit the platform with the balance in place and with it level look between the banking pins and see if the roller jewel is sitting between them, if it is nice and central its there or there abouts in beat, if its not the the position of the pinned end of the hairspring needs to be adjusted to move the roller jewel into the correct position, thats why I asked if it has an adjustment on the platform or not, if it has its an easier job. 
    • I've managed to adjust it. I'm going to try and explain it as well as I can with my limited horology knowledge but I hope it helps someone in the future. There is a cam to the right of the front plate as shown in the picture. As the clock ticks along, the pin indicated in the gear comes around and slots into one of the silencer cam gaps, turning the cam. The pin completes a full rotation in 2 hours. To adjust the cam to start at the right time set the clock to just before 7. I did 6:45. Then I turned the silencer cam anticlockwise, which spins freely, until it pushed the silencer lever up and was placed just before the drop. Just before the 7AM indicated in the picture. All I then had to do was progress the hands to 7-7:15which made the pin slot into the silencer cam gap and turn the cam so the lever comes down again, unsilencing the clock. That was it. If anyone comes across this issue again I'd be happy to assist. Thanks again to everyone that helped. Hey Transporter! Thanks a lot for the reply. That was a really good explanation and I'm sure it would have made my troubleshooting a lot less painful haha. I'm sure someone will find it useful in the future. Thank you again for taking the time to try and help me out with this.
    • Now I'm completely confused, it would appear that the epilame  is oleophobic  as @Marc states: This oleophobic  behavior can be seen as beading of the droplet (as above) which stops the oil spreading which is supported by what we observe on treated/untreated cap stones (for example), but as @VWatchie states this should make the drops more mobile and is supported by the literature:   A review on control of droplet motion based on wettability modulation principles design strategies recent progress and applications.pdf   However the hole point is that we have less mobile oil so an oleophobic  would see to be the opposite of what we want. In fact this beading and high mobility are desirable properties in things like smart phone covers, see below.  I am fairly sure that epilame doesn't make the droplets more mobile, so maybe its a strange coating with dual properties that are both oleophobic (beading) and cohesive/adhesive resulting in low mobility?? This may explain the high price??  
×
×
  • Create New...