Search the Community
Showing results for tags 'Seiko'.
-
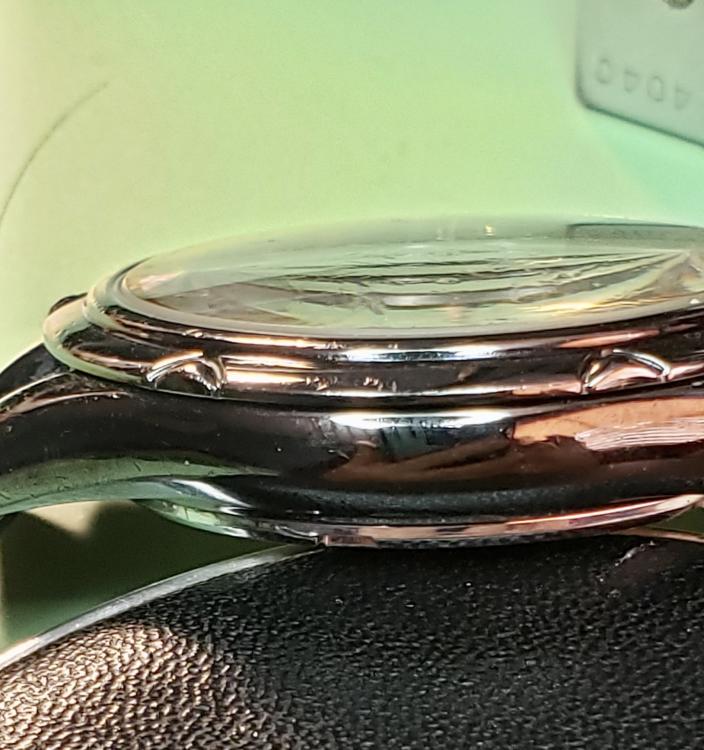
Hi, I recently got myself a Seiko Lord Matic 5606. As the time of writing this, it has not arrived yet. Anyway, I am wondering how to open the case for the Lord Matic since you can only access movement by opening through crystal. I am completely new to the world of watch repair, so I am just wondering what are the tools that are needed to open and close Lord Matic case in a scenario where for instance I want to regulate the watch myself? And also what are the techniques that are involved to do so? Is this something that is doable for beginner like me? Is the whole operation possible to do with a relatively simple set of tool or is it something I can only do unless I have a crystal press for instance?
-
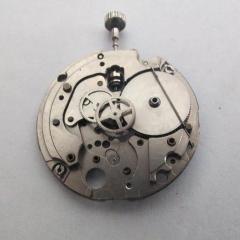
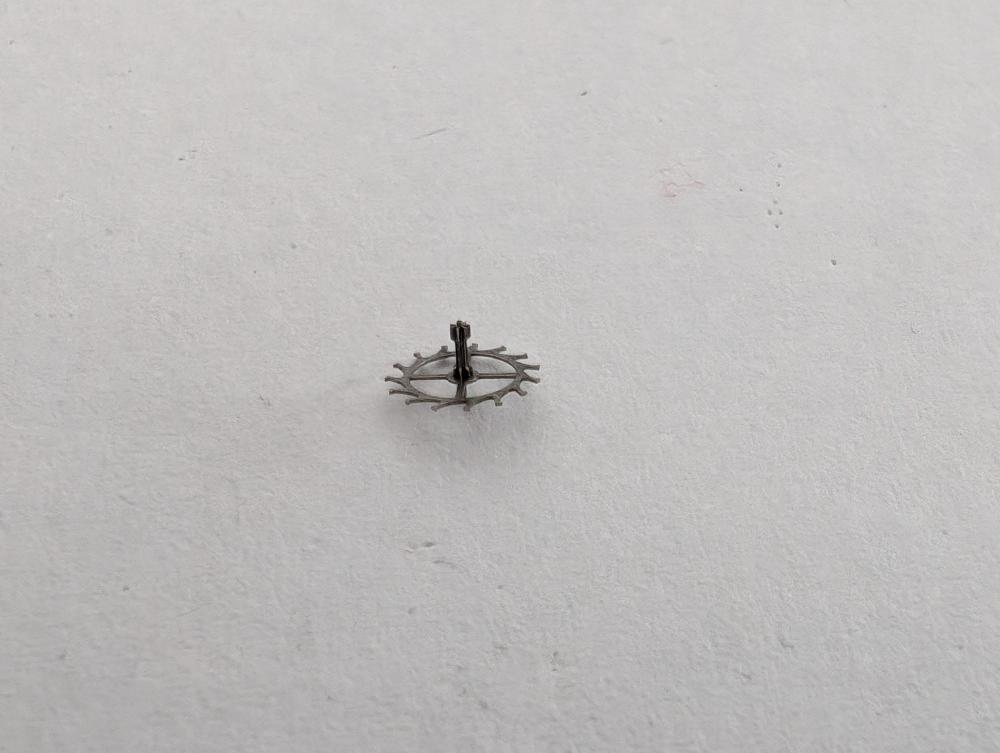
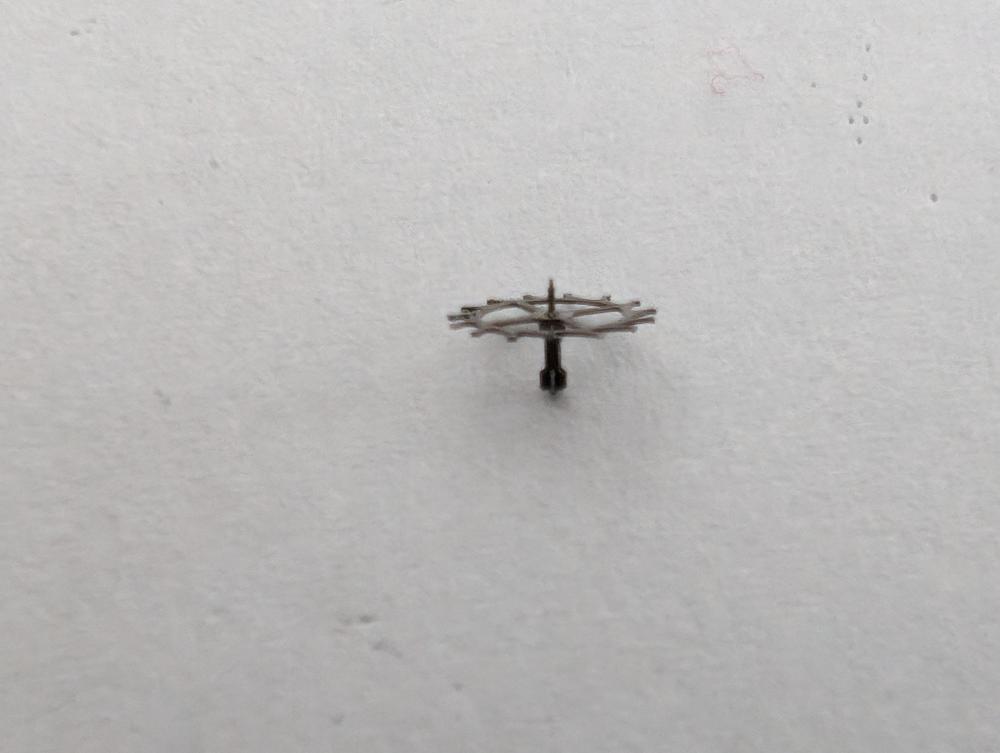
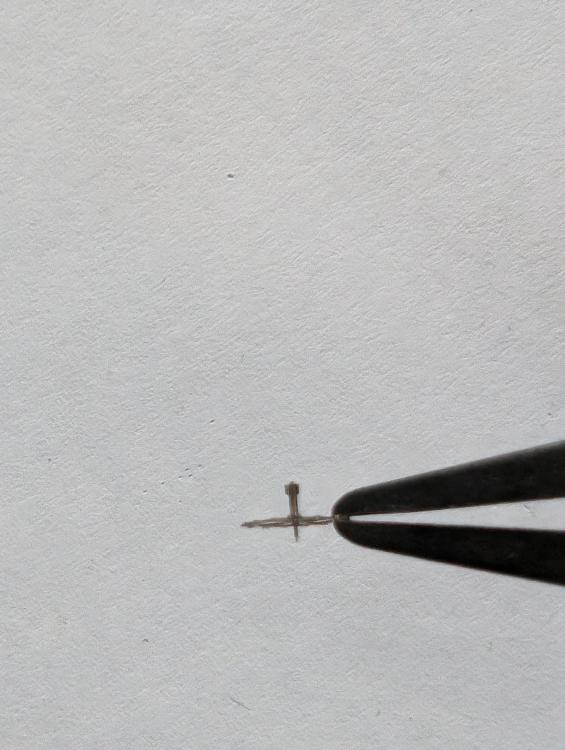
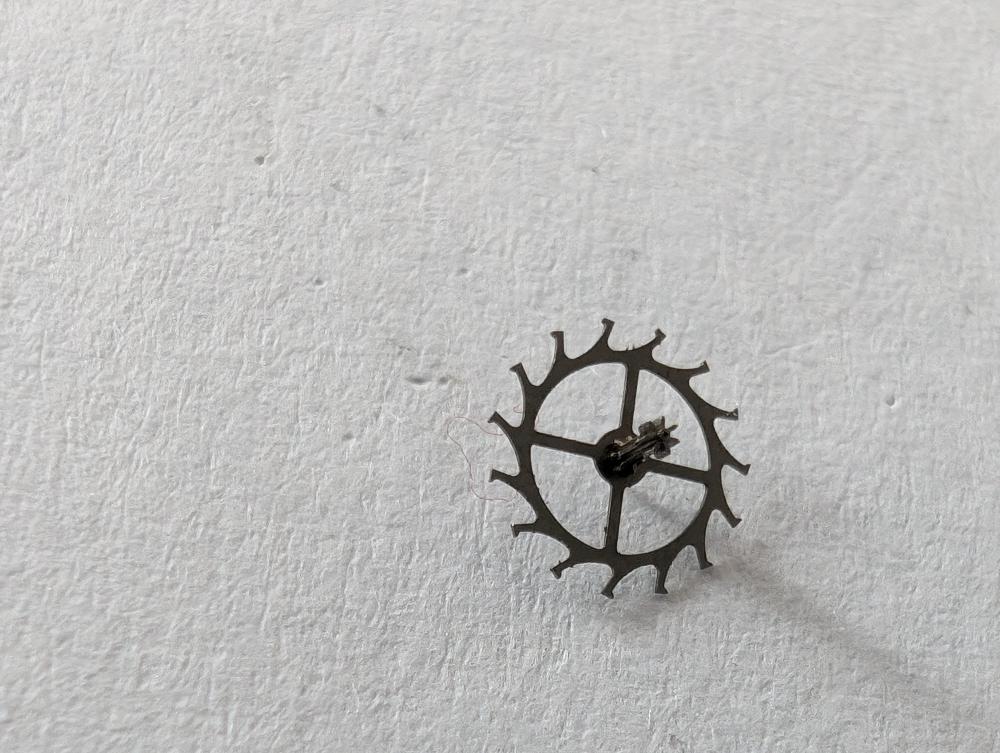
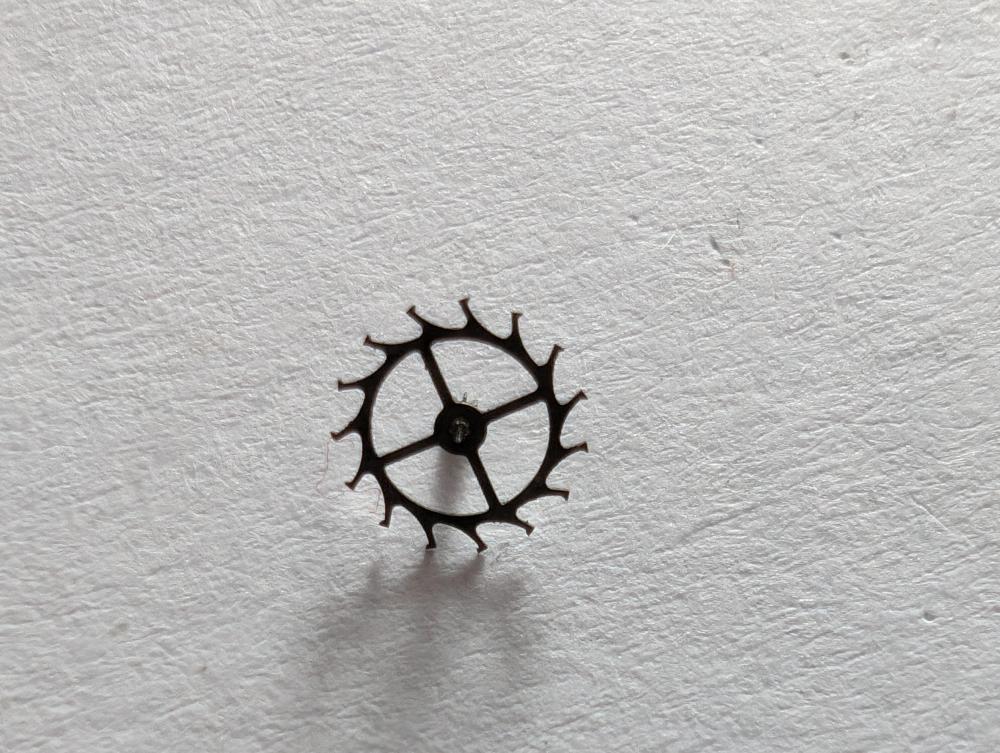
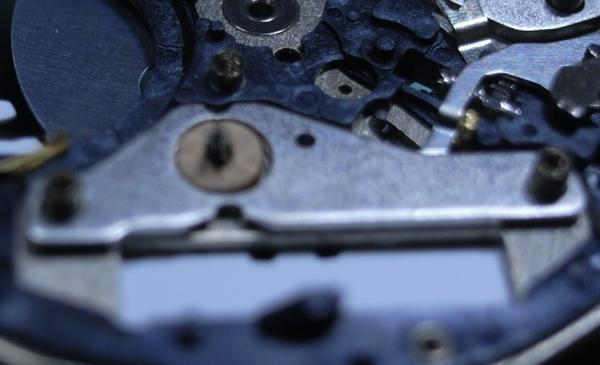
I recently bought a Seiko 5 7009 which turned out to only run intermittently. After taking it apart and giving it a clean I went to reassemble but struggled to get the escape wheel and pinion to sit between the jewels. I think it looks like it might be slightly damaged at the top and was wondering if anyone agrees? It's part number 251012 and I've attached some images below. If it does need replacing does anyone have recommendations of where to find them in the UK, the only ones I can find seem to cost more than a donor non-running movement. Is it a part that is commonly broken or would people take the risk on a donor? Thanks, James
-
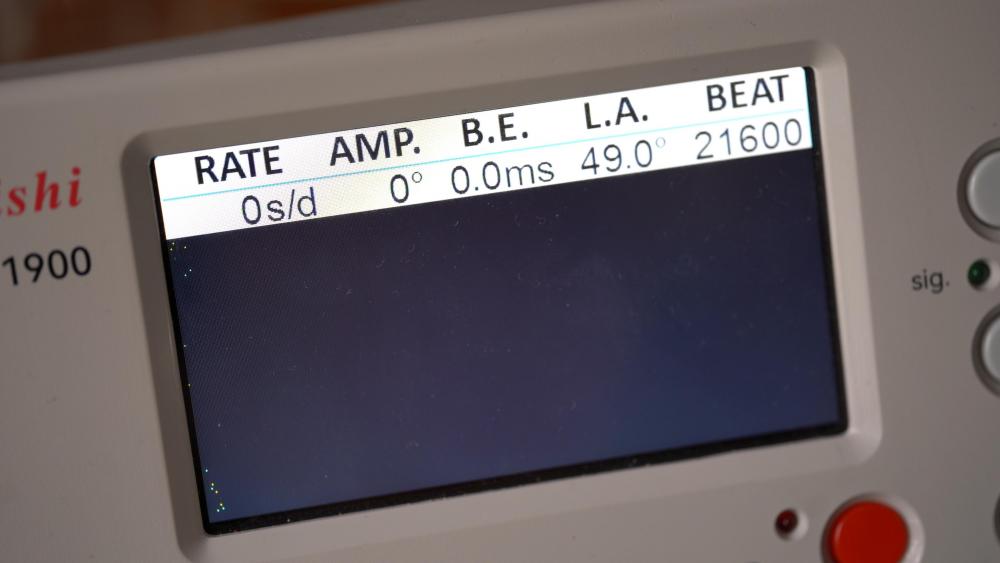
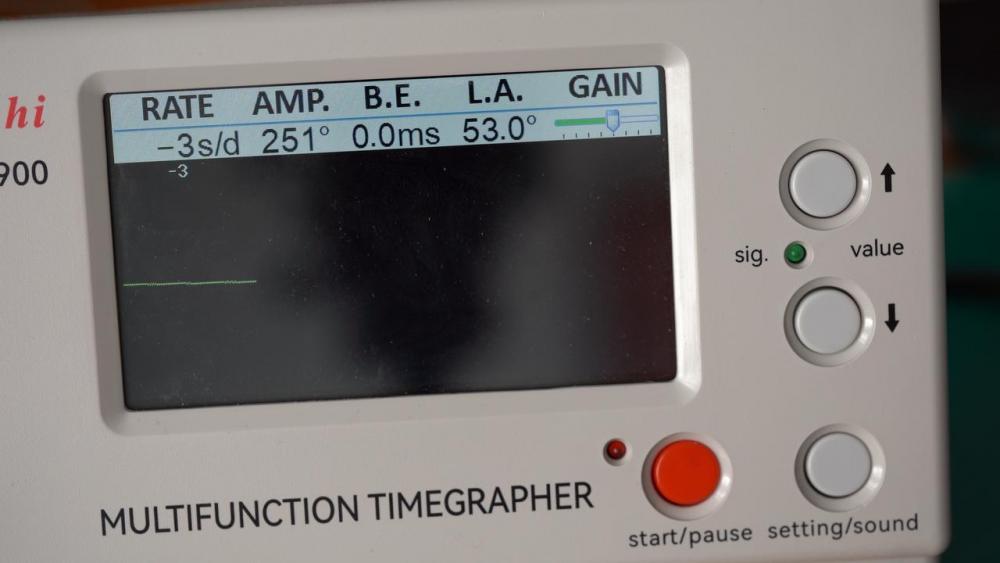
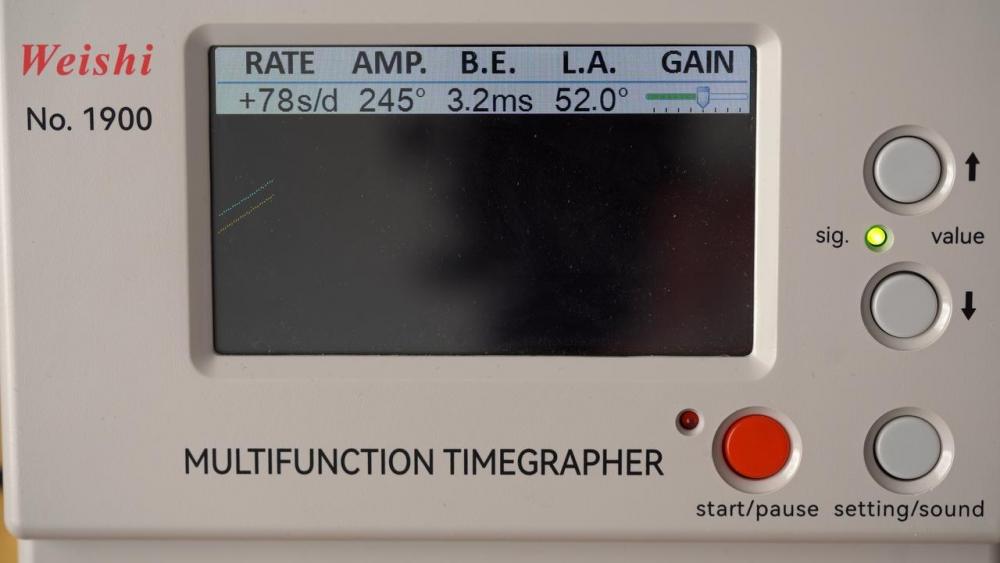
Christmas has come early, just received a brand new Timegrapher 1900 (cause I've been a good boy and have only used naughty words 99 times a day instead of the usual 200+). Have been looking for lift angles of various Seiko movements but the links to lists have dried up, any one out there have these?
- 12 replies
-
- Timegrapher
- Seiko
-
(and 1 more)
Tagged with:
-
Good day all, I'm looking for a user manual (not tech manual) for a Seiko 7009 the little ones that you usually get in the watch box, ideally in pdf format. I have looked but cannot find on line. I want to give these out with my refurbished 7009s as I repeatedly get calls (sometimes from the same person!) saying the watch won't wind up, or how come that the date change function works but not the day function - despite telling and showing them beforehand that, by design, these are automatic only watches and you push in the crown to change the day. I can find the booklets for the 7002 and 7S26, but not the 7009. The 7002 and 7S26 are close, but not close enough and will only add to the confusion.
-
Hi everyone, I have a Seiko SNL001 7L22-0AA0 I removed and replaced the stem and it stopped ticking when back in. what have I done?
-
Hi!! I recently got myself a Seiko Lord Marvel with the Caliber 5740C. Right after getting it, I took a timegrapher reading through Tg and manual calculation through Audacity. I measured the amplitude of it to be about 140 degree (assuming lift angle to be 53 degree.) I thought the low amplitude may have indicated the watch needs some servicing, so I took it to a watchmaker and had him looked into it and did an overhaul of it. (There were also some other problem with the watch like the minute hand being quite loose when adjusted the time.) Anyway, I got the watch back yesterday and did a measurement again. To my surprise the watch's amplitude is still 140 degrees. The watch itself seems to be in a good working condition. Should I be concerned with the low amplitude or is the lowish amplitude normal on an old high-beat watch such as the Lord Marvel? Could the lowish amplitude be indicating that the main spring is having some issues? Please help!
-
Greetings all, I have a question about a ladies Seiko I am working on (Cal. 11A), it has a horrible plastic stem seal that badly needs replaced. Does anyone know where I would get such a thing? Here is an image of the type of seal I am talking about: PS I know the picture is of a 1104A, this is from eBay and shows the seal better than the picture of my 11A I took, also the 11A, 1104A, 1120A, 1140A and 1144A share a lot of common parts
-
Hello All. I'm a fellow watch enthusiast from the North-East of England. I hope everyone is keeping well. I recently bought myself a cheap watch repair kit, dusted off the old watch storage box and started to giving my watches the attention they required, it's been going quite well so far but do need some guidance with the correct steps of putting the workings and the case back on for my Accurist GMT Grand Complication, hopefully I will do a separate post on this with pics. Anyway hope everyone is having a decent Friday night.
-
Hello everyone, I'm trying to restore my father's old Seiko 2260-5510 quartz. I'm not really skilled on Seiko and I'm not able to find any info on bezel and case-back gaskets (they are shaped). They really need to be substituted. Where can I find parts numbers? Are there any catalogue online? Are there any non-Seiko equivalents if original parts are not available? Thank you very very much in advance. Regards.
-
Hi all, If anybody could help me with pointing me to the right site where I could download a Technical repair guide for the Seiko quartz 6N52, I would very appreciate it. I need to find a stem for this type of watch, but unfortunatelly when I bought it on Cousins UK, as it stated under the description, it is for this type, it didn’t fit as it was to small and it didn’t do the job. All parts have their own number, which I think the only option is through looking at a Technical guide I suppose? Thank you!
-
So I picked up a mid-1970s Seiko 7006-8007 to learn about vintage Seiko movements. The movement is working but poorly (perfect for learning how to service), but the case is really worn. i know all of the bulovas I’ve worked on were either SS or 10k RGP over brass. Does anyone know what process Seiko used for their entry- and mid-level watch cases? I don’t want to put a lot of time in trying to clean up the case until I know what’s underneath the worn plating. thanks
-
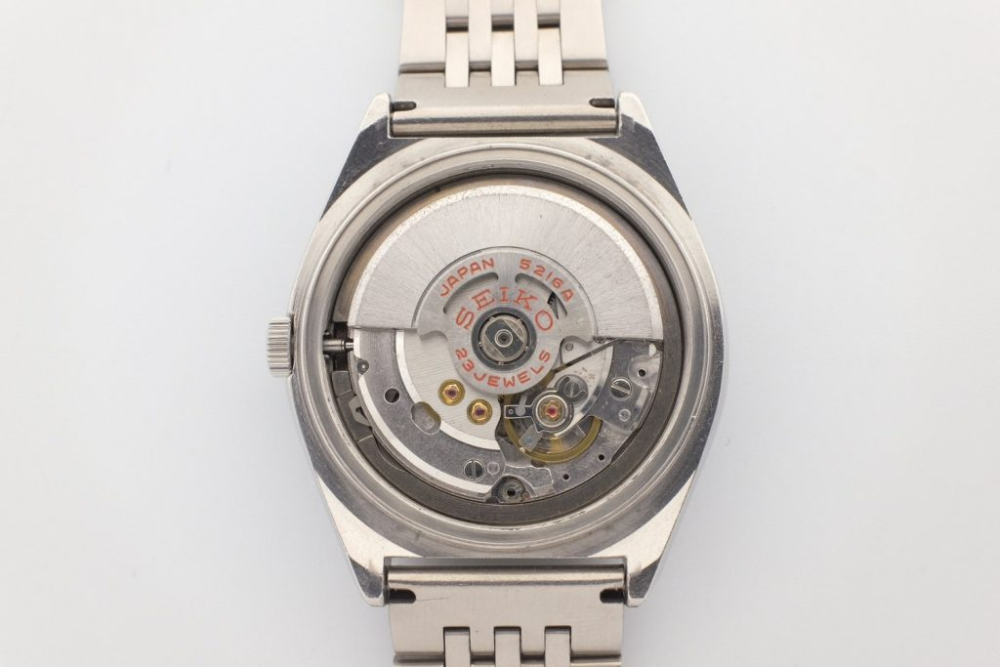
Greetings all, I am restoring a Seiko Lord Matic (5206A) and have a question about the automatic works rotor. When I opened up the watch the rotor was very loose and (fortunately) this was due to it not being screwed on very tight and not a bearing problem and I removed it with a few turns using my fingers. However, the thought struck me that I'm unsure how to put it back on, what tool should I use as it is a chunky rectangle and not a slot type where I could use a screwdriver (see picture below - Note: this is a similar movement picture from google as the picture I took of my watch isn't as clear). I don't want to grip and try to tighten it with tweezers as I think the chances of slipping would be high and I probably couldn't apply enough torque this way before damaging my tweezers and/or slipping and scratching up the watch. Anyone have any ideas what tool I can use for this job? Maybe I could 3D print something if there is no easy answer out there?
- 5 replies
-
- seiko
- lord matic
-
(and 1 more)
Tagged with:
-
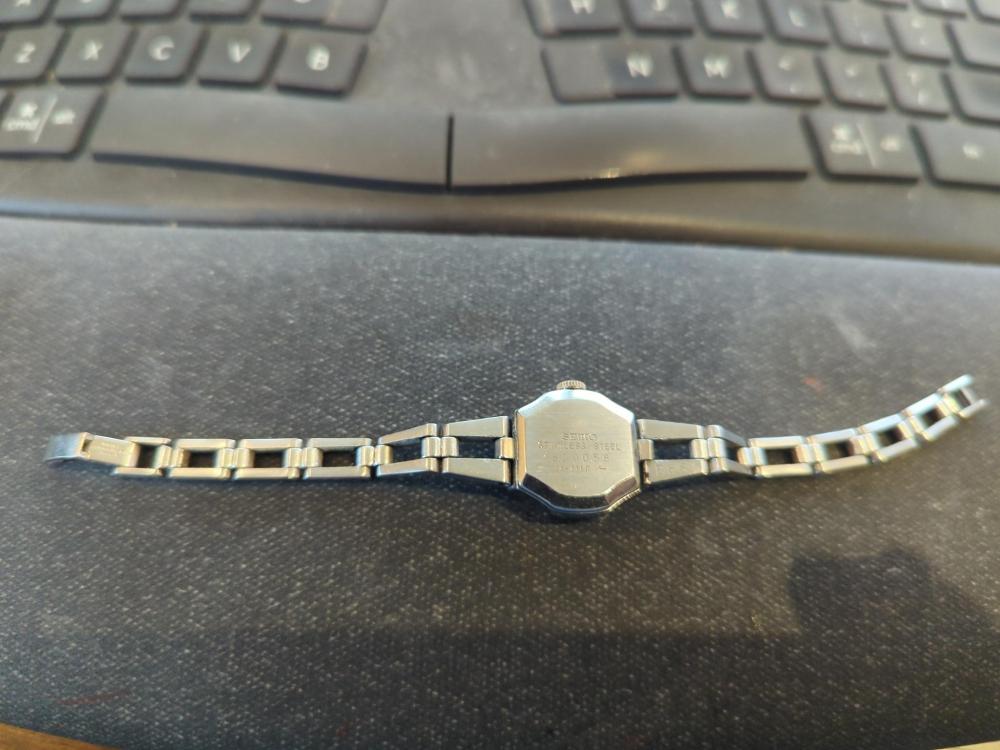
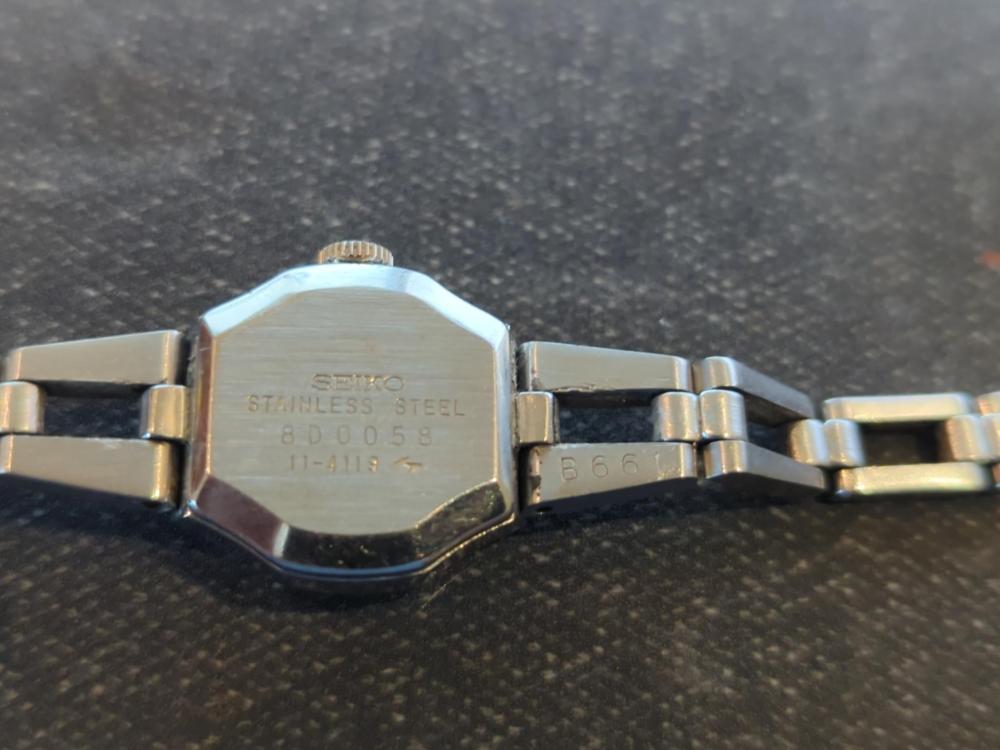
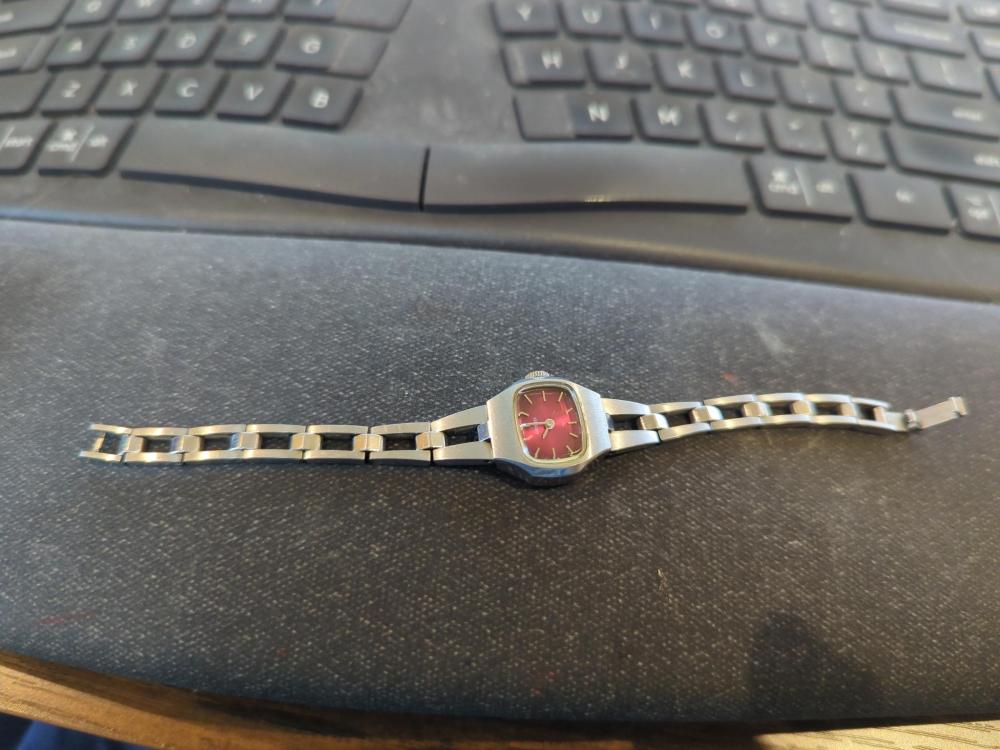
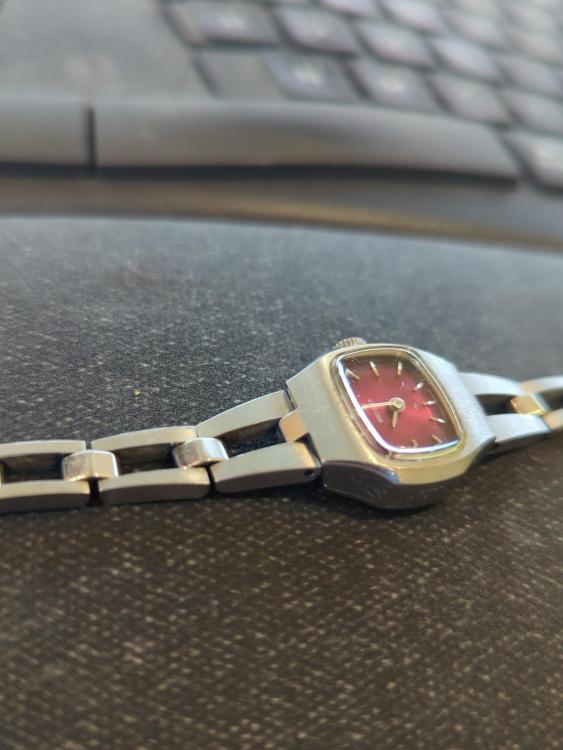
I need some help finding a replacement strap fro a womans Seiko Watch - it has a single central lug and pinned from the outside in, this seems to be a relatively common setup for womans watches (see below), but I cannot find anywhere to start looking for a replacement (current strap is too short and missing/damaged links). Can anyone point me in the right direction (web link or correct search term) for a replacement strap that would work - not looking for an exact replacement, just one that would fit the watch. See dimensions below (also see annotated picture) The central/internal lug (part of watch case) measures about 3.11 mm The (outside) width of the bracelet where it touches the case os 10 mm The link width at the end is about 5.9mm Like I said not looking for a direct replacement, just something that would work. Thanks
-
I am fixing up a Seiko diver (6309-7290) and I'm looking to change out the gasket on the winding stem - I ordered part OK0240B0A which should be the correct replacement gasket, but it doesn't look right. Does anyone know where I can find the dimensions of the real part so I can check I received the correct one.I have searched all over the interweb but without any luck?
-
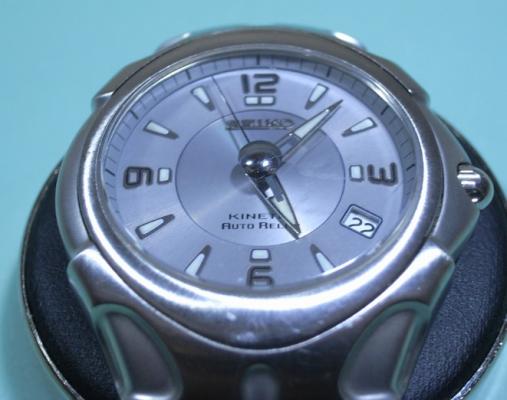
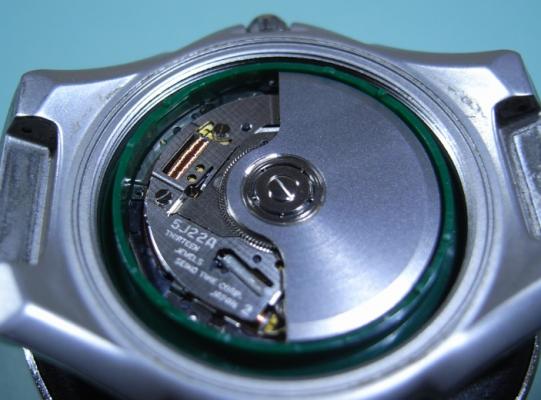
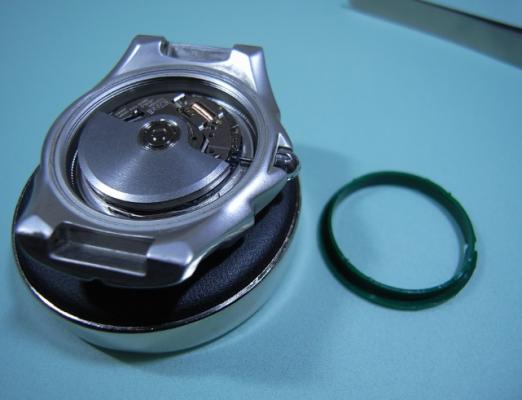
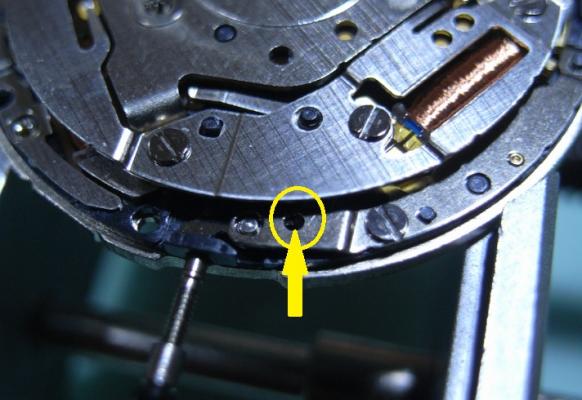
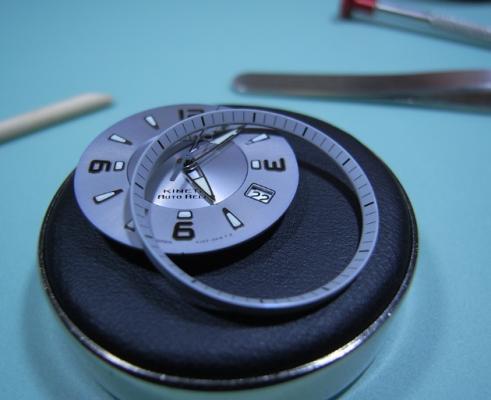
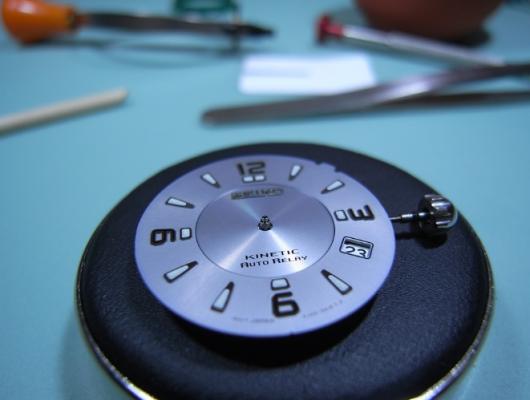
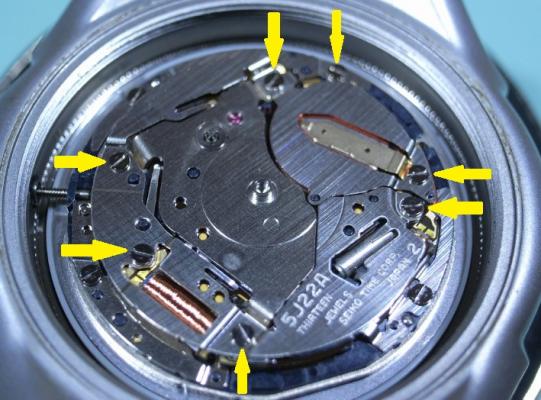
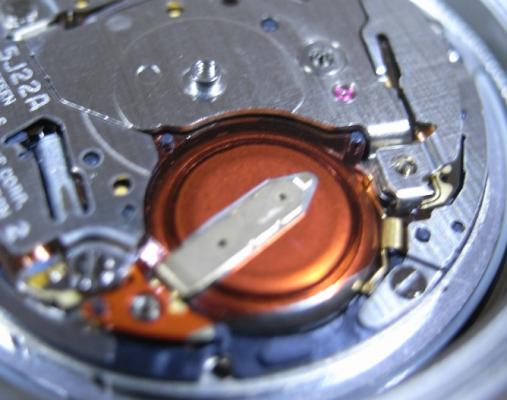
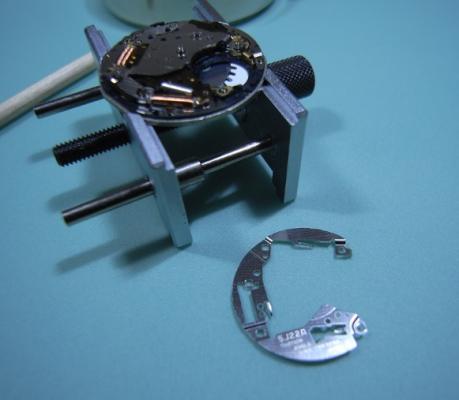
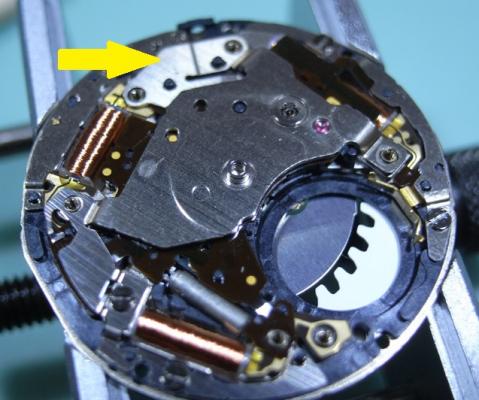
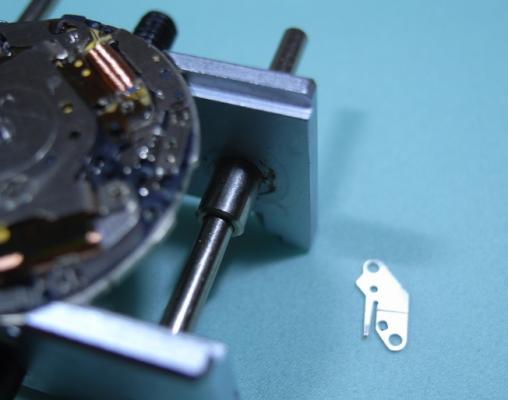
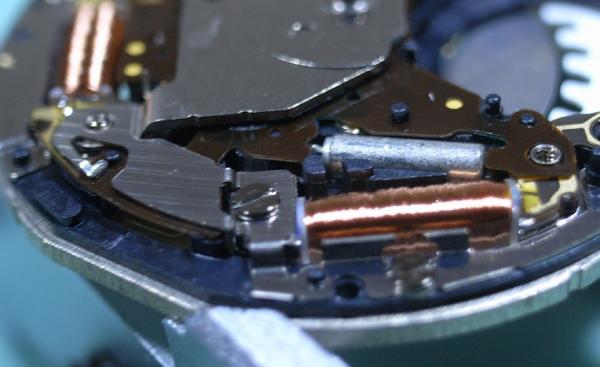
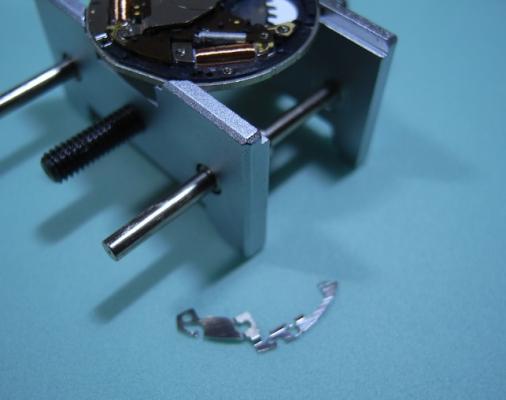
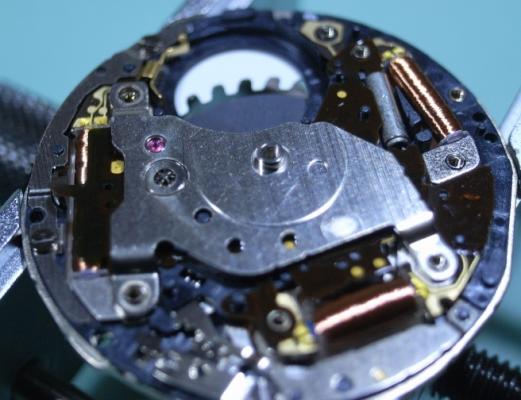
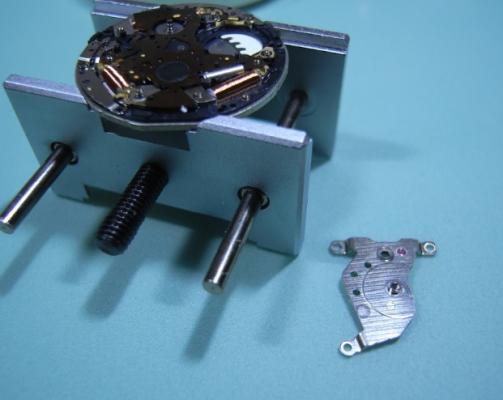
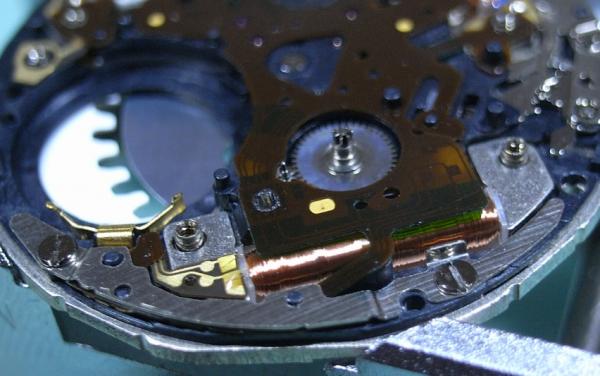
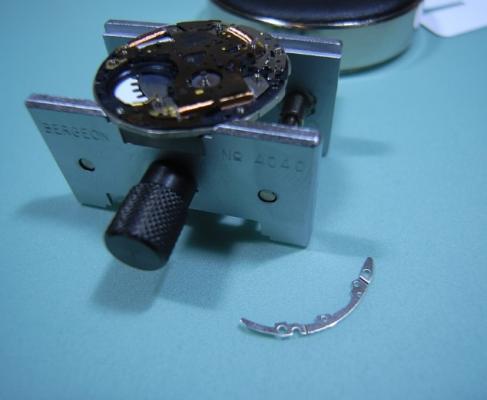
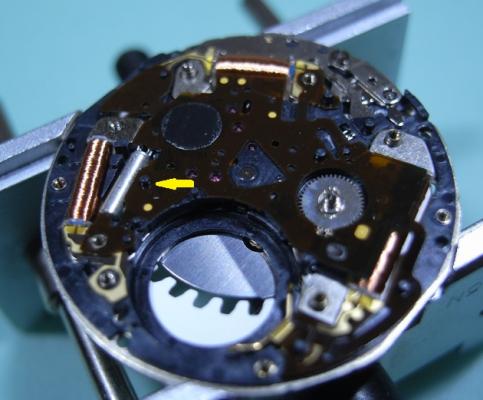
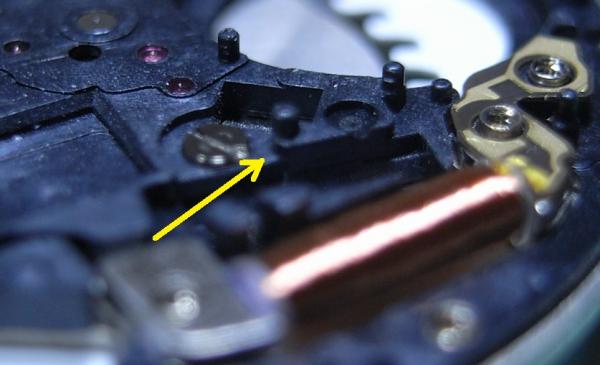
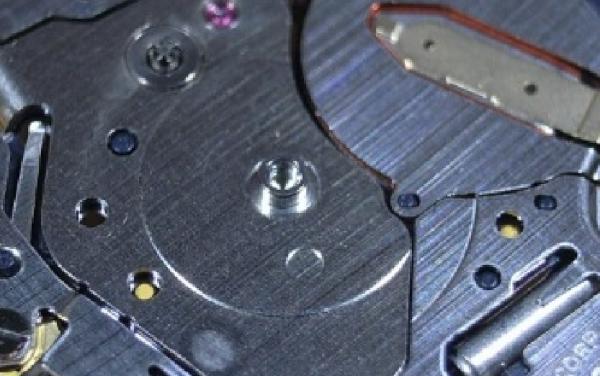
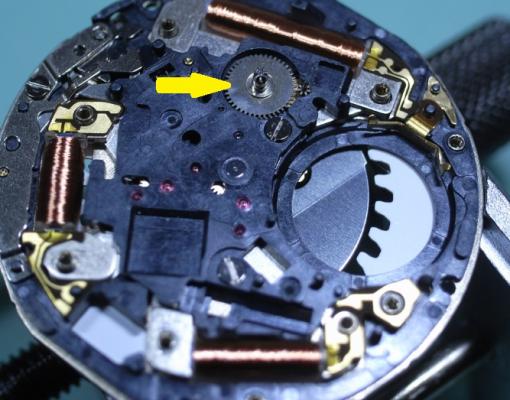
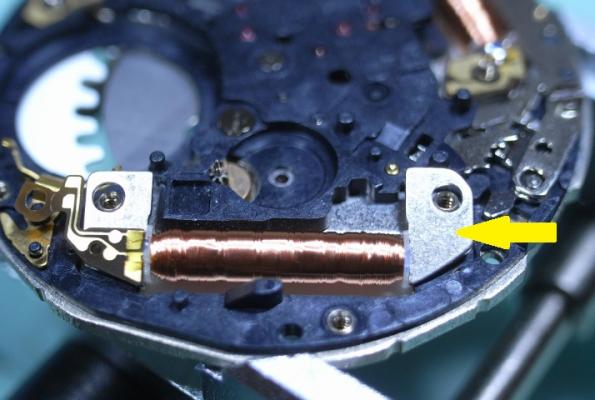
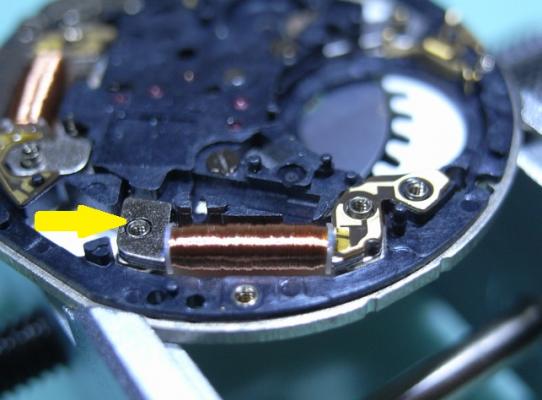
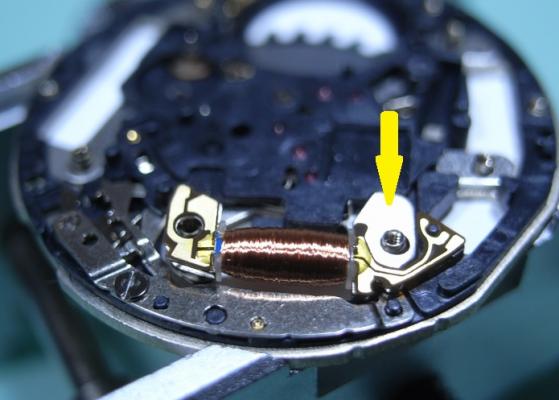
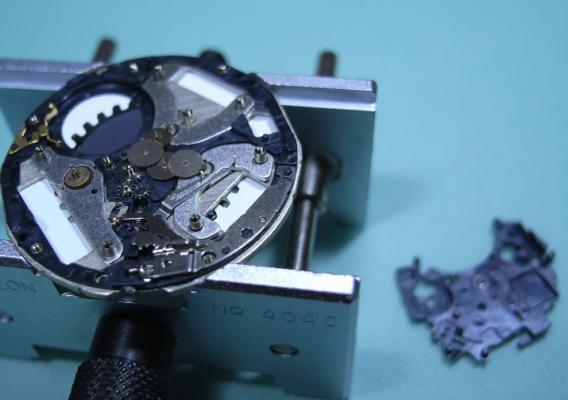
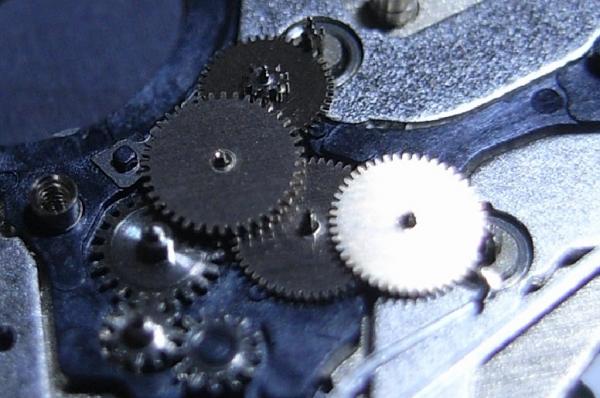
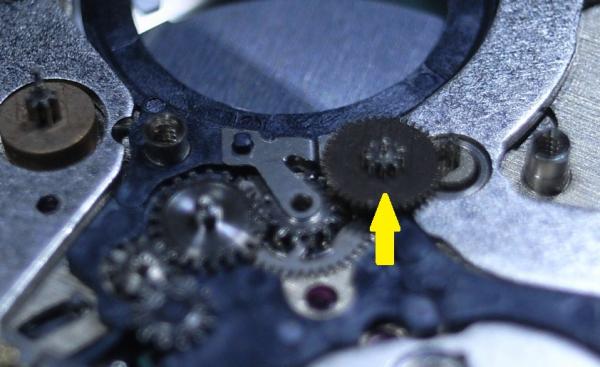
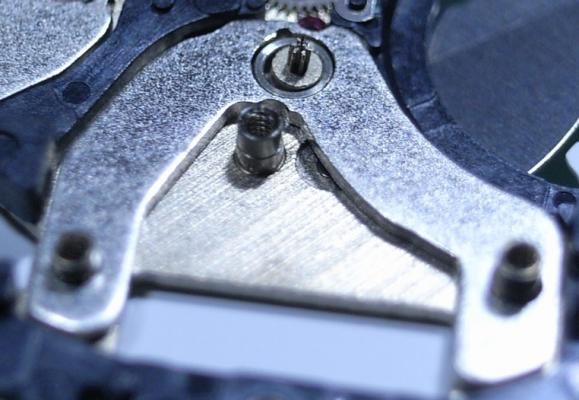
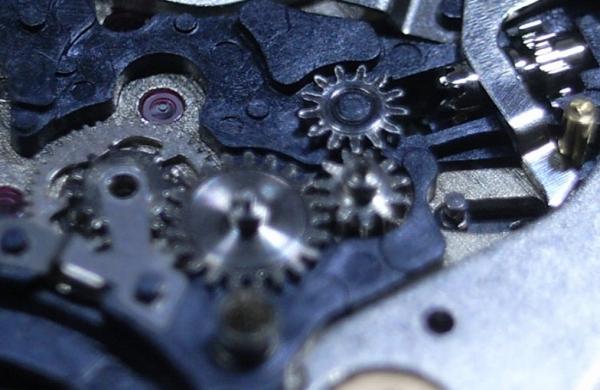
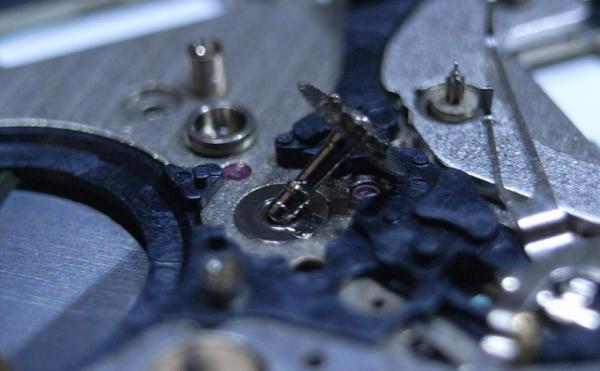
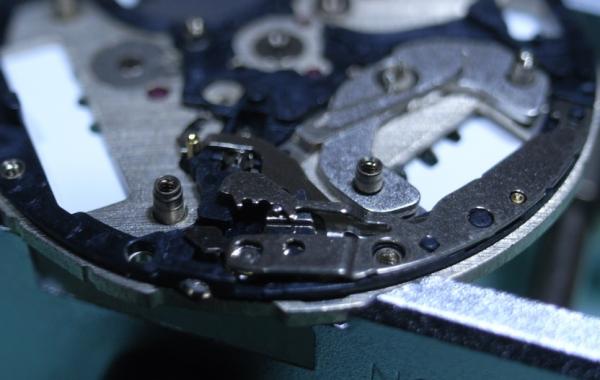
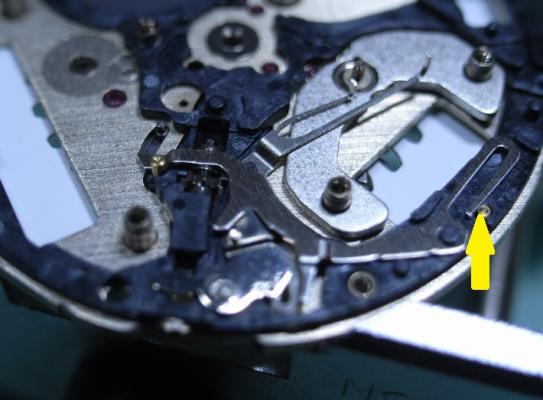
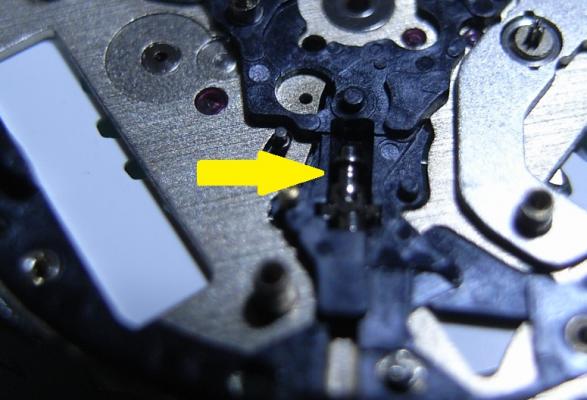
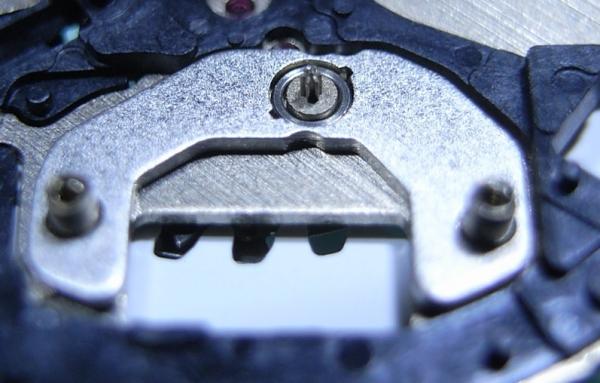
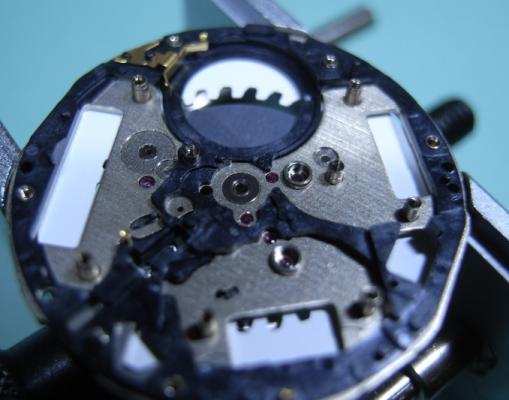
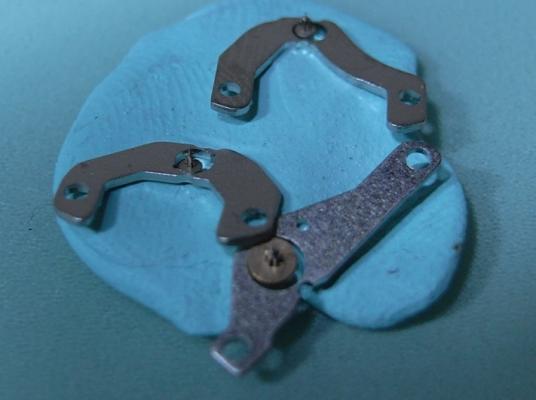
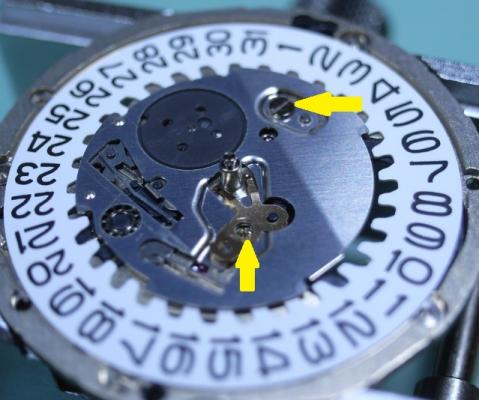
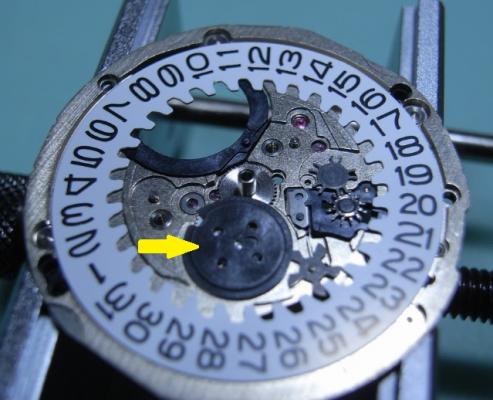
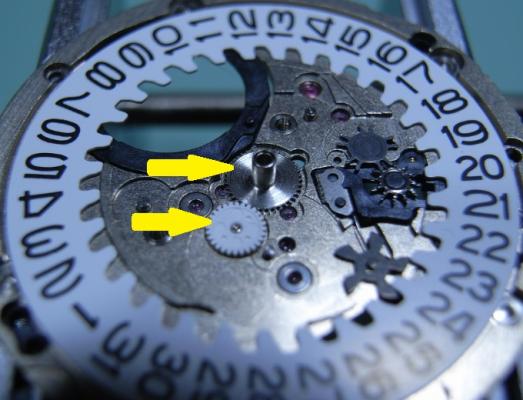
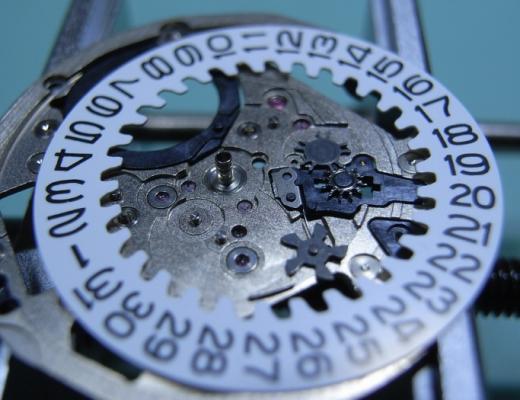
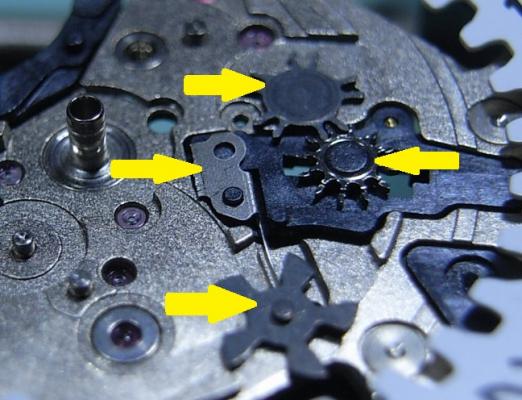
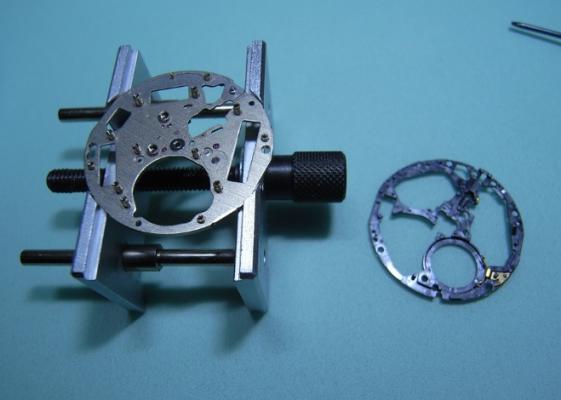
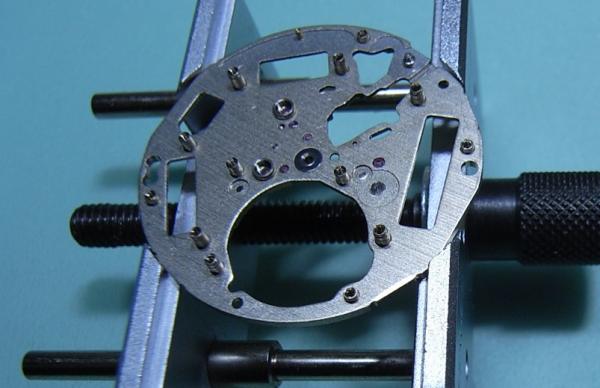
Seiko 5J22A Complete Service Hunting through my cupboards I found my old Seiko Kentic "Auto Relay" that I purchased sometime in the 90s, when this was the latest cutting edge Quartz Watch on the market offered by Seiko. It's been sitting for over a decade without use, and I decided to really push myself and, with the Lord's assistance, completely strip and service this watch. So I tracked down the Tech Specs, and if you are thinking of embarking on servicing the 5J22 YOU WILL NEED THEM!! :) So here they are: 5J22A.pdf I will be using the part names from this document for this walkthrough, so download and print it out for you own sanity. The parts in this movement are incredibly small, so much so that my camera had trouble focusing on them ... so part names will help you as much as the visuals aids for this service. Once again, I've had no one to guide me on this, so this is the way "I" stripped the movement down, the correct factory procedure may, and probably does, differ from my way ... so I give a warning here: CONTINUE AT YOUR OWN RISK. Disassembly Unscrew the back cover and store the rubber gasket away safely. With a 2.0mm Screwdriver, pry the Location Ring out with the slots provided in the plastic ring. Remove the Oscillating Weight with a 1.20mm Screwdriver ... and this will be the driver you use on all further screws. To remove the Stem, you need to have the Stem push all the way home, to move the Yoke into the correct position so you can depress the lever (Location shown in picture after I removed the movement to make it easier to see the spot where you push) The movement should now come out of the case along with the internal Bezel Ring. Remove the Hands Remove the 7 screws for the Circuit Block Cover A, and the Rechargeable Battery Clamp (Sorry referred to an older pic to so you the location of screws) Remove the Insulator for Rechargeable Battery, and then the Battery itself. Remove Circuit Block Cover A Remove Circuit Block Cover D Reference picture of Circuit Block Cover D Remove Circuit Block Cover B Reference picture of Circuit Block Cover B Remove Oscillating Weight Bridge Reference picture of Oscillating Weight Bridge Remove Circuit Block Cover C Reference picture of Circuit Block Cover C Remove Circuit Block NOTE: The pin with the yellow arrow pointing to it holds onto the Circuit Block very firmly. Be CAREFULLY and GENTLE, as the Circuit Block can be easily damaged. This is the angle of attack that I recommend. Coming in on an angle just in front of the Crystal Unit, and gently push upwards ... and I mean GENTLY. Patience wins the day! Remove the Intermediate Wheel for the Generating Rotor Remove the Generating Coil Block (grasp with tweezers where indicated with yellow arrow) Remove the Second Coil Block (grasp with tweezers where indicated with yellow arrow) Remove the Hour and Minute Coil Block (grasp with tweezers where indicated with yellow arrow) Remove the Train Wheel Bridge Remove the Second Wheel and Pinion, the Third and Fourth Wheel Remove the Intermediate Second Wheel TIP: Next is this first of three sets of Stators and Rotors that make up this Quartz Movement. Be sure to place all the Stators and Rotors into a piece of Rodico for safe keeping. As shown below: THESE PARTS ARE MAGNETIC AND WILL ATTRACT PARTICLES, SO DO NOT PUT INTO THE BASKET FOR CLEANING Remove the Second Stator and Second Rotor Remove the Minute Wheel and Pinion, Intermediate Minute Wheel, and Setting Wheel Remove the Center Wheel and Pinion Remove the Generating Stator and Generating Rotor Remove the Setting Lever Spring Remove the Yoke and Setting Lever Note: Release tension on the Yoke Spring FIRST Remove the Clutch Wheel and the First Intermediate Wheel for Calendar Corrector Remove the Hour and Minute Stator and Hour and Minute Rotor This side of the Main Plate is now finished ... time to flip it over and start on the Calendar Works Remove the two screws indicated and remove the Hour Wheel Guard Spring, and the Date Dial Guard Remove the Intermediate Date Driving Wheel Remove the Intermediate Hour Wheel, and Hour Wheel Remove the Date Dial Remove the Day-Date Corrector Wheel, Second Intermediate Wheel for Calendar Corrector, Date Driving Wheel and Spring Note the position of tension of the Date Driving Wheel Spring (bottom of page 9 in the Tech Specs) Remove the Circuit Block Spacer ... and the disassembly is complete! I started work on this rather late at night and took my time and studied each part before removing, making sure to document everything carefully. So I'll clean the parts and begin reassembly fresh tomorrow. I can see this one is really going to push my abilities, and I'm looking forward to tackling it and uploading the reassembly steps.
- 19 replies
-
- 5
-

-

-
Good day, I have a strange situation - I have restored a non-running Seiko 7S26A and thought I had done a great job Rate <5 s/d Amplitude >220 degrees Beat Error 0.1 Hands move in sync Day/Date changes correctly Then I notice that the second hand continues to make one revolution every 60 seconds BUT the hour and the minute hand barely move over the course of a day. I pull the crown and both hands move smoothly and correctly. Then once I push the stem back in again the second hand ticks correctly but hour and minute hands are VERY slow. Timegrapher still shows watch is working well. Obviously the train of wheels/balance etc are working well as the watch seconds hand is ticking correctly, and the watch is performing well on the timegrapher. The hour and minute hands are installed correctly and not fowled as I can move them easily and in sync with the winding stem/crown. So what could be stopping/slowing the minute and hour hands from moving correctly (min hand moved 5 mins in about 12 hours), but still allowing the seconds hand to move at the correct speed (60 seconds in 60 seconds) and the watch to perform well on the timegrapher and visual confirmation that the balance/escape wheel/pallet fork are moving well? This has me baffled and I have taken the watch apart/cleaned and re-built with the same result... feel like I'm losing my mind as I don't see how these things can be happening at the same time! (pun intended)
-
Dear amazing community of watch enthusiasts, a newbie here, with probably something that is a newbie problem. So I bought my first 'vintage' watch to tinker with, a Seiko 7s26A diver's watch from around 1996. I have taken it apart, cleaned the components and started to try putting it all back together. So far so good. I oiled and assembled the keyless works, the main train, the barrel and the barrel and train bridge. Of course testing if everything moves freely. All the jewels seemed to be in the right place as when the barrel is turned with a screwdriver (in either direction) all the gears spin up and everything is beautiful. Next I installed the pallet for and the pallet cock (as far as I can tell without damaging the fork), the pallet fork 'jumps' from side to side when prompted, upon turning the barrel everything still works. Once I try and install the balance spring, it does not start spinning. I have took extra care in slotting it in it's place, when installed and blown some air upon it, it turns freely and comes to a stop very quickly. When I apply some pressure to the barrel (now it only turns clockwise) it doesn't rotate very much, but the balance starts turning just fine. On the other hand, the third wheel now suddenly doesn't turn either (when applying a tiny bit of pressure to turn the third wheel, the balance starts spinning again). I have attached an amazingly shot video to demonstrate my problem. Also tried taking everything apart, reoiling (the only thing that I have not is the diashock, as I do not want to damage that with my inexperience) and putting everything back together. If anyone could help me fix this, I would be eternally grateful. BB
-
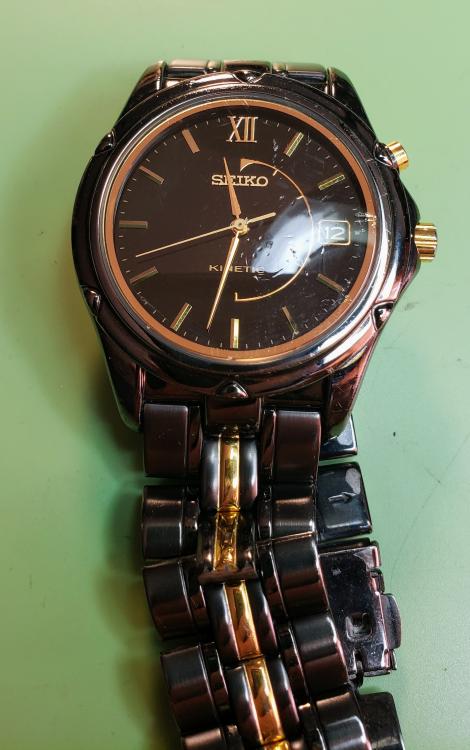
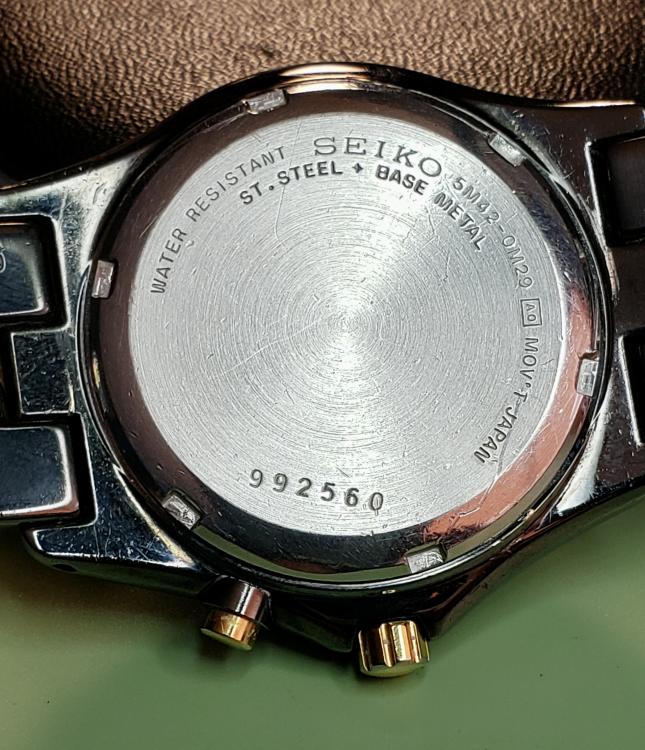
To all My first post besides my intro post. I have my wife’s nephew's Seiko Kinetic 5M42-OM29. It had stopped working. With a quick YouTube search I found Mark Lovick’s posting on how to change the capacitor. That worked great and now I am testing for 24 hours for stability. Now my question, the crystal is very scratched up. I have used the PolyWatch diamond paste for mineral crystal but the scratches are too deep. I am pretty sure I can find a replacement crystal but I am confused on how to remove the crystal. Please see pictures. It looks like it might be a removable bezel but I don’t want to force it if it isn’t removable. I have a glass press but I don’t want to force that either. Suggestions?
-
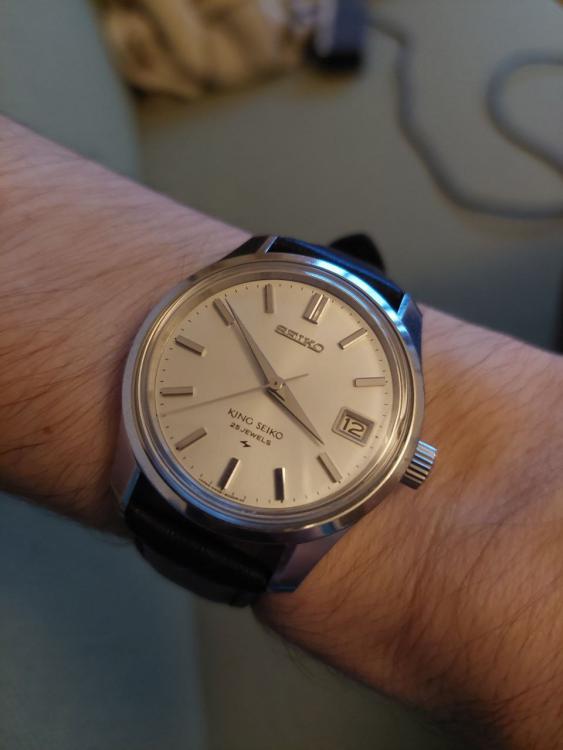
I recently serviced this Seiko 4402-8000 King Seiko with a 4402A manual winding movement. I've serviced this grade a couple of times before and it's went OK. Before servicing the watch was gunked up and a non-runner. Since servicing the watch is stopping maybe once or twice a day with the second hand between about the 28 and 32 second mark. Giving it an extra bit of torque by winding will start it off again. I initially thought it was the second hand touching watch crystal, but I've ruled this out by placing some tape inside the crystal to simulate it being lower, and there is still lots of clearance with the second hand. Thinking maybe it was gunk somewhere on the fourth wheel teeth stopping the second hand, I cleaned and inspected the wheel which seems fine. Independent of the position of the second hand relative to the minute hand it will stop around the same point, so I'm assuming it's not something to do with the minute wheel... Any ideas much appreciated! this has me well puzzled.
-
Hi Watch bangers! I did actually make it a personal goal of mine to present a watch every week but real-life caught up and ive been busy helping people move around haha. Bit nevertheless I am a week late but have another beautifull watch and project report for you guys! This watch was one of a few which I presented my Mother for her birthday to let her decide which one I should fix for her. She chose this vintage Seiko 4206A which I got from Ebay and so I sat down and got to work. Now I bought this watch online because I was really surprised at the remaining quality of the original dials and how there where still so many of them. After purchasing one and reading up a bit online it turned out that this movement line was particularly prone to behave irrationally or to repair so I kind of messe dup but nevertheless, I faced my challenge! The watch on arrival: Disassembly 1. Remove the watch case by unscrewing the back and removing the stem 2. Remove the Watch hands 3. Release the Dial feet from the back with the small levelr at the 10 and the 4 Position I think and remove the dial. As you can see it is in pretty good condition and has a very pretty sunbust effect. There is a slight stain though around the “ Automatic” text which left me kind of clueless since it is a metal surface and I wouldn’t really know what would stain it in such a way. I decided to leave it be to minimize the risk of further damage. Heres a close up picture: 4. Remove the Day clip and the Day wheel underneath it. This revealed a very interesting sping-like swan neck system for the day-wheel quick set system. Never seen that before! 5. Then remove the Day wheel spring and the 24 Hour day turning wheel. 6. Now you can unscrew and remove the main setting cover plate and the attached date wheel. 7. Take away the ( im not sure what this part really is called) but it is part of the quick set system which hooks into the second clutch wheel. 8. Now remove the Date Spring and lever, the bottom day wheel and the hour wheel to remove some more from the front side. 9. Remove the one translation wheel and the setting system sub cover which also separated the two clutches. 10. And finally take out the clitches and the yoke, setting system to completely disassembly the front side. Now you can turn the movement so we can work further on the back side. 11. Remove the Rotor 12. Take off the Automatic module 13. Remove the Winding wheel Y ratchet. I did try to remove the winding wheel in the first run but for some reason the screw did not watch to budge so I left it in for the picture. Off camera however I eventually did make. 14. Remove the elegant arching balance wheel. I was really surprised to see this in this kind of movement since I thought that this kind of design was only present in really high end watches. Interestingly enough the 4206 B however has the classical one winged balance. 15. Remove the Pallet fork system ( sorry for the blurry focus) 16. Take off the main bridge and and the small spring attached to one of the screws. 17. Pick out the Barrel, its ratchet and the 4th and 5th wheel. Interestingly enough the gears wheels have as many holes in them as the number which is kind of cool! 18. Now focus on the little winding module on the bottom right. Remove the translation wheel, the spring and the small bridge to take it out completely. 19. Almost done! Take of the final bridge which holds down the 6th wheel and the escapement. 20. And finally remove the 6th wheel and the escapement wheel. With that, we have completed the disassembly of the Seiko 4206A. Cleaning For cleaning im still sticking to the good old hand cleaning method. So this means that I let the individual parts marinade in lighter fuel for a while before giving them a scrub and rinsing them of in Isopropanal alcohol. I was thinking about dipping my toes into the ultrasonic cleaning branch but im unsure what fluids to buy and what parts I cannot drop into the cleaner so I think ill stay with what works at the moment. Additionally im broke haha. Mainspring service Now as always I did not have a spare Mainspring at hand so I removed the spring by hand and checked it out: As you can see it is / was absolutely disgusting haha so I gave It a good rub down in lighter fluid and isopropanol and the paper used for that was absolutely nasty in the end, see for yourself: However, I did clean it nicely I think and lubricated the spring with Moebius 8200 and the barrel wit Moebius 8217 before winding the spring back in carefully. After closing the barrel I did a mainspring wind test with the winding wheel and it had tension on it so it seems like I did a decent enough job. Lubrication Moebius 9010 – All jewels aside from the pallet fork jewel pivots Moebius HP 1300 – For parts which turn a bit slower. Between the arbour and the watches wheel, the barrel pivot in the main bridge or the metal pivots for translation wheels for example. But that’s just my personal tase Moebius 8200 – Used to lubricate the mainspring Moebius 8217 – Braking grease for automatic barrel wall Moebius 9415 – For the tip of the pallet fork jewels. Molycote DX Paste – Any strong friction contact points. So the setting and winding system basically Reassembly For the reassembly of course you just follow the above given steps and pictures from the disassembly backwards. Ive been thinking about making reassembly pictures as well, it would make the report way more comprehensive and would show more difficult nifty parts for example shock and balance jewel lubrication. However it would be way more annoying to take the pictures and it would cost me a lot more time. What do you all think? Timegrapher Test Okey, so once I’ve cleaned everything it was time to put my work to the test and I strapped the watch into the timegrapher. And this is the catastrophic result: This was the start of the snowstorm like reading which followed. It couldn’t really pick anything up and I was just devastated. Because I did not have any replacement balance on hand, I was desperate and opted to measuring the Rate my eye and stop watch. As you can think, this did not end up well so I ordered a lot of a few spare movement to butcher them for the balance. After placing in the 4th replacement balance however, I managed to get a decent reading. The Amplitide could be better, but this is the way I left it in the end haha. Final Results: After the timegrapher drama I closed the back up and attached a basic rubber strap for testing purposes. And from here on its basically B-Roll pictures! Here is a comparison of the movements size to my pinkie finger! And here the final satisfying shot: So yeah all in all a stressful but also fun little project which I could conclude by gifting the watch to my mother. I was very surprised to see the winged balance as well as challenged by working on a movement of this size but in the end I managed! I hope you all enjoyed reading this and that the guide may help other hobbysts or even professionals ( haha who am I kidding) in the future. Any comments, questions or criticism is of course welcome! If you guys would like the full commentated 4K Macro video of the whole process, ive uploaded it to my Youtube channel here and it would bring me great joy if you would watch it! And so as always watch bangers... Stay safe and healthy and till next time!
- 3 replies
-
- 2
-

-
- watch repair
- walkthrough
-
(and 2 more)
Tagged with:
-
Hey everyone I’m working on an nh36 and when I go to put the time at 12:00 (for the day/date to automatically change) the date wheel gets pushed to the right a bit, then it switches the date and goes back to normal. It’s not a huge problem but it kind of bugs me seeing a gap in between the two wheels at certain hours of the day. Anyone know a fix? Thanks!as you can see there is space in between the two wheels on the side the crown is on
-
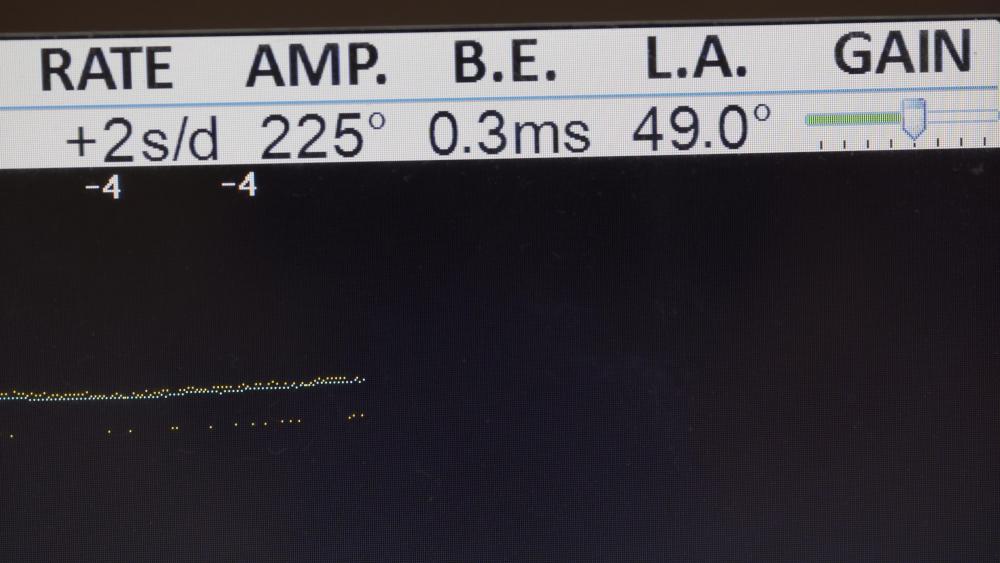
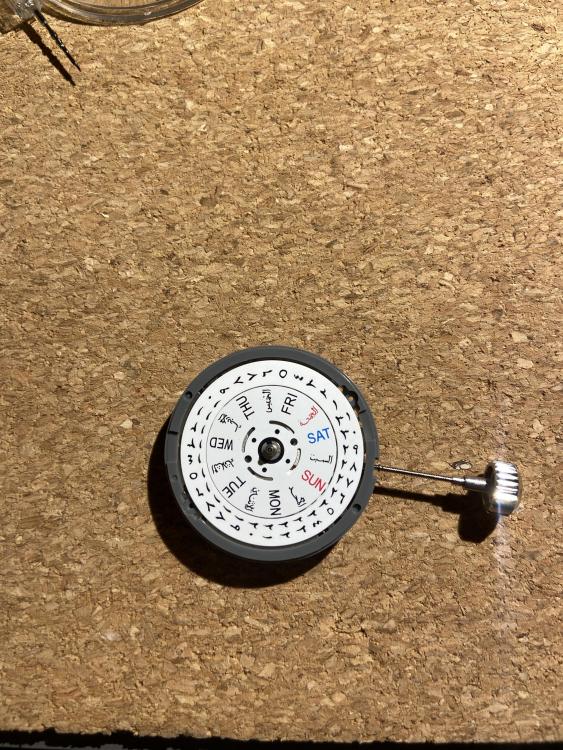
Seiko 7009 Report Hi dear Watchbangers, and welcome back to another little report from me! This week I am keeping in my set deadline and delivering my next project on time haha (not like last week).I know there probably have been a million reports, reviews and video on this but hey, it’s a classic; so this weeks watch is: A Seiko 7009 with a fully lumed up dial! I was super lucky to have found this, since at the time of purchase, I only found the pattern and colour scheme interesting and suddenly, this dial is just glowing up during night! So yeah, as always here’s a link to the commented 4K YouTube video for the lazy readers out there: Lets get into the written report then: Arrival status So this is how the watch arrived after I ordered it on Speedtimerkollektion and it seemed in pretty decent shape. The case was still in a nice condition, the original signed Seiko strap as well and the glass only had a minor little chuff so no need for replacement there. Interestingly enough the watch did not move a second for the first few weeks of me having it but started working again once I was filming for the above-mentioned video. Disassembly 1. Remove the caseback. 2. Remove the Stem by pulling into second position and pressing on the revealed lever to release it. Then remove the case. 3. . Remove the watch hands. They seemed In very good condition with me so no repolishing or reluming. Yay! 4. . Remove the Dial by turning the lever knobs at the dial feet, on the back side, releasing them in the process. The dial texture looks super organic and it makes sense since it is fully lumed! I used a little new makeshift dial container here for the first time to store the dial! 5. Take of the Dial spacer ring. 6. Remove the Front clip folding down the Day wheel by user something thin and sharp ( a cutter knife for example) and follow up by removing the day wheel. This day wheel was in English/ Arabic, which I found really awesome, and it also looks great so Ill be keeping that! 7. Unscrew the day wheel spring. 8. Unscrew the front cover plate and take that off. 9. Remove the top part of the 24 hour wheel by unscrewing the screw holding it all together. 10. Take away the rest of the 24 Hour wheel, the hour wheel, the cannon pinion underneath and the date spring. 11. Then remove the day quick set lever and its spring and the translation wheel from the setting system. 12. Move on to the setting system cover, the yoke and the clutch lever. 13. Remove the cluth and optionally the stem (if its inserted). 14. Lastly unscrew and remove the large metal arch which goes around the movement and hooks against small metal pole. With that, you have completed the disassembly of the front! Turn the movement in the holder so we can work on the back. 15. Remove the rotor and the balance wheel so that no further harm could possibly happen to it. 17. Remove the Pallet fork bridge and the pallet fork (this is ideally in an unwinded state, if there is power, please unwind the mainspring first). 18. Now you can unscrew the winding wheel and the ratchet wheel for the mainspring. 19. Unscrew the main bridge and remove it to reveal the gear train! 20. Remove the small clips holding in the automatic winding mechanism to completely disassemble the main bridge. 21. Remove the Mainspring and its ratchet spring and the complete gear train. 22. Unscrew the secondary small bridge. 23. Remove the final wheel underneath it to fully disassemble the complete watch! Congratulation!! Cleaning Cleaning as always is the hand cleaning method. Let the parts marinate in some naphta and then brush them if necessary. After this treatment I rince the parts of with Isopropanol alcohol to get rid of the previous cleaning fluids and left-over residue. I did however do some searching for vintage cleaners and what not but they really are expensive, around 200 Euros. And while that is a worth while investment, im not really sure if I want to and even can spent that money on something that ill only be using a few times a month at most. Well it’s a dilemma haha. But im also thinking about putting jars with cleaning fluids into ultra-sonic cleaners but I’m not sure if the jar walls are too thick for the ultrasonic waves to be effective. Mainspring Service As usual, I did not have a replacement Mainspring so it came down to servicing the mainspring. Upon opening the barrel, the spring seemed in decent condition, maybe a bit dirty but no visible physical defects. The barrel lid however did show signs of wear, so that place would get some well needed lubrication. Here is is unwinded and the back in its serviced barrel before closing it up. Lubrication Moebius 9010 : All jewels except for the pallet fork jewels Moebius 8200 : Mainspring lubrication Moebius 8217 : Breaking grease for mainspring barrel wall lubrication Moebius HP-1300 : Lubrication for slower turning/moving parts. On the barrel arbour for example. Moebius 9415 : Lubrication for pallet fork jewel teeth Molykote DX: Grease for heavy contact points. Mostly for the front in the setting and winding system for example. Reassembly Just reverse the disassembly Process above. Don’t forget to lubricate the balance and shock jewels and reassemble the main bridge correctly. Timegrapher Test So after cleaning and lubrication, I slapped the watch onto the timegreapher to see if the whole process did anything at all. Here it is preregulated: And post regulation within acceptable parameters. Im very happy about the Amplitude since this amplitude was the highest I have ever gotten in all of my projects! Final Results Concluding Fotoshoot strapped and lumed up again: Conclusion: All in all, restoring this old Seiko 7009 was really fun! Despite me not having the spare and clean replacement parts to replace all parts with visible damages and wear, I still managed to get the watch running in good condition again. Also the very unique and rare dial adds to that and Im happy that the light brushing with th Q-Tip did not damage the Lume on the Dial. Sadly, since the dial is a bit older (70s I would say), the fully charged lume on the dial does not hold its glow for very long and I have no possibility to relume the dial. Either way, Im happy if it even shines a little and yeah! Was a cool little project to work on! So if you guys have any comments, questions, criticism or suggestions/tipps, please write me or put them in the comments! I hope you guys enjoyed reading or the video and stay healthy! Till next time Watch bangers!
-



a.jpg.b78f9c3f5b2966b8cbb696edbb678cf4.jpg)





.thumb.jpg.399e08a8f06b9e5d0b571990a8aed04d.jpg)
.thumb.jpg.59830b8131ba3dd9f62df7b745064ab4.jpg)
