Leaderboard


Popular Content
Showing content with the highest reputation on 12/26/23 in all areas
-
Hello! I'm Konstantin, a hobby watchmaker with about 1.5 years of experience. Have been lurking around the forums for a long time, and finally decided to register. My latest project is a 3D-printed day/date quickset part for Seiko 56xx movements, I thought it might be useful to somebody.3 points
-
I sometimes just use autosol instead of dialux. The abrasives in autosol breakdown into smaller particles as pressure is applied, so you don't have to change polishers or change grit. And when my polishers really look dirty, like when the black stuff gets shiny, I just ultrasound them in a jar of petrol.3 points
-
Hi @tomh207 I think it’s the fact that we old men se through the charade and false bon-homme which seems to abound at this time of year Be good and kind ALL year not just for Christmas3 points
-
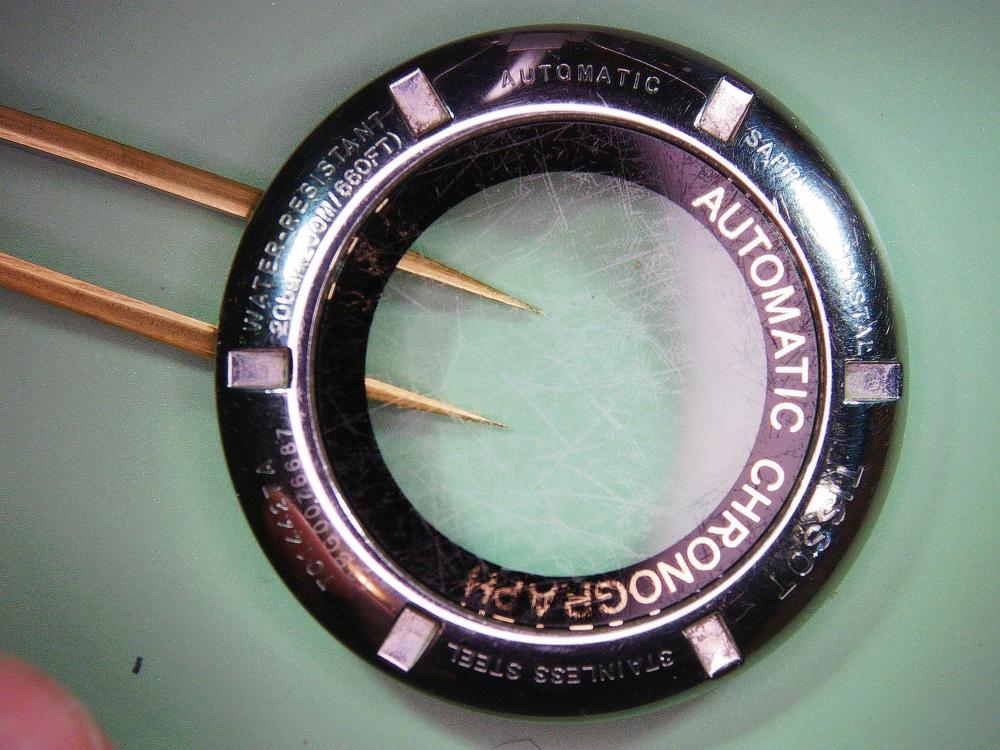
Reference number T014427A. Movement ETA C01.211 The rookie mistake. I saw this listed on eBay for $300 and offered the seller $250 without doing any research on the model or movement. I knew it was a non-runner, which is why he was selling for about half of the running price for similar models. The first surprise. The display back crystal was so scratched that you could barely see the movement. Everything else showed signs of wear but nothing like this. The only thing I could imagine was that the previous owner was a performer in a Renaissance festival and wore it over his chain mail. The movement shock. I knew something was odd as soon as I got the movement out of the case. Half of it was plastic. So NOW I did a little research. This is an ETA movement based on the Omega 1045 and/or the Lemania 5100. There are some minor differences between the three, but they are all bases on the same design. The one big exception is that the ETA C01.211 has a plastic pallet fork and escape wheel. (more on that later) There is a very good strip down of this movement on youtube which I followed very closely. The Diagnosis. What I found initially when I began stripping the movement was a shock spring floating around inside and a missing cap jewel from the dial side of the balance. It is clearly bent and I assume the watch took a pretty substantial impact to knock the jewel and spring out like that (never found the jewel - more on that later, too). The balance staff pivots looked in decent shape. But hey, proof of concept for shock settings, right? I was able to find a suitable cap jewel and I had a Novodiac spring on hand so before I had it in pieces I was able to replace them and the watch ran, so that was almost that. If you watch the video referenced above, that's the stripdown better than I could have shown it. I am going to go into the service and rebuild in subsequent posts, but it's Christmas day after 9:00 p.m. here and tomorrow is a work day so I'll post more tomorrow. I want to cover the rebuild in stages and go into some detail on the unusual things specifically found in this movement.
 2 points
 -
Hello and welcome. We usually introduce ourselves on here. I'm assuming you're from the USA, so try this site.

 2 points
 -
One of the minor problems with the movement like this is it's basically restricted the Swatch group watch companies which don't like us which means technical information is practically nonexistent and any of the supplemental guides are also going to be nonexistent Then for the lubrication of your plastic escapement this is what Swatch group recommends
 2 points
 -
I have news for you young man. I no longer fiddle with watches.2 points
-
Previous link didn't work, lets try again
 2 points
 -
Hello, folks. I am in my early fifties and have been watching some of the YouTube channels on watch repair. My dad passed a way a few years ago now and have his old pocket watch. It's a simple manual Tissot movement (781-1) and so I thought I would start learning to maintain it. My thought is also that this may be a nice hobby to take into my retirement years too in order to keep me out of my wife's hair. J1 point
-
My course movement was Miyota 9015. I found a great tutorial on this web site with step by step good quality photos on disassembly and assembly by VWatchie.1 point
-
Kalle doing an 861 today...1 point
-
OK, but the lenght of the pin is limited by the hihgt of the mouth and the opening of the cylinder. The way to do the thing is to put something on the flat surface of the bottom of tampon, e.g. ball from ball pen. Usually it is enough to make tampon pop up a little, then it will be able to catch it with good pliers/cutter pliers, twist and pull it1 point
-
Sadly, no. It's the barrel hole which was, and now even more so, is the problem. The hole in the lid is untouched and the play between the arbor / lid-hole seems very acceptable (meaning: low). So, it's the hole in the barrel itself.1 point
-
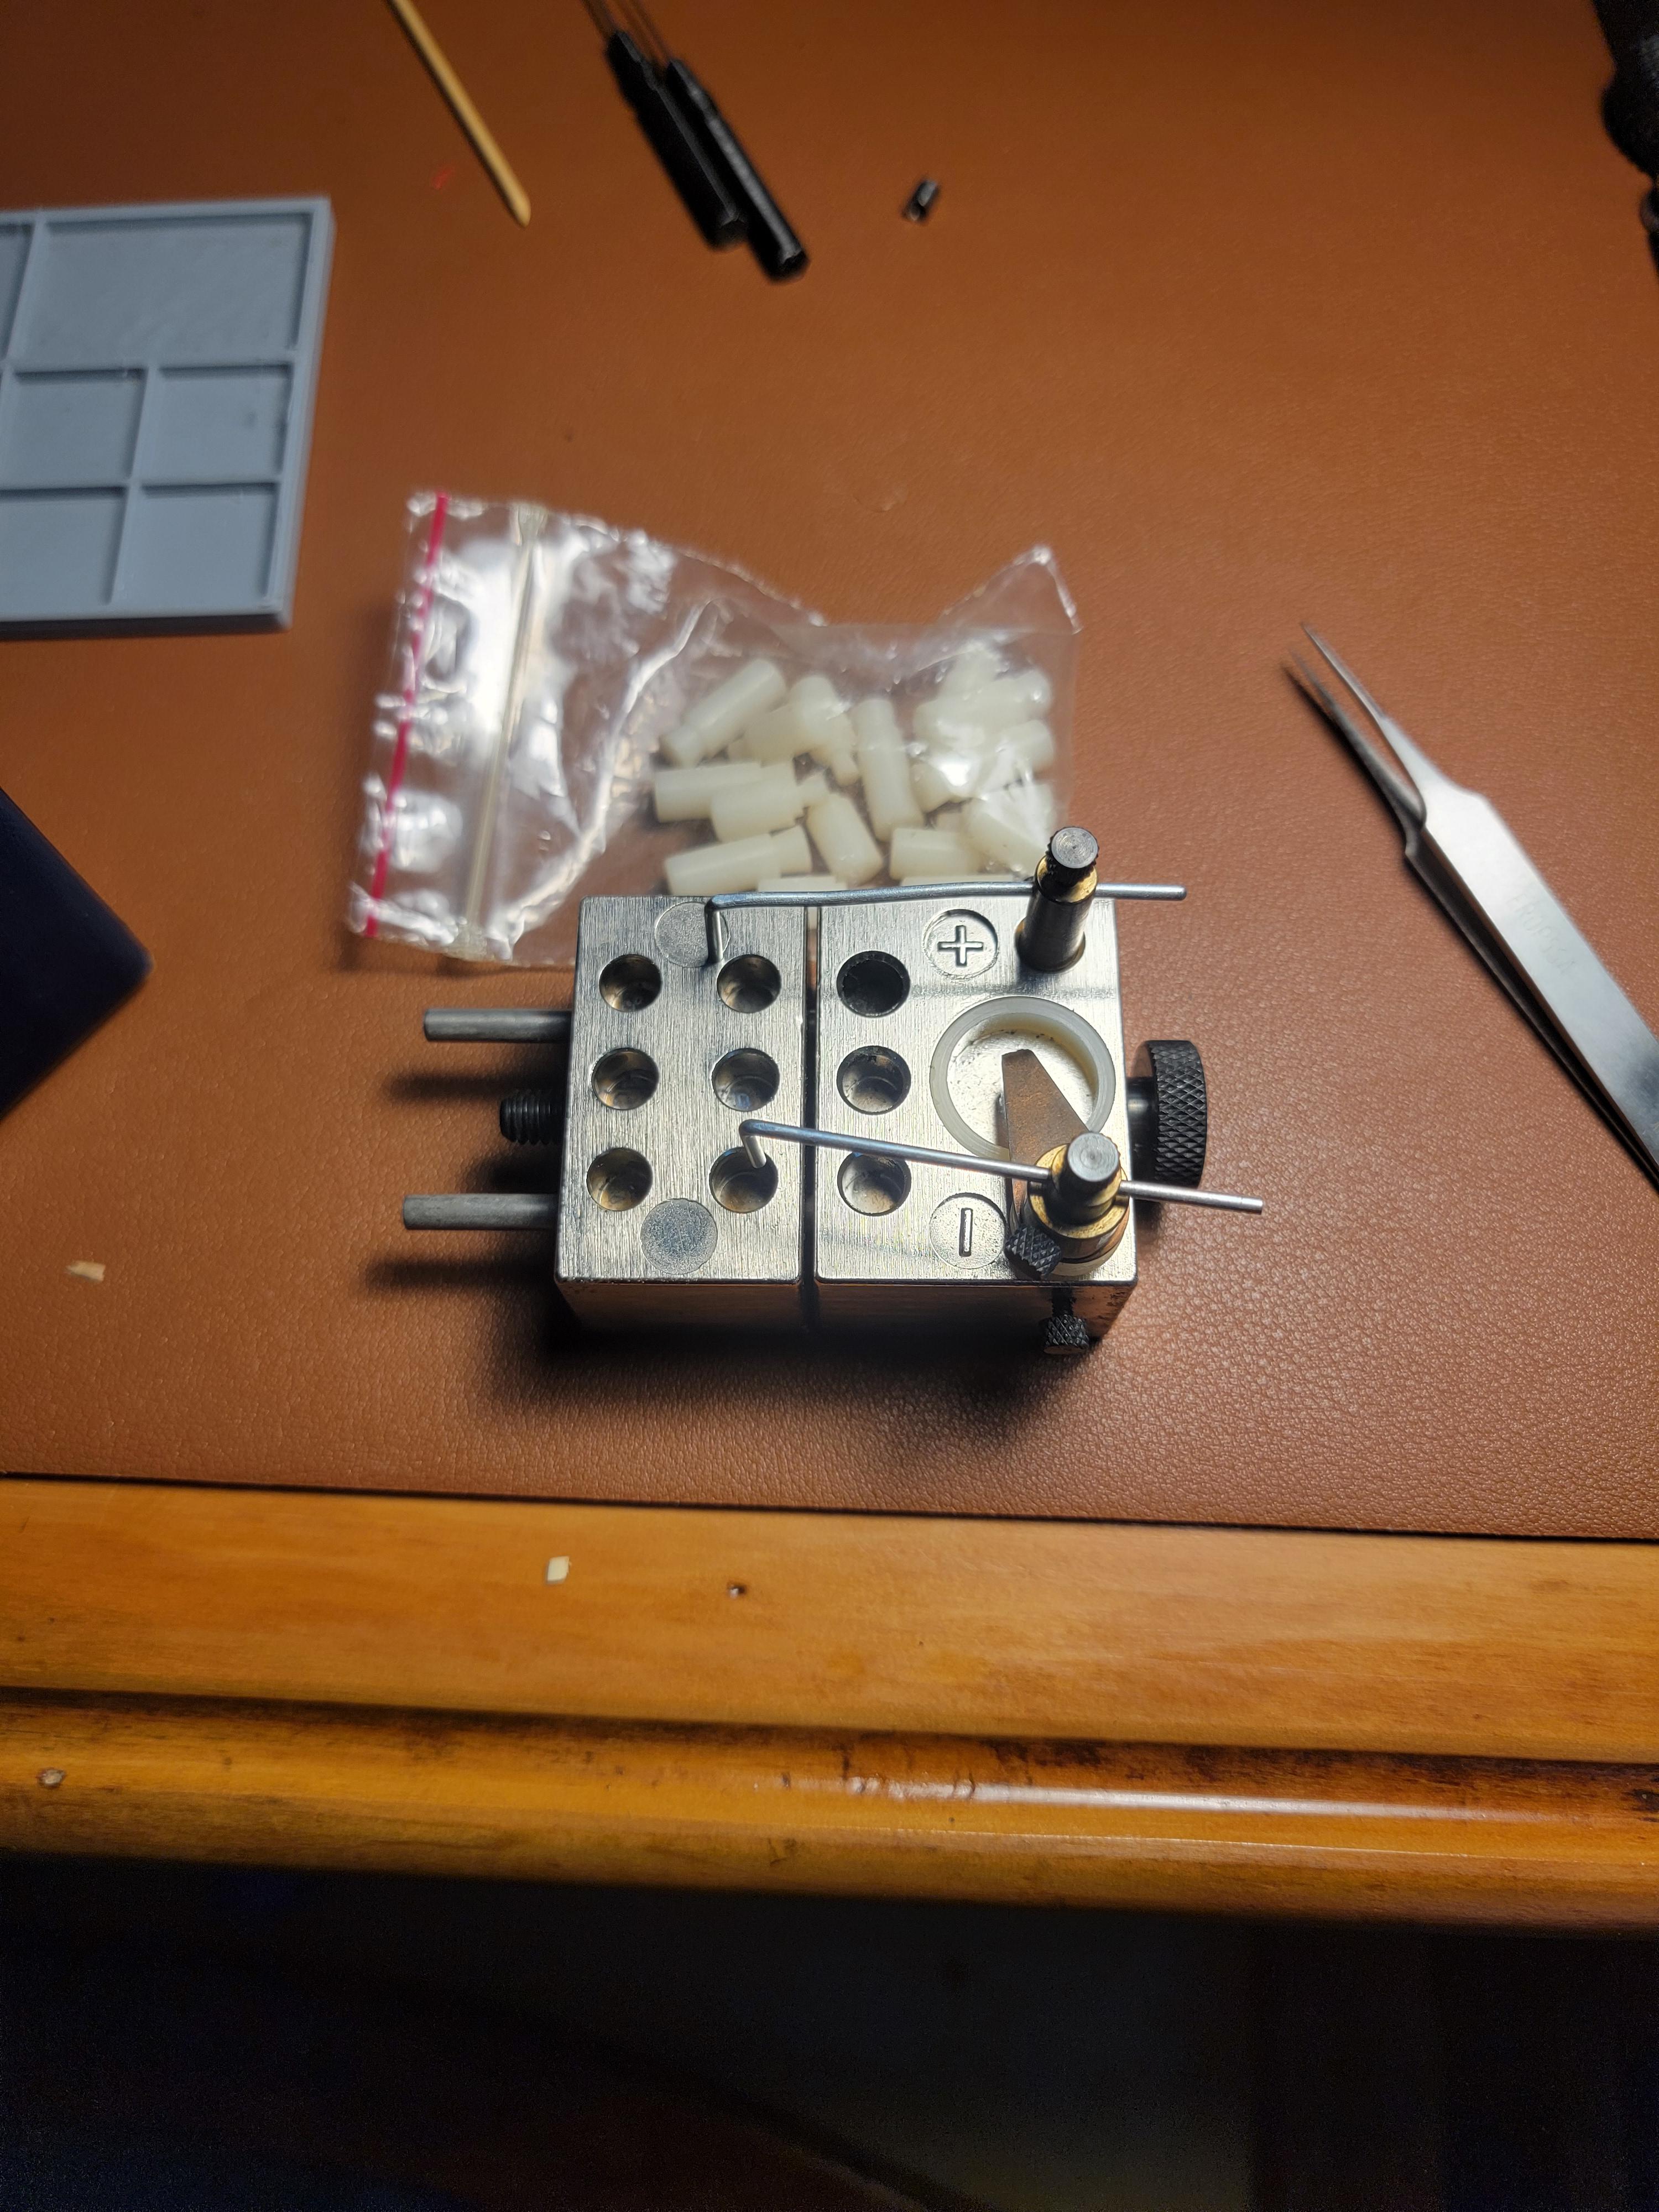
Here's one. There are also renders of the model at Thingiverse (see the link above).
 1 point
 -
Screwdriver has to be used to unscrew the screw. Be sure not to touch the coil !!!1 point
-
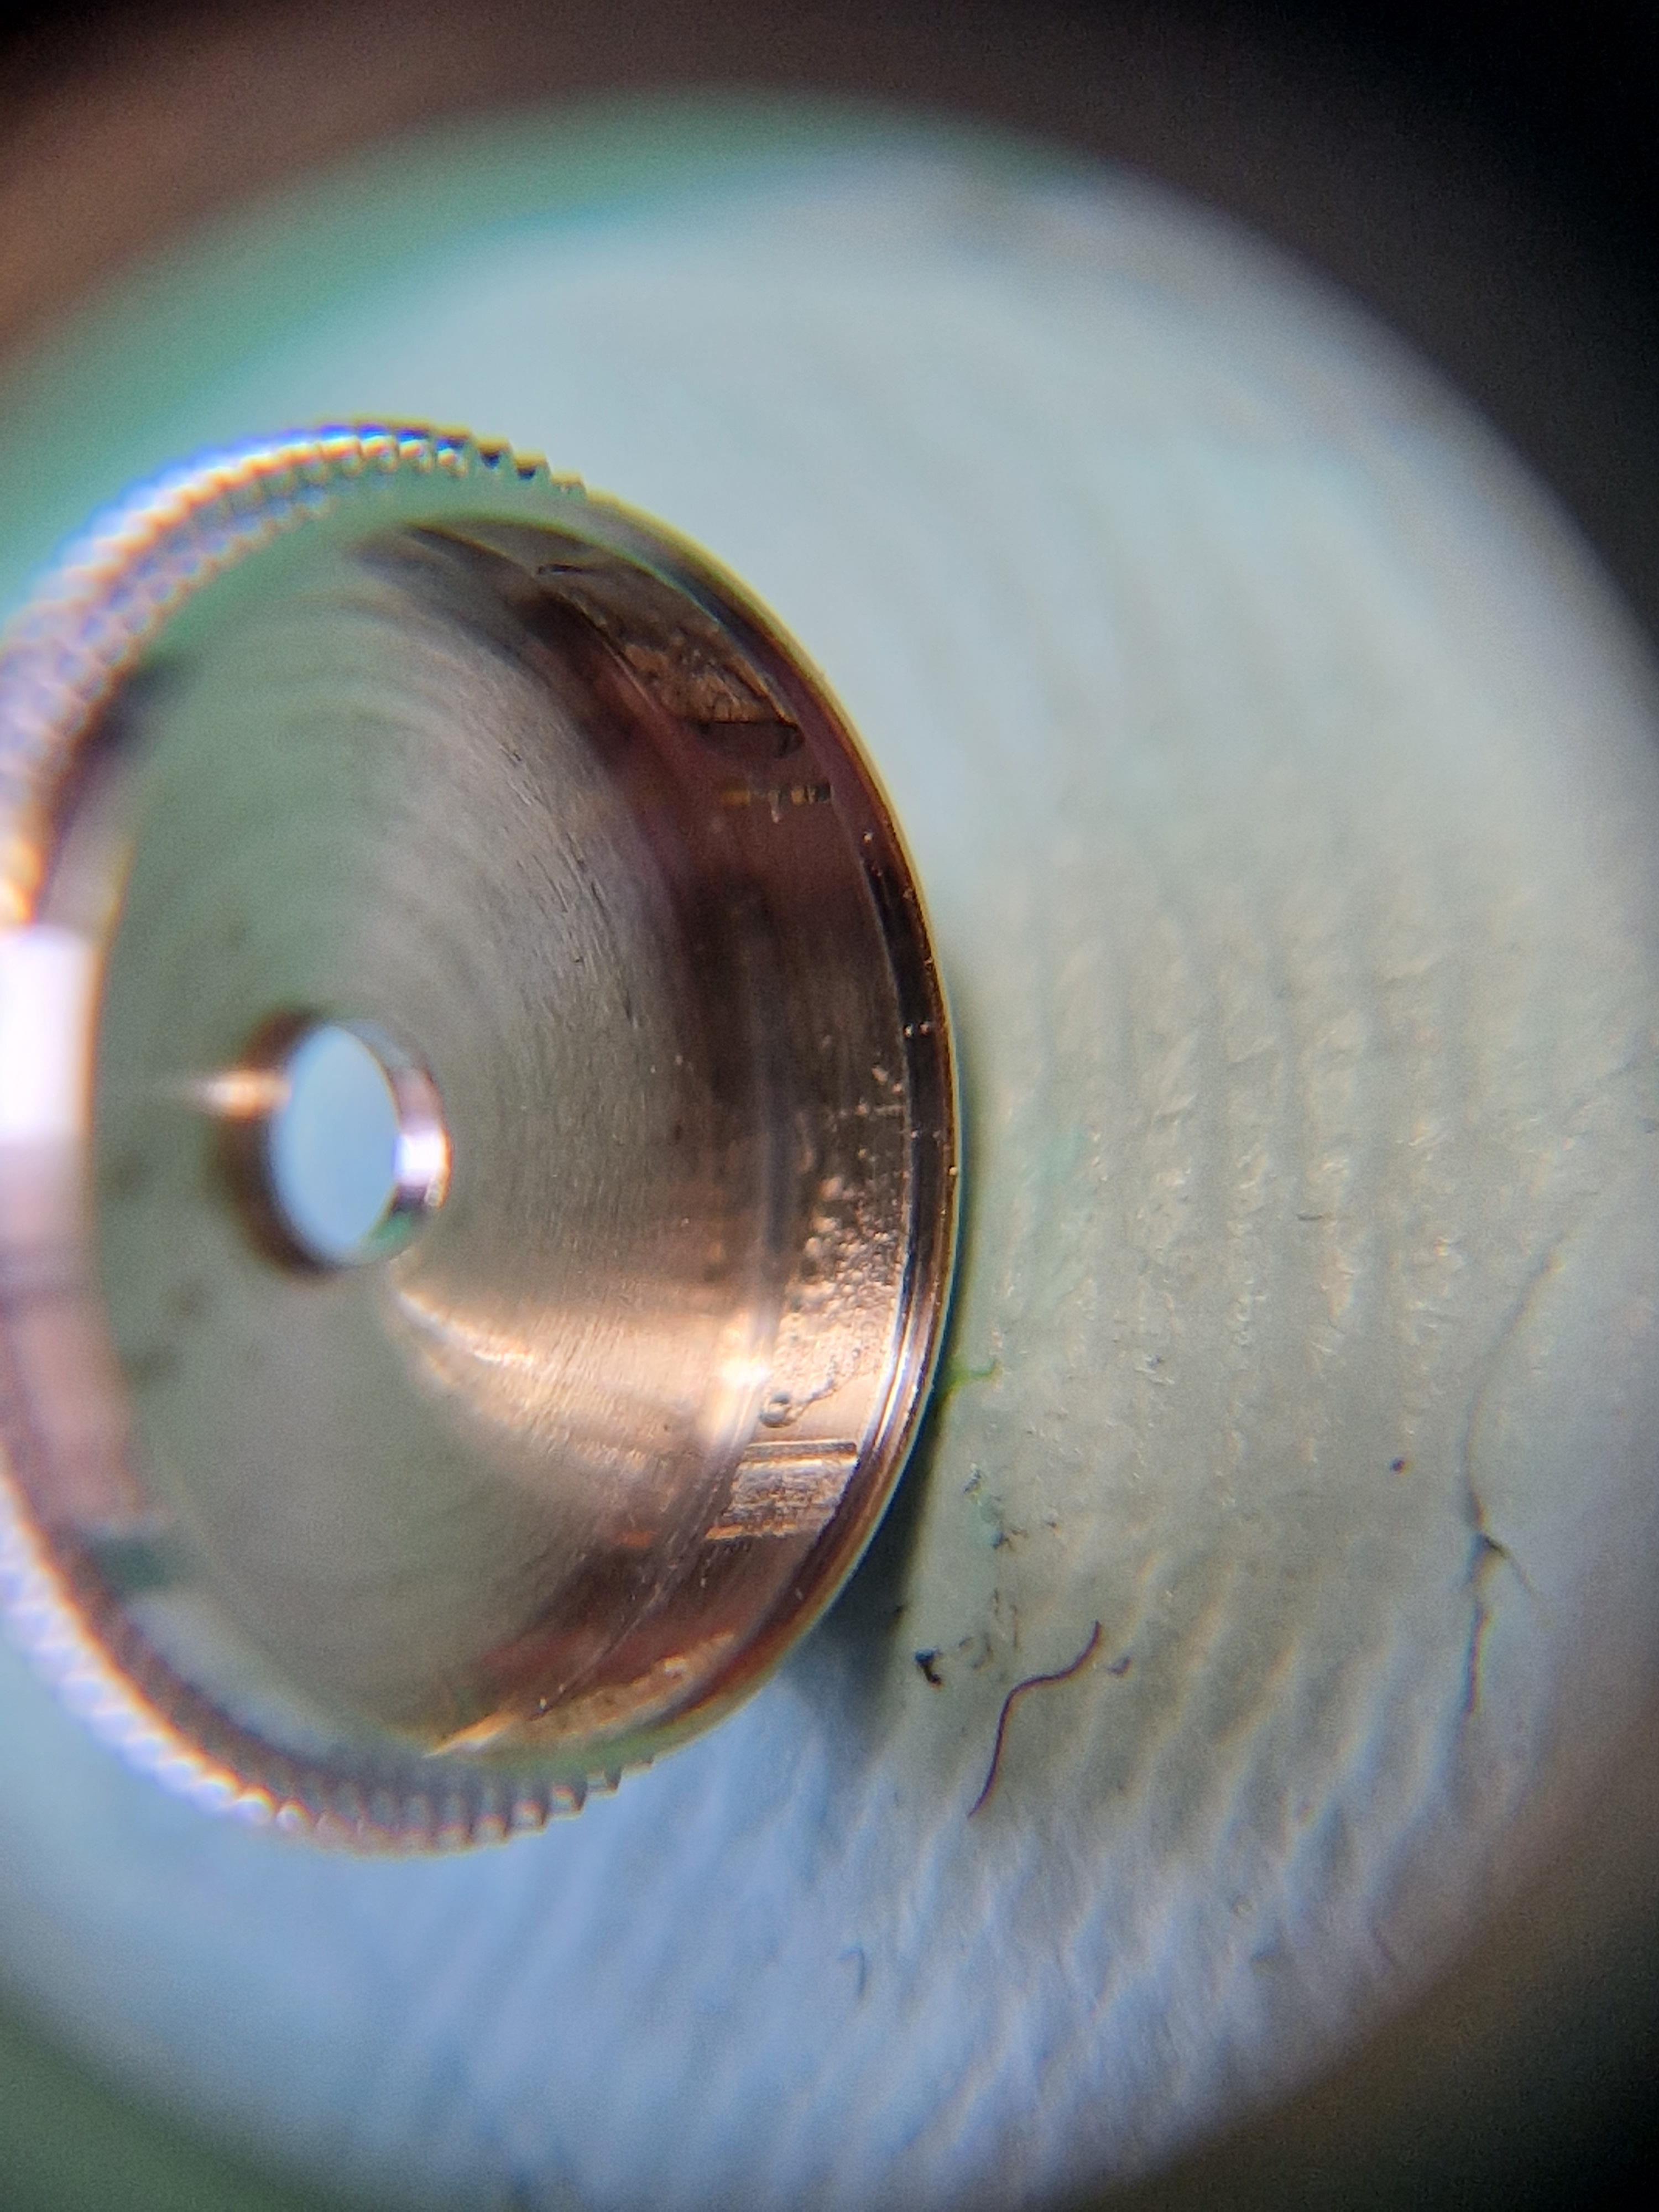
Hi Rich, and Marry Christmas to all! Sorry for the delay, I was not able to get close to the computer this days. Many questions to answer... The anvil needed for tampon removing looks like on the picture. The hole has two sizes. The bigger is to take the bare cylinder, or the brass part that is riveted to the balance with the cylinder inside. The smaller size is such as the cylinder will not go through, but the tampon will. E. g., if the cylinder diameter is 0.75, then the small size will be 0.7, and the big - 0.8. This if the cylinder is out of the balance. If the cylinder is on the balance, then the big size will be little bit bigger than the collet hole size. Yes, the hairspring side tampon can go out with cylinder on the balance. But, sometimes the tampon is very stiff and will not want to go out, then is easier to push the cylinder out and then tap the upper part of the cylinder with hammer on anvil to make tampon going out easier. No problem to use offset punch with normal staking tool, just the anvil of the tool must be turned a little. It is not so right to adjust the high of the cylinder by tampon position. The bottom part of the tampon must be ideally flat and polished and it must be positioned right where the mouth of the cylinder begins. This is to ensure correct oil retention. The cylinder itself is not riveted to the balance. It is made of steel tube and has uniform diameter everywhere on it's lenght. The cylinder is pressed in a bras bush part, which has seat for the balance and for the collet, this part is riveted to the balance and is part of it, and remains on the balance when the cylinder has to be removed. The cylinder goes out or in always in direction as the mouth will not go thru the hole. The balance on the anvil, the mouth part of the cylinder in the hole. Then a tube a little smaller than cylinder is used to push the cylinder out. If 0.75, then source 0.7mm syringe needle and cut part of it, put in a punch with 0.8 hole, then cut so it is 3mm above the head surface of the punch. This is the punch that is used to push the cylinder out. To push the cylinder in, use anvil hole that will take the hairspring part of the riveted bush. The cylinder is lead to the bush hole, then the special punch is used for pushing the cylinder in the hole. The punch must push only the upper part of the mouth.
 1 point
 -
It helps a lot to be able to inspect under a microscope. You've really got to avoid contamination from coarser grit when moving to finer. Wiping really isn't enough. There will still be bits stuck around edges and crevices than get picked up when buffing and leave scratches. I run though the ultrasonic. It's very tedious. Try a larger diameter felt buff. That one looks like ½" diameter. I find the 1" work much better. The small indentations look like maybe the metal is smearing. If you run the buff too fast, with too much pressure, and for too long without putting fresh compound on it, this seems to happen. More buffing isn't necessarily better. The compound doesn't really last for the long before it's used up and doesn't cut anymore. I think some metal just isn't as good. It has inclusions or carbides or something in it. Under the microscope you can see little pits, with scratch trails running from them in the direction of the buffing that weren't there when sanding. I found this site to have pretty good information, https://www.struers.com/en/Knowledge/Grinding-and-polishing#1 point
-
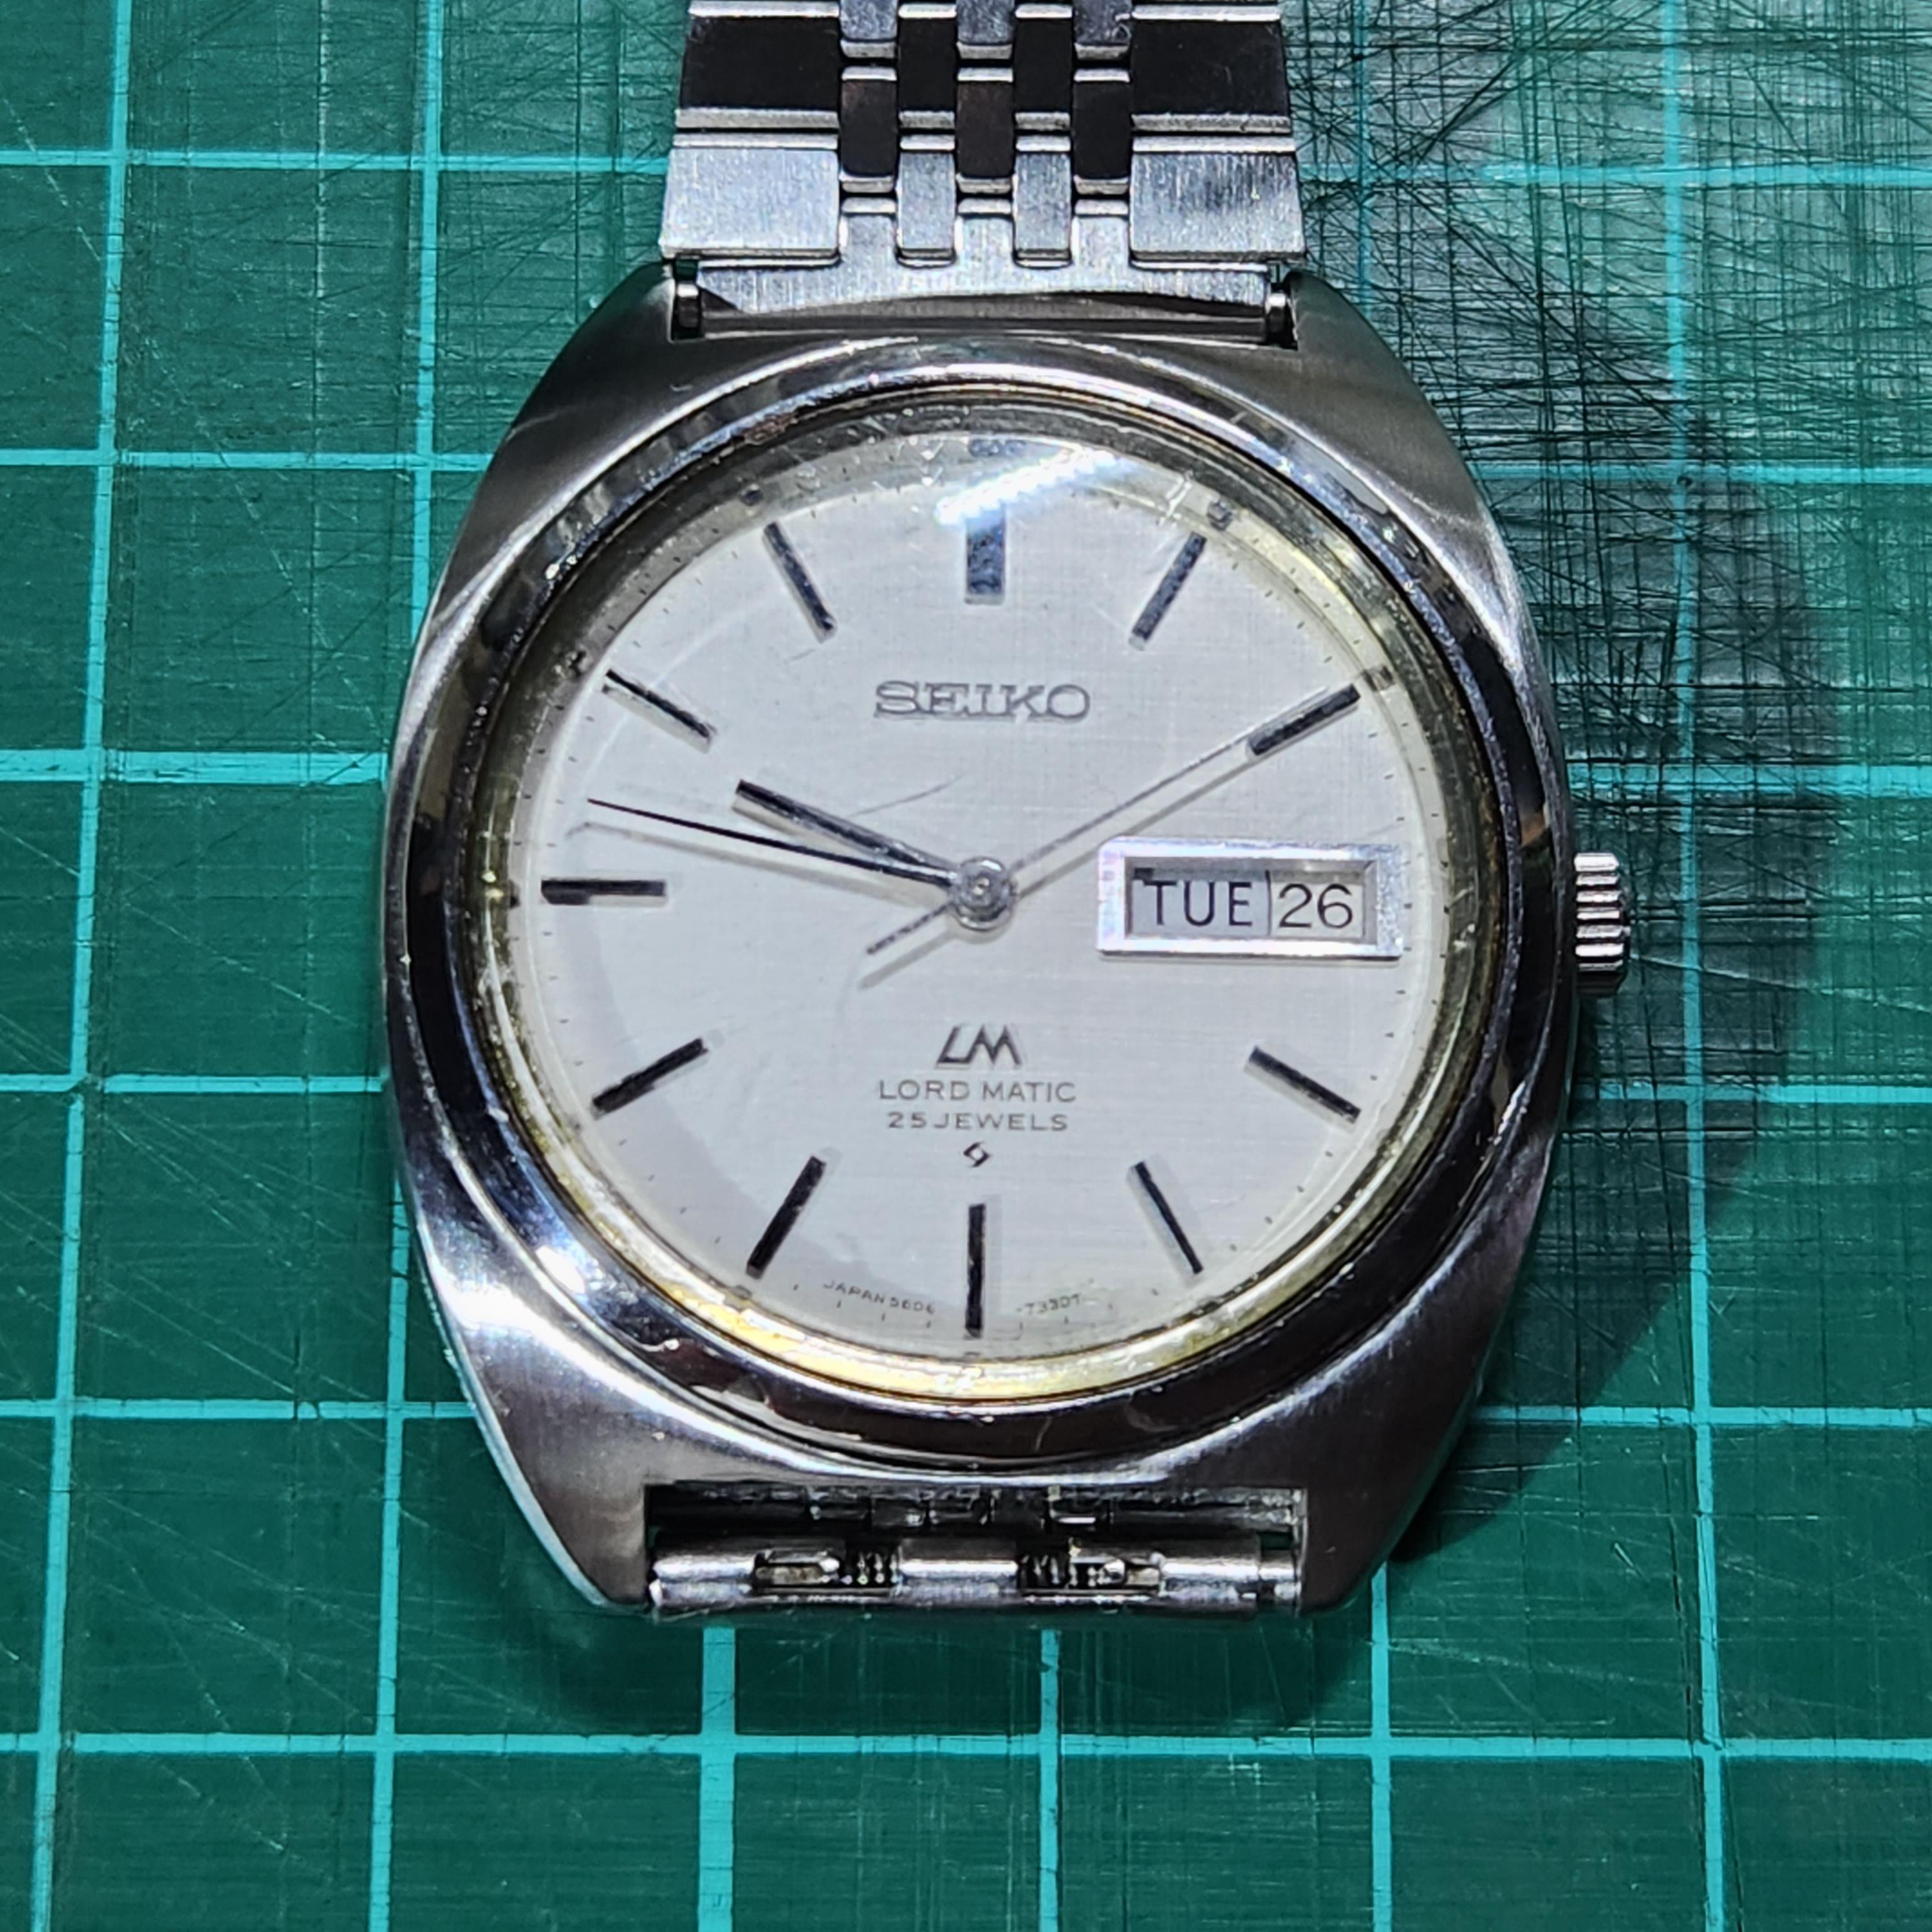
I just got my first Lordmatic earlier this month. It was a non-runner from Japan. The movement lock ring was jammed so tight that I had a hard time getting it out. The previous watchmaker must have given up because the all the screws looked pristine. The second wheel jewel was broken and by some miracle, I found an exact jewel in my collection of scrap jewels. It's running again, although the positional variation in the amplitude and rate is not perfect. Now I'm looking at getting a Lord Marvel or King Seiko.

 1 point
 -
Rolex has a very active looking for the fakes and would probably sue them in court but typically people making these more interesting low-priced watches don't leave addresses for Rolex to find them that usually make their goods and move on to some other venture before Rolex catches up to them. Like somewhere probably on YouTube is a video of all the fake watches seized by the US customs department and then there are run over with a steamroller showing them being crushed. But that doesn't change somebody's business profile where they sold those to somebody in this country they have their money and their long ago and they'll continue to do what the delay until somebody actually catches the individuals and there's more individuals than just them so it's a hard thing to put a stop to for instance I went spotted an advertisement for an interesting reproduction of a Rolex exactly identical to a Rolex and Hattaway know they had pictures. So I sent it to a friend who occasionally would take classes with Rolex on identifying these things. He centered on to Rolex and we never heard again what they thought? That was until he took the next class on counterfeit watches where the instructor was wearing a nice chronograph complement of the Chinese mafia basically. So they had actually gone ahead and purchased the watch to see if they could track down who was selling them and it basically goes back to Chinese criminal organizations. So basically tracing the money is hard to do so it's almost impossible to stop these people and obviously they make a lot of money selling watches with popular names on them.1 point
-
Yes you're going to have to make a New Year's resolution to get a life and not spend so much time here oh wait, I suppose that means I'd have to make the same silly New Year's resolution of having a life and spending too much time here so just forget about that silly thing everyone has to have a hobby. It's a secret code word you need the secret decoder ring to grasp its meaning. It's a reference to something forbidden at least by a horological Association Which is explained in the paragraphs on the webpage. http://www.pocketwatchrepair.com/catt/pwr-supply.php Here's another example of something similar. Then if you didn't have the Bulova holder for electronics they do make nice small clips that will clip on to the watch itself without a problem. Because that's typically what I do with my power supply just don't have a picture of the clips that I'm using but I see if I find something https://electric-watches.co.uk/accutron-test-meter-mark-3/ Here's what I'm using what I work on electric watches their very nice and tiny and providing you have really lightweight wire that don't pull on anything but basically any of the really tiny microbe grabbing for electronics would work Here's a link to all kinds of places you can buy them from then you do want to buy them into separate colors C keep track your plus and minus so typically that The red and black https://www.pomonaelectronics.com/products/test-clips/micrograbber-test-clip-do-it-yourself-available-ten-colors
 1 point
 -
Hi Ross when I go into the shop I will do the business, pictures and I will find the information on how to build it for you.1 point
-
1 point
-
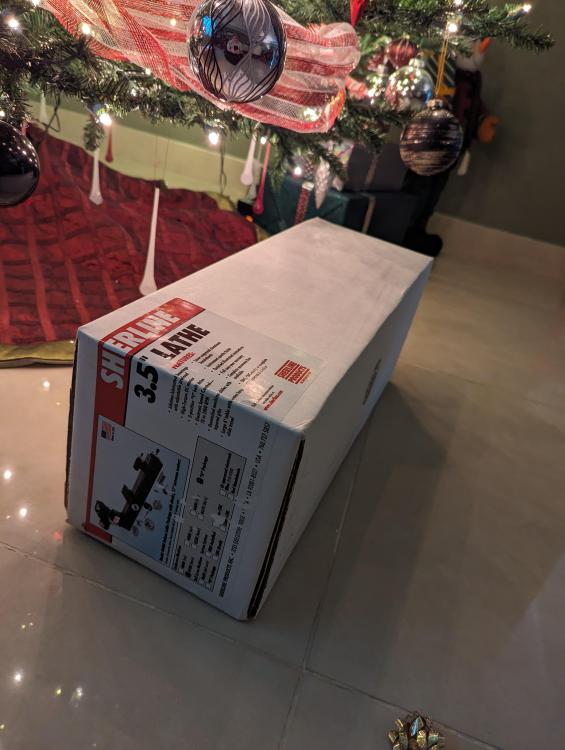
Merry Christmas, new toy to play with, what do you all get?
 1 point
 -
You're in luck, the American Watch and Clock Makers Institute is just down the road in Harrison ans the regularly have classes for all skill levels. https://www.awci.com/1 point
-
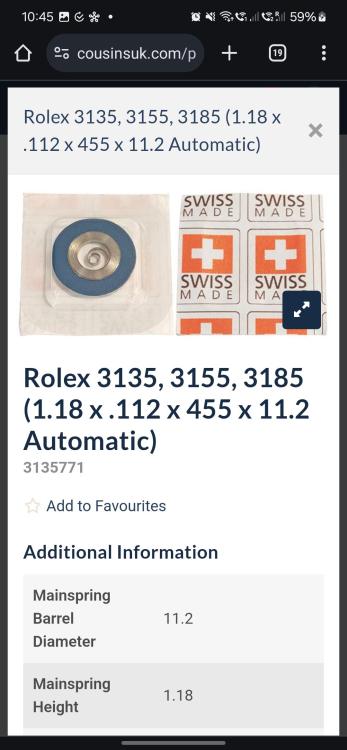
Thanks, that's a very useful input! I fit a generic Generale Ressorts mainspring specifically meant for thr 3135. Screenshot below. I unfortunately didn't take a picture of the quantity of breaking grease applied. But I took pictures of a recent cal 2035 and I'd say that I put an equivalent (not equal, because the barrels are not the same size) amount. The picture should give an indication. I applied 5 blobs and then spread them out rather thin to avoid that putting the mainspring would result in pushing the blob down to the barrel floor. Last thing the point out, it really only takes 1min for the amplitude to settle at 300-310.
 1 point
 -
Thank you for your introduction and welcome to this friendly forum. We all look forward to your contributions and continued involvement. You might find this helpful. 704789946_TZIllustratedGlossary(2).pdf1 point
-
Welcome J, from not so sunny Yorkshire Uk. Just be careful what you watch on YouTube. All that glitters is not gold. A few that are worth watching are chronoglide, chris spinner , chris soto, retro watches, french watch collector, watch repair channel, about time alex Hamilton, Richard Perrett, nekkid watchmaker and saving time. Bit of a mixture of talent,some of these are or were professional watchmakers the rest good amateurs.1 point
-
The hairspring looks pretty well twisted right at the stud, which is something I've seen on several watches I've done (and has been the easiest to fix of the hairspring defects I've dealt with). That would cause the hairspring to twist relative to the plane of the balance wheel, possibly rubbing on it or the cock and stopping it. Can we see the balance complete installed directly from the side and front? Your hairspring should be dead parallel to the balance wheel and the balance cock.1 point
-
Problem solved! The link works when I first open the WorthPoint website on a parallel browser window!1 point
-
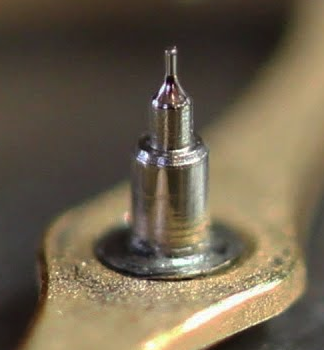
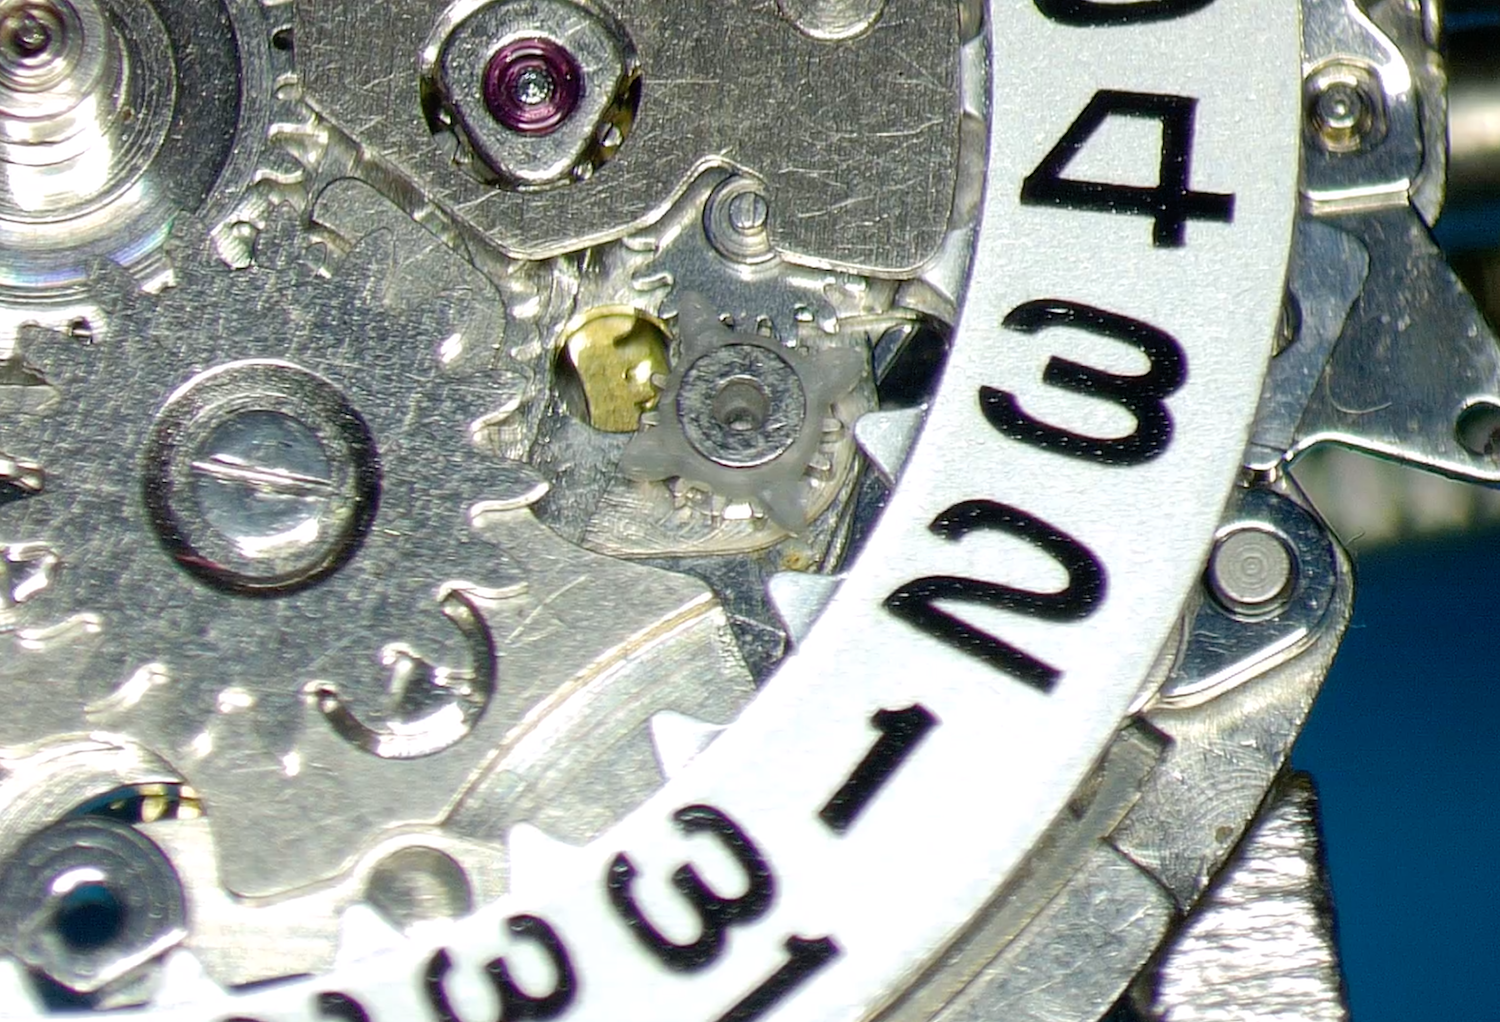
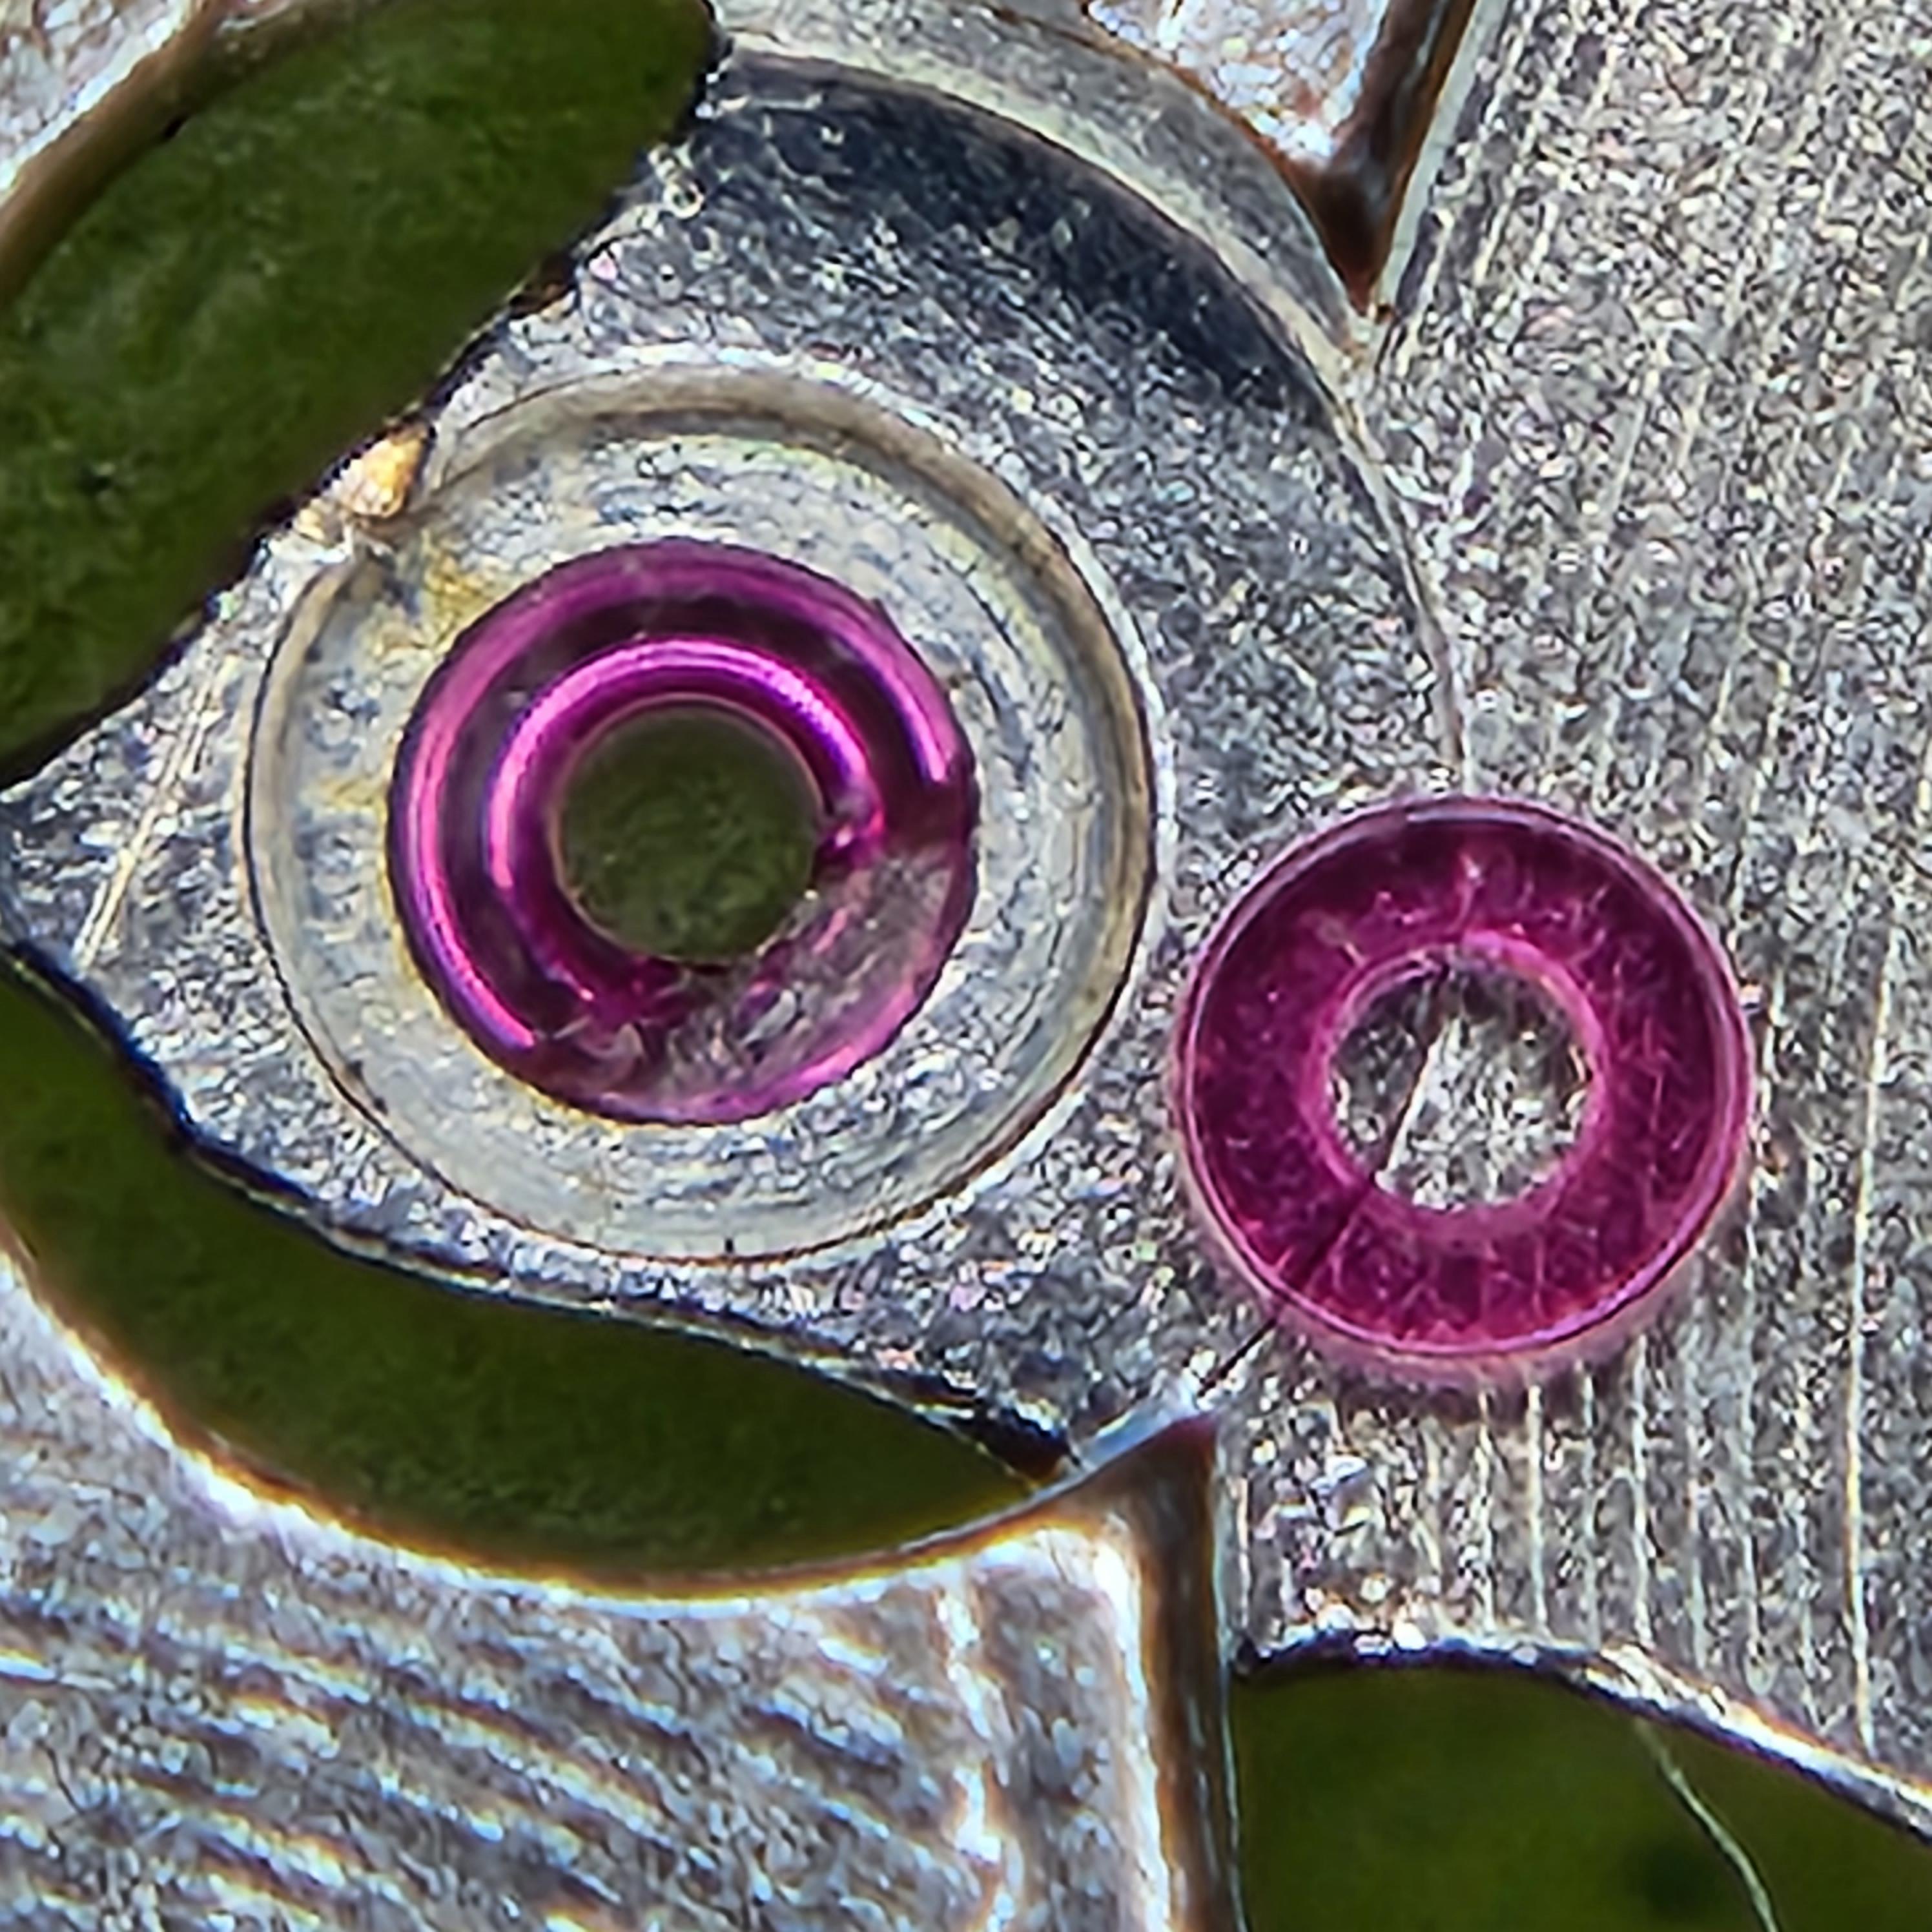
Even though you checked, first thing I would check again is your balance staff pivots. I know when I was first starting, even a broken pivot looked okay to me, and it'll still assemble fine and often run (albeit poorly) with a bad pivot. Take a close look under as high magnification as you can get. The one on the right is broken, left is not: Or bent like this guy: You want to see this:

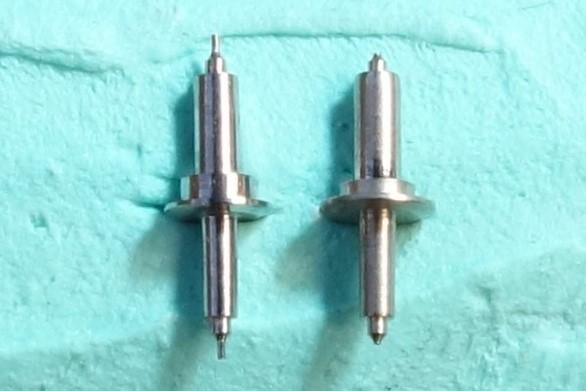 1 point
 -
My mistake today was getting up. I have a cold, so I need lots of sympathy.1 point
-
Manual is good, but one has to know how to read it... Here, on the picture, I have shown with the big arrow the 'screw' that regulates the reset hammer. The small arrow shows a gap in the hammer that will change when the screw is turned. You have to reduce the gap. Actually, the hammer must be regulated in a manner that the reset surface for the seconds heart will rest firmly on the heart, and the reset surface for the minutes heart will alow a little free play of the heart. This free play should be smaller than half minute to + and - of the arrow on the subdial.
 1 point
 -
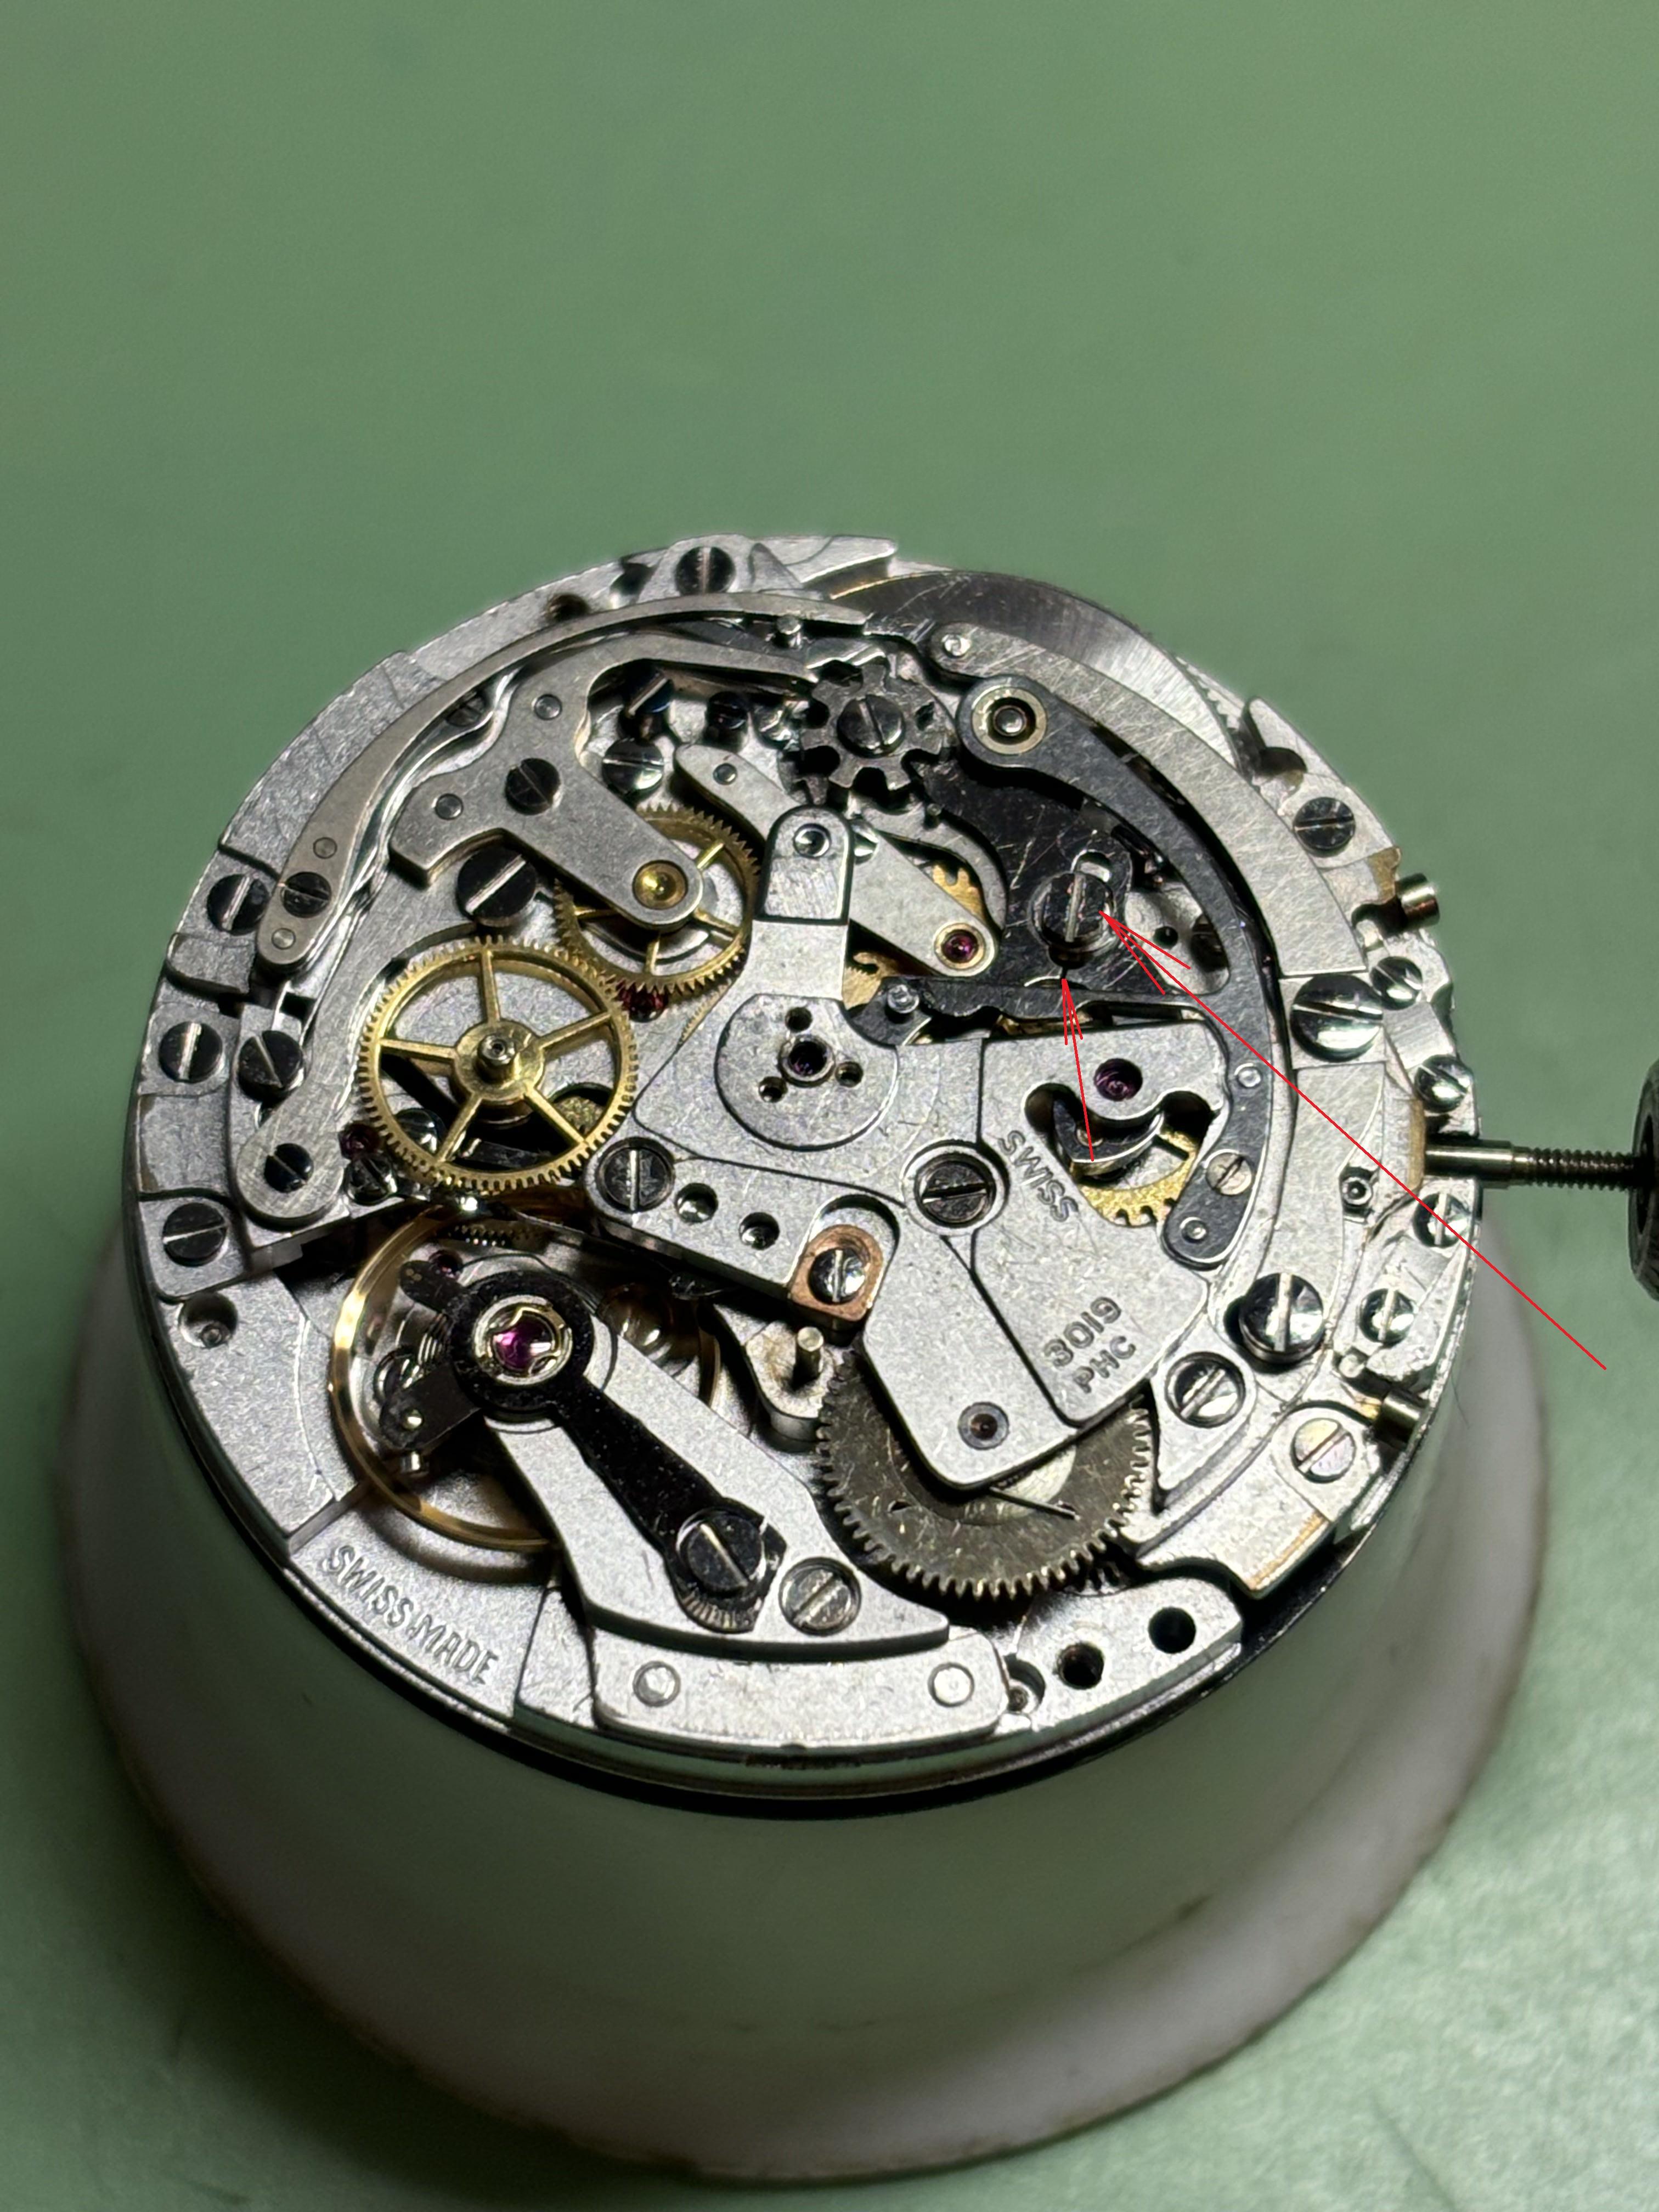
You shouldn't have to modify the parts of the chronograph because now you may possibly have to fix the adjustment that you've made by modifying depending upon where you did it Usually chronographs are filled with adjustments everything is usually adjustable in some way. There will be a lot of screws that are Not really screws but are offset cam is for adjusting things. This is where if you're not familiar with a chronograph you really should have a service manual which shows all the adjustments.. So I'm attaching a PDF a little light reading.. Then if you do do an adjustment and it doesn't seem to fix the problem put it back where you found it because are probably introduce a new problem.. Zenith_Zenith 3019PHC.pdf1 point


.thumb.jpg.cb17a66989f1e796fd4217db2e9ca9df.jpg)