Leaderboard


Popular Content
Showing content with the highest reputation on 04/28/22 in Posts
-
OK, that's understandable. If this watch is worth anything to you, my advice is to either take it to someone who knows what they are doing or put it aside until you have acquired the experience and confidence yourself.4 points
-
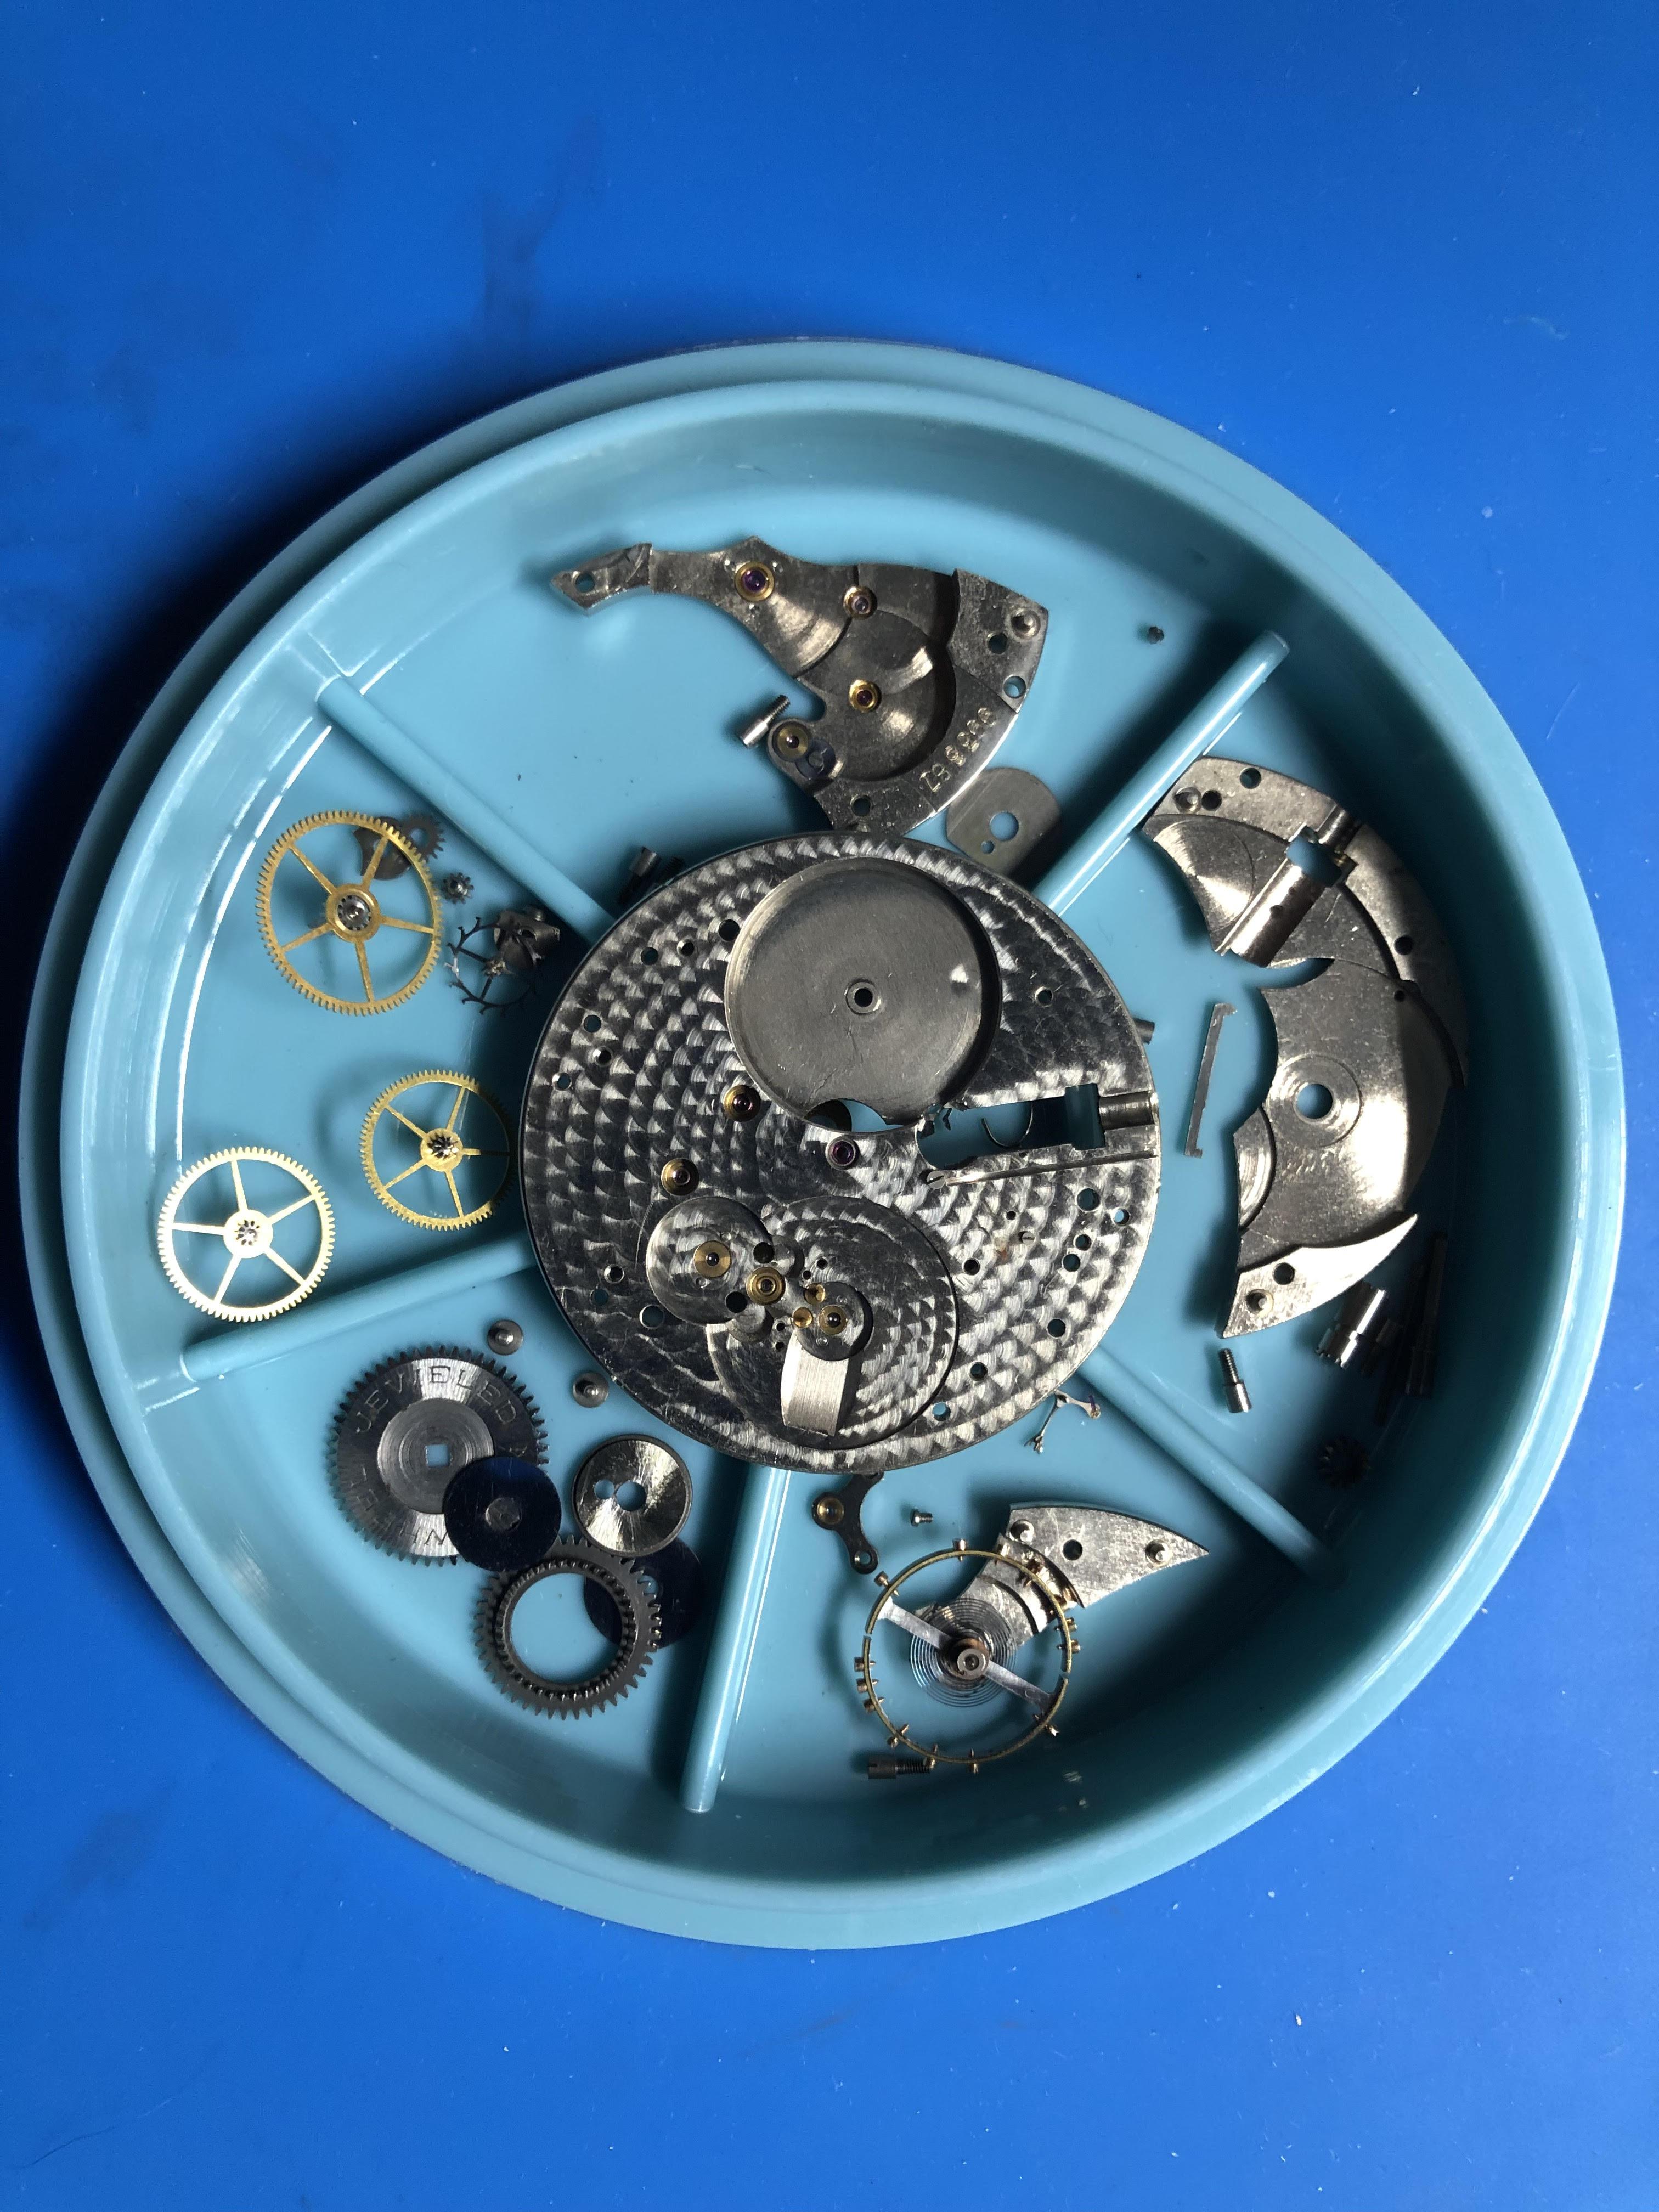
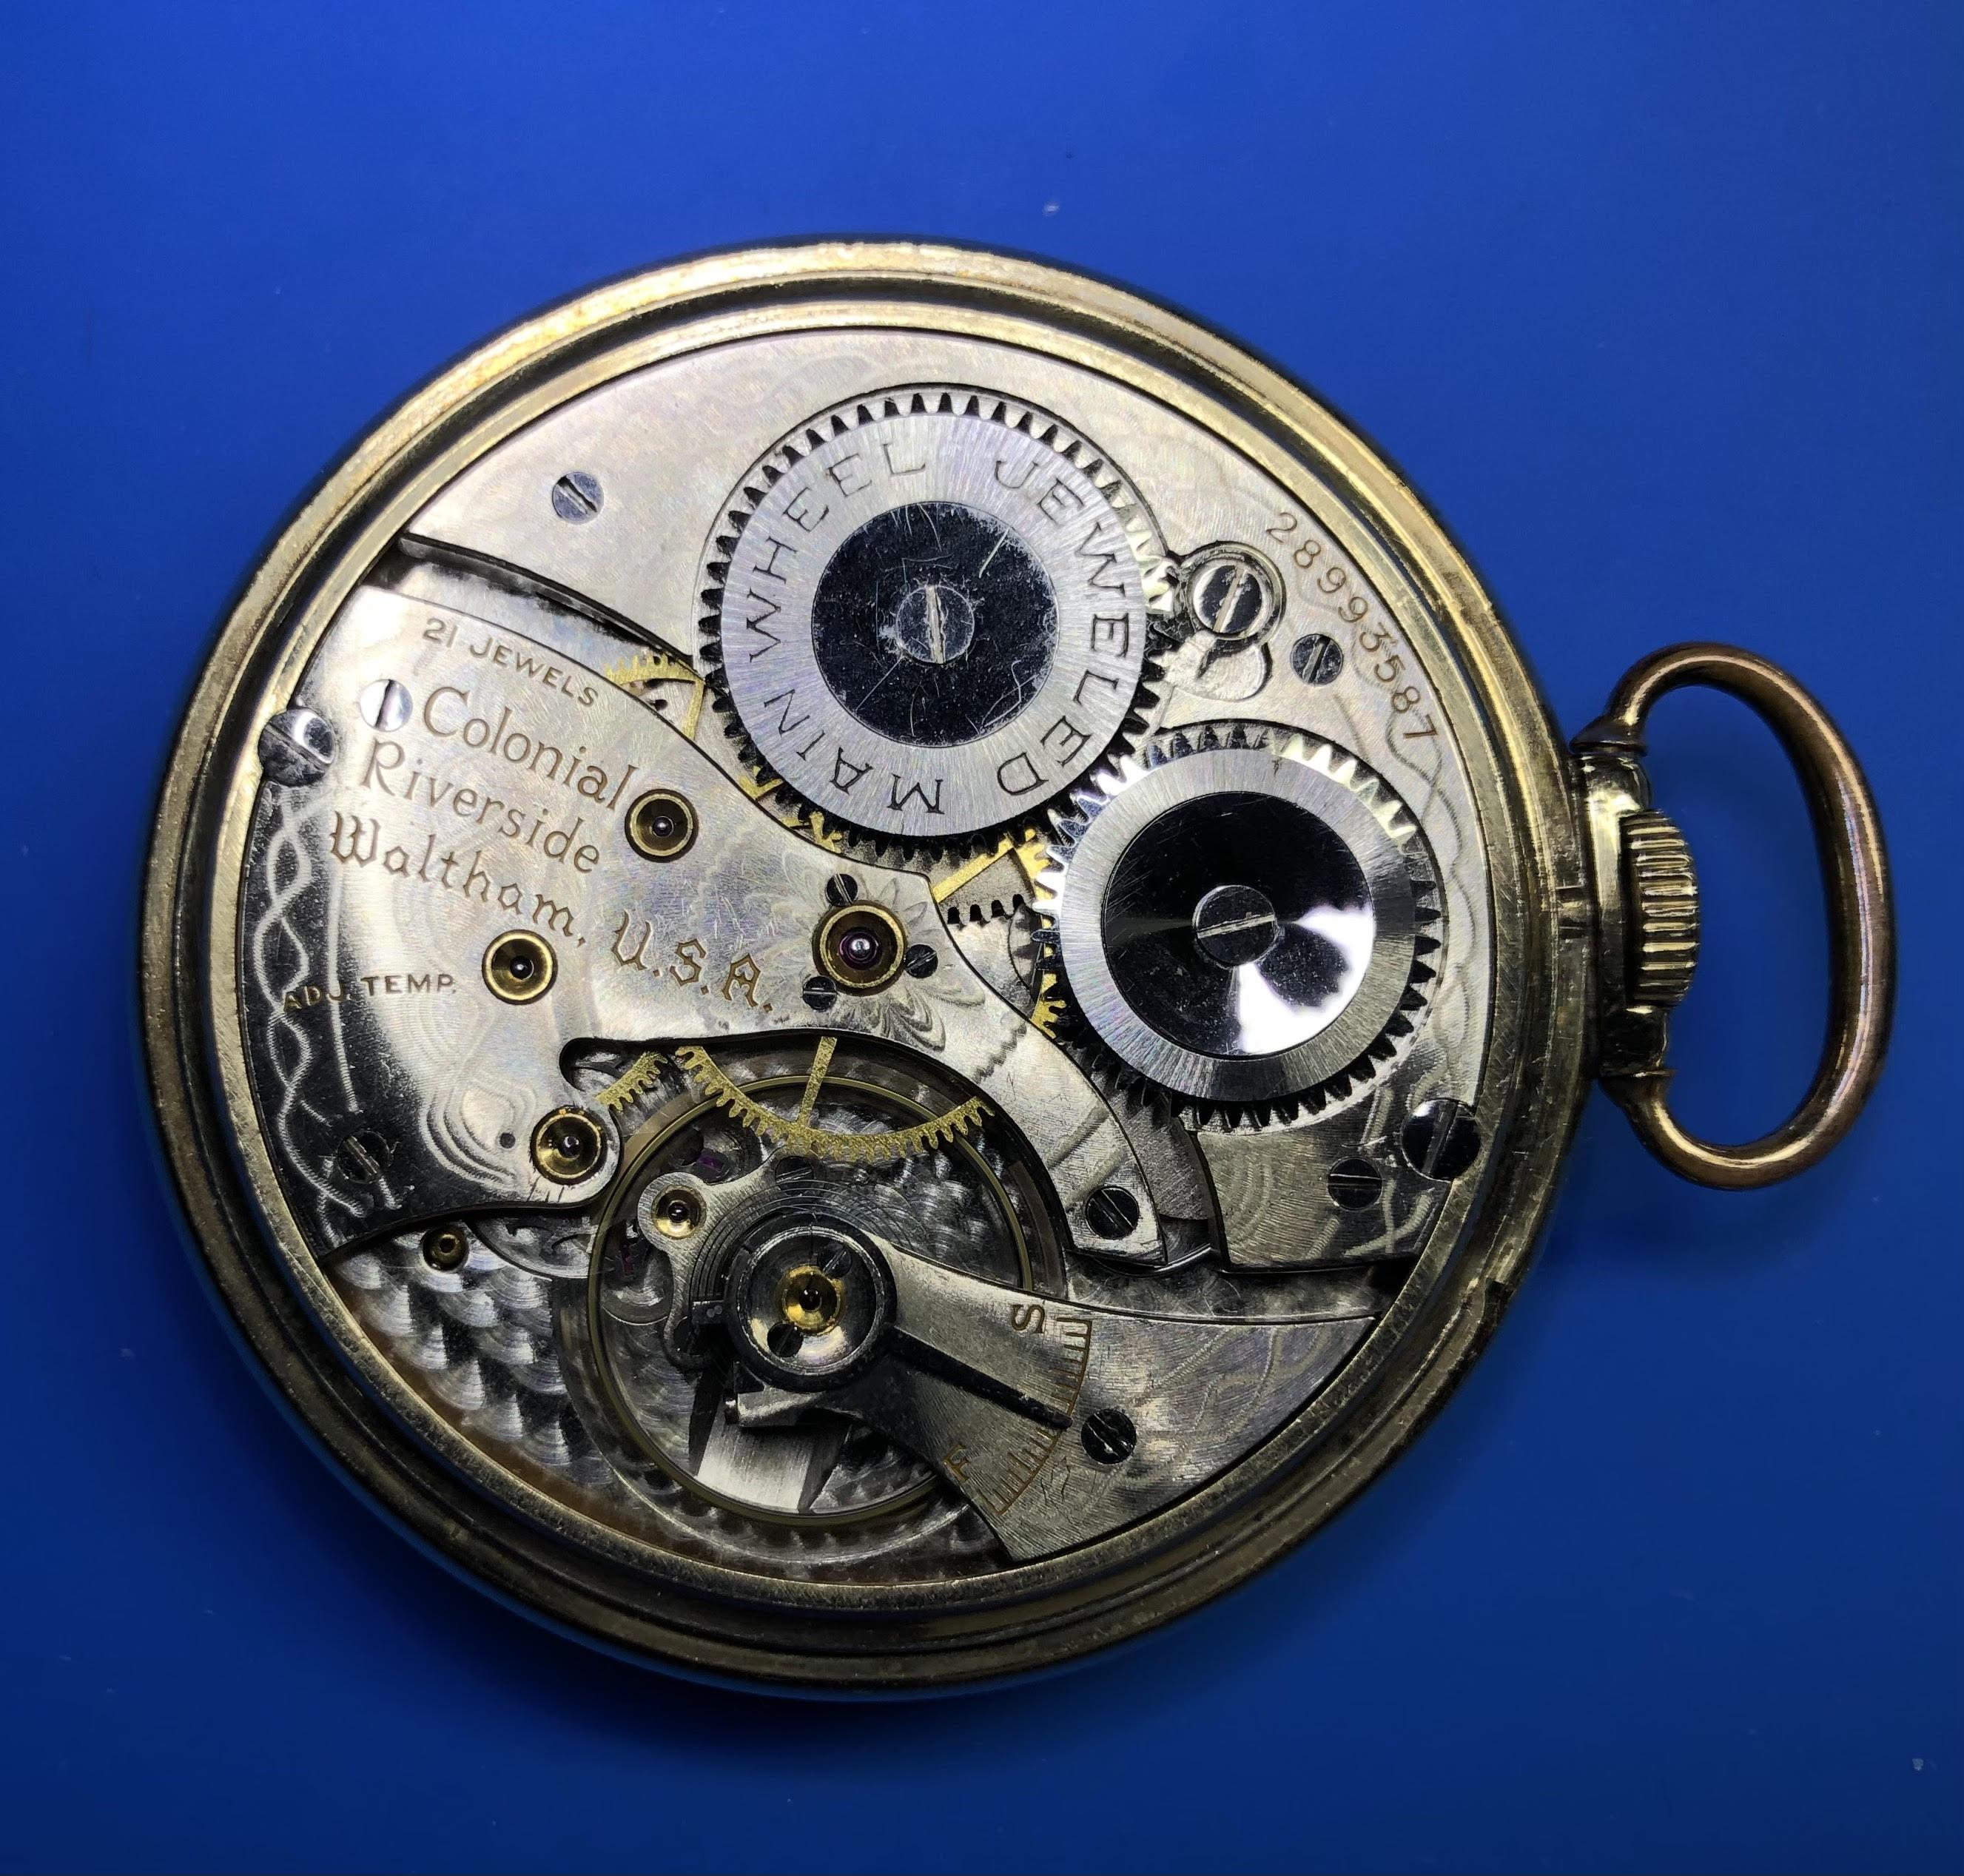
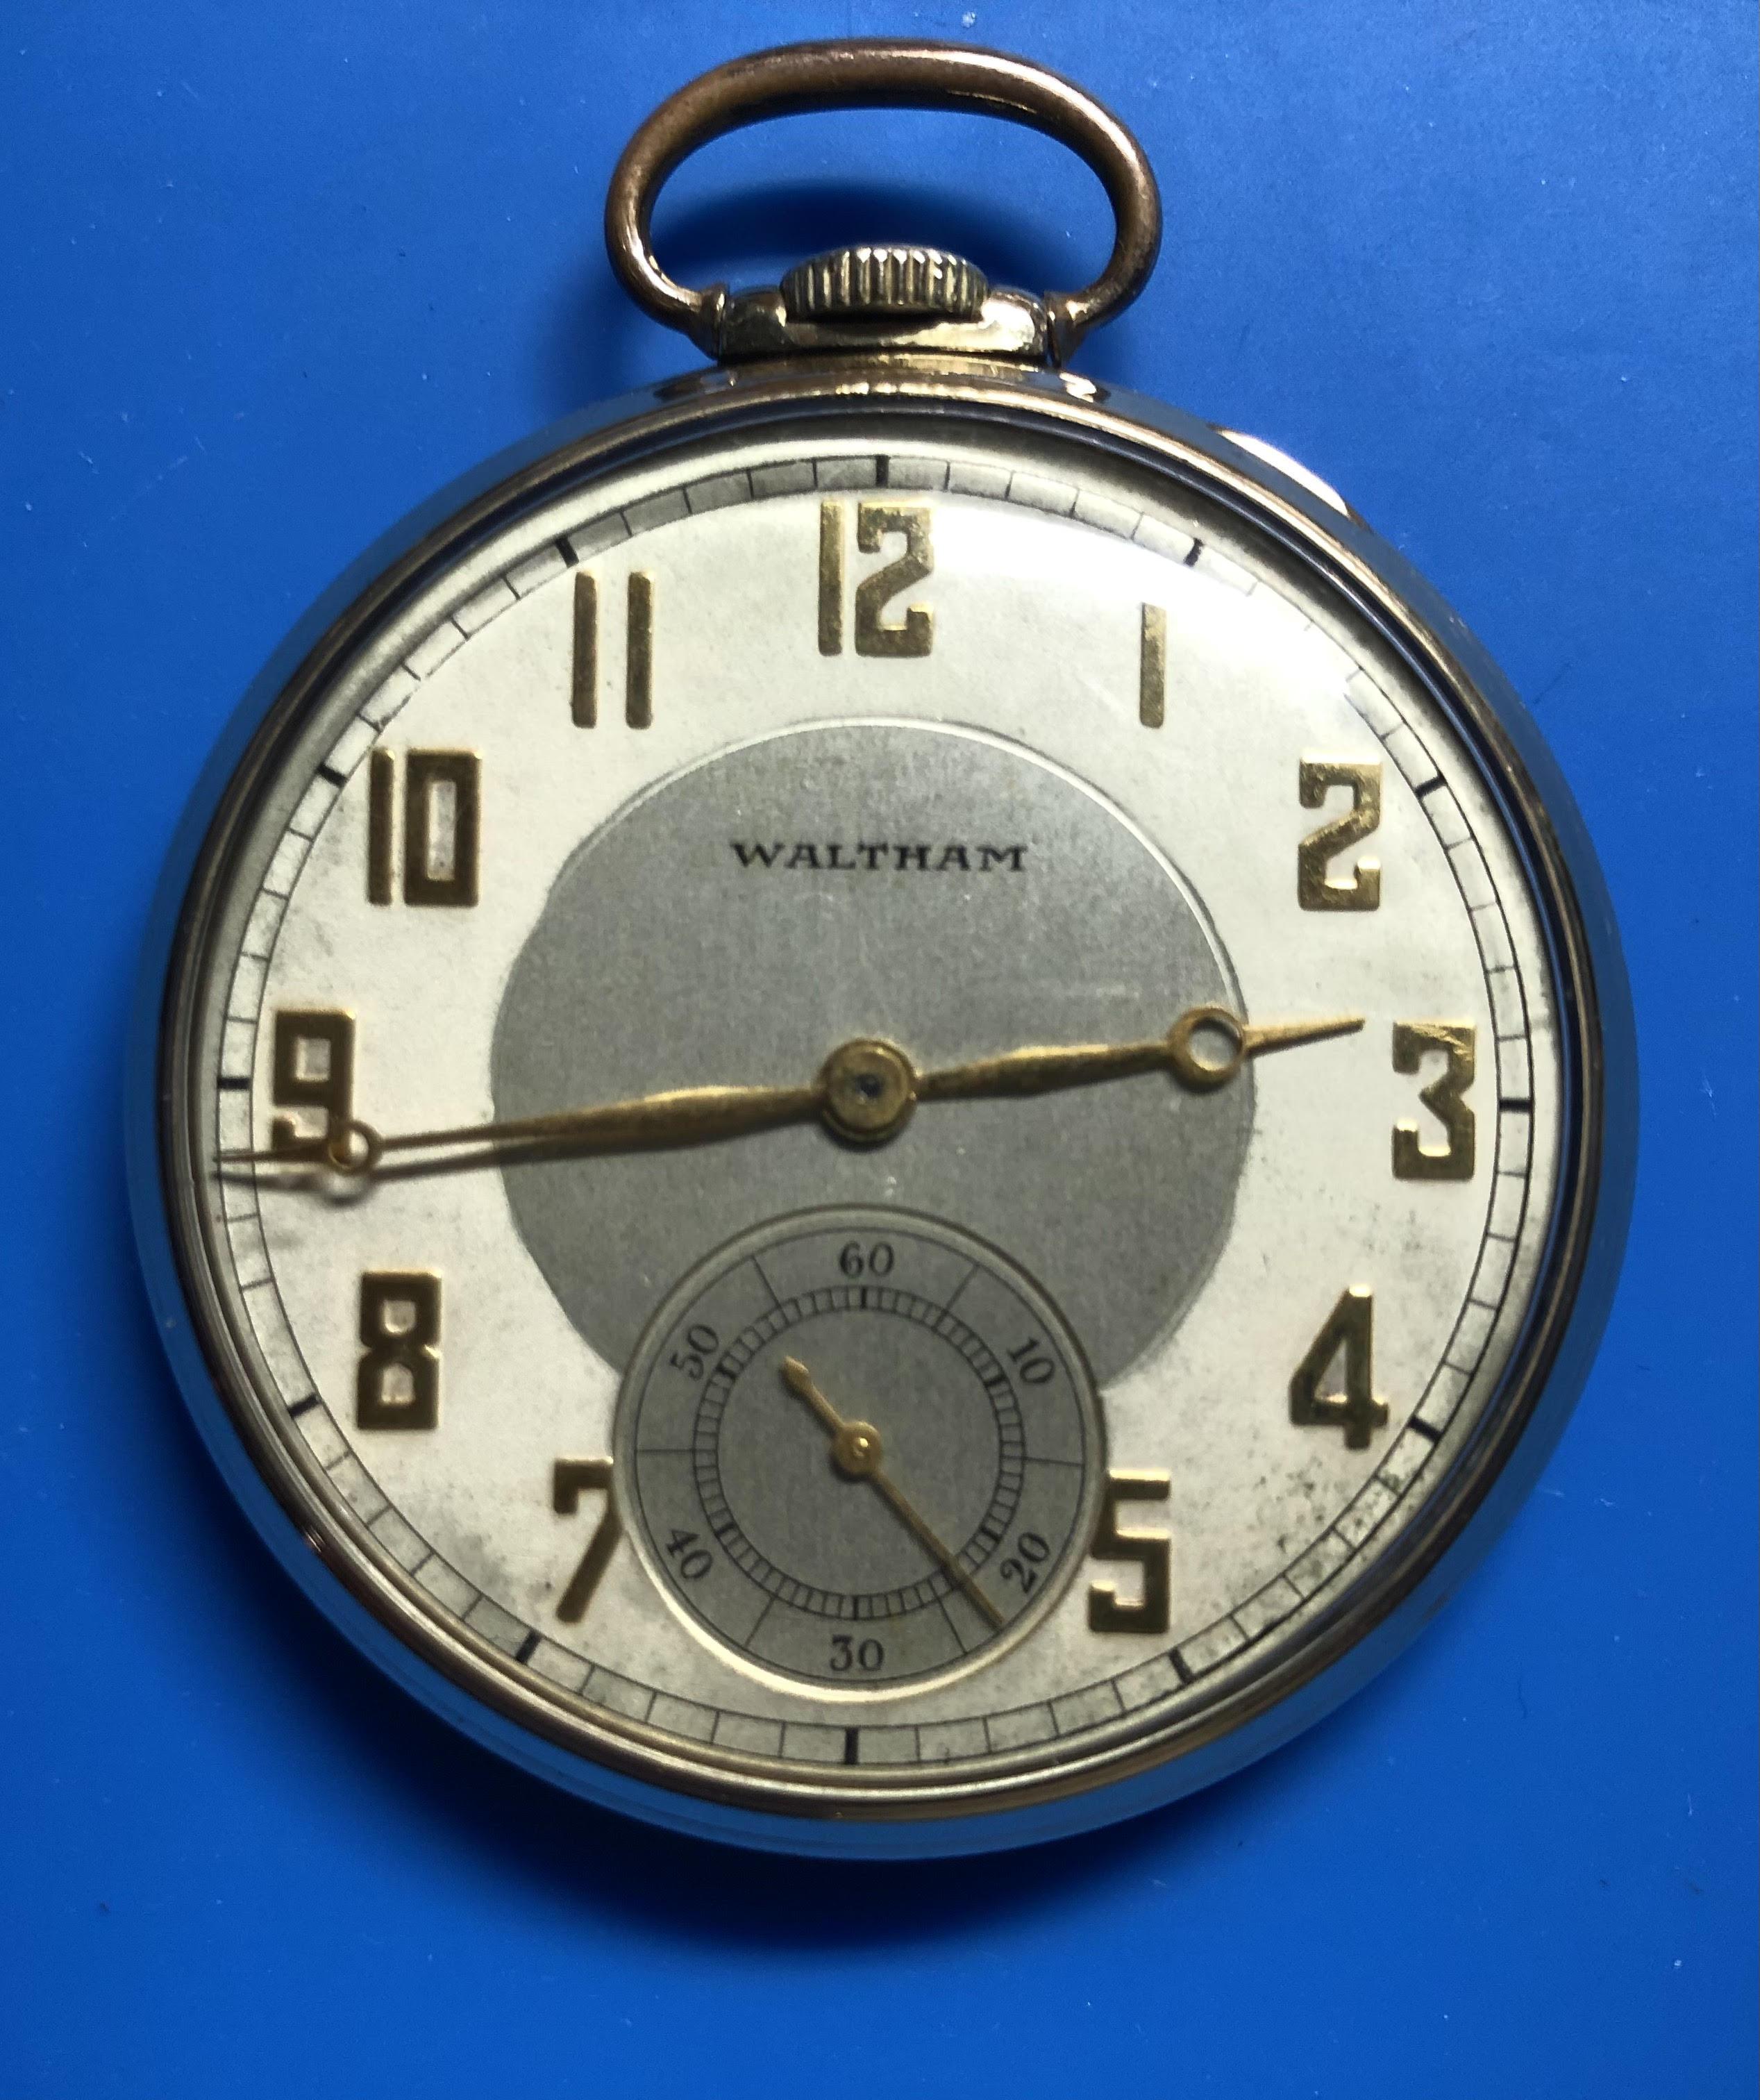
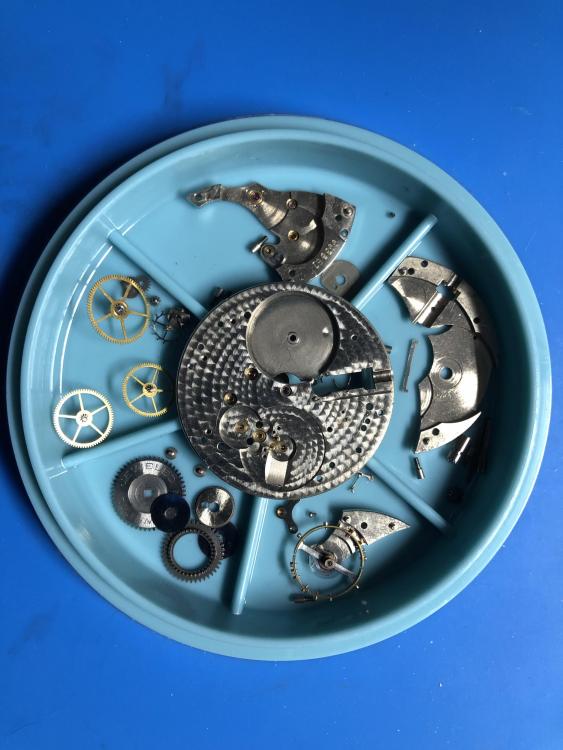
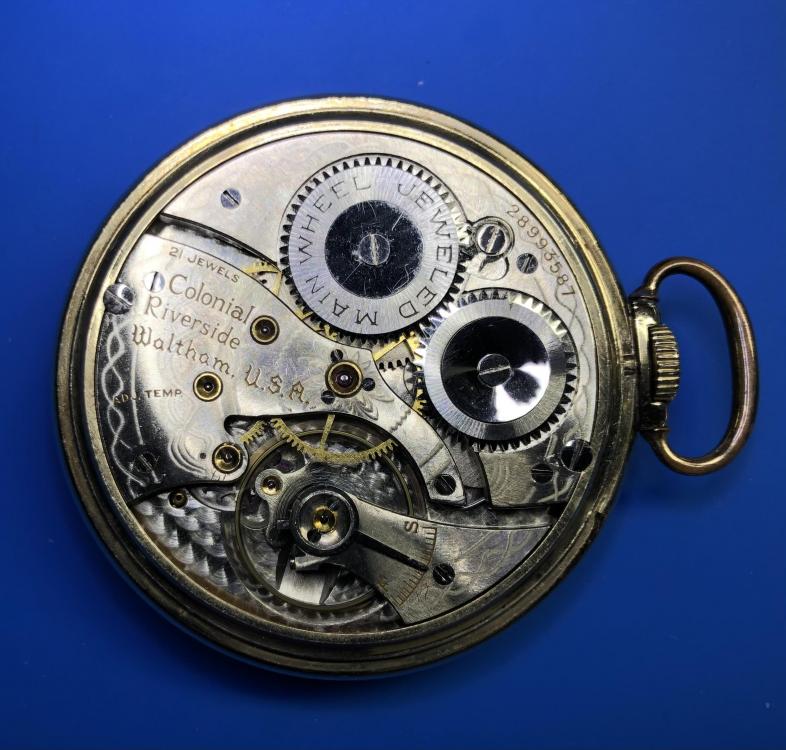
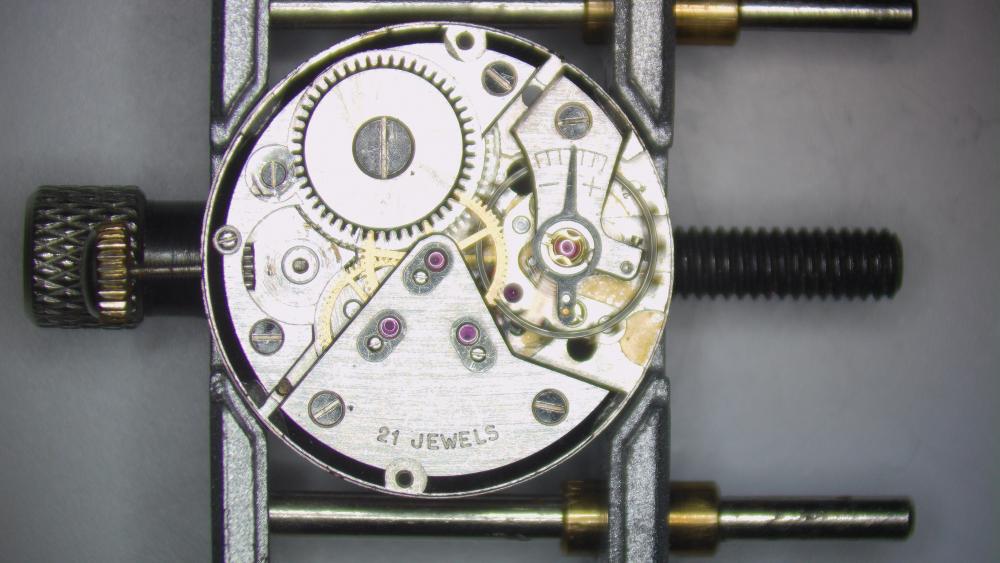
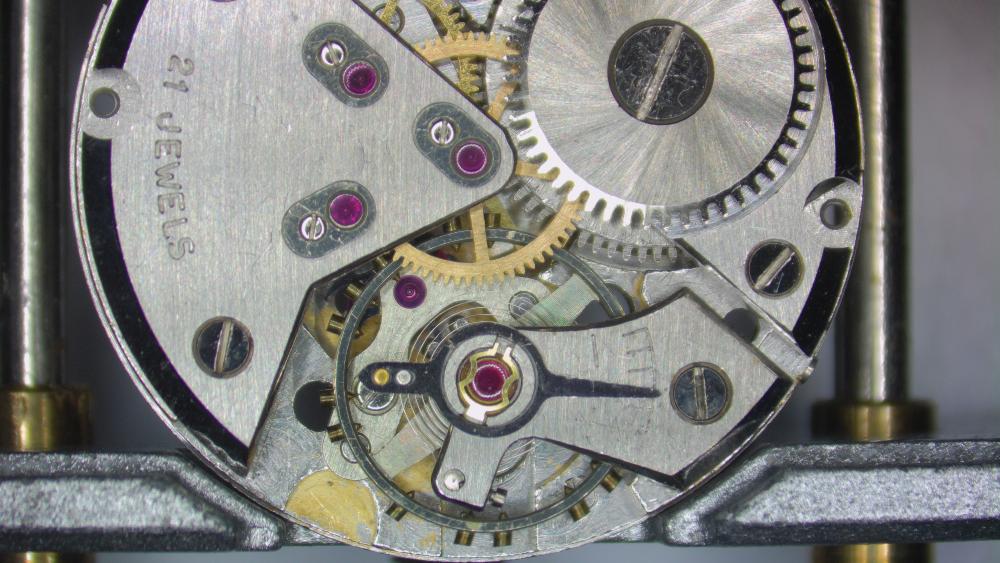
Here is my latest ebay acquisition. A Waltham Colonial pocket watch. This one was in pretty good nick. I disassembled, cleaned and oiled. No broken parts on this one.
 2 points
 -
You will need to do a complete strip-down, clean, parts inspection, step-by-step rebuild and functional checks at each stage to diagnose the problem(s). Depending on what you find, you may or may not have the equipment or skills to correct the faults. If you are still curious enough to proceed despite the risks, there are plenty of people here who will assist you as far as we can. Just be aware, there is a good chance of you introducing new faults as well as not resolving the existing ones. On the other hand, faint heart never won fair lady!2 points
-
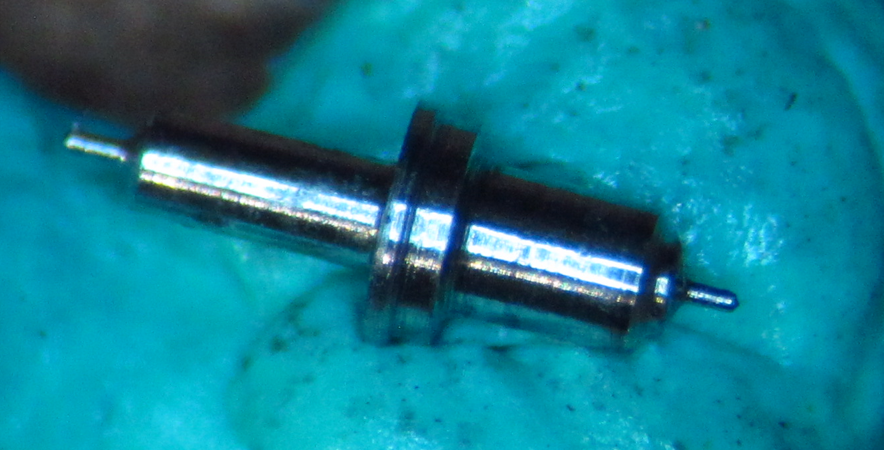
OK, here it is. I dont think I gave enough of a depth on the HS side. I can put it back in the lathe and improve it. I did not do a single-pass mill. Instead, I flipped it to do the roller side. Never would have happened for me the other way. I have pretty good Levin collets, so it remained quite true after the flip. This has been extremely hard and took SO many hours. I have great respect for you professionals who do this regularly!! While fitting the roller, I noticed that some previous watchmaker crimped it...I guess to tighten the fit on the balance staff that was perhaps the wrong diameter. Anyway, while doing the fitting, it began to split at the crimps. Oh well. I think it will still work.
 2 points
 -
I suppose it would depend on the individuals target market/audience, are they just working on their own watches or taking in customer work. Are they known for Vintage work or just watch repairs. Anyone just doing general watch repairs and servicing to the general public probably sees a high number of ETA, Miyota or Seiko movements in the average day, if they specialise in Vintage then it will be something else. A quite specific question with a rather general answer I am afraid2 points
-
The F stands for Felsa so the part will fit a Felsa 290 cal2 points
-
This is slightly off topic, but YT just recommended this video to me. The microscope in question is slightly out of most of our price ranges, but the results are absolutely amazing, and the watches being examined are pretty stunning too.2 points
-
Hi I suppose one could ream/drill it out and solder in a brass bush and then re cut the thread might be less destructive than welding.2 points
-
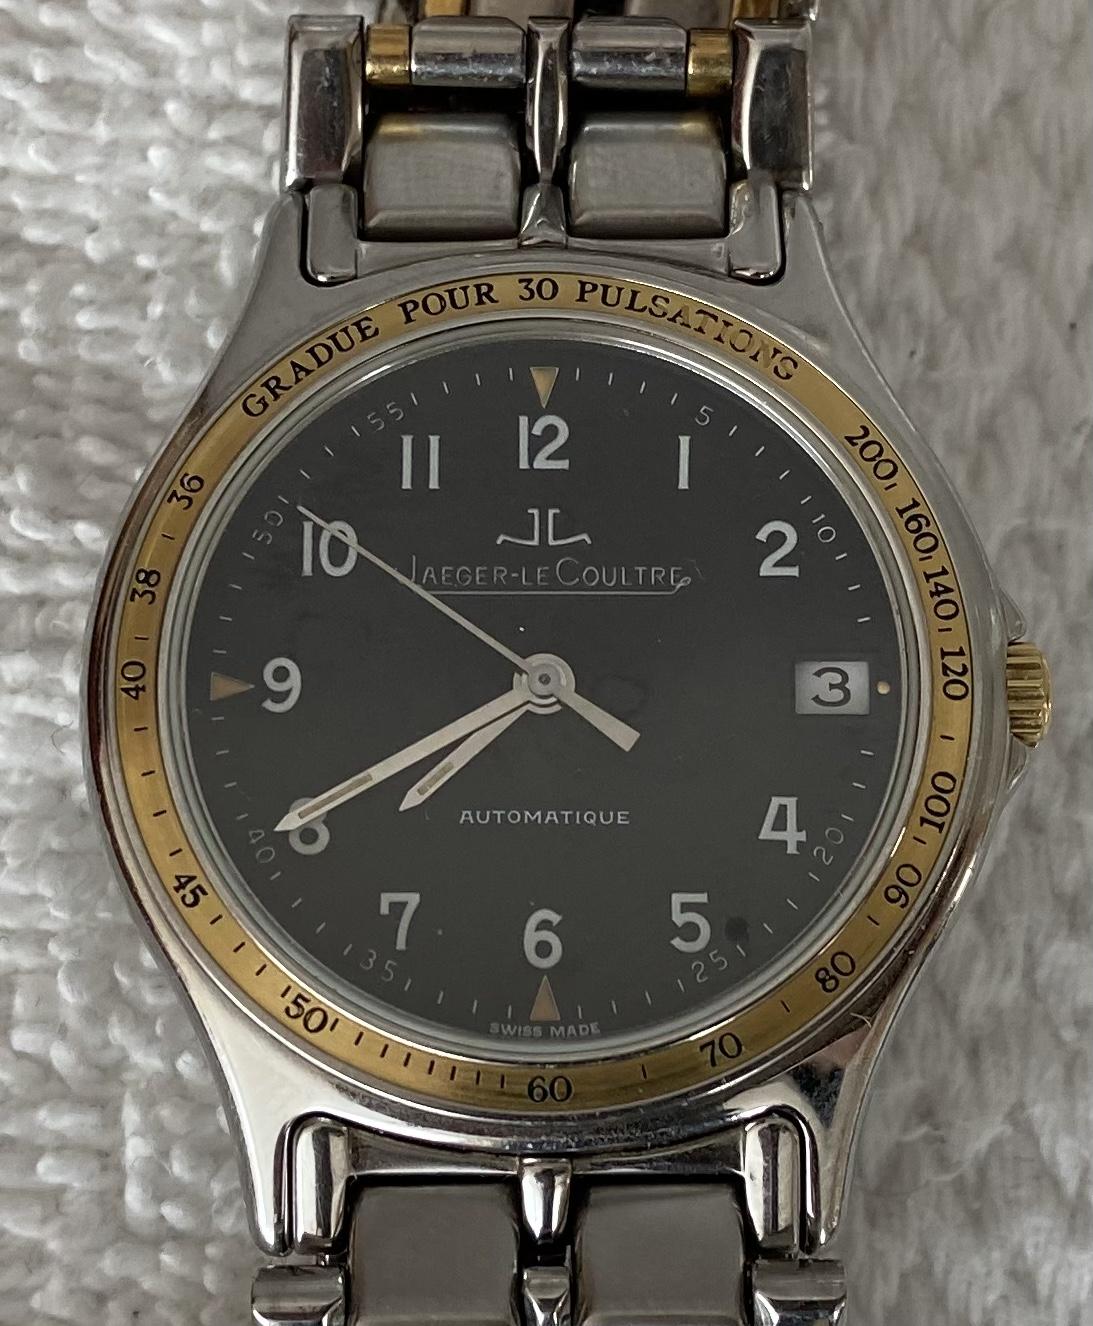
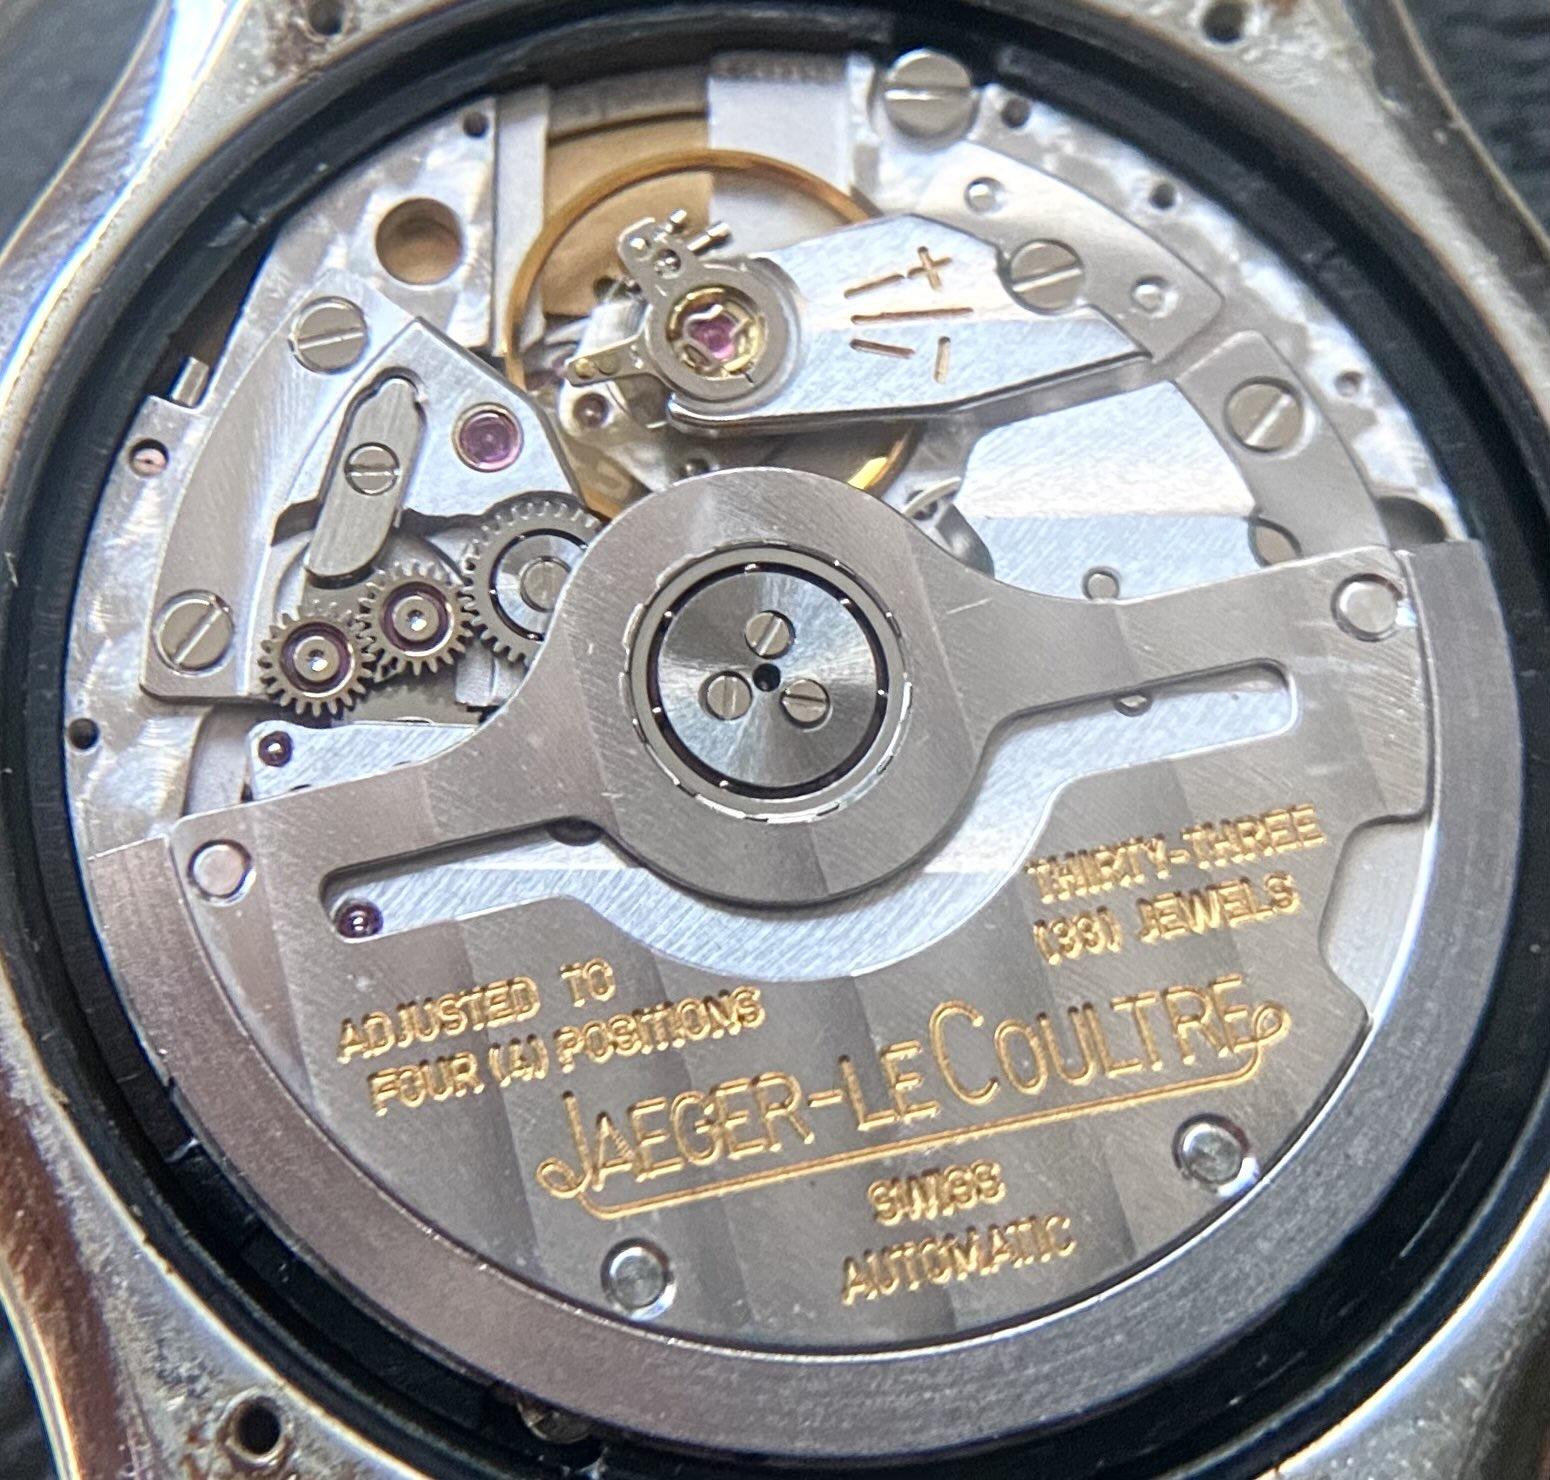
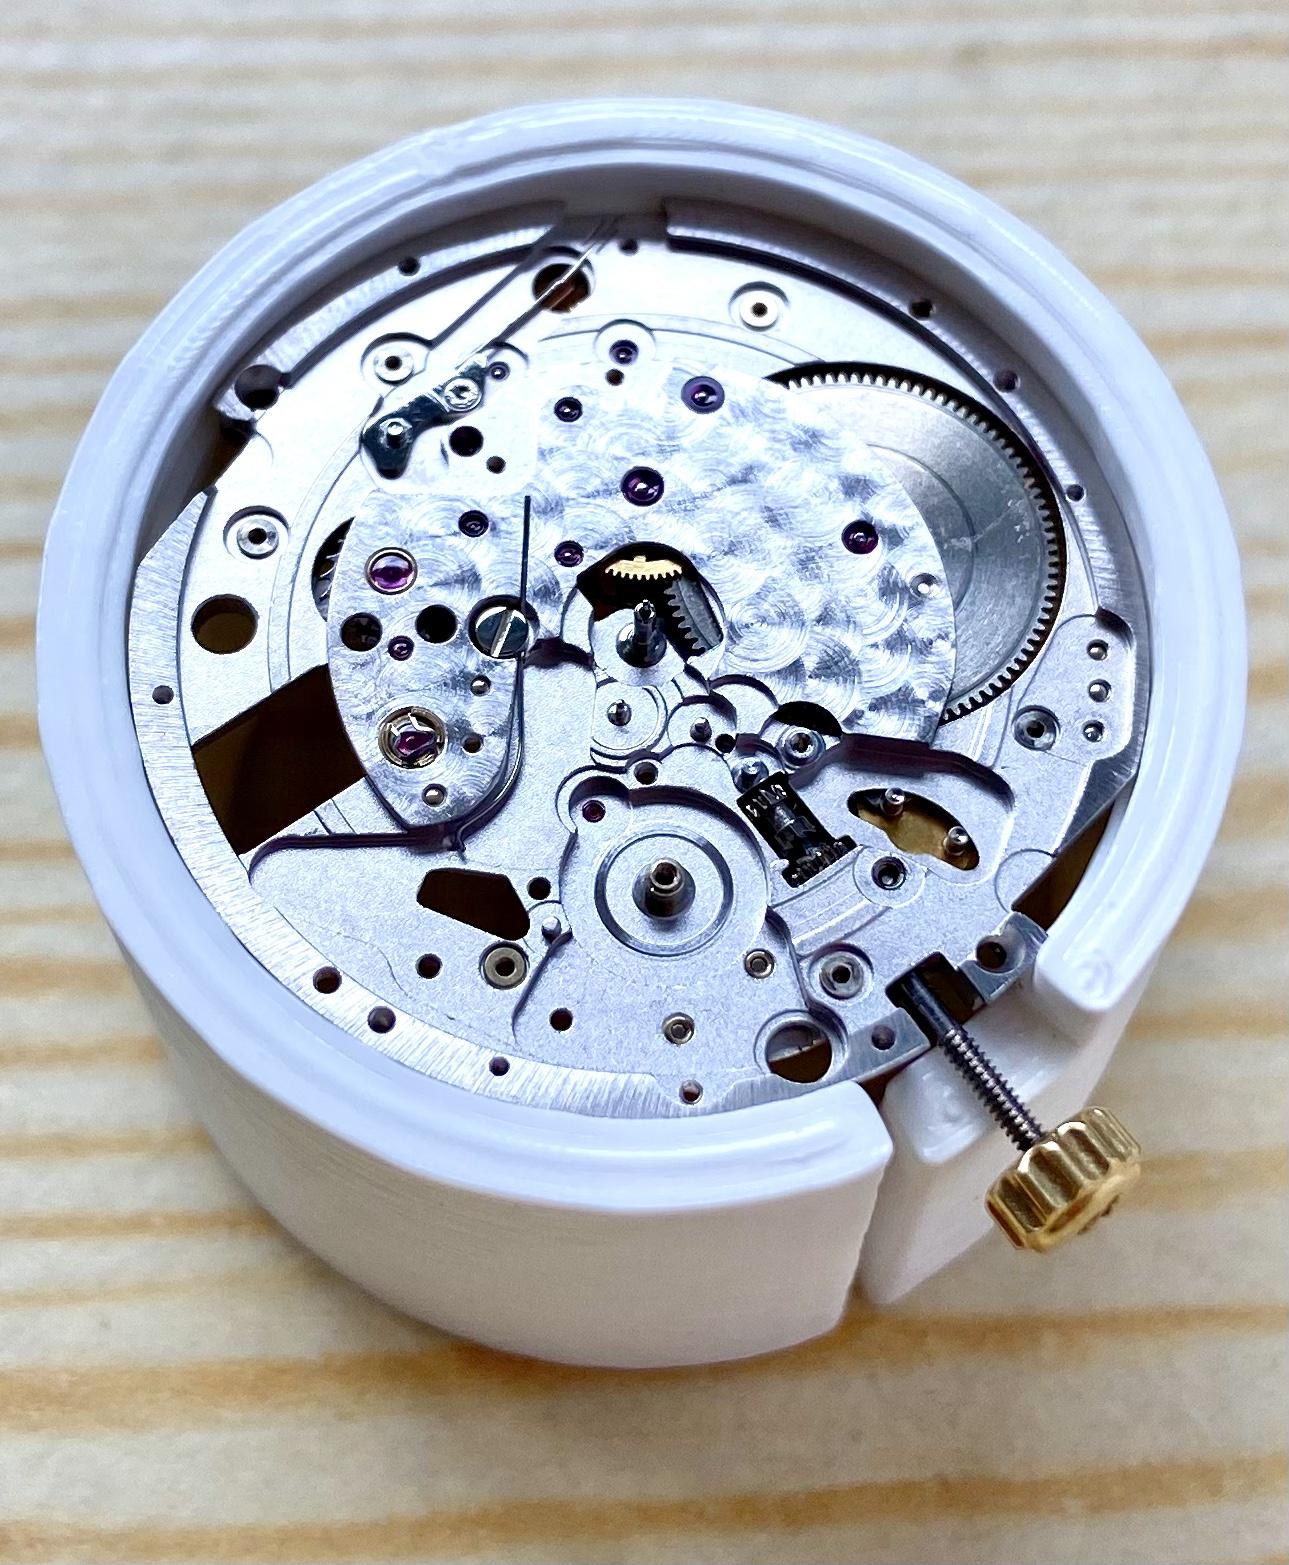
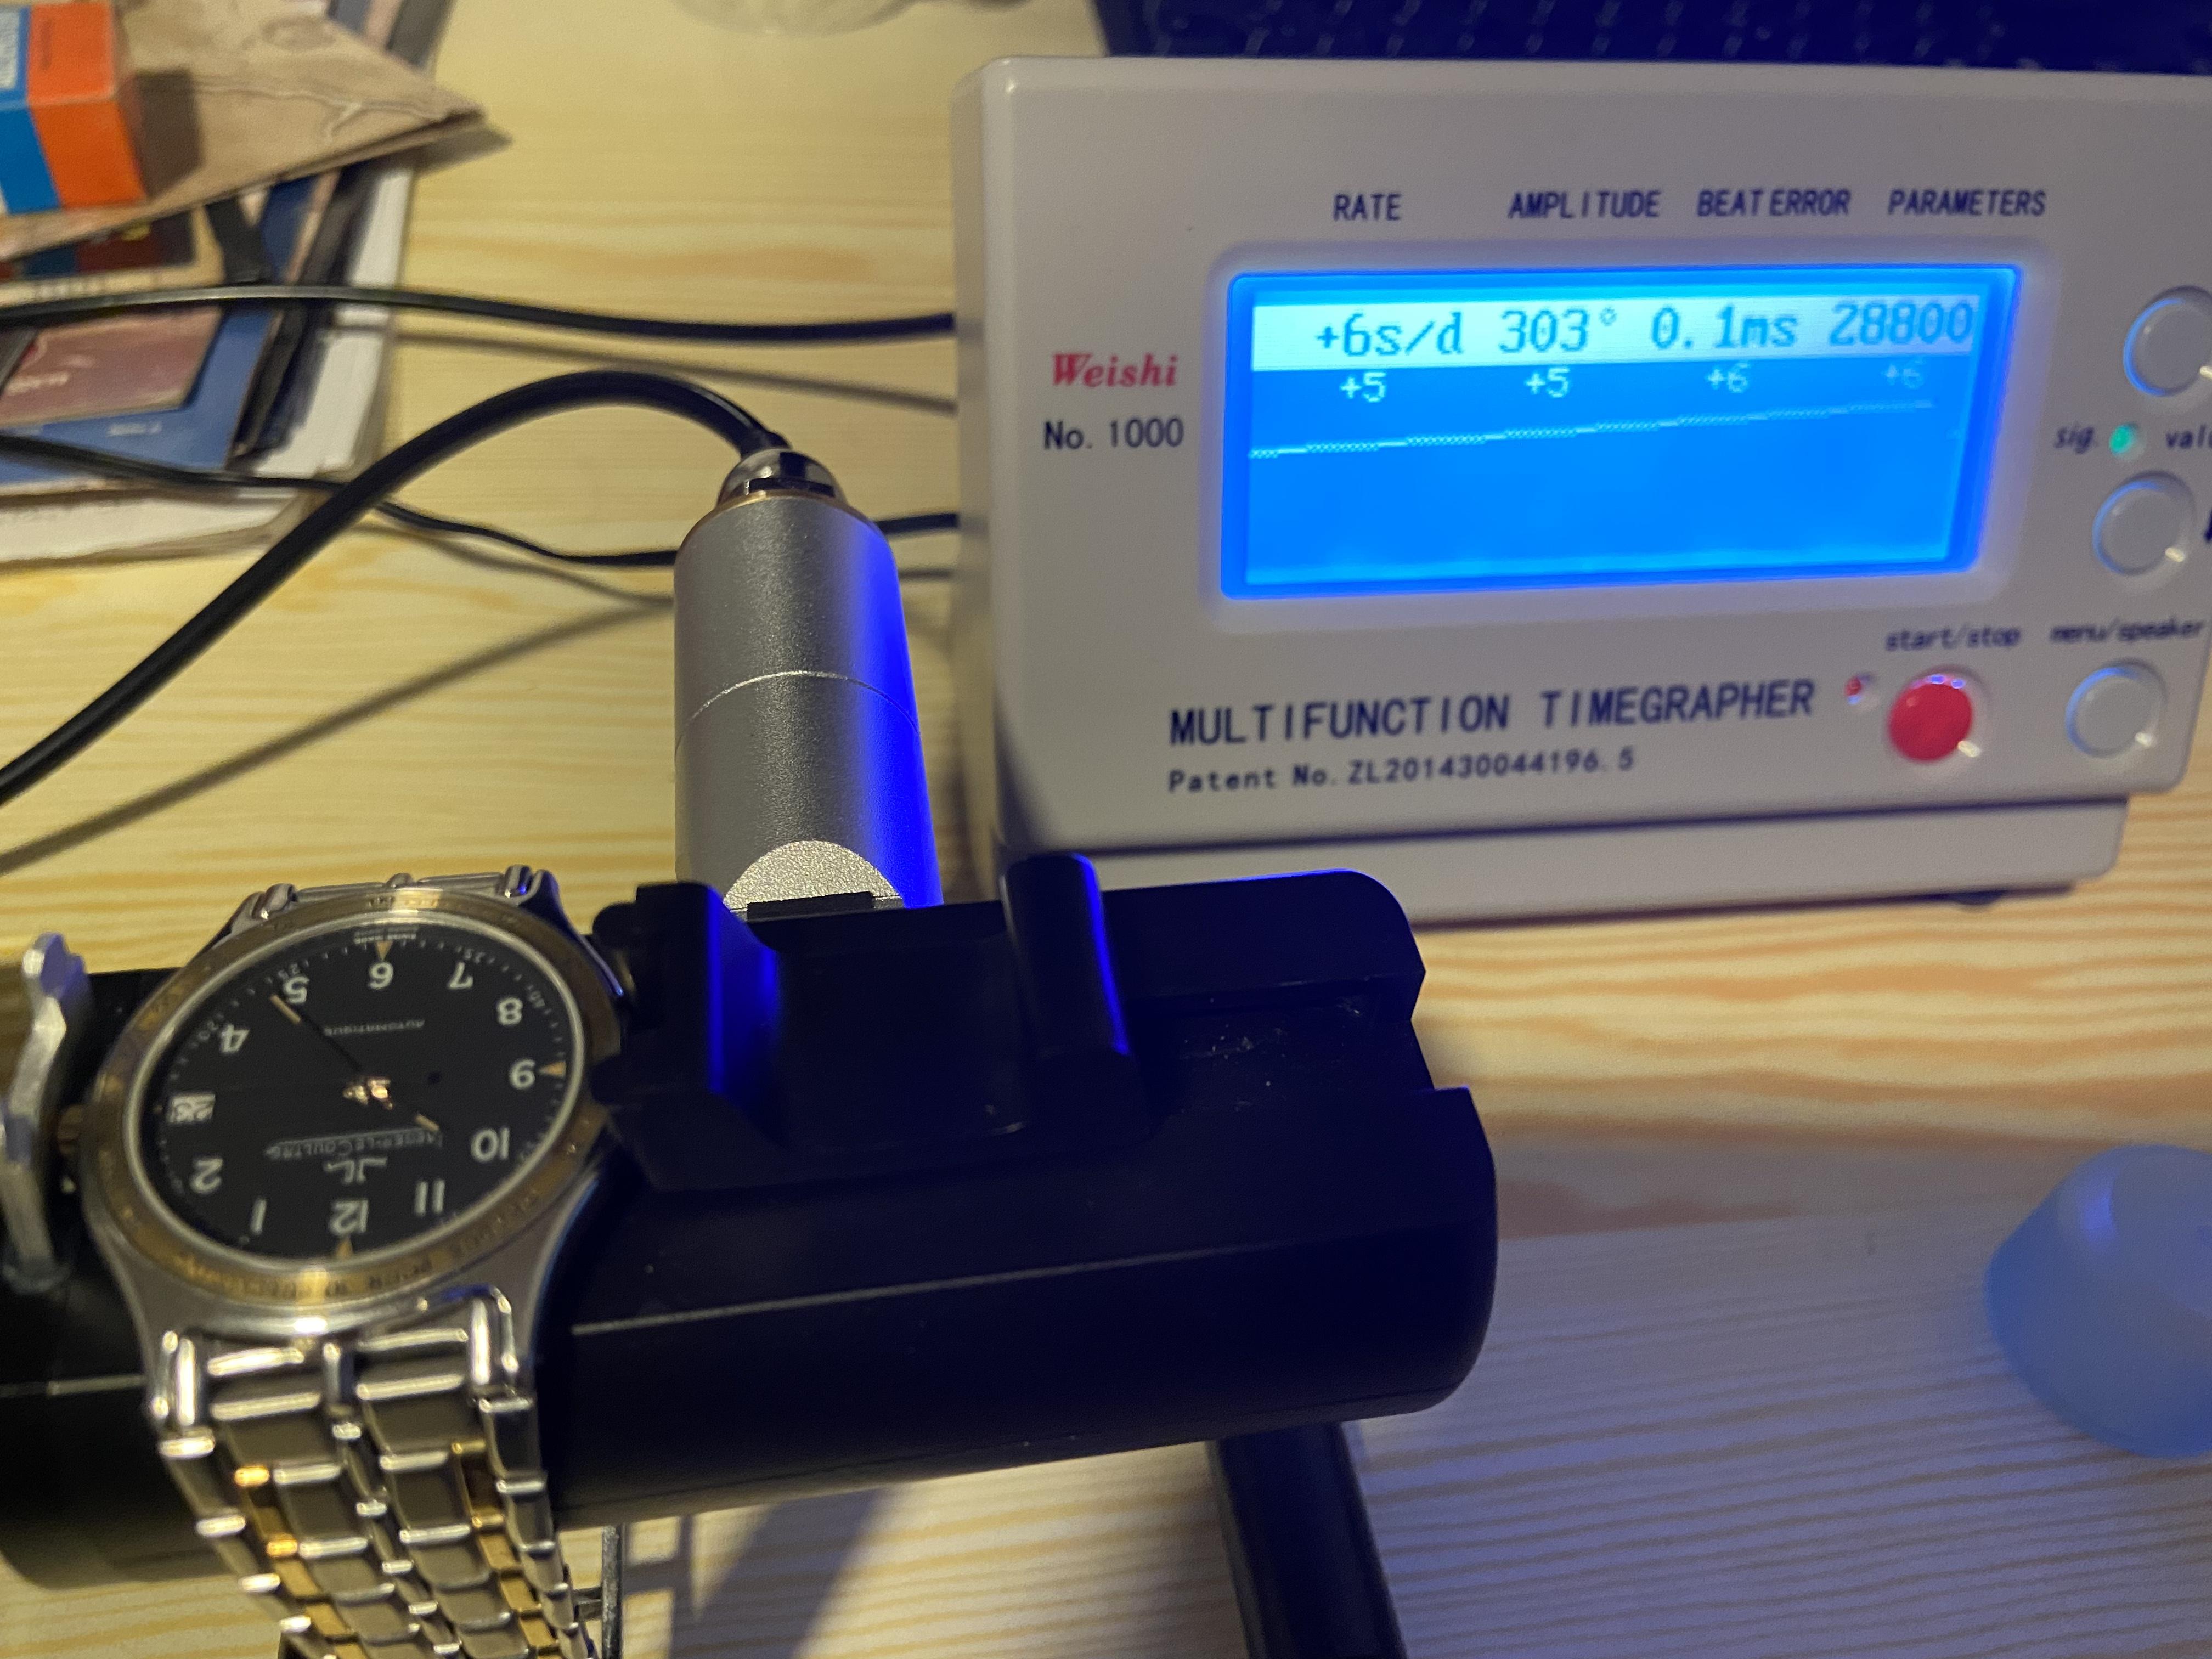
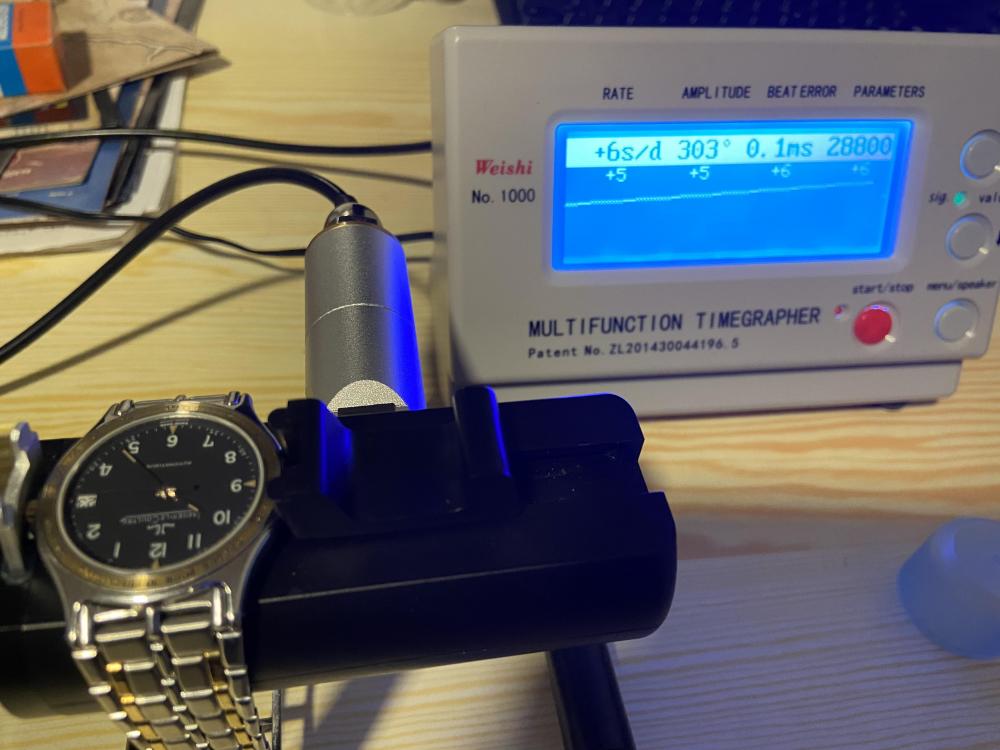
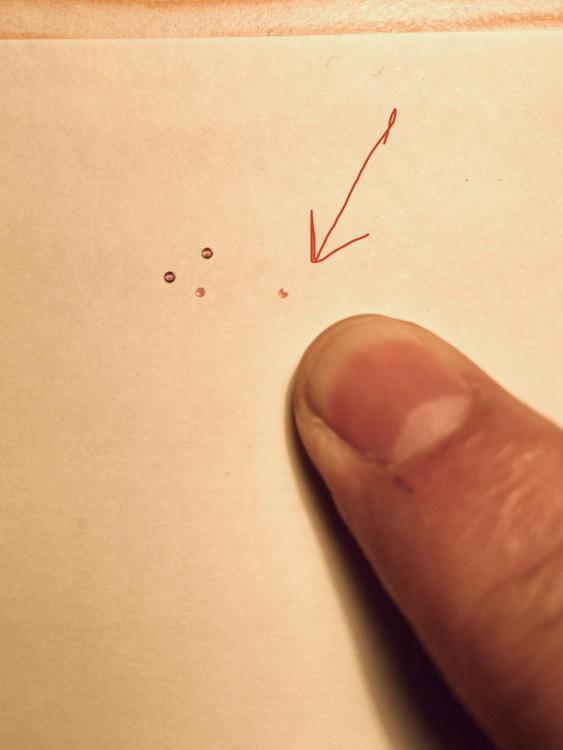
My JLC Heraion with caliber 889/1 needed a service. Having gained experience with several other (cheaper) watches I decided to try it myself. Being totally aware that I wouldn‘t get any spareparts if something might go wrong I was willing to let it serviced by JLC (about €800,-) if an accident should happen. Preparing my work I found a technical guide for the partially identical 928/2 at cousinsuk and a workthroug by the WatchGuy (AP Royal Oak with JLC 889/1). I designed a movement holder with a free CAD program and 3D printed it with my Ender 3. This holder supports the movement much better than my vice type holders. I didn‘t put me under time pressure in any way and just worked on the movement when I felt totally relaxed. A week later I had successfully disassembled the movement. Some screw hads unfortunately showed that I was not the first being inside this watch. The jewels of the fast reving wheels were totally dry and clean (!) showing that modern oils don‘t gum up but do eventually evaporate. I successfully cleaned the parts in pharmaceutical petroleum ether 40/60 and One Dip. The escape wheel and the pallet fork got epilamed. What happened to be the most challenging task was handling and oiling the super tiny capstones (0,9x0,12mm). One of them slipped out of my tweecers. My heart stood still for a moment. After hours of searching I gave up. I suspect the tiny particle landed on my clothes, skin or hair where it couldn‘t be seen. After some research I found that it is a standard KIF 508 which I could order with Boley. This time I was lucky For oiling the combined stones (fixed cap) of the escape wheel I found help in this forum. Meanwhile the watch is ticking healthy again and shows good results on the time grapher.


 1 point
 -
Hello everyone, happy to see this forum and looking forward to exploring and gleaning some advise on my watch/clock servicing journey. I’m in my early 50’s and from one of the Maritime provinces in Canada. I have always been interested in horology but never thought I would want to tear down a clock or watch movement. I’m not rushing things. Currently I’m voraciously reading and putting a megaton of hours viewing servicing videos. Favourite Youtube channels currently are Nekkid Watchmaker, Wristwatch Revival, Vintage Watch Services and of course Watch Repair Channel. Also currently procuring basic tools and lubricants. I look forward to any type of advise you are willing to unload. Cheers1 point
-
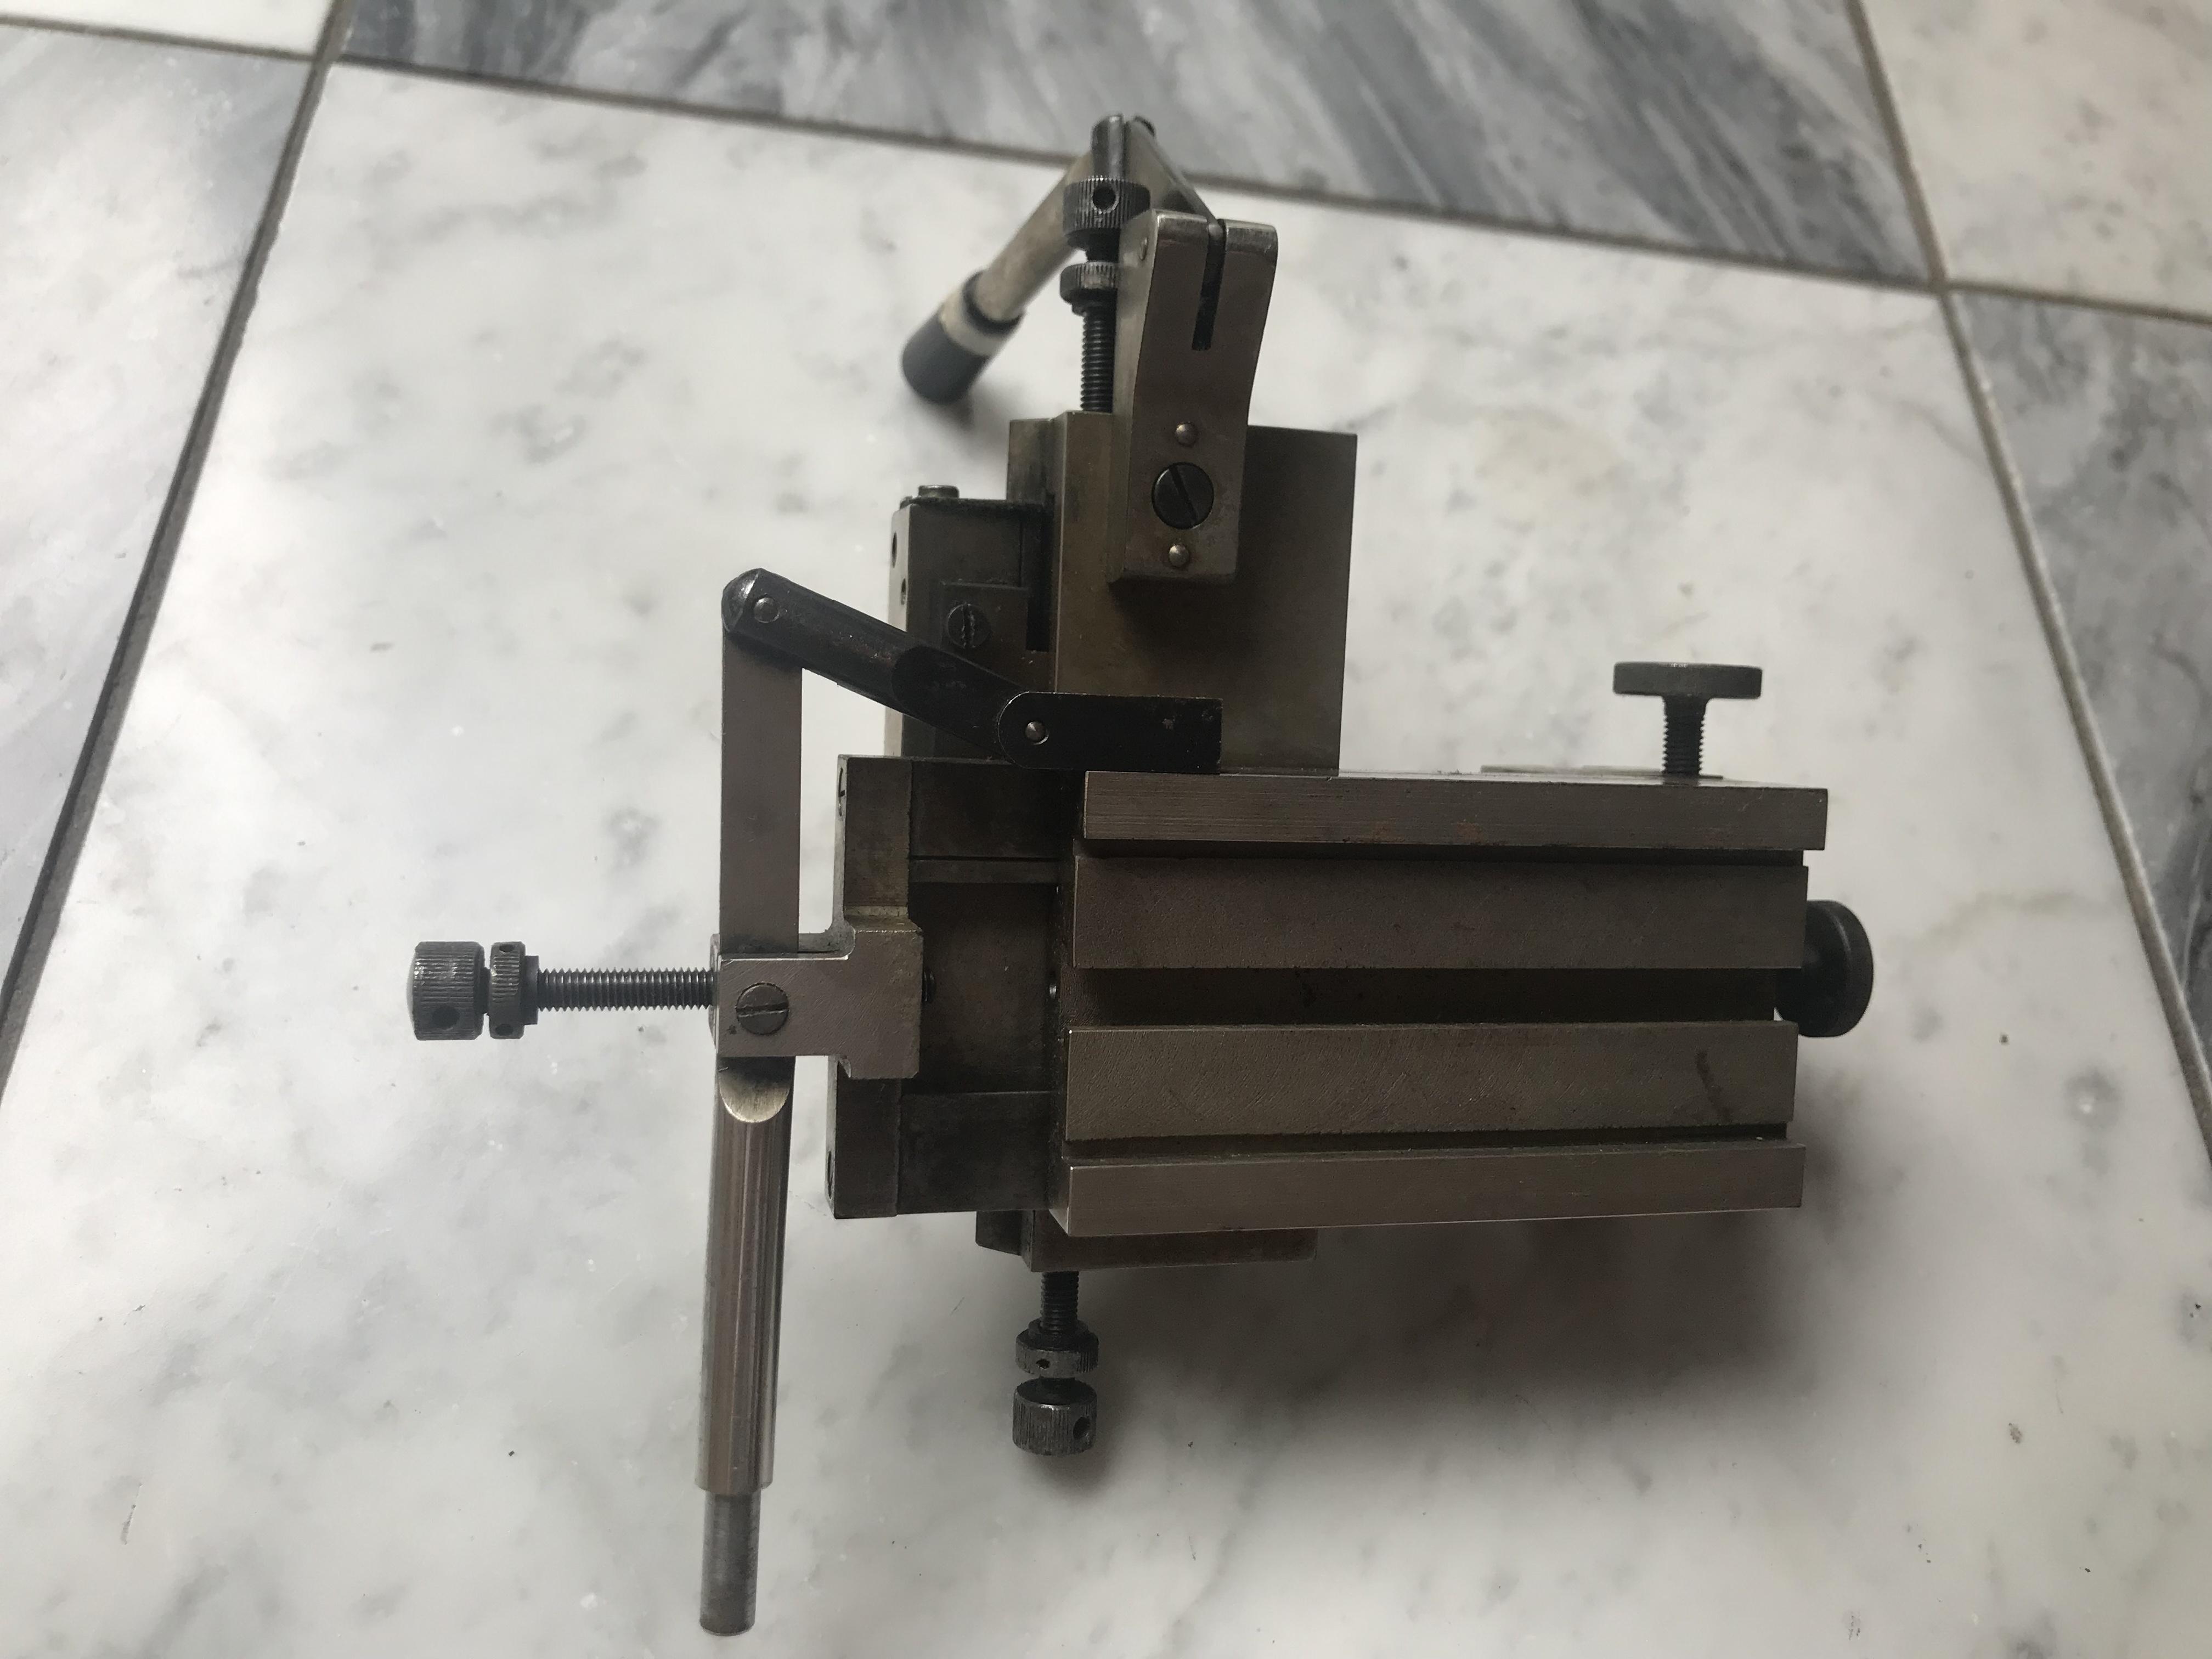
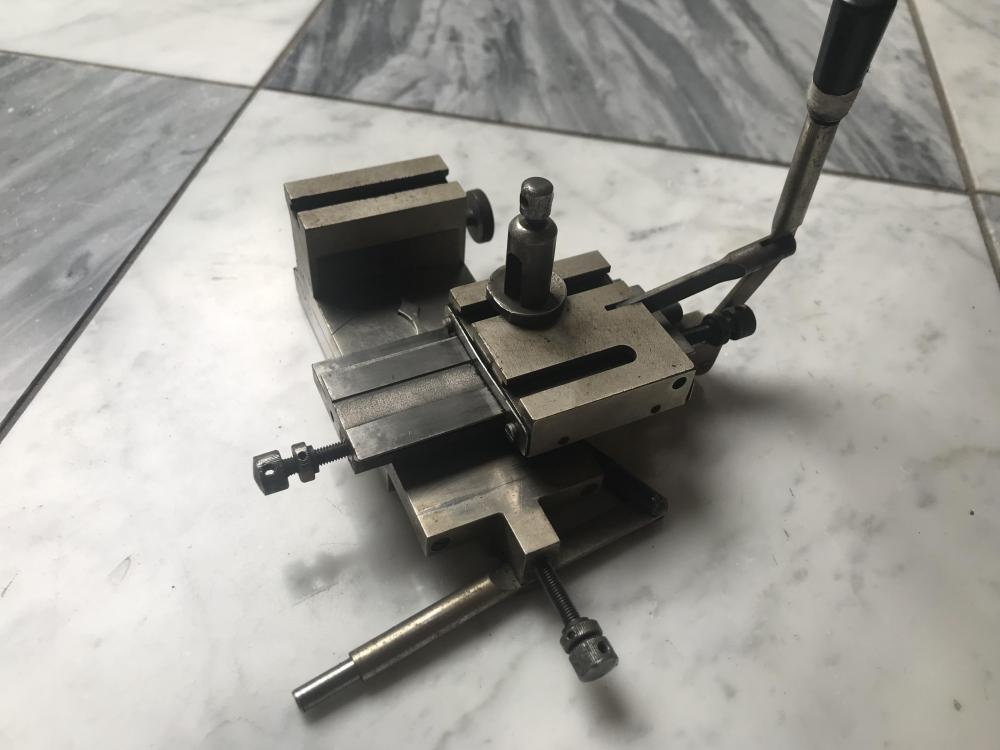
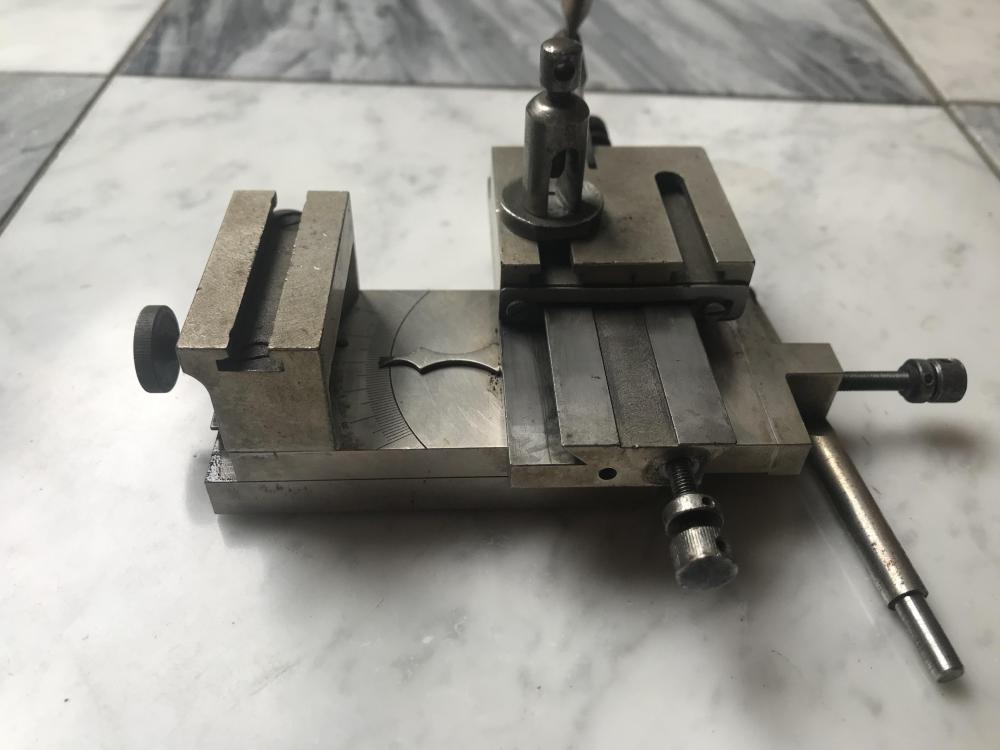
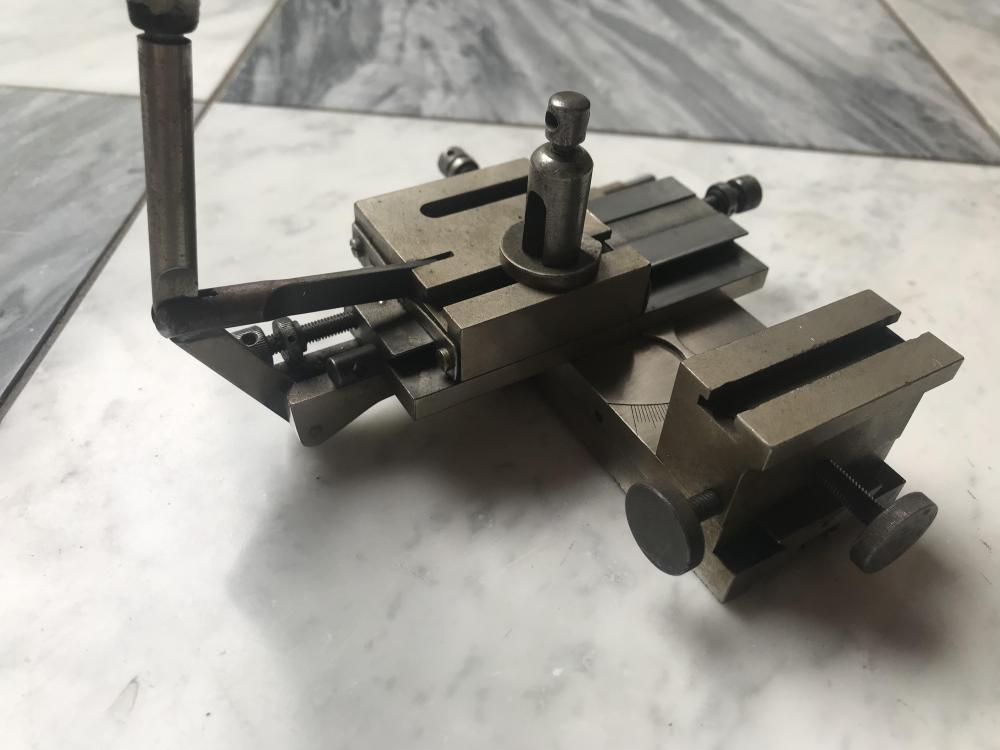
Picked up this lever-feed slide rest as I thought it looked nice. It’s got a fantastic action and beautifully scraped finish. I’m not sure how useful it’ll really prove to be though. I think they were designed for repetitive work as you can set start and end stops for the lever action to limit the movement. Has anyone else used one? Also, does anyone know what the additional taller toolpost is for? A vertical slide or milling attachment?
 1 point
 -
Hiya NH. Welcome to the forum . There's a tonne of knowledge here from pros amateurs and even beginner's. Yup they are all good youtubers. Also check out Kalle at chronoglide, a very experienced professional but explains things at a laymen level. Make sure you post up photos along with your questions as this really helps with diagnosis of problems. Any thing that helps you or you like etc . Use the icon buttons at the bottom right of the screen. It just shows that you appreciate the help that's been given. Enjoy matey.1 point
-
T. Take your time. Whenever I have something complicated I take photos at every piece I take out then use them as a reference. Another way I sometimes work is, I take a couple of parts out then i put them back in again. Do this few times with each part you remove. If you imagine that you've stripped a dozen watches down all of the same make and calibre, from that point on every time you work on that calibre it would be second nature yes ? Apply that same methodology. Part strip and then reassemble, and then keep progressing a couple of parts at a time. Your brain will automatically retain the progression. Do this as opposed to a full strip down and then having to remember how it all goes back. It's really good practice as well. Let me know how that goes. If you are unsure as to what I'm saying then just ask fella Do you know what I mean ? I always try to explain things in an easy to understand way.1 point
-
Yay! Let's see how it turns out1 point
-
Exactly. The bulk of what I do is chronographs, the rest is vintage which is a real mix. One Seiko (chronograph too) in the last 10 years. Rolex once or twice a year. Lots of JLC. Modern ETA stuff from time to time, not counting 7750. Also some clocks, but that's mostly really nice Le Castel or Zenith Neuchateloise clocks, they're sooo nice to work on. I imagine that's quite different to what a lot of other pros do.1 point
-
Hello and welcome to the forum, Good advise from grsnovi take it steady and most of all enjoy it. Hi I have attached a bit of reading for you to get you started. moebius-specsbook (1).pdf 1612608791_ToolsfortheHobbyist (2) (1).pdf TZIllustratedGlossary.pdf1 point
-
Welcome to WRT forum.1 point
-
Those very YT channels are what hooked me. You should also investigate Mark's courseware. Have reasonable expectations when you start. Start with a pocket watch (preferably one that you know was previously running). Don't go crazy buying tools as it can get spendy. Have fun! This is a great resource. There is quite a lot of knowledge buried in some of those 25 page threads.1 point
-
Baumgartner BFG866 seems to pop up pretty frequently in older watches. It was used a lot for inexpensive time only, but also a handful of complications (i.e. jump hour and other interesting dial/displays). For newer watches, 2824, and whatever the workhorse Miyota/Seiko movements are of the period.1 point
-
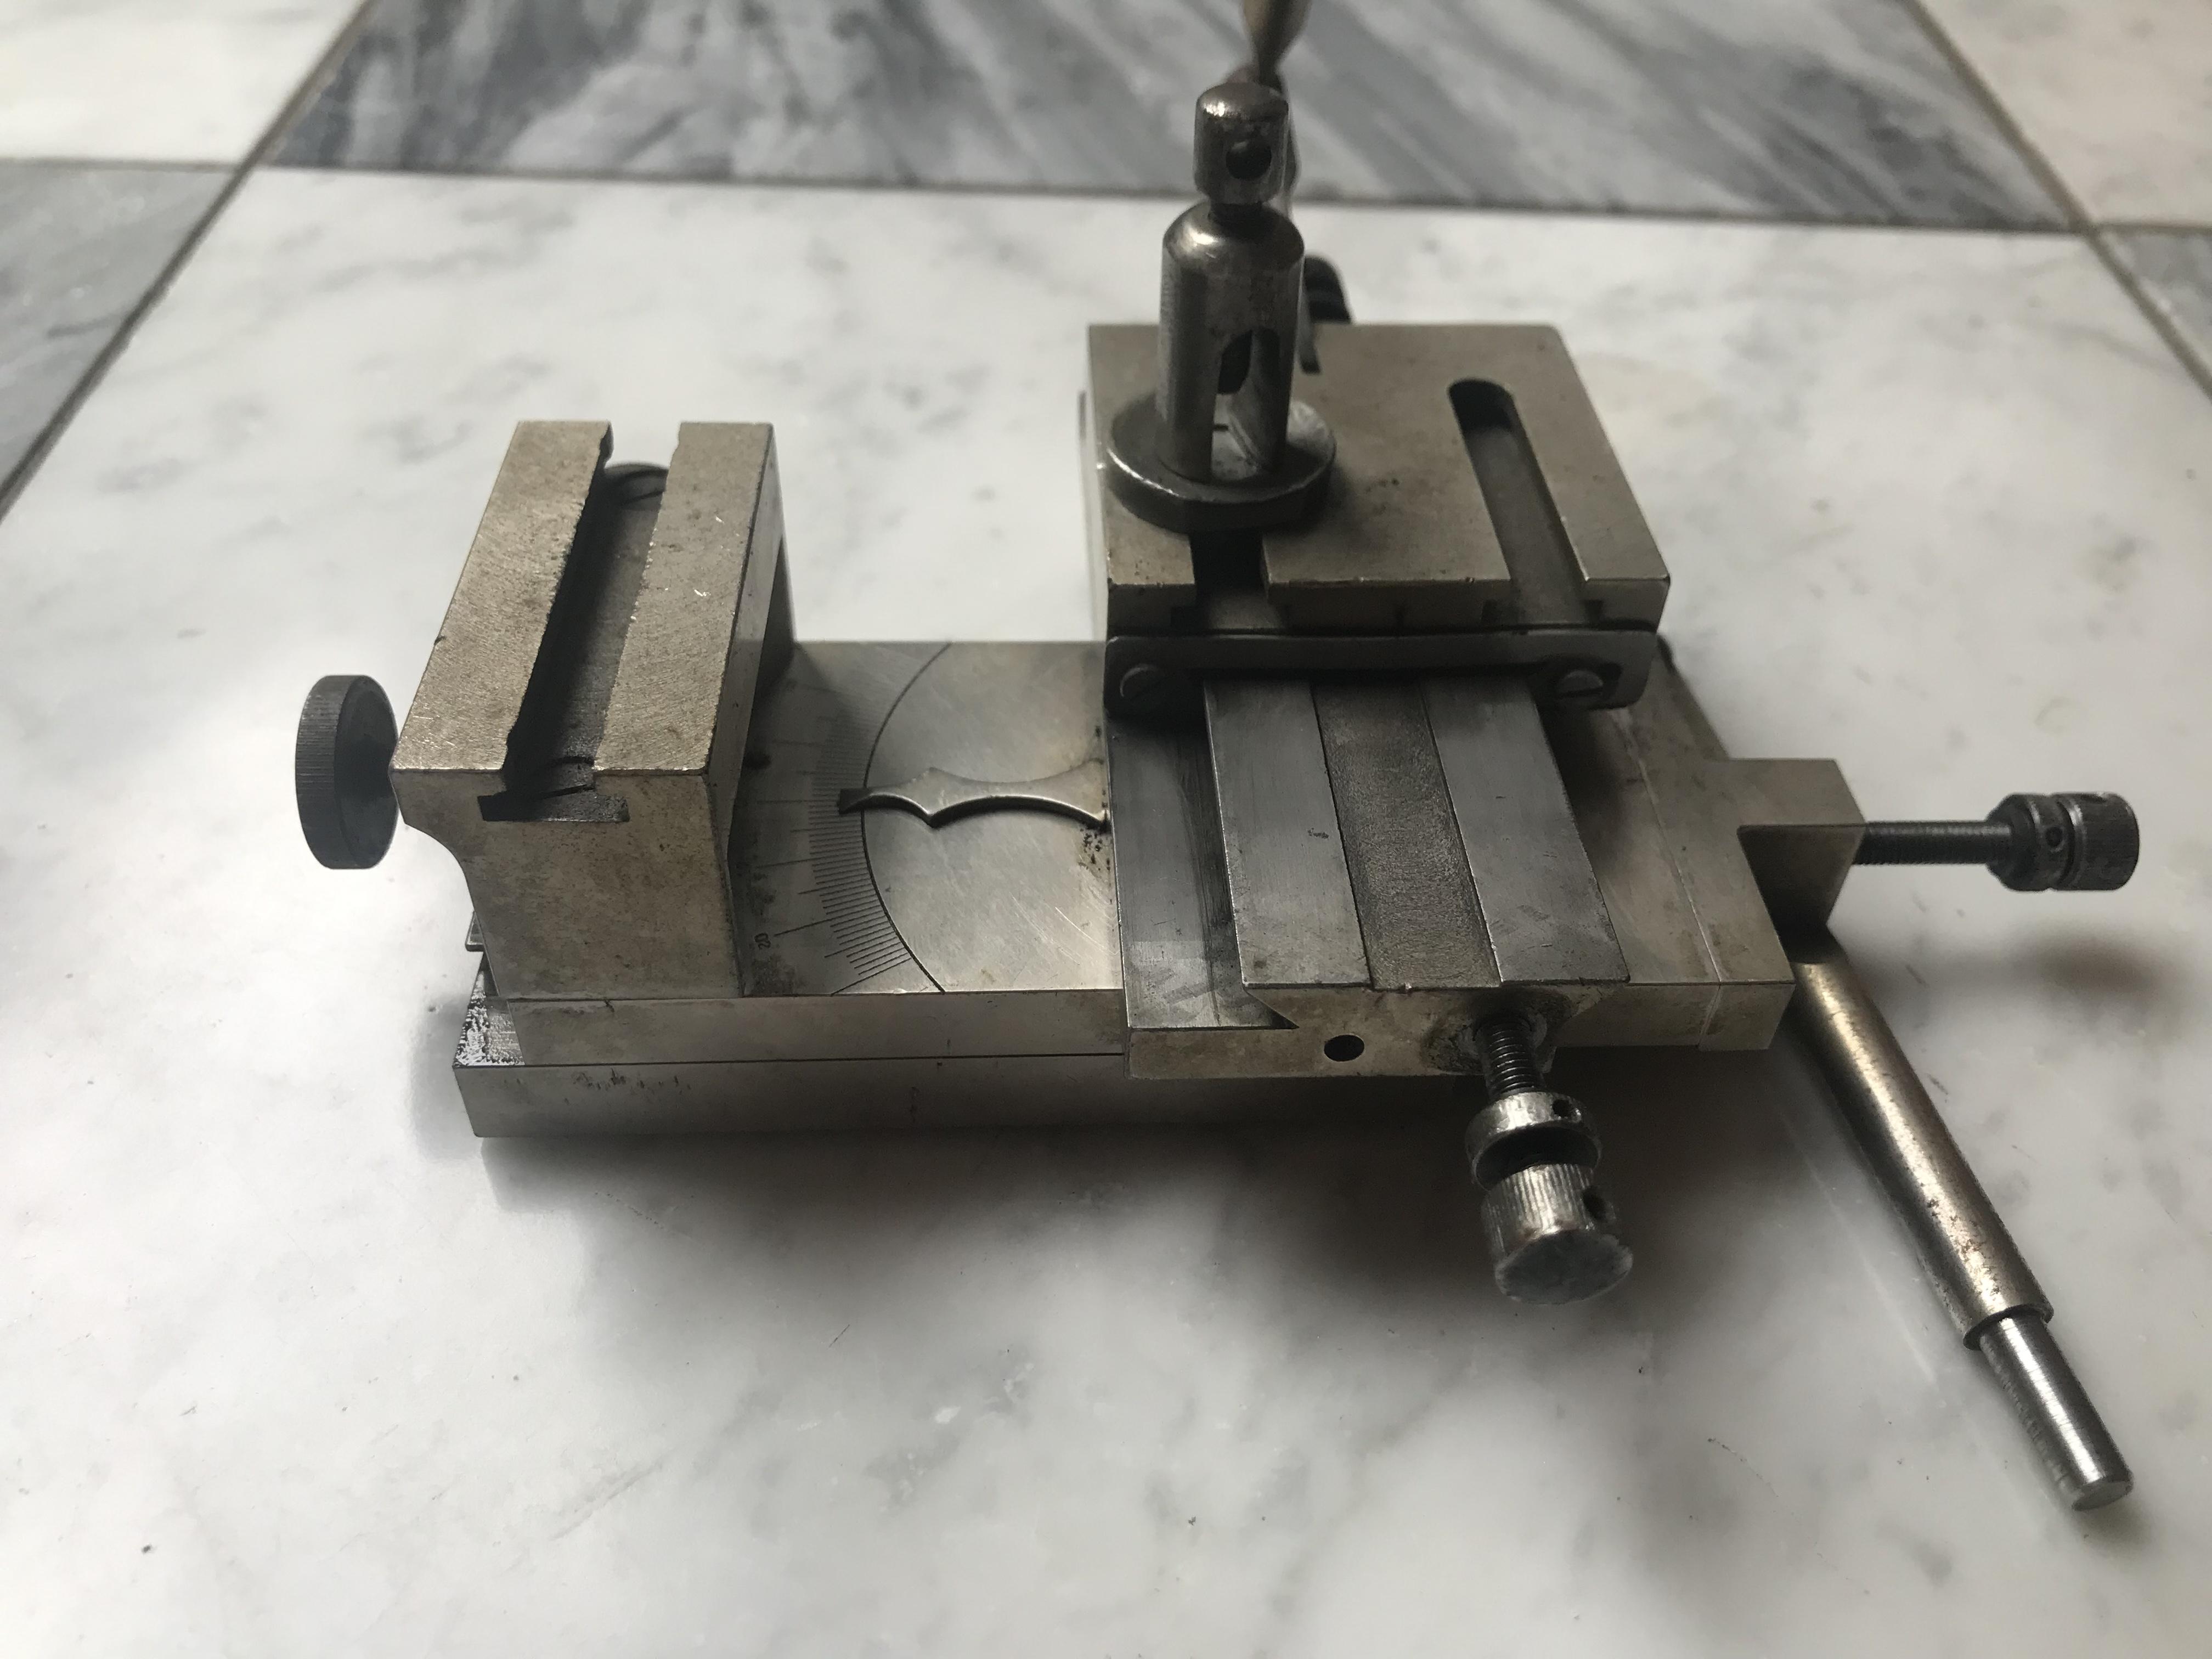
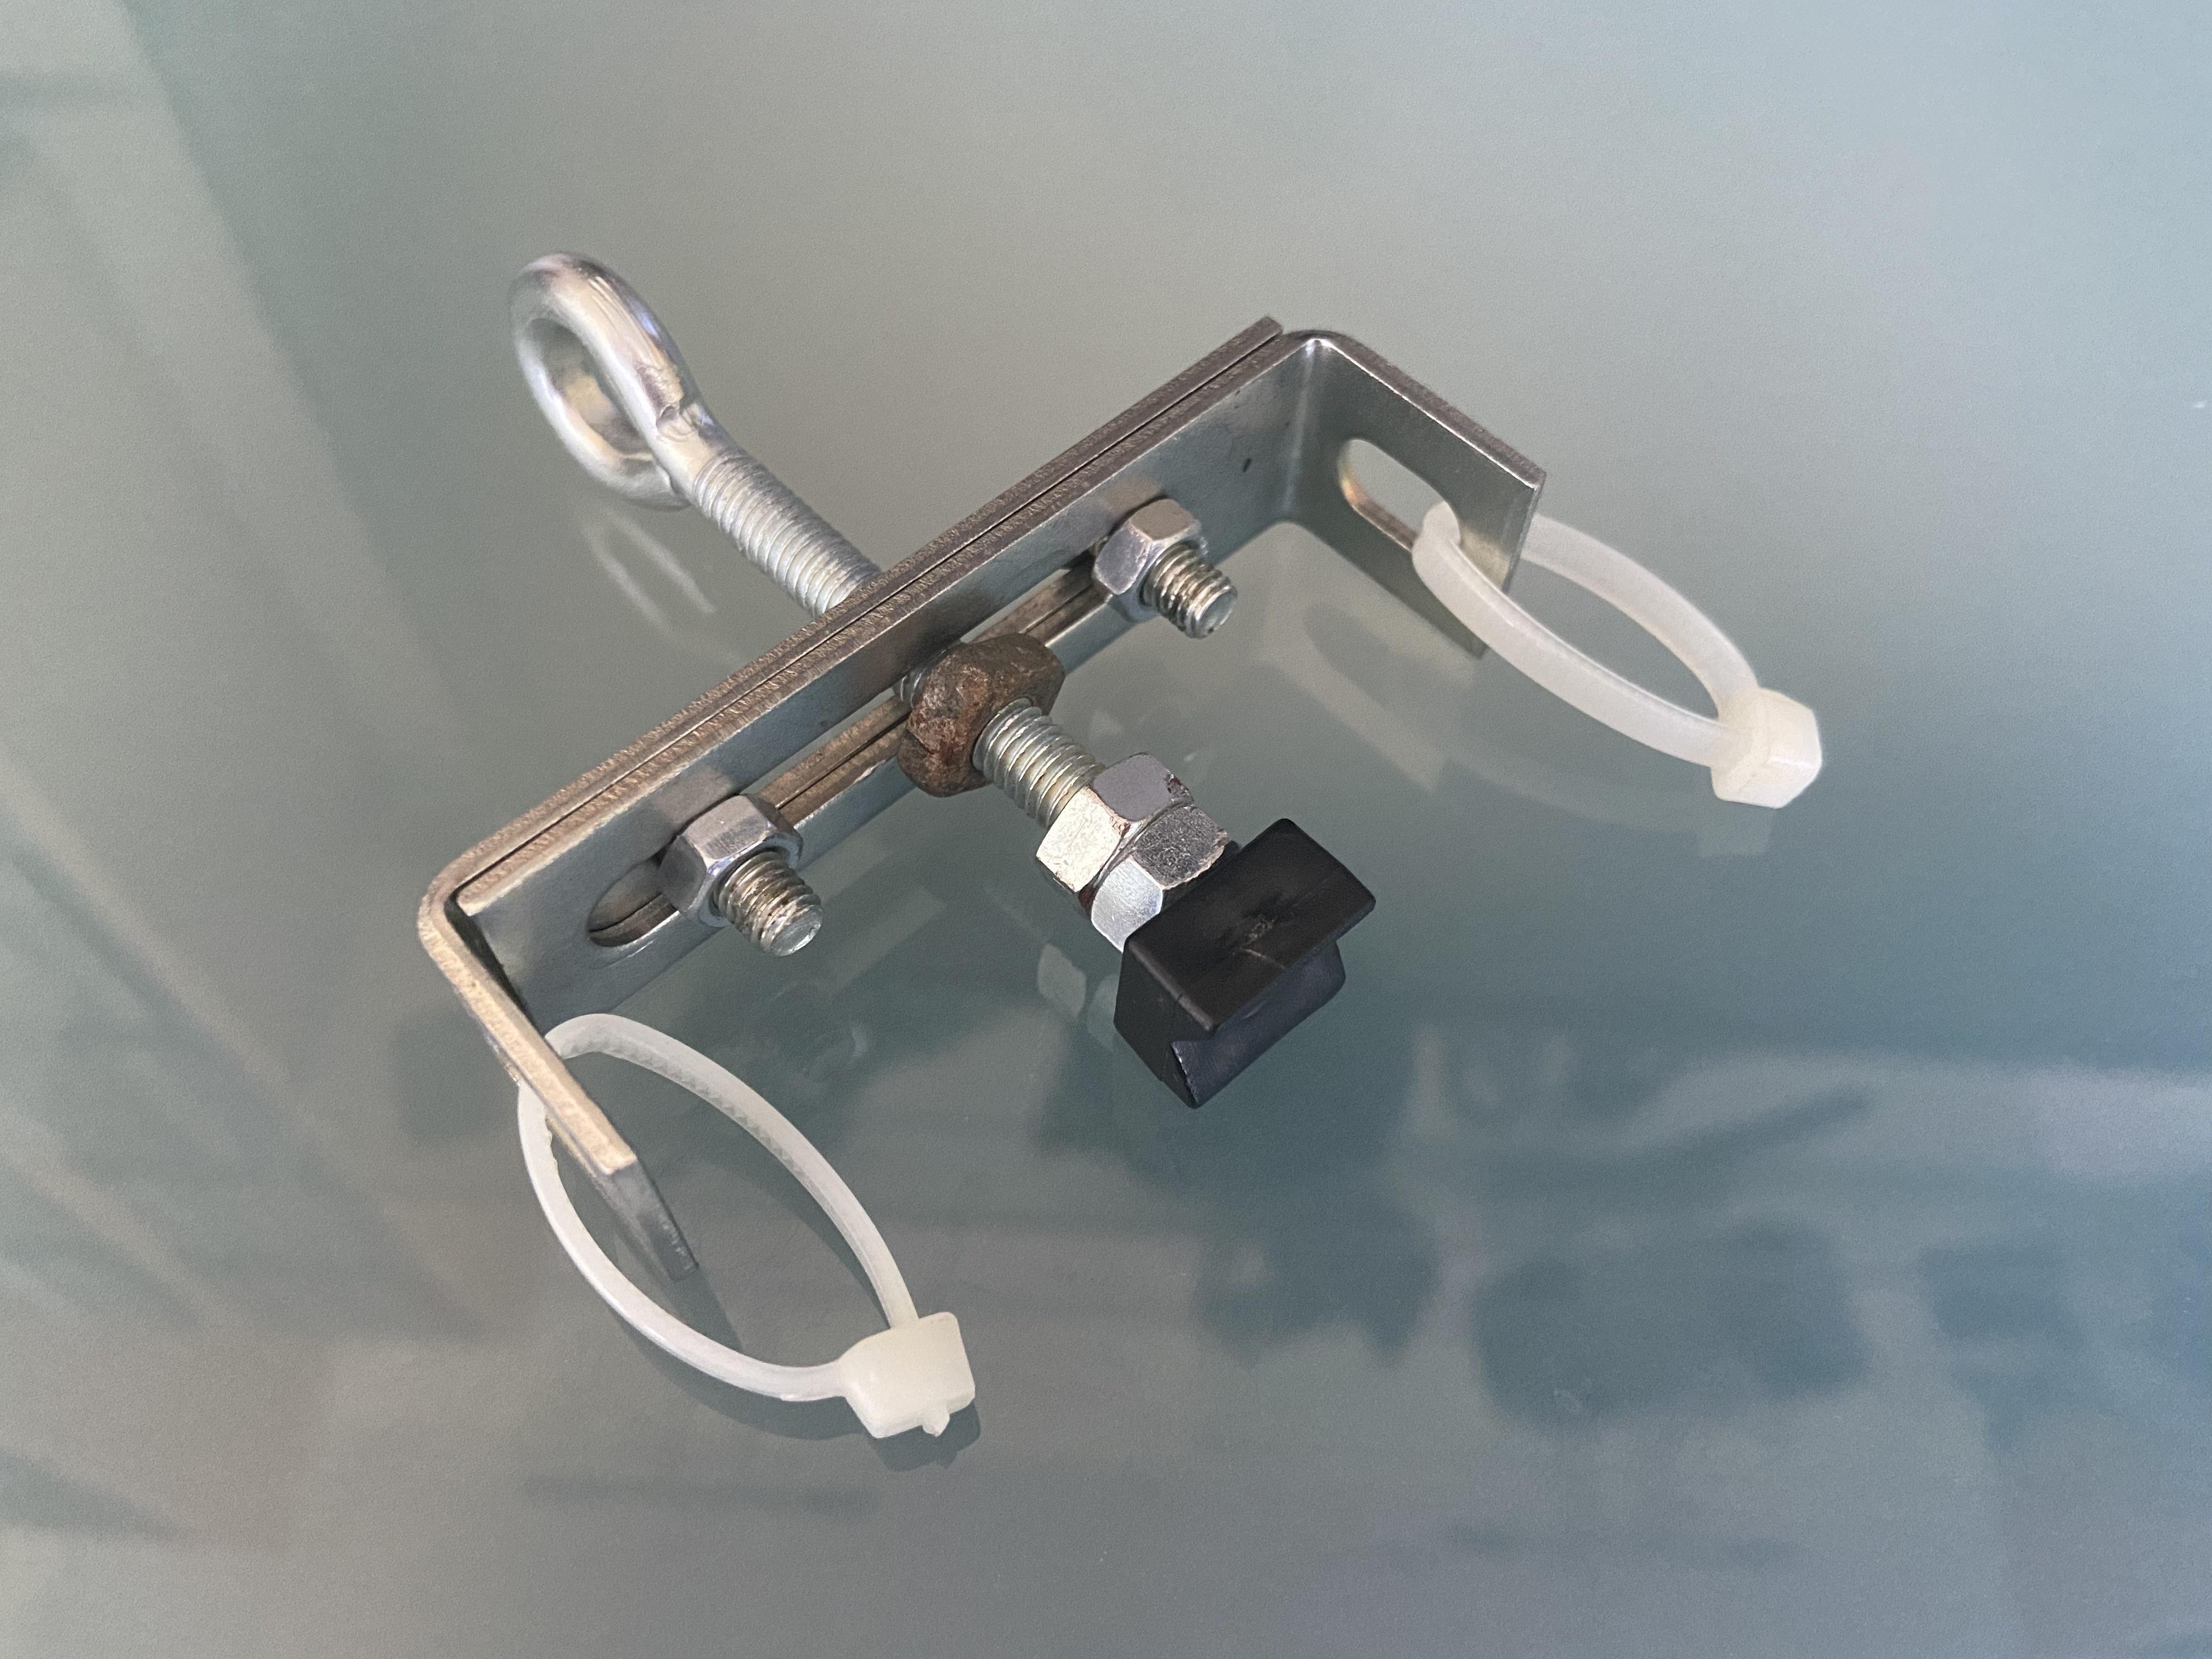
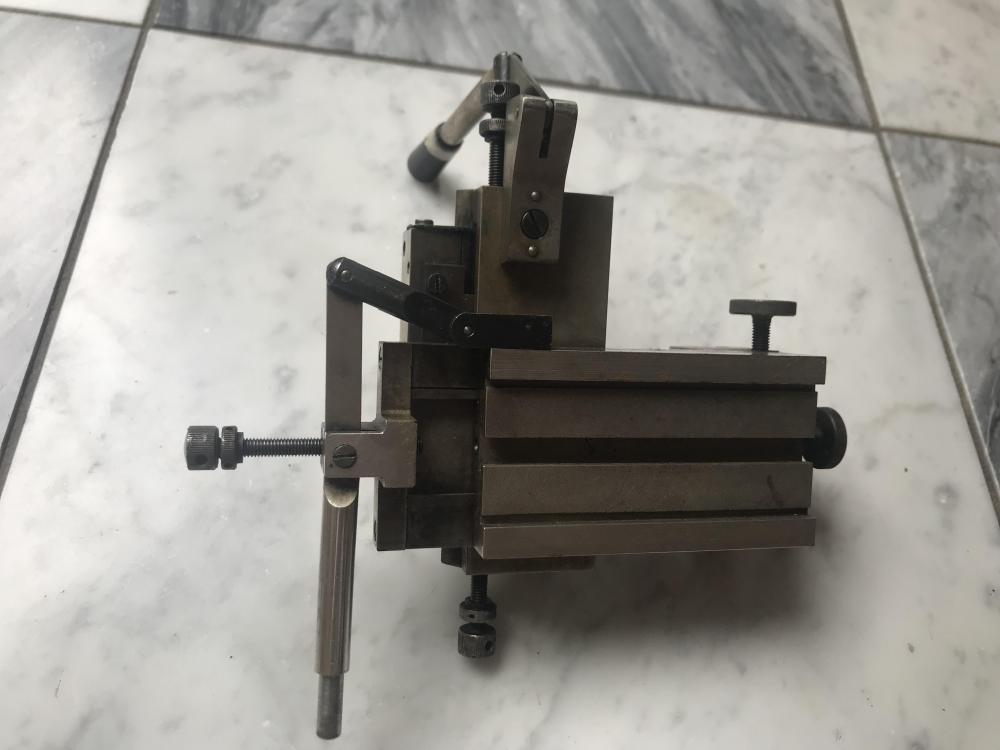
Sorry I overlooked this thread! 15 years ago I got my father‘s Atmos which was not running anymore. With the help of a repair video from an experienced american clock maker (Anthony Montefusco, passed away 2011) it was not to difficult to replace the broken balance wire. Here ist the only (self made) special tool I needed to poise the balance shaft. The documentary I gathered at that time is still available if it‘s needed.


 1 point
 -
It will run for couple of years without epilame.1 point
-
Great information for Tiny1 point
-
I don't suppose we can have a picture because that's a pretty broad description.1 point
-
modified by who? Who made this movement? Then the problem you're having did it just suddenly happened or did you purchase it this way when did the problem pop-up?1 point
-
the unhelpful answer is you have a mystery? Looking up each of the watches the pallet forks do not interchange. even going to the bestfit online hoping maybe there'd be some different something newer and know they're both unique. http://cgi.julesborel.com/cgi-bin/matcgi2?ref=FF_372 http://cgi.julesborel.com/cgi-bin/matcgi2?ref=[]ZDXF[G http://cgi.julesborel.com/cgi-bin/matcgi2?ref=FF_59N http://cgi.julesborel.com/cgi-bin/matcgi2?ref=[]ZDXDZG1 point
-
Usually this is due to worn pivot, short pivot on the cock side lets pivot shoulder touch the jewel hole and stops the watch. If incabloc, the cap jewel is dome shape, flip the end stone over so the domed side faces the pivot, the do e will compensate for the shortness of the pivot. You should then give the cap jewel an epilame treatment so oil stays on top of the dome. Works but might be frowned upon like gouging. I swear it does work. ha ha1 point
-
That's great! Thanks for pointing that out. I've changed back and all is well1 point
-
You released pretension forces in the plates, allowing space for any bent pivot, depthing ... etc to run . Usually pretension is due a bend in the plate caused by tightened screws. To find which screw/screws are causing this pretention. Loosen all and tighten one at a time, then tighten and loosen one at a time. Once spotted shim the plate near or opposit side of the screws causing the fault, shim material must be real thin. Lets ask @nickelsilver to correct me if wrong and his advice. This all is true only if end shakes did exist when you reassembled. Shakes should be checked during disassembly/ reassembly. Regds1 point
-
Hi To me the use of shims is preferable to mauling the plate or the cock. Reason being the aplication of a shim can Raise the cock by fractions of a mm in parallel whereas gouging etc is a little less accurate and once done iis far harder to remove. One has also to take into account as to why shimming ar gougeing was done in the first place. I think Joes comment regarding a changed staff being the most likley.1 point
-
Thanks for the reply . Much appreciated. Yeah I would say it pretty much the same way . At 55 I'm starting to think I have the same problem as my end shakeless watch.1 point
-
You have mentioned most possibilities I can think of for lack of end shake, staff might have been replaced with a longer one or bent cock, well how else would you native speakers say the last one. Just between the two of us, sometimes I force raise the bridge instead of shimming. You see a screw for bridge height adjustment on some Rolex calibers, which tells me Rolex deems the need for such adjustment as inevitable. Regs1 point
-
Loosen the screws to the upper deck and mainplate, see if that makes a difference.1 point
-
If you're doing this make sure you place a slightly undersized rod inside to prevent the canon pinion collapsing. Anilv1 point
-
It sounds like friction in the gear train. Let the power down in a controlled manner and remove the pallet fork. Wind a little power on. The escape wheel should spin and come smoothly to a stop, even reversing slightly at the end. If it doesn't spin, remove it and do the same test on the fourth wheel, and so on wheel by wheel back to the barrel. Disassemble everything. Check for wear, damage and contamination, especially at the places where you found the most friction. Reassemble, lubricate and repeat the test. Never "unlock" with power in the system.1 point
-
Thin aluminum foil.1 point
-
Once you've built the movement you'll want to wear it for a few days to make sure everything is OK - tricky without a crystal! For these all but obsolete crystals (particularly the cut glass ones) I've had success with Sternkreuz after market replacements, particularly their XMF line. For your crystal 300W41GC0F, the first three numbers are the diameter (30mm), you can search the SK catalog for the phrase 'XMF 300' and you should get three Seiko results - XMF 300.860, XMF 300.862, and XMF 300.863. These are all flat topped, not cut like the original. These are available from cousins for 3.95 GBP. I'd suggest you try the .863 as it's thickest, with a corresponding increase in bevel diameter which is needed to optically hide the gasket underneath. These are not guaranteed to work, but the angled bevel will likely match the original glass so chances are good. You'll need a crystal press in order to fit it - the blue Chinese ones are good enough. If the watch keeps good time, and you like wearing it, then by all means consider splashing out on the original cut glass crystal - ( but be warned they chip easily! ) I think your bracelet is original, or at least close. Jake O1 point
-
Many frown upon gouging as it destroys the mainplate or cock. Moving the setting is prefered and if thats not possible then shimming. Both ofcourse are only worth considering when you are sure lack of end shake is not due to short pivot. Ain't that right Weasol.1 point
-
The good news is that you can change it back. You just have to go to the bottom of the page (below the YouTube, Facebook, Instagram and Twitter buttons) and select: THEME and change it back to LIGHT MODE. Apparently during a forum update a change was made and we all ended up seeing DARK MODE. All is well.1 point
-
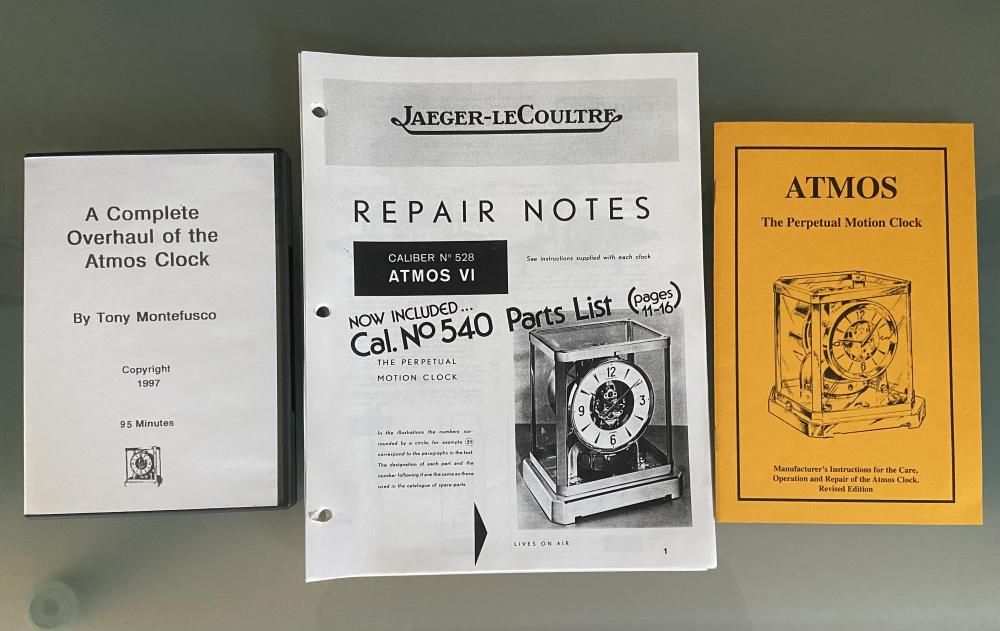
I'm not a tribologist so I don't know the answer. I do work professionally for a living, and my reputation is very important, so I use the lubricants recommended by the industry, with excellent results. Lubrication and anecdotal unscientific observation vs tightly controlled testing is something I've been a spectator to since many years ago as a mechanic. I try to keep my dog out of the fight. How old is the JLC literature you have?1 point
-
nickelsilver, I highly respect your knowledge! Please tell me, why 8207 is wrong when it seems to work well in a professional workshop. I‘m confused about the braking grease discussion. The technical literatur of JLC recommends the clock oil „859 + PTFE“ for this application. This is also not specified as a braking grease and lets me assume, that each thick grease with a dry lubricant additive (graphite, PTFE, MoS2) should work. I once used Molykote DX (PTFE) in a rlx 3135 clone and got 42h power reserve. Eventually I will test an automatic watch with different barrel wall lubrications and report here1 point
-
No. That's nitrous oxide. You often see the medics at football matches spraying it on the knees of injured players. It's a cold spray, it just temporarily numbs the pain. We use it to test the nerves in a tooth and also to numb a wiggly milk tooth for extraction. You could knock somebody out with ethyl chloride, but there is a good chance that person is not going to wake up. There have been cases in US schools where kids inhale the stuff for a buzz. And some didn't wake up. So now it's really hard the get the pure stuff. The stuff used by footballers has an additive in it that smells like "pig's fart". Some suppliers didn't know this and tried to sell this ethyl chloride to dentists. GOOD LORD! We use the stuff in the mouth!1 point
-
If I'm not mistaken it looks as if it is from a French movement I'm going by the finish. With many of these the crutch screwed on that is how it would be a friction tight fitting. If the long brass colar has two slits in it then more then likely it would be screwed.1 point
-
Thanks. I will get some 8217 next time I order from Cousins. I did look at P125 but soon looked away as soon as I saw the price.1 point
-
For years, in the ultrasonic, I used Naphtha (Hydrotreated light SBP3) bought from ebay, for cleaning, and 99.9% pure IPA for rinsing. As Nickelsilver says, it is not good for removing oil and grease. I switched to Elma WF Pro. Ok it stinks a bit, but cleans better than naphtha, and leaves a nice shine. I have continued to use IPA for final rinse - it does remove any residue from the WF Pro. I'm about to order some Elma Suprol Rinse. It's not cheap, but 2.5L will last me ages (I only service my own watches). It's designed for the job, and there's no worry about shellac.1 point
-
More progress
 1 point
 -
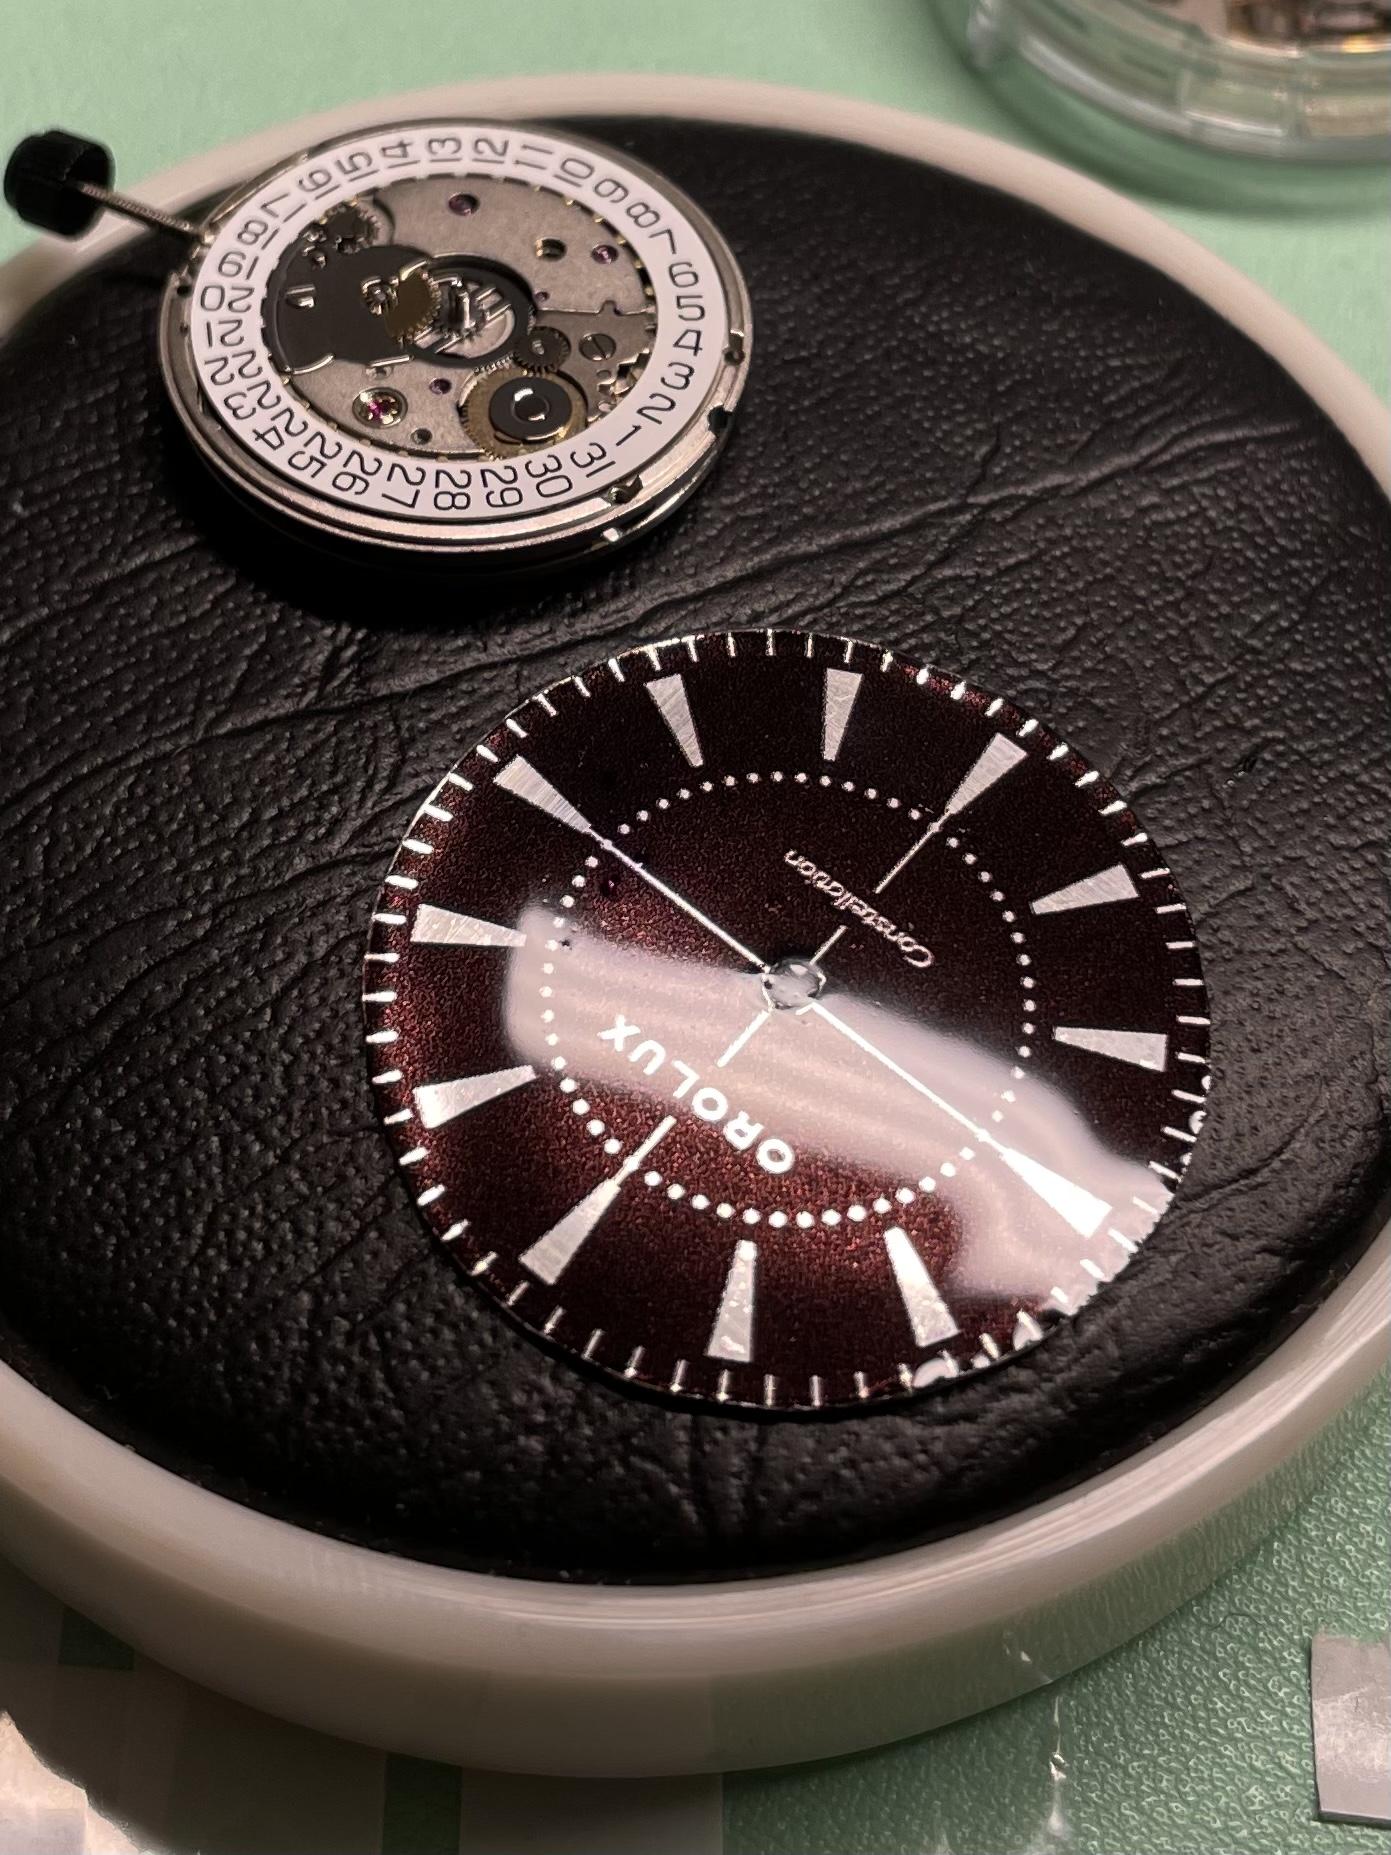
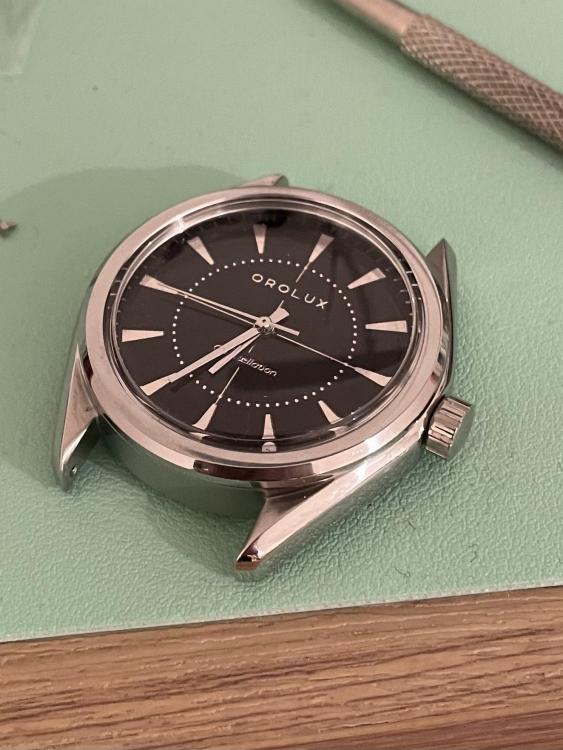
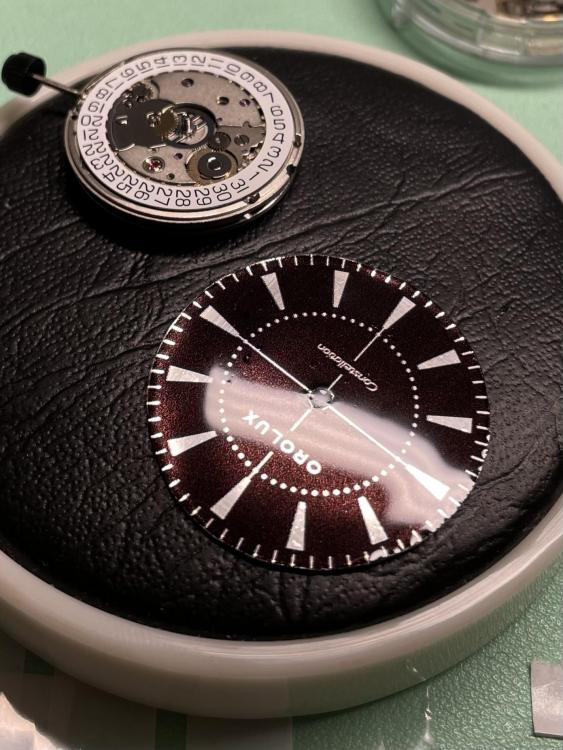
Shiny new dial waiting to be fitted to its shiny new sellita sw200. I know the sw200 has a date complication, but it makes more sense for me to buy these as I can use them in projects with date windows if necessary.
 1 point
 -
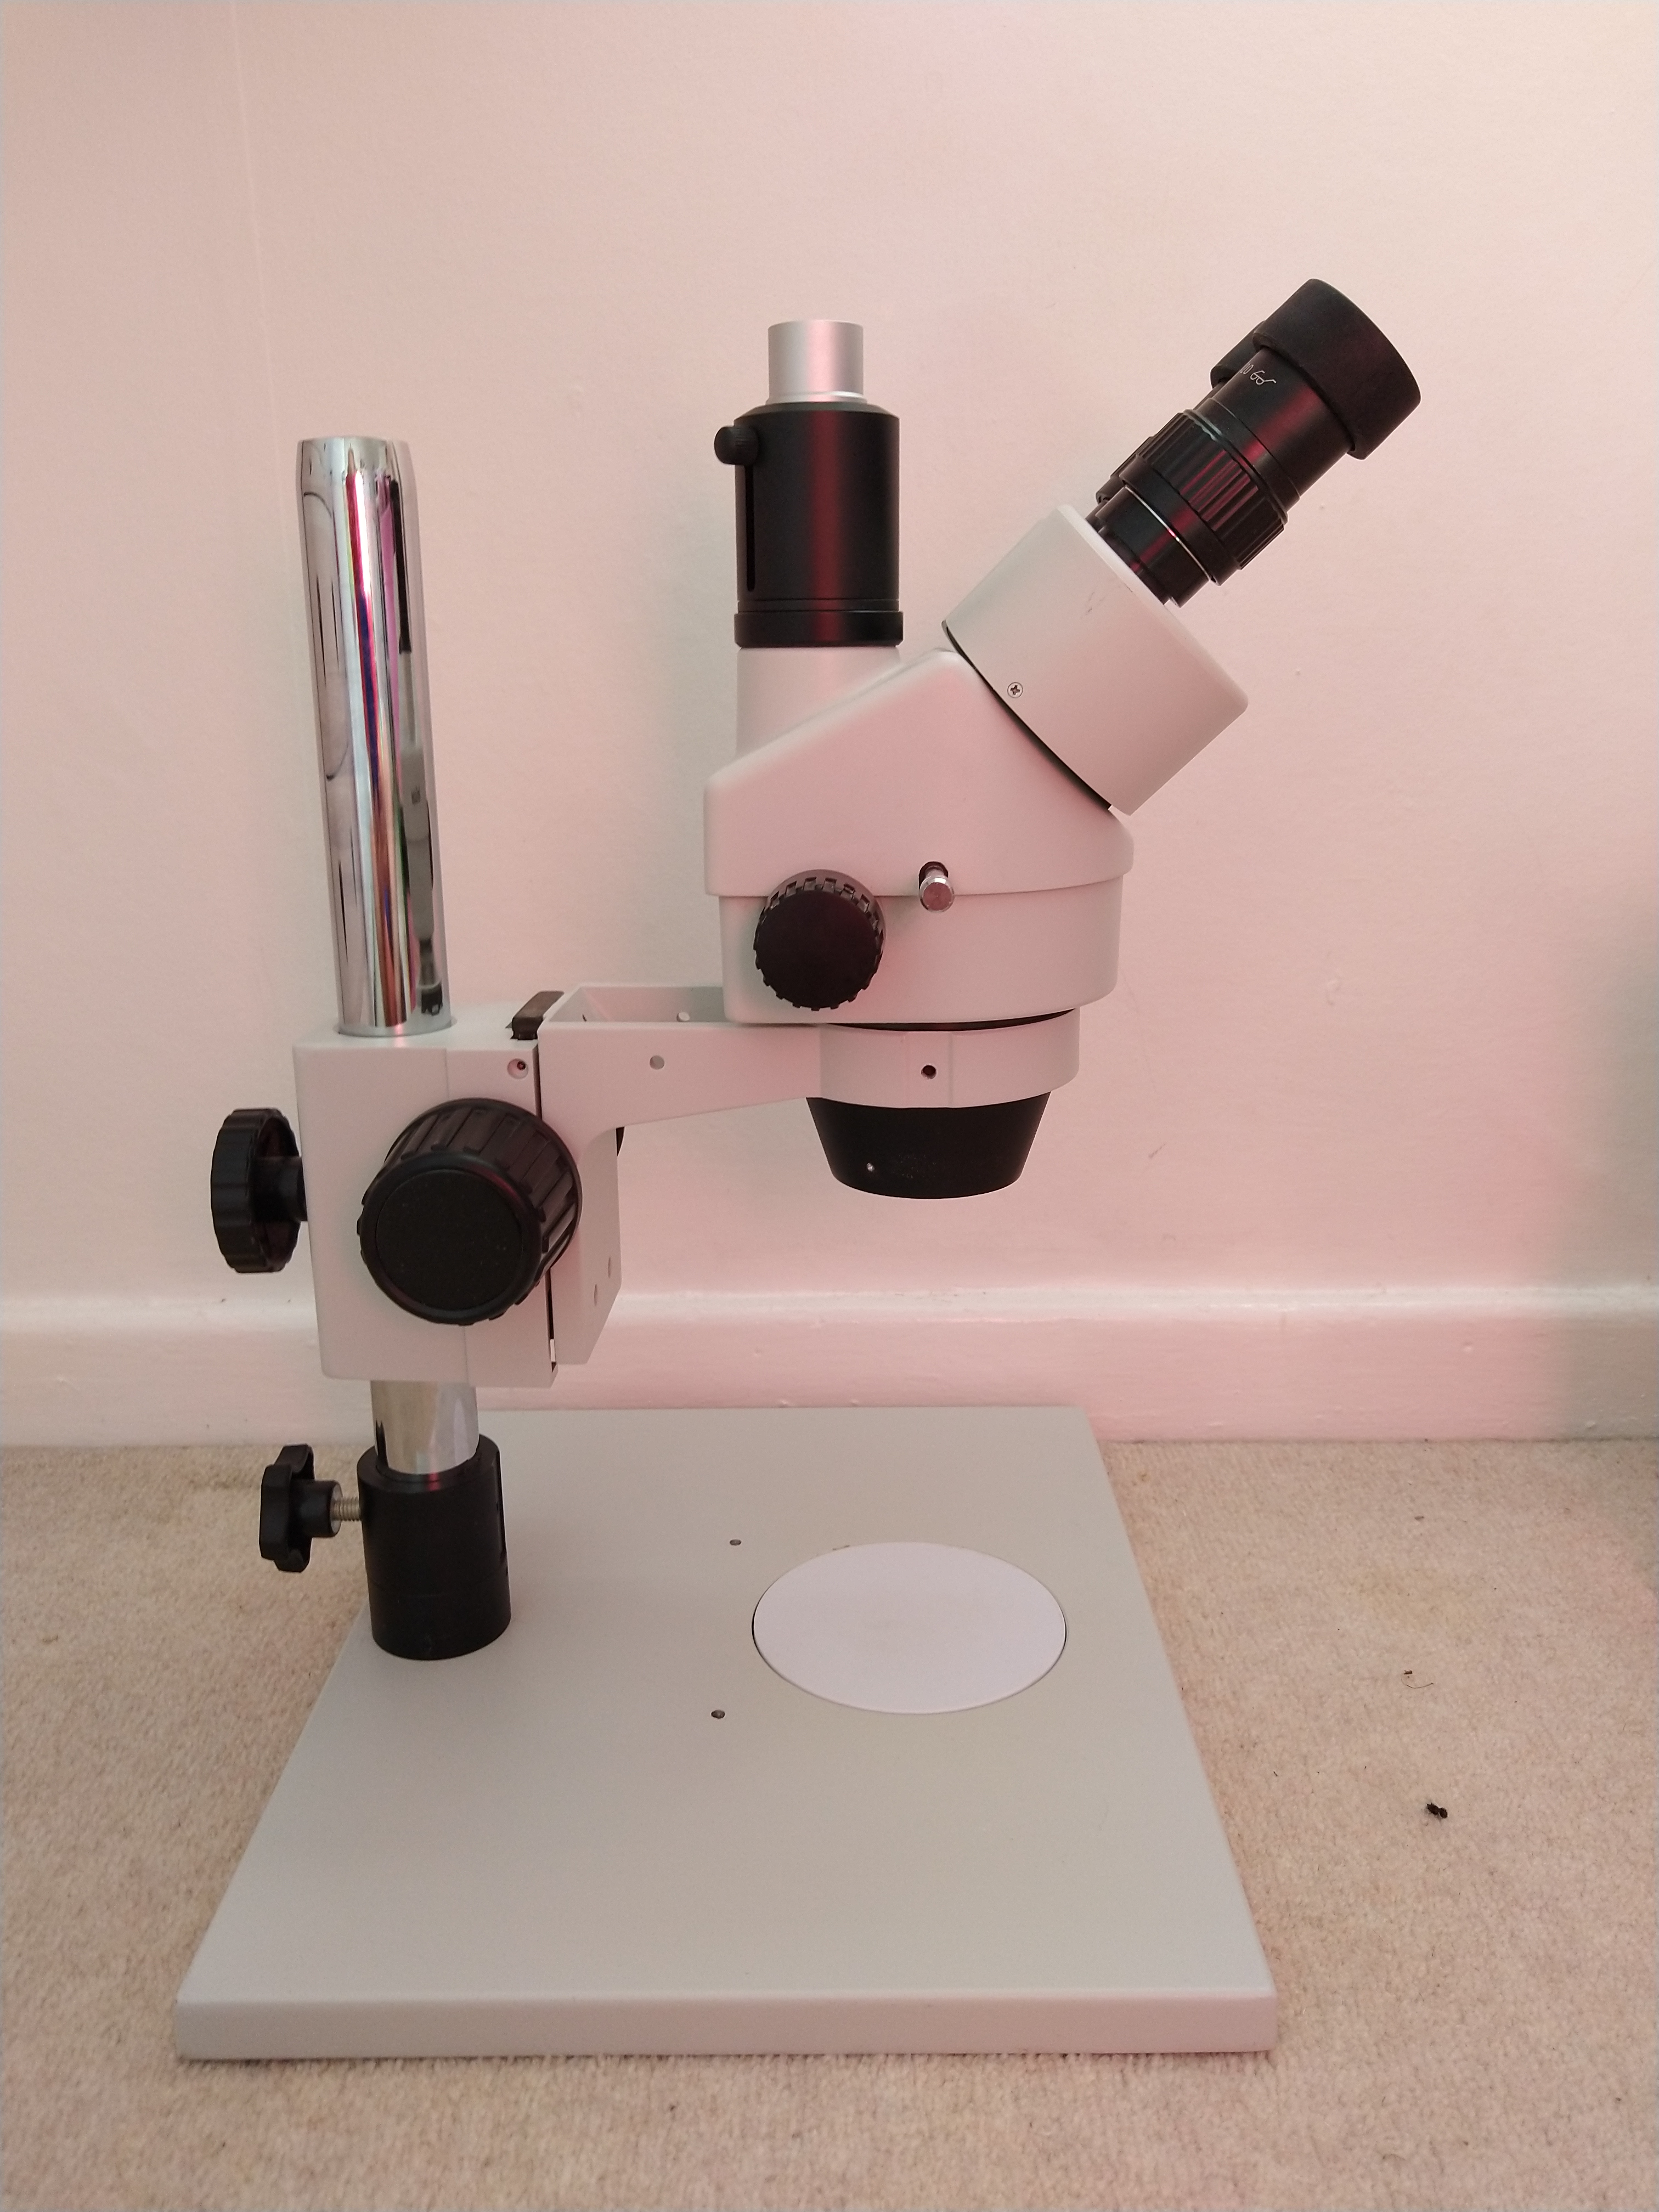
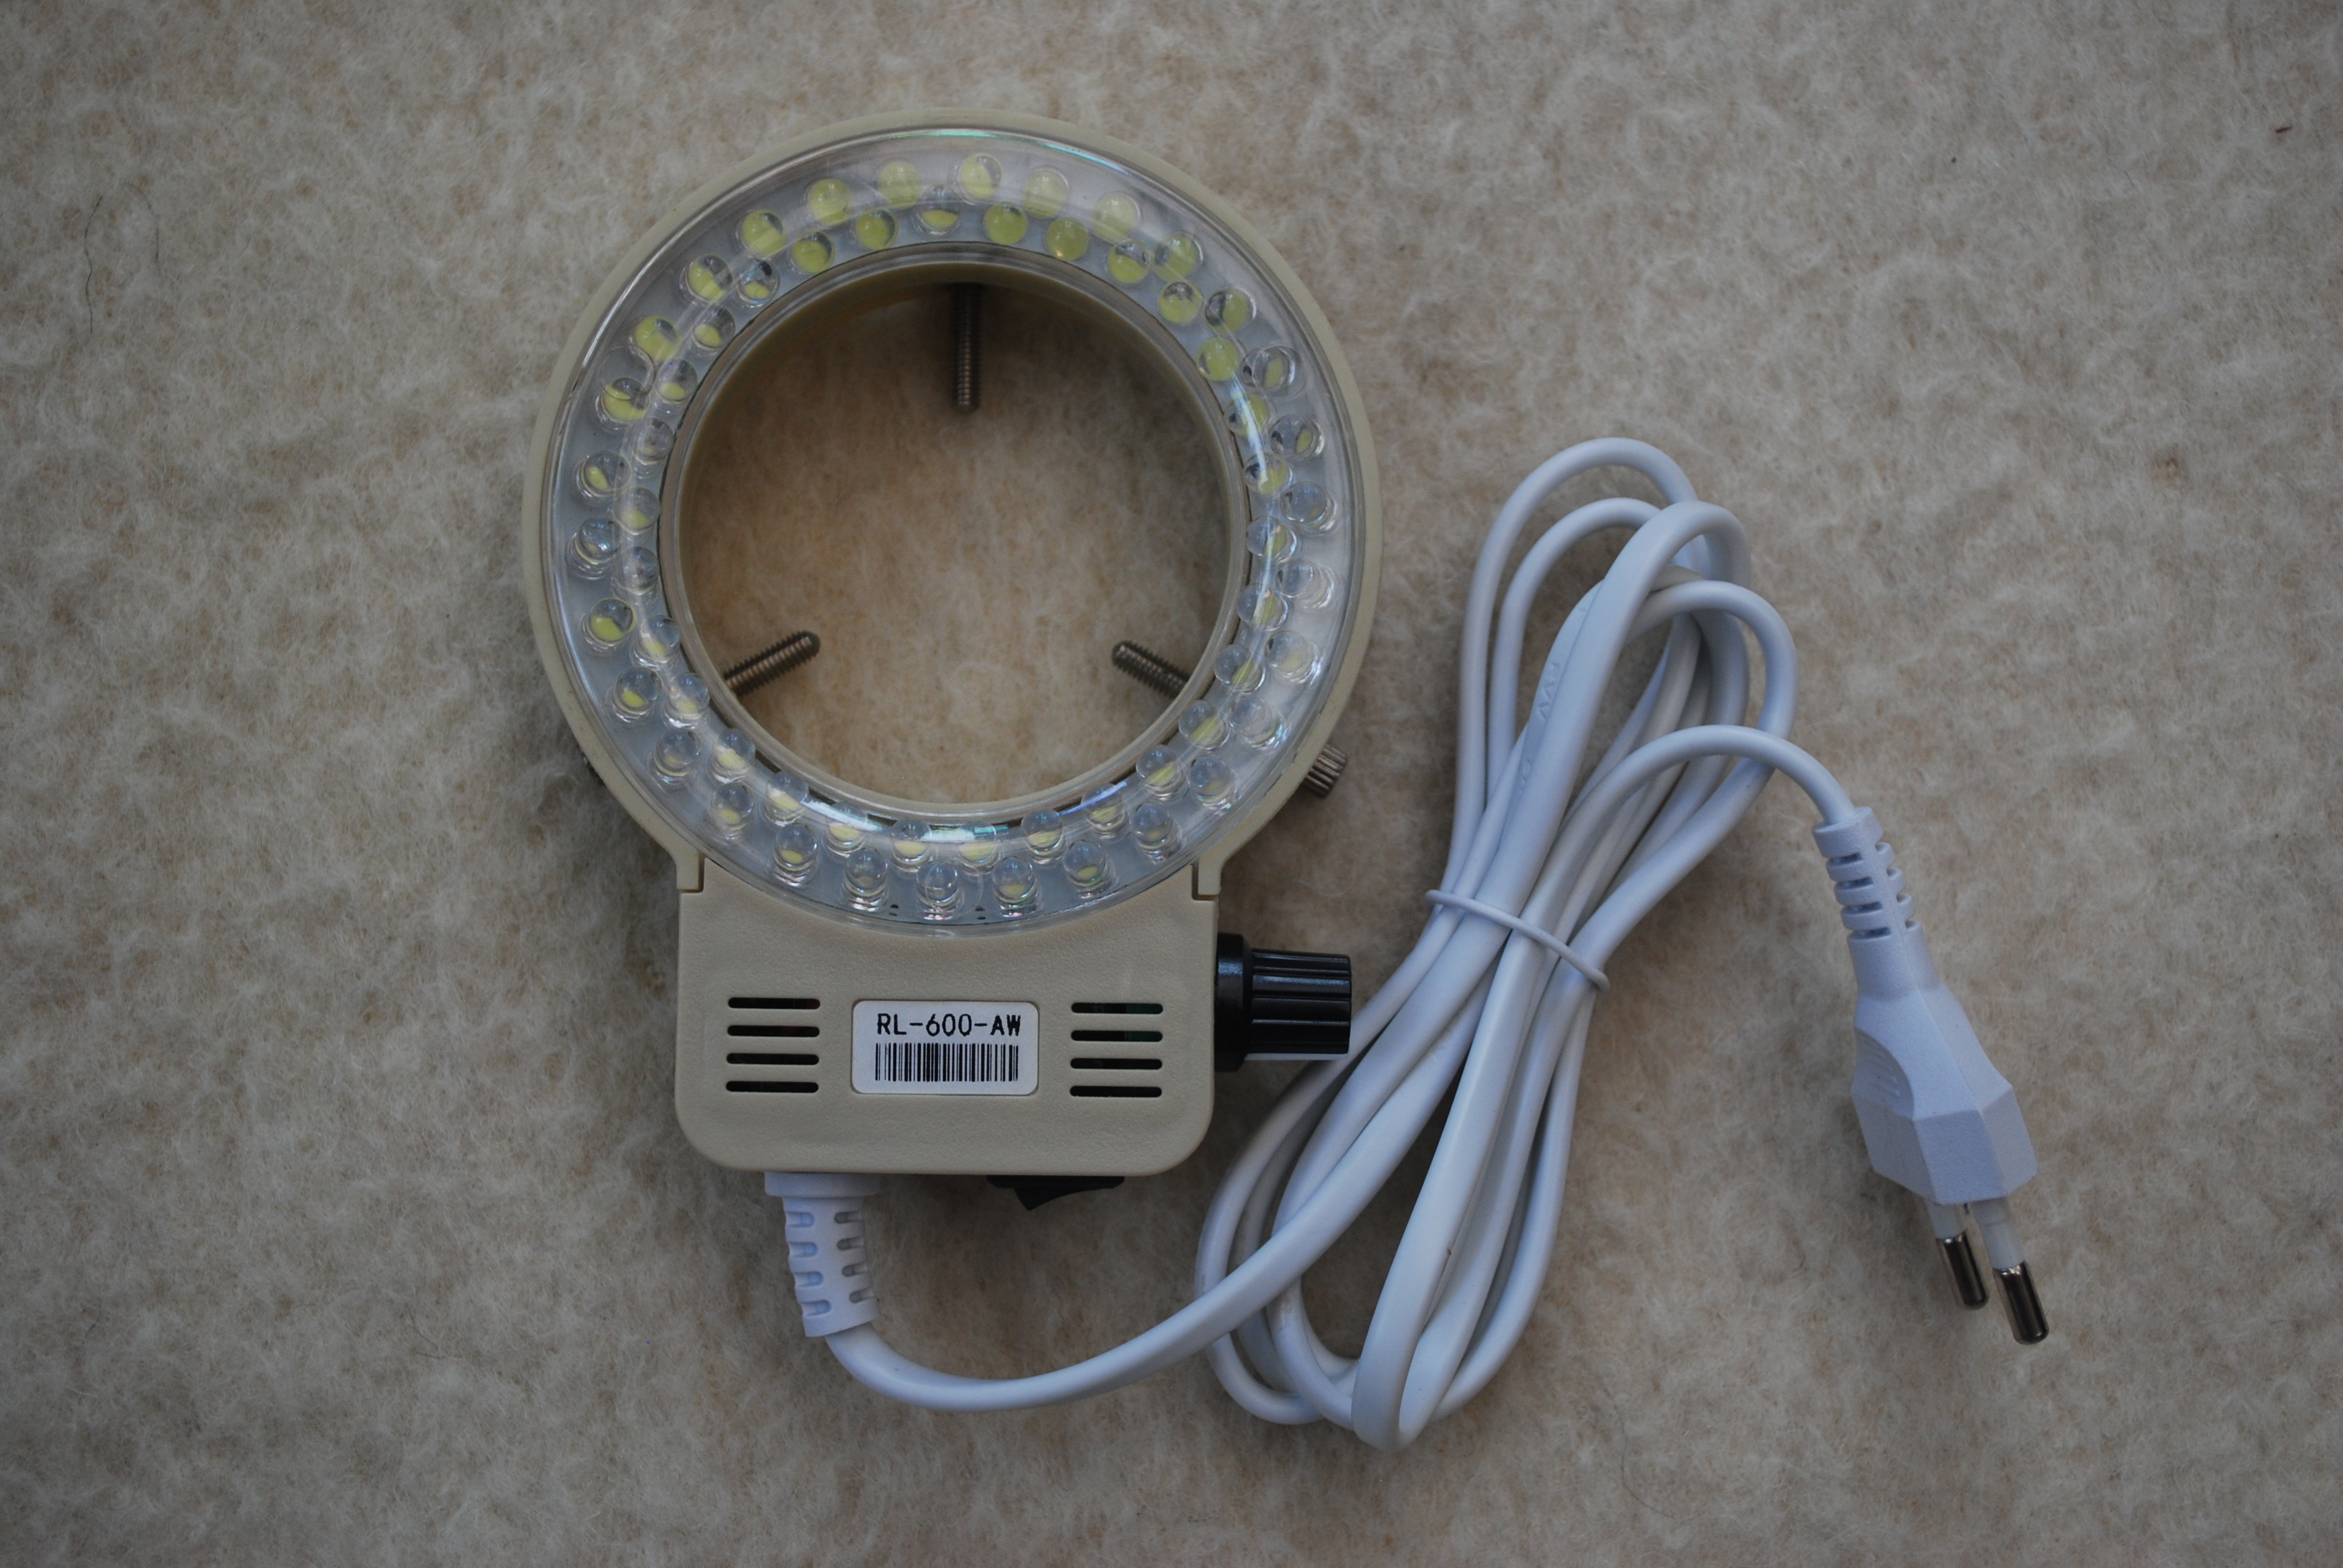
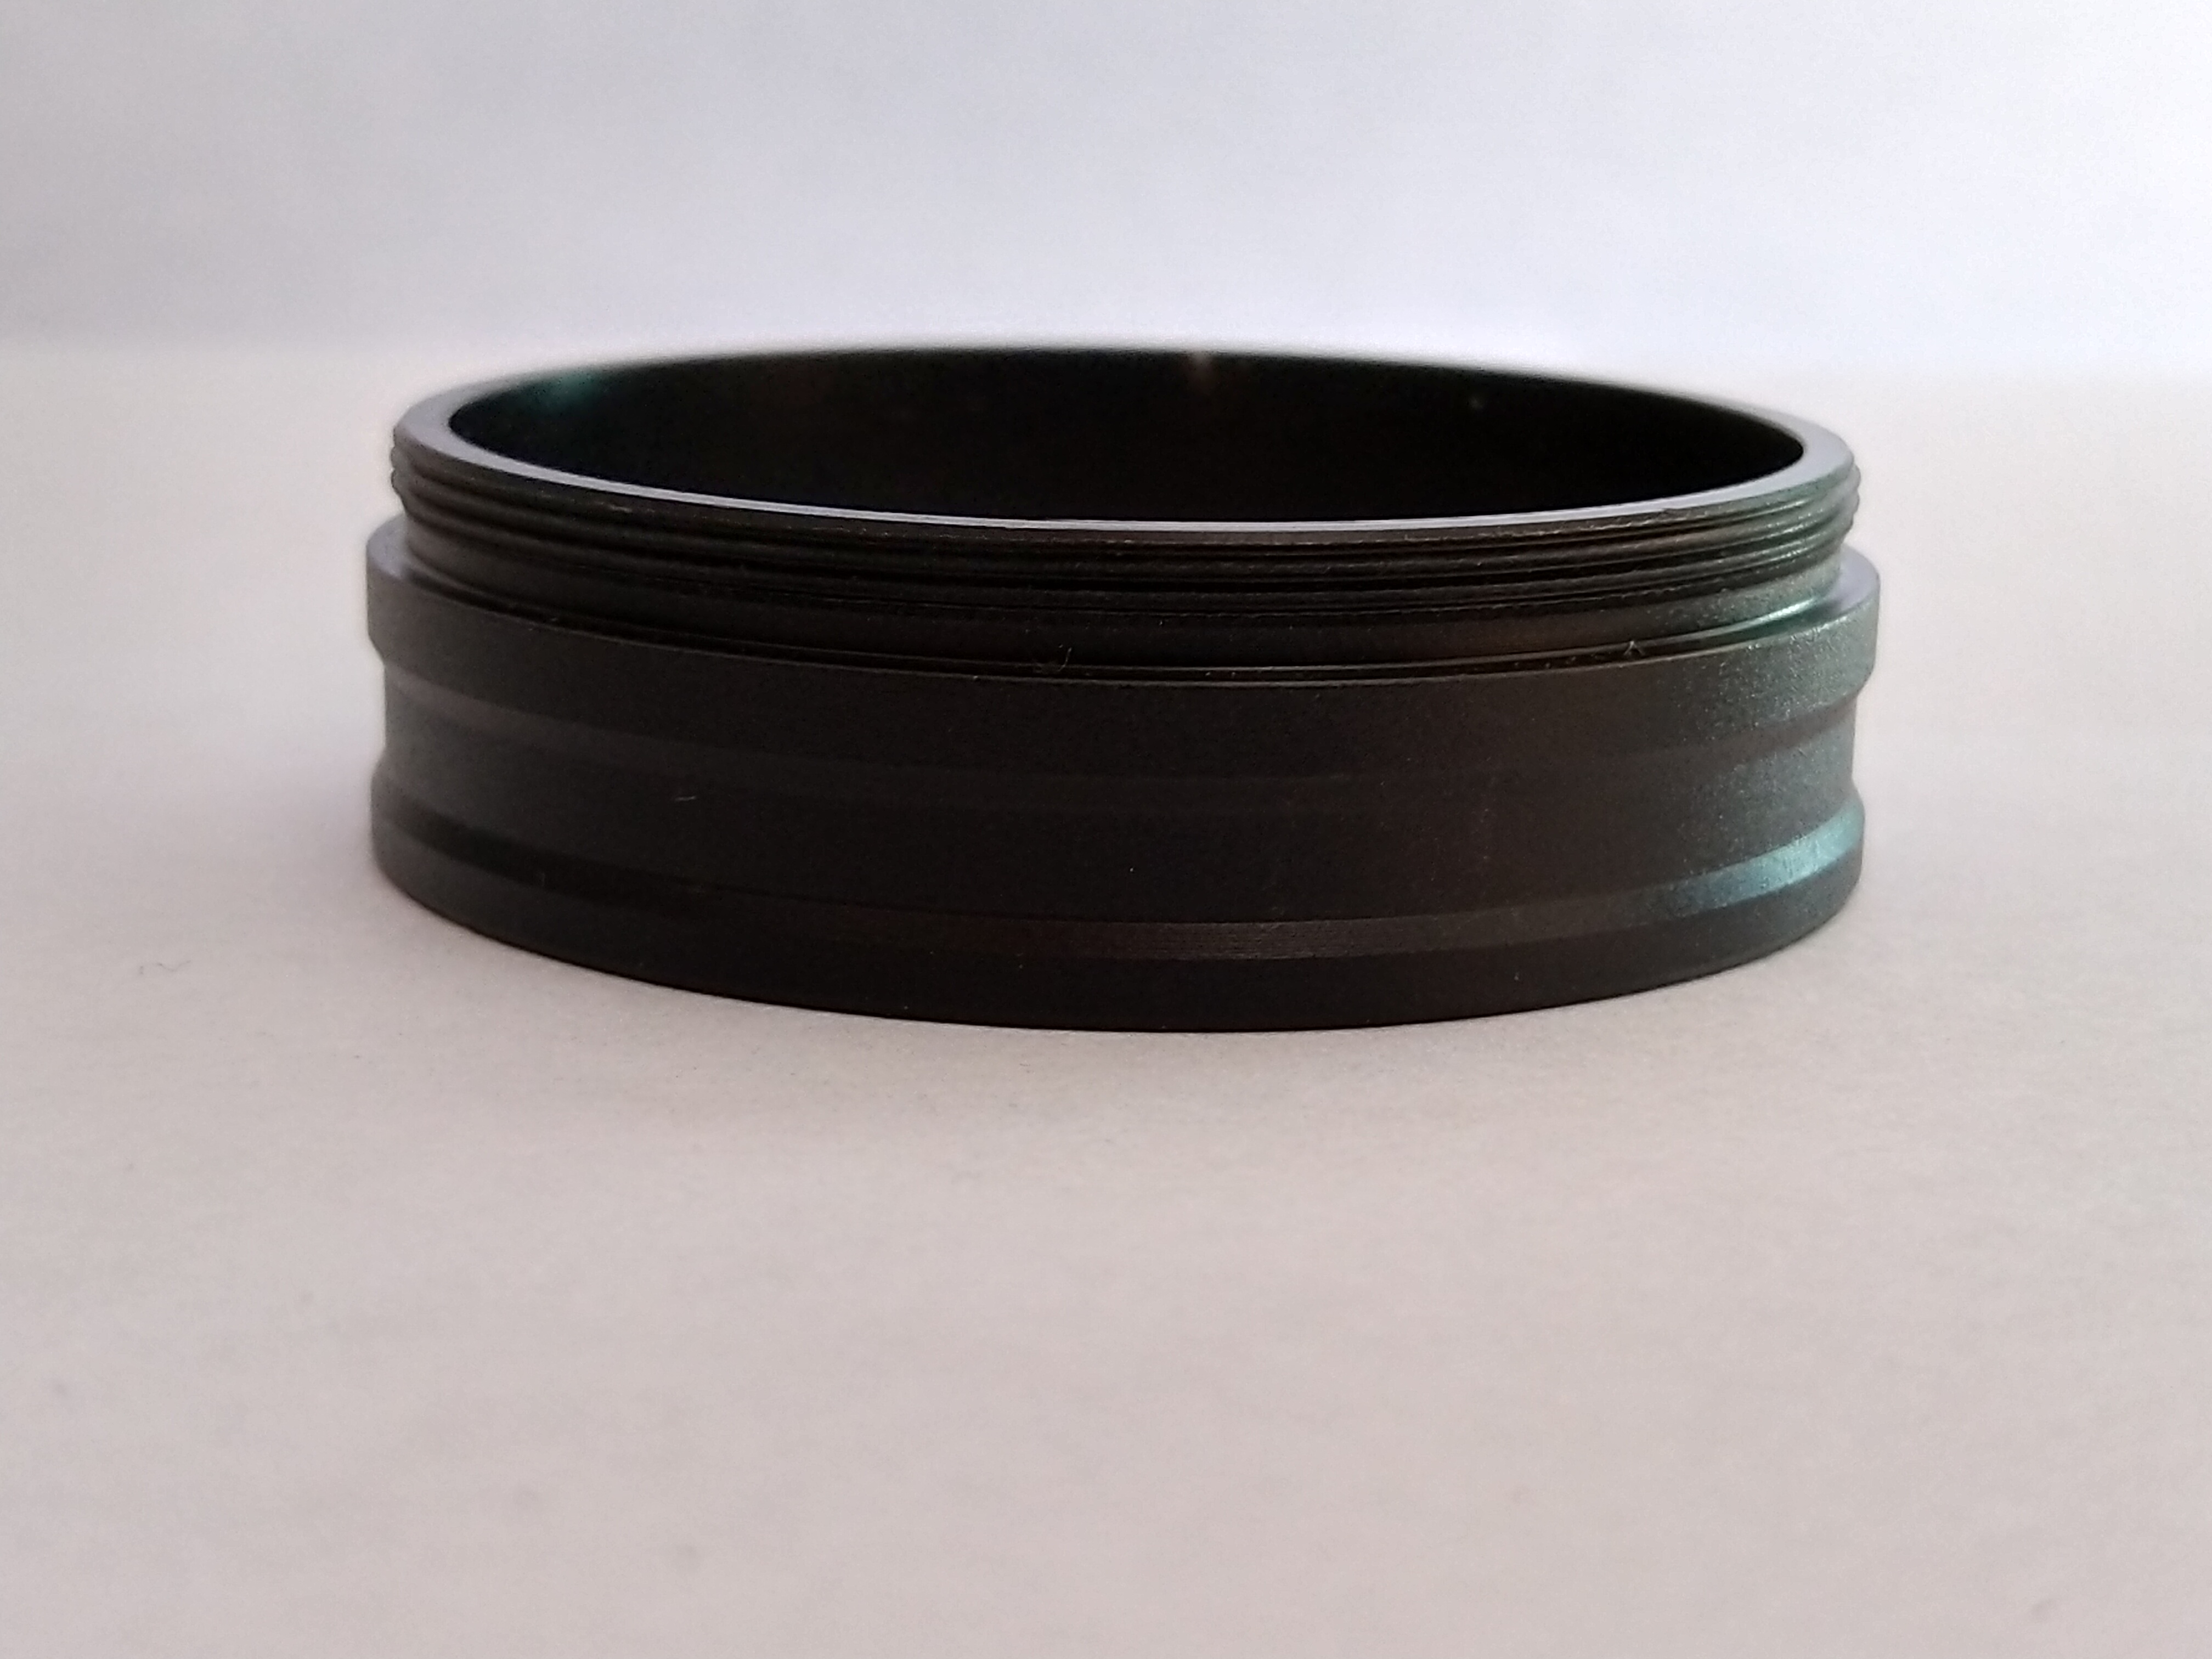
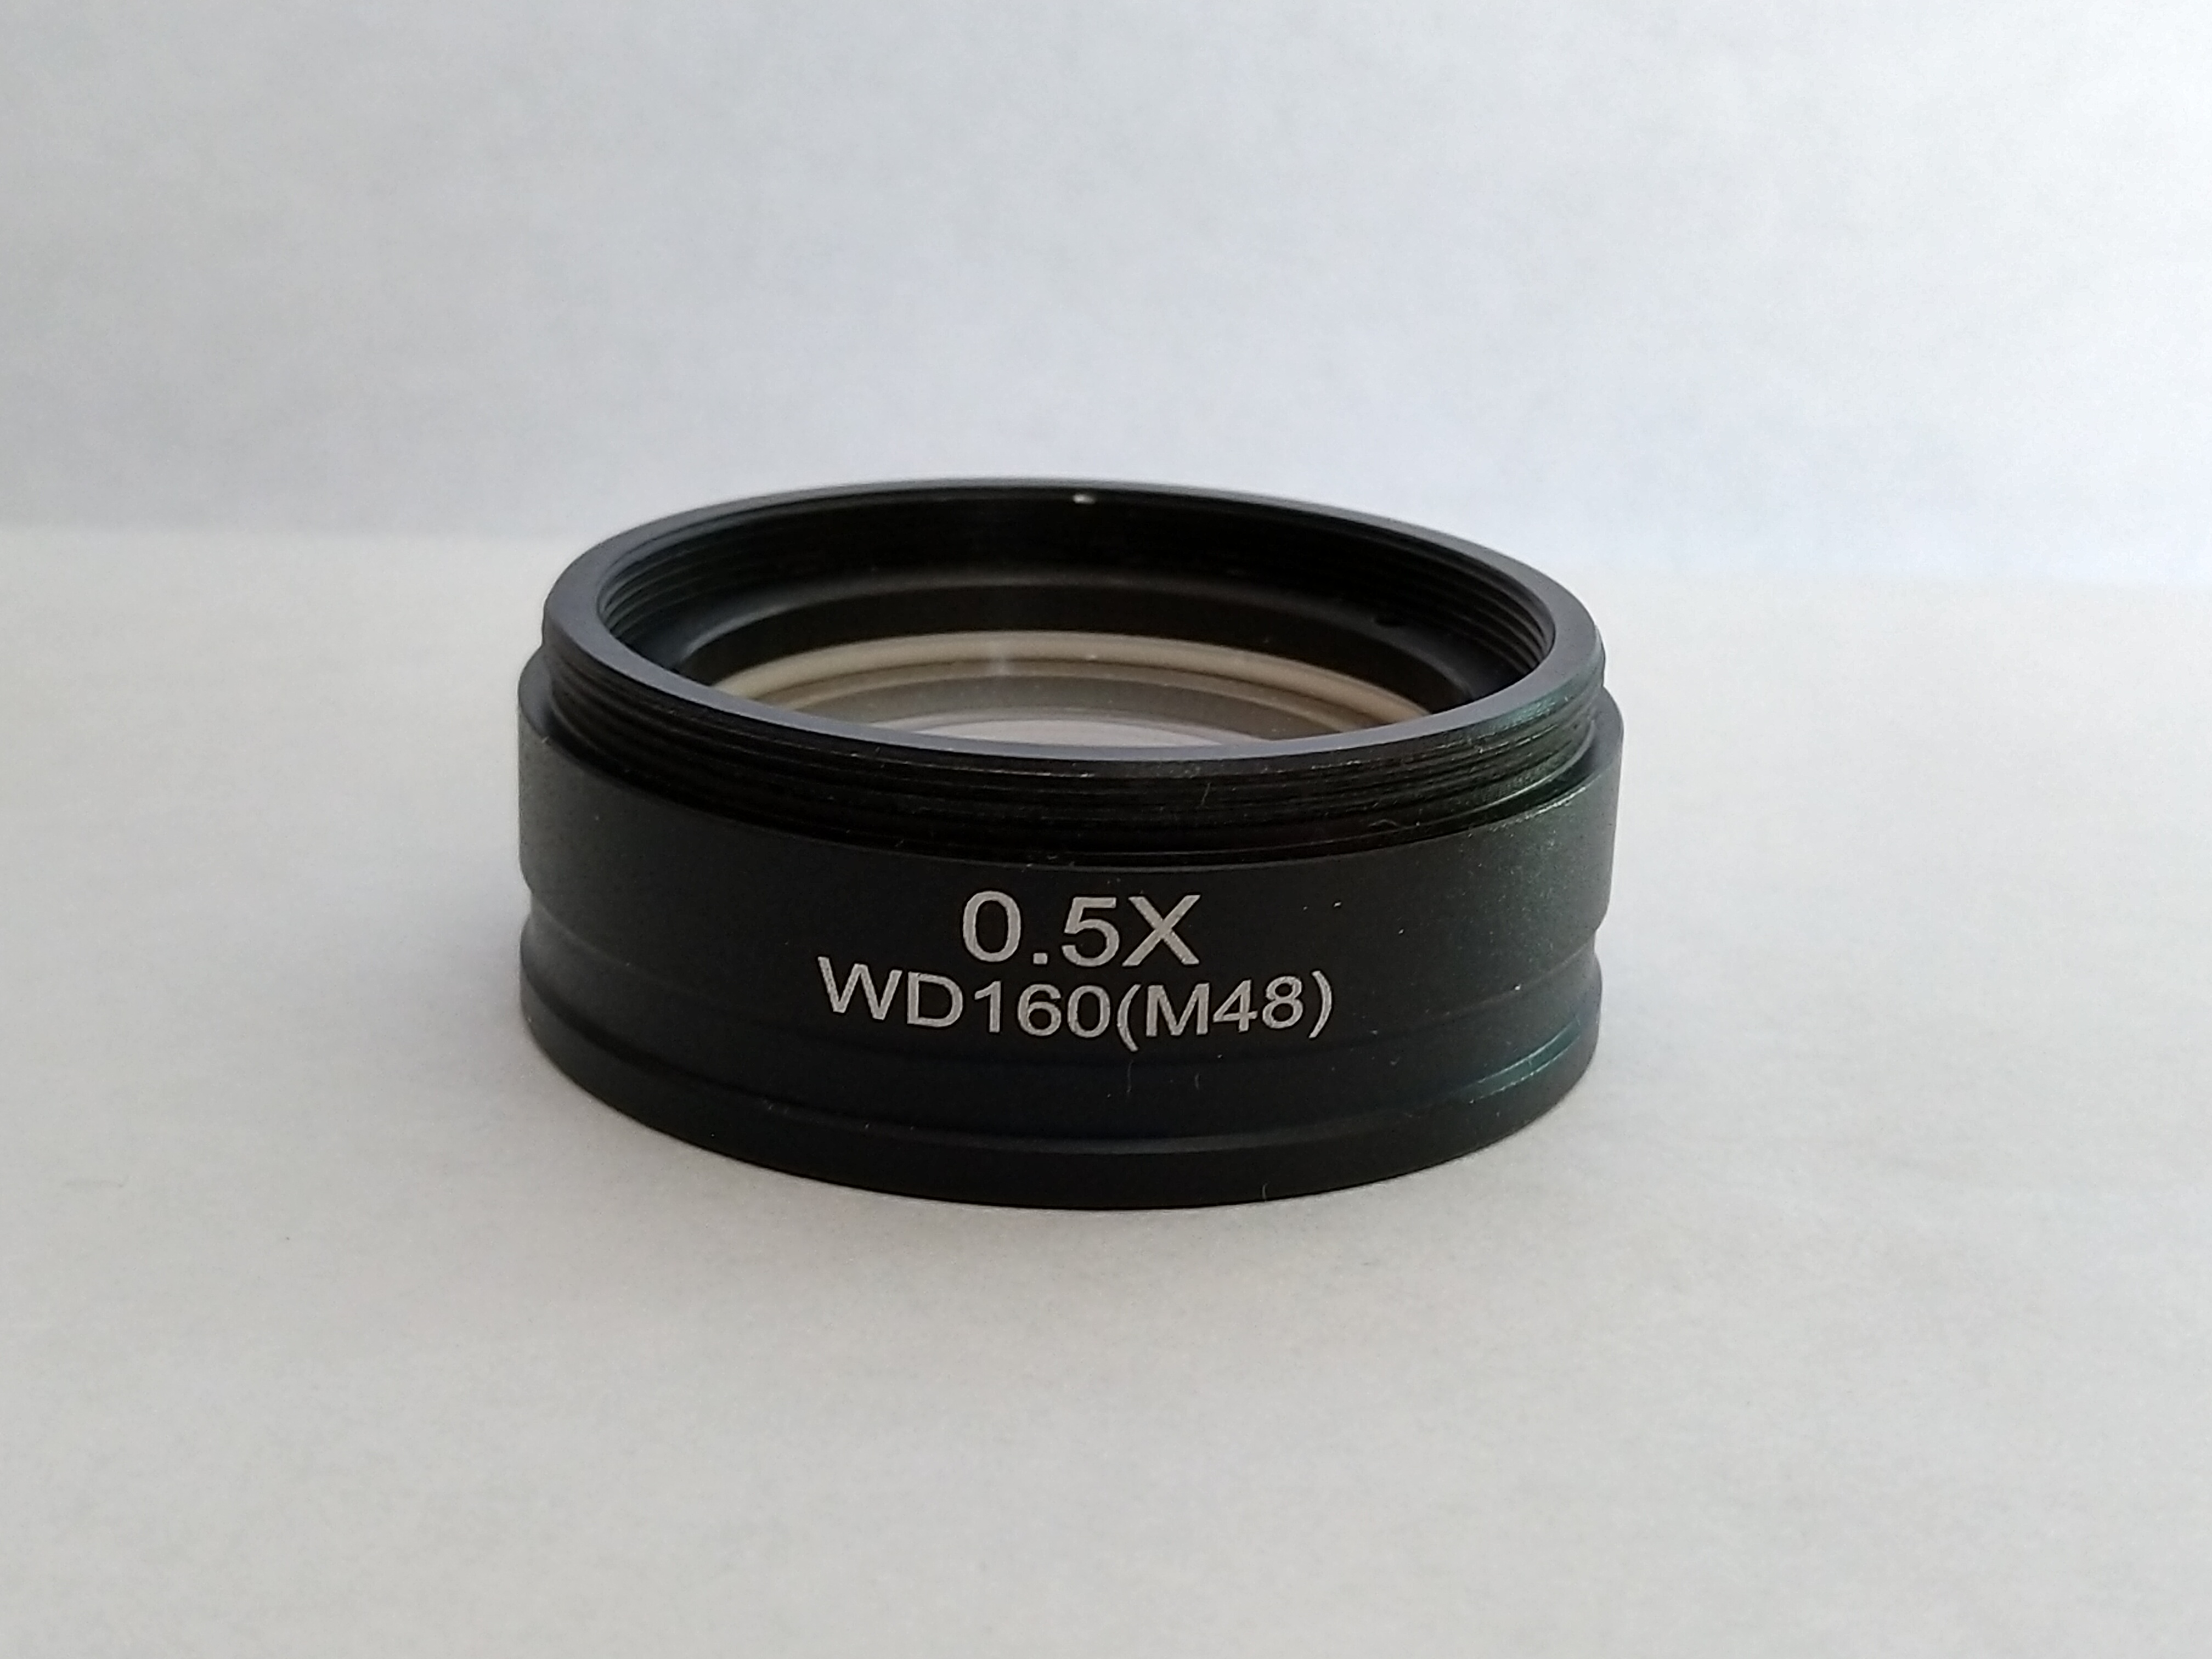
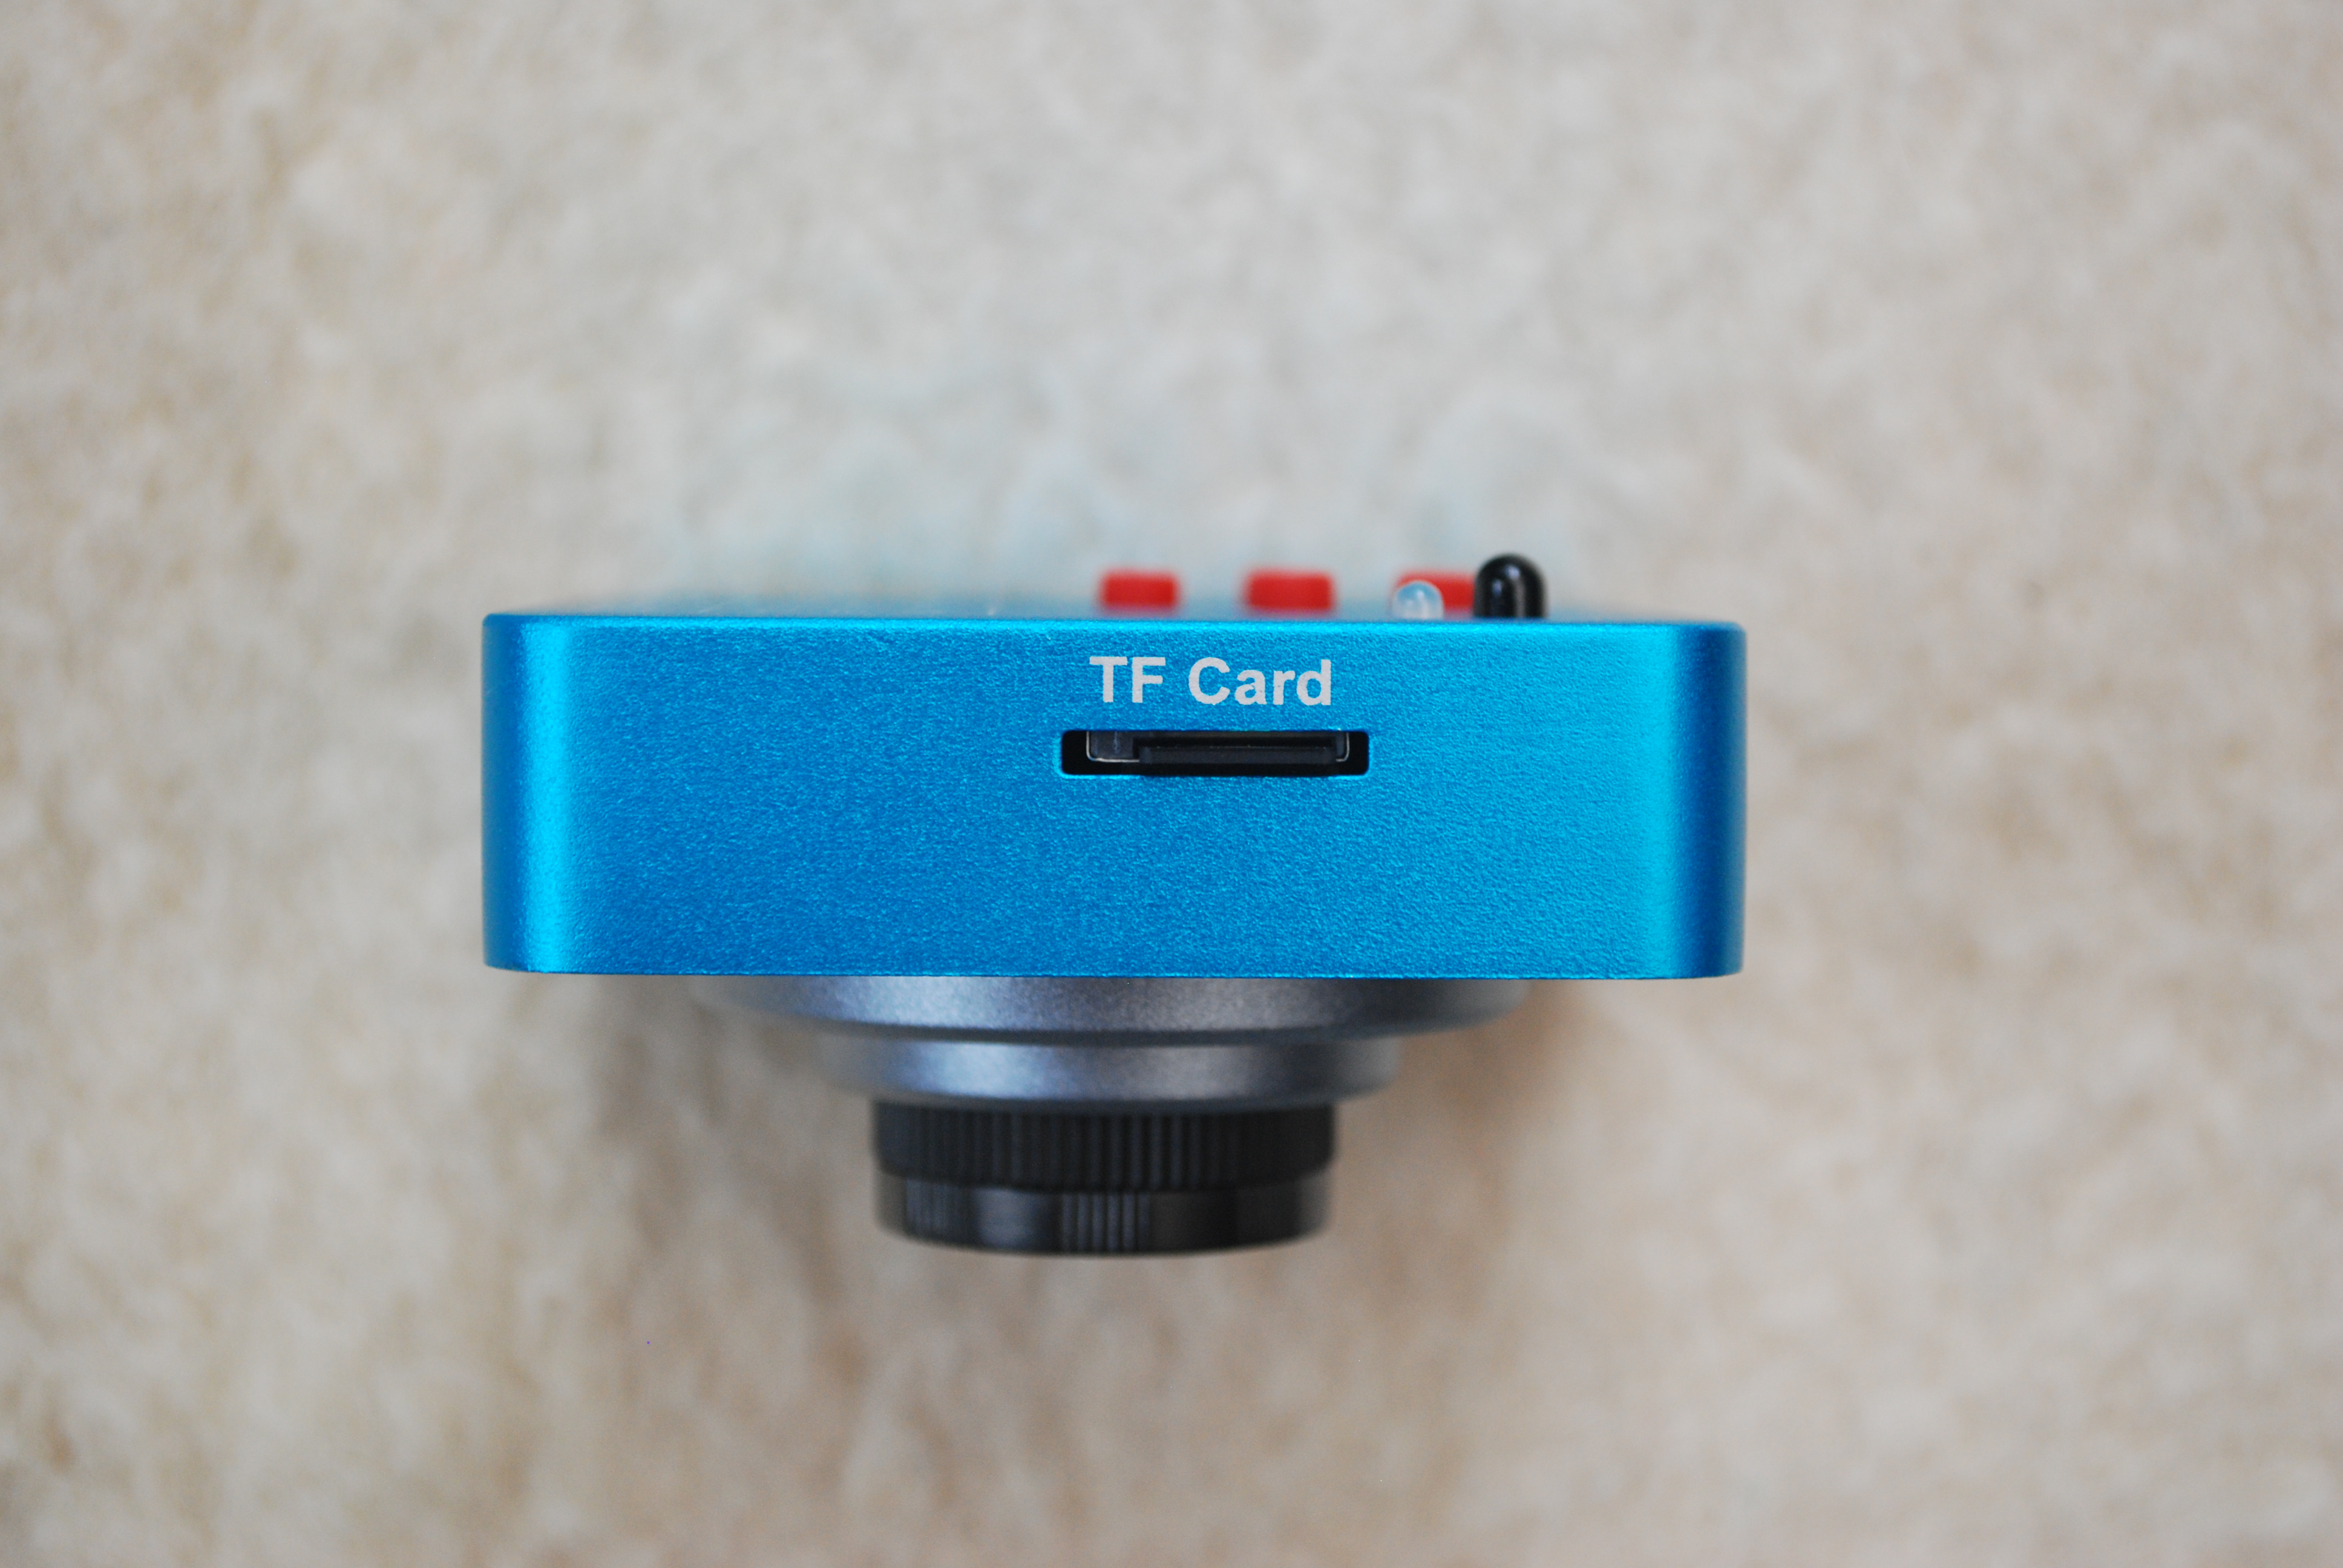
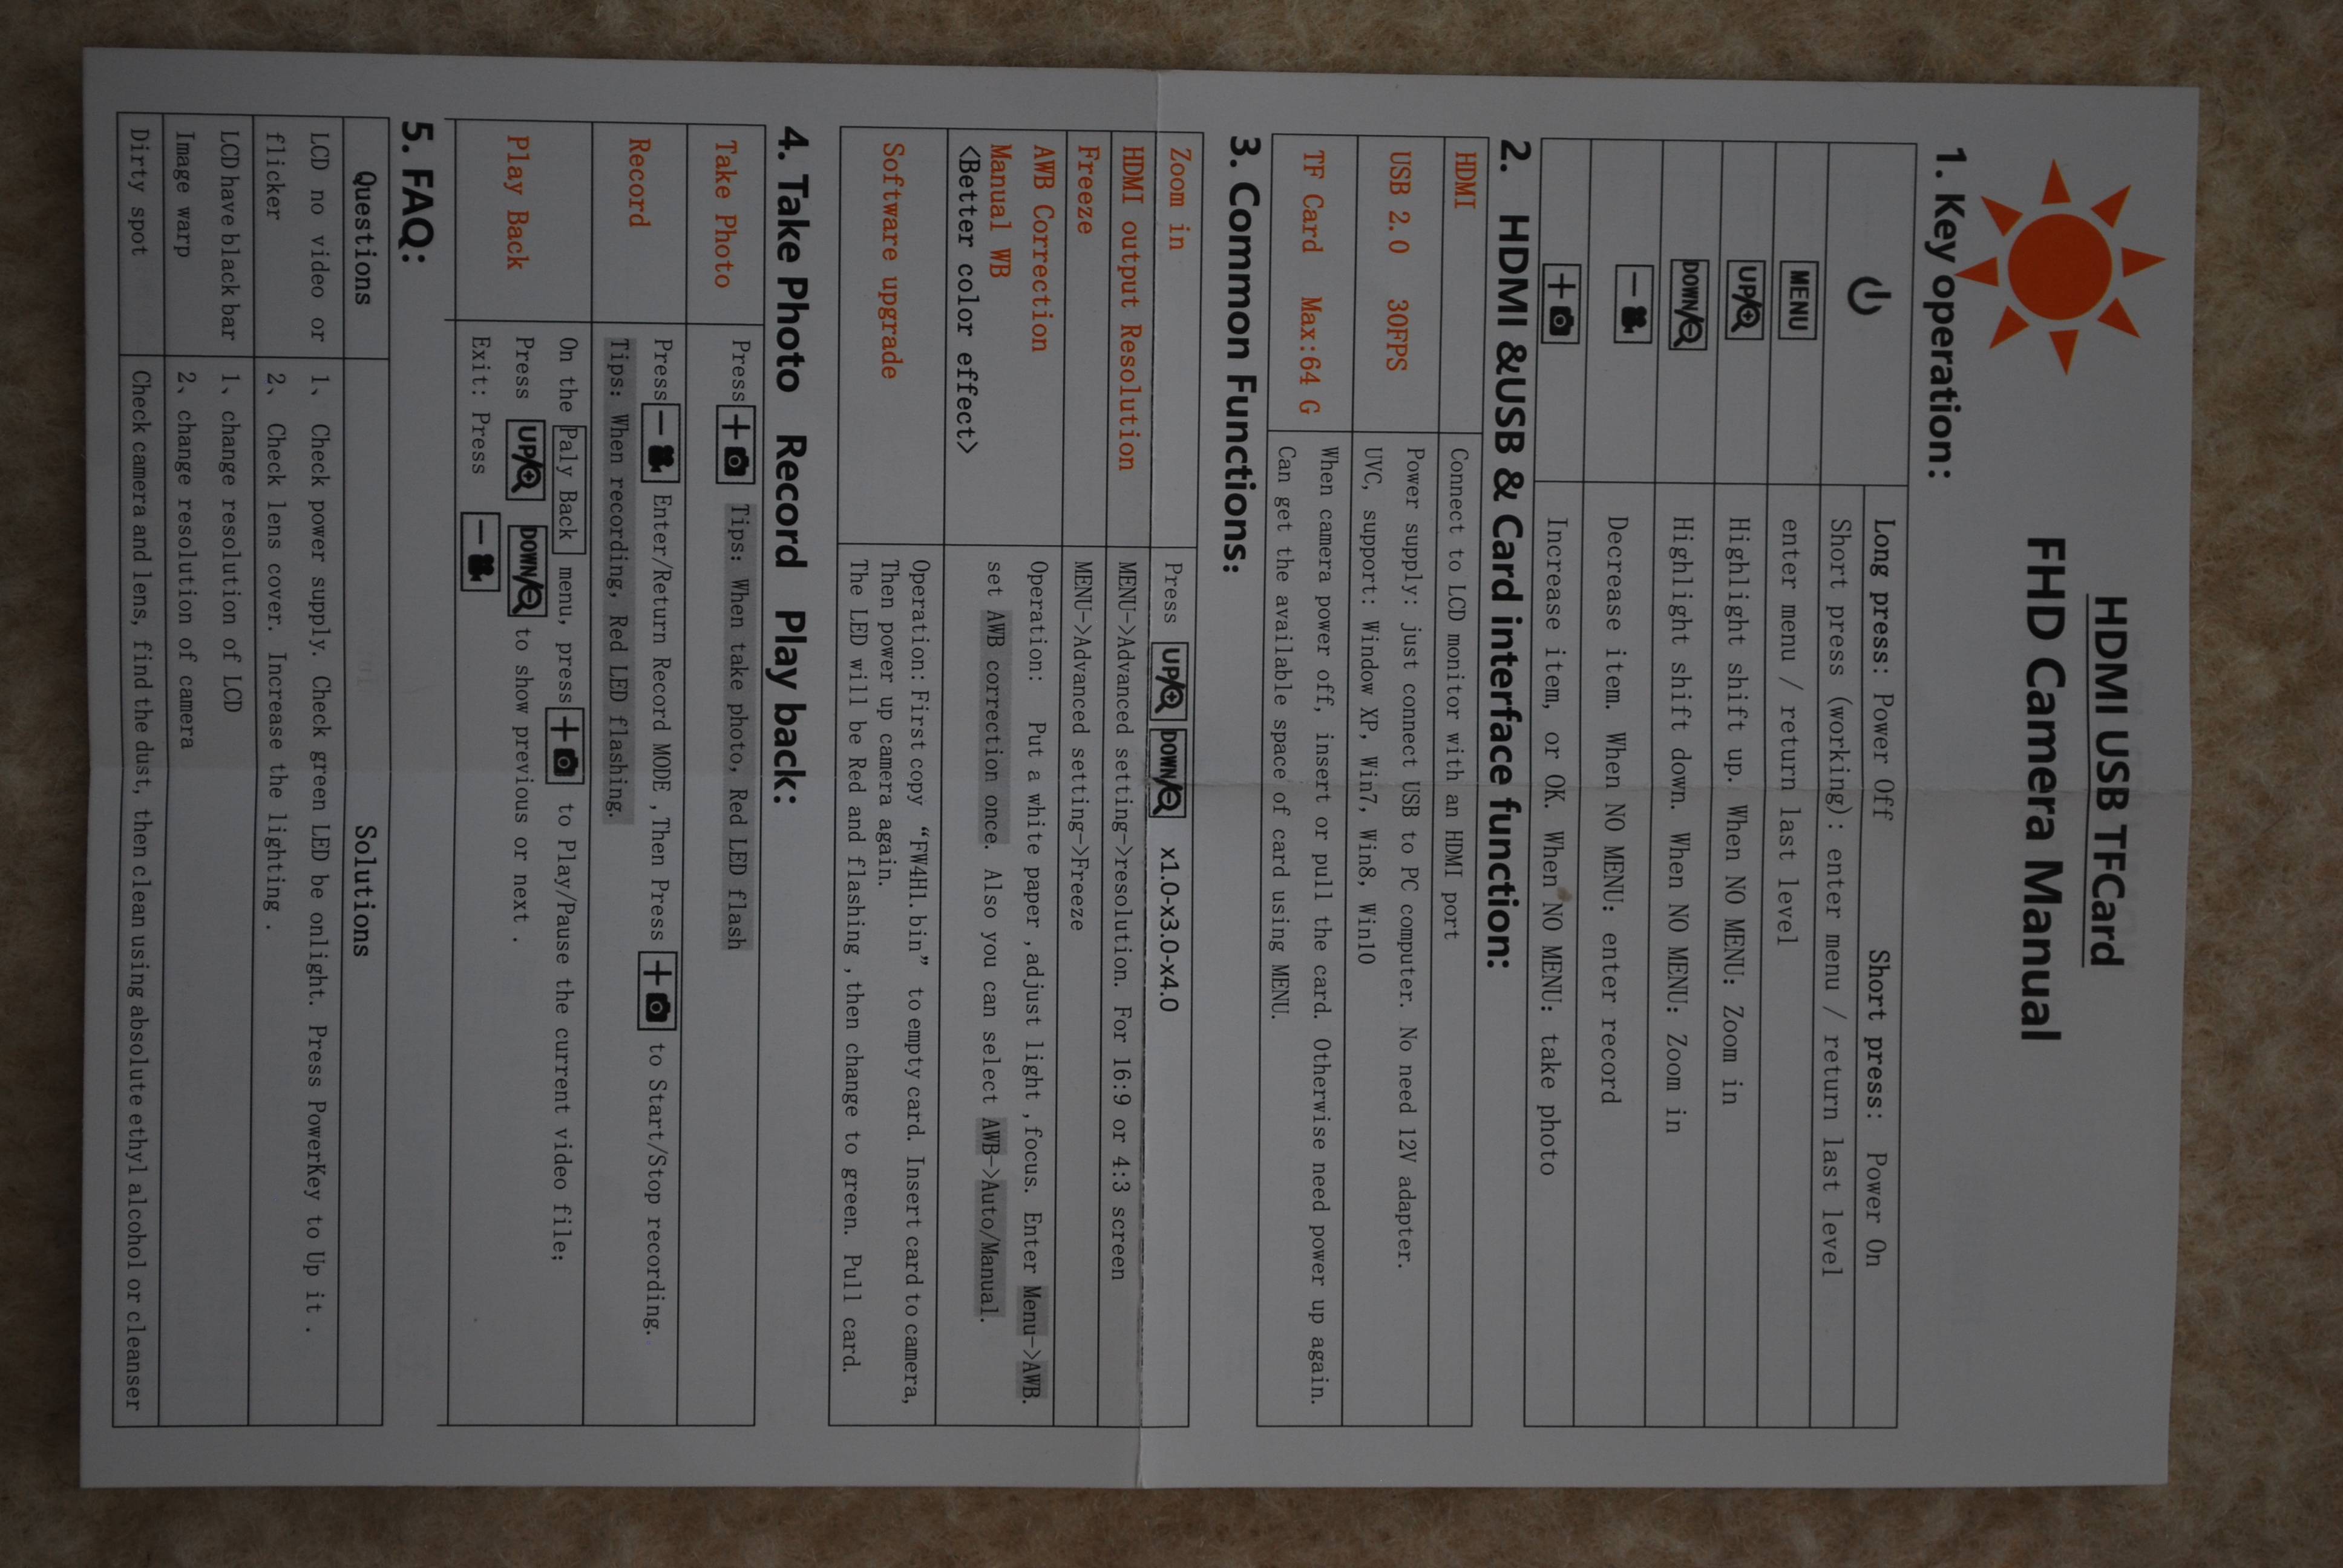
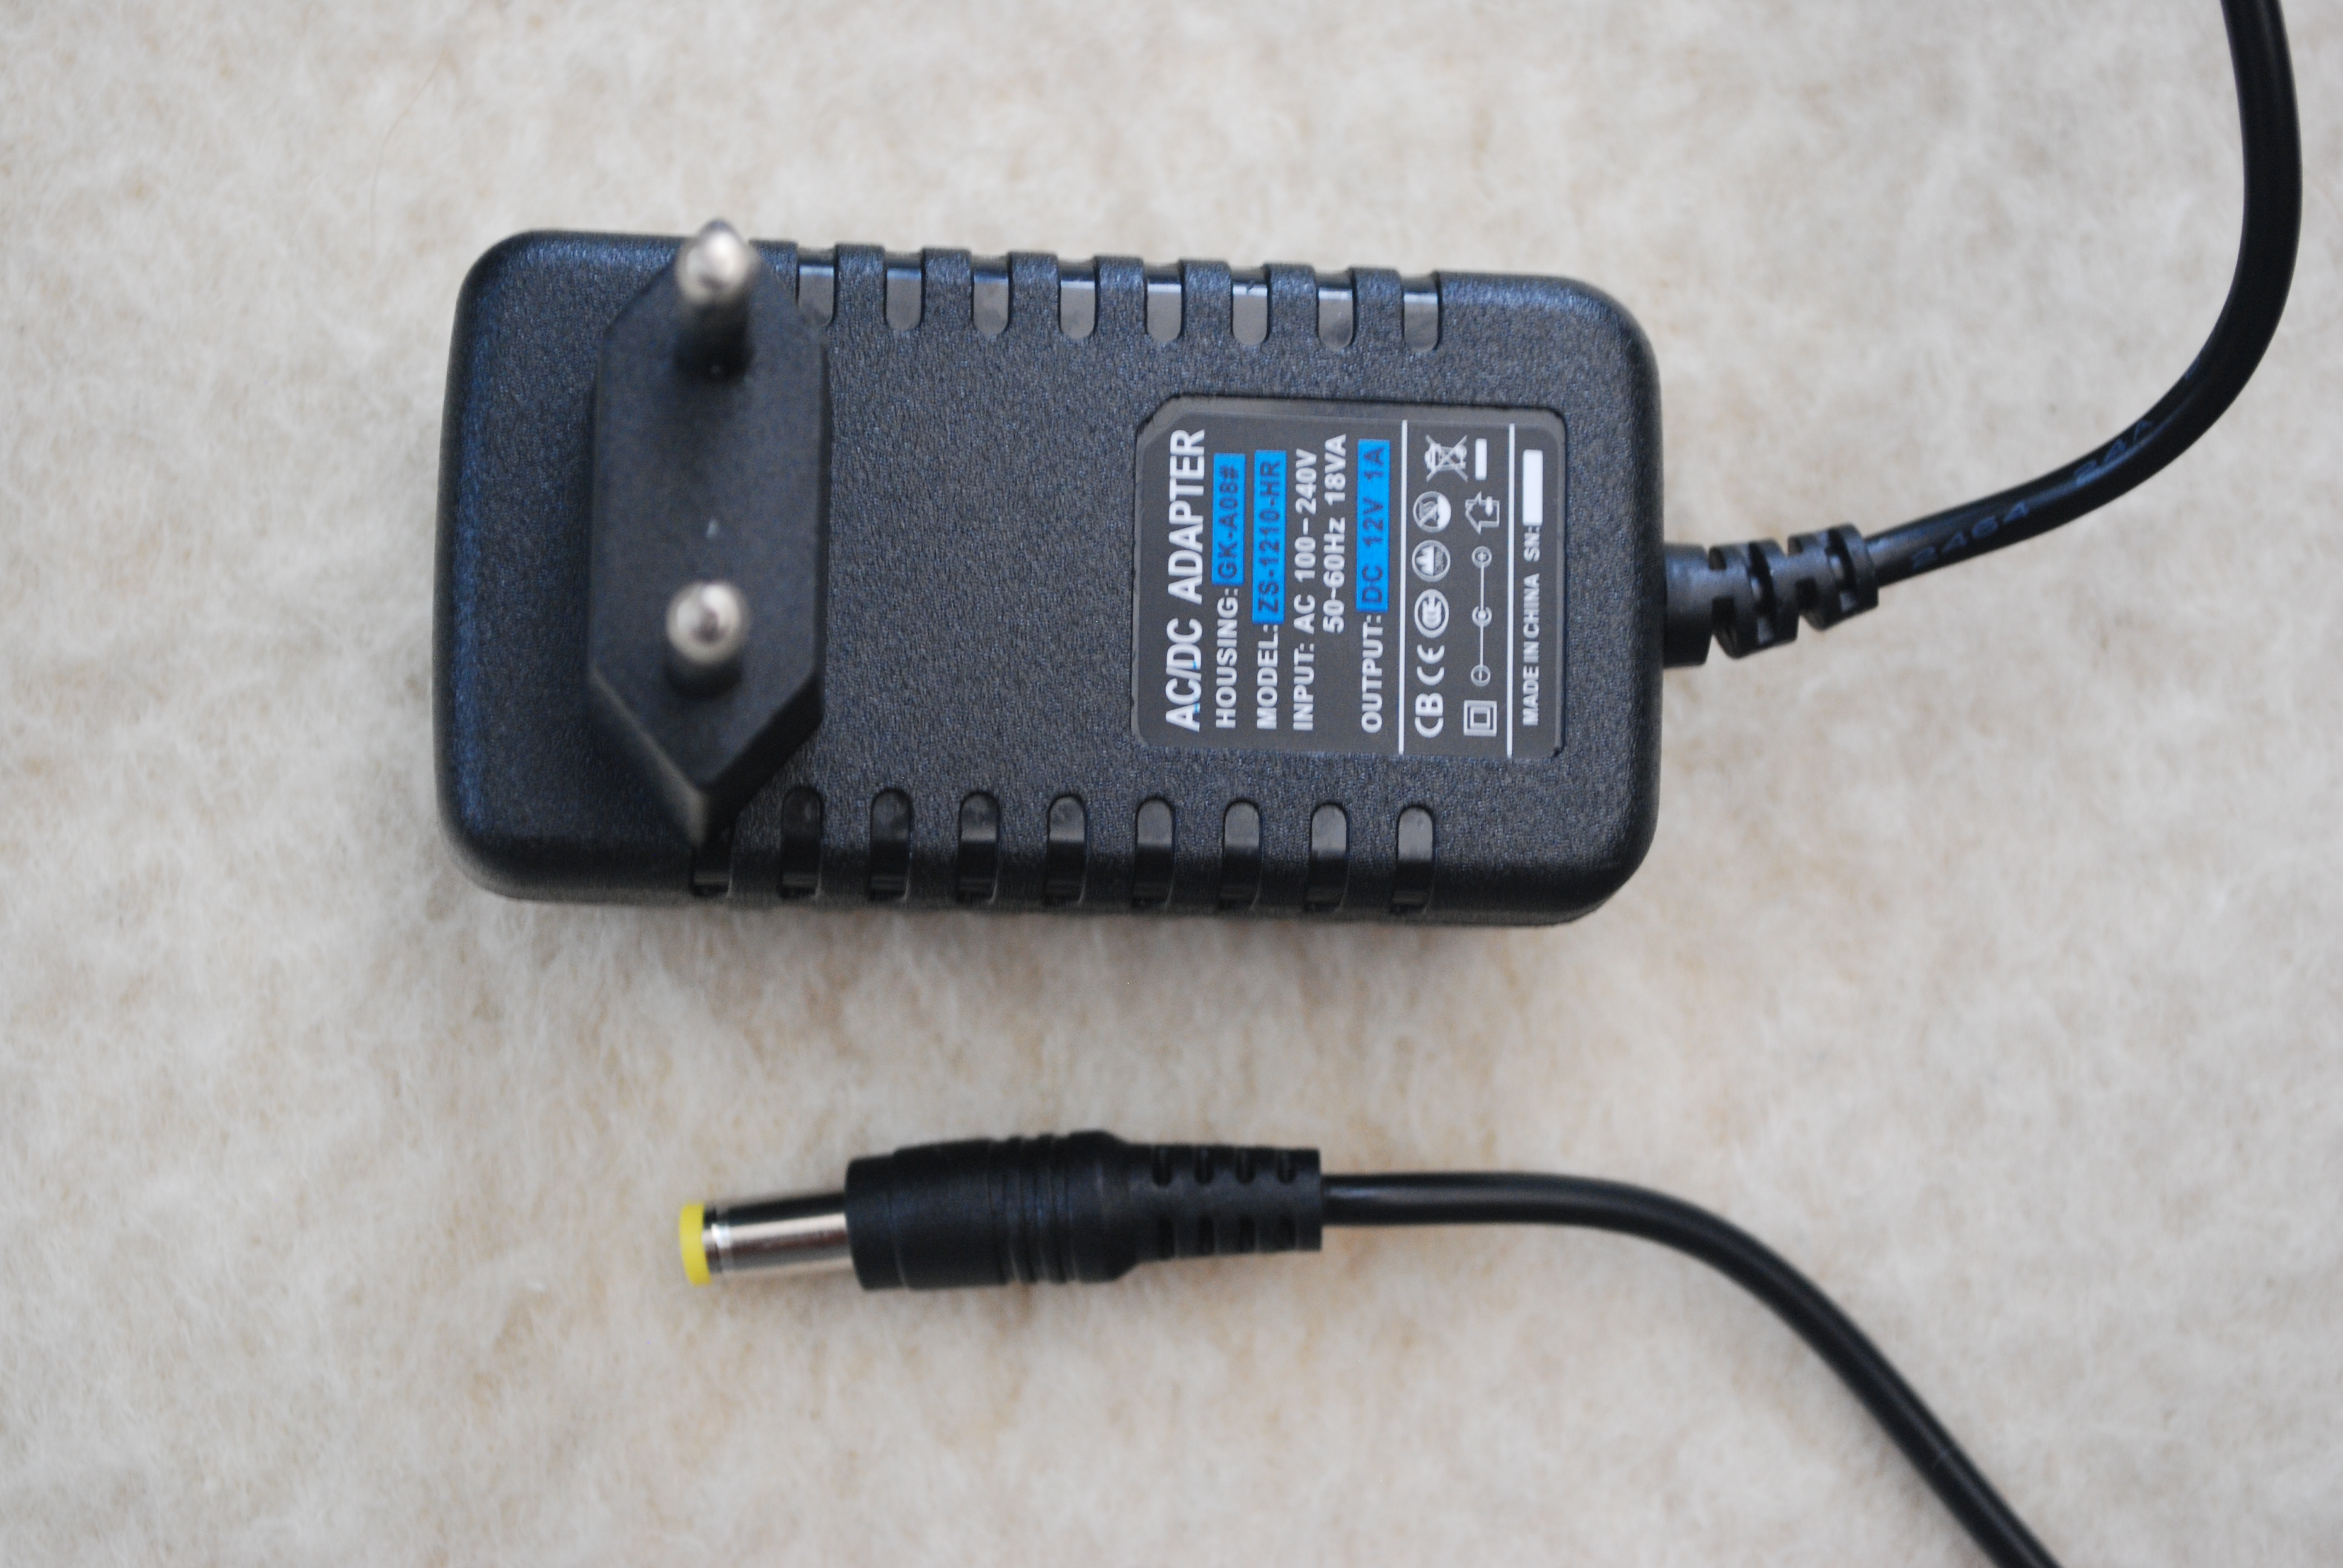
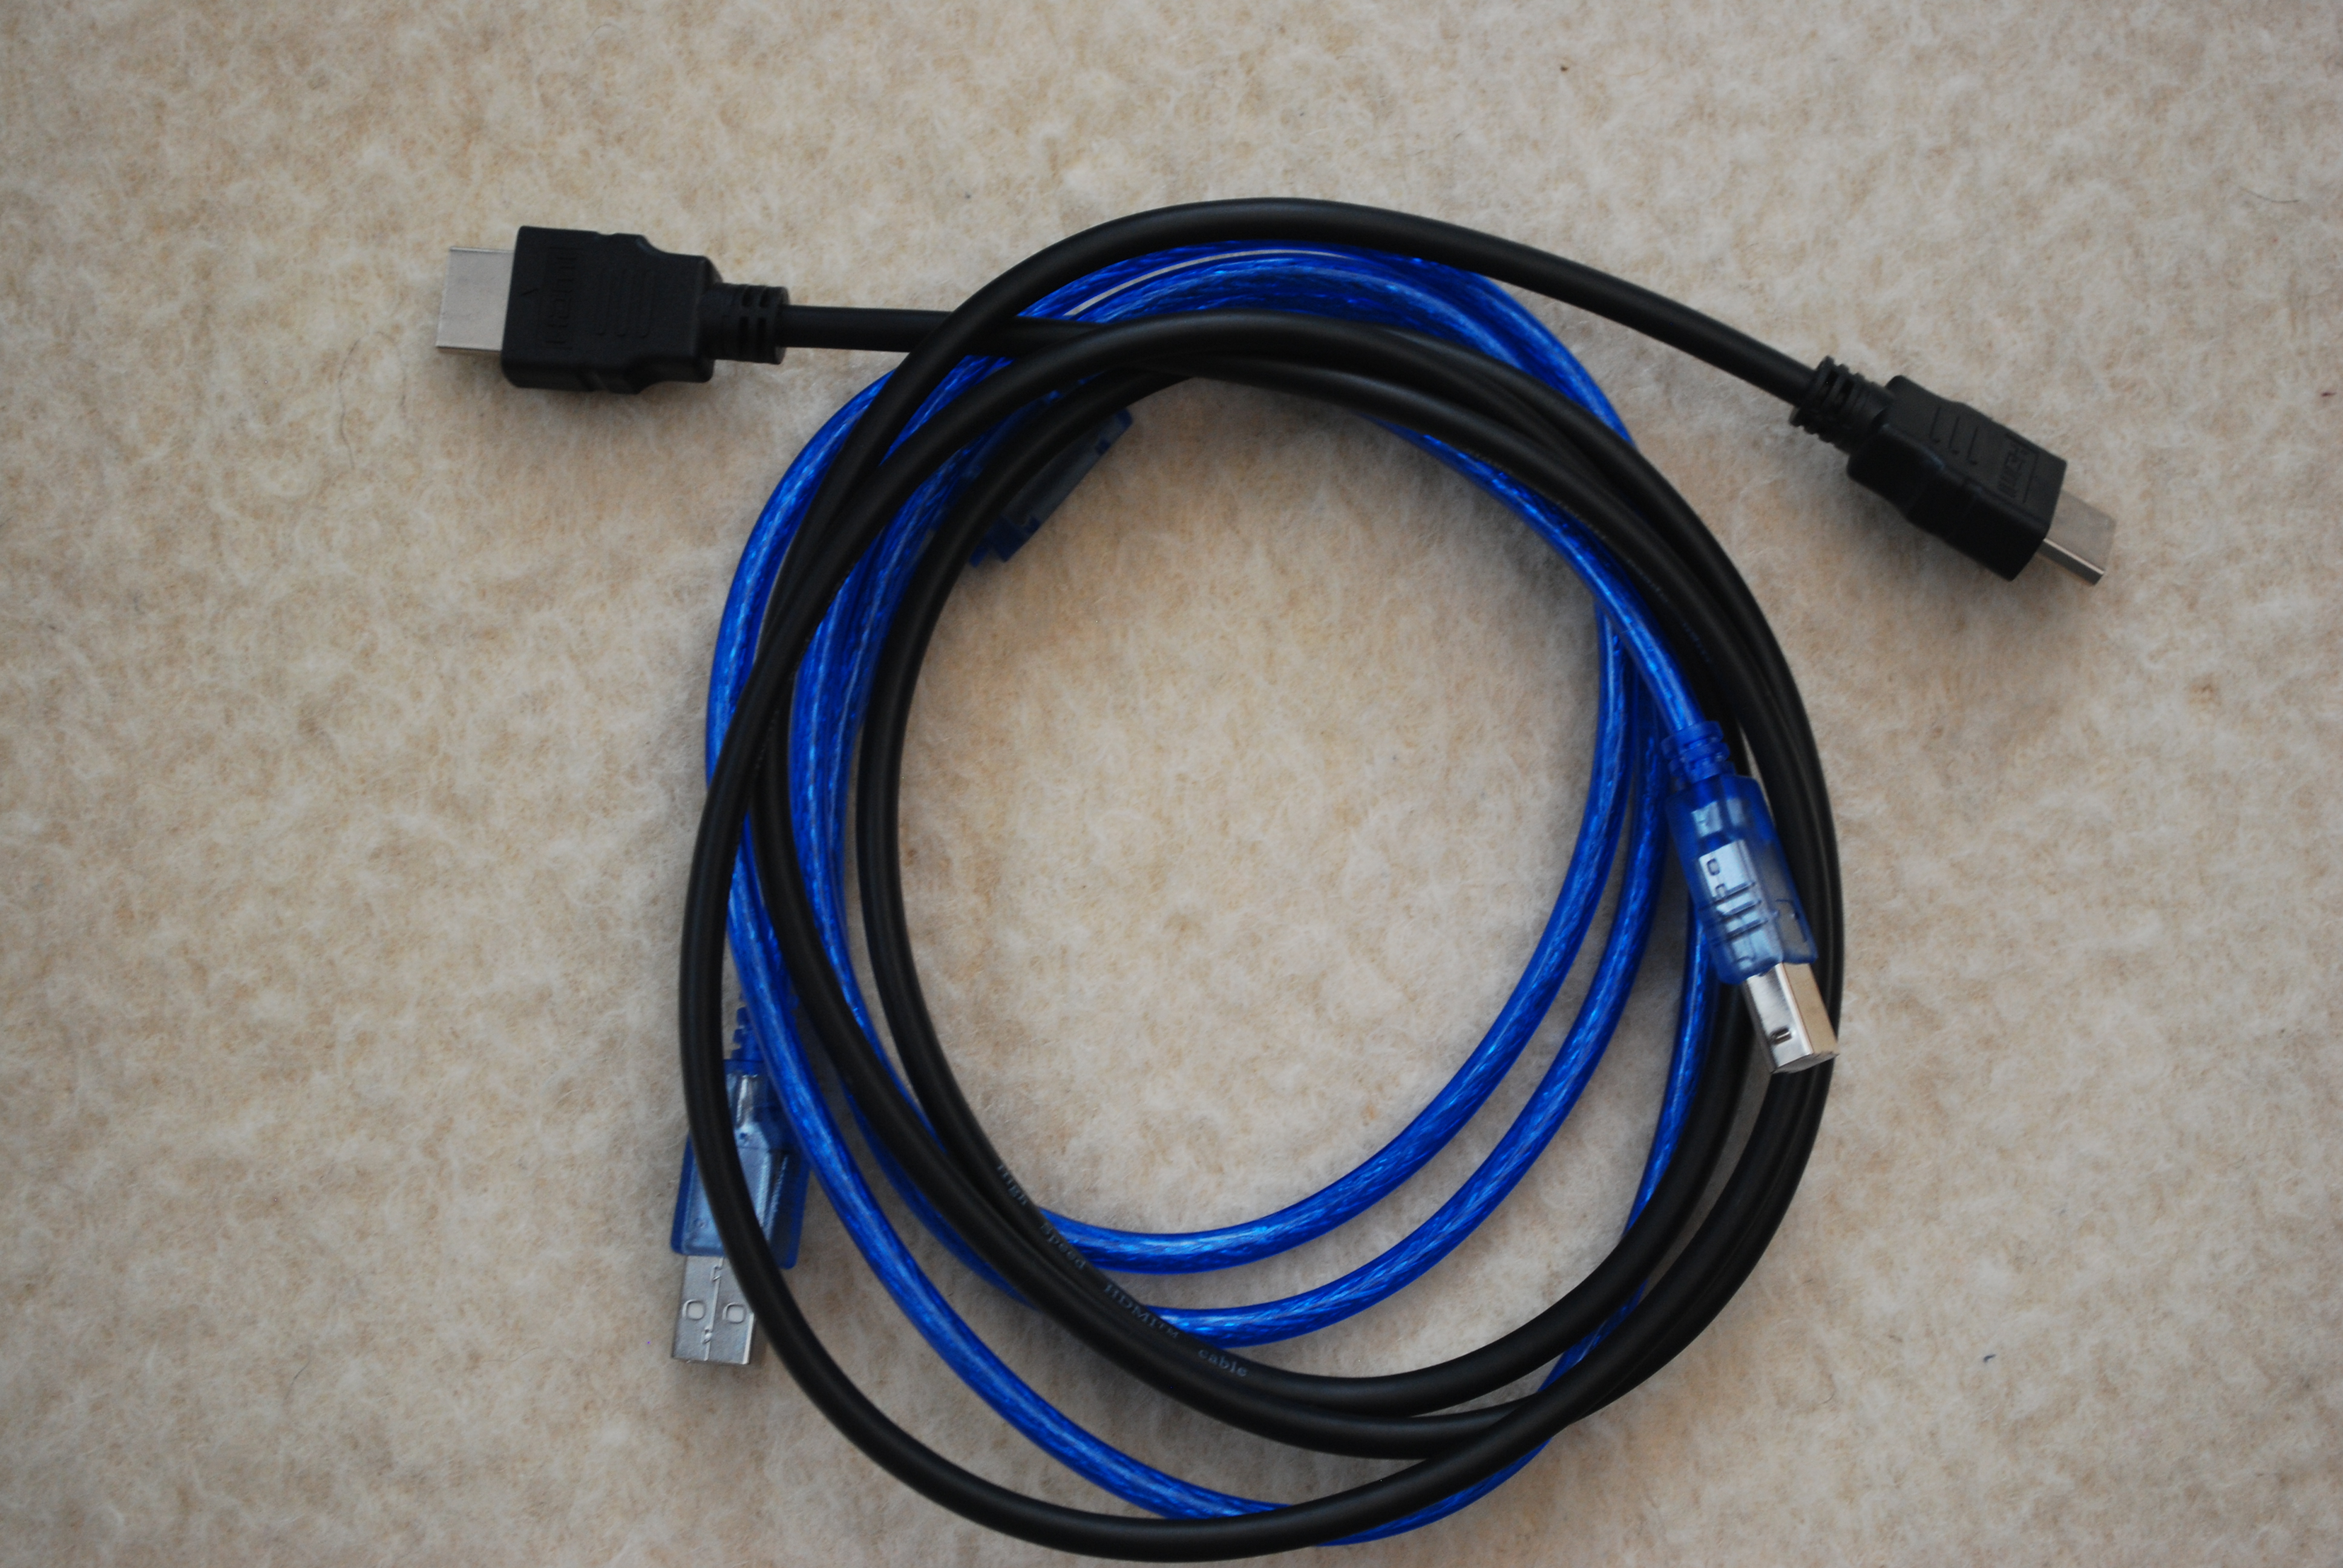
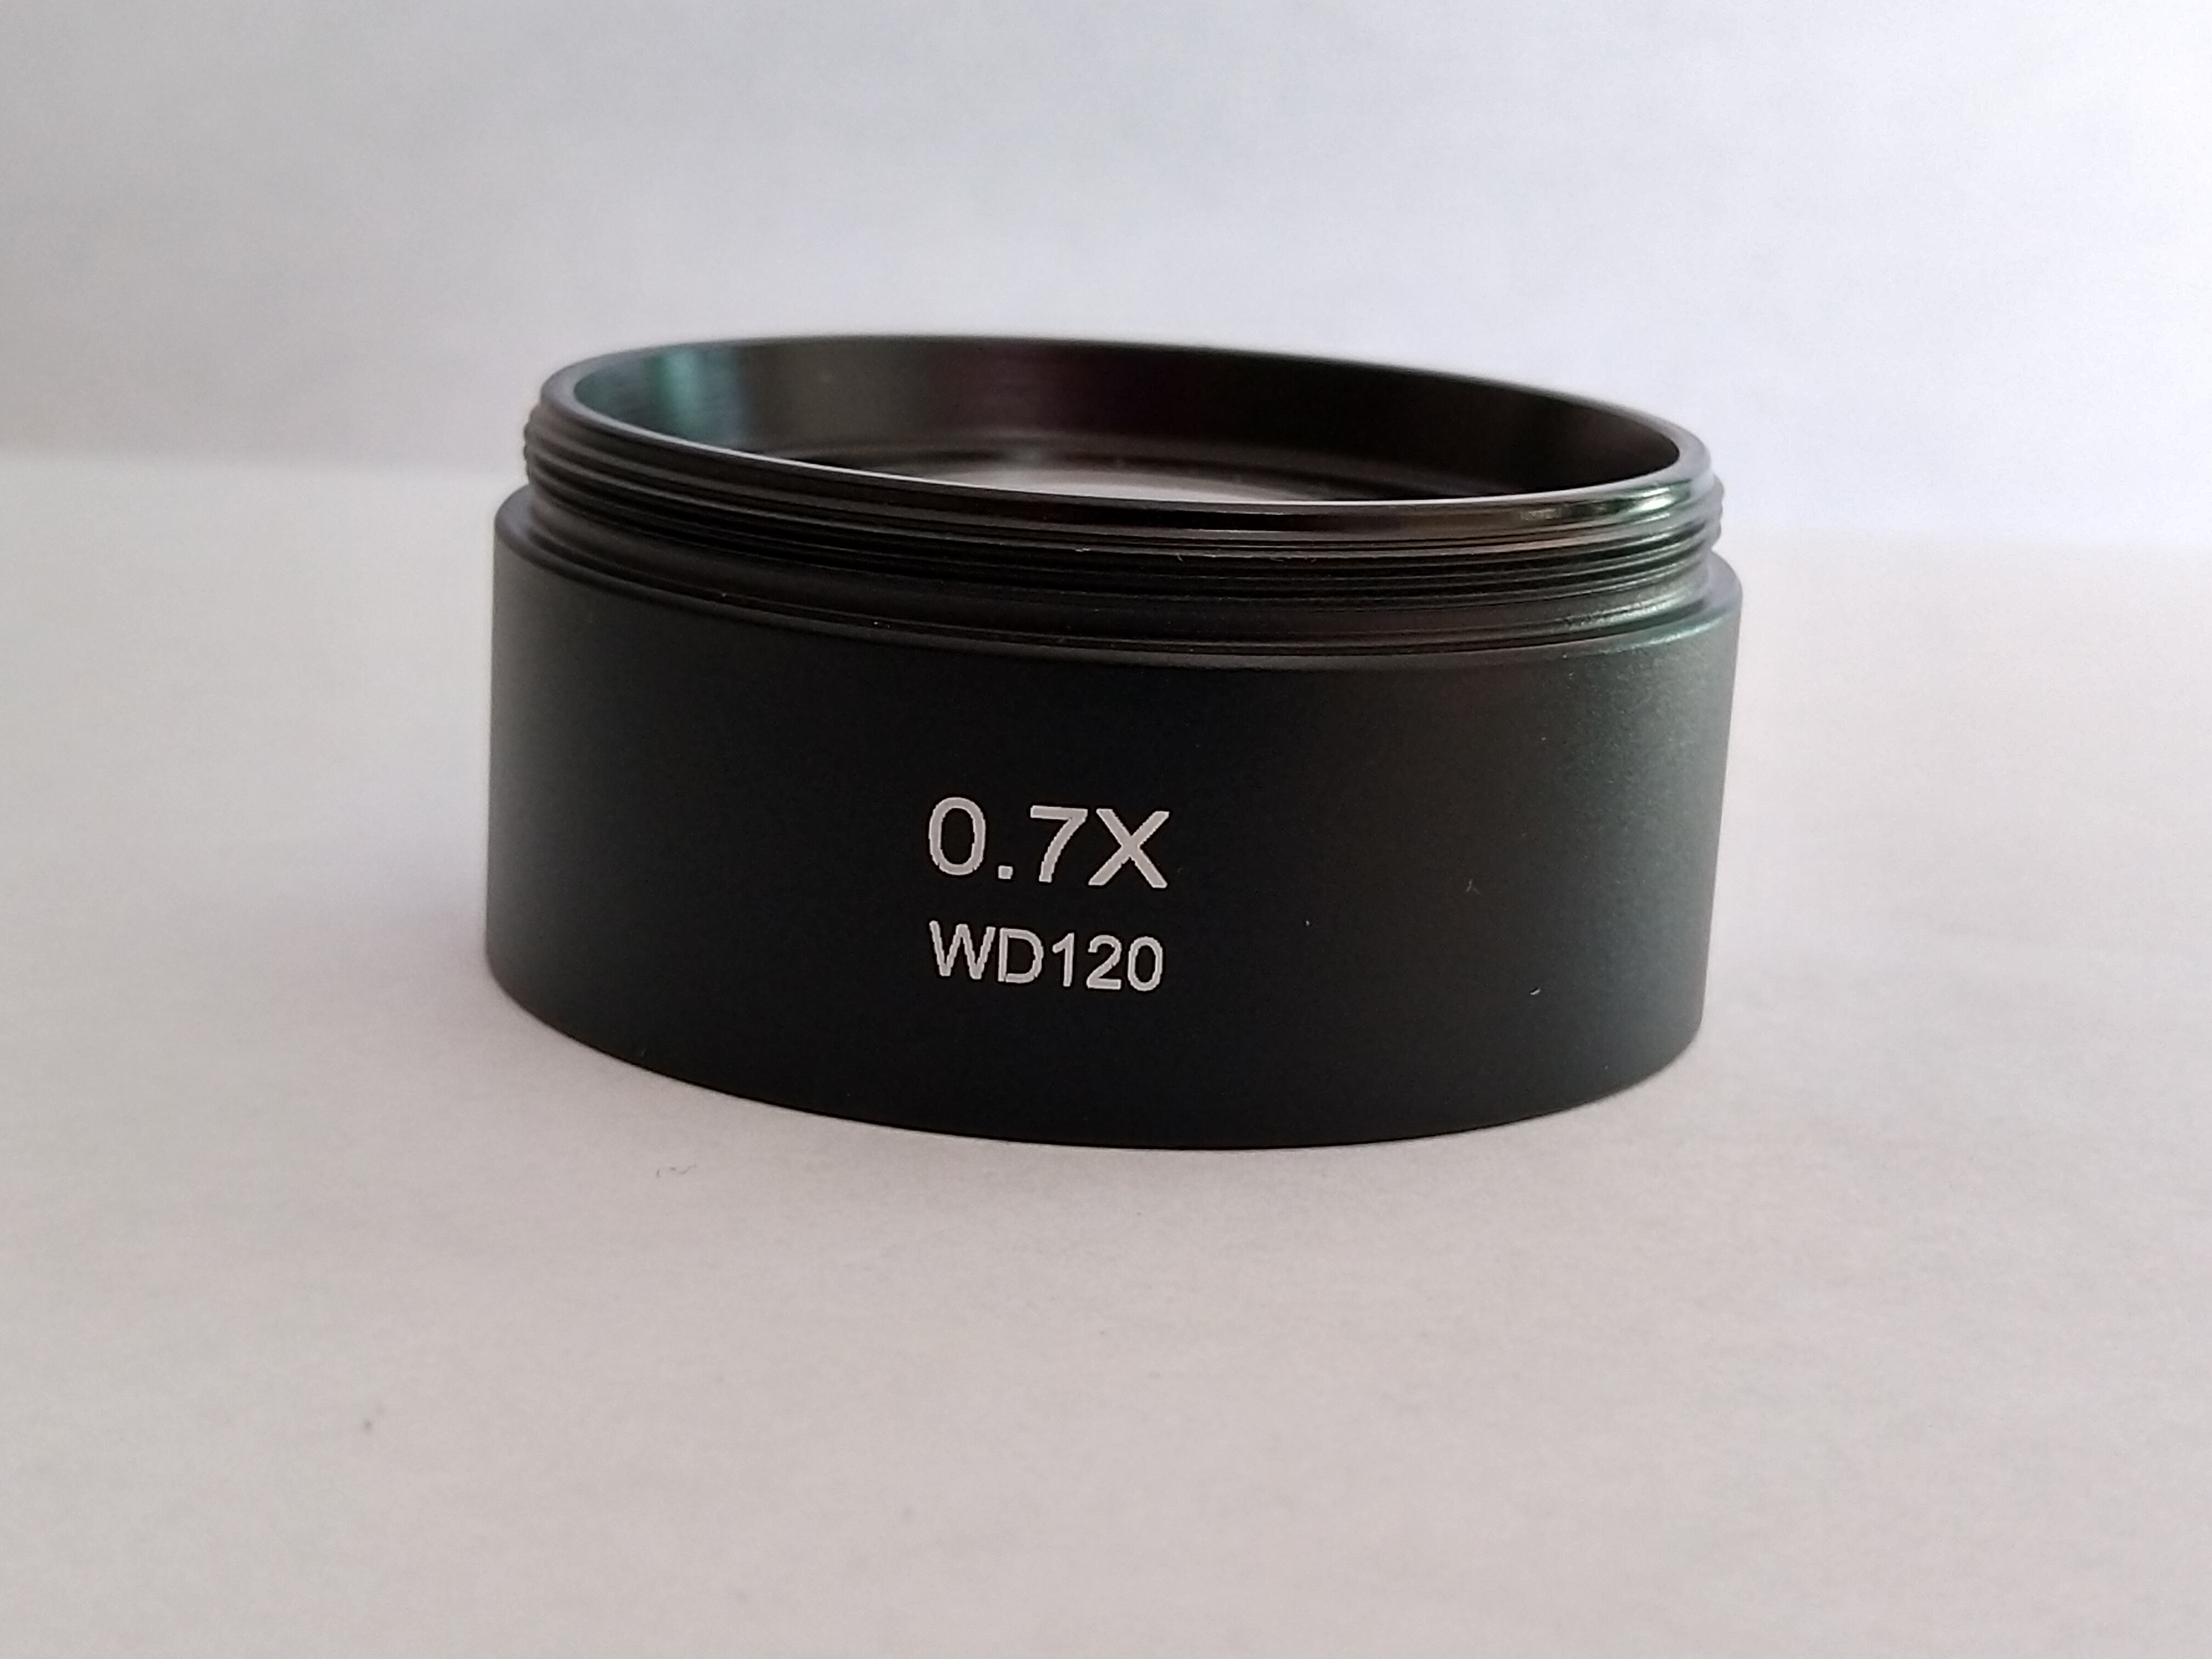
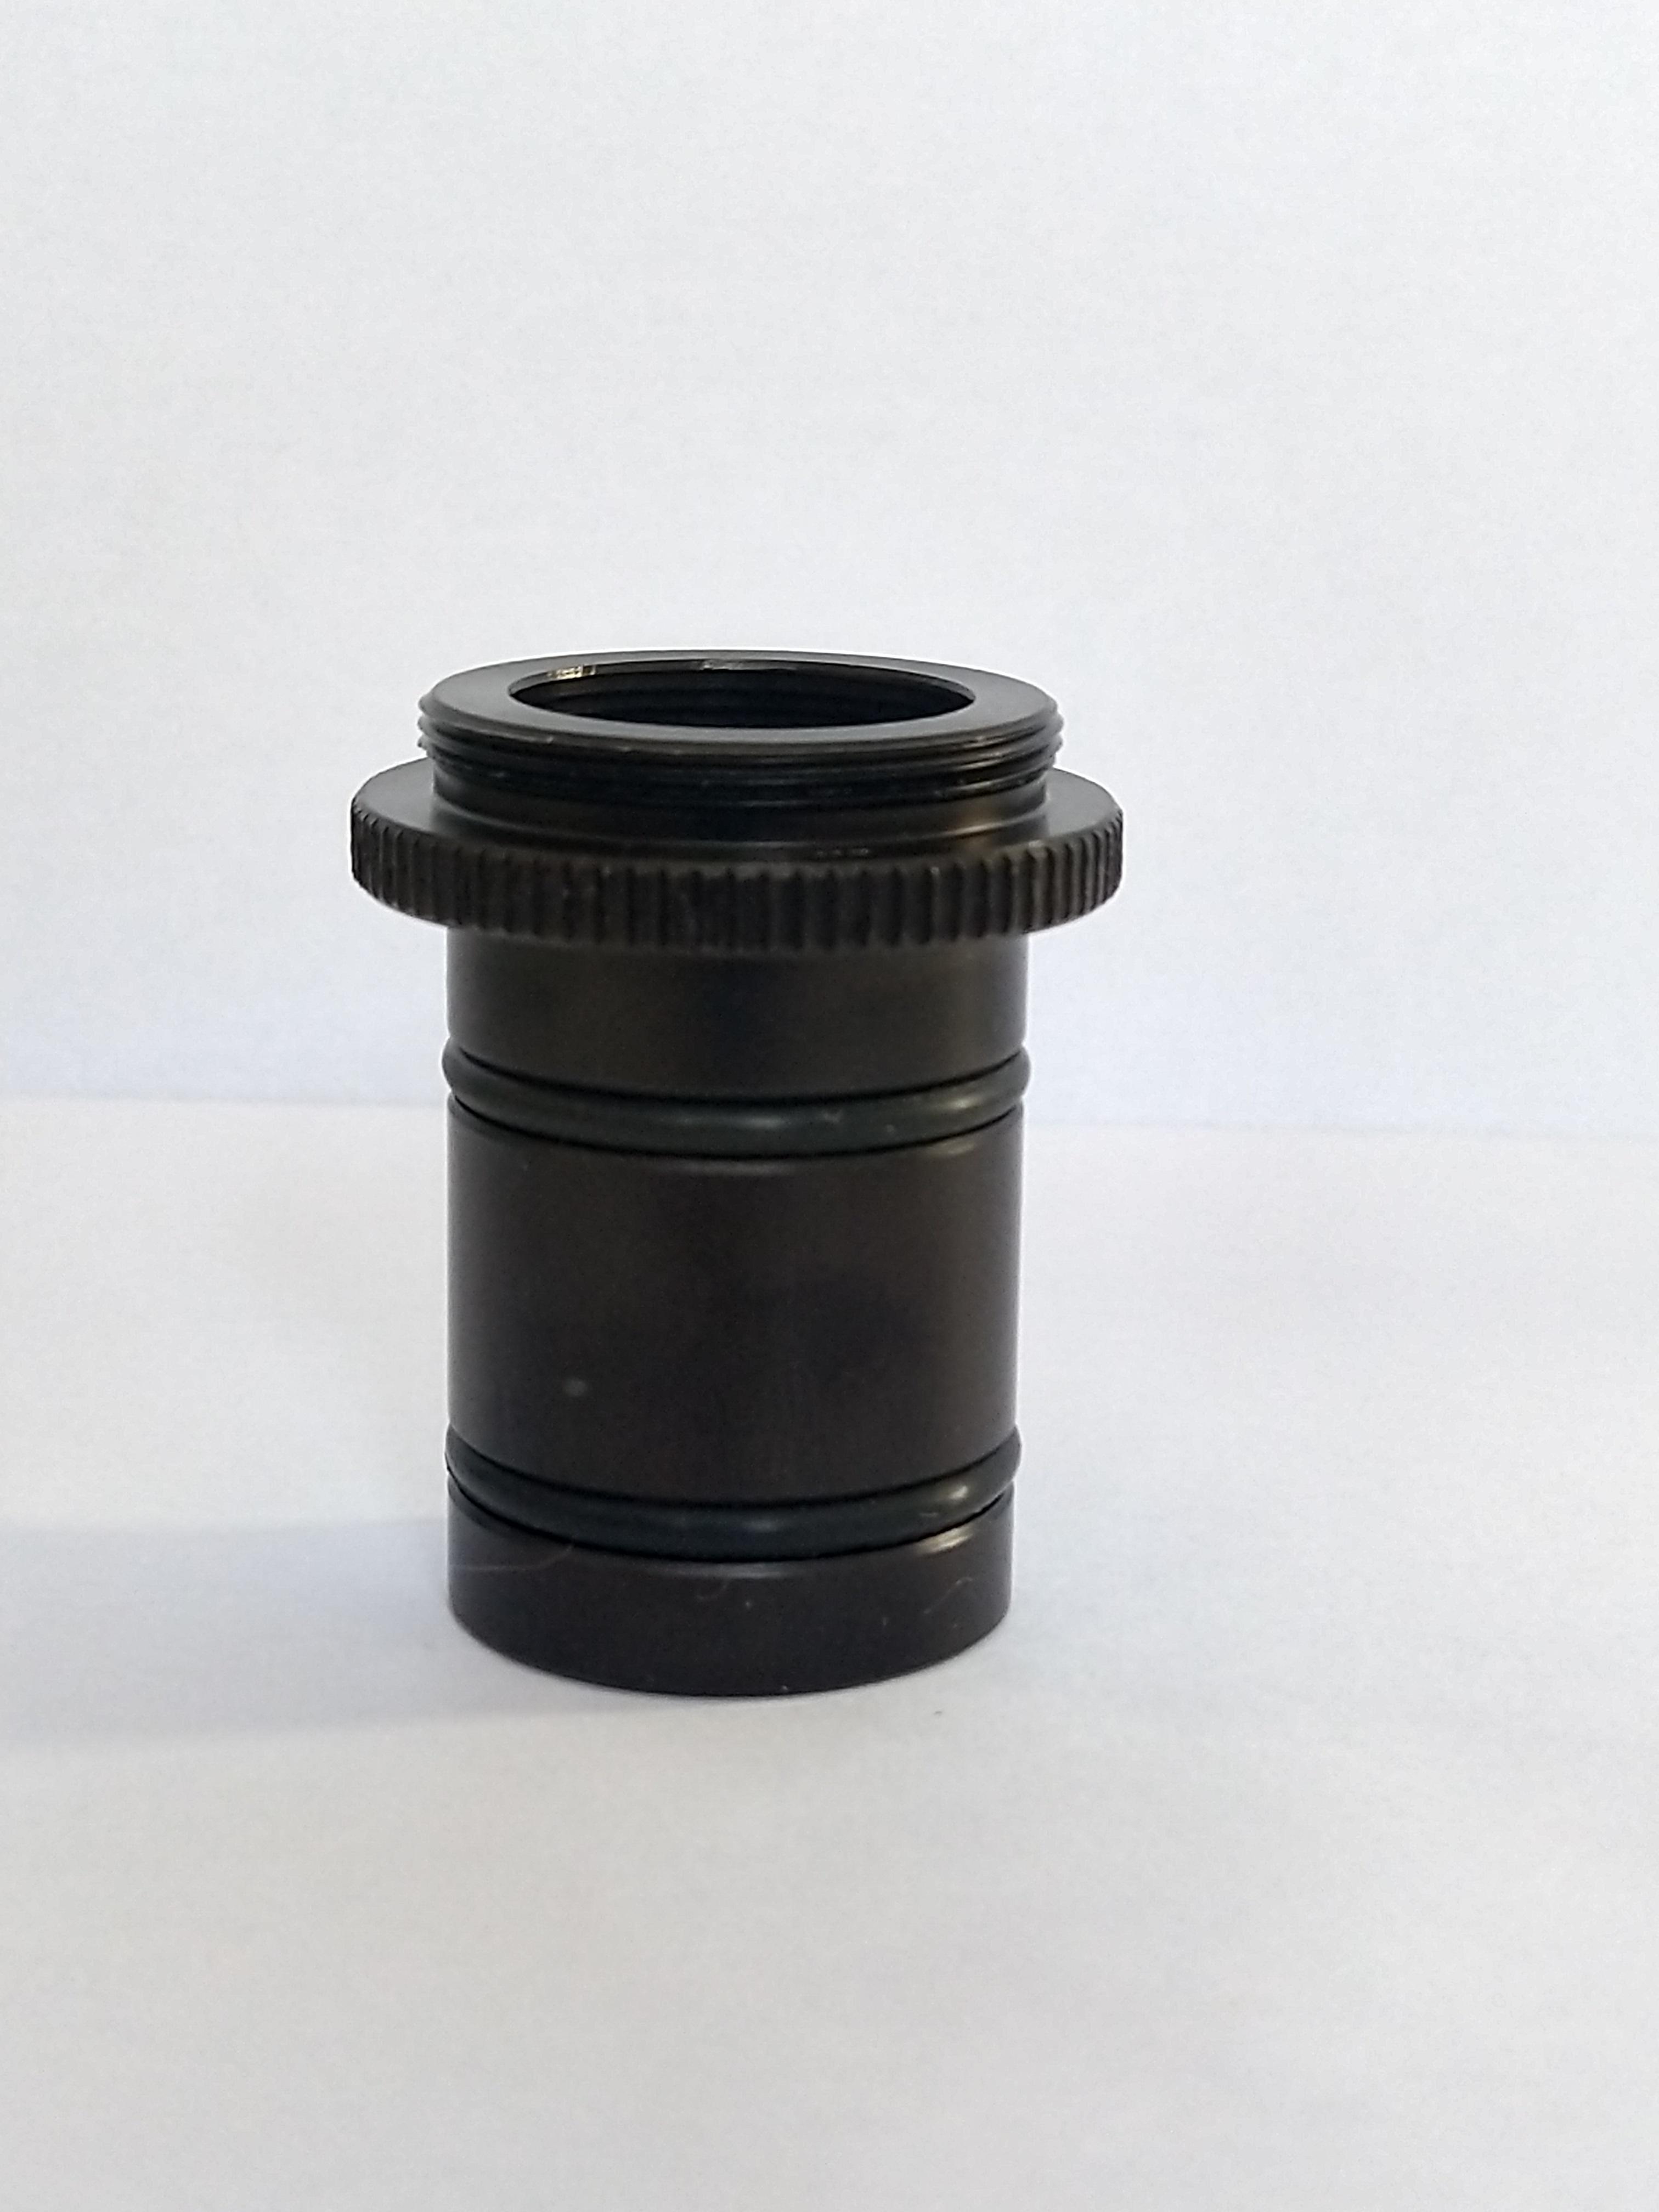
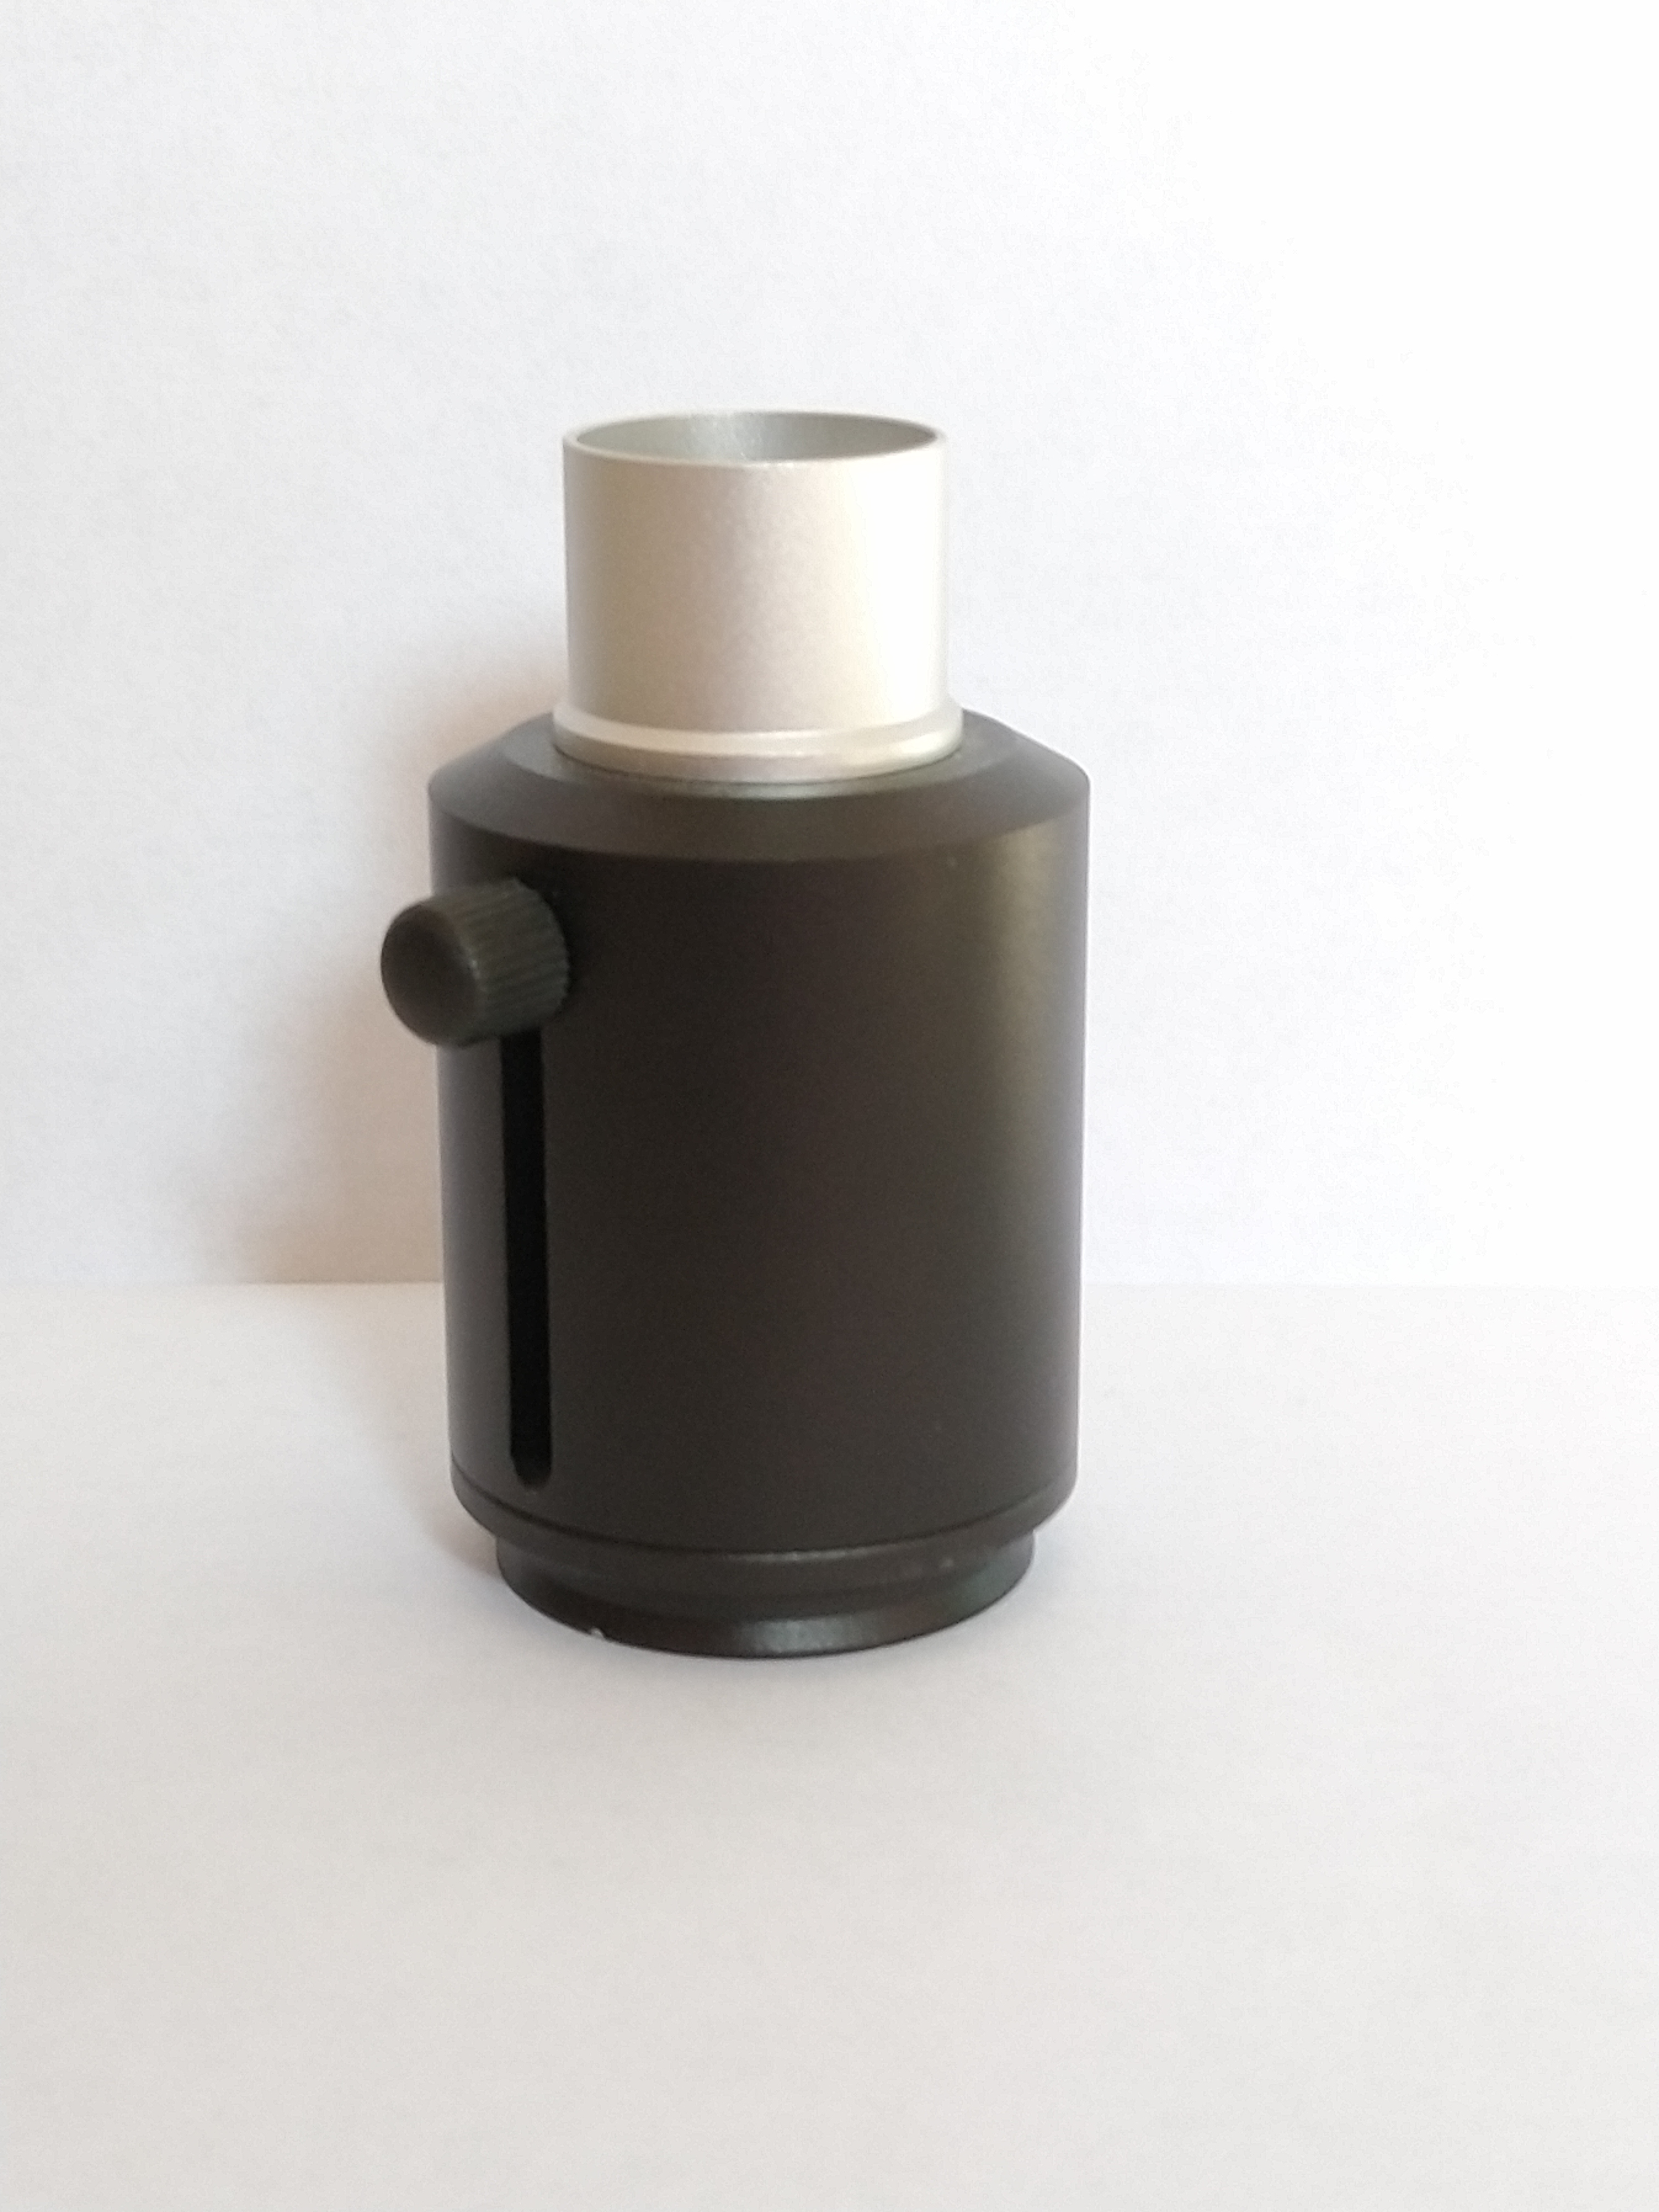
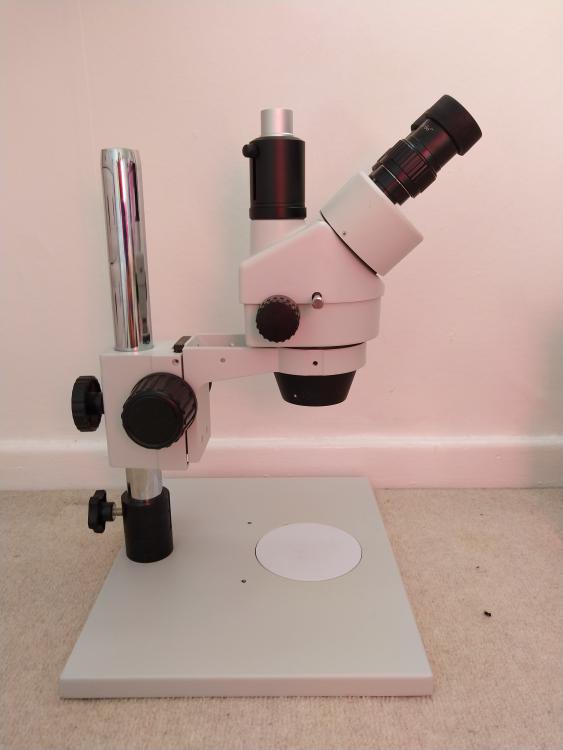
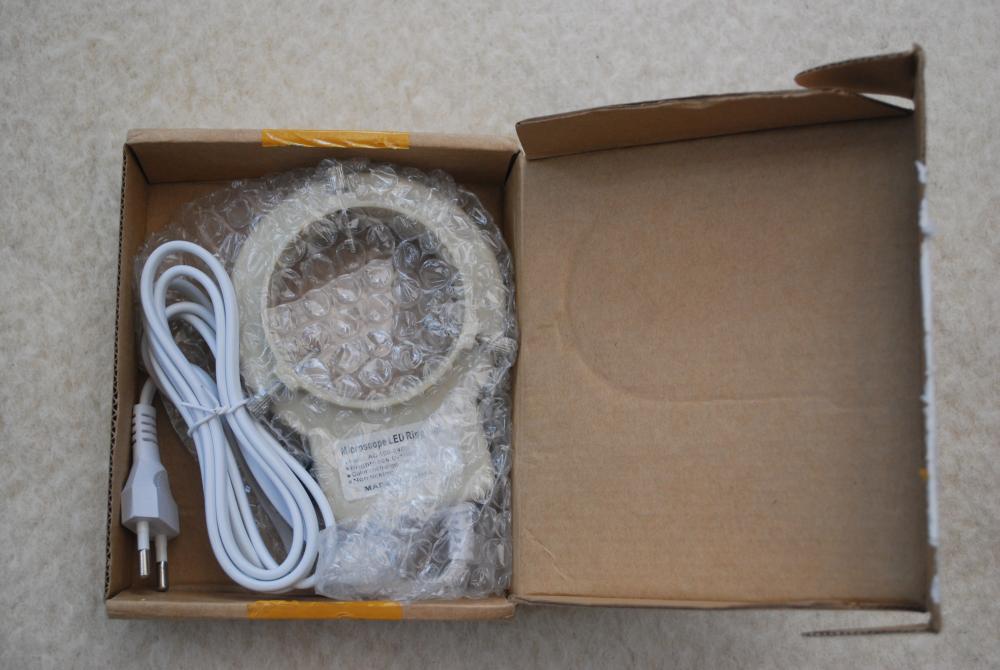
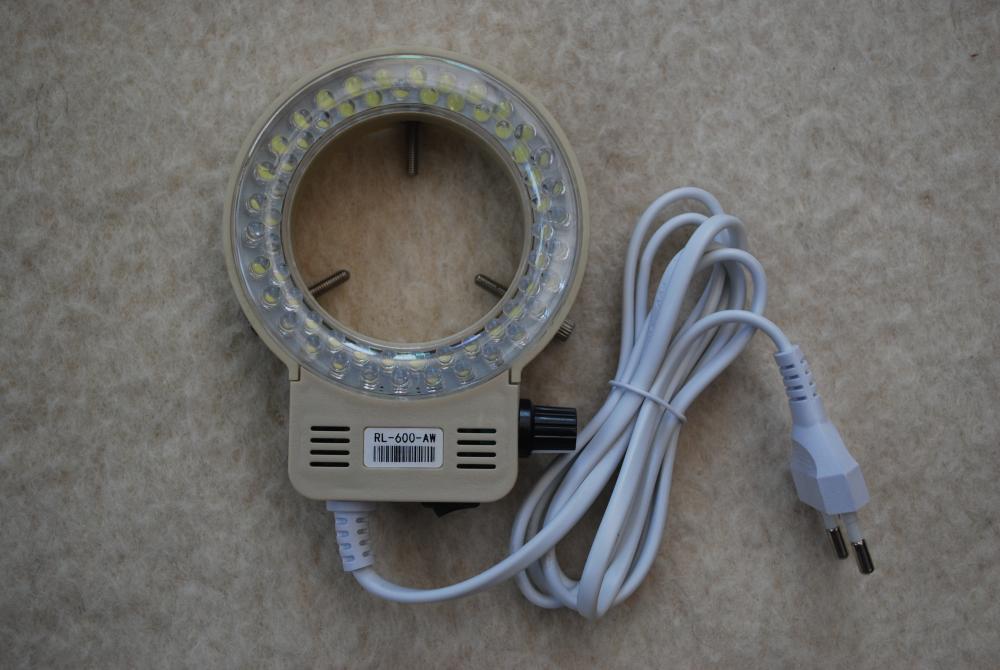
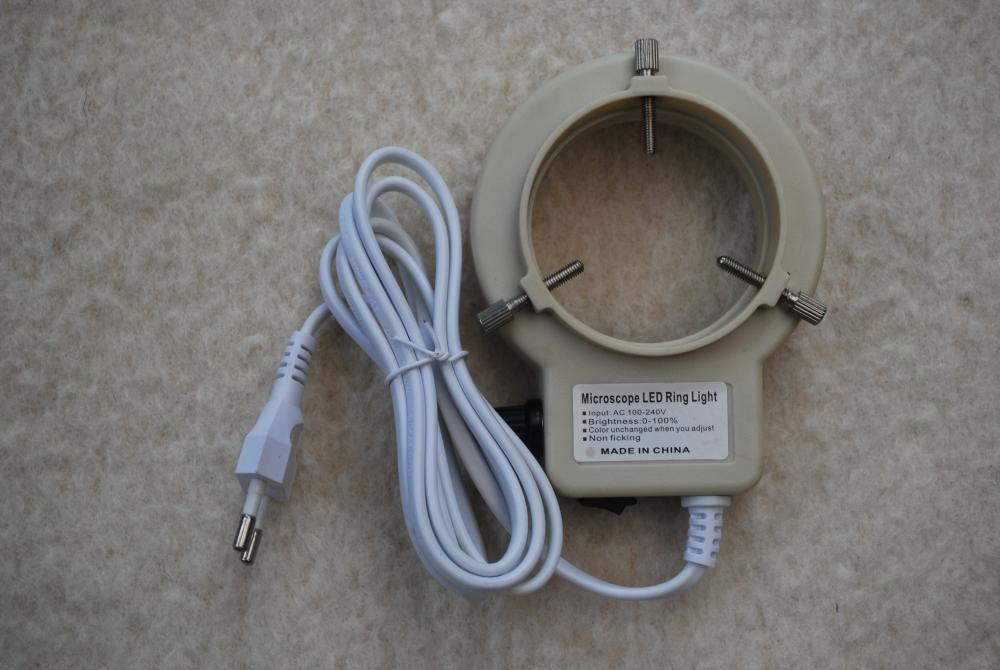
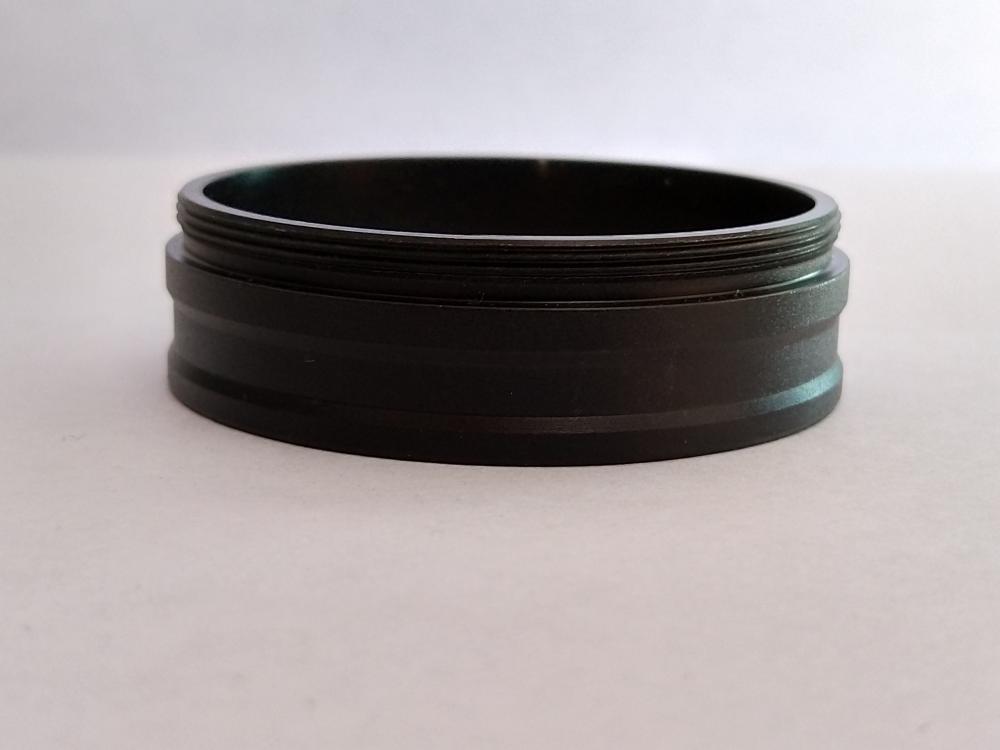
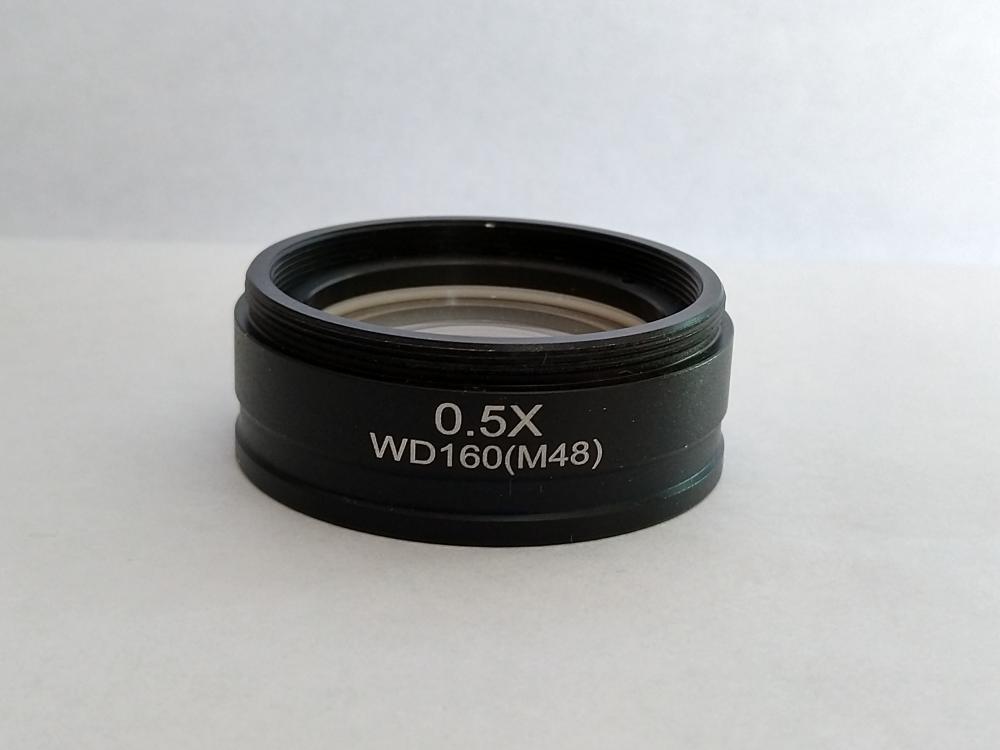
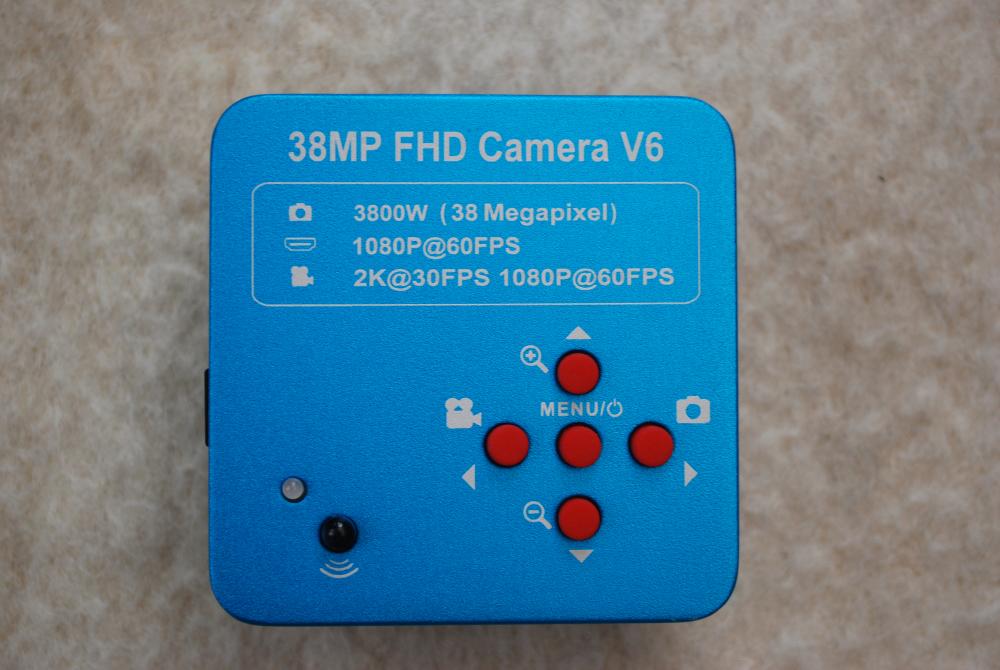
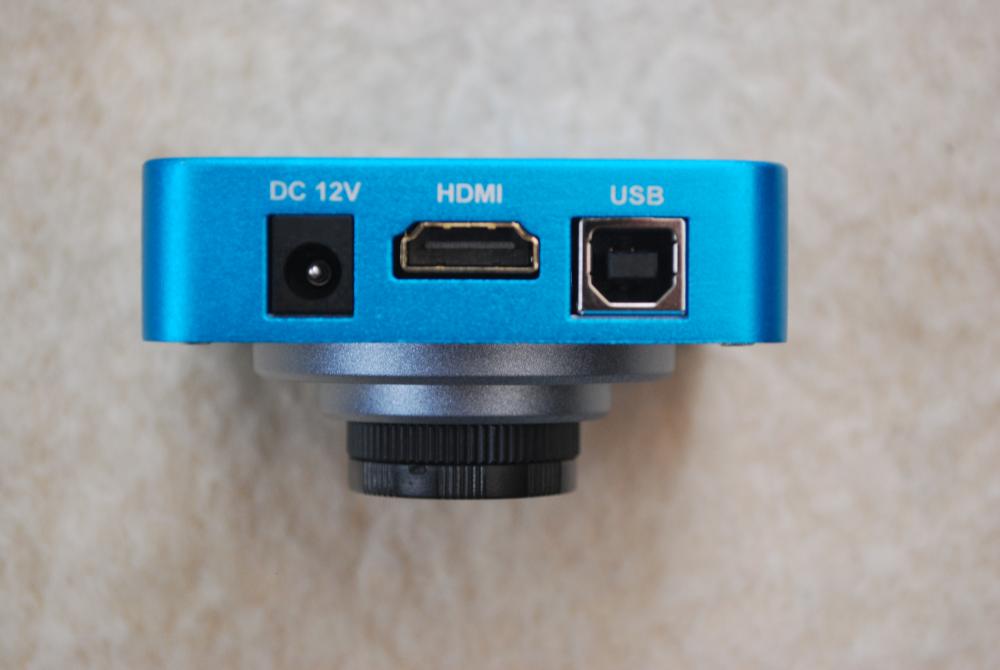
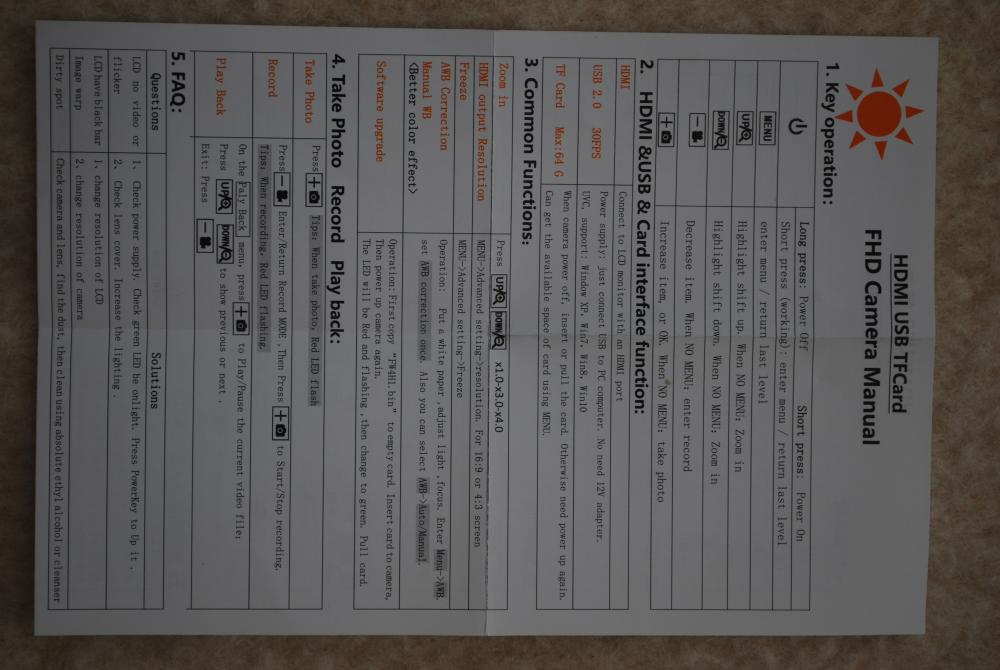
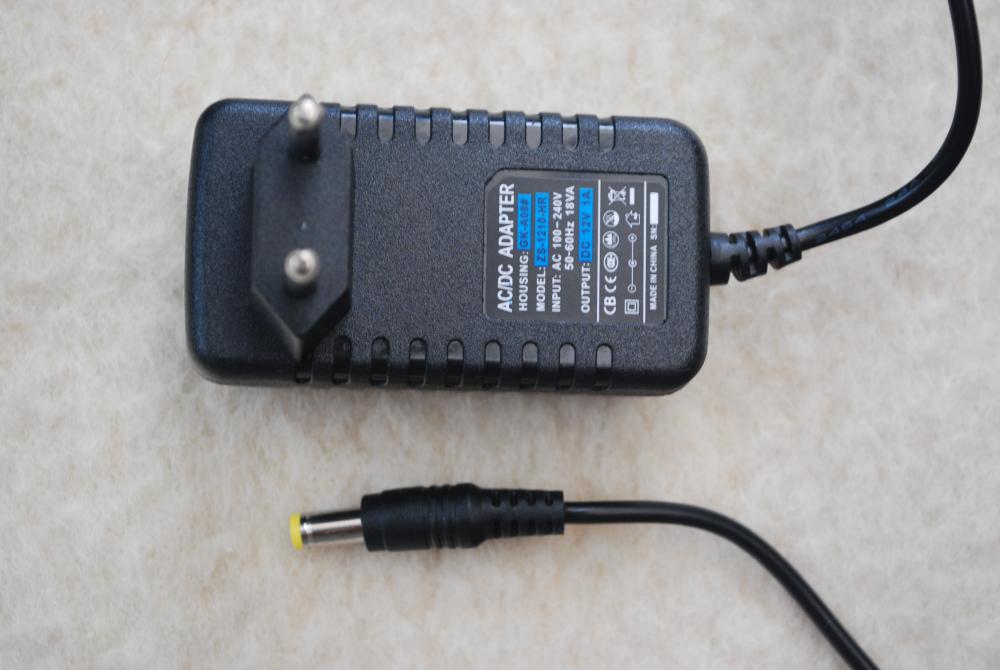
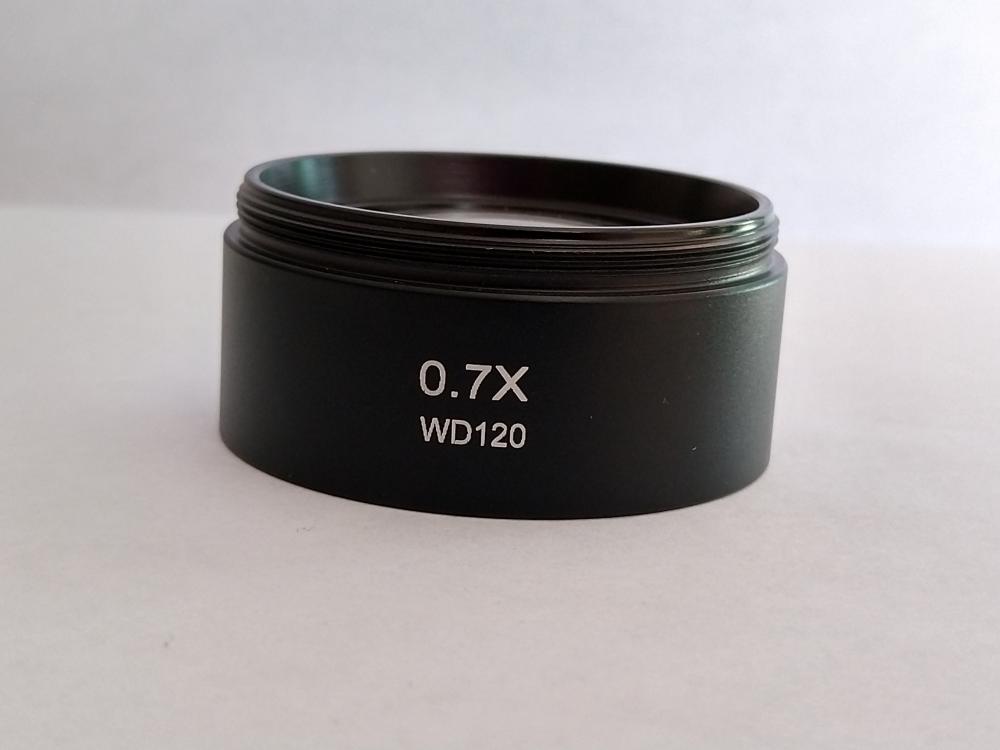
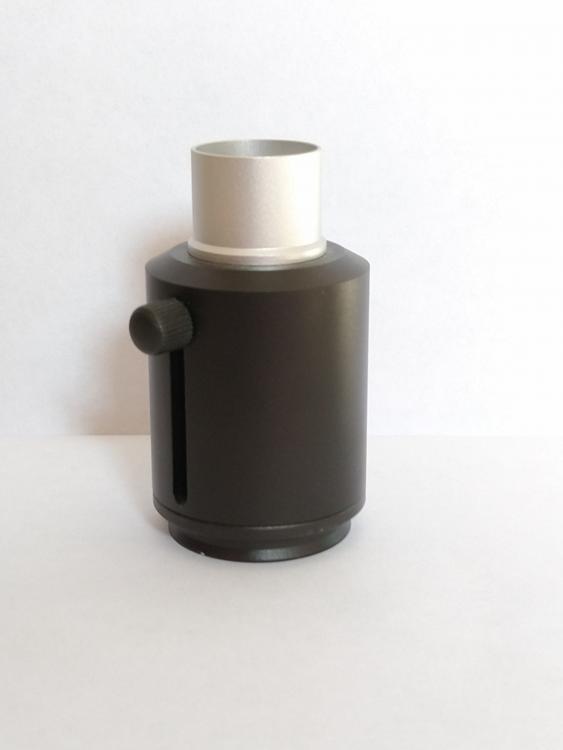
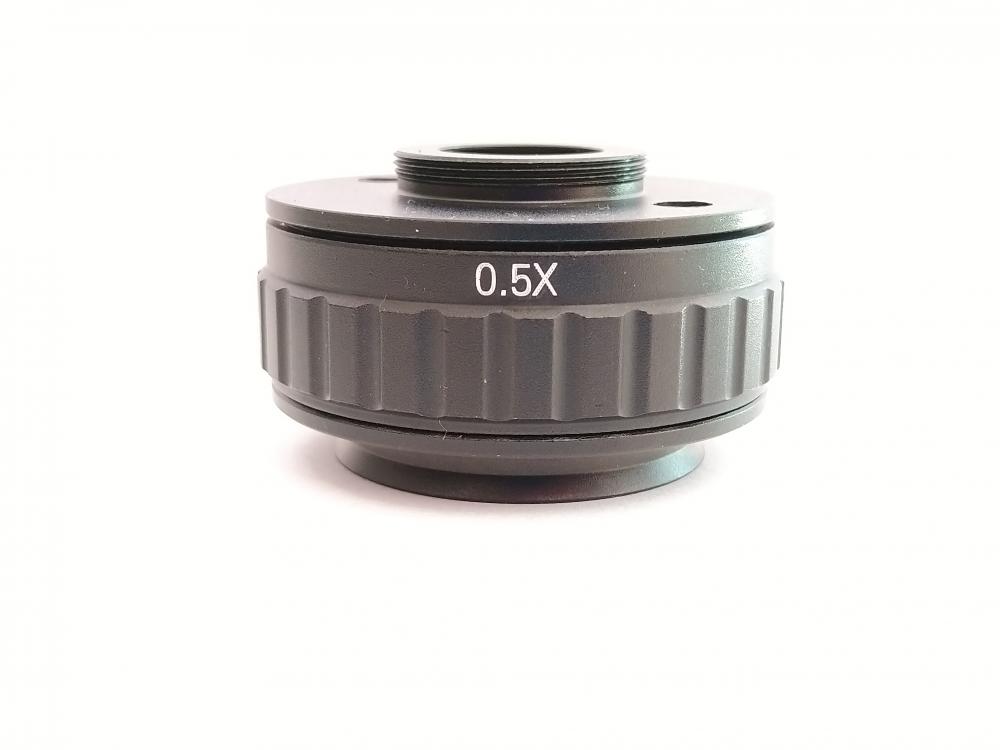
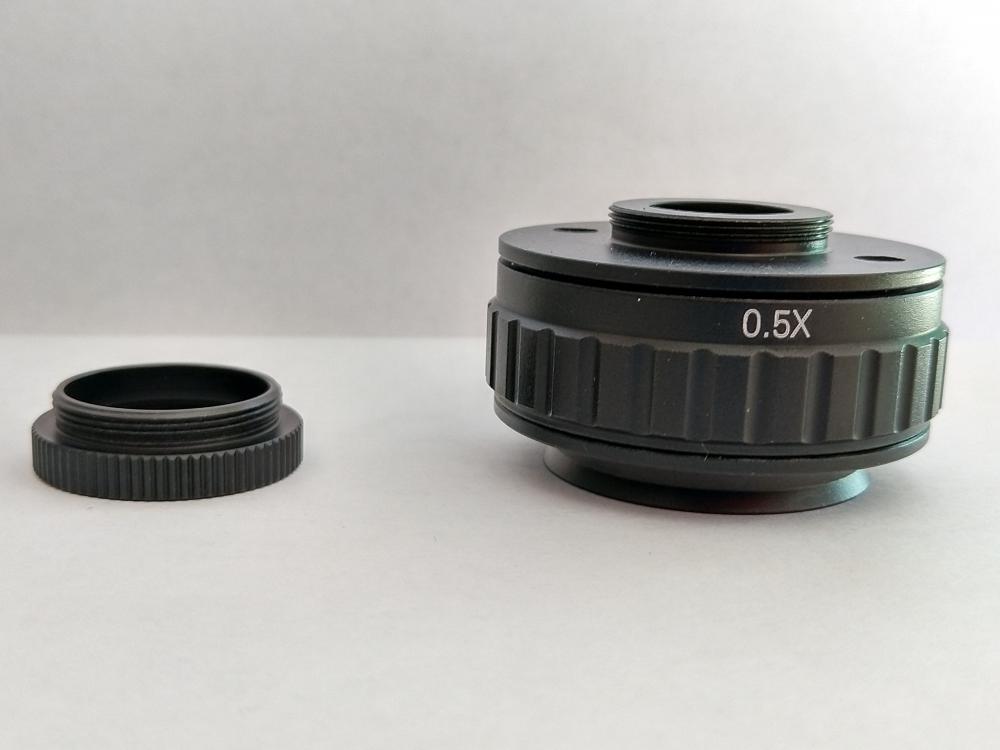
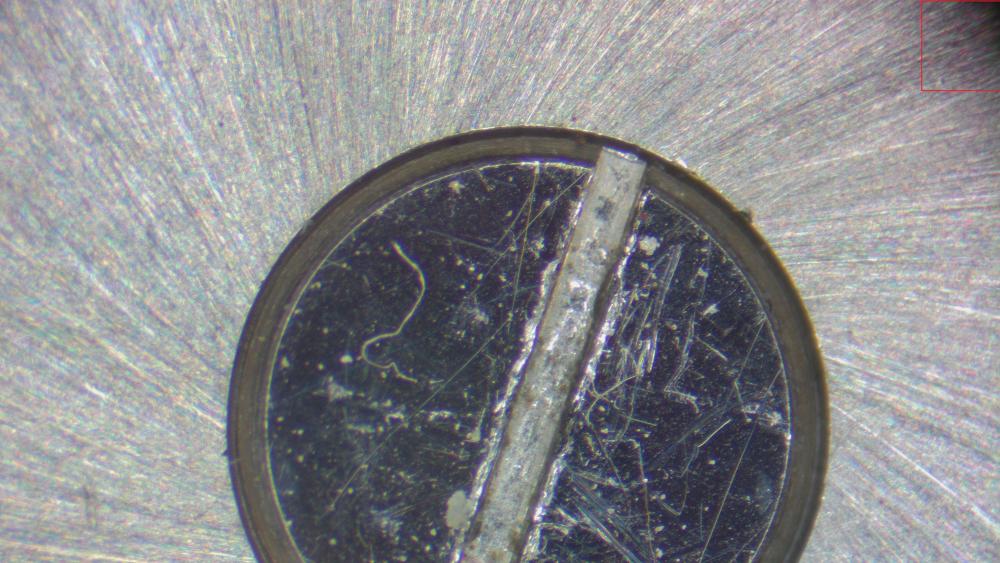
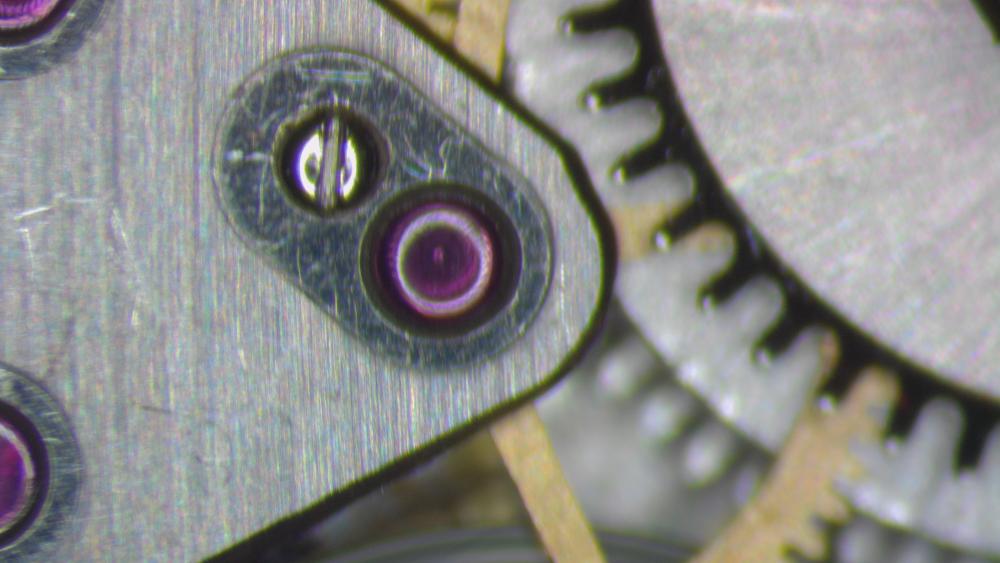
Hello Everyone, I am going to share the details of my adventure with a trinocular stereo microscope and a digital camera attached to it. I bought a second hand AmScope SM-1T (1st purchase) and I had no experience with stereo microscopes before. What I am going to write might be evident for some, but probably will help someone out with limited experience with trinocular stereo microscopes, I might be even wrong with some of the things I am writing/thinking, please feel free to correct me as the last thing what I would like to do is to mislead somebody else. You might have a different type of stereo microscope and you might have a different type of digital camera so you might be in a different situation I have been. A stereo microscope is incredibly useful and is a completely new world for the watchmaker in my opinion. You can see things you were not able to see before, worn pivot holes, pivots, cracks in jewels, bent hairsprings, and dirt everywhere, etc. I wanted higher working distance though and I also wanted to take pictures and record videos about watch movements and one of my initial goal was also to be able to take a picture about the whole movement. To achieve this I bought a number of things one buy one waiting weeks between the different items as I was not sure what to buy exactly. The AmScope SM-1T I own: The only thing I was sure about was the illumination so I bought a led light ring (2nd purchase): "220V 60000LM Adjustable Microscope LED Ring Light Illuminator Lamp For STEREO Microscope Excellent Circle Light EU plug" The first one did not work for long, its circuit board died after a week or so. I got a replacement however I am still using the original led light ring without its original circuit feeded directly by my bench power supply with 12V. I did not know that time that there are adapter rings for ring lights so I drilled 3 little holes into the head of the microscope. Now this sounds silly and indeed it is, but it became handy later as I can use these three little holes to attach my ring light to the microscope head without loosing much of the working distance if I want to. I bought an adapter anyway (3rd purchase): "M48X0.75 48 mm Thread Aluminum Objective Adapter Ring Stereo Microscope to Attached LED or Fluorescence Ring Light" The adapter ring: The next thing what I bought was a 0.5x barlow lens (4th purchase) for the AmScope as I knew it would increase the working distance and the field of view and additionally would decrease the magnification. I went again for aliexpress and my number one priority was to get one as cheap as possible. Now this might be one of my biggest mistake here. I cannot compare the one I bought to any other 0.5x barlow lens, but I am not happy with this one: "0.5x WD160 Working Distance 160 mm Barlow Auxiliary Reduction Objective Lens with Mounting Thread 48 mm for Stereo Microscope" I cannot get a sharp image with this one so ended up not using it at all. You can attach your ring light directly to this one. This article talks about the barlow lens and suggests to buy a quality product from a trustworthy manufacturer: https://www.microscopemaster.com/barlow-lens.html 0.5x barlow lens for the AmScope: Blurry images when fully zoomed in: Fully zoomed out, too much light and not very sharp: Then I bought a digital camera (5th purchase) for the trinocular port namely: "2020 Full HD 1080P 60FPS 2K 3800W 38MP HDMI USB Industrial Electronic Digital Video Microscope Camera For Phone CPU PCB Repair" but it was not compatible with the adapter the AmScope came with as it was designed for AmScope own digital camera, i did not know that at this stage though so I bought (6th purchase) a "CMOS CCD USB HDMI Industrial Video Camera Adapter Electronic Eyepiece Microscope 23.2mm to C Mount For Biological Microscope" because i hoped that it would help me to attach the digital camera to the AmScope adapter and I would be able to focus it. It turned out that this was not the case. I could not get any useful image, not even close. The digital microscope camera: AmScope adapter for their own digital camera what I could not use: And the adapter which fits into the AmScope adapter above but it did not help: Meanwhile I bought (7th purchase) a "0.7X WD120 Trinocular Microscope Stereo Microscope Auxiliary Objective Lens Barlow Lens" barlow lens for the AmScope. The other issue with the 0.5x barlow lens for AmScope was that the working distance went to the sky and I could not comfortably sit in my chair as I could not reach the eyepieces easily. I was hoping that the 0.7x barlow lens would sort that out, but it did not turn out the way I hoped for, I am going to write about the working distances later. However I am satisfied with the 0.7x barlow lens, I can get sharp images. You have to use a ring light adapter with this one as you cannot directly attach your ring light to it. I am happy with this/ fully zoomed in: Still happy, fully zoomed out: Then I was advised to buy a 0.5x or 0.35x c mount adapter for the digital camera so I bought (8th purchase) "0.5X C mount Lens Adapter Focus Adjustable Camera Installation C mount Adapter" first, and yes it worked finally! The digital camera came with a ring and that ring must be used otherwise you cannot sync the focus between the digital camera and the microscope. 0.5x adapter for the digital camera: And the ring what must be used: As I was not happy with the 0.5x barlow lens for the AmScope but I still wanted to take pictures about the whole movement I thought i would buy (9th and final purchase) a 0.35x c mount adapter for the digital camera what would bring me a wider field of view so I bought a "0.35X C mount Lens Adapter Focus Adjustable Camera Installation C mount Adapter" too. And indeed it was the case, but it seems that the body of the microscope comes into the picture, what you can see in the upper right corner of the following picture so I ended up not using it. 0.35x: Check the upper right corner: When you use the microscope your field of view is a circle, but when you use your digital camera your field of view is a rectangle. So i give you and idea about the dimensions and the working distances now. Digital Camera with 0.5x adapter for all cases. Field of view with 0.5x barlow lens for the stereo microscope: Zoom full in 7.5 mm x 4 mm Zoom full out 5.3 cm x 2.9 cm Field of view with 0.7x barlow lens for the stereo microscope: Zoom full in 4.5 mm x 2.5 mm Zoom full out 2.9 cm x 1.6 cm Field of view without barlow lens for the stereo microscope: Zoom full in 4.5 mm x 2.5 mm Zoom full out 2.9 cm x 1.6 cm Stereo microscope field of view and working distance. No barlow lens. Zoom full in diameter: 4.5 mm Zoom full out diameter: 30 mm Working distance: 8 cm (from the workpiece and the bottom of the ring light which is attached to the 3 drilled holes) 0.7x barlow lens. Zoom full in diameter: 5.5 mm Zoom full out diameter: 40 mm Working distance: 11.6 cm (from the workpiece and the bottom of the ring light which is attached to the 3 drilled holes, ring light adapter is not attached to the barlow lens as it would further reduce the working distance.) 0.5x barlow lens. Zoom full in diameter: 10.5 mm Zoom full out diameter: 70 mm Working distance: 20.5 cm (from the workpiece and the bottom of the ring light which is attached to the 3 drilled holes) Conclusion: I ended up using the 0.7x barlow lens for the microscope, and the 0.5x adapter for the digital camera which is a must have. The ring came with the camera is also a must so you would be able to sync the digital camera with the microscope so they would be both in focus at the same time. I had to ditch the 0.35x mount adapter for the digital camera because the body of the microscope came into the picture and I had to ditch the 0.5x barlow lens for the stereo microscope as it did not give me sharp images. Even if I would have a good quality 0.5x barlow lens which would give me sharp images I still would need to sort out the seating position by purchasing an adjustable chair (mine is adjustable too but it did not go high enough to reach the eyepieces) however it would give you an amazing working distance of about 20 cm bearing in mind that it halves the original magnification. My original wish to be able to take a picture about the whole movement probably was not something reasonable. First of all a microscope as its name suggests is about to focus on tiny things not on things like a whole movement, my phone takes better quality pictures than this microscope if we talk about the whole movement. Additionally I could not take a good quality picture (apart from the blurriness) about the whole movement when the 0.5x barlow lens were on the stereo microscope (and they had to be on to be able to get the whole movement in the field of view), because there was too much light and regardless of the settings of the digital microscope i could not sort it out. An additional thought, as I mentioned earlier I hoped that the 0.7x barlow lens would sort out the "too high" working distance and instead of 20cm it would be around 15 cm, but it came to 11.6 cm which is doing the match is about right as the original working distance without any barlow lens is 8 cm, the 0.5x gives me 20.5 cm, but if it doubles the working distance it should really be about 16 cm. The 10.5 cm what I have with the 0.7x barlow lens is just about enough, it would be better if it would be a bit bigger. Probably a new chair and quality 0.5x barlow lens for the stereo microscope would be ideal for repairing, but none of the setup would be ideal for taking pictures about whole movements. AmScope video about the Barlow lens: https://youtu.be/ozPae_nnbH4 My setup: This video is captured by the digital camera itself, its size was just too big ~ 160M so I could not upload to wrt, however I wanted to show you its original quality so decided to upload it to my google drive, to my surprise when you click on the link the video quality is much worse than the original I uploaded, i dont know why is that happening, probably google tries to save the bits going trough the network: digital camera recording This is what I see from my chair: digital_camera_1.mp4 One more thing to add, the digital camera started to play up after a while, its main menu came up and it switched itself off. Contacted the seller and they gave me a new firmware. I flashed the camera and there is no issue since. This is my longest post so far, I am happy I am at it's end.


 1 point
 -
I hope you're getting commission for selling these? I too have been thinking about one for quite a while now. This watch business fair gets a grip o' ye!1 point
-
I have no idea what it will likely cost you (or what it may be worth to you) but these guys seem to do amazing work. I think there's also somebody in Texas that does dial restoration.0 points