Leaderboard


Popular Content
Showing content with the highest reputation on 12/09/21 in Posts
-
I just posted a new video on my channel I thought might be helpful to the larger community. As always comments and critiques are welcome.2 points
-
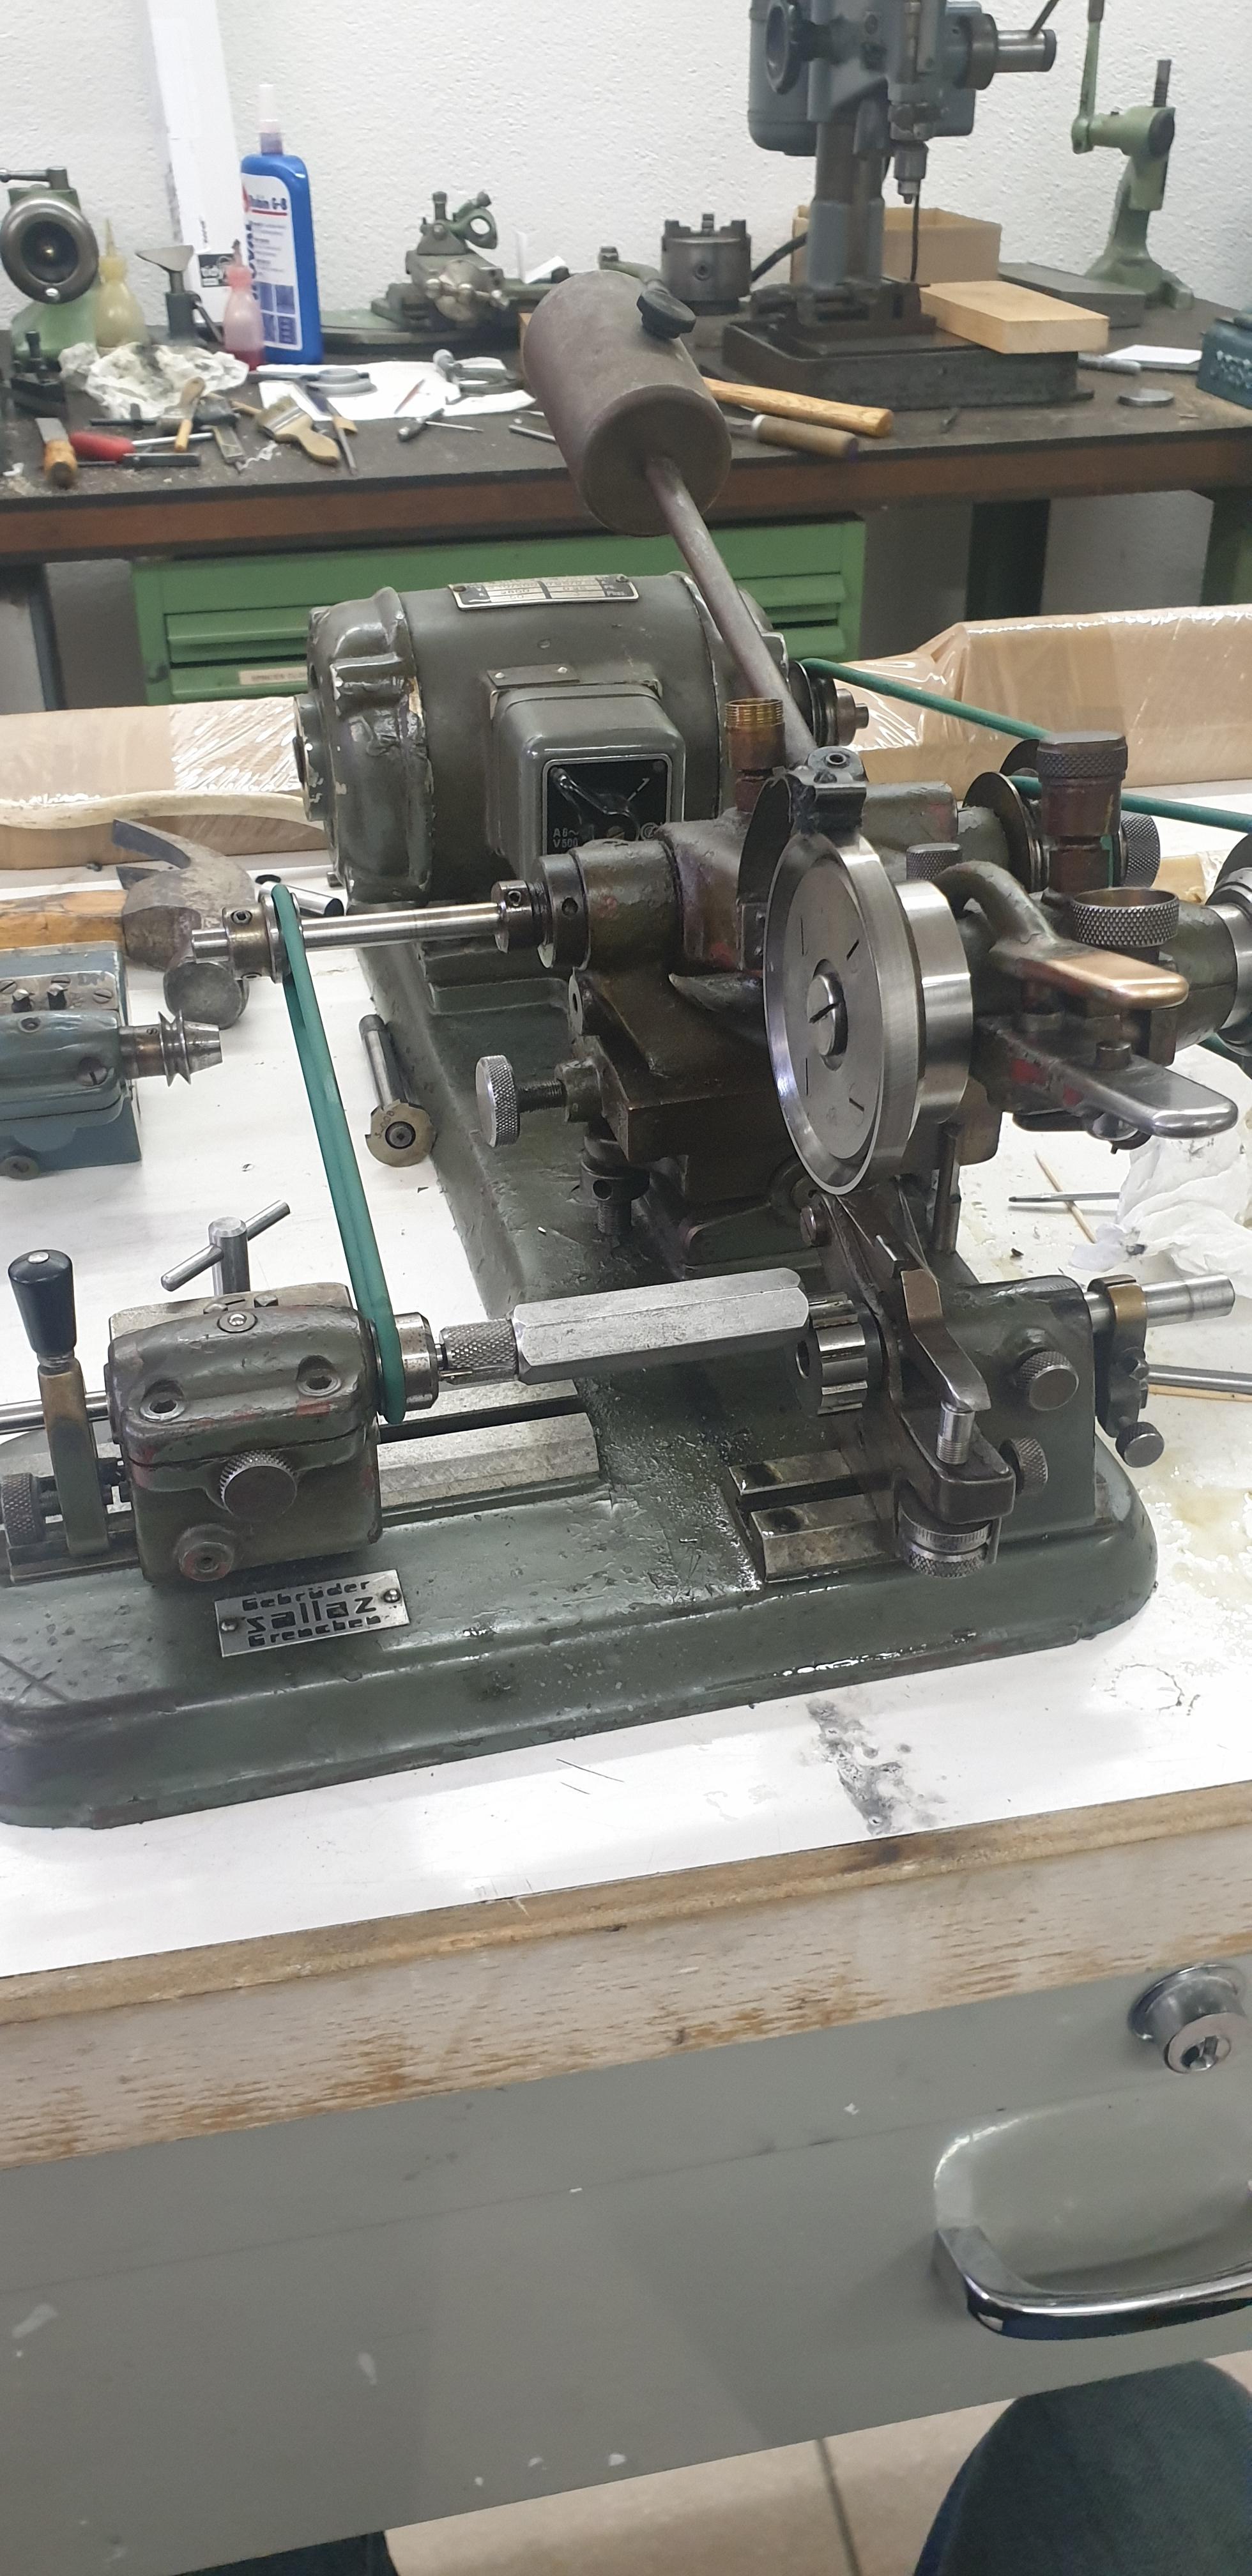
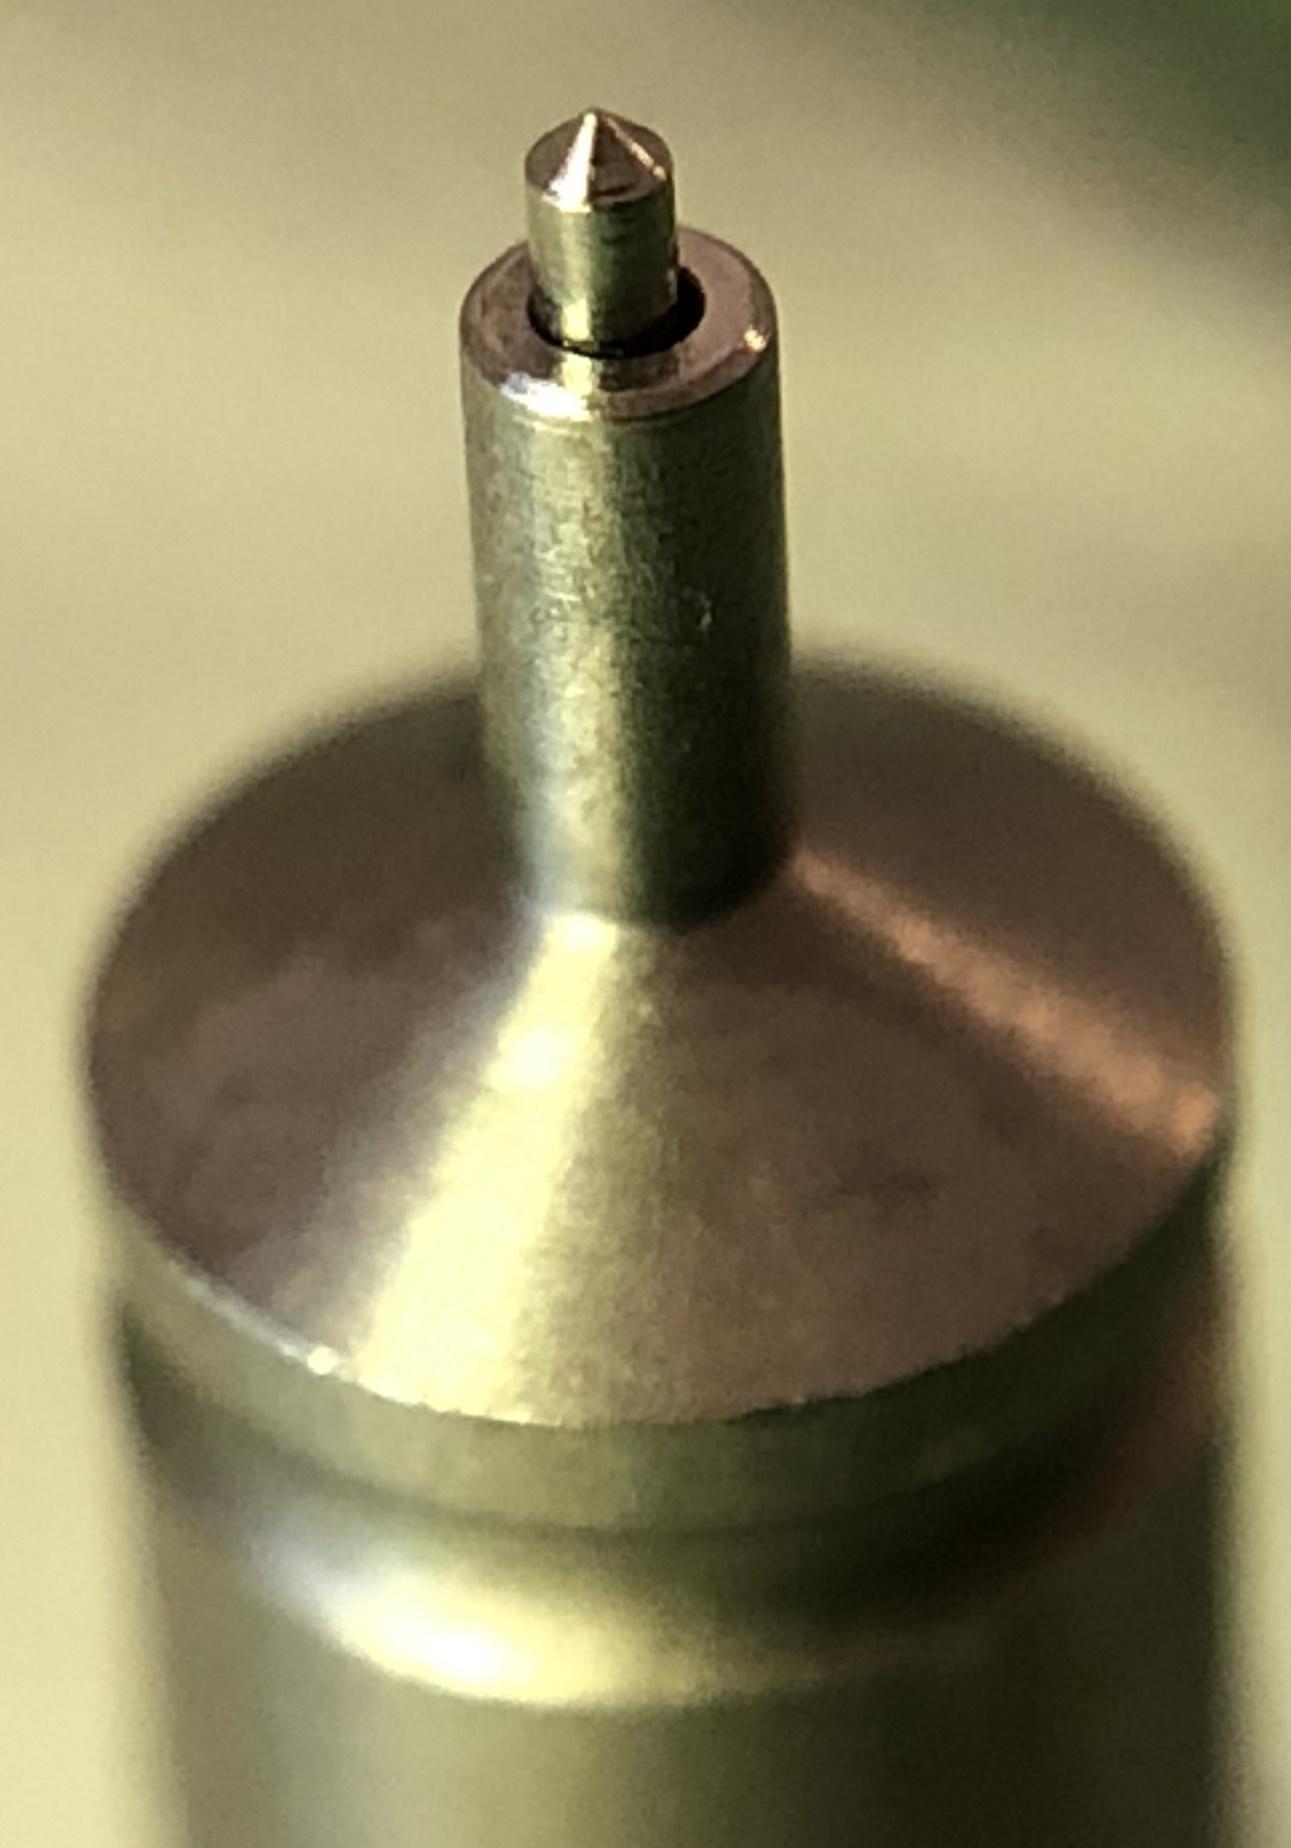
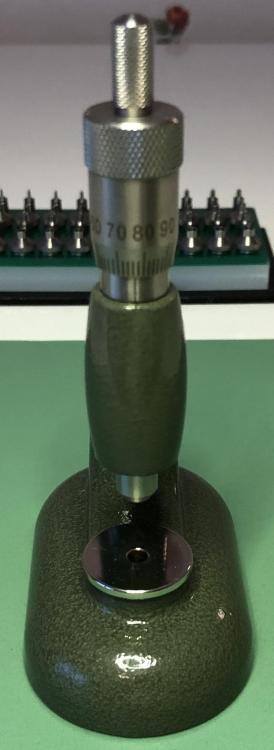
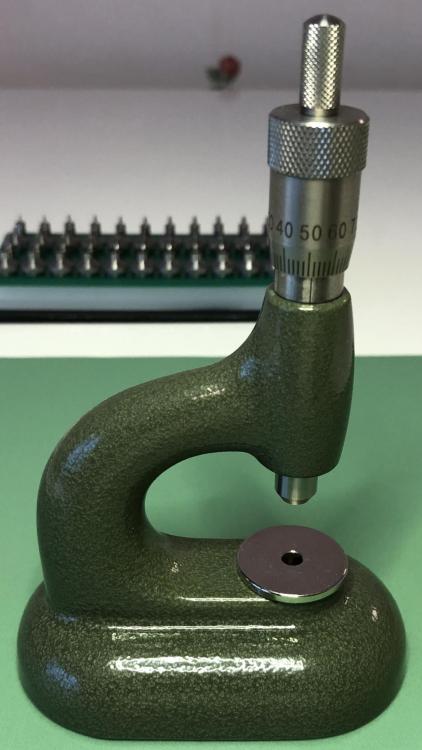
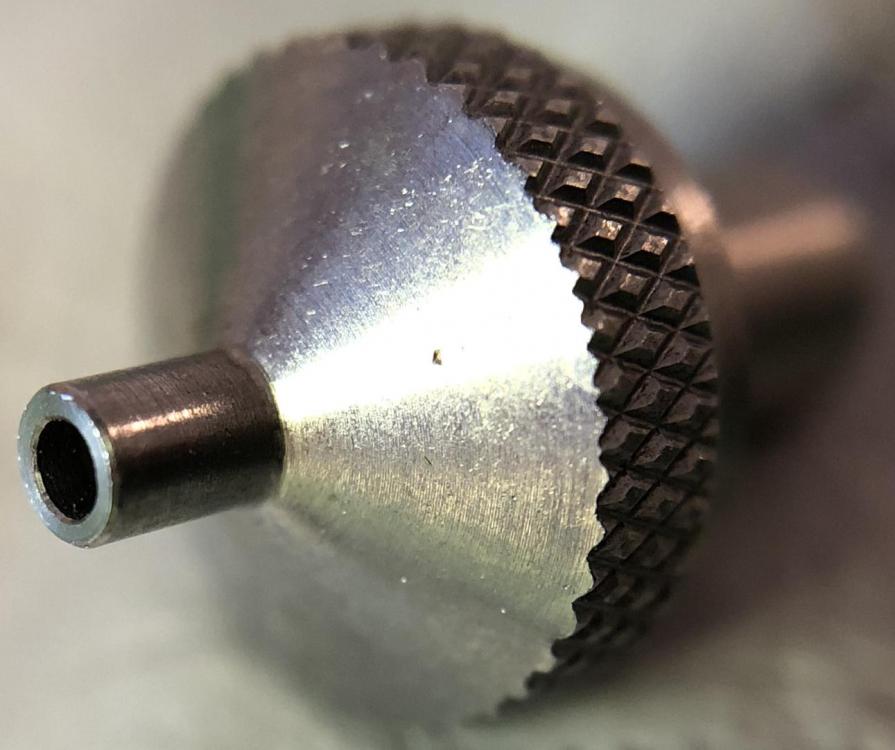
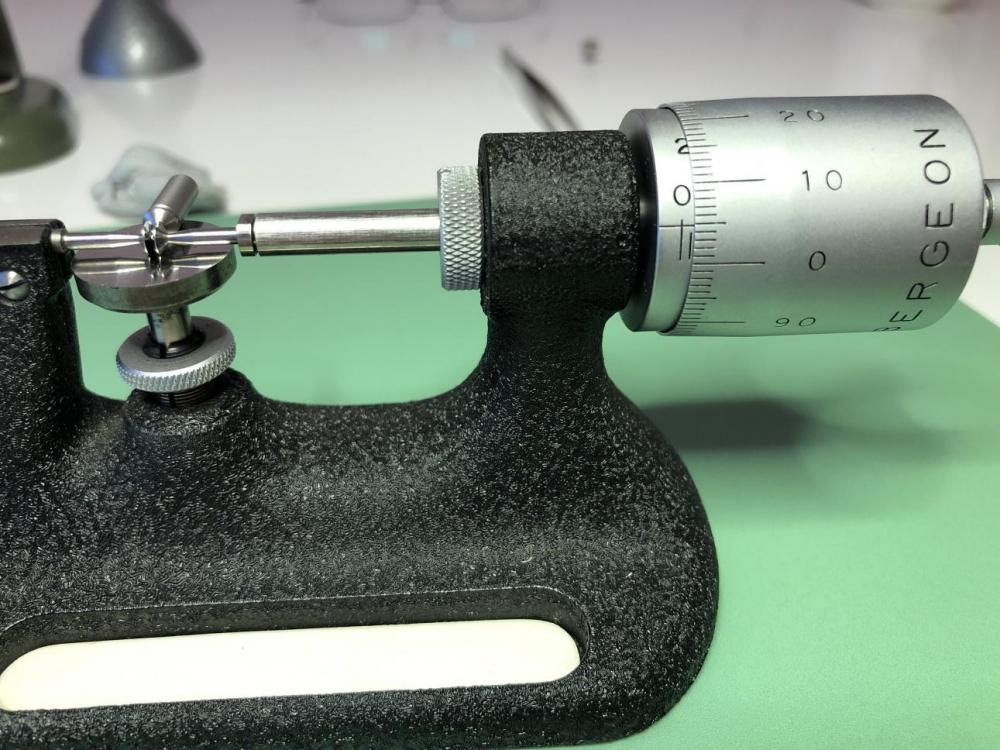
Burnishing removes a tiny bit, and compresses. Burnishers are textured for a reason, they are essentially ultrafine files. If they only compressed they would be mirror finish (and there are burnishers like that for beveling work). A pivot finished by burnishing, with a proper burnisher, has an extra hard skin with a perfect finish. There are commercial machines that use carbide wheels that are for production work, and also smaller wheel based machines for repair work like the Rollimat for clocks (awesome machine), or Pivofix for watches. I prefer a regular Jacot for watch work except for large diameters- those can take forever with a hand burnisher to take off even a couple microns. I have a commercial machine I break out if I have to make a barrel arbor or something. Here I needed to make 16 barrel arbors so I was happy to set up the machine.
 2 points
 -
To work on clocks you will need decent screwdrivers, decent pliers and tweezers. I also have some small BA/Metric spanners a small adjustable and a few others bits gathered over the years such as brushes etc . Initially for cleaning use some hi grade petroleum for primary cleaning dirty clocks, I use some of the PRIORY polishes clock cleaner concentrate dilutes to 7:1 do a 500ml bottle goes a long way preferably use distilled water. Drying is the key. Peg wood for the pivot holes and some Windle's clock oil. With all the above you will manage to clean most clocks. Bushing plates and re pivoting is a long way in the future but read the books watch the videos, when I started with clocks there was only books and I STILL read them. You may want a volt meter for the odd electric job and battery testing but take small steps don't dive in to three train chiming clocks untill you understand the single train and striking clocks (two trains) remember small steps, and don't over complicate things it just fogs the mind all the best2 points
-
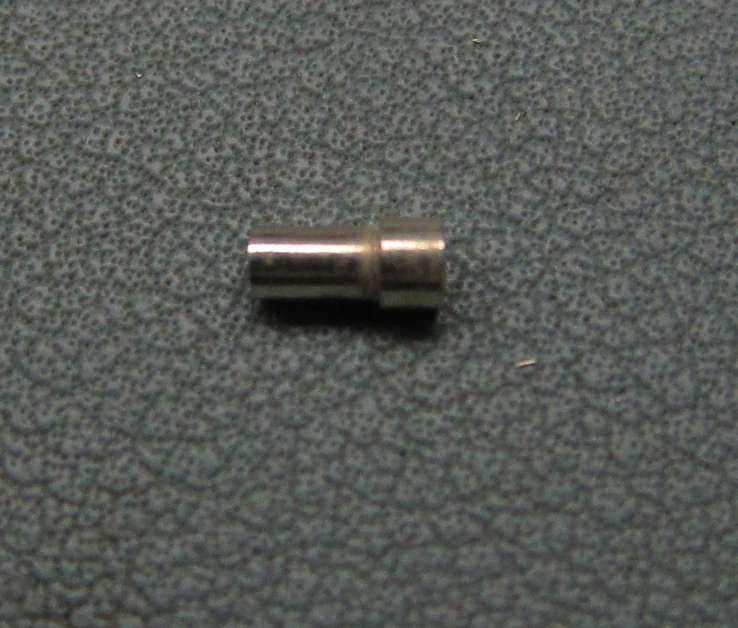
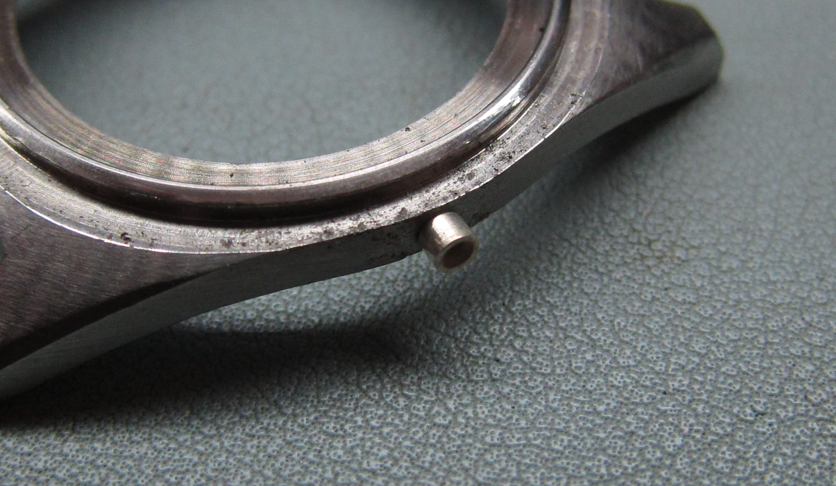
I am aspiring to become a watchmaker rather than just a watch fixer. Don't know if there are enough years left to really accomplish that. Today, I turned this case tube from some brass tubing I found in the watch bench. Then after turning it, I plated it with some magic rhodium. I think it is gonna work fine, but if anyone wants to critique it, I will not be offended. Somebody told me to buy some Loctite to secure case tubes...this was awhile back. Somebody else told me to buy a different Loctite for some other purpose. Now I have two, 648 and 680. Which one is for case tubes...LOL?
 1 point
 -
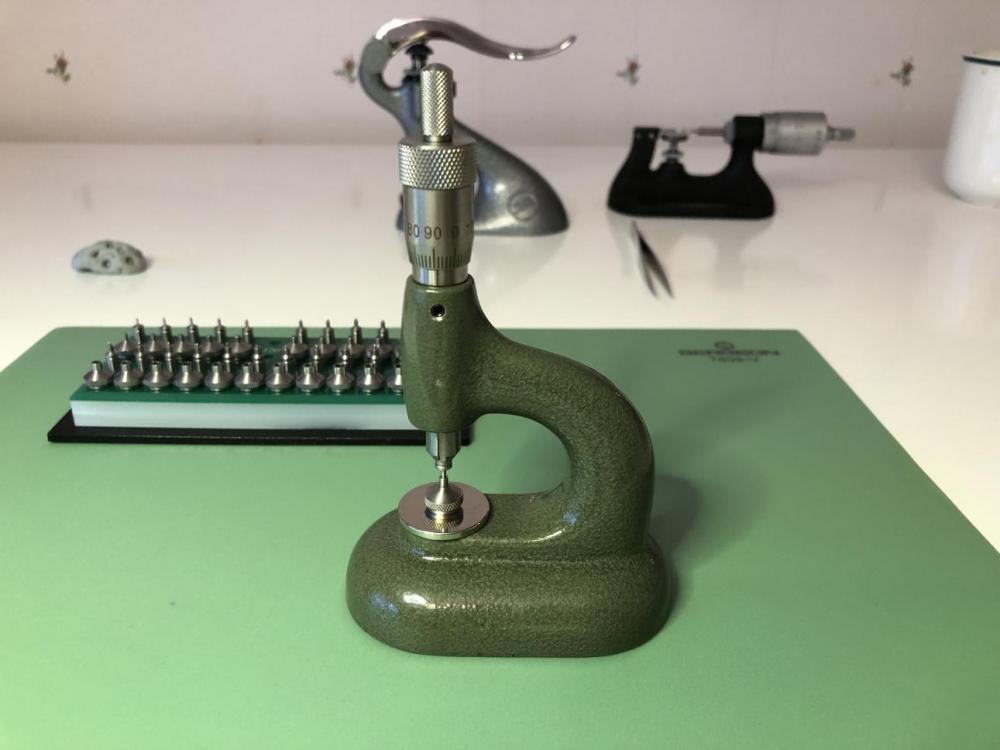
Thinking about a perfect finish here's an interesting PDF to read. A Quick Evaluation of Surface Finish of Pivots.pdf1 point
-
Only thing I can reply to this and I'm in the minority, is the lever type is less sensitive or precise etc. For me the lever type are more precise due to some trigonometric function. I find the lever type "handier" as you can (in real world) set a stop and have both hands steadying the piece while a palm hits the lever. Probably just being old, but I'm a practical person.1 point
-
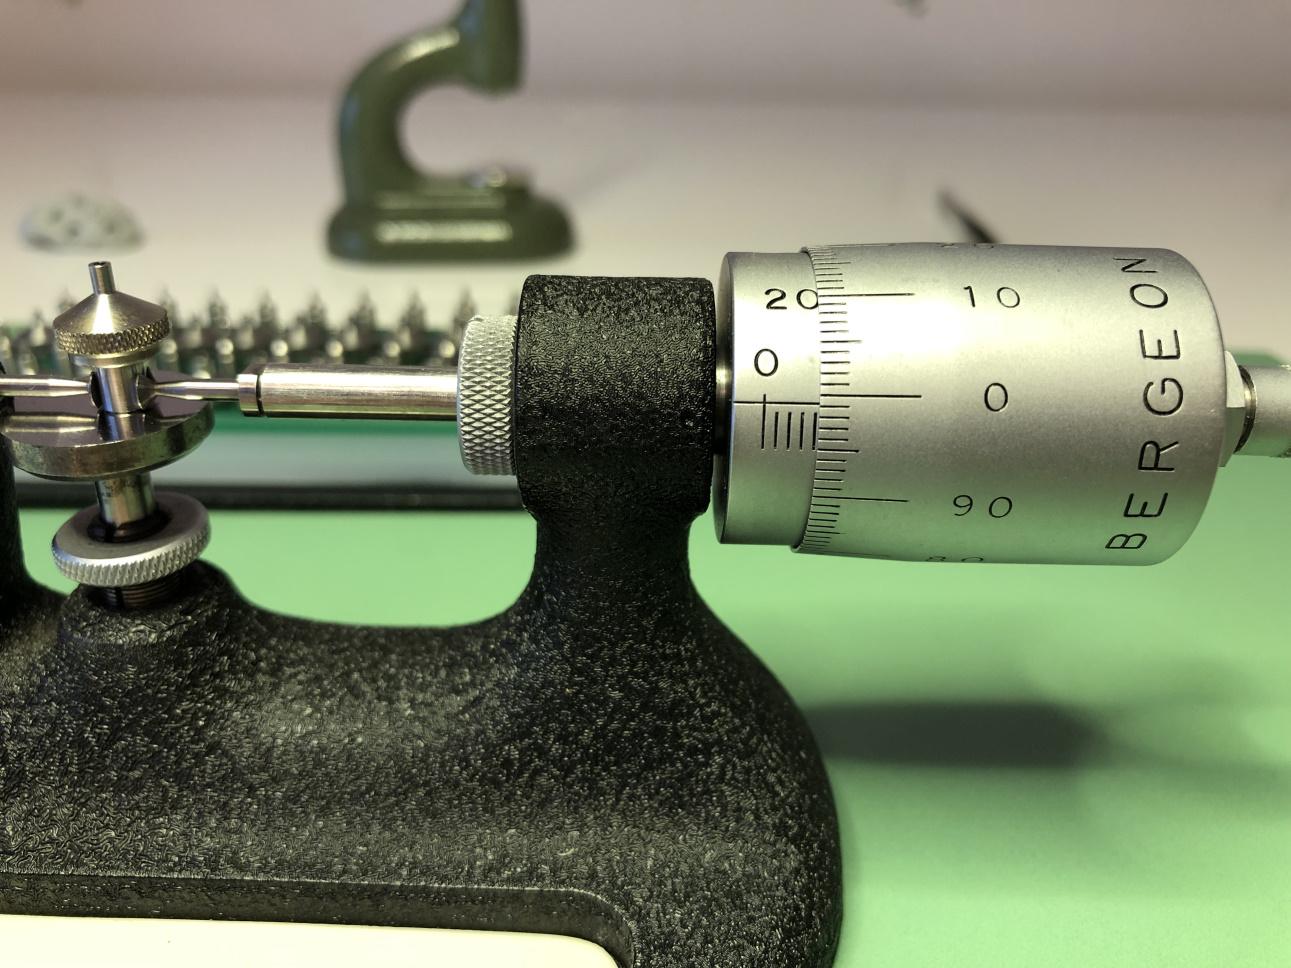
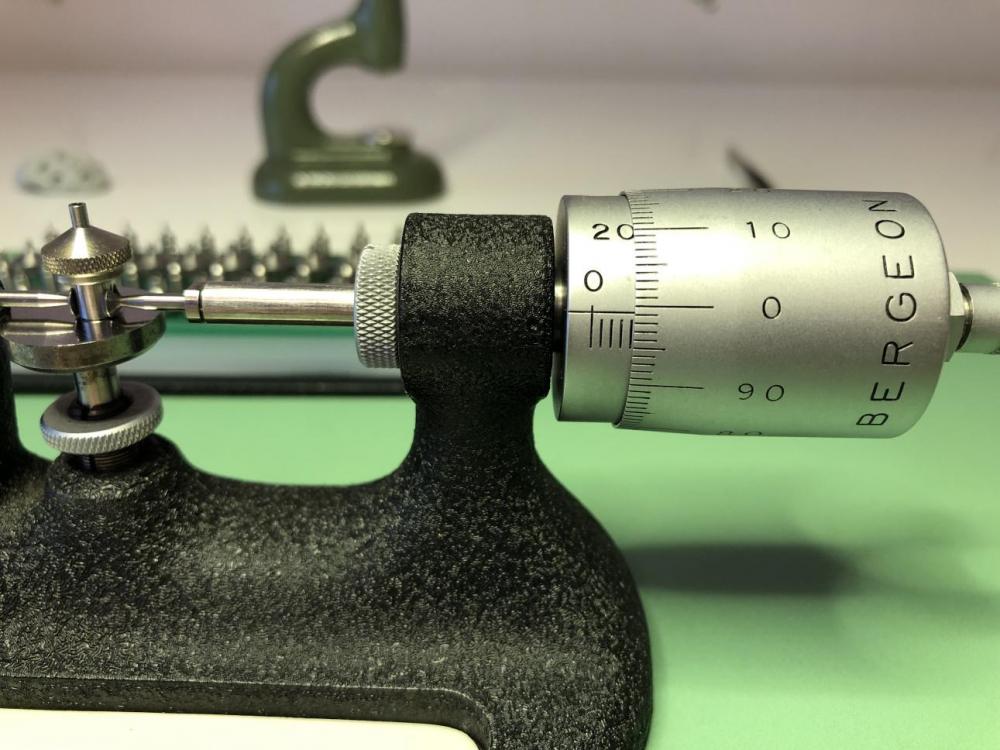
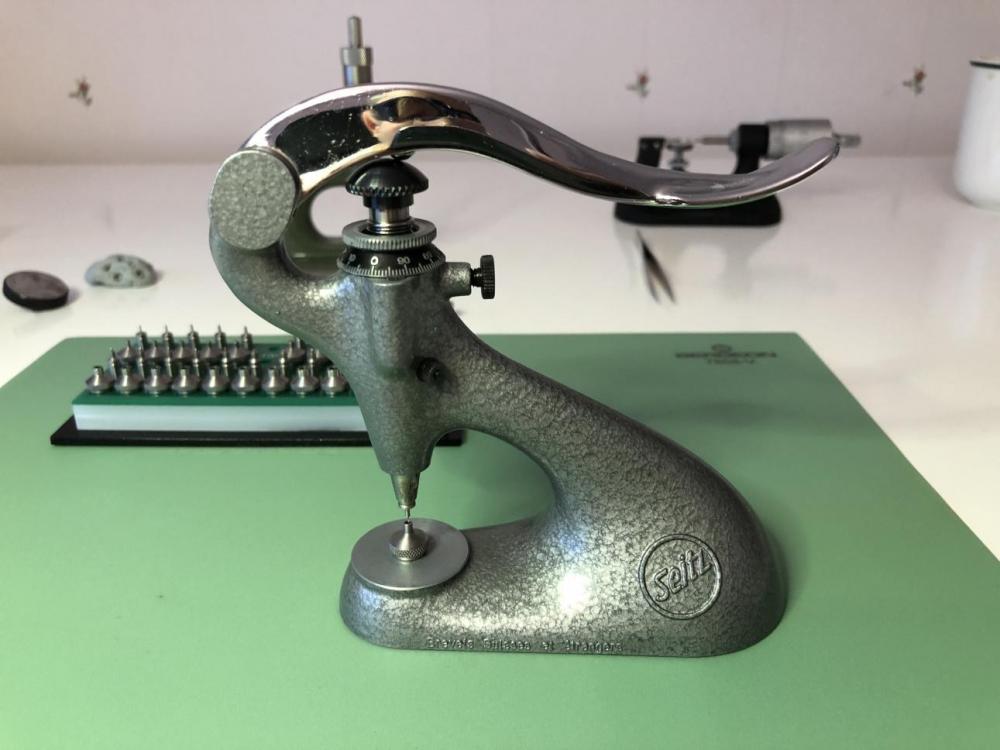
A couple of weeks ago, or so, I got my AliExpress Chinese Horia jeweling tool clone having 24 pushers and 24 anvils. So, it took approx. a month for the package to arrive. That's a lot less than I had expected. Another pleasant surprise was that it wasn't delivered from China but from the Netherlands (another EU state), so no additional fees had to be paid. Yippee! Anyway, it wasn't until today I had a chance to take a really close look and give it a try. Here're some pictures... (Click to zoom in!) Unlike the Seitz jeweling tool this tool does not have a "threaded cup" to catch the jewels pressed out all the way Anvil bottom-side Anvil top-side Pump pusher Pump pusher bottom-side (spring held in by screw having a slot) Pump pusher bottom side (spring held in by a hexagonal screw) Overall, I must say everything feels very well made and exceeded my expectations by a margin. Why some pump pushers uses a normal screw and some a hexagonal screw I have no idea, and I didn't try to remove any of them. The screws look like they could be made of plastic and they don't look all that nice. I don't know what the original Horia pump pushers look like, but the Seitz pump pushers are, is this respect, of a much better design. I measured the diameter of five randomly selected pump pushers and they all had the given diameter minus approx. 5/100 mm, which of course is necessary to make them pass through the holes for the jewels in the plates and bridges. I also measure the foot of a few randomly selected anvils and they all came in at 3.99 mm. So, as an added bonus the anvils and the pump pushers fit perfectly (near zero shake) in my Seitz jeweling tool (and in the clone tool) as well. Nevertheless, after having adjusted just a few jewels I already prefer this type of jeweling tool. With the Seitz tool you must always assert pressure on the handle, but since the Horia type uses a screw it frees up one hand and makes the operation feel both more precise and safe. The only drawback, of course, is that the Horia jeweling tool can't be used for reaming, so for that reason I'll be keeping my Seitz. Using my caliper I also measured the distance between the anvil and the pump pusher, then rotated the screw 360 degrees (1.00 mm) and measured again. The difference between the first and second measurement was just a few hundreds of a millimetre (minus the added millimetre of course) and my caliper is naturally not as exact as my Bergeon micrometre. So, it would seem the Chinese got the threading on the screw just right as well! Conclusively I must say that my very first AliExpress buy of a watch tool was a (somewhat unexpected) success and I wouldn't hesitate one bit to recommend this tool. The finish is not up there with the Swiss (Seitz and I would expect Horia), but it does what it's supposed to and it does it well. And, considering the price difference between the original tool and this clone, I'd say this is a no brainer, especially if you're a hobbyist.


 1 point
 -
Hi @nickelsilver Thanks again for the info. Based on what you said before, I'm guessing that as sapphire needs diamond to modify, it's harder than the jacot, thus will wear it down? Also, I think I read (probably here!) that polishing and burnishing are two different things. Polishing removes material, whereas burnishing moves material, taking the bumpy stuff and smearing it around so it's smooth. The added effect of burnishing is it also hardens then the material, something polishing can't do. Is that correct? Thanks again for your patience! Hi @LittleWatchShop, I've a premonition that my new sapphire burnisher will also languish in a little draw, never to be used Still, it will serve as a reminder to do proper research and ask people more skilled than me first Best regards to you both, Ed.1 point
-
I agree that sounds a long time. I use Elma WF Pro in an ultrasonic at 40C for 5 mins (the spec sheet recommends 3-8 mins), then 2-3 mins in isopropanol (about 1 mins for pallet and balance due to shellac)1 point
-
And you take your guess from where? Armoured (tension ring) glasses were typically used in watertight cases. Here I can see neither a case gasket nor a crown w/ gasket. My counter-guess: a snap-in glass Frank1 point
-
Yes isn't that weird you can't find the part of online yet I found the part number online don't you find that weird? Not entirely true though if you do a search for that number on cousins website you get this link https://www.cousinsuk.com/sku/details/omega-case-parts/pn0314 Notice the description what kind of armored ring does it have? If you do Google your case number you'll find hints that it does exist but they must automate a lot of them or individuals art popping their backs off looking to buy parts for them they probably just took him to a qualified watchmaker. How about if we try an experiment? Is the crystal number that I have above correct or not? So let's do a modification of your serial number by one digit. For now are going to look at the first link for 14707 and 18 karat gold nice crystal doesn't appear to have an armored ring below the real question is how similar is it to yours? In other words if the crystal for this has a similar part number to your crystal it gives us a clue that what I found was correct it's a non-tension ring plastic crystal of the size I listed above. https://omegaforums.net/threads/fs-omega-ref-14707-solid-18k-gold-w-linen-dial.94091/ This website is the idea for the experiment because they had a crystal almost the same number and the serial numbers off by one digit. You get this crystal number PN0316 Very similar to the other crystal number which is what I was curious about https://www.ofrei.com/page_168.html You notice the crystal numbers they like to drop off the first digits the actual definition of this crystal is 062PN0316 | GLASS PLEXI D31.60 H3.00 So we get the important parts here crystal number is very similar to the number I have the size is different though in the height is different. My guess is the P stands for plastic or Plexiglas. The letter N is no armored ring. You know you can't use this crystal in your watch it's not tall enough and slightly too big in diameter I wouldn't risk it on 18 karat gold case. But I think it does confirm that the number I have above is correct you just need to find somebody with Omega parts access or find an equivalent.If you go for the genuine omega crystal be prepared for sticker shock that is if they sell them at the retail price.1 point
-
I am no Omega specialist at all, but not yet mentioned in this thread: is the case made for a snap-in or for an armoured glass? Would be the first question before selecting a Sternkreutz glass. Both are not interchangeable. Frank1 point
-
lightly punch the edge of the hole all around. Hard enough to see a mark but not so hard that it visibly distorts the hole. Work around the hole and both sides of the wheel and that should tighten it up sufficiently. I have also used solder to hold the pipe of an hour wheel but in this case I would try the punch method as the wheels are not under great load. Anilv1 point
-
Looks like watchweasol has answered your question. It would help you if you watched a few videos on Youtube to understand which each part plays in the chiming and striking. It would also have been better if the diagram had the parts in order instead of all over the place.1 point
-
Some really imaginative and creative stuff here. I particularly like the blue and black ones from the first page. Nice work. Kudos.1 point
-
Hi The lowered crystal and the changed second hand do the business looks very professional, nice and clean and the second hand change (Matching the hands ) blends nicely and doesn't take the eye away from the dial as did the aeroplane. as class act I like it very much.1 point
-
Hi Michael There are two books from Donald De Carle, Practical clock repairing and watch and clock repairing, So I take it you have the clock repairing one. the locking wheel has a pin on the edge of the wheel to lock and release the long lever. The strike warning wheel is similar with a pin to lock and release the strike The third wheel has no pin Because the locking wheels look very similar in construction it is important when dismantling clocks to keep all the strike parts together, same with the going side and the chime side and label each container so as to avoid confusion on re assembly1 point
-
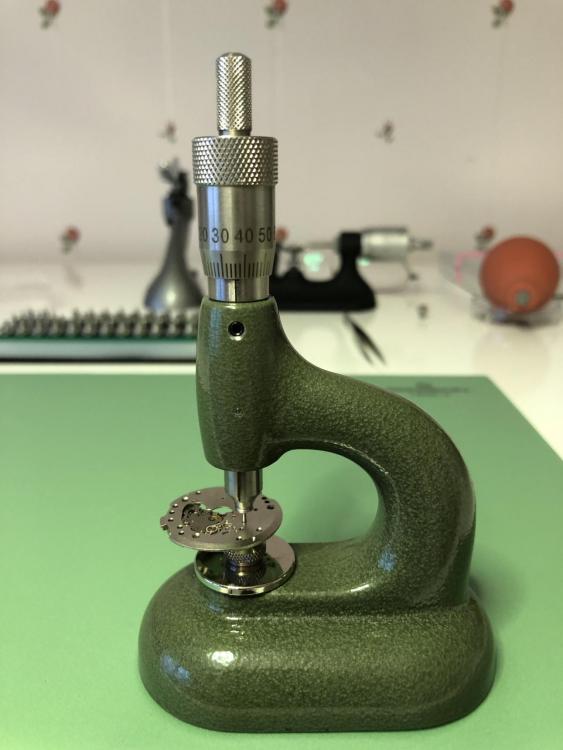
I have one but have never used it. The one and only staff I have made...I polished it while on the lathe. I did use the file that came with my Jacot. Again...this was another inherited tool.1 point
-
Wow, thanks for all the great responses! I used the charts provided and came to the conclusion the 386 is probably the correct battery (which is what I was leaning towards before I asked the question but my methods were based on more ignorant assumptions) The photos @Randy55 linked provides the proof. Can't wait too see if I can get this thing to light up! Thanks again for the help and the documentation- it will certainly come in handy in the future as well!1 point
-
The Americans (and I'm one) were big on working pivots in "free space", not so big on Jacot tools. So sapphire burnishers got used. I jokingly think this is one of the reasons they came up with truly drop-in interchangeable parts when the rest of the world was individually fitting parts, haha. But it's more like my Japanese watchmaker friend says- laziness begets efficiency. The U.S. makers came up with ways to make watches work with interchangeable parts because they wanted to make a BUNCH of them. Still, I love my Jacot tool, and use it at least once weekly. One of my spare Jacots is behind me at a friend's bench, and he uses it regularly. With carbide burnishers, both of us. Almost 20 years on my (already secondhand Steiner) and no visible wear on the beds.1 point
-
Nothing in the Bestfit book, or the old Flume book I have. I think it is a longines but what cal I do not know.1 point
-
Usually on the earlier Swiss watches they would use French or just the letters like A & R. That's why the word was interesting because it's only one word they don't have both of them and it wasn't the usual spelling for French word.1 point
-
That looks like a lot of radium on the hands and dial. Take care : I wear a mask and gloves when working on radium dials. I work on some plastic sheet and everything I use for cleaning - q-tips, tissue, water, etc gets double bagged for disposal. All tools washed under the tap. Radium paint easily dissolves in water. I've just 'cleaned' the radium from the dial and hands of an old Rotary watch. I use water on q-tips to remove it from the dial, and use the ultrasonic to remove it from the hands. Then check it with a geiger counter, and re-clean until it doesn't detect any radiation.1 point
-
It was nice that you did clarify because as long as you're happy with your balance staff and have zero intention of ever changing it then is taking set is probably of no use to you. But if you work on vintage pocket watches you do tend to run into broken staffs. Or if you work on modern watches I know of people work on Rolex watches and they change staffs all day long just because they have to be perfect for timing requirements. So apparently they never change a staff because it's broken only for timing Reasons. Seems like on a watch repair discussion group you wouldn't be paying a watchmaker you would learn how to do it yourself? So here's the problem on American pocket watches or basically anything vintage. They were not mass-produced even though they were. As a rather confusing sentence isn't it? Basically the escapement's are all adjusted to the particular components in the watch. Like American pocket watches all the bridge parts are serial numbered you can't take a bridge from one watch and put it on another because the serial numbers don't match and probably needed to the holes. If you swap a complete balance wheel your pivots sizes may not be the same in other words you could need to be too loose or too tight somebody will have to adjust that. Possibly because the escapement's are all adjusted somebody will have to adjust the escapement. But if you're doing a vintage watch that is standard operating procedure and that shouldn't be an issue. Which is usually why always recommend trying to keep as many of the original components as you can for your vintage watch Here are two other references I have first one somebody selling it on eBay which is nice. This is obscure book that most people I don't even think new that even existed. The second book I got it as a PDF off of eBay but it doesn't seem to be there anymore probably because people PDF thing copyrighted material get in trouble. So I'm giving you a reference to the Amazon where you can see its actual book is probably out there someplace. This is the one where I found the measurements because what they did is they went through and measured a huge assortment of staffs and arrange the book by sizes. Then in the back they have the various reference material including the drawings. Swartchild's American Balance Staffs https://www.ebay.com/itm/162769575312 American Watch Balance Staff Interchangeability https://www.amazon.com/American-pocket-wrist-balance-interchangeability/dp/09139025271 point
-
Instead of paying your watchmaker $200, why not just buy a staking tool and a staff remover and attempt it? It's really not that bad a repair, especially if you're competent enough to change the balance anyway. Re. those two examples above, note that one is Breguet and the other is not. Hairsprings cannot be transferred so you need to buy the correct type. In any case he doesn't list the staff type so you would have to message him and see if he will check. I think 1365 is the more common of the two '83 staffs but you should still measure to be sure... Also it's not just the length that is important. The divisions (horizontal distances between components) have to be correct. For example here the distance from bottom pivot to roller seat differs by 0.03, not 0.01, which raises the risk the fork won't engage properly.1 point
-
Have you searched balancestaff.com? lists bunch of waltham staffs and gives all dimensions.1 point
-
There have been several Timex forums over the years, the current incarnation is here - The New Timex Forum This is a general forum, not specific to repair. The owner (Mel) is battling ill health at the moment. Since the forum is set for moderator approval of new posts, it can take some time for them to appear. I am sharing some Timex documents, including repair manuals, here - Timex Documents As far as sharing repair/restoration info,tips,and tricks, right here might be the best place that I know of, just ask!1 point