Leaderboard


Popular Content
Showing content with the highest reputation on 01/15/17 in all areas
-
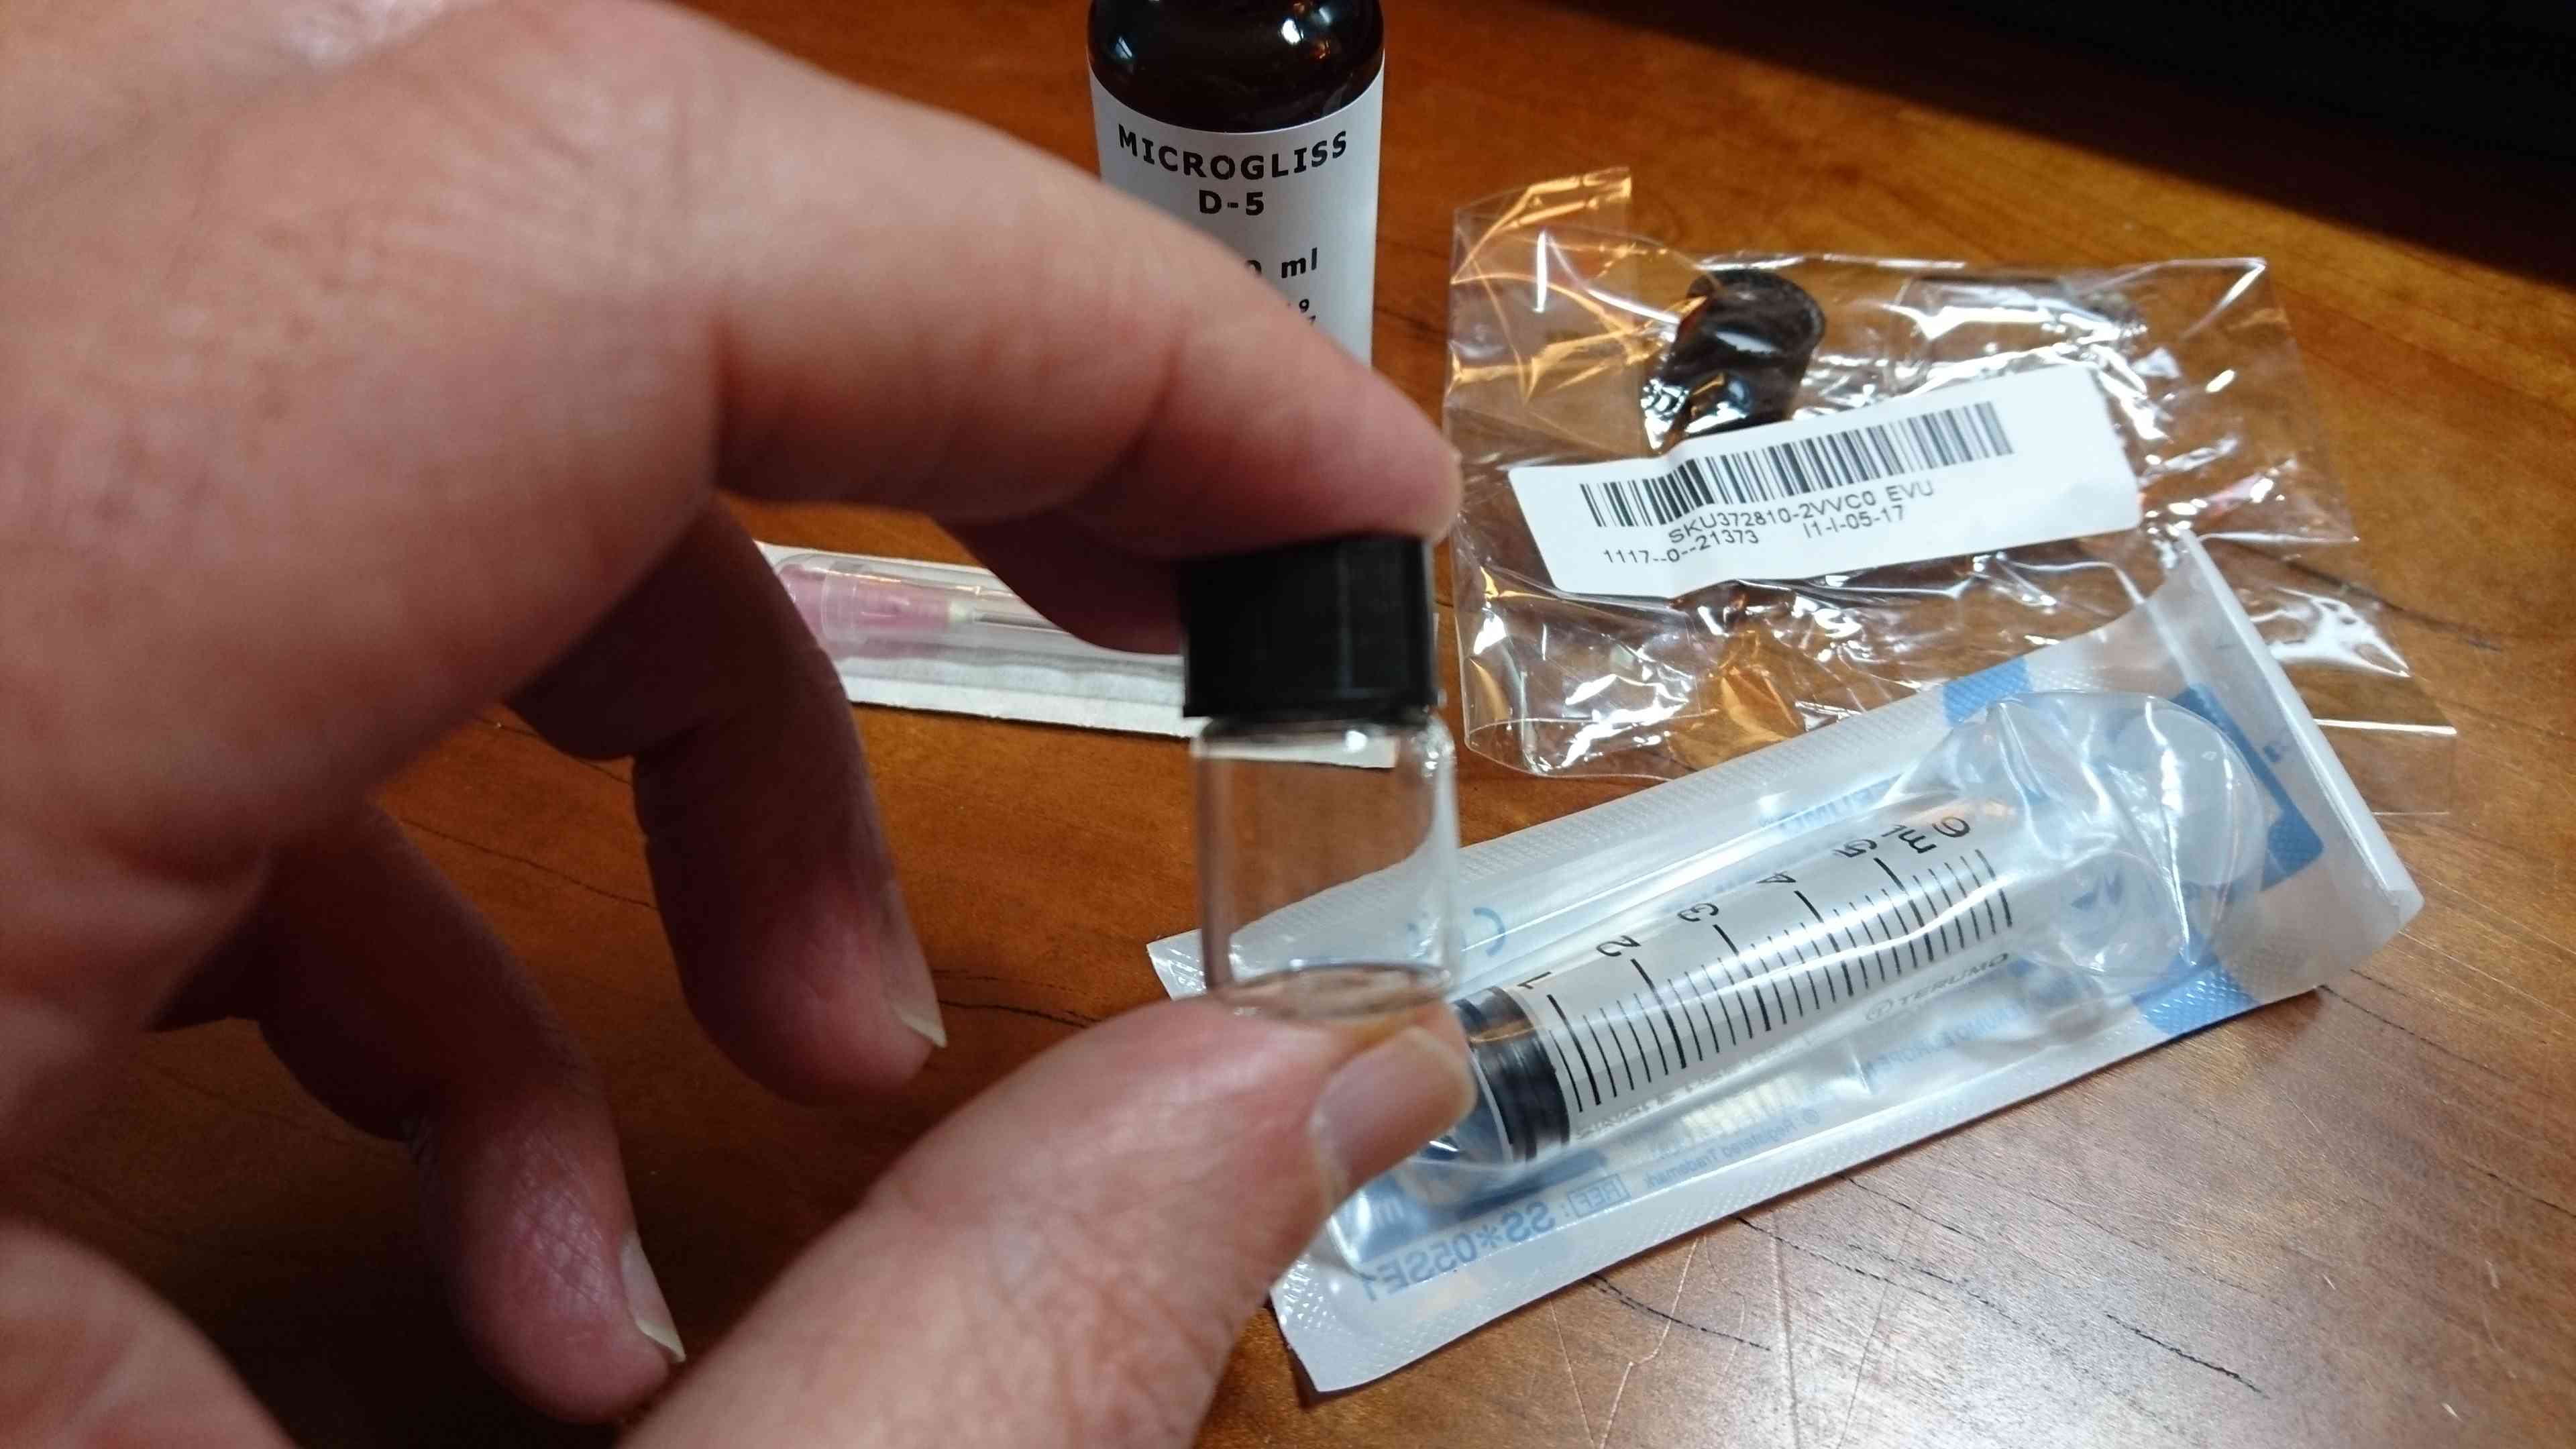
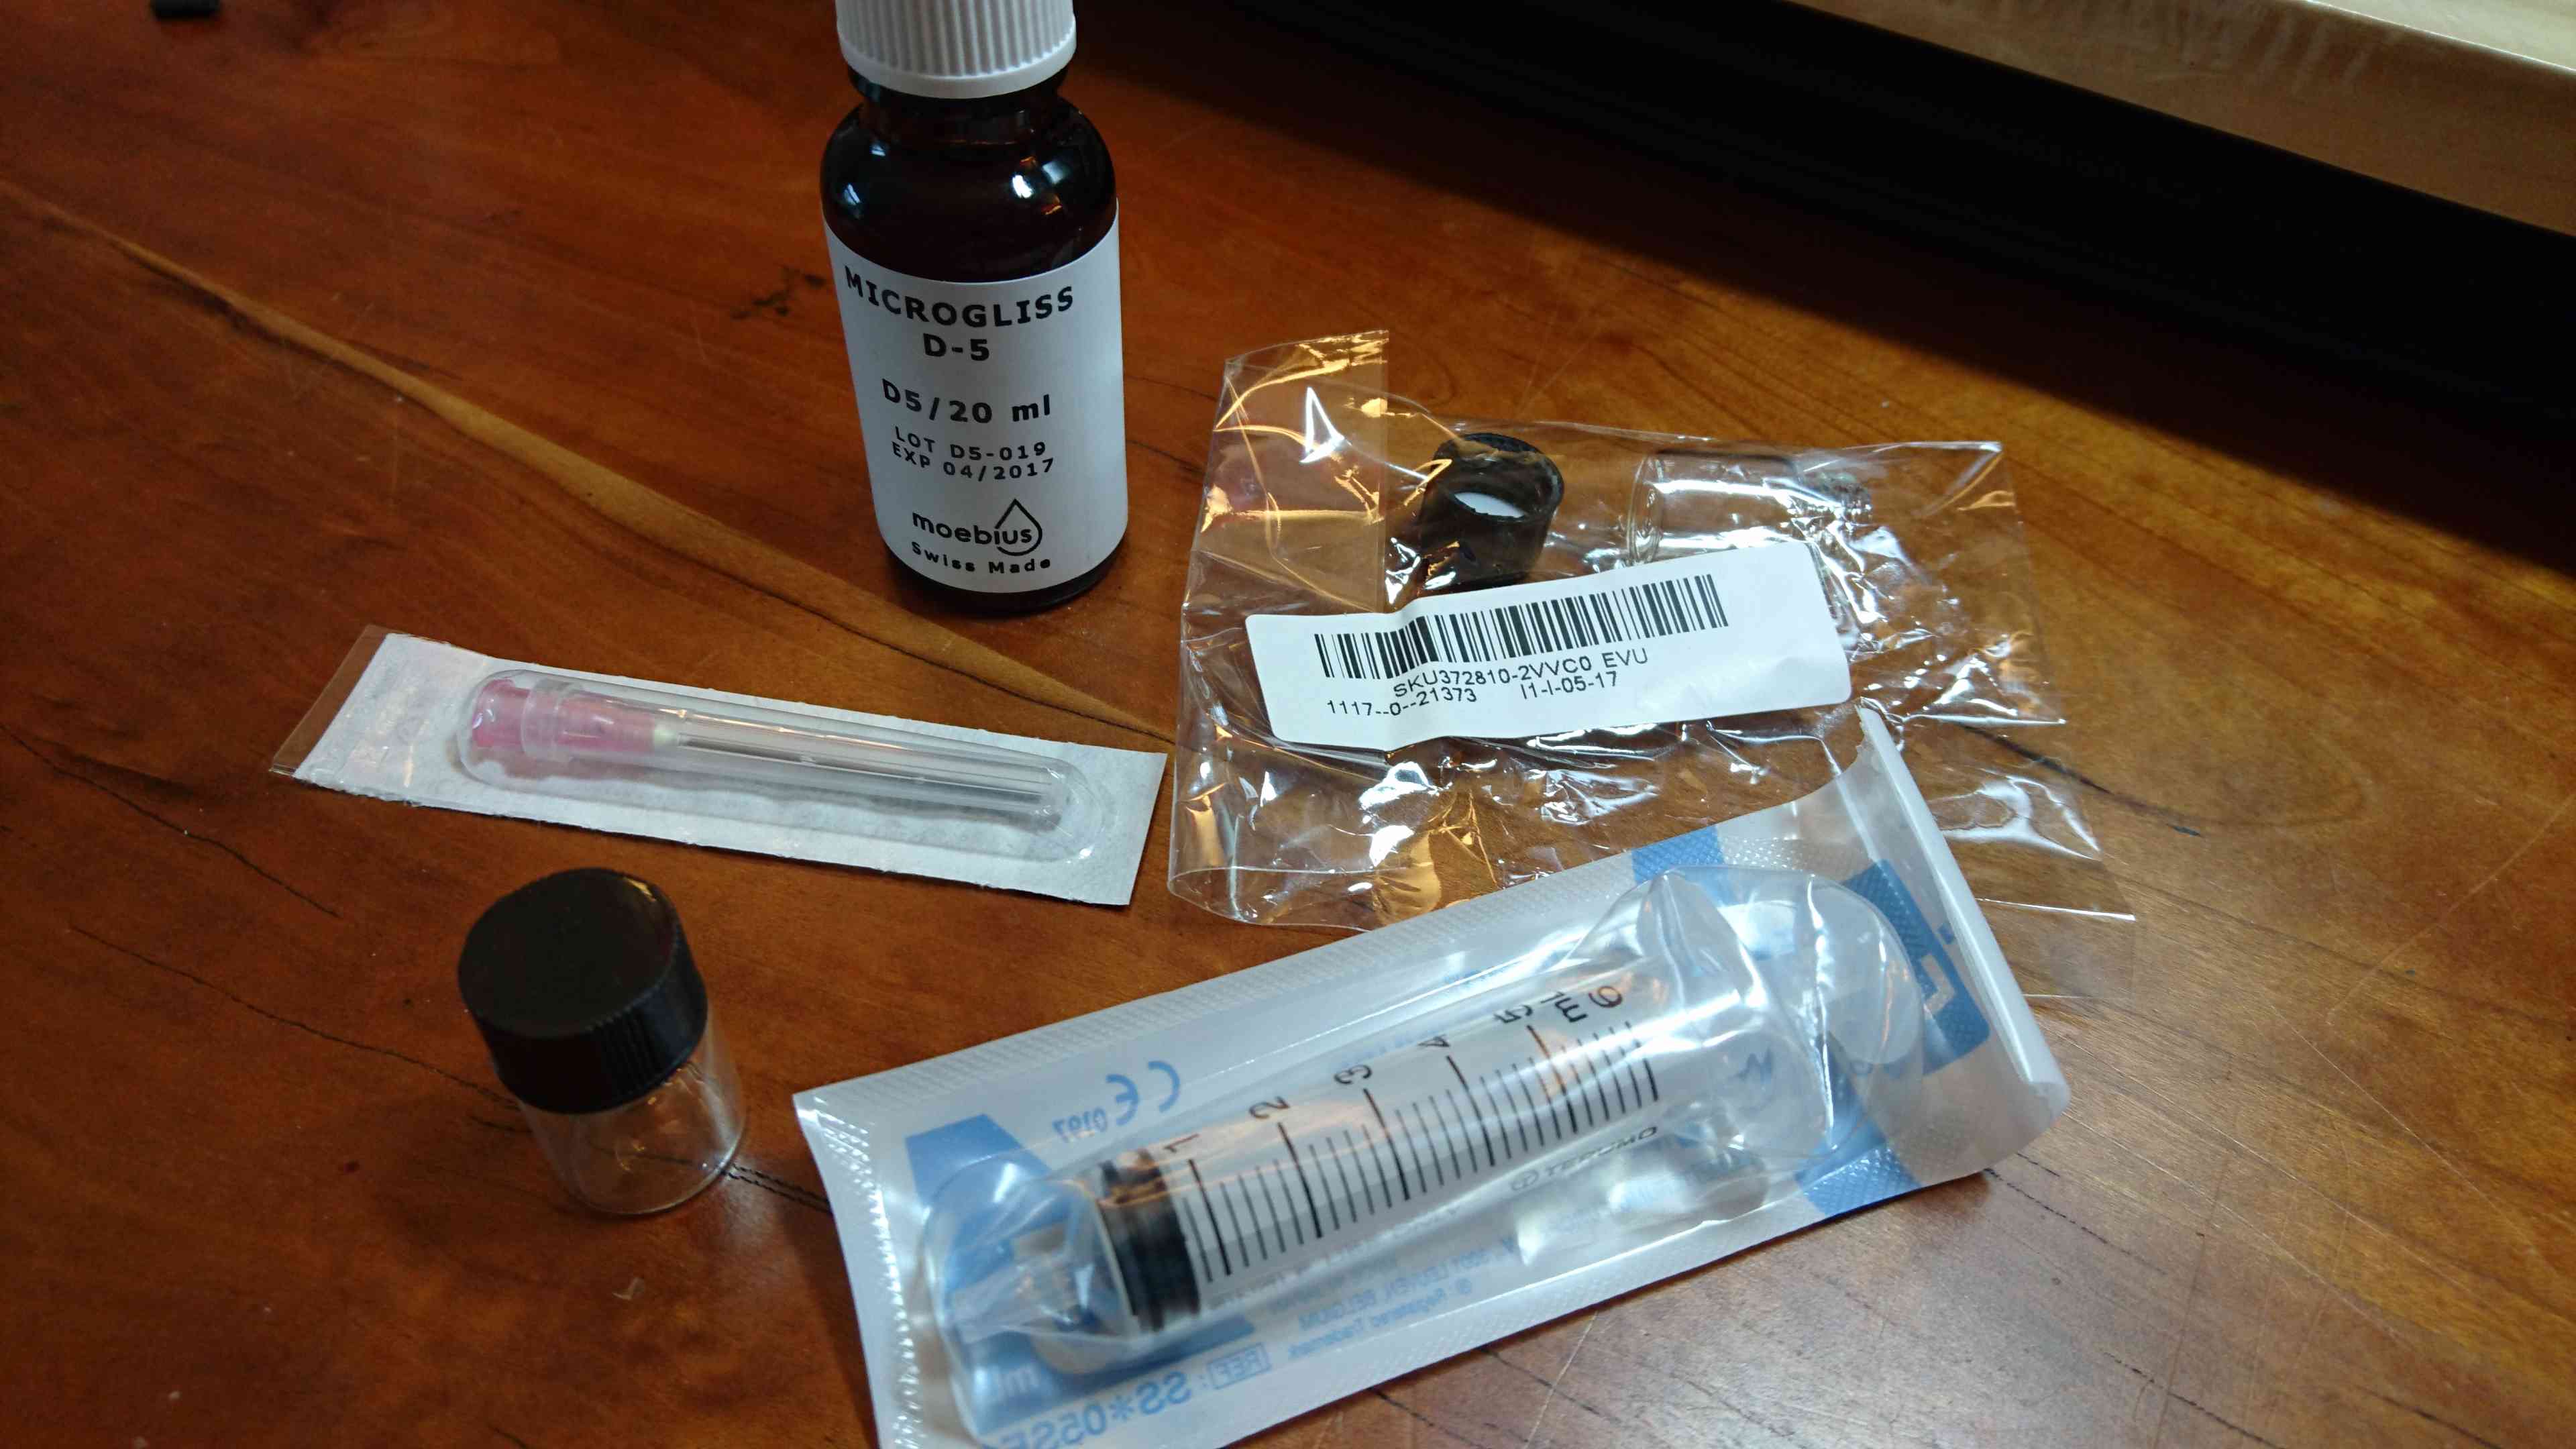
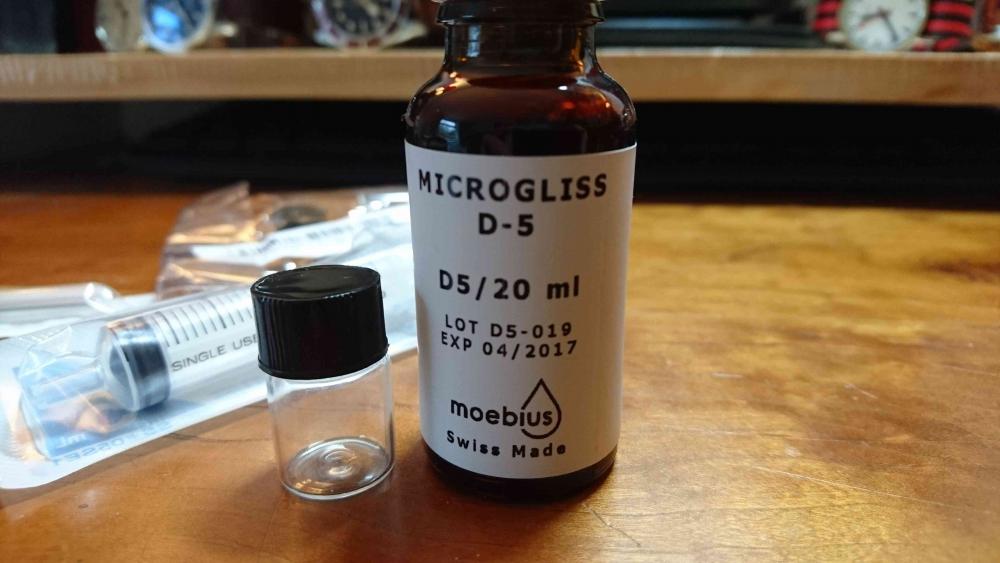
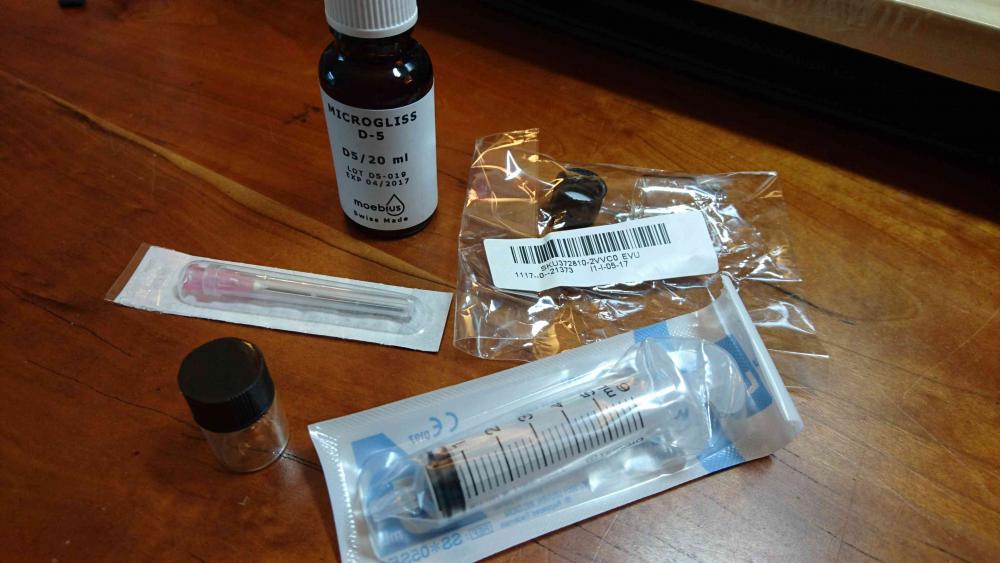
I have some Moebius D5 I bought from Cousins last year. It's a 20ml bottle which I'm unlikely to finish in my lifetime, let alone between now and the end of April 2017 which is the shelf life expiry date of this batch. I haven't been able to find a clear answer to just what the expiry date means for the oil in the bottle. Does it mean the oil should no longer be used from that date? Does it mean that if you use it at the end of the shelf life period the oil will do its job for another two or three years in the watch? Either way, as a tinkerer I'd be content to use it for the next couple of years. That would still leave me with more D5 than a hobbyist would ever need, so I'm planning to keep 2ml and I'm offering the rest of the bottle to other tinkerers in either 1ml or 2ml doses. I have some new small 2ml glass bottles, an unopened syringe and a blunt mixing needle to decant the oil without contamination. You can have it for free, but I'll provide my paypal address in the package if you want to make a voluntary contribution to the P&P. If all of the oil is taken I'll post an update in this thread. PM me with a postal address and tell me whether you would like 1ml or 2ml.

 4 points
 -
@chadders1966 whilst searching for a replacement, just for fun why not try and make one. You need some decent springy high carbon steel of about the right thickness, slightly thicker is good, something like an old (but decent quality) hacksaw blade for instance or a piece of old clock main spring. Heat it to a bright cherry red and then let it cool slowly to anneal it so that it can be worked. Next get it to the right thickness by working it on 400 grit wet/dry paper on a sheet of glass using an old champagne cork to hold it flat and keep your fingers out of the way. Work both sides and check the thickness often. Then drill the holes, one for the screw and two for locating dowels. Now superglue the broken pieces to the stock so that the locating dowels are in the holes and the screw hole lines up. Using this template you can cut and file to shape. Once you're happy, remove the template and carefully tidy up the finish, apply any chamfering or counter sinking. It might also be wise to test fit at this stage too although you don't have any locating dowels. Now bind the whole thing in soft iron wire in preparation for hardening. This helps to keep the heating even and reduces the risk of warping. Heat to a bright cherry red again but this time cool it quickly by quenching it in vegetable oil (some people also use brine). Unwrap it and check that it hasn't distorted. Also test it for hardness using a file, it should be glass hard at this stage. If all is well then clean at least one side to a bright finish so that you can see the tempering colours. Now temper it by placing it on a piece of brass sheet (the thicker it is the more evenly it will heat) over a spirit lamp and watch closely for the tempering colours to appear. The colours start with a very pale straw colour which gradually darkens and then goes to a light blue which then darkens. You want to make sure that the process happens evenly over the whole surface and you are aiming for a mid to dark blue. Once you have got that, quench the part in water. You can now polish the part back to bright, or even leave it blue depending on the aesthetic effect you want. For the locating dowels find yourself a sewing needle of the right diameter. Anneal it as above, and cut two pieces, slightly longer than you need. Install in the dowel holes in the spring and rivet in place. Now carefully grind to the correct length. Install the spring in the movement, sit back, and admire your handiwork over a glass of something suitable. Just a thought...2 points
-
Hi Stephen, glad you found My videos helpful in some way. Since you already sourced the jewel I'll jump to the next issue: the hammer jumper/spring. Honestly I've never seen a spring snap like that, and the only solution is replacement, unfortunately. On eBay you will find many that sell incomete movements for under 80€ so I would search for the occasion and grab it, you will have some spare parts aside just in case, which is always good. I bought some time ago a lot of 5 incomete movements, from which I then managed to fix 3 complete watches, spending 50€. Not bad... The PDF linked above with the compatibility chcart amongst model numbers will be really helpful. And should you still need them, I got the service manuals in PDF too for almost all models of Landeron movements.1 point
-
It is a rubbed jewel setting. No need for a perfect outer diameter match.1 point
-
You're right, it has to be replaced. It appears to be a friction jewel which means it's only held in place by the pressures of the walls around it. Typically 0.01mm bigger than the whole. Before doing anything to it you should measure the depth it was from the level of the main plate. How deep or shallow determines the endshake and so it is helpful to know it before you push the jewel out. Once out you have to measure the size of the pivot hole unless you have a gauge that has like 80 sizes where you put your pallet fork or wheel until you find the right size. This is very important as it determines the sideshake. Anyway, once the jewel is out you have to find its replacement based on your measurements. Jewels don't have specific positions, just sizes. There are Seitz sets with hundreds of vials that contain all sorts of options out of which you pick the best possible match. Then the fun part is to use your jeweling tool to gently tap the jewel into position, i.e. Friction fit it. Using the depth measure you got before removing the old jewel you tap the new one in. Like i said, it's ideally 0.01mm bigger than the whole. Too big and it will crack as you try to force it in. Too small and it won't stay in place. Once you get it where you think it's right you should test it by assembling the balance wheel and fork to check endshake and look at interaction with balance wheel. If it's good then move on to assembling the train so you can check interactions with escape wheel. This is fascinating stuff that I wish I had more experience in but this looks like a great case to start for you if you have the tools and interest. Good luck! Sent from my iPhone using Tapatalk1 point
-
It's a pallet staff jewel and it's unlikely you will be able to buy this by name, you will have to take it out and measure it then scour the globe for one. Good luck with that bit. Some say it is more sensible to take one from a scrap movement, but finding one of those can also be hard. Search this forum for "rubbed in jewel" and you will get a few hits which will explain. Szbolagh will no doubt be along shortly to show you how to grind down a more readily available pressed in jewel into the right shape!1 point
-
If it is a snap back case then this is the tool you need. I used this tool only a few times but it is really handy for the tight one's. https://www.cousinsuk.com/product/bench-top-case-openers1 point
-
Hypo cement is best for acrylics that dont have quite enough tension on their own, or if there's any other concern about the sealing. For mineral I suggest Seiko cement, it's very high performance, and dries clear (even though the hardening agent first makes it yellow) has to be left for 12 hours or so but maybe you don't want to buy and store one of those UV light boxes for baking the glass in (which I assume is necessary, but I might get told otherwise). and maybe time is not of the essence, in that case Seiko cement is ideal.1 point
-
€400 I think is very reasonable (in my opinion that is)1 point
-
Thanks for this, I was debating on getting G&S but I have a strong liking for epoxy type glues and I wasn't sure the 5 minute would work well. We have an equivalent in Canada for Devcon, it's made by Lepage.1 point
-
I've found that the G&S glue doesn't really work very well for crystals, it doesn't create a strong enough bond. I usually only use the hypo cement for re-gluing dial markers, date windows, etc. I would recommend a two part epoxy. I personally use the Devcon 5 minute epoxy - it dries clear and creates a strong bond.1 point
-
I've had the best results with UV glue Sent from my SM-T585 using Tapatalk1 point
-
There are a few on the market & I have recently used the Seiko two part adhesive to attach a lens to a crystal and it worked great & dried transparent.1 point
-
@Vich, I sometimes do the same... As per the Sturmanskise, a bit more fiddling got it down to a couple of minutes per day. I left it fully wound in the office before leaving tonight and will leave it there until Monday. It should still be working when I go back in the office Monday morning and I will check the accuracy. Will update with the data then.1 point
-
I second that with the UV glue. I have used G & S and I'm not a fan of it at all1 point
-
Any UV cement will work.1 point