Leaderboard


Popular Content
Showing content with the highest reputation on 02/03/24 in all areas
-
Getting quite good with my 7S26's now. I knackered at least 4 on my learning curve. Been learning just over 25 month. System All parts oiled as per Seiko chart. I use the maxim from Mike of Myretrowatches. If you can see it on the oiler, it is too much. Centre wheel and then bridge. Insert barrel. Rotate barrel to see centre wheel ok. 3rd wheel. 4th wheel and escape wheel into relevant correct locations. Gentle touch on barrel to if all move. Don't spin it much as it will dislocate the wheels. Pawl lever parts fitted correctly to Barrel train wheel bridge. Make sure pawl lever is inserted correct way. Offer Barrel train wheel to plate. Move click and allow it to settle. Move it gently over pivots. It it doesn't settle, then I usually rap tap the holder with the top end of the tweezers. This allows, sometimes, the pivots to find their respective holes. Even if I think all is ok. I gently hold the barrel with pegwood and gently move the mainspring barrel. If all OK. Put a screw into a holding hole. 1 or 2 winds. Check rotation on the mainspring barrel. If ok, wind down to small bind. Check again. Do the same to two other screws. If all ok, by checking with mainspring winder rotation, secure each screw separately and check wind. I have had it where on the final tightening of a single screw the wheel bound. Ease off. Try wind. Only when happy, secure all. Check rotation again. I've been lucky with my last two 7S2's. Both had the barrel bridge settle as I offered to to the plate. Flaming amazing. But they were virgin watches. Had never been opened before. All three watches prior took me over 2 hours each time. All working now. But 'gentle' is the name of the operation. Not damage a pivot for nearly a year now. Phew! Movement is now working well. Case cleaned. New crystal to be ordered tomorrow. Note Don't despair. Consider the alternative to damage Have a break. Coffee. Go shopping with bride if you have one. Show her your problem. Maybe she will not understand. But letting your bride into what you are doing is a great show of trust. It was she who learned to say to me the lifesaver, "Don't ping. Coffee". I'd come back. Flaming thing would often go in ok. She would smile that knowing smile. Hope this helps Great hobby this.

 5 points
 -
I made a few mistakes in my beginning. But I would never had offered the damaged watches to anyone. In fact I am now actively beginning the restoration of my own 'botched' work'. I have learned about the pride that servicing and repairing a watch can give.4 points
-
I just purchased a gel cushion from aliexpress as it saves me some fabrication. If there is anything of note to report (great or abysmal), I'll post it here. I expect it will be just fine, and I'll practice my lettering skills and write "Bergeron' on it. Just like painting racing stripes on a car to make it go faster....4 points
-
From time to time, one encounters strange "repairs" or "short-cuts"; Yesterday I opened a show case-back and noticed some white "plastic" in and around the movement If the O-ring is broken or missing, why not using Teflon-tape ?
 3 points
 -
In my case the service sheet was right.
 3 points
 -
I couldn't agree more, and that is how I go about it although I prefer to cut the hub rather than try and get the rivet. However I'm also a self confessed tool junkie so I was rather intrigued by this when I came across it, especially as it was described as some sort of "stacking tool", I had to know more. A quick Googlefoo and I arrived at this thread on our very own forum and thought that the folks on here might be interested. I'm afraid it's one of my more obscure obsessions, the practice of finding "things" that I have no idea what they are, and trying to figure it out. I do it at car boot sales too, in fact they are the best hunting grounds, where the seller has no idea what they are selling. I invariably end up either with an absolute bargain, or simply enjoying engaging the seller in a little voyage of discovery.2 points
-
Resurrecting an old thread because there's one of these just appeared on eBay, albeit with a very misleading description. https://www.ebay.co.uk/itm/116057709213?hash=item1b05941a9d%3Ag%3AH68AAOSwc8dlvgzP&amdata=enc%3AAQAIAAAAwNHVJ6dkY%2FFW4KXJdAMVbZBtcBM2jZED3vrALHGX5zx4PnEhVj2zUJvkqnqj295S40ywnvORIWRX8gqeYt3JI3PO15FVN5ZH9cKpk%2BPegjpu73whkVUAXkBqkeftfn7oKmBgVSSyig7z%2FdPaEc9flbsZJeS%2FetM96B03lkPjbjyhBO0JprY35BvSmtoHdeLBRdlaa4o8DcBifHPGUB2RyweMF%2FD0e8KTZYTrVEzQjqsL8F2yFcrMvk7LHhPfC%2FoYIw%3D%3D|tkp%3ABk9SR6Tpt_2tYw&LH_ItemCondition=30002 points
-
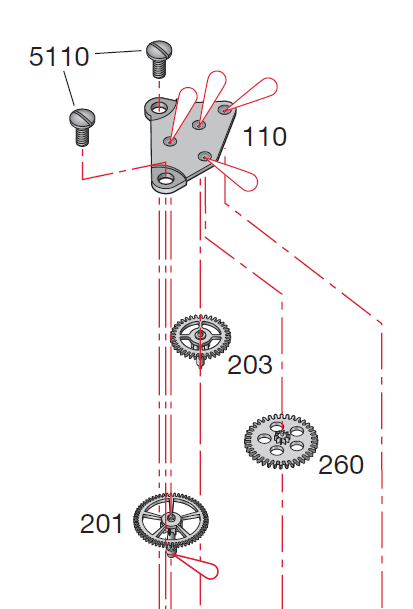
Does it show it correctly in the service sheet? That's why I always take lots of pics. The first time I serviced my Breitling Aerospace I just couldn't get the bridge to sit on the gear train. I was following the service sheet. I double checked the pics to make sure the gears were the right way up - still couldn't fit it. Only when I looked at my disassembly pics did I notice that the service sheet is wrong, wheel 260 is shown the wrong way up.
 2 points
 -
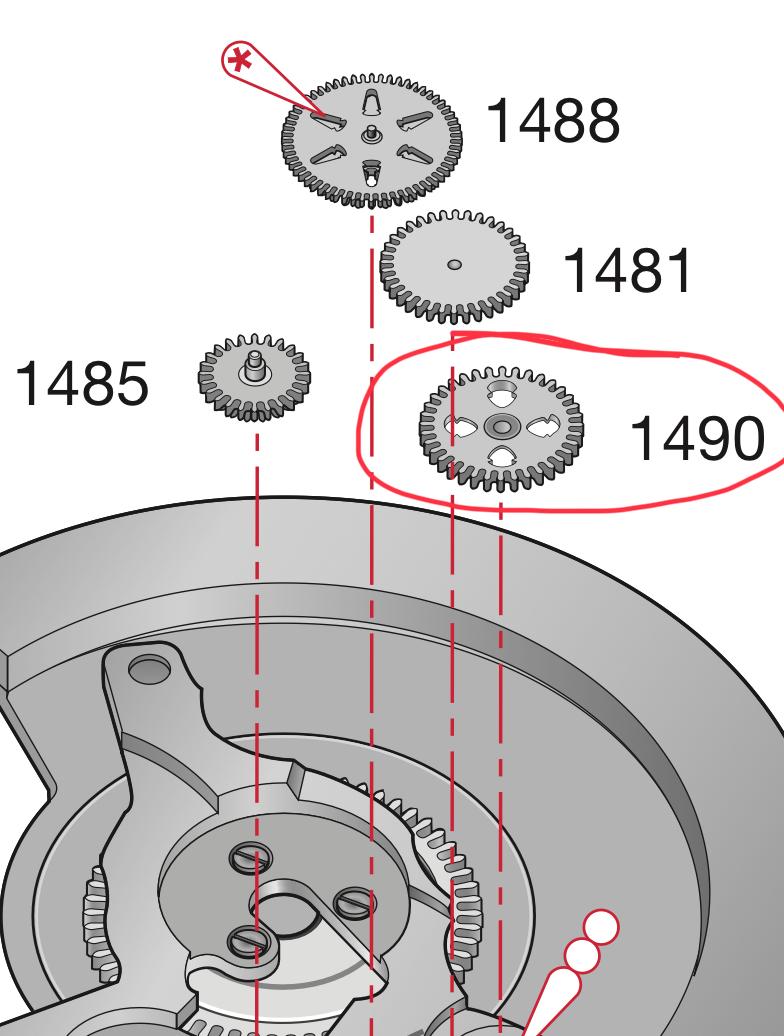
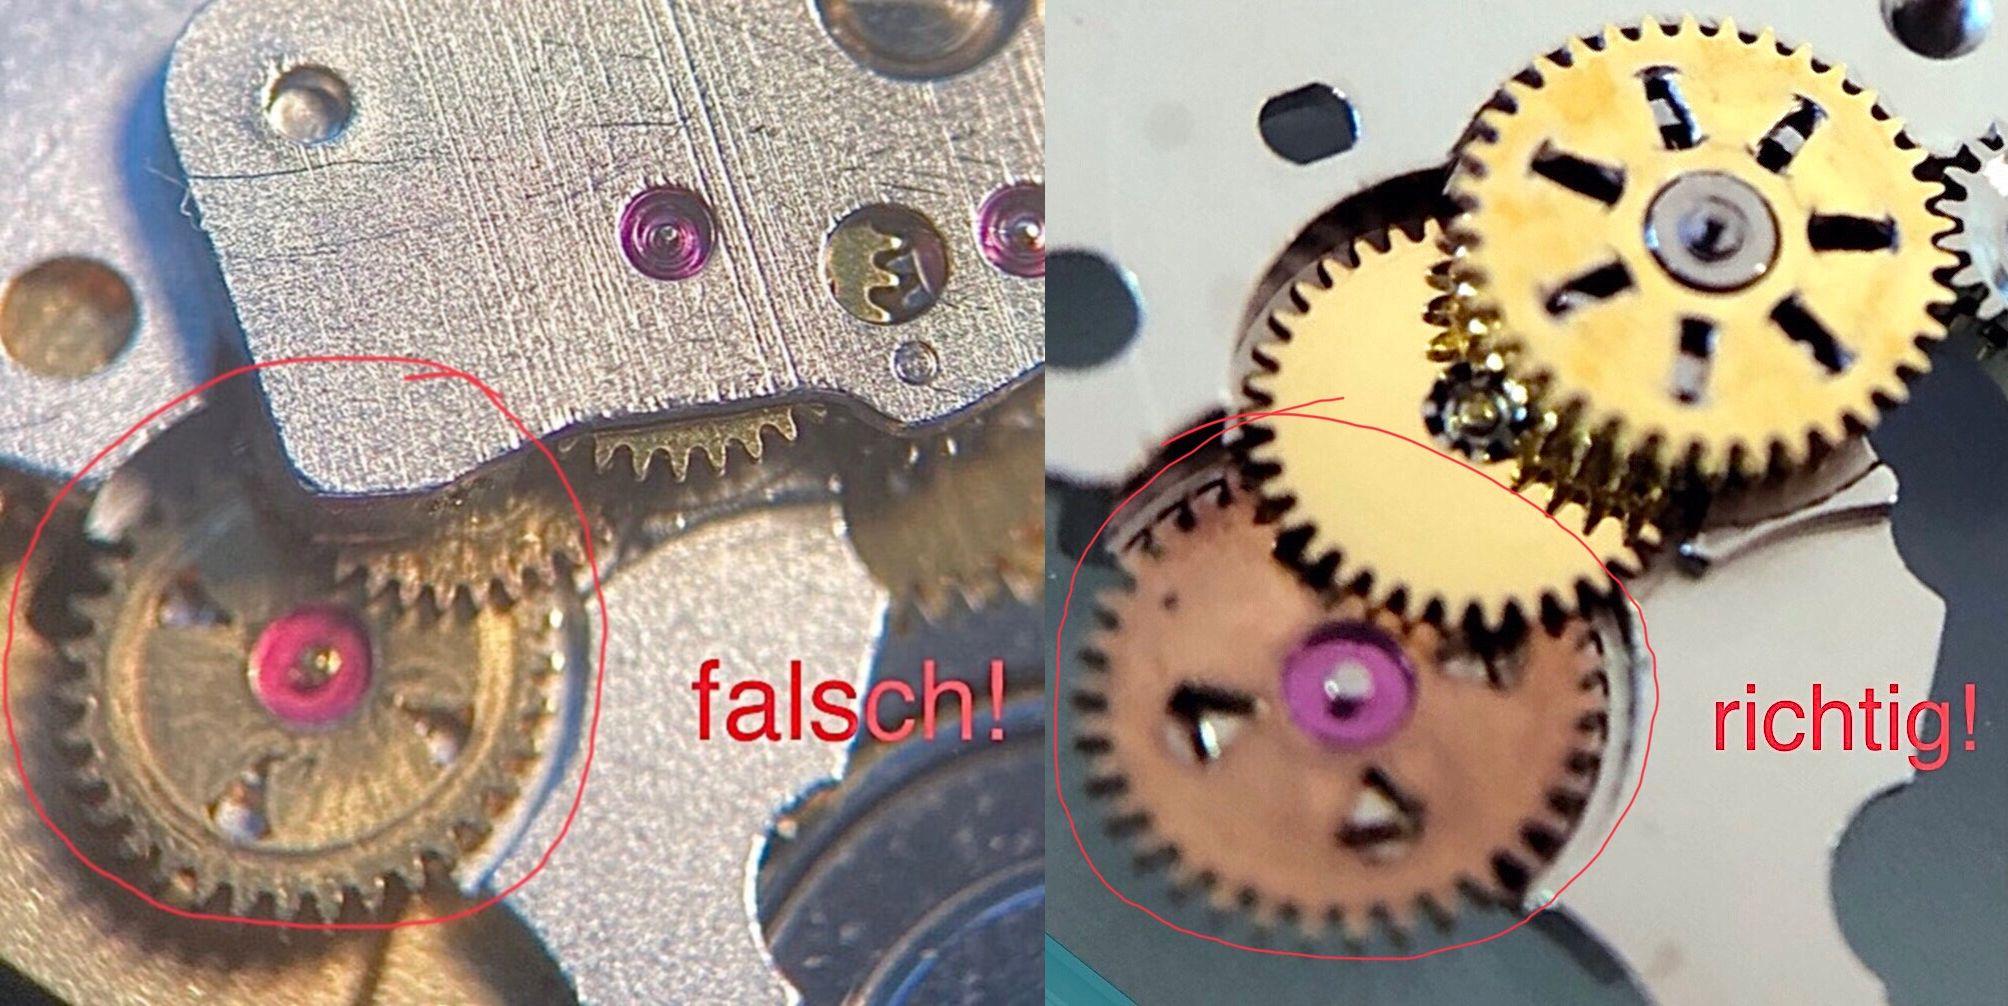
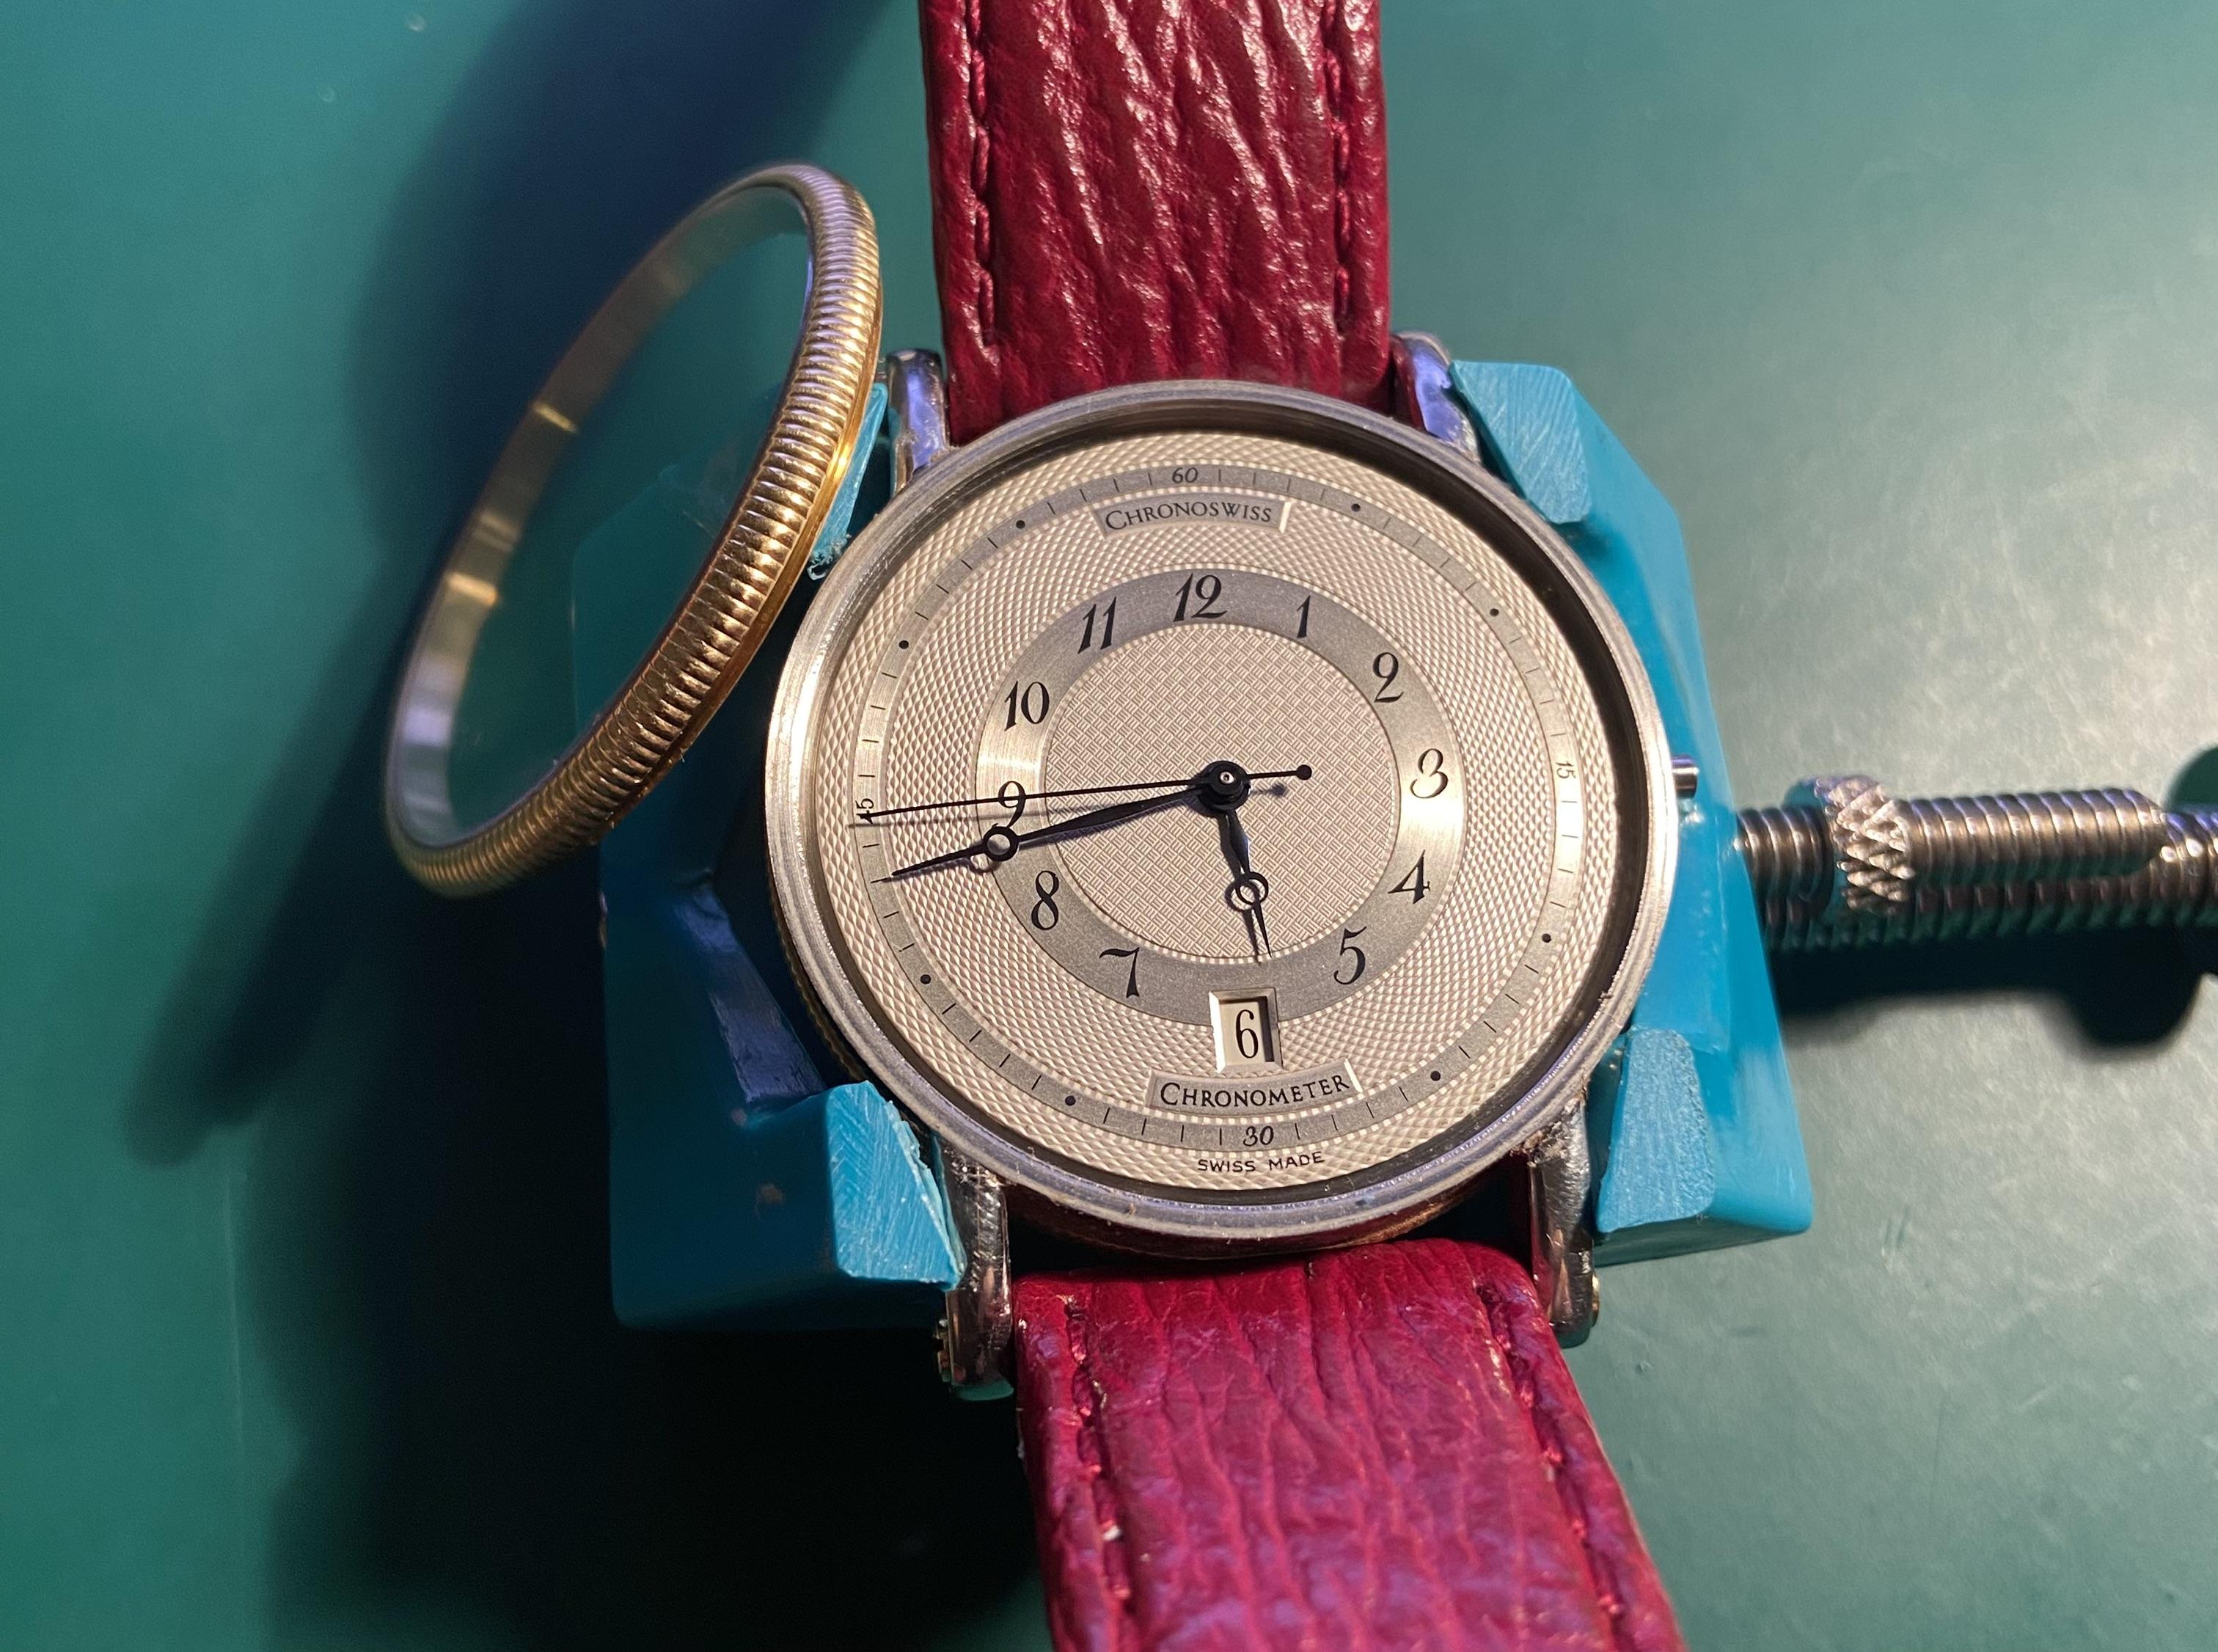
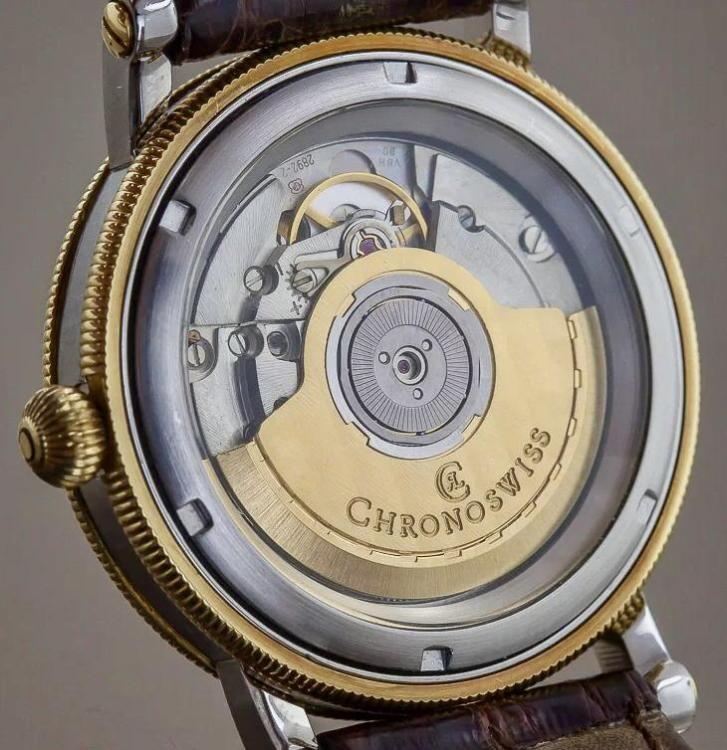
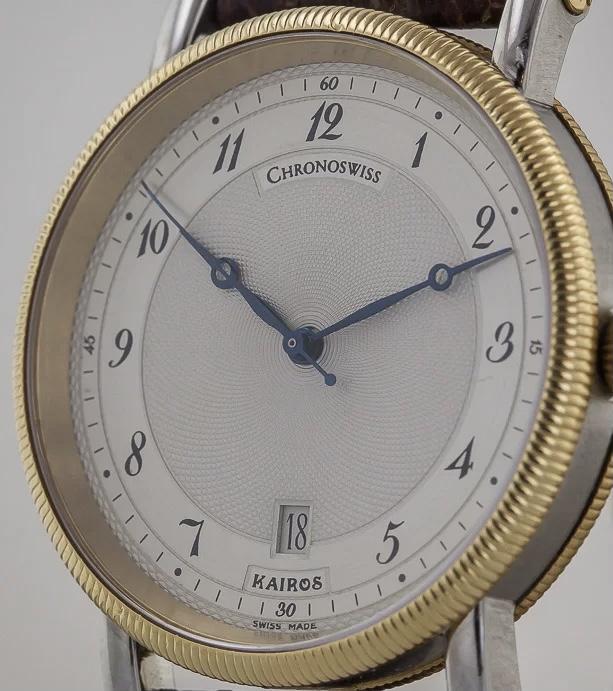
Recently I serviced a Chronoswiss Kairos with an ETA 2892-2. This watch had a professional service 15 years ago. During disassembly I noticed that the screws holding the automatic works were loose After cleaning and reassembling the movement I found that the automatic works only functioned with loose screws. Searching for the rootcause I found that the „intermediate reduction wheel“ in the automatic works was mounted in a flipped position. Relying on my foto documentation I had mounted it as wrong as it was before. I successfully flipped the wheel back instead of loosening the screws as my predecessor did
 2 points
 -
I was lucky all the people who influenced me in my formative years taught me that there was only one way to do a job. Correctly.2 points
-
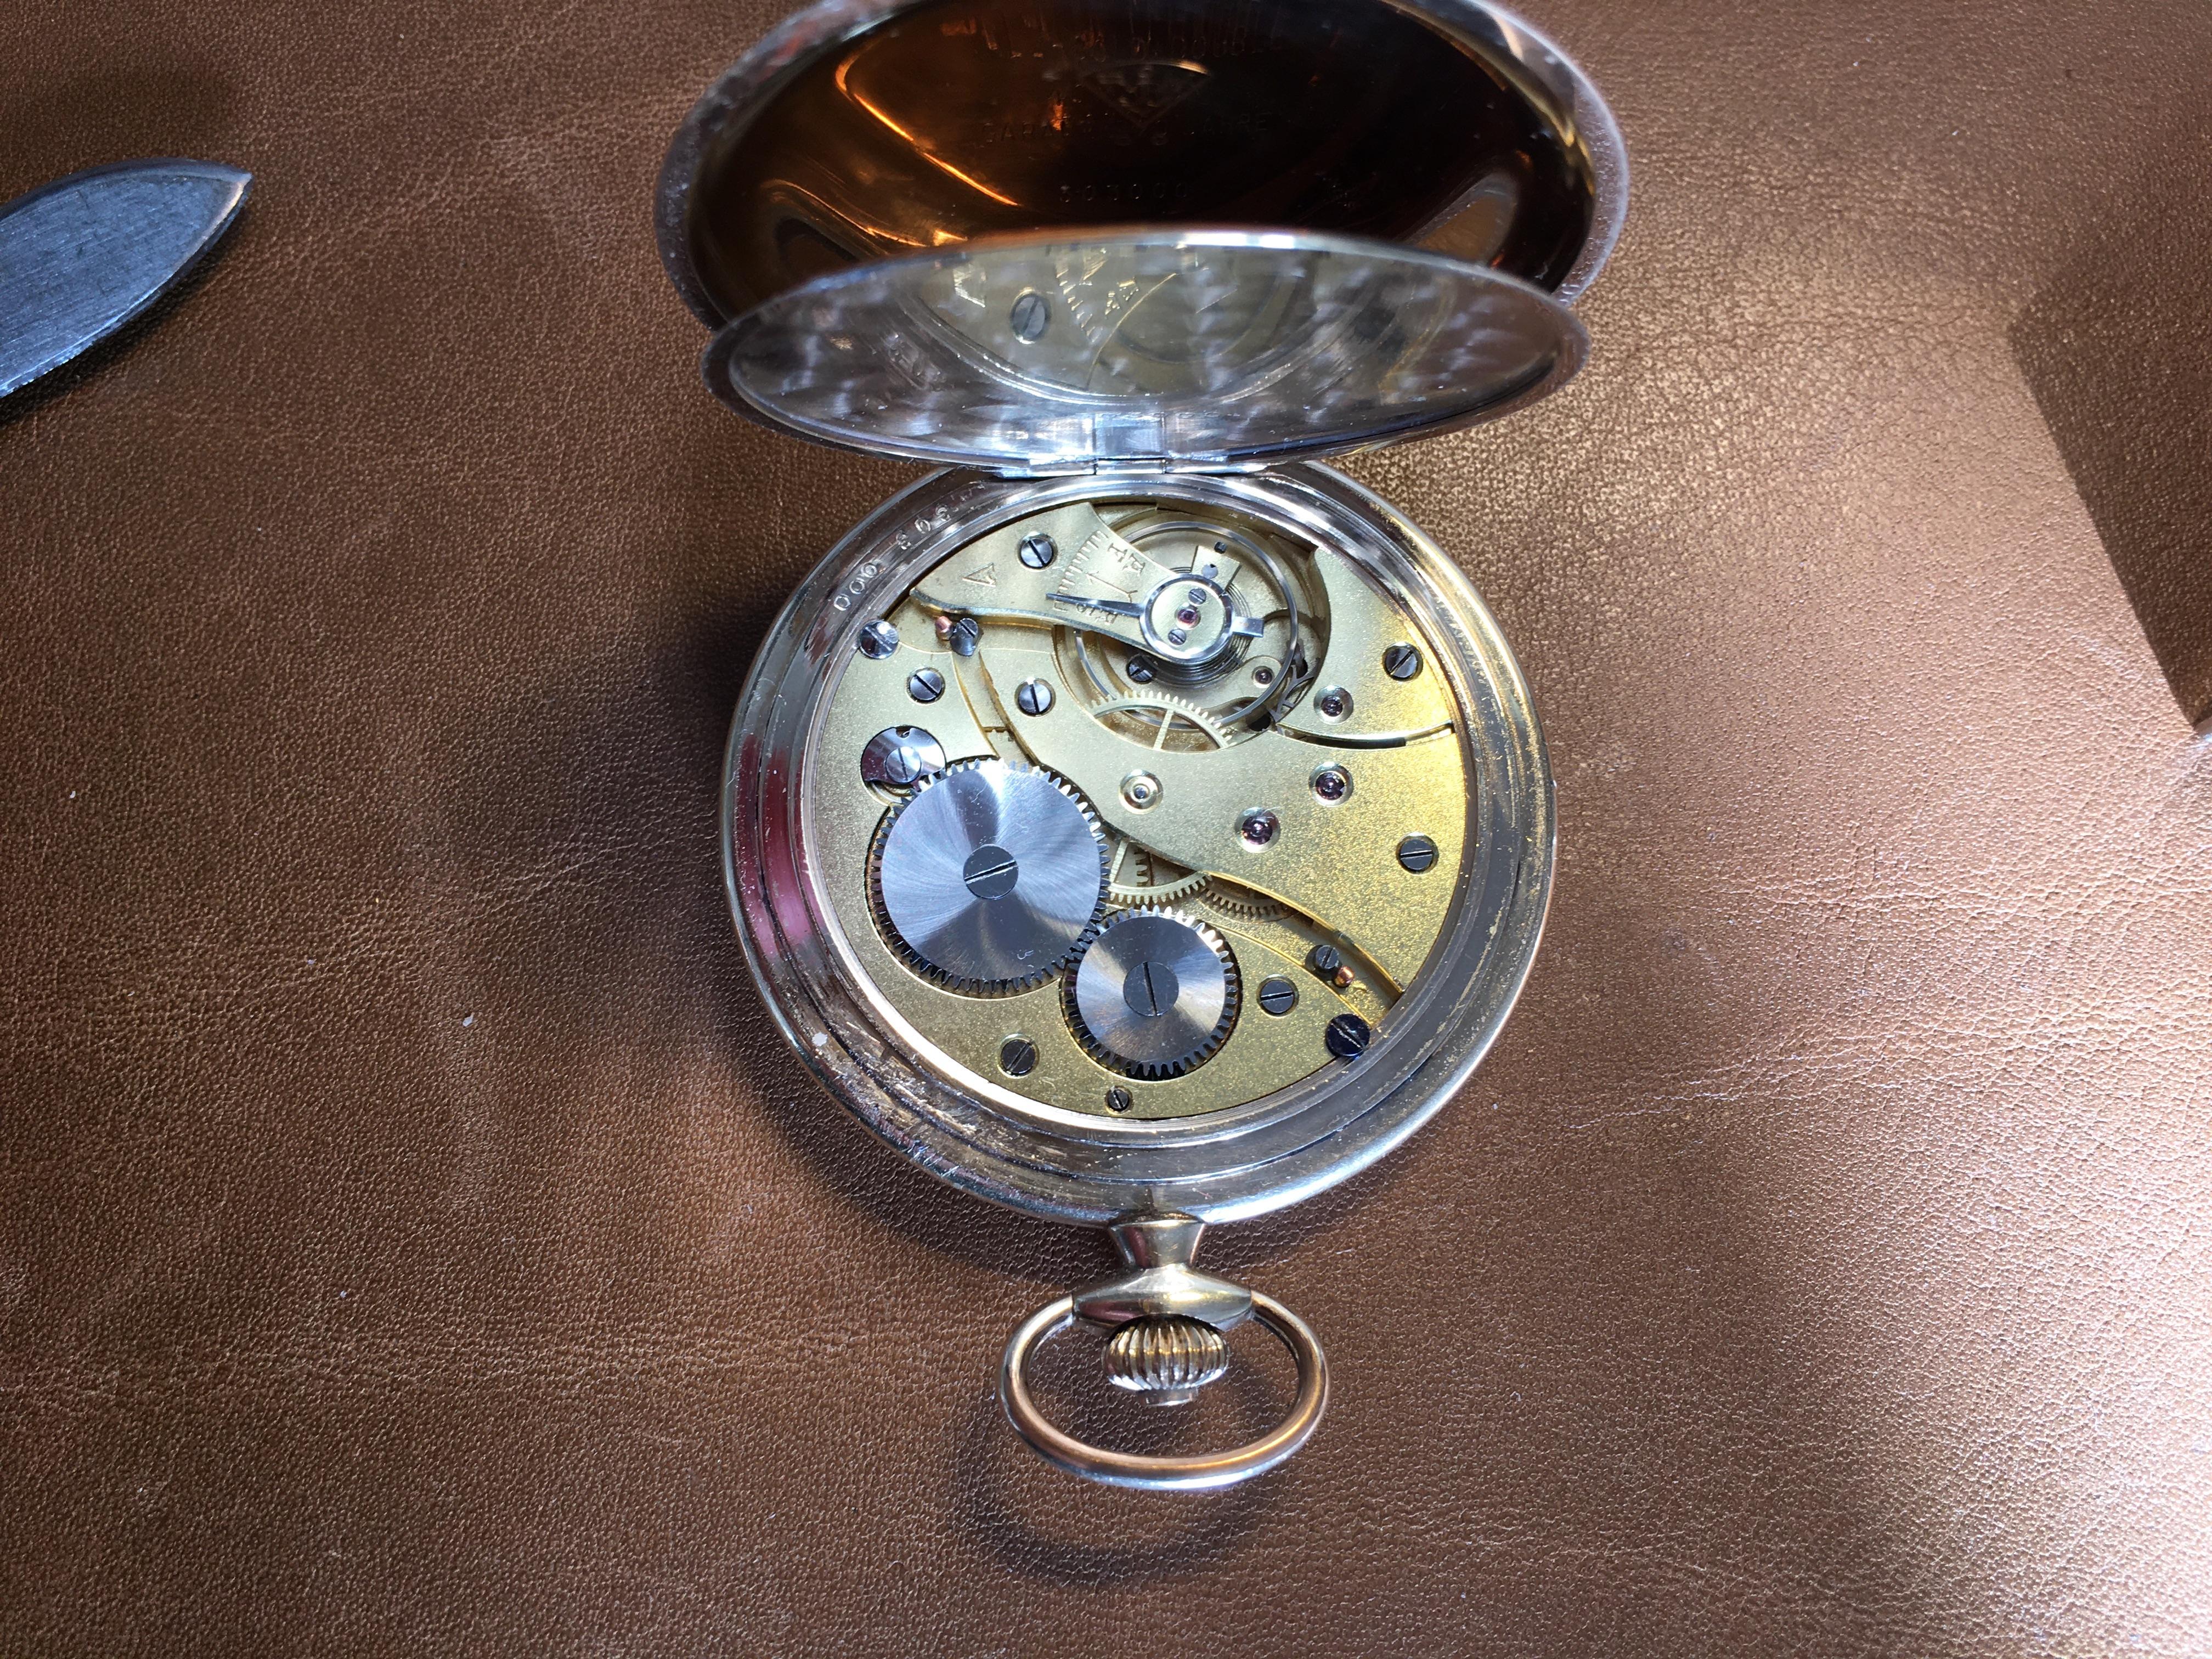
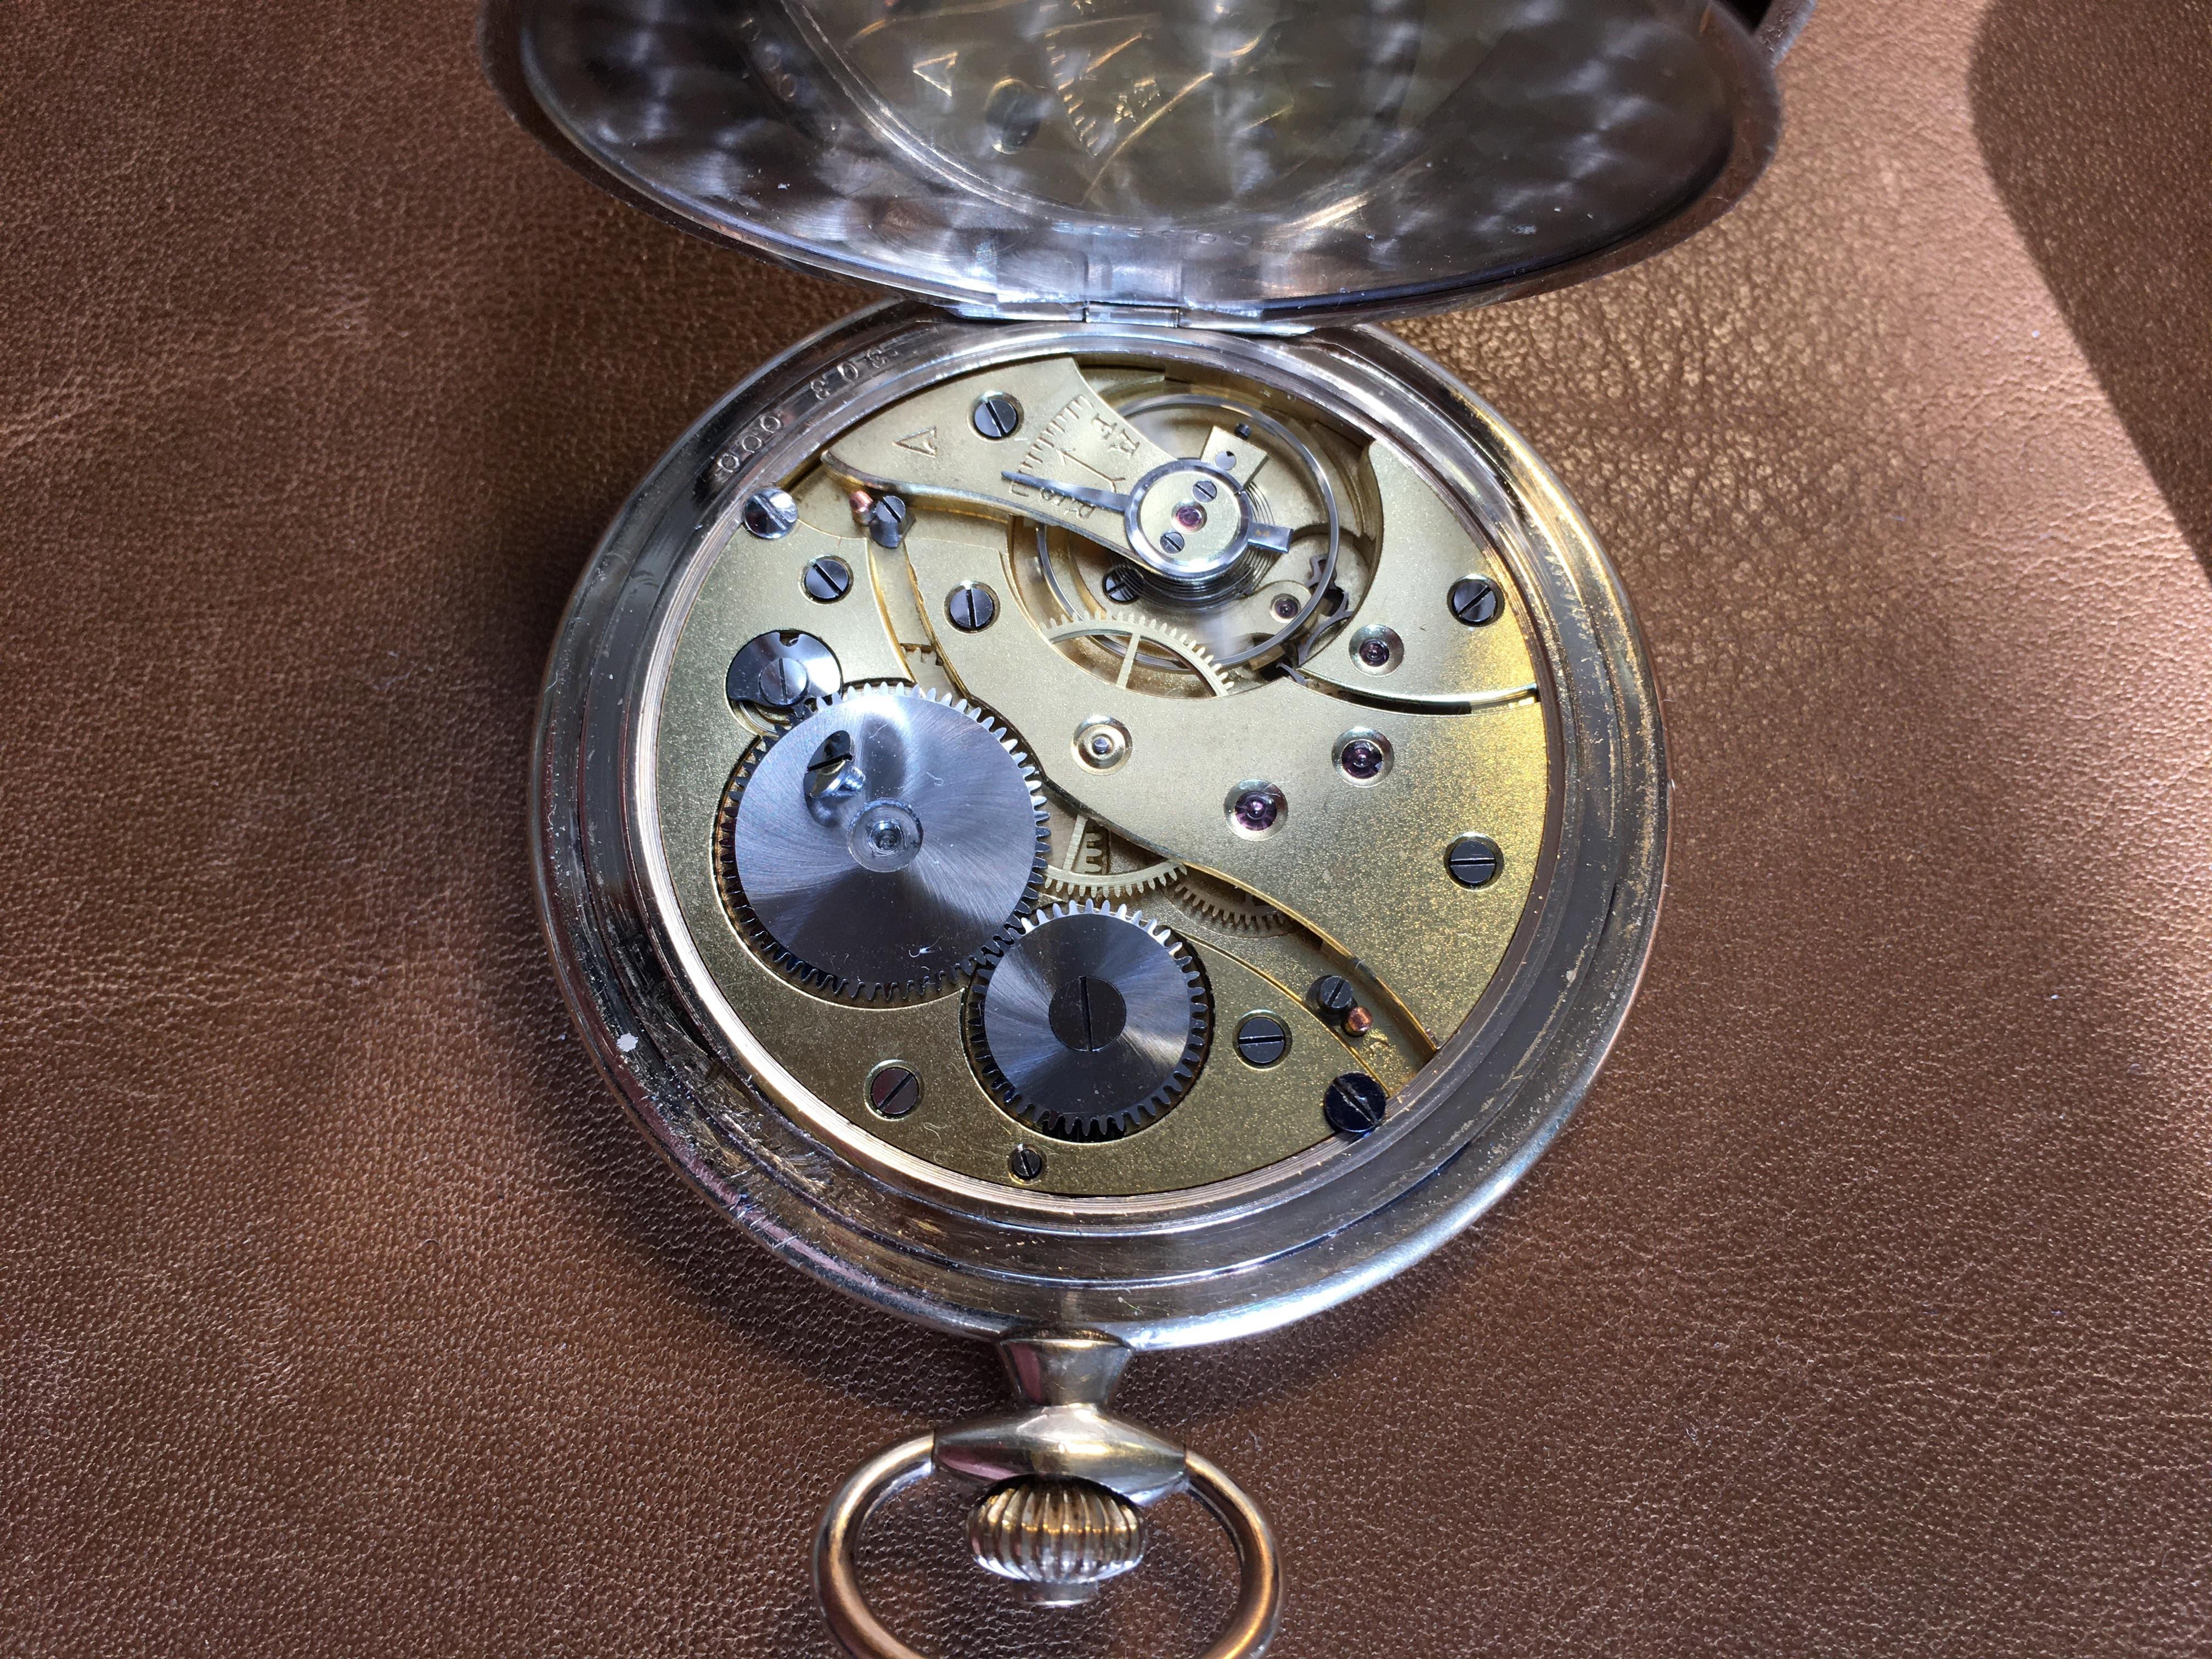
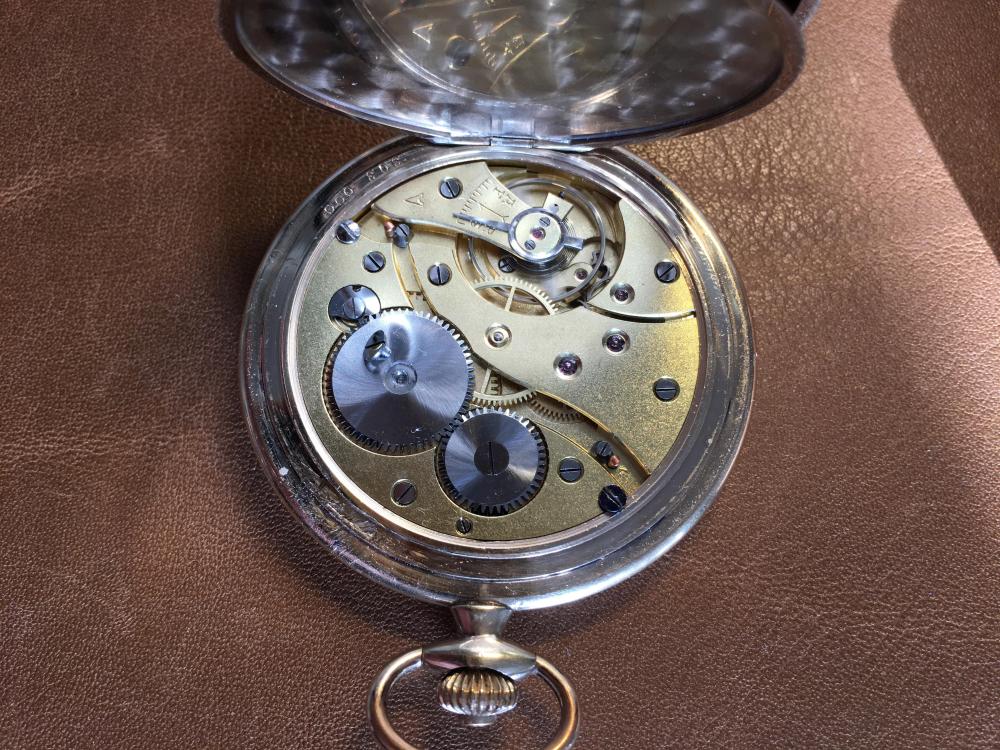
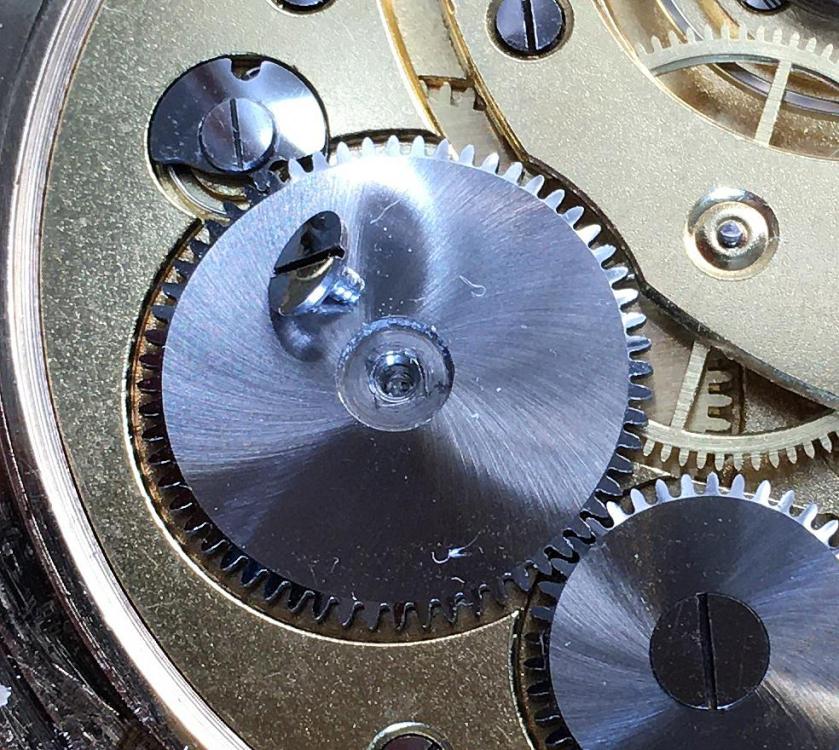
Yes, please ! It may learn everybody some more about the "tricks" of the trade Here another one which annoys me since I haven't found an answer on how to fix it I bought this gold-plated hunter pocket watch with a nice looking movement; Only to find out, during my service, that the ratchet wheel screw wasn't only of the wrong size, but it had left-handed thread and to make it stick, kitchen aluminum foil was used. The thread inside the arbor is totally ruined ..... No idea how to avoid this type of "scam".

 2 points
 -
Lost you already after having read three words...2 points
-
Great stuff, PTFE tape (Plumbers Tape Fixes Everything) !2 points
-
I have learned something new today. I have never heard or seen such a tool before.1 point
-
Hi. When you think the bridge is correctly fitting check the end shake on the wheels they should all lift and drop under their own weight then fit the screws and continue checking the drop whilst tightening down the screws.1 point
-
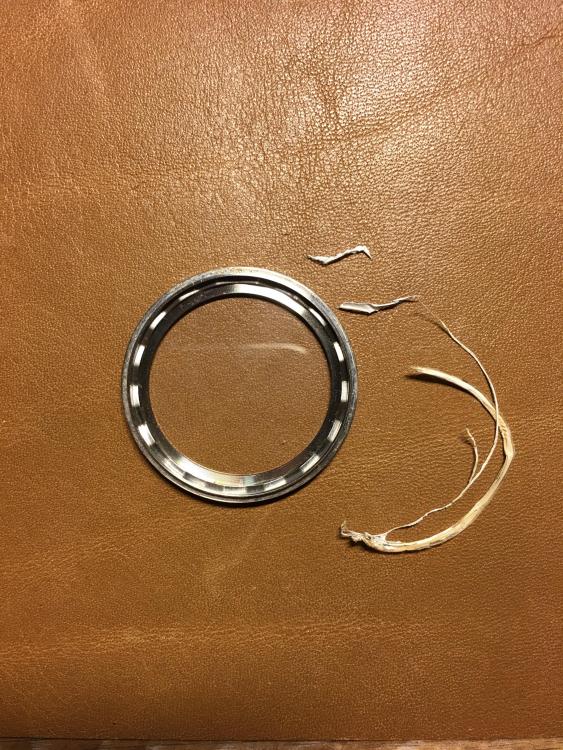
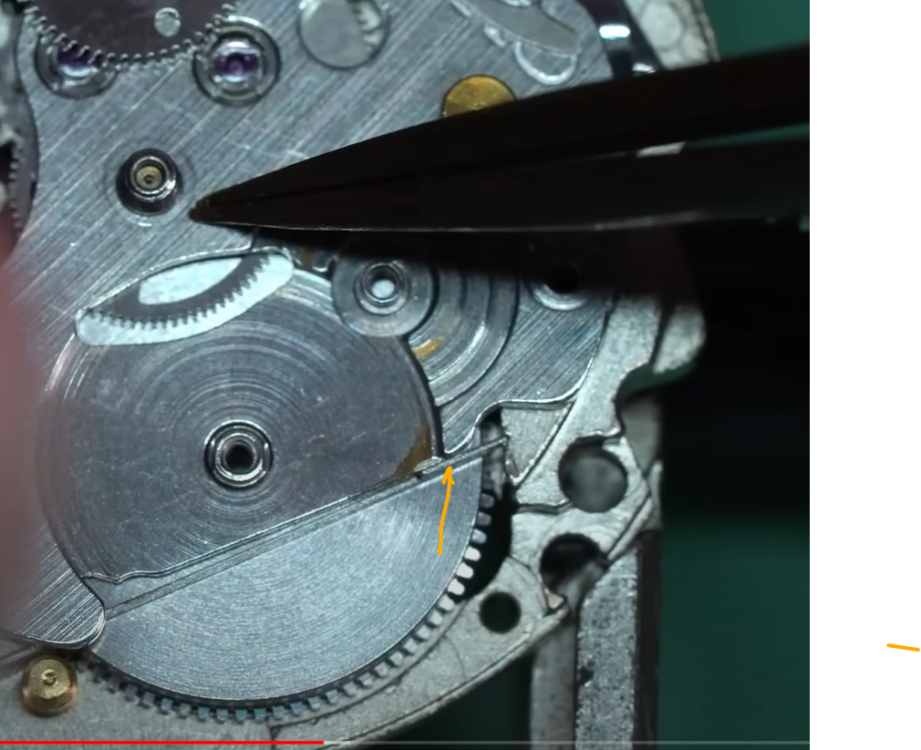
It's not completely circular, there are two straight sides opposite each other. The escape wheel might have a pivot missing. I snapped one when learning stuff the hard way. I also snapped a pallet fork pivot. You have to be absolutely certain before tightening the screws. Keep very light pressure on the bridge with a peg wood while turning the wheels to make sure every pivot is in its hole. Maintain the pressure while tightening screws.1 point
-
To sum up removing a balance staff can cause many issues if not removed with care and no distortion to the balance wheel. The way to remove a balance staff with little danger of creating other problems is to go to the tried and test method for many years by removing the balance rivet on a watchmakers lathe. Changing a balance staff was a common job for a horologist before the emergence of shock jewels and this was their method.1 point
-
Hi @Neverenoughwatches an odd ball tool better off with a Kendrick, this looks a bit like an electric version, no instructions a bit hit and miss.1 point
-
The click trapped under the bridge issue got me a few times when I was starting out. I also struggled with the tiny diafix cap jewels.1 point
-
Hello and welcome to the forum. Enjoy.1 point
-
Hello and welcome from Leeds. It is indeed a great forum.1 point
-
I could make you really angry and suggest jointing paste on threads1 point
-
Plus plenty of people just don't understand the difference between quality work and a bodge job. It doesn't matter how many good watch repair videos they watch or if someone tried to train them, they just can't see why it matters.1 point
-
Could also be your well intentioned neighbor, who in his garden shed has a "go-at-it" and has no clue where to order or what to do1 point
-
The problem is that there are plenty of people who for some reason are into repair without having any intent of doing a good job but instead just make a quick buck. They don't have the patience to measure, place the order, and wait for the delivery.1 point
-
If the bezel is friction fit turning it shouldn't damage anything but if it is screwed then trying to pry it will damage the threads or lock it tighter.1 point
-
Ramblings of a madman watchie, plumbing nothing to do with watches1 point
-
Is this thread meant to be continued by others who found weird repair work?1 point
-
What I can't understand with some of these 'botch merchants'' and I've met a few on my learning curve, is why they don't' use the correct items. O rings are cheap enough1 point
-
Don't get me started!!!!!1 point
-
Hi what Jack says is right that’s why I suggested fitting the plate without a thing else to appreciate how it fits and Ger the feel of it as it fits, then start reassembling again checking out each abs every step1 point
-
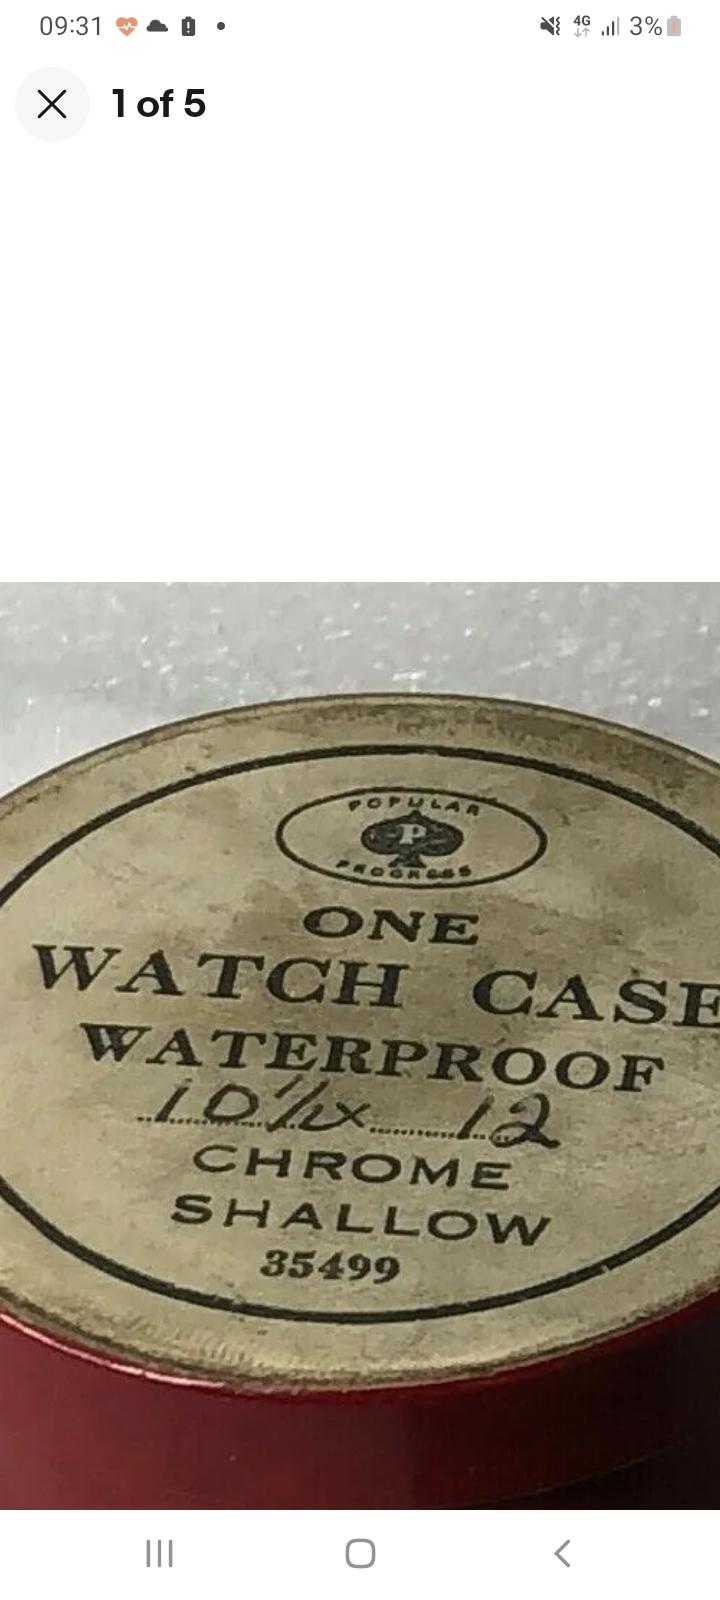
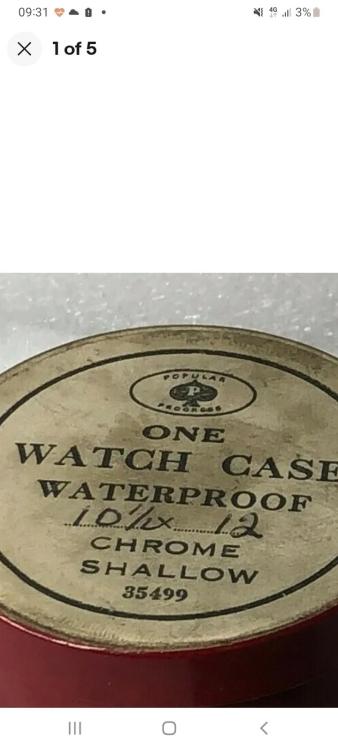
Belongs to the maker or supplier Progress. Listed as other makers at the mikrolisk site.
 1 point
 -
One thing to check is if the click is wedged under the bridge. It should be outside the edge. When I first started, I had it caught under the bridge and took me a while to find it.
 1 point
 -
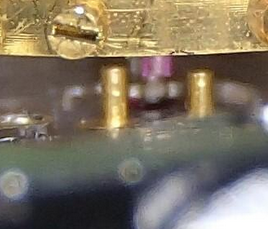
The split does run the entire length of the pins. They are different from cotter pins in that the ends are the ones with the "bulge", and not a loop folded over. I use split pins most of the time. Sometimes I just use ortho wire, 1.2mm or 1.5mm and hammer a flat portion and cut it to length. A drop of Loctite for added security.1 point
-
Hi Richard, Thanks for the welcome. I hope all is well in Leeds.1 point
-
That happened to me two days ago. I bought a donor watch, advertised as "non running", to use for parts on a Postala that has a Roskopf movement. It arrives and, as I always do, I give the crown a couple turns...and it springs to life and ticks merrily away. And I think "Great. Now what?" Turns out the donor Postala was easier to get serviced than the one I'd been working on. Needed a bit of dial and case restoration, but otherwise in excellent running order in all positions. Wonder why they thought it didn't run?1 point
-
What? Cleaning a lubrication isn't enough? Are you suggesting that the word repair and watch repair would also mean diagnostics and then repair before cleaning and oiling? Then yes this one I definitely agree with any time you're dealing with vintage watches even if they sometimes show potential that they're going to Run and they're going to do what you think there do sometimes they won't. So technically I like the verify that the watch is going to run before it's cleaned and or and I like the fix any of the problems that I can find before I disassemble to run it through the cleaning machine if I can so things like timing adjustments and escapement adjustments and any of that stuff I can do before cleaning I would like to do it. But even if I get a watch that shows that it's going to be fine the rest of the way there is no guarantee that's going to happen if it's vintage. Oh and I didn't reread the whole discussion but there is something I was curious about it looks nice except? Before putting the watch in beat did you verify that the banking pins are where there supposed to be? Yes there movable banking pins and often times because are movable and there in a watch and people like to move things that move them with zero idea of what the consequence will be. So you can't visually put the watch in beat until you verify the banking pins or where there supposed to be.
 1 point
 -
you're listening to Turn To Stone by Electric Light Orchestra and immediately come to think of a rebanking balance.1 point
-
It's working now. I can see the full list, but the link I tried didn't work.1 point
-
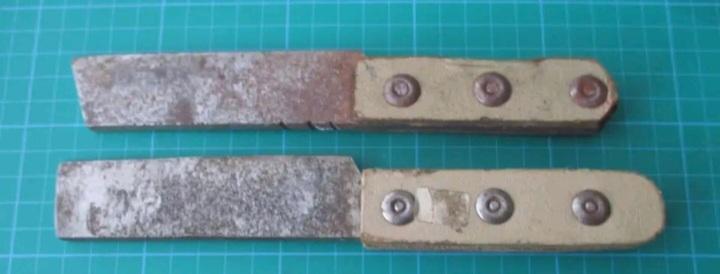
Very much like the hacking knives i use for woodwork and deglazing frames. Same principle of use, the blades mushroom over with impact above the cutting edge eventually. Stanley blades can be quite brittle though, I'd suggest a brass hammer like you're using here Jon, rawhide would be good if one that small is available to buy. I get the technique entirely which is why i said appropriately vicious Haha, i nearly spat my tea out when i first read it.
 1 point
 -
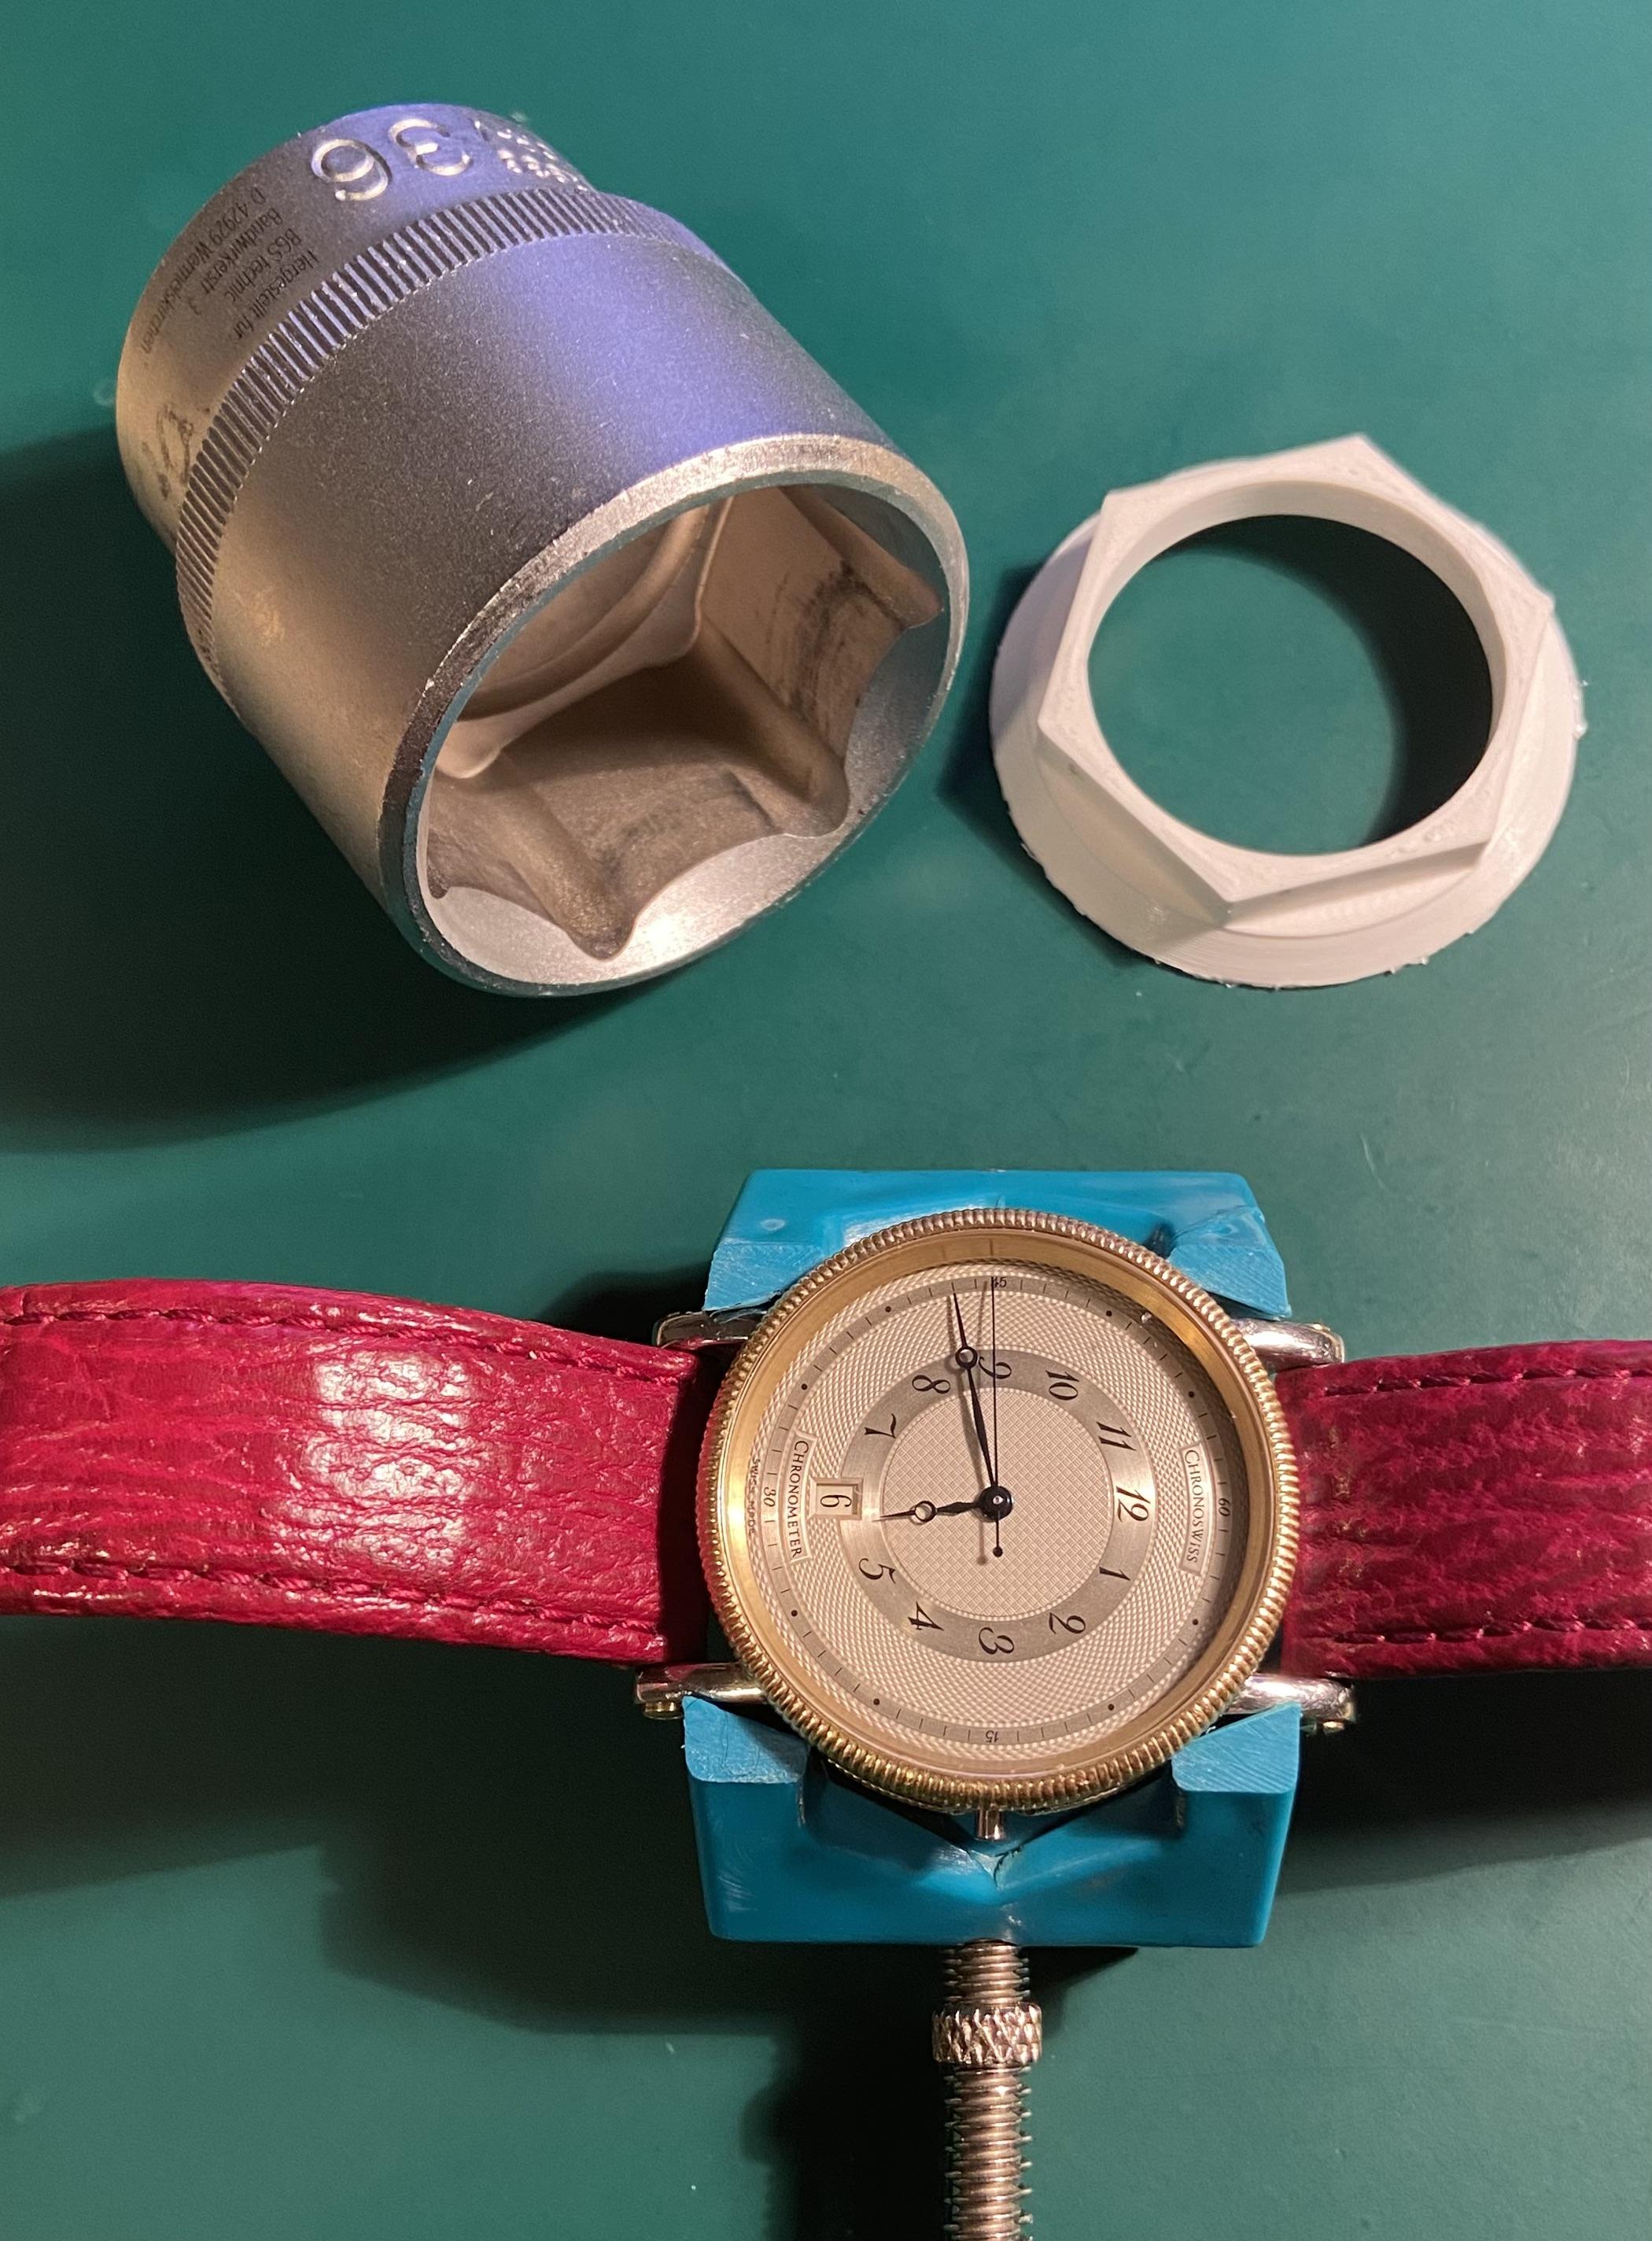
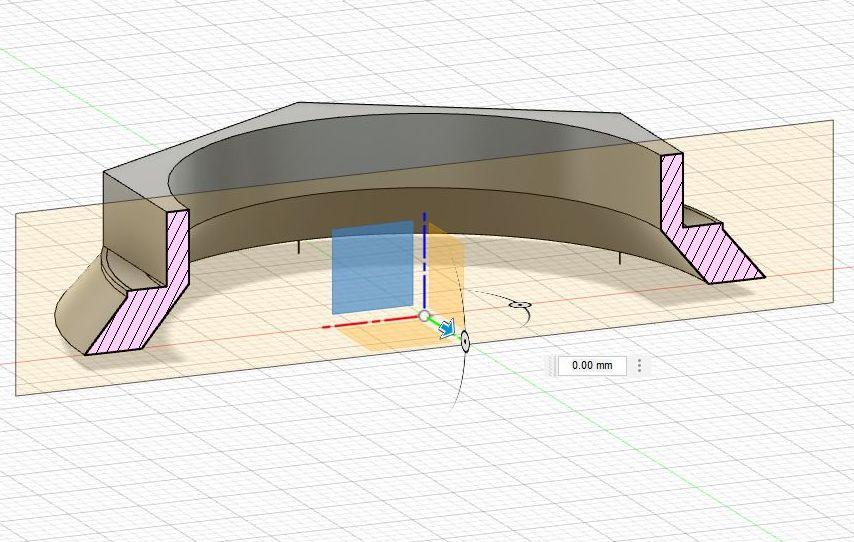
Last time I had a similar bezel it was screwed on. For opening I used a 3D printed tool and double sided adhesive tape to get more grip at the bezel. chronoswiss-kairos-how-to-get-the-movement-through-the-front

 1 point
 -
I used a Robur press and dies to fit the bezel back on. I must admit, it does look pretty vicious, but very effective. You can see why a four jaw bezel removal tool is as much use as a chocolate tea-pot! Taking out the stem is a good idea if you're doing this for the first time, as you don't want to slip. The lugs are never touched when working around the bezel, as you only need to flex the blade a little at a time so as not to touch or damage the lugs Yes the balance was removed first. Don't use the blade on its own because it is only thin and when hitting it you want it to remain as flat to the work as possible without the blade moving about and risking damaging the case and bezel. The Stanley tool is the best thing to hit as there is more stability. Don't worry about the hammer not being perpendicular, as the end of the Stanley tool is resting on the bench. Most watchmakers use a blade to remove this type of bezel, although this was quite a tough one to remove. The trick is be deliberate in your actions. As soon as you are tentative, that's when things go South very quickly, in my experience.1 point
-
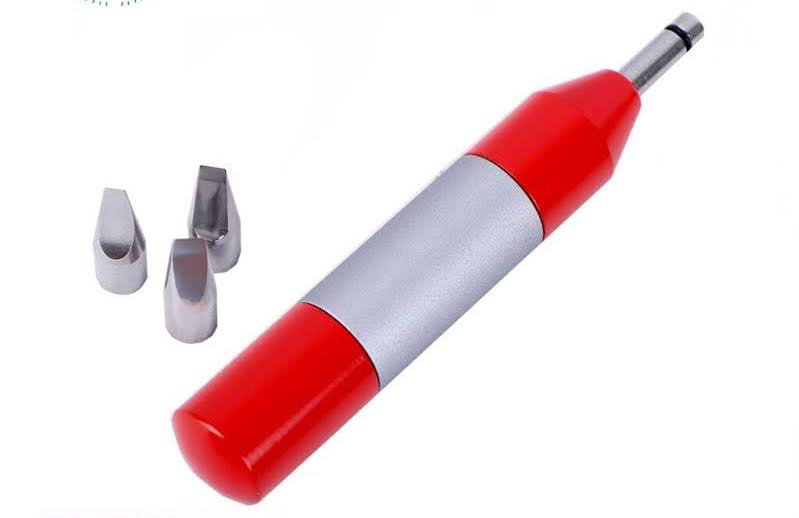
I have this. Great if the bezel is so stuck that a knife is no good. Kind of a spring loaded hammer.
 1 point
 -
Well done.1 point
-
I managed to find the video that mentioned the rust dissolver - on Marshals Wristwatch Revival. he was recommended Evapo-Rust. In Australia here it is made by CRC. Video: https://crcindustries.com.au/products/ds/sds-EVR1.pdf The ingredients are not clear - or at lest not the same, but he did say it is very slow and it turns the steel parts black.. It is labeled as a 'super safe rust remover'. https://automotivesuperstore.com.au/crc-evr1?utm_term=CRC-EVR1&utm_source=google&utm_medium=cpc&gclid=CjwKCAjw0ZiiBhBKEiwA4PT9z-UbKUfVf-Fq_OKLKxp2KshYTBrPA4J3Qp75JMmMEqTIws-37f1zZRoCMz8QAvD_BwE1 point
-
There was an actual Molfres at the Swiss school I attended, it was highly regarded. There's a very fine feed and apparently it's practically impossible to do damage to the balance. I've always turned off the hub (which is what it grinds off), so I never used it. When actual Molfres machines come up they always go for a pretty penny. Money I always figured was better off adding to the lathe accessories. A quick vid that shows how it works.1 point
-
Problem with ptfe, generally in plumbing but it could be with any application of its use i guess, its supposed to seal the threads, which it does when there is no shoulder on a coupling. But if a rubber ring such as a gasket is used or some kind of brass or fibre washer as with plumbing fittings then the tape can stop the joint pulling up tight. Its often wound on the wrong way and pulls away from the threads upon tightening. Shouldn't be used on the threads of olive compression fittings. Ha plumbing lesson0 points