Leaderboard


Popular Content
Showing content with the highest reputation on 06/21/19 in all areas
-
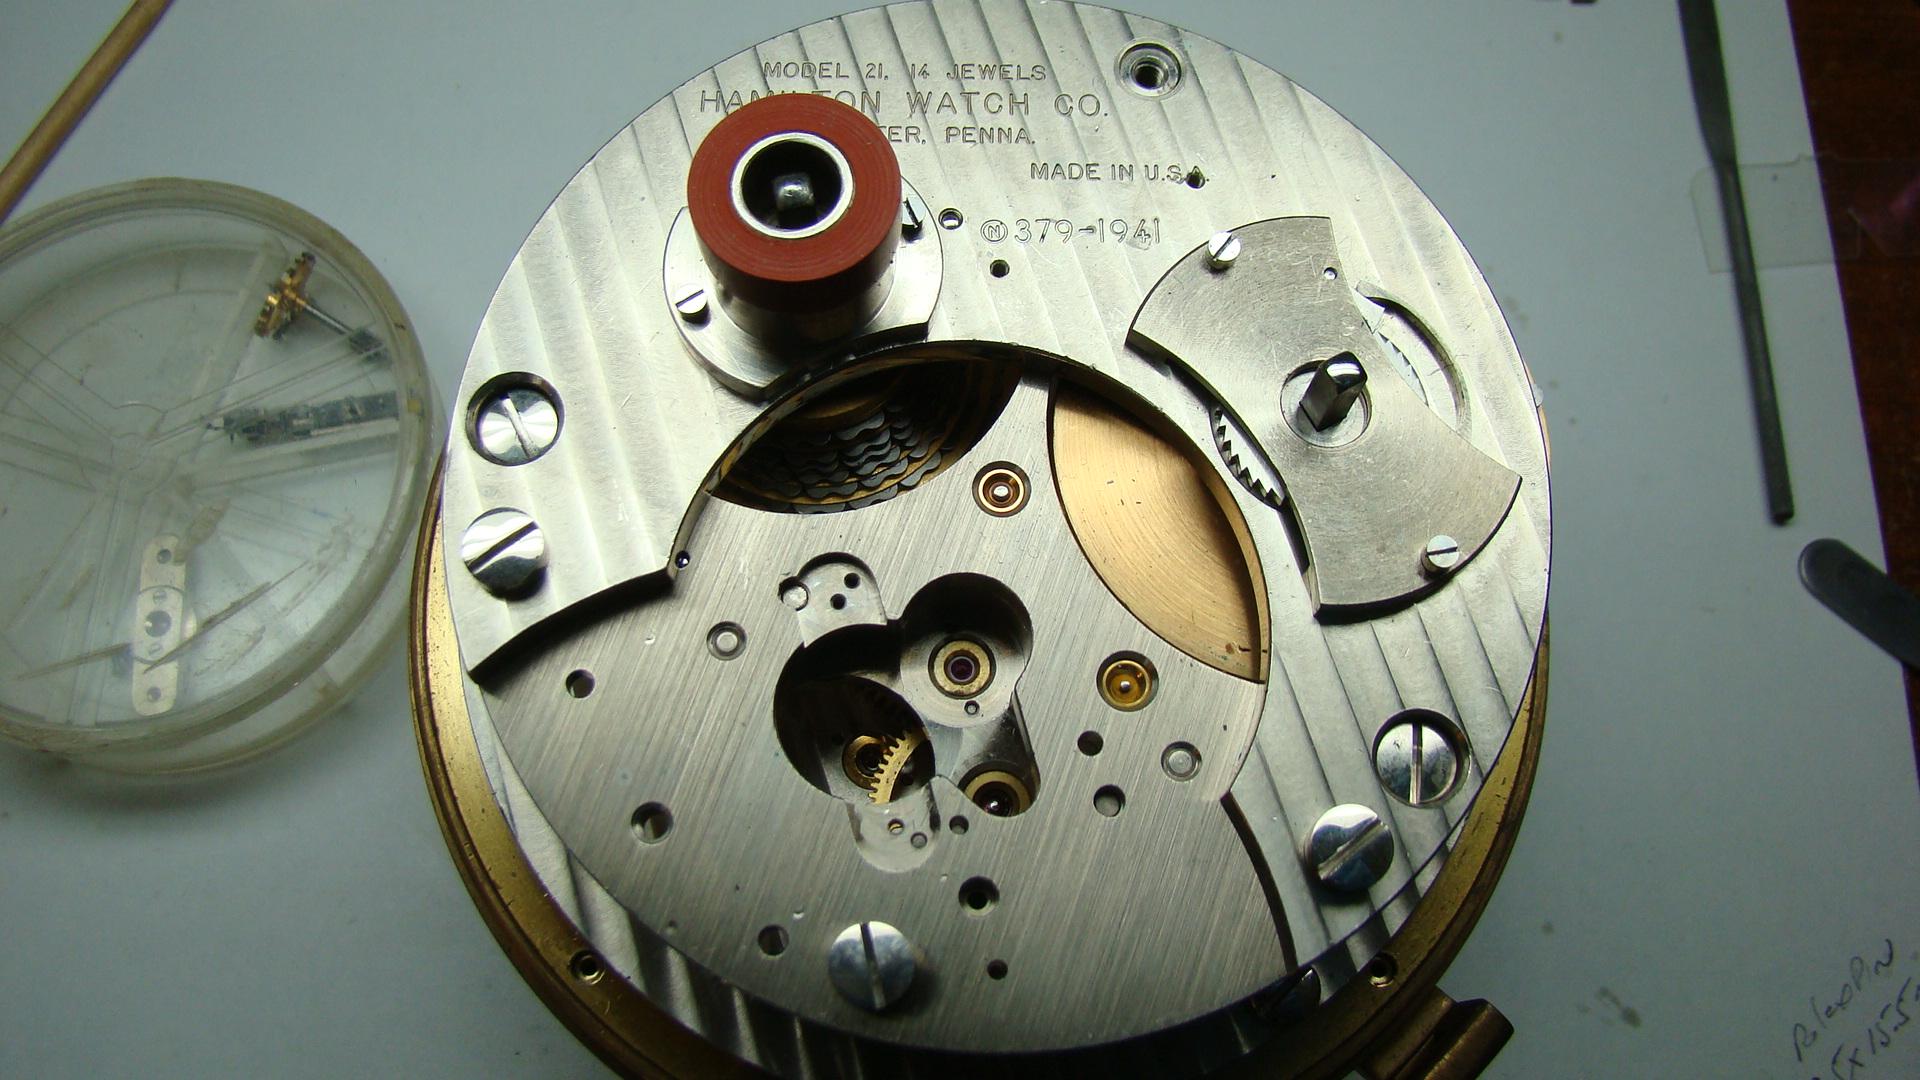
I would like to see some phots first of the movement including the balance before I comment further. There is a screw called a “stop-up” screw, which was built into the model 21 chronometer by Hamilton. This screw was used to block the train wheels for transport. This screw was often removed during service. Does yours still have it?2 points
-
Trigus, Watchmaker screwdriver shafts are skinny for a reason. It is to reduce the force transmitted from your fingers and thumb to the screwdriver tip. The screws used in watches are very tiny and can be easily overpowered and broken.. Trying to use a pin vice could present problems from applying too much torque to the screw, twisting it in half. Breaking a screw off in a watch plate can be a disastrous problem as you may not be able to get the broken piece of screw out of the plate. Most inexpensive watch screwdrivers are usable, especially when starting out. You can start out with a less expensive set and upgrade at a later time.2 points
-
Thanks for those instructions, I'll have a read through. Like yourself I'll maybe be doing one a week, perhaps one a fortnight so my biggest Quezon mark is how long a solution will keep once diluted. The Horolene came to mind as recommended by Mark (of the forum creation) in his video, (which is an Elma as per those instructions). When I receive it I'll post some images of the undersides and plate etc, the listing said it had a replacement motor and the wiring you can certainly see has been changed so we'll see how it looks. I'd have preferred another layer or two of baskets with compartments like the Elma as I like to try and keep each component section and screws separate but it might just mean I have to get more of the little mesh baskets I use for endstones. I'm sure I'll be re reading your tweaks and re config.1 point
-
I think you made a great purchase, and yes, I admit bias. They are very robust machines that have already lasted likely over 60 to 70 years, and with a bit of TLC, should keep on going and providing useful service. Your machine looks to have the separate on/off switch for the speed control, which mine does not have, but is still identified as a Model 1, as is mine. Yours has a much better makers plate on the front than mine, so maybe has not has as much use. Hopefully then, yours will have plenty of life left in it. For cleaning fluids, I’m going to go with something very original. I have yet to find out exactly what the National recommended fluids consisted of, but are likely to be similar to what I am going to use. Now I know this risks “many” opinions from others as to what their particular recommendations are, and I respect that. But, all I am going to say is, this was always good enough for Elma, so it’s good enough for me, at least to get me started as a hobbyist. I will likely only do one cleaning a week and not on a commercial basis, so this will do nicely. For the first wash, I plan to use Elma 1:9 cleaner which, as it is named, is diluted 1 part cleaner, to nine parts tap water. Elma themselves say that tap water is OK as the formulation allows for this. For the first rinse, I will use de-ionised water, again in line with recommendations from Elma when using the sequence described. Final rinse will be Elma Suprol. Followed by a spin-off and then heat drying. I have not found any instructions for the National yet, but as these machines are all so generic, the Elma Instructions for the Super Elite, should easily work well for both the sequence, timings and cleaning fluids. (They are described in the attached instructions.) Others will also have their opinions as well, so we can always experiment to find out what works best in our own situations. I have uploaded the Elma instructions in full, which are freely available for download direct from Elma, Cousins and Walsh, so I do not believe there should be any copyright issues as long as they are reproduced in full. I’m looking forward to hearing about your National when you have time, and I hope That my ramblings here help out in some way, to get yours back into productive use. Instructions For HC511 - Elma Super Elite Watch Cleaning Machine.pdf1 point
-
It's bookmarked for delivery Monday, which in reality means Tuesday or Wednesday because, here in the highlands. When the courier says delivery Monday they really mean we'll get it to Inverness Monday and give it to the royal mail because we heard there are dragons and wizards and feudal armies north of there and we're too scared to go any further. Then royal mail deliver it 'when it gets here'. I'll have the chance for a quick going over and see if it works but then I'm off with my son for a couple of weeks for the summer hols so it'll be after when I get to play with it properly. What do you plan to use for cleaning and rinsing solution? I'm looking at horolene currently. Looks expensive but dilutes 7 to 1 so should be quite economical I hope.1 point
-
Ahh... well done. I was watching this one on eBay and was wondering it it would anyone on the forum. Good for you! well, I hope there is enough in these simple posts of mine to get you going and refurbish it to the level you want. I am pleased to say that mine is now nearly completed and I just have to do some quick photography on the required base, and then test with fluids. cant wait to see yours when it arrives and maybe we can compare notes. G.1 point
-
Oh that'll do fine.1 point
-
Thanks, oldhippy. No, mine does not have the screw. The manual says that they didn't start that until serial number 3500, and they weren't standard on all until serial 4003. Mine has a serial in the high 300's. I have made the preliminary decision to reassemble the movement w/o a thorough cleaning. I'm just not set up for cleaning such large parts. As I mentioned, I gifted my big cleaner. The movement still has signs of liquid oil from its service from year ago, except at the balance jewels. If I decide to go ahead with the incomplete job, I will clean and oil the balance endstones and hole jewels before reassembly. I may also oil other pivots with a dab or two. Heck, since the stuff's just going to dry out in 5 years anyway, and I'm not going to run it, what's the point? I will clean the the escapement parts, as they do show signs of dried oil, etc., on them. I can be talked out of this if it sounds completely insane, as I am just now working to replace the upper train-bridge, which isn't going easily onto the pillars. I hate that. It's a reason I don't like Hampden full-plate pocket watches. I've had to replace the plates by slowly tightening the plate screws, and watching to make sure the pivots are lined up well. Otherwise, well, you know what would happen. Nerve-wracking. The image I am including is the best I can do, as I had already removed the balance from the movement. If you need another view, I have a couple more, but they are really just to aid my reassembly of the train wheels, etc.
 1 point
 -
You can use normal watch cleaning solutions. But you can also wash things wild dish soap and hot water and a soft brush, rinsing in hot water and then two alcohol baths (so soak off the water), drying with warm air or old school sawdust. You'll want to grease the mainspring with 8300, use that for the barrel and fusee pivots too. Clock oil for the center and 3rd wheel, then 9020 for the rest is fine. Don't oil the escape teeth of course. It's good to oil the chain a bit too, pull it through watchpaper repeatedly after until it leaves no residue. Try to observe how much prearming is on the barrel when you let it down so you can set it up the same. I'm sure you already know to never remove the balance with power on the train, and there's maintaining power in the fusee. I've made a number of escape wheels and detents from even experienced watchmakers pulling the balance with power in the train.1 point
-
The plastic could be anything from ABS through glass reinforced nylon, polycarbonate, PLA, polystyrene, epoxy.. you name it.. so figuring out the correct solvent is tricky. Nail polish *may* work, but equally it may not. Superglue may appear to work, but fail shortly after. You might also have luck with a mix of superglue and baking powder, which rapidly sets up hard as a rock. It dries as an off white to clear resin though, so you would need to paint it to hide the repair. Test it on some similar plastics first to get the hang of using it. Also be aware that some materials react in a very exothermic way with cynoacrylate (superglue). Cotton wool for example may actually catch fire. An interesting party trick, but not much fun when you spill it on your frayed jeans. You could try a repair with black epoxy resin, having keyed the surfaces with sandpaper first, but in my experience it is very tricky to get a neat, but robust, lasting repair of small plastic items, since plastics are generally difficult to stick anything to reliably.1 point
-
Cousins are showing that they have a male inner stem for the 955.412 in stock. Length is 9.79mm. ETA956101964 (Disregard the "Swiss Part Description" filter and just search by caliber and scroll through the result set, it will be towards the end of the list.) Bit confused though as the Ranfft site shows that both the 955.412 and 555.412 as having the same stem reference. Probably best to measure the original split stem and check that the ends of both stems that you have actually match. Hope that this is of some use to you. Nigel Sent from my moto g(6) play using Tapatalk1 point
-
As it happens! Inspired and interested by this thread and having, for a long time cleaned manually with naphtha and IPA etc, (which has always been adequate for me and more than adequate volume wise as I only work on one at a time). I chanced a bid on one on eBay which I am now arranging transport for and appears to be the same (or close) as yours. So I'll be checking it and re reading this thread to see what I need to do to ensure it's safe to use. It'll only be accessed by me and only used when I'm there and unplugged at other times so I'll be looking for info on cleaning fluid and operation instructions once I know it's usable.
 1 point
 -
Greetings folks. I've been working on watches as a hobby for about 20 years now. I started out on pocket watches and have never cleaned a clock. In fact, I had a great cleaning machine, with the big jars, and a few other clock tools, that I gave away to an aspiring clock guy over at the Tascione site. But I digress... Nearly 20 years ago I bought a Hamilton model 21 ship's chronometer. It's an early one, pre 400 serial number, and is a thing of beauty, as these generally are. Back when I got it, I had a professional service it for me. It was done well, but wasn't cheap. $400-500, IIRC. I used to display it in my living room and run it occasionally just to hear the escapement and marvel it its accuracy. From about 2009 to 2014 it sat in my storage unit, waiting for new digs. In 2014 I wound it up and it took off running. I let it run down and then put it away for a couple of years. When I pulled it out, I discovered that it had a broken balance pivot. While originally I thought someone had knocked it over and wasn't copping to it, but now, after inspecting the upper pivot's wear, I don't think that's the case. After botching the first staff I got trying to replace the hub, I set it aside again for the past couple of years. The way I broke the staff was I overestimated how deep the hollowness went in my hollow punch that I was using to tap it on. It bottomed out in the punch and destroyed the pivot. Now that I'm finally over that disappointment, I decided to give it another go. I bought a staff that already had the hub installed. I may have to polish the lower pivot, as it doesn't seem to want to set in the hole jewel properly. I'm in the process of verifying all of this. I had to tear down the chronometer at least to the point where I could check to see if the broken part of the pivot was impeding the staff from setting properly. The hole jewel is clear. I'm doing the best I can to do it right, and get it running again. I won't be running it, but want it running just in case I should decide to sell it. Otherwise the value drops quite a bit. Since I have it completely torn down now, I might as well clean and oil it. Does anyone have a hot tip on the best cleaning solutions for cleaning these chronometers? I'd like to use something that will cross over and work for my cleaning of watches as well. I have both an ultrasonic and the small L&R mechanical. I have one more fresh batch of cleaner and rinse, petroleum, no-water, formula. Should I use that, or make, or get, something new? Any tips for oil and grease types to get me by? Any suggestions are appreciated. I do have the Manual for the movement. I know that this is risky business, my working on this chrono, but I just can't afford to spend another $500 to get it running. Plus, I heard that if you're going to run these, you've got to spend this $500 or so to service them every few years. That is not going to happen. Feedback, suggestions, warnings, tips, etc., are all welcome. Many thanks. Cheers.1 point
-
Not really. The end stud is glued and the spring very delicate, attempts to mess with it most likely ends badly. The balance assembly is sold as "complete" only for good reasons, its construction does not allow in practice to take apart staff, roller jewel, stud and without damage, and put them back with precision, as you can read reported above. That you use an A balance, or B/C one replacing the balance cock also. I have seen -but not tried- non-original balances on Ebay going for very little. If you want to try anyway for practice I can send you parts for free but with a bad hairspring.1 point