Leaderboard


.jpg.6225a64433578a11e0218b27c20b13f5.thumb.jpg.d82b0cd1e370f3a3a59a06afa957d184.jpg)
Popular Content
Showing content with the highest reputation on 08/29/18 in all areas
-
Hello, Looks like an AP Royal Oak if I'm true (real or fake I dont mind ) I have never rebrushed any of those watches but the method I have used to successfully refurbish my father-in-law's really worn Rolex bracelet (with polished central link) should work I suppose. So here's what I would do ... STEP 1 - remove the bracelet from the watch and put the 2 parts and clasp apart STEP 2 - gently clean with ultrasonic or just bathing it with a cleaning fluid (I use "essence C" but that's a french product denomination) STEP 3 - put some double-sided tape on a perfectly flat surface and stick the bracelet parts on it, downside-down, while checking that all the links are perfectly aligned ... press vigorously and check that not any part can move STEP 4 - gently sand (YES) your bracelet with an abrasive block of really high grade (1200 or higher would be good) until all the big scratches have disappeared ... if some of the scratches remain then consider them as "part of history" of your watch because you dont want to thin your bracelet here ... you just want it to be clean and nice NOTES : - after part 4 your bracelet will look dull and unbrushed but don't worry you will solve that problem later - if the down-side of your bracelet is scratched too (it doesn't seem scratched on your pic but who knows) you just repeat steps 3 and 4 on that side - if the sides of your bracelet have scratches you should do the same process but here you will have to hold the parts with one hand and do the sanding work with the other ... proceed slowly and carefully because you will have to repolish those sides STEP 5 - blow the metal dust which remains on your bracelet after sanding it ... DO NOT scrub it because doing this you would create more thin scratches STEP 6 - clean your bracelet parts again with cleaning fluid and let everything soak or dry everything STEP 7 - repolish the sides of your bracelet, using Cape Cod polish or any other steel polisher you can get ... the best is if you have a dremel (or you can borrow one) and use White Dialux with a felt disc then Blue Dialux with a cotton pad NOTES : - of course you have to proceed both sides of each part of your bracelet - I really dont know how the clasp should be polished ot brushed so just check on the web STEP 8 - clean your bracelet parts again (YES) with cleaning fluid and let everything soak or dry everything STEP 9 - put some new and clean (no steel dust) double-sided tape on "the above" perfectly flat surface and stick the bracelet parts on it, downside-down, while checking that all the links are perfectly aligned ... press vigorously and check that not any part can move STEP 10 - stick a ruler (or a perfectly straight piece of wood, steel or any other material) on your work surface close to one part of your bracelet ... you must check that it is perfectly parallel to the axis of the bracelet part you will work now so take your time and align everything perfectly STEP 11 - take an abrasive block of medium high grade (I'll explain how to choose the grade in a note below) and put it on your bracelet, placing the side of your block against the ruler so that you can use the ruler as a guide to produce perfectly parallel marks STEP 12 - brush the bracelet part slowly and regularly, always proceeding from one end to the other and always on the same direction (I generally brush from the part close to the watchcase to the one that fit to the clasp) ... do as many pass as needed to obtain a perfect brush ... DO NOT apply too much pressure on your sanding block because you DO NOT want to brush the polished chamfers on the sides of your bracelet STEP 13 - repeat the process with the other parts of your bracelet STEP 14 - blow the steel dust, clean again, put back on your watchcase and ENJOY STEP 15 - now if you have done really good work you should think that your watchcase too needs some rebrush/repolish ... but that's another story NOTES : What is really difficult is to figure out which grade of sanding block you should use to get a perfect final brushing. It really depends on the brand and the model of the watch (I didn't redo my wife's vintage DJ Jubilee bracelet the same way than my father-in-law's Daytona bracelet). The best could be to get a piece a clean stainless steel and do as many tests as needed and decide which grade will do the best finish. That's all and hope it helps2 points
-
So today, I took a few minutes to make up a timing sheet for myself. It is based on (ok, ALMOST a blatant copy of) the Rolex service timing sheet. I liked the layout so I replicated it in excel. I didn't see another one around so I figured I'd post it up. I am attempting to attach it now- if it fails, PM me and I can email the file out. Let me know if you'd like to make changes, so we can implement improvements for everyone. You can of course adjust it to your liking since it's just excel. Timing Analysis.xlsx1 point
-
See this vid of some really amazing historic watch tools enjoy:1 point
-
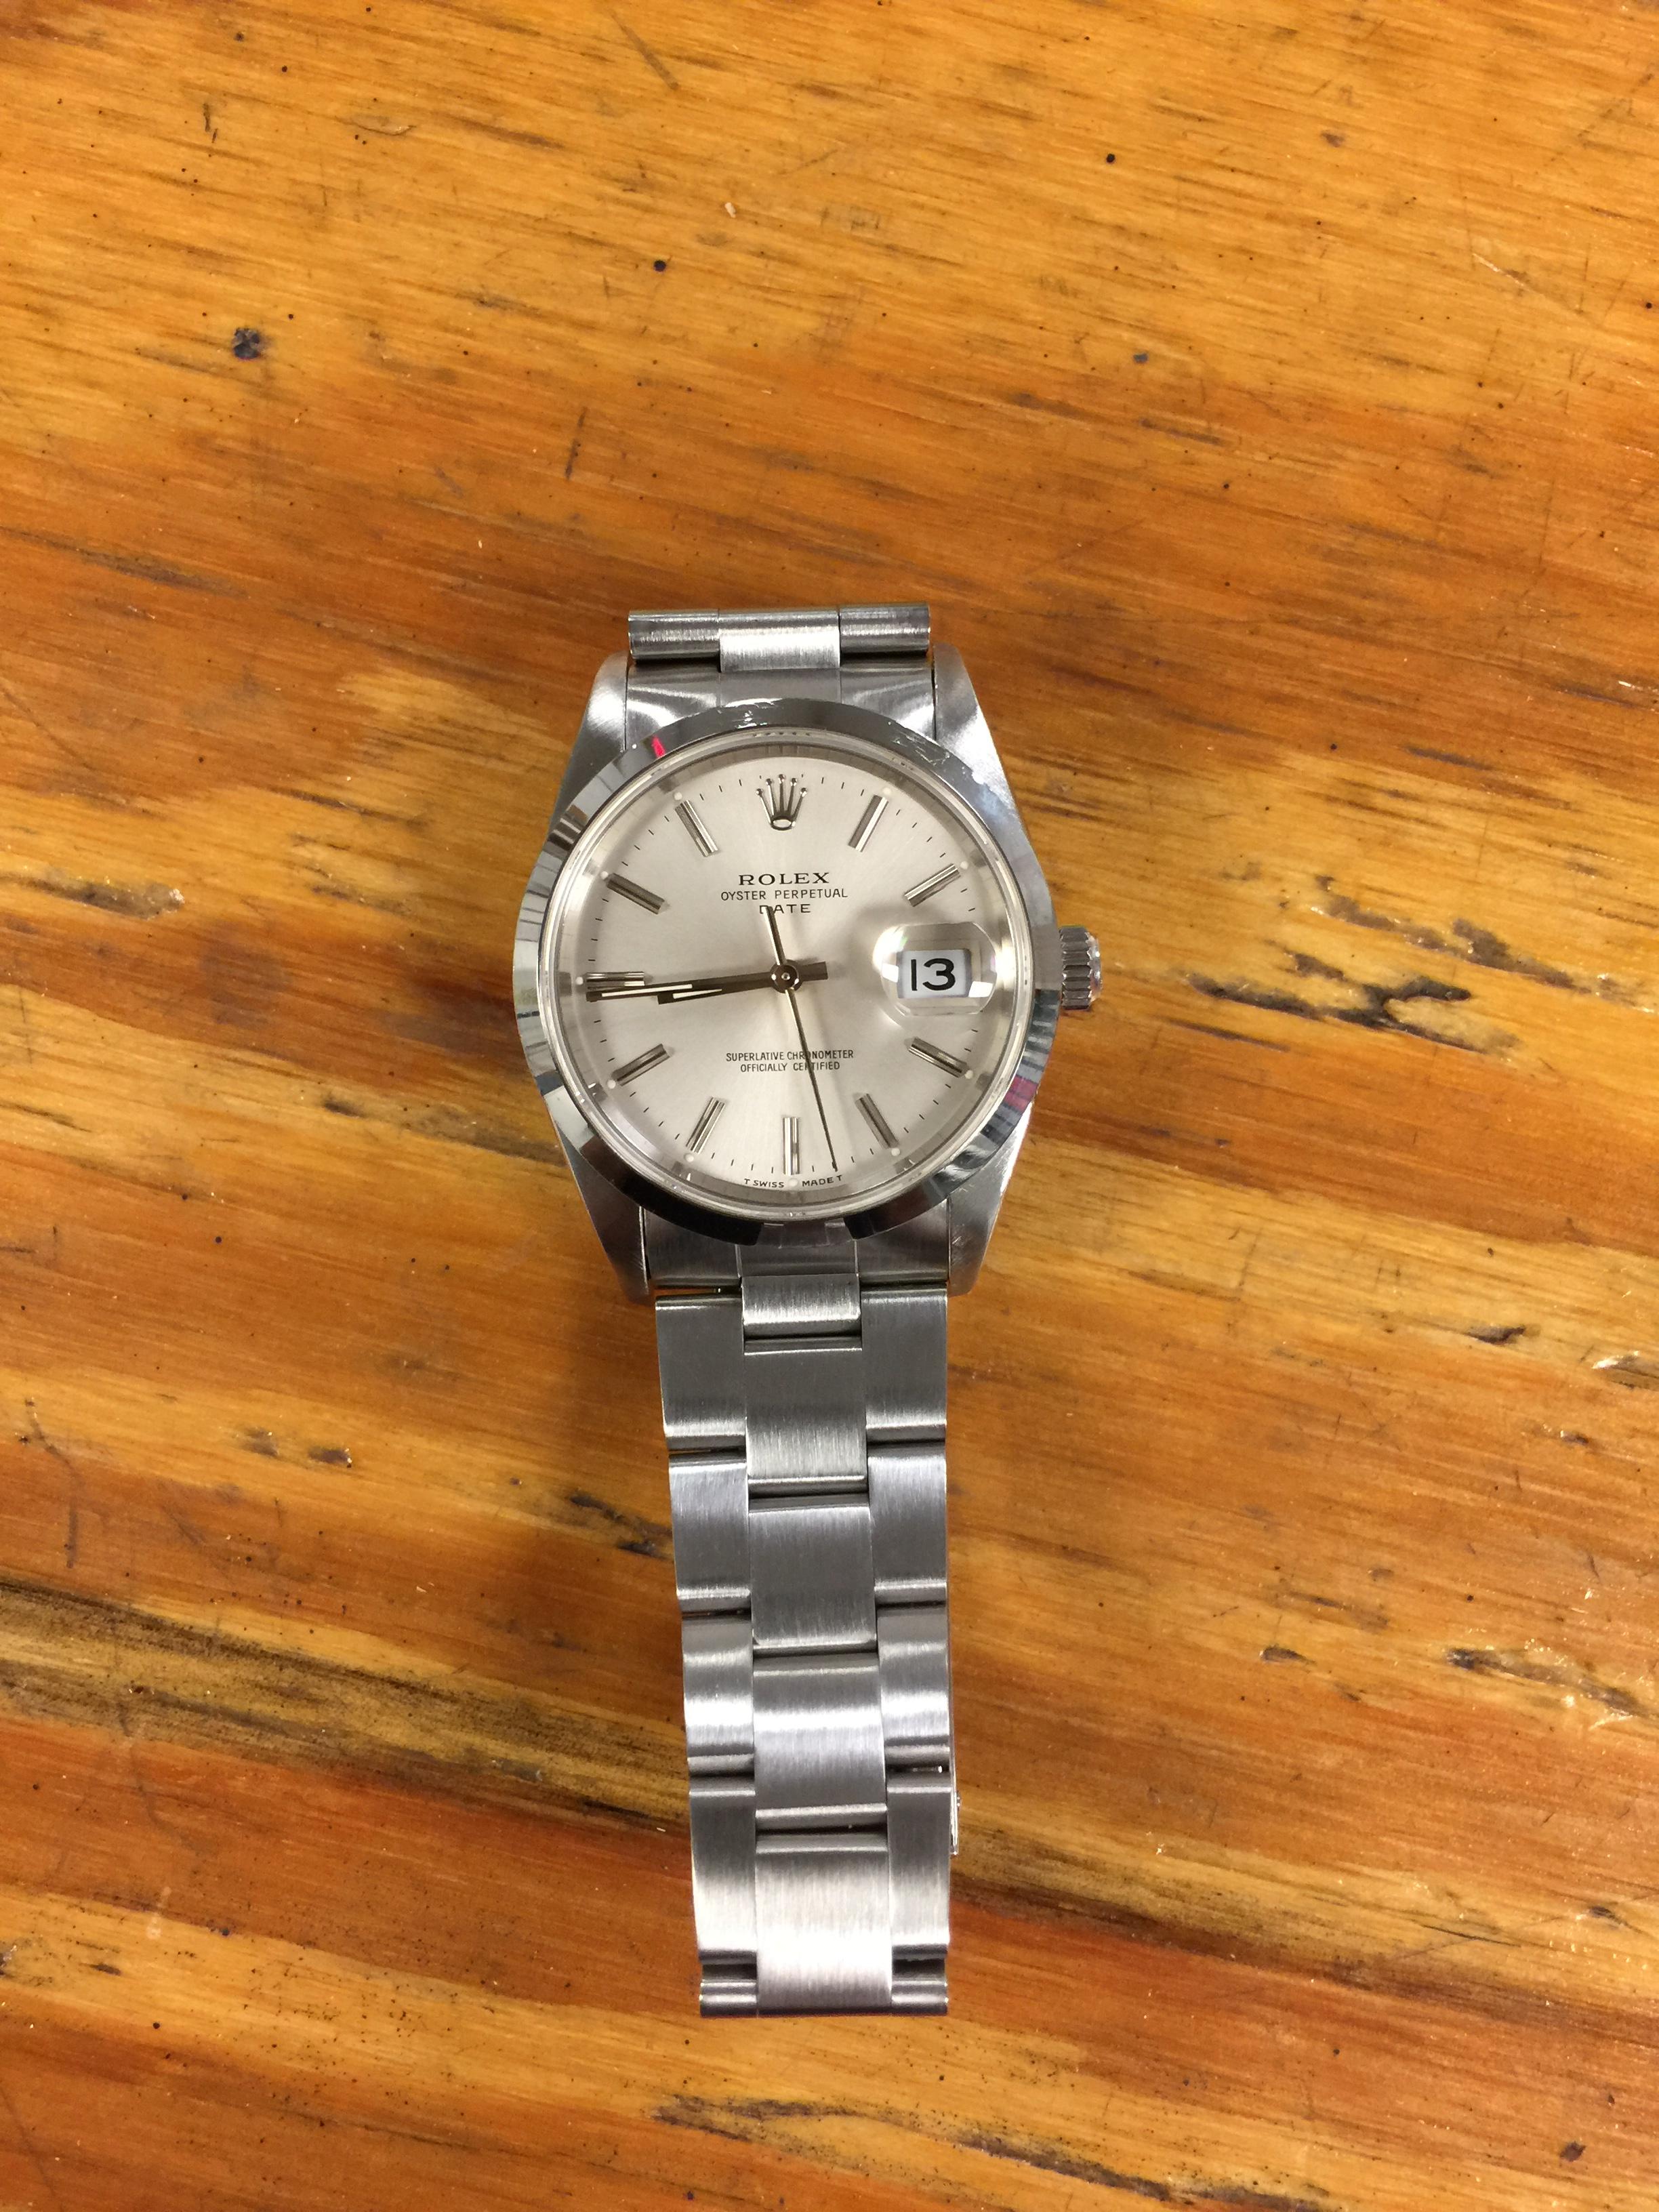
‘93 Rolex Oyster Perpetual Date ref. 15200 I love it! My first Rolex that I happen to be enjoying more and more each day. Any thoughts on fitting it with a smooth grain leather strap?
 1 point
 -
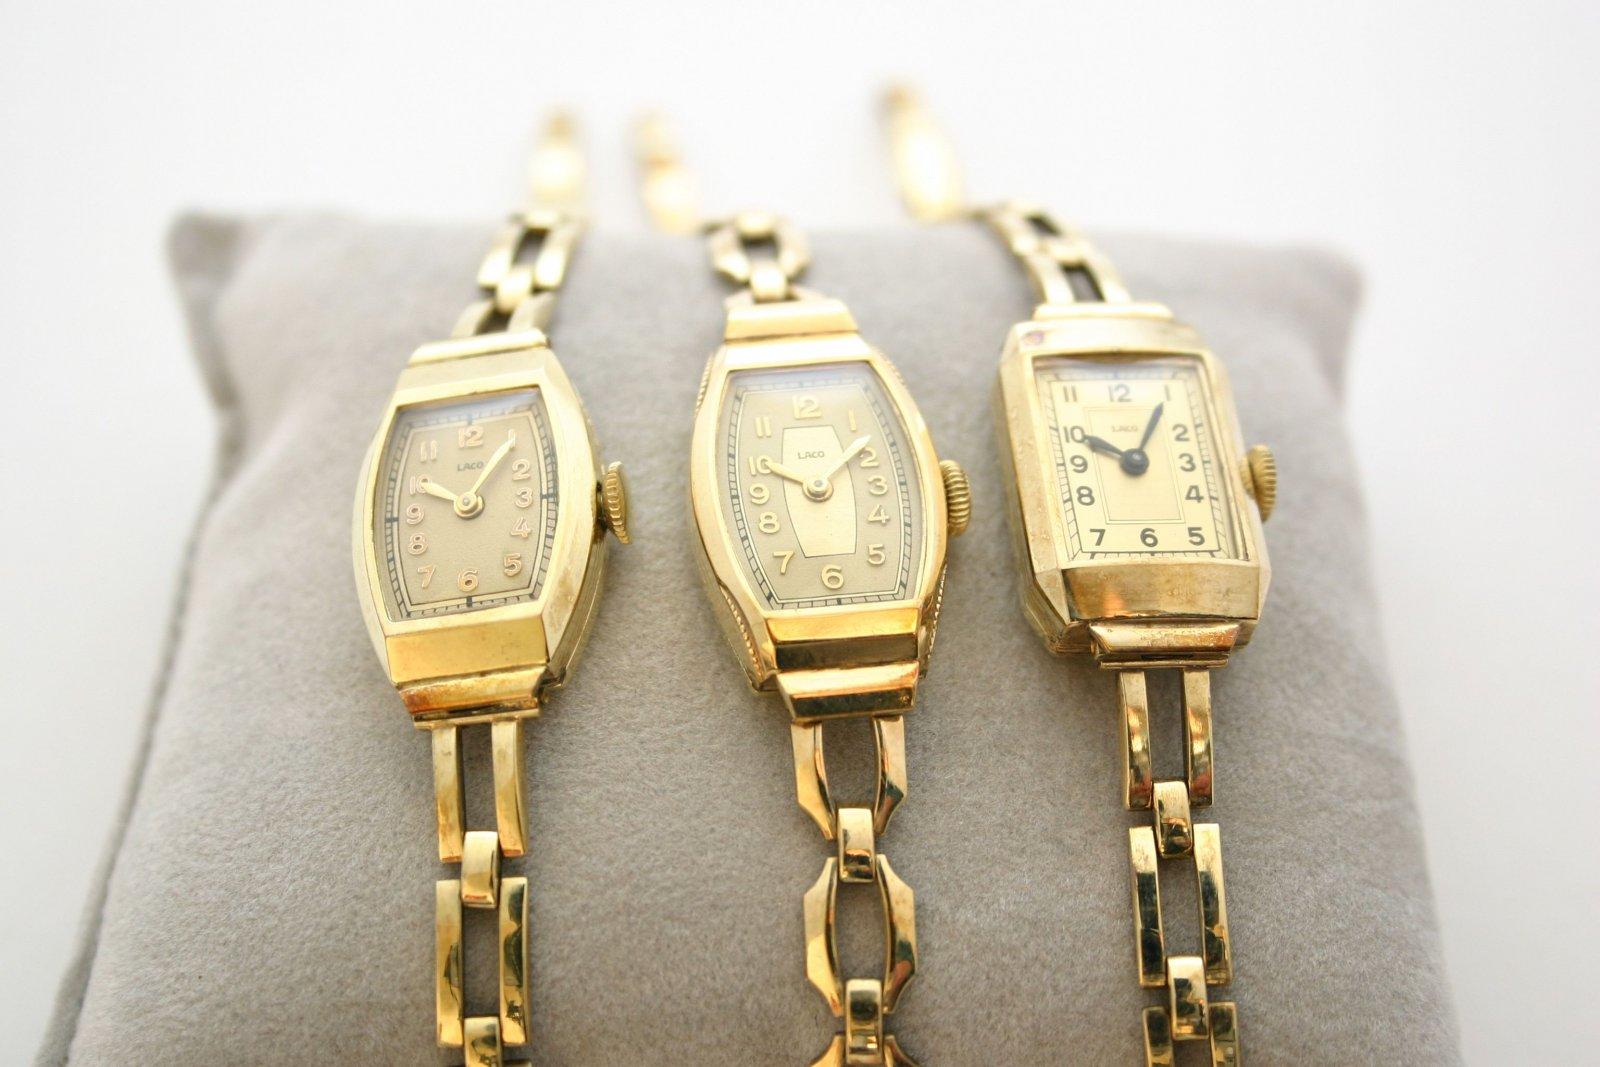
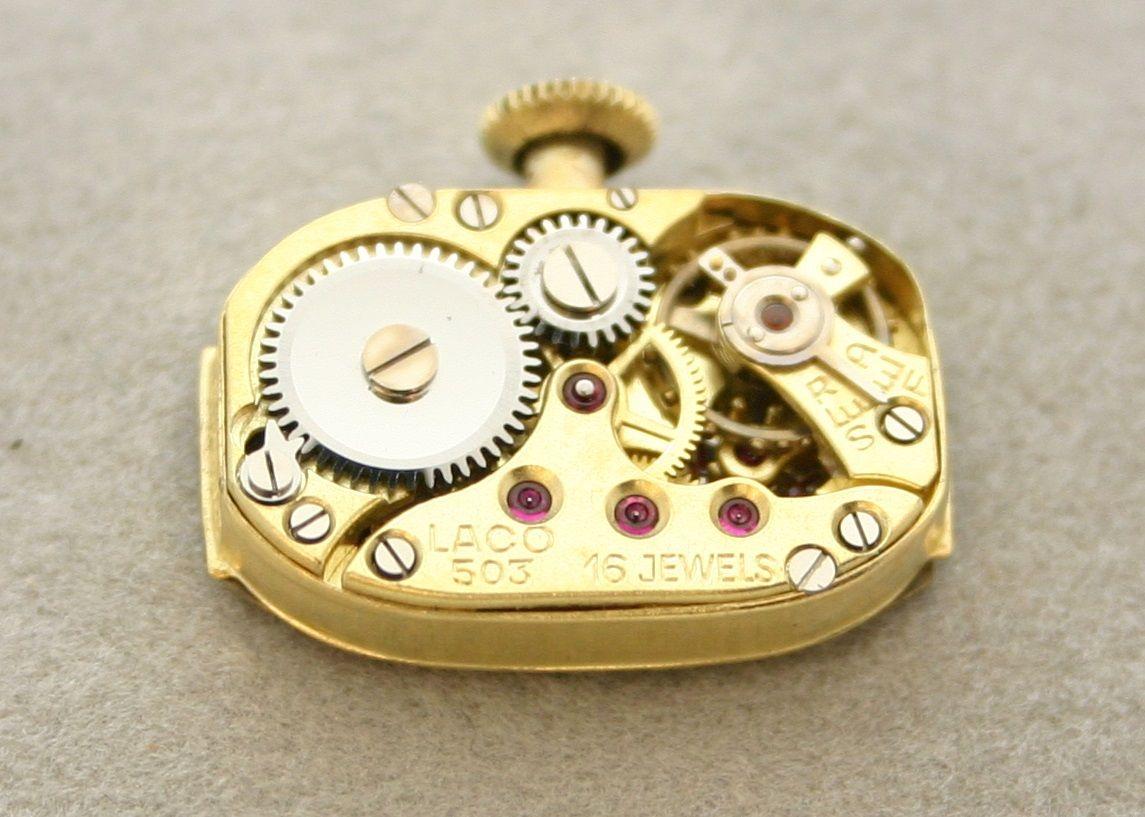
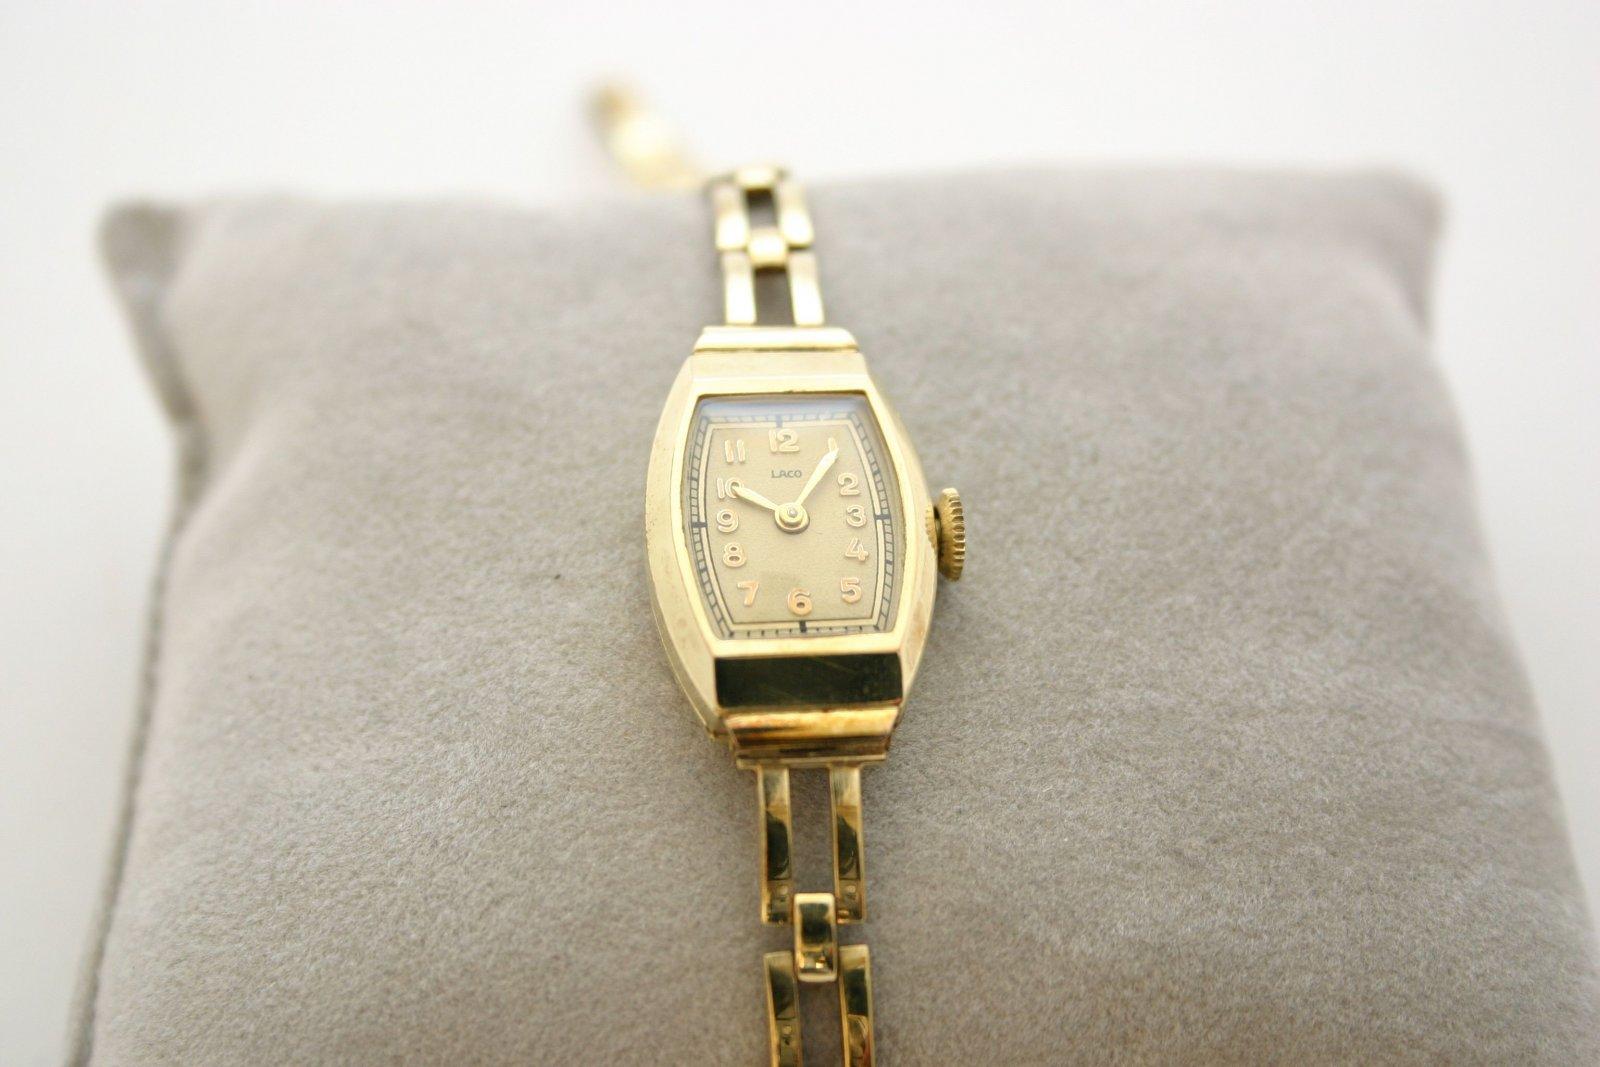
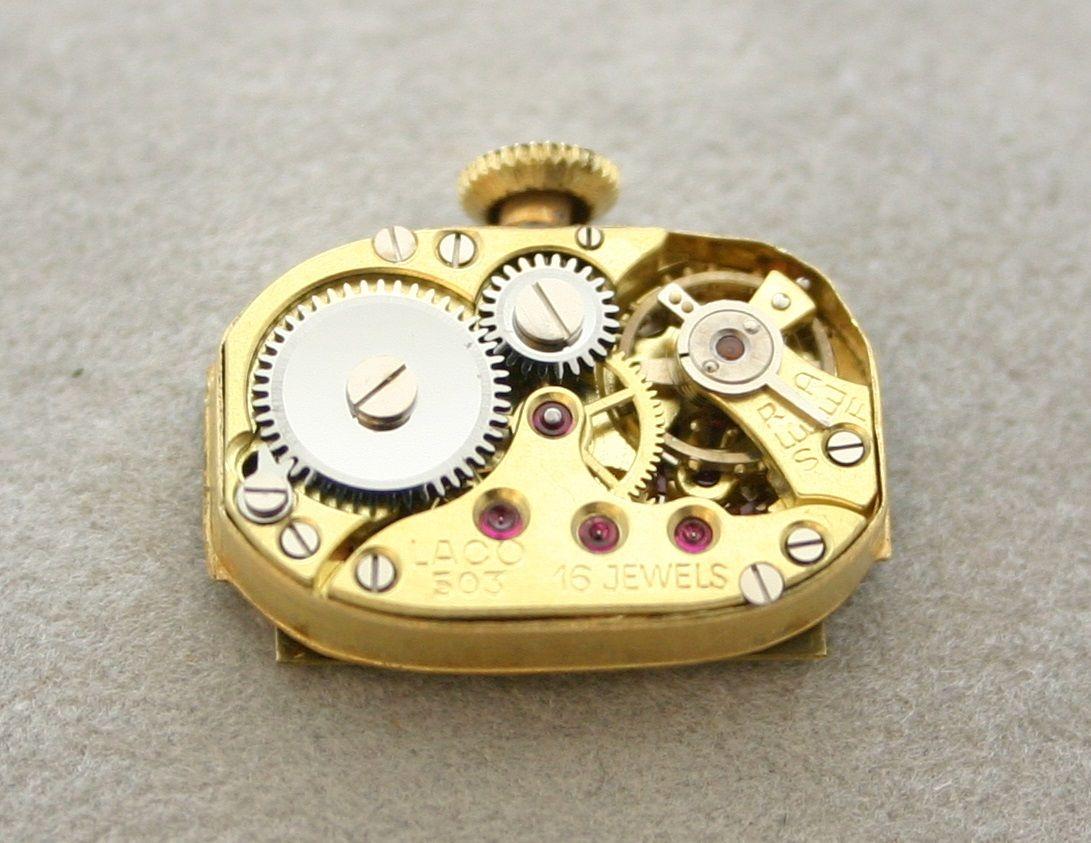
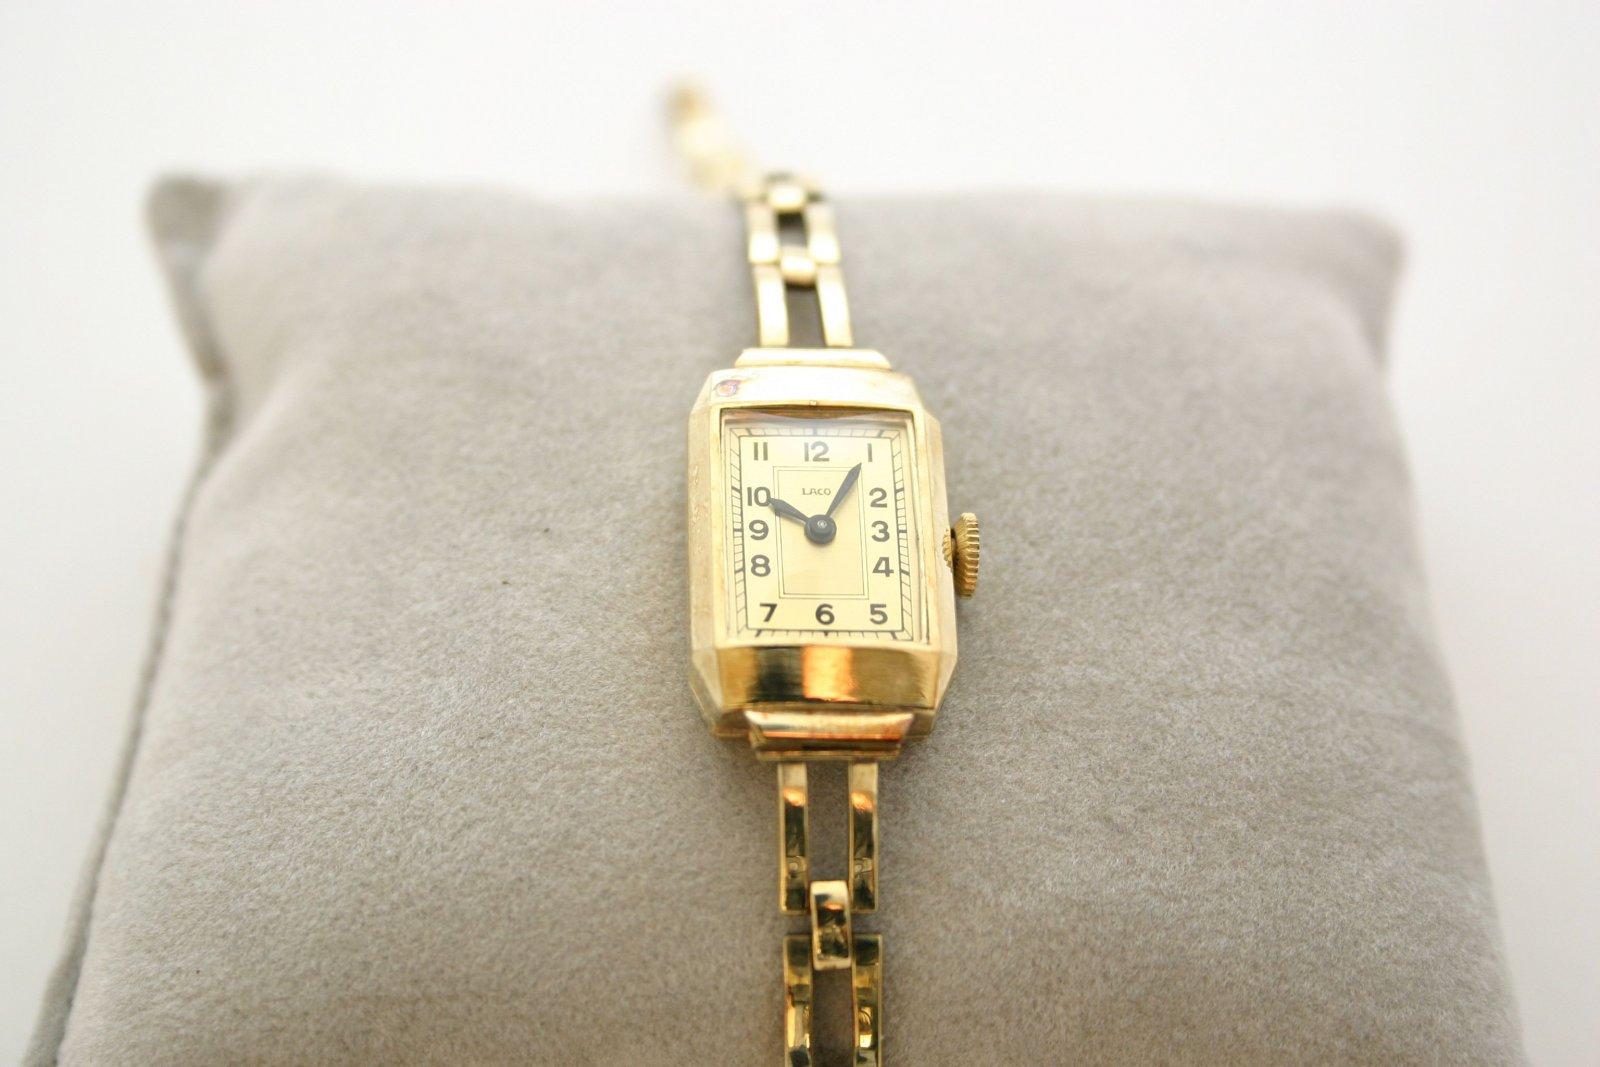
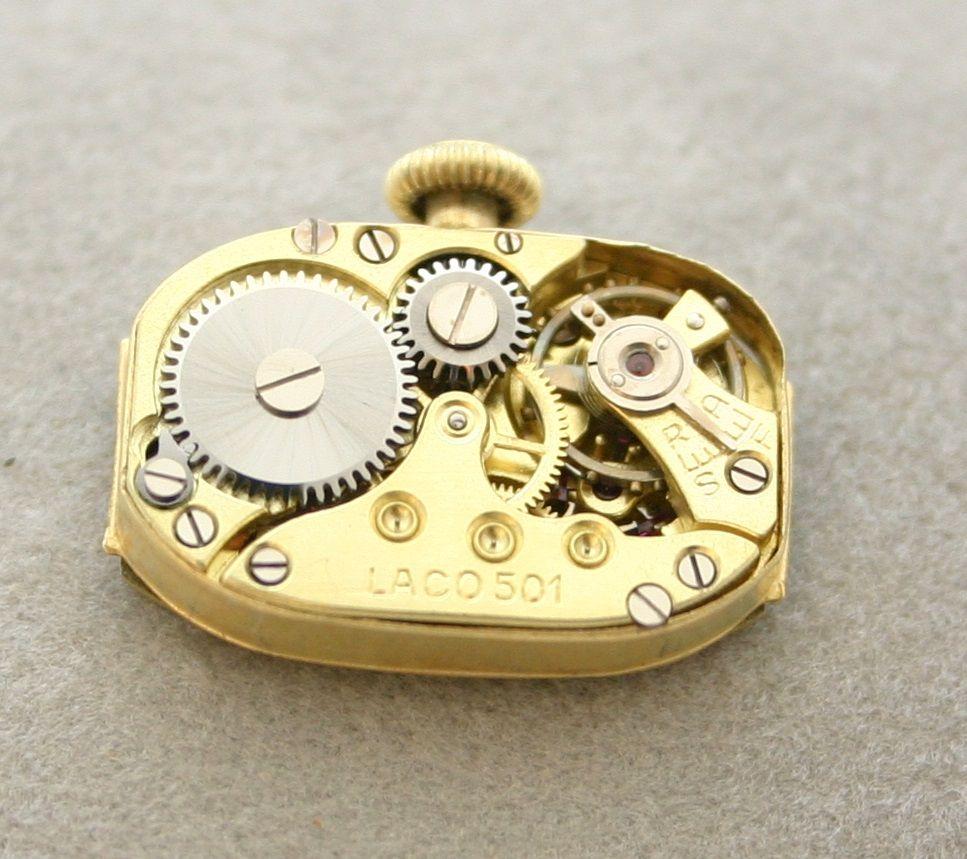
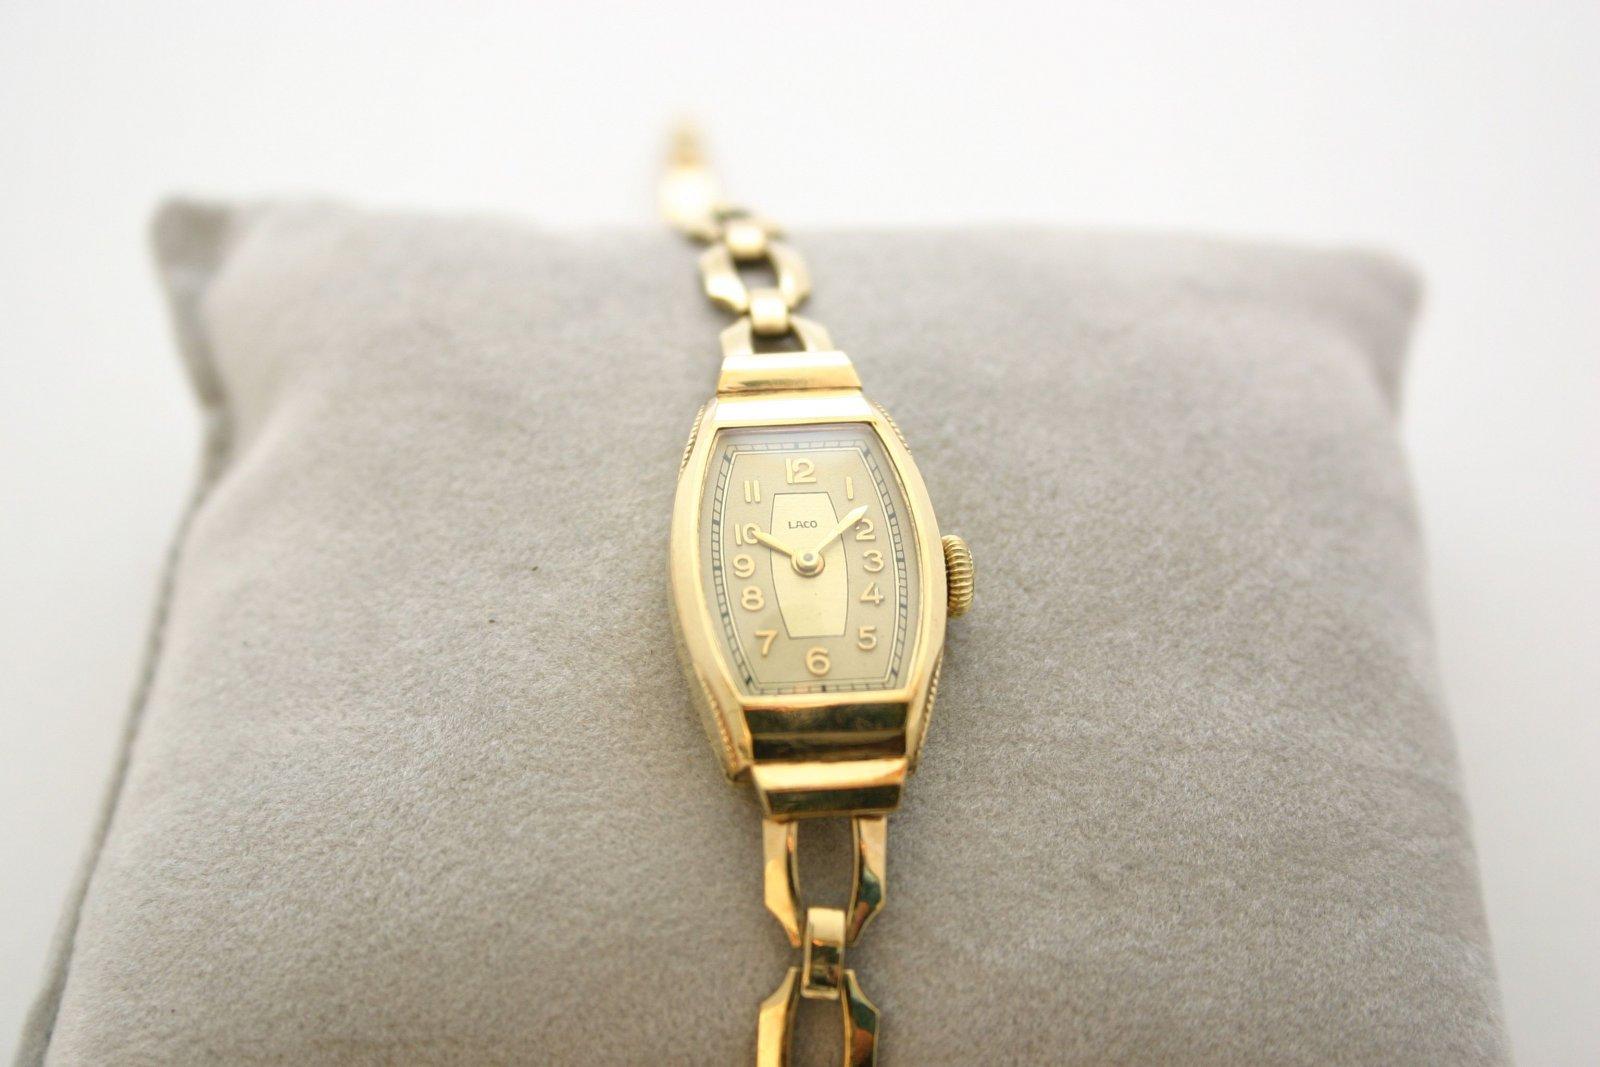
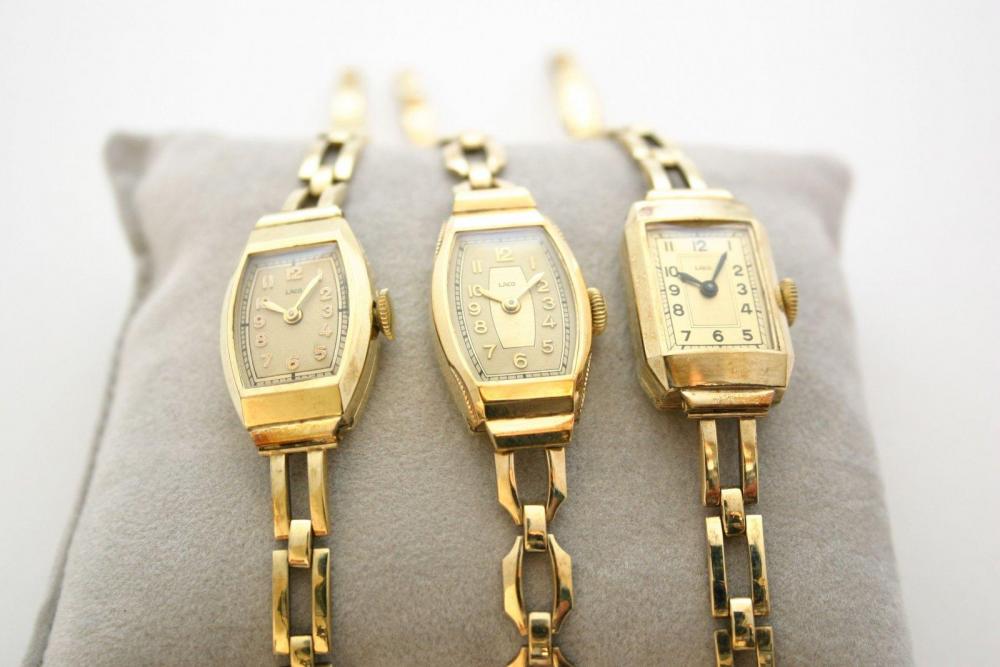
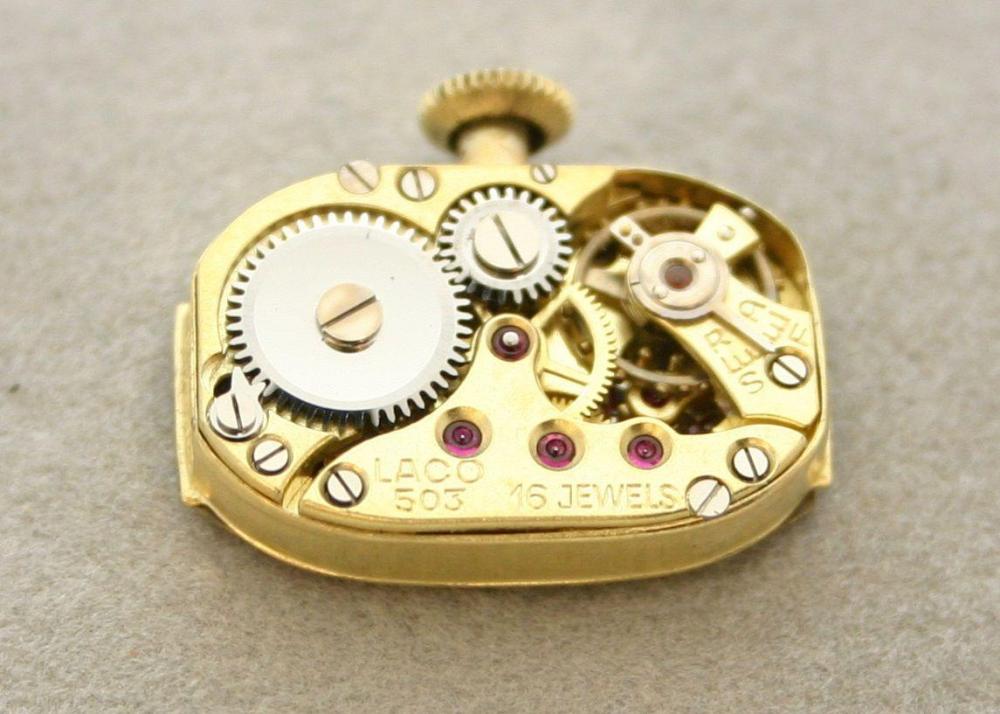
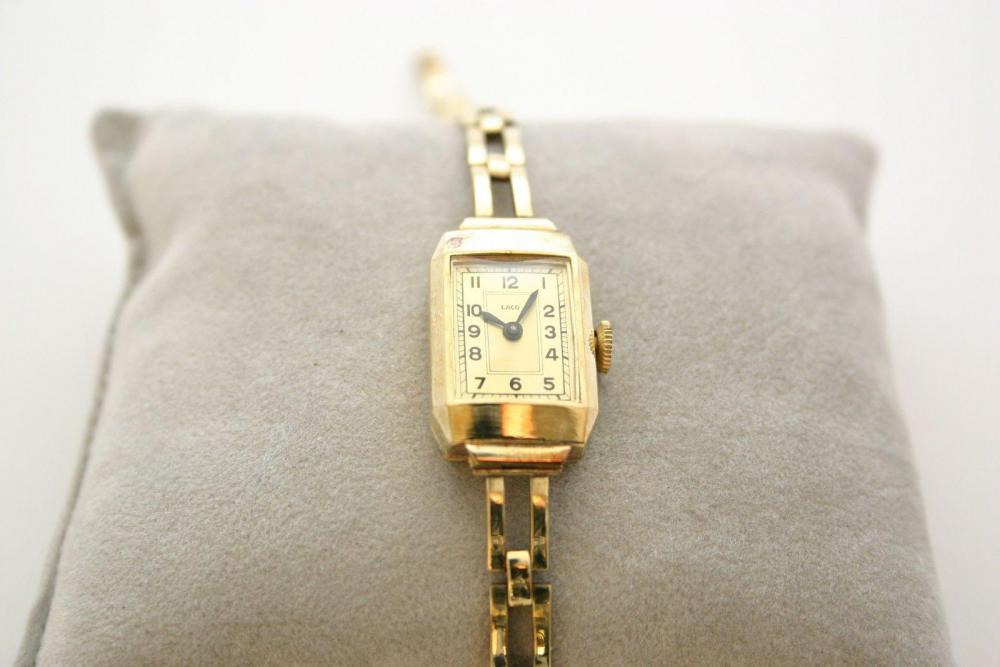
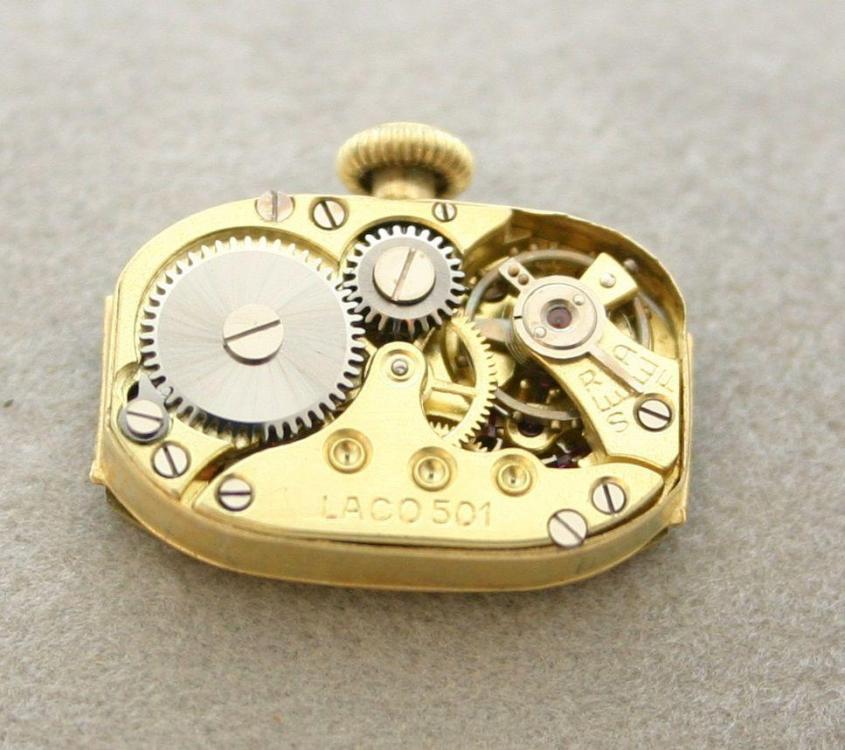
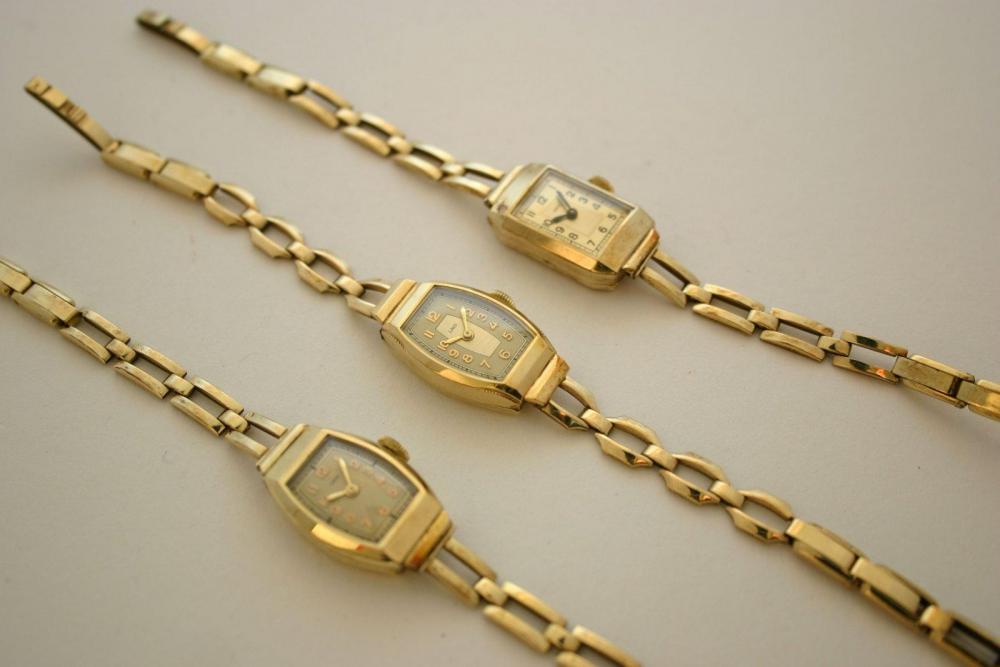
I took a gamble and bought these 3x N.O.S., 1940 -'50's ladies watches. They are made by "Laco", a German watch factory who, one of the very view in the WW2, was awarded to make aviation watches. Those Laco aviation watches became later very sought-after & very expensive. Looking at the pictures, after 70 year in the drawer, their quality & condition doesn't look too bad. Two movements are with 16-jewels, one seemingly without. Paid £32 including postage, so a bit more than a "tenner" each. Perhaps there are still some ladies/girls out there who likes to wear them, or as a dress-watch ......?? I do hope so because I think they deserve finally some wrist time............ if I'll get them to work, that is .....


 1 point
 -
Glad your here, I am mostly an American P/W man also1 point
-
Manodeoro's advice above seems very good. Perhaps this may be of some help too? ; http://www.great-british-watch.co.uk/how-to-polish-a-watch-case-and-bracelet/1 point
-
The new mainspring may be slightly too strong. You can try a slightly thinner one. Either that or you have to get into the escapement, increasing the lock (either by opening the bankings or pulling the pallet stones out a bit or both).1 point
-
Hi happydude1 point
-
Welcome to this excellent forum.1 point
-
Welcome to this friendly forum.1 point
-
The beat is adjusted by adjusting the drop of the escape wheel against the side of the cylinder. this should be about 3 - 5 degs. take the spring barrel out, and move the wheels with your finger back and forth till you can get it about the same each way.it may have three dots on the underside of the balance, and one on the lower plate. these show the 5 degrees each side of centre, but as for setting up the watch, this cant really be relied apon, especially if it has had a new staff fitted. will show how far it needs to move anyway. you adjust it by REMOVING THE BALANCE and altering the hairspring collet the direction you think, untill the watch is self starting, or untill you cant stop it in any place.1 point
-
Indeed, and thanks for asking! CousinsUK has updated their website and has offered me a refund! Quote from Sam Cousins: "I have heard back from Bergeon who have stated that "the tool can lift cannon pinions diameter Ø1.00 to Ø1.80mm". I have added this information to our website" I must say I was impressed by CousinUK's customer service before, but even more so now! I will definitely keep going to them for my future needs!1 point