Leaderboard


Popular Content
Showing content with the highest reputation on 02/22/19 in all areas
-
The chronograph wheel is dirty or damaged. It has a clutch that is engraved and disengaged. When engaged it seems that it’s getting caught. Sent from my iPhone using Tapatalk2 points
-
Hi guys … I had promised that I would make a « custom decal dial tutorial » on another thread there So here we are … There are many variations of decal dials, the best IMHO being the « negative gilt » dials which gives the best results. The process I’m showing today is aabout how to make a dial with black printings on a one color background. I had a cheap quartz diver waiting in my drawers so I’ll make a Heuer diver hommage based on the 980.016 model (quartz one too). DAY 01 : It’s 4:30 AM (I’m an early bird) and I have 2 hours to kill before a business trip to Paris (I’m French) so I decide I have time enough to begin. The first part of the process is to prepare the dial plate : - stripped it, removing all the lumes bars and dots - soaked the dial for some minutes in acetone to remove the paint - filled the tiny holes where the bars and dots go with cyanolite glue - sand everything flat I sand with 800 and don’t try to get a smooth surface as I want the paint to adhere perfectly to thedial plate. Here is the result … Then I want to spray paint. I make a tube with some painter’s tape, from a « curve » with it and place it on a plastic bottle cap. I want it curved so that I can stick the dial on it without any risk of bstructing the center hole or the date window of the dial plate. So I stick the sanded dial plate on the tape tube. As you can guess from the pic below … that’s not the first time a make an orange dial. Then I place the bottle cap and dial plate on a paper sheet and spray paint in orange. I use street art spray paint as it is « water resistant ». As you can see on the next pic, I don’t try to get a smooth surface, or even to perfectly cover the dial plate at first. I will let this coat dry, sand it with 2000 grade, then spray 1 or 2 coats until I get a perfectly smooth orange dial plate, ready for receiving a decal. So I place the bottle cap and dial under a shooter glass and will let it dry for about 24 hours before sanding and spraying the second paint coat. The 24 hours drying time is really important (though it could depend on the paint you use). The paint I use looks perfectly dry after about 5 hours but if you spray the second coat without waiting enough, that coat won’t perfectly adhere to the first and you could get a granular surface like an orange peel. And here is the dial waiting under the shooter glass. On the right is a « negative gilt » dial (third and last matte varnish coat) On the background there are two Raketa 2609 movements from the 70ies, quietly (really loudly to be honest) ticking for test after I‘ve recently serviced them. Now it’s 5:45 AM so I will have a and go to the train station. I’ll sand the dial plate this evening and spray the second paint coat tomorrow morning. Then sand it in the evening and spray the third coat (if needed) the day after. DAY 02 - DAY 03 : So here's what you get after the first paint coat … doesn't look really good but no matter as there's still some work to do to get a better result. And here's what you get after 3 coats of paint, each one sanded with 2000 grade, to get a perfect finish, flat and smooth. Now the dial plate is eady to receive the decal. DAY 03 : I won’t explain anything about Photoshop and Illustrator here … I’ll only explain how I print my decals. One thing really important, from my own experience, is the definition of the design. I’ve tried several, from 1200ppp to 6000pp and the best results I’ve got on printing decal sheets were with a 4000ppp definition. So all my dial designs are done in 4000ppp. The result is really BIG files … for example an A6 template with 12 dial desings ready to print is about 800Mo. As that dial is black printing only I open it with Photoshop and let the softwre (so ont the printer) deal with the printing quality. My printer is an old Epson Picturemate with a 1200 maximum definition. As the good quality decal sheets are not cheap and as I’m a « skinflint» I often print on A7 sheets … 6 dial designs on one sheet. When printed you should let it dry for about 4 hours then spray 2 really thin coats of matte varnish, letting each coat dry for at least 12 hours (24 hours is better). DAY 04 - DAY 05 : 2 days of speed-hiking with my wife so I didn’t worked on that tuto. You can check on the net what speed-hiking is, but to summarize it’s hiking as fast as you can with really light backpacks, trying not to run (or only short runs). On a good day you can walk 5 to 6 miles/hour … when trained you can walk up to 6,5 miles/hour … and while I trained for my first 62 miles ultra I achieved to walk (no running) up to 6,85 miles/hour (11 km/heure). DAY 06 : Today is Monday 6:00 AM. It’s been 5 days since I begun that tutorial and … my legs ache and all my body is painful (see Day 04 - Day 05) The dial plate is ready and the decal sheet too. You can see that the decal sheet looks matte now. That is because I have sprayed 2 coats of matte varnish on it, to protect the inkjet ink while I’ll soak the decal in water. Of course if you print with a laser you won’t have to spray varnish as the laser inks are (almost) water resistant. First thing to do is to chose the best item on the decal sheet and cut it round. Then you are ready to go. On the next pic you can see all you need now : - dial plate … fixed on a foam board using the dial feets - decal dial … nicely cut round - tweezers - thin and smooth brush (mine’s a watercolor brush) - some « micro set » … or just vhite wine vinegar (it helps the decal to set on the dial plate) - cold water Now you put the decal in cold water and while it soaks you brush some micro-set (or white vinegar) on the dial plate. Then you put the decal on the dial plate. Here you can see why I prefer using clear decal sheets on coloured dial plates … because it’s much easier to « perfectly » positionate the decal, using the central hole and the date-window. When you’re happy with the position of your decal you use a paper tissue to absorb the excess of water. Do that carefully as you don’t want to move the decal on the plate. And here we are … everything worked fine while absorbing the water and the decal position is OK. I’ll let it dry for about 12 hours before I cut the central hole and the date window, before I proceed to the varnish finish. Still Day 06 but 7:00 PM The decal has dried for about 13 hours so now I can proceed on cutting the decal sheet That's what I do then I : - fix it back on the foam board - apply some « micro set » around the center hole, the date-window and the outer diameter - gently press with a paper tissue so that the decal is perfectly applied (no more «air bubbles) And I let dry for 3 hours more Evening … 10:00 PM Now the decal is « perfectly » applied and dried and ready for the finish Last pic for today is after spraying the first coat of glossy varnish I will let it dry for 12 hours, sand it with 2000 grade paper and apply the 2nd coat. DAY 07 : 20:00 AM … only 1 pic today just after finely sanding with 2000 grade the 2nd varnish coat I applied yesterday DAY 08 : Yesterday evening I applied the 3rd and final varnish coat after finelt sanding and cleaning And today I can show you the final result … and say I'm pretty happy That dial is so glossy it’not easy to get a good pic, even on close-up. May I say that me hpone is nit the best at shooting pics (just like me) and the actual dial is much much better that it looks on the pictures below. I hope that you liked that tutorial and that it could be helpfull to members who want to try to build their own watch dials. I’ll try to make better pics with a real camera and a better lens … next week of the week after, after luming the dial together with the hands. Then I will still have to get a case and rework it so that it could be a 980,016 lookalike. Some of you may wonder how much time did I spend to make that dial. It took 8 days to achieve the all process but I spent only 1 hour the first day then only from 15mnm to 5mn the days after. So, apart from the design work on Illustrator and Photoshop (which took me hours), I would say that the whole process is about 2 to 3 hours. I must say that it's not my first try at dial making and I've trained for 2 years now. So if you want to try you should consider spending a few more hours but it's really worth the time spent as at the end you get your unique DIY dial.1 point
-
Had to make a balance staff for an Elgin 16S Pocket watch. Used the old on as a sample and cut 90% of the staff without flipping it around. The pivots were 0.12mm and I needed to use the Jacot tool to remove material from the pivots for the final fit. As well, I shaved too much material off the hairspring side and needed to reduce the size of the collet with my staking set. Also needed to adjust the hairspring as it moved when I compressed the hairspring. Photos and video(hairspring collet reduction) Sent from my iPhone using Tapatalk Pro1 point
-
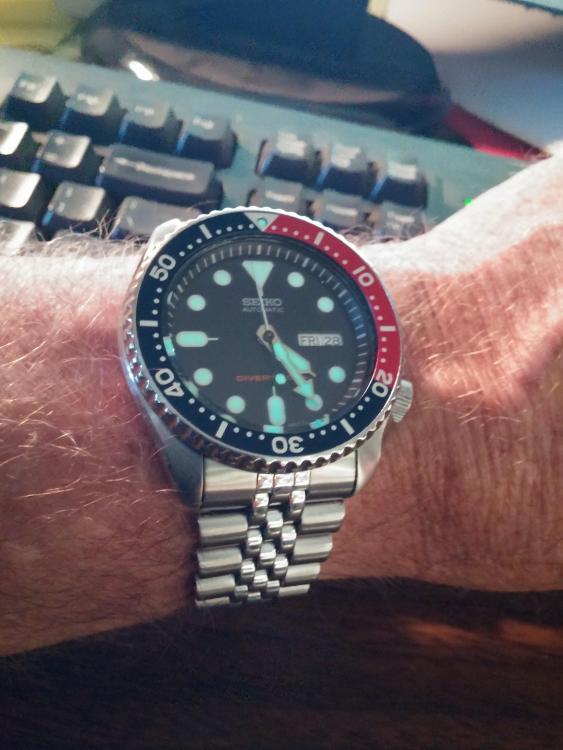
The project finally came to fruition today. The new dial arrived and I assembled the old girl. At first, I couldn't get the movement to align with the chapter ring properly. After further investigation, I found that I had somehow let the chapter ring slip when installing the new crystal. Out came the crystal again, correctly aligned the chapter ring with the keeper in the milled slot, then reassembled it all. Now, everything's good to go. Old: 7S26 21J mechanical auto wind movement, flat mineral glass crystal, factory supplied hands. Literally, any stock SKX007 will show you what I began with. New: 7S36 23J mechanical auto wind movement, double domed blue AG coated crystal, custom coin edge 316L bezel, green insert, new crown. I've installed the original Jubilee bracelet from Seiko that the watch has always worn. I've ordered new fat spring bars as the old ones are a bit dodgy. I won't wear the watch until I have those in hand and change them out. Total cost of parts = $92. Labor = $0. Fun involved with project = priceless! A big old Texas "Thank you pardner" goes out to Mark without whose videos and encouragement this would have never happened.
 1 point
 -
Interesting...It's usually the other way around. Watch stops when chronograph stopped. I think the second hand may be touching the glass. (its sitting to high?) Or the centre chronograph wheel is warped and dragging on something maybe. Or lastly the power reserve is poor and extra needed to run second hand is not enough.1 point
-
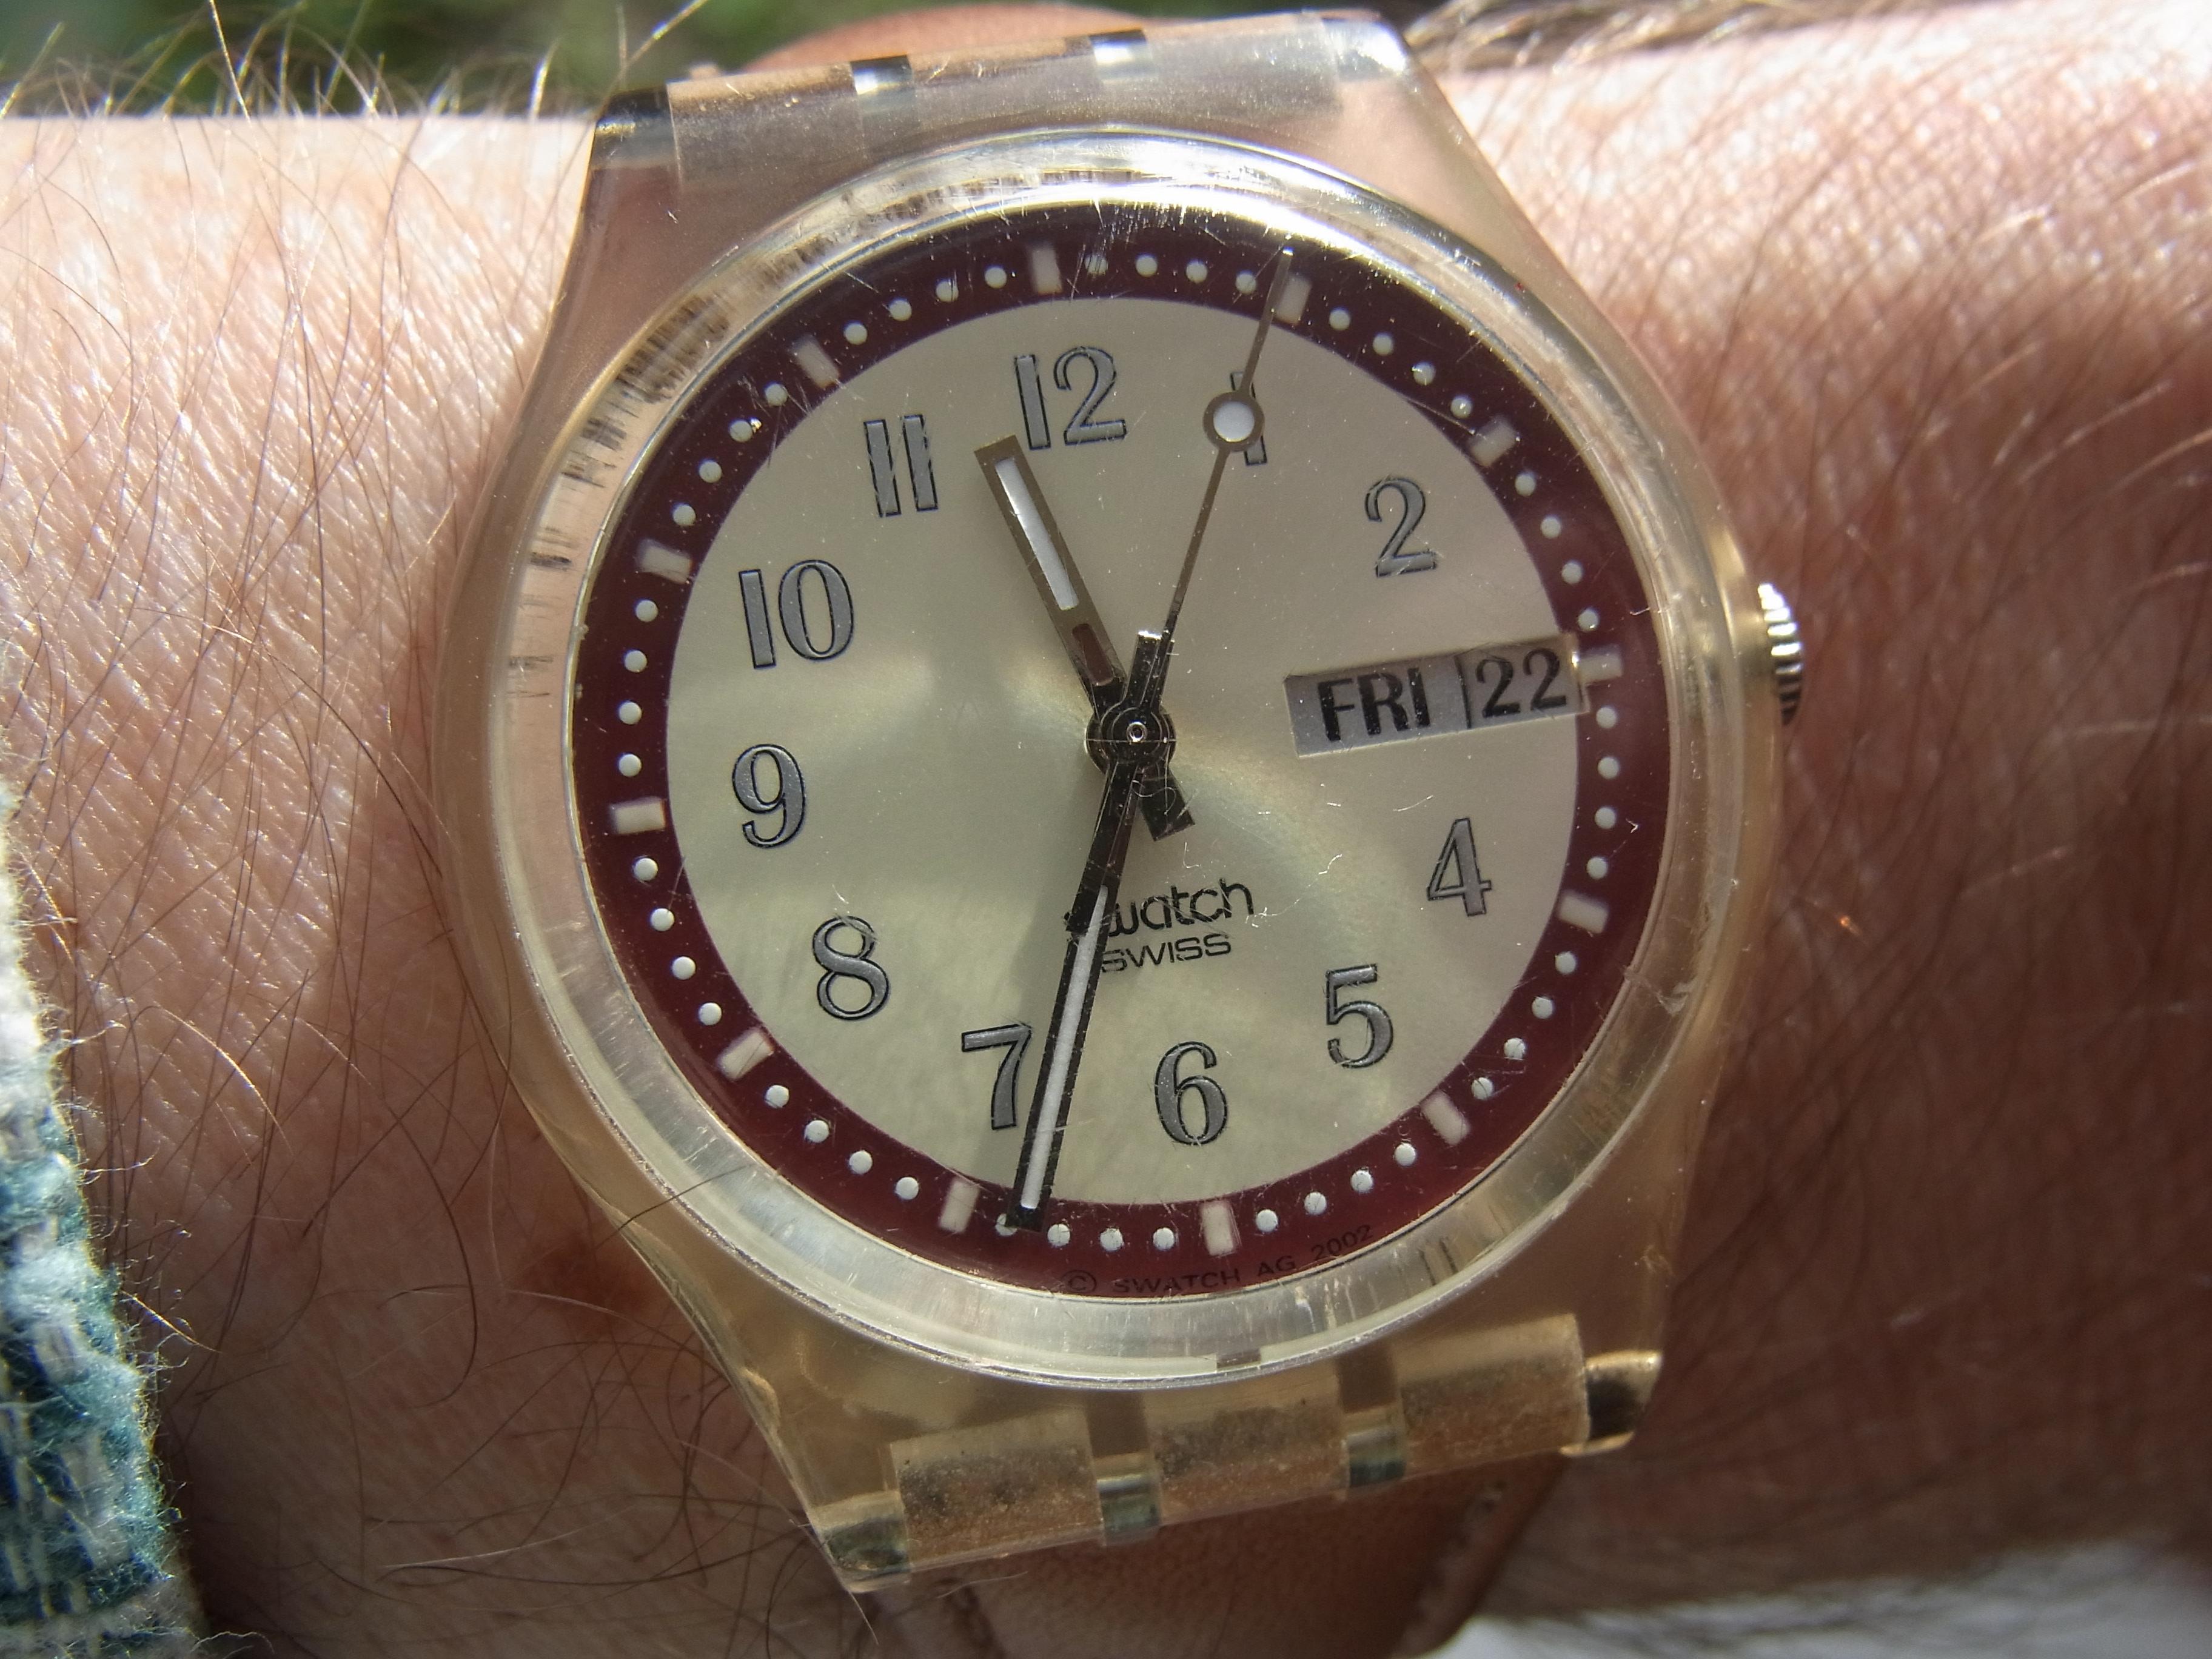
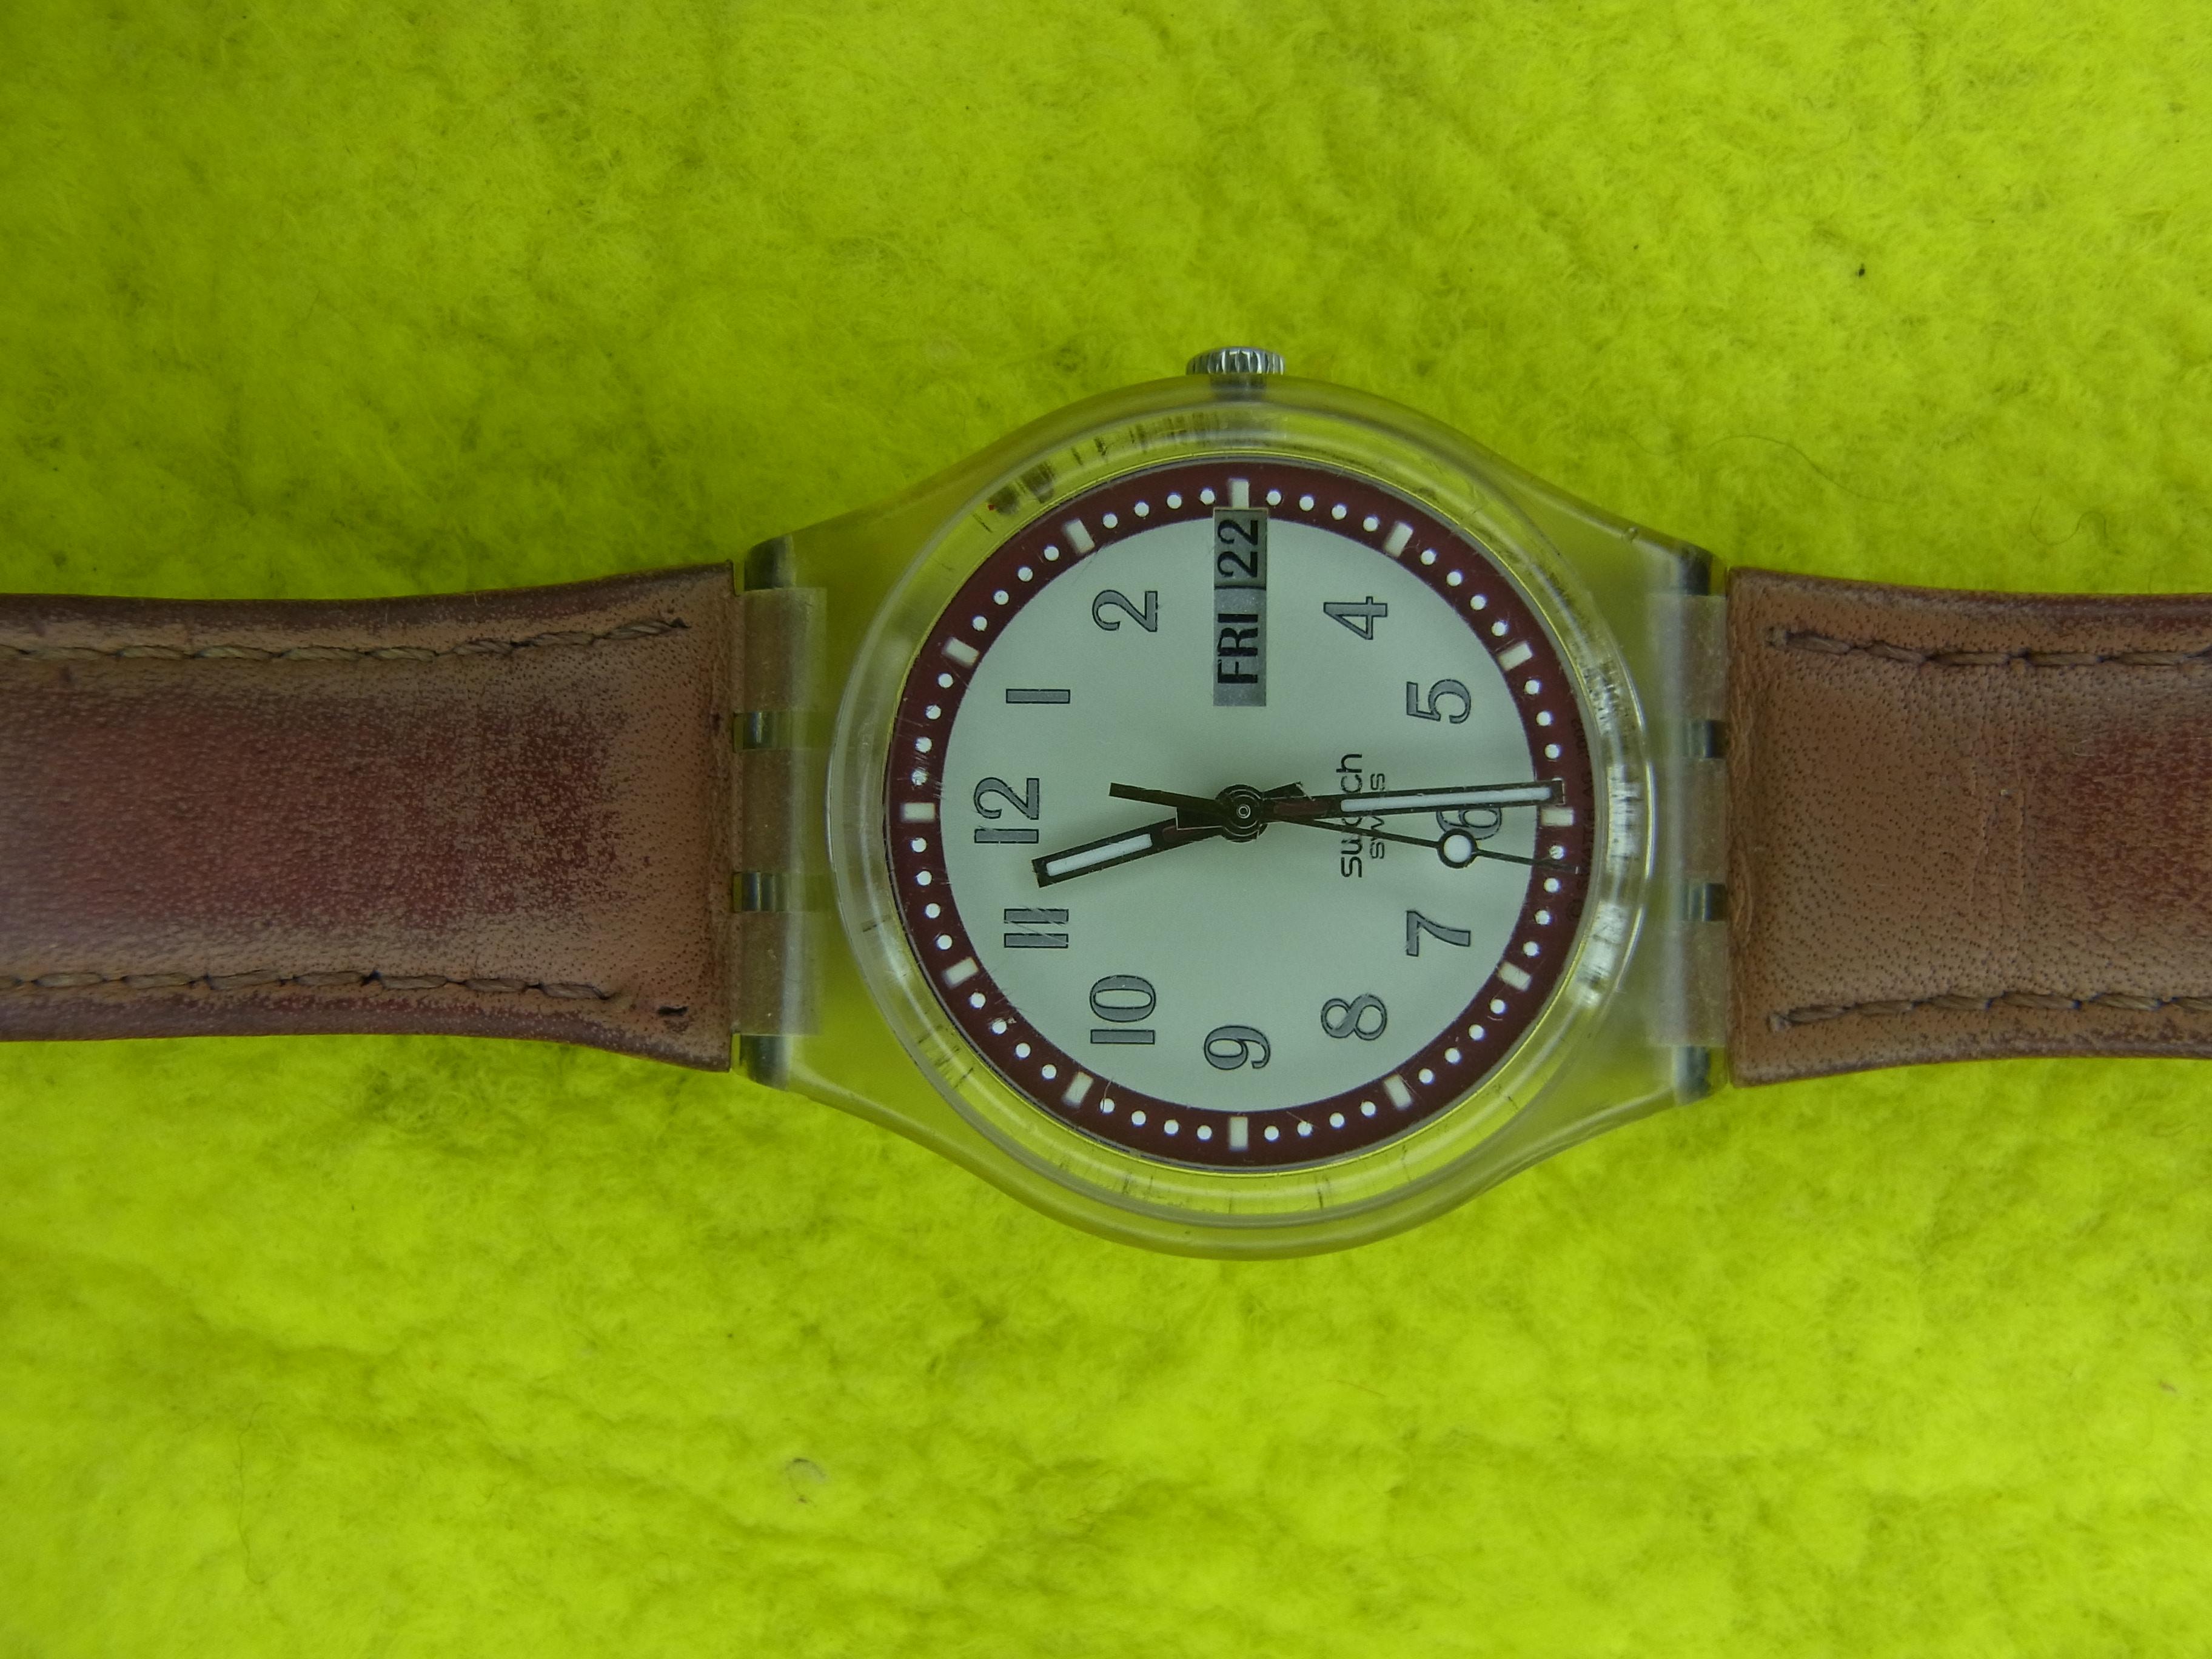
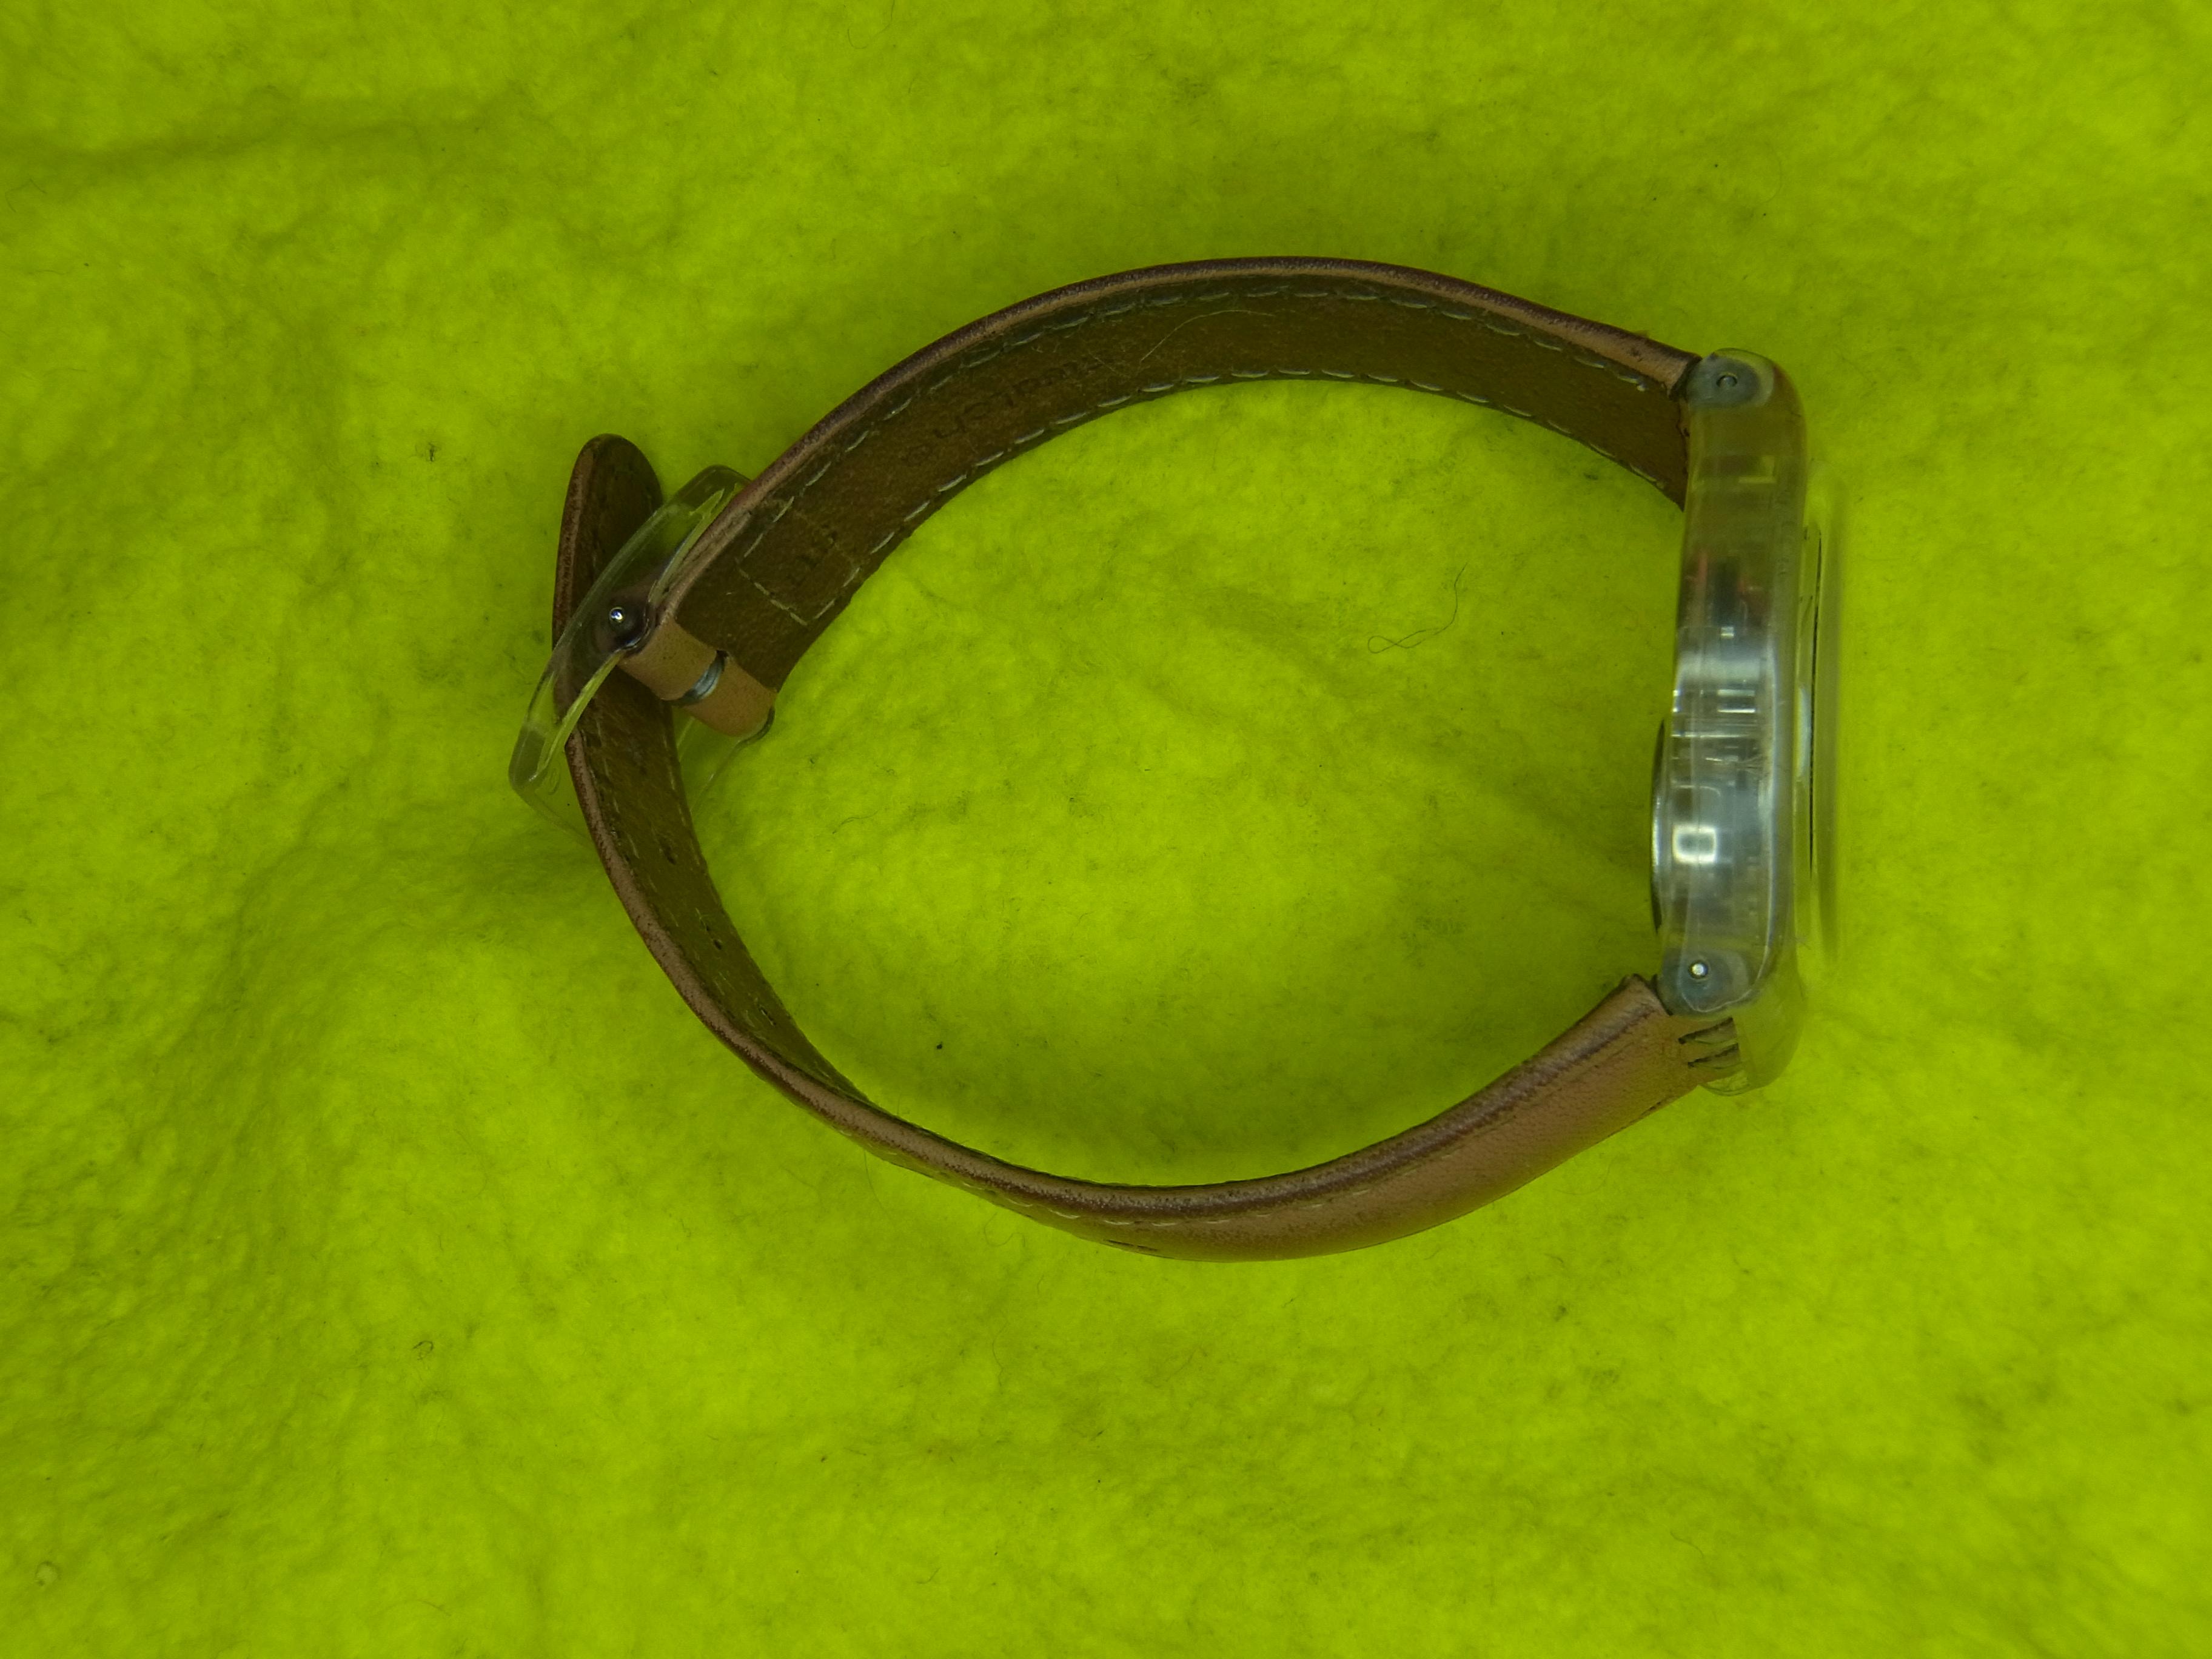
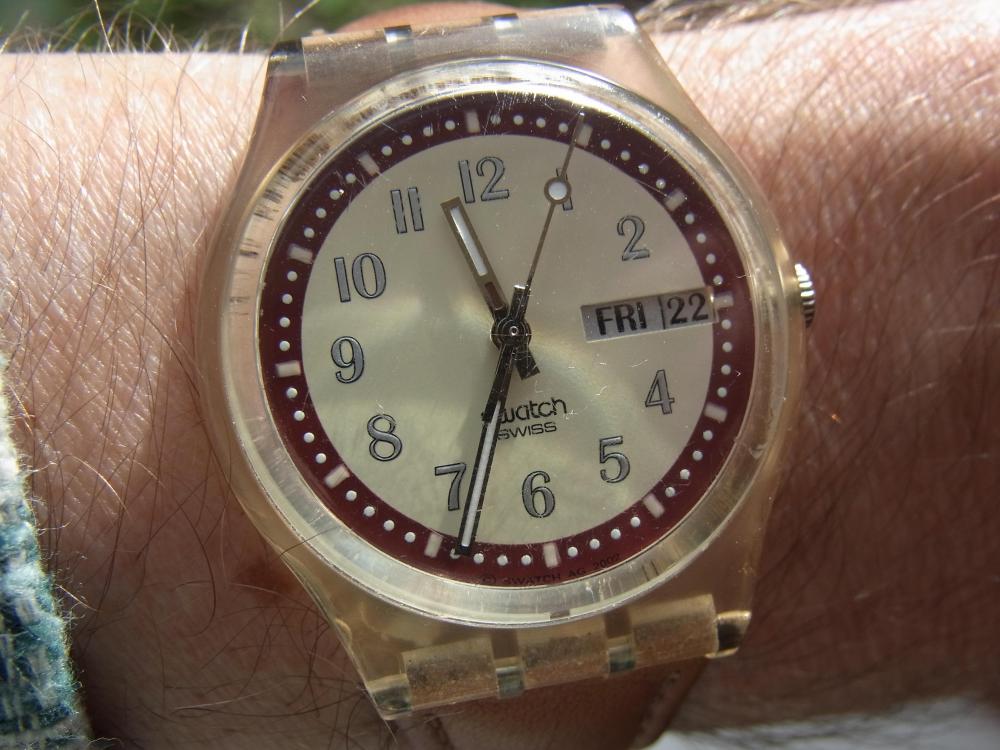
A little bit of a fun watch for today's Watch of Today. Another Swatch rescued from the junk pile. This one had a couple of obvious issues. The leather band was filthy, heavily kinked, and stiff as a board. So much so that had to be scrubbed with detergent, dried, and some leather restoration work carried out. The watch itself however, as well as the usual heavily scratched crystal had an electro-machanical issue. When I popped in a brand new battery, the second hand would move for a bit, then falter. This turned out to be a combination of slight corrosion on the spring contact for the battery, and the fact that someone had previously run the watch with a tiny button cell, wedged in place with some scrunched up paper, which had bent the sprung battery contact. A little very careful re-bending and off it went like a champ. This illustrates the point nicely, that even a little extra resistance in the battery contacts can be enough to stop a quartz movement, or make it behave erratically. The band took a little more effort. Once dried, following its bath, it became obvious that the original uniform kid leather look was long gone, so I went for a more vintage finish, with a little blending of the very worn patches using the leather dye in some dark tan shoe polish, combined with some lighter "Clarks Shoes" branded leather restoration cream. I only needed a hint of the dark tan, since I didn't want to end up with a brown shoes effect, simply to shine up the worn patches, and blend them with the existing colour. Several thin coats of leather cream mixed with a little dark tan, and much buffing later and the strap is back to its original soft calfskin feel, rather than dry as a stick. All of the holes are the same size again. The band forms a gentle curve, rather than being corrugated, and the stitching is clean. The band looks ten times better than when it arrived. This is yet another member of the "404 Club", since it was effectively free with a bunch of other junk, I picked up which was purchased because it included a mechanical watch that I have yet to restore, all for under the magic £4.04

 1 point
 -
Heat " IS" the kenetic energy of constituant particles. If water molecules are moving, there is heat. If at rest , no heat. What we call / preceive as the heat in content in the boiling water is the amount of kenetic energy of water molecules (sum of all molecules in it) as molecules vibrate about. Temperature is the amplitute of vibration, the larger the amplitude the higher thermometer show the temp. So as you mix the cold and hot, molecules vibrating at higher amplitude beat on the ones with low amplitude( cold ones) in doing so some kenetic energy ( heat) is transfered from high temp to low temp molecules. ( like when billiard balls collide), this will continue until no excess kenetic energy ( heat is there to be transfered) the estate which is reffered to as equilibrium. Furthure you can understand that, there is no such thing as cold energy, cool is just a lack of heat or lower heat content.1 point
-
I checked all variations listed by Dr ranfft. I think it is Movado75. Later modified fitting incab shock protection.1 point
-
Your Seiko Watch is considered a very inexpensive watch by even Seiko standards. We recently had discussions on Seiko watches and timekeeping there is an exact procedures Seiko recommends for timing. Casually your numbers are super good for a watch of this grade. Then tech sheets are really handy because this watch is using what's known as the etachron system. This is why I quoted something above on a normal watch you can push on the spring to get things in alignment but with this system both the stud can be rotated and you can rotate the regulator pins. You're supposed to have a special tool but you can do with tweezers. That makes it considerably easier to get things in alignment it also makes it much easier for those not paying attention to get things out of alignment. Then this " smart phone regulator " Thing you're talking about does it tell you if your watches in beat or not?1 point
-
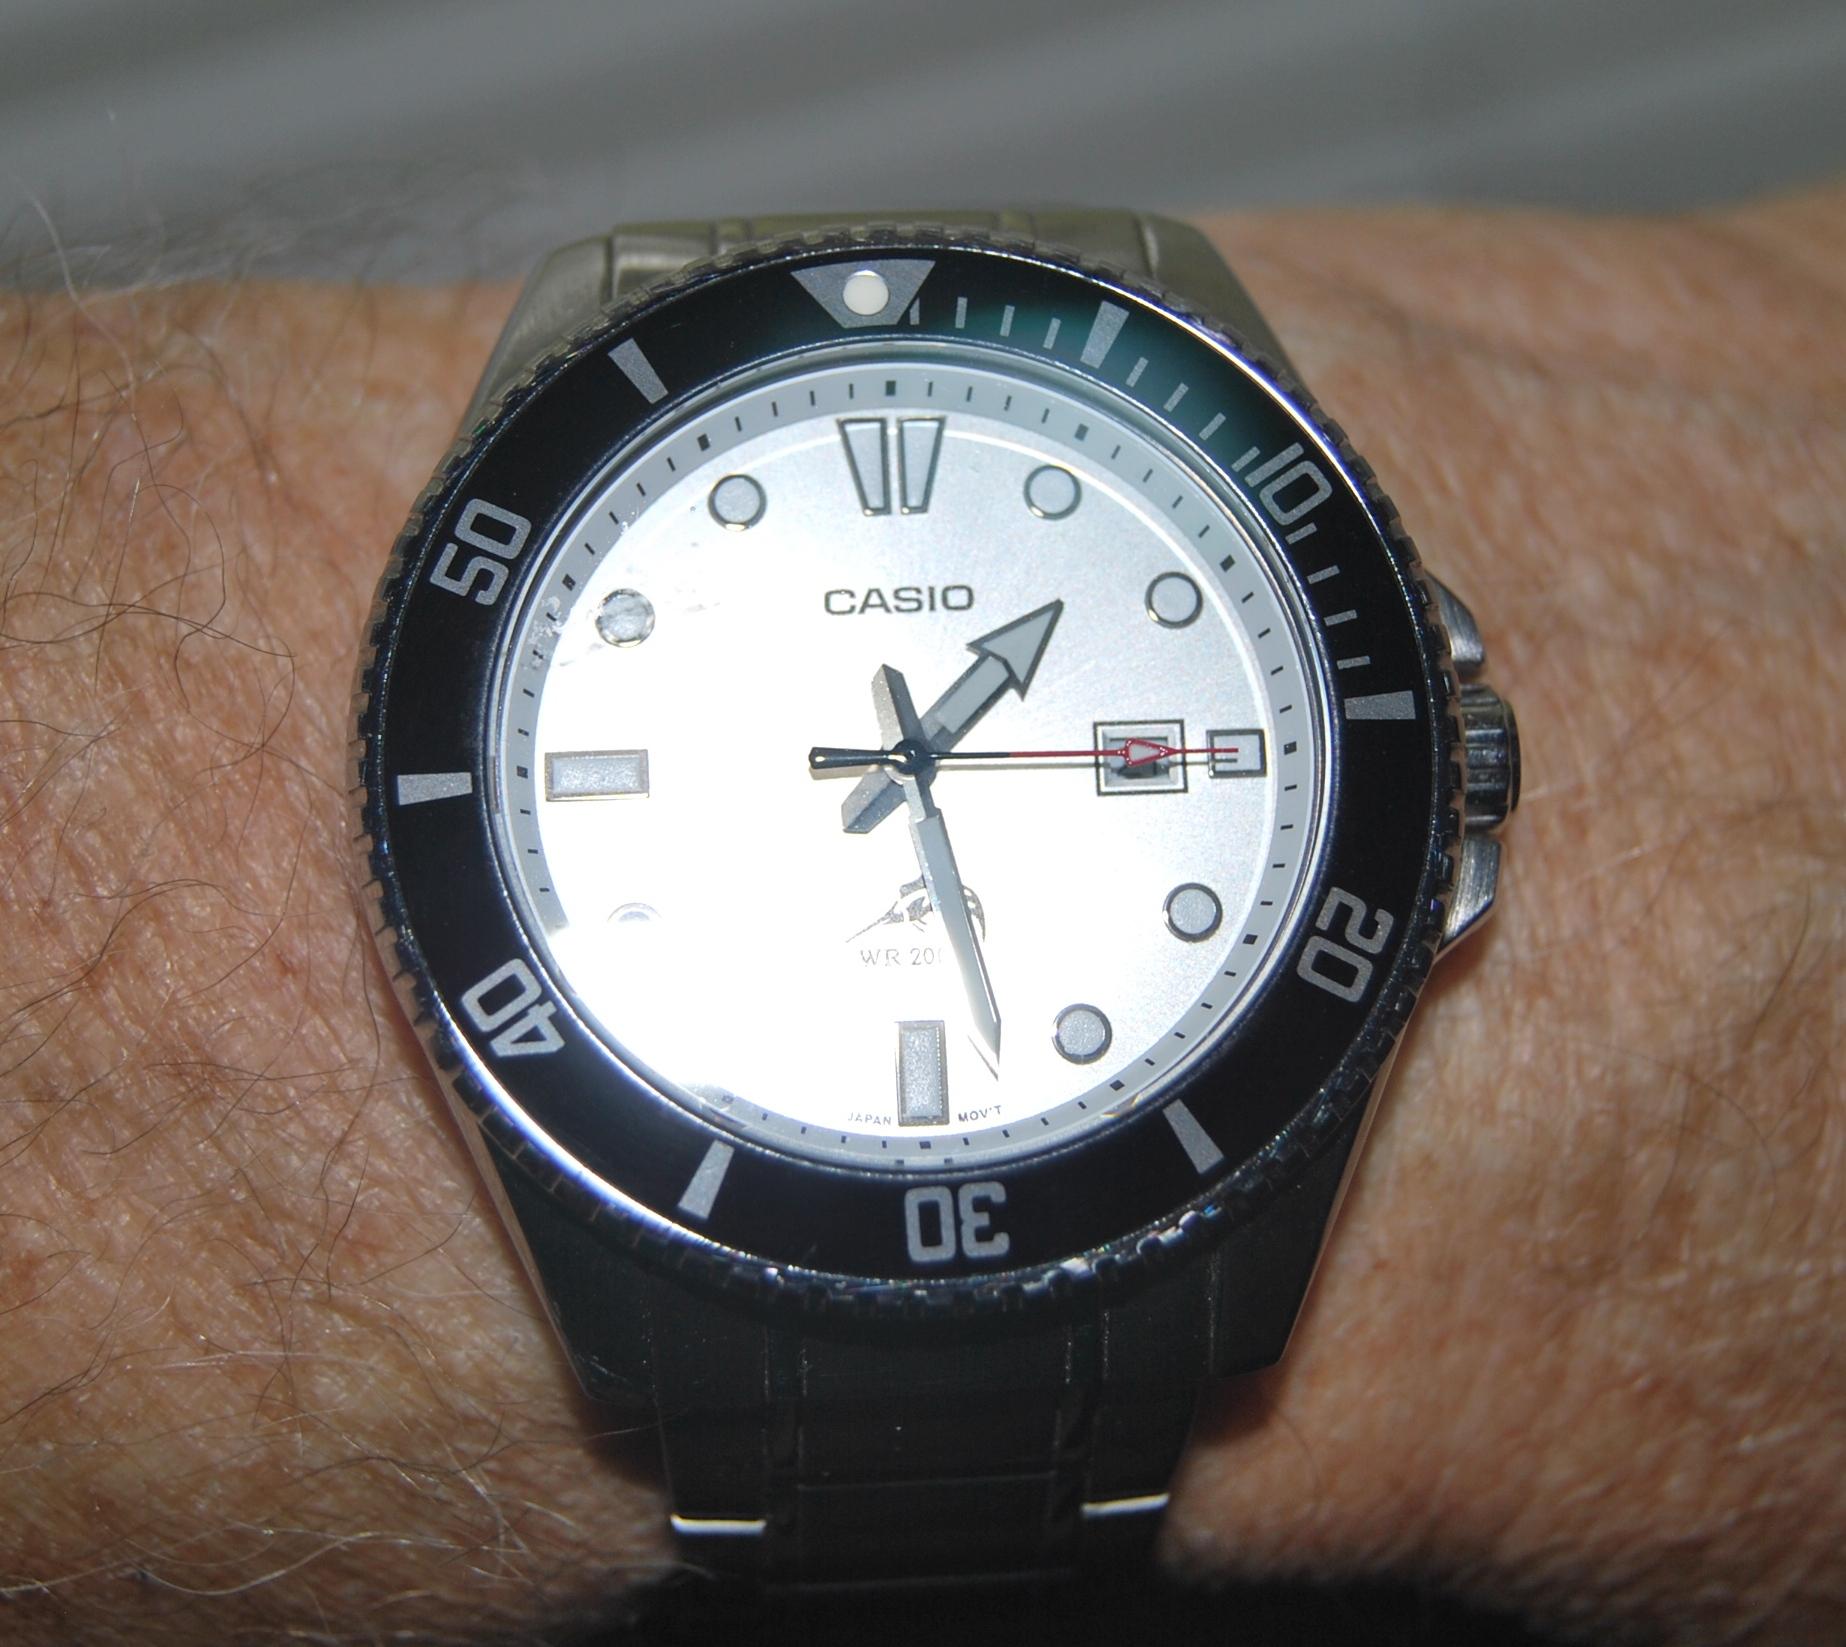
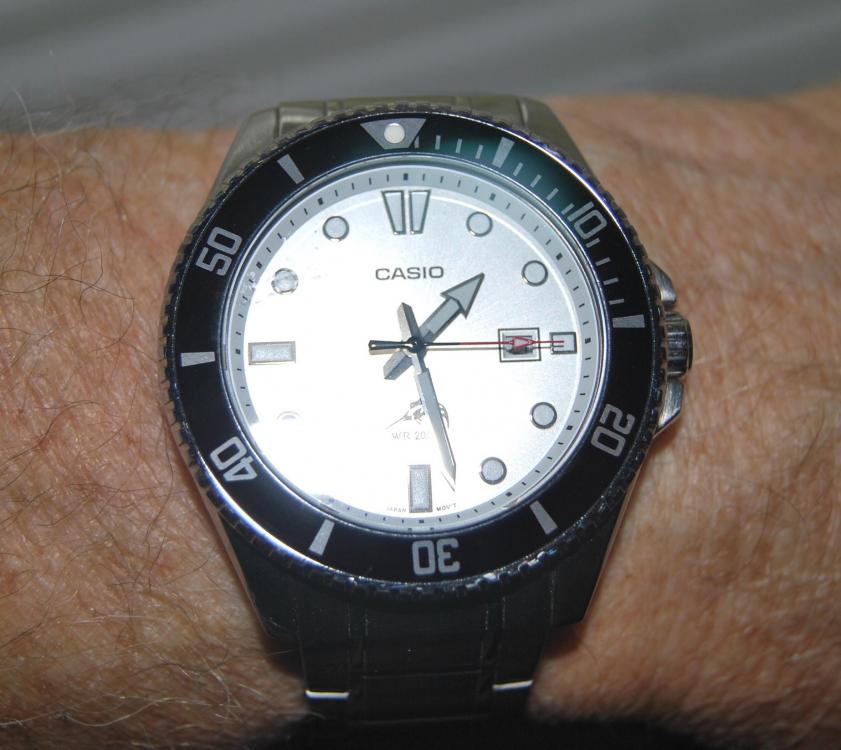
This was in my mailbox today. It's the Casio MDV-106 but with a white or silver dial, not the black one that you see everywhere. I wouldn't call these rare but they are scarce. Possibly only sold in the JDM for a short period of time prior to being discontinued. I have it in black also and am quite smitten with the watch size, ease of readability and low maintenance. This one popped up on well know auction site less than 5 minutes prior to my logging on. I didn't even quibble with the $125 price tag, I just bought it. It arrived as advertised with a dead battery. Once replaced, everything worked perfectly. If this watch was even worn, it couldn't have been much. There are no scratches on the watch case and only the faintest swirl on the clasp. There was no dirt or body grime to remove from the case back prior to removal. All it needed was a new Renata 377, a quick blow with the dust blower, grease the gasket and button it up. I apologize for the picture quality. It's overcast and raining here (yet again) and the flash tended to overpower the shot. I can do better.
 1 point
 -
Just joined today. Man, there are a LOT of great watches and information here! I sure look forward to learning more. This is my daily go everywhere watch. It's also my first repair. After my SKX009KD Seiko Diver got dropped on a tile floor, the oscillator weight and bearing separated into two pieces. It took a lot of patience and research, I just hopefully it's fixed for now.
 1 point
 -
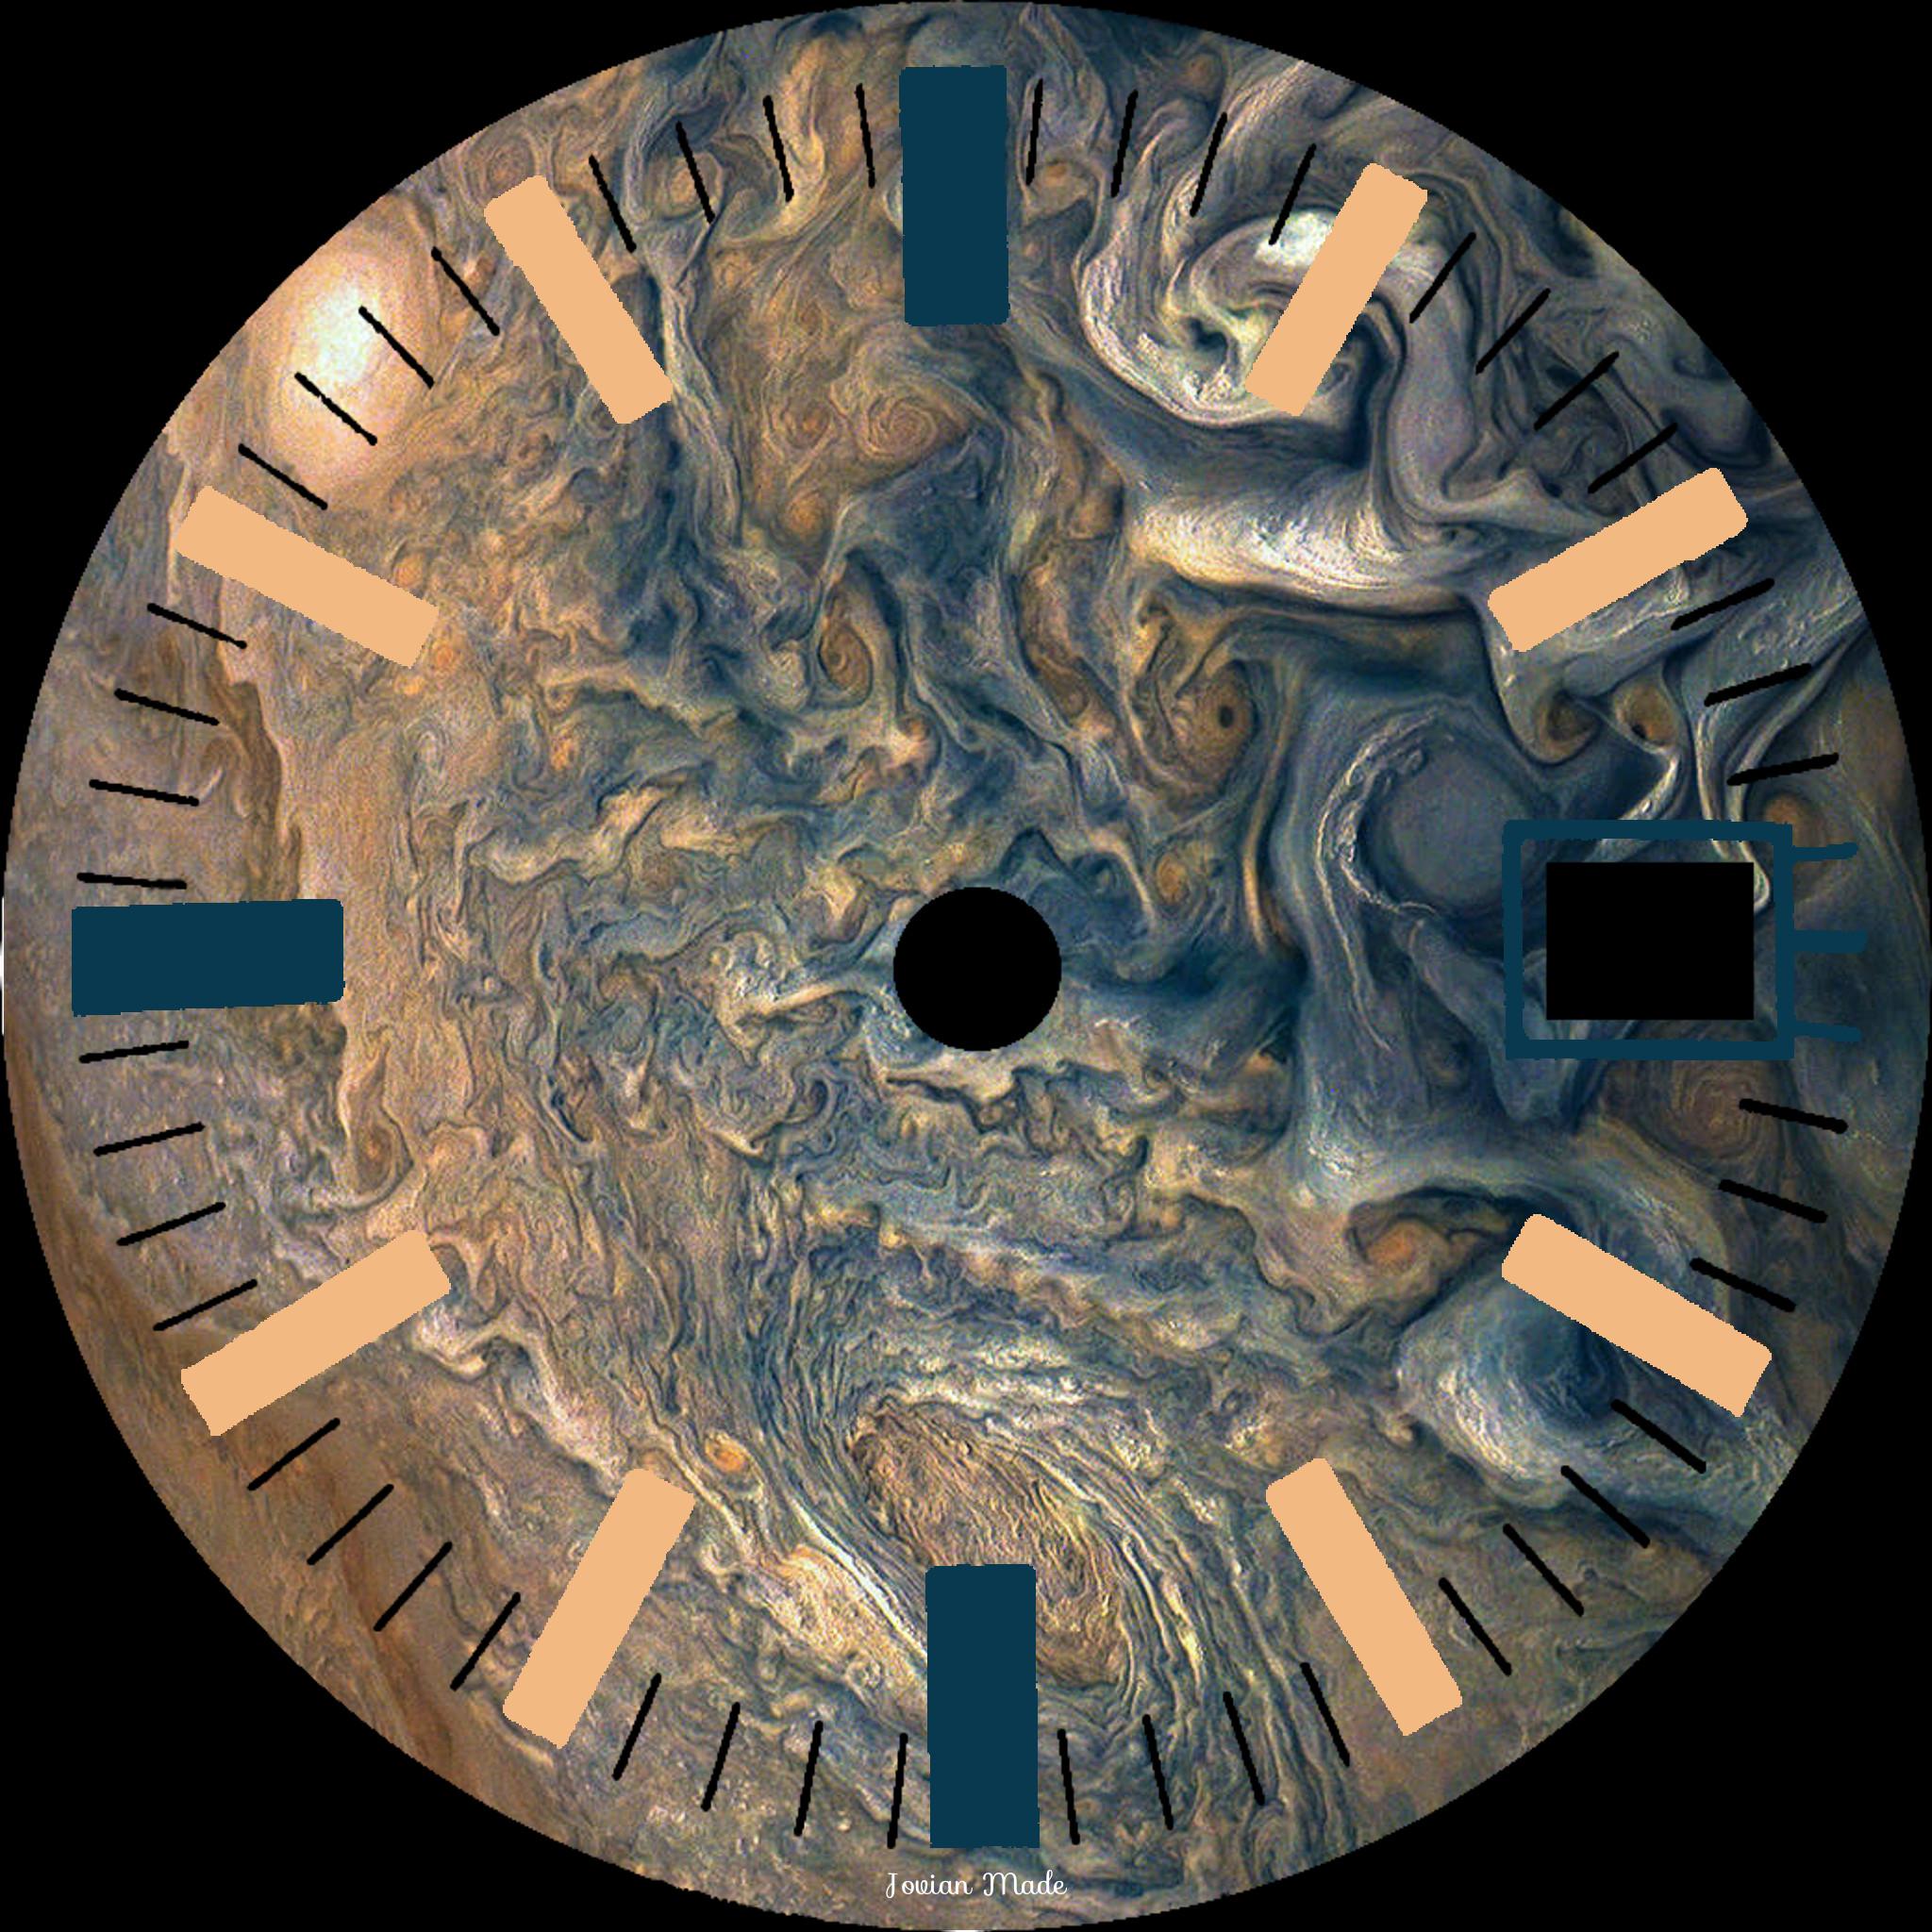
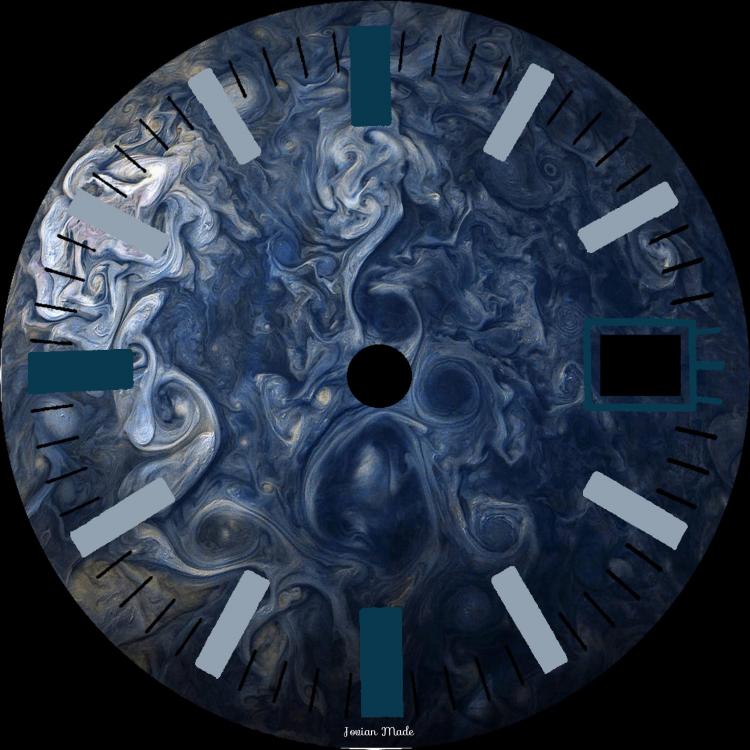
Just to show how simple it is to work with layers to quickly alter the image, here is the same set of dial markings on a vivid blue image in the same sequence. I only needed to alter one layer and pick a new colour to replace the sandy tone of markings of the original example.
 1 point
 -
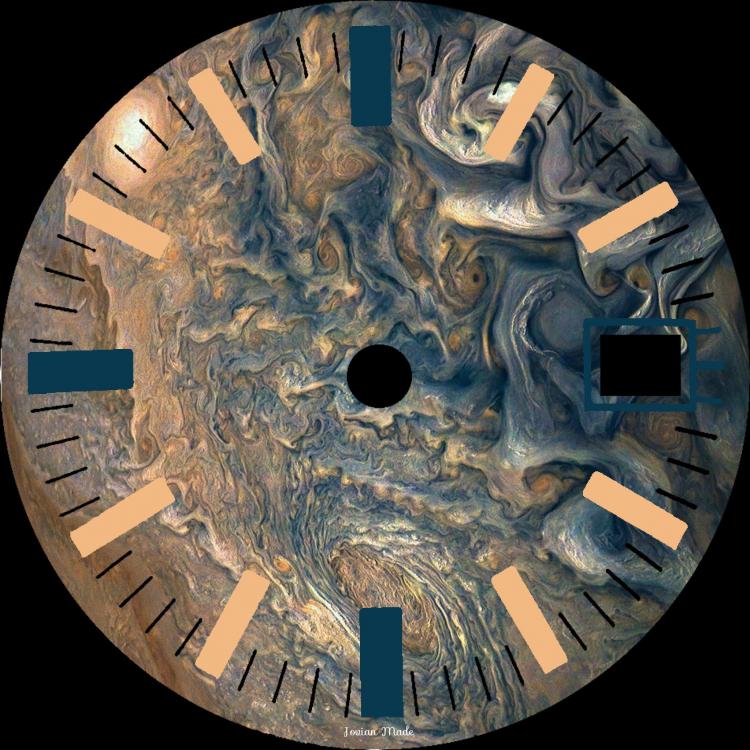
Inspired by a documentary I saw about the NASA Voyager missions (launched 42 years ago, in 1977), which I was watching on the flight home, I decided to see what I could come up with in a Jovian theme. The base image is actually from the Juno mission, but it is such a spectacularly colourful image I had so see what I could make from it. The dial marker positions are borrowed from a Certina 2000 dial, which had a suitably 1970s vibe to it. I can see I could have a lot of fun with this if I can get the technique mastered. The sky and your imagination is the limit. It needs a little more work, and I'm not sure I'm 100% happy with those hour markers, but the great thing about image editors is, if you don't like it you can change it.
 1 point
 -
It is a mass produced robot assembled movement.It is inexpensive and robust in design. It's mechanical oscillator, the balance wheel will never match the accuracy of a quartz crystal, ever.It will however run for decades and never need at battery.It sounds like it is running pretty close to design parameters to me.1 point
-
Hairspring just needs a clean or a demagnetise, probably both.1 point
-
I’ve not seen that defence before, nice watch and a good save! Sent from my iPhone using Tapatalk1 point