Leaderboard


Popular Content
Showing content with the highest reputation on 12/23/16 in Posts
-
it's certainly true to say that there are a lot of watchmakers out there who consider Timex's own published service procedures to be inadequate, and the design philosophy and build quality of their watches to be contemptibly inferior. This is something that I have never understood; it's almost as though there is amongst watchmakers a culture of bias against the brand, dare I say it, an element of snobbery. It's also quite correct that Timex's service procedures would be wholly inappropriate for a fully jewelled movement, in much the same way that the service requirements for a Ferrari differ from those of Ford, but if your garage tried to tell you that they need to service your Ford in accordance with the Ferrari service procedures (and that they should charge you accordingly), because the published Ford procedures are inadequate you would quite rightly question their rationale and take your custom else where. I can only speak from my own experience and that includes quite a lot of Timex watches. There are definitely some aspects of Timex design that I dislike, just as there are design aspects of many other Swiss, American, Russian, and English watches that irritate me, however, I don't think that their durability can be questioned. What is more, from experience I can happily say that the vast majority of apparently dead, 50 years old and never been serviced and look like they've spent most of their life in a war zone Timex's that I have then given the Timex spa treatment, have straight away sprung back into life and gone on to perform as designed. If that isn't evidence of an effective service procedure then I'm not sure what is. And as I said before, I have never encountered a broken Timex balance staff. Obviously other people have different experiences and accordingly (and quite rightly) will have arrived at their own opinions. What I find so difficult to accept, let alone understand, is the (so often repeated) assertion Timex watches were never intended to be repaired or serviced. The fact that Timex went to the trouble and expense of publishing service manuals and tech sheets, and providing a supply of spare parts is proof positive that they were meant to be serviced. And my own experience with them has demonstrated to me that the published service procedures are not only perfectly effective, but also incredibly simple to carry out.3 points
-
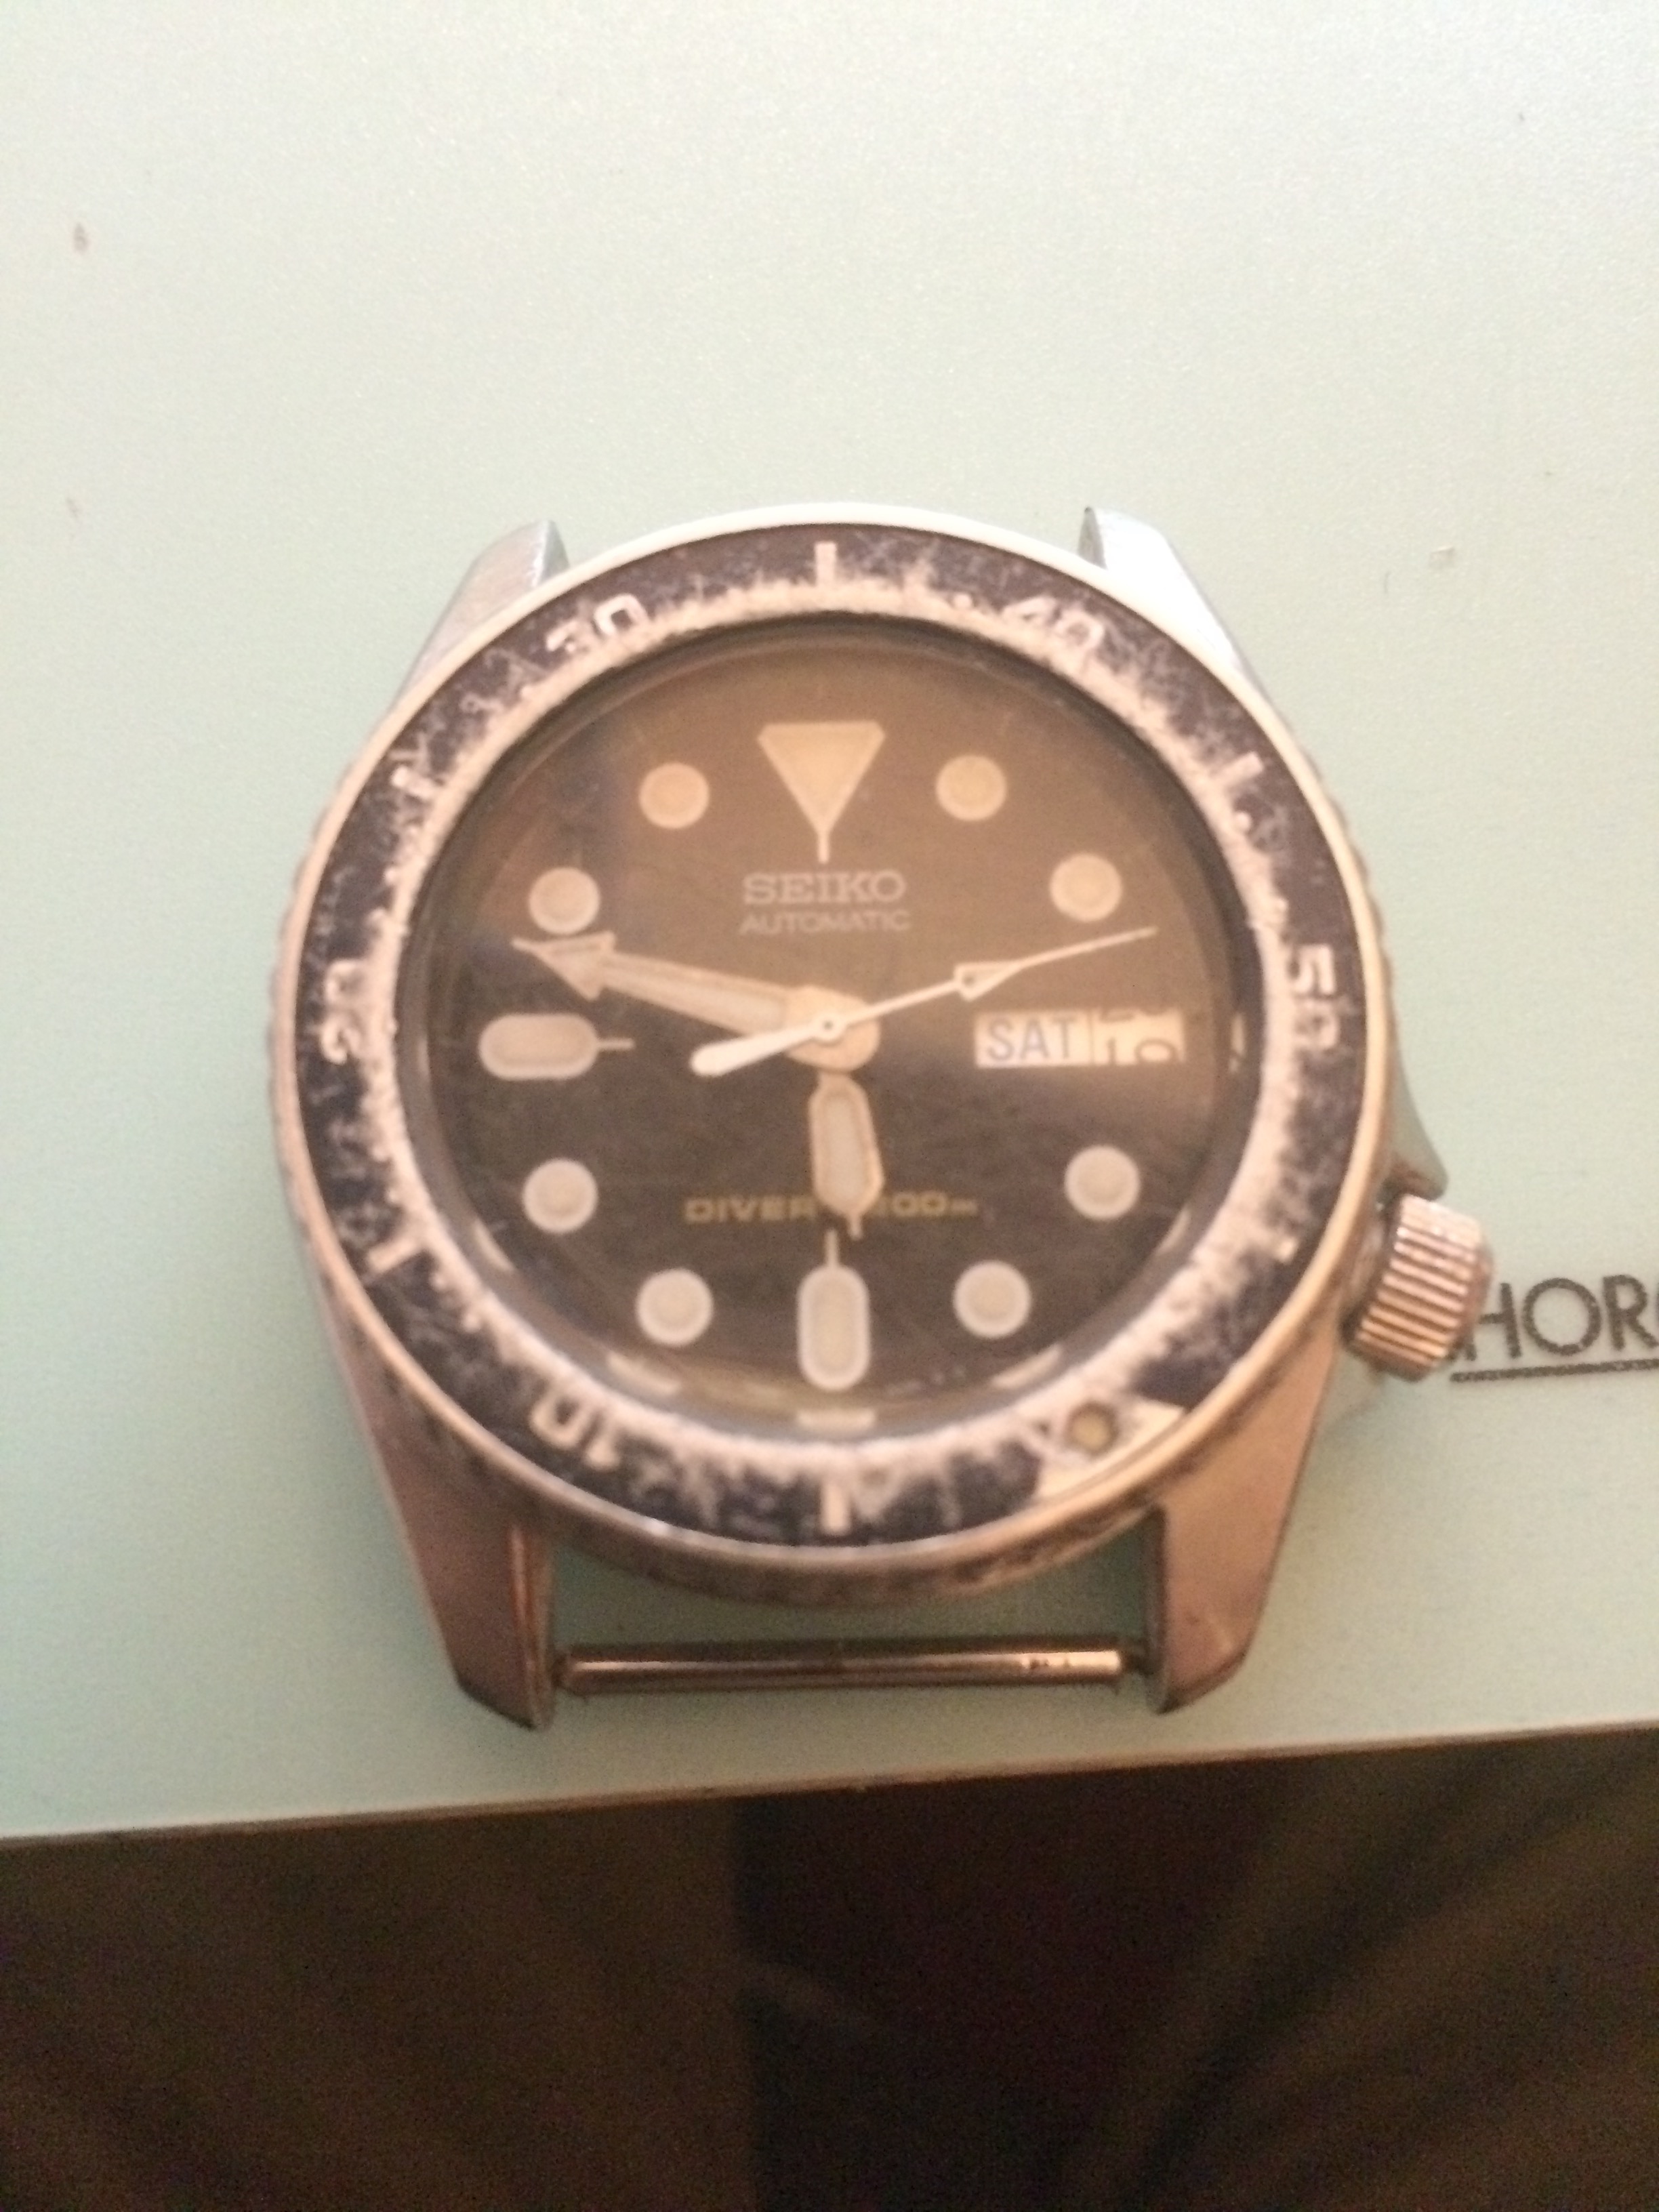
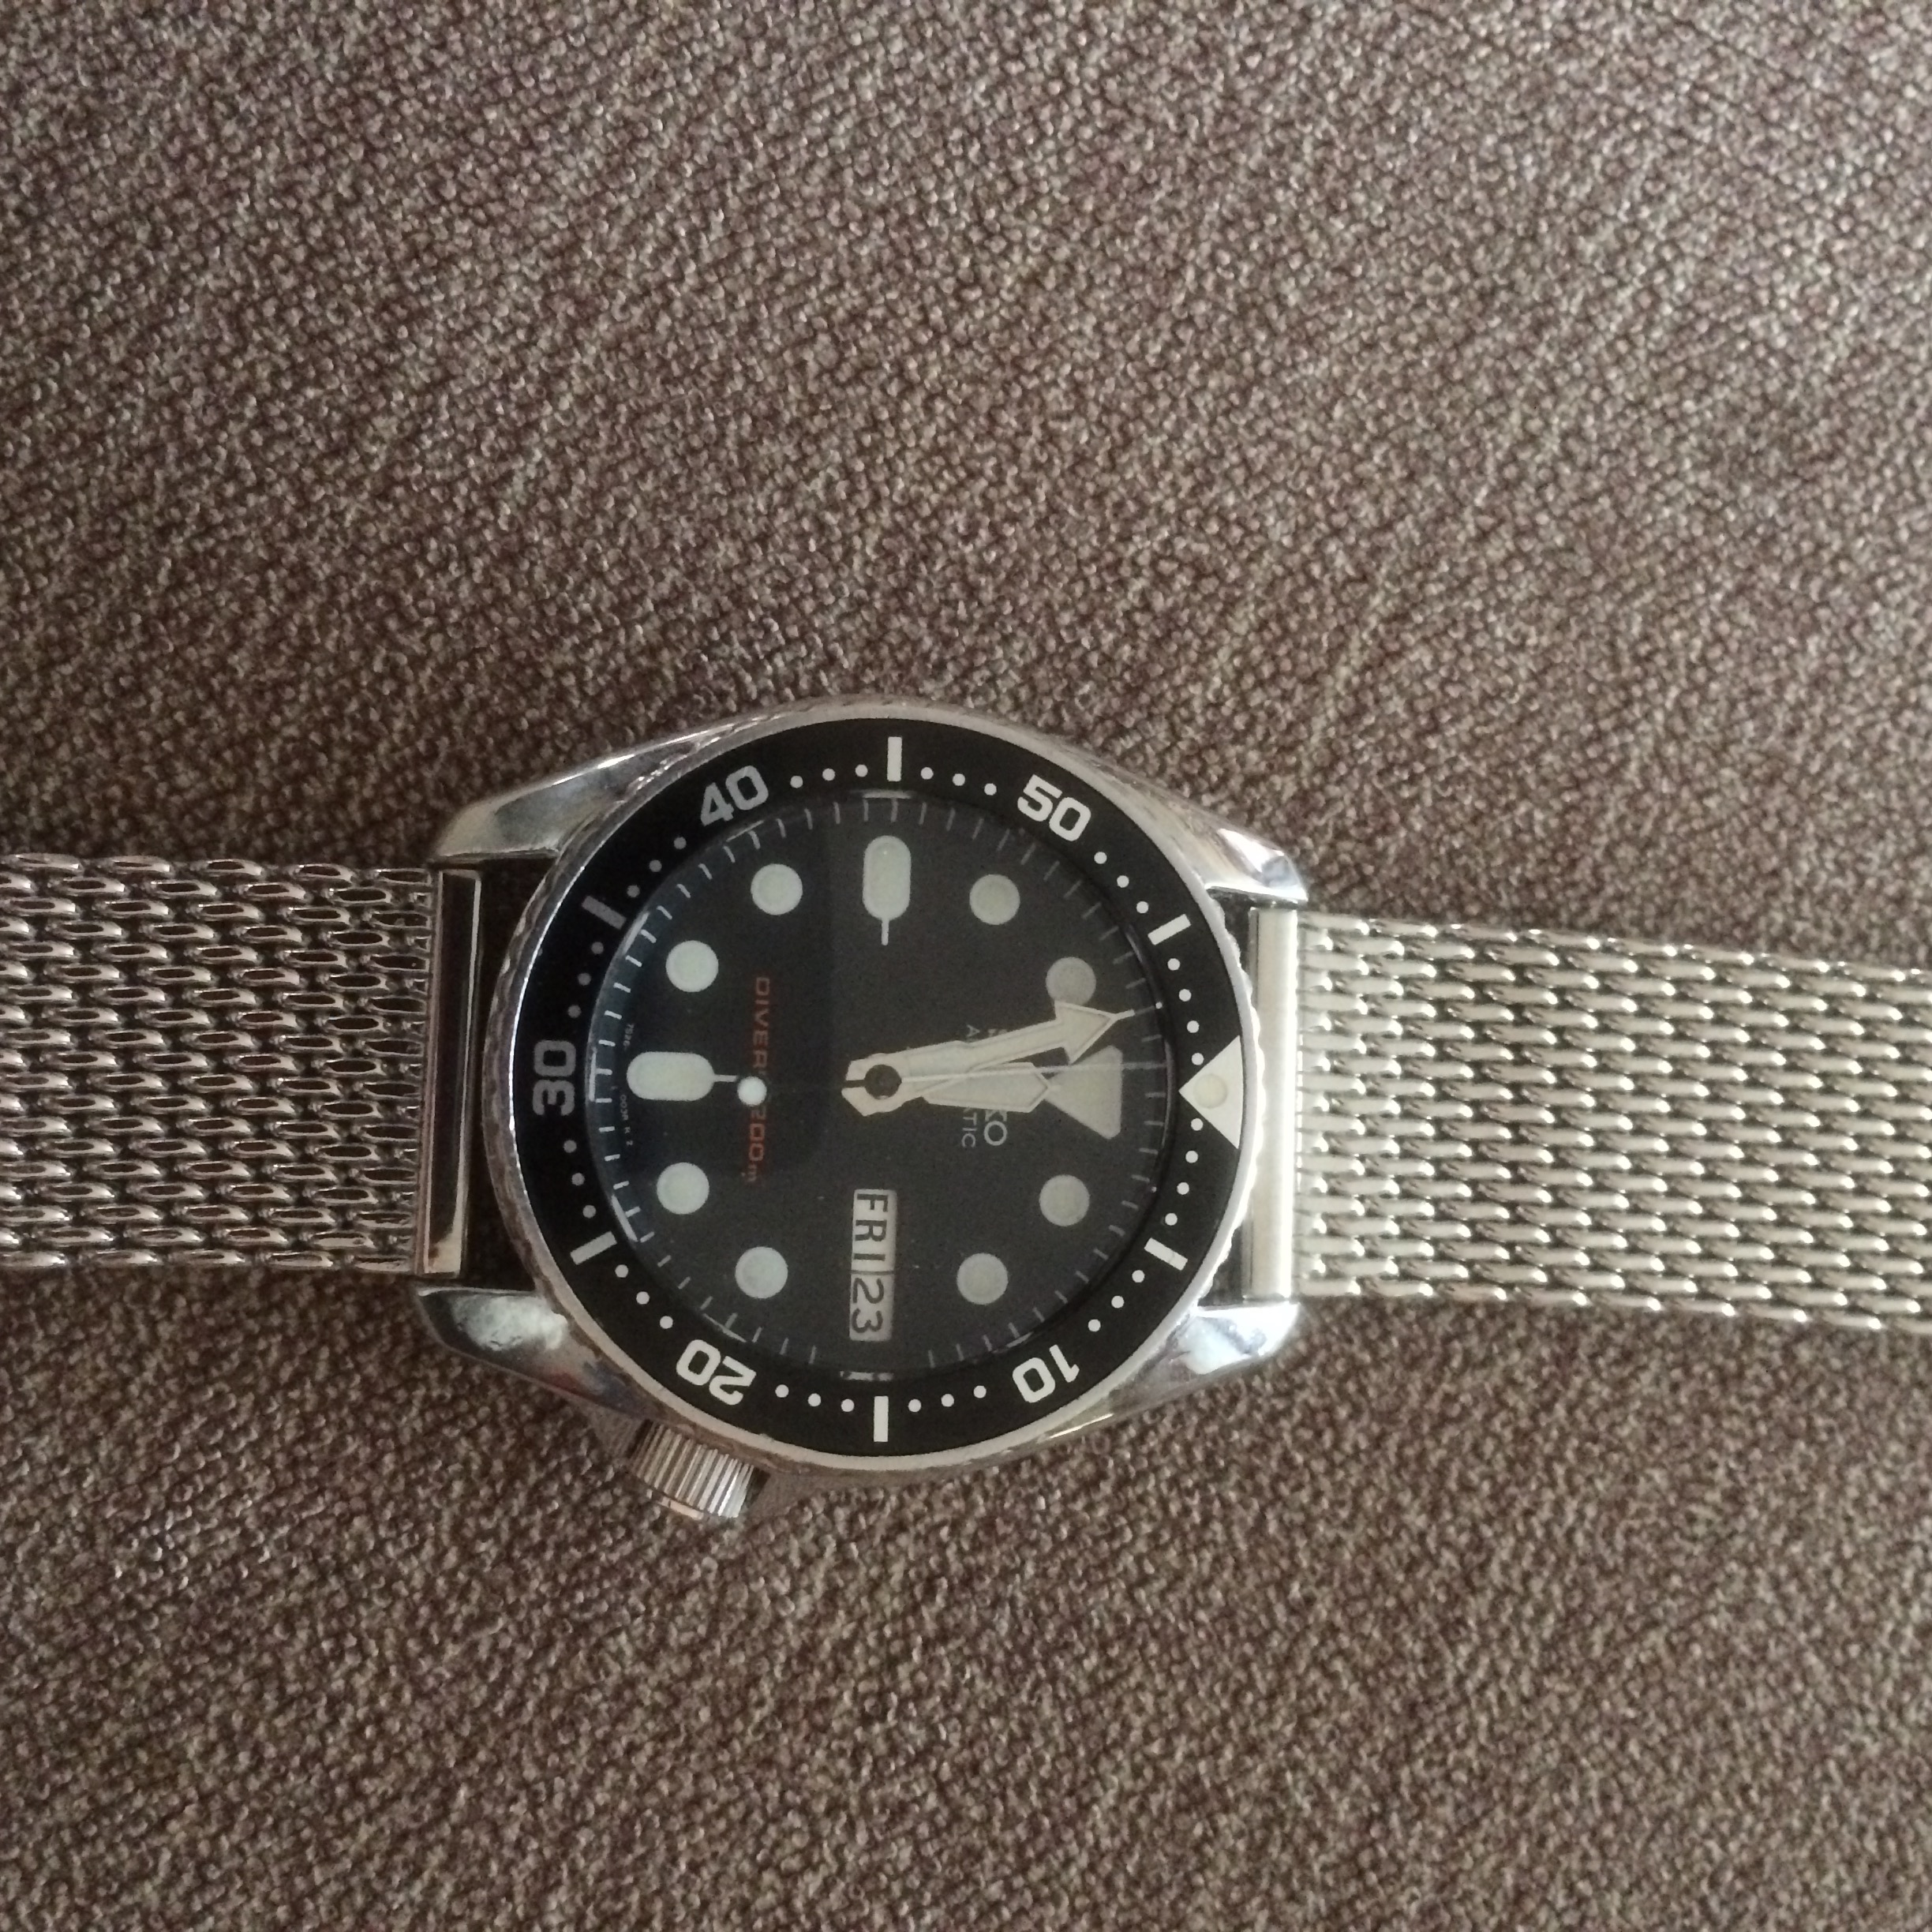
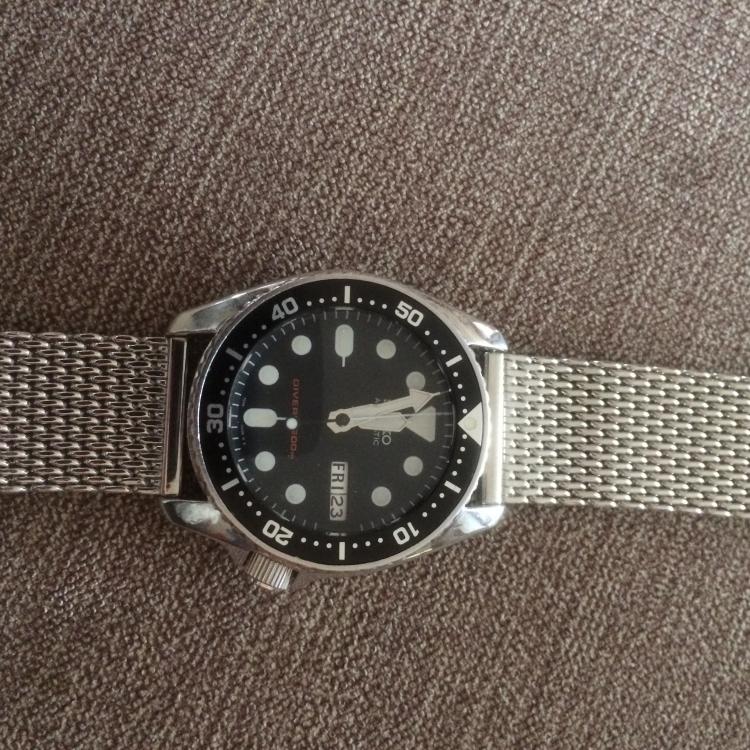
Purchased for myself this non working & badly scratched Seiko 7S26-0030 which is a mid sized diver. Interesting project that was on & off my bench for a couple one months. New Seiko parts fitted dial, stem,crystal & bezel. After market parts the hands & mainspring. The only issue was when I fitted a GR2378X mainspring I had problems with the centre coil around the arbour slipping. I tried to reduce the final bend around the barrel arbour but it still slipped. I don,t know if it was my Bergeon winder which arbours have very fat diameters made matters worse by re-widening the inner coil but it still slipped when under presser. Anyway I purchased a GR2377X which is slightly shorter in length but seemed to have a smaller inner coil & it worked.I polished out the case scratches with a Proxon fitted with cotton wheels and different grades of Dialux polishing compounds The strap is a mesh style from “watchgecko” who supply better quality straps. Before After

 2 points
 -
First part of the disassembly, fixing and reassembly of my new Seiko 7T32-7C20 Flightmaster Chronograph that recently bought as defect. The damage was caused by trying to manually setting the date at around 11:30PM, when the watch usually starts to change the date automatically. Enjoy the first part of the video.1 point
-
When fitting new stems to watches I use these tools :- Digital calipers, Fine grade diamond lap Wire cutter Pin vice Now for fitting. (1) Hold the stem in the pin vice and screw on the crown tightly by hand. (2) With the movement fitted correctly in the case, insert the stem until it locks in place. Now measure the gap between the case and the underside of the stem. In this case it is 2.16mm. (3) Subtract 0.2mm from this size and this will give the amount to remove from the stem. In this case it will be 1.96mm which will give 0.2mm clearance below the crown when fitted to the watch. (4) Now remove the crown from the stem and hold the stem very tightly in the pin vice, then place the pin vice and stem between the jaws of the digital calipers then zero the calipers. (5) Remove the calipers and without touching the zero button set them to minus 1.96mm. THEN RE-ZERO THE CALIPERS AT THIS LENGTH The wire cutters are now used cut off the excess thread leaving a small amount to be filed to the exact length. (6) All that is required now is to dress the stem with the diamond lap a little at a time until the calipers read zero. (7) Finally screw the crown on tightly and it should be ready to fit to the watch without further adjustment. I find that this method cuts down on trial and error. FOR SCREW DOWN CROWNS. A) Screw down the crown tightly onto the case without the stem and measure the distance nbetween the bottom of the crown and the case. B ) Screw the new stem tightly into the crown, then insert into the watch until it engages and locks into the movement. C) Press the crown down firmly as far as it will go and hold it there. D) Using the vernier callipers, measure the distance between the bottom of the crown and the case. E) Subtract the size determined in (D) from the size measured in (A) then subtract a further 0.15mm from this size. This is the amount to shorten the stem by. This should allow the crown to screw full home without compressing the stem too tightly between the movement and the inside of the crown. F) Cut the stem leaving it slightly longer than the size determined in (E), and dress down to size using the diamond lap and vernier callipers as described in the original post. G) Screw the crown onto the shortened stem and check fit and function, before using a tiny spot of Loctite 221 to secure. Click here to view the article1 point
-
Hello J Borel has some screw-down crowns. They don't mention the tap, but I would suggest emailing them for that info. If you need help ordering, I have an account. http://www.julesborel.com/s.nl/it.A/id.7442/.f JC1 point
-
Man you are good! Found another like it with 7019 21j auto, appears to be pretty scarce model. Thanks again guys!1 point
-
Thanks I didn't know that Ikea did a cheaper version of the adjustable desk, that is now on the top of my list. For the price of the Bergeon desk I would expect the watches to fix themselves once I placed them on the desk.1 point
-
Seiko Perpetual Calendar1 point
-
OH is quite correct in that you need to remove the dial in order to access the click and safely let down the main spring. CB has also provided the service manual which if followed will result in an effectively serviced Timex. Contrary to popular opinion Timex watches were manufactured with servicing in mind and Timex had in place the supply of all spare parts for exactly this purpose. The servicing procedures that Timex outline in the servicing manual were specifically developed to facilitate a simpler and cheaper approach to servicing a movement which was itself designed with this approach to servicing in mind. I get the feeling that a lot of he more traditional watchmakers got frustrated with Timex movements because rather than adopting the Timex procedures they tried to fully disassemble the watch to clean it and subsequently struggled to reassemble it, resulting in a hatred and disrespect for the brand. Looked after the way that Timex intended, they are perfectly capable time keepers (not Rolex precision granted, but perfectly adequate) and significantly more robust than the fully jewelled, 10x the price, Swiss alternatives. I've never come across a "V-Conic" balance with a broken pivot for instance.1 point
-
I have not found a effective way to service a Timex. Timex watches were produced to be used and then replaced. This might help but how to actually remove the plate is not explained but on page 24.4 shows how to let the mainspring down. Timex 24.pdf1 point
-
I believe that Bergeon no longer supply the spares on this model, and it is not exactly the same design as the 5555-98, so it could prove tricky to service it / change gaskets in the future1 point
-
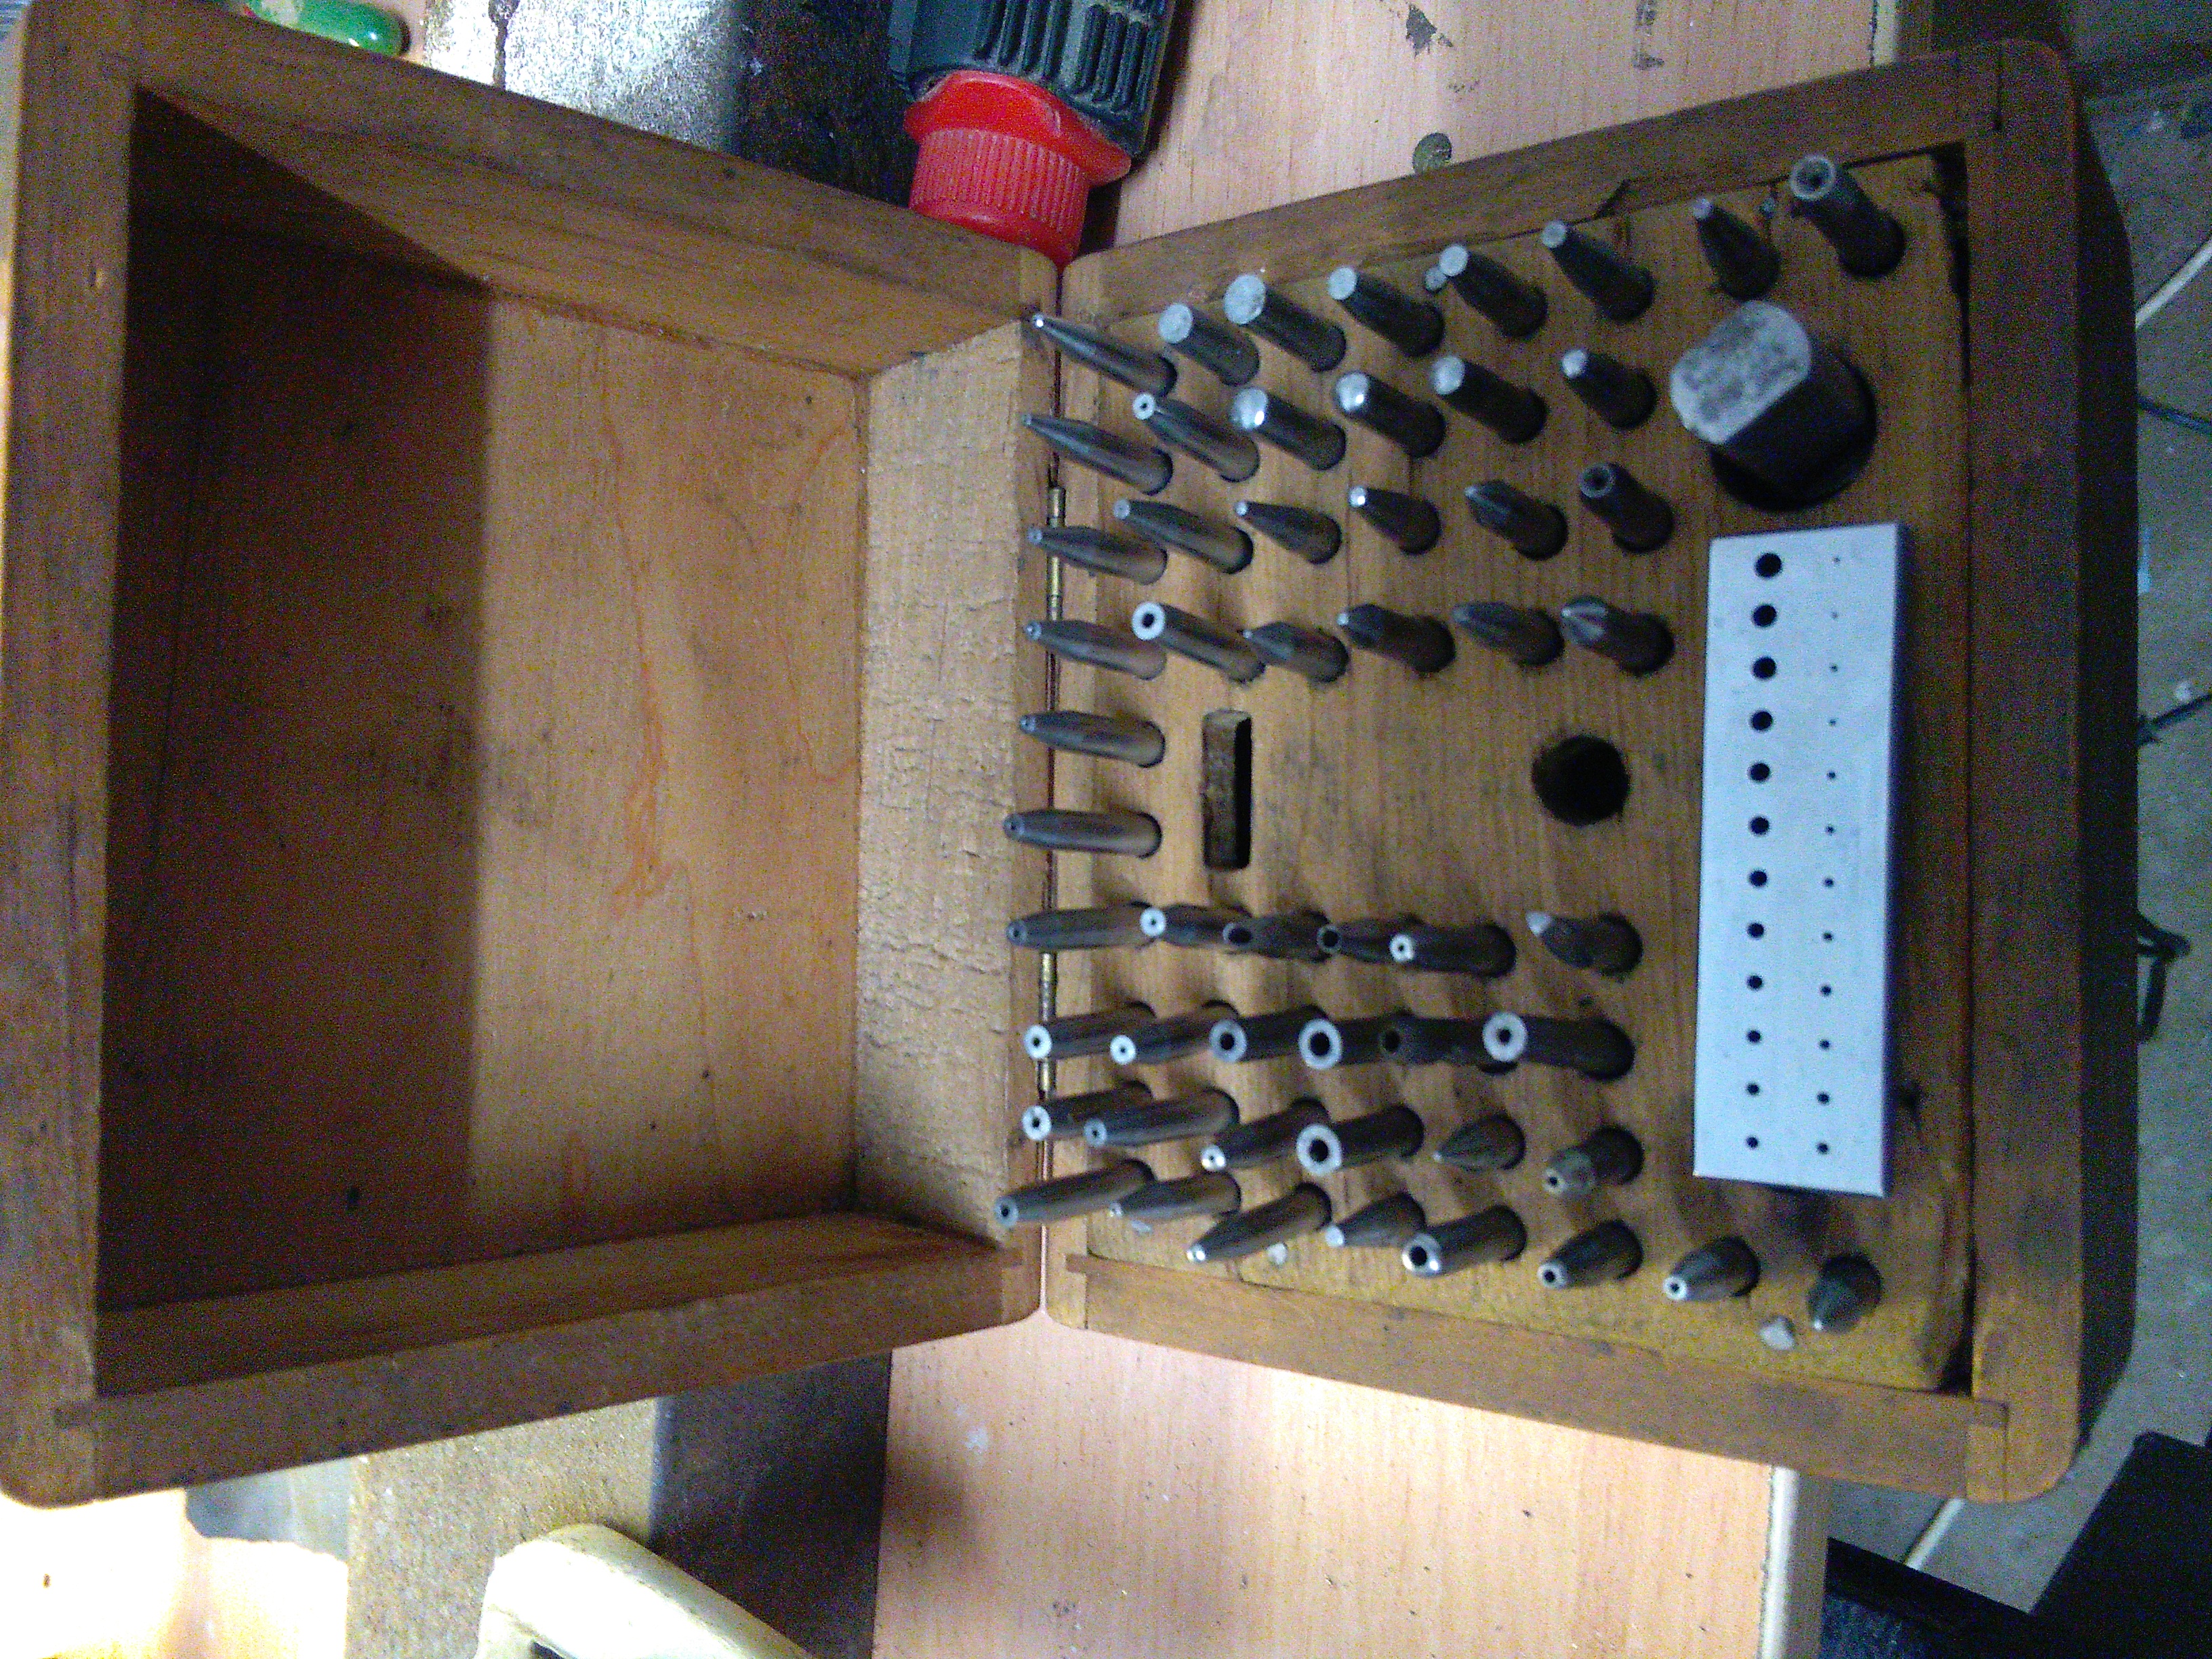
I have an addiction to LOOKING at tools....Too poor to buy any right now. But, a staking set and mainspring winder are on the list. Sent from my XT1585 using Tapatalk1 point
-
I was most likely using the Bergeon tool wrong, patients is not one of my virtues! i suppose being in the watch repair game was probably not the best idea for me, but it kind of did happen by chance really, we bought the business back in 2010 - however we had staff running it for us, bad idea as it nearly went down the pan! so i stepped in and here i am 3 years later, a much more healthy business bank balance and i'm hooked on repairing watches - and i think i'm becoming addicted to buying tools!1 point
-
i've run into the crown coming off of the stem in a few of my watches. what i've been doing is putting a micro drop of thread locker on the crown and reinstalling in on the stem. it usuall will hold until i can get it taken out properly. then i will tighten it on the stem with a pair of tweezers. usually that is all it takes for a permanent fix.1 point
-
i did the exact same thing with an elgin movement. i looked at it last night. i can't recall if the thread was marked, either. i have some alum and i'm gonna give it a whirl.1 point
-
Yes thats a good and better idea & will look at it after the Christmas period. Very busy with family now & not allowed into my workshop by her who must be obeyed.1 point
-
I've got a bag like that in my desk drawer too. My tried and true method: Dissolve about a half teaspoon in a shot glass of water (water will become a bit cloudy) Fill rice cooker with about 1 inch of water and set to warm Place plate (stripped of steel) in glass Set glass in center of rice cooker bath Check in 12 hours or so The steel you're attempting to extract should turn black and crumbly and you'll be able to work it out of the plate with a sharp bit of pegwood or an old oiler. It may take more than one bath in the Alum depending on the strength of the solution, temperature, and the surface area of the steel.1 point
-
Hi David, Sorry for being slow in replying I've had a busy few days. The BTM was made in England for the British military and their allies during WWII and is basically a direct copy of the Bolley lathe as for some reason German made lathes were in short supply in the UK during this time. I have never had access to a Boley lathe to compare it directly to my BTM to see if the parts are truly interchangeable though, but I am guessing they would be as it would of allowed what Boley accessories were in the UK to be used with the lathe. The lathes have two finishes, 'War Finish' with is black crinkle paint on the stand and grey paint on the rest, or those that were made after the war have a chrome finish which were made to sell to the general public. Obviously after the war many became war surplus so 'War Finish' ones are more common. Is the video one of Mark's premium videos as I haven't come across it on his youtube channel and have yet to subscribe to his premium videos although I can see at some point next year it will become worth my while. Tony1 point
-
That should do it.1 point
-
Is this the right stuff?1 point
-
There are a few methods of removing the screw end but I must say the Alum trick has not worked for me. I have used this tool once but it did work a treat (Bergeon 30209). As you become familiar with watch repair breaking screws is a rare occurrence because you just don't over tighten & became familiar with what screws are left hand threads. A good tip when tightening is once the screw bites just tighten further by it the width of the screw head slot.
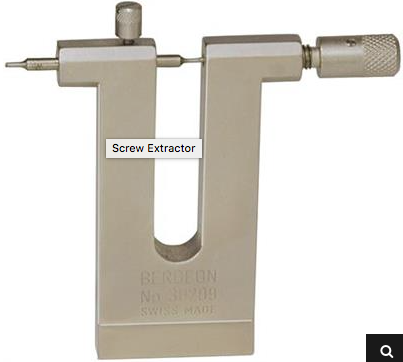 1 point
 -
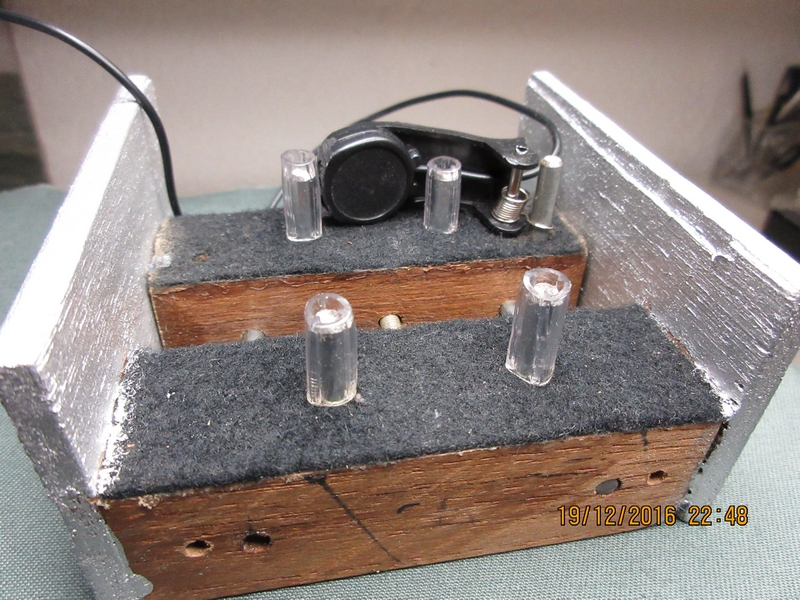
Just for info (probably already known but . . . you never know): the best result are achived when measuring with a laptop running pure on batteries (no connection to mains); this reduced the 50-60Hz noise considerable!. Maybe an SSD helps as well, but can verify that. Futher a picture of my watch-holder; note the mounting of the micro which is pushed with a spring against the crown (constant force) allowing to fix the watch firmly between the four stands. Furthermore two sides which makes it easy to measure the 4 positions Crown up etc. and dialdown while the strap is still mounted. Only dialup required the watch-holder to be put onto two books or so to make space for the strap.
 1 point
 -
Opps i did it again.1 point
-
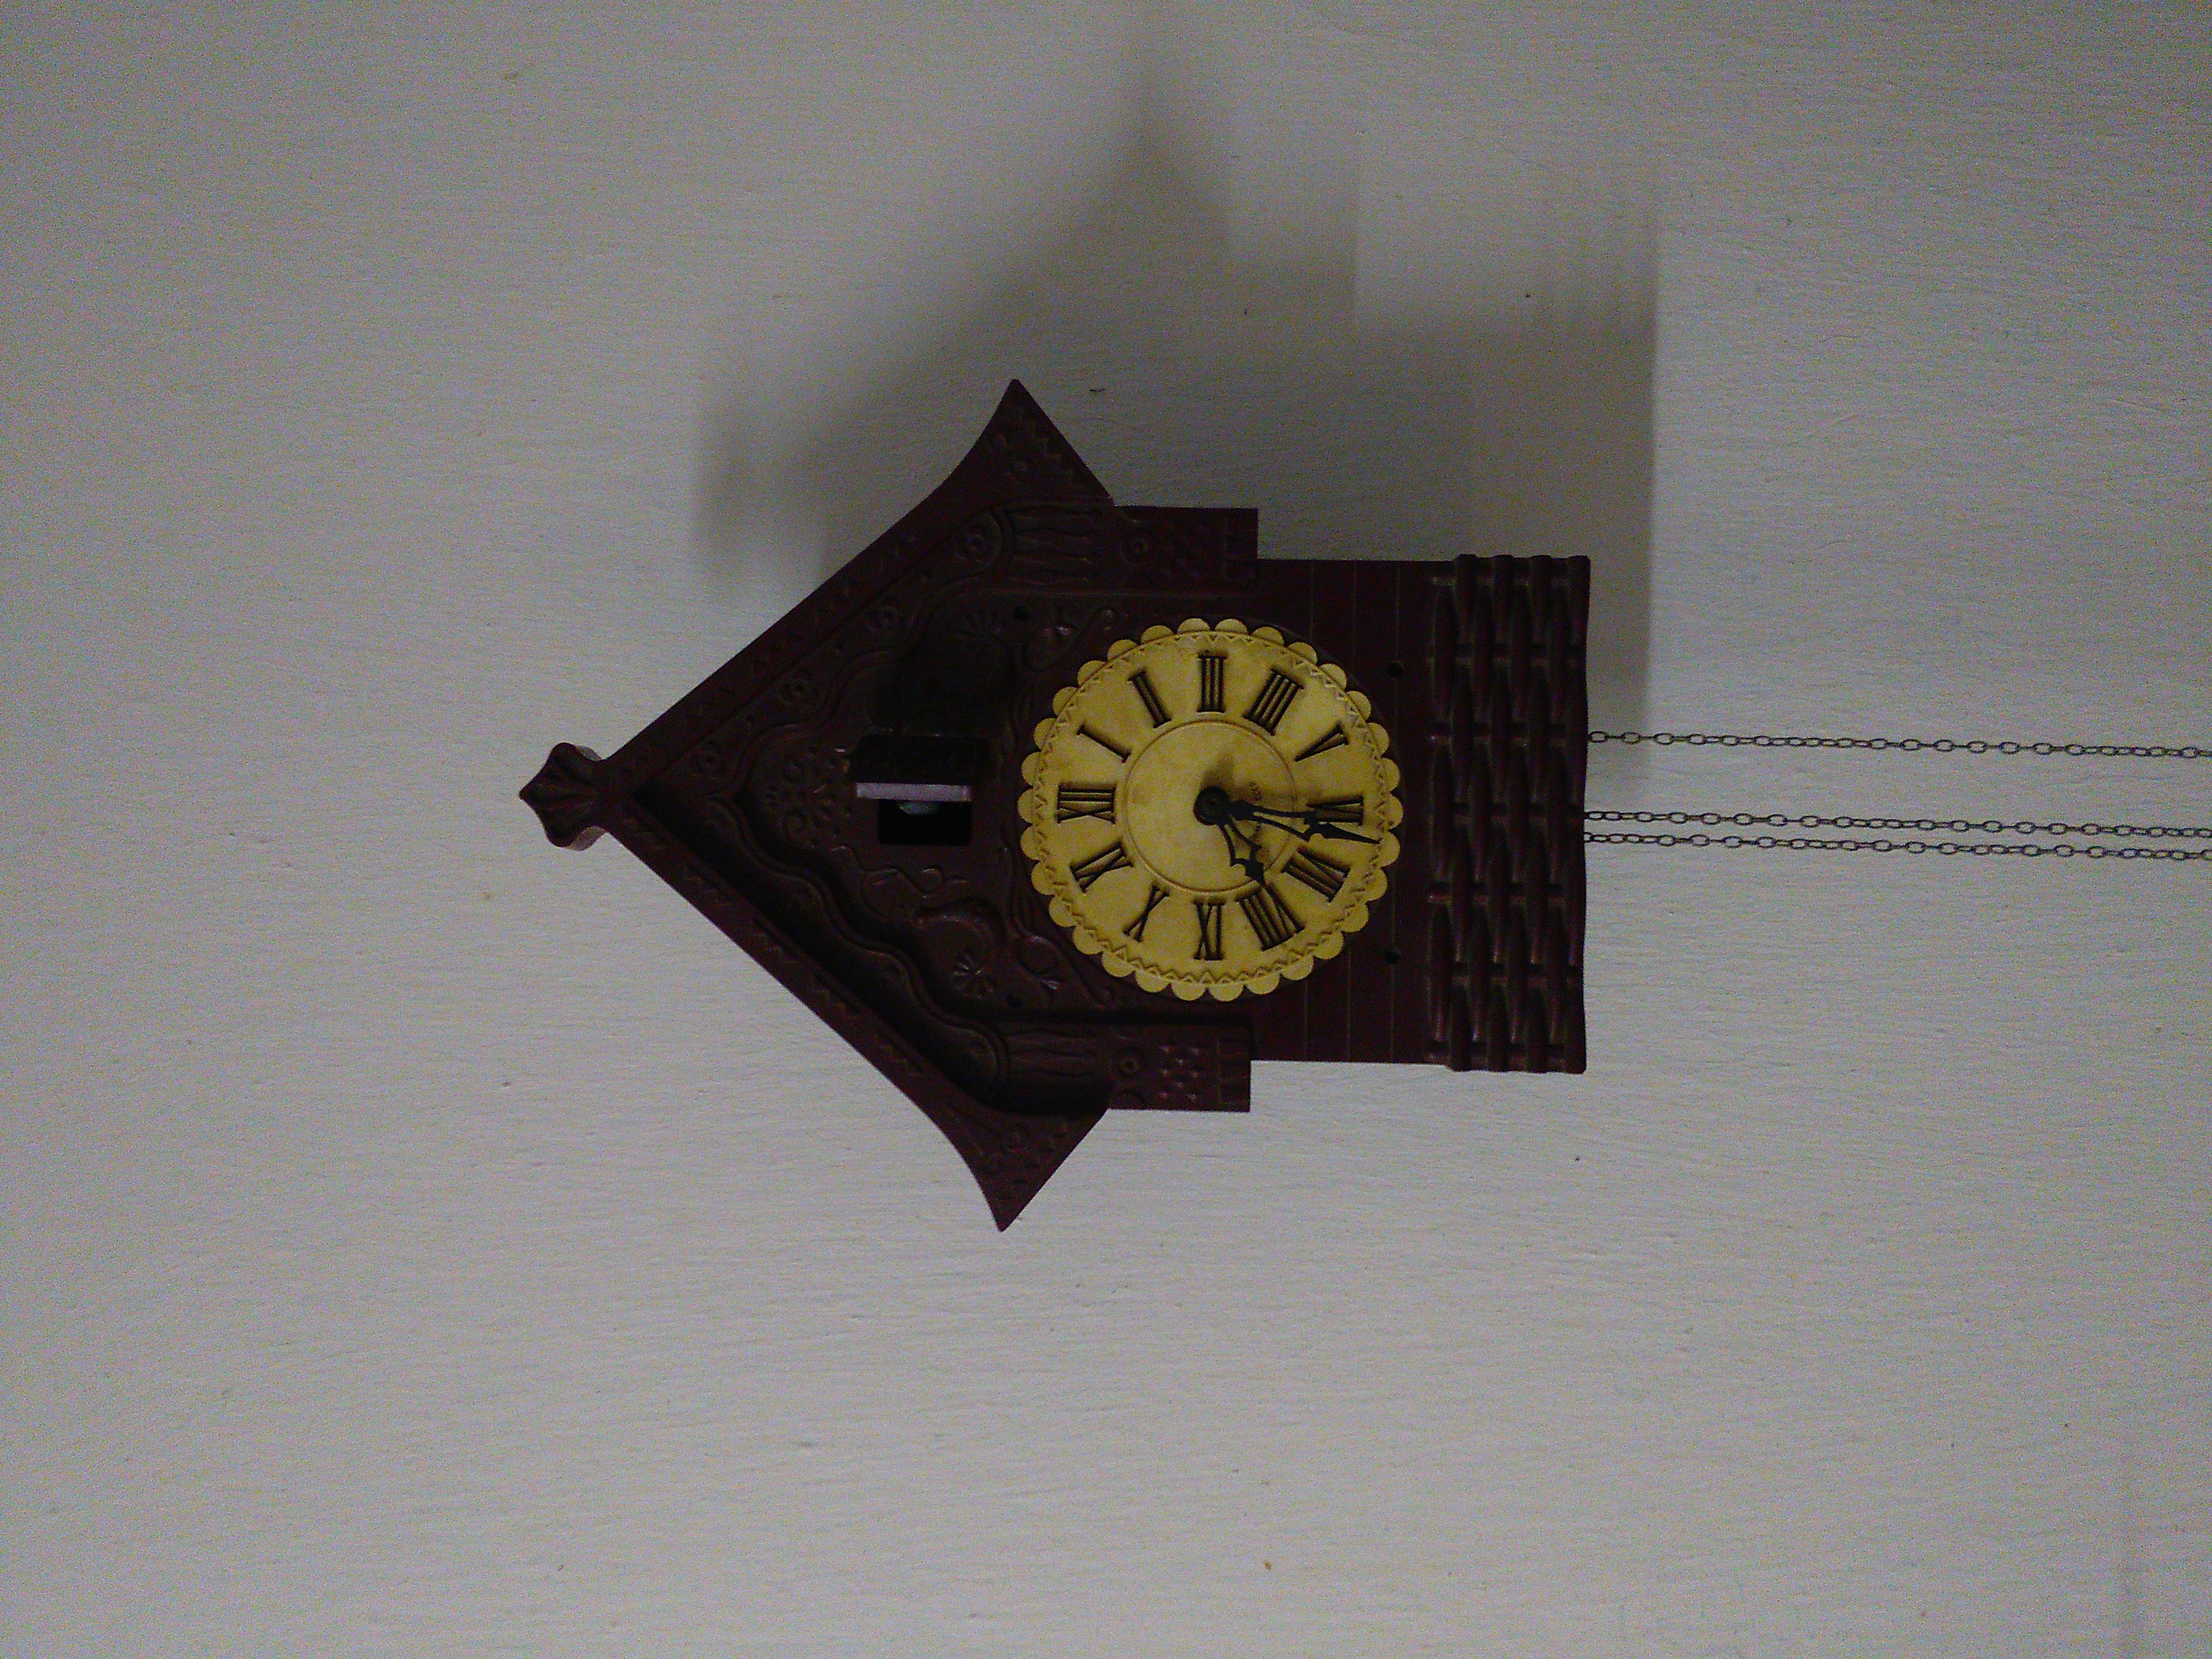
Today i recived a basic staking set for free to use from a friendly watchmaker here in Hungary who already helped me a lot with helpful hints. So i feel authorized to take part in Your survey And also received a russian cuckoo for free and to repair for myself My first wall clock, i am so excited
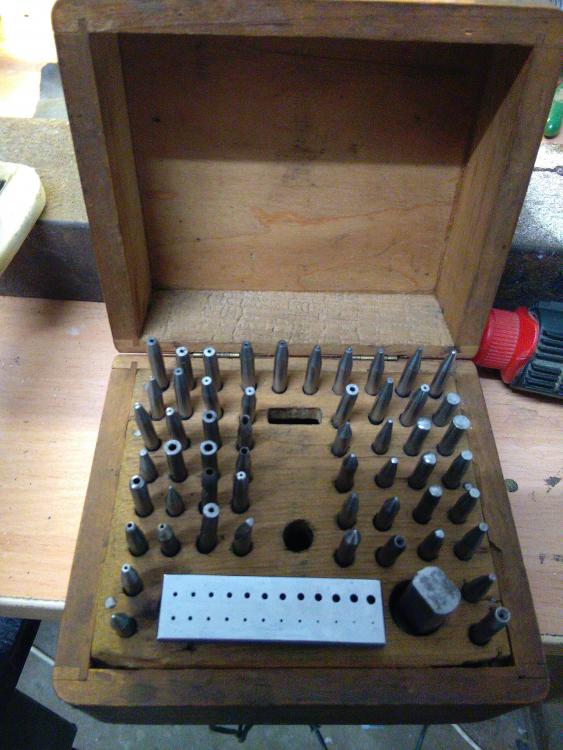
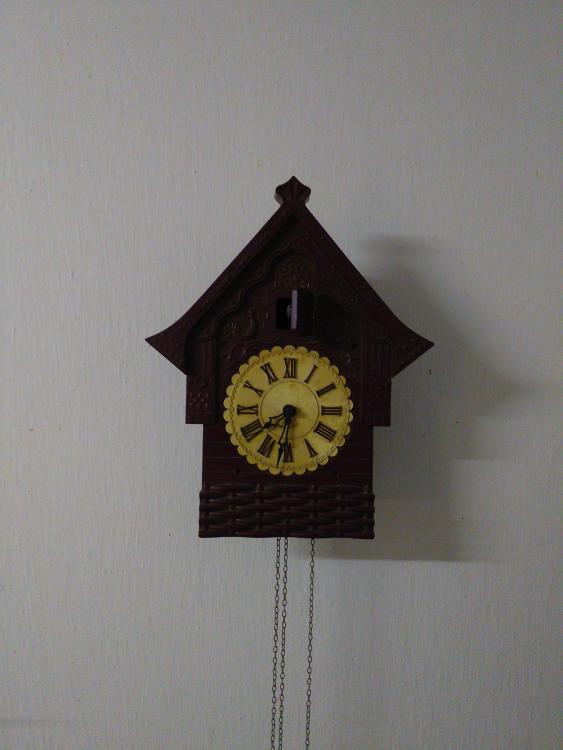 1 point
 -
At about 5 minutes and 50 seconds into the video below they show finishing the plates then how the girl puts decoration on and even one of the templates they used. https://www.youtube.com/watch?v=ys4ChOWYNy8 In the next links they show a variety of techniques and you learn some new terminology like GENEVA WAVES (COTES DE GENEVE) and CIRCULAR GRAINING (PERLAGE) http://www.thehourlounge.com/en/vacheron-constantin-articles/movement-finish-true-mark-haute-horlogerie-557275 http://www.watchwow.com/2013/09/110008/basics-of-movement-finishing?page=2#.V9hSrIJ0-70 Then a different technique which unfortunately uses a really expensive machine but does produce interesting results. Plus from time to time she runs classes with the machines she has. https://mechanicalcurios.com/2016/02/15/photos-from-engine-turning-ii-class/1 point