Leaderboard


Popular Content
Showing content with the highest reputation on 05/02/16 in all areas
-
In this video I am stripping down and servicing a Seiko 7S26 watch movement which has not been serviced for a very long time. View full YouTube video2 points
-
Part 1 http://youtu.be/pKcIPpjPLpI Part 2 http://youtu.be/0o6_a3EVMf4 Part 3 http://youtu.be/M5J7pe2I2Gk I will be hand cleaning the parts and refurb the case. Sent from my iPhone using Tapatalk1 point
-
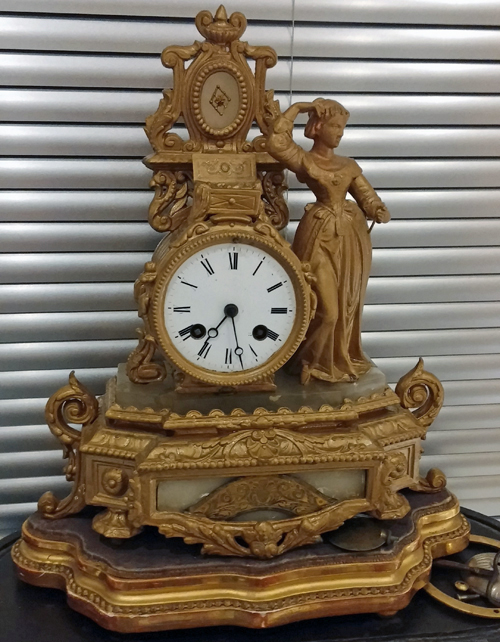
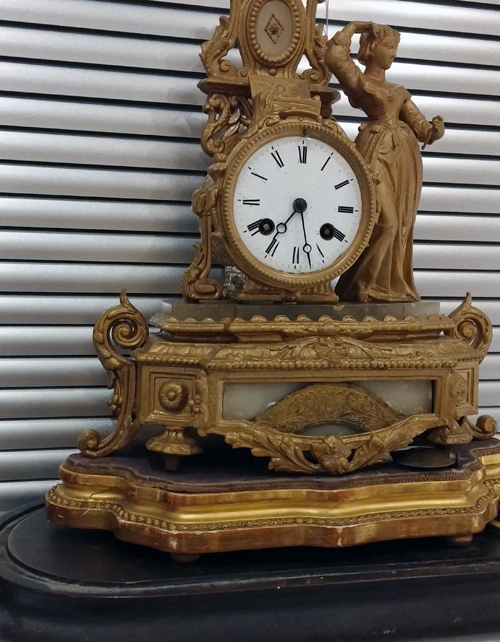
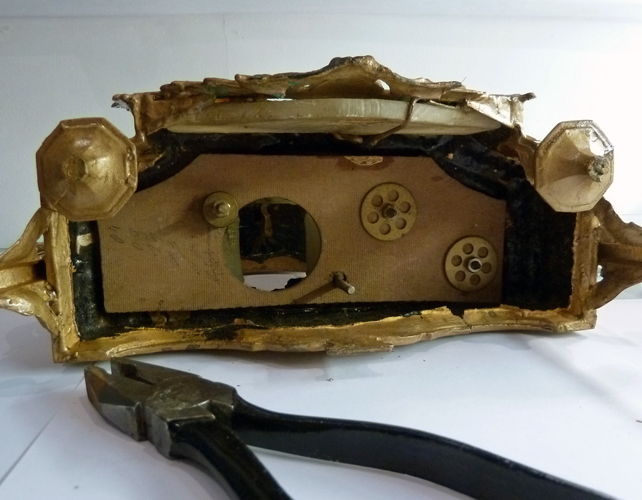
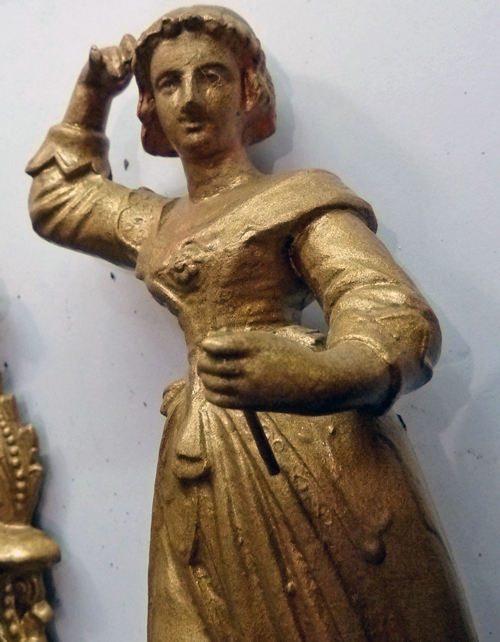
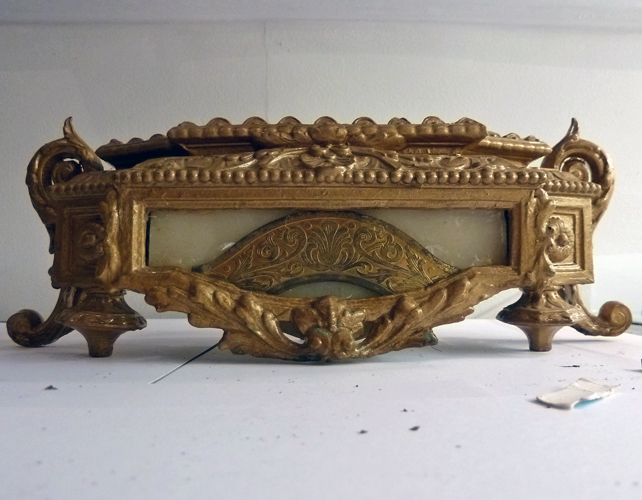
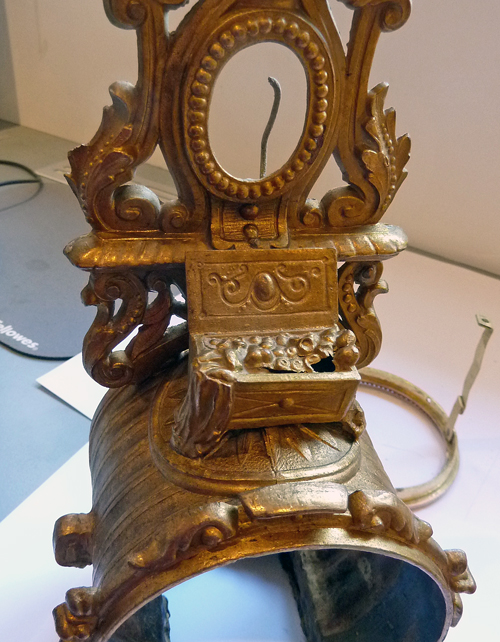
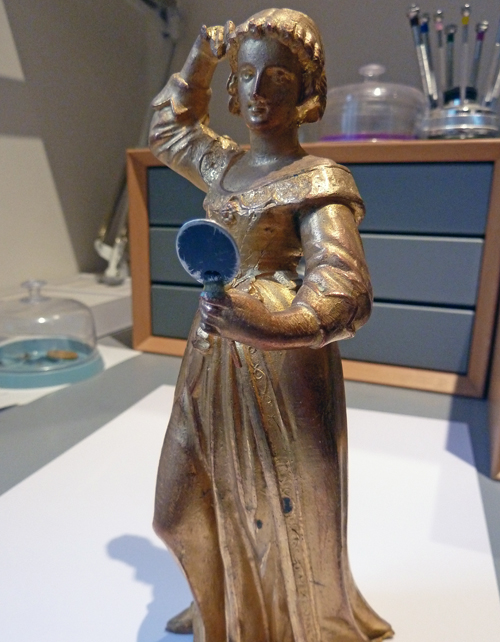
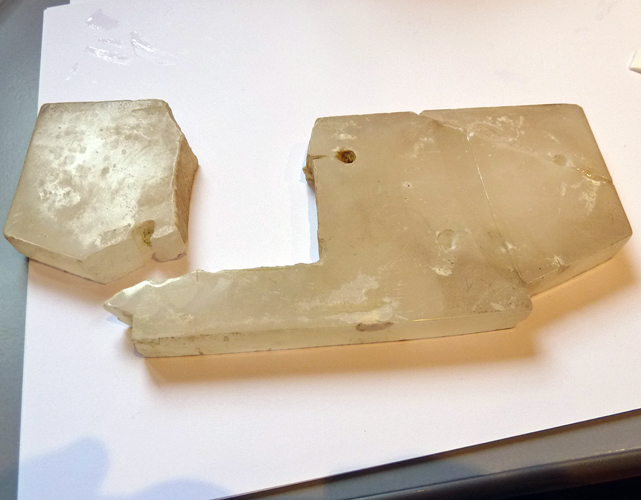
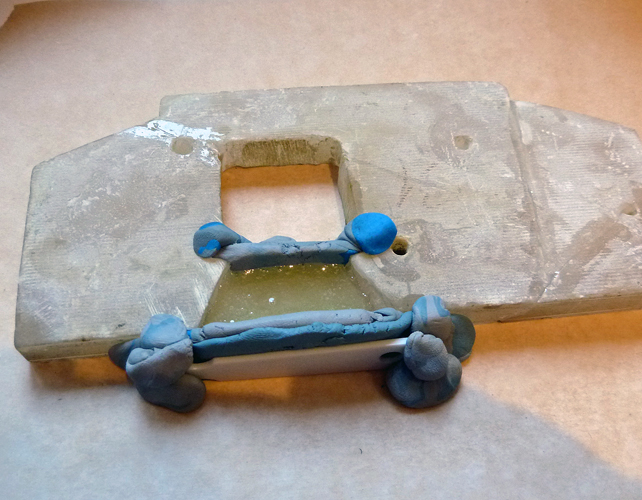
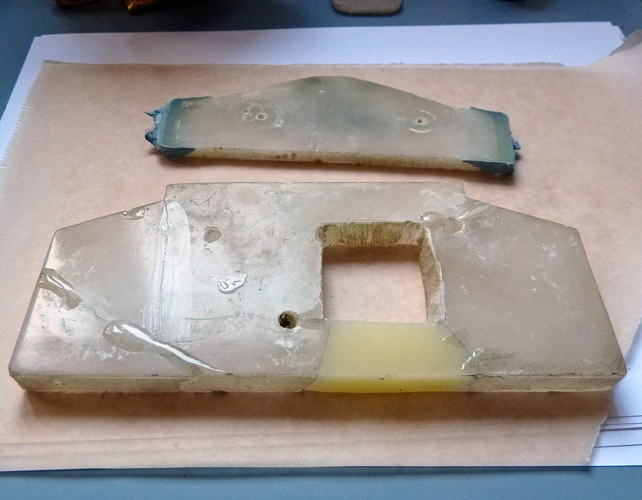
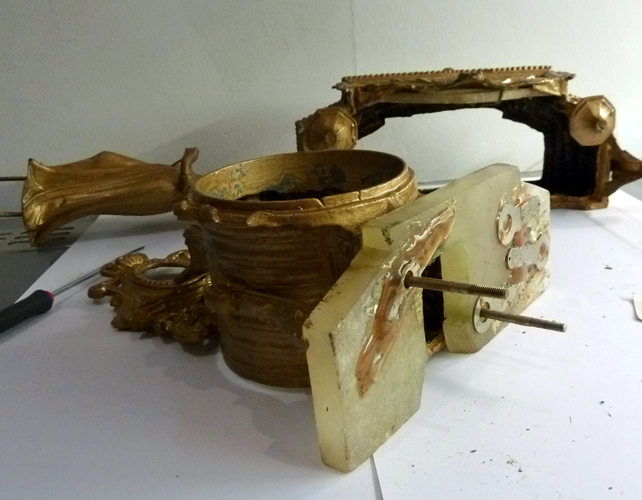
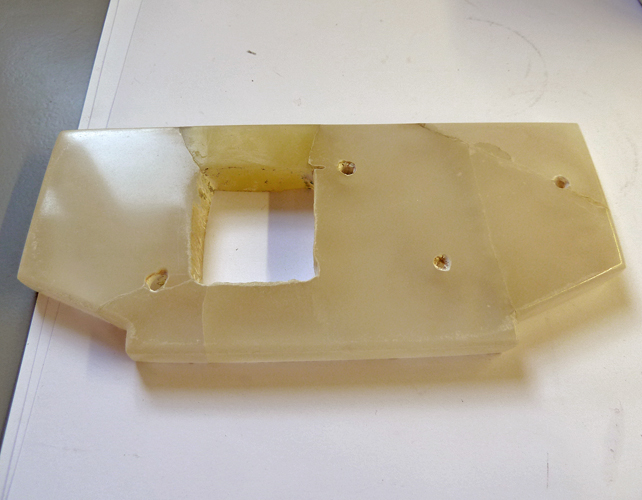
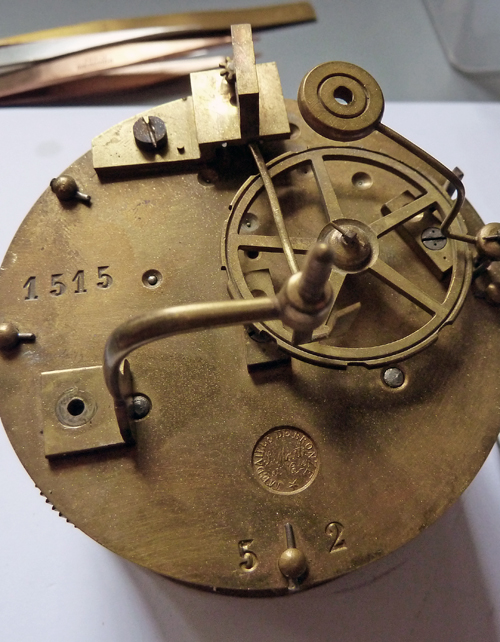
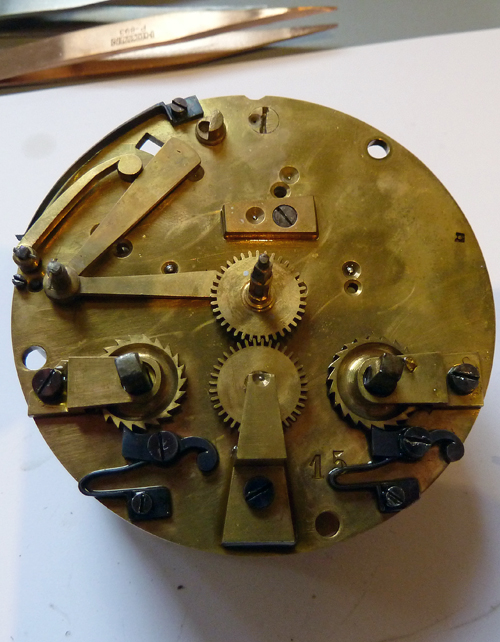
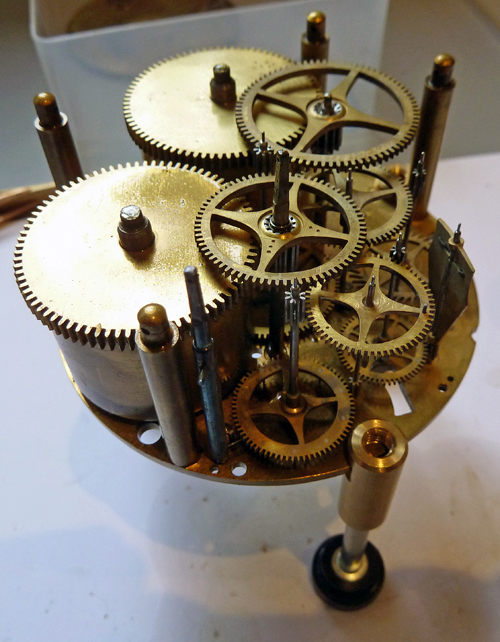
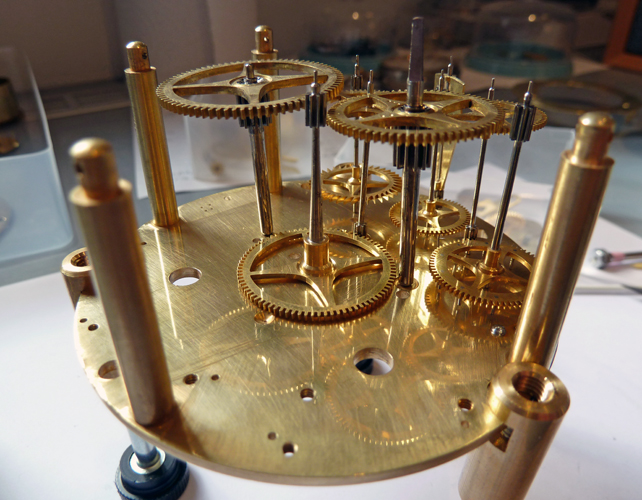
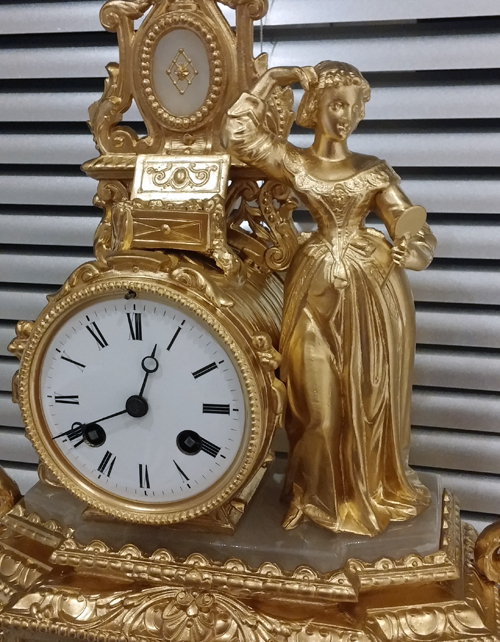
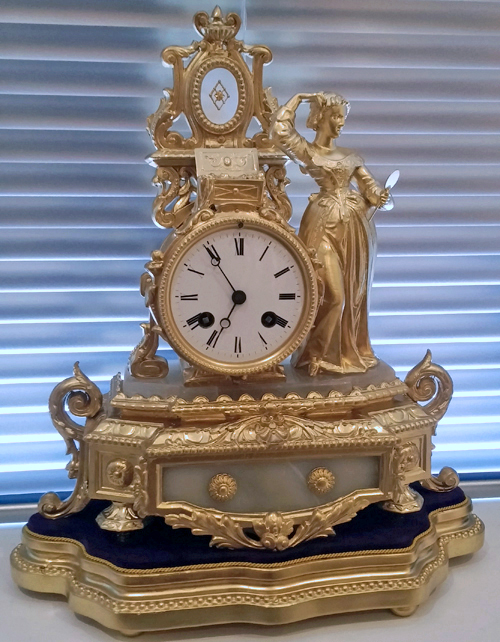
A friend threw this thing at me recently: Bought at a recent car boot sale for the princely sum of £10, it also has a glass dome (not shown) in good condition. The bad points: 1. Lots of thick gold paint. 2. The figure is missing something in her hand (a mirror?). 3. The alabaster base is cracked in several places, with a section missing at the back. 4. The alabaster on the front is cracked, too short on the sides & has had a non original brass plate fixed to the front. 5. Hands are rusting. 6. It looks like it's taken a few heavy knocks in the past. 7. The sub base is very poor, worn gilding, moth eaten velvet & cracked. 8. Very, very dirty. The good points. 1. It runs. 2. err.. 3. that's it. Right, lets see what we can do (a polite request to the conservationists among you- look away now, you may not like what you see!) Movement out and seen from underneath the previous attempts at repair: The studs holding the figure & the clock case to the base have been replaced with various odds & ends. The base has had some interesting repairs with epoxy: Copious amounts of gold paint: The base with the ill fitting stone & brass inserts: After stripping with Nitromors, acetone & an old tooth brush, were back to the original gold plate (what's left of it). The holes in the treasure chest will be filled with epoxy: A new mirror is fashioned out of a piece of scrap alloy & epoxied in place (note the casting detail showing now the paint has gone): The cracked alabaster base is soaked in acetone for about a week to remove the old epoxy then resembled using clear epoxy: The missing section is remoulded by laying the item face down on baking parchment, fashioning a couple of dams out of old Rodico & filling with epoxy (Araldite in this case): Mould removed, more clear epoxy applied to fill the cracks. Also the front stone is extended using the same method: Filled & sanded using wet & dry papers. The colour match on the front piece was adjusted for a better match by adding a little more of the clear Araldite. It looks like it originally had a couple of rosettes fitted: Given a further polishing with diamond impregnated polishing pads it begins to shine, unfortunately alabaster is almost impossible to repair invisibly so we will have to live with the cracks. It is however somewhat more stable: Onto the movement. Stamped S (Samuel) Marti, Medaille de Bronze - this being awarded during 1860 in Paris. The company later received the Medaille d'Argent in 1889, so it would have been produced between these two dates. Nothing major to report, just a bit tarnished, oily & grubby: Duly cleaned in Horolene, checked & showing (amazingly) no discernible wear: The case was originally (very thinly) gold plated, showing the copper base coat & spelter in places. As electroplating is too expensive, gilding using gold leaf was attempted first but the colour was far too bright yellow, so the case was repainted using a couple of thin coats (to preserve the detail) of Rustoleum brilliant gold (Valspars equivalent was also tried but looked to brassy). New screw studs for the clock case & figure closely matched to the original ones still in the figure were sourced from www.ba-bolts.co.uk . The alabaster stone base inserts still looked a little dull, so were given a thick coat of clear acrylic high gloss varnish. The non original brass plate covering the front alabaster insert was replaced with 2 brass rosettes from Cousins & painted to match case. The gilt sub base was sprayed gold & the fabric recovered using purple dressmaking velvet with gold rope trim. The wood main base (not shown in the final pics) was cleaned & french polished. Movement regulated. Dial cleaned. Hands re-blued etc: ..........and this is what it looks like now:

 1 point
 -
The glass would be quite flat.1 point
-
This any good: ebay item no. 371419840347 one or two others on there as well.1 point
-
Ah its all about time as my grandad used to say "Constipation is a killer of time but diarrhoea waits for no man" I will just nave to wait1 point
-
I will be post game the full reassembly on YouTube. The rotor was pitted due to corrosion but with a drumel tool I cleaned it up. All other parts were hand washed and I did clean the mainspring and re grease the barrel ( breaking on the sidewalls .)1 point
-
The restoration completed? That's great! Were there any major problems? Looking at that before picture I would think there would be some issues with moisture and rust. I've worked on one or two Seikos and know how robust those movements are. Well, How about some after photos! JC1 point
-
Restoration complete . Currently uploading the full rebuild on YouTube . Many hours of work but all went relatively smooth. Sent from my iPhone using Tapatalk1 point
-
Woah that project watch for a friend is going to be a challenge! JC1 point
-
What a tread !!!! Thank you Alexander!!! It's great to see your progress, your questions, your struggles, and thought process. Congrats. Regarding your questions: - Never heard of polishing an oiler, but let us know what you find. Those 2 oiling videos completely changed my life when I found them the first time. I used to just dip the oiler and put a blob of oil wherever it was needed. But then I found I was always overlubricating (and it's hard to remove oil without cleaning all the parts again...) - Using a sharp piece of pegwood to clean all jewels can make a huge difference. The smallest piece of dry oil in the jewel will contaminate the clean oil, making it all gunky in no time, and that could influence how "smooth" the movement is. I've also had a tiny piece of lint float in the escapement and stop the watch. In your case, the readings you're getting are nice, and if it were my work, I'd be happy with them ! As mentioned already, run the watch for a couple of days and check again, it'll probably have changed (all the lubricants will be where they should, all the wheels will have gone around a couple of times at least and it should all be nicely settled) - For those pesky little flying springs, it's always a 2 hands job for me: brass tweezers freshly dressed (makes a HUGE difference, just like with small screws), and a nice piece of pegwood. As an insurance policy, you can try to work inside a transparent plastic bag (when I do that, I use a plastic bag open on both ends for easy access (more like a plastic tube), and it's pretty effective at restricting the flight range of the spring to a confined area) Also, I highly recommend "Watch Repair for beginners" by Harold C. Kelly if you don't have it yet. It's a great book that covers a LOT: basic disassembly, automatic movements, fault finding with a timegrapher (the old plot style), to oiling, to some math related to watches and gears, all the types of escapements.... This is my go-to book Again, congrats on your great walk through and on your accomplishments, I look forward to see more !!!1 point
-
Hi Noirrac, I won't be opening this watch any time soon but there's some good write-ups if you Google 'top-second'. As far as complications go, this one isn't complicated at all! Something like the waving Mao Tse-Tung. Cheers!1 point
-
According to ranfft you need 0.9mm for the minute hand. The hour hand is 1.5mm and the seconds hand is 0.21mm.1 point
-
I like that watch. The little eye blinks every second then? What a useless little complication---love it! I'd like to see the workings of how they managed to power that little blinker using the escape wheel. Thanks for sharing this. JC1 point
-
i couldn't have said it better. i bought a gruen watch a few weeks ago. it looked really great in the picture. yeah, right....it's about the size of a dime. same with the tissot i got last year. i really think the deceptions were intentional.1 point
-
The German watchmaker Steffen Pahlow have some videos using old watchmaker tools on his website and on his youtube channel. You might find some of your tools there? http://www.s1p.de/01/list%20of%20videos/fr_list.html https://www.youtube.com/user/spahlow1 point
-
DGW, the last picture relate to the jewels. Some sort of expansion tools to close and/or open the hole where they go...it is in the forum somewhere. The 3rd picture up from the bottom, is a depth gauge if I'm not mistaken... Now, I have no idea about the rest and honestly I haven't even tried or used any of the tools you have posted...I would use the center tool in the first picture to bury a watch that is giving me a headache! Sorry I can't say much about those...but don't dismay, our experts will soon lift the mystery! Cheers, Bob1 point
-
I might be able to help you as I'm an old and decrepit watchmaker. But I'll need pictures1 point
-
you are so awesome! thanks for sharing the watch repair process!1 point
-
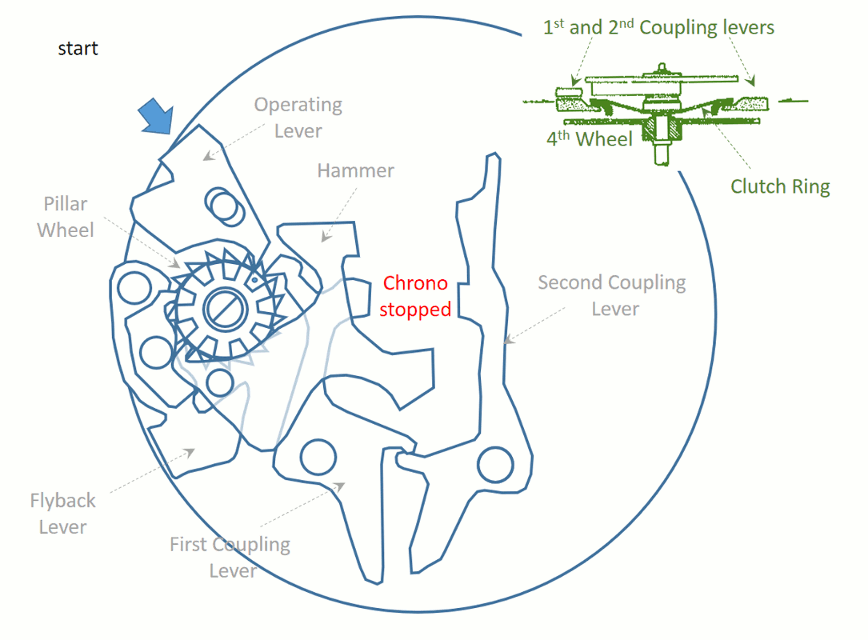
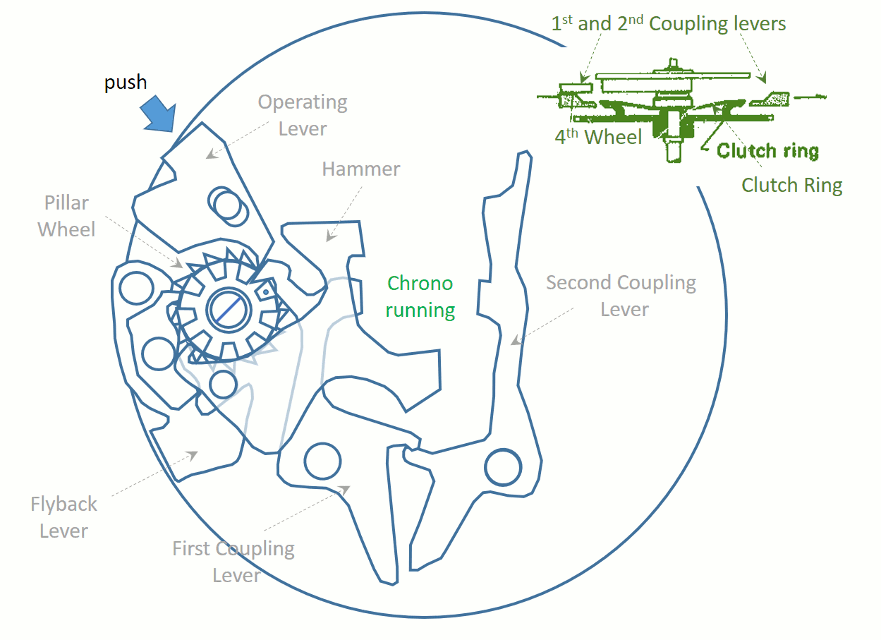
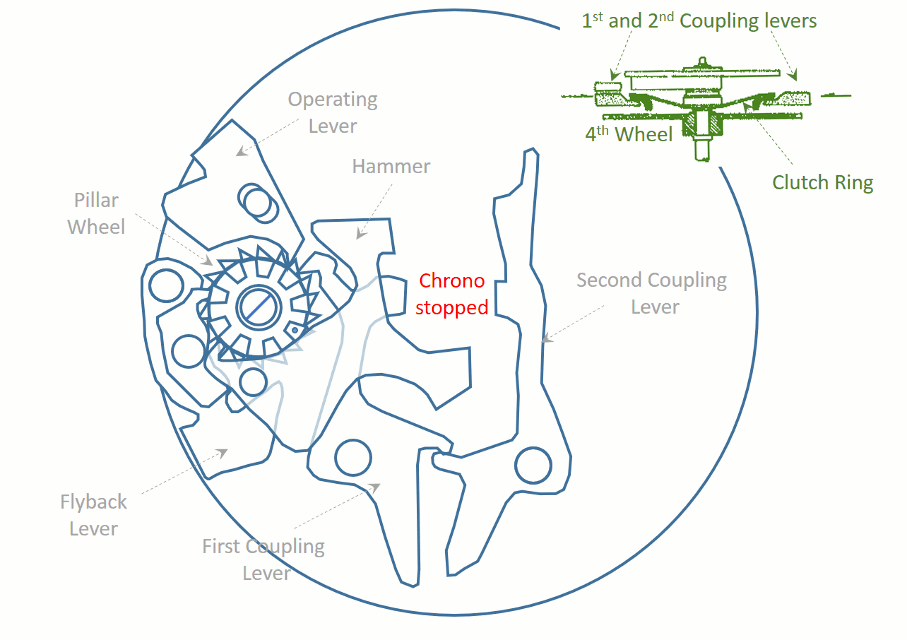
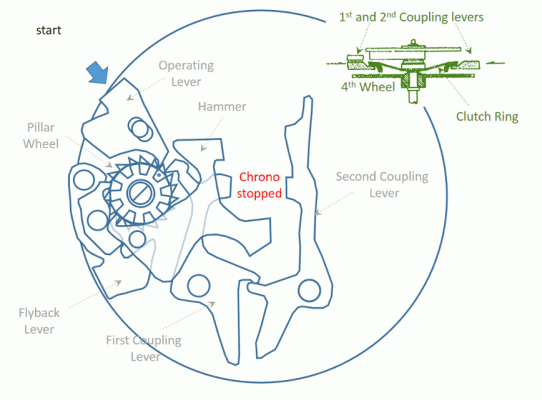
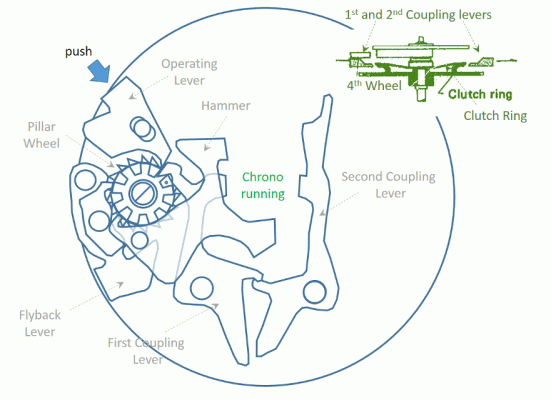
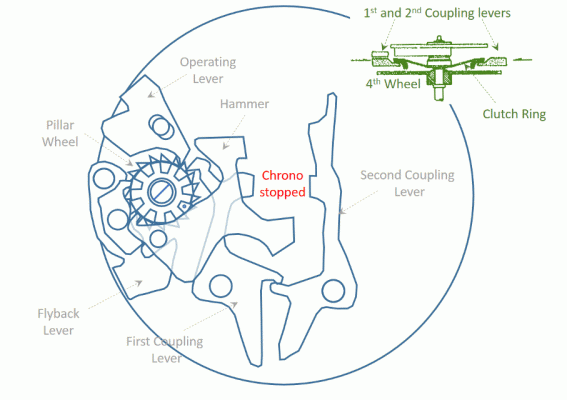
I believe that the best way to assemble and fix a movement is to first understand how everything about it works. So I made some animations to help in understanding how the chronograph assembly works. The Seiko 6139 features a column wheel and a vertical clutch. The chronograph second engages and engages with the 4th wheel via a clutch spring. The clutch is controlled by the first and second coupling levers. See how pressing the operating lever rotates the column wheel, which in turn, controls the coupling levers. While the chronograph is running, pressing the flyback lever will have no effect. But when the chrono is stopped, pressing the flyback lever will activate the hammer, which in turn, resets the chronograph second wheel and the minute recorder wheel. I hope these animations were helpful.
 1 point
 -
I'm using the similar Bausch & Lomb StereoZoom 5 & 7 scopes and you should get the 0.5x lens. It'll give you an extra 50% or so of working distance. It's probably a good idea to get to 10x eyepieces as well to get a zoom range suitable for horological work. With my setup (10x eyepieces + 0.5 Barlow lens) I get 168mm (6.6") working distance on the StereoZoom 5, with a zoom range of 4x to 20x. On the StereoZoom 7 the working distance is 127mm (5") and the zoom range is 5x to 35x.1 point