Leaderboard


Popular Content
Showing content with the highest reputation on 04/25/24 in all areas
-
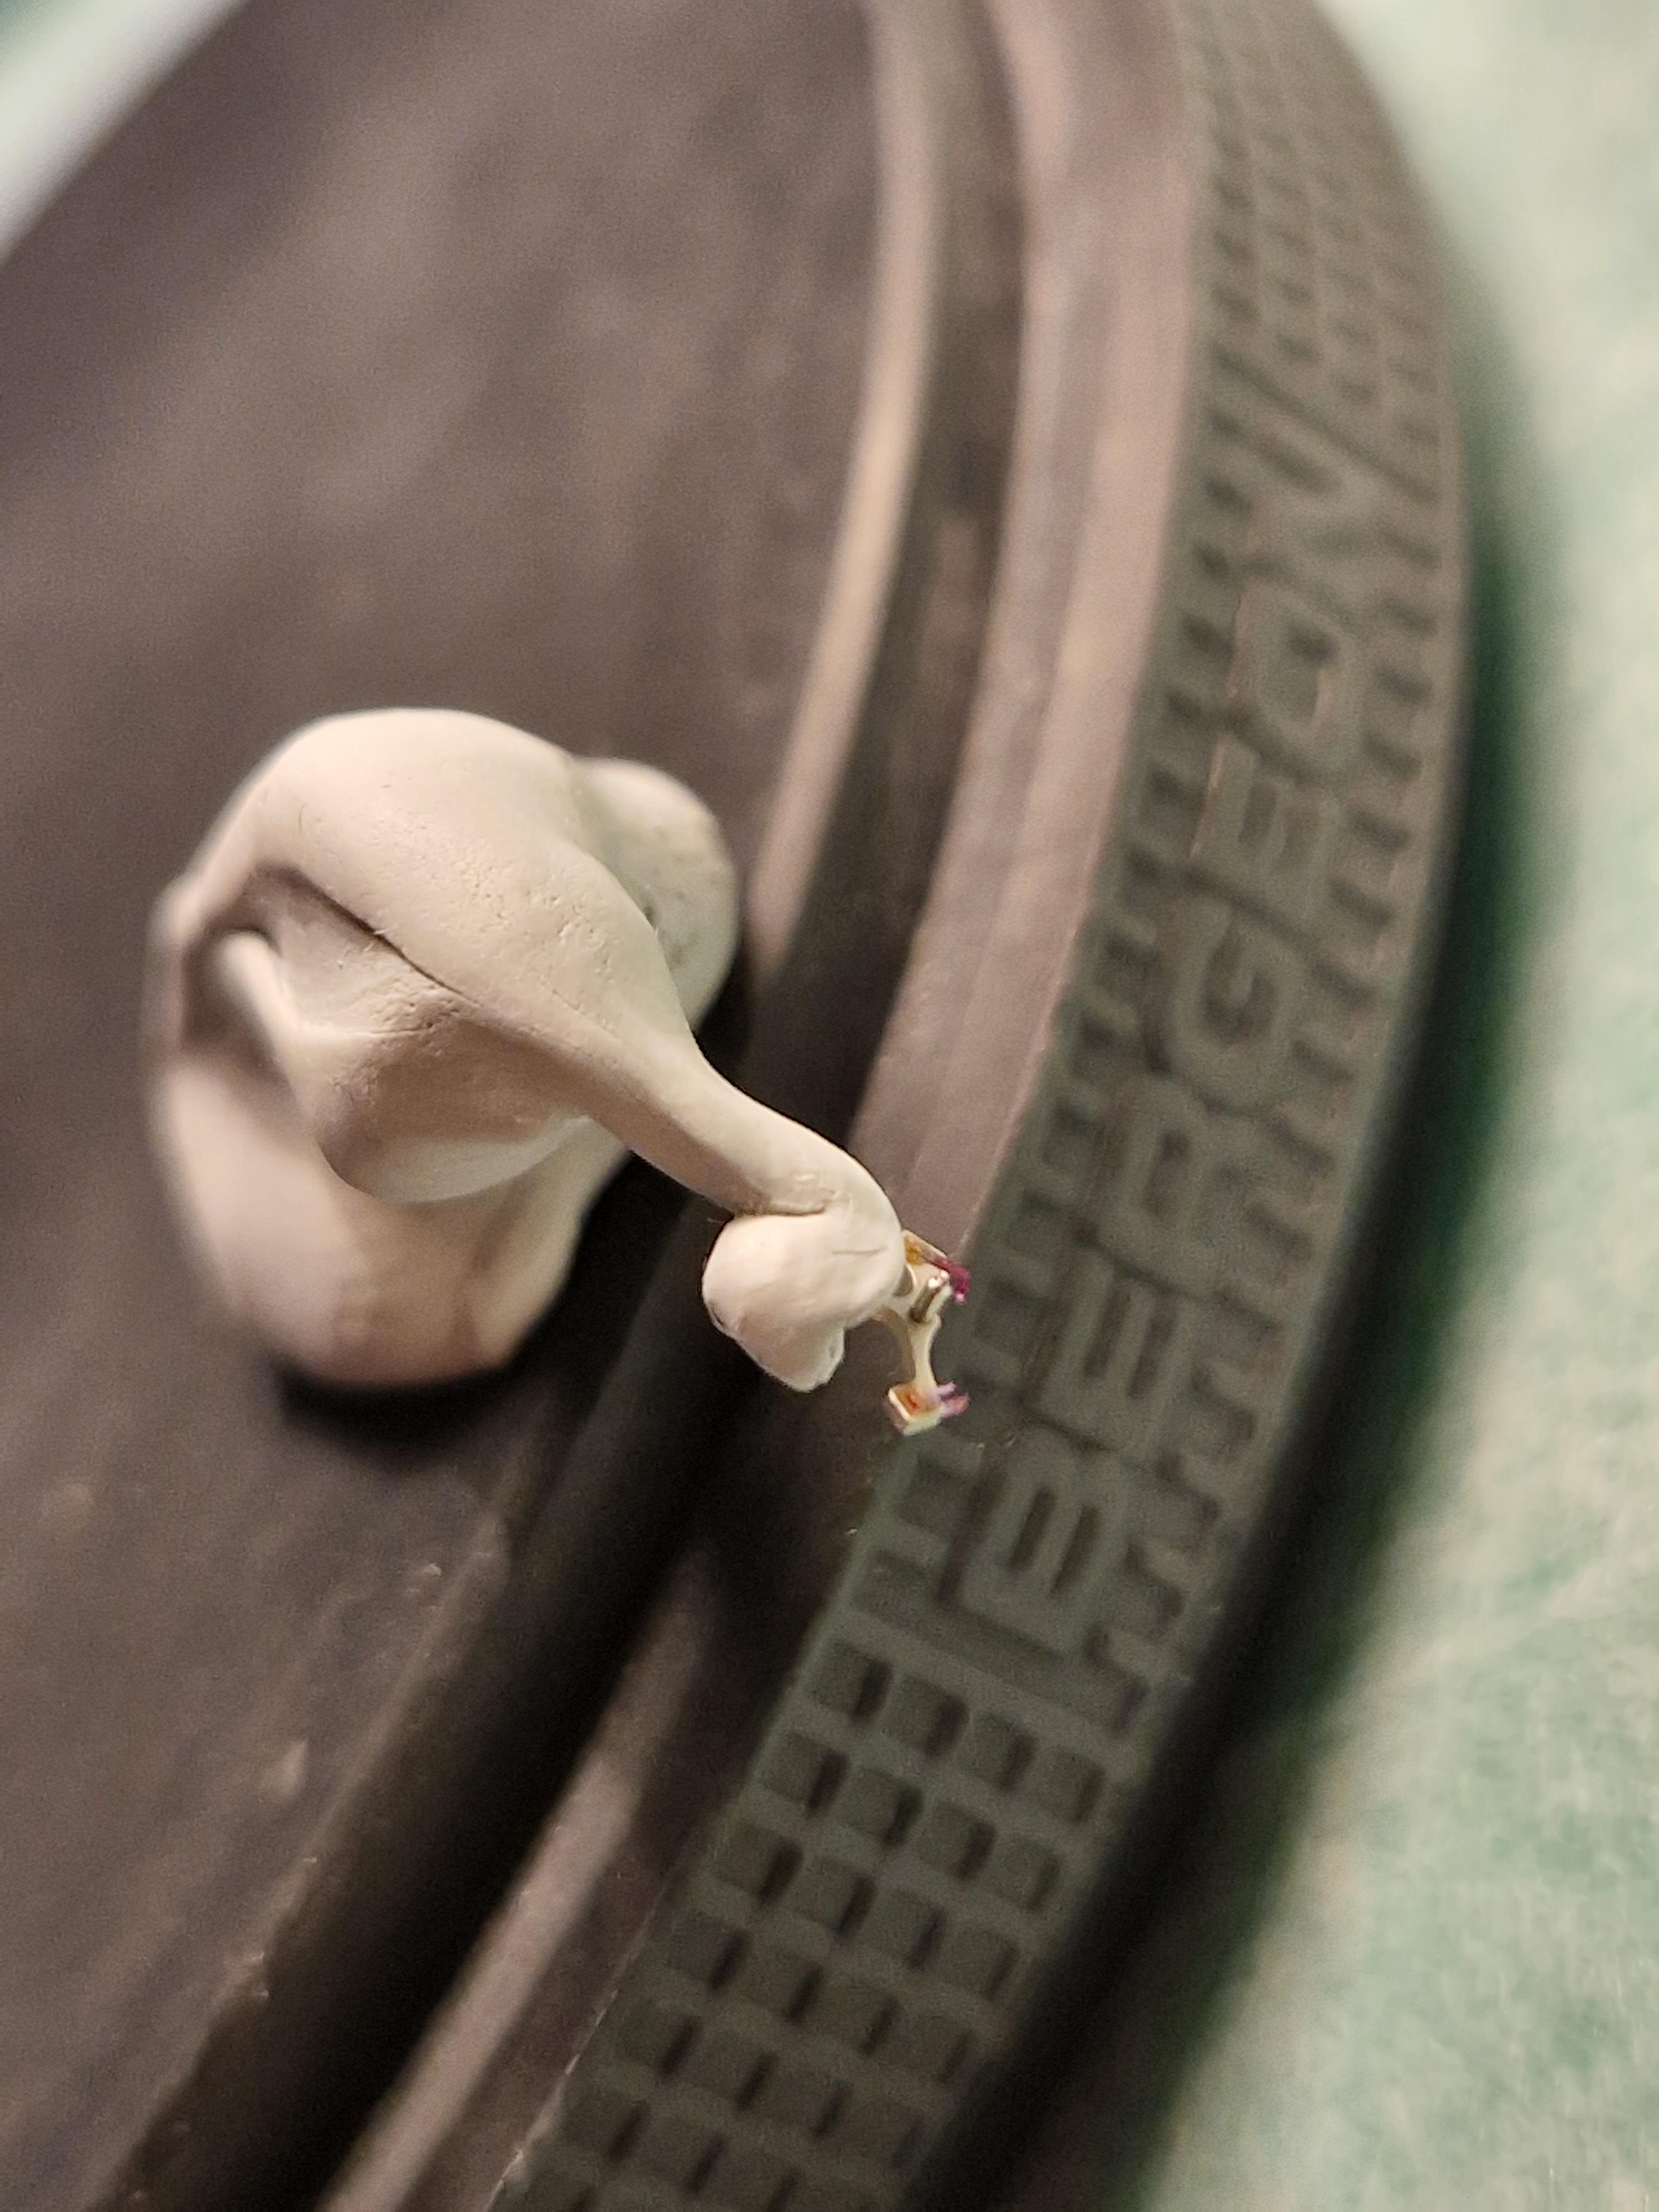
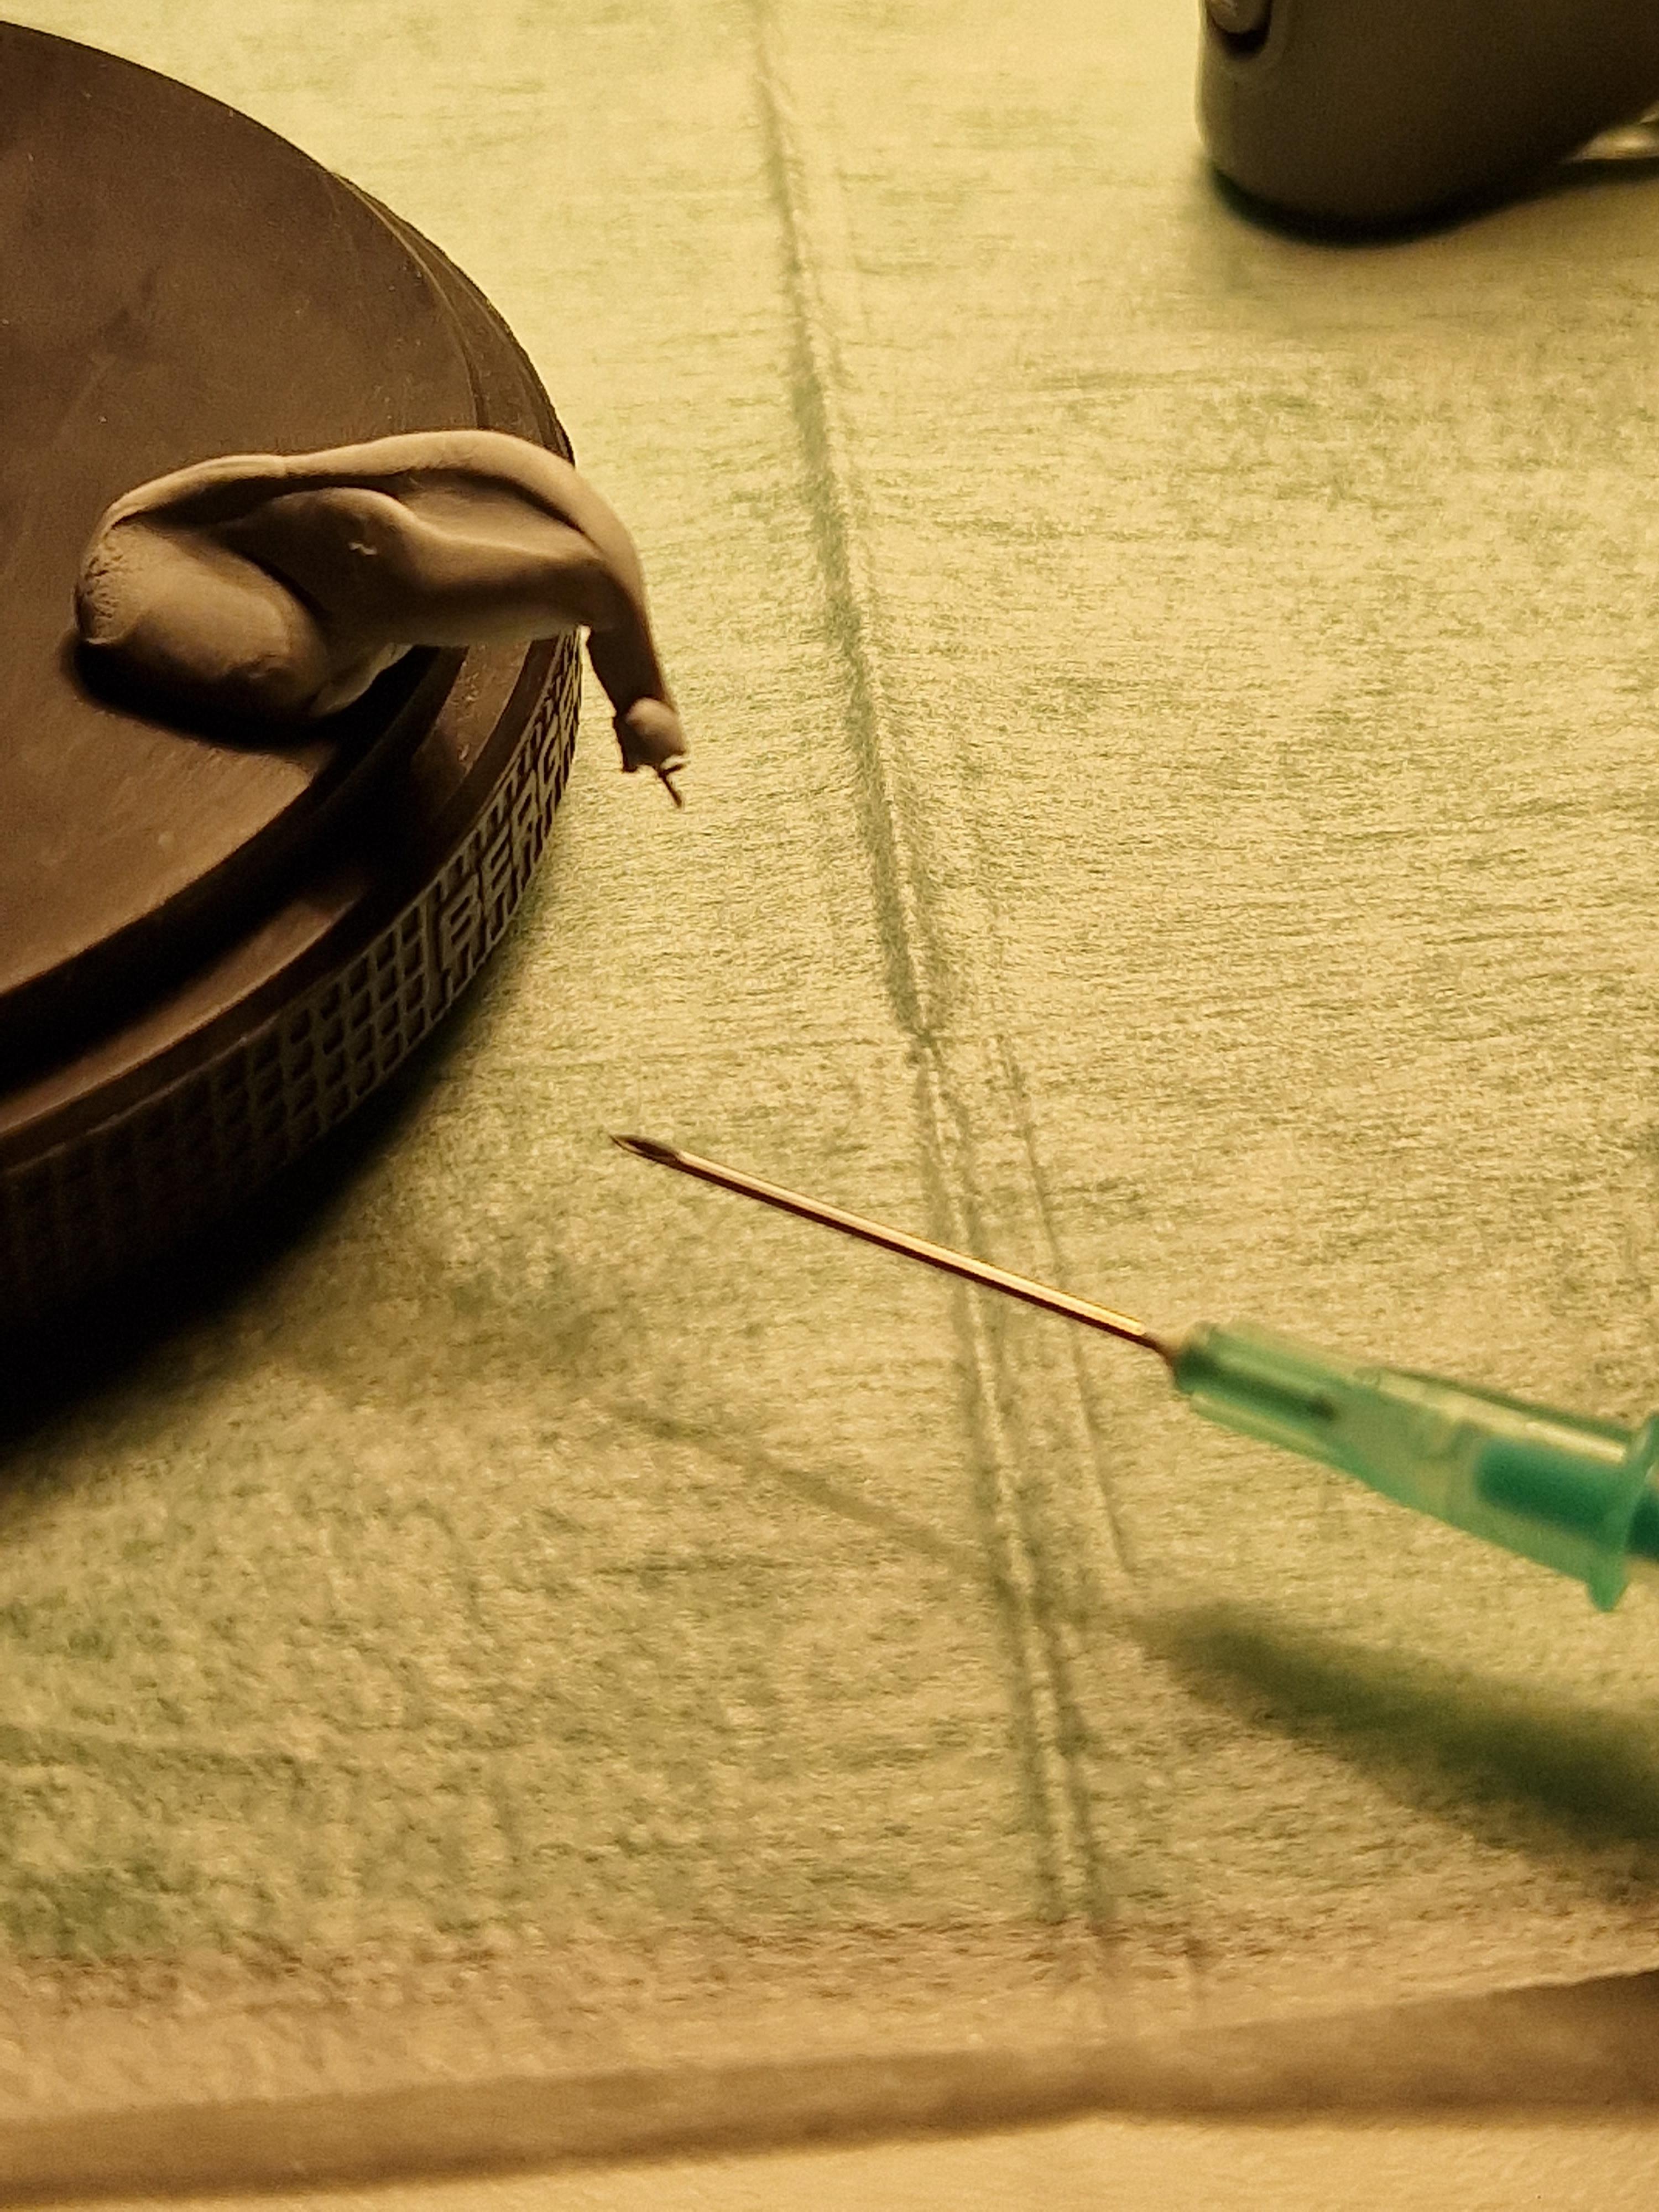
Hello everyone, for what it's worth, here is my approach: 1. Escape wheel submerged in Epilame, then dried quickly with a hairdryer. Then the final tip of the pivots are cleaned by poking into pithwood. The logic being that the Epilame is removed at the intended contact point (to avoid any residue that may mix with the oil), but remains in the areas where oil is not supposed to spread to (further down the pivot towards the wheel). The escape wheel teeth also benefit from having Epilame to keep the 9415 in place. 2. I use a syringe to treat only the pallet stones. I suspend the pallet fork with some Rodico so that the stones hang downwards. I notably use a rather thick needle where a drop WON'T form, but rather where the Epilame liquid stays in the needle tip, which I then dip into the pallet stones. It requires some practice to get the right amount of Epilame into the needle tip, but it works for me now. This way, no drop will "jump" onto the pallet fork and potentially go all the way to the pivots. 3. I let the movement run for a few minutes without lubricating the pallet stones... to scrape off the Epilame in the intended contact "channel". Then I remove the balance again and lubricate the exit pallet stone with 3-4 successive drops. See the "channel" that forms on the pallet stone in the picture -- not so easy to see, but it's visible. I am conflicted about the use of Epliame in balance jewel settings. My impression is that the two jewels sufficiently suspend the oil (even 9010). Apparently Rolex recommends NOT to use Epliame there (heard from a former Rolex service center watchmaker), as it could cause additional wear. Apart from that, I follow specific instructions where I can find them. E.g. the infamous Rolex reverser wheels or sometimes (parts of) the seconds wheel. Exception: I'm currently servicing an Eta 2824 and will probably ignore the service sheet that recommends treating the whole keyless works with Epilame and then using HP1300... I'll skip the Epilame and use 9504 grease.

.thumb.jpg.9bb1d20ca71162225b2e652ed4cfed34.jpg) 3 points
3 points -
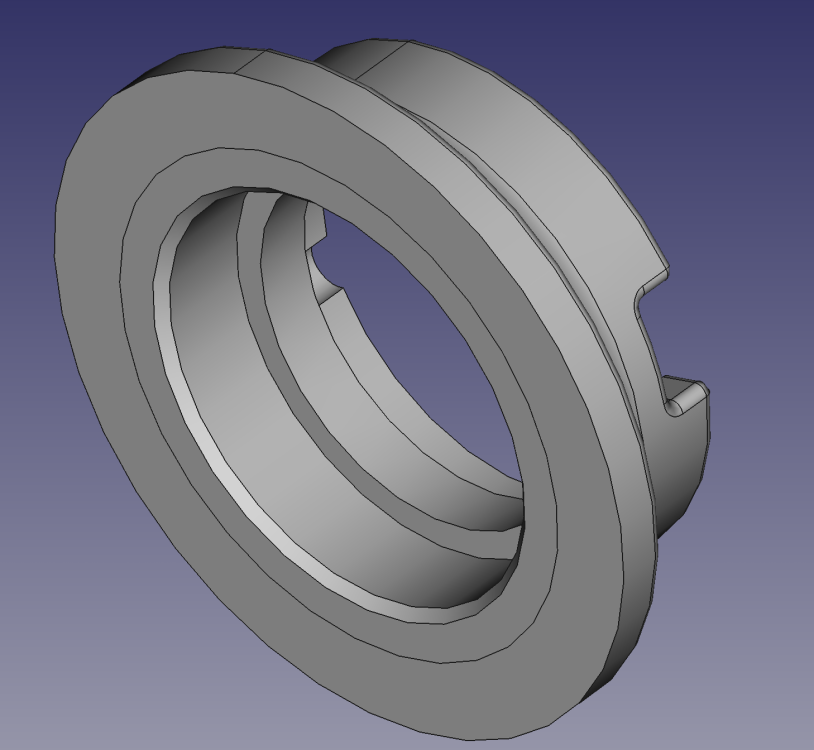
I missed this earlier. The dial isn't going into the holder, it should sit proud of it. This is what I am currently using which I print for each different movement.
 2 points
 -
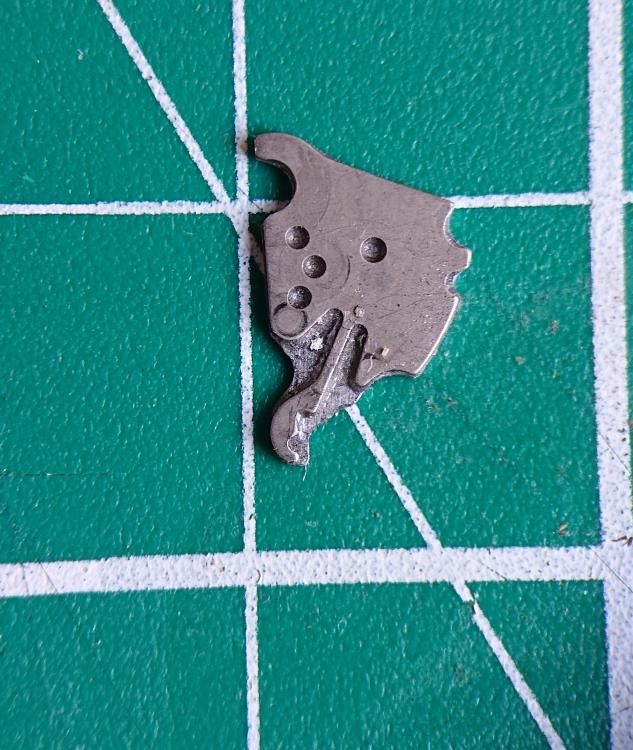
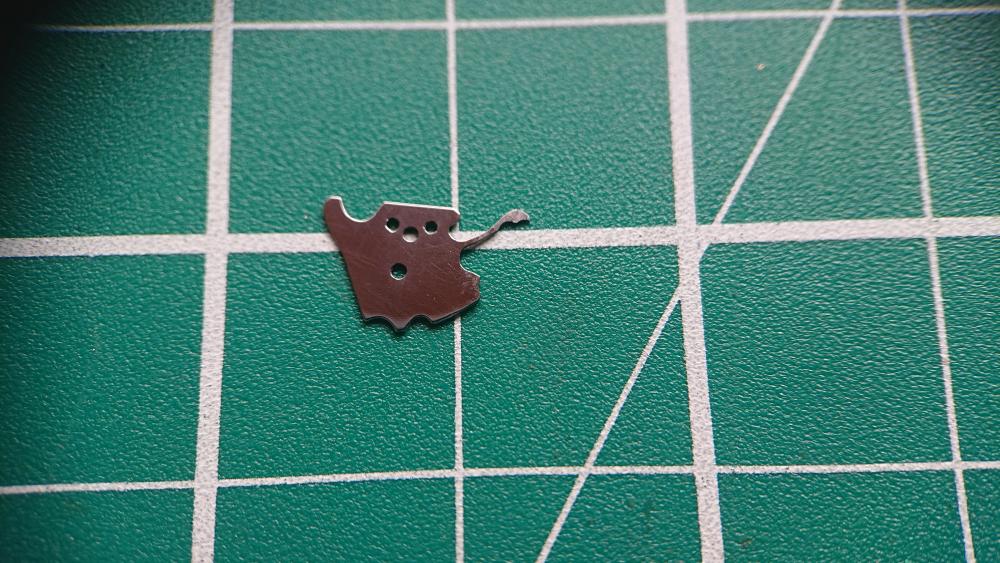
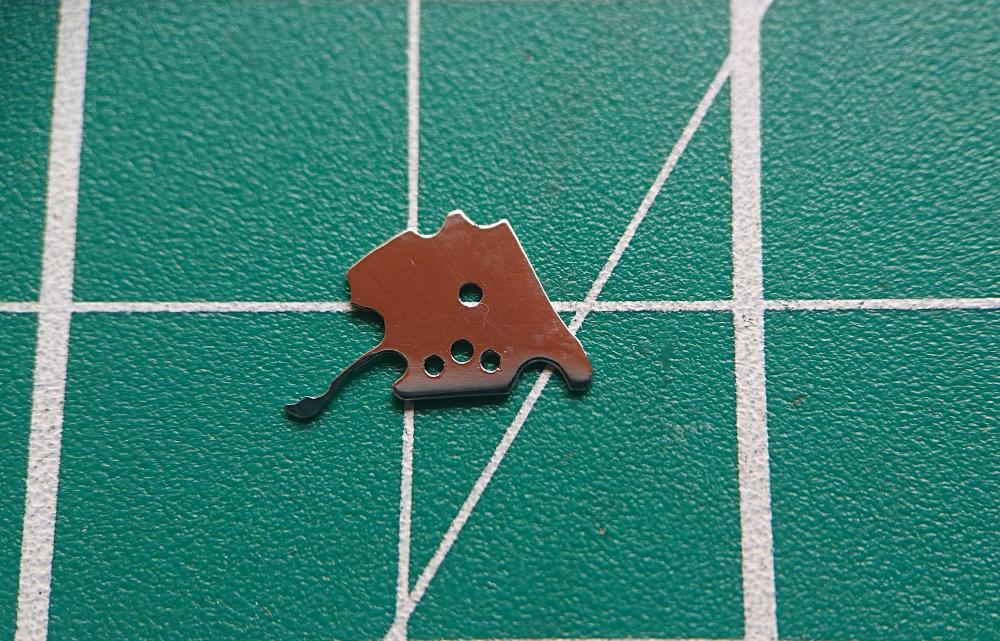
The one thing I took time over was to round and polish the curves at the bottom of the jumper arm. The slightest mark (left over from cutting of filing) acts as a stress raiser, just where you don't need it.2 points
-
Polish it where the old part cracked as well. Get rid of the stress-raisers.2 points
-
Don't forget Mark is a hard working watch maker so he is also tied up with work. I'm sure he is keeping his eye on this forum making sure it is running along nicely.2 points
-
I've remained silent on this thread, and at the risk of upsetting everyone, the thing that worries me the most the the apparent absence of Mark. The moderators do a great job and the members also pitch in, and the site seems to run itself, but it is a concern for the future of this forum when the owner is absent for all intents and purposes. Like many of the comments above I would hate to log in one day and things be closed down as I rely on this site for ideas and knowledge and also cheer me up. maybe the Moderators could reach out to him, assuming he does not read this thread, and express our concerns and let us know the plans going forward? some kind of WRT ark2 points
-
So here is the new base (v 2.1), I made it so that the base will fit over and swallow the stump of the hand pusher tool (or at least my clone of the tool), I also reduced the OD of the bottom skirt a little as it looked/felt a little large, here are a few pictures and the fake .pdf file which you need to convert to .zip once downloaded. The cut-out seen on the below image on the bottom of the base should swallow the OD (40 mm, +0.1 mm tolerance) of the stump and the height of the stump 9.5mm (measured to 9.1mm, but rounded to 9.5mm) - let me know if this works for your tool. Note, I think you may need to print supports for the new internal shelf created? Here is the fake .pdf for just the FreeCAD base file and 3mf files Modular Movement Holder.pdf Here is the fake pdf for complete set of the new base and ring FreeCAD/3mf files: Modular Movement Holder base and ring v 2.1.pdf However, I'm wondering how often you could use this feature, adding the dial usually increases the OD of the movement, so you would need a new (larger) adapter ring tuned to the OD of the dial and I wouldn't like to grip the dial in any kind of movement holder if It could be avoided for fear of damaging it. Maybe I'm misunderstanding you?

 2 points
 -
Good idea, working on it....2 points
-
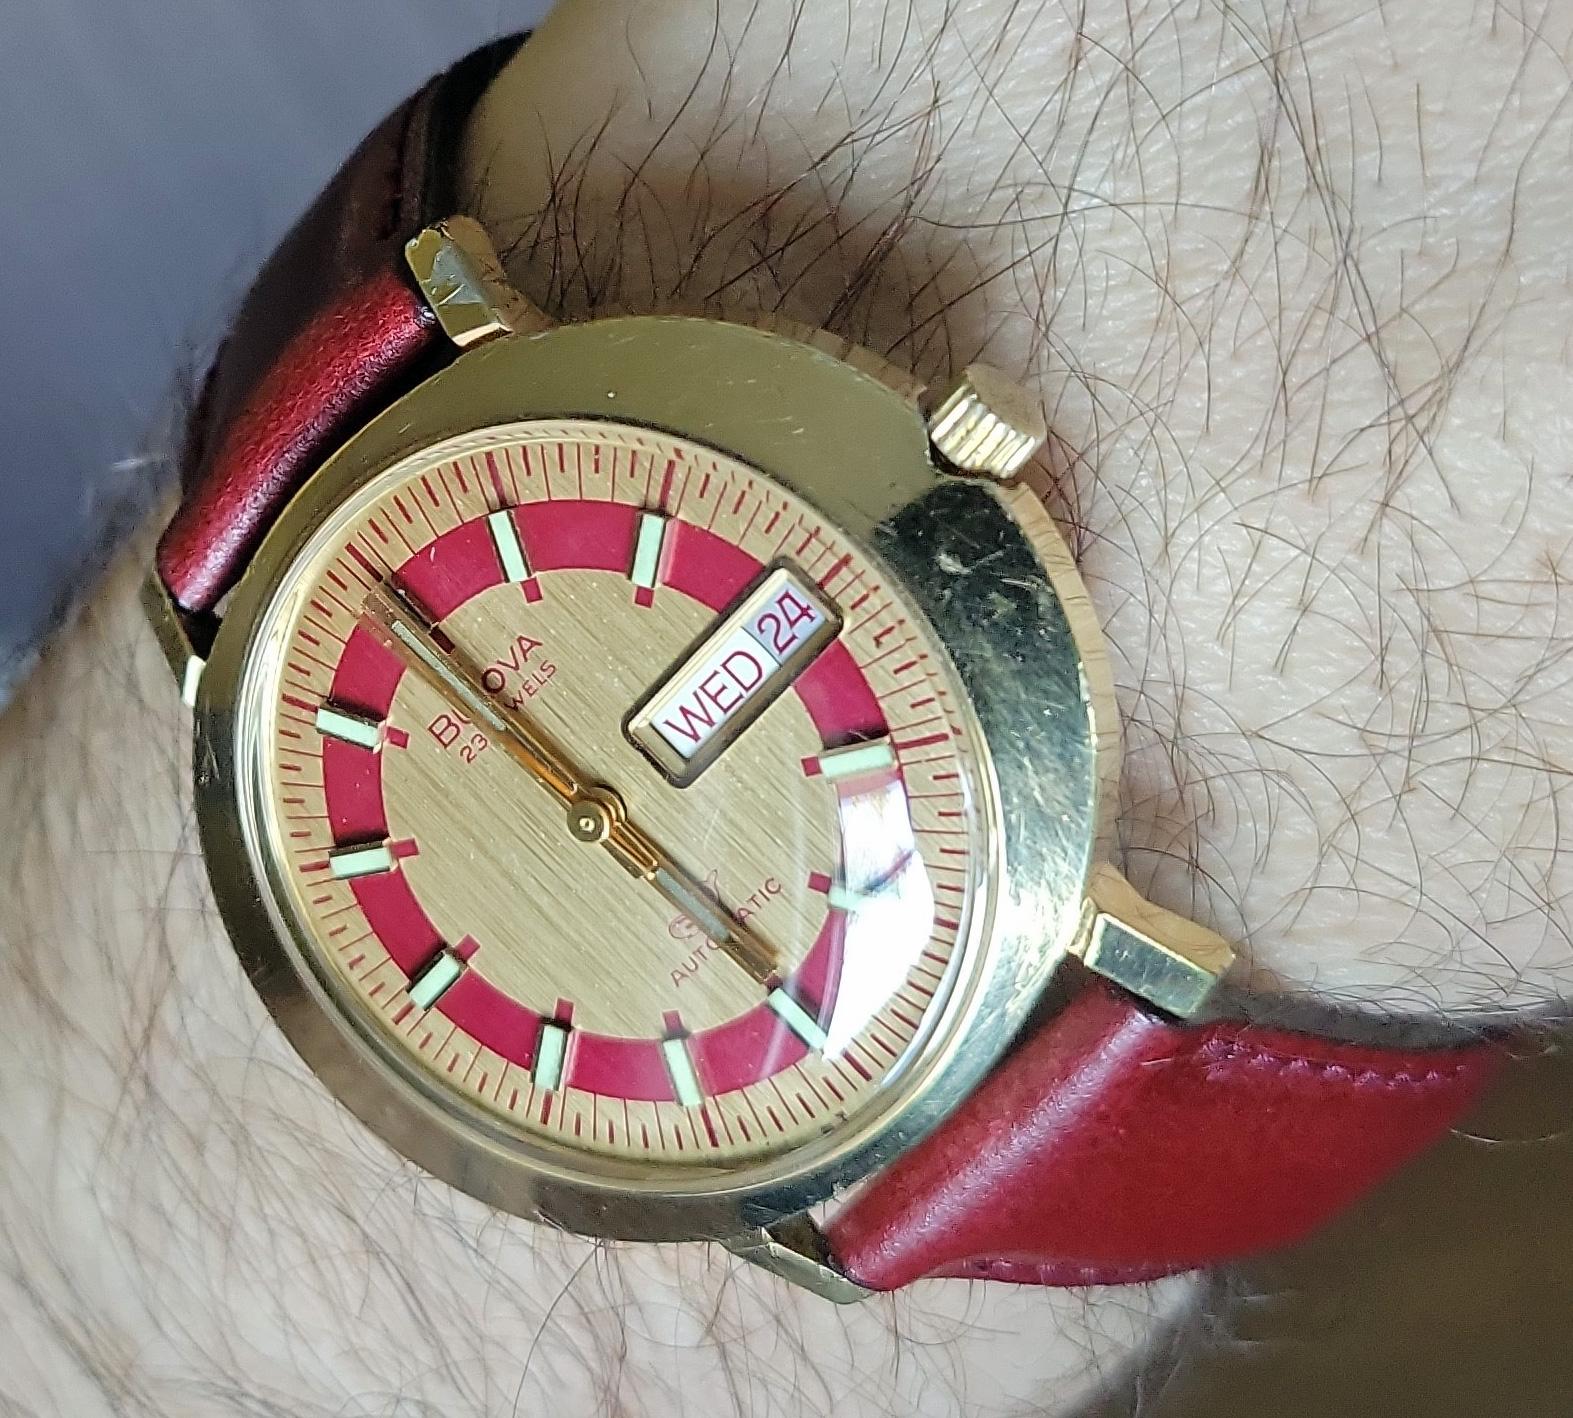
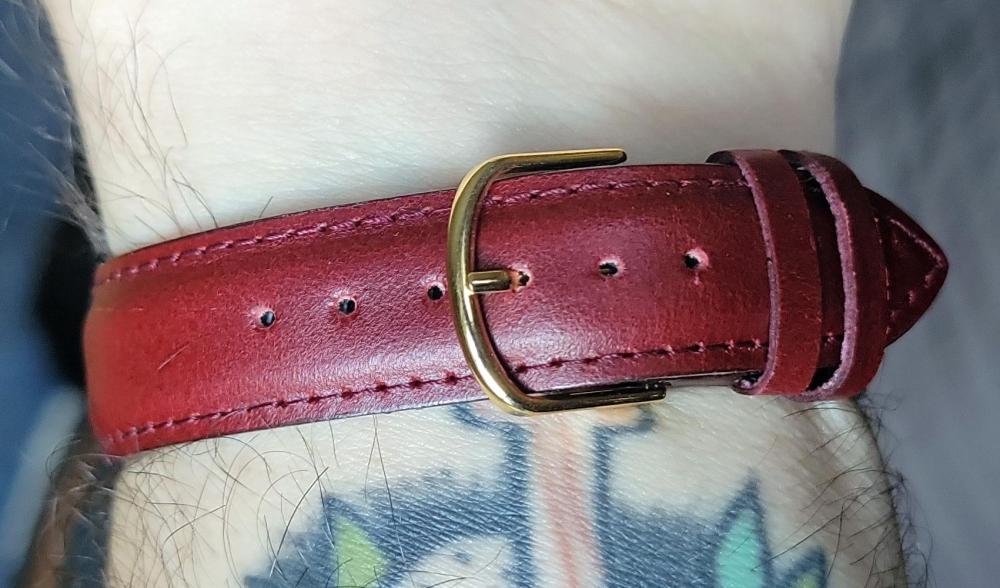
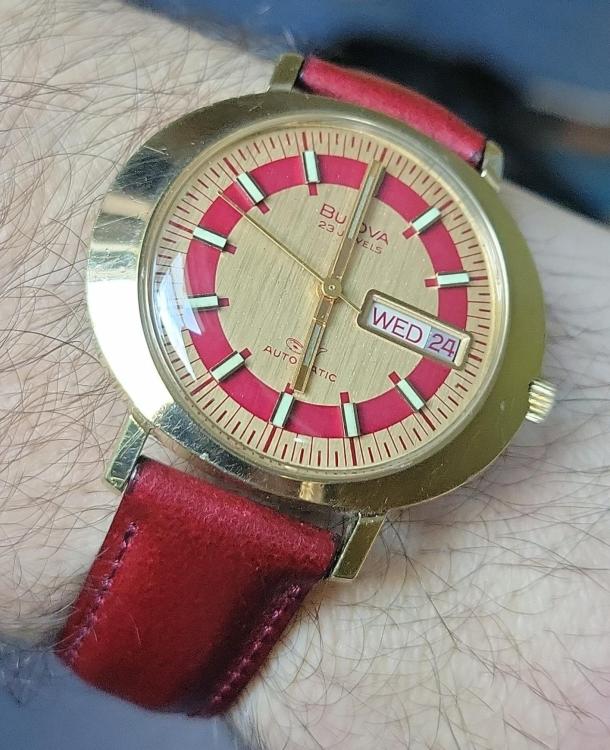
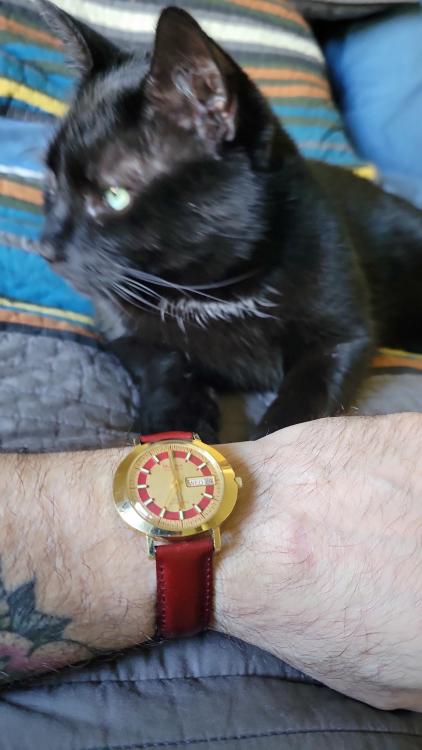
All right! Back together, cased up, and ready to rock and roll. Well, after I cased it and forgot the seconds hand. And then after I found a fitting back gasket. And then after I had to take it apart again because I forgot to put the automatic rotor back on. I did find a vintage Hadley Roma strap in red leather, as an homage to the original maroon strap. I'm super pleased with how it looks. Can I say chuffed as an American? I may polish the case at some point, but for now I'm just gonna wear it. And of course, pictures. First dial up, dial down, and on the wrist. Including the cat tax.


 2 points
 -
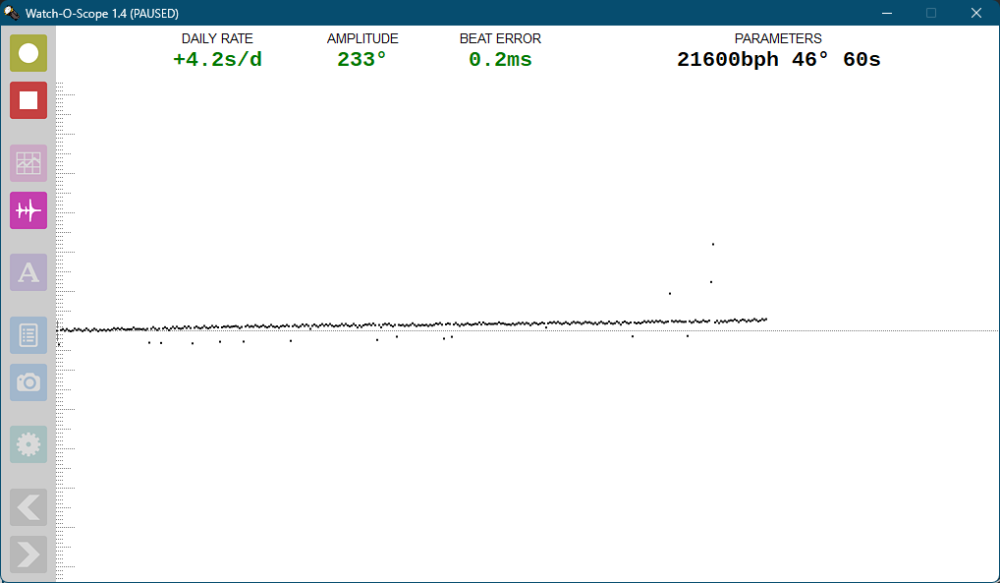
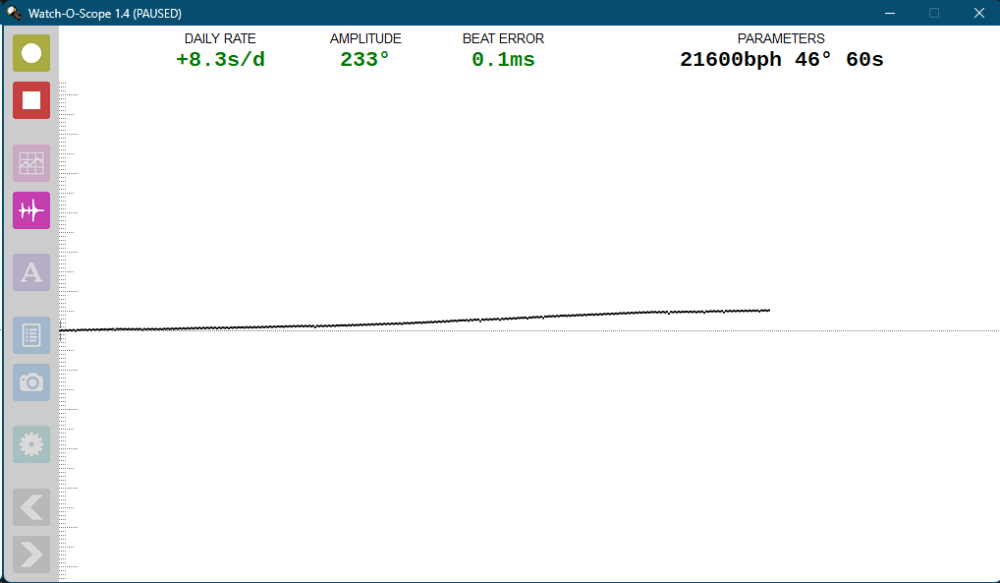
When you move the index which changes the timing from an extreme fast to an extreme slow, is there a big change in beat error? Obviously there will be a big change in timing. If there is a big difference in BE then this is strongly inferring the the end-curve of the hairspring isn't set correctly or/and the collet is central to the jewel on the balance cock, because the hairspring that is breathing between the curb pin and boot is being pushed and/or pulled when you move the index from left to right. Also not having the hairspring set correctly can dramatically reduce the amplitude. A quick check is to take power off the movement and move the index from extreme fast to slow and with high magnification see if the hairspring sits nicely between the curb pin and boot at all times (give the balance a spin and watch the hairspring - has it got total freedom?) or if it moves by being pushed or pulled by the curb pin or boot. I'm guessing it is the latter. I think that may be a possibility to your problem.2 points
-
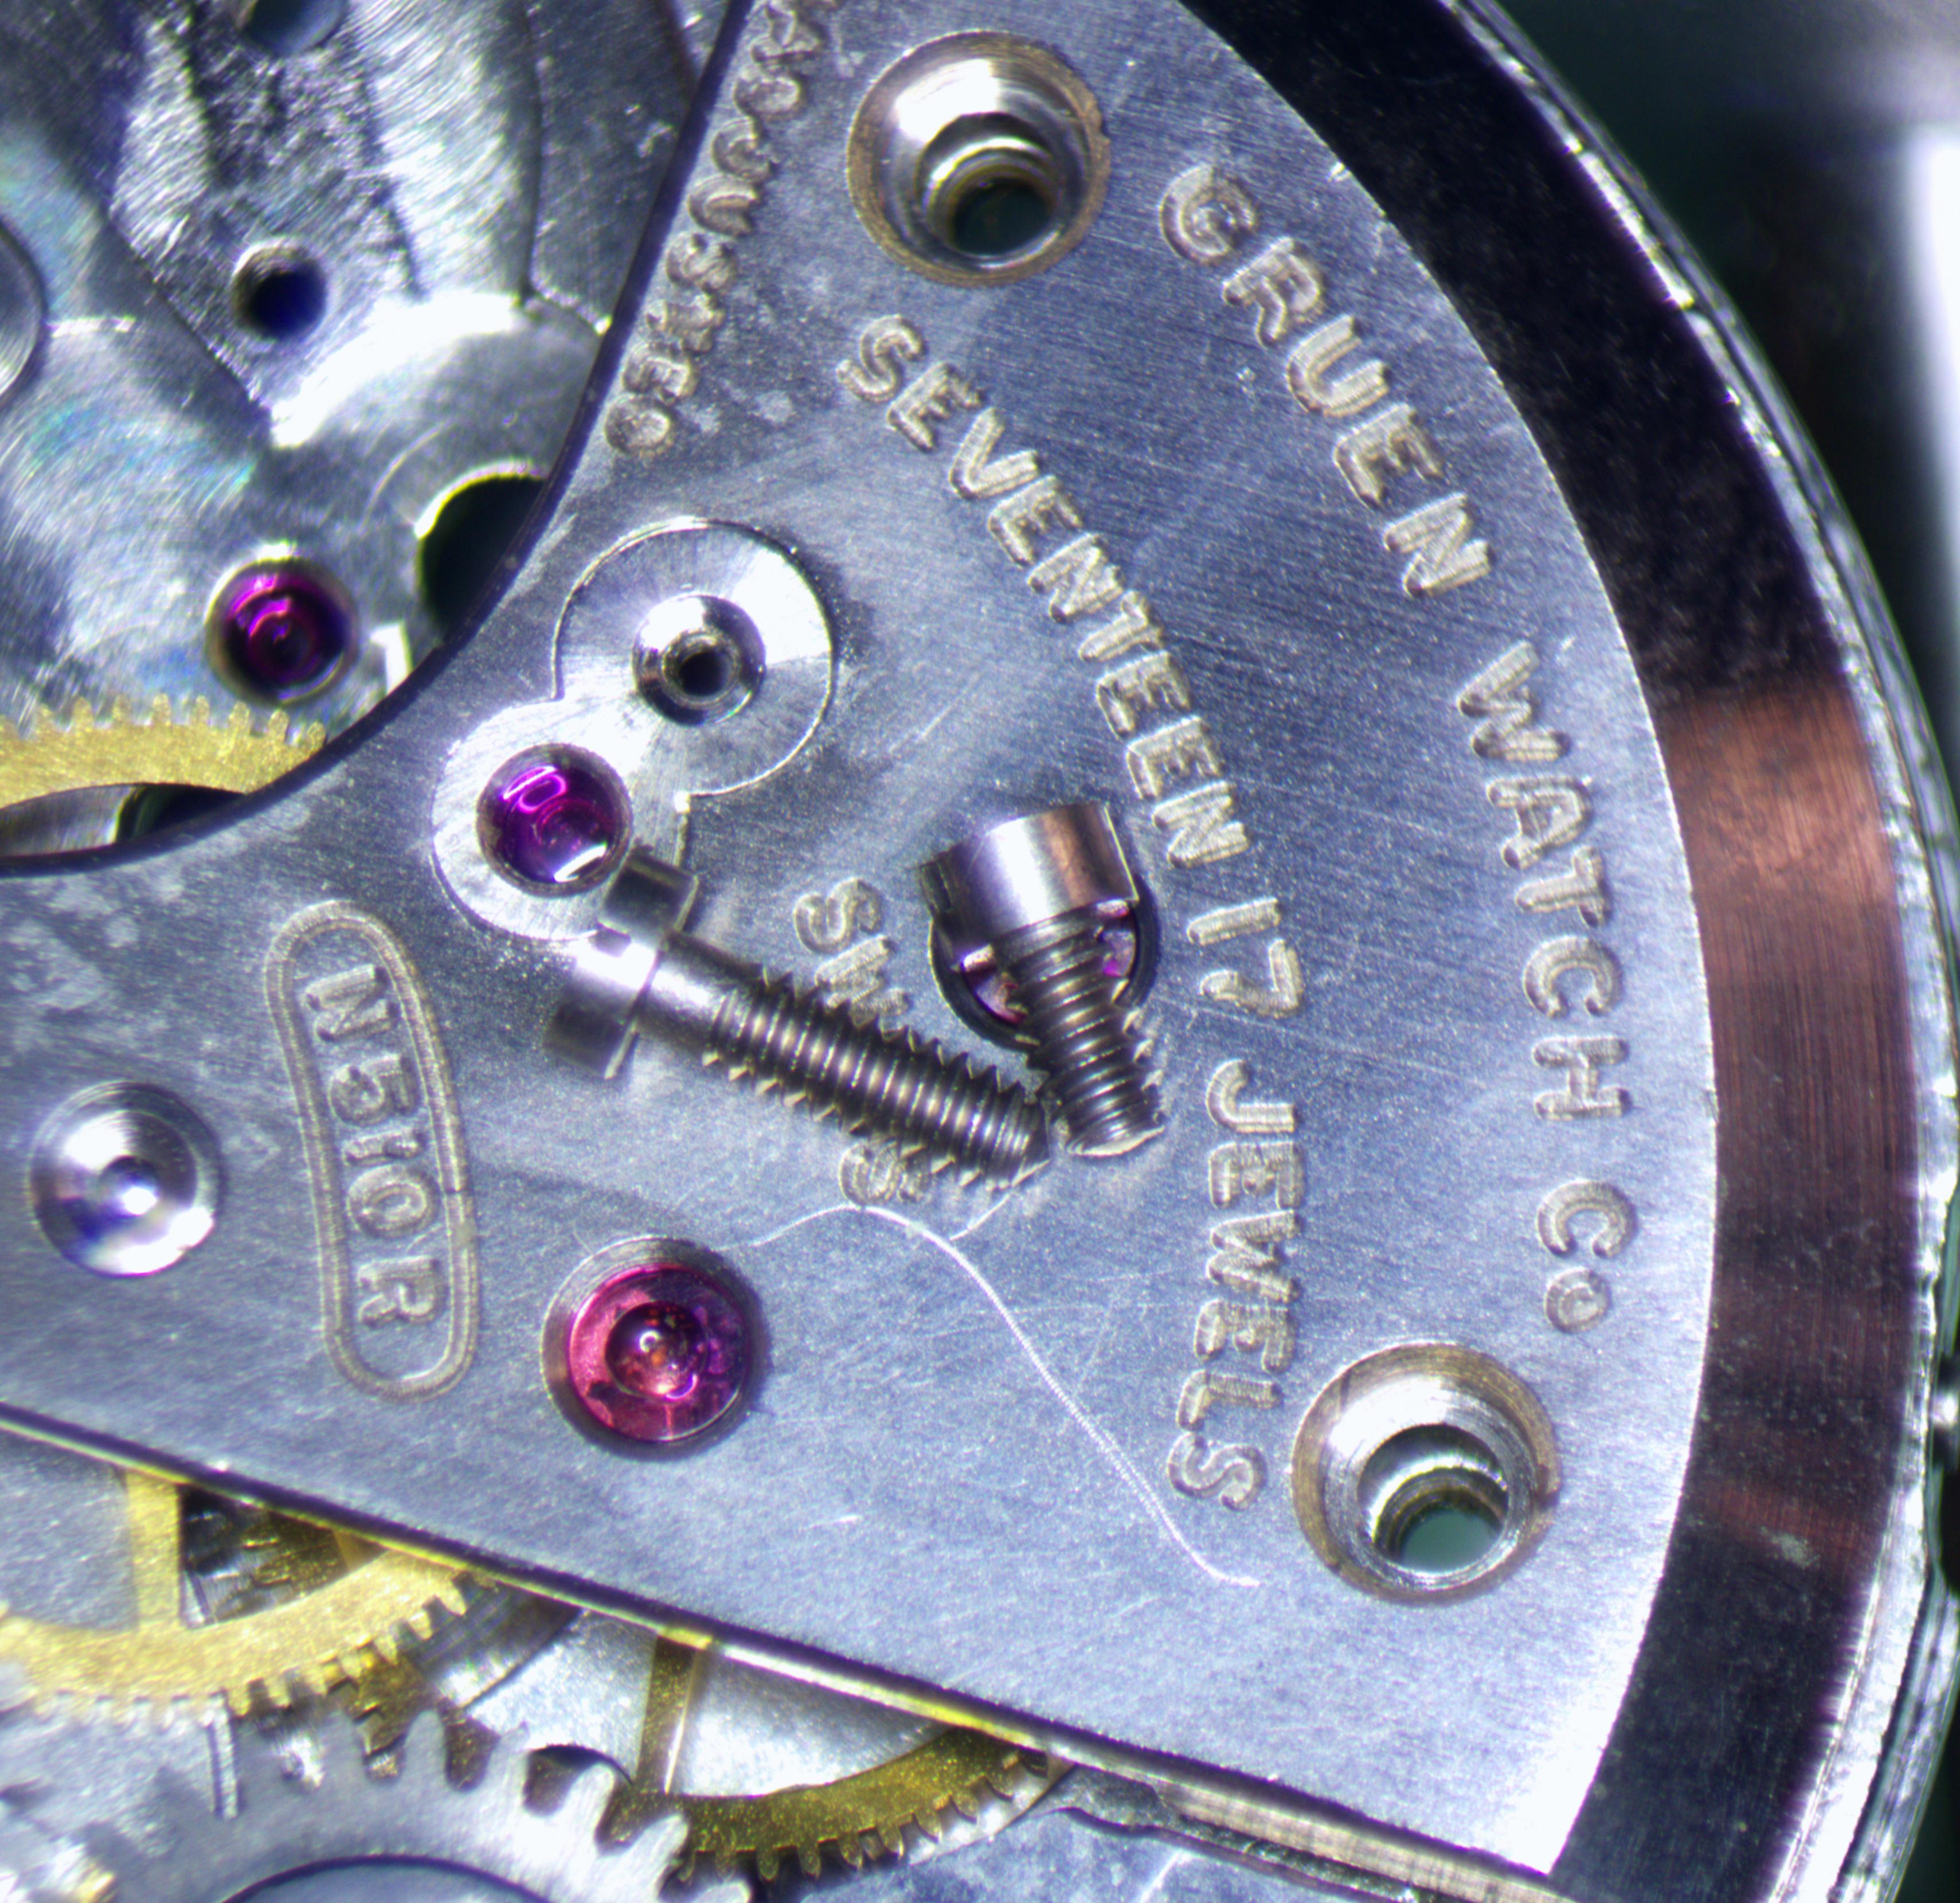
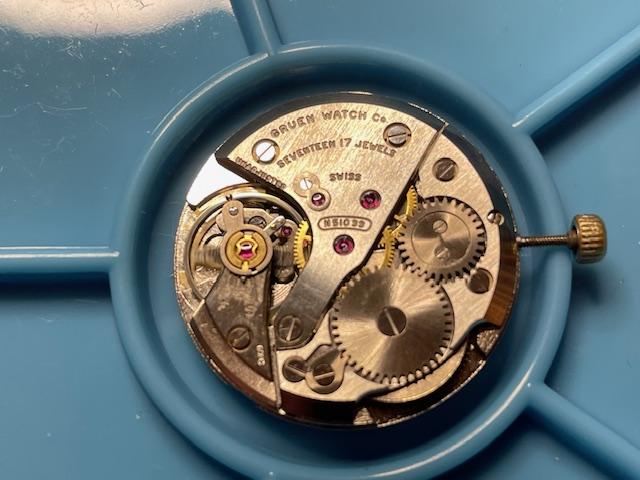
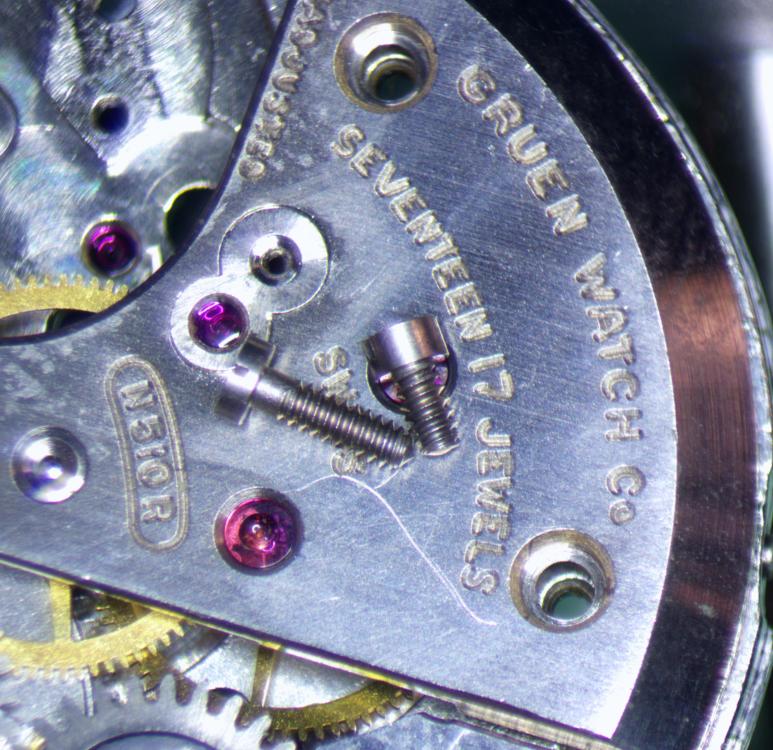
Snap! I recently finished my Gruen 510 movement - though the case for mine is in a rather sad state; I'm going to try re-plating it (in nickel, it's not a gold one). Re. the screws, I got a few of the one gram mixed batches from ebay. I've only needed a couple of screws for things so far, both rare, minuscule types - but both in the mix, after enough time sorting through them! The ones such as normal bridge screws are quite common in those lots.
 1 point
 -
Two pins or screwdrivers angled out slightly, pressing through from the barrel centre from the opposite side so they contact just clear of the hole in the lid? eg. Strap pin driver needles or similar.1 point
-
this is something I've never quite understood about the some of the Swiss companies. In 1957 Omega was using 9010 for the keyless parts with epilam. there's been a slow migration towards using heavier lubrication's but still typically oils and epilam to keep them in place. When it seems like 9504 works so much better.1 point
-
OK, welcome in the world of alarm clocks... I guess the 4th wheel is dished because it is from another movement. If it was not dishet, then it would not mesh with the pinion of the escape wheel, am I right? The marks of wear on the 4th wheel pinion doesn't corespond to the 3th wheel table position, at list this is what i see on the picts. Calculating the rate is easy - there is a formula - BR = T2 x T3 x T4 x T5 x 2 /(P3 x P4 x P5) where T2 - T5 are the counts of the teeth of the wheels tables, and P3 - P5 are the counts of the pinion leaves. Vibrating the balance is easy - grasp for the hairspring where it should stay in the regulator with tweasers, let the balance hang on the hairspring while the downside staff tip rests on glass surface. Then make the balance oscillate and use timer to measure the time for let say 50 oscillations, or count the oscillations for let say 30 seconds. You must do the free oscillations test to check the balance staff tips and the cone cup bearings for wear. This kind of staffs wear and need resharpening to restore the normal function of the balance.1 point
-
Glue a nut to the barrel lid, insert a bolt, pull, disolve the glue. Maybe someone will have a better answer.1 point
-
The stress is the force (on the spring) x distance. The maximum stress is at the bottom, and decreases up the arm. That's why they always break at the bottom. I used a round file, then something like 2000 grit to finish. I gave the rest of the arm a quick polish - no need for a perfect finish. Just make sure there are no 'notches' left from cutting/filing. The notches act like the perforations in your toilet paper1 point
-
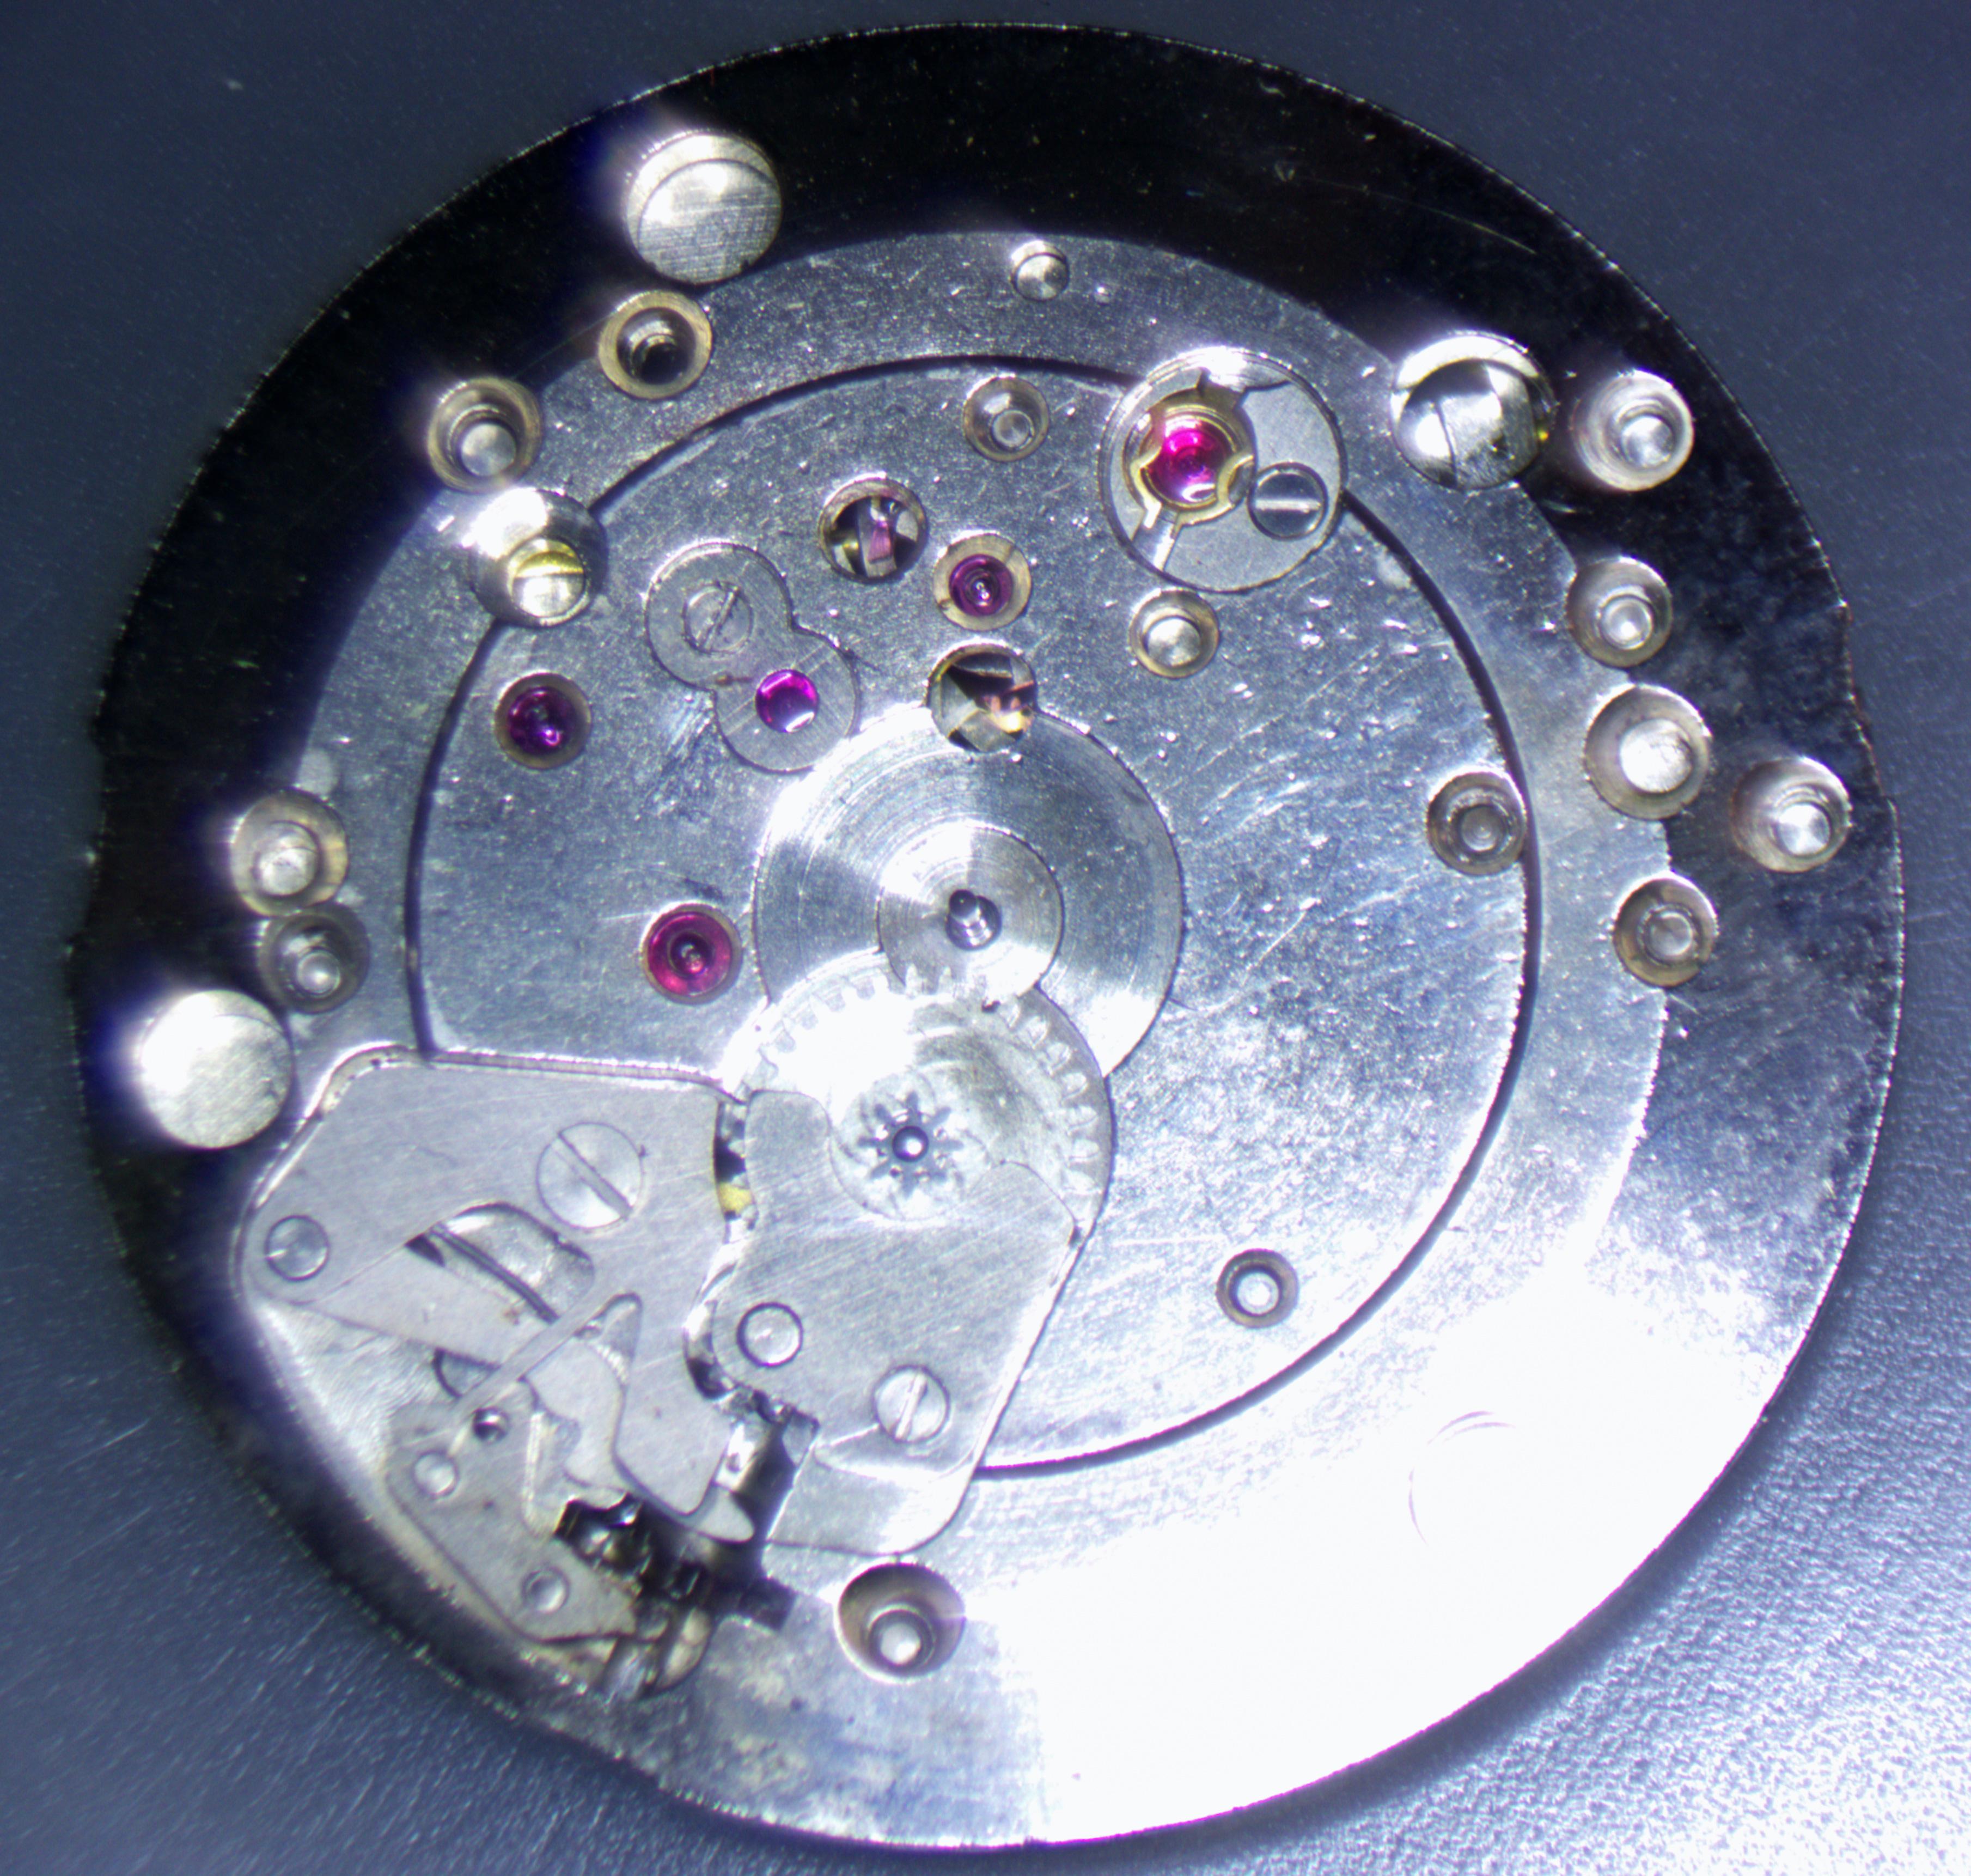
Finally getting these guys in the repair rotation. I'm starting with the N510R, since it's shock protected and will be less prone to damage on my clumsy wrist Dial side Trying to keep track of the different bridge screws. One is missing, and I don't want to steal it from the other 510. Maybe I'll find a donor movement, since I need a stem or two anyway. Left-hand wound mainspring! Don't forget that when putting it back... All ready for a bath

 1 point
 -
I'm going to give this a try today/tomorrow on my UTC33/Seiko 66, thanks!1 point
-
I have it, so until we get a lunch one day , nearly everyday is with my mum at the moment.1 point
-
That was the exact reason for me starting this thread watchie. Still we haven't worked out how the regulars are going to hook up if it goes tits up. I honestly think something should be arranged to stay in contact, we all help each other so much.1 point
-
Steel has some funny properties, or at least counterintuitive. The modulus of elasticity is effectively (not exactly, but close enough) the same for steel that is annealed and hardened. What changes is the point of plastic deformation* . If the movement of your spring doesn't pass that, it should work fine. It looks a little thick, I would thin it a bit maybe from the main body out about halfway, maybe 10-20% thinner (not in thickness, along its form). But if it works it works! *So- if you have two bars of the same steel, one annealed, one at 600 Vickers (general hardness watch arbors might be), clamp them to a table so the same length is hanging out, and put a weight on the ends, they will bend the same amount. But if you continue to add weight, then remove it, at a point the annealed bar won't return to its original straightness. That's the point of plastic deformation. But up to that point, as springs, they are the same. However- their wear characteristics will be very very different. And getting the hardened bar past its point of plastic deformation takes a lot more effort.1 point
-
I would harden and temper (to a light blue). It's so easy to do and only takes a couple of minutes. A search on ebay UK for "spring steel strip cs" finds plenty available in small quantites and thicknesses from 0.1mm up. But the question is ( @nickelsilver) which "CS" number is best for watch parts ? Also, from one of the ads : "CARBON SPRING STEEL. SIZE IS METRIC 15.00mm X 0.10mm X 304 MM CS100 FINISH BRIGHT . HARDENED AND TEMPERD TO 480-530VPN" I've no idea about 480-530VPN. Does that mean it needs annealing before working? Have you seen this video, he shows how to determine where the indents go ?1 point
-
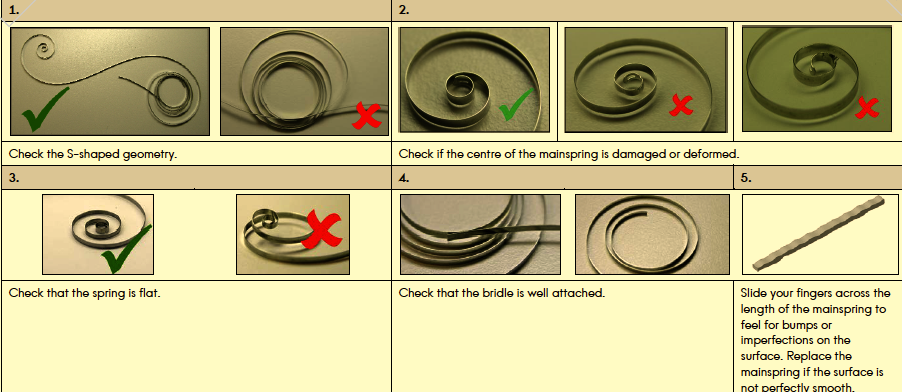
as you took the mainspring out what did it look like? It's amazing how much amplitude you can get if the mainspring actually has the proper shape. last week I was doing a 12 size Hamilton and was very much surprised with the beautiful back curvature the mainspring had. Then the watch had a really nice amplitude the group would be so proud it was 350 until I dropped the lift angle down to 38 that drop the amplitude quite a bit below 300. then with the beautiful back curve it still had really nice amplitude the next day. I really wish all my mainspring's look like this as the watch had beautiful amplitude the next day. So many of the aftermarket pocketwatch Springs I see now do not have anything resembling a back curve may be a slight curve and that's about all. They still work but they just don't work as nice as a properly made spring. then Omega as all sorts of nifty technical documentation unfortunately every single corner is watermarked with where it came from who downloaded it etc. very paranoid company. On the other hand I will snip out images like from the document on recycling a mainspring barrel. for instance here's the section on what your mainspring should look like. water damaged a lot of times means rust was there rust on this watch?
 1 point
 -
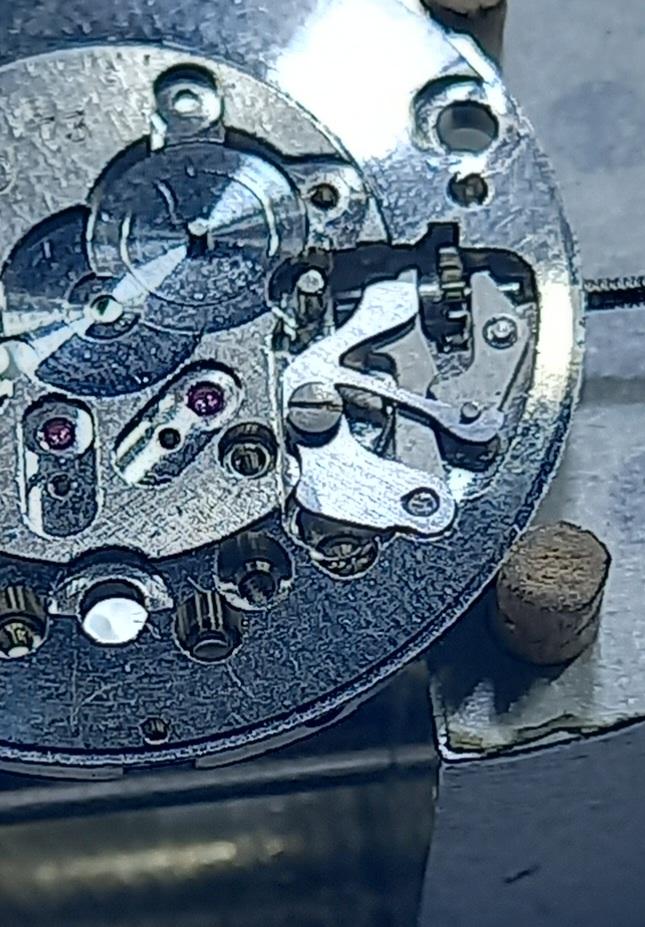
just one little minor reminder here this isn't your normal balance wheel. pages 17 and 18 are what you really want to be looking at. normally studs don't turn but this watch has the etachron system designed for lots of adjustment. Personally I would try to rotate the stud back to where it's supposed to be. If you're lucky you didn't actually bend it at the stud it just looks really bad as the stud has been rotated grossly out of position.. I think things will look a lot better if you put the hairspring back where it's supposed to be by rotating the stud. it's hard to tell if you actually did bend it at the stud or not we won't know until you rotate the stud back more or less where it's supposed to be. Then you want to pay attention to the manual of how to put the hairspring back in the regulator pins because yes they rotate also and they rotated specific directions otherwise bad things will happen to your hairspring. so initially you can open up the regulator as wide as it can go and don't worry about closing it until thing everything is right then you can close them a little bit1 point
-
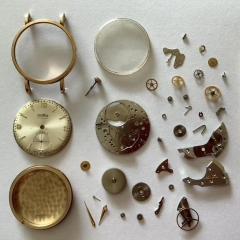
I need to see photos of the whole movement before I comment.1 point
-
Hi Frank, you have dived headlong into the deep end. Hairspring work has to be the scariest thing a newbie has to tackle. Your hairspring appears to be bent and just putting it back into the regulator would not allow the balance to work properly. It might start oscillating but the performance would not be good. The proper thing to do is to unstud the hairspring, remove the hairspring from the balance, reinstall the hairspring on the stud carrier, reshape the endcurve and centre the collet to the balance jewel hole. This challenge would either make you or break you. Hope that you will be able to fix your watch. Welcome to the world of watchmaking. Watch this video. It think it'll give you an idea of the task ahead. From your 1st photo, I think you have a etachron type stud. Let me see if I can find a video on how to remove it from the arm.1 point
-
Have read of the Tech Sheet attached on the balance section page 12. It may be bent but until you reposition it back in the regulator pins you'll never know. Cheers CJ 4R35B_4R36A.pdf1 point
-
Good job, that band matches the watch perfectly.1 point
-
That is a stunning old Sea King you have! And a very cute little furry assistant also.1 point
-
No problem with this steel breaking its a perfect working material, the difficult bit is figuring out where to put the detent on the spring. Yessss, at last not a watchmaker but a part maker. Its not perfect, i made 2 mistakes . I made a guess where to put the detent on the spring and i made it a bit too deep and the other was the drill bit caught a wobble on when i tried to open up the post hole 2 tenths. But it works perfectly with a solid click on crown set position so I'm well chuffed. Not sure what to do about harden and tempering it, seems to have a good spring action in its annealed state, do i leave it as is ?

 1 point
 -
If the metal was twice as thick, it wouldn't snap so easily. The thickness is governed by the space available so you can't use thicker metal. If you glued two pieces together, the likelihood of snapping would be reduced. That's my theory anyway, could be wrong.1 point
-
Could you glue two pieces together for rigidity and separate after forming?1 point
-
I will advice to share the idea first here before doeing something to the movement1 point
-
I'm going to give that a go next time, thanks for a great idea @rossjackson01 One of my students uses this tool and swears by it https://www.cousinsuk.com/product/wheel-hand-roller-remover-bergeon?code=W1851 which is very like getting two sticks of pegwood under the wheel and rolling them in your fingers so they create a slight prying from underneath motion, I suppose. Maybe bind one end of the two sticks of pegwood so they are like tweezers.1 point
-
Take the measurements and go for which ever on you like. An assortment us under £11.1 point
-
Thanks for sharing! Valuable to know! Well deserved Ross!1 point
-
Yes, I was so chuffed when he acknowledged me. I'd heard him talk about it and I had tried it by gentle pressure under the wheel and rolling the Pegwood in my fingers. The wheel rose. His way was to rotate the whole wheel in reverse. Learn something every time from Kalle.1 point
-
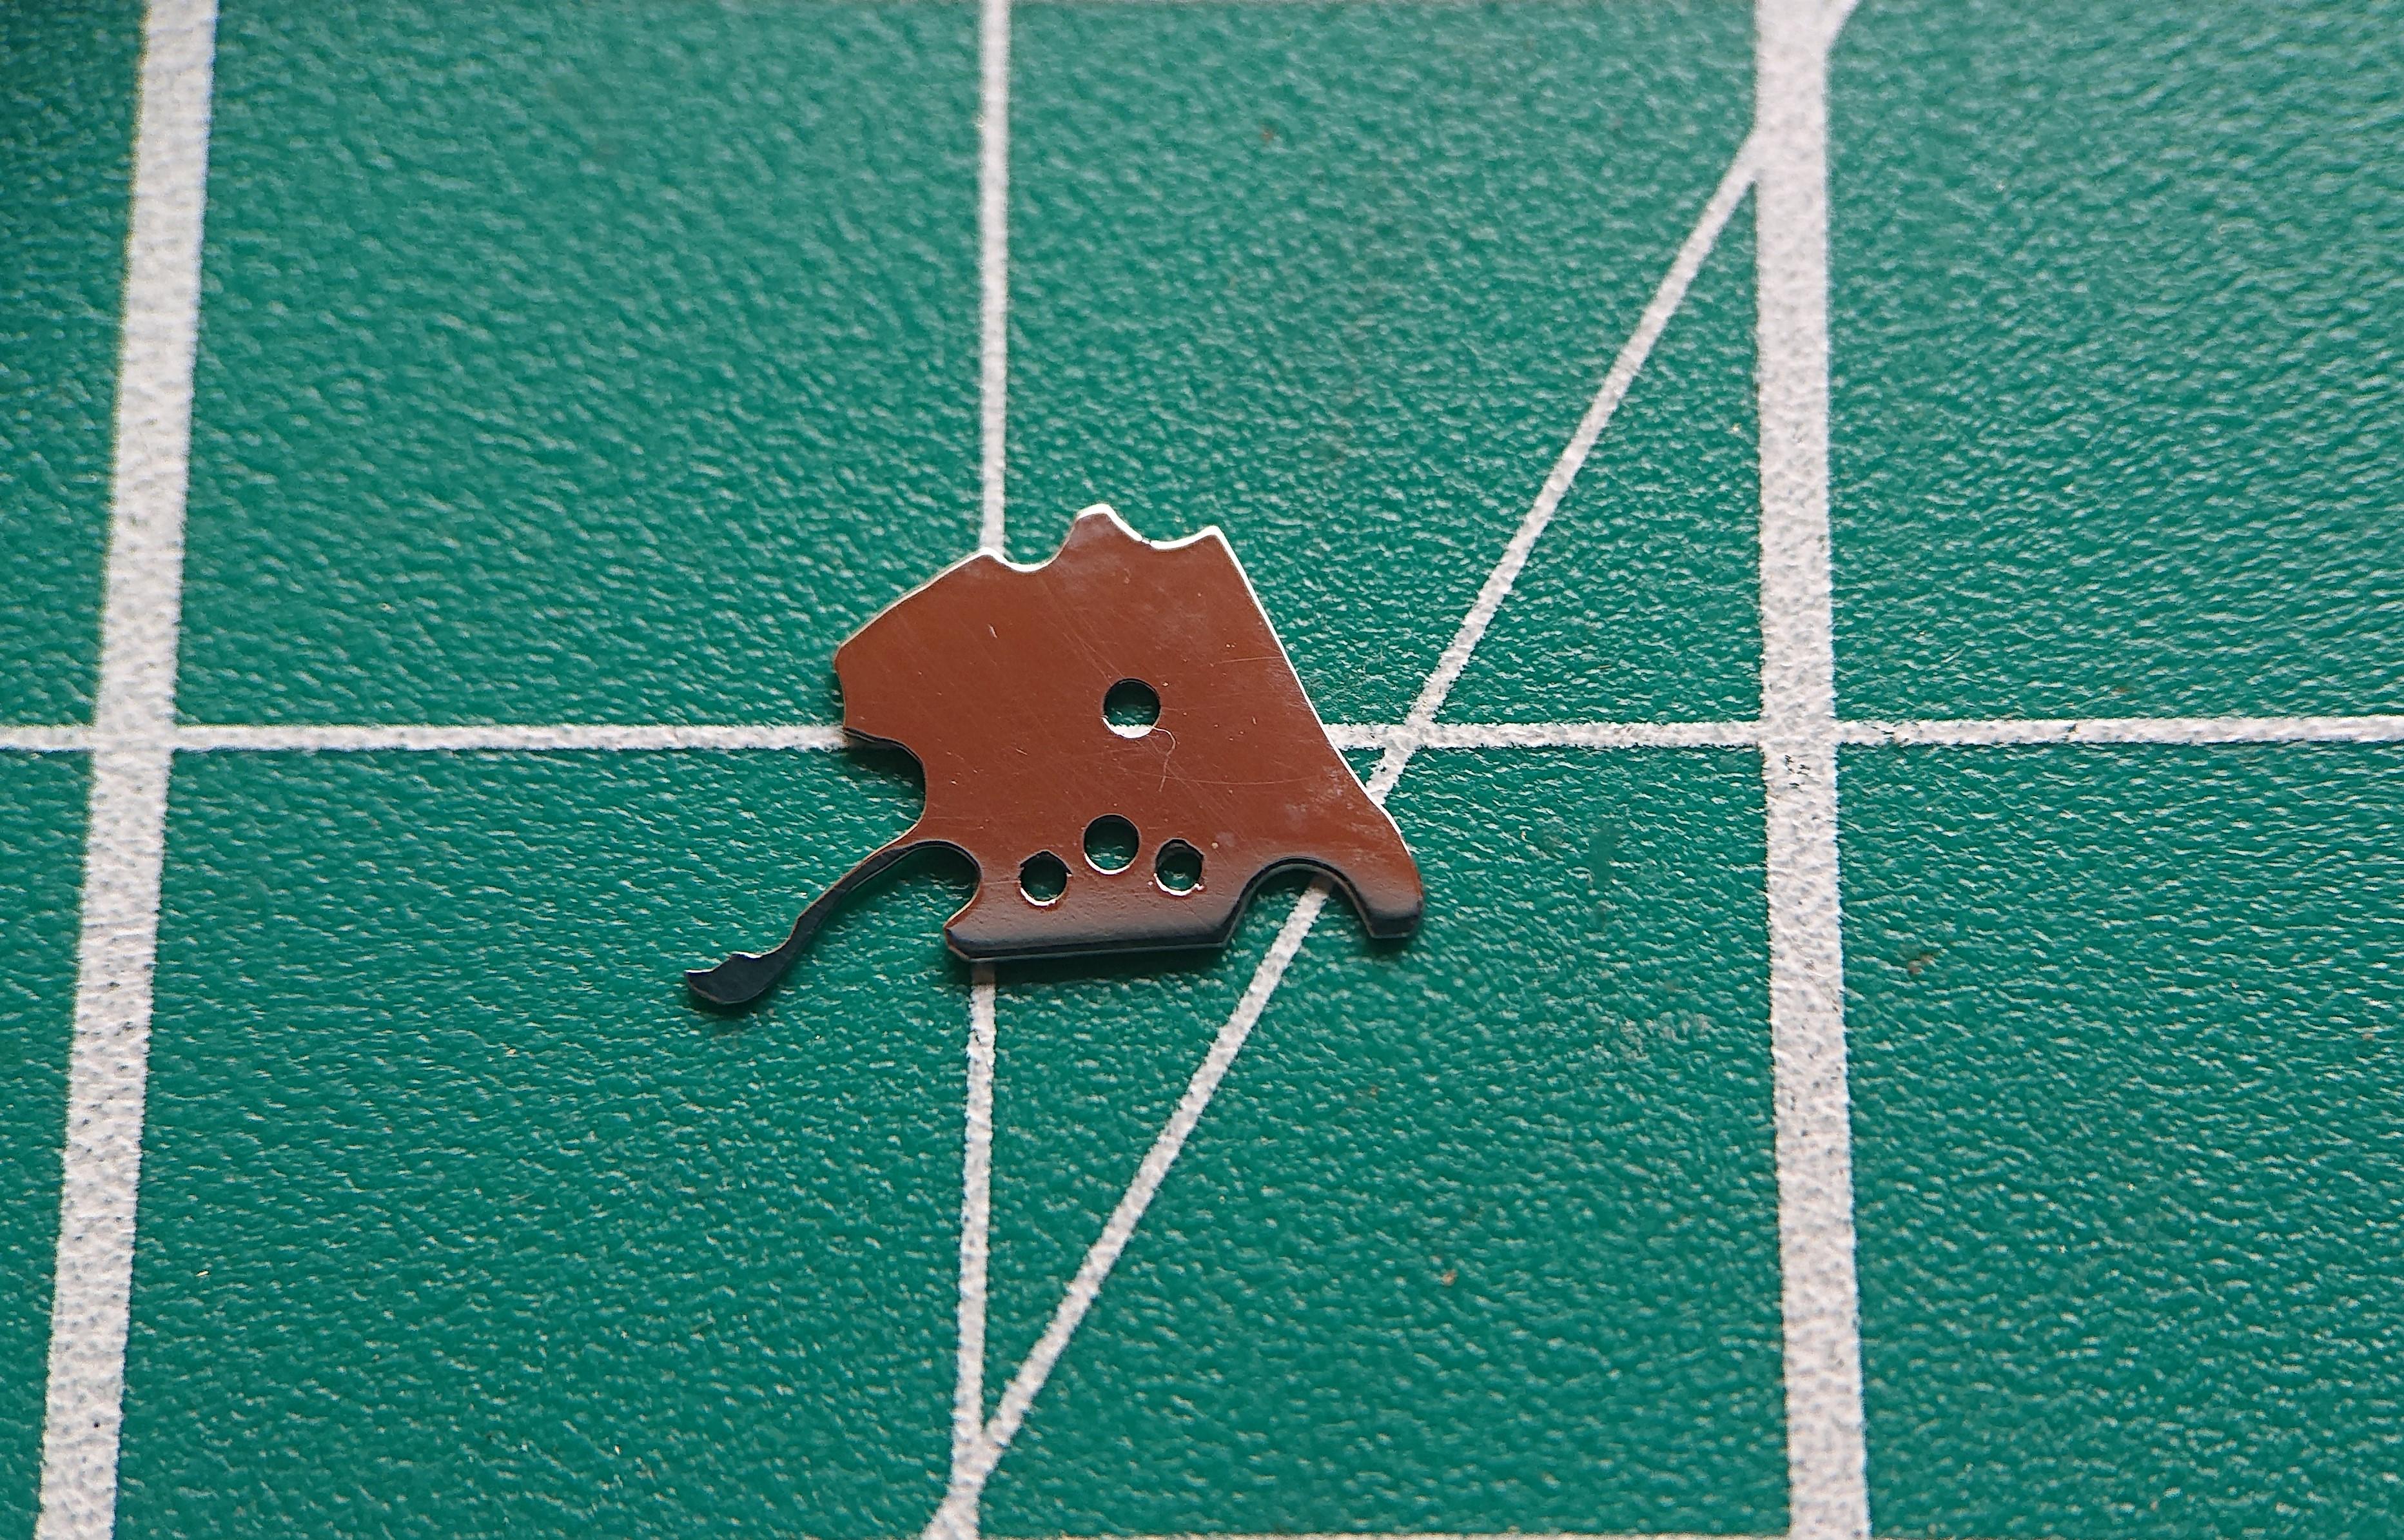
Thanks for the tips everyone. I went with the feeler gauge option as it was to hand. Rather than risking the temper I used a mini angle grinder (plus constant cooling) to cut a rough blank, then carbide drills and diamond files to drill and shape the part. I tried scribing the shape on to the part but eventually having scribed a copy as a template I glued it to the blank and worked on that: I changed the design of the detent spring slightly as the original obviously had a stress riser at its root. I couldn't match the exact shape of the detents but their positions are identical to the original. Time to check for functionality and fit: I bent the spring slightly (about 0.3mm at the tip) down towards the setting lever. It functions perfectly and feels smooth with a distinct click from one detent to the other, so I'll polish it ready to fit to the watch when it is cleaned: Thinking of stress riders I polished the cut edges of the spring with metal polish on the tip of a toothpick . It will be interesting to see if it lasts.

 1 point
.thumb.jpg.cb17a66989f1e796fd4217db2e9ca9df.jpg)
.jpg.764214994c20d13909676a28d5351a28.jpg)