Leaderboard


Popular Content
Showing content with the highest reputation on 03/22/24 in all areas
-
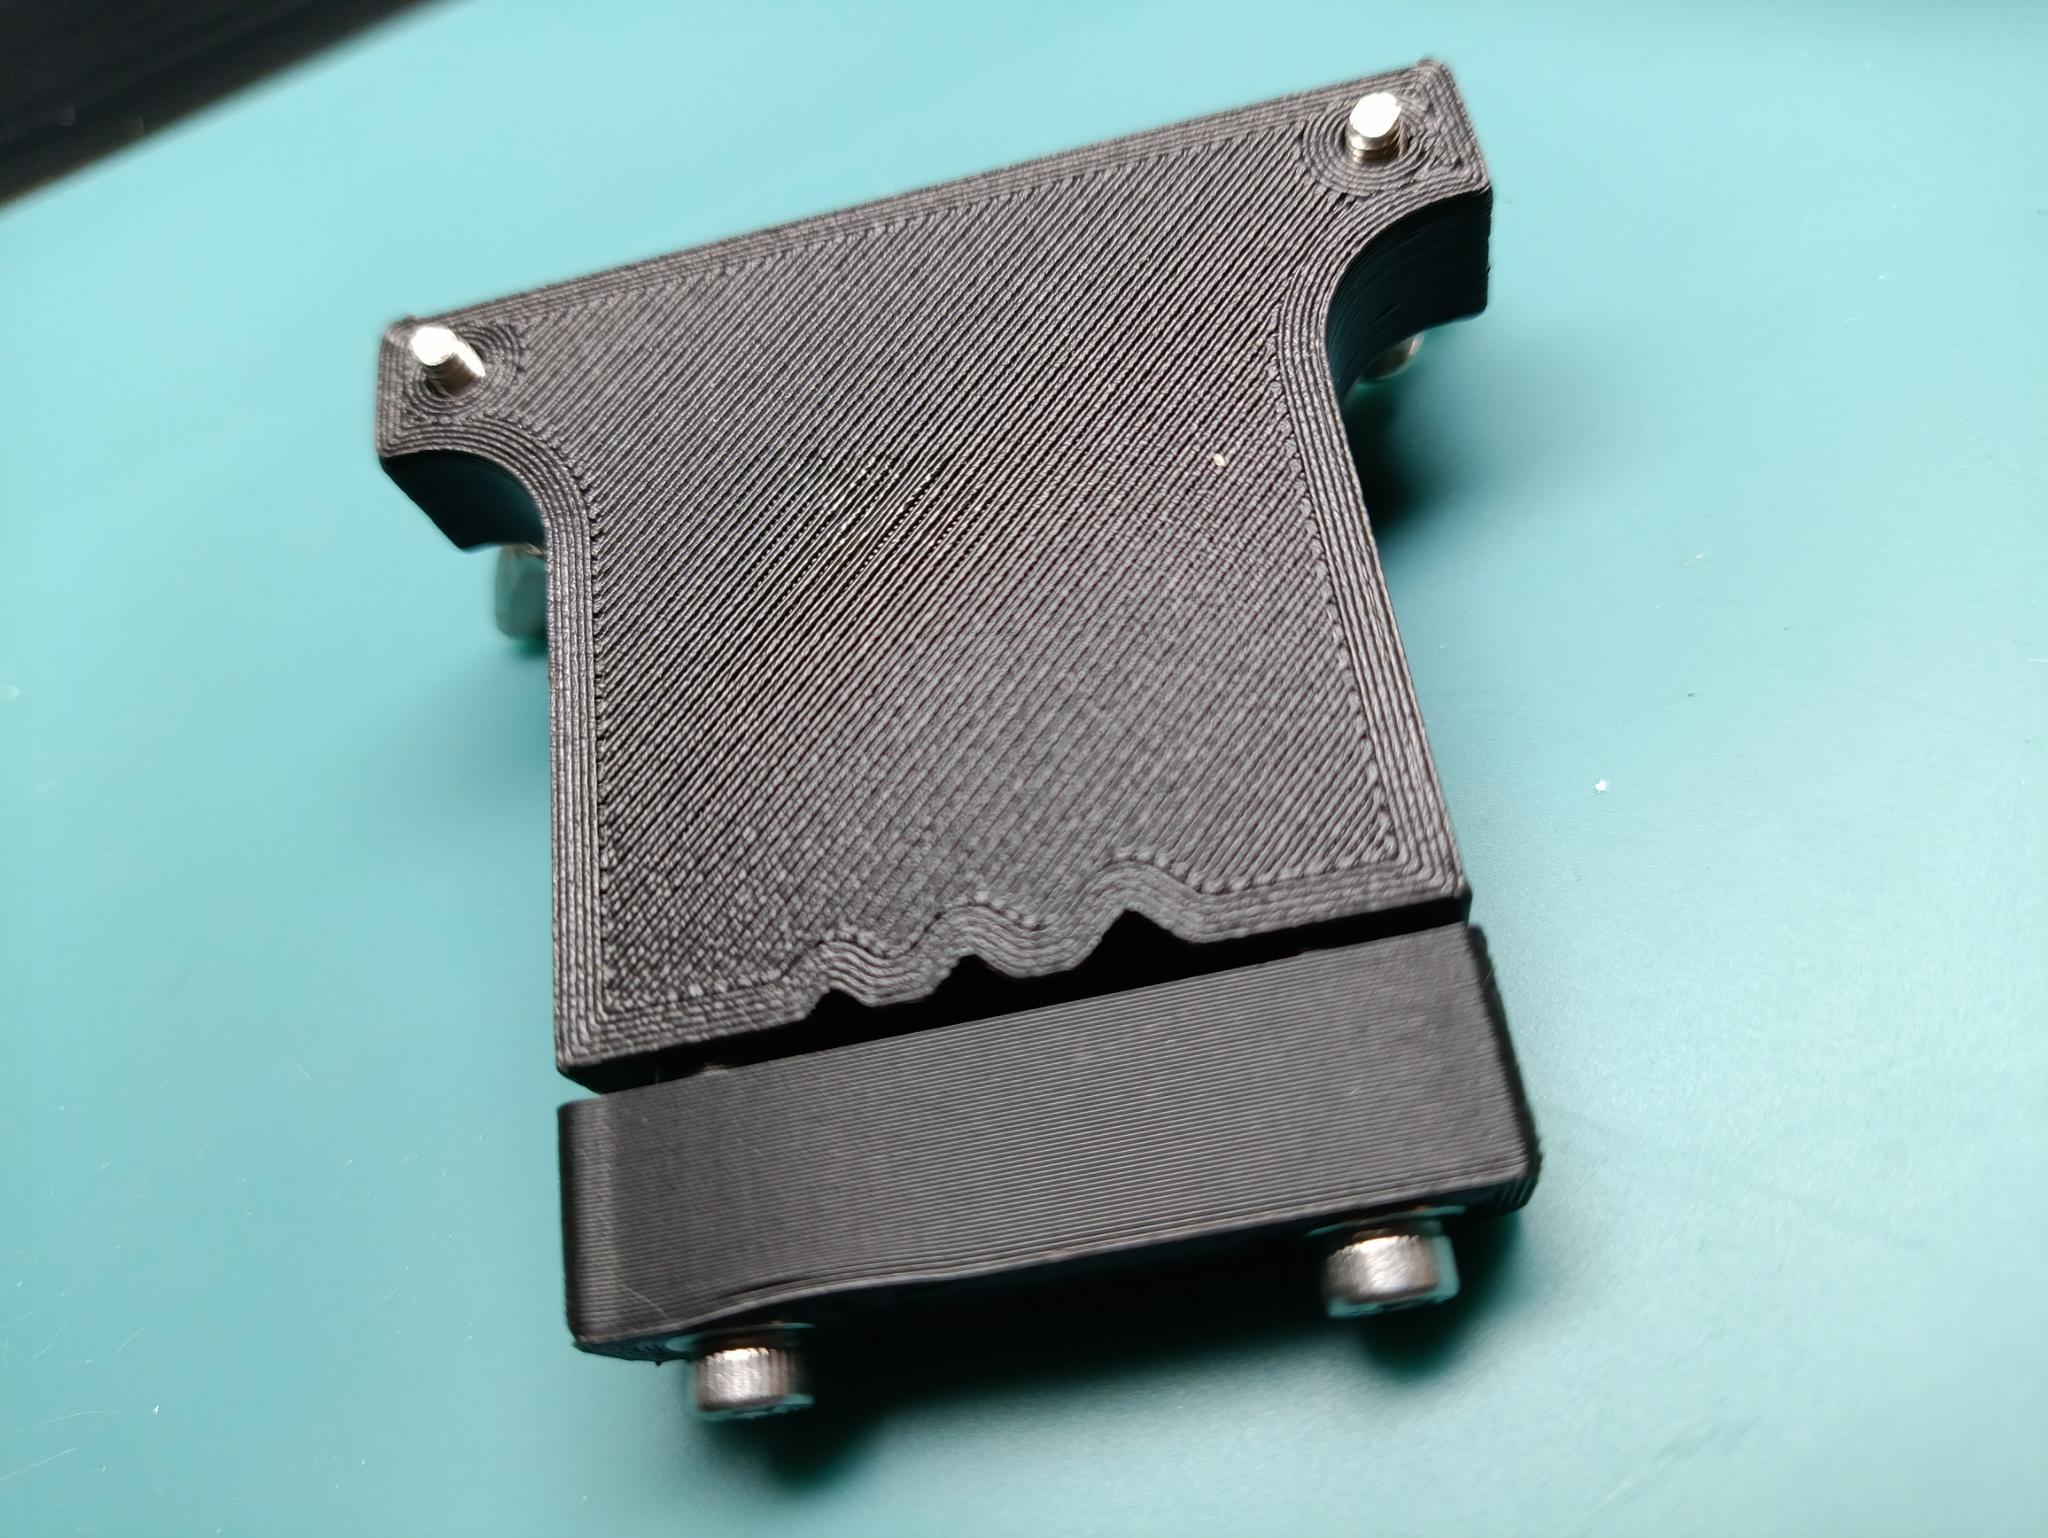
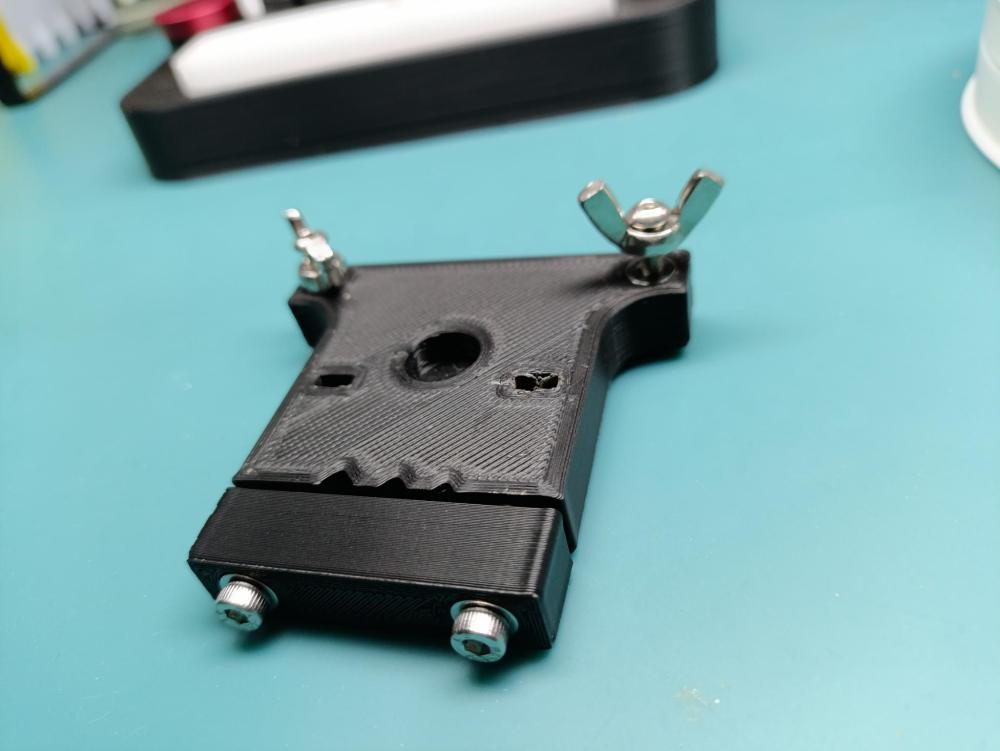
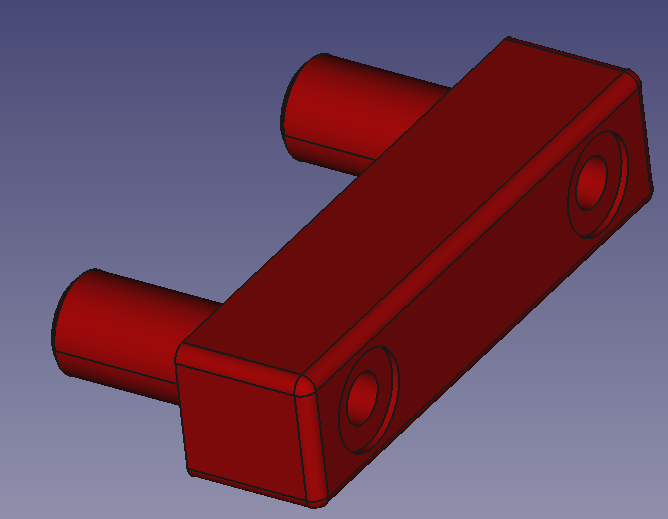
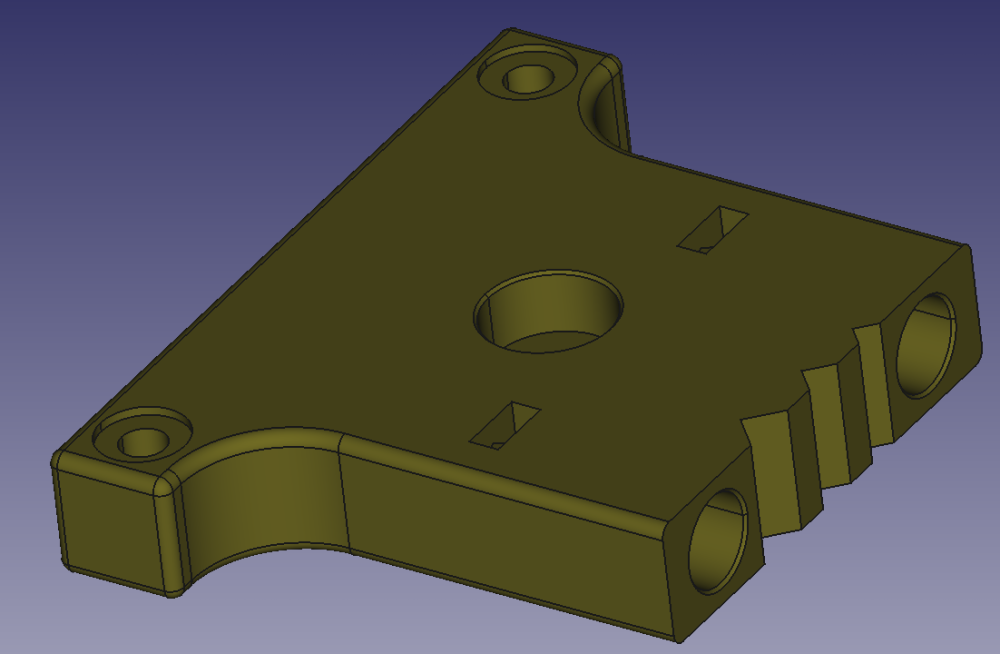
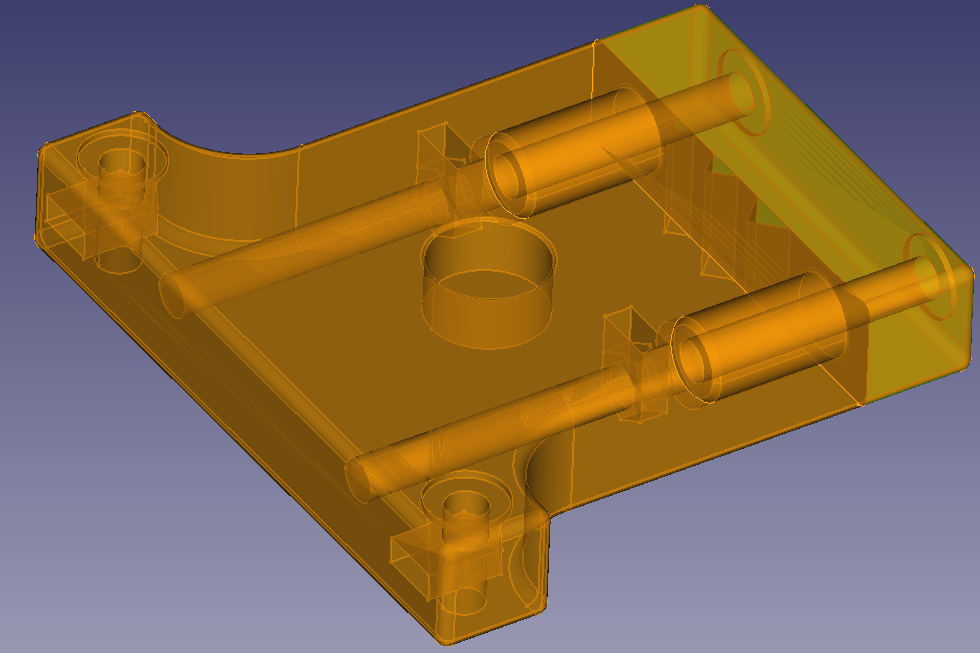
I recently watched a YouTube video (see below) on screw polishing and in the more information section there were instructions on how to build a screw polisher, I decided to make a 3D printed version of this tool based upon these instructions (pdf instructions of brass tool attached - credit or original author): Here is the version I created based upon the brass tool instructions and instruction from the video - I had to change some of the design aspects based upon the different requirements needed for 3D printing, but the essence of the design and key features are kept: Here is the top of the tool (prototype): Here is the underside: I have used M3 bolts throughout (see parts list below) and reinforced the areas under the bolt heads with a standard M3 washers, here is the FreeCAD view showing the complete assembly: Here is the "Bar" section: Here is the body "Frog", the slots in the top and back are to insert the 'trapped' M3 nuts (point down) Here is an x-ray view of the complete assembly: I used M3 wing nuts as locking nuts to prevent the bolts (legs?) backing off during use, I also included a cutout in the top to insert a bullseye level (10mm x 6mm) which hasn't arrived from Amazon yet, and so is absent from my pictures. Parts list: 2 x 40mm M3 Stainless Steel 304 Hex Socket Head Cap Screws Bolts 4 x M3 Stainless Steel 304 washers 1 x Mini Spirit Level Bullseye (10mm x 6mm) 2 x Wing Nuts M3 A2 Stainless Steel Butterfly DIN 315 4 x Hexagon flat nuts A2 Stainless Steel M3 2 x 30 mm Fully Threaded Allen Key Hex Socket Cap Screws Bolts M3 High Tensile I have uploaded the design to printibles (link here), but will include the file here also, I'll attach it as FrogV2.pdf so I can upload here, please download and replace .pdf with .zip to access. 3D printing settings: Material is PLA+, just what I had on the printer at the time, could also work with PETG etc. Fill is 75% gyroid, setting is high to ensure rigidity of the tool during use 1.6mm wall thickness, setting is high to reduce wear on faces which interact with metal parts. Here is the missing bullseye: Here is the link to the youtube: Enjoy! how-to-make-a-bolt-tool.pdf FrogV2.pdf


 3 points
 -
Doesn't sound like a loose canon pinion. A loose canon pinion results in loss of time but hand are still in sync. Loss in syncing of hands is usually caused by missing dial washer, loose pinion of minute wheel or hands touching each other or something.3 points
-
There are still a few old antique dealers that show up to the local shows around where I live who are stuck in the mindset of 20 years ago when the antique American watch market was much hotter than it is today. They know I like watches and I often have to politely decline their 7 jewel Walthams that don't run and are missing the bow etc for $250. I don't have the heart to tell them the value is closer to 0.3 points
-
if you scroll down the page far enough you'll see a reference to Wyler 17. Because of the age it's too early for the bestfit book and even another book I looked at the 50s didn't have it listed. https://uhrforum.de/threads/wyler-incassable-ca-1935-aussen-bauhaus-stilikone-innen-technisch-eigenwillig.383435/2 points
-
These movements were made on the French Swiss border and there are no I D for makers, date from 1850 to 1900.1 point
-
It's a five bar pocket watch, cylinder escapement, pin set. It may be impossible to find the maker. Measure the diameter of the movement and post photos of the keyless works. Unfortunately finding spares may be impossible too.1 point
-
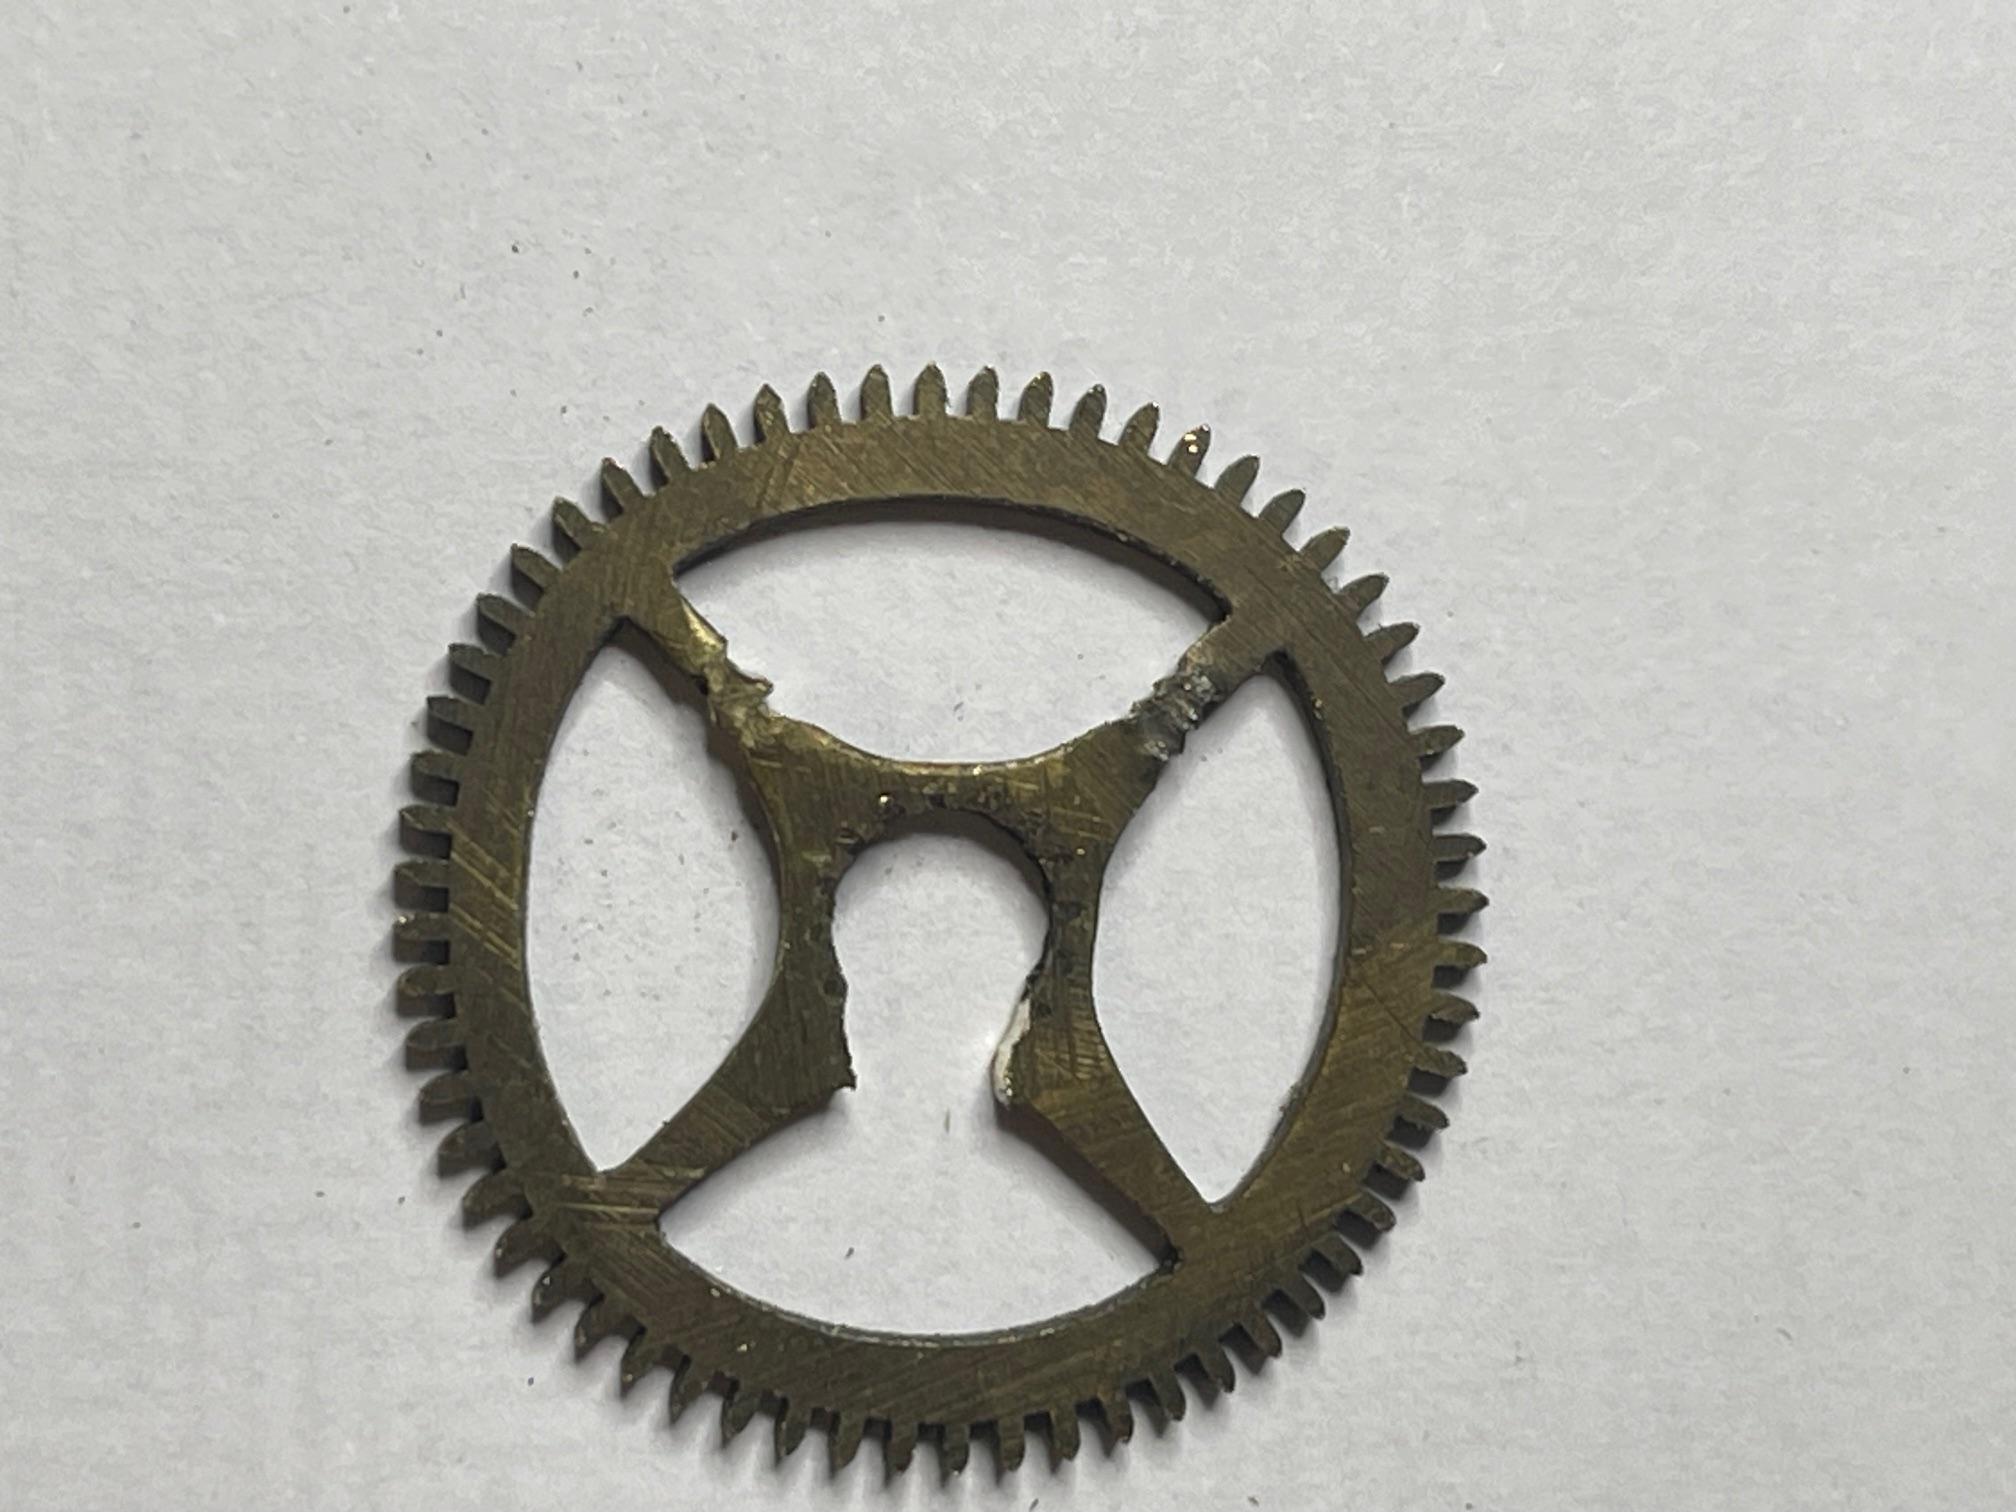
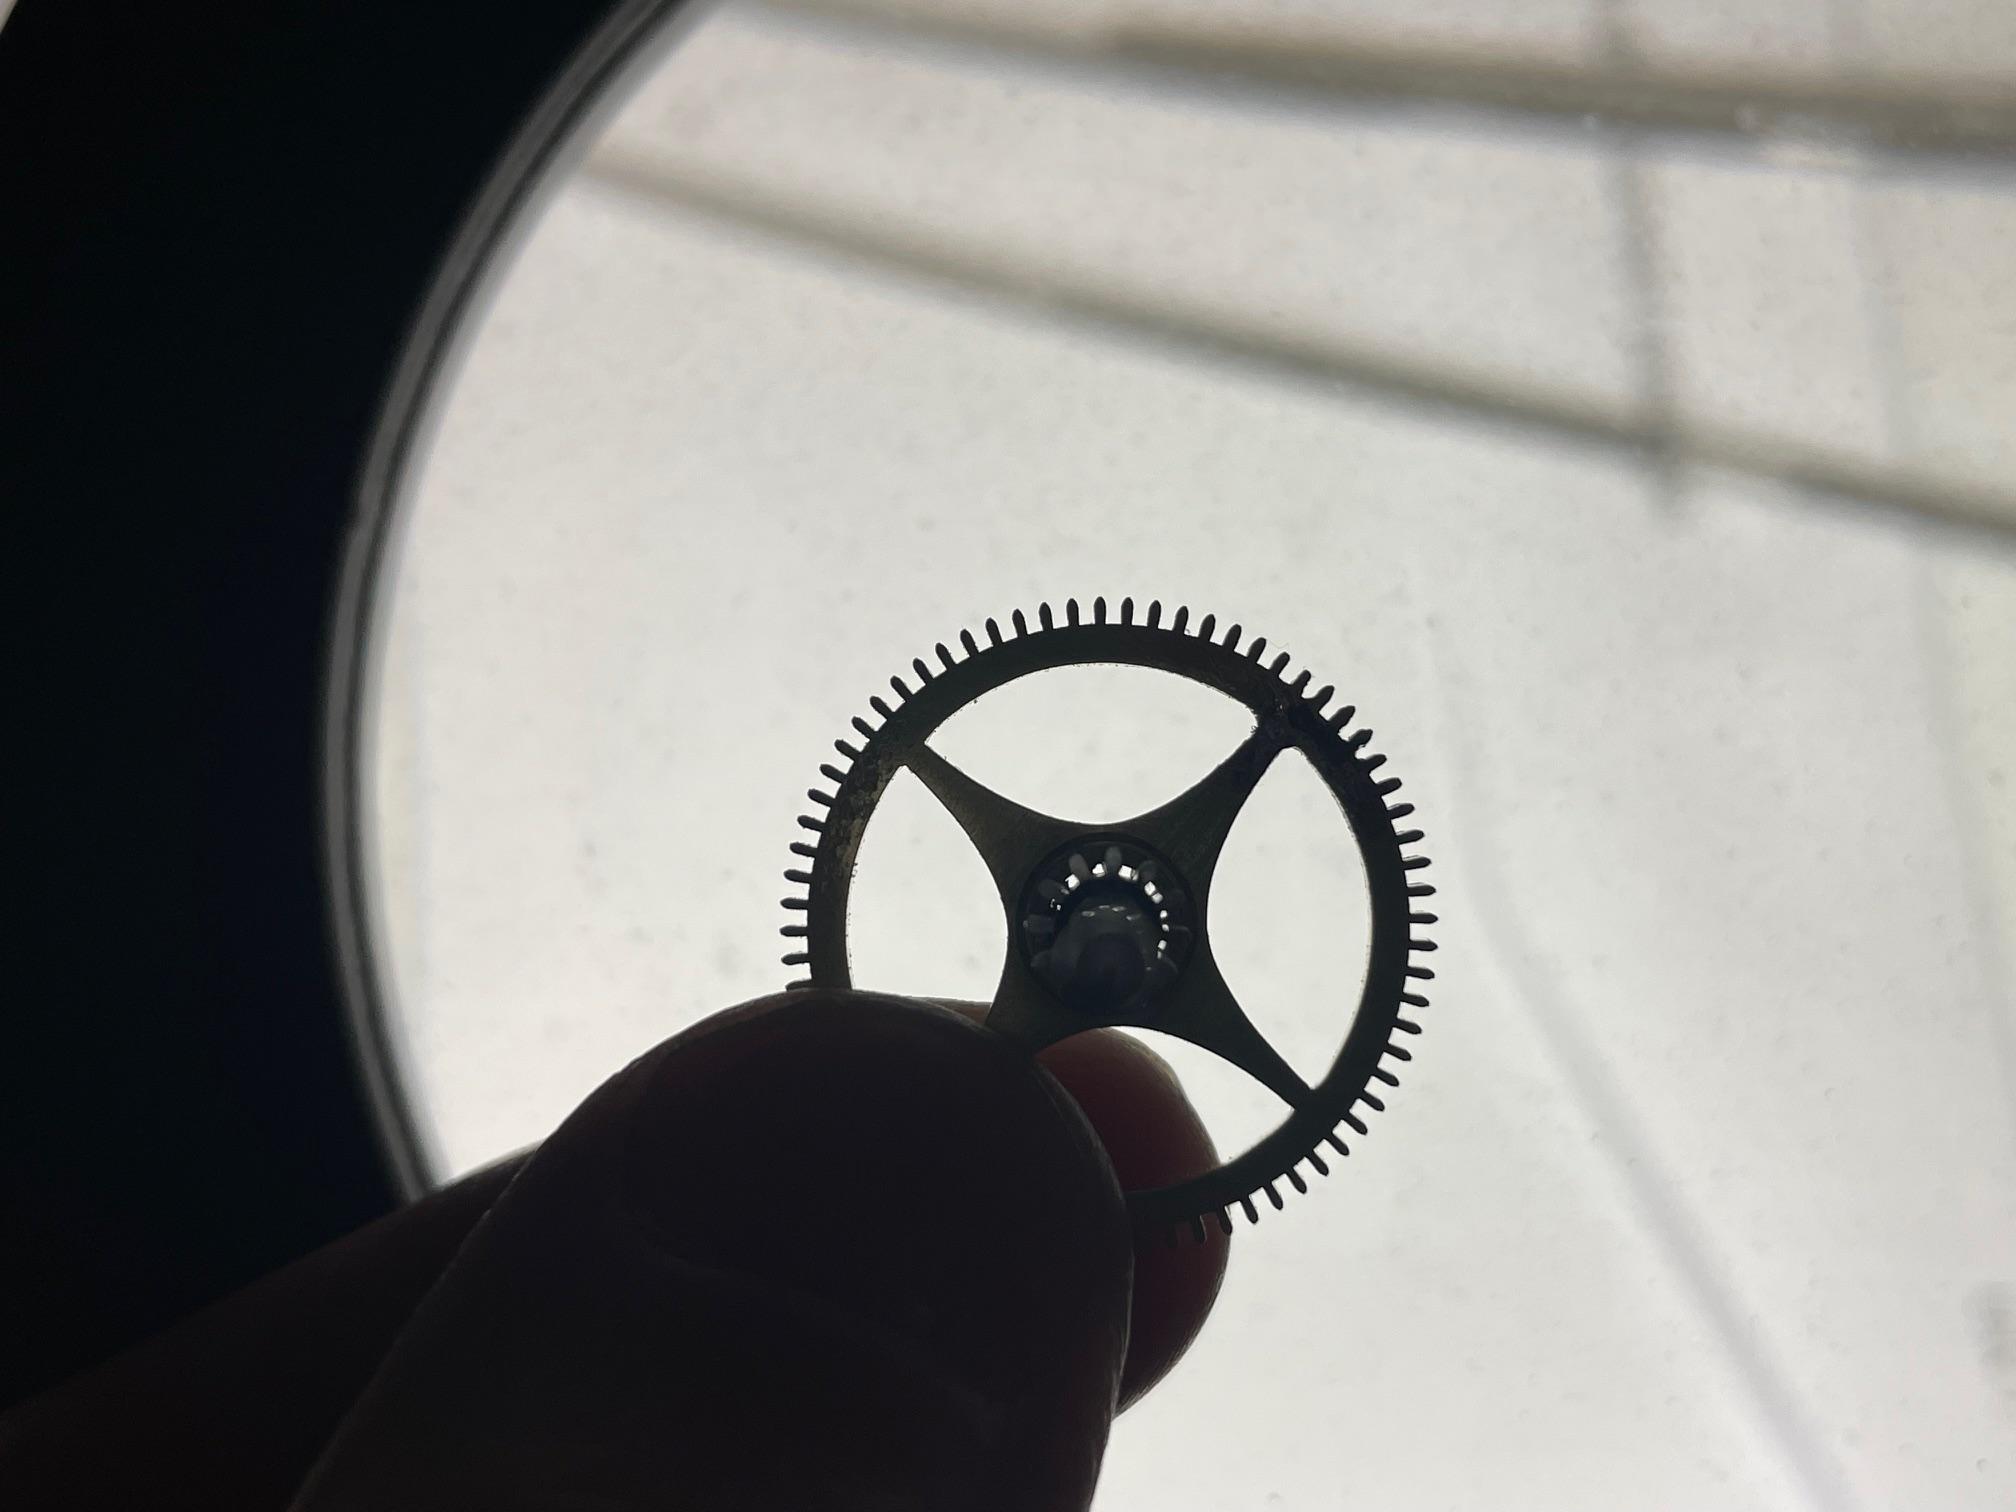
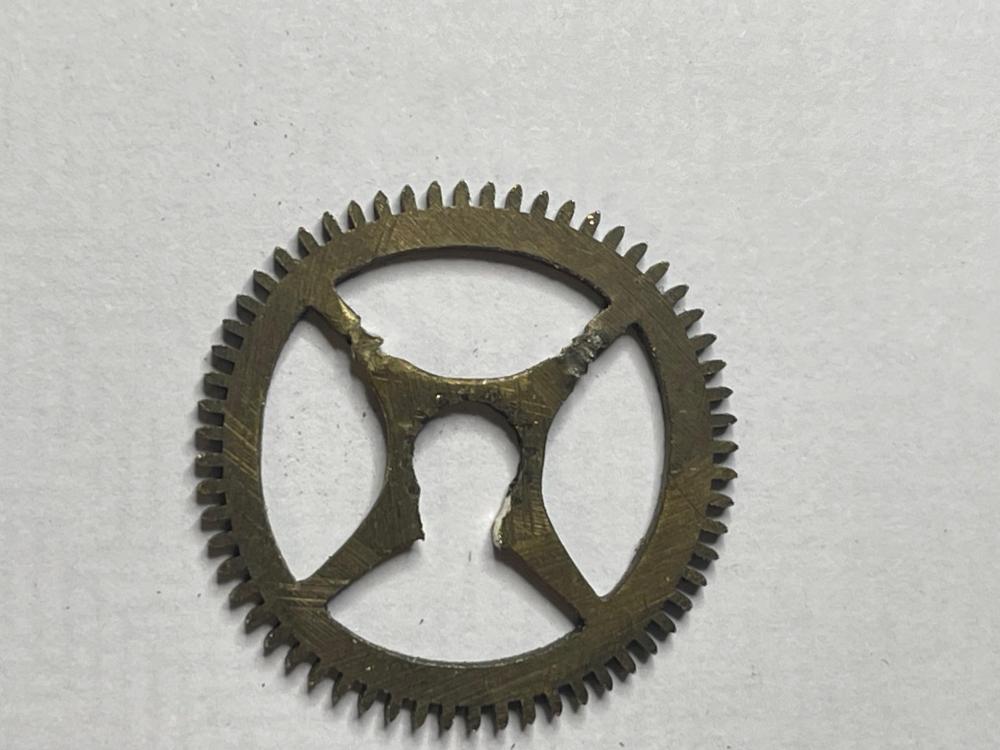
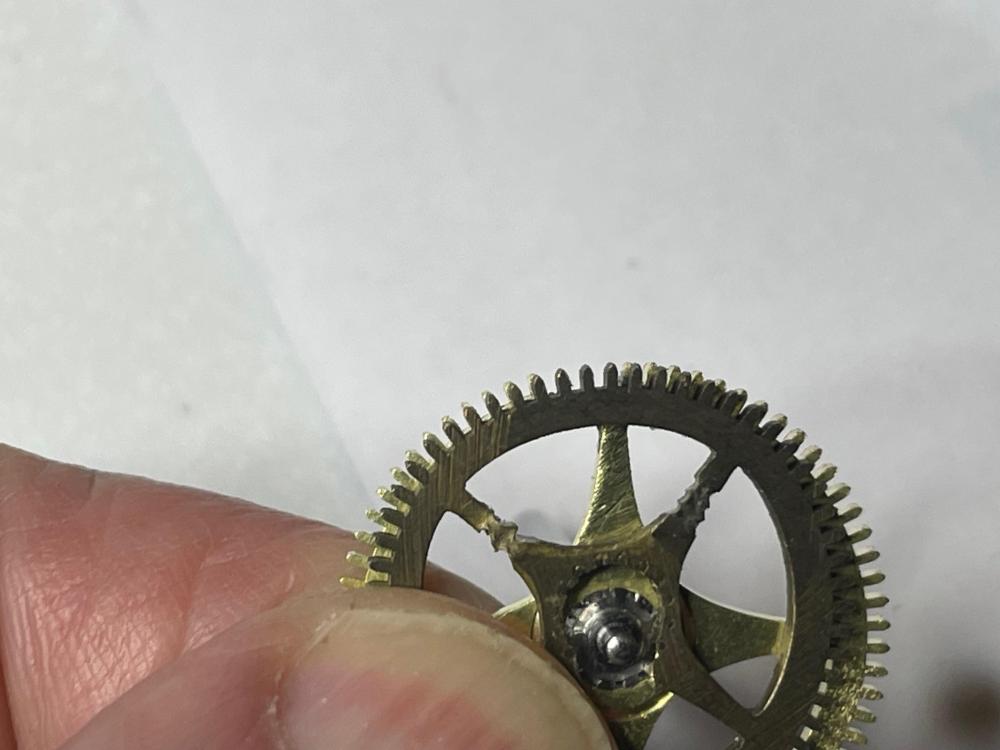
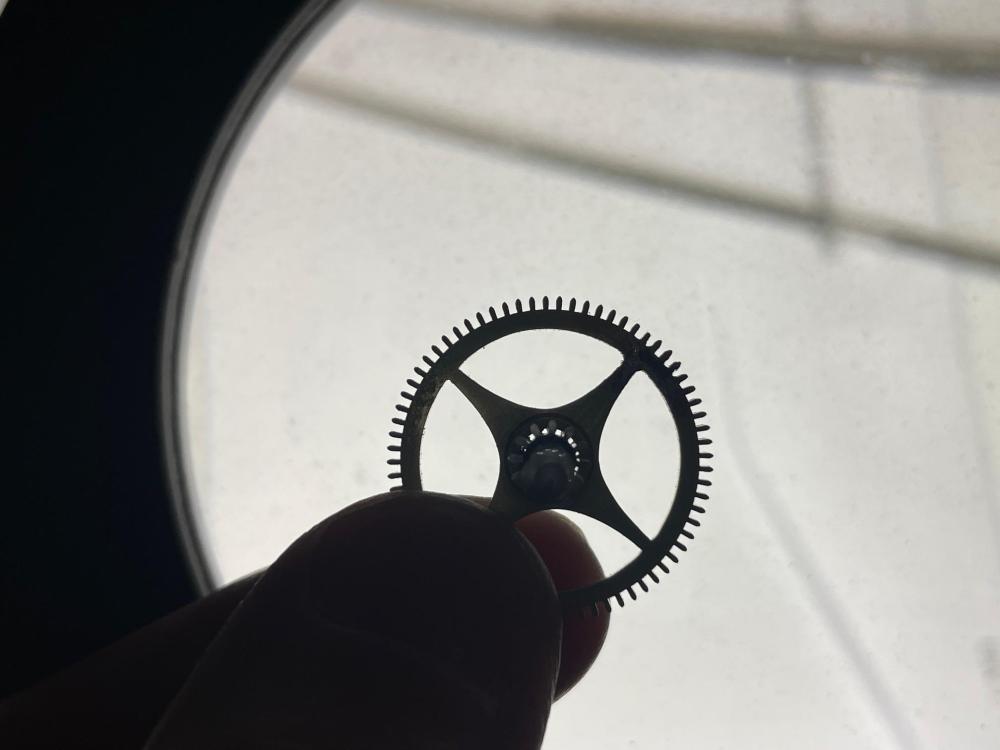
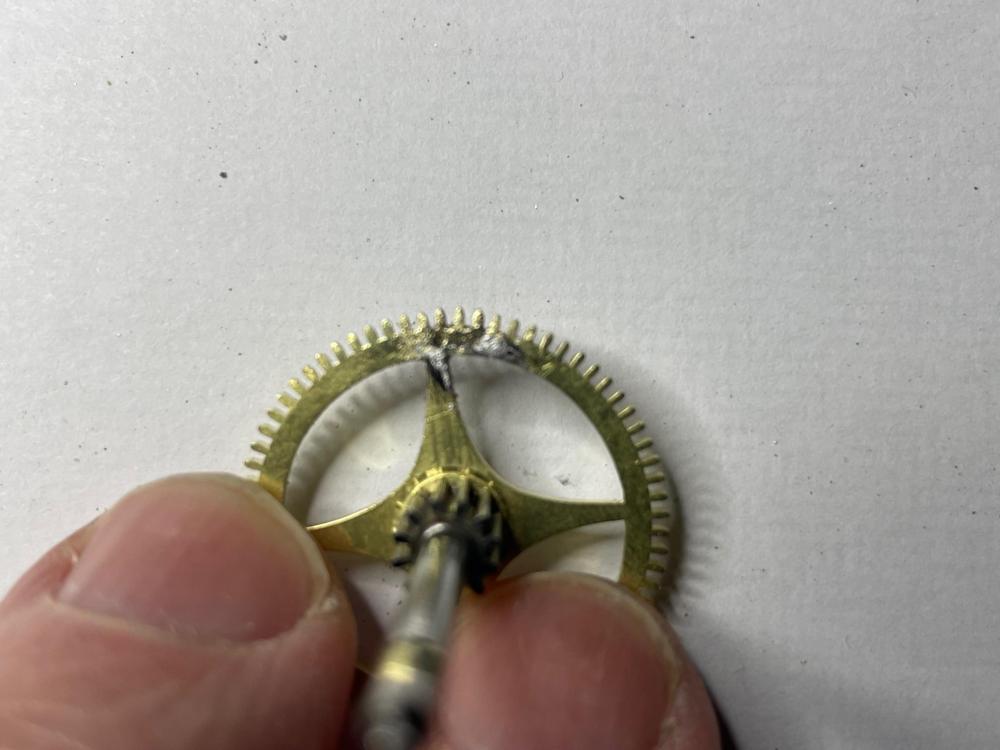
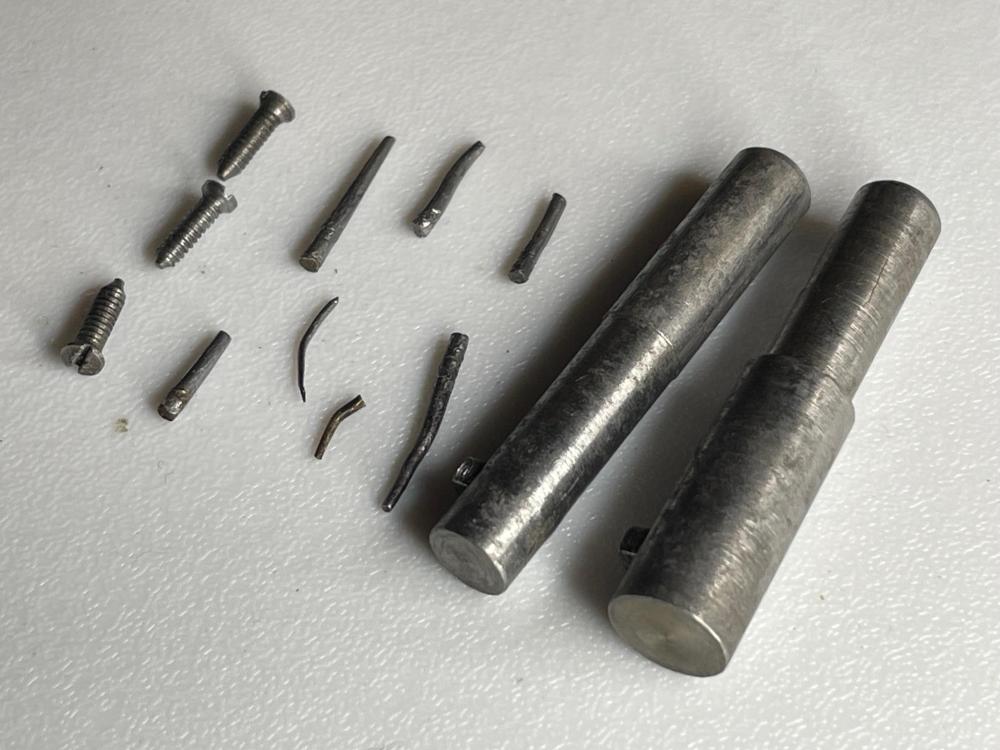
Ok, I've found a wheel in the box of junk that has the same pitch but slightly smaller, as a donor for some teeth. I stretched a section of it by pinching two of the spokes until the radius matched the damaged wheel, then cut a piece out and did a lot of filing. It's in, it looks OK, but I do not trust it to be long term reliable in that particular wheel, as it effectively gets a hammer blow through the gear train every time the strike mechanism stop arm drops in to the pinned wheel & locks it up dead. I'm going to add a strip on the side to reinforce it.. Not pretty, but soft solder is removable if a better repair is ever done and no one is going to see it for hopefully several years - then possibly just me.. "Stretched" donor wheel: Very close to the same curvature: Spot the insert! The solder is actually flat, the lumpy appearance is a camera effect.
 1 point
 -
one of the confusions for people new to watch repair is what are they working on? Yes you have a description up above but that is not helpful as we need to know who actually made the watch itself. In other words companies purchase movements and put their names on them so we need a picture of the watch movement itself from the backside to identify the watch.1 point
-
Hi there are lots of Yorkshire men on here but we don’t all live there. I lived in Leeds some time ago. Welcome to the forum. You have dangled the maggot Richard jus wait for it catch1 point
-
Hello and welcome from Leeds.1 point
-
I've been told to use the lowest part of a cigarette lighter flame. Works fine with me and no discoloration of parts.1 point
-
I wouldn't think that temperature would damage anything but I'm not 100 per cent sure. Put it in the oven.1 point
-
12:36 then 10:40 ratios, looking at the photo. /3 the /4, so correct 12:1 reduction.. It must be something slipping or skipping due to allignment?1 point
-
Actually this is a matter of repivoting. This is the easiest, the fastest and may be the only way to make the watch work again. Well, the other way is making new pinion, but it is much harder.1 point
-
Digging a bit deeper, there is, not surprisingly, a whole "glass grinding" world out there.1 point
-
Any faulty gear or locating pin, in entire minute train, might let gear teeth miss adjacent pinion.1 point
-
Oh shoot, I hadn't understood OP's descriptions OK minutes hand looses 15 minutes every twelve hours and the loss accumulates. The two adjacent gears shown above must either not belong to same caliber ( need a vulenteer to do some calculation because I am lazy ) or a few gear teeth miss pinion leaves which must have gone unnoticed, a vid in slo mo shows this kinda stuff. Loose revit of pinion on gear wont by itself explain the accumulation of those 15 minutes , but I check the revit for looseness anyway, it can facilitate gear teeth to miss pinion leaves.1 point
-
Hi. Have you checked the hand it’s self for tightness or the canon pinion friction. Fit the hands and with a fine artists brush gently check the friction.1 point
-
How can this be I see the difference without . Cutting a long pivot is easier said than done, not to mention the need to polish the pivot end. You might get by with just shimming the cock. Rgds1 point
-
Hi Richard if the edges of the cut are filed back to form a dove tail the the new piece cut and filed to the same shape and pressed on fron the side then soldered it will work ok and can be finished cleanly. By fitting an additional piece on the side would look unsightly and not look very professional, not only that the additional piece would have to be cut and filed to shape additional work.1 point
-
one of the minor problems with balance staffs quite common with American pocket watches is pivots sizes can be different it's usually in the specification of the balance staff. American pocket watch staffs get a complicated enough that one part number like for a particular Elgin watch could refer to 12 different staffs all uniquely different. Basically I think there's three or four groups of whether it's a new style or old-style and then all the rest of the variations are pivots size. Then of course you did you check the jewels to make sure they're not cracked often times they get cracked or shattered when the staff breaks. The other thing that sometimes happens our staffs are deliberately made oversize and the watchmaker is supposed to fit the staff to the watch. In other words your pivots could be too long and you might have to reduce them slightly. A lot of this depends upon when the watch was made of is a much newer watch the staff should fit perfectly but a vintage may require some fitting of the staff. Then hairspring rubbing is quite common especially when you're learning watch repair and it's amazing what that can do to keeping a watch from running can lose all your amplitude right there. Which is why one of the things you do what restaffing a watch is before even put the hairspring on his put the balance wheel in without the roller table and see how it fits see if it spins as now it's a perfect time to make adjustments. in other words it's usually best to go one step at a time rather than all or nothing and then wonder what the problem is.1 point
-
Only if roller table isn't and can't be otherwise leveled with escape teeth, and you can't move settings. Inadequate end shake might at worst reduce amplitude. Zero end shake would stop the balance dead. In general this indicates faulty jewels or short or faulty pivot on cock side, exclude short pivot in your case, as it doesn't seem to be a problem here. How to fix, Shim the cock, whilst other engagement in escapement are good. Good luck.1 point
-
Perhaps this was the video you were referring to? BTW; in the link you provided they recommend wet sandpaper at all times. Your wife's machine, like mine, doesn't seem suitable for wet sanding. Does she uses water or just dry grinding?1 point
-
I've got a few of those Bulova parts drawers too, but mine are all full of parts The dividers in the photo are not great. I ordered 10 of them (at around $3/each delivered) from Aliexpress as a trial as I would need around 35 of them. They are difficult to adjust to the correct length due to how they are designed. Each increment is too large such that if you extend them to the point where they are slightly too large and won't lock but then back off one increment, they are then too loose. I ended up 3D printing some shims to get them to fit somewhat snugly. My next attempt worked out much better. They are sturdier and are easy to adjust to the correct length. I got them from Amazon and they worked out to about $4/each. I still need more space for my tools and miscellaneous parts. I have stuff just sitting on the floor as I am 100% out of storage space in my room. I ordered the 7 shelf version of this yesterday to help with parts storage and make more room on my work bench as it is currently cluttered with tools. It's only 12" deep but I think/hope it will help create some much needed room.
 1 point
 -
Re. rust removal: I'm using a formula created by one of the science channels on youtube (Elementalmaker). It's cheap, not acidic and works in a similar way to evaporust, but seems milder. It has worked well on everything I've tried it with so far, with no detrimental effects. The formula is: Per 100ml deionised water; 5g Tetrasodium EDTA [from amazon or ebay etc] then enough citric acid to bring it to ~6.5ph, testing with ph paper, plus a few drops of washing up liquid / dish soap. I've only made one, 100ml batch so far and it shows no signs of stopping working, though it is starting to look a bit murky! These spring winding arbours were the worst rusted items I've put in it - they had quite heavy scaled rust patches; you can see the darker grey areas where the rust ate in to the metal, compared to the untouched areas. The small clock parts are unaffected by the solution, other than the rust having gone. (I've also used it on such as setting levers & other keyless components, that had quite significant rust from water ingress).
 1 point
 -
That conductive paint just does not look good. it looks like separate particles rather than a solid conductor. The better types are silver based, but even those are not guaranteed to work if the conductors they join to are not immaculately clean & the stuff applied perfectly. Do you know anyone who works on electronics professionally? They should be able to bridge the broken track sections with bits of fine wire soldered in place.1 point
-
"For evil to flourish, it only requires good men to do nothing".1 point
-
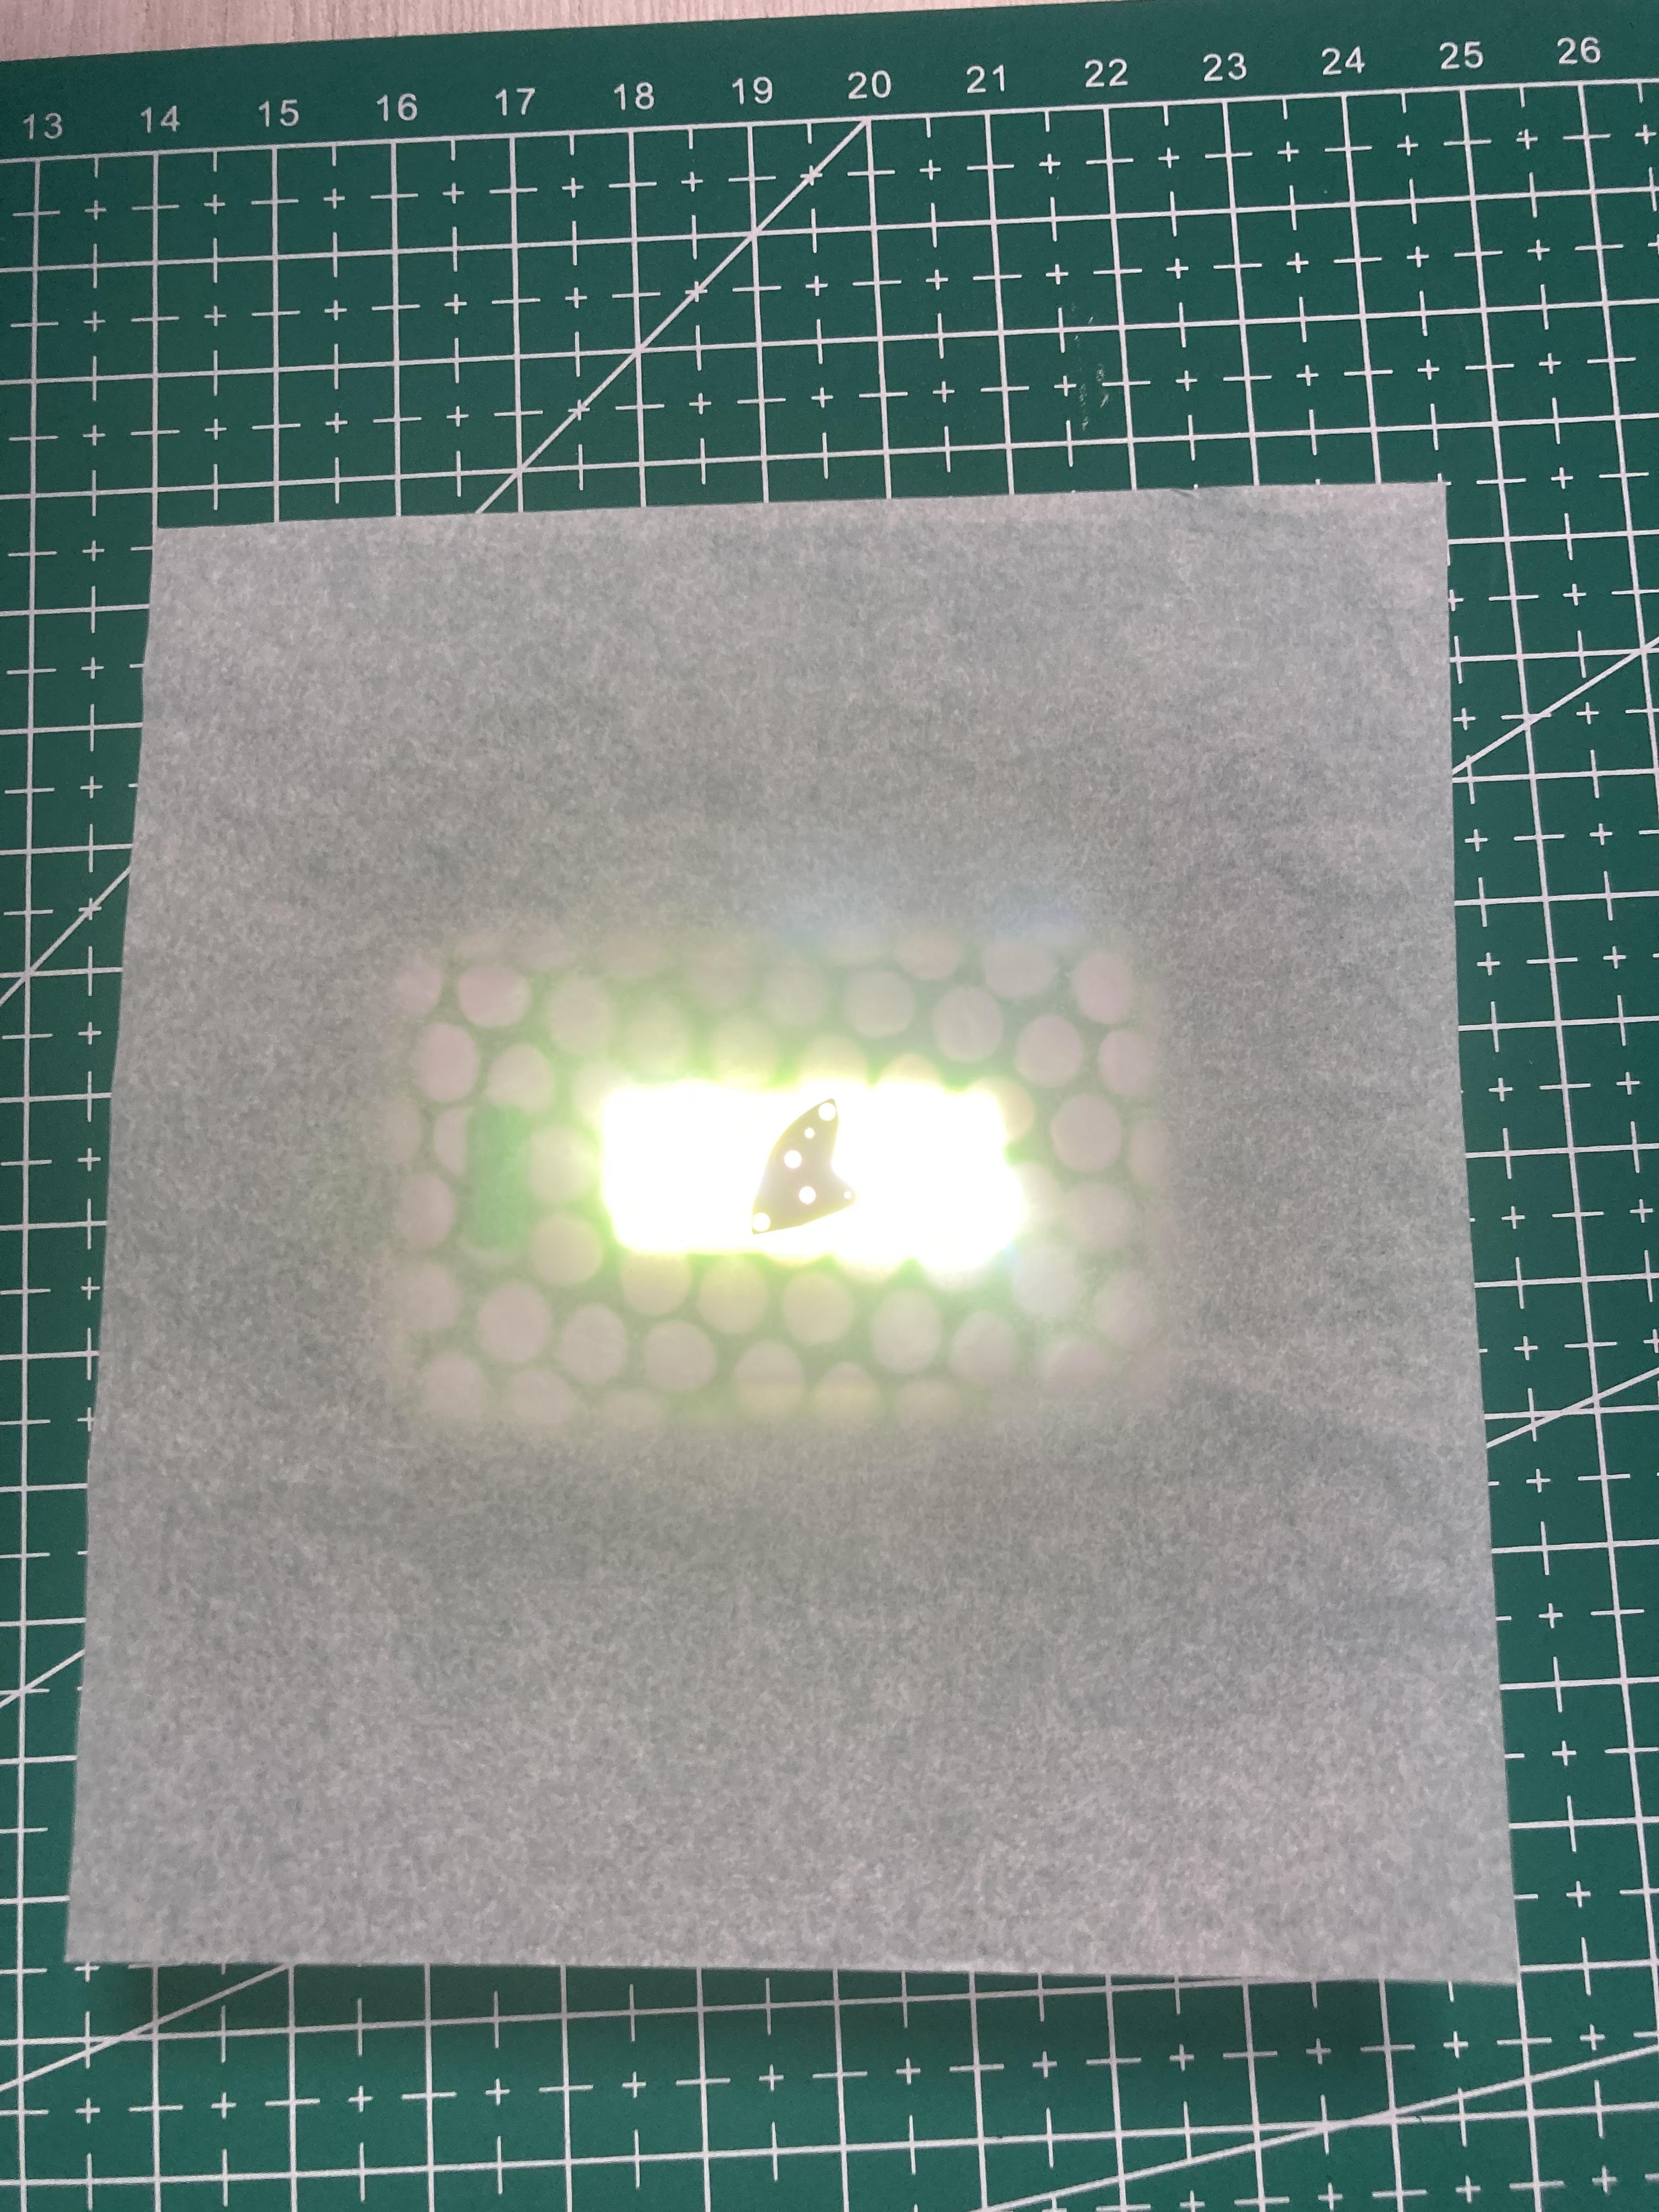
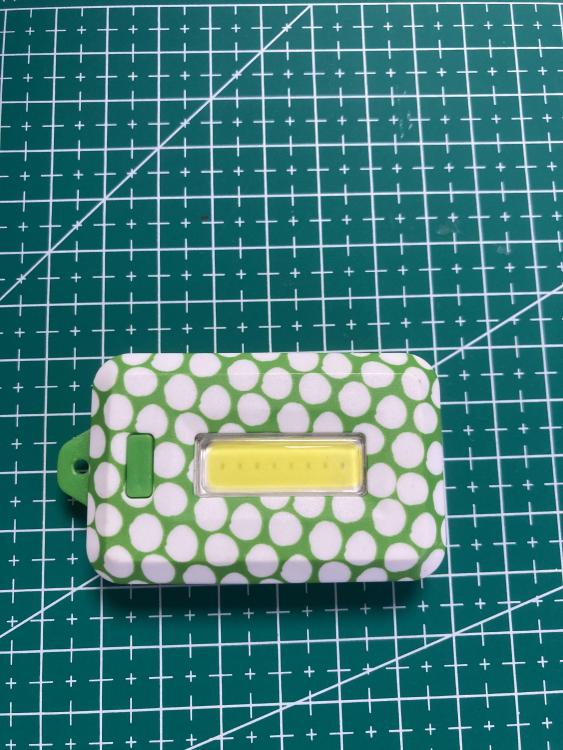
I use a little LED keychain light I bought in a discount store. Piece of paper and I have a backlit base for examining parts under the microscope
 1 point