Leaderboard


Popular Content
Showing content with the highest reputation on 03/20/24 in all areas
-
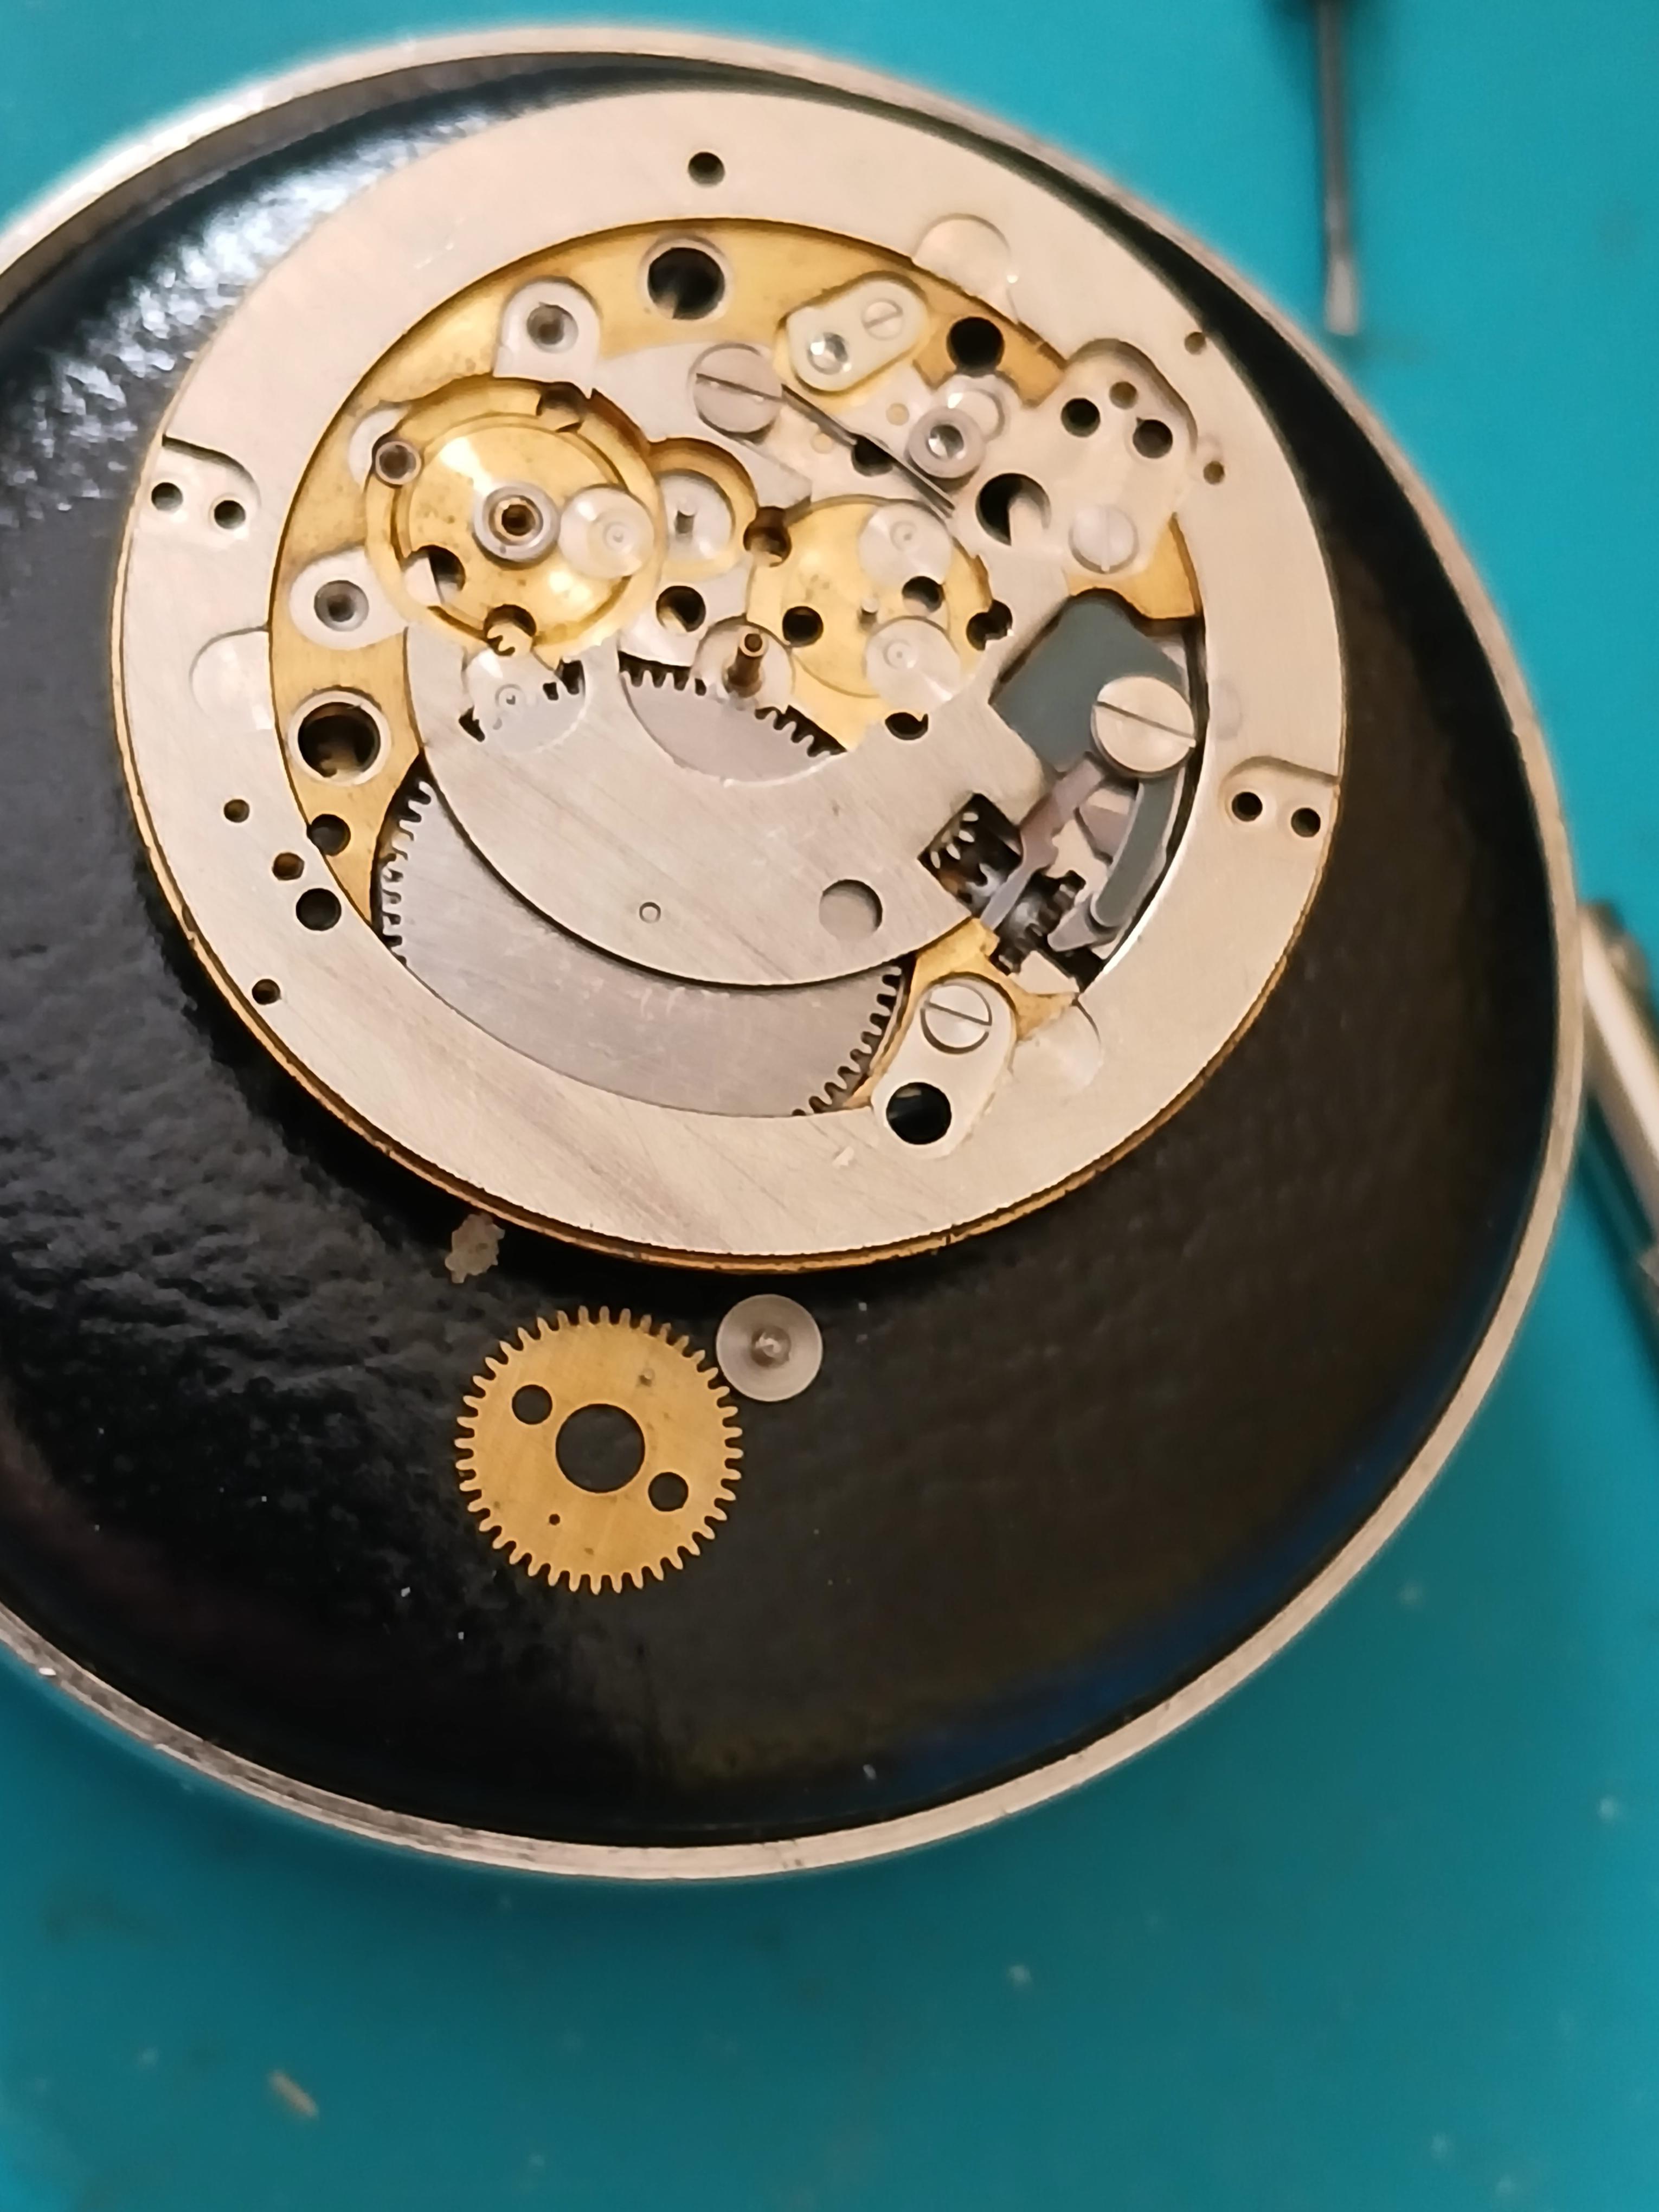
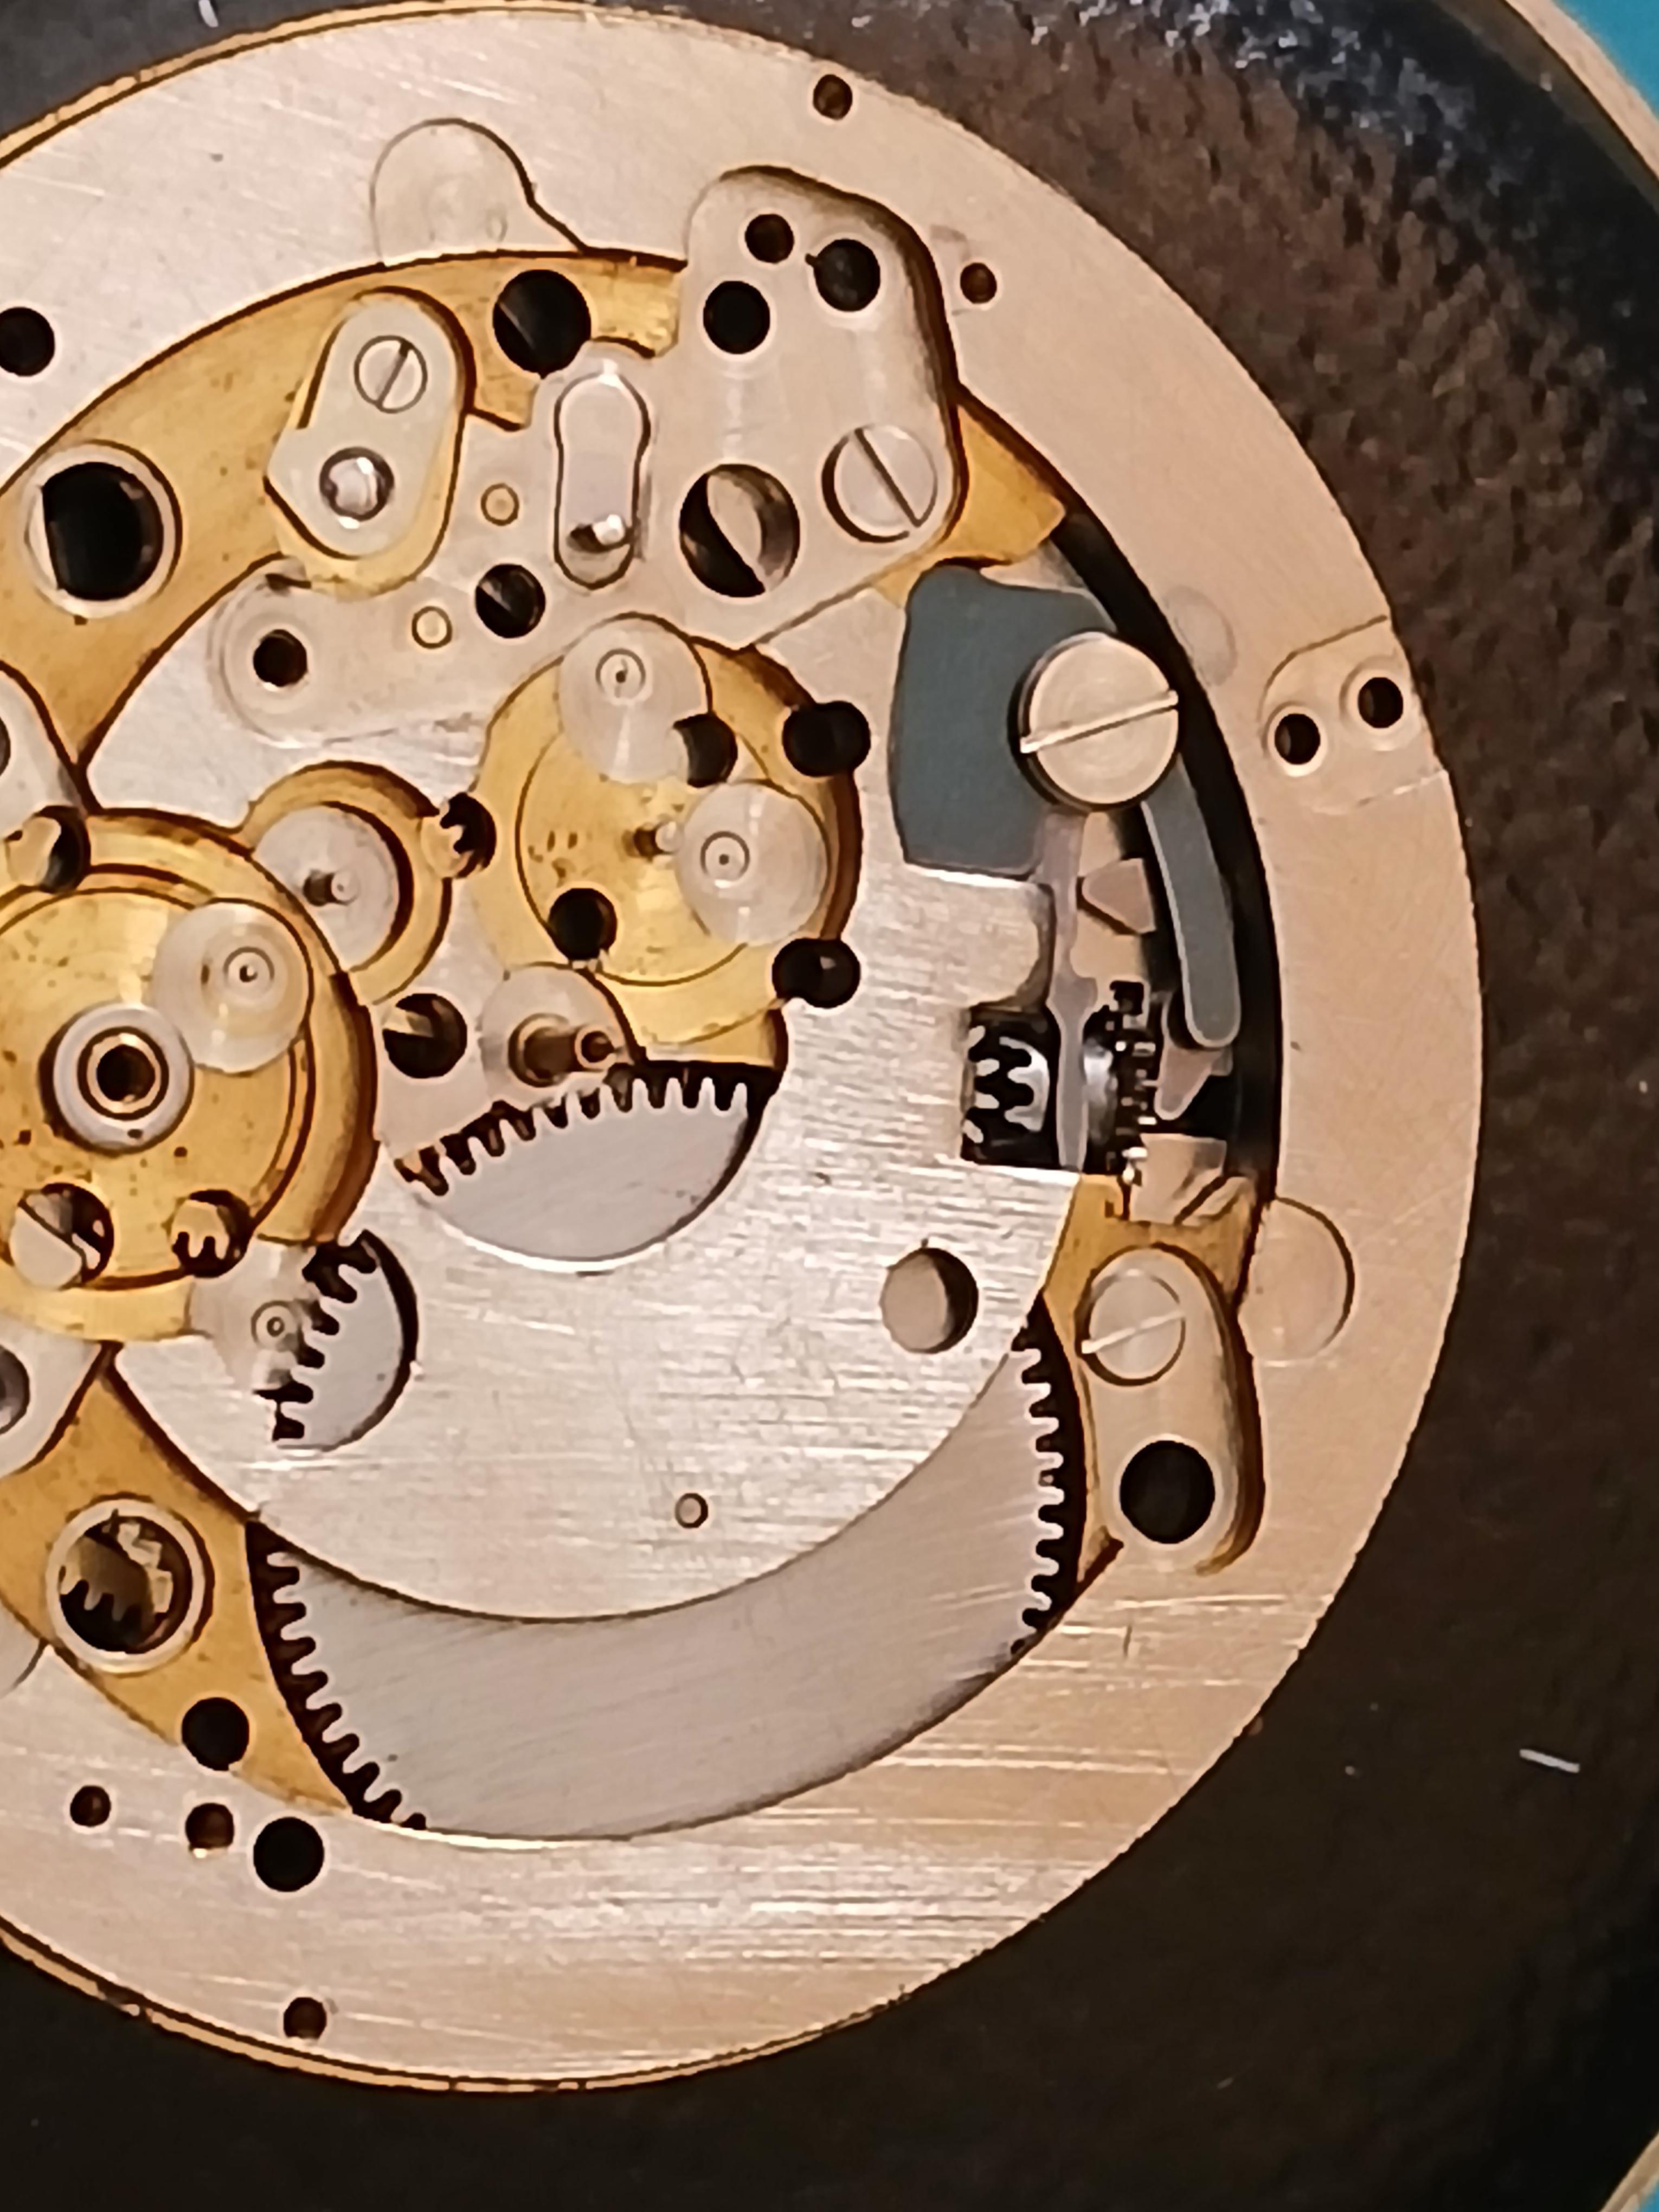
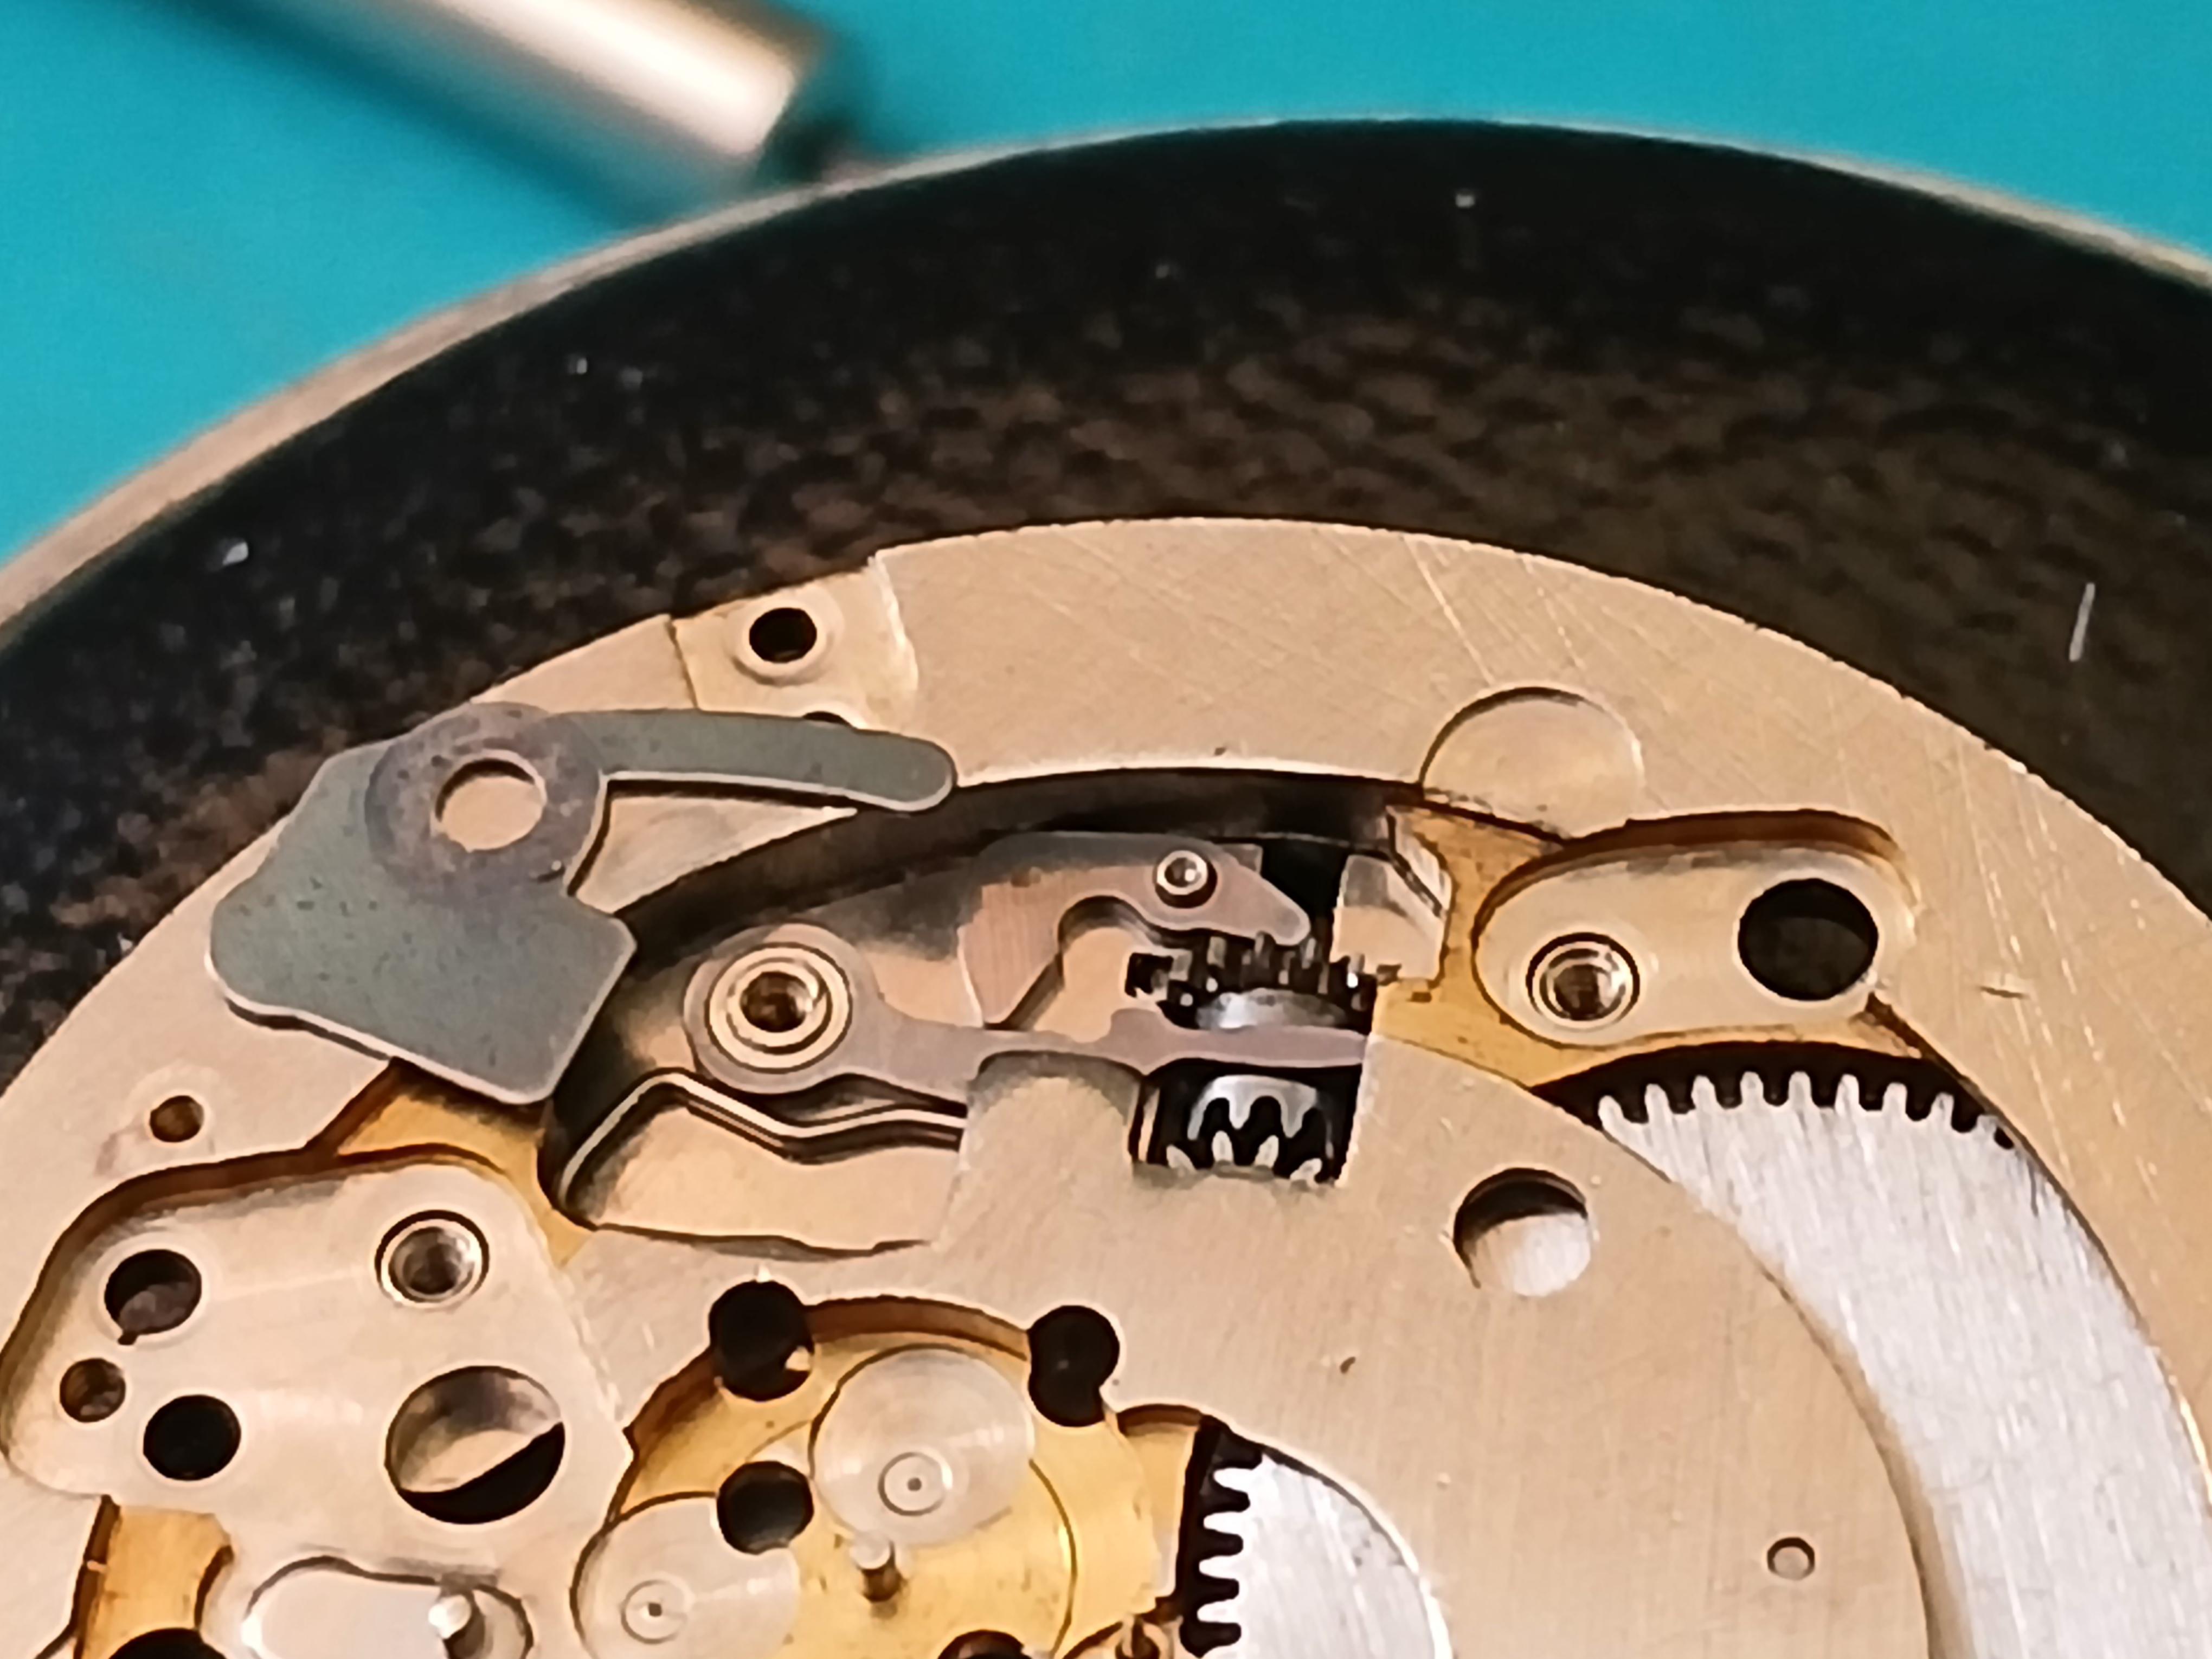
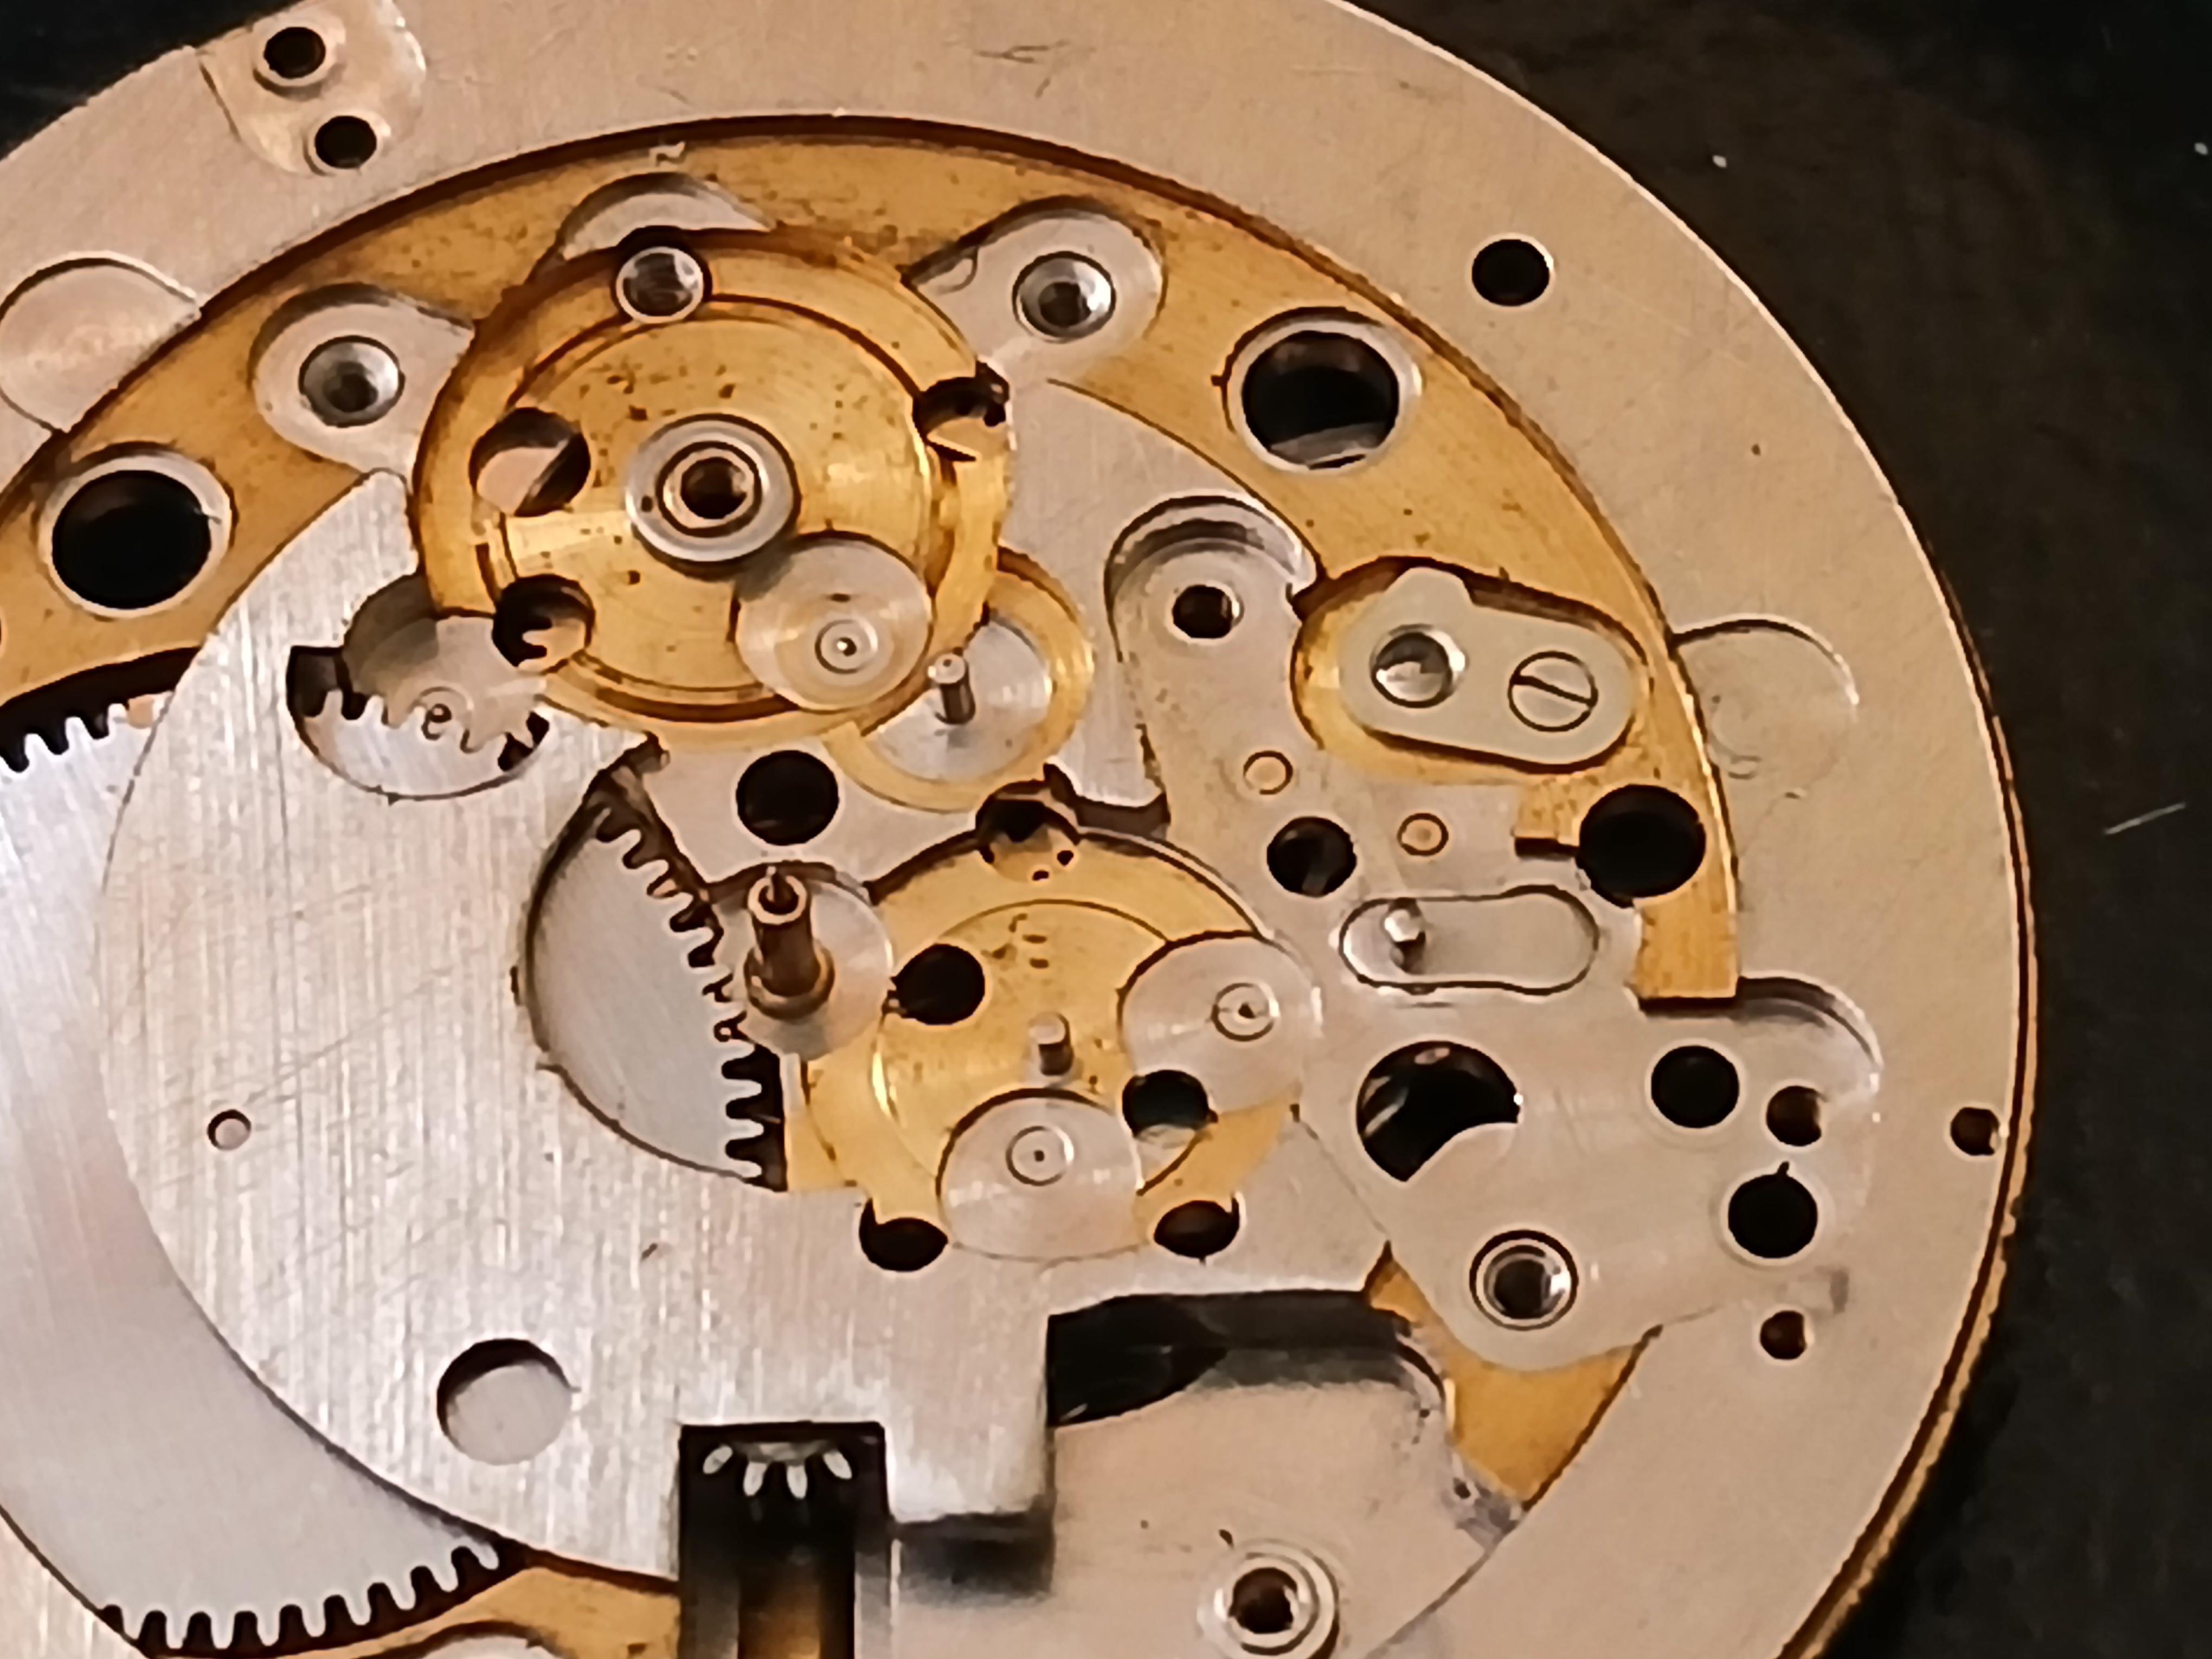
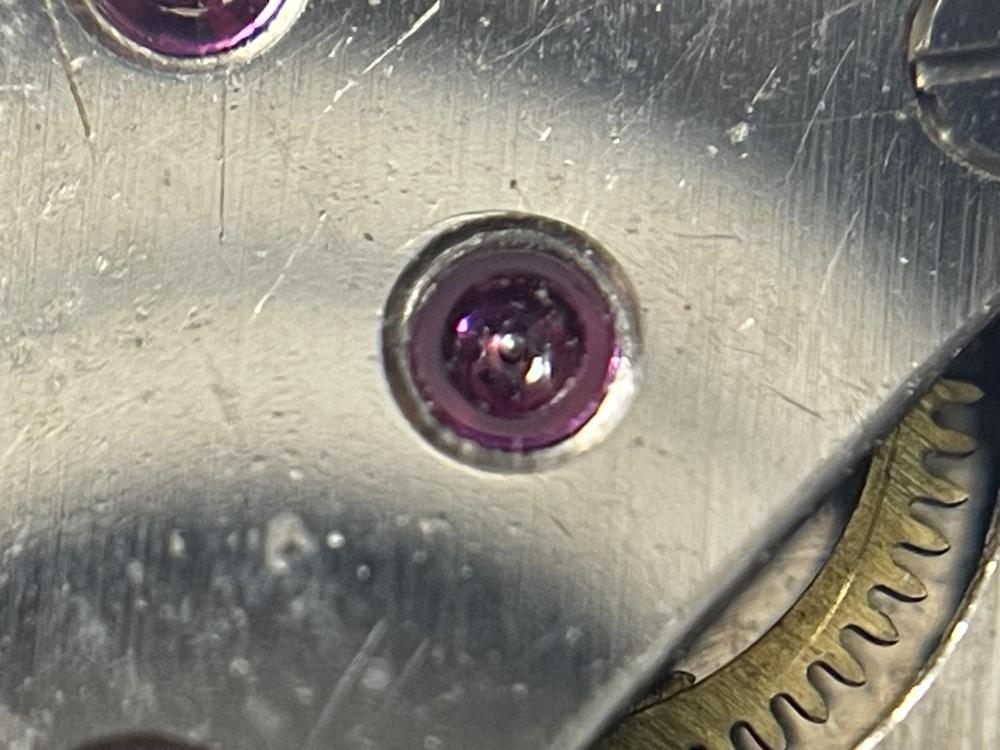
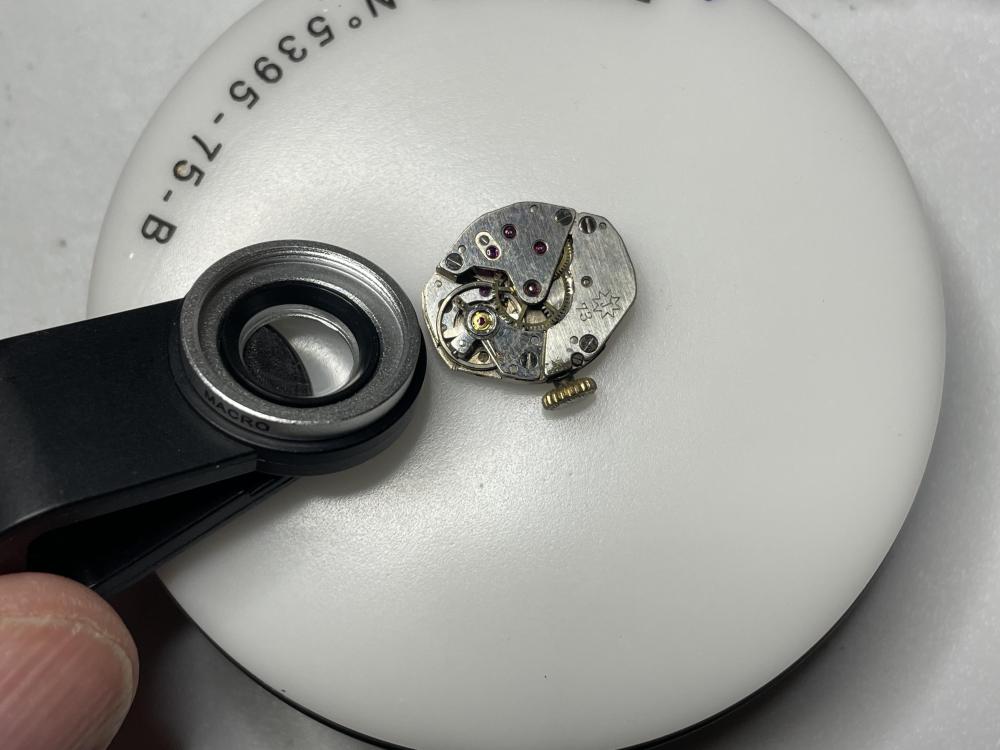
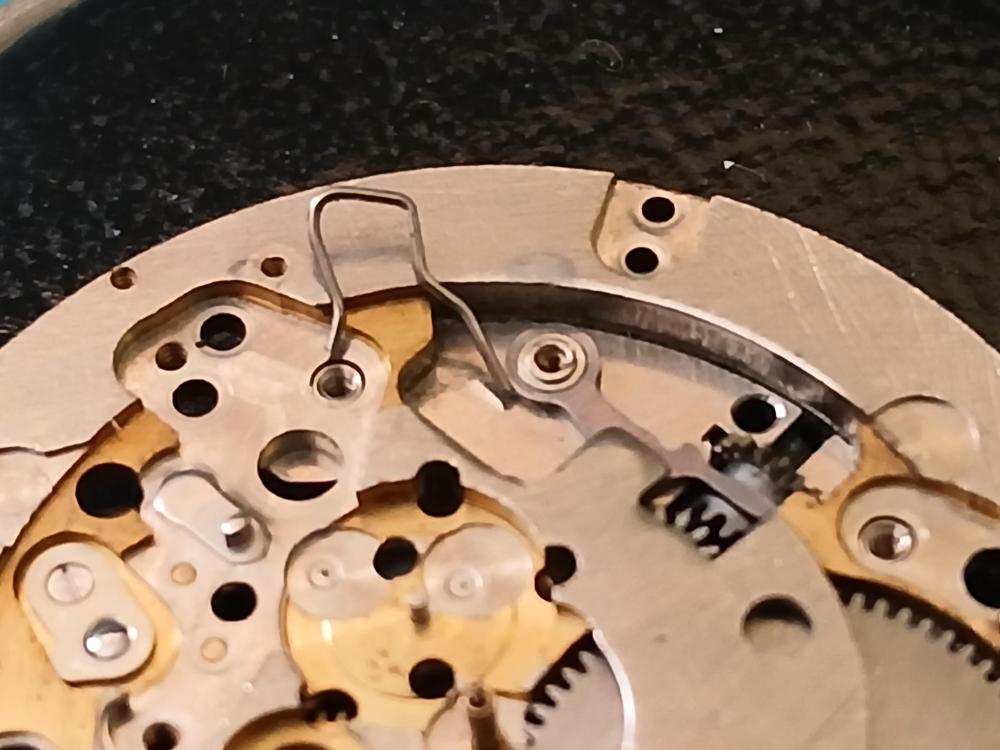
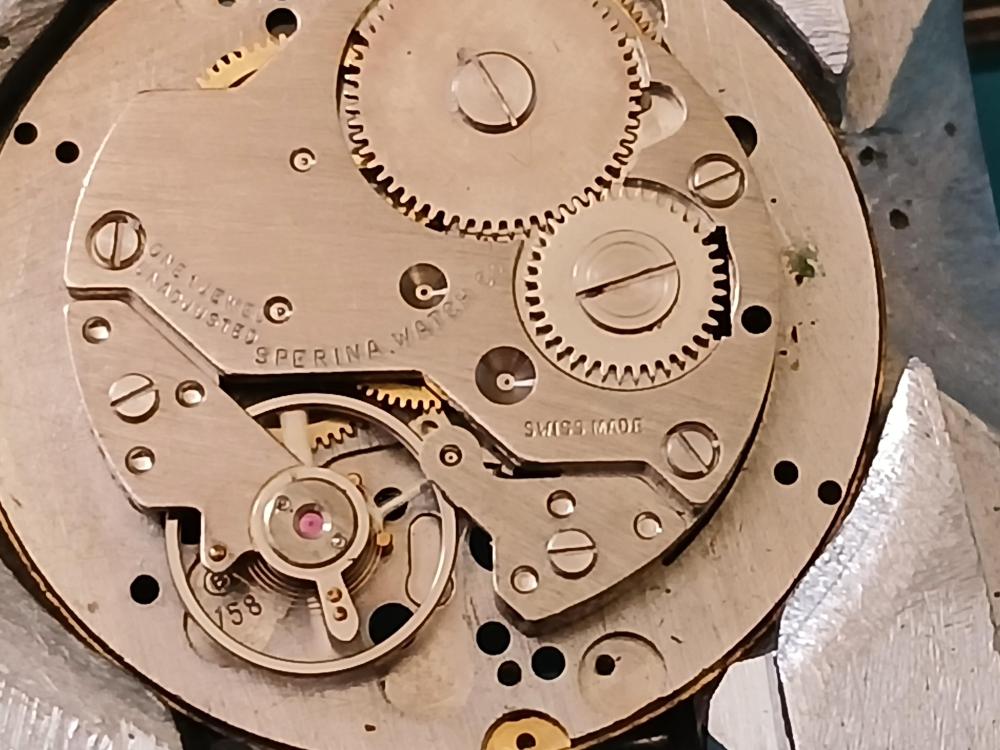
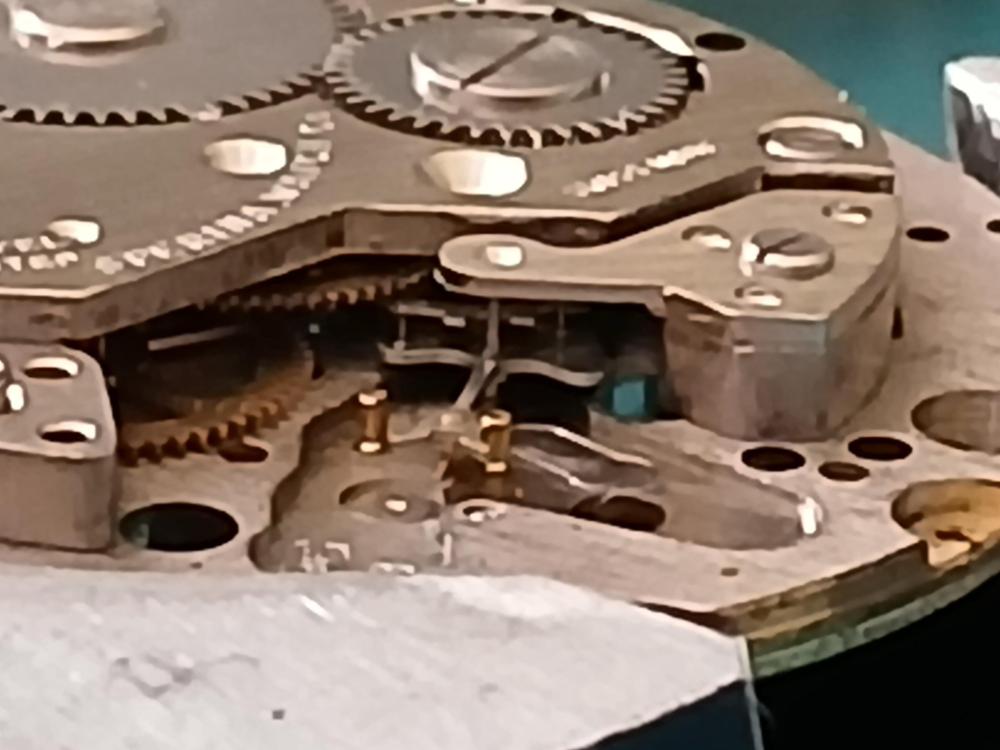
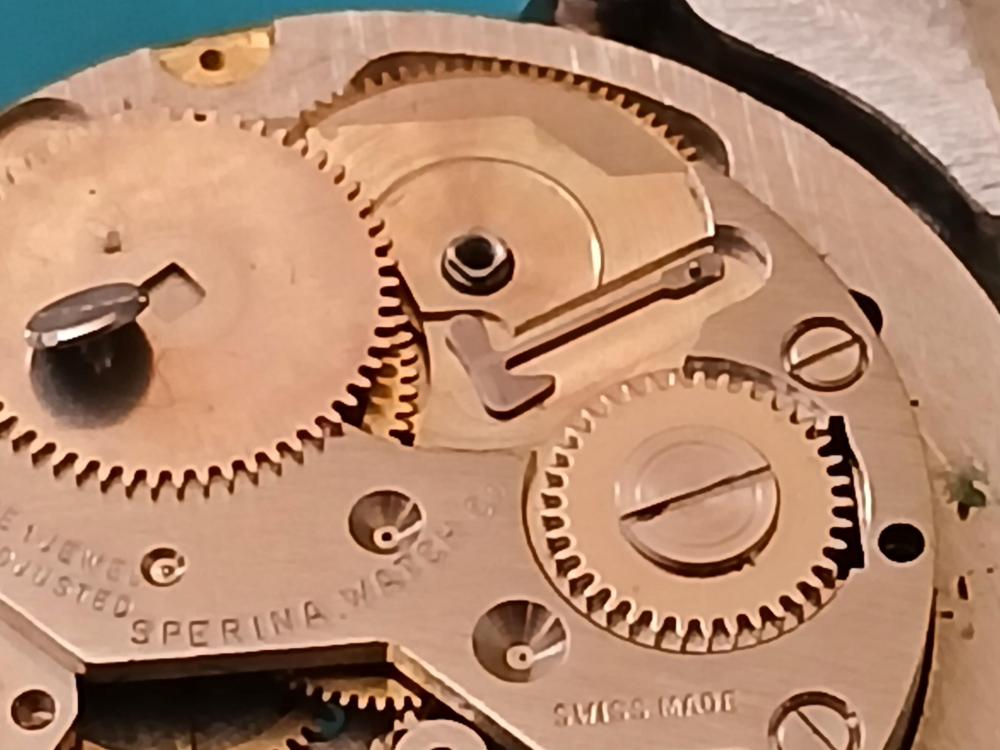
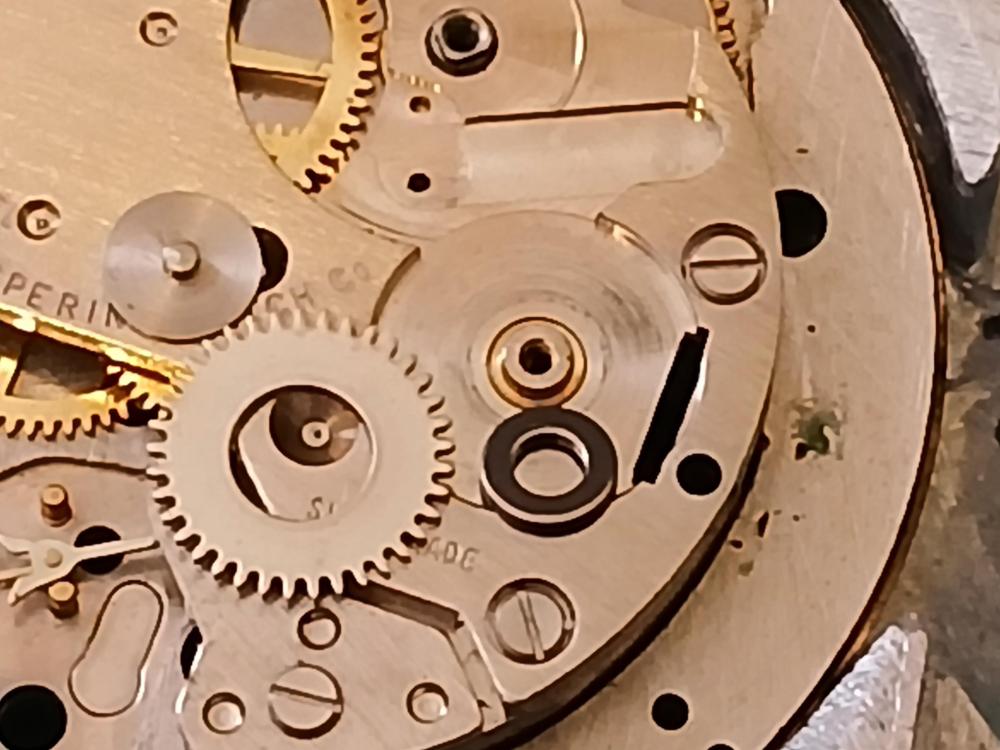
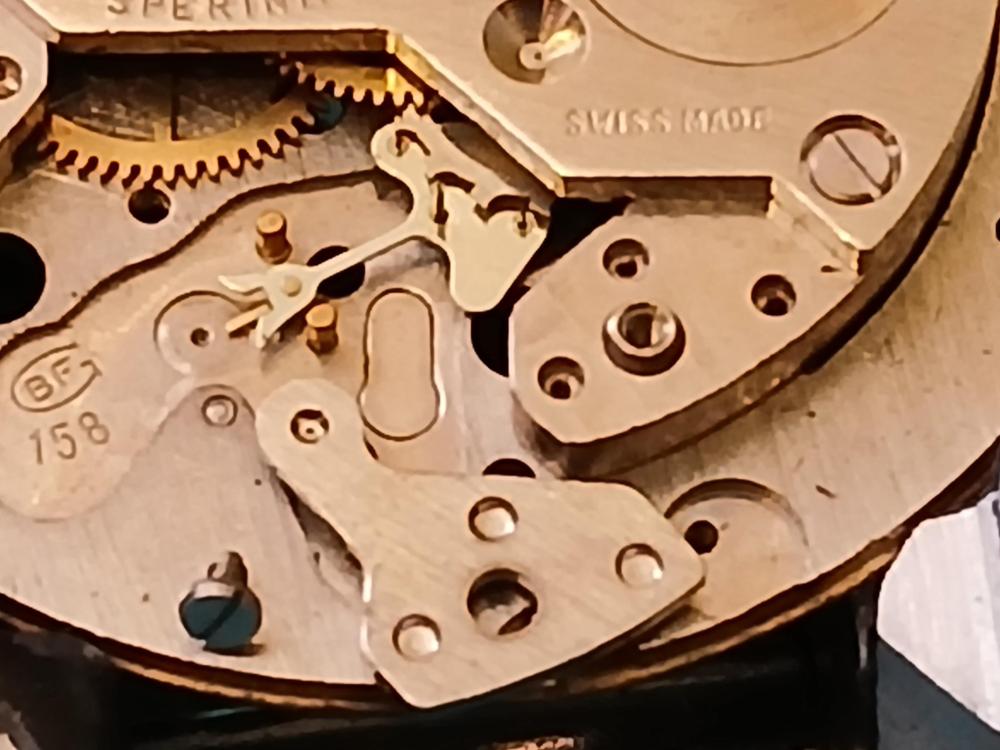
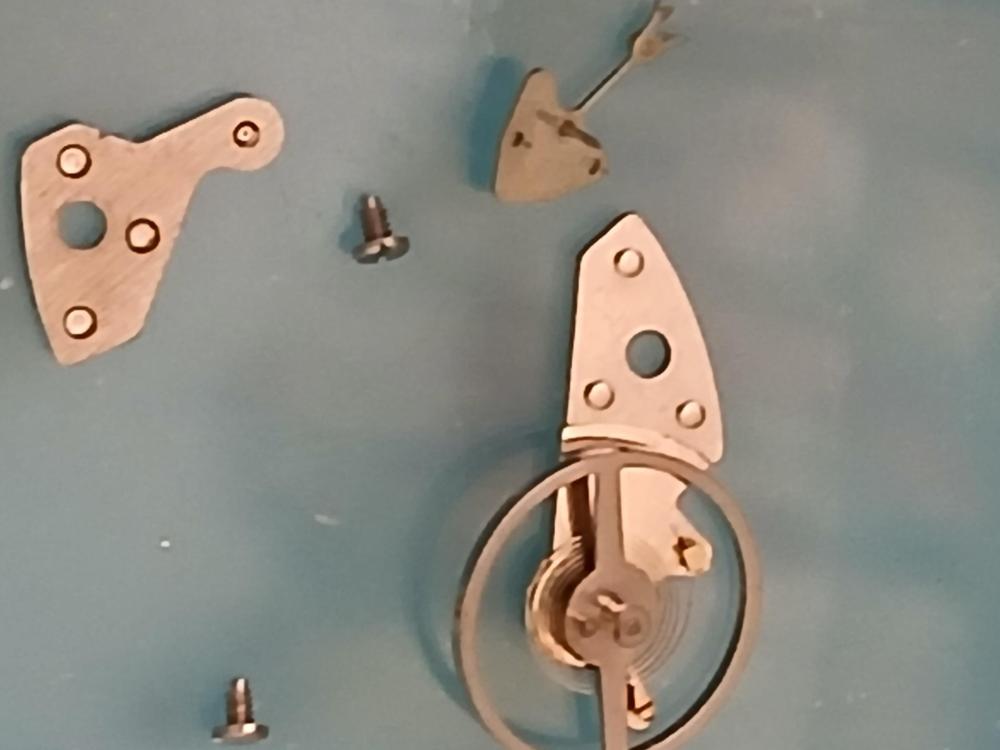
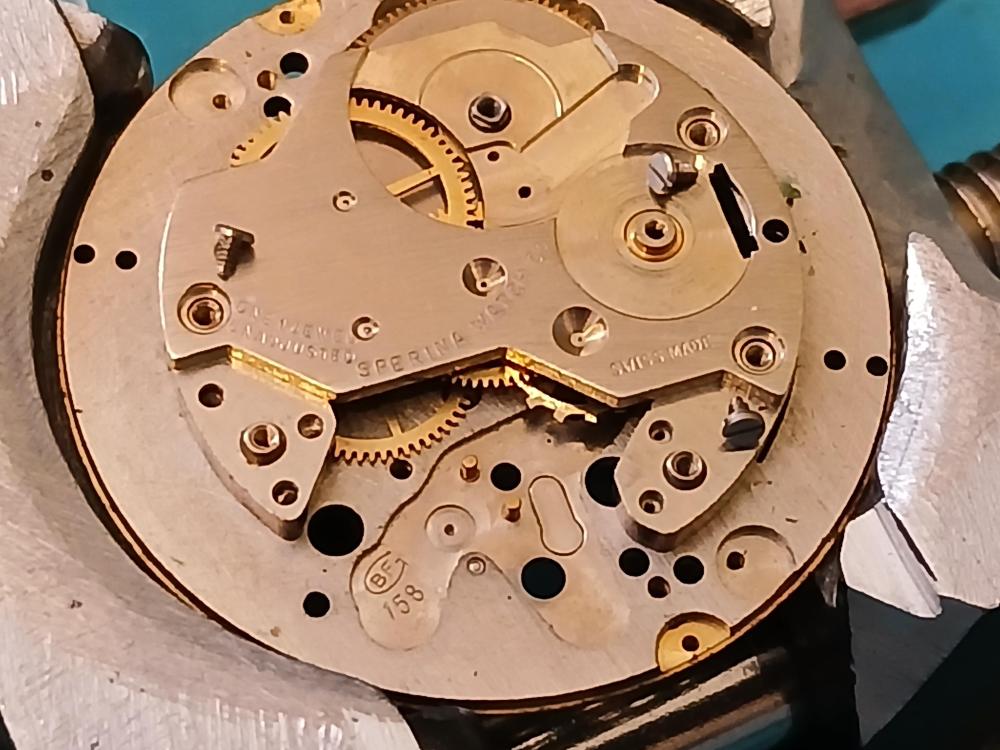
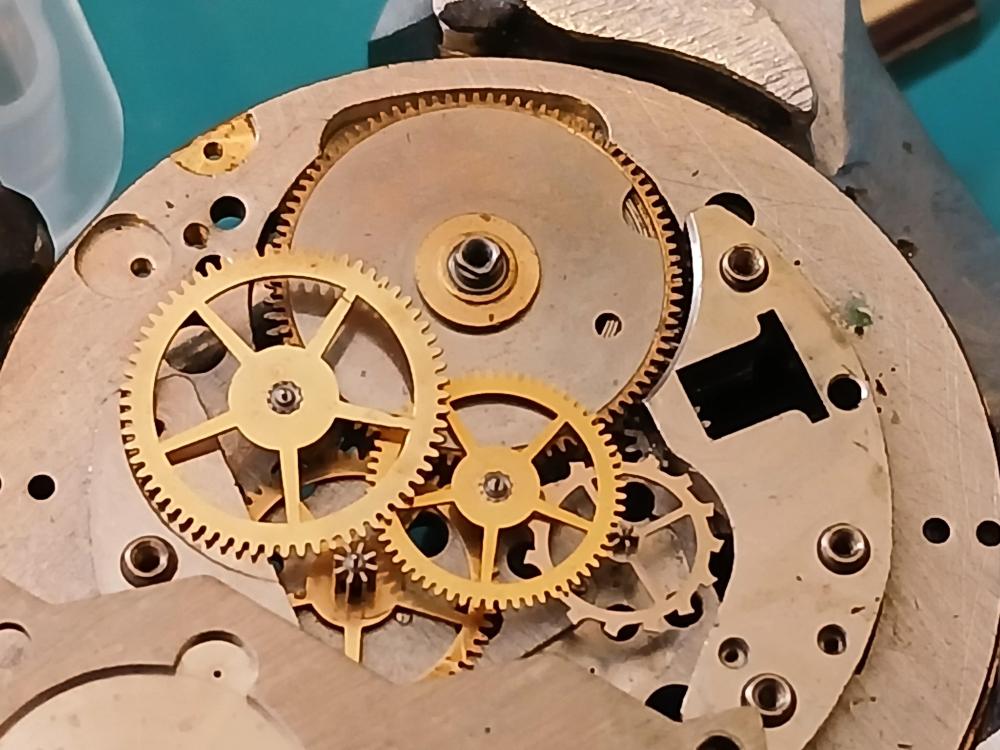
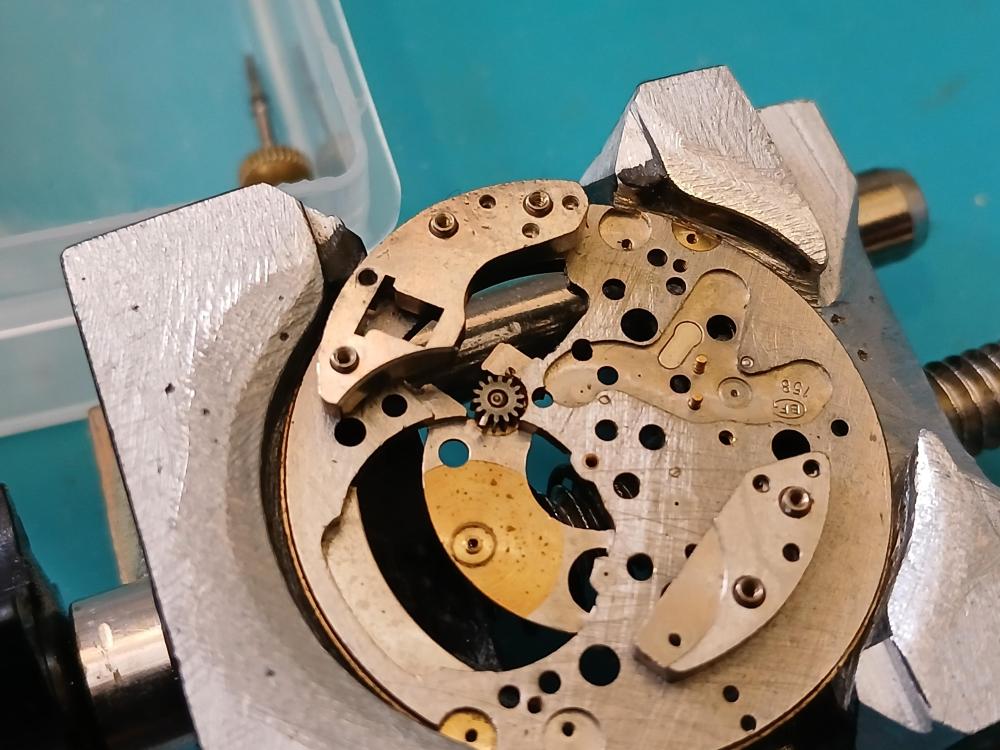
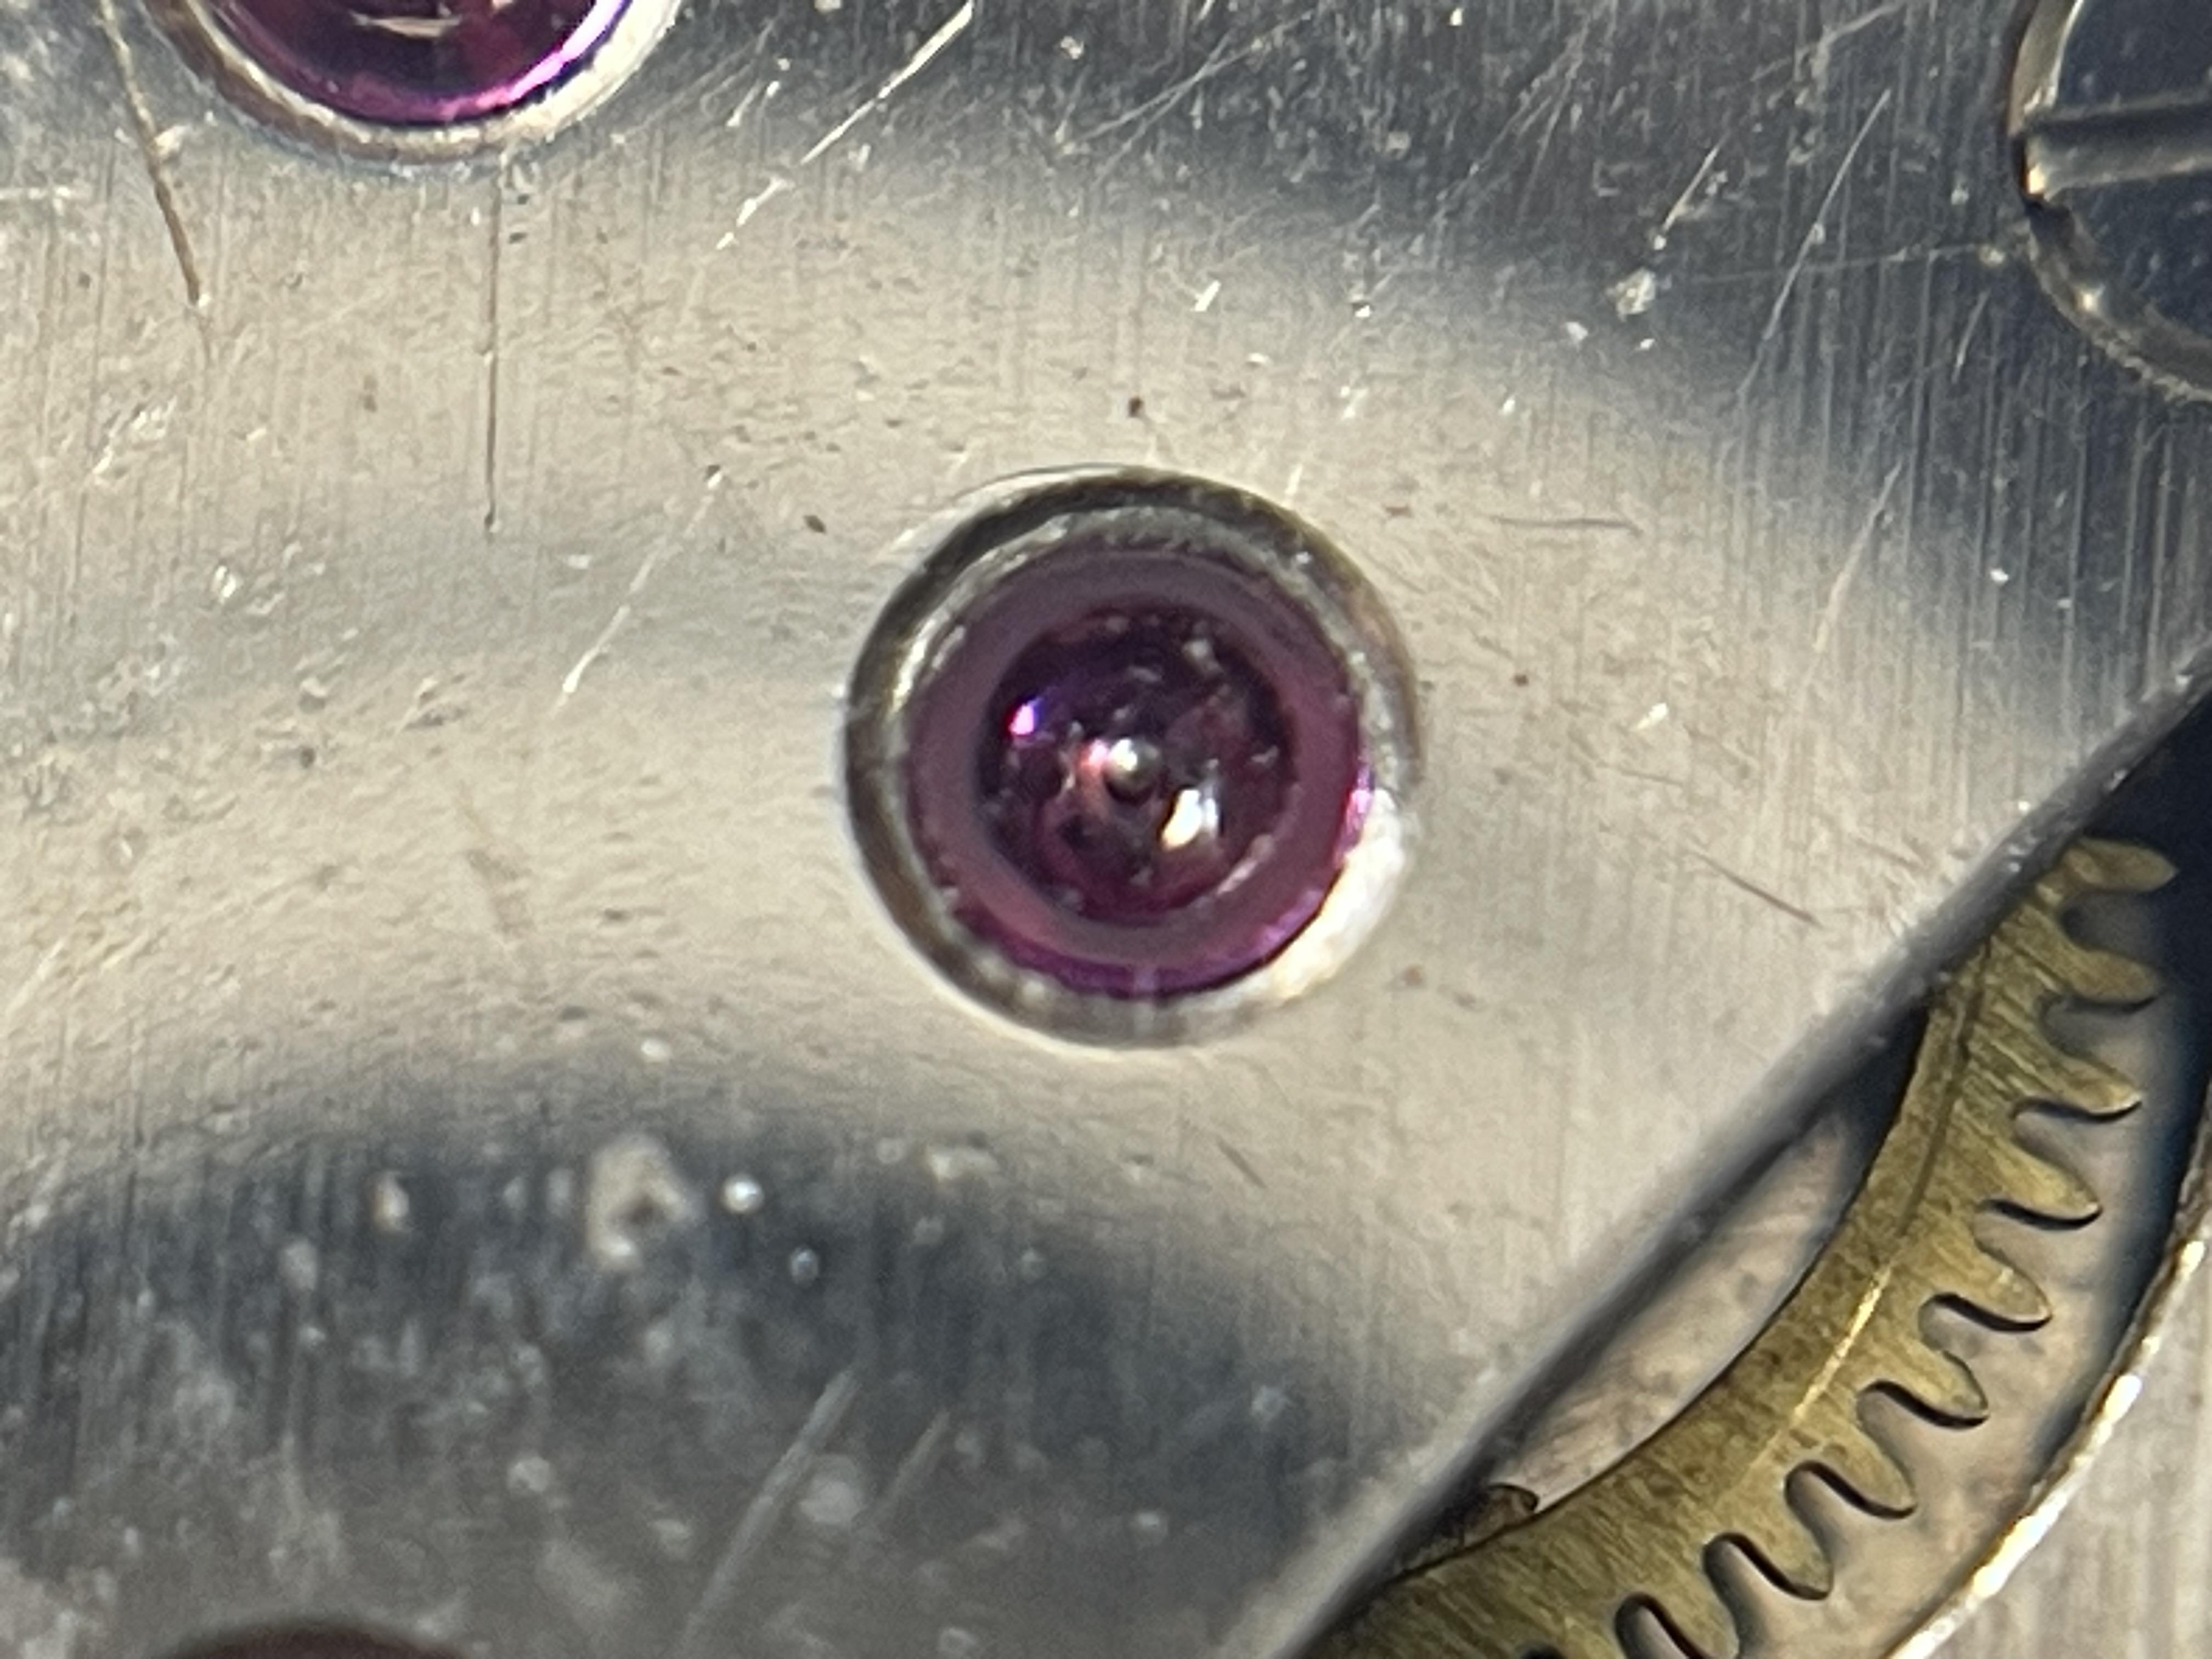
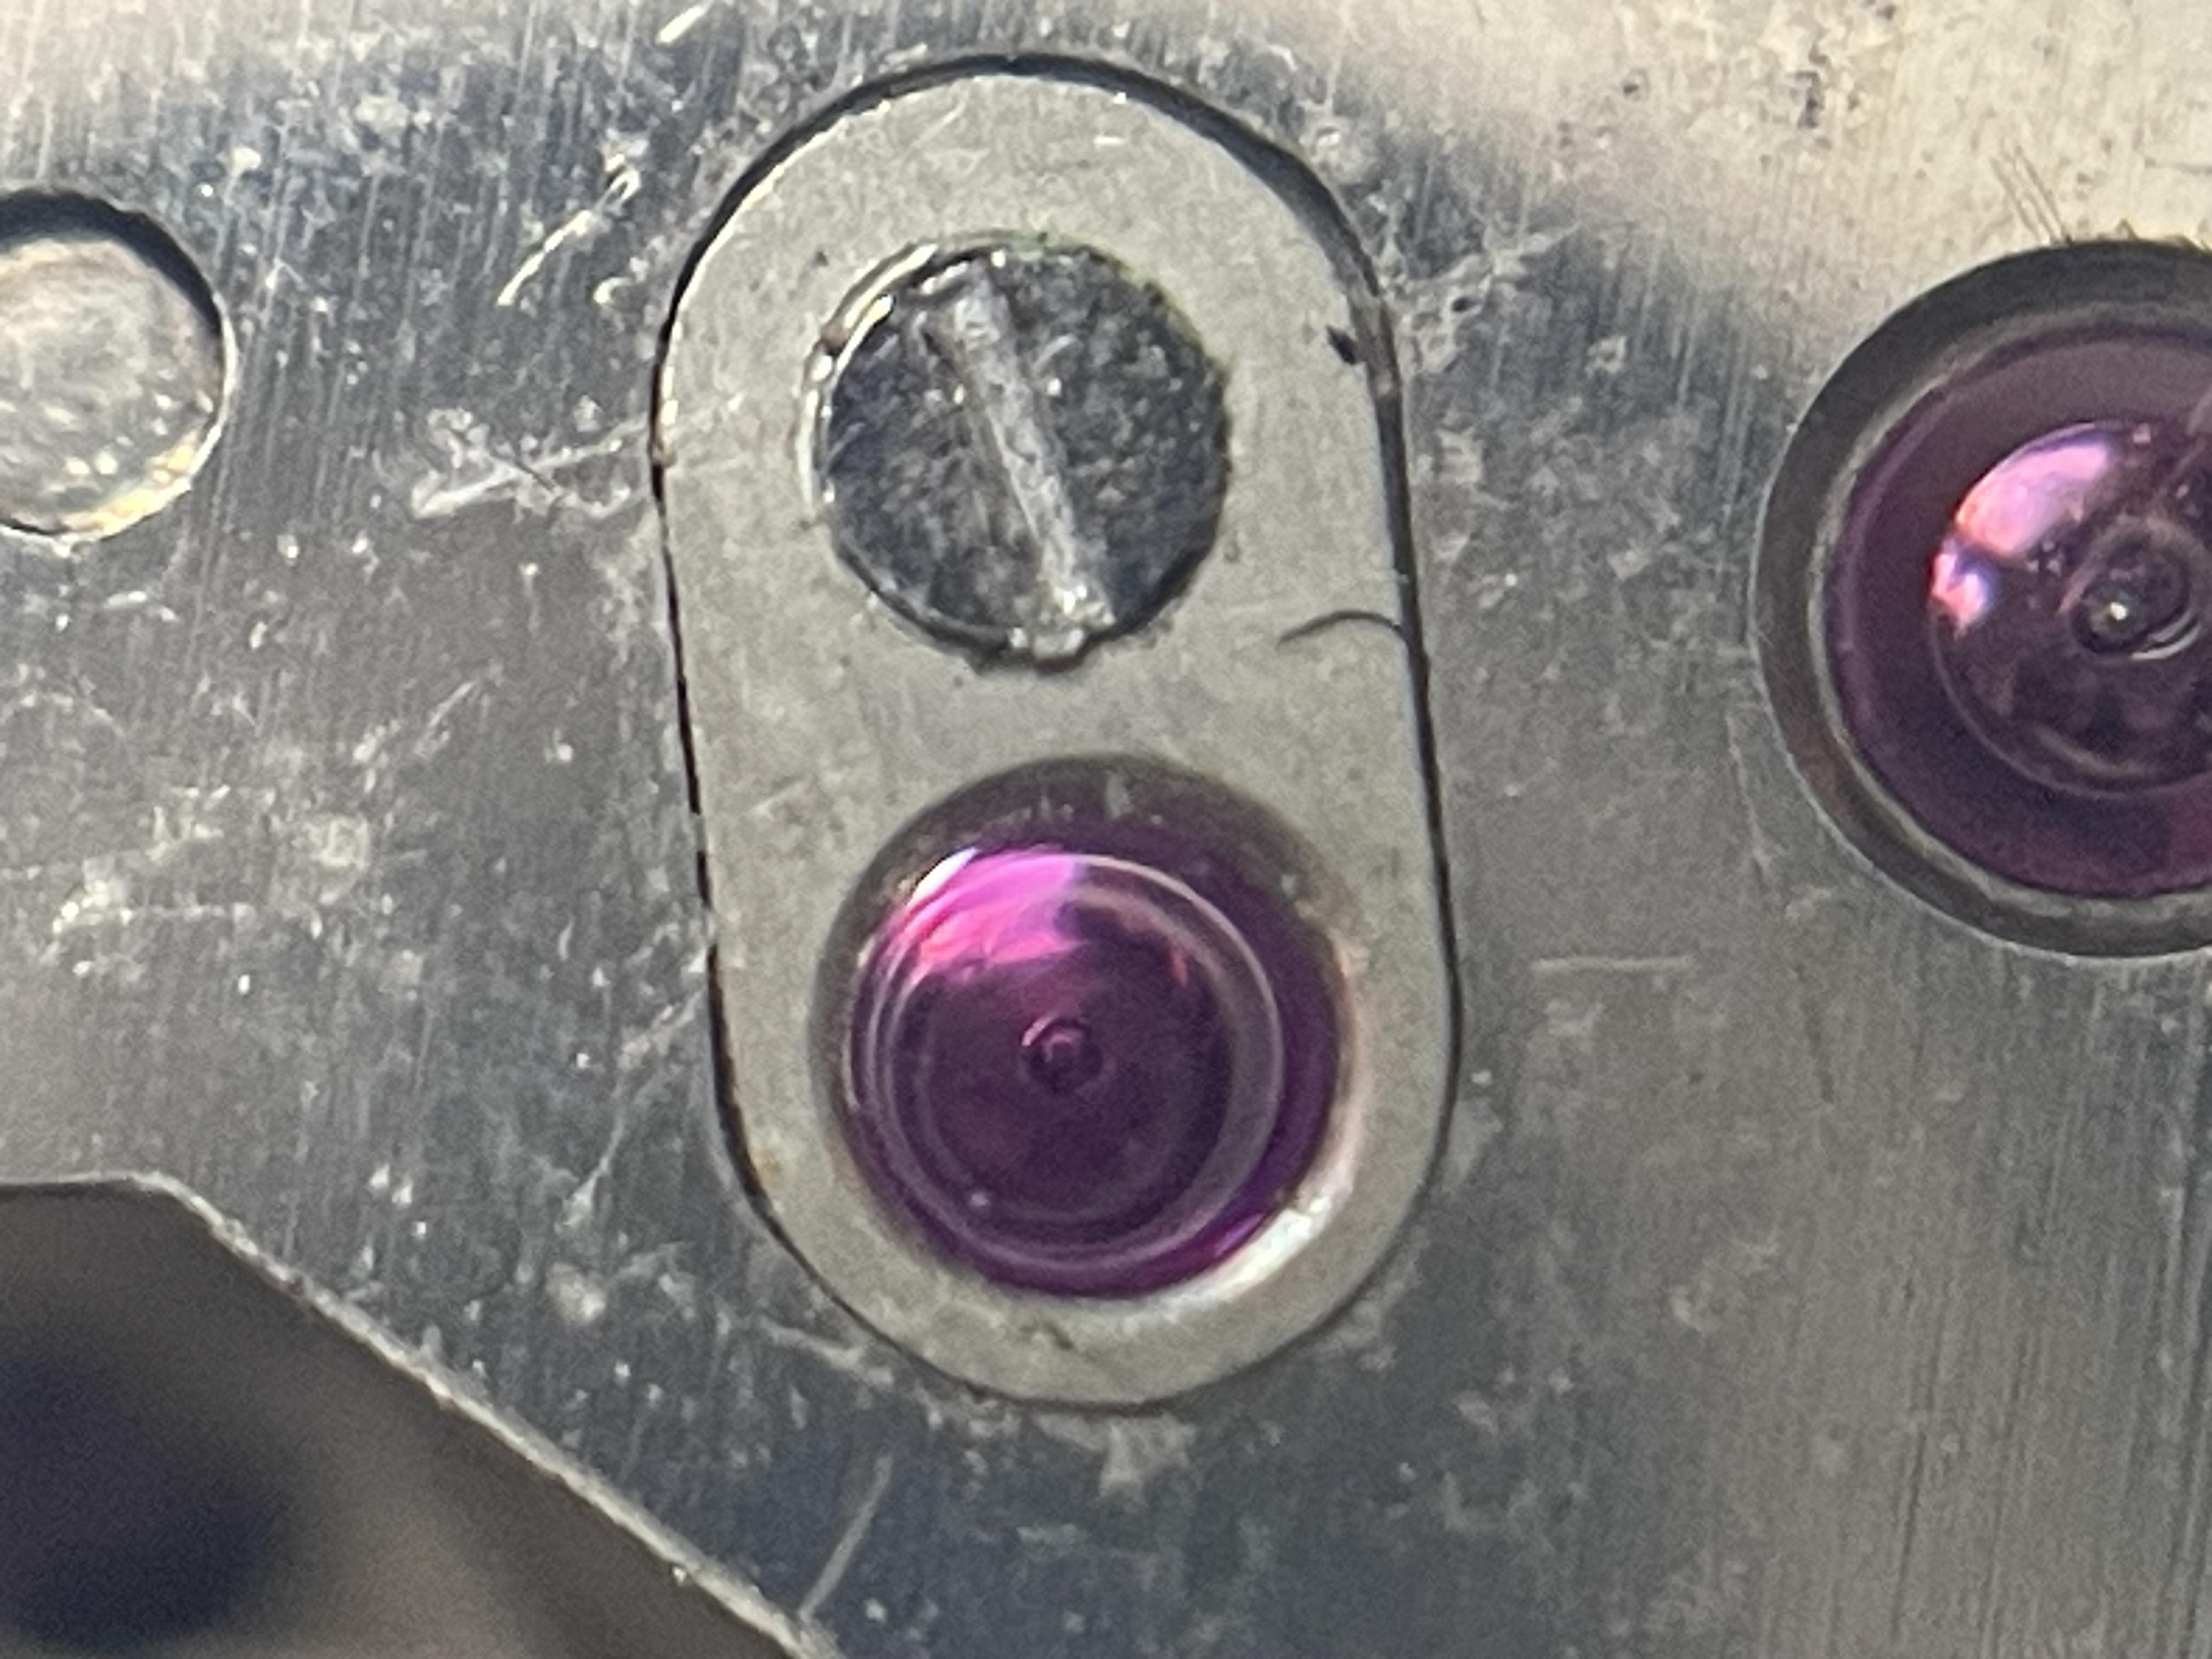
I saw a mention in one thread with the OP saying they could not take good photos of a watch movement they were asking about, so I thought I'd post my ultra-cheapo method: A local second hand shop had a stack of the nasty looking "clip on" lens kits for smartphones; they were priced at 50p so I got one out of curiosity. I didn't even try they for weeks, until I was struggling to take a high enough magnification of a damaged piece of jewellery, for a friend. The "macro" lens in these kits is actually amazing, it's very effective - and the full kits around only around £3 to £4 on ebay. The first photos are the particular 50p lens kit I got, and the lens I'm using from that, then examples photos, using my iphone with the macro lens in the clip and approximately centred over the camera lens. It does need a good light, and finding the exact height for best focus can be tricky sometimes, but the results are worth it. The movement is a Junghans calibre 73 from ebay:


 5 points
 -
After a long delay, I finally got a larger o-ring to seal the crystal. Somehow it's not thick enough to really grab the crystal, despite being the same size as the old one. Either way, the design of the case very firmly seals the crystal against the inside of the case, so I'm just going to wear it and keep it out of the sink. I think Pop-pop would be proud. And just to round out the whole story, mom texted me this after I sent pictures:


 4 points
 -
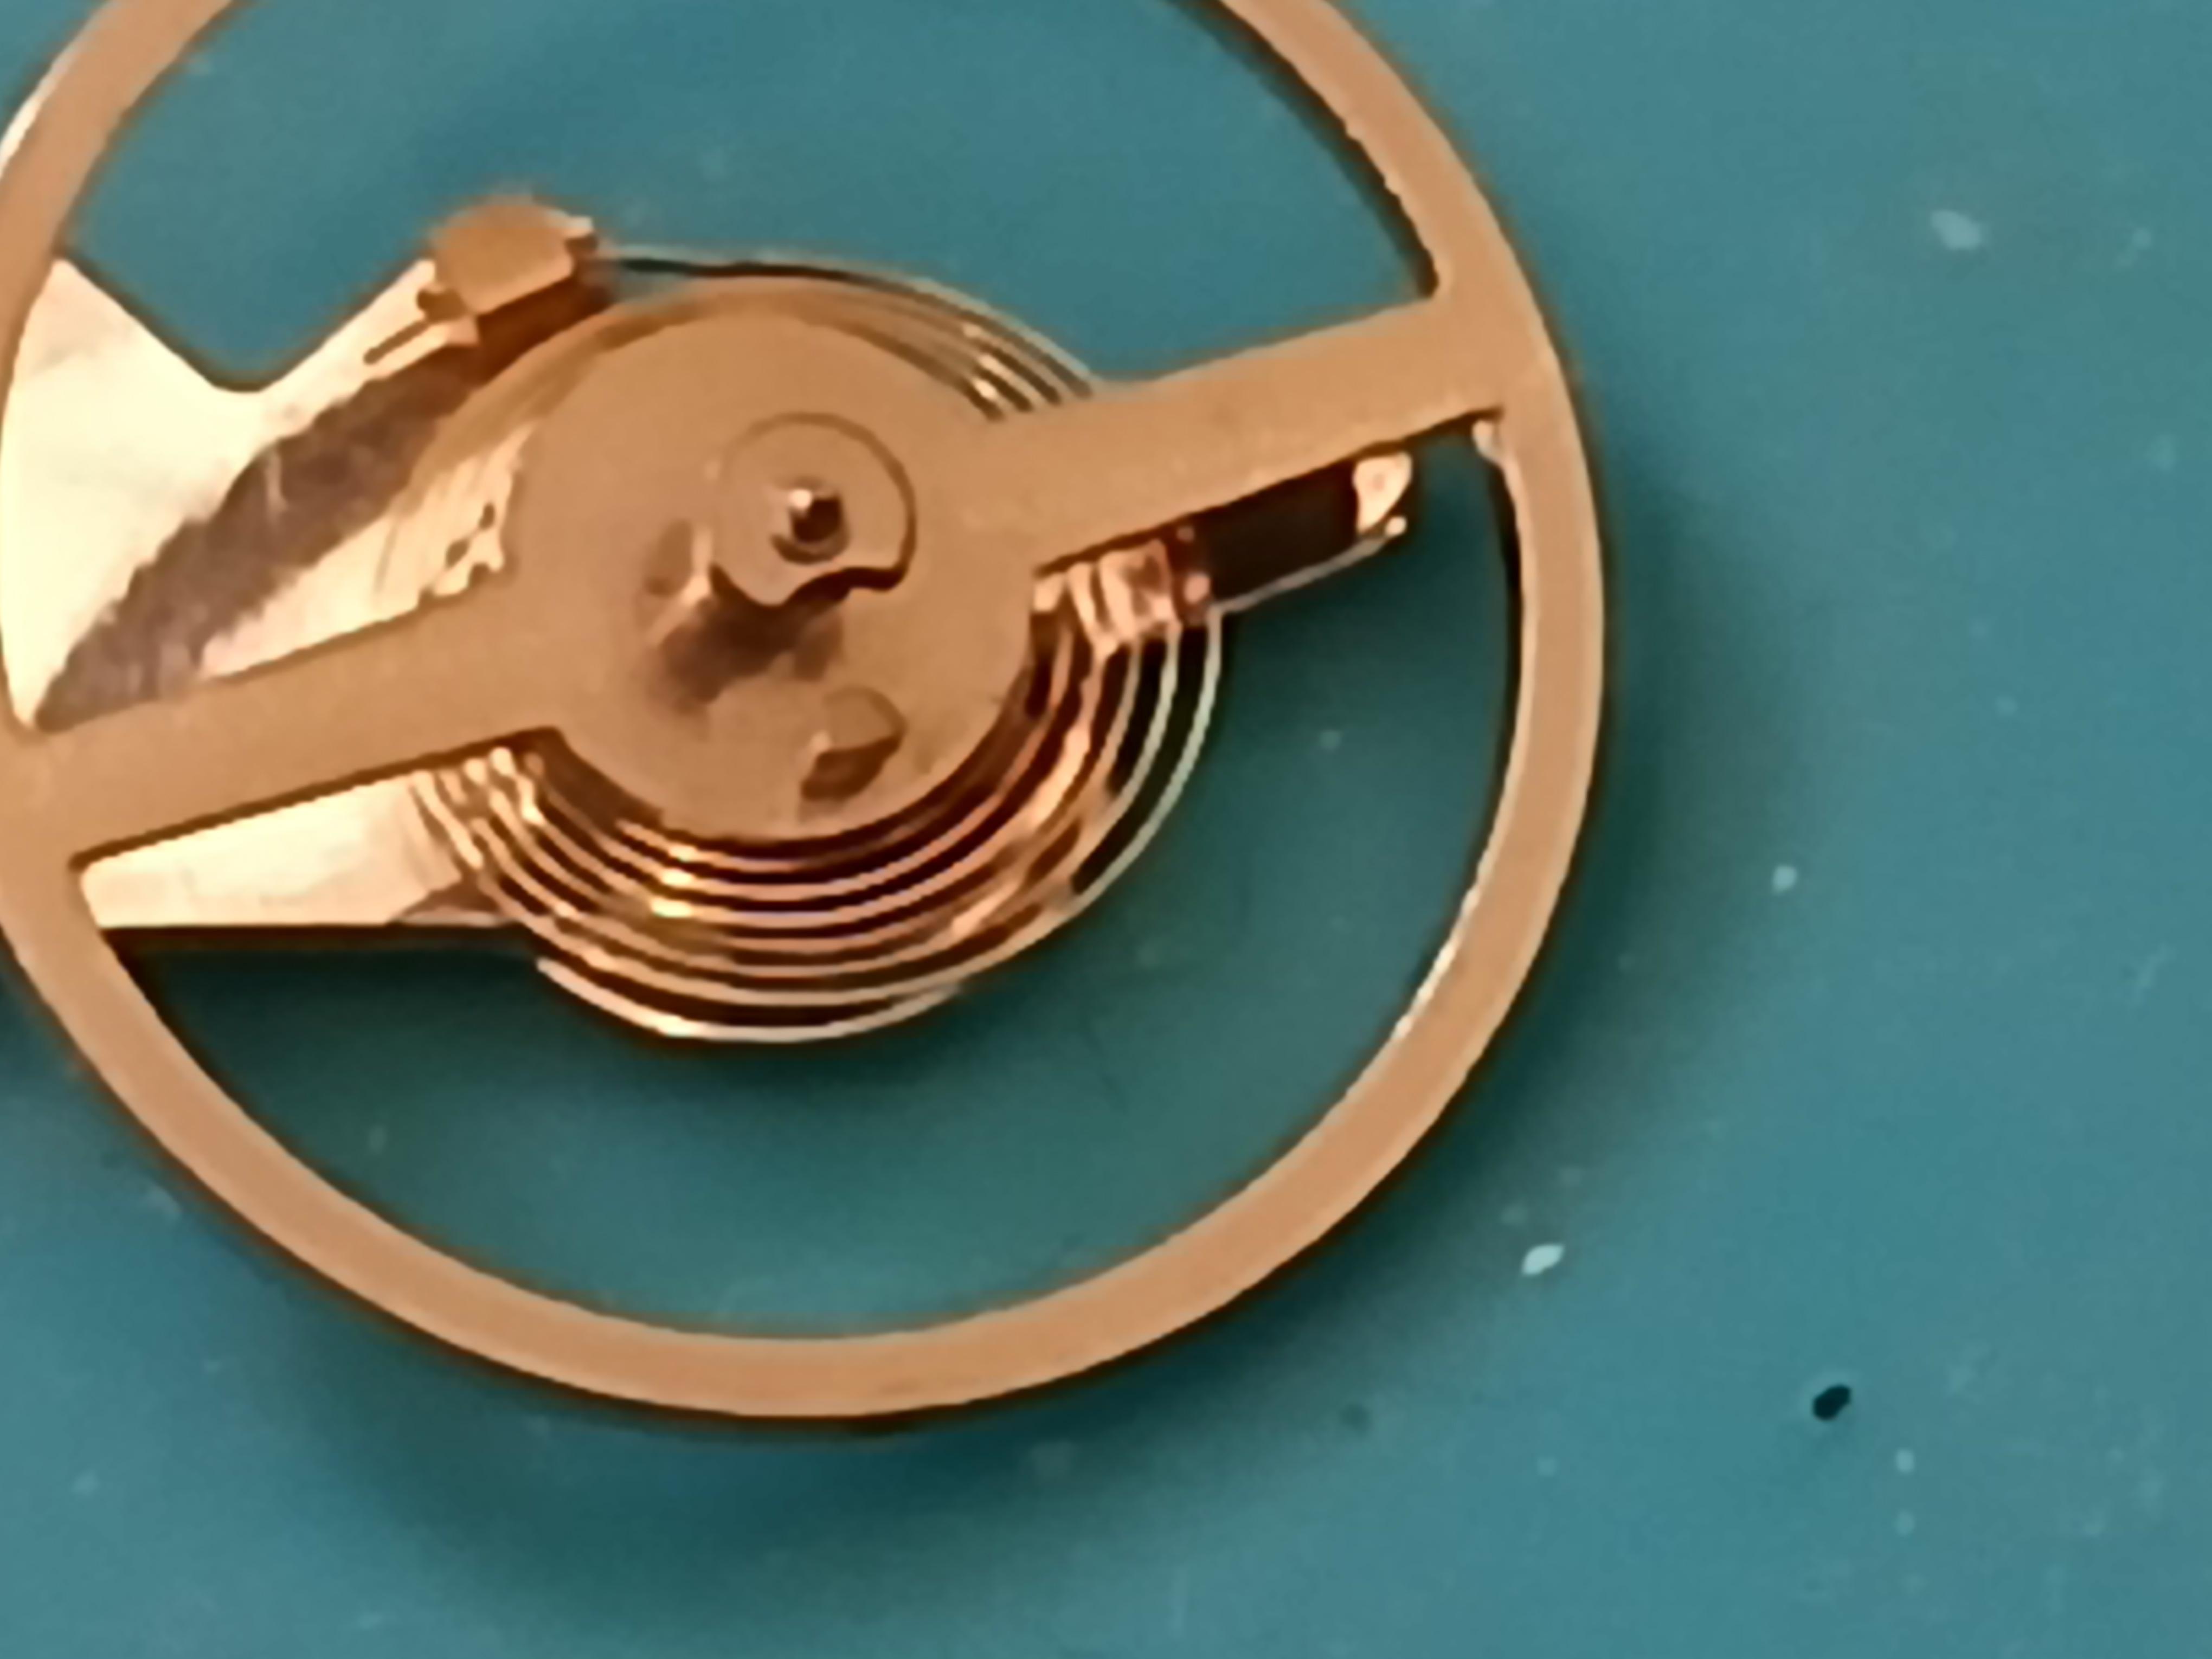
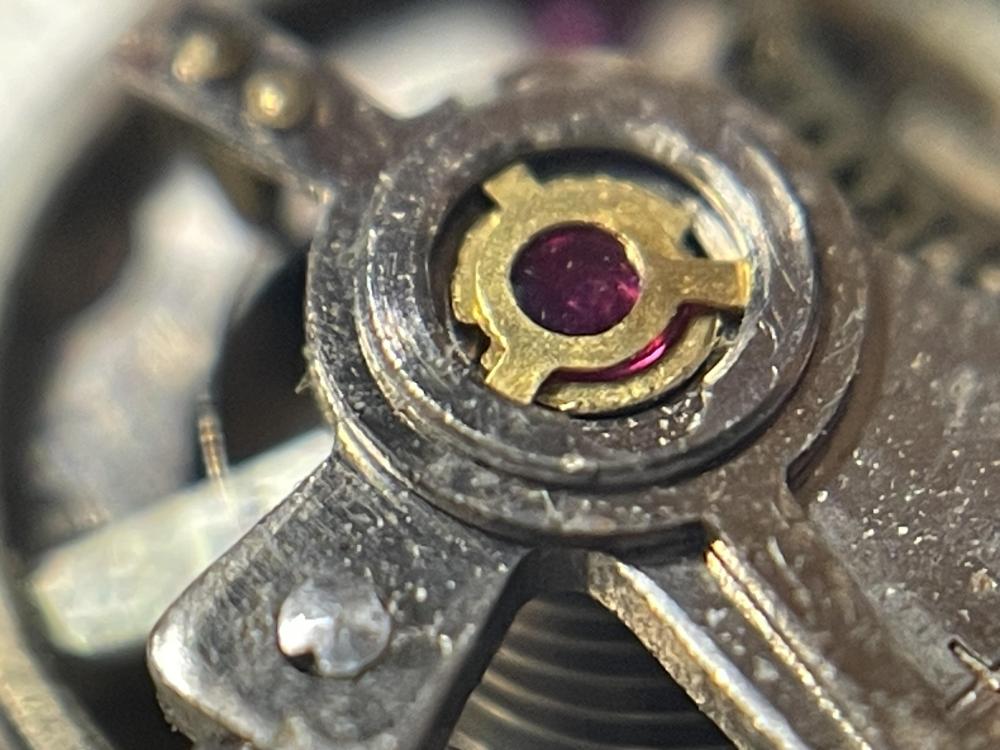
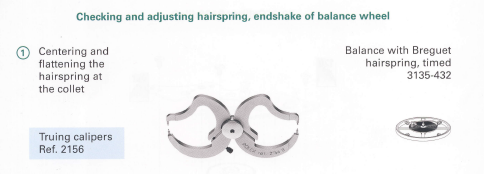
if you look at your timing machine you'll notice that it is running an average over a certain quantity of seconds. Otherwise the instantaneous variations would drive you totally insane. Remember this is a mechanical watch. You're looking more at a trend over at times span averaged then you are looking at individual ticking sounds. but if you're paying attention you will see the fluctuations. It's why run the time plot at work when I'm looking at a watch and I see the numbers going up and down slowly around the time plot the see why it's doing that and whether it's going to be a problem or not. here's an example from a Rolex service manual of the tool used for centering and flattening the hairspring at the collet. Because the only way he can see either is in some method where you can see in all directions and spin the balance wheel. Then you shouldn't have to be doing major reconstruction or manipulation your usually just tweaking a problem. here's an example of the balance wheel in the truing caliper. The only problem with the example is in the lot of the examples are there from people learning how to vibrated hairspring. In other words they started with a raw hairspring and there's no stud things only way more dramatic you're only supposed to be checking to see if there even is a problem https://youtu.be/RrFpjqzEBv4?si=nB0JDqSunygnsRhm c01-precision-timing_brochure_en wostep.pdf
 3 points
 -
hello everyone! im new to this forum. i never really used forums before so its a bit new and exciting at the same time. i will be posting my questions and topics later on but in the mean time ill tell a bit about myself. i am a 18 year old guy with a OBSESSION of watch collecting. ive grown up around watches and always had a love and passion for them. ive collected many over the years and will show my collection some time soon. i dont have any "high end luxury" brands like rolex, omega, etc but to me its not always about the brand but simply how the watch looks and some of their features. i have around 20 or 30 so watches all including brands like citizen, seiko, fossil, bulova, and a few others. not the most luxurious but they get the job done and still look incredible. thanks for stopping by to read all that haha hope you all can help me through my journey of the watch world and hope i can share and receive much knowledge from this community.3 points
-
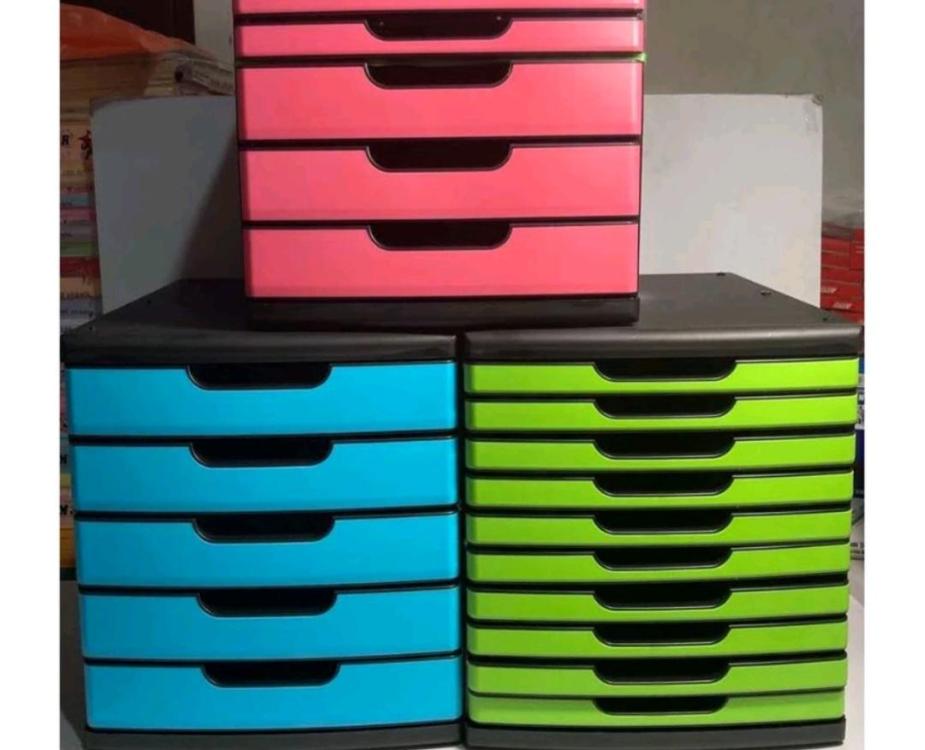
I have several of these pastel storage boxes. See? a degree in art does have value!
 3 points
 -
Would the case strap lugs fit around the raised blocks, to help with holding the case while removing a screw-on back?2 points
-
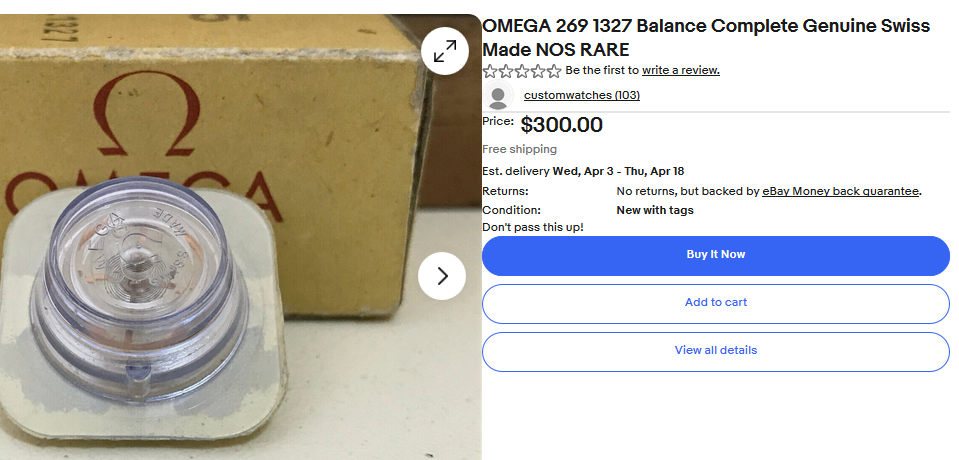
usually on modern watches you cannot purchase a separate hairspring. the part number you have is for the balance complete which is the only way you're going to get the hairspring is with the balance wheel as they are matched very very closely. then unfortunately the problem with Omega watches are there expensive and the components replace them are expensive but eBay is a good source here's one brand-new. https://www.ebay.com/p/24012048122
 2 points
 -
I FOUND THIS INTERESTING AND HOPE YOU WILL TOO...RIGHT CLICK AND OPEN IN ANOTHER TAB https://ow.ly/7g6Y50QwKvE2 points
-
I use office A4 document drawers.
 2 points
 -
I've done this with a tool and cutter grinder. It is important that the centre be axial with the punch. Most small engineering shops would have one so maybe finding a friendly local one might be a way forward? Punches are often non-standard sizes so it probably needs one that has collets to hold the work.2 points
-
As @rossjackson01says, "good this hobby, isn't it " or words to that effect. I'm not sure that I do learn daily but no matter how much I do learn, there's always something new and I'm constantly learning. So yes, since I love learning, this is a brilliant hobby or profession.2 points
-
Found this
 1 point
 -
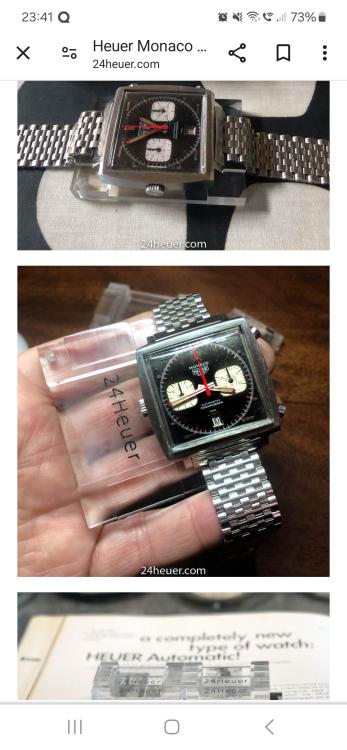
From my online research and doing an image search, that is a Heuer Tool 033. It is supposed to be used for opening a Heuer Monaco case. That's all I managed to find. As to how it's used, we can only speculate.1 point
-
With there being no adjustment i did think it could be a case holder for a specific watch.1 point
-
Welcome to the forum, pal.1 point
-
I have restored hundreds of French clocks. I know what you are saying that they look alike and yes they do but fitting pats in to another not so easy, there is 9 times out of 10 some difference. As for wheels you have depth, wheel count pinion count, as already mentioned length and pivot length diameter of the wheel and it has to be in the same position.1 point
-
The right decision depends on the condition of your watch and what your plans are, if its worth spending $300 plus on, then JohnR advice is best, also, however small there is a chance of finding a ruined Omega balance to scavange the spring off of, so we would start with spring of the right CGS No. Your balance left Omega adjusted , then if some watch destroyer fitted a staff in the wheel, theres a good chance he throw the wheel out of adjustment and handed it back to the owner perhaps even unpoised. Secondly, Balance spring come in different grades, and meet metalurgical and physical specifictions. This all means your balance wheel can be completed with a spring to oscilate at the rate your watch needs to show accurate time, but is unlikely to meet the original standards embeded at Omega. A spring out of Cheap , Russian or Chinese watch would do , IF its spiral is the same or close to your Omega spring. So, in case you are determined to attack , enough knowledge and experience is available at WRT to work with you in building a balance complete out of your balance wheel. Just shout. Rgds1 point
-
The caliper John shows is the same as from a previous post of mine. Just to be more precise to VWatchie's question on how the pivots are held: In these calipers the pivots are in V cones, held at the tip. They are really nice and I've never broken or damaged a pivot in one. But man, like all their other tools* the Levin are the absolute bomb. And the pivots are held on the cones. *For lathe work, serious lathe work, a slide rest is essential. The Levin slide rests are miles away from all the others. Many people have used my lathe over the years and they always ooh and ahh how awesome it is (it's a Leinen and pretty awesome), but what really sets it apart is the Levin slide rest. Those boys made amazing tools, all of them, snap them up on Ebay, all of them! -and, having viewed John's link, you can't see f all in that vid. Sorry John your links are usually great.1 point
-
The video clearly shows the problem when the spring is out of round at the collet. It's something I've never taken much notice of before - apart from a visual check the first coil looks OK. When tweaking the hairspring on the balance, I've always sat it in a hole in a bench block, held with some Rodico, so I can tilt it. Never thought of using calipers . I will from now on though.1 point
-
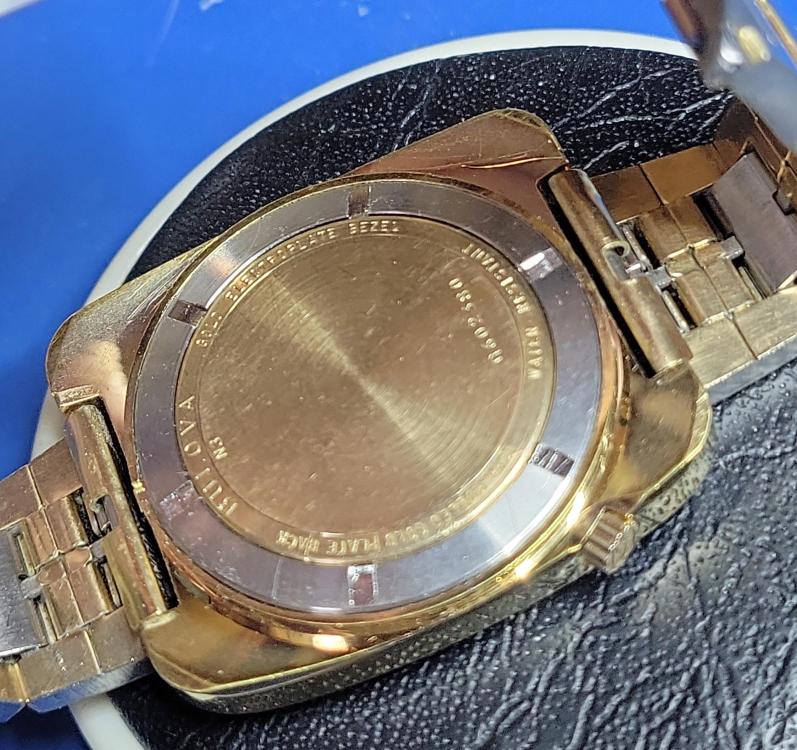
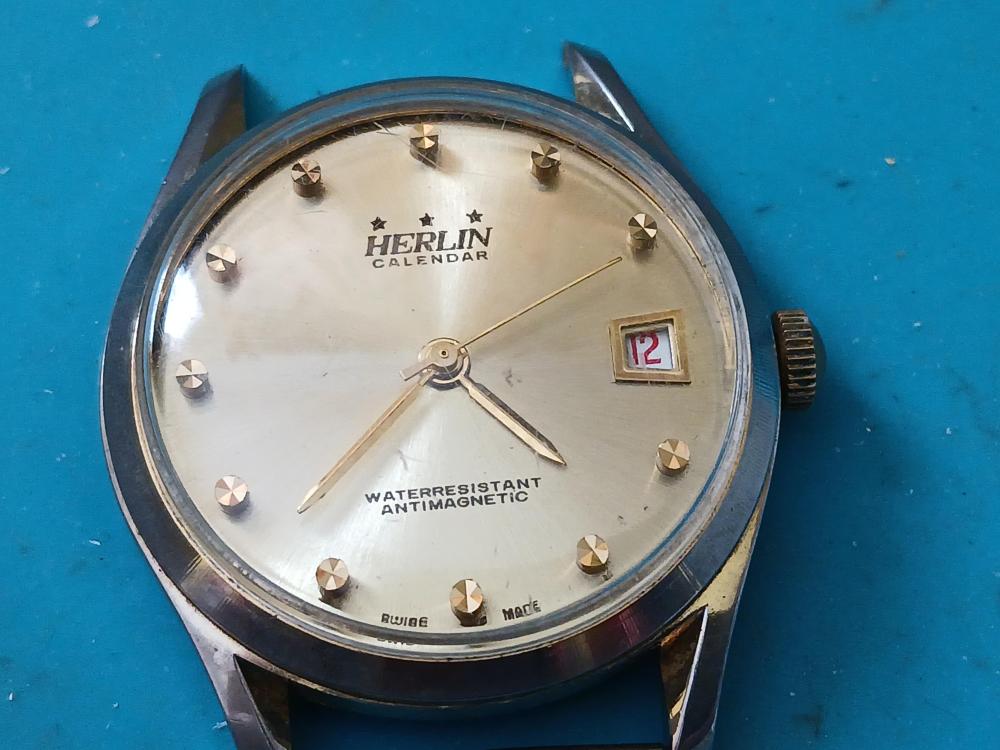
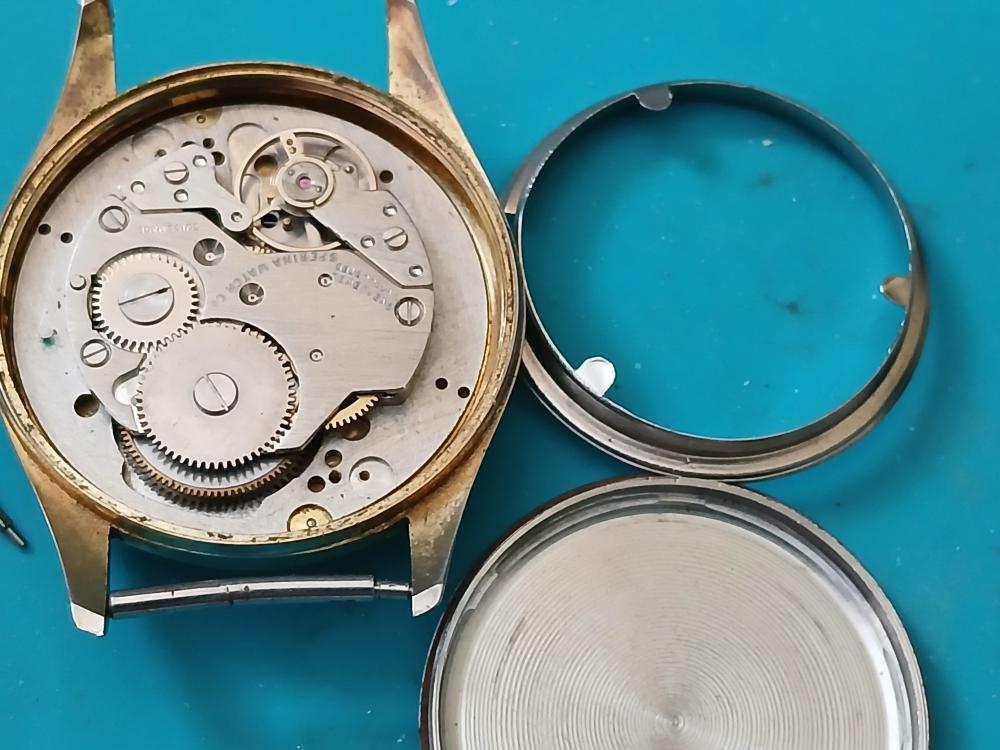
A picture of the movement would be helpful1 point
-
Thank you for your introduction and welcome to this friendly forum. We all look forward to your contributions and continued involvement. There is no such thing on here as daft questions, we all have to start somewhere. You might find this helpful. 704789946_TZIllustratedGlossary(2).pdf1 point
-
Hello and welcome from Leeds. We don't consider any questions daft on here.1 point
-
Acrylic makeup brush holder on the left, and a tweezer stand for ladies eyelashes on the right. Both were found for only a few dollars on Amazon and work quite well.
 1 point
 -
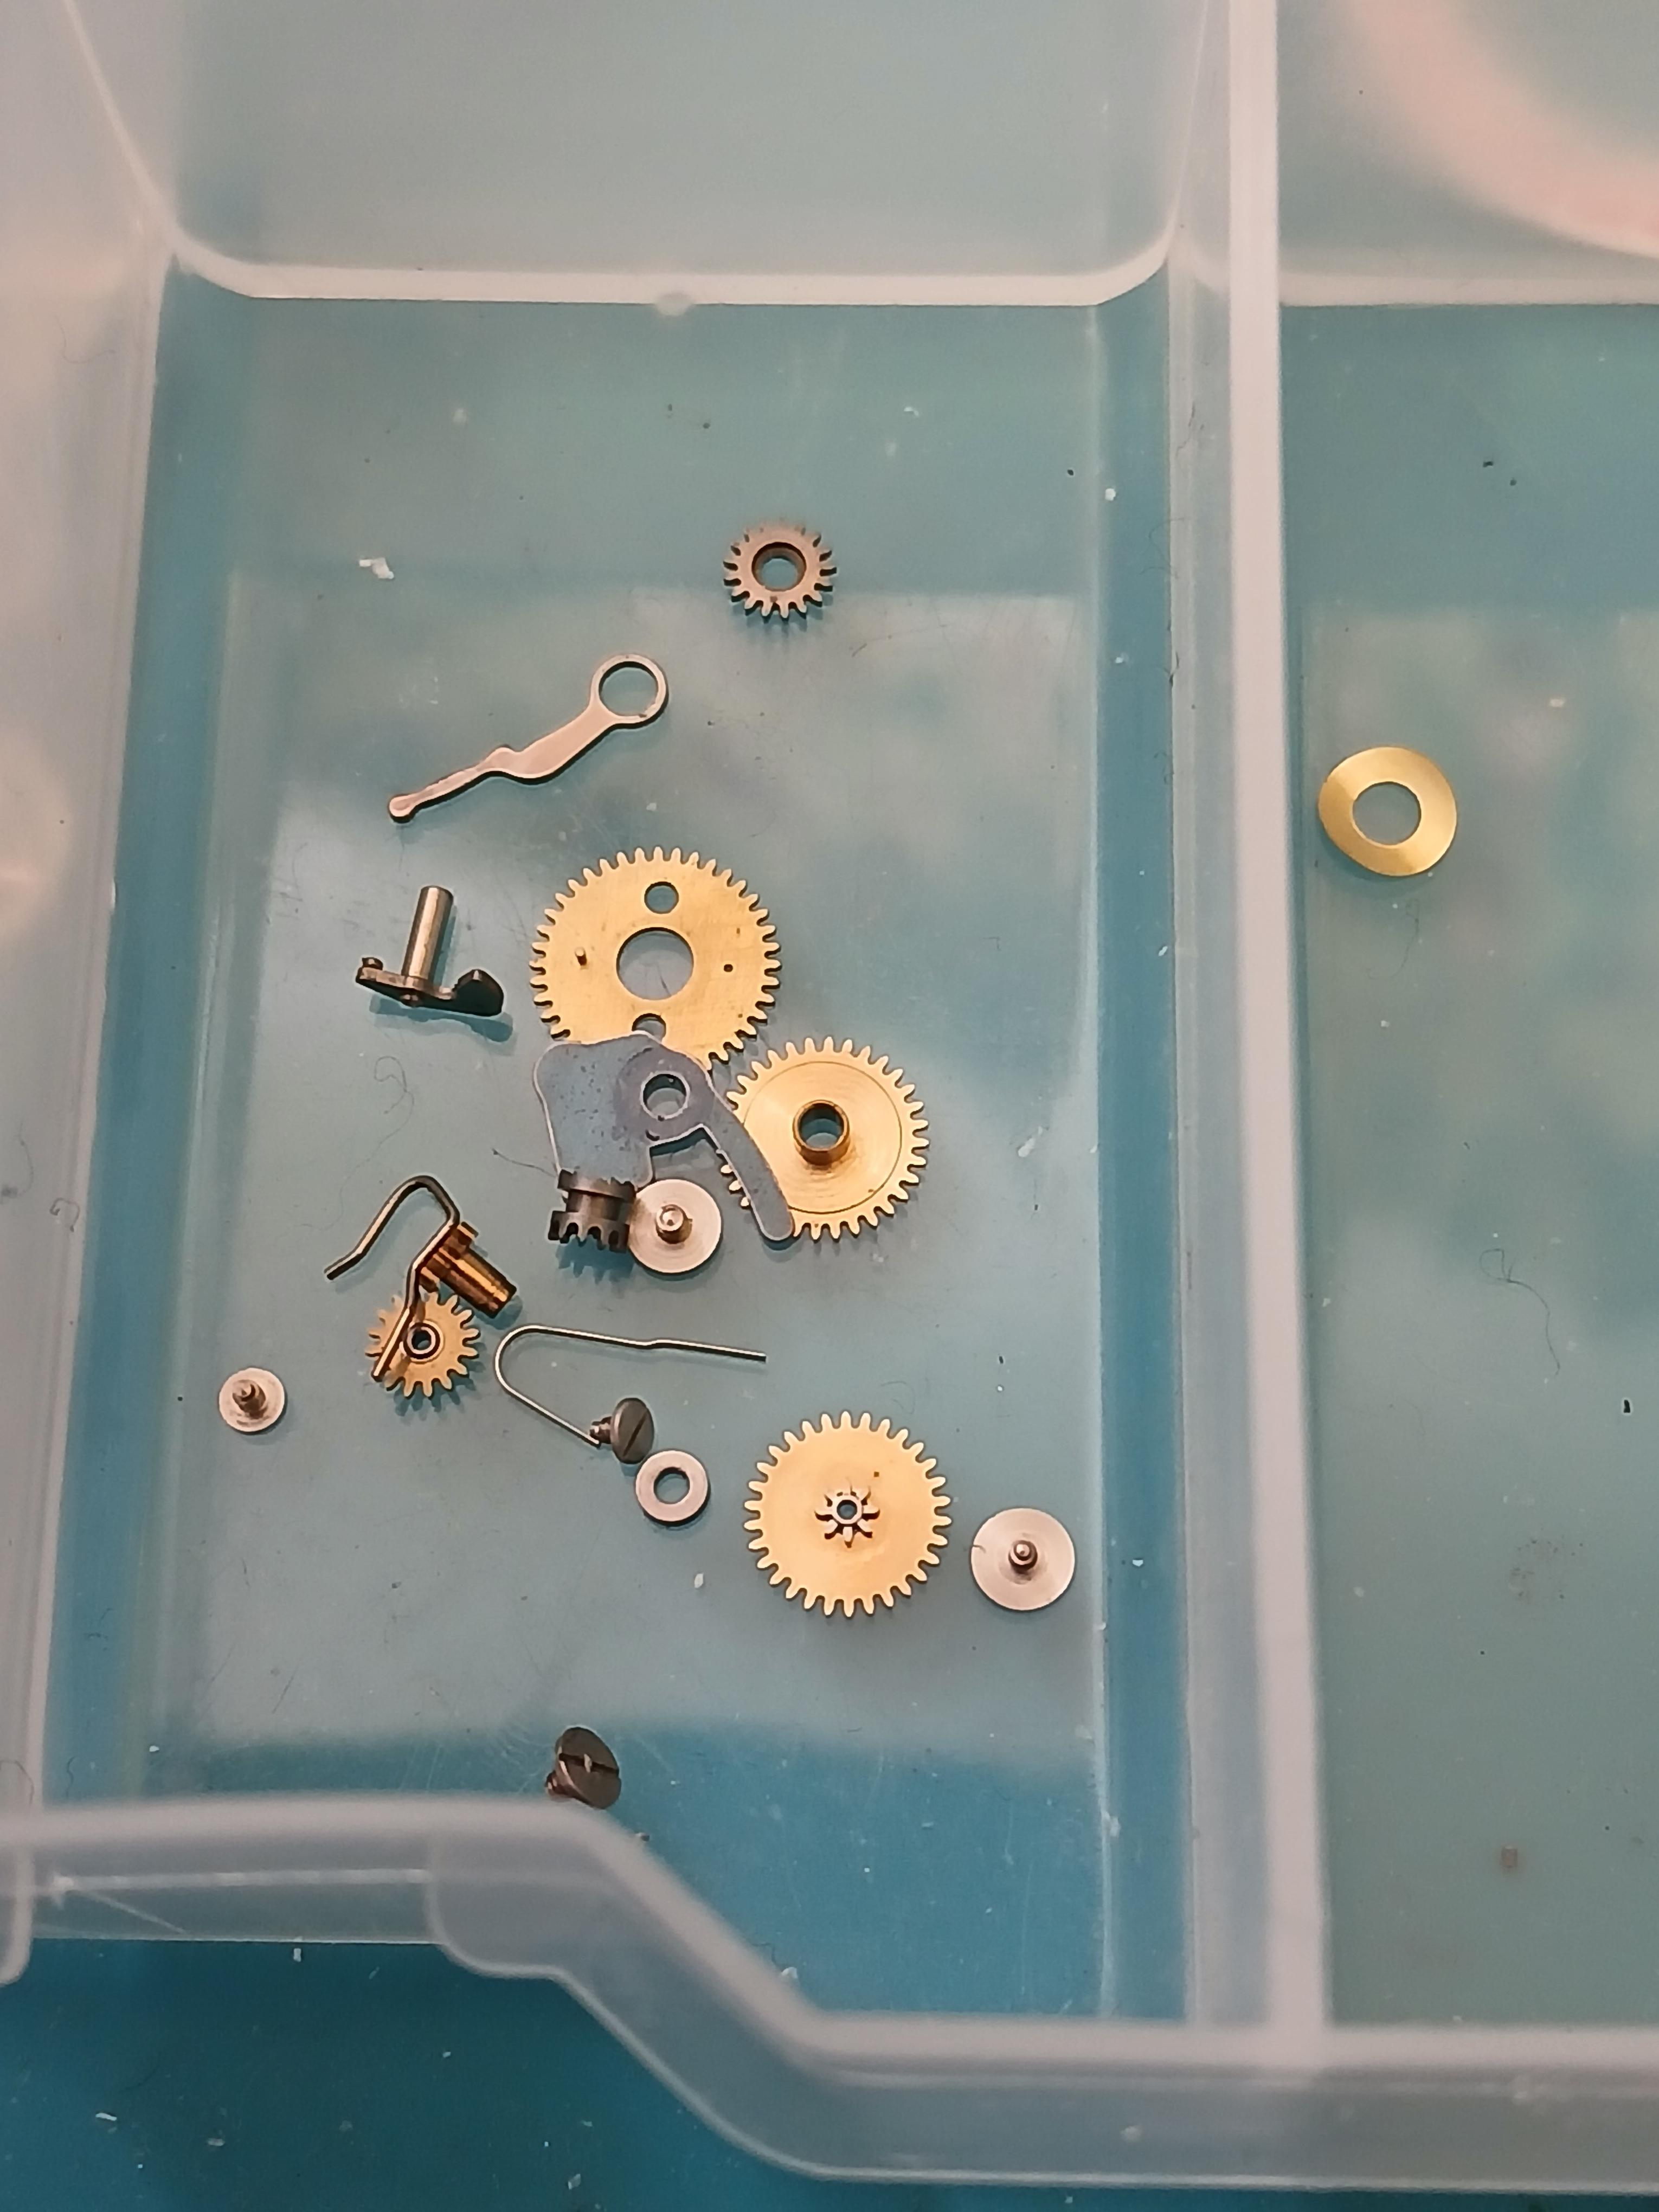
Specimen tubes. Free from Doctors. A place for everything. Everything in its place. Front to back. Left to right. Tools for pin removal on straps Oilers and holders. Red, blue, black Plastic holders whilst using tweezers for spring work. Screwdrivers in common use Tweezer in common use. One metal, one brass. Hand removal tools Tweezers for special operations. Plastic etc. Fibre brush Peg wood Folded tweezer for holding and removing 30mm cleaning baskets from jars. Big Red. Grooved screwdriver for removal of Seiko rotor. Large tweezer for arbour removal. White container - Knife, case opener and hand/canon pinon removal tool. Rubber bands - Asda As I said. My space is limited.
 1 point
 -
Yes you do the truing in the caliper, with it resting on the bench or at least the hand holding it resting on something ( I do them under the microscope). The pivots are in holes similar to a regular truing caliper, supported on their cones. Yes any hairspring truing is due to something happening to the spring. Errors in the flat are indeed due to a twisting of the spring. Most truing one might do is near the stud, as this is the easiest place for an error to be introduced. Problems at the collet generally come when the hairspring is removed. Truing in the flat at the collet is actually usually a matter of pushing down at the maximum high point or lifting up at the low point, though there are times when you do have to get in there with very fine tweezers and tweek/twist it. The tweezers would be held so they are offset from vertical in relation to the spring, then closed to induce the twisting motion. Same as you would do if truing the flat at the stud. But - this really would only ever be done in the first few degrees coming out of the pinning point, best is to do the correction simply lifting or pushing on the first coil. It gets to be a real pain with collets where the spring is very close to the balance arms, as there isn't necessarily enough room to effect the plastic deformation necessary (going far enough so that the metal doesn't spring back to the original faulty position). Then it has to come off, and go on a broach, and leveled in relation to the collet- which is often just fine then- but hopefully close enough that any further correction can be done on the balance now.1 point
-
I always preferred to paint the lacquer on, spraying can leave minute bubbles I admit you can hardly see them but you know they are there. Horolacq clear is the one I had and painted on with a paint artist flat brush. I drys very quick.1 point
-
Buying a new one is surely the cheapest option if you can't do the work yourself. https://www.cousinsuk.com/product/centering-spindle-staking-punch1 point
-
This needs another lecture, but I have faulty X-ray machine 130 km away so have to prepare and go. I will try to answer when have the time.1 point
-
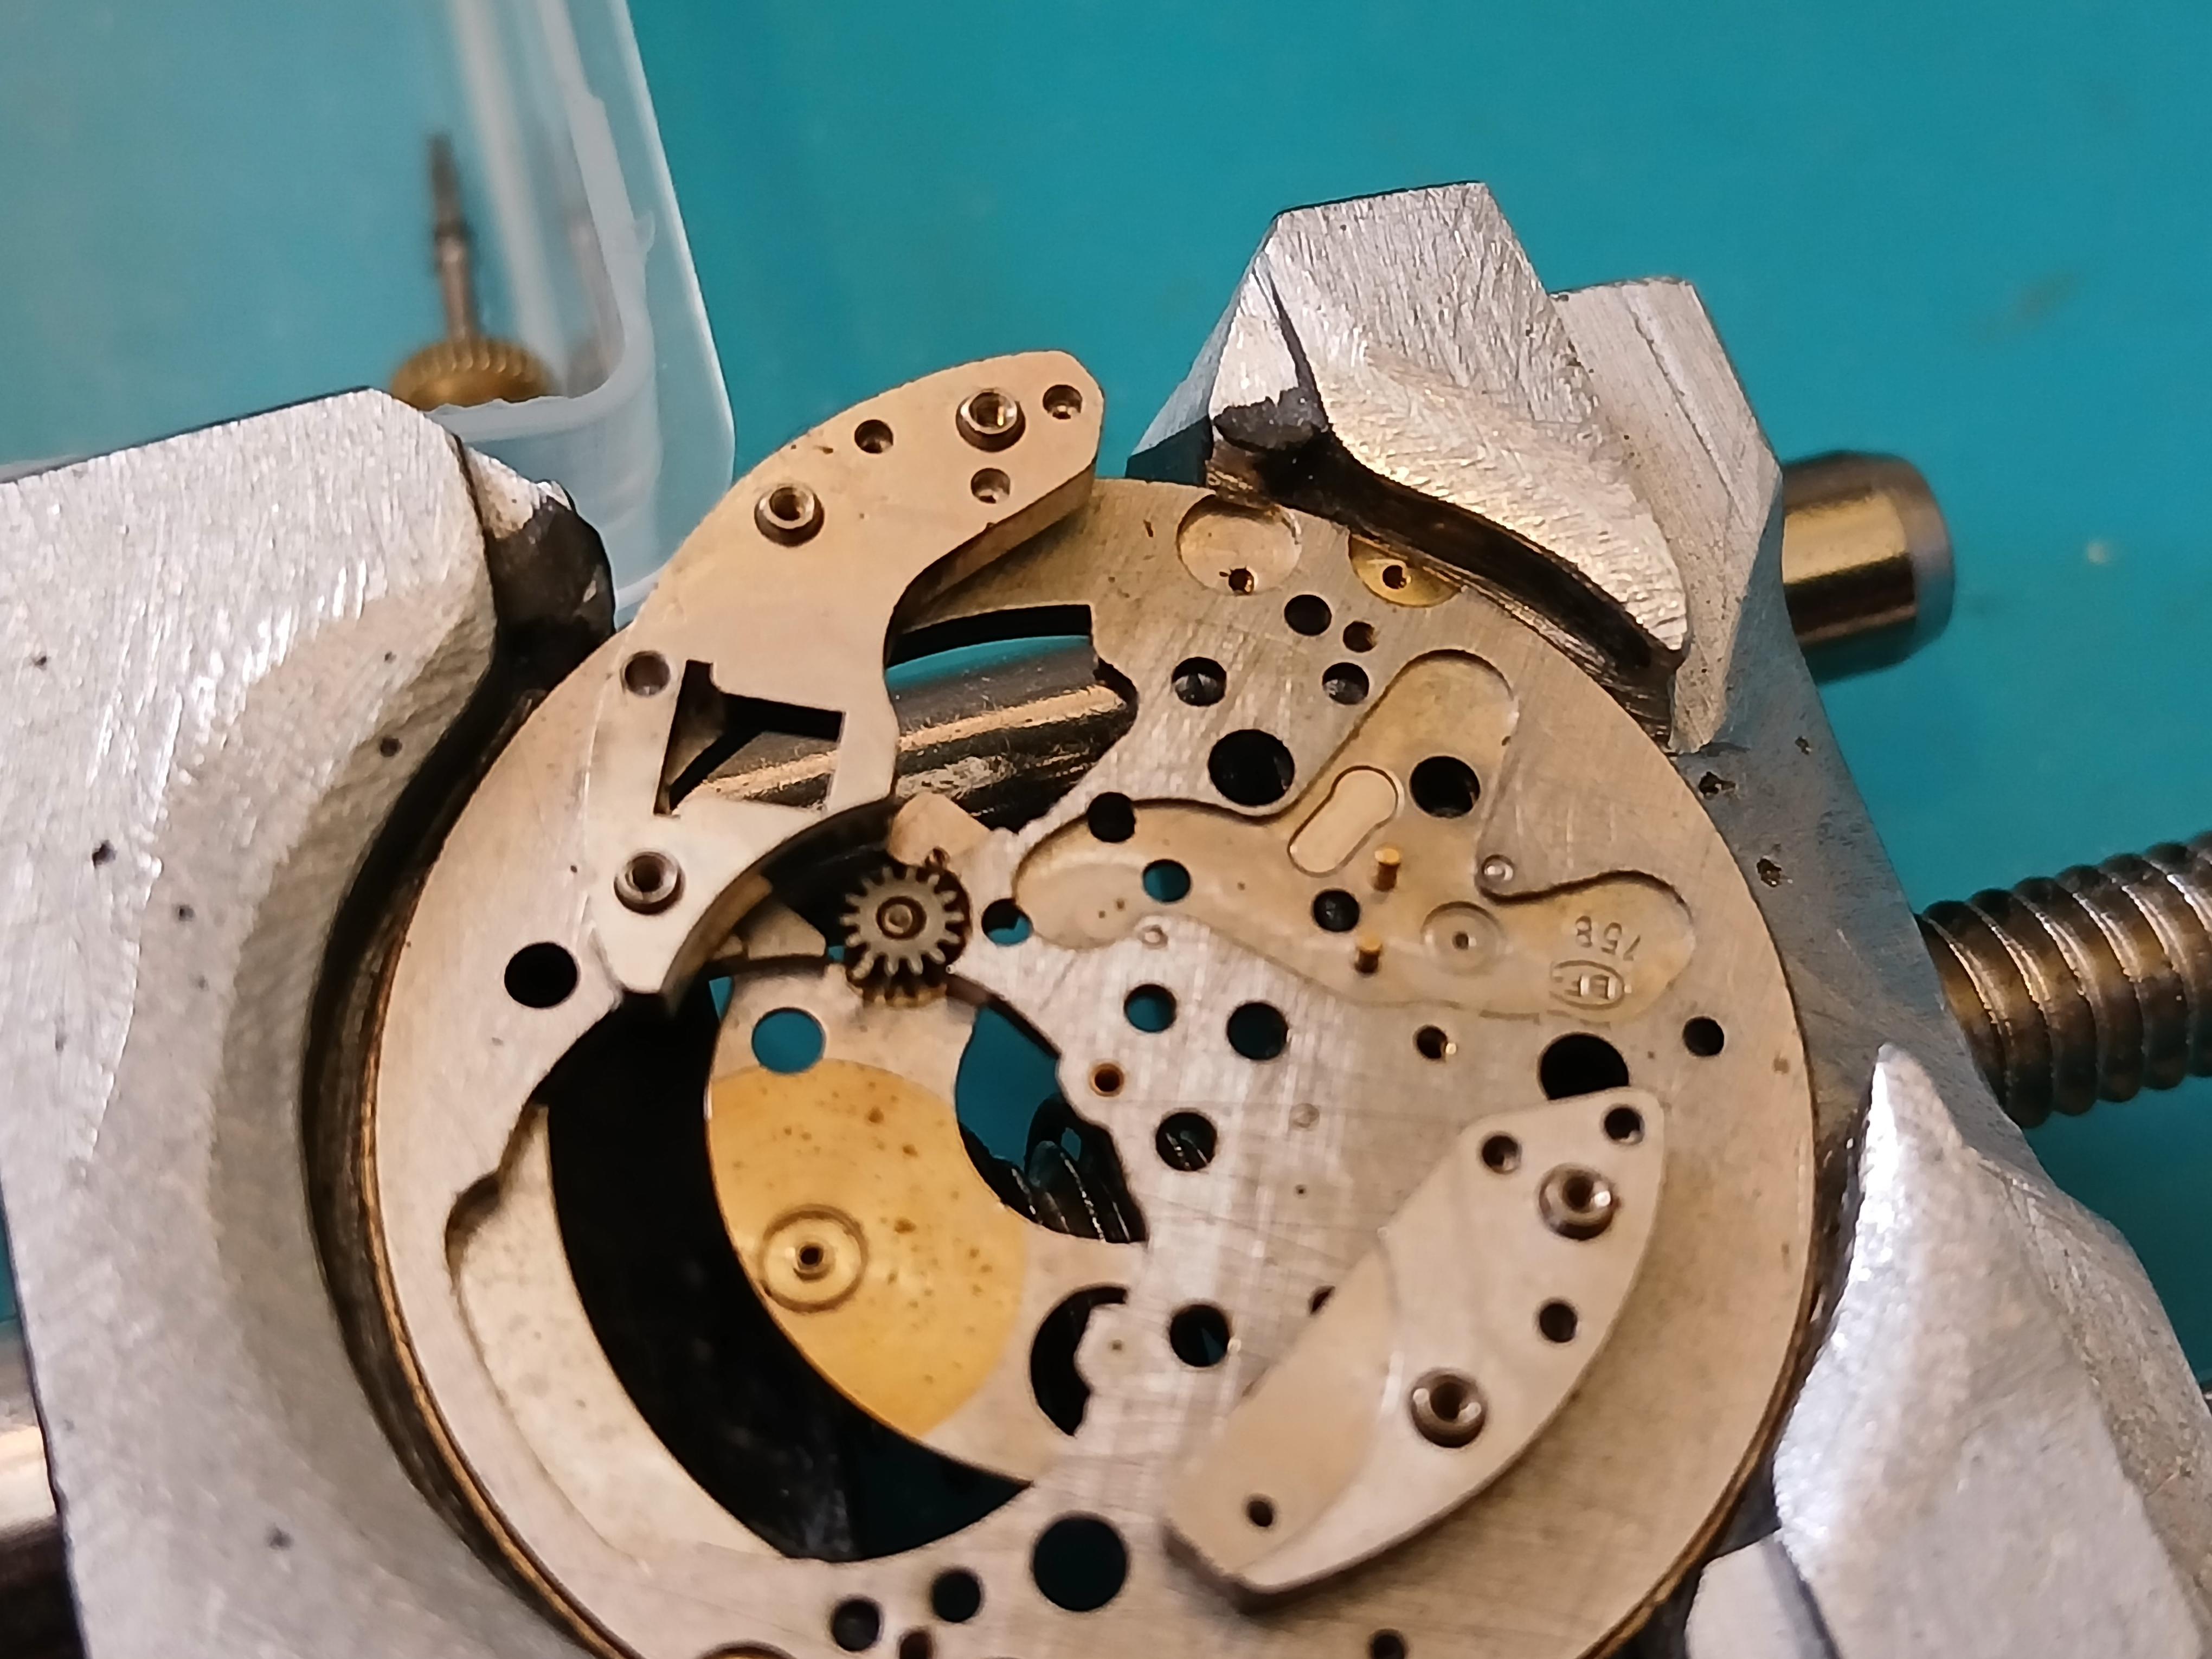
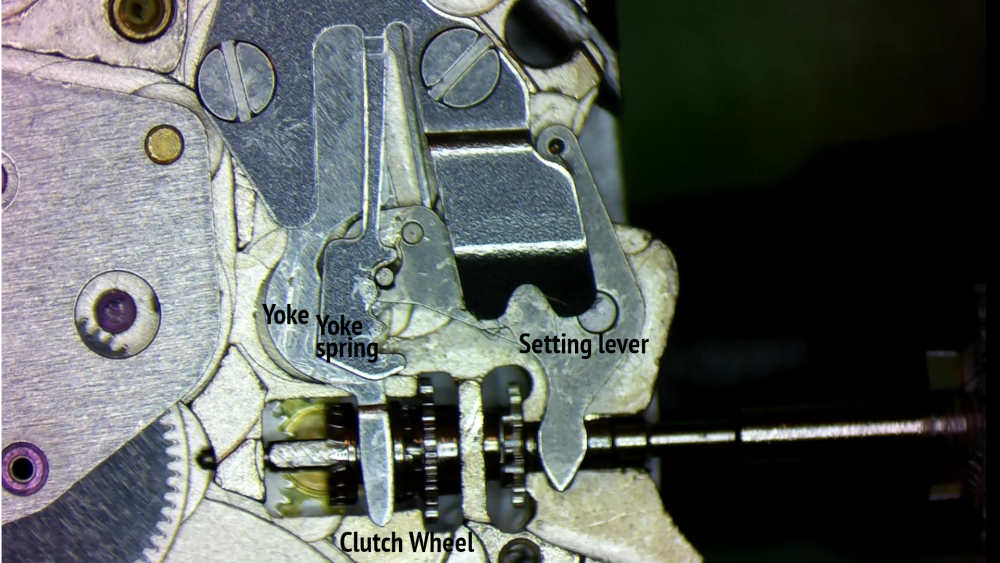
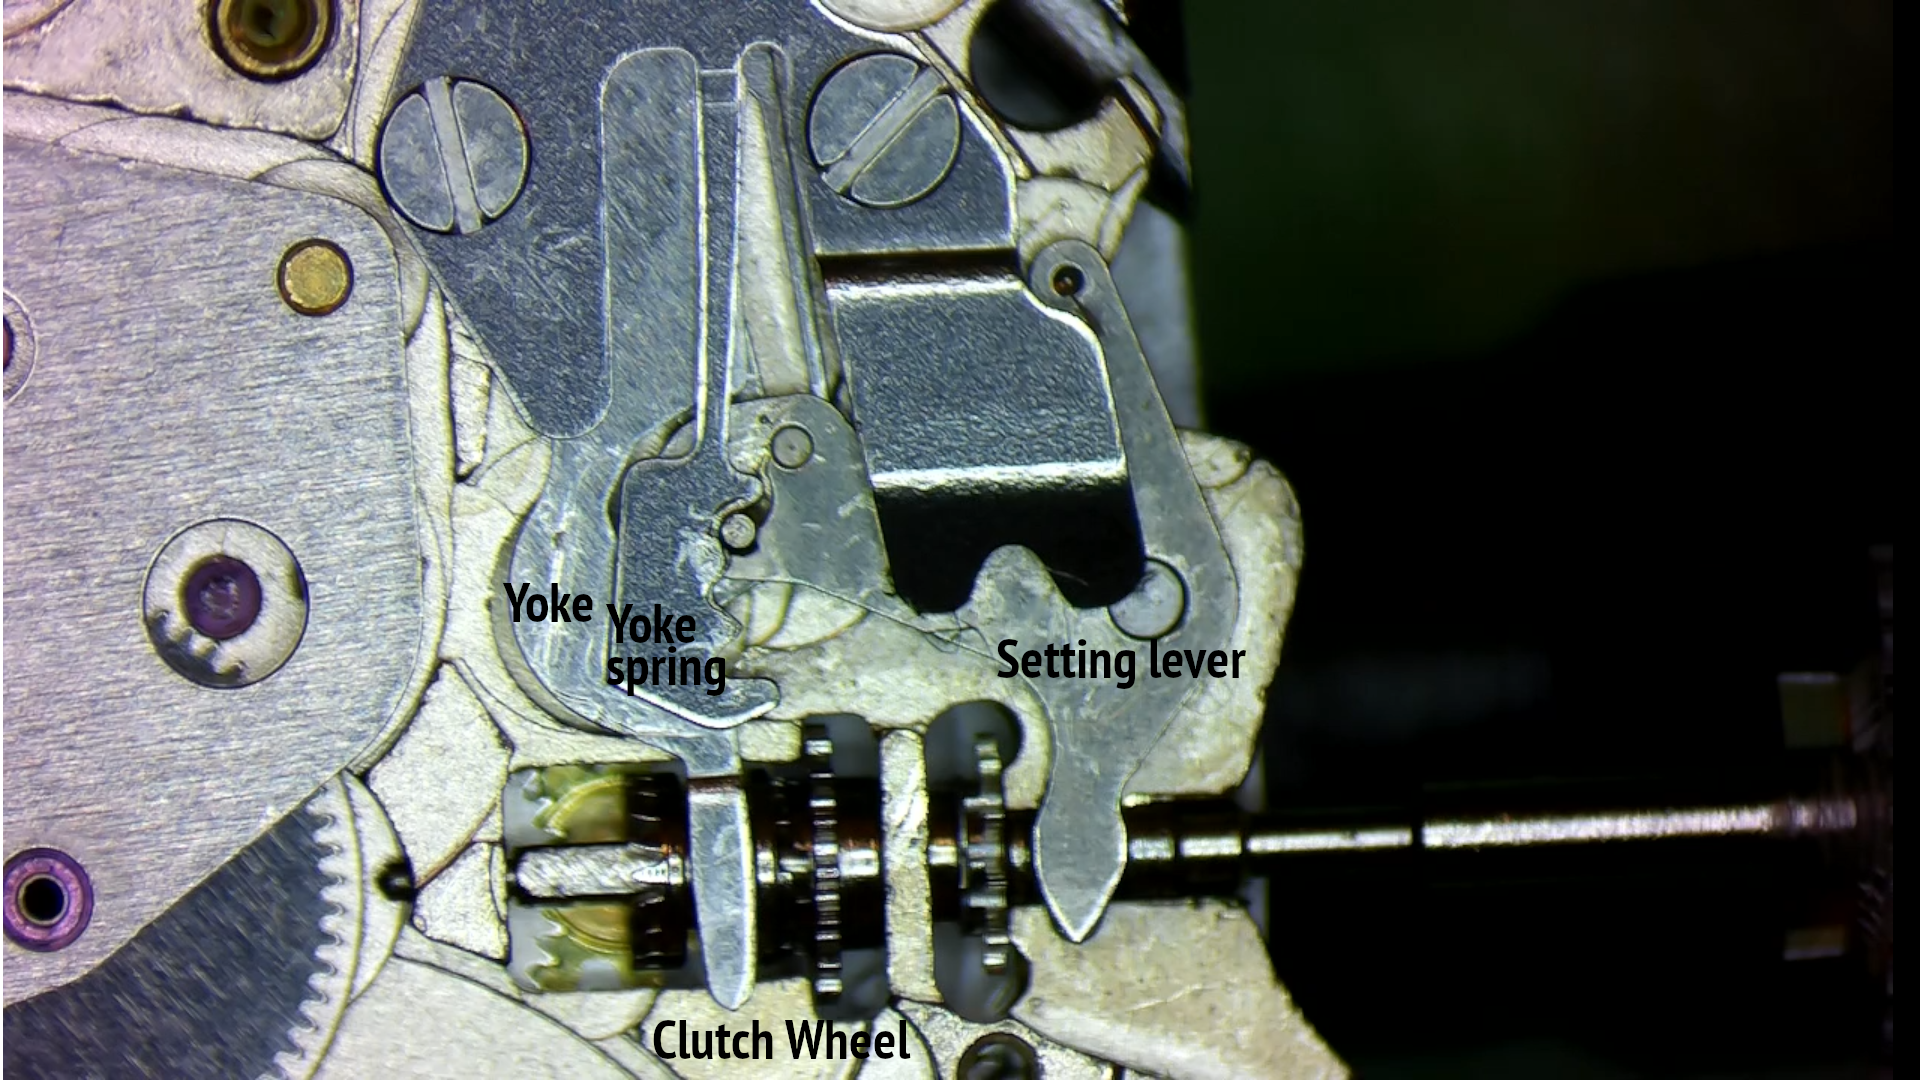
Well, I disassembled most of the dial side and sure enough the yoke lever had slipped out of the clutch wheel. I tried to nudge it back but wound up taking apart most of the movement side to get to the setting lever, yoke and yoke spring, all of which I had to remove to reset the yoke into the clutch wheel. What a pain but a good learning experience. I've attached a photo and also did a short video for anybody who might run into this who, like me had no clue what lay ahead. Please pardon the video, or actually audio quality; I have lots to learn if I'm to ever be a watch repair "influencer Here's the URL for the video:
 1 point
 -
If you can't buy the part, persuade someone to make it for you.1 point
-
Yes indeed. That's what I mean but wasn't able to express in the correct working. Thanks. we may have to come up with the definition of extremely expensive when looking at the various eBay listings like the above indicated that well it has potential and this one is slightly cheaper indicates less potential I'm really surprised to see that at this price. Not extremely expensive, I agree. My experience was always that Rolex parts/movements are several times more expensive than Omega parts/movements -- looking at 1950s-1990s era. I was recently looking for a 1930s Omega T17 movement and it goes for around 200-300. I assumed that a Rolex from the same era would then costs over 1000. But I'm proven wrong. Always amazing to see your access to literature and the effort you make to identify obscure things with them! Cudos to you! 100% @Qutadah, your enthusiasm is admirable and a great start to this hobby. However, did we understand correctly that you, like the seller, ALSO don't (yet) have much experience in watchmaking -- particularly with very old movements (i.e. without shock spring settings)? Working on watches without shock protected balances implies that you need to handle hairsprings (remove if from the balance cock, and attaching it again, making sure the hairspring goes back between the regulator pins, etc), The hairspring material is also a lot softer and much more prone to bending and breaking. A LOT can go wrong for a beginner. I can tell you from (unfortunate) experience that this results in a 50% hairspring destruction rate when you are doing it the first 2-3 times. After that, it gets better. I guess the seller may be reluctant to take things apart because he will likely cause damage. That's reasonable. The risk in this case is defined by two factors: 1. the uncertainty of the damage 2. the skills you have to fix damage If you can't get better pictures, you'll have to accept the uncertainty (point 1). Then only increasing your skills/experience (point 2) can reduce the risks. And your experience should include movements from the early 1900's -- and particularly in the area of the balance/hairspring. I can "feel" that you really want to get this watch and try your luck. I'd say: better stay away. But if you really want to do it, plan on some prior practicing on very old movements and budget for buying one or probably two Rolex donor movements... Best of luck!1 point
-
About 100 years ago , Mr Wyler introduced his design, pattenting didn't take long. Adverts claimed it to resist shocks when dropped from a aeroplane, didn't say if the guy who wore it survived or not. lol1 point
-
Well, I've done it. completed my first service on a pin movement. It was a non runner when I purchased it. When doing the service I found the reason. Two items on the crown wheel stopping rotation. Removed and cleaned. Only a cheap watch, but I wanted to try my skill. Pin are more difficult than jewelled watches, in my opinion. Running well. Disassembly 1 hr. Cleaning 1/2 hr. Assembly 1 1/2 hrs. Followed members instructions. Photograph each removal and watch in reverse for assembly. Happy bunny. thank you to all. Ross


 1 point
 -
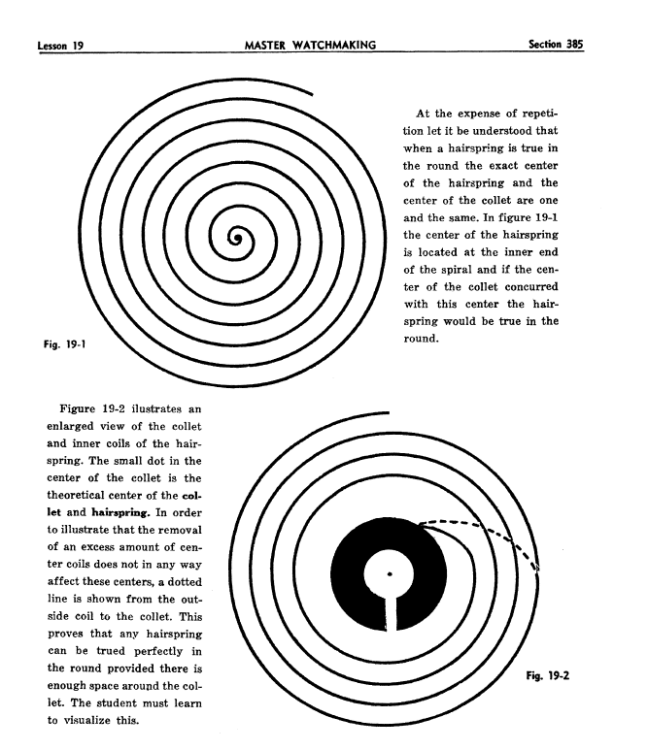
There's a section in "The Chicago School of Watchmaking" on centring the collett. chicago lesson 19.PDF
 1 point
 -
one of the problems with multipage discussions is that it makes it hard to go back and reread everything so let's review the process? Did you measure the old staff and the new staff to verify that they're the exact same size? Then riveting despite the fact all the images show one round punch I usually use several of them. In other words I will start with the smallest one I can get start two spread the rivet then I'll do another one slightly larger to keep spreading the rivet or basically whatever it takes. Followed up with a flat punch to just flatten the whole thing out hopefully. The last watch I did didn't flatten out as well as I liked but is held nice and tight so worked fine. actually ended up with a small pile of staking set punches on the bench when doing it despite the fact the photos only show one magical punch I seldom find that works the way it shows in the picture. interesting method not sure I've ever seen it in any book and you really don't one of even begin to grasp what anyone understanding watch repair would think about this method. So if you solder a balance staff PN in a future watchmaker has to replace it is that going to be an issue? if you have a lathe visually the look really nice to impress your friends but they do have purposes in watch repair. Then why don't you start practicing with it and some scrap balance wheels I know hobbyist never practice it takes away the fun but still find some scrap balance wheels look on eBay practice cutting the hubs off see if you like that method. Personally I never did but to each his own. then find some metal start turning it on the lathe maybe make a balance staff a really big balance staff. Watch repair is all about practicing.1 point
-
Update: After giving up hope that I could get the staff riveted to the balance, I got to musing over the above advice. I decided to just play around with different methods of attaching the staff using a junker staff and balance. I used liquid shellac first and I thought it held moderately well initially, but then with a bit of wiggling from my tweezers, the joint failed. I then tried the solder. Oh what a big blob of mess that made. I could see, however, how a skilled jeweler could make that work quite well. Finally, I tried CA glue (super glue). It took two tries but ultimately it turned out quite well. I got the watch back together and it's still running. I realize this is just a temporary fix, and is probably considered blasphemy by the real watchmakers here (i don't include myself under that esteemed label), but it's super cool to see and hear this 19th century timepiece chugging along again. It's nice to have an occasional small victory to offset the frustrations with this hobby. PS I appreciate everyone's kind advice. I do think that next time I am going to give my lathe its maiden voyage and try cutting off the hub to remove the staff. That seems like it's do-able for a novice, whereas making my own staff seems daunting at this stage of the game.
 1 point
 -
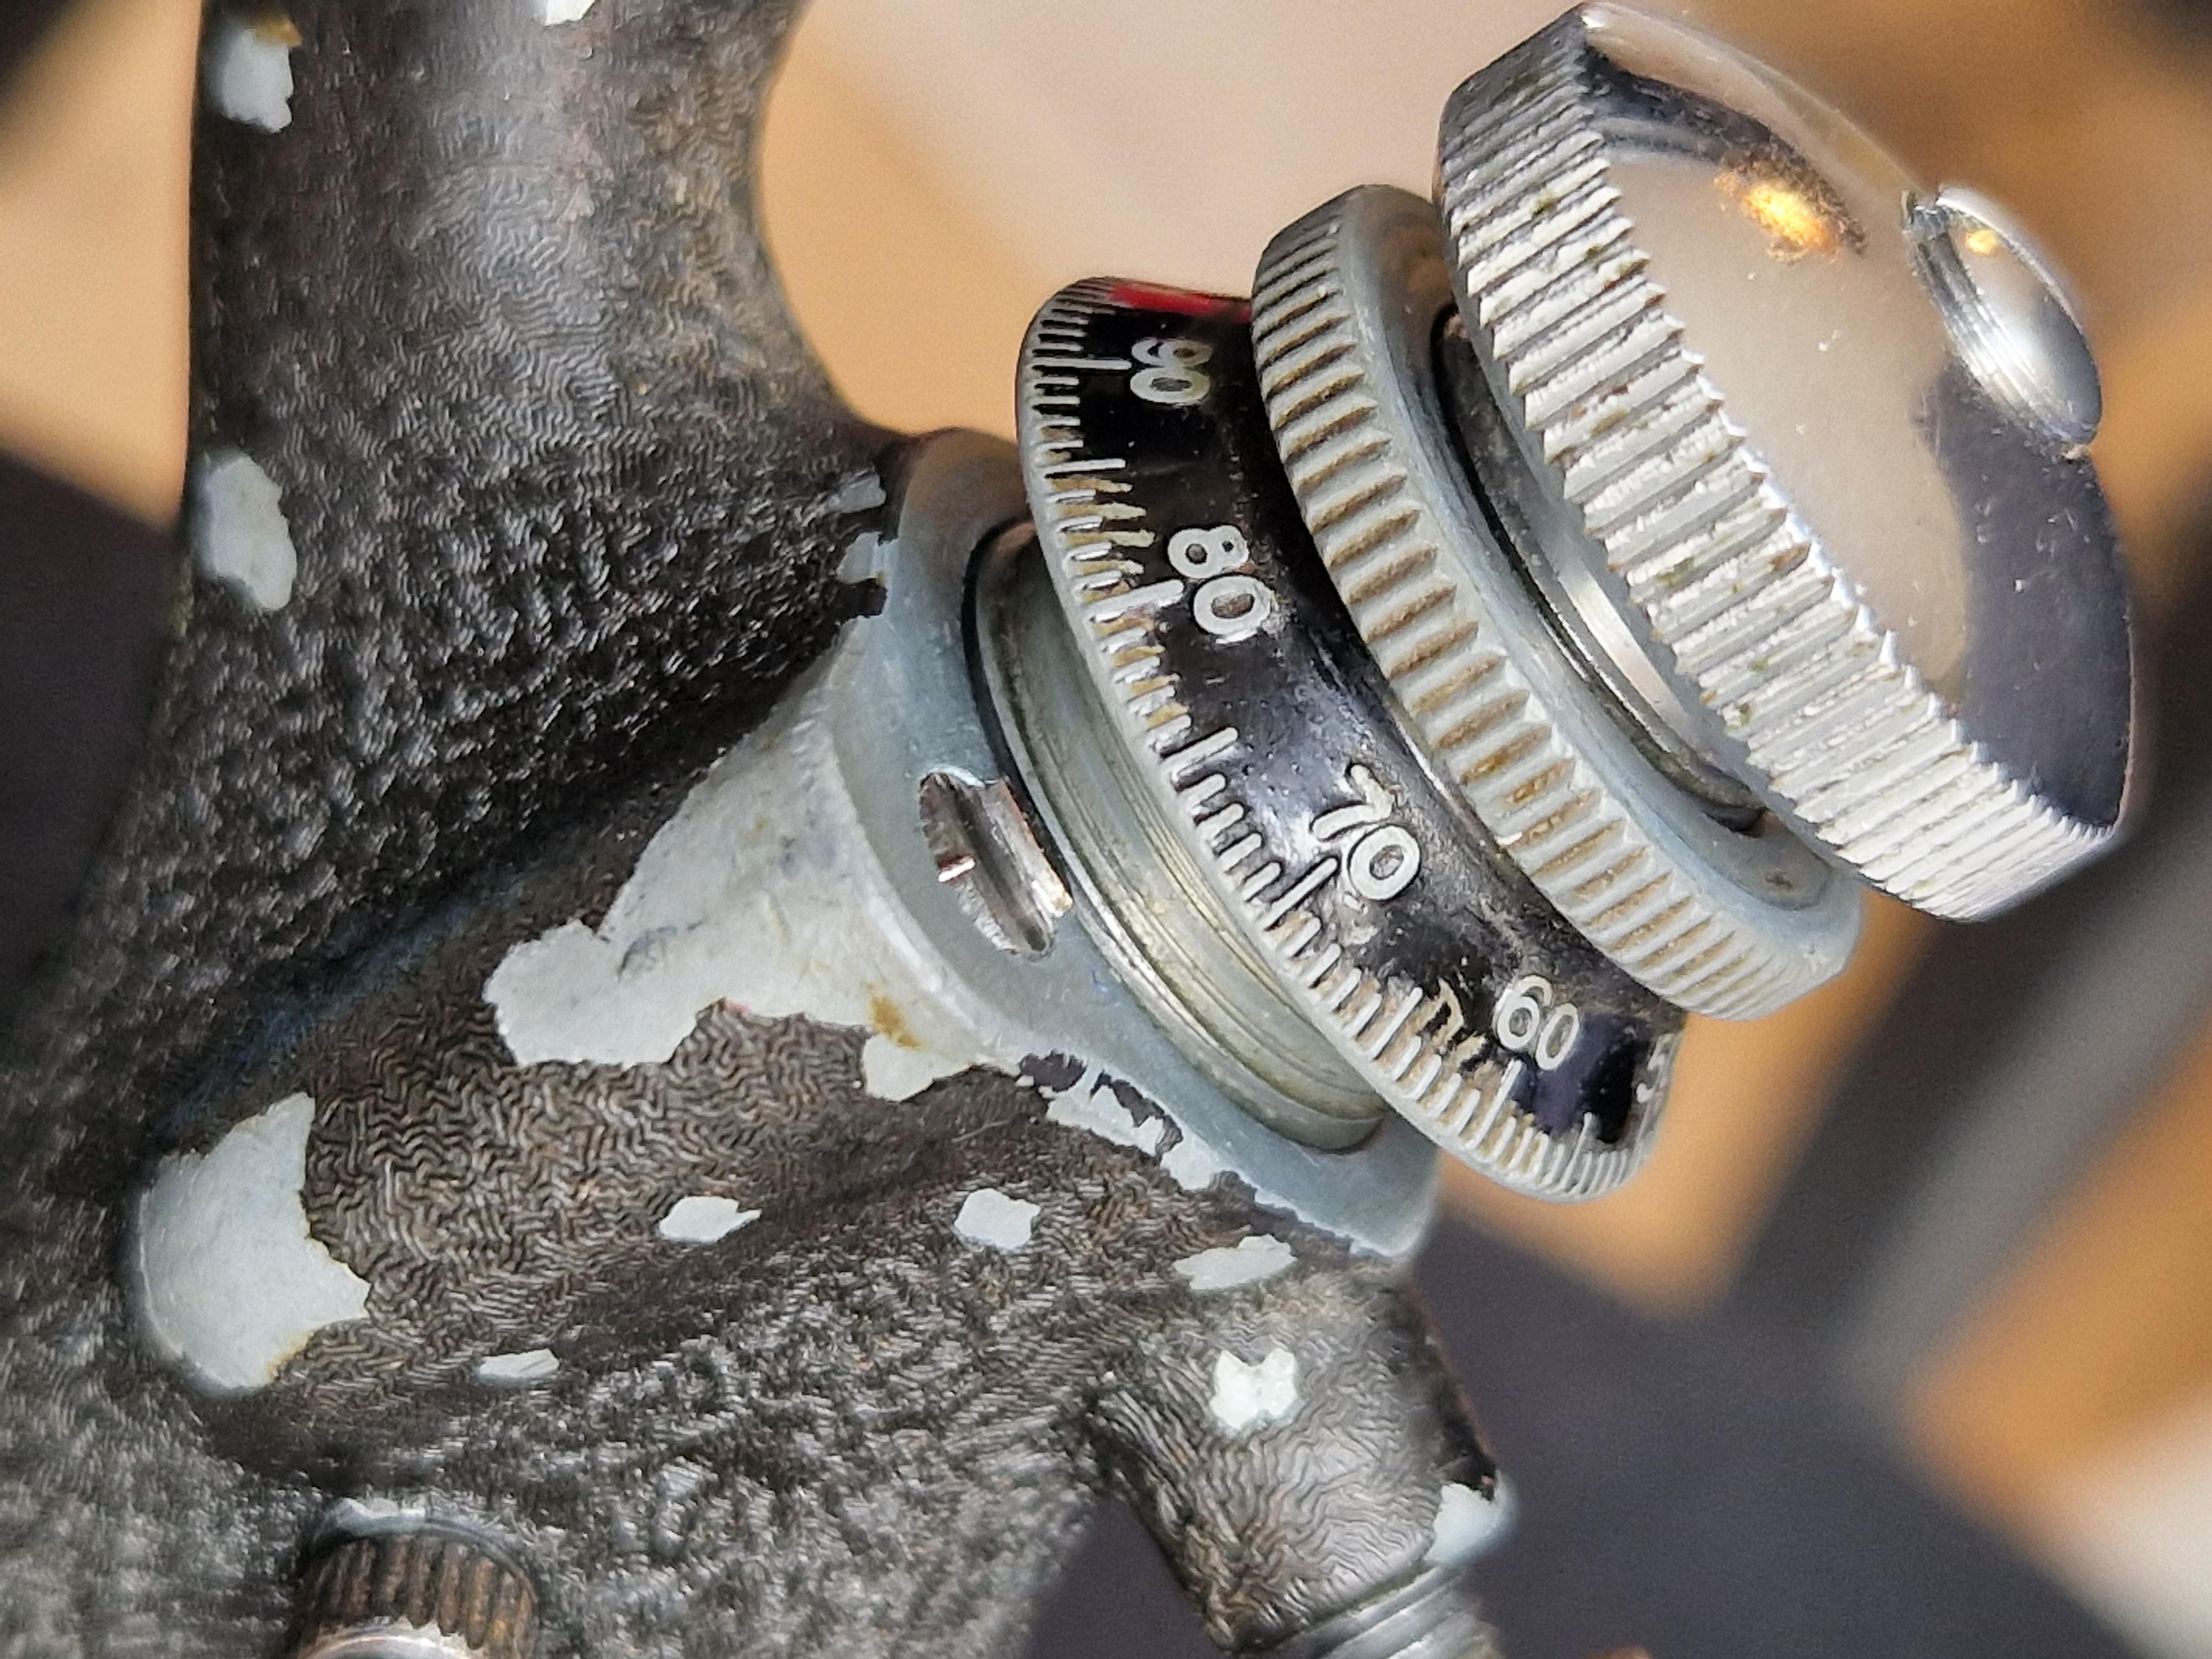
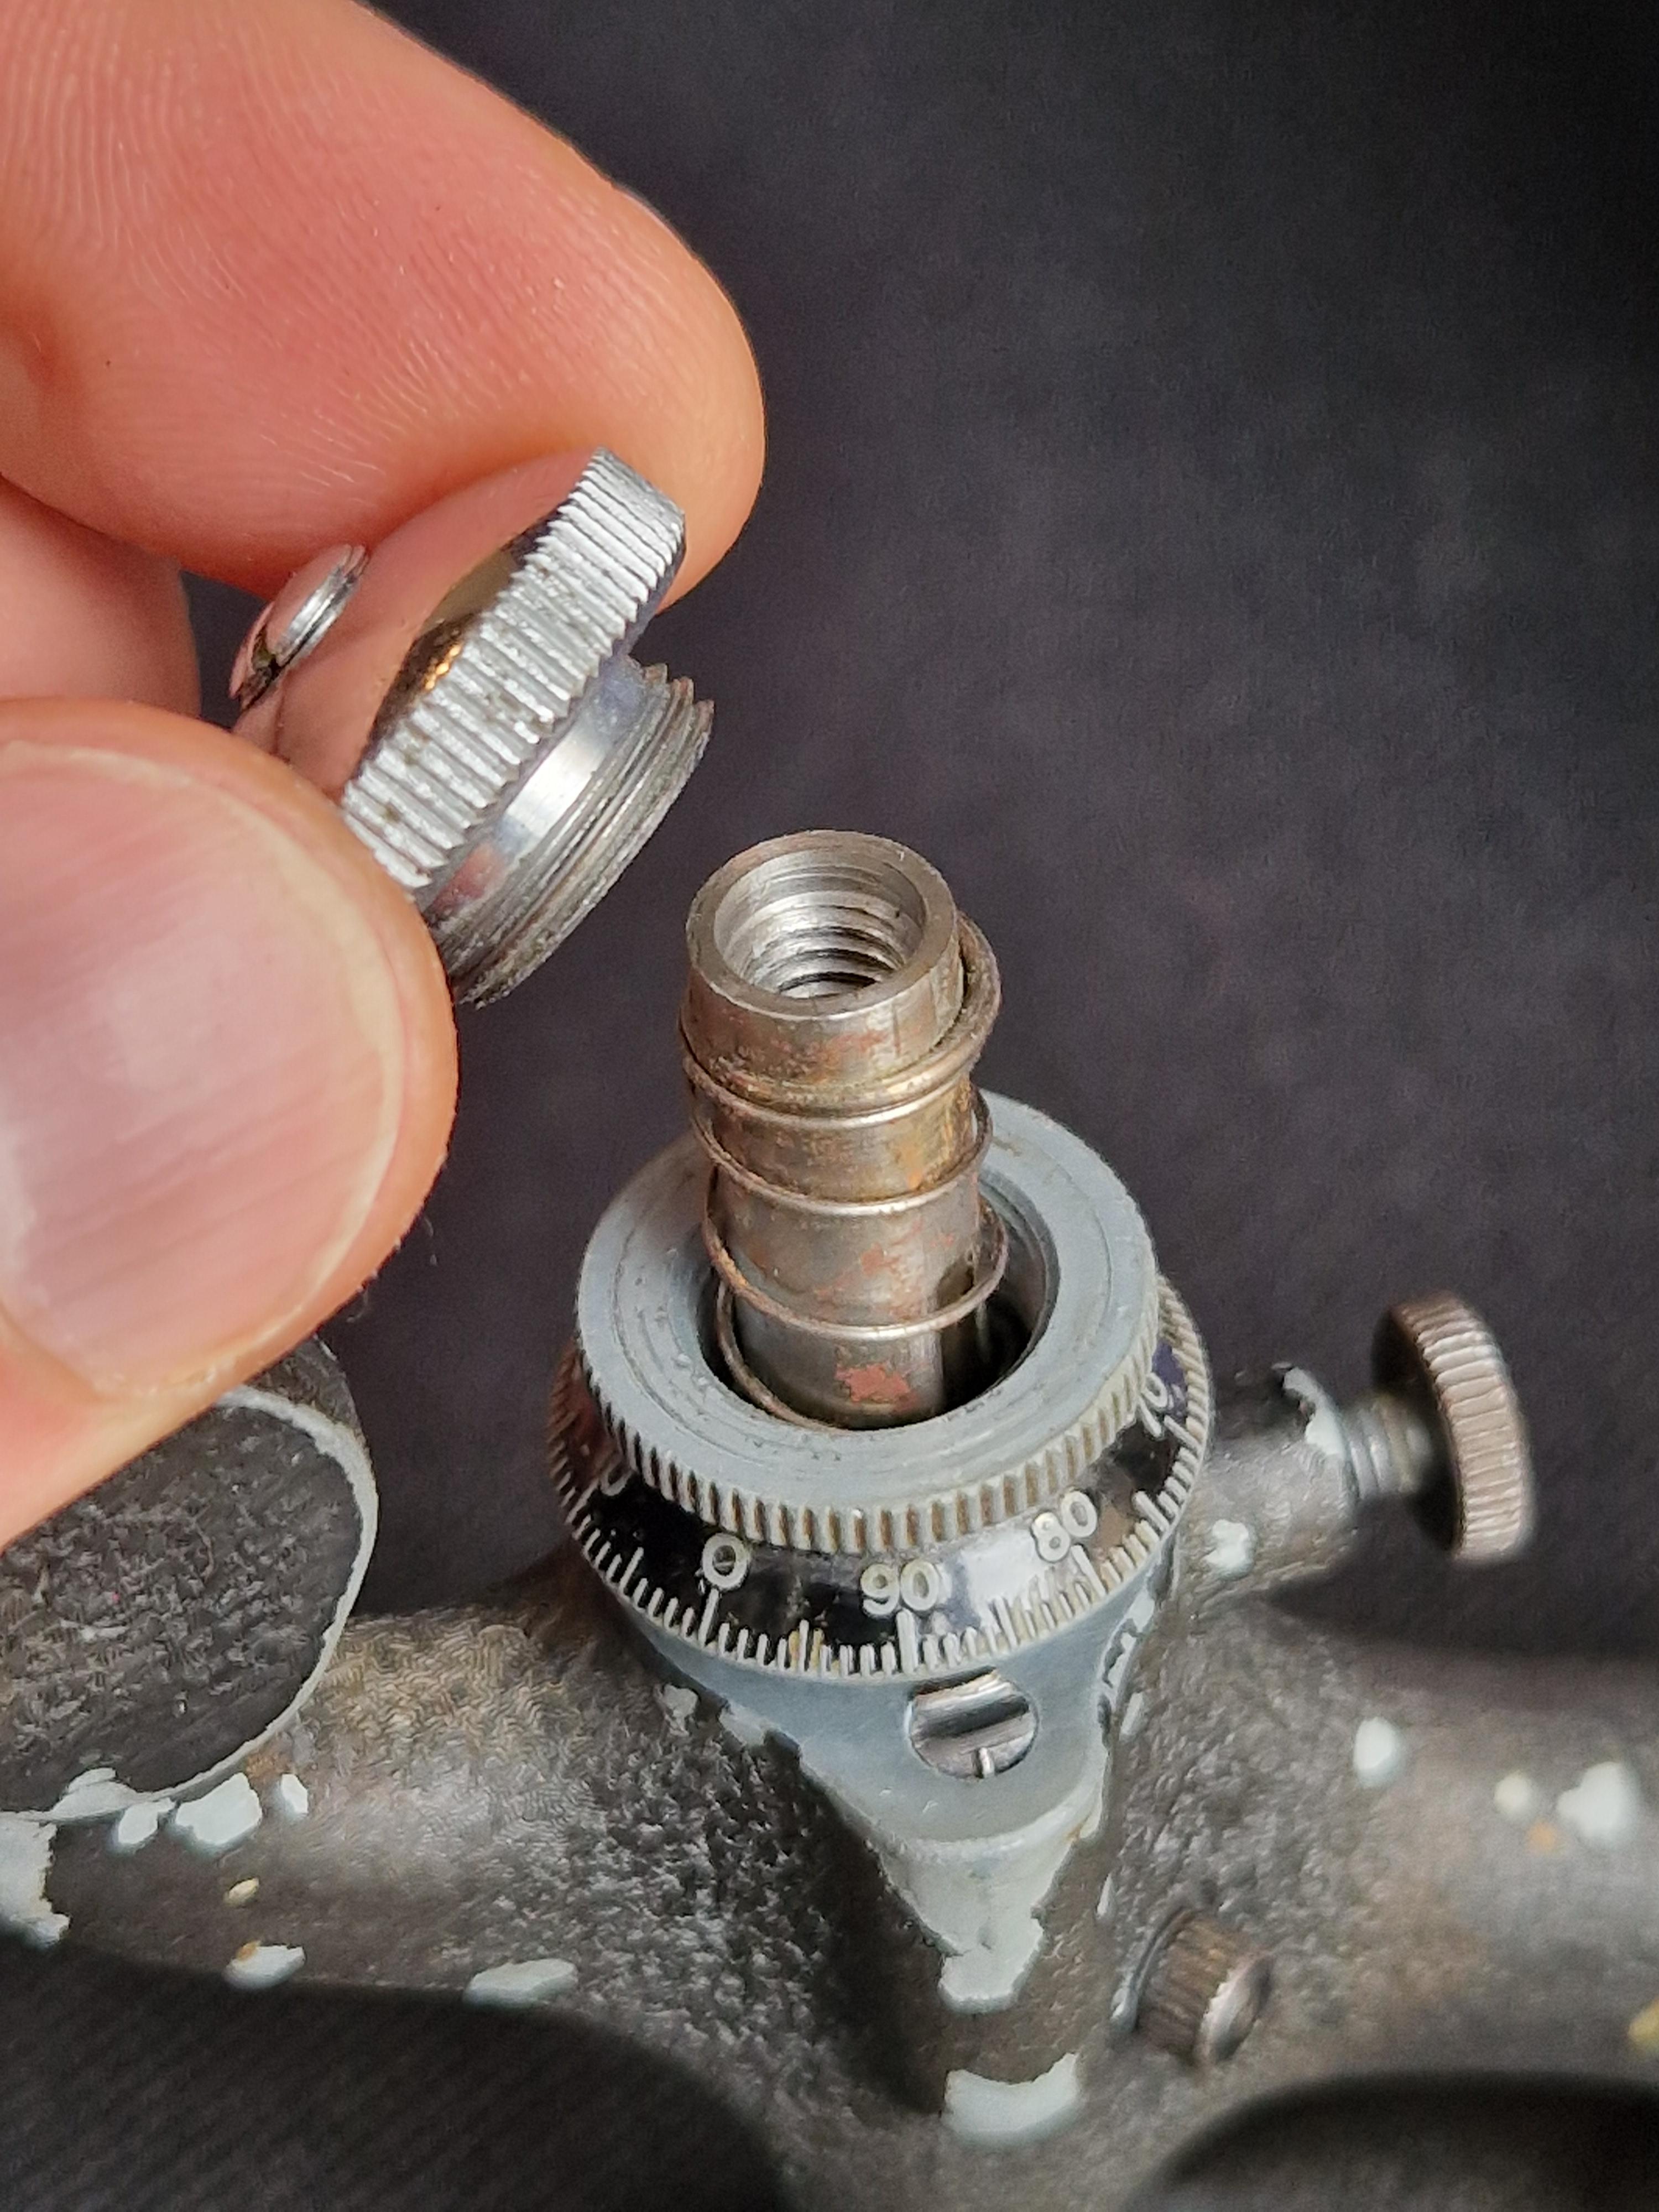
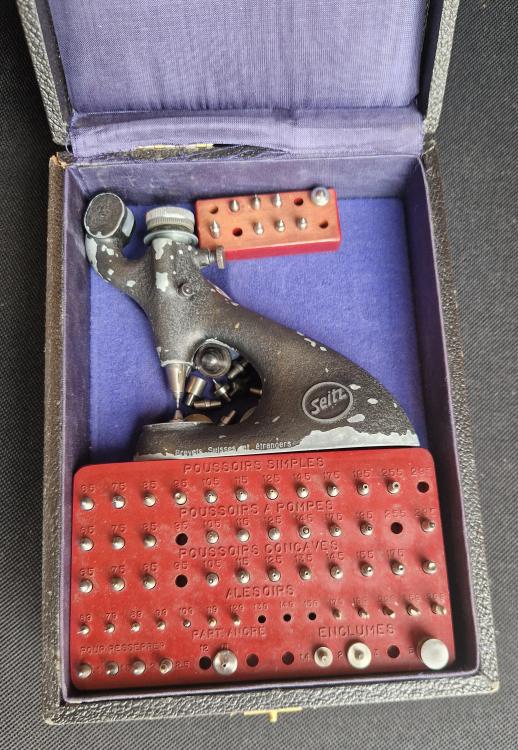
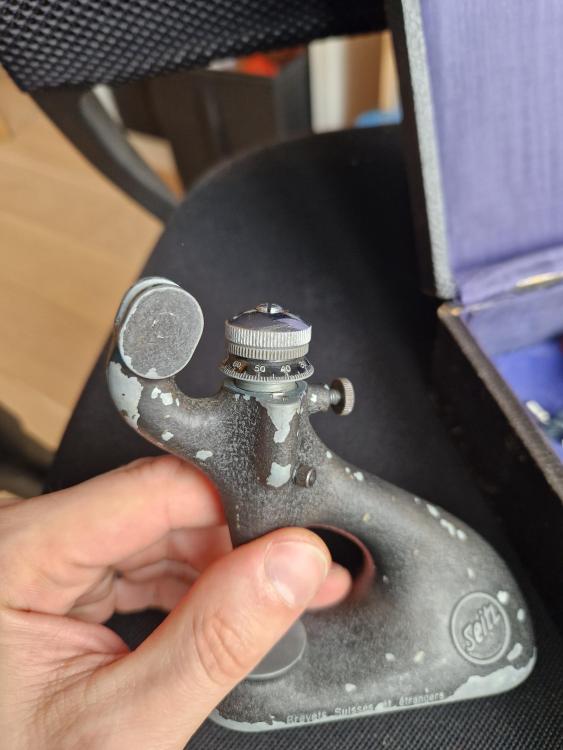
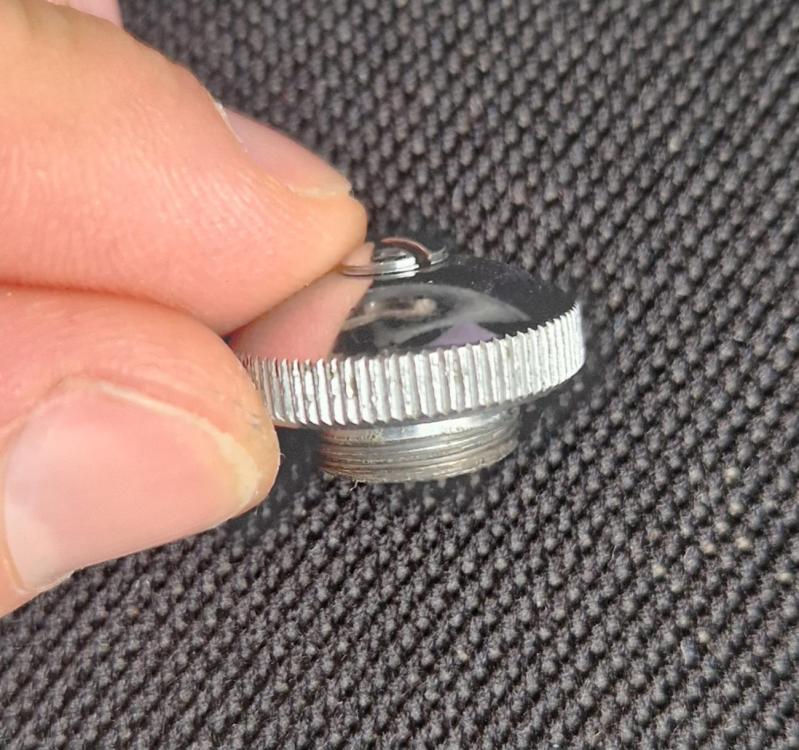
That's valuable information for those on the lookout for their first Seitz jewelling tool! I guess I got lucky then! It didn't know about this when I bought mine. But even if you get the newer version, you need to make sure the respective adapter/knob is included. See pictures below.


 1 point
 -
1 point
-
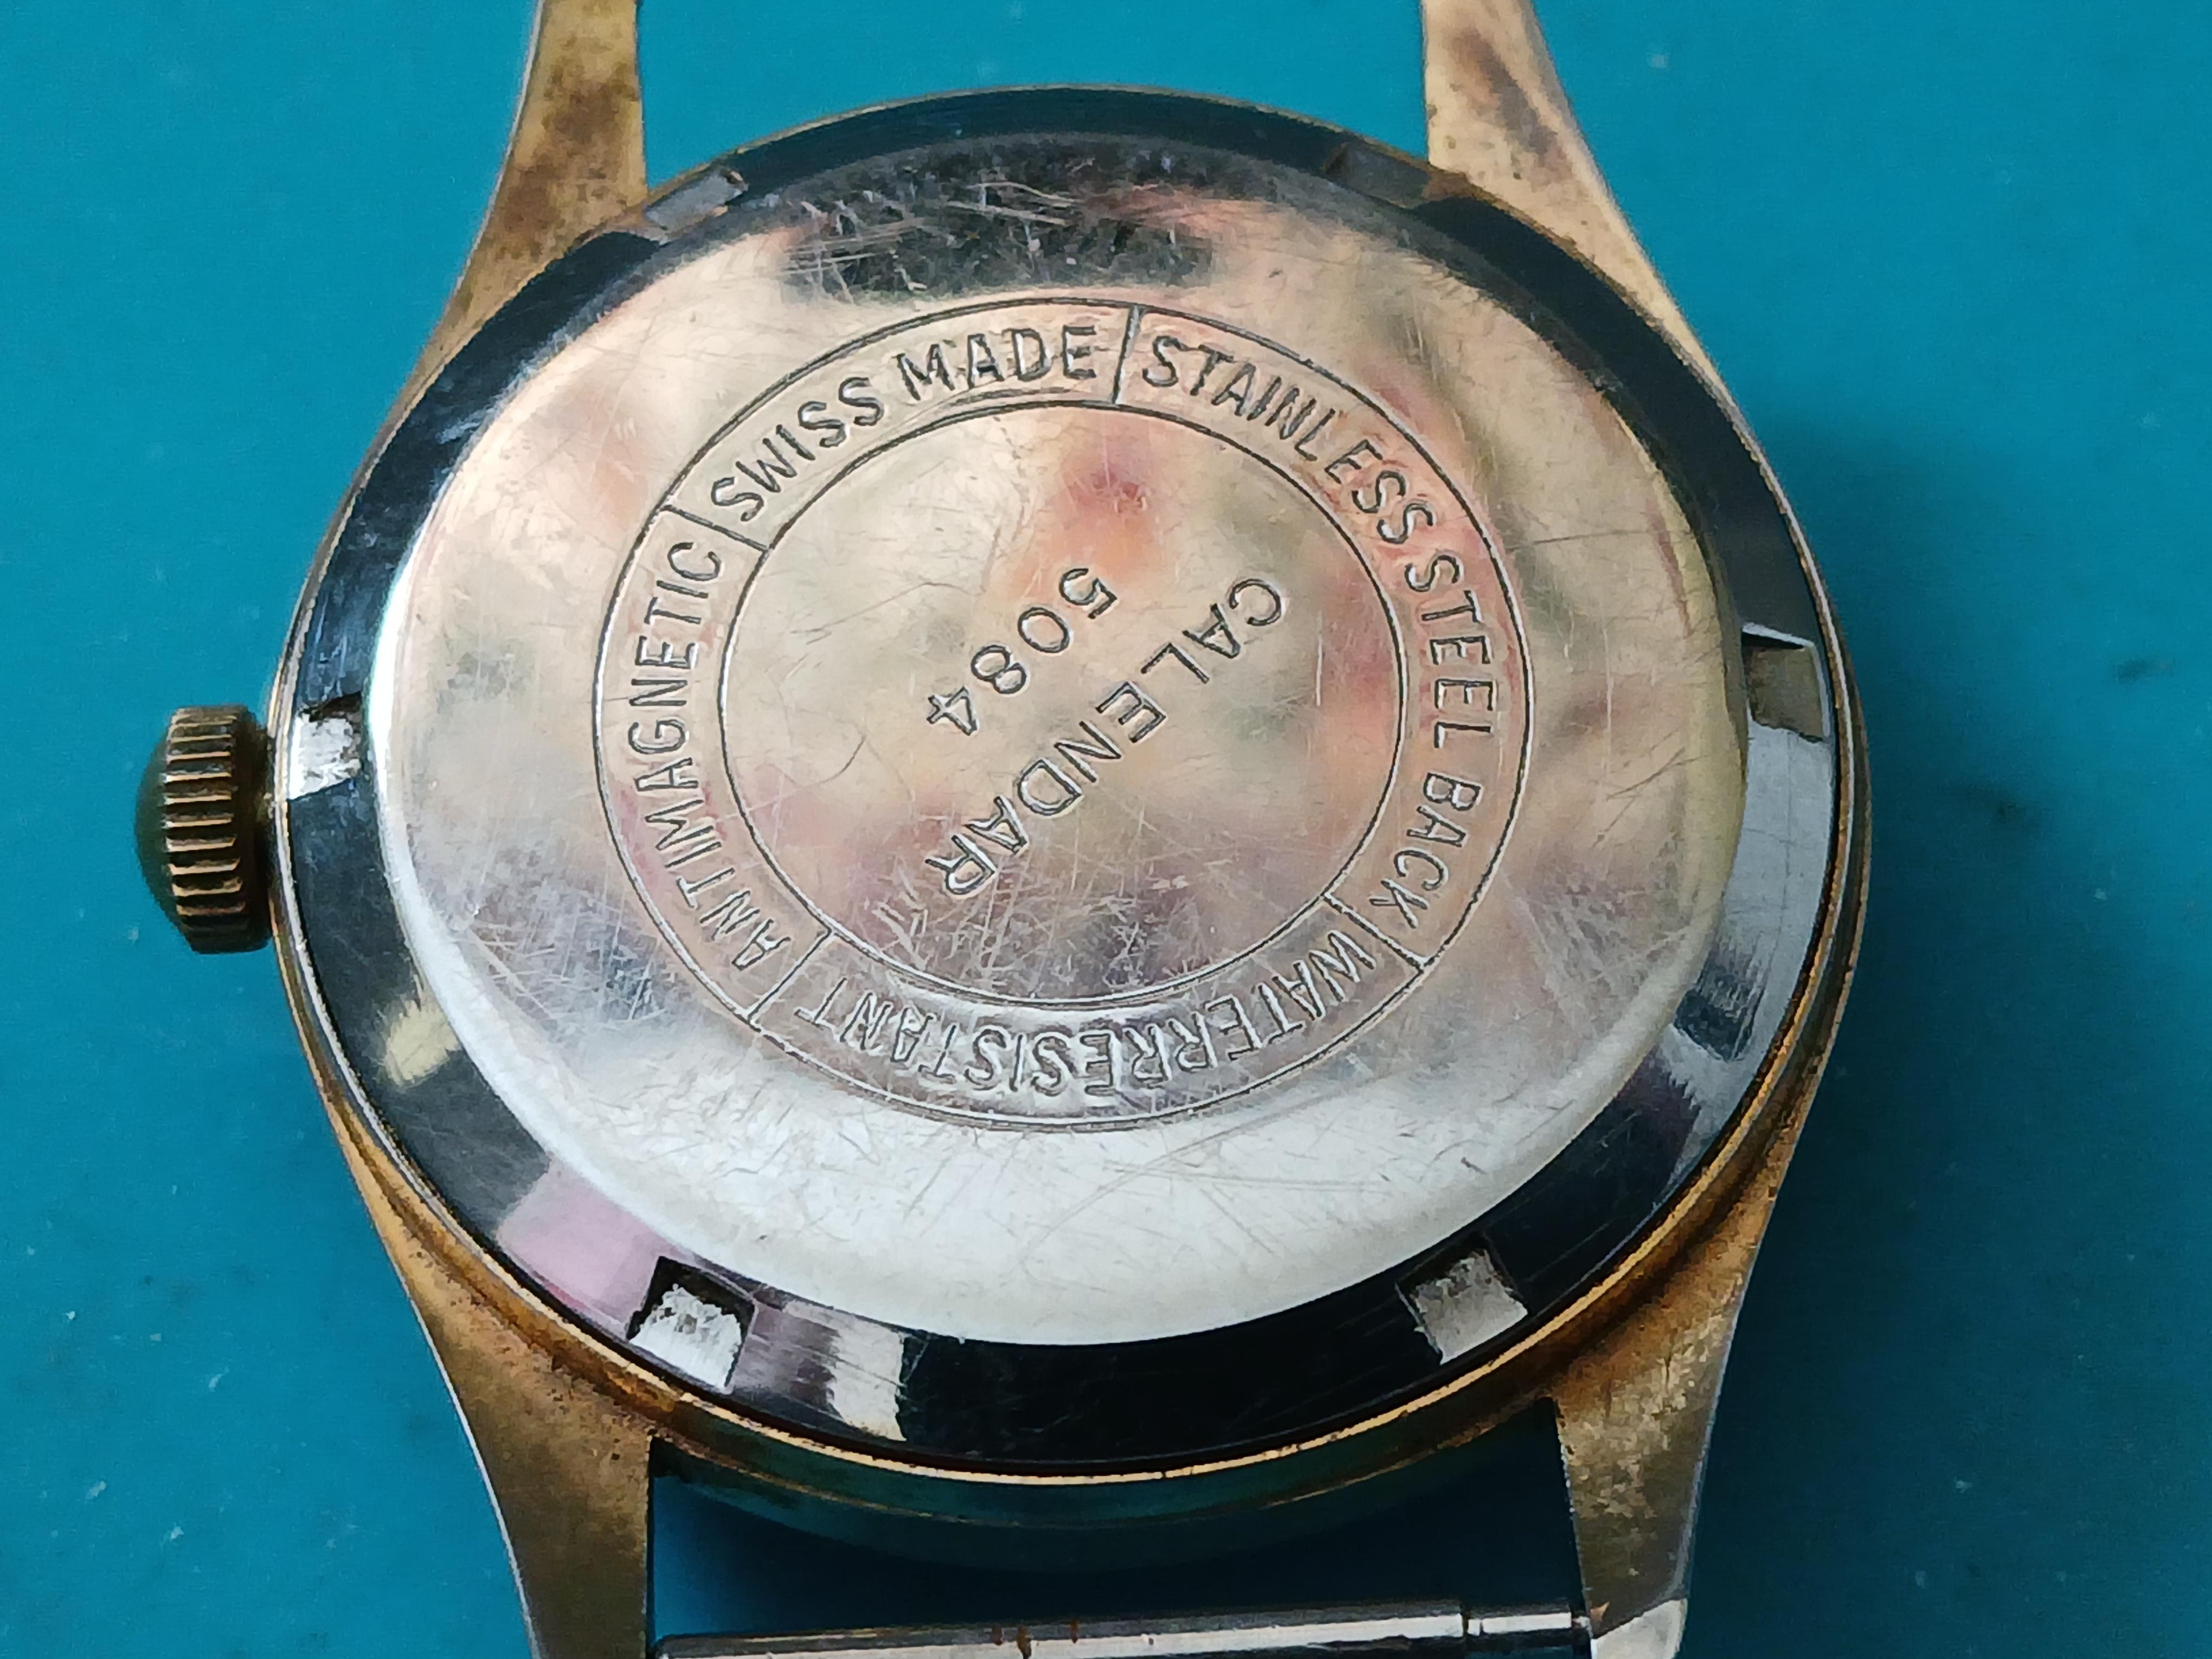
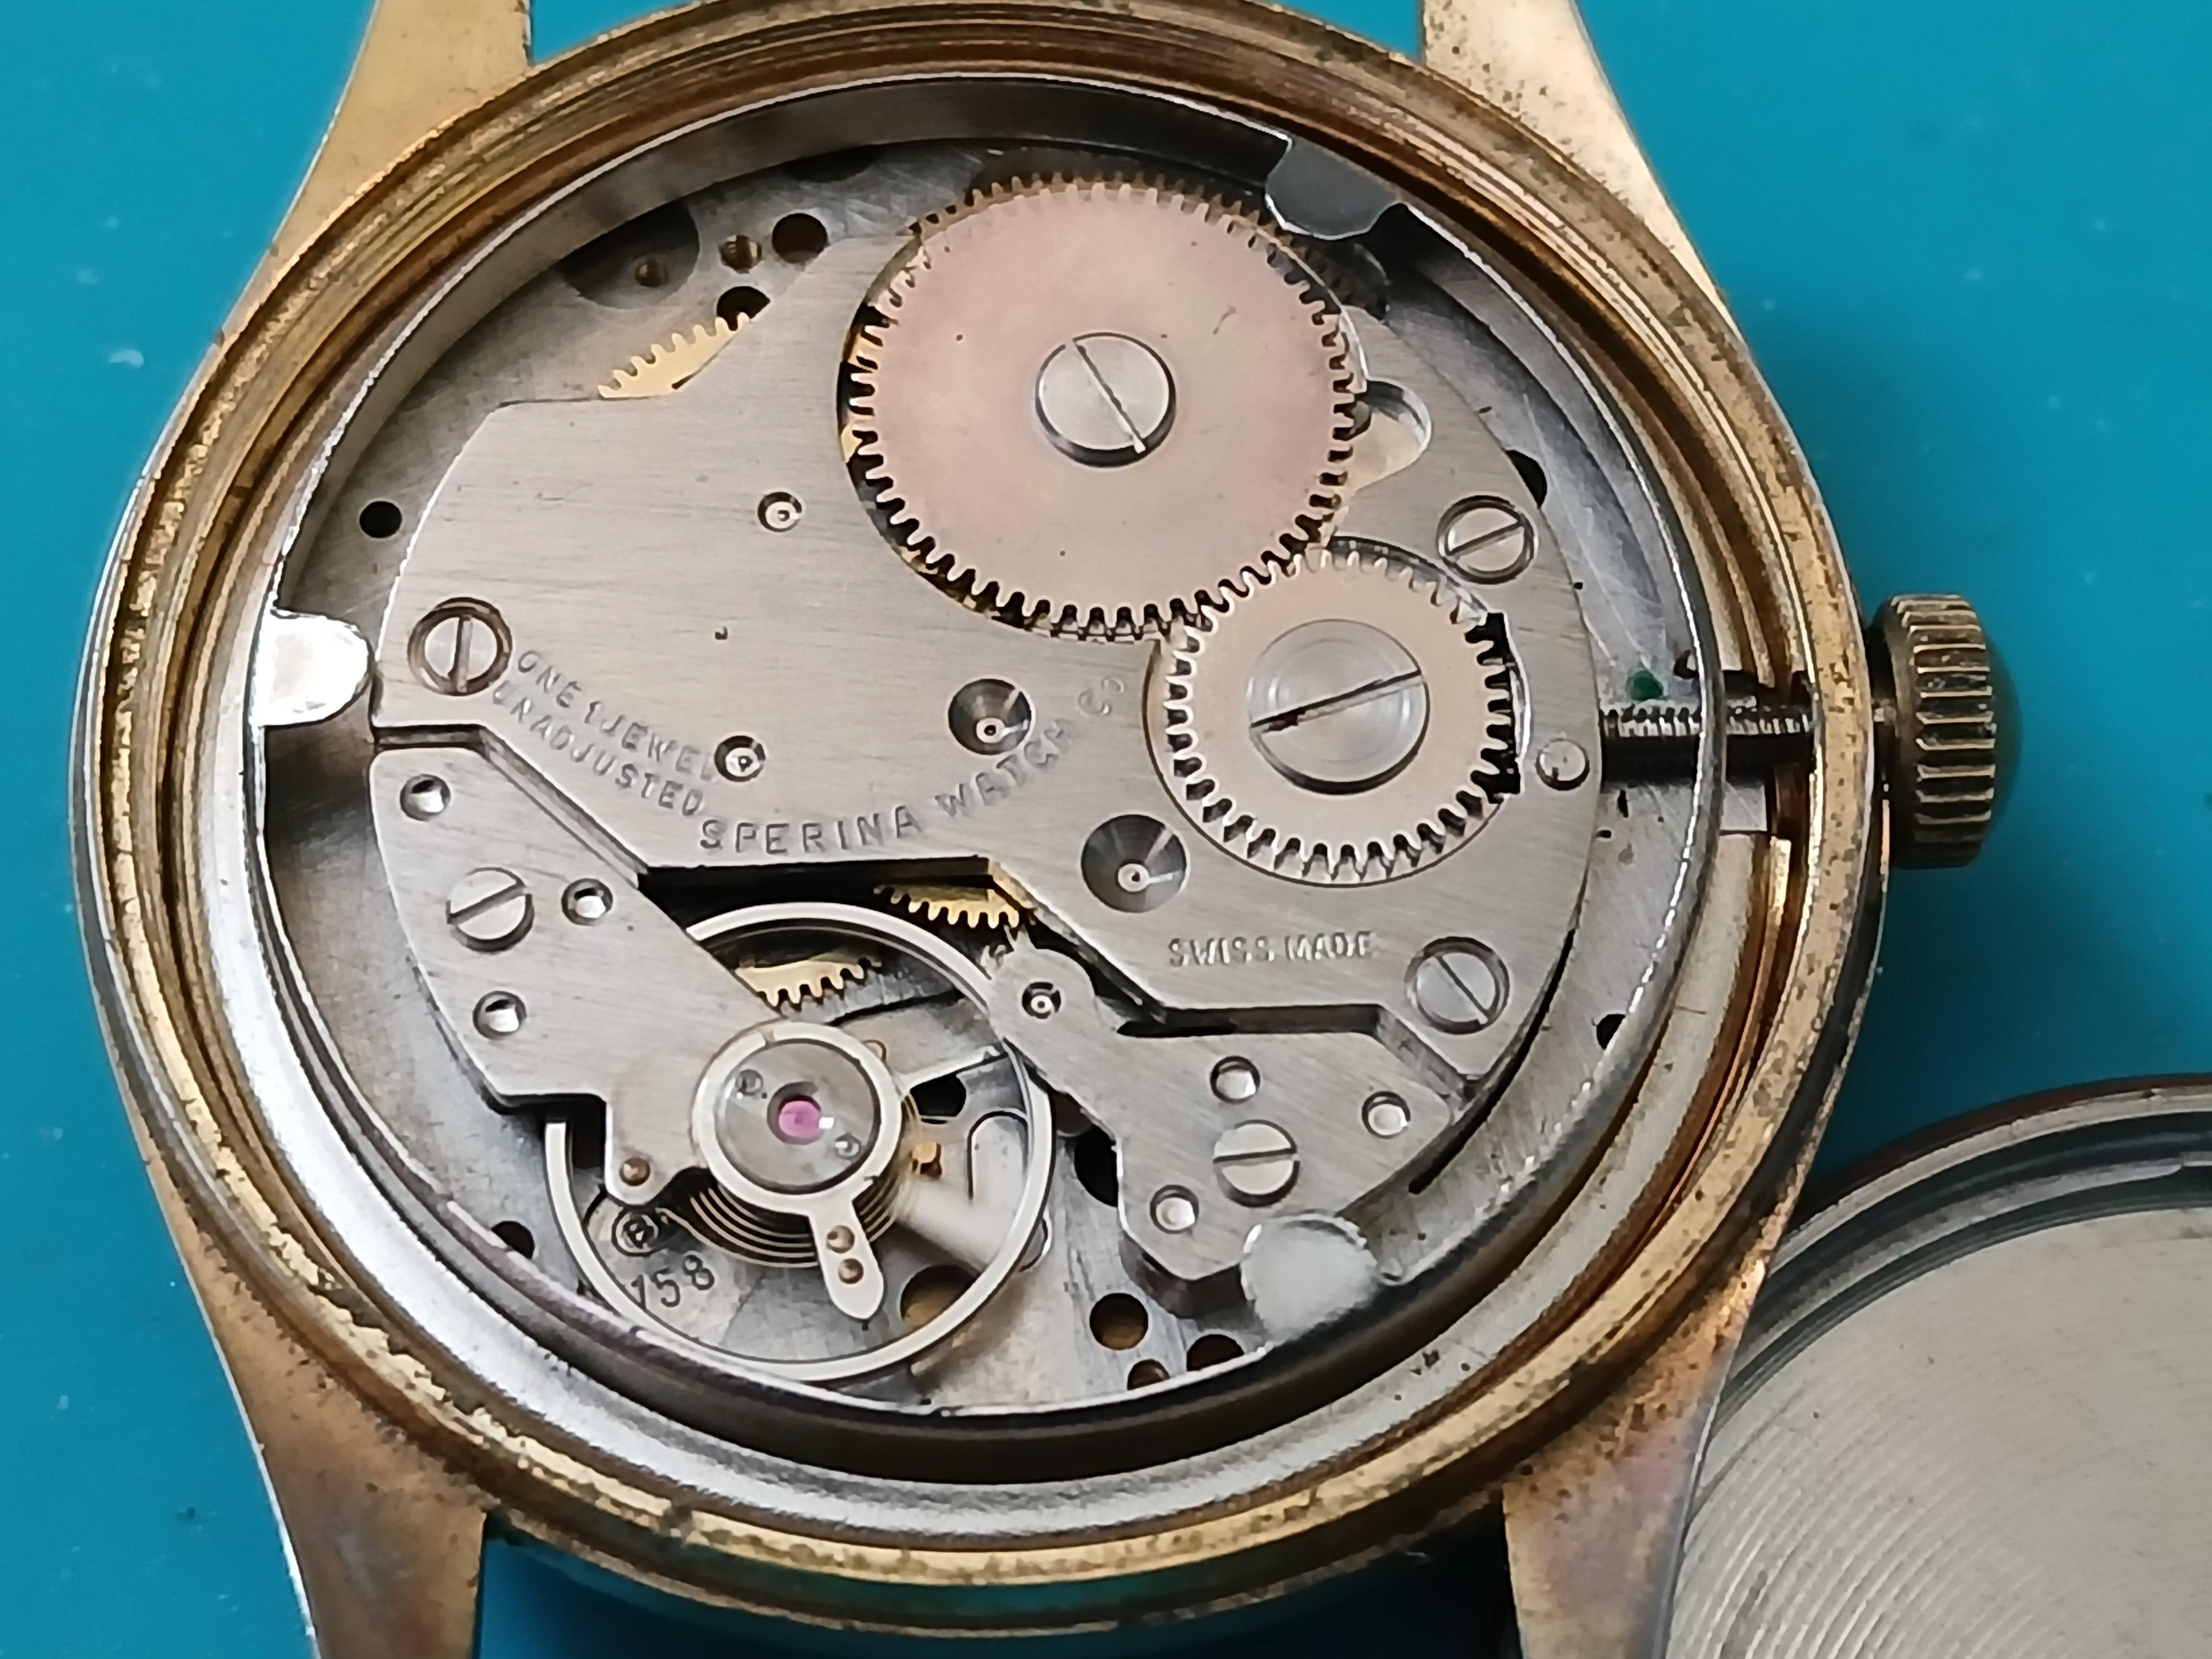
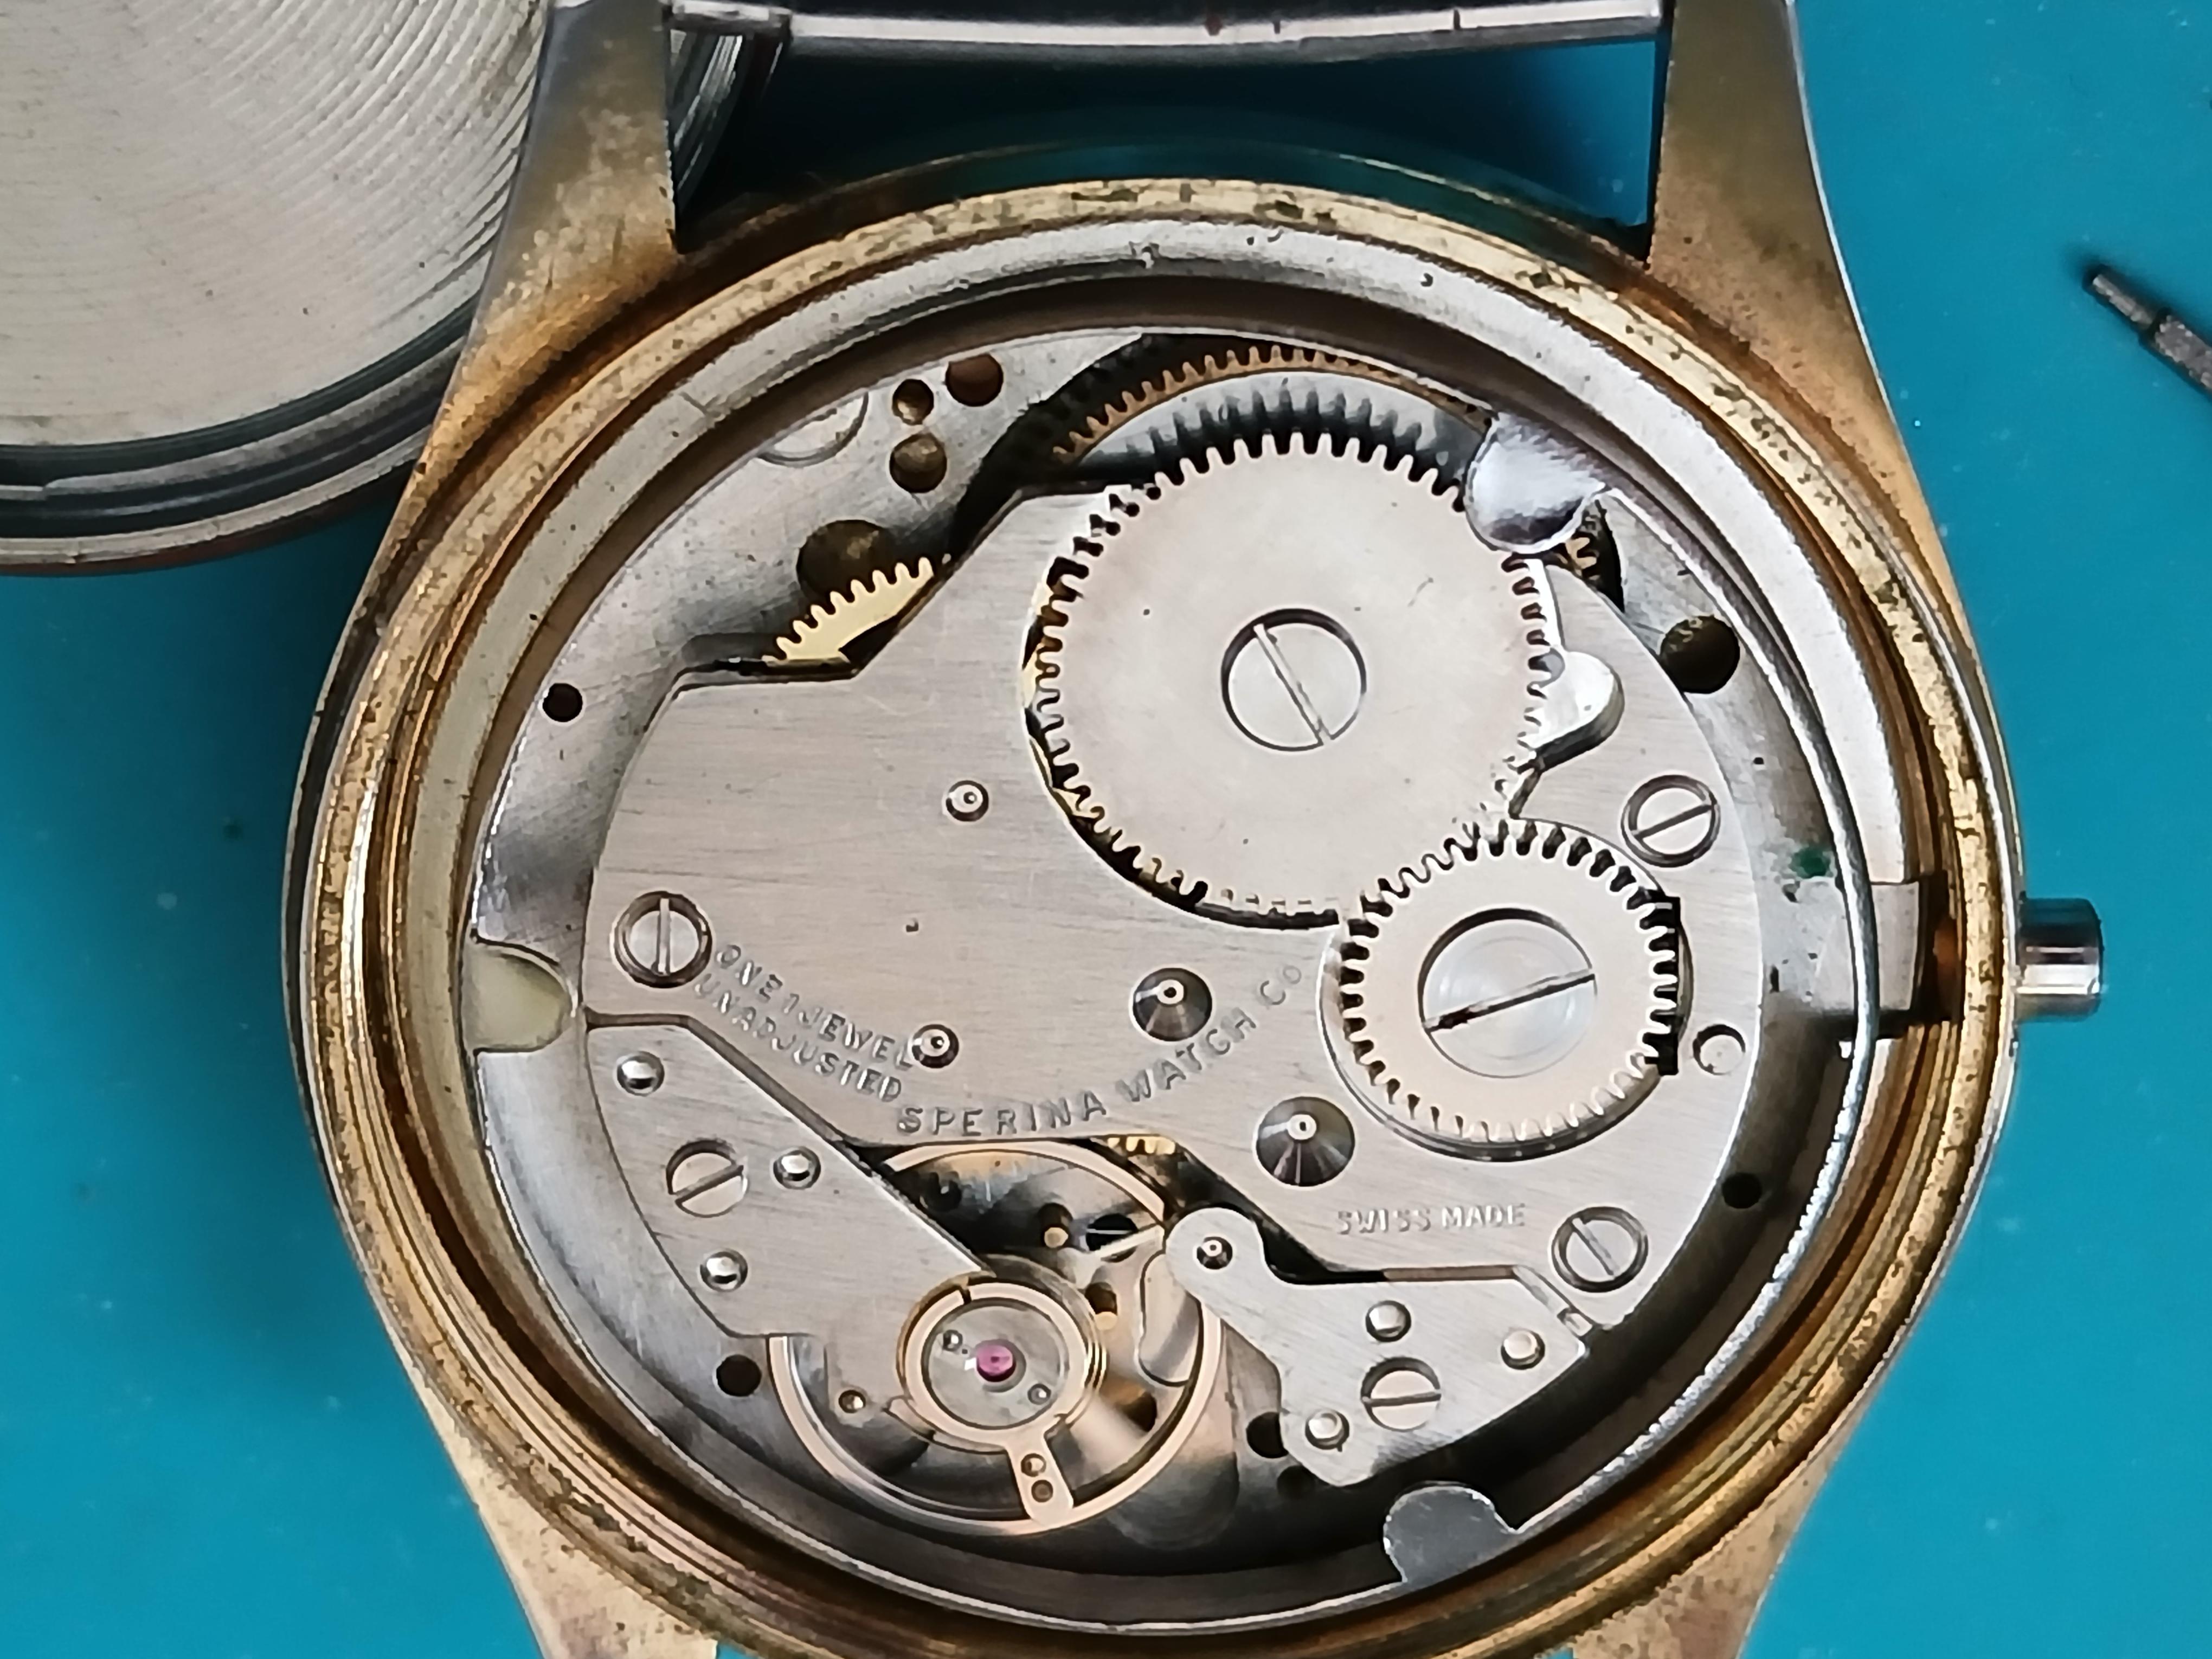
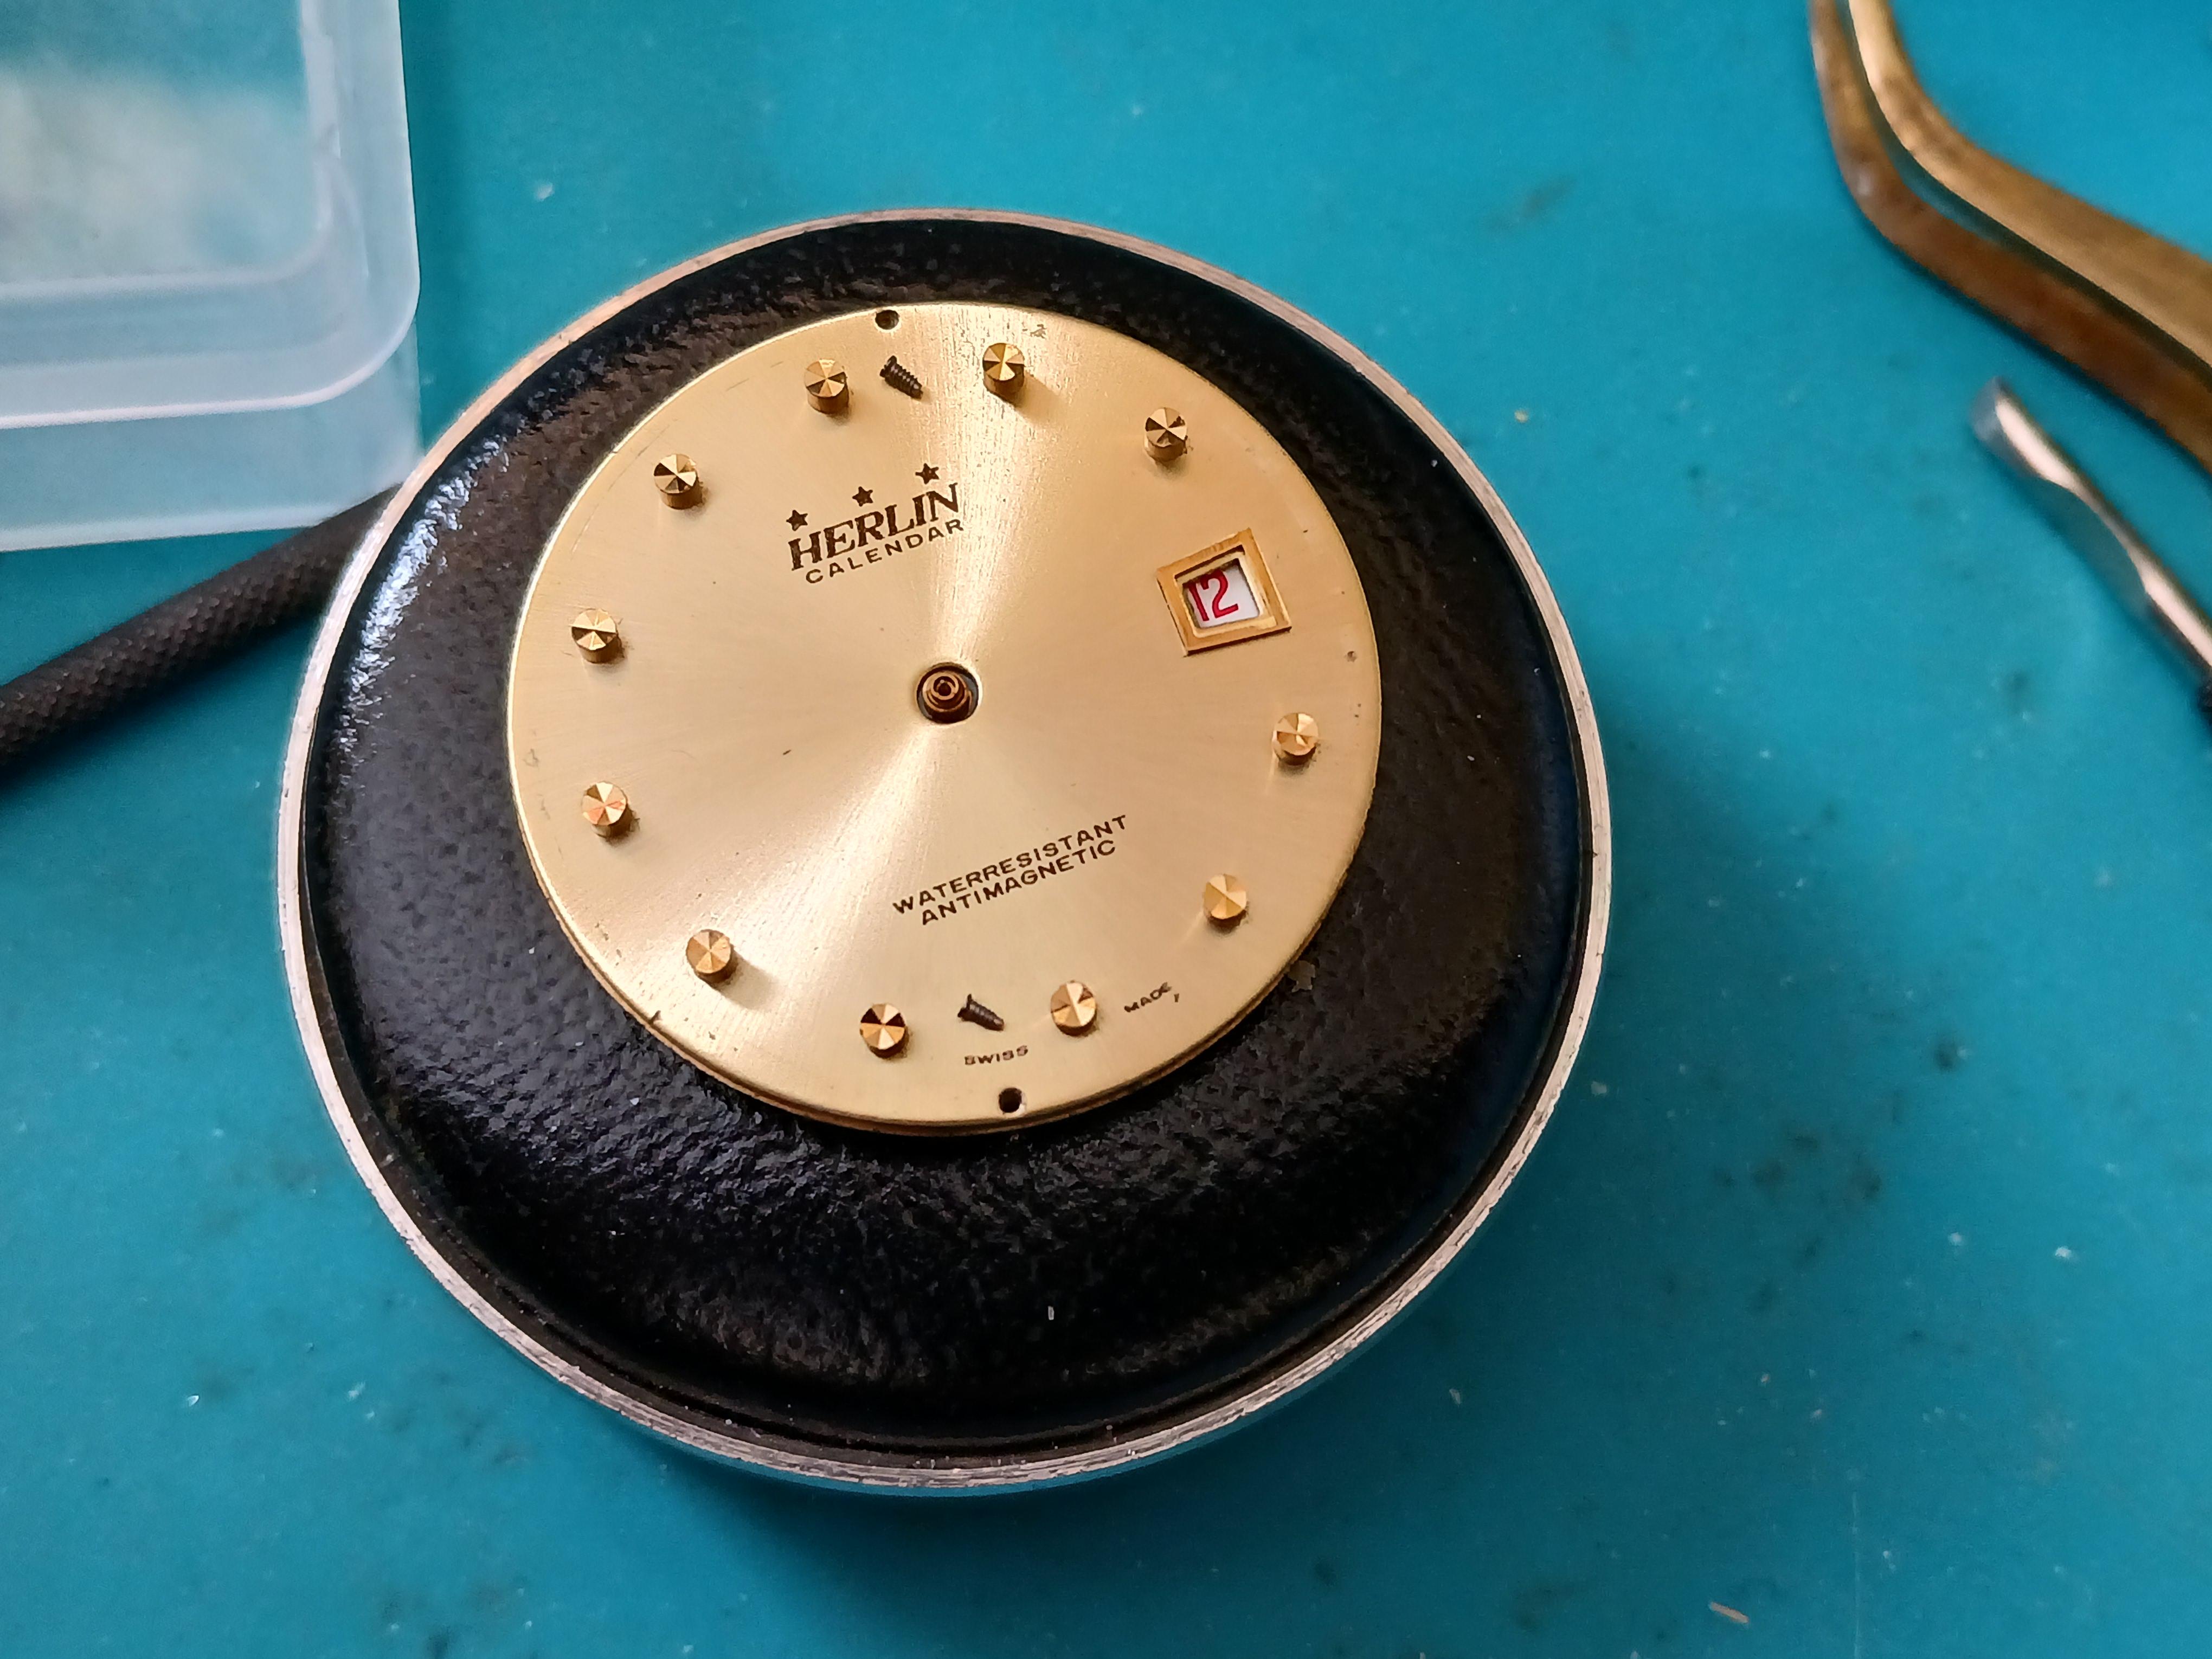
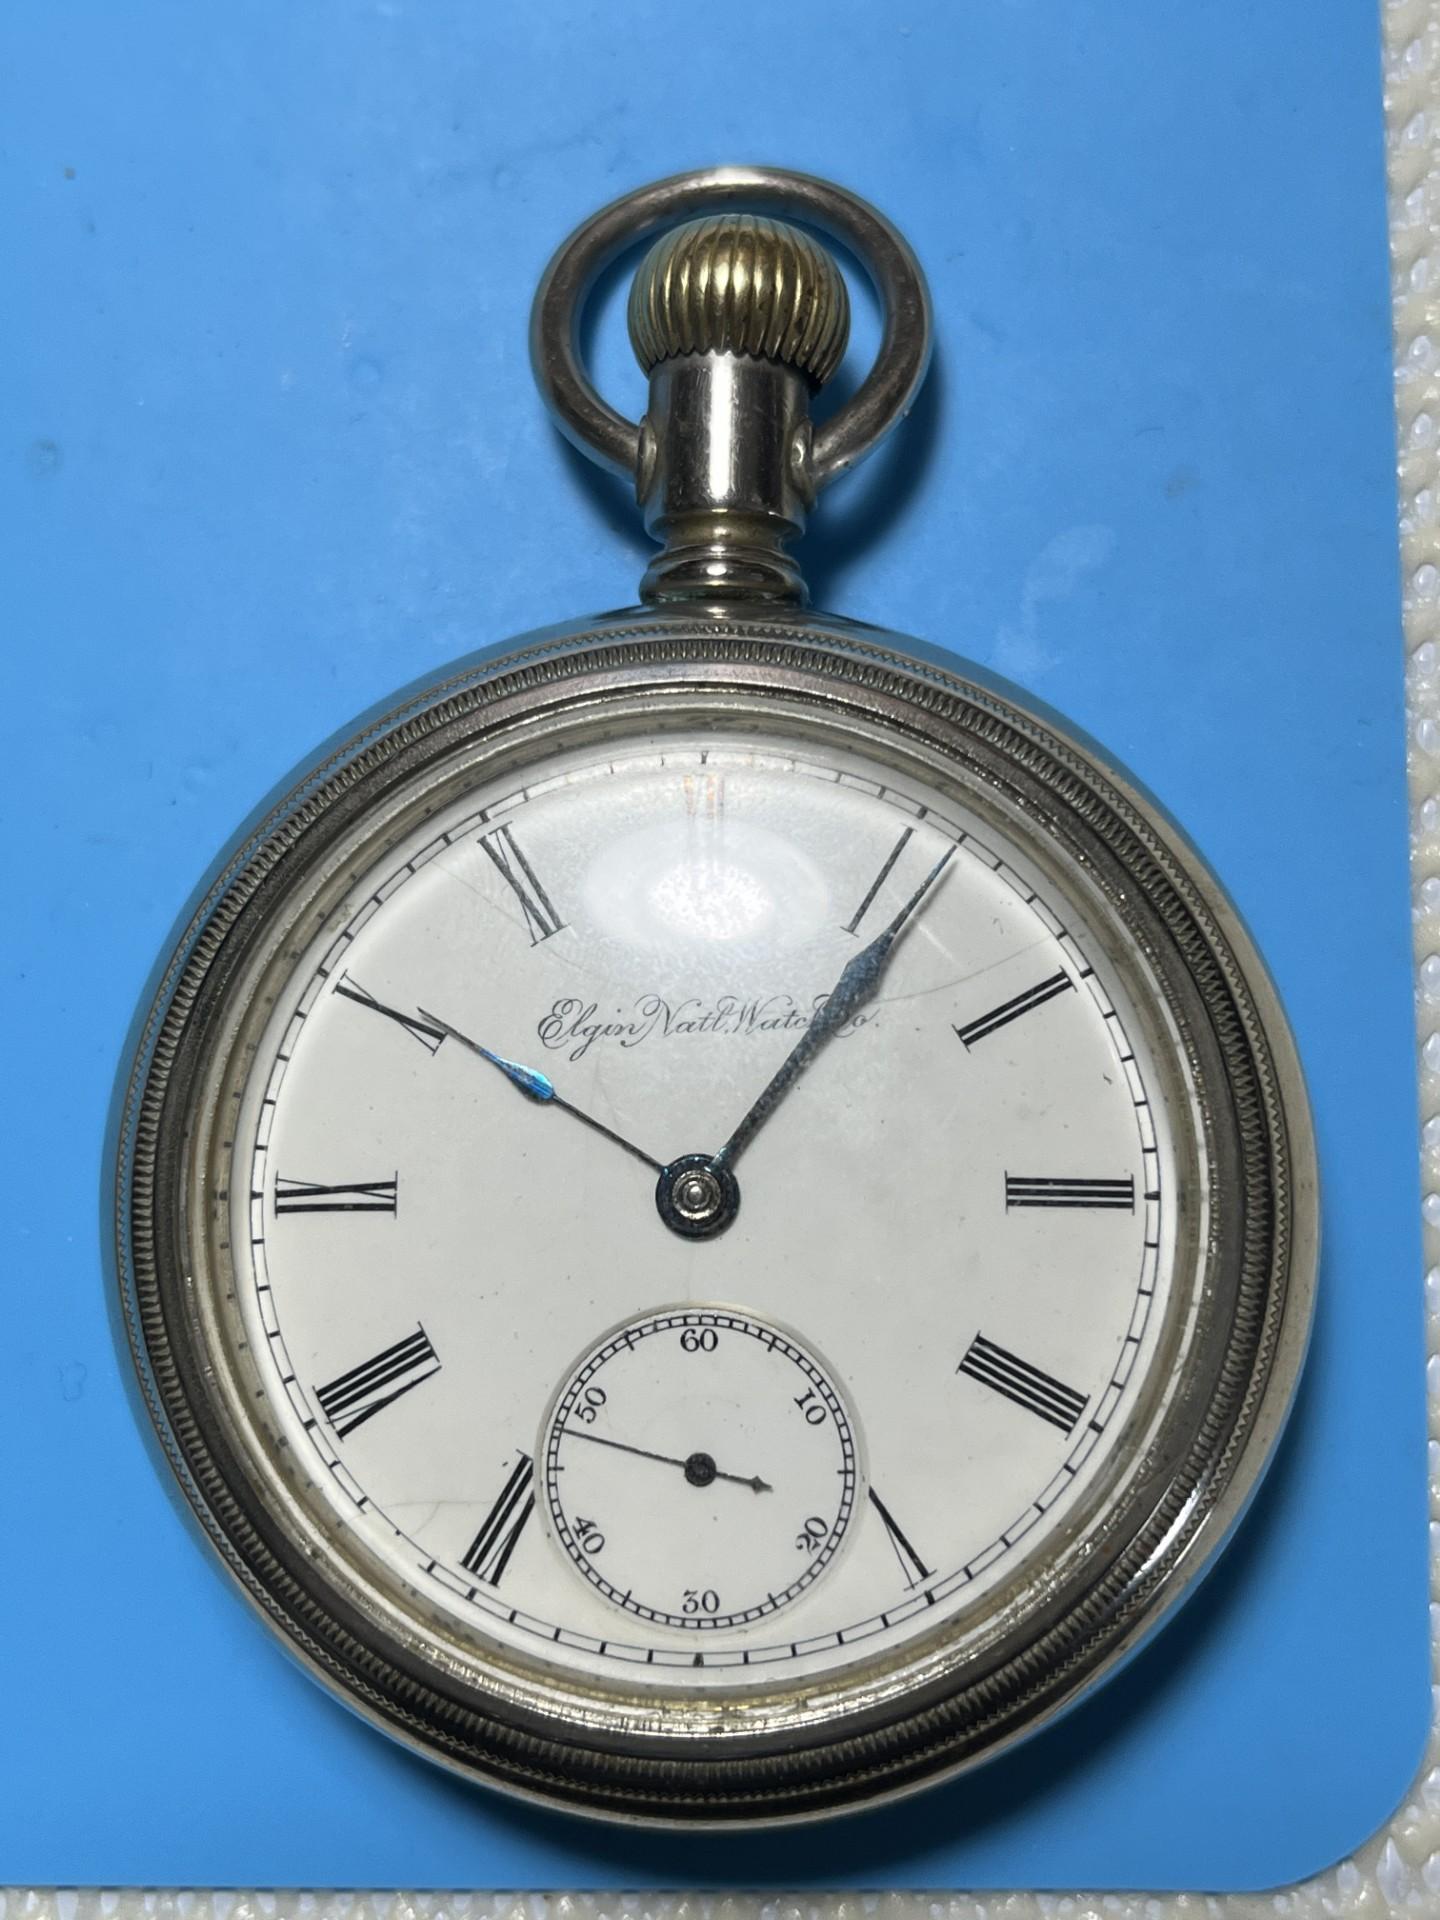
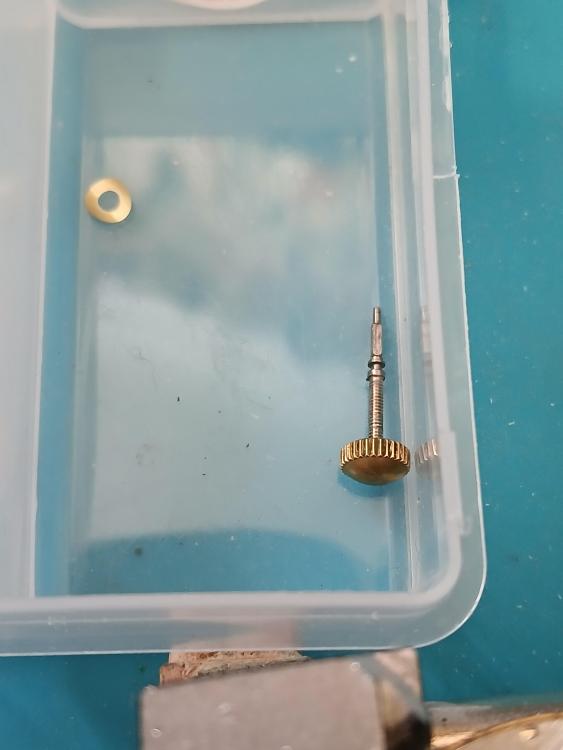
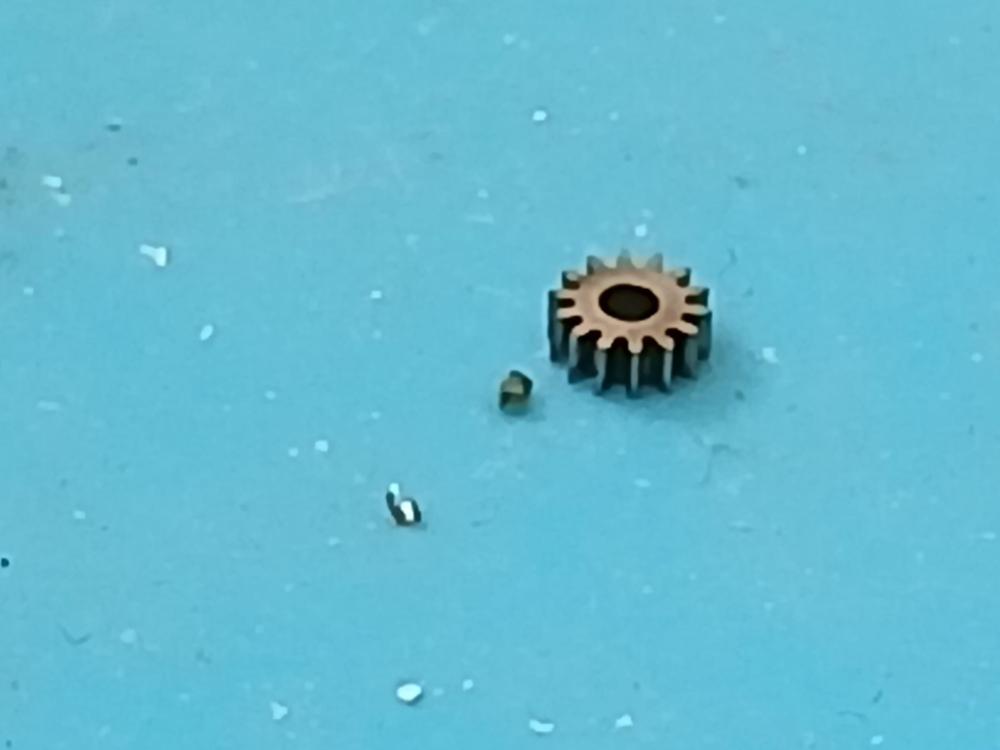
It's awful! I disassembled the movement to clean it, and when reassembling it, I broke the upper pivot of the escape wheel . Impossible to find a spare escape wheel for that movement. I can't even find the reference of the caliber. Would anyone have an idea ?0 points


.thumb.jpg.cb17a66989f1e796fd4217db2e9ca9df.jpg)