Leaderboard


Popular Content
Showing content with the highest reputation on 11/21/19 in all areas
-
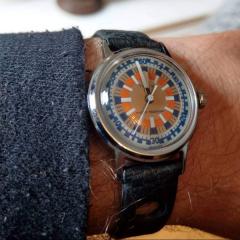
Got this 1950's Timex Mercury running and relumed hands with new second hand. Seems to be keeping good time also. Sent from my SM-G975F using Tapatalk3 points
-
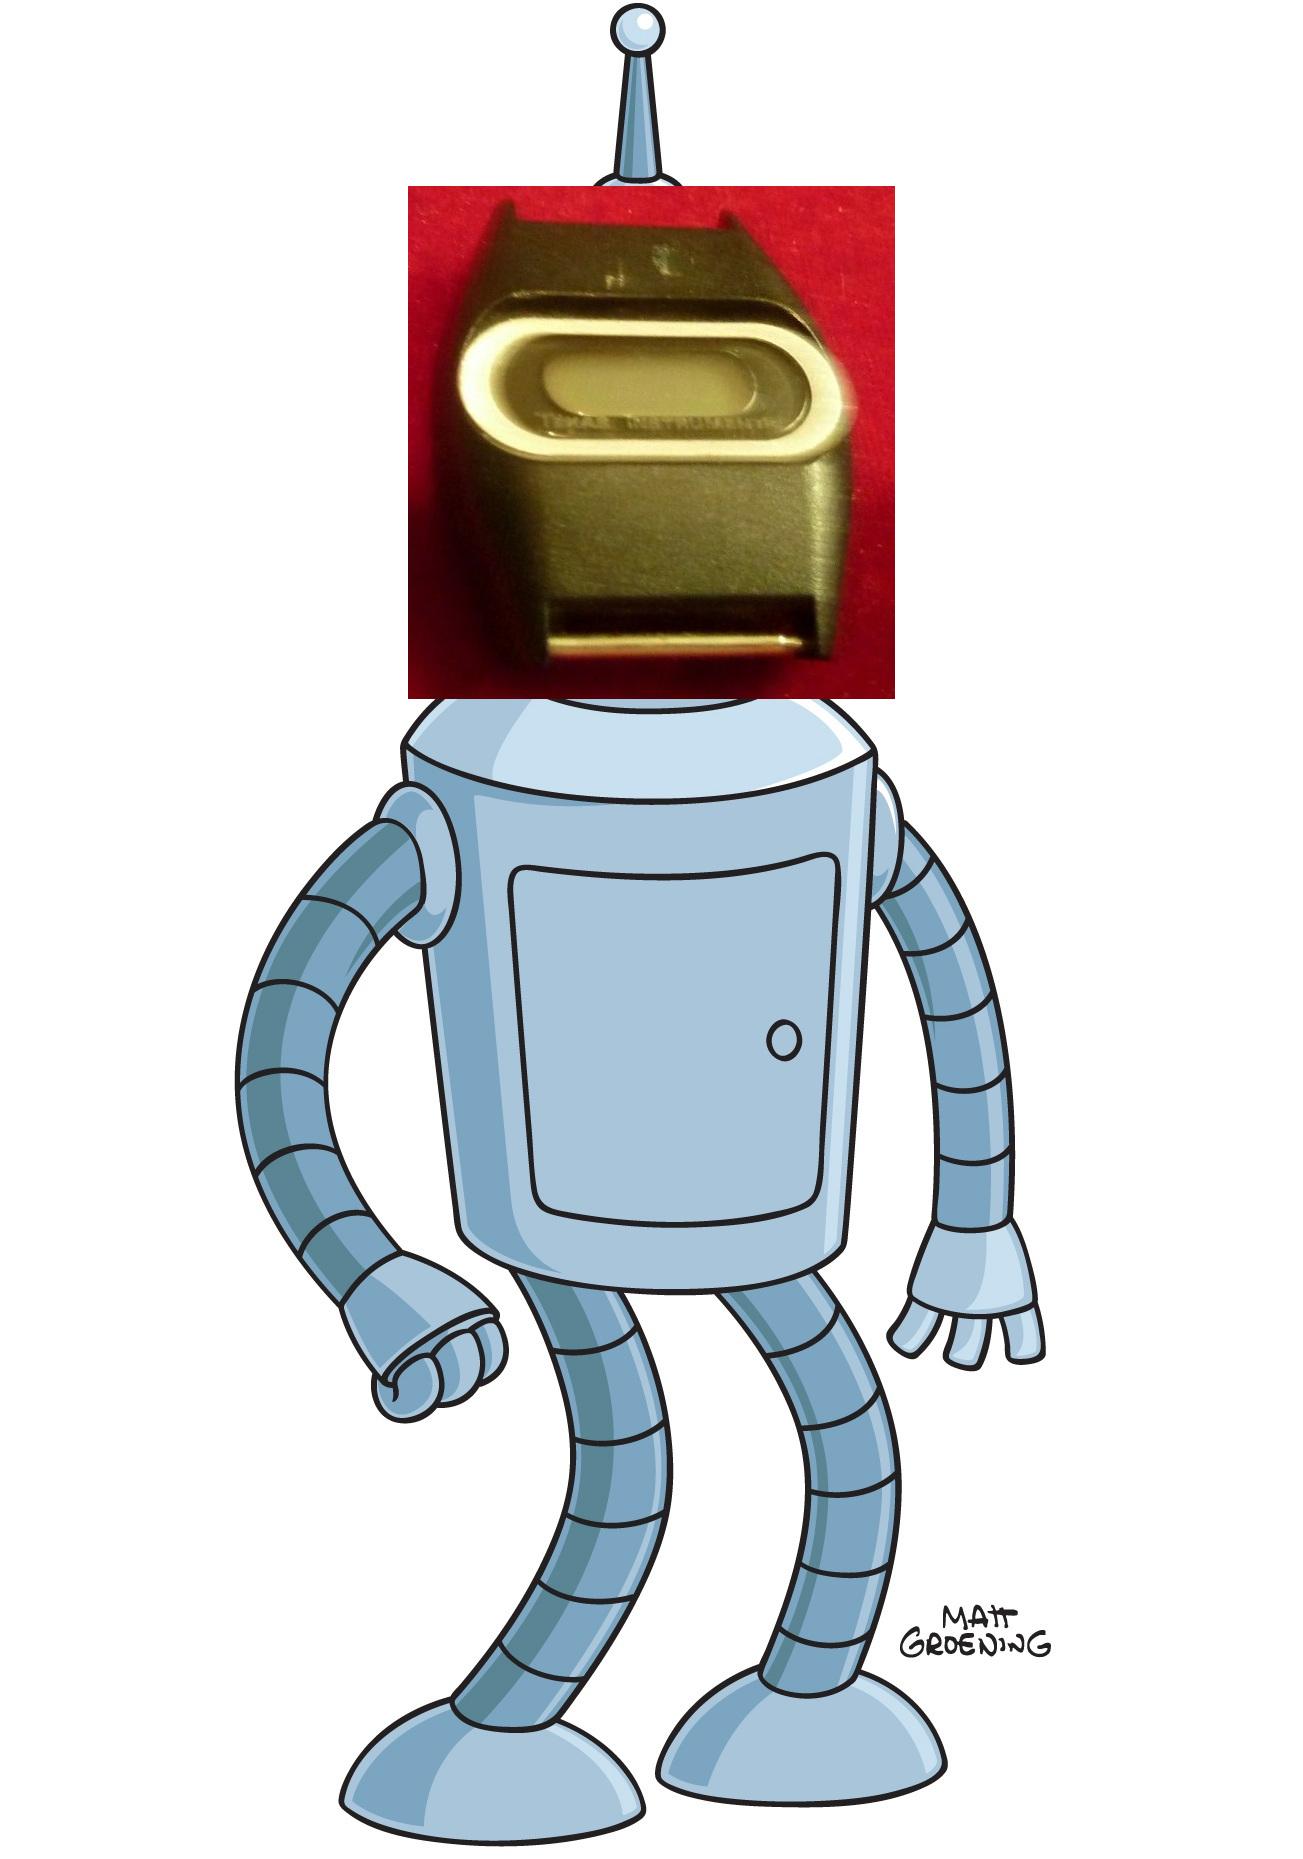
An early Texas Instruments LCD is winging its way to me from the fleabay penny lots. I just love the design. I couldn't make up my mind whether to paste it on Bender or Batman.
 2 points
 -
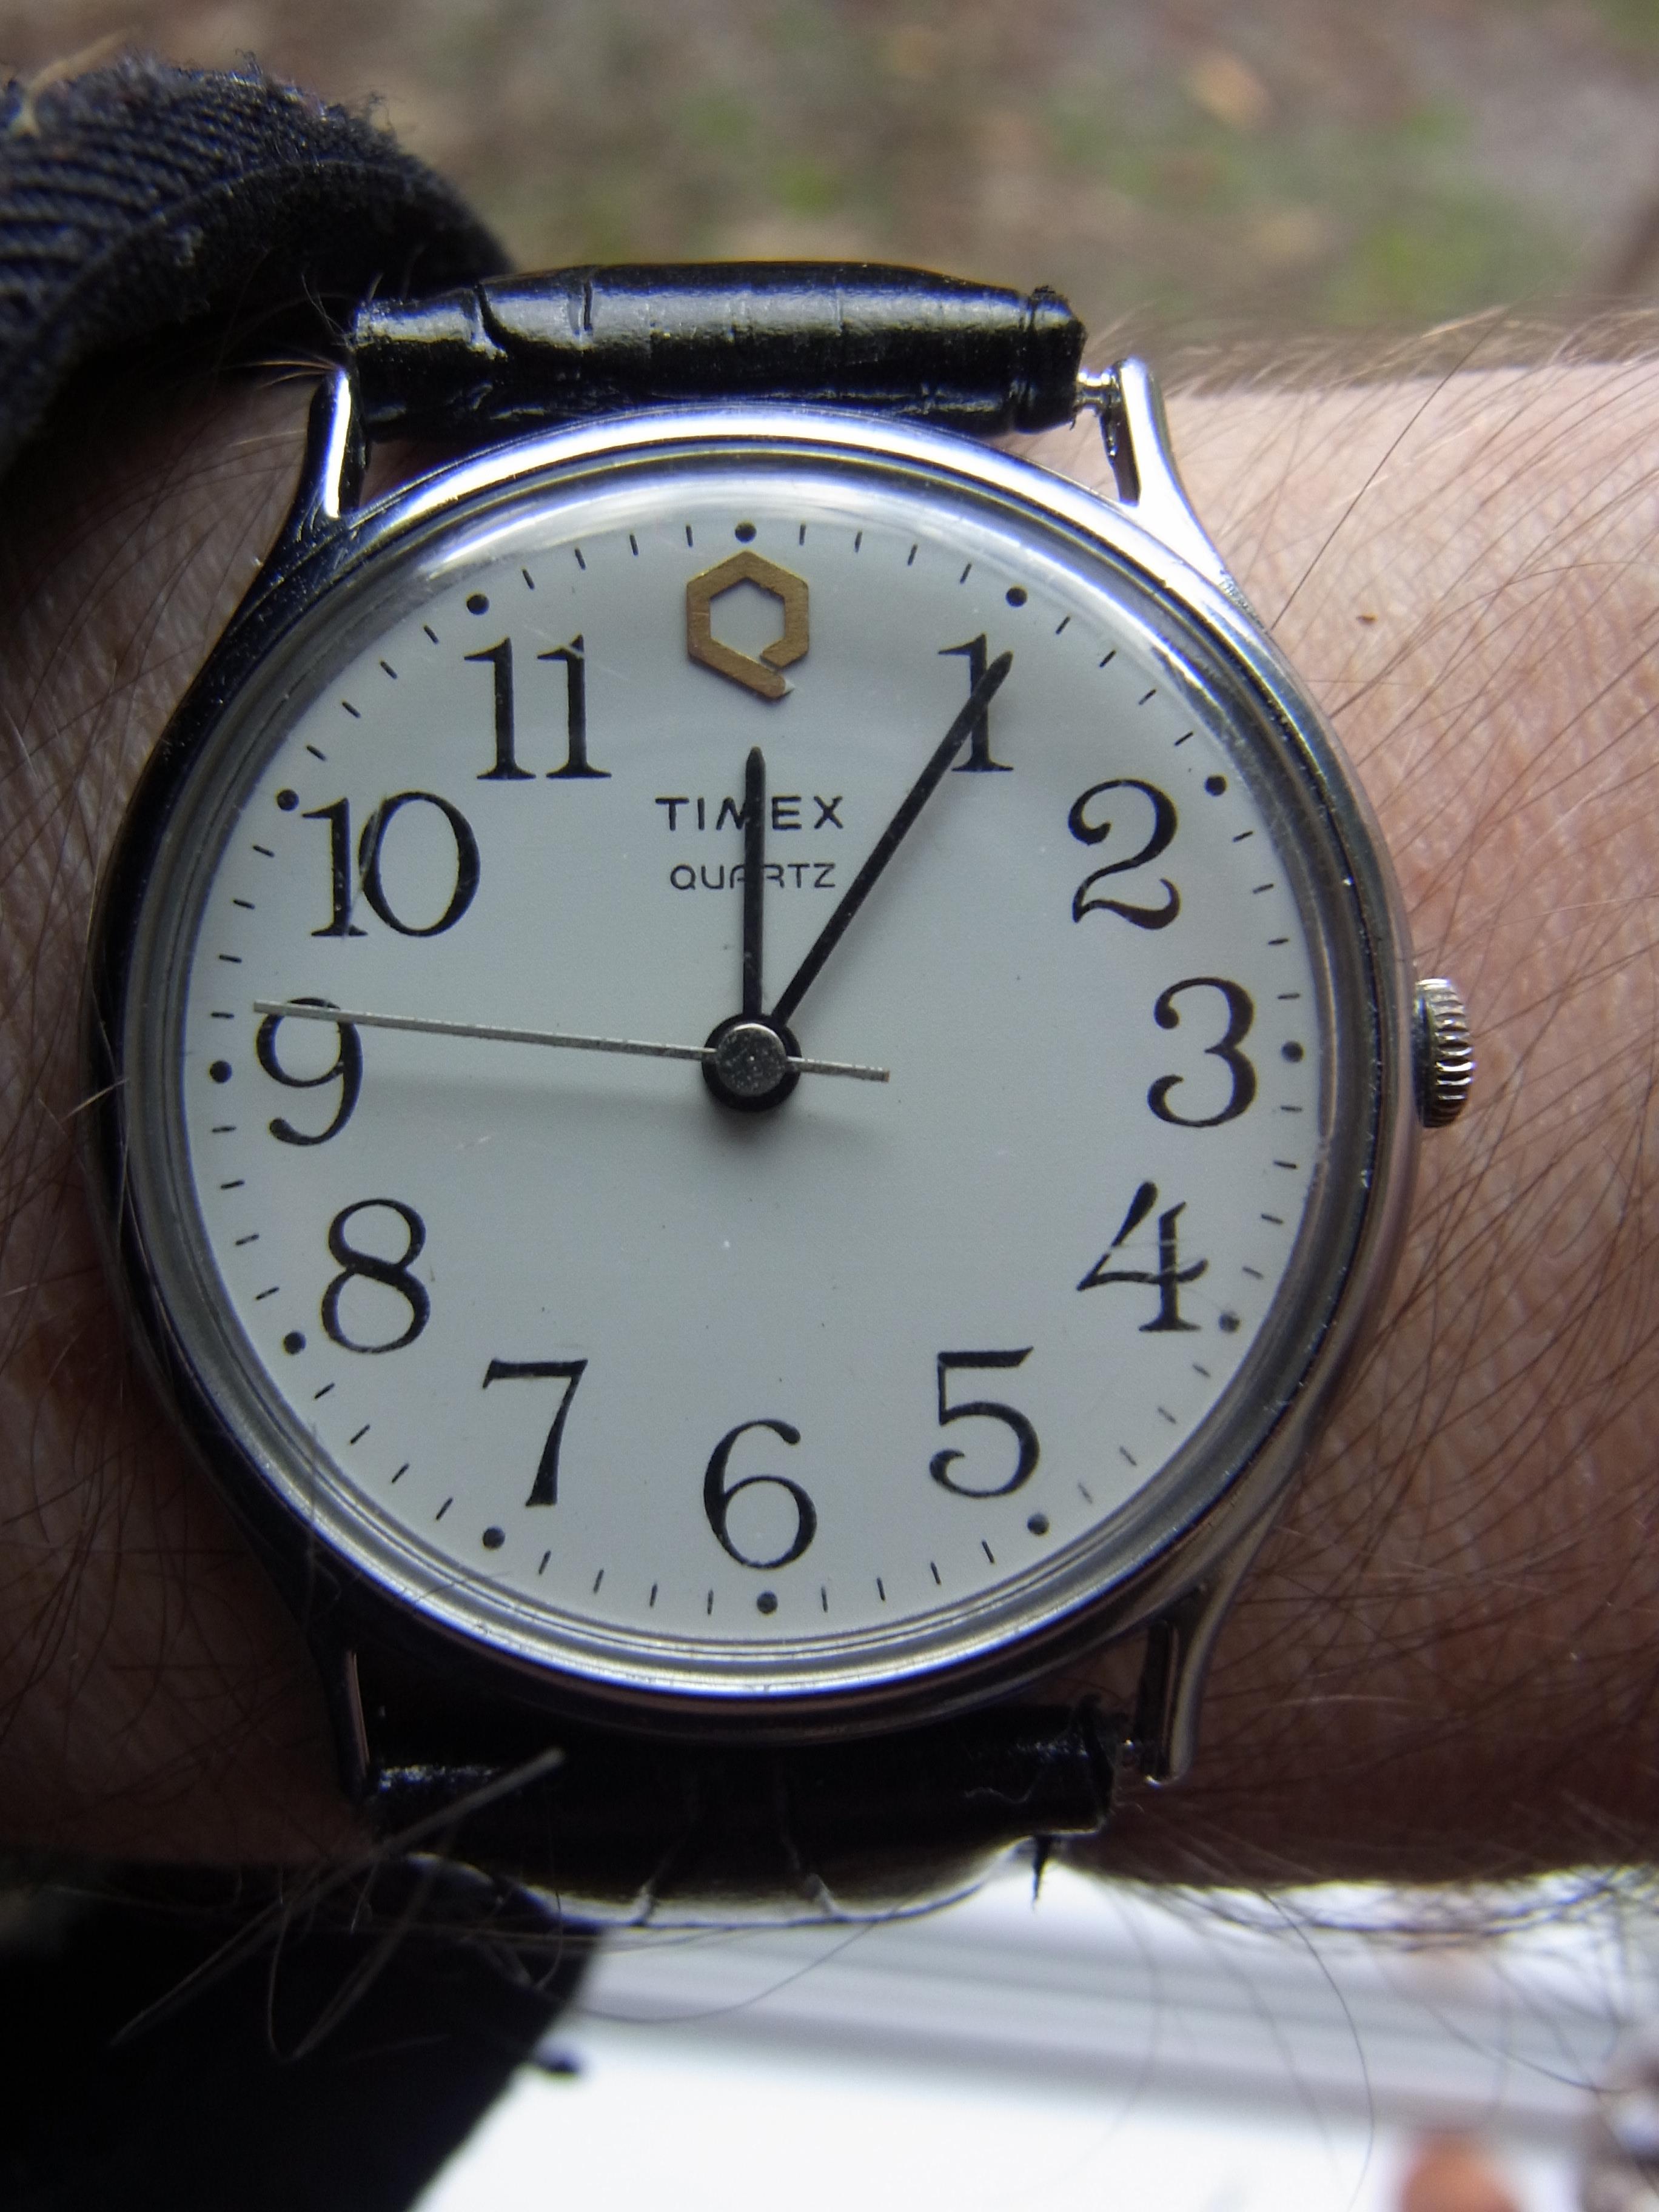
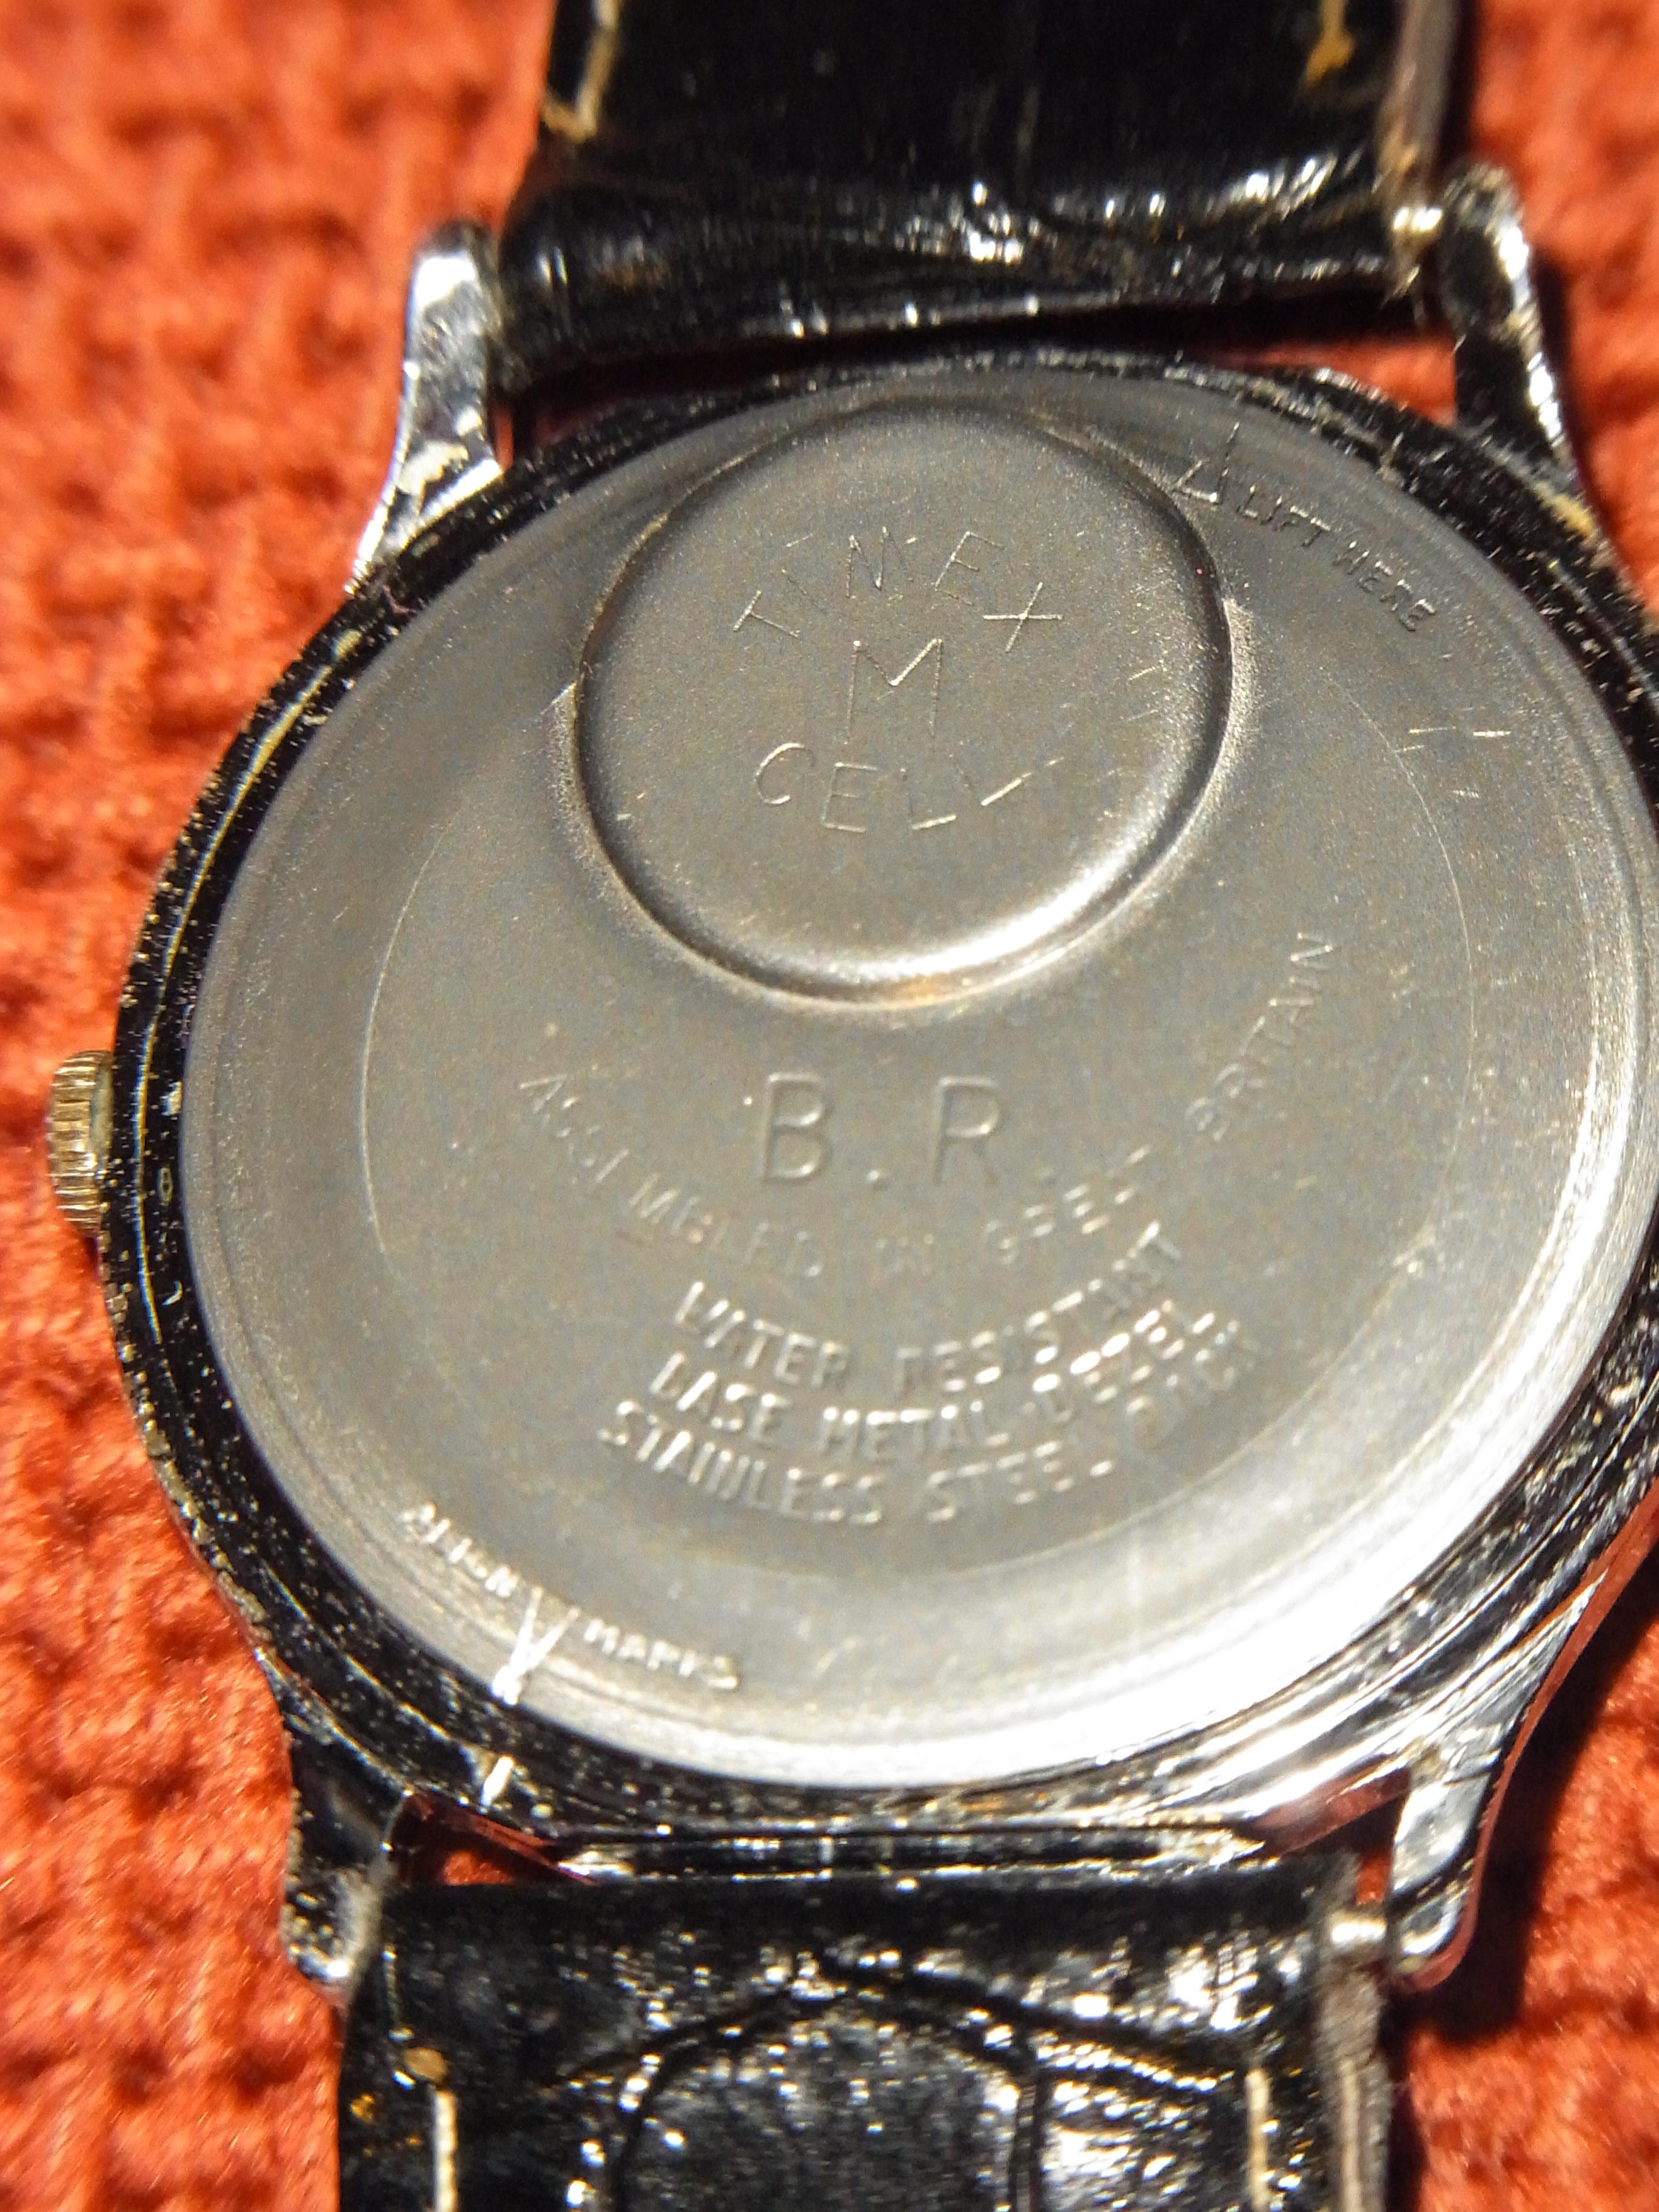
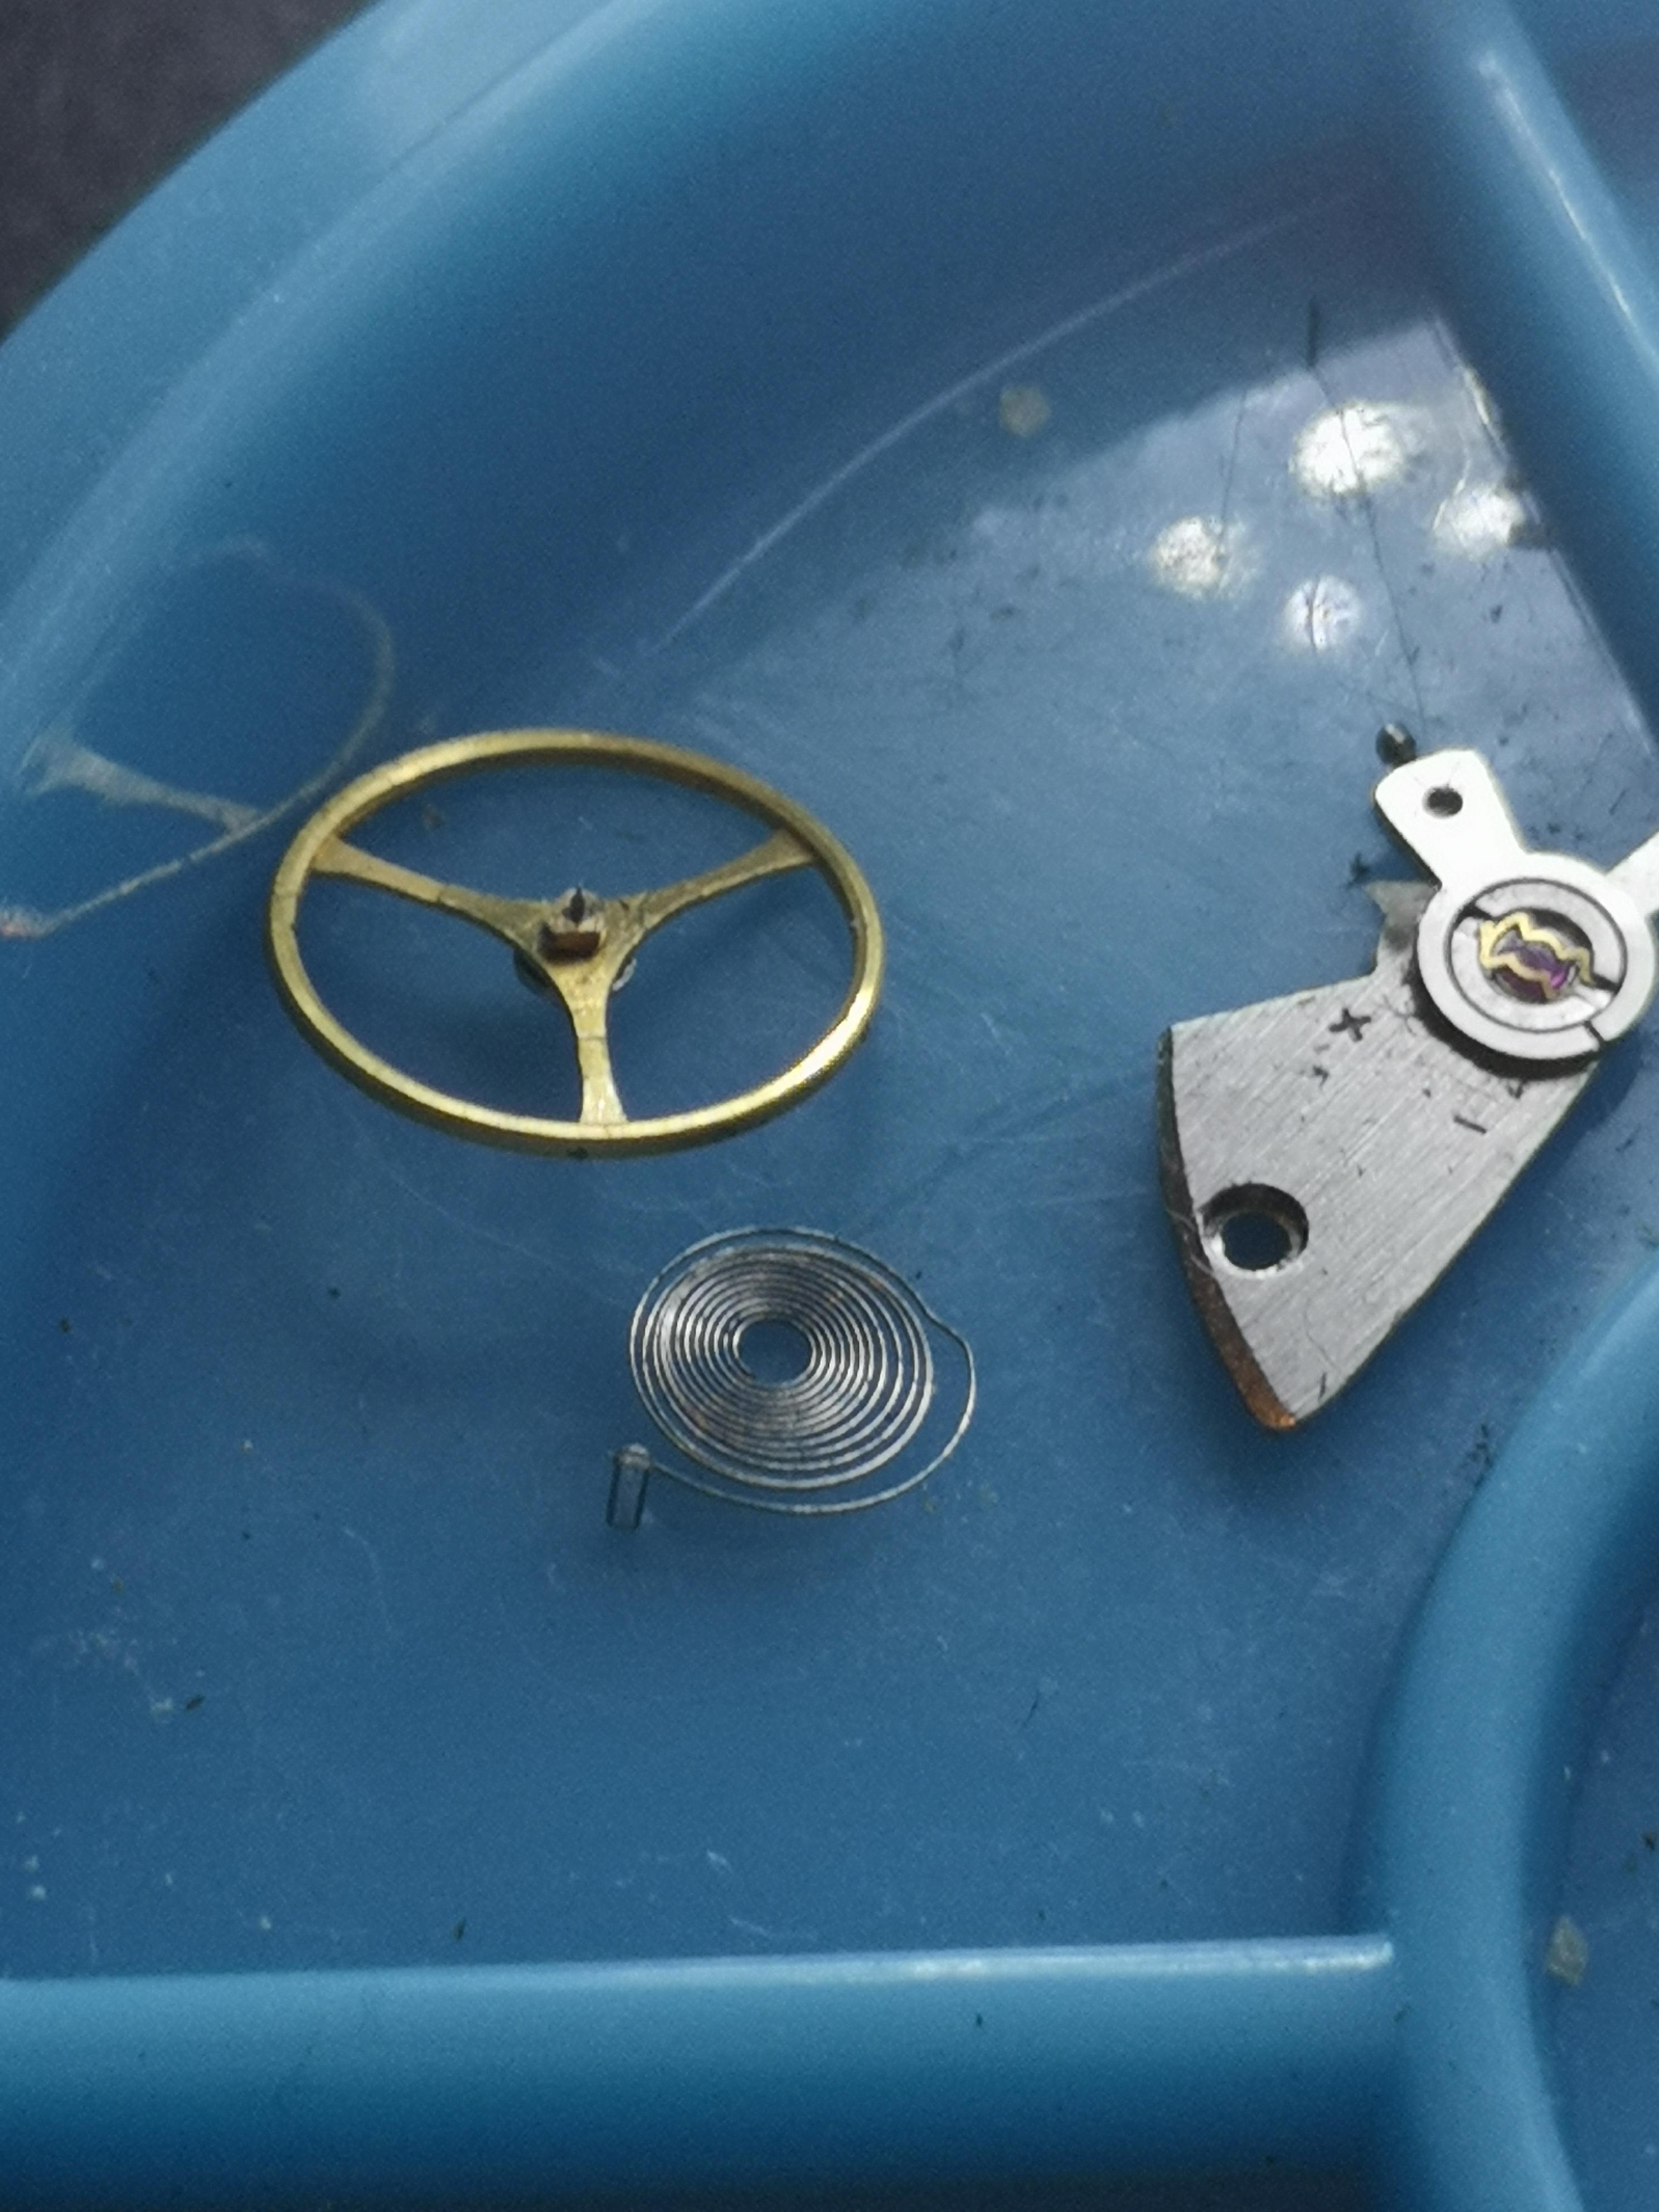
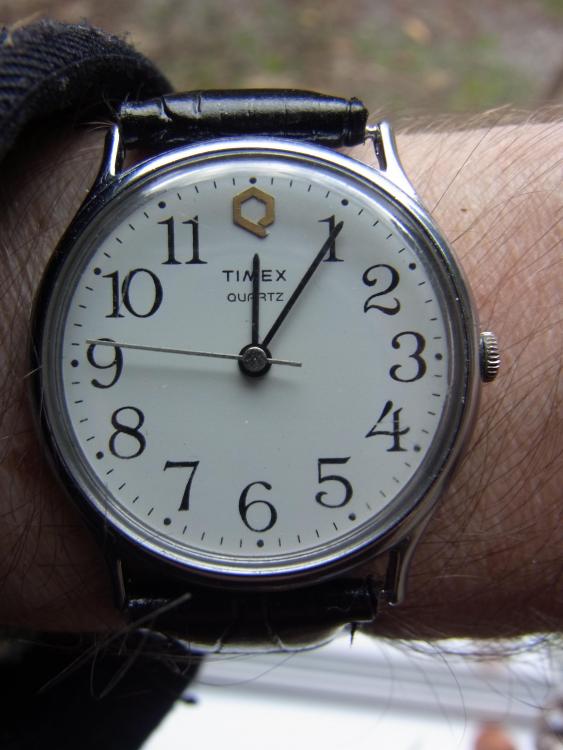
Railway time today, in the form of a British Rail Timex "Q" I posted about one of these a while back, with a made in France dial. This one is similar but different. This one appears to be from Dundee, but the exact date of production is not obvious. It must be pre- 1997 since that was when British Rail was "privatized" (or arguably the profit was privatized and the loss was subsidized, but that is a whole 'nother story). The watch arrived sans pins or strap, in a filthy condition and listed as spares or repairs, not working, but a quick scrub and brush up, and a fresh 'Timex "M" cell' (AG10) and off it went. These high readability dials are perfect for telling the time at a glance, or waving at customers as they charge along the platform trying to jump in to the moving carriages, or indeed ensuring you don't miss your thirteenth tea break of the day as you sit in the warmth of the guards van, guarding a few bashed parcels an old milk churn and a tandem with a wonky back wheel, or whatever other junk the traveling public has entrusted to your care that day. It has a few remaining battle scars, but that is just part of its history. Whether it spent its life with the 'romance' of "The Calendonian" Inverness sleeper trains or passed its days trundling back and forth on the eight fifteen to Bognor, we will never know.
 2 points
 -
Oh, I don't know about that, I'm pretty darn happy with my new teeth. I do agree though, that the watch is looking really good2 points
-
Hey Just had another go after listening to members thoughts. heres pics of my next attempt Thanks everyone gary

 2 points
 -
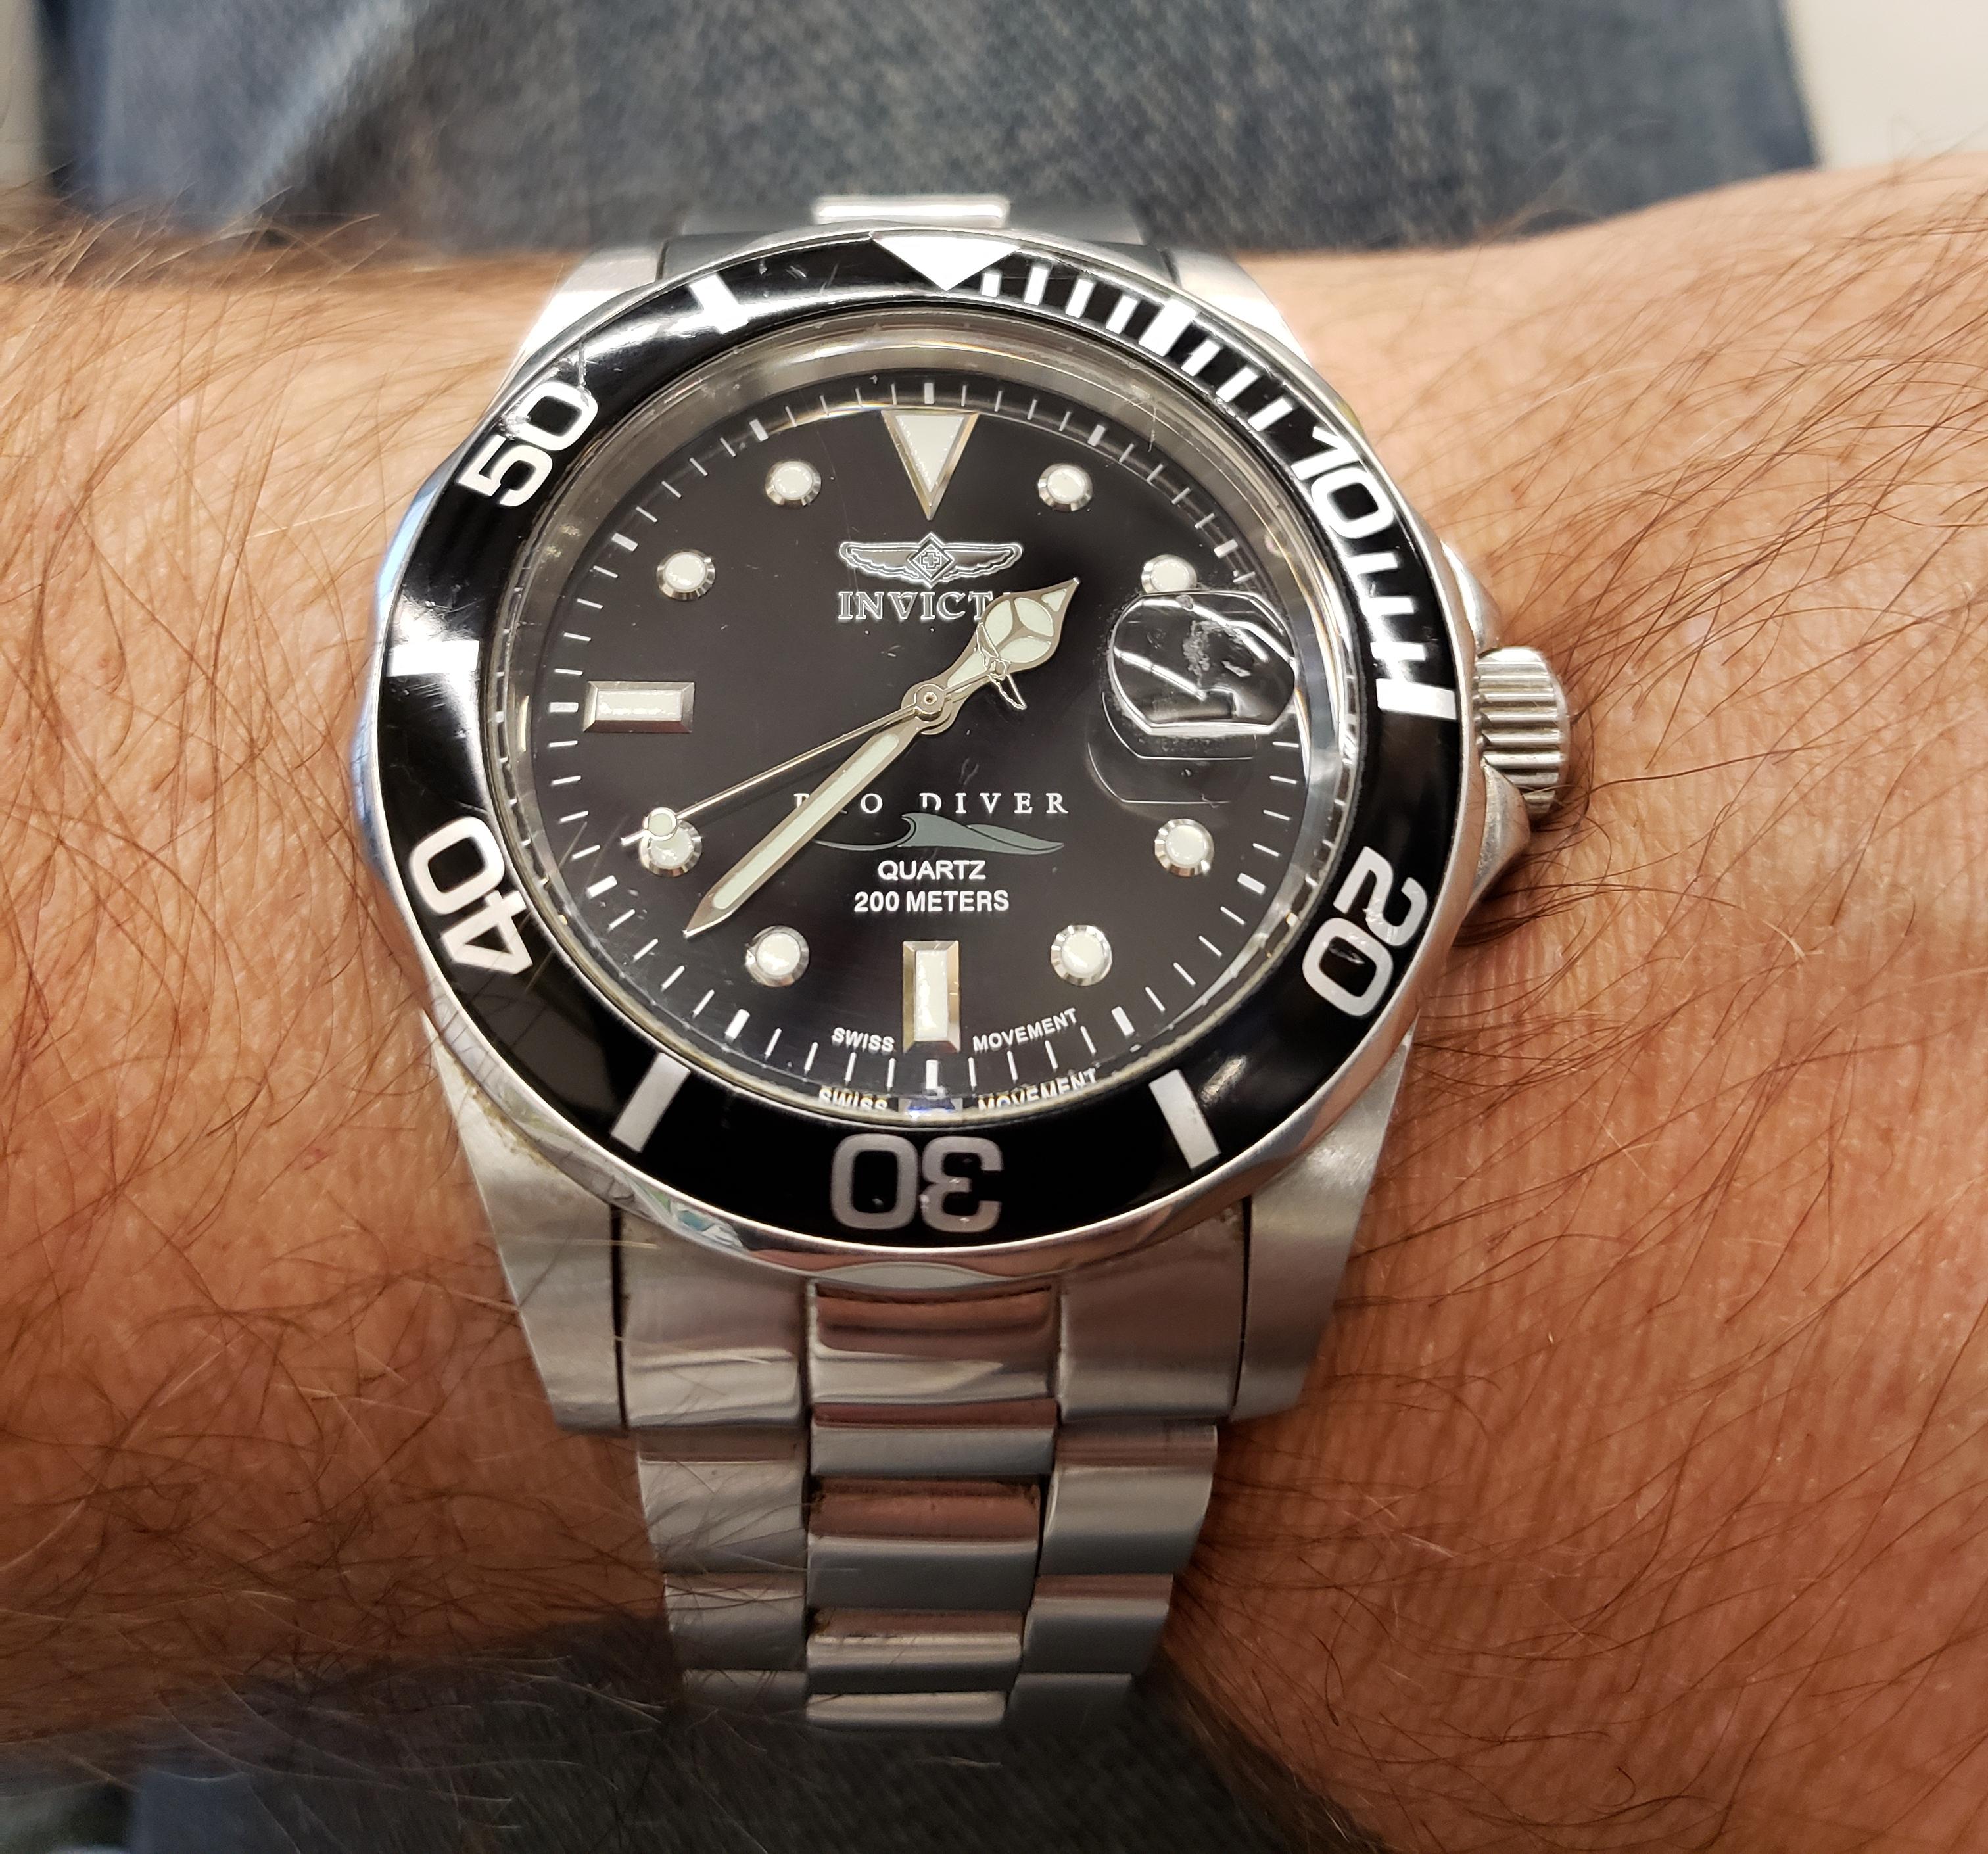
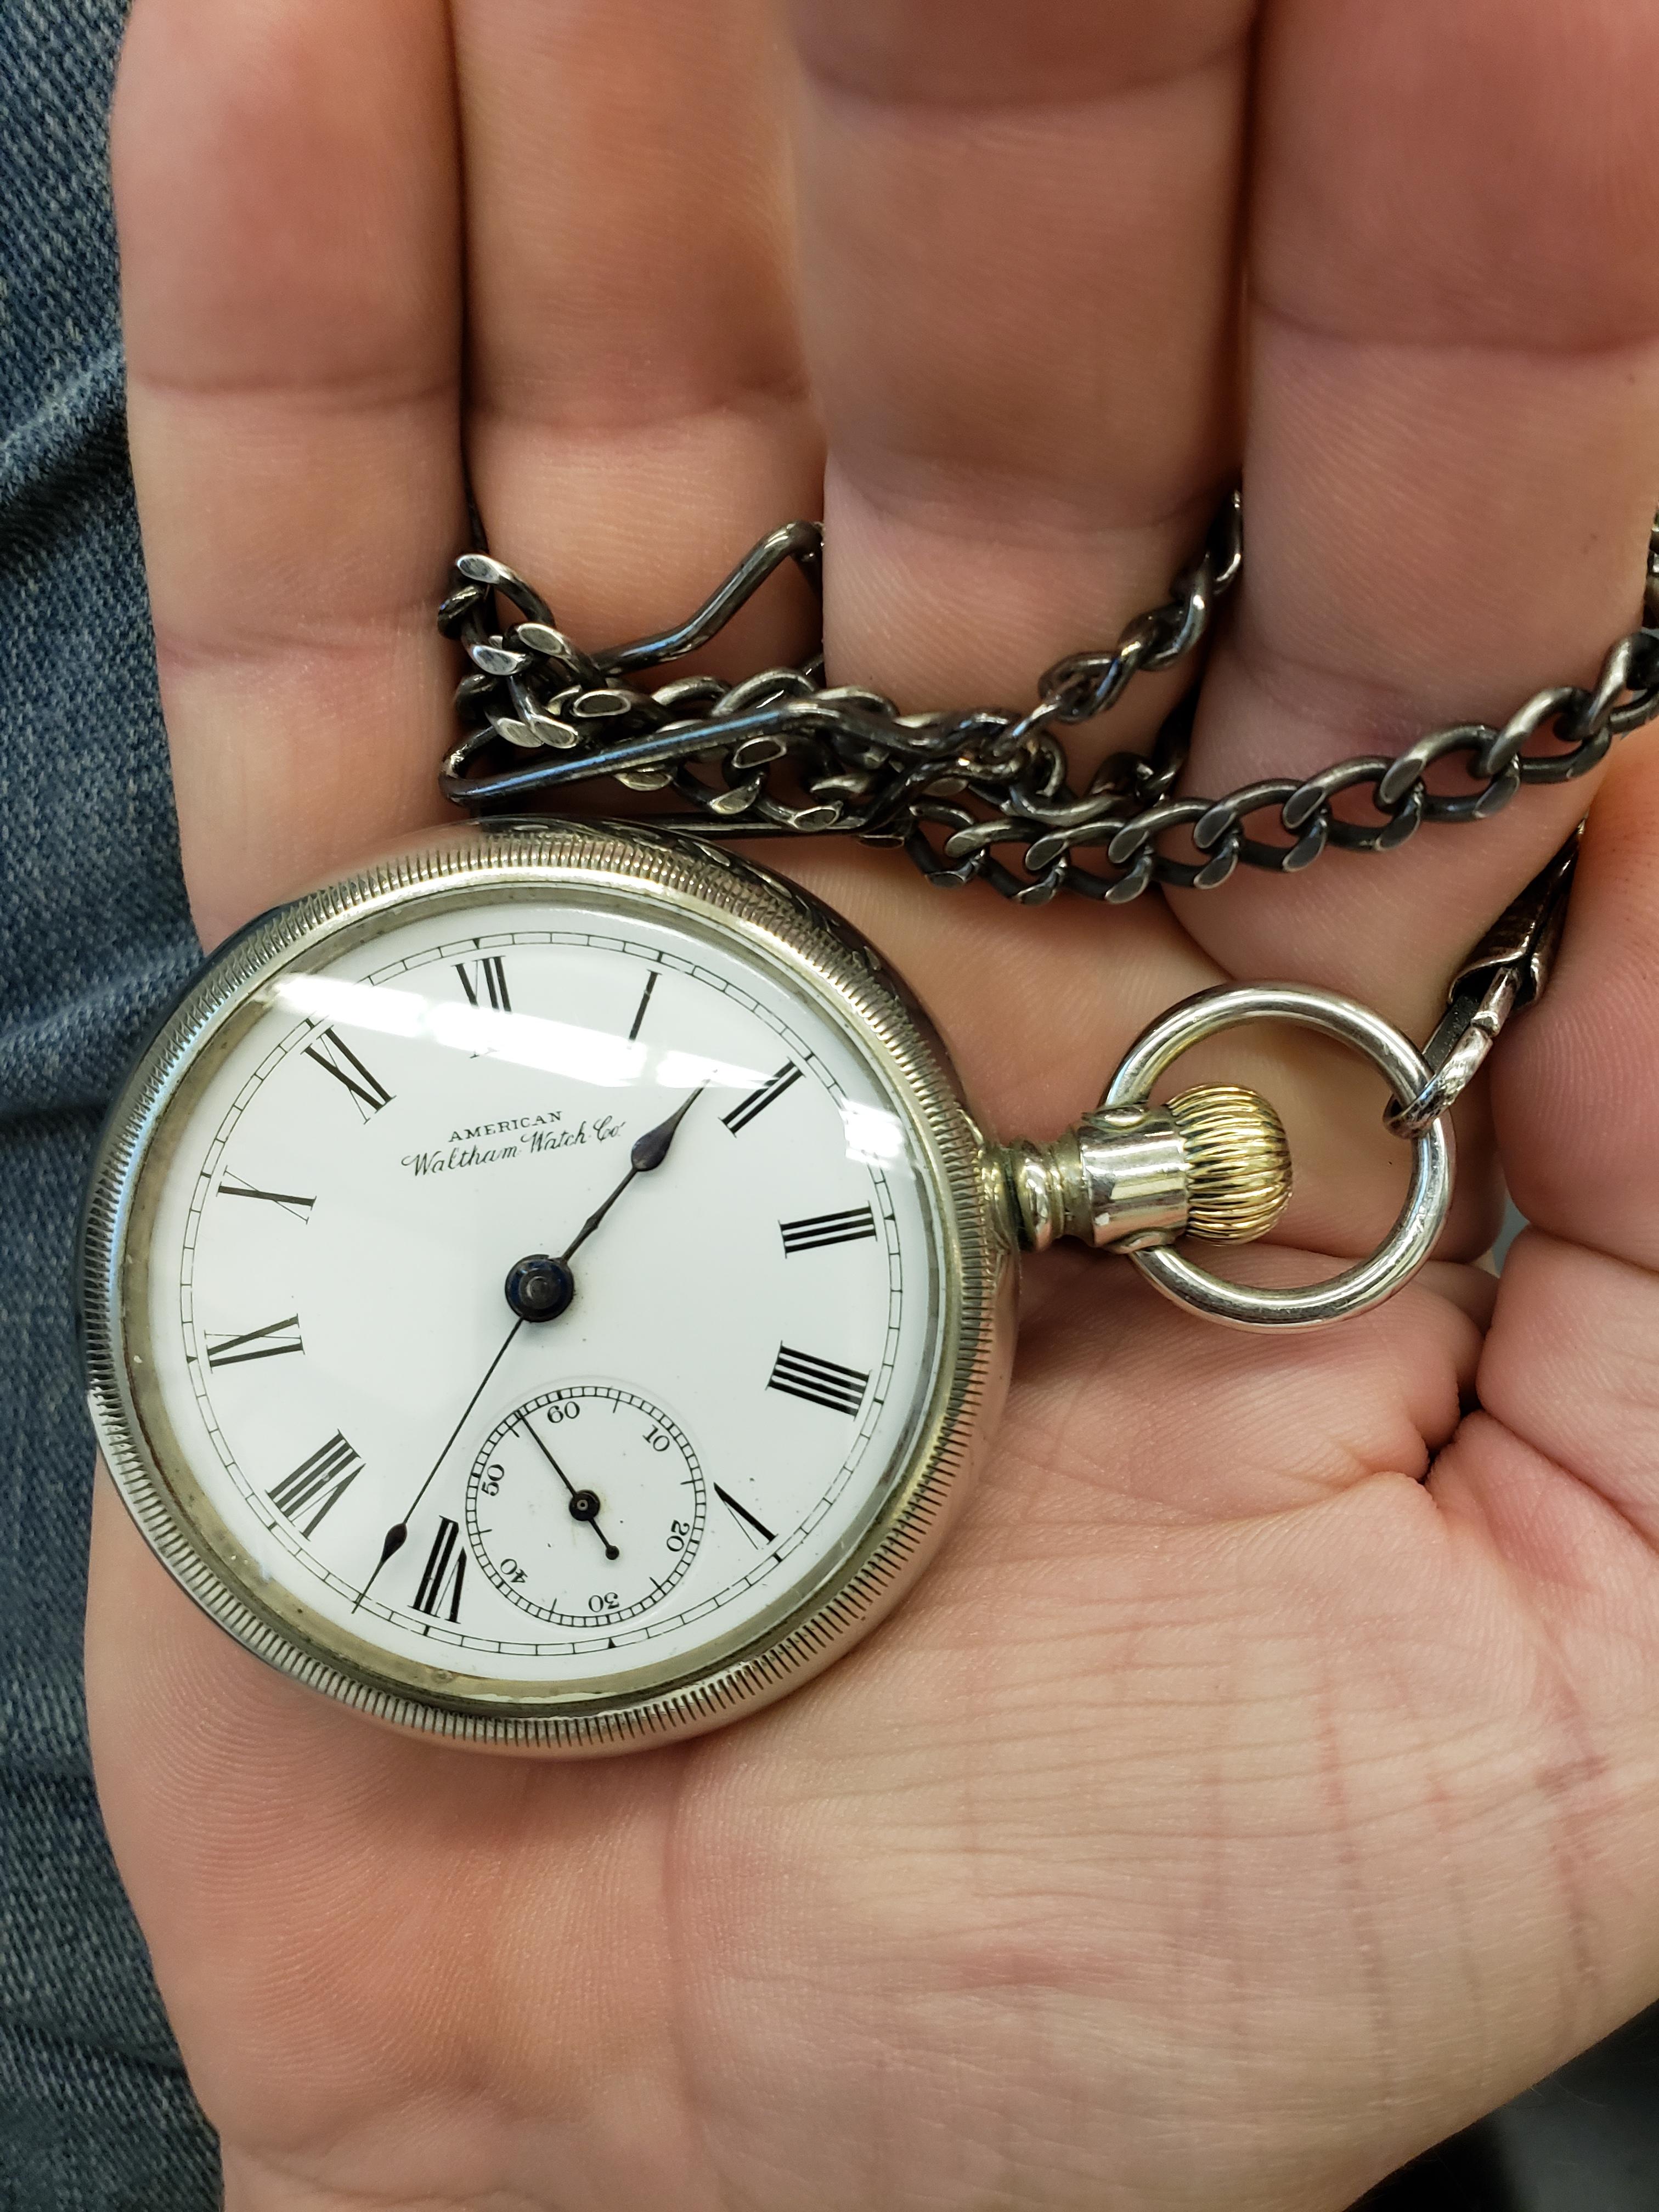
Wearing my Invicta Quartz Pro Diver today. One of the few Invicta's that aren't gaudy and pretentious or enormously oversized. This is also 1 of the only 3 quartz based watches I own. On a side note, I also carry a pocket watch every day. This is my only Waltham. It is a model 1883 made in the last half of 1892. This was my very first 18s watch.


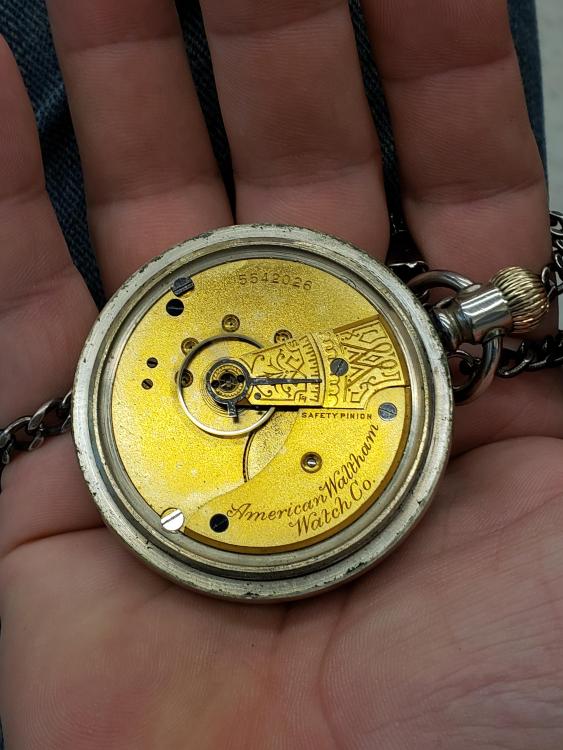 1 point
 -
Right on Johnnie I second that, we have been doing it for years and lok to be doing so for years more.1 point
-
Hi Jason, enjoy he forum.1 point
-
My Friend, that is too much like work!1 point
-
You could always chain the inept son to the stamping machine. All he has to do is get the B and the R in the correct order.1 point
-
Functional and not obstrusive. They work well with odd ball bracelets that attach to the watch in non standard ways.
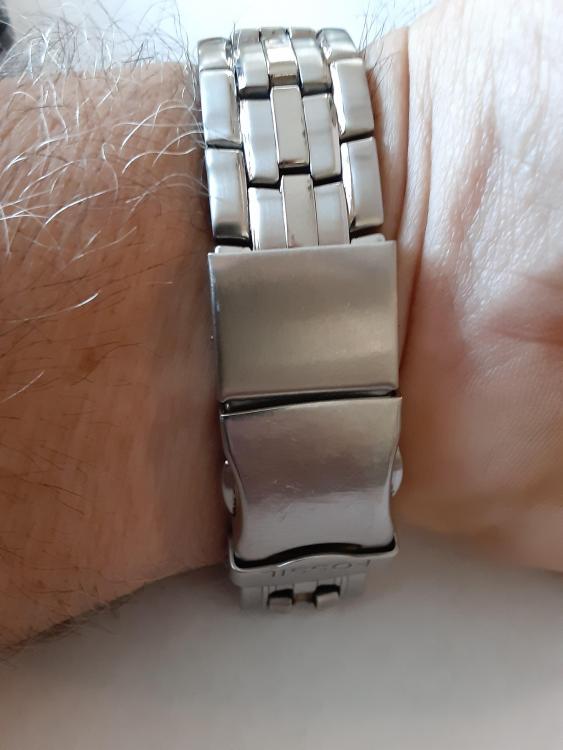 1 point
 -
Looks better than a new set of teeth!1 point
-
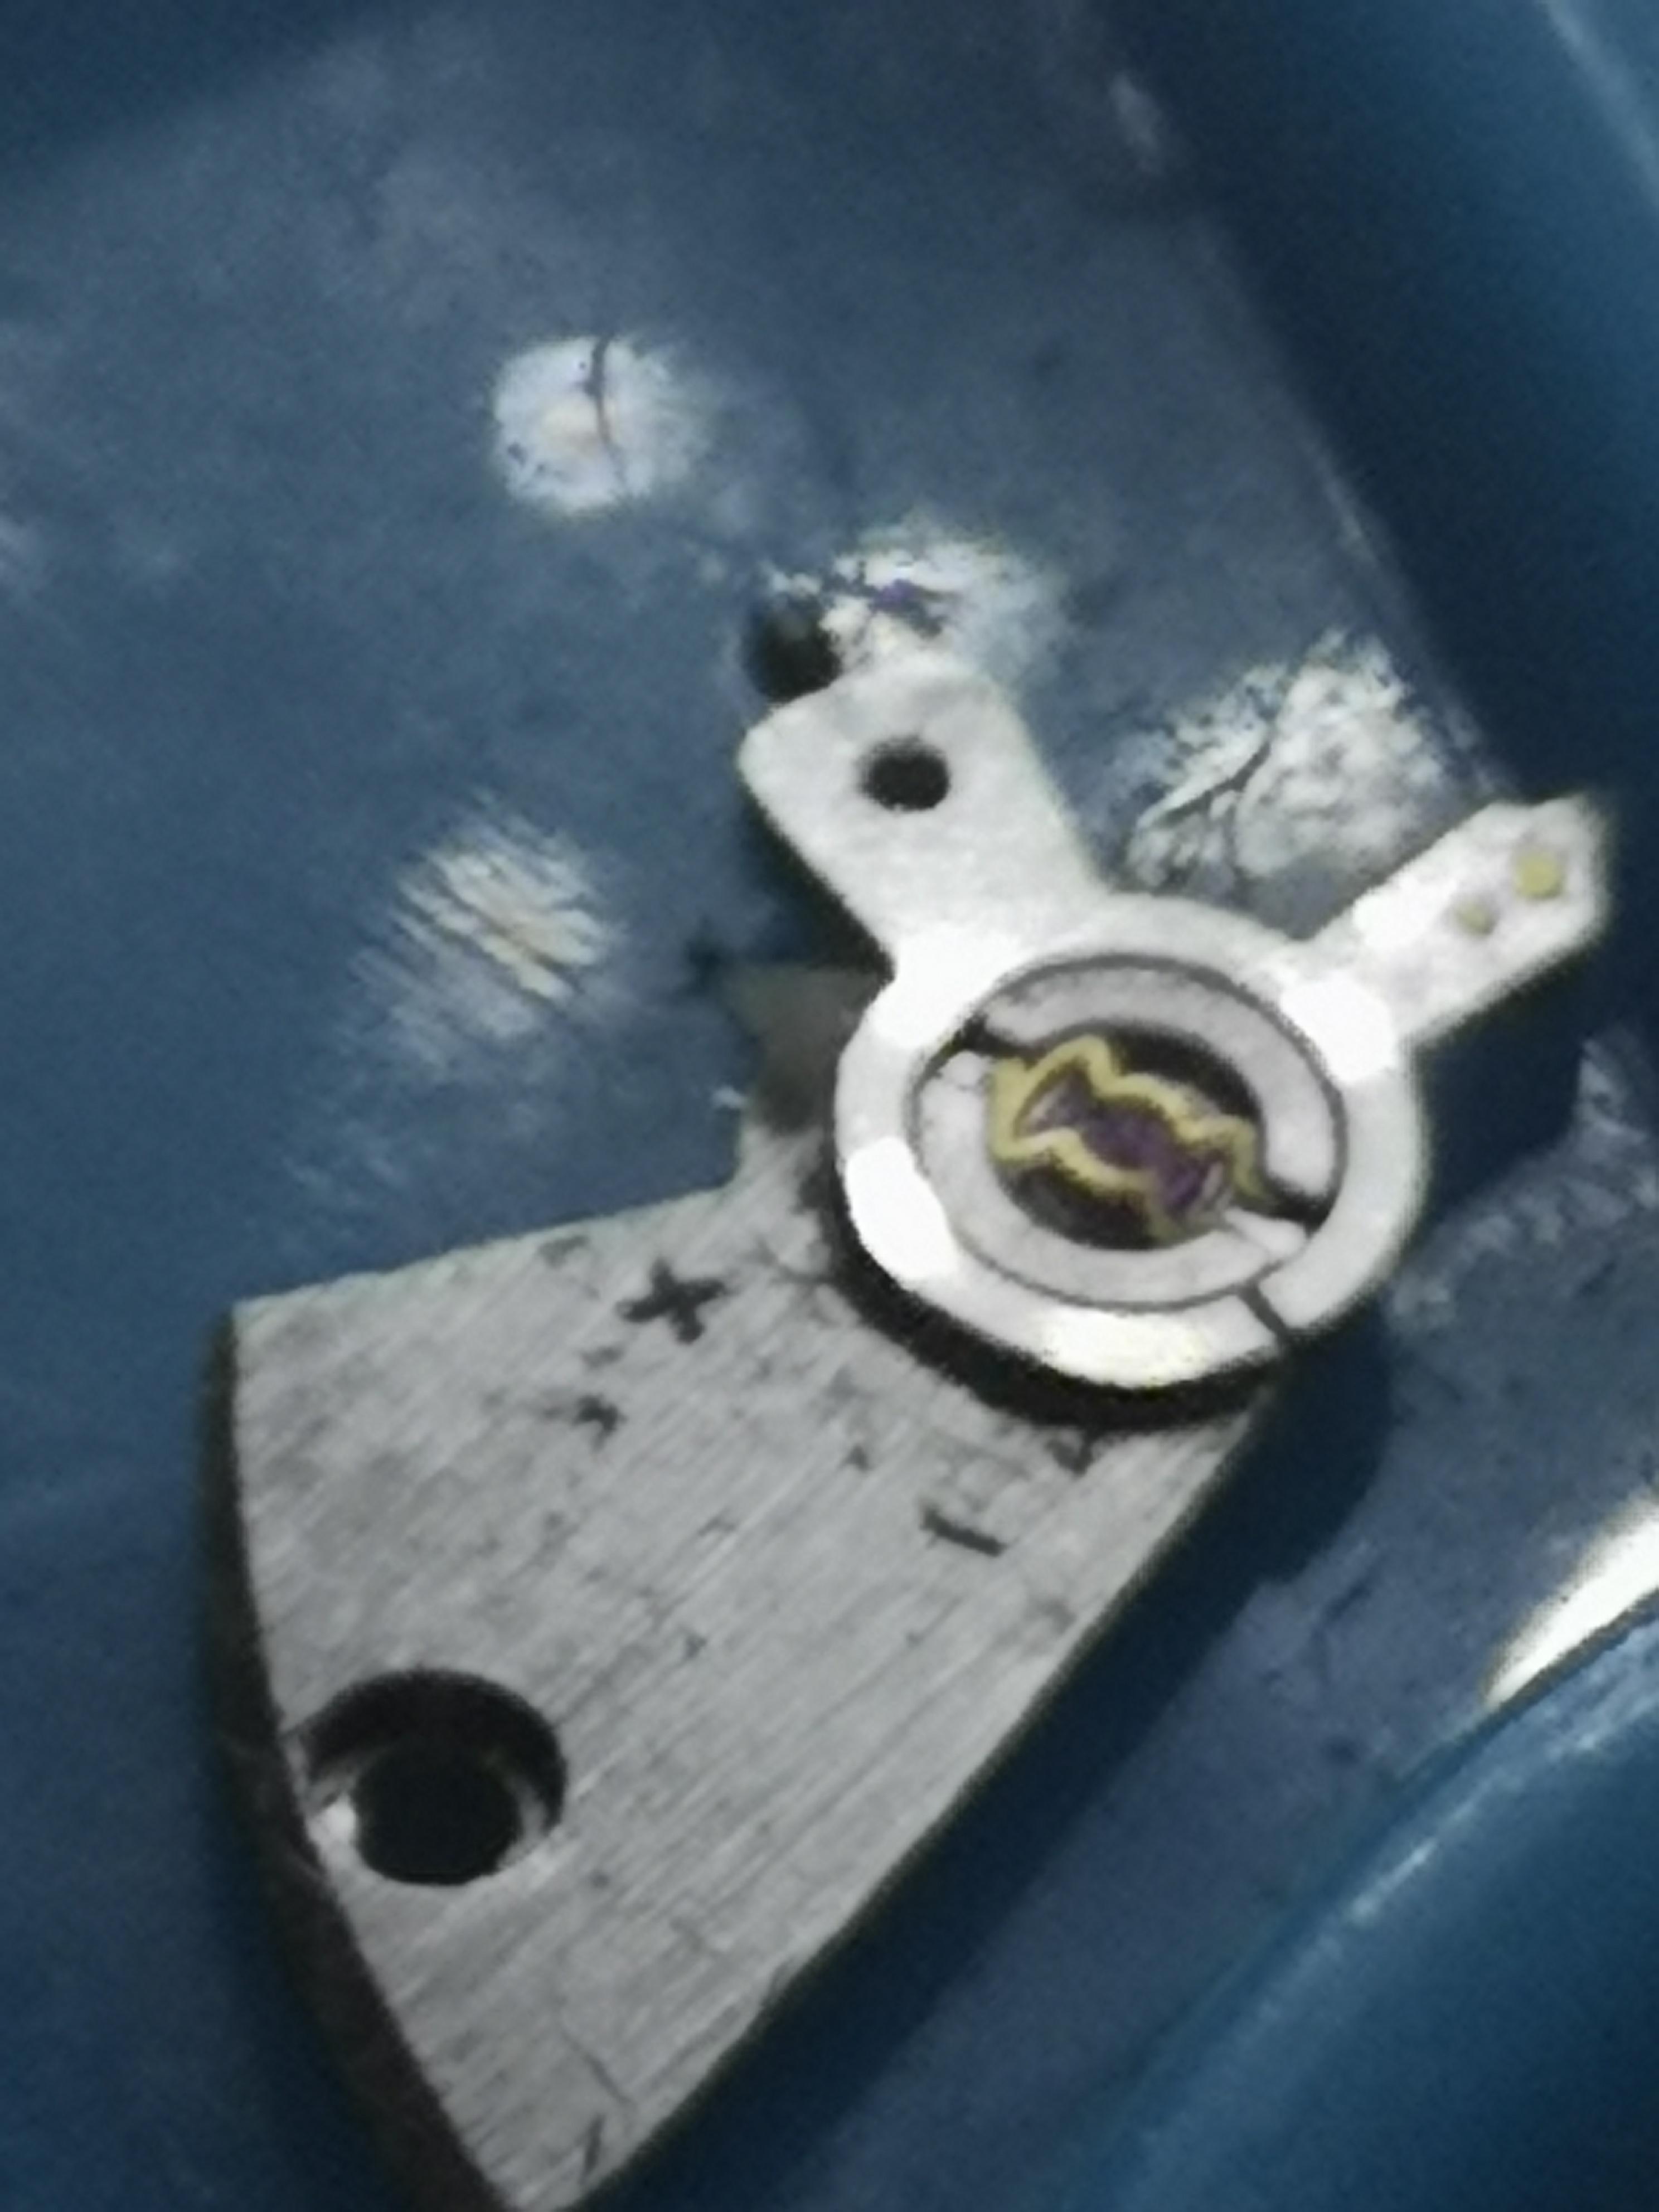
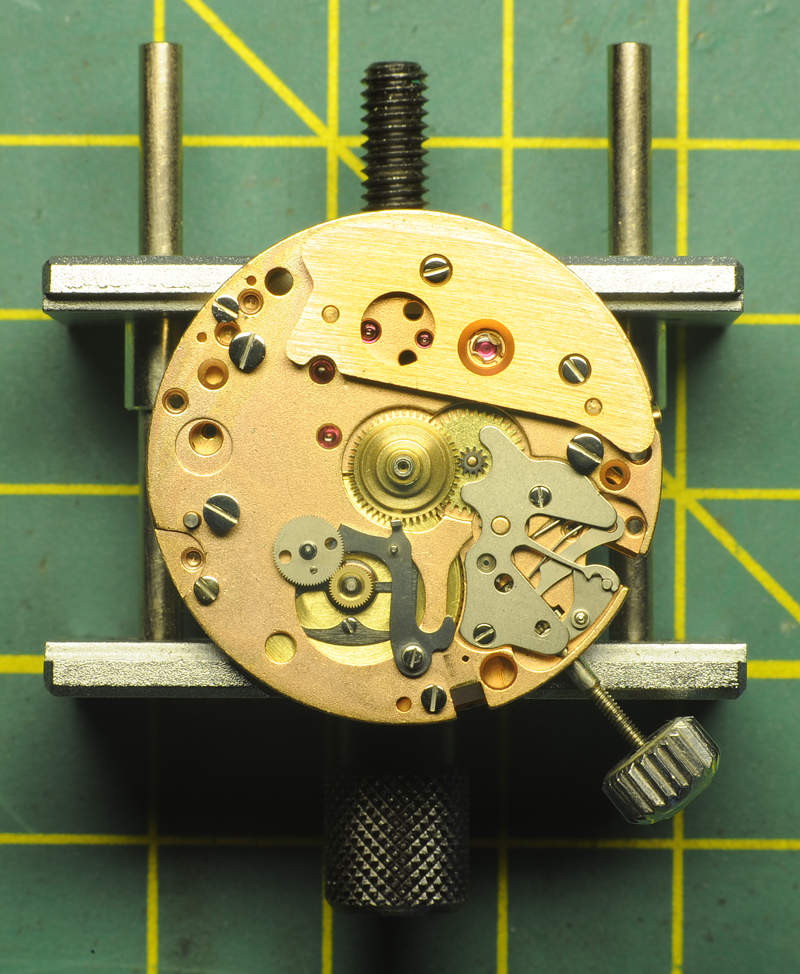
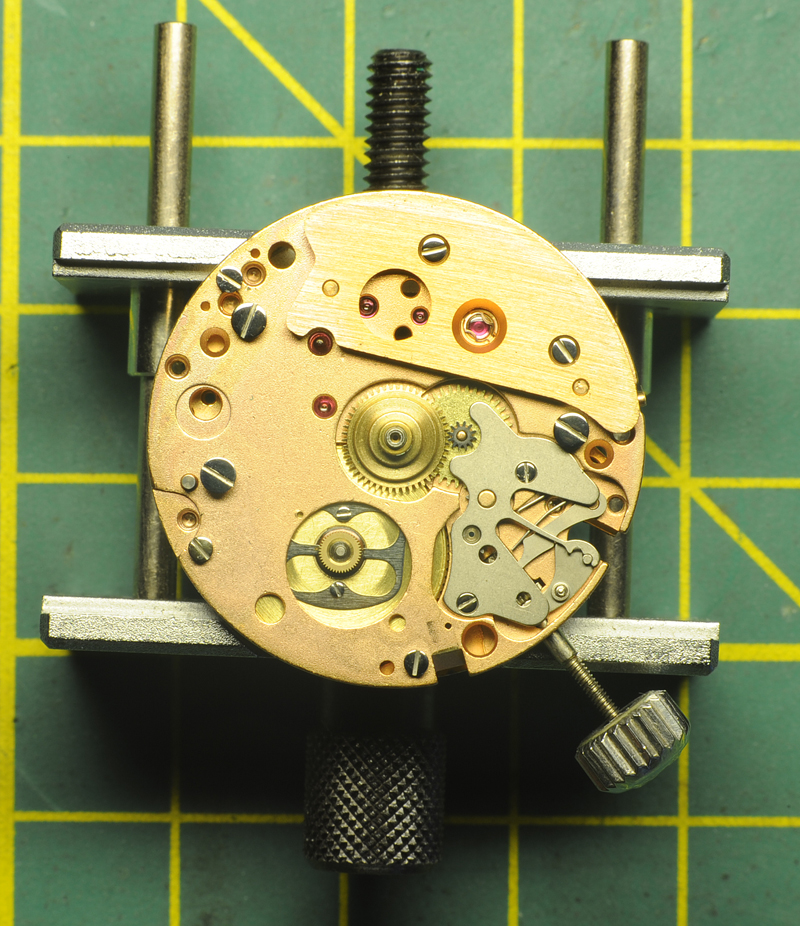
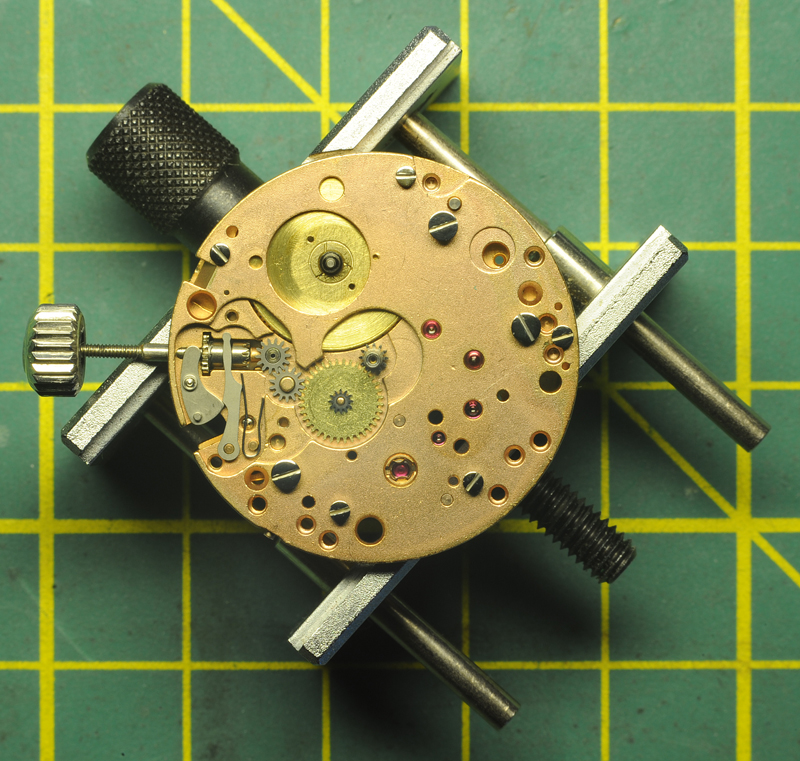
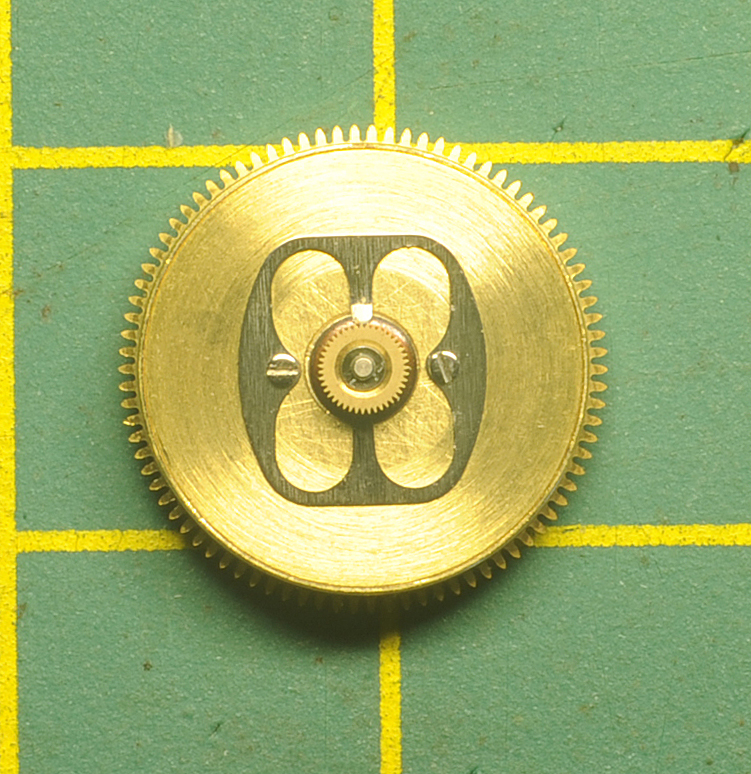
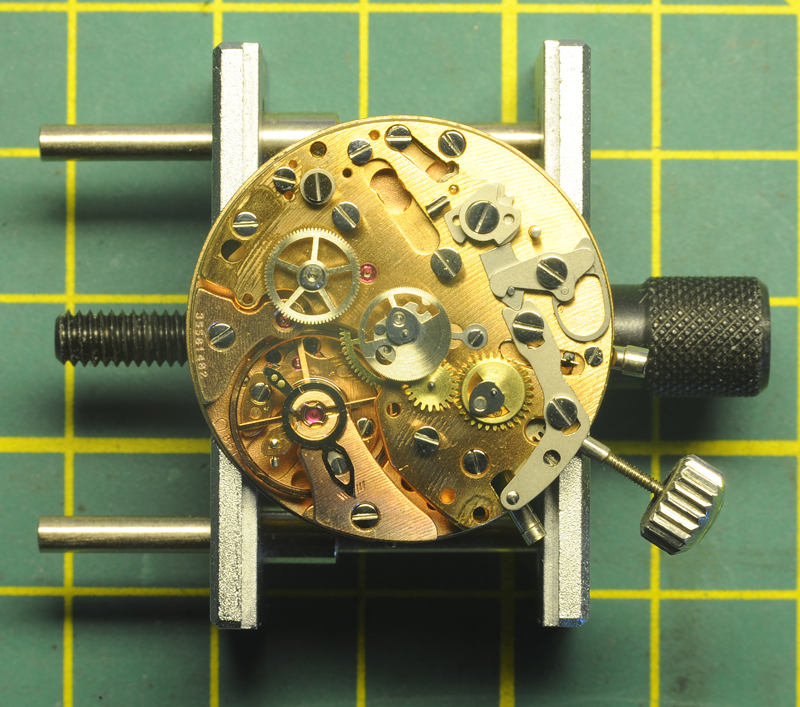
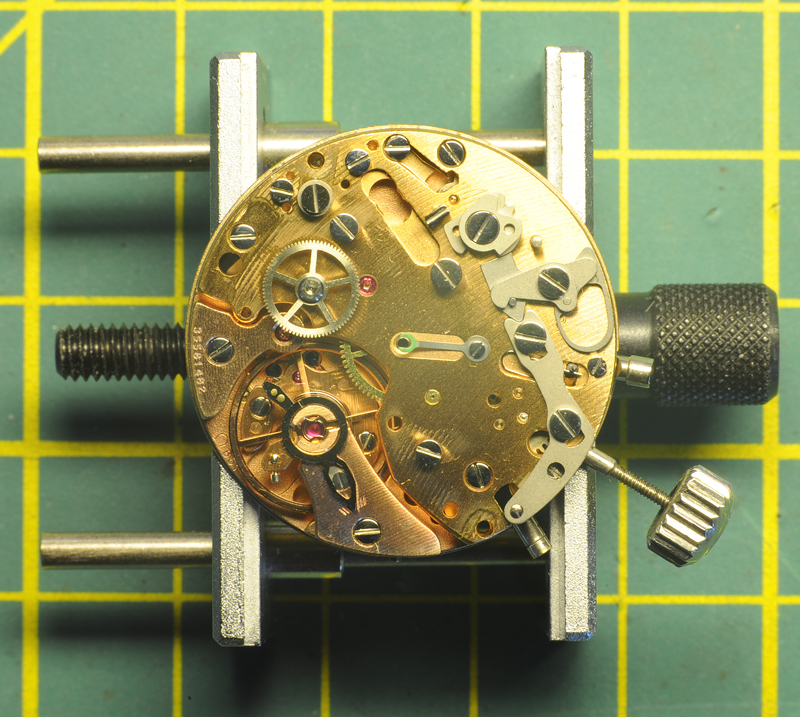
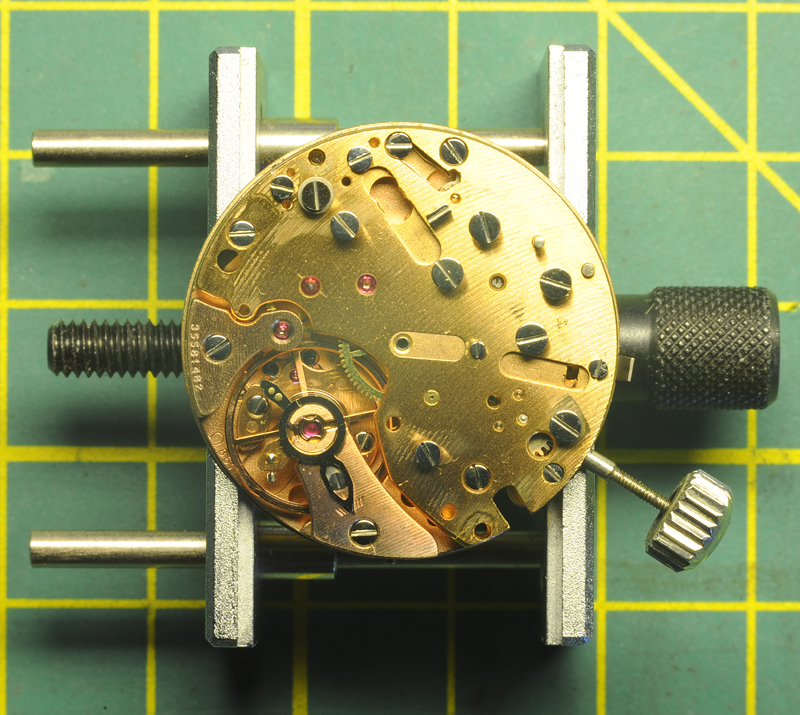
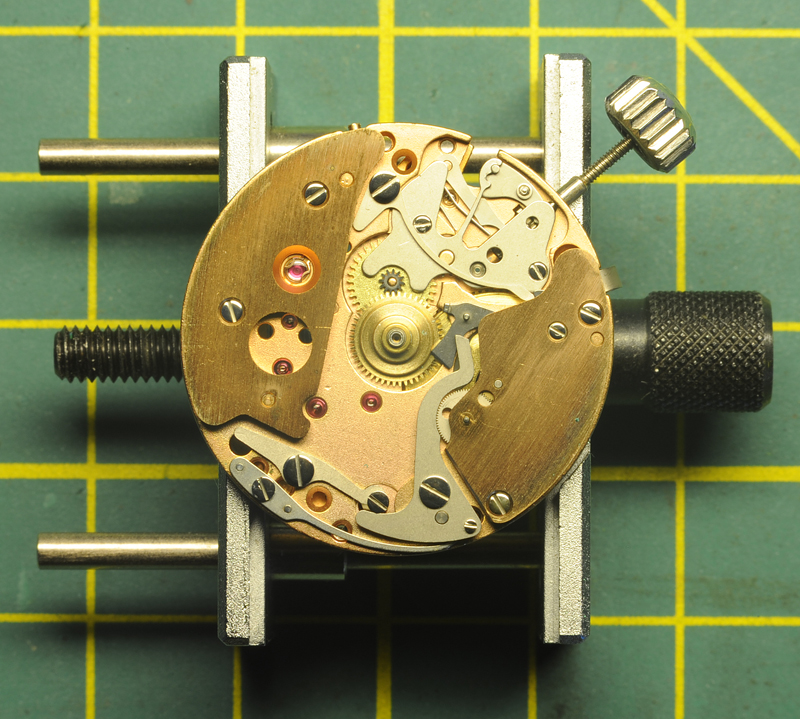
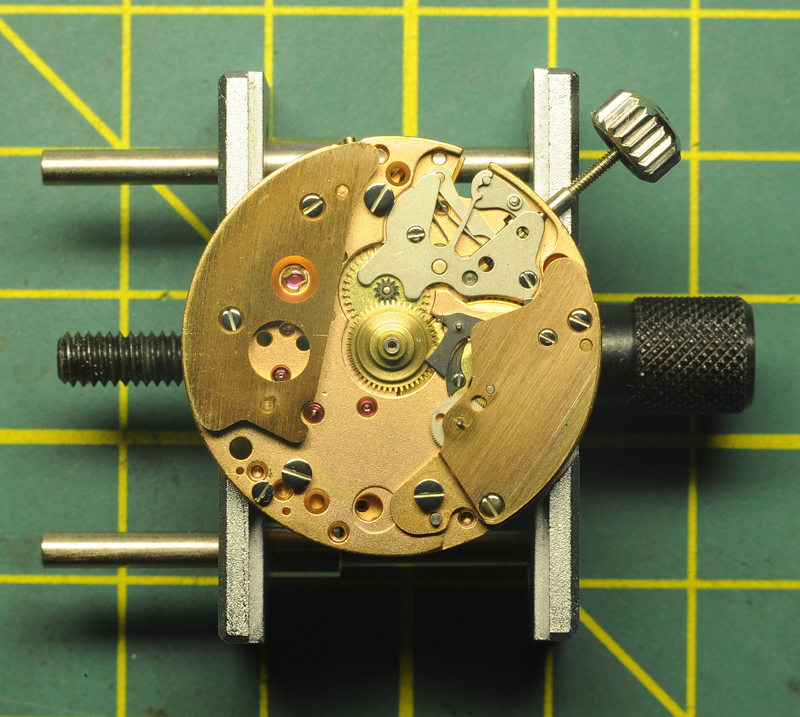
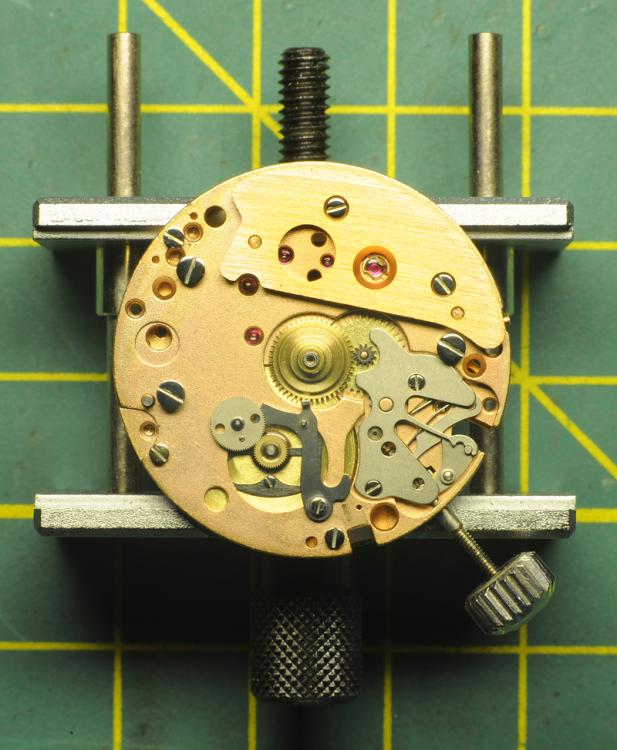
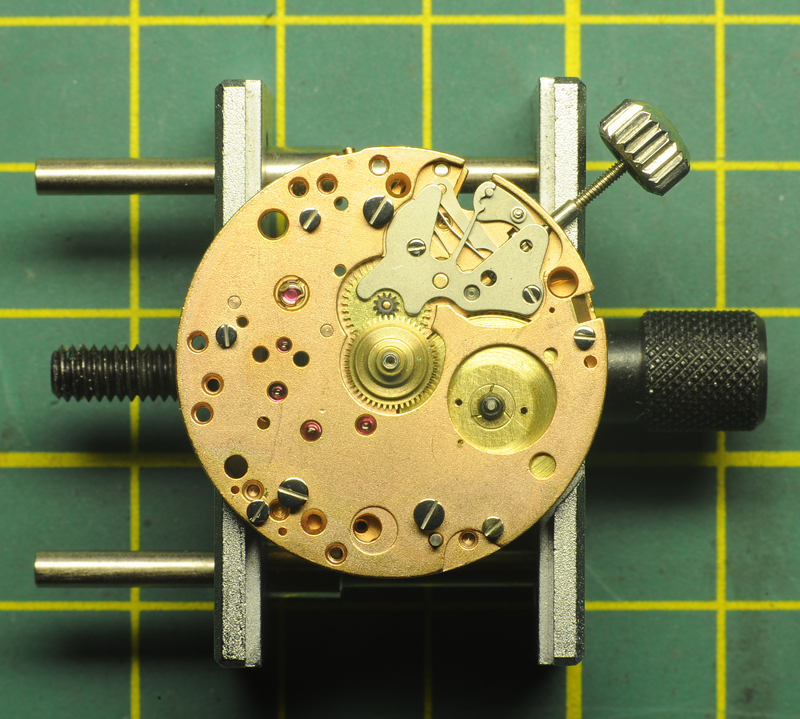
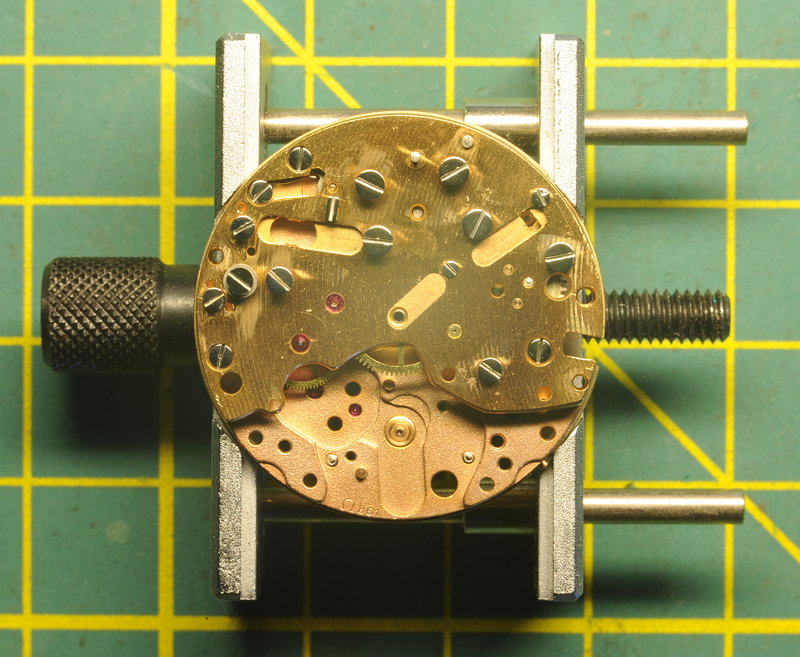
Finally got around to finishing up the pocket watch project. I can say that at least it runs, and remarkably keeps decent time. I took some pictures just so I could reference how the movement went together, but it doesn't do justice to the amount of crud that was in there. All I needed to replace was the crystal, since it came without one, and the hands. I went with what I could find that seemed appropriate to the style. What do you think?
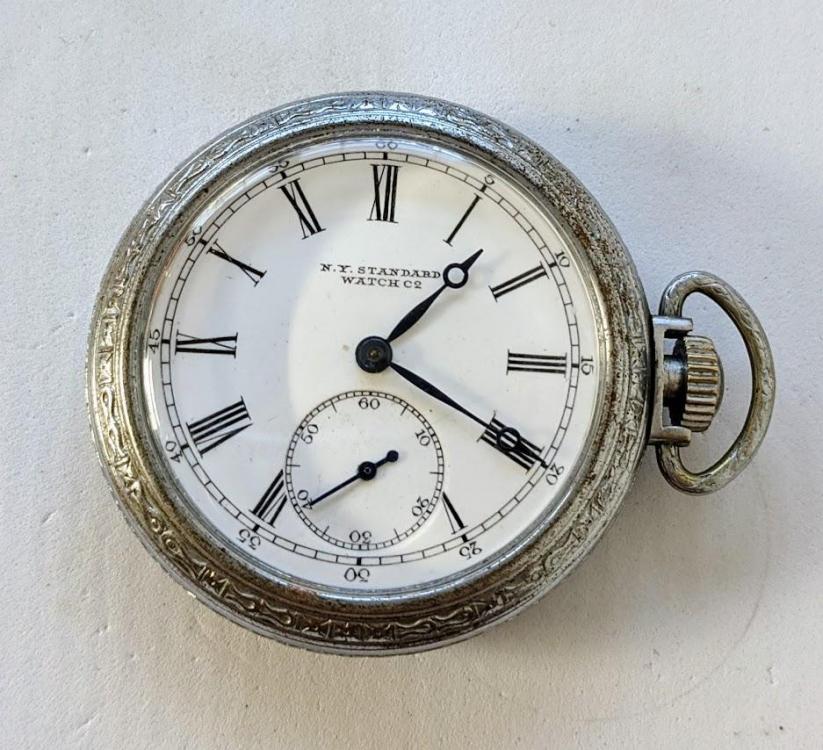
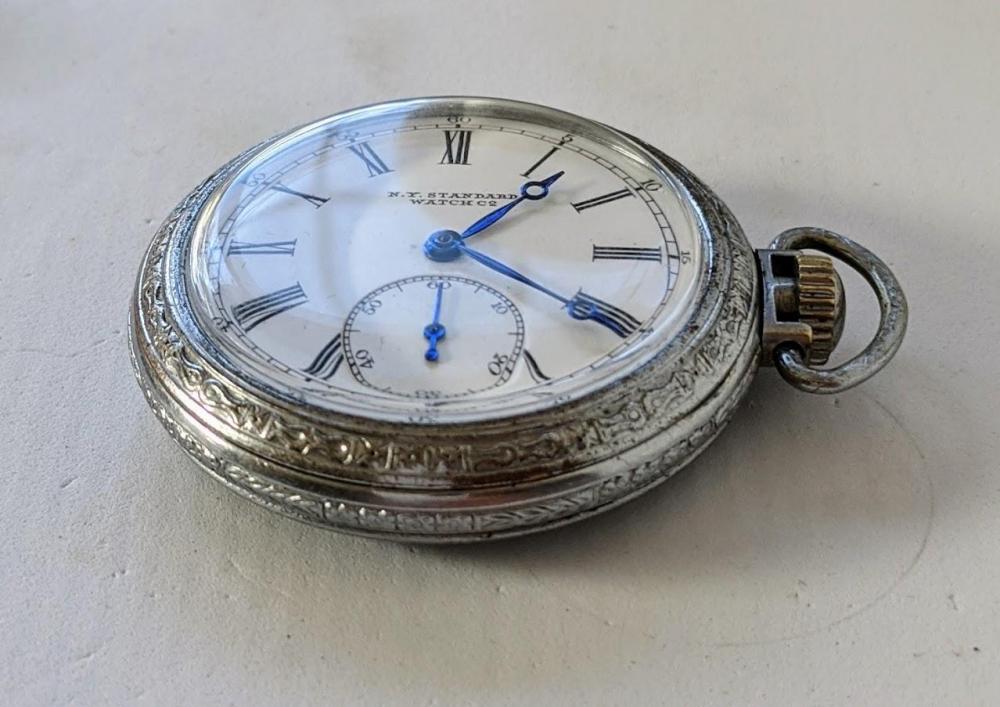 1 point
 -
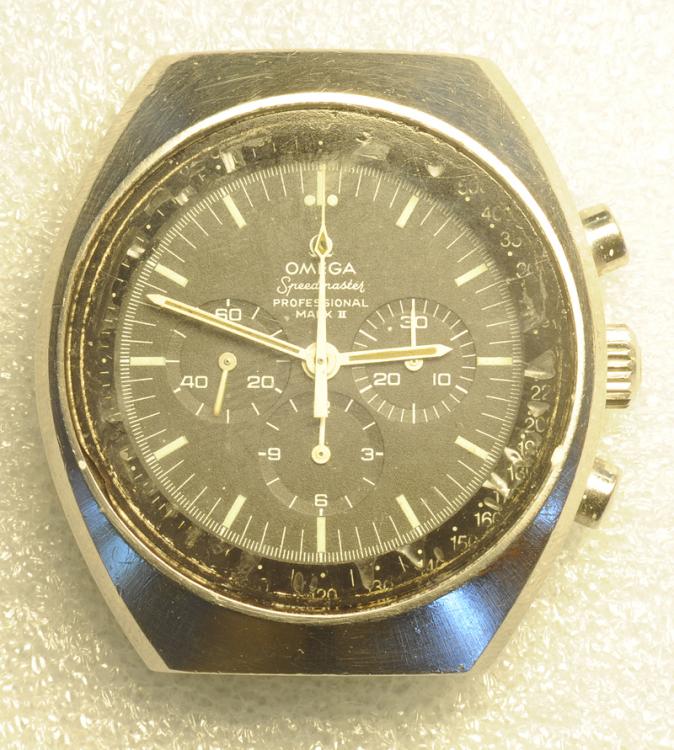
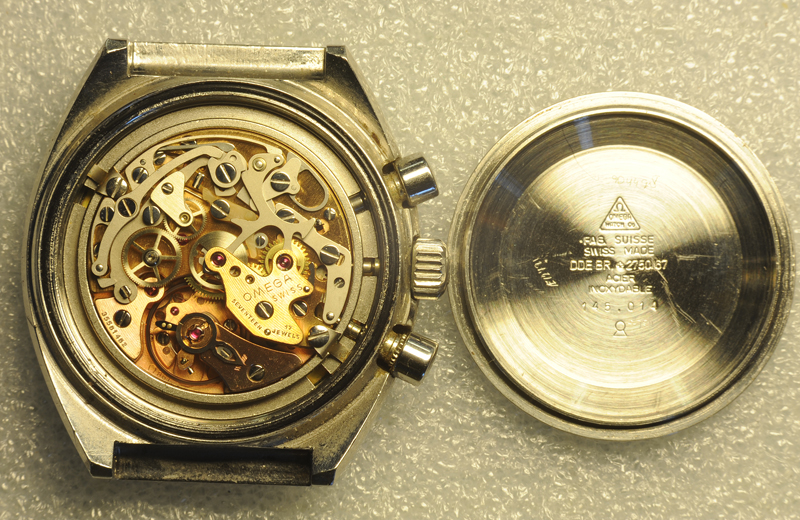
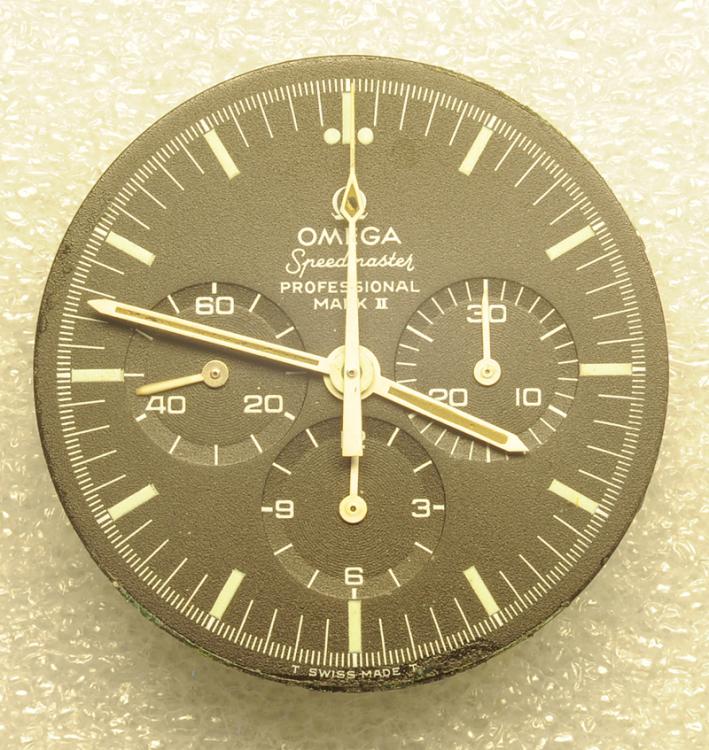
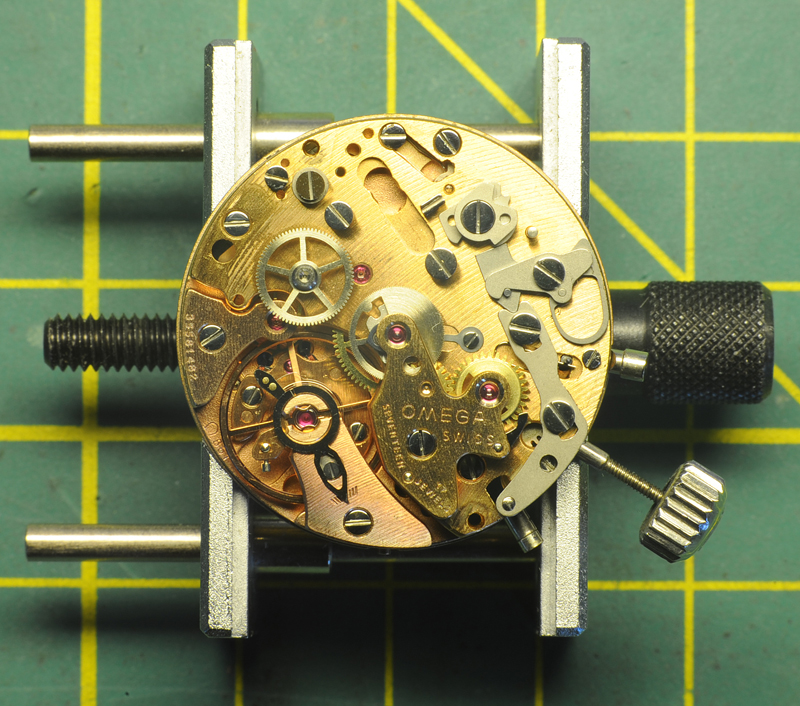
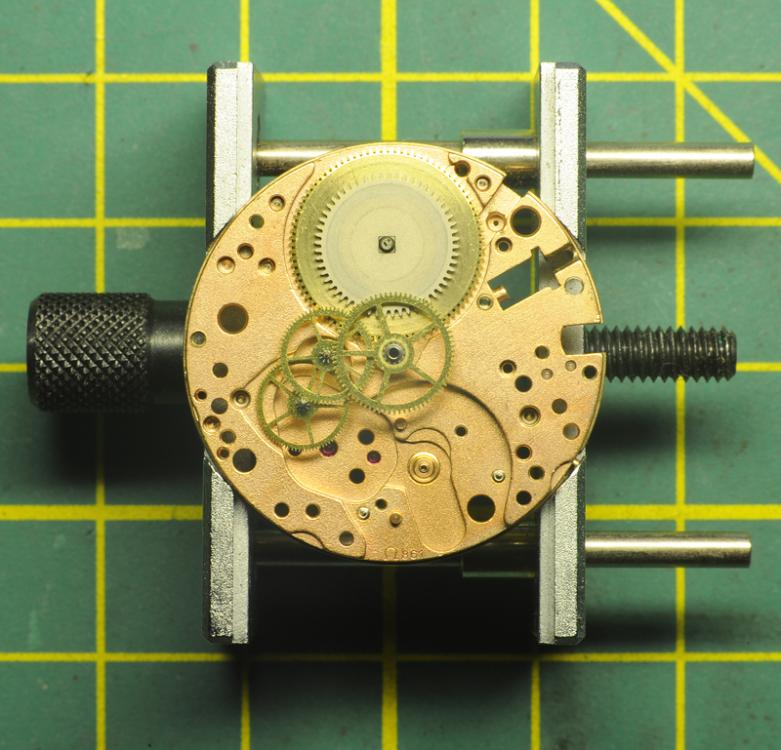
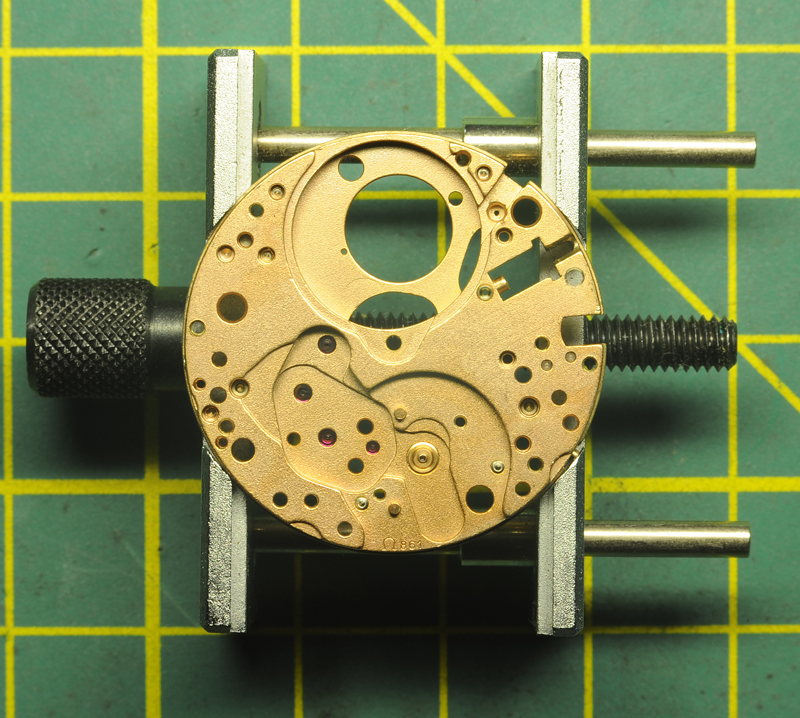
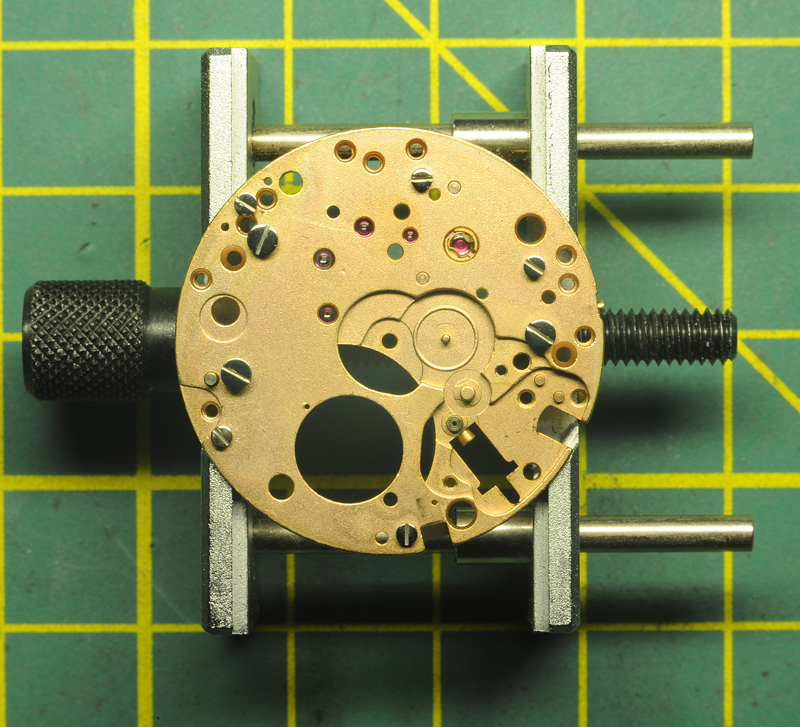
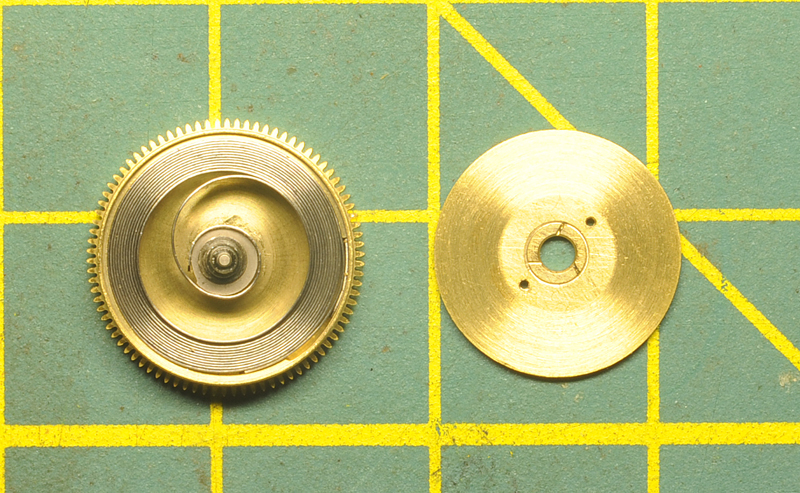
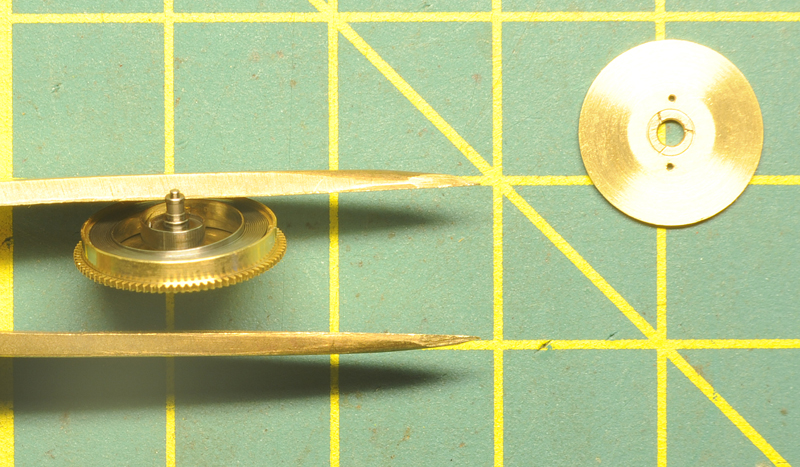
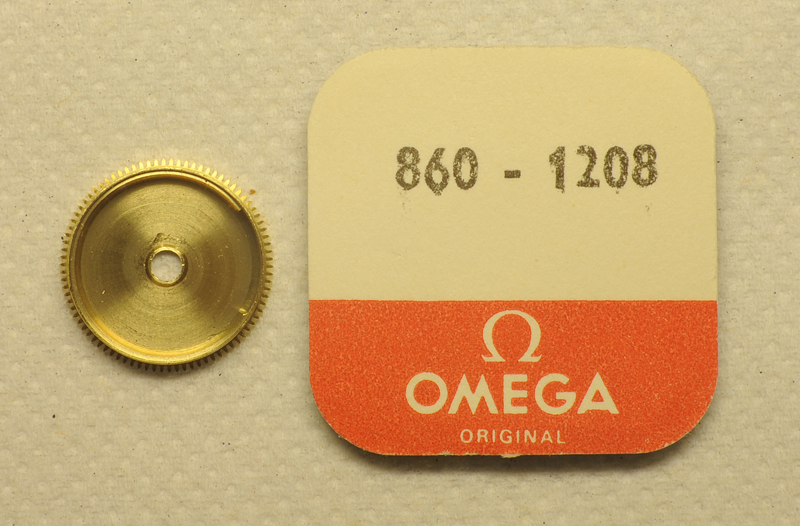
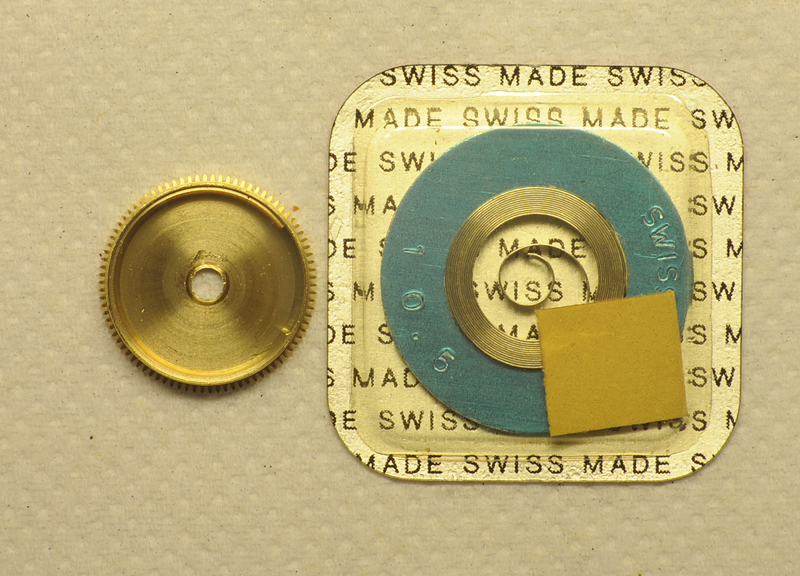
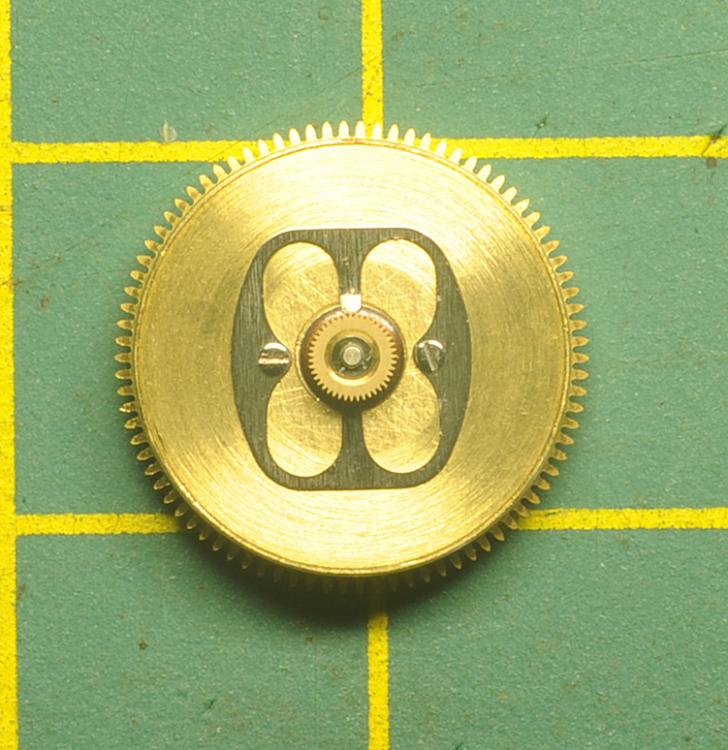
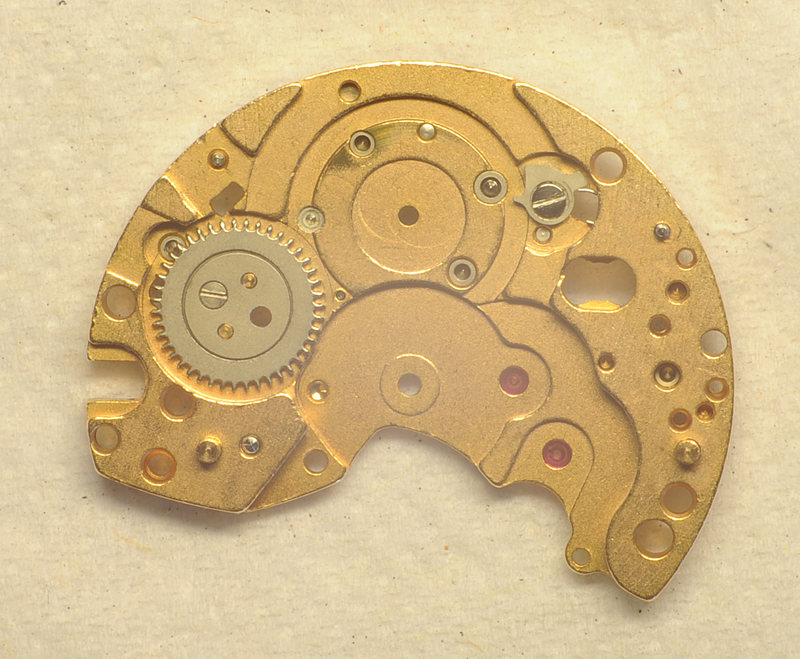
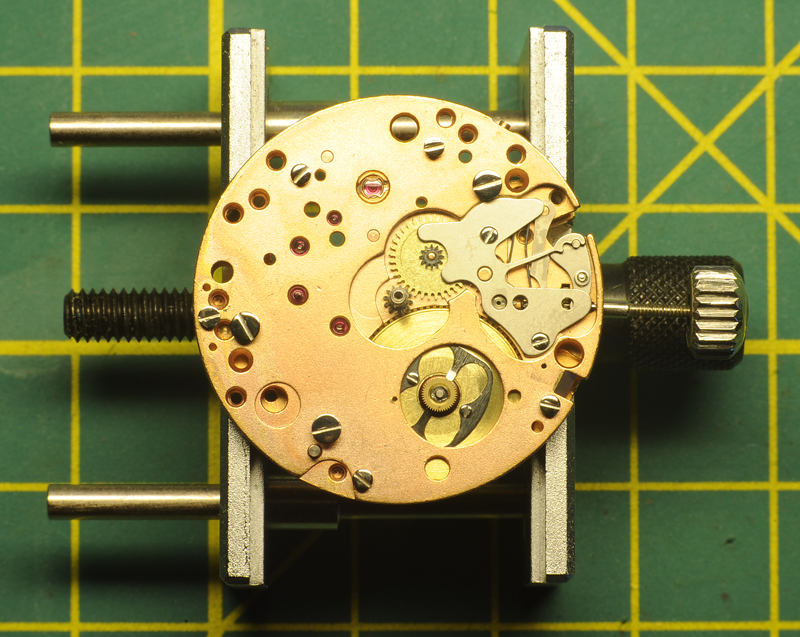
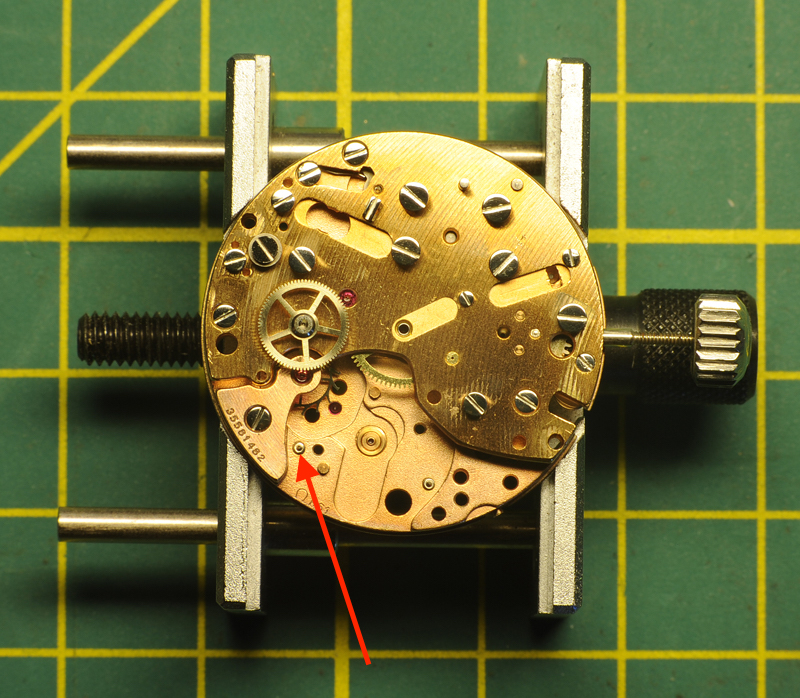
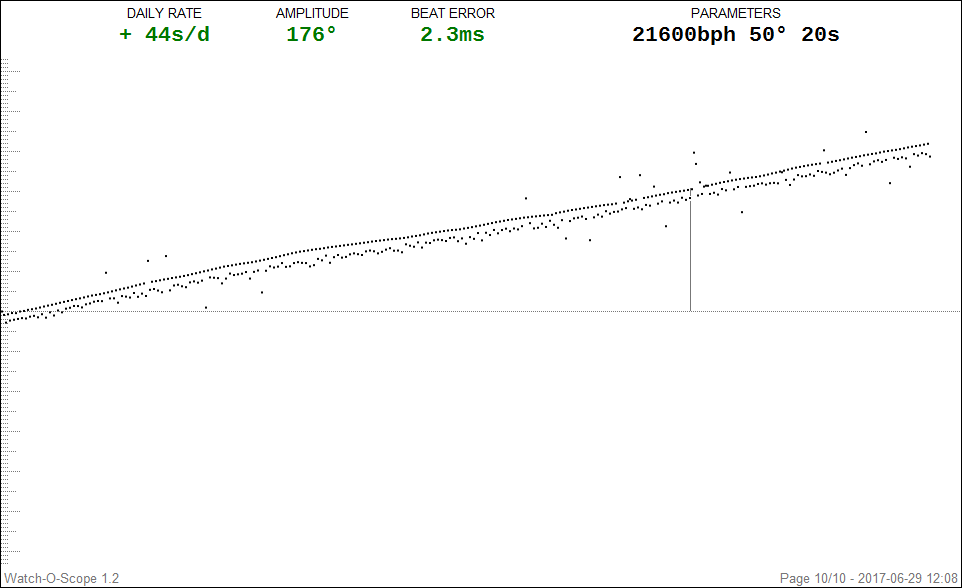
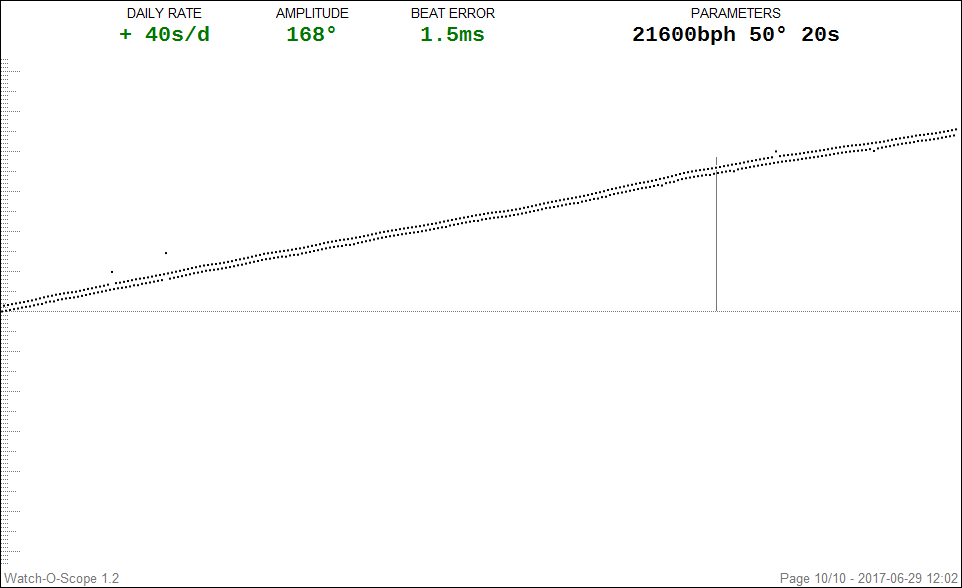
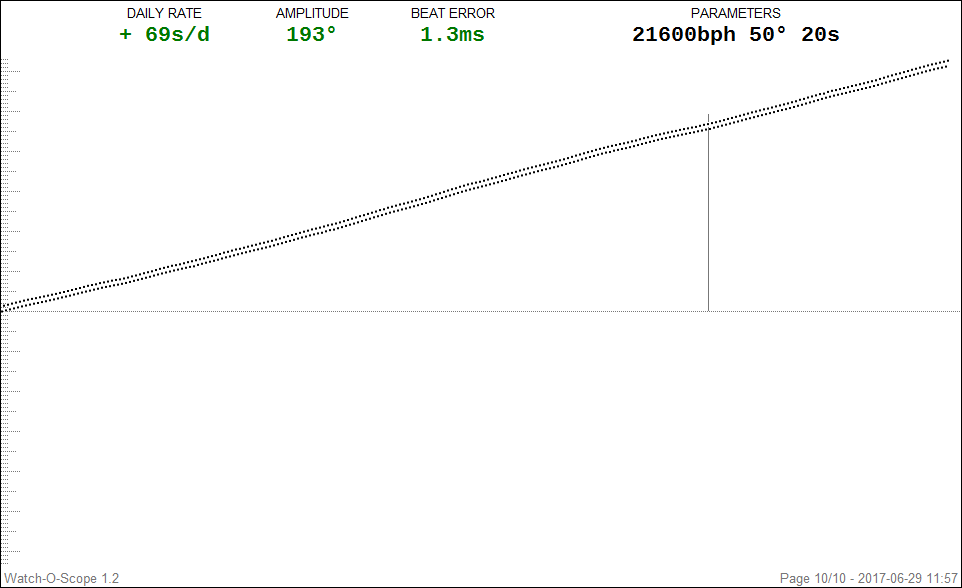
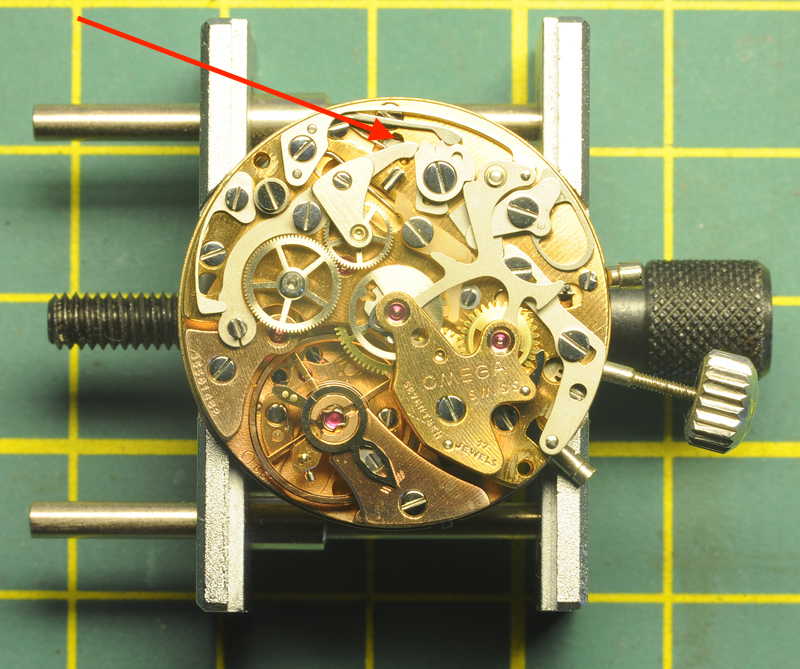
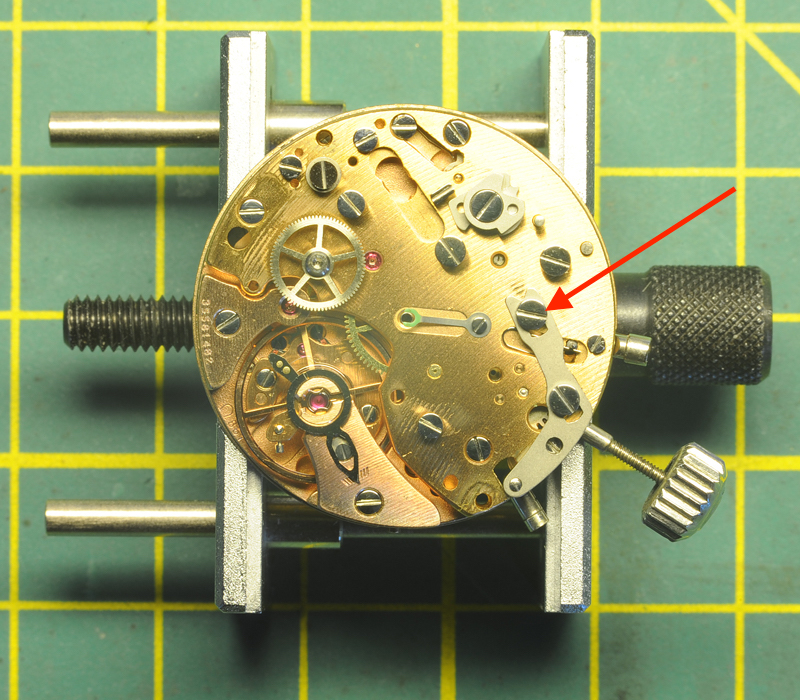
Hello All; On my desk landed a 1975 Omega Speedmaster professional Mark II. It was in a sorry state and water ingress was suspected. The last services were quite a few years ago, mid '80's towards the '90's. Those services were performed by a watchmaker working for a local highly reputable jeweler with a glossy facade. Instead of using the proper tools (a guide-ring) to replace the glass, for ease or necessity the official seal-ring was taken out and the glass was placed using a black sealing-kit. The back-cover received the same treatment, instead of the correct O-ring, the O-ring groove was filled with the same black sealing kit and the cover was thereafter closed. By a stroke of luck, the Omega was replaced by another watch and has for 20+ years been stored in a drawer; until recently. The owners current watch was sent away for a service and the Omega had to fill the gap. Unfortunately the Omega came in contact with water. The owner suspected water ingress and as soon as his current watch was back from servicing, the Omega was sent to me. Though time, the black sealing kit has eaten away the printed Tachograph-ring and made its way onto the edge of the dial. The task on hand; a full service of the movement, installation of a new mineral glass and replacing all seals. Perhaps some new luster to the watch-case........ Whether I show the full restoration of the watch-case needs to be seen, but I like to start off with a walk-through of the 861 movement. Two Omega 861 manuals were of enormous help; Omega 861 service manual.pdf Omega 861.pdf I printed them out and best is to read and cross reference both manuals before starting. Each manual contains important information, not necessarily mentioned in the other manual ! Once the information is combined, then there is enough information to do a proper service. For chronographs like this one, I replace each screw after the component has been removed. This avoids screw mix-ups, but can cause some problems too ...... read installing the pallet-fork bridge. Without any further ado; Here is the watch as I received it; Luckily the inside looked pretty okay and no visual signs of water. BTW, the black sealing kit on the back was already replace by a proper O-ring. Took some Watch-O-Scope shots (lift angle 50 degrees) Dial up: Dial down; Crown Up; Crown down, this one was harder to get due to a weak signal; All in all, not too bad.......... at least not "devastating" differences in the four positions. The movement is attached to the case with two clamps and a spacer ring. Remove those plus the winding stem and the movement can be taken out. Clearly visible is the black sealing-kit around the dial edges, starting from 5 till 10-o-clock. Pay special attention when removing the little hands, these have different tube sizes. I stored them separately, each in their own container; Left, Bottom and Right. Taking ample pictures was a great help to me as well. I had to consult them a few times during the assembly. Another remark I like to make is that the movement doesn't sit comfortable in an universal movement-holder. The movement-holder I used was a Bergeon 4040 and with great care it can be done, but later I've spotted on eBay Omega 861 movement holders for reasonable prices ..... On the picture below, the Joke 1774 has been removed. This exposes and give access to the click (see arrow). The main-spring can now be disarmed. Next is the hammer-spring 1734; it sits on two center-pins and has to be lifted at its heel. The hammer 1728 sits on a post and can be lifted straight off. Remove coupling spring 1731 and coupling yoke 1724. Be aware of the eccentric screw, it clearly has a different shape. I left the unit (wheel bridge 1716 and coupling wheel 1712) in one piece. Later I dismantled the unit and attention has to be paid which way around the coupling wheel is mounted. Removed the plastic blocking lever 1726 and blocking lever spring 1733: in the manuals different names and number are used for seemingly the same item. One end of the spring has a "hook". This "hook" has to face upwards against the blocking lever. Next to remove is the cam-jumper 1845. Next is the chronograph bridge 1037. The manuals are not very clear if one does this for the first time. Underneath and fixed to the bridge is a thin spring for the minute recording jumper. This spring will come together with the chronograph bridge. The spring pushes against the minute recording jumper 1767, which is attached to a post underneath the bridge. While lifting the chronograph bridge, the jumper 1767 may, or may not come as well. I my case, all lifted in one piece. By turning the bridge around, it all becomes clear .... Das "Aha Erlebnis" ;-) Remove chronograph runner 1705, minute recording runner 1708 and intermediate wheel for minute recording runner (1714); note which way around of the wheel ! Remove operating lever 1841, operating lever-spring 1842 and connecting lever 1840. Attention: The operating lever 1841 sits under tension. After I removed the screw and attempted to lift the lever 1841, the connecting lever 1840 had its personal launch ...... luckily not that far ...... Remove operating lever 1720. In my case, the "Glossy Facade Watchmaker" left a surprise; the top screw was sheared off right under the screw-head and screwed in by literally one thread (red arrow, picture above). I later attempted the remove the remaining stud, but no success. After consulting the owner and this being the second, more a guiding screw, the decision was taken to repeat the GFW-trick. The screw held for many years, so hopes are it will do it again. Remove (and note position) upper cam for hammer 1844, remove lower cam for coupling clutch 1843, remove stem for "Zero pusher" by undoing the screw, remove bolt-spring 1752 and bolt 1759. Carefully, use Rodeco, remove fragile friction spring for chronograph runner 1735. Carefully remove the driving wheel 1710; I managed to lift it using two hand-levers. I then removed the balance & bridge, the pallet fork-bridge & pallet and the escape wheel bridge & escape wheel. Flip the movement over; Remove bracket for operating lever 1784 (note position), remove hour hammer spring 1794 (not described in both manuals, note how it engages) and remove hour recorder stop lever 1750. Be aware: as soon as lever 1750 is lifted, spring for stop lever 1793 will jump free !! Remove spring for stop lever 1793, remove switch mounted 1779. Watch out !! Little screw at tail end is an eccentric (see arrow above) ...... do not touch !! Remove hour recorder bridge 1775; Remove hour hammer 1783, hour recorder runner 1788. Next is, according to the manual, removal of the friction spring for driving pinion 1792 and driving pinion 1791. I did this according to the manual, but found out that the removal of the friction spring 1792 and driving pinion 1791 can be done (much easier) later when the main-spring barrel is removed. Remove support bridge for dial 1776. Remove hour wheel and keyless works, note the two intermediate wheels. Remove canon-pinion. Flip movement over; Remove barrel bridge. Note crown wheel and click are underneath barrel bridge. Also note that ratchet wheel lays on top of the barrel. Remove wheel train; Open barrel and note spring position; Note arbor position; Install new spring; Install arbor, grease/oil and close barrel. Mount driving pinion for hour recorder 1791 and friction spring 1792. Grease as per manual. Service crown wheel and click. In my case the little screw of the crown wheel center was too tight and deemed not worth the risk. Applied some oil in the wheel groove. Now as for replacing the screws after each removed component; During the assembling I encountered a problem placing the pallet fork bridge and good pivot engagement of the pallet fork. After quite a few nerve-wrecking attempts, I noticed that a replaced screw on the other side of the main-plate stood proud of the main-plate and prevented the pallet bridge to seat. Once corrected, all fell in place ....... Assembling of the chronograph is the reverse of the above. Greasing / oiling is done as per attached manuals. Below; the movement is back together, running and all functions work ..... Tomorrow adjustment of the daily rate & bear error. As said, I may or may not follow up on the case restoration. Cleaning the dial is another challenge ....... Hope this walk through is to somebody of any use ....... ;-) Roland.


 1 point
 -
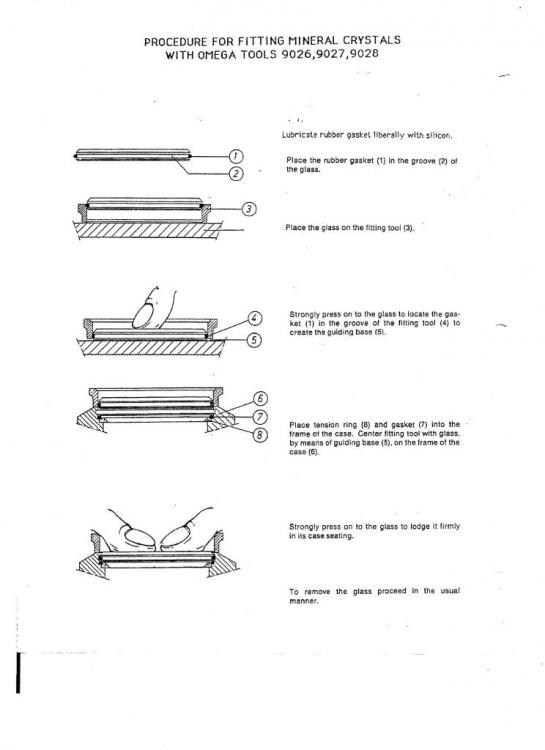
To add to my story above; Marks video's Omega 865 contains also some valuable tips and is highly recommended. I also replaced the chronograph driving (or "wheel over 4th"-) wheel before installing the escape wheel and pallet fork. The balance capstones (Incablock system?) had hinge-type anti-shock springs. @rogart63 Thank you for pointing this out Roger. I wasn't aware of this phenomena and the seals looked indeed like that; completely dissolved! Not only that, the rubber / "tarmac" had eaten the tachometer print behind the crystal as well! Perhaps the GFW wasn't the biggest after all !? Next to the sheared off screw that is. If the seals weren't his fault, my sincere apologies to him.... Very strange that a company like Omega used seals like that? Something went wrong in the R&D? Now I have to get it off the dial...... and have to find out how? What medium to use without harming the dial? Has anybody any experiences with setting the glass. Even though it is claimed it can be done by hand, I also read "horror" stories if it is attempted without the proper guide ring: From what I've seen, a tachometer glass is in between €60 - €80 ex. postage and a bit too expensive to give it an unprepared "go". Is there anybody who has this guide ring or knows where to purchase it? (please PM me if deemed required) Anybody any idea's of how to "polish" the case and keep (enhance) the "star" pattern? Or else; Any recommendations or addresses of people who could assist me? Any help would be highly appreciated ! Best regards: Roland
 1 point